Tag Archives: straight line quilting

Diamonds are a Girl’s Best Friend

Wayyy back in the fall of 1992 I moved to State College, Pennsylvania. This was a huge change for our little family; me, my husband and our three young boys. My (first) husband was taking a break from his job teaching at a local community college in California and studying for his PhD in Instructional Technology. We sold our 20 acre farm in California and moved to a little neighborhood near the university. Neither of us had ever lived in the mid-west, lived in a snowy climate, or relocated to a place so far from family, friends and all that was familiar!

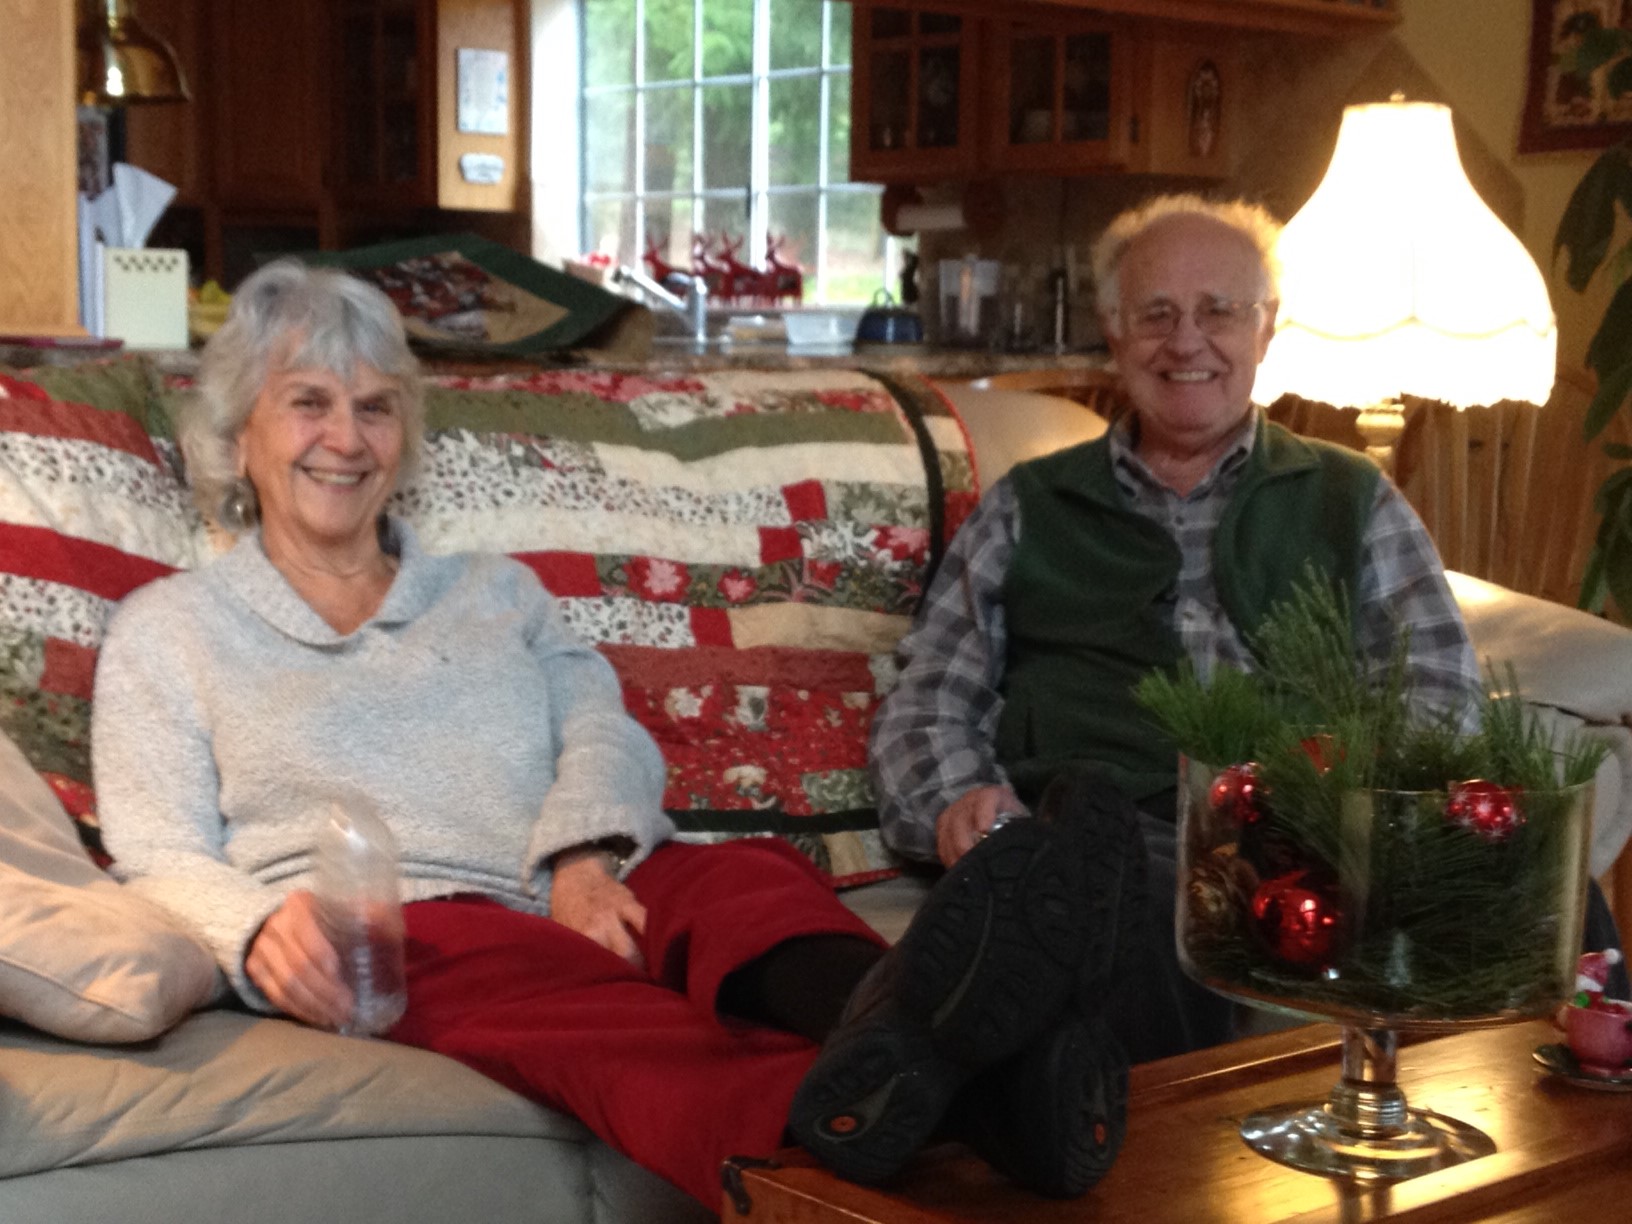
We decided he would go to school and I would have an in-home daycare, making just enough money to get by while he got his degree. I went through the process and got the house and myself licensed and put an ad in the paper. It was nerve wracking, to say the least. Almost immediately, I had response from Rich and Denese. They were in a similar stage of life where Rich was pursuing his PhD and she was working as an attorney. They needed full-time childcare for their toddler, James, becoming one of my first families.

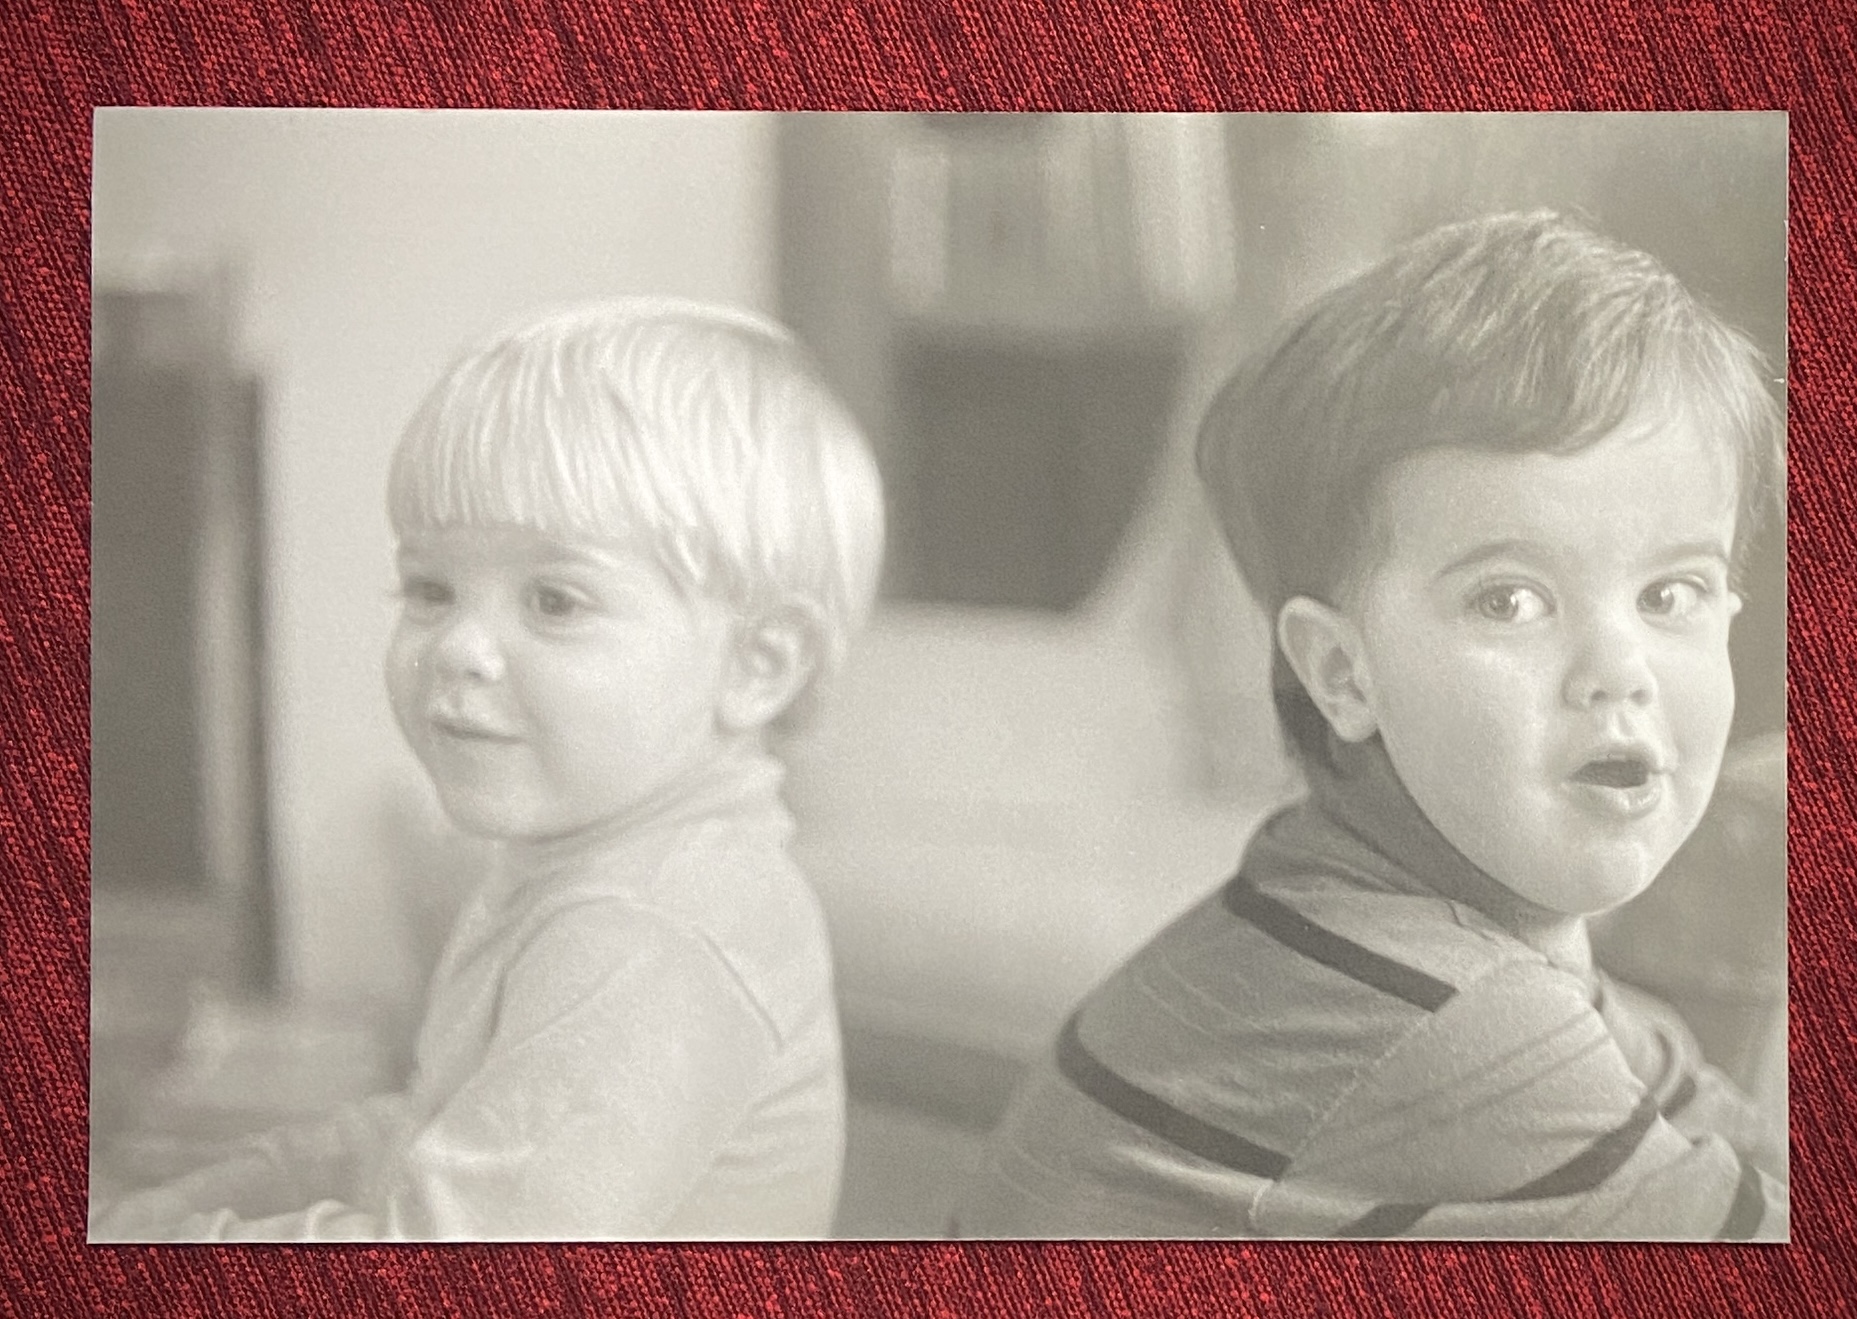
James and my youngest son are two weeks apart in age, both were just turning two years old. The two of them together made for a very dynamic duo. They were both so active, impulsive and basically into everything! It was a wild and very fun time.

As most of you know, my husband passed away suddenly in spring of 1994. During this horrific time, Rich and Denese jumped right in, helping wherever they could. After the kids and I moved back to CA, Rich and Denese came to visit the following summer, checking in on us and providing great comfort to me. When I remarried, Denese and her mom came back to California to be at the wedding. They have always been there, even from a distance, for many years.

Fast forward to several months ago, I learned Denese was diagnosed with breast cancer. She is fortunate in that this cancer is treatable and she will come through it. But we all know it is a miserable experience to go through the surgeries, chemo and radiation that are necessary to quell the cancer.

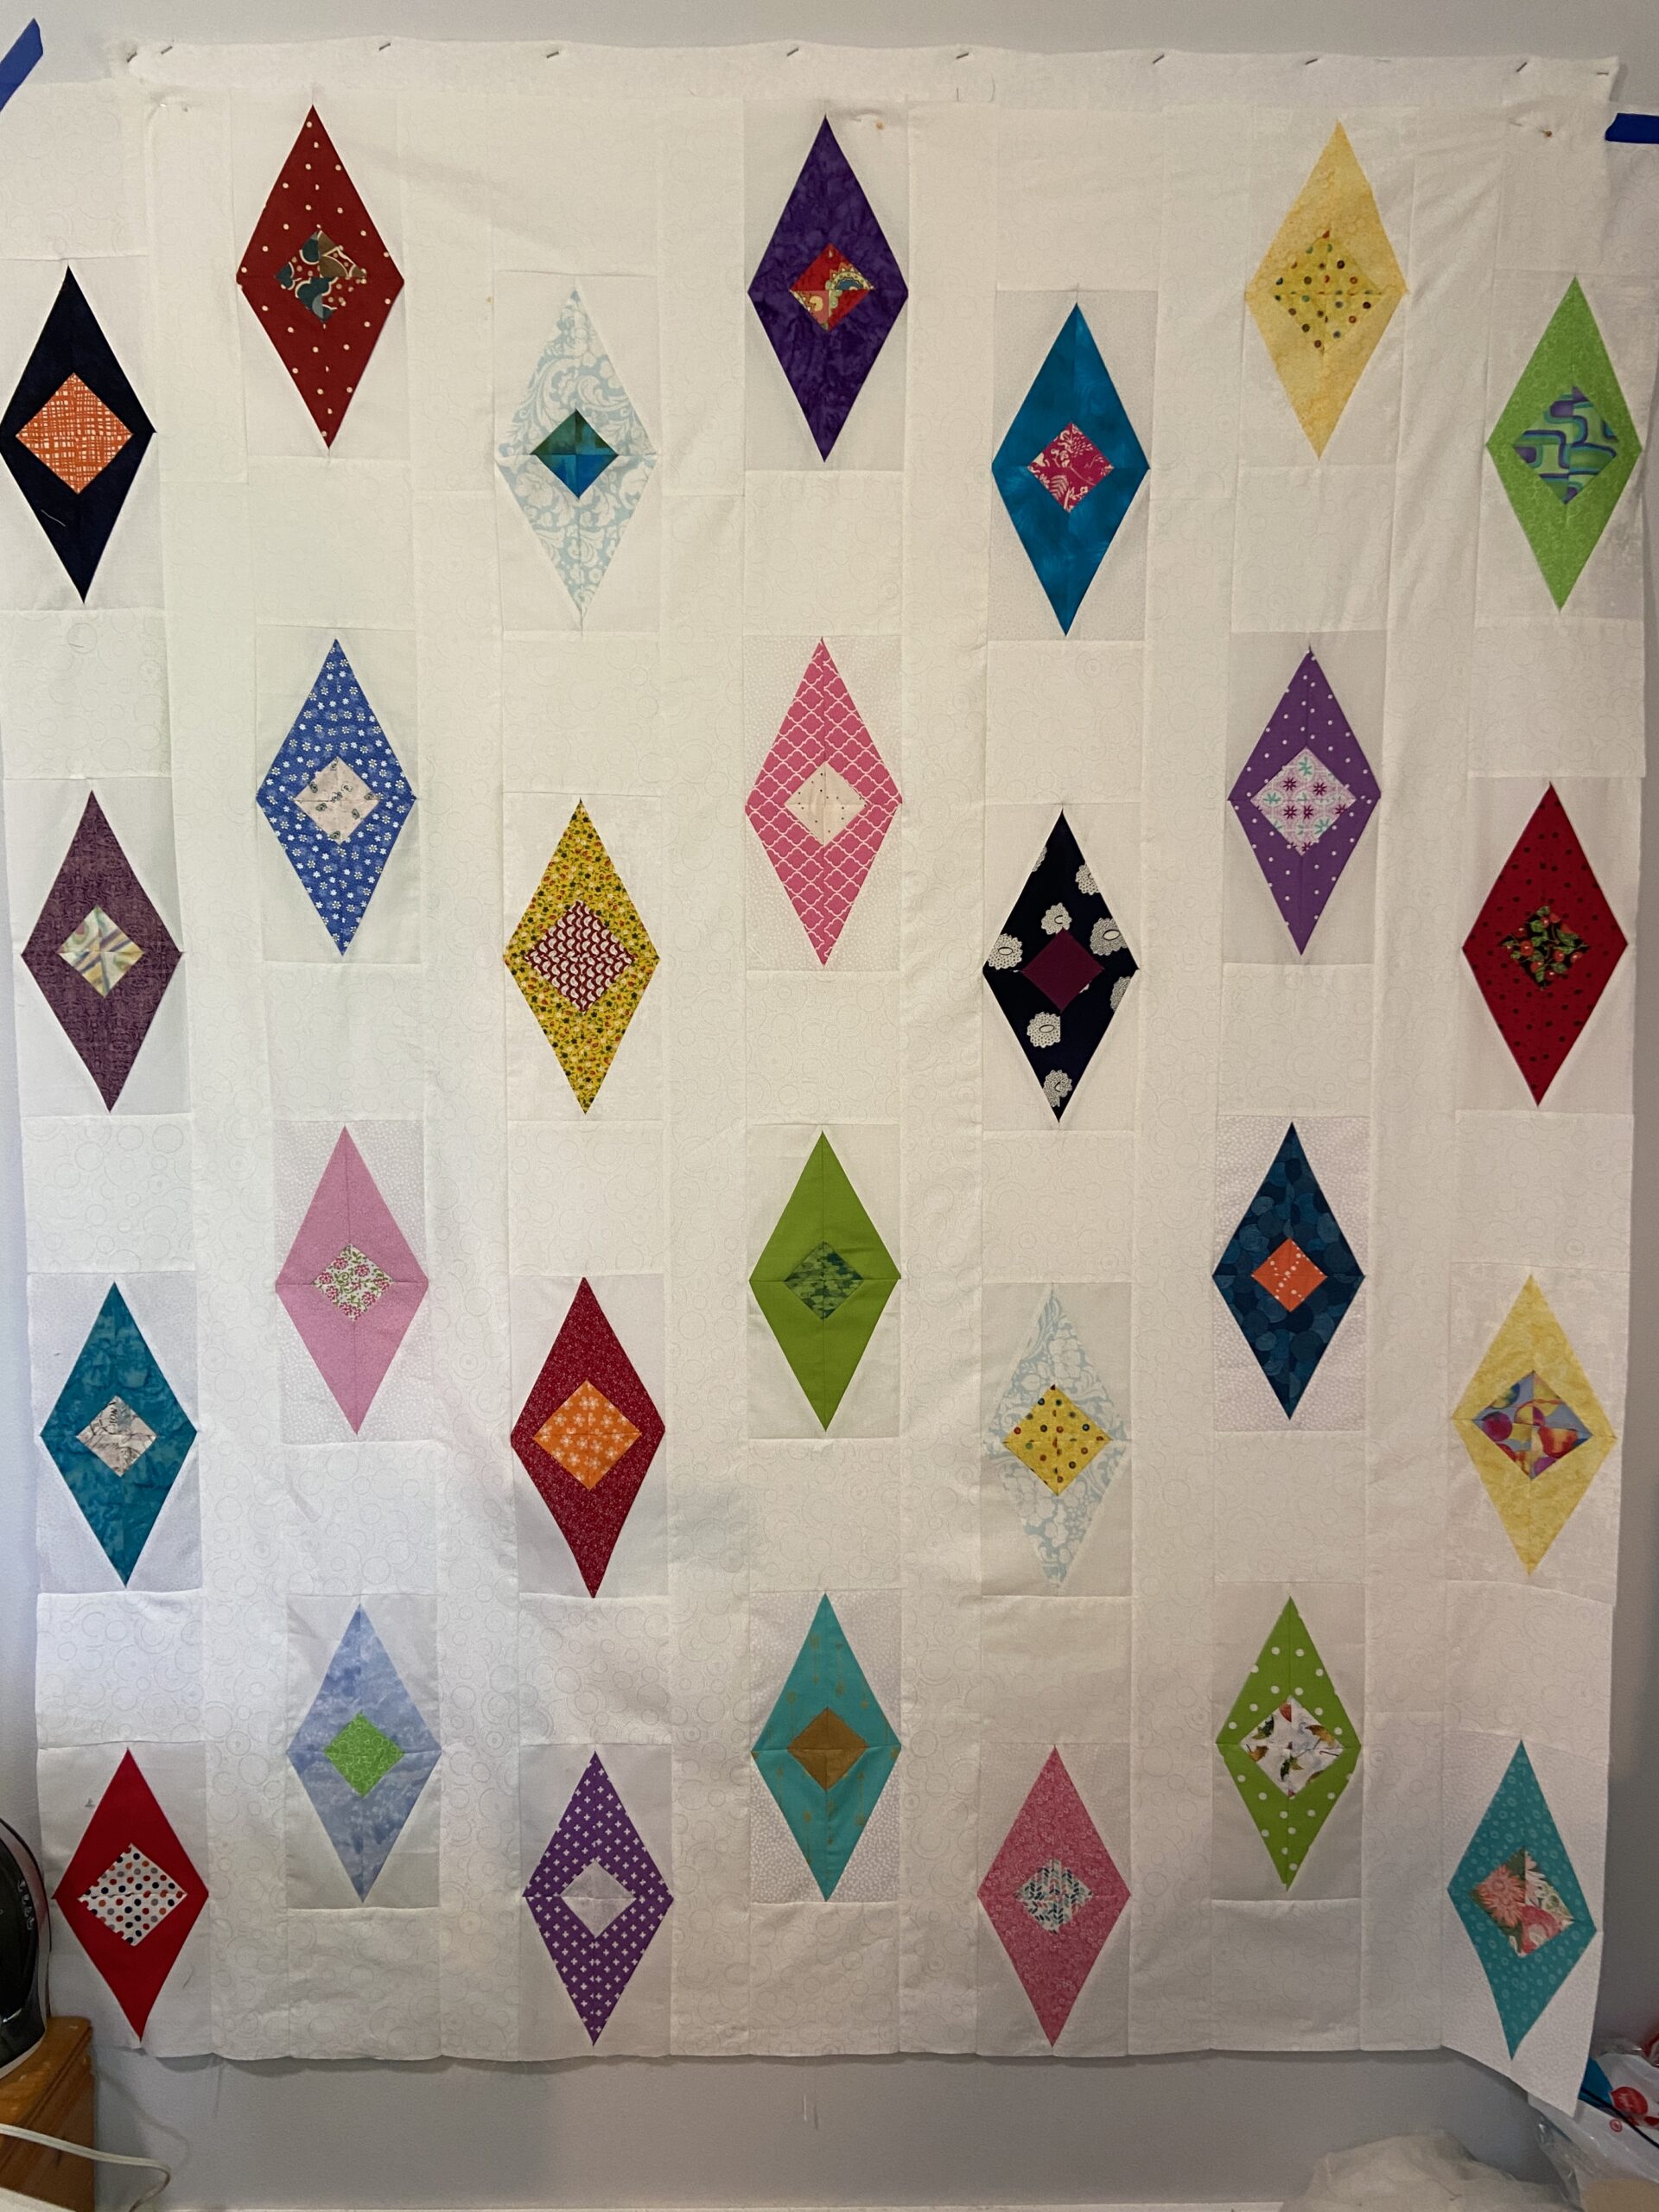
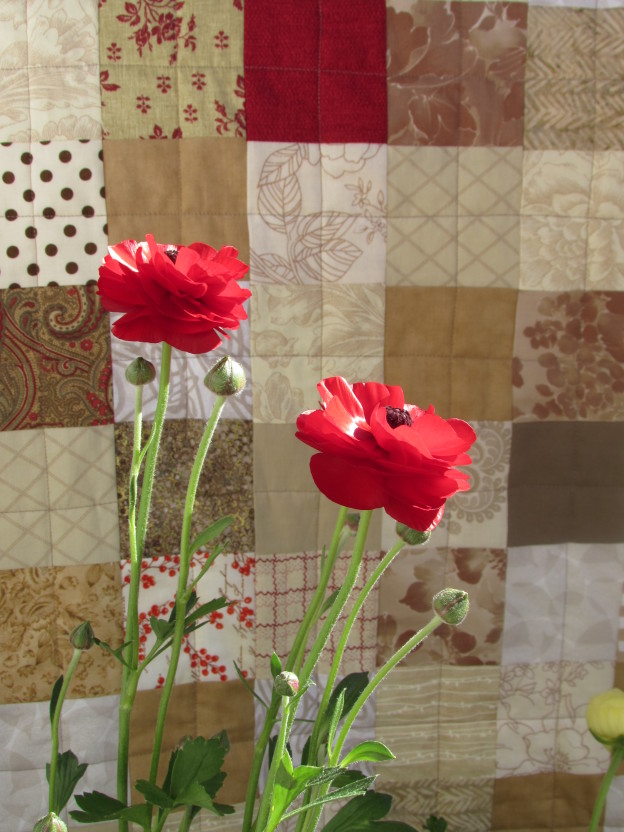
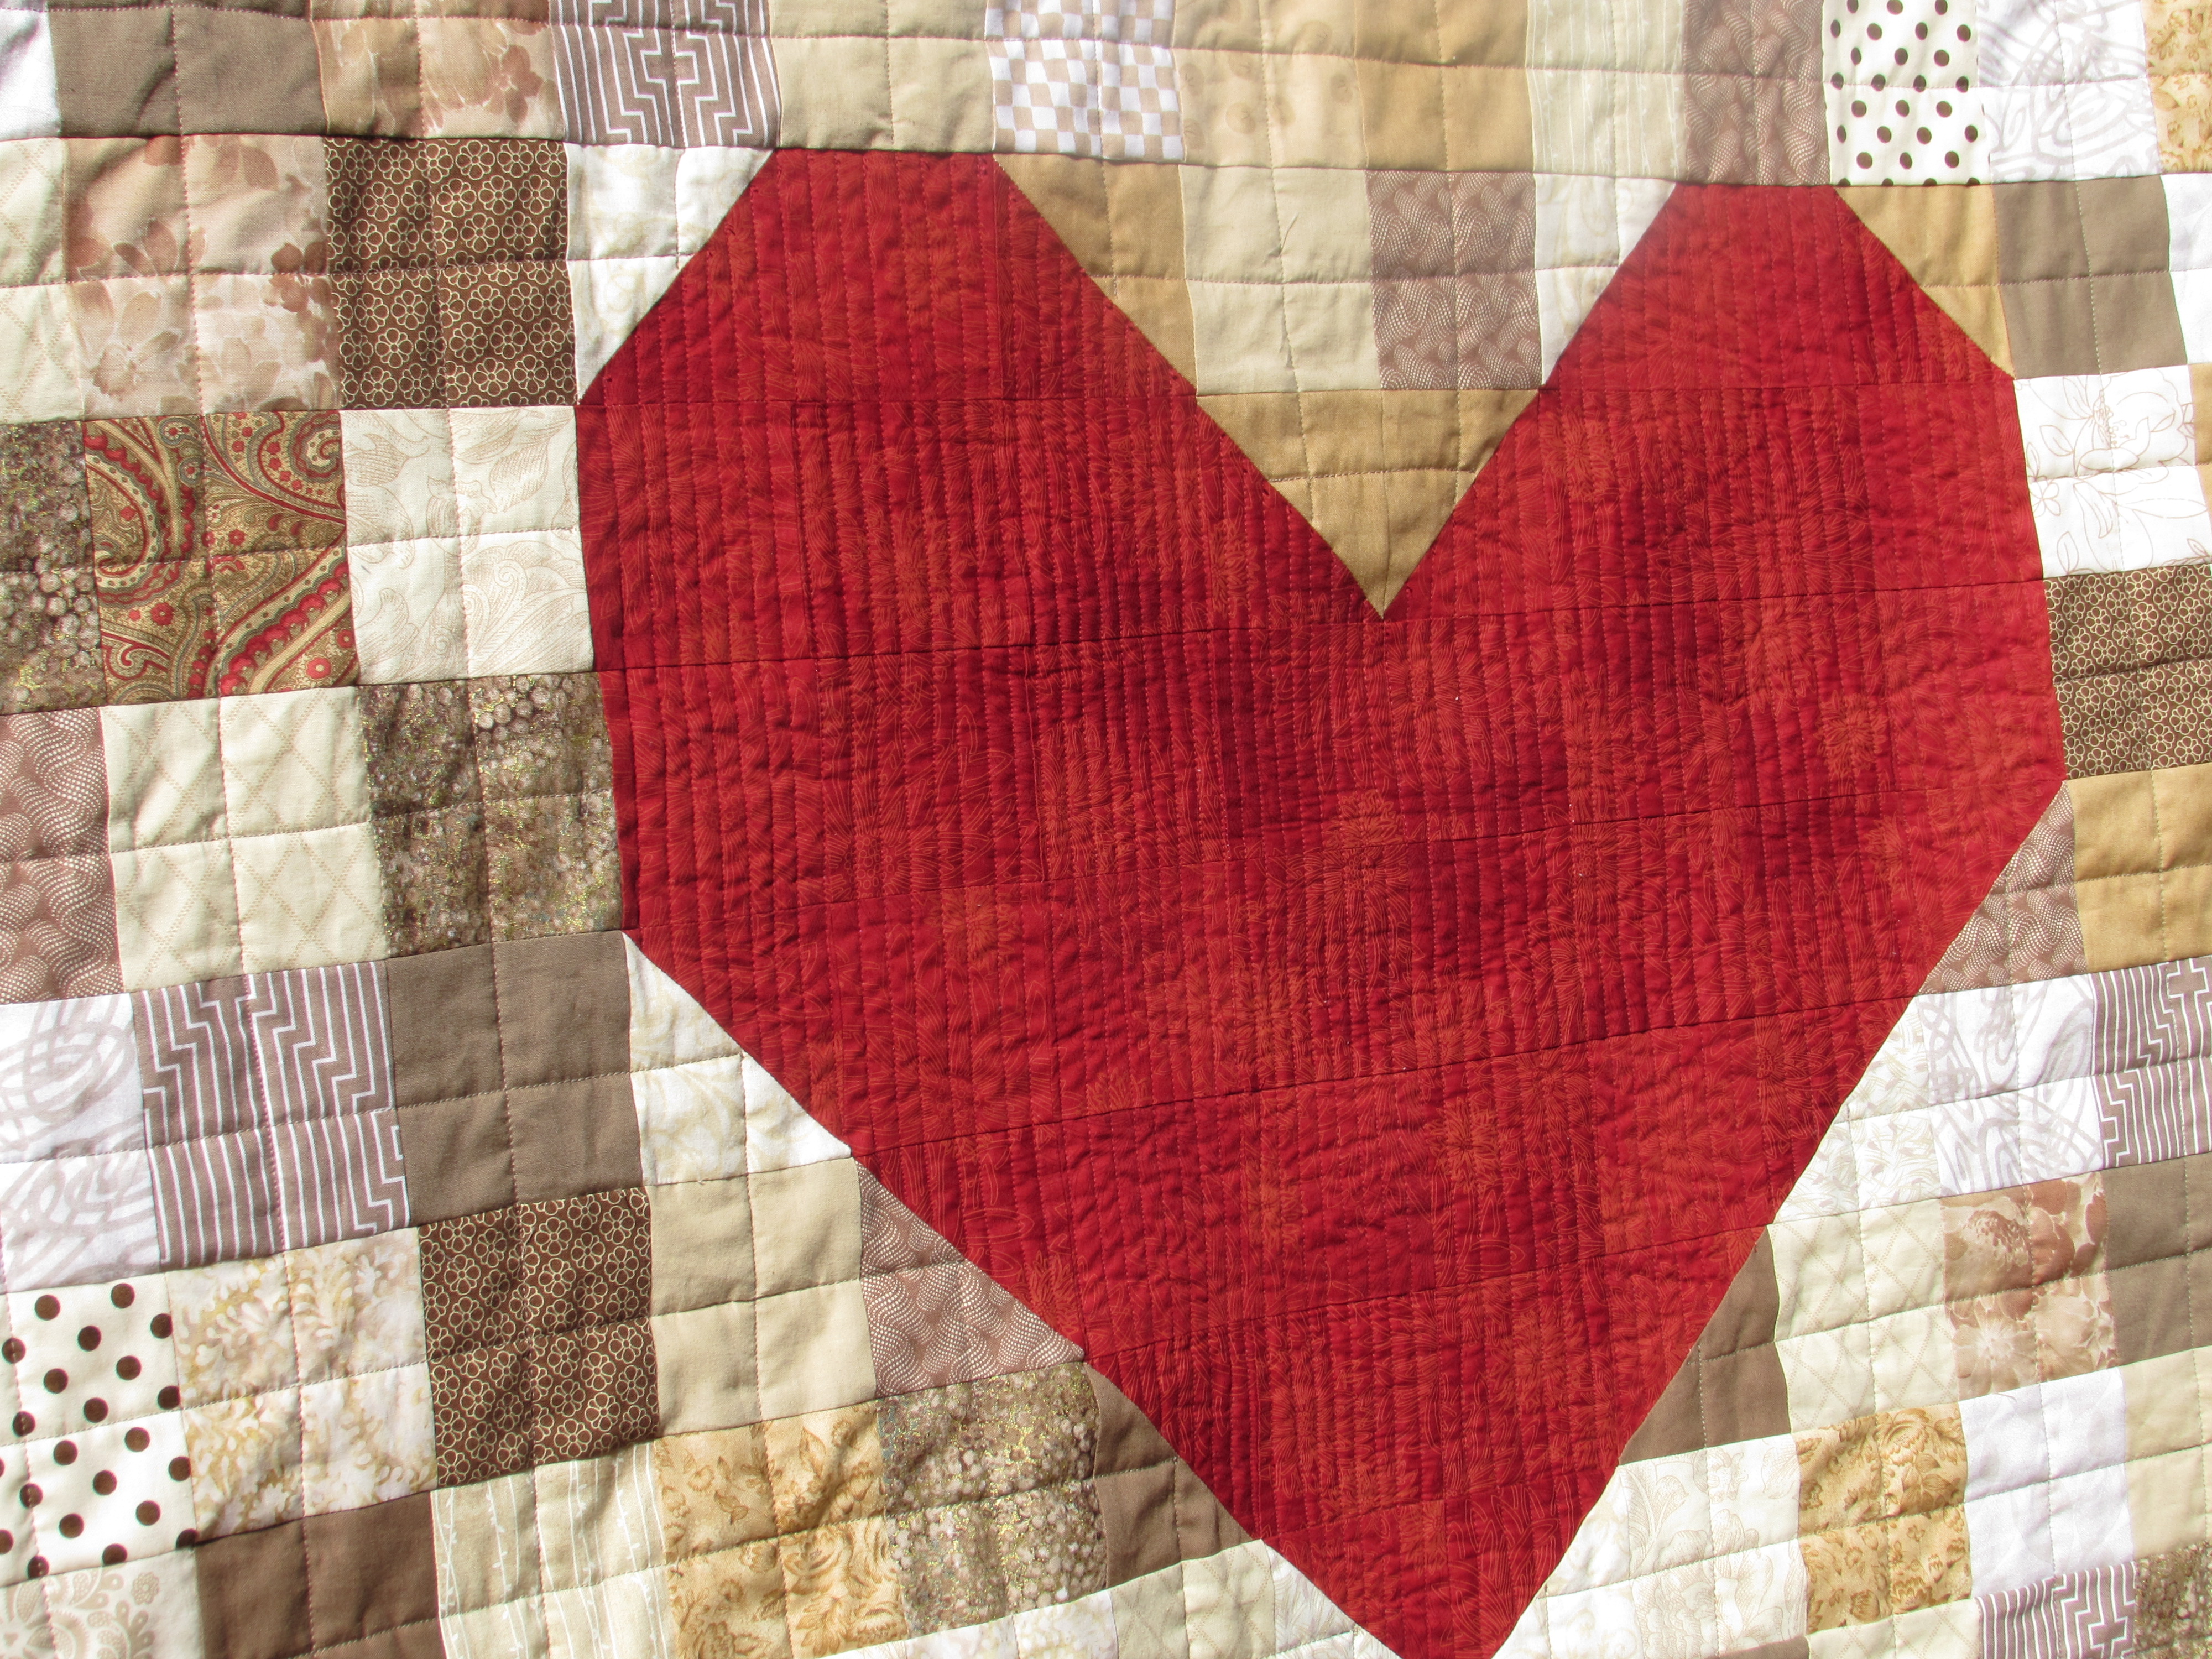
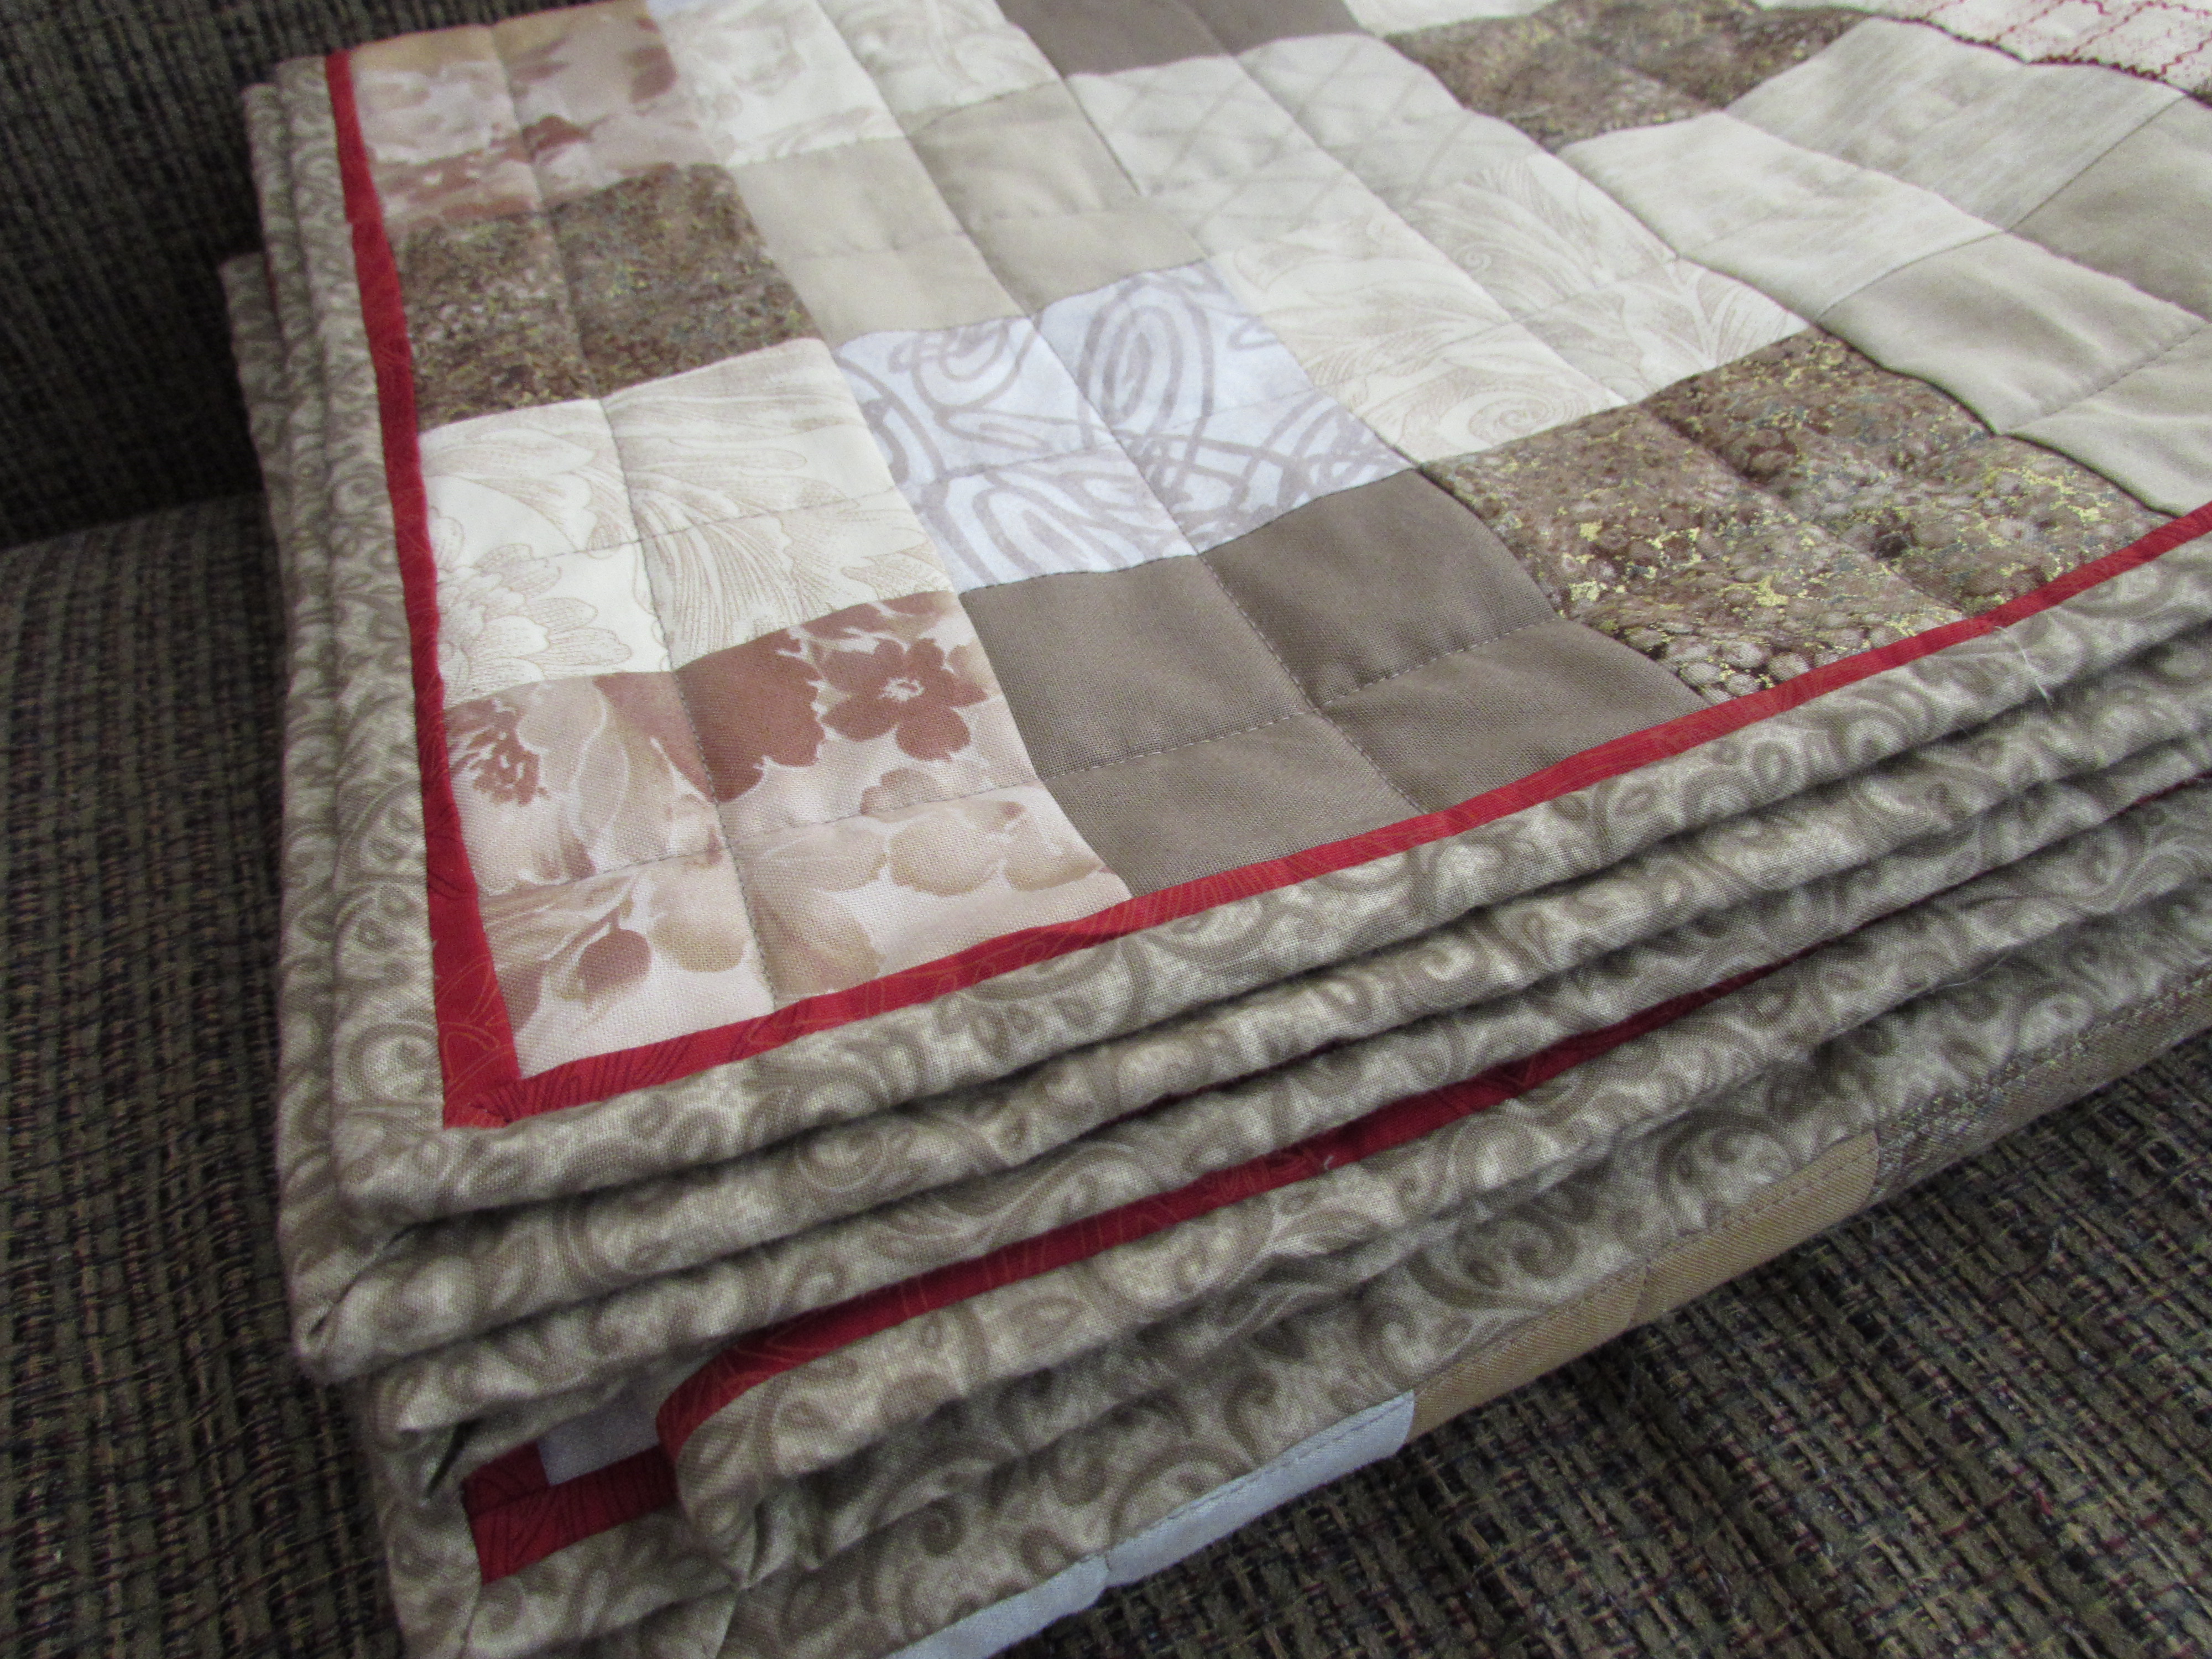
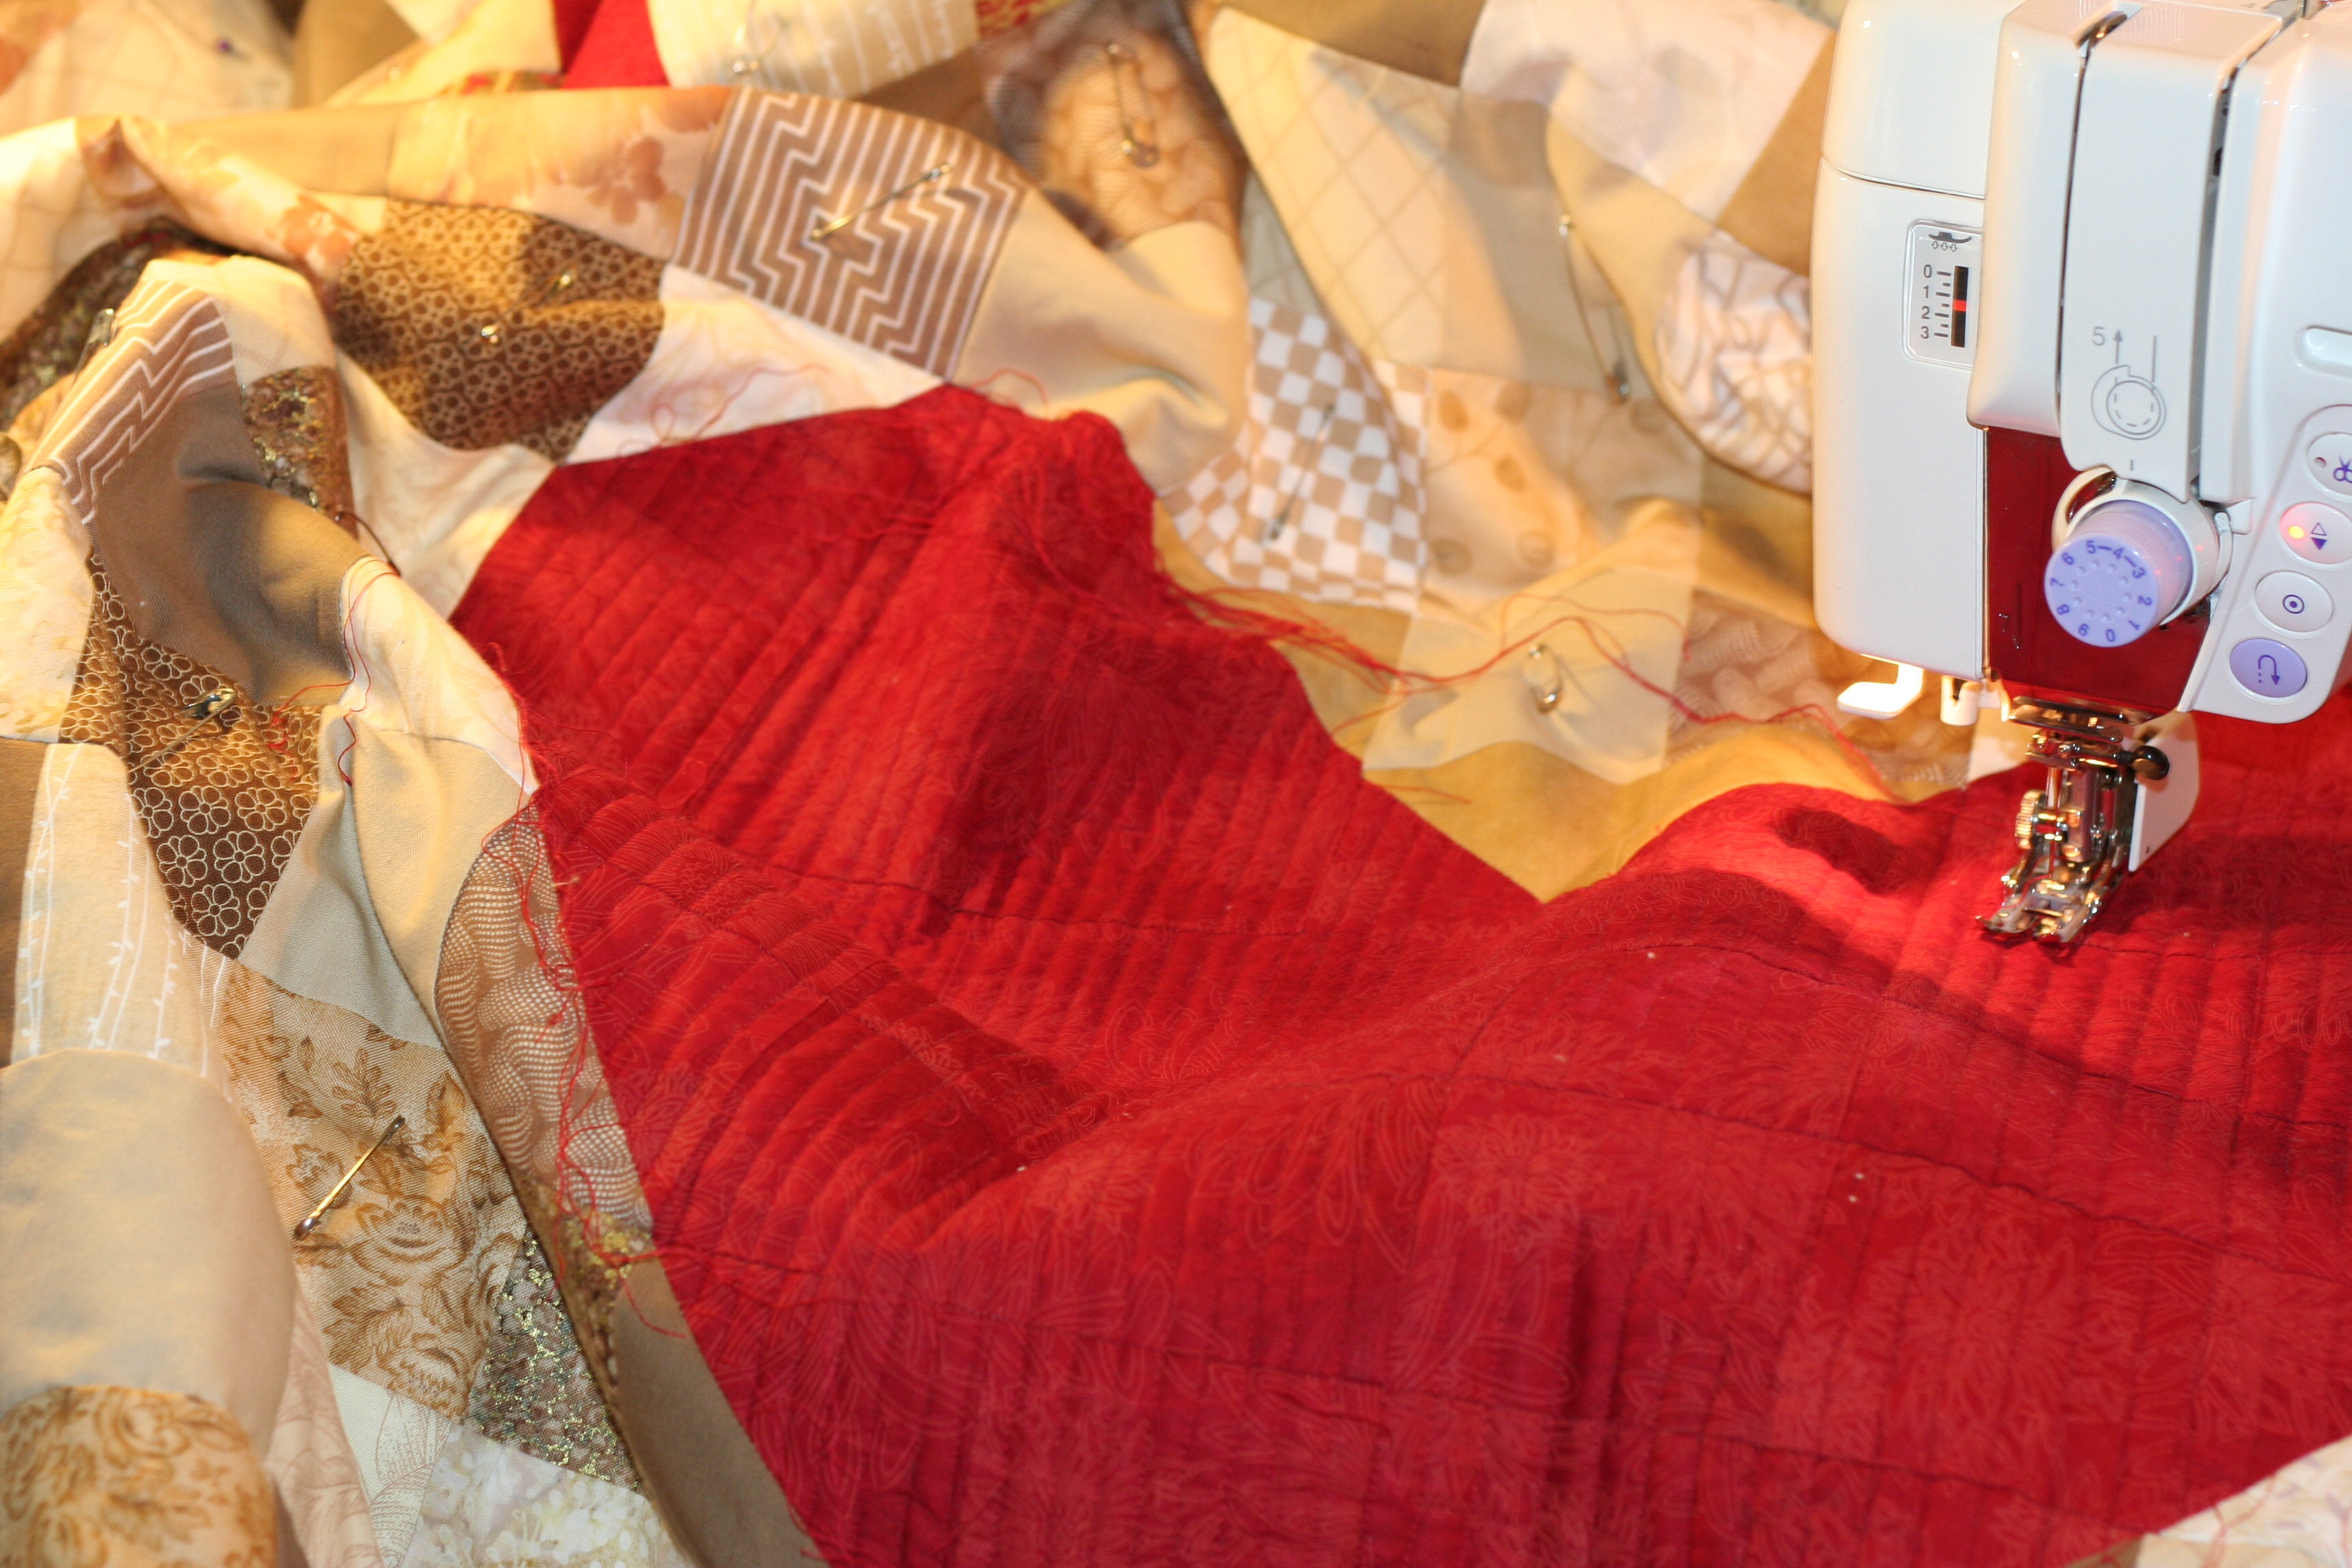
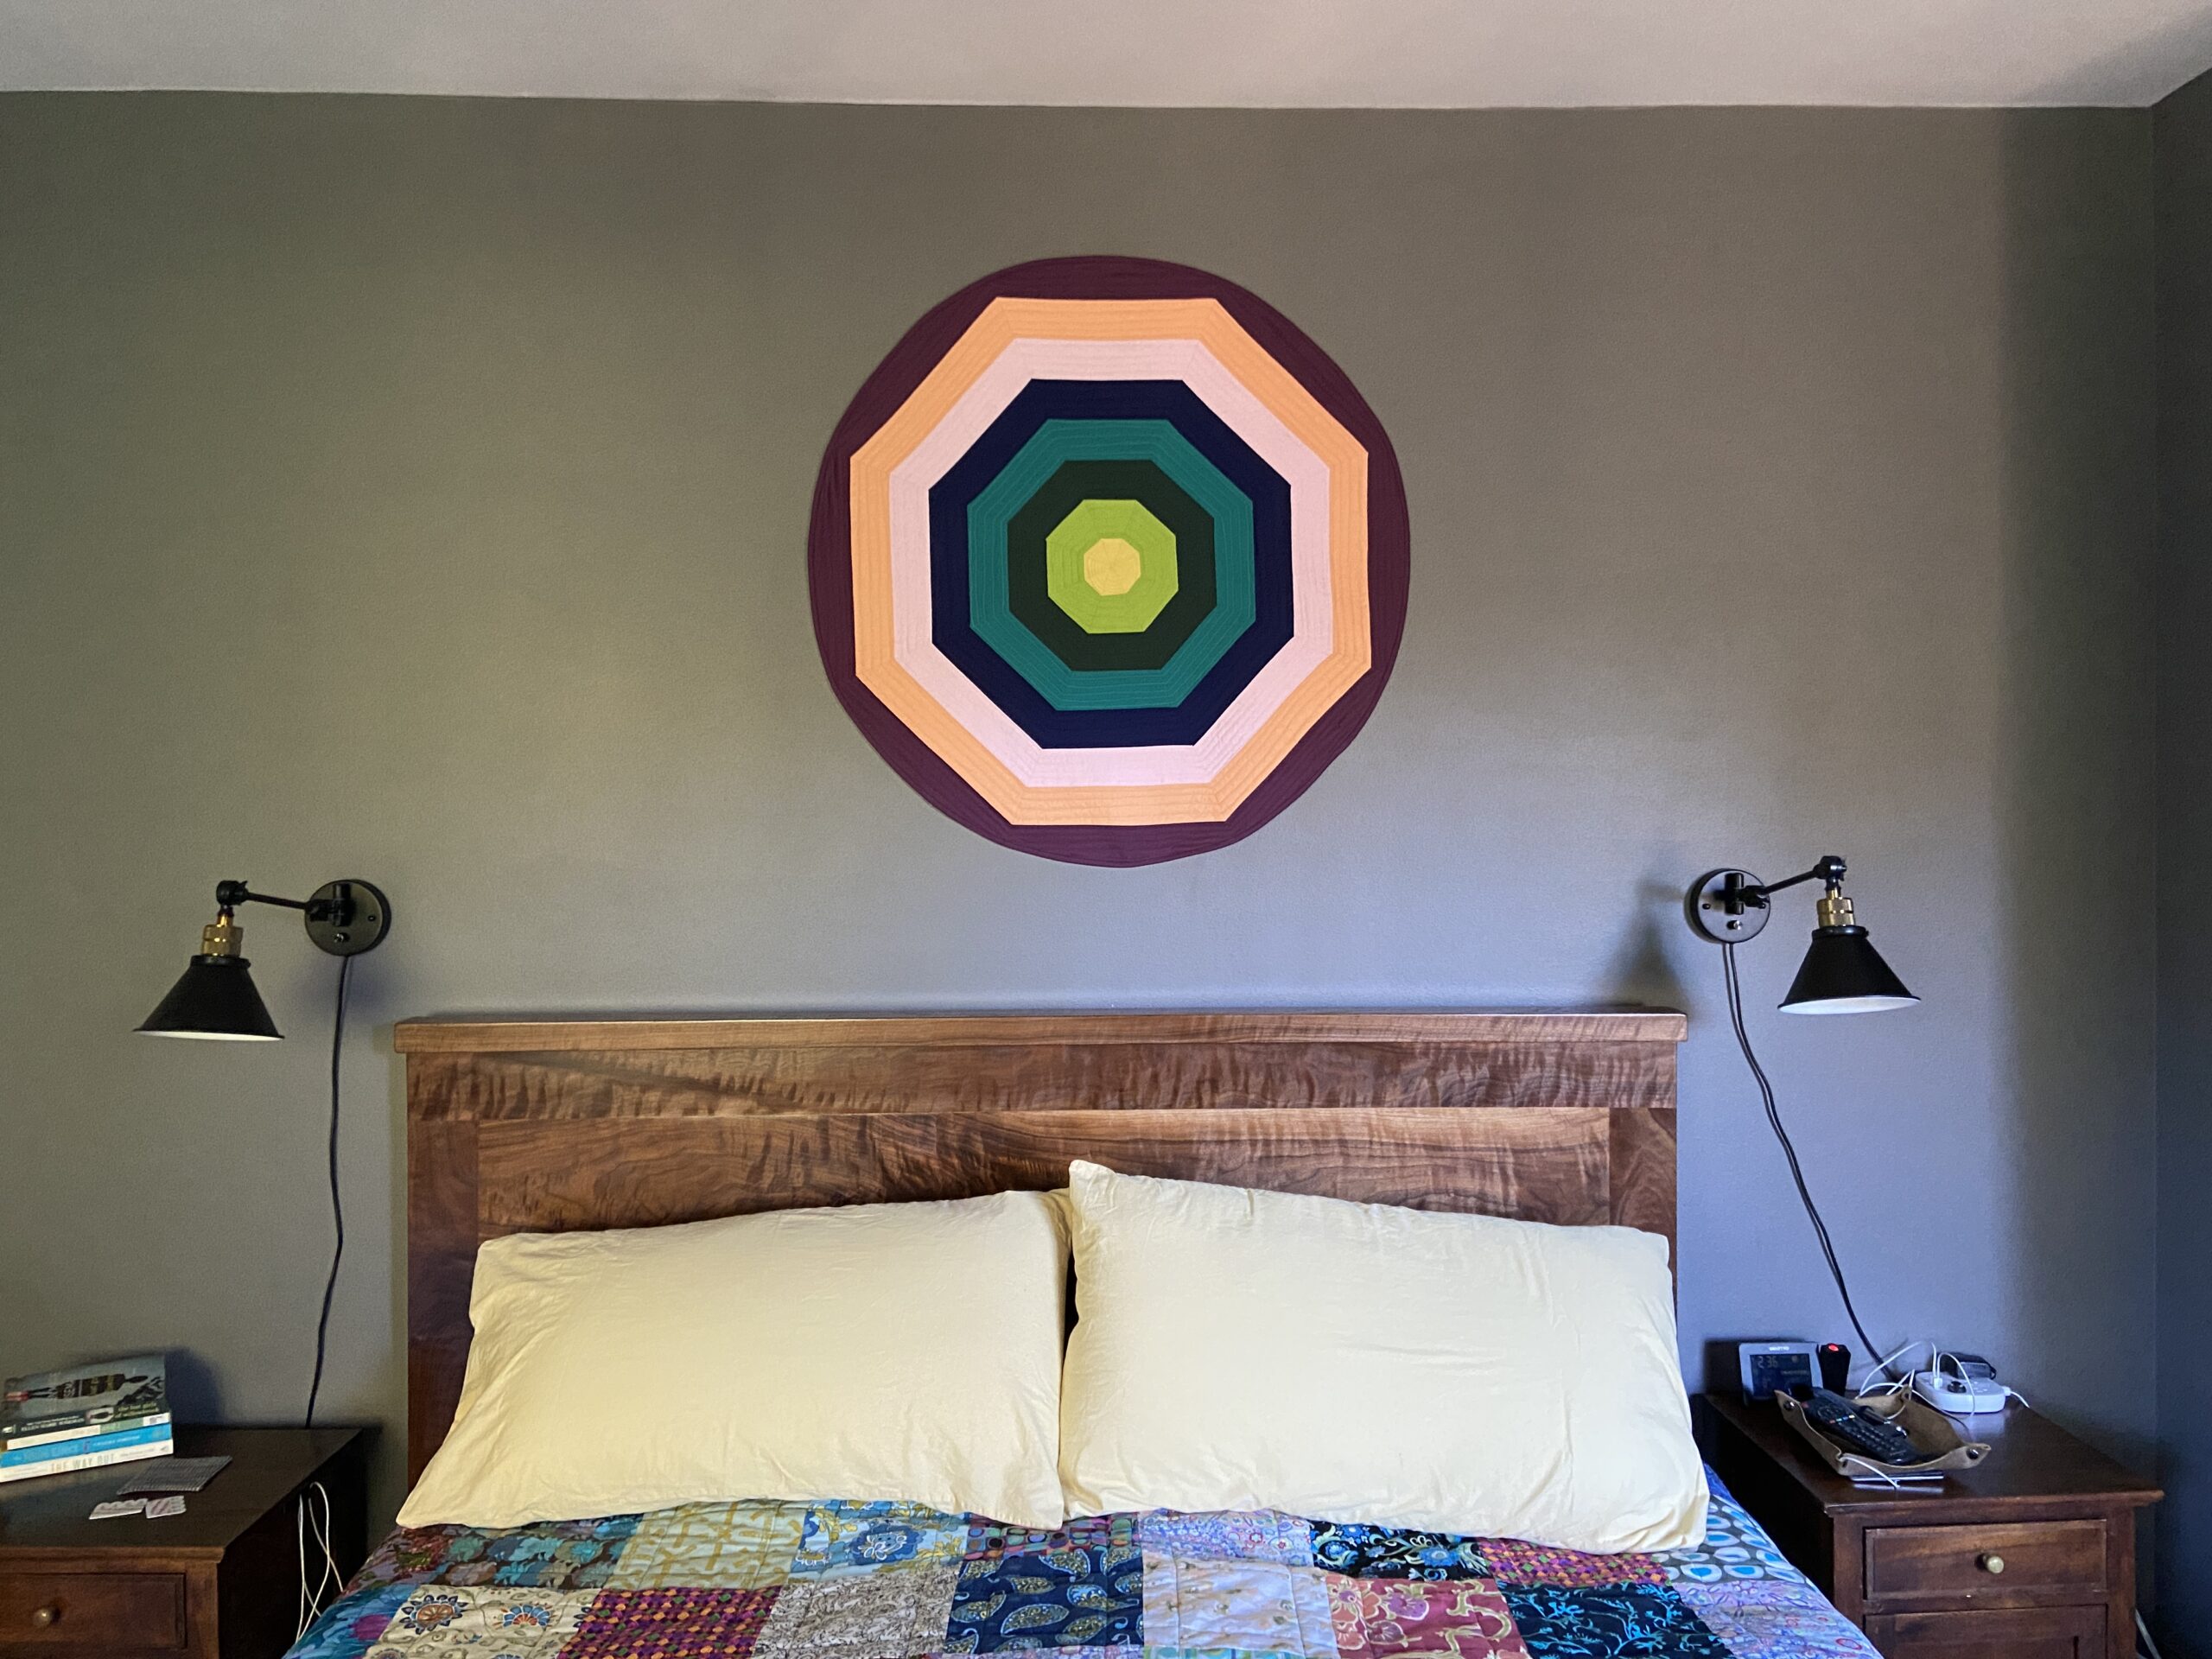
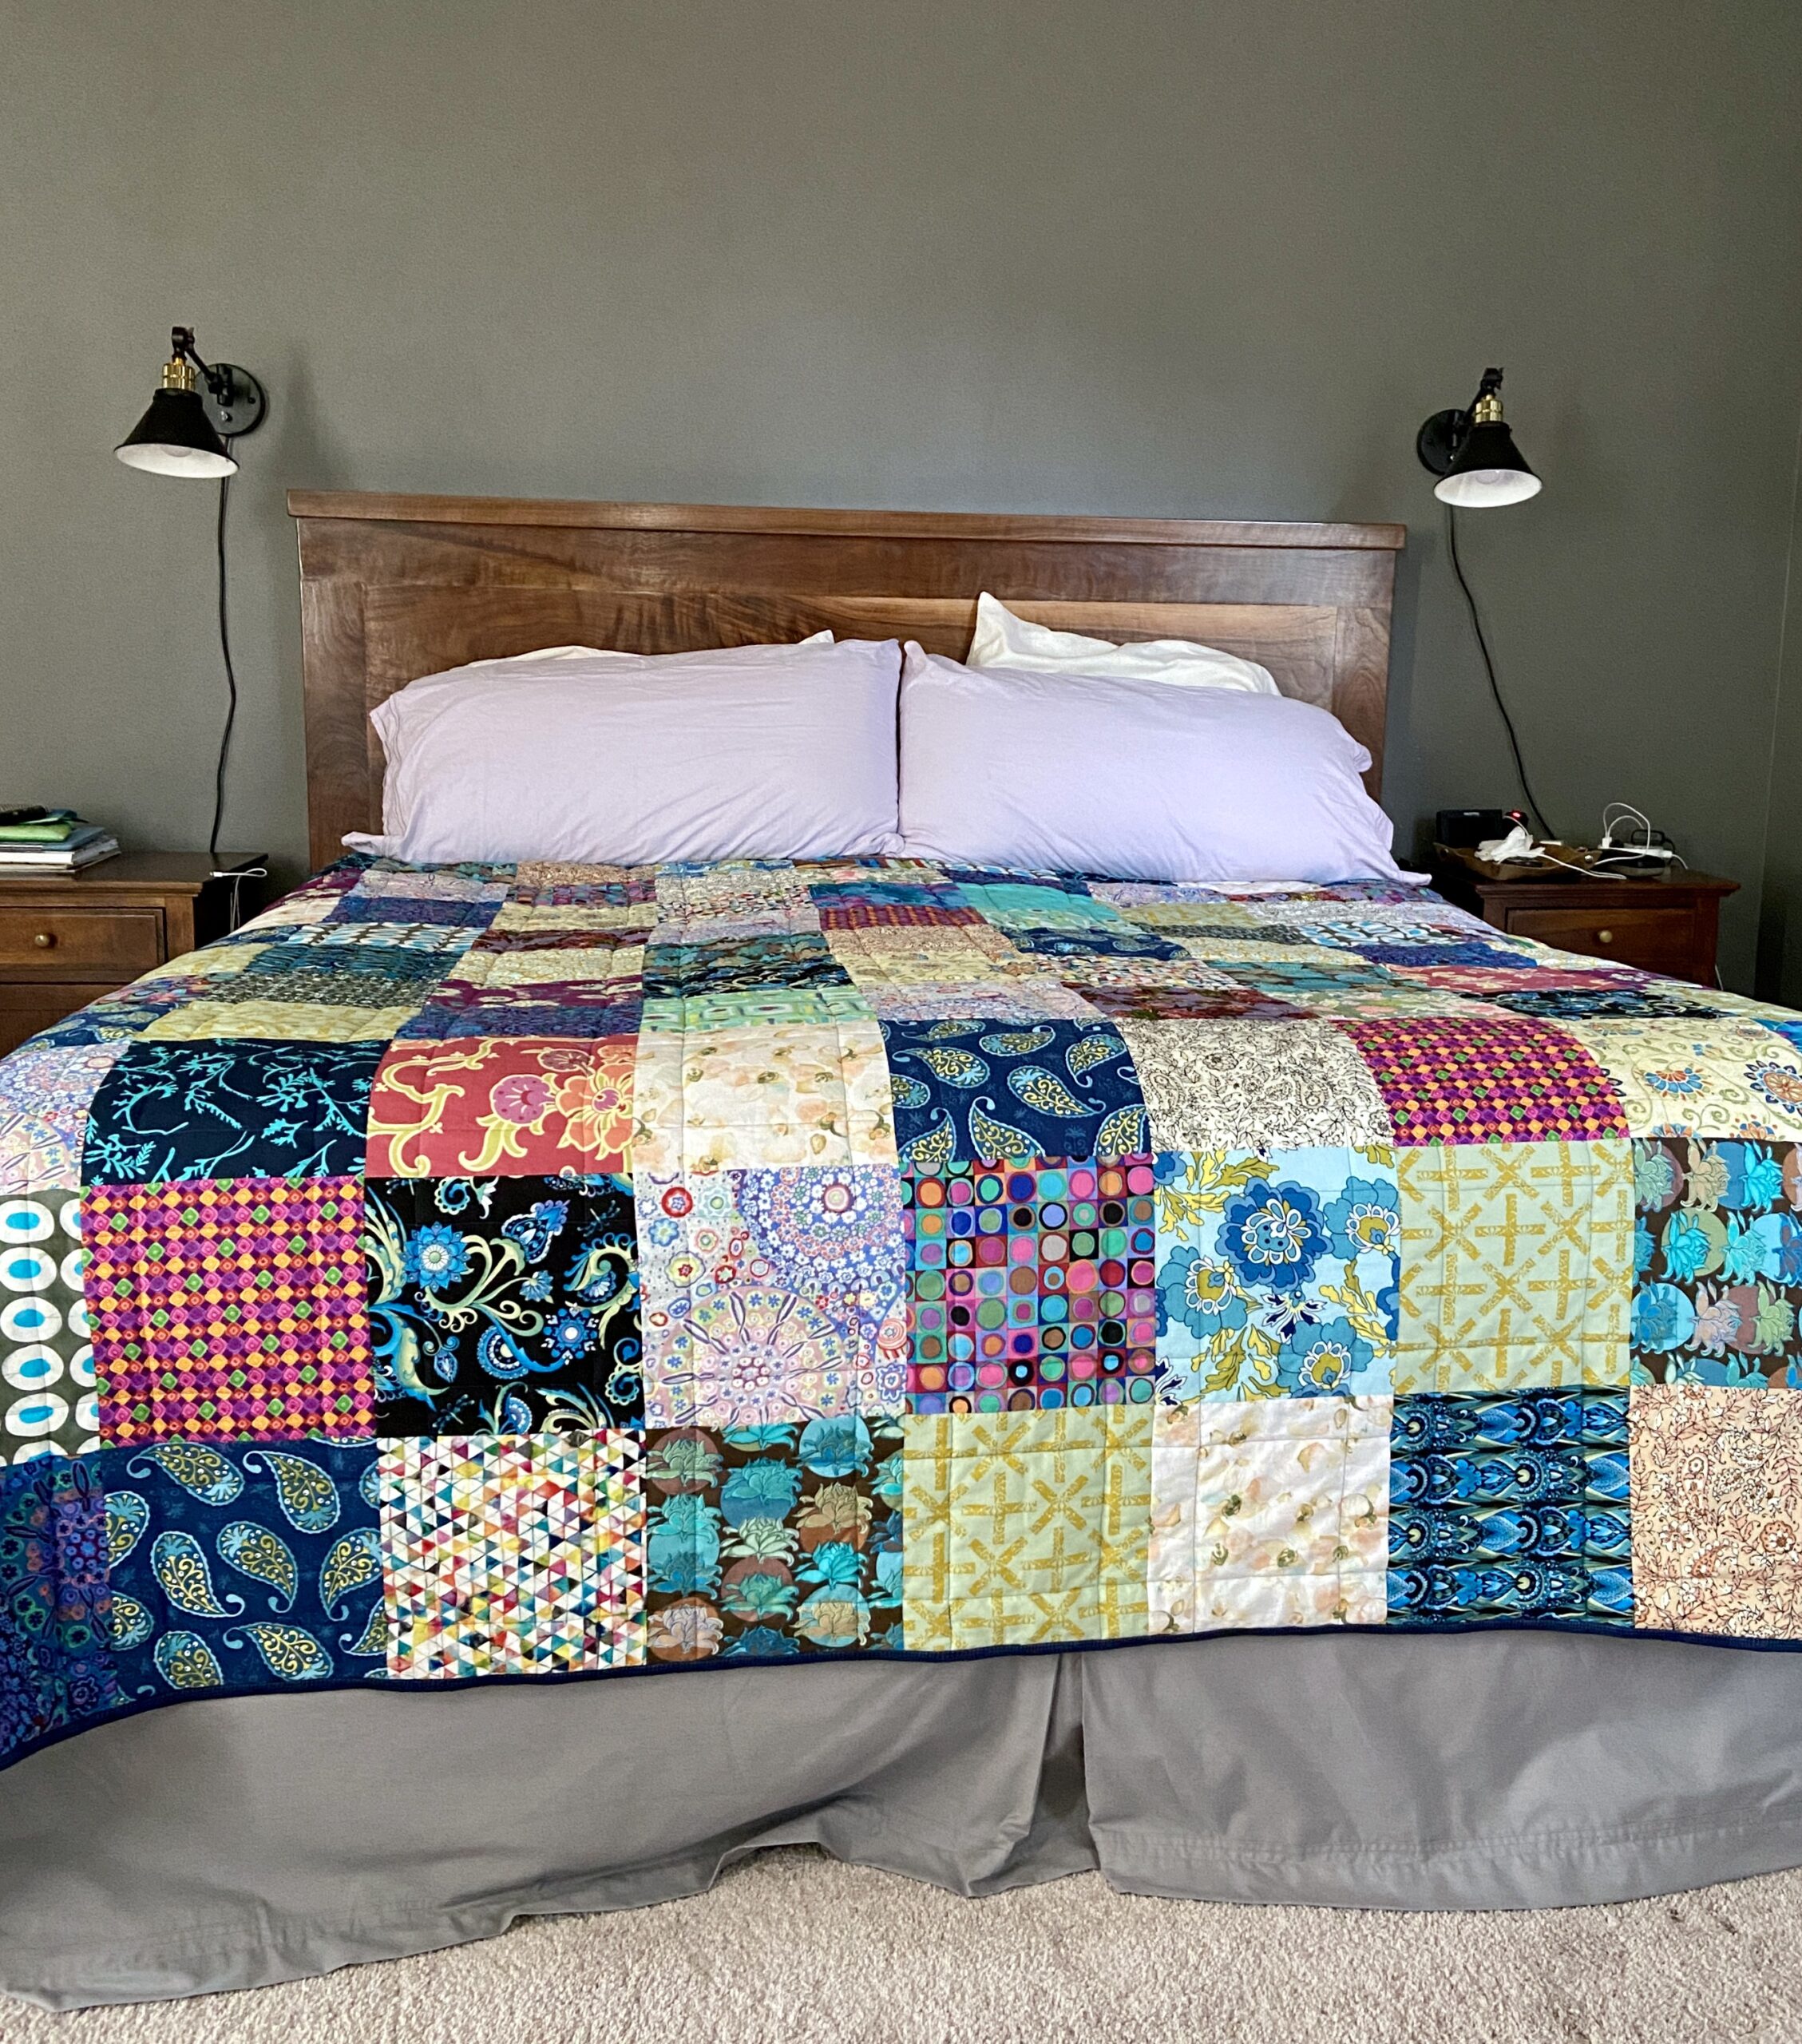
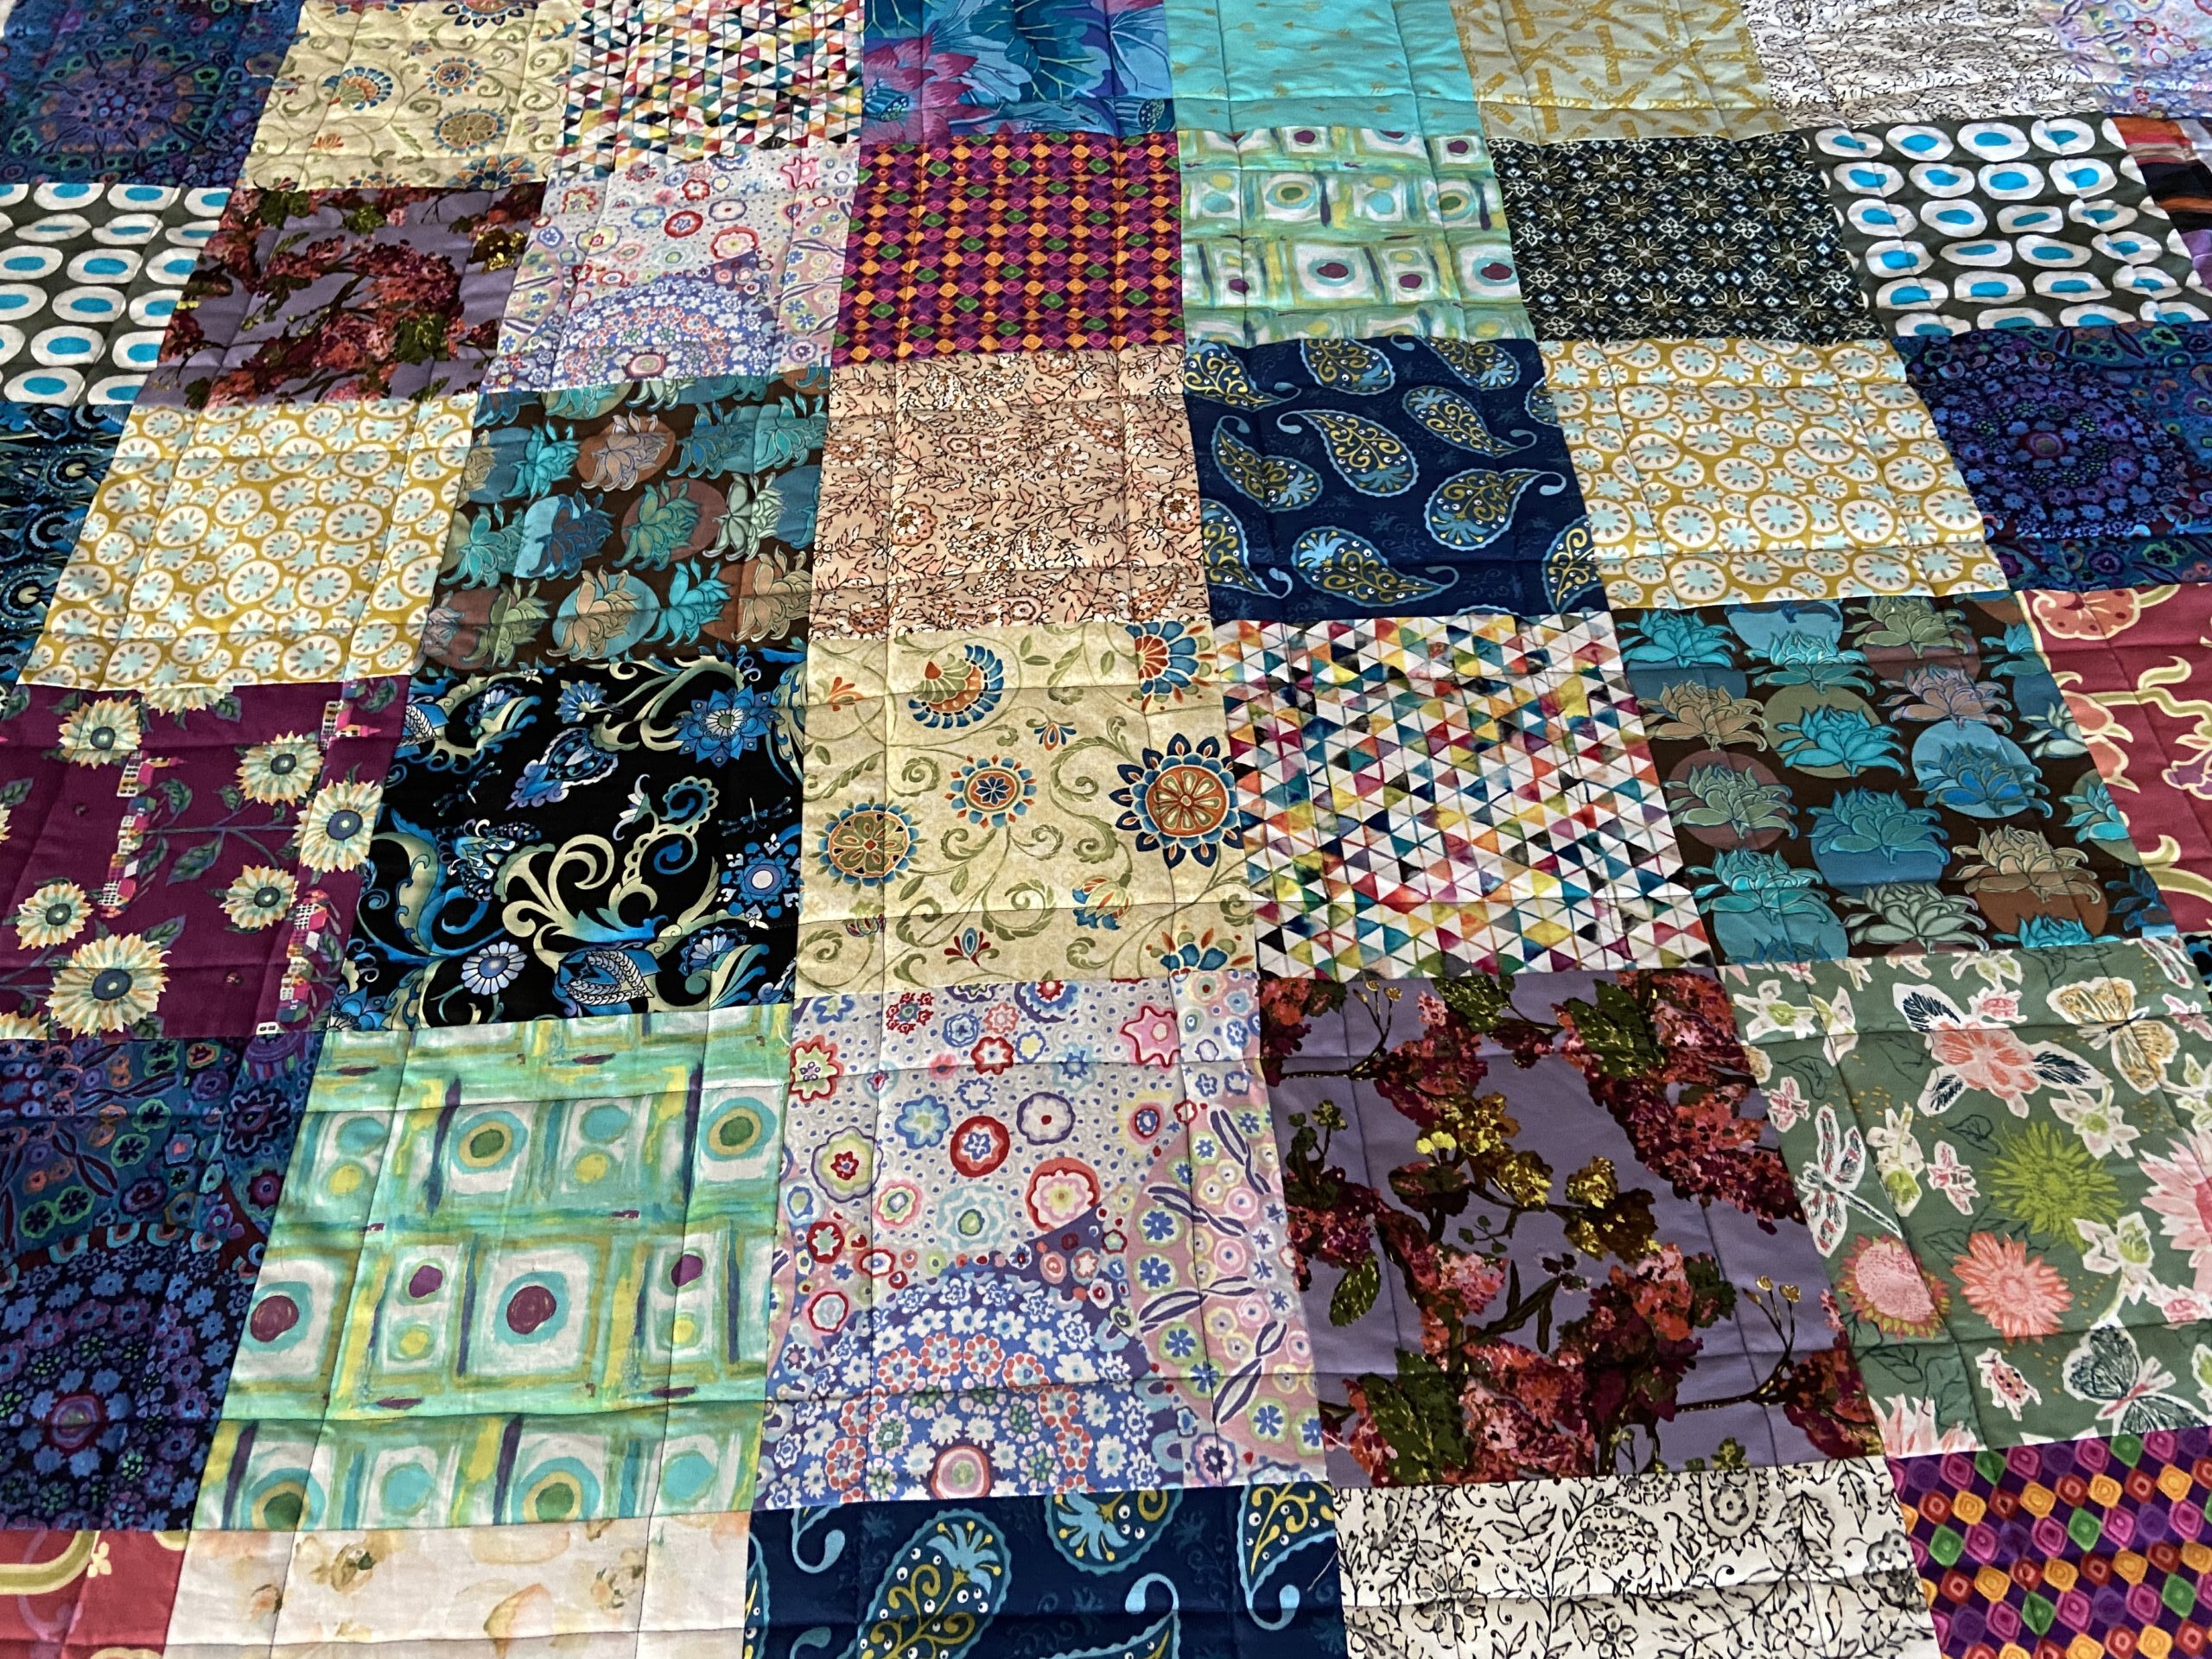
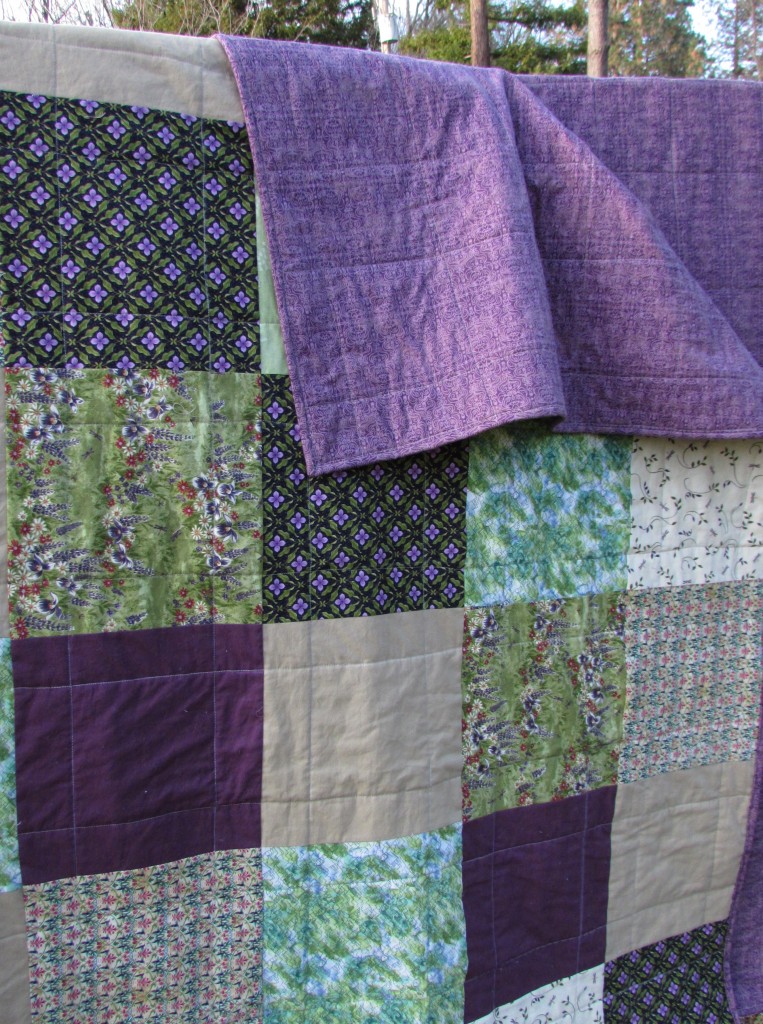
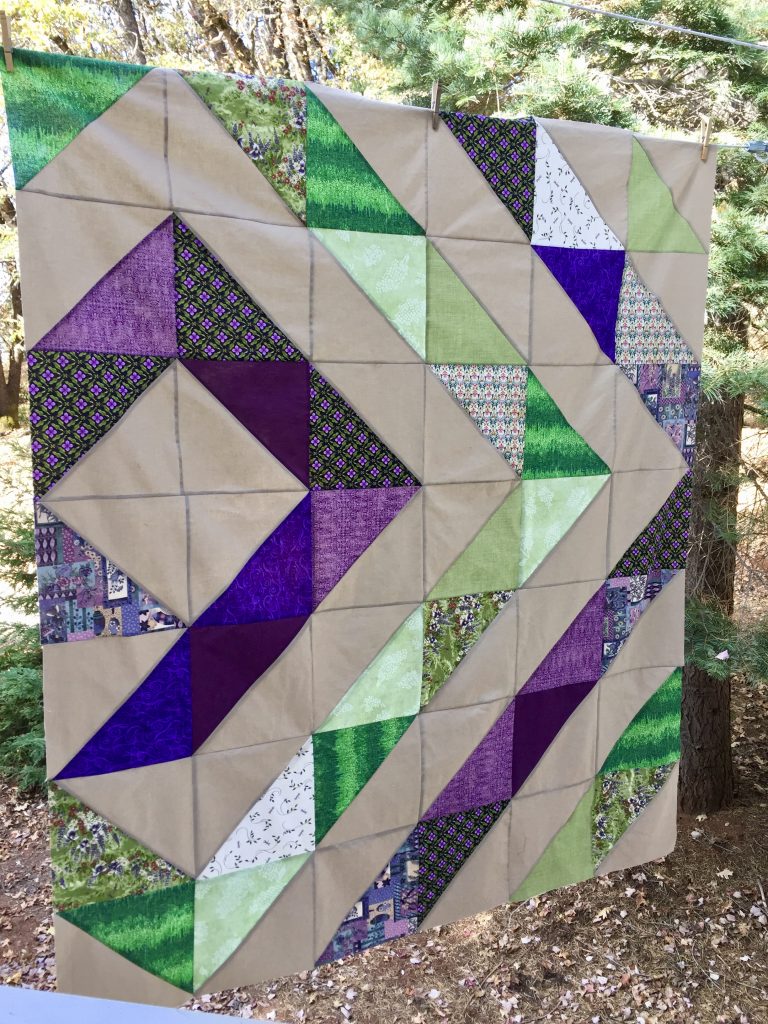
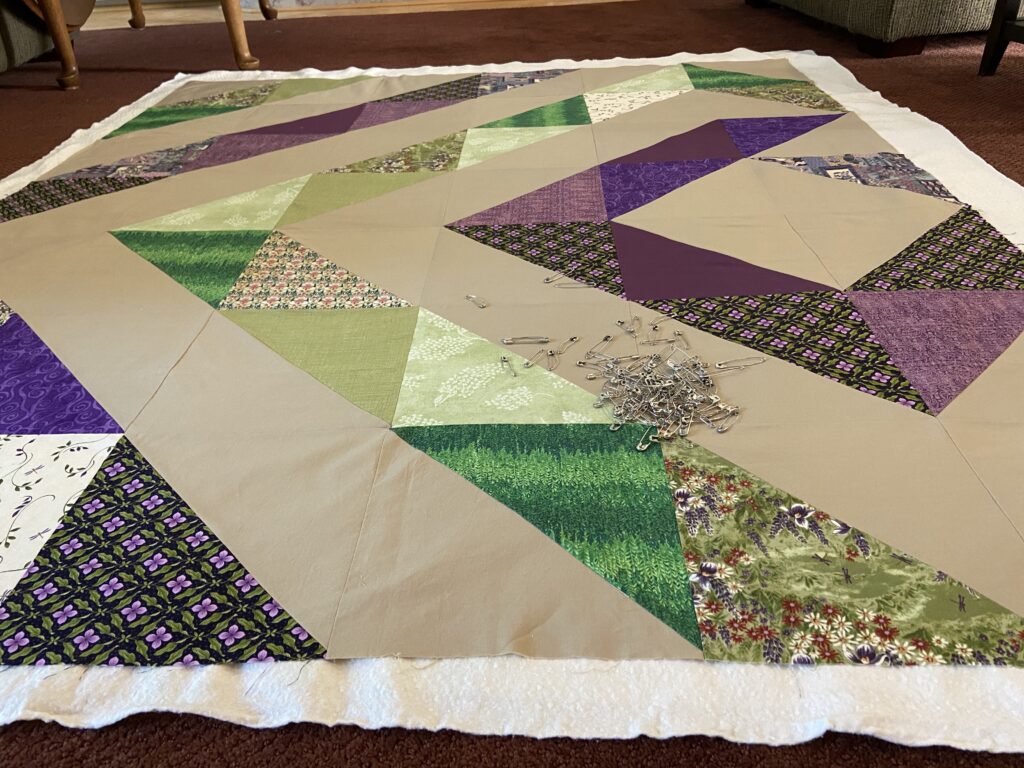
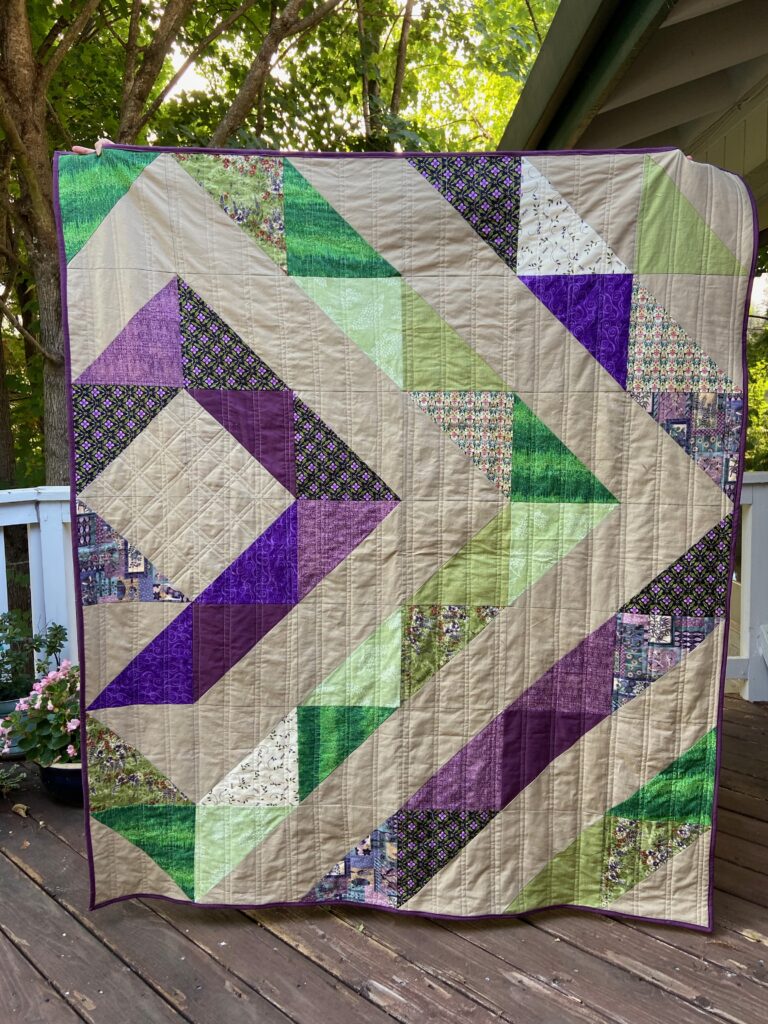
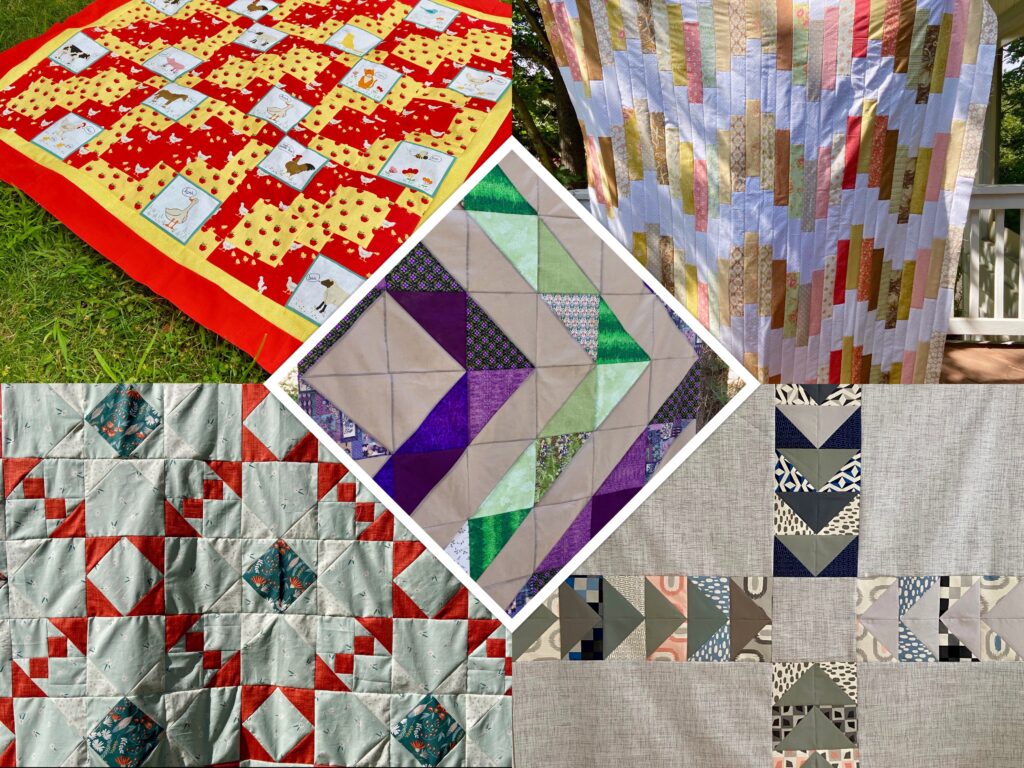
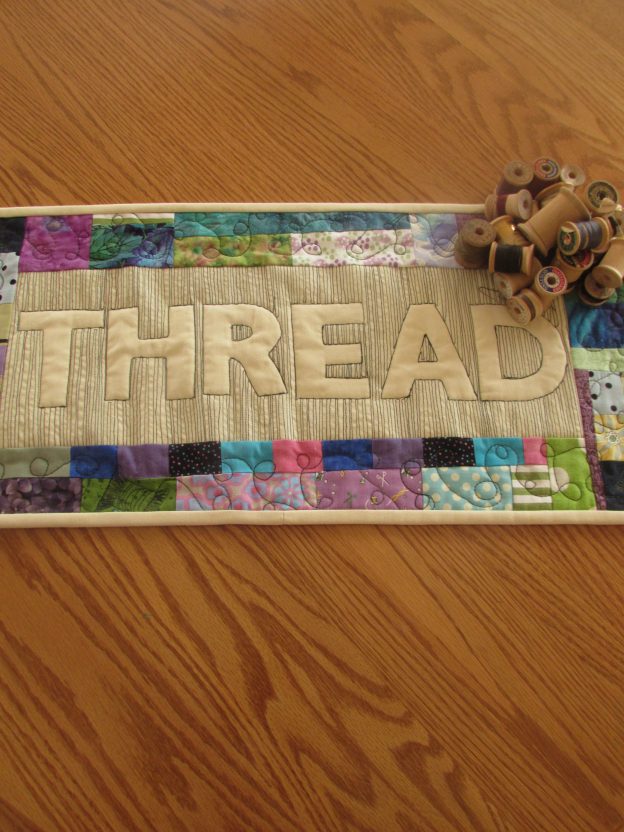
Of course my first thought was to send Denese a quilt. I wanted her to have it while dealing with chemo and the exhaustion that is so prevalent during this time. So I looked at the quilts I had in process and decided the diamond quilt was meant for her – we are great friends and diamonds are also ‘a girl’s best friend’! So I finished up the top and started quilting it. Of course then my machine went on the fritz and it spent two weeks in the shop.

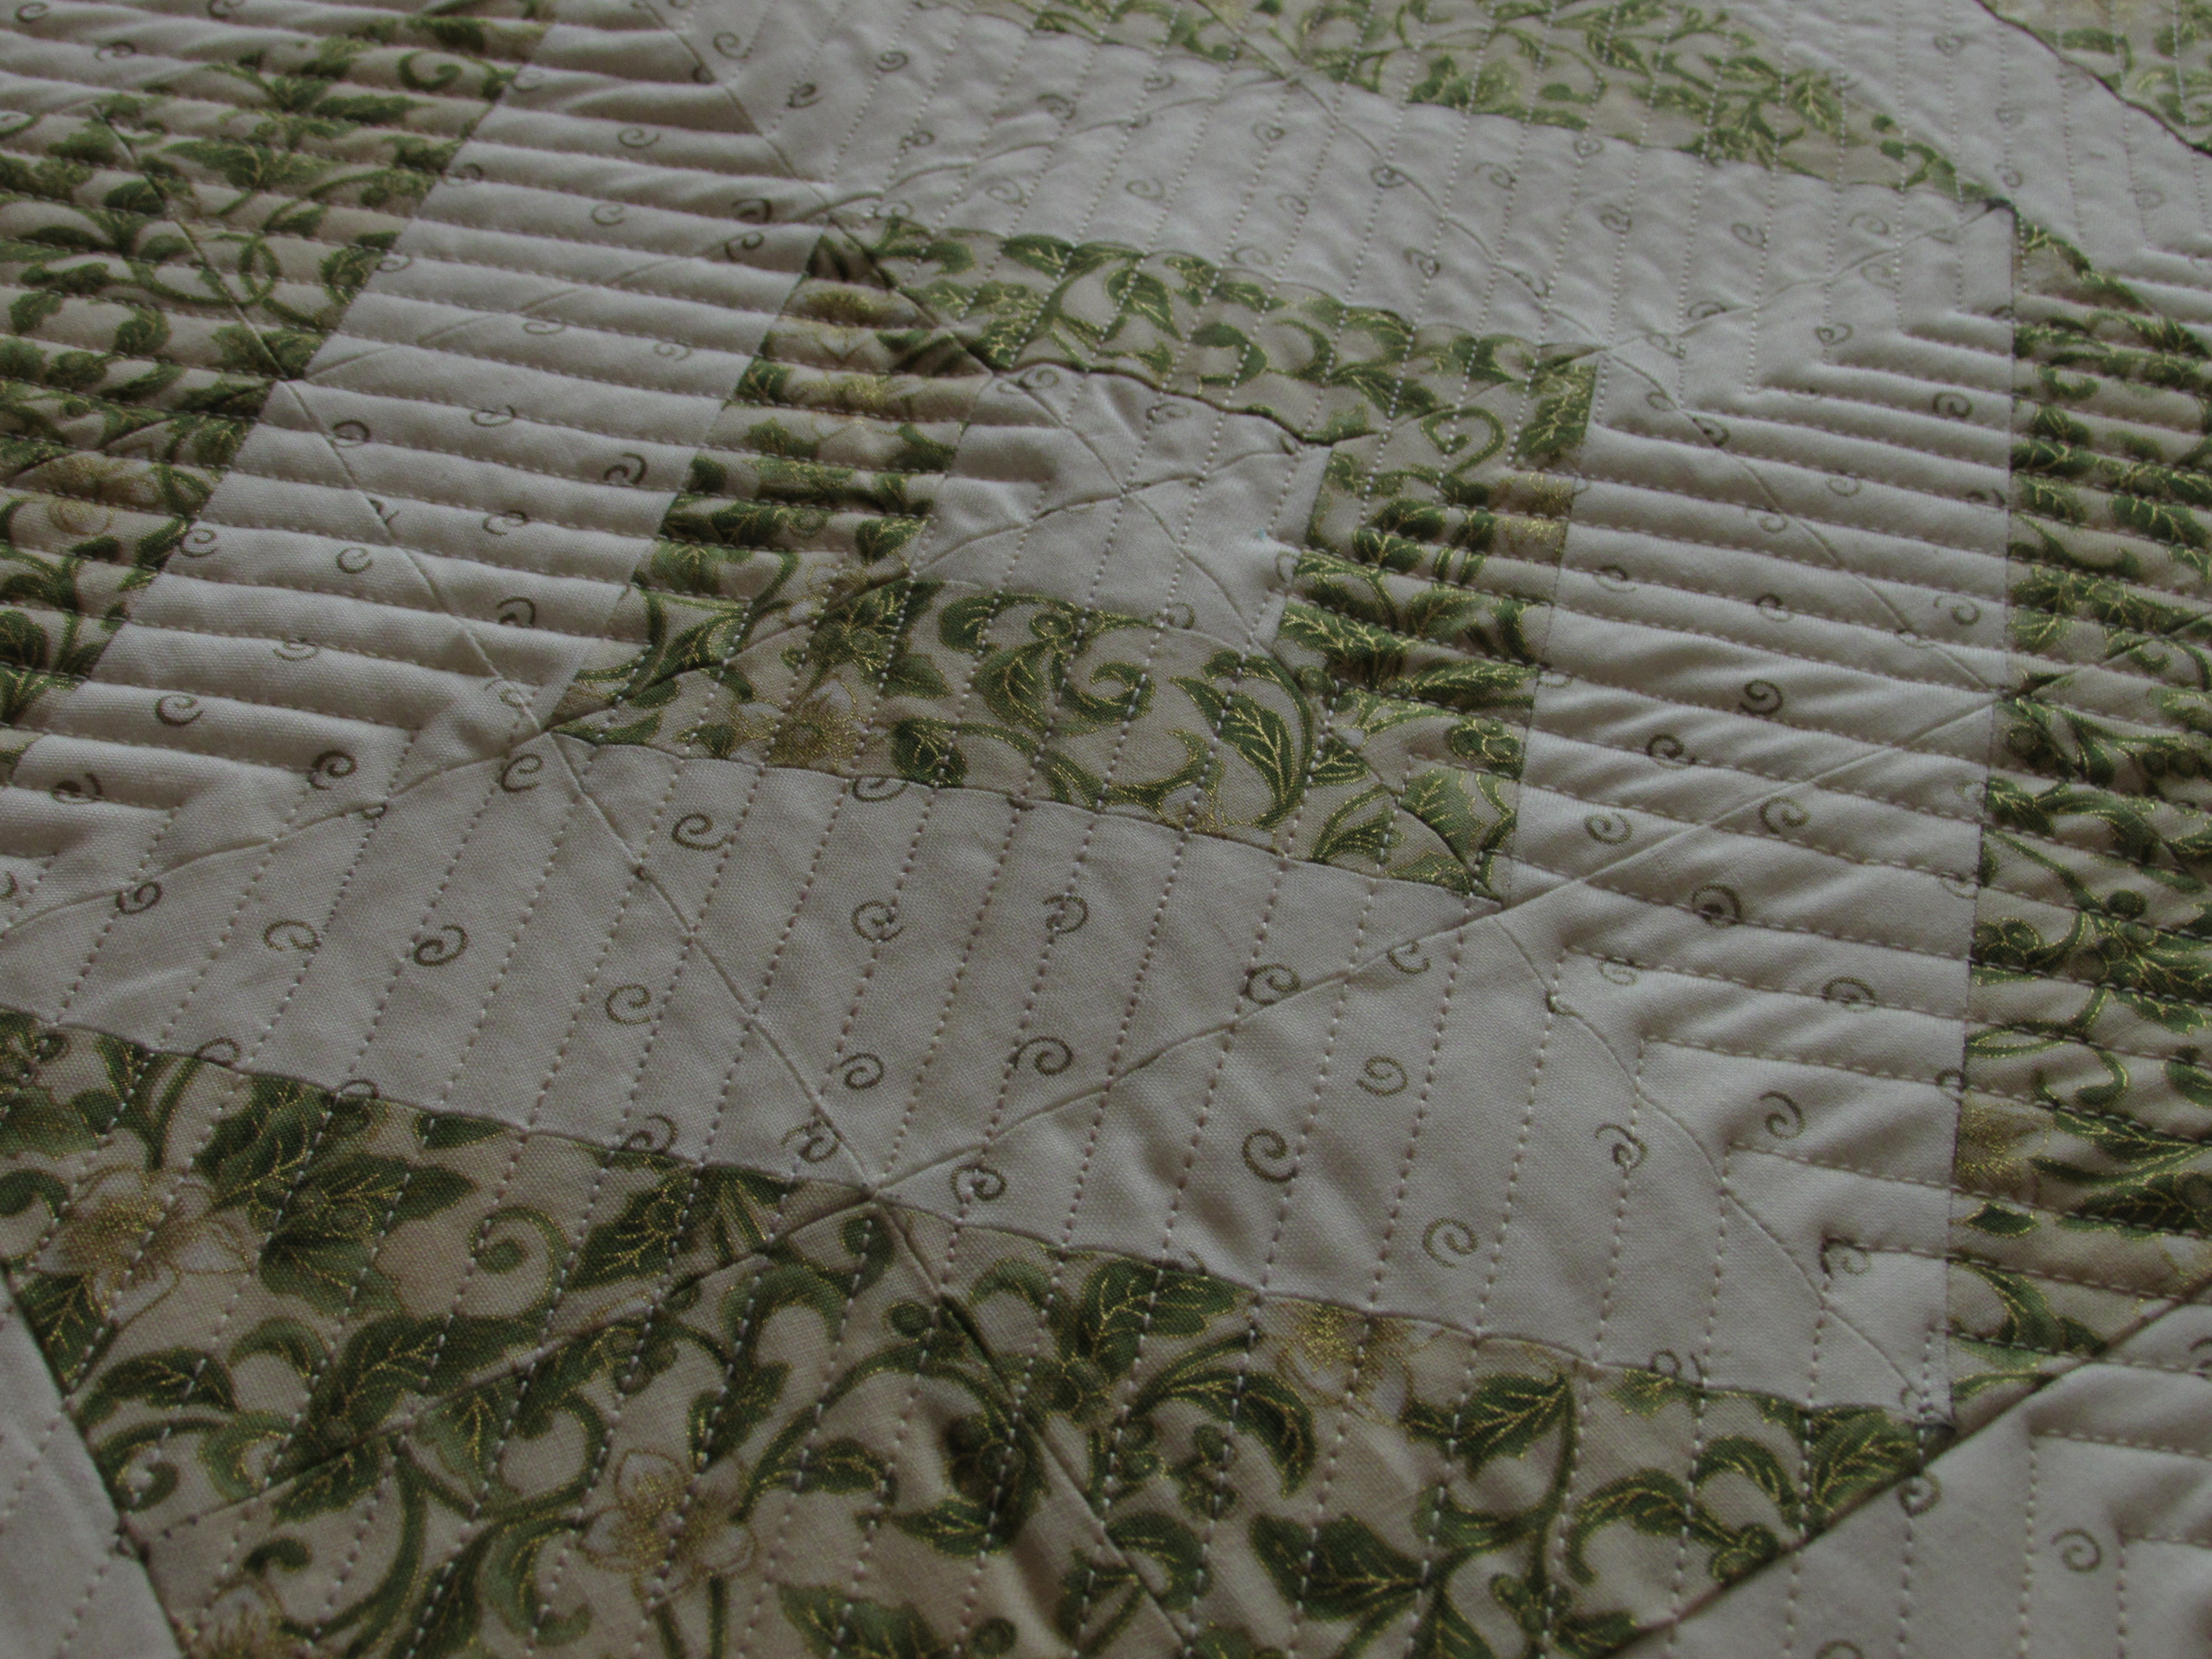
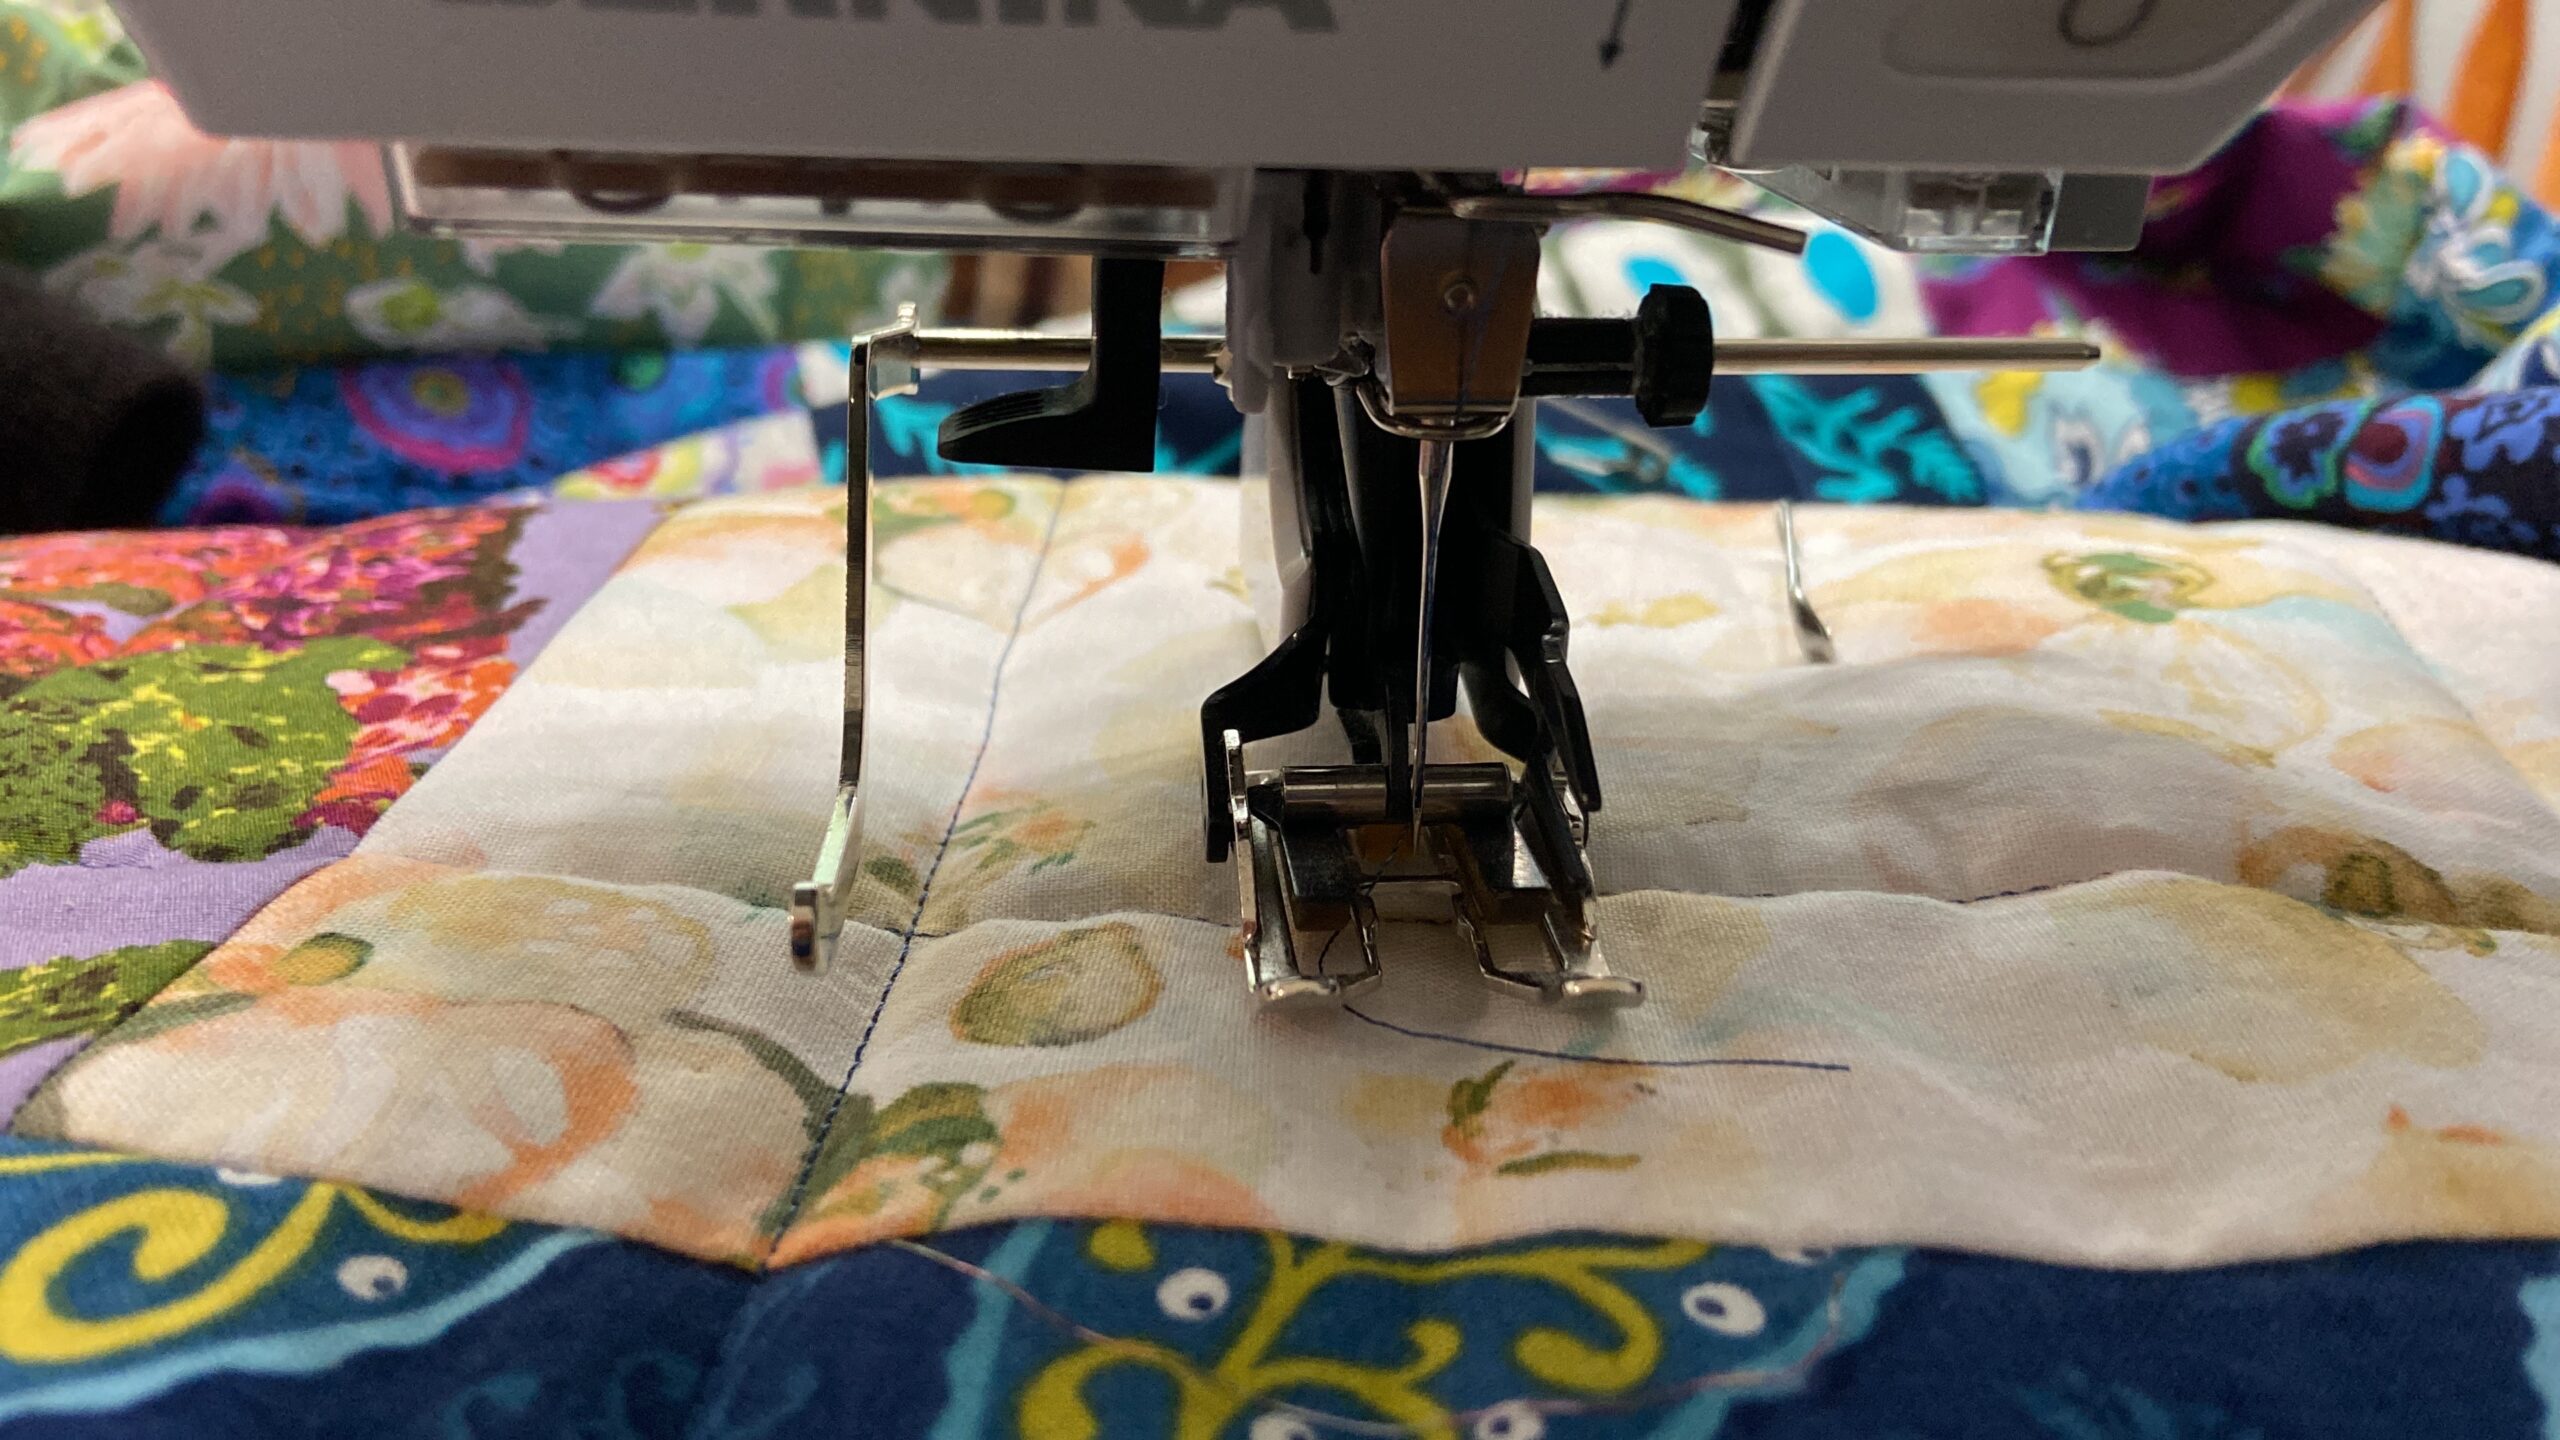
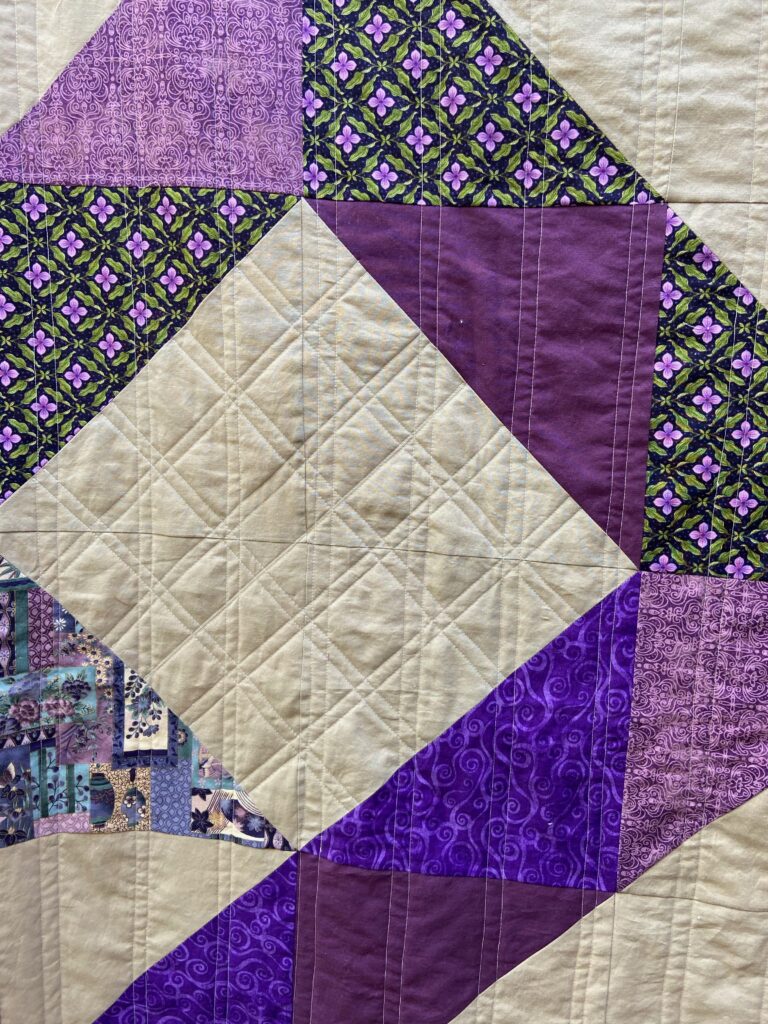
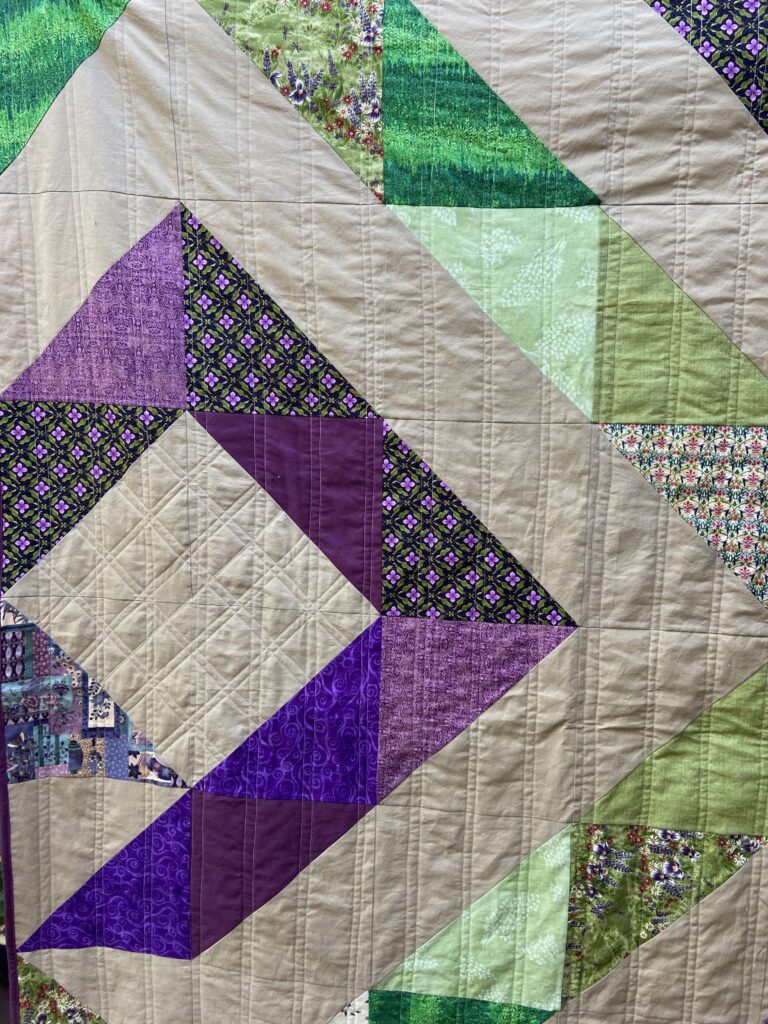
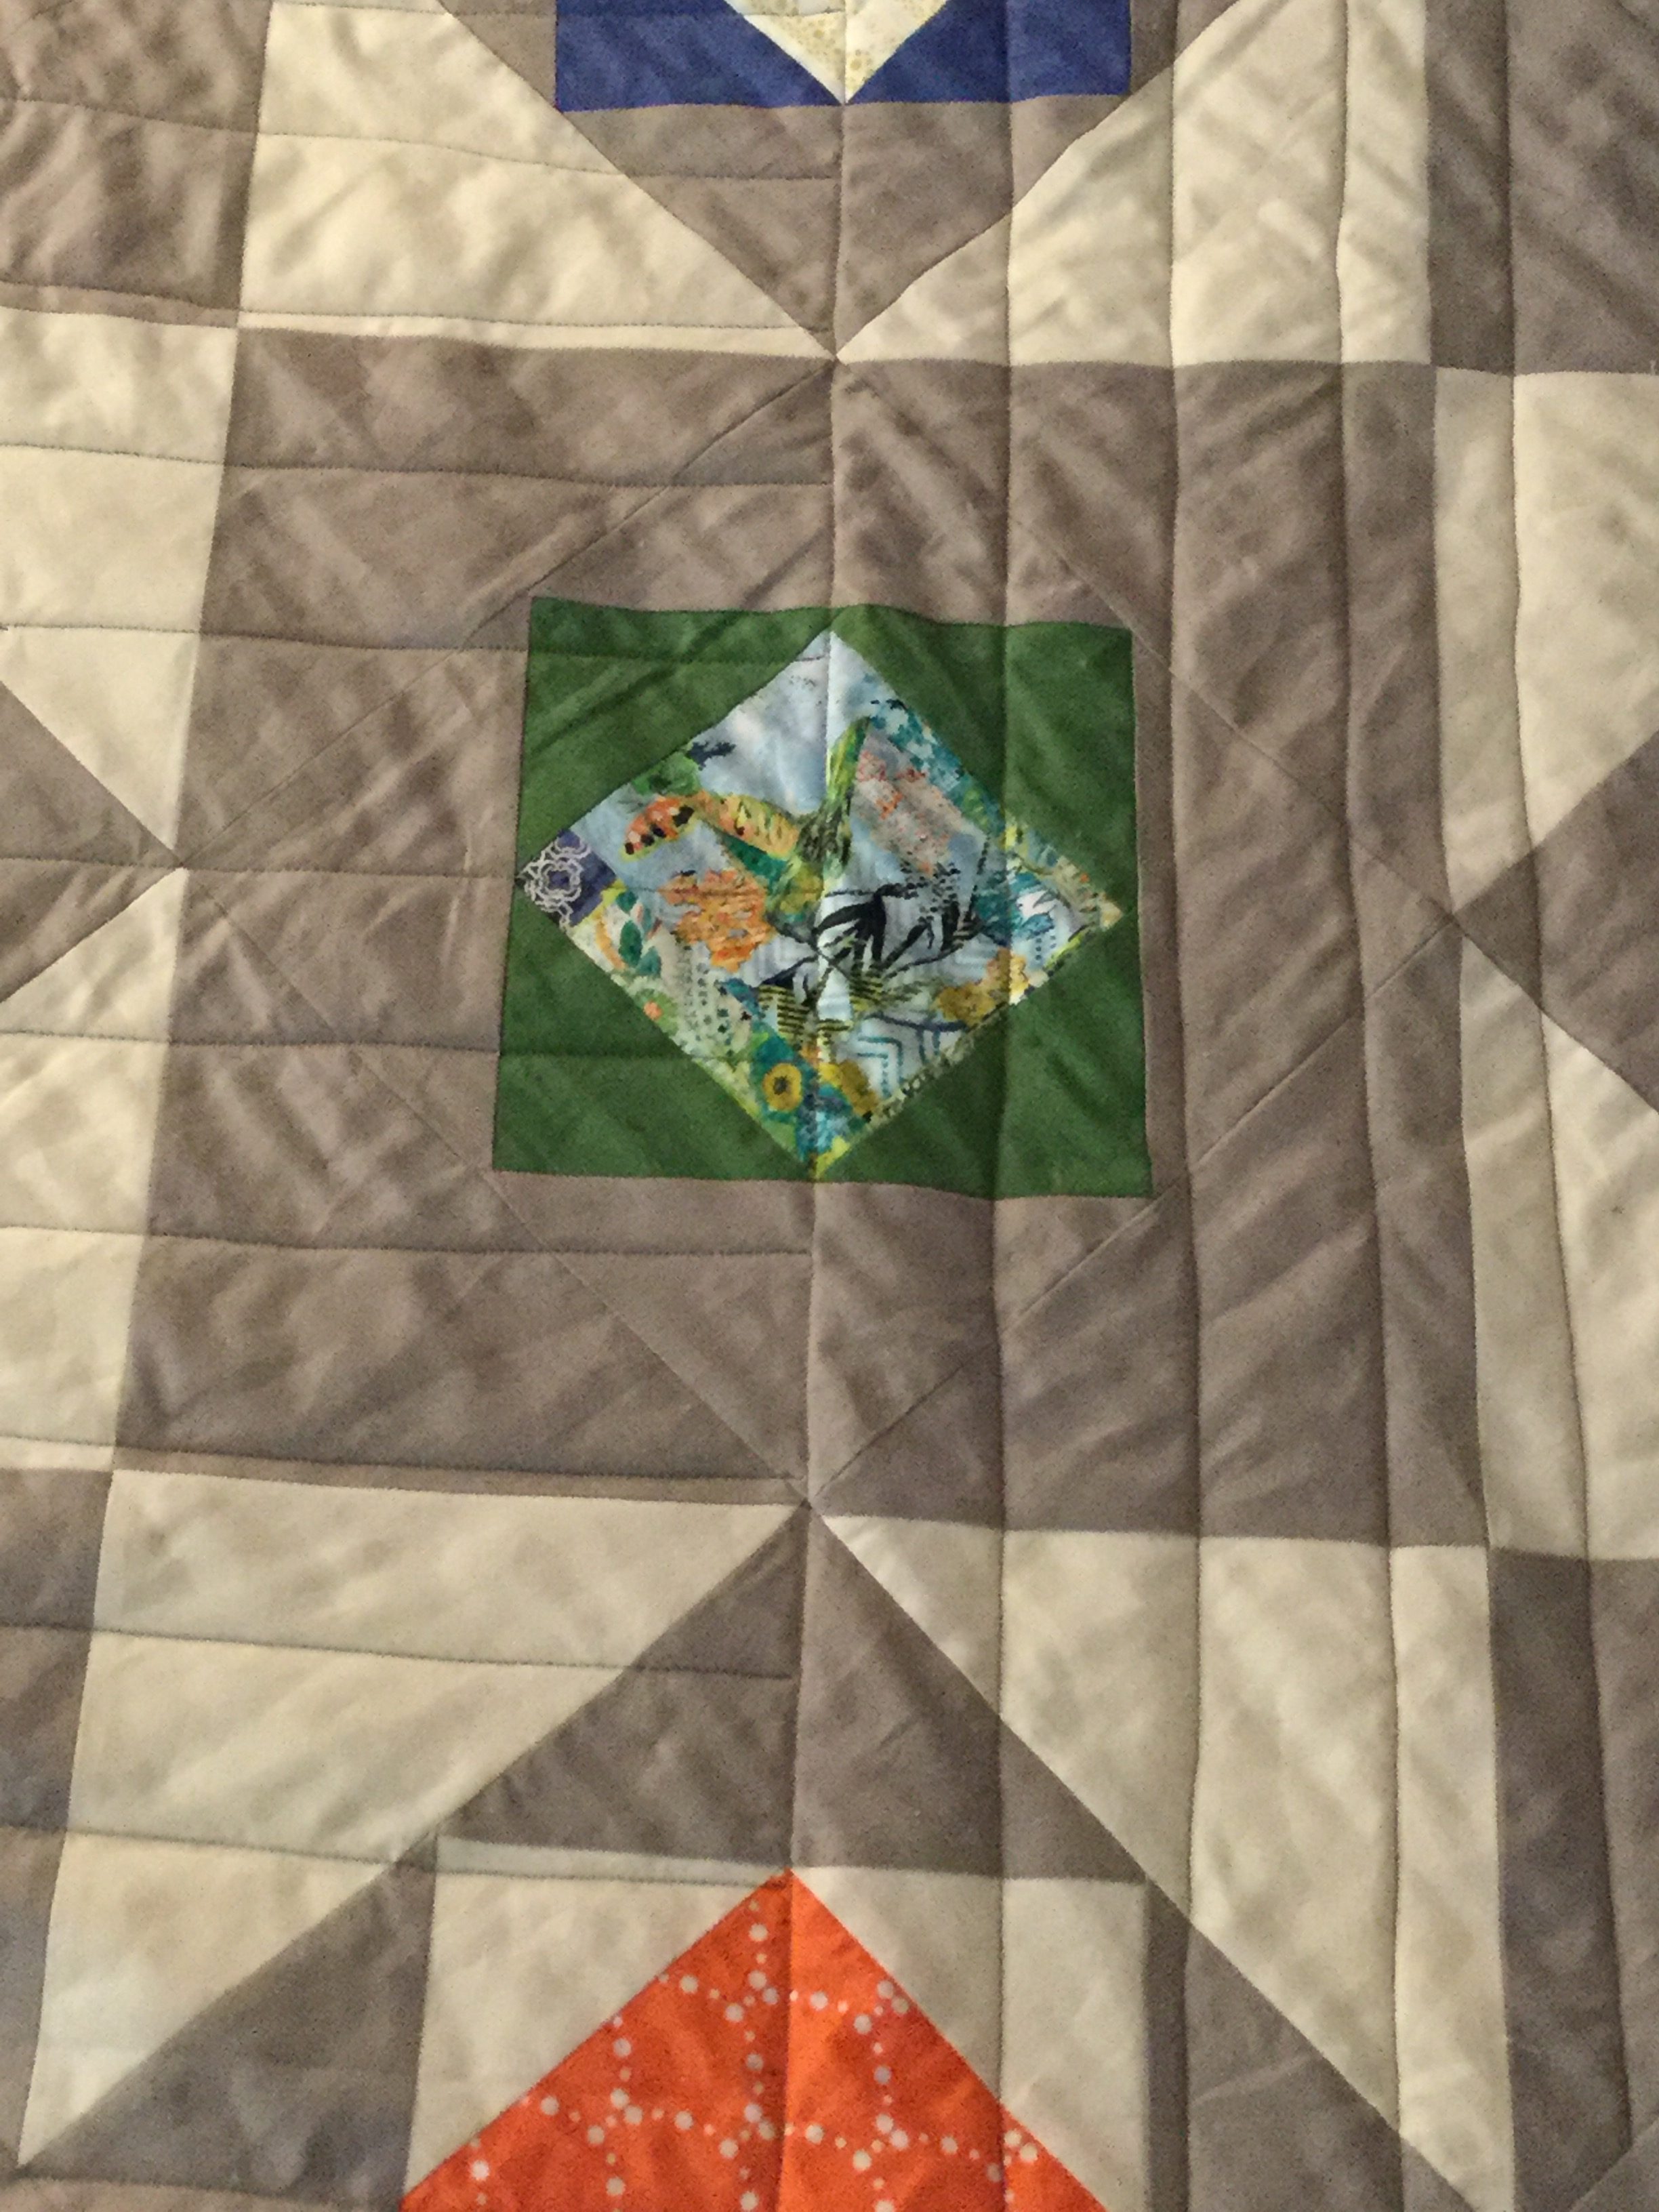
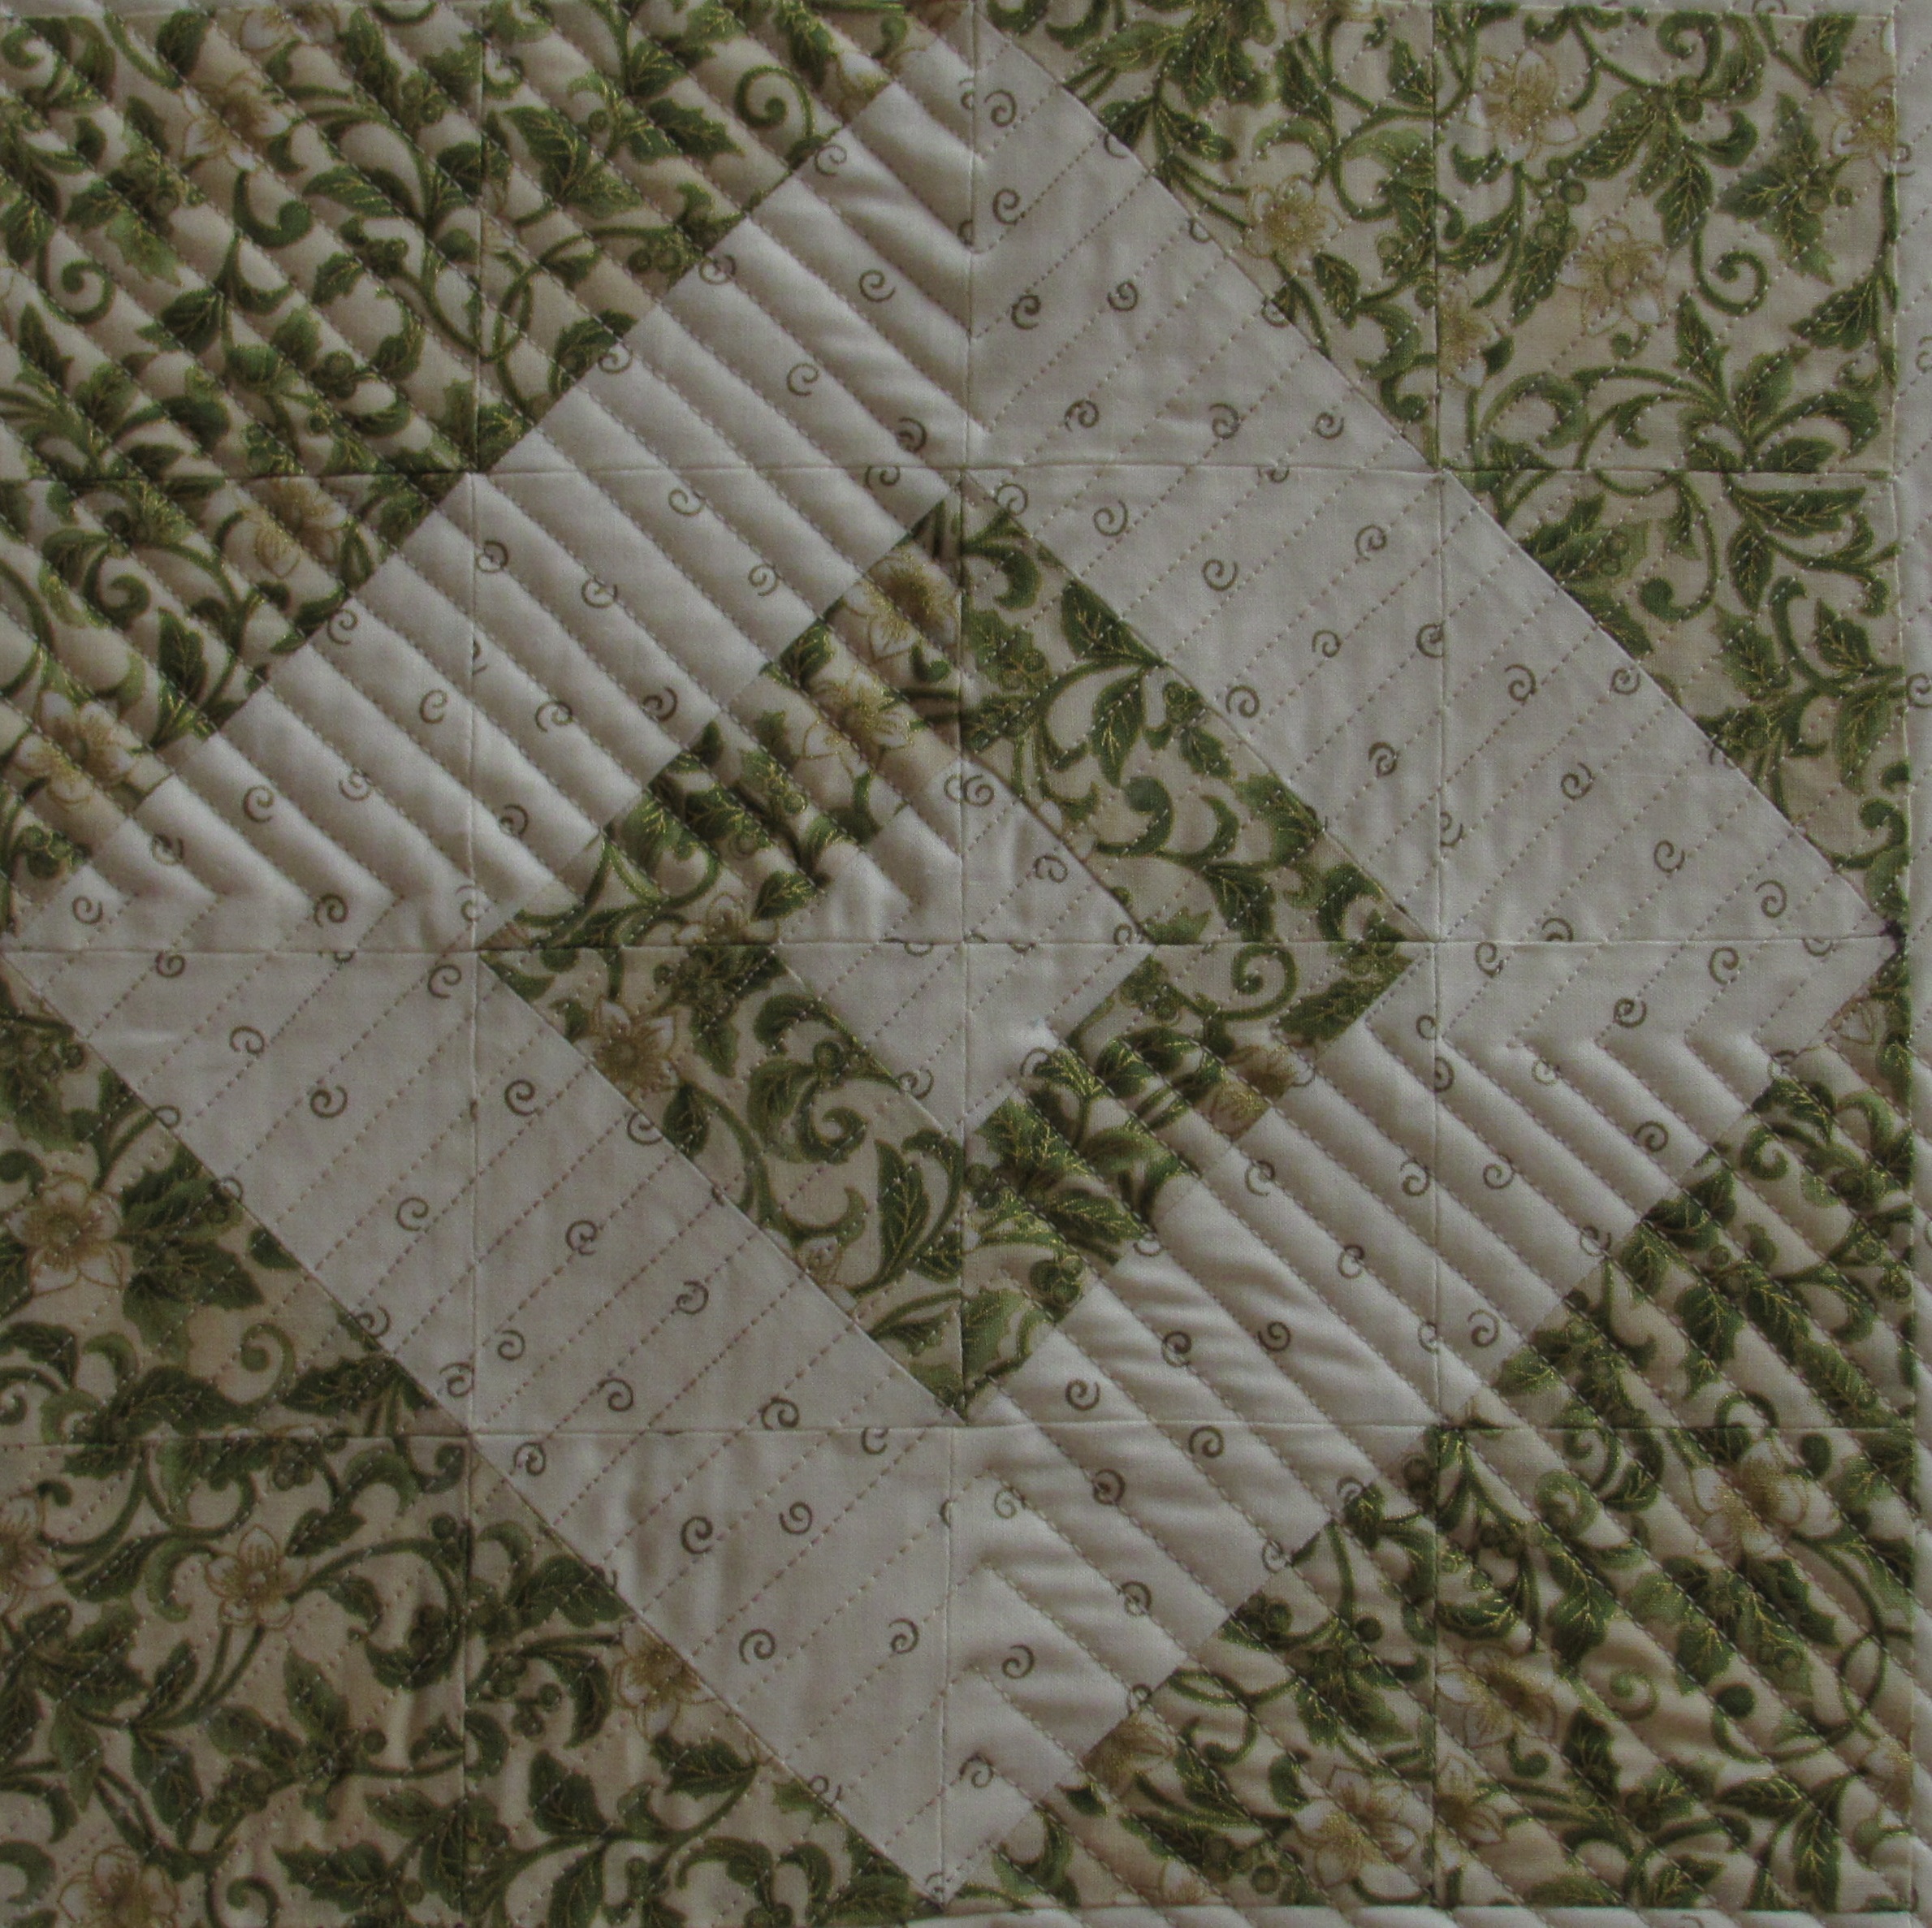
The quilting design happened organically. First I decided to do a couple of passes on the diamonds, anchoring them down with a few lines echoing the small center diamond. Then I did a pass echoing just half of the larger diamond.

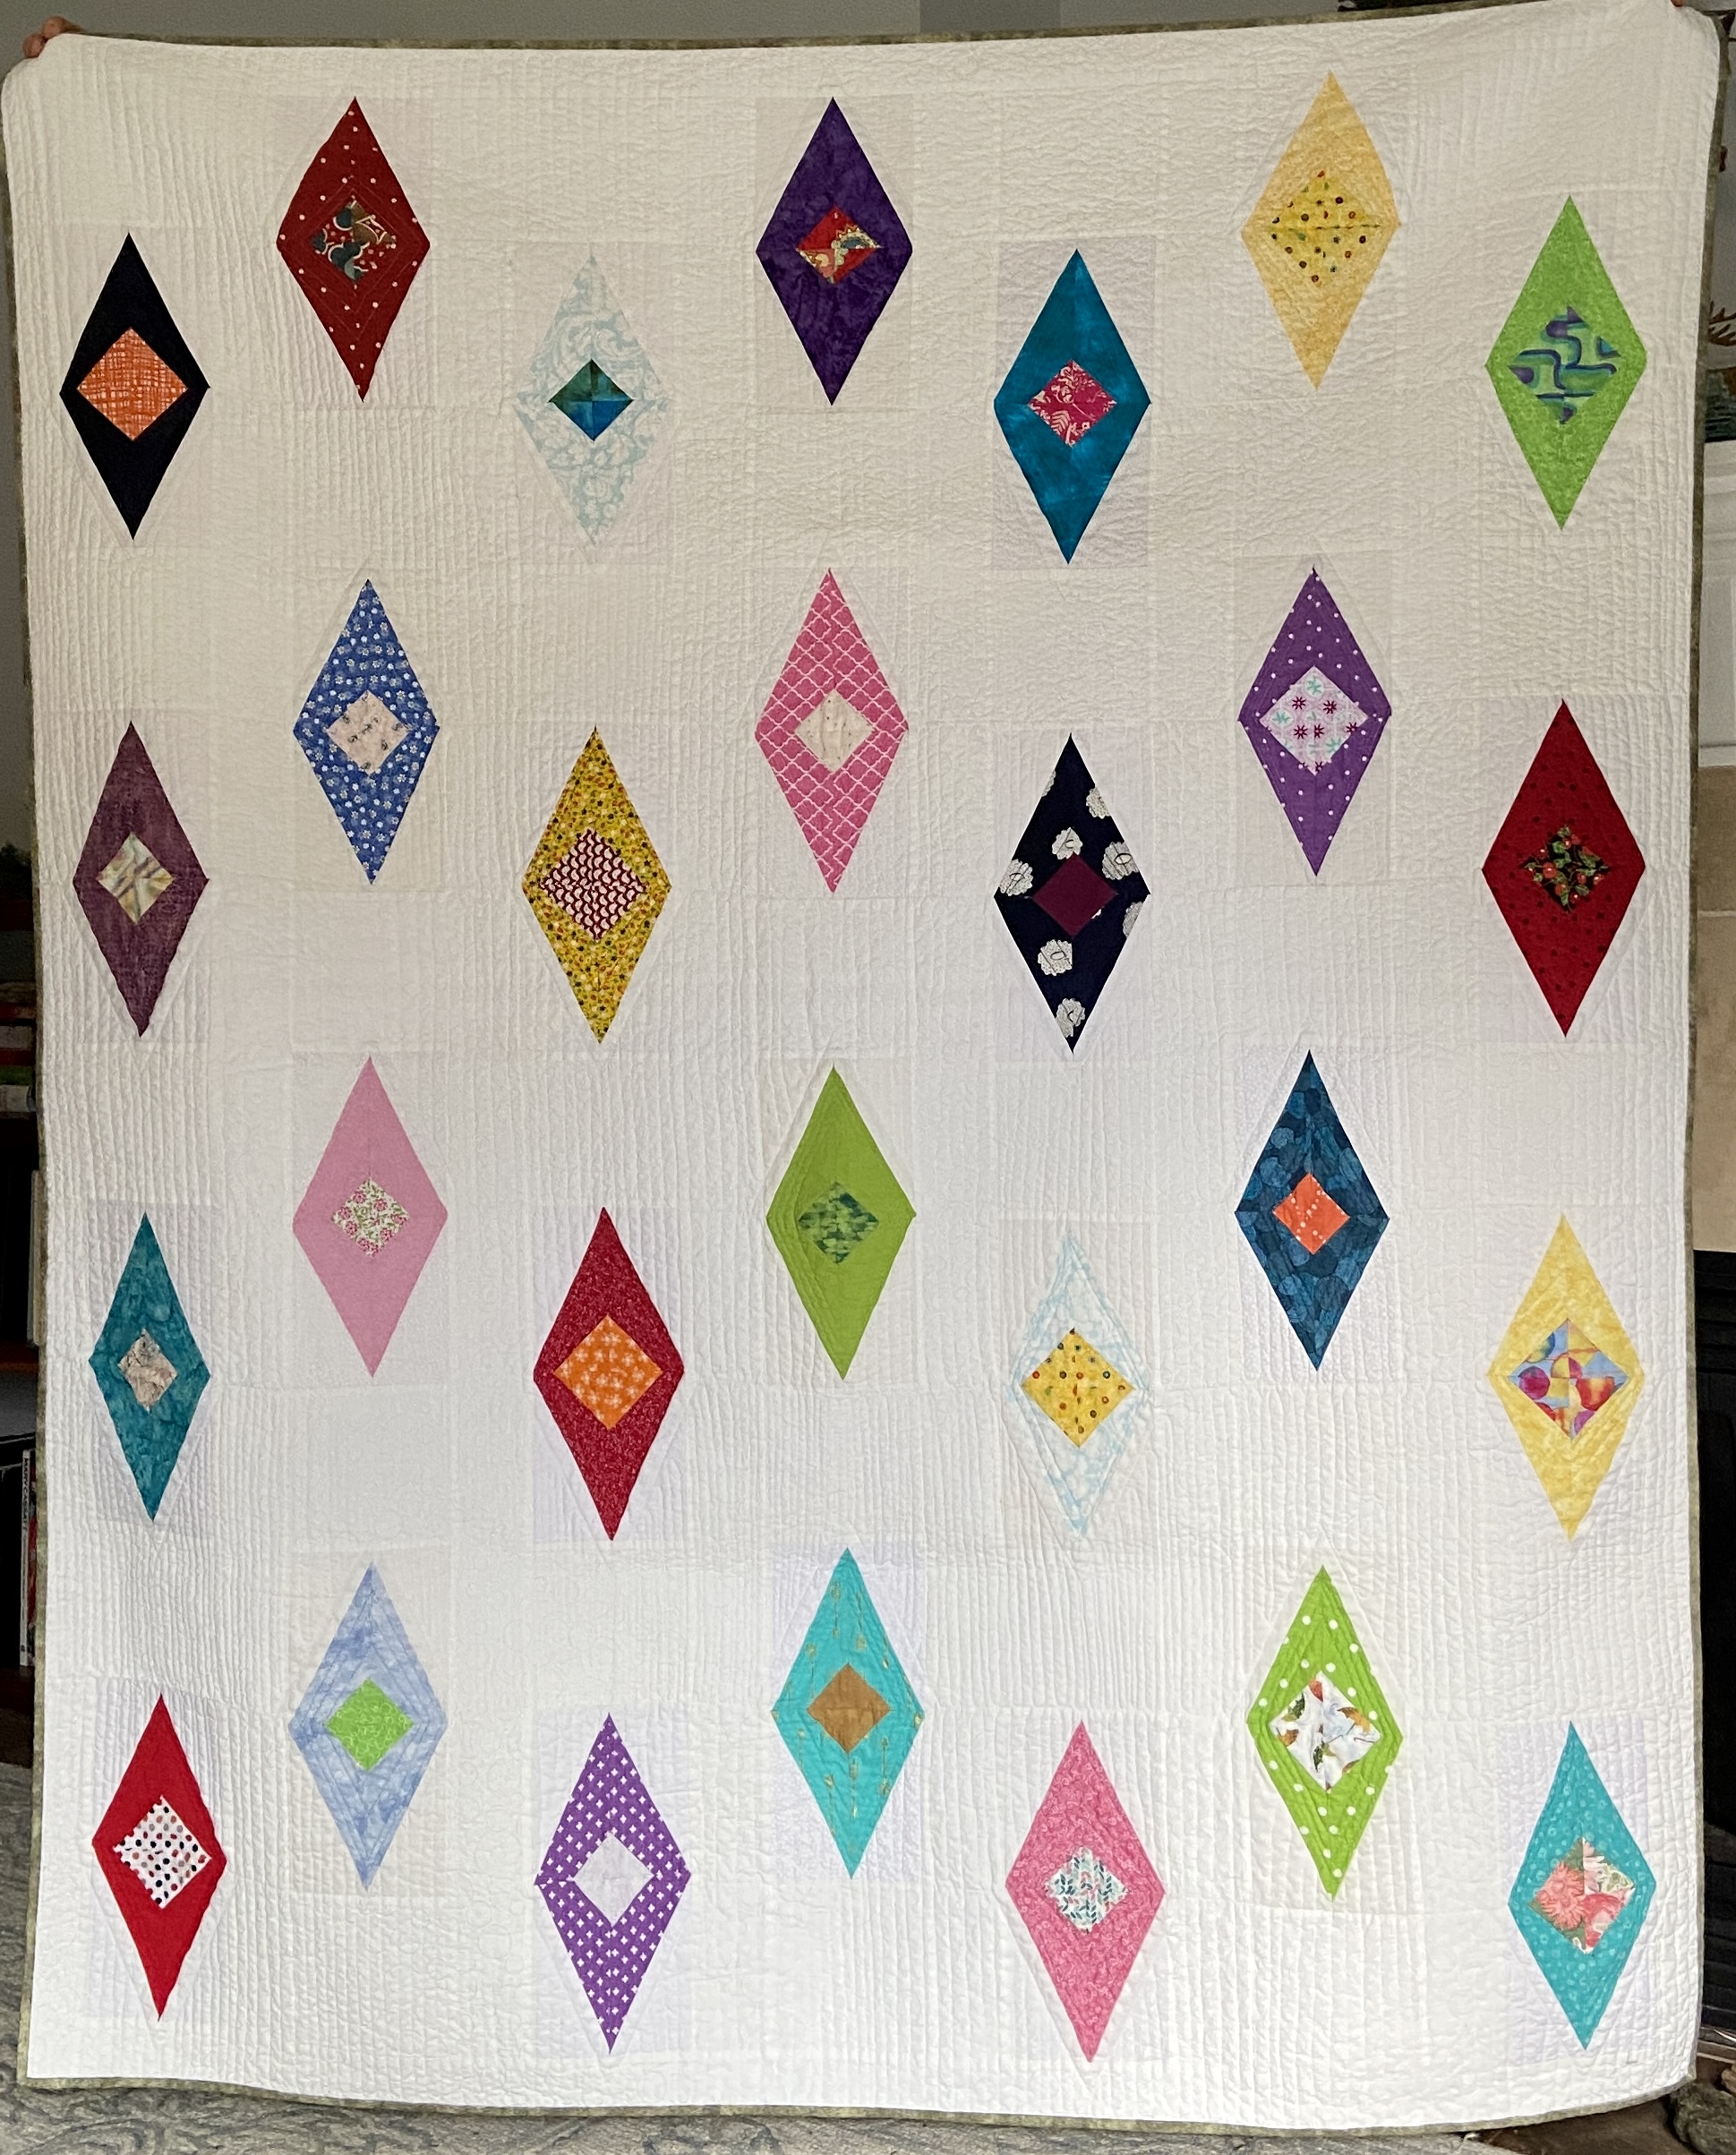
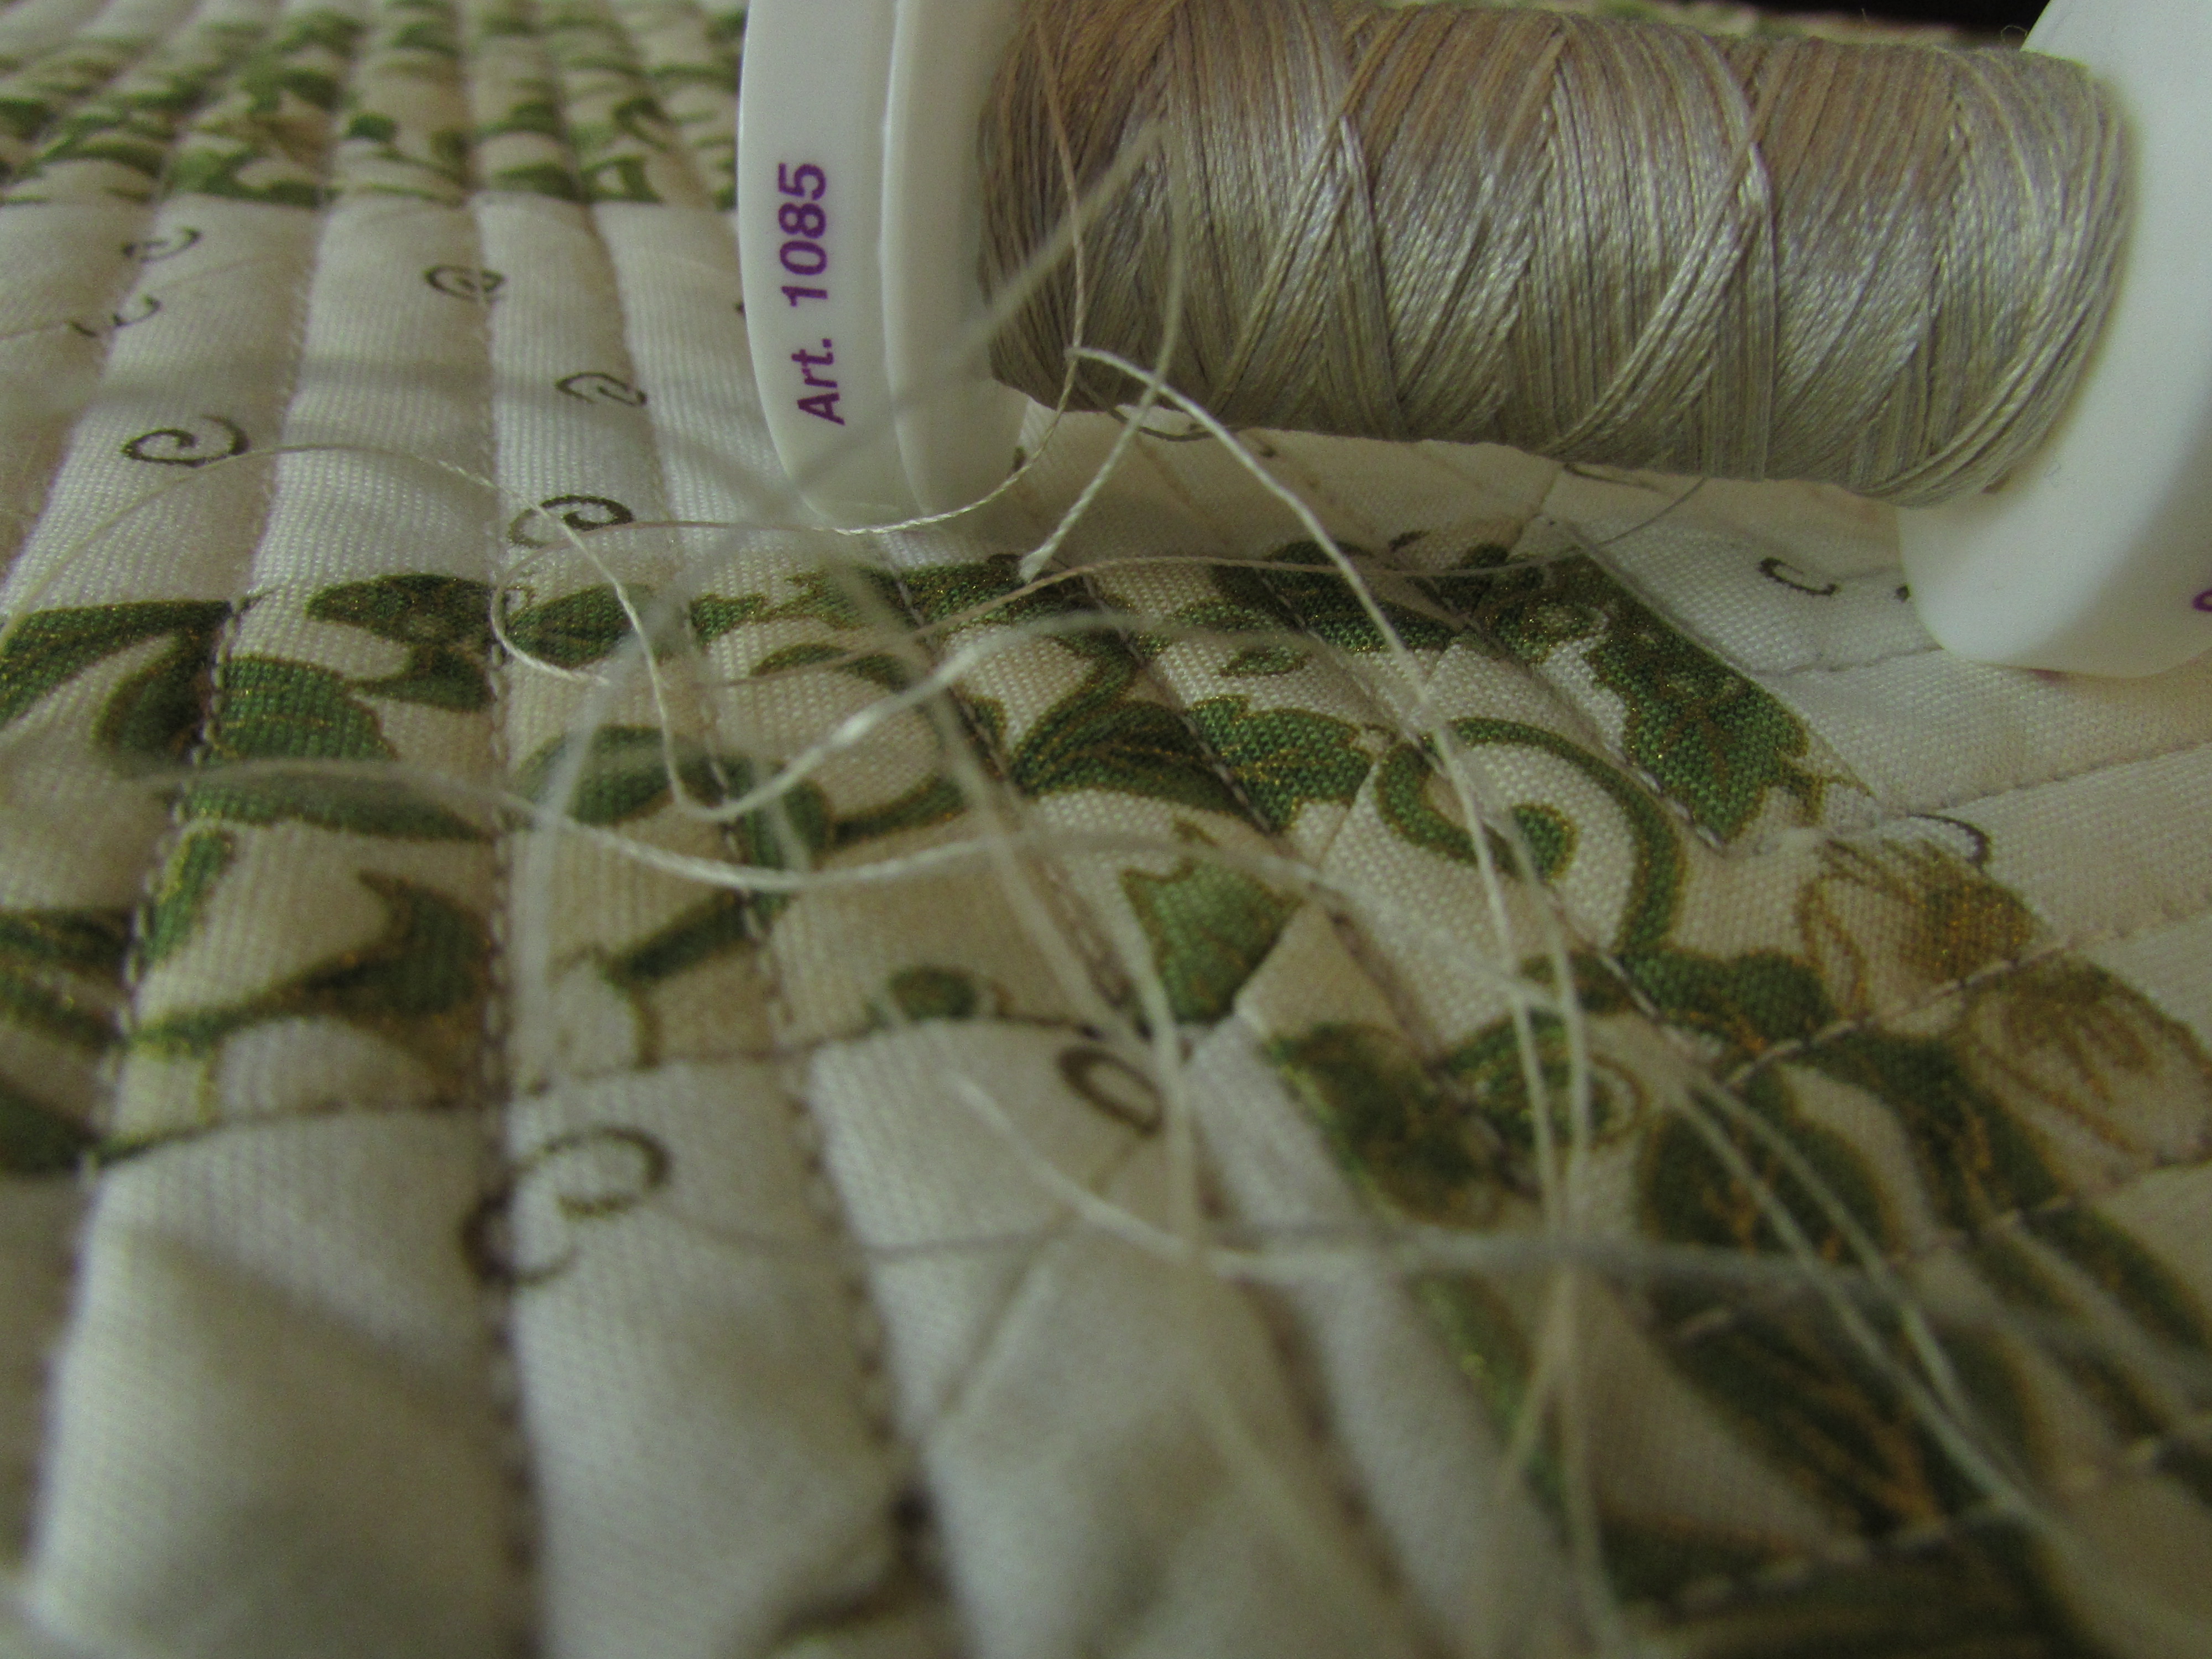
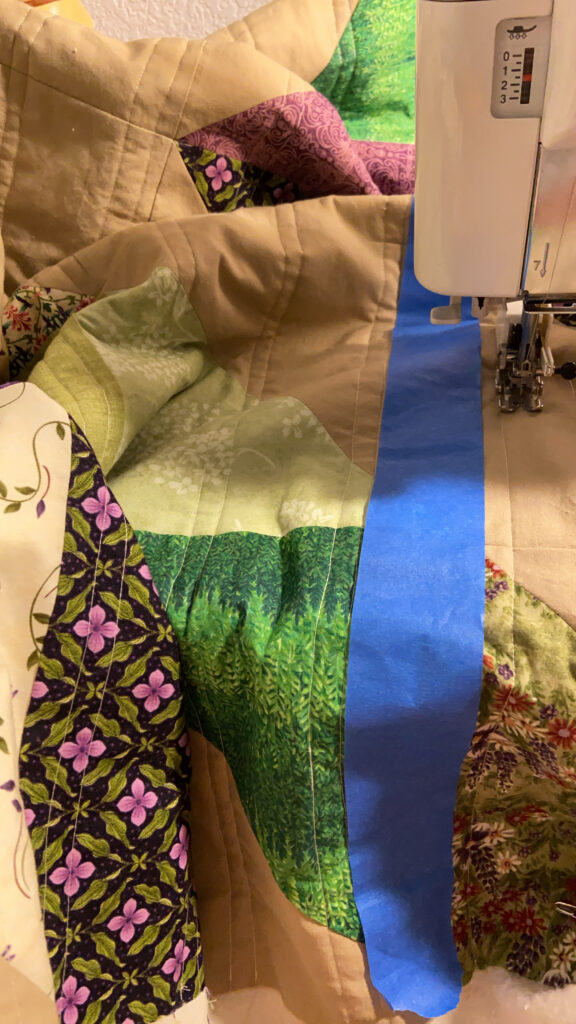
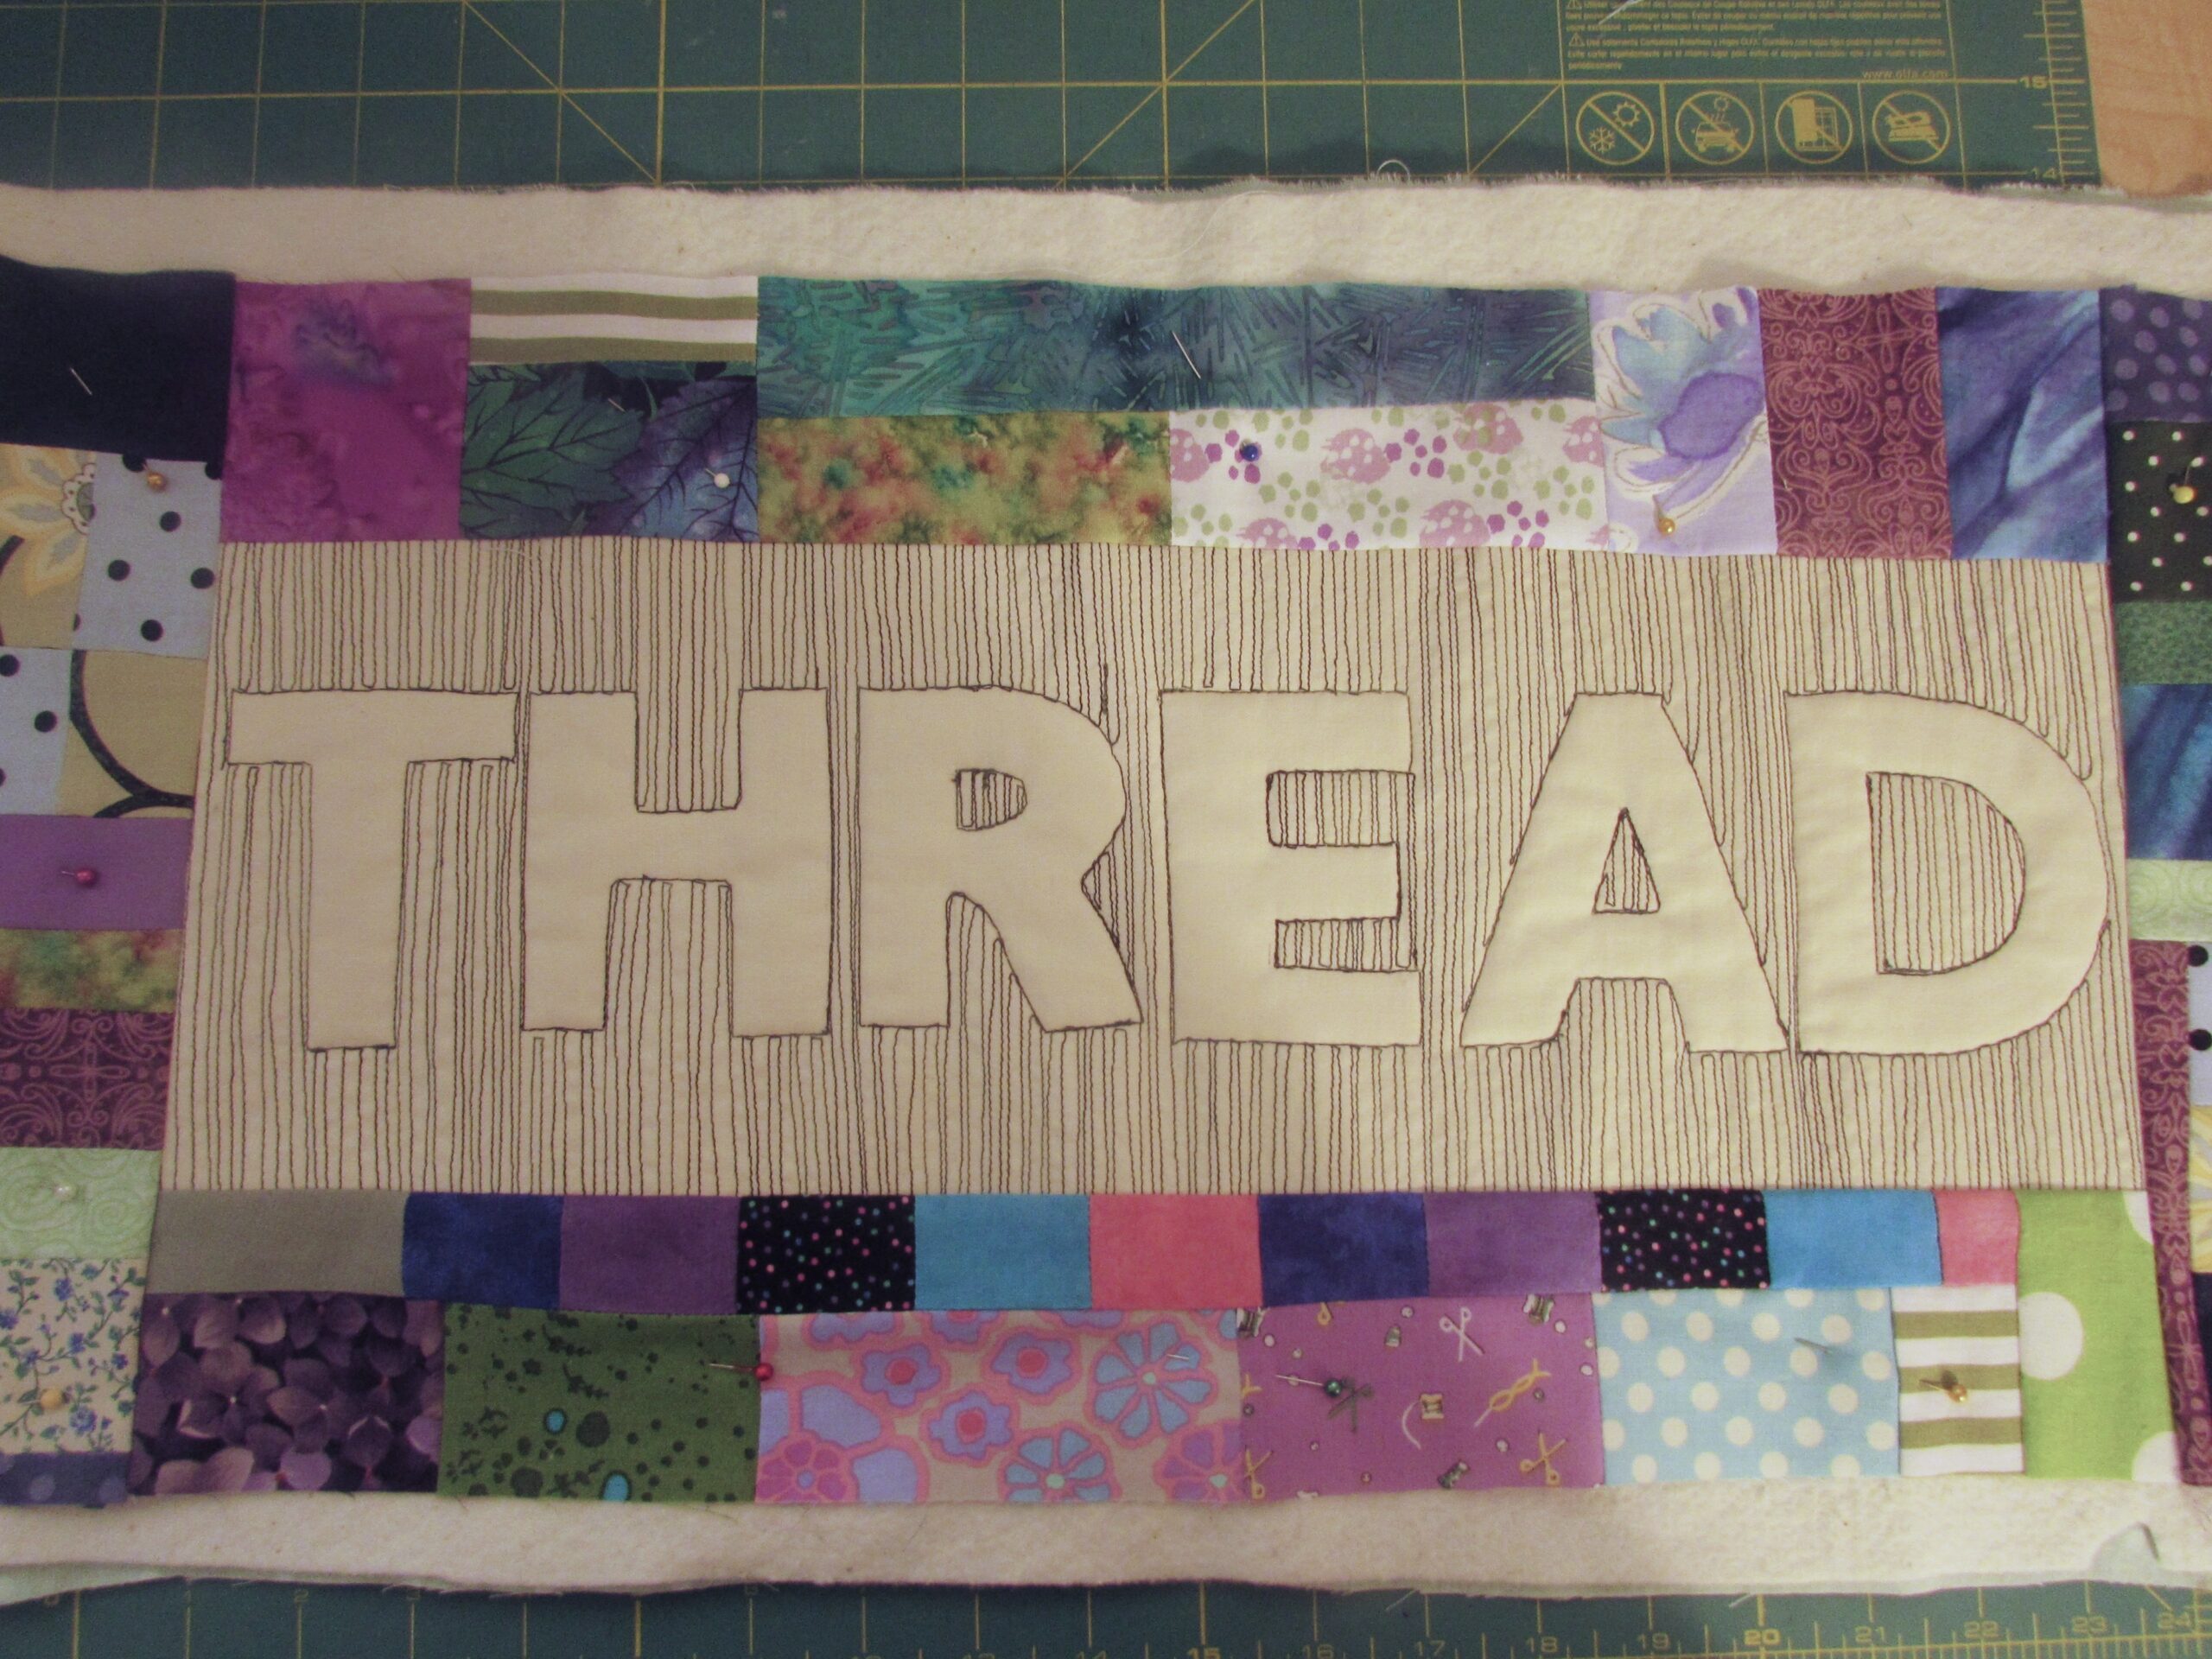
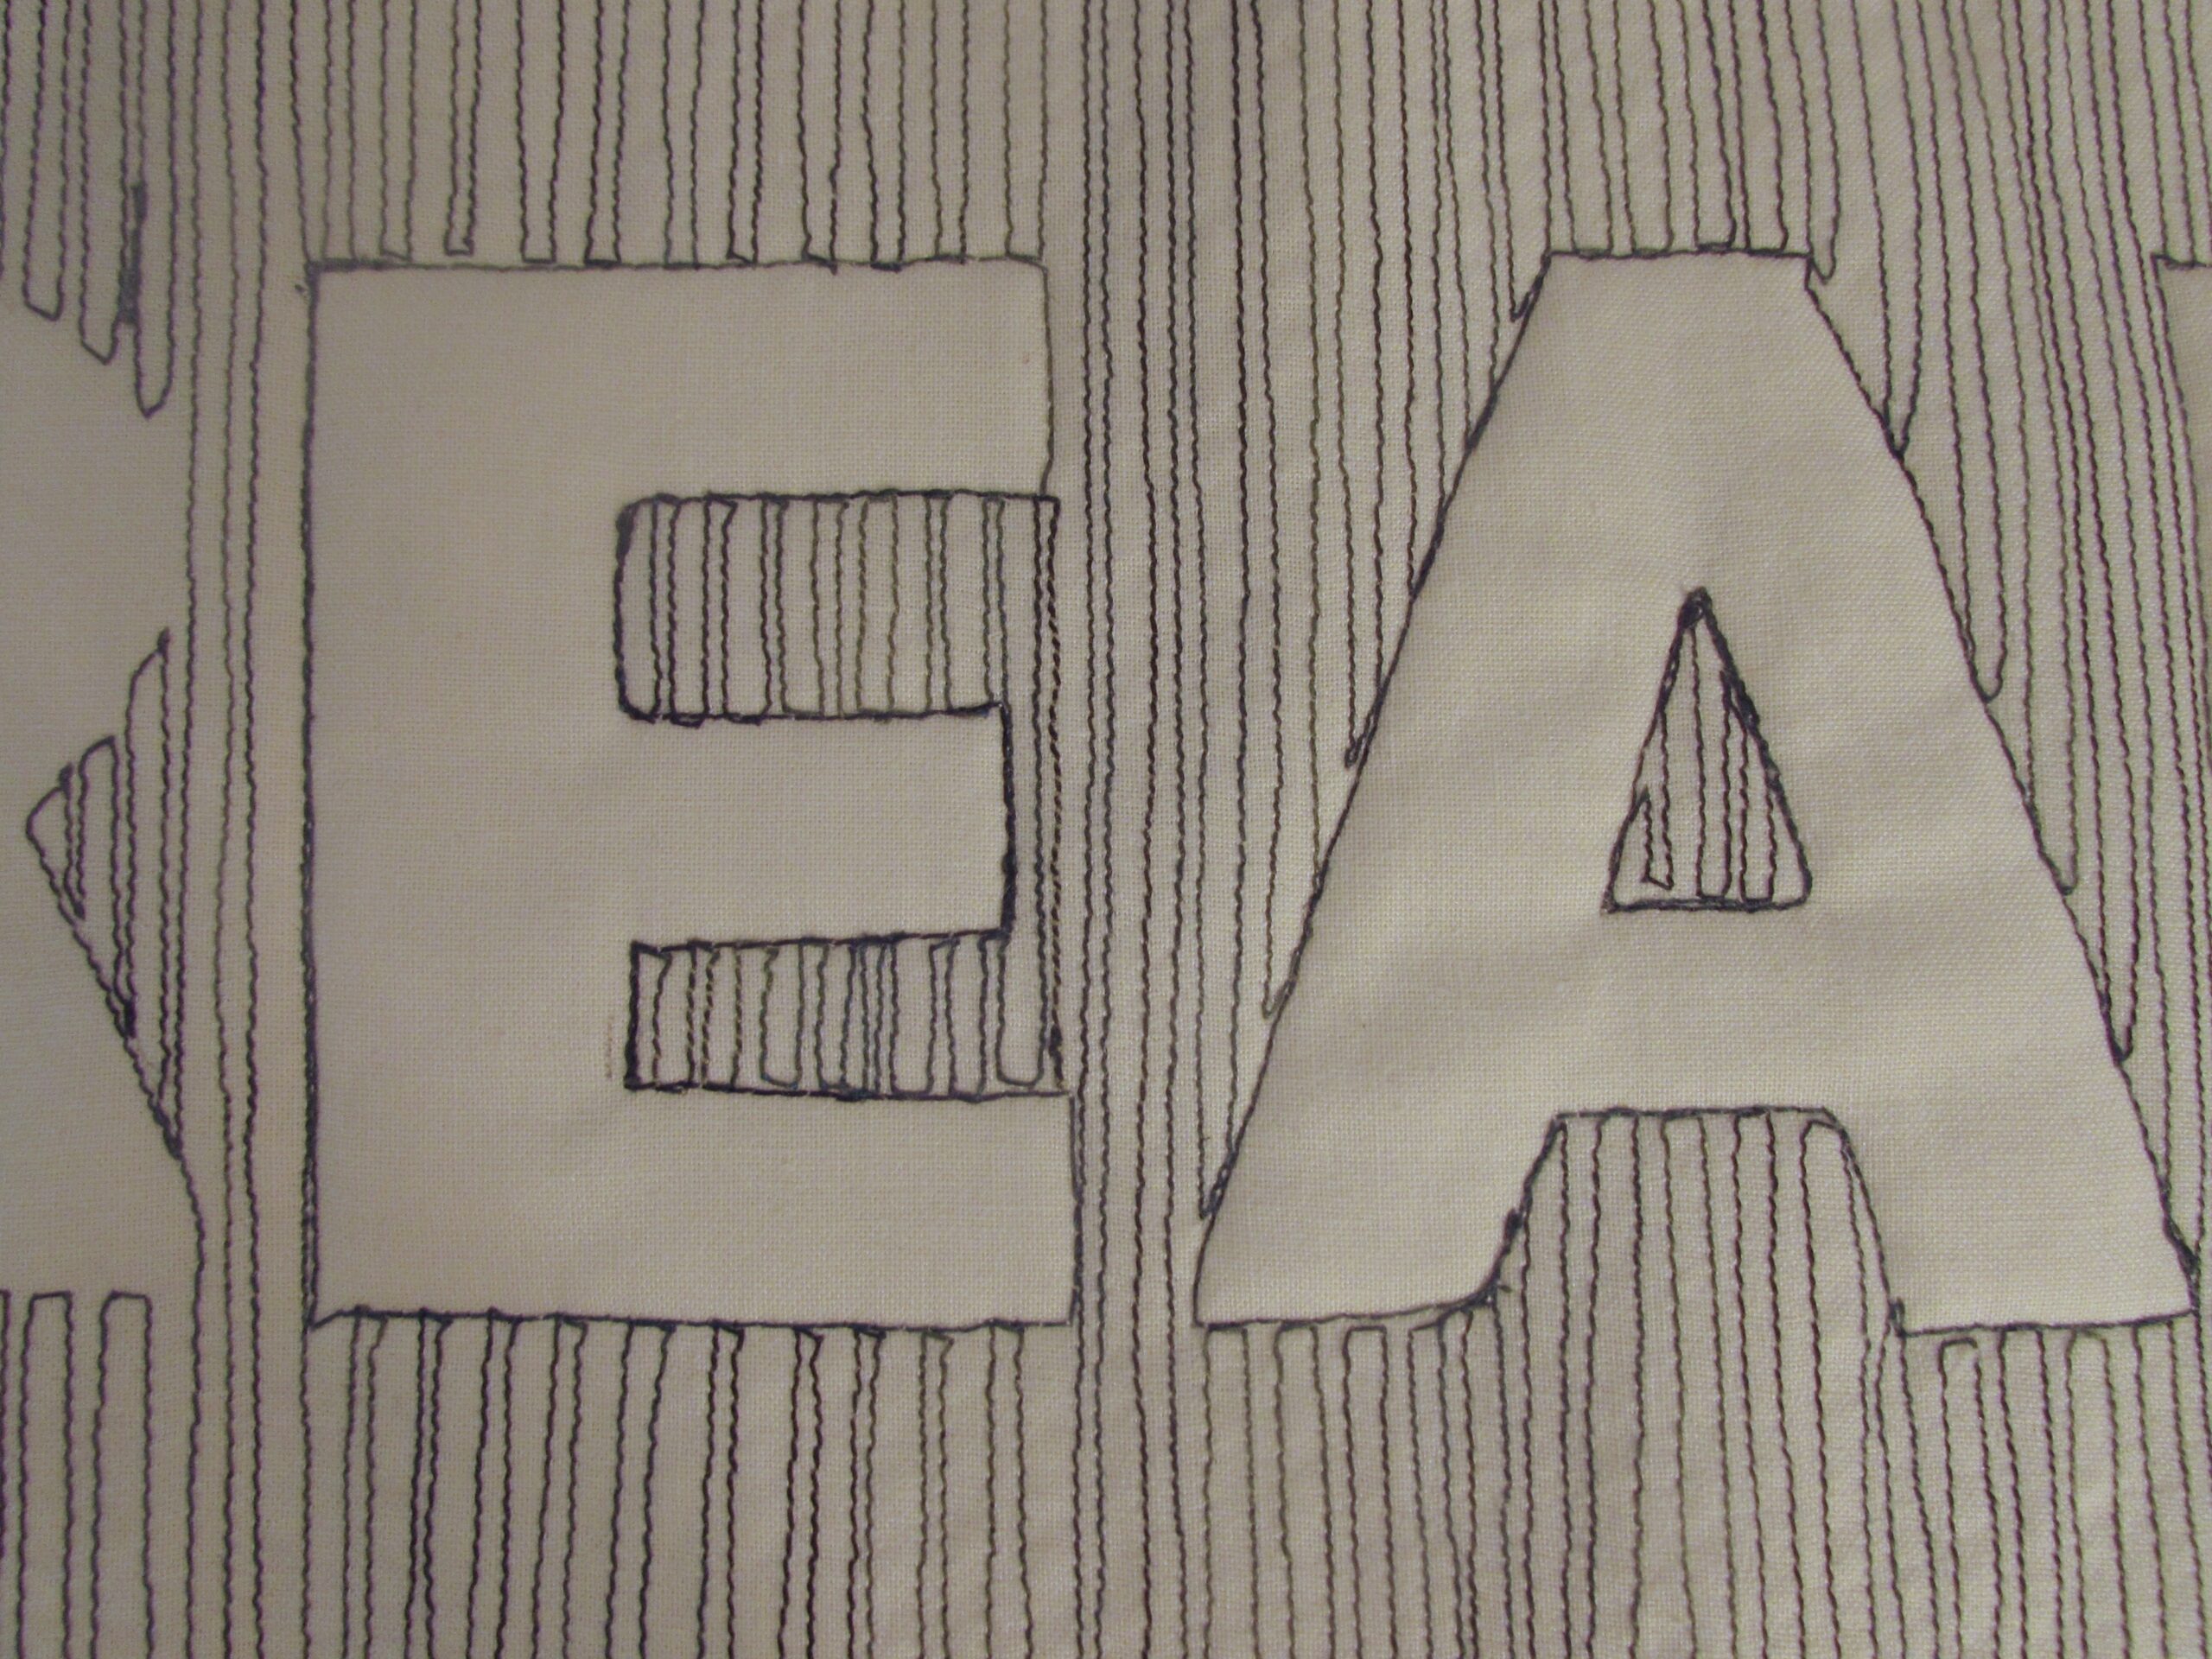
After this was done the straight line quilting began. The lines are free hand, using the last line be my guide for the next line. The widths are similar but not exactly the same, if that makes sense. I almost never quilt a lap quilt so heavily but this seemed to be the right thing for this quilt. Also, the lines don’t go top to bottom. I worked in sections so they loop up and down at various points – boy, I am not writing this clearly, hence why I am not a pattern designer!!

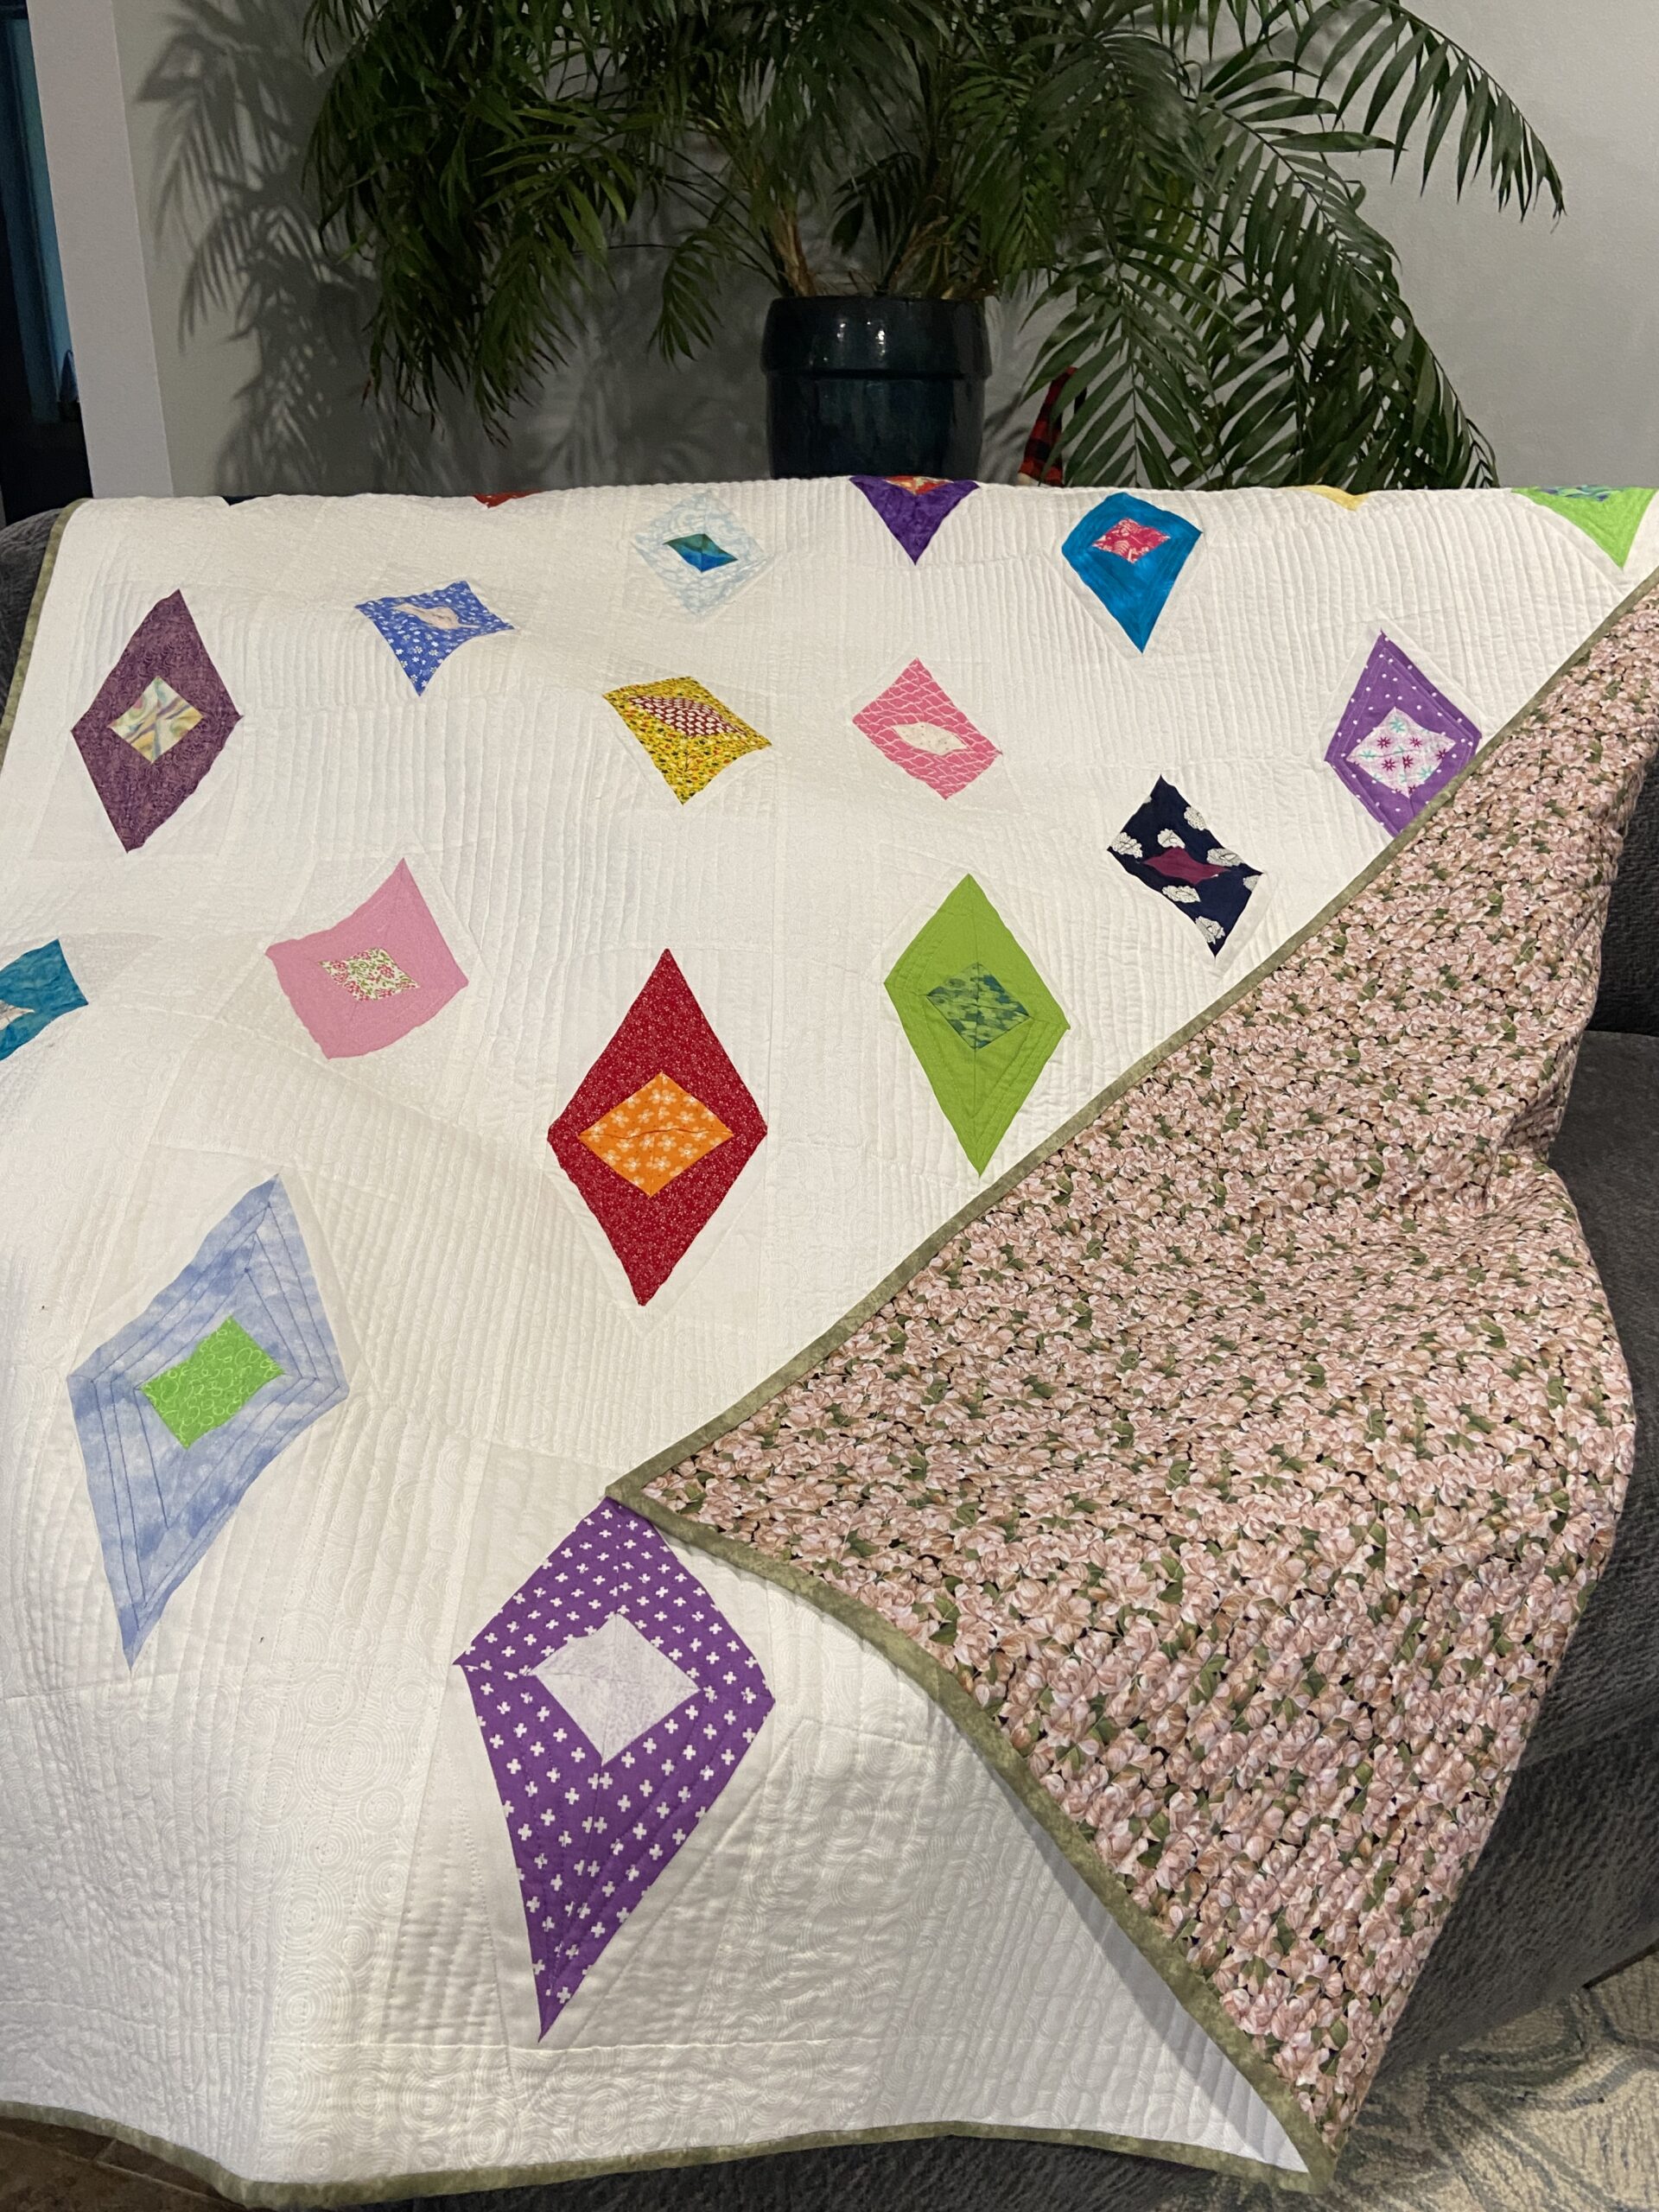
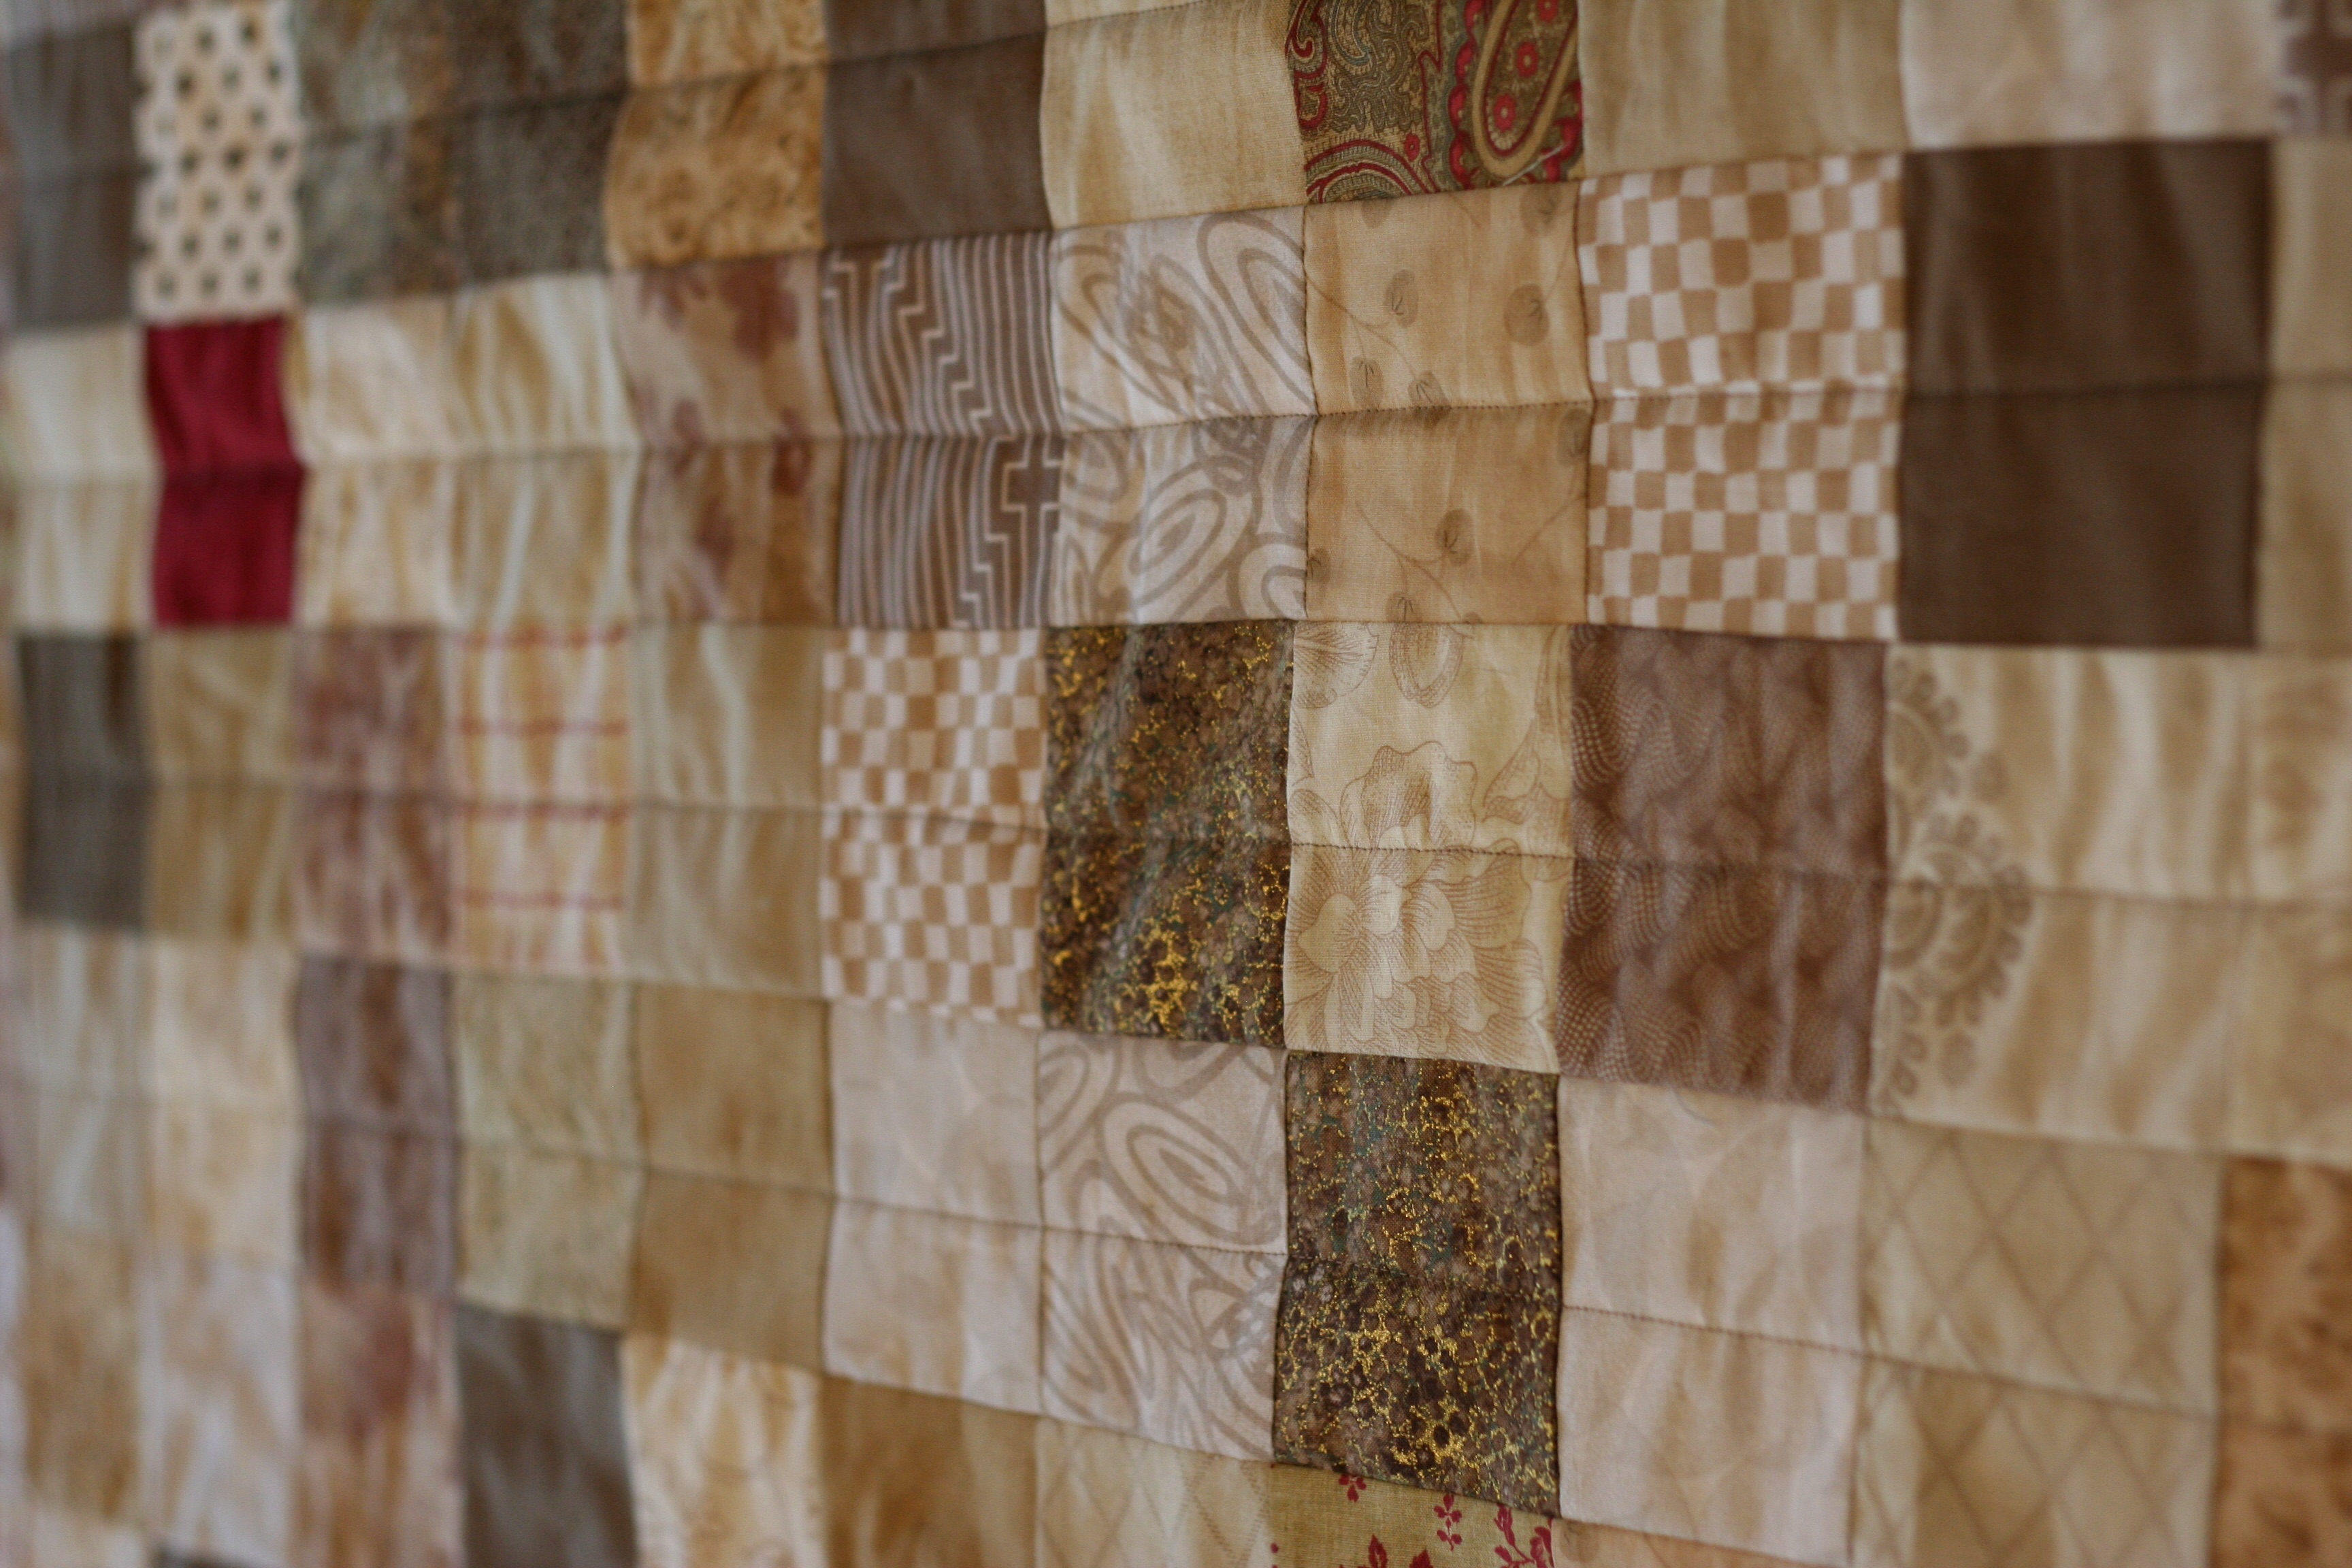
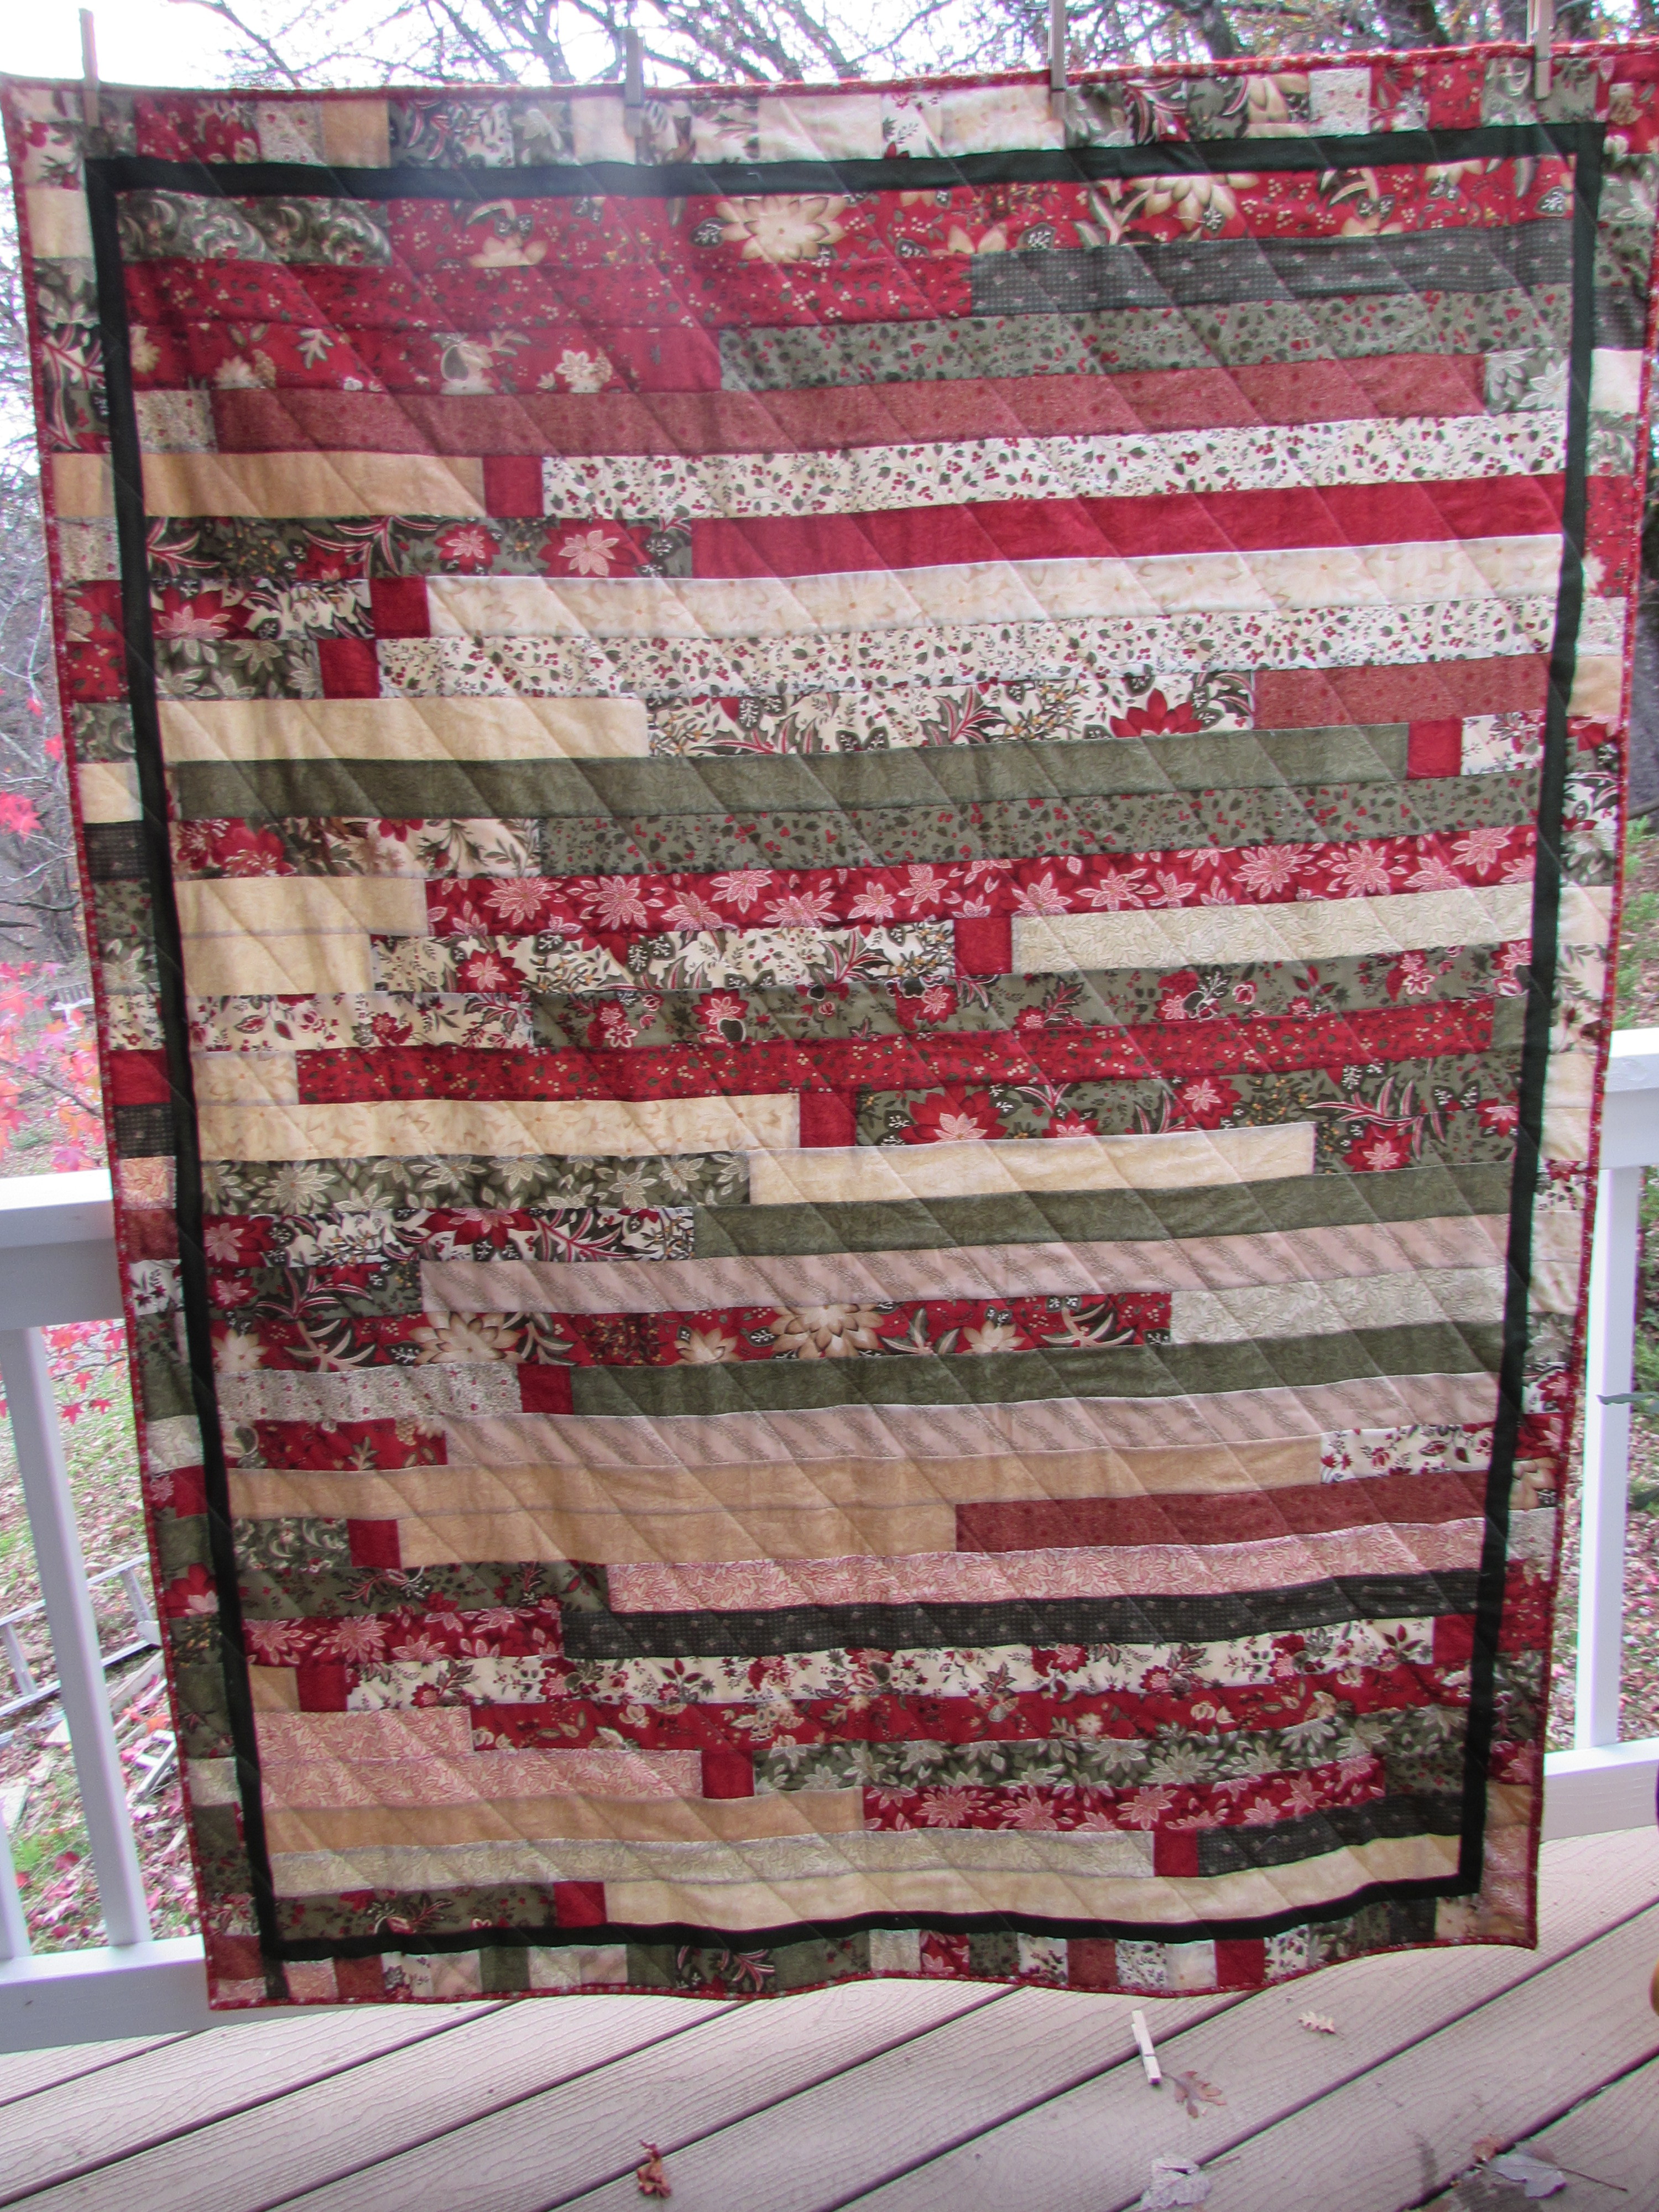
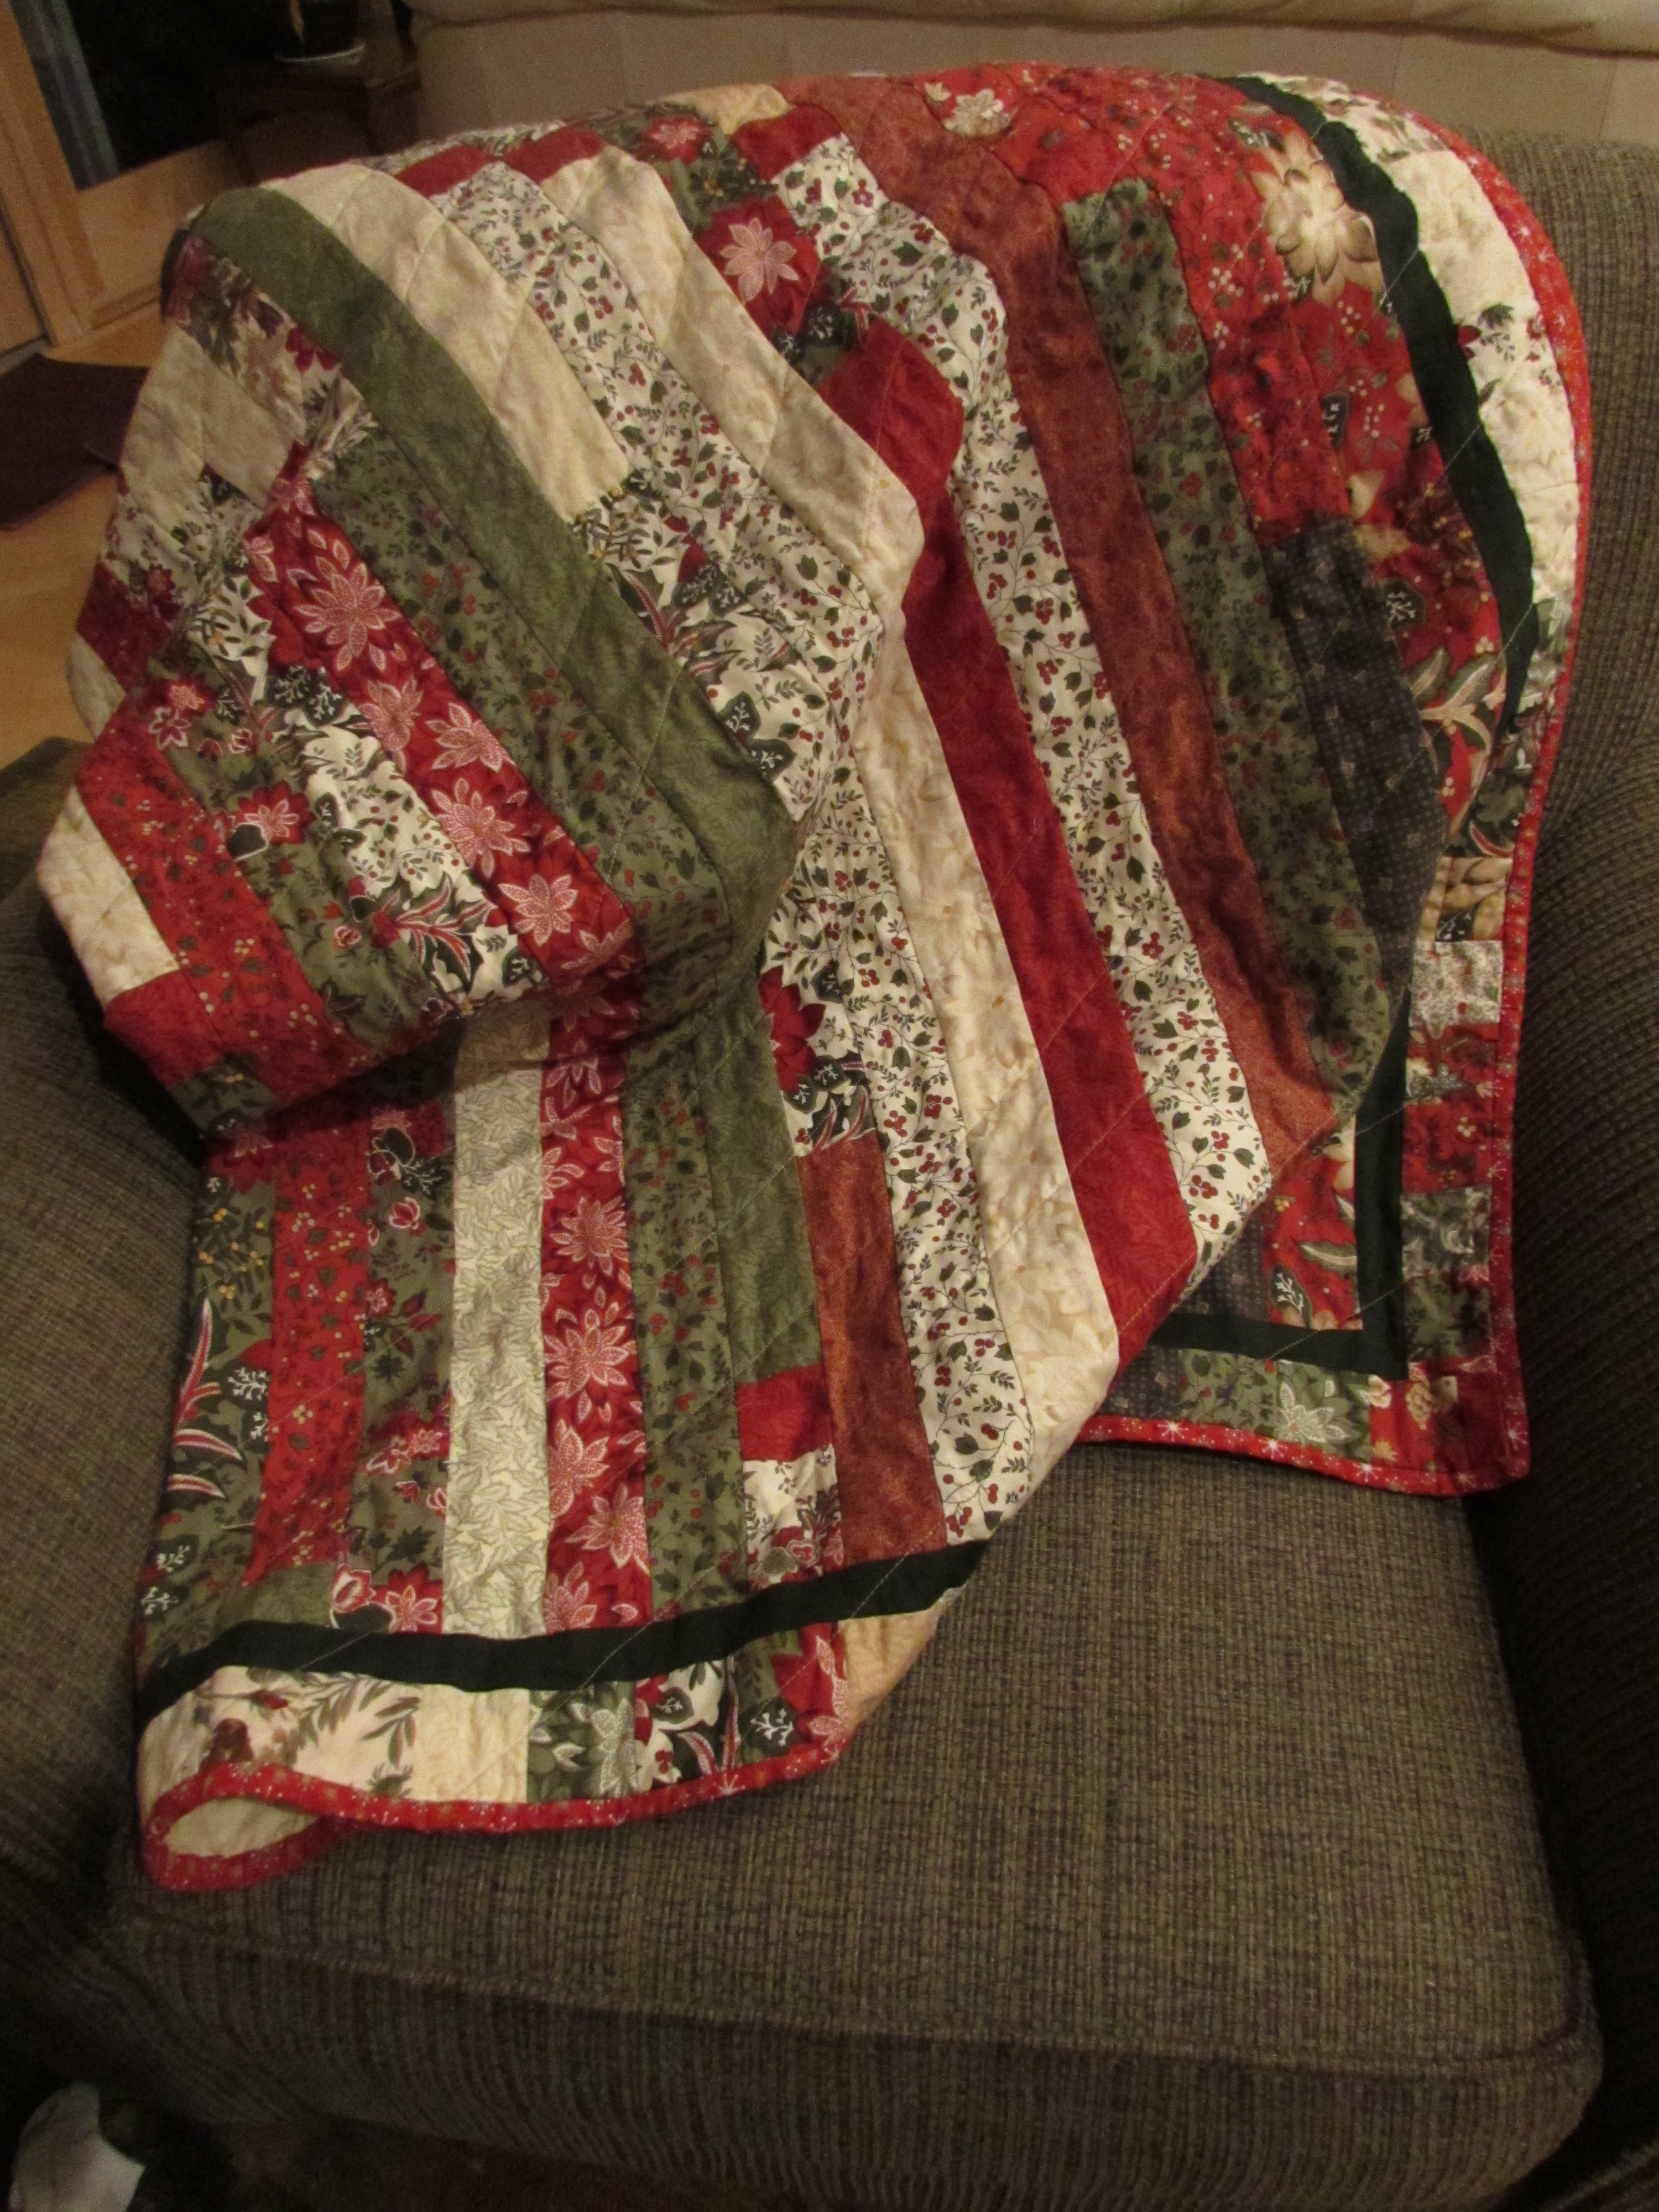
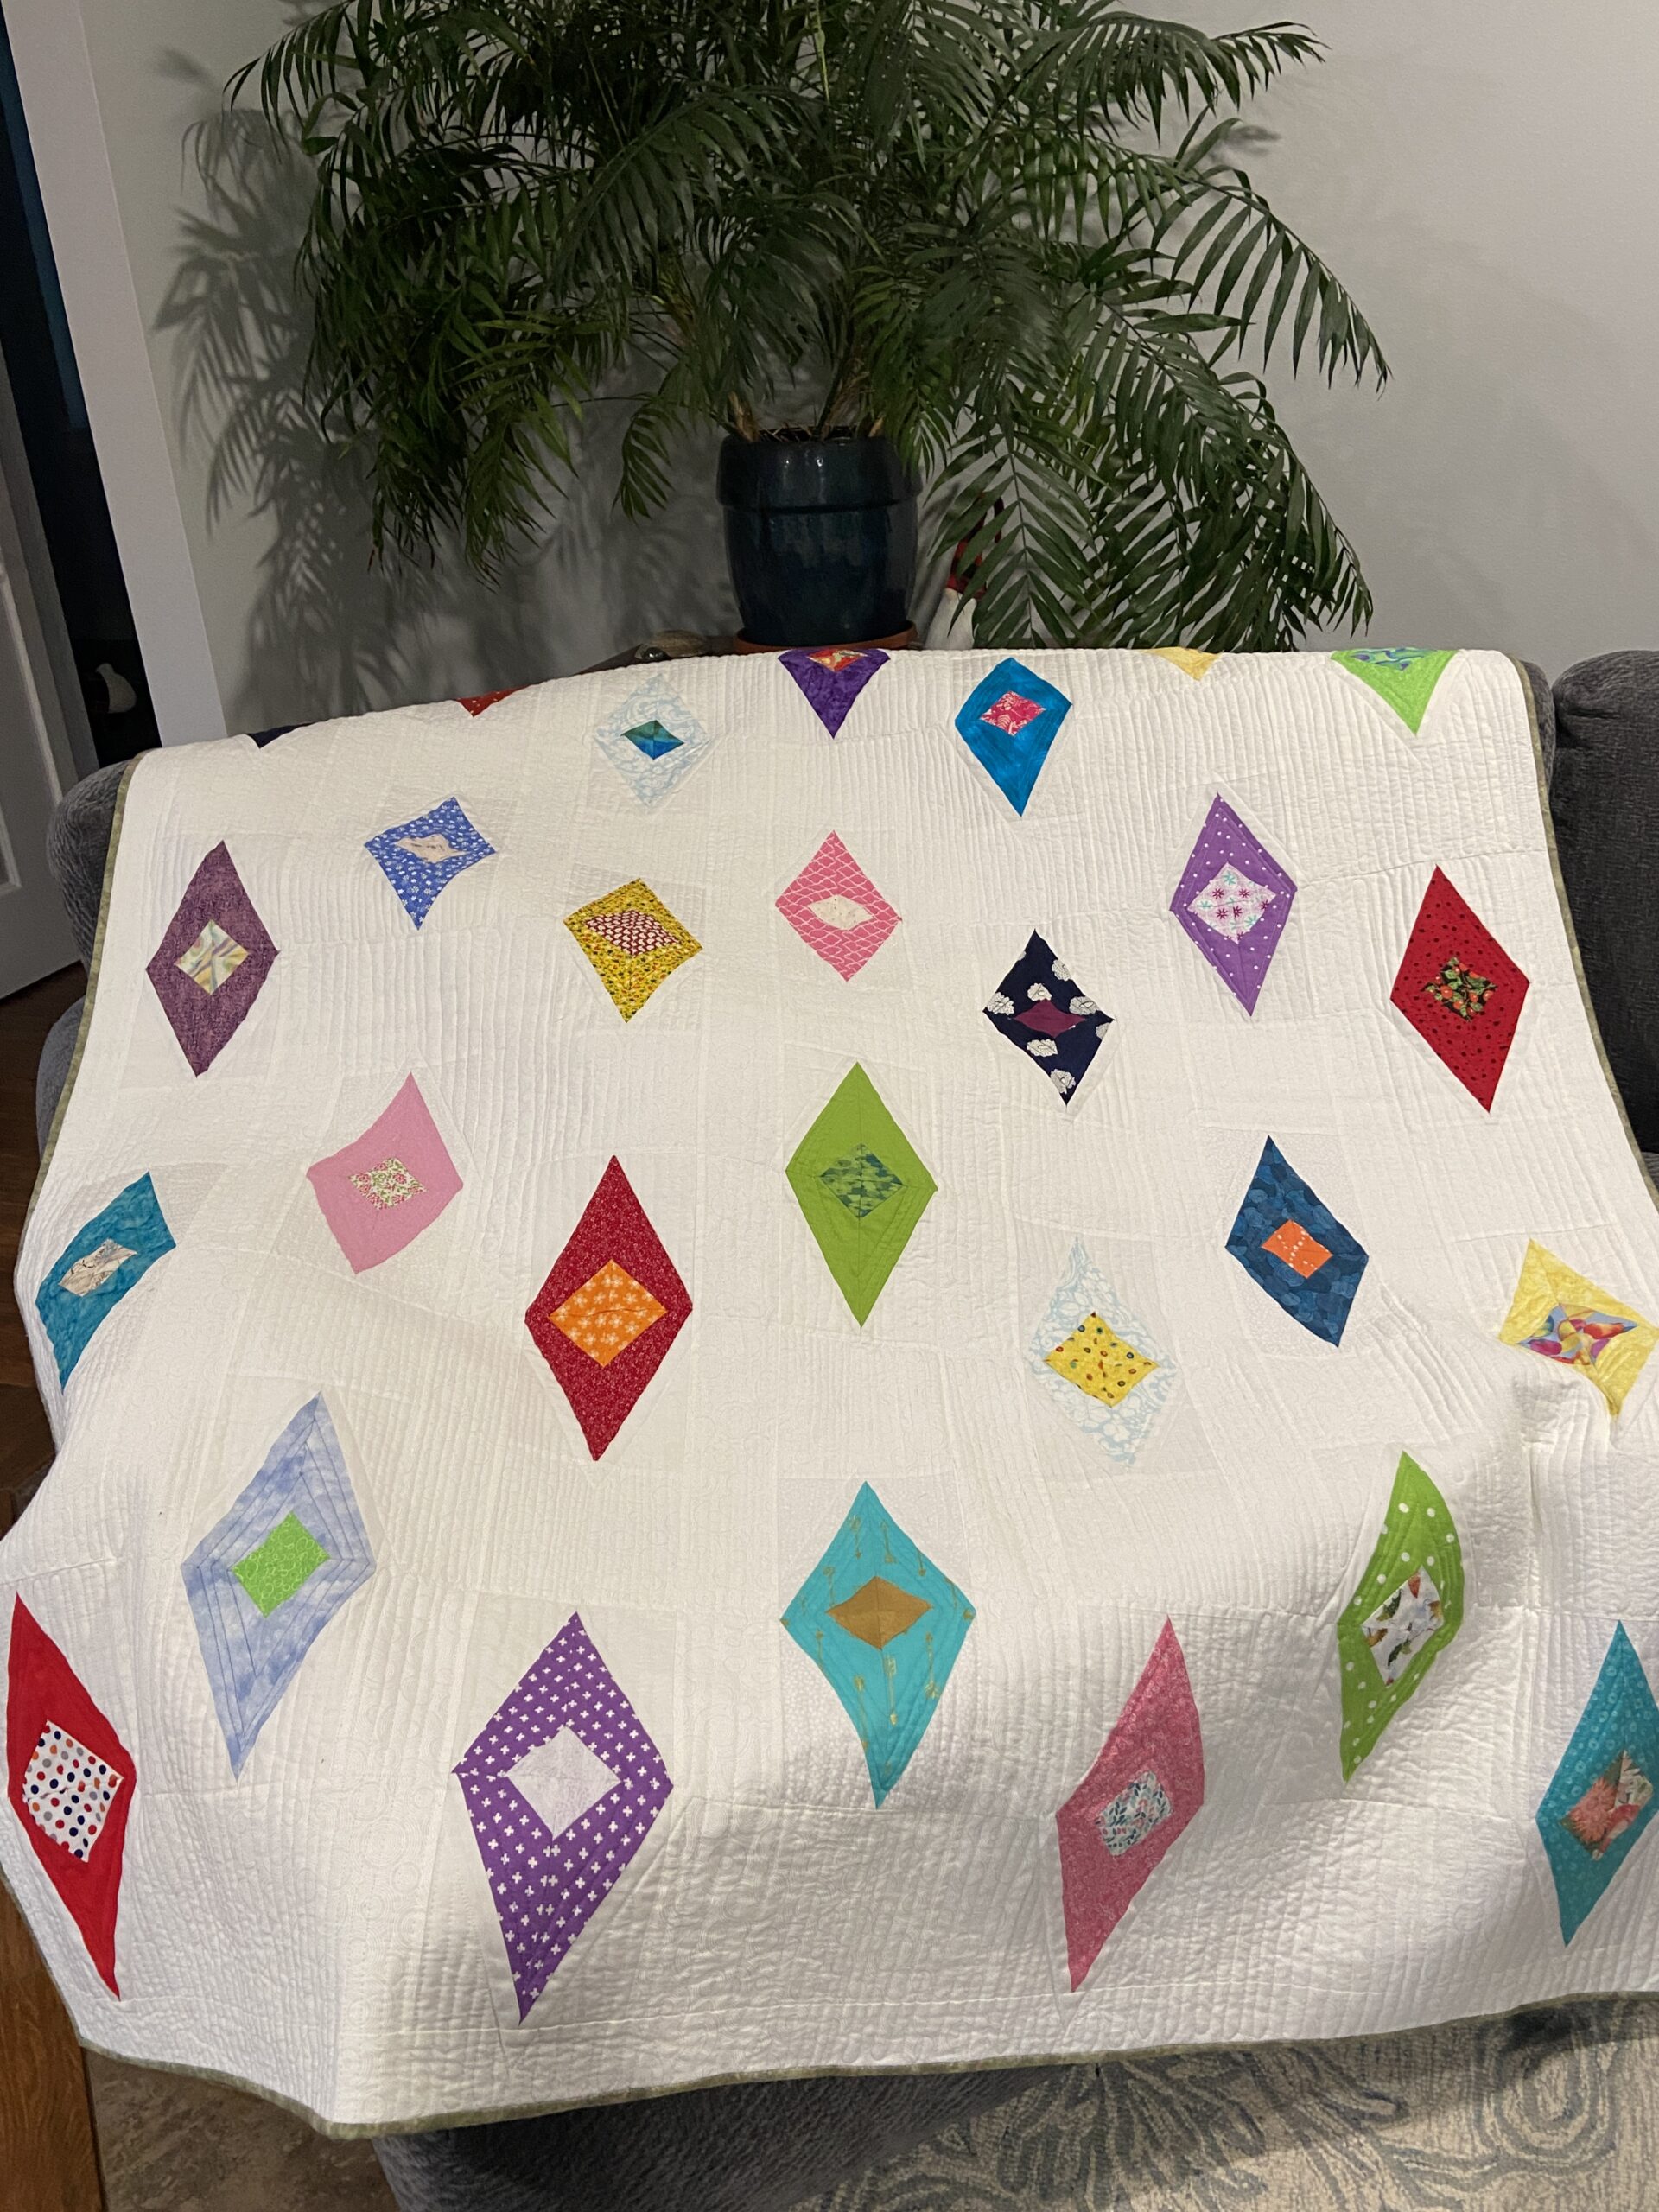
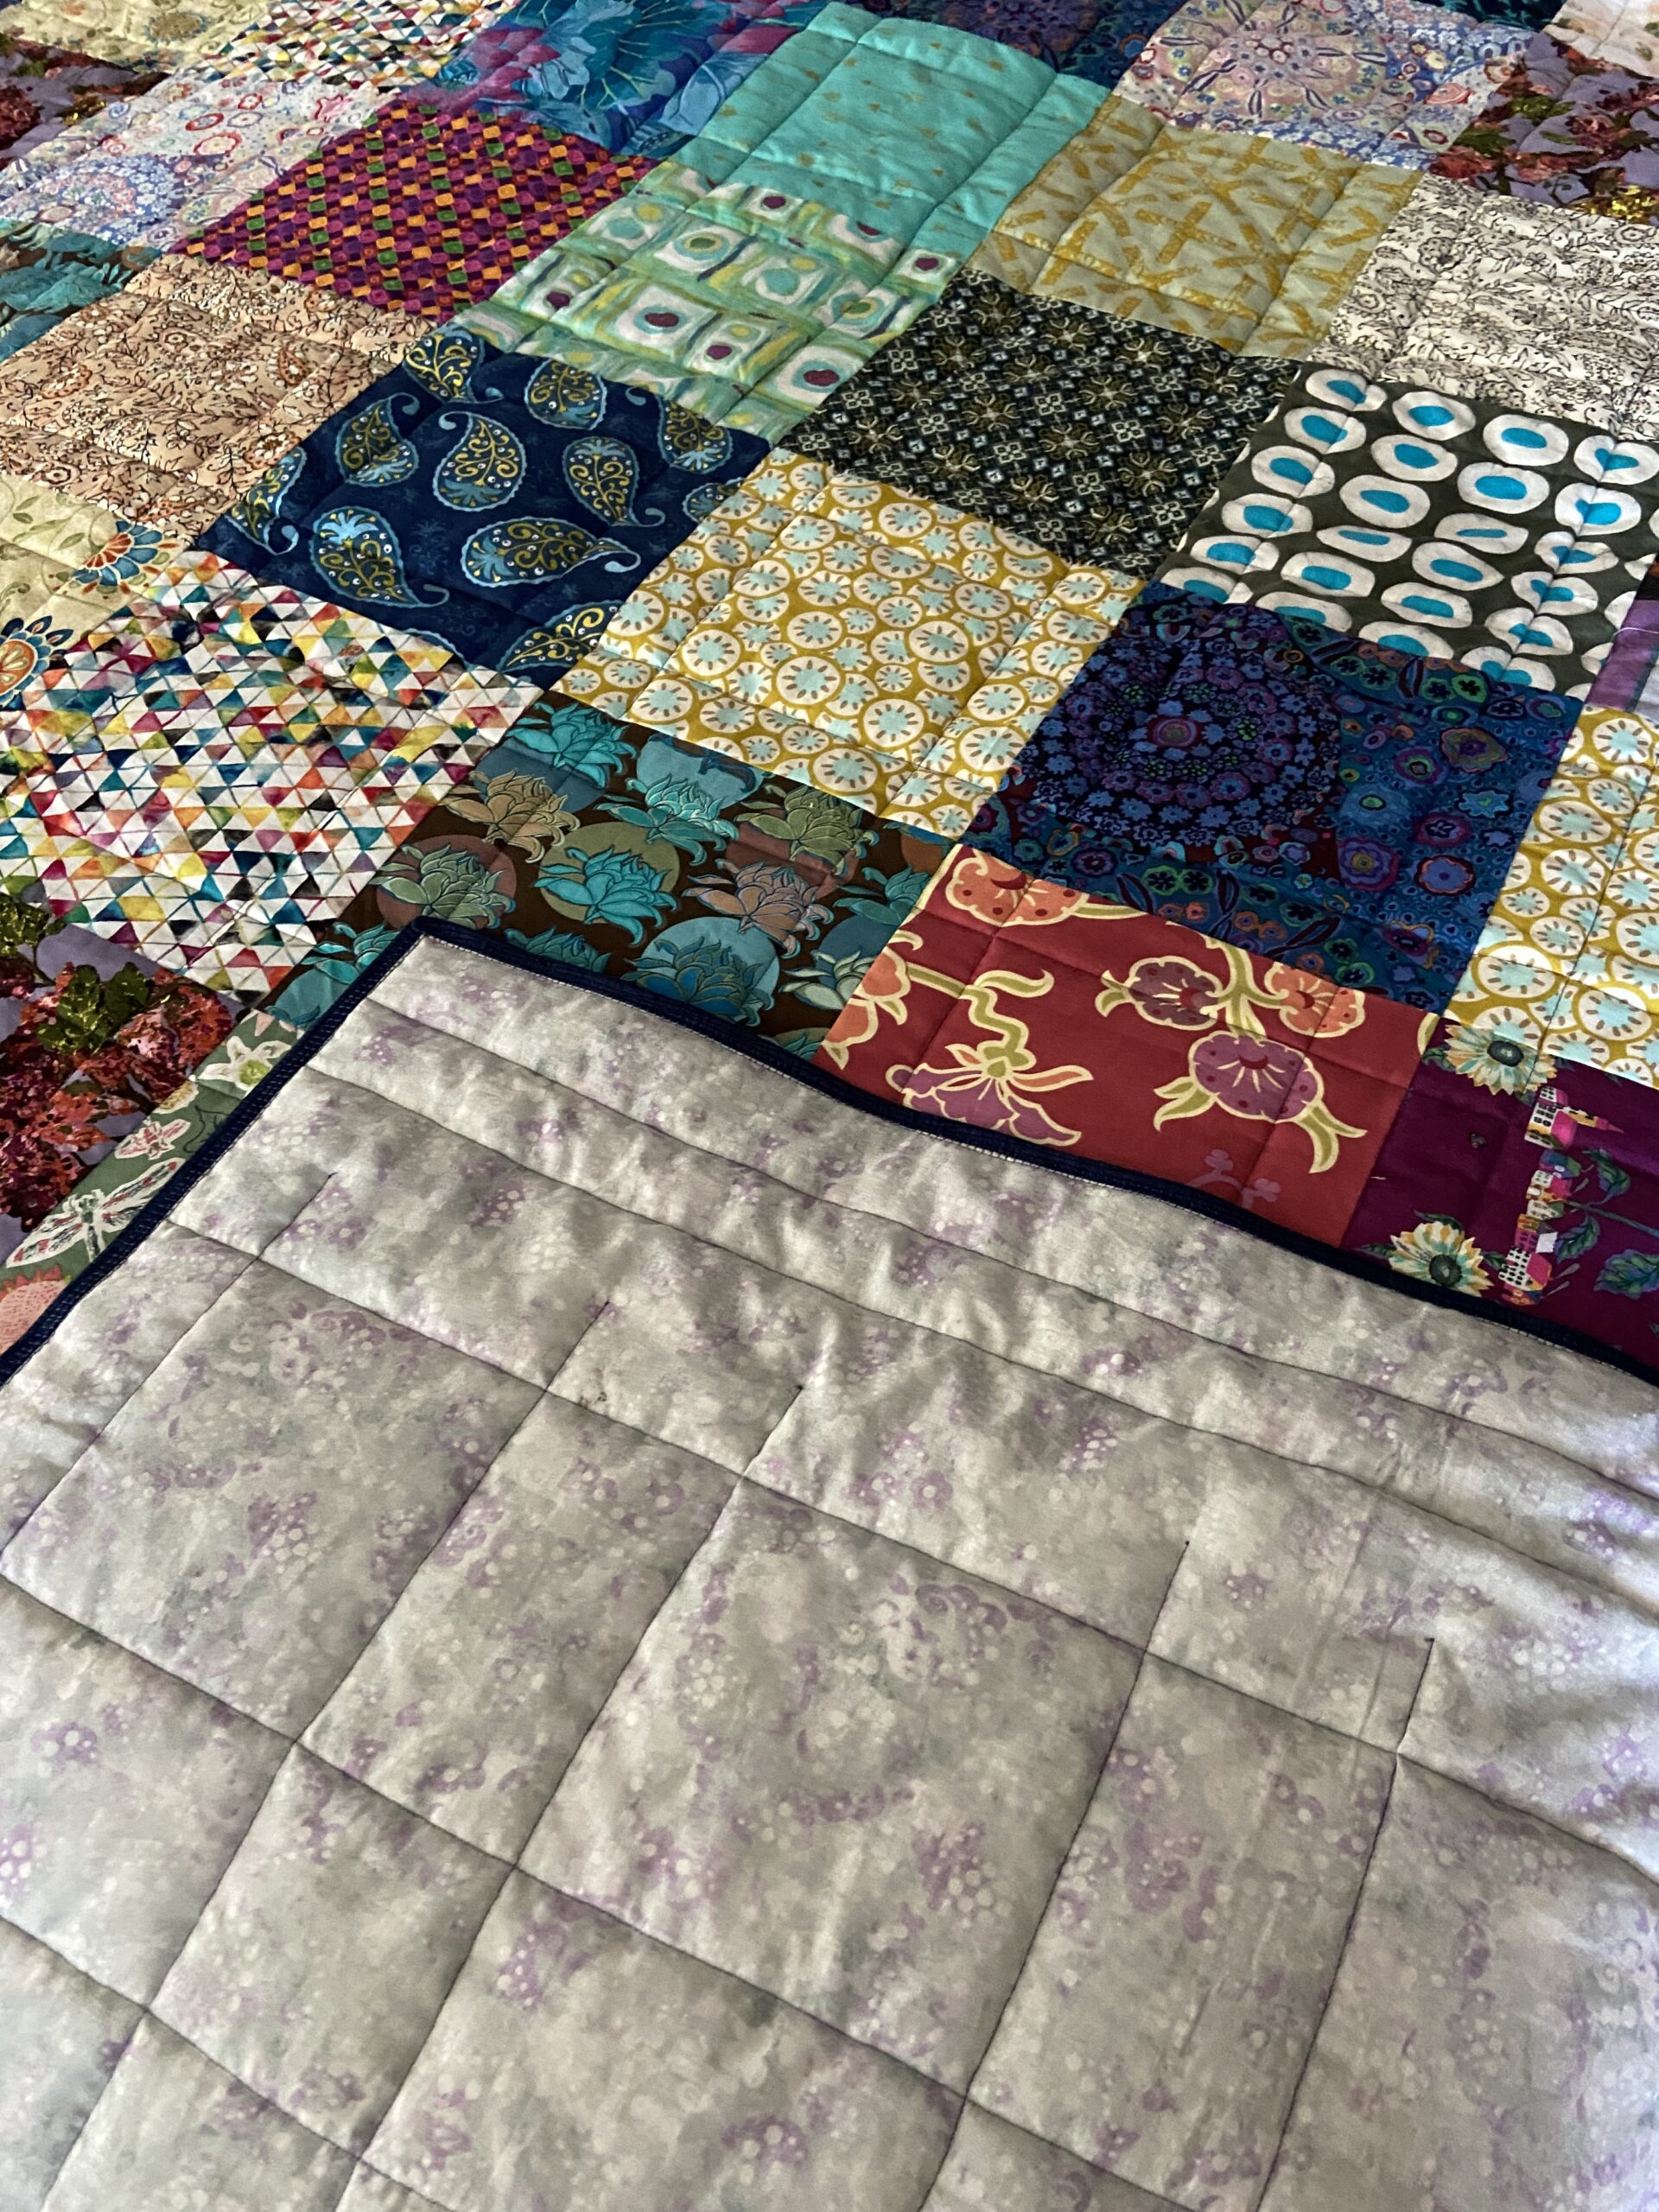
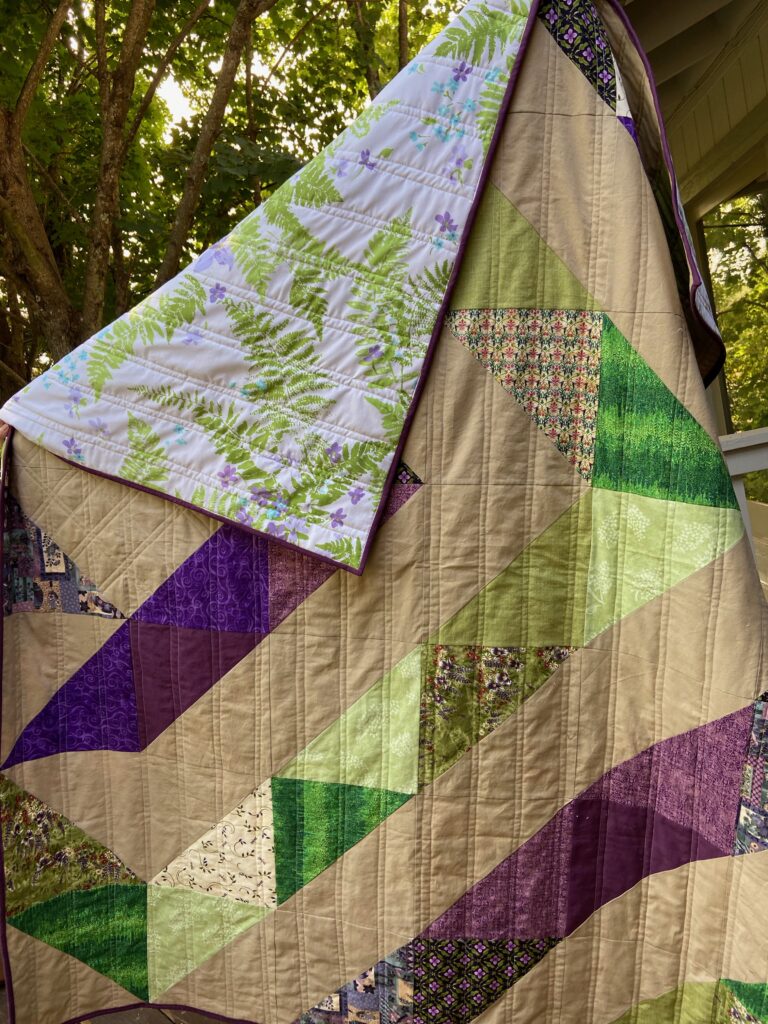
The backing is a gorgeous floral I had on hand. The binding, however, was a trick for me. One would think with all of the many colors on the front, it would be a snap to pick a binding. But the backing has only four colors (green, black, white and pink) and nothing looked right. A trip to the fabric shop was needed and I found this mottled green that looked pretty from both sides.

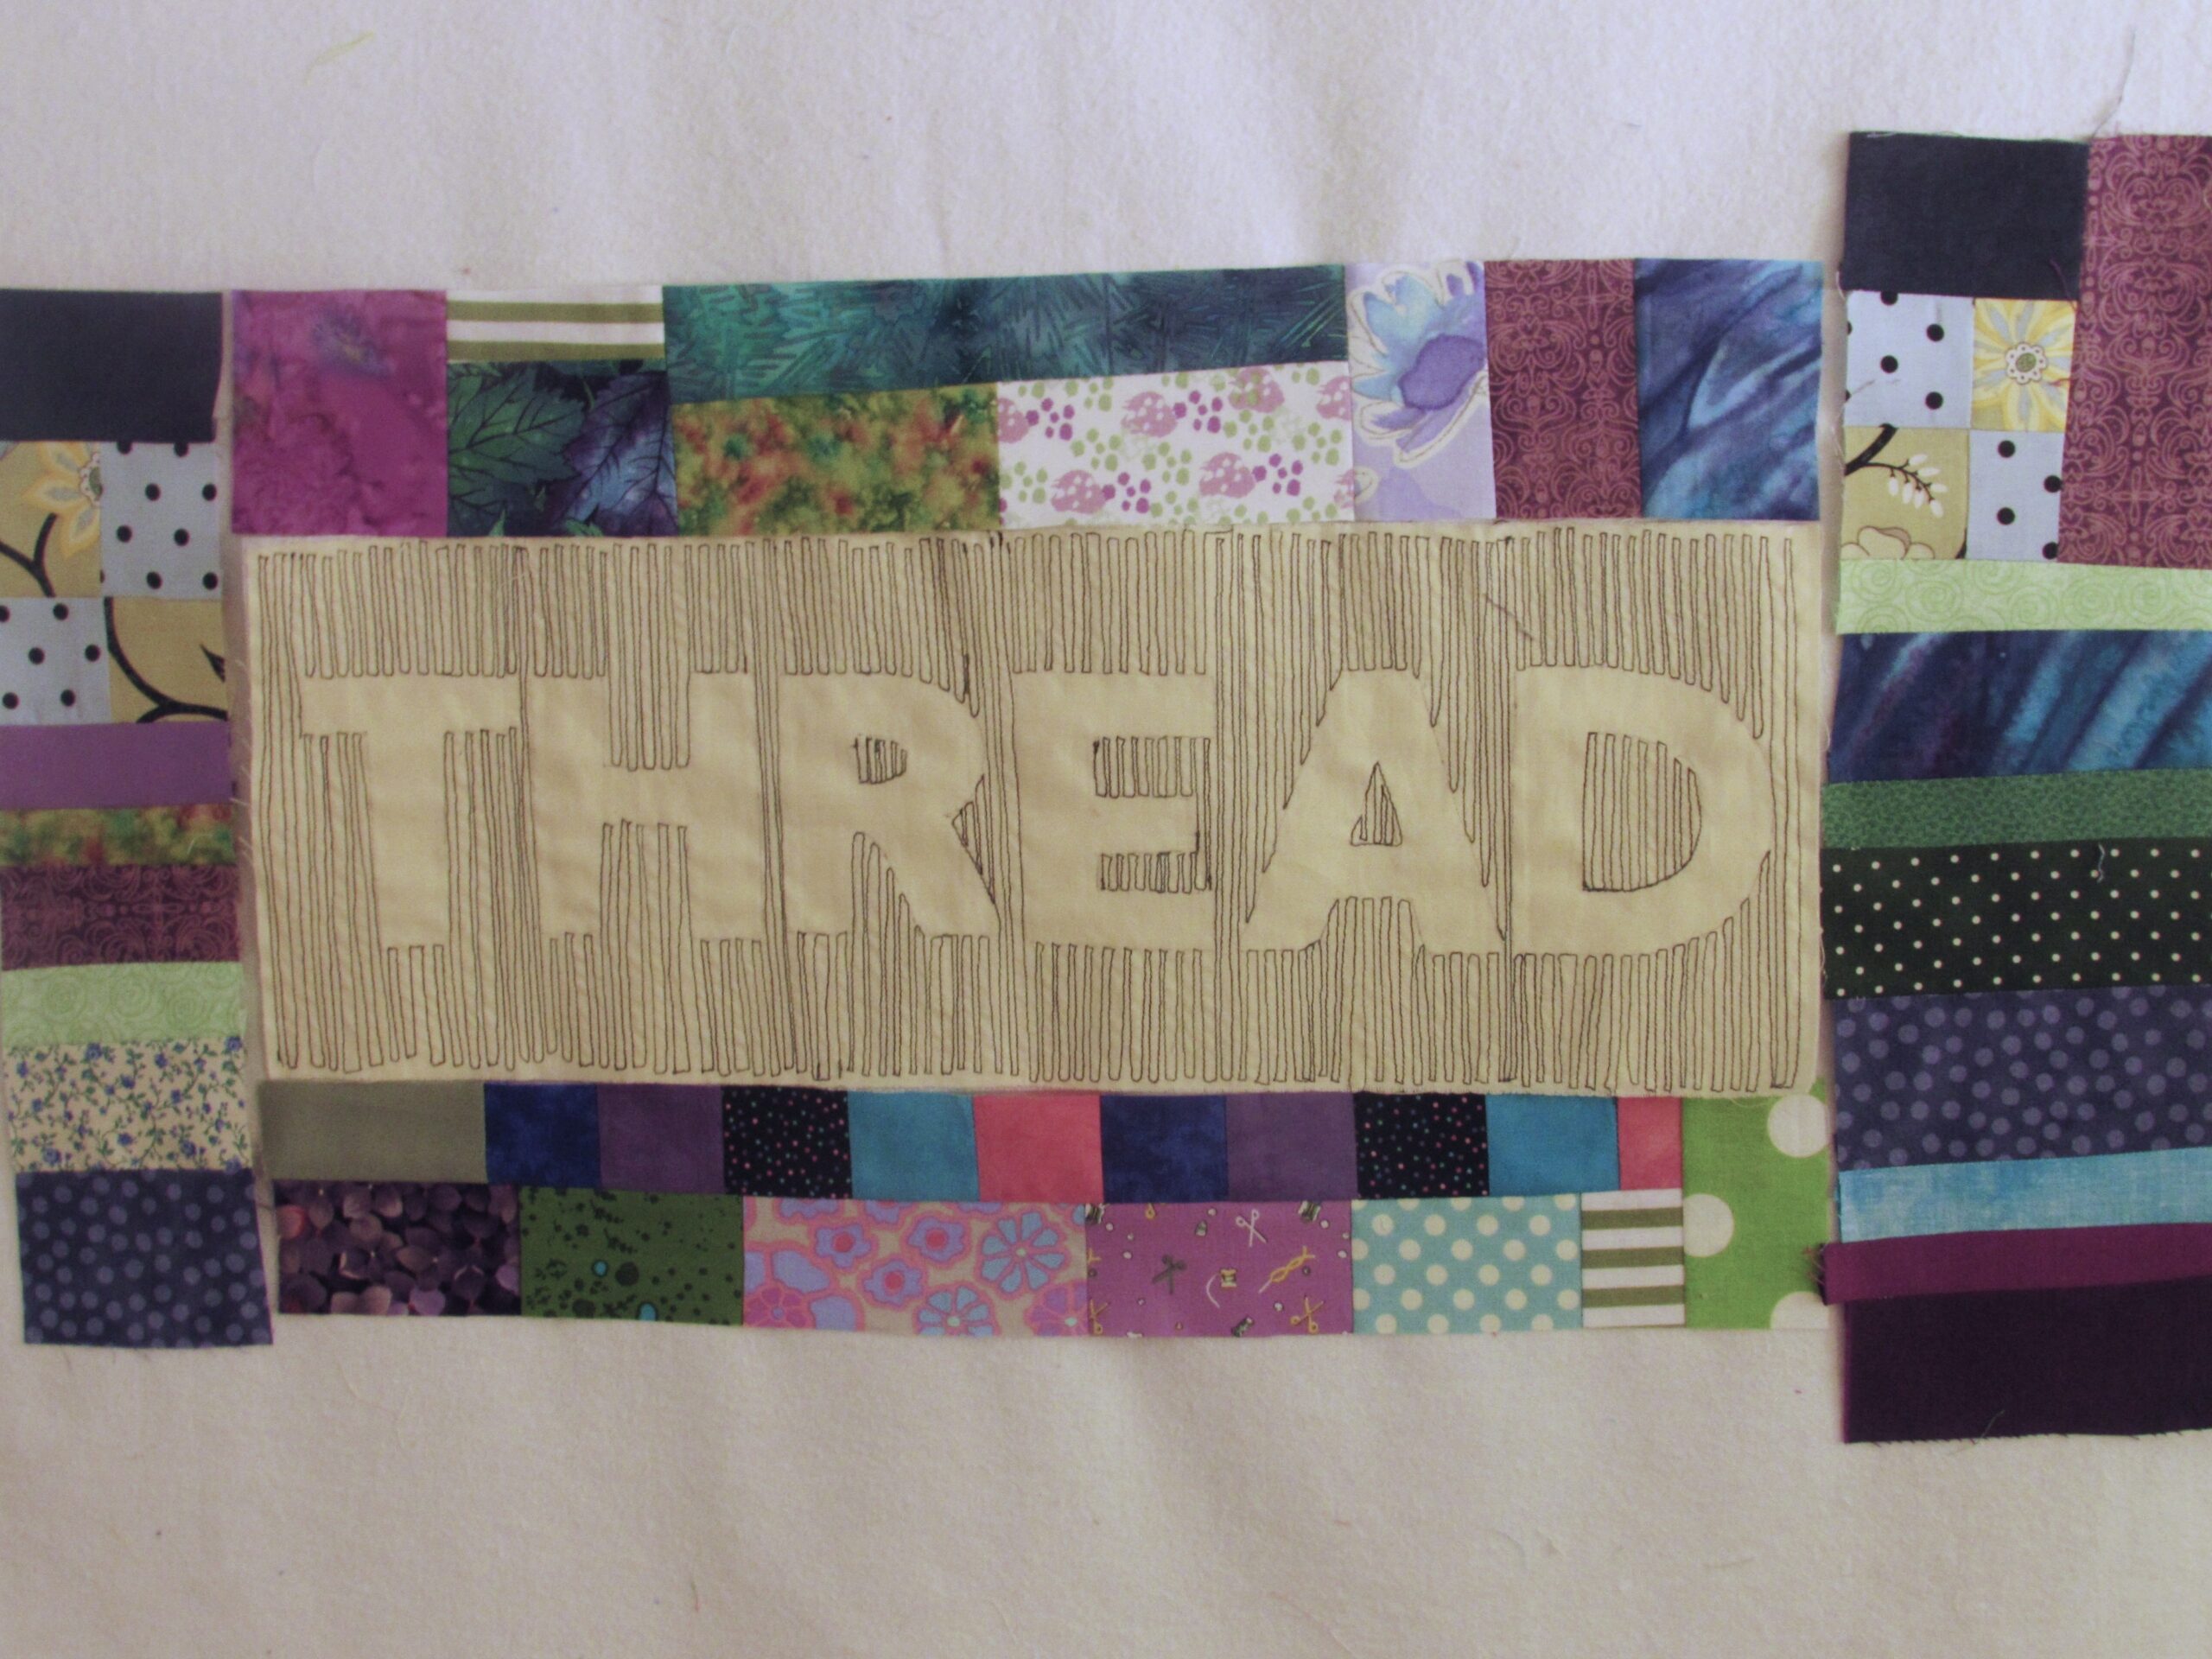
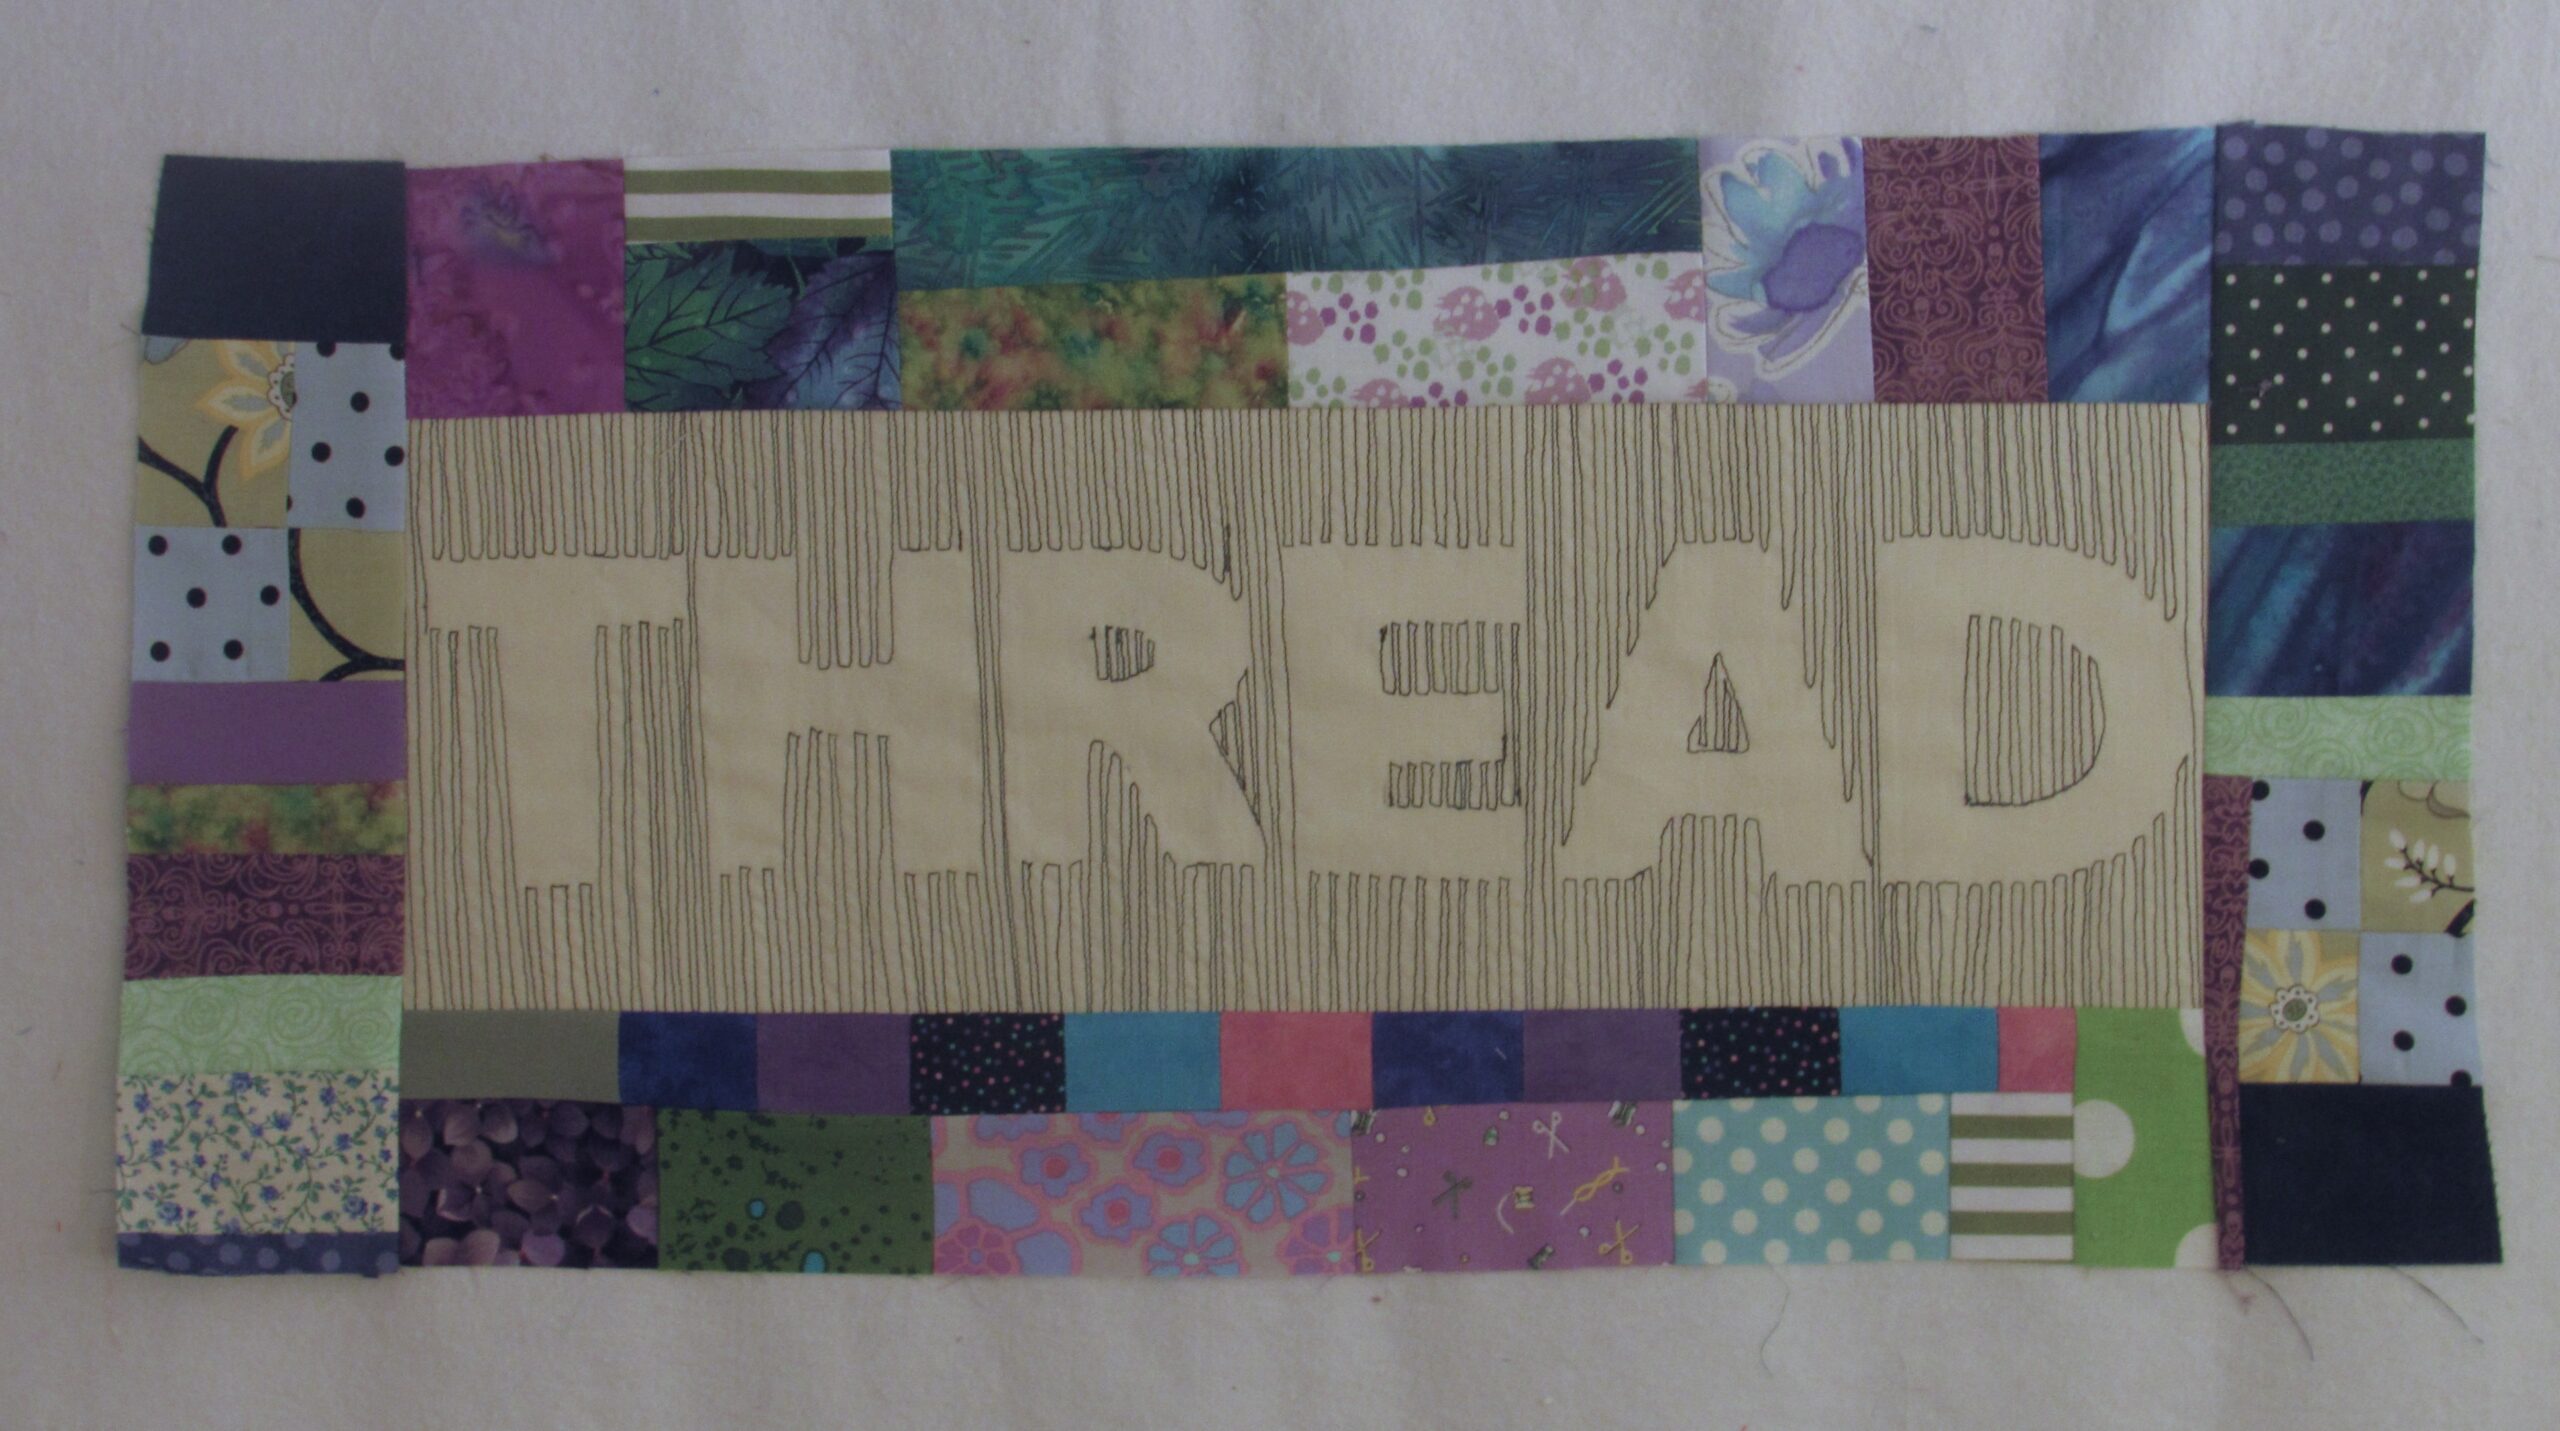
Post Update: If you are interested in making these diamond blocks, I used the tutorial over at Bonjour Quilts. Here is the link to it. These blocks are a breeze. I offset them by adding space between the blocks as well as a sashing strip between columns.

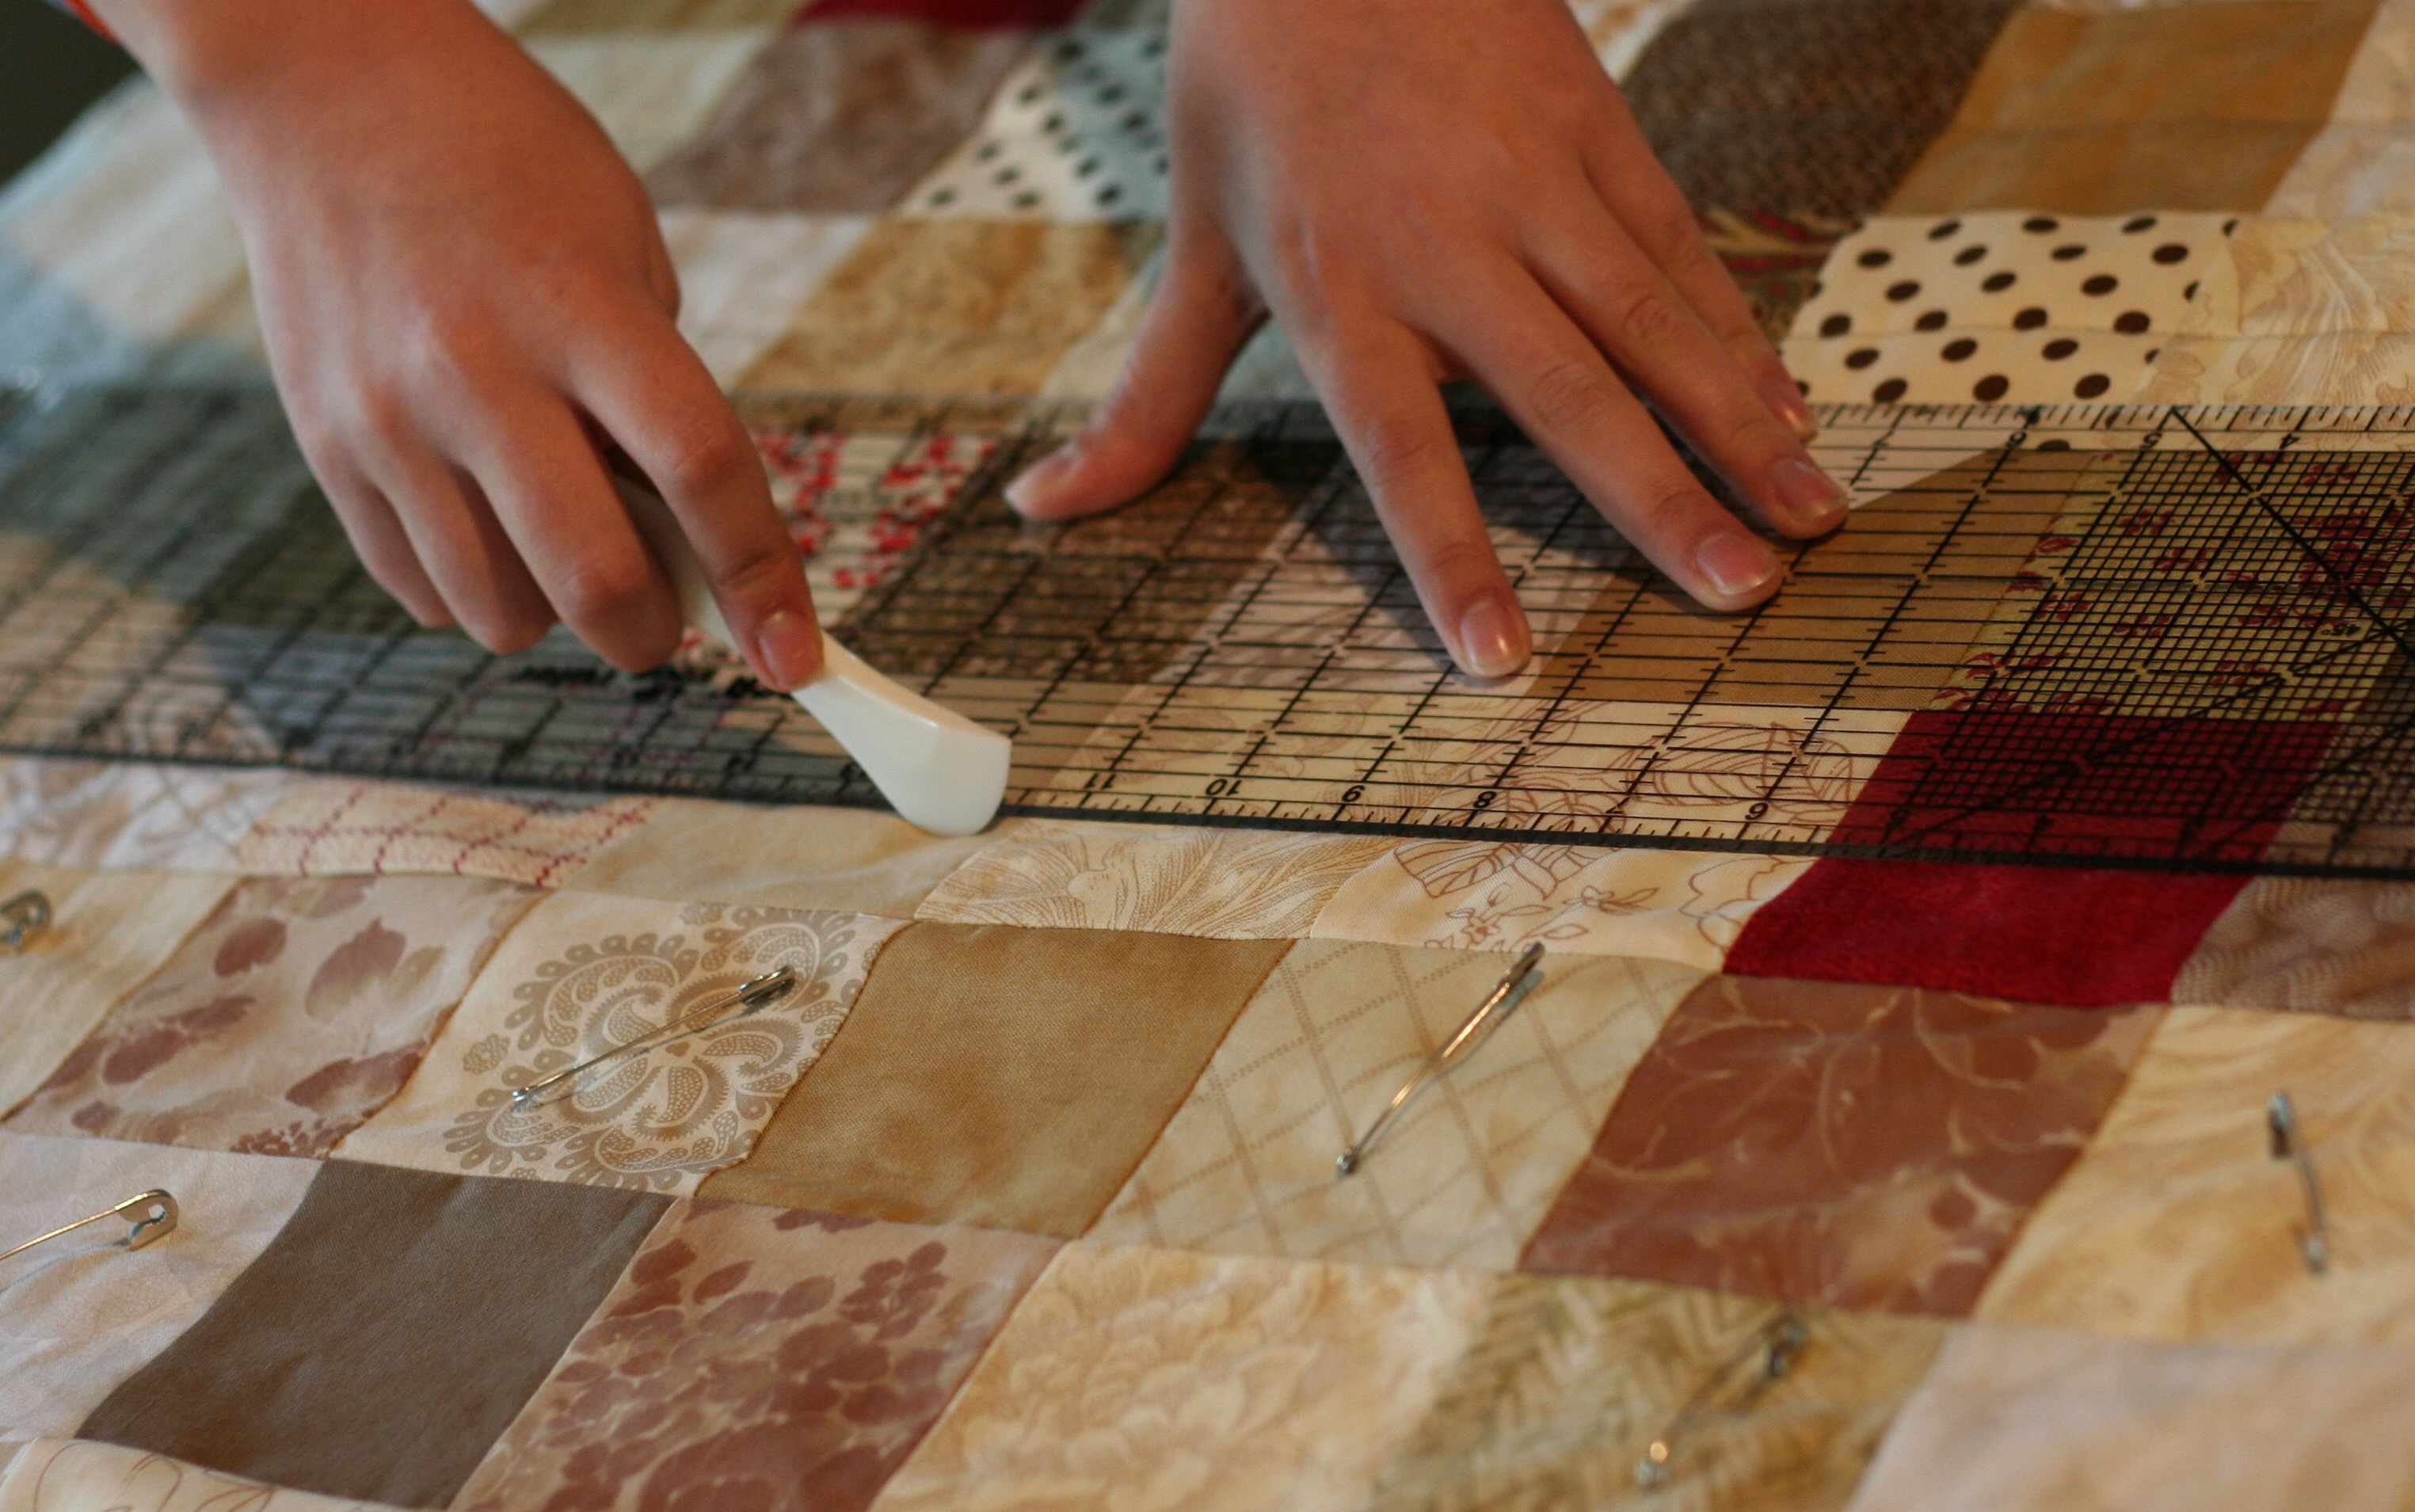
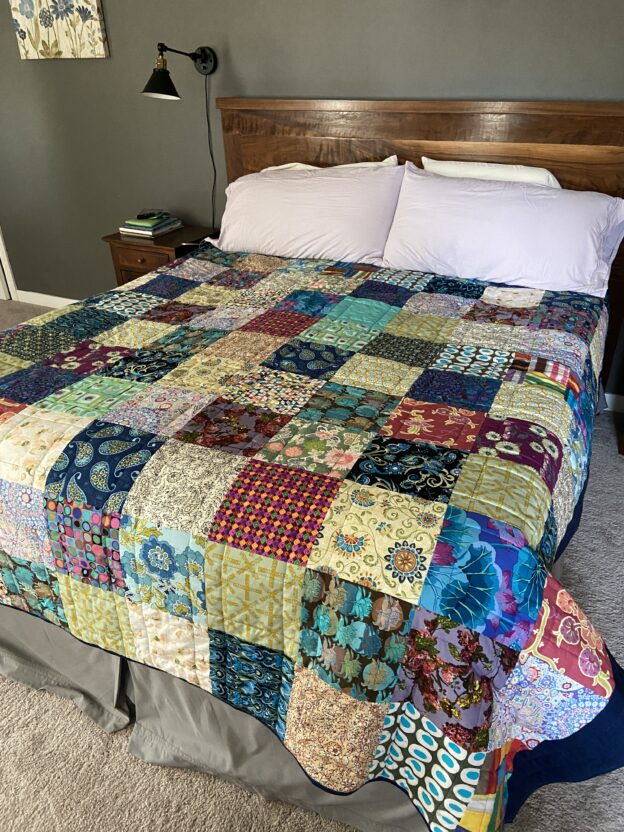
After a quick wash (with lots of color catchers to protect that white background), the quilt was sent off to Denese. I am happy to say she really likes it. I truly hope it brings comfort to her as she goes through the rest of her treatments. I know the latter parts 2024 will be a better time for her but currently, she has more to endure. Fortunately, she has really good family support to help her get through all of this. Plus one quilt from her best friend out in California.

Sharing to my favorite link ups. See the Link Up tab at the top of the page.

Modern Wall Quilt

Isn’t that a boring title for a post? I don’t know what to call this quilt. Maybe after you look at the photos and read the post you’ll come up with a clever name for it.

Love this quilt book!

I bought a book for making baby quilts a couple of years ago. There are a few quilts in it that I thought would be very fun to make. There are ten projects, each one by a different designer. C&T Pubs just happens to have the book on sale right now. Make Baby Quilts includes designs by Camille Roskelley, Allison Harris, and Latifah Saafir – among others.

The Sweet as Pi pattern really drew me in though. Sure, it would be wonderful as a floor mat for a baby. Designed by Malka Dubrawsky, it is a strong graphic pattern and the colors could be changed as needed. But I decided to make it as a wall quilt.

Cutting the strips was easy. Choosing the colors – not so easy! I knew I wanted the colors to be bold and to have a strong presence in the quilt I had just made for our bed. After some back and forth with a stack of solids, these are the fabrics I selected. Assembling the wedges was a breeze. This all happened in early fall. With the holidays and all those silly viruses we all had, it was shelved until recently.

One wedge of the circle

Ignore the wrinkled appearance of this wedge! I was taking pictures to communicate my project to my son in Brooklyn NY. There are instructions for creating the template to cut the strip pieced wedges but I wasn’t getting it. Thank you FaceTime! Kyle was able to take a look and tell me what I needed to know!

Too long!

Somehow I made the template slightly longer than it should be. My sweet husband was able to trim it just a smidge and it was perfect.

Thread decisions

Once it was put together and basted, it was time to select threads. I normally quilt with a neutral thread and if this was to be a floor mat for a baby, that is what I would have done. However using gray or off white just didn’t cut it for these colors. Each stripe was quilted with a matching thread. I quilted a spiral in the yellow section (center). Then I switched to straight line quilting for the other stripes. No marking was done. It seemed if this was going to be on the wall, above the bed, no one would be face to face with it. (Unless the viewer chose to stand on the bed to get a closer look – haha). Viewing from a fair distance, the placement of the quilting lines wasn’t a huge deal. I basically set the width by using the outermost part of the walking foot as my guide.

It is done!!

Total honesty here – all the while I was working on this quilt, I never once considered the how heck it would be hung on the wall. It is quite large (approx 40″ across) and with a hanging sleeve on the back, it wouldn’t have laid flat on the wall. I was at a loss for a while. Then I thought about making some sort of circular frame with wire. I had florist wire but it was fairly light weight. So I measured out four (very long) lengths and twisted them into one piece to give it more strength. Then I pinned it around the circumference of the quilt. I wish I had taken pictures of this but I totally forgot. I sewed the wire to the back – butting it up as close as possible to the binding, being careful not to go all the way through to the front of the quilt. This kept the quilt flat and held it’s shape perfectly.

Hanging it was a bit of a chore. Ray was standing on the bed with level, screws and screw gun. He had to put screws all the way around because I really wanted it flat on the wall. Success!

I love it! The wall hanging contains many of the colors of the rather bohemian quilt I made for the bed so it just works.

I love looking at the quilt and the wall hanging together. Makes me happy!

It was my goal to finish this wall quilt in January and it is down! I checked it off the list of unfinished projects which is always a good feeling before moving on to the next thing! Now that you have seen it, what do I call it? Many of you are so clever at thinking of names for your finished quilts. This is not my strength. Help a girl out?

Linking to my favorites – check them out at the top of the page, under link ups!

(Note – this post contains affiliate links. Should you purchase something via the link, I will receive a small compensation at no cost to you.)

My Current Favorite

This quilt has been a long time in the works. It is ‘just a patchwork’, no complicated piecing, no fussy blocks, but oh I have wanted to make it for a really long time! There are a some really gorgeous quilts made with very bold colors which totally appeal to me. A while back, I started to collect pieces with powerful color and scale. When I had my shop, I would cut 1/3 yard of pieces that appealed to me and set them aside in a project bag. I got lucky at thrift stores and garage sales a number of times and picked up pieces that I knew would work in this quilt. Mixing the scale and the lights and darks to make sure there was a good variety was a lot of fun. Finally the project bag was full to bursting and I knew I had enough to work with.

Doing some very complicated math, I decided to cut 11″ blocks and end up with a quilt measuring about 100 x 110 inches. This is by far the biggest quilt I have made. The piecing was not a big deal. I laid the squares on the floor and moved them around for a bit trying to keep like fabrics from touching. Other than that, I didn’t worry too much about a particular layout.

Once the top was assembled, I had to move furniture around to be able create enough floor space to baste it. Honestly, this is a monster size quilt (for me anyway)! The backing is a wide back I saved for this project when I closed the shop. I am fortunate to have a reasonably sized sewing table but it wasn’t going to work for this. So I commandeered the dining room for a couple of days to quilt this. I don’t know how I could have free motioned it – there is so much weight. Instead, I bought a walking foot (hurray!!) and stitched straight lines, two inches from each seam.

I do love this bar for projects like this. The walking foot came with one for the left and another for the right side. It really wasn’t too difficult except for when quilting the middle sections – there was a lot to stuff through the throat of the machine at that point. It all worked out though – save for a few puckers on the backing. I took a bit of time and ripped out some stitching to fix a few of the puckers. For the most part though, I left them as is. After all, it is the back side of a utility quilt. Who is going to see those puckers?

It doesn’t show in the photos but, on a whim, I decided to use the blanket stitch on my Bernina for the binding. I can’t give a reason for this – I just thought it would look cool. Which it does but, oh my gosh, it ended up taking fooorrevvver to bind this.

If you are admiring the walnut headboard on our bed, it was made by my talented husband.

This quilt is a bit like a quilter’s I Spy quilt. See if you can find fabrics by the following designers: Alison Glass, Sharon Holland, BariJ, Kaffe Fasset, Malta Dubrowsky, or Amy Butler – there is something from all of them. (Plus many where I cannot tell you who designed them)!

Another fun fact – this is the first time I filled a quilt with wool batting. It surprised me how different it was to work with. Much puffier (more loft) so the quilt is thicker. When I cut my usual 2 1/4″ strips of binding, I didn’t know there would be such a difference and it was a bit challenging to wrap that binding over the side. Next time I will definitely cut a 2 1/2″ binding. That should work better. I love the feel and heft of the quilt plus it feels warmer.

I have fabric set aside to make a couple of matching pillow shams. This is going to happen very soon. Shams will finish this off nicely!

Thanks for reading folks! Big quilt equals long post I suppose!

Beginning today, C&T Publishing is holding their warehouse sale! I love this event because they clear out some excellent books at great prices. Enjoy up to 70% off of loads of titles! Sale runs through Sunday, September 25, 2022. (Yep – this is an affiliate link!)

Linking with my usuals, found at the top of the page under Link Ups. Check out some of these sites to see what everyone is making!

Could it be?? Another Finish?

Yep – it’s true. I have another finish to share. The very small, almost non-existent, silver lining to the fires and smoke we are experiencing is having to stay inside. The smoke is thick and the air very unhealthy so we have been indoors continuously for a long while. This means I can sew!

OK – I started this quilt ages ago. The fabric was leftover from the twin size quilt I made for Julia’s bed in our Downieville house (which we sold this summer.) I made that quilt back in early 2016.

Downieville Quilt

This was a huge quilt as I wanted it to hang over the edge of the bed by a ways. I had planned to make two matching quilts for that bedroom but the second one never happened. However I had already cut many squares intending to make the second one. I decided to use the leftover fabric to make a Mercyful quilt for the families at Mercy Hospital in Sacramento. I matched up a number of the squares, making sure each was partnered with the tan solid and made large (10″ finished) half square triangles with (some of) the leftovers.

Quilt Top Completed!

I made the quilt top in November 2018 and promptly stashed it away – for almost two years!! Why?!?

Basting the top – Finally!

In my last post, I shared I was basting the top and planning to finish it up.

Marking my lines with painter’s tape.

After some thought, I decided to go with simple straight lines for the quilting. Marking the quilt with wide painter’s tape, and starting from the center, I did a two lines of stitching with my walking foot. I used the width of the walking foot to mark off the separation for the second line in each set. This, naturally, went very quick.

My quilt holder, aka Julia, and I took some quick photos on the deck. Didn’t want to stay out long because it was too smokey! I am so pleased with the way this quilt looks.

For the off-centered diamond, I did some extra quilting on the diagonal. I didn’t measure this accurately and my center line is a bit funky. Such is life. I am not overly bothered by this.

The overall effect is good and as we know, I am not one for precision.

A peek at the backing.

For the backing, I used one of the vintage sheets I have stashed. I know many quilters dislike backing with sheets but I have not had a problem with it. They quilt up fine and I have washed the finished quilts (those I have kept) many times without issue. I love how the soft purple and greens complement the darker shades in the quilt top.

This quilt is headed to Mercy Hospital and I hope the family it is given to will take comfort from it.

Unfinished Quilt Tops

About two weeks ago, I made this collage of the unfinished quilt tops I have. I have finished two of them since then which makes me so happy. I haven’t decided which one I will tackle next. I think I need to decide on backings and see what I have available.

For my next project, I need to make a bunting (with the letters of her name) for my youngest grand daughter. When we were up in Seattle, my son reminded me I had made one for older sister before she was born yet this baby is nearly 6 months old and I haven’t made hers. Yikes. Better get on it!!

Take care everyone. If you are affected by the fires (and pretty much everyone in the west is) please take care and be safe. If you have extra rain, please send it to us. We are all in dire need.

Sharing at:

Brag About Your Beauties, Finished or Not Friday, UFO Busting, and Can I Get a Whoop Whoop

Checking In

Balance (for me) is never easy. Lately I feel I have ignored my blog slightly as I work to get my fabric shop up and running. There are a limited number of hours in the day and I find myself divided between regular life chores, sewing, writing, listing items on Etsy and shipping a few orders here and there. The other distraction for me is social media. Oh how easy it is to be sucked into it and look up 30 minutes later, wondering how to get that last 1/2 hour back. This week I have tried to stay with one task to completion before moving on to the next.  I have also tried (with limited success) to stay off of social media and check it less frequently. I love seeing everyone’s posts on Instagram but really, it isn’t the best use of my time!

Earlier in the week I made it my top (sewing) priority to finish quilting the Harmony quilt that I made last fall for my nephew. I really wanted to quilt it at the long-arm shop where I can rent time on their machines. After scheduling and rescheduling appointments several times, I gave up on that wish and decided to quilt it at home. As luck would have it, my Janome 6500 (which has a nice big throat) is being very cranky. This means I am quilting it on my little workhorse – an older Janome with a narrow throat. As a result, I switched over to standard straight line quilting. To add some interest, I am quilting it in two halves. Starting on the center diagonal line, I began vertical straight lines. Those vertical lines continue to the far corner. Then on the other half of the diagonal, I am quilting horizontal lines. (Does this even make sense?)  At first I spaced them out about eight inches to anchor everything down. Now I am working on filling them in to about two inches apart.

I think it is working quite nicely and I should be finished with the quilting in the next couple of days. Selecting a fabric for binding it is still up in the air. I am aiming for a scrappy binding with the leftover fabrics but I am unsure if I have enough.

Moving on, I have been playing catch up with the Sewcial Bee blocks. This weekly bee is hosted by Maureen Cracknell and Sharon Holland. The blocks are fun and relatively simple. But I got behind and have to make about three more blocks to catch up. (Remember the first paragraph – just not enough hours to get it all done!) I am (was?) trying to use only my Fleet & Flourish scraps (by Maureen Cracknell) for the print fabric and various solids to tie everything together. As I create the blocks though, it is becoming clear I won’t have enough Fleet & Flourish to stay with this plan.  Now what to do???  Decisions, decisions. My choices are to:

  1.  Add in some Garden Dreamer (also .by Maureen Cracknell and would probably blend reasonably well) and since I carry it in my shop, it is readily available to me
  2.  Buy more Fleet & Flourish.
  3. To be very careful with the scraps I have and make it work by adding in a larger percentage of solid fabrics for the last 12 blocks.

Looking at these three incredibly important choices, my thoughts are these. Buying more fabric is silly.  I have more than enough fabric on hand and should be able to avoid buying anything.  Number three would probably be unsatisfying because I would have to use a whole lot of solid fabric to make it work and I don’t think the result would be to my liking. So, number one for the win. I will go slice six inches or so off several of the Garden Dreamer bolts downstairs in my shop and combine both lines. Phew! I am relieved to have gone through the process and made up my mind.

Before I close and go off to quilt a few more lines and make a Sewcial Bee block or two, I want to share some pictures with you. Remember I mentioned Julia was going to raise two piggies for her 4-H project? I have to say, these animals just crack me up. Here are some recent pictures with photo credit to my daughter. She is really enjoying this project and has done a great job with these two goofy pigs. They are growing like crazy but then that is to be expected considering the amount of feed we are going through!

Daisy and Ella Napping

Eating, always eating!!

Daisy, after playing in the mud.

Silly Ella!

Off to the sewing room now. Wishing everyone a wonderful weekend!


Relief Quilting Tutorial – Thread

I really enjoyed playing with relief quilting when I made my FABRIC mini quilt a couple of weeks ago. So much so that I decided to make another one! I took plenty of pictures while making it so I could post a tutorial. I hope you will give it a try. The effect is wonderful and it is such an easy process.

This time I wanted to try stitching the word on a piece of fabric with fusible stabilizer and then building the quilt from there. It worked out wonderfully. Since I already had one mini that said FABRIC, I decided to make another that said THREAD. This idea was inspired by a comment left on the first post by Diana, of A Red Delicious Life.  She mentioned wanting to make one to hang above her thread. I decided to do the same. Now I have one to hang above the closet where I store fabric and another to hang above the thread collection hanging on the wall in my sewing room. Thanks Diana!!

Let’s get started.

I am going to provide the sizes that I used but this is so flexible. Increase or decrease as you like. My quilt finished at 11″ x 23″ so if you want a different size, adjust accordingly.

Materials List:

  • Background Fabric: one rectangle measuring 7″ x 19″
  • Heavyweight fusible interfacting: one rectangle measuring 7″ x 19″
  • Scraps for your border
  • Stencils for tracing the word THREAD. I used letters that were 3″ high.
  • Frixion pen or similar fabric marking pen
  • Binding fabric:  Two strips that are 2 1/2″ by 42″ (Width of fabric)
  • Quilting thread.  I used YLI thread in a variegated green and loved it!

IMG_7181Take your background fabric and fuse the stabilizer to the wrong side of the fabric. Follow manufacturer’s instructions if you are not familiar with this process.

Trace the word on the fabric with the fabric safe marking pen of your choice. I didn’t leave very much room between the letters because I liked the way this looked. You could certainly adjust this to your taste. Also, I didn’t leave a ton of room on either side. Again, adjust as needed by cutting your background wider if you like.

IMG_7185

Using a walking foot, begin stitching long straight rows above, below and between the letters. I didn’t stitch the outline of the letters. This happens later on when you are quilting everything together. For now, just fill in every bit of space above, below and between each letter. You might choose to use a free motion foot for the little openings within a letter (e.g. the A and the D) so you don’t have to start and stop, twisting the fabric. I kept working with the walking foot because the block is small and easily rotates. Each time I came to the botton or top and needed to move to the next line, I very slowly stitched one stitch over, sometimes doing so by manually turning the wheel on the machine so I moved just one stitch. This kept my rows extremely close together. If you have a needle down function, this helps. Just go one stitch and let the needle stay down while you turn the piece. Now and then, the width looked to wide to me and I would back up and fill in with another line of stitching. Remember you will be viewing this from a distance and it looks much better that way. While stitching, you are looking at it from 6-8″ away and you’ll see every wobble. Not a problem. You are going for the overall effect.

IMG_7186

See how the word starts to come to life? I love that! Now keep on stitching!IMG_7206

Making good progress here.  The word is complete and it is time to begin working on your border.

I made an improv border by taking squares and rectangles in my color scheme (basically greens, purples and blues) and built four pieces, two for the ends and two for the top and bottom. I didn’t worry about size too much. I made them a bit longer than the side I wanted to sew them to and since I wanted to have them trim out to 3 inches, I made sure the whole thing measured wider than 3 inches.  Note:  If you are not comfortable with this scrappy improv process, I recommend grabbing a copy of 15 Minutes of Play by Victoria Findlay Wolfe at your library. She does an excellent job of guiding you through.  Alternatively, Amanda Jean Nyberg at Crazy Mom Quilts did a Quiltalong last summer called Scrap Vortex. In this post, she talks about building with scraps. It might be of help to you.

After playing with them on the design wall, I trimmed each to a width of 3″. I sewed the top and bottom borders on first and then added each side.

The next step is to make a quilt sandwich with your top, the batting and your backing fabric. I pieced the batting from scraps I had. Just pin it around the border tightly since you are going to quilt in the center first. My batting was just barely bigger than the top but since it was such a small piece I felt ok with that. Normally I use batting that is a good two inches larger than the top all the way around.

Continue to use your walking foot and slowly stitch around each letter. It is a bit like connecting the dots as you want to trace over the place where you stitched over to the next line. Just move slowly and turn frequently (with your needle down while turning) when stitching over a curve.

I love the way the letters come to life when quilted to the batting.  Next I moved on to the border. I love the little spools of thread that I quilted on the first piece and carried them through to this piece as well. Considering the thread theme of this project, it worked well.

IMG_7287

With each spool, I filled in the top and bottom so they would show up a bit better. If you like this idea, take a look at this tutorial of Lori Kennedy’s over at the Inbox Jaunt.

IMG_7286

The spools are whimsical and they add a bit of movement to the quilting as the ‘thread’ flows off each spool.

Once you complete the quilting, trim, square and bind. Finished!

IMG_7298

Isn’t this adorable?????

IMG_7289

And both of them together?? All kinds of cuteness. What fun (and easy) projects both of these were. I have the sleeve sewn on to FABRIC but still need to make a sleeve for THREAD. They will be on the wall soon. I’ll post a picture next week.

I hope my explanation is helpful. If you make one, let me know. I would love to see it!

I’ll be linking to the usuals which can be found at the top of the page, under Link Ups.

Odds and Ends

The weekend is just about here. Julia is going to her first high school football game tonight and we are not a football family. It is rare that you’ll hear any talk of sports in our house. But I am fairly certain that 14 year olds don’t go to football games for the sport – it’s all about the friends. She will have a great time and I will wonder how she got to be this age so quickly.

It was a busy week here in Grass Valley, CA  (doesn’t that sound just like Garrison Keillor? I love him.) I decided I was tired of looking through filthy windows so I hired a couple of window cleaners to come and clean them. We have lots of windows (40 to be exact, I paid per window so I now know this number.) Turns out that having windows cleaned involves lots of prep on the part of the window owner. They asked me to clear any items near the windows so they could have access.  Yikes.  My sewing table, ironing station and cutting station are under a window. I am sure you can imagine. But after I got the house put back together, it was well worth it. Shiny clean windows. Just in time for fall colors… the maple trees near these windows turn a great shade of yellow-gold and now we will enjoy the changes that much more. (Well, that’s if fall ever comes, it is a balmy 98 degrees outside today.

IMG_20150911_3796Time in the sewing room was not plentiful this week. I did finish up one quick project though. Remember the block-hop that I posted about last week? When I was playing with the design for that block, I did a mock up first. I used some holiday fabric that I had (mainly because it was right next to the cutting area and saved me the long walk to the closet across the room where my stash is stored.)  The block was pretty though and I wanted to use it for something.

IMG_20150911_3784I added two borders, one 2″ wide and the other is 3″ wide. With these borders I ended up with a pillow cover that is about 21″ square.

IMG_20150911_3788I used an envelope backing and stitched a seam 1″ in from the perimeter to make a flange.  Straight line quilting with a fairly narrow gauge was done on an angle, dividing the pillow into four quadrants.

IMG_20150911_3785I used a Mettler variegated thread with shades of gold, silver and cream which I love with these fabrics.

IMG_20150911_3793When I quilt a pillow, I sandwich the quilted portion with plain muslin and pieced batting scraps. The quilting looks kinda cool on the muslin side.

IMG_20150911_3783It makes me want to try some sort of whole cloth project to really emphasize the quilting. Another addition to the list….

It will be fun to pull this out in a few months when the time comes to decorate for the holidays. Hoping everyone has a great weekend. Seems like it is hot across the country right now. Maybe this is the last blast of heat before wonderful autumn starts.

Linking to Finish it up Friday at Crazy Mom Quilts, Confessions of a Fabric Addict as well as Freemotion Mavericks (even tho this is quilted with a walking foot, not my darning foot.) All links to these link parties are available at the top of the page, under Link Ups.


A Finish with a Flange

So pleased to show this week’s finish!!  I love this quilt for a variety of reasons. The colors are just what I wanted for one.  I have always loved a basic pallette using neutral colors. As I mentioned earlier, I then decided I wanted to put a pop of red it. The more I played with this, the more I liked that red. Thus the addition of the large red heart!

IMG_20150325_2982

The biggest reason though is that it is my own.  The design is simple but it came from me; I didn’t use anyone’s pattern and that is absolutely a first. I used straight line quilting going in several directions. The hearted was densely quilted with lines about 1/2″ apart. I used the edge of the walking foot as my guide for that. The body of the quilt has straight lines going through each square, both horizonally and vertically. I started out marking each line with my Hera Marker but after a while, I got used to the patterns in the fabric and used those to guide me along and just freehanded it. Much simpler and very freeing!

IMG_20150325_2986

I took my time with this and didn’t rush to finish it. I did get antsy when I was quilting it and again when I was burying the threads around the red heart. I reminded myself to relax and enjoy the process and it was so nice. I loved every bit of it – even the annoying tasks like cleaning up the myriad little threads all over the back before sandwiching it. Even (and especially) sewing the binding to the back. I do love the process. I think part of the issue is that I feel like I should crank something out so I have “something” to write a post about. This was in the back of my mind but really, even though this blog is something I truly enjoy, I don’t want to be cranking out finishes just so I have a post. That doesn’t make any sense to me.

IMG_20150325_2988

After I got the quilting finished up, I was looking at it trying to decide how I wanted to bind it. I had enough of the fabric from the backing to use as binding but I was torn between using that and using the red fabric from the heart. Finally I remembered a post I had read a long while back over at Persimon Dreams. She had placed a very narrow flange on the quilt before binding it to add a pop of color. Yay-it was the perfect solution. I commented on that particular post and Kim was so kind to send me a quick email explaining how she did it. (So, actually part of this quilt was inspired by another but that’s ok. I want to give credit where credit is due.) Adding the flange took very little time and I think the effect it provides is wonderful.

IMG_20150325_2996


If you haven’t ever done a flange, it is very easy. I cut strips that were one inch wide of the contrasting red fabric. Then I sewed them together, just as one would with a binding strip. Fold it in half and press so you are left with a 1/2″ wide folded strip. (Kim used a 3/4″ strip ending up with a 3/8″ folded piece but I wanted something a little bit wider.) Once you have the flange prepared, attach it to the quilt’s raw edge on the top side. Sew it to the quilt using a VERY scant 1/4″ seam. I used a longer stitch (my Janome was set to 3.5 stitch length) which made attaching it a breeze. Then attach your binding as usual. Be sure to hand stitch the binding to the back. If you machine stitch it, those stitches will show on the flange. Easy peasy!  If you have any questions, let me know in the comments.

IMG_20150325_2989

Yep, this was a great finish and I will be gifting it to someone soon. That is the best part – giving it away and giving someone the joy of a cozy quilt. Hope the recipient loves it.

Linking to Sew Bittersweet Designs as this is my March finish for ALYOF. Yahoo for setting a goal (I had better plan my projects for April soon.) Also linking to Freemotion by the River and Let’s Bee Social.

Not a lot of sewing going on

I haven’t spent a whole lot of time at the sewing machine this week. Lots of regular life going on and my neck was being sort of cranky. But that’s ok. I did get a few odds and ends done.

For RSC15 I am working on the March blocks from the Classic Stitches BOM over at Academic Quilter. I only finished five of the ten blocks but they are really fun.

image

For the kitchen in our Downieville house we decided to put in pleated shades. In keeping with the vintage look of the kitchen, I ordered a Waverly plaid that was printed in yellow, blue and green to make valances. We have green and yellow on the walls and I just put a 1950’s formica table in the eating area. It is gray with turquoise trim and the chairs have turquoise vinyl on the seats. I love pulling all of the colors together with these valances. I made a valance for each of the four kitchen windows. Hopefully we will be up there working on the house over spring break so I can hang these soon.

image

I’ve also worked a bit on the quilting for the neutrals quilt. I have a newfound appreciation with my Hera marker (which is made by Clover). I bought this (inexpensive) little tool months ago and each time I use it, I am so impressed by it. If you don’t have one, this tool is used to mark lines for quilting. No worry about removing ink or chalk after you sew. It is so cool. I have been marking the lines on the neutrals quilt with it.

image

The lines aren’t always easy to see. But the indentation left by the Hera marker is enough to guide me along. I don’t mark more than two lines at a time because the indentation doesn’t last very long. If you mark a line and don’t like what it looks like, a simple spritz of water (lightly sprayed) will remove the mark, as will smoothing the fabric with your hands. I don’t know that I would rely on this for intricate marking, but for straight lines it works great. If you want a quick tutorial on using a Hera marker here is a brief video – though it is so simple, not much instruction is needed.

image

I am quilting down the center of each three inch square and when I finish this direction, I will quilt down the center, going the other way.

image

For the heart I used lines that were much closer together. I didn’t mark these, just used the edge of the walking foot to judge the distance. It seems to solidify the heart, almost removing the lines of the patchwork. Looking good so far. Should make my (ALYOF) goal of completing this quit in March. Yahoo!

I was lucky enough to have one of my sisters here for a couple of days to visit this week. What a treat. Even better, her son was also here briefly. My nephew and his wife live in Japan which means I don’t see him very often. We used to live next door to each other when the kids were growing up and I miss having them around all the time. Family visits are the best. That’s the update for the past week or so. Hope everyone is doing well and spending some time with at the sewing machine and some time hanging with family. Best of both worlds!

Linking to Freemotion by the River and Let’s Bee Social. As always, links to these sites are available at the top of the page, under Link Ups. This post is also linked to Stephanie and Michelle at Late Night Quilter for Tips and Tutorials Tuesday.

When it rains, it pours!

I am sitting here in the kitchen listening to it pour rain. Living in parched California, this is really a wonderful sound. As we were enjoying the downpour my cell phone and my husband’s cell phone start beeping with one of those emergency alert sounds. Apparently it is coming down so hard that the Weather Service is posting flash flood warnings!  It’s ok, we need it so desperately.  There is actually one tiny town in Central California, called Porterville, where many of the residential wells have dried up.  Truly and completely dried up. The residents of that town are buying their water and taking sponge baths. The city officials actually brought in portable showers so the 600+ residents with dry wells could have a hot shower (the rule is to bring your own towel and soap.) Clearly it is no exaggeration that we are experiencing a drought.  The fact that my rain gauge shows 2.43 inches of rain in the last 24 hours is wonderful!

Today I gave the first Christmas gift of the season! How fun it is to gift a quilt to someone – I love the feeling of making it for someone special and knowing they are touched when they receive it. I made a 1600 quilt top (jelly roll quilt) back in October. You can read about it here. Using Moda’s “Merriment” line, it turned out to be lovely shades of deep red and pine green with lots of creamy colors thrown in for good measure. It is technically a holiday print but really it isn’t that “Christmasy” so I think it can be used throughout the winter months.

Holiday Jelly Roll Quilt November, 2014

I cut off enough of the edge of the original quilt top to be able to create a pieced border around the edges. I put a narrow strip of pine green between the main section and the border.  Using diagonal, straight line quilting made this project a breeze to quilt.

Holiday Jelly Roll QuiltThe backing is a simple creamy tone on tone fabric. It looks pretty with the red binding. (I forgot to take a picture of the backing though, oops!)

The most fun was bringing it over to its new owners, my Mom and Dad. Merry Christmas – I thought I would give it to them now since they were just decorating for the holidays. They love it and it looks great on the couch, right near their wood stove. So cozy. The picture isn’t the best, I only had my phone with me. But look how cute!

photoI have started another project that will be gifted at Christmas time. That won’t be shown here until after the holidays. Don’t want to ruin the surprise. Time to go read my book and listen to the rain. Hope all is well at your house!

Linking to Let’s Bee Social, Linky Tuesday, Confessions of a Fabric Addict, Crazy Mom Quilts and TGIFF. Take a peek at all of these link ups to see so many amazing projects. As always the links are available at the top of my page, under Link Ups.  Also…. thanks in advance for your comments, they always make my day!