
I have been remiss in posting lately. It has been really hectic and I haven’t had time to sit with my laptop. What little free time there was, I spent in front of the sewing machine. A girl’s got her priorities, right? As summer came to a close, Julia had the typical teenager desire to pack as much as she could into those last few days. That is fine – she will soon be a slave to homework and won’t have a lot of free time. There were movies to see, shopping to do, and friends to hang out with. School started Wednesday and so another year begins.
When it is busy I like to have a simple project to work on during those 15 minutes of sewing time that present themselves now and then. I have been wanting to try relief quilting for quite a while now. Over a year ago, I read a cute post over at Night Quilter where Kitty explained her process of relief quilting a name on a baby quilt. I love the look and have been planning to give it a try. I pulled out some graph paper and fabric scraps and got started.

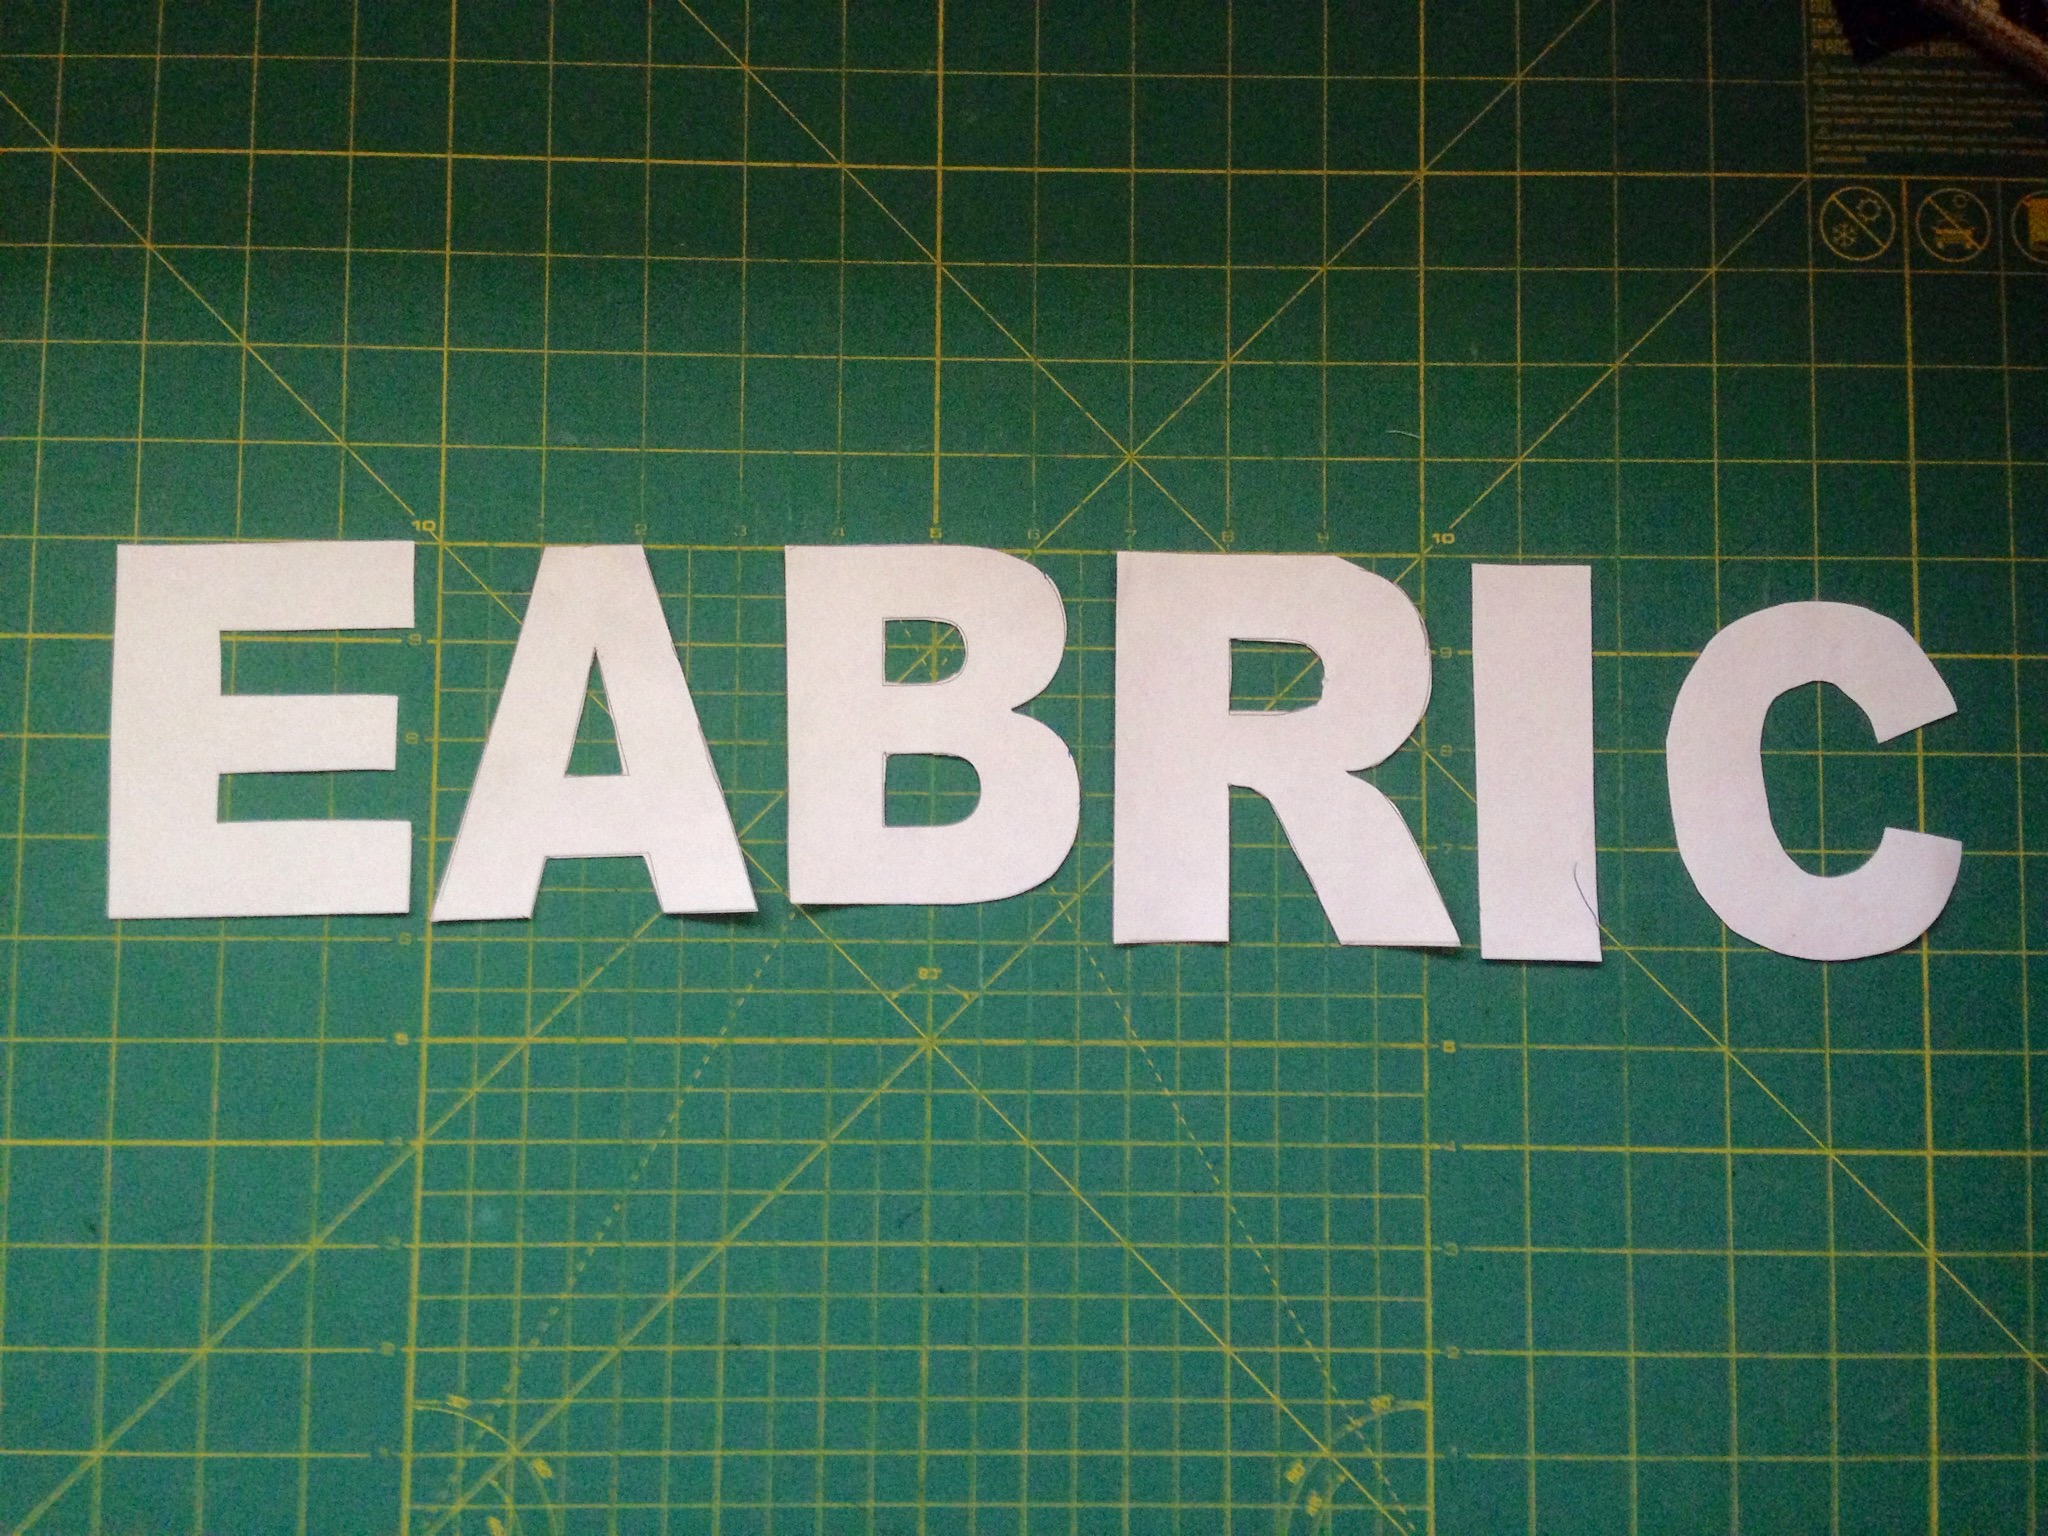
After creating this incredibly inspiring sketch of the project that was floating in my head, I brought out some alphabet stencils that I have. I don’t have the whole alphabet but it was enough to get going. I used the E in place of the F. For some reason, the R was a bit bigger than the rest. I think there are multiple sets in the zip-lok bag and these letters weren’t really from the same set.
Next I found a rectangular scrap of some Kona cotton and traced the letters, centering them as best I could. I didn’t measure this at all. I used a Frixion pen to trace them. I am not a huge fan of Frixion pens for marking but I figured this was just a practice piece so I wasn’t too worried about the final result. Isn’t there something totally freeing about working on a practice piece? Knowing it isn’t going to be your best work and it doesn’t have to be spot on allows one to sit down and have fun. No pressure.
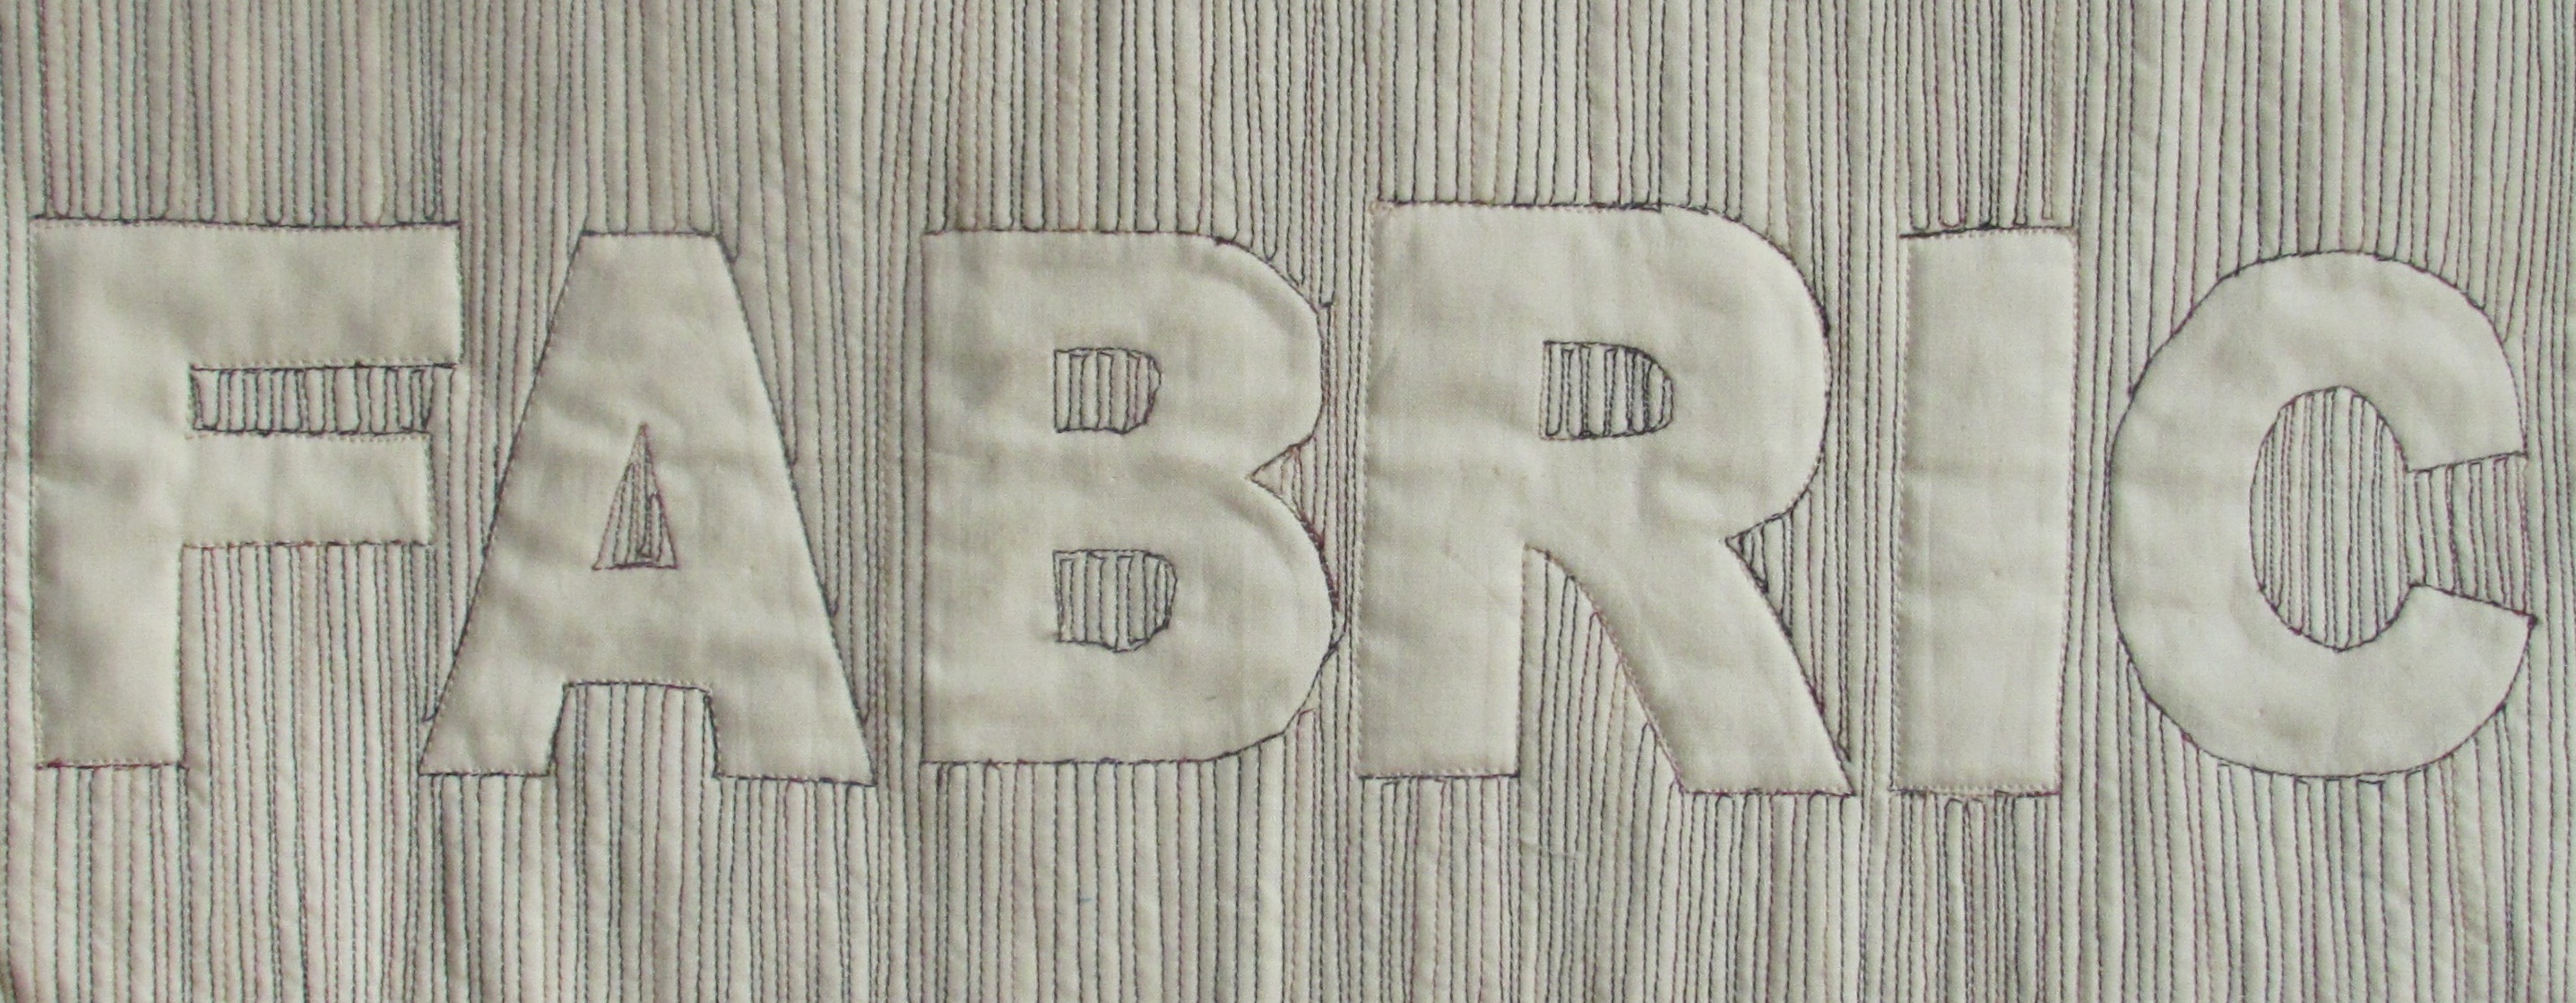
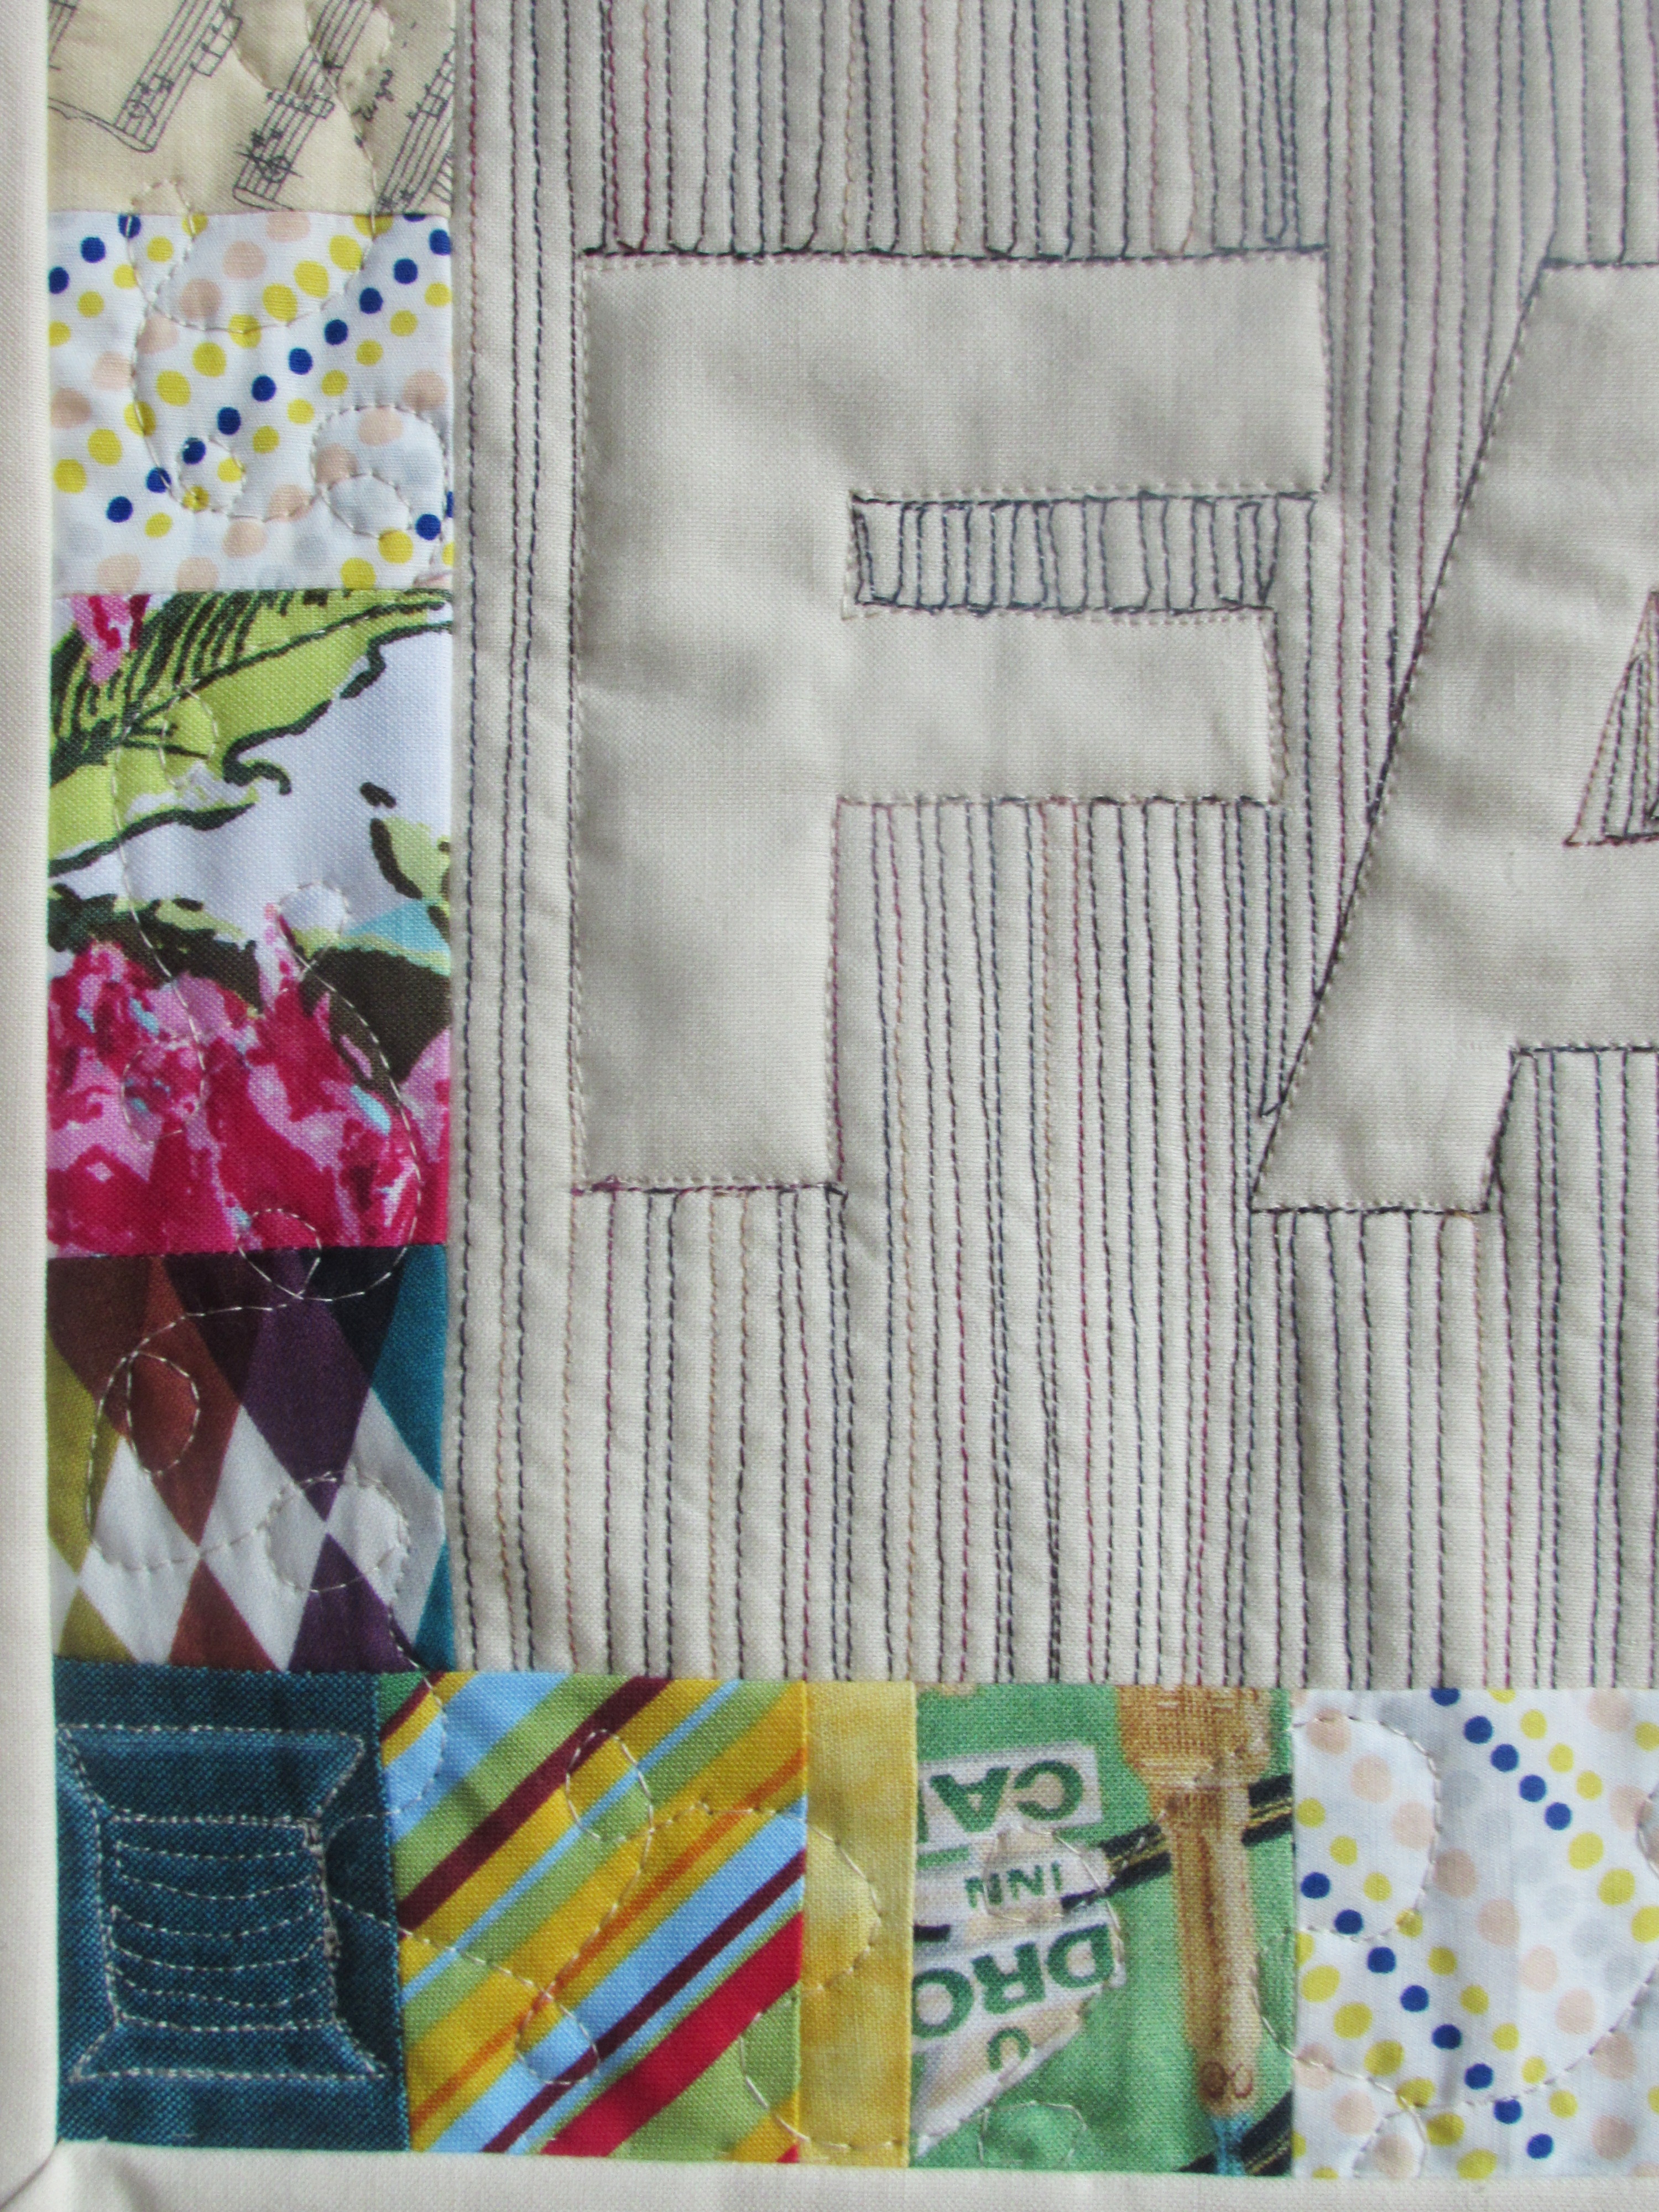
I placed the fabric on top of the batting (which was a large piece that I had created with batting scrap). Using a walking foot, I started to fill in the areas around the letters I had traced. I used tight, straight-line quilting. Without a real plan, I was sort of all over the place – just filling in areas.

In retrospect, I see that I didn’t need to stitch as wide a swath above and below the letters. With my next attempt, I will plan a bit further and decide how far I really need to stitch. I wasted quite a bit of thread with the extra quilting. I used a variegated YLI thread which provided a nice bold look. The more I use YLI thread, the more I love it. The texture is provides is just wonderful.
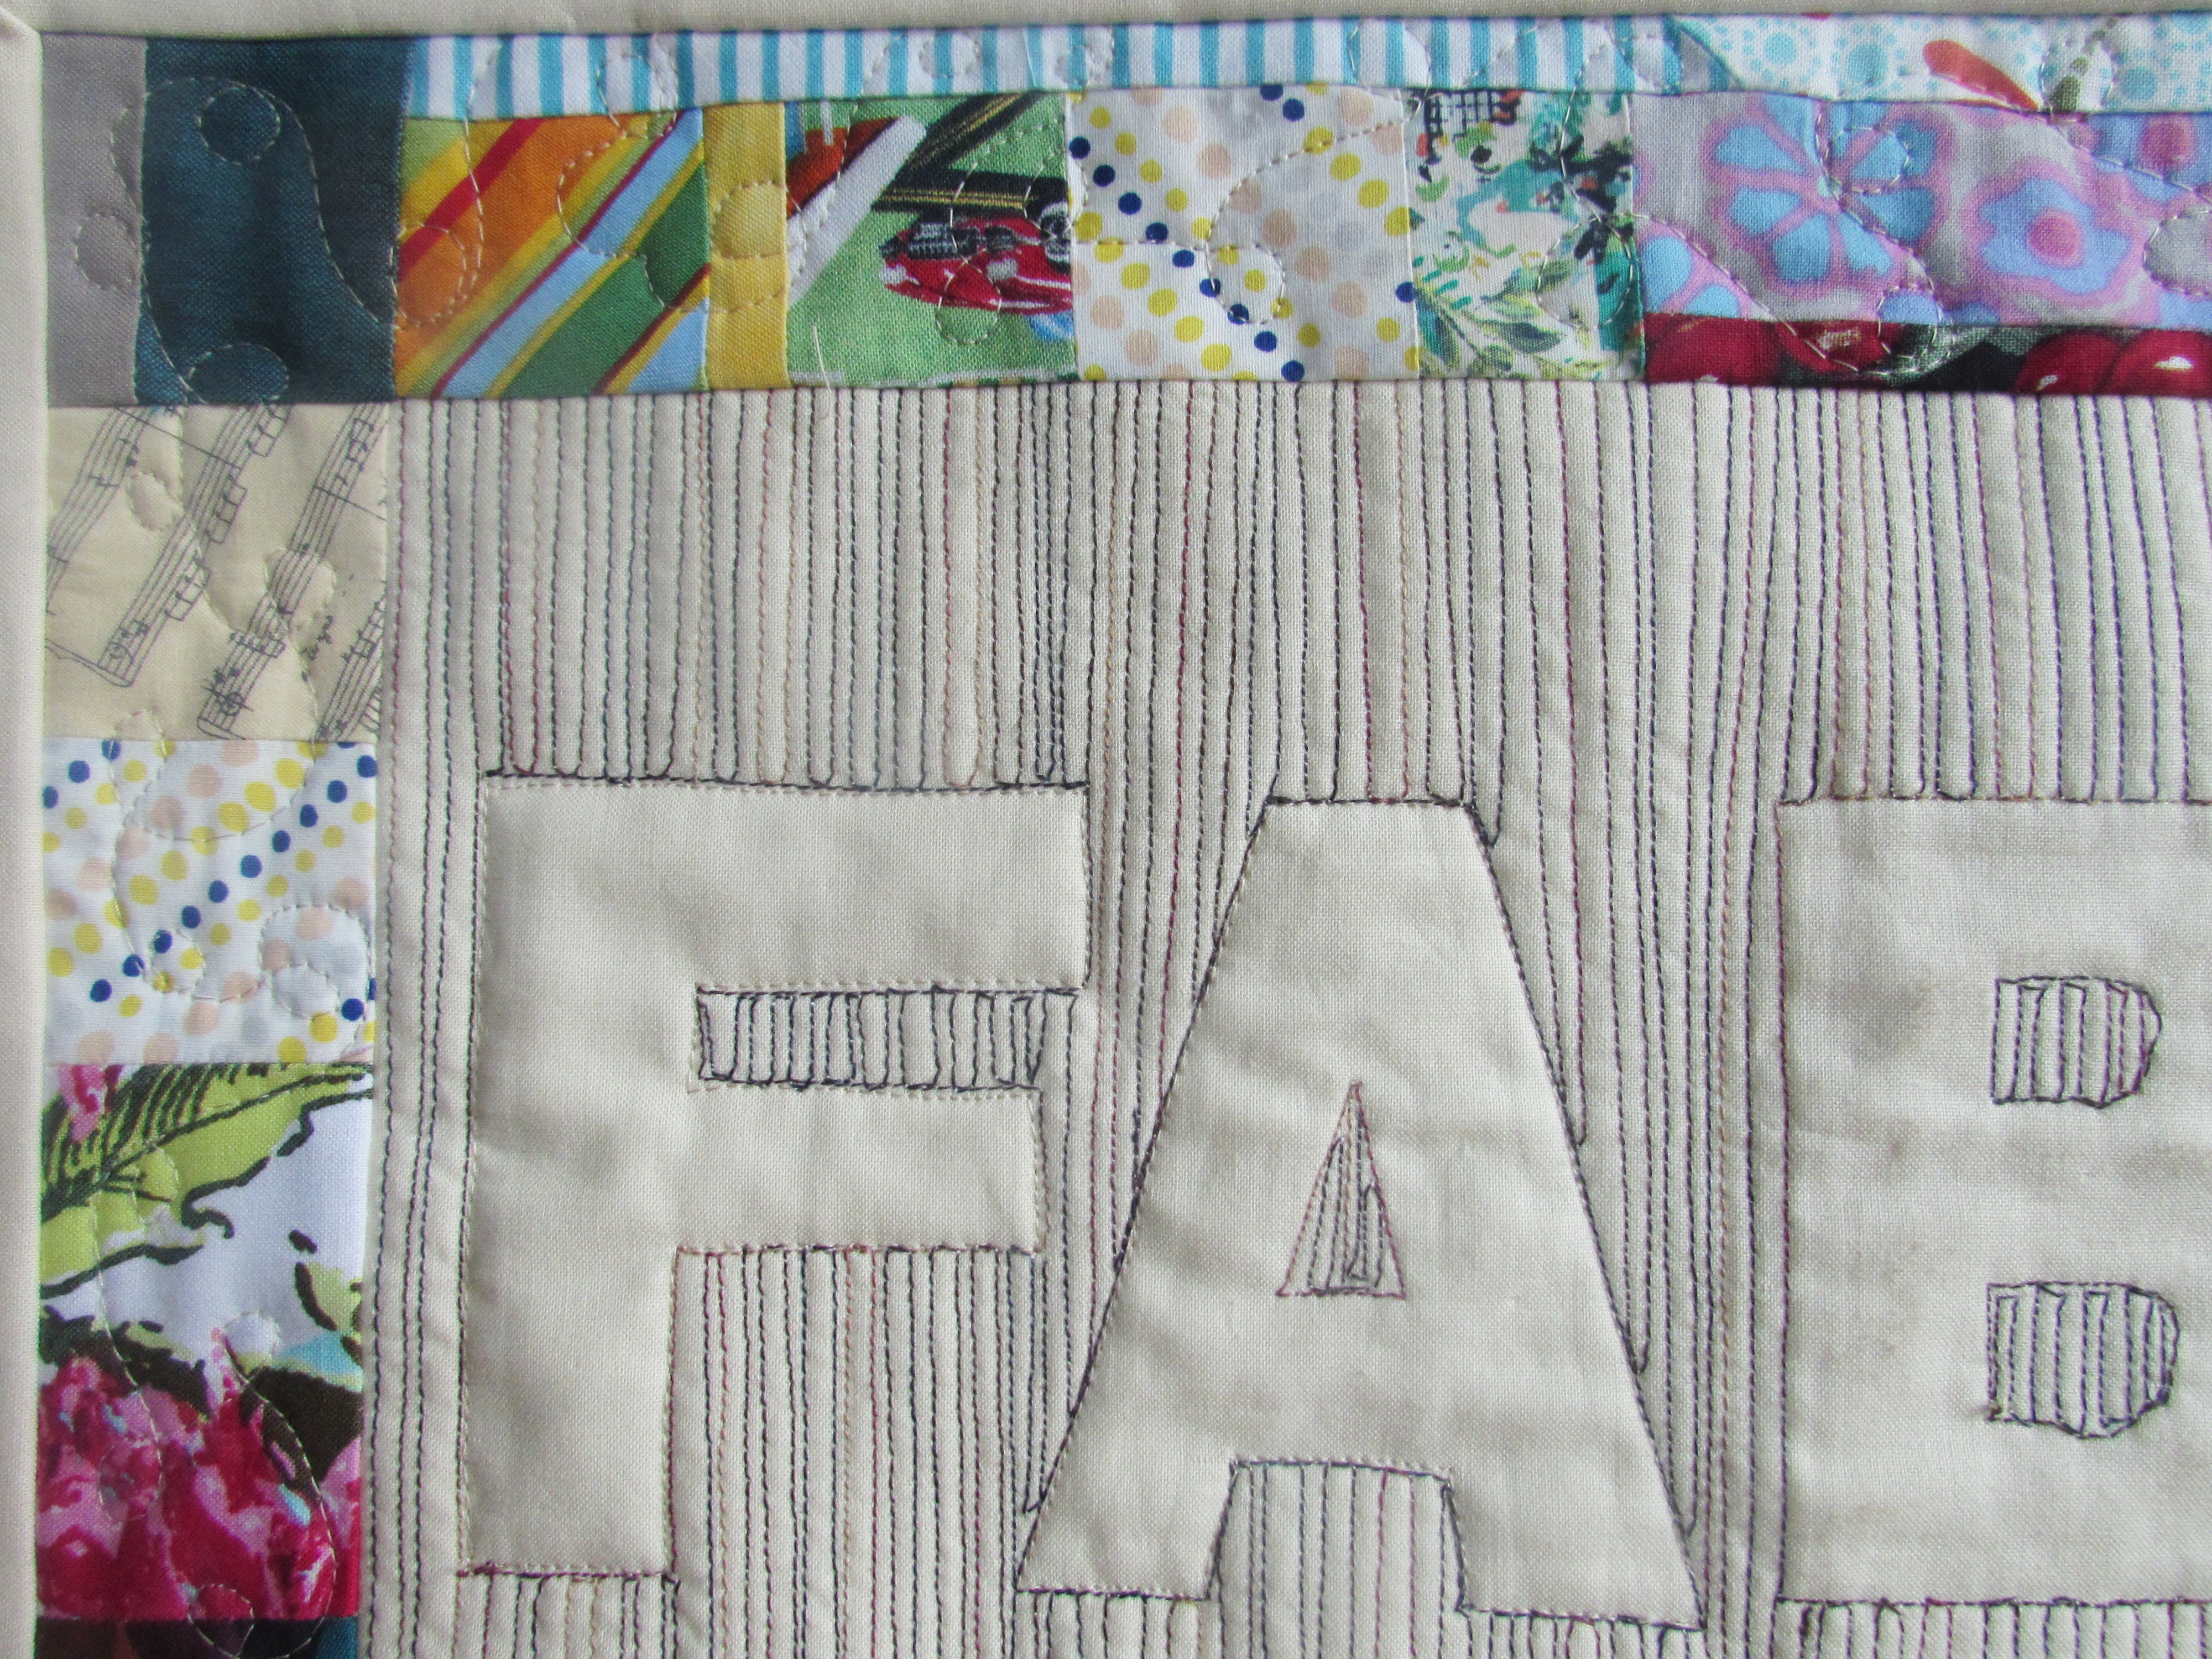
When the quilting was done I was just thrilled with the look, even with the slightly oversized R! 
When I first sketched the project out, I planned to use a stack of 2 1/2″ squares that I have collected to make a border for this. Once I got to this point though, I changed my mind. This guy was calling out for a scrappy, improv border. With my bin of bright, multicolored scraps, I began piecing bits together with only a rough idea of what I wanted the result to be. For the borders I created two large improv pieces that were both more than five inches wide. Then I sliced each in half lengthwise, creating 4 strips measuring 2 1/2″ wide.
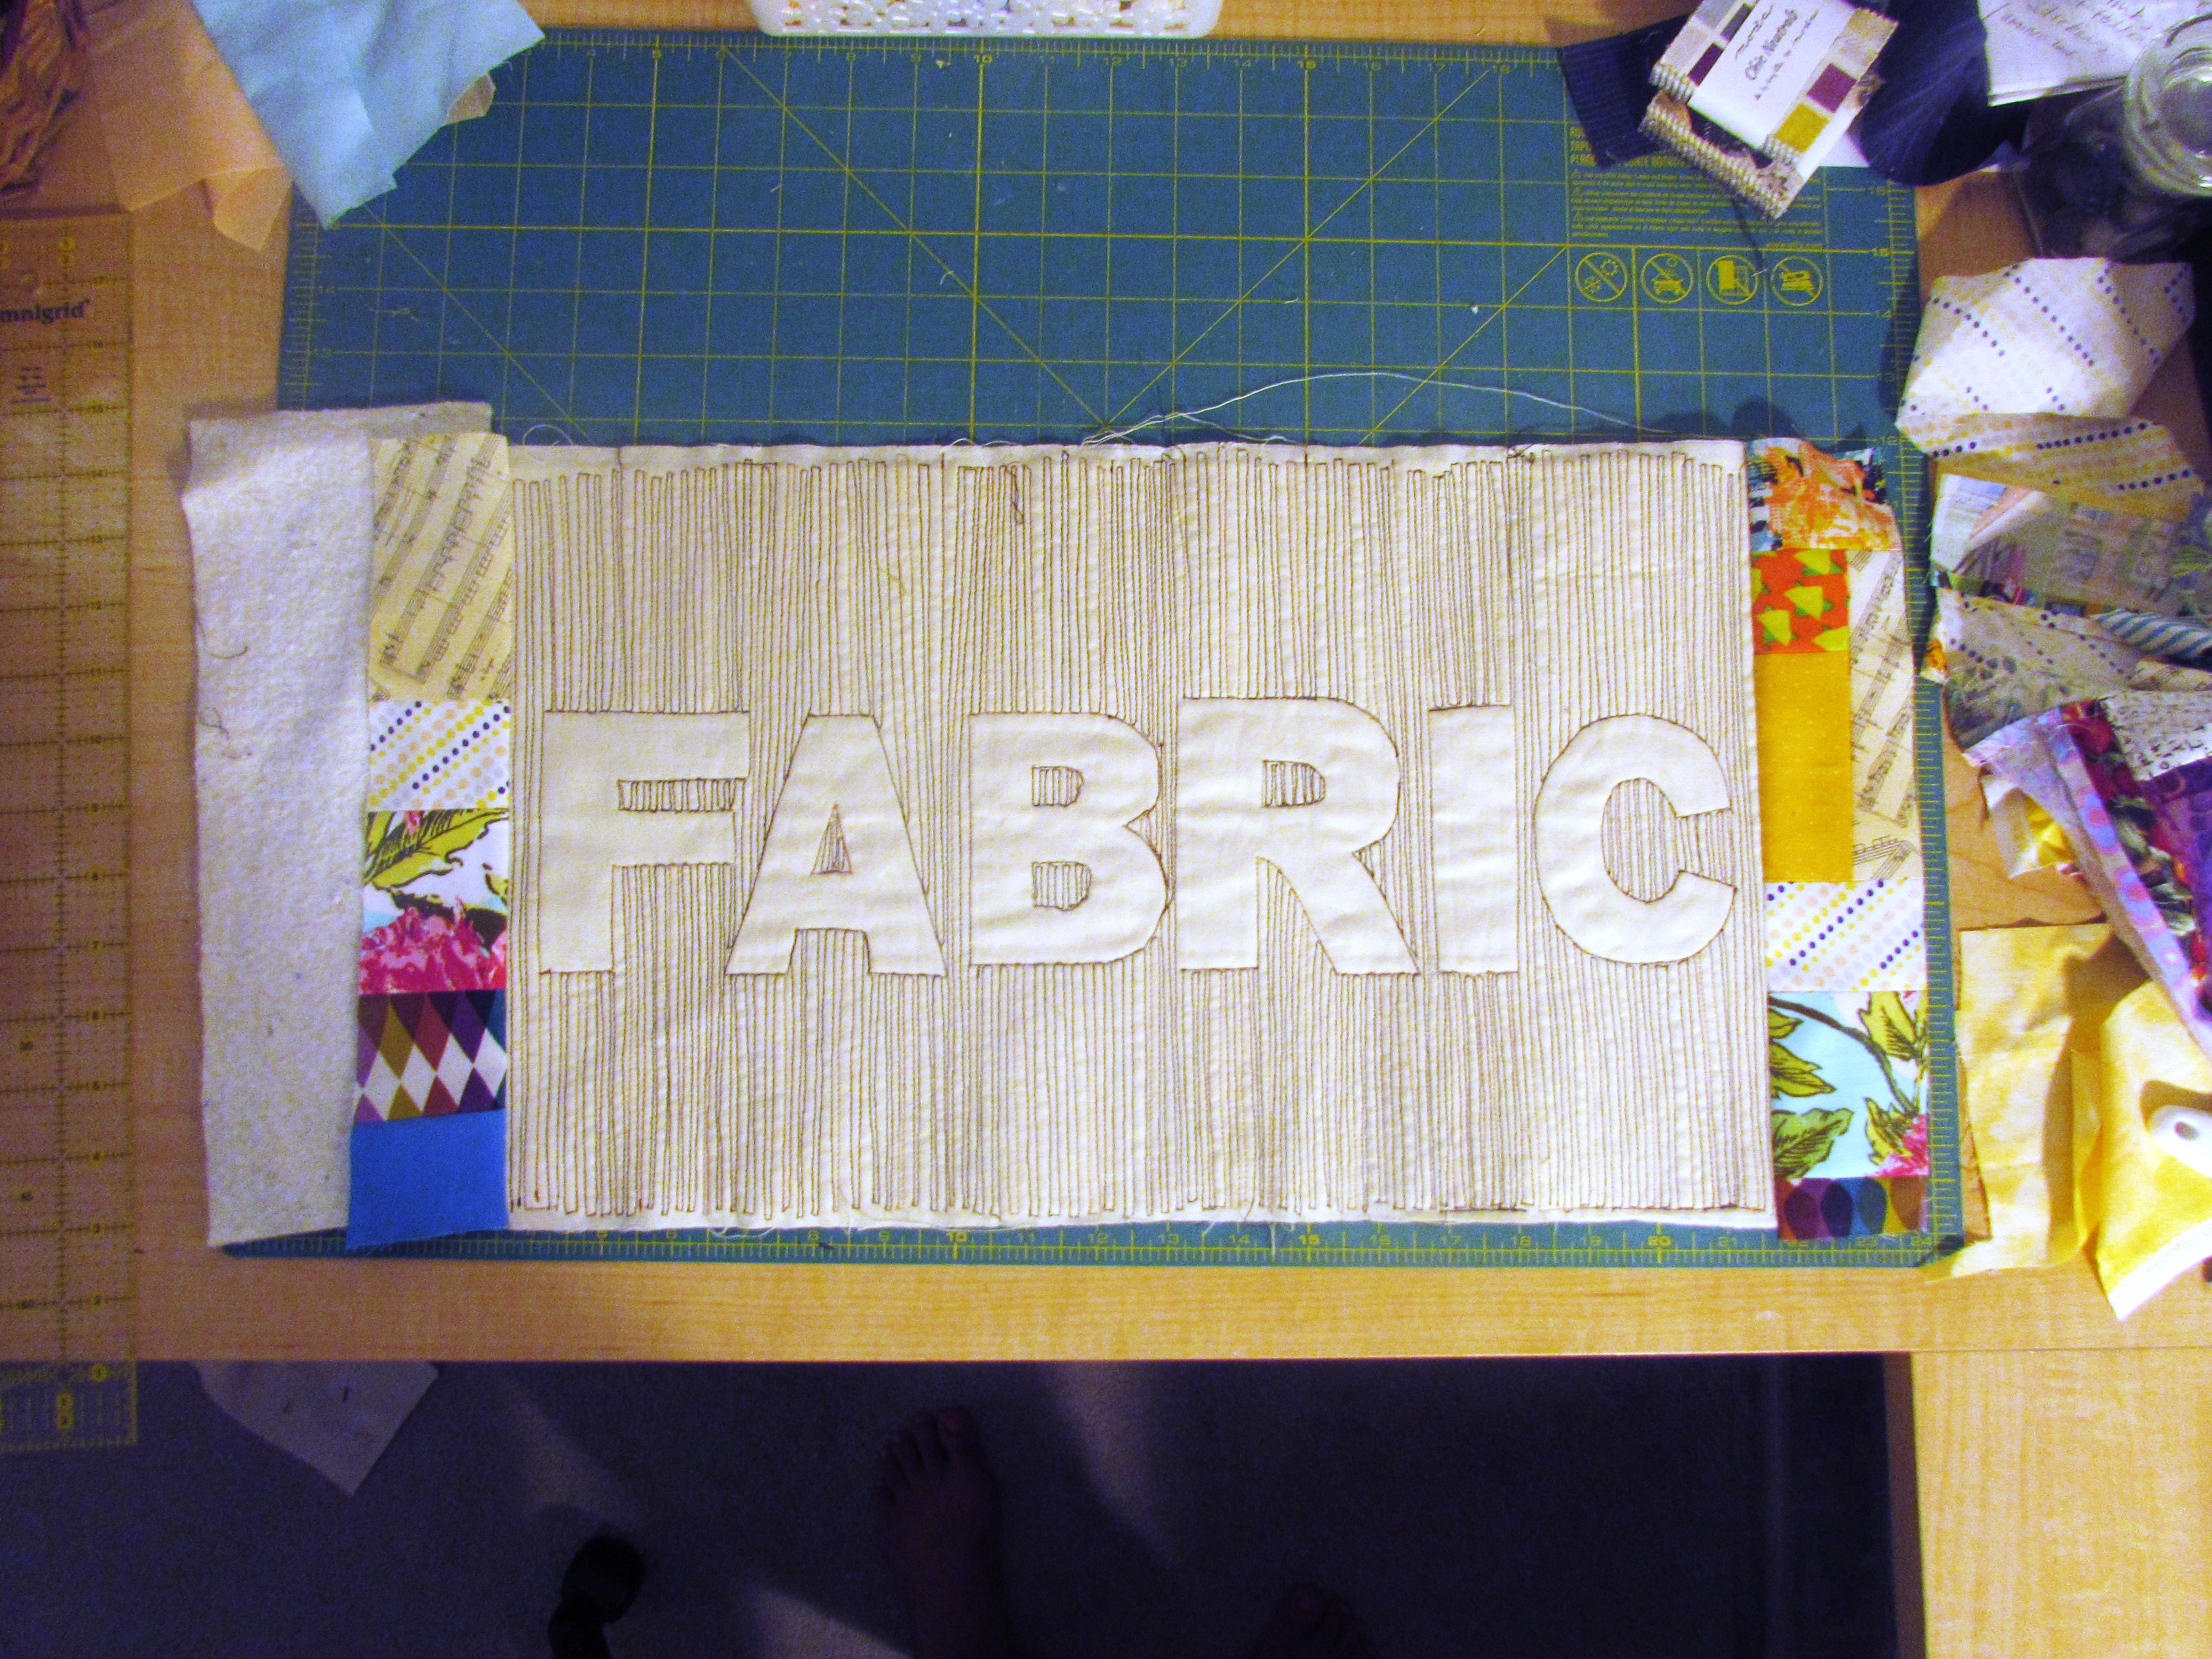
I laid them, right sides together, on both sides and stitched the border on. It was a bit of a Quilt as You Go project, since I was just sewing right on top of the base fabric and the batting. The bottom borders were stitched a few inches below and above the lettering. (This is where it became very clear that I didn’t need to quilt as high and low as I had done.)
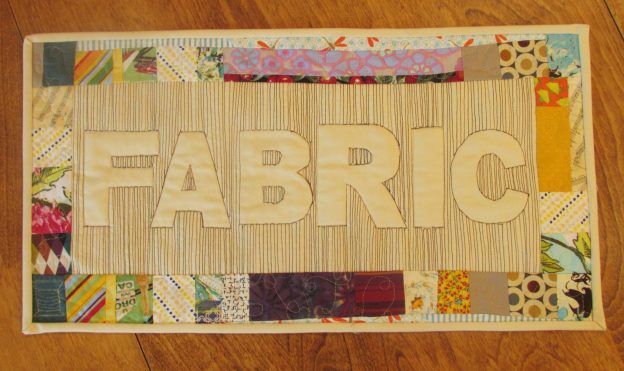
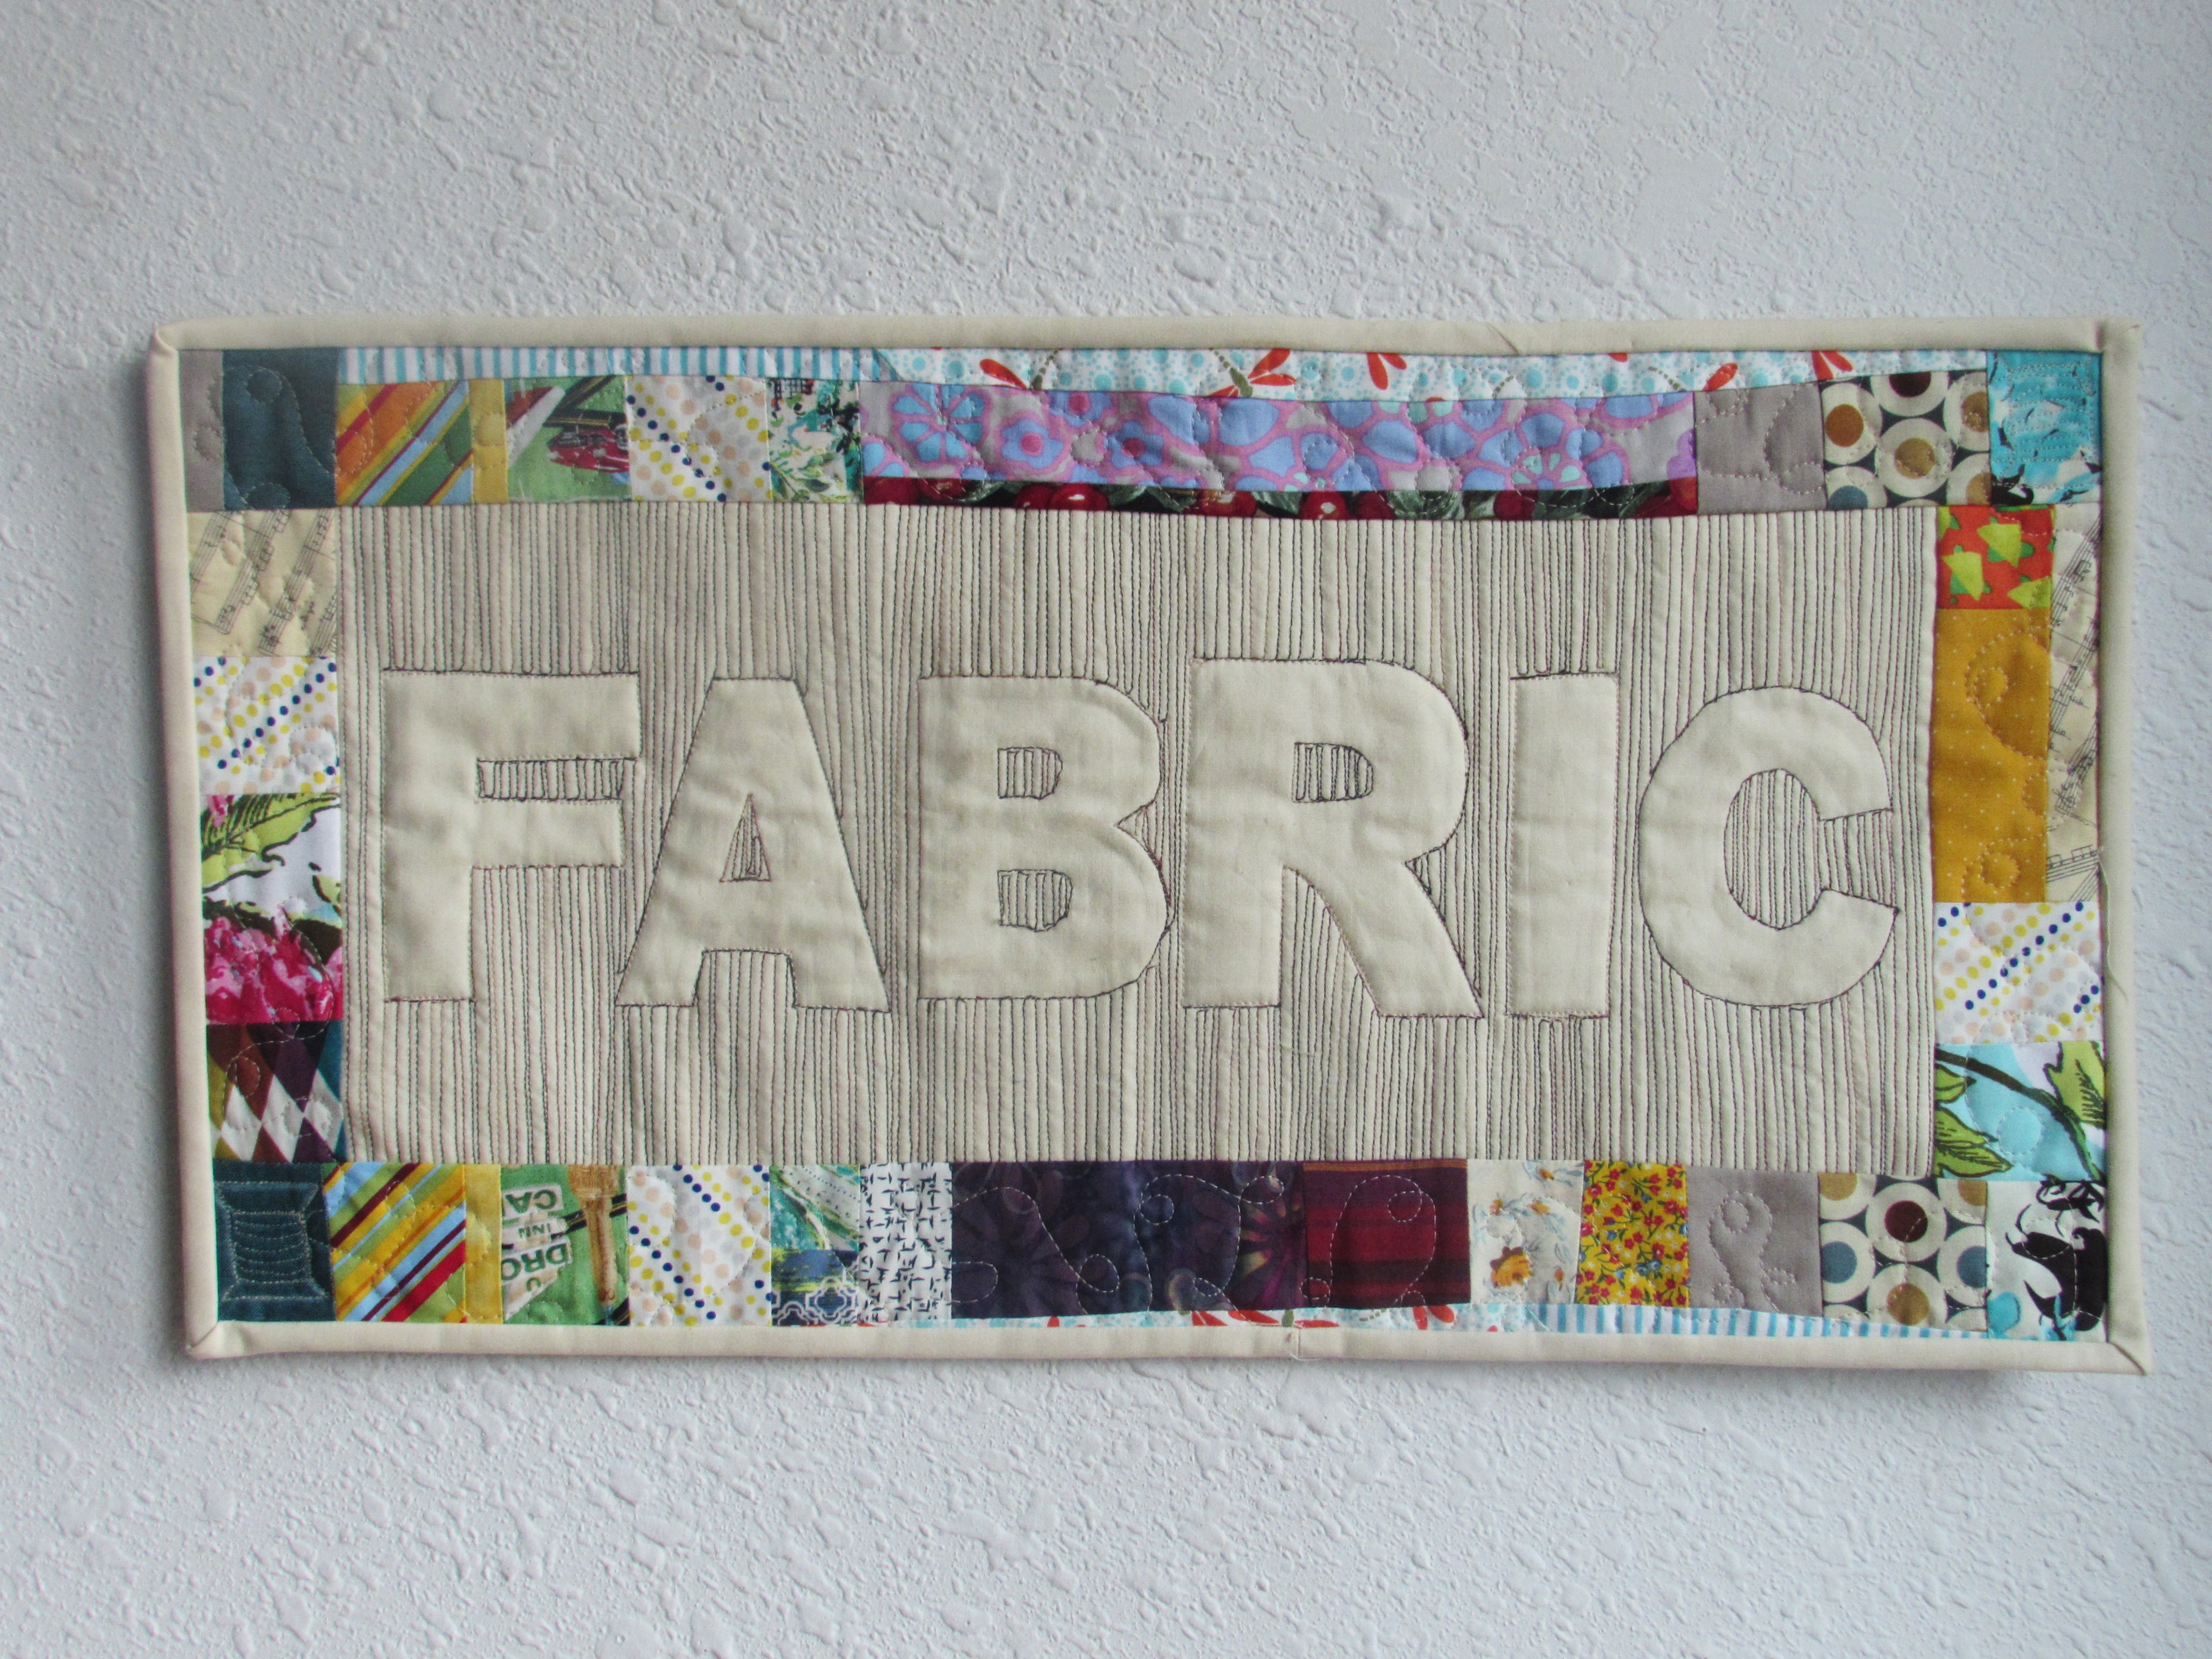
Borders on and pressed, all that was left was to make baste the top to a backing and quilt it. I thought it would be cute to FMQ a spool of thread in one corner and then have the “thread” spooling off of it, looping along the borders.
After creating that little spool, I wished I had used a solid fabric on each corner so I could place spools on all four of them. I did put one on another corner but it doesn’t show up very well with the print fabric. The overall look is cute though, isn’t it?
 I love all the bits of different fabric that surround this piece. They bring back a little memory of whatever project they were originally used in. A piece of green dotted fabric was used for the backing (I think I got it out of the remnant bin at Jo-Ann’s) and I bound it with the same Kona that is in the center.
As always, I would do a few things differently the next time I made this sort of project. If I were doing this sort of thing as a part of a larger quilt, I would fuse stabilizer behind the solid fabric and do the relief quilting over just the fabric (sans batting). Then I would incorporate the block into the larger project. Once I was quilting the larger project, I would use a walking foot to outline the letters (to quilt the block down).
I need to make a sleeve for it and then I will hang it above my sewing machine. This was great fun and I am really pleased with the result. I encourage you to give it a try. Let me know if you have any questions or check out Kitty’s tutorial.
Linking up all over the place – for details, look at the top of the page, under Link Ups.

Weekends are the time to shop Craftsy. This weekend they are having a Black Friday “When You Need It” sale on kits and supplies. If you are hoping to make handmade gifts in time for the holidays, it is a good time to make a plan and stock up. I love the kits at Craftsy – the fabric is often a huge bargain and no one will know if you use that fabric for a different purpose. I am loving this Benartex quilt kit – 100 charms and 3 yards of fabric? Another one is the Eclipse kit, which uses the Allison Glass Sunprints line. There are almost 18 yards of fabric included and the pattern is gorgeous.

If fabric isn’t your thing this weekend, there is also a great sale on books over at C&T. They are having a $5.00 Blowout Sale and many great quilting titles are on sale. I love C&T – they are the publishers of so many of our favorite quilty books. Check it out! Sale runs through the end of day on Sunday, August 21st.
(This post contains affiliate links.)
What a darling little project! I think it turned out just lovely.
That spool of thread in the quilting is nothing short of genius. This might be something I will have to try for my own sewing space wall.
Thank you. I had so much fun with this as there was virtually no plan or expectation yet it turned out so cute. Make one for your sewing space. Hope you enjoy it. In fact, if you make one, will you come back and let me know?
Practice projects are *incredibly* freeing, Bernie! And beyond this project, I really love your message of choosing to spend time at the sewing machine with your precious few minutes here and there. And that spool is really awesome and the perfect touch – it really jumps out and shines in the corner!
Thank you Yvonne. It was fun to watch this project sort of evolve. I had a great time with each portion of it and I’m looking forward to trying it again on another project.
This looks like fun — another idea to put on my things to try list. Just one (dumb) question: I assume you made the whole quilt sandwich before you began the stitching, right? Thanks for sharing. I enjoy Kitty’s posts too!
That isn’t a dumb question Wendy. Actually, no, I didn’t. I wasn’t sure if this would turn out to “be” anything. So initially, I just stitched batting scraps together and placed the solid cream fabric over a piece of batting and started quilting. Then when I decided I wanted to keep going, I pieced the border and added it on. At that point, I placed a backing fabric under all of it, pinned it and started to quilt the borders (where I put that little spool of thread) I also outlined a couple of the letters again to quilt the top to the backing. I suppose I should have explained that with a bit more detail. I will update the post. But really, it was a lot of fun and I could see lots of ways to do this again. Thanks for asking.
Practice pieces are relaxing you can just let go and have fun. Your piece looks great Bernie.
Thanks Cindy. I agree and this one fit the bill. It was certainly an easy & quick project.
Great practice piece and one that will definitely brighten up your sewing room. I wanted to do a similar project using the word Thread with the intention of hanging it when I keep my thread (obviously) but a recent reorg of my sewing room and I’ve started storing most of my thread in a drawer now. But that’s okay, I’ll figure out something else for this project. Thanks for reminding me about this technique.
Oh, I love that idea. Thread would be perfect. Make it anyway Diana. It would be so cute in your sewing room.
Have a great weekend.
This project – writing letters with walking foot quilting – is on my to-do list for the last 6 months. Ever since I took Jacquie Gering’s class, I knew I had to make a small quilt with that lettering. I think the oversized R is your signature, Bernie. You have inspired me!
Hugs,
Preeti.
I have not take a class with Jacquie. Does she also cover this sort of thing? She is an amazing quilter. Happy Friday Preeti.
Hope you get around to trying this. Isn’t hard to fit all of it in? So many things to make.
I love how this turned out, Bernie. I’m sure this was a lot of fun to practice on. I love that type of dense quilting becauseI can put my mind on auto pilot t and just go. Though, I like to use my free motion foot. I like your idea of stitching next time using stabilizer instead of batting, especially if the words are only a small section of the quilt. That’s a great idea.
Thanks Tish. I appreciate your compliment – Hope you are in your sewing room happily stitching away!!
This looks like so much fun! I love that the letters aren’t all the same size and that you used that riot of colorful prints that hold memories. But my favorite part is your use of the variegated thread. It adds so much to the background for the letters. You are a never-ending fount of ideas, Bernie!
I am becoming quite a fan of YLI threads. I have not had any problem with them and I love their colors. The thread is heavy and gives such good texture.
Thanks Janine.
Oh!oh! Pick me!! …if you ever get tired of this cutie just send it my way! I have a stash closet it would look wonderful over! Awesome job!
That is such a good idea Debbie. I am going to see if this will fit in the space above my closet (where I keep my fabric) Thanks for stopping by! Happy weekend. ?
Pingback: Crochet a Dragonfly Blanket! Easy DIY Embroidered Pillow! Learn Relief Quilting! How to Prepare and Use a Bullet Journal! Make a Simple Hot/Cold Pack! Piece a State Quilt! DIY Cookie Basket! Sew Mary Jane Baby Shoes! Knit a Pullover Lace Sweater! Make a C
My brain just went into overdrive. I can see using this technique both on fabric and with clay. Guess I’ll just have to spend tomorrow making art.
Deb, the clay idea sounds interesting! Let me know how that goes. It would be fun to see a picture. Enjoy your artsy day tomorrow. Also, thanks so much for stopping by.
Best,
Bernie
Fabulous! I did a few relief hot pads when I first started FMQ and they still remain among my favorites! Well done! XO
Thanks Karen. That is a good idea for hot pads. Little kitchen themed words or small shapes would be fun to do.
Hope all is well!
Okay you guys: 3 blogs I’ve read and 3 more projects, DREAMi moments about to happen! I loved this when you first showed it, and seeing the finish makes me want to make one ASAP, love the improv pieced border, and the memories it contains. But there’s the one block wonder Anja showed and Jayne’s wonky block mini quilt tutorial…not to mention a few on-the-go projects of my own…Oh for more hours or two of me!
I know how you feel…. so many fun things to make! Makes it very hard to choose.
Hello Bernie,
I love the way you have combined the straight line quilted centre with the pieced border, and I enjoyed the fact that you remembered where the little scraps came from.
Thank you for linking up with Free Motion Mavericks!
Love, Muv
Bernie, I’m late to the game, but this turned out beautifully!! This makes me want to revisit the technique for a practice piece wall hanging for my creative space! Thank you for spreading the love, and for reminding me of this fun!