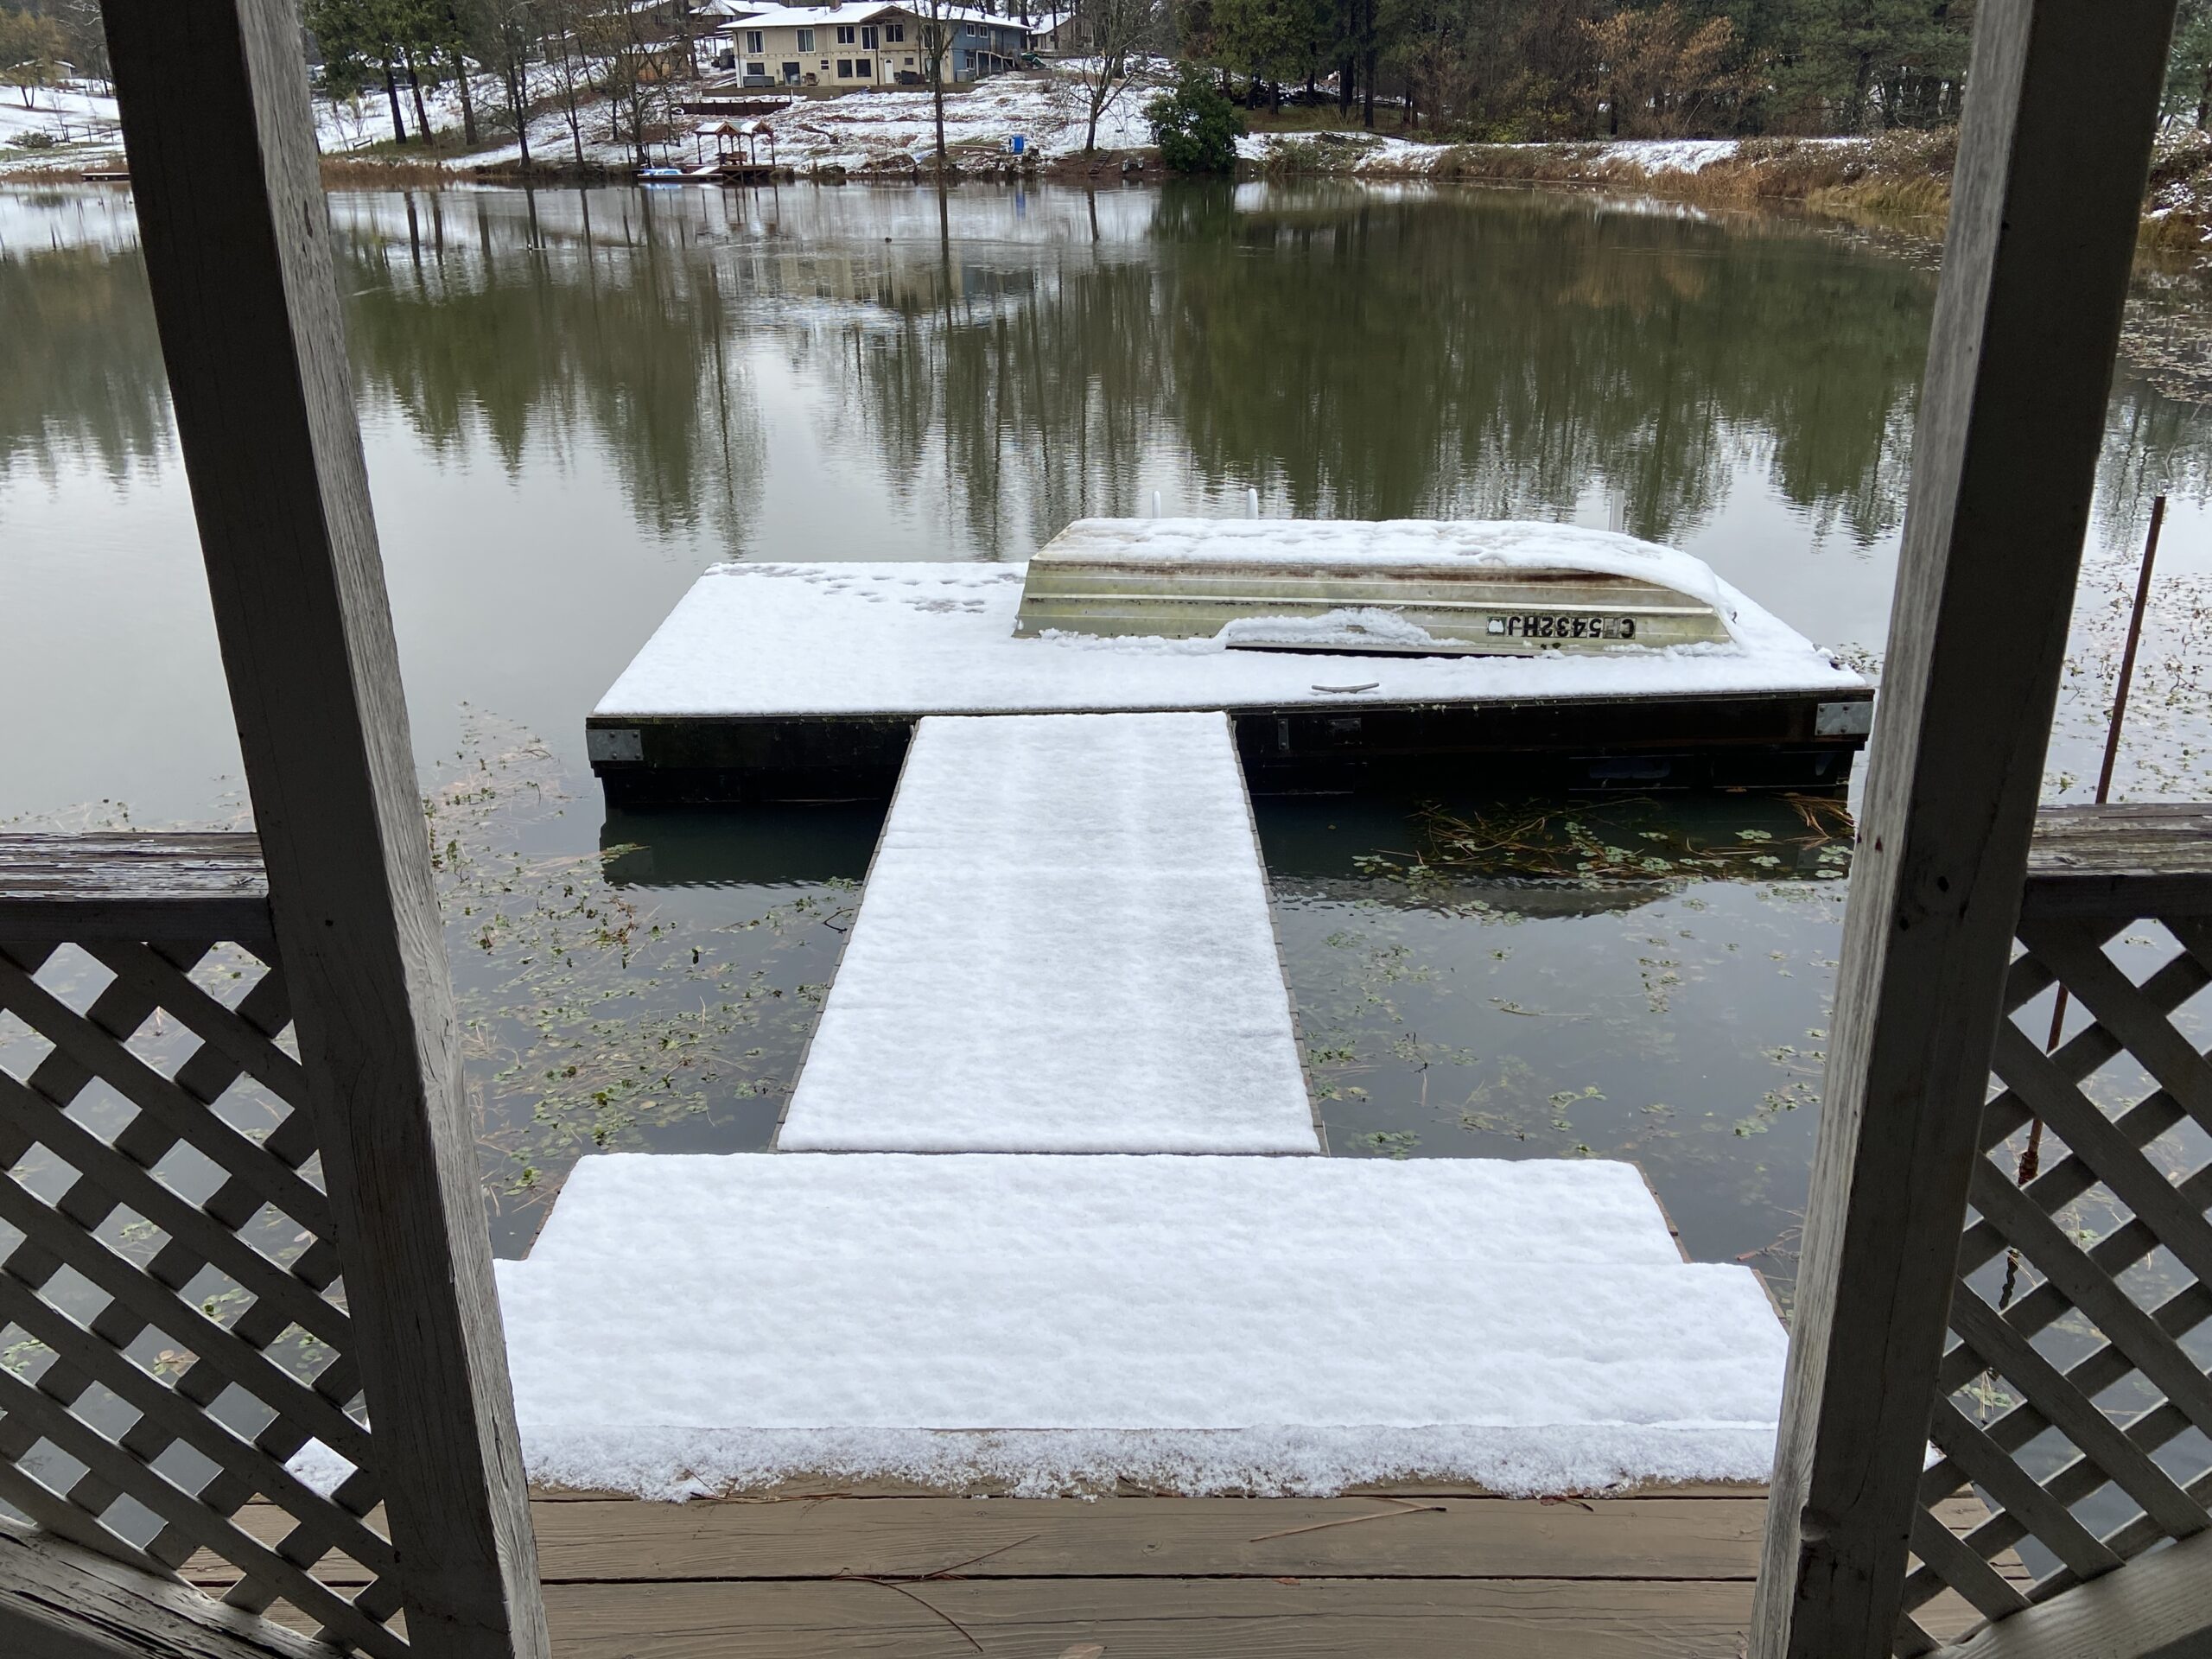
It snowed this week!! Years ago, it seemed like we got a snowfall every year. The kids would get the day off of school and it was a treat for all of us. With climate change, we rarely see snow. But this week we got about two inches and it was wonderful. Prior to this we got rain, a lot of rain. Living with drought and fires like we do, nothing is better than rain. Anyway, we are enjoying this wintry weather up here in Northern California.
Taken after the snow started to melt off, this is a peek at the pond from our gazebo.
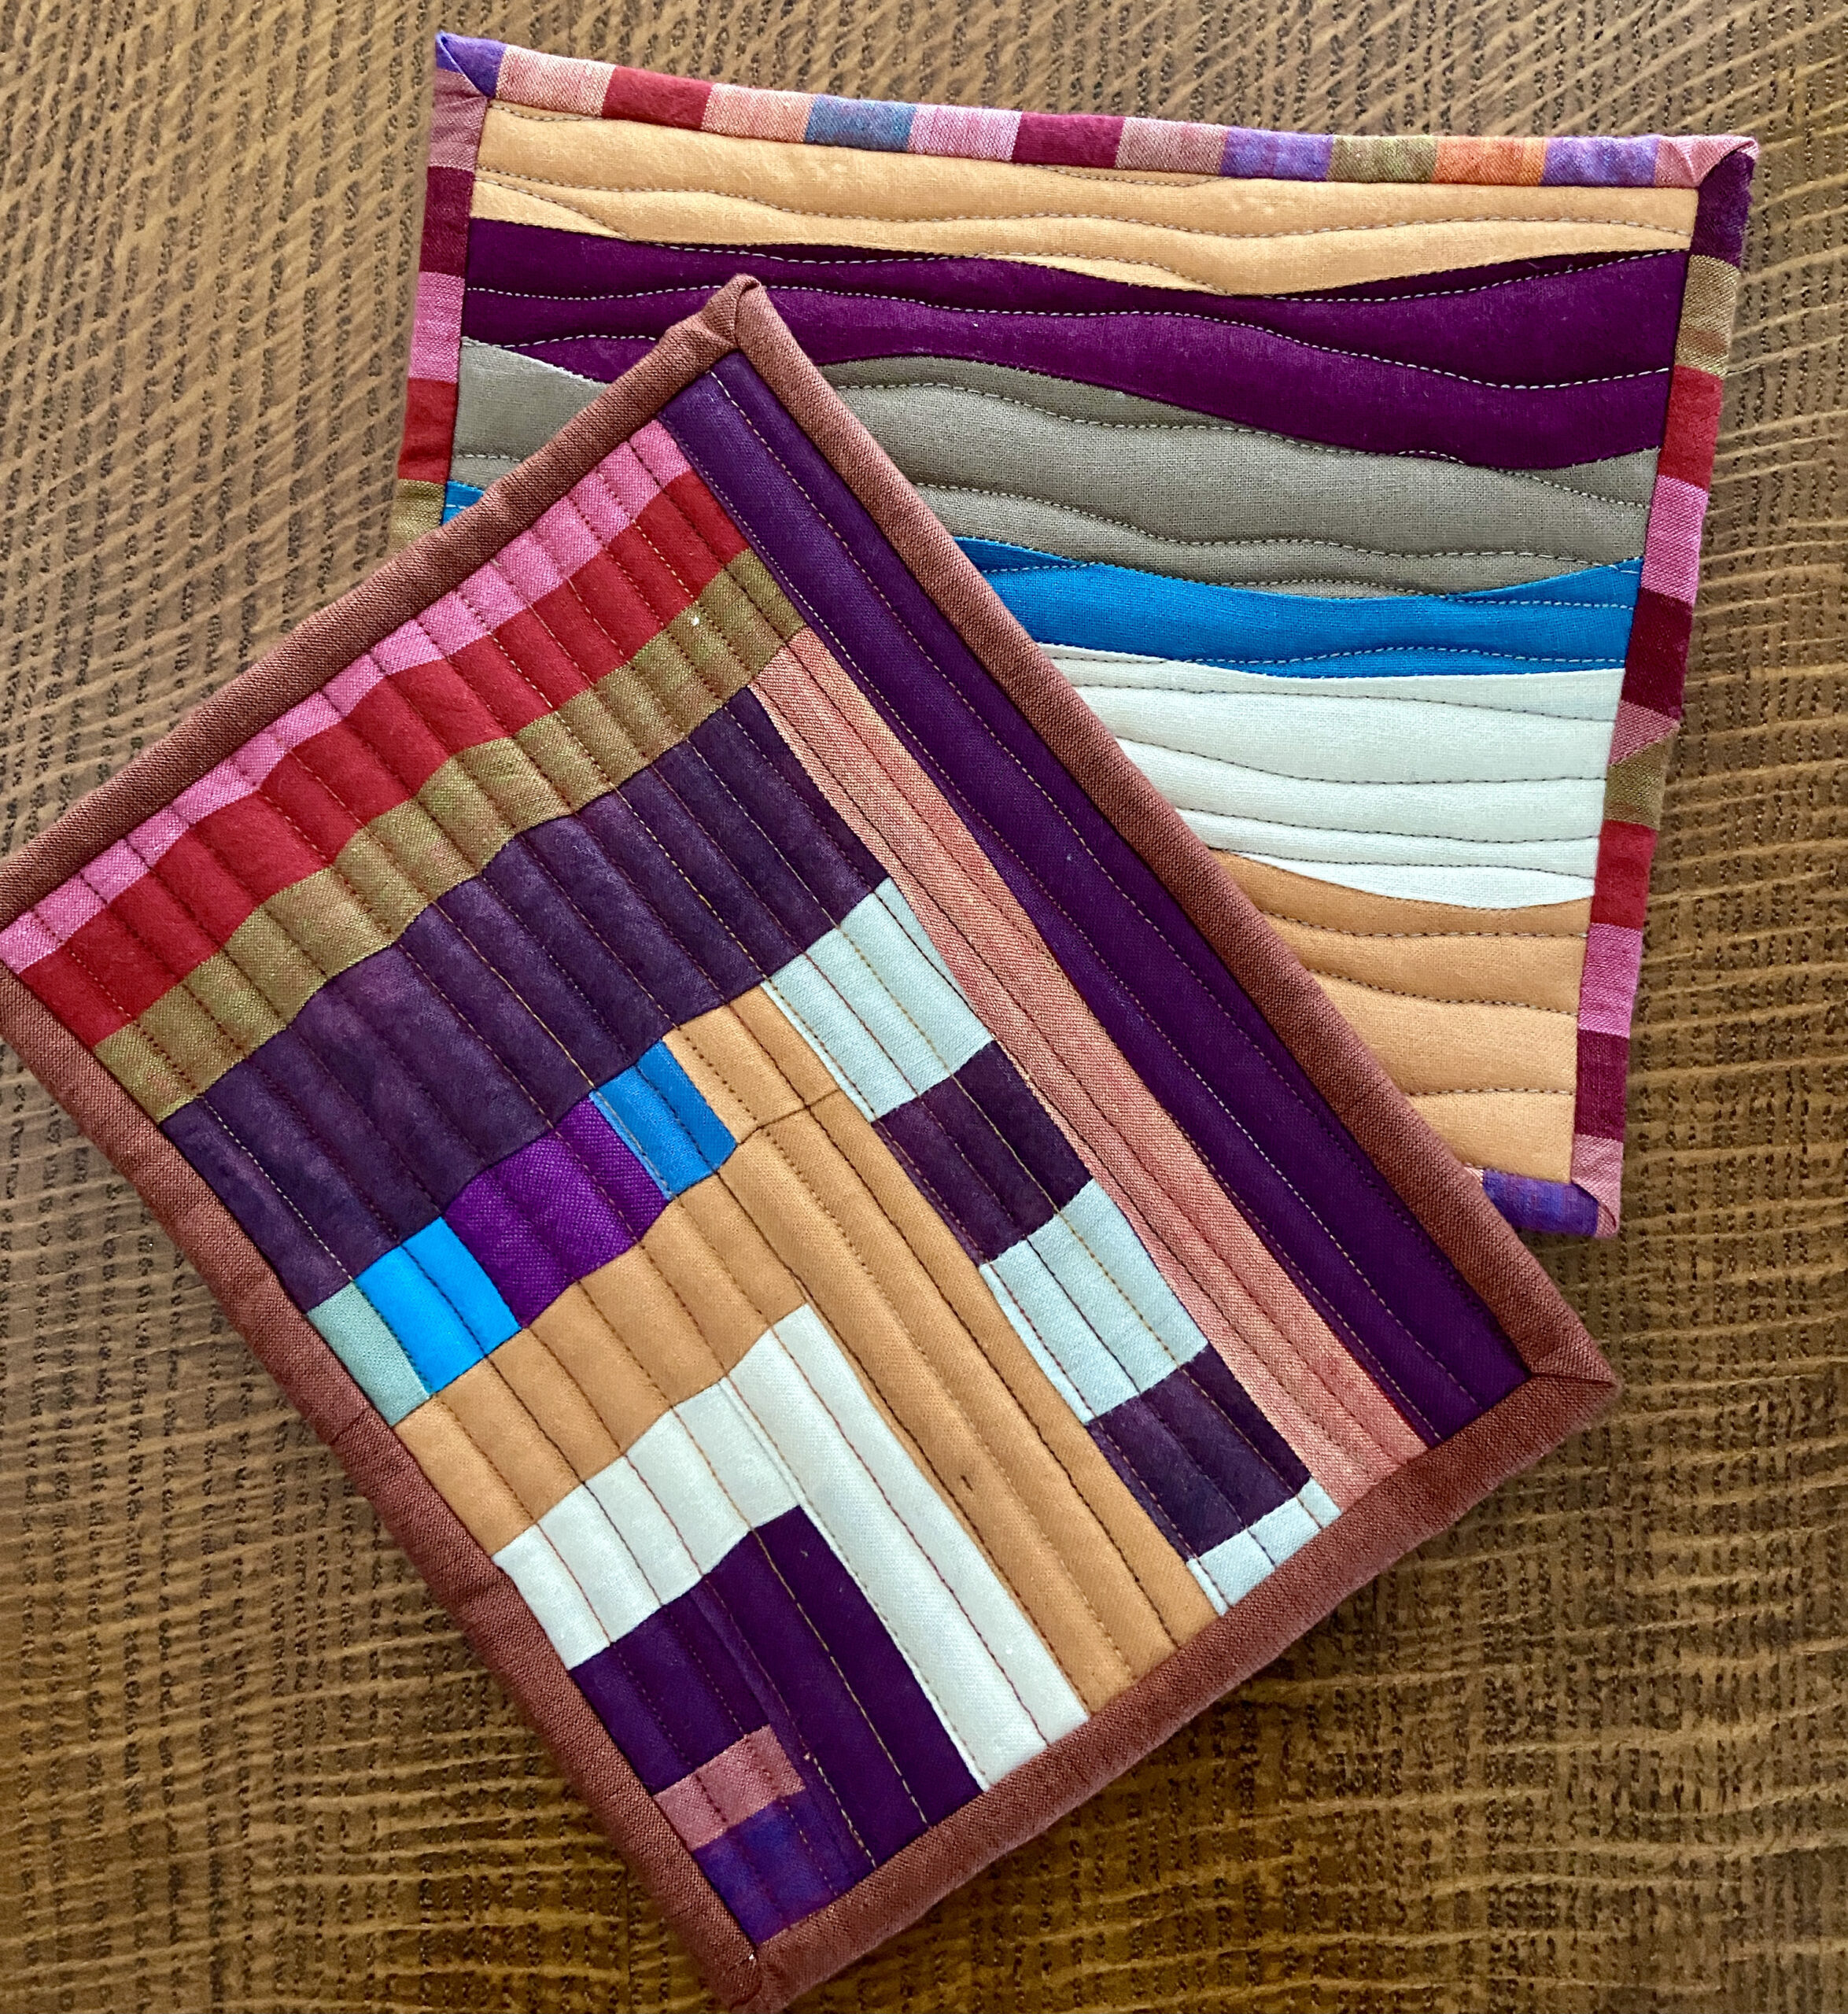
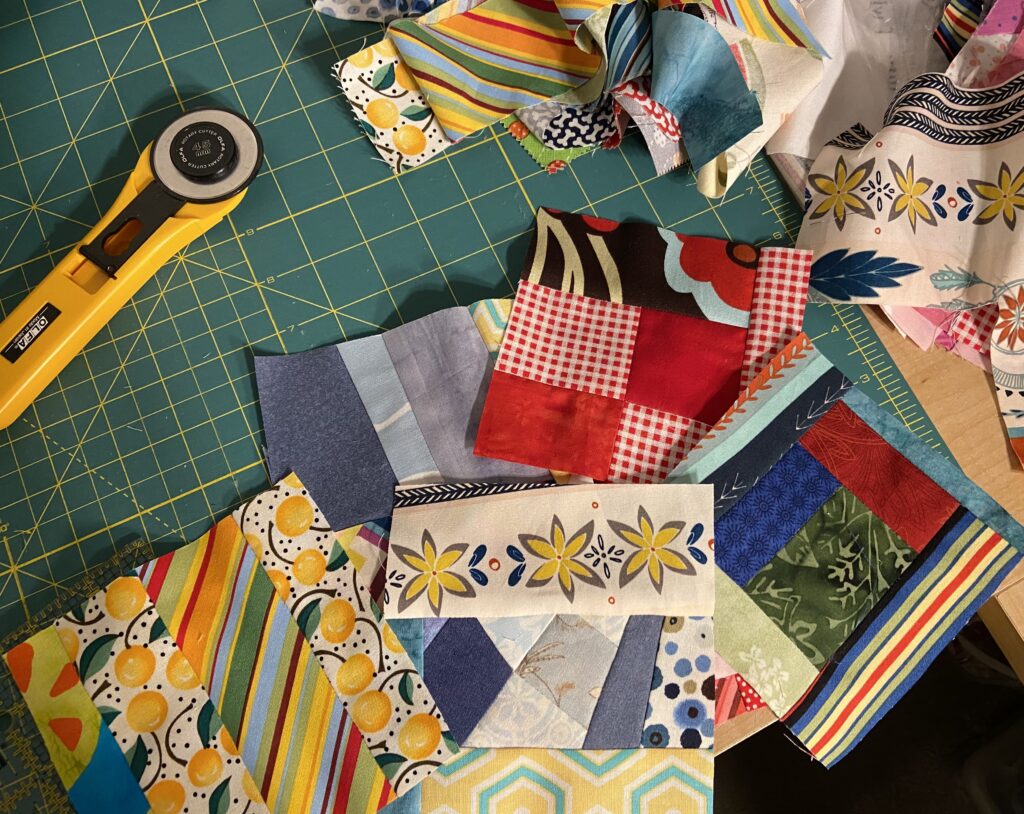
Most of my time has been spent packing and great progress has been made. However I have found a few minutes here and there to sneak in a little bit of sewing. When I was sorting scraps last week, the pull of the solids bin was great. I did a little improv and ended up with two cute minis.
Aren’t these fun?
I put Insul Bright and regular batting scraps in these so they can be used as pot holders or trivets on the table. They are a little be stiff since I quilted them densely.
Wavy piecing and quilting
This was the first one I made. The wavy piecing was fun but I do have to say, I am not hugely satisfied with the jittery look of my wavy quilting.
This was number two. It is made mainly with shot cotton which doesn’t have a ton of body. (Hmmm, I should have starched the pieces.) So it pulled with the quilting. No worries though – still fun to just sew!
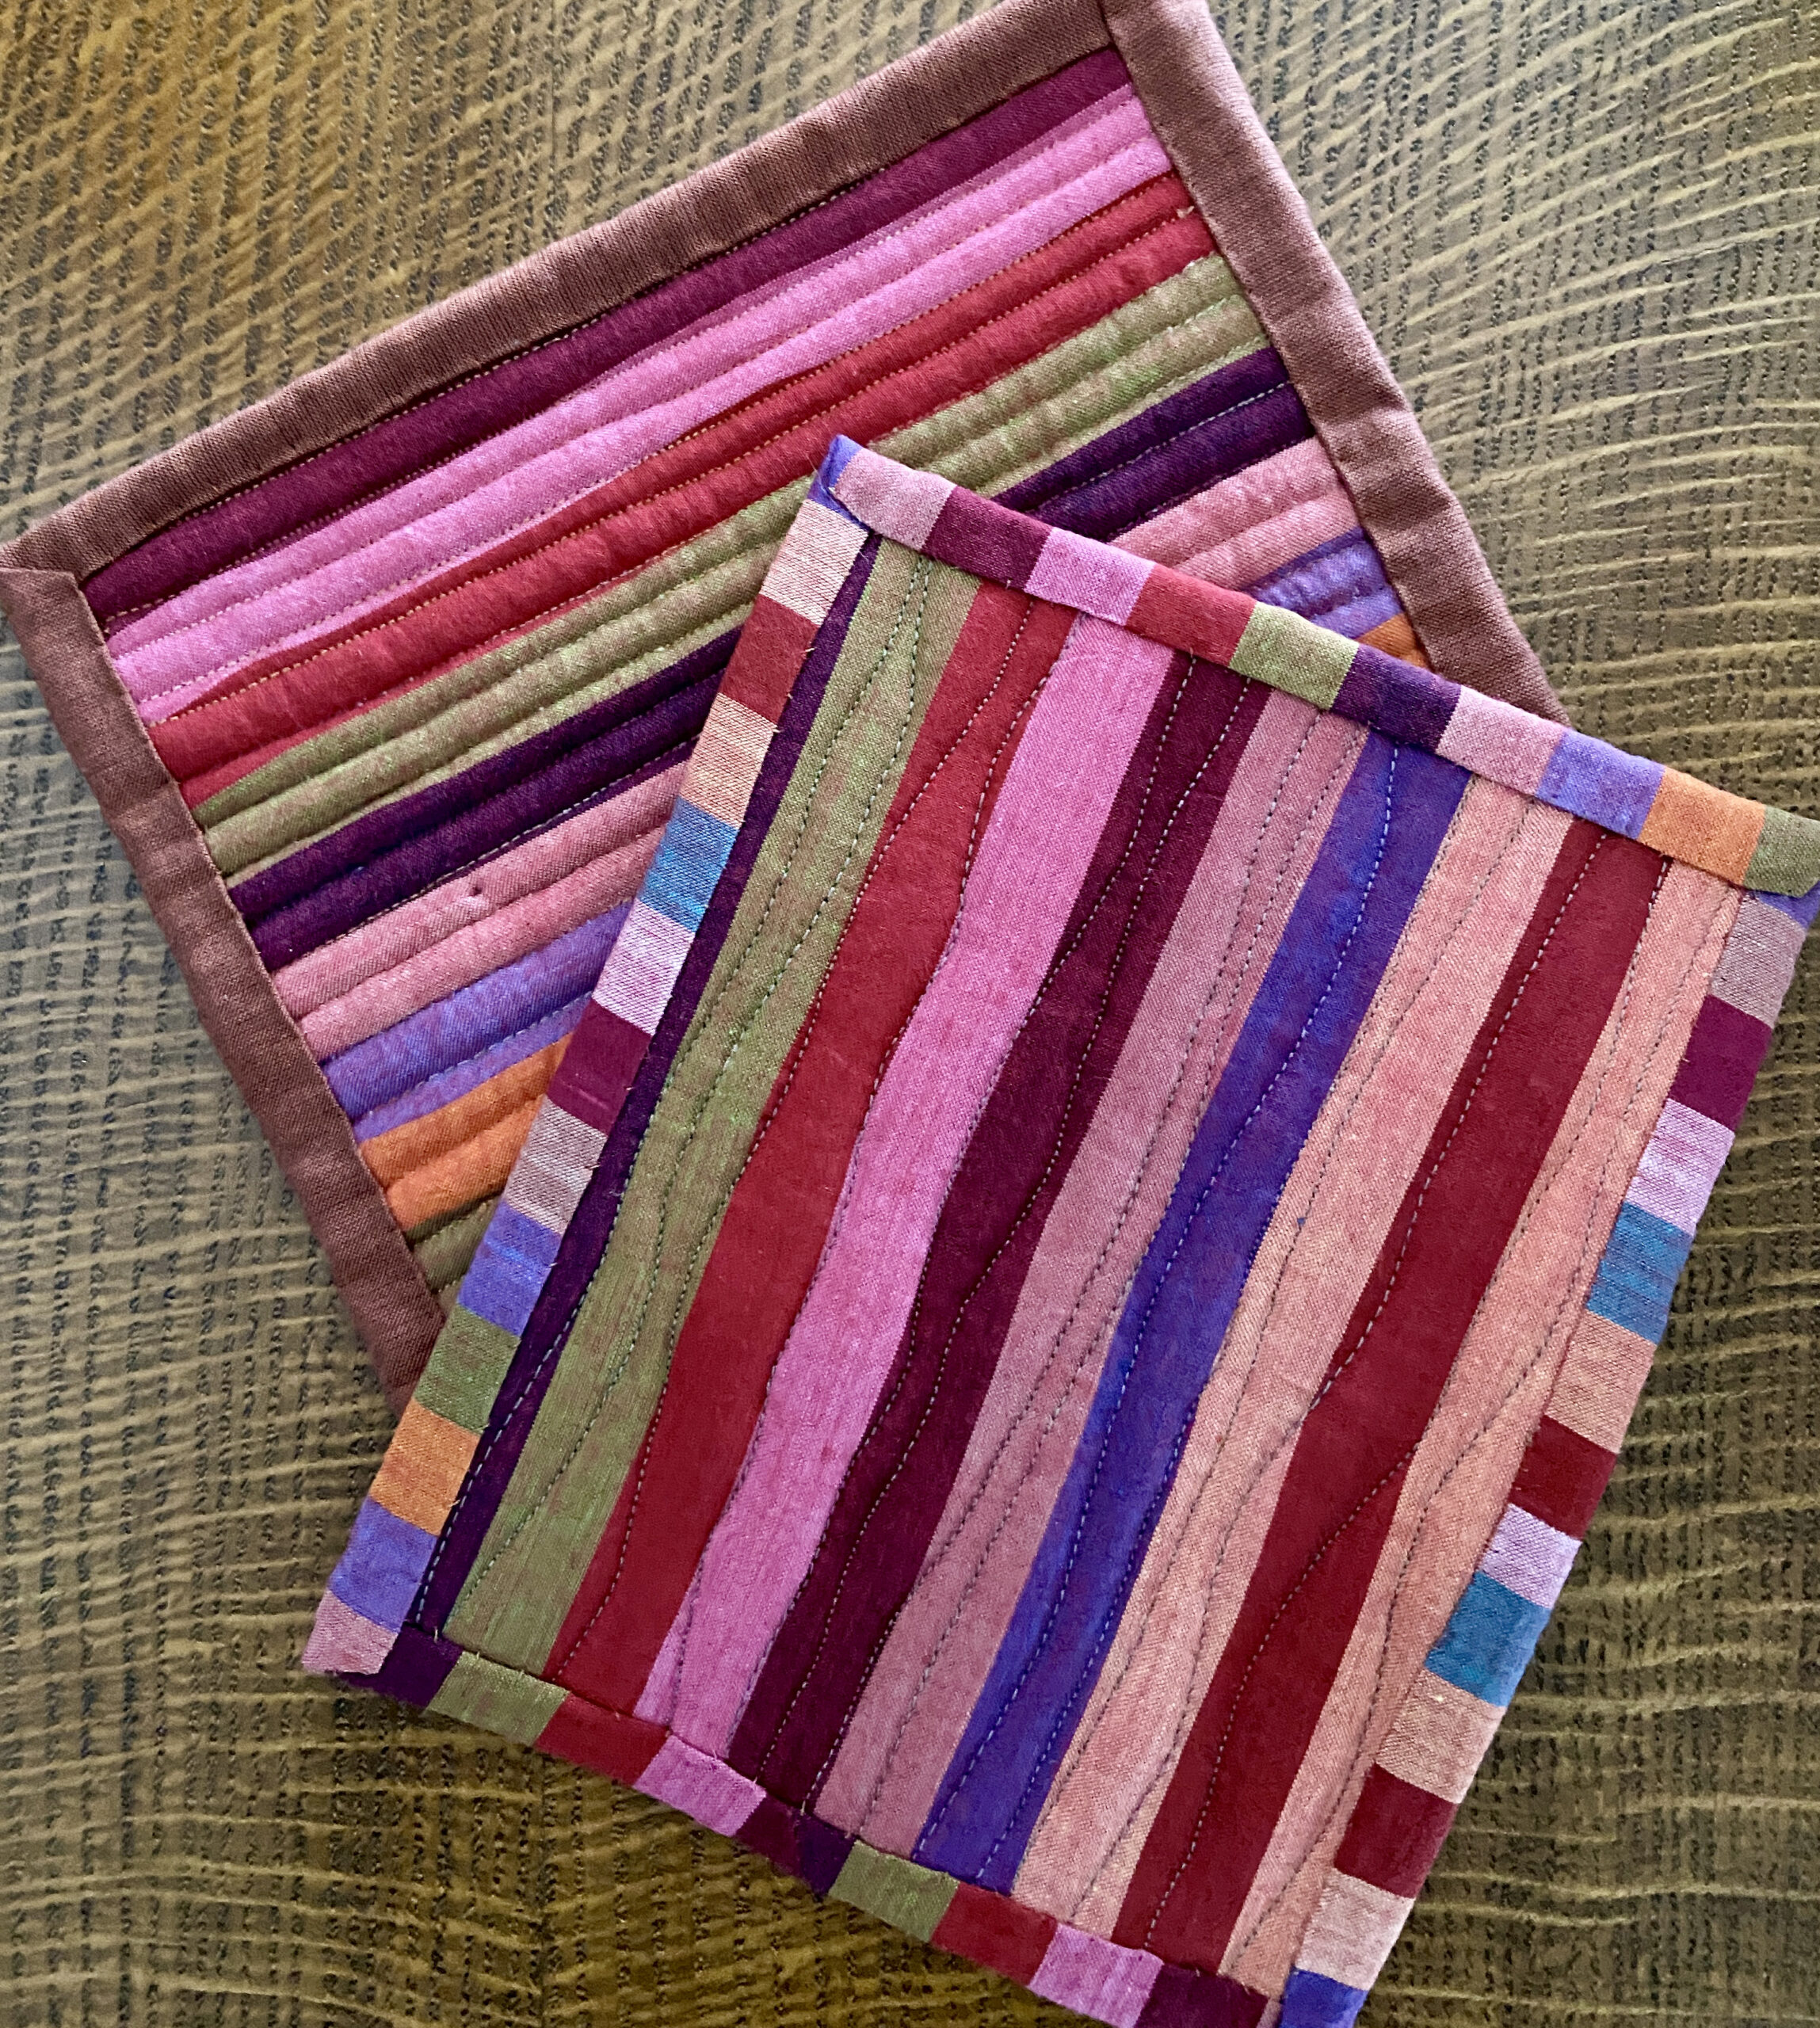
The backs
Both of these little projects are backed with Kaffe Fassett stripes.
A Community Service Project for our guild
This is what I have on my machine this week. As I packed, I found a quilt top that belongs to our Guild’s Community Service team. Guild members can drop by and pick up completed tops and finish them or quilts that need to be bound. I have had this on the shelf for months! (Sorry team!) So I basted it and am giving it a meander this week. I have the binding strips cut and ready to go. It should be finished in a day or two.
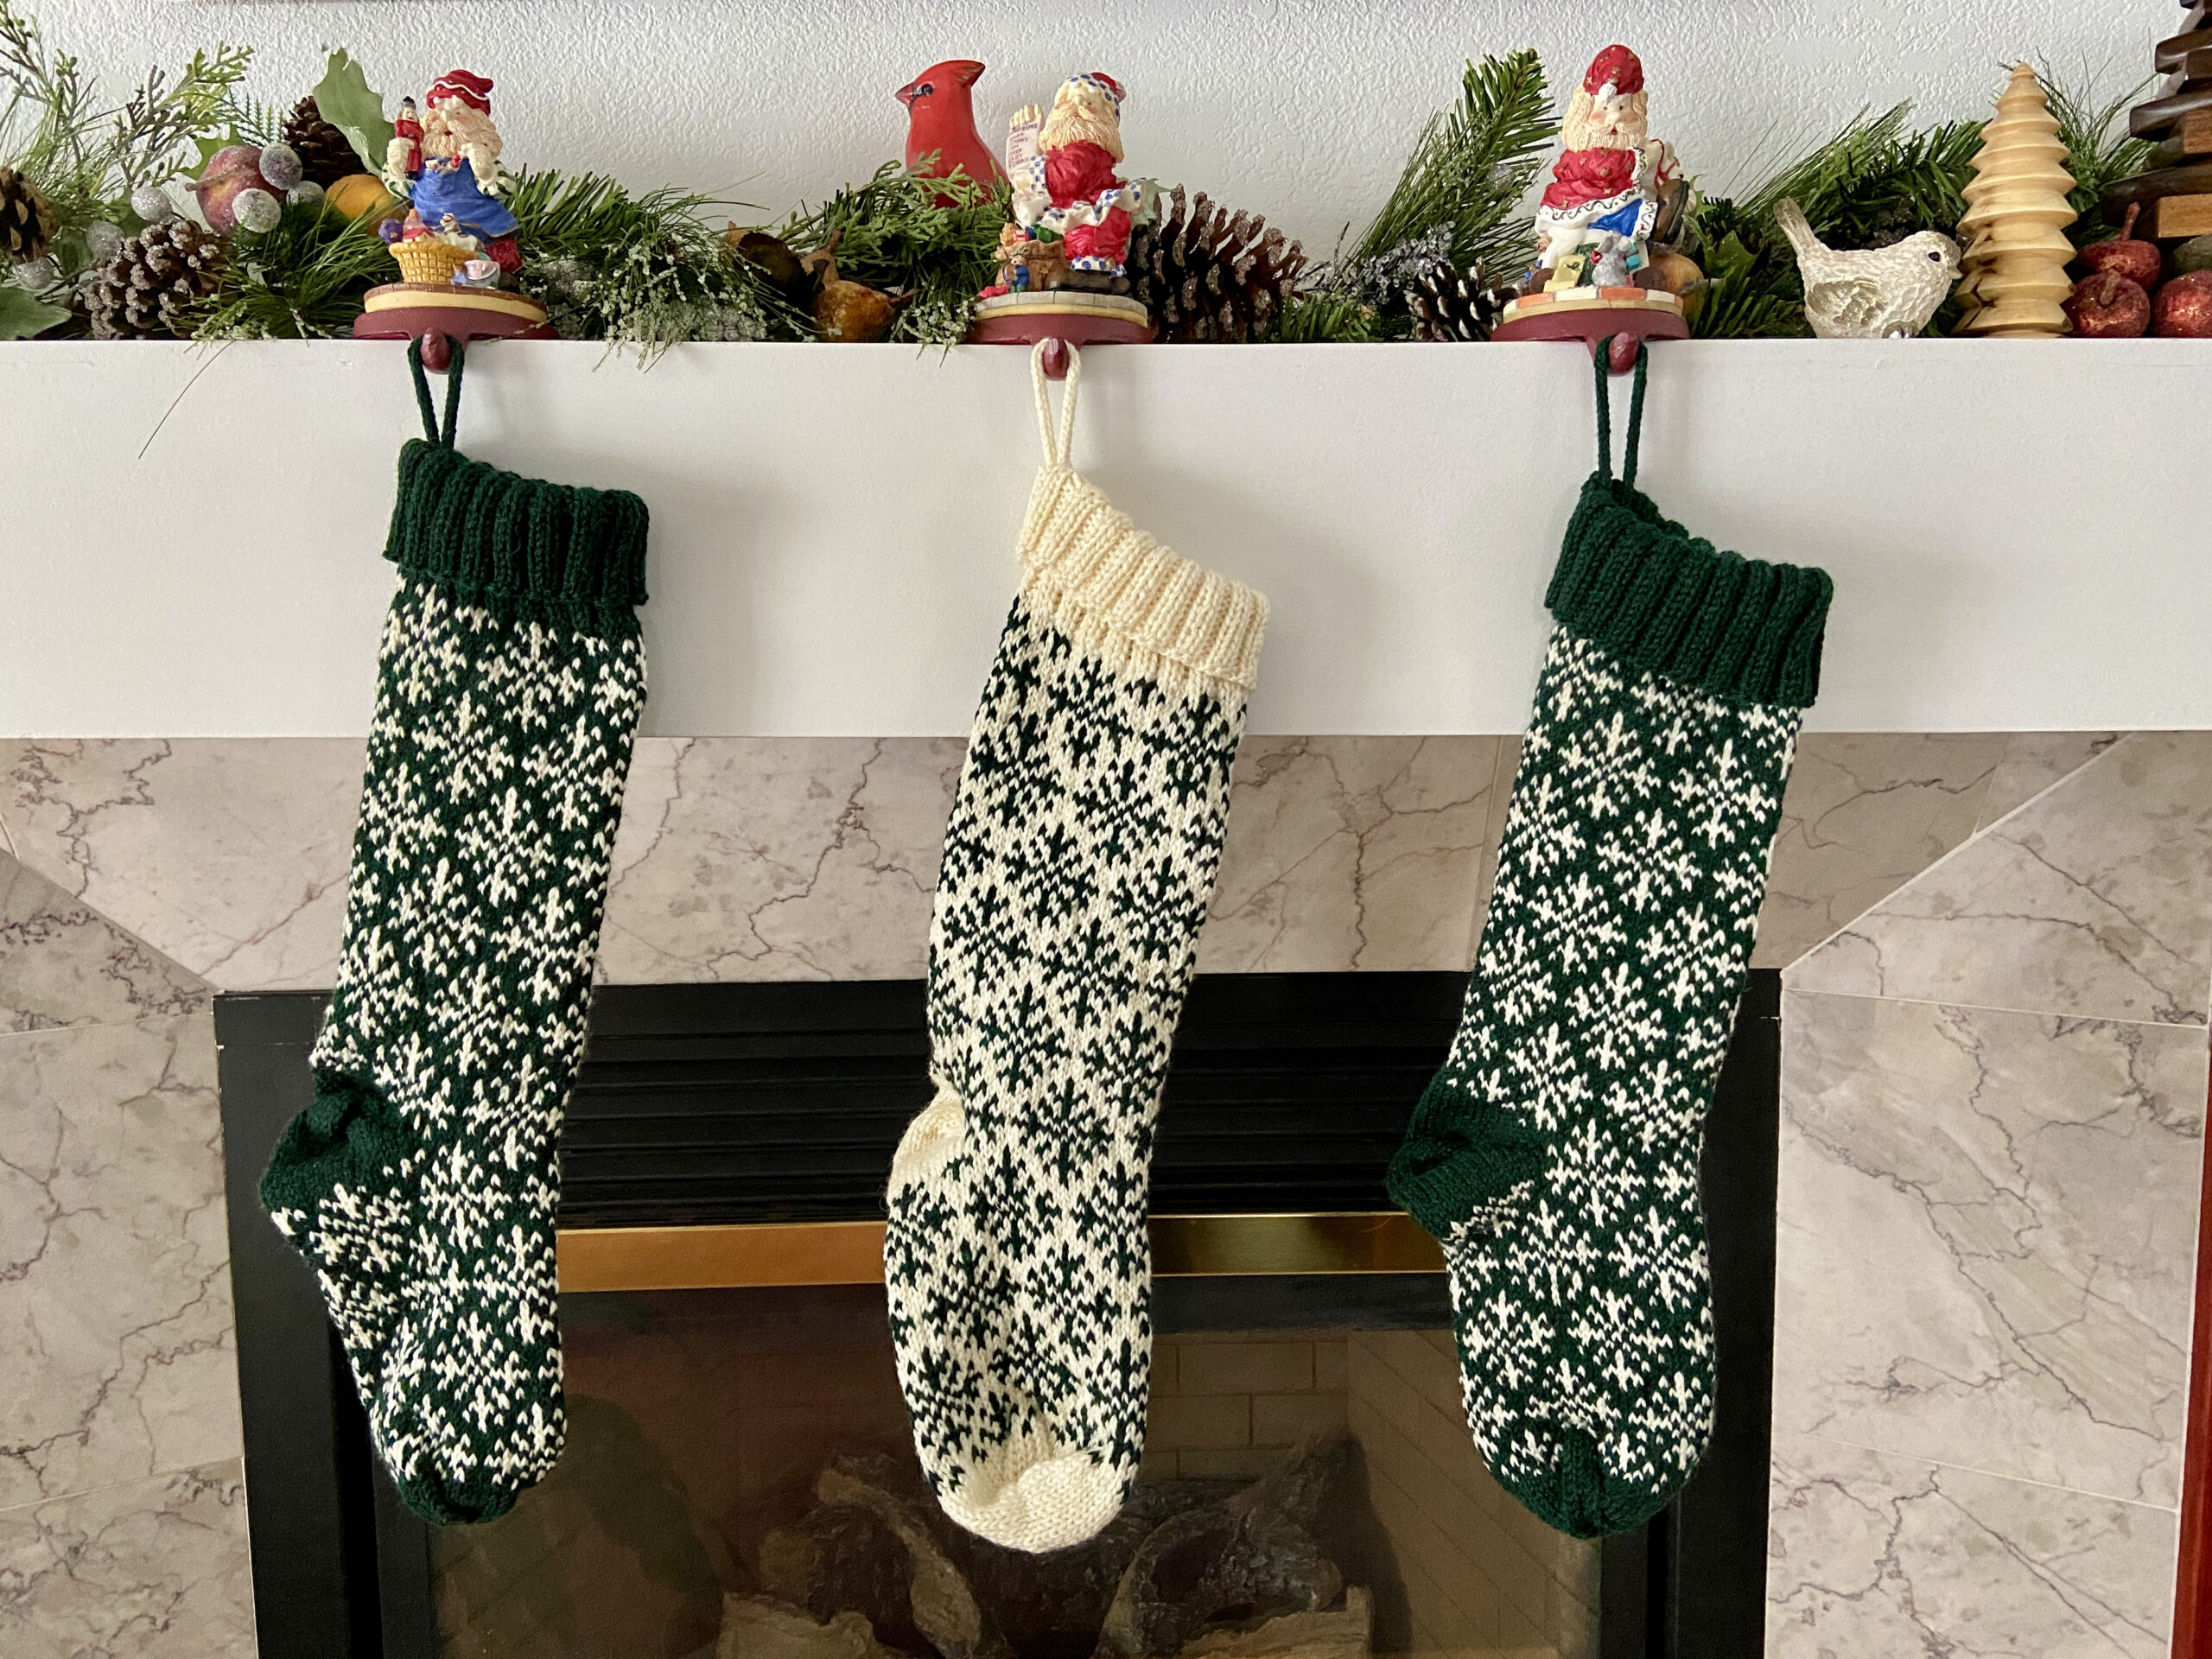
New Christmas Stockings!!
Finally, aren’t these holiday stockings gorgeous? My sister sent these to me, Ray and Julia. She is incredibly talented with her knitting needles and made these for us. I really, really love them. Her work is just amazing. I can’t wait for Santa to fill our stockings this year!
That is it for now. Since it is Tuesday, I think I will head over to Linda’s for To Do Tuesday. You can click here to check out what everyone is working on this week. Also linking up with Pat at Stitch, Sew & Show.
Know what I mean? I keep pulling bins and zip lok bags out to sort and organize. Then I find something fun and ditch the cleaning process and start sewing. I suppose I am kind of cleaning up but if you look at my sewing room, you wouldn’t really know it. Hahaha. Surely this is not unique to me. Cleaning up a mess usually means making a bigger mess temporarily. However, the inability to overcome the temptation to play with little bits here and there is certainly slowing down the process!
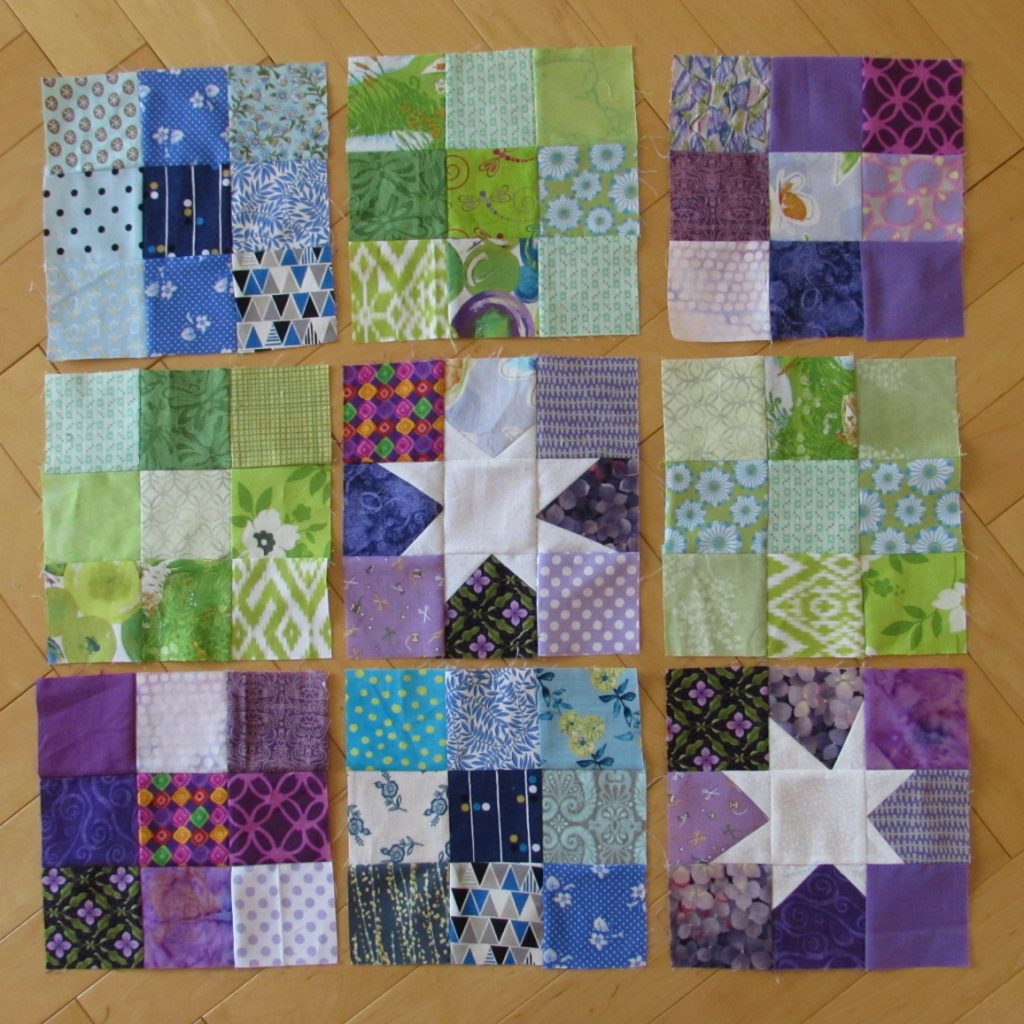
Just a sampling of the blocks I found.
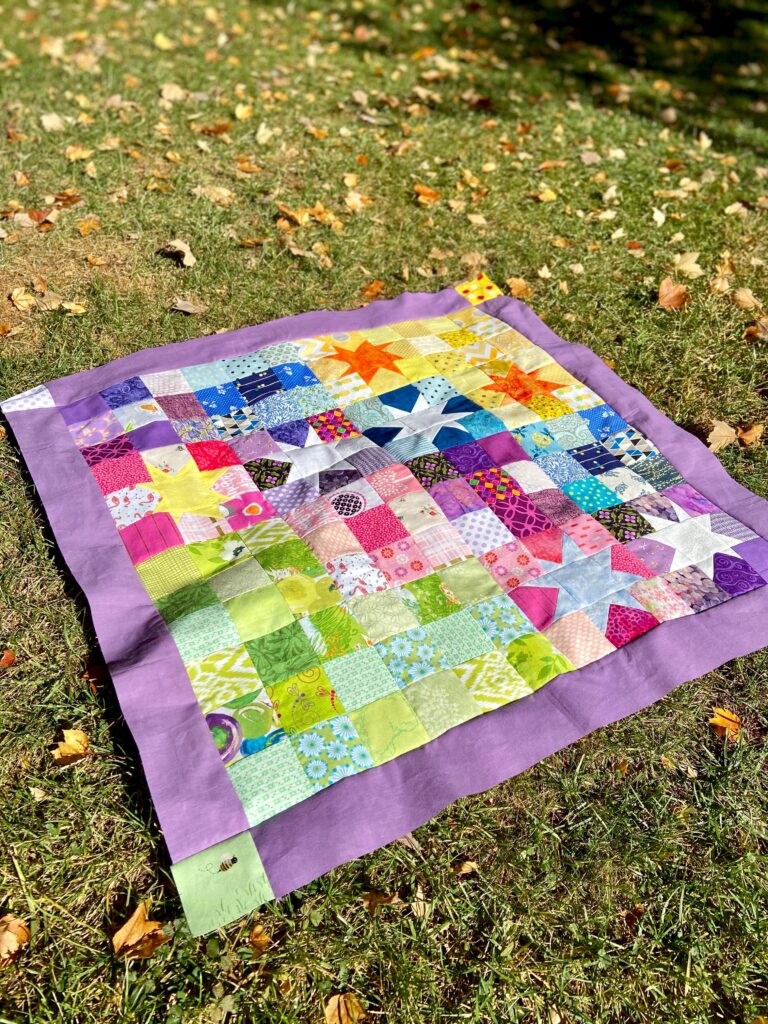
When I was pulling out a stack of zip lok bags I found a stack of 17 nine patch blocks. I made these during the first half of 2018 and then got tired of them. This is a habit of mine! Anyway, when I found the stack I decided I should use them up rather than put them away again.
It took very little time to stitch them together and put a border around the whole top. It will be just the right size for donating to Jack’s Basket. I wish I had made a few more with the wonky stars but I knew if I set it aside, telling myself I would do that, it would be months before I picked it up again. Better that it is going to be finished and sent off. I found some purple flannel for the backing and will get it basted and quilted up asap.
What the heck?
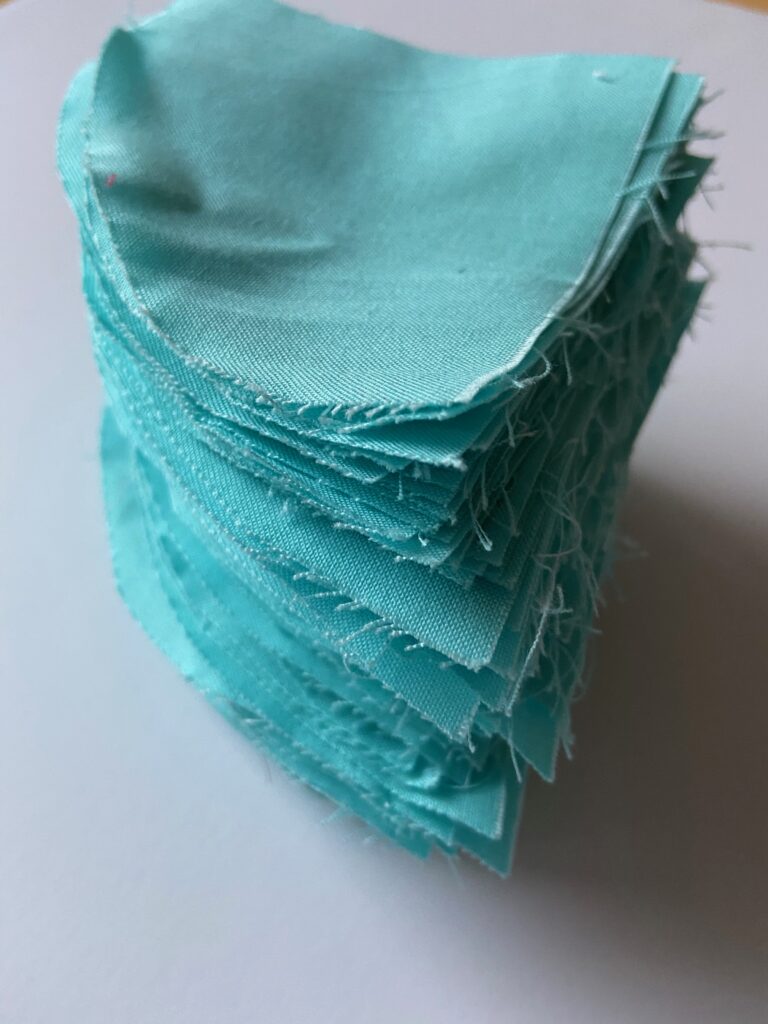
I have a bin marked solids. All colors are in there, all sizes and shapes. When I was picking through it, I found all of these light blue 1/4 circles. They are from the quilt I made for Julia’s bed back in 2013. I don’t know how many there are in the stack so we will just say a million. I was contemplating what I might do with these and in the blink of an eye, I was at the sewing machine playing with curves. Sigh. Maybe I am just not meant to have a clean sewing room?
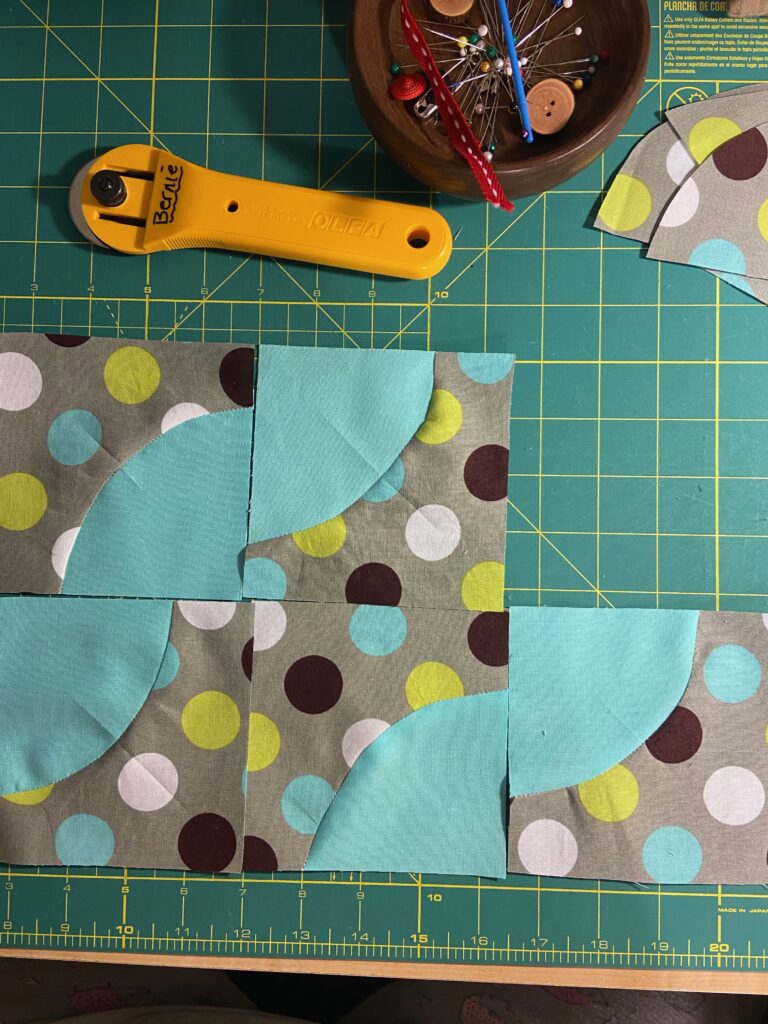
But look at this. I think it is really cute and could be a fun quilt or mini. I pulled some chocolate brown and chartreuse and bagged all of it up as a project to work on soon. I love making the curves without having to measure. I am just tracing around the blue curve on the polka dot fabric and sewing them together. Then I square each block to 4.5″. I know I will use them in some fashion.
I put the blue 1/4 circles and related fabric away and – I kid you not – I found another zip lok bag. Jeez, it is endless. But this one had a lot of brightly colored strings in it PLUS about ten little improv crumb blocks. This was a huge distraction and I spent the evening yesterday making more of the blocks. I am up to about 18 or 19 now. The crumb blocks finish at five inches. My plan for these is to make economy blocks using the crumb blocks at the center. I believe the blocks will finish at nine inches which is a nice size. I need to make more of the crumb blocks to have enough for a lap size quilt. This project is now in the “make for Mercy Hospital” pile.
In between all of this, I have been using the AccuQuilt Go to trim scraps into usable squares. I now have a bin that is really stocked up with 2.5, 3, 3.5 and 4.5″ squares. Plus a huge stack of 5 inch squares. This is quite satisfying!
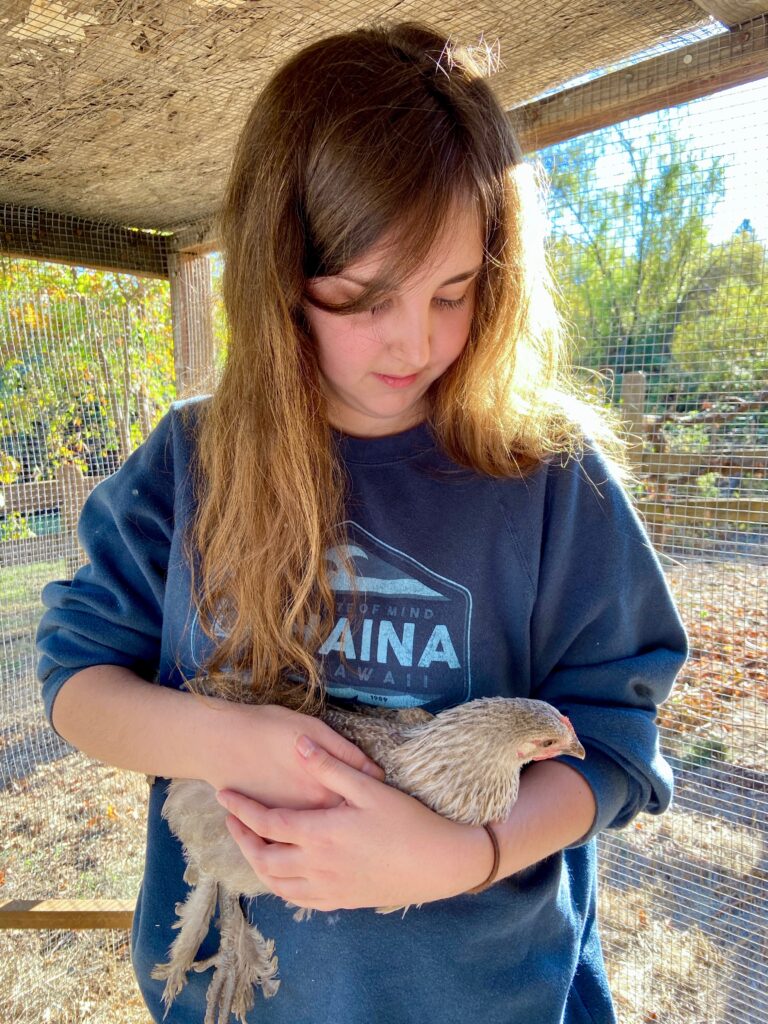
OK – now I am off to cut out a pair of flannel pajama pants for Julia. Hers are looking a little ratty so she is in need of a new pair.
Here is a picture of her with one of her older chickens. She has two out in the coop and is trying to socialize them a bit. I think she is working her magic because they are calmer now when we hold them.
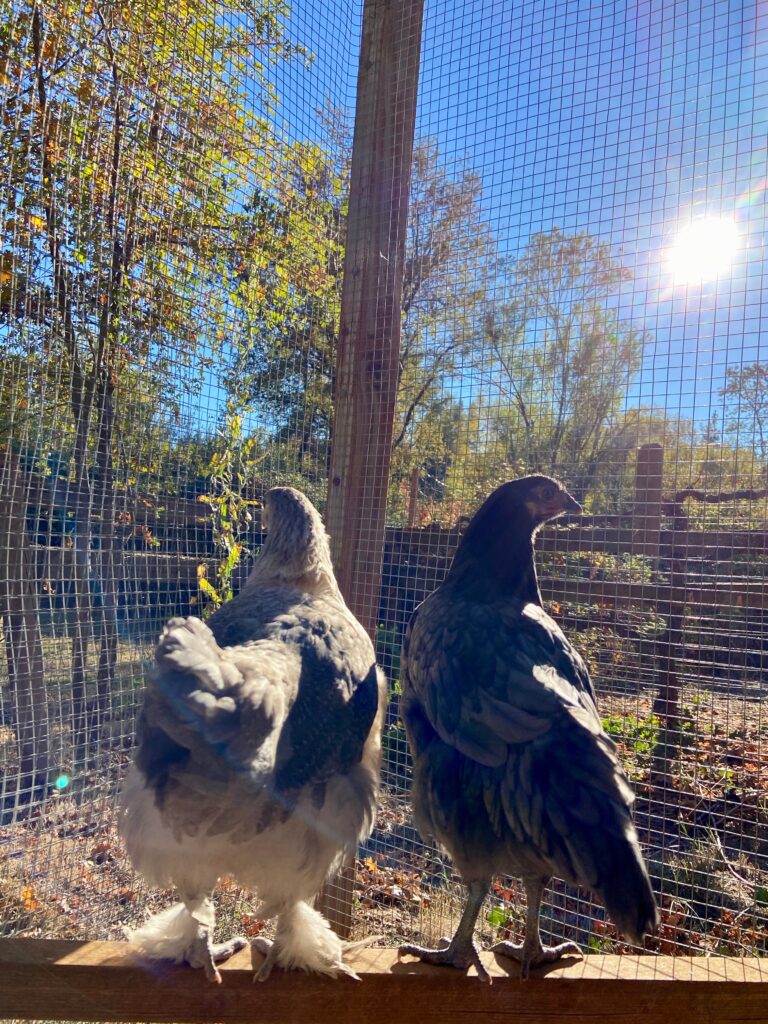
Flora and Fauna, enjoying a little sunshine.
Enough for now. Hoping all of you are well and happy.
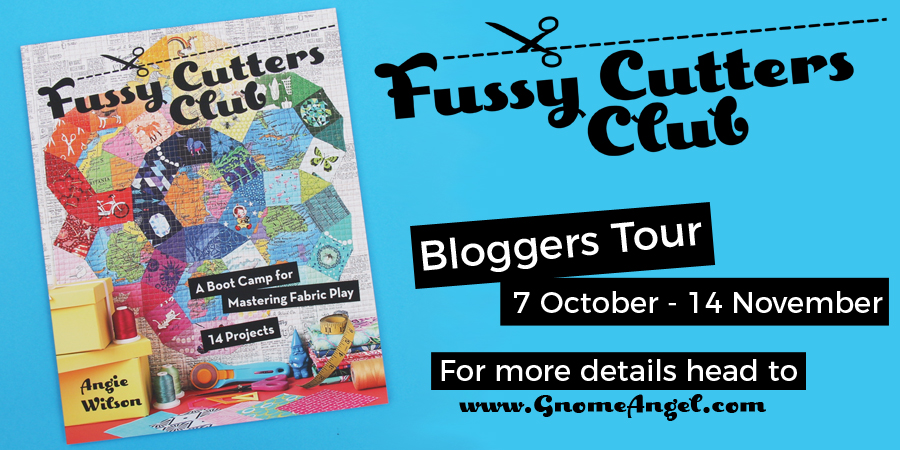
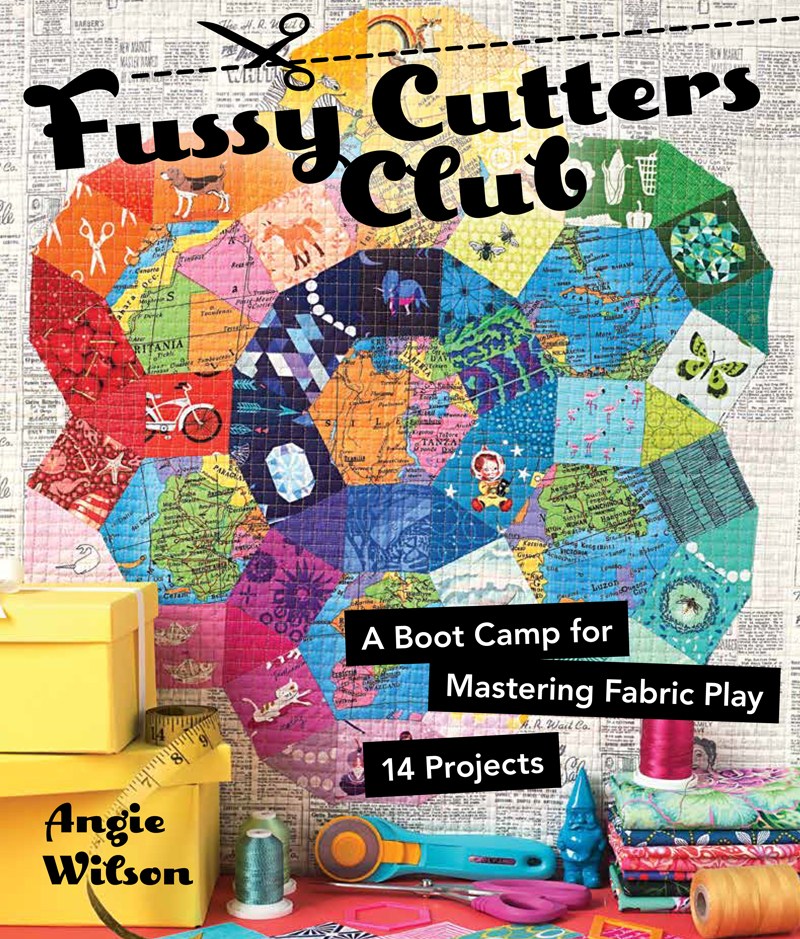
Today is my day to post a review and host a giveaway of a fun new quilt book. If you are here for the first time via the blog hop, welcome! The book of the day is Angie Wilson’s Fussy Cutter’s Club published by C&T Publishing. You may know Angie as she is the queen of online quilt alongs and swaps. She thrives on leading large groups of quilters through complicated projects such as her current QAL making Jen Kingwell’s Gypsy Wife Quilt – not for the faint of heart for sure. For more info on the events she is currently leading and has done in the past, click here.
It was about two months ago when I was invited by C&T Pubs to review Angie’s upcoming book. Right away I was intrigued by the title of the book and the gorgeous cover. I know we aren’t supposed to judge a book by its cover, but come on. Look at this cover! It just pulls the reader in at the get go. Angie’s reputation for mad skills with fabric play and use of color assured me the book would be worth the time to read, review and create with.
The premise of the book is to learn to look at your stash with a new perspective – Angie teaches the reader to use your fabric by cutting into it and emphasizing the bits you love the most. The book is well written and the instructions for each of the 14 projects are precise and easy to understand. Angie takes the reader through the design process, how to best use your fabrics, color theory and more, prior to introducing projects. She really did a great job with this book. The projects range from the very simple to quite complex (again, look at the cover!)
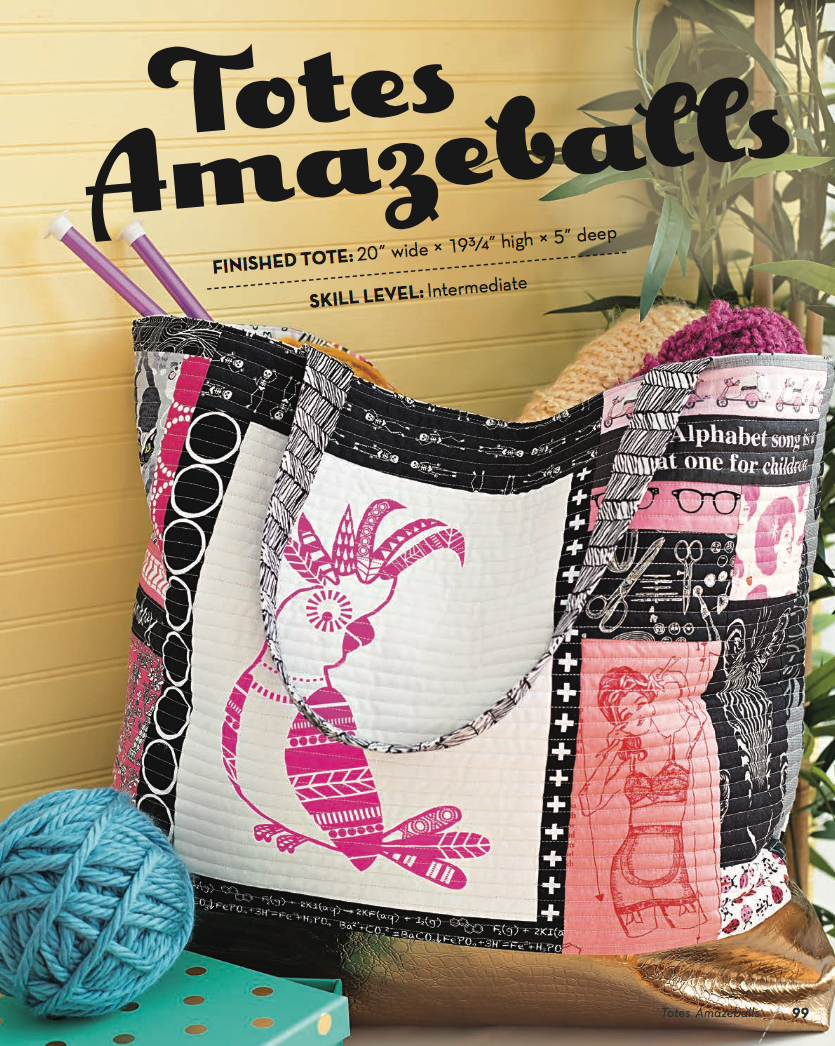
For my project, I chose to make the tote bag. Angie rated it as an Intermediate project but with her clearly written instructions, I didn’t have any trouble. Following Angie’s thoughts on color for this project, I chose a limited palette.
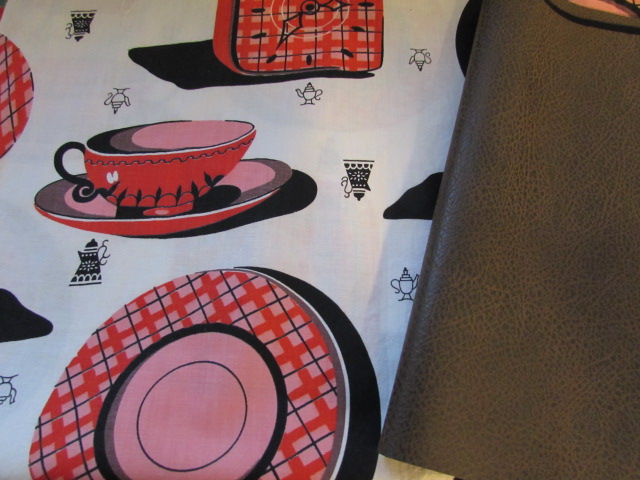
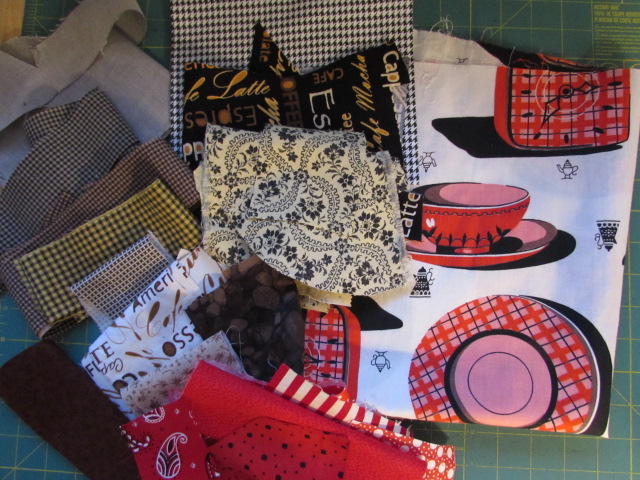
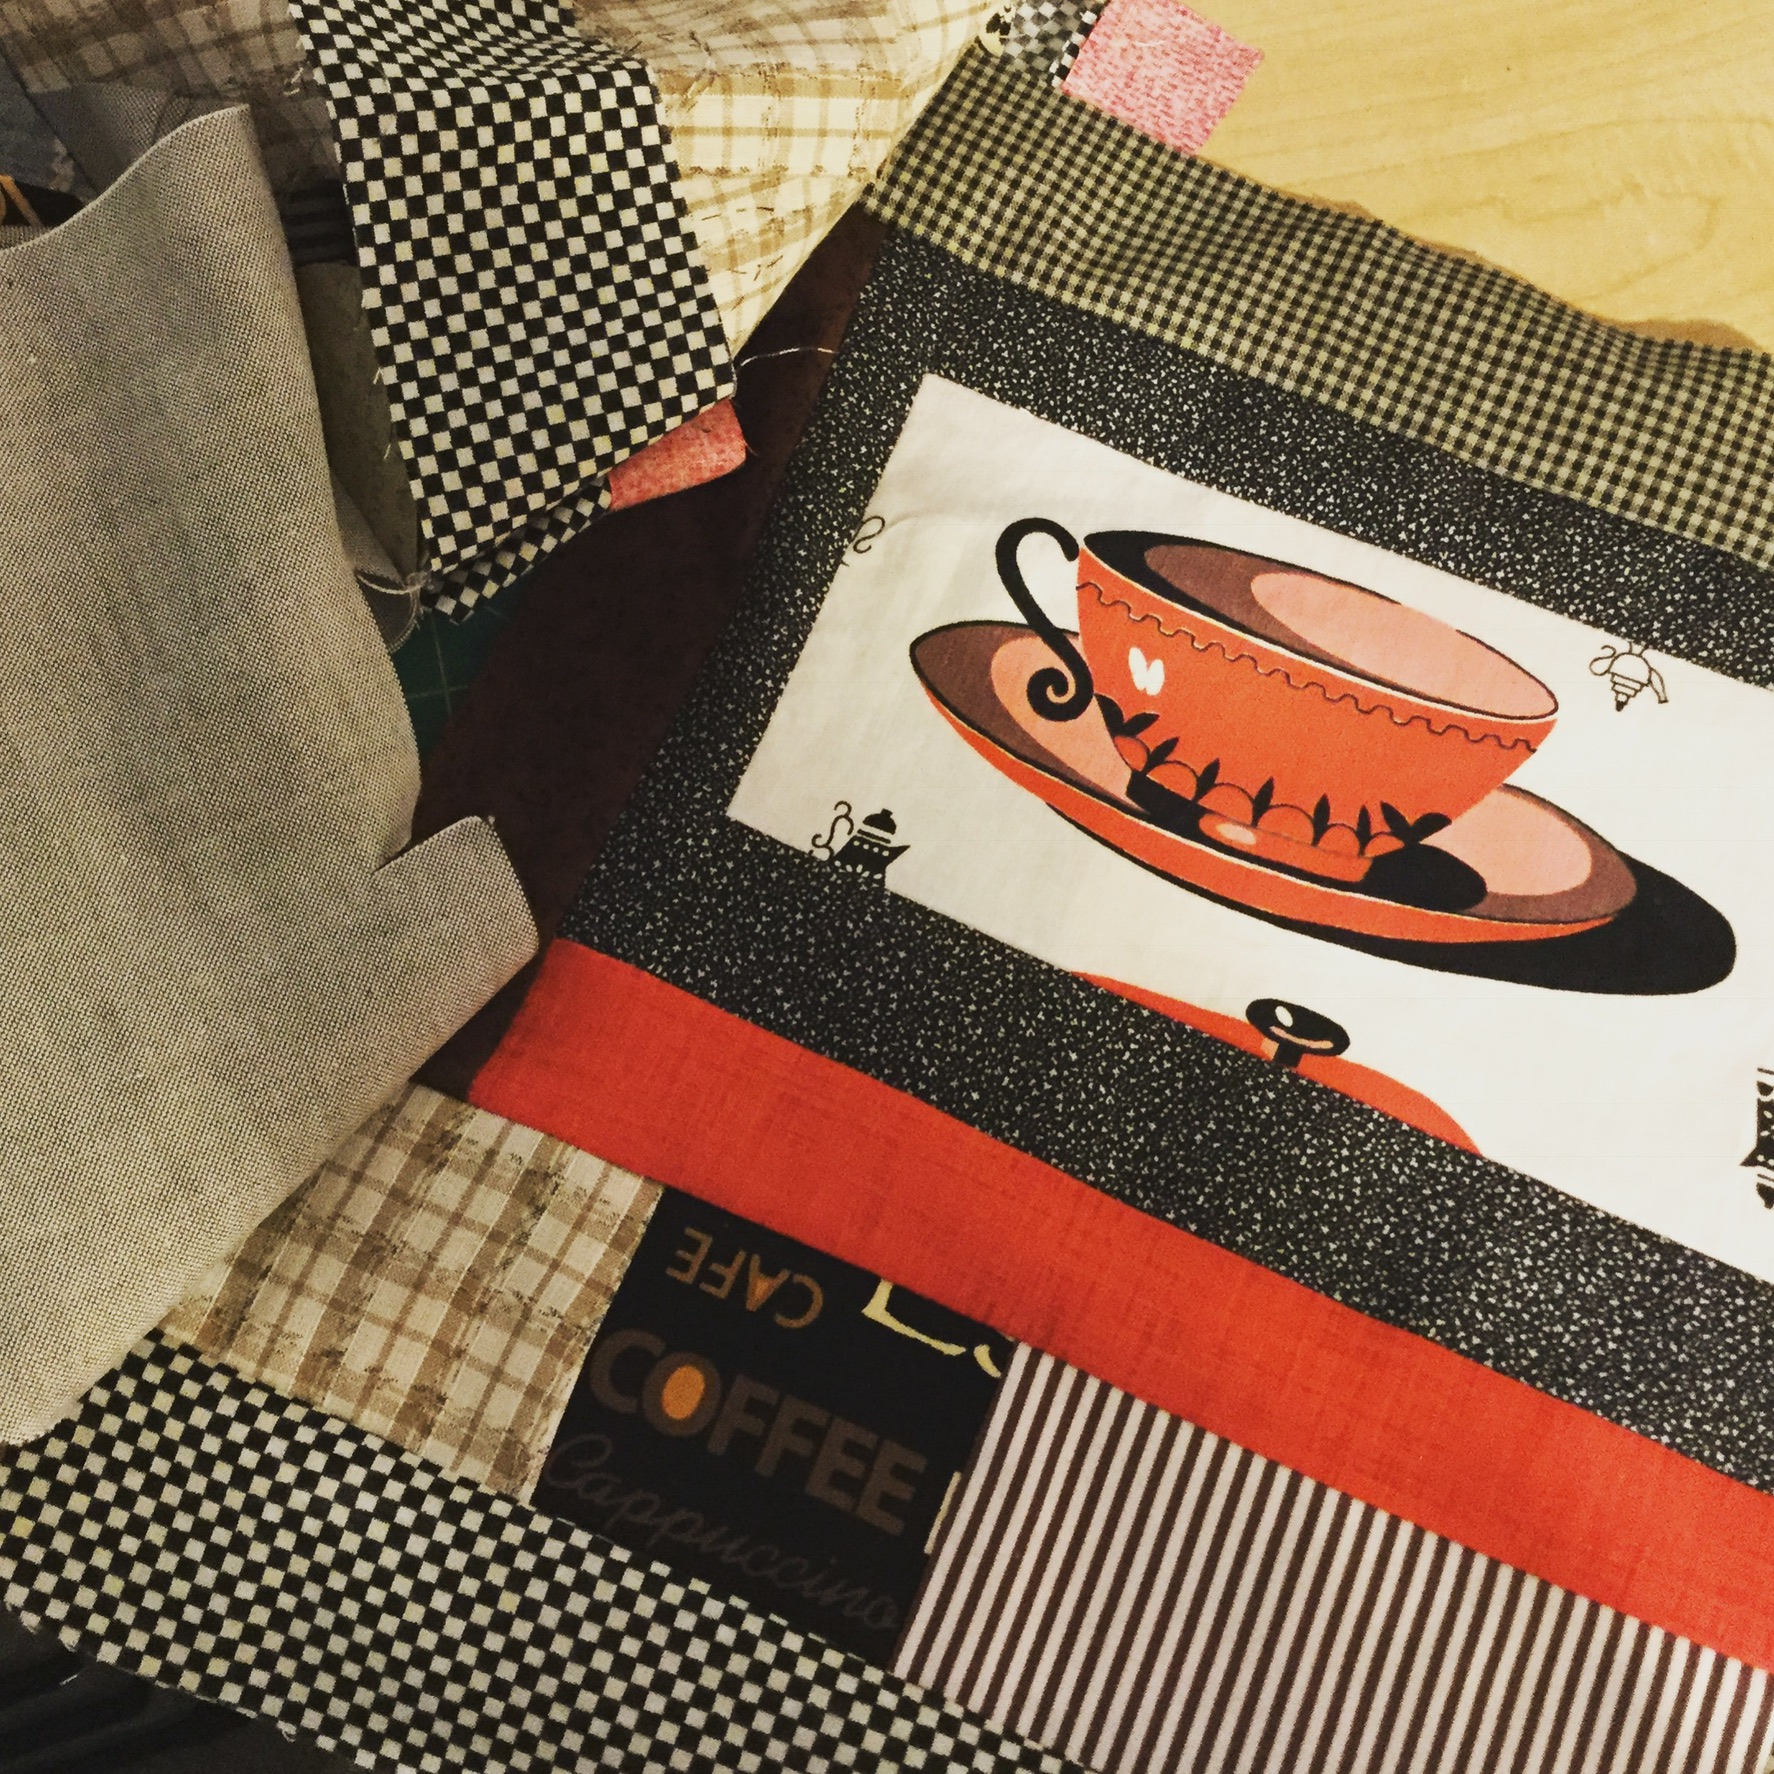
My bag is built around a piece of vintage fabric I have from the 1950’s. It is a kitschy print featuring red, brown and black kitchen appliances, clocks and coffee cups. I loved the idea of using vinyl for the bottom of the bag (looks great and gives durability) and found this textured vinyl at Ben Franklin. Once I had my focus fabric and the vinyl, the rest of the fabric was pulled from my scrap bins.
Since the red coffee cup was the primary focus, I decided to use mainly black, brown and white with the occasional pop of red. Most of my fabrics had a vintage look to them except the coffee themed text prints. Those are clearly current and modern but I liked the idea of including the coffee text with the other fabrics, to further the coffee theme of the bag. The main fabrics I fussy cut were the coffee cups and saucers, the text prints, and the tiny black coffee pots on the vintage fabric.
Making the slabs for the outside of the bag was really fun – I have improv pieced in the past, but it has been a long while. Putting these scraps together was very satisfying. I did reduce the size of the bag by a few inches in width and length. I am fairly short and the bag seemed like it would be too big for me at the original size but breaking it down to reduce it was easy.
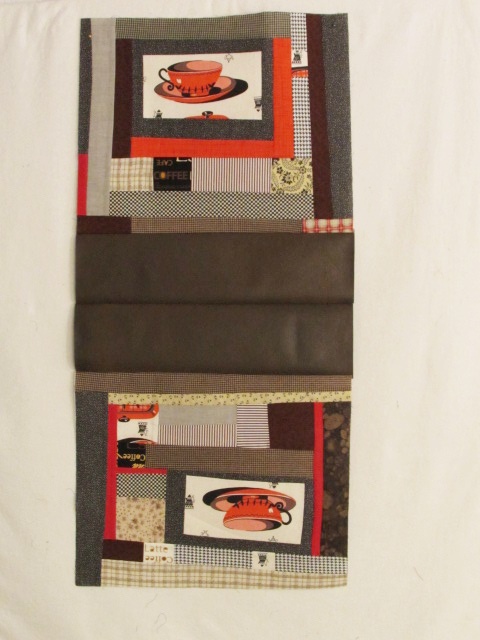
The two main slabs and the vinyl bottom are assembled here
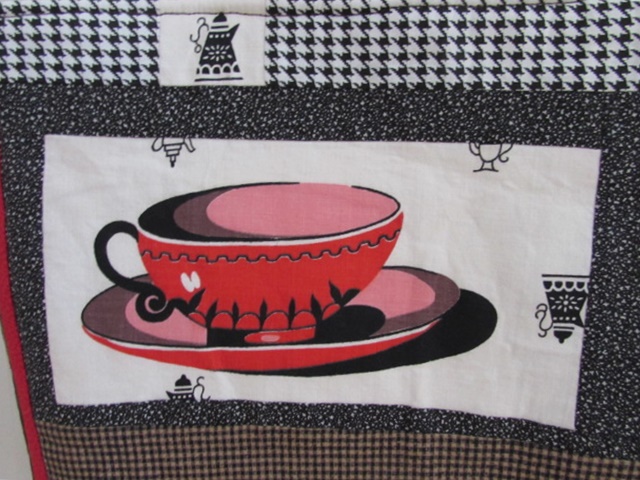
I learned quite a bit about fussy cutting. Like anything, the more you do it, the better it becomes. Looking back, I feel I should have trimmed the bits I fussy cut closer in. I left too much peripheral pattern and that detracts from the focal point. Note the cup and saucer below. I think if I would have trimmed it down a bit and removed the little bits of coffee pots, it would have been much cleaner. In the picture above, take a look at the text print. Were I to do this again, I would not allow the other words to appear. I really only wanted the word “coffee” to be the focus. But live and learn (or sew and learn?). Next time I will remember these bits and pieces that really make a difference in a project.
When assembling the bag, Angie’s instructions called for me to line the outer pieces with fusible interfacing and then to apply fusible batting. I was skeptical at first but it really makes the structure of the bag a nice combination of crisp and soft (does that make sense?) The addition of the fusible interfacing gave it a nice shape. Once I had those layers assembled, I used simple straight line quilting to hold all three pieces in place.
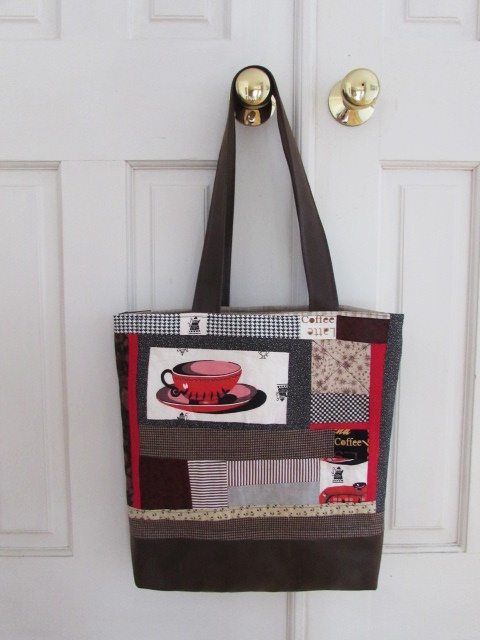
Her pattern calls for fabric straps but I had plenty of the vinyl so I decided to make the straps with that instead. I like the look of it and was pleasantly surprised that my machine had no issue stitching through several layers of vinyl. (I did use a heavy duty jeans needle.)
My model shows just how cute this tote bag is!
Overall, it was a great project and I felt the book was a great inspiration to look at my fabric with a different perspective. The tote is really fun (as you can see with my always available bag model.) It traveled with me to Vermont last week and when combined with the cross body bag I made, it was the perfect set up.
This is just one example of the projects that Angie designed for her book. There are thirteen others though, including pillows, coasters, minis and zip pouches. To take a look at some of the projects, here is a list of the bloggers celebrating this new book. Check them out for lots of inspiration as well as several chances to win a copy of the Fussy Cutters Club book! As with most book giveaways, if the winner is international, an e-book will be provided. If in the states, you will receive a hard copy of the book.
To enter to win, please leave a comment telling me your current go-to quilt book (I guarantee if you purchase or receive this book, it will be right up there on the list!) I will leave the giveaway open through Saturday, October 28th and will announce a winner on Sunday.
Linking up with lots of my favorites – most are listed at the top of the page, under Link Ups. Also linking to Elm Street Quilts annual Bag It event. Check that out here!
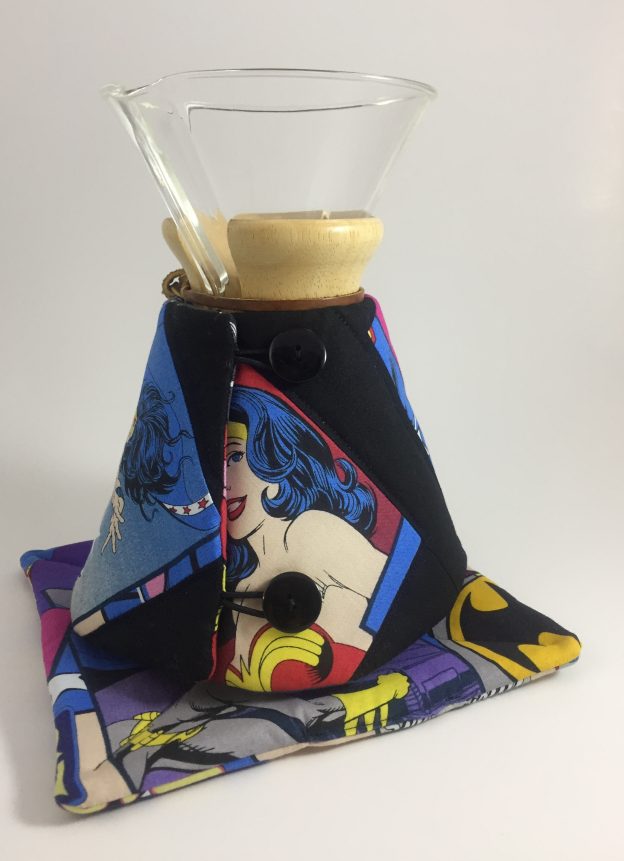
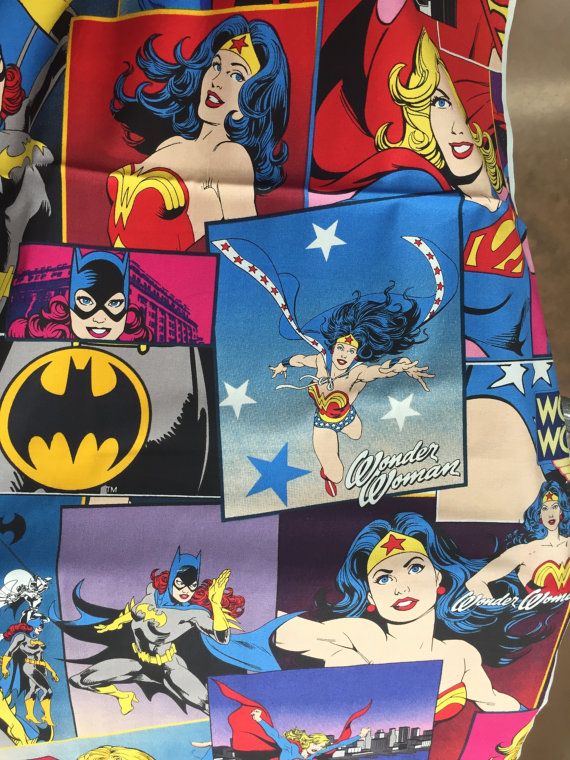
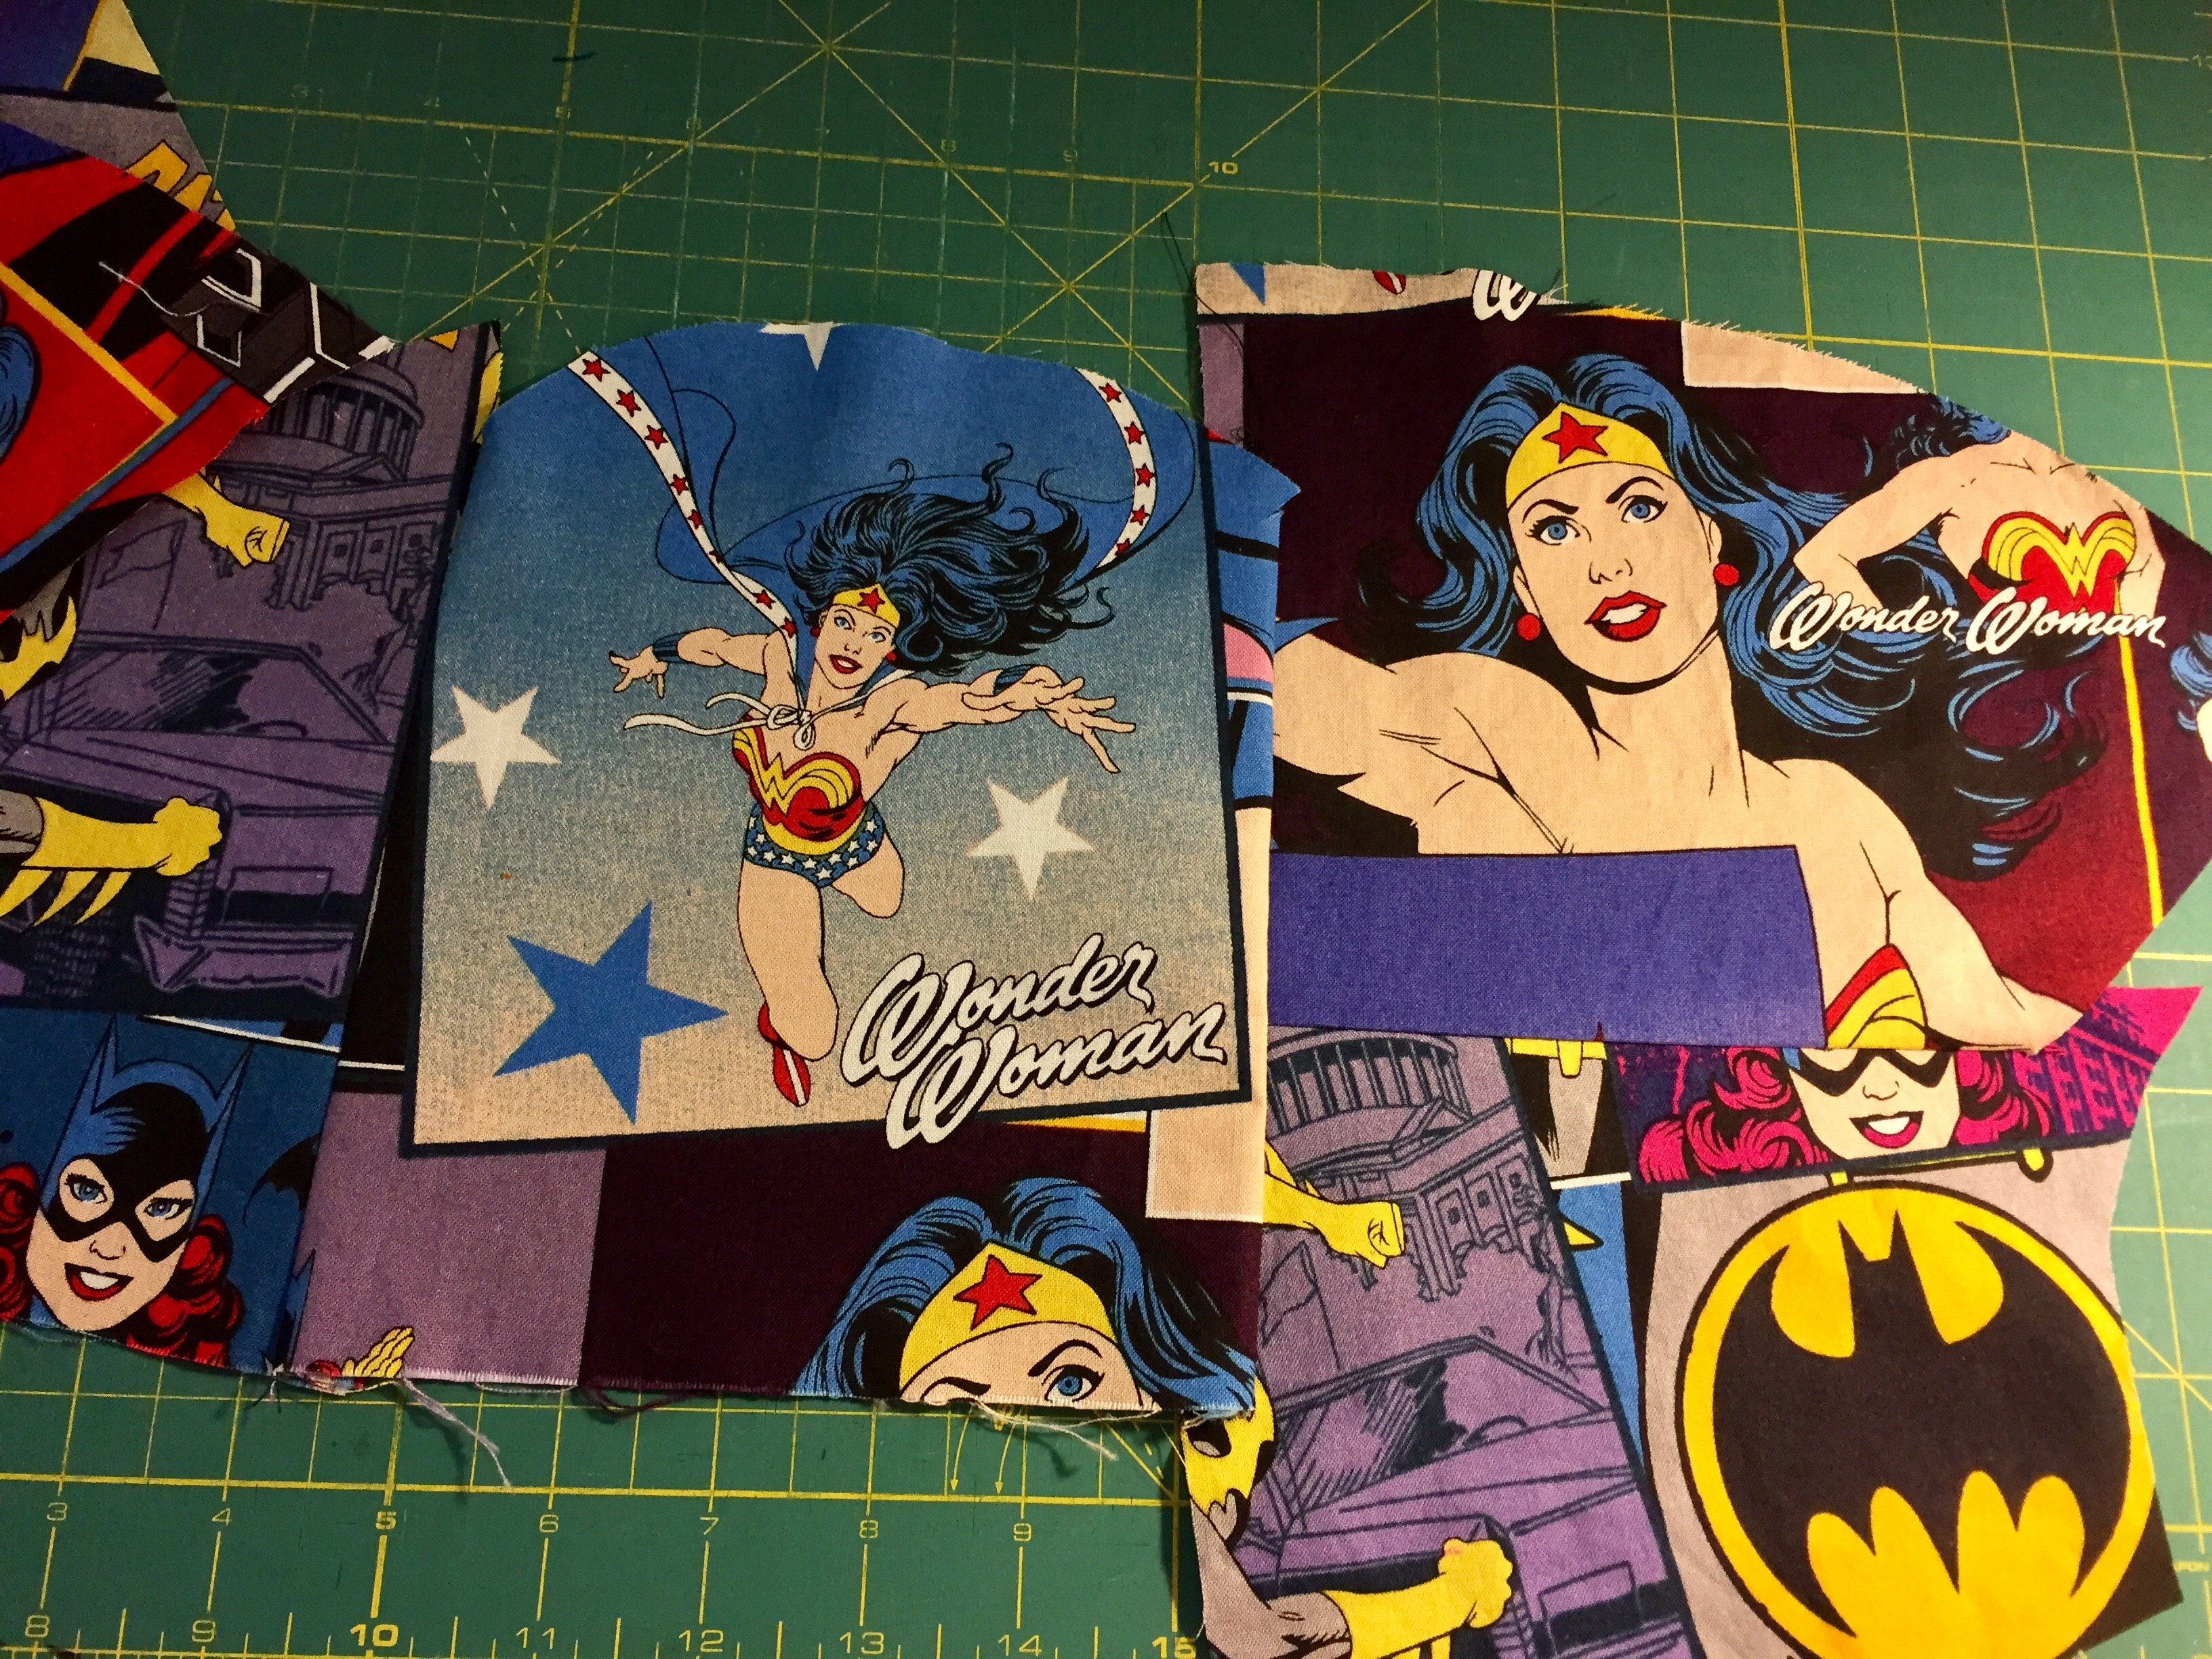
I just finished up a really fun project. I haven’t made a custom Chemex Cozy for a while and received this note from a customer about a week ago. She asked….”do you have one that is more Wonder WOMAN and less super Man?” Clearly she wanted some female superheroes to grace her kitchen. After a very quick search, I found this fabric.
My customer thought it was perfect so I placed an order and waited for it to arrive from an Etsy shop in Texas. As soon as I got it, I cut into it. I must have been terribly excited because I cut these girls out upside down. Not once, but twice. Considering I only had one yard of fabric (it takes about 1/2 yard to make a set) I was seriously frustrated. It didn’t take me long to decide to try some improv work to save the fabric.
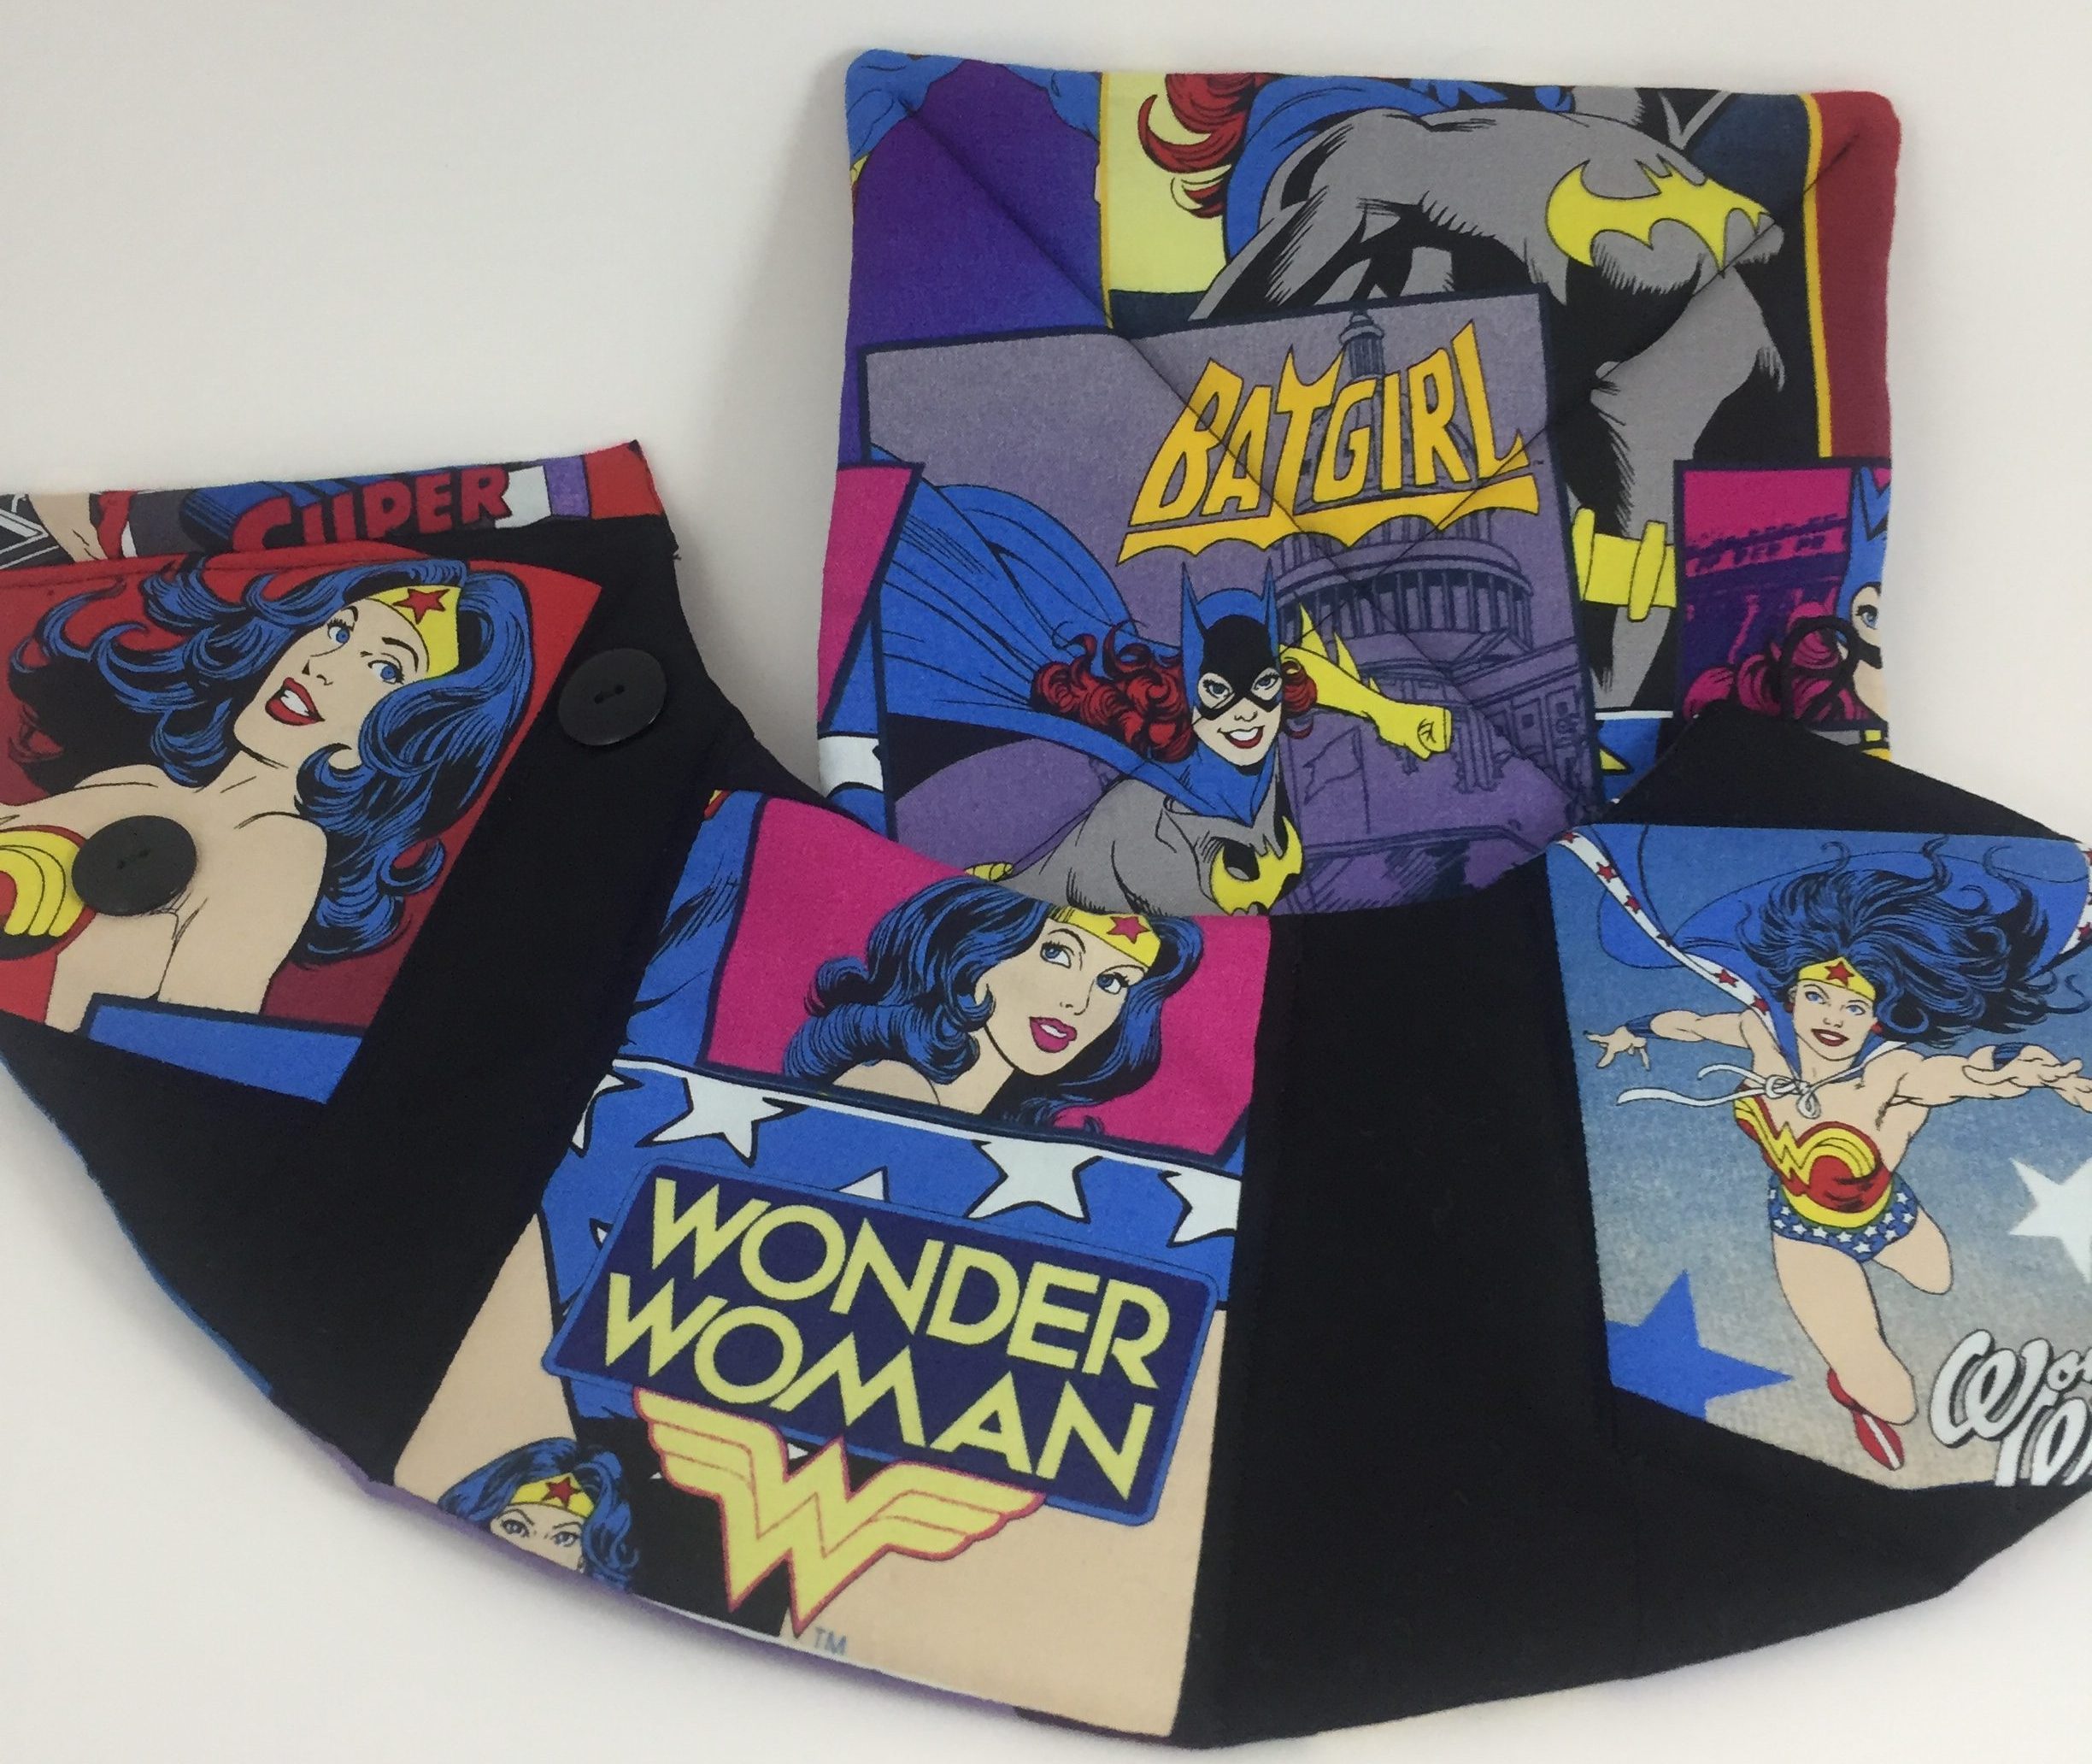
I started cutting out Wonder Woman (she was the key player for my customer) and laying out pieces with black fabric framing off the individual pieces. I was really liking the way she looked and felt like the black fabric calmed the craziness of the fabric down a bit.
Once I got one cozy put together, I sent off a progress picture to my customer. I was honest and told her what had happened. Asking for her honest opinion, I explained I would be happy to purchase more fabric. She immediately responded that she missed all of the action and wasn’t too wild about the black in between the clips of Wonder Woman. She suggested I take the fabric scraps and just sew them back together ‘like a patchwork’. Ok then, on to round two. (I was not at all disappointed that she was unhappy with my first rendition as I knew I could list it for sale in the shop.)
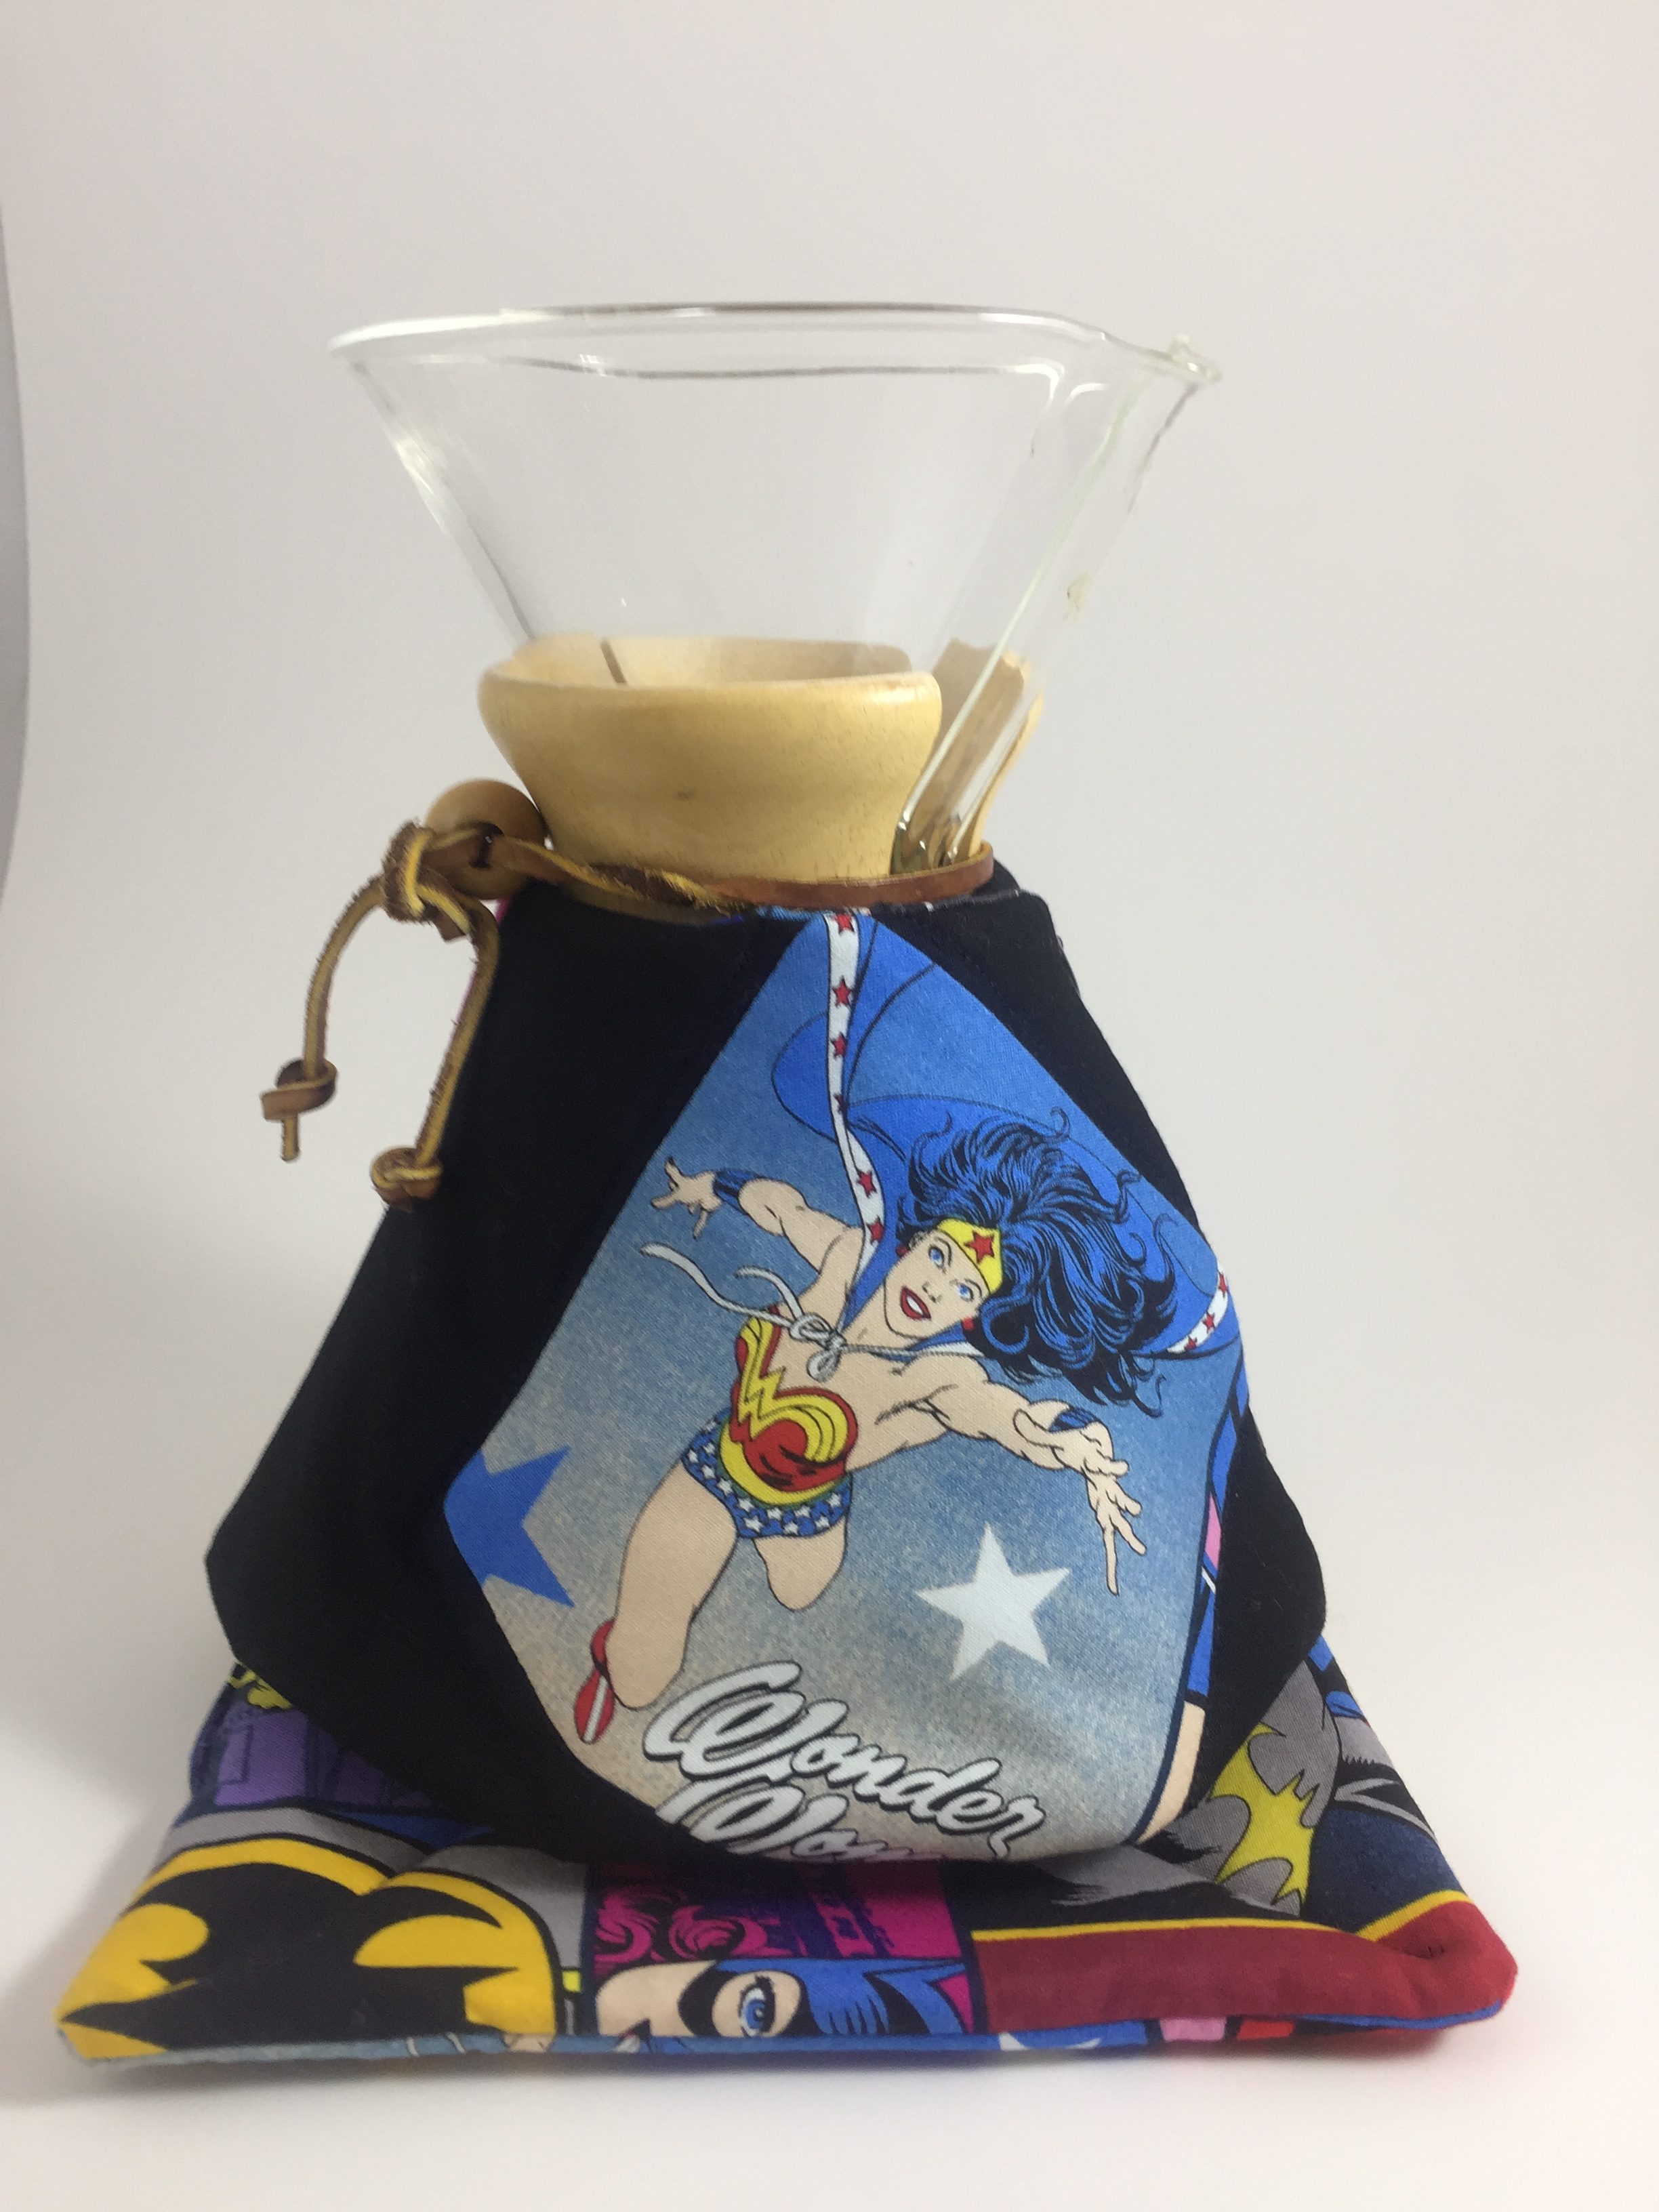
Drawing on my practice with making fabric Victoria Findlay Wolfe style, I played with the scraps I had. Luckily, I still had a lot of scraps.
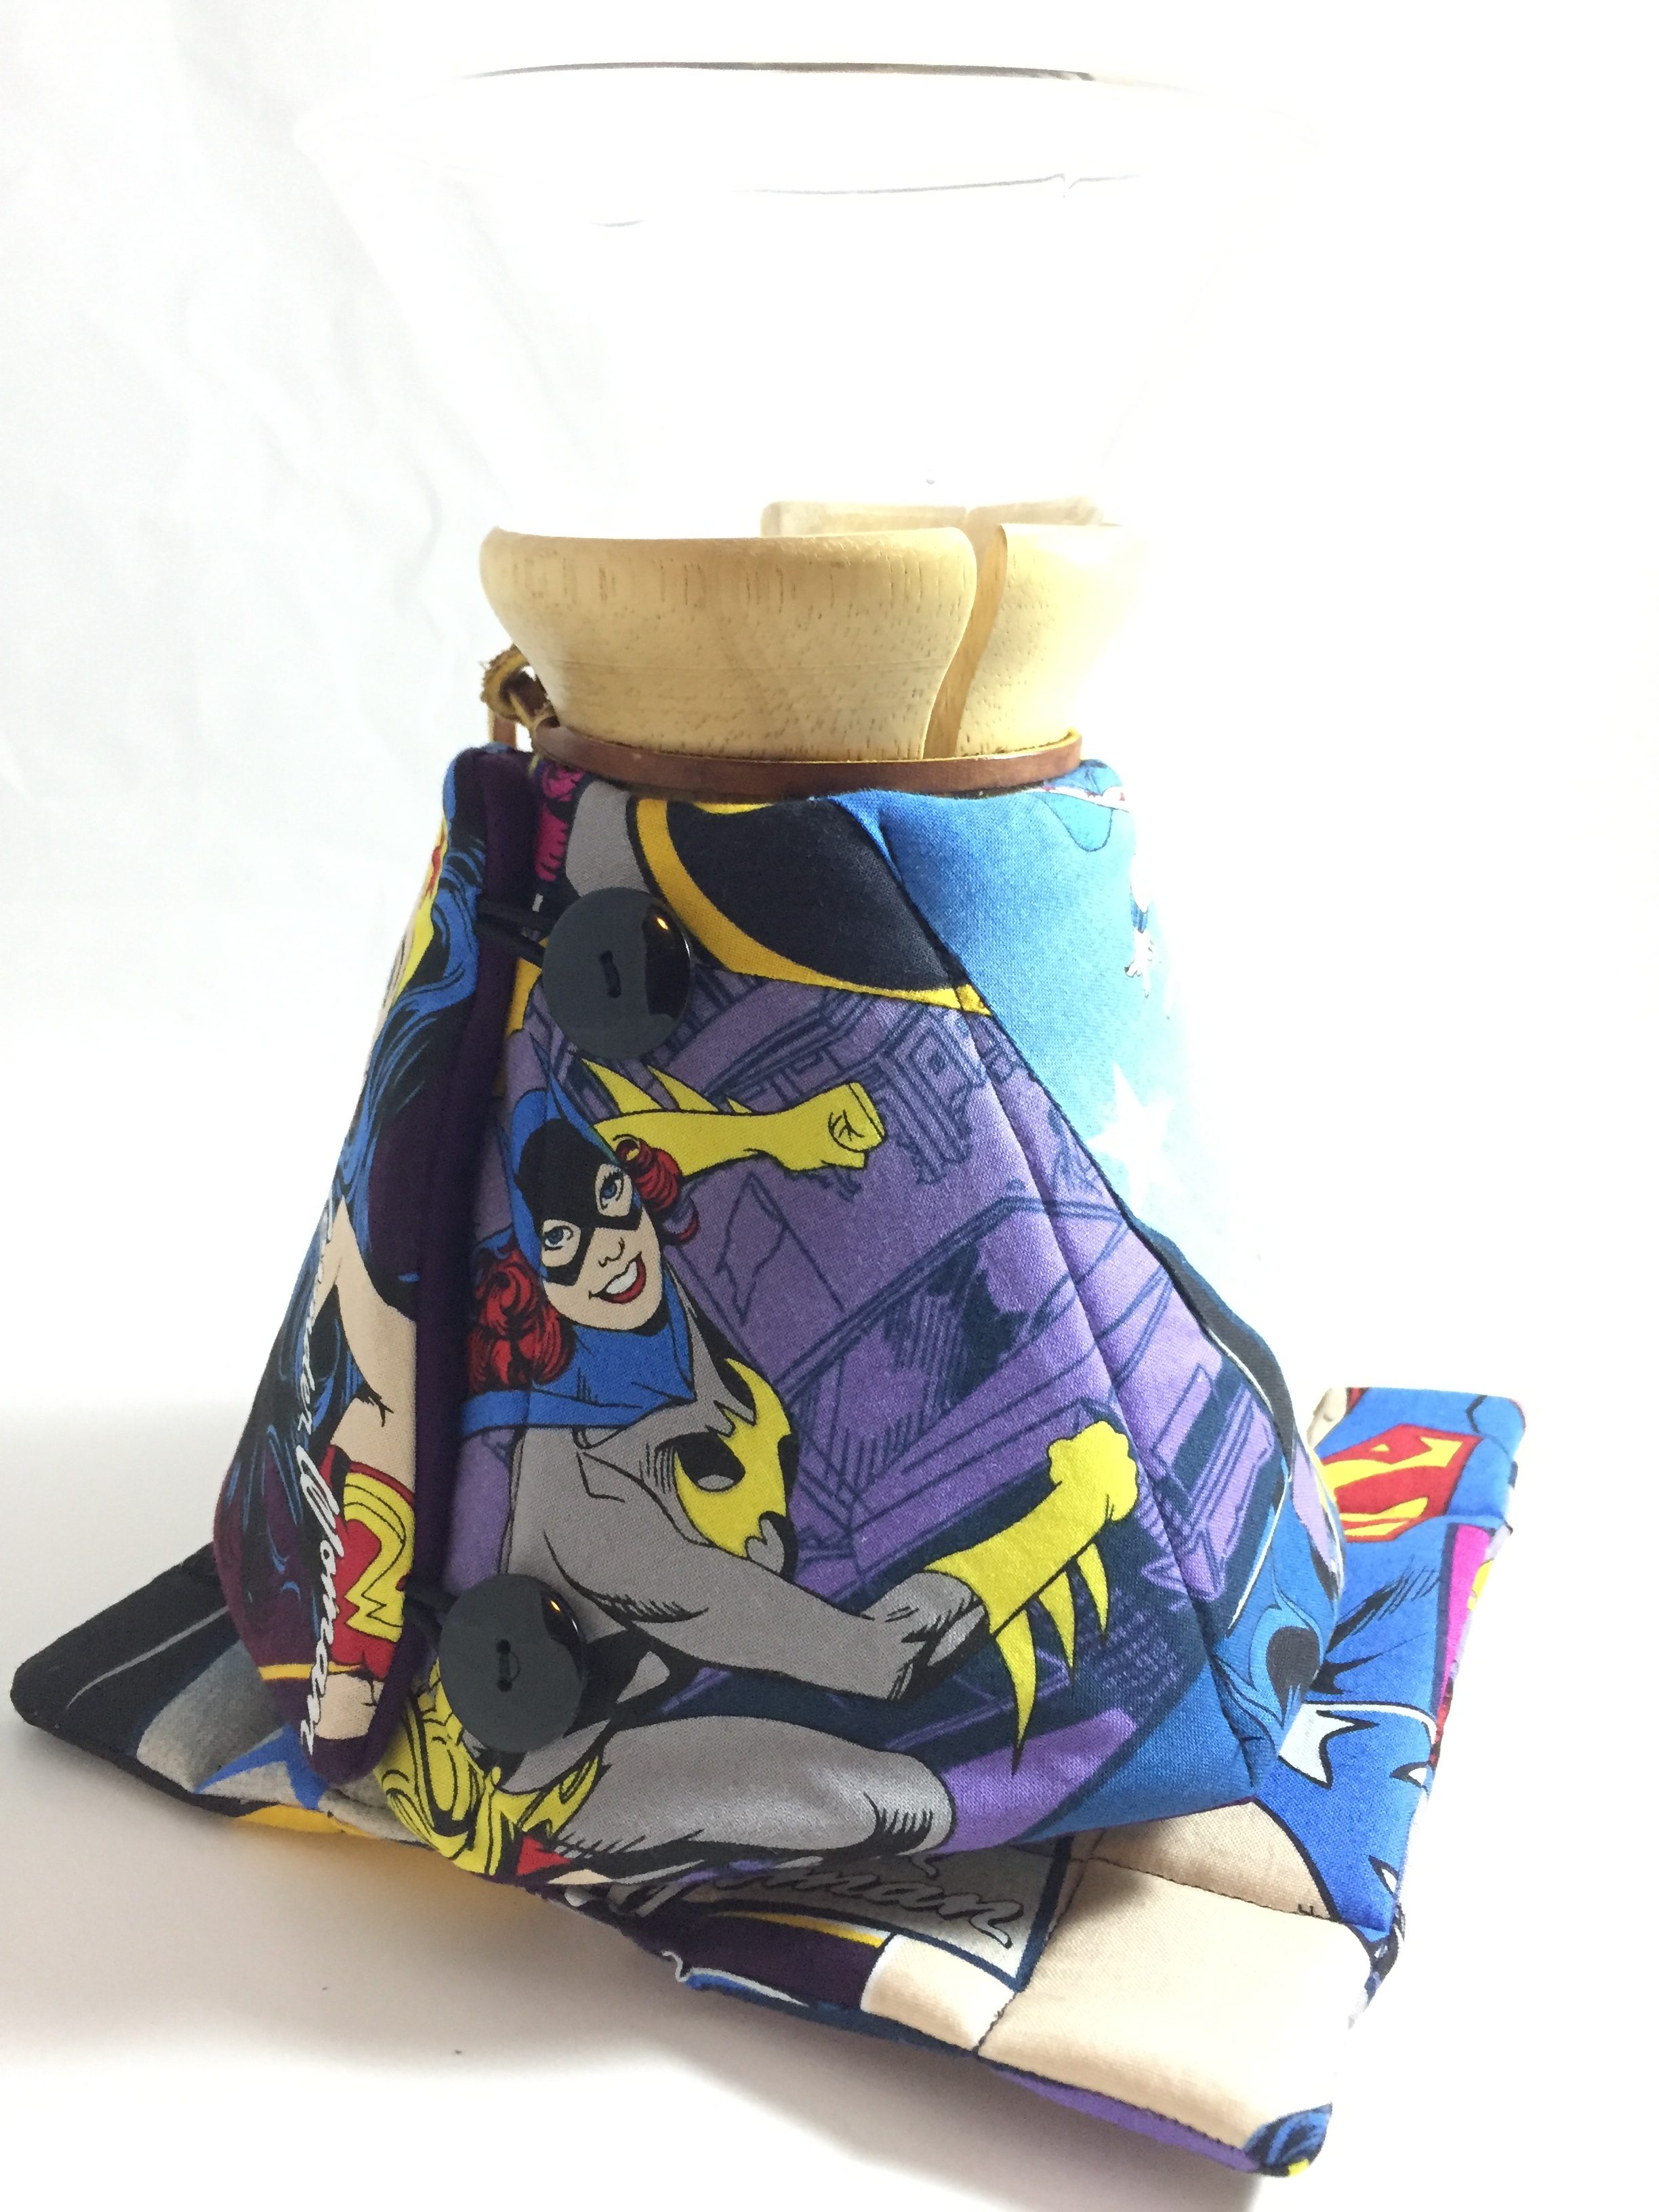
I only needed to have enough for the outside as I planned to line it with a solid fabric. Again, I tried to keep Wonder Woman as the main super hero and began laying pieces next to each other. I needed to end up with a wide strip of pieced fabric, enough for the large curve I cut for these cozies.
It came together so fast! I showed Judy another progress picture and she was thrilled. Having both a bright yellow solid and a deep purple solid, I let my customer choose her lining. She went with purple and I finished everything up soon thereafter.
I think it was a great lesson for me. Where I wanted to calm everything down and add the drama of the black frames, she wanted the chaos that DC Comic shows on most of their licensed fabric.
I suppose what I am trying to say is, it is such a trick to stock my shop with items (both handmade and fabrics) for my shoppers. I buy and make with my personal tastes reflected in my choices. I need to keep perspective on what the customer is going to like as well. At any rate, I loved creating both of these pieces and have no doubt the other one will sell swiftly.
If you make for others or for customers, how do you get that perspective? It is only natural to have a bias toward the styles, colors and themes you as the maker prefers, but we need to be able to figure out what the customer wants. Any input?
Just a quick note – I want to let you know I have begun a newsletter to keep readers posted about my fabric shop. I will be sending it out about every eight weeks or so and it will contain information on new arrivals and fun promotions for my newsletter subscribers. If you are interested, there is a sign up form on the right side of the page.
Linking up to a few places this week. Please take a look at the choices I have listed at the top of the page, under Link Ups.
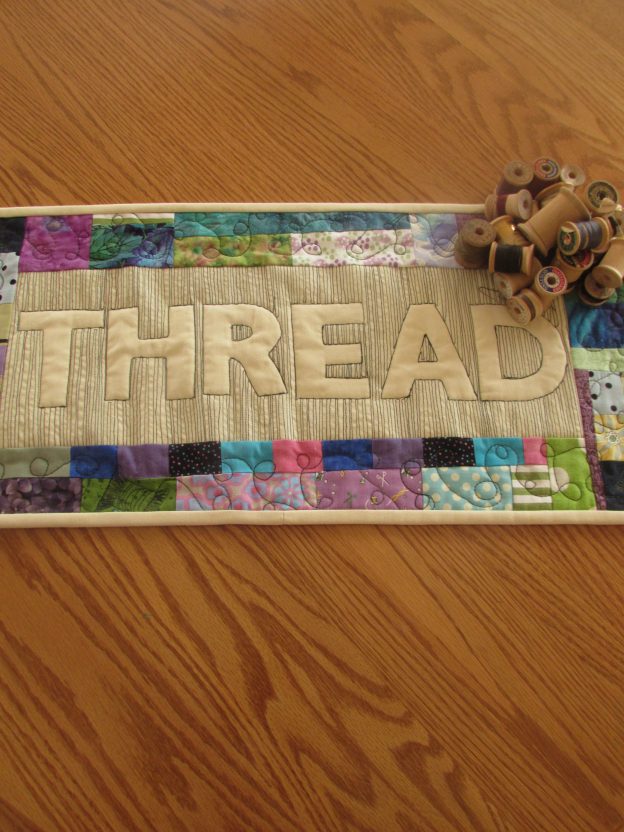
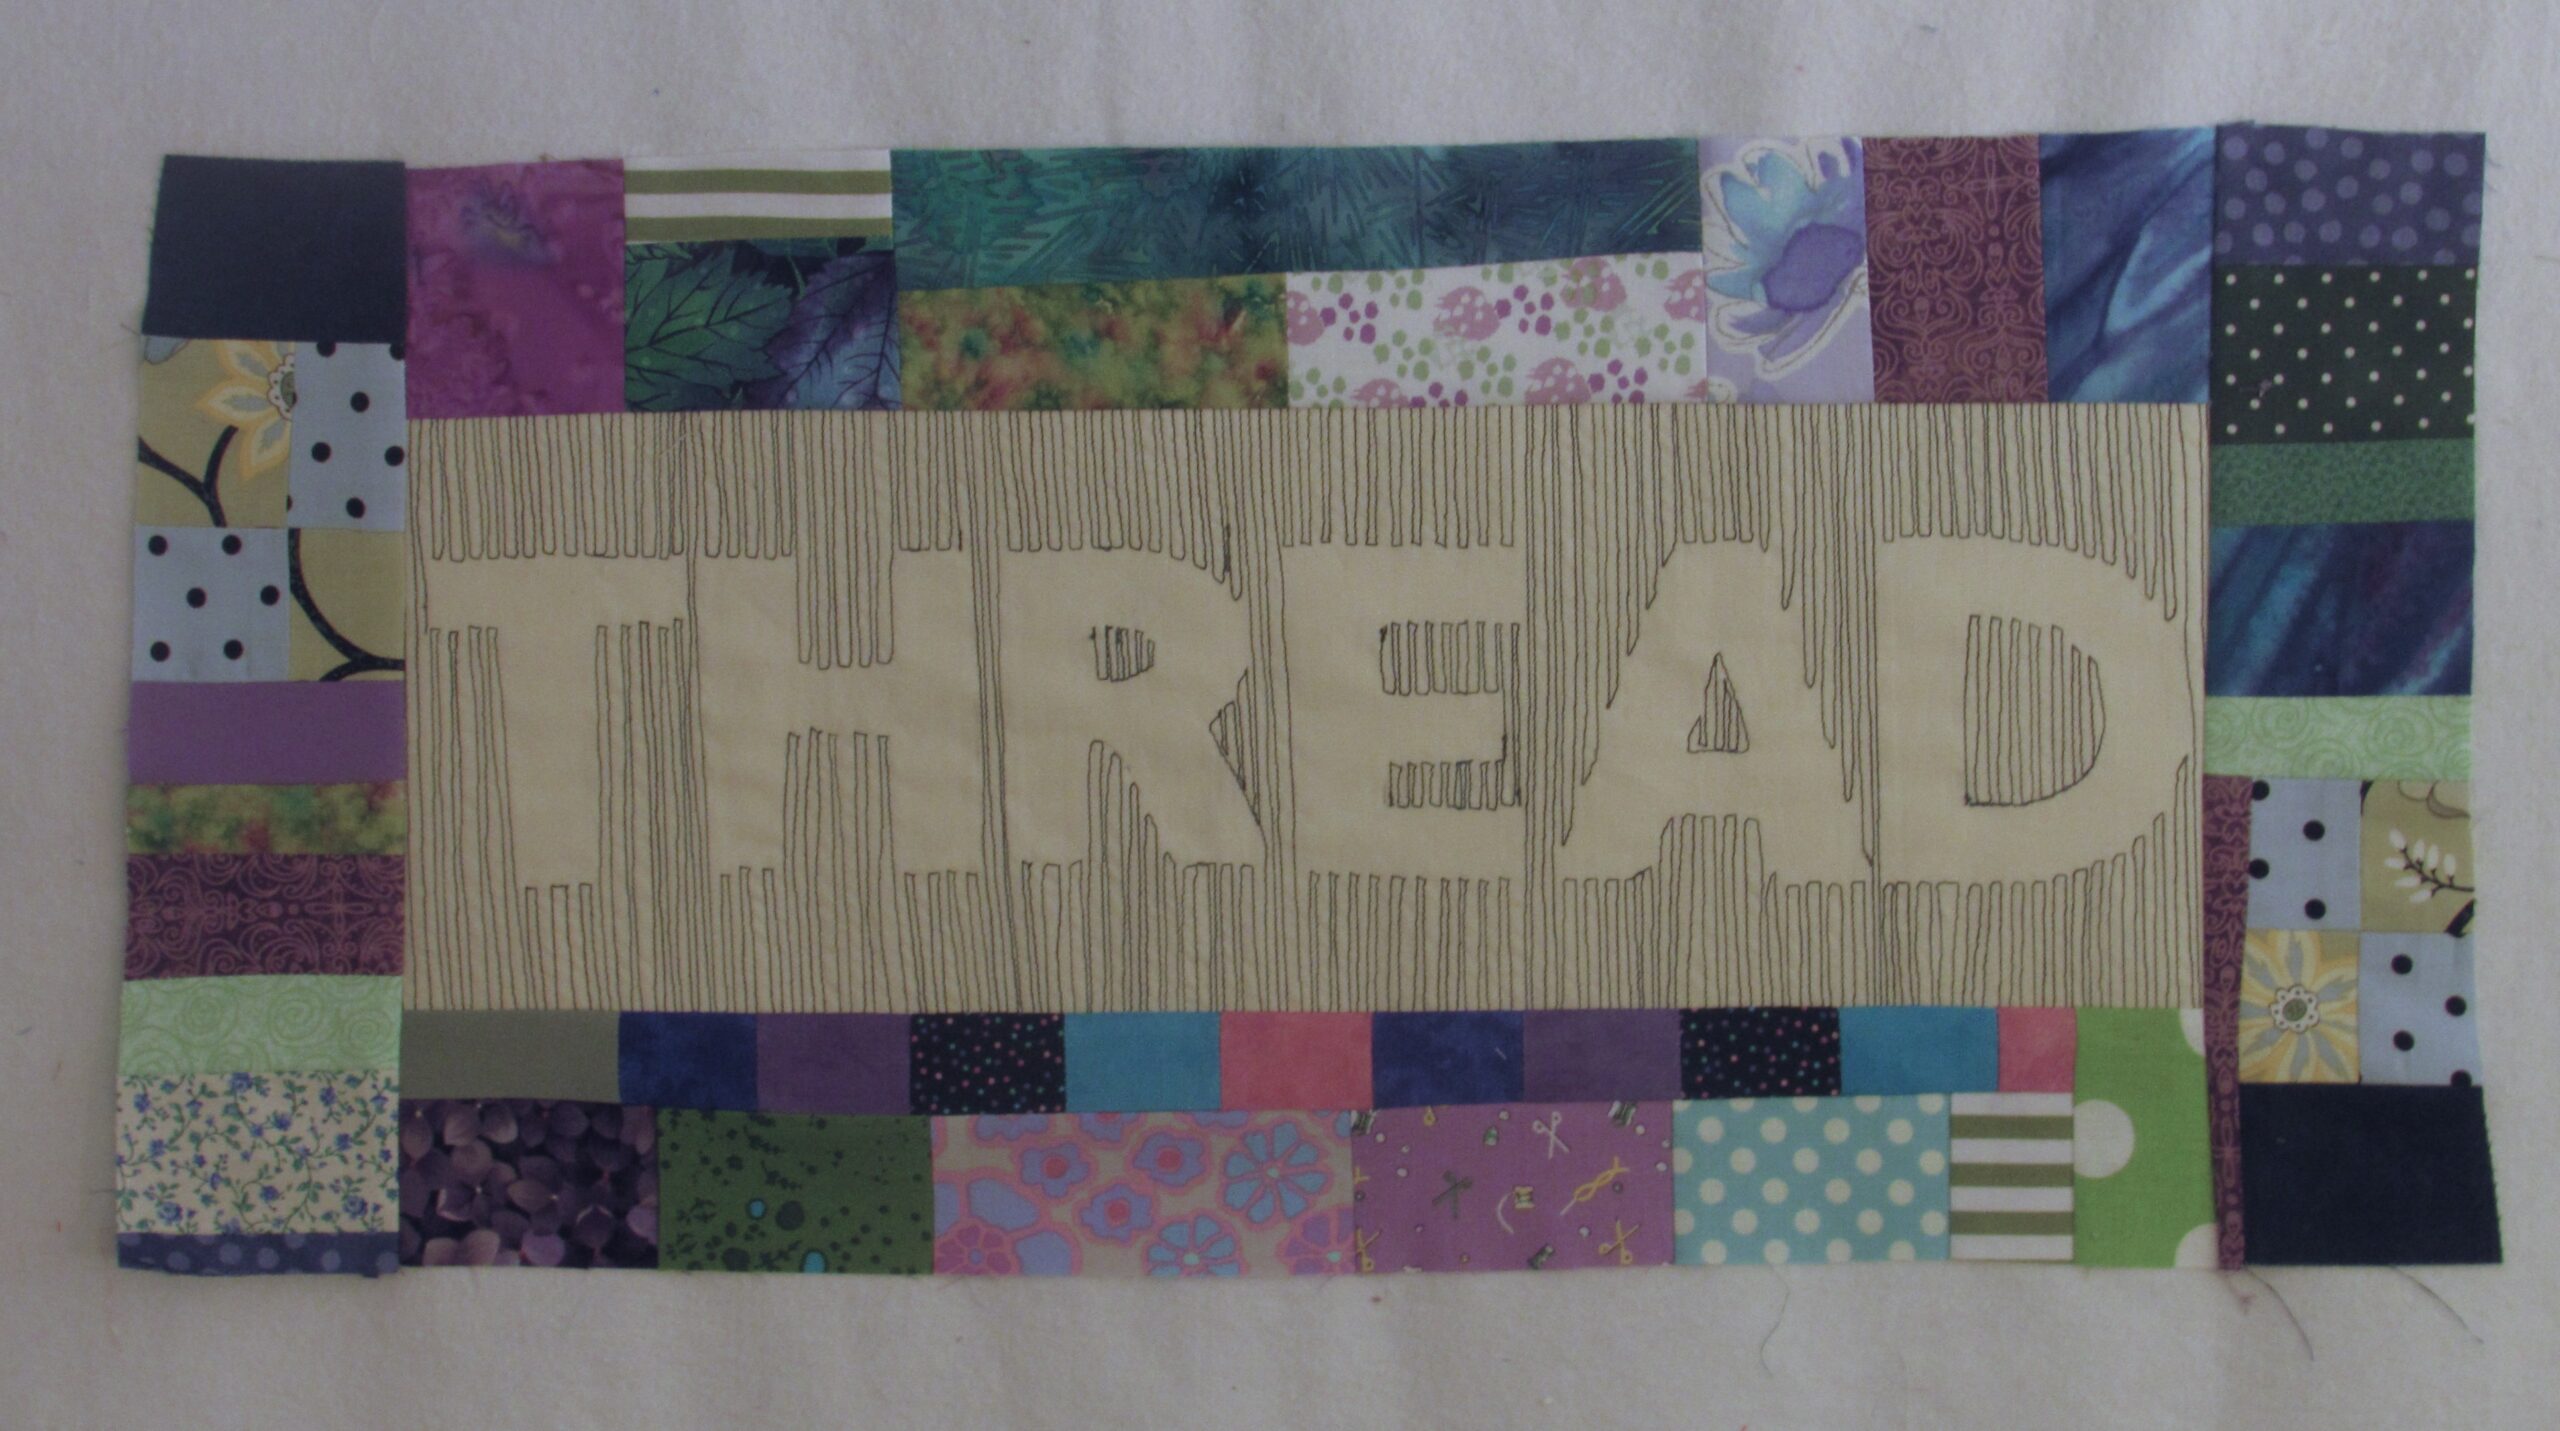
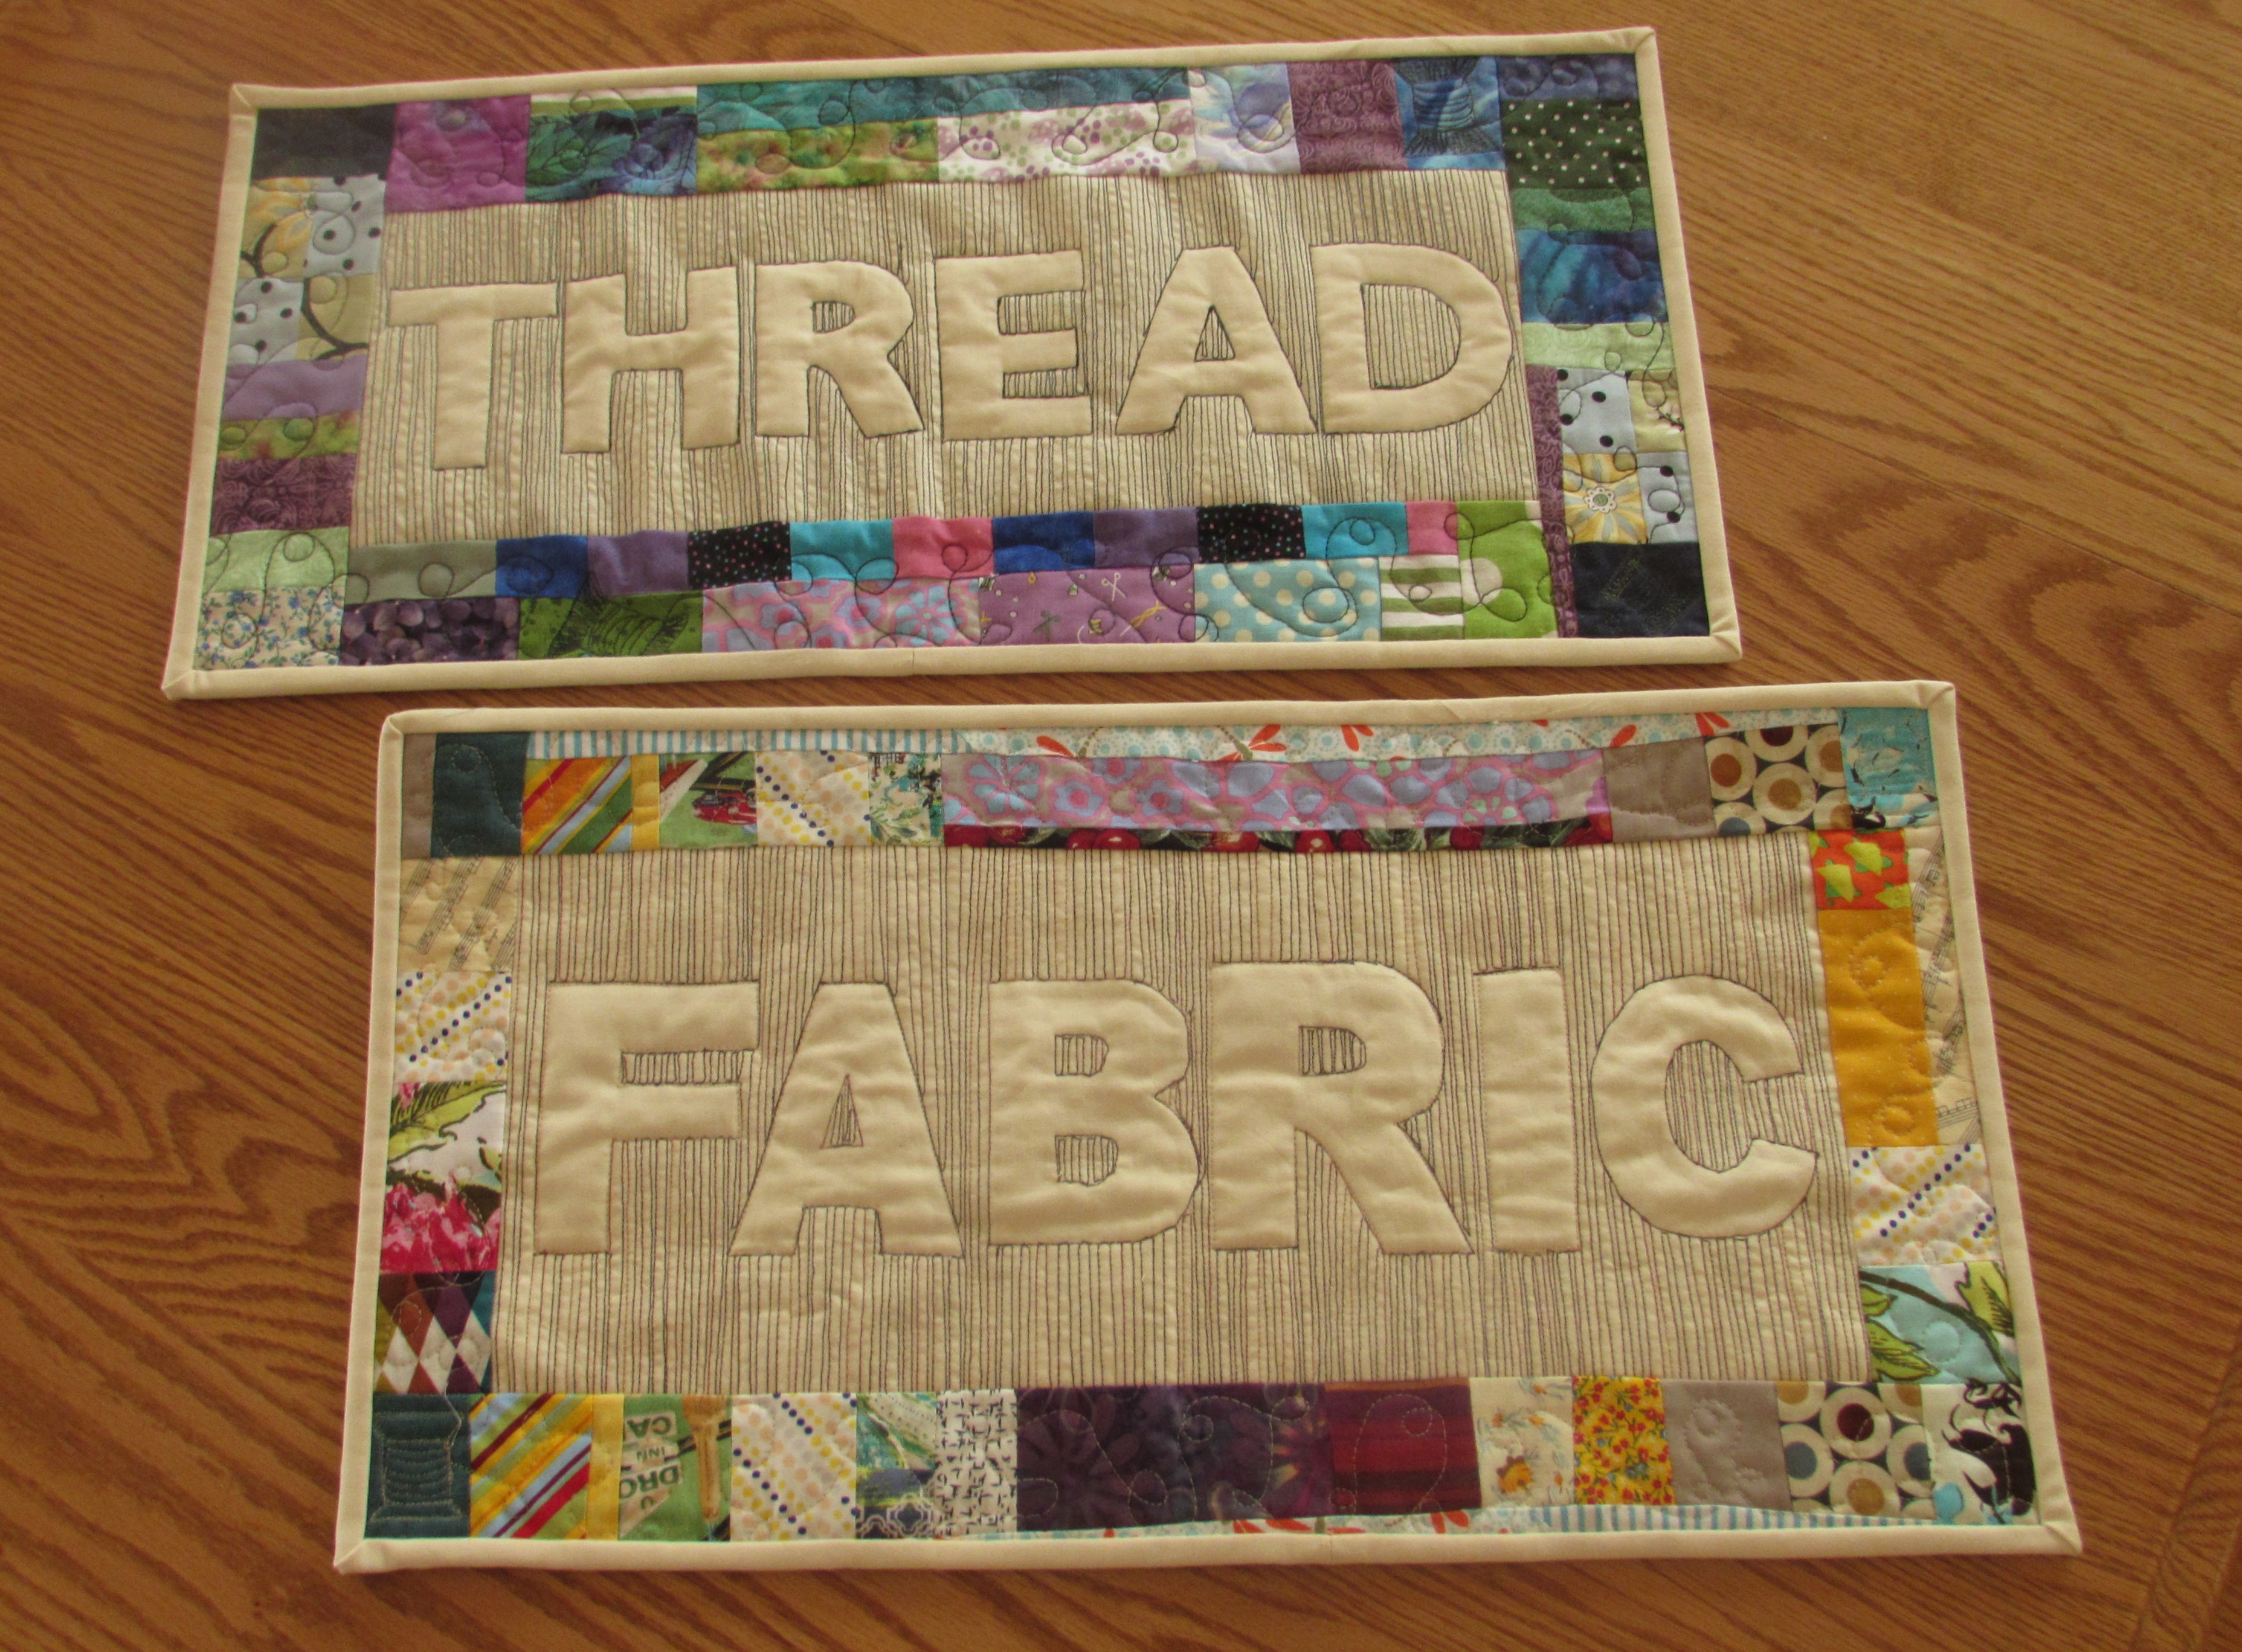
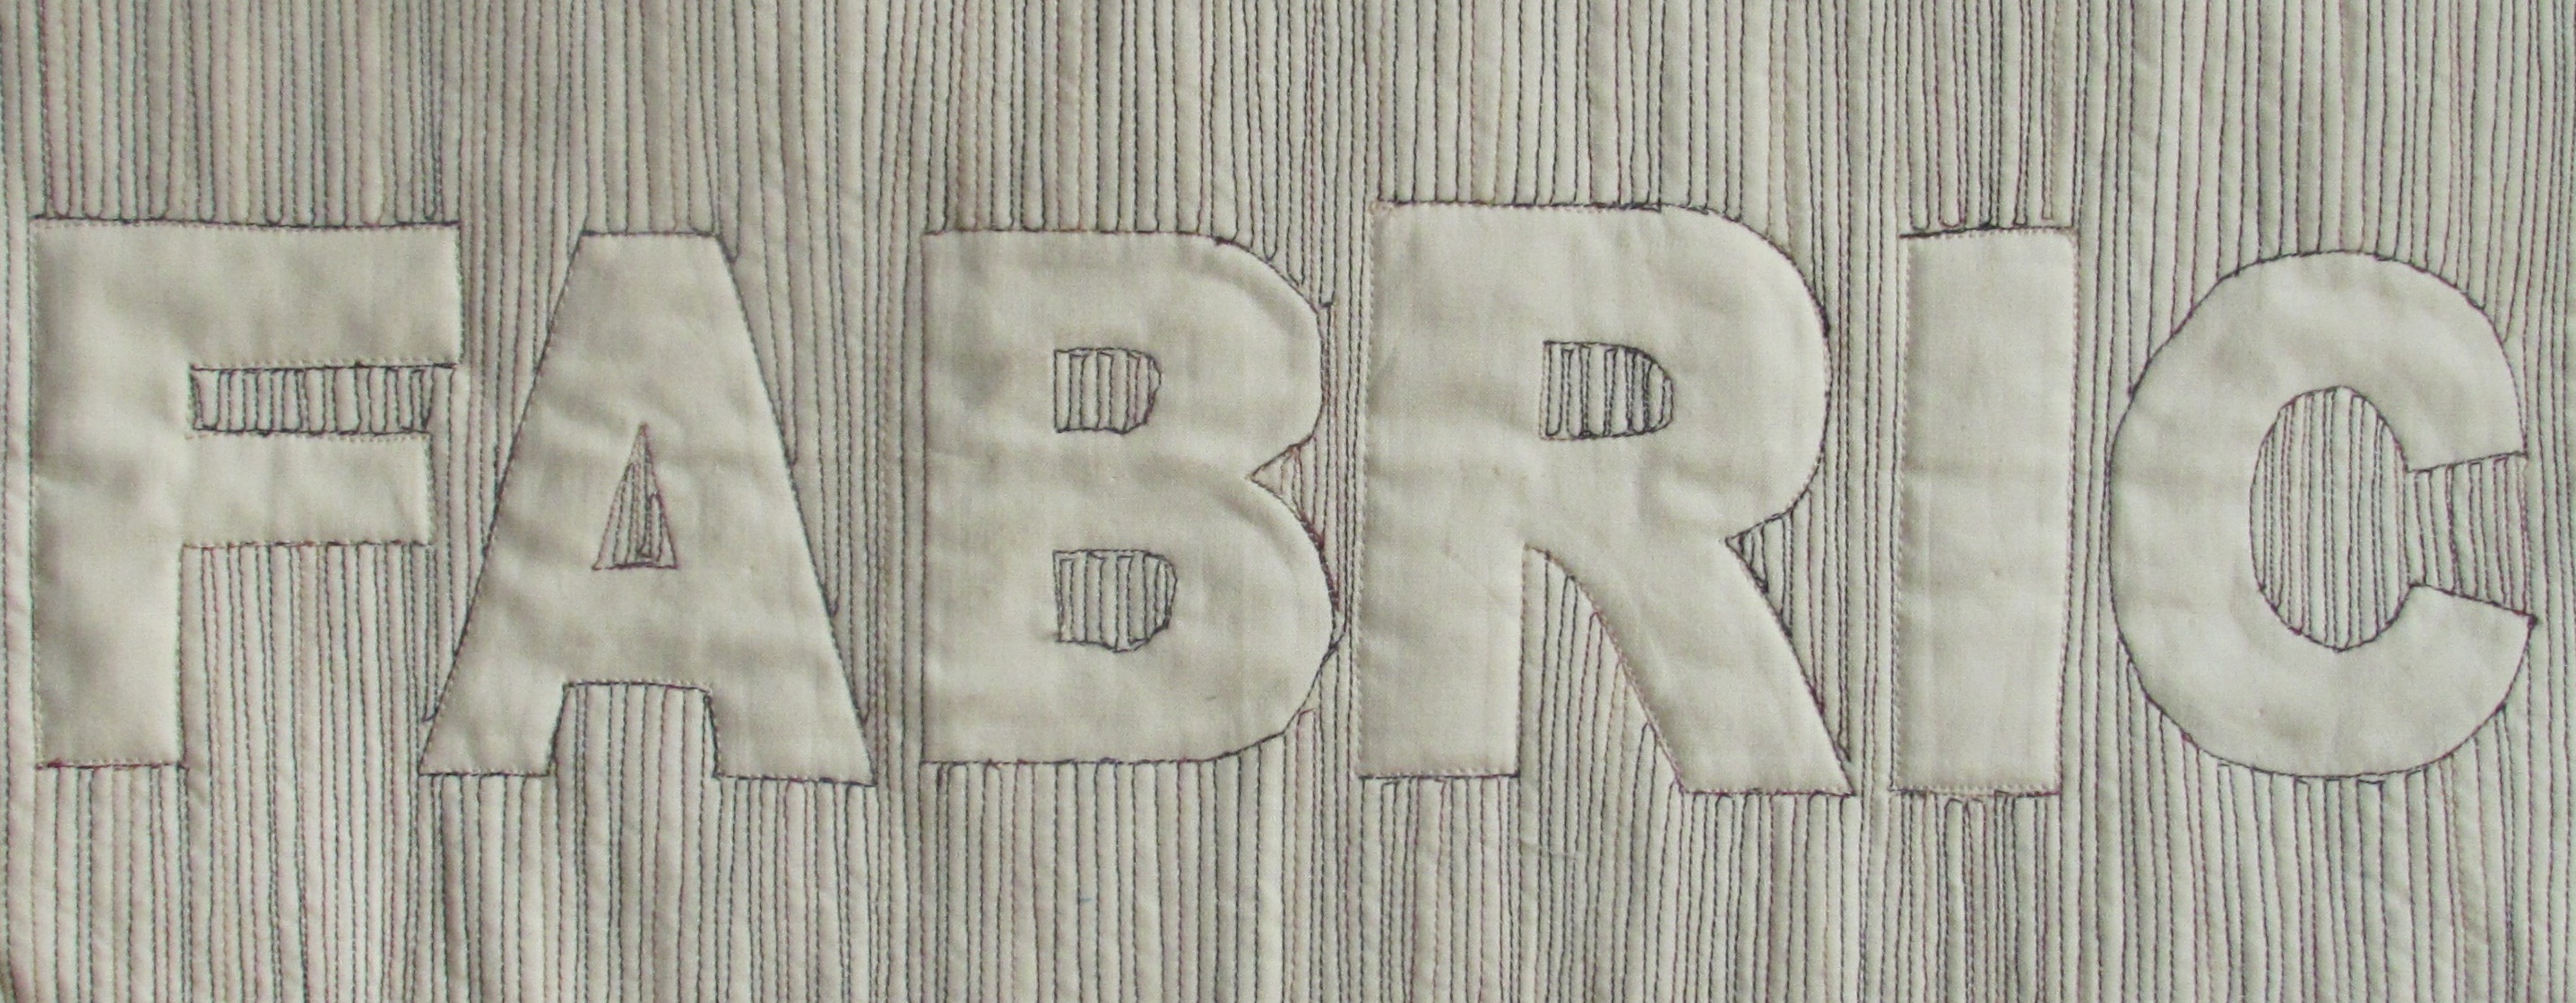
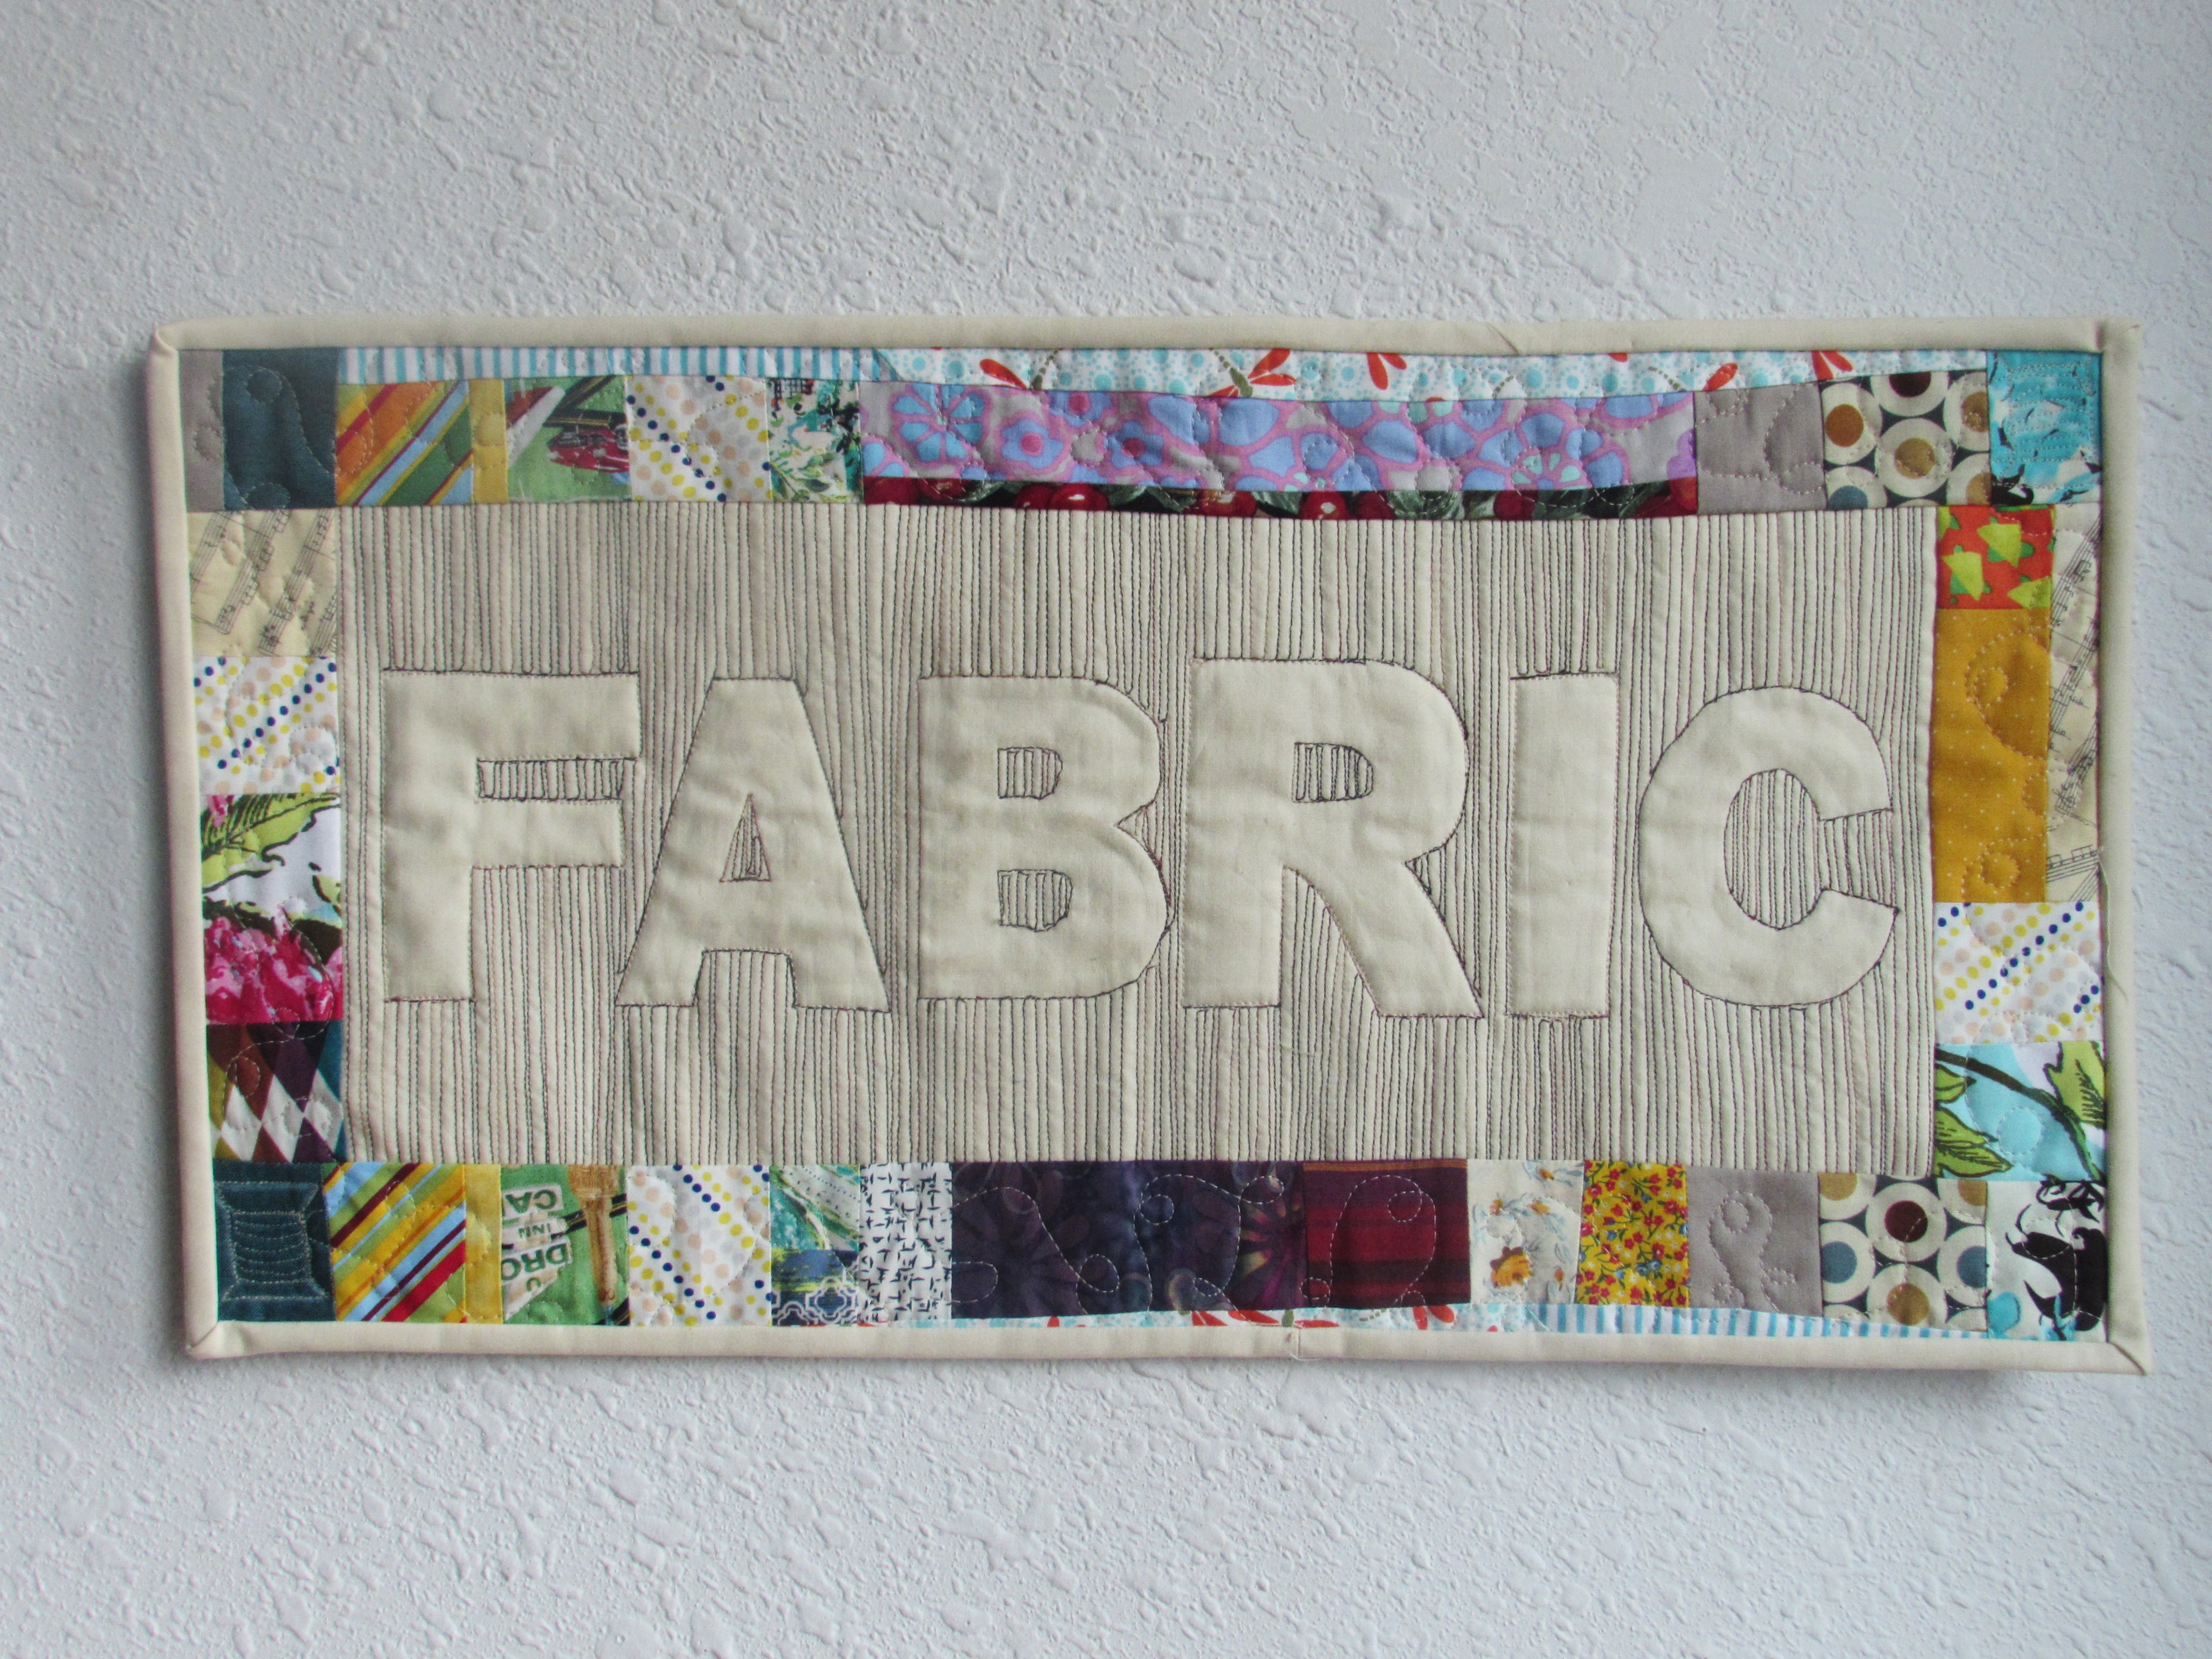
I really enjoyed playing with relief quilting when I made my FABRIC mini quilt a couple of weeks ago. So much so that I decided to make another one! I took plenty of pictures while making it so I could post a tutorial. I hope you will give it a try. The effect is wonderful and it is such an easy process.
This time I wanted to try stitching the word on a piece of fabric with fusible stabilizer and then building the quilt from there. It worked out wonderfully. Since I already had one mini that said FABRIC, I decided to make another that said THREAD. This idea was inspired by a comment left on the first post by Diana, of A Red Delicious Life. She mentioned wanting to make one to hang above her thread. I decided to do the same. Now I have one to hang above the closet where I store fabric and another to hang above the thread collection hanging on the wall in my sewing room. Thanks Diana!!
Let’s get started.
I am going to provide the sizes that I used but this is so flexible. Increase or decrease as you like. My quilt finished at 11″ x 23″ so if you want a different size, adjust accordingly.
Materials List:
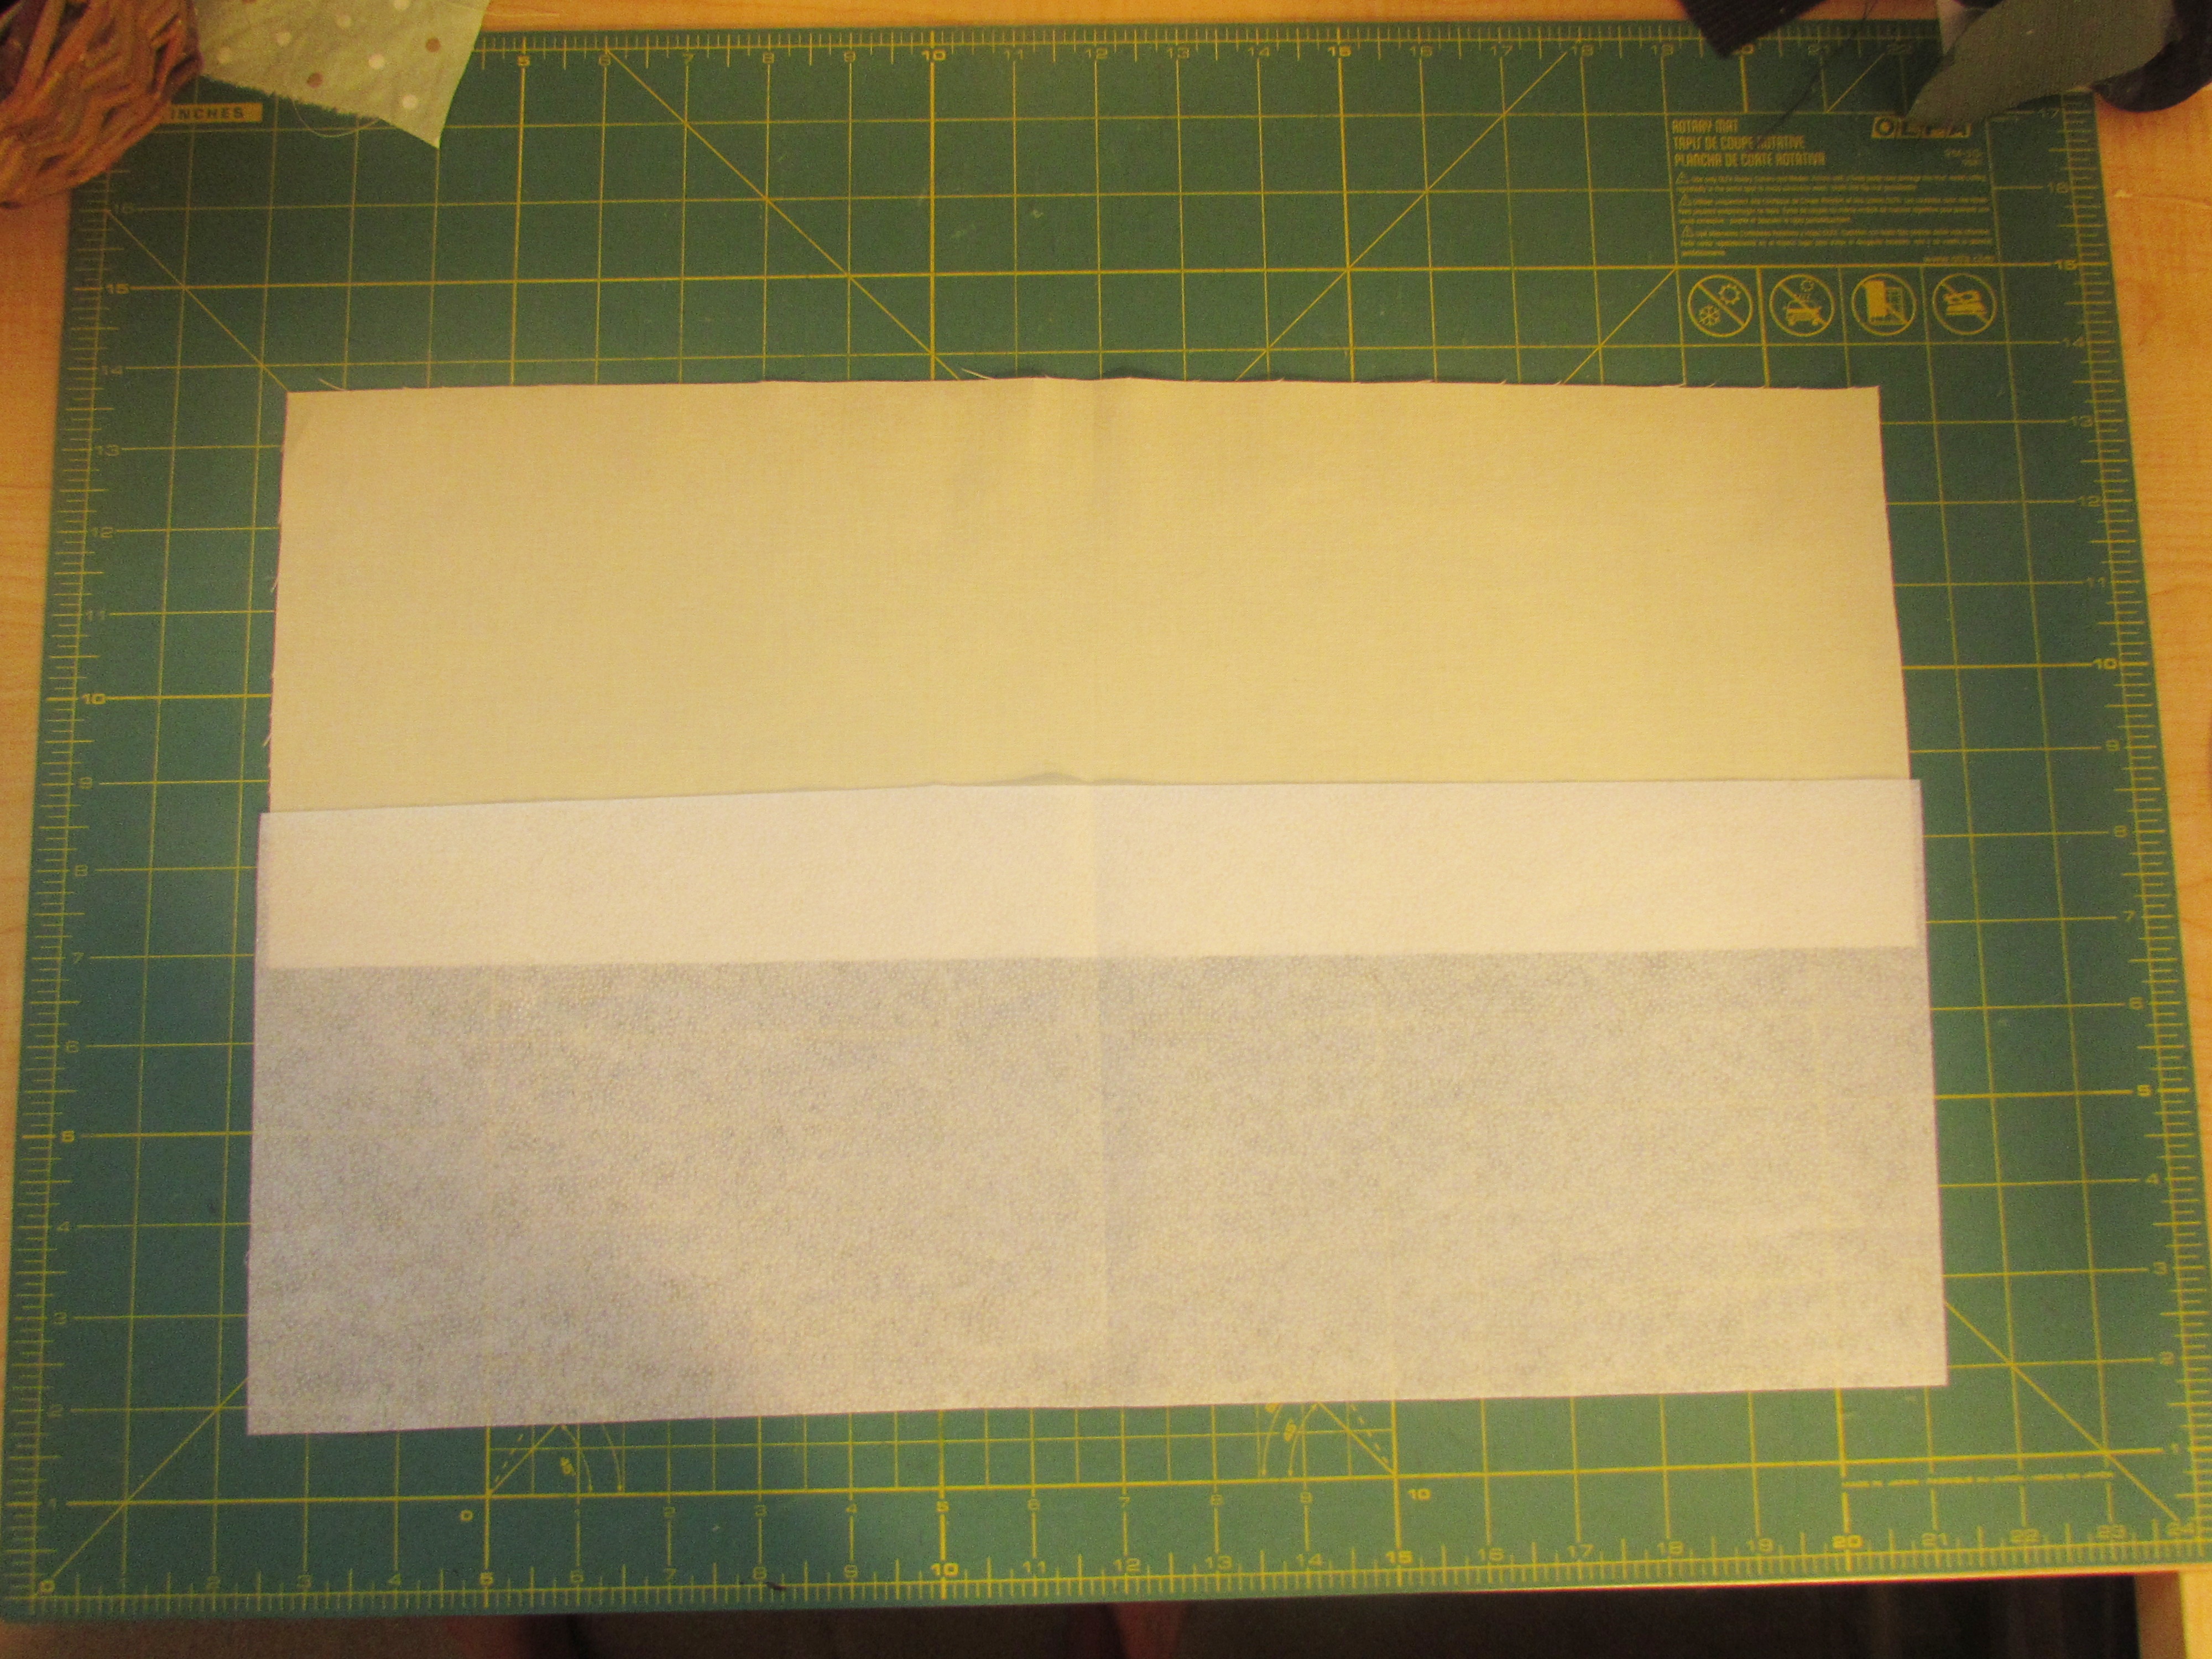
Background Fabric: one rectangle measuring 7″ x 19″
Heavyweight fusible interfacting: one rectangle measuring 7″ x 19″
Scraps for your border
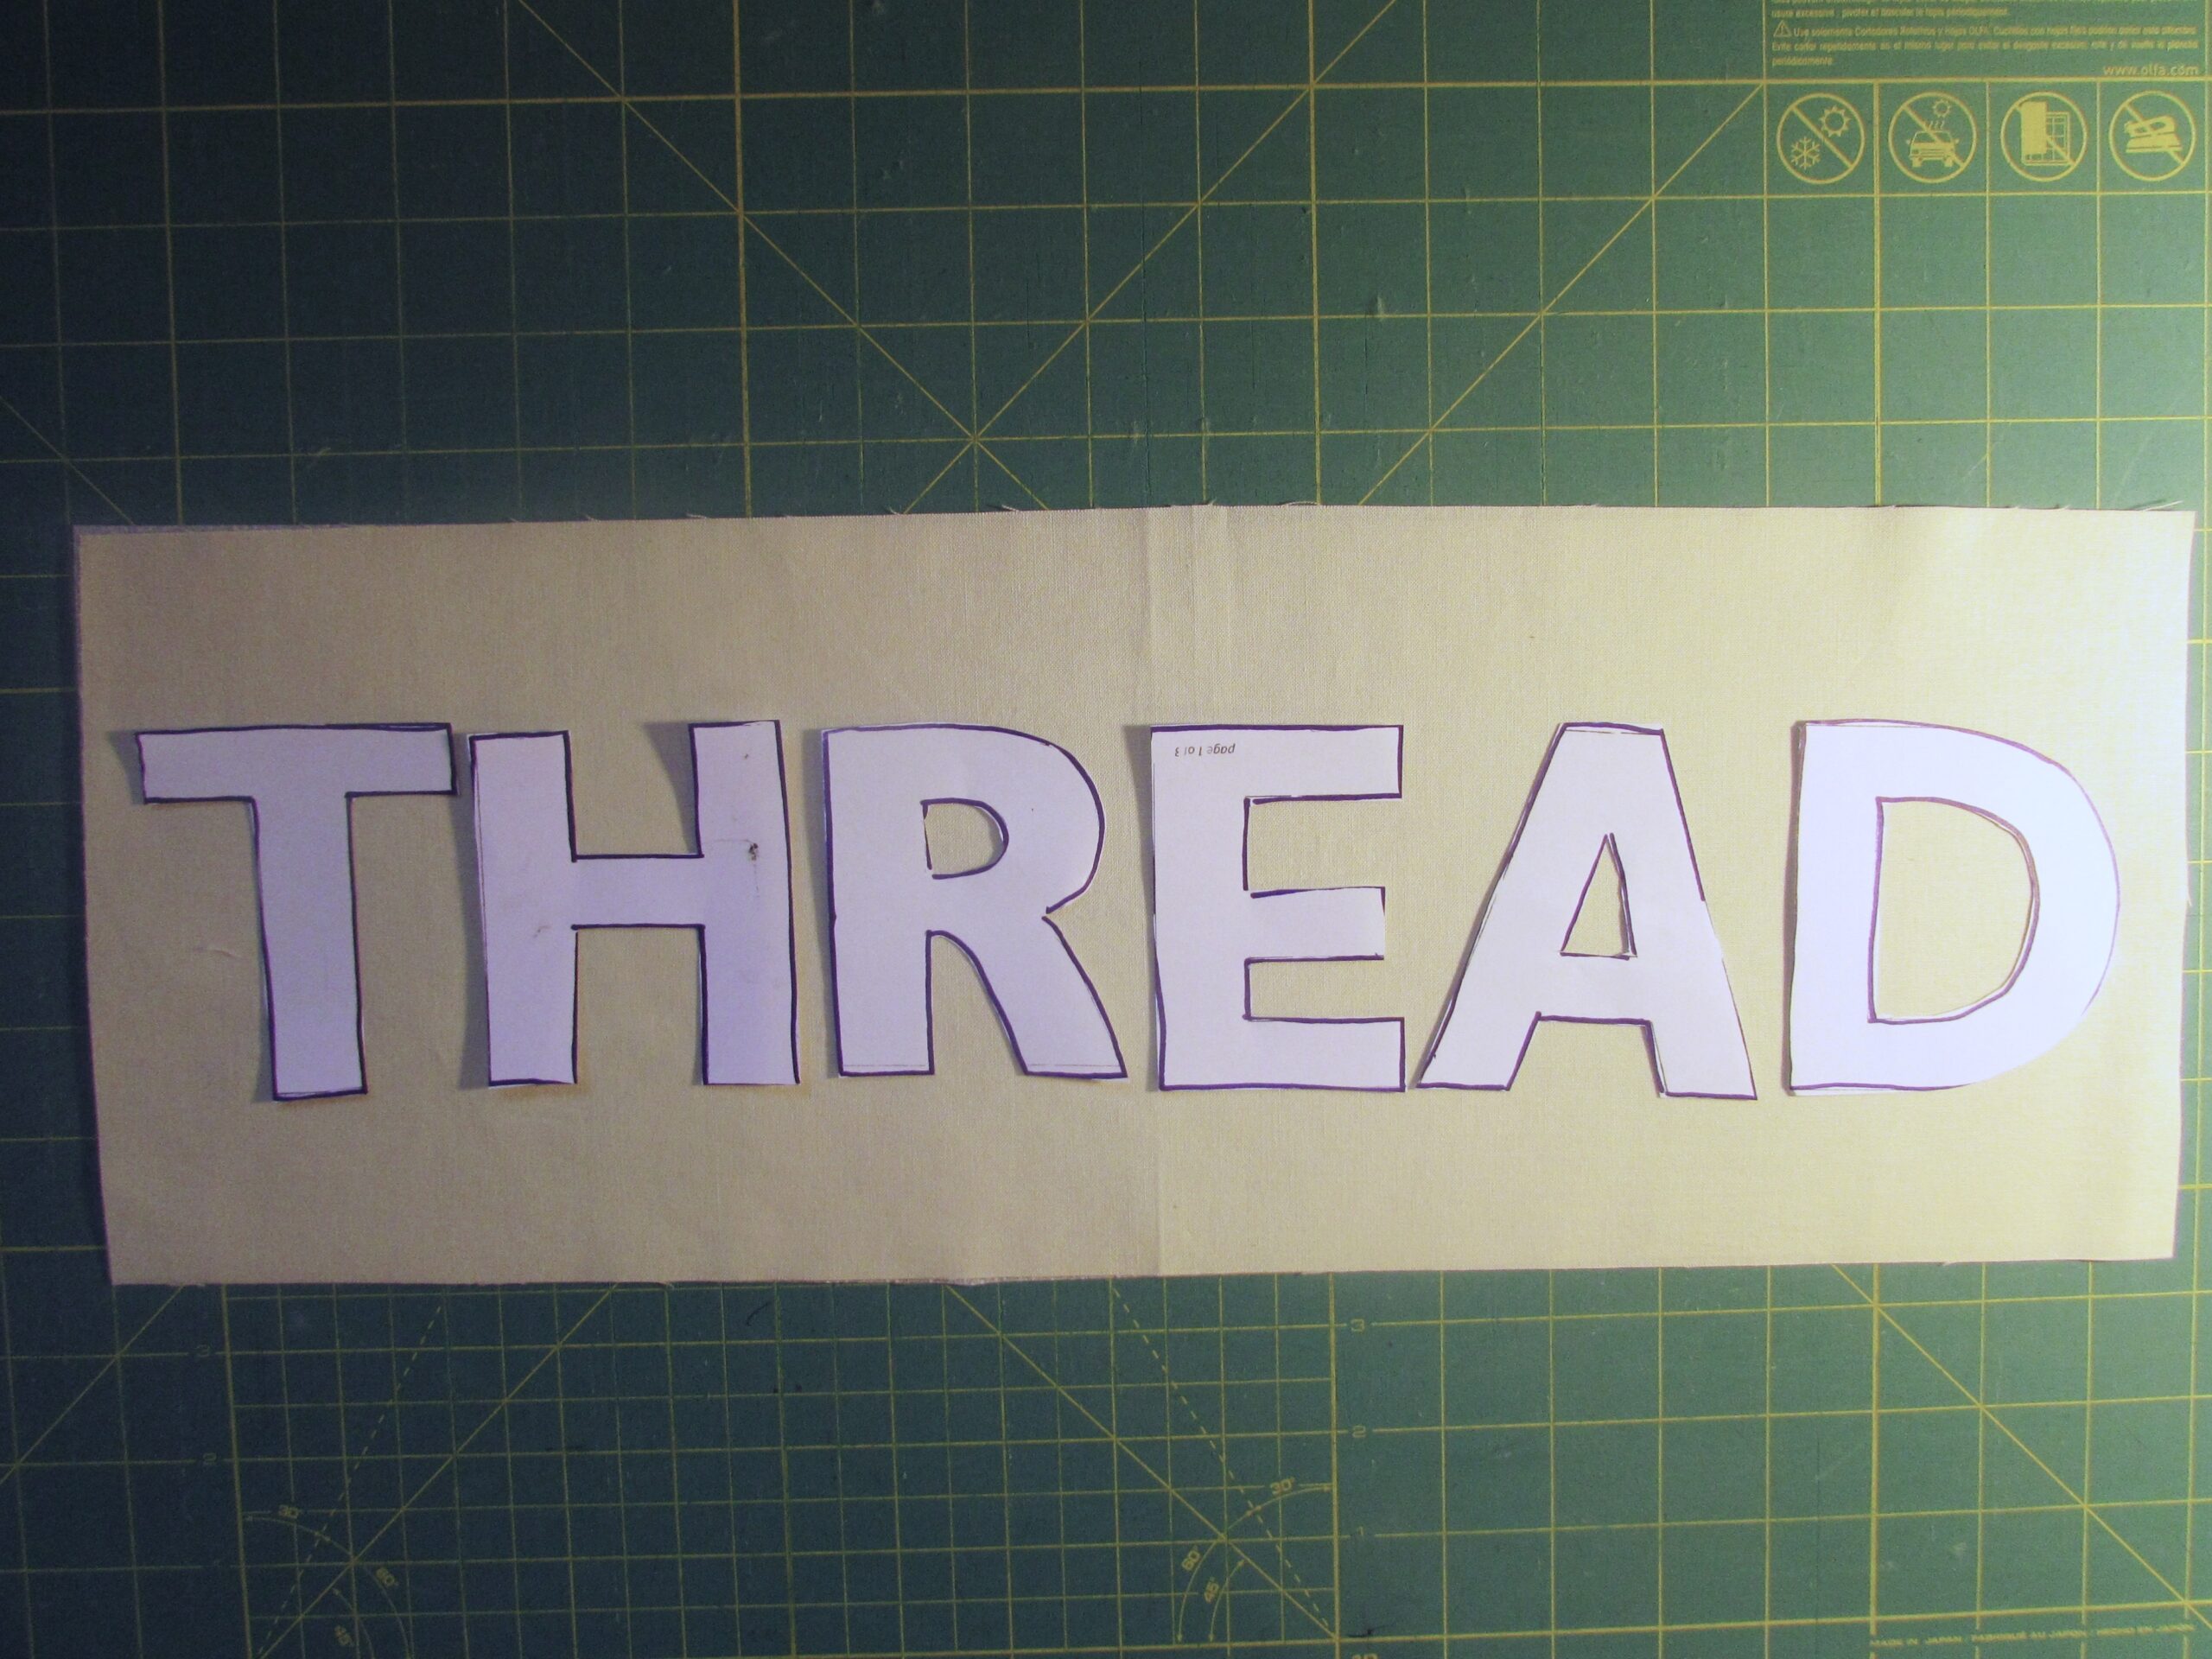
Stencils for tracing the word THREAD. I used letters that were 3″ high.
Frixion pen or similar fabric marking pen
Binding fabric: Two strips that are 2 1/2″ by 42″ (Width of fabric)
Quilting thread. I used YLI thread in a variegated green and loved it!
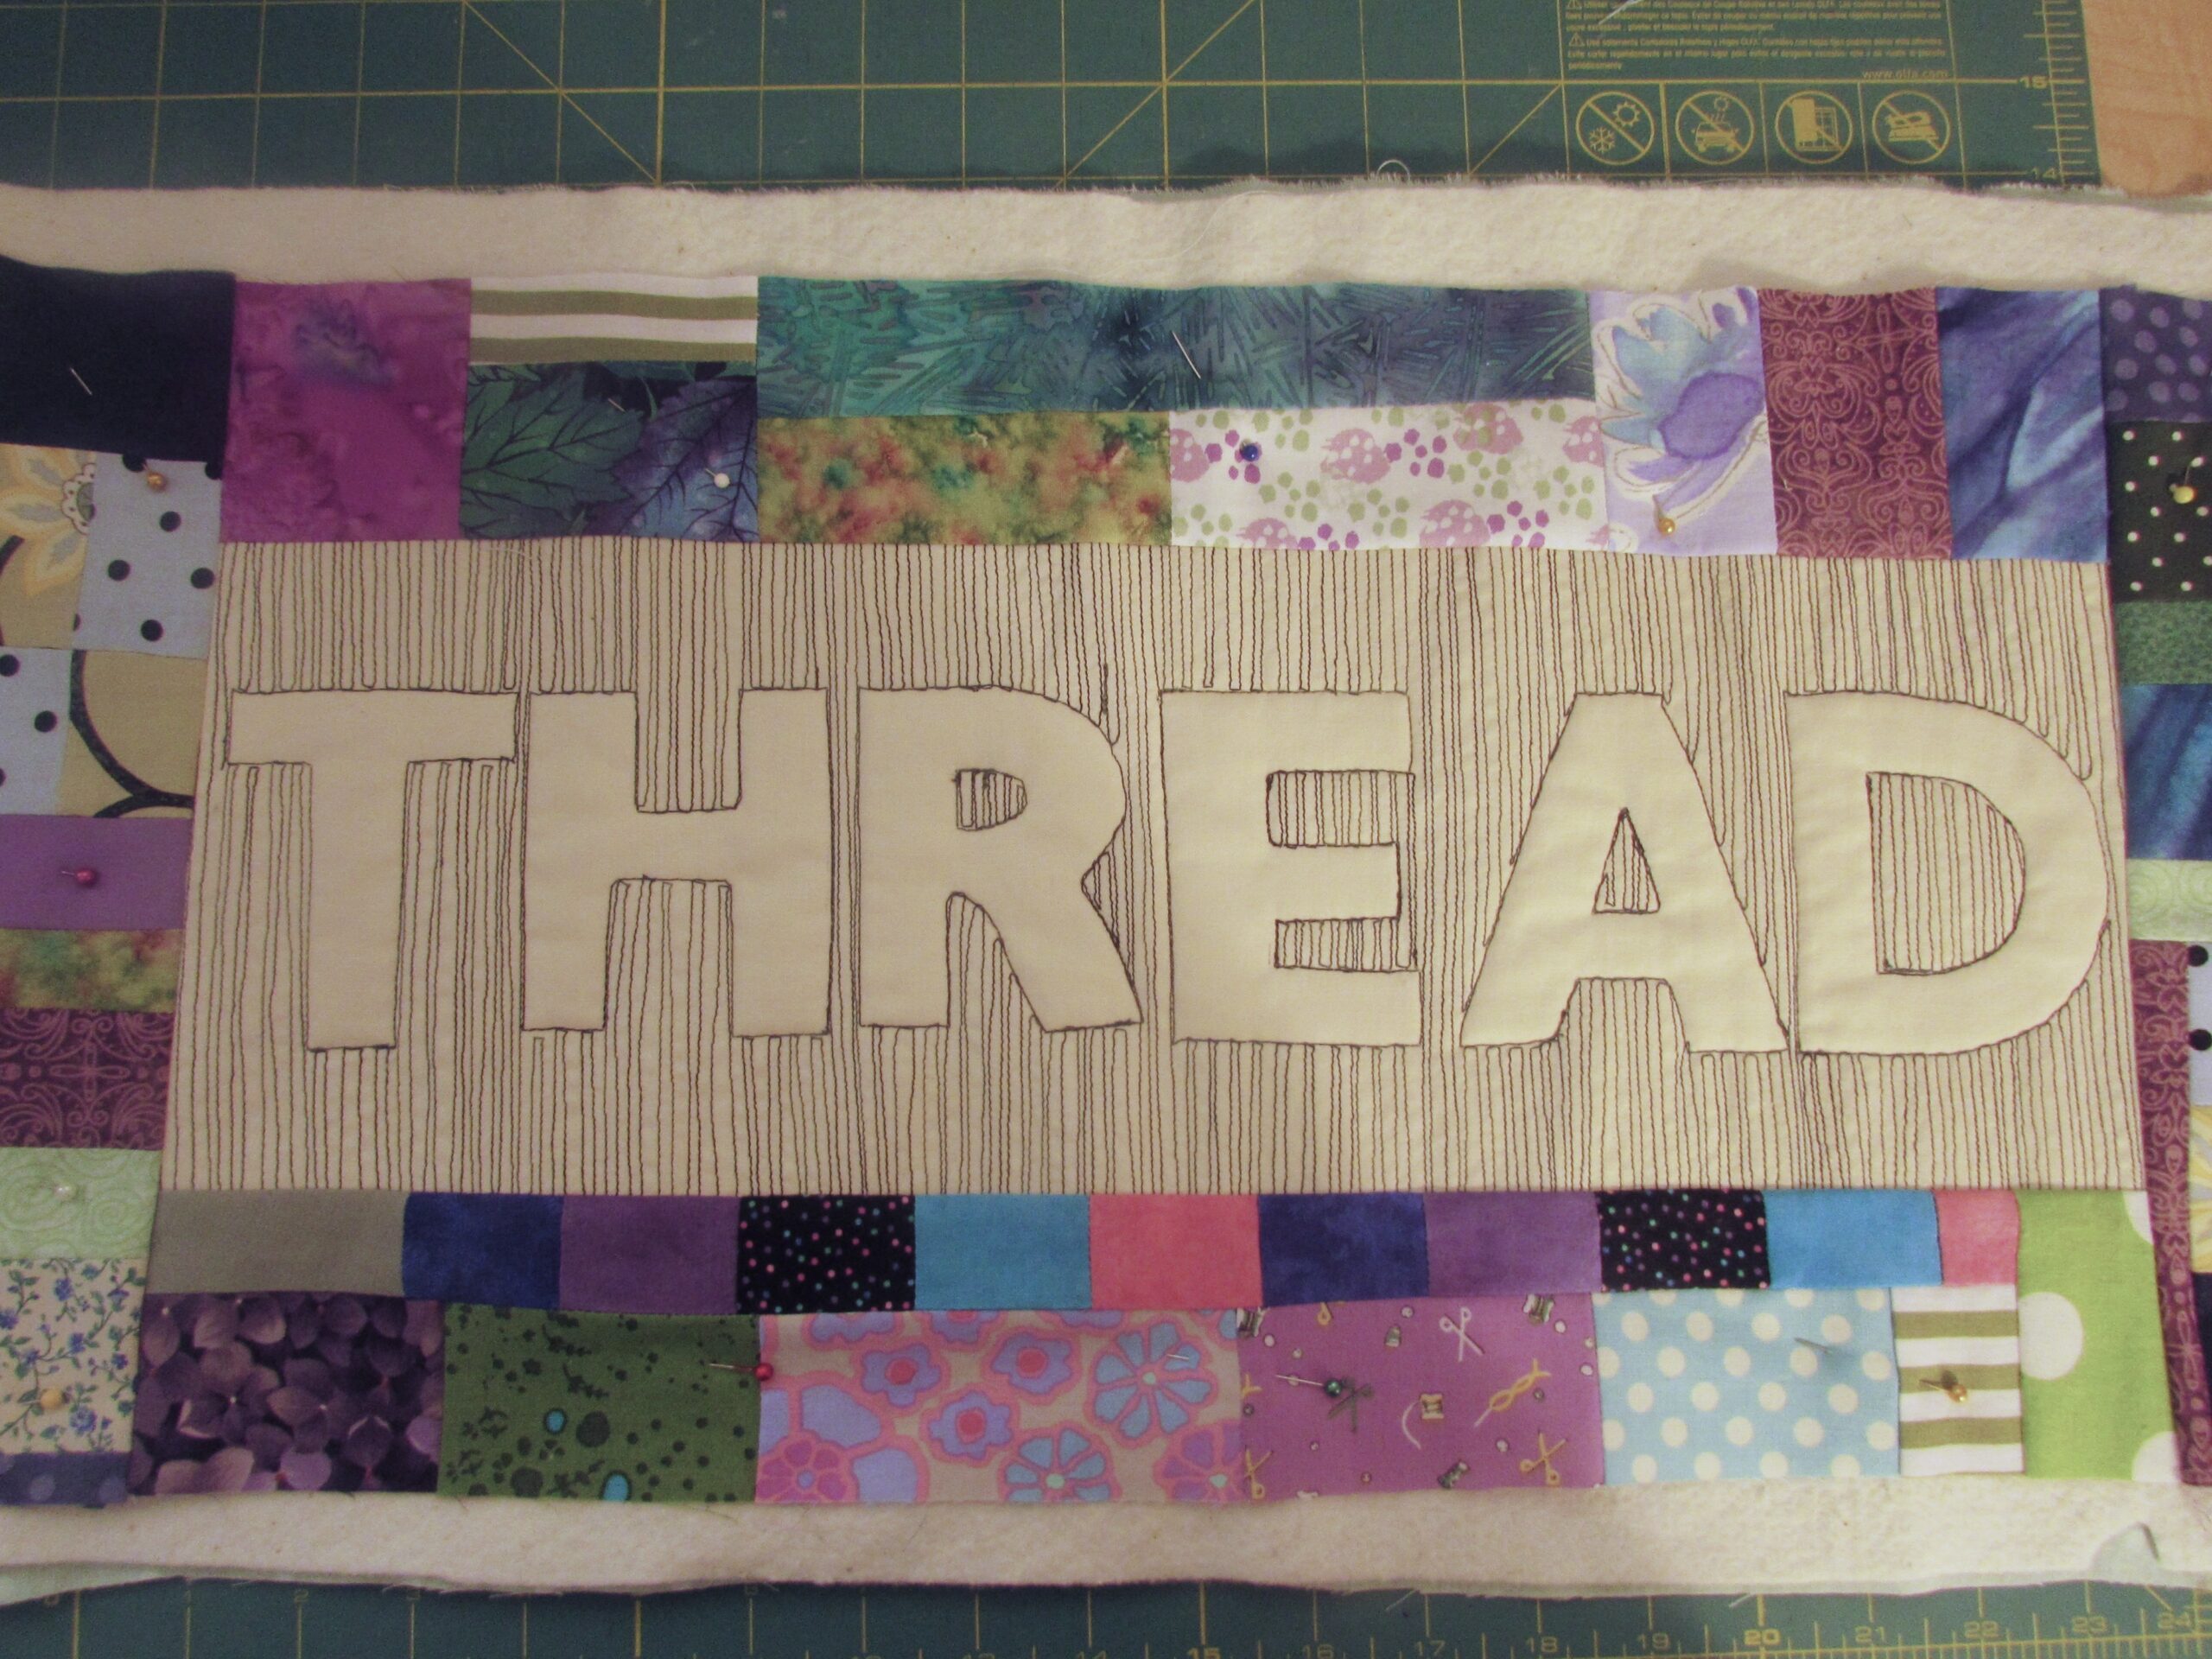
Take your background fabric and fuse the stabilizer to the wrong side of the fabric. Follow manufacturer’s instructions if you are not familiar with this process.
Trace the word on the fabric with the fabric safe marking pen of your choice. I didn’t leave very much room between the letters because I liked the way this looked. You could certainly adjust this to your taste. Also, I didn’t leave a ton of room on either side. Again, adjust as needed by cutting your background wider if you like.
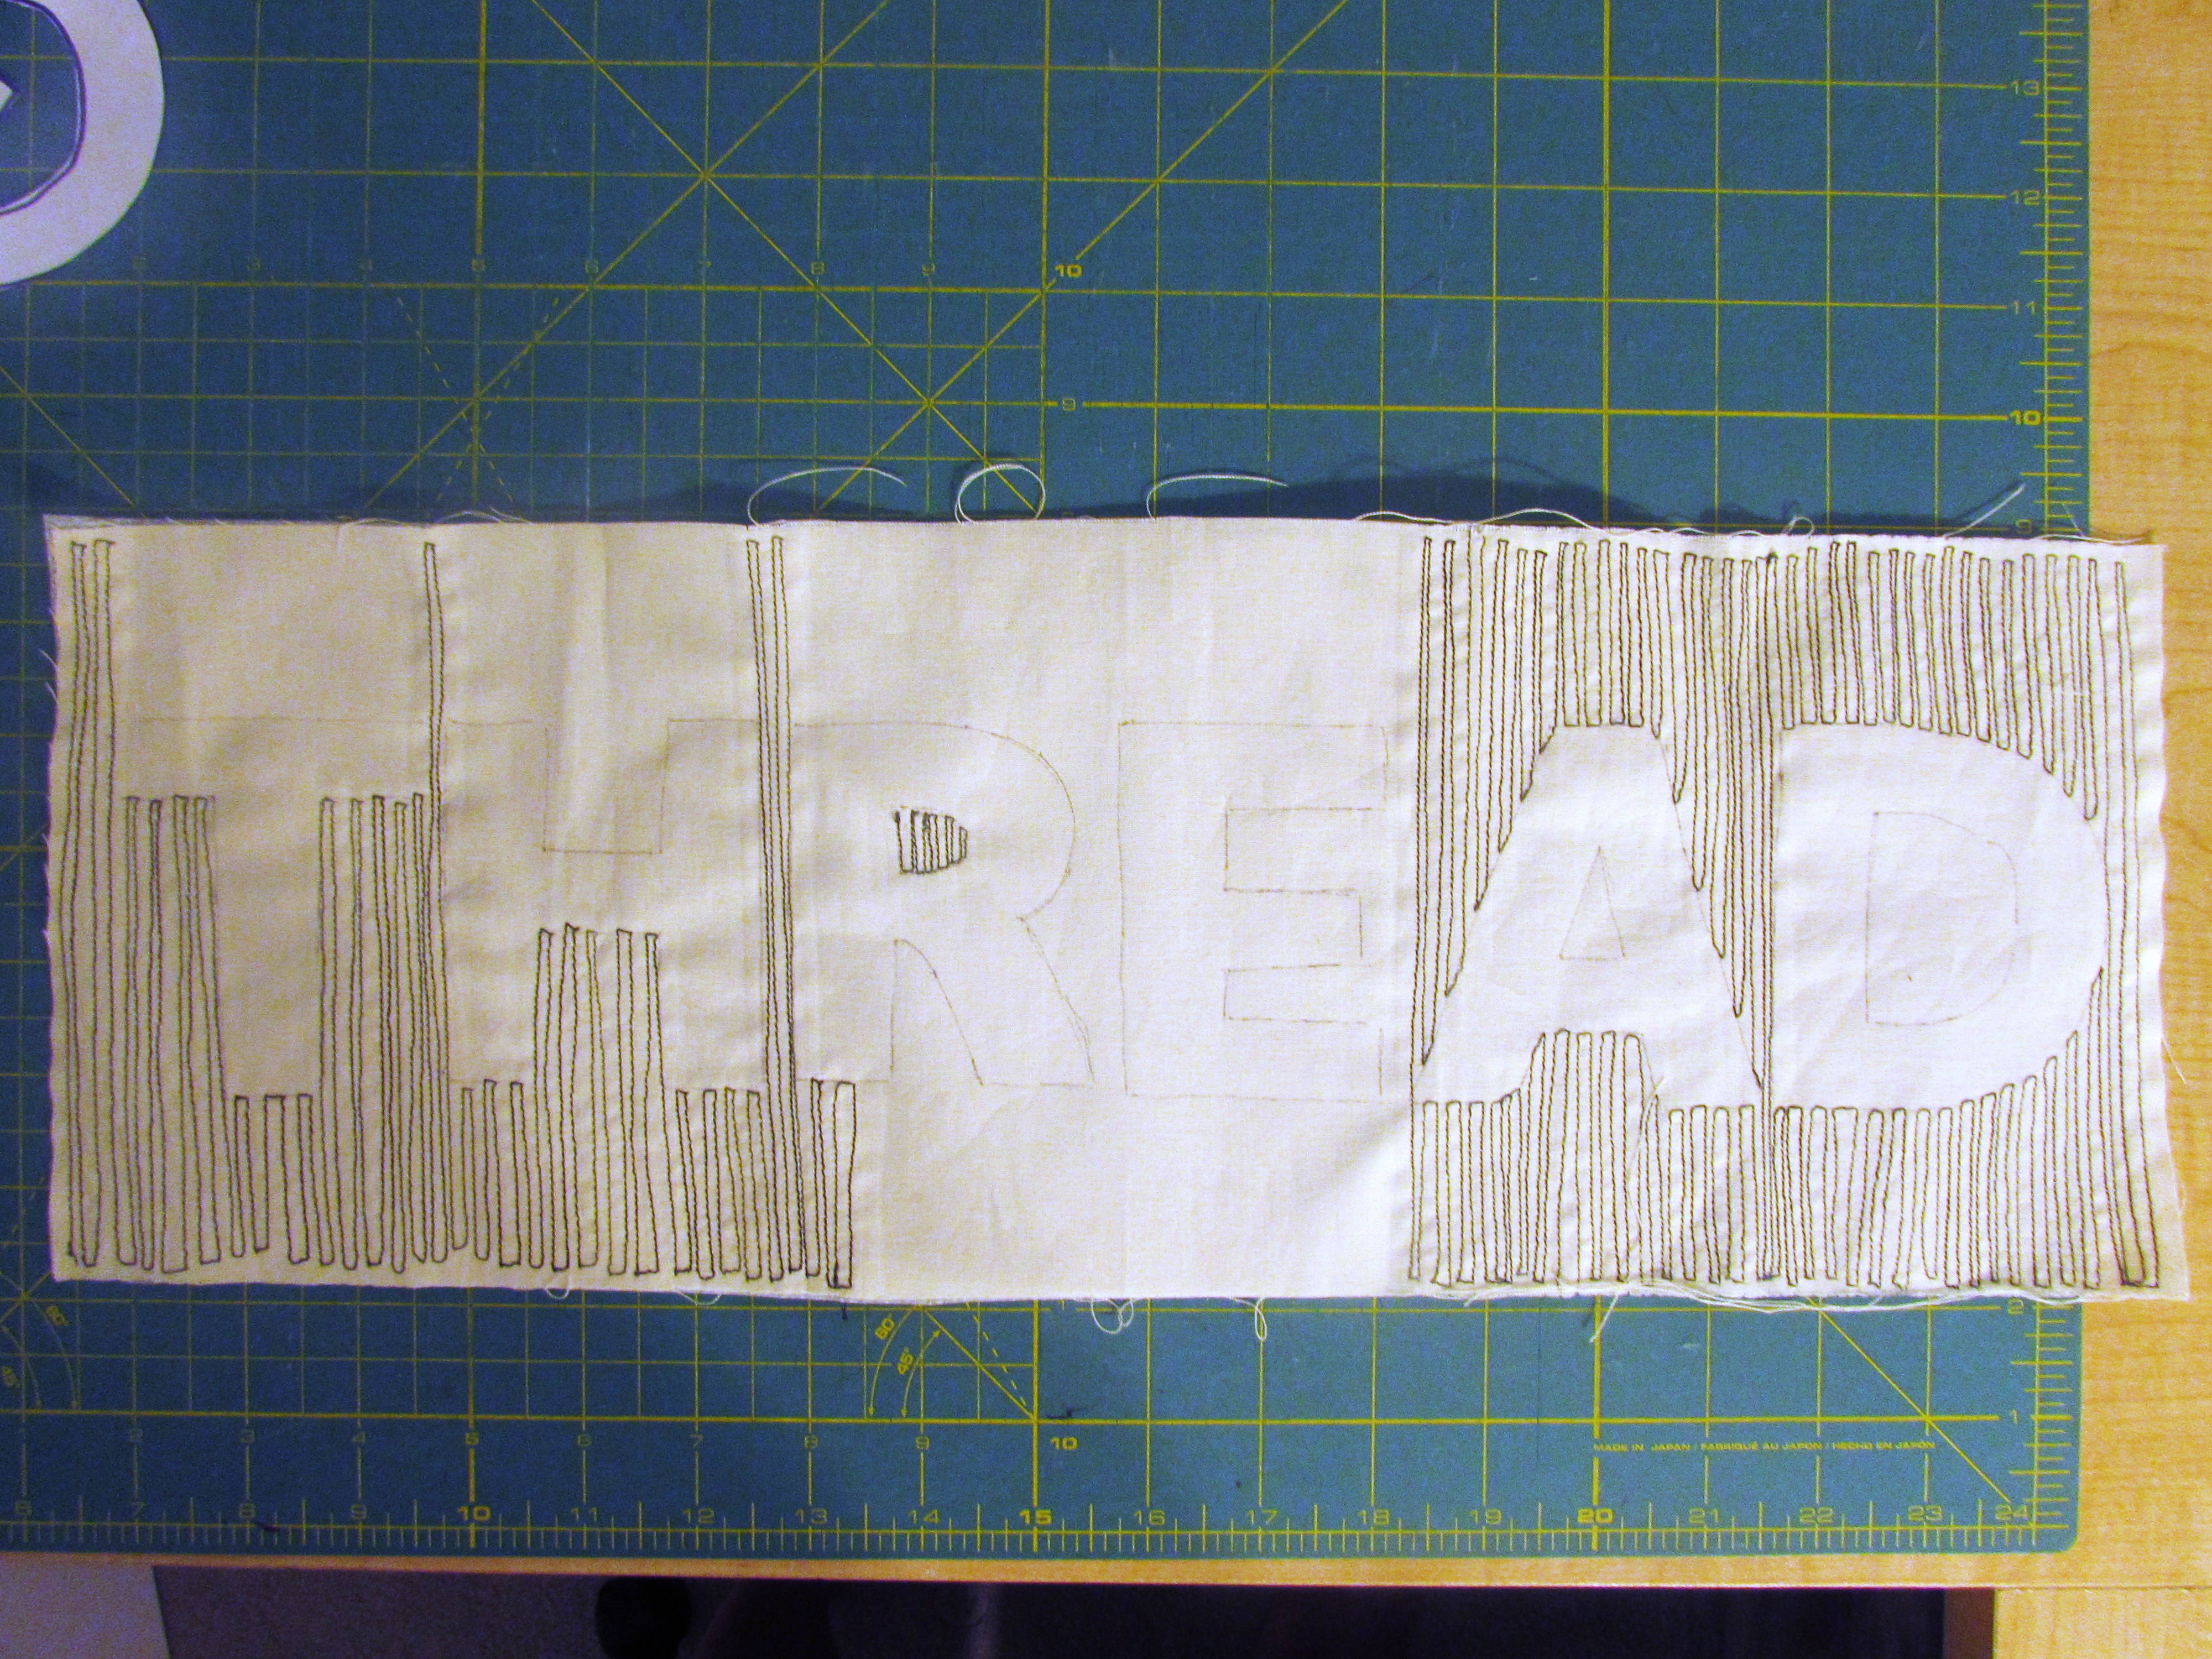
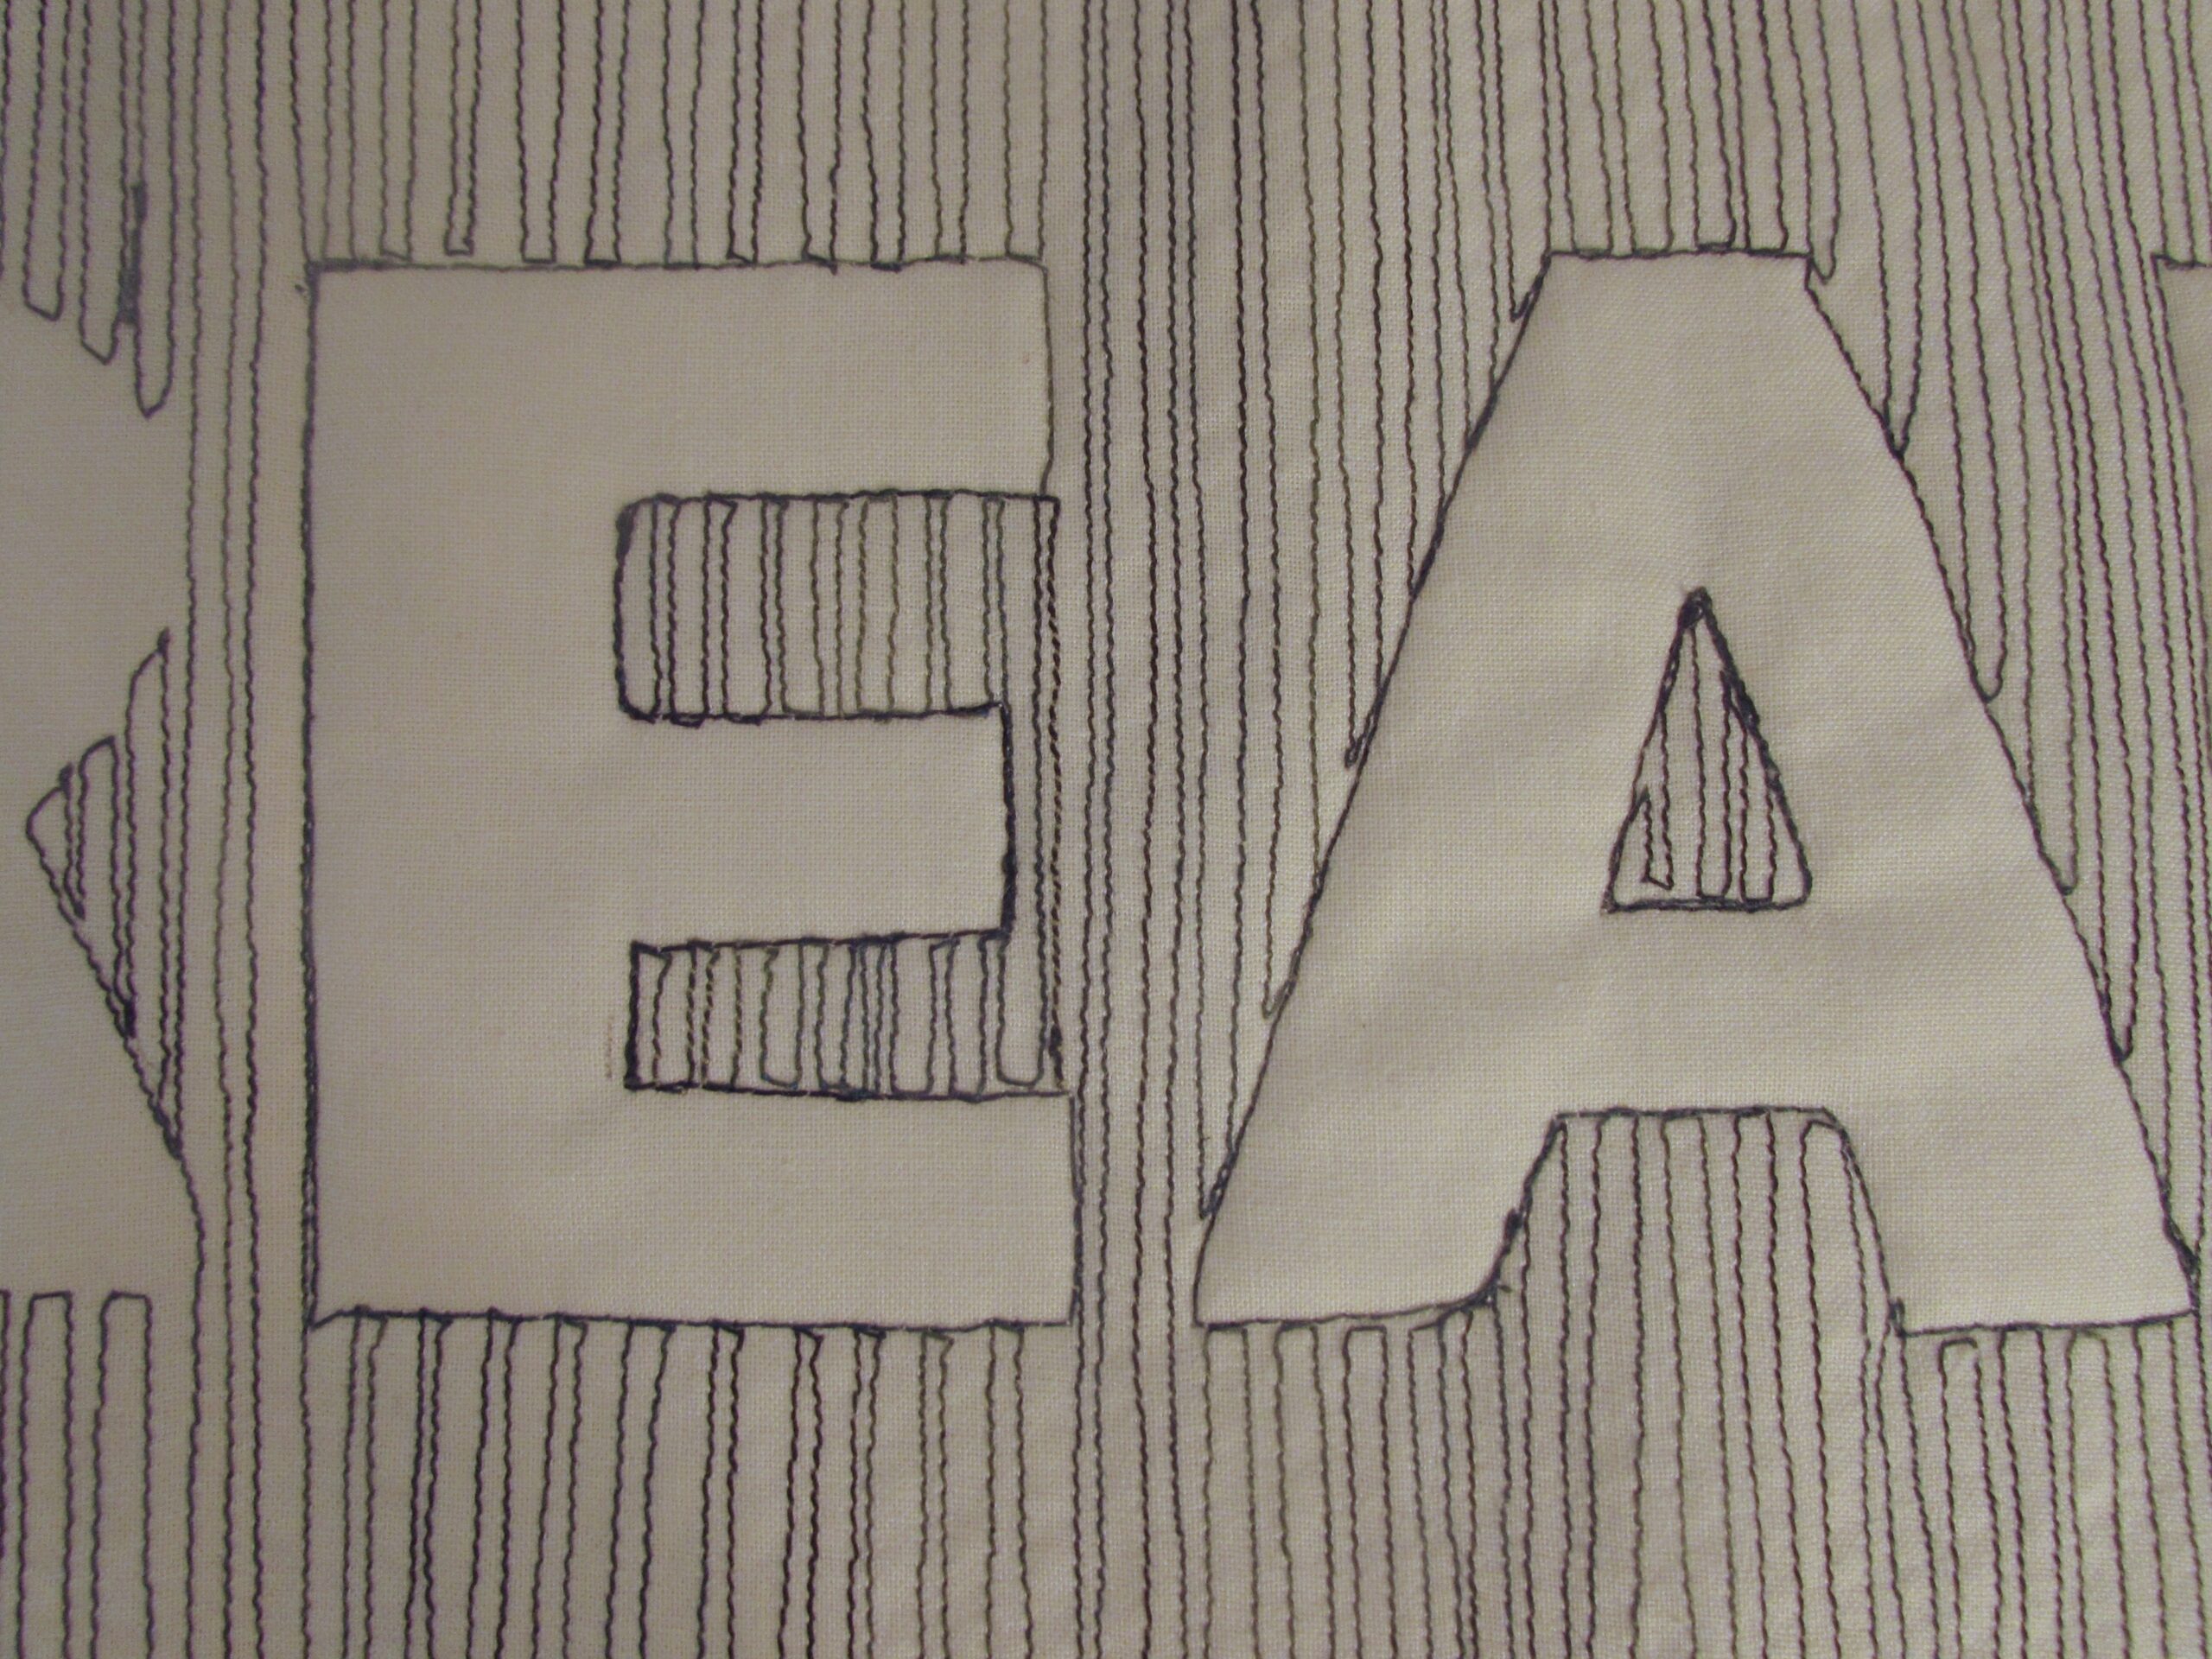
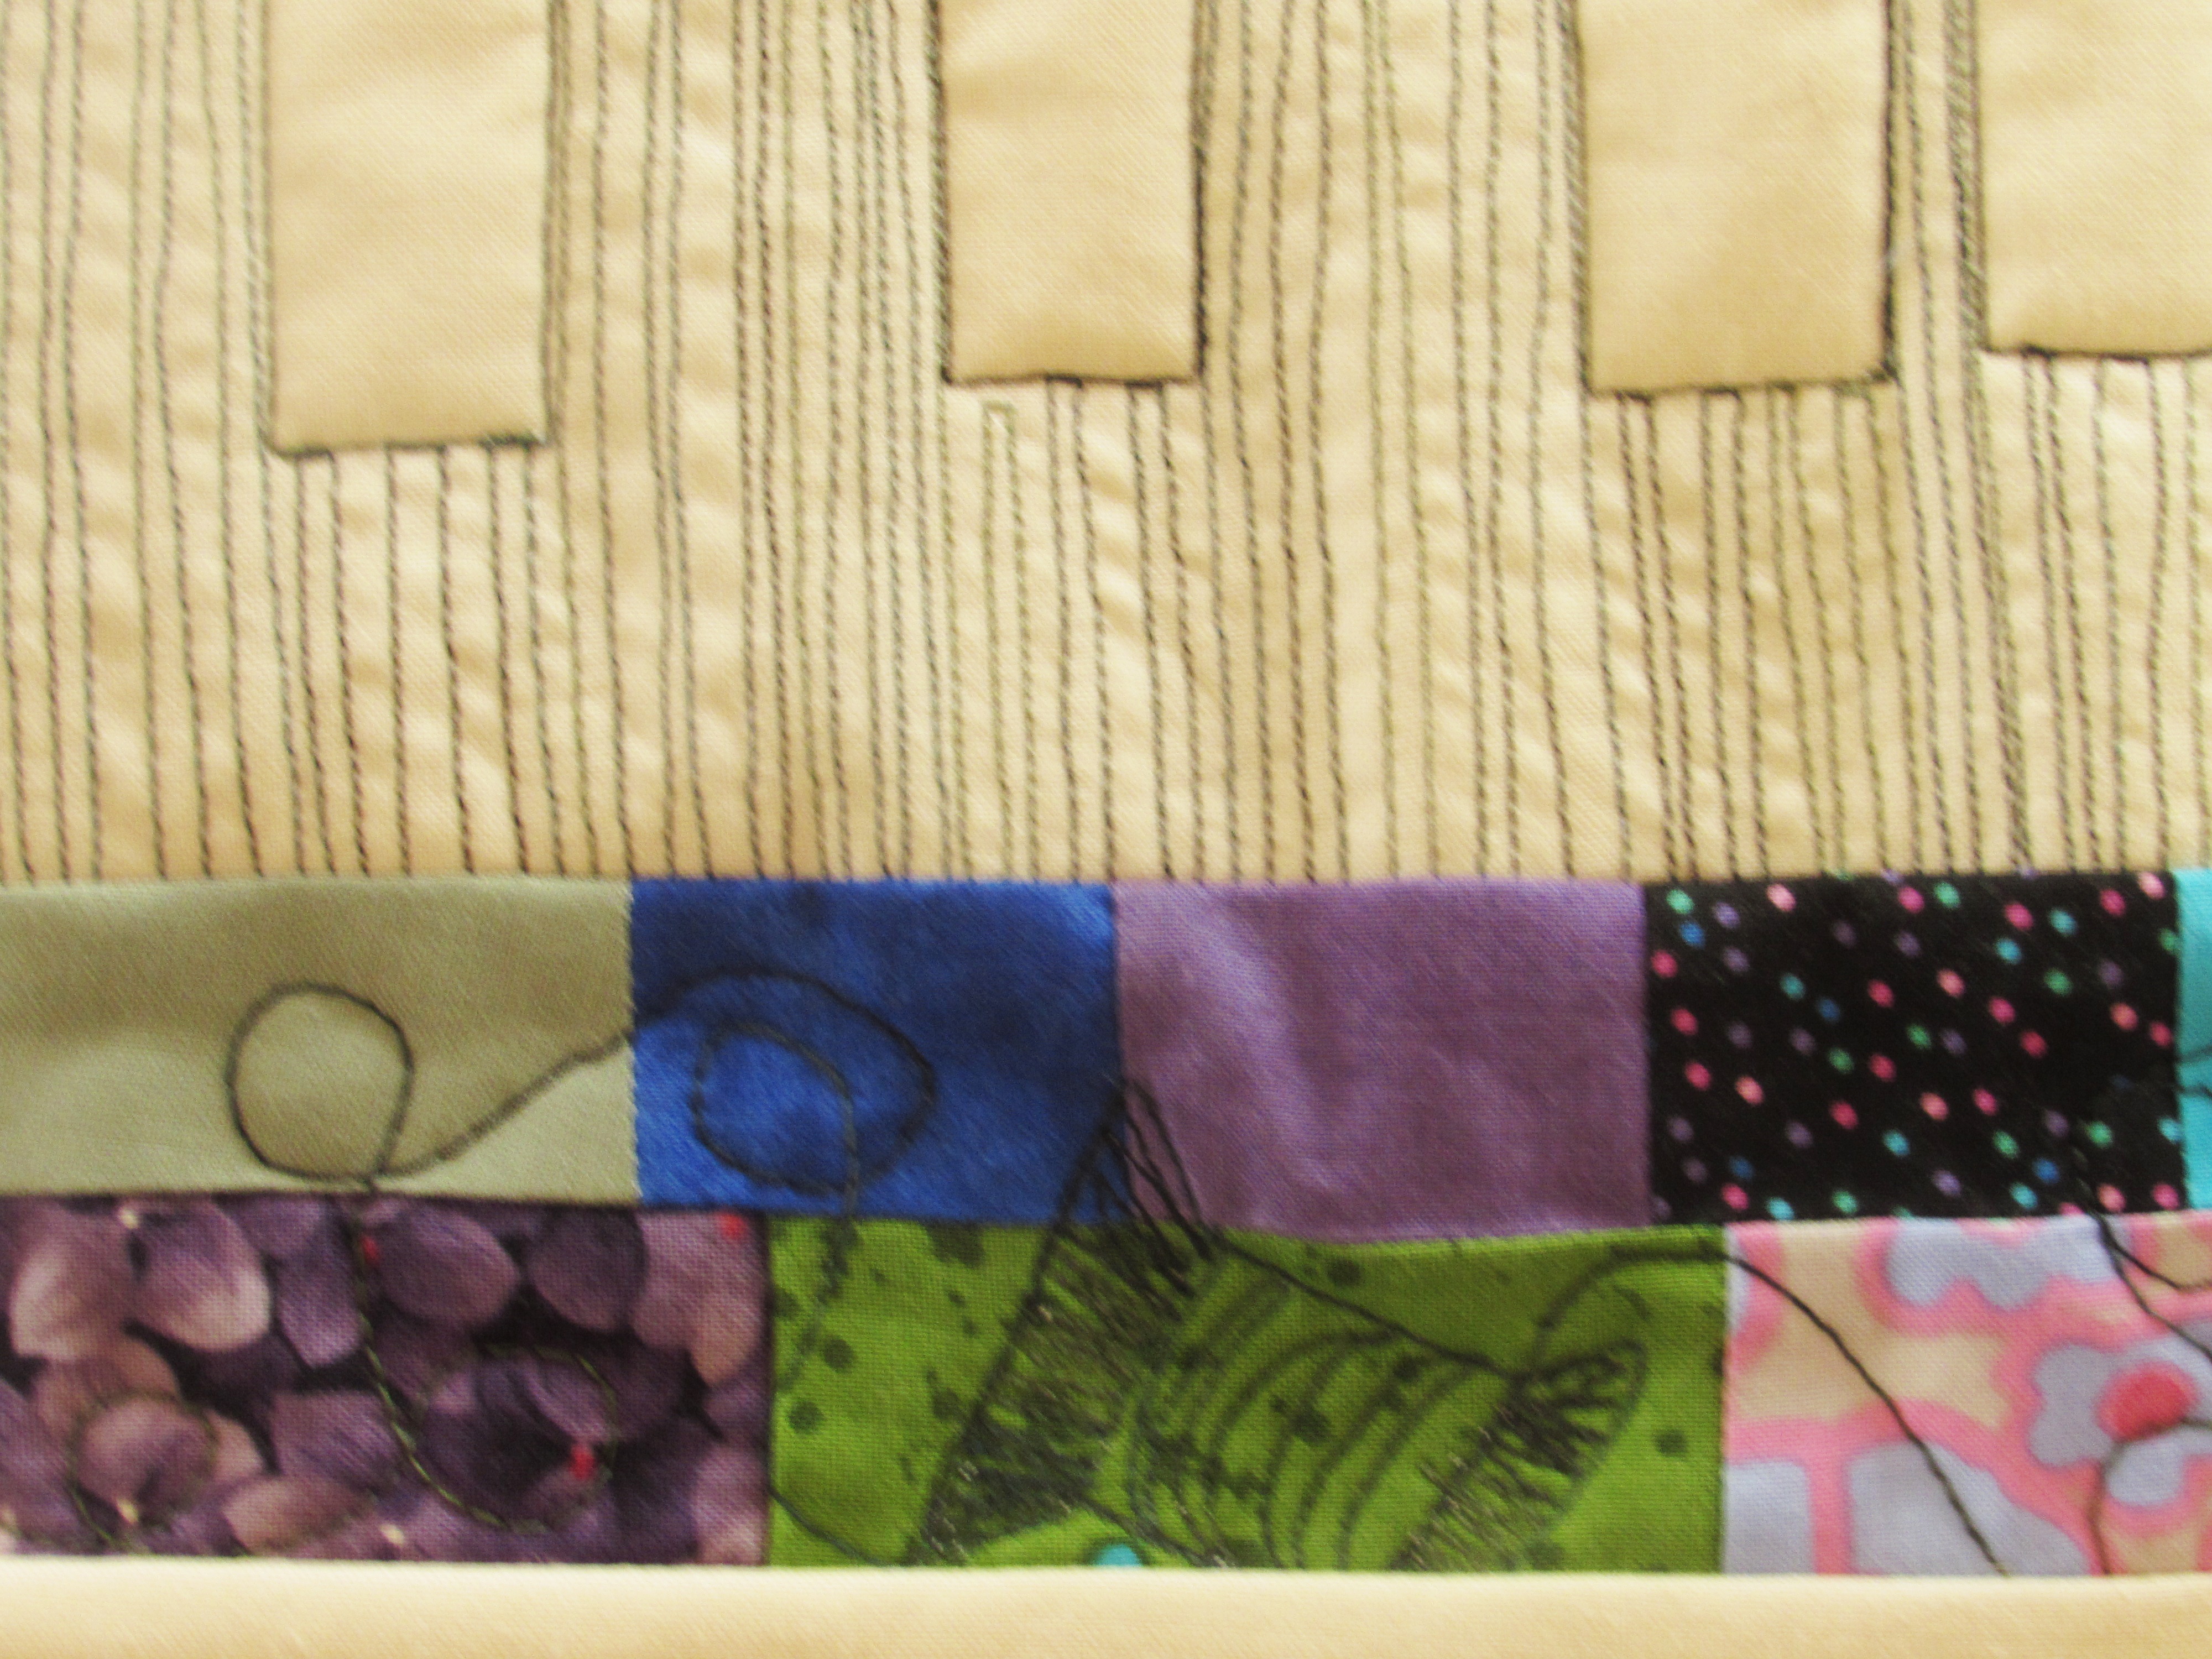
Using a walking foot, begin stitching long straight rows above, below and between the letters. I didn’t stitch the outline of the letters. This happens later on when you are quilting everything together. For now, just fill in every bit of space above, below and between each letter. You might choose to use a free motion foot for the little openings within a letter (e.g. the A and the D) so you don’t have to start and stop, twisting the fabric. I kept working with the walking foot because the block is small and easily rotates. Each time I came to the botton or top and needed to move to the next line, I very slowly stitched one stitch over, sometimes doing so by manually turning the wheel on the machine so I moved just one stitch. This kept my rows extremely close together. If you have a needle down function, this helps. Just go one stitch and let the needle stay down while you turn the piece. Now and then, the width looked to wide to me and I would back up and fill in with another line of stitching. Remember you will be viewing this from a distance and it looks much better that way. While stitching, you are looking at it from 6-8″ away and you’ll see every wobble. Not a problem. You are going for the overall effect.
See how the word starts to come to life? I love that! Now keep on stitching!
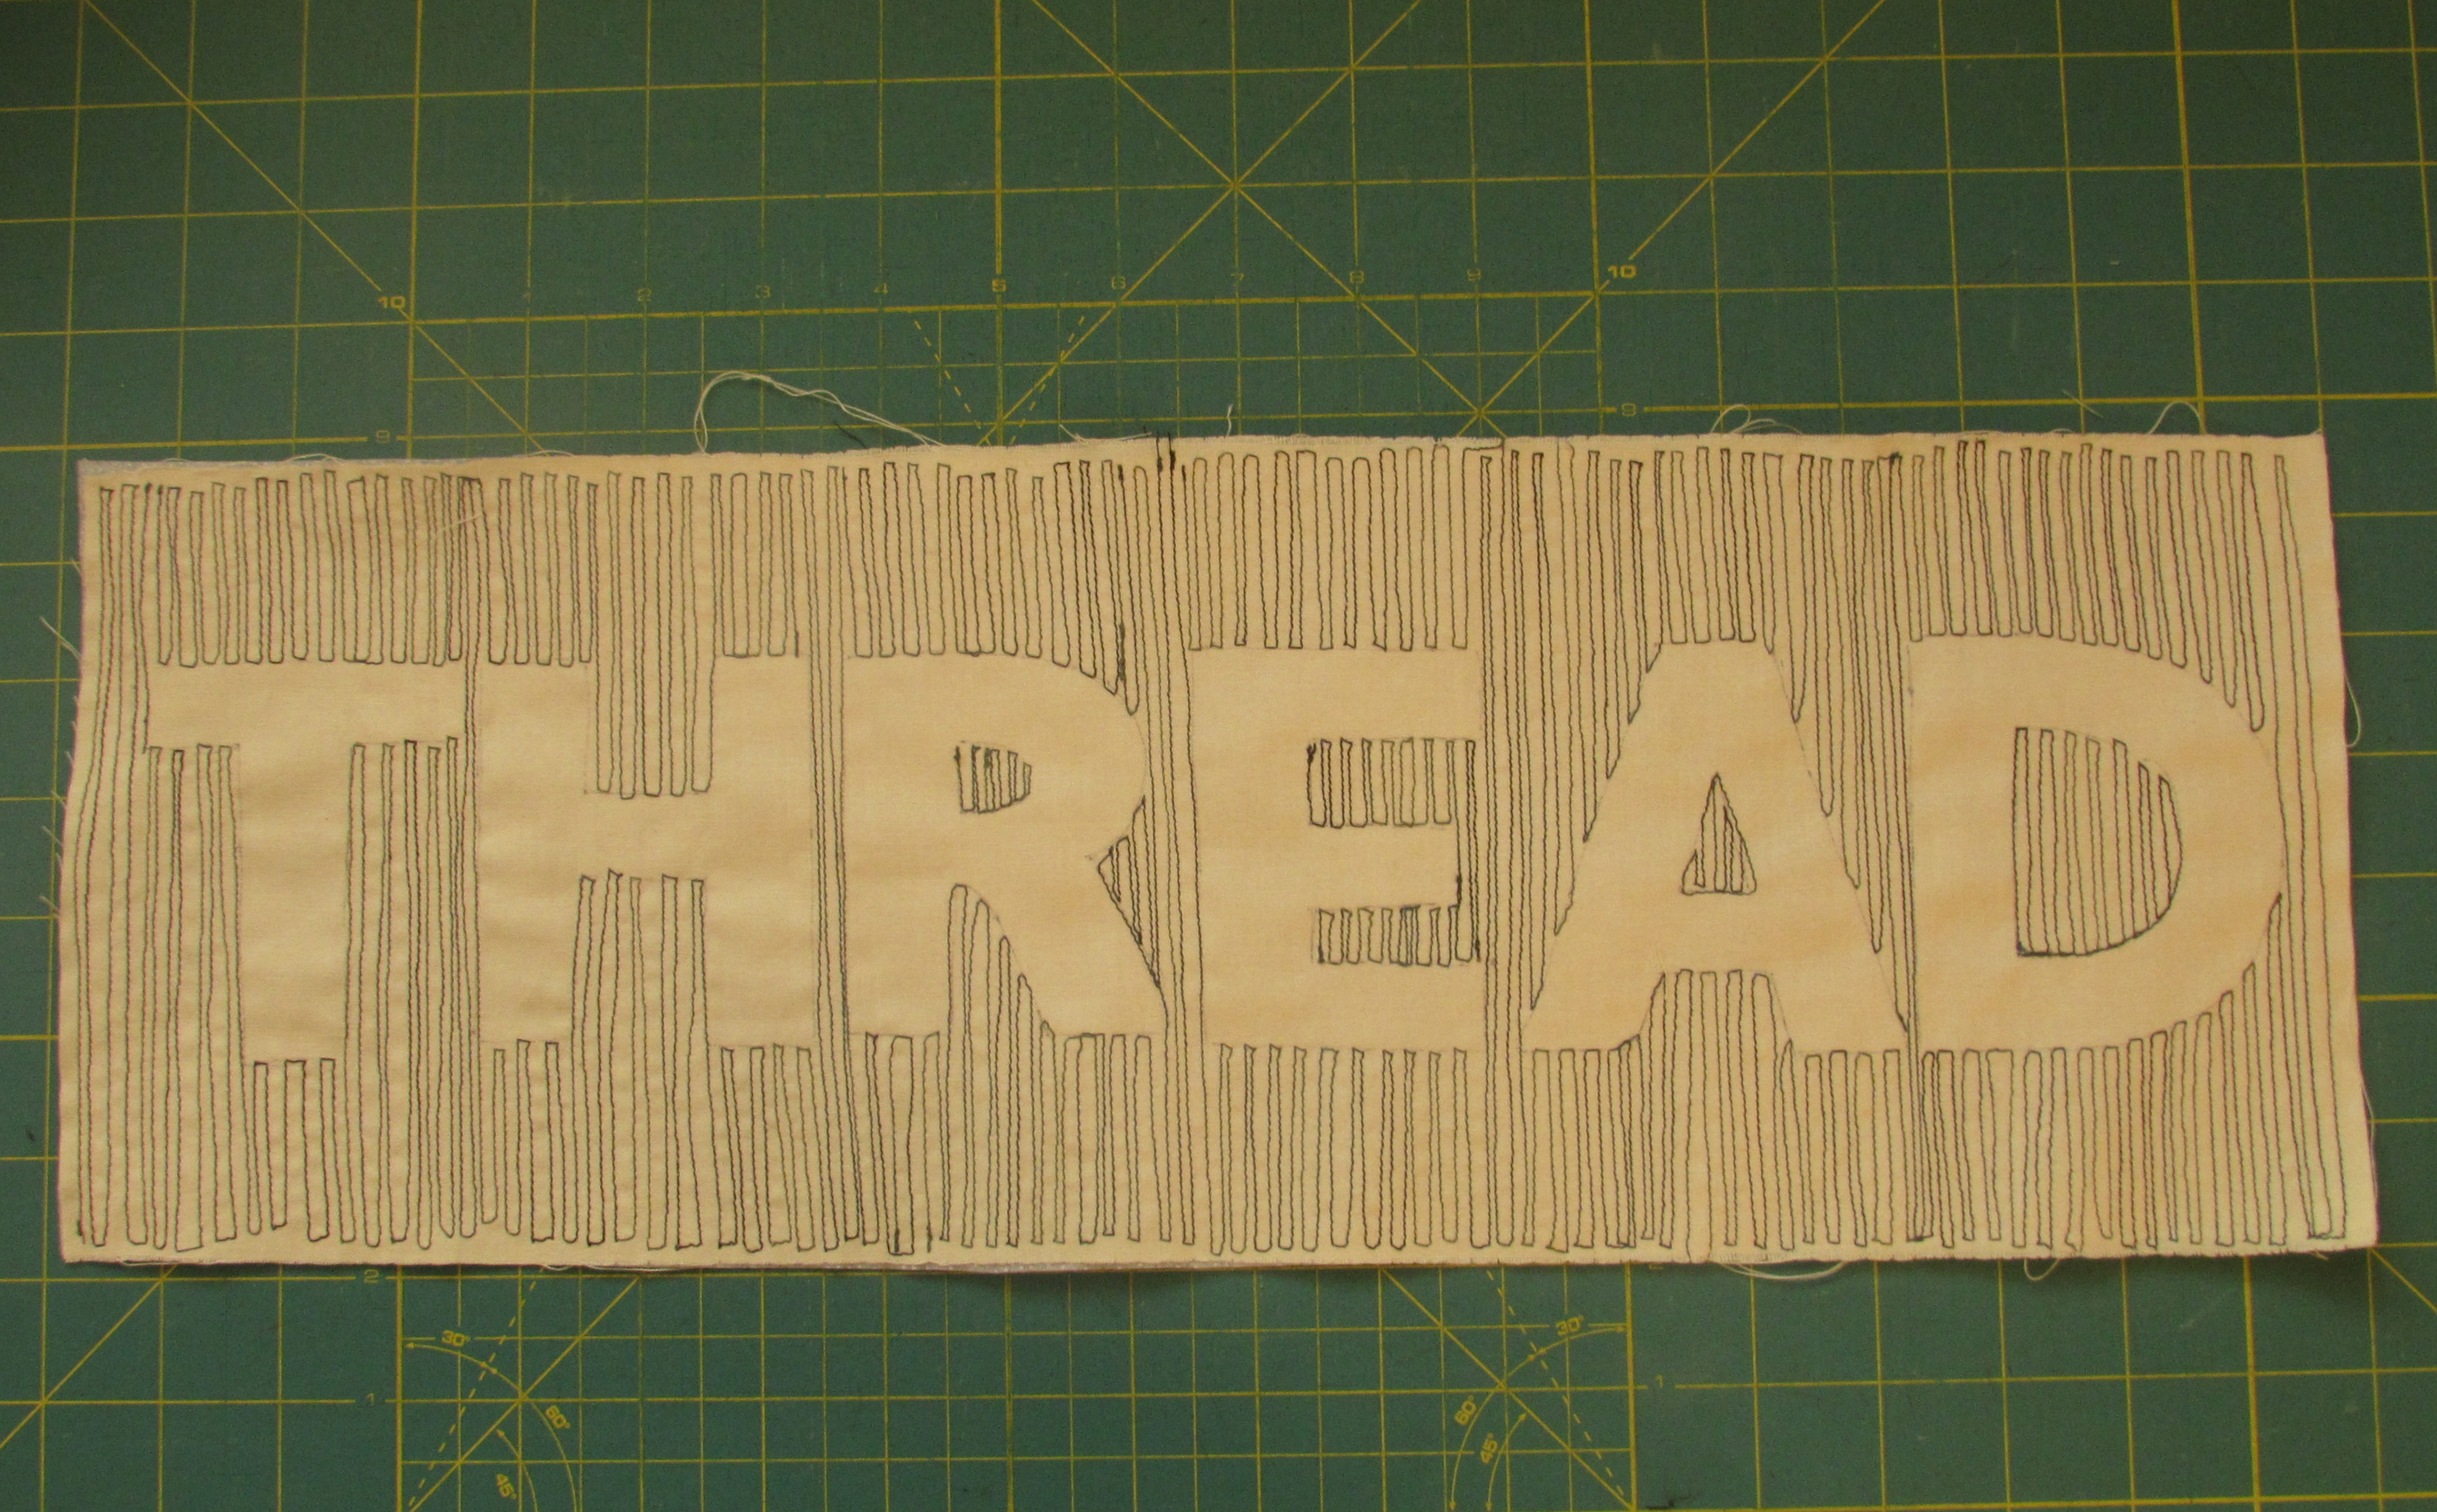
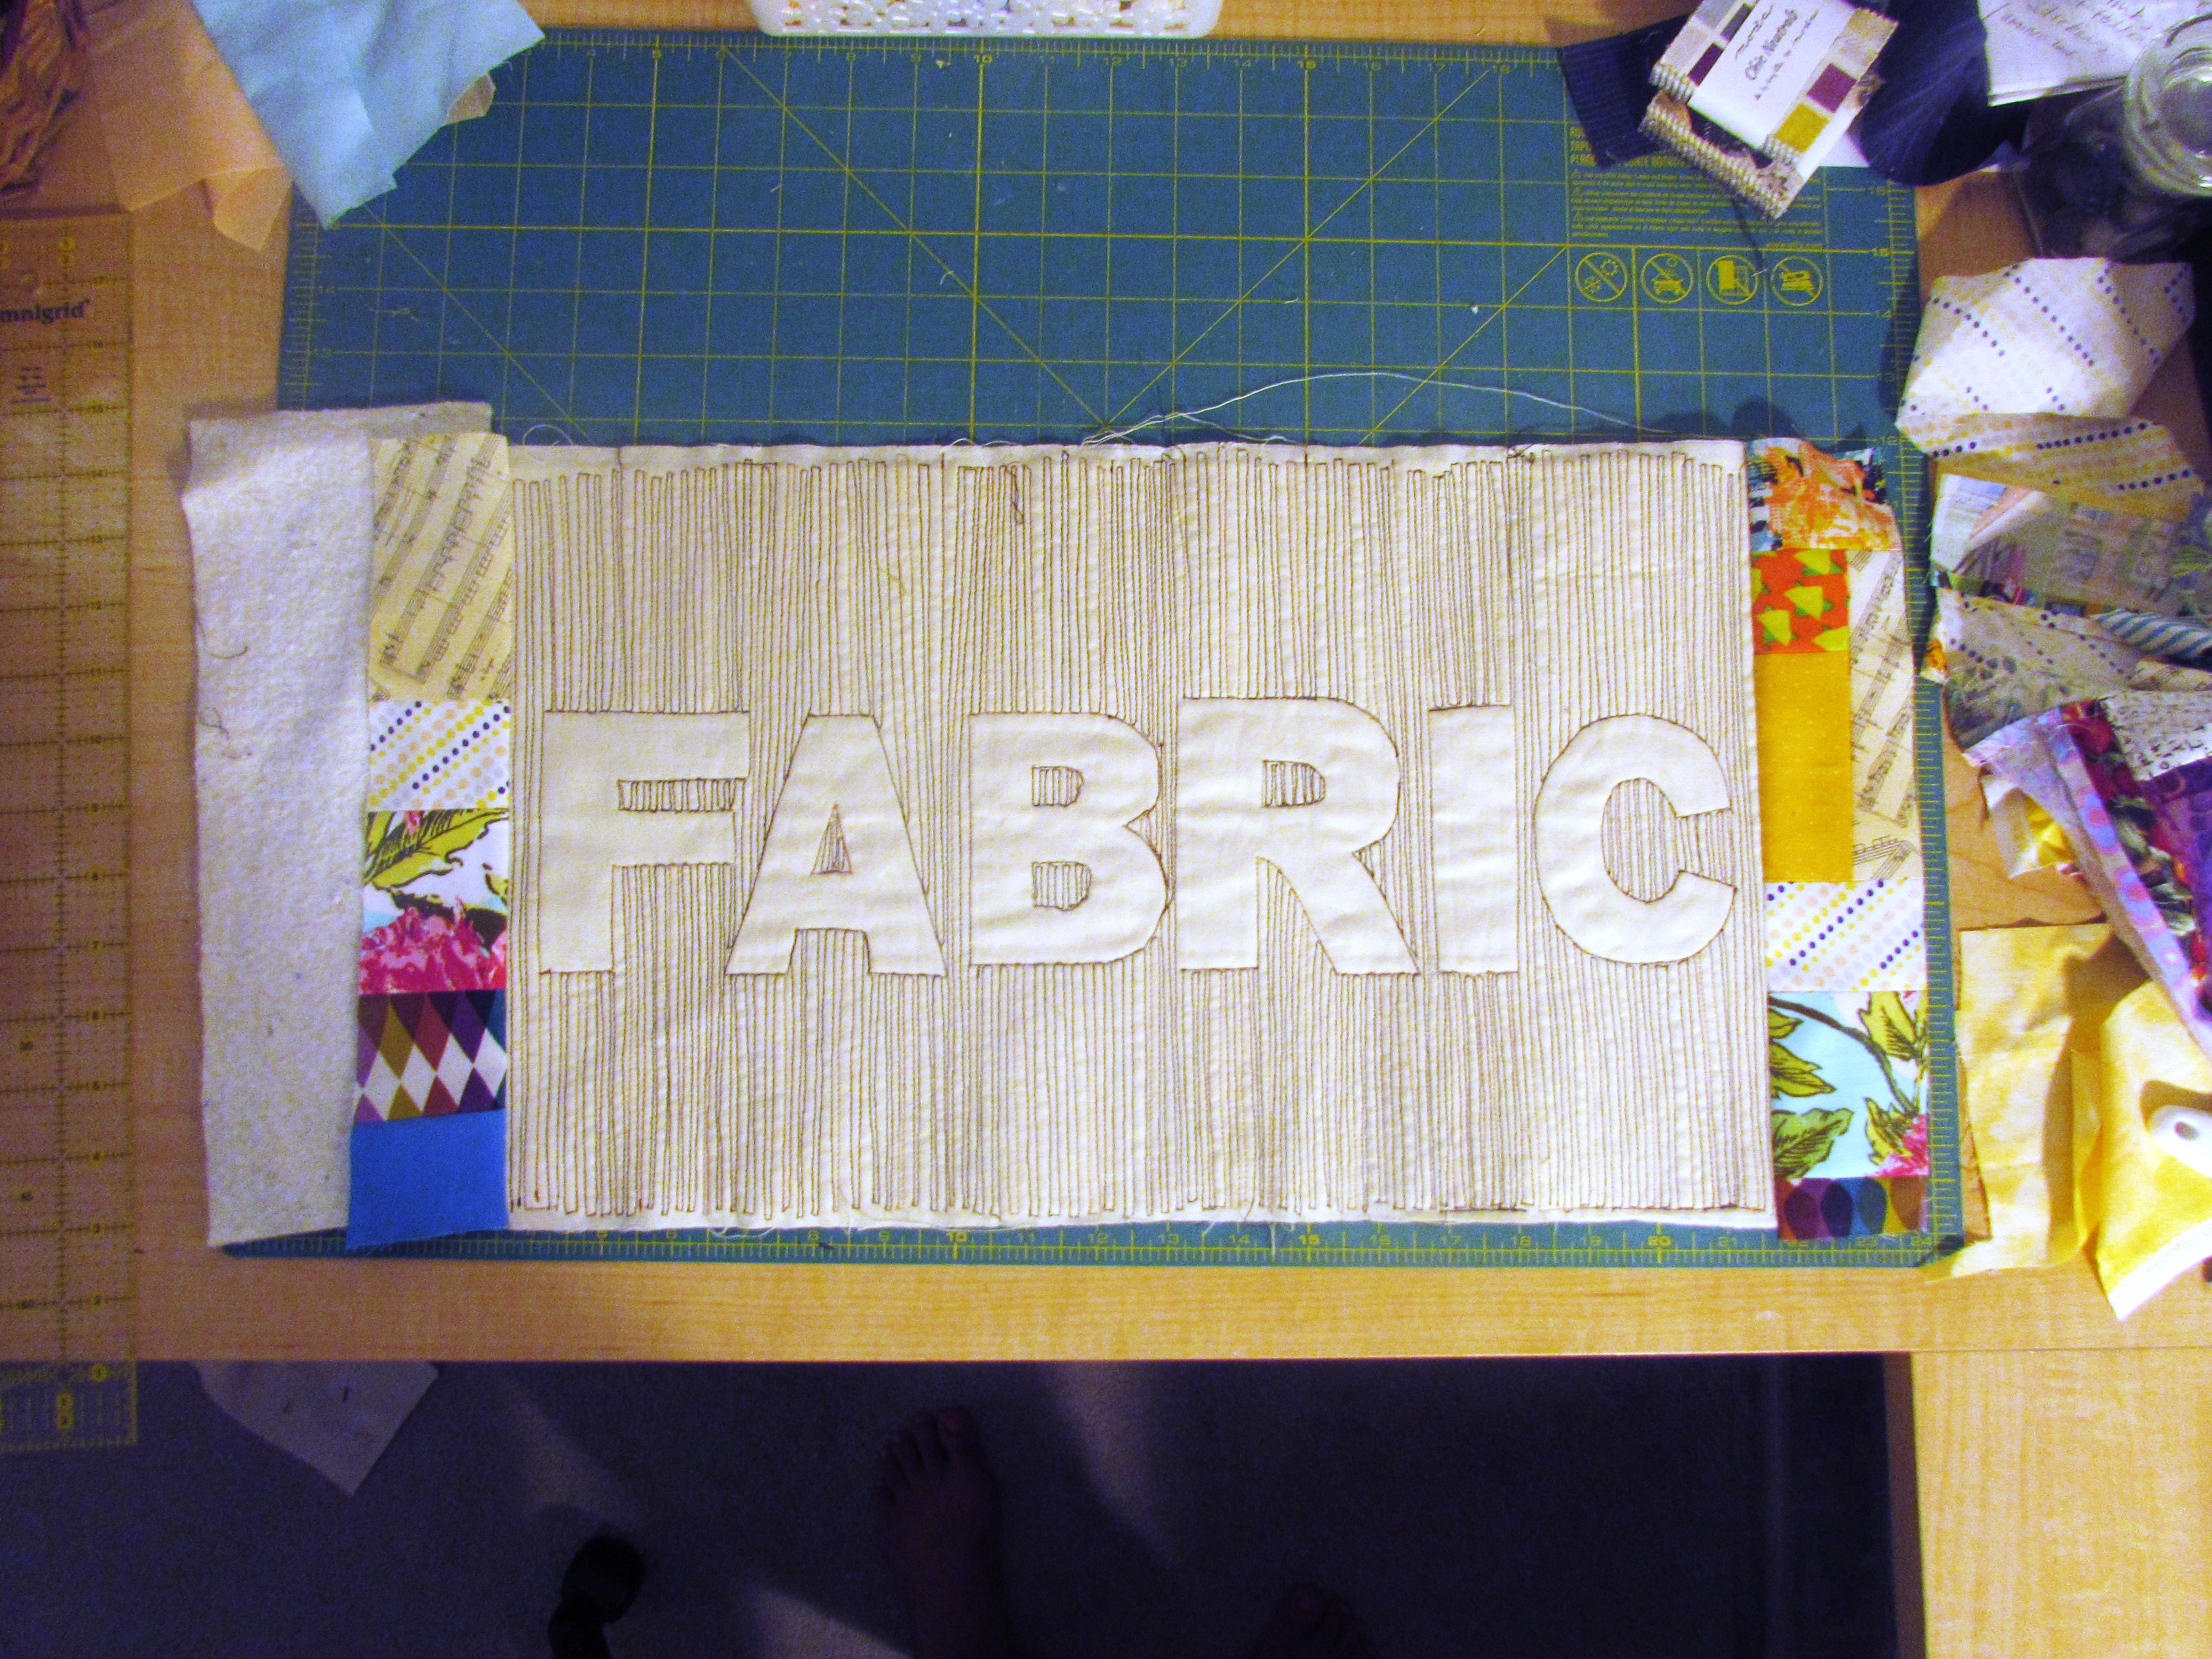
Making good progress here. The word is complete and it is time to begin working on your border.
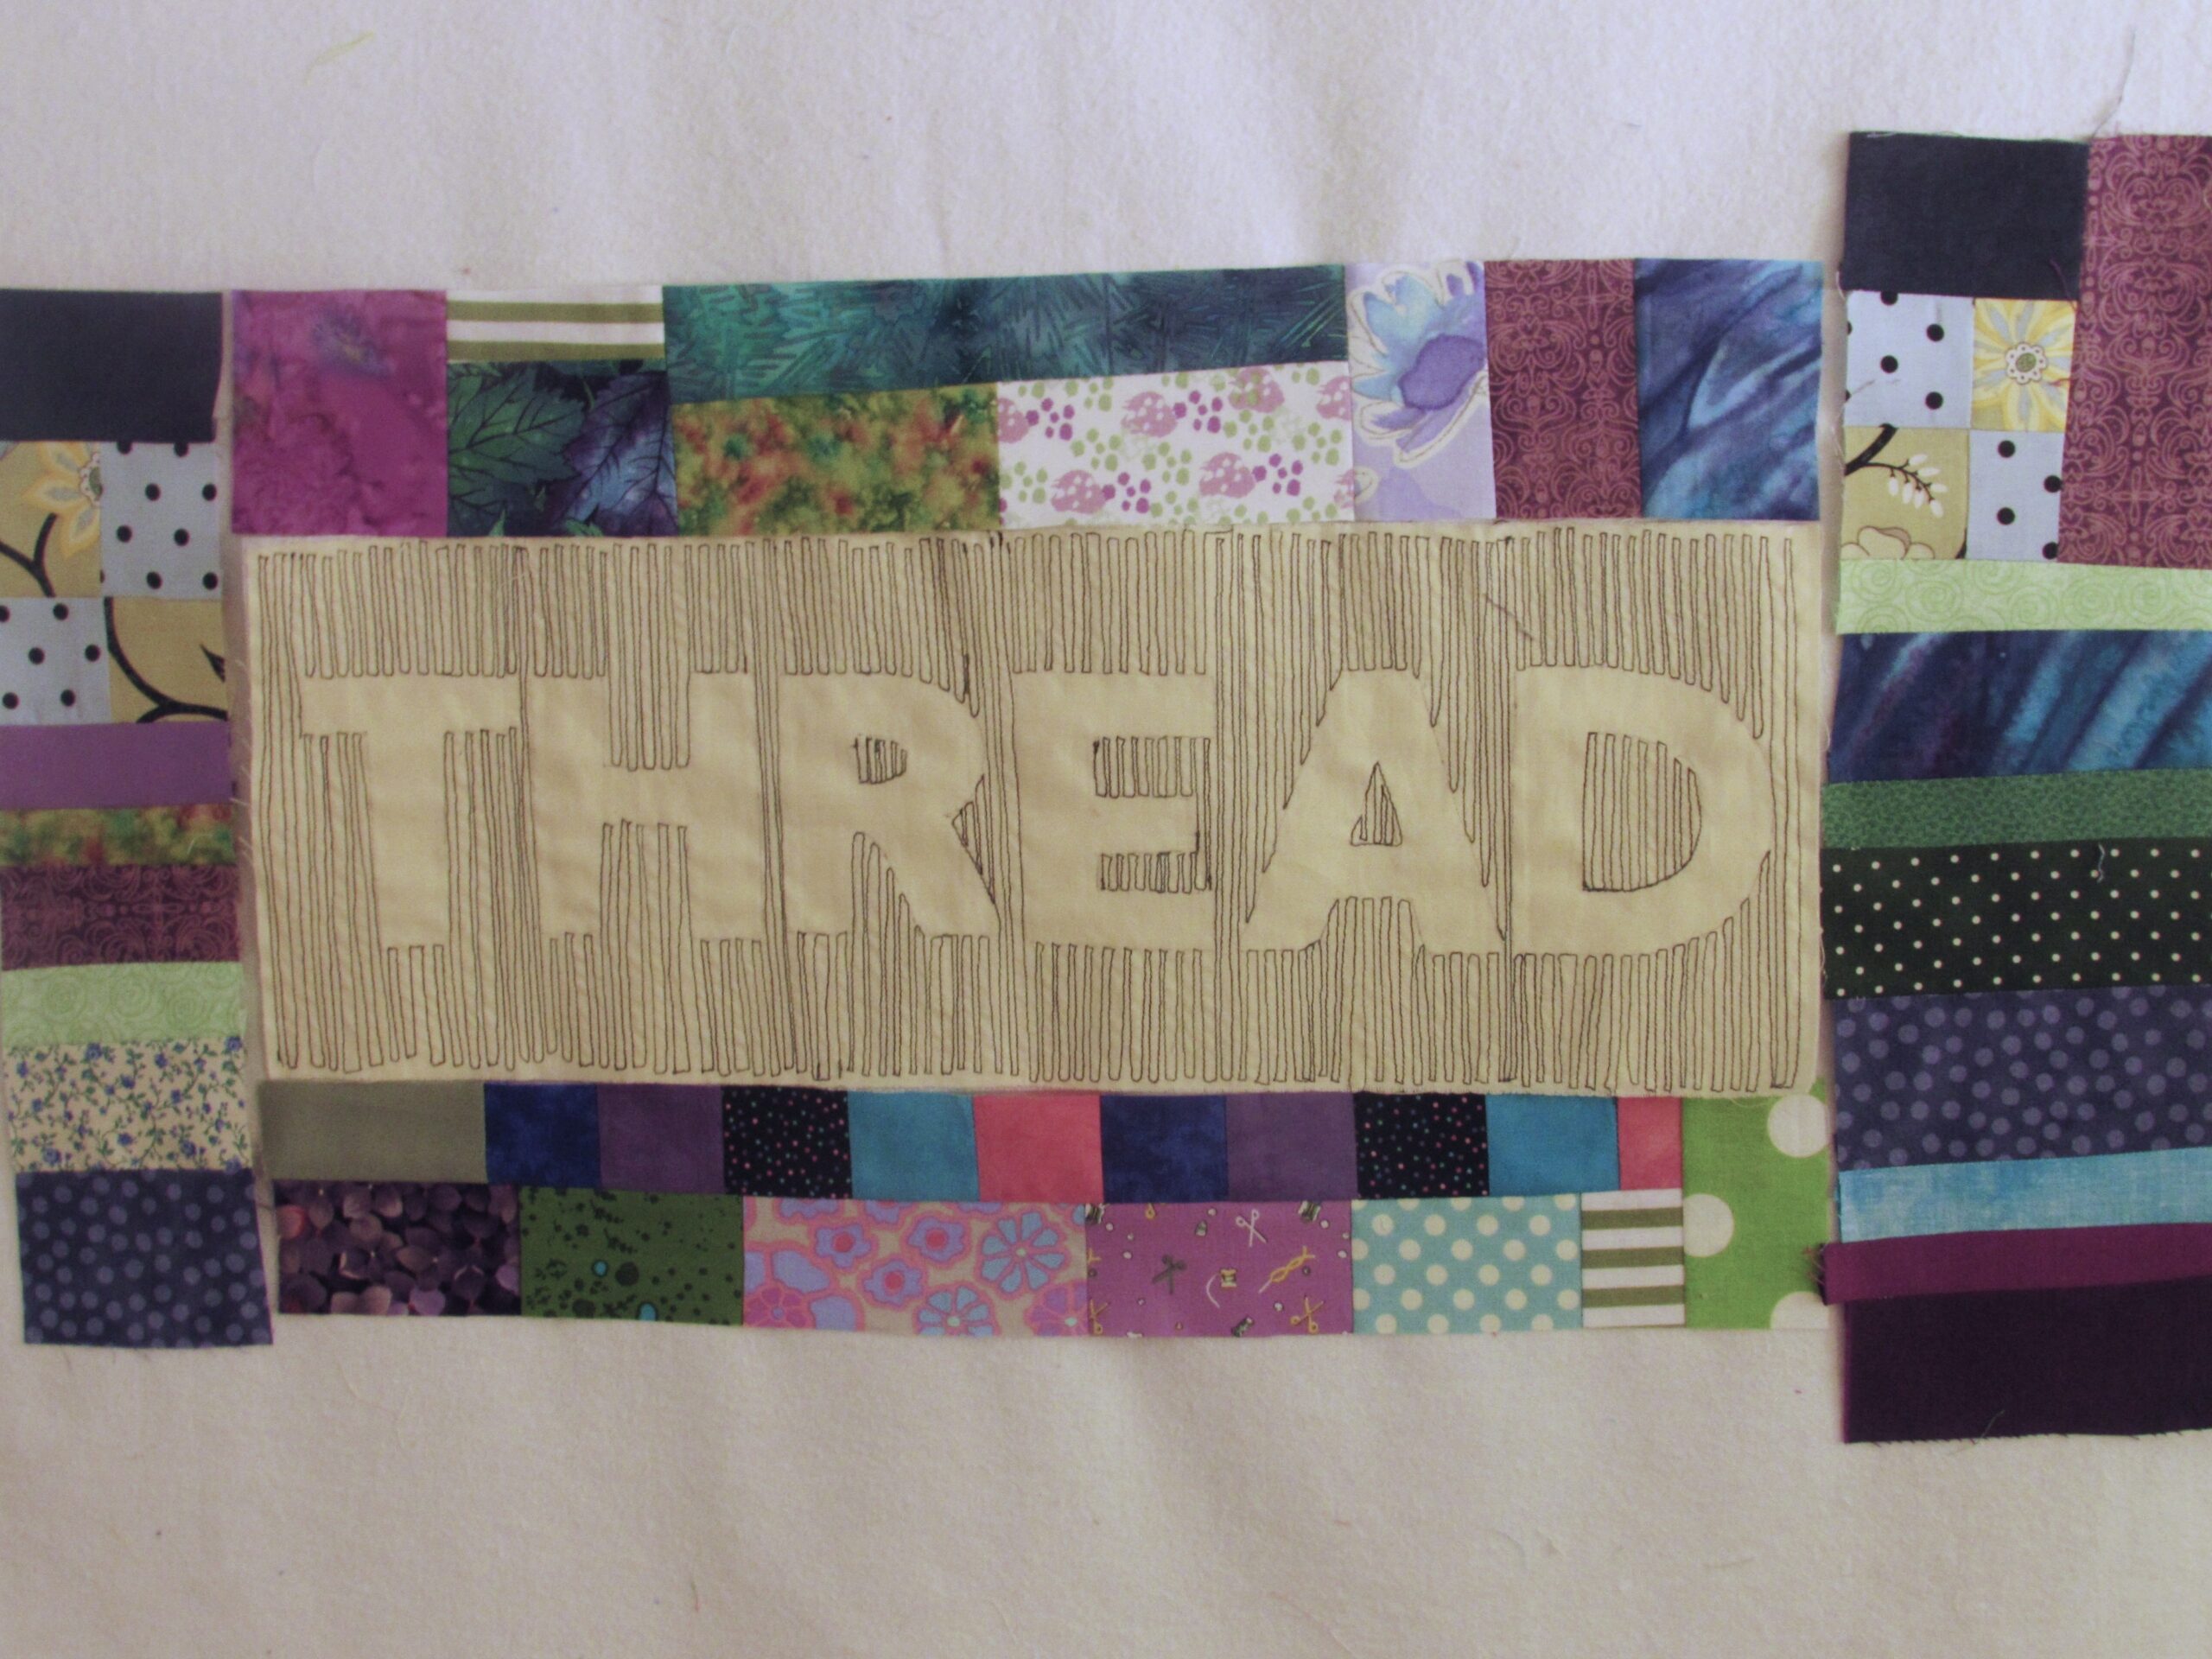
I made an improv border by taking squares and rectangles in my color scheme (basically greens, purples and blues) and built four pieces, two for the ends and two for the top and bottom. I didn’t worry about size too much. I made them a bit longer than the side I wanted to sew them to and since I wanted to have them trim out to 3 inches, I made sure the whole thing measured wider than 3 inches. Note: If you are not comfortable with this scrappy improv process, I recommend grabbing a copy of 15 Minutes of Play by Victoria Findlay Wolfe at your library. She does an excellent job of guiding you through. Alternatively, Amanda Jean Nyberg at Crazy Mom Quilts did a Quiltalong last summer called Scrap Vortex. In this post, she talks about building with scraps. It might be of help to you.
After playing with them on the design wall, I trimmed each to a width of 3″. I sewed the top and bottom borders on first and then added each side.
The next step is to make a quilt sandwich with your top, the batting and your backing fabric. I pieced the batting from scraps I had. Just pin it around the border tightly since you are going to quilt in the center first. My batting was just barely bigger than the top but since it was such a small piece I felt ok with that. Normally I use batting that is a good two inches larger than the top all the way around.
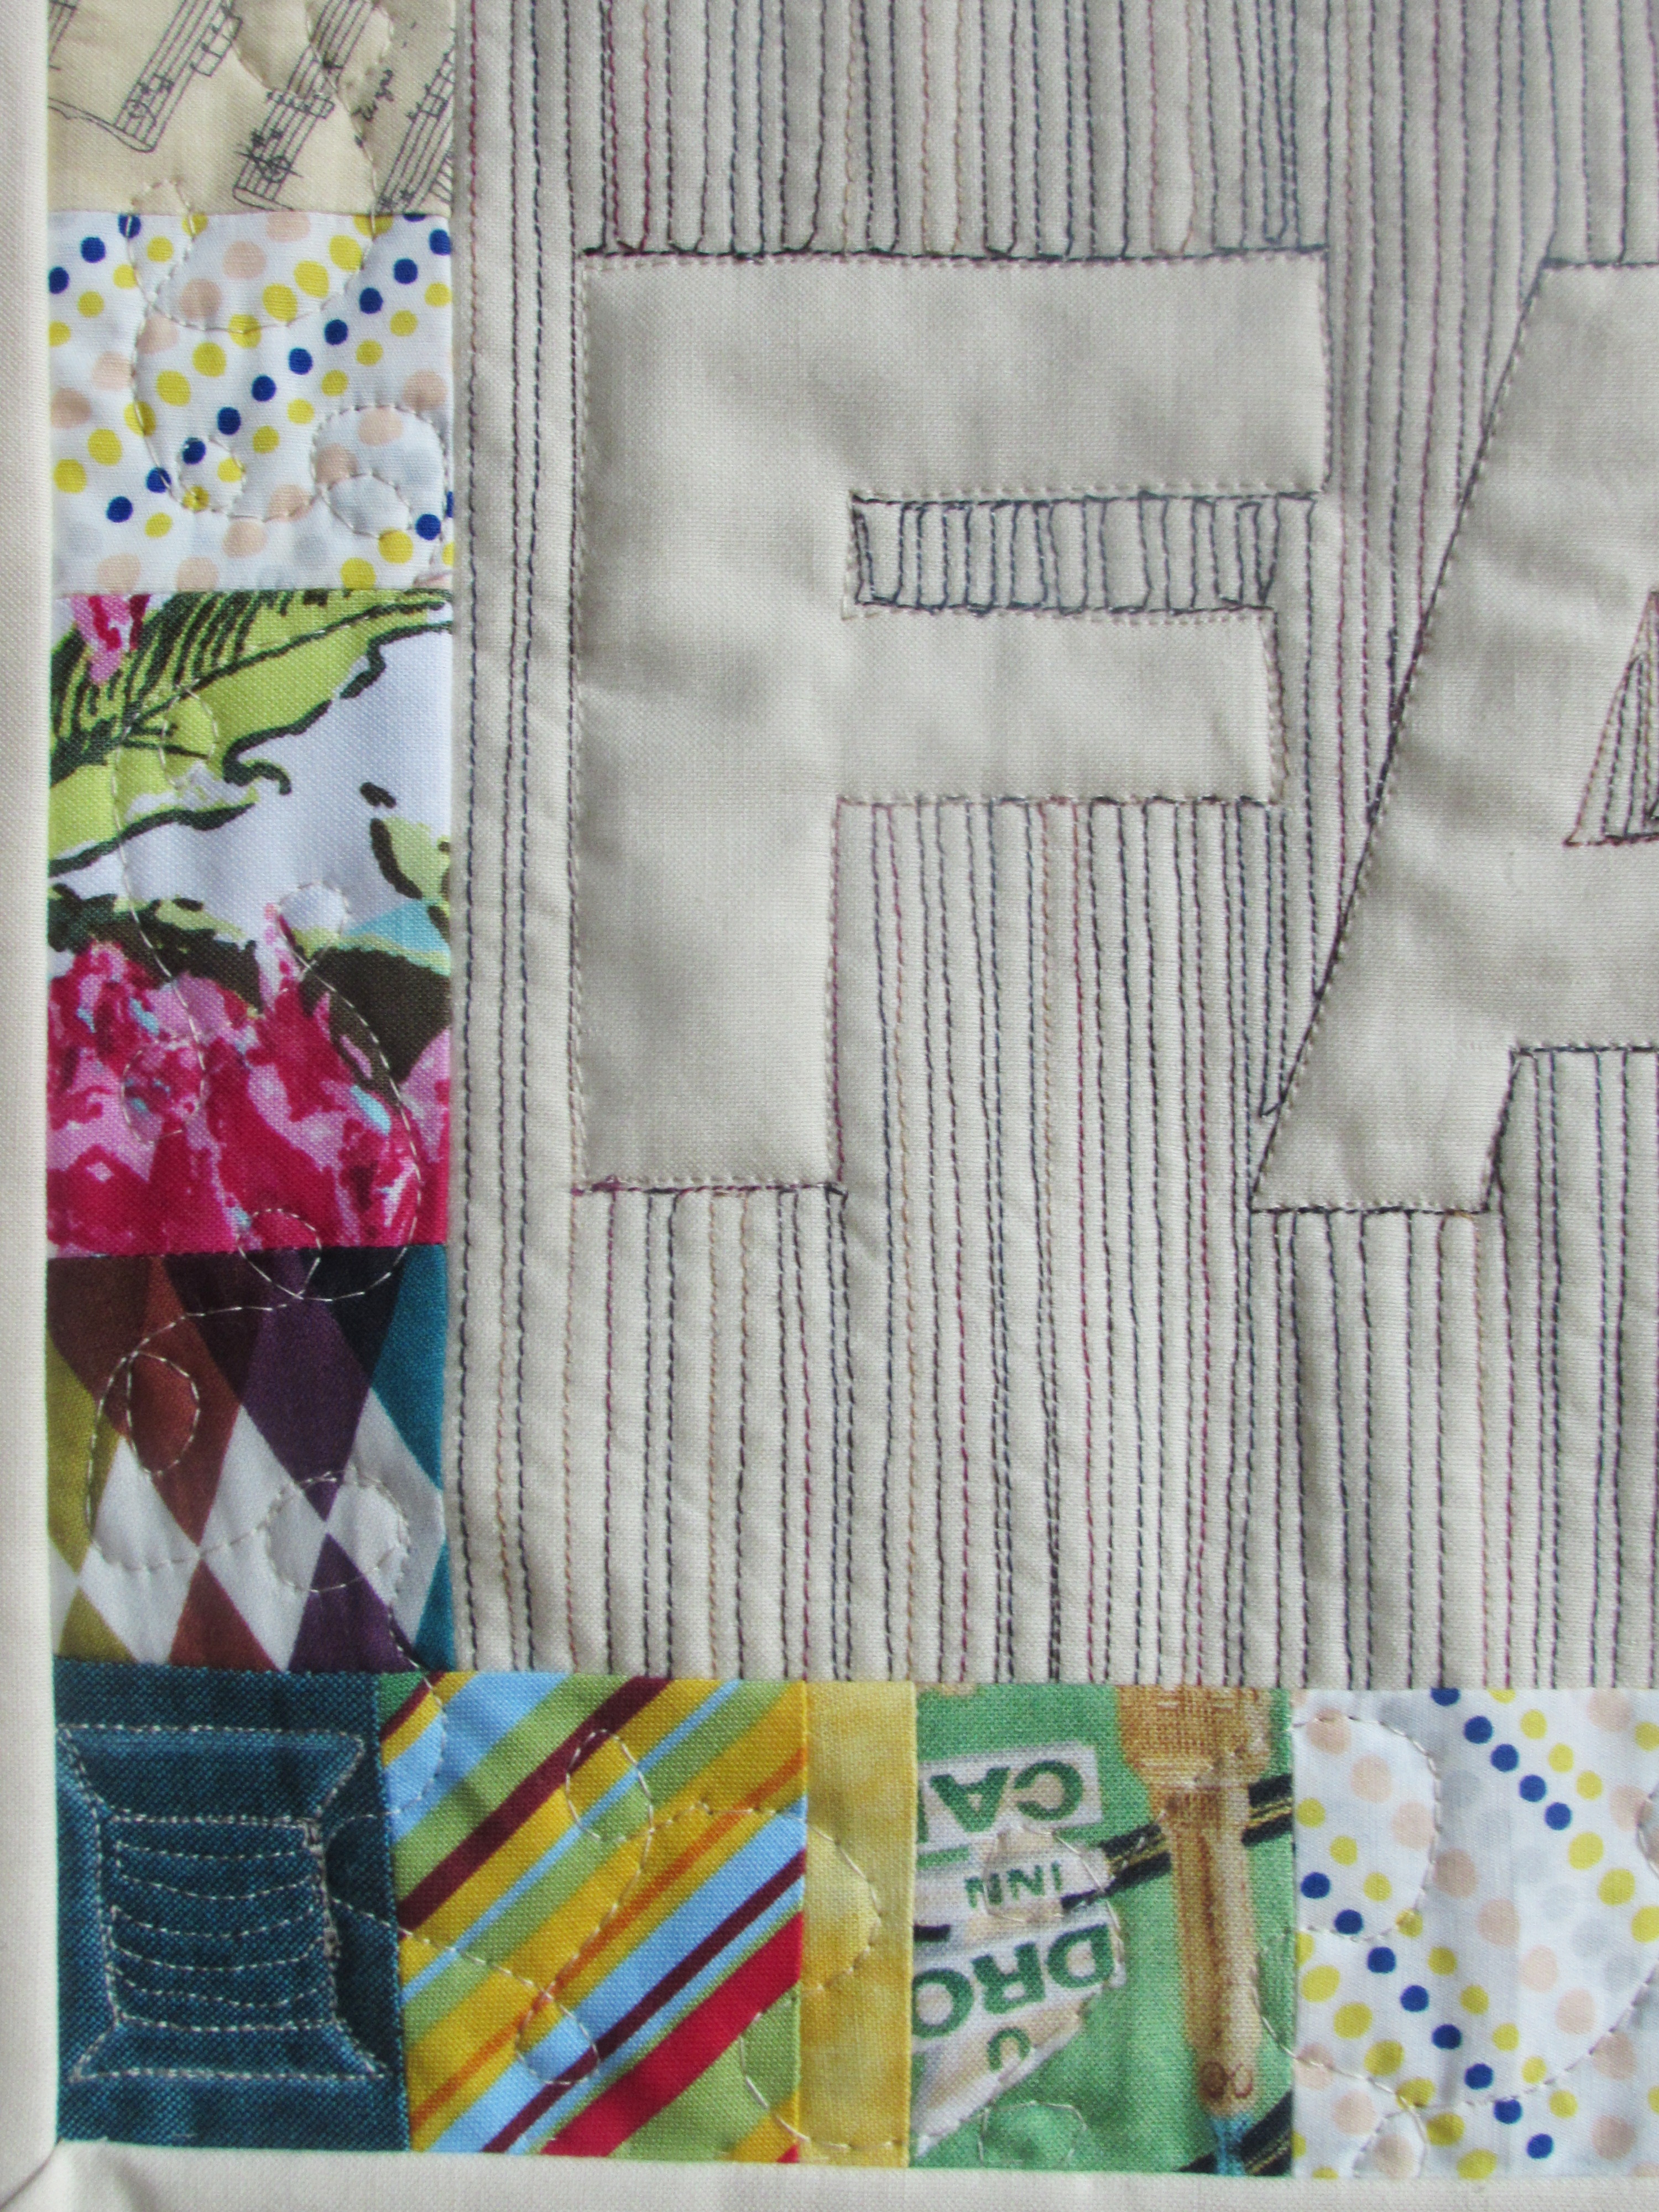
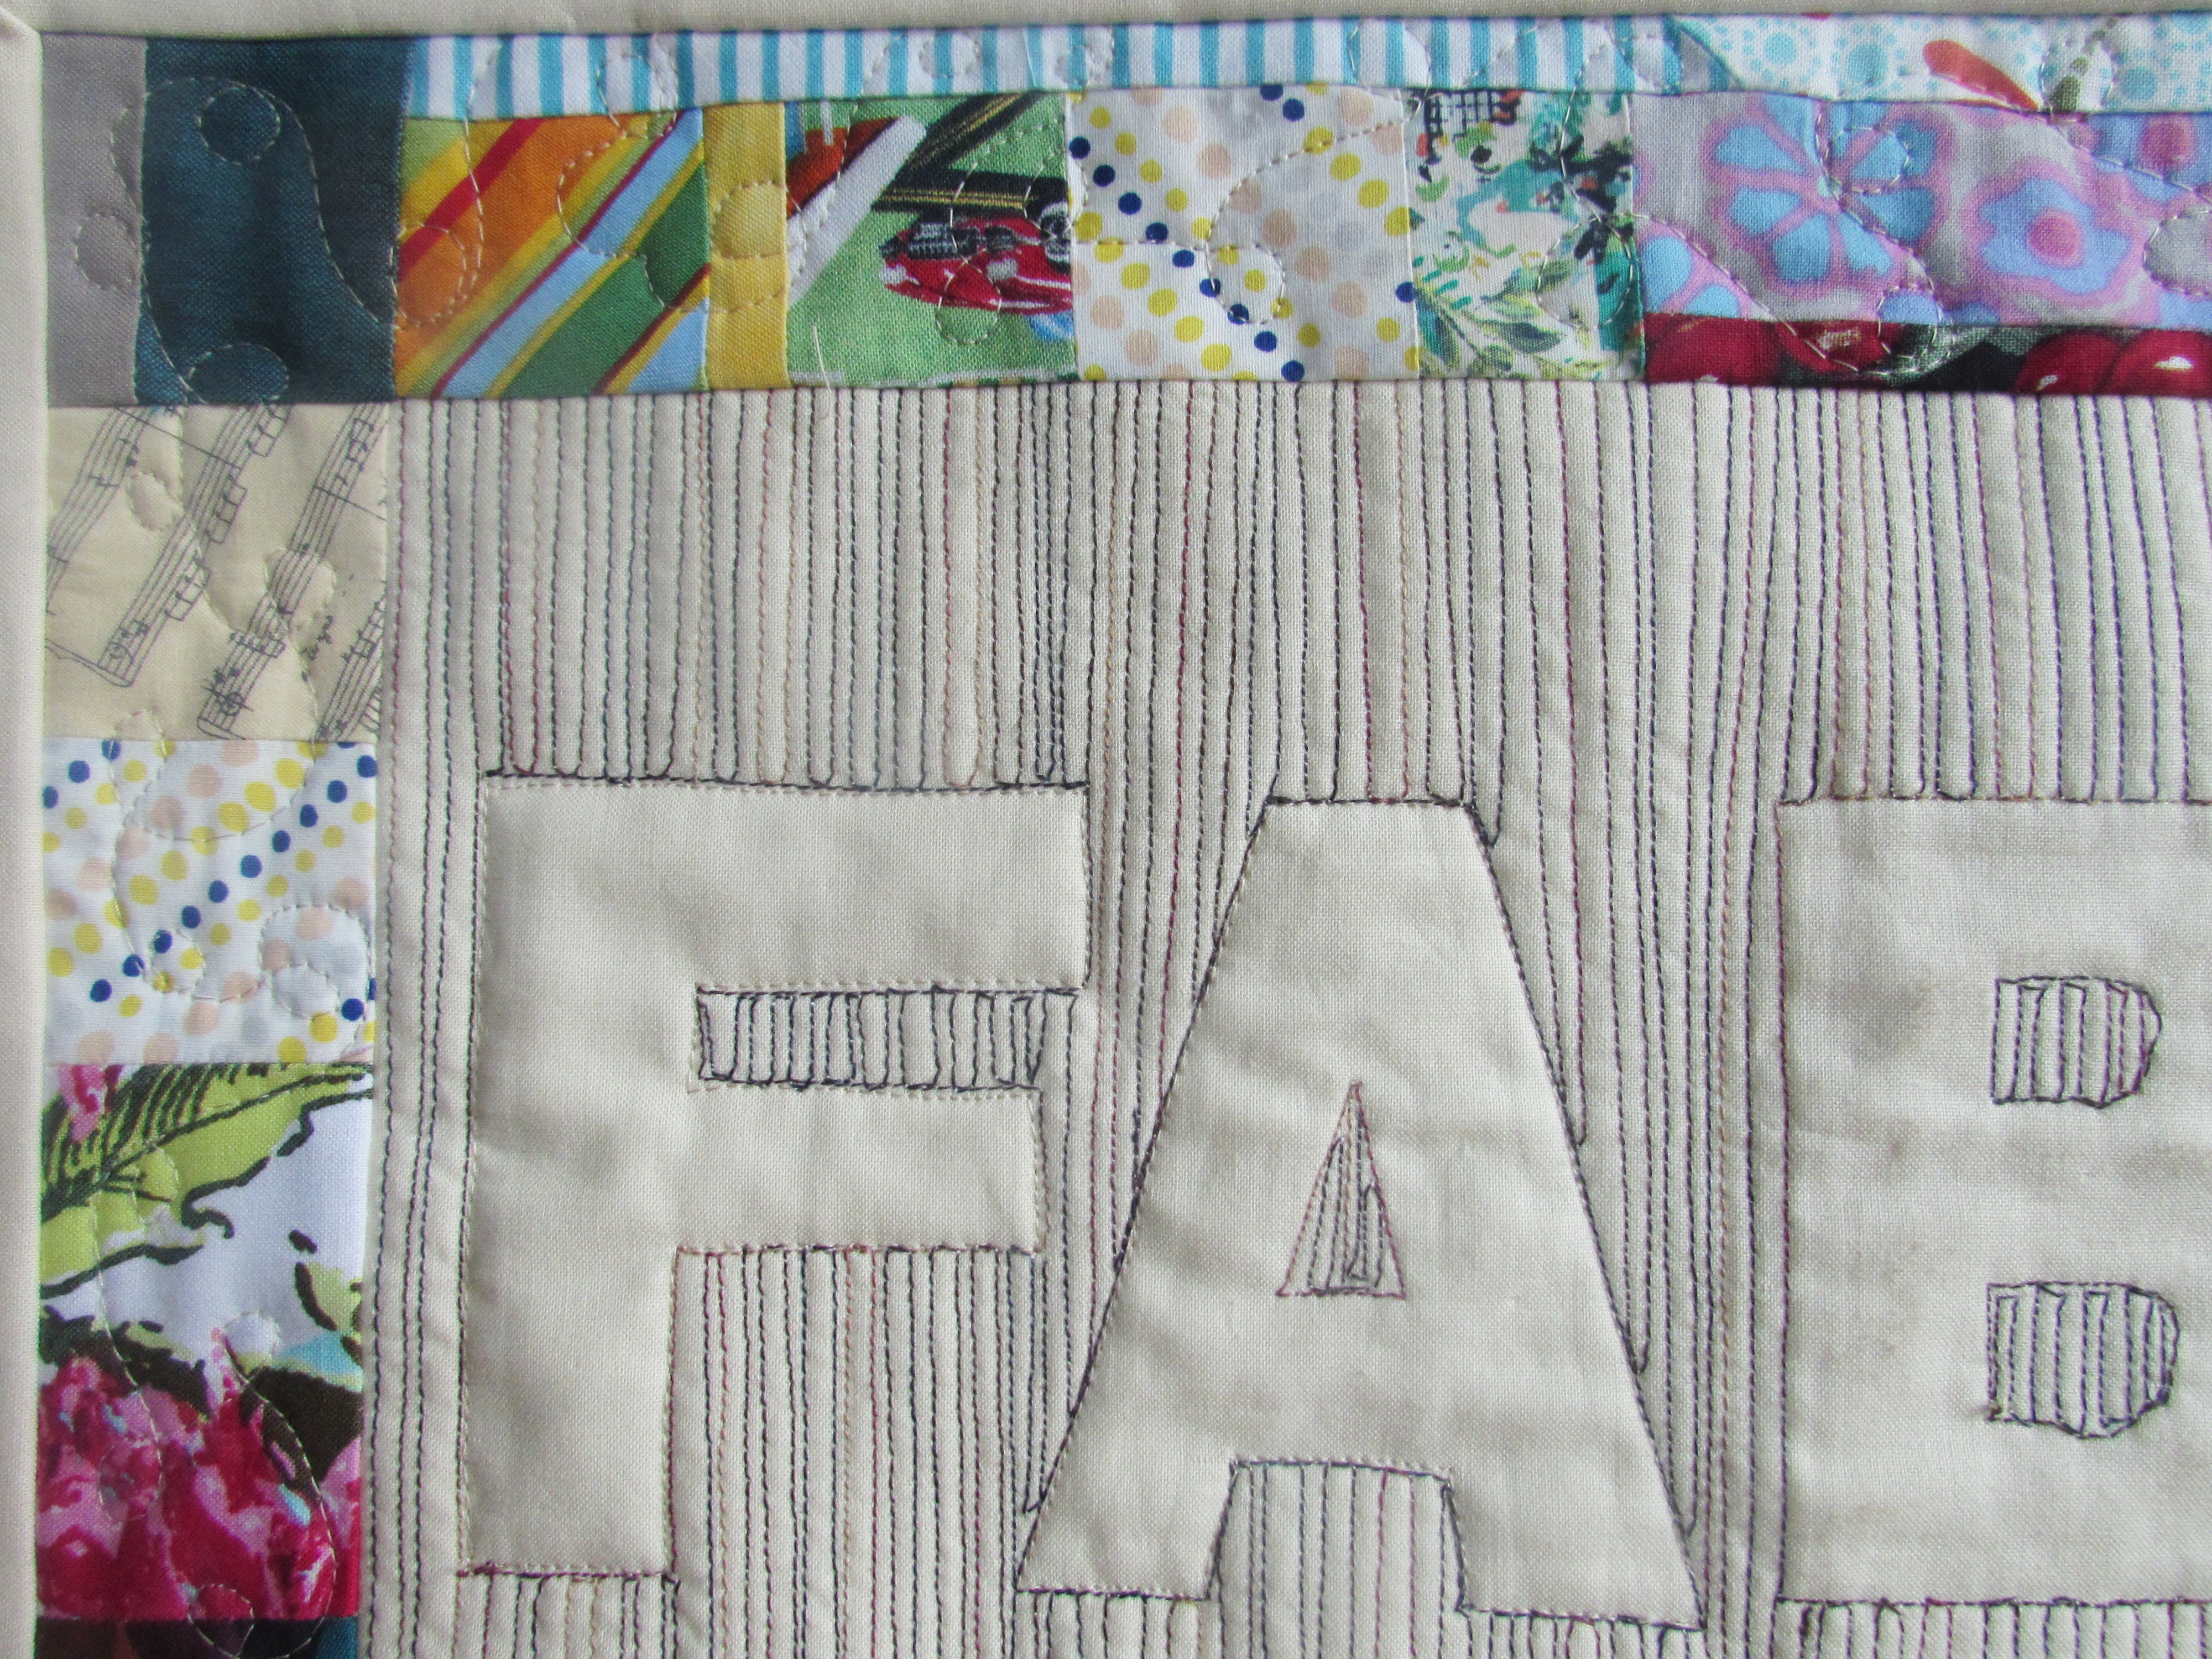
Continue to use your walking foot and slowly stitch around each letter. It is a bit like connecting the dots as you want to trace over the place where you stitched over to the next line. Just move slowly and turn frequently (with your needle down while turning) when stitching over a curve.
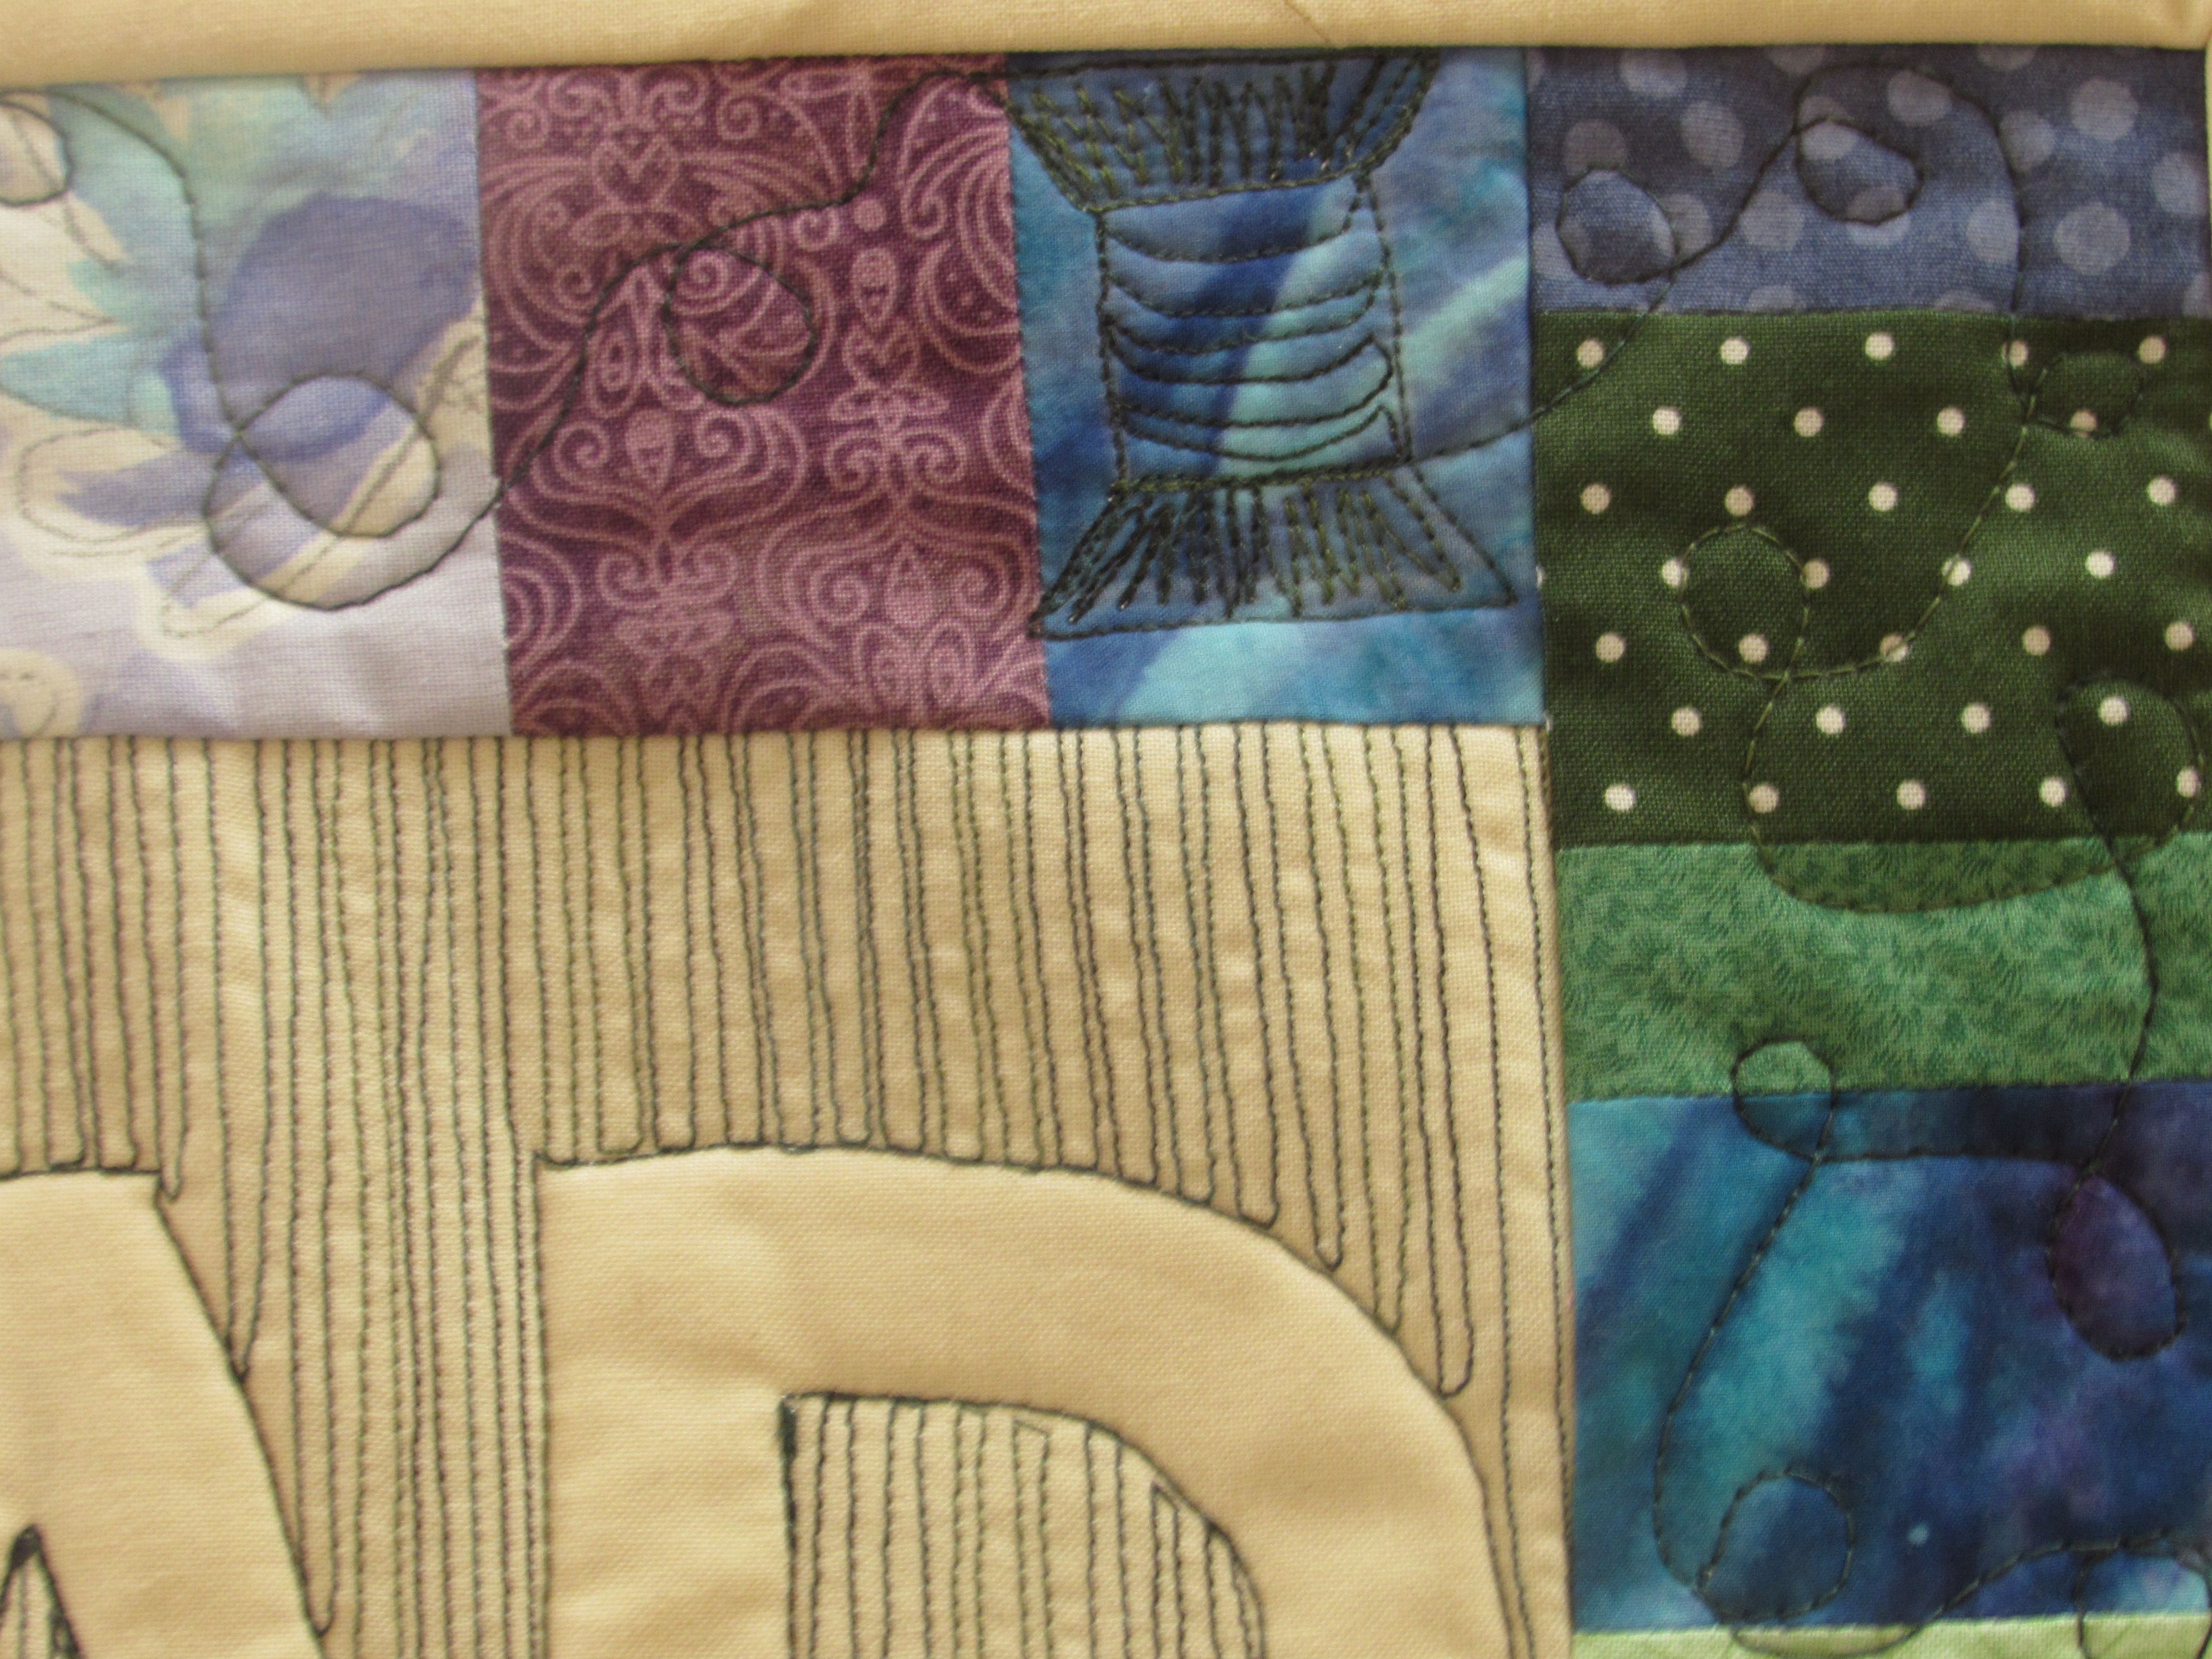
I love the way the letters come to life when quilted to the batting. Next I moved on to the border. I love the little spools of thread that I quilted on the first piece and carried them through to this piece as well. Considering the thread theme of this project, it worked well.
With each spool, I filled in the top and bottom so they would show up a bit better. If you like this idea, take a look at this tutorial of Lori Kennedy’s over at the Inbox Jaunt.
The spools are whimsical and they add a bit of movement to the quilting as the ‘thread’ flows off each spool.
Once you complete the quilting, trim, square and bind. Finished!
Isn’t this adorable?????
And both of them together?? All kinds of cuteness. What fun (and easy) projects both of these were. I have the sleeve sewn on to FABRIC but still need to make a sleeve for THREAD. They will be on the wall soon. I’ll post a picture next week.
I hope my explanation is helpful. If you make one, let me know. I would love to see it!
I’ll be linking to the usuals which can be found at the top of the page, under Link Ups.
I have been remiss in posting lately. It has been really hectic and I haven’t had time to sit with my laptop. What little free time there was, I spent in front of the sewing machine. A girl’s got her priorities, right? As summer came to a close, Julia had the typical teenager desire to pack as much as she could into those last few days. That is fine – she will soon be a slave to homework and won’t have a lot of free time. There were movies to see, shopping to do, and friends to hang out with. School started Wednesday and so another year begins.
When it is busy I like to have a simple project to work on during those 15 minutes of sewing time that present themselves now and then. I have been wanting to try relief quilting for quite a while now. Over a year ago, I read a cute post over at Night Quilter where Kitty explained her process of relief quilting a name on a baby quilt. I love the look and have been planning to give it a try. I pulled out some graph paper and fabric scraps and got started.
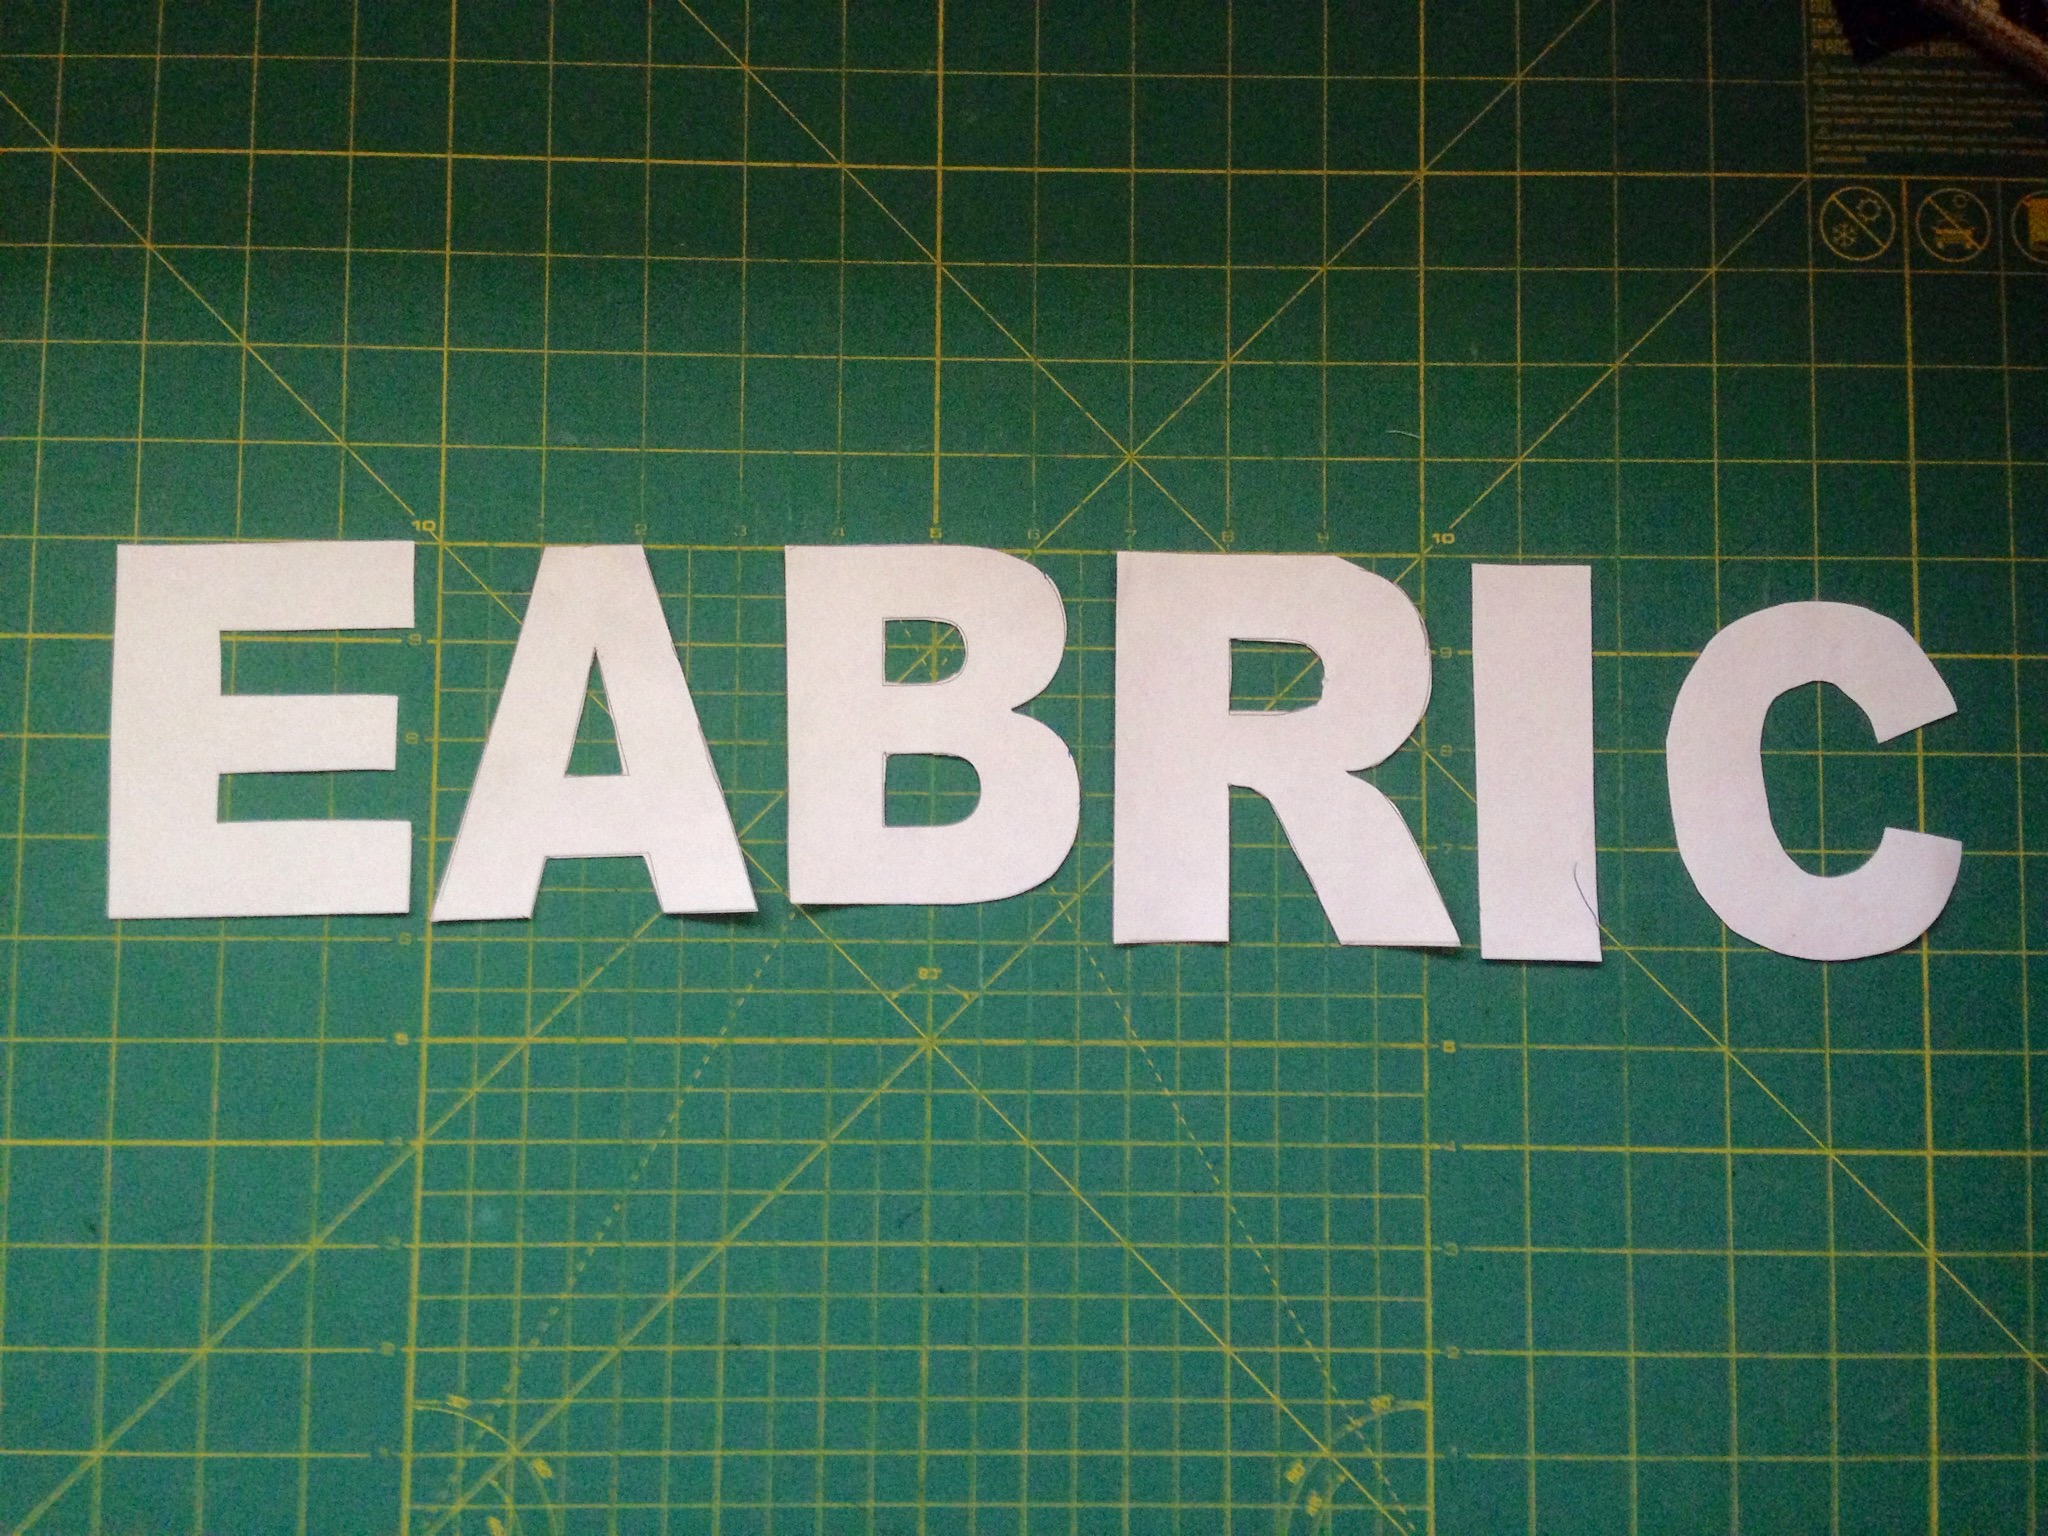
After creating this incredibly inspiring sketch of the project that was floating in my head, I brought out some alphabet stencils that I have. I don’t have the whole alphabet but it was enough to get going. I used the E in place of the F. For some reason, the R was a bit bigger than the rest. I think there are multiple sets in the zip-lok bag and these letters weren’t really from the same set.
Next I found a rectangular scrap of some Kona cotton and traced the letters, centering them as best I could. I didn’t measure this at all. I used a Frixion pen to trace them. I am not a huge fan of Frixion pens for marking but I figured this was just a practice piece so I wasn’t too worried about the final result. Isn’t there something totally freeing about working on a practice piece? Knowing it isn’t going to be your best work and it doesn’t have to be spot on allows one to sit down and have fun. No pressure.
I placed the fabric on top of the batting (which was a large piece that I had created with batting scrap). Using a walking foot, I started to fill in the areas around the letters I had traced. I used tight, straight-line quilting. Without a real plan, I was sort of all over the place – just filling in areas.
In retrospect, I see that I didn’t need to stitch as wide a swath above and below the letters. With my next attempt, I will plan a bit further and decide how far I really need to stitch. I wasted quite a bit of thread with the extra quilting. I used a variegated YLI thread which provided a nice bold look. The more I use YLI thread, the more I love it. The texture is provides is just wonderful.
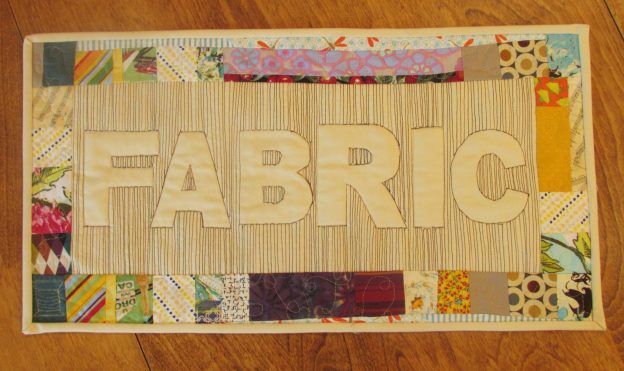
When the quilting was done I was just thrilled with the look, even with the slightly oversized R!
When I first sketched the project out, I planned to use a stack of 2 1/2″ squares that I have collected to make a border for this. Once I got to this point though, I changed my mind. This guy was calling out for a scrappy, improv border. With my bin of bright, multicolored scraps, I began piecing bits together with only a rough idea of what I wanted the result to be. For the borders I created two large improv pieces that were both more than five inches wide. Then I sliced each in half lengthwise, creating 4 strips measuring 2 1/2″ wide.
I laid them, right sides together, on both sides and stitched the border on. It was a bit of a Quilt as You Go project, since I was just sewing right on top of the base fabric and the batting. The bottom borders were stitched a few inches below and above the lettering. (This is where it became very clear that I didn’t need to quilt as high and low as I had done.)
Borders on and pressed, all that was left was to make baste the top to a backing and quilt it. I thought it would be cute to FMQ a spool of thread in one corner and then have the “thread” spooling off of it, looping along the borders.
After creating that little spool, I wished I had used a solid fabric on each corner so I could place spools on all four of them. I did put one on another corner but it doesn’t show up very well with the print fabric. The overall look is cute though, isn’t it?
I love all the bits of different fabric that surround this piece. They bring back a little memory of whatever project they were originally used in. A piece of green dotted fabric was used for the backing (I think I got it out of the remnant bin at Jo-Ann’s) and I bound it with the same Kona that is in the center.
As always, I would do a few things differently the next time I made this sort of project. If I were doing this sort of thing as a part of a larger quilt, I would fuse stabilizer behind the solid fabric and do the relief quilting over just the fabric (sans batting). Then I would incorporate the block into the larger project. Once I was quilting the larger project, I would use a walking foot to outline the letters (to quilt the block down).
I need to make a sleeve for it and then I will hang it above my sewing machine. This was great fun and I am really pleased with the result. I encourage you to give it a try. Let me know if you have any questions or check out Kitty’s tutorial.
Linking up all over the place – for details, look at the top of the page, under Link Ups.
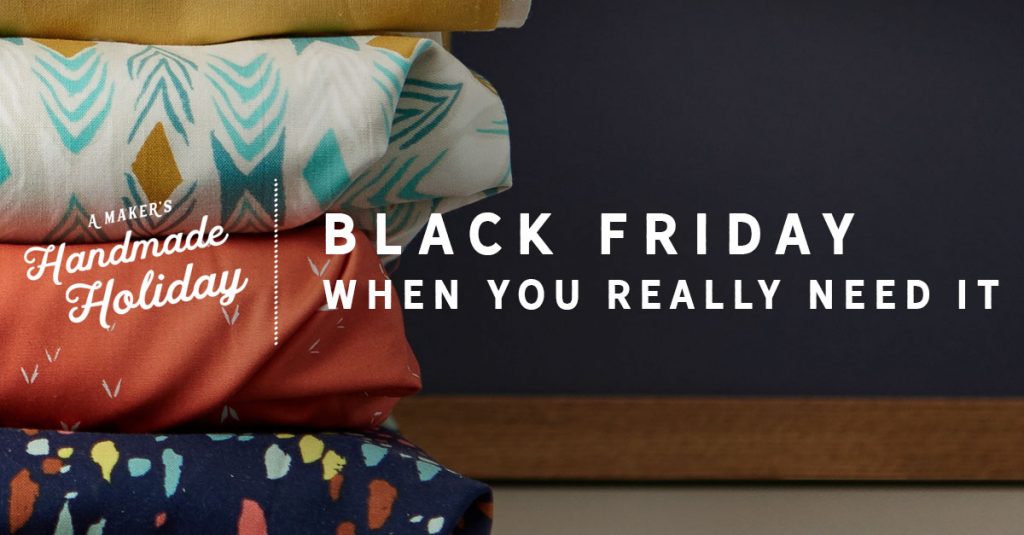
Weekends are the time to shop Craftsy. This weekend they are having a Black Friday “When You Need It” sale on kits and supplies. If you are hoping to make handmade gifts in time for the holidays, it is a good time to make a plan and stock up. I love the kits at Craftsy – the fabric is often a huge bargain and no one will know if you use that fabric for a different purpose. I am loving this Benartex quilt kit – 100 charms and 3 yards of fabric? Another one is the Eclipse kit, which uses the Allison Glass Sunprints line. There are almost 18 yards of fabric included and the pattern is gorgeous.
If fabric isn’t your thing this weekend, there is also a great sale on books over at C&T. They are having a $5.00 Blowout Sale and many great quilting titles are on sale. I love C&T – they are the publishers of so many of our favorite quilty books. Check it out! Sale runs through the end of day on Sunday, August 21st.
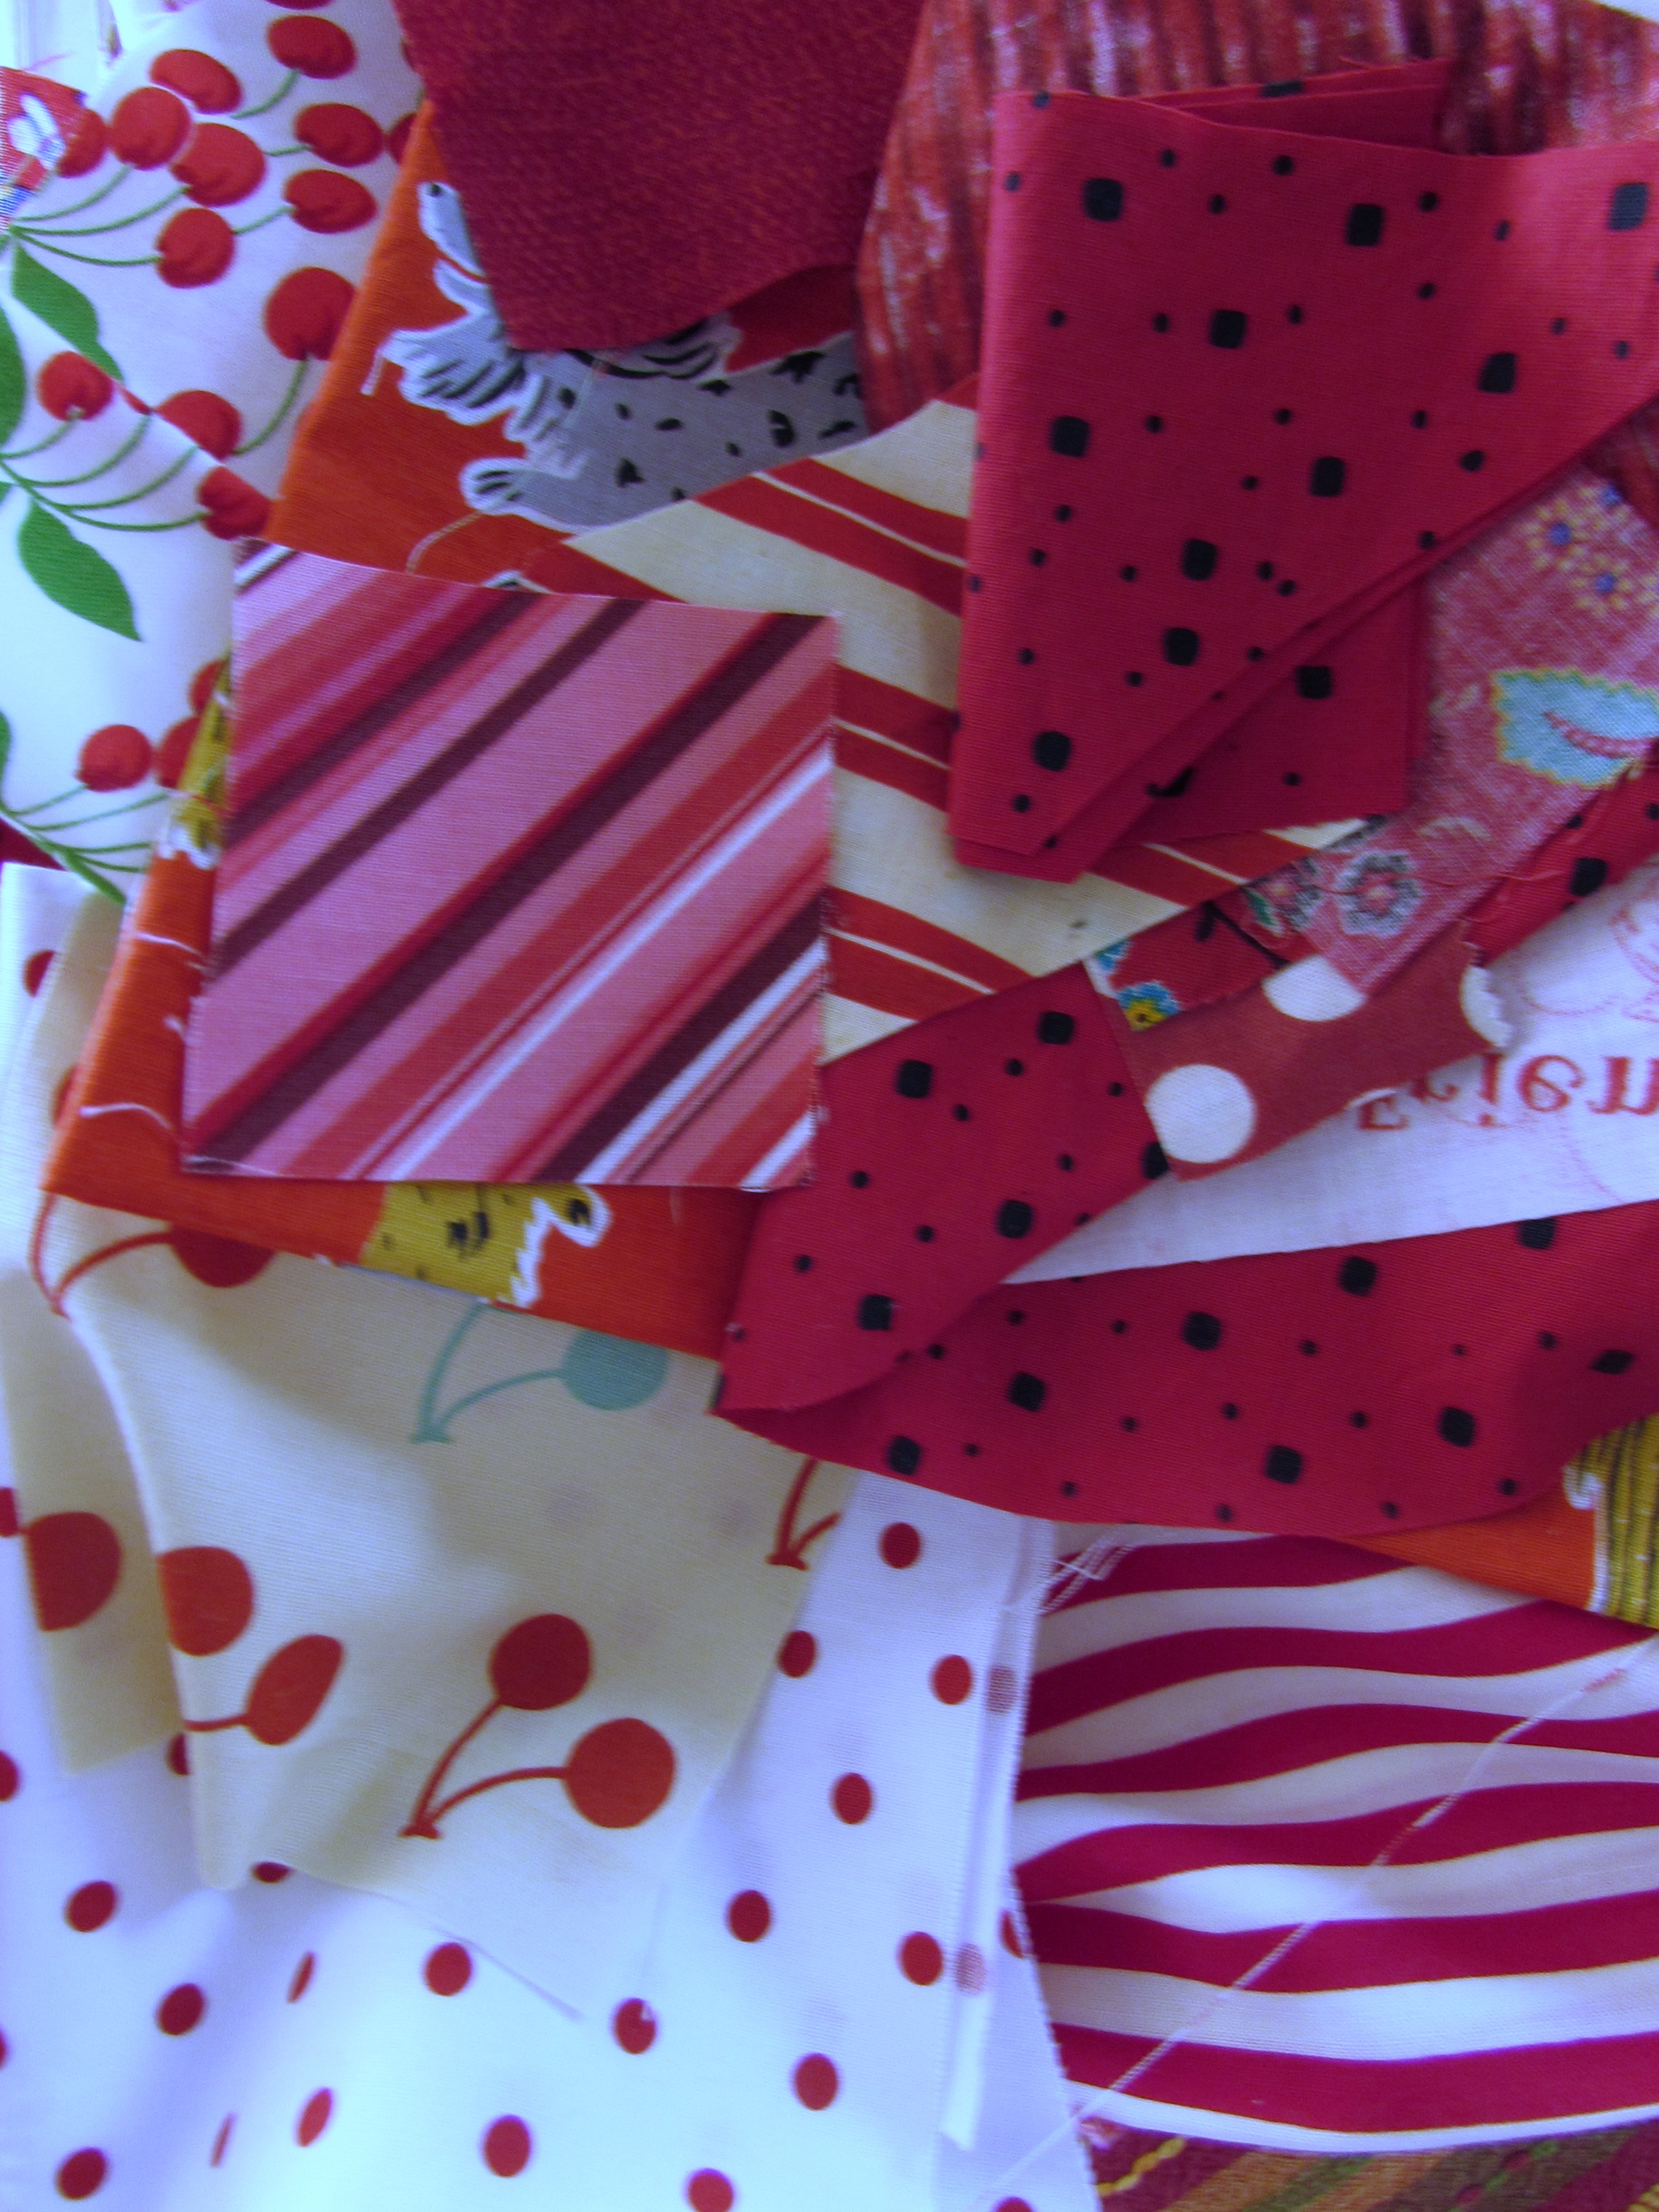
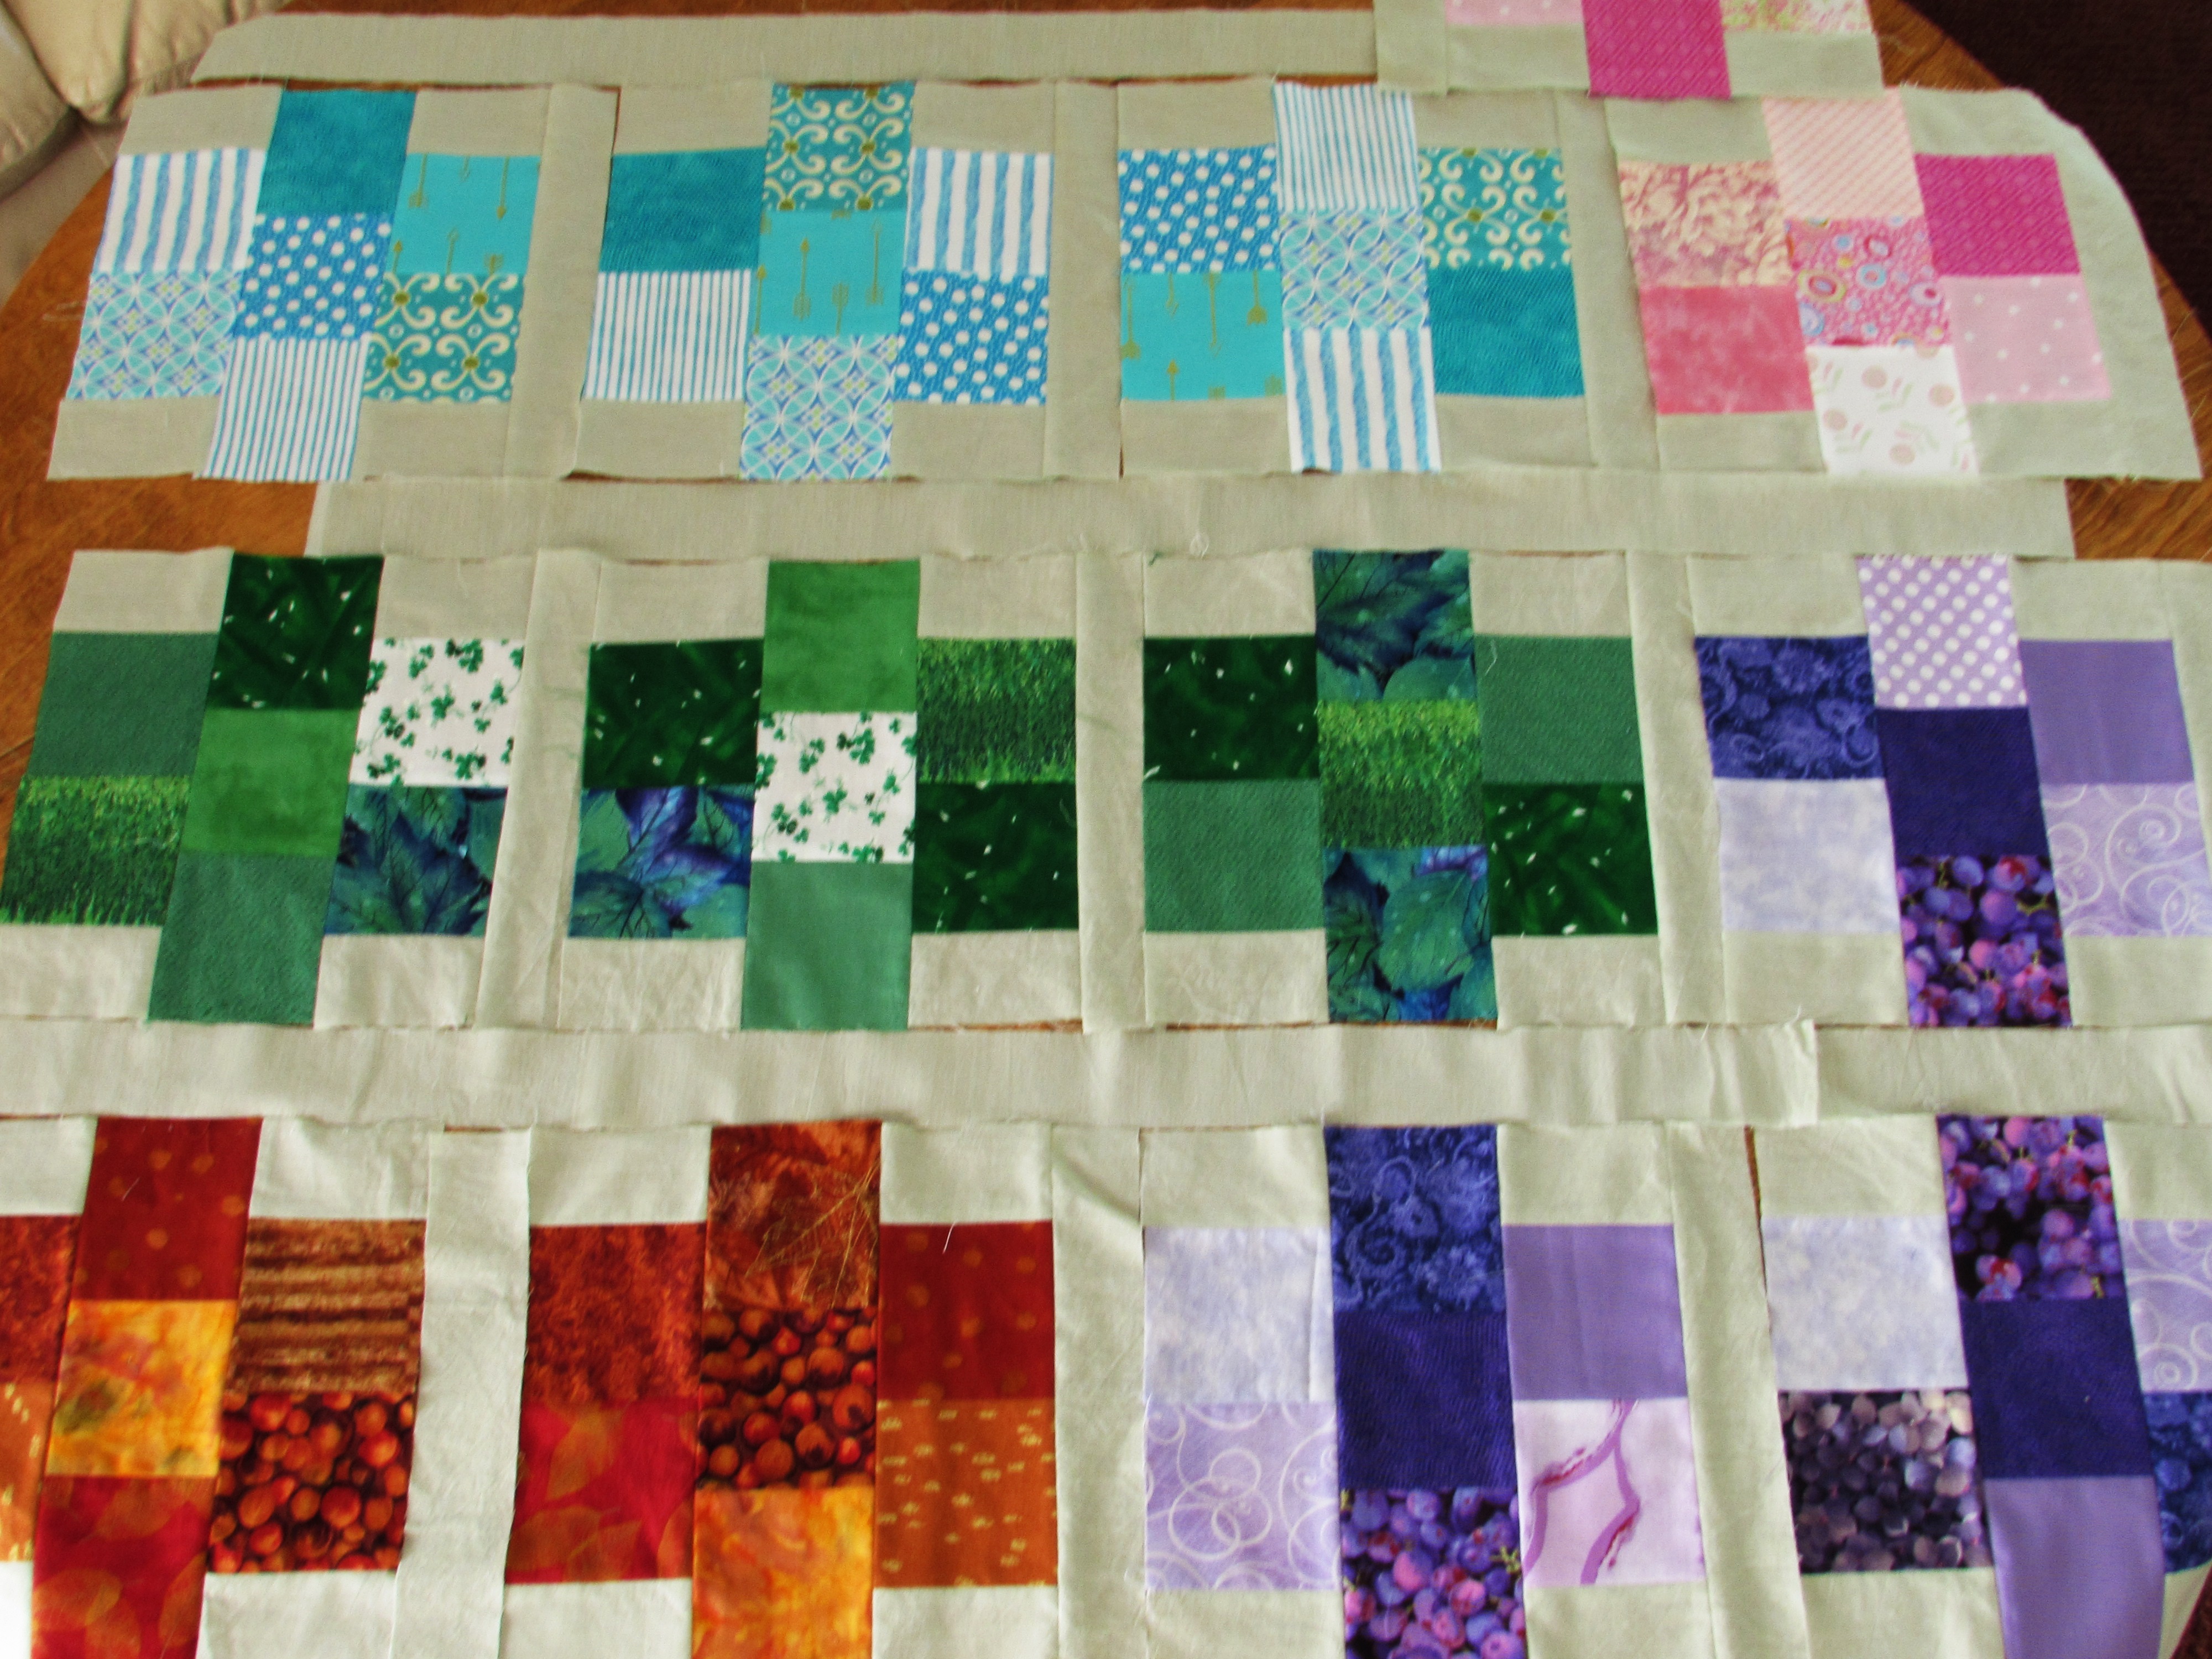
This month I barely made it in time! I kept thinking about working on my two scrappy projects but there was always something else going on so I would put it off. But I squeaked them in. Part of the problem was that this month in RSC16 land, the color is hot pink with a lime green accent. People have been making some really awesome blocks with this combination but it just wasn’t calling to me. So I decided to change it up and pulled out my bin of red scraps instead.
Once I made that change I was able to get into the idea and worked first on my made fabric. Scraps came together well as the red bin is packed with scraps to choose from. For the Gemstones quilt, I wasn’t sure how any red blocks to make. I started with two. But I like the addition of the red so I will need to make two or three more. Looking at them all together, I am getting excited to finish this one up. Remember there will be sashing between the rows when I start to piece the top.
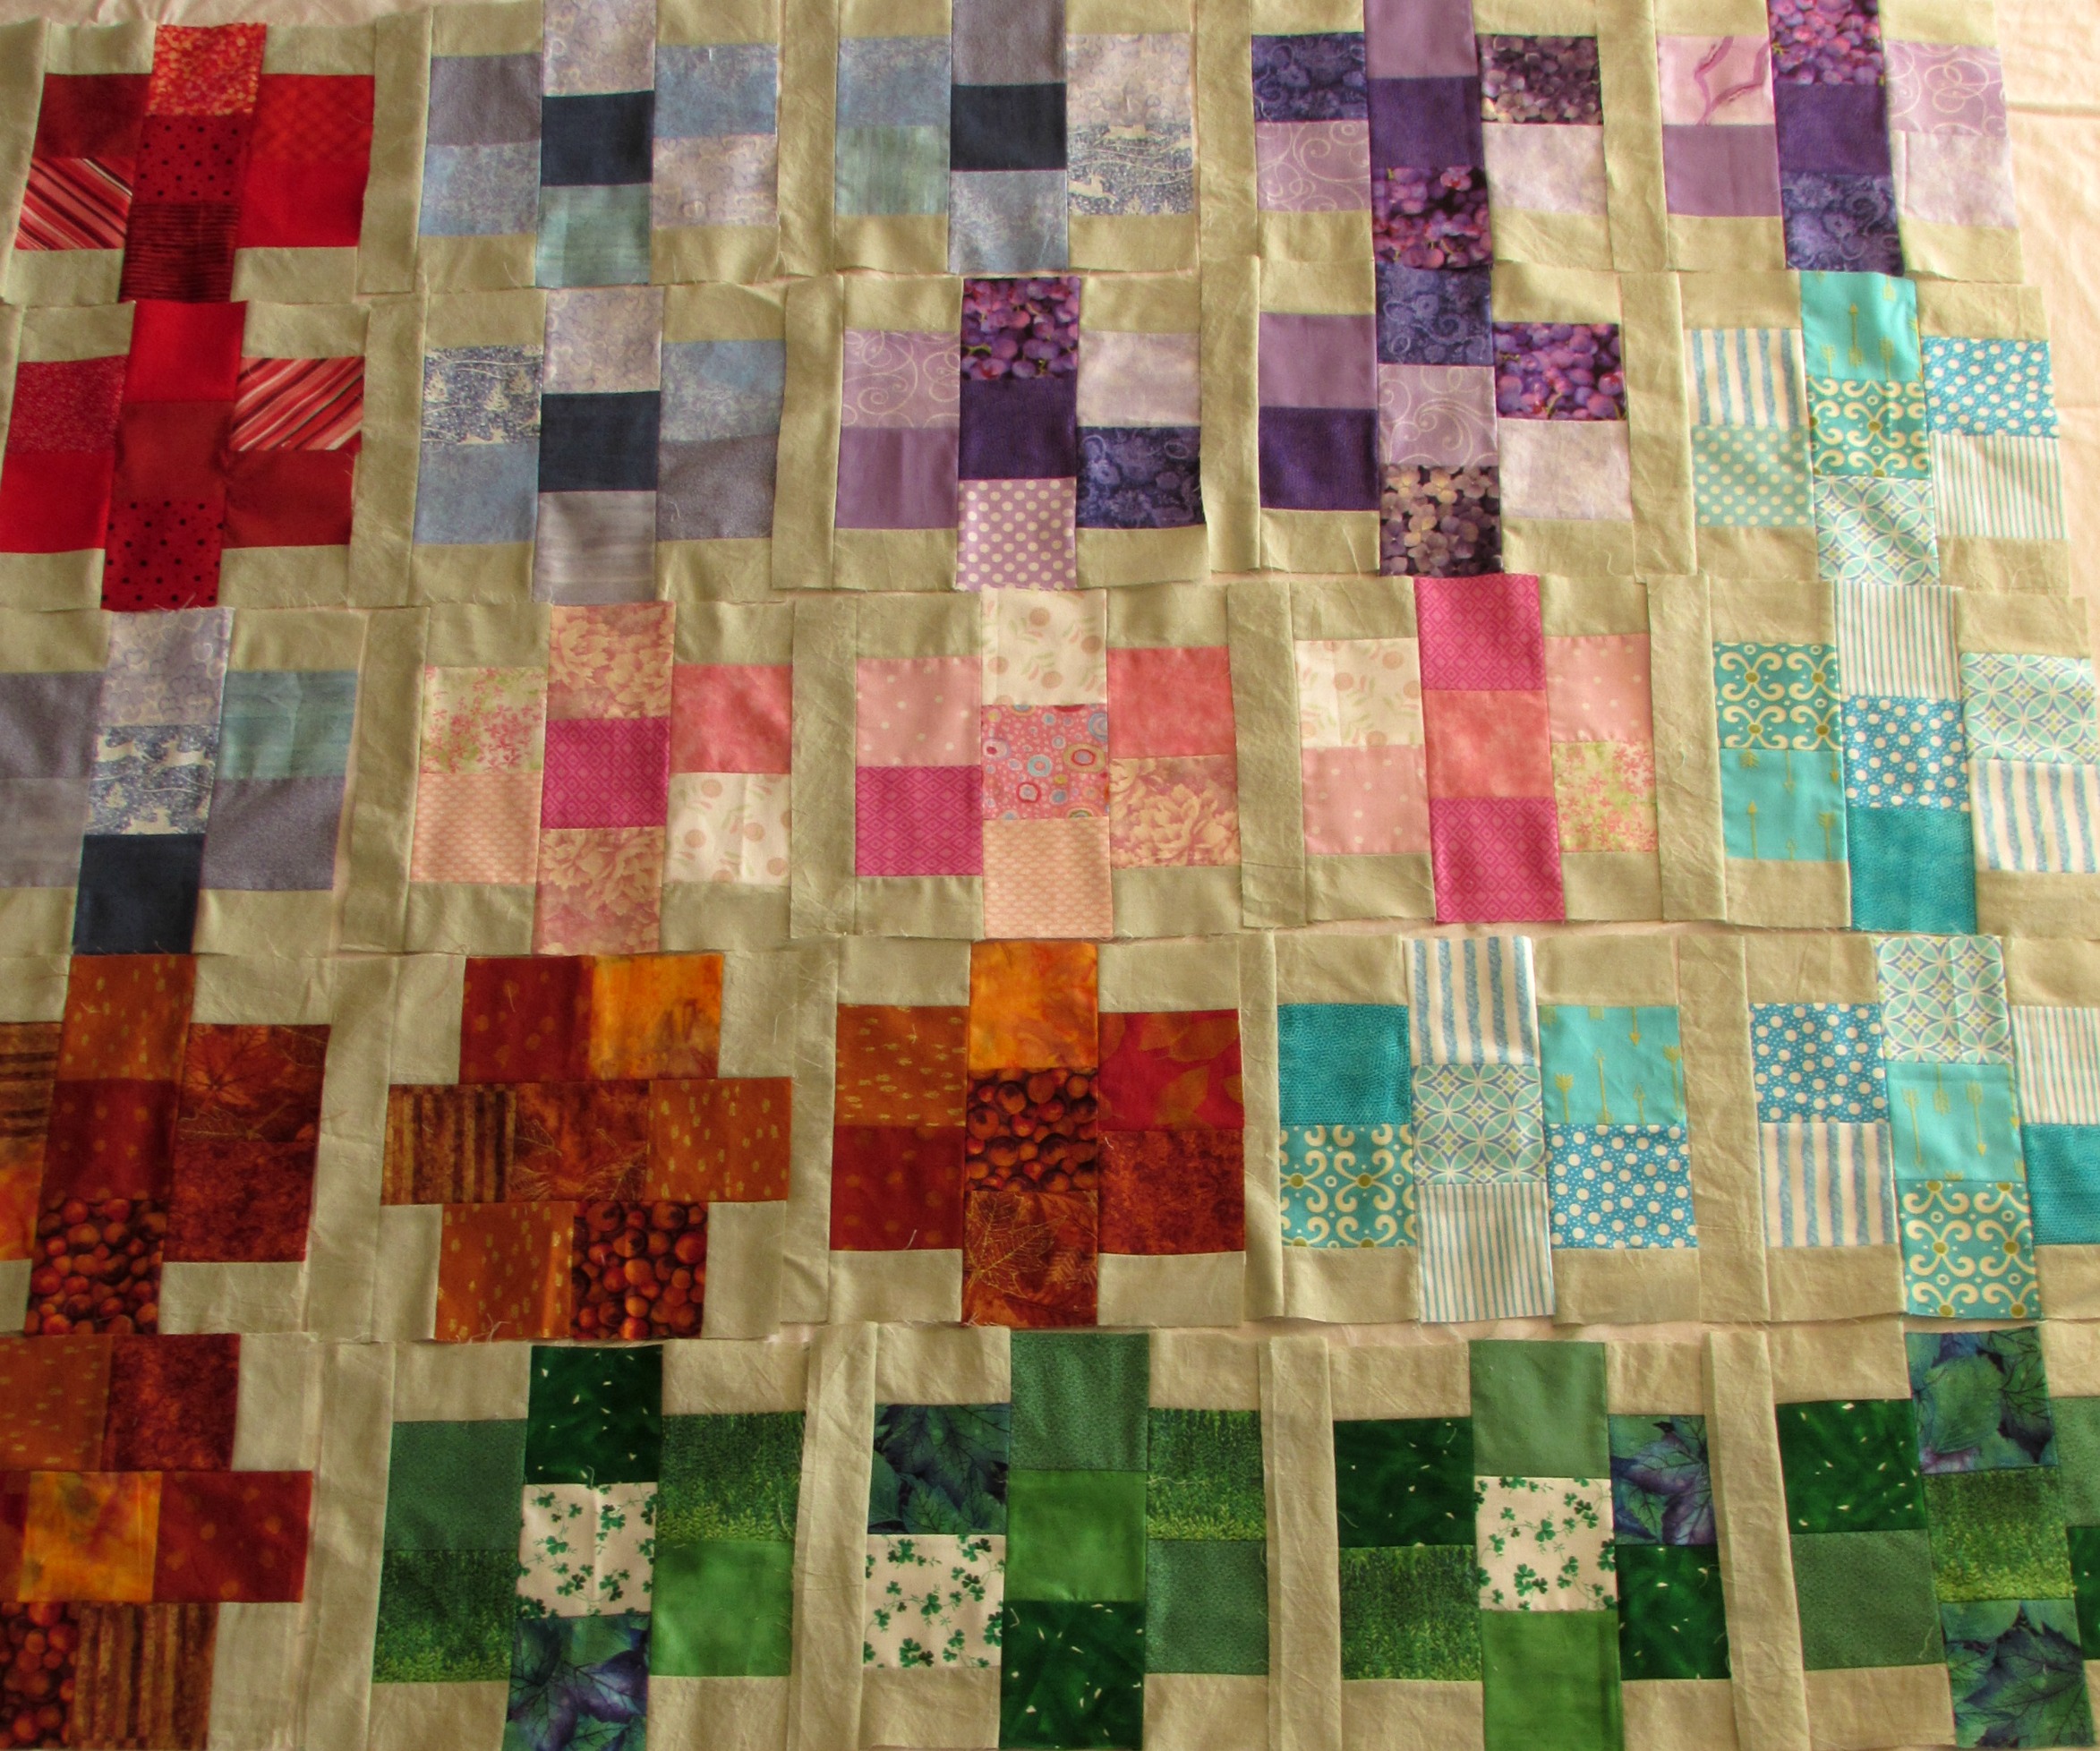
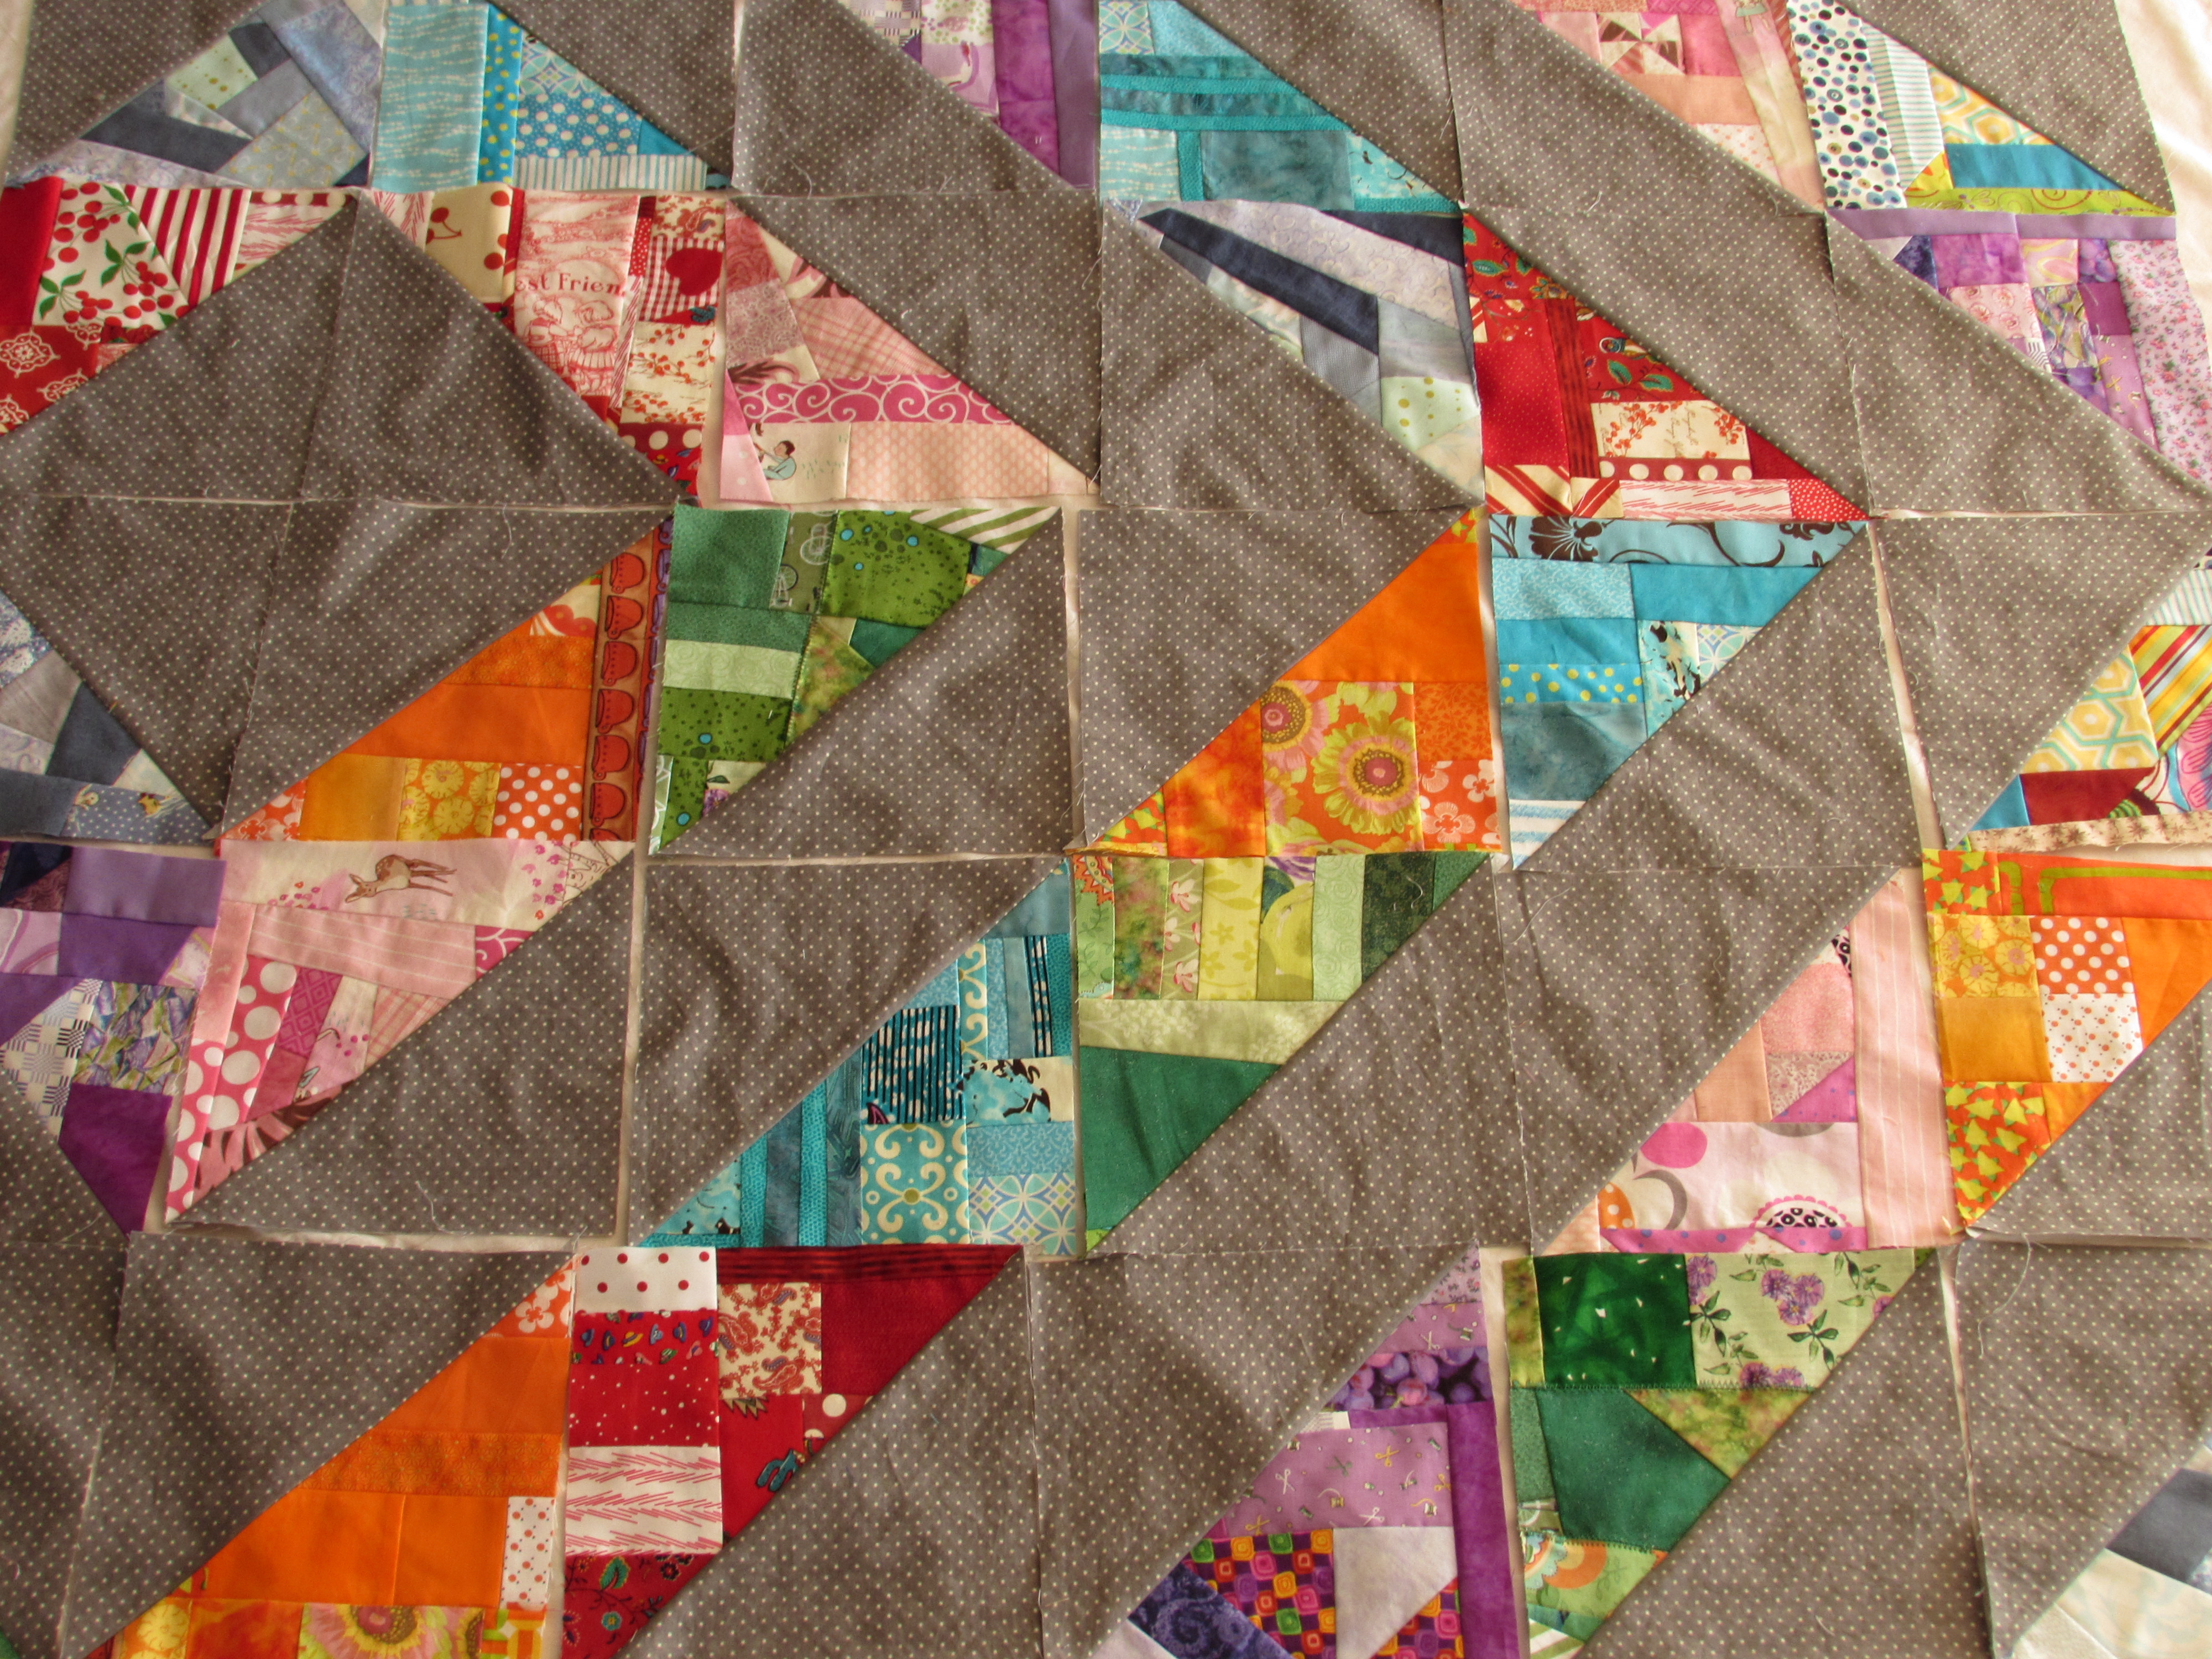
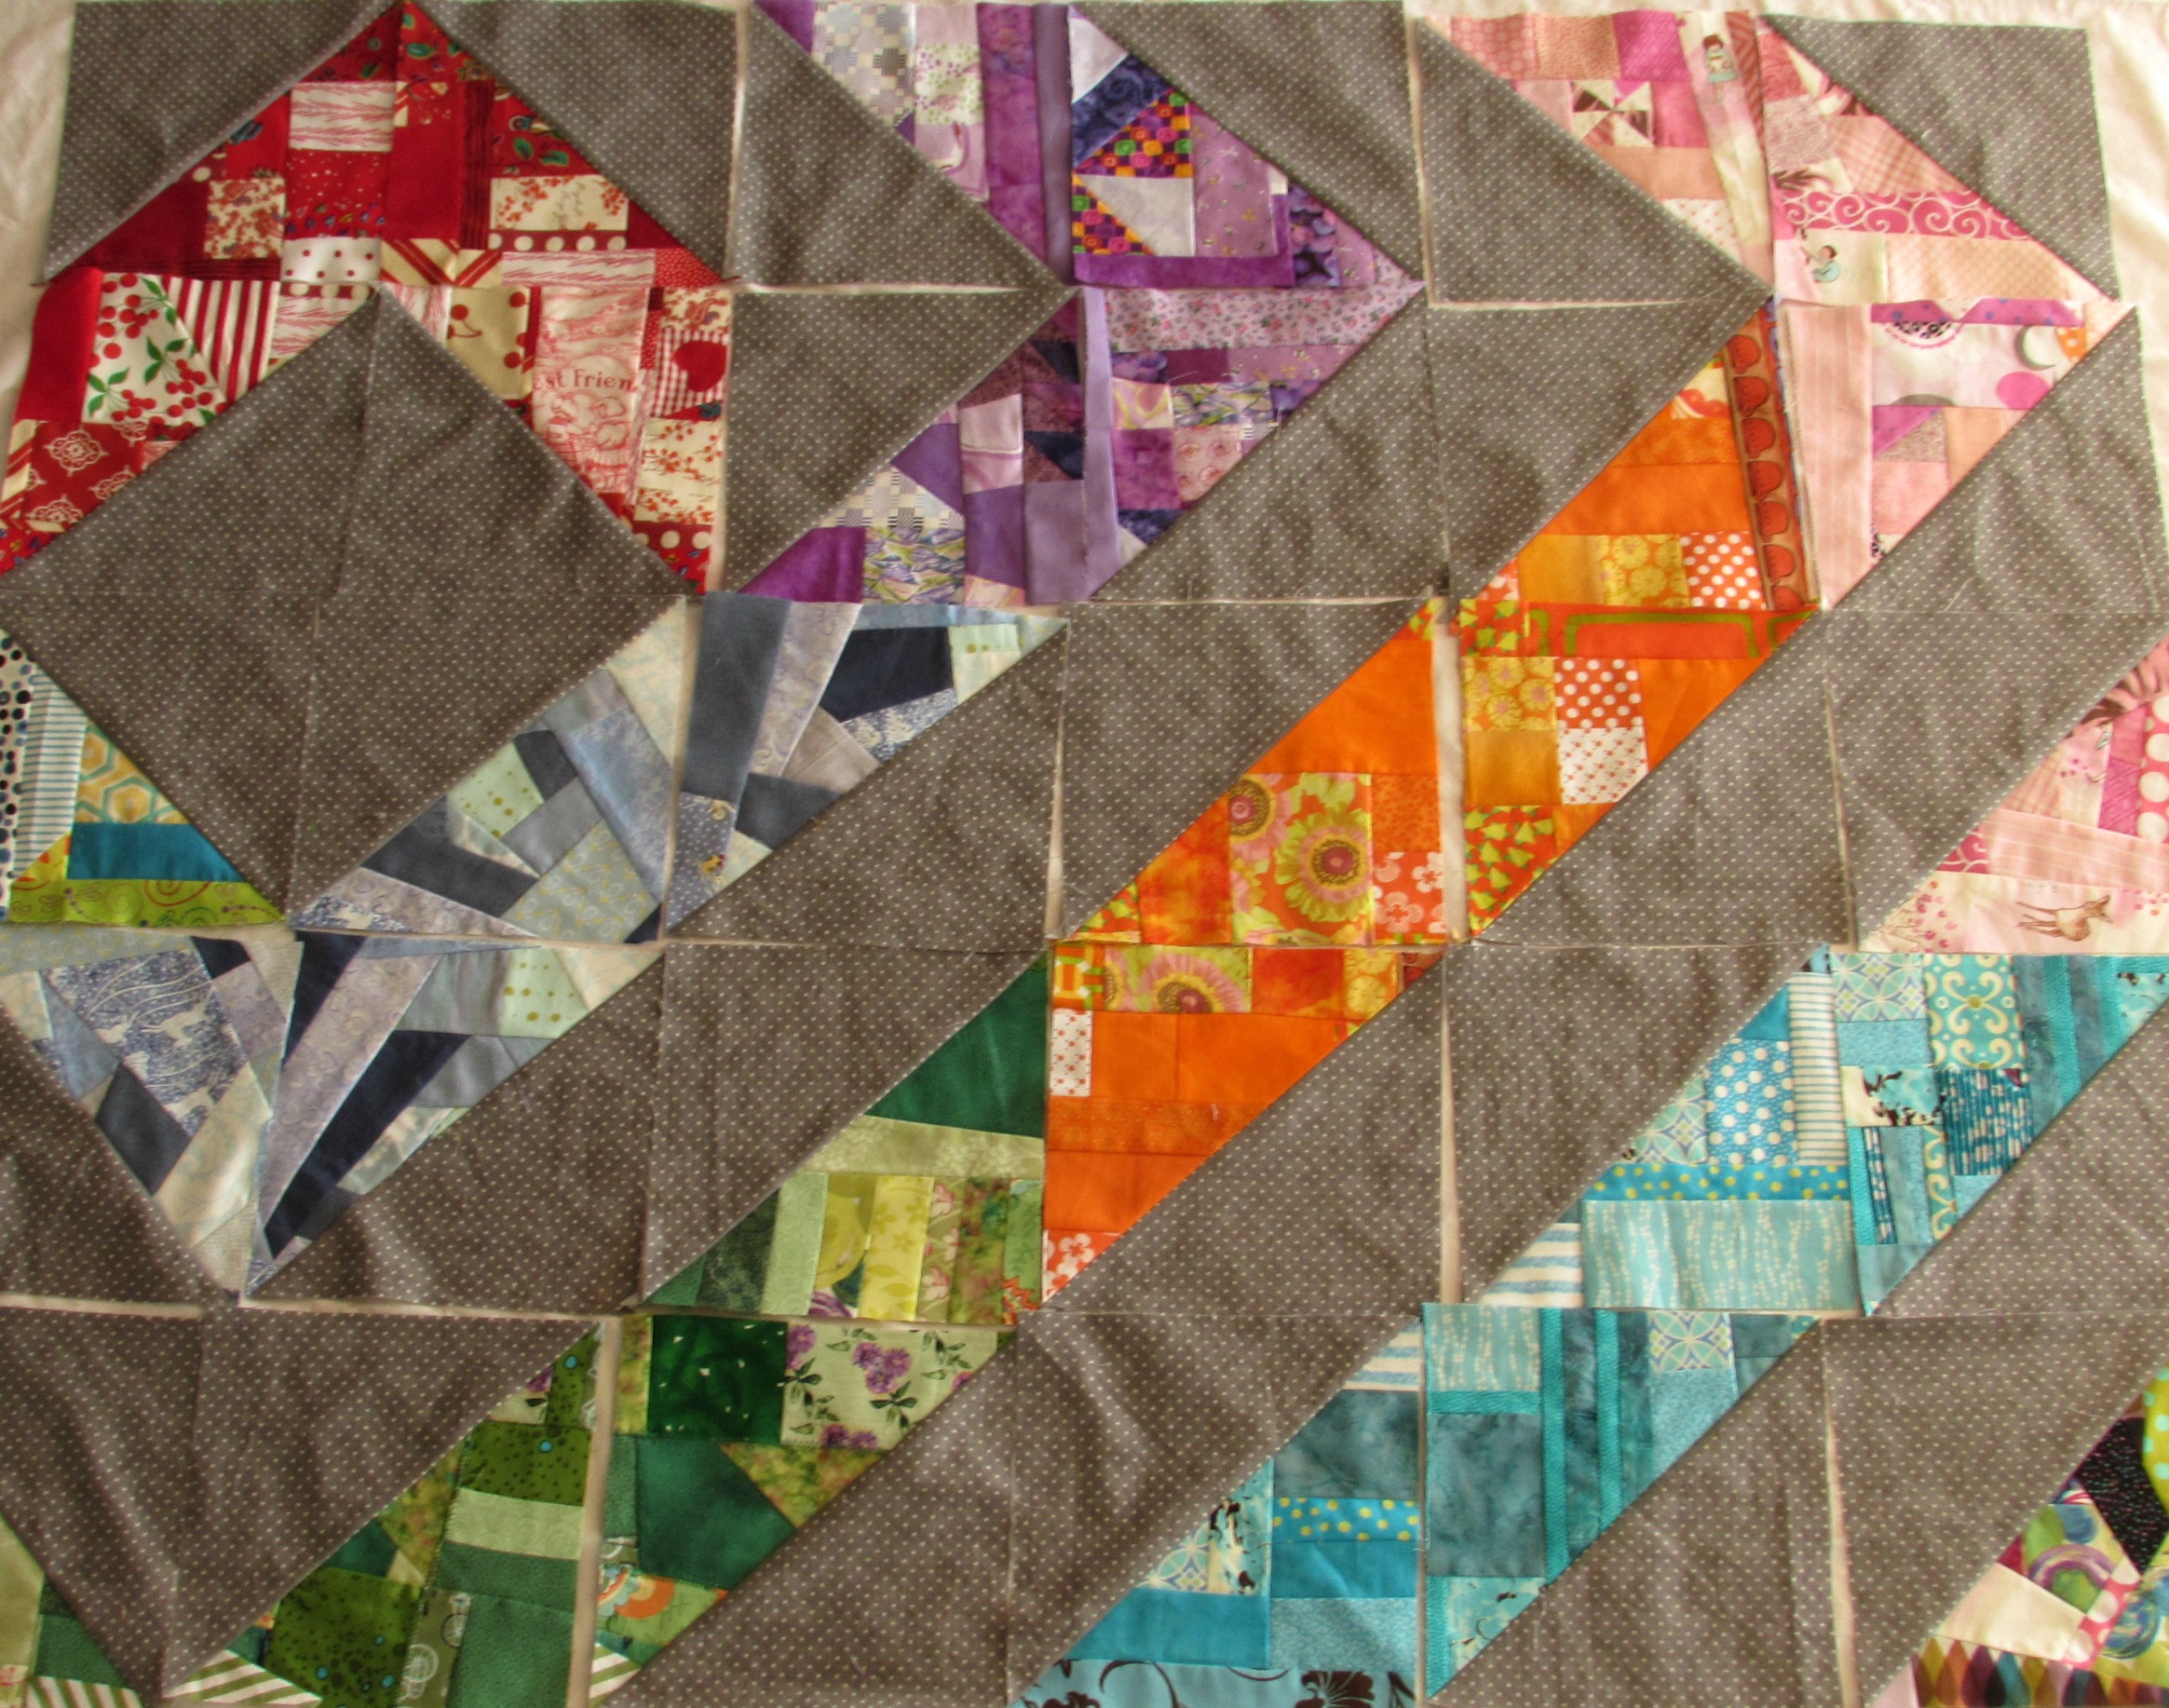
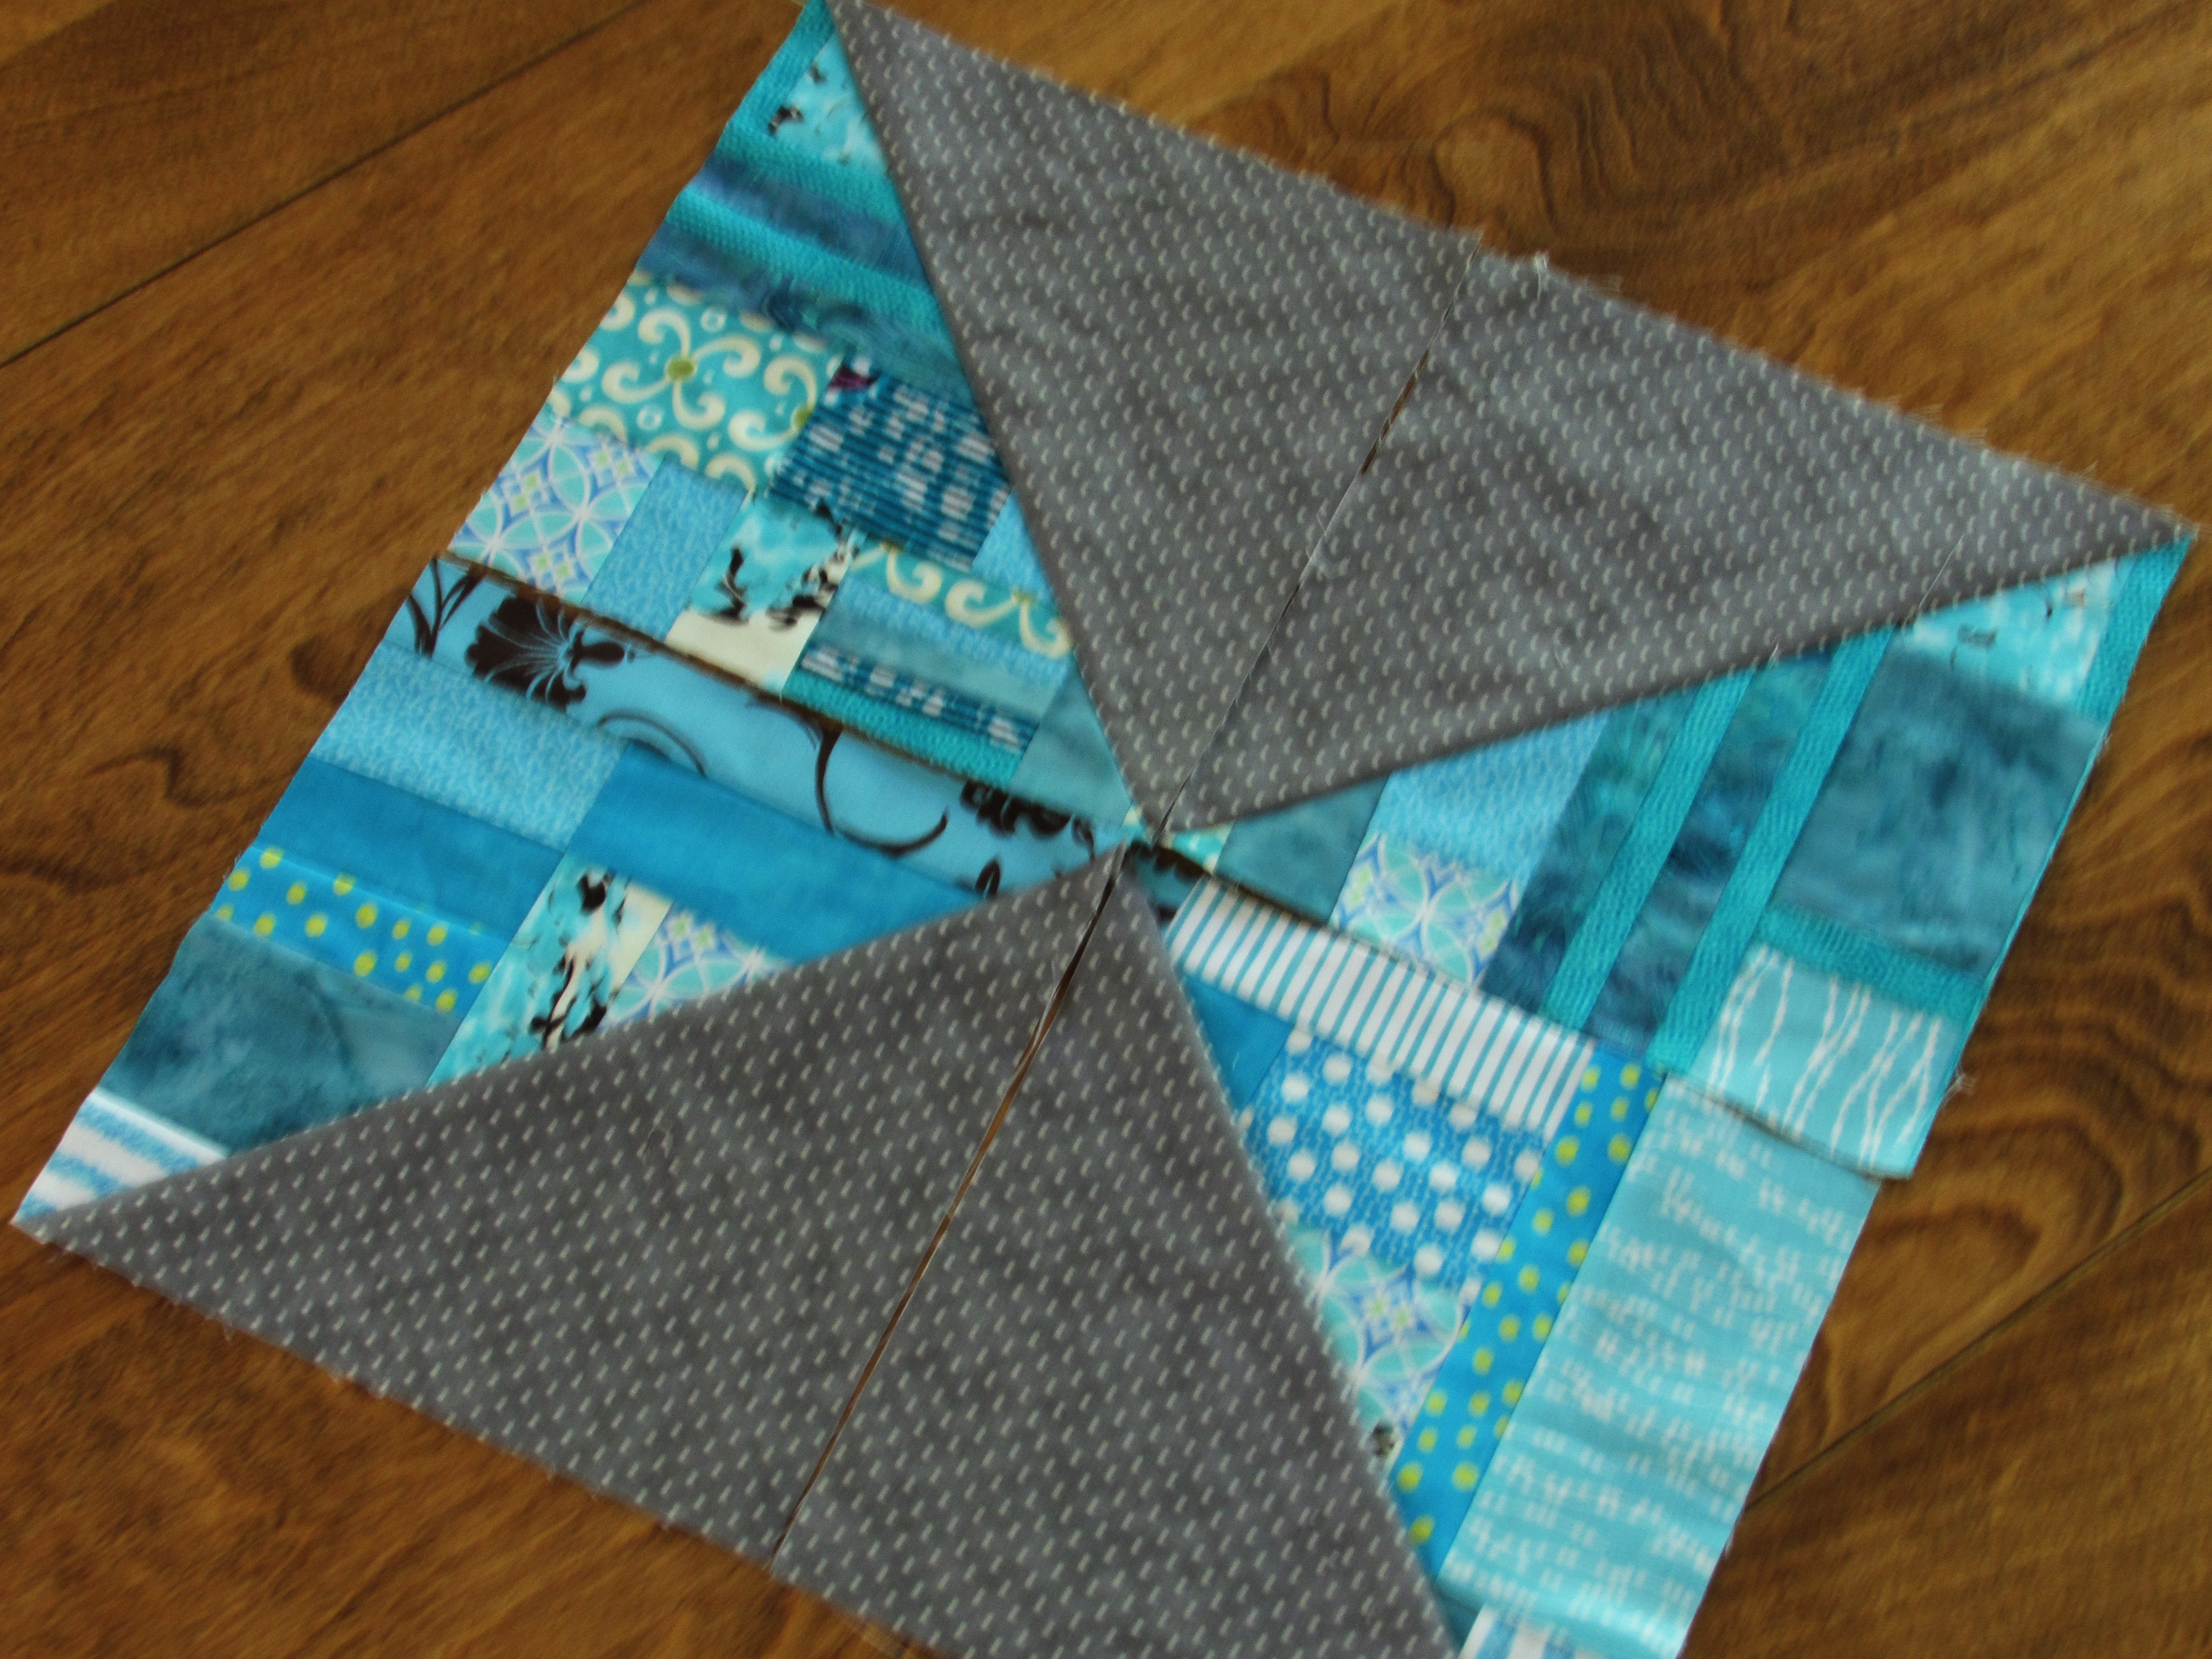
Looking at the scrappy HST’s, I am at somewhat of a deciding point.
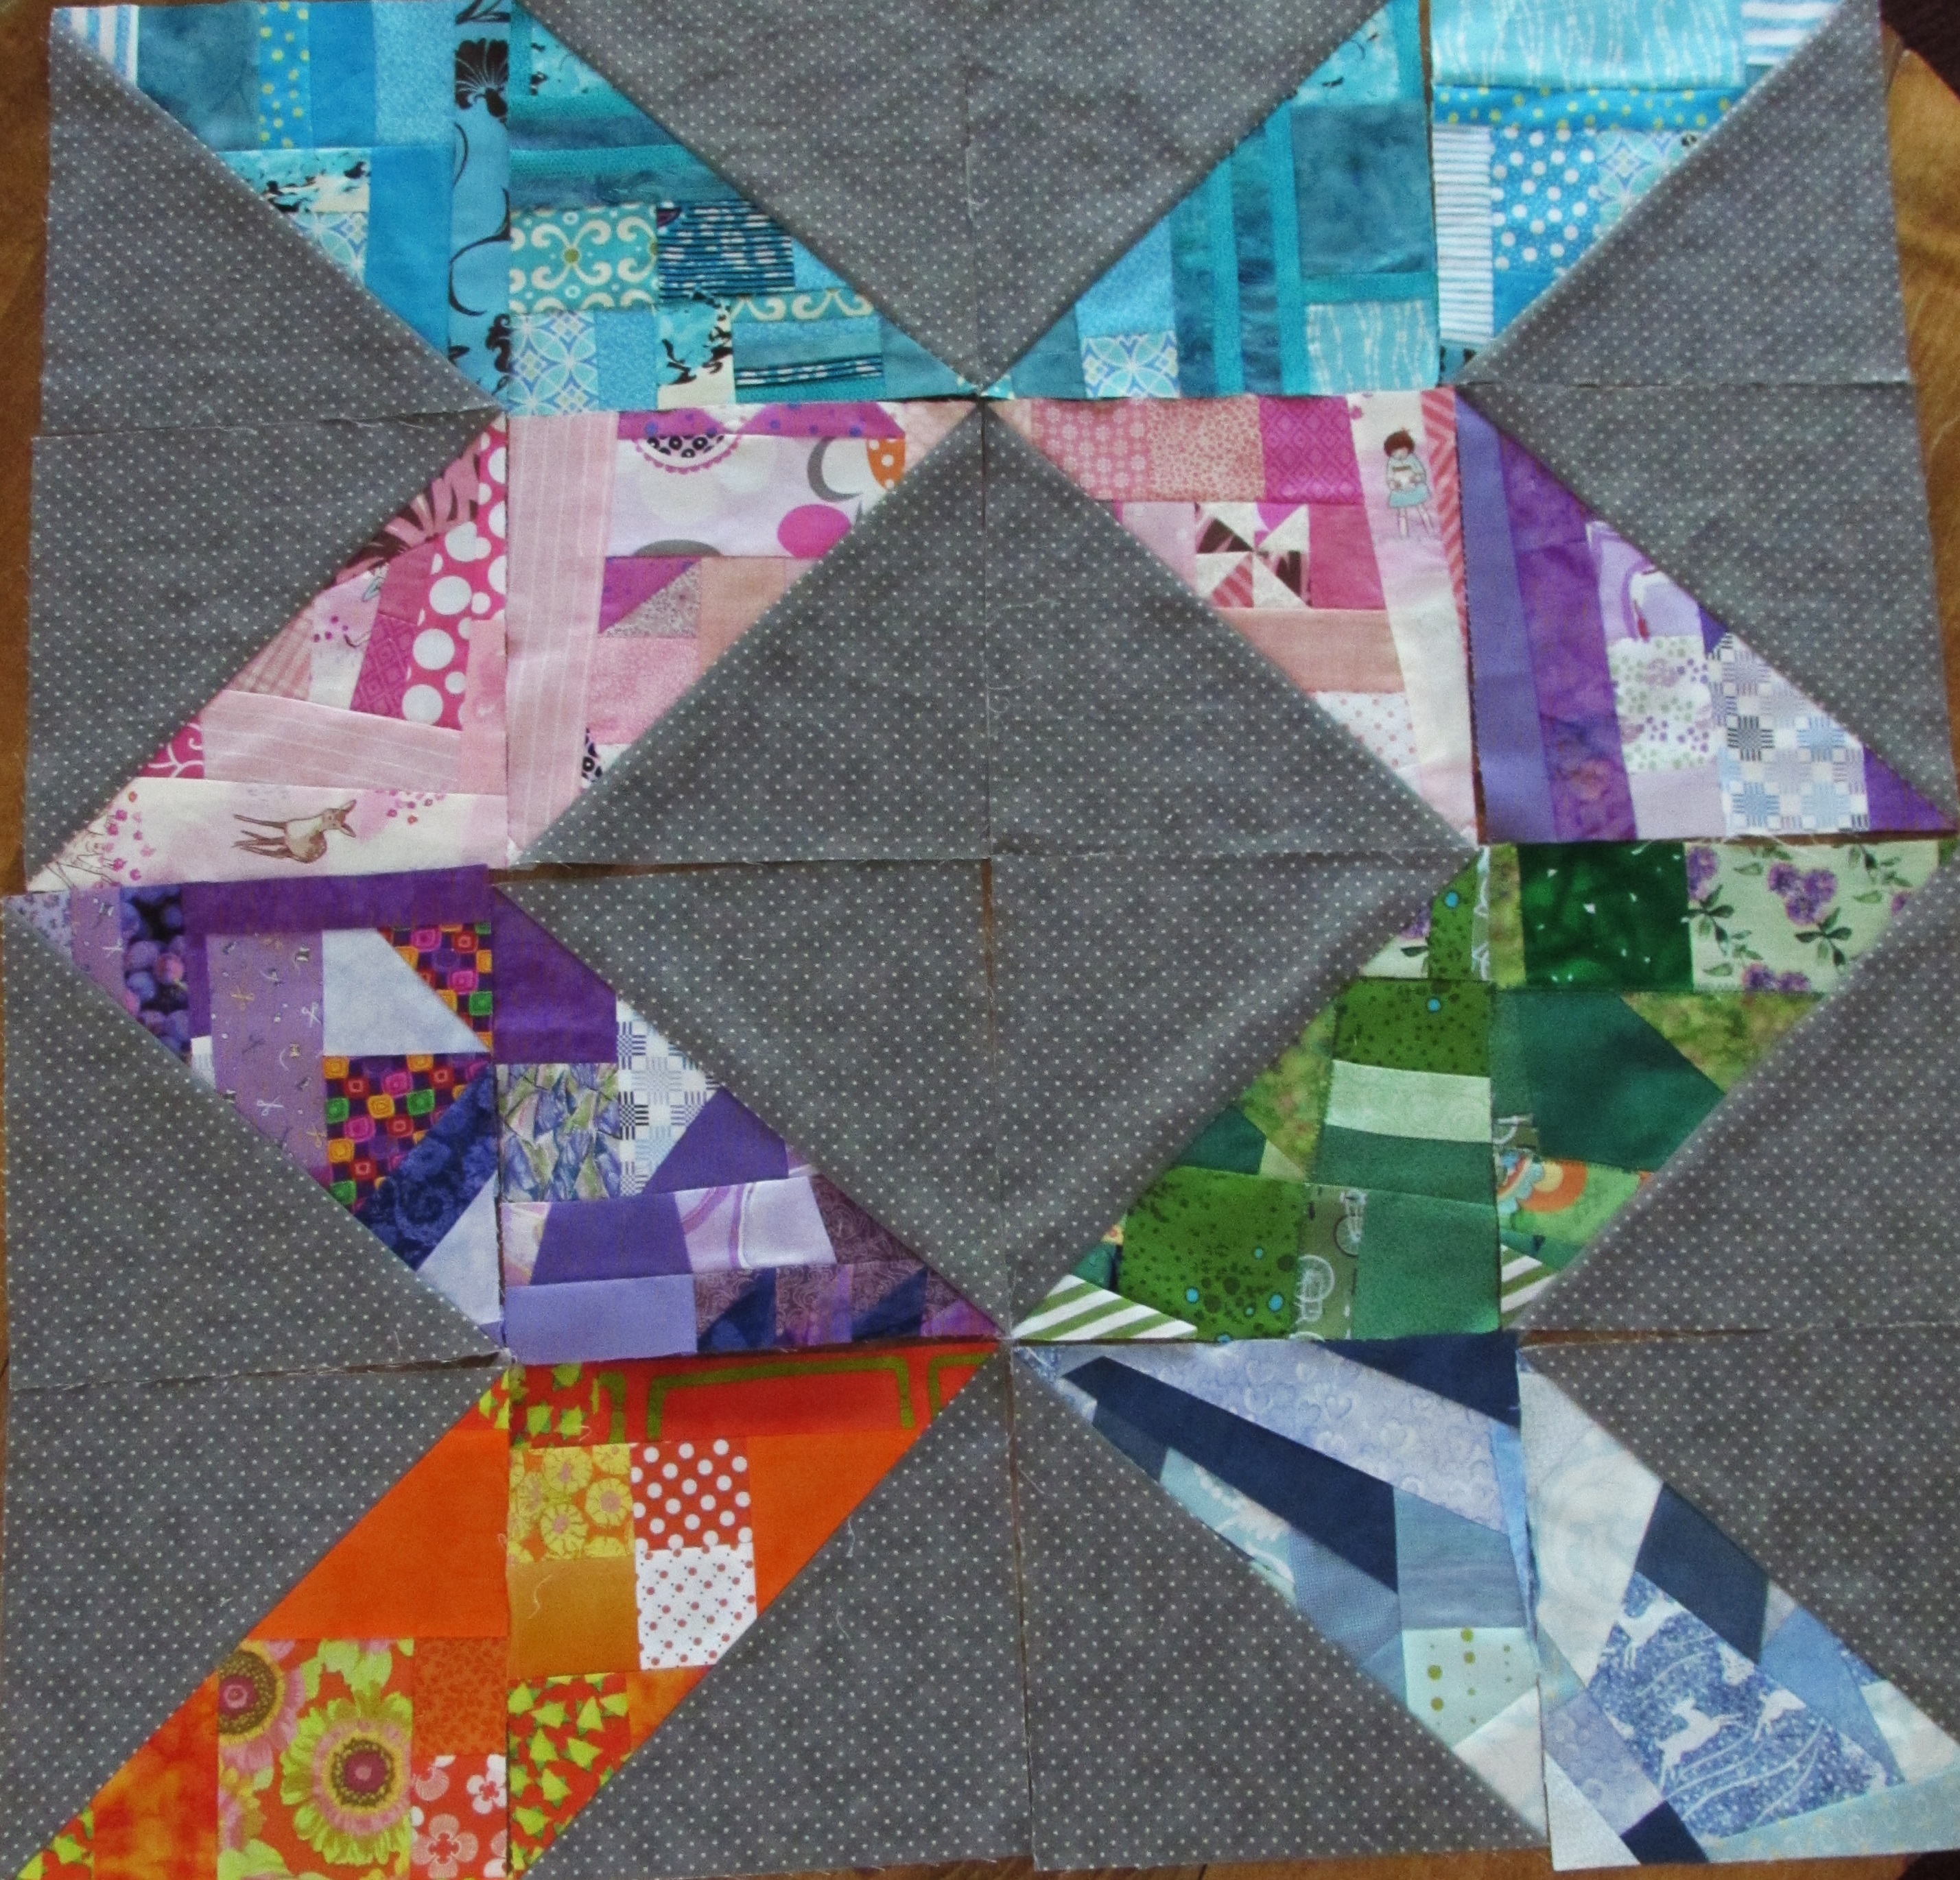
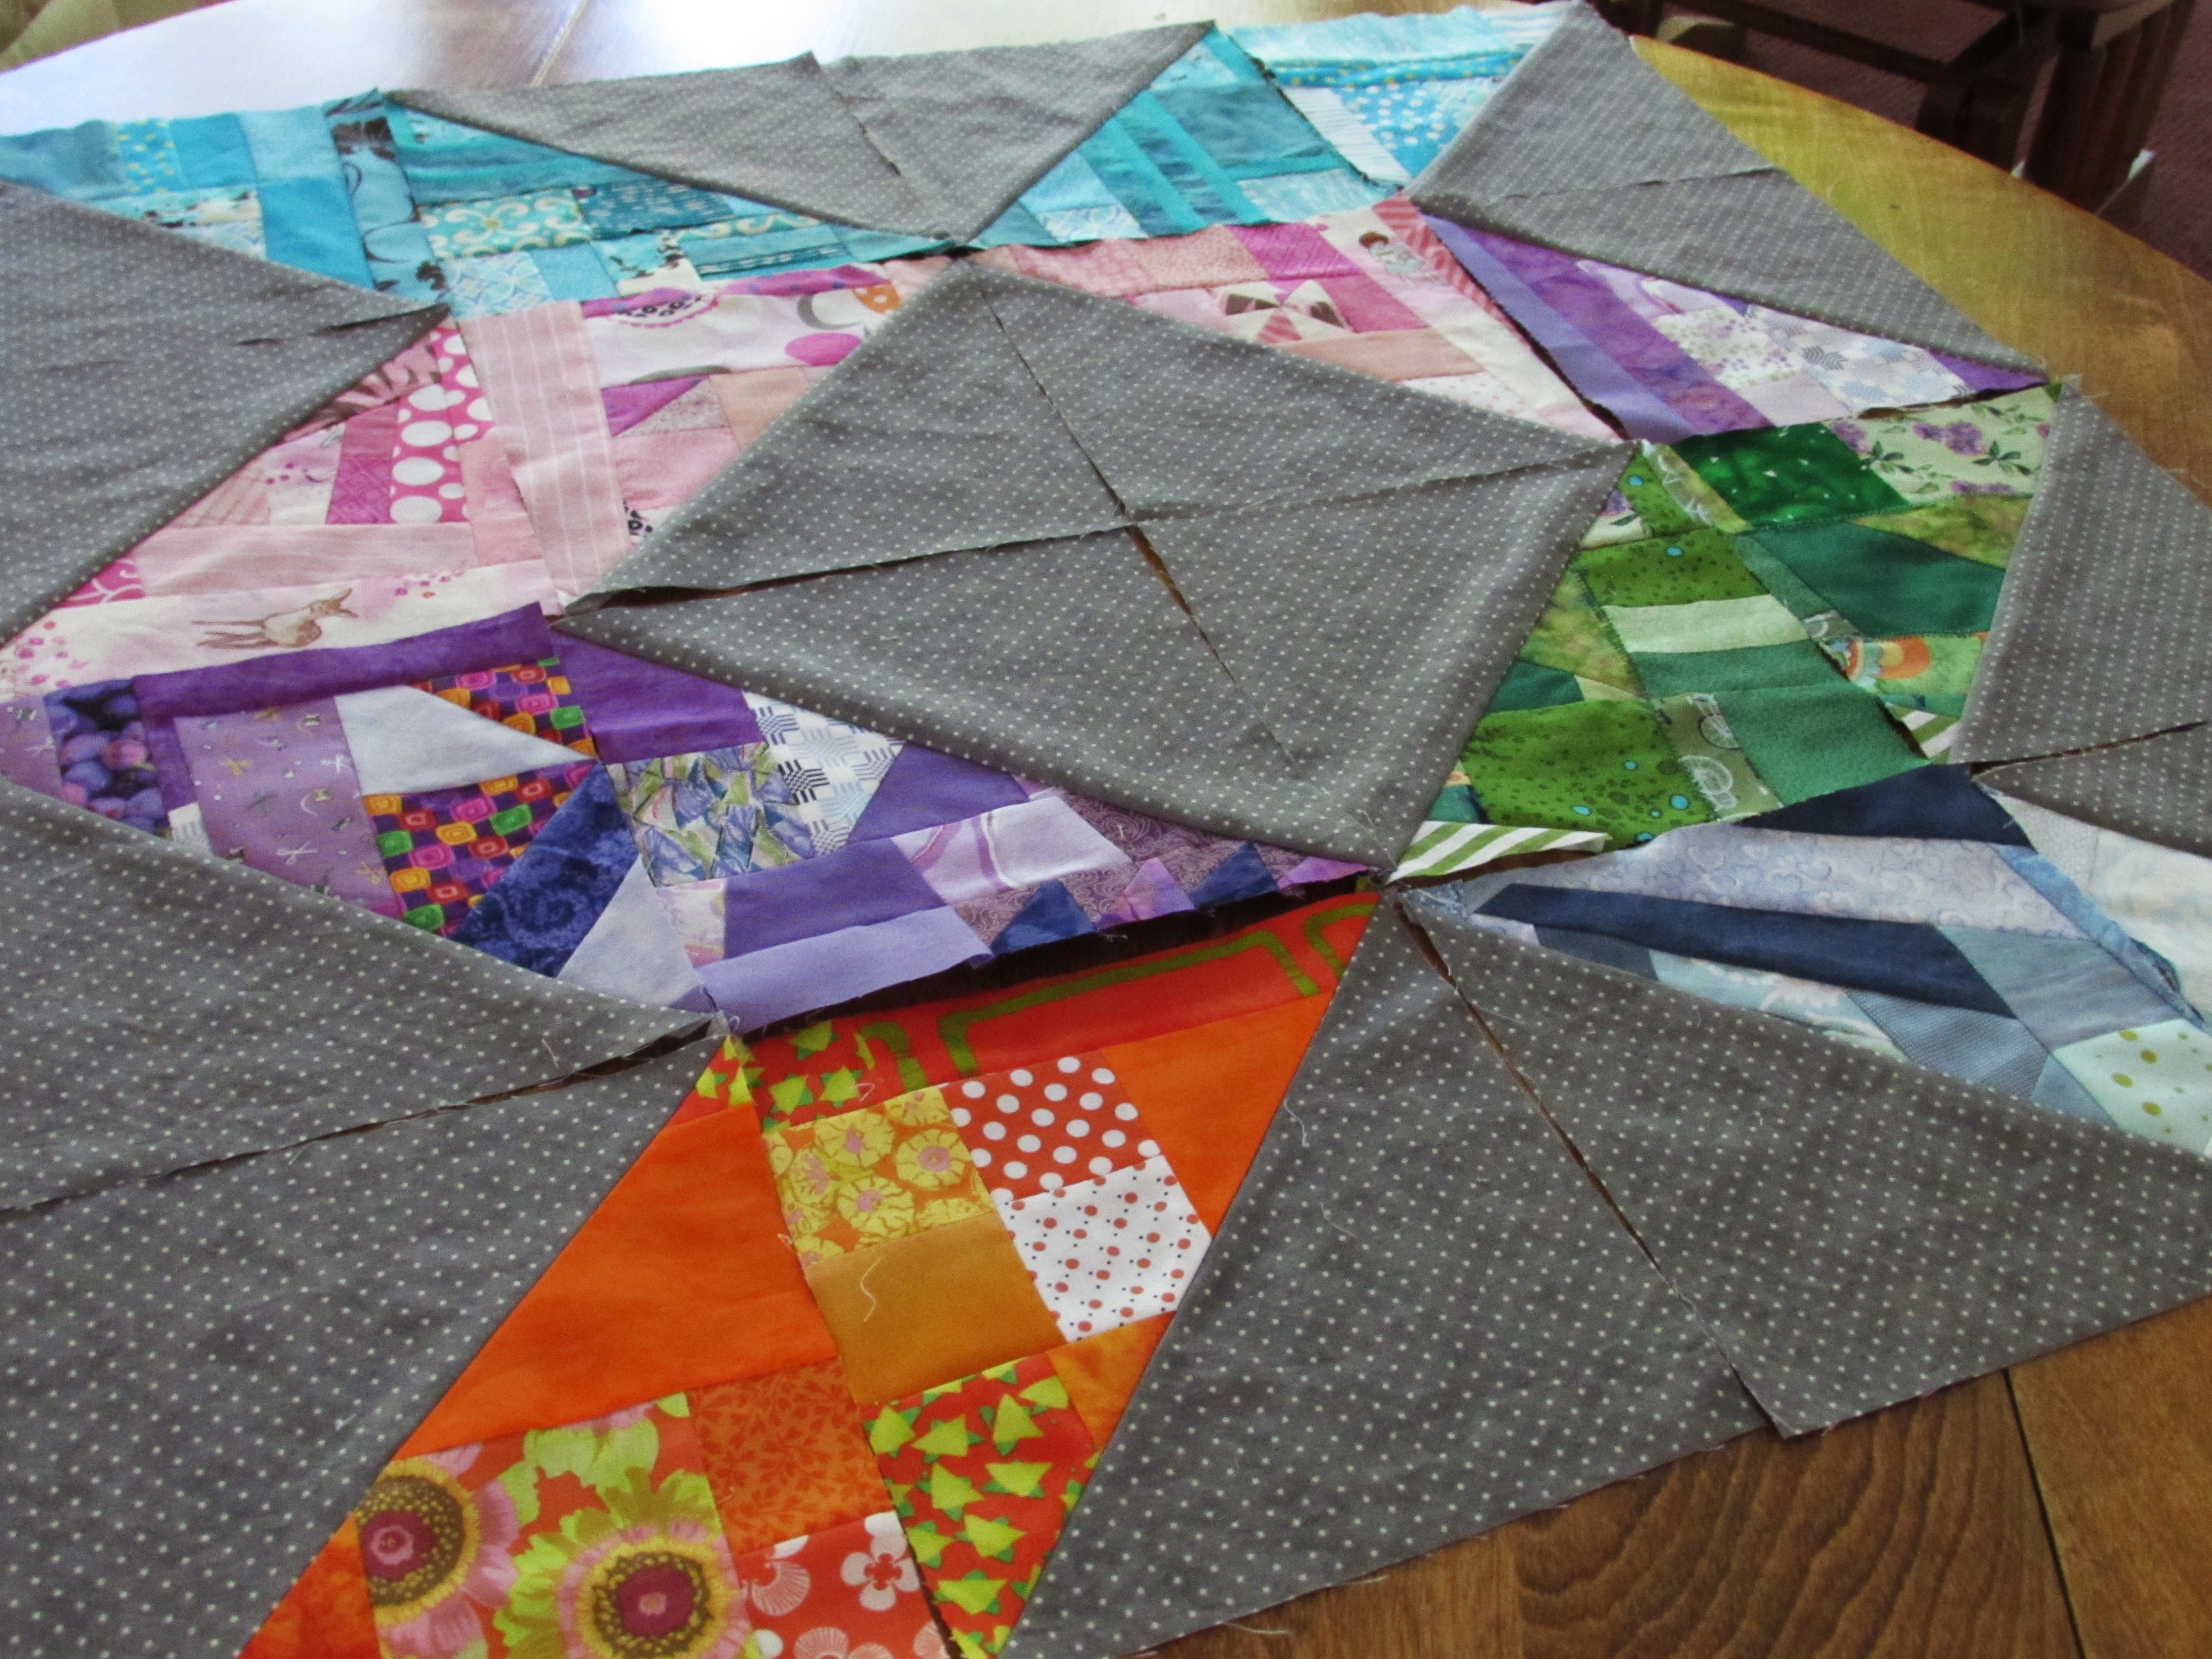
I think it is time to commit to a layout. The layout will determine how many of any one color I will need. Well, unless I choose to go scrappy and not group by colorway. Above is a scrappy layout without grouping colors. Below is one where I am keeping colors together.
If I keep colors together, I think I need to sketch this out and try to plan how many blocks of each color will are needed. Do I break the colors up in any one row, or make enough that the row is cohesive. Decisions, decisions… I think I will do some planning using the Quiltography app that I recently posted about.
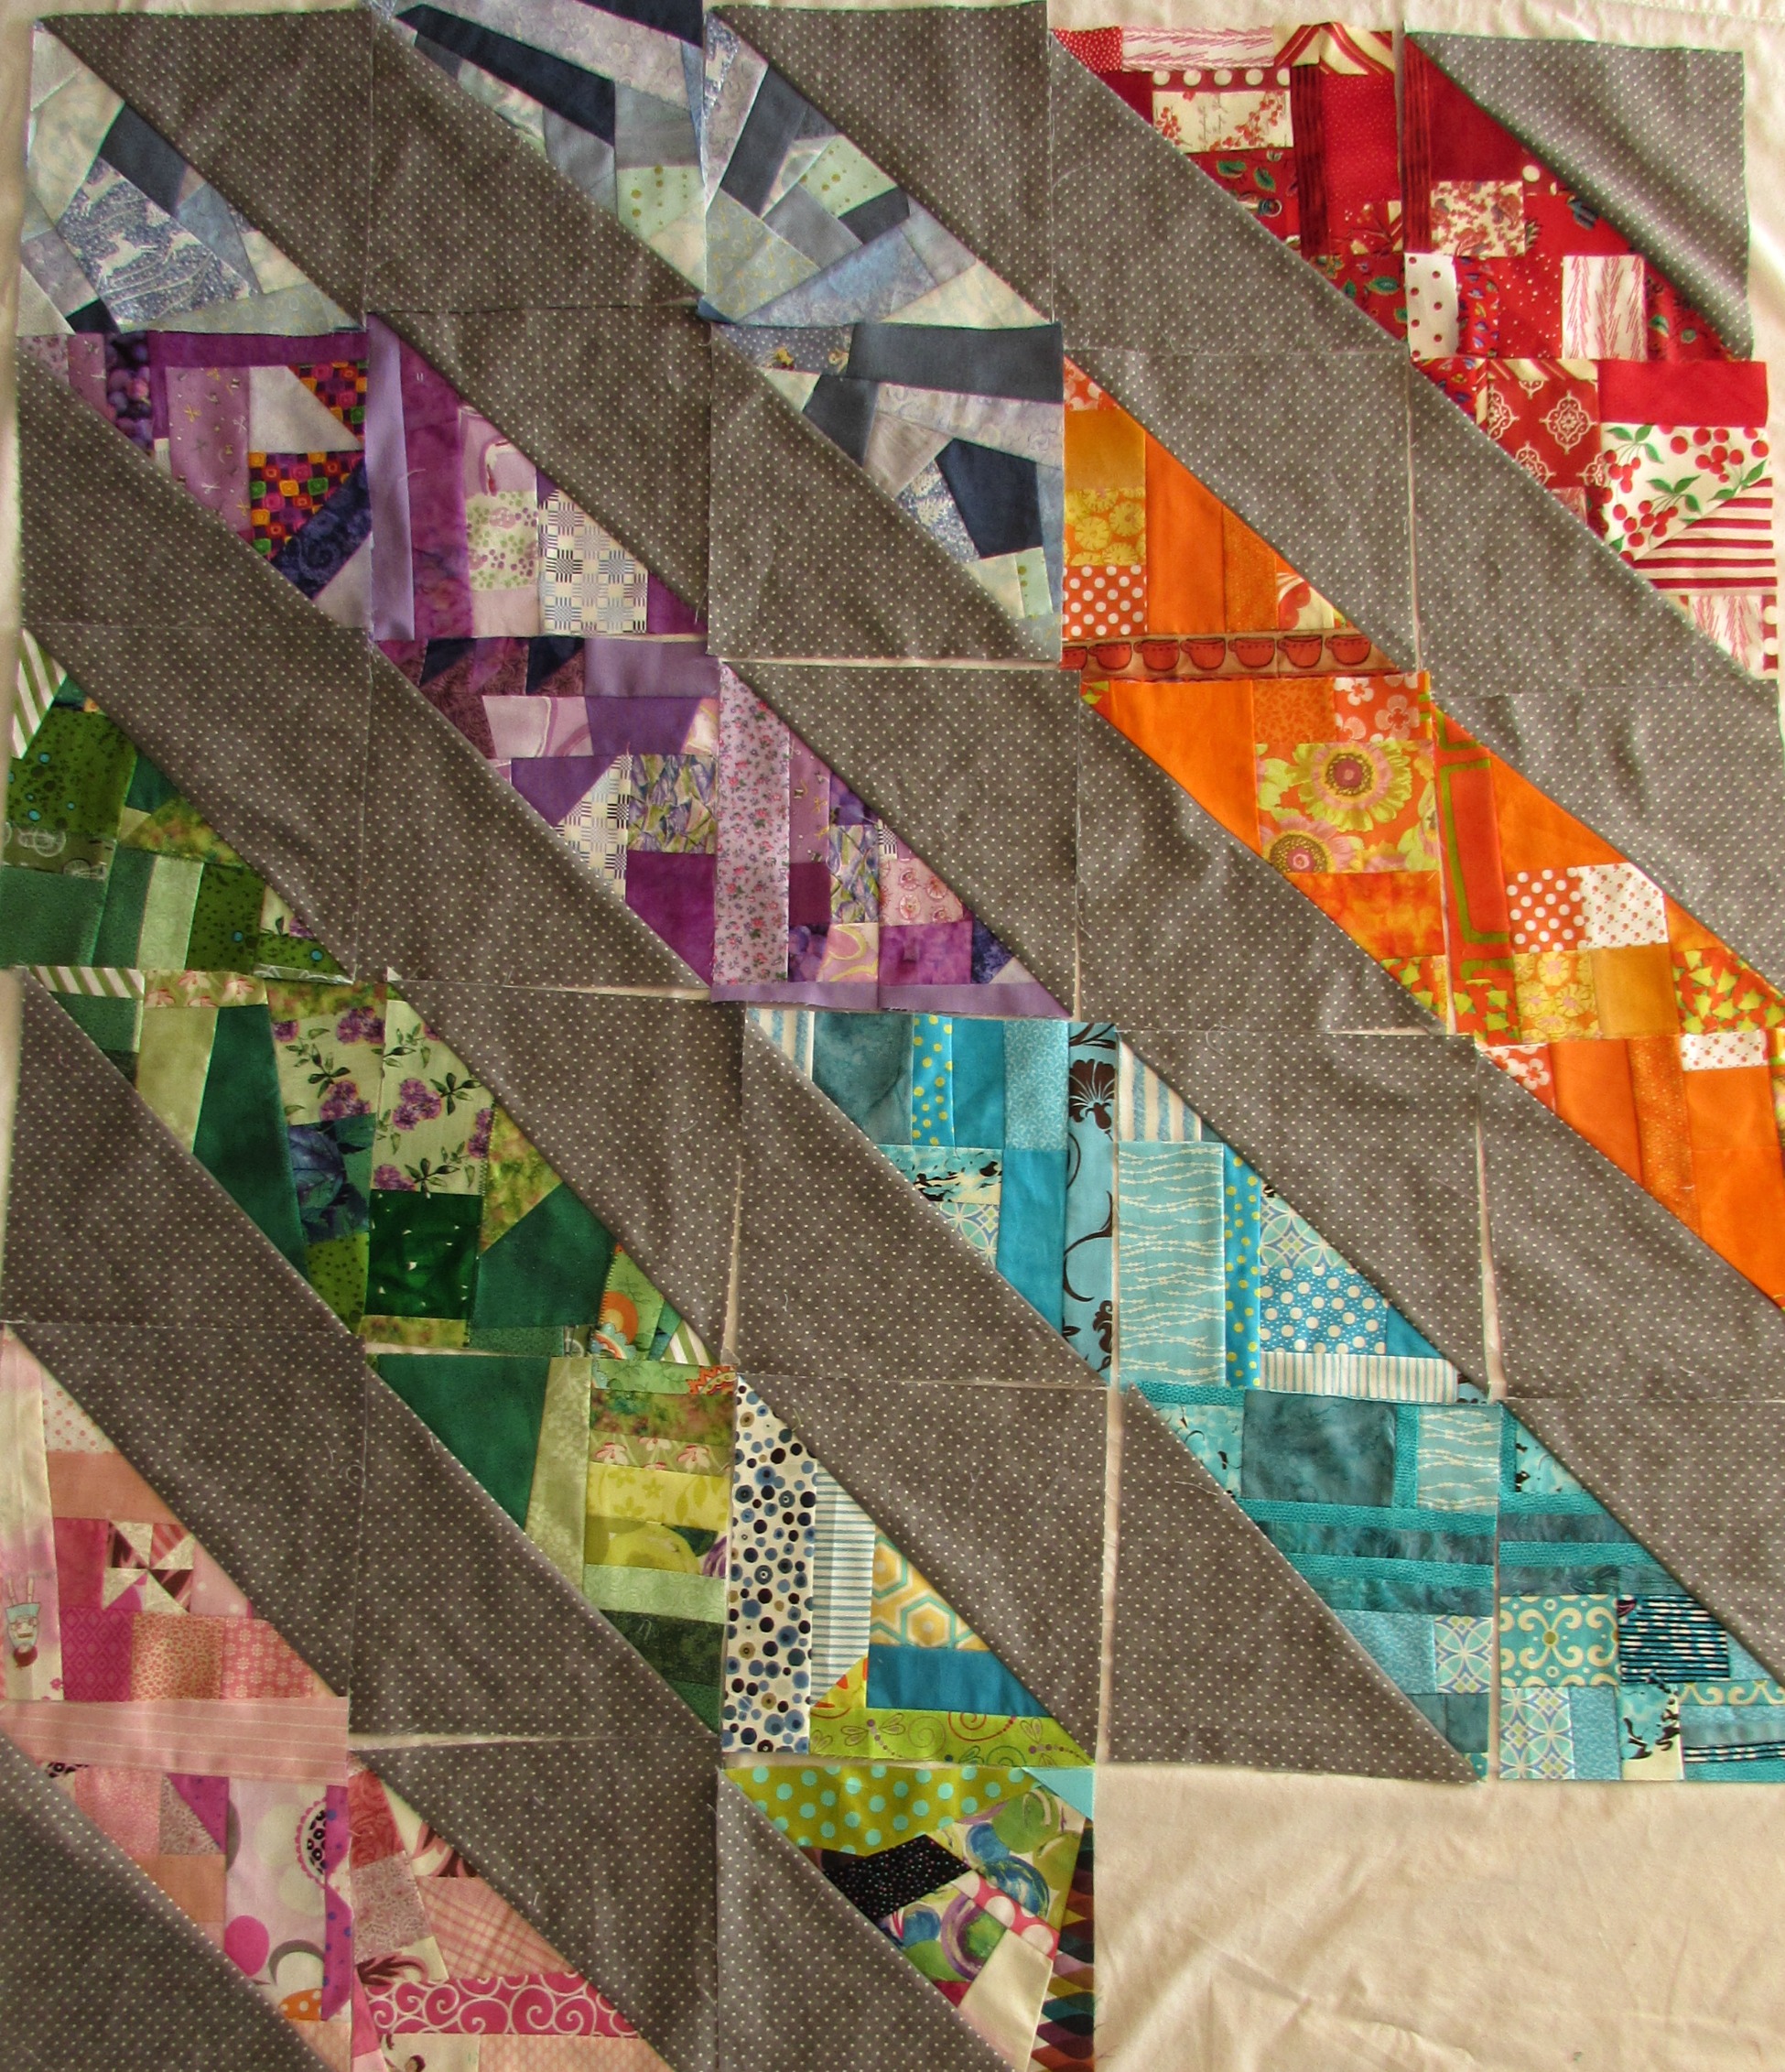
Alternatively, I could use a simpler layout. With this one, it feels like each row should be one color. Planning is still needed though. Luckily, I have been saving any chunks of the scrappy made fabric in case I need to make more of any color. It won’t take any time to add blocks here or there.
I am strongly leaning toward the first layout shown above. However, I am equally enjoying the scrappy look and the more organized, cohesive look. Will you throw in a vote? Striped layout or the diamond? Scrappy or organized colors? I am curious and would love to hear your thoughts.
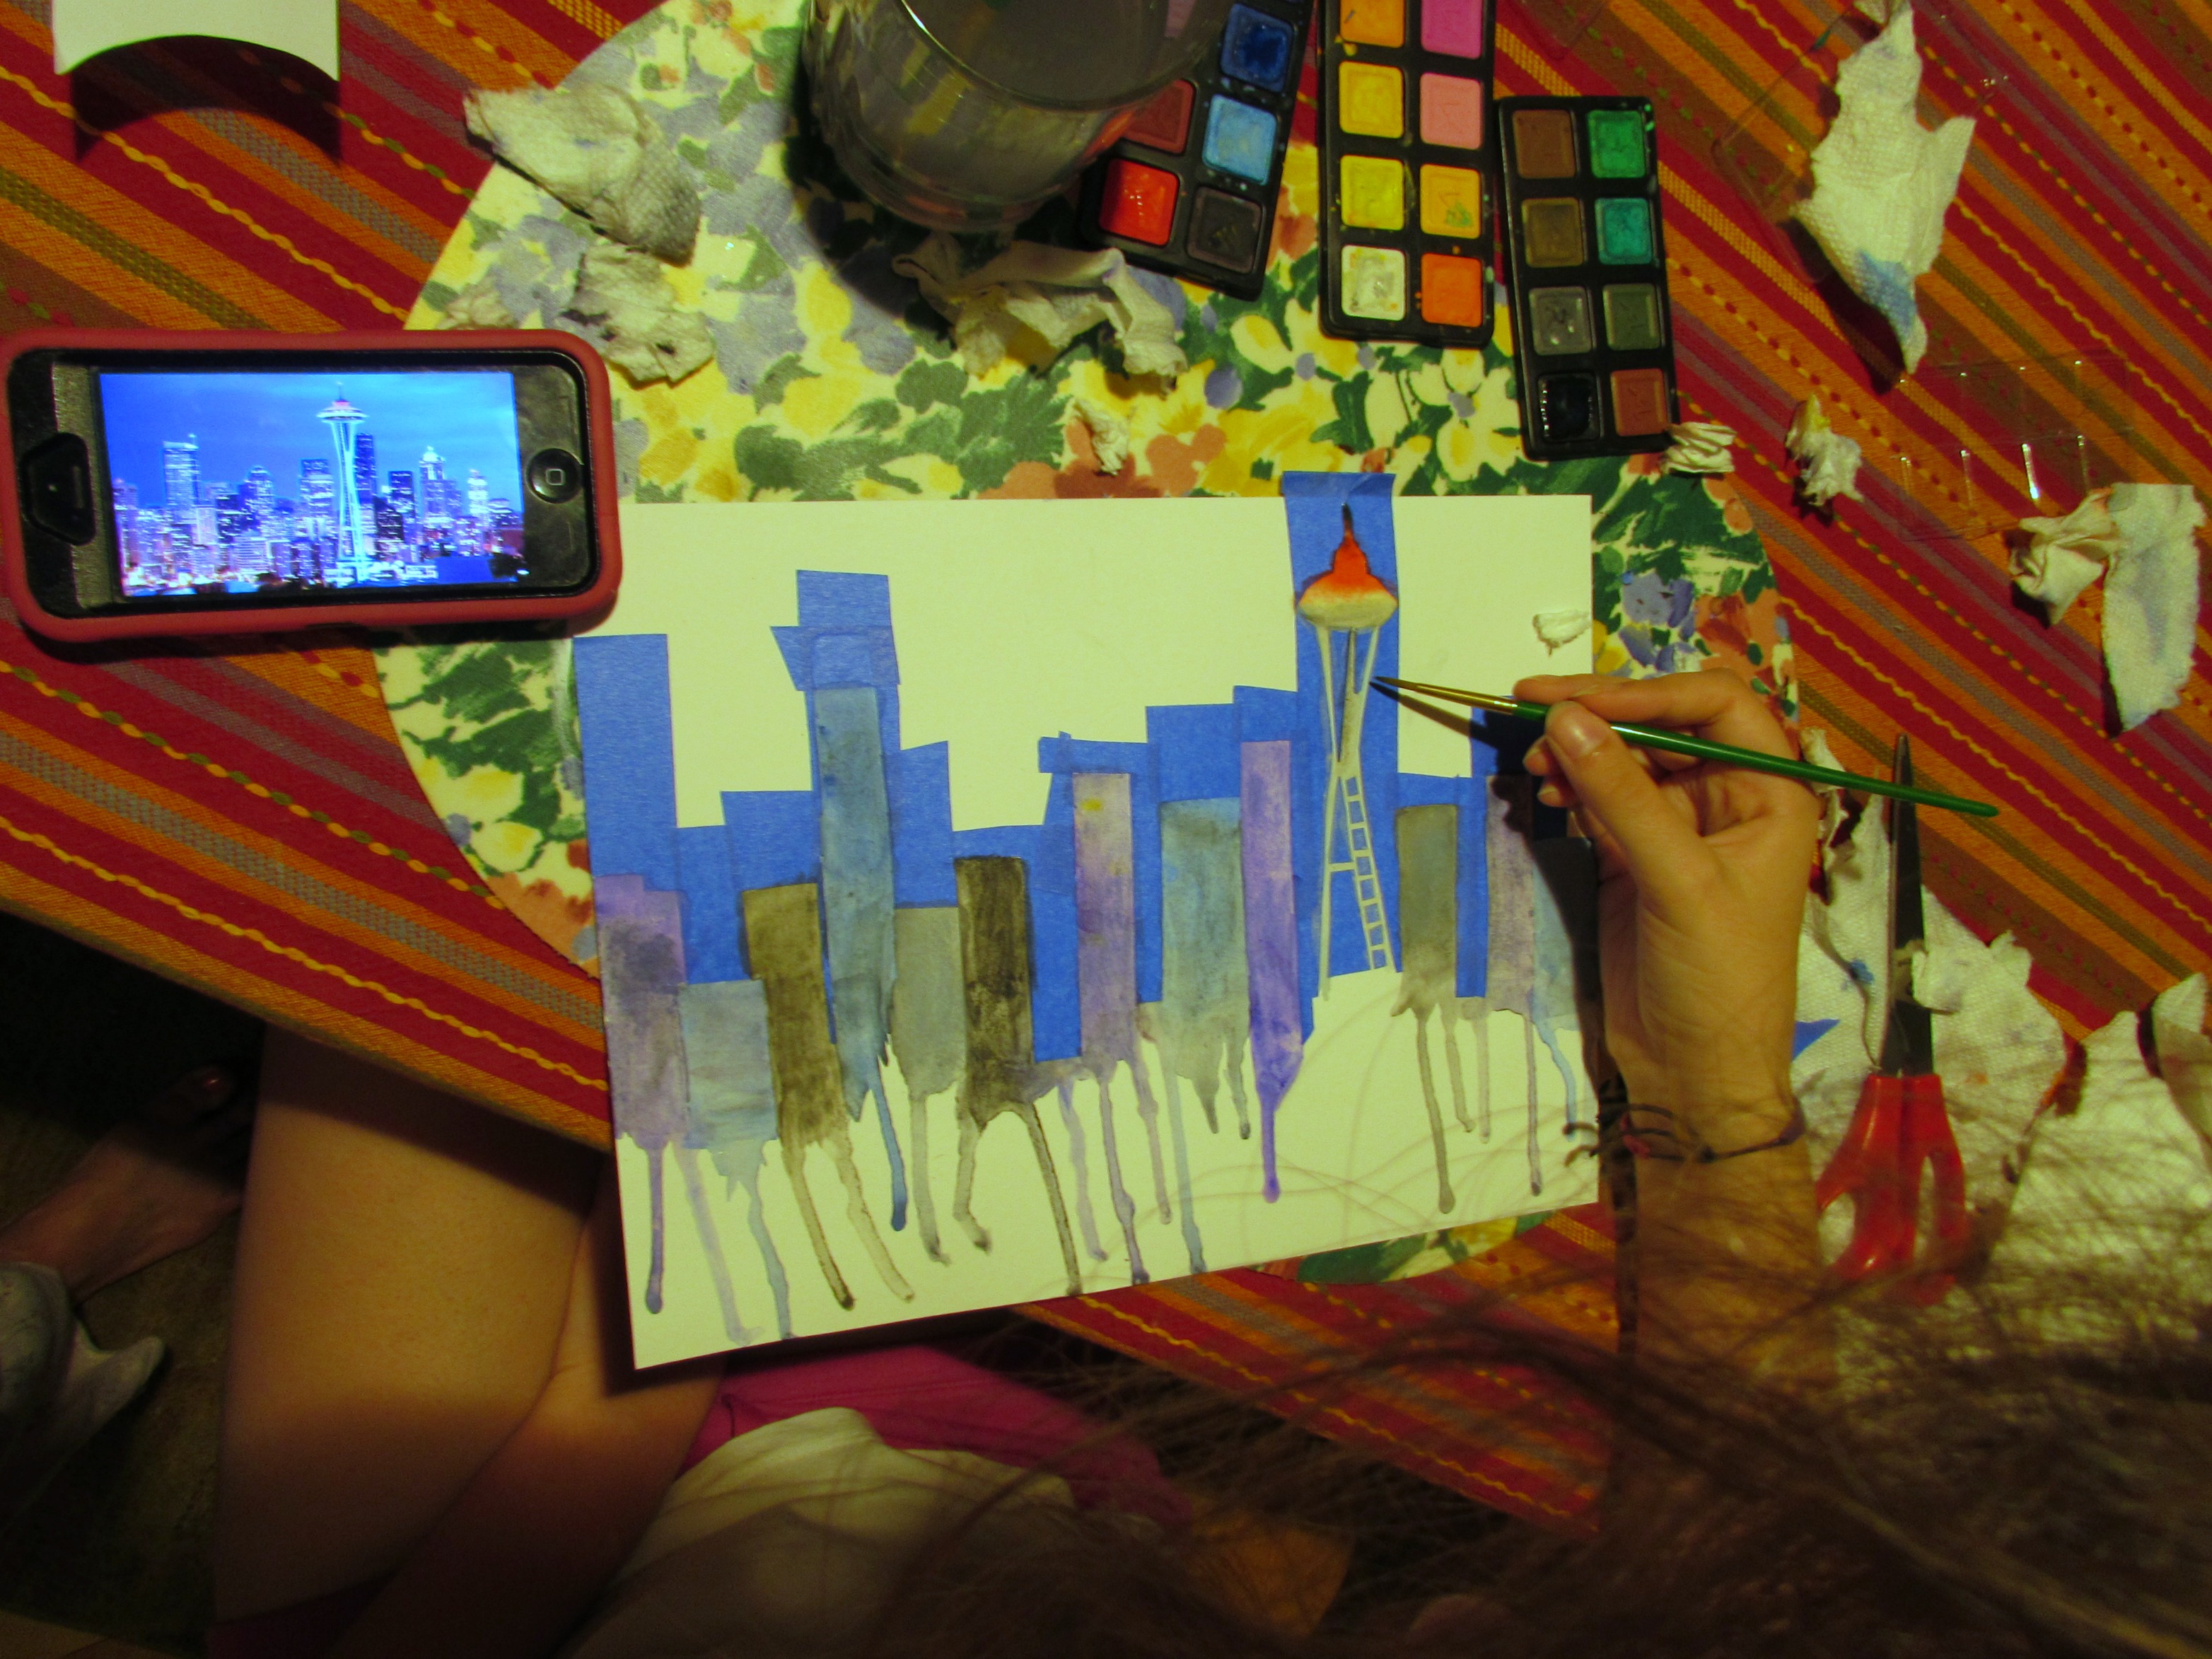
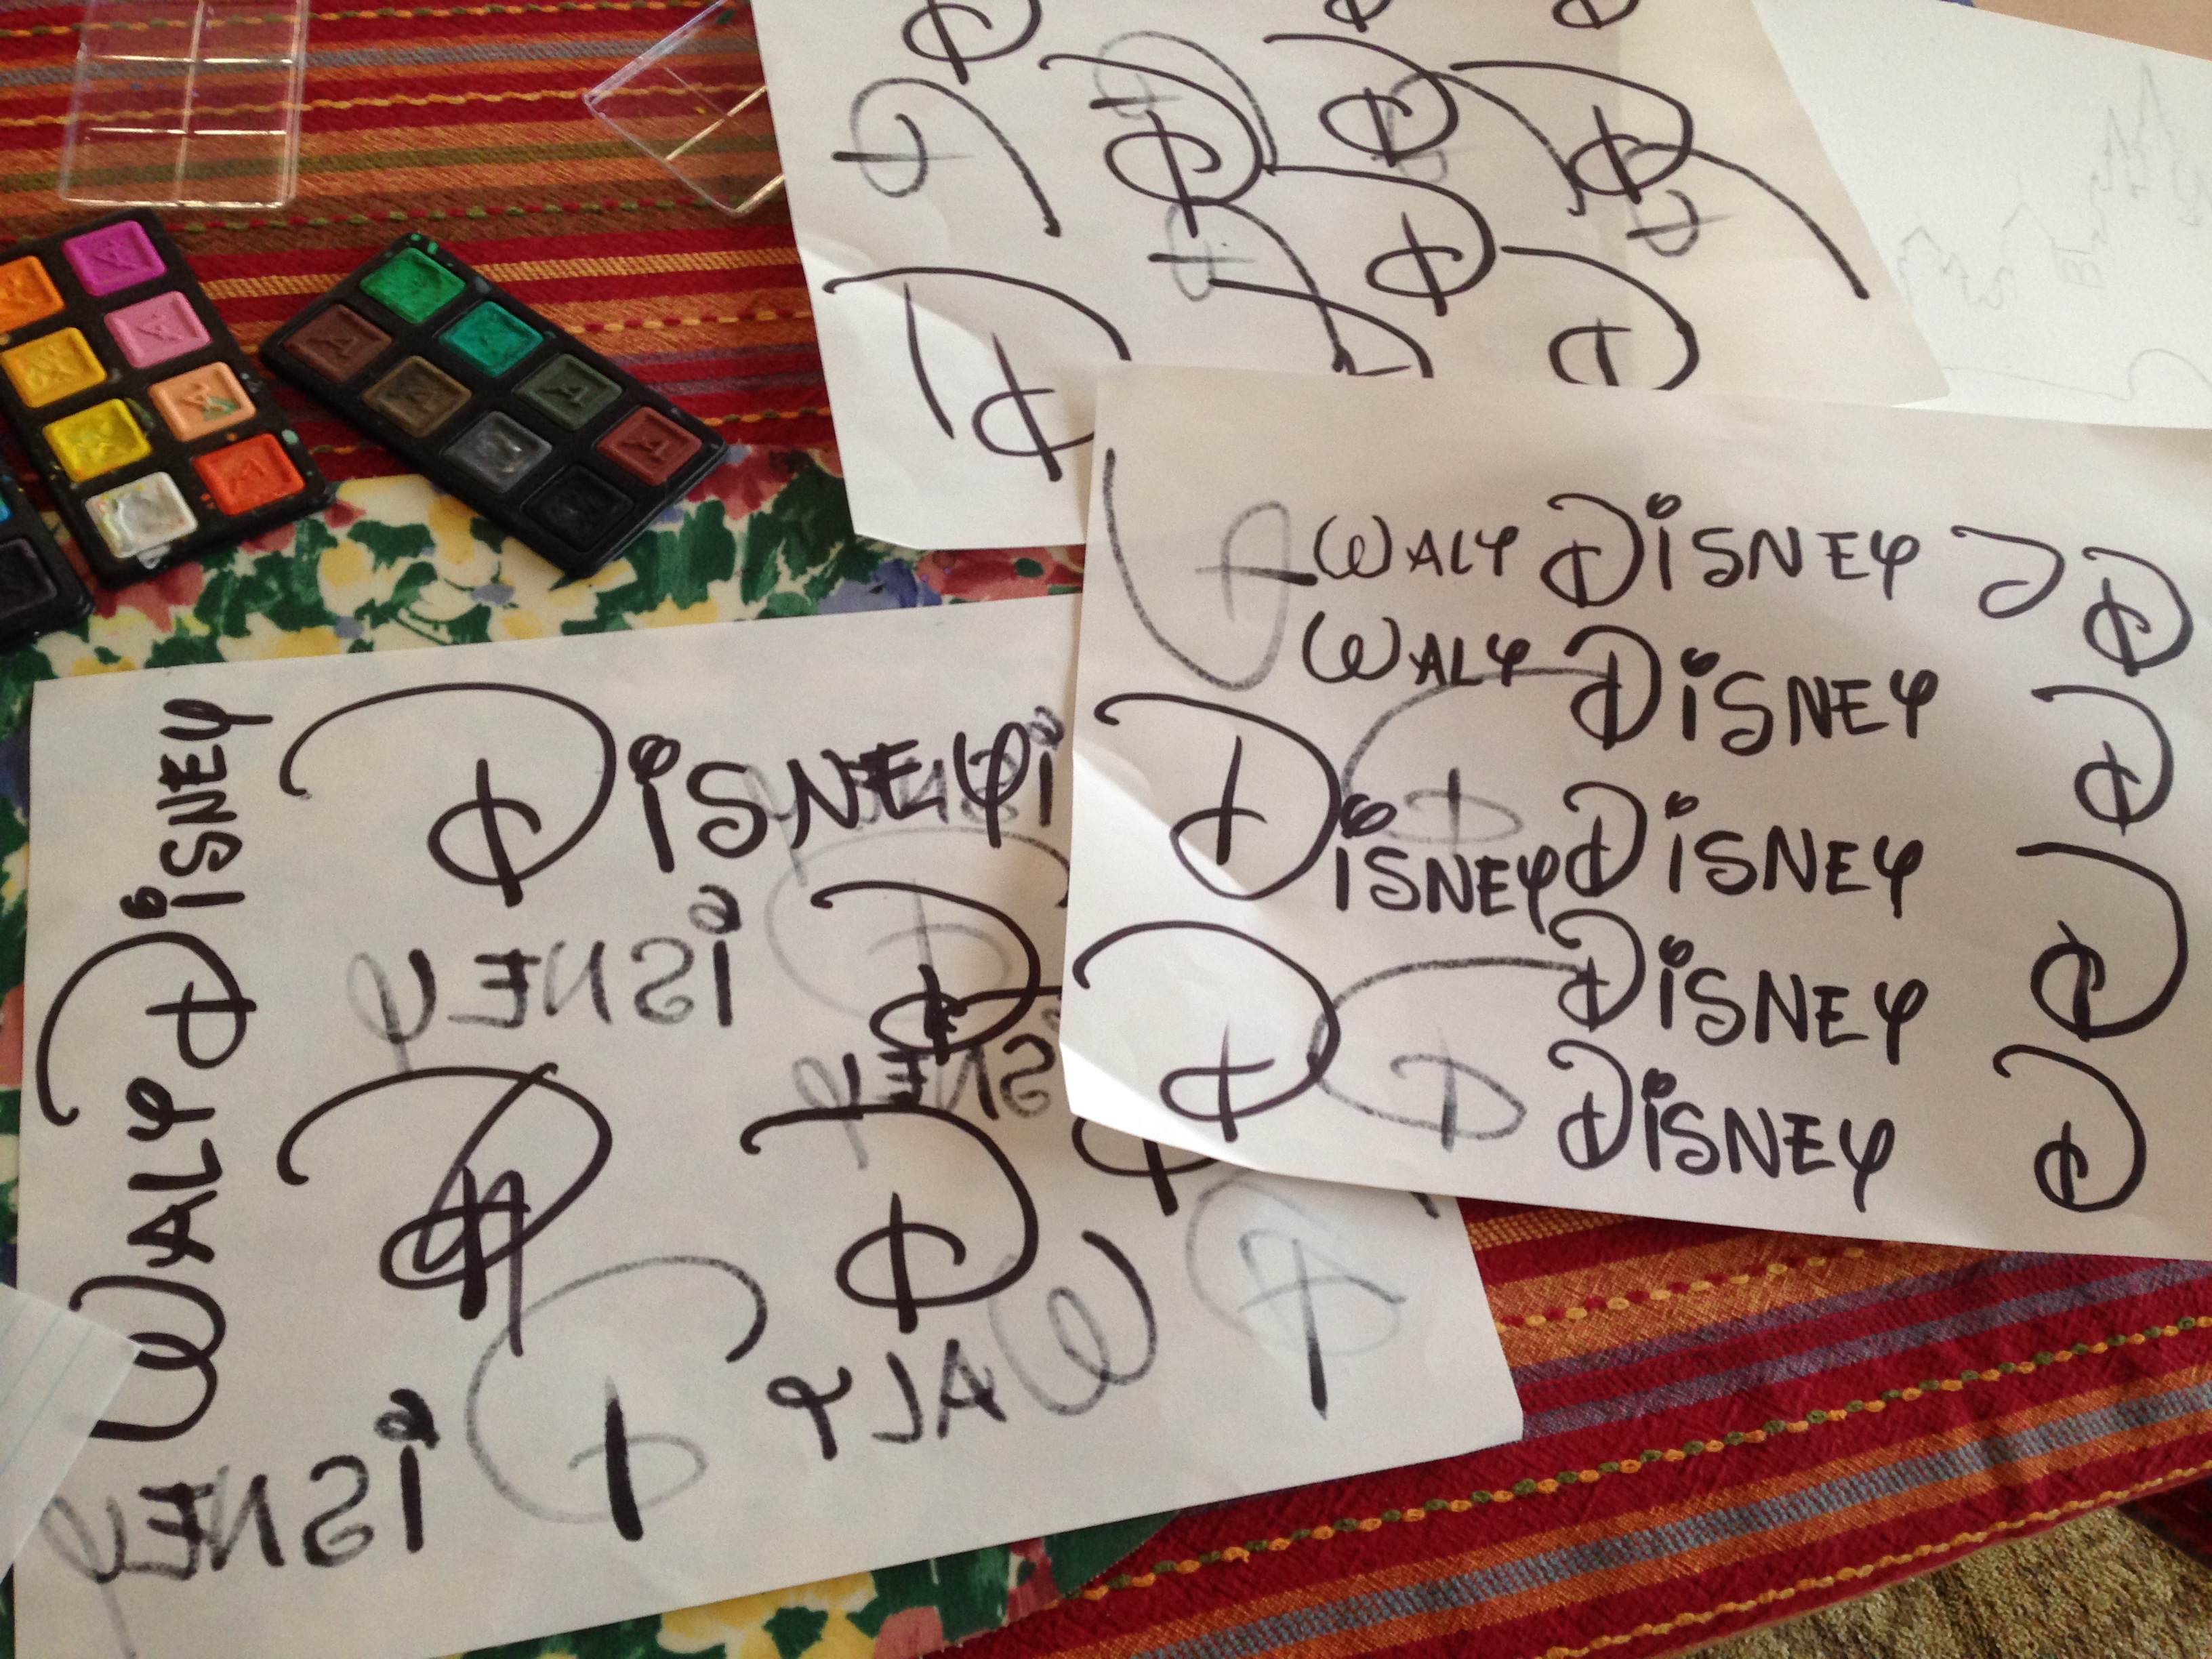
This is the hottest part of our summer thus far with triple digit heat all week and into next. We were able to escape some of the heat while at the coast for a few days. Now that we are back home, Julia and I have been hunkered down enjoying the AC. It is just awful outside. Julia has been trying out some fun techniques with her water colors, making stencils with painters tape. This one is an interpretation of the Seattle skyline with the Space Needle featured.
She is also working on some lettering. Yesterday she was channeling Walt Disney.
I am pleased to see her enjoying other activities and relying less on technology. Three more weeks and school resumes. Hard to believe but summer is winding down. Hope you are staying cool these days!
Linking to Oh Scrap and Crazy Mom Quilts, both of which are listed at the top of the page, under Link Ups.
The day we were to leave for our vacation in Maine, I decided I really wanted to take a hand stitching project along with me as I was fairly certain Ray wouldn’t be too keen on my bringing along a sewing machine. He can be so darn unreasonable. Ha ha. We were to be gone for two weeks which is far too long to be without needle and thread. I was searching through the closet in my sewing room and decided to change my plan for a UFO that I had.
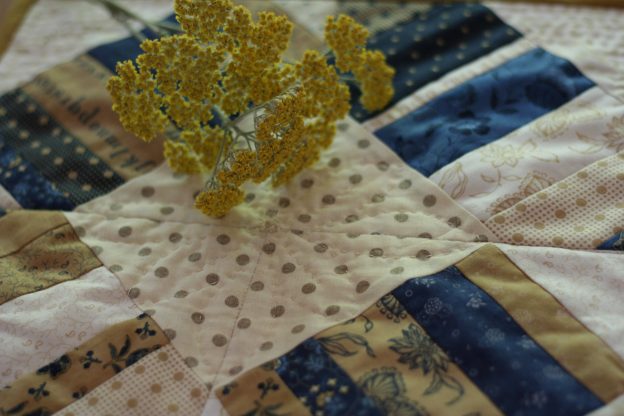
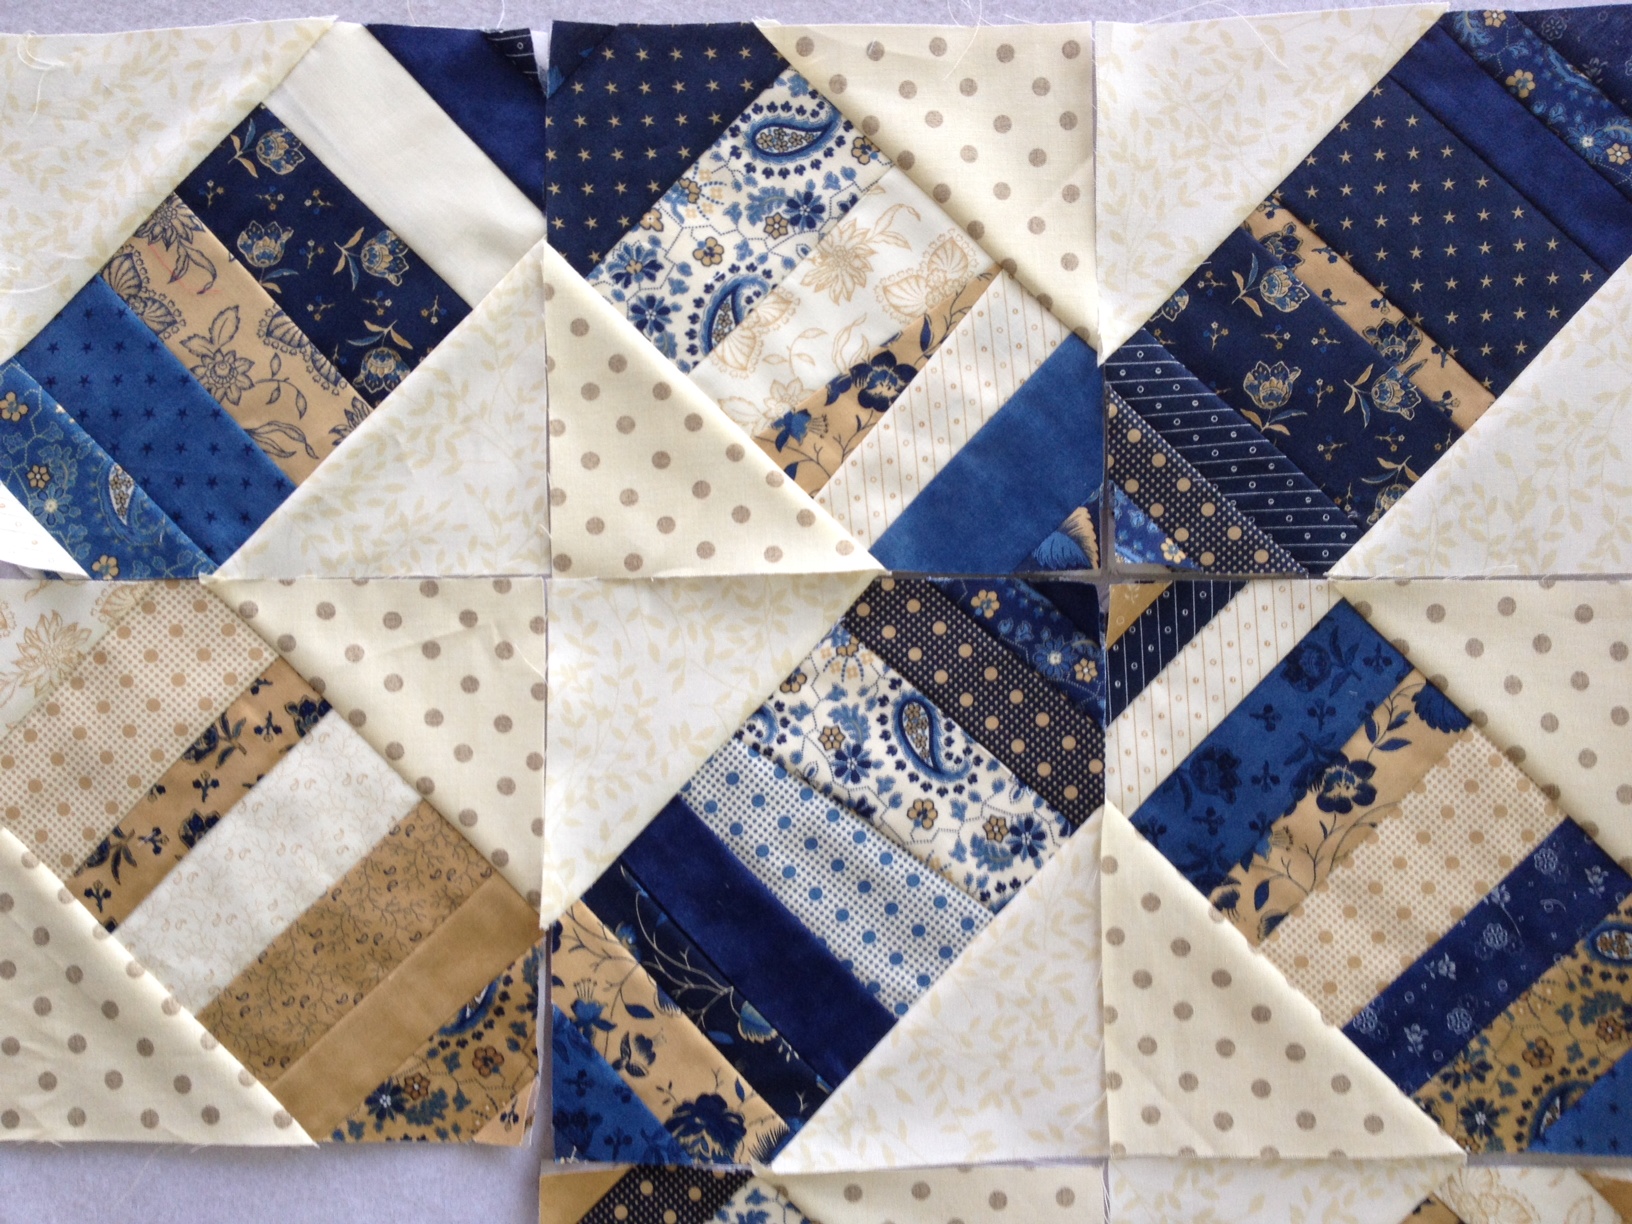
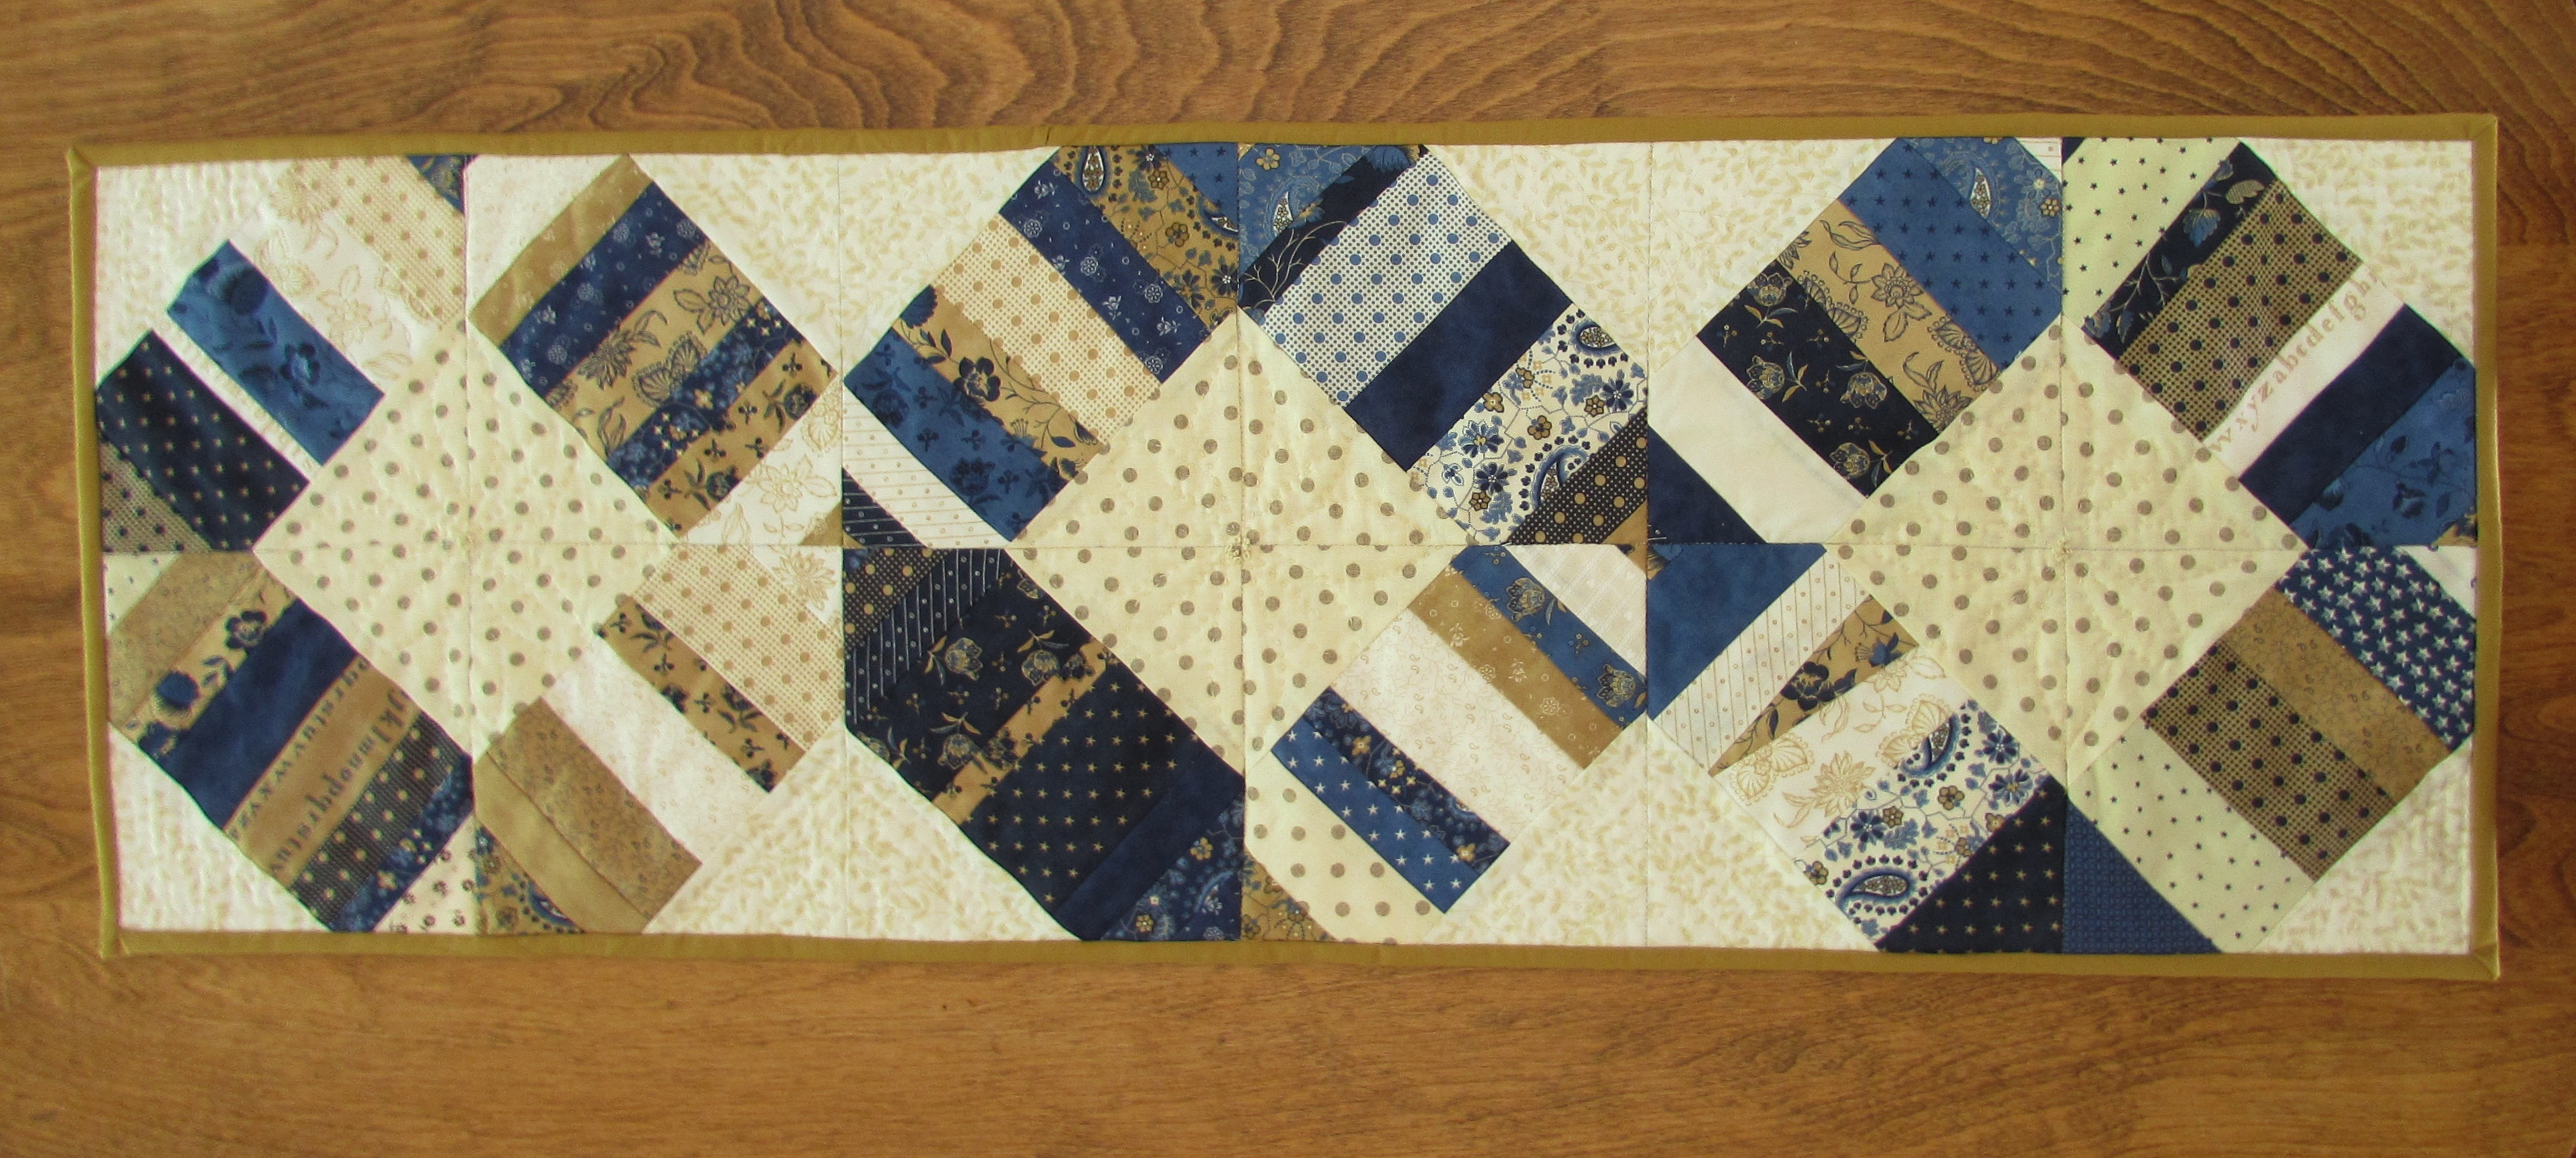
Here is the back story. In July, 2014, I posted about a packet of scraps I ordered online. It turned out to be strips from the Moda line called Lexington, designed by Minnick & Simpson. I planned to make a string quilt. Here is a picture of some of the blocks. Side note: wow, that is a horrible picture. I am happy to see that my photography has improved over time.
Each string block finished at seven inches. After making about 20 blocks I set it aside and have not touched it since. I am not sure why, but I lost interest in it. I really like the colors in the project though. I decided to repurpose the blocks that were made and quickly sewed twelve blocks together to use as a table runner. Using twelve blocks gave me a runner that was about 13.5″ x 40″ which is a nice size for my table.
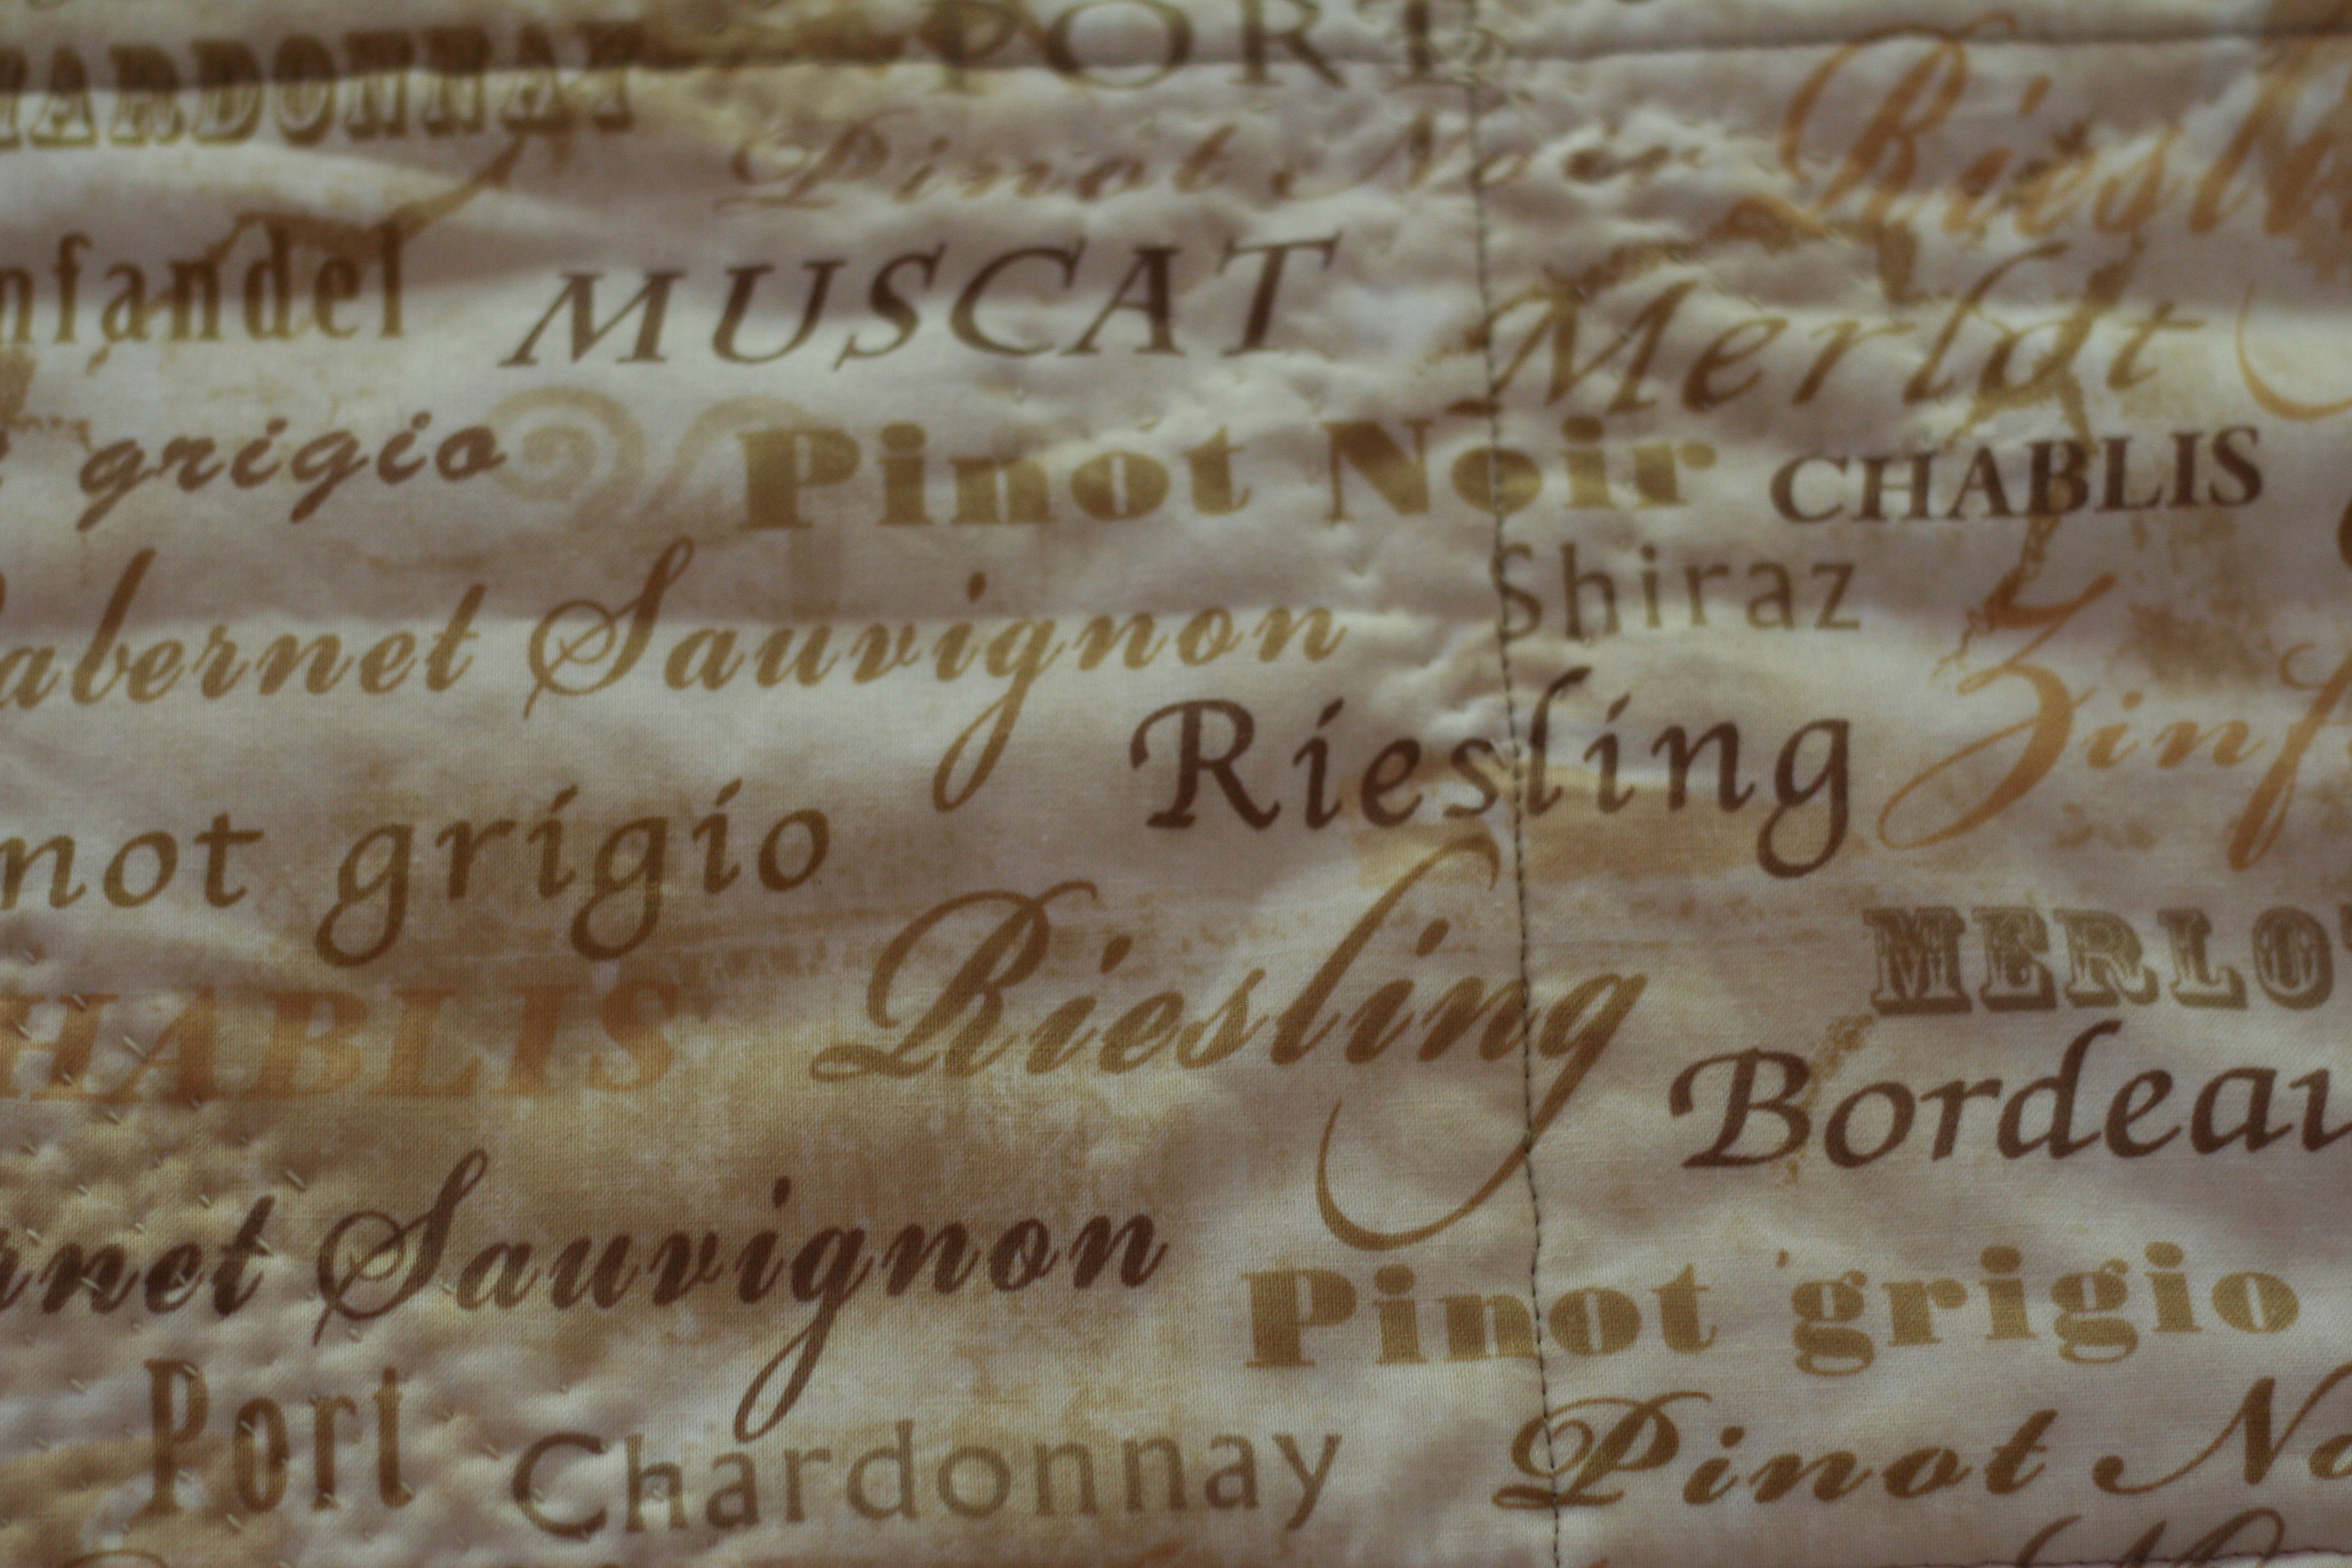
I cut a piece of batting from a bag of batting scraps that I had and also a piece of backing. I love the backing – I purchased it a couple of years ago at a quilt shop in the bay area. My sister, Cathy, found it on a sale table for me.
It has been on the shelf for a bit and I was happy to find a project to use it in. After stitching up the blocks, I quickly sandwiched everything and ditch stitched it down the center and across the width at each seam. I didn’t want to pack a hoop to quilt it and if it was stitched already, I knew it would be stable to hand stitch.
This was such a nice way to practice hand quilting. I have not done a lot of handwork. I did quilt a pillow last spring but since then, not so much. I brought my Hera marker and a square ruler with me, hoping I could figure out some sort of design once I got going. I also brought some basic hand quilting thread as well as Perle cotton.
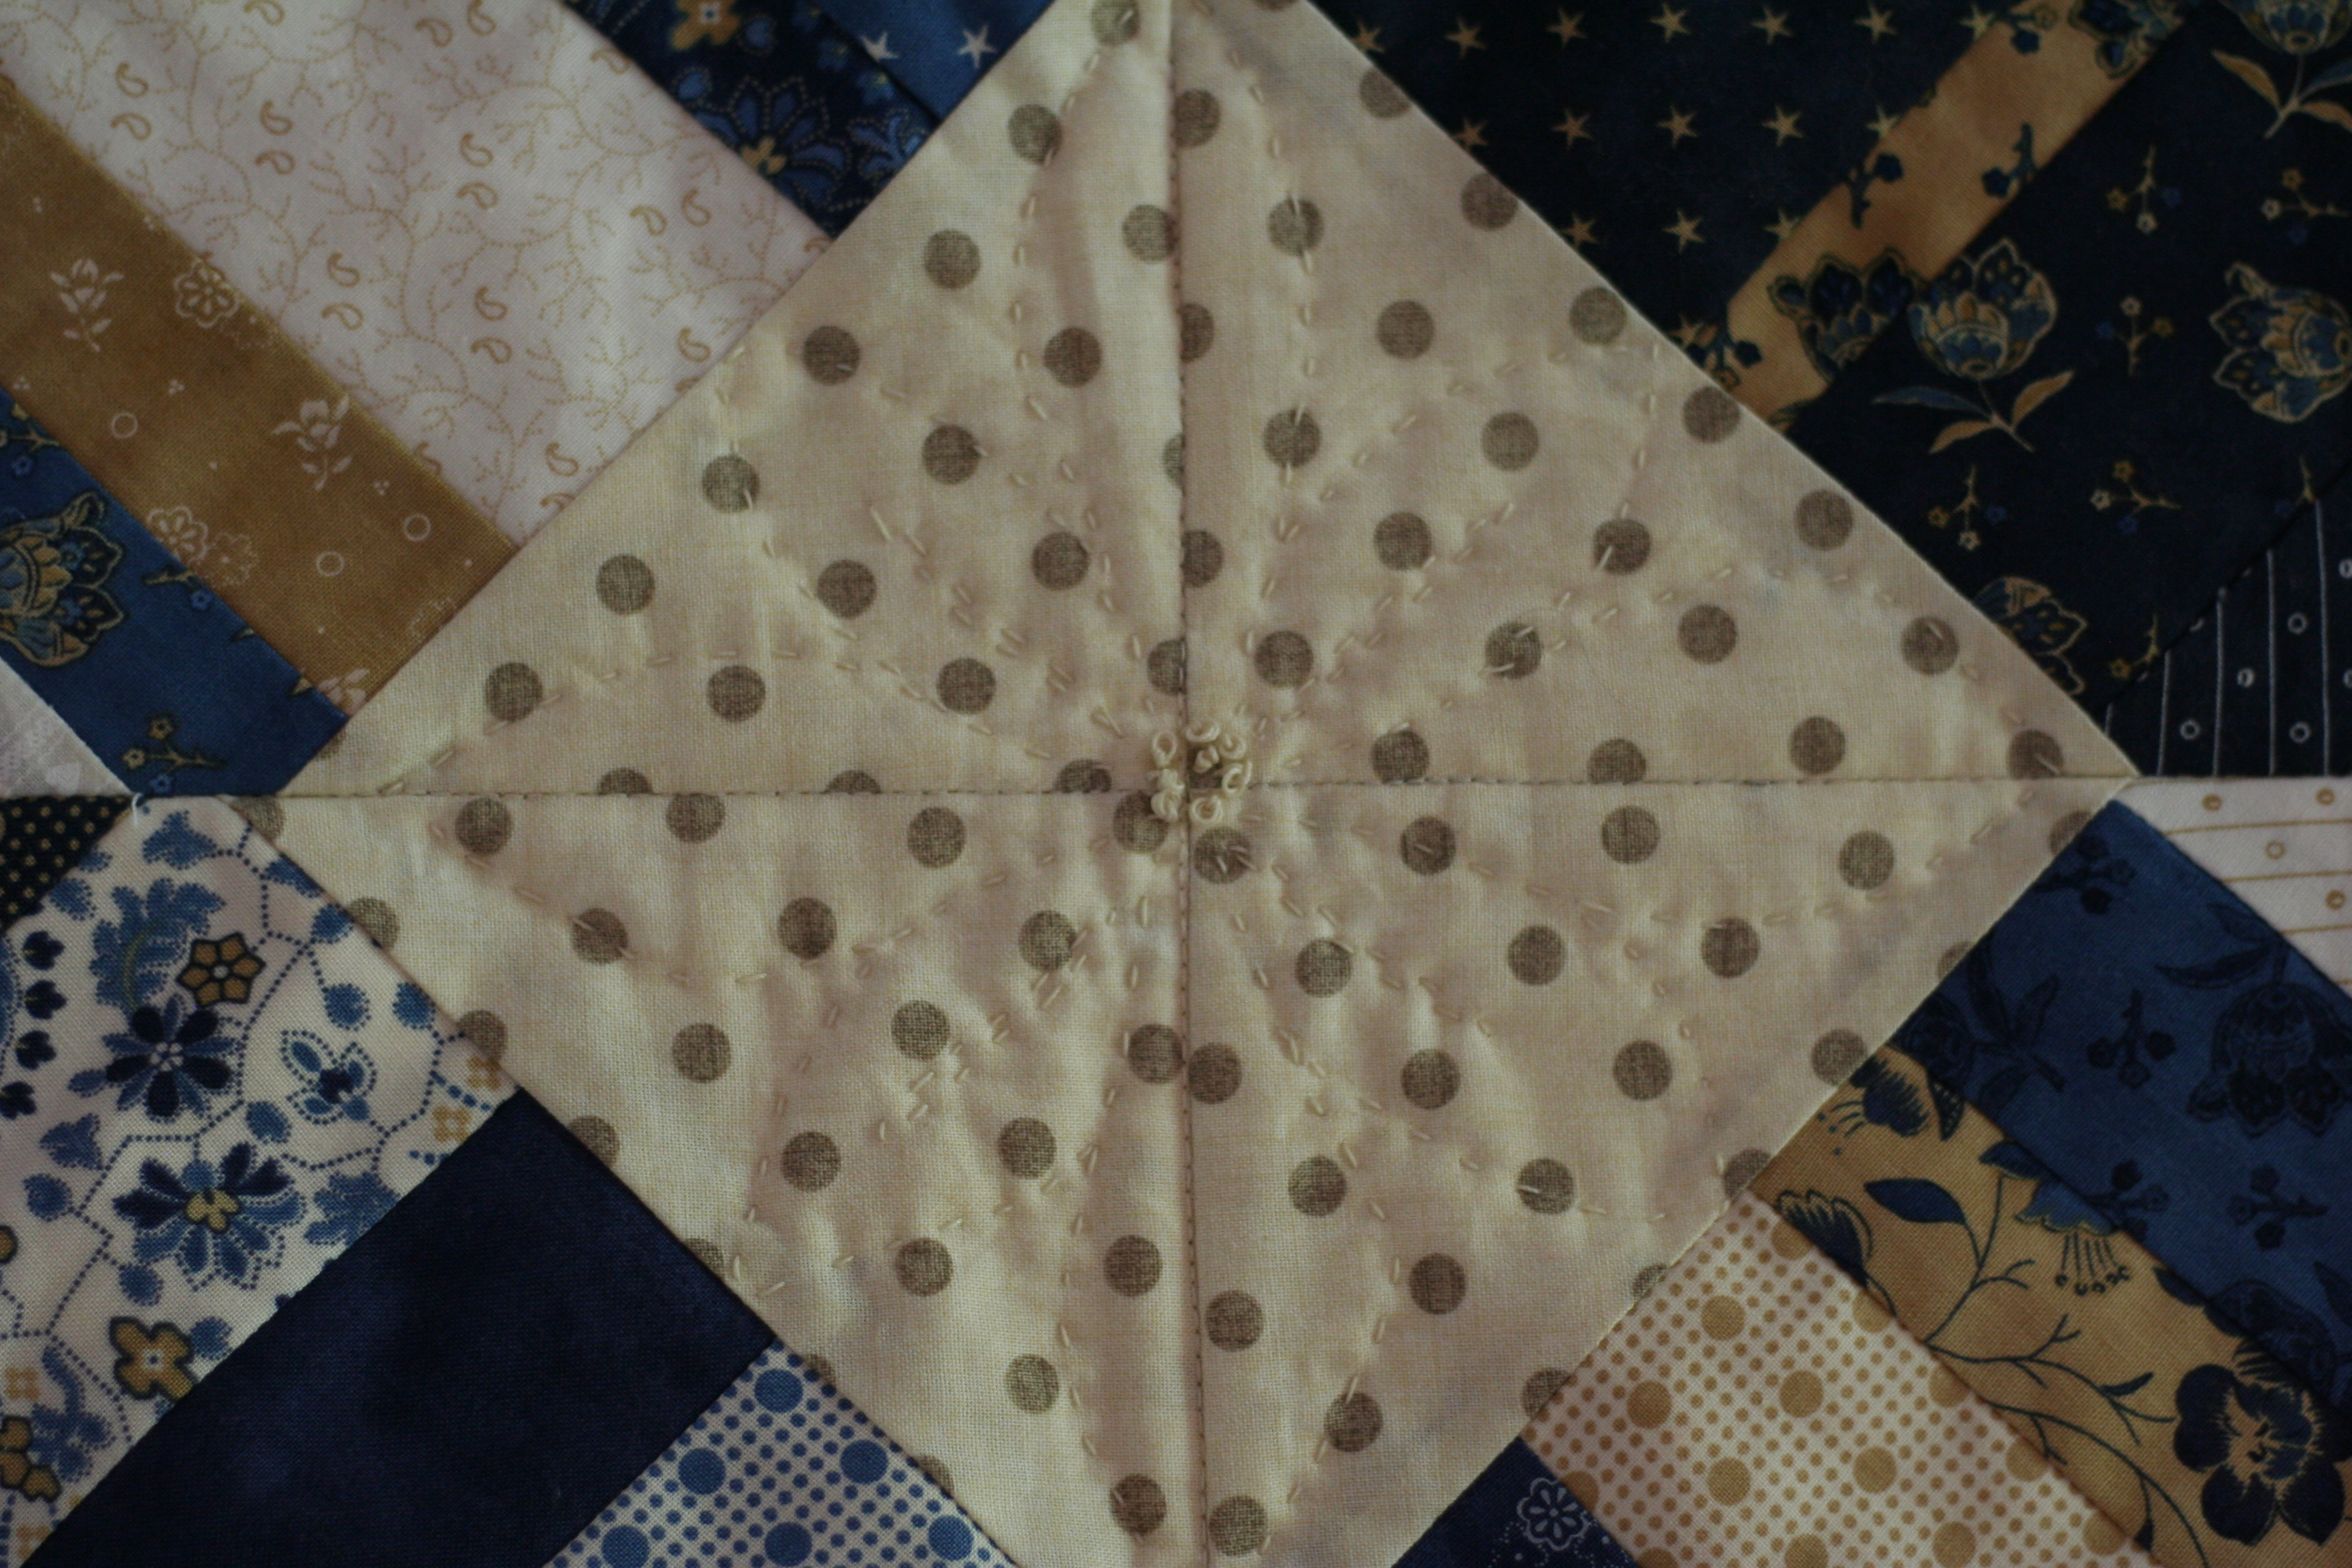
There are three centers and on each, I stitched a flower. In the center I placed a cluster of french knots. To create the flower petals I used my Hera marker and traced around the top of a coffee cup. Once I got going, I could just freehand them but I needed a guide to get me started.
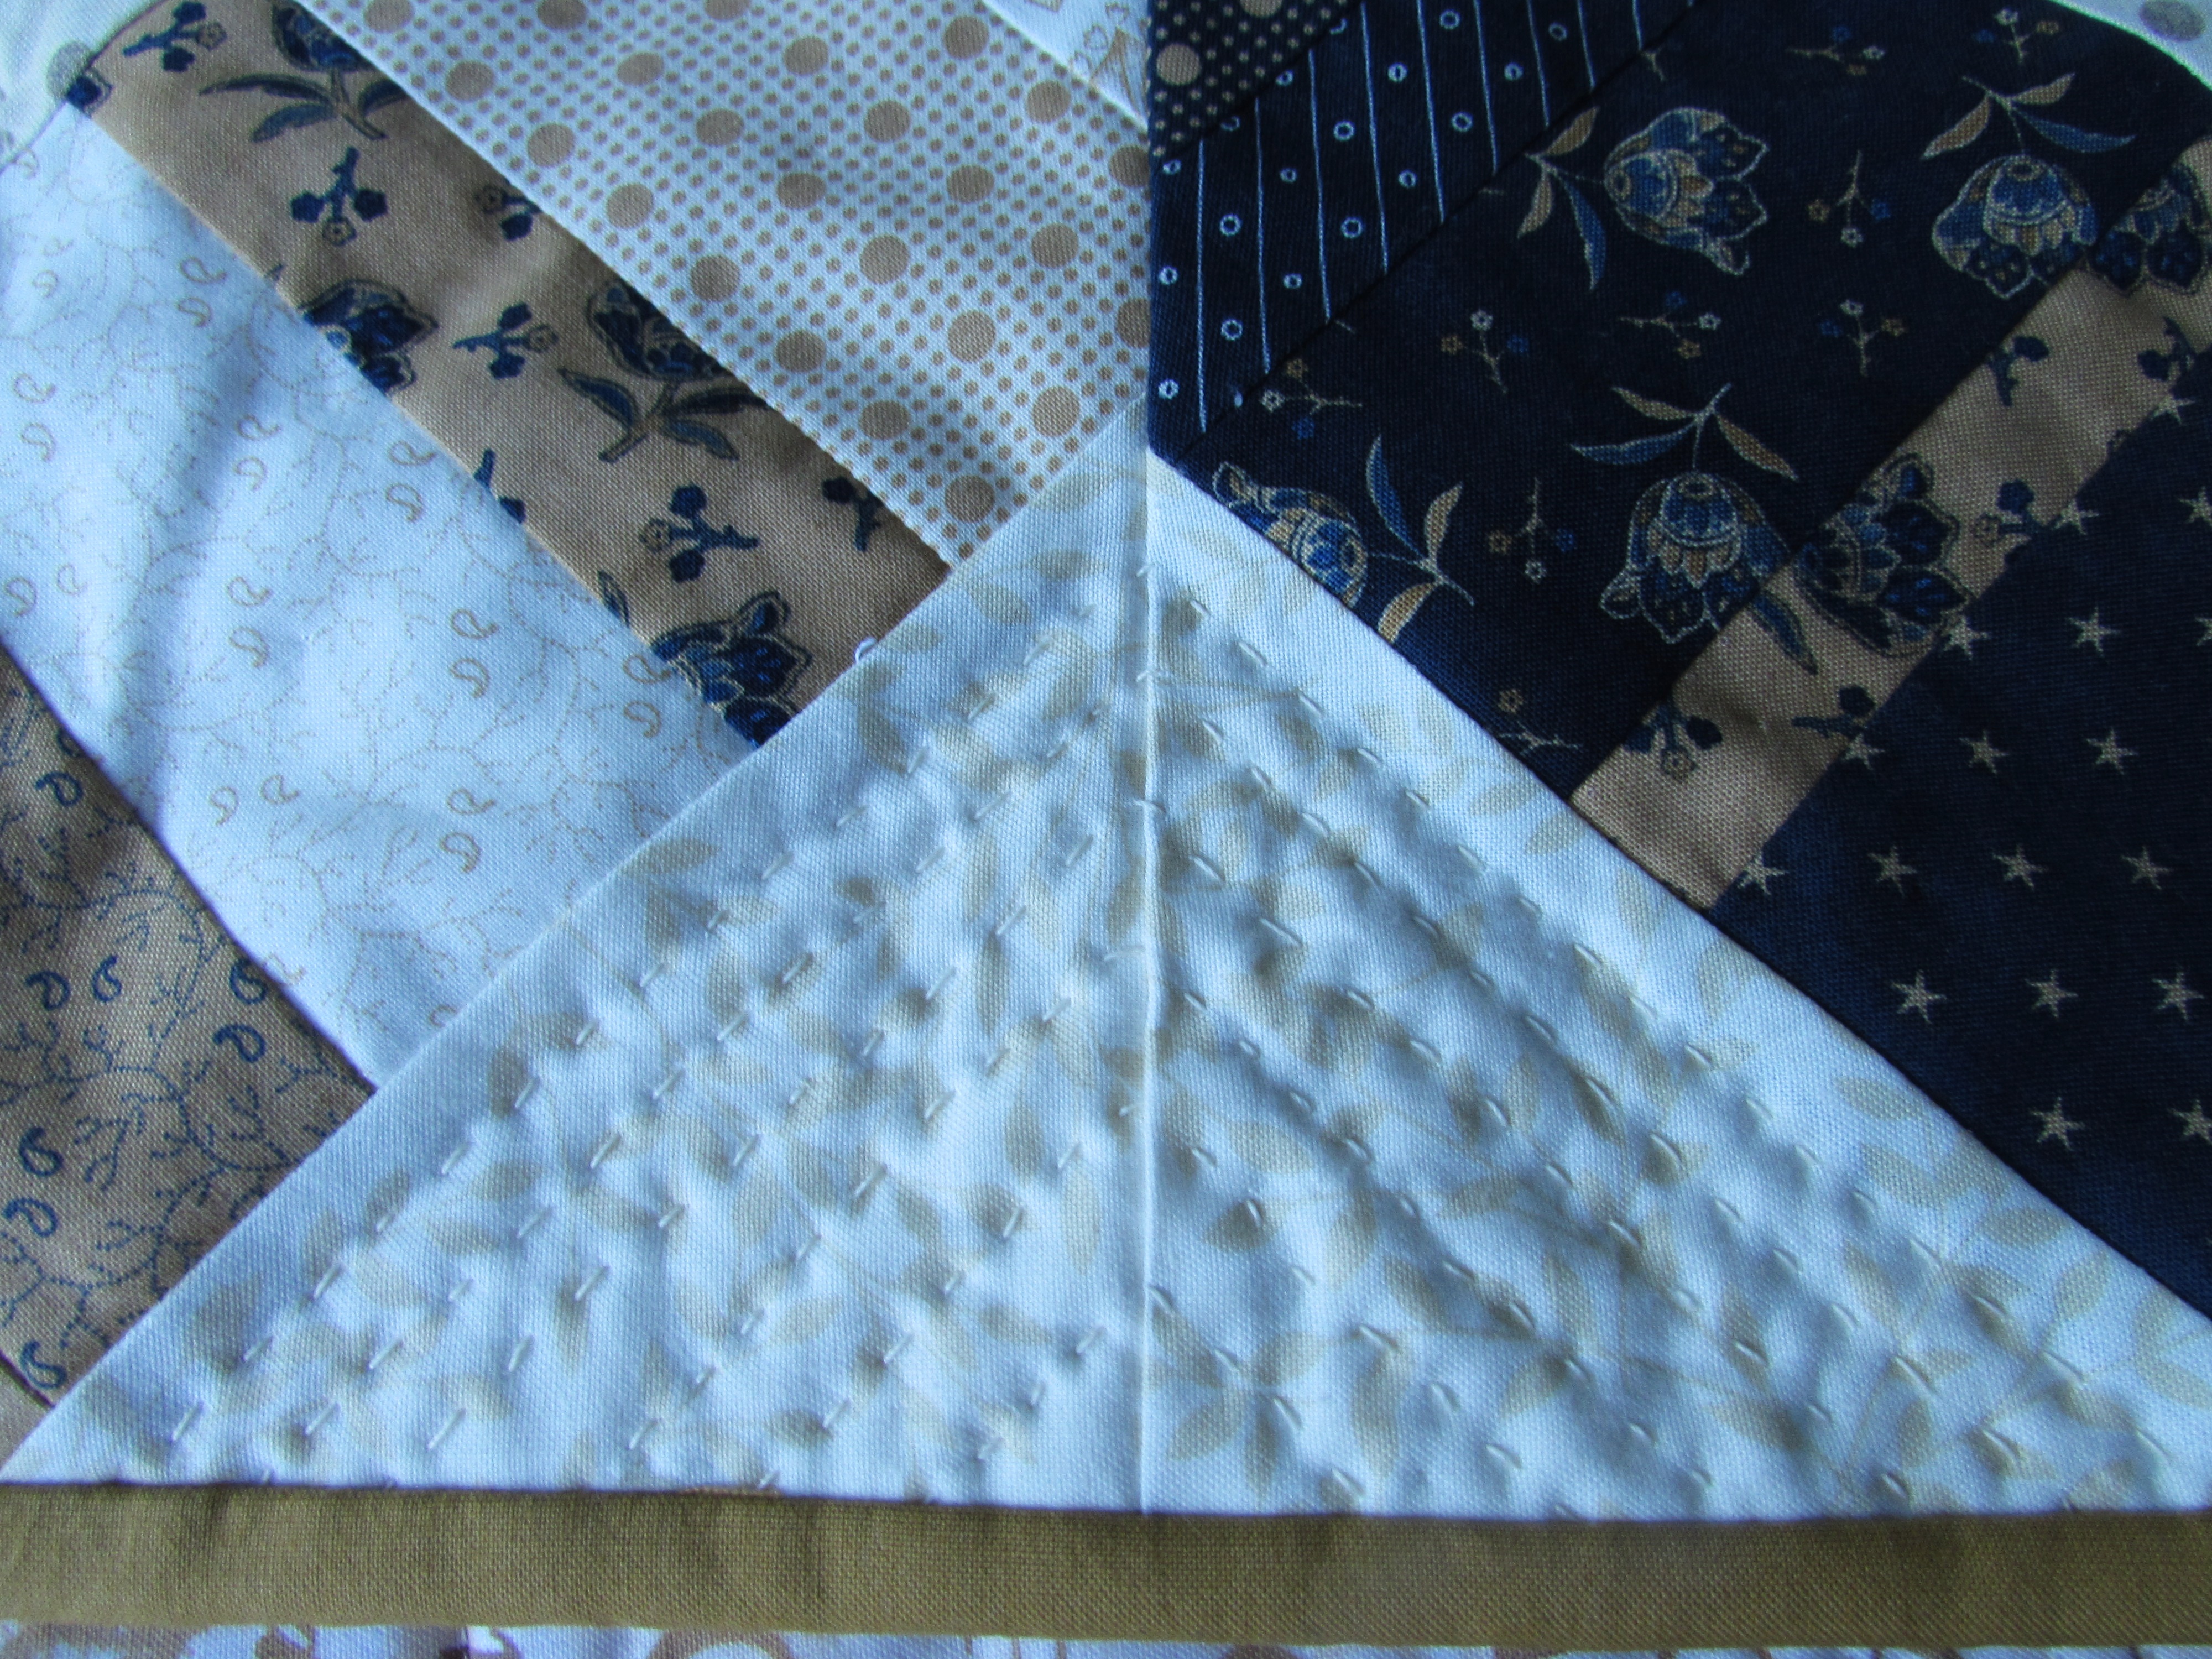
In each triangle I echoed the lines of the triangles with straight lines. I like the simplicity of the quilting. While we are looking at this picture, let’s all ignore the fact that the point isn’t even close to matching properly. Thank you kindly.
The table runner is very pretty and I look forward to using it later this fall. It feels autumnal to me. I love the binding. This bit of fabric was in my stash and works perfectly. I definitely enjoyed the hand quilting and will continue to practice my stitching.
I still have a few more of these string blocks which will likely sit in that lonely pile where orphan blocks go until I find a use for them.
Hope everyone has a lovely weekend which involves at least a little time in the sewing room. Linking to my usual favorites. Find them at the top of the page, under Link Ups.
In case you are searching for that perfect class to take on Craftsy, there is a sale running this weekend on their most popular classes. It’s a good time to take advantage of a great deal and learn something new.
As a Craftsy affiliate, I will earn a small portion of any sale made by clicking through the links on my page. If you choose to make a purchase, thanks a bunch!
The RSC16 color for June (according to Angela over at So Scrappy) is aqua. She suggested adding a pop of lime green but I am pretending I didn’t hear that part. I love the aqua part though. My blue scrap bin is overflowing and the lid no longer closes (literally) so I was happy to use a few scraps up.
This week I finished up the turquoise gemstones and they look so pretty. Turquoise, as in the actual gem, isn’t one of my favorites. But these blocks are. What do you think?
Now that I have so many blocks done, it is becoming difficult to lay them all out. (My design wall is not huge and the light in the sewing room makes for terrible photos.) But here is a sampling of them to give you an idea. I like this more and more with each month! I will have to find another way to lay them out. I suppose I will be crawling around on the floor with them next month!
After working on the Gemstone blocks (the pattern for which was designed by Cynthia Brunz and published in an issues of McCall’s Quilt magazine), I played with more aqua scraps to create some scrappy HST’s. These are so much fun to make. The process is very relaxing.
I have added these four HST’s to the pile which now consists of 24 eight inch blocks. As before, it is really fun to play with different layouts. This is a favorite of mine.
I am drawn to this configuration. Next month when July’s blocks are added to the pile, I will crawl around and arrange all of the HST’s and see where I am at that point. But this arrangement is high on my list! We will see after I add a few more rows to it.
There you have it! The scrappy updates for my June RSC16 projects. I am kind of hoping that July will be some shade of red. We haven’t done that this year and I want to create some ruby gemstone blocks.
If you haven’t already entered, I have a giveaway happening this week. Saturday, 6/11 is the last day to enter. Hop over and see! Have a great weekend all!
As usual, Craftsy has another great sale going on. Classes are 50% off beginning today, June 10th and running through the 13th. You know how I feel about their classes – I love them. If you haven’t tried one, now is the time.
(Note: I am a Craftsy affiliate and if purchases are made by clicking on the link I provide, I will be paid a small commission.)
If you follow along with Angela’s Rainbow Scrap Challenge, you probably know that this month’s color is mocha. Angela suggested adding bits of pink if that felt like a good idea. Hmmm…. neither of my scrappy projects for this year call for brown. So I rebelled and just sewed pink. Call me crazy.
I love both of my projects. They are coming along nicely now that I have two colors to look at.
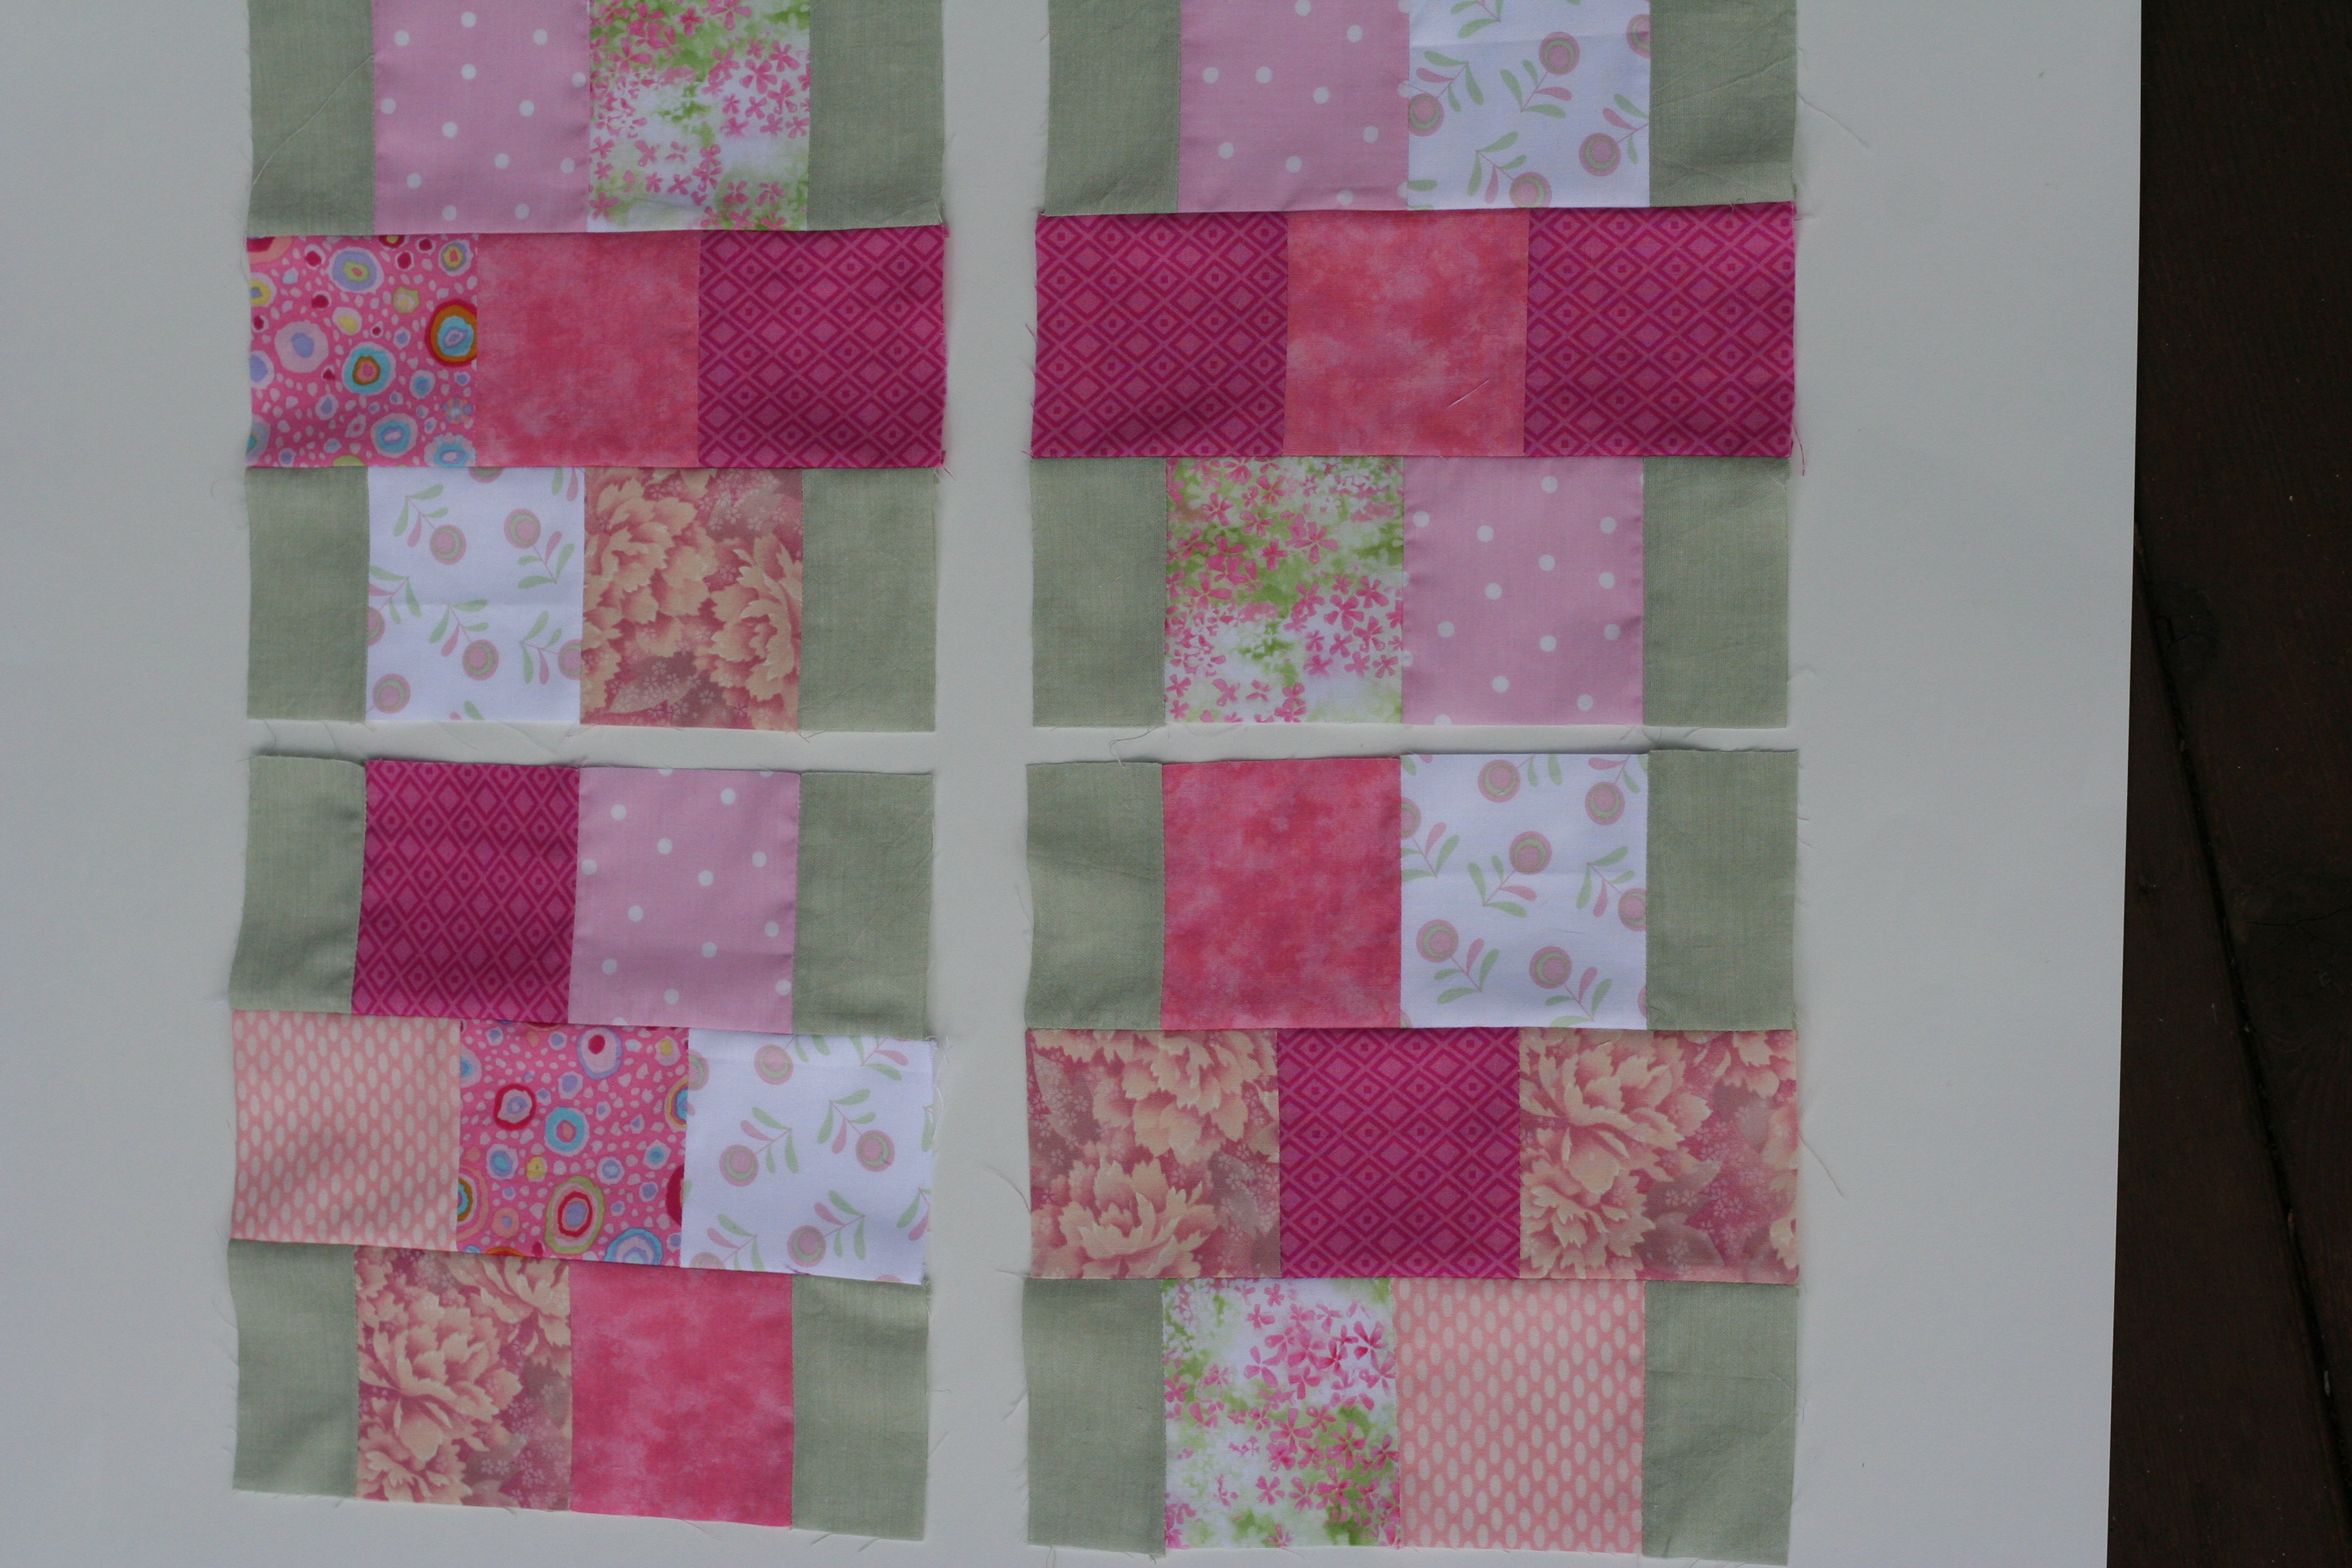
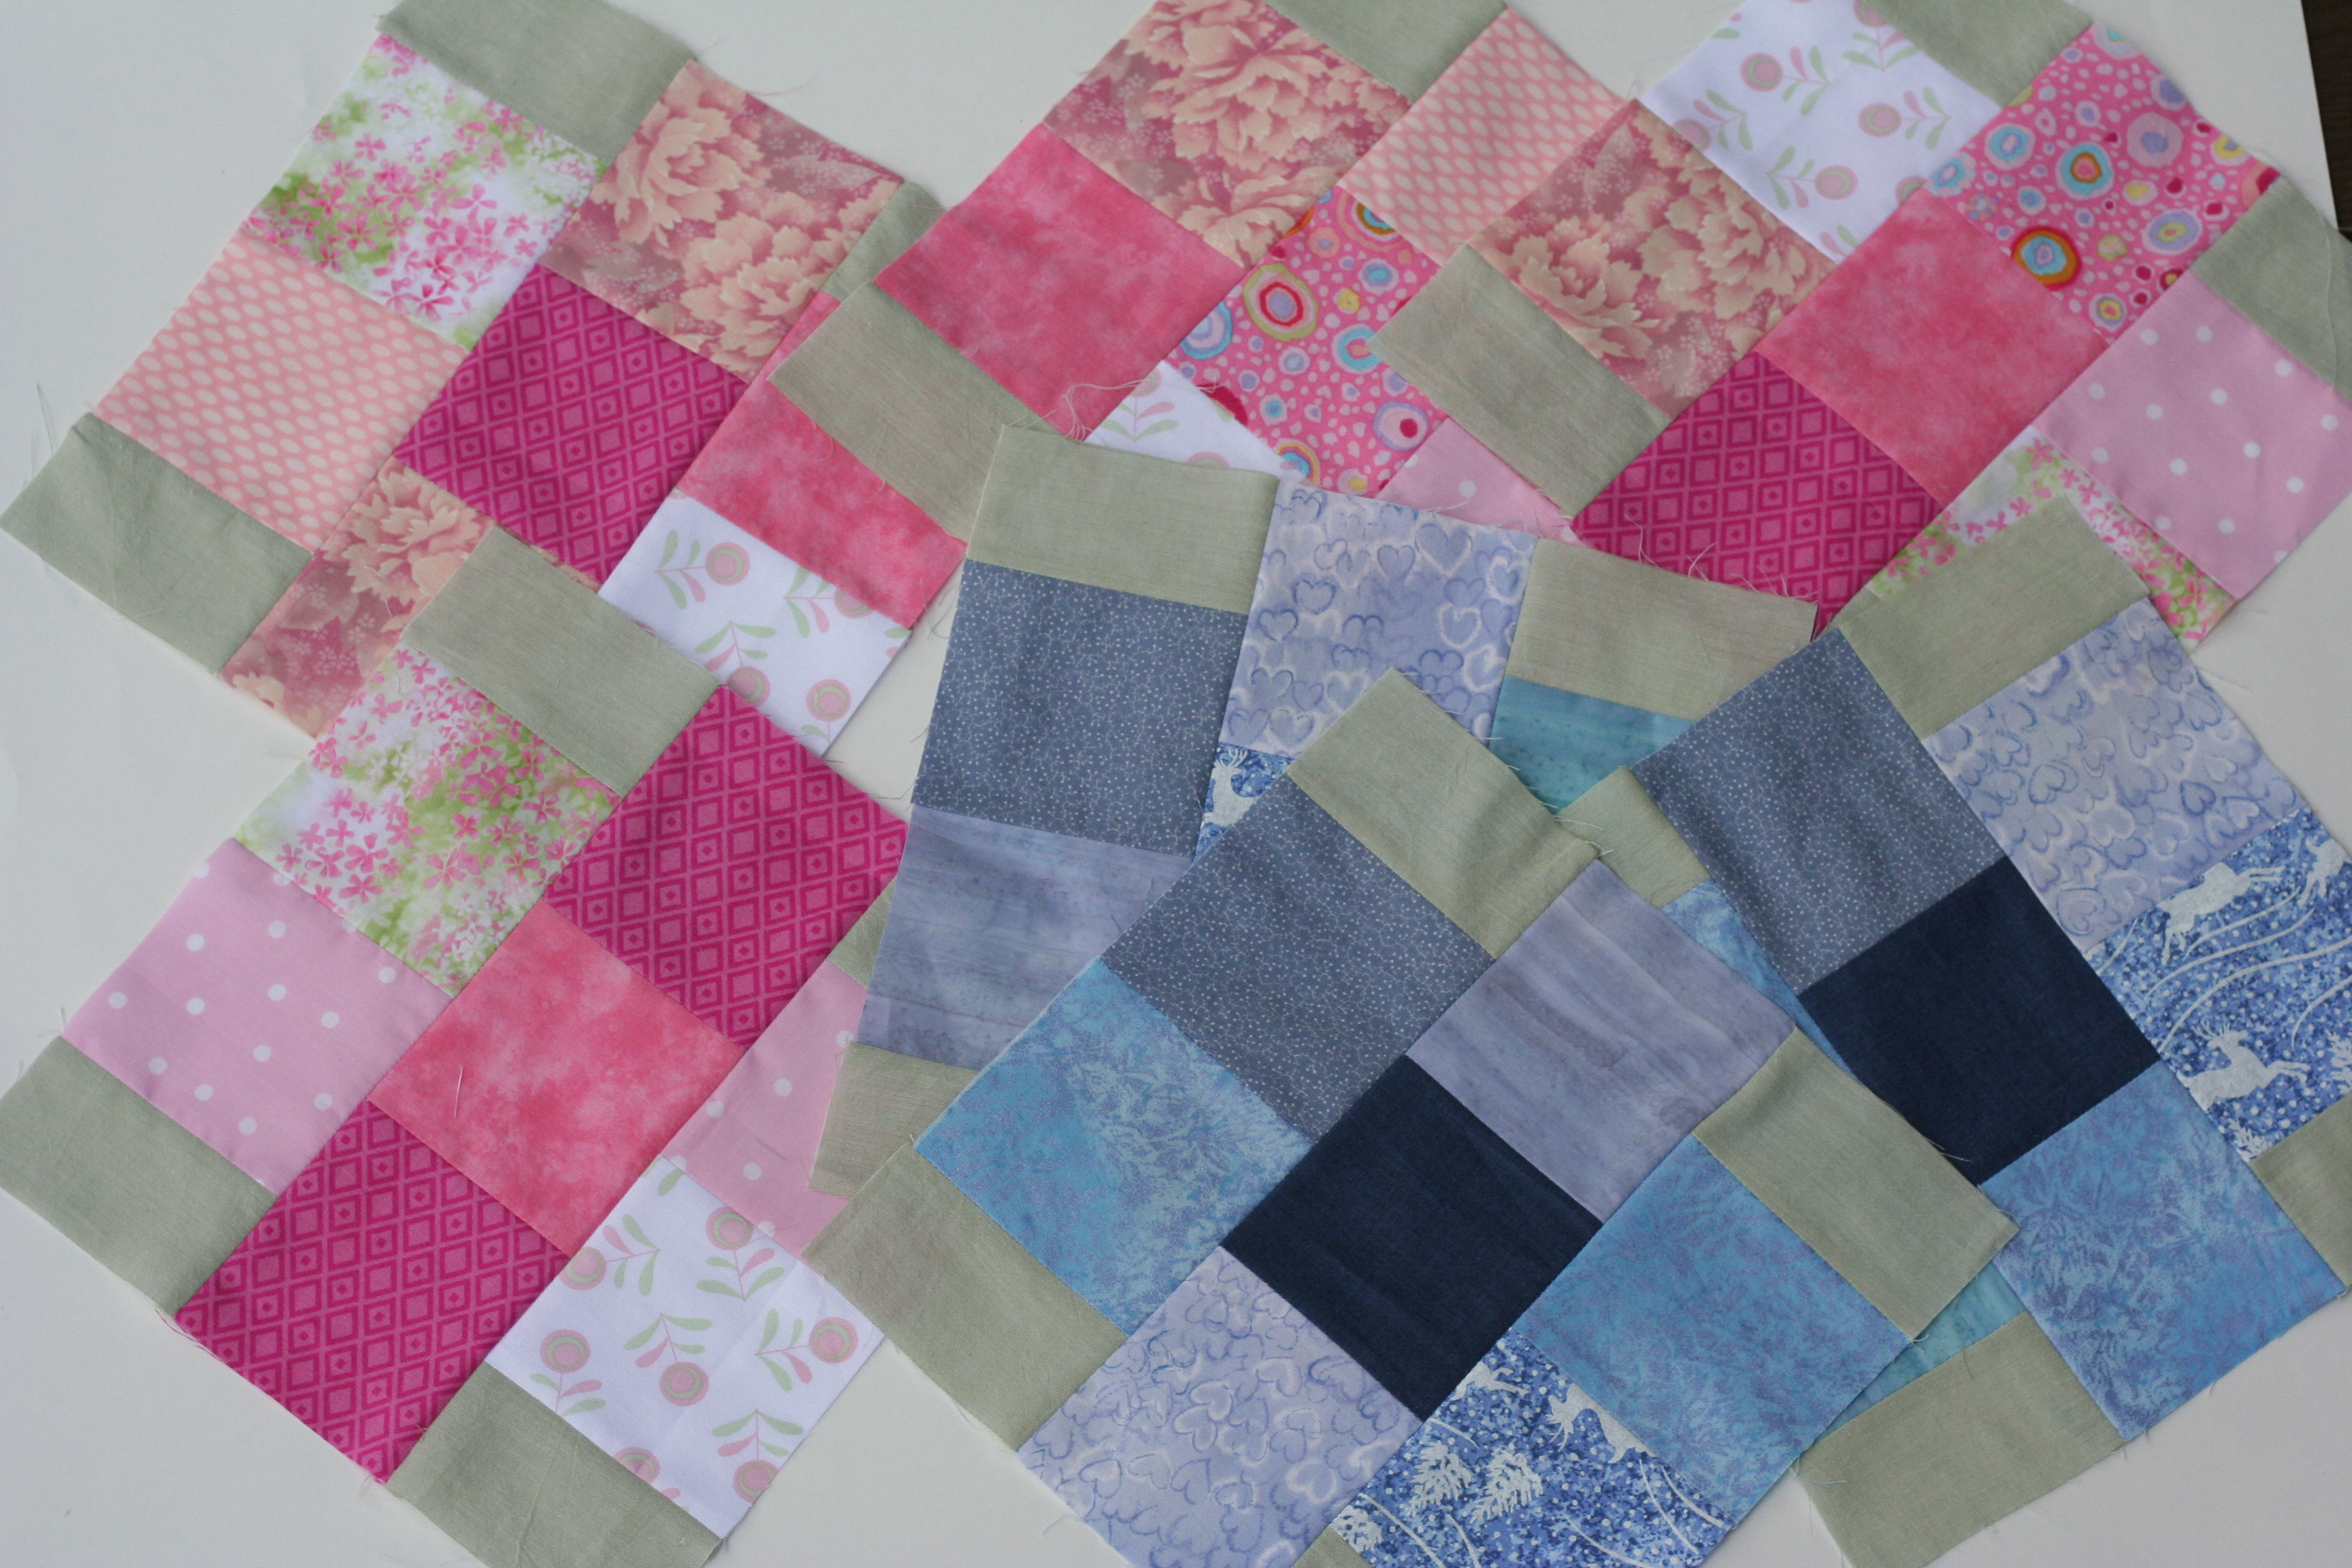
Here are my blocks for the Pretty Gemstones quilt.
The pink looks great with the sage green solid corners. They look wonderful mixed in with the blue squares from January. I already know I am going to love this quilt.
I made two rather large pieces of “made” fabric, just like last month. I don’t have a huge amount of pink scrap but I found enough.
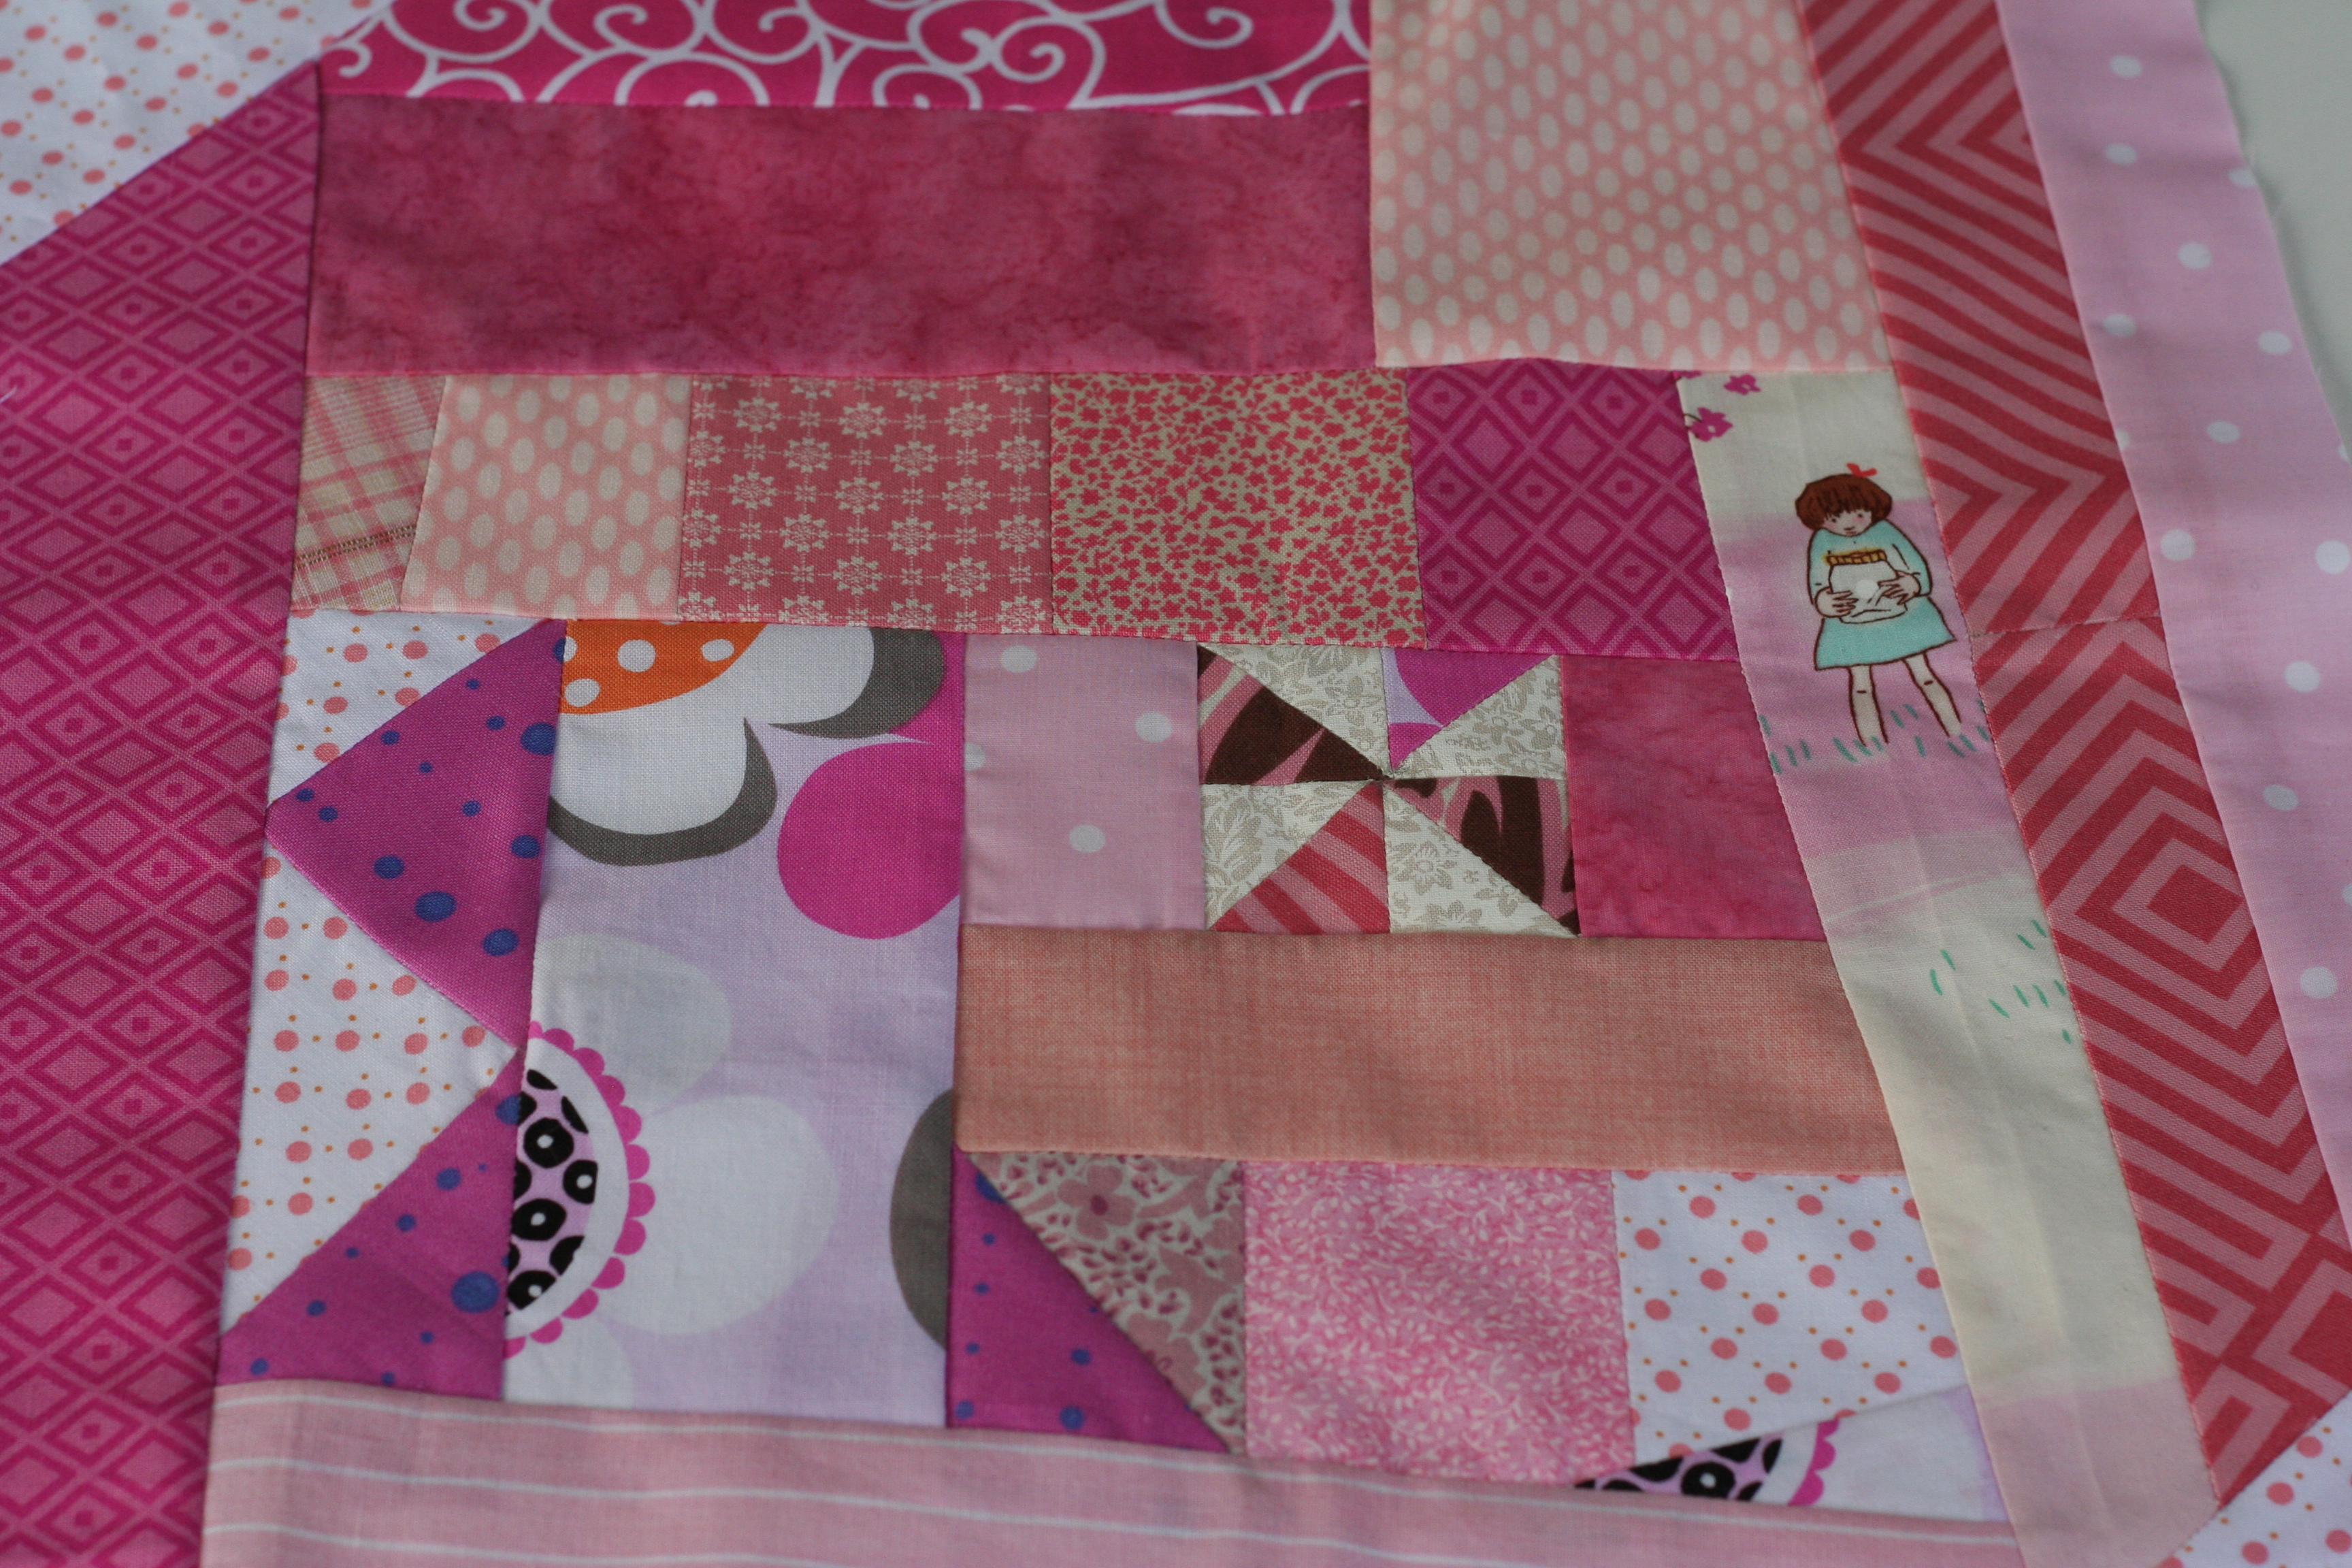
I love the scraps that are in this piece. The windmill block is made from those little triangles that were snipped off of my row of heart blocks when making my BOM for Classic Stitches last February. It is just peanut sized, measuring two inches square. There are pink dotted triangles that were saved from my Allison Glass mini quilt swap last spring. And, my favorite, the little girl looking into her jar of fireflies from a piece of Wee Wander, Wander Woods. I fussy cut her and will be sure top keep her intact when I make a block from this piece. It might be a trick to keep the tiny pinwheel and the little girl whole but that is my goal.
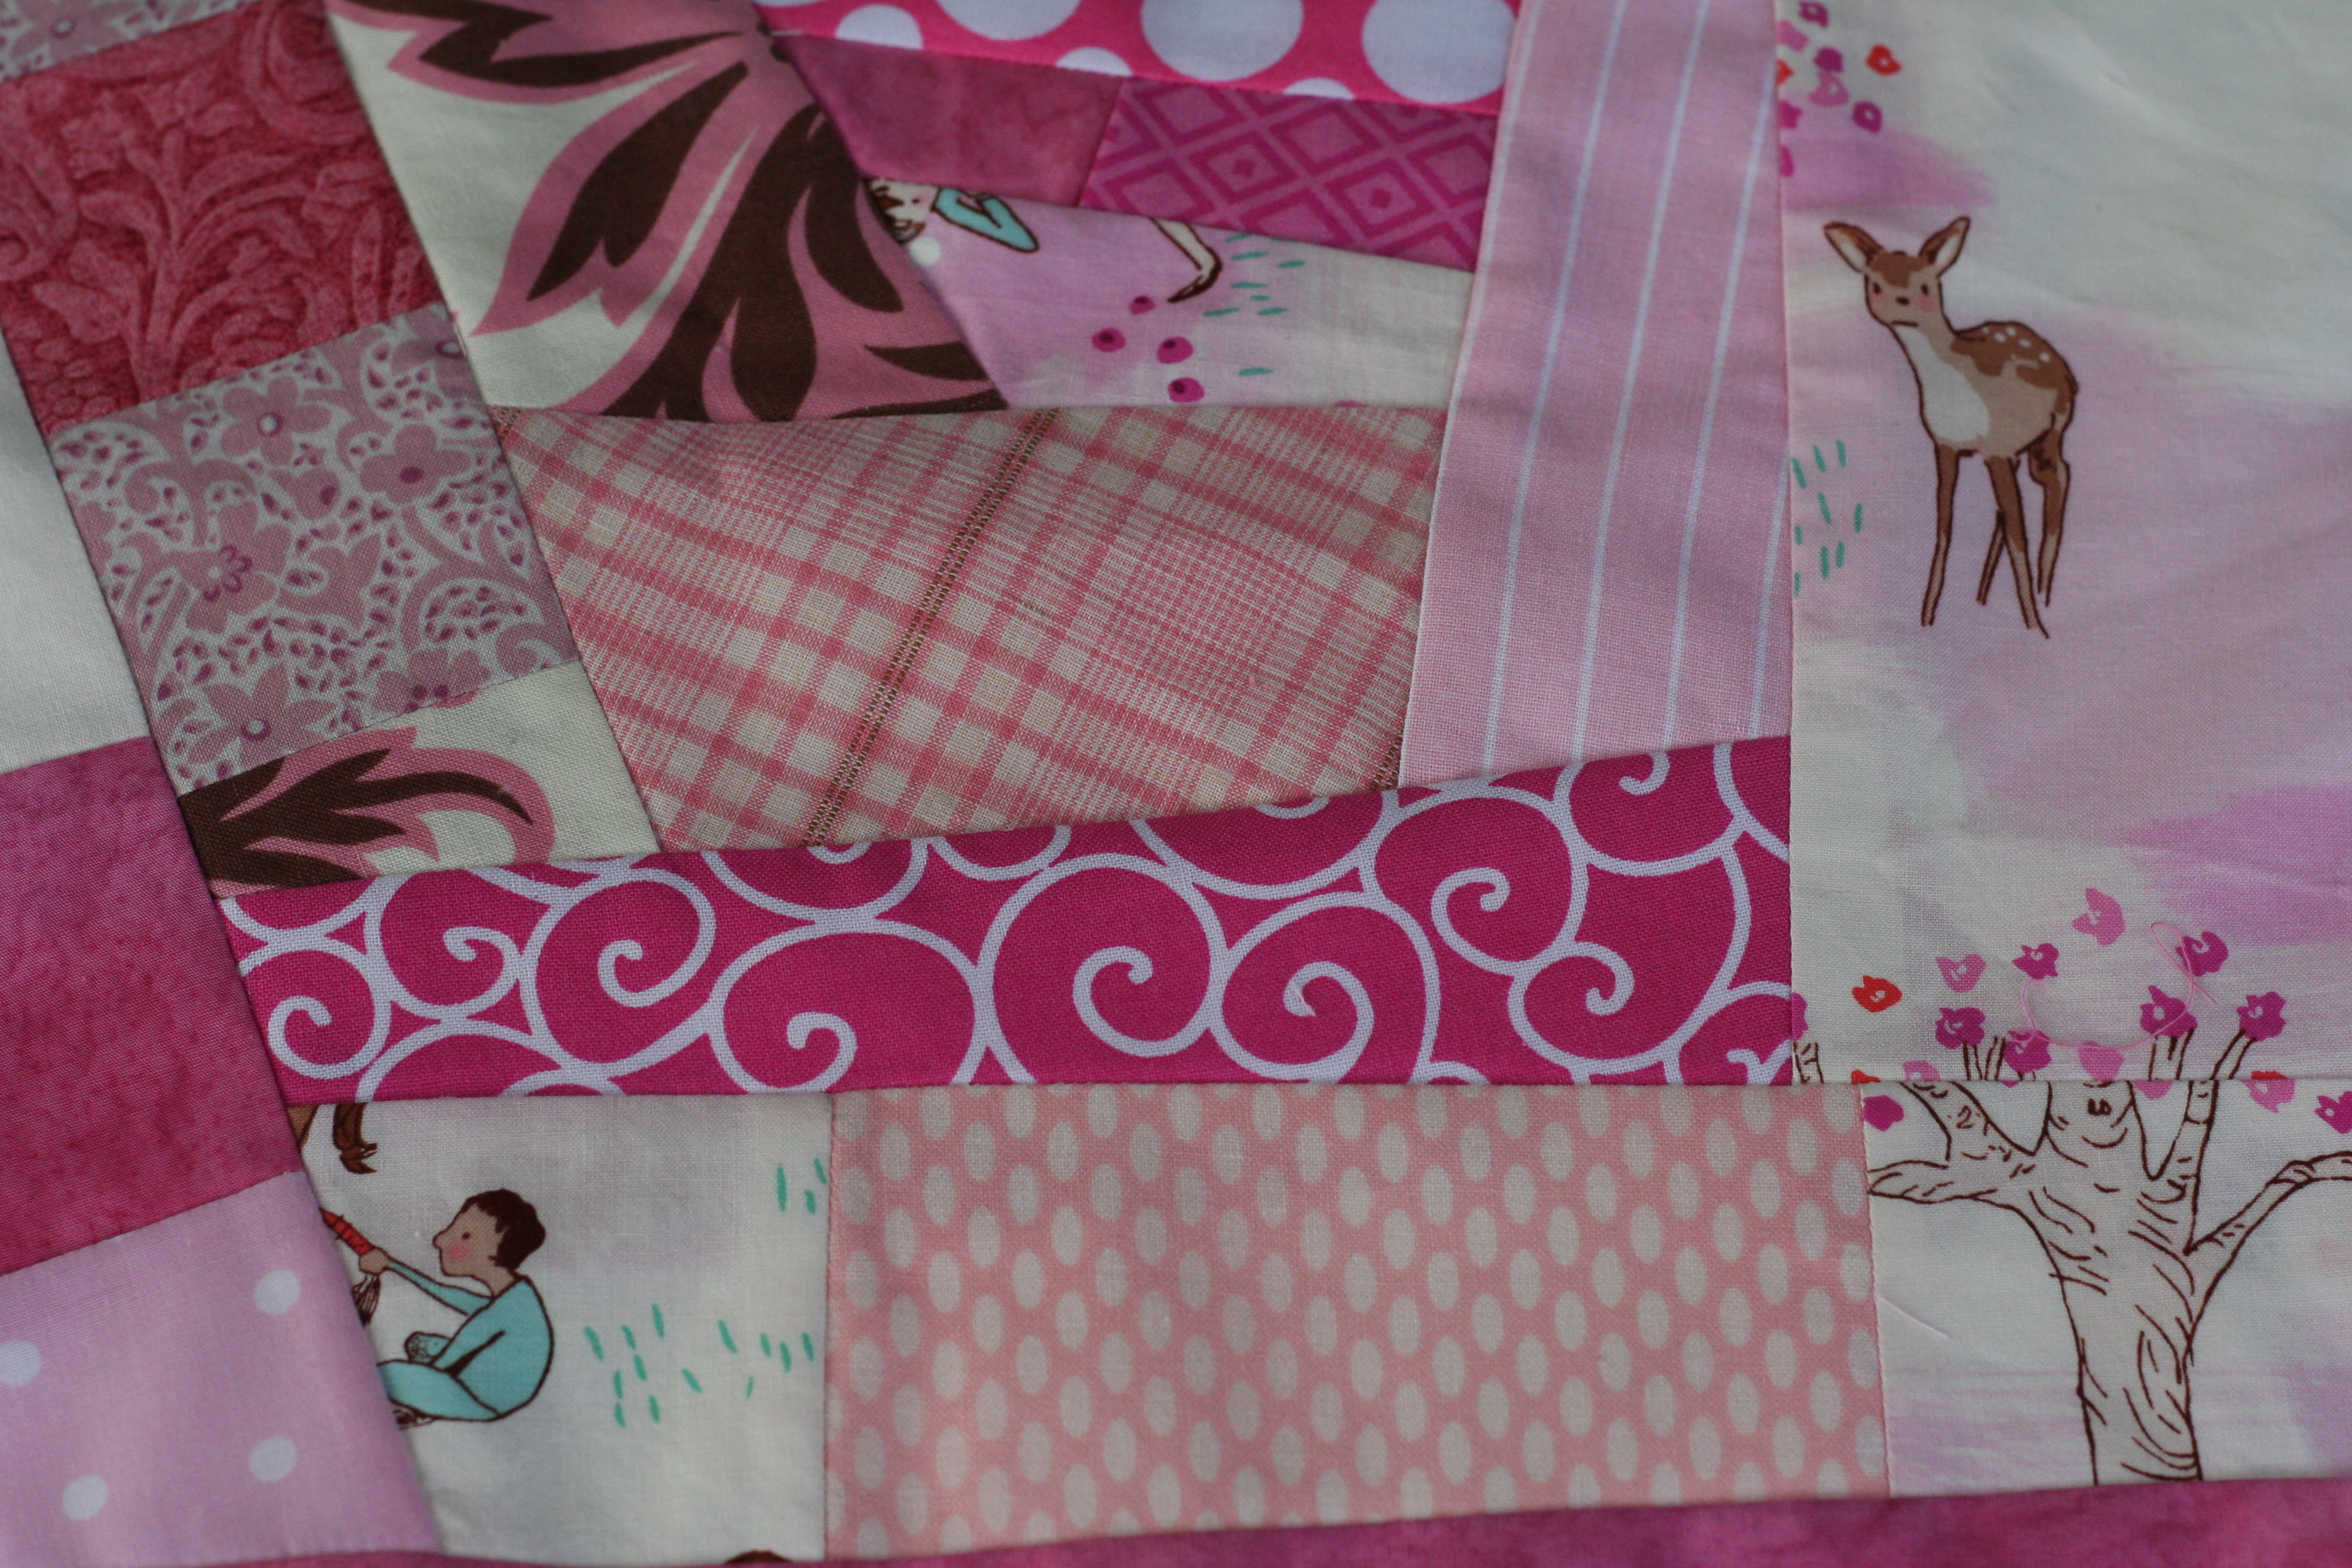
This second piece has more kidlets and a deer from the Wander W!oods piece. Check out the tree that looks like it is in blossom on the lower right. The pink plaid in the center is a piece of vintage fabric from the bundle of fabrics that were given to me last spring. There are a few fun posts about this fabric here and here. I love seeing bits and pieces of past projects popping up.
I am almost certain that I am going to create HST’s with these fabric collages. I bought a pall gray dotted fabric and I am thinking I will use that for the “other” side of the HST. My next decision is how big to cut the HST’s. I need to do a little thinking before I start cutting, but they will be on the big size. If I actually make any of the HST’s between now and next month, I will post them with my March scrappy post.
February was all about pink scraps for me. I am sure that at some point Angela will call for a pink month and I will have to substitute something else in that month.
Linking to Oh Scrap!, So Cute Tuesday, Linky Tuesday, and Let’s Bee Social. Find these links at the top of the page under link ups.