Monthly Archives: September 2014

Paying Homage to High School Home Ec

Growing up, I used to sew a lot of my clothes.  Even as an adult I made clothes for myself as well as my kids.  Since I have been spending so much time quilting over the past several years, I haven’t done any garment sewing for a long while.

I mentioned in an earlier post that I started sewing when I was in 7th grade. My mom taught me to use the sewing machine and cut a pattern out. Because I went to a small parochial school through 8th grade I didn’t have any home economics classes during junior high school.  Once I got to high school we had all sorts of Home Ec options. I took them all. Let’s face it.  Home Ec was an easy elective. I loved to sew and this class beat Spanish, History, Math and English any day. My sewing teacher was fussy, really fussy (or at least she seemed like it to 15 year old me). She was forever making me rip seams out and fix my errors. The nerve!  I suppose she had to be tough on me. I was a lazy seamstress. I can remember, on multiple occasions, sewing the sleeves in the armholes backward.  The pattern companies try very, very hard to help the seamstress avoid doing this by clearly marking the sleeves with those small and large arrows.  Match the arrows and you are golden.  Sloppy cutting leads to a vague arrow and, hmmmm, which one matches to which?  More than once (probably more than five times!) I got it wrong,  resulting in my shirts having the cuffs on upside down so that the buttons were on top of my wrist.  This didn’t honestly bother me.  My go-to solution was to wear the shirt with the cuffs rolled up. I was going for kind of a casual, sporty look. My teacher, Mrs. H, was not ok with my sporty fashion.  It is really a pain to take the sleeves out.  Not a lot of fun. The lazy 15 year old that I was could usually circumvent this task by finishing the project without letting her see it in progress.  My grade was lowered but at least I didn’t have to rip the sleeves out. We usually had to turn in our projects along the way and it was so irritating to get something back with a veritable list of errors that needed to be fixed. Looking back, I will admit if it wasn’t for Mrs. H and her pickiness, I wouldn’t have learned to sew; or at the very least I would have been wearing lots of shirts with the sleeves rolled up. I found her picture in my yearbook from my sophmore year of high school.

mrs H
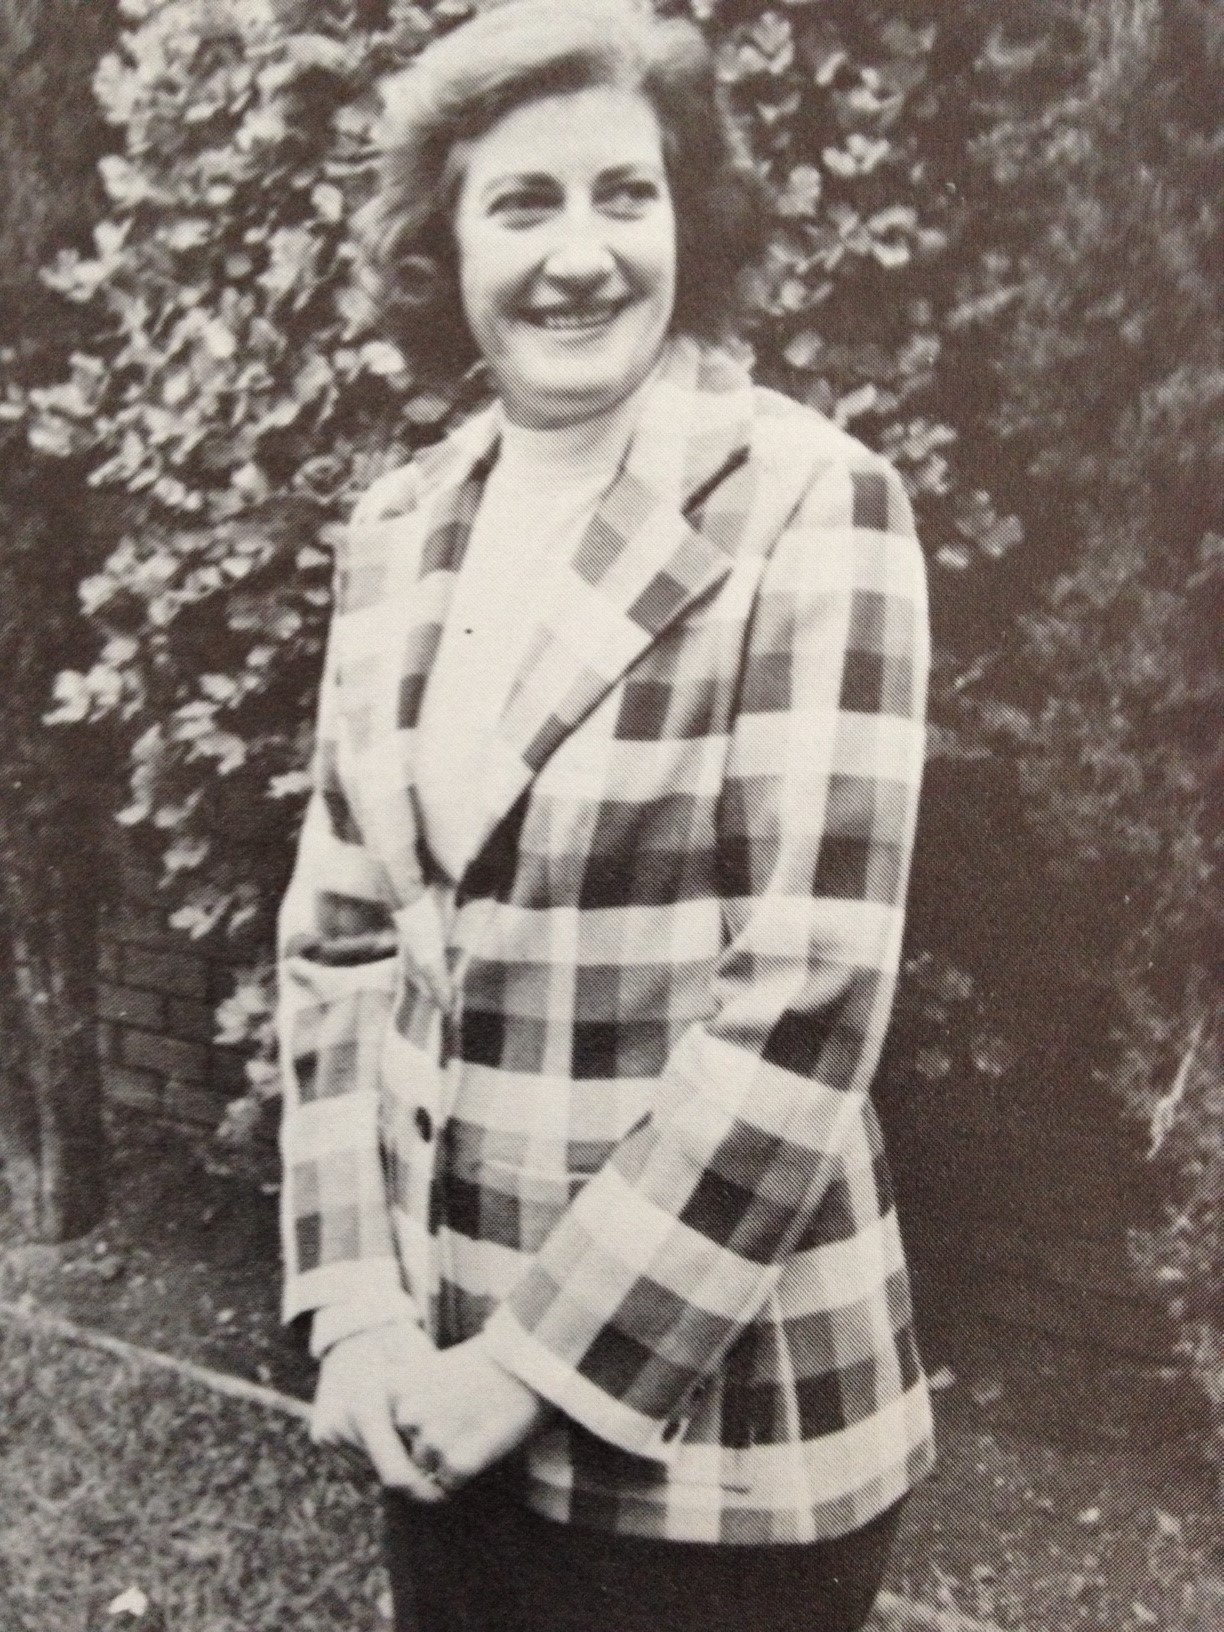
I haven’t looked at a high school yearbook in many years – at least 20. I remembered Mrs. H as being old. When I was in high school I am sure I thought of her as old. Now that I look at her  picture, she doesn’t look all that old. She was probably in her 40’s? My perspective has changed some 38 years later. I bet anything she made her plaid blazer!

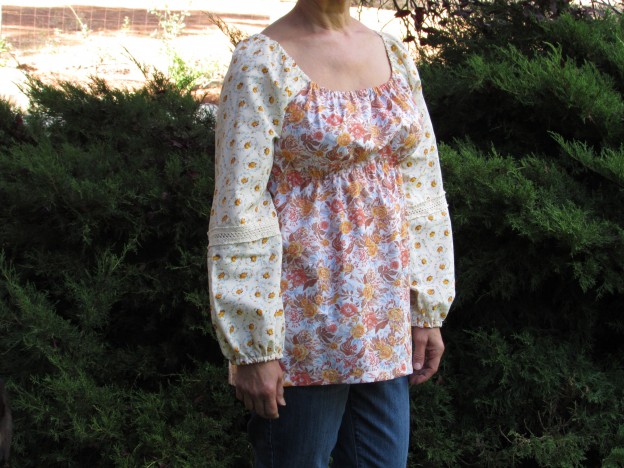
OK – moving on. I had a hankering to make something that was not-a-quilt.  Anything really.  I poked around the fabric in my sewing room and decided to use these two vintage pieces that I bought a while back. I played around with them and decided to make a blouse – my vision was something kind of bohemian or like a peasant blouse. The vintage prints made me think of peasant blouses, the 1970’s, high school and Mrs. H.  One thing led to another and the whole time I sewed this blouse I kept thinking of what Mrs. H would have changed, commented on or corrected.  Lots of nostalgia going on in my sewing room over the past couple of days! First, let’s  take a look at the blouse. It turned out pretty but definitely would not have earned me an “A”.

Here are a couple of things that would have brought the grade down.  First of all, the sleeves. I did a french seam on the first sleeve but then got distracted and did a regular seam on the other sleeve.  The 15 year old me decided this was just fine.  At least one sleeve has a nicely finished seam. Two french seams? Overkill.

20140925_1752Another definite mark-down is the hem.  I didn’t use any sort of hem tape or blind stitch for a nicely finished hem. I am so sorry Mrs. H but I just didn’t feel like it.  I did a quick roll of the fabric and machine stitched the hem.  I know, I know, it should have been hand sewn and she would have knocked my grade for that but I am ok with a machine stitched hem.  Honest, it is fine with me.

20140925_1759
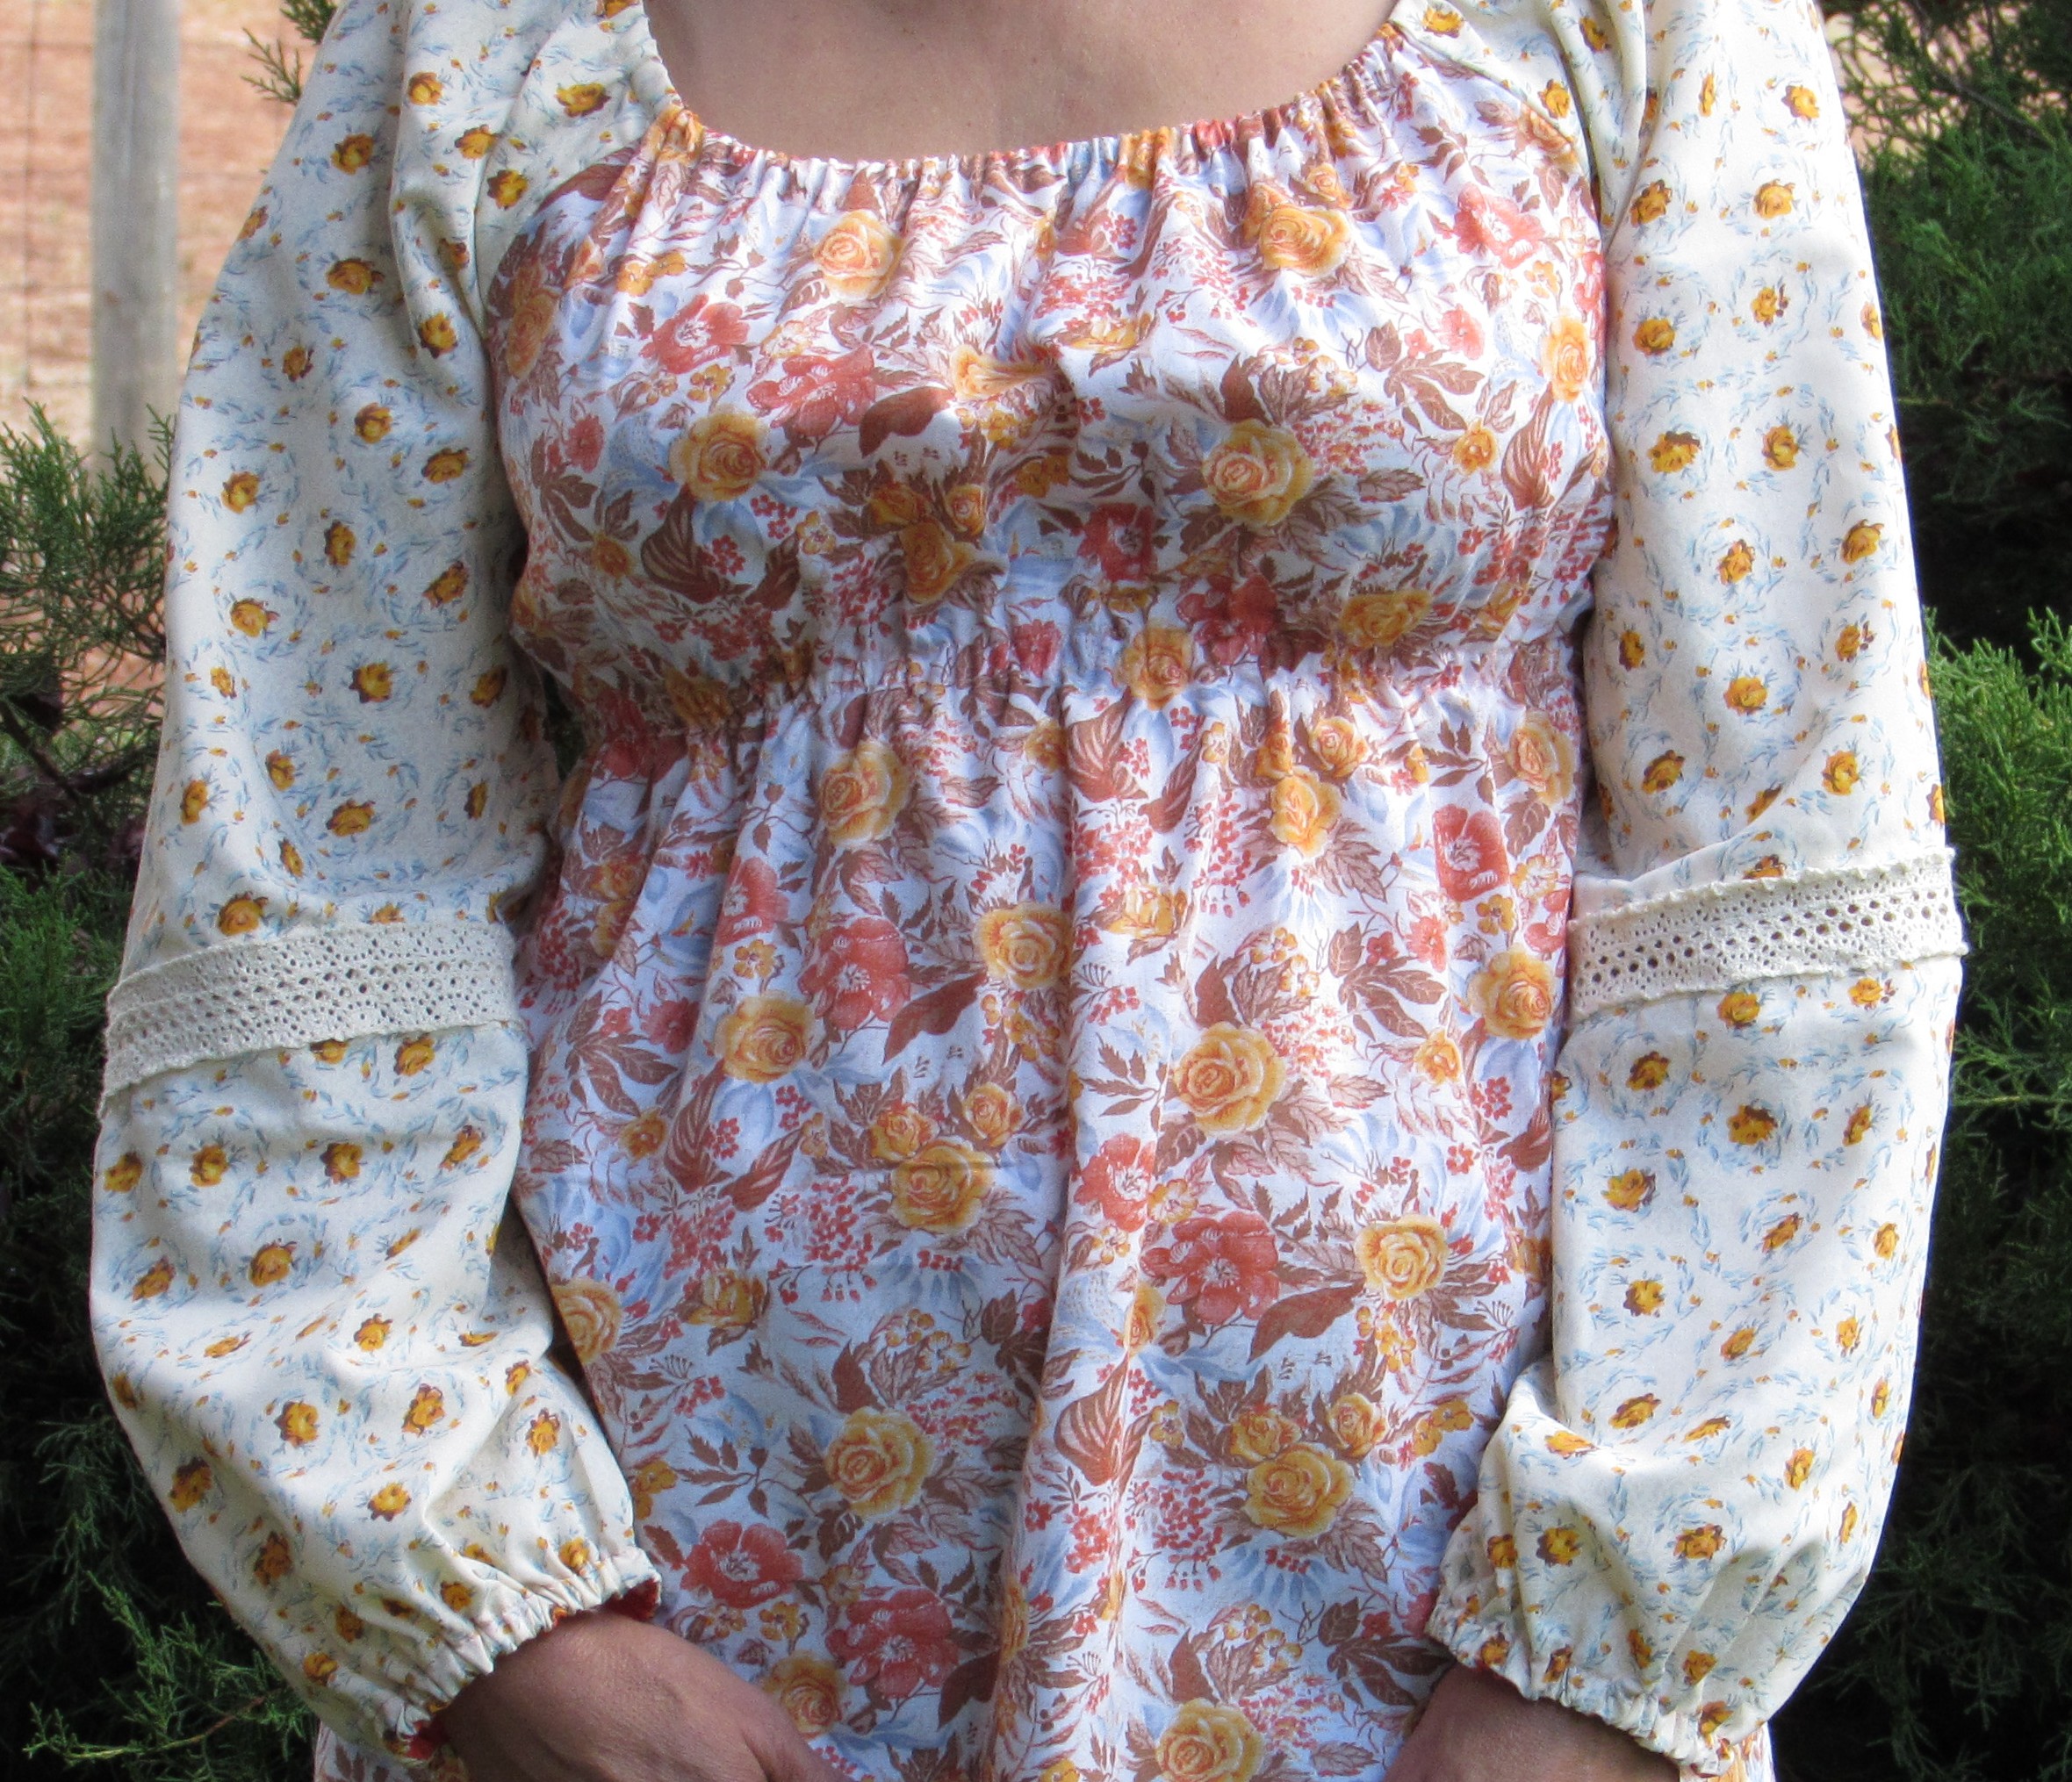
Then there is the sleeve length.  I had this idea to cut the sleeves and put a cotton lace trim on them. That worked out nicely except that I didn’t measure the sleeve length correctly and they ended up almost-too-short.  The 15 year old me was not at all concerned about this.  She found some bright orange, single fold bias tape (that was probably purchased back in the 1970’s) and made a casing for the elastic so as not o lose any length on the sleeves by making a casing for the elastic.  If you look closely you can see the orange peeking out of the bottom of the sleeves. I feel this was probably a wash – Mrs. H would have been impressed with the inset cotton lace and irritated with the bright orange bias tape.

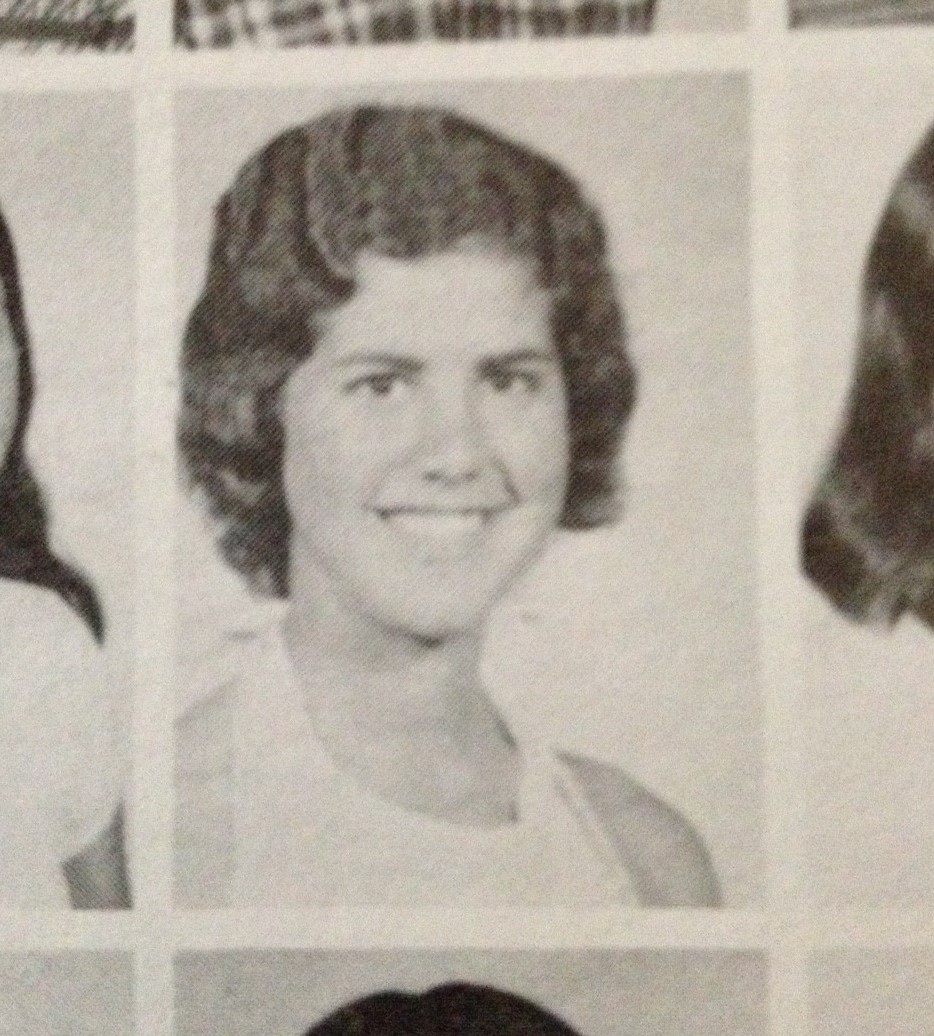
This was a really fun, sweetly nostalgic project.  Just for kicks, here is 15 year old me.  I cannot explain the hair except to say that my hair was never my best feature!  Also cannot explain the halter top on picture day. Remember, this was 1975. We got to wear halter tops to school. Times have changed!

hs pic

Linking to TGIFF, Finish It Up Friday, Link a Finish Friday and Confessions of a Fabric Addict. All of these wonderful sites are listed at the top of my page, under Link Ups.  Take a minute and check out these blogs. I love them all!  Have a good weekend everyone!


Crazy Smokey Days

I don’t know how much this makes the news across the country but Northern California is basically on fire.  It is horrendous. We had a local fire about a mile from my house two weeks ago.  It burned 350 acres and caused a lot of local damage.  Before this we had a fire  up at Yosemite.  It burned 4,700 acres and is just about contained.  Along with this fire is the Happy Camp fire (the name is sort of ironic.) Burning still, it has consumed 132,000 acres.  It is in a wilderness area so it hasn’t burned many structures. Closer to my home, we are dealing with the King Fire.  It is burning near the town of Placerville which is about an hour from my house.  But as the crow flies, it is much closer. This fire is now burning just over 92,000 acres. There are over 7,000 firefighters working it and it is only 35% contained as I write this.  The fire started over a week ago and has consumed 65 structures so far. It is a horrific fire.  The worst part?  It was started by an arsonist.  The suspect has been arrested. Just unimaginable. Crazy, smokey, frustrating times.

Here is a picture of the smoke we are dealing with.  This was taken this morning by my hub.

smoke from King fireLuckily this afternoon a breeze came through and cleared the smoke for a while.  I am sure it will settle back in by morning.  They closed a number of schools on Monday.  For today and tomorrow they decided to keep the kids indoors and cancel after school activities.  It is completely unhealthy to be outside. The good news is that we have a 60% chance for rain on Thursday.  We are so excited!  Doing a rain dance for sure. Keep your fingers crossed for us.  We need to get the fires contained and we desperately need some (a lot, a lot, a lot!) of rain.

Since I was inside all weekend with the exception of one trip to the grocery store, I spent a great deal of time at the sewing machine. It was a good opportunity to work off my stash because there was no going to the fabric store.  Here are a few things I worked on.

I used more of the upcycled burlap that I love creating with. This pennant is hanging up above my (very fancy!!) design wall, inspiring me. On the design wall is a strip that I created with some holiday fabric scraps. I will add some lengthwise strips to the long edges to create a Christmas table runner but I need to find something at the LQS because none of my fabric worked. Love the banner though.

20140923_1730

After making the “CREATE” banner I decided to make one for the holidays.  First I made this one:

20140923_1724 I put up a few odds and ends on the mantle to give it a holiday feel.  I like the pennant with the exception of the E on the end.  It needs to be a darker color so I will replace that flag.

This is the other one that I made.

20140923_1721I like this one but it needs some embellishment.  I think I will add some buttons to the ends of the twine for weight and maybe that will dress it up a bit.

Finally, I made progress on a holiday lattice quilt that I am making.  It will be set on point and needs sashing.  I am thinking of using a fabric that is a deep cream color, tone on tone, for the sashing.  Again, I didn’t have anything for this.  I need to get the sashing as well as a fabric to use for the corner and setting triangles. But this is coming along nicely and will sew together quickly.

20140923_1731

Not bad for a few days stuck inside! Hoping for clear skies tomorrow and a trip to the fabric store. Simple pleasures, right?

Linking to Stitch by Stitch, Freemotion by the River, Fabric Tuesday, WIP Wednesday and Let’s Bee Social as well as Needle and Thread Thursday.  Links to these wonderful sites are found at the top of my page under Link Ups.


Family Time and Quilting Time

This has been a great week. My son was home for a few days. He had a long weekend at work and came home for some family time.  He is a production engineer in the Central Valley and works all sorts of shifts.  His “weekend” depends on what shift he works that week.  This week his weekend was Tuesday/Wednesday.  As always, it is was so nice to have him home.  One day he called my dad and asked Papa if he wanted to spend the afternoon together and go on a tour of the Sierra Nevada Brewery.  Dad was up for it so the three of us went.  Sierra Nevada Brewery is located in Chico which is just over an hour’s drive from us.  They have a yummy pub on site so lunch was first on the agenda. The food at this pub is excellent. Lunch alone was worth the drive!

20140917_1675Sierra Nevada’s brewery is gorgeous.  The whole facility shines.  We spent about an hour touring it. They produce around 900,000 bottles per day and it is completely mechanized.  It was almost eerie how few humans were seen working in the plant!

20140917_1687


One of my favorite stops on the tour was the refrigerated room where they store the hops.  It smelled so good in there! They had us rub the hops between our hands and inhale the fragrance. Each variety had such a distinctly different smell.

20140917_1684

Ian and I both loved this part of the tour.

20140917_1683

As you’d expect, they save the best for the end!  Beer tasting finished off the afternoon.  Dad and Ian compared the tastings, deciding which were their favorites.  I was the designated driver for the trip home.  It was such a fun day with my dad and my all-of-a-sudden-all-grown-up-kiddo.

20140917_1704

Lest you think I completely strayed from the sewing machine this week, I did work on a couple of projects.  My finish for the week was a tablerunner that is reminiscent of a sunset.

20140918_1715

I used batiks for this runner and arranged the colors to look like a sunset.  I love the color combination. The yellows, oranges, pinks and purples are so rich.

20140918_1713

My goal for this project was to try something more complicated when I quilted the outside borders.  I am really working on my FMQ skills and quilting this was satisfying.  Some time ago, a friend of mine gave me a roll of printed FMQ pattern paper.  I haven’t done much FMQ using a paper guide before.  The paper patterns are made sold at Quilting Made Easy and have adhesive strips along the edges of the pattern.  Once they are laid down on the fabric, you just FMQ right through the paper.  This works well but picking the paper off after quilting is a bit of a pain. It was worth it for the good practice it allowed. I liked being able to focus on the speed and rhythm of my stitching without having to plan “where” I was going to move to next. Following the pattern removed one element of focus, allowing me to concentrate on the quality of the stitching.  I think it turned out well.

20140918_1717

The pattern is a double cable border. It is still a bit herky-jerky in places but much improved over my past efforts.

20140918_1719I decided to leave the center strips alone and only stitched in the ditch between colors. I didn’t want to detract from the gorgeous colors of the batiks. The backing is a purple and orange batik that I had in my stash.

20140918_1720

I also had on hand the purple batik that I used for the binding. When I came across that piece I was surprised to realize that I have absolutely no idea where that fabric came from.  Usually I can remember buying it or owning it or receiving it from someone.  This piece just magically appeared while I looked for something to use for binding.  It works well with the colors of this piece.

Hope you have all had a blend of good family time and good stitching time this week.  Really what more does a quilter need?

Linking to:  Freemotion by the River, Let’s Bee Social, Needle and Thread Thursday, TGIFF, and – of course – Amanda Jean’s Finish it Up Friday. There are links to each of these sites listed at the top of my page under Link Ups.  Check out of few of the projects on these pages.  So much inspiration to be enjoyed!


Cowboy Small

Big news! I sold my first baby quilt on Etsy! I was so excited to see that order come across. My  quilt, Snips and Snails, featuring the ‘Here Boy’ fabric ,was purchased. I wrote a post about it earlier. After recovering from the excitement of selling a quilt, I decided I needed to make another baby boy quilt to list in my Etsy shop.

So… What to make??  I love reading and/or hearing about the process that an individual quilter uses to develop the design, choose the right fabrics, auditioning different prints and then coming up with the quilt they want to create. It is interesting to hear about those that choose and buy fabric first and then go forward from there  vs those that develop the design and then purchase fabric. I fall into the camp of buying the fabric first.  I love to pick up pieces that strike me for whatever reason.  Once I have a few that go together or even one that will be a good focus fabric, I start to think about what I want to make with it.

This week I made a darling baby quilt for a boy.  I developed the project around a piece of fabric with a vintage design featuring horses. About two weeks ago I found a great deal on some fabric at a garage sale.  I don’t tend to pay much attention to garage sales but my husband happened to notice an ad for a garage sale that listed fabric for sale. My interest was piqued and I went to it.  I scored an assortment of awesome fabric!

Back to the retro fabric that I found.  It is adorable.  I became sort of nostalgic as it reminded me of a book I read to my boys when they were little. This book, Cowboy Small, was written in 1949 by Lois Lenski. We read this book constantly and it was especially favored by my eIdest, Andrew (now 29 years). At some point in the story the cowboys are shown sitting around their campfire (eating beans out of a can) singing “Home on the Range.” At this point, Andrew would belt out his rendition of Home, Home on the Range. Look at the picture below from the book.

cowboy quilt 2

On the fabric there is a bucking horse that is so similar to this. Look to the left side.

horse quilt

Such a good memory for me. Needless to say, I was pretty excited to use the horse print for a baby quilt for a little guy. I selected a simple pattern alternating whole 8″ blocks with 8″ four-patch blocks.  The pattern was inspired by a quilt made by Amy Smart on Diary of a Quilter. Making the quilt five blocks wide and five blocks tall would give me a baby quilt that measured 40″ x 40″.   Ok, focal fabric selected and pattern decided upon, I just needed the scrappy fabrics for the four patch blocks. I pulled a stack of fat quarters and played around with those. Fortunately my sister was visiting for the weekend so I had her take a look.  As only a sister is allowed, she looked at a number of them and scratched them from the list right away.  She vetoed them saying they were too modern, wrong color, or too contemporary. Looking through my shelves, she pulled a black and white houndstooth pattern and the black, white and red paisley. Perfect additions! She has such good taste. Cutting and piecing such a simple design took no time at all.

Cowboy Small Baby Quilt; September 2014

20140911_1672

I backed it with this sweet Moda fabric called Honky Tonk. This was the perfect piece to use as backing.  It features cactus, guitars and musical notes – just like Cowboy Small!

20140911_1667

I quilted it with a large meandering pattern.  I really enjoyed quilting this project.  The stippling is a little herky-jerky in spots but overall it looks good (especially after washing and drying the quilt.) The binding is a bias stripe of light tan and red. Adorable! I machine stitched the binding on both the front and back of the quilt. (If you need a good tutorial on quilt binding, check out this one at Crazy Mom Quilts.)

Overall, this project was a blast.  It was a trip down memory lane which is always a fun thing! I will list this quilt in my Etsy shop for some lucky little cowboy.

Linking to: Freemotion by the River, Needle and Thread Thursday, Finish it Up Friday, and TGIFF. Links to each of these sites are available at the top of my page under Link Ups. There are some great projects featured at these linky sites. Take a minute and check them out!

RSC14 Win!

orange

Orange Block for September

What a fun surprise! When I got up this morning and checked email I found a note from Angela over at So Scrappy. Each month she has a giveaway for the participants working on RSC14, the Rainbow Scrap Challenge for 2014.  This month I won!  The sponsor for the giveaway is Vicki Welsh over at Field Trips in Fiber. Vicki hand dyes fabrics and they are gorgeous.  After just doing my first project with batiks and loving it, I am so excited to receive such a treasure from Vicki.  Her fabric appears to glow. Check out her Etsy shop here.  Thank you to both Vicki and Angela! Actually, thanks also to Mari at Academic Quilter since that is how I first heard of this fun challenge in the first place!

For RSC14 I have been working on 25 patch blocks in all of the colors of the rainbow.  I am almost caught up to September.  Two months more (green and yellow) and I will be current.  Hopefully I will get those done by the end of this month. I plan to sash the blocks with white and add  bright corner blocks with the sashing.

Here is what I have thus far:

20140902_1661Linking to Angela over at So Scrappy.

Honeymoon Quilt-16 years late!

I was fortunate enough to meet my husband back in 1997.  We were set up on a blind date by a good friend that we both worked with at the time. It was just a lunch and as blind dates go, it wasn’t bad! I was a single mom with three small children under the age of 11 years and it was a busy time.  My blind date called me a couple of times and I didn’t return the calls.  Mostly because dating as a single mom was just a pain. Somehow we did go out again about a month later.  And that was it.  We were engaged six weeks after that, married six months after becoming engaged. A whirlwind romance, to be sure.

I can’t say that I heartily recommend becoming engaged after six weeks of dating but it worked well for us.  Both of us joke about it often.  We have decided that the universe somehow knew that if we spent any length of time dating and/or deliberating marriage, we would both chicken out.  It was his first marriage and he hadn’t any children.  He was inheriting my three boys with no kid experience at all (he did however have a huge dog, which was a big score for my dog-less children.) It was my second marriage, after having been widowed four years earlier.  Things were still rough as the boys and I continued to grieve the loss of their dad. Step-parenting is an absolute challenge, as I am sure many of you know.  Both for the step-parent and for the natural parent overly-possessive-mama of the kids being step-parented. However, we worked through all of it and life is grand.

On to the quilty part of the story.  After the wedding we honeymooned on the island of St. John in the Virgin Islands.  It was blissful. Heavenly! One of the many things I learned about my new husband on that trip is that he takes millions of sunset pictures and they are really good.  This just looks heavenly, doesn’t it? (This was before digital was available so scanning this photo doesn’t really do it justice.)

EPSON MFP image

While we were on our trip I picked up a piece of batik fabric, maybe 1 and 1/2 yards.  It was so pretty.  It sat on the shelf with my other fabrics and waited patiently for me to figure out what to do with it.  Sat there for sixteen years! I looked at it now and then but didn’t want to cut into it.  I couldn’t figure out the best way to use it.

20140830_1646Last week I finally decided what to do with it! About a year ago I purchased three charm packs of Moda’s Dancing In the Rain batiks. I bought them for a great price from Judy Madsen’s on-line shop, Green Fairy Quilts.  Quick, unsponsored, plug here – This shop is awesome.  She has good prices and often has great sales.  There is no shop (that I have used) that ships as fast as Green Fairy Quilts.  I swear they must ship the order the day it is received.  She ships out of Utah and it hits my California address within a matter of a couple of days.  Wonderful!  Anyway, I purchased these charm packs and added them to the proverbial shelf.  When I was looking for a project last week, I pulled these out.  I chose to make a nine patch quilt.  Something simple, mainly for the satisfaction of sewing and finishing something without any fuss.  As I was laying out the charm squares and deciding how to use them, I remembered that batik from St. John.  Perfect for the border!! I was so excited. I knew it was the right place for that fabric.

I sashed the nine patch blocks with a bit of black to set off the colors.  I think it lends a look of stained glass to the quilt.

20140829_1640

I decided to use the blue batik charm squares as the center of each block.  It lends continuity to the colors. After I sashed the blocks, I made four cornerstone blocks.  I just diced four extra charm squares into four squares and made small patchwork blocks with them.  I cut my precious honeymoon fabric into strips for the border and added the cornerstone blocks.  Hurray, my quilt top is finished!!

20140901_1658The sun was shining hard through the quilt top which makes it even more reminiscent of stained glass.  Love the pink square at the upper right corner.

20140901_1660

I keep looking through my fabric trying to come up with something that works for the back.  Alas, I have not found anything I like which necessitates a trip to my LQS.  How unfortunate for me.  😉

I am so happy with this quilt top.  I love the batiks.  I haven’t ever made anything with batik before and it is really pretty.  I plan to add a black piping or flange to the top and then bind it with the honeymoon batik against that black flange.  I will post a picture of the finished quilt when it is actually that, finished!

Happy weekend all!

Linking to: Freemotion by the River, Sew Cute Tuesday, Let’s Bee Social, NeedleandThread Thursday, TGIFF, Finish It Up Friday.  All of these wonderful sites have a link listed in the Link-Up tab at the top of my page.