Category Archives: Upcycling

Christmas Happenings

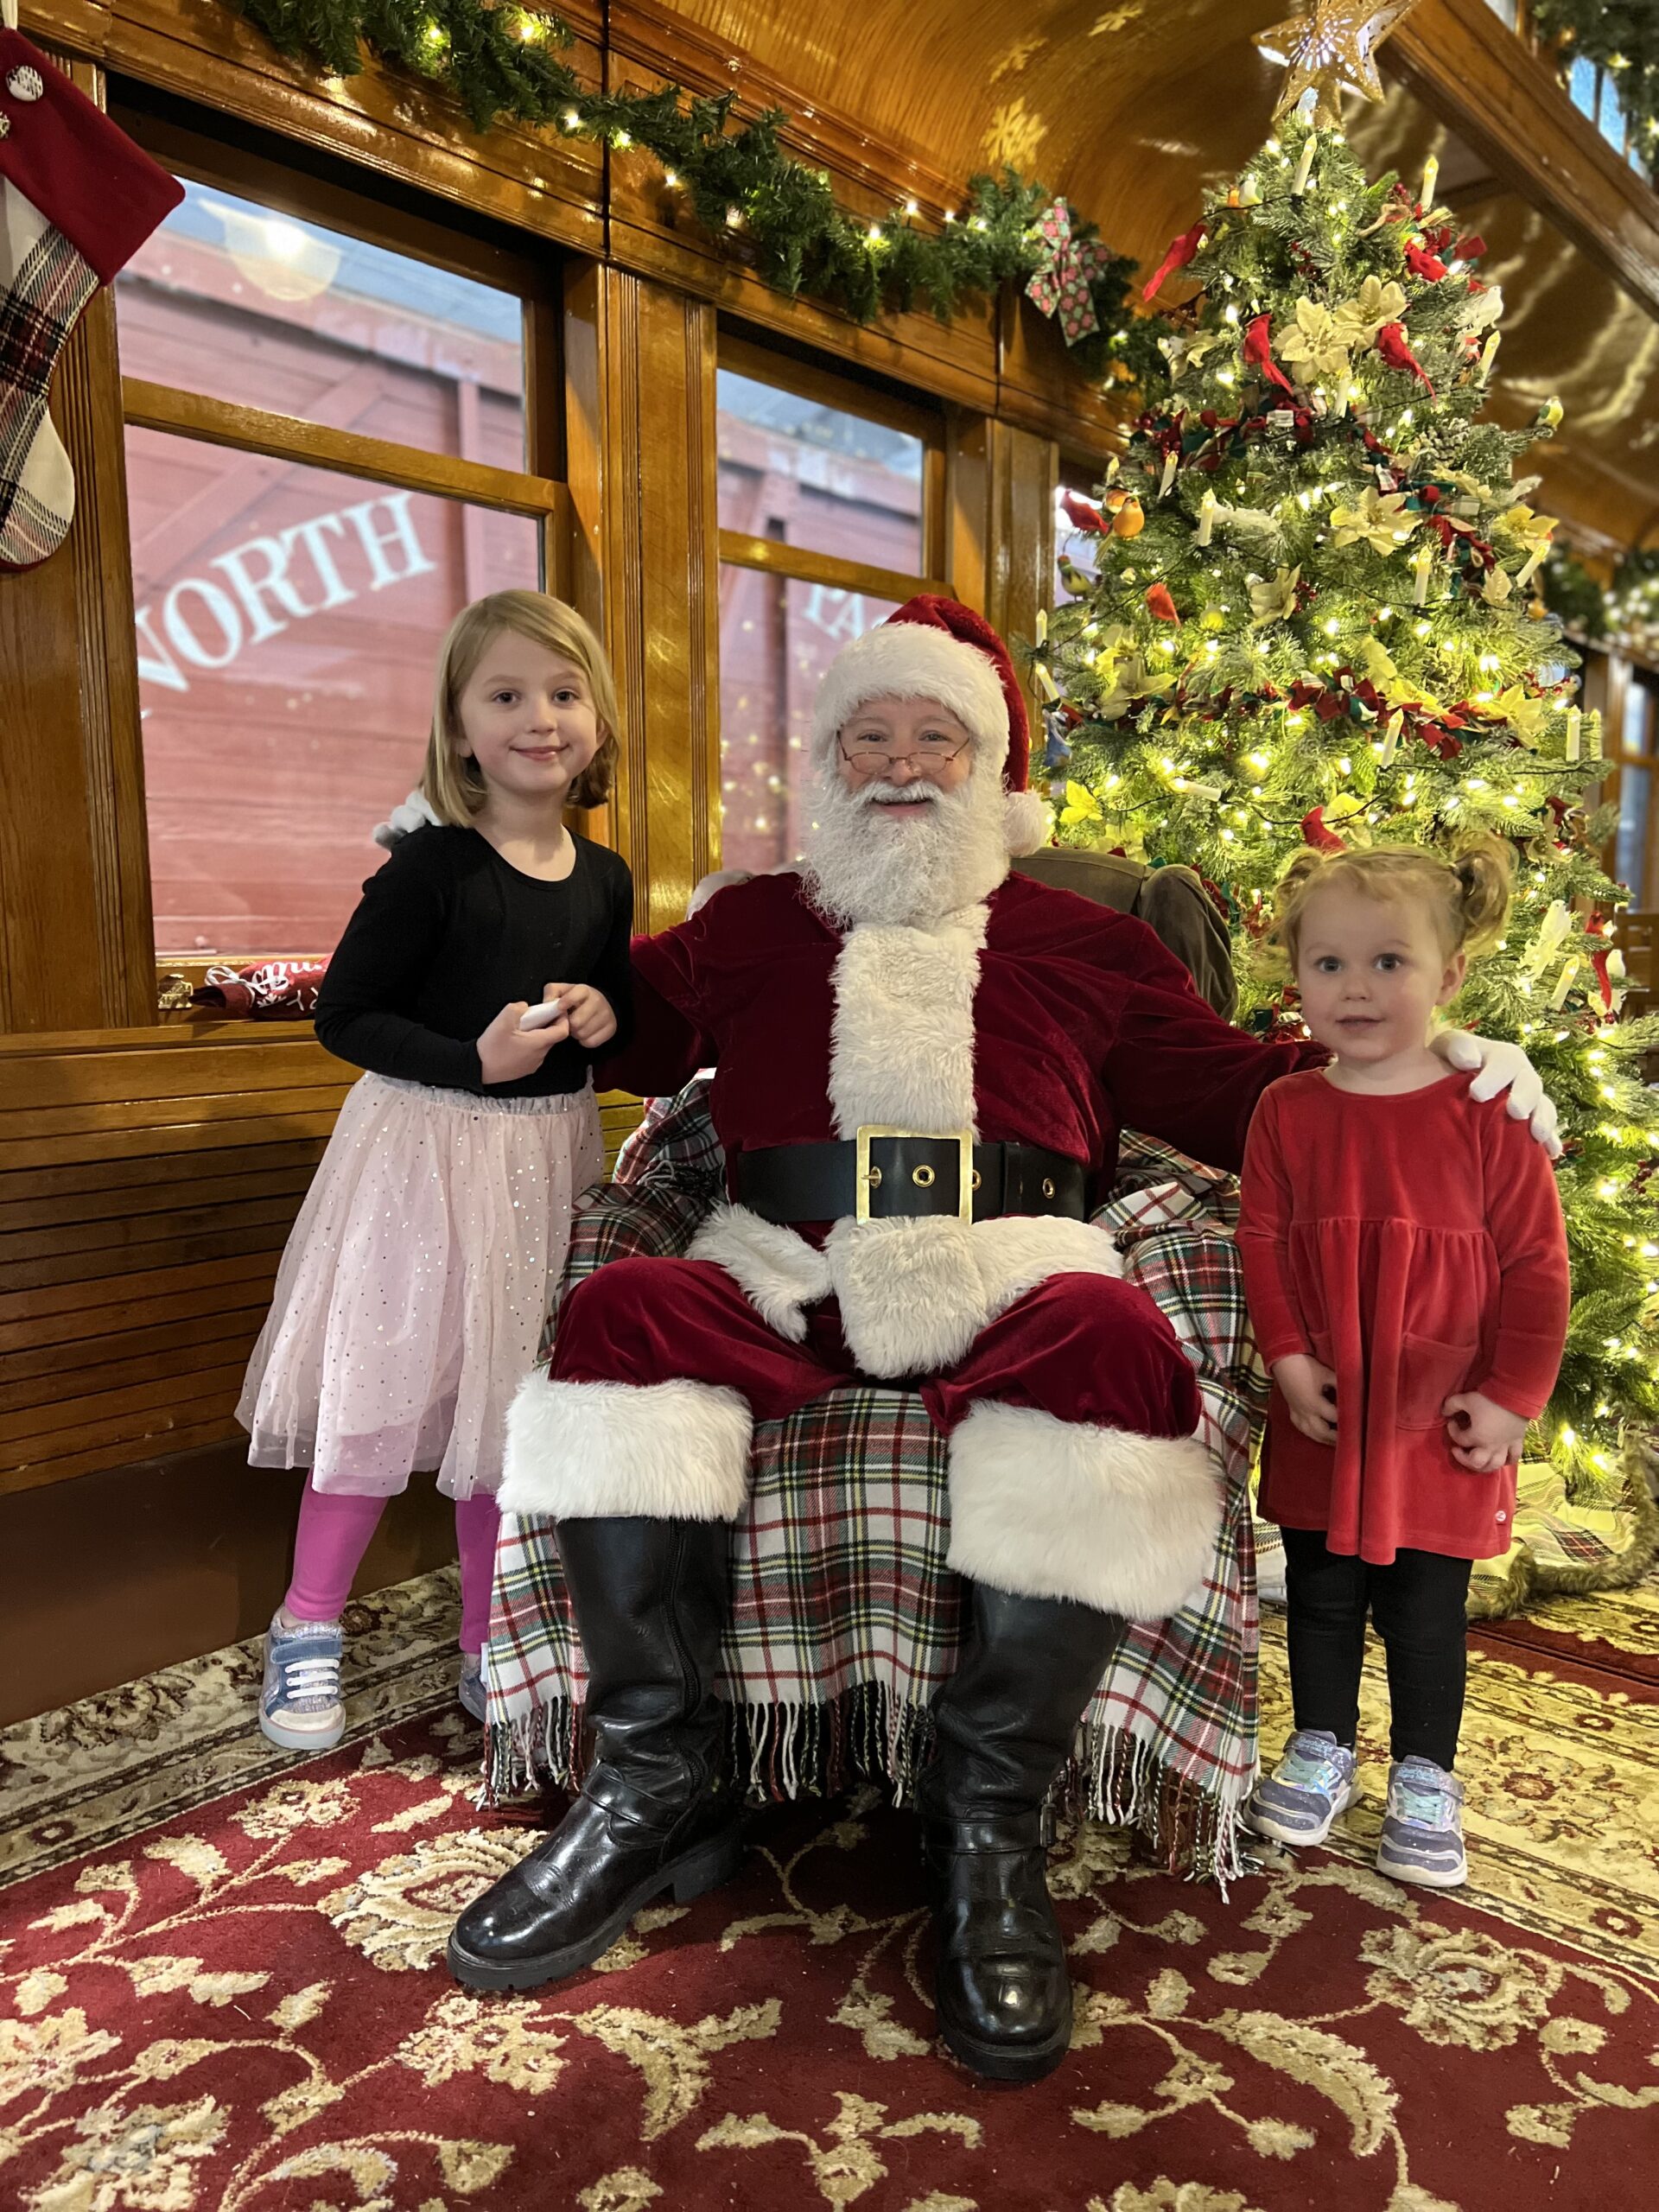
Happy Holidays to you! Last I wrote, we were planning to spend Christmas Eve and day with my son and his family. We haven’t had the pleasure of watching the girls experience Santa and all of the related excitement. Alas, it was not to be. My son and his wife came down with the bug and were feeling ill. It was decided that each family would have separate Christmas celebrations in an effort to squash this virus we keep passing back and forth. We will go see the kids when given the all clear. We did FaceTime on Christmas Day and it looked like they were doing well enough. My DIL was on the couch trying hard to get well since she has to be at work today.

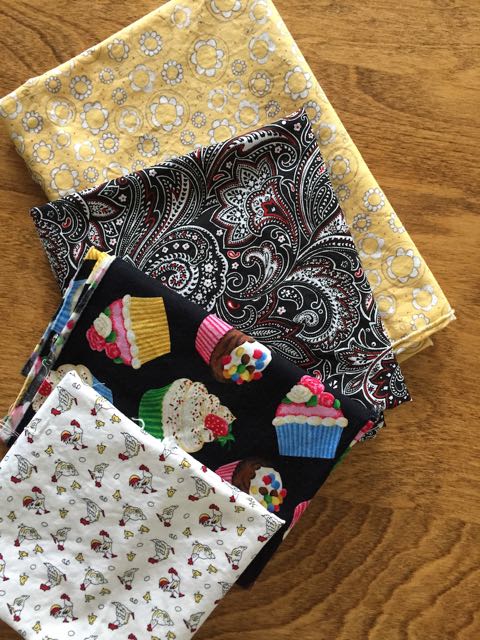
This year I made a strong effort to limit the use of paper when wrapping gifts. The challenge was actually quite fun and a bit success.

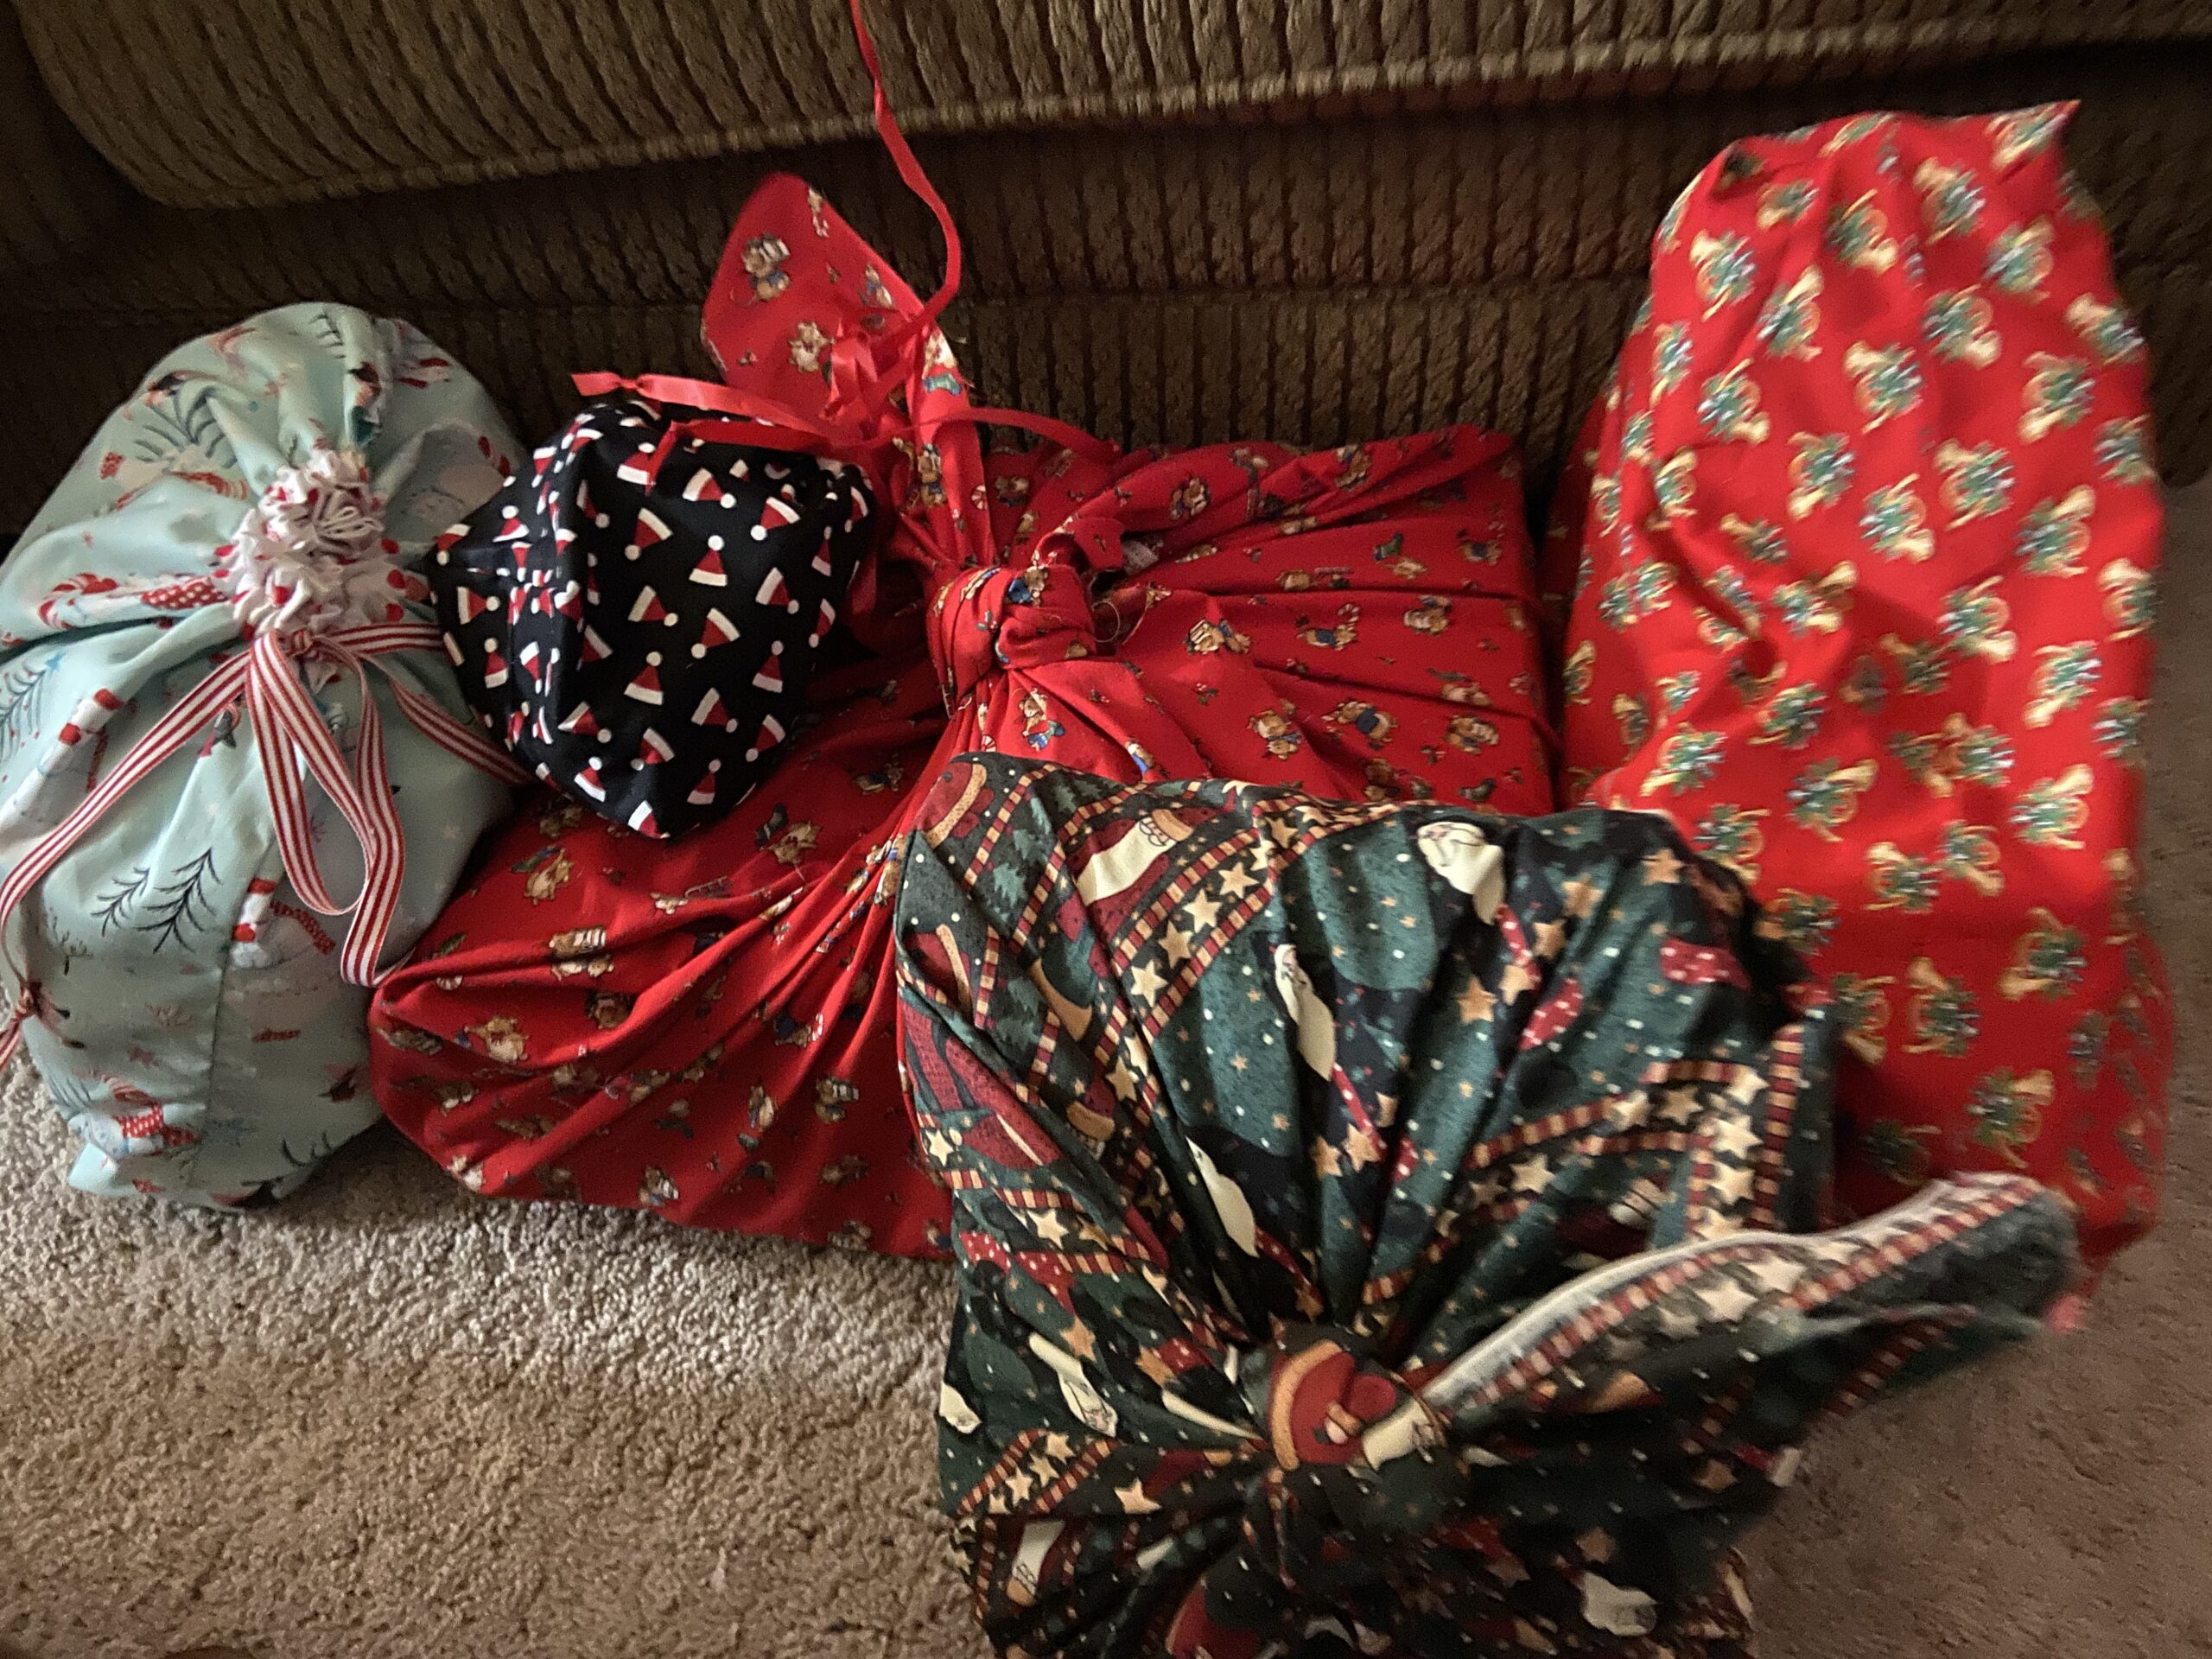
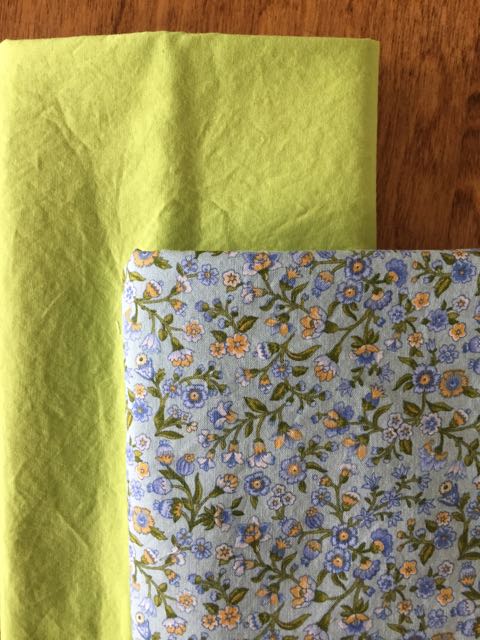
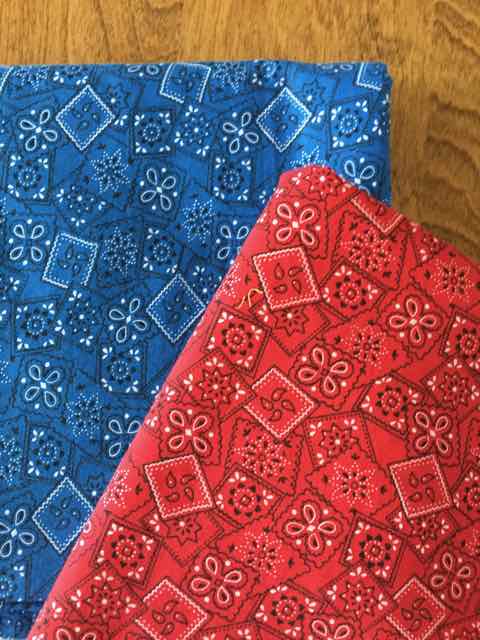
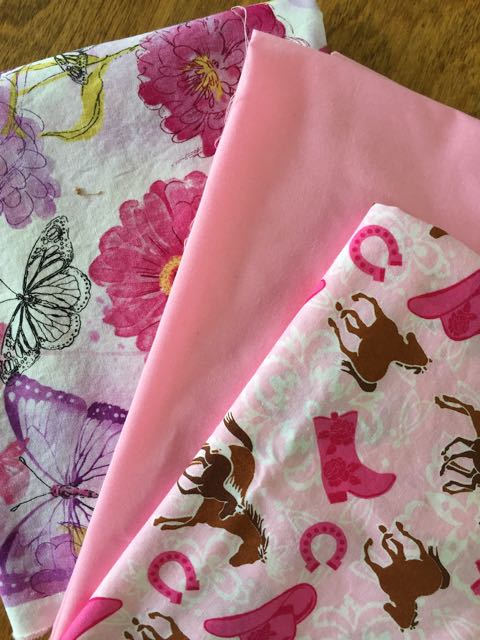
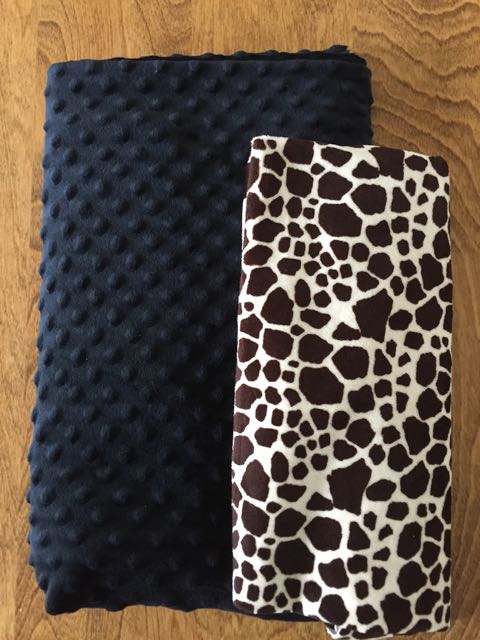
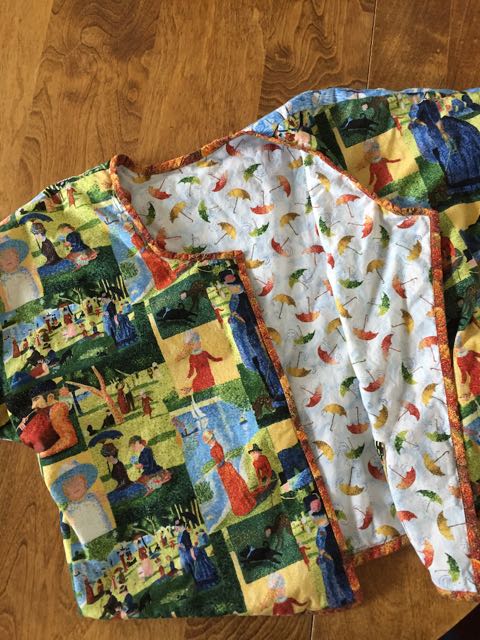
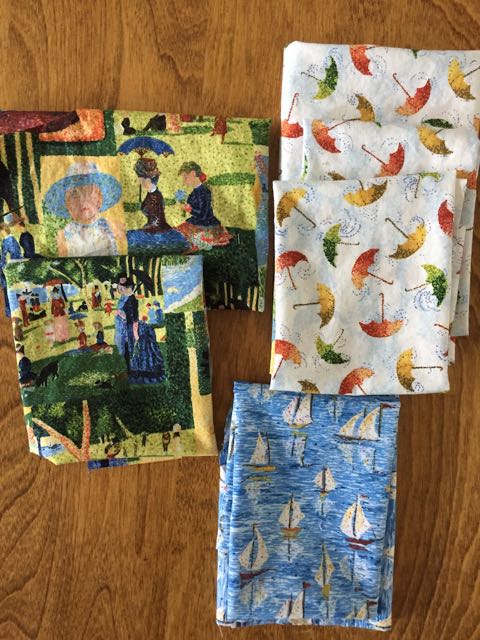
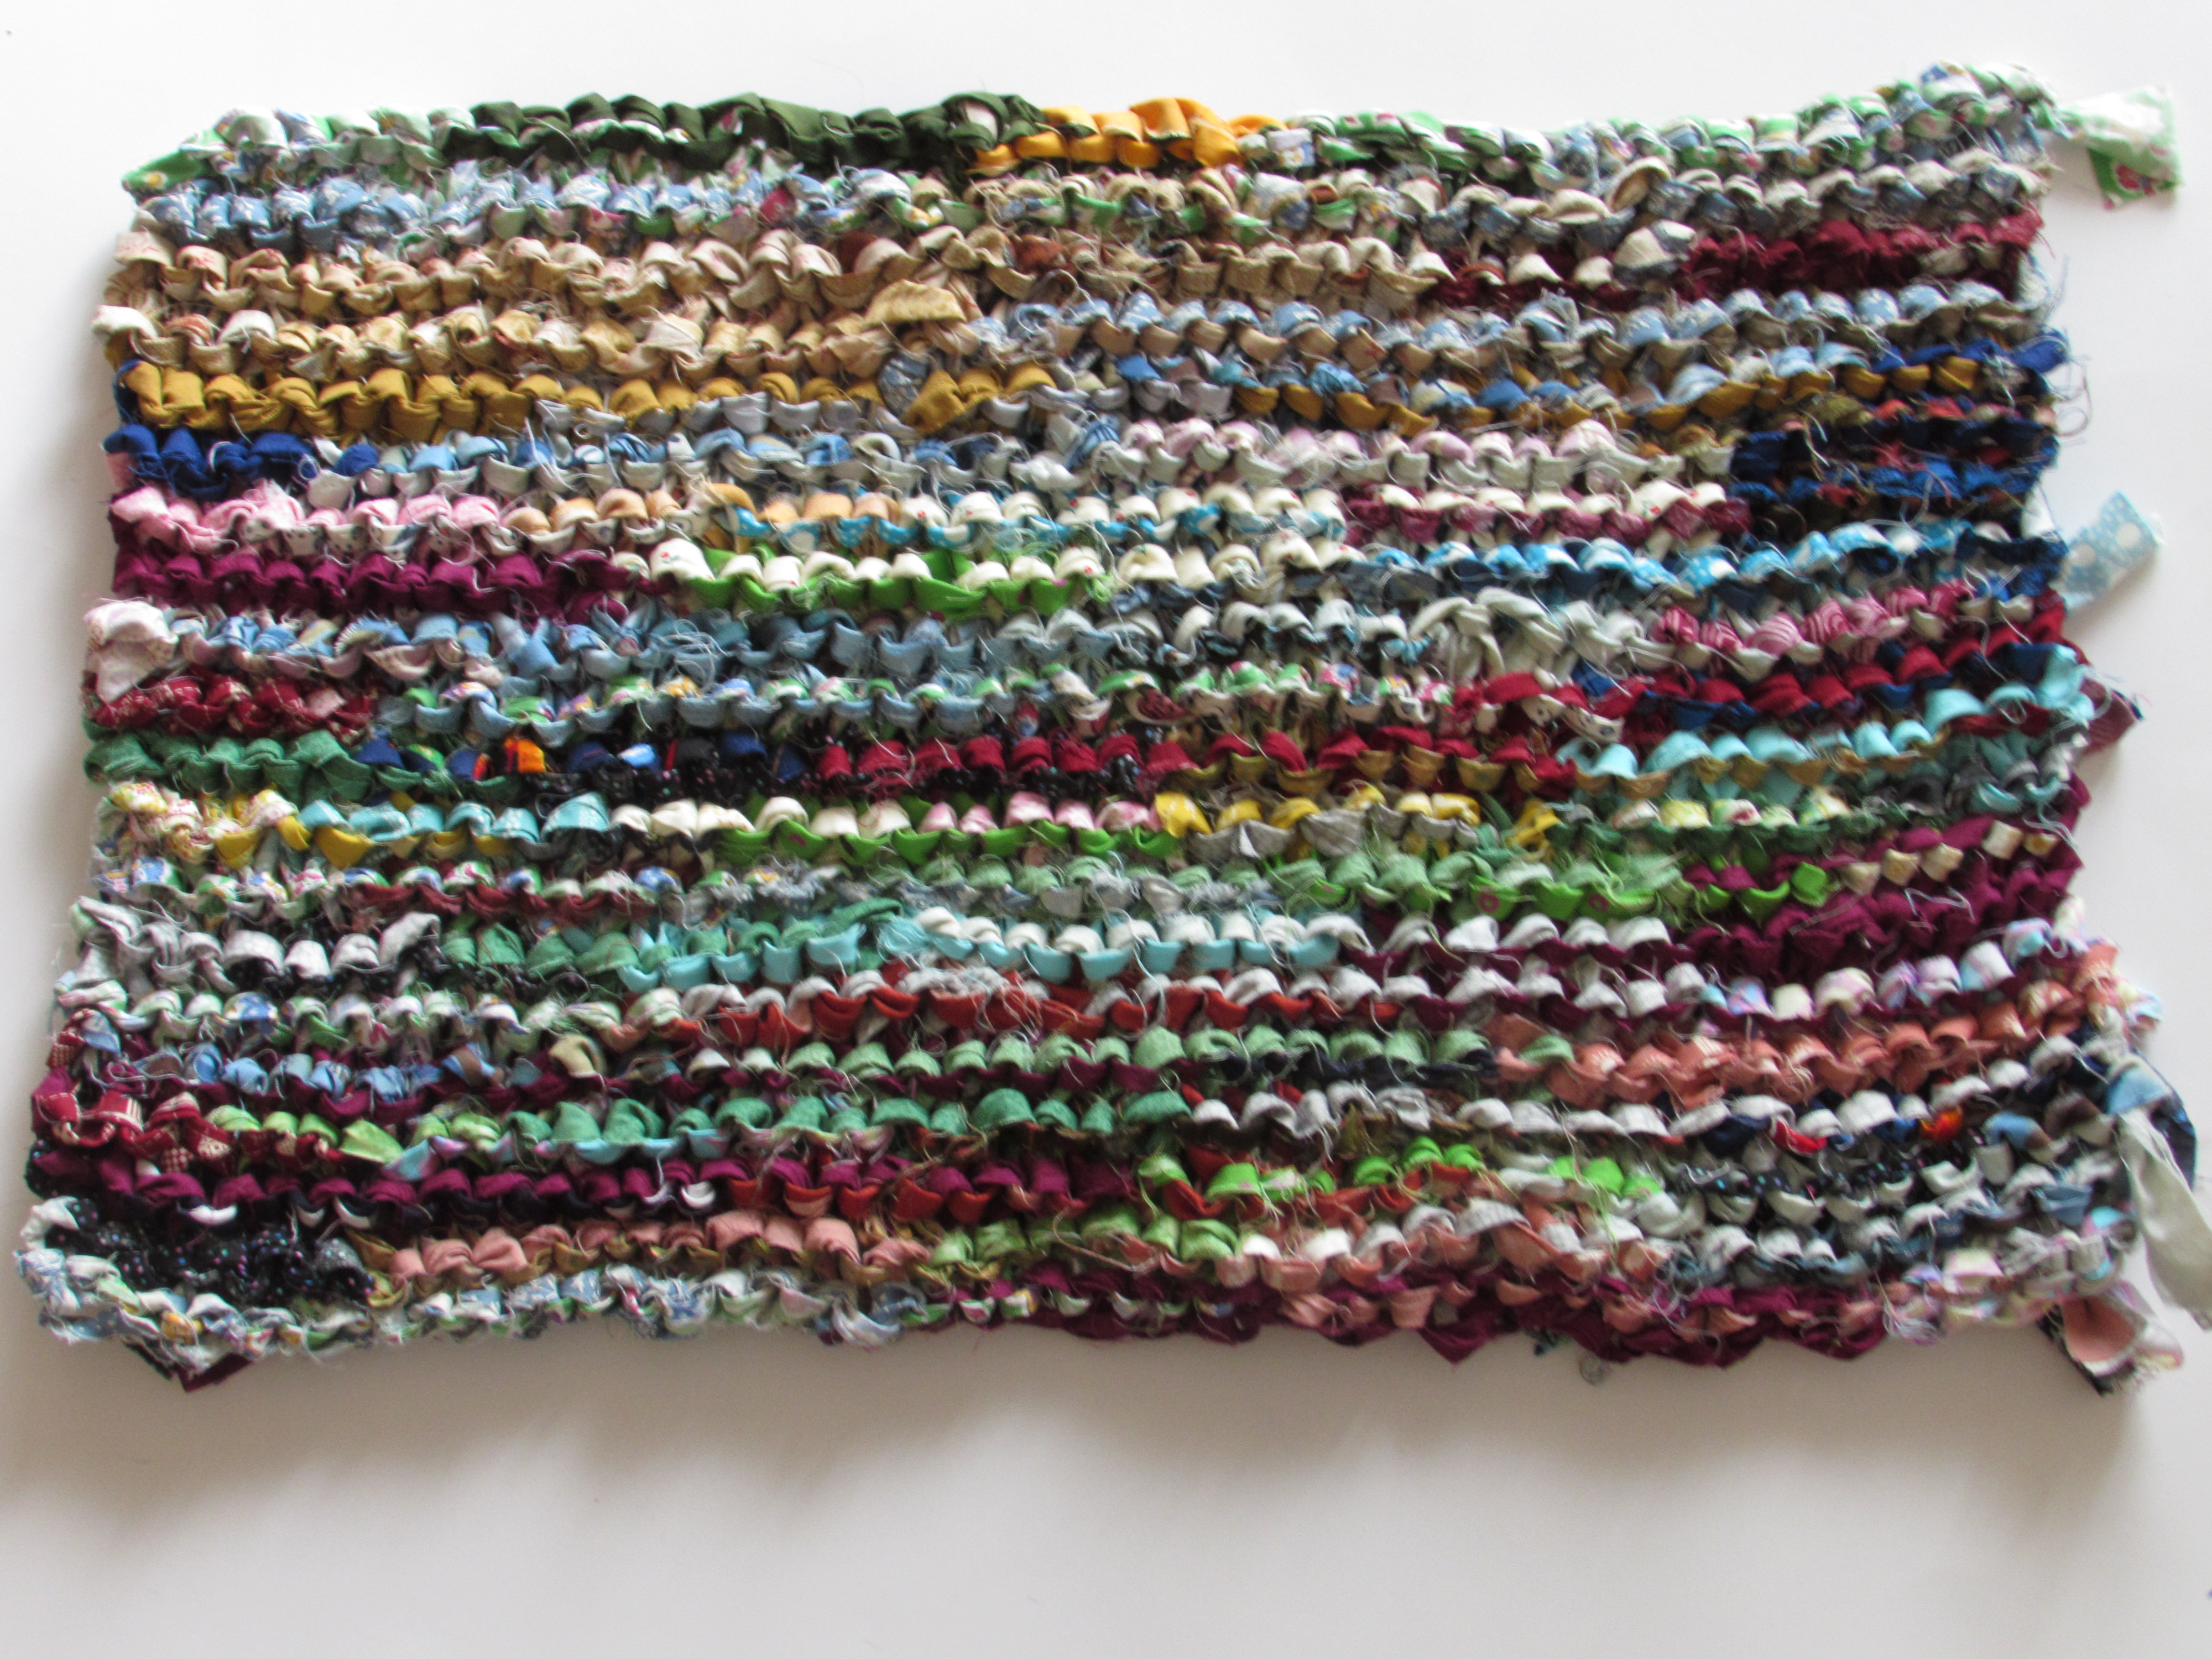
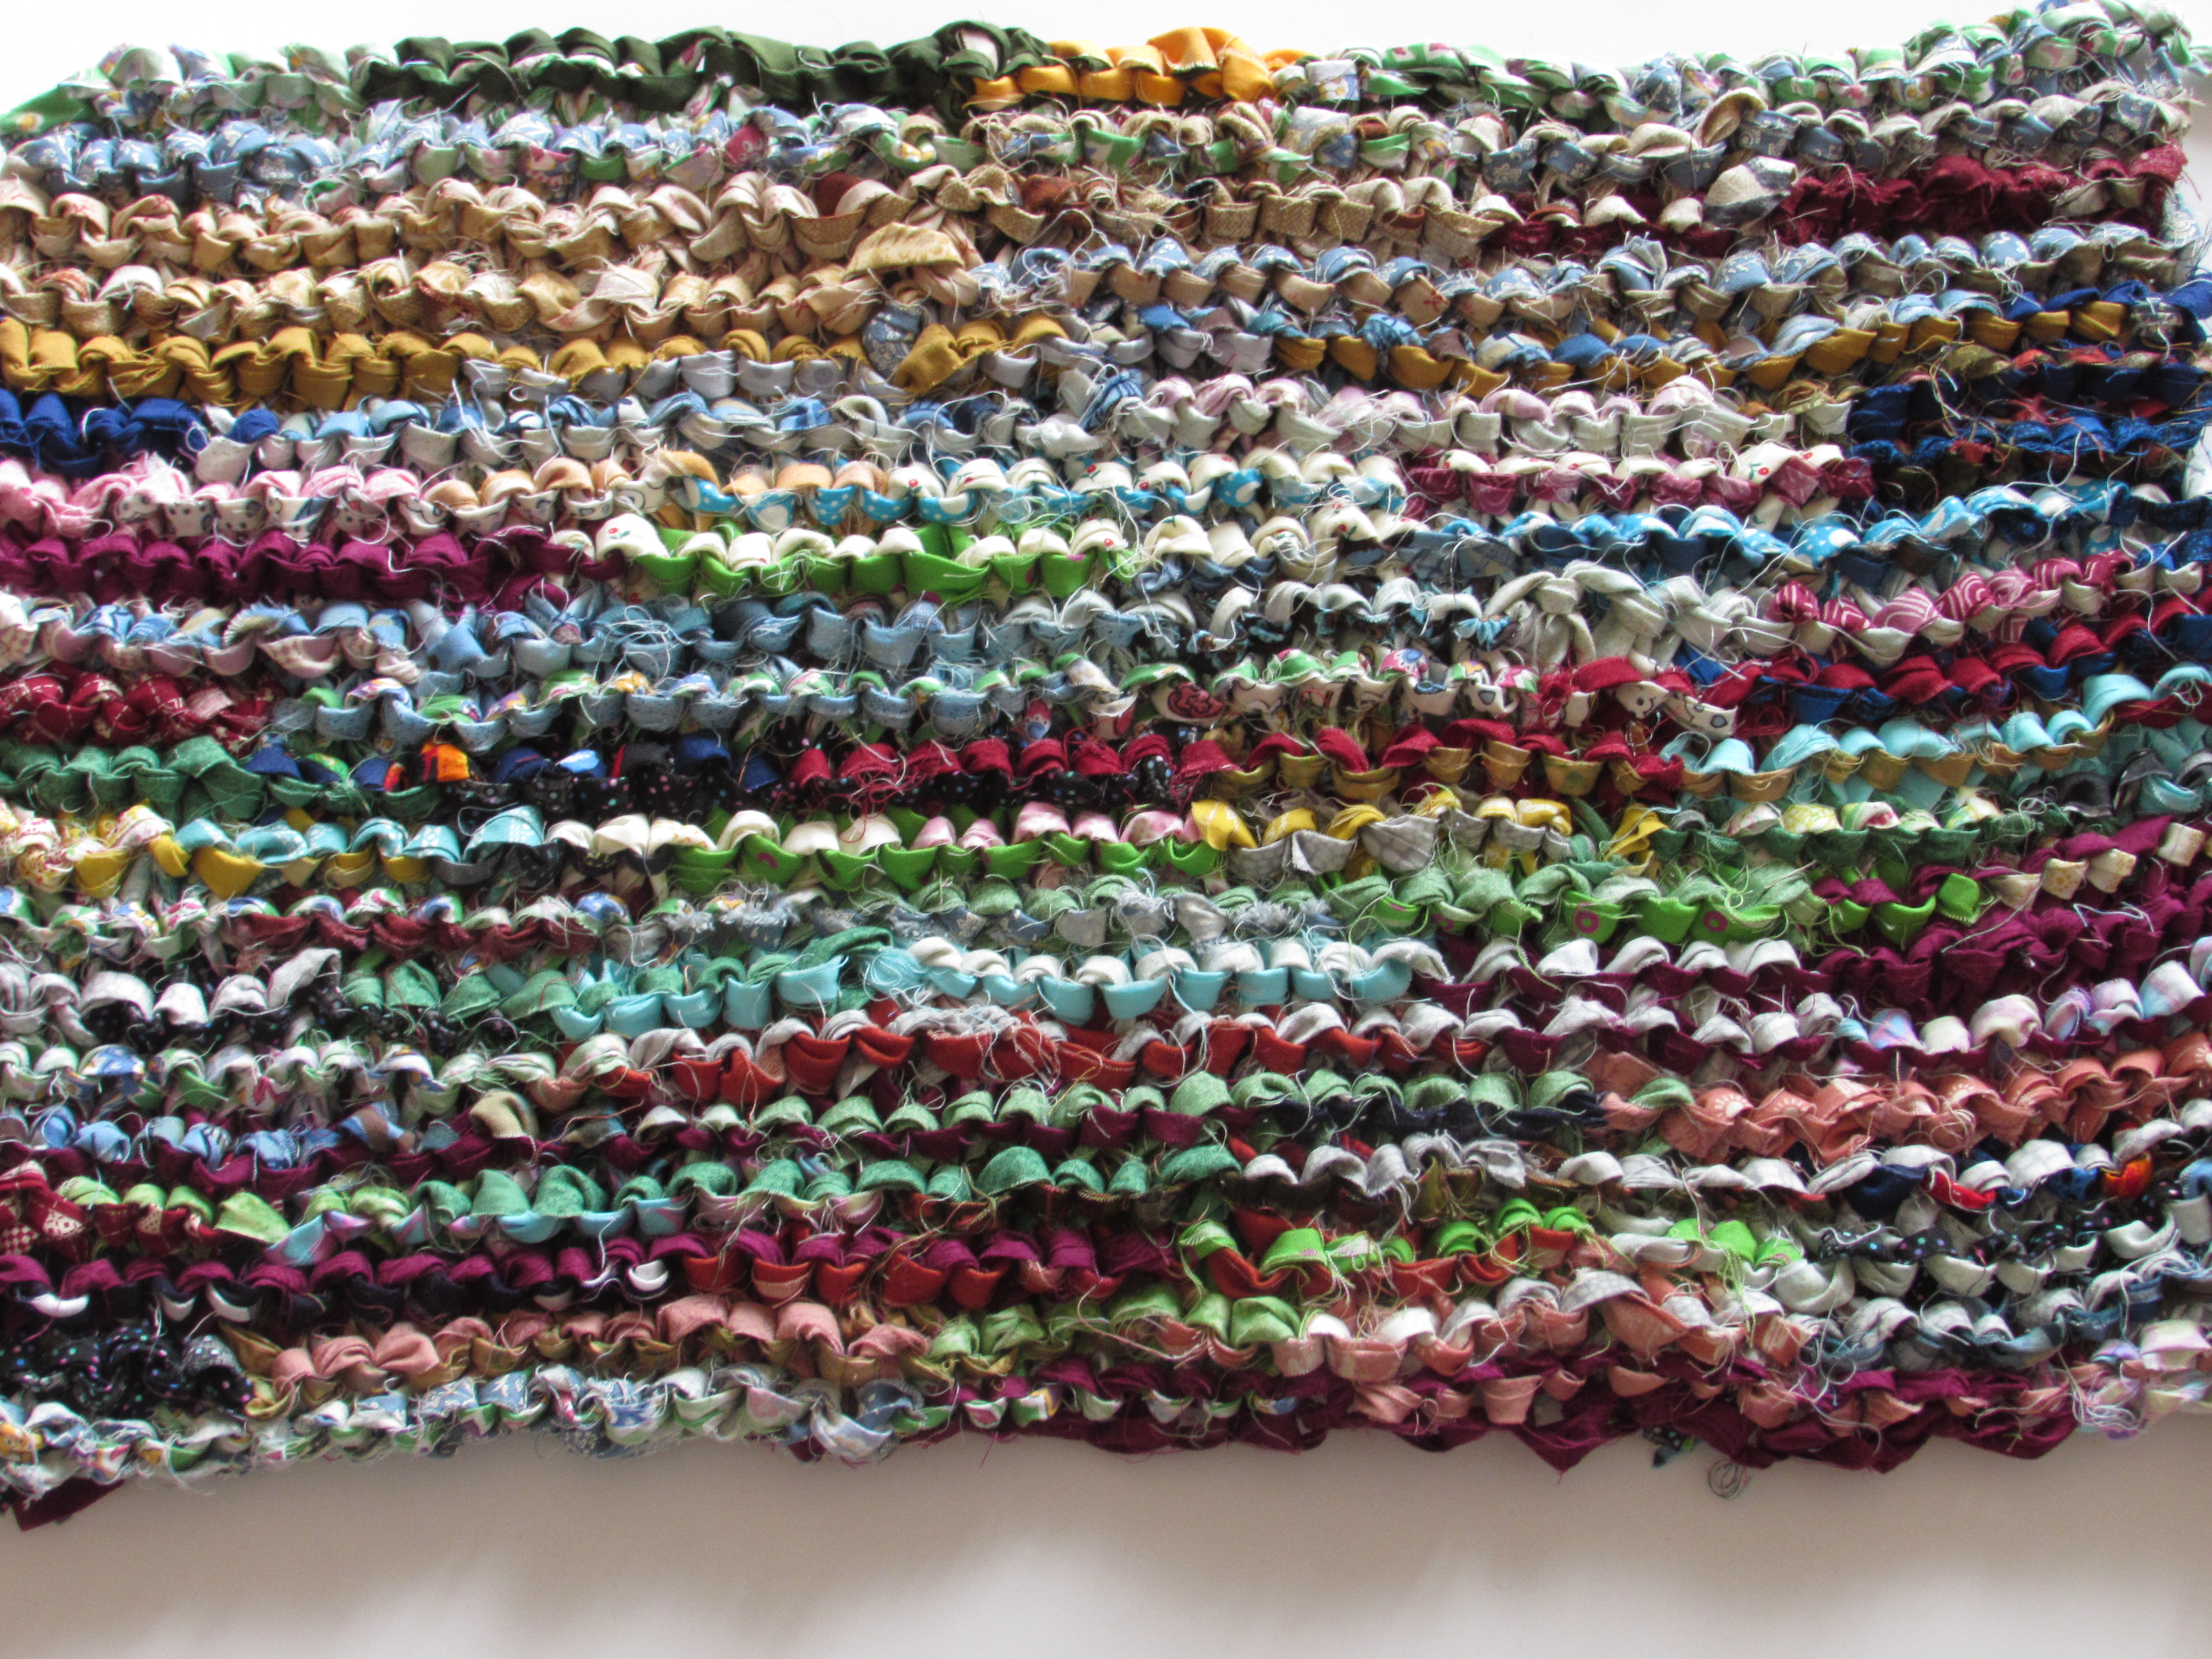
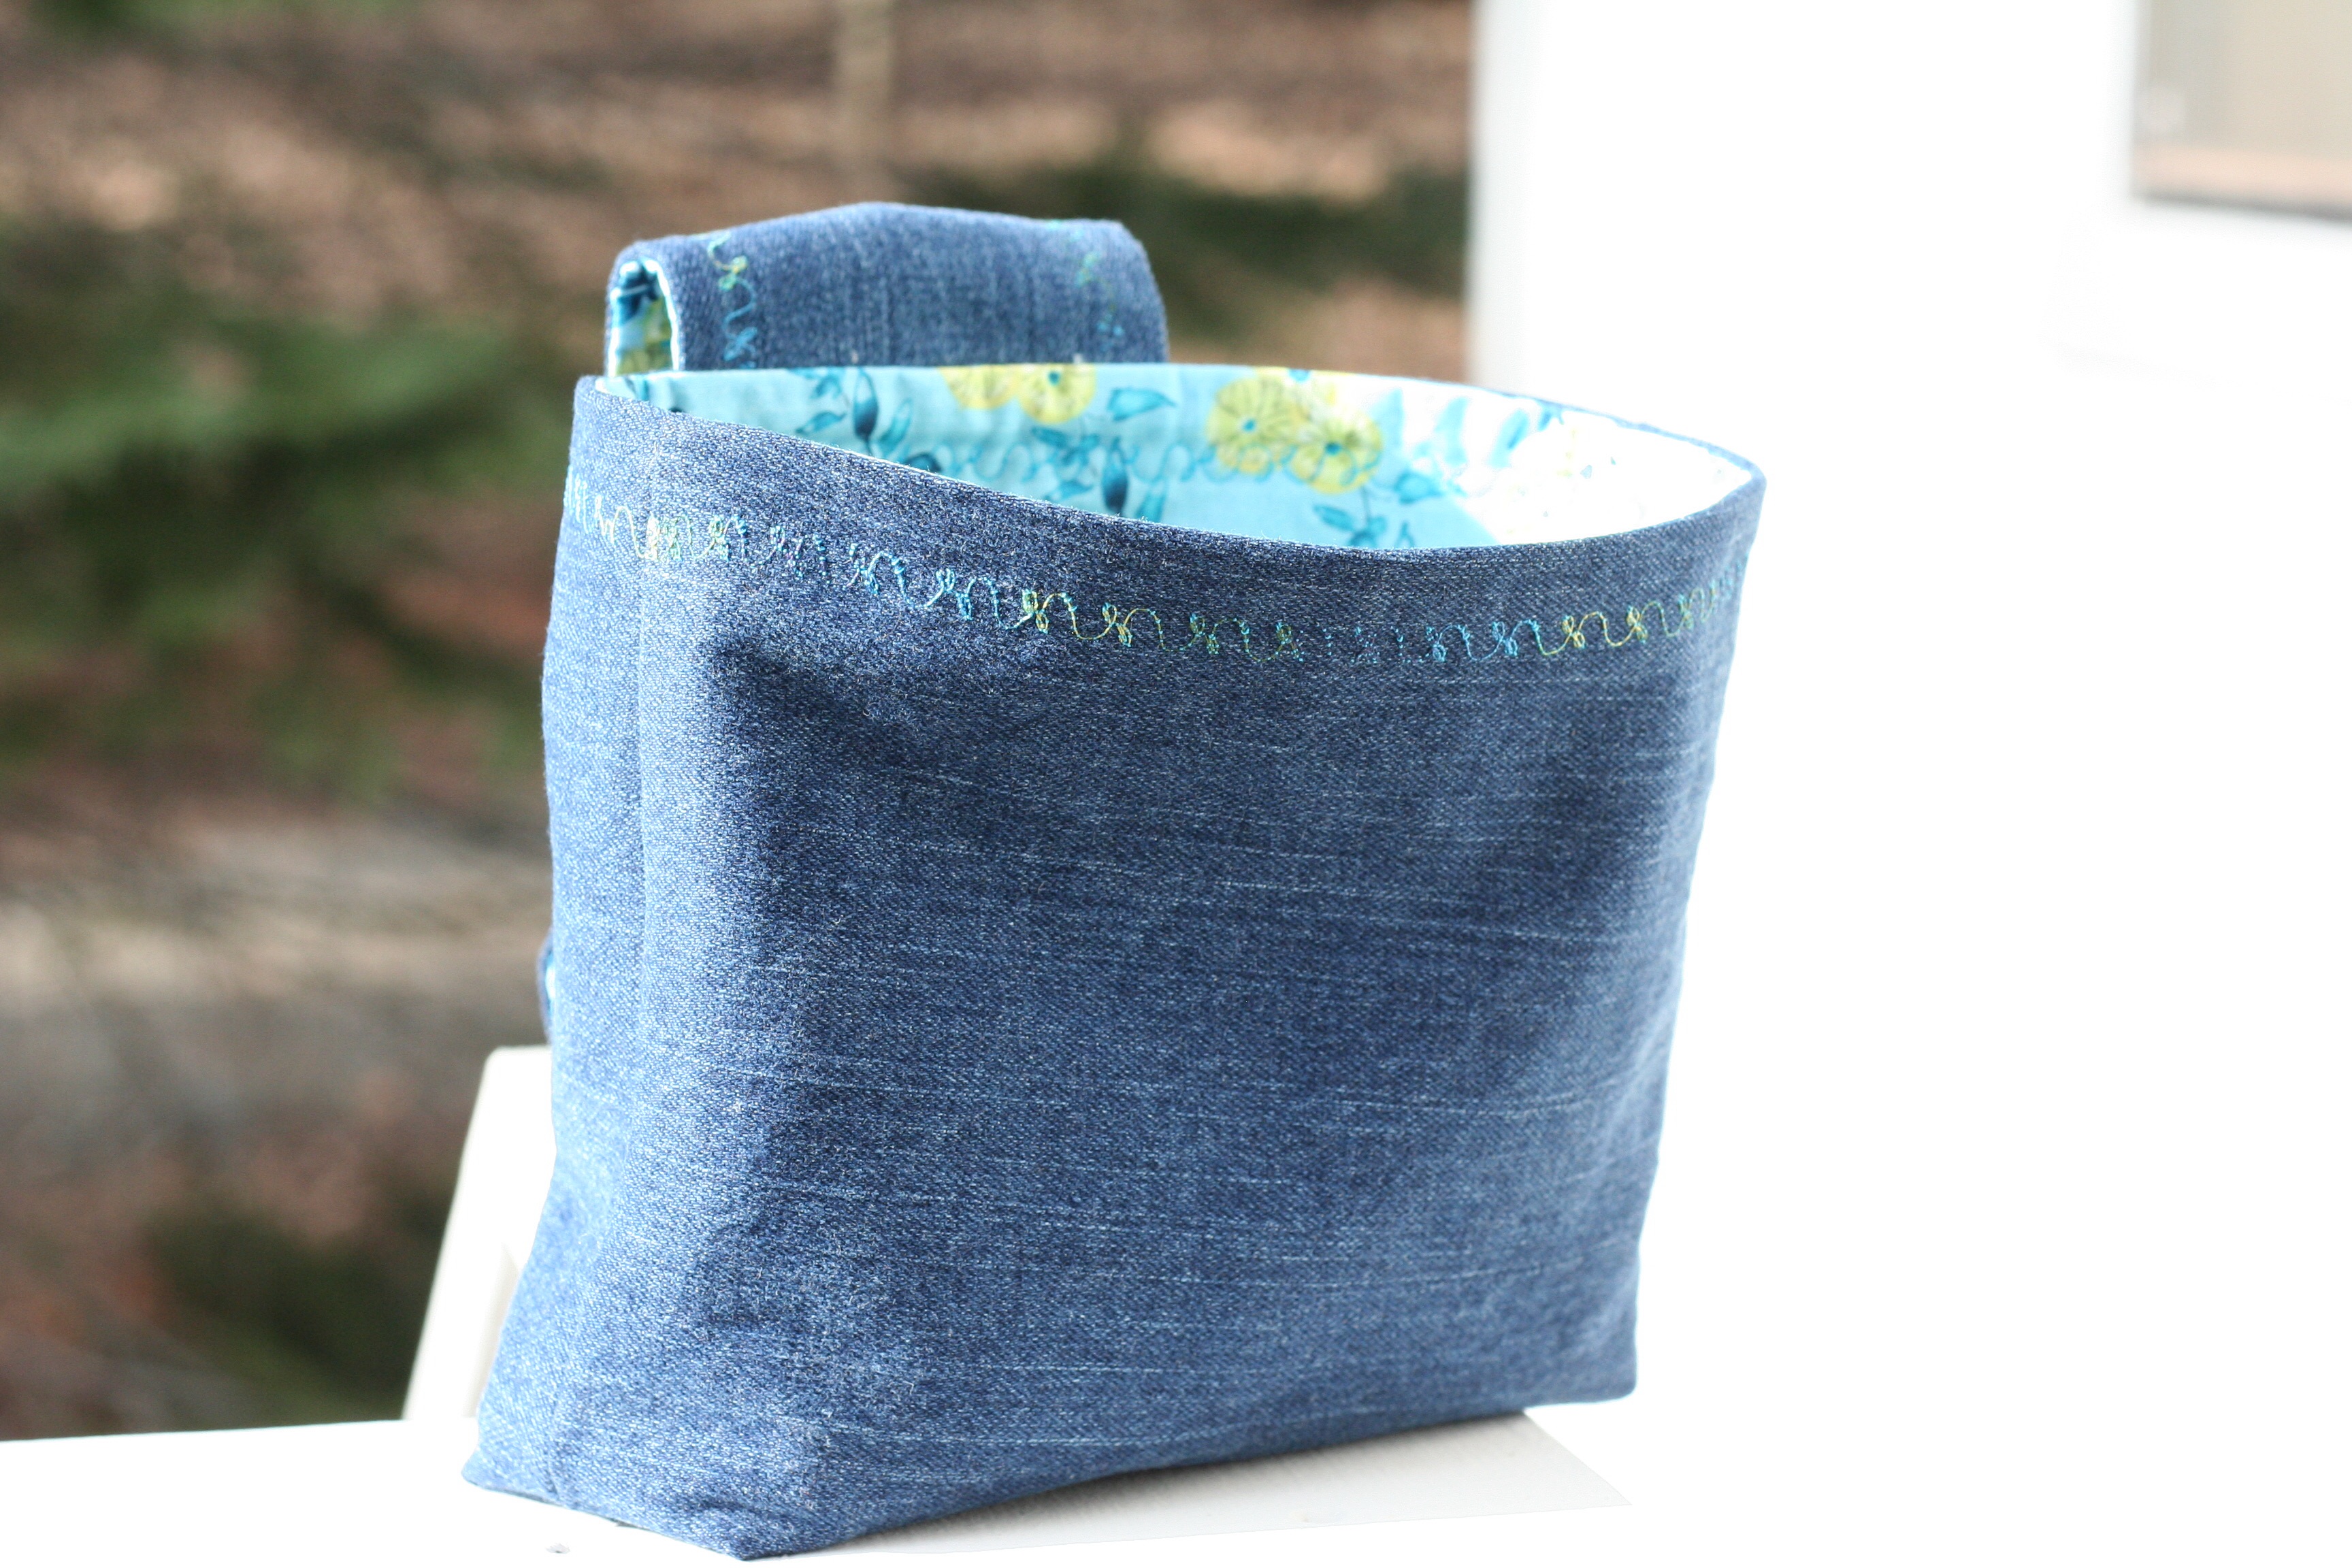
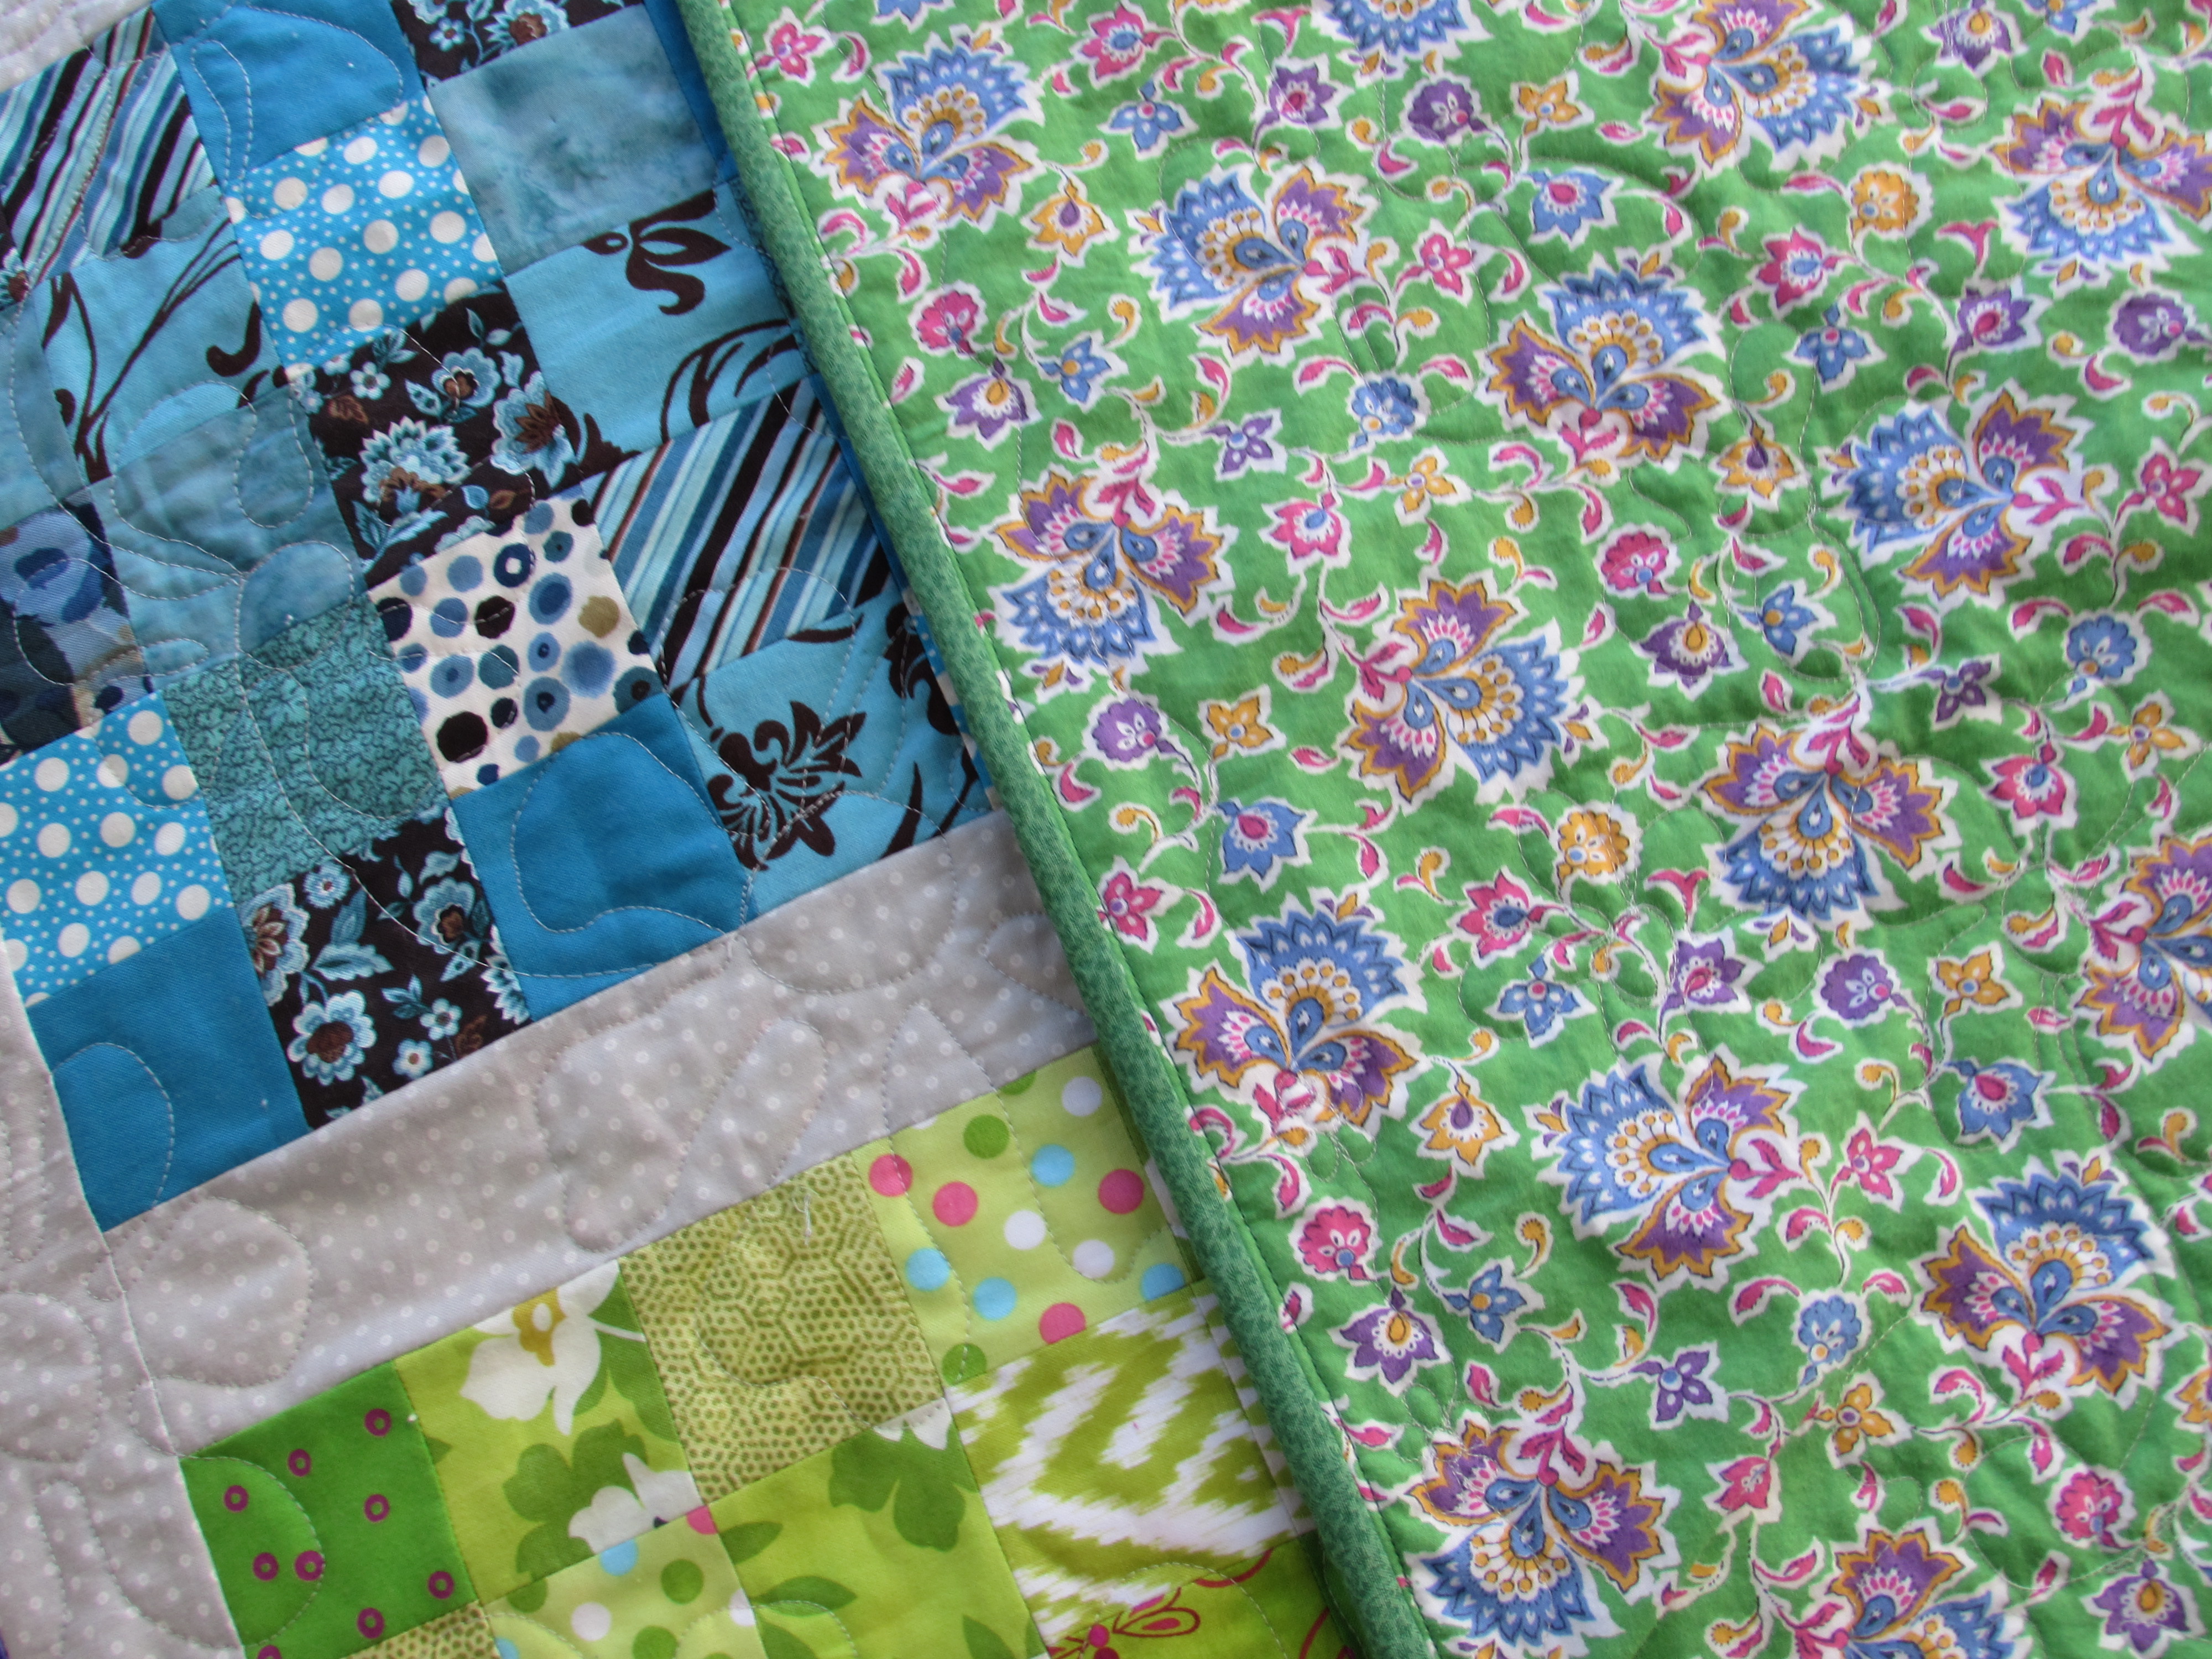
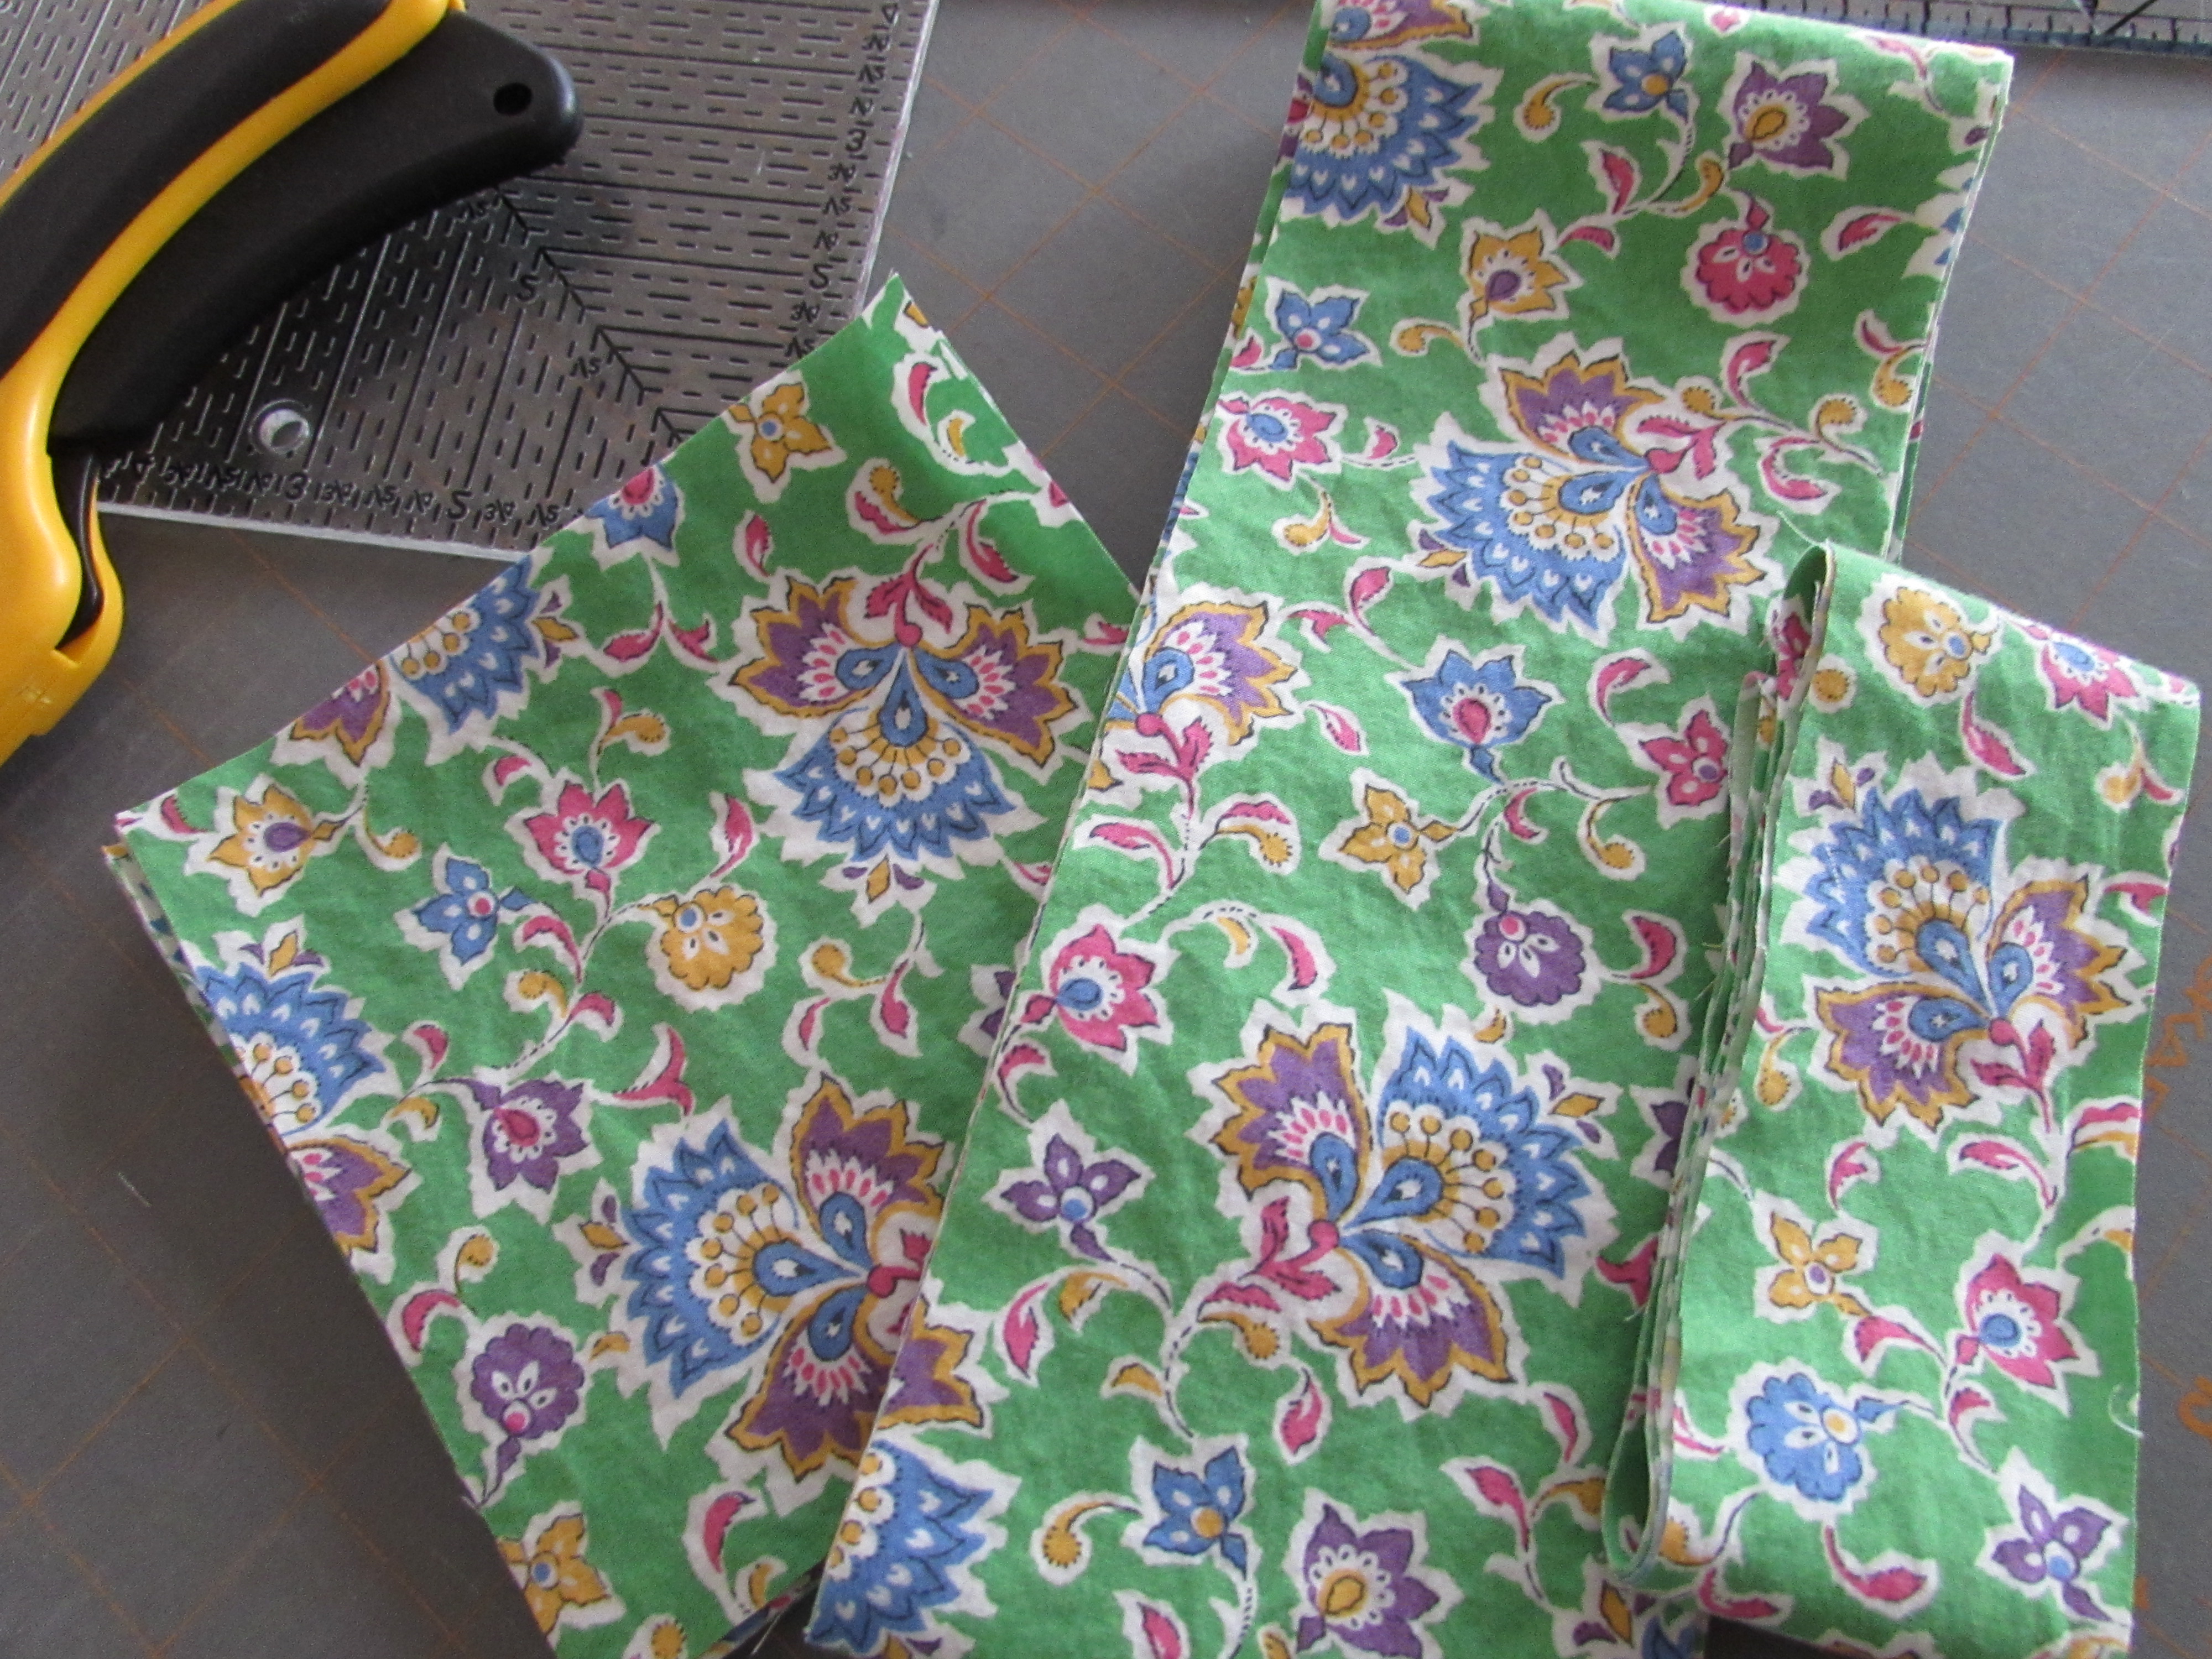
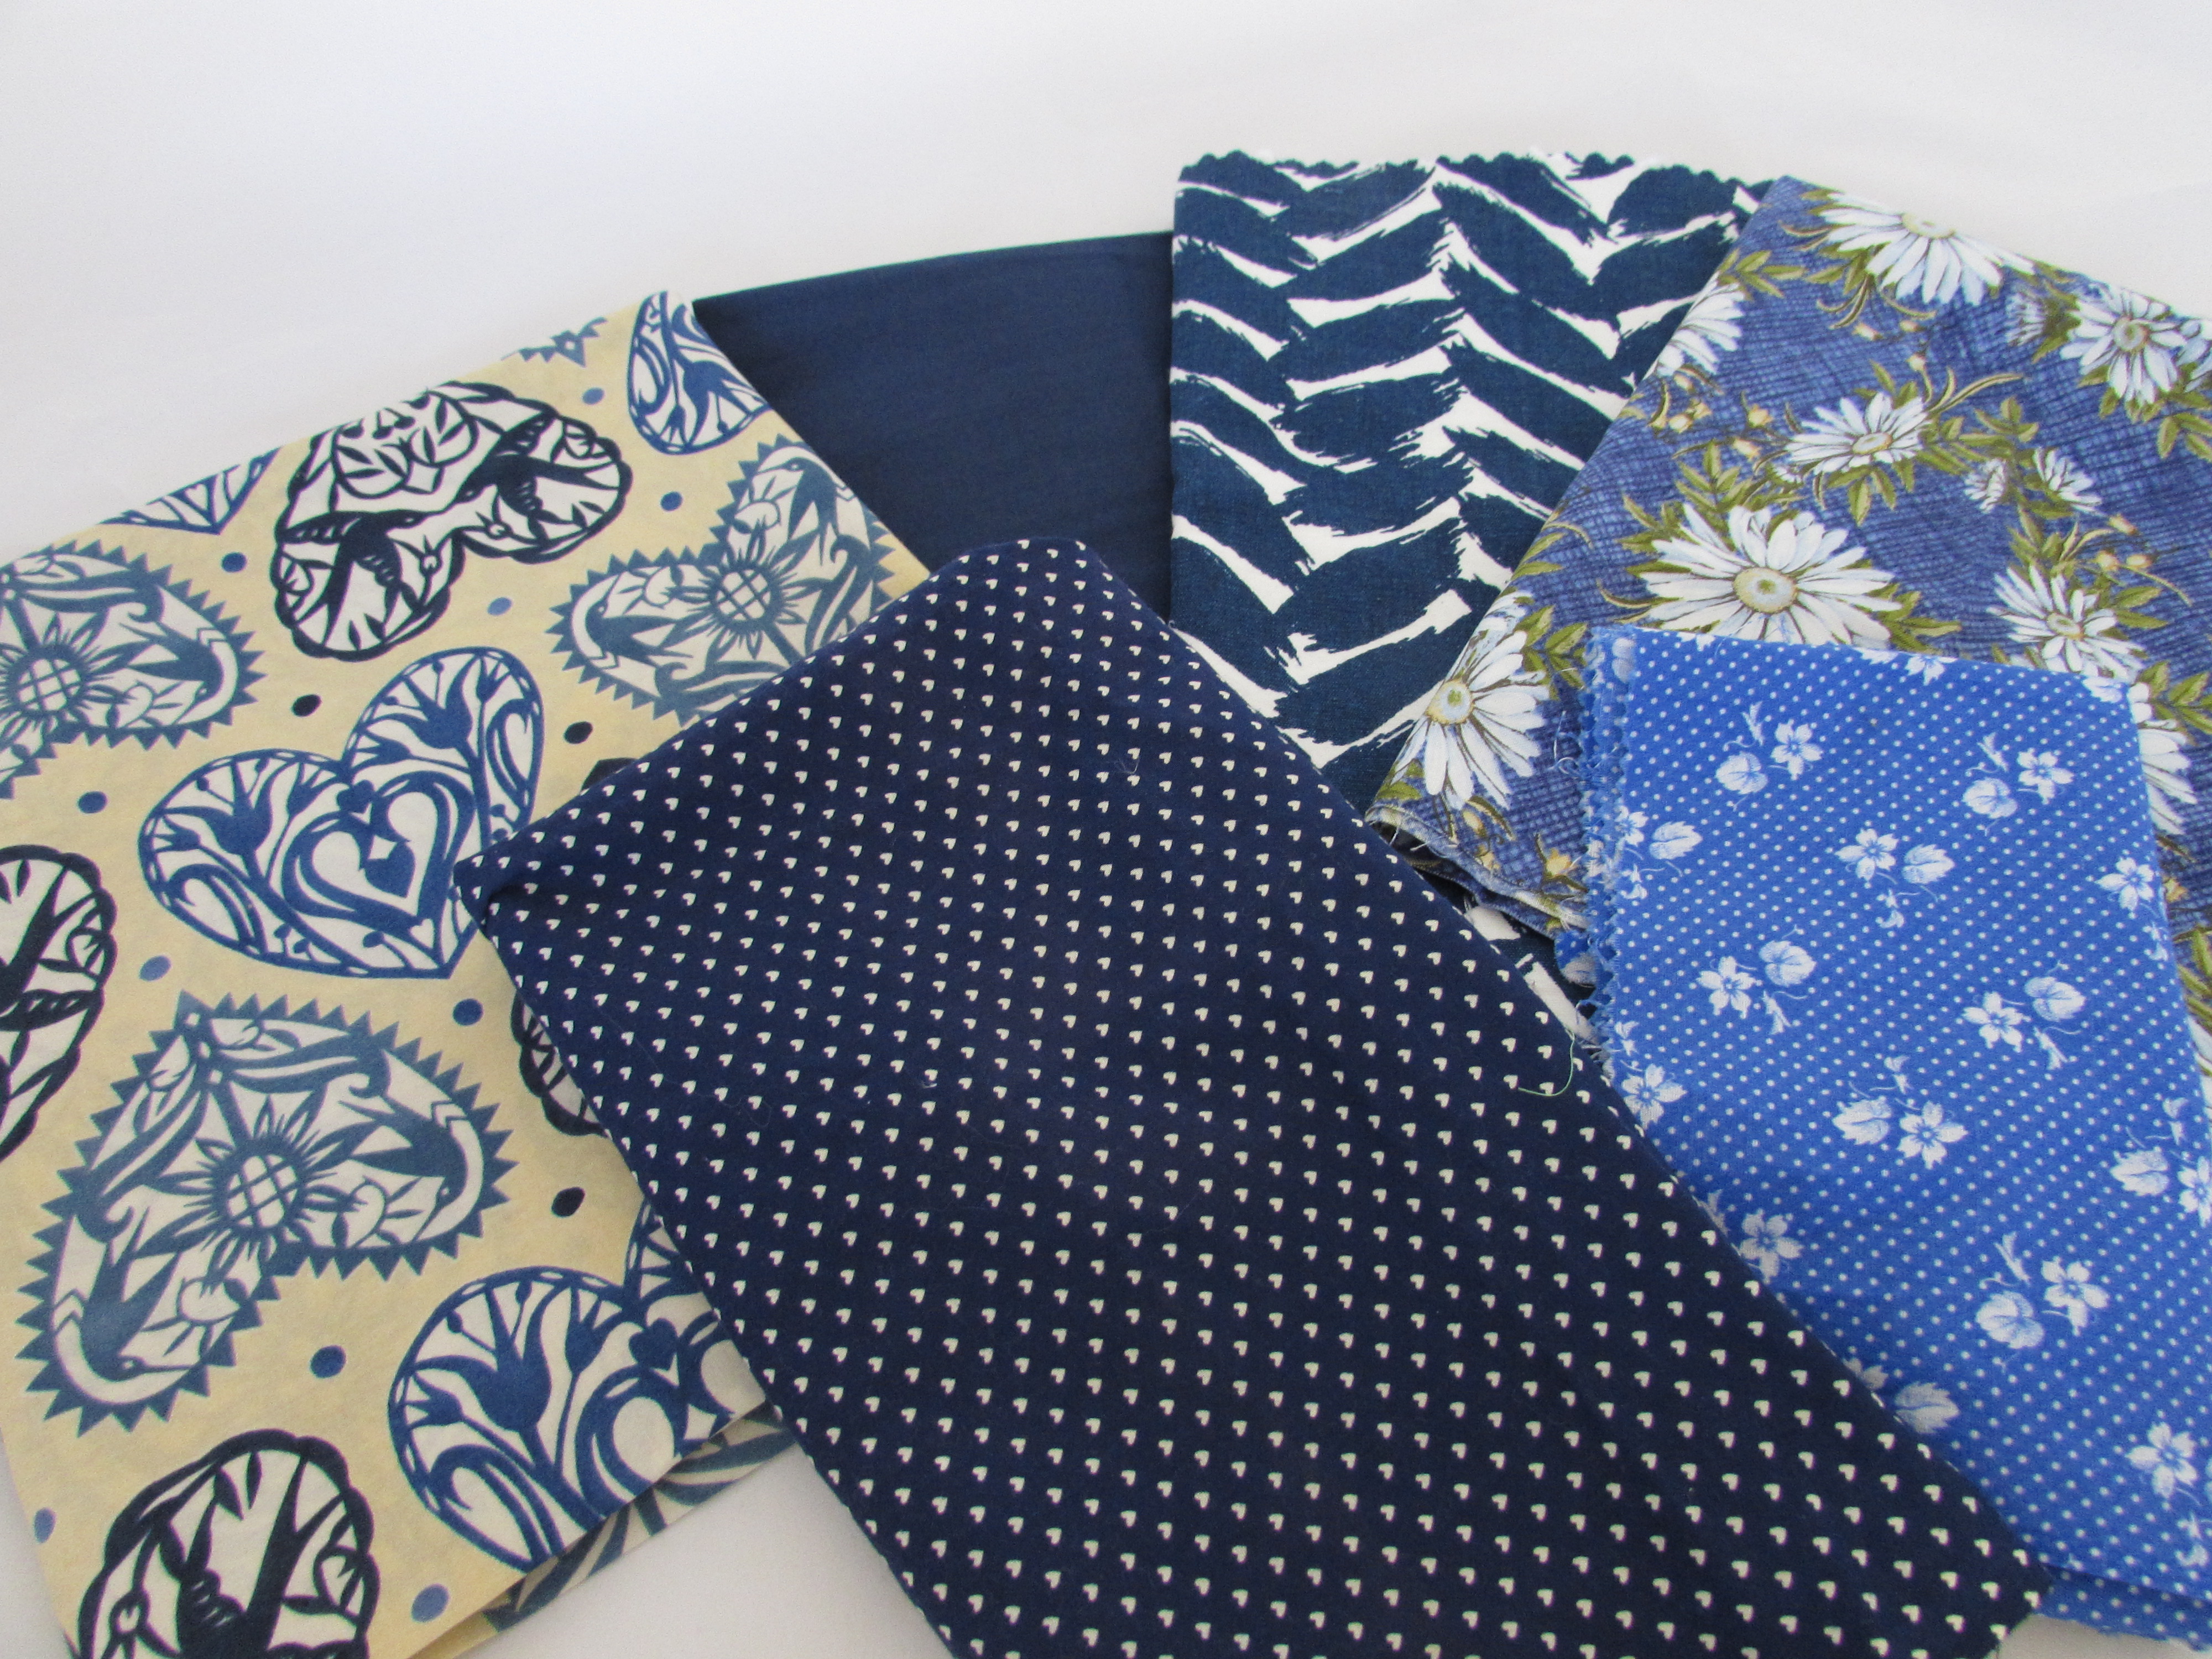
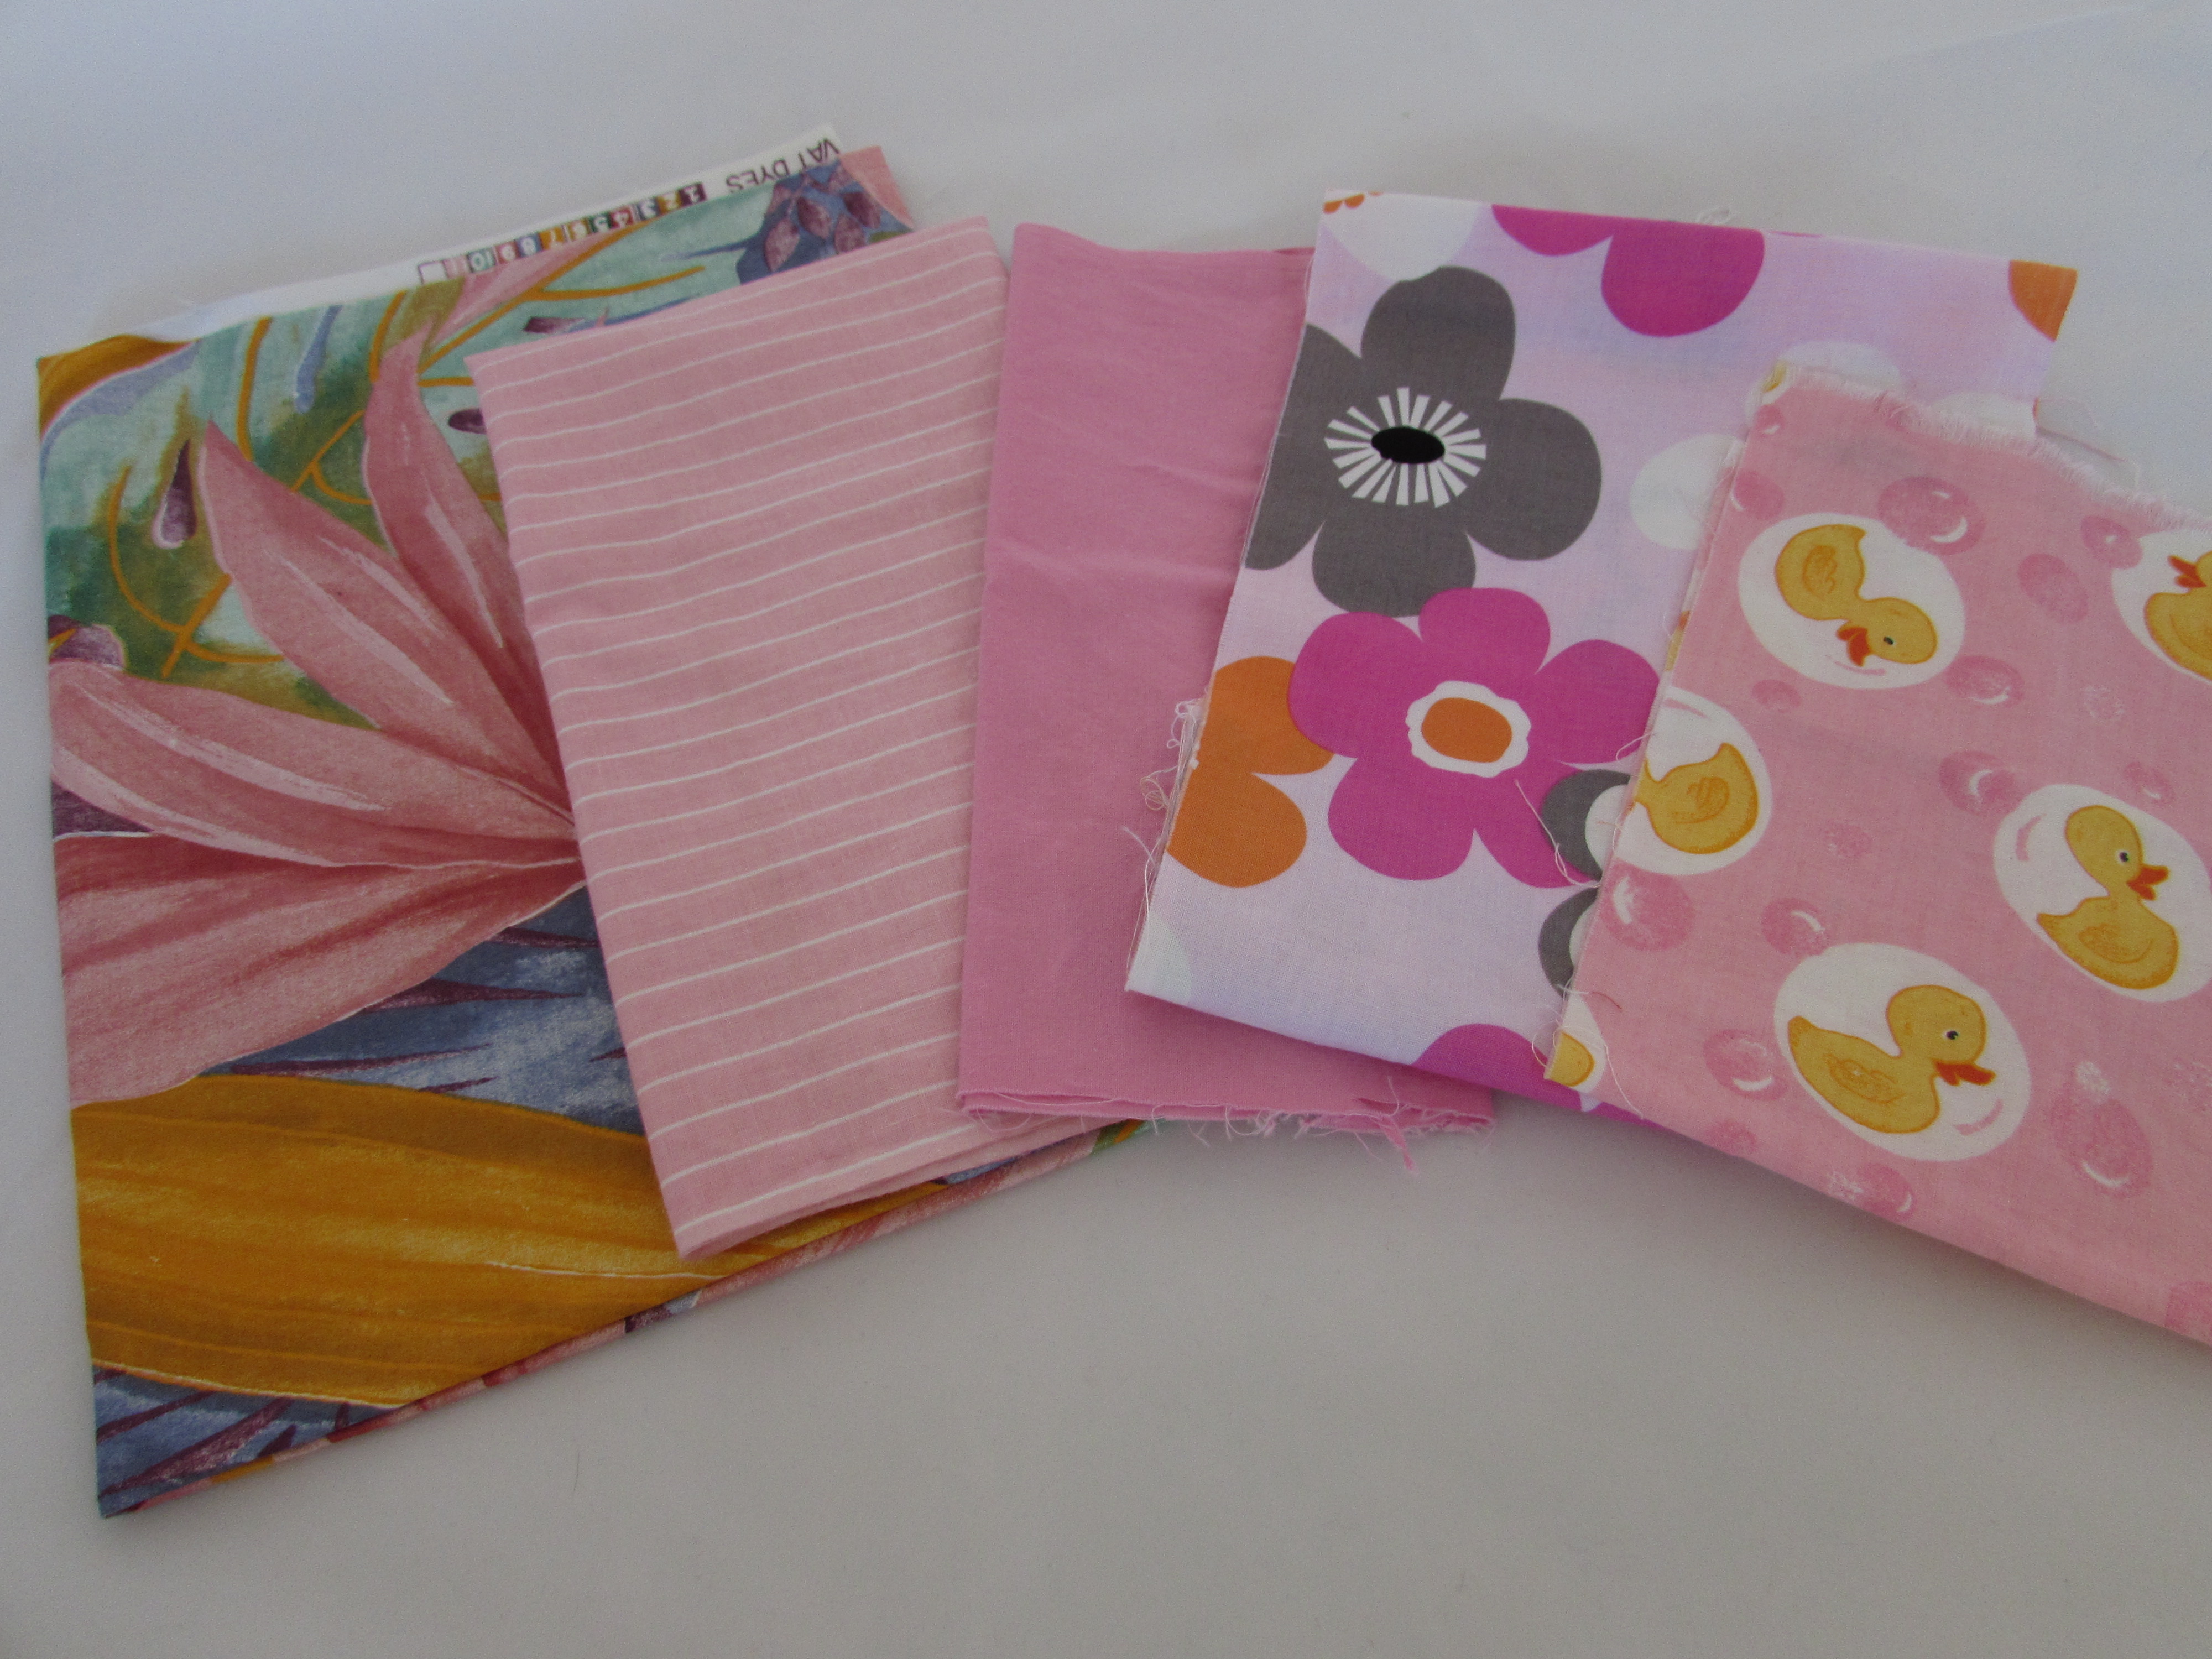
Here are a few of the gifts I wrapped using either holiday gift bags I made this fall or large pieces of fabric as wrapping paper. The gifts looked really cute under the tree.

The result!!

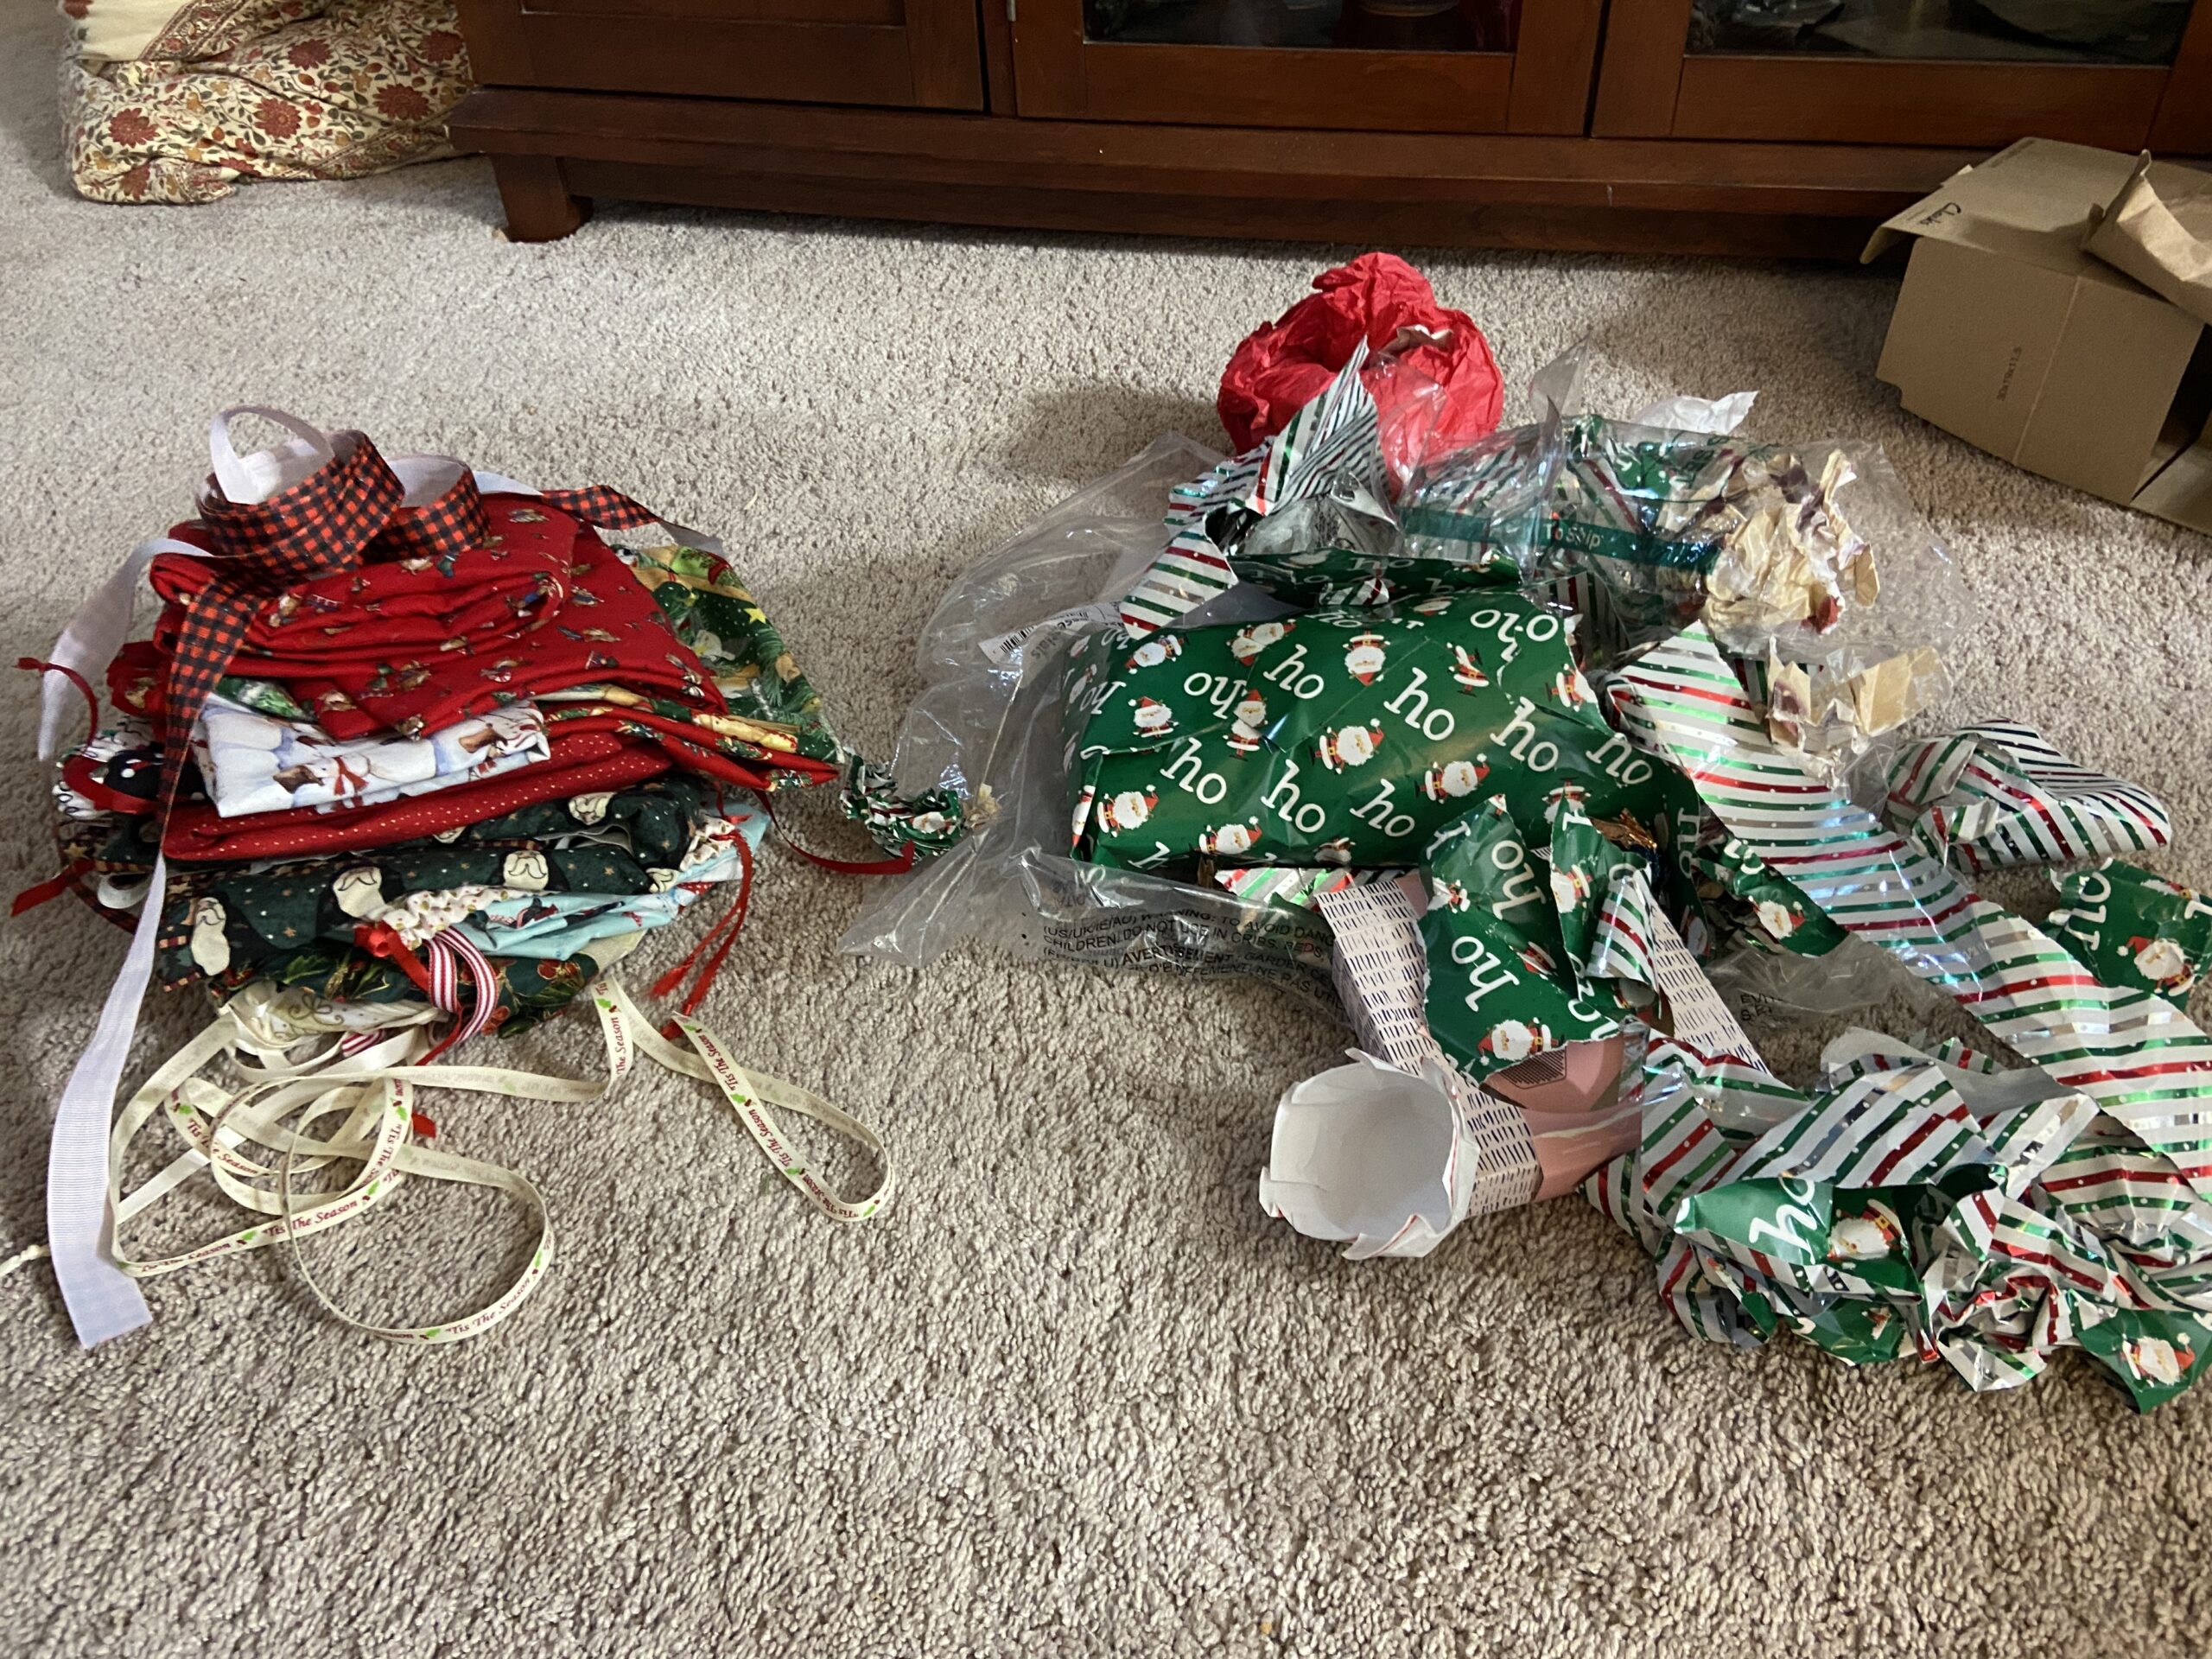
Check out the small pile of paper on the right. Often times we fill a large trash bag with paper on Christmas morning. Granted there were only the three of us here, but this is still a huge improvement. On the left you see the stack of bags, folded fabric and ribbons all ready for next year. Hopefully next year I will have more gift bags made so when my husband wraps his gifts he won’t have to use paper. At any rate, I call this a success.

Dairy Free Eclairs

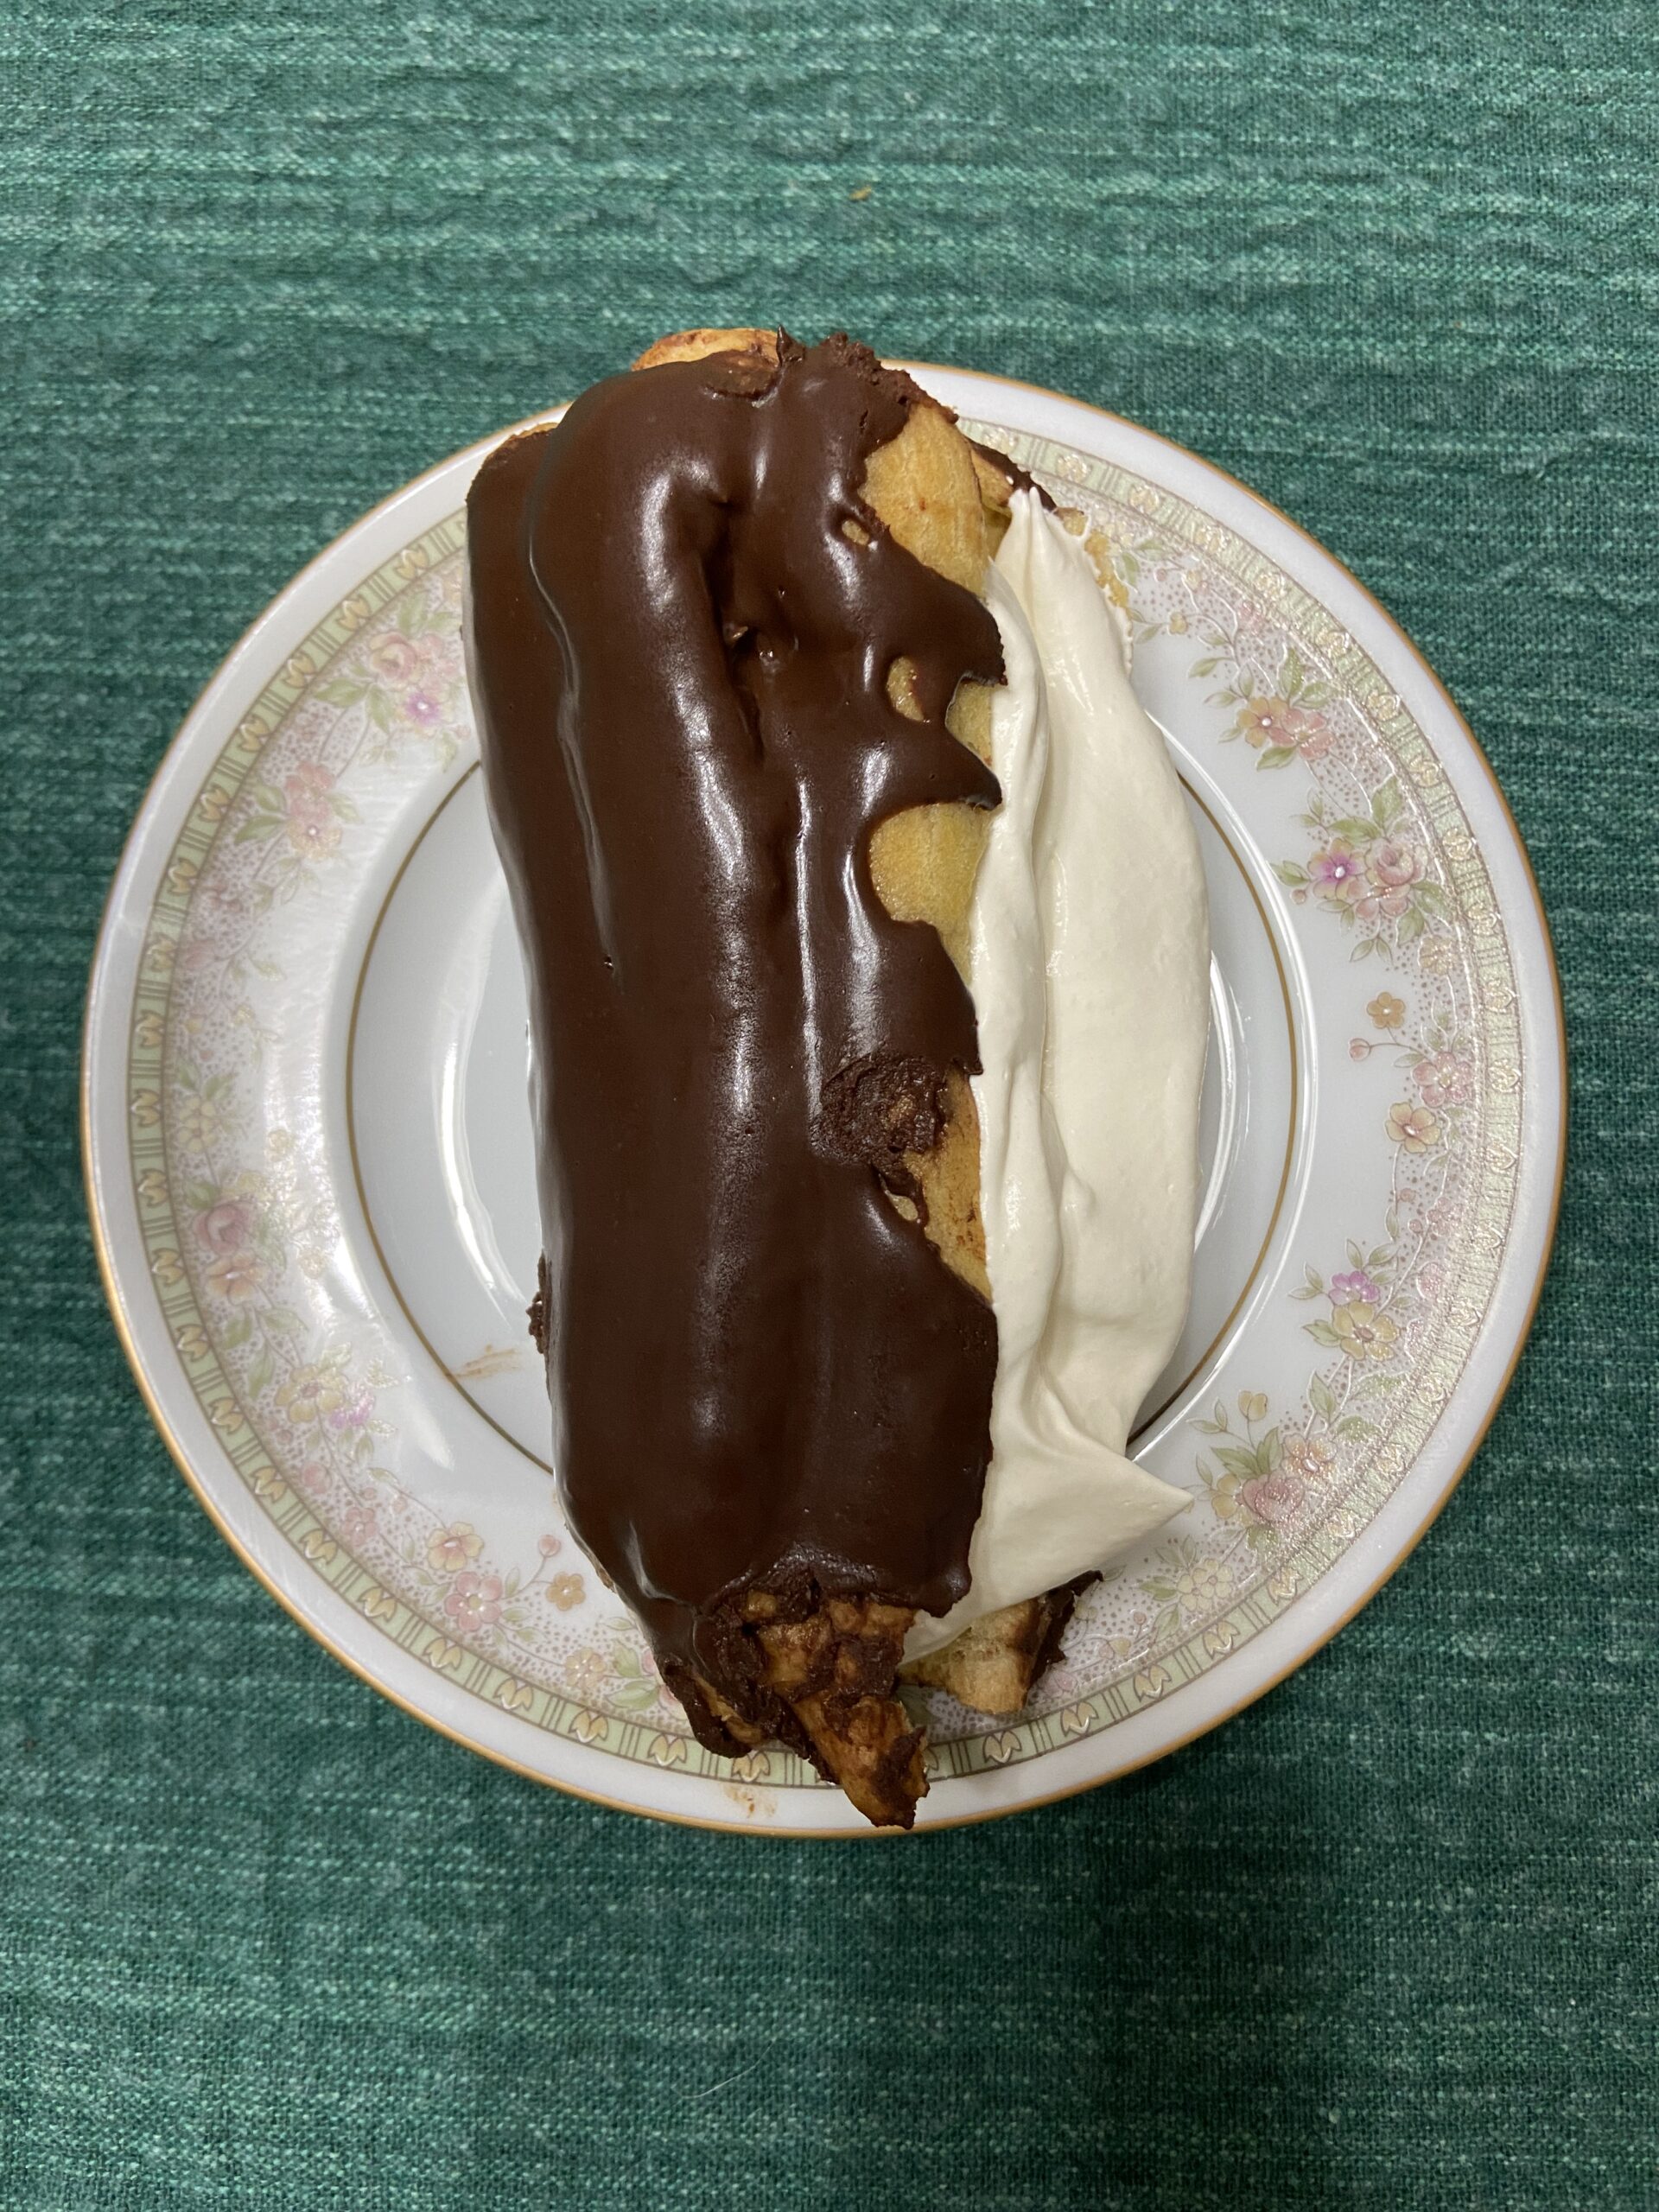
Ray was the baker for our Christmas dessert this year. He made these incredible eclairs. The ganache and the whipped cream filling were both dairy free. I was so impressed.

The week before Christmas the girls went to visit Santa. When asked what she wanted, little sister replied “a box with stripes and polka dots and a purple bow”. Santa told her ‘he would see what he could do’. These words from Santa so impressed A and she repeated them to me verbatim several times. She was focused on that box and even before her visit with Santa, she only asked for that exact box.

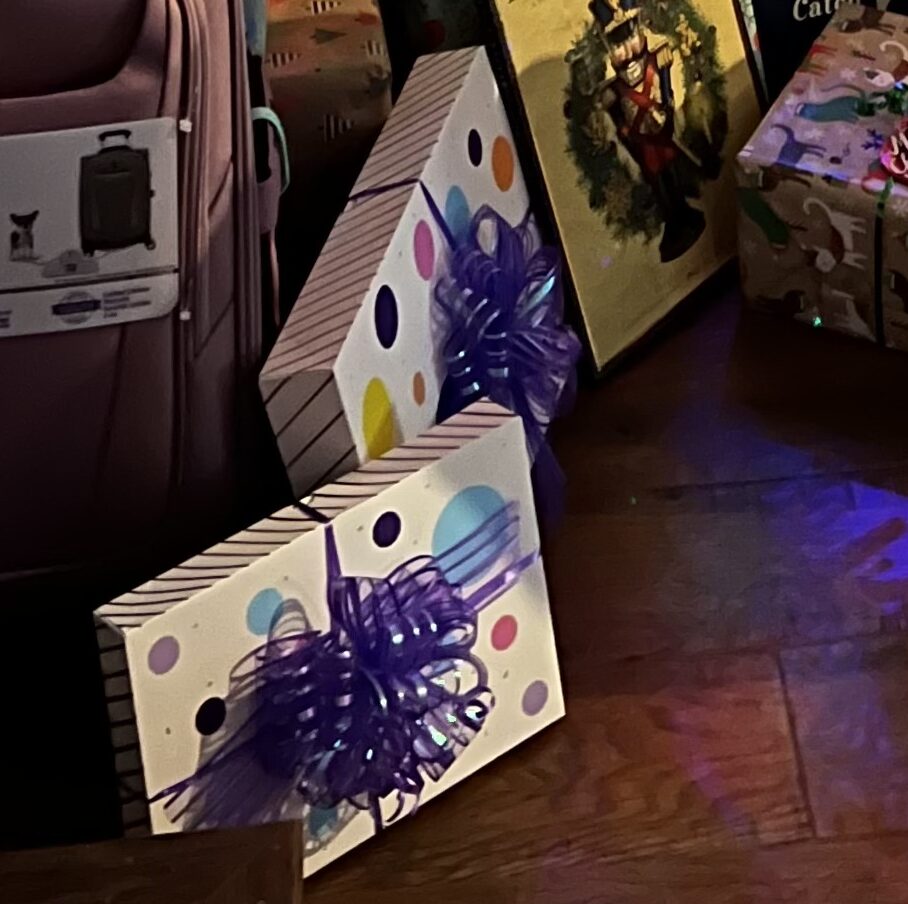
My daughter in law really wanted Santa to come through on his promise. Not finding any striped and polka dotted boxes, she made her own with stickers. I love this so much – making A’s Christmas wish come true. By the time they unwrapped these gifts on Christmas morning, little sister was so overwhelmed by everything that big sister had to open these for her. But I know she will remember that she got just the box she wanted.

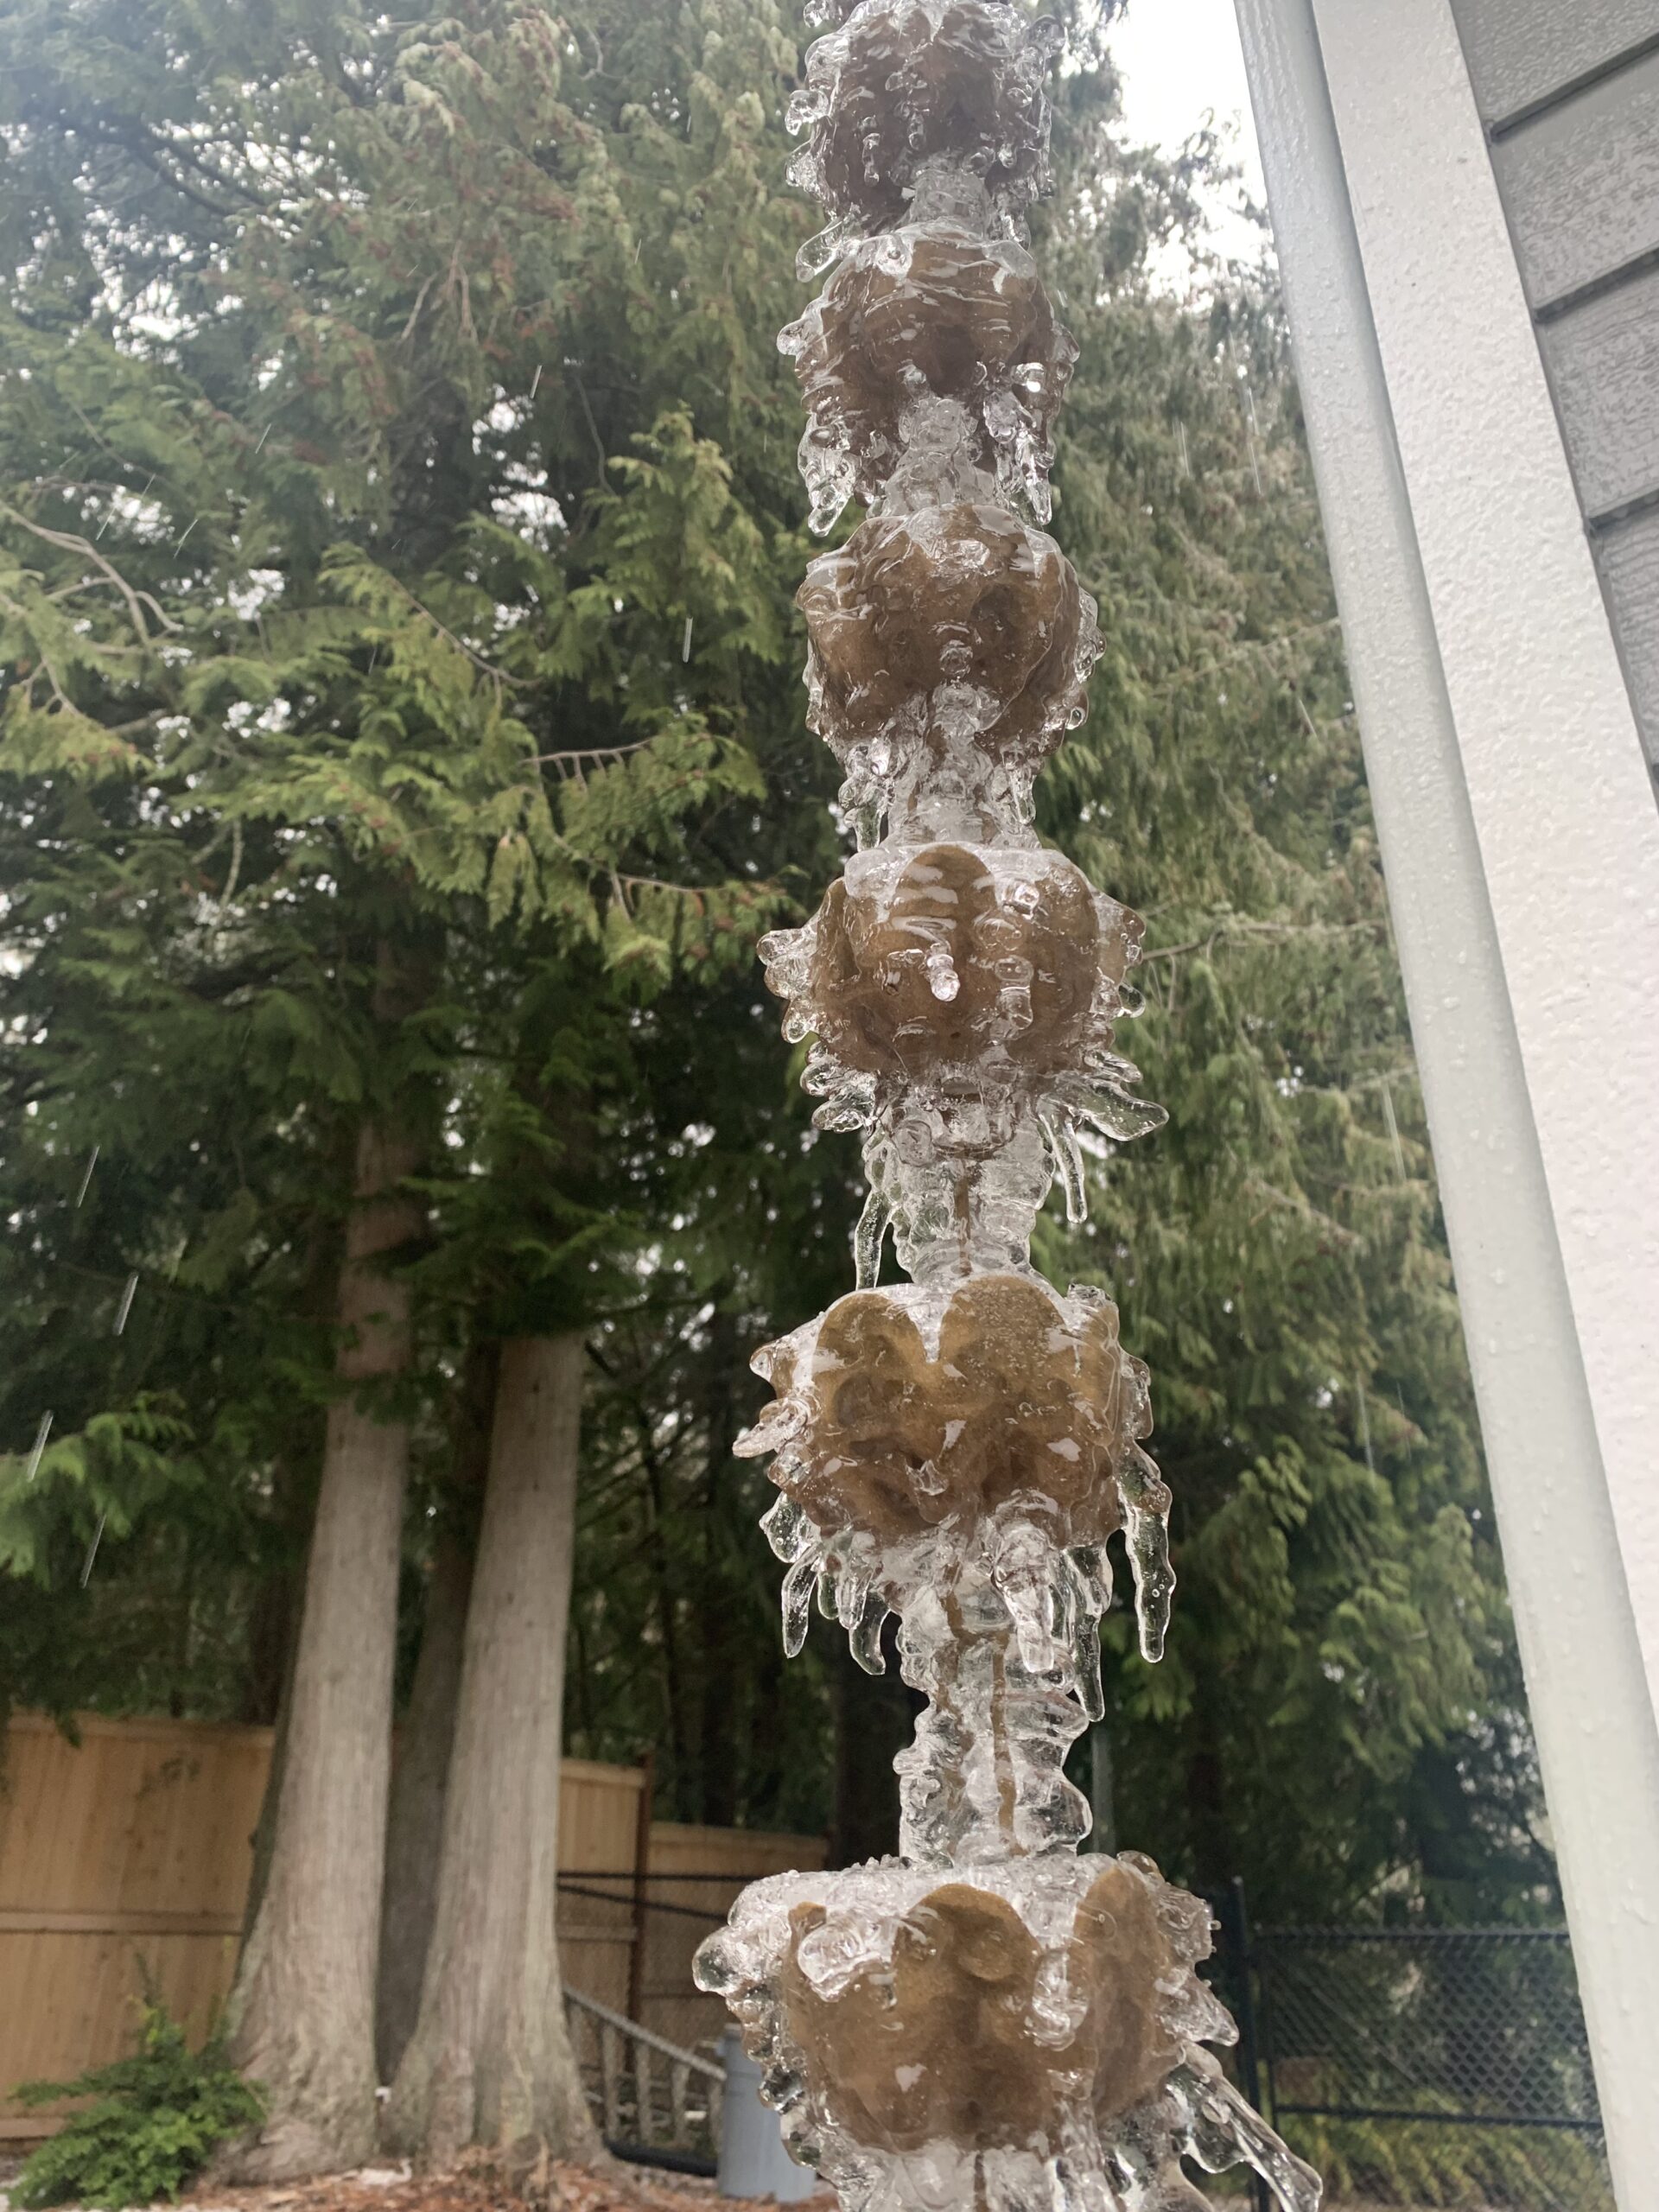
The weather has been fierce for much of the country lately. I am holding good thoughts for those who have been impacted by the tragic storms in the Northeast. Not comparable at all, but still interesting, was the ice storm that happened recently. My husband took this picture of our rain chain. Two days after this storm the temps climbed to 50 degrees and everything melted off.

Today I am meeting a girlfriend for breakfast. We were really good friends in the 1980’s. Somehow we lost track of each other but with the help of the internet I found her last year. We have been chatting on the phone regularly since then. She doesn’t live up here but happens to be visiting family about 40 miles from me. I am so excited to see her! We think it has been 30 years since we last were together. Off to get ready for my date!

Wishing everyone a year of joy, good health and loads of creativity in 2023!

Upcycling a Vintage Caftan

This post is picture heavy and contains just a bit of sewing related info so if you aren’t in the mood, I totally understand!  As you might already know, my son and his fiancé were married on Saturday.  As the parents of the groom, we hosted a rehearsal dinner on the Friday night before the wedding. The couple wanted a Mexican dinner which we had catered by a local Mexican restaurant.  I don’t usually do this but it worked out well for us.  I had so much going on and not cooking the meal myself was so helpful.

When my husband and I thought about the dinner, we really wanted to have it outdoors.  Our front yard is so pretty and very private because we live on rural property and don’t have neighbors close by.  Again, I went the simpler route and rented tables, chairs, dishes, flatware and wine glasses.  This really made for an easy party because we didn’t have to wash dishes afterward.  All that was required was to stack the dishes, glassware and flatware in restaurant style racks and they picked it up in the morning.  With the wedding the next day, it was great not to have to deal with lots of clean up that night.

The fun part was thinking about decorations.  My first thought was I needed two brightly colored table cloths and table runners for the center of each table.

1970’s Caftan

My frugal self sent me over to the thrift stores in town to hunt.  I didn’t find any table cloths but did find a fun vintage caftan.  I decided to use a harvest gold table cloth I already had and a red one belonging to my mom.

My thought was to utilize the stitching somehow by taking it apart and reassembling it.  I cut the bottom off, leaving a border of the green.  I hemmed it all the way around and that created one runner.  For the second runner, I cut a large swath of the solid fabric from the center of the dress.  Then I cut the sleeves off so I could use the decorated portion of the sleeves. The width of the second runner was determined by how wide the stitching was on the deconstructed sleeves. I attached one section of the decorative stitching to each end of the solid color fabric so it ran vertically on each end.  I did have to block the runners and starch them to get them to lay (mostly) flat.  These had been laundered and worn quite a bit so the fabric was not at all square.

The runners are different but coordinated.  (I didn’t take pictures of just the runners but this  sort of gives you an idea.

Here is the other one.

To finish things off, I potted little succulents in small clay pots gleaned from my garage and. my mother’s.  I added votive candles and small vases with Alstroemeria and dwarf Sunflowers. The vases are actually small pitchers I bought during a family vacation in Mexico a long time ago.  We also tucked in some lemon halves that had a large number of whole cloves inserted across the cut side because we read that it might repel the Yellowjackets.  (At this time of year, we often have yellow jackets and they are so annoying when we eat outdoors.  My husband put about 1/2 dozen open cans of cat food and tuna in strategic locations around the perimeter of the lawn and this proved to be a good distraction for the bees.  They were not a problem during the dinner). The lemons looked nice but I highly doubt their scent did much to help us.

Of course, way too much food!

The dinner was wonderful.

Toasting my son and his fiancé

We celebrated the bride and groom with toasts, laughter and great food.

Decorating the arbor on Saturday morning.

Saturday morning we all headed over to the venue (maybe ten miles from home) and got everything ready.  My husband built an arbor for the kids to stand in front of for the ceremony.  Now they will have it to put in their yard as a remembrance of their day.  The bride wanted it draped with soft, flowing tulle.  I found two colors at JoAnn’s and bought 15 yards of each the Eggnog and the light Peach colors.  My husband patiently draped and re-draped it as we all stood on the ground giving direction. (You can imagine, right??)

It was a breezy day which was nice and it made the tulle float a bit.

My daughter-in-law’s Jackie O look. She is so funny.

Saturday morning was really a fun family time.  Everyone was so excited about the wedding and just enjoying each other’s company.

The guys set up the chairs while we decorated the arbor.

This guy loves being a father!

My grand daughter had so much fun running around but we had to keep close track of her because there is a creek running through the property and a large pond as well.

Time for coffee and scones.

Once the arbor was set up and the chairs in place, all we had to do was place the tables where we wanted them.  Then the wedding coordinator and the caterers came and set the tables.  I wish I had a picture of this before the ceremony started.  I am sure the photographer got some though.  I will share them when we get to see them (likely a several weeks from now.) Spending the morning of the wedding day together getting things ready was so much fun.

I will share some wedding pictures in a separate post.  Everyone has gone back to their real lives.  The bride and groom are taking their honeymoon in May so they are back to work now.  My plan for this morning is to tackle some housecleaning.  It is a complete disaster!  Then I need to get back to work.  I received a box of fabric yesterday and there is another scheduled to arrive this afternoon so I have lots to do.  If you have been waiting for Carrie Bloomston’s new line, Wonder, it should be listed by tomorrow, maybe late this afternoon if I can get to it!  It is just fantastic.

Linking to my favorites!  Including a new link up called Brag About Your Beauties, hosted by Michelle of From Bolt to Beauty. Come take a look – there will surely be something to inspire you!


Stash Post

It has been a while since I wrote a stash post.  But a few weeks ago, a friend of mine kindly gave me a large collection of fabric. It was in mid-February when we were in the thick of making doll quilts for A Doll Like Me.  My friend, Susan, emailed me and said this was a particularly busy time for her so she couldn’t make any doll quilts.  However, she had a lot of fabric that would be perfect for this sort of project. She asked if I would like to have the fabric. Who could say no to that?

There were two large bags of fabric and another bag of patterns.  The patterns were for making doll clothes for 18″ dolls, the same size as those made by A Doll Like Me.  Some of the fabric was not right for children’s quilts or doll clothes so I carefully sorted it and what I didn’t think I would actually use was donated to a local thrift shop. But there was much that I kept!

These  bandana prints are large pieces of yardage.  I think a whole cloth quilt would be super cute with these and there is also plenty to use to back a number of little quilts.

Susan has a daughter who is Julia’s age and I could tell that many of these pieces had been used to make clothes and costumes for Sarah (she is really into ballet and performs a lot.)

These pieces are both minky and large enough to back a few doll quilts, making them extra cuddly. It will be a fun project to try because I have’t worked with minky before.  The smaller size of a doll quilt makes for a manageable project to attempt. It was so kind of Susan to gift all of this to me and I have it washed, folded and waiting for the next project for A Doll Like Me.

Another bit of fabric I want to share was found at a local thrift store.  When  poking around at a thrift shop, I often take a quick look at the clothing to see if anything appeals to me from a fabric standpoint.  You never know what you will find! A few weeks ago I saw this hand made blouse.  It isn’t something I would wear but I really like the fabric which features the work of George Seurat, a French painter from the late 1800’s.

A Sunday on La Grande Jatte, by George Seurat

The painting featured in the main fabric is called A Sunday on La Grande Jatte and was painted using Seurat’s well known technique, Pointellism, a process of creating with very small dots of different colors which then read as a solid color when viewed. This work of art hangs in the Art Institute of Chicago and I loved it when we visited there several years ago. I have a little print of it hanging in my sewing room. So…. when I saw the shirt I decided to upcycle it. 

After a quick wash, I careful cut it apart and ended up with this little collection of fabric based on Seurat’s work. It made me feel bad to take it apart after someone put out the effort to sew a shirt with it, but I knew I wouldn’t wear it.  As quilters often do, I cut it apart so I could sew it back together and make something unique.  I did a quick search on-line to try and figure out who printed the fabric (no selvages were available) and was not successful.  I am looking forward to deciding how to use this though. I think I will add some solids and then what???  There is likely enough for a table topper or a mini. I am sure I will come up with something. It was a such great find for $2.00.

I hope you will be back on Wednesday when I post the Blogger Bundle for March.  Curated by Yvonne Fuchs of Quilting Jetgirl, it does not disappoint!!!

Linking to several blogs – check them out at the top of the page, under Link Ups.


Scrappy Rag Rug

img_1495

Last month I started knitting a rag rug from my bin of scrappy strips. What a fun project. Using a  tutorial from Crazy Mom Quilts, I cast on about 35 stitches (I can’t remember for sure) and used size 19 needles that were 13 inches long.

img_1537

This worked well though once the rug got going, I wished I had longer needles. I was really scrunching the project when I got to the end of a row. It was a bit awkward, partly due to using such fat knitting needles and maybe even more, the fact that I rarely knit anything. I really enjoyed crafting in a way other than sewing.

This is a tiny rug, finishing at 13″ x 22″. It will be used in the bathroom in our Downieville house. This bathroom is very tiny (maybe six feet by seven feet?) so this will look really cute in front of the sink.

img_8118

I pulled the knots (where I joined one strip to the next) to the back of the rug. I am not sure if I should trim the strands to  be closer to the knot or if it even matters. The rug feels really nice, sort of spongy, when I stand on it. When I first started, I was using strips that were anywhere from WOF (width of fabric) to about 15 inches long. The shorter strands started to annoy me as it made for more knots to deal with. Eventually, I restricted myself to longer strips that were WOF. I actually used every long strip I had in the bin which is nice. It is amazing to look at the reduction of strips in the bin. So many strips went into this project, making it a great scrap buster. Lots of the strips I had saved were 2 1/2 inches wide and I cut them in half so I was knitting with 1 1/4″ wide strips. As I knitted, I would fold the strip in half, wrong sides together, so I would end up with the “good side” of the fabric showing, rather than the inside. I didn’t work too hard at this for the solids (since it didn’t really matter which side showed) but if it was a print I would try to keep the good side showing.

img_8119

I stopped knitting when I ran out of strips. I thought about cutting some from yardage so I could continue but that seemed silly (creating scraps from yardage??) Honestly, I am kind of sad to be finished with this because it was a nice evening project. I will let the strips build up again, and you know they will,  because then I can make another one. 🙂

I am not sure I will write another post this week, so I want to wish all of the readers in the US a wonderful Thanksgiving.  And to the readers outside of the US, I wish you a week of peace and joy as well.  Happy Thanksgiving.

the-gratitude-sale

Finally, remember that this week there is a wonderful event going on over at Mari’s site, The Academic Quilter.  I hope you will check it out – Mari is doing a HUGE destash and donating all proceeds to one of three charities. I did some shopping this morning. She is a generous soul and I love the way she structured this to benefit both the buyer and the non-profit.


craftsy-black-friday

Finally – Craftsy has gone all out for Black Friday this year. Beginning on Thursday, 11/24/16 classes are $17.99 each. Fabric and notions are all on sale as well. I am quite curious about the Boundless line of solids. I took a look and the prices are amazing. Solids, in a rainbow of thirty different colors, are available in pre-cuts such as layer cakes and jelly rolls, as well as yardage.

This is an affiliate link, meaning if you make a purchase after clicking over from my blog, I will receive a stipend.

On Gratitude

Hi Everyone!  Two posts in as many days. How about that?

I have recently started reading Yvonne’s blog over at Quilting Jetgirl. She is a really talented quilter and her blog is fun to read. She has begun a link up on Thursdays that she calls Thankful Thursdays. This week she has a great post about the inspirational quilters from Gees Bend that recently spoke at Quilt Con. It was really an interesting read. I think it is a timely reminder to focus on what we are grateful for. My last post was a bit of a downer because I recently finished a quilt and was not so thrilled with the final product. Rather than point out the nice things such as the amazing, hand dyed fabric that I used as the center accent fabrics (which I won from the monthly giveaway sponsored by Angela on soscrappy.com!) or the overall look of the quilt, all I could see was the less than perfect quilting I had done. Way too negative.

So this post is a reminder for me to remain mindful of the positive. This week I am filled with gratitude for the amazing spring blossoms that I have in my garden. We are having a very early spring – it has been unseasonably warm here in CA while the rest of the world is enduring a very harsh winter.

My peach tree is blossoming. Crazy early and I am hoping we will still get peaches. Hard to say with the blossoms coming about in February. Either way, it looks lovely.

image

Daffodils and primroses are in bloom as well.

006

004

Hard to believe how the climate can be so incredibly opposite from one side of the country to the other. The silver lining to a crazy warm winter are these blossoms that are popping up in my yard. Hope the eastern half of the world begins to thaw soon.

I had lots of finishes this week. I started replenishing the little clothesline/clothespin bags that I sell on Etsy. I was almost sold out (it is warm enough to use a clothesline in parts of the country!) This week I made them with upcycled denim jeans that I thrifted. They came together so quickly compared to the ones that I have made with burlap. (Burlap can be tricky to work with.)

image

imageAnd now a polka dotted version.

image


imageNice to add a few new items to my Etsy shop.

Also finished up the February Row for my RSC15 quilt. I am following along with Mari over at Academic Quilter on her Classic Stitches Row Quilt. She should be releasing the next block for March on Tuesday of next week. Looking forward to seeing what she has planned as well as what color Angela has picked for March.  For February Mari did a tutorial on these little heart blocks. I did 6 inch blocks. They were very simple to piece.

image

Here they are with the broken dishes blocks that we did for the January row.

image

They look cute side by side like this. Tempting as it is, I won’t stitch any rows together until I see what the others look like.

Hope you are all finding reasons to feel grateful. Some days you have to look deeper to figure it out but there is always, always something. Thanks to Yvonne for the reminder. Leave me a comment on gratitude. I would love to fill the page with positive thoughts. 🙂

Linking to Thankful Thursday and Sarah at Confessions of a Fabric Addict, as well as TGIFF.


Two Down and One to Go

Yay!! Got my second UFO of three finished up this week. Completing these three quilts is on my list of 2015 goals. Going well so far. I’m very glad to be done quilting this one. It didn’t take long either. I don’t know what the deal is. I think I get bored about 1/2 way through the quilting process. It looks great though. It was a bit narrow so I added a green border to each long side for width.

IMG_20150128_2830To quilt it I free motioned large, loopy flowers all over the top. They reminded me of the flowers girls would draw in the margins of the notebook when you are supposed to be taking notes in junior high but your mind is wandering. Anyway, I mean I’m pretty sure I saw the other girls doing this…..

IMG_20150128_2832

Oddly enough, the flowers also brought to mind a weird memory of this PE teacher I had when I was probably 8 or 9 years old (so we are talking 1968 or 1969 here – hippy days). I went to a parochial school through 8th grade. Mostly we had nuns for teachers and usually the classroom teacher/nun was also your PE teacher. But for a while, we had a young woman that as our PE teacher.  I bet she wasn’t more than 21 or 22 and I thought she was SOOO cool. For one thing, she wasn’t a nun and she was young. (To me, the nuns seemed old no matter their age since I couldn’t see their hair.) For another, her name was, get this…. Flower!! Looking back, I’m guessing that wasn’t her legal name but that was what we called her.  Shocking, right? It sure was to me. Ahh… the 1960’s.

IMG_20150128_2833I also quilted flowers along the gray borders. Once I got to the green, I switched to a medium sized leaf. Kind of wish I had switched to green thread when I quilted that portion. Oh well. I also attached the binding by machine on both front and back sides. Not sure I like that as well but I gave it a try.

In my on-going resolve to upcycle, I used a duvet cover for the backing. I found it at a thrift store for $7.00 and it is huge. I will easily back a couple a quilts with it. One side of the duvet cover is a green stripe and the other is a green floral print. I had the green binding sitting in my stash so this quilt is all scrappy and used a good portion of my stash. The only piece I purchased directly for this project is the gray print that I sashed the blocks with. Not too shabby.

IMG_20150128_2836

Trying to start the new year out right with better scrap management habits. (Wow, “scrap management” sounds so quilty-dorky!) But really. When I trimmed the excess off around the perimeter of the quilt I actually trimmed the scrap into usable pieces. This is definitely a first for me. Three inch and 2 inch strips plus a stack charm squares!! It hardly took any extra time and it’s done.

IMG_20150126_2824Not exactly sure what I will work on next. I want to do some piecing. I need a break from quilting for a while.  I have some blocks that have been sitting around for a while. I don’t love them, know what I mean? I think I am going to create a quilt to donate to a fundraiser at my daughter’s middle school.

20141006_1774The lighting on this picture is horrible. (I took it at night with my phone.) I think I will set the blocks on point and sash them with black. I have a cute black and white print for the backing and maybe I can find a jewel toned batik to use for a border and binding. Hopefully that will jazz this up a bit.

Linking to Freemotion at the River, Lorna at Sew Fresh Quilts and Amanda Jean at Crazy Mom Quilts. Links to these amazing ladies are found at the top of the page under Link Ups.

Will also be linking this post to A Lovely Year of Finishes as this completes my January goal.  Hurray for that – three days before month end.


A Vintage Week

The week has come and gone. It started with a Monday holiday (Martin Luther King’s birthday) which always makes the rest of the week go by quickly. Monday holidays also cause me to remain in a state of confusion for the rest of the week, wondering exactly what day it is. At any rate, it’s nice to be looking toward the weekend.

I was focused on my Etsy shop this week so not a lot of regular quilting was accomplished. I had two custom orders which are finished and shipped off. I also decided to cut into a pile of vintage sheets that I have been collecting and get those listed in the shop. For the past several months I have had my eye out for vintage sheets whenever I was in a thrift store. As the pile grew, it became clear that I don’t need to keep all of it. Sheets are large! I decided to cut some into fat quarters to list.

There are some really pretty sheets to be found.

IMG_20150123_2797The florals are so sweet and feminine. I try to look for flat sheets as opposed to fitted. The fitted sheets can be a bit worn but the flat sheets don’t take the abuse and are often in great condition. Vintage sheets are almost always 50/50, cotton and polyester. I haven’t quilted with them yet but have a plan in mind. Jeni Baker of In Color Order has posted about some really cute projects she has done with vintage sheets and I am using her work as inspiration. I like her use of stripes with the florals. I haven’t found any stripes yet but my eyes are peeled. They will show up!

IMG_20150123_2800The three in the picture above are my favorites so far. Especially the middle one. The colors are just gorgeous. If you’re interested in working with any of these, check my shop. I bundled a few sets but if you see colors you want I am happy to create a set of the pieces you like. This week I sold a few sets to a young woman who is making bunting flags for her wedding this coming spring. The venue is a rustic barn and I think the flags will be adorable. Hoping she will send me a picture when she gets the buntings finished up.

Moving off topic a bit, I found a pile of vintage magazines this week when I was in a thrift store. They are a blast to read. Not sure what I want to do with them but am so enjoying looking through them.

Kind of a risque cover for 1965!

IMG_20150122_2774

Take a look at the upper right corner of the Look magazine shown below. A “hot dog” diet? For real? I couldn’t help but laugh. Just in case you want to try it, the article suggests that you eat three hot dogs per day with all the trimmings (mustard, onion, relish and bun). This diet allows you to add a beer or coffee and suggests you add a glass of tomato juice or a piece of fruit for added nutrients.  They estimated that this would be equal to about 900 calories a day and if you follow this diet for a week, you should drop a pound per day. 900 calories a day? Three hotdogs for seven days?? Ugh, 21 hotdogs? Nutritional insanity circa 1963!

IMG_20150122_2775Check out these ads for cigarettes. Print ads for cigarettes were banned in January of 1971 but wow, prior to that they were on every other page.  Love this one. So glamorous. Except, why does he get to go swimming and she has to settle for wading and wearing jeans and a long sleeved shirt? No fair.

IMG_20150122_2777

I don’t think I like the way this guy is checking her out….

IMG_20150122_2778

This guy is the epitome of sophistication.

IMG_20150122_2776

Finally, I leave you with this chart showing average income and spending for a single income family of four in 1973. I found this interesting. (My apologies for the crummy copy. I was being lazy so I took a picture of the page rather than scanning it.)

IMG_20150122_2771Have a great weekend everyone!!

Linking to WIDTW at Sew Stitching Cute and Molli Sparkles Sunday Stash.


Didn’t Take Long!

Ahhhh, personal weakness! Remember the post I wrote at the end of the year where I laid out a few quilting goals for the upcoming year? My second goal on the list was to sew from my stash and avoid buying any new fabric for a while. Hmmm…. how does one really define “a while”?  For me, I am thinking that means a week. That is exactly how long my “fabric fast” lasted. Ugh!! Where is my will power? Ok, it isn’t that bad. Totally explainable and I hardly spent any money.

There is a local shop called Humble Fabric and Crafts located in Grass Valley. A very sweet woman owns it and she specializes in “pre-owned” fabric. She scours estate sales and sometimes people will bring in pieces they no longer want and receive credit for their fabric to be spent on others’ fabric. Another example of recycling that makes total sense. Really it is a great idea and helps contain the cost of sewing. I usually go to this shop for smaller pieces or just to look for unusual fabric. You won’t find a collection or a new release here. But, it is a mecca for the bargain hunting seamstress (which would be me). Roxy sells the smaller pieces (less than a yard) by the ounce. The price ranges from 30 to 60 cents per ounce. Weighing one yard of quilting cotton I usually end up with 4 or 5 ounces. Do the math and you’ll see this is a steal. I am on her email list and she sent out a note saying that she is moving the shop to a bigger location and was going to have a sale. What? A sale on fabric that is already a total bargain? All of the ‘pre-owned’ fabric was 1/2 off. Crazy. How could I resist? I didn’t even try to talk myself out of it. I did think to myself, be reasonable, you don’t even need anything, etc.  I was pretty restrained, if I do say so myself!  Here are some of the pieces I picked up.

20150112_2733

Some were tiny and others were multiple yards.

20150112_2734


The fabric on the far left features a tropical floral, including Birds of Paradise. It is a home dec cotton and I will use it for the Chemex Warmers that I sell in my Etsy shop.

20150112_2736


This is a Marimekko print that I think will end up as the back of a child’s quilt. I love the bold colors. The large scale print will be fun to use as a backing. It will need to be framed with another fabric as this piece isn’t quite large enough. I think I will use a green polka dot that I already have. The dots are really big so it should work well with this.

Finally I also grabbed a large piece of cotton batting that was 36″ by 108″. Perfect for the Etsy projects that I make.

OK, so I didn’t last but a week. That doesn’t mean that I am going to drop the goal that I had set. Kind of like when you start a diet and then have dessert the next day? I wouldn’t know, but you hear of that sort of thing happening….  Just have to re-focus and start over. So, I haven’t bought any fabric since January 8th.  Now how long can I last?  Hoping for more than a week!

Linking to Sunday Stash at Molli Sparkles as well as Let’s Bee Social at Sew Fresh Quilts


Mini Design Board

I currently have a very fancy, high tech design wall consisting of a large piece of thick cardboard covered in white flannel.  I then used high tech push pins to hang it on the wall.  It works great but is across the room from the sewing machine. There are times when I am playing with piecing a block and want to then carry the block to the sewing machine and piece it in the order. it is laid out. I haven’t always been very successful in stacking the pieces and then sewing them together. Better for me to have it laid out in front of me. So I made this little guy.

20141022_1970

To illustrate the ease of this little project, I assembled this while talkiing to one of my kids this morning. I love talking to my boys on the phone (none of them live at home or we would talk in person.)  🙂   Today my youngest called me to talk about his rotten day at work. He is working his first job out of college and quickly learning the joys of managing a large team.  During the 26 minute conversation I made this little design board.  I had to put him on speaker so I had my hands free. The pictures aren’t great but just in case they are of any help to you. This is how I did it.

First took some scraps of foam core board (remember I recycle everything and have a bag of scraps from my daughter’s school projects) and taped them together.  It was roughly square which is good enough for non-perfectionist me.

20141022_1965

I found a piece of batting that was just a bit larger than the square. Using hot glue, I pulled the edges tightly to the back and glued them down. I did trim the bulk off of the corners to minimize the fabric in the corner fold.

20141022_1966Like I said, I am not a perfectionist so I didn’t trim the batting to be straight.  It doesn’t matter. Once all four edges are glued down you are done. Hmmm, if I get fancy, I might hot glue a square piece of fabric over the back, covering the raw edges and the taped board. Just thought of that!

20141022_1968Flip it over and you’re good to go.

20141022_1969The board measures 14 x 14″. I can prop it up right by the machine to piece a block. Here is another orange block for the Rainbow Scrap Challenge I have been working on. Look closely.  See the error in this layout? You would think with my handy new board this wouldn’t have happened! Didn’t catch it till after I sewed it together.  Dang it.  I hate ripping a seam out.   😉

Linking to Lets Bee Social and Needle and Thread Thursday. Links to these sites are up at the top of the page under Link Ups.

Crazy Smokey Days

I don’t know how much this makes the news across the country but Northern California is basically on fire.  It is horrendous. We had a local fire about a mile from my house two weeks ago.  It burned 350 acres and caused a lot of local damage.  Before this we had a fire  up at Yosemite.  It burned 4,700 acres and is just about contained.  Along with this fire is the Happy Camp fire (the name is sort of ironic.) Burning still, it has consumed 132,000 acres.  It is in a wilderness area so it hasn’t burned many structures. Closer to my home, we are dealing with the King Fire.  It is burning near the town of Placerville which is about an hour from my house.  But as the crow flies, it is much closer. This fire is now burning just over 92,000 acres. There are over 7,000 firefighters working it and it is only 35% contained as I write this.  The fire started over a week ago and has consumed 65 structures so far. It is a horrific fire.  The worst part?  It was started by an arsonist.  The suspect has been arrested. Just unimaginable. Crazy, smokey, frustrating times.

Here is a picture of the smoke we are dealing with.  This was taken this morning by my hub.

smoke from King fireLuckily this afternoon a breeze came through and cleared the smoke for a while.  I am sure it will settle back in by morning.  They closed a number of schools on Monday.  For today and tomorrow they decided to keep the kids indoors and cancel after school activities.  It is completely unhealthy to be outside. The good news is that we have a 60% chance for rain on Thursday.  We are so excited!  Doing a rain dance for sure. Keep your fingers crossed for us.  We need to get the fires contained and we desperately need some (a lot, a lot, a lot!) of rain.

Since I was inside all weekend with the exception of one trip to the grocery store, I spent a great deal of time at the sewing machine. It was a good opportunity to work off my stash because there was no going to the fabric store.  Here are a few things I worked on.

I used more of the upcycled burlap that I love creating with. This pennant is hanging up above my (very fancy!!) design wall, inspiring me. On the design wall is a strip that I created with some holiday fabric scraps. I will add some lengthwise strips to the long edges to create a Christmas table runner but I need to find something at the LQS because none of my fabric worked. Love the banner though.

20140923_1730

After making the “CREATE” banner I decided to make one for the holidays.  First I made this one:

20140923_1724 I put up a few odds and ends on the mantle to give it a holiday feel.  I like the pennant with the exception of the E on the end.  It needs to be a darker color so I will replace that flag.

This is the other one that I made.

20140923_1721I like this one but it needs some embellishment.  I think I will add some buttons to the ends of the twine for weight and maybe that will dress it up a bit.

Finally, I made progress on a holiday lattice quilt that I am making.  It will be set on point and needs sashing.  I am thinking of using a fabric that is a deep cream color, tone on tone, for the sashing.  Again, I didn’t have anything for this.  I need to get the sashing as well as a fabric to use for the corner and setting triangles. But this is coming along nicely and will sew together quickly.

20140923_1731

Not bad for a few days stuck inside! Hoping for clear skies tomorrow and a trip to the fabric store. Simple pleasures, right?

Linking to Stitch by Stitch, Freemotion by the River, Fabric Tuesday, WIP Wednesday and Let’s Bee Social as well as Needle and Thread Thursday.  Links to these wonderful sites are found at the top of my page under Link Ups.