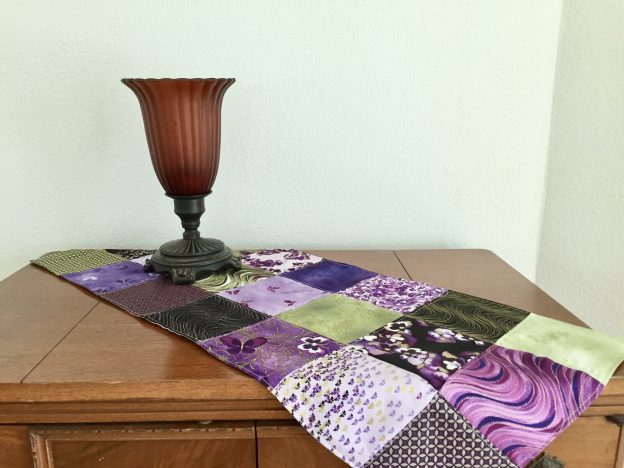
When I was in Vermont at the beginning of the month, I noticed the table runner on my daughter-in-law’s dining table. It was really simple and didn’t have any batting in it. I liked the flexible, casual look of it. I decided to give it a try and grabbed my stack of charm squares.
I have a rather large collection of Benartex charms. Have you heard of the Fabric Club at Benartex? (No affiliation – I just think it is kind of a fun subscription.). For $25 per year, Benartex sends the subscriber a newsletter and a set of 5″ squares from a new fabric line every three months. It is a rather inexpensive and fun way to see what is new with Benartex. Each set has a minimum of 20 charms, some have more than that depending on how many pieces are in the line.) The newsletter usually has a suggestion or pattern for the charms. I did this for quite a while (maybe two years?) and as a result have a number of these sets.
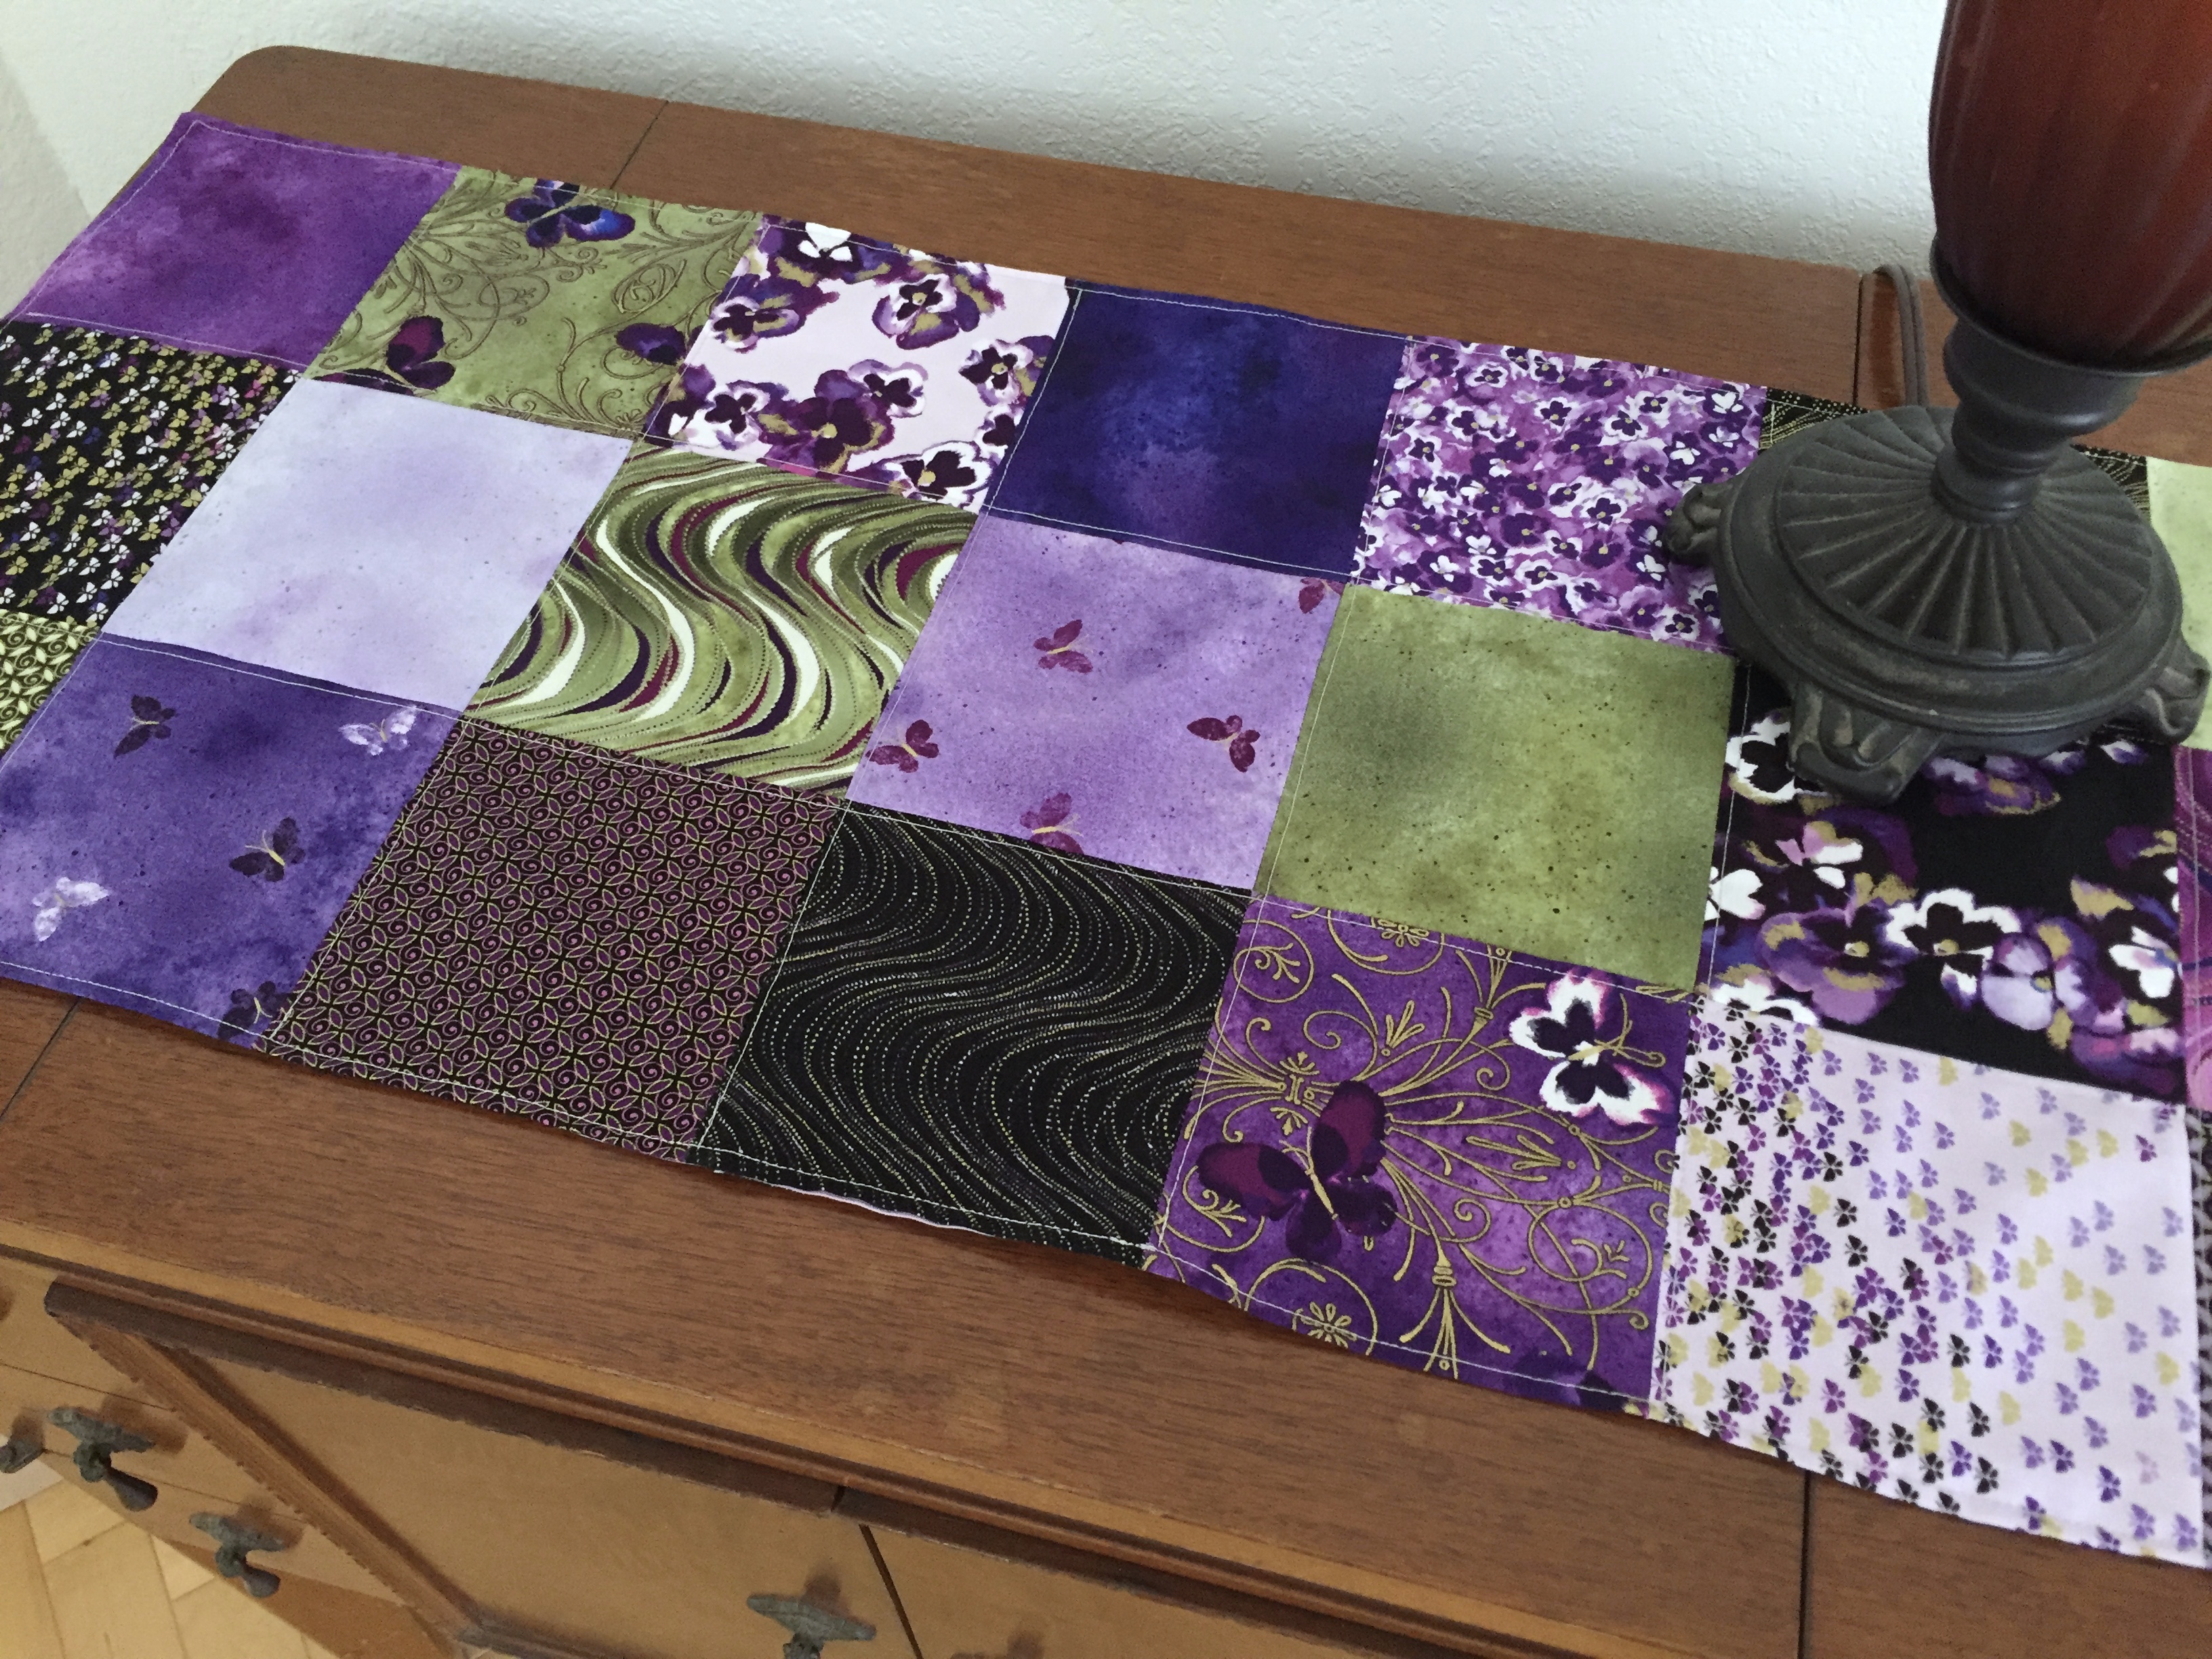
For this project, I decided to use a set called Pansy Noir. It is a rich collection of shades of purple, gold, black and green. Using a set of charms like this can be satisfying because the designer has already made sure there are a variety of scales and values in the set.
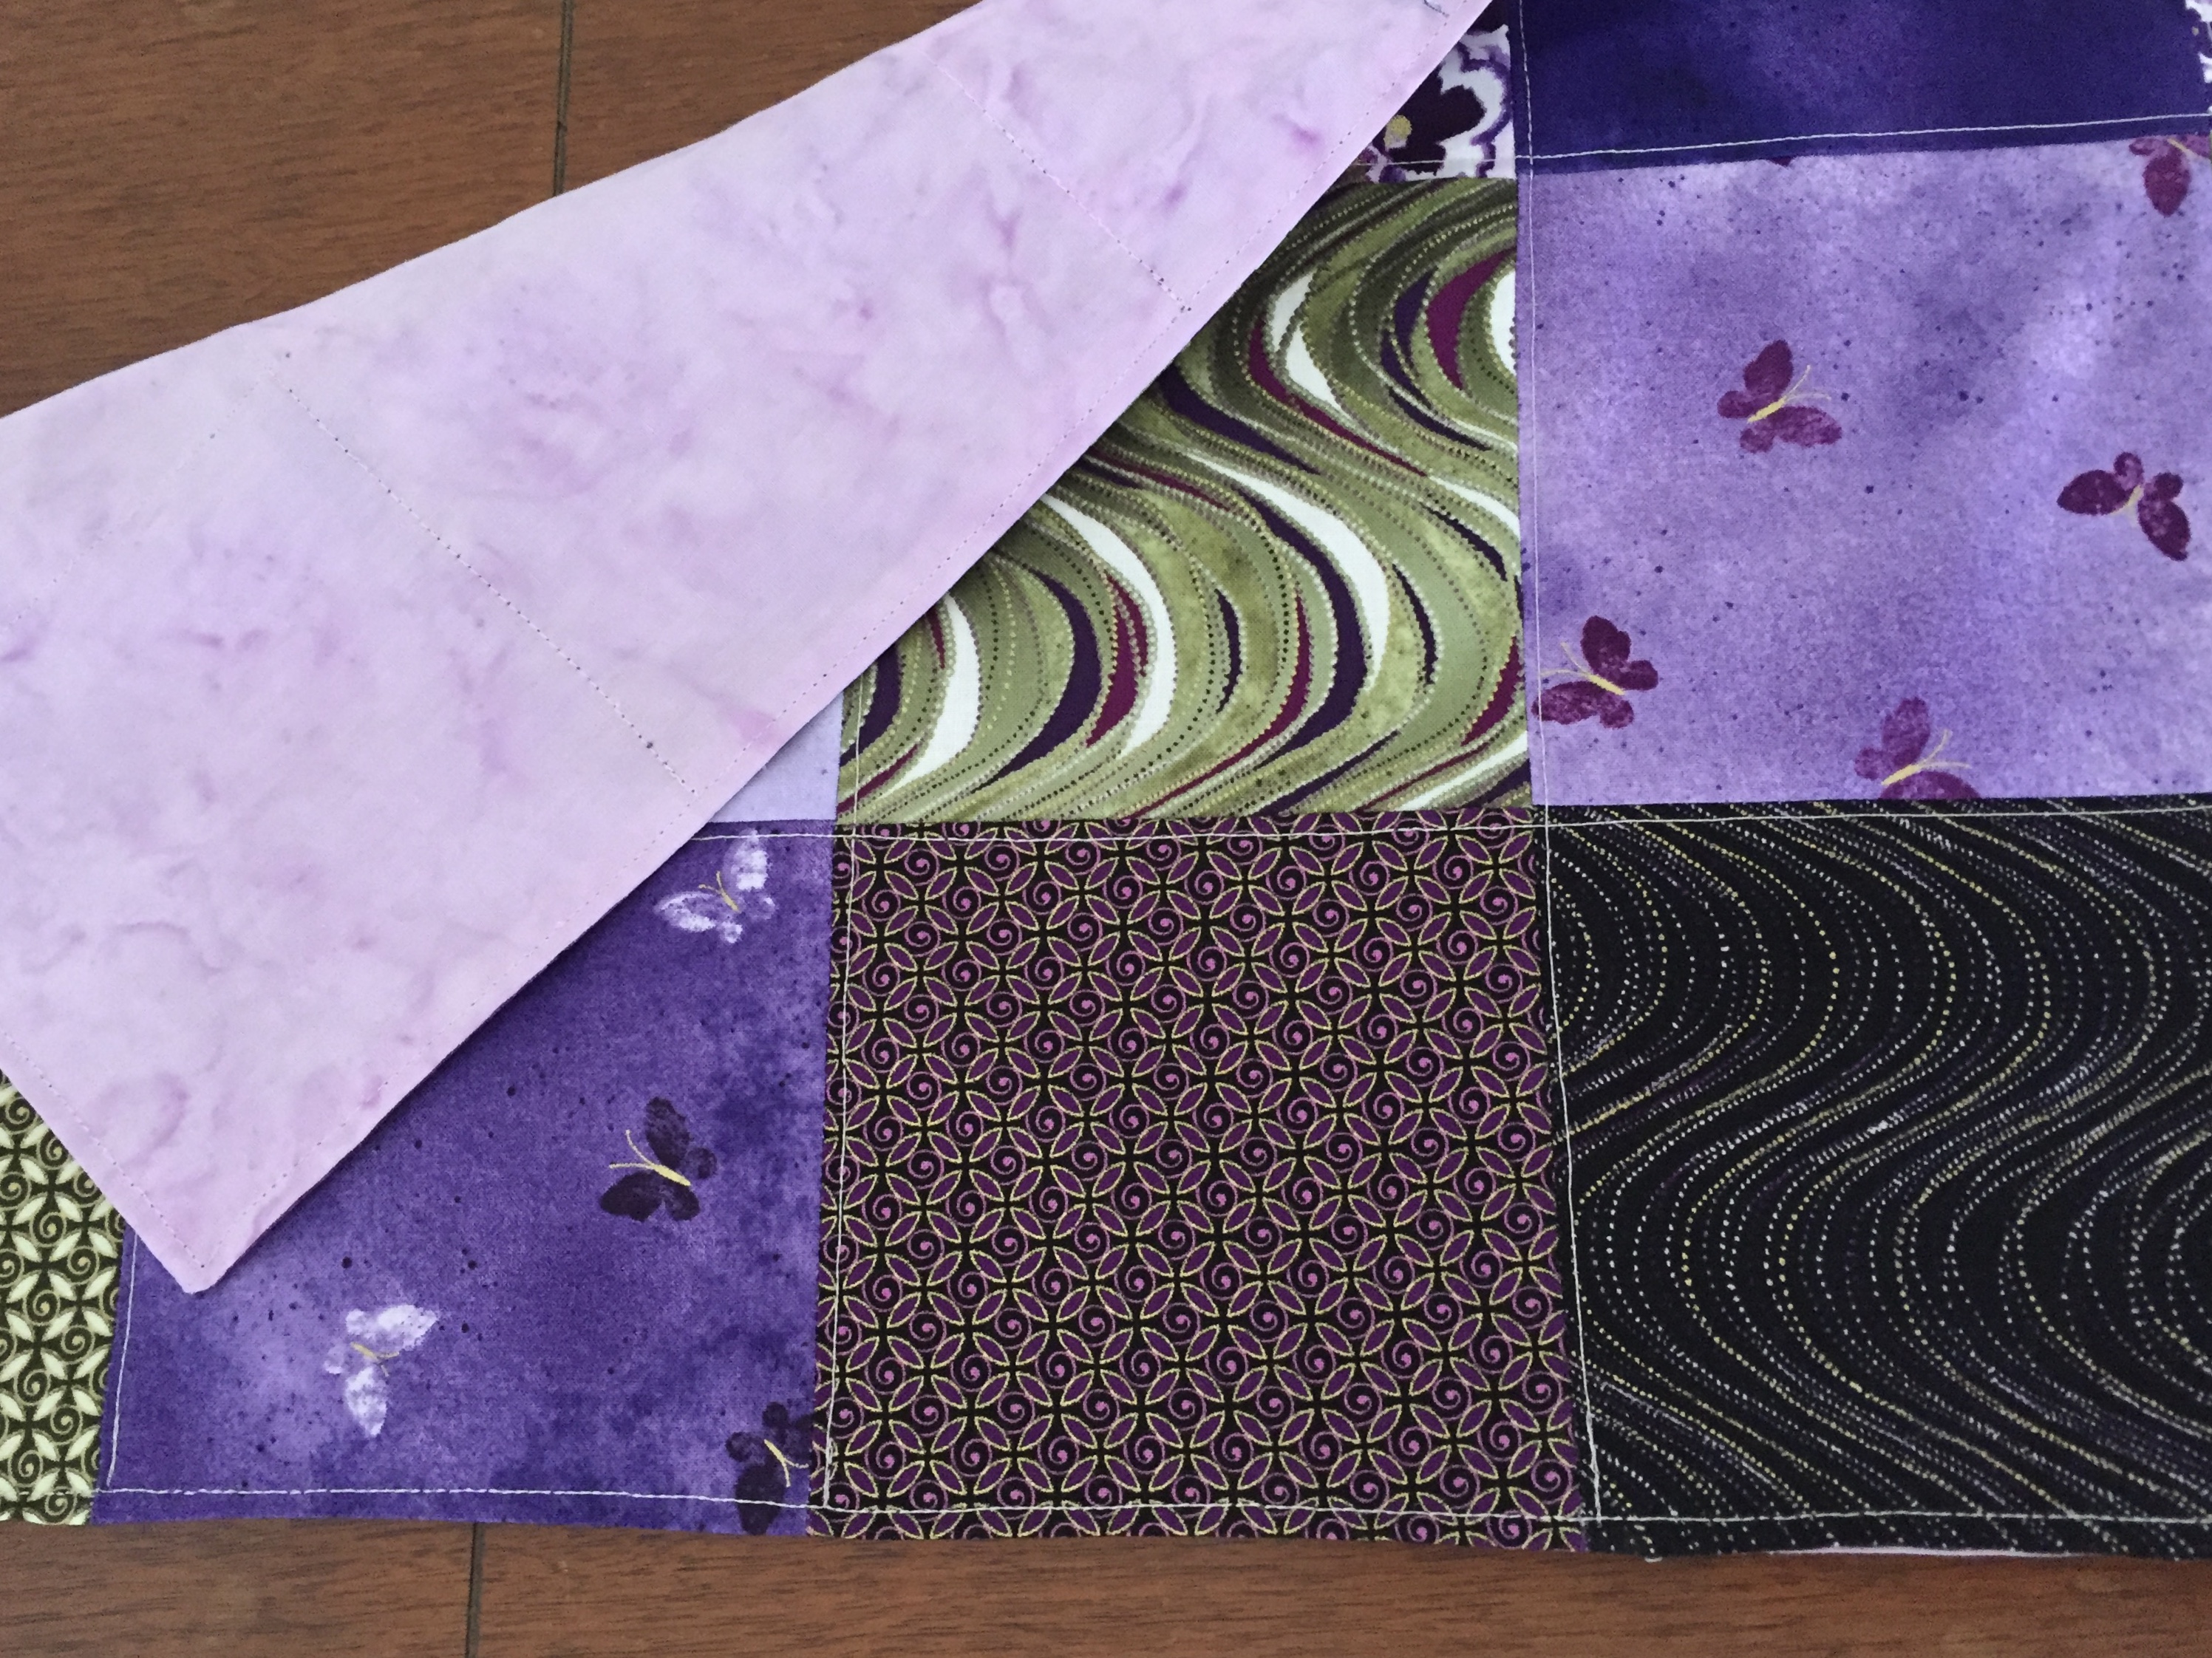
In this set, I love the contrast of sweet pansies, such a simple flower, with the rich swirls of purple and black. How do these designers come up with this?
I didn’t add anything to the set and made the runner with 21 of the 22 squares in the pack. So it measures about 14 x 30 inches. Using a silvery Sulky thread, I stitched straight lines going down the column (at the seam line) and across the rows (again at the seam) to hold it together when laundered. No binding makes this a 1/2 hour project. The backing is a pale lavender fabric from my stash.
This was a fun project to whip up during a time when I am getting very little sewing done. This summer I have noticed a large uptick in the orders rate at my shop. It is really rewarding to see this happening now that I have been in business for 18 months. Of course it takes away from my sewing time which is a trade off!
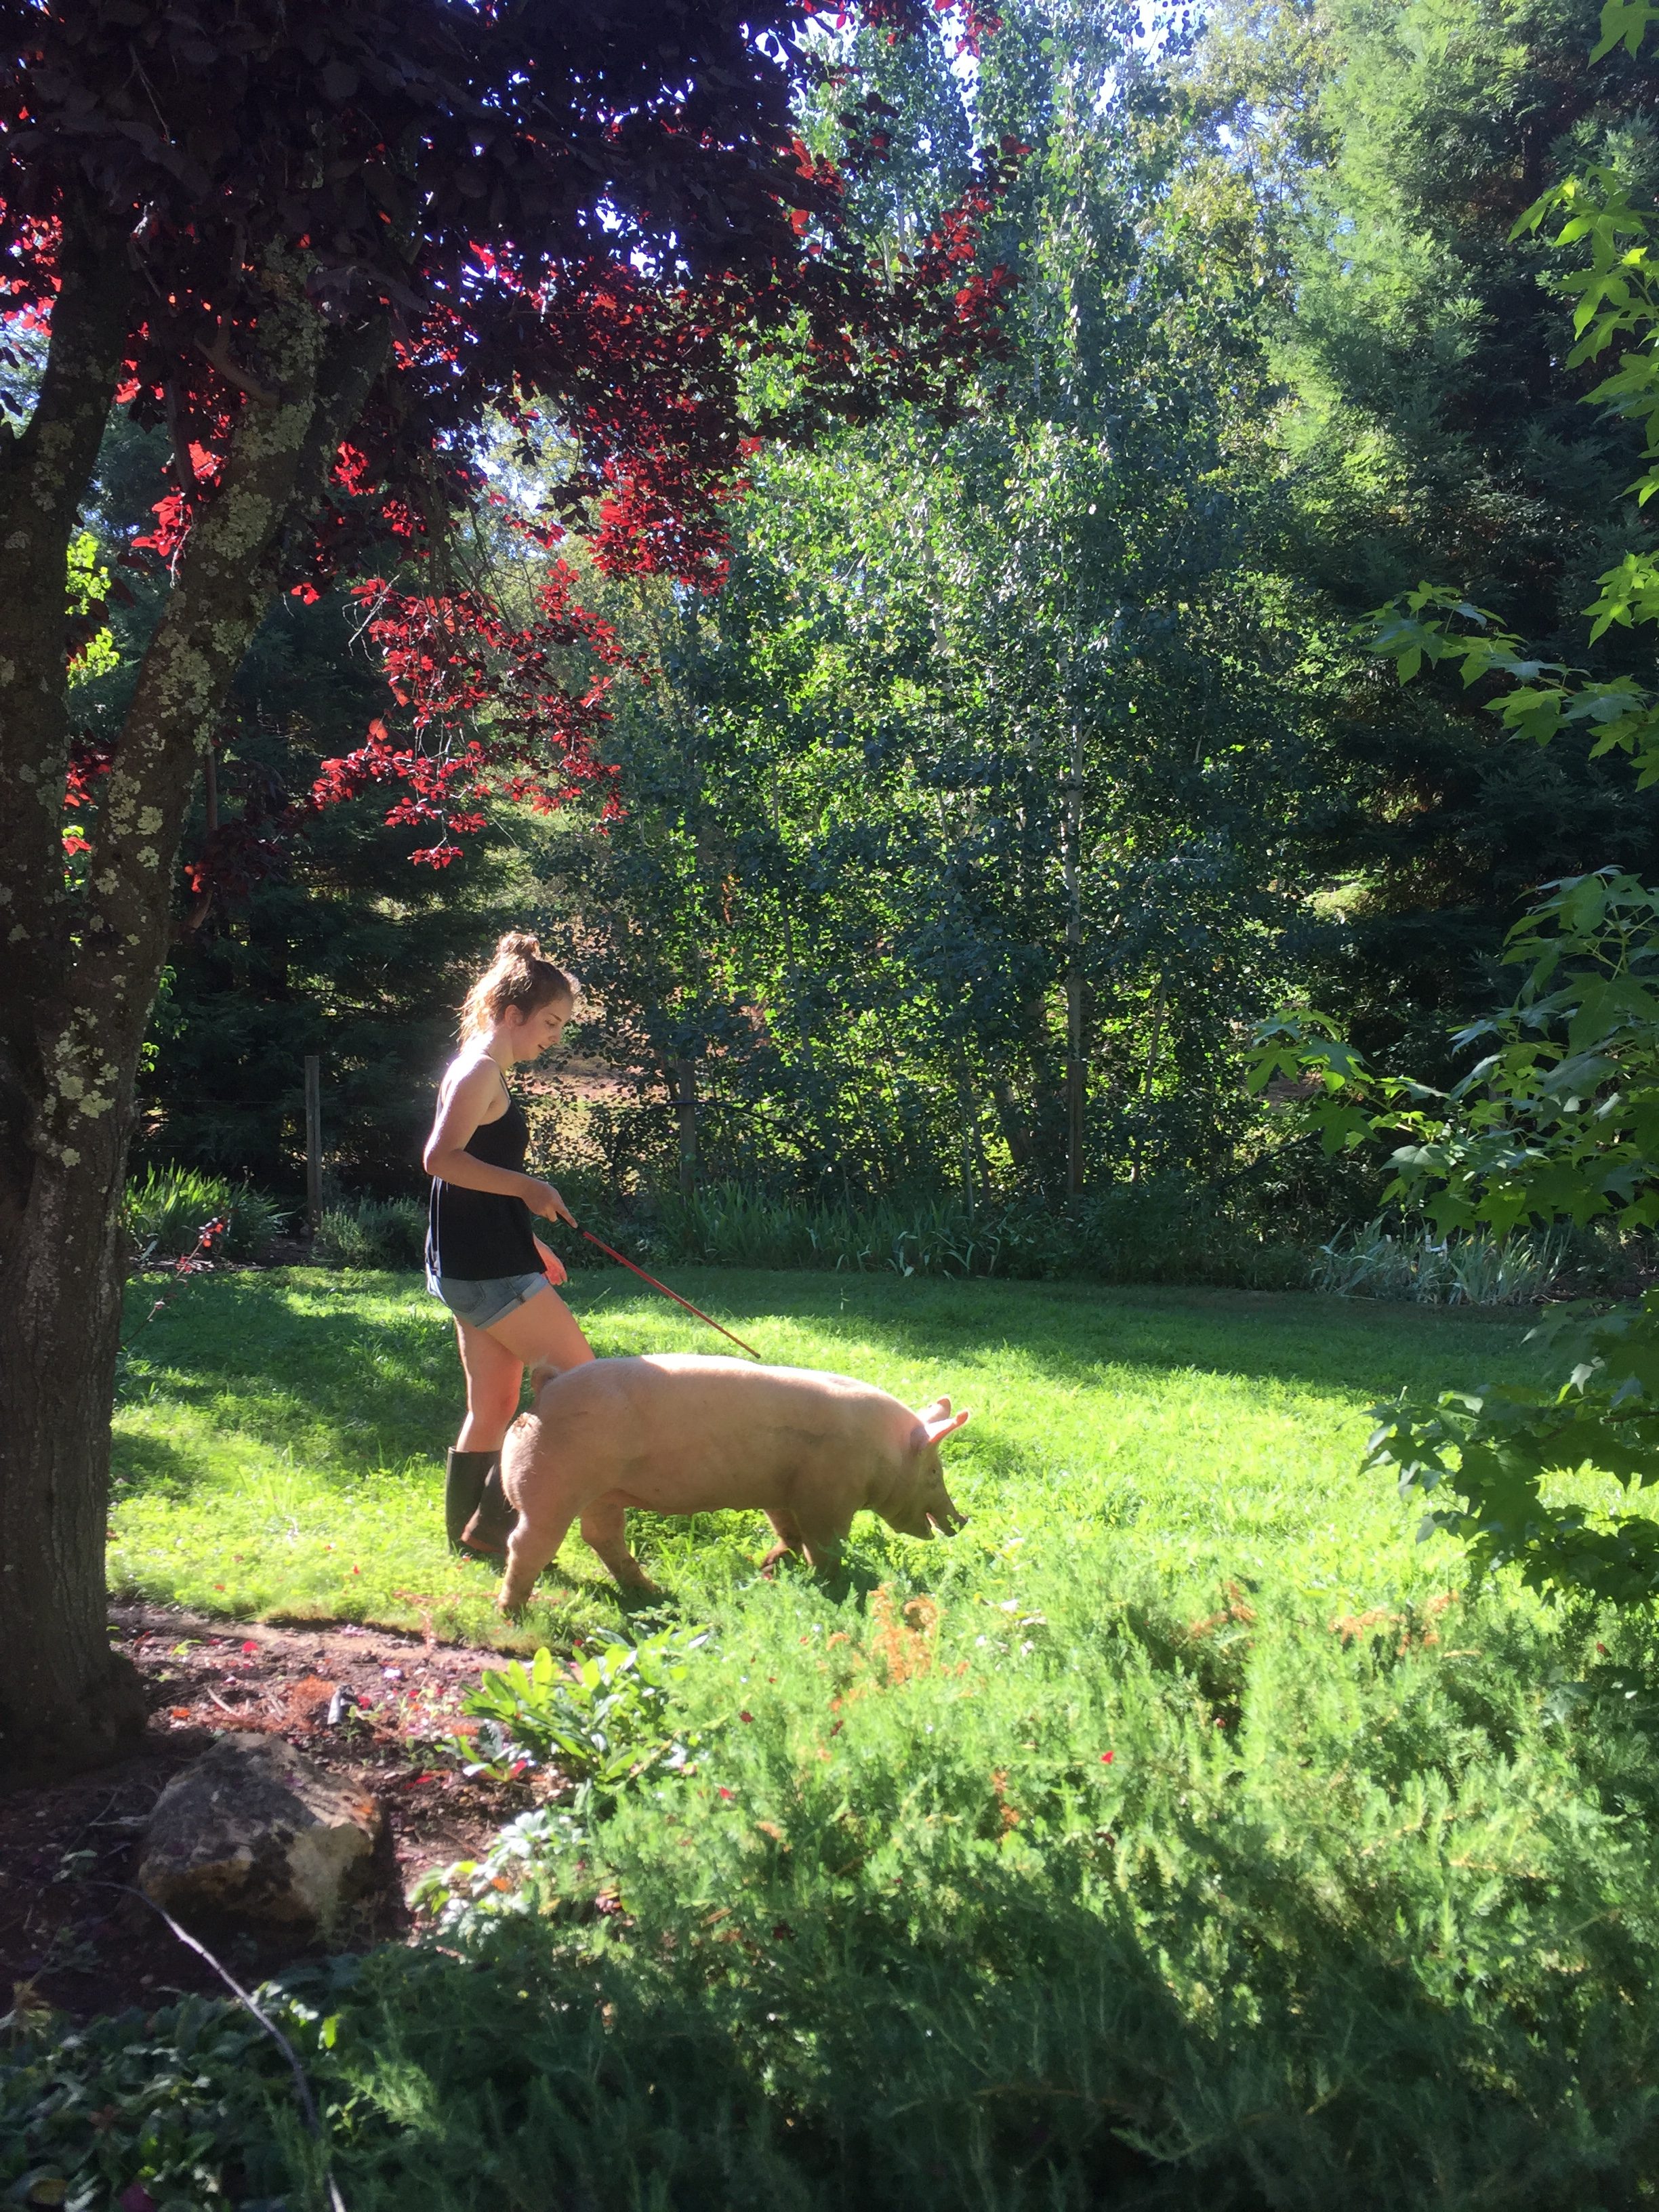
Otherwise, summer has been busy with house projects, gardening and taking pictures of Julia and Olive!! The fair is in two weeks so Julia has been really focused on training Olive for showing her at the fair.
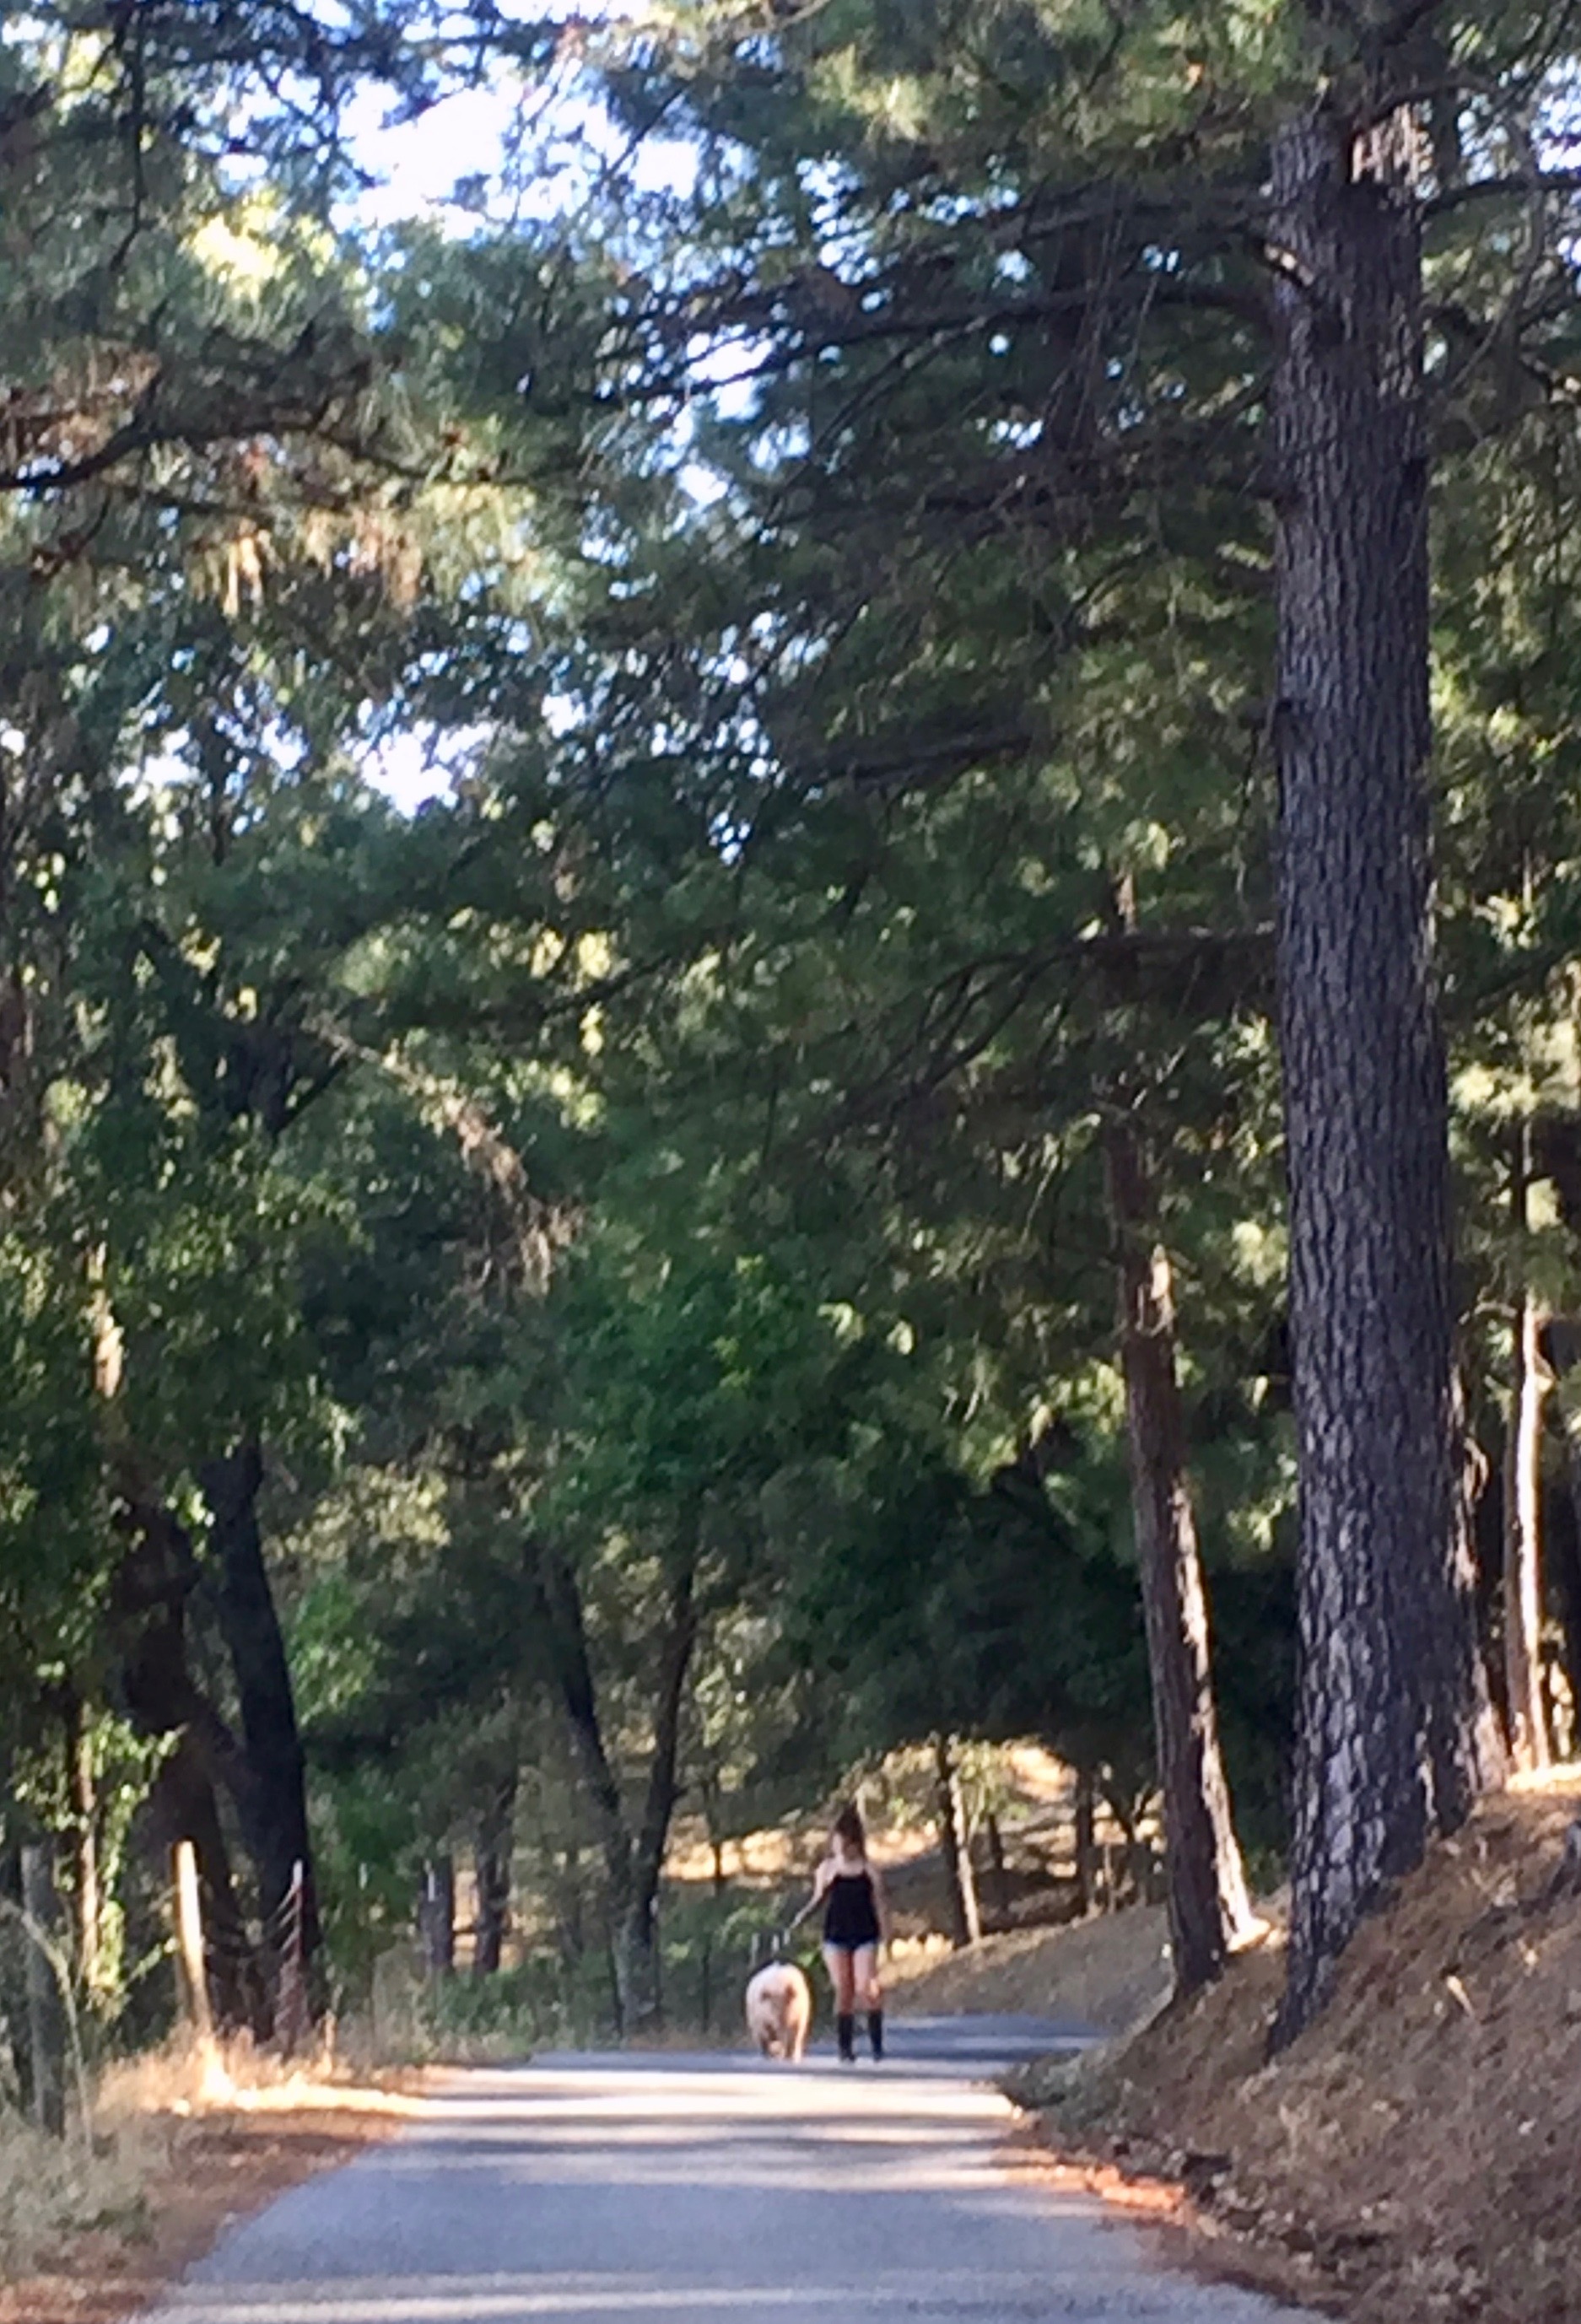
Julia and Olive walking in the yard.
To increase stamina and muscle mass, Julia has been taking Olive on long walks. For much of the summer she would walk Olive around the perimeter of our property which was a nice long walk. Well, Olive is a very smart pig and learned that route quickly. Soon as she knew she was close to the end of the route, Olive would take off running to the pen (her source of food and mud!)
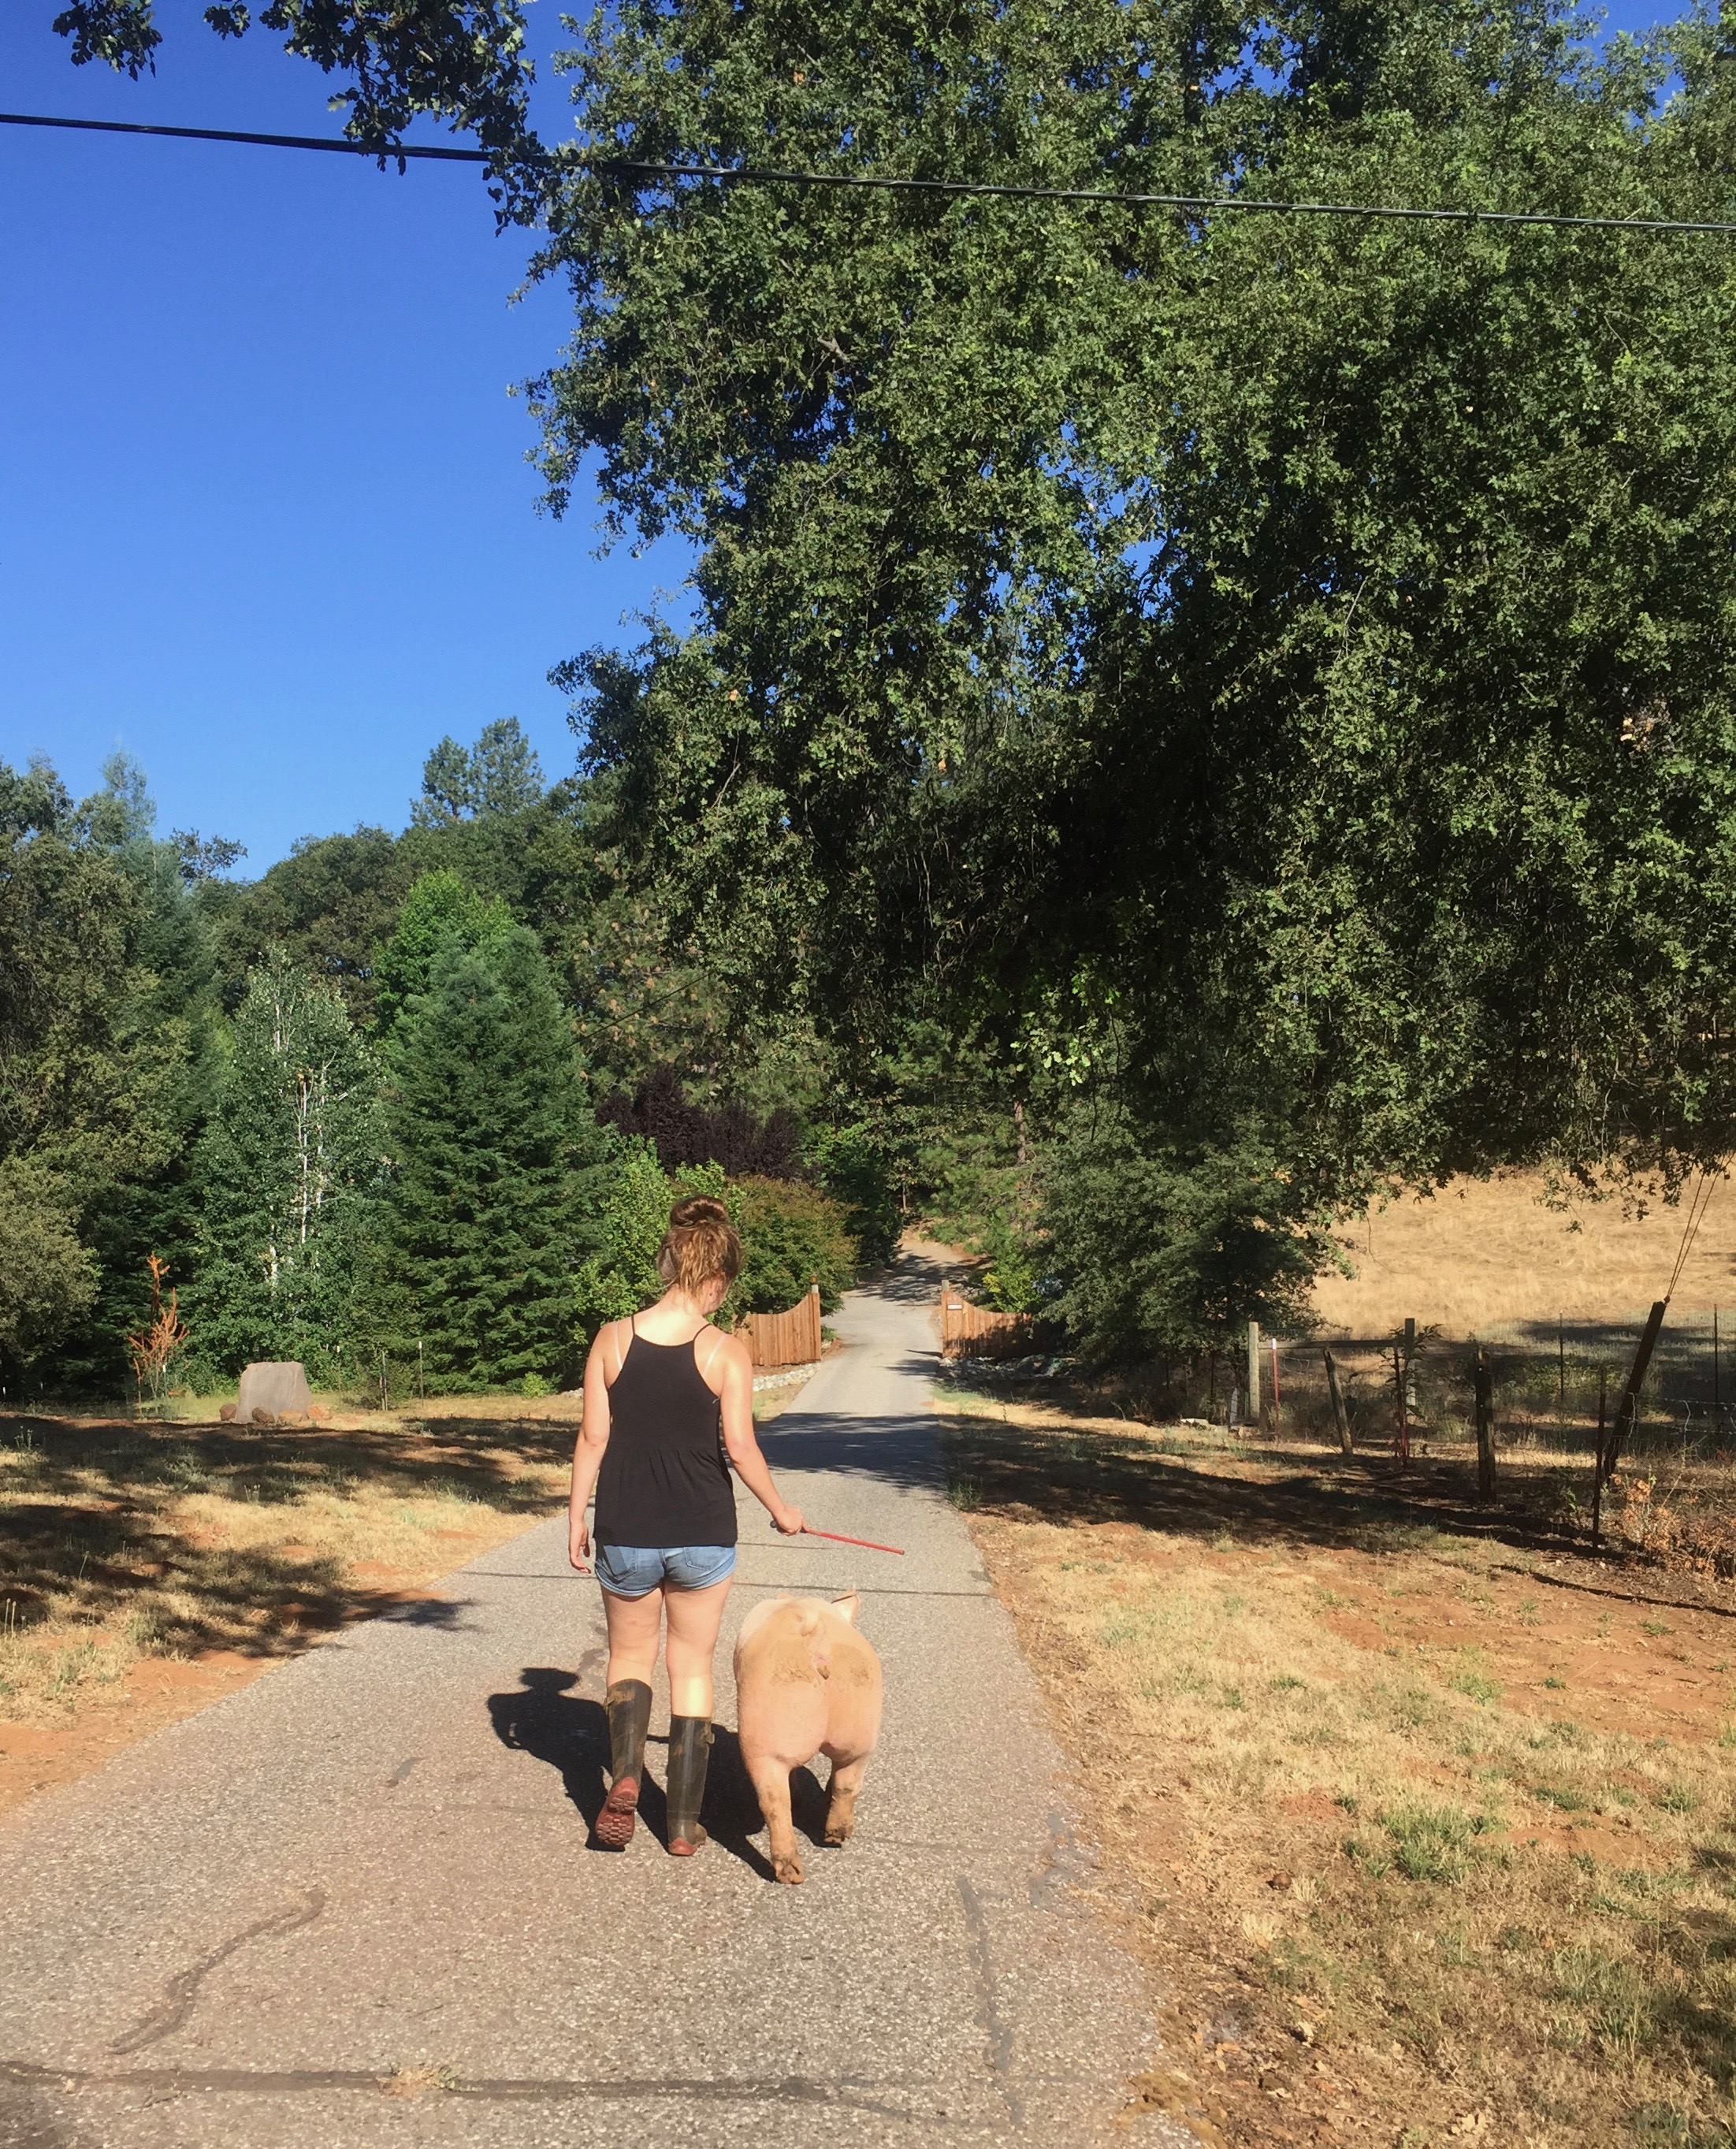
Strolling down the street!
Julia decided to mix it up and started walking her in our neighborhood, much to our neighbor’s delight. It is hysterical to see Julia and a pig strolling up our driveway and down the road. But Olive does really well. She is sometimes a bit startled by a horse or dog and it is nice to see Julia can redirect her when this happens. I think they will do well together in the show ring.
Heading down the driveway for home.
This weekend I am hosting a bridal shower for my soon-to-be daughter-in-law. Her parents are coming up here for the weekend which will be fun. I have met her mother only once and haven’t yet met her father. We will enjoy getting to know each other. Once again, another no-sew weekend – Such is life! Whatever your plans are, enjoy your weekend.
Happy Friday! Before I get going here, I want to thank everyone for the great response to the July Blogger Bundle. It is a beauty and I am happy to announce that Kathie L will be receiving a bundle in the mail soon. She won the drawing for the giveaway! Yay for happy, squishy mail – it’s coming your way Kathie!
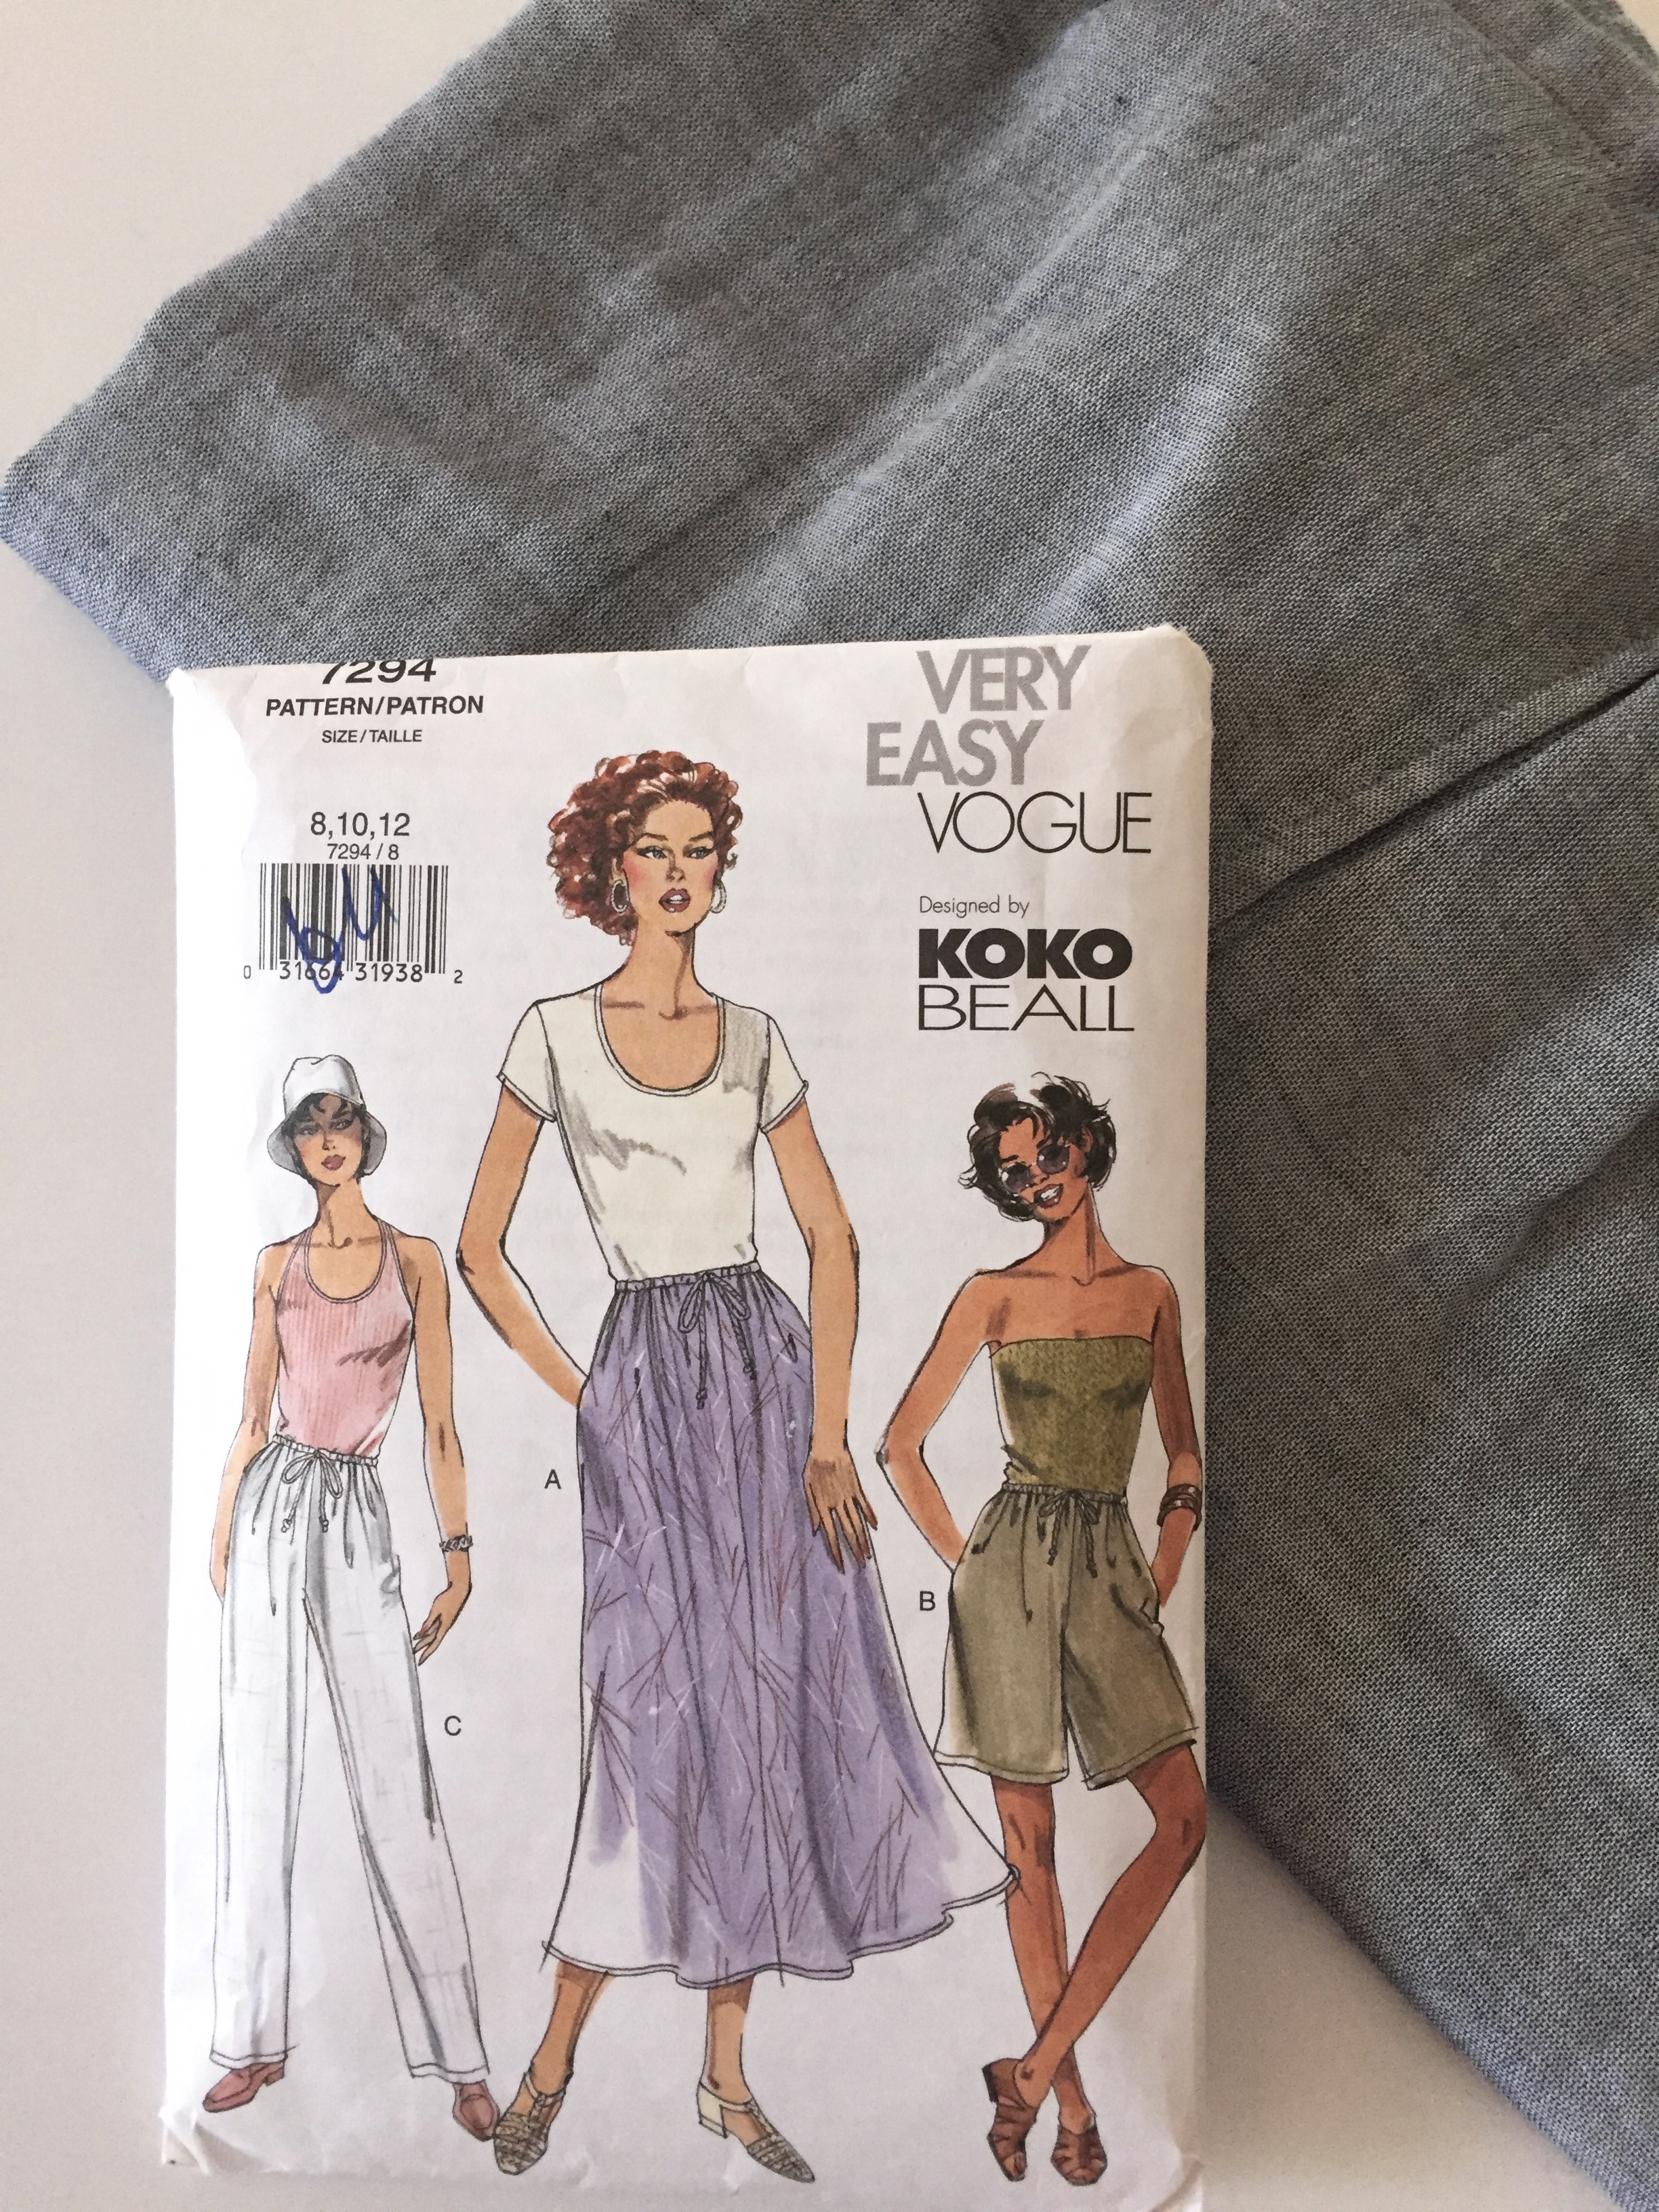
I actually do have a finish to share – not a quilt finish but something to check off the WIP list nonetheless. I began making a pair of pants in May – Well, I actually bought the fabric over a year ago and it sat on a shelf until May. But then Me Made May rolled around and I got excited about making some clothes. I got these nearly done in May – they only needed to be hemmed. It took me until mid-July to hem them. Why?? Now it is too hot to wear pants. Silly me.
So these were a very easy make. The pattern for these was Vogue 7294. The pattern was from 2001 and the pants had a high waisted cut. I took a few inches out of the rise so they would hit me below the waist. There isn’t a waistband – just a simple elastic waist. I don’t tuck my shirts in so this won’t be an issue.
The biggest issue I ran into was the fabric I chose for the pants. It was not a good choice at all! It is too light weight and it frayed continually, making it a pain to sew with. I did the best I could, making sure to finish each seam with a zig zag stitch to help with the fraying. My plan is to hand wash these (in the washing machine – my washer has a “hand wash” cycle) and hang them to dry. I really have no idea how long they will last? For all I know, they may disintegrate upon first wearing.
I was concerned that this lightweight material would make the pants look like pajamas. To be honest, they do look a lot like pj’s. But I like them anyway. They are comfortable and they have pockets in them!! However, I am afraid to use said pockets because of the lightweight, easily frayed fabric. Yikes, these are going to be some high maintenance pants! 😉
In closing, does anyone need a good book to read over the summer? I just finished two and both of them were excellent. The first one was The Spool of Blue Thread, by Anne Tyler. I am a huge fan of Anne Tyler’s. She writes such great stories about regular people. I love how she develops her characters. The reader always comes away feeling like he really knows those people. Great read!
The second book I read is the The Book of Unknown Americans, by Cristina Henriquez. It iss a timely novel about several families who came to the US from various countries such as Mexico, Puerto Rico and Venezuela. The relationships between the families, their history, and a love story between two young teens make this book hard to put down. Have you read anything good lately? I am ready for another book.
Hope everyone has a great weekend. We are having lunch with my in-laws on Saturday and then we will be home all day Sunday. Supposedly it isn’t supposed to be over 90 degrees this weekend so that will be a nice break from this crazy heatwave.
Linking to lots of linky parties. See them at the top of the page, under Link Ups.
Newsletter!
Have you signed up for my newsletter? It is published every month or so and is full of information about my shop, new arrivals, sales, and events. Click here to sign up!
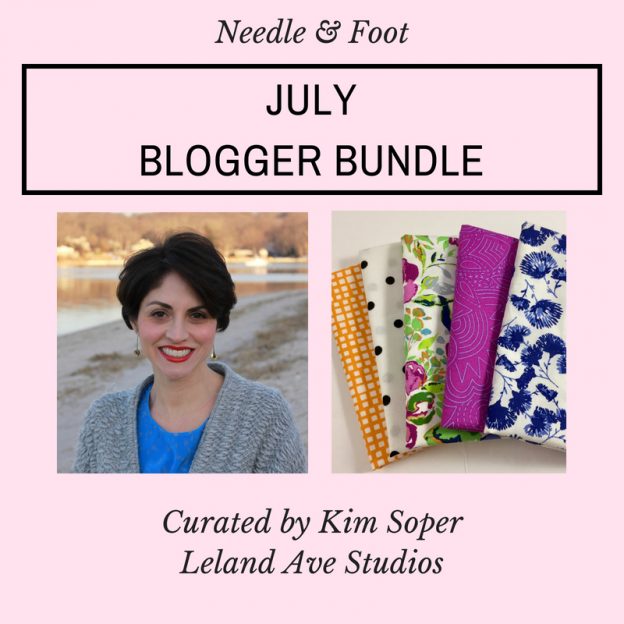
It is time for another Blogger Bundle and I am so excited to share it with you! The July bundle was curated by Kim Soper of Leland Ave Studios. Kim is an award-winning modern quilter, a blogger as well as being a stay at home mom to three boys. Once an attorney, she decided to stay home to raise her boys and like many of us, she looked to sewing to fulfill her creative need. Kim’s “about me” page is great and I encourage you to take a minute and read it, if you haven’t already. I especially like the part about how she came to name her business Leland Ave Studios.
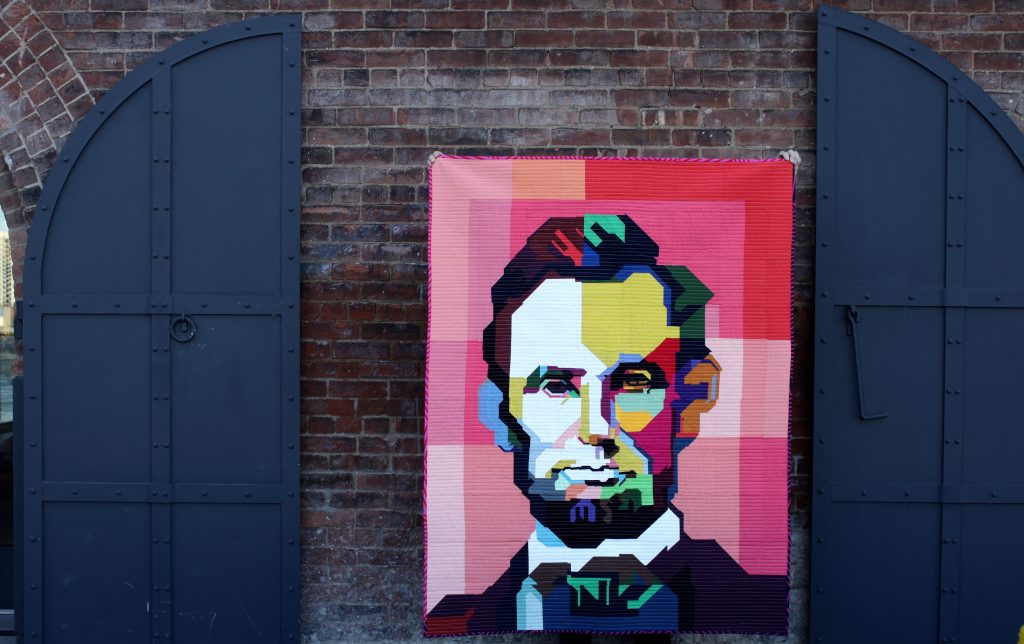
Lincoln, designed, pieced and quilted by Kim Soper.
You might know Kim from her Mr. Lincoln quilt which was awarded People’s Choice at the 2017 Quilt Con. That is how I first became aware of Kim and her work. I’d like to share the blurb she wrote when she submitted this quilt:
This quilt (passion project!) developed out of a desire to create an entirely improv-pieced, recognizable image without use of template, paper-piecing or applique. Using an iconic image of Lincoln that had been converted to WPAP (vector-based geometric pop art) by Ihsan Ekaputra, it was constructed using 6-inch blocks. The backing fabric is a repeating pattern of the original image of Lincoln. The binding is a nod to the vector-style of art on which the quilt is based. The end result is a quilt that is both identifiable as the intended image, and distinctly my own.
To read more about the process she used to design and create this gorgeous quilt, click here.
Following that, I began following her to read the weekly interviews she has been posting since the beginning of 2018 in The Creativity Project. Oh my gosh – talk about a dose of weekly inspiration. The series is wonderful and while I have enjoyed reading interviews with creatives I am already familiar with, I have really loved meeting many whom I hadn’t been familiar with. I am grateful for the work Kim has done to create this weekly series.
Suffice it to say, Kim is a huge inspiration to many in the quilting and creative community. I was so happy when she agreed to participate in my Blogger Bundle series this year. Want to see the bundle she curated?
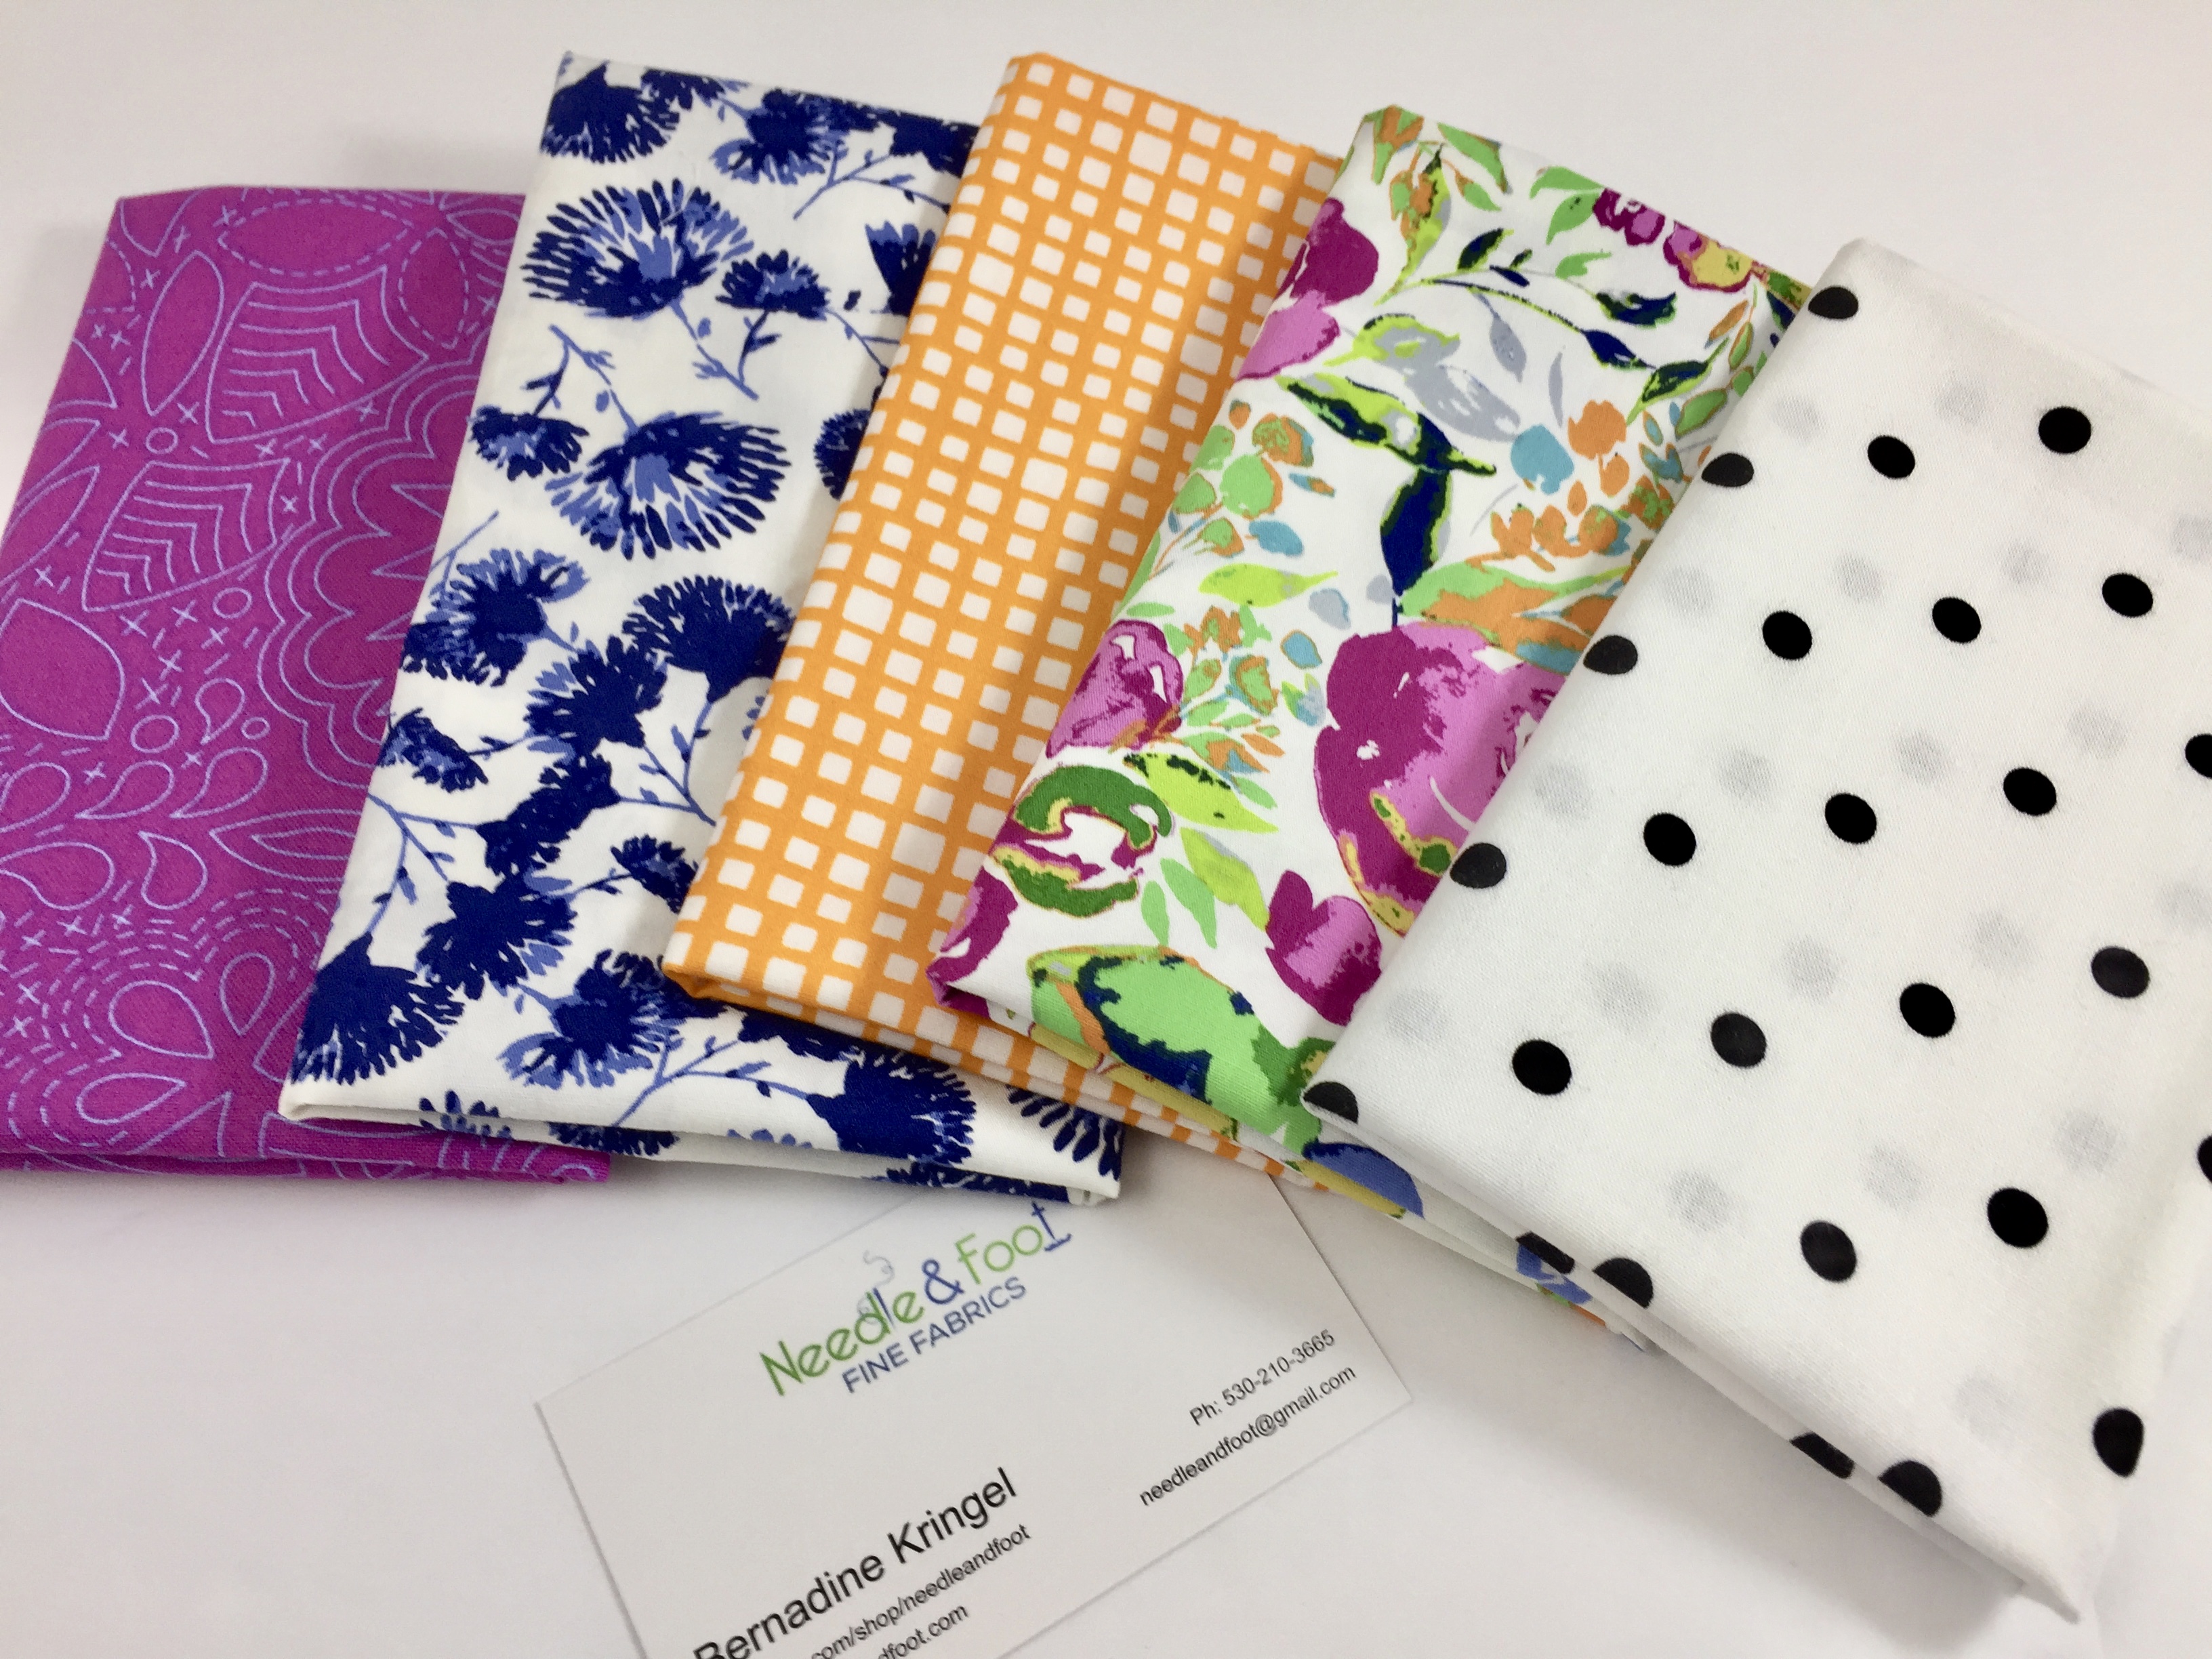
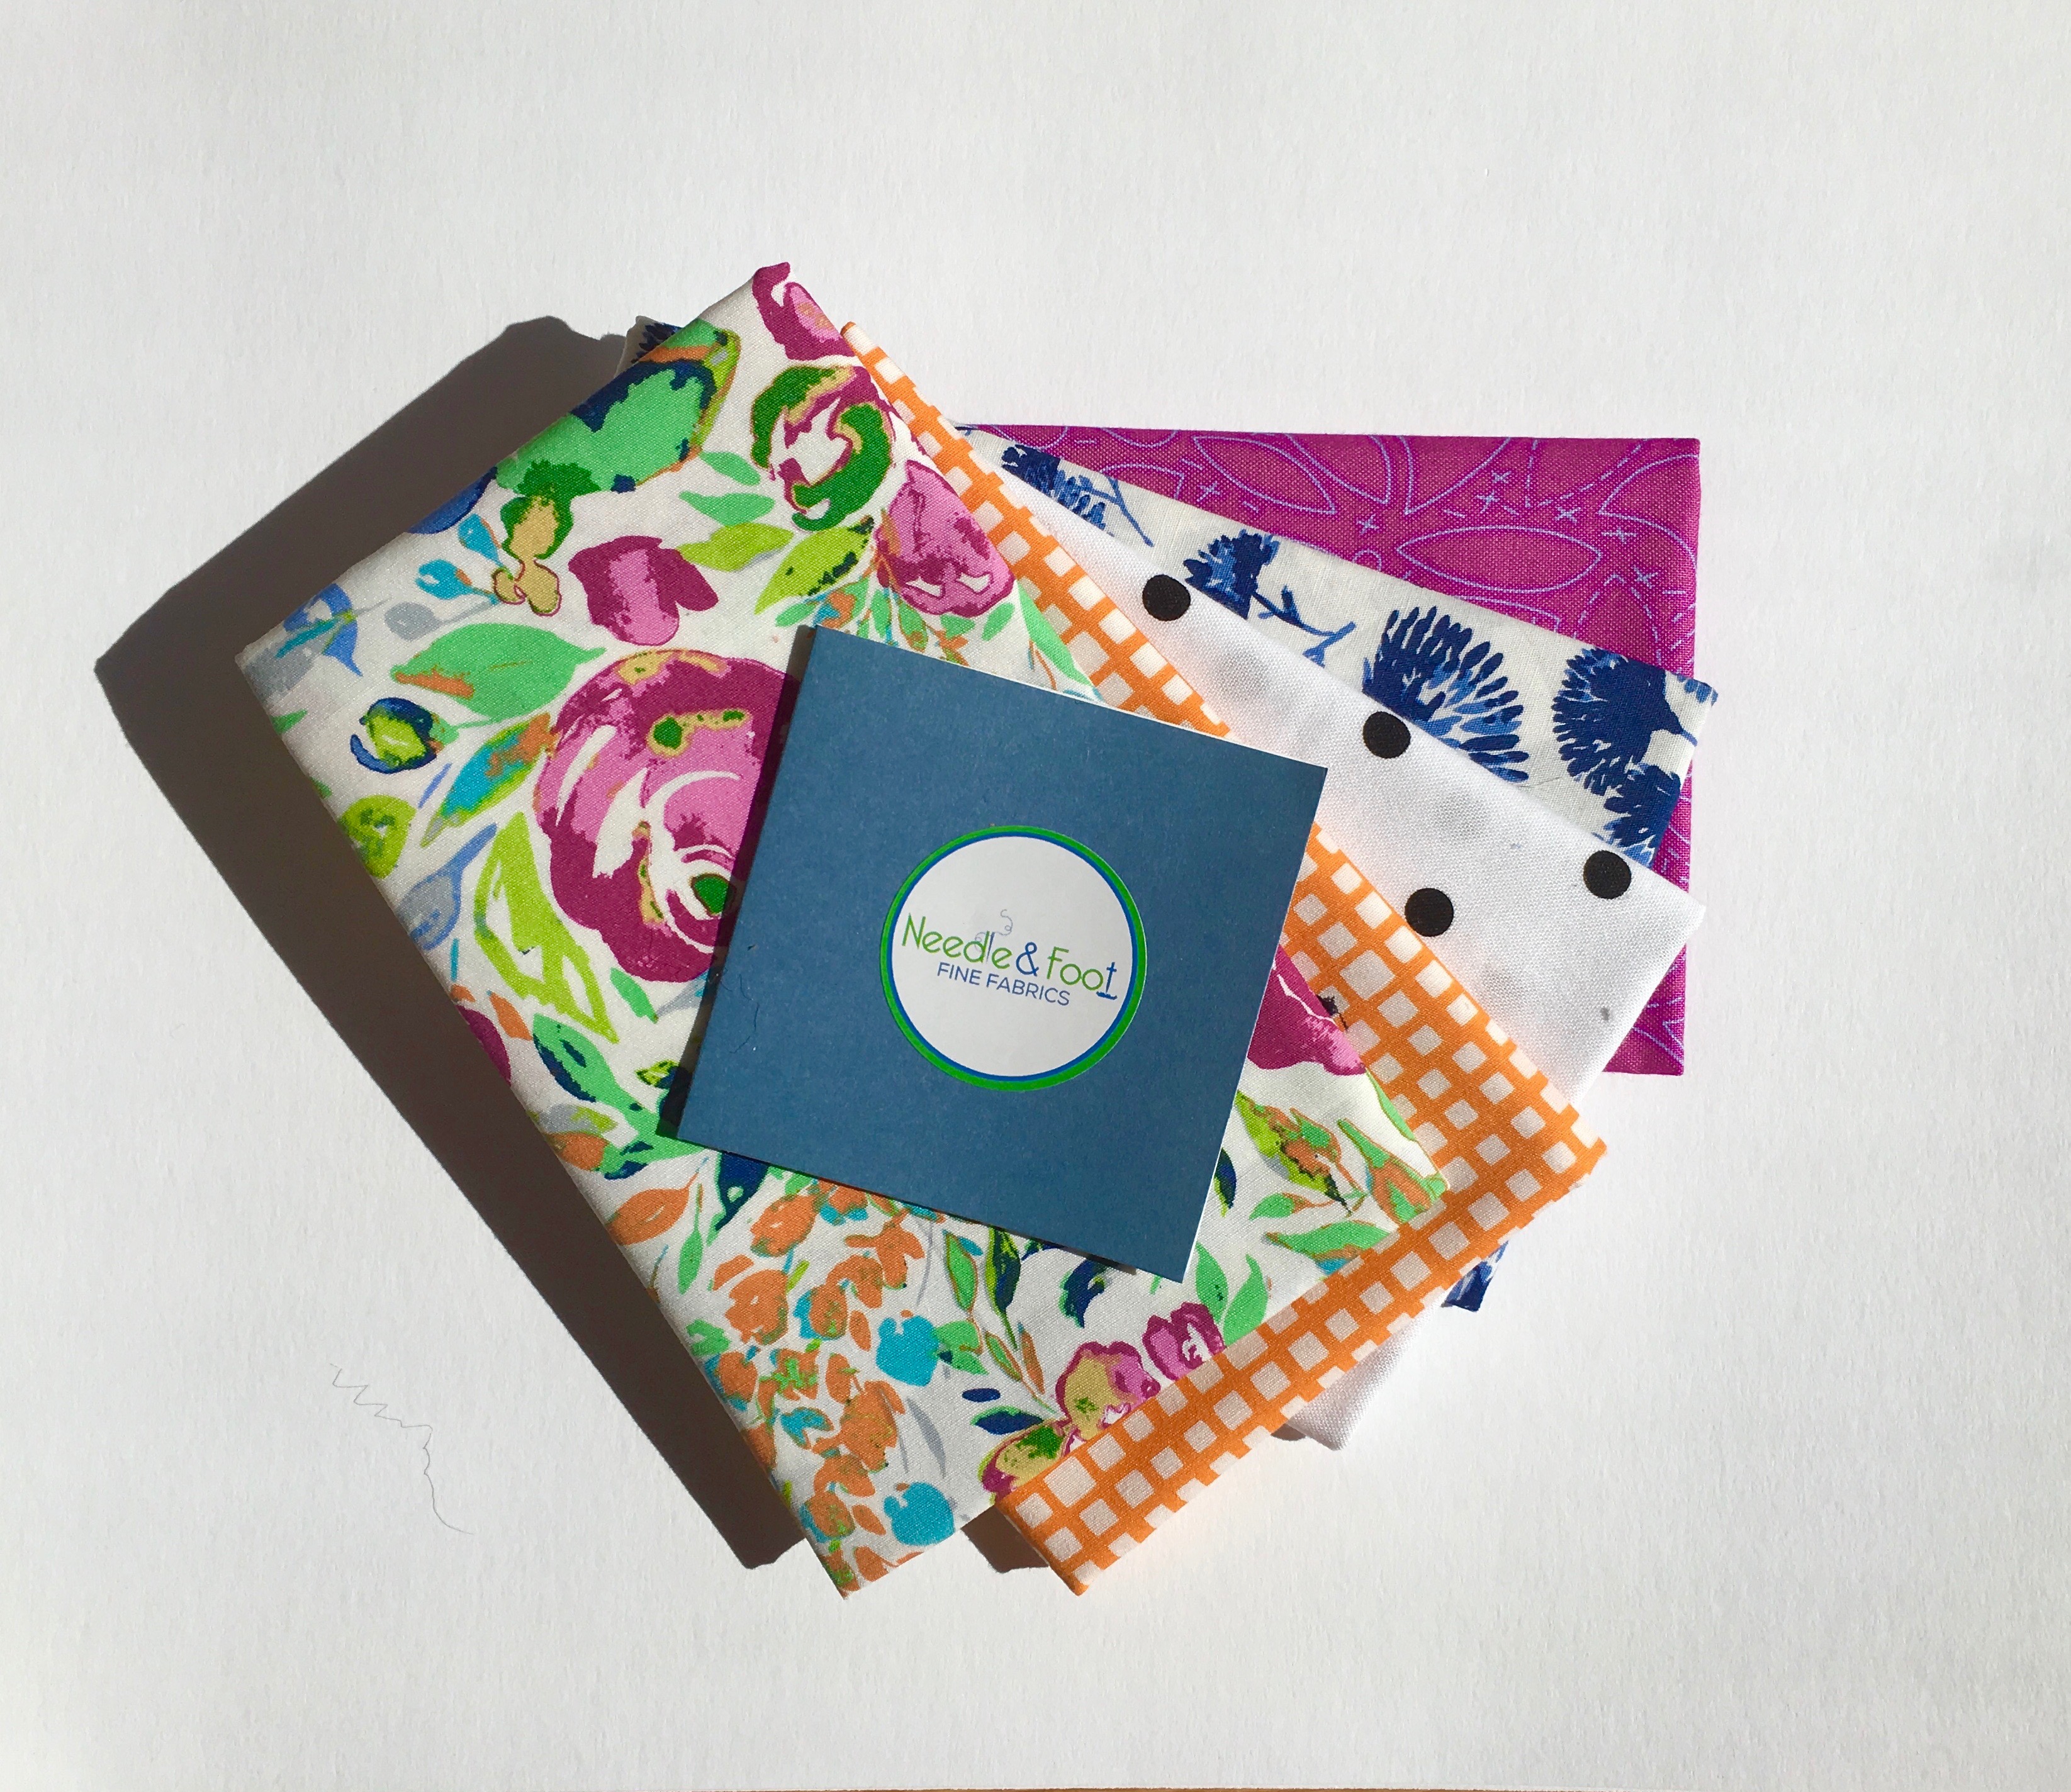
Kim wanted a modern collection that had a summer vibe. I think she definitely got it! Both of the florals are from a new collection called Indigo & Aster by BariJ. She pulled in more fuchsia with the piece on the far left from Alison Glass’ 76 collection. To keep it bright and summery, Kim added Squared Elements in Mandarin, from Art Gallery Fabric. Finally, she chose a neutral and added the black and white polka dot made by Red Rooster Fabric. This might be my favorite move on Kim’s part. It moves the collection away from the femininity of the floral and adds whimsy to the bundle.
Once again, I have so enjoyed working with a quilt artist and seeing how she gathers fabrics from various lines in my shop and uses them together. Kim made a really cool, non-quilty, project with this bundle. Head on over to see what she made. I just love it!
As before, this bundle (in either fat quarters or 1/2 yard cuts) is on sale in my shop for 20% off today through Wednesday of this week. Also, there is a giveaway – one lucky winner will receive a fat quarter bundle to use however they please. Normally the blogger who curated the bundle hosts the giveaway but this time, I will host it. Kim is getting ready to go on a vacation to Italy with her family and we decided it would work best if I held the giveaway. She has enough going on getting ready for their trip.
To enter, please comment and tell me what you think of the bundle – why do these five fabrics work so well together? Also, to be eligible to win, remember to follow me on here the blog, or on Instagram or Facebook. The giveaway is open through Wednesday of this week, just like the sale! If you purchase a bundle and then win one (which has happened in the past) I will refund your purchase price of the bundle.
Thanks so much to Kim for the bundle she has curated for my shop. I hope you are enjoying these collections as much as I am!!
Newsletter!
Have you signed up for my newsletter? It is published every month or so and is full of information about my shop, new arrivals, sales, and events. Click here to sign up!
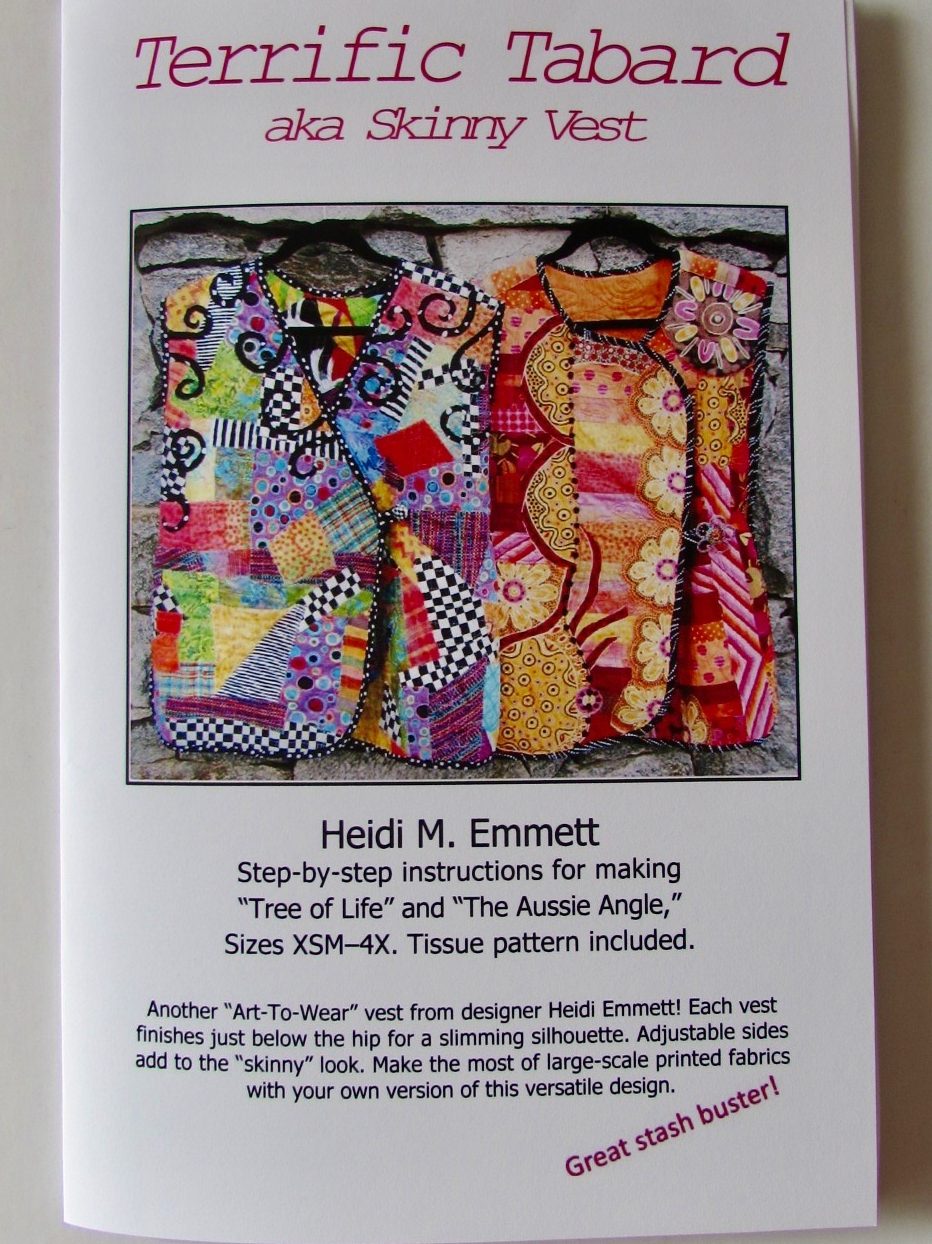
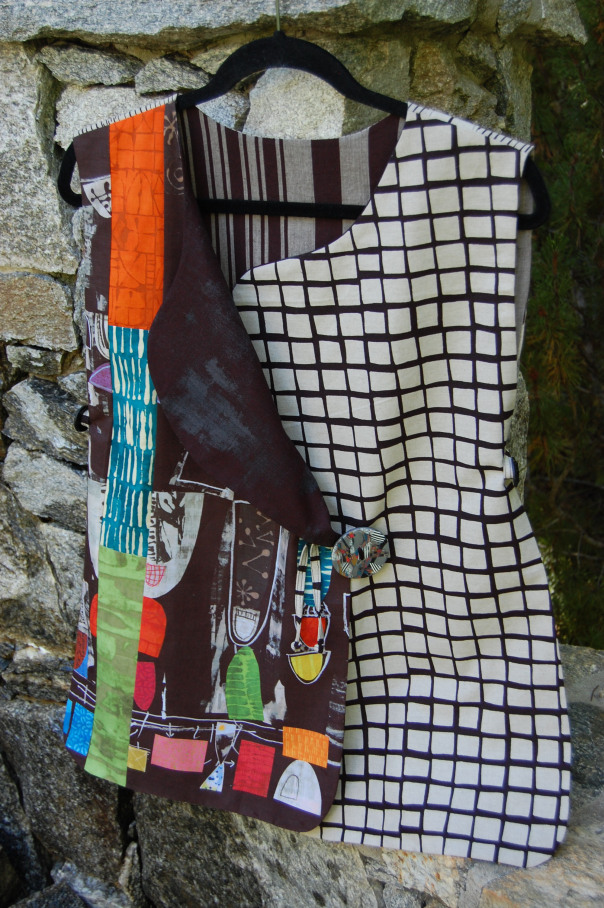
Hi Everyone – I am back from our back-to-back vacations! Both trips were awesome but as always, home sweet home! After a relaxing time away, I am ready to jump back into my blogging/sewing/shop routine. Today I have a really special post to share with you. I would like to introduce you to Heidi Emmett. Heidi is a really talented pattern designer and I am proud to carry a number of her patterns in my pattern shop. To do justice to this introduction, I need to tell you a bit more! Heidi lives in Grass Valley and we are both in the same quilt guild. Heidi makes both quilts and garments, designs clothing patterns, teaches sewing classes at an annual retreat up at Lake Tahoe and is generally a creative maker at heart. She also owned a brick and mortar fabric shop in Grass Valley for quite a few years. She is a person with what seems like unlimited energy and is constantly making or designing something. About a month ago, she and I chatted at a guild meeting and we were brainstorming ways we could work together since we both have so many common interests. As a result, I have begun to carry her patterns in my pattern shop. She had purchased some of the Sarah Golden linen blends from me at the quilt show last May with the intent to make one of her Terrific Tabard vests. Today she will share the vest she made and explain the process she used to make it. I hope you enjoy the post. If you have any questions for Heidi, be sure to leave them in the comments and she will post a reply to you there. I hope you all will enjoy getting to know Heidi as she is a creative force to be reckoned with!
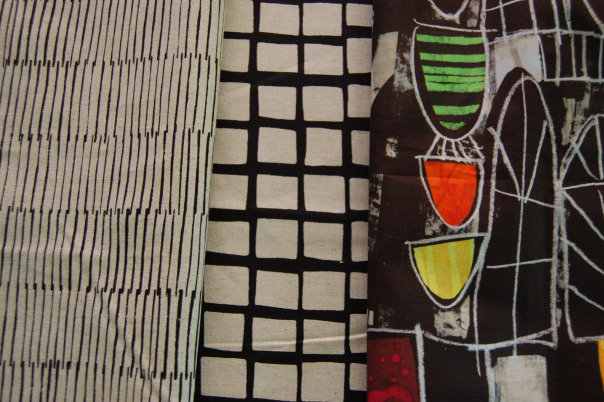
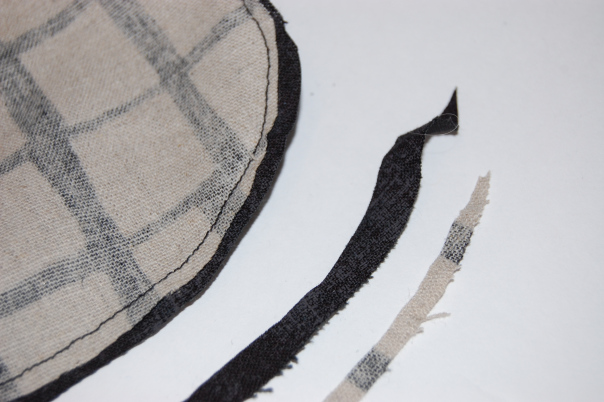
I’m going for a whole new look (than the cover shot above) with the linen blends I got from Bernie’s Etsy shop. Let me show you what I did to create a sophisticated and smooth Terrific Tabard. I started with two linen blends from Bernie. I absolutely LOVE linen! And these two linens by Andover Fabric are neutrals that will work with ANY other palette of colors. The piece with the columns of lines is called Lines (appropriate enough!) and the piece with the checked pattern is called Squares on Tailored Cloth. Both were designed by Sarah Golden and are available in Bernie’s shop.
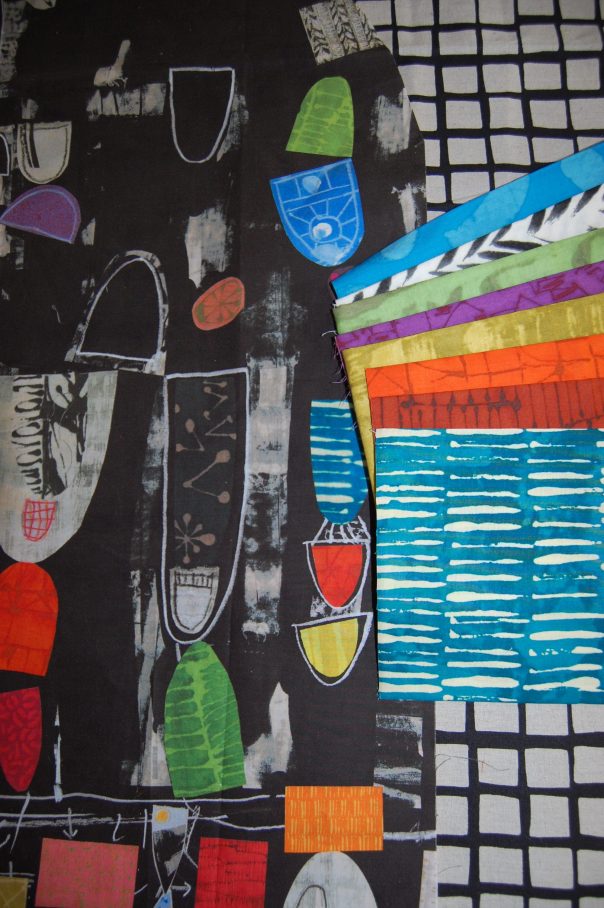
I went to Quilt Market in Portland, OR this past May and was able to buy a modern black and brightly colored panel by Marcia Derse. This panel won’t be available in stores until October. I immediately thought to use it as a part of my Tabard vest!
Fortunately, I also snagged some very small pieces from Marcia’s newest collection, again available in October. The linen fabric is just perfect with these prints.
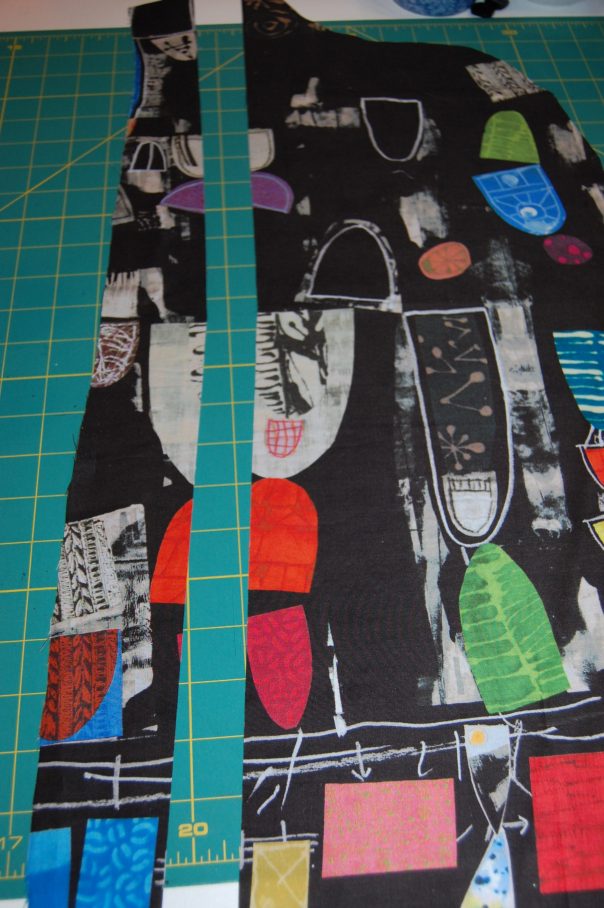
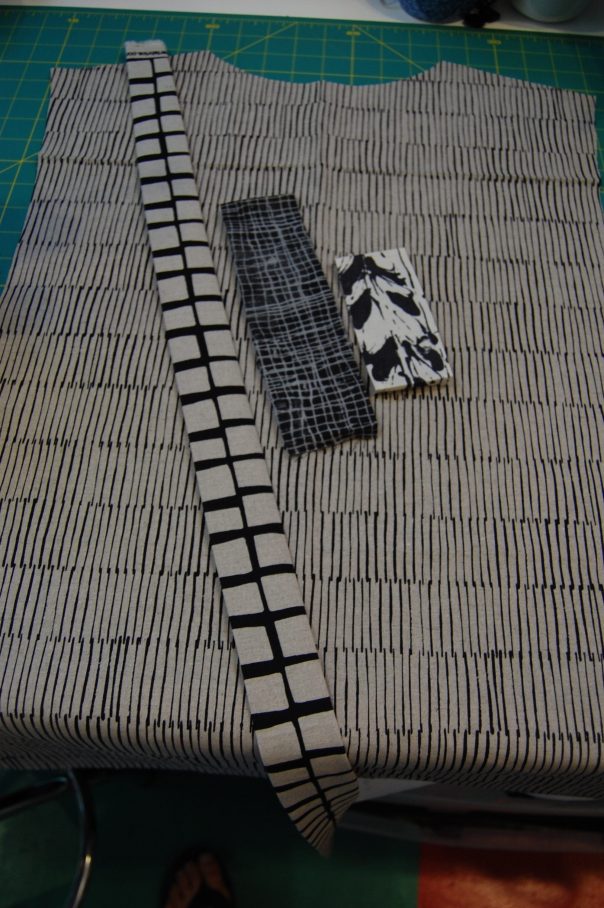
Most of my patterns have tissue pattern pieces included (I always include a range of sizes in one pattern). Notice I have taken a lengthwise fold in some of the tissue (closest to the side, not the center). I did this because I want to insert some improv strips to add color and visual interest to the vest.
I love lots of bold color and plan to use bits of the smaller Marcia Derse pieces to create a long strip of fabric. Remember when I cut out this piece I pinched out some, so now I have to fill it back in with something.
I first cut the panel apart near the pinched out area all the way up through the shoulder area. Tip: Always cut wherever you pinch it out, then you can replace that space with your accent fabric and bring it back to size again. It is a fun and creative trick.
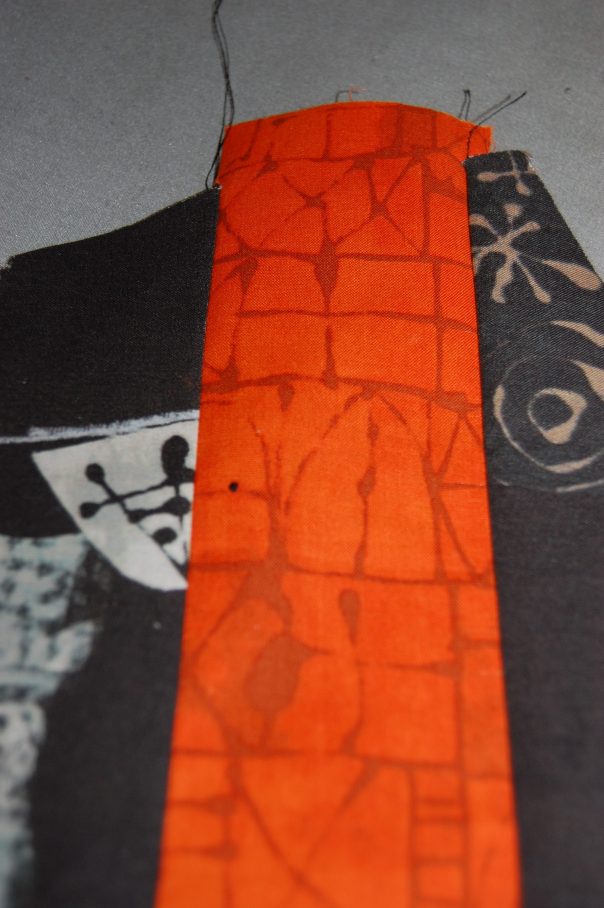
I cut up a few of those colorful pieces and sewed them together and then stitched them to either side of what I cut apart.
Always line up other seams and plan to have extra on either end to trim off. I do not like to run short. I will just snip, snip, the orange fabric in line with the shoulder seam.
While I let the fashion layer dictate what each section will look like, I always, ALWAYS, strive for a long and lean look. I want your eyes to see the whole design in an up and down fashion as this tends to be much more flattering than looking side to side.
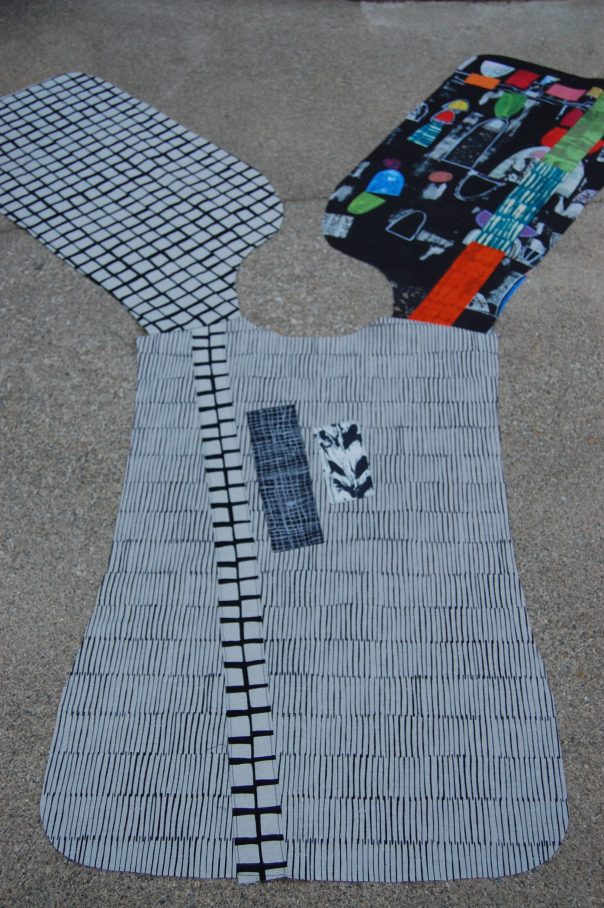
Preparing the embellishments for the back of the vest
When I created the back piece, I wanted to add some embellishment to it as well. For this, I used an applique process rather than slicing and inserting a strip. I cut the pieces I wanted and folded the raw edges under and pressed them. Next I pinned them in place and top-stitched around the edges to attach them to the back as well as finish those raw edges. I didn’t fuse them first though you certainly could if you preferred that method.
After stitching the front pieces to the back, in most other “quilted” version of Terrific Tabard, I would be layering the vest with batting right now (sometimes even before the shoulder seams are stitched together) and quilting all three pieces. Then the vest would be finished off with quilt style binding (albeit much narrower than a quilt binding). These instructions are included in the pattern. But THIS vest will have no batting. I chose to line it traditionally which means no binding necessary! This version really goes together quickly.
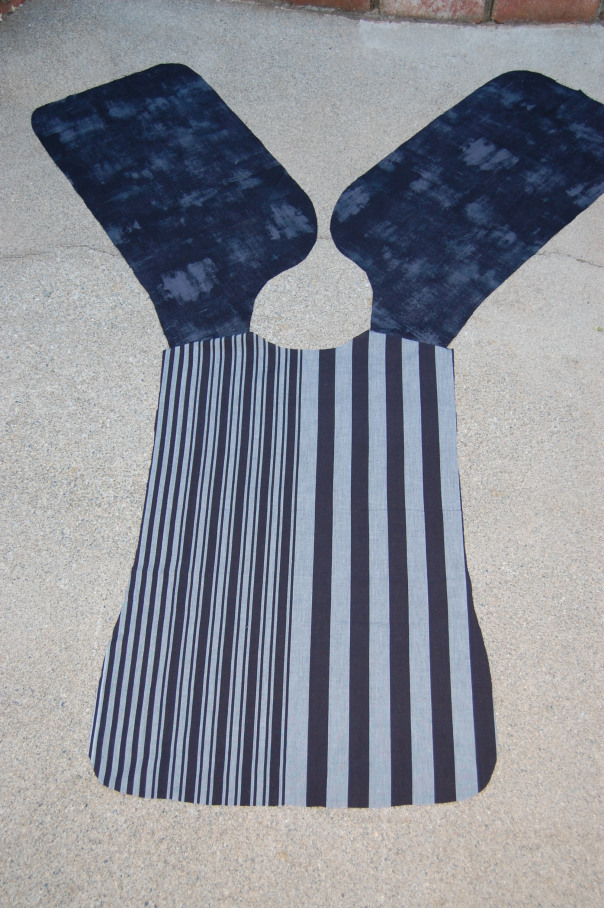
Front and back lining pieces stitched at the shoulders
The two front lining pieces are “Grunge” in black. The back piece lining is a very old (no longer being made) Kaffe Fassett stripe. To line this I pinned it, right sides together, and stitched all the way around using a 1/4″ seam allowance. I made sure to leave about a 6-8″ opening on one side so I could turn it right side out.
Grading a curved seam.
Very carefully grade the seams on the curved portions. Grading just means trimming one piece smaller than the other. When you turn the whole piece inside out and begin to press, press, press (that’s the secret to a beautifully lined piece), all the rounded edges will fall into place as you press. Tip: On dark fabrics use a press cloth (a piece of muslin works) on top of the fabric before you press. Sometimes you get a shine, even on linen.
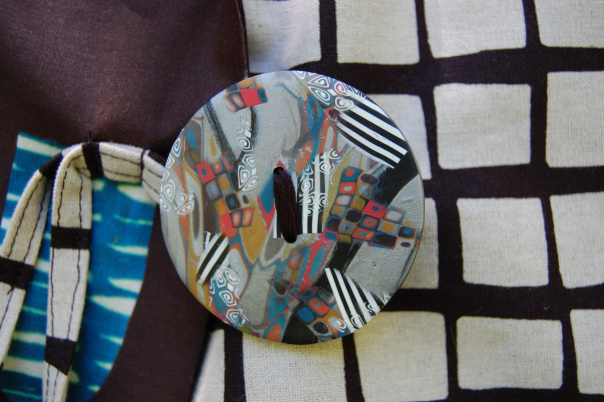
Handmade buttons by Sandra Bruce
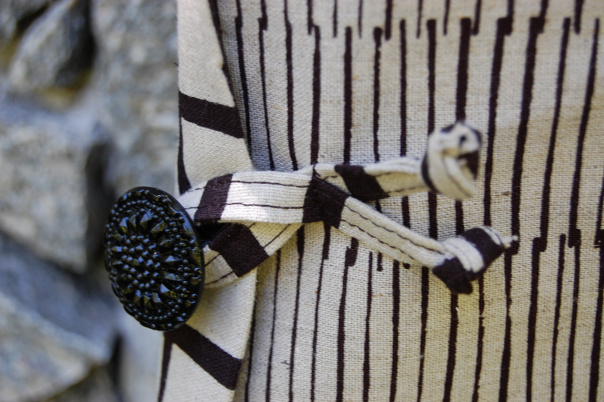
I have a rather large collection of buttons. Here is a group of handmade polymer buttons by the talented Sandra Bruce. I love to buy the buttons I like, knowing that someday, I’ll have the perfect button for a project. Forget buttonholes. I use strips of fabric that have been folded and pressed and stitched into place.
The polymer button I chose for the front is very intricate and it’s really BIG, but I think it blends in nicely.
The two side buttons are from my glass button stash. I know, I know, it’s a sickness, but one I don’t want to get over. Ha, ha.
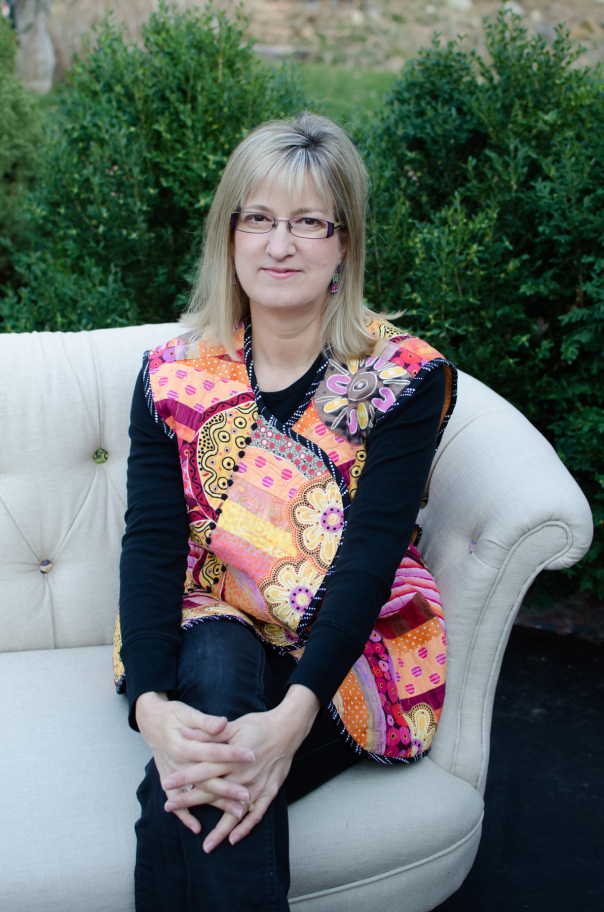
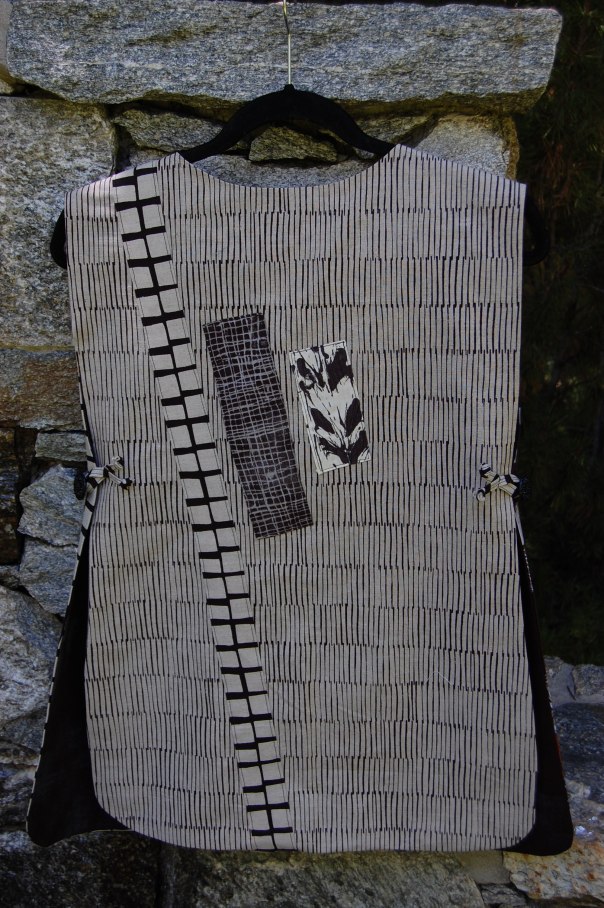
It’s finished!!
I love my new vest. I can’t wait to wear it (not sure when since it is still summer!), but I’ll be ready when cooler weather comes.
Here is the finished back side of the vest. I love the look of the larger scale linen print slicing through the narrower lines.
Worn with just one lapel folded out.
One last way to style this Terrific Tabard, fold back the lapel on just one side.
If you like what you have seen, please join me at Designs by Heidi for more fun and creative happenings. I love sewing “Art to Wear.” You can also follow me on Instagram to see the latest patterns and classes I offer. Thank you again Bernie for letting me join in with you all at Needle & Foot.
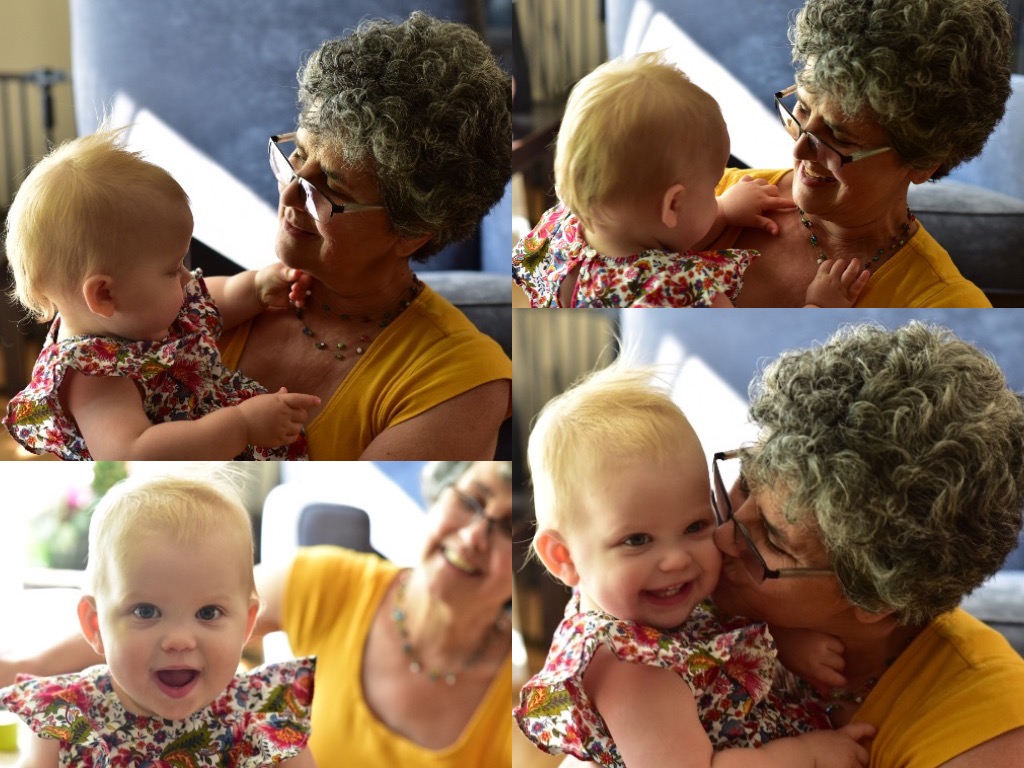
Just checking in before we leave for another trip! We had the best time ever in Vermont. The weather was horrible with record breaking heat and humidity – truly awful, but who cares? The kids have A/C in the house and I was really there to spend time with my grand daughter so it was all good.
We had such a nice visit – lots of water play, time at the lake and hikes to the river. I was really surprised to see how adventurous this little girl was. She doesn’t balk at anything. From playing in the freezing cold river to swimming in the lake, she was up for it. This girl is on the go constantly.
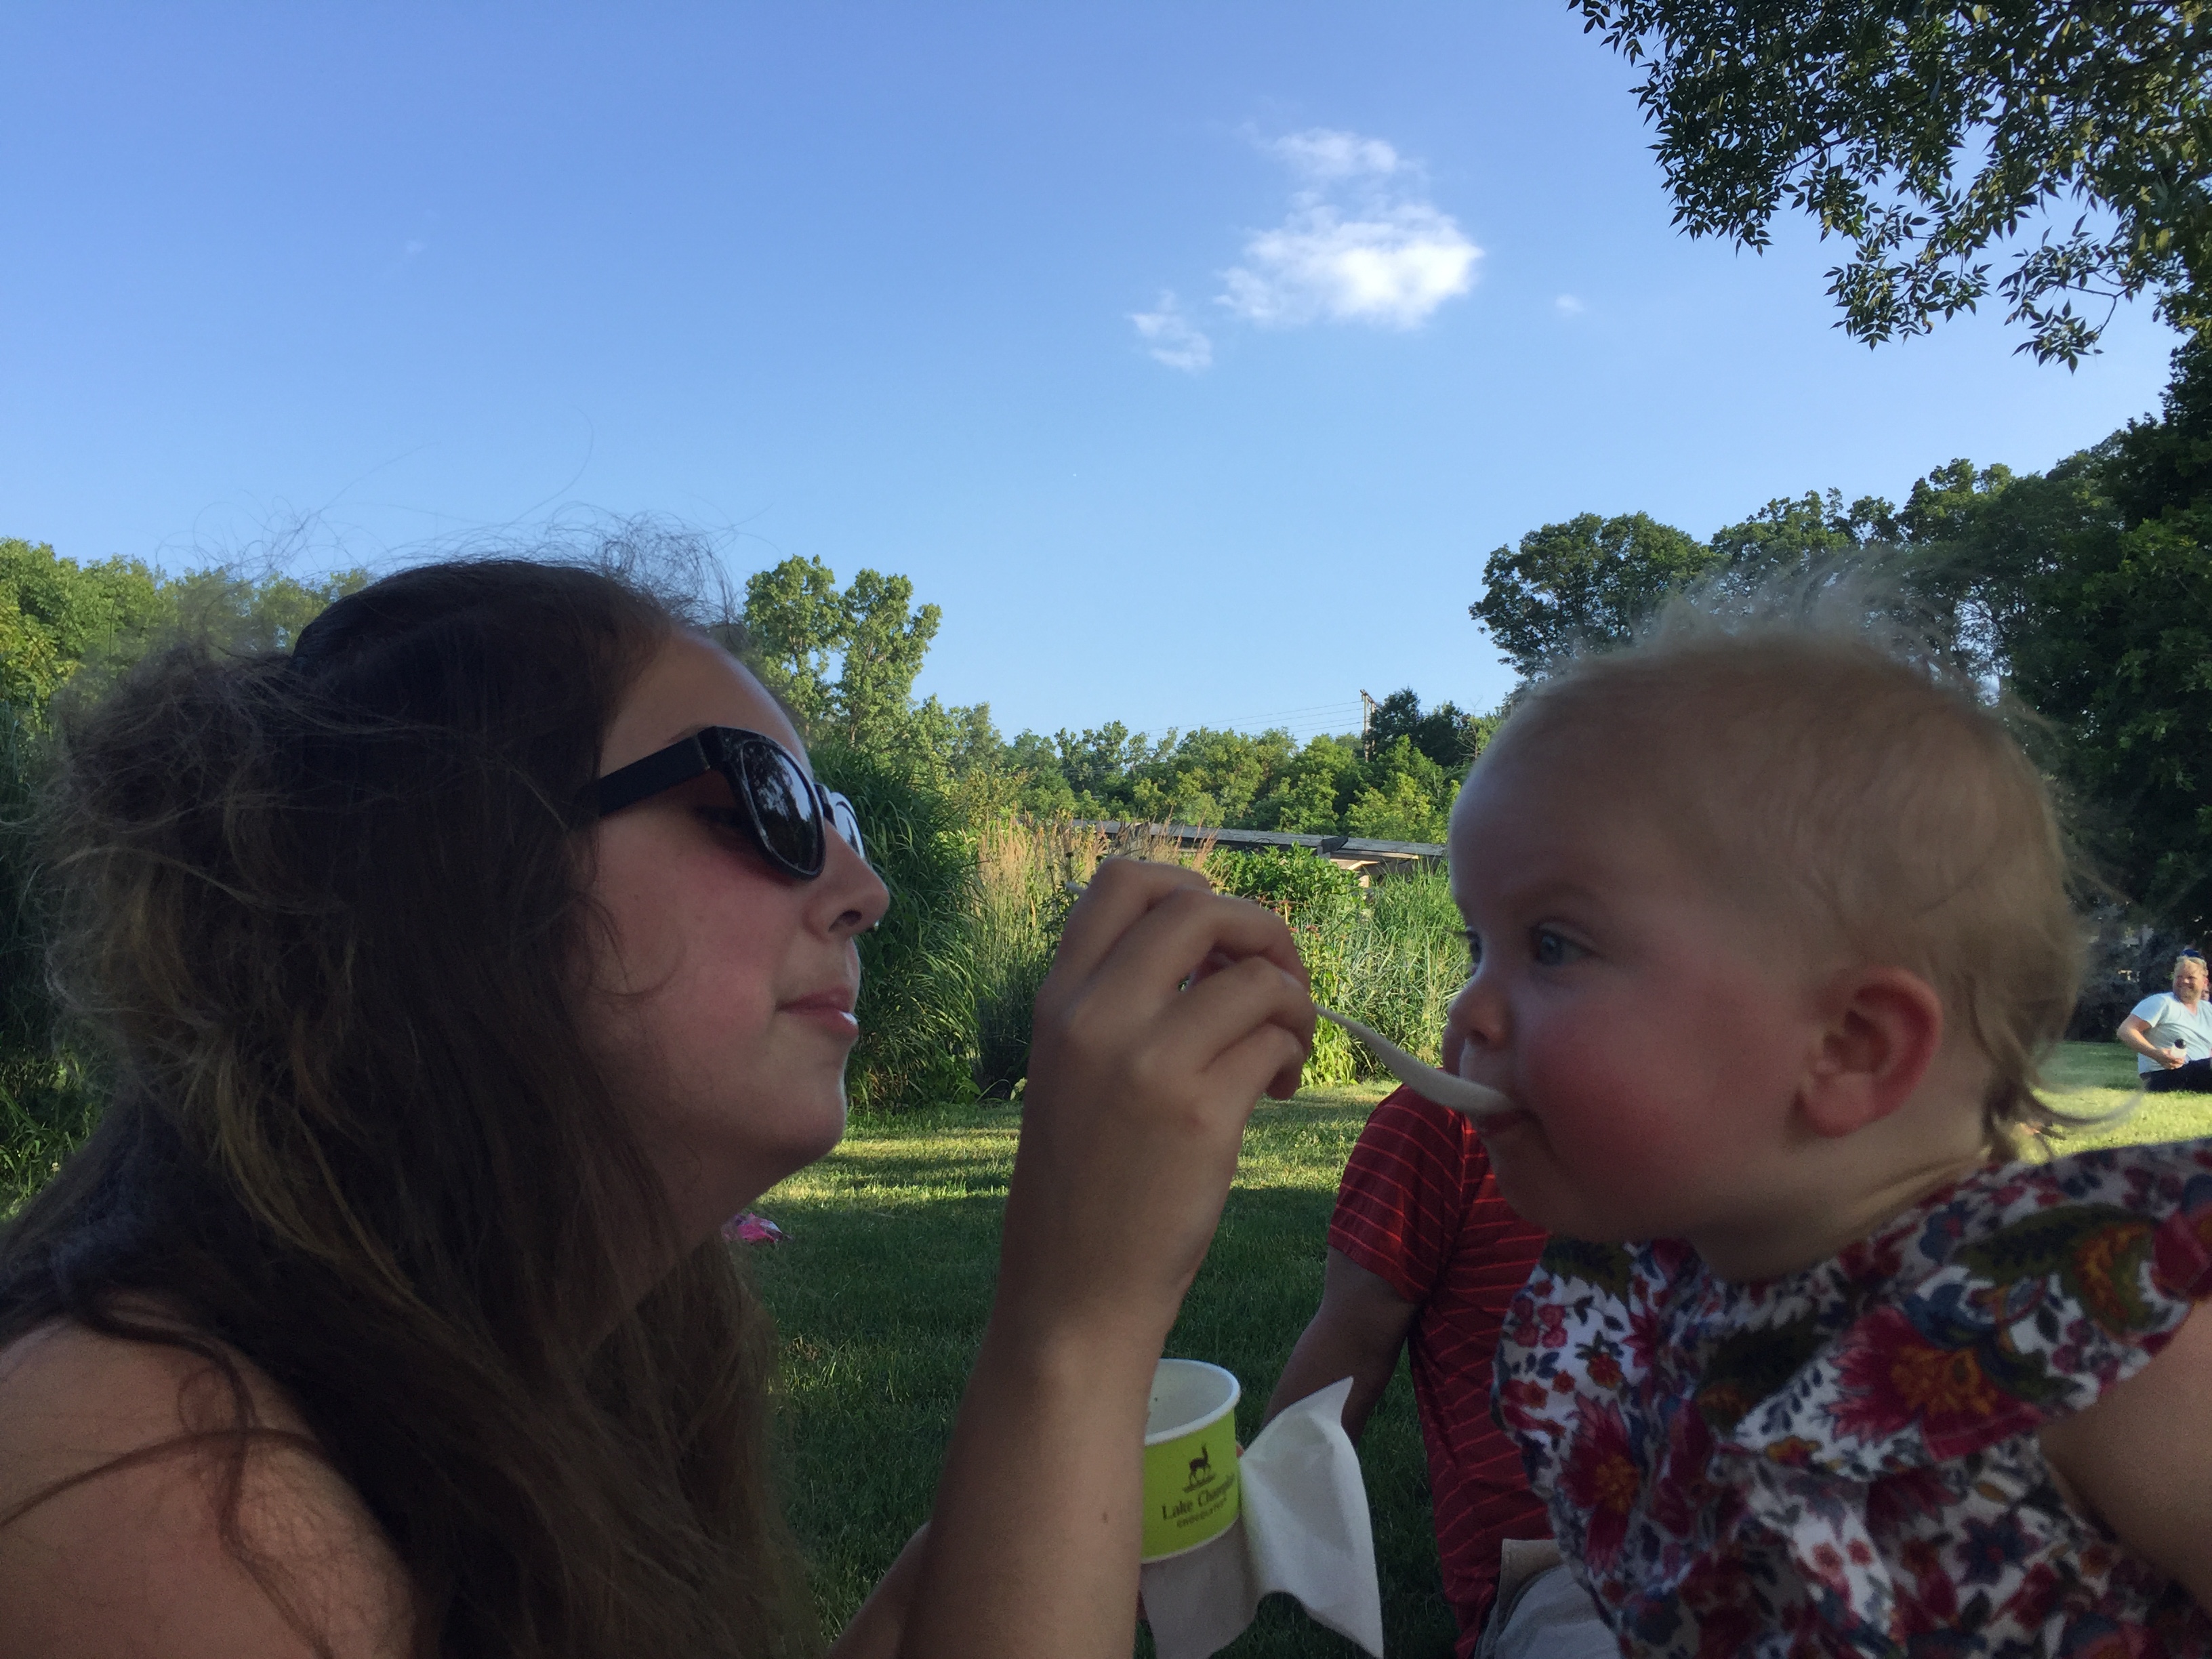
Julia spent time reading books to her and sharing ice cream with her. The baby was cutting some molars and it was bothersome. Julia made popsicles for her with pureed strawberries, banana and some yogurt. What a nice auntie! They were close buddies by the end of our week there.
I am hoping as she gets older, she will remember us from visit to visit. We do FaceTime quite a bit which will help. It is hard to be a grammy from 3,000 miles away.
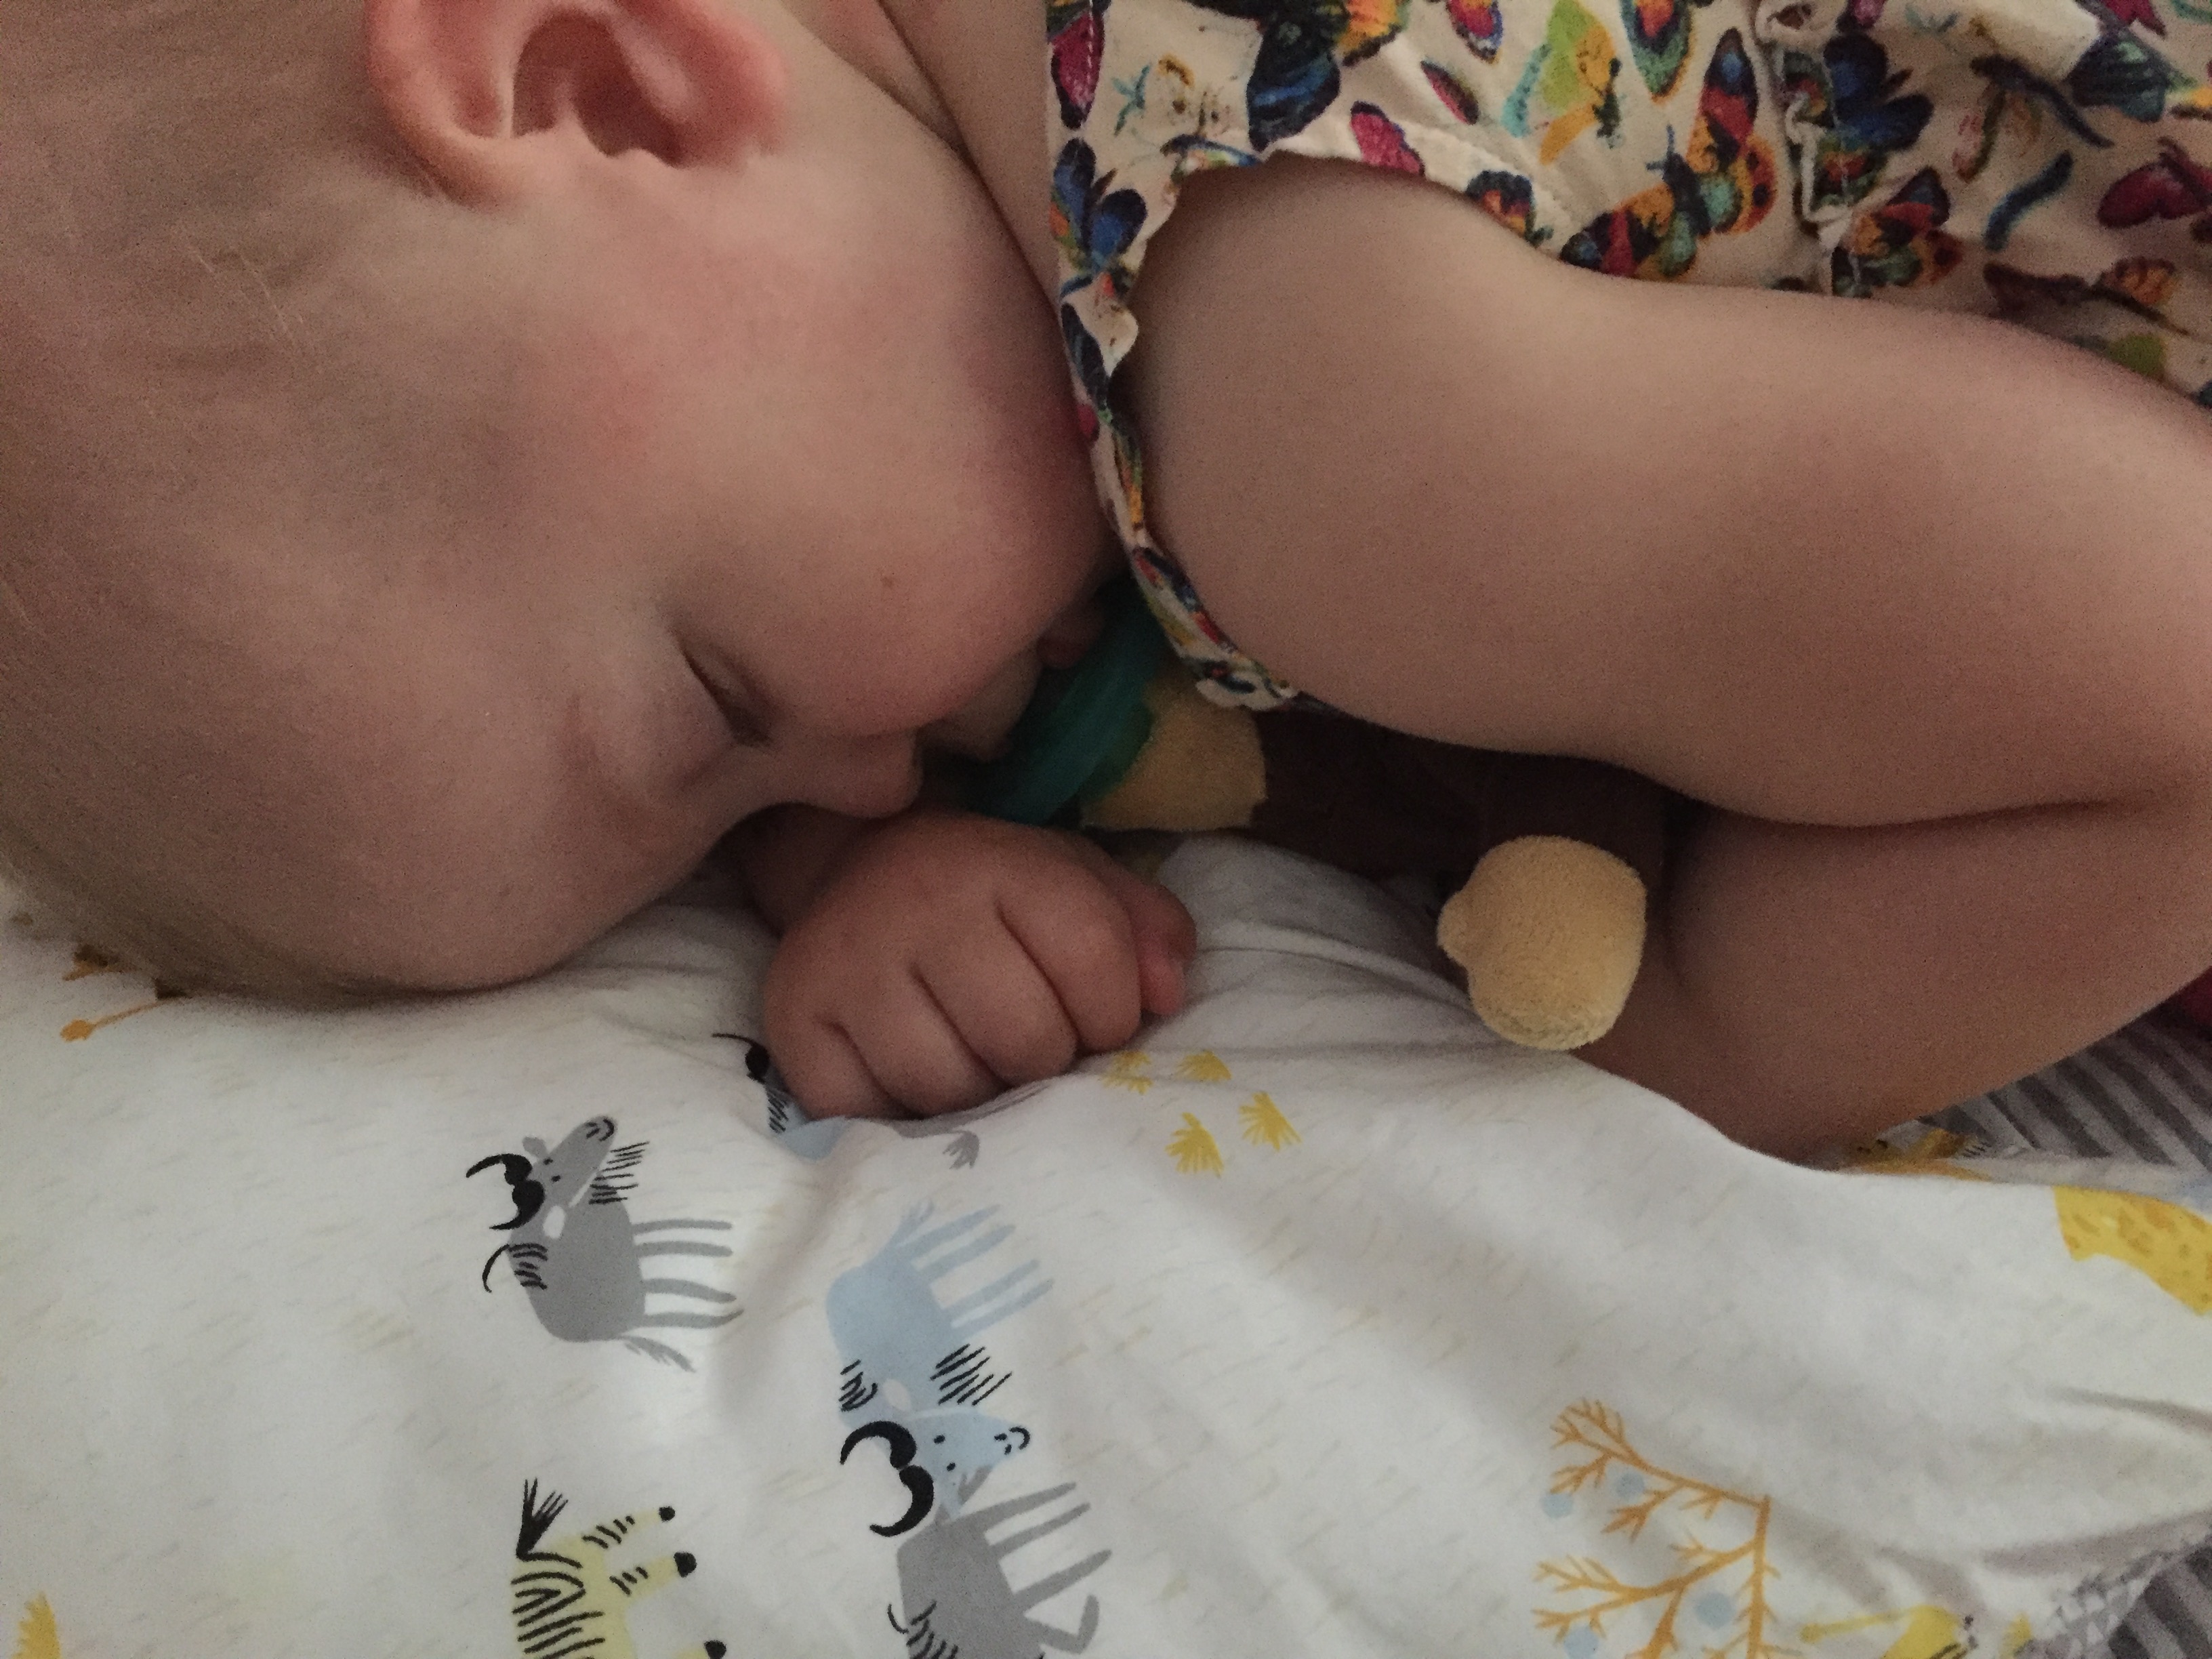
I really enjoyed rocking her which she will only do when she is super tired. I had the treat of rocking her to sleep just once. She is usually far too busy for that.
Organizing for the next trip!
We got home Friday night and I spent Saturday catching up on orders that came in while I was gone. My husband has this week off so we are going to spend the first half of it at the beach. We are back Thursday afternoon and then life goes back to normal. Like I said in a recent post, I miss my sewing room!! I don’t have any hand stitching to bring with us but I am going to do some free motion doodling. I have two quilt tops I need to quilt so this will be a good time to practice drawing out some motifs.
Hope your summer has started off well! Back soon – hopefully with a project of some sort to share!