Monthly Archives: February 2015

On Gratitude

Hi Everyone!  Two posts in as many days. How about that?

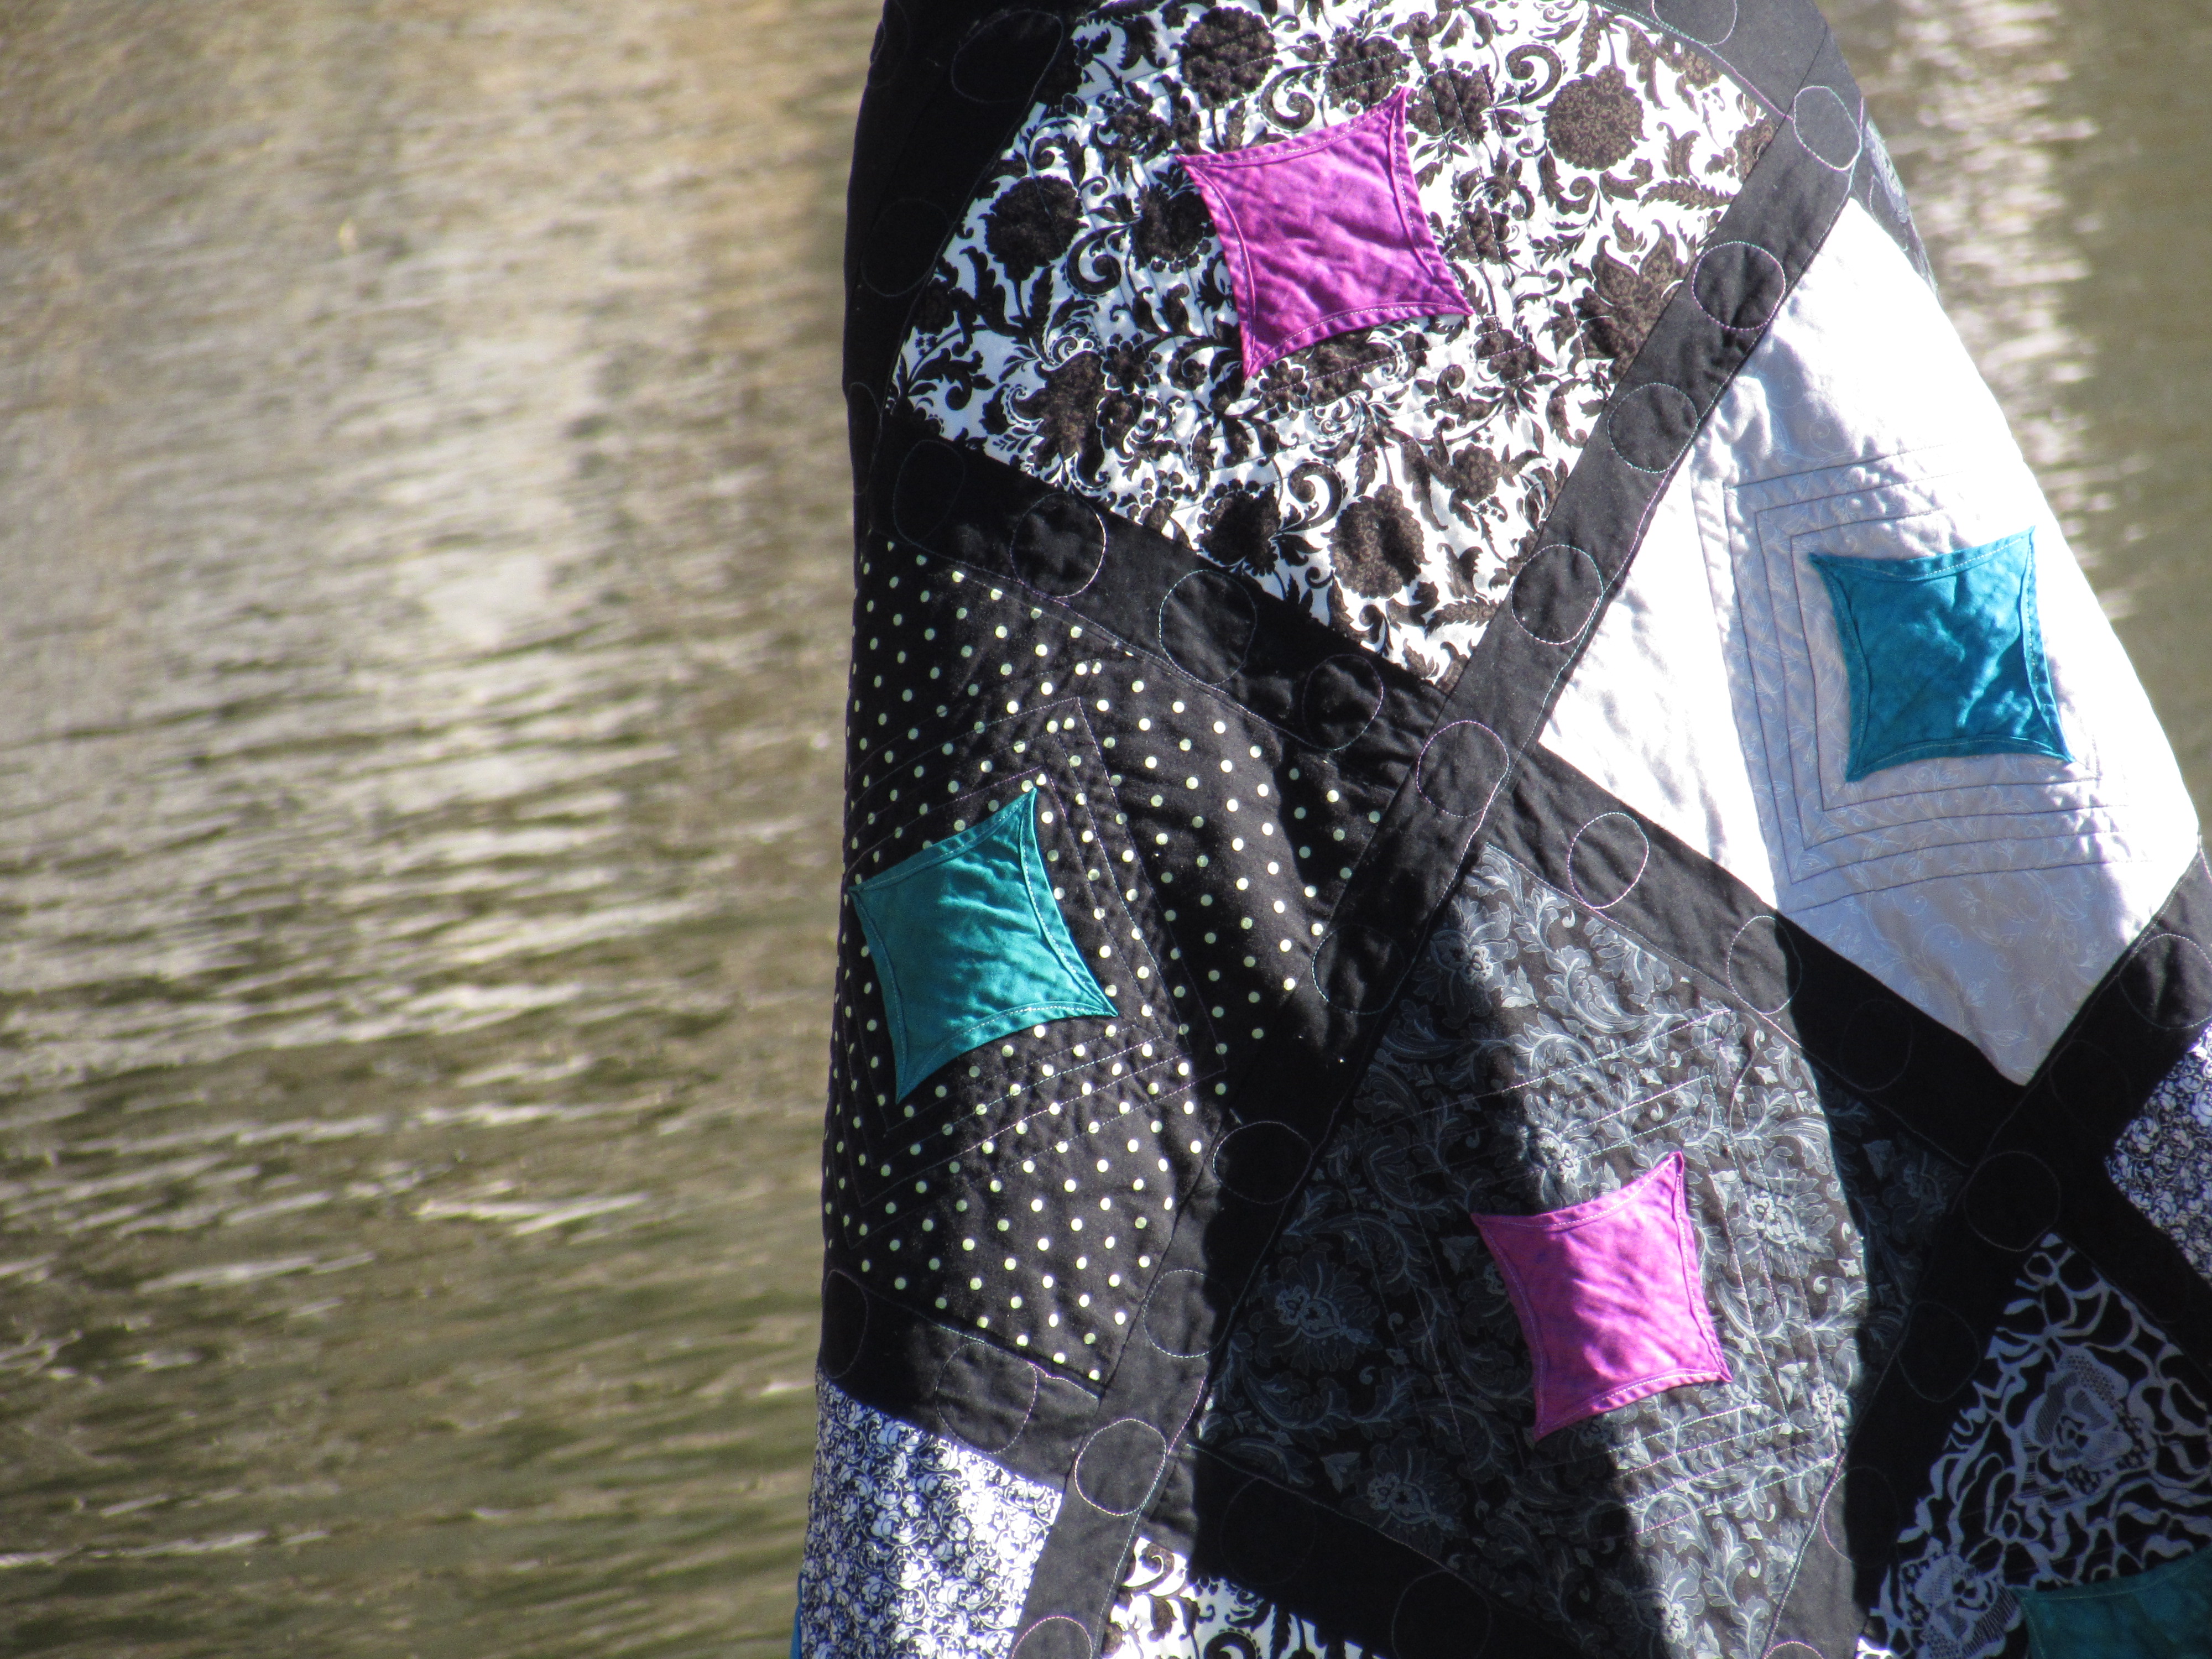
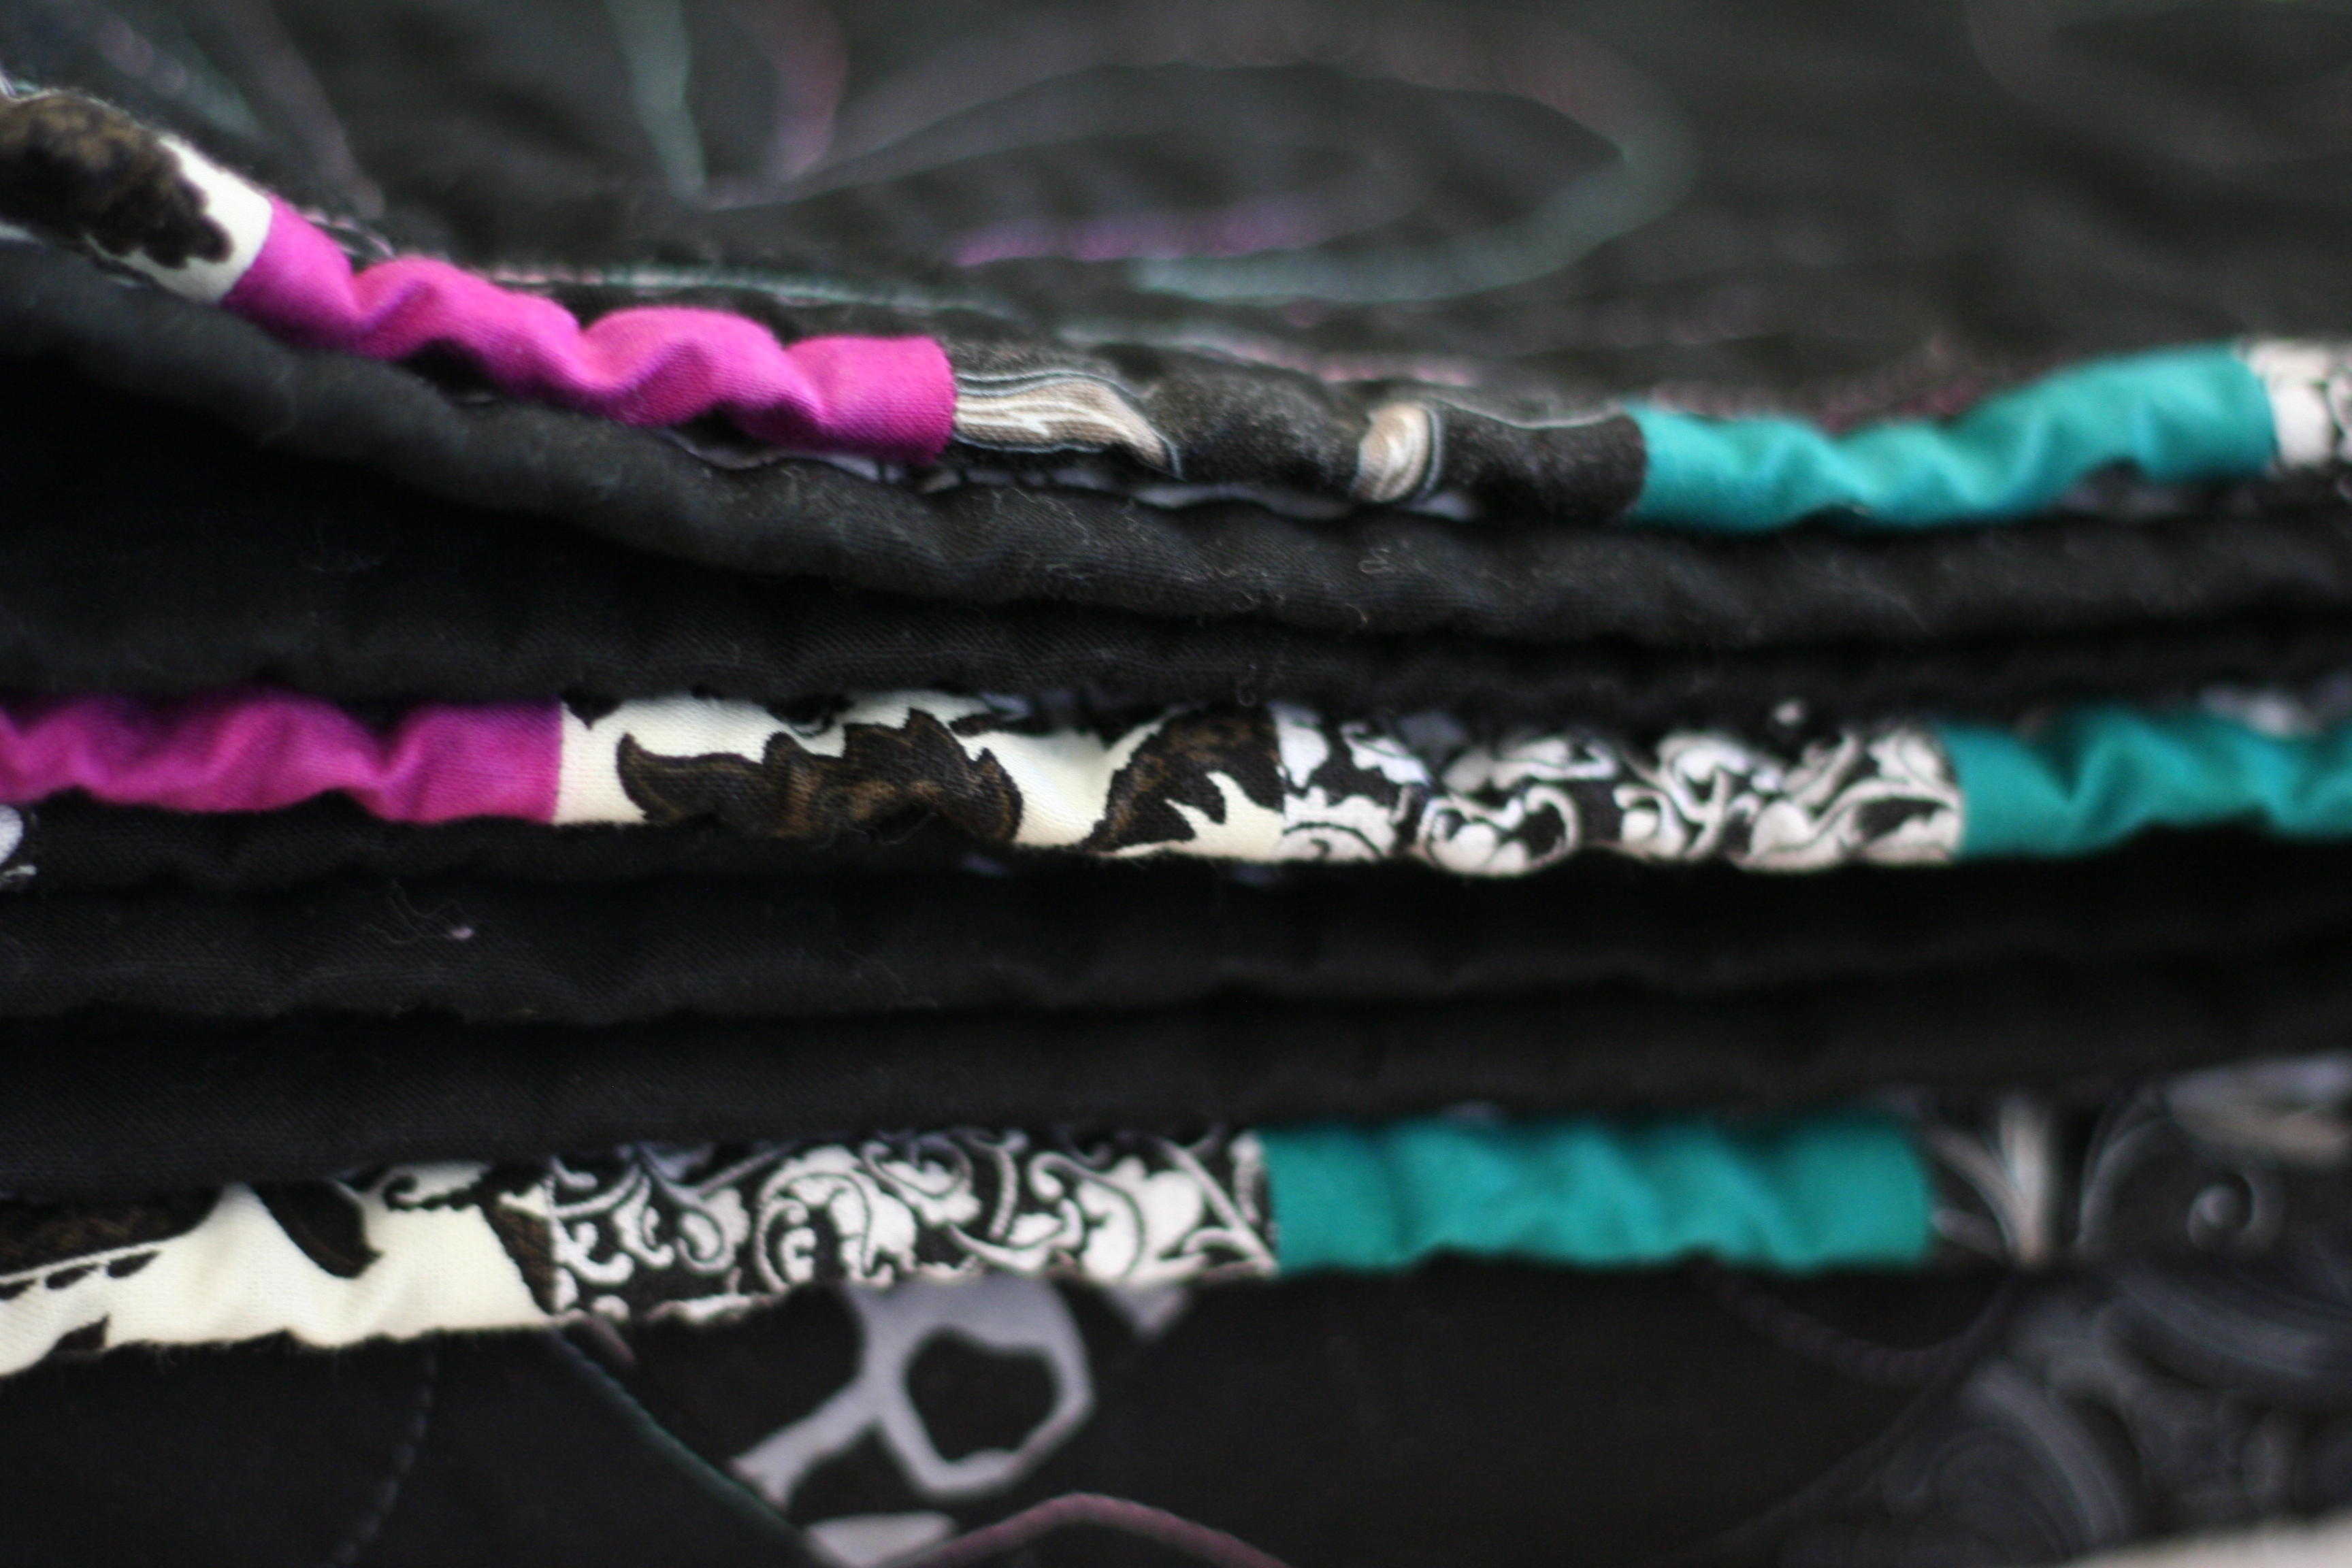
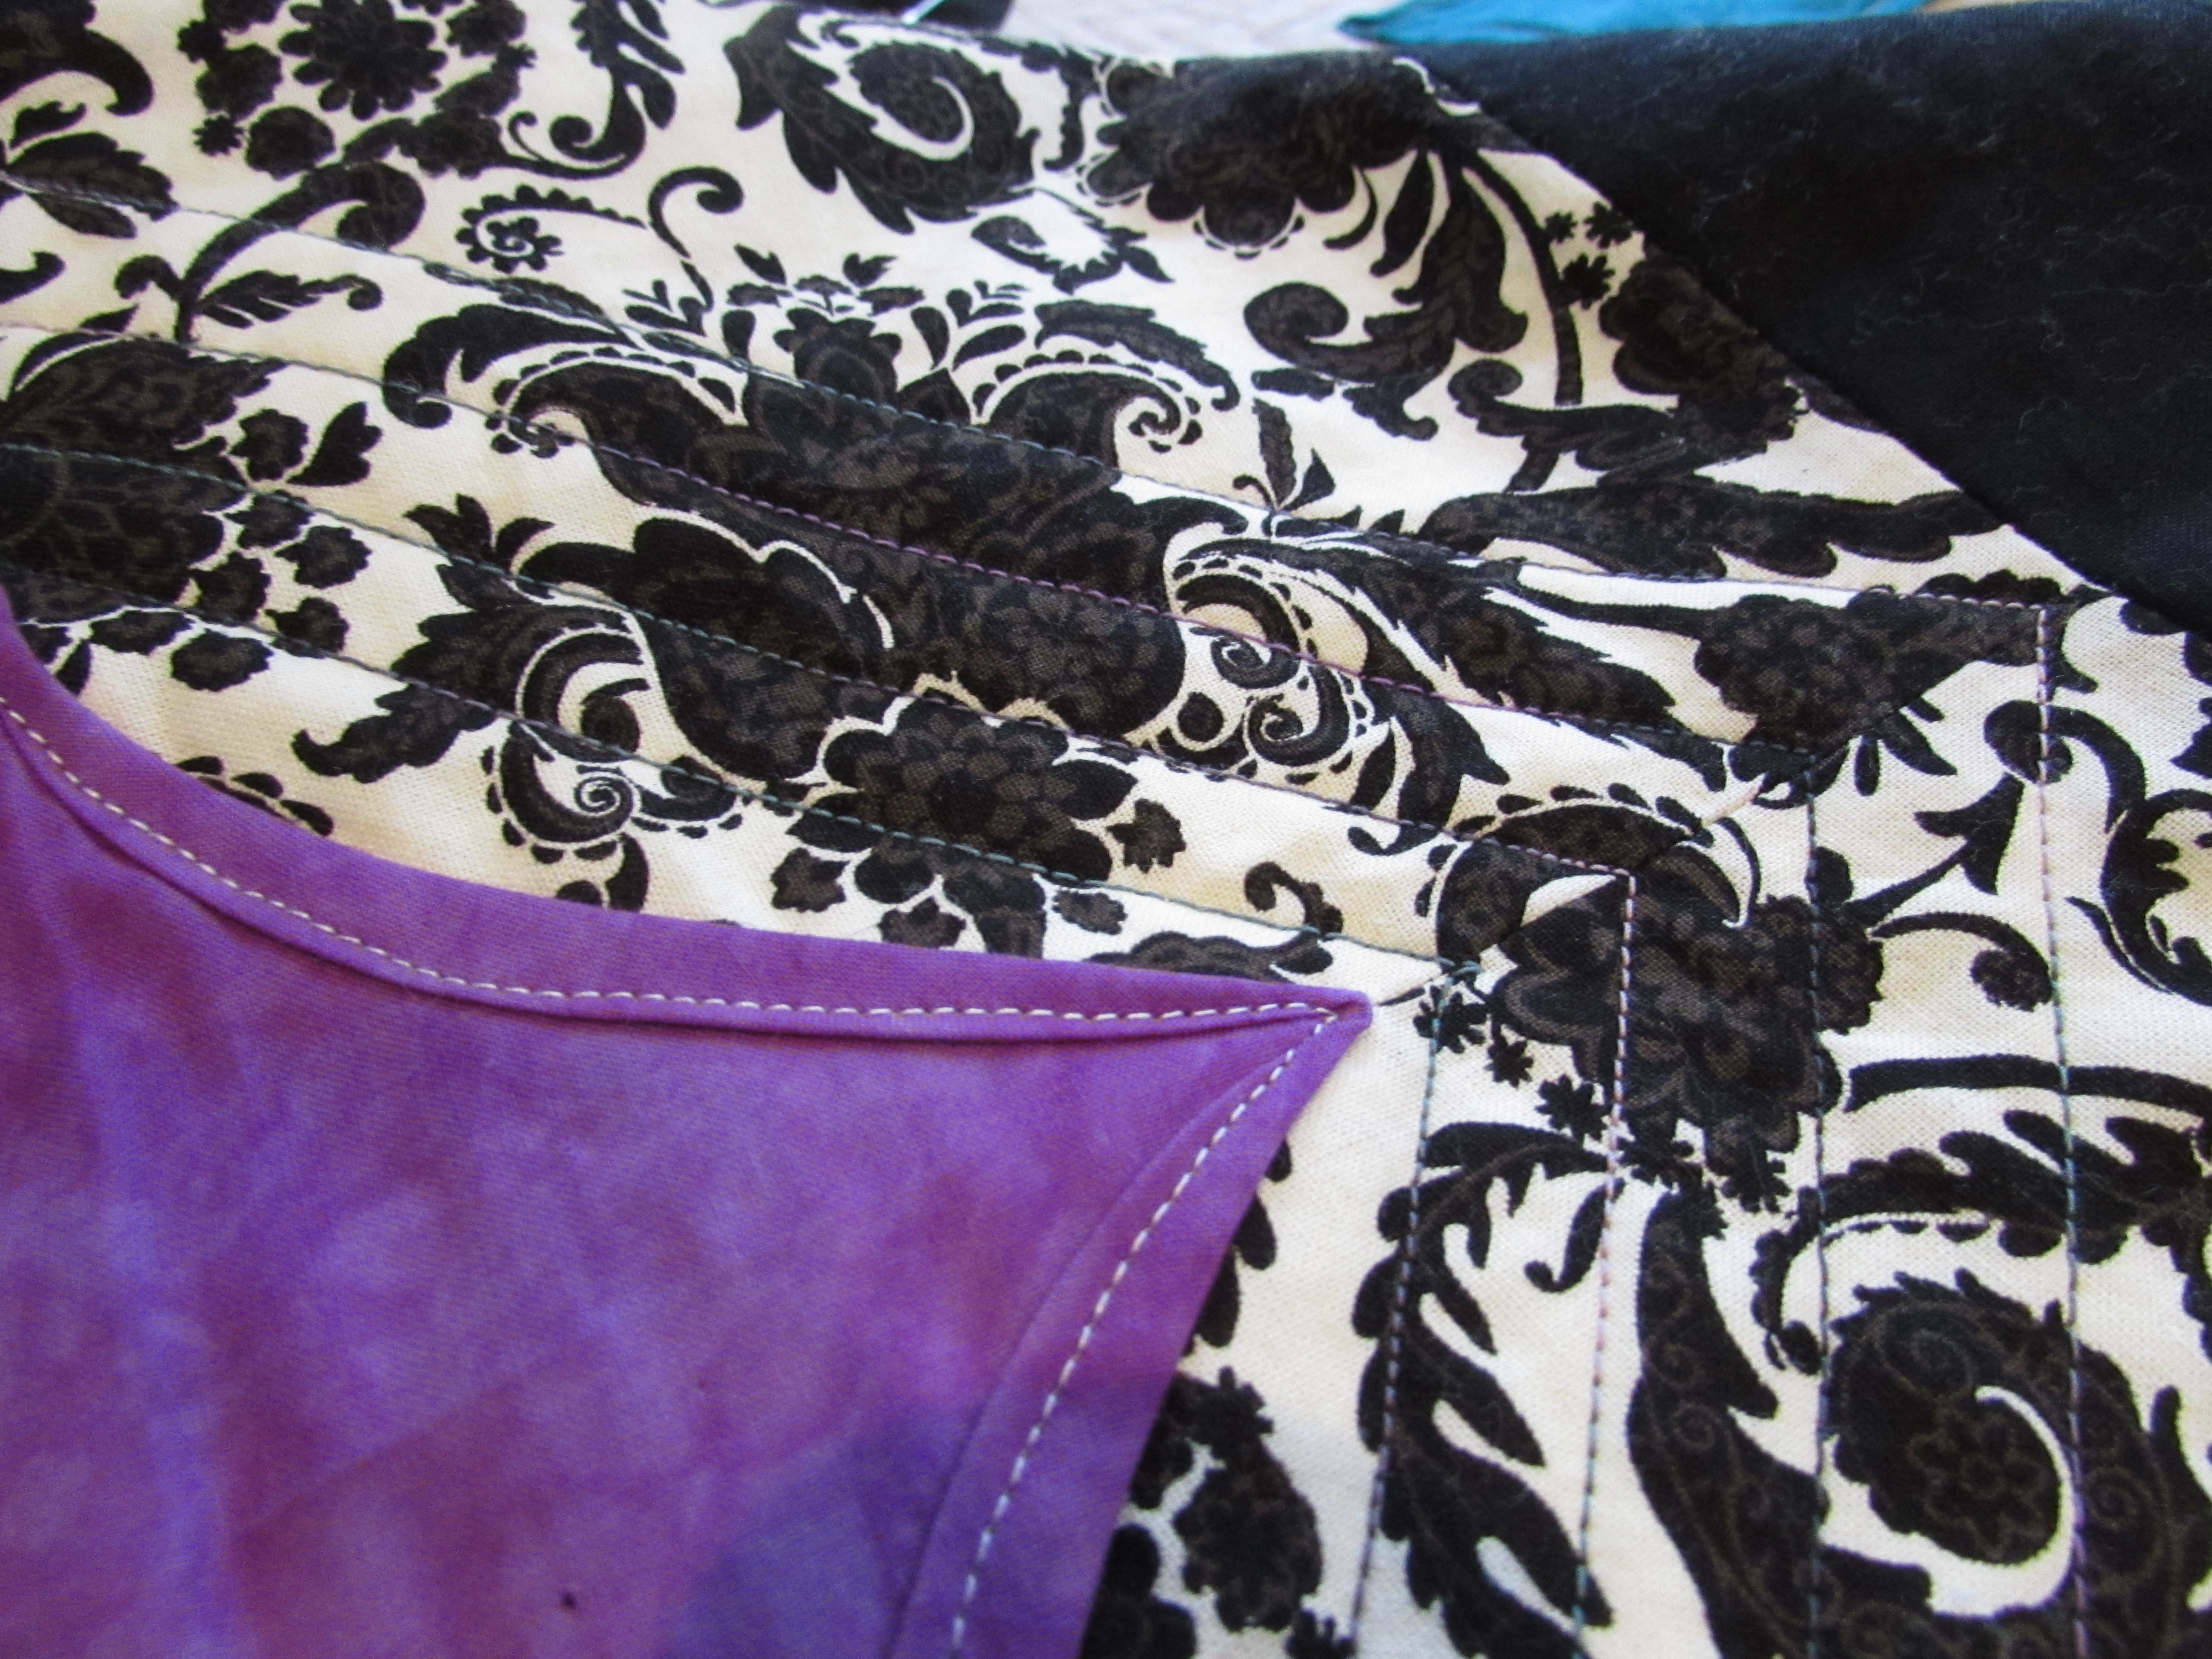
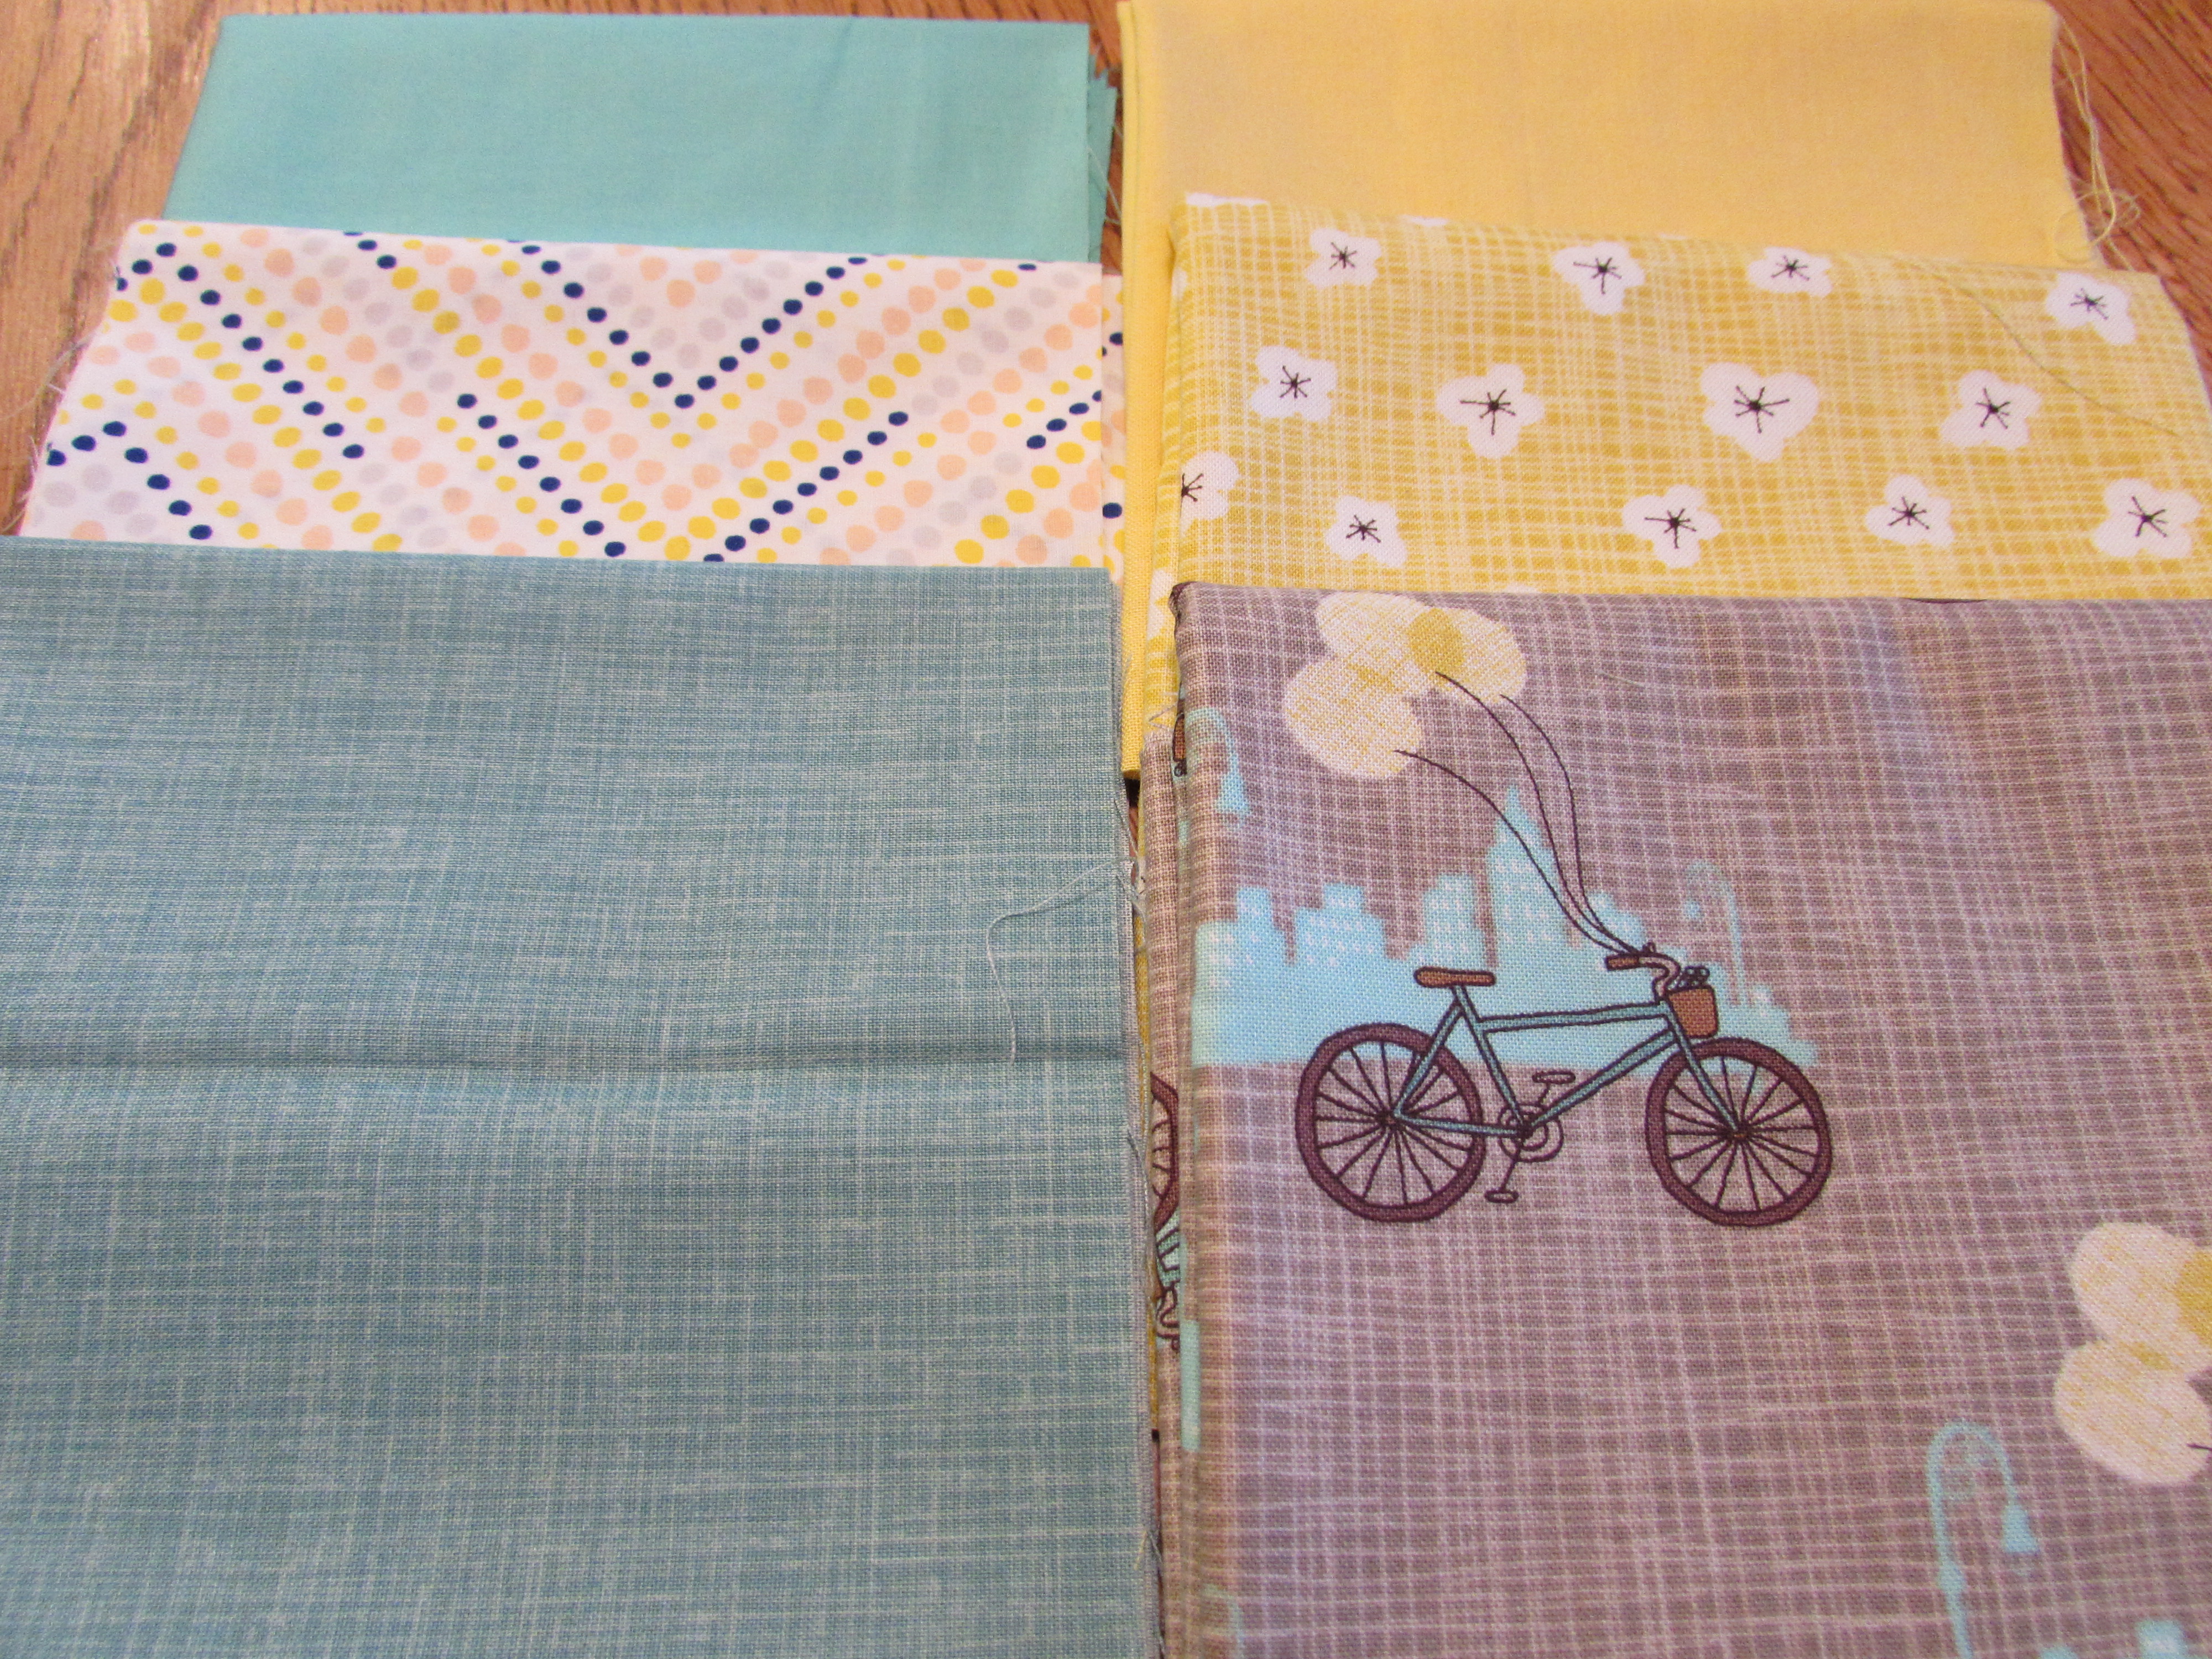
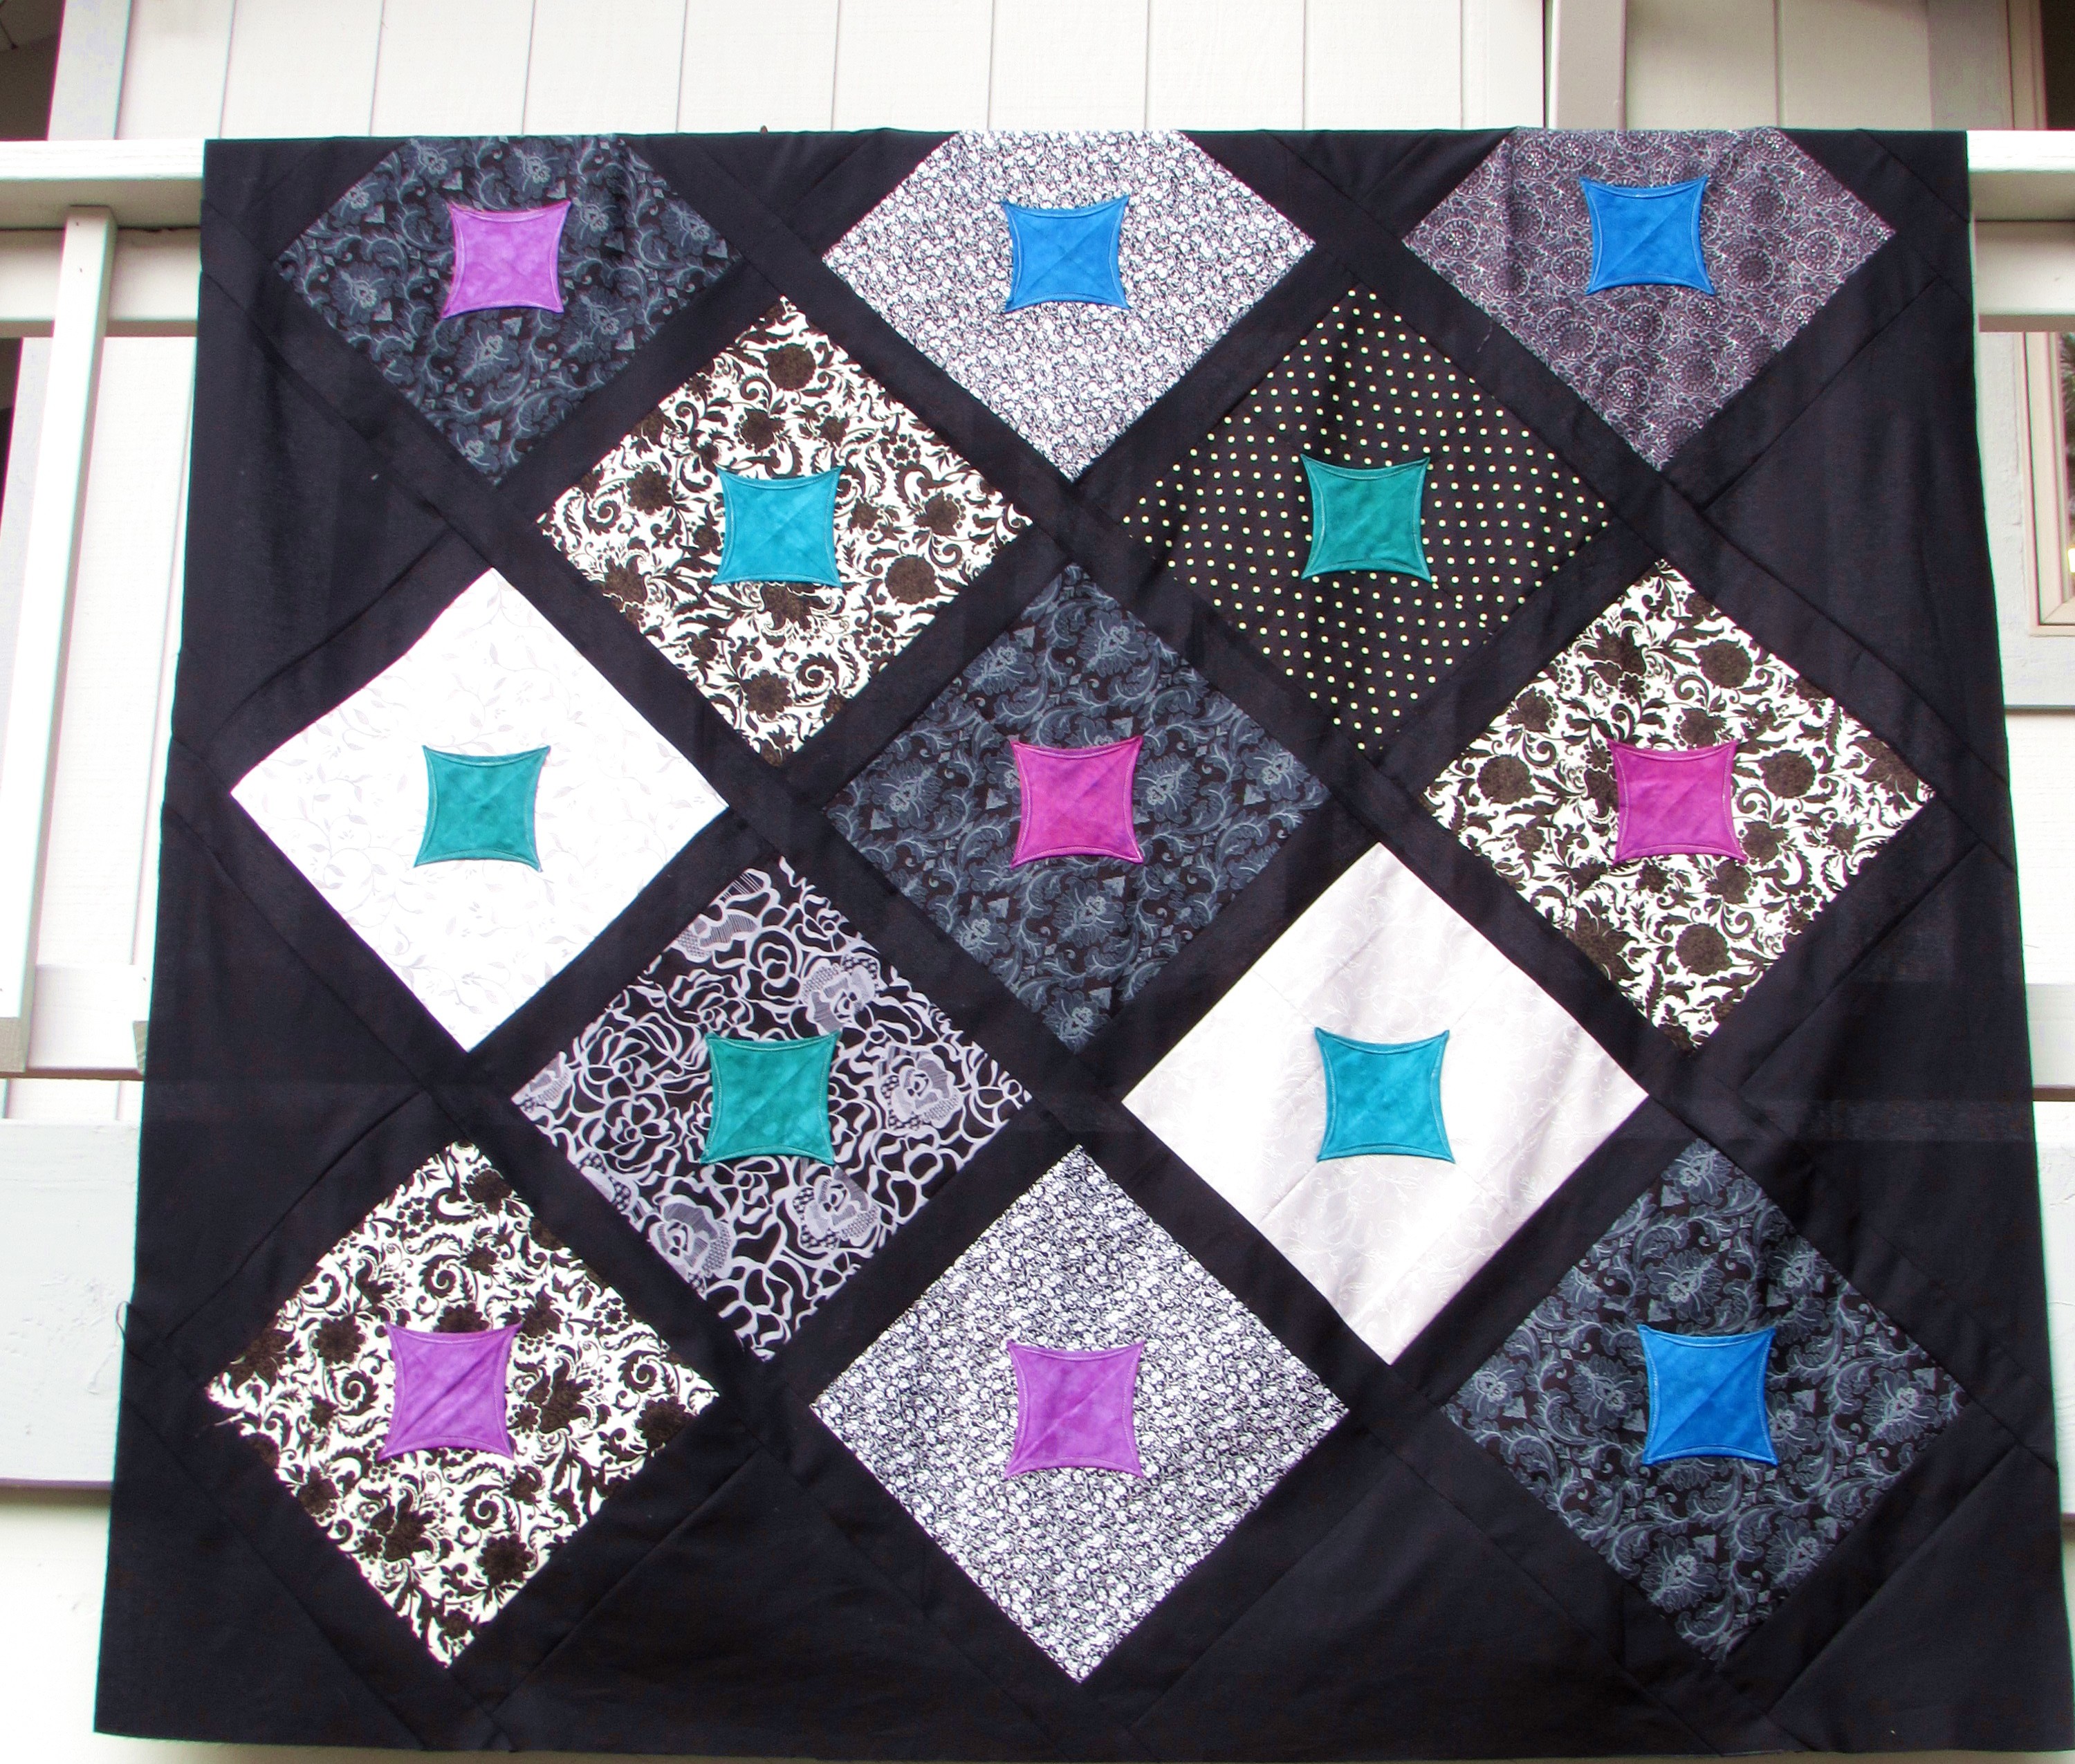
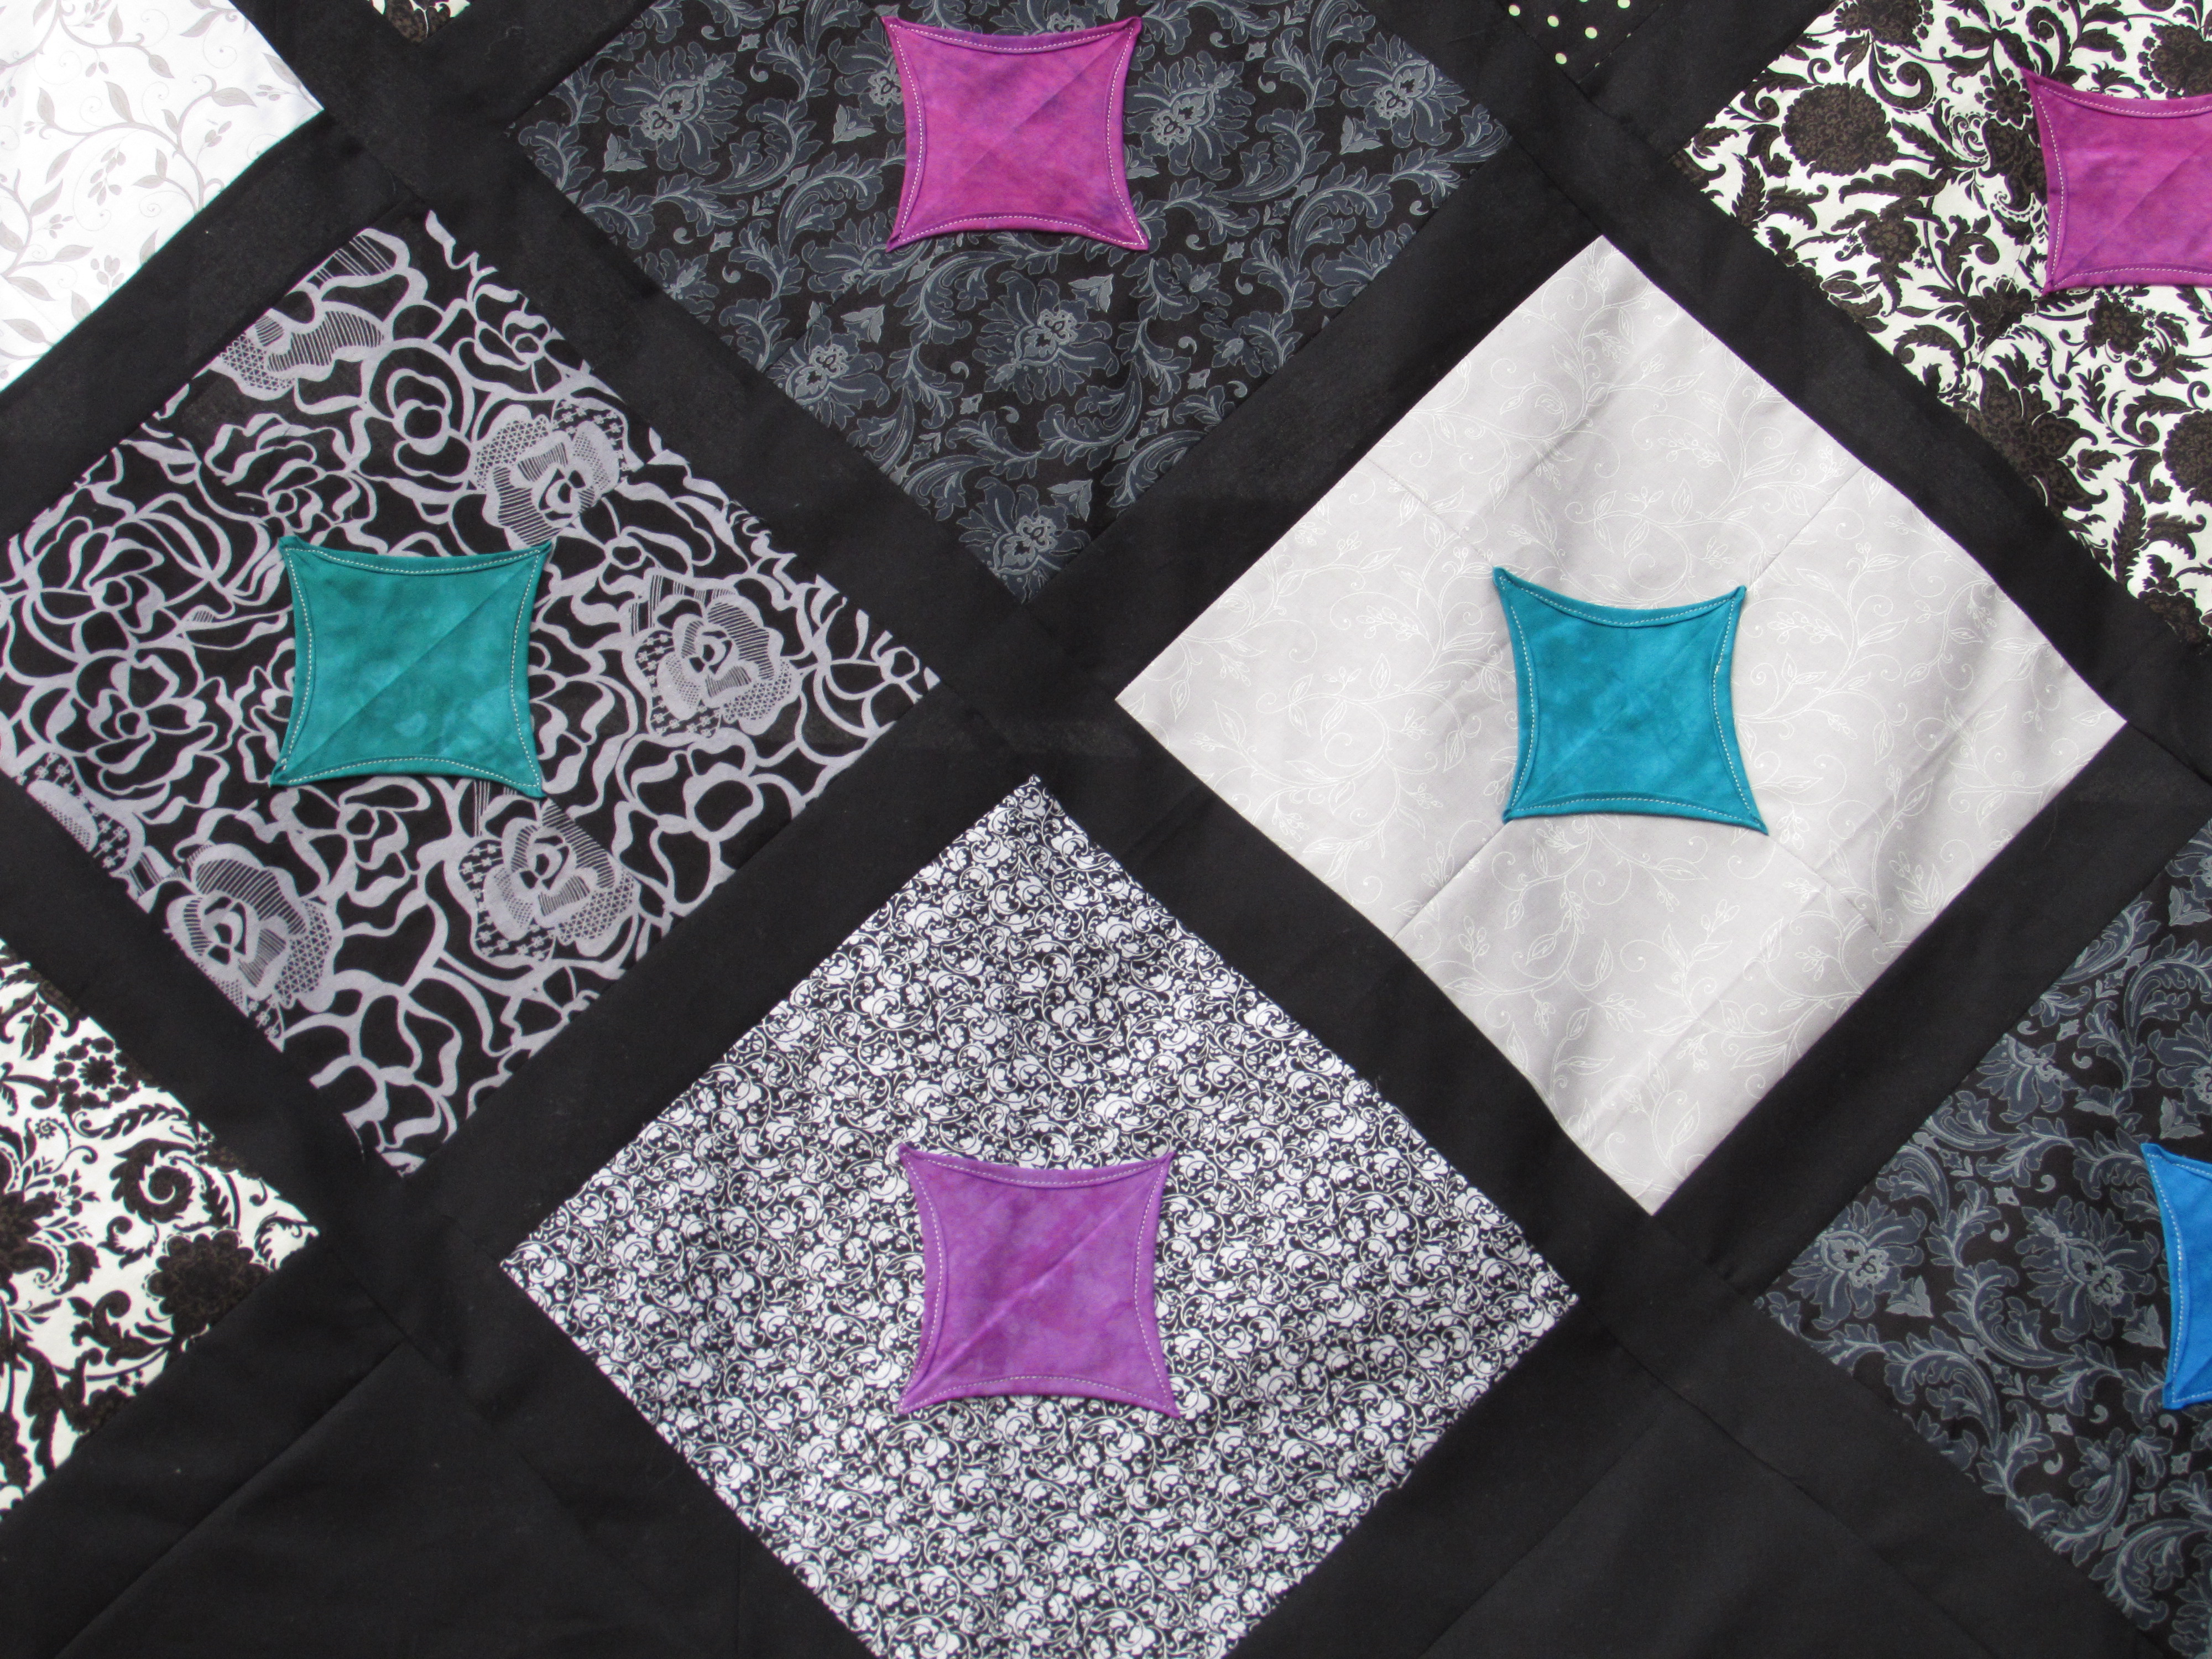
I have recently started reading Yvonne’s blog over at Quilting Jetgirl. She is a really talented quilter and her blog is fun to read. She has begun a link up on Thursdays that she calls Thankful Thursdays. This week she has a great post about the inspirational quilters from Gees Bend that recently spoke at Quilt Con. It was really an interesting read. I think it is a timely reminder to focus on what we are grateful for. My last post was a bit of a downer because I recently finished a quilt and was not so thrilled with the final product. Rather than point out the nice things such as the amazing, hand dyed fabric that I used as the center accent fabrics (which I won from the monthly giveaway sponsored by Angela on soscrappy.com!) or the overall look of the quilt, all I could see was the less than perfect quilting I had done. Way too negative.

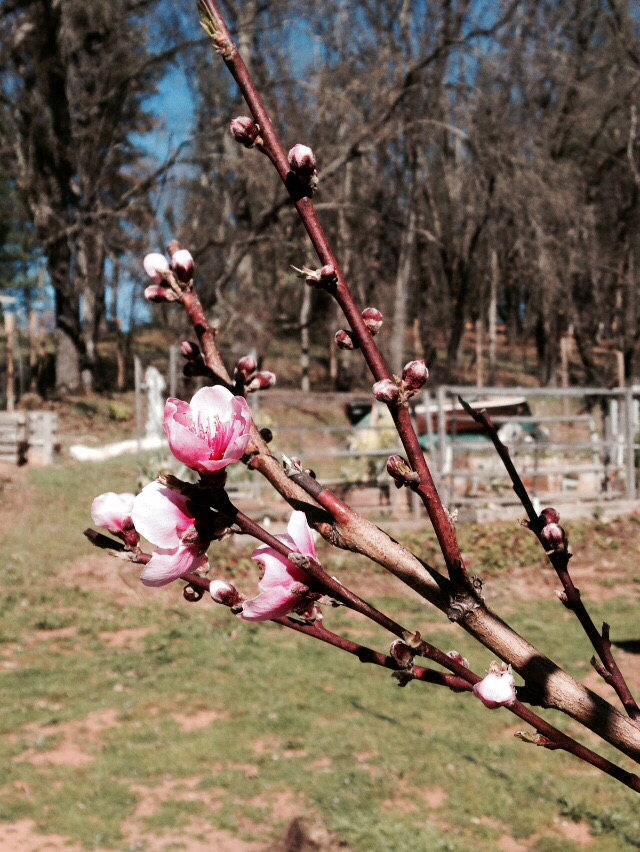
So this post is a reminder for me to remain mindful of the positive. This week I am filled with gratitude for the amazing spring blossoms that I have in my garden. We are having a very early spring – it has been unseasonably warm here in CA while the rest of the world is enduring a very harsh winter.

My peach tree is blossoming. Crazy early and I am hoping we will still get peaches. Hard to say with the blossoms coming about in February. Either way, it looks lovely.

image

Daffodils and primroses are in bloom as well.

006

004

Hard to believe how the climate can be so incredibly opposite from one side of the country to the other. The silver lining to a crazy warm winter are these blossoms that are popping up in my yard. Hope the eastern half of the world begins to thaw soon.

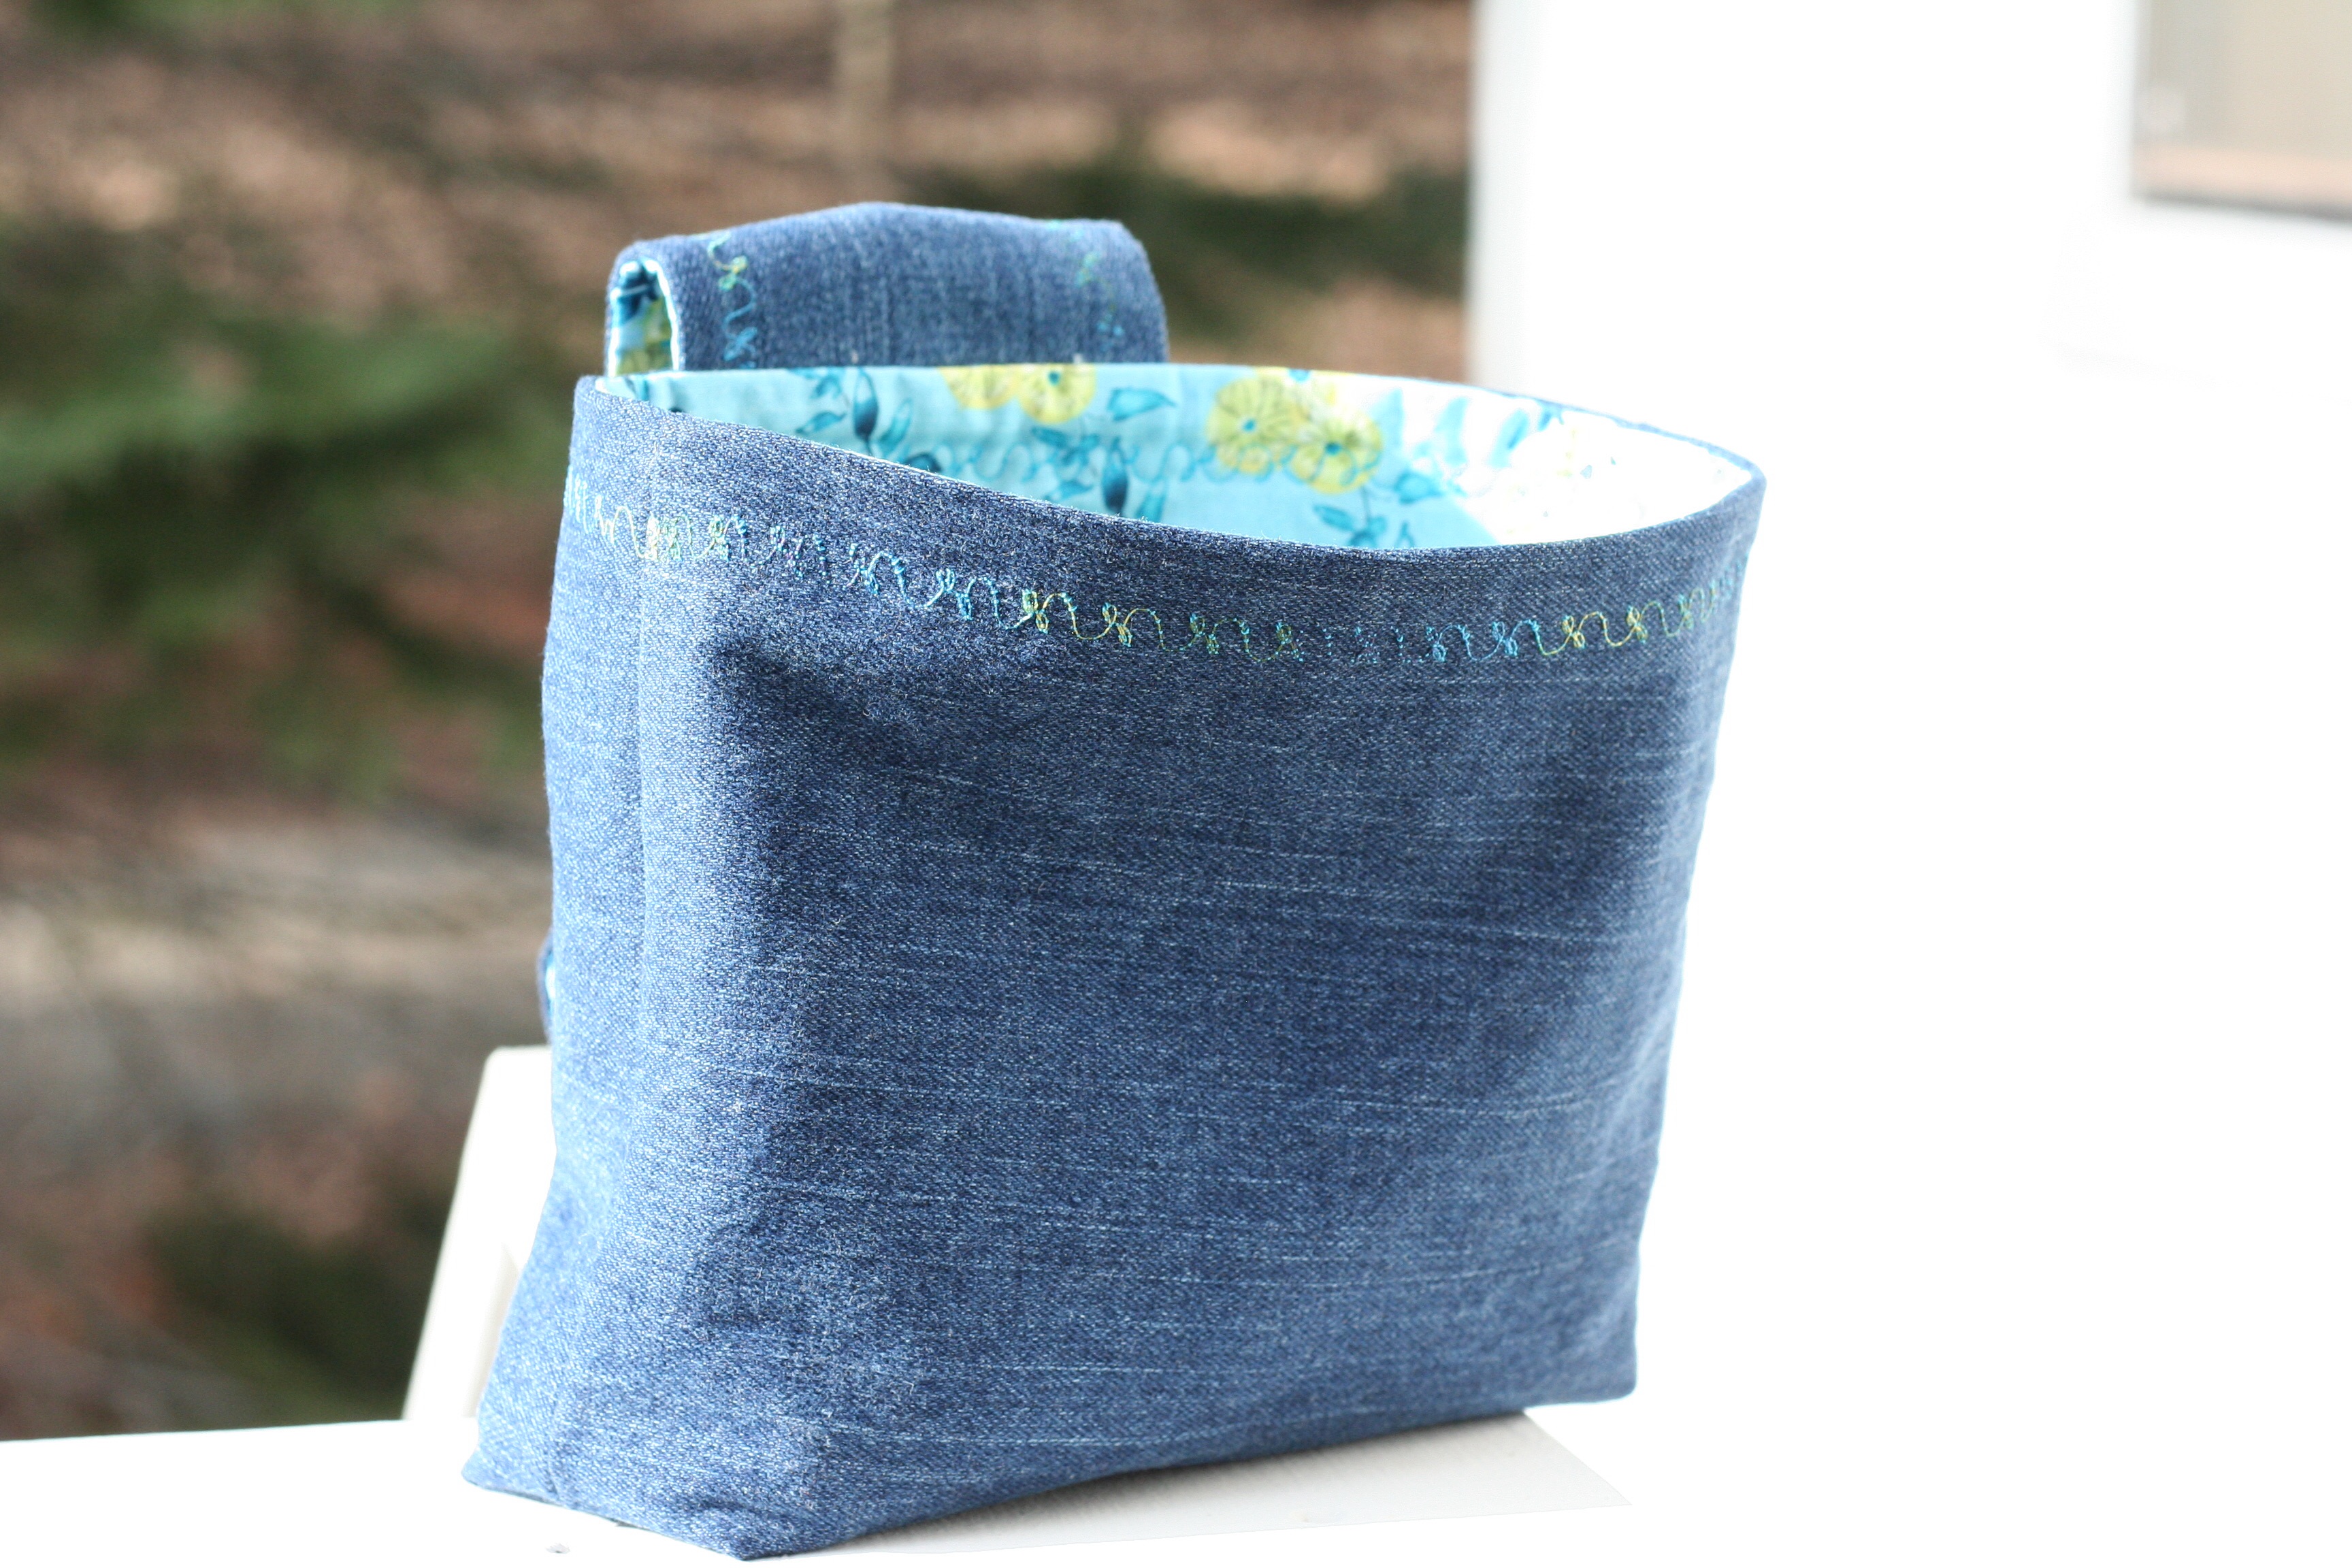
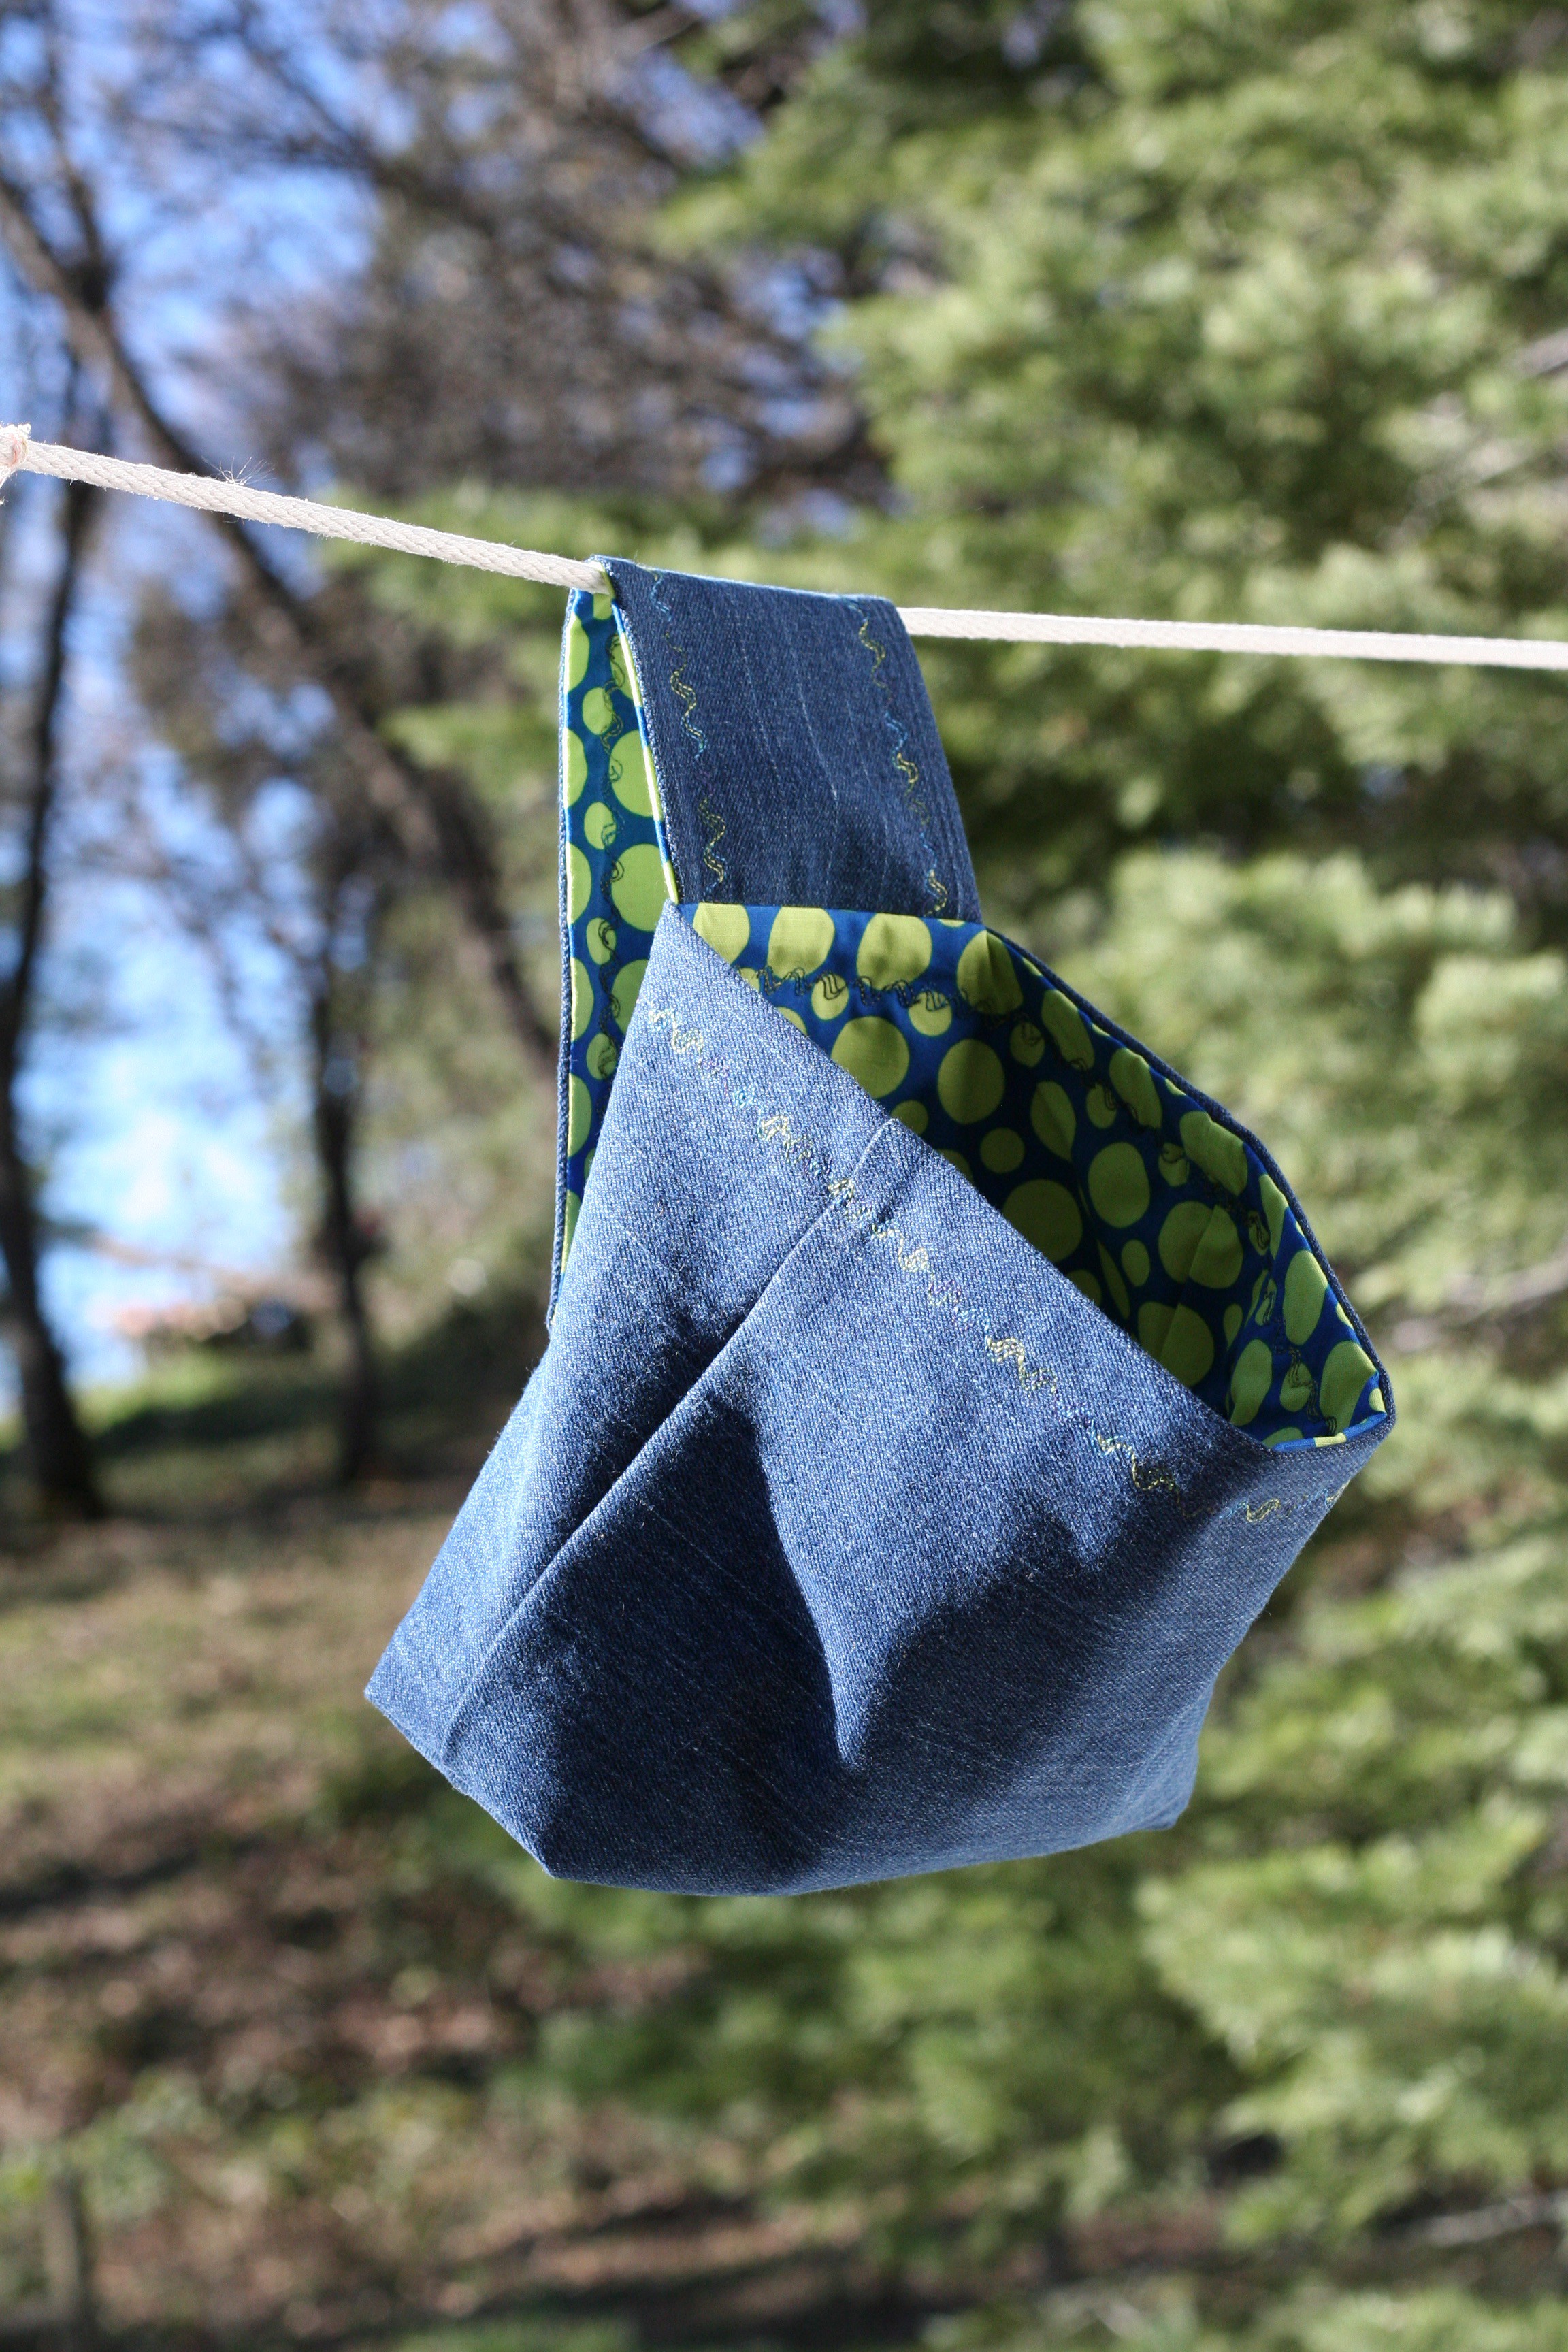
I had lots of finishes this week. I started replenishing the little clothesline/clothespin bags that I sell on Etsy. I was almost sold out (it is warm enough to use a clothesline in parts of the country!) This week I made them with upcycled denim jeans that I thrifted. They came together so quickly compared to the ones that I have made with burlap. (Burlap can be tricky to work with.)

image

imageAnd now a polka dotted version.

image


imageNice to add a few new items to my Etsy shop.

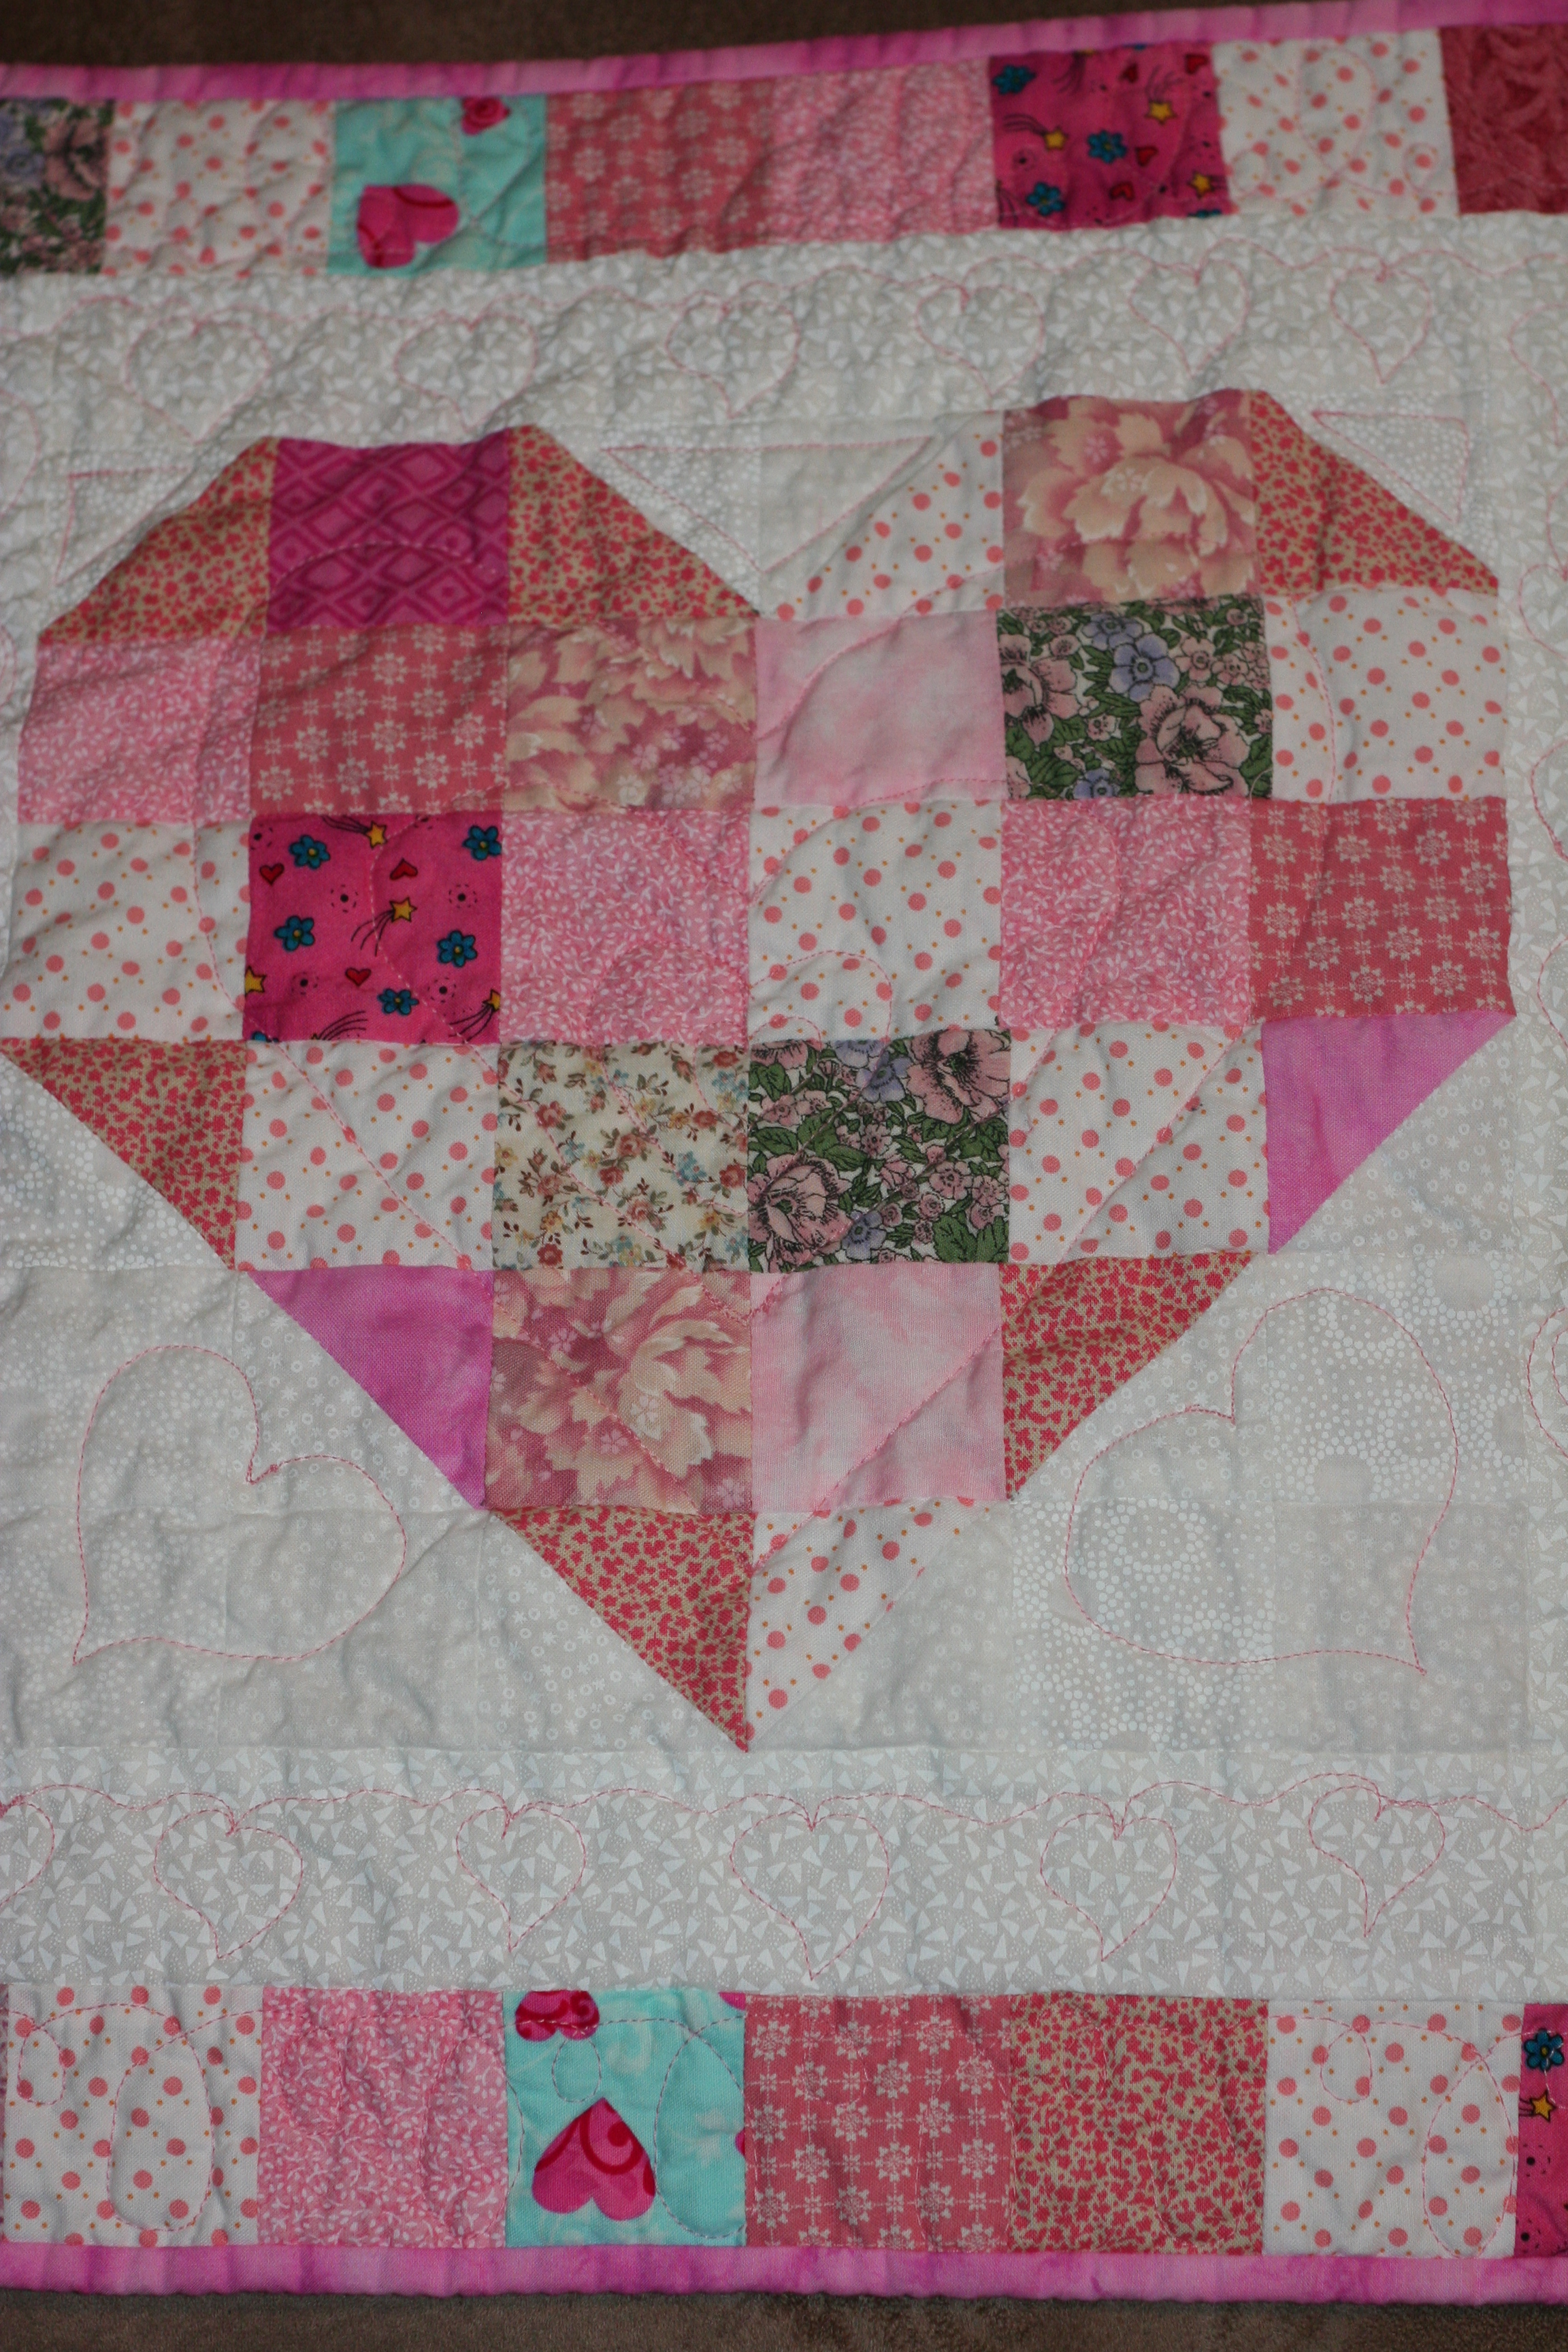
Also finished up the February Row for my RSC15 quilt. I am following along with Mari over at Academic Quilter on her Classic Stitches Row Quilt. She should be releasing the next block for March on Tuesday of next week. Looking forward to seeing what she has planned as well as what color Angela has picked for March.  For February Mari did a tutorial on these little heart blocks. I did 6 inch blocks. They were very simple to piece.

image

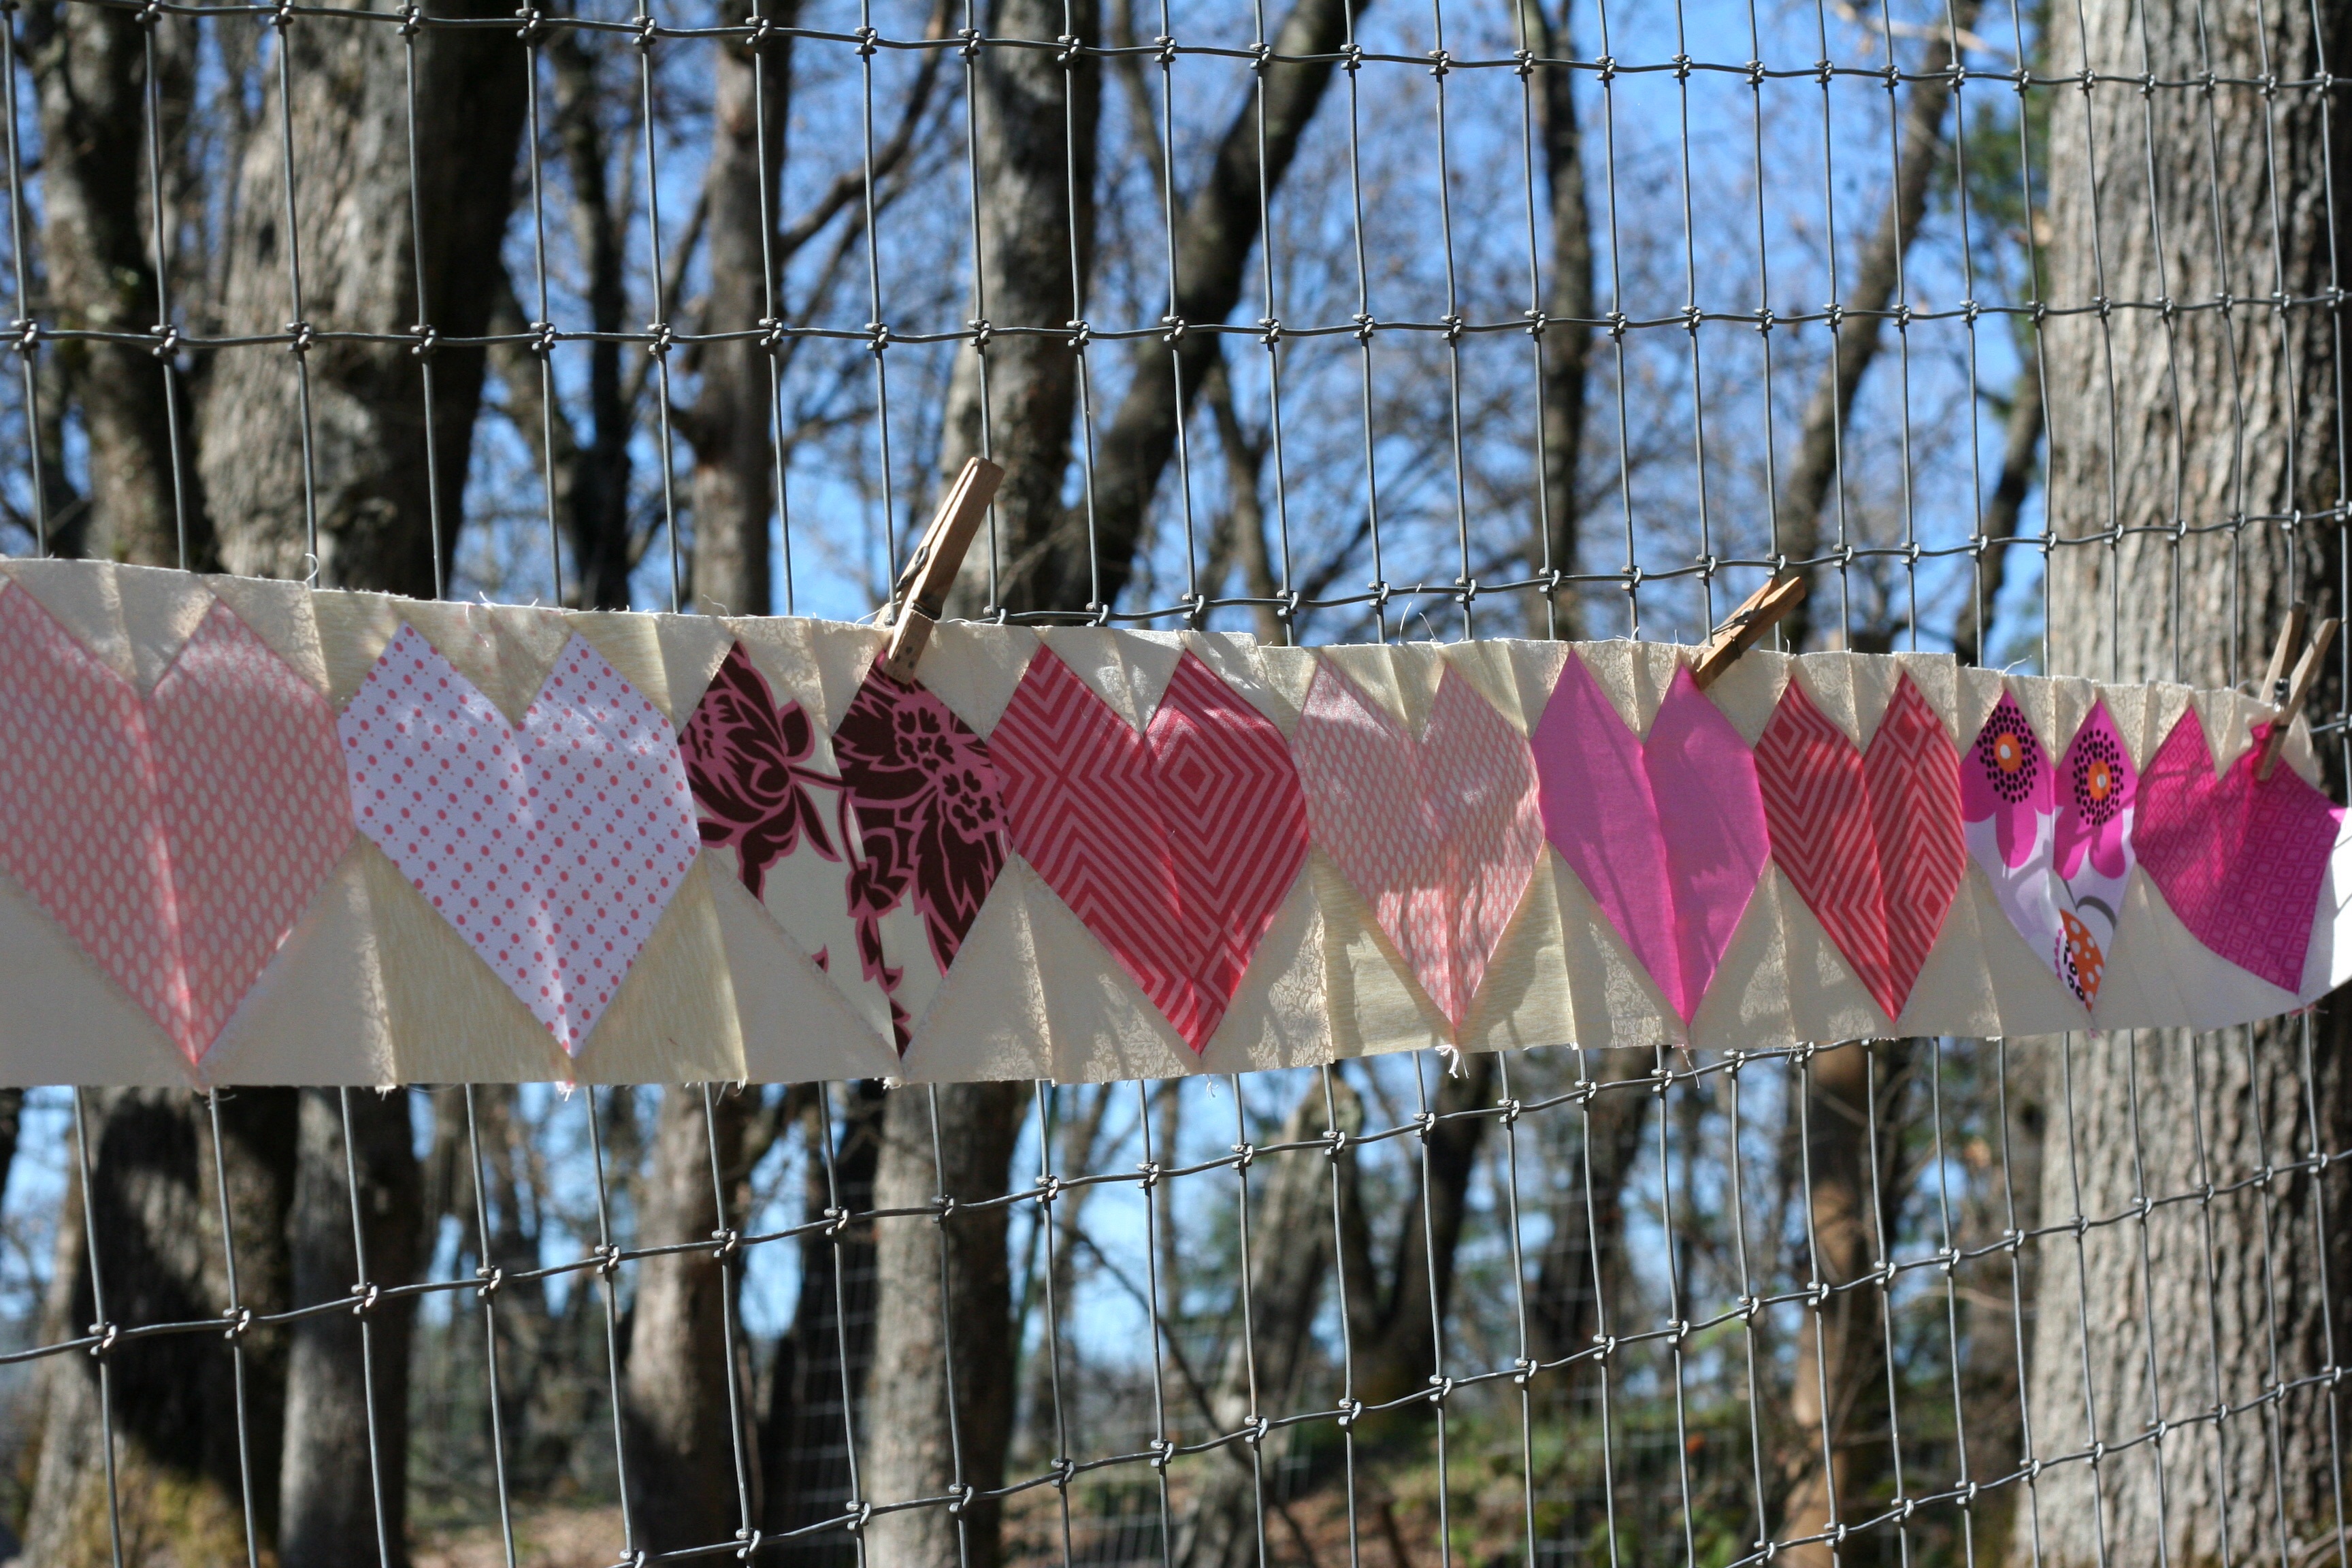
Here they are with the broken dishes blocks that we did for the January row.

image

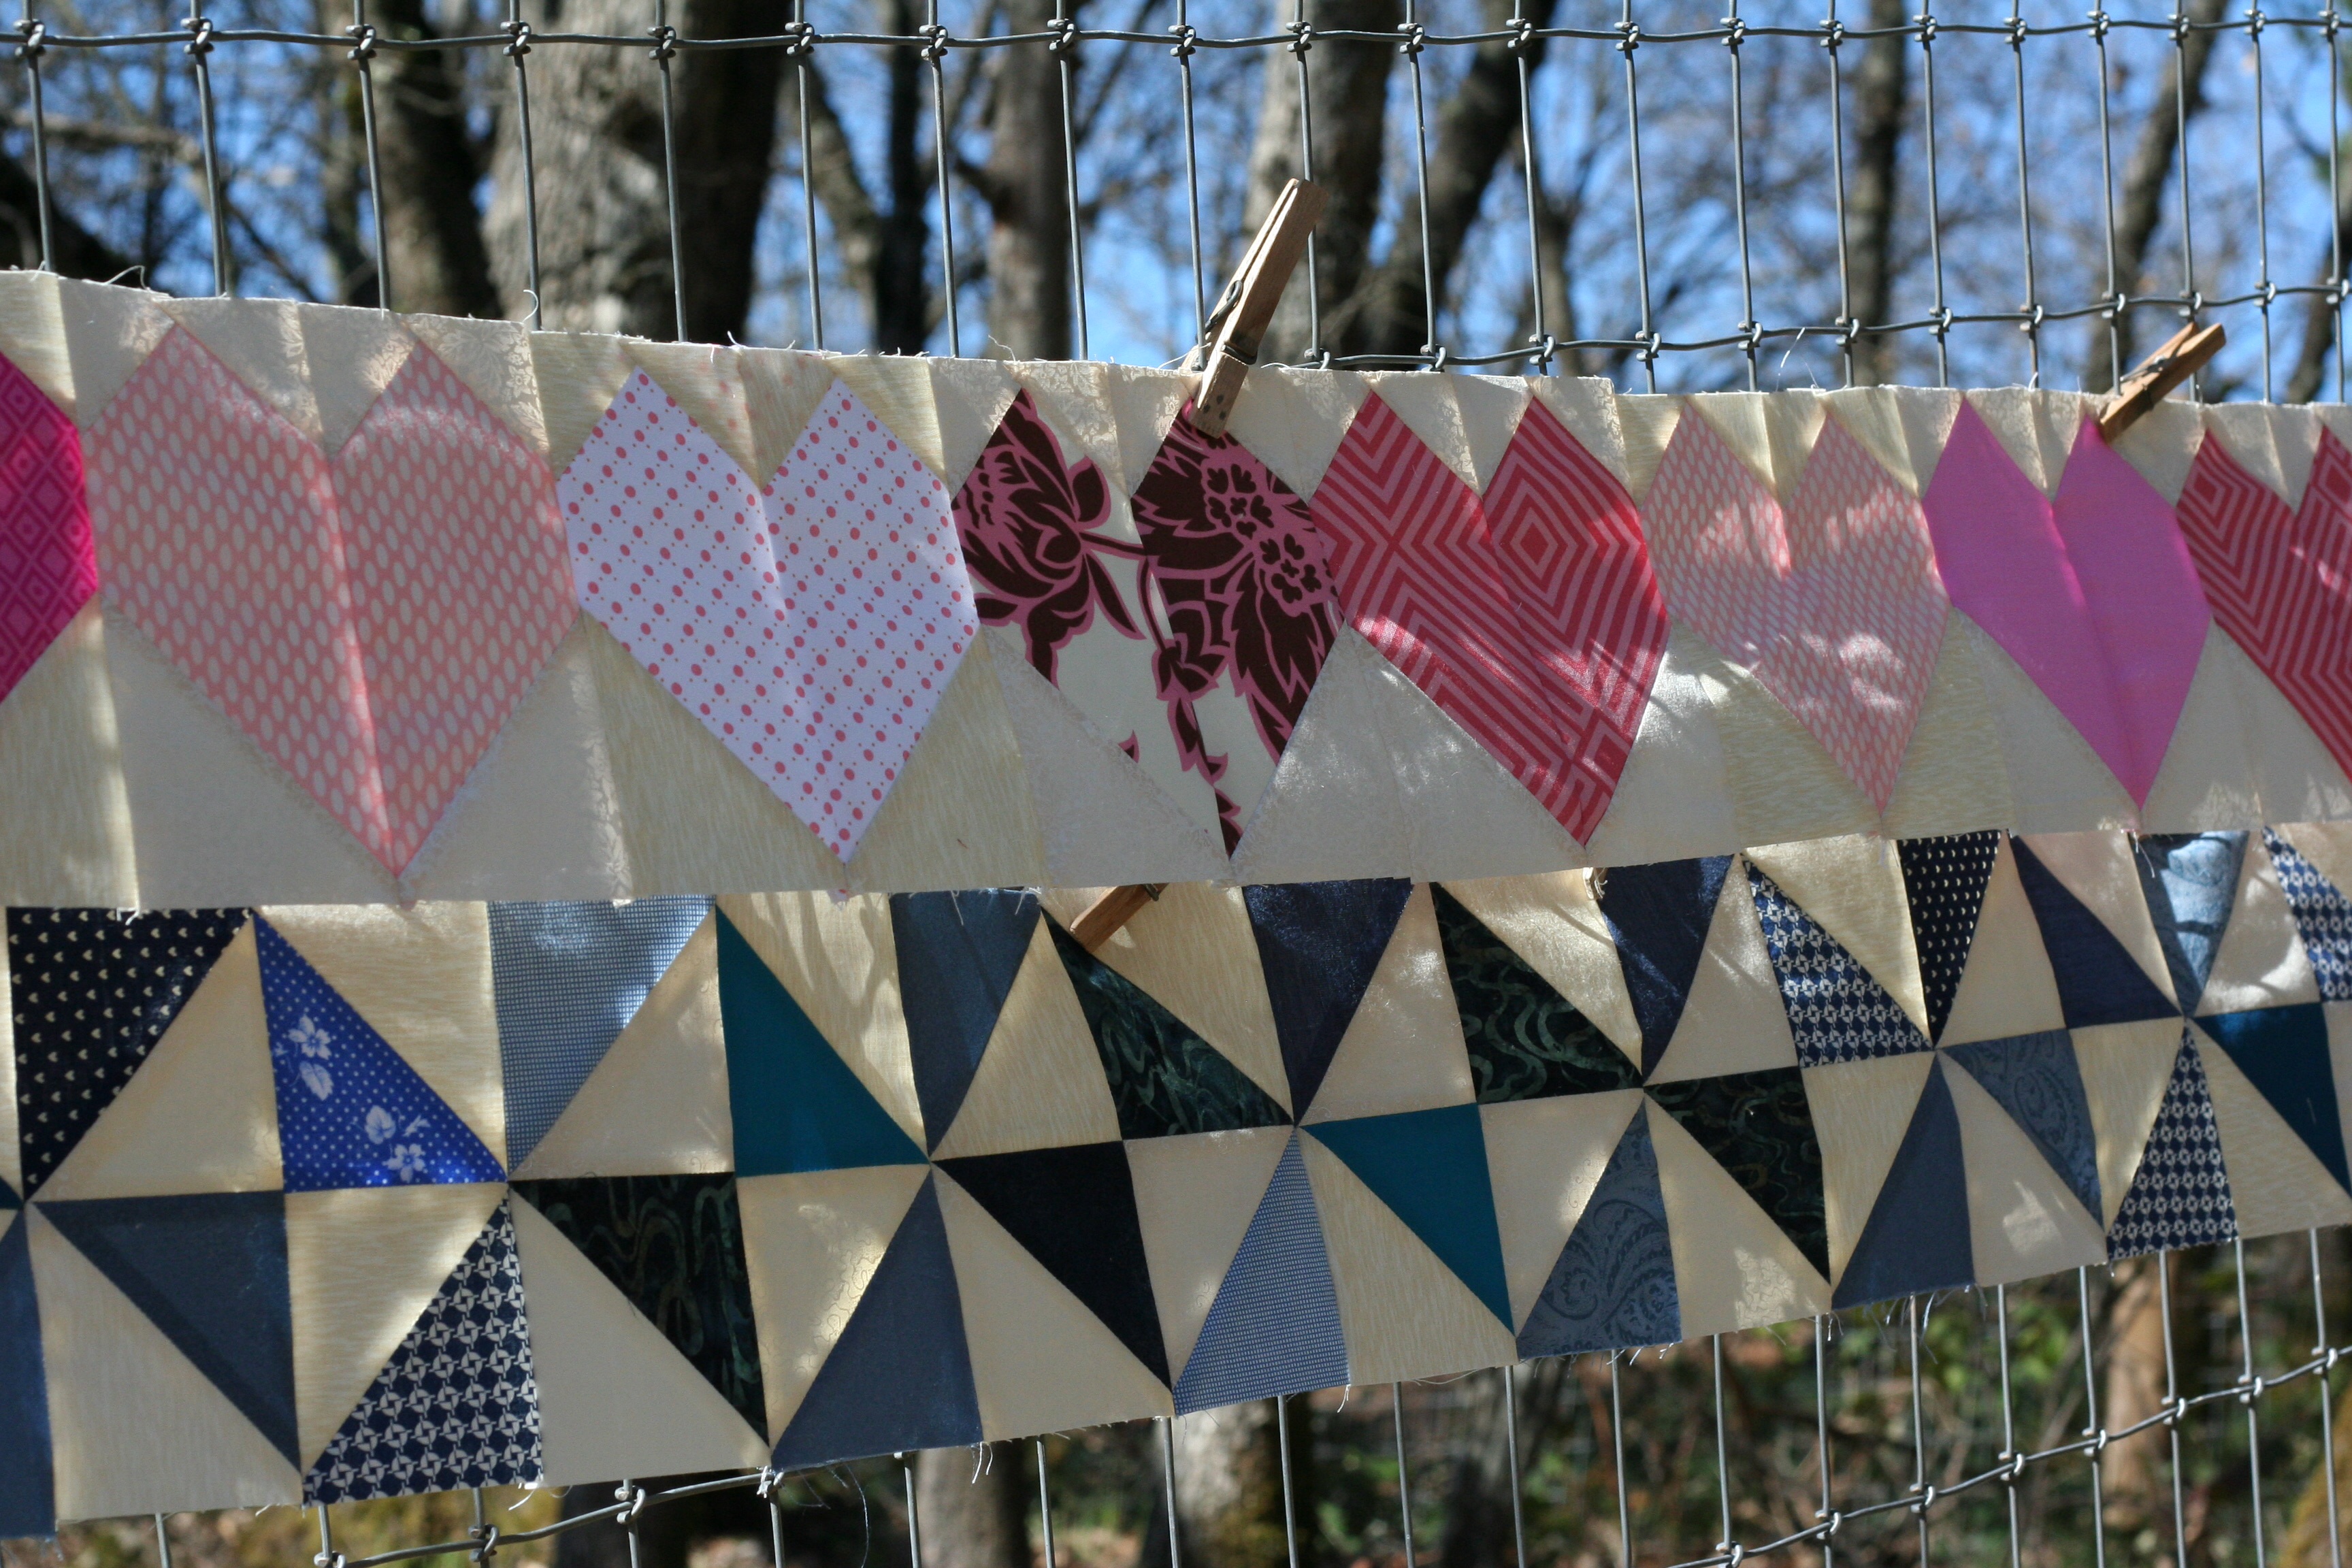
They look cute side by side like this. Tempting as it is, I won’t stitch any rows together until I see what the others look like.

Hope you are all finding reasons to feel grateful. Some days you have to look deeper to figure it out but there is always, always something. Thanks to Yvonne for the reminder. Leave me a comment on gratitude. I would love to fill the page with positive thoughts. 🙂

Linking to Thankful Thursday and Sarah at Confessions of a Fabric Addict, as well as TGIFF.


ALYOF, Sort of

If you are unsure what ALYOF means, it stands for A Lovely Year of Finishes (a fun link up at Sew Bittersweet Designs where you set goals and see what everyone finishes up during the month). Let’s just says some are lovlier than others! I finished my quilt with the black and gray ten minute blocks which was my February goal for AYOLF. Finishing it feels good because I met my goal, but I am not thrilled with the finish. I didn’t like the blocks a whole lot from the get go. I set them on point, sashed them with black and used black for both the corner and setting triangles. Then I remembered that I hate quilting on black…. Ooops.

IMG_20150222_2933

I have been really working on improving my FMQ skills. Want to know how to highlight the fact that you are not yet highly skilled at FMQ? Quilt with lighter colored thread on black – that will do it. I used a varigated YLI thread which matched the colors of the quilt very nicely. YLI has some heft and it is nice to sew with. It looked ok on the print fabrics.  On the black, not so much. Oh well, live and learn!

The saving grace for this quilt, in my opinion, is the scrappy binding. I love a scrappy binding. I had actually gone to the LQS for fabric to bind it and couldn’t find anything so I decided to just bind it in black. Alas, I didn’t have enough black when I got home so I dug through all the scrap left from the project and made a lovely binding. To me a scrappy binding adds charm to a quilt.

IMG_0268Like I was saying, lessons learned….  if I were to be granted a “do-over” on this one, I would quilt it in charcoal gray (dark but a color I could see against the black). The stitching would look reasonable if it wasn’t so darn light. I am not at a skill level (yet) to highlight the stitching by using light colors on a dark fabric. Hard to post pics of your work when you aren’t really happy with it but this is the real deal.  It doesn’t all turn out perfect. I am definitely done with black for a while. Luckily, my daughter loves the colors and she doesn’t give a hoot about the quilting. I had planned to use it as a donation quilt but I think this one will stay with us.  🙂

My daughter was my quilt model yesterday. My favorite pictures were of her running down the hill from our pond, back to our house. Put a cape on a kid, no matter the age, and they will run.

IMG_20150222_2942

IMG_20150222_2943Hope everyone is having a good week. As usual, we are crossing fingers for a bit of rain at the end of this week. California has virtually NO snowpack which should make for a horrendous fire season this summer. I am hearing hints that there might be a tiny bit of snow coming our way this weekend. Please, please, please……

Linking to Sew Cute Tuesday, Freemotion by the River and Let’s Bee Social as well as AYOLF at Sew Bittersweet Designs.  Links for most of these are at the top of the page under link-ups.


WIP Wednesday

I mentioned in my last post that Julia and I were going to attend a “Hearts” party (so named by my three year old great-niece) on Valentine’s Day. It was a blast! The cousins loved having some time together as did all of the adults. On the drive down to the Bay Area I made a stop at Intrepid Thread in Milpitas, CA. I have looked at their on-line store and wanted to check out the brick and mortar version. I wasn’t disappointed. It was smaller than I expected (based on the selection they have on-line) but the fabrics they carry are lovely. My goal was to get some Alison Glass prints for the miniswap I joined over on Instagram. They had loads to choose from and I ended up several prints from the Sunprints collection. I ended up with a nice selection and look forward to cutting into them.

IMG_1791

Before doing that though, I need to finish quilting my donation quilt. It is due to be turned in by the end of February and it is my goal for this month on ALOYF.  It’s going well. I am about 1/2 way done. Right now I am trying to decide on a pattern to quilt in the sashing between the blocks.

IMG_20150218_2895I am using a variegated thread by YLI that has shades of purple, blue and gray in it. It looks great. I love the texture that YLI provides when I quilt with it. Hoping to get the quilting done this week and then next week all I have to do is bind it.

IMG_20150218_2894

We got back from the Hearts party on Sunday, late in the afternoon. That night my son spent  the night. While he was here he helped me cut a bundle of 3 1/2″ squares. I want to do a simple patchwork quilt using only neutral fabrics. I mentioned my neck issues in my last post and cutting for any length of time is a big stress on those muscles. He was great and probably cut over half of these 500 squares for me. What a nice guy!

IMG_20150216_2892Somehow that doesn’t look like 500 squares, but it is.  I am really excited to get started on this. I’ve wanted to do a neutrals quilt for quite a while – I have many of them pinned on a board on Pinterest for inspiration but decided to keep it simple and do a patchwork quilt.

Finally – while at Intrepid Thread I was browsing their scrap packs. I know, I know. I have no control.  I formally rescind item number two on my list of 2015 goals. I will not speak of it again. Don’t judge me. The scrap packs were so tempting and I did buy one. At $10.00 each these packs are a good deal. This one includes two pieces that I just love (the two prints in front on the right). They are from Kate and Birdie’s Bluebird Park line. One of the pieces is a 1/2 yard and the other is 1/3 yard. There are four coordinating pieces that each measure about 1/8 yard. I have a great project in mind for this so stay tuned….

IMG_20150216_2891

Better get busy and quilt the rest of the donation quilt. Enjoy your day!

Linking to Sew Fresh Quilts and Molli Sparkles today!

Quilting is a pain in the neck

My obsession with quilting wreaks havoc with my neck. I have two discs that slip (they extend farther than they should when I bend my neck forward or backward). It doesn’t take much activity to make my neck tighten up and go into these really fun muscle spasms. Most quilters get that tired neck and sore shoulder thing going on when doing a lot of piece work or, expecially, when quilting a piece. The other day Megan Jorrick of Sew Stitching Cute was mentioning issues with her neck and I could completely relate. This week my neck was giving me fits and I was really careful not to aggravate it too much. There are a few things that I do to protect it and I thought sharing what I have learned might help others that deal with the same issue. The main goal is to limit the amount of looking down that I do. The head is really heavy and to look downward is a big strain on your neck. Googling for information, I found that the average human head weighs approximately 10 pounds. Imagine supporting the weight of two 5 pound bags of sugar on your neck. When you extend your head to bend forward to look down that is a lot of stress on your neck.

First off, whenever possible, I look at something straight on rather than bending my neck to see it. This means that if I am ironing seams or bits of fabric, I don’t use my ironing board. I made a little pressing pad which I keep on the desk near my sewing machine. I actually kneel down at the desk and press away – that way I really don’t have to bend my neck. It probably looks odd, like I am worshipping the iron, but it is helpful.

003

Second trick is when I am piecing a long stretch involving matching many little seams (e.g. one row of blocks to the next row of blocks) I, again, get at eye level with it. I happen to have a queen size bed in the sewing room. I lay one row on the bed, kneel down and place the other row on top of it. Then I can match seams and do all of that fussing while looking (almost) straight on to the piece.  Same goes for pin-basting a quilt sandwich. I have a long table that is fairly low in the basement and I use that. Kneeling down at that table is a challenge because of the cement floor but I found an old pillow to kneel on and I can push that along as I scoot around and pin while looking straight on the quilt. Pin basting a quilt on the floor involves crawling around and reaching to the center of the quilt which is horrible for my neck. As you know, it takes a while to pin a quilt sandwich together. Better to use a table for this task.

This is one of my favorite tricks though. My husband was watching me sew and he kept telling me that if I could change the angle of the actual sewing machine I might be able to lift my head a bit. It works. Not perfectly but it makes a difference. My machine sets down into a table so I took an old piece of flannel and rolled it tightly. I lifted the front end of my machine and put the flannel under it, tipping the front of the machine up. It hasn’t posed any problems with stitching or quilting unless I am appliqueing. For some reason, my machine has to be flat for that. Here is a picture to show you. Not gorgeous but it is worth it.

001

My last tip, and the most obvious one, is to sew in short increments. My neck has very little tolerance for sewing which means that I have to limit myself to 15 minute increments which makes it tough to accomplish what I really want to. This is probably the hardest part for me. I get sucked into the process and then I look up and see that 40 minutes have passed. I’m working on it though.

I only did a few quick projects this week. I got a few French Press cozies made for my Etsy shop. More fun though is the baby doll quilt I made.

020

Julia and I are going to see my sisters this weekend. One sister is having a “Heart’s Party” for Valentine’s Day at the request of her three year old grand-daughter. I made a “heart” baby quilt to bring for the kids to use with their baby dolls.

009

I had a pile of 2 1/2 inch squares leftover from the scrappy rainbow quilt I made for RSC2014 so this came together very quickly.  It finished at 15″ x 18″.  The quilting is a mix of heart shapes and loops quilted in pink which I am sure will be totally appreciated by the toddlers that will be playing with it!

011

Can’t wait to see my sisters, their kids and their grandbabies!! Hurray for long weekends!

Linking to Lorna at Sew Fresh Quilts and Amanda Jean at Crazy Mom Quilts.  Also linking to Tips and Tutorials Tuesday and So Scrappy (since pink is the February color.)


Wake up and smell the coffee

I had a couple of fun things happen this week. They all center around coffee… so much good can come from such a small bean.

First story – I usually post pictures on Instagram of the Chemex covers that I make on Etsy. There are a lot of hashtags centered around Chemex loving coffee drinkers and it is fun to share the pictures. After seeing an IG user “like” a couple of my photos, I started looking at their feed in return. It turned out that a guy and his wife had recently started a company offering fresh roasted beans and related treats to their customers. We went back and forth a bit and the proprieter, Steve, asked if I would do a review of their product. It sounded like fun and I agreed. So, here goes. My first product review, which I am honored to do!

This new company is called Joe’s Brew Club.  (Nice play on the phrase cup of ‘joe’.) The company started in October of 2014 so they are just getting going. They are located in Albuquerque, New Mexico with access to several local coffee roasters that slow roast beans from all over the world. Their model is to have the customer subscribe monthly, entitling them to receive a 12 ounce bag of roasted coffee (whole bean only at this point) along with biscotti cookies and selected high quality chocolate each month. That would be a great package to look forward to each month. Here is what they sent me:

IMG_20150205_2853Their packaging is lovely and the contents even more so! Yesterday I started my day by grinding beans and brewing a pot.  The coffee brewed with these beans was delicious. My husband and I both loved it. Coffee is very much part of my morning routine and I loved the bold, rich flavor of these beans. No bitterness whatsoever, just a smooth cup o’ joe.  I appreciate the care that was taken in the selection of goods in the box. A bar of chocolate, four biscotti cookies, and a bag of chocolate covered espresso beans making for a great selection.  My husband and daughter were the chocolate testers and they gave it two thumbs up. My husband thought it was wonderful and Julia’s review was, “I’m not a huge fan of dark chocolate, but this is good!” I found they had sprinkled a few espresso beans loose within the package. They are going for an aromatic experience when the box is opened. Honestly while I think the idea is so creative, I didn’t truly notice the aroma until I opened the bag of coffee – that offered a fragrance that was exquisite.Talking to Steve, he told me that he and his wife are really enjoying this adventure. As with any new business they are open to ideas and looking for ways to expand their offerings. My suggestion would be to also offer this a one time order to be used as a gift. The selection in the box would be such a great present to send to someone. The items are really good quality and the packaging is lovely. It would be a nice choice to use as a gift without having to subscribe.  Second, I would love to see a decaf option. I drink more decaf than caffeinated coffee and I think their customers might appreciate having decaf as an option.

Overall, Joe’s Brew Club offers great product and really outstanding customer service. They have a generous return policy and it is easy to cancel your subscription if you decide to do so. Their subscription is $29.99 per month (this includes shipping within the USA) and they are offering a great deal to Needle and Foot readers. Use coupon code NEEDLEANDFOOT to receive 20% off your first order. Check them out!

I had (another) great experience with a customer order on Etsy. My customer asked if I would create a pattern that works with the Chemex pot designed with a handle (rather than the traditional wooden collar.) I got my hands on one of these pots and went through several iterations before coming up a good result. For these two pieces, I chose to use novelty fabrics. This one has a coffee cup/coffee bean print that is adorable.

IMG_20150207_2860


Thanks to Joe’s Brew Club for sending these lovely beans featured in the pictures. (Which I meticulously scooped up and put back in the bag when I was finished taking pictures!)

I love this bicycle print also.

IMG_20150207_2865

I think working on these custom requests has been my favorite part of having an Etsy shop.  I have made things I wouldn’t have thought of otherwise which has been really satisfying. Hope your are working on something equally satisfying!

Linking to Sew Stitching Cute’s WIDTW as well as Sarah over at Confessions of a Fabric Addict. For the first time, I am also linking up at Main Crush Monday.

Finish for the Week

This week seemed to just buzz by. Actually, time just seems to buzz by in general. Not much can be done to slow it down though. After a ridiculously dry January (.05″ of rain instead of our 11″ average) we are supposed to have a stormy weekend. I am looking forward to the rain, maybe as much as 4 inches will fall over the weekend.. The weather gurus on the news keep saying that this will not impact the drought and we are still in deep trouble for this coming summer. (This is mainly because it is too warm and we aren’t getting any snow. The snow pack is a huge source of our water later in the season.) Well, be that as it may, any rain is going to help. The news can be such a buzz kill….

Had a few nice finishes this week. I am working on a quilt for a donation to my daughter’s middle school. Got the quilt top done!

IMG_20150205_2848


I was really not liking these blocks. They look better now that they are framed with the black and set on point. I made the sashing fairly wide to add some size to the quilt. It is a lap quilt and measures 58″ x 58″ now.

IMG_20150205_2850

Not sure that the process for making these blocks is all that special. It is called the “ten minute block”. The best part of making them was timing myself to see if I could do the block in ten minutes, which I could. (Gotta find the fun wherever possible!) However, the finished block is a bit boring. If using only one fabric for the background of the block (like I did) then couldn’t the same effect be achieved by cutting a 12 block of fabric and just using applique to put the center accent on? It would be less work than cutting the five pieces that it takes to may it as shown in the “ten minute” block tutorials. If you are using different colors to make the 12″ block then the “ten minute” system makes more sense. (It also makes the blocks more interesting. Probably should have mixed it up a bit on these.)

At any rate, the quilt top is done. I have backing fabric ready to go. A trip to my LQS is in order for the binding, which is always a good thing!

I am trying something new! I signed up for my first mini quilt swap on Instagram. I have been reticient to do this. When I see the pictures that people are posting for their mini quilt swaps, it is so intimidating. Some of these are just gorgeous. The ten year old me rears her head in fear that whatever I make just might not be “good enough”. Oh well, I smacked her down for once and signed up anyway. 🙂  I got my partner assignment this morning. I am really excited about this project. The quilt has be be between 16″ and 20″ in size and must be shipped to my partner in early June. At least I have some time to decide what I want to make.  It is an Alison Glass swap so the fabric used must come from one of Alison’s lines. She has such gorgeous fabric so that will be fun to choose.

Finally, my heroine, Amanda Jean at Crazy Mom Quilts, posted some cute pictures of pincushions that she had made last week. I loved them and immediately started digging through scraps. I found a little piece that was leftover from the center of a mini quilt that I did last year, Garden Patch. It made a sweet center for the cushion. It is about 4″ square and I filled it with crushed walnut shells which gives it a nice heft. I love it!

IMG_1765


I will be using the donation quilt shown above as my ALOYF goal for February. It is the obvious choice since I have to give it to the silent auction committee by March 1st. Also linking to a new linky party, Show Off Saturday, at Sew Can She.  Be sure to check this party out along with the others!

Linking up with Connie at Freemotion By the River, Lorna at Let’s Bee Social, and Amanda Jean at Crazy Mom Quilts. The links to all of these quilting queens are listed at the top of this page, under Link Ups.