Category Archives: Lap Quilts

Ring Me – Quilt Top Finished!

Over the past year my friend Sophia and I have been trying to work on some older projects. We have done a decent job of it and gotten a few things finished up. I have another one to share with you today! This one came about because I had to take my Bernina to the shop. Fortunately I have a back up machine for these times. It is an older Kenmore and works well. However, I don’t have a 1/4″ foot for it. I wanted to work on something where precision wasn’t key.

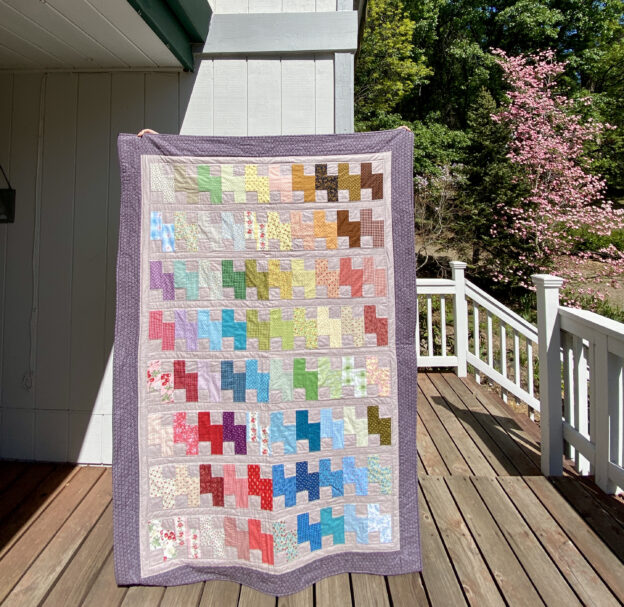
My unfinished Ring Me quilt was the ticket. This pattern has no points to match making the piecing very simple. This project was started back in early 2017. I took part in a blog hop to announce the release of No Scrap Left Behind, written by Amanda Jean Nyberg (aka Crazy Mom Quilts). I love this book! Amanda has written two quilt books, Sunday Morning Quilts and No Scrap Left Behind. I have both of them in my library. She had an incredibly popular quilt blog but chose to stop blogging at the end of 2018 after a ten year run. Fortunately, she left the blog up so we can all still access her amazing ideas, tutorials and quilt patterns. She is definitely the queen of scrap quilting!

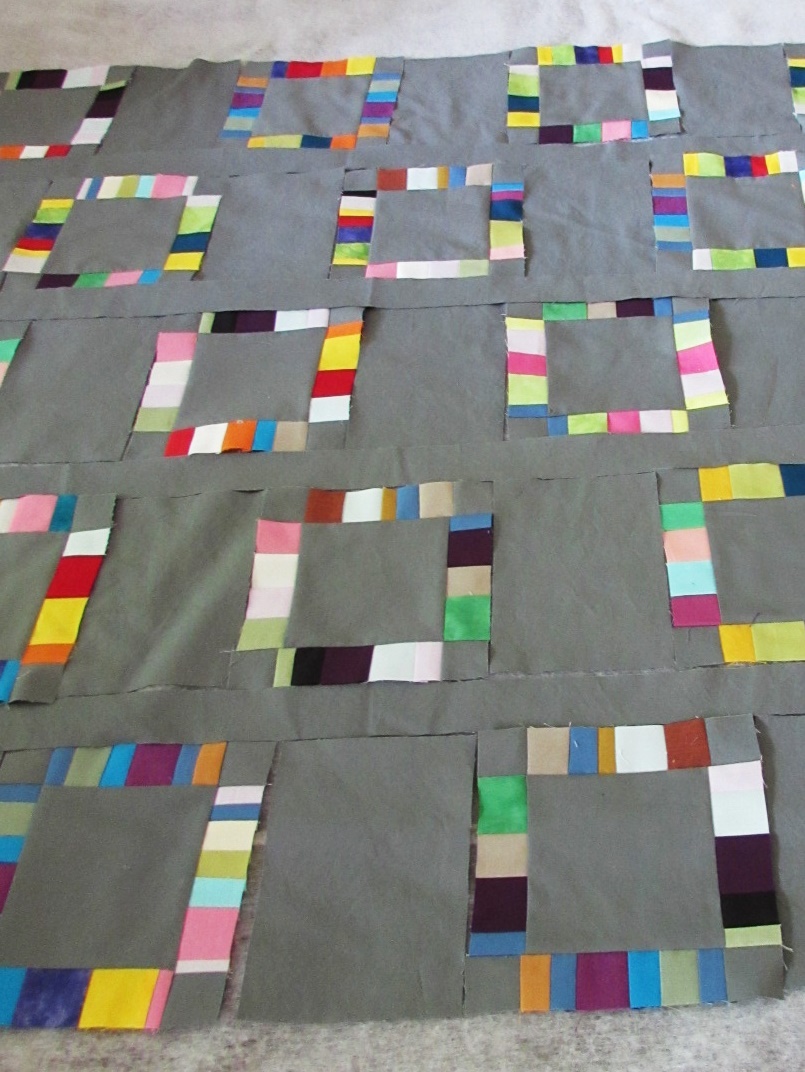
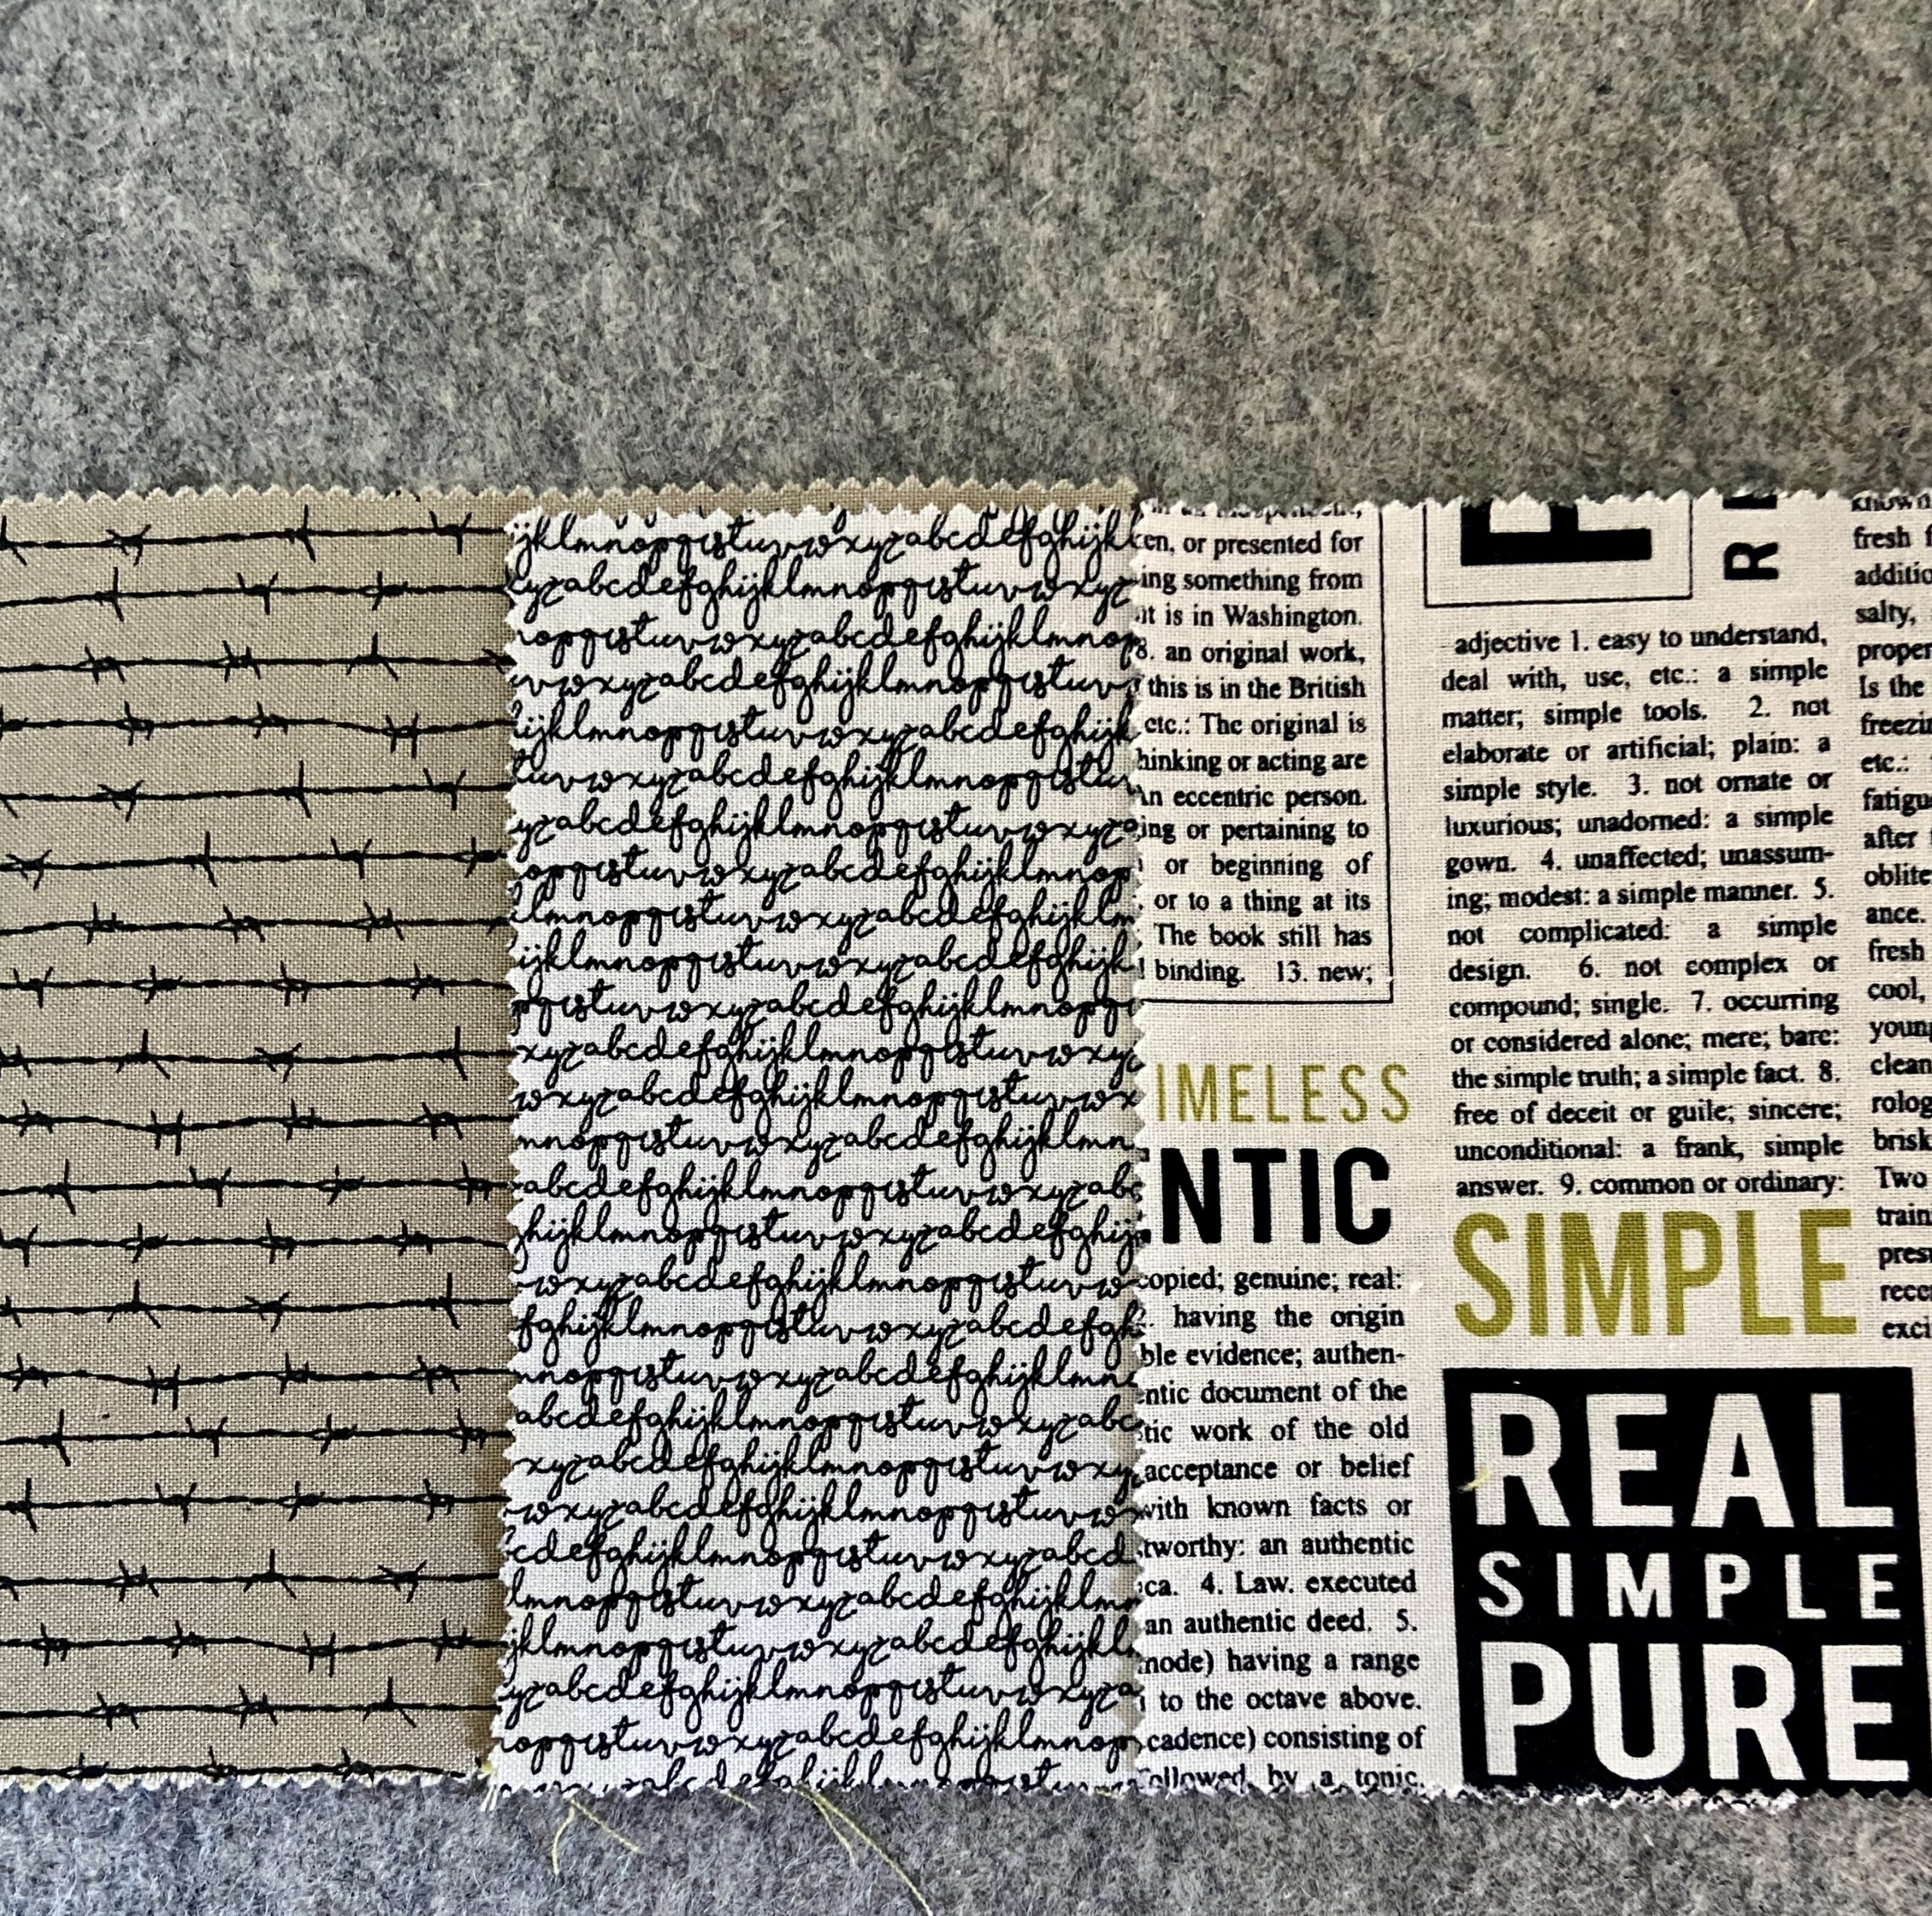
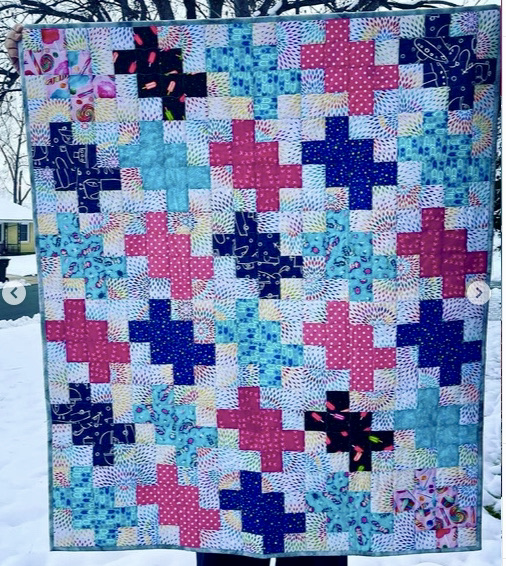
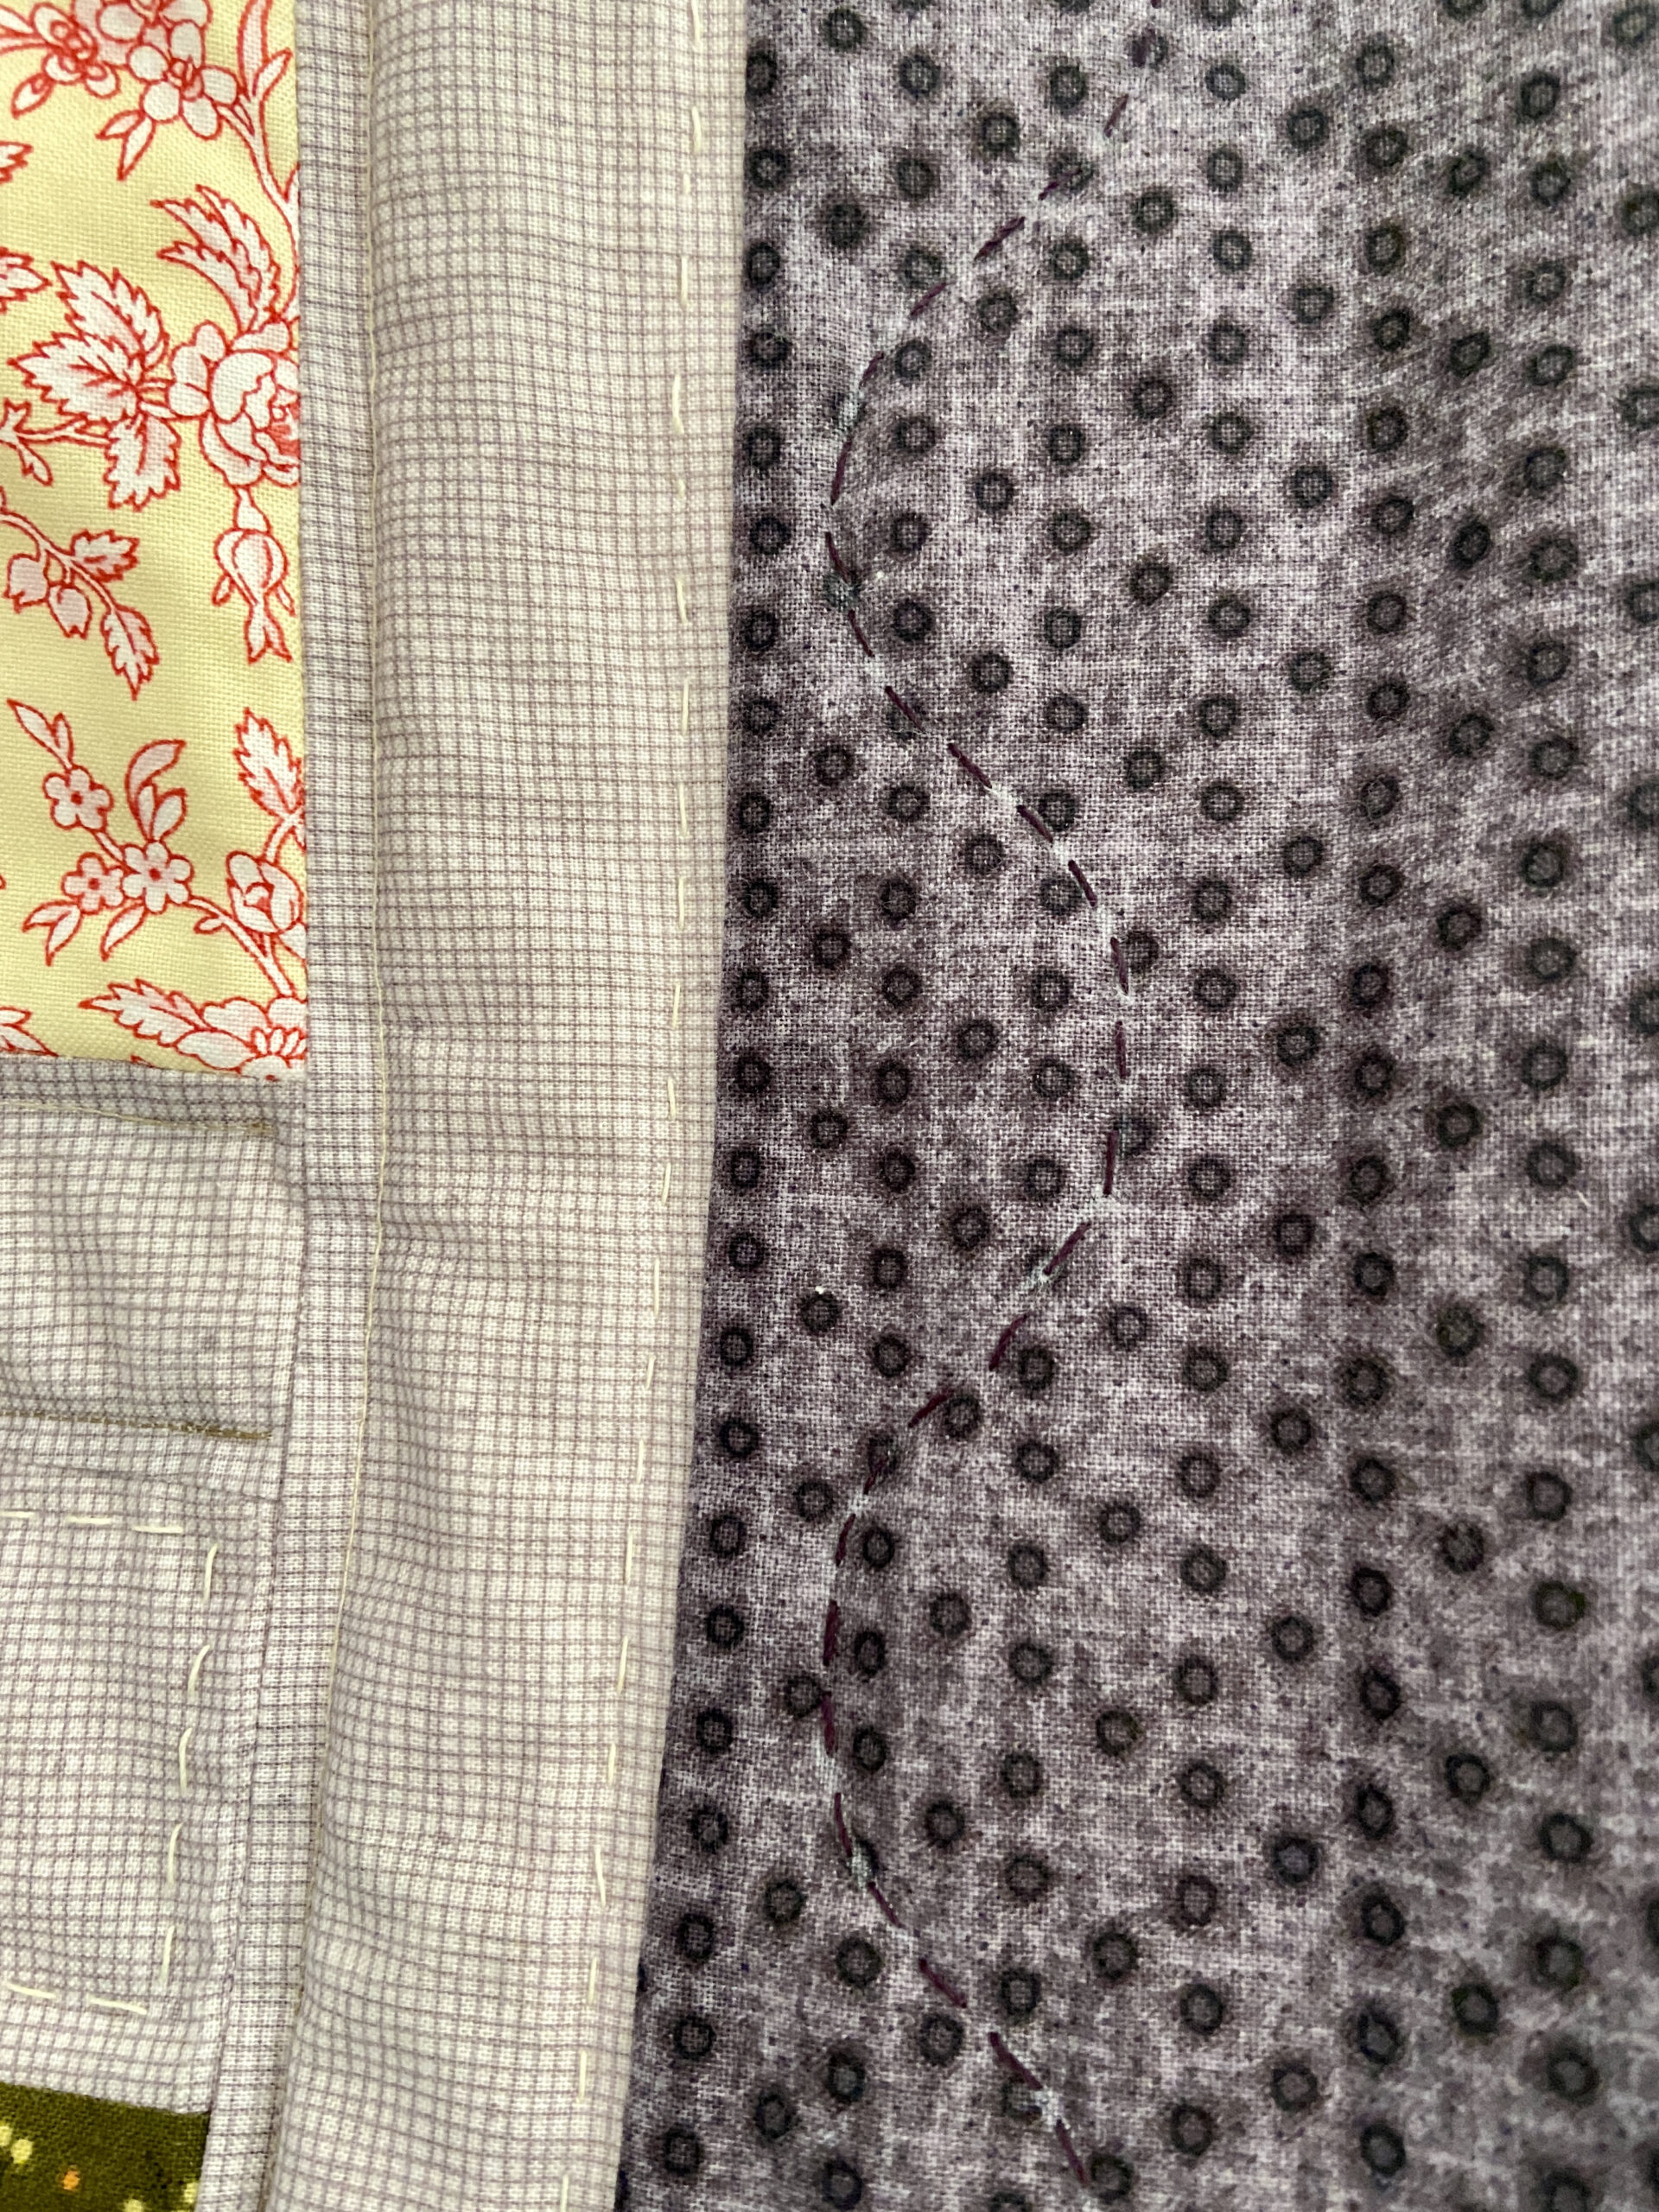
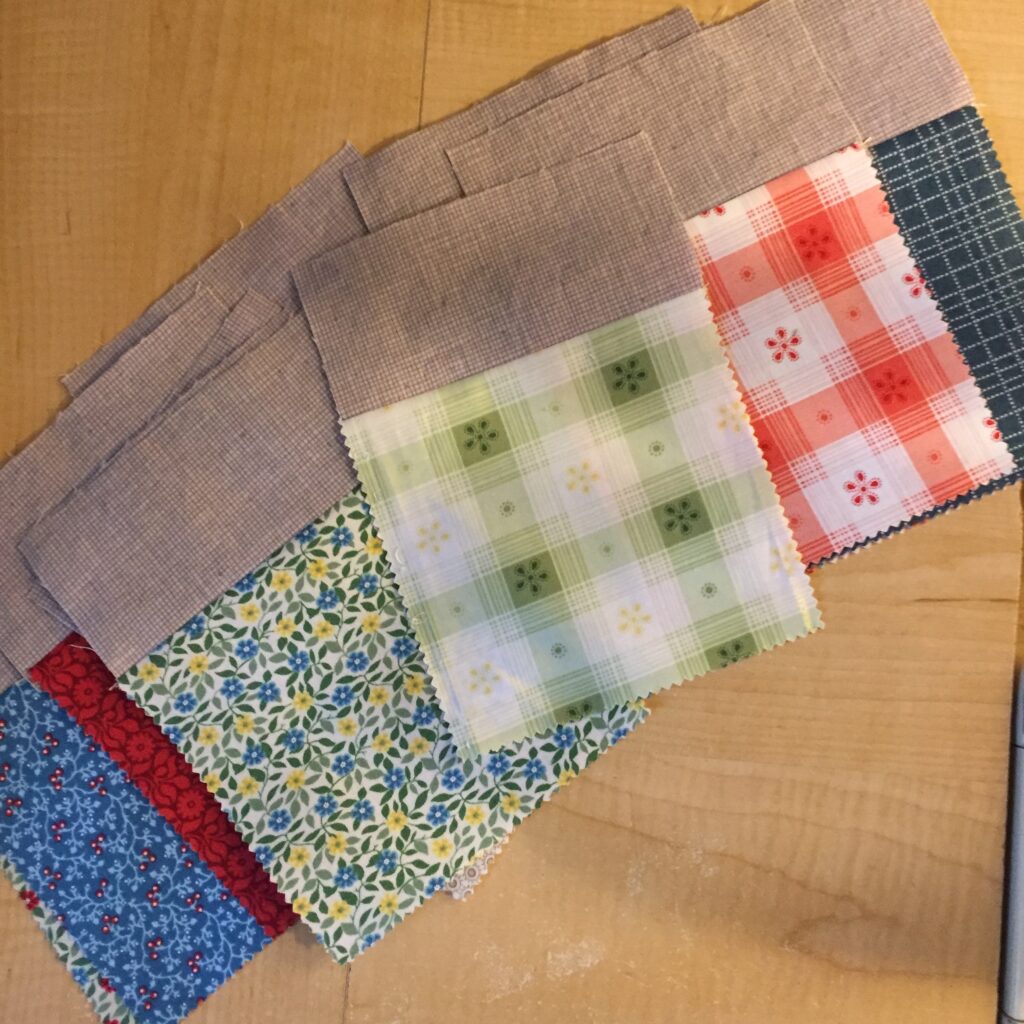
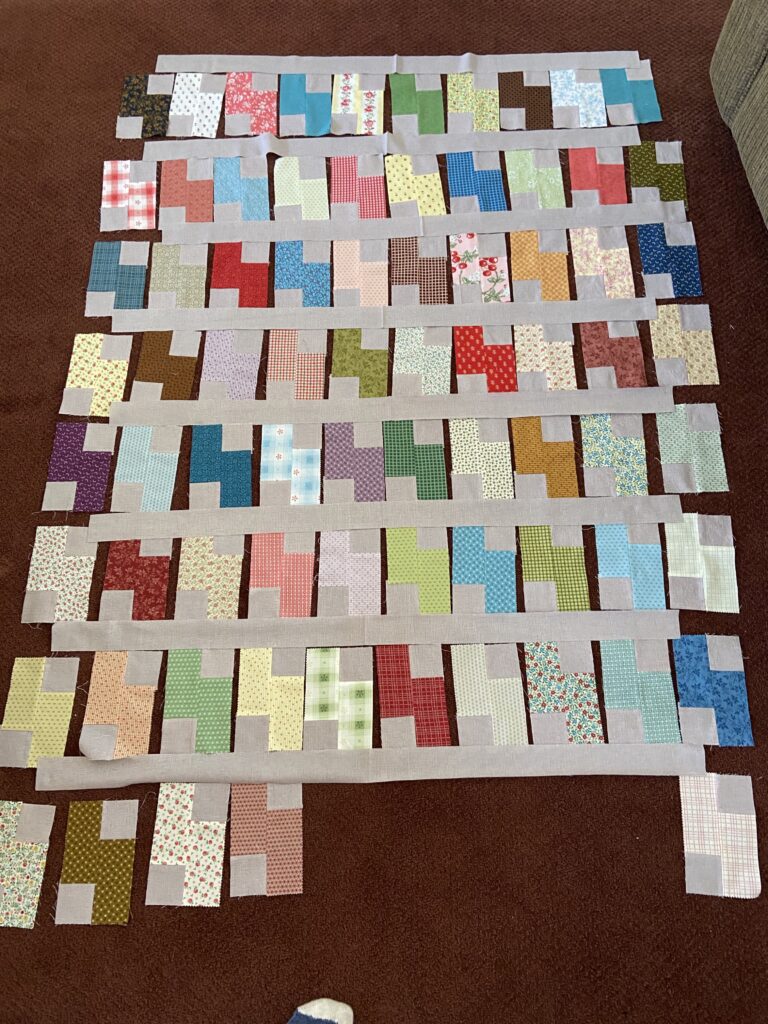
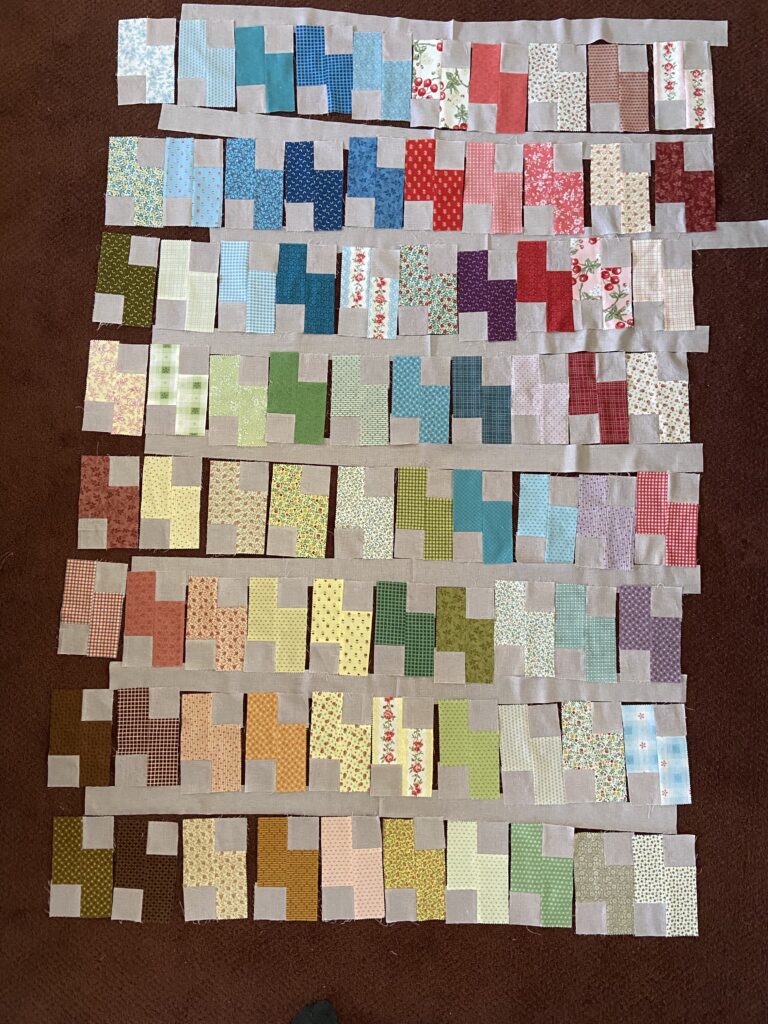
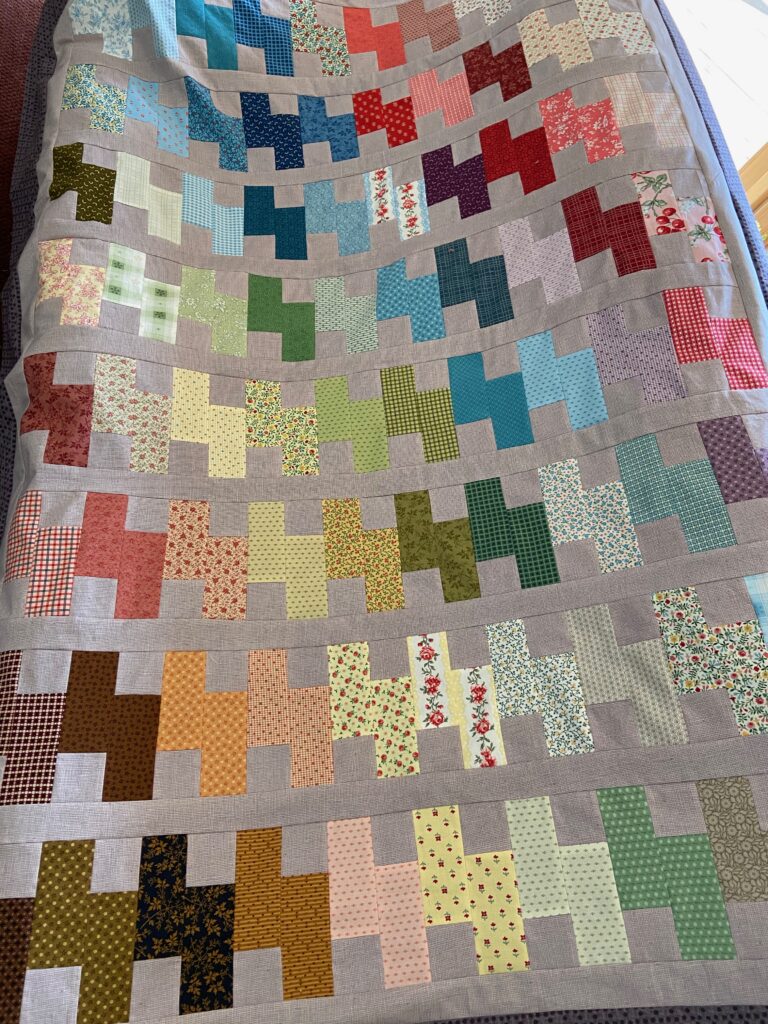
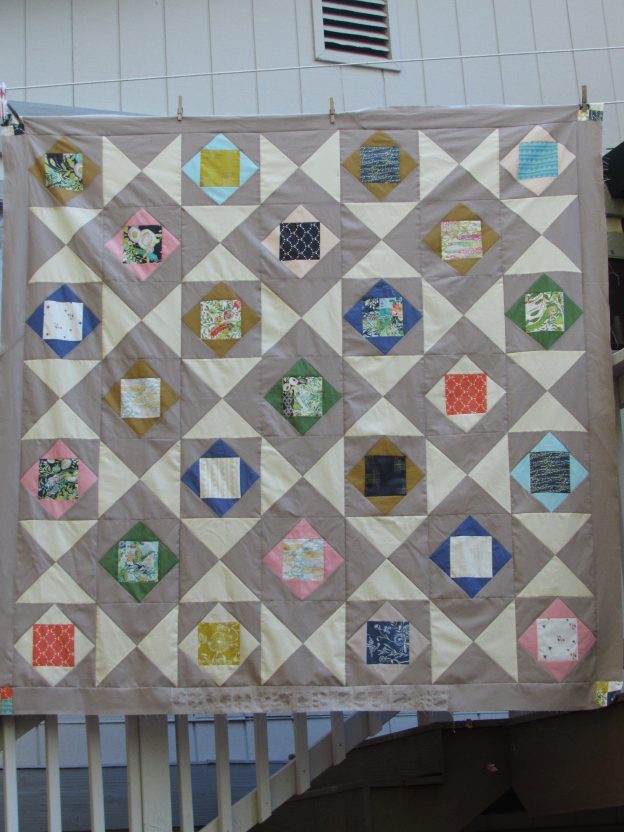
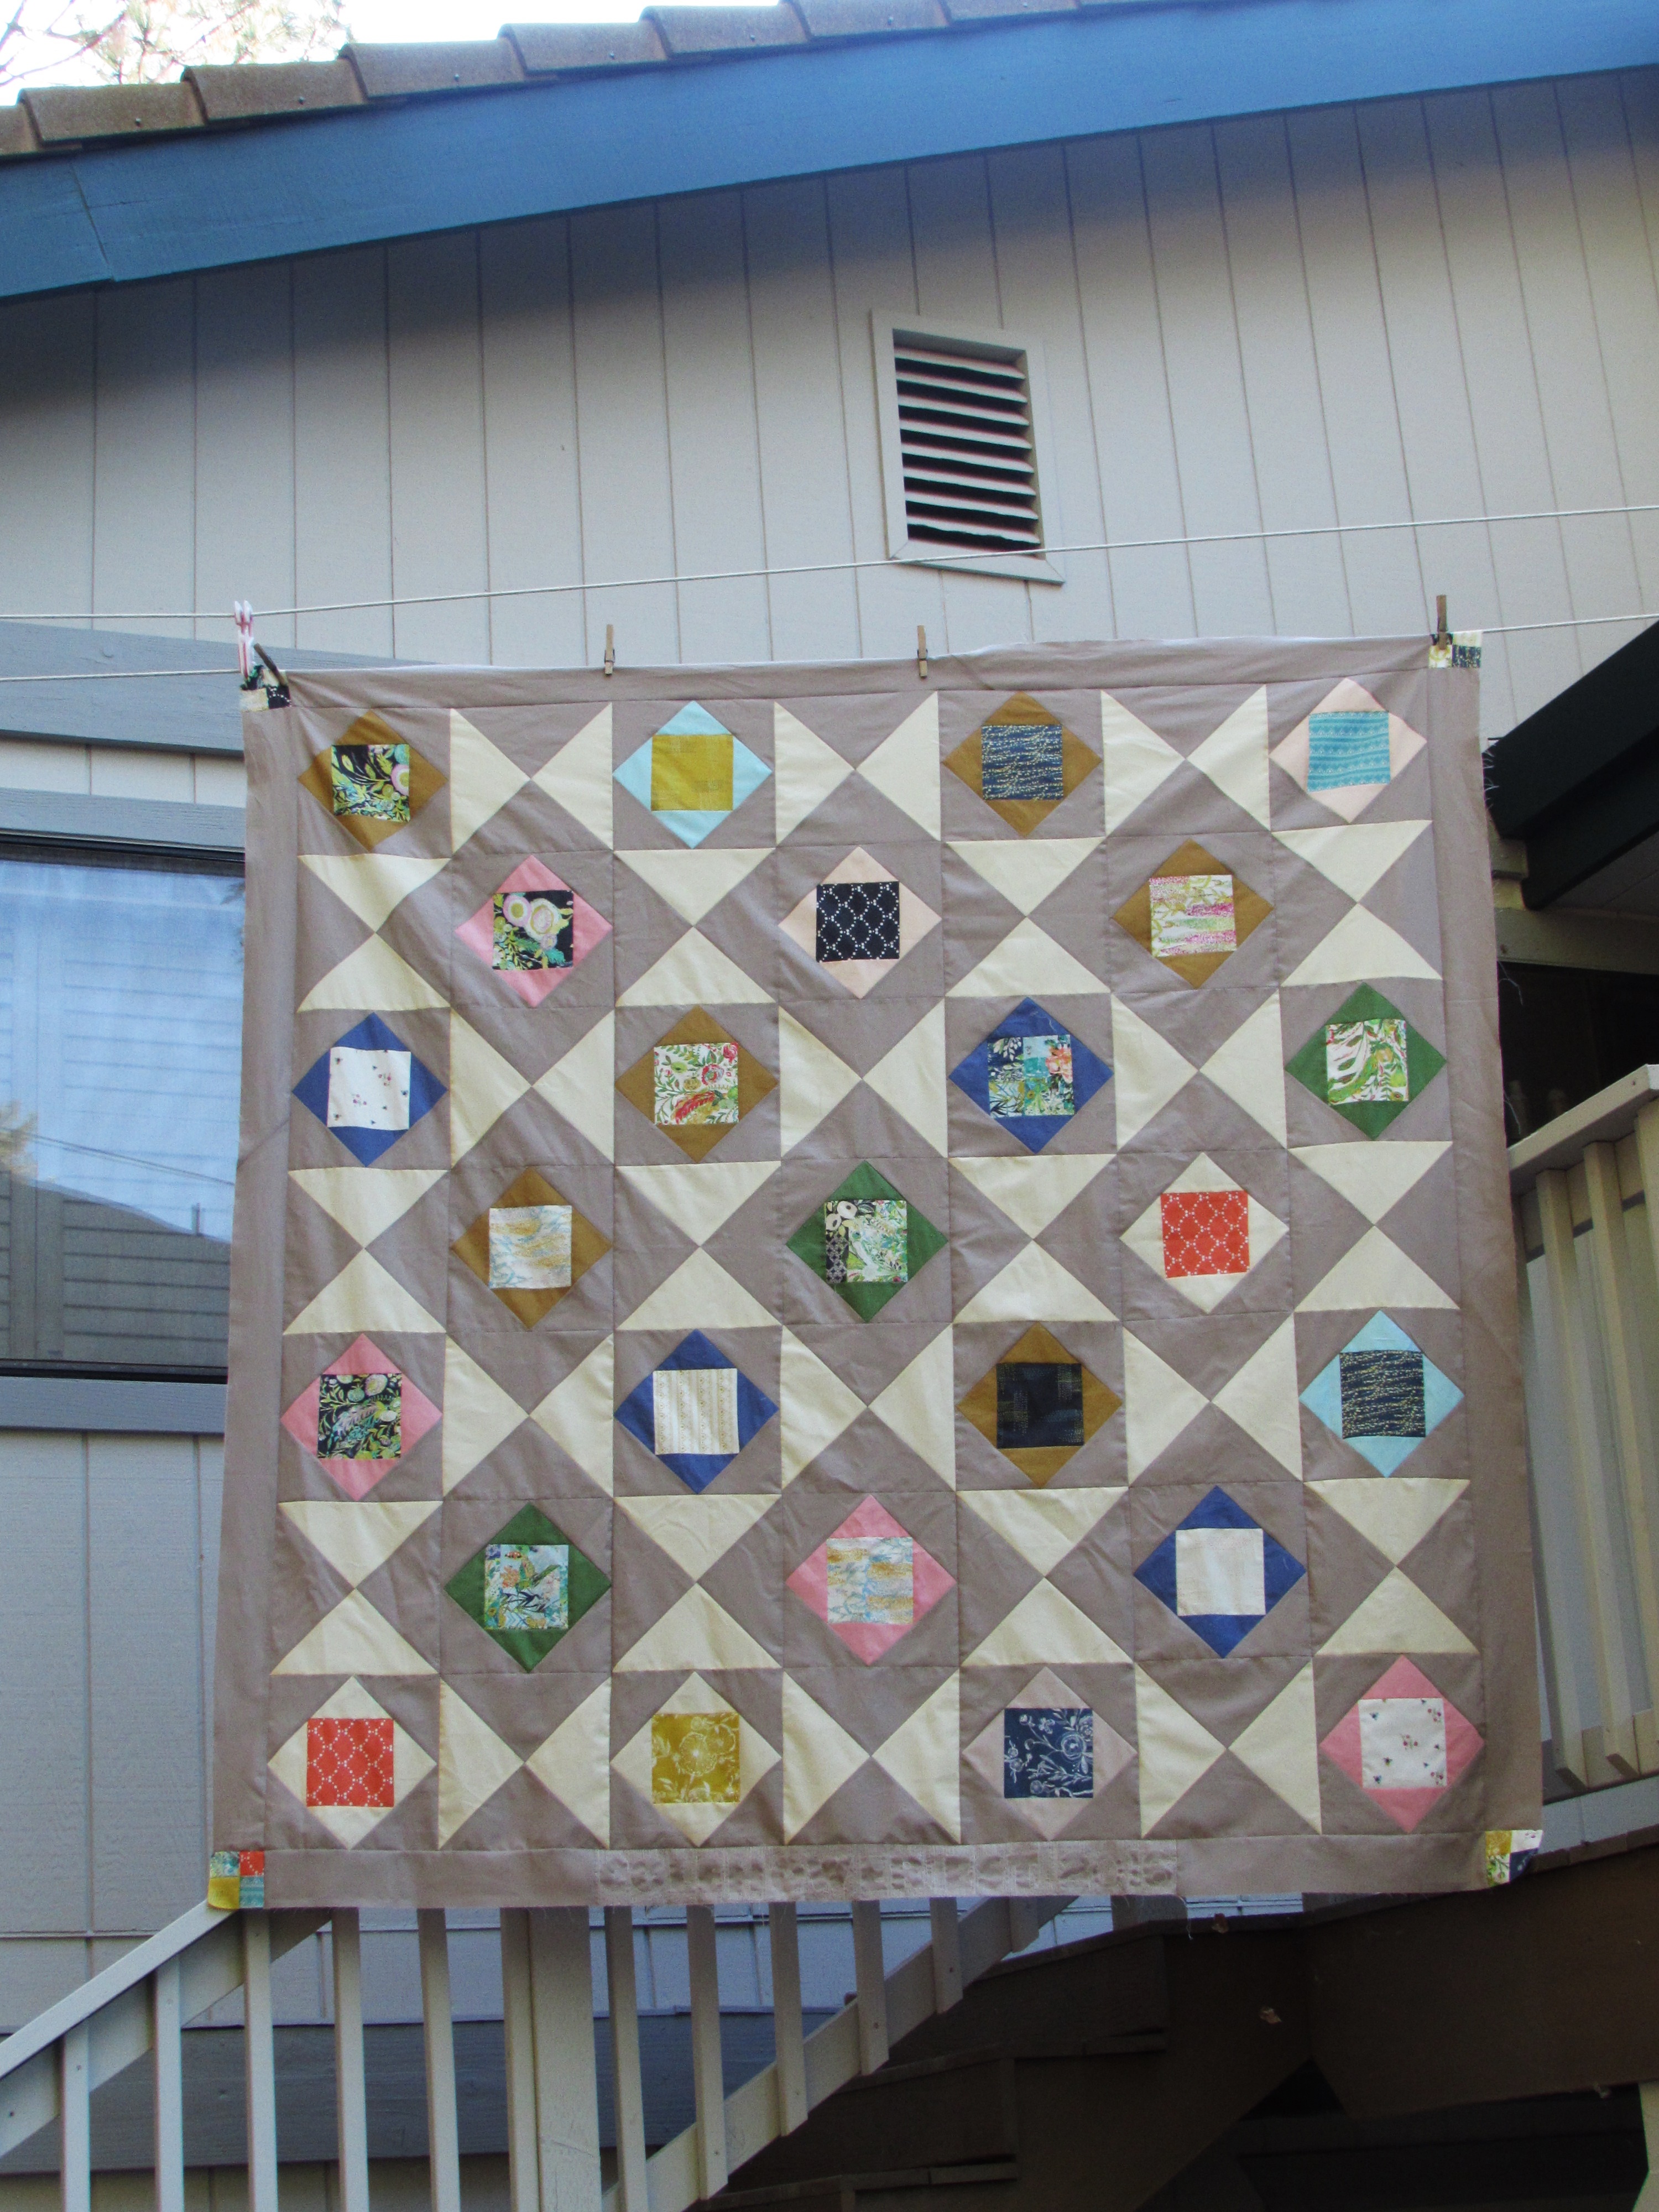
Back to the quilt now. When I was due to publish the project for the blog hop, I was really in the early stages of making the quilt top. I posted progress pictures (see above) and that was as far as it got.

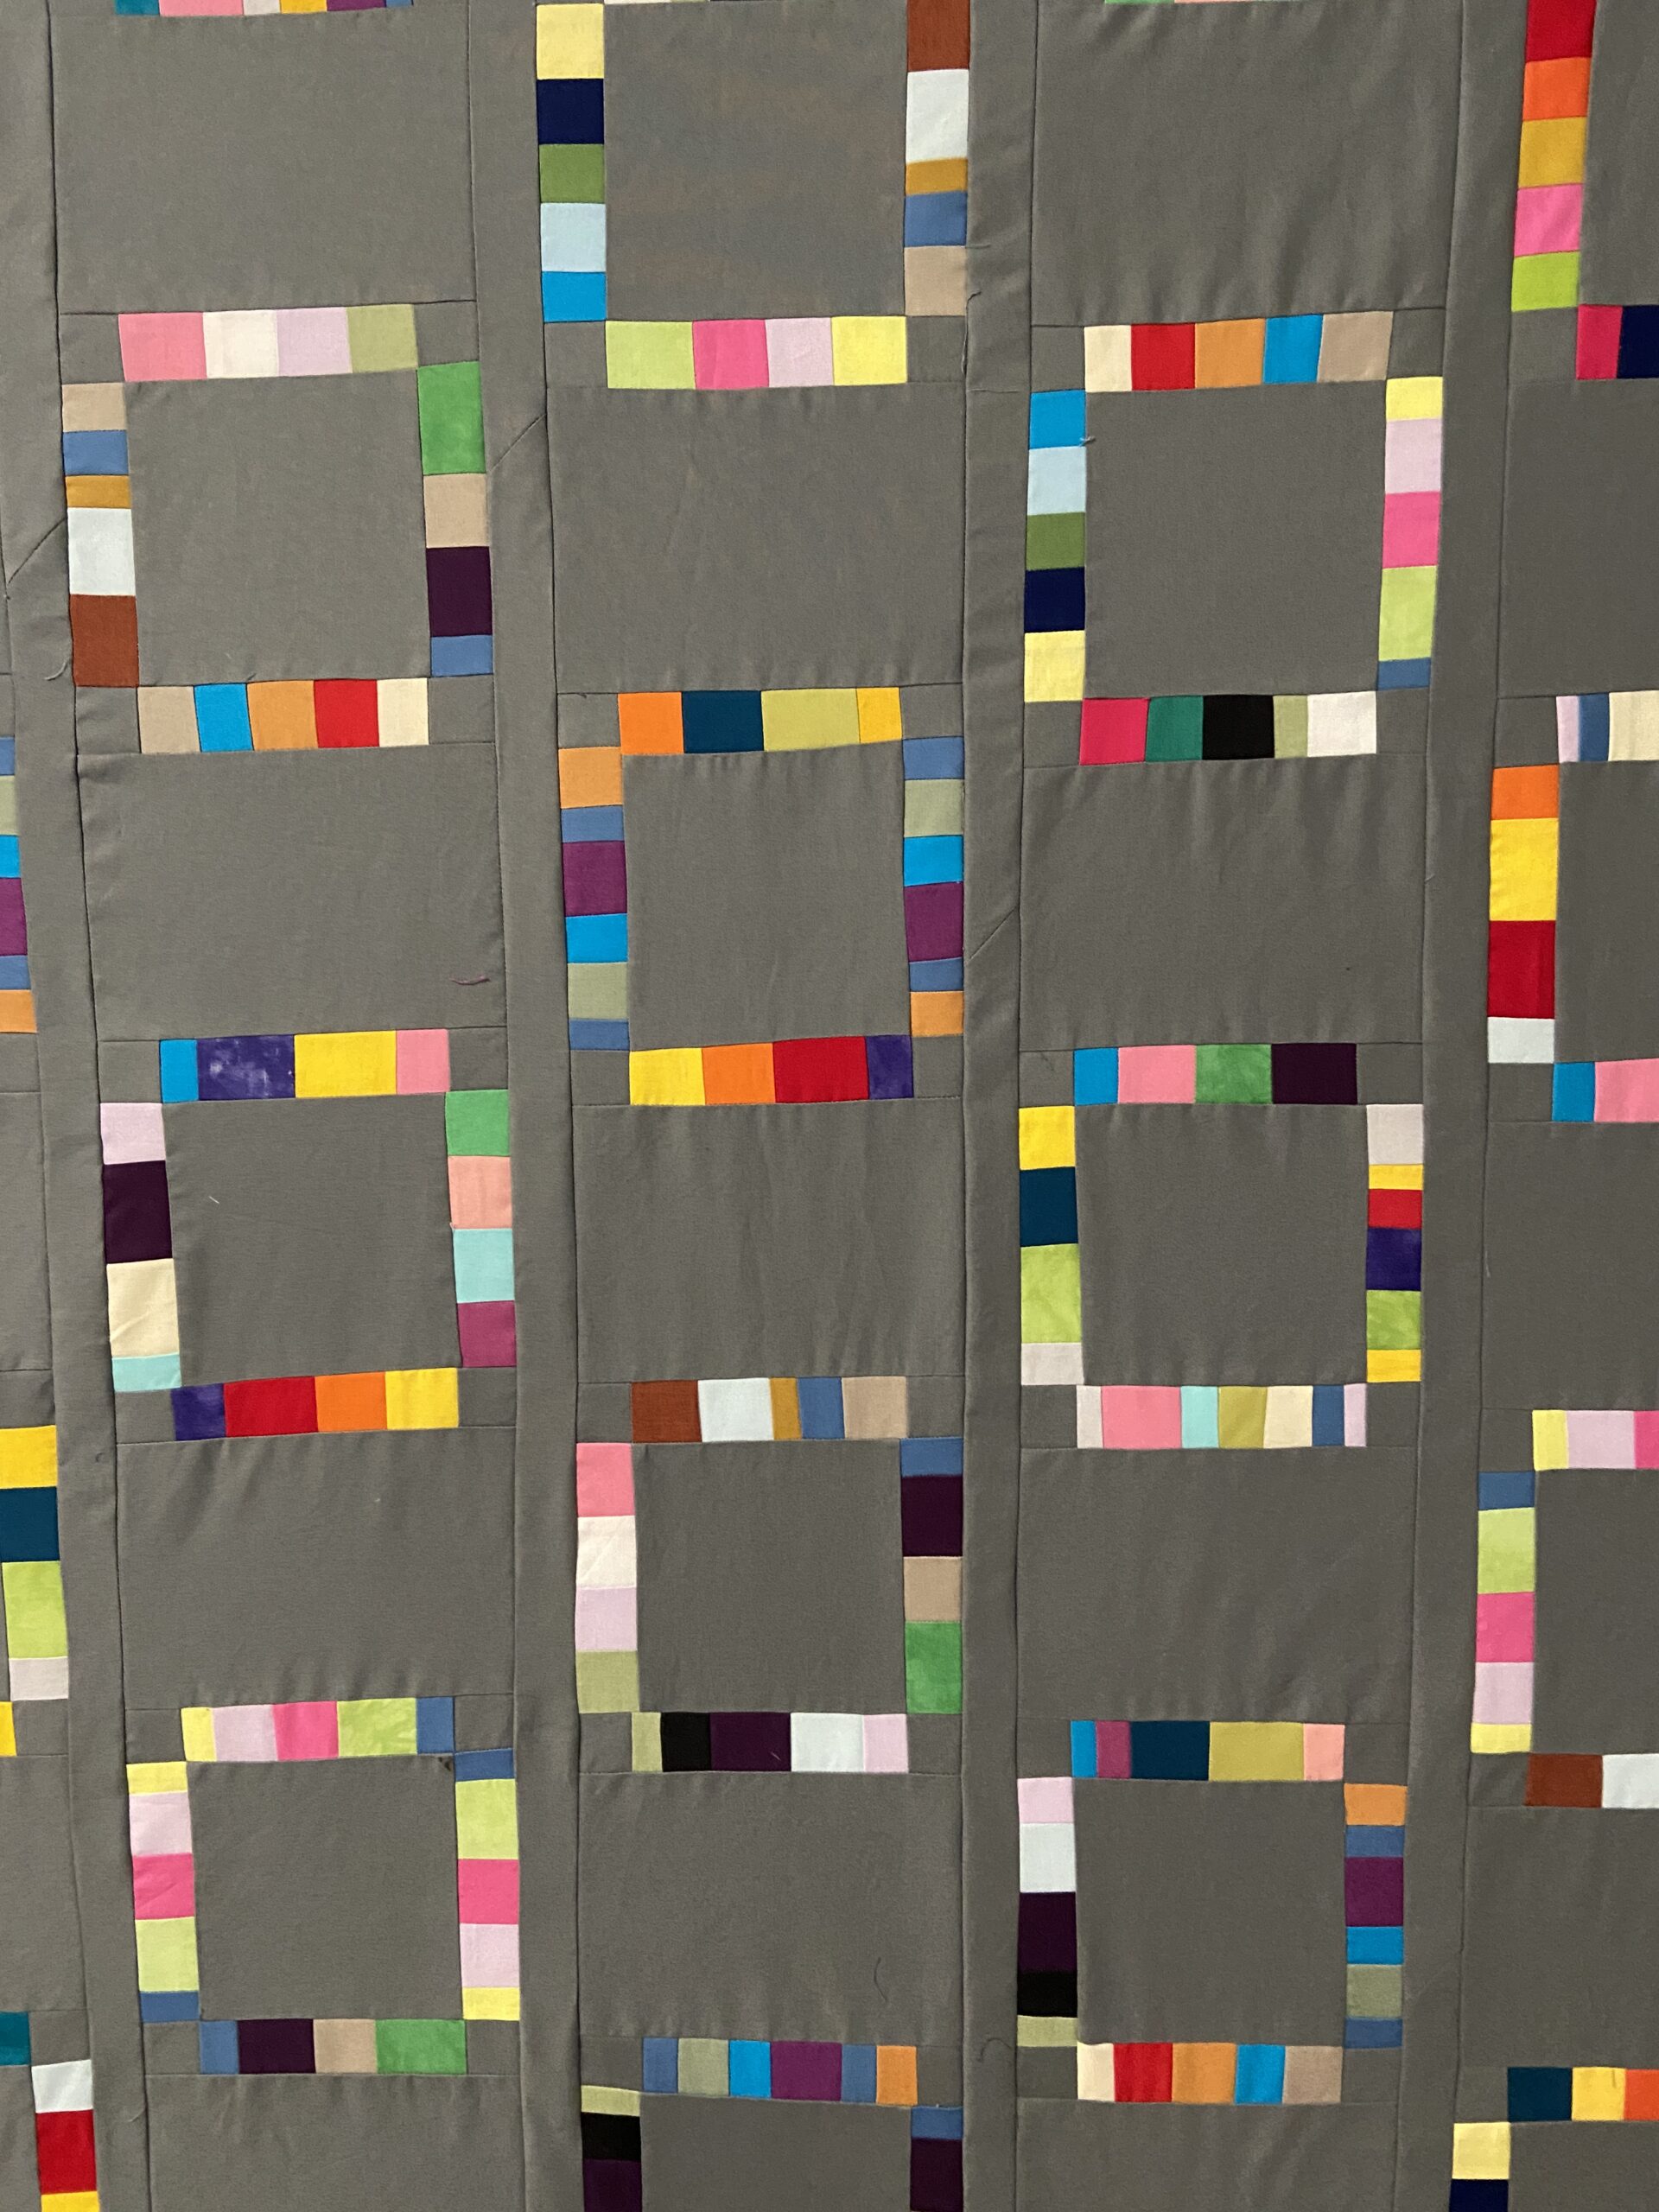
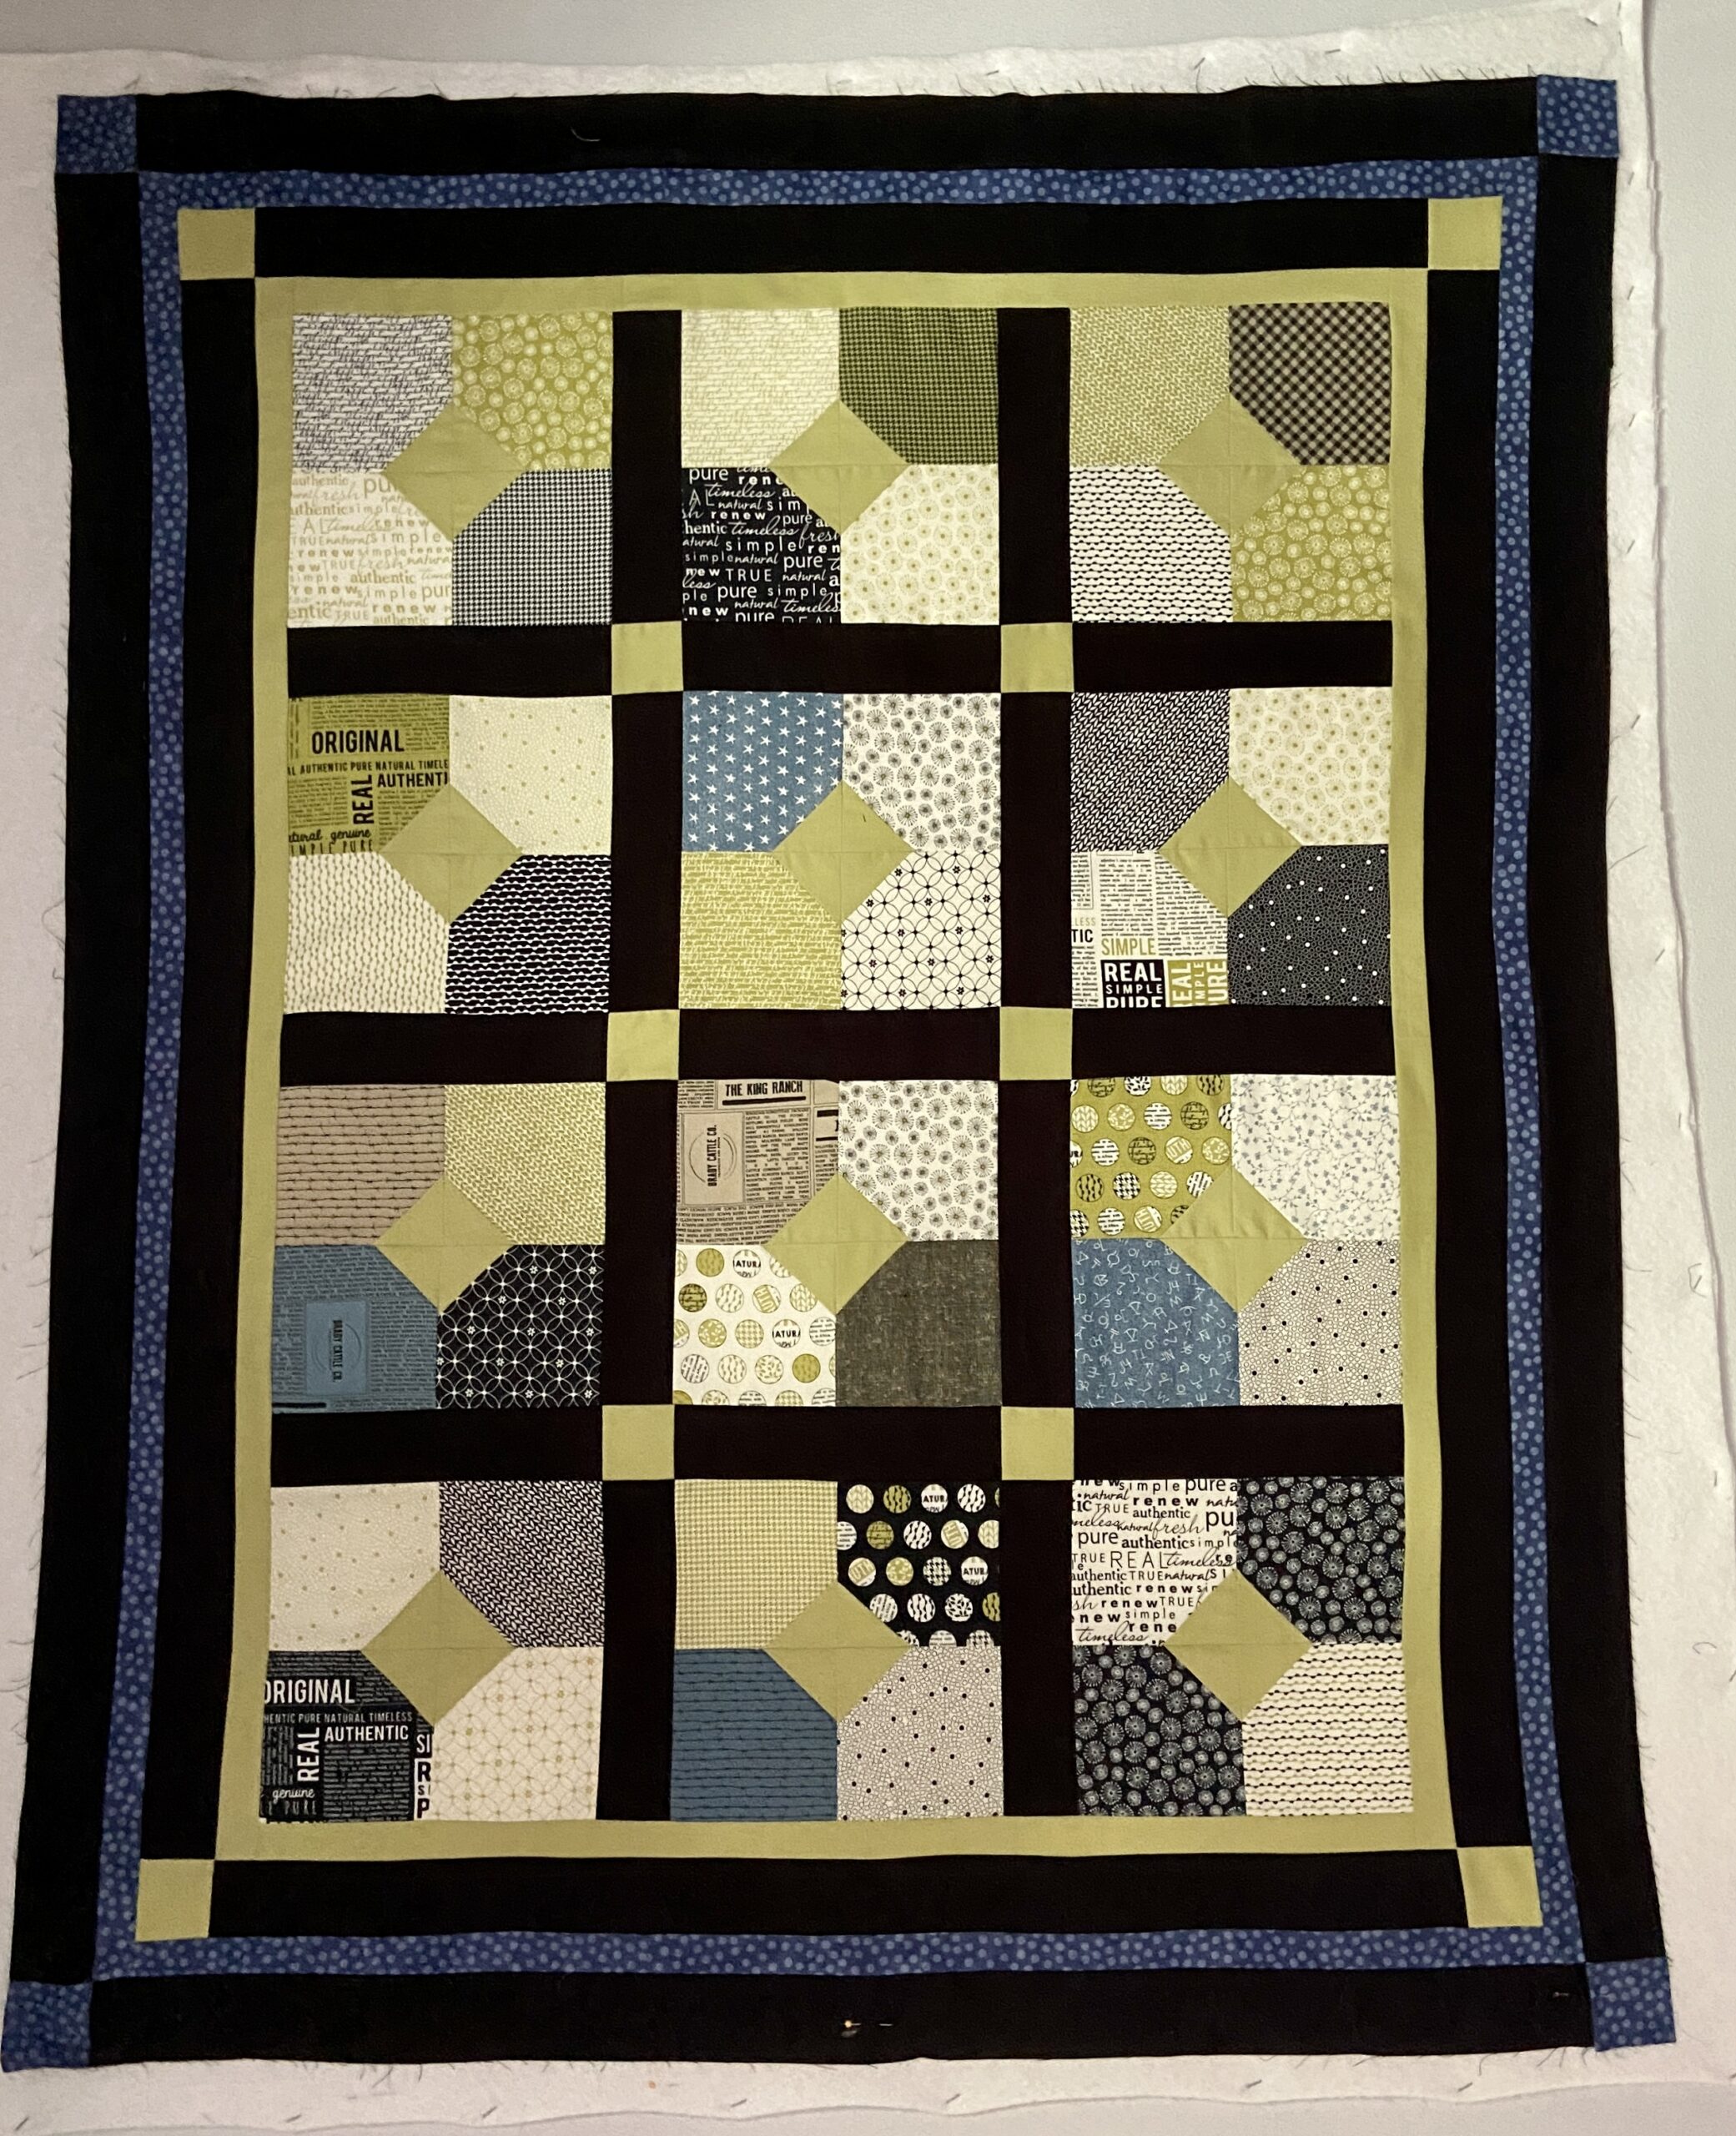
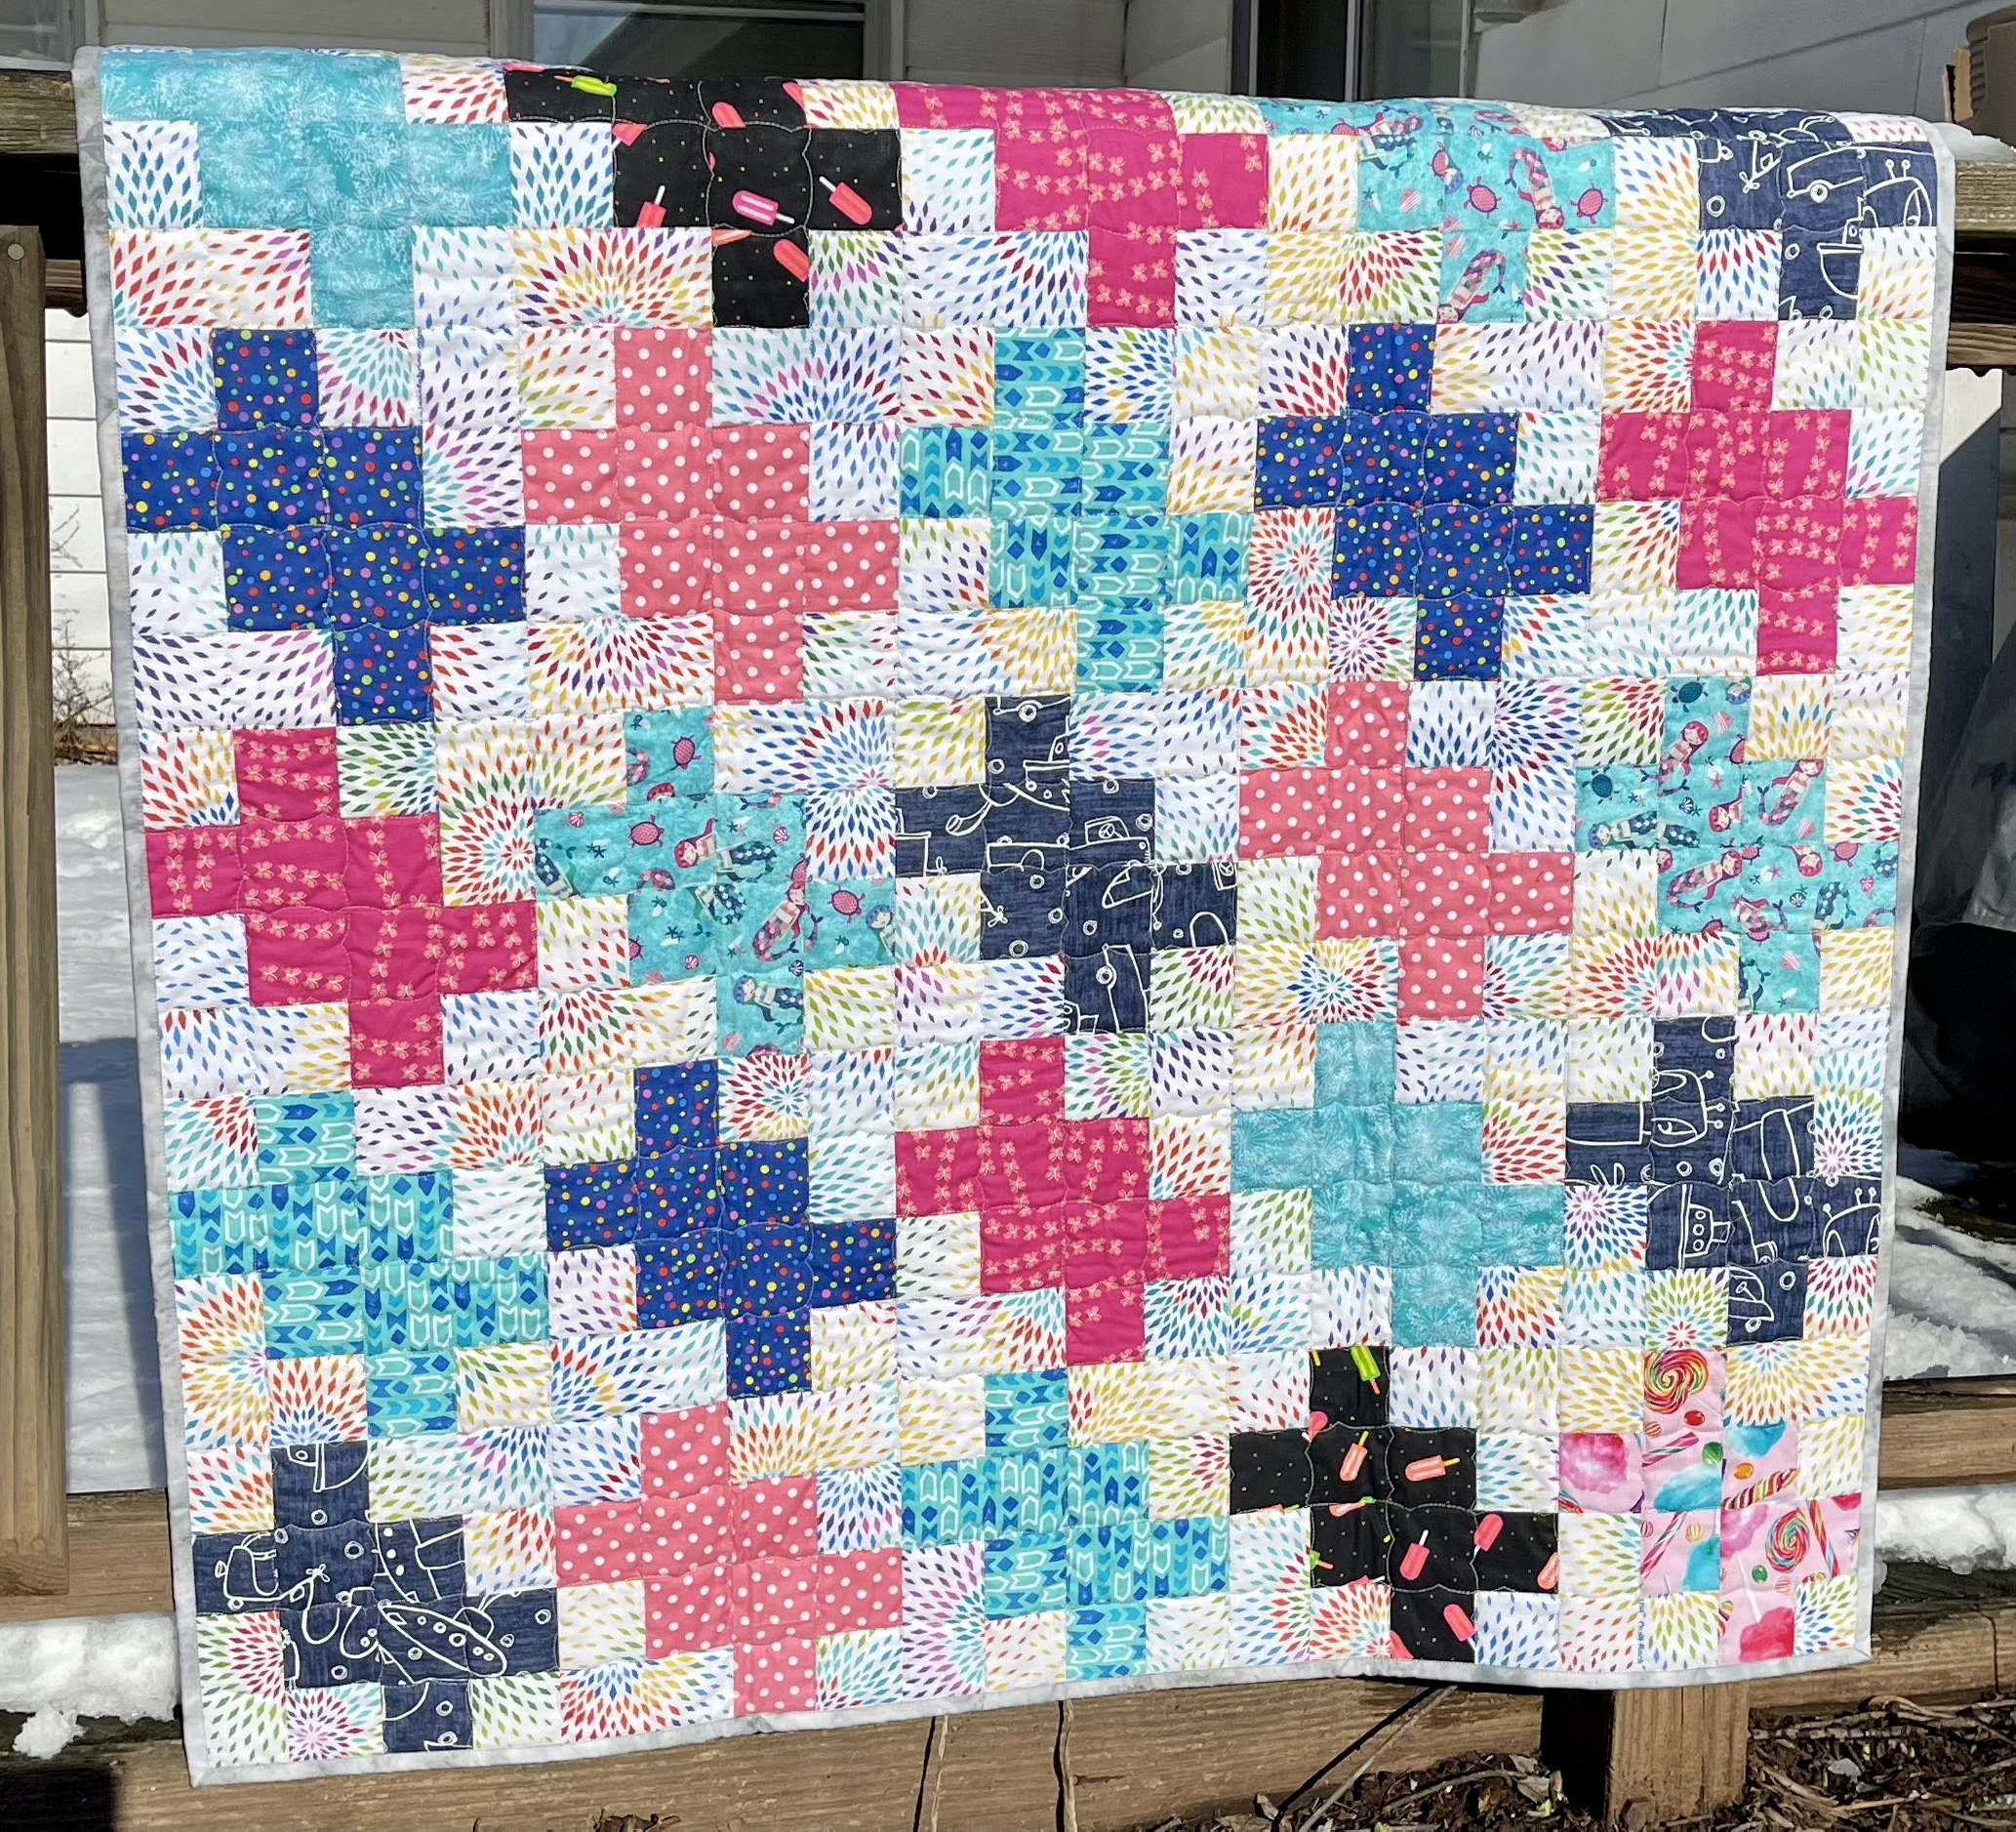
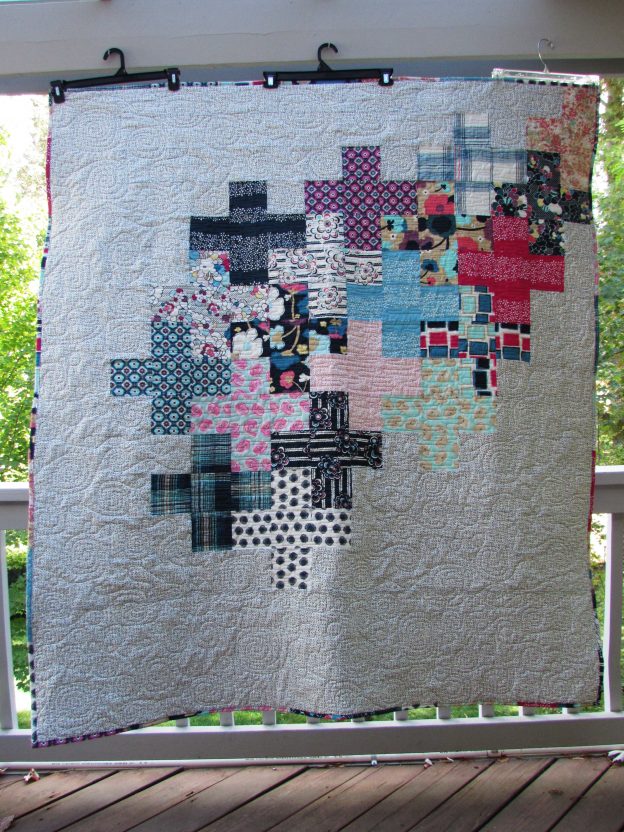
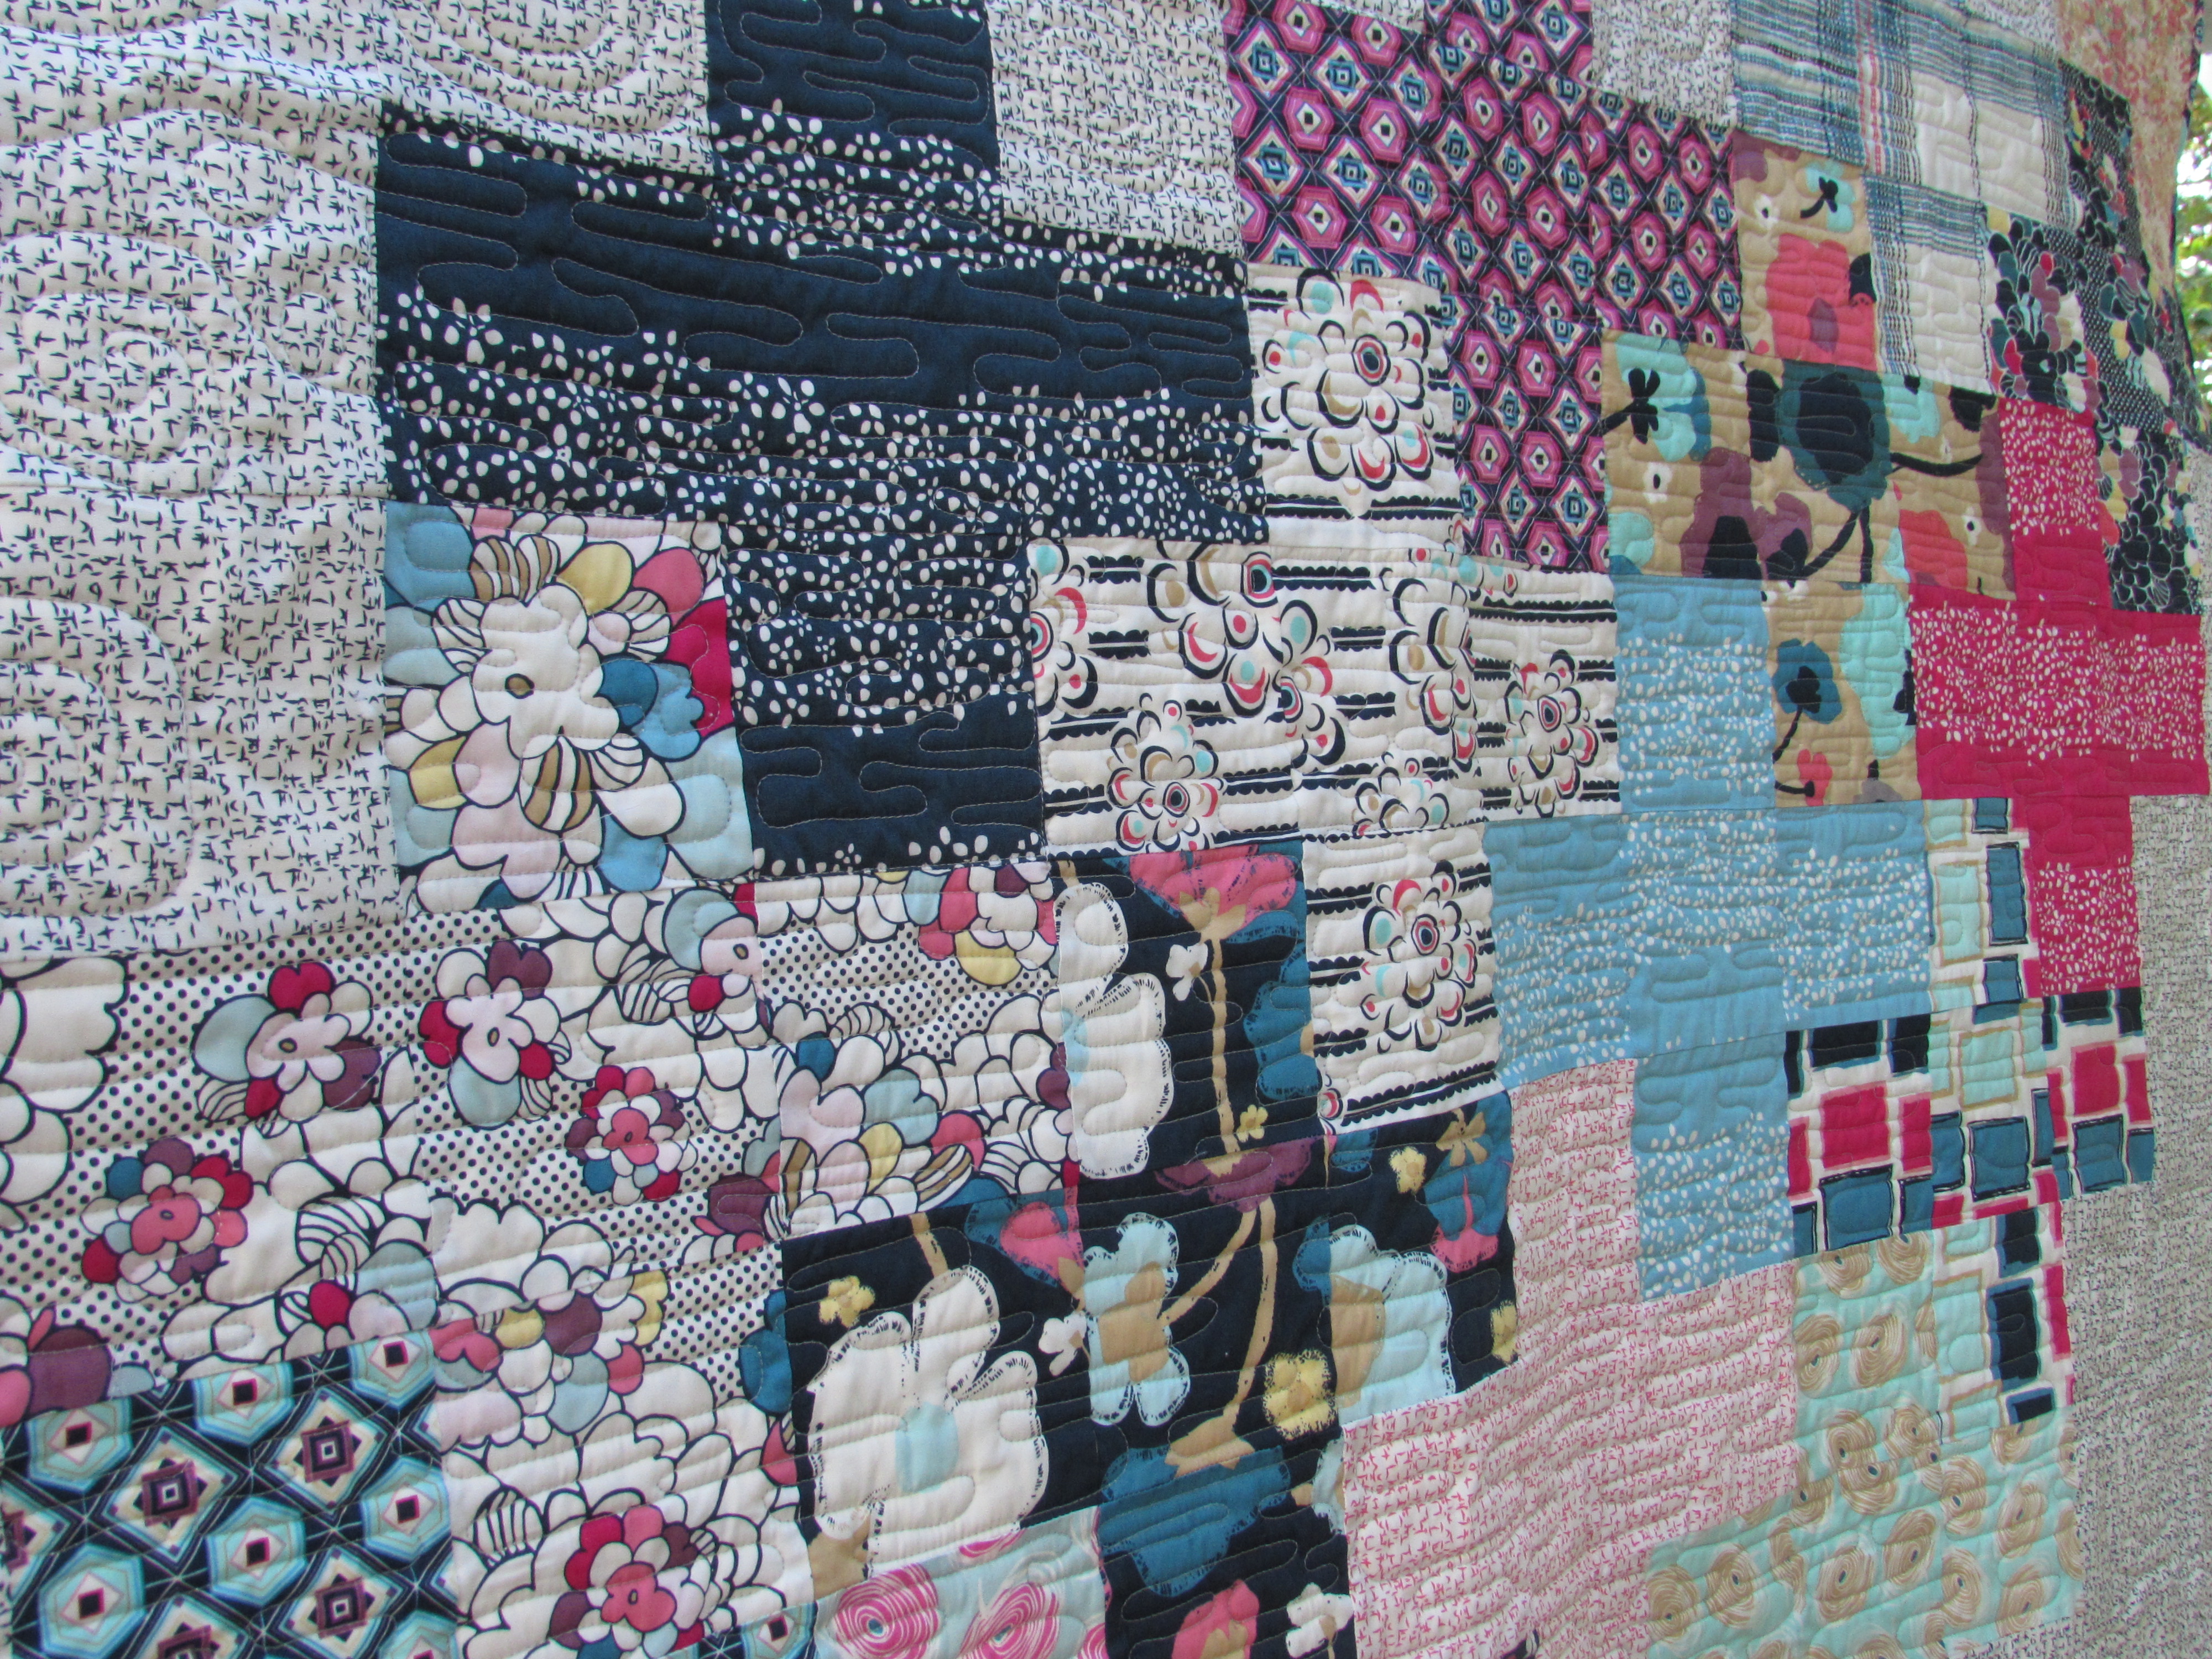
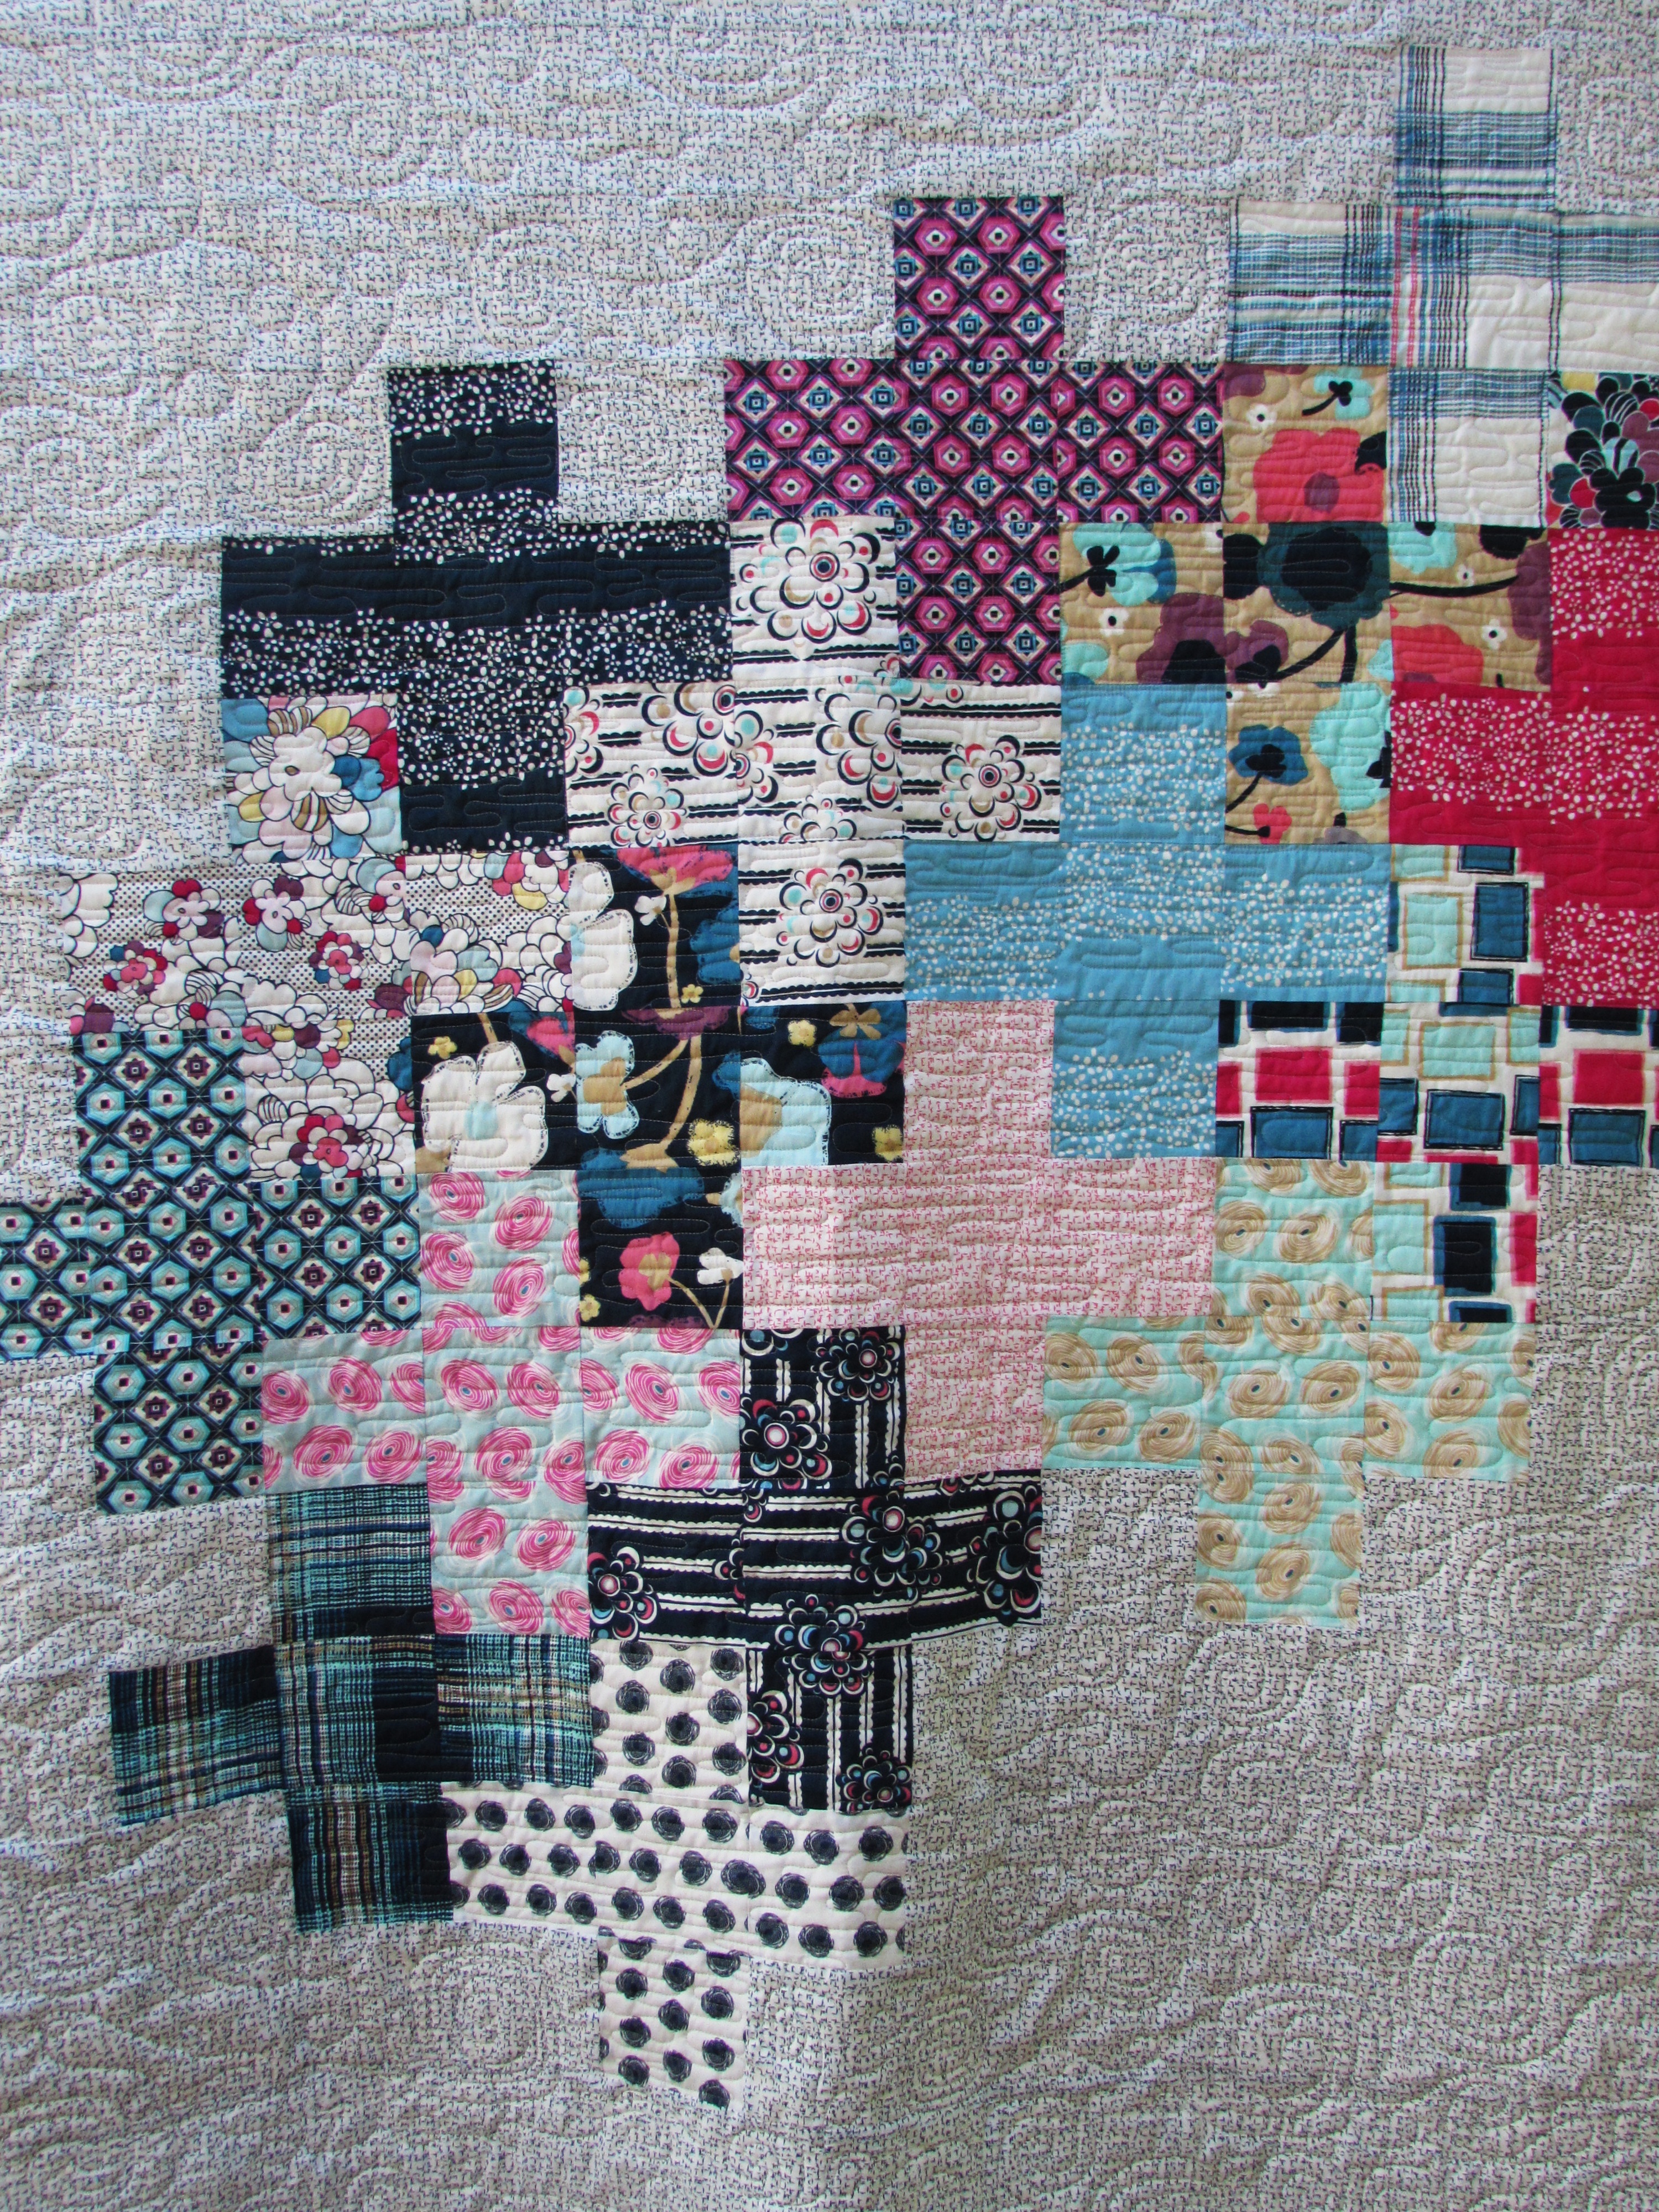
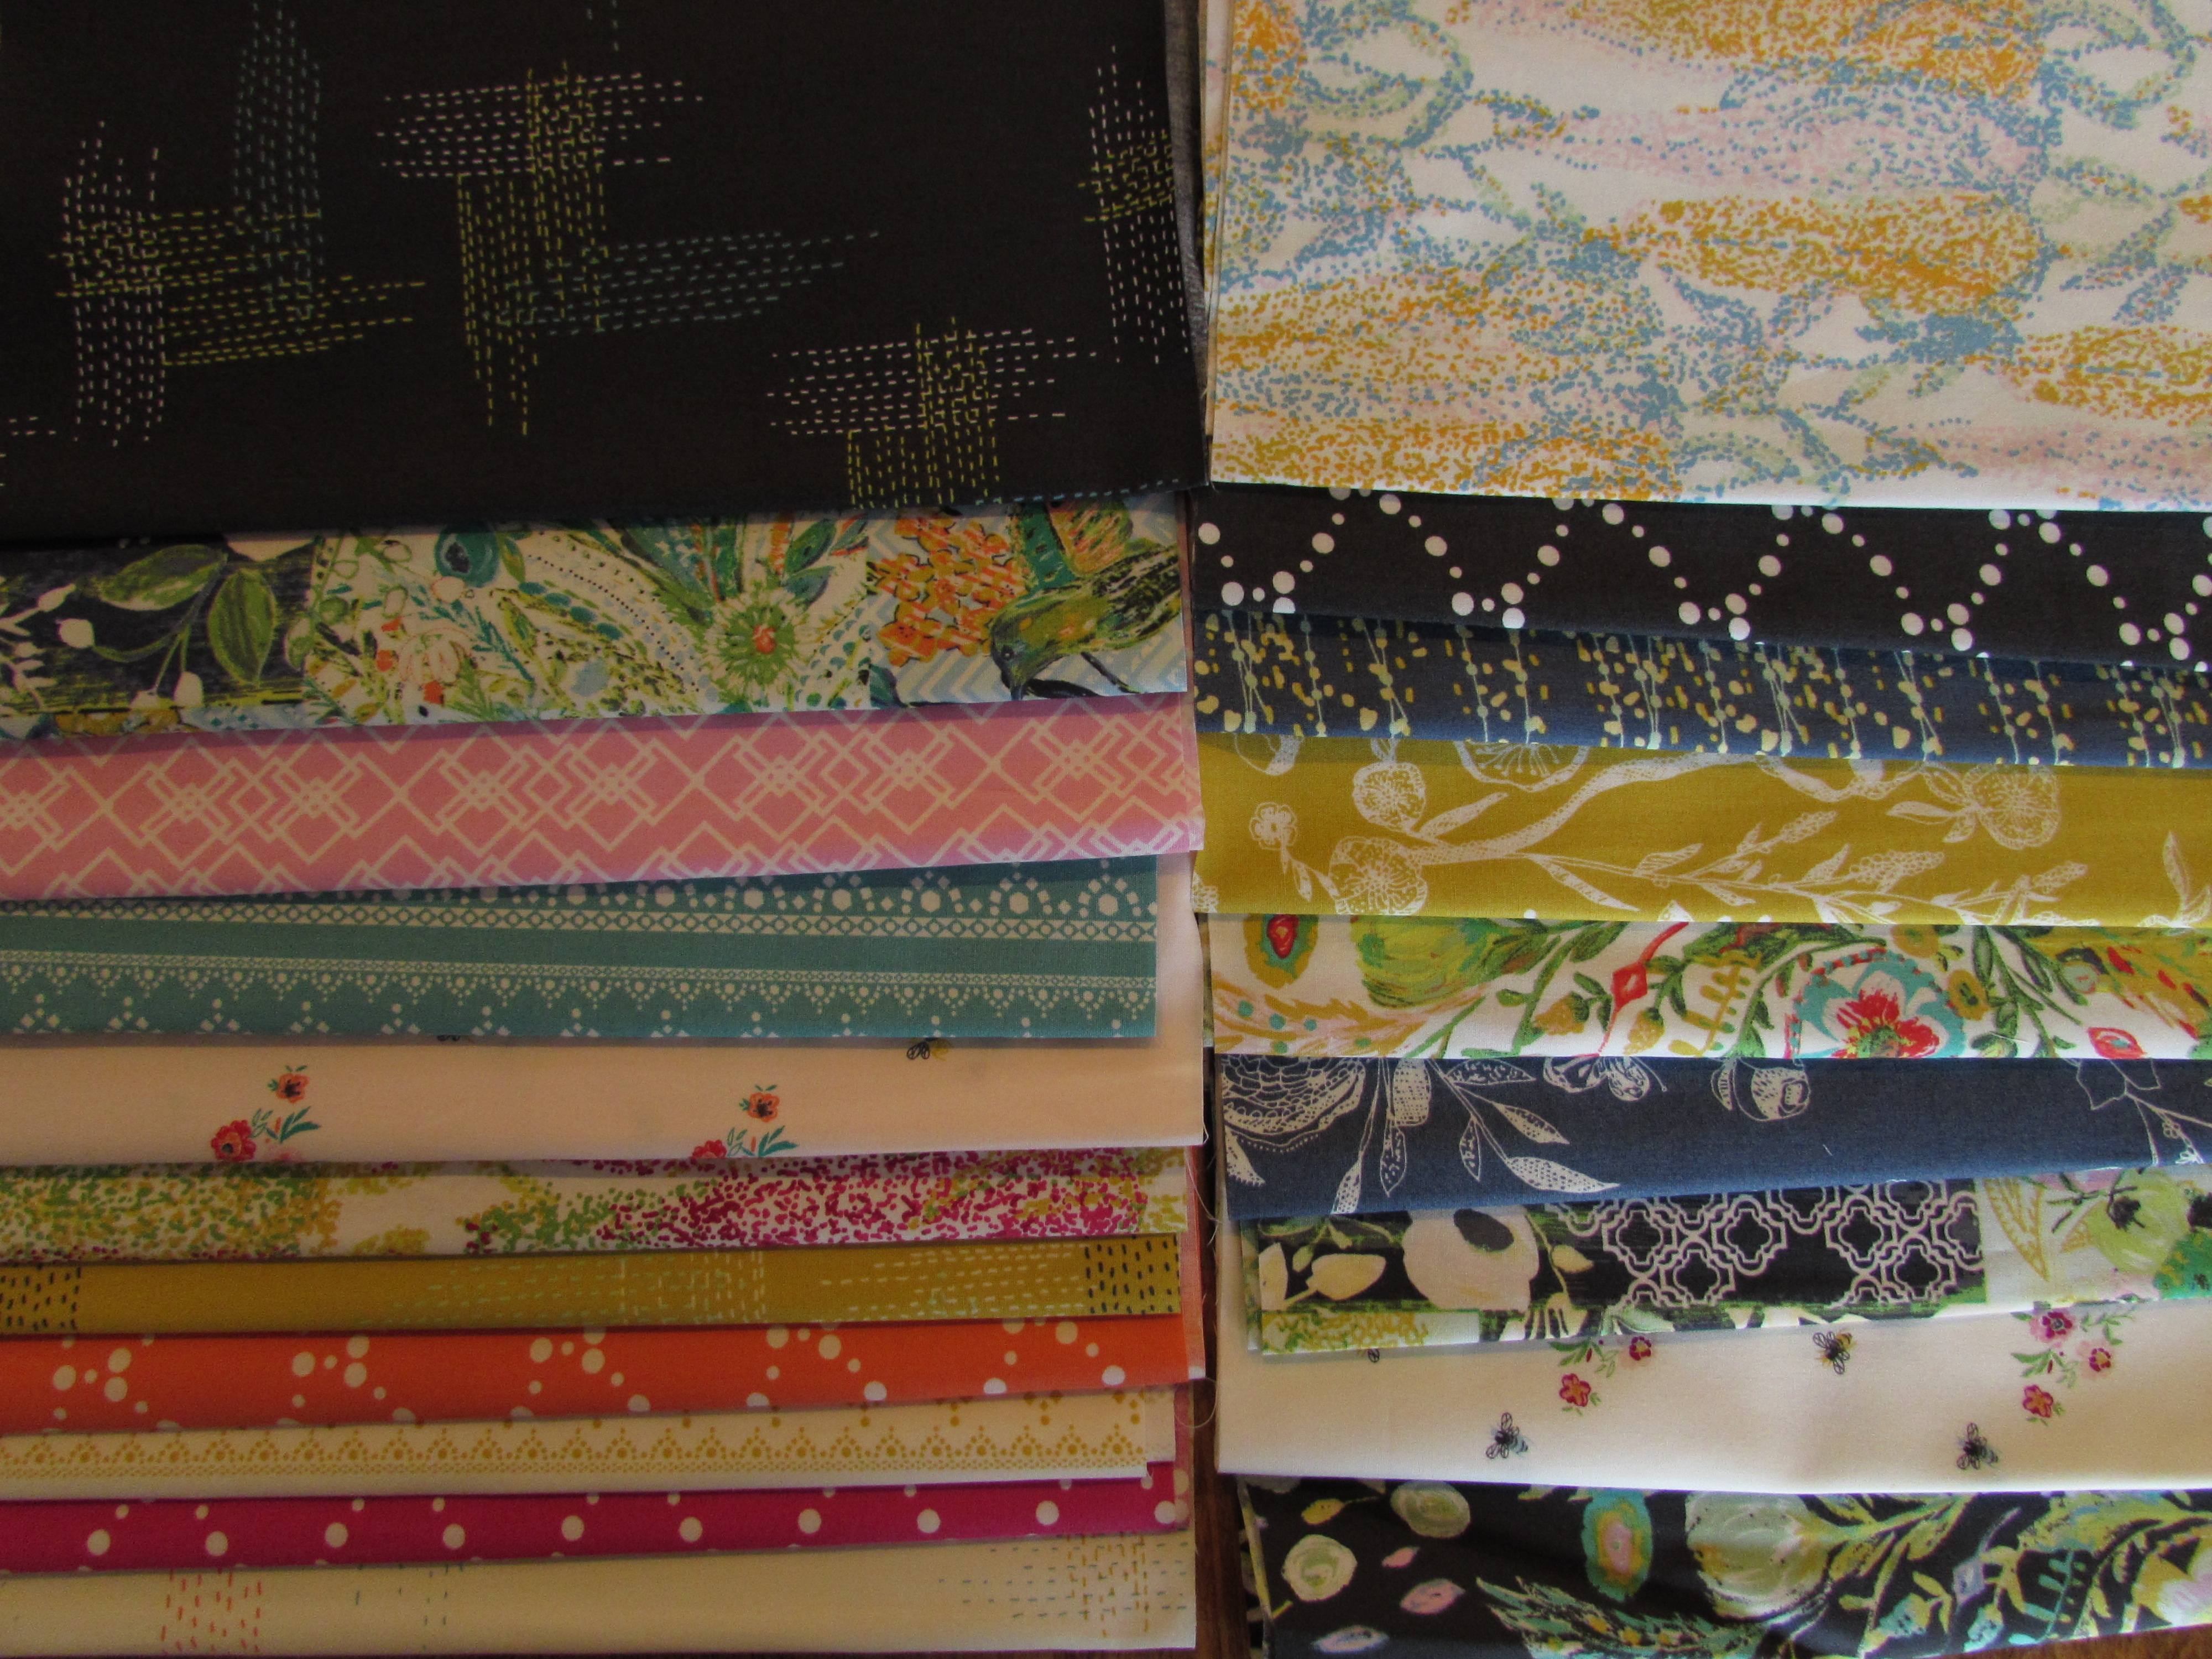
In a relatively short time, I was able to complete the quilt top. With a charcoal gray background, the solid ‘rings’ add vibrant color. To make the rings, I gathered solid fabric strips and trimmed them to about 1 1/2″ or 2″ wide. After making strips sets I cut strips that were 1 1/2″ wide. These were combined with 1 1/2″ corner stones of the gray and stitched to squares.

I encourage you to find a copy of the book if you don’t already have it. The book has many patterns made with scraps with the projects categorized by shape of scrap (eg squares, triangles, strips). Before I knew it, I had my top completed and sewing without the 1/4″ foot was a non-issue.

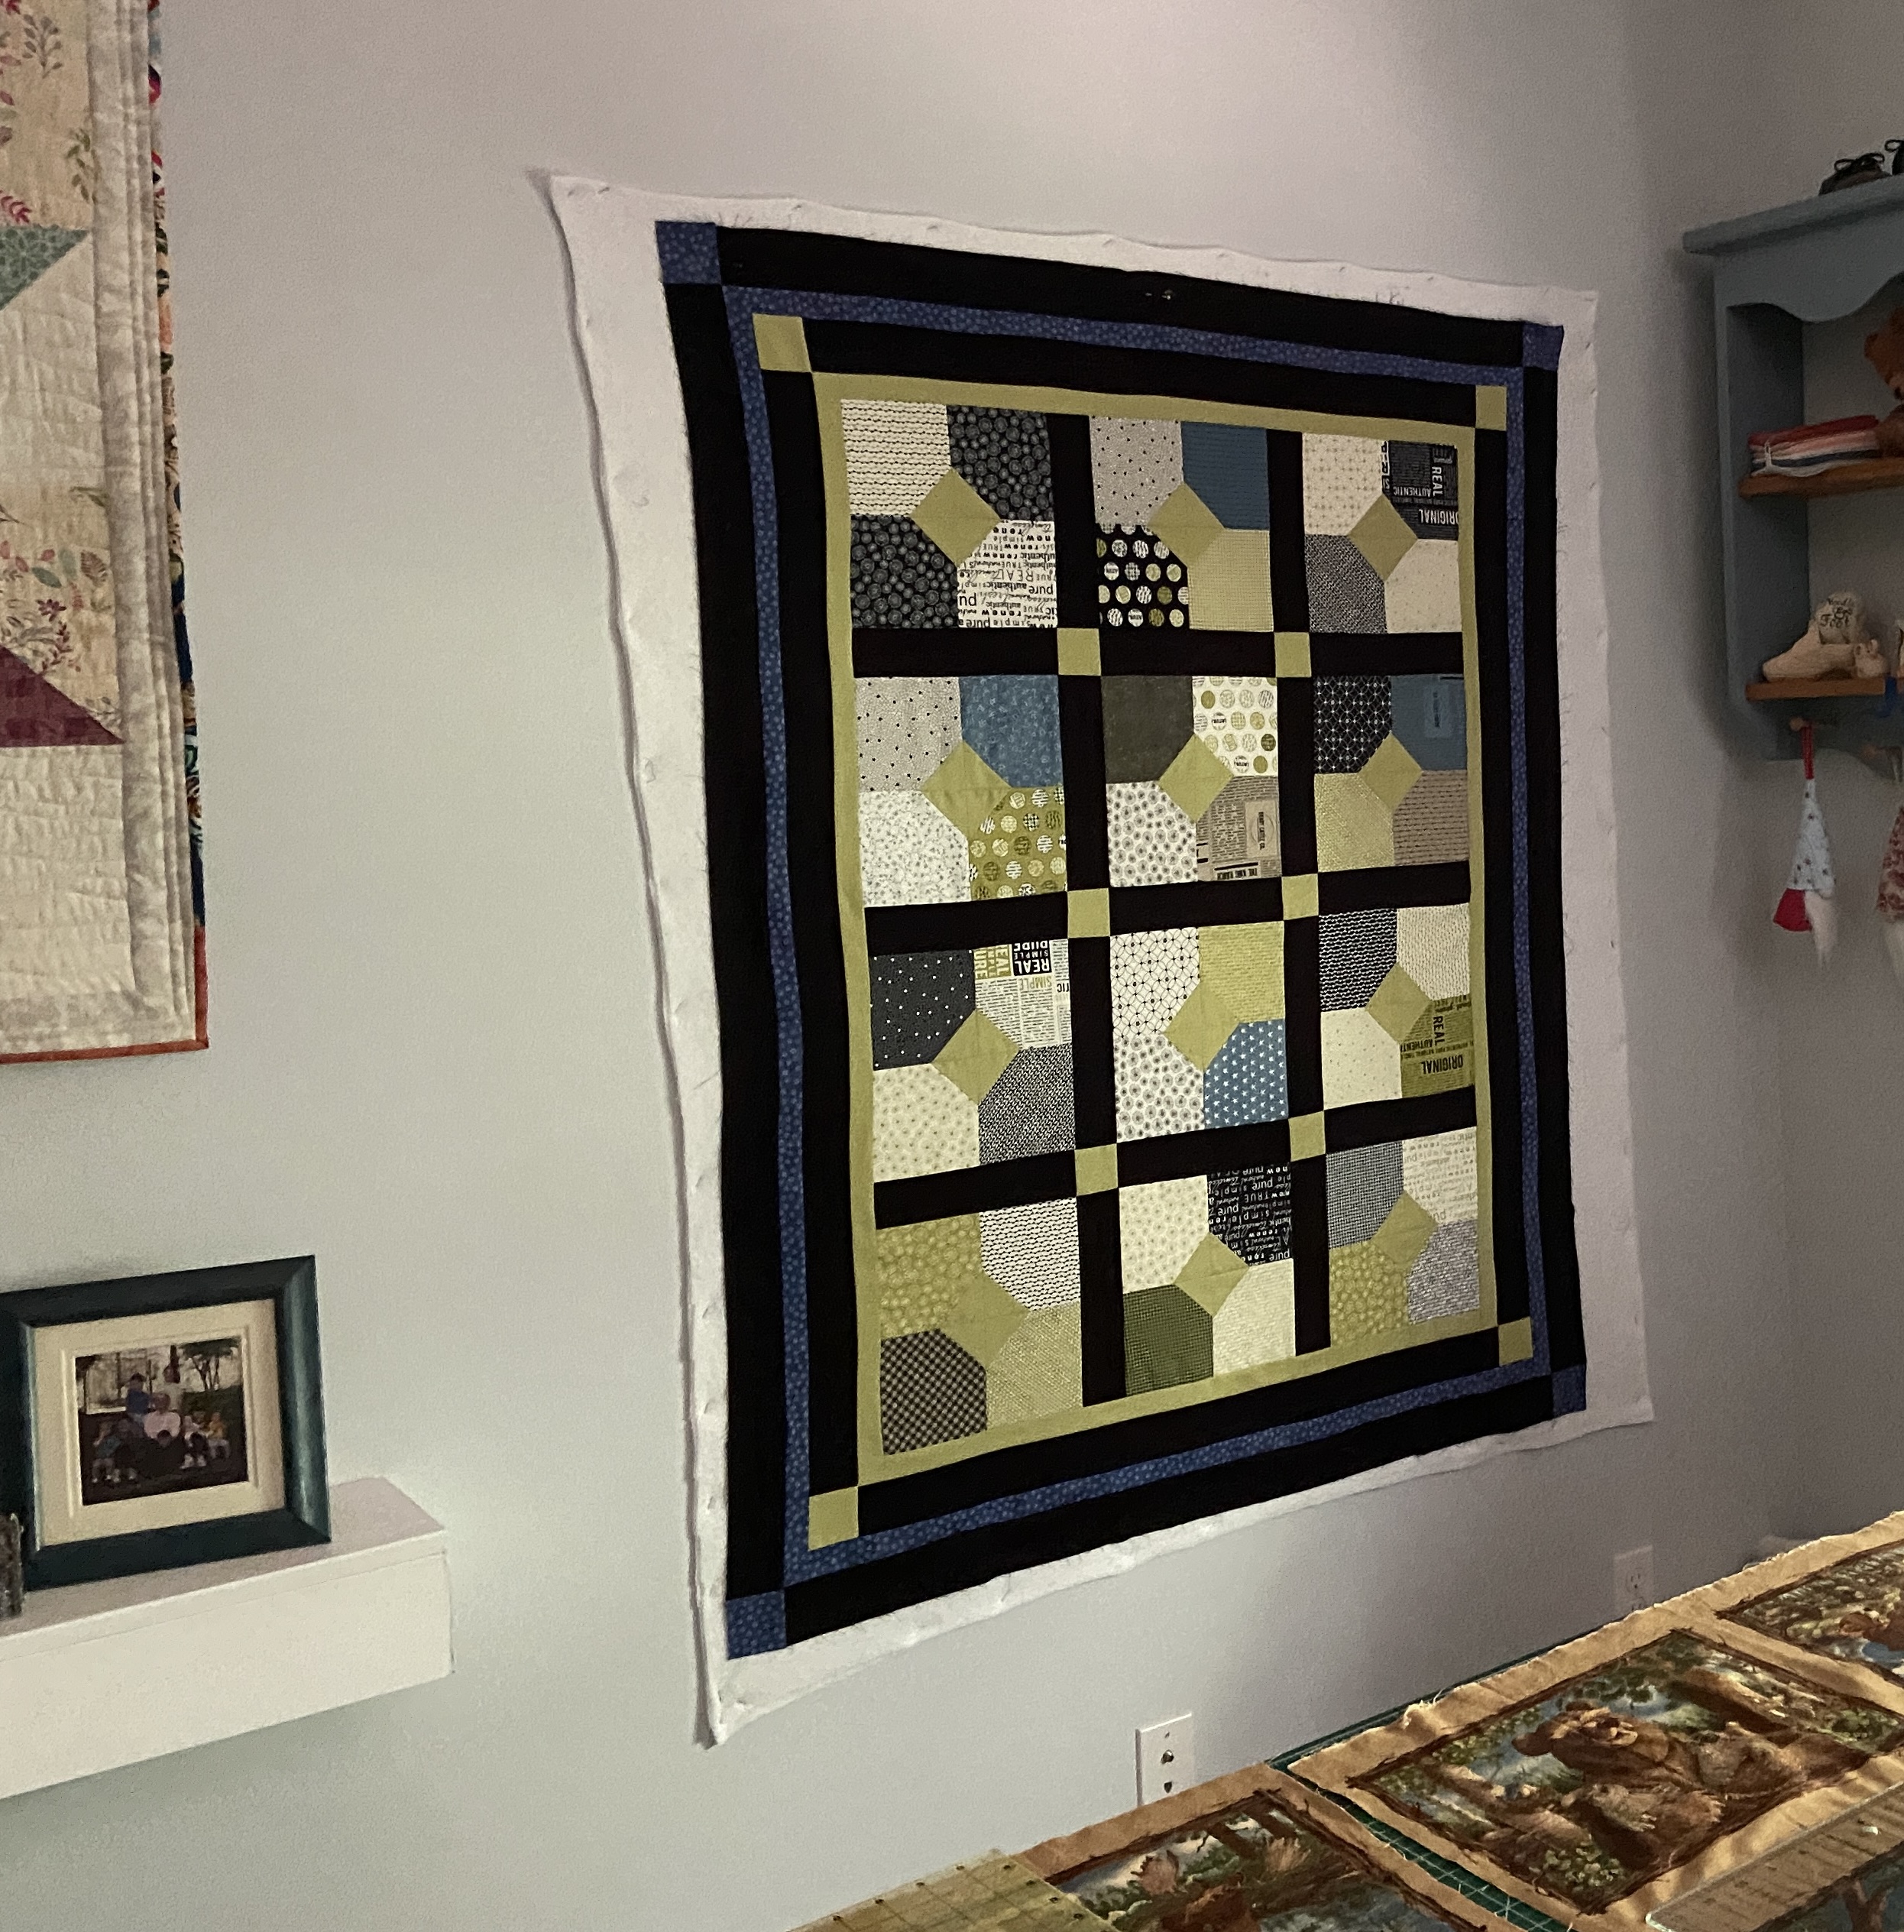
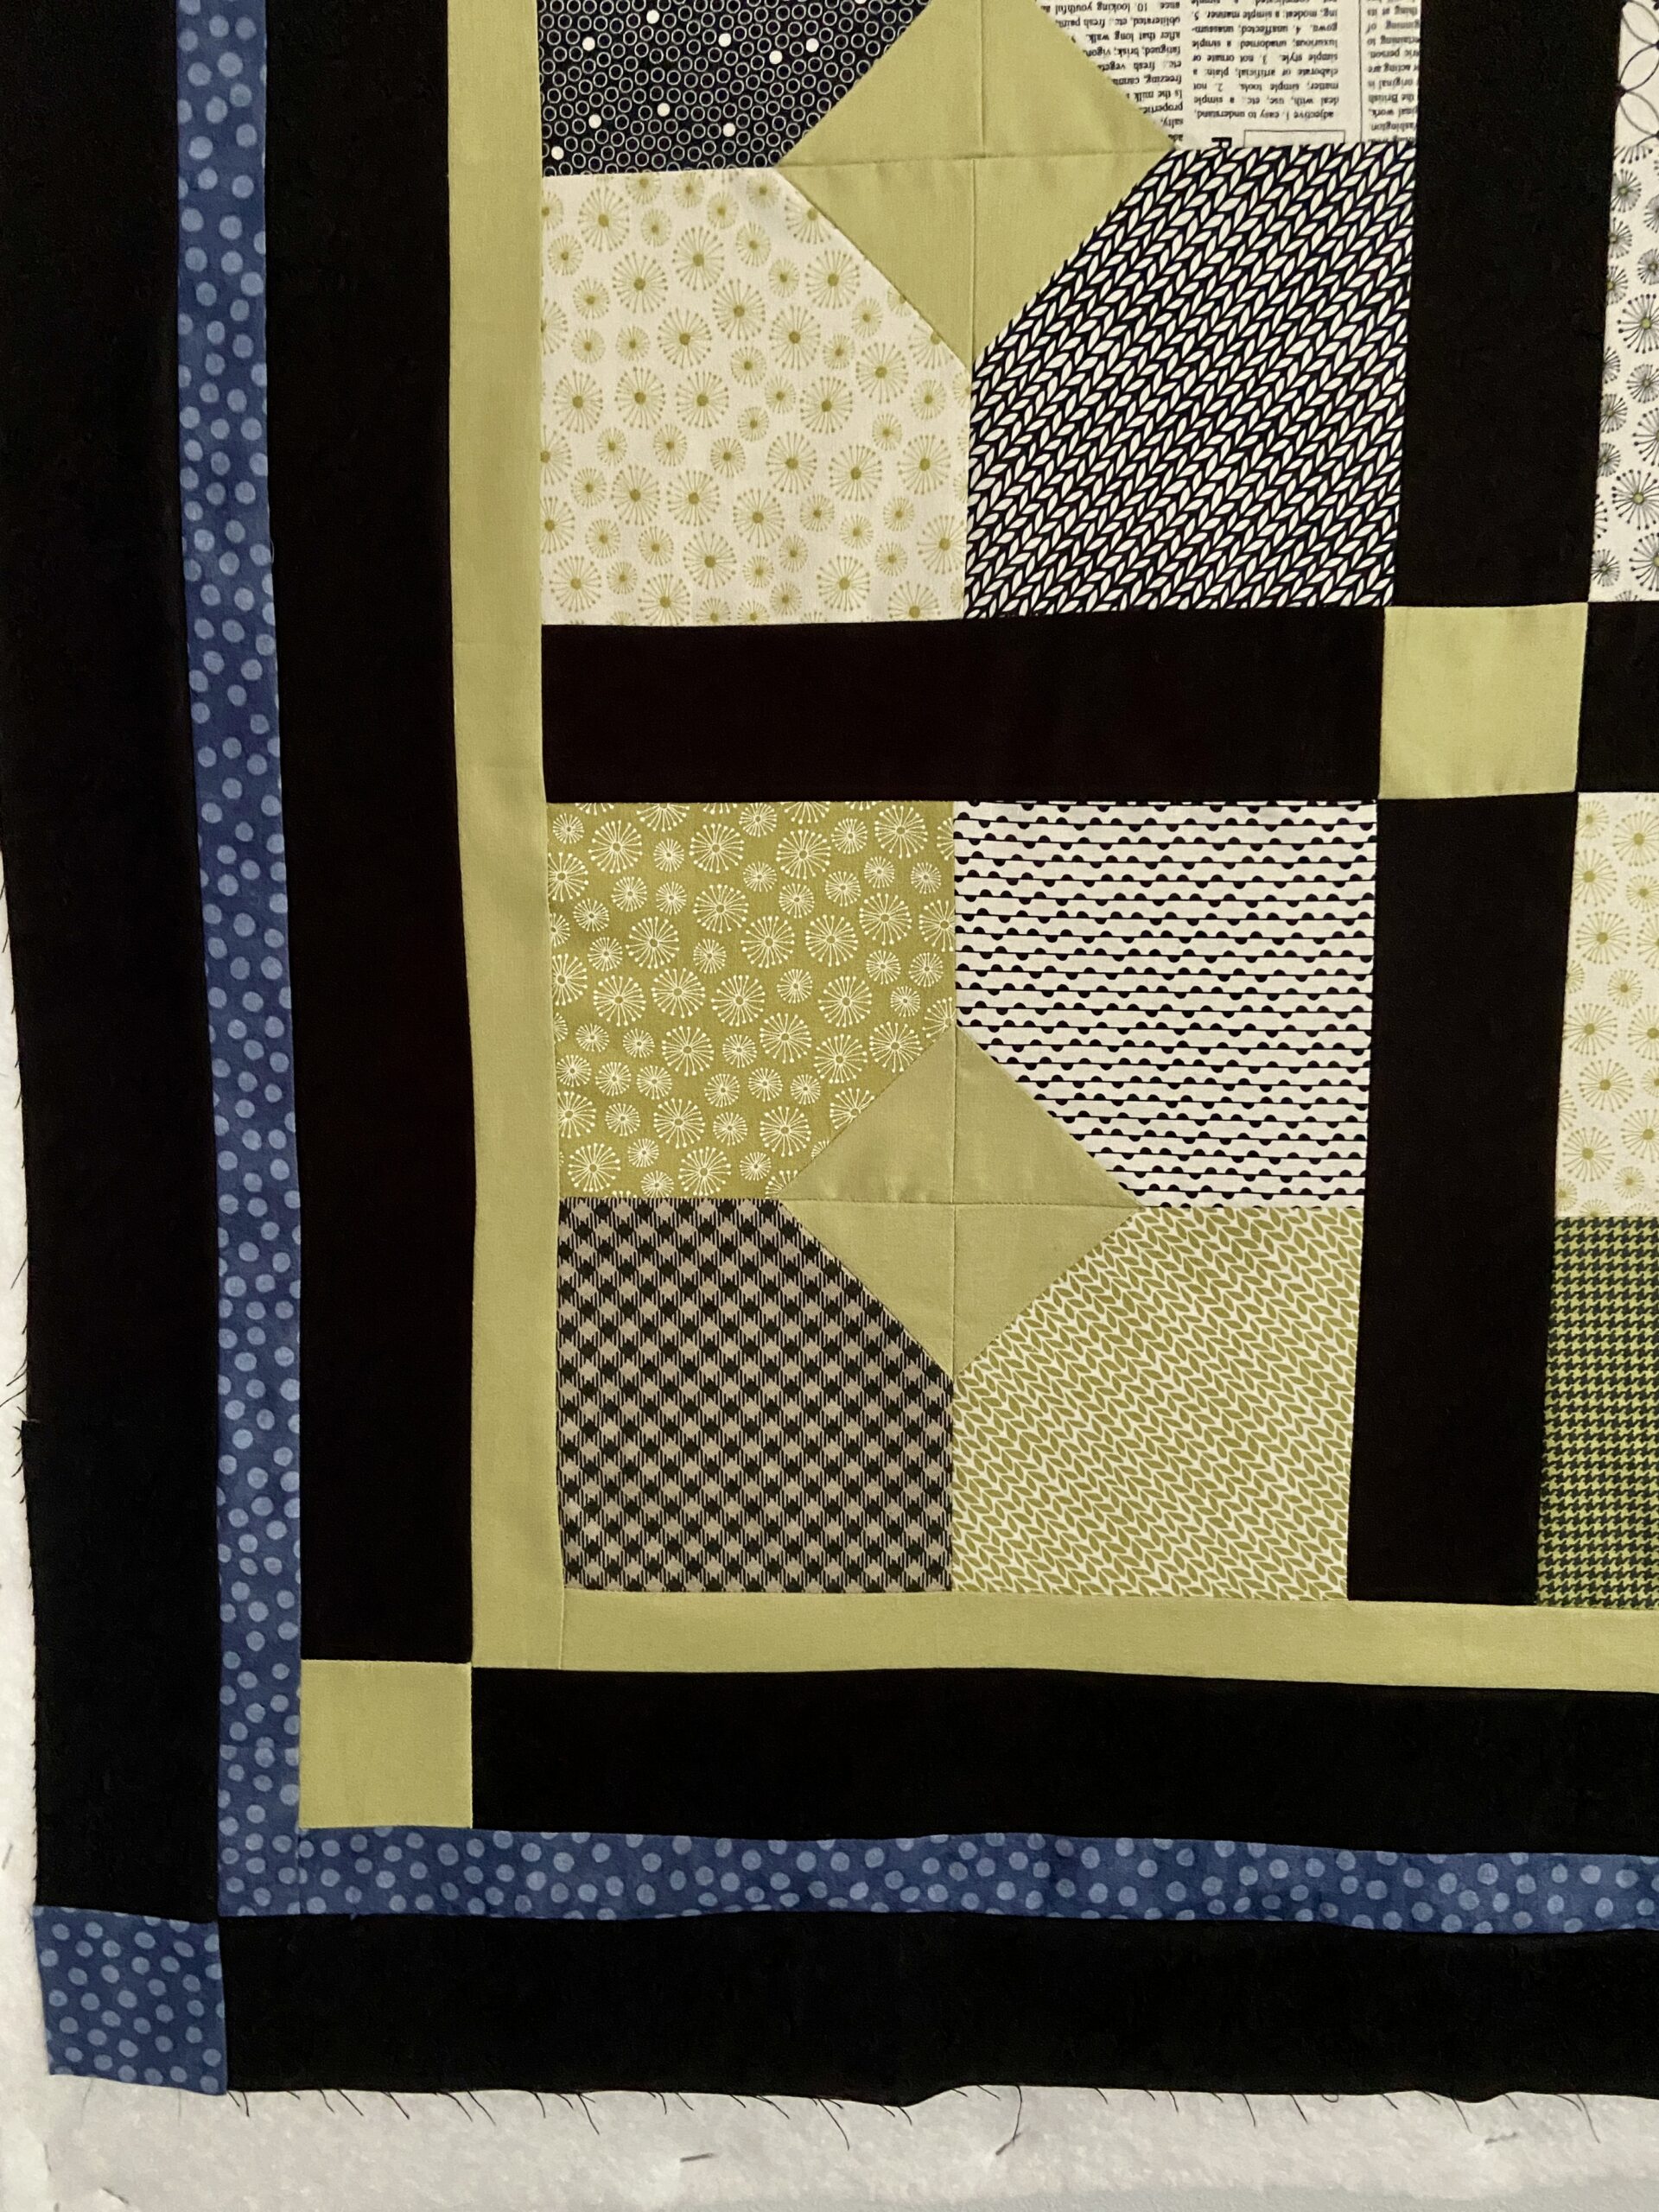
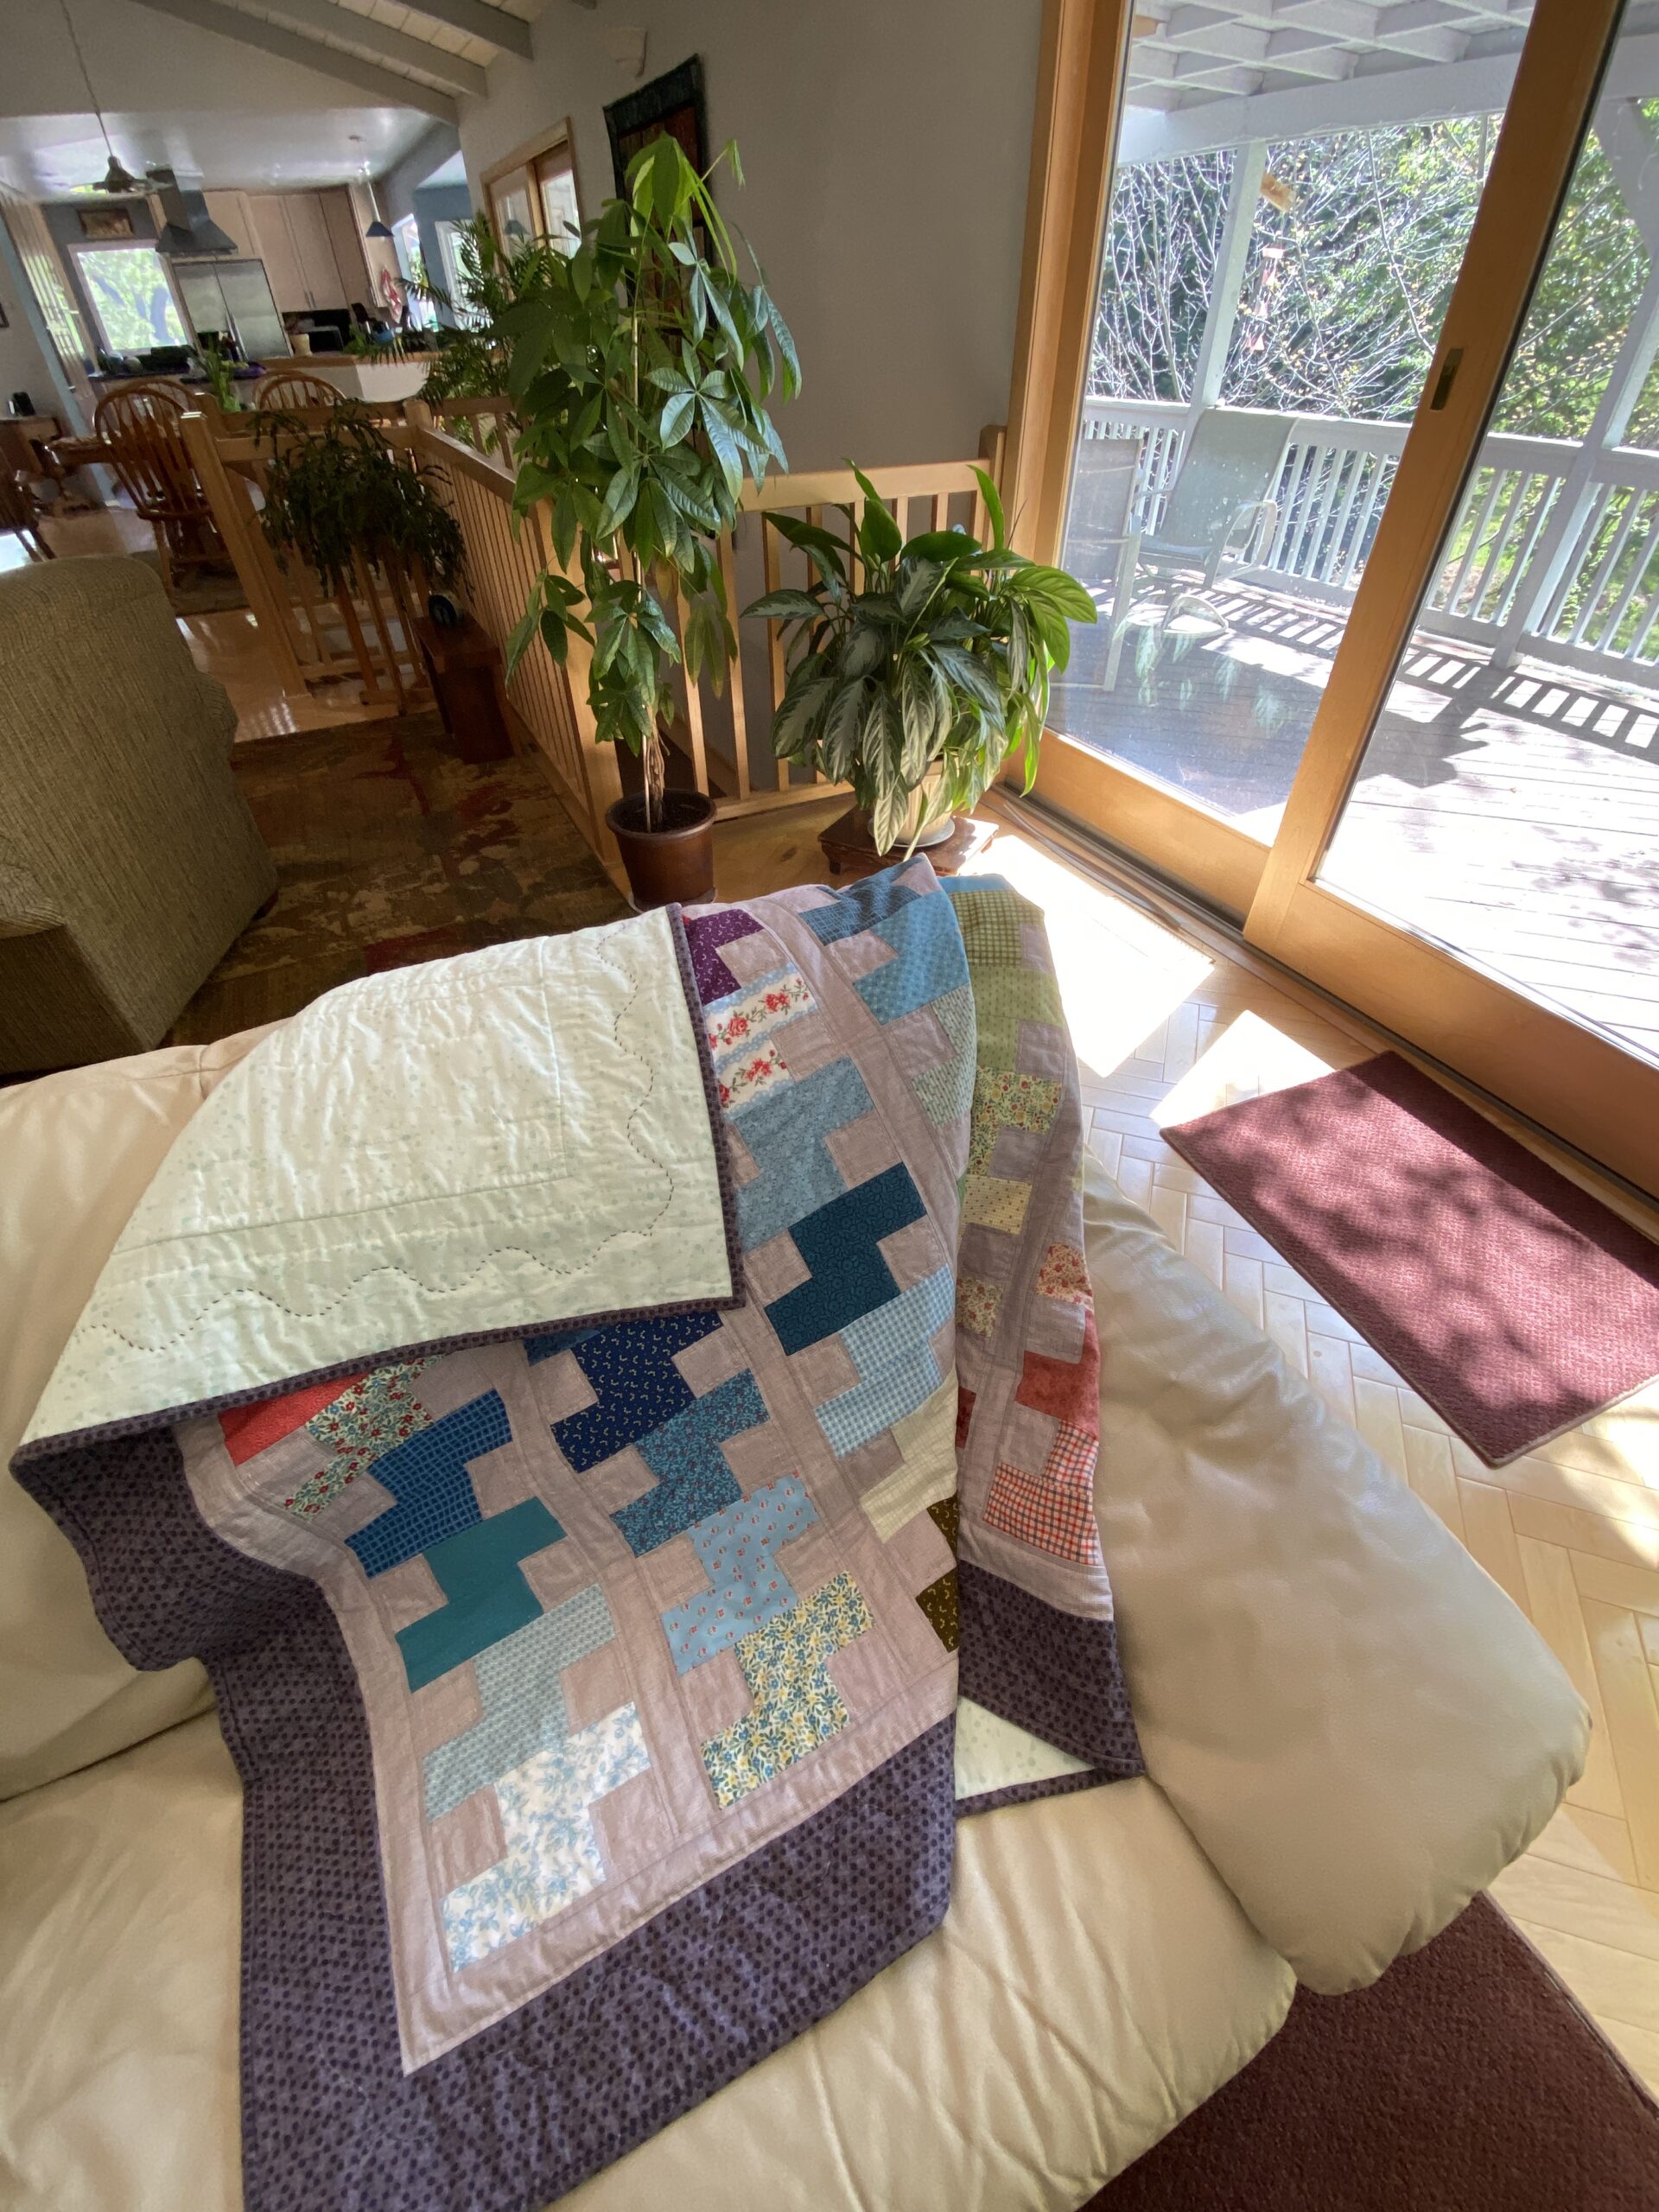
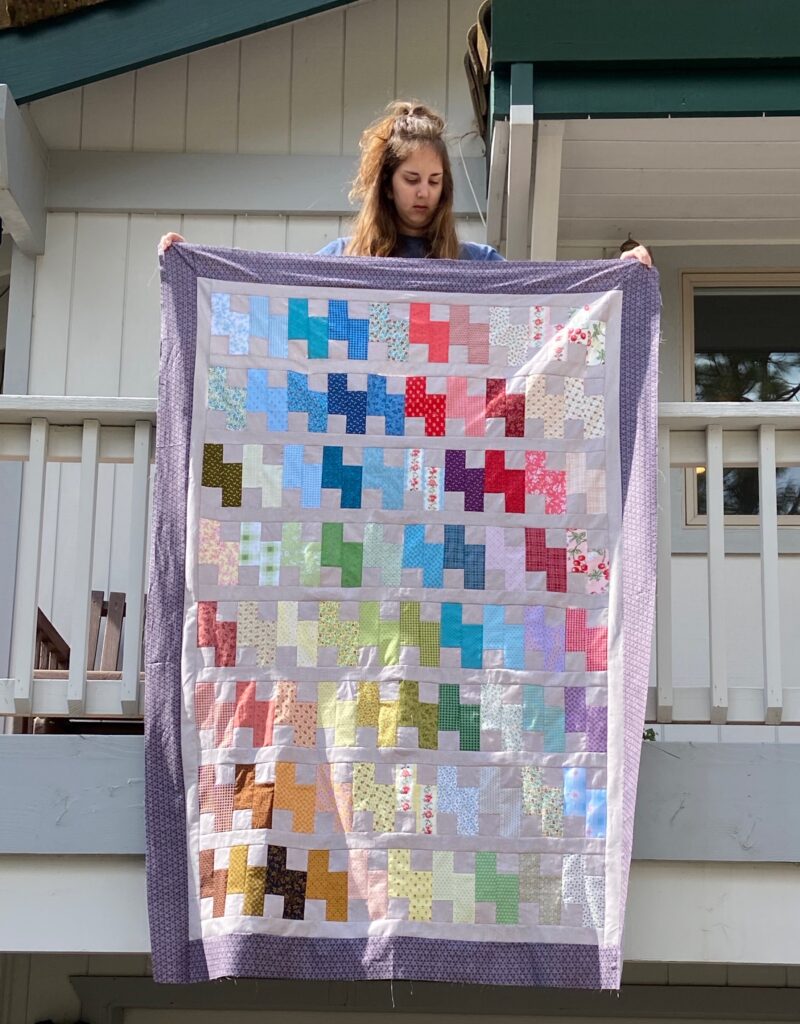
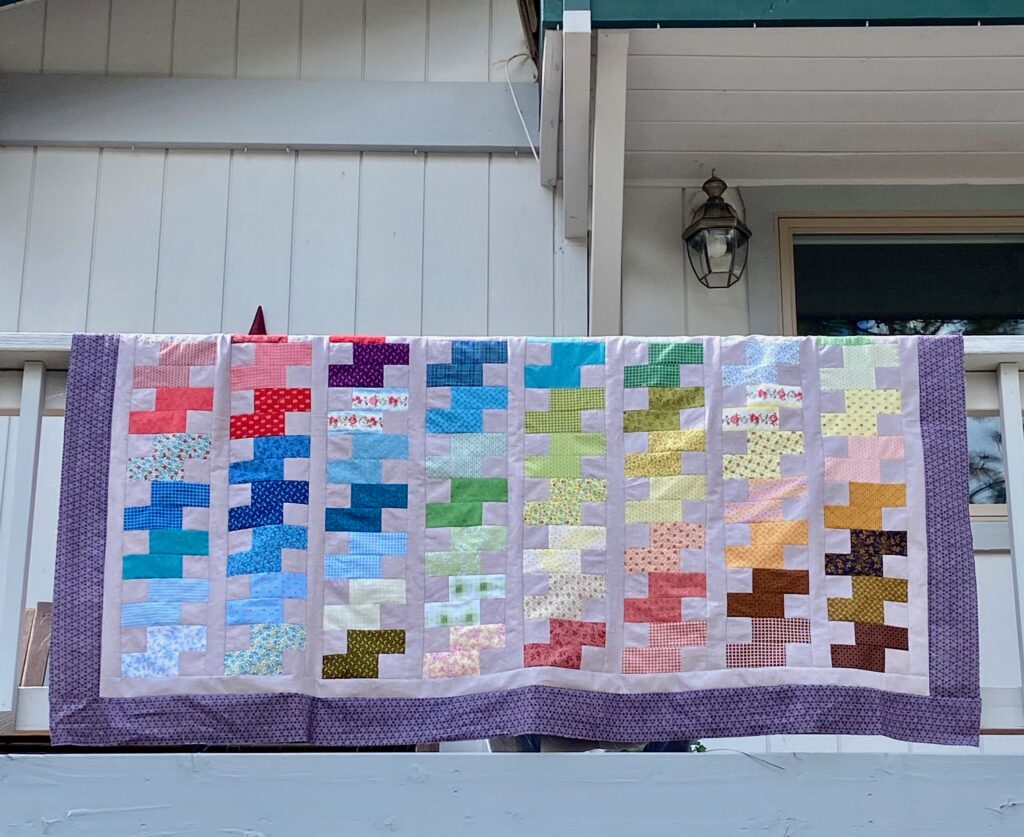
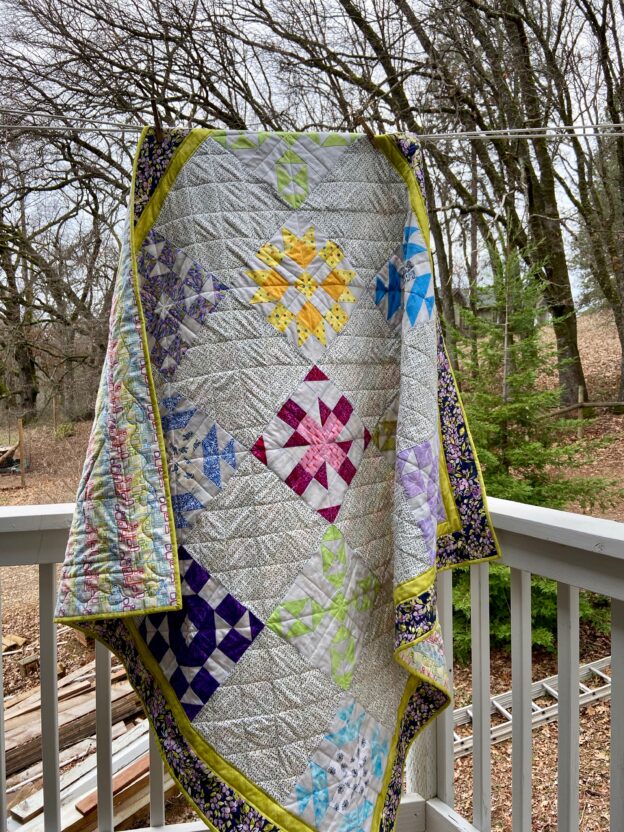
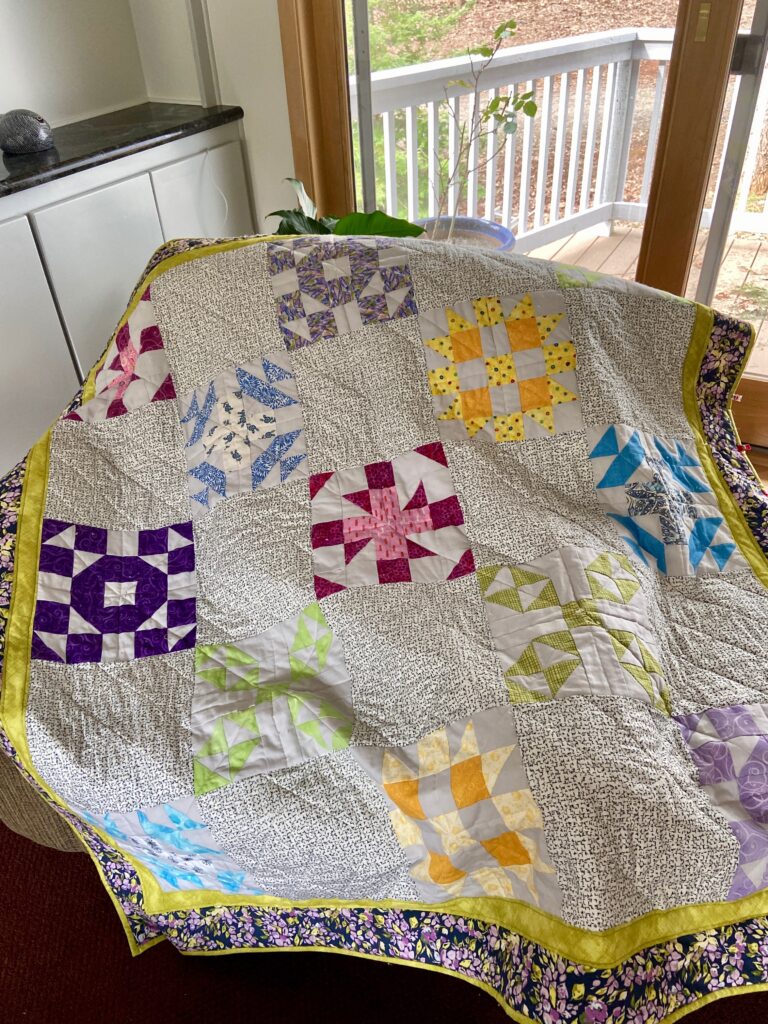
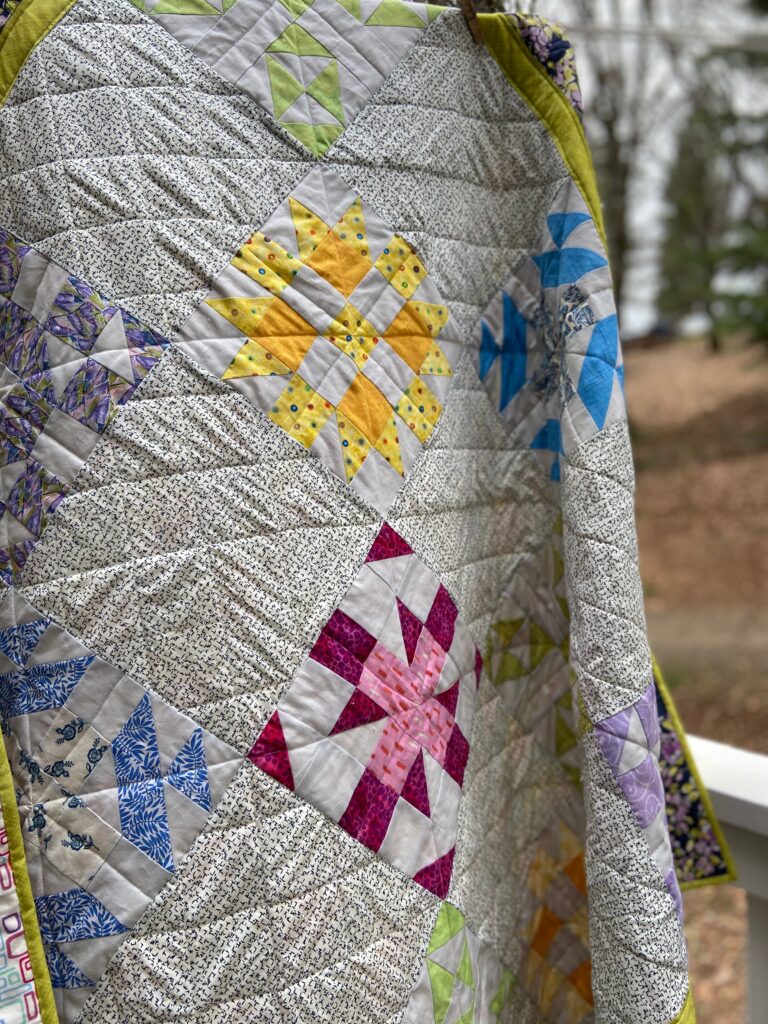
Yesterday the sun was shining through a window in my bedroom and I knew it would light up the quilt top. Isn’t this stunning? I love the way it looks with the light pouring through.

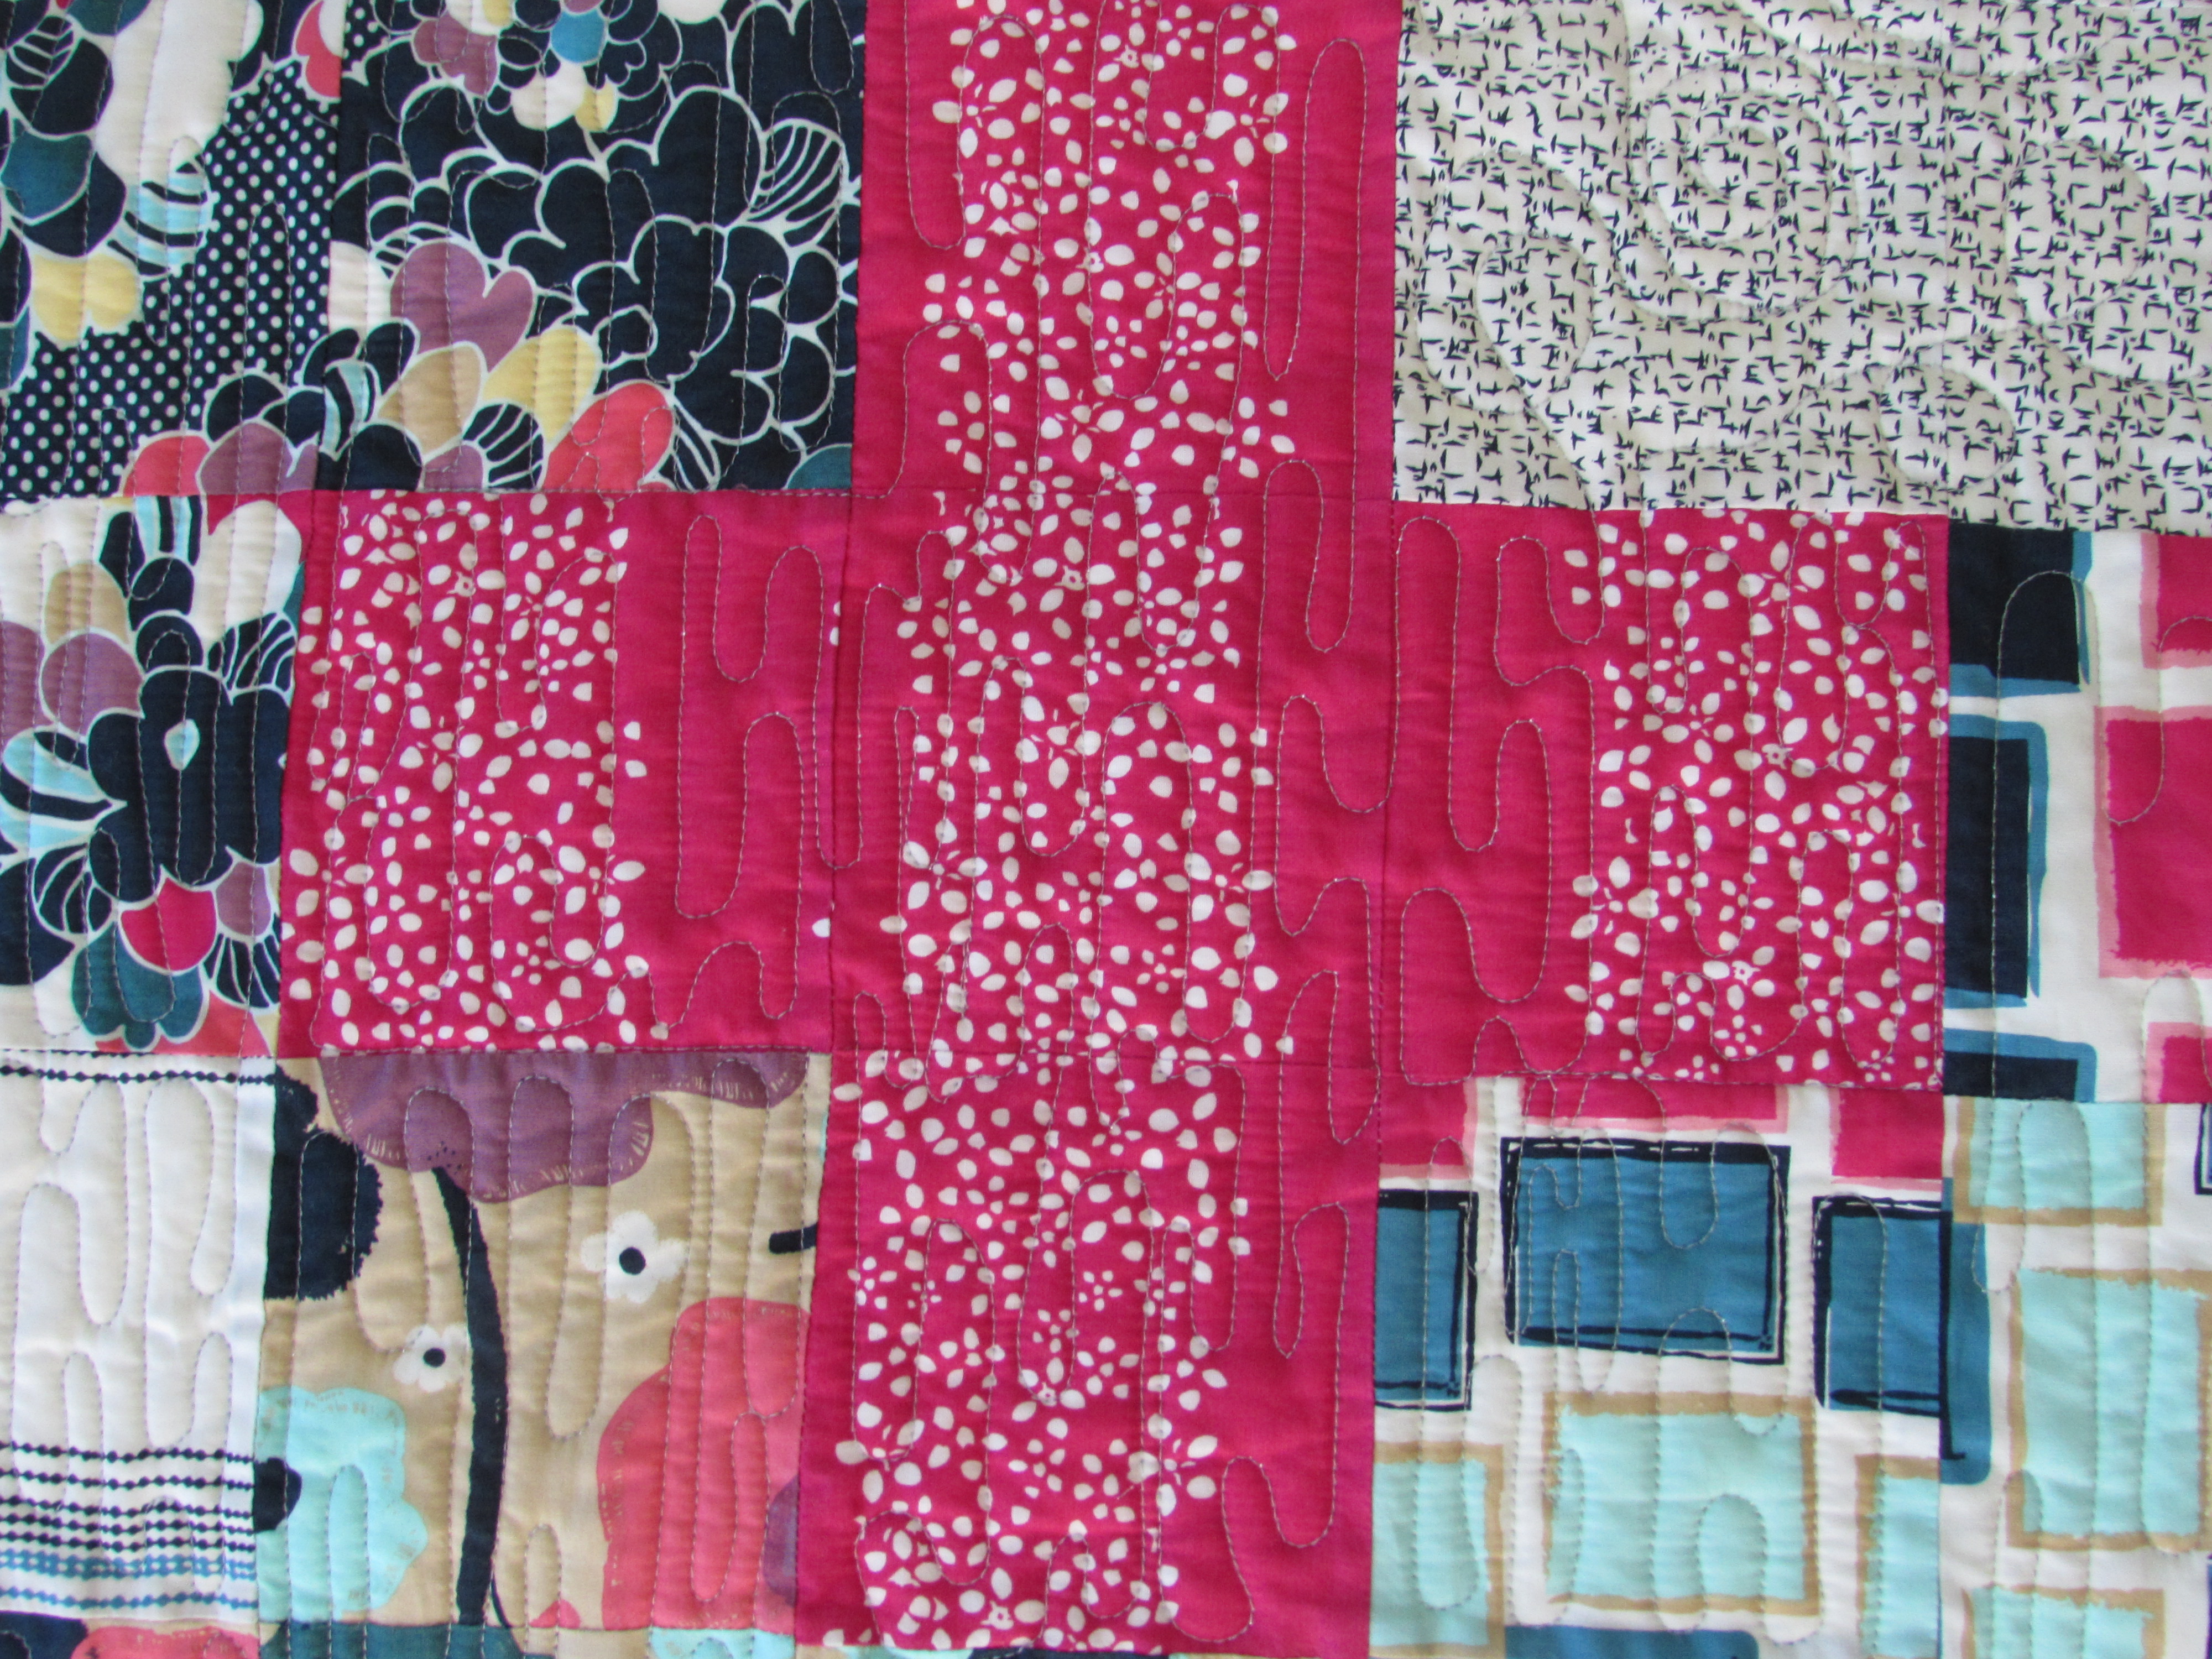
Stained glass, right?? The seams on the back side of the flimsy look like black framing around the color and the sashing strips. Such a cool effect. This is as far as I took the project though. I wanted my Bernina back for quilting it.

Today I was able to go pick up my machine. I have one quilt in process where the quilting is nearly finished (I was working on it when the Bernina decided to get stuck). Once that quilt is done, I will baste this one and get going on it. Can’t wait!

This week has been a bit of a drudge as I have had a cold. While I can’t prove it, I am guessing I caught it when I was babysitting the girls last week. Who knows? Historically, my sweet grand daughters have been very generous in sharing any germs they might be harboring. We went home on Thursday, Friday the 3 year old started running a fever and on Sunday I started to feel sick. Oh well. They are worth it. We had so much fun with them. My son and his wife took a well deserved trip to Hawaii. Ray and I had the pleasure of spending loads of time with the grands. Here are some pictures of the fun we had:
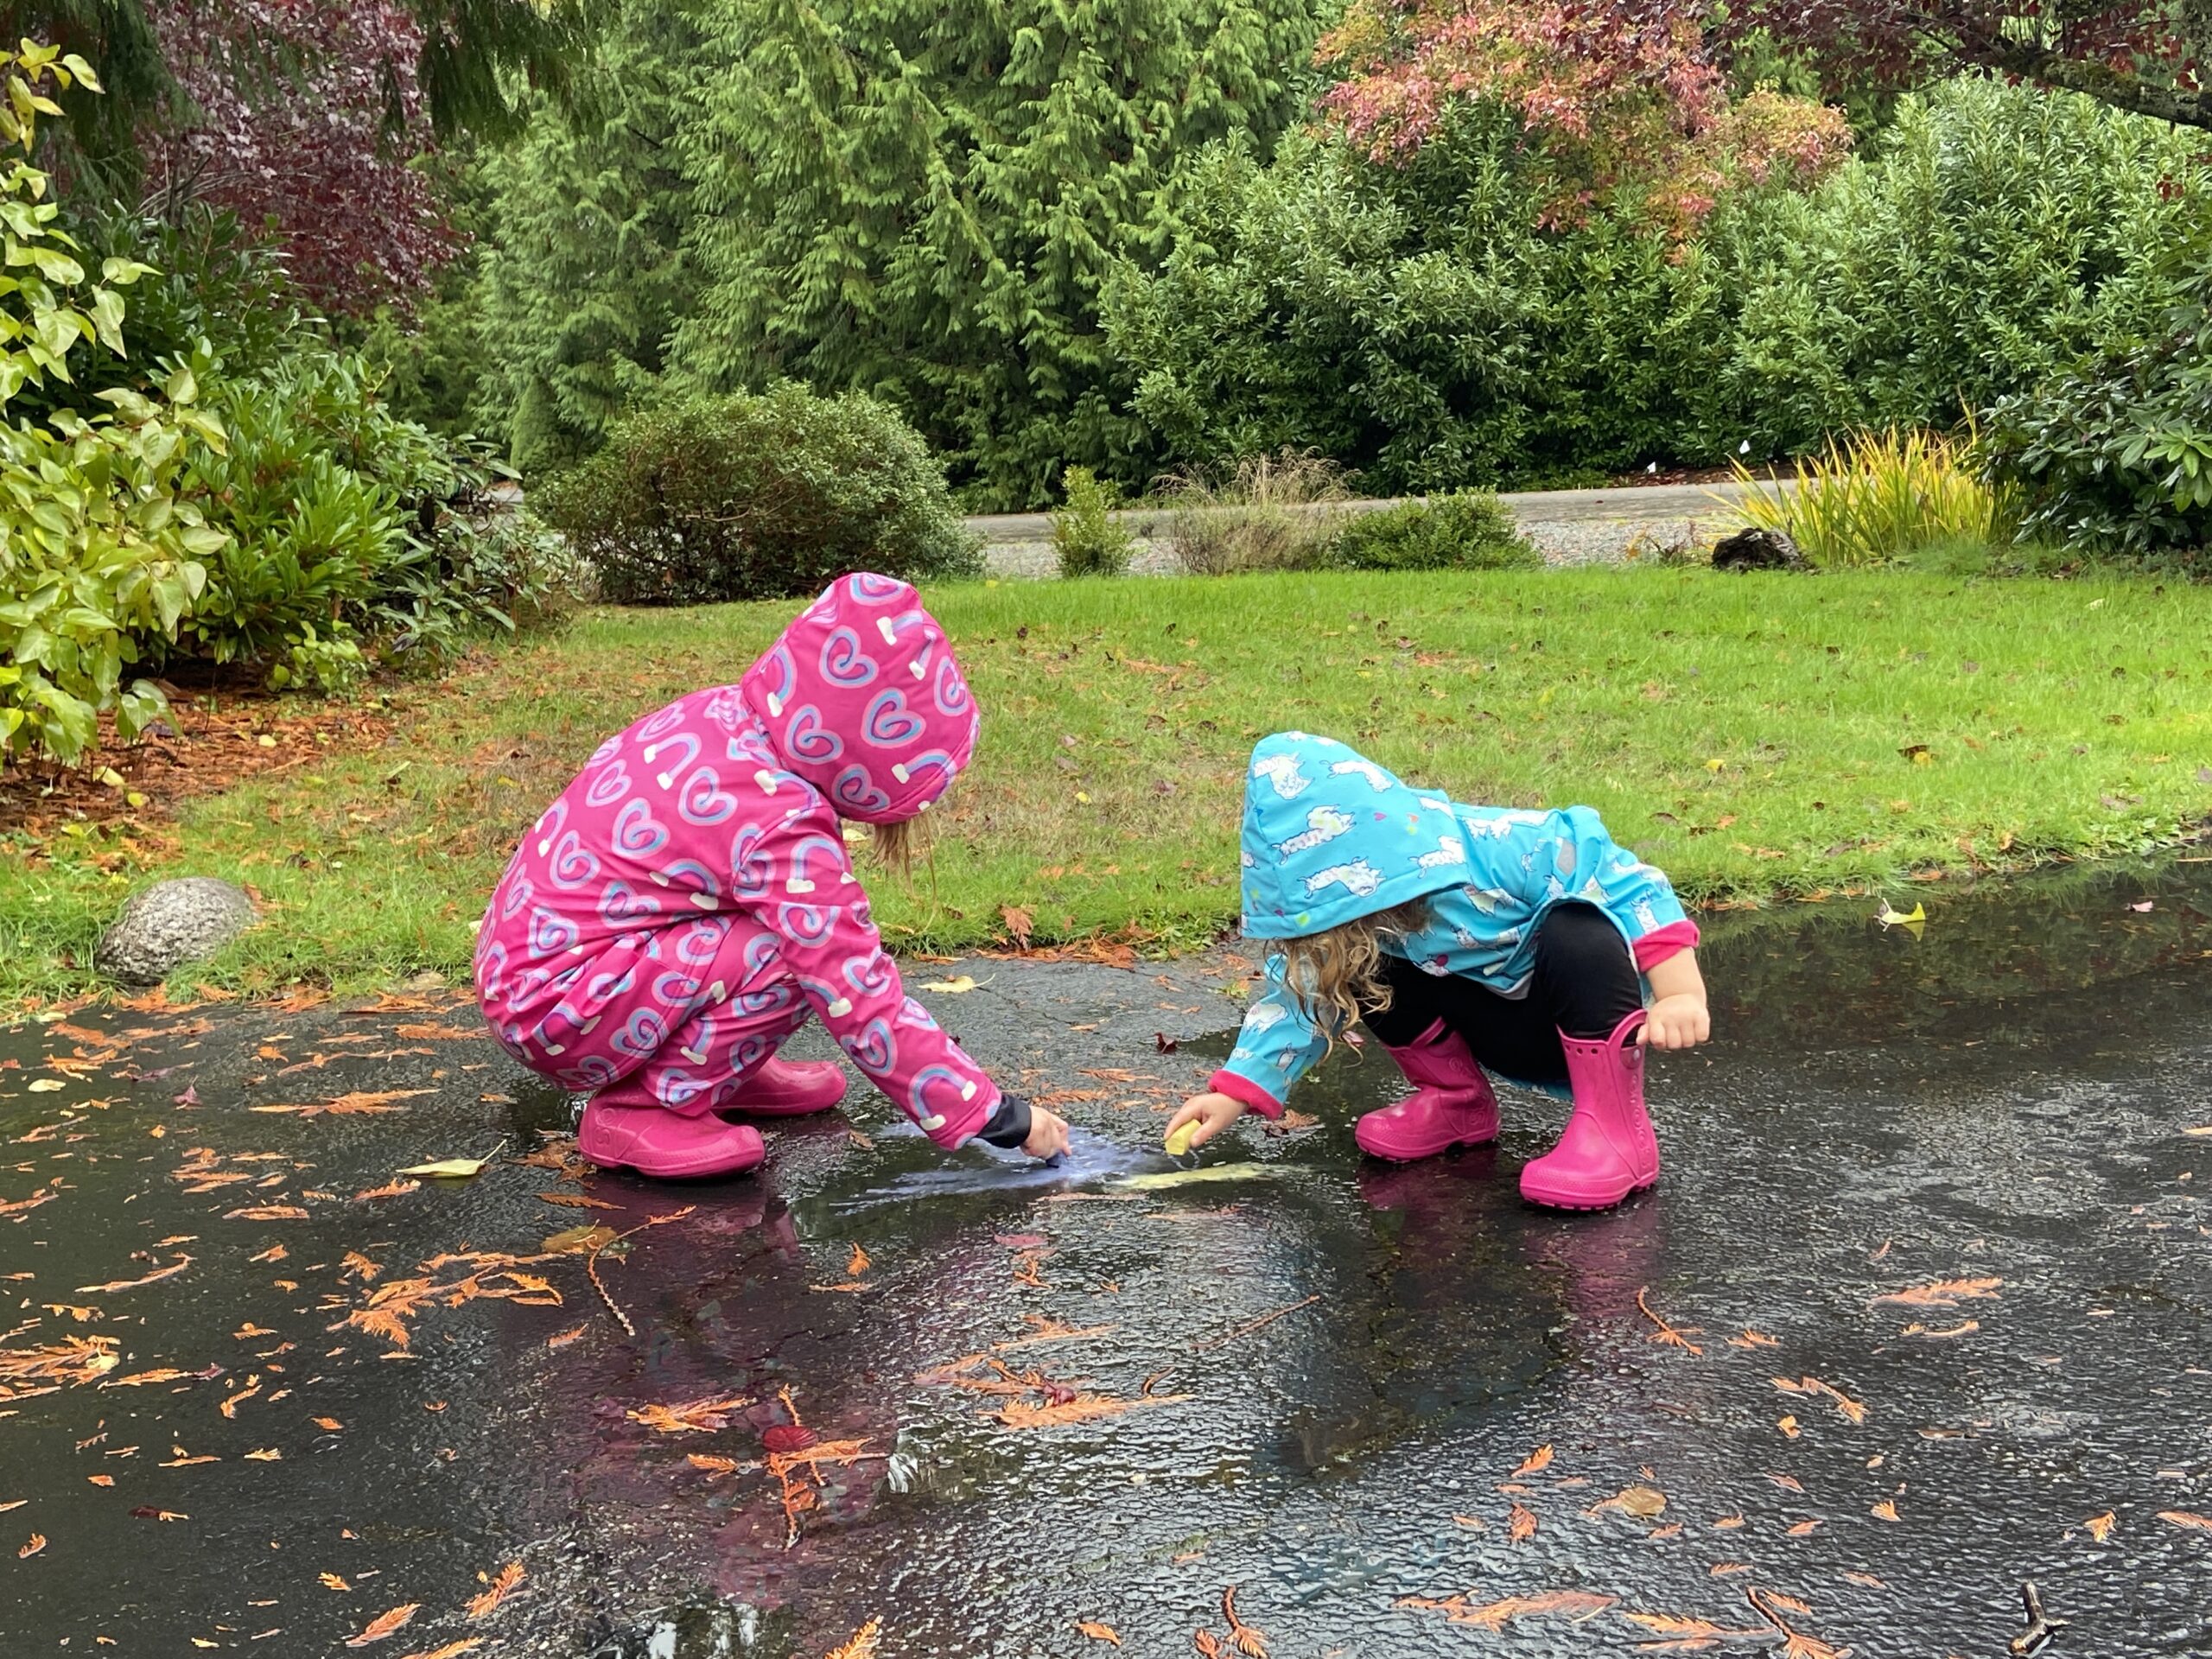
Playing in puddles.

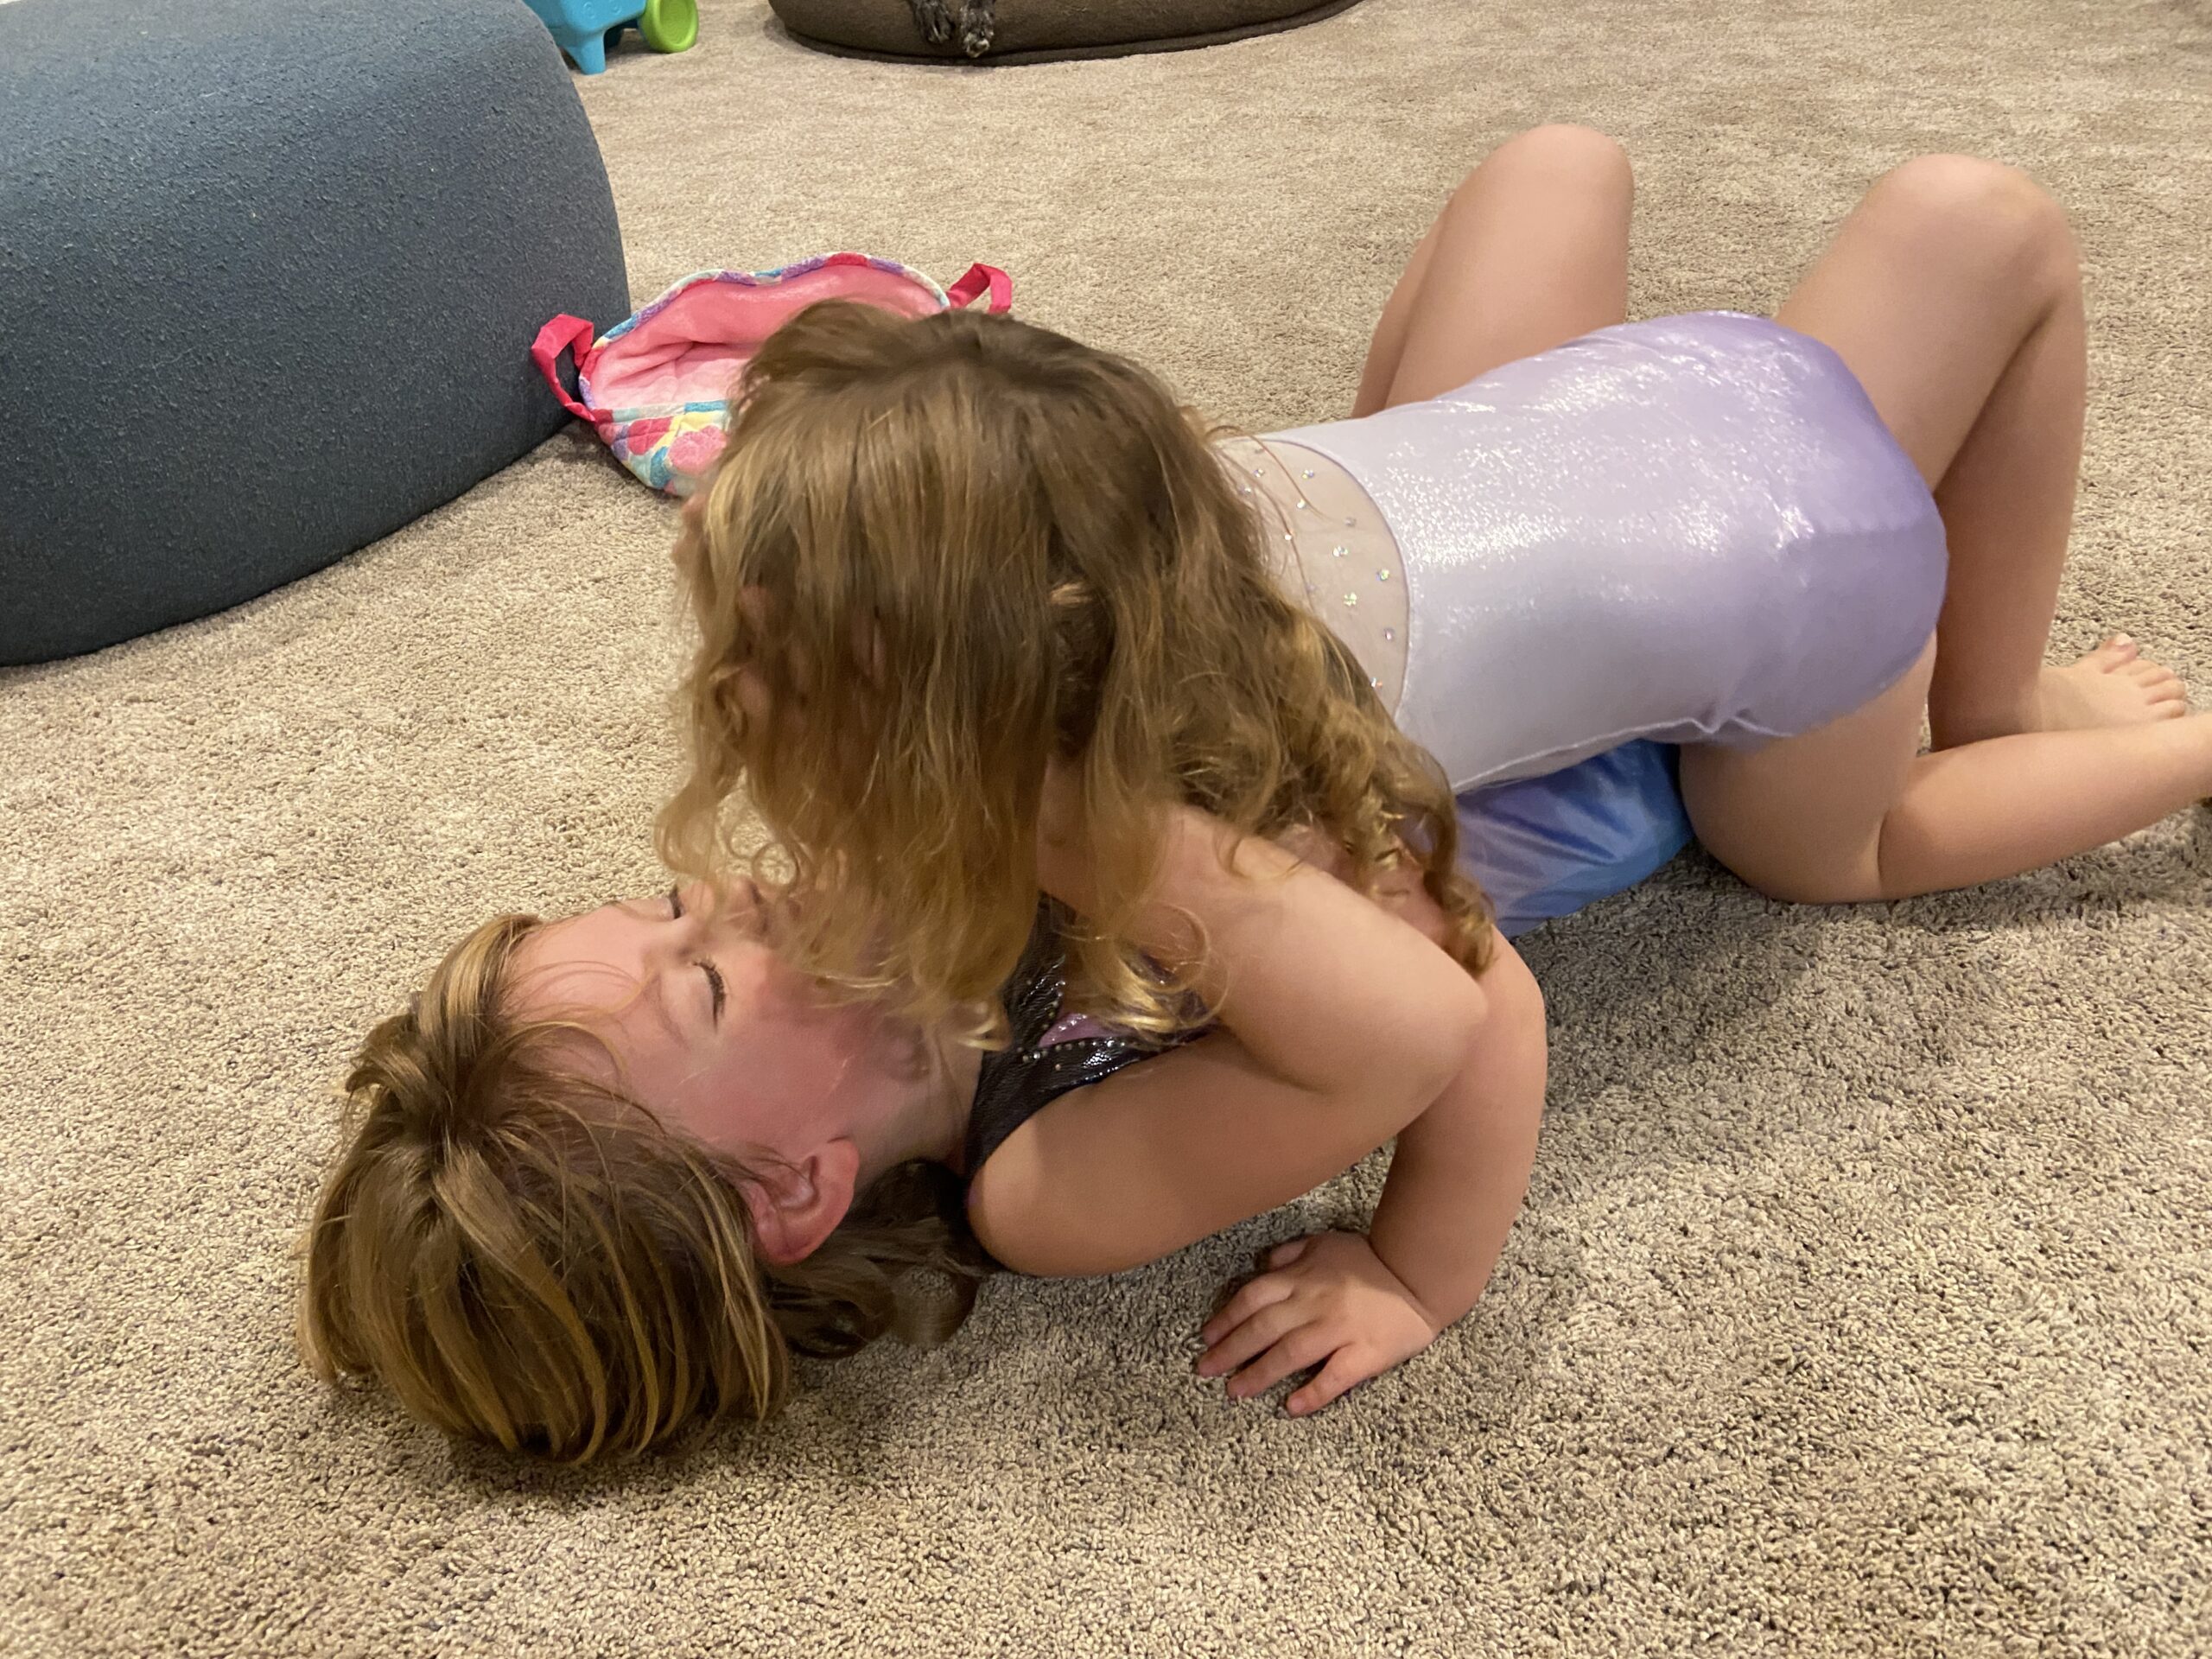
So much dancing, wrestling and gymnastics happens with these two. They love to perform for an audience.

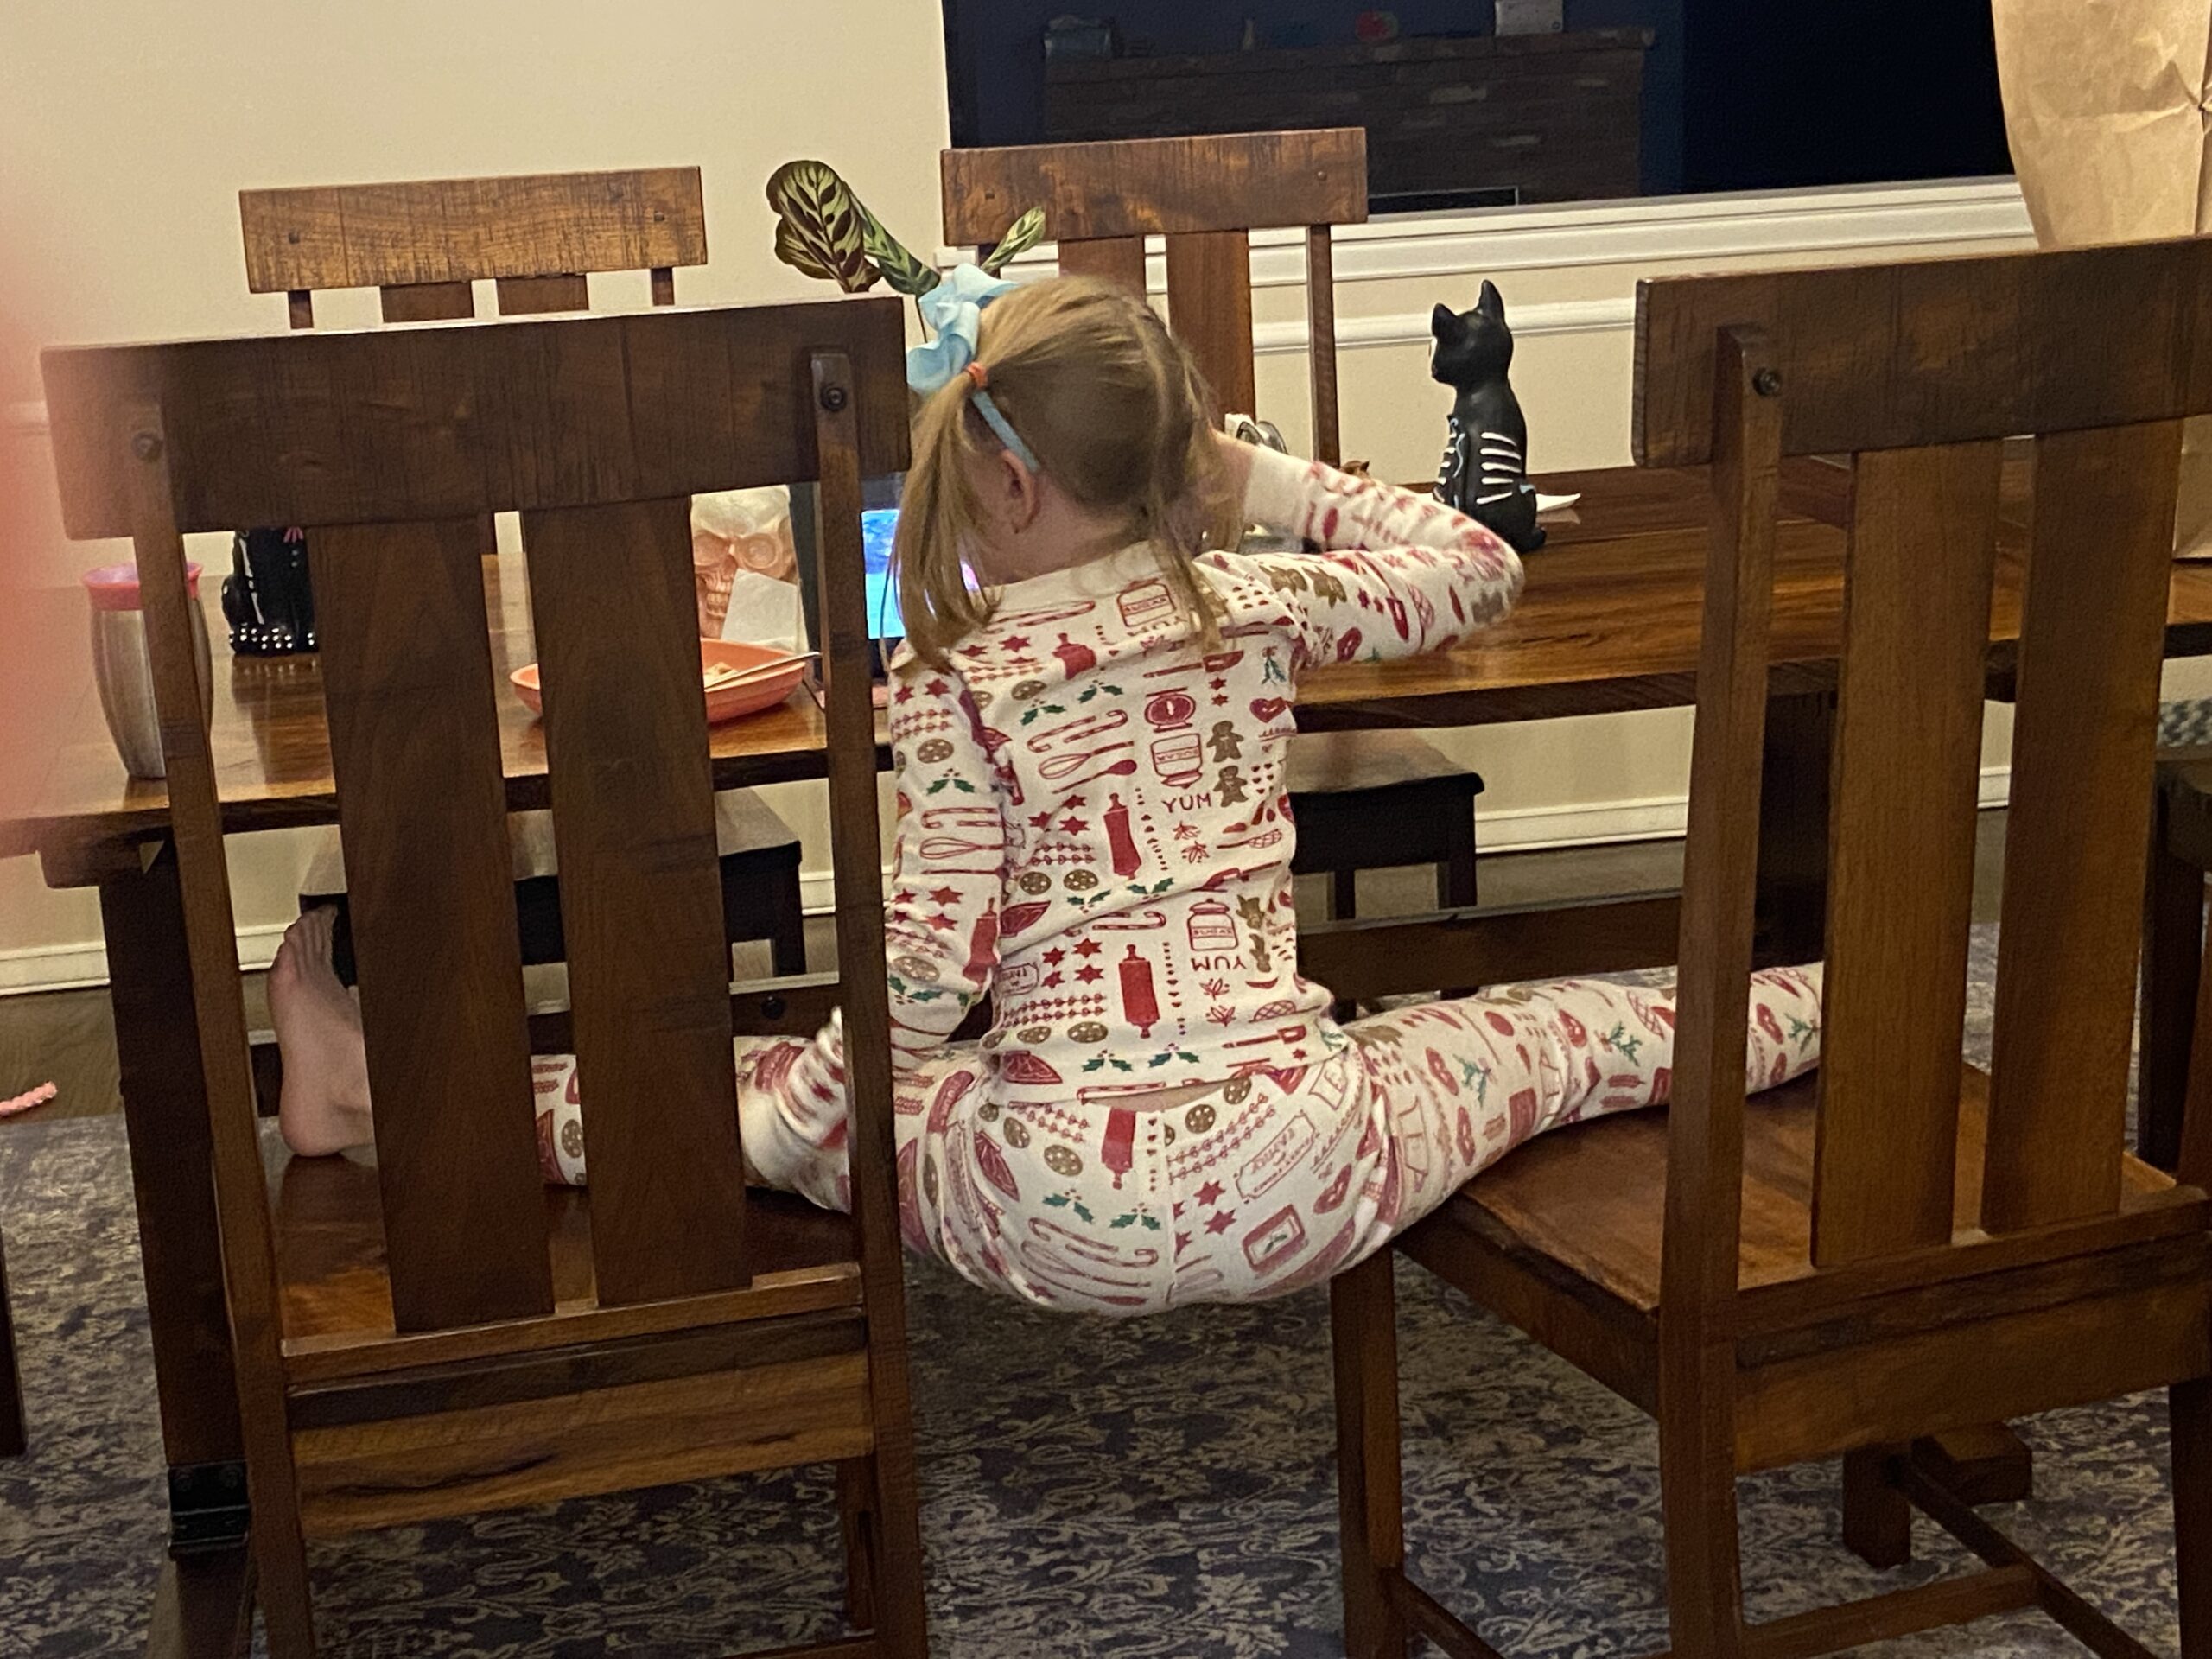
This silly girl was having some dessert and watching a show on the iPad. I had to laugh when I walked by and saw her sitting like this. Ouch.

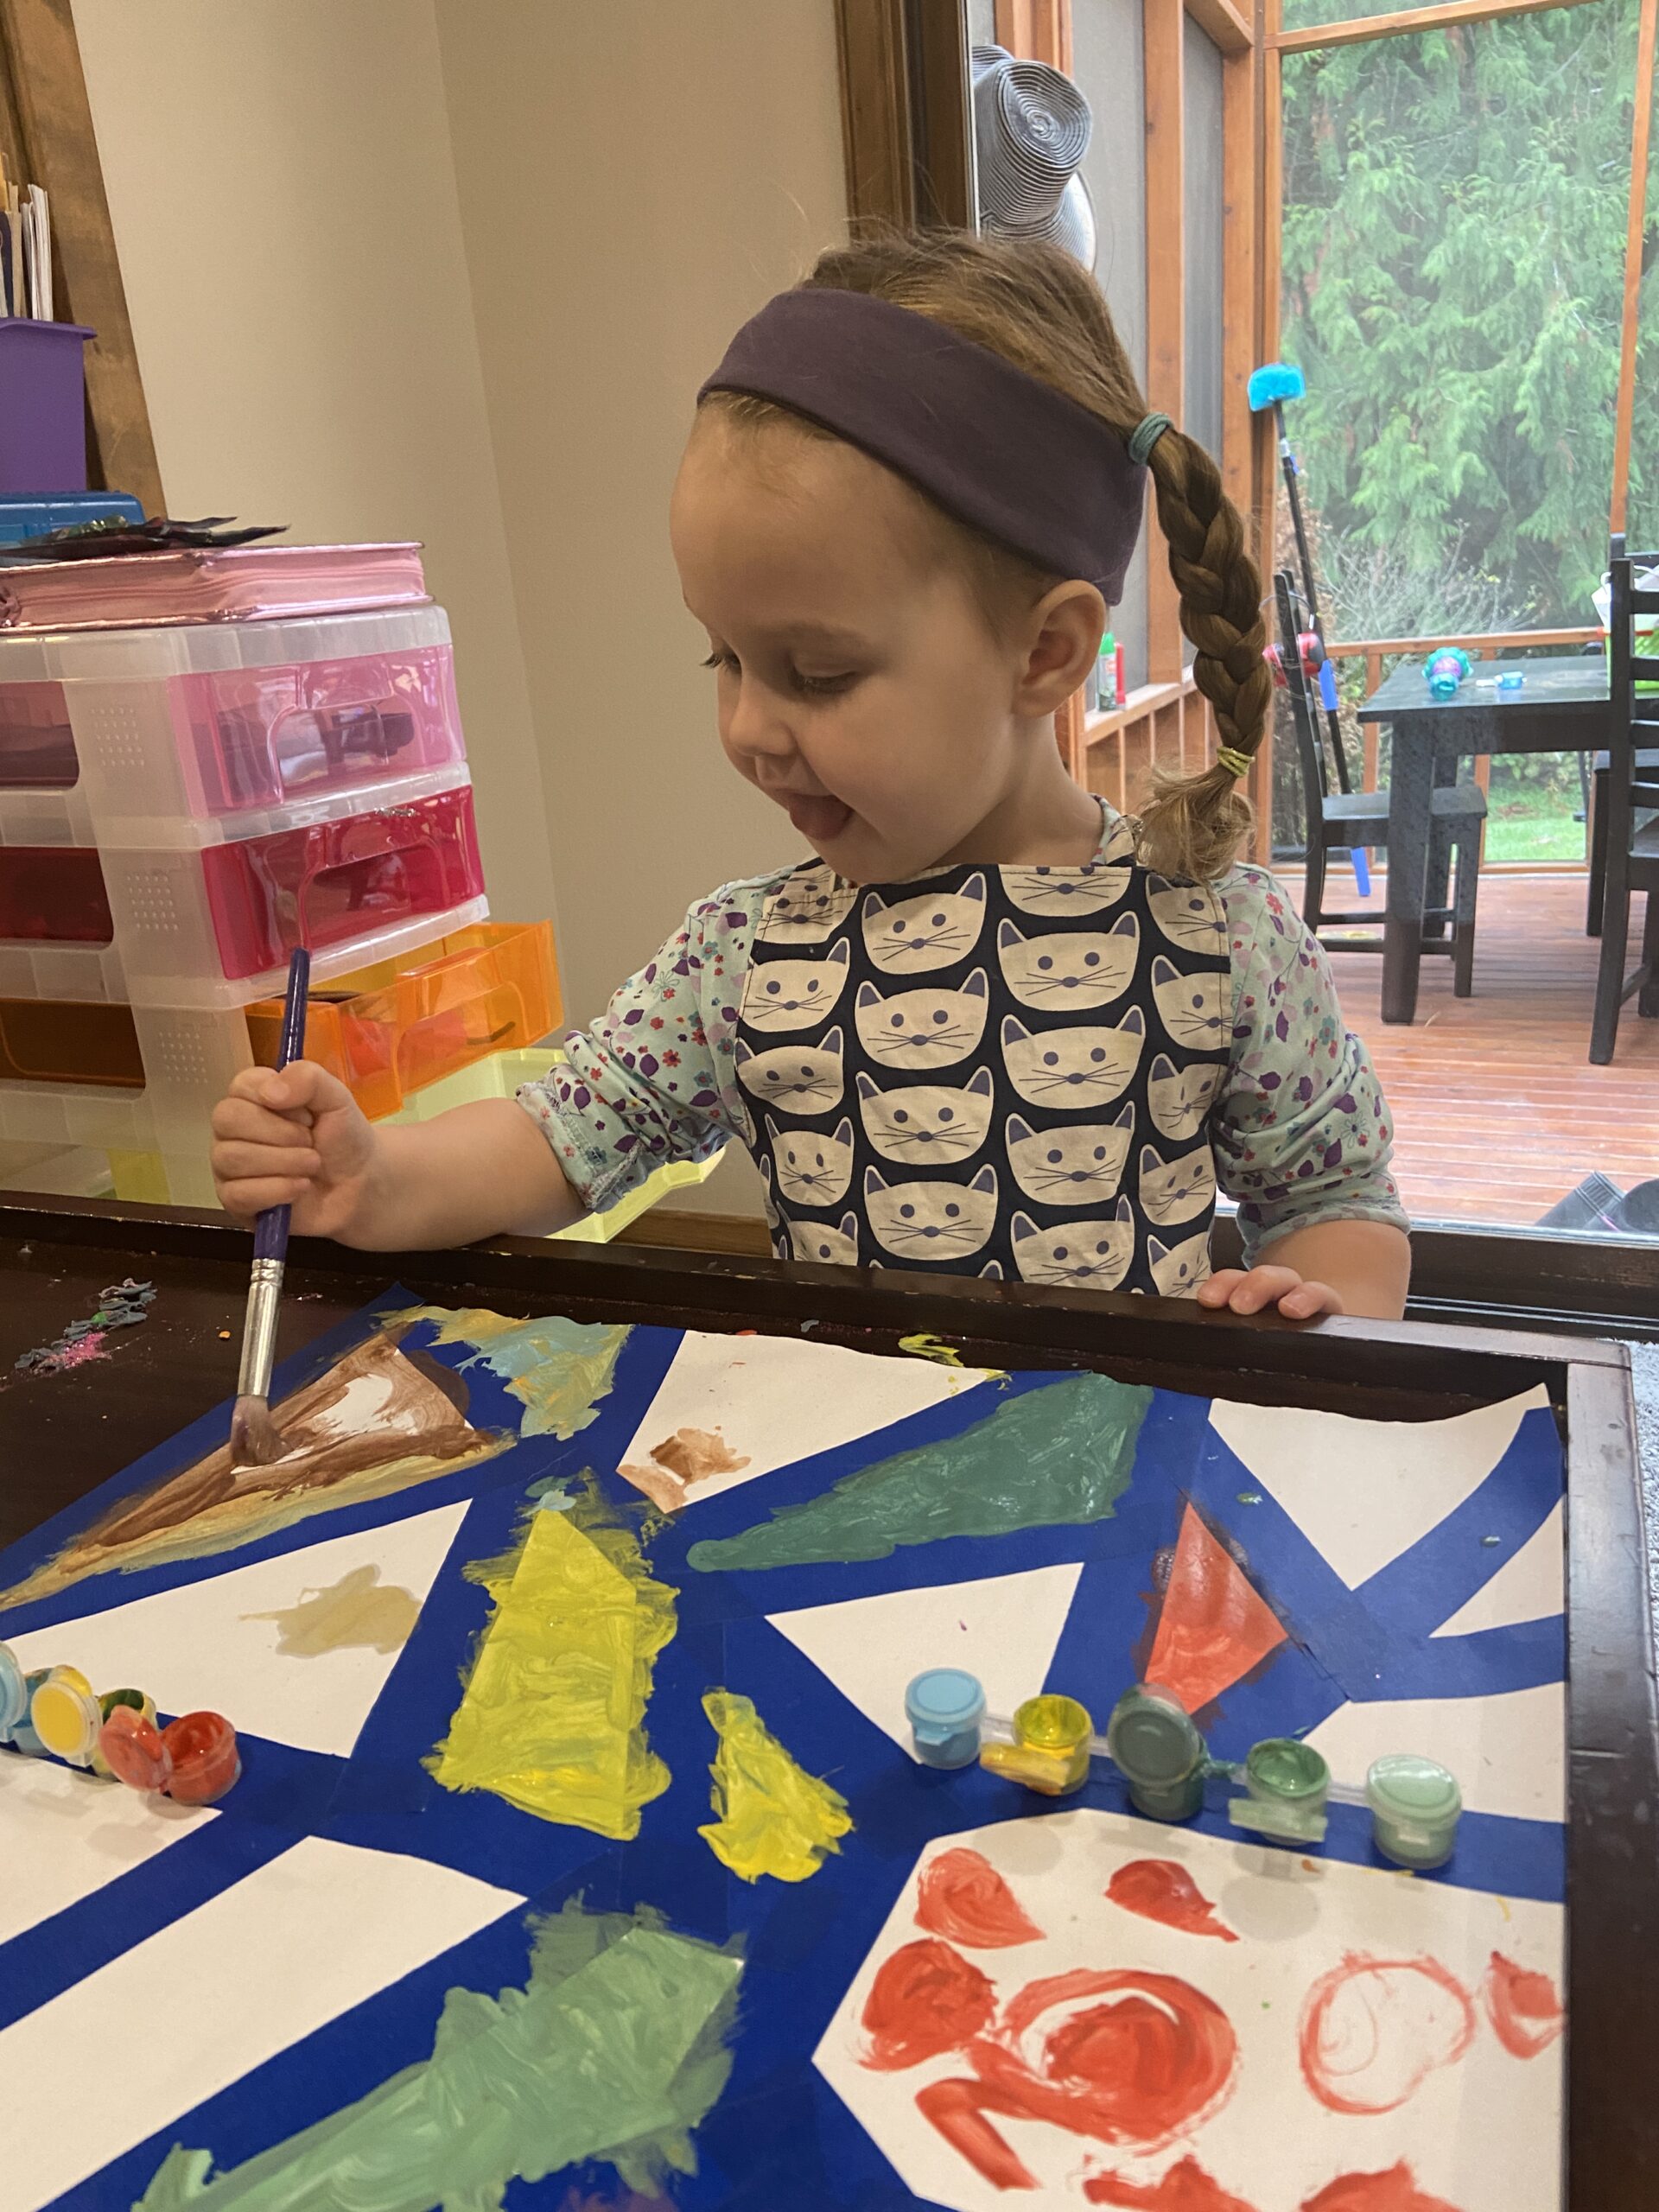
We did a number of art projects with the kids. This one was fun. I put blue painters tape down and told them to paint the sections however they wanted to. It was a challenge to peel up the painters tape though. I should have used heavier paper (or even cardboard). The tape was pulling on the paper a lot so I had to go super slow. The results were great though.

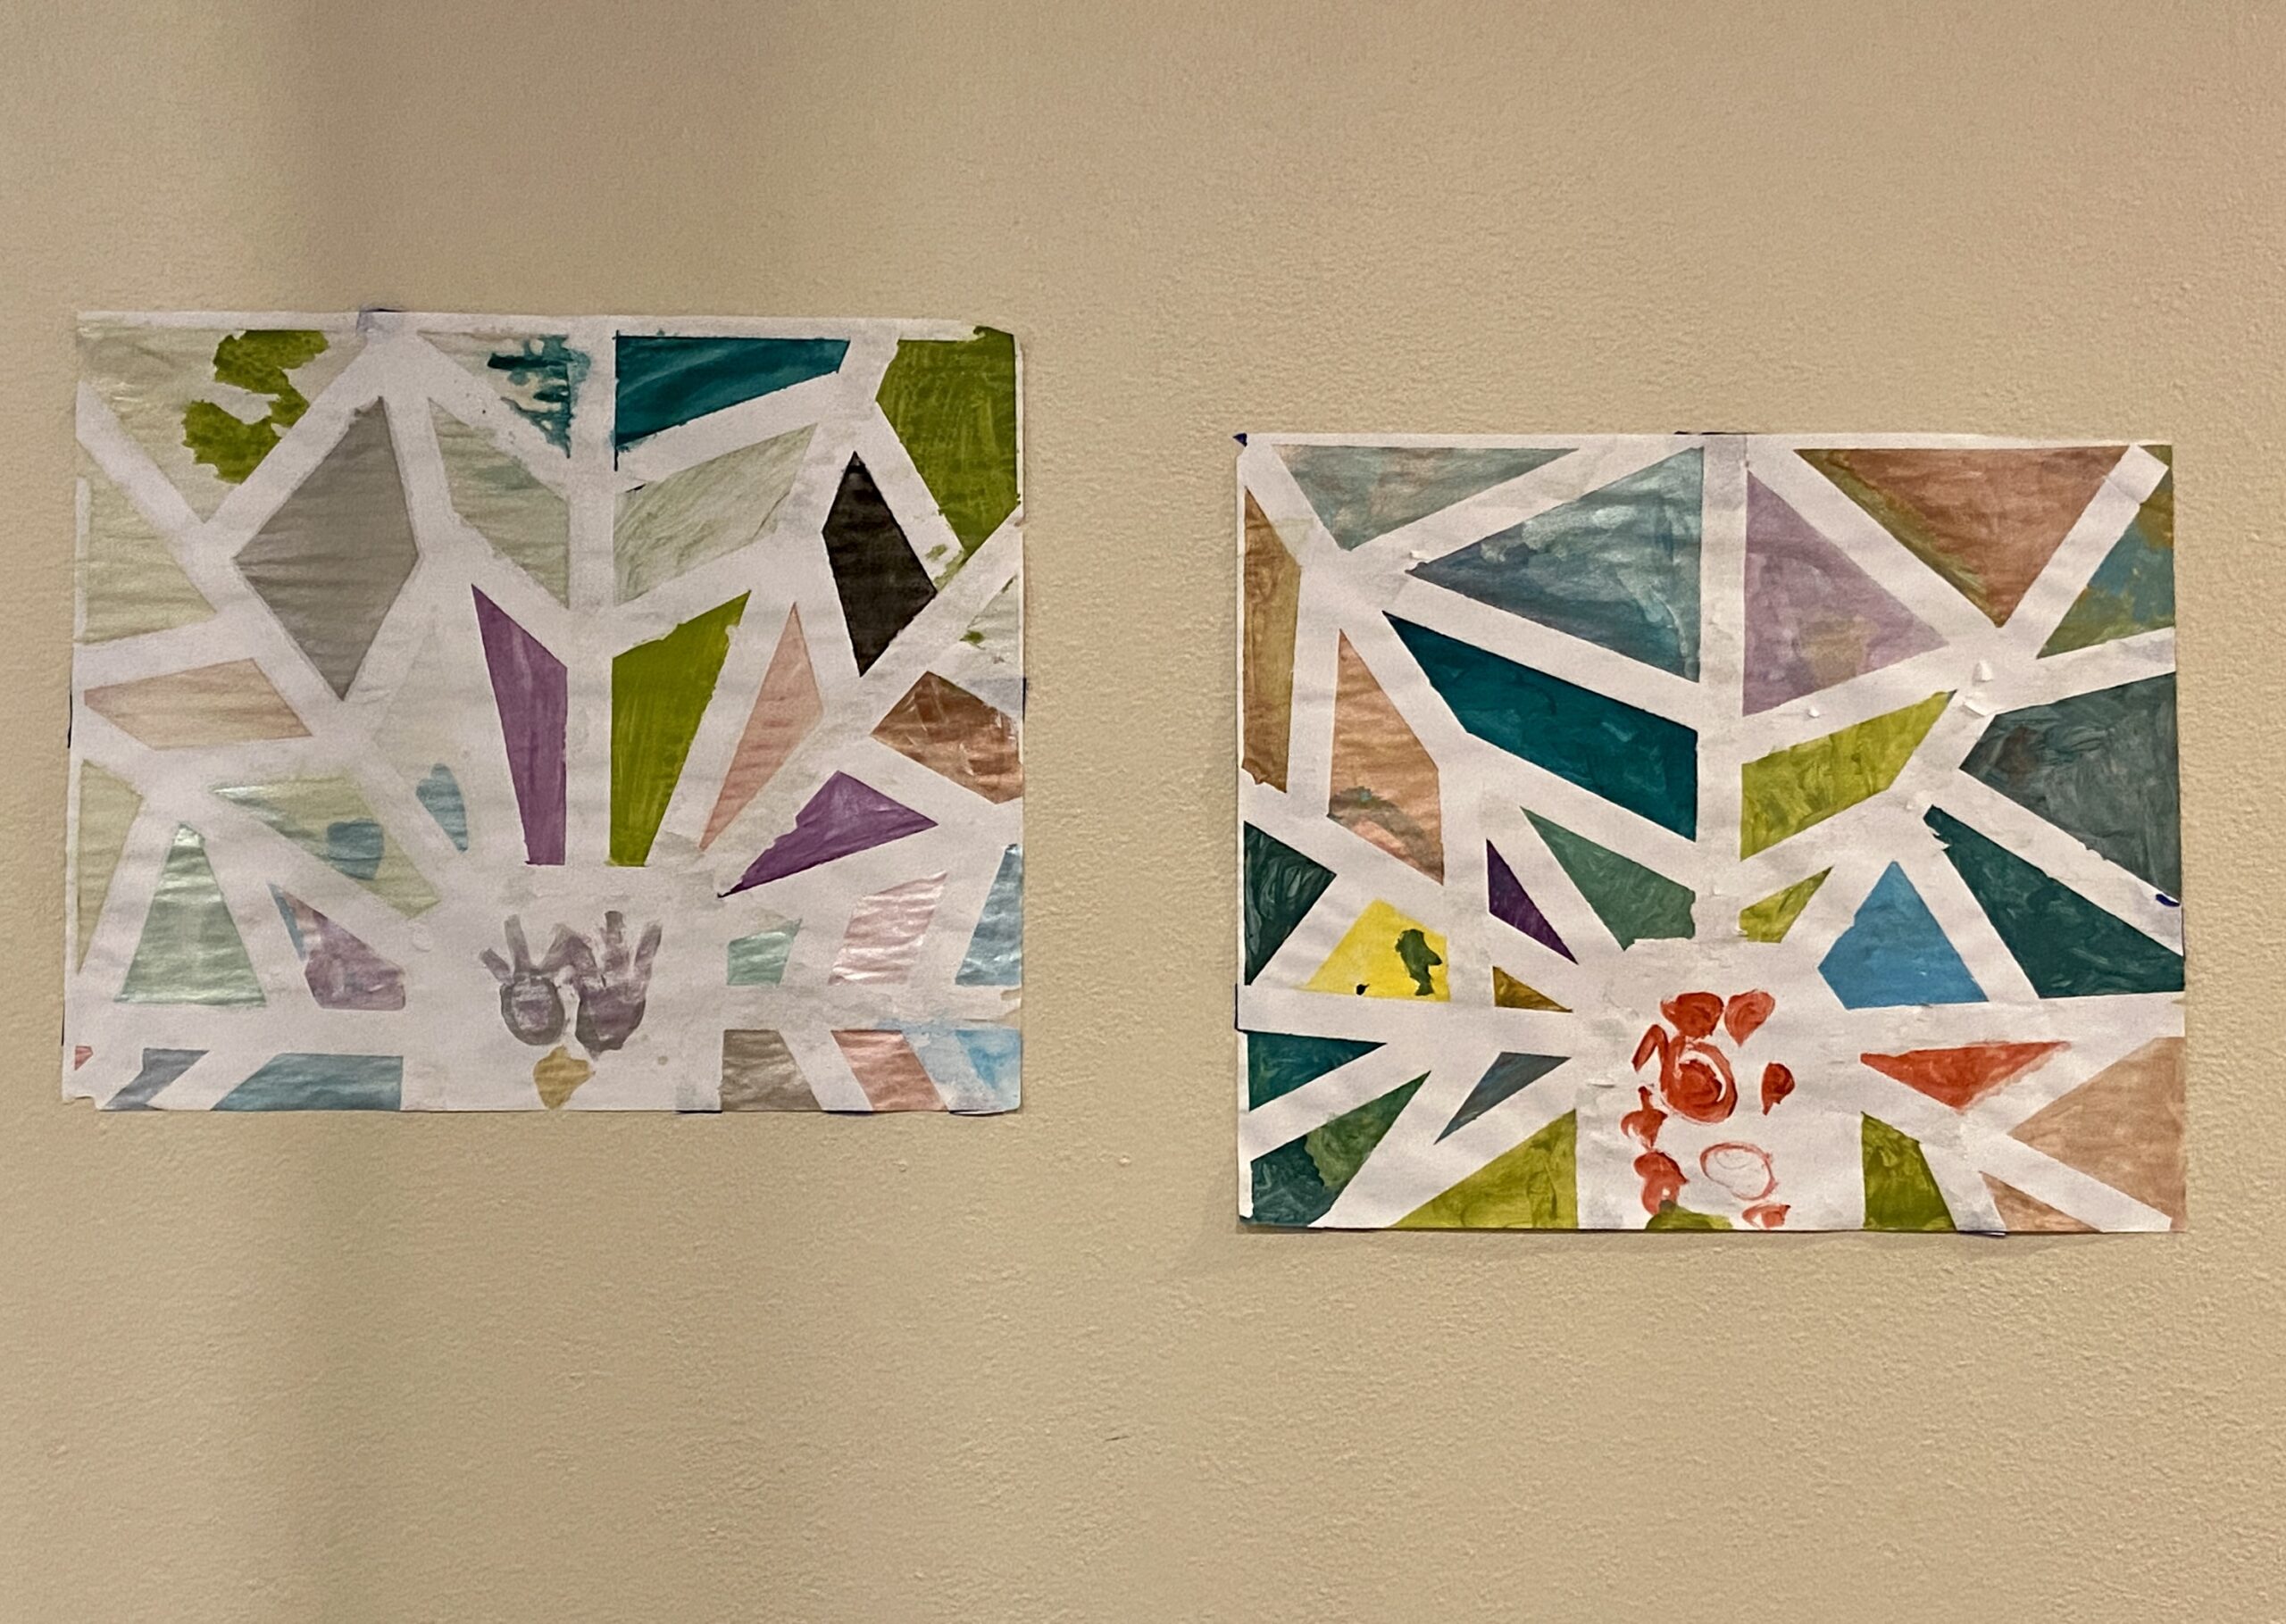
Aren’t these pretty??

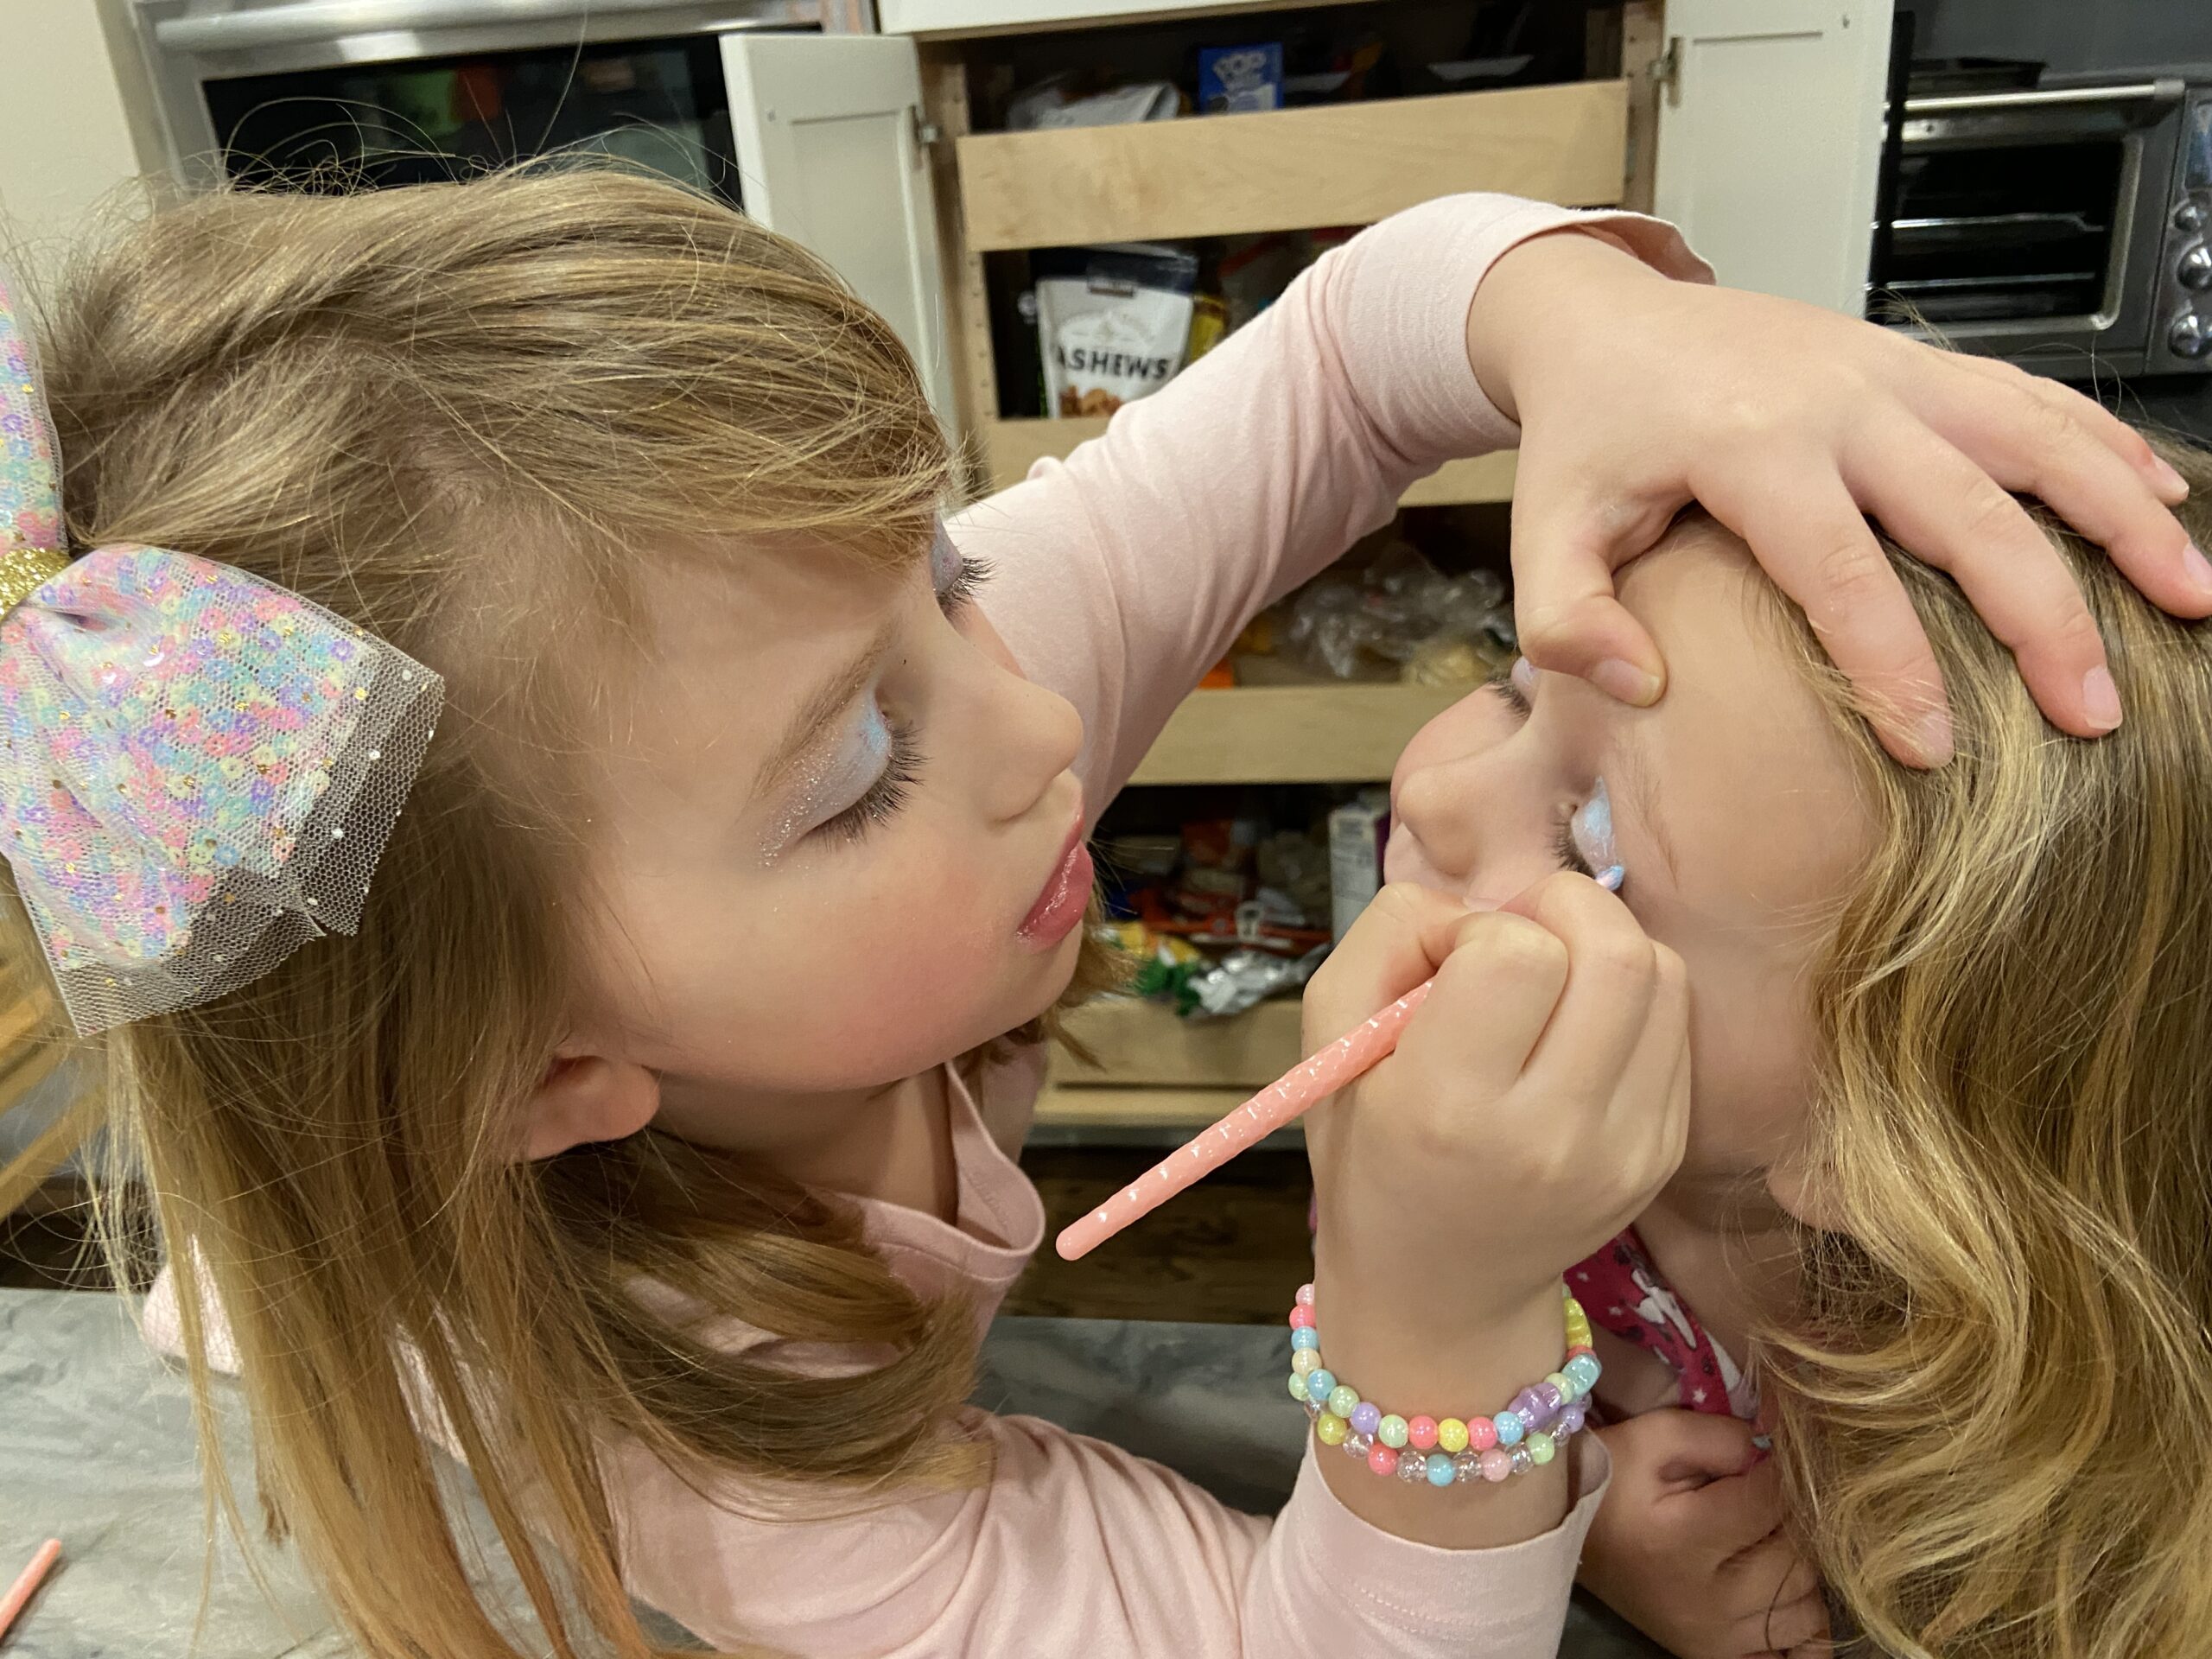
We went shopping one day and H (age 6) saw this make up kit that said ages 5 years and up. I was very hesitant to buy it so I texted the parents a picture of it to see if they approved. She was overjoyed when Mom and Dad gave the go ahead. Oh my gosh, the glitter and color these two had all over their faces for the remainder of our time together. It was so funny.

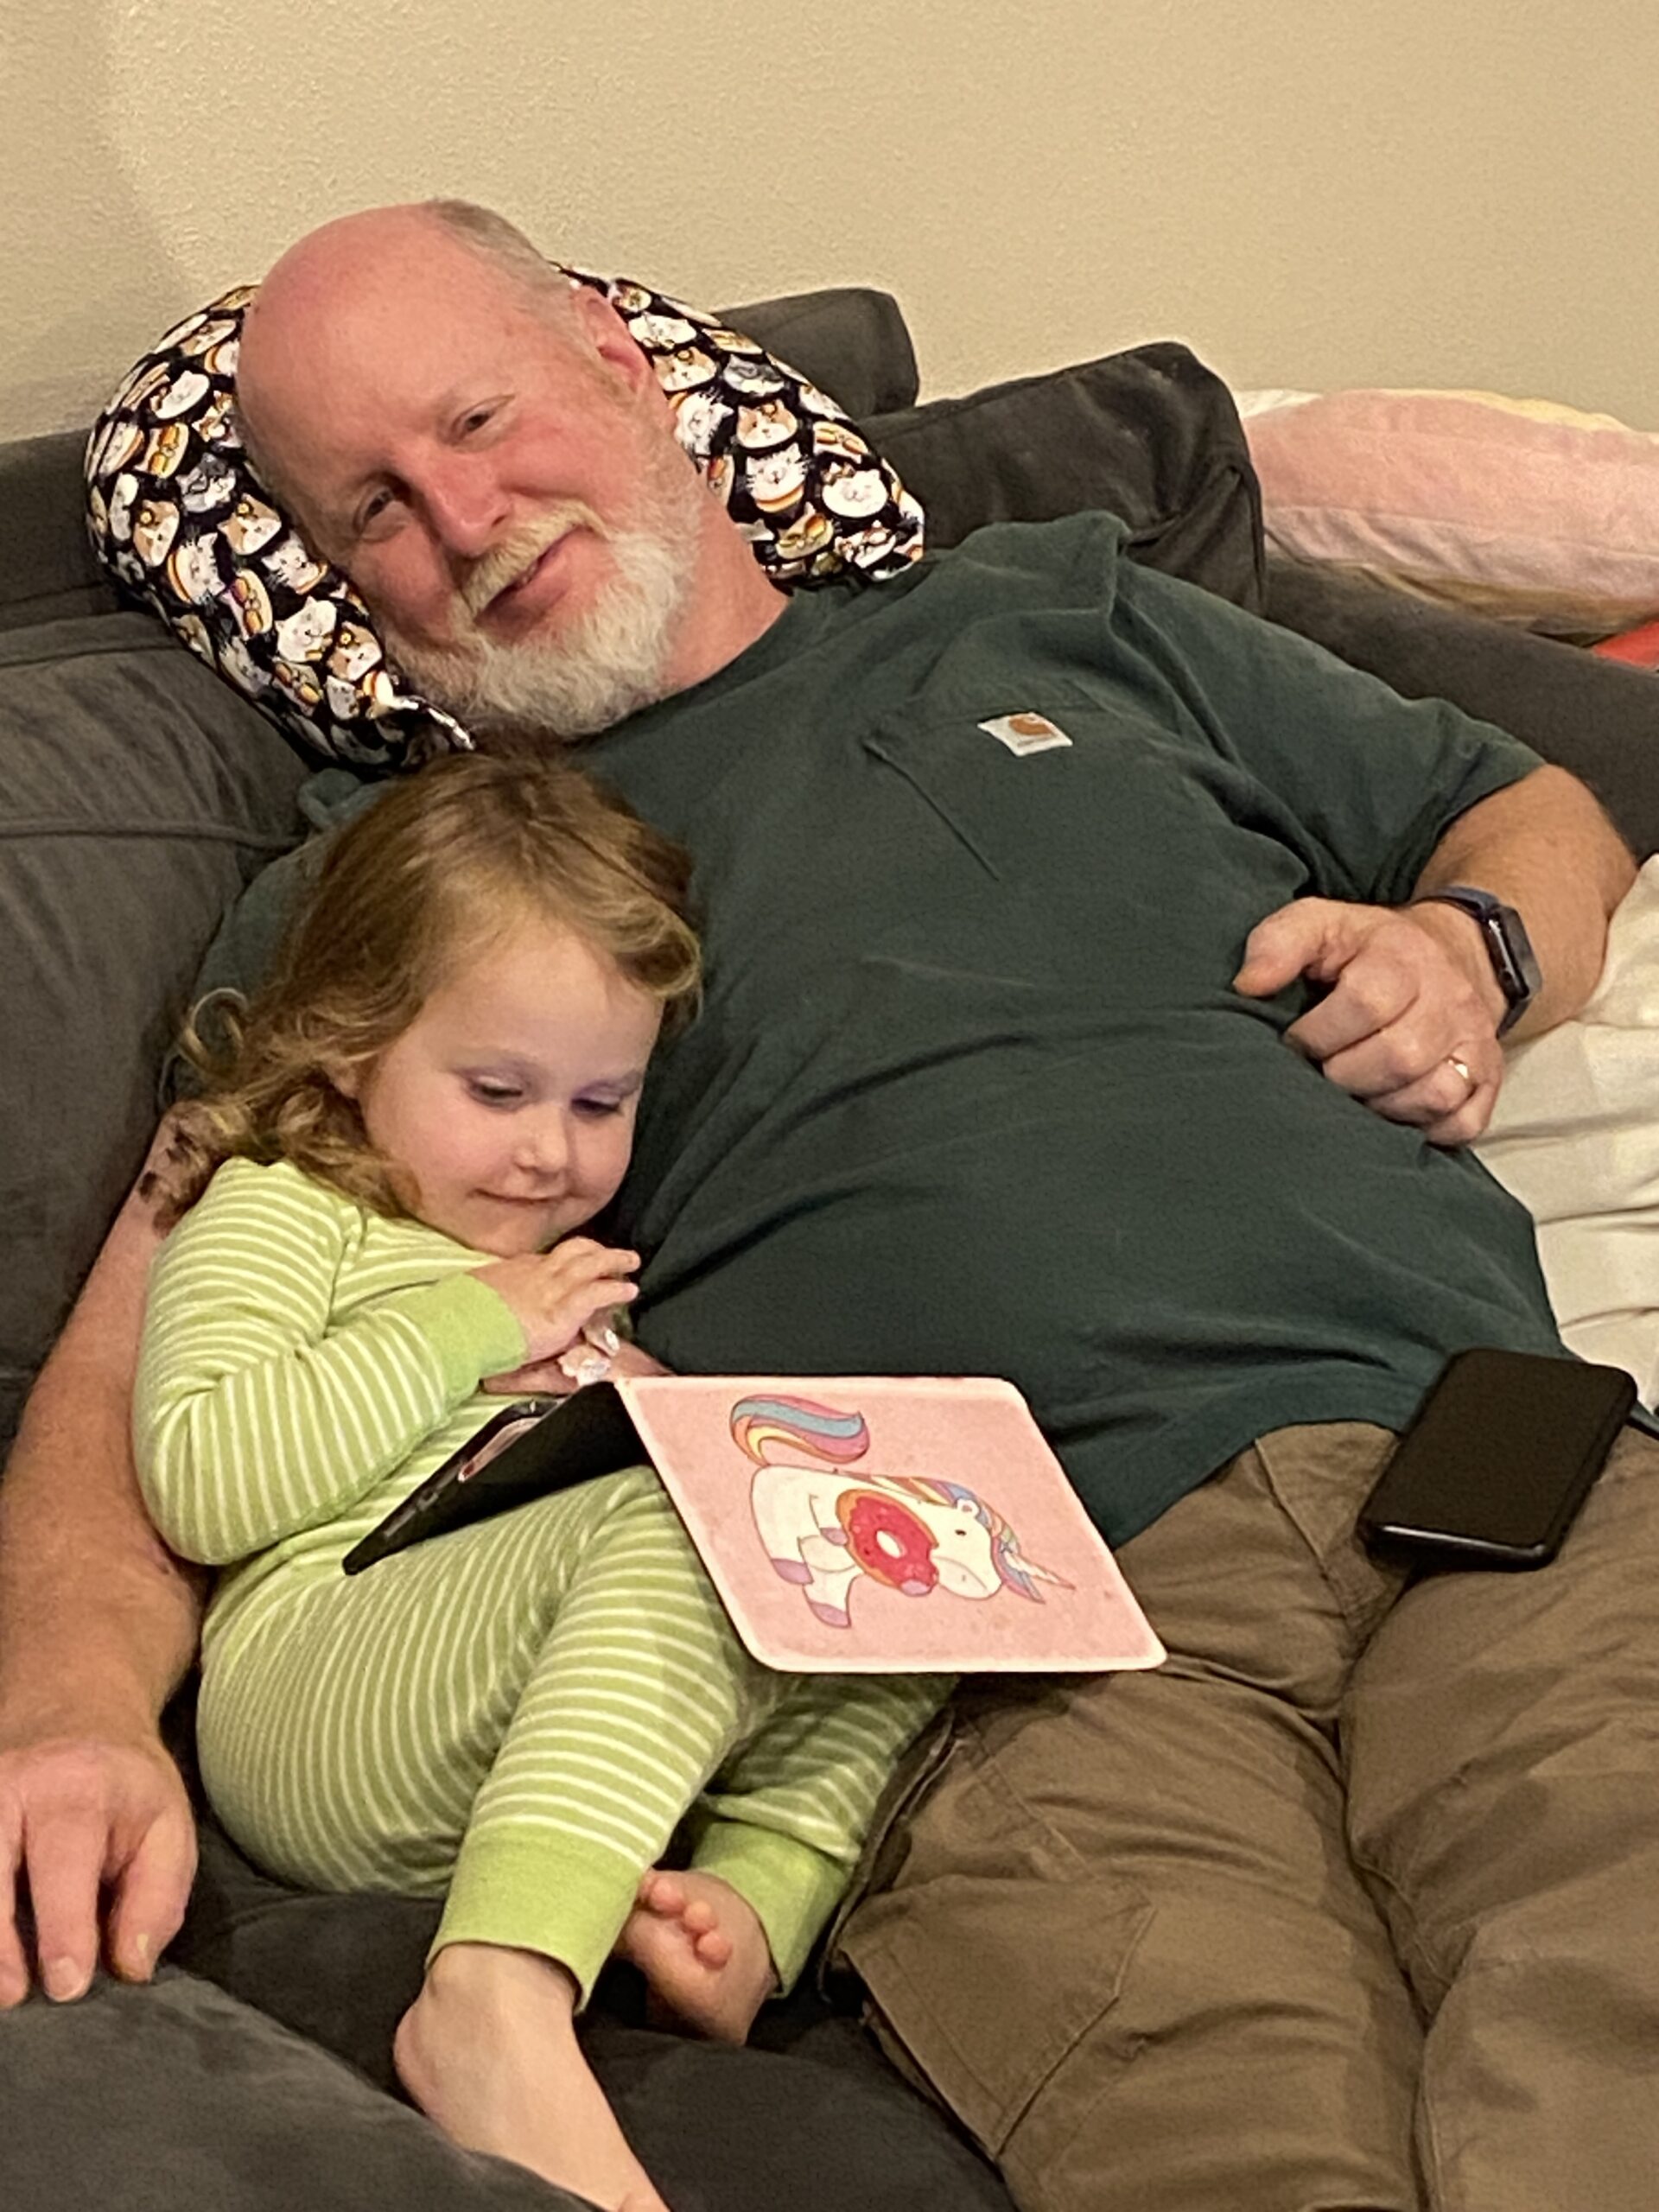
The girls love their grandpa and he enjoyed lots of snuggle time.

Overall, the week went well. We came home exhausted and happy. These two kids were one of the reasons we wanted to move up to Washington. Ray and I grew up with grand parents who were actively involved in our lives. It is so special to have a close relationship with the girls.

It is time to go plug in the Bernina and get it set up. I have missed this machine and am anxious to have her back up and running! If I don’t post again, I wish all of the US folks out there a Happy Thanksgiving next week!!

Linking up with Alycia at Finished or Not Friday

Procrastination Situation

Whenever there is a post on social media asking for a quilters most favorite or least favorite part of quilting, the answer for my least favorite is immediate and passionate. I really dislike basting quilts. There is so much riding on it. The need for a perfectly flat backing, a well prepped quilt top, the perfect amount of pins (I haven’t yet tried spray basting), no secret folds or wrinkles – ugh! It is more than I can stand. This is where I start to procrastinate. I know I am not alone. This is clear by the fact that the majority of quilters have any number of quilt tops that are unfinished, waiting to be basted and quilted. I don’t mind the quilting process and I usually enjoy binding a quilt. It is just the basting.

This is why I found myself in my sewing room this week starting a new project. Because really I should be basting and quilting my 2023 Positivity quilt. The top is finished and it is adorable (if I do say so myself). But I need to fuss around and create a backing and then…… baste it. I would venture a guess that someone could make a successful side gig offering to baste quilts for people like me. There are loads of us. Off I went to make something else, anything else, so I wouldn’t have to baste the quilt.

Last week while wandering the local quilt show (where I enjoyed that Sinbonnet Sue quilt) I spent more than a few minutes checking out the country store portion of the show. I love looking through the fabrics and other items quilters are selling. There was a bundle of charm squares that had been put together by a quilter. It was from a variety of lines and looked like leftovers from charm packs they had used. I liked the colors and knew it would be cute to make something with them. (I am proud to say this is the only purchase I made! I dug deep and restrained myself from buying anything else).

On Sunday I found myself in the sewing room looking for something to work on, anything that didn’t require basting. There were those cute charm squares sitting there, calling to me. “Choose us, choose us. You’ll have days of fun before any basting is required.” Sounded like a grand idea to me. I poked around on my Pinterest boards and decided to make a quilt similar to one I had pinned some time ago.

I looked through the solid green fabrics on the shelf and chose one to put on one corner of each charm square. Then I stitched them into a four patch. Because of my limited number of charms, I put a black border on them using the same green for cornerstones. (True confession time – I didn’t keep the little triangles from the stitch/flip on the corners. I know I should have, it was reckless of me, but I tossed them. Mia culpa.)

With the twelve blocks and the sashing, the quilt was fairly small. First I added another narrow border of the green (using almost all I had of this fabric) and then added a wider black border with green cornerstones. But it was still too small.

Last night I put out an alert – all the way from Washington state to Minnesota. Isn’t technology the best?? Texting Wendy at Pieceful Thoughts, I asked for some ideas. After sending pictures of a variety of fabrics to her, it was agreed that a narrow border of this denim blue dotted fabric would be cute with another black border. I used cornerstones again for consistency.

TaDaa! Another quilt top is finished. Another quilt top is whispering ‘finish me, baste me, don’t let me sit here forever.’ This puts me at four quilt tops needing to be basted and one that is in the midst of being quilted yet no where near finished. It is a vicious, never-ending cycle. Help!!! Help me!!!

Meadow Quilt is a Finish!

Making a quilt is not a quick endeavor. At least for me it isn’t. Back in 2016 I read a tutorial by Bonjour Quilts and left a comment about how much I loved the quilt. Then in 2020, in a newsletter by Bonjour Quilts (side note – if you don’t receive her newsletter, check it out. Kirsty writes a great newsletter and I very much enjoy reading it) I was reminded of the quilt. At that time, I started cutting pieces for the background. I believe this was at the beginning of the pandemic. Fast forward to 2021, I decided to finish the quilt so I could give it to my nephew and his bride when they married in July 2021. Well, then we decided to list the house and move so all sewing came to an abrupt halt.

With my sewing room (almost) set up and my time freed up, I am sewing and quilting again! I had the Meadow quilt top finished and basted before we moved, so I started to quilt it. Before basting it, I did some FMQ over the flowers in the center. I knew I wanted to secure them tightly, even though they are fused to the base. However I didn’t want all of that to show on the back. I did a preliminary set of stitches before basting and then finished securing the flowers after it was basted.

The background is free motion quilted with whatever came to mind. There are swirls, basic stippling, some flowers, hearts, sunshines and a few words here and there. On the top I used an off-white Glide thread and the bottom is a pale green Glide thread. (I am a big fan of Glide for free motion quilting).

Every meadow has a few butterflies fluttering about, right? I fussy cut these and fused them to the top. Using Perle cotton, I did some basic stitching around the edges to help them stand out a bit.

I forgot to take a shot with the backing showing but in this one you can see a bit of the corner. It is a 60″ wide voile by Frou Frou. Grassy green with tiny white stars on it, the fabric is so soft. I think it gives a cuddly feel to the quilt. (I have had this on the shelf for a long time so don’t know that it would be available anymore?)

The pictures were all taken in our yard. Right now everything is so green. Foxglove are standing tall in the backyard, giving a meadow like feel to it.

I am so happy with this finish. It is unusual but not difficult. I actually think this is the case with many of Kirsty’s (Bonjour Quilts) patterns and tutorials. It is on the way to the bride and groom, just in time for their first anniversary!! I hope they love it.

Sharing at my favorite link ups – see the list at the top of the page for the details!

REMINDER: The first link up for 2022 Positivity QAL opens this Sunday, June 26th. Please come back (here) then to link up and show us your progress with your blocks. I am looking forward to seeing the different color combos!!

Positivity Quiltalong 2022

This is a good day! I feel like life is getting back to normal. With time for a little sewing, a couple of chores, and time to write blog posts; it is evident that the work of the move is behind us. The timing could not be better as it is time for the second annual Positivity Quiltalong, hosted by Sew Preeti Quilts and Needle and Foot. This quiltalong happened for the first time, last spring. At that time, life was getting crazy and it was difficult for me to focus on it. This is made most evident by the fact that I have not yet finished my quilt from that QAL. My incomplete quilt aside, Preeti has once again created a fun, easy to make pattern for all of us to create together.

In case this is new to you, Preeti Harris is a staunch supporter of a project I organize called Mercyful Quilts. Mercyful Quilts collects lap size quilts for patients who are at end of life at Mercy Hospital in Sacramento, CA. I have been coordinating this program for nearly four years now. You can read a lot of the details by clicking here. Countless quilts have been made for this project – each one given to a person who is saying goodbye to a loved one. The family uses the quilt to cover the person while in the hospital. When the person passes away, the quilt goes home with the family as a remembrance of this special family member. We have heard several very moving stories from families who received a Mercyful Quilt. These quilts serve to remind us how important it is to show kindness to everyone, even to people we don’t know. We are reminded that these acts of kindness and care might just provide a bit of extra support to a family going through a sorrowful time. This is why we make the quilts.

There are only a few requirements for Mercyful Quilts. The hospital serves adults only so no juvenile fabrics or themes. We always need male, female and gender neutral quilts so search your fabrics with that in mind. Lap size only please – no bigger or it becomes too difficult to store them.

Last year when Preeti asked if I would like to work with her on a quiltalong for Mercyful Quilts How could I say anything but yes?? Feeling we all needed a dose of positivity in our lives, Preeti designed a pattern, wrote very clear instructions and even gathered a few prizes. We all made a “plus” quilt together and if memory serves me, Mercy Hospital received over 20 quilts. There were a few others made internationally which were donated to causes closer to the quilter. After such a successful and fun time, she is at it again!

Positivity Quilt 2022

This is the pattern we will be sewing for the 2022 event. Preeti has put together a relaxed schedule (that I am hoping to actually adhere to!) There will be several Linky parties (hosted here at Needle & Foot) to share your progress along the way.

Here is the breakdown:

  • May 29, 2022 – QAL Launch – Block tutorial and fabric requirements will be shared.
  • June 5, 2022 – Finalize your fabric picks, block and layout etc.
  • June 12, 2022 –  Complete cutting fabrics
  •  June 19, 2022 – Complete blocks 1-20
  •  June 26, 2022 – Complete blocks 21 – 40. Linky Party to share your progress
  •  July 3, 2022  –   Complete blocks 41 – 60
  • July 10, 2022  – Complete blocks 61 – 80
  • July 17, 2022  – Share finished flimsy. Linky party participation required for prizes
  •  July 24, 2022  –  Level 1 prizes announced. Complete making the binding.
  •  July 31, 2022 – Complete piecing the backing. Complete basting your quilt tops.
  • August 7, 2022  – Quilting in progress.
  • August 14, 2022 – Complete quilting and attach binding
  • August 21, 2022  – Share finished quilts. Mail finished quilts to Patty (our Mercy Hospital contact). Linky party participation required for prizes.
  • September 4, 2022 – Level 2 prizes announced.
Positivity Quilt 2022

This will be a fantastic project to work on over the summer. I have an idea in my head for the fabrics I think I will use. How about you? Will you join in and make a quilt for Mercy Hospital with us? Preeti and I would love to have you join us! If you have any questions, please feel free to leave them in the comments. I am thrilled to, once again, be working with Preeti, gathering Mercyful Quilts and hanging out with all of you!

A Homespun Finish

This quilt has been in process for quite some time. I finished the quilt top last March. The piecing was quite fun – I used two different charm packs from Benartex that both had a vintage feel to them. After sewing a 2 1/2″ wide strip to the top of each one, I sliced the block in 1/2 and flipped one side upside down. That gave me the rectangular blocks you see here. To add some size to the quilt, I sashed between rows. Finally I added a deep purple border all the way around.

I knew I wanted to try hand quilting and this seemed a good project to learn with. Wanting to think just about the hand stitching and not worry about the durability, I stitched in the ditch along the sashing lines and around the inner border. This was really helpful in keeping everything together.

There are many who would say I might have used a darker color thread but again, this was my first time and it shows! The stitches are inconsistent – honestly, I didn’t want them to be the star of the show here. I quilted around each smaller square and was ready to call it good there. However, what was the rush? I enjoyed quilting this in the evenings so I decided to go around the inner border once.

Then it came to me I might want to do some stitching in the purple border. I used a stencil to trace the curves here. I felt like I was done at this point so I put the binding on. For some reason, it was a challenge to find a binding I liked with this quilt. The neutral fabric used as the background is gone so that wasn’t going to work. There was enough of the purple fabric though and I decided I liked the simplicity of using the same fabric for binding and the outer border.

This quilt is sooooo cozy and soft. The only reason I haven’t yet washed it is there is one more thing nagging at me. I think maybe I should quilt another wavy line on the purple so it intersects and makes a bit of a chain. What do you think? Add more, or leave it as is?

Hand quilting was quite satisfying, especially since I was in no rush to finish this, and I knew I wanted to keep it so there wasn’t the pressure of it being just perfect for the recipient. I have a long ways to go. The back of the quilt doesn’t look so amazing. My stitches on the back look so tiny. I need to learn how to stitch so the front and back are more uniform. A few times, I forgot to pull my knot through and now it seems like it is too late. This doesn’t really bother me but you know…. it is a learning curve.

Spring is surely here! This pond is on the edge of our property and there are geese galore right now. Ray has seen a mama and her goslings swimming but I keep missing them.

The Dogwood tree in all its glory!

Our yard is at its best in spring time, before it gets too hot and the plants become stressed. The iris are pushing loads of blooms so they will be putting on a show soon.

This weekend I am celebrating spring flowers with a sale for you. All fabrics with flowers and blooms are 25% off. Sale begins today and runs through Sunday, April 25th! Enjoy!

Working with Cooking Up Quilts!

Hello everyone! Just popping in this morning to share a project that Beth Sellers and I ‘cooked up’. As you know, I love to support many of the talented quilt designers in our community by selling their patterns in the shop. My preference is to purchase directly from them whenever I can, as opposed to through a distributor. It helps the designer a tiny bit financially and allows me to get to know the person too. A total win-win.

Recently I placed an order with Cooking Up Quilts to restock some patterns that had sold out in the shop. Her patterns are lots of fun, not terribly complicated and her directions are so clear and easy to follow; making them popular items in my shop.

When the last order arrived and I was able to take an even closer look at Summer Rain, I thought it would look great with a set of layer cakes I have in the shop called Spring Blue. Summer Rain is designed to be used with a layer cake. Spring Blue features blue and white tones with soft florals, birds and butterflies. The bundle is so pretty and with a light background and dark blue corner stones, it just works perfectly! I contacted Beth at Cooking Up Quilts to get her opinion and she agreed.

Beth quickly did a rendering of what the quilt might look like with the fabrics in the bundle. Isn’t it lovely? After seeing the rendering, I decided to add the kit to the shop.

The dark blue used for the cornerstones and binding is very saturated. I think it best to prewash it to prevent any dye issues since it will be placed directly next to the white background. Both the white and blue fabrics are subtle tone-on-tones from the Urban Legend line by Blank Quilt Co.

Here is another rendering Beth provided. This one has a more organized layout. Are you into the random look of the first photo or this structured look? (I love them both!)

Many thanks to Beth for working with me on this kit and for the wonderful patterns she creates! Hope you will take a look at the kit and let me know what you think. Thank you so much, Beth, for your help with this project!!

Quarantine Quilting – Quilt Top Done

Well all this time at home is certainly allowing for lots of time in the sewing room. Last June I started sewing these charm squares I had accumulated into blocks. The charm squares are from a variety of sample packs from Benartex. Simple, prints in soothing colors that wanted to be made into something rather than live on the shelf in the closet (where they had been for at least two years or so).

I saw this idea on Julie’s blog, Me and My Quilts, around that time. She was making something similar and I absolutely copied her!! I cut 2 1/2″ strips and sub cut them into five inch strips. Each was sewed to a charm square, then sliced vertically. One piece flipped around and then I sewed them back together.

I did lay out the pieces in a random order first but decided I wanted something a bit more organized so I started putting them in collections by color.

Finally making up my mind, I got the rows put together and added a few borders (it is a bit on the long and skinny side).

I used this purple print from the shop for the outer border. It is from the Ginger & Spice line by Missy Carpenter and looks great with the neutral sashing. I chose purple because there are only three purple blocks in the quilt and I thought it just needed more!

Draped sideways on the railing.

Now I am looking through choices for the backing. I have decided to keep this one. It is time for me to set up a hand quilting project to work on in the evenings. I have never hand quilted anything larger than a pillow or a mini so this is a big undertaking for me.

I have so many questions since this is a new undertaking for me! Once I baste it, I am thinking of stitching in the ditch along the sashing lines. I was thinking if I had it anchored in place, it would be easier to quilt. Of course one might say after stitching in the ditch it is basically quilted already. Is this a normal progression? I need all the hand quilters to give me lots and lots of tips and tricks in the comments please!! I am thinking of using Perle cotton. Yay or Nay??? I really don’t know what I am doing here so would love any and all hints or referrals to good places to read up on this.

I appreciate the help. Hope everyone is doing well as can be. These are trying times so let’s all stay connected even if virtually. Take care all of you. 🙂

Linking up with all the usuals. Check them out at the top of the page, under Link Ups.

Finish – Squared Away!

It has been a while since I actually finished a quilt. Hurray for Squared Away – all finished and so pretty! I started this quilt in the beginning of 2018. The block of the month was hosted by Mari at Academic Quilter. Somehow I didn’t end up following along all year though. I can’t honestly remember why. Then the blocks sat and waited, all lonely and sad, until I stitched them together last spring. Since I didn’t have enough blocks for an entire quilt, I interspersed them with a modern print of Pat Bravo’s. It was from her line called Dare. I had an abundance of it leftover from a previous quilt I had made back in 2016.

I love the way this all came together. The squares are bright and fun while the background calms everything down. When I chose the borders, I shopped downstairs in my fabric shop and chose a chartreuse textured solid and then did a wider border with a beautiful print by Bari J called Bougainvillea Lilac. I love how these look together. So much so that I used the chartreuse fabric as the binding. They are perfect together!

For quilting, I kept it simple with straight lines and my walking foot. I did two different patterns, a checkerboard in the background and a simple star in the pieced blocks. This was easy and kept the quilt loose and fluffy. In the wider purple border, I did some free motion with curving lines and little hearts.

One very crooked label!

The backing fabric is a cute rainbow print with rectangles of all sizes and colors. I labeled this quilt as I intend it as a gift to my nephew who married last summer. I machine embroidered it which was fun. Don’t even ask my why it is so crooked. It just is. Kind of how things go with me. 😉

Let’s see…. what else can I tell you about this one? It was my goal for January and yahoo! I got it done! Makes me so happy – it was fun to quilt it and I enjoyed the hand stitching for the binding. It has been too long since I finished one up!

I am now working on a quilt for grand daughter number two. She is scheduled to arrive (by c-section) on March 12th, unless her mama goes into labor sooner. So that is really exciting! I will share some progress on that in a post soon.

Just in case you missed my post from a couple of days ago, I am holding a giveaway to share lots of cute scraps. You can hop over here to read about it. Be sure to enter today as this is the last day of the giveaway. I will select two winners tomorrow morning and will email the winners. Great fun if you are a scrappy quilter or if you like making quilts for kids.

Linking up with Elm Street Quilts and also with Brag About Your Beauties. How about you? Are you happily finishing up a project this weekHappy weekend everyone – Enjoy it and find a few minutes to sew!

Positively Floating – a Finish

Earlier this summer I made a plus quilt using the Art Gallery Dare fabric line, designed by Pat Bravo. I set it aside for a while, as most of us tend to do. After taking the long arm class, I decided to quilt this one for my second round of practice. Thursday last week found me at the Sew-So Shop ready to load the project on the machine.

When I arrived, I was told that the owners would be running a bit late due to a family emergency. There was another woman, a very experienced long arm quilter (Diane), who was there to pick something up and she offered to help me get everything set up. I felt so fortunate to have run into her because she taught me a great deal in the 15 minutes that we worked together. It was so helpful!  We got the backing, batting and quilt top loaded and straight.

I talked with Diane about my plan to quilt this. I wanted to do simple spirals in the negative space and something linear within the pluses so they would be differentiated from the background. She and I scribbled on paper for a bit and decided on a flow of linear lines that look like water flowing. This would allow me to leave the machine free (as opposed to setting the channel locks for straight lines) and would give me a relaxed pattern to stitch. It worked perfectly (well, nothing is perfect but overall, it was very successful!)

img_7524

I love the flow of these soft linear curves. At first I tried to treat each plus as a separate entity but it didn’t seem to make a difference so I relaxed on that and let the lines flow over the edge of one fabric and on to the next.

img_7523

I love this motif – I don’t think I have used it prior to this but I will definitely use it again. It was really relaxing to stitch.

img_7521

For the negative space, or the background, I did large, loose spirals and loops. My goal was to work on my speed control and precision so I picked a simple motif. Looking back, I wish I would have selected a darker gray thread because the quilting hardly shows up.  I was not feeling very confident about my abilities so I picked a light thread, in case the stitching wasn’t the best.

img_7528

The stitching shows up better on the back.  For the first time, I bought a wide back cotton for the backing. This was so convenient! I had begun to piece a backing using the leftover Dare fabrics but when I decided to do this on the long arm, I nixed a pieced backing. I have enough going on loading the long arm without having to worry about a potentially wavy or ‘un-square’ backing (is that a word?).  Using a wide back fabric eliminated all of those possible issues.

img_7530

Since I had already pieced strips of the scraps, I decided to use that as the binding. I sliced the strips into 2 1/4″ strips for the binding. You know how much I love a scrappy binding.

As with each long arm experience before, I do have a question. The finished quilt has a bit of a wave to the center of it. (Look at the photo at the top and you’ll see it.) I feel it was flat and square when I started to quilt it. My question is, do you think this is because I quilted the Plus section more tightly than the negative space? It definitely has a stiffness to the Plus area. When I did the surrounding area, I kept it loose so the whole quilt wouldn’t be stiff but maybe I should have been consistent all the way through? Looking for some advice here. Yvonne….. Help please! 🙂

Oh how I have enjoyed learning about and using the long arm. I have one more finished quilt top to do so I will set up some time for that project soon! It has really helped me to get some projects finished up that were languishing a bit.

Couple of reminders –

  1. The voting begins for the Quilt Bloggers Festival on Sunday! Go take a look and choose your favorites — so many gorgeous projects have been entered.
  2. Handmade Halloween is coming soon! I hope you are checking your blog history for fun posts to link up that will inspire readers to make something for Halloween! If you don’t want to link an older post, you are welcome to write a new one. Lots of fun prizes have been provided by Craftsy, C&T Publishing, as well as Lorna from Sew Fresh Quilts. Come back and join the party October 4th!! Be sure to let me know if you have any questions!
  3. Craftsy has a sale going on this weekend. All classes are less than $20 (except for those in the Great Courses line.) Take advantage and learn something new!! There is always something new to learn.  (Note, I am a Craftsy affiliate.)

unnamed

Linking up to my favorites. See the tab at the top of the page, Link Ups, for more info.

Economy & Hourglass Blocks

Yesterday I finished a quilt top. This hasn’t happened for a while! I am excited about this one because it is going to be a gift for someone that I am almost certain does not read my blog. I certainly hope so, otherwise, I have just blown the surprise. 😉

The fabrics in this quilt worked wonderfully together. The background fabrics are Moda solids, Figtree Cream and Stone. I am not entirely sure how this rich and creamy, off white color relates to a fig tree but it is gorgeous. Maybe they were thinking of that creamy outer part of the fig’s flesh? Who knows.  The centers of the economy blocks are from a fat eigth collection I received for my birthday. The Art Gallery collection, designed by Bari J, is Millie Fleur. This quilt didn’t consume too much of the collection so I think I will use the rest to create a scrappy binding. (I love a scrappy binding!) Along with the prints, I used a selection of solids from my stash to create the center of the economy blocks. The blocks are quite large at 10″ square.

IMG_20151219_4298

Looking at the secondary pattern (the cream and stone diamonds that surround the smaller economy blocks) will help me determine how to quilt it. The quilt is 70 x 70, so a slightly large lap quilt. Since I just took the long arm class, I plan to quilt it at the shop. It will be fun to quilt over all of that space created by the solid fabrics. However, since it is a gift, I want to do one or two quilts as practice before I work on this one. I still have two tops waiting to be finished which will make for good practice sessions.

img_7375

There is a three inch border surrounding the blocks with four patch blocks serving as cornerstones.  The bottom border looks distorted in this picture. I did some relief quillting there which I will show in the next post after I quilt this up. For now, just know that is why that portion looks a bit odd.

This was a bit of a beast to photograph, especially since my trusted quilt holder is back in school. Alas, I had to rely on my clothesline instead.

img_7377Hopefully I will be able to reserve some time at the long arm shop next week to practice. I’m very much looking forward to that. Then when I am a bit more confident, I will finish this project.

The weekend is coming and we don’t have anything planned. If it is cool enough outside, there is plenty of yardwork to be done. Not terribly exciting but that’s ok with me.

Linking to my usuals. Find them at the top of the page, under link ups.

blowout sale

Have you heard about the $5.00 Blowout Sale over at C&T Publishing? It runs through Sunday, 9/11/16 and is a great opportunity to grow your sewing library for not a lot of money! Take a peek at the titles that are on sale this weekend. One of my favorites is Get Quilting with Angela & Cloe, a book about sewing with kids written by the wonderful Angela Walters.