Monthly Archives: July 2016

July’s Scrappy Projects

This month I barely made it in time! I kept thinking about working on my two scrappy projects but there was always something else going on so I would put it off. But I squeaked them in. Part of the problem was that this month in RSC16 land, the color is hot pink with a lime green accent. People have been making some really awesome blocks with this combination but it just wasn’t calling to me. So I decided to change it up and pulled out my bin of red scraps instead.

Red scra[

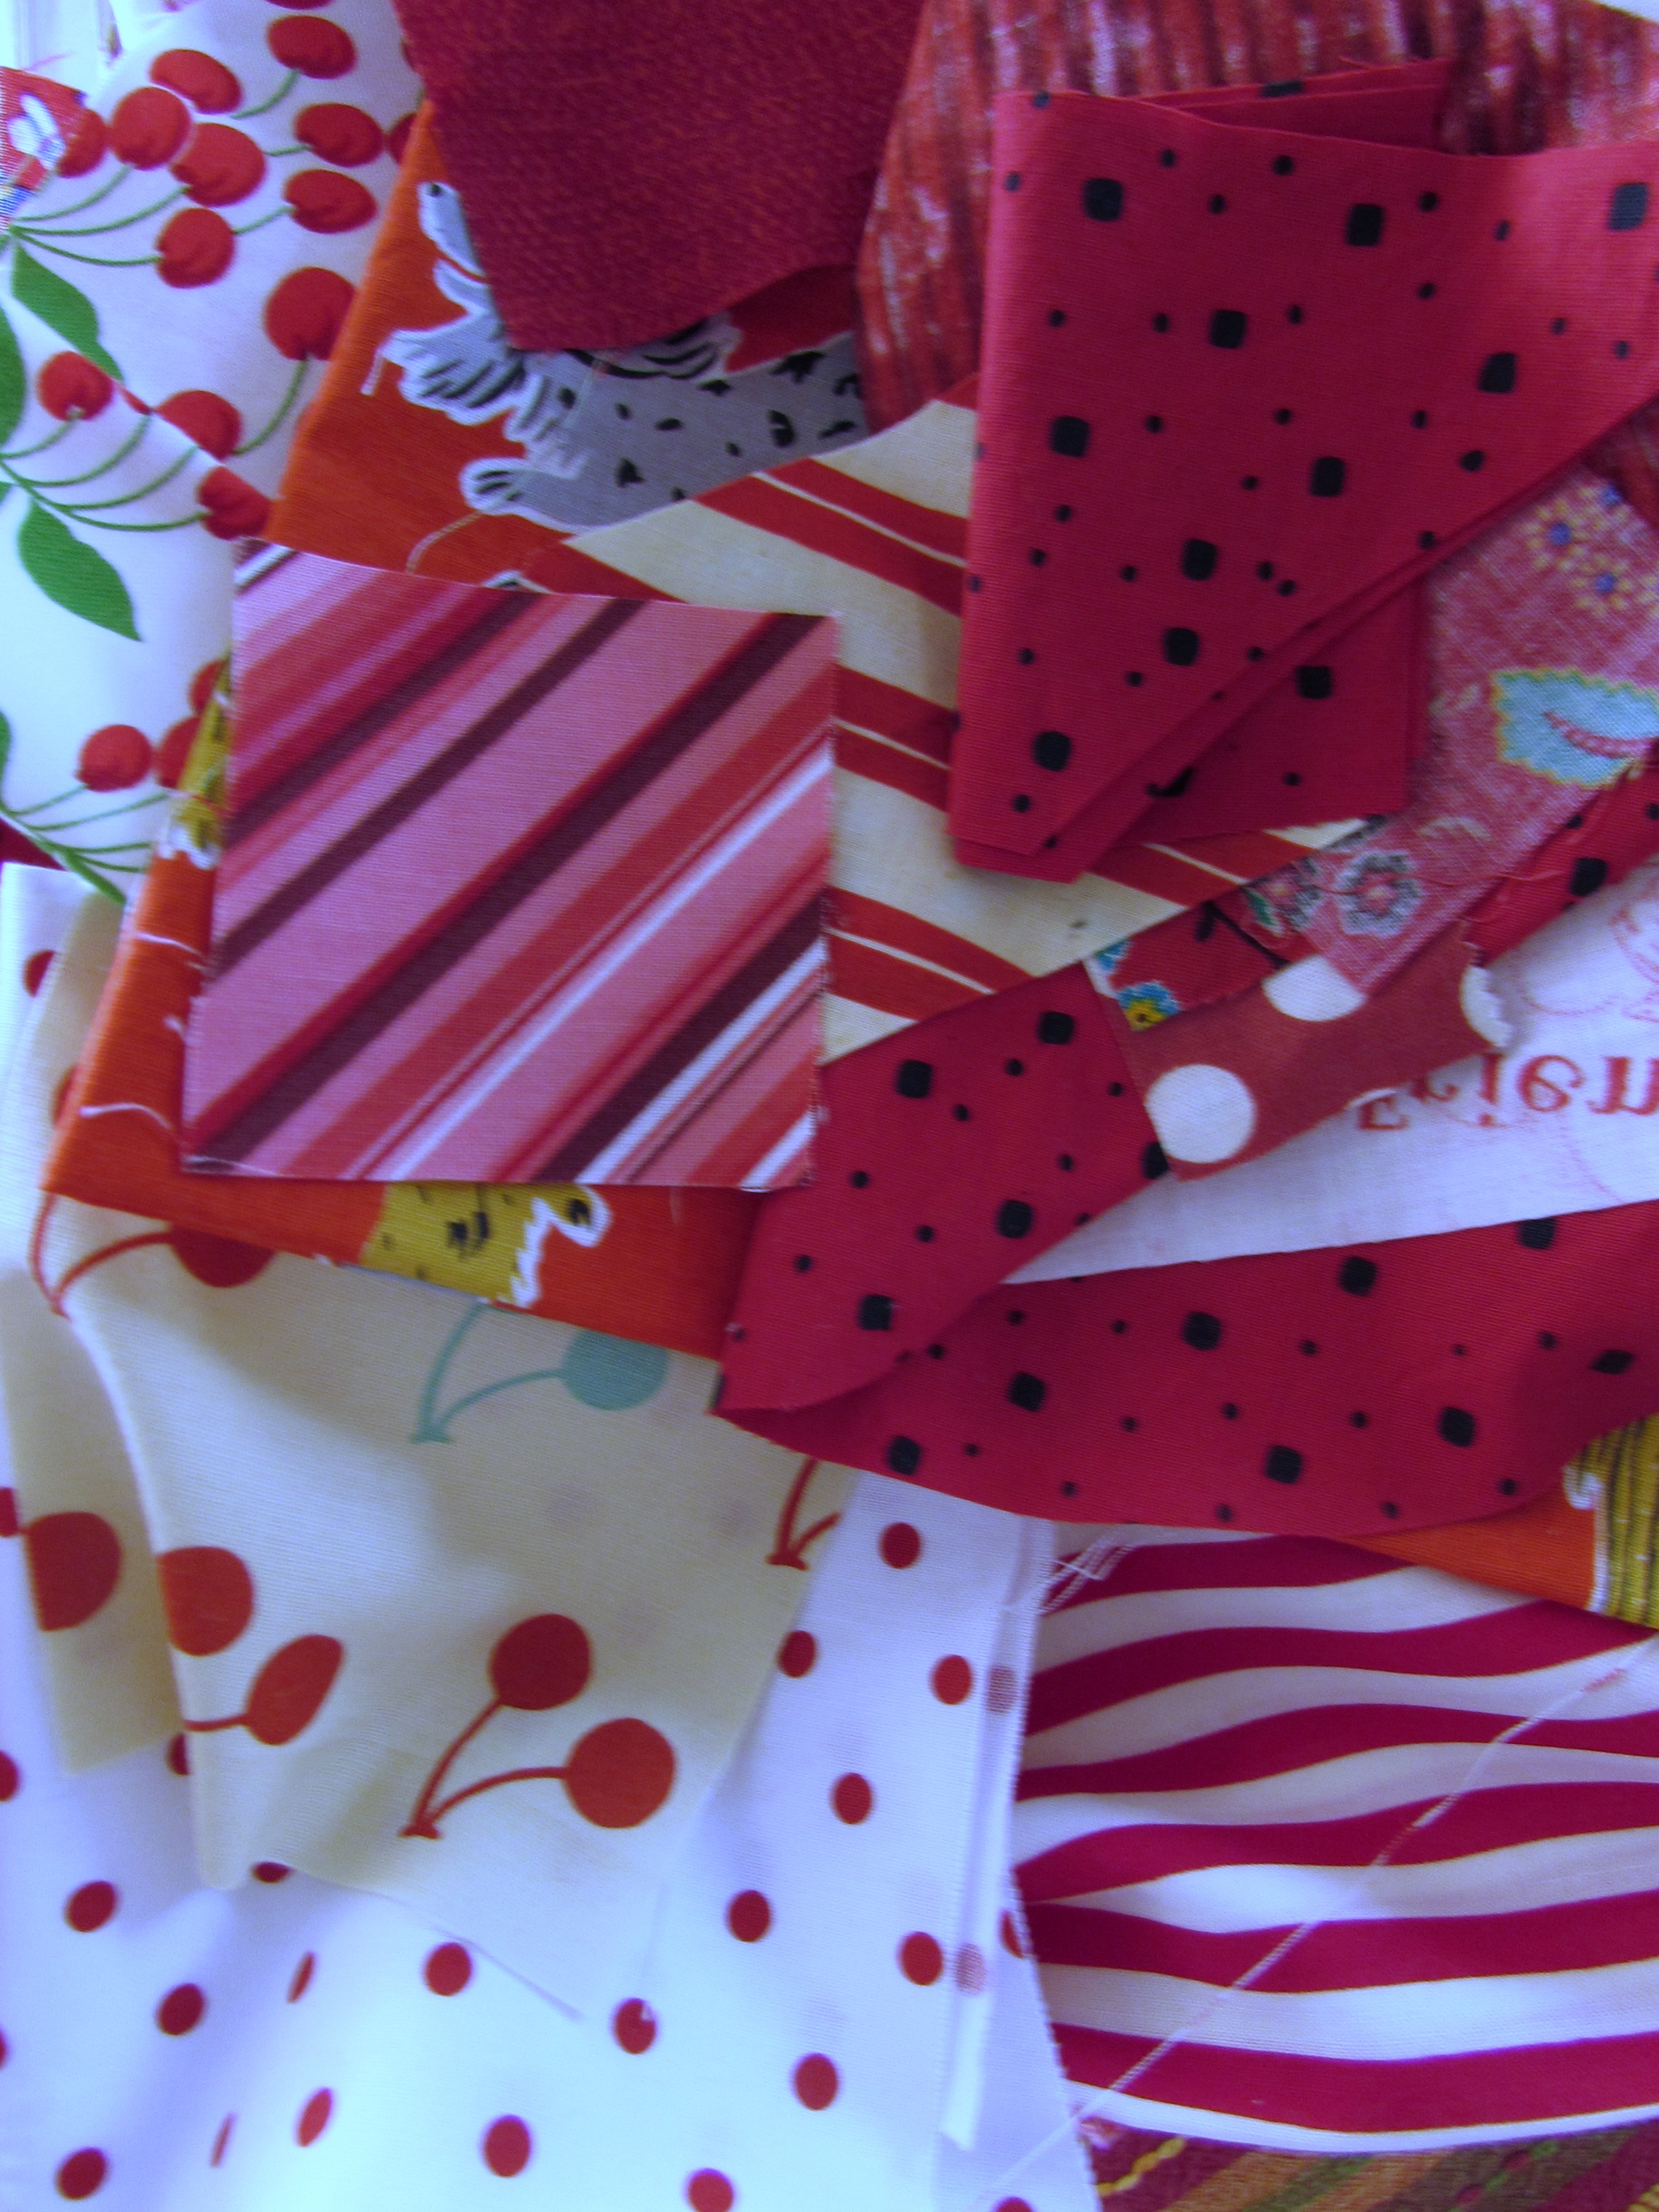
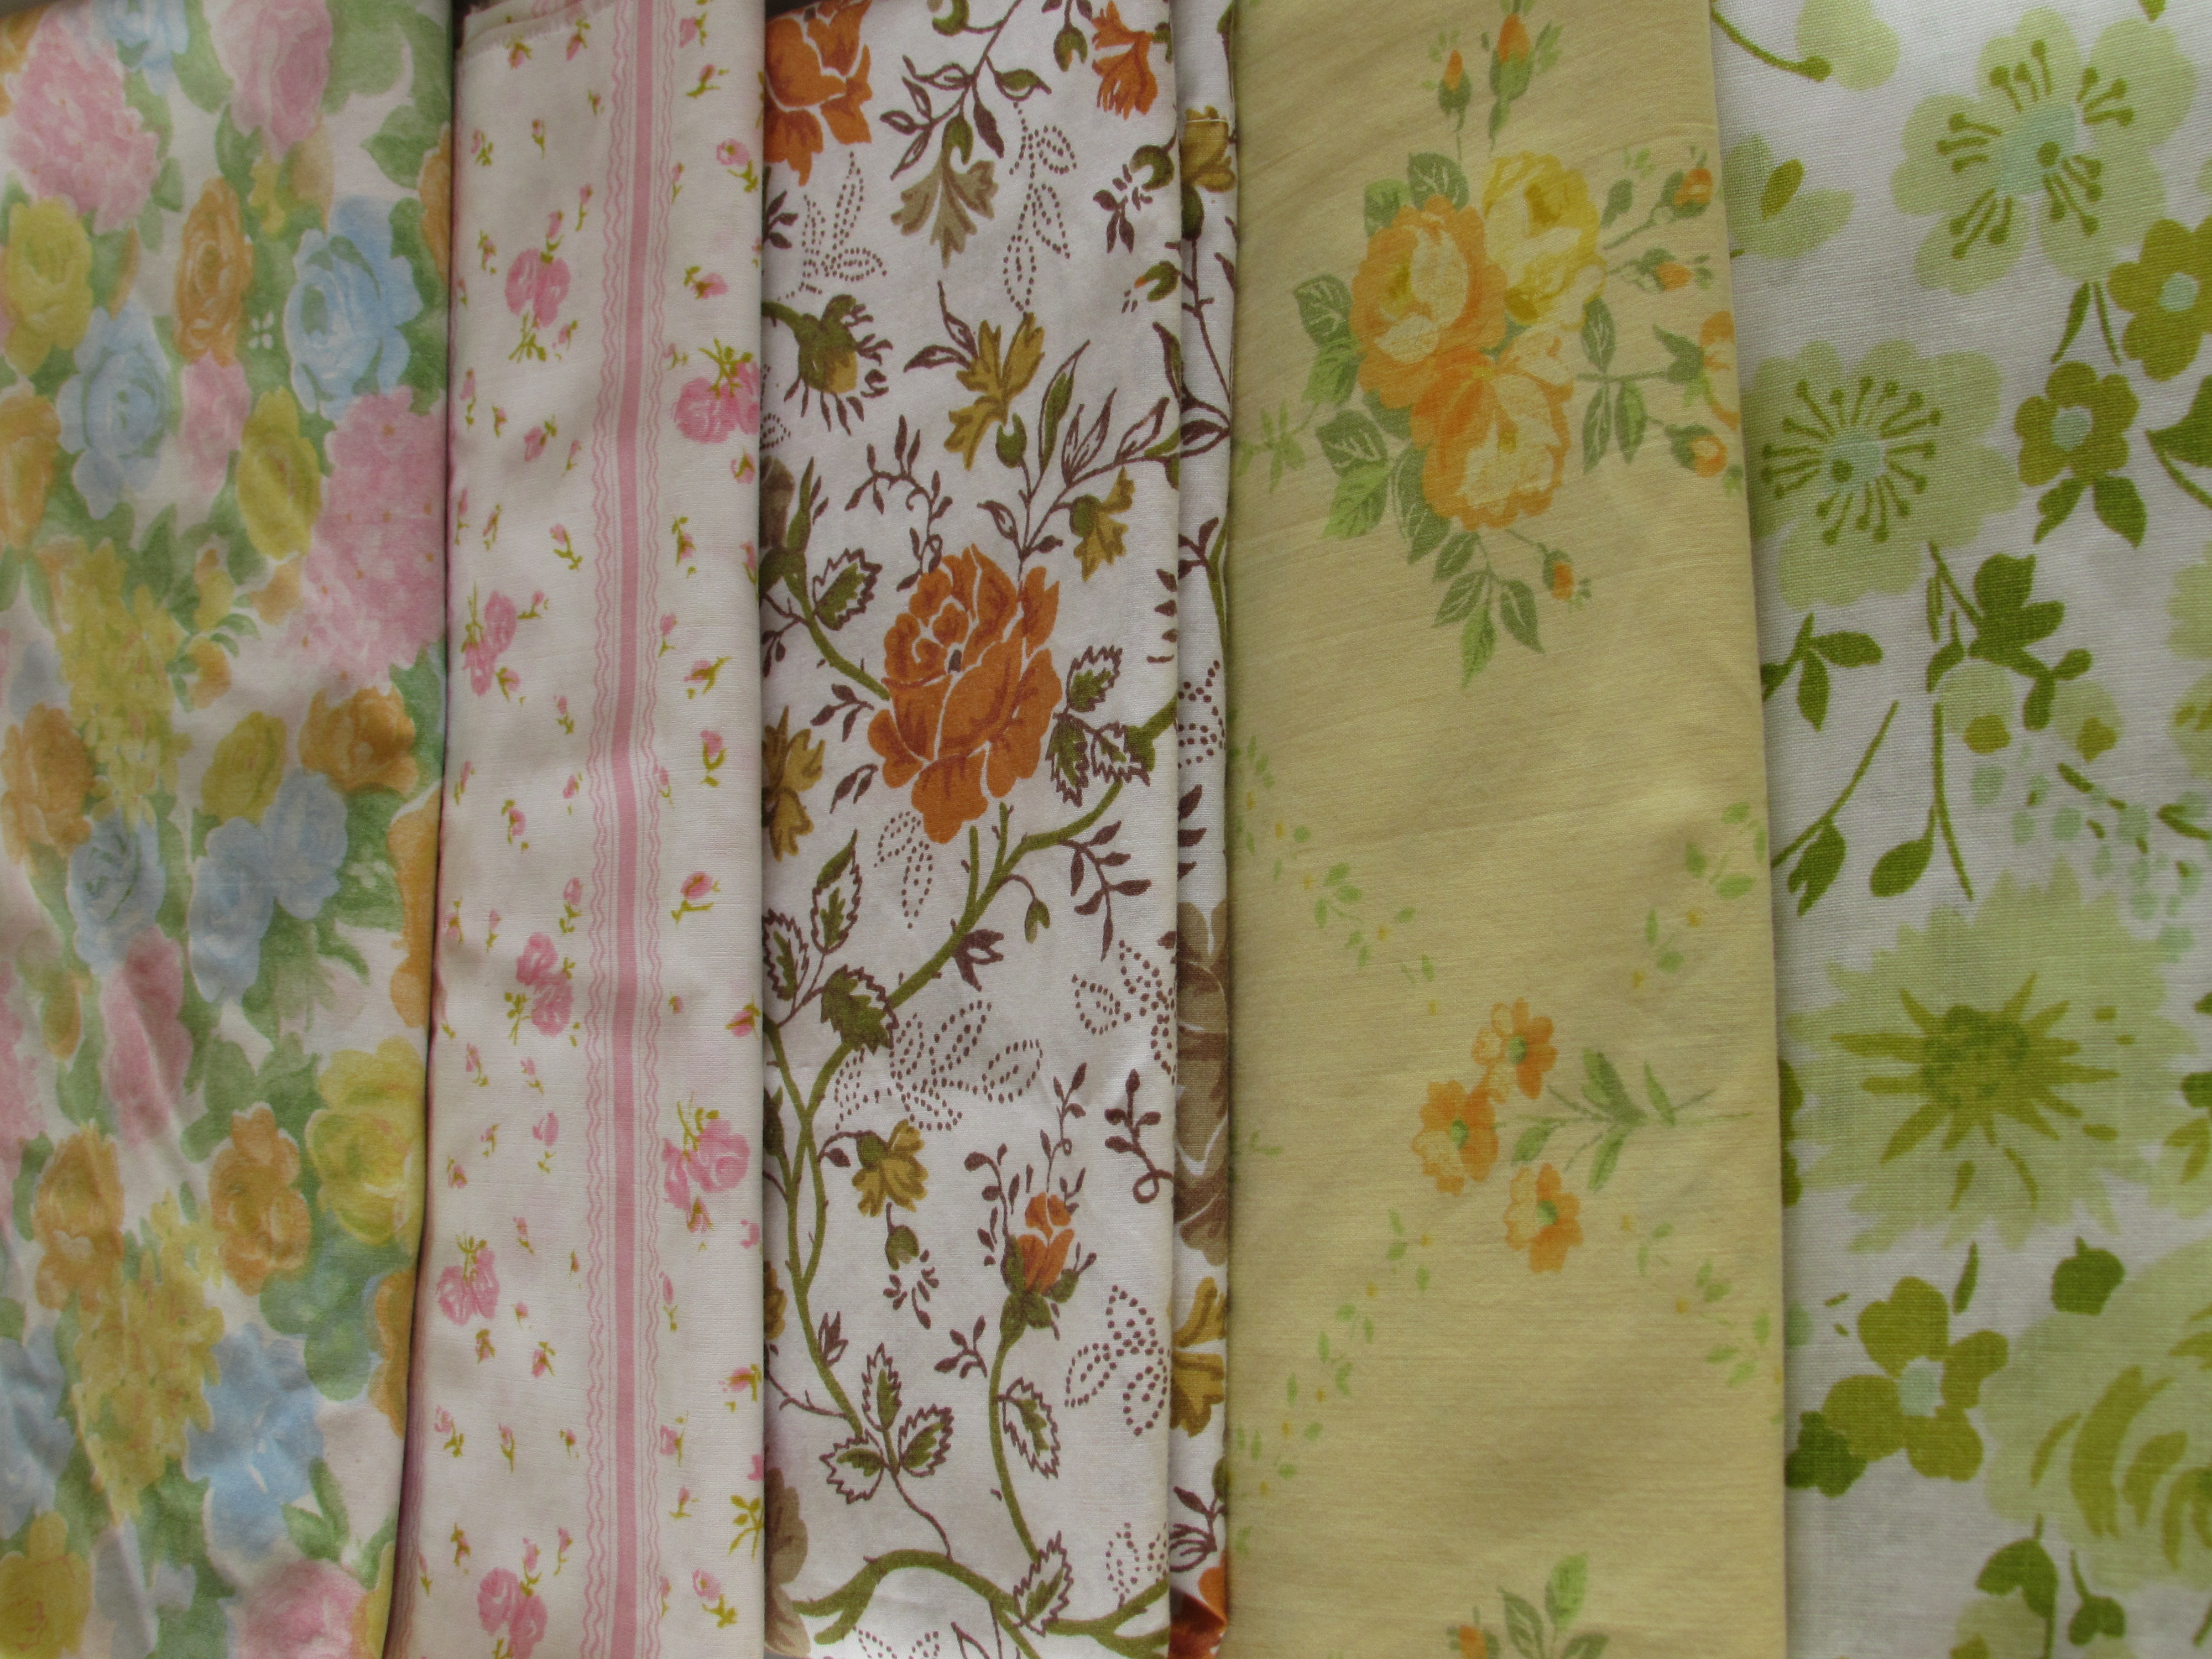
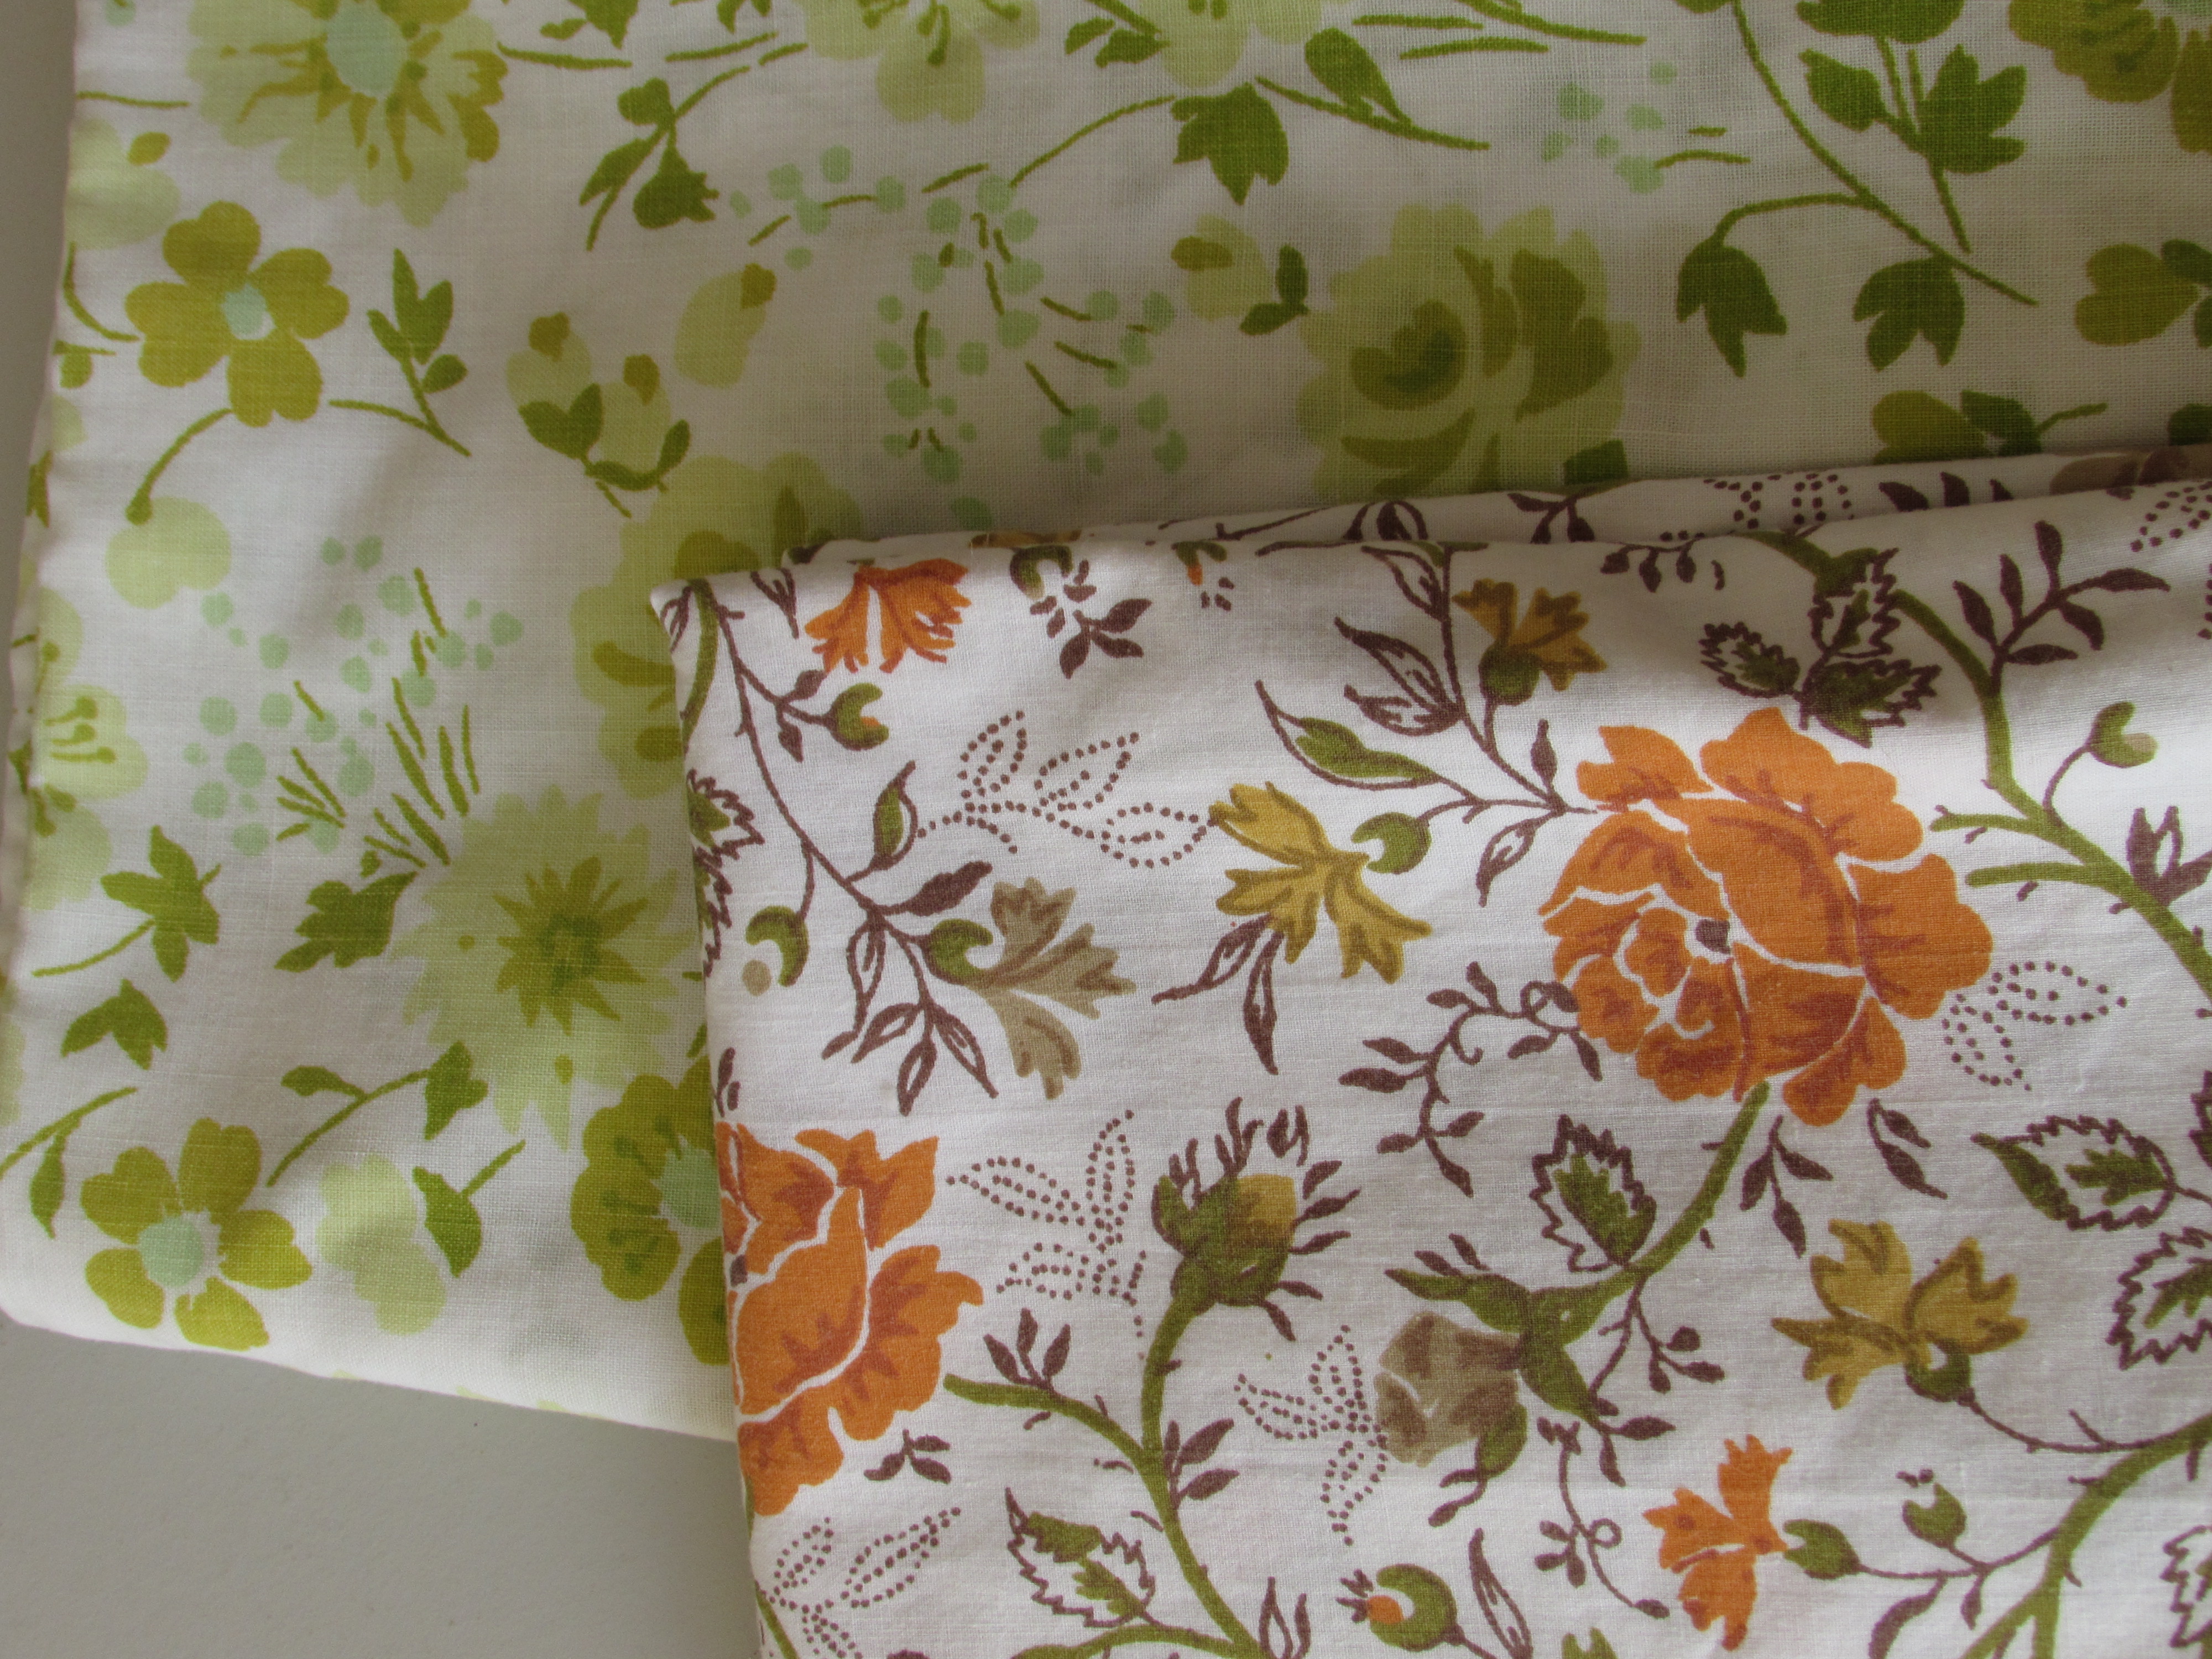
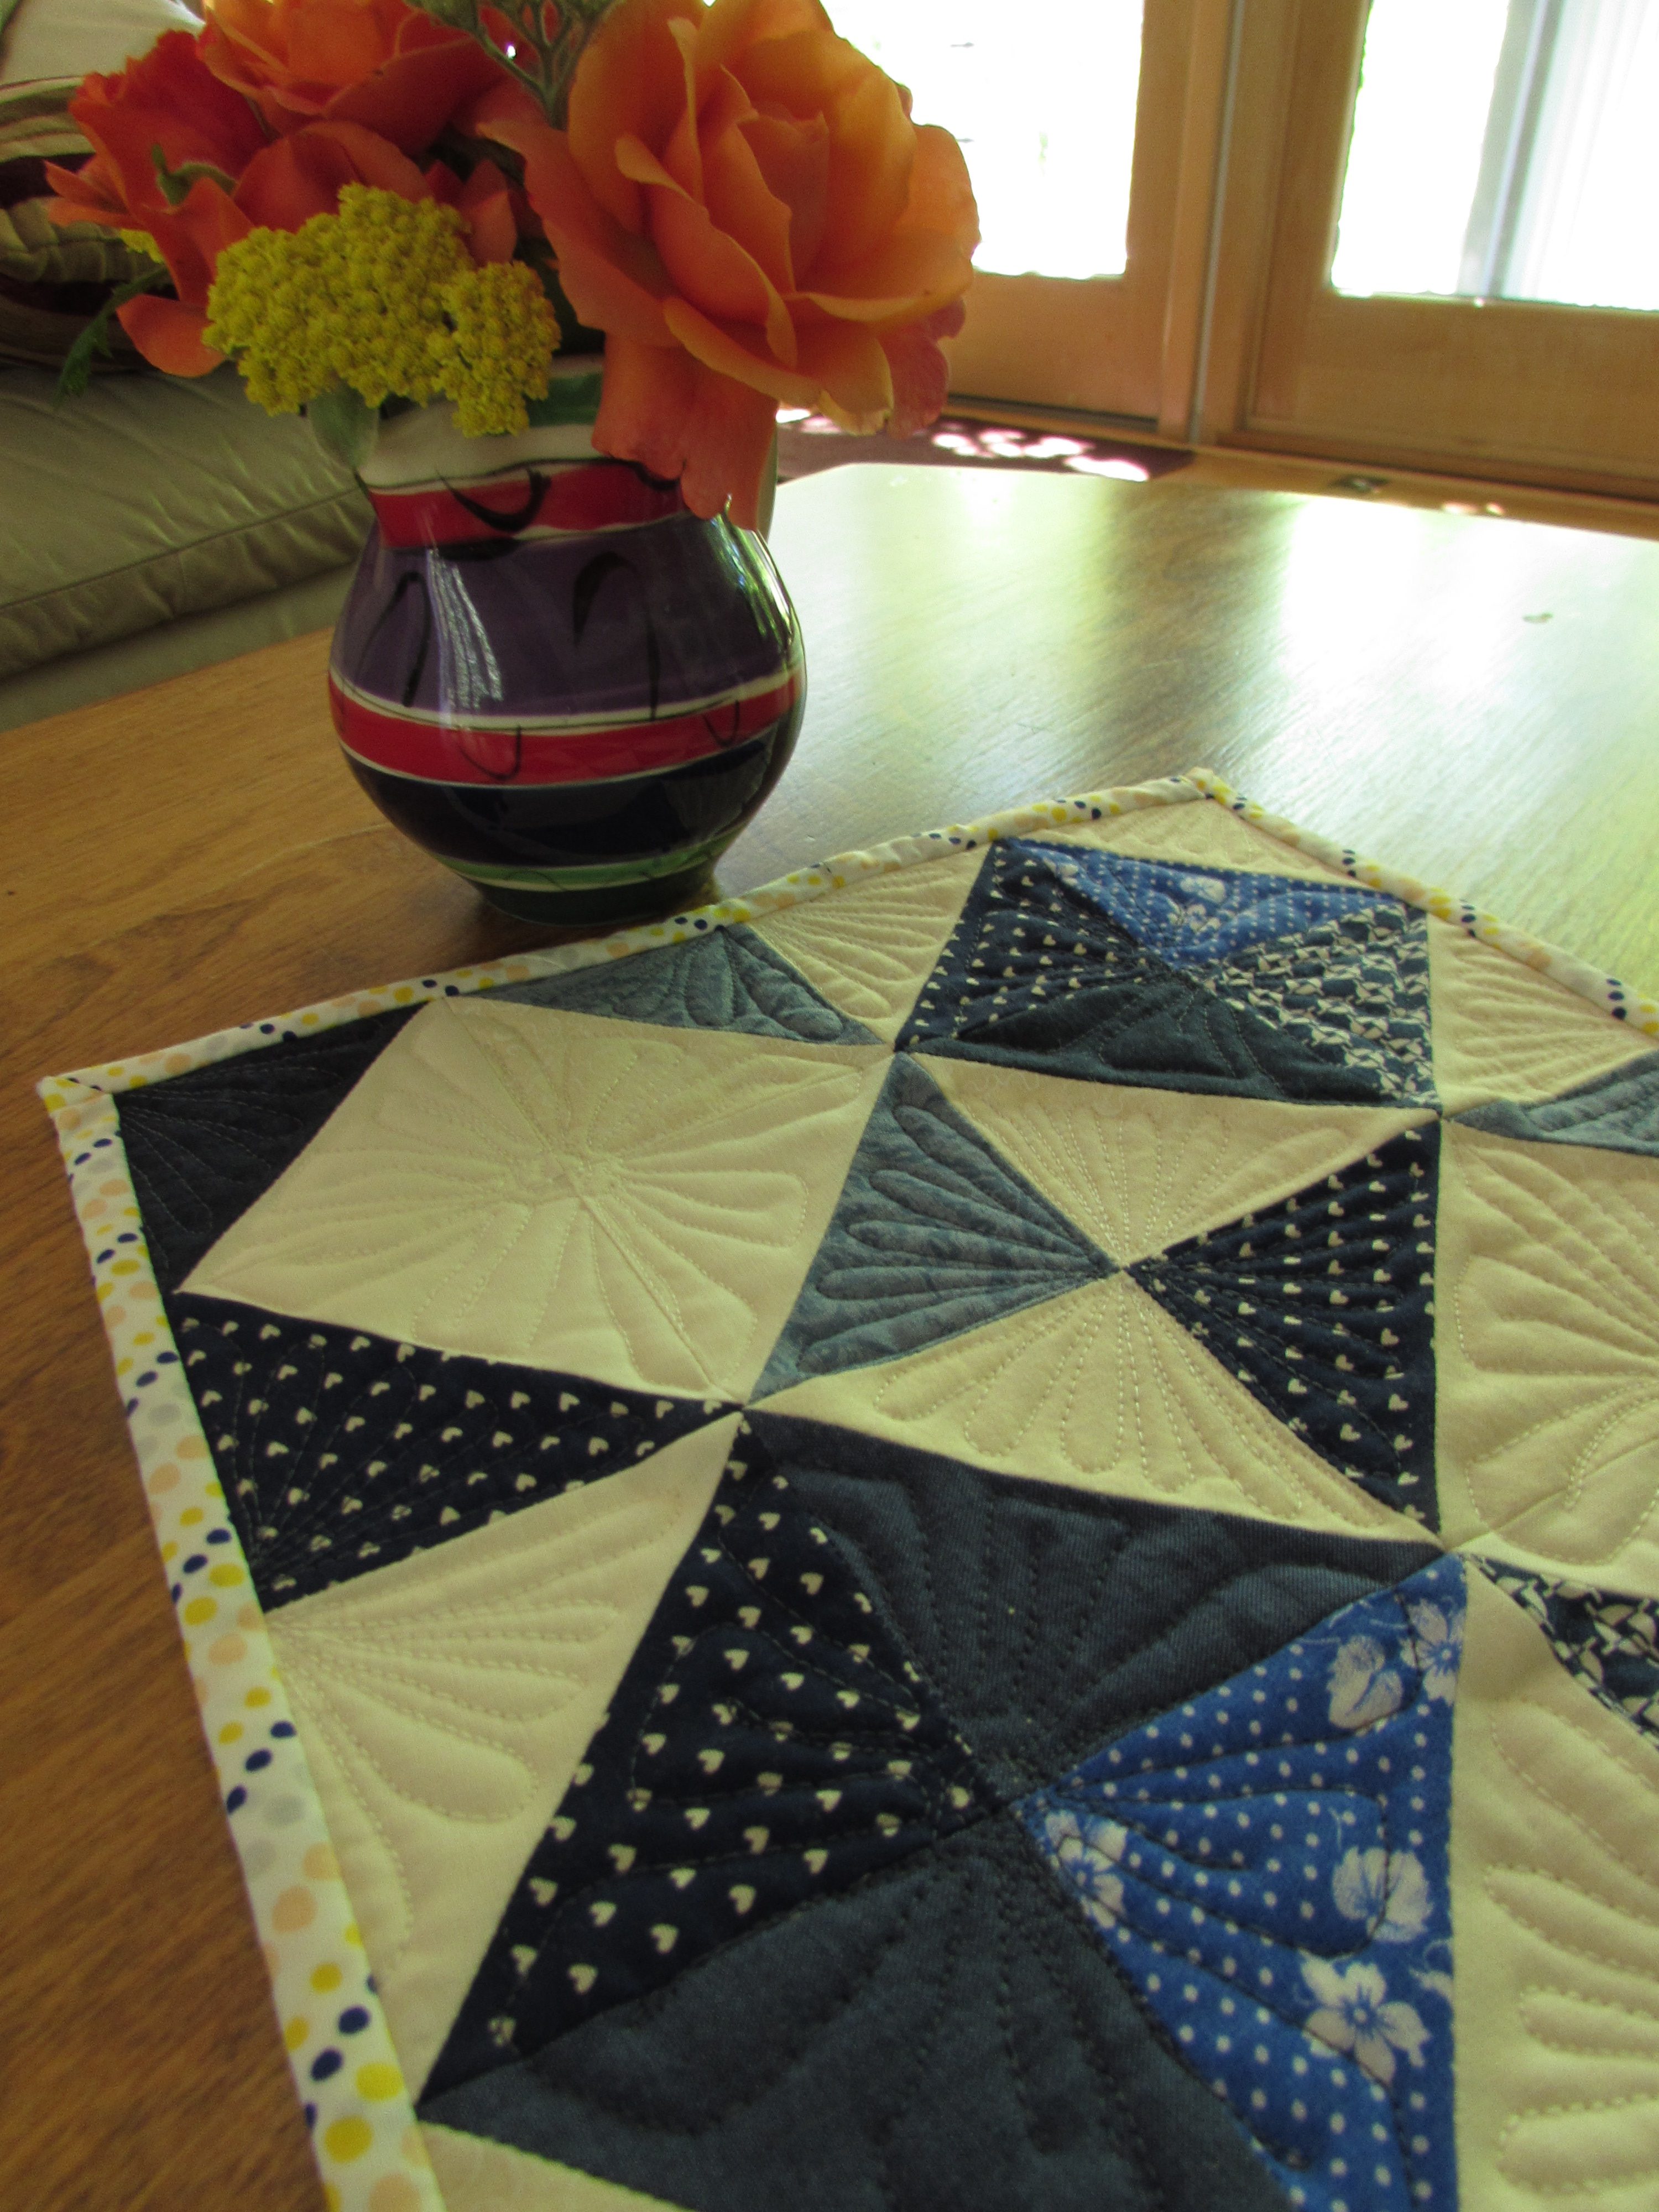
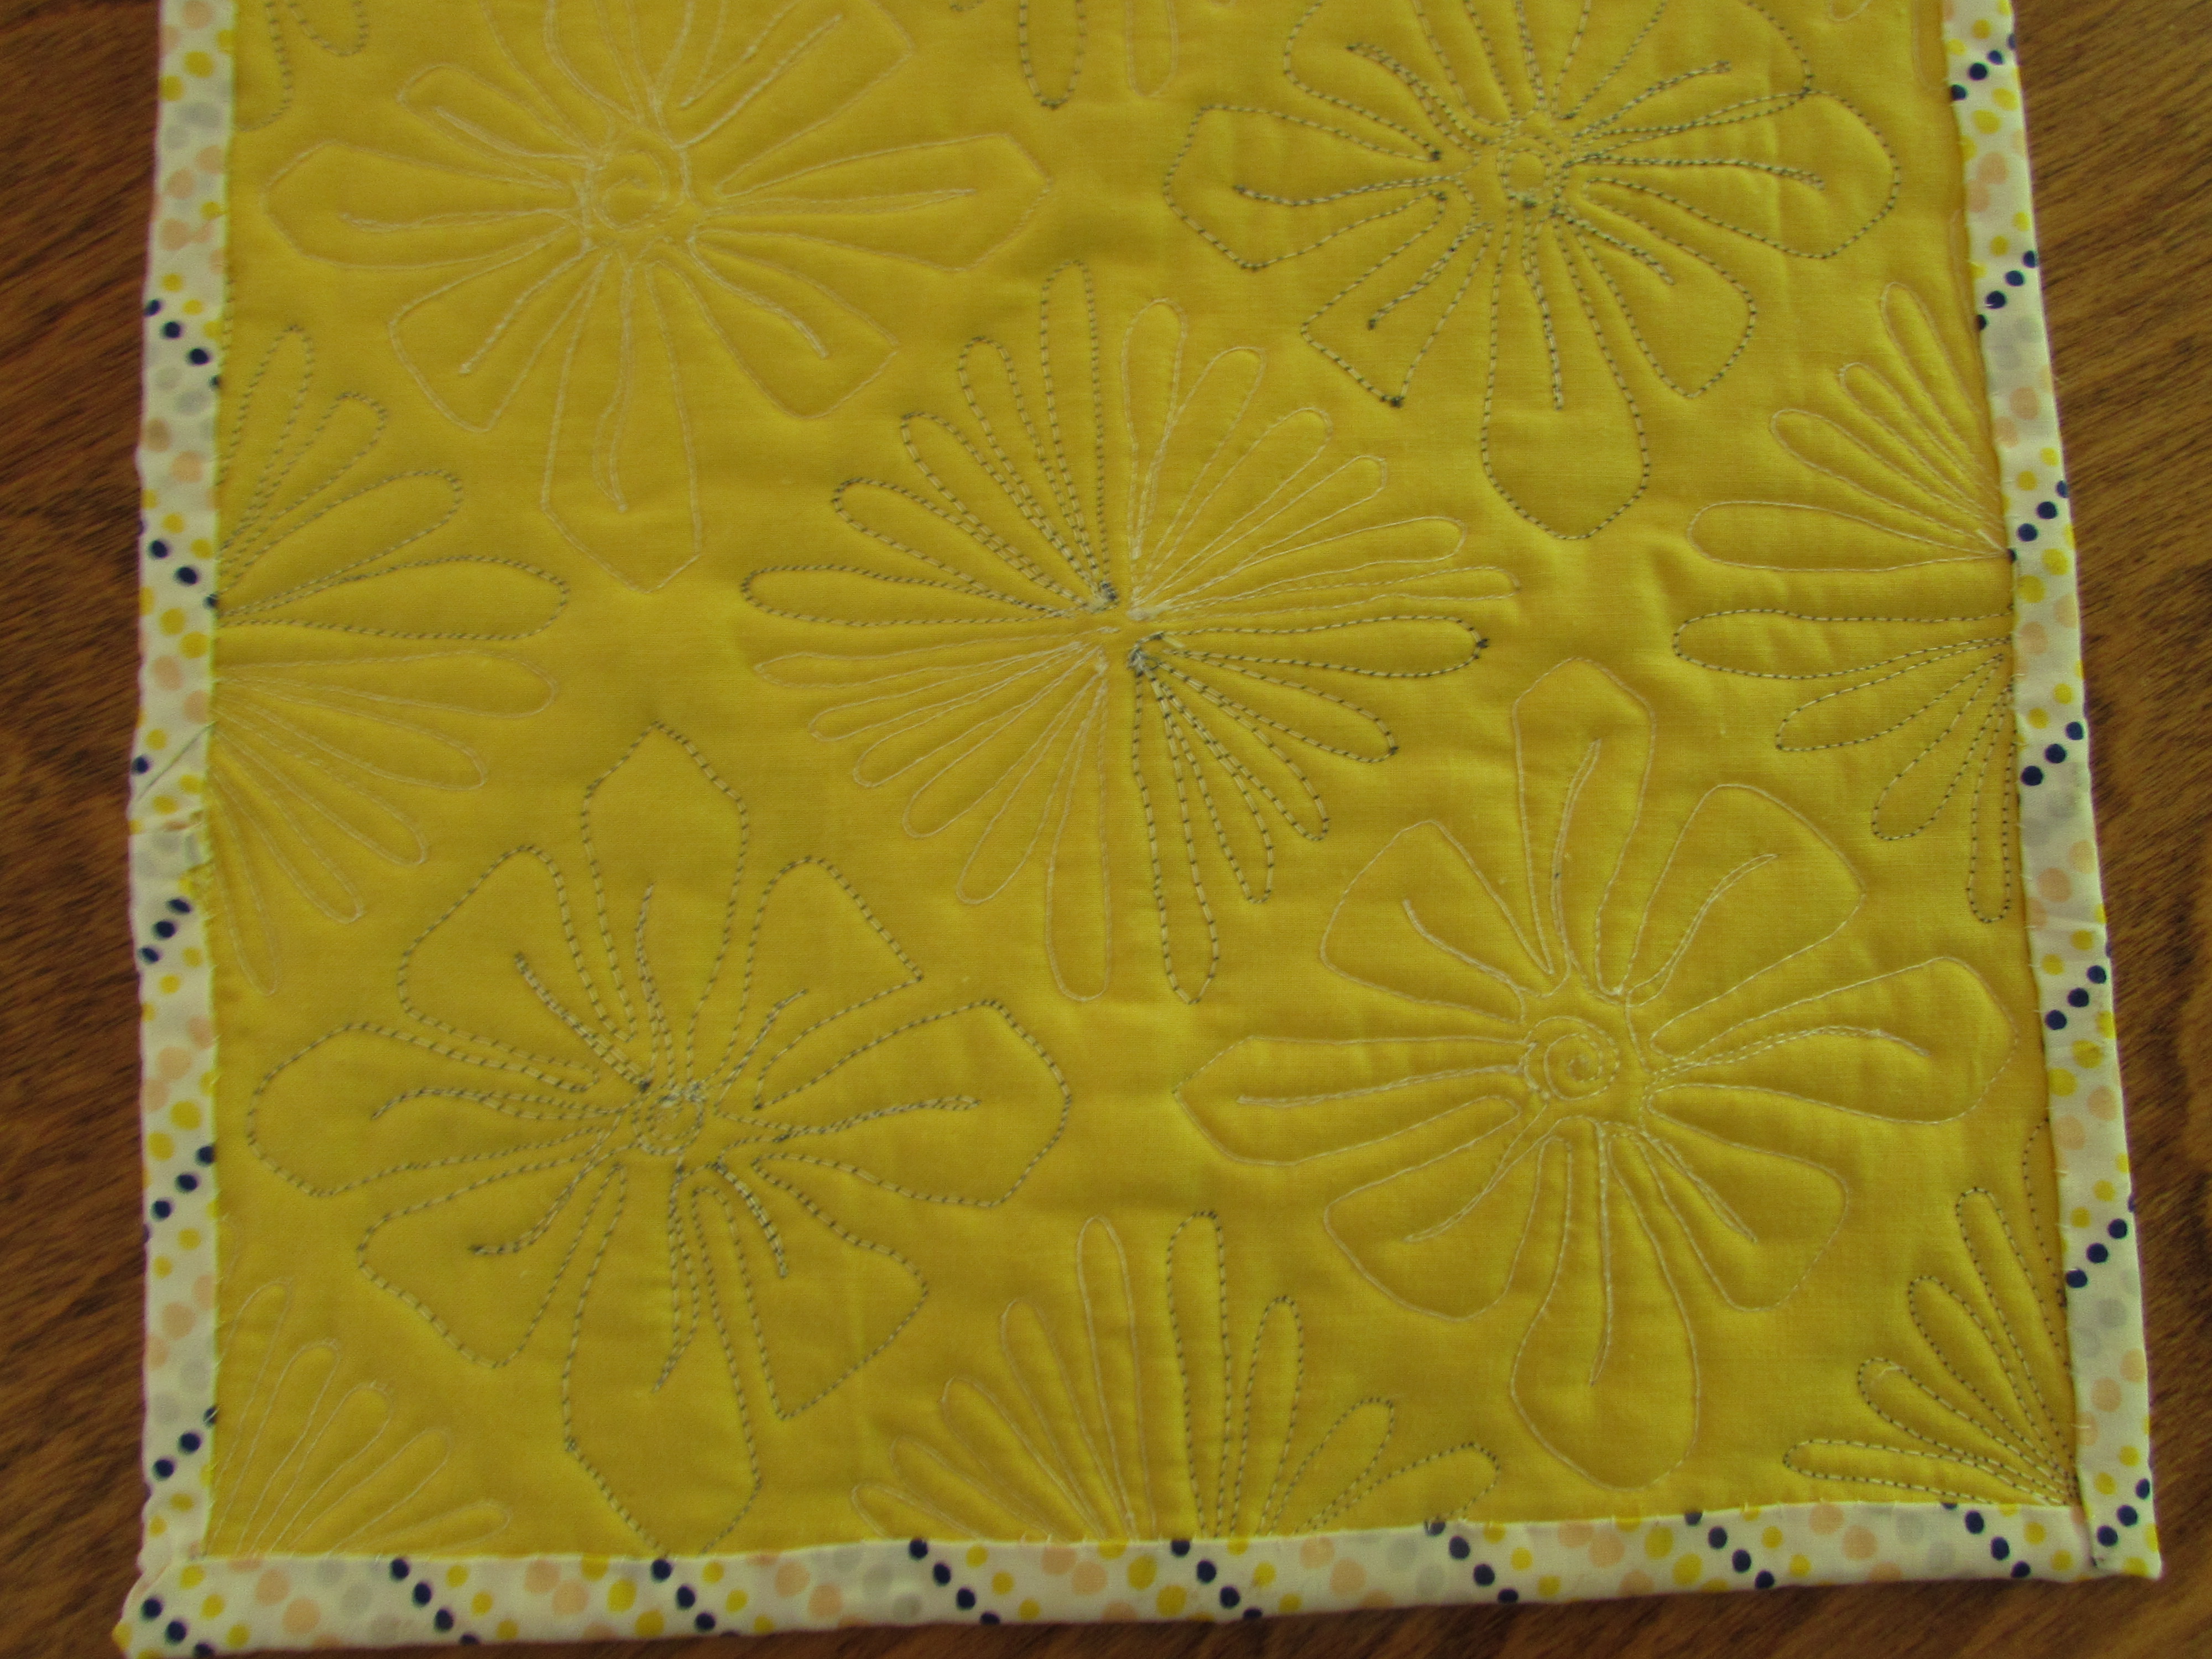
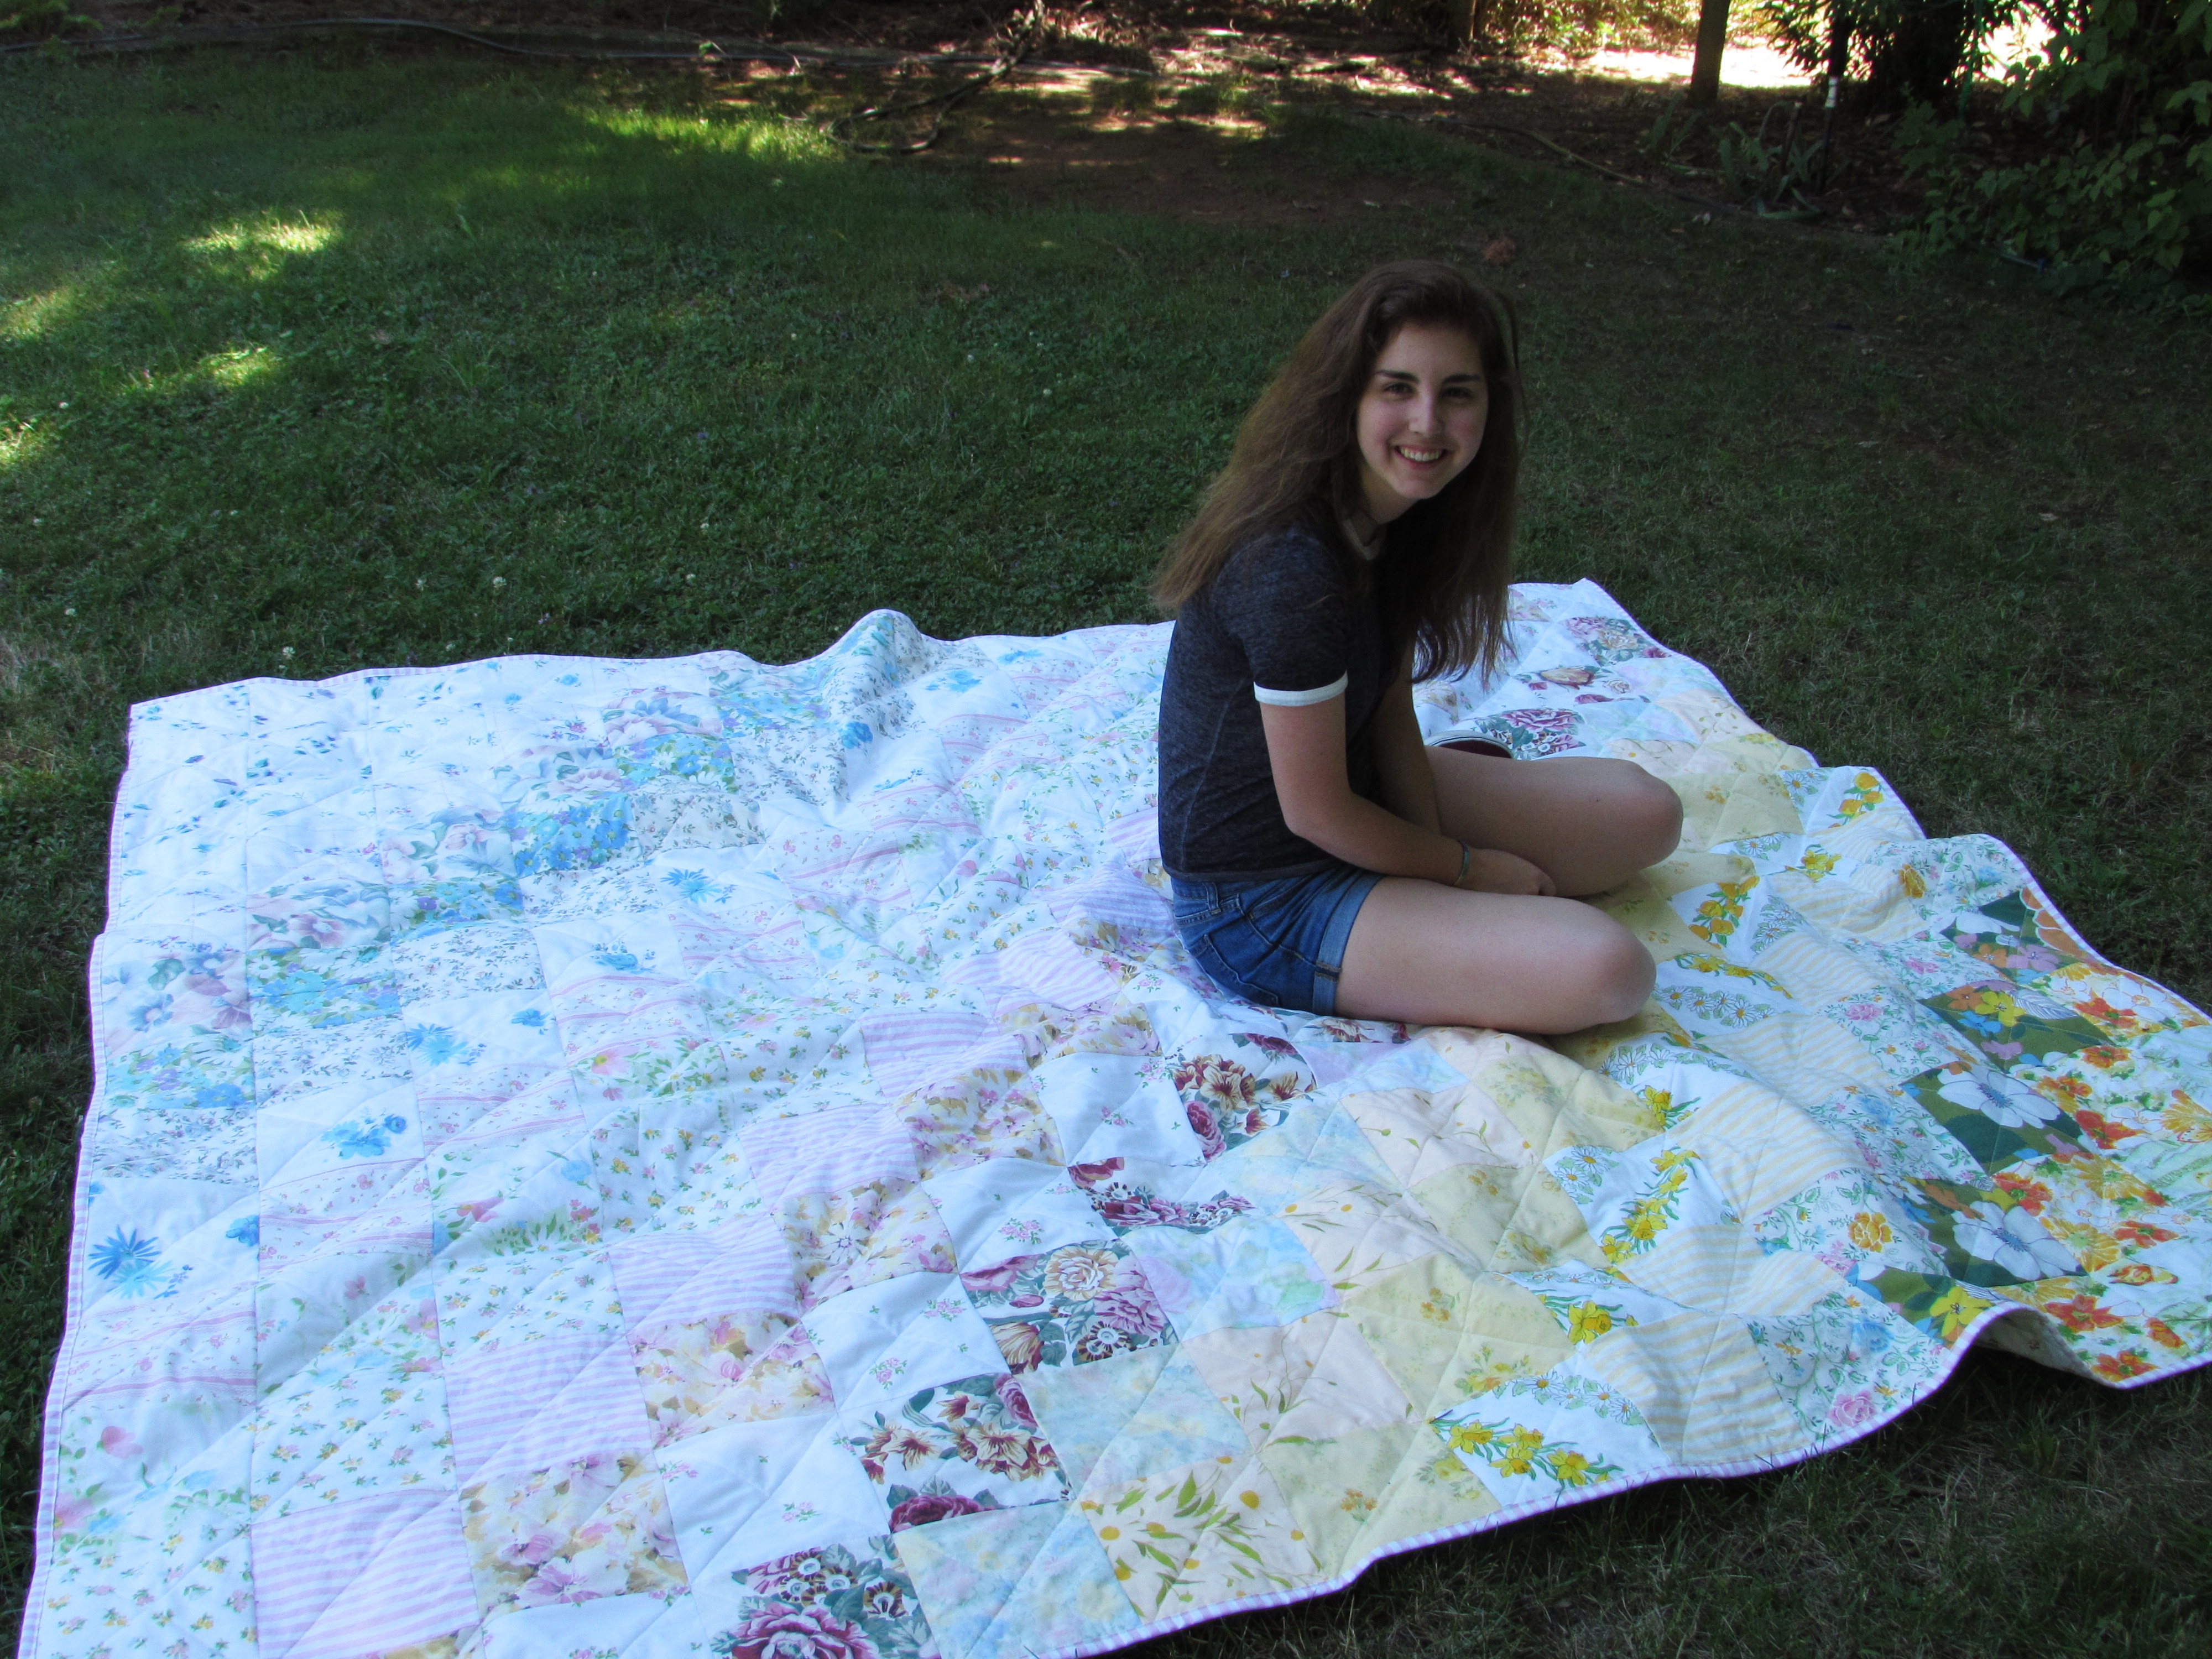
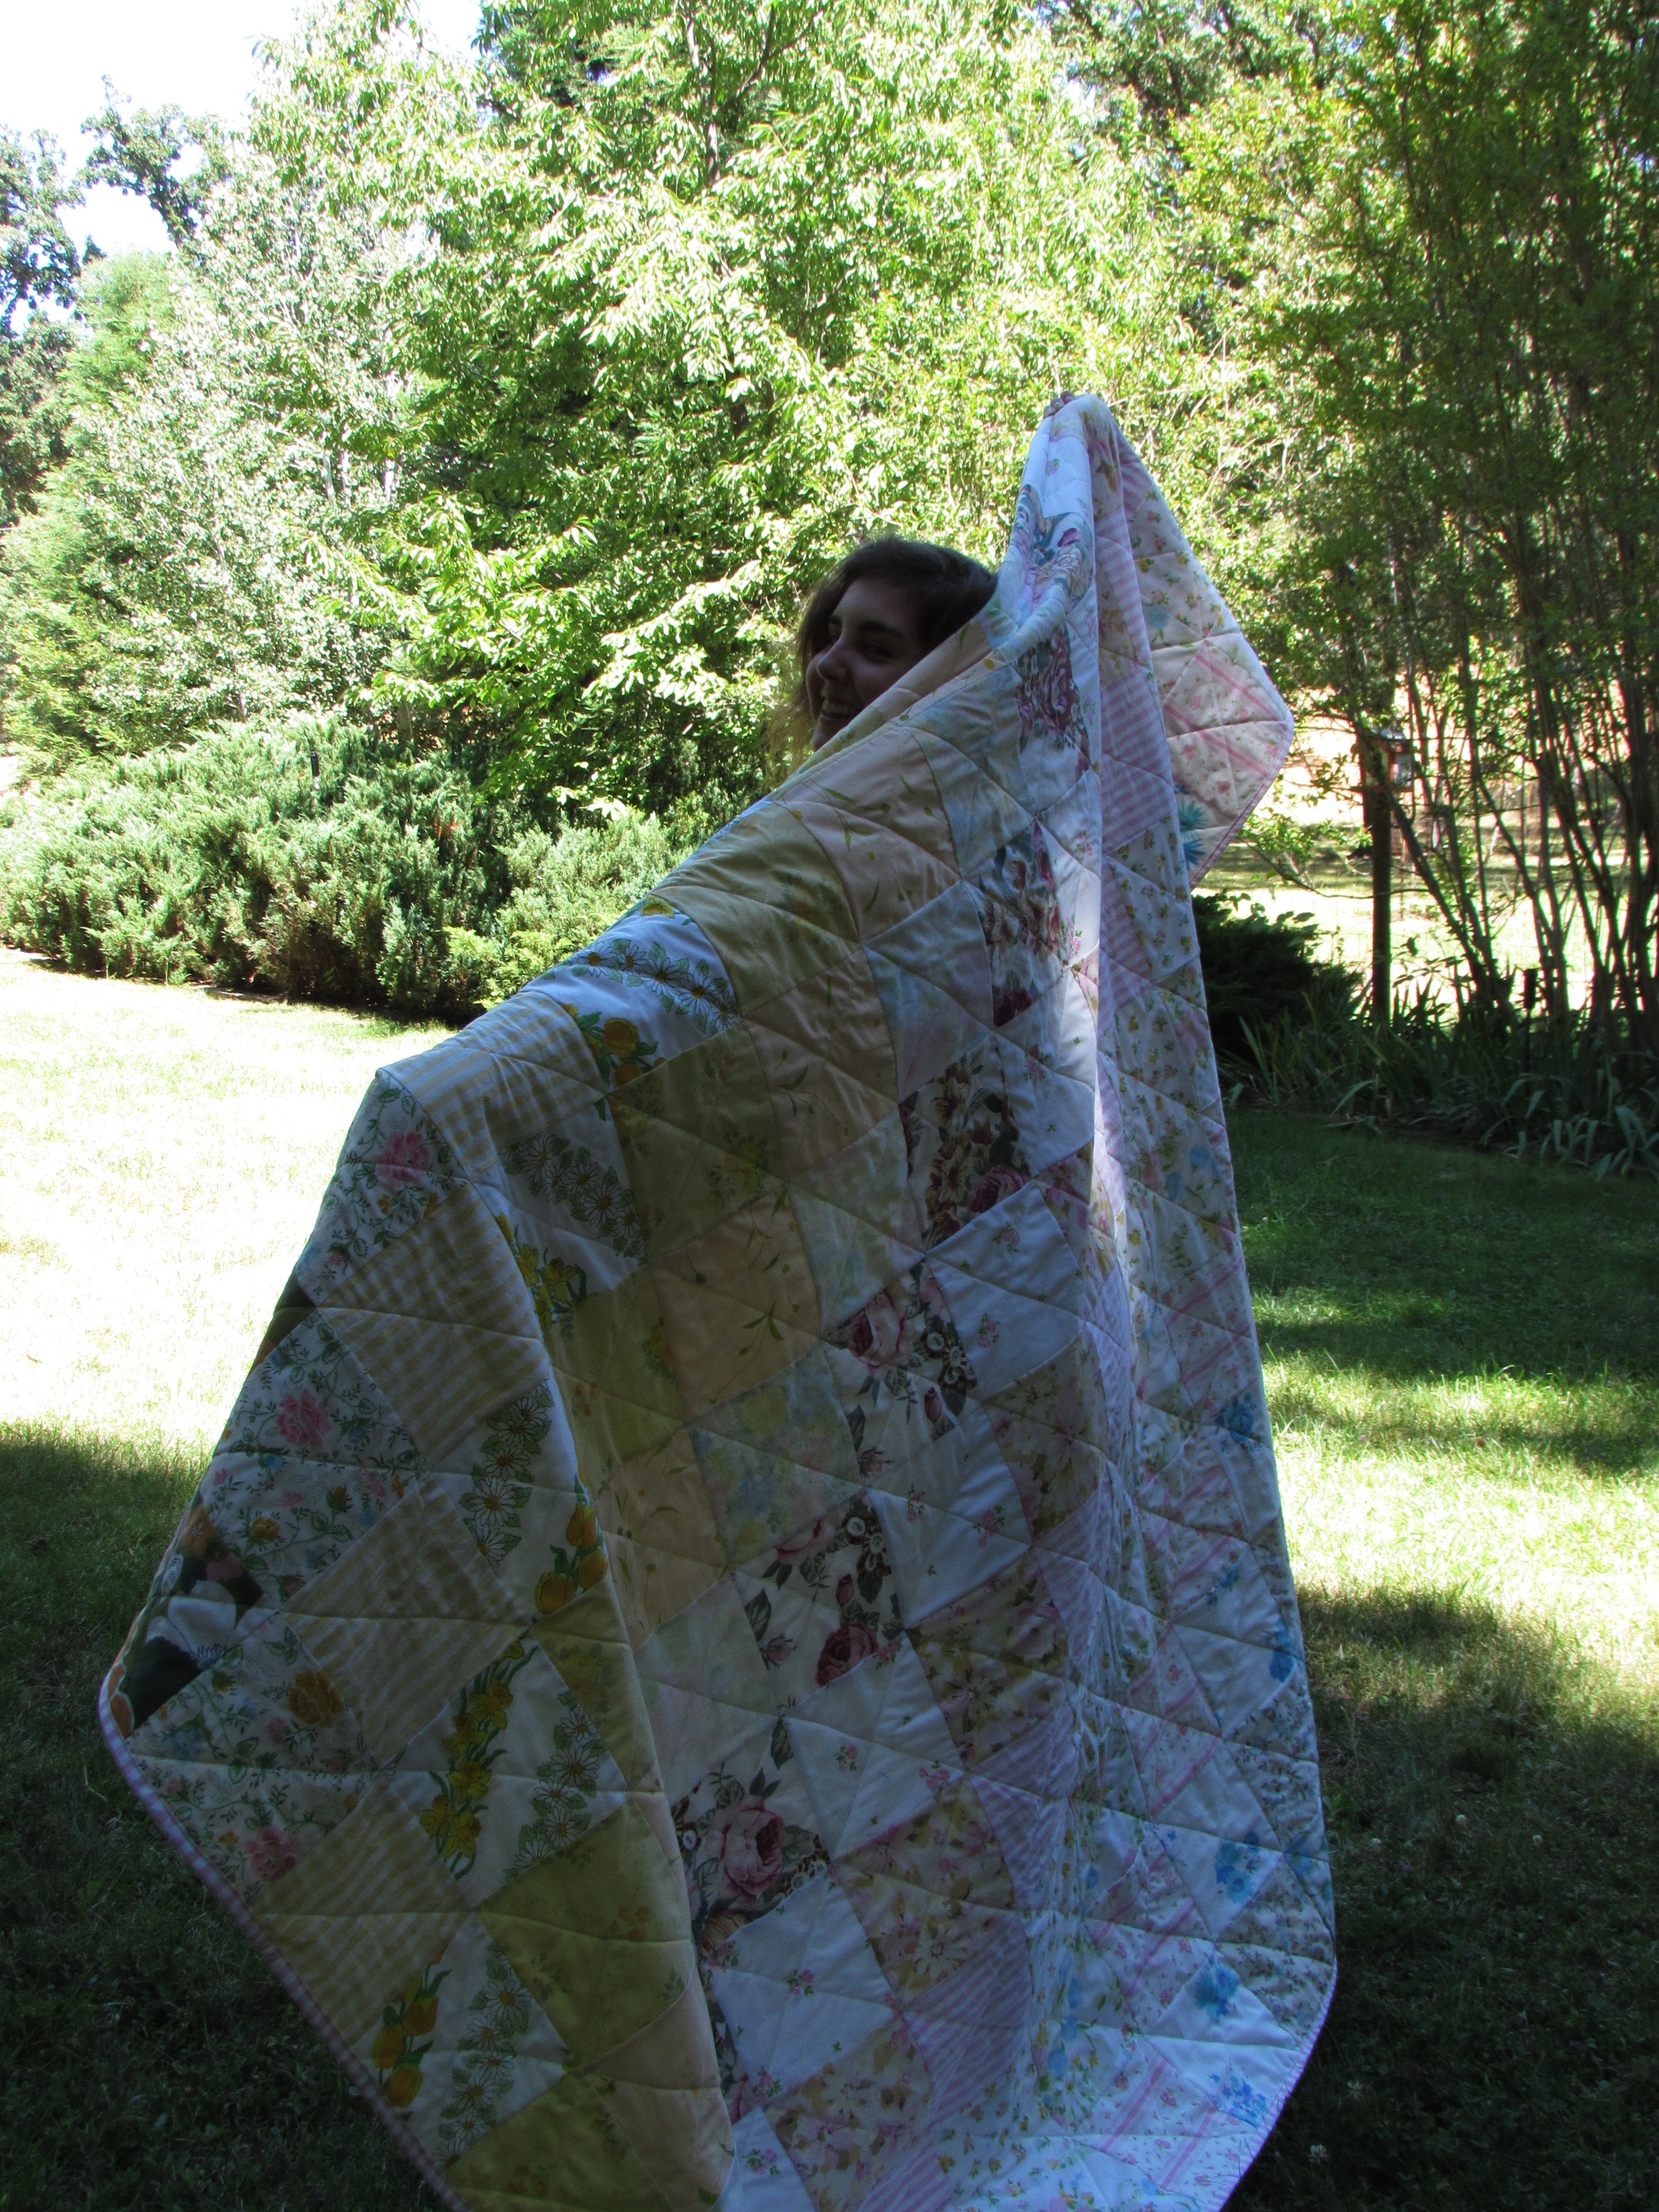
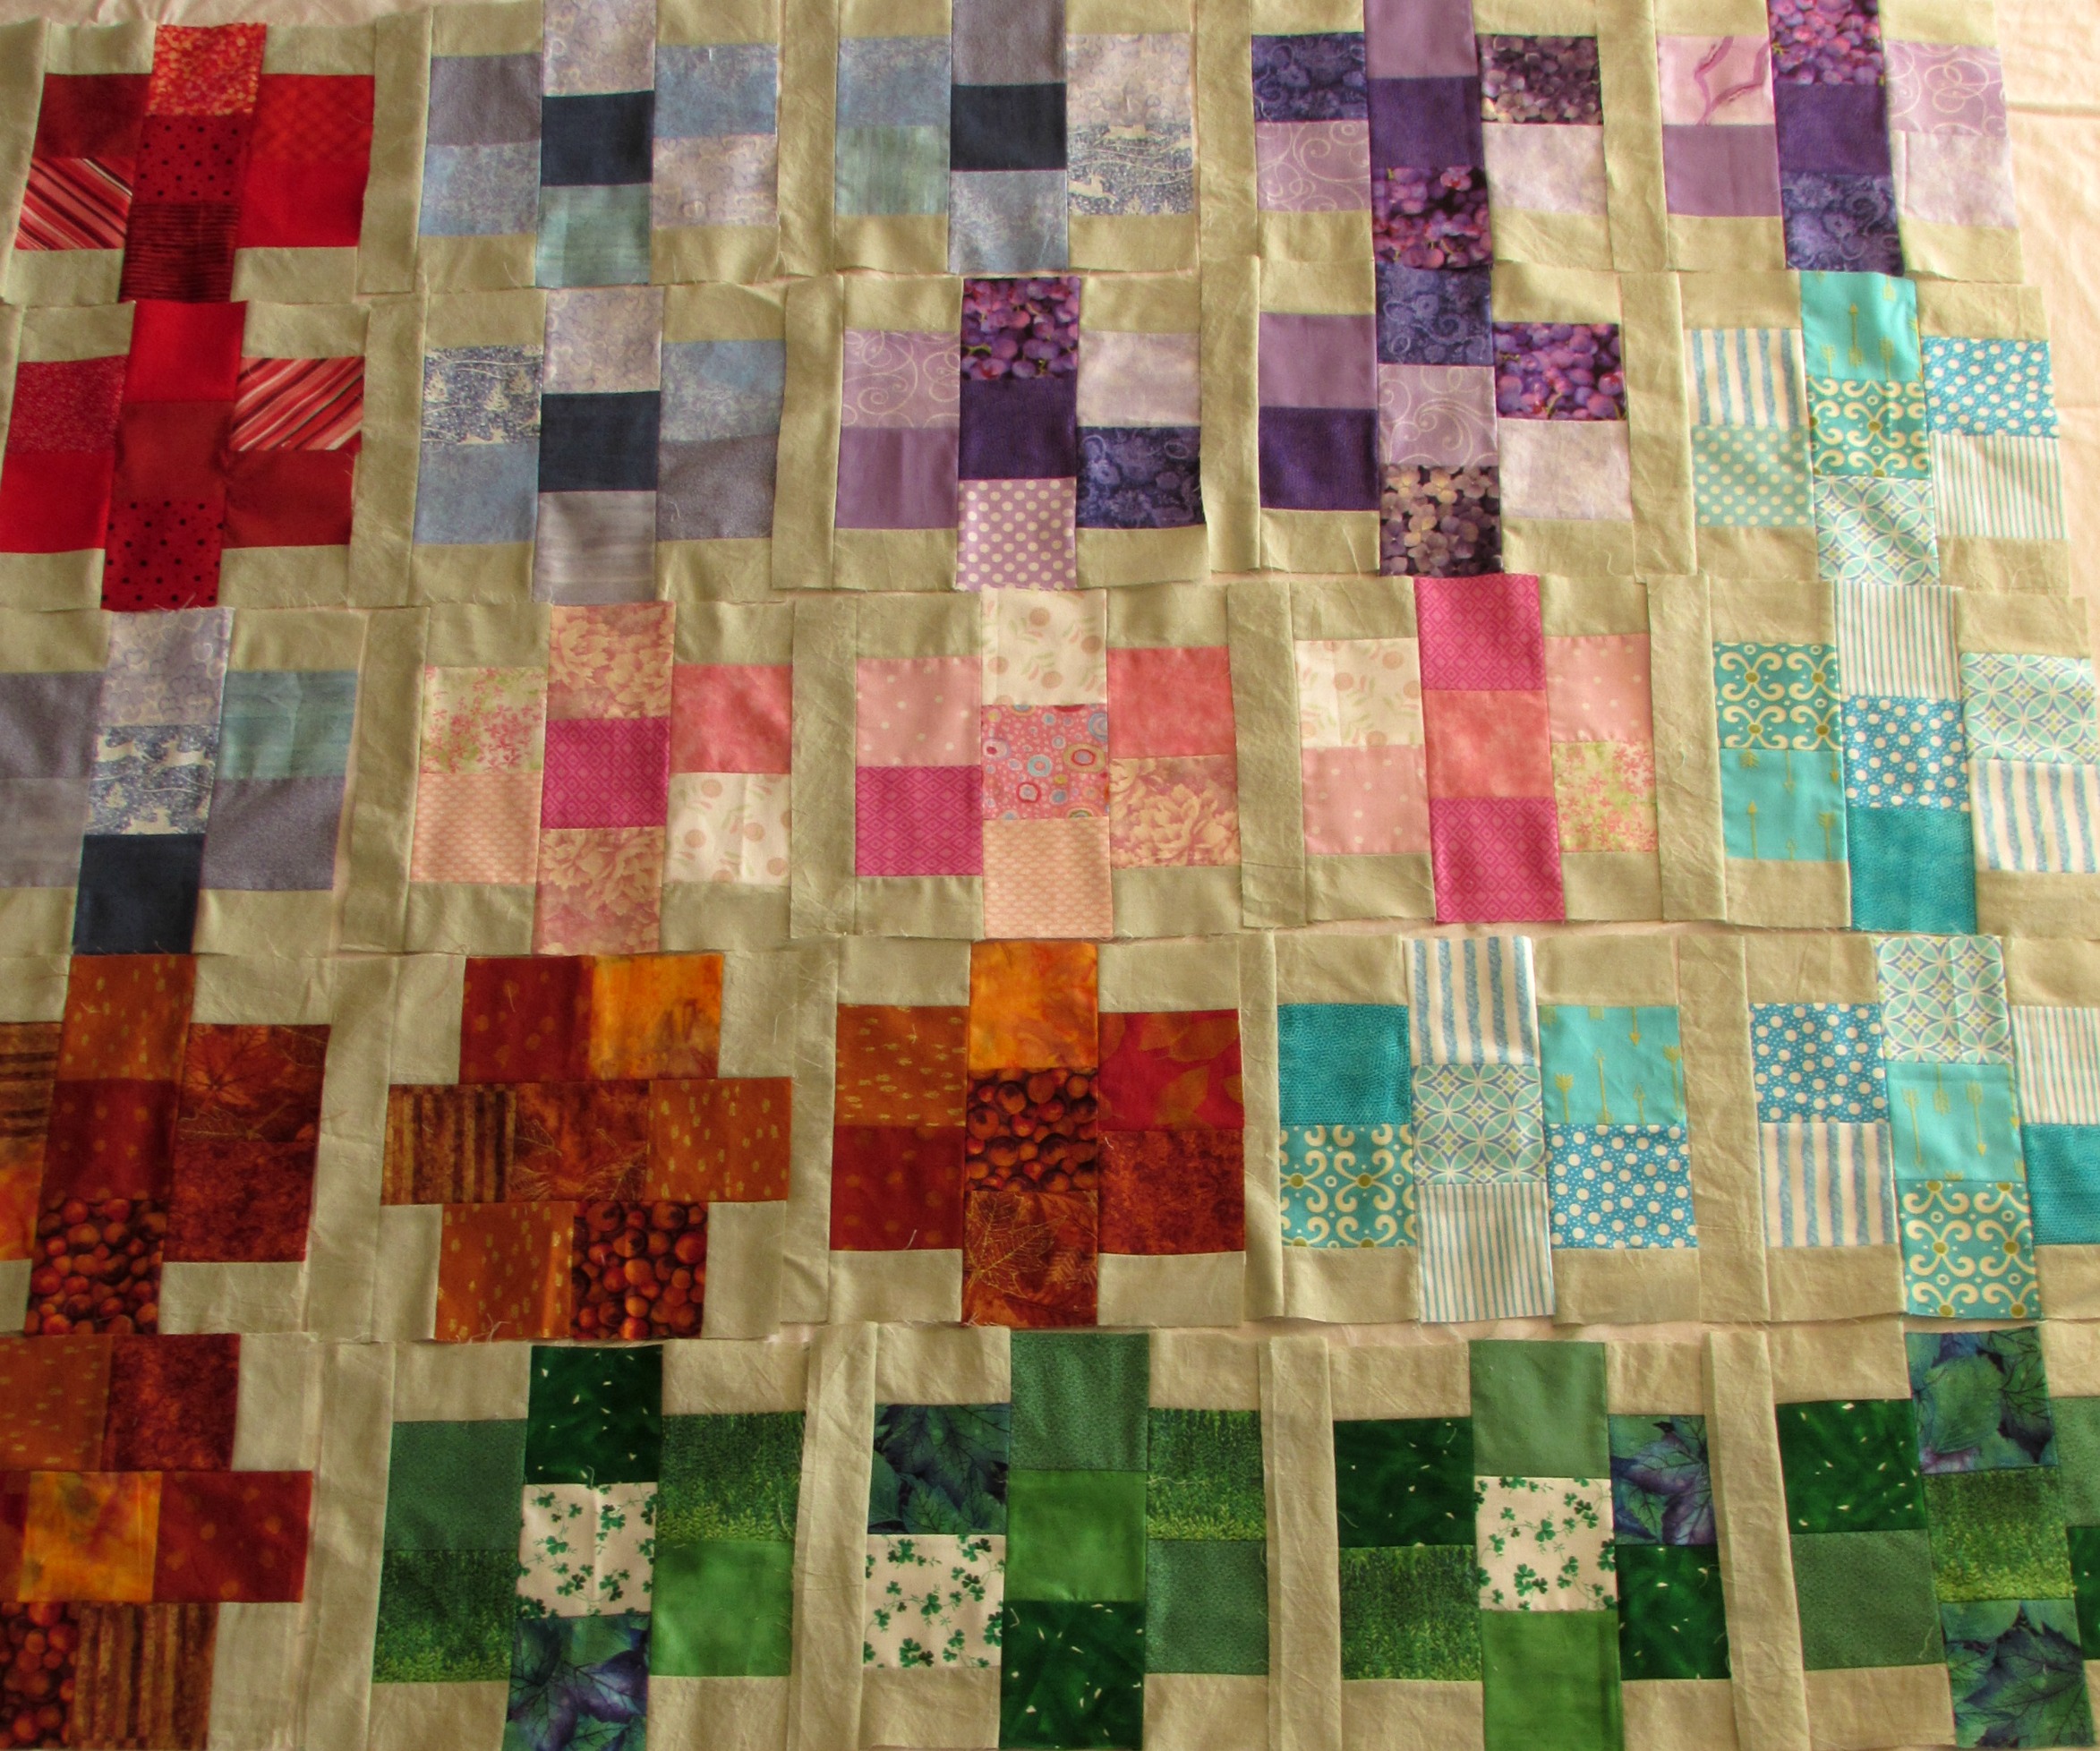
Once I made that change I was able to get into the idea and worked first on my made fabric. Scraps came together well as the red bin is packed with scraps to choose from. For the Gemstones quilt, I wasn’t sure how any red blocks to make. I started with two. But I like the addition of the red so I will need to make two or three more. Looking at them all together, I am getting excited to finish this one up. Remember there will be sashing between the rows when I start to piece the top.

IMG_6903

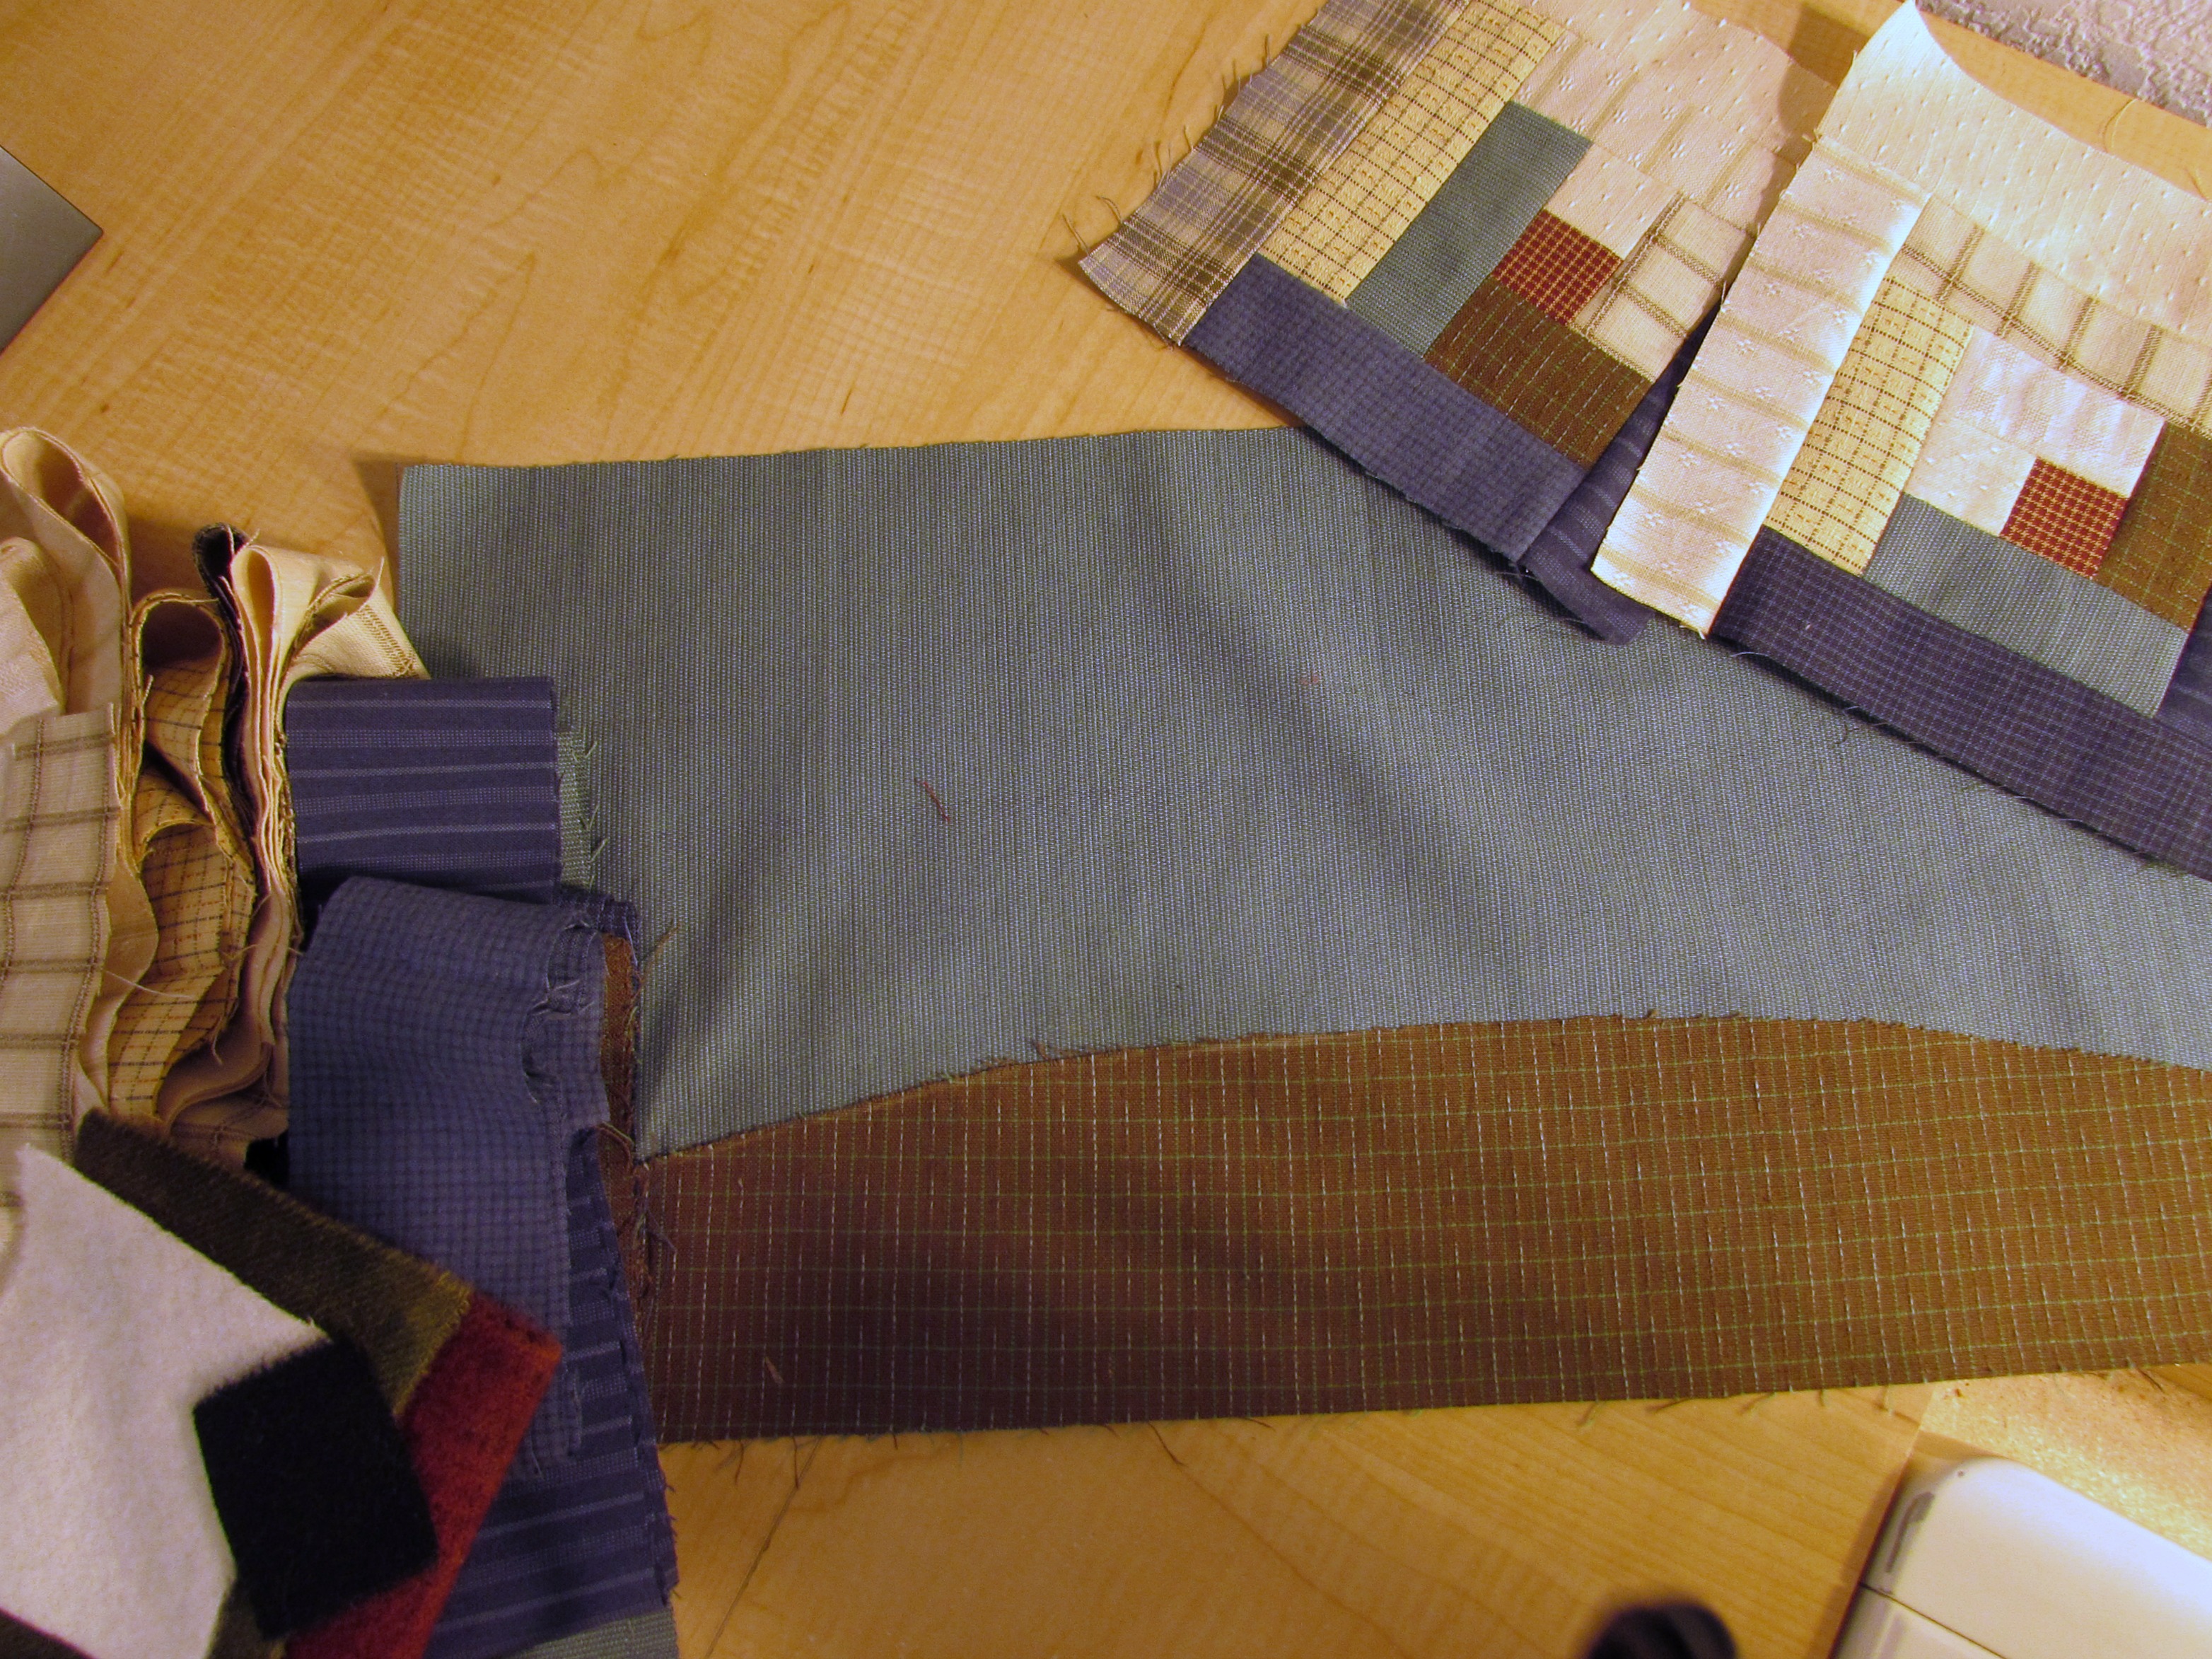
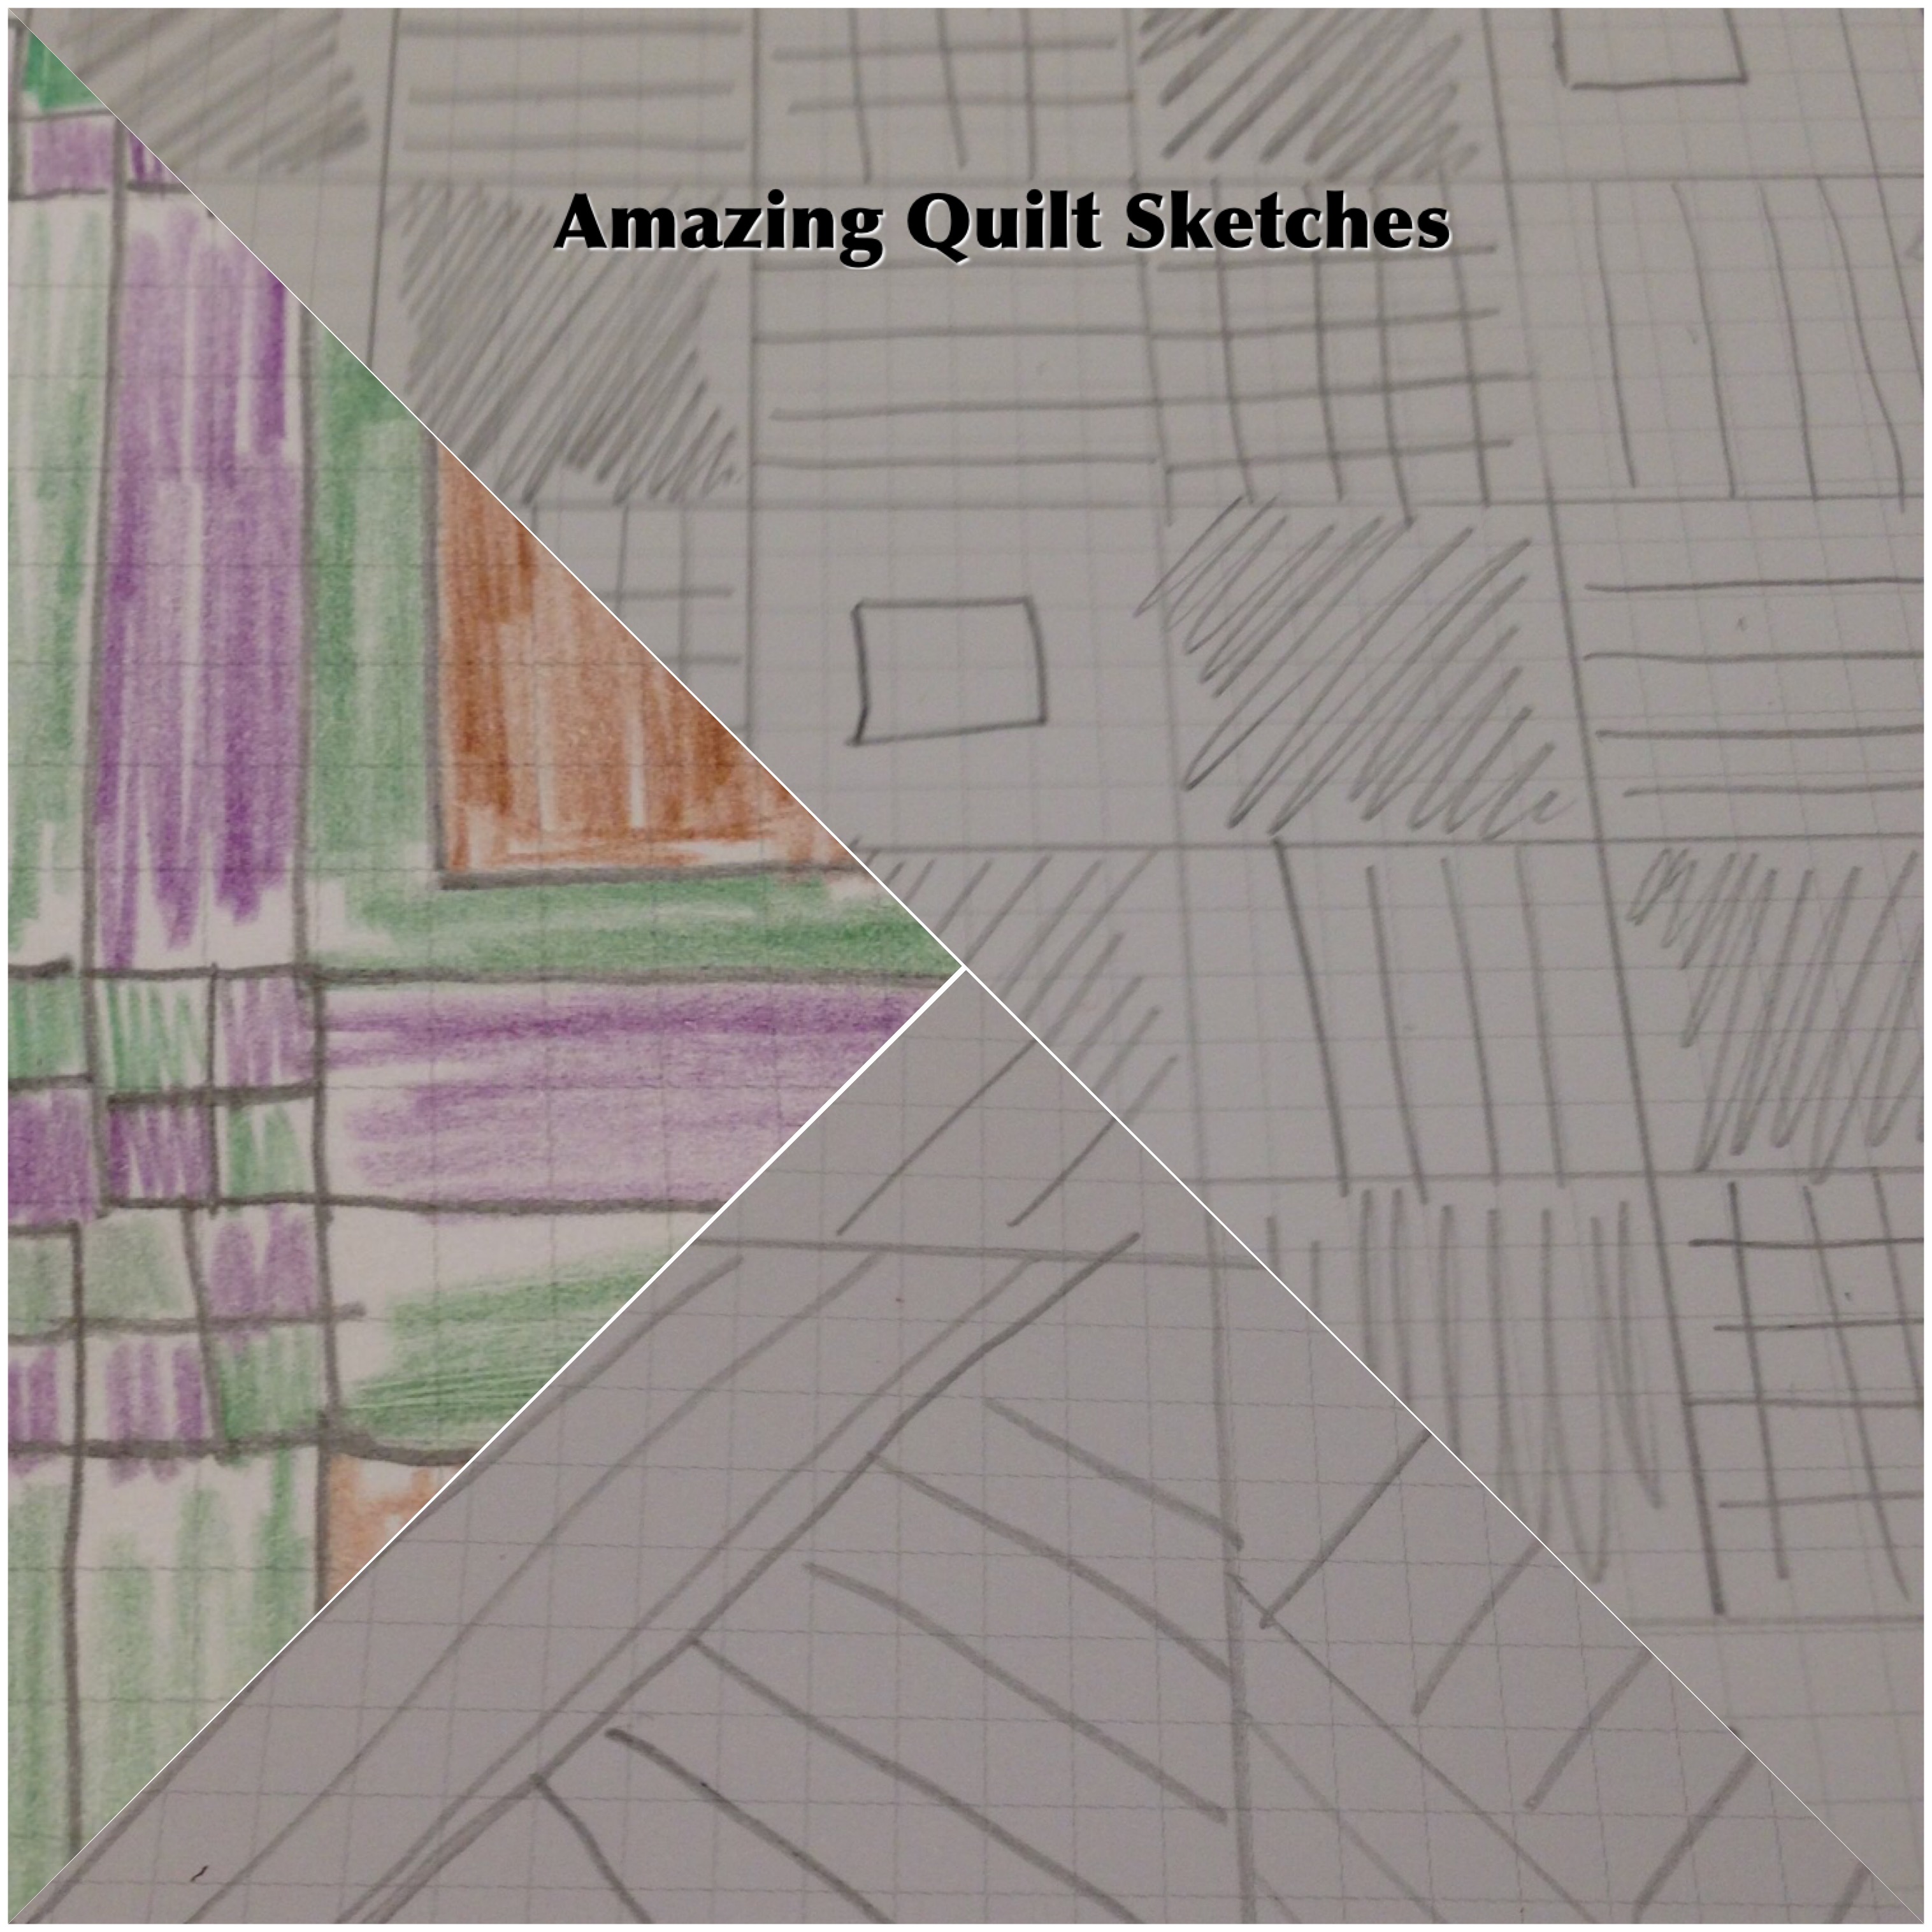
Looking at the scrappy HST’s, I am at somewhat of a deciding point.

IMG_6908

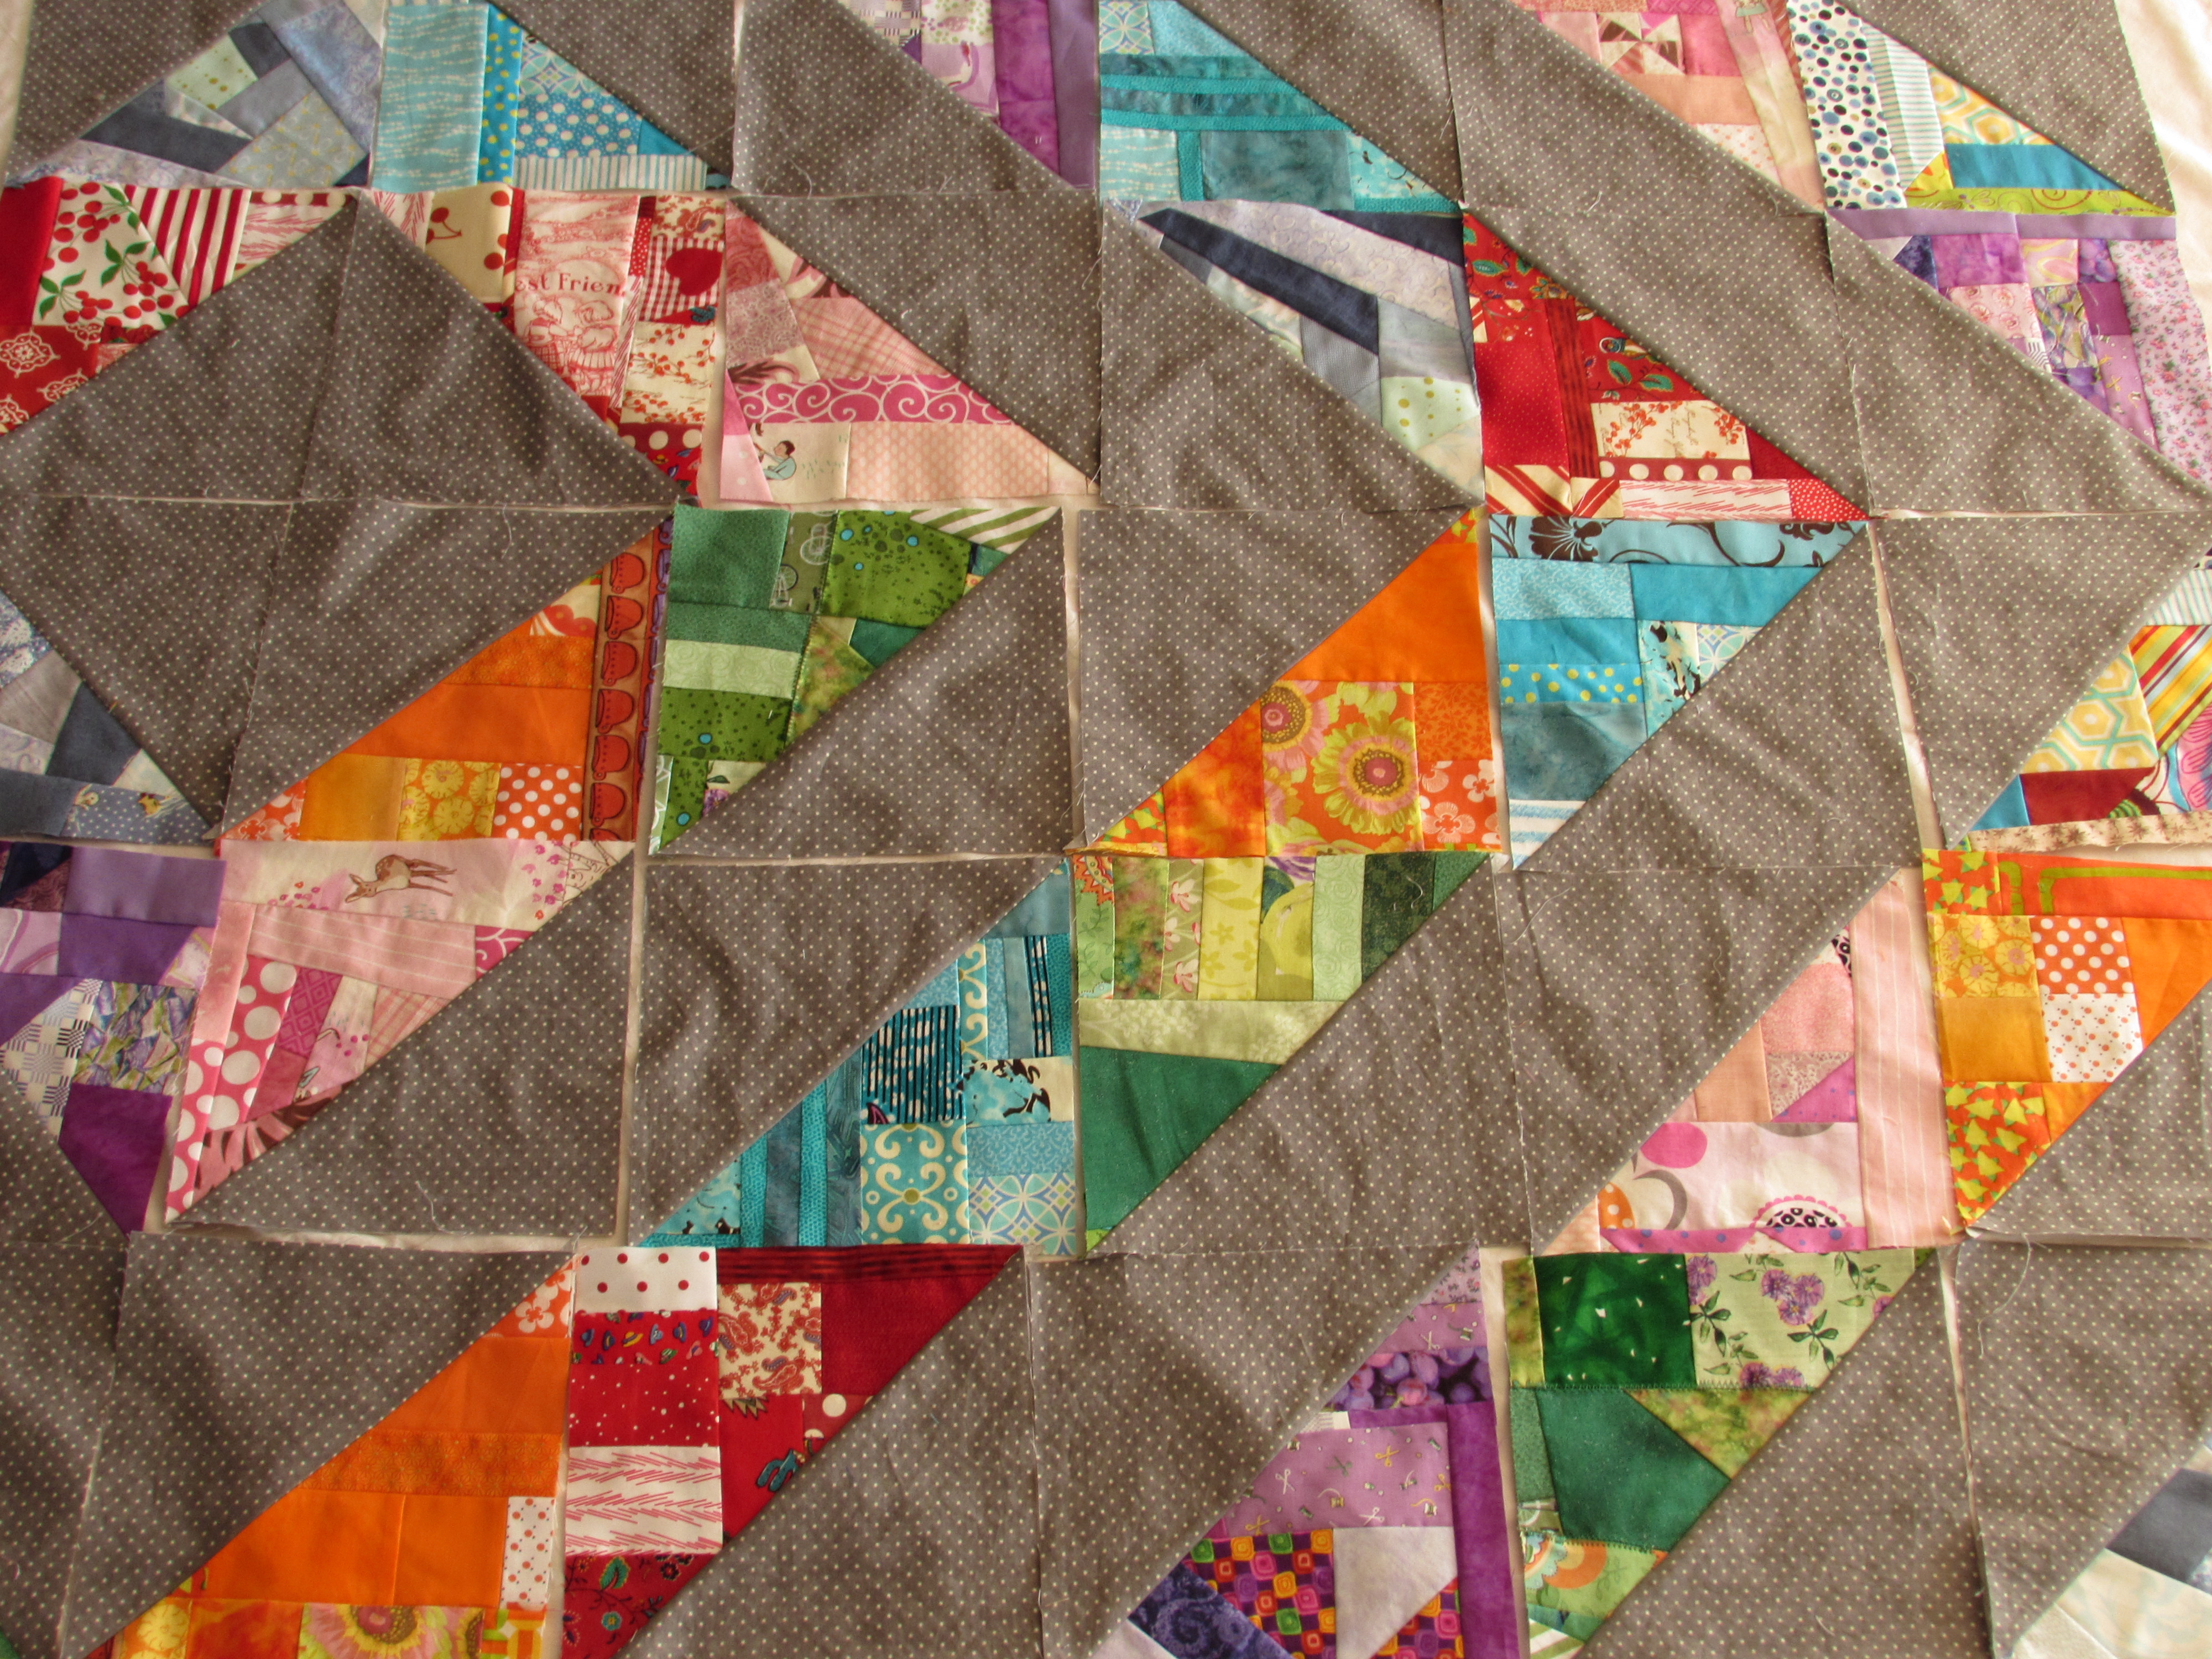
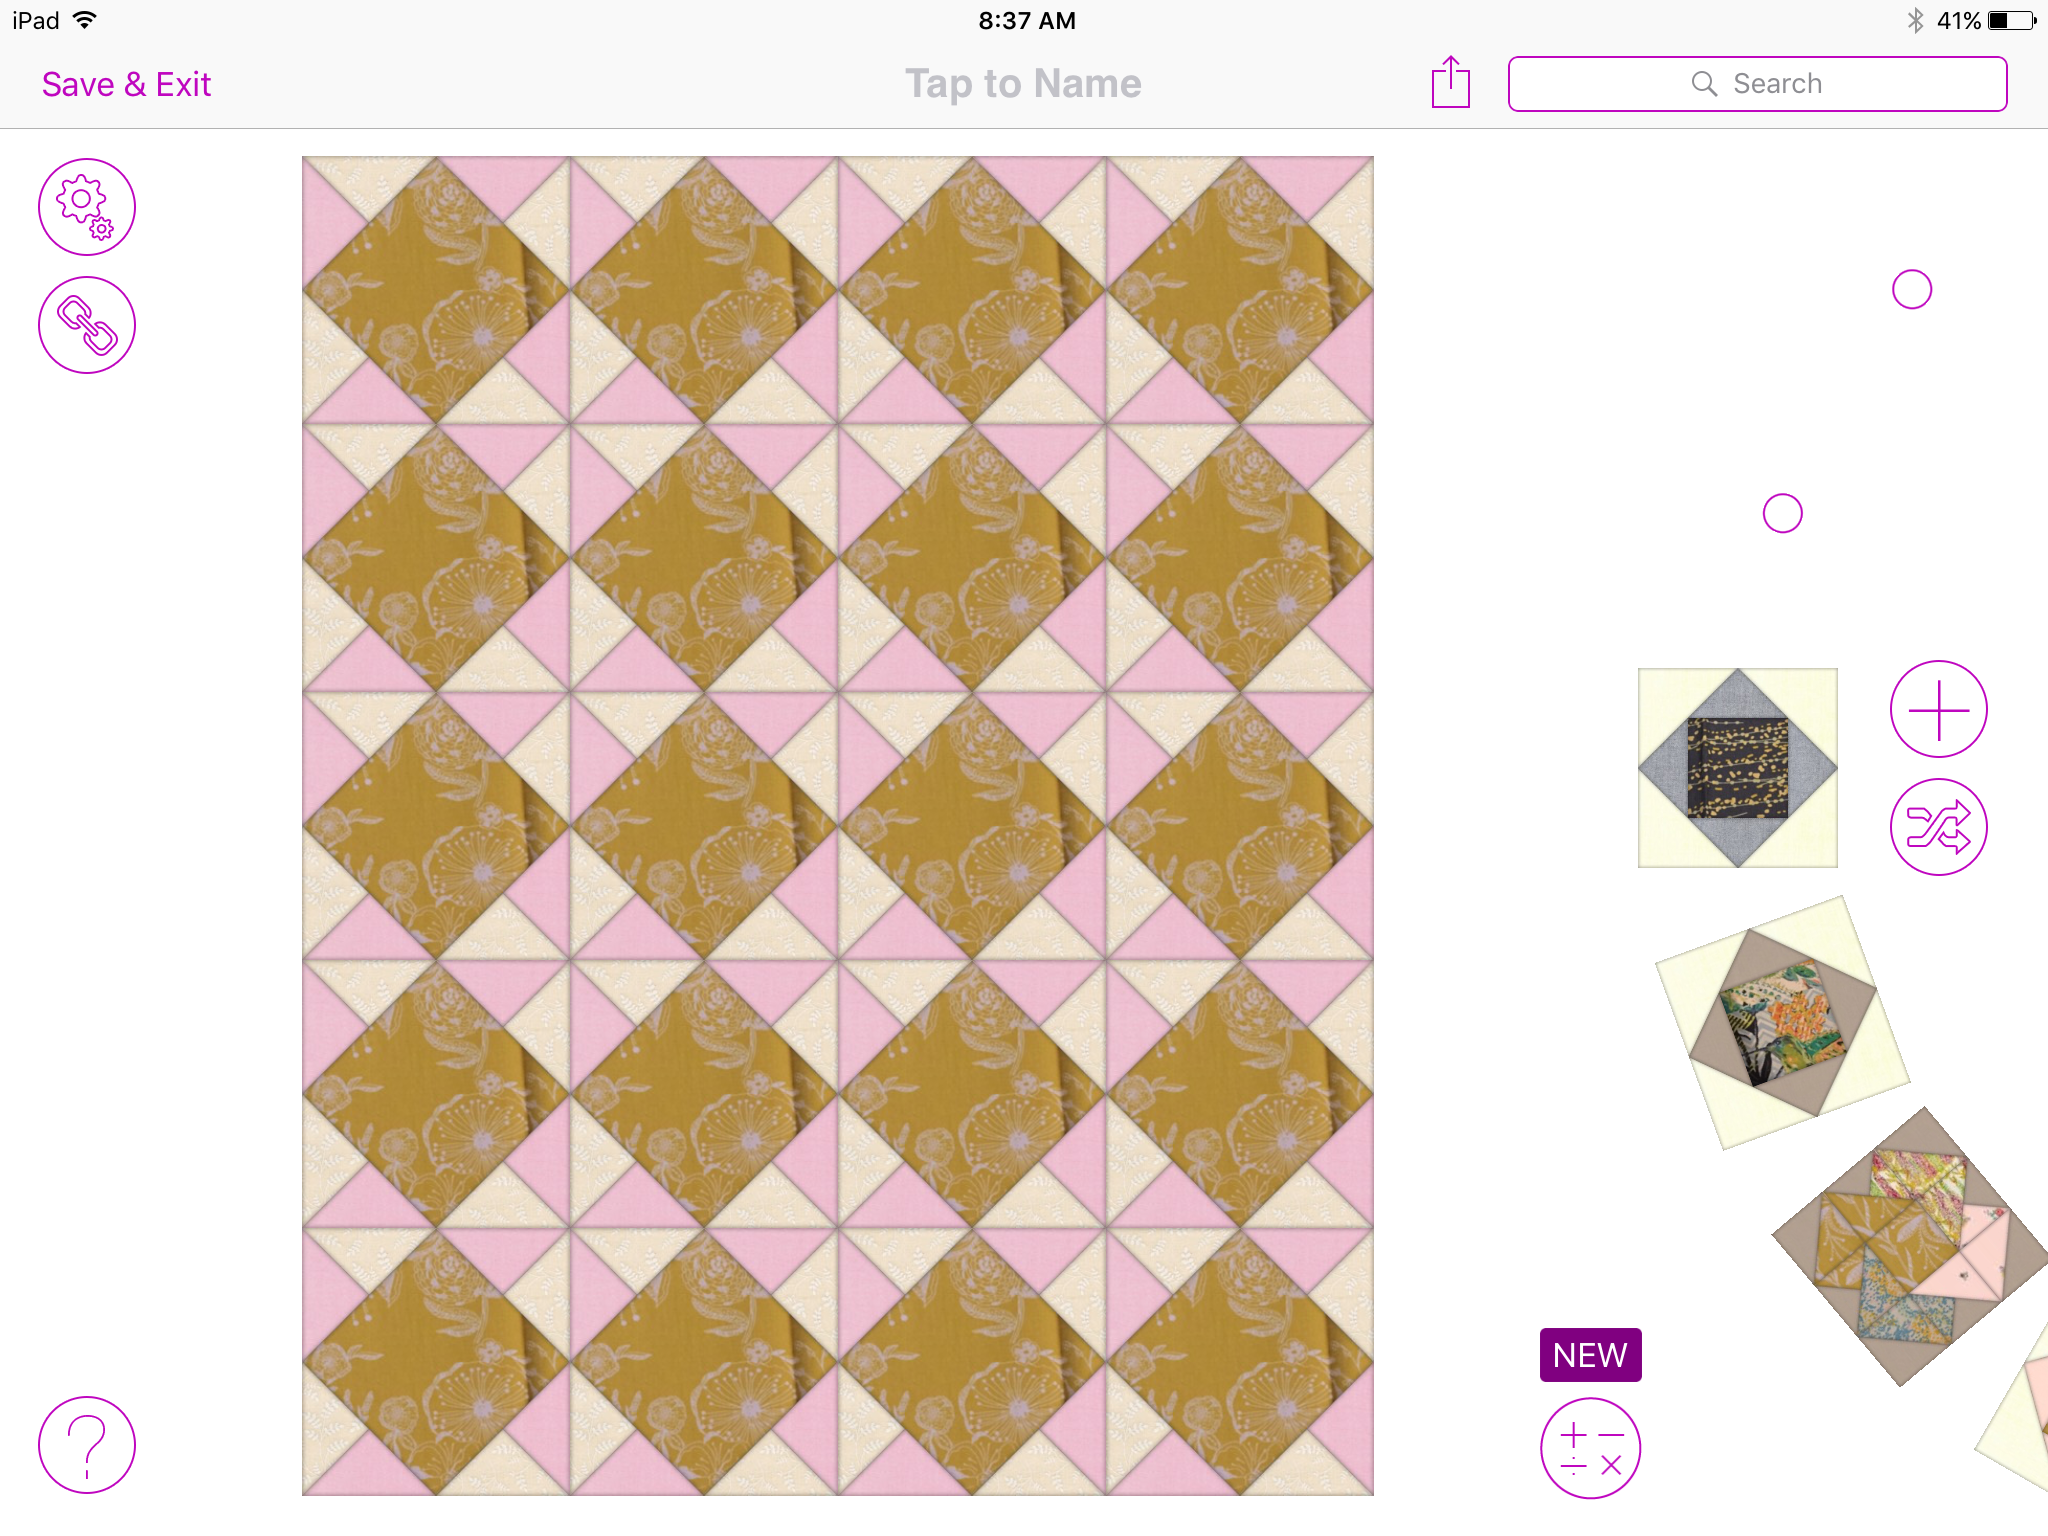
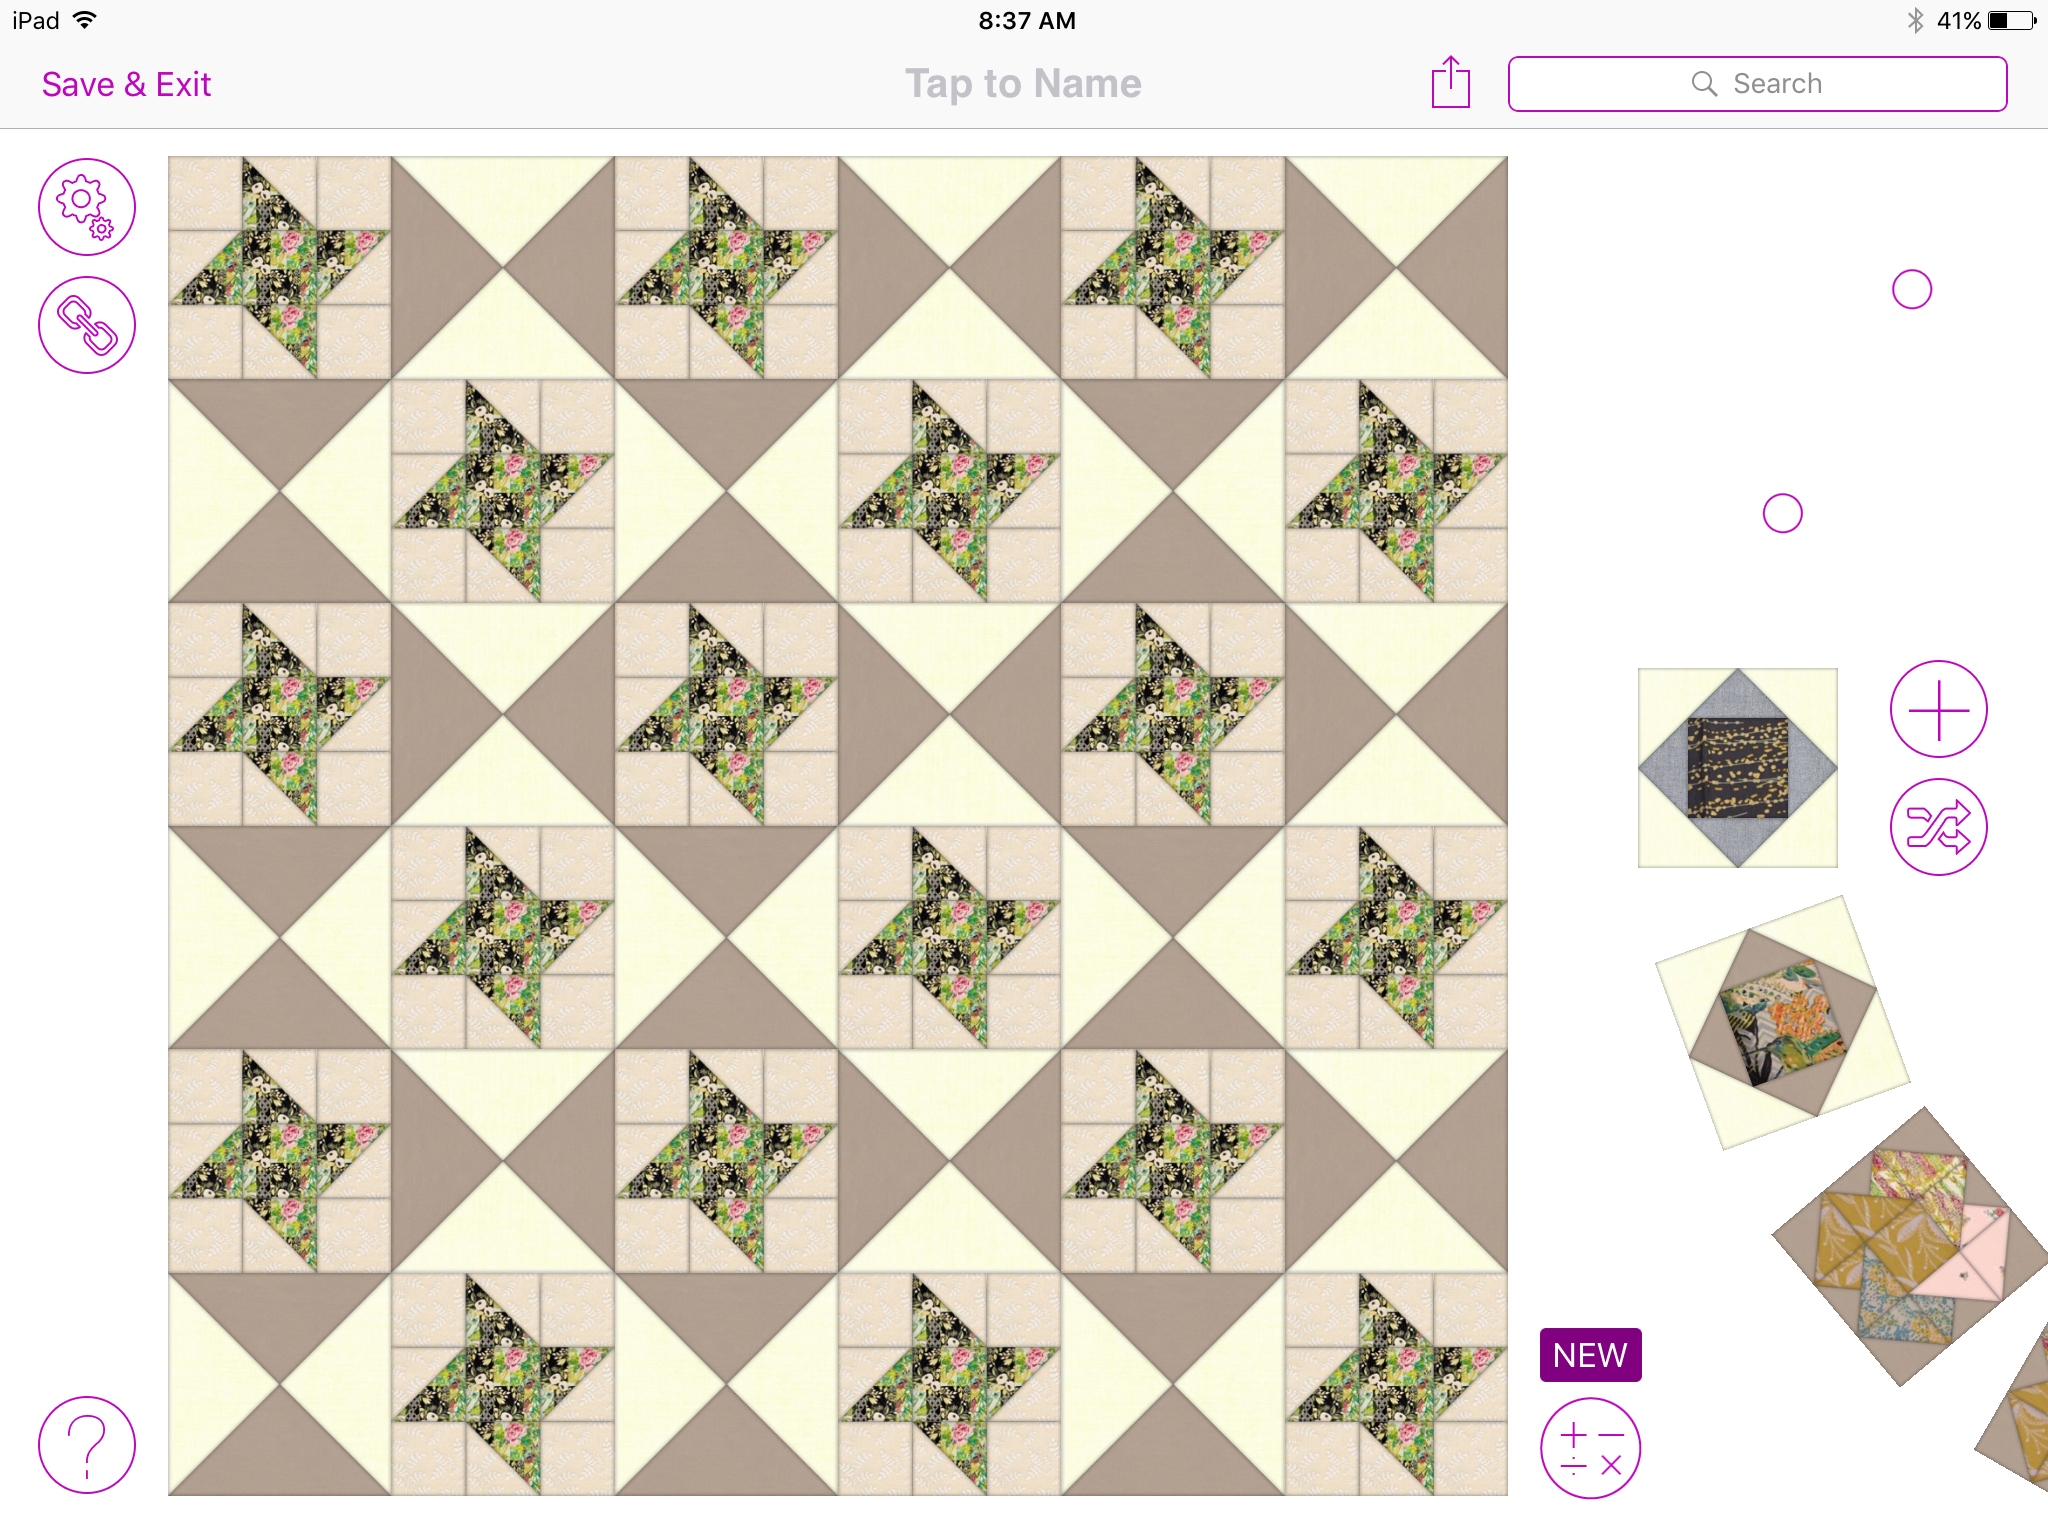
I think it is time to commit to a layout. The layout will determine how many of any one color I will need. Well, unless I choose to go scrappy and not group by colorway. Above is a scrappy layout without grouping colors. Below is one where I am keeping colors together.

IMG_6909

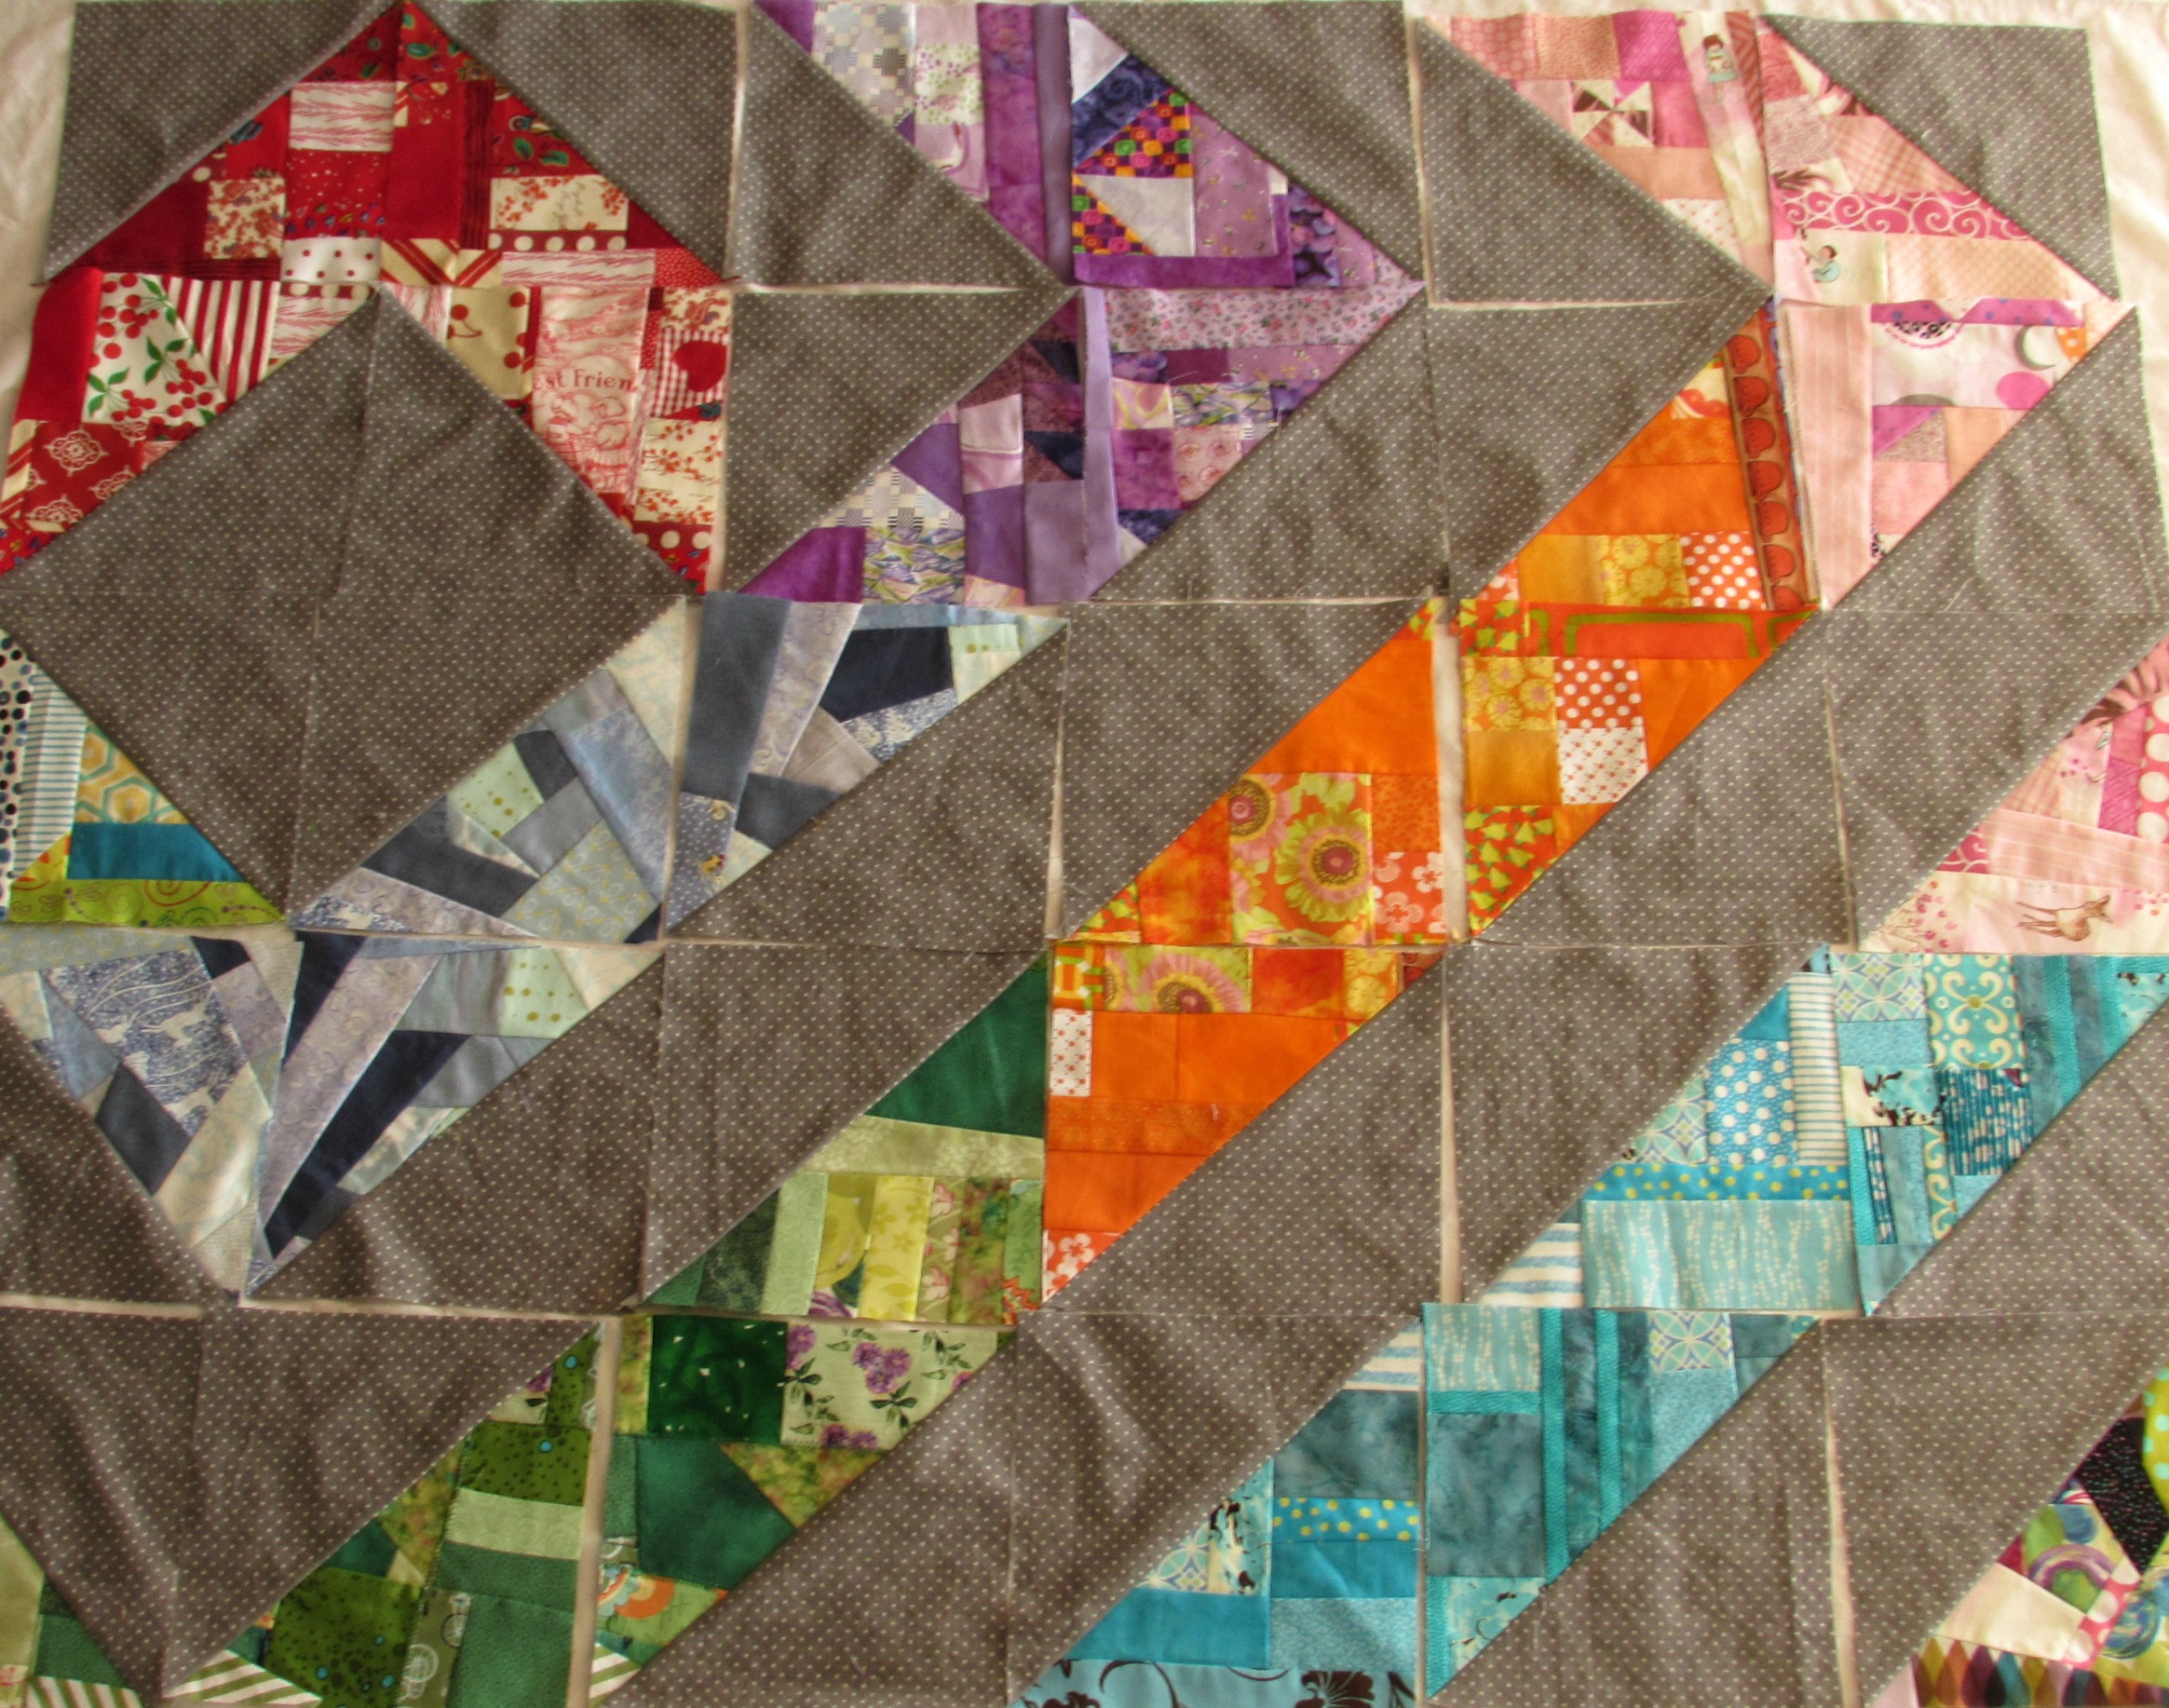
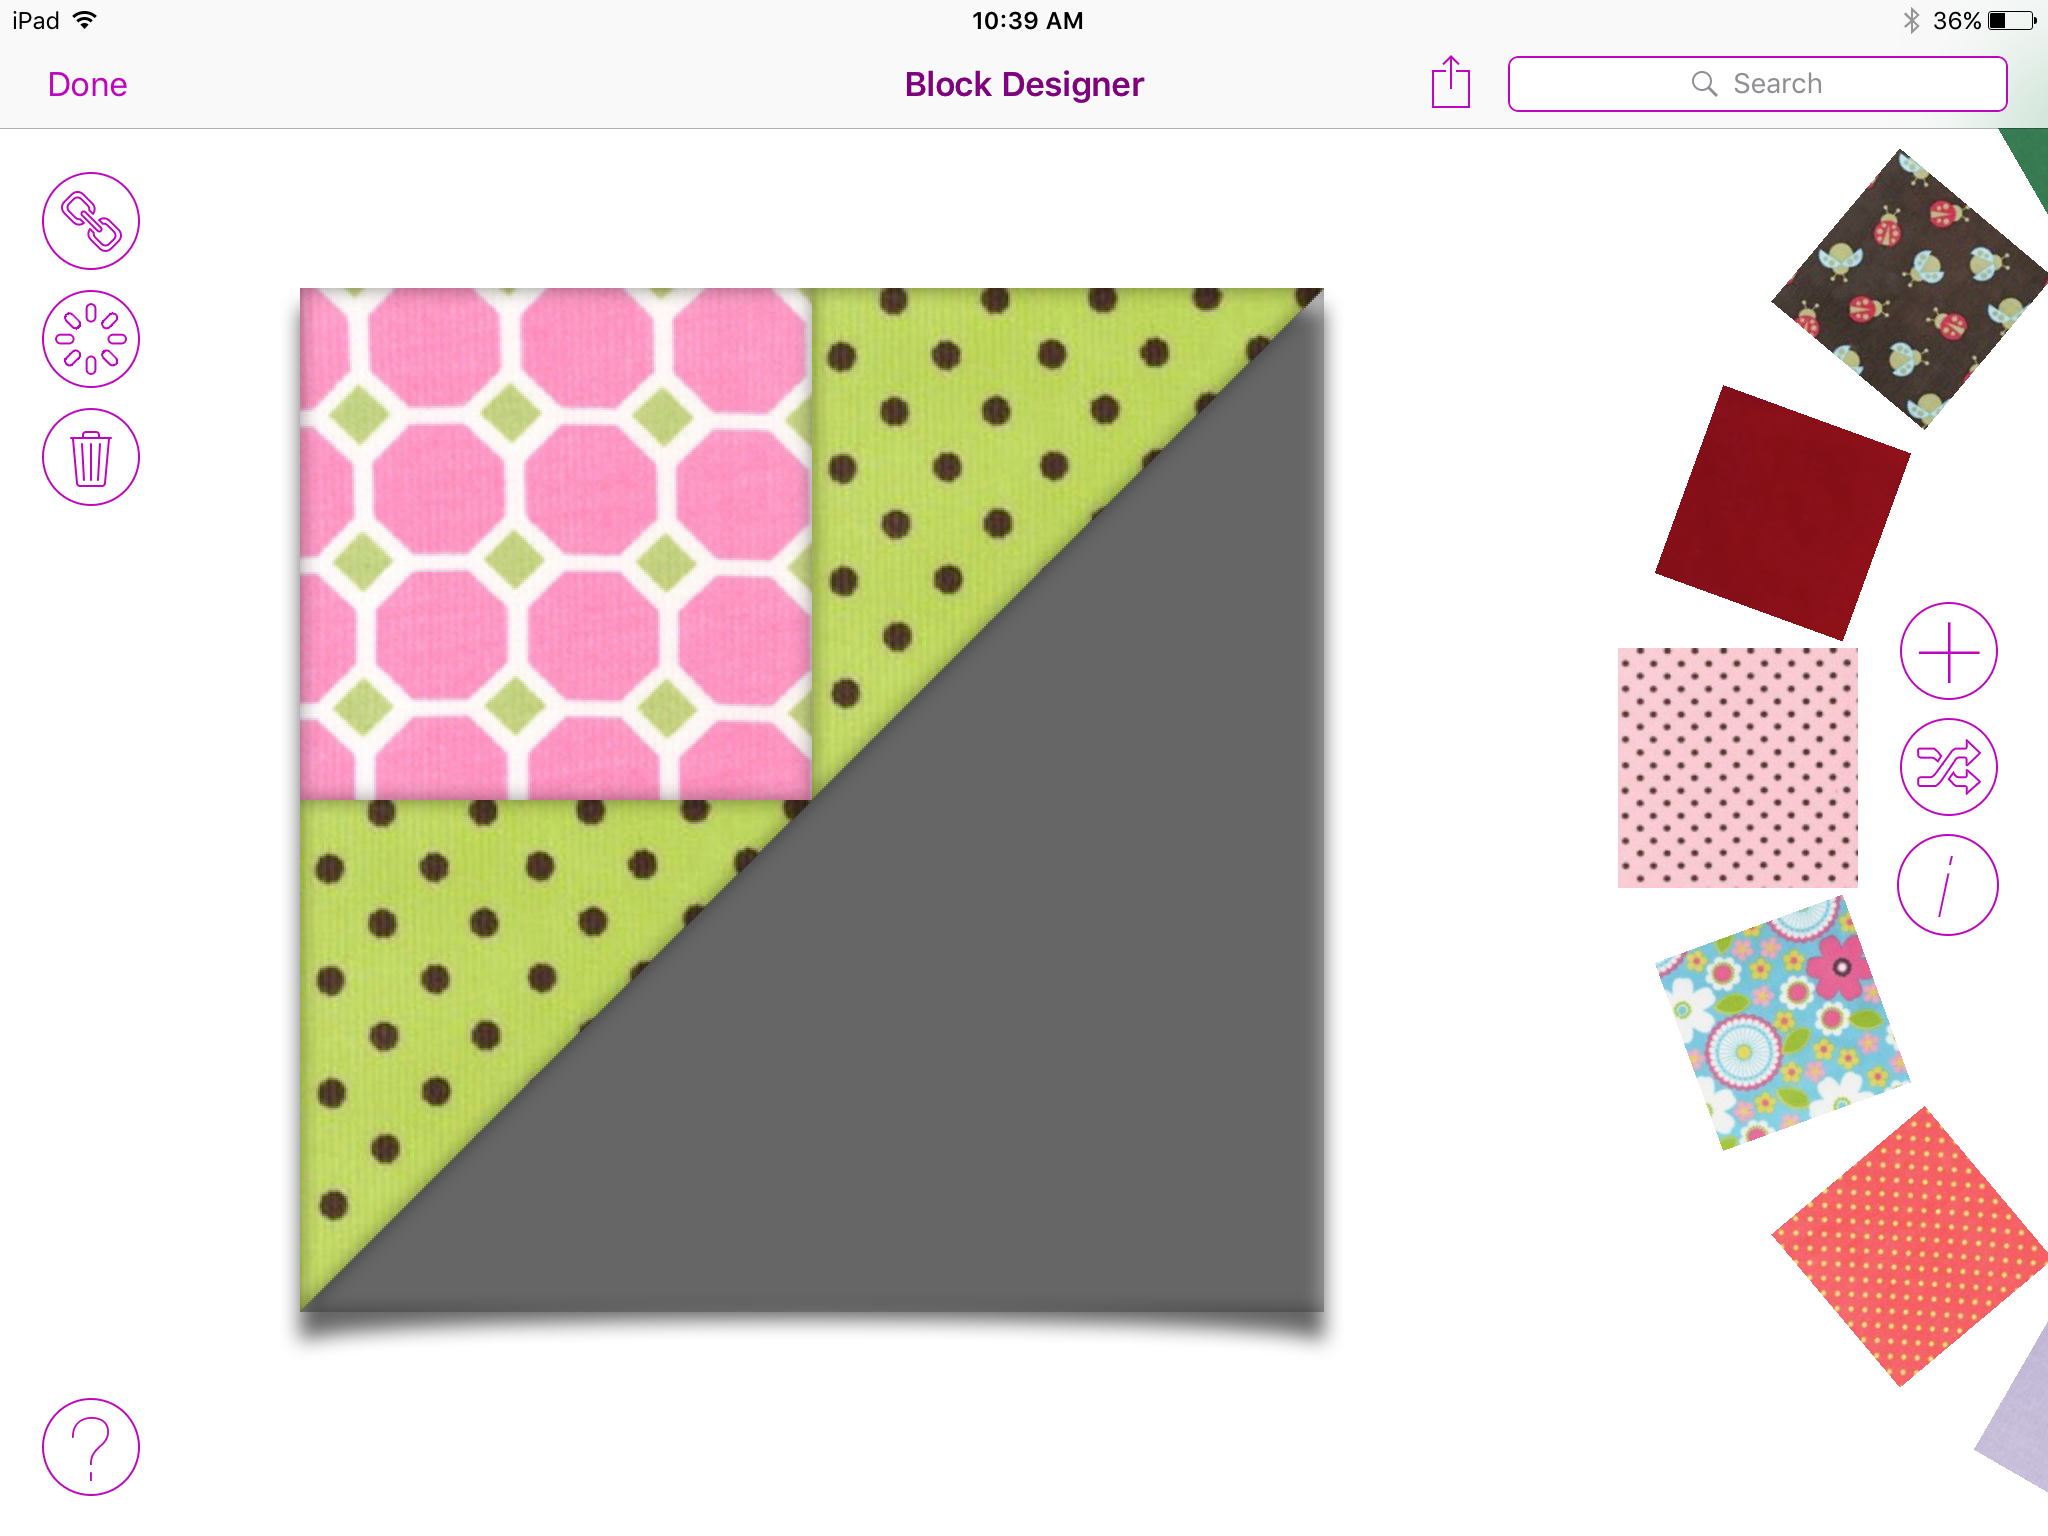
If I keep colors together, I think I need to sketch this out and try to plan how many blocks of each color will are needed. Do I break the colors up in any one row, or make enough that the row is cohesive. Decisions, decisions… I think I will do some planning using the Quiltography app that I recently posted about.

IMG_6912

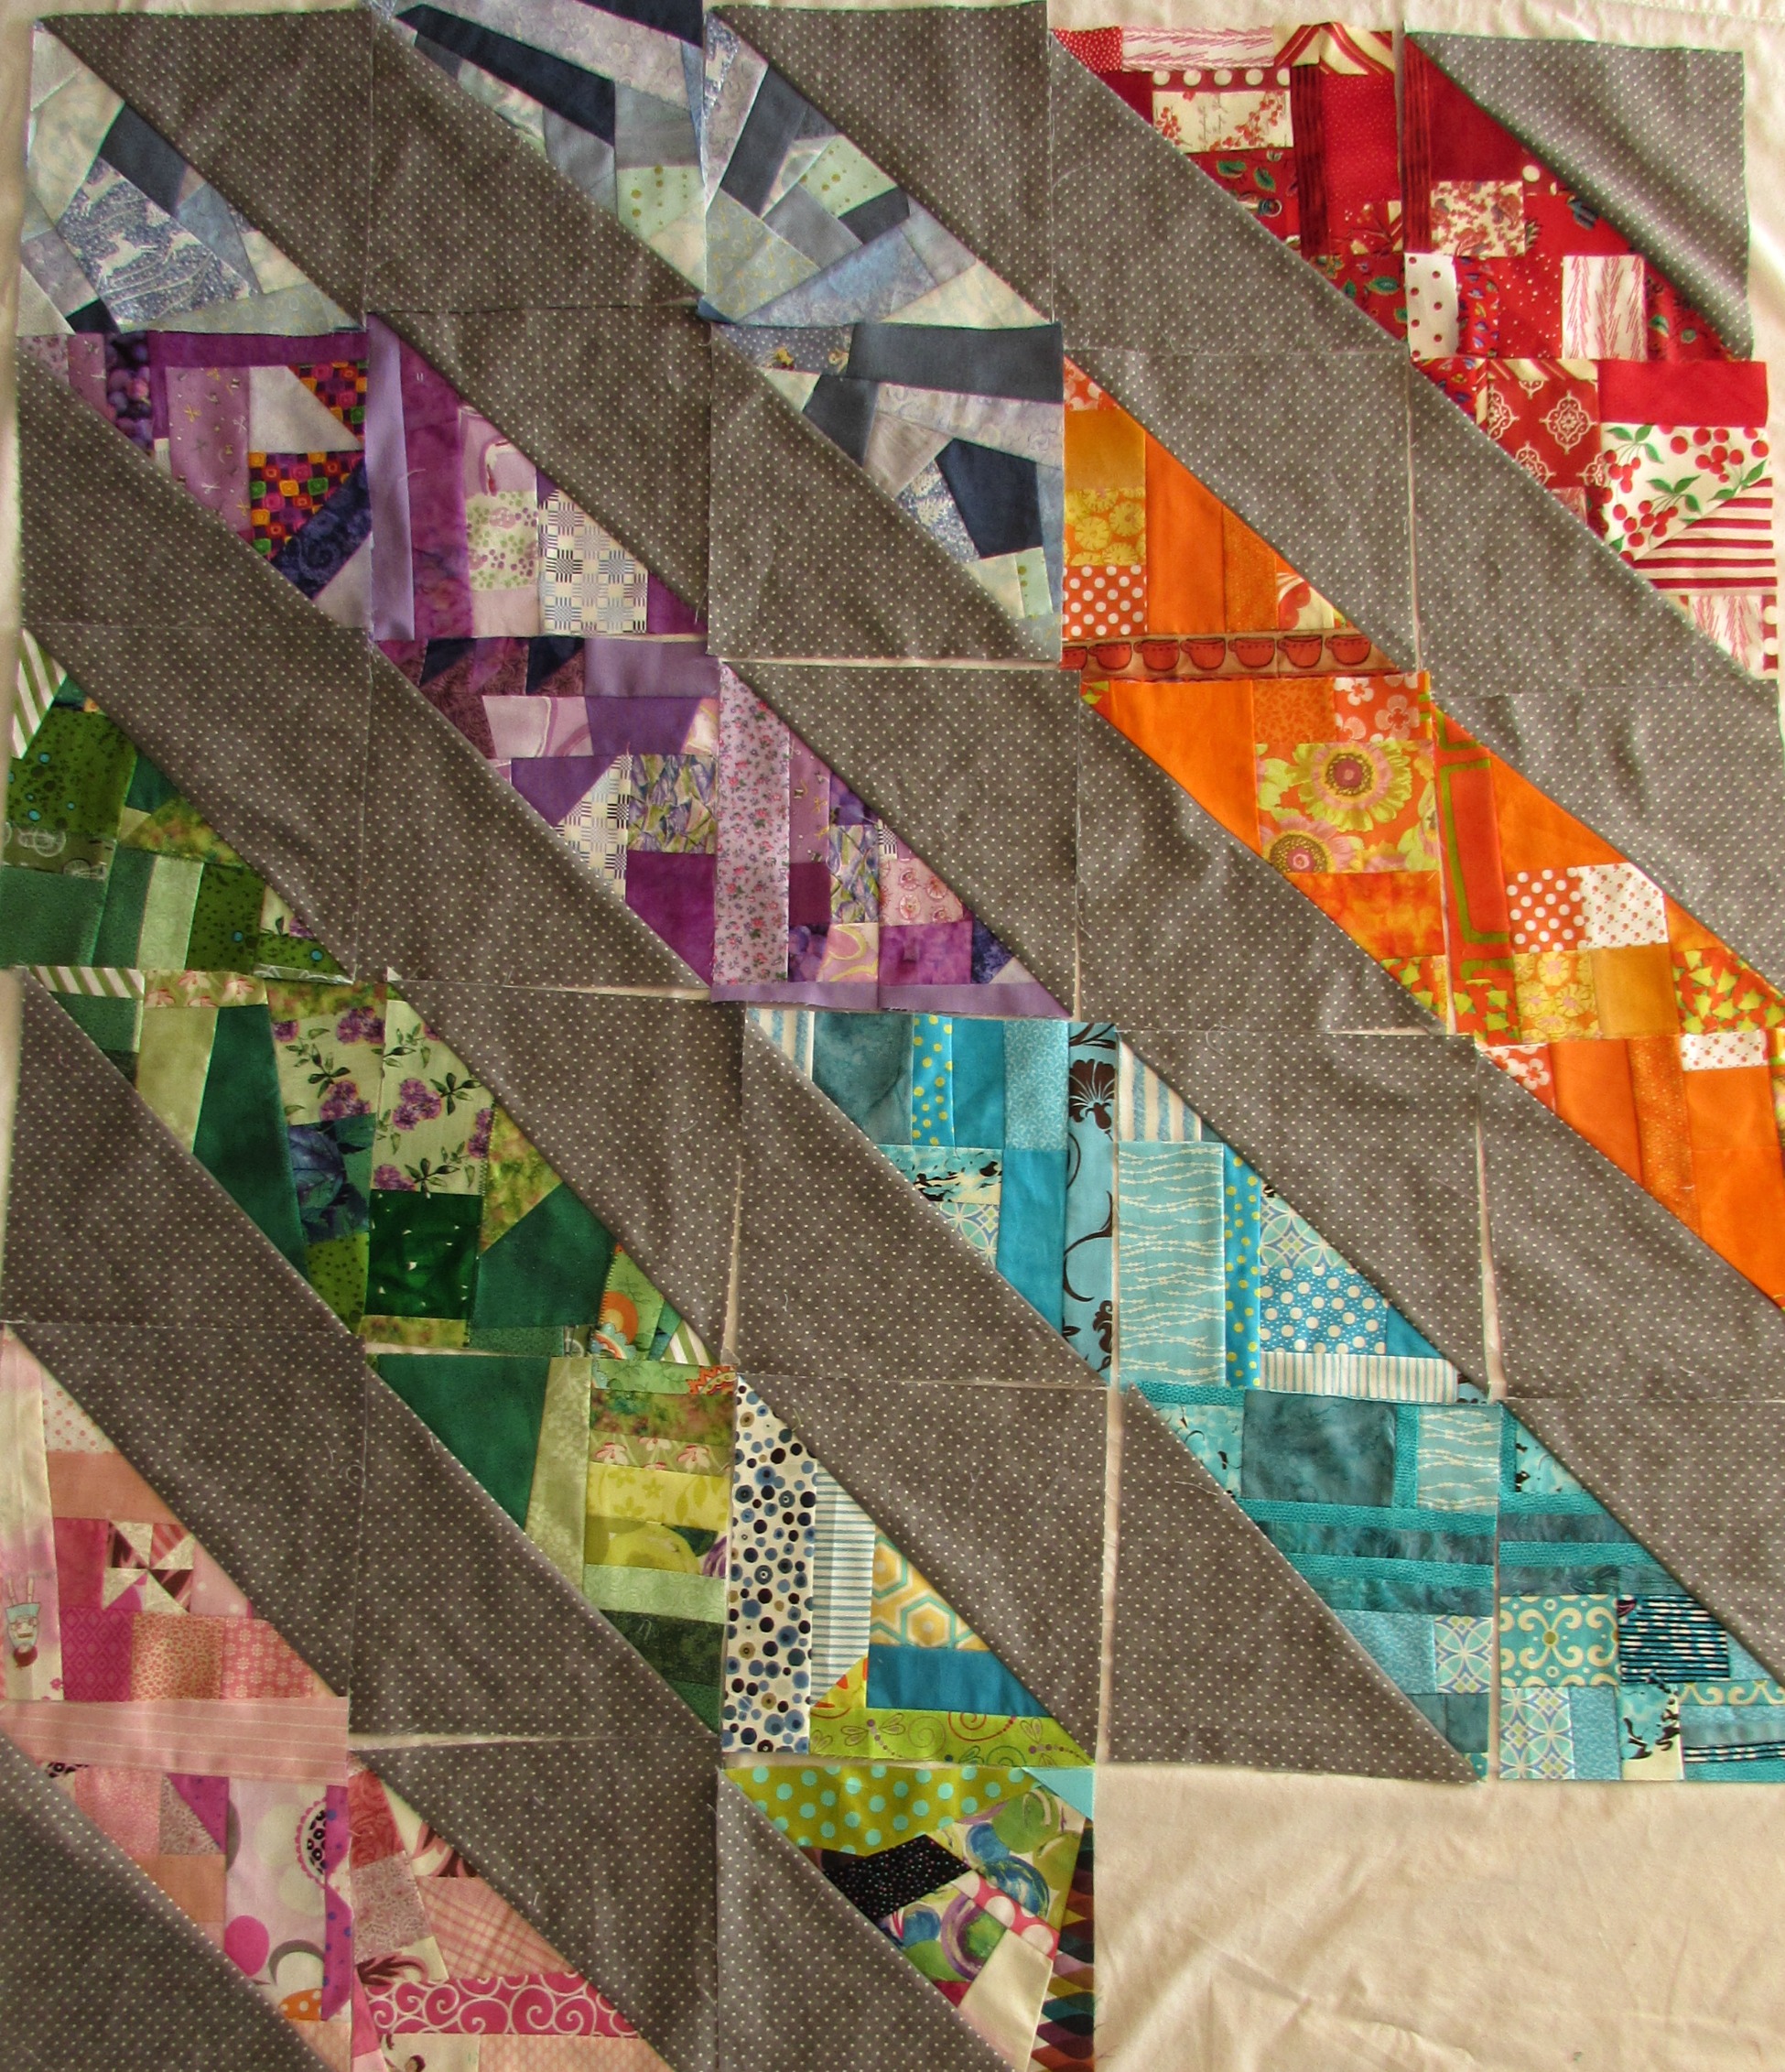
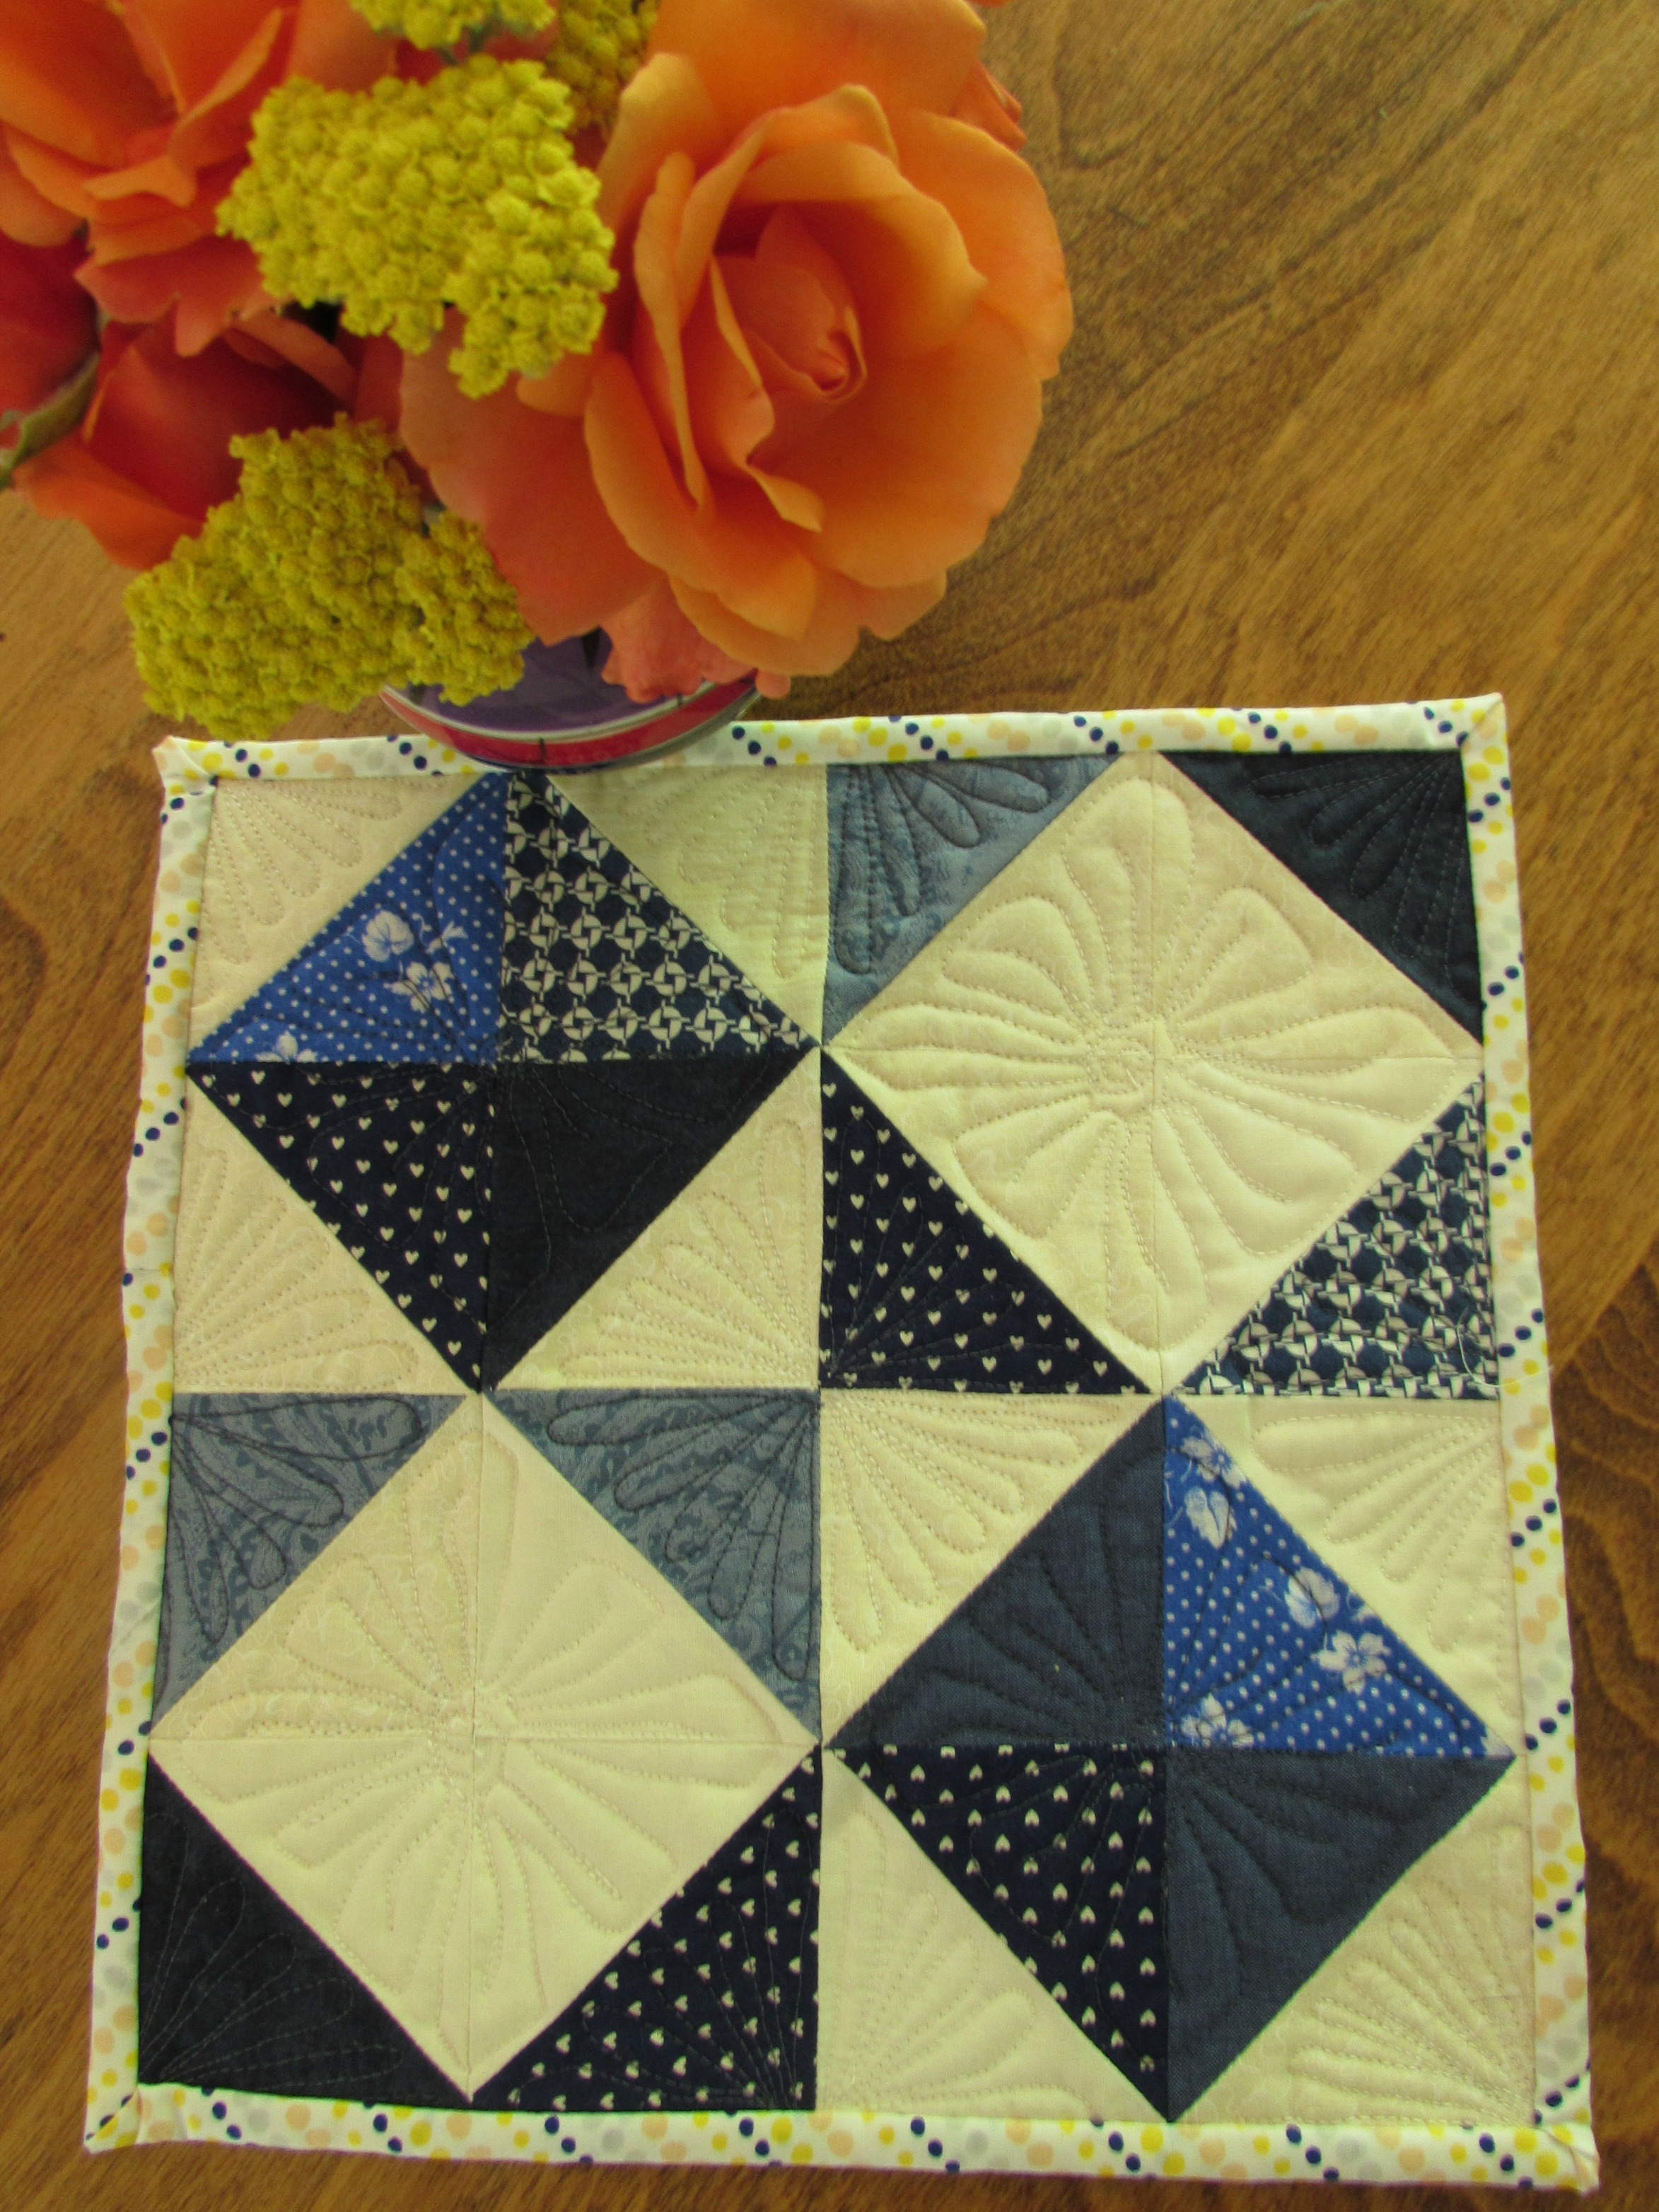
Alternatively, I could use a simpler layout. With this one, it feels like each row should be one color. Planning is still needed though. Luckily, I have been saving any chunks of the scrappy made fabric in case I need to make more of any color. It won’t take any time to add blocks here or there.

I am strongly leaning toward the first layout shown above. However, I am equally enjoying the scrappy look and the more organized, cohesive look. Will you throw in a vote? Striped layout or the diamond? Scrappy or organized colors? I am curious and would love to hear your thoughts.

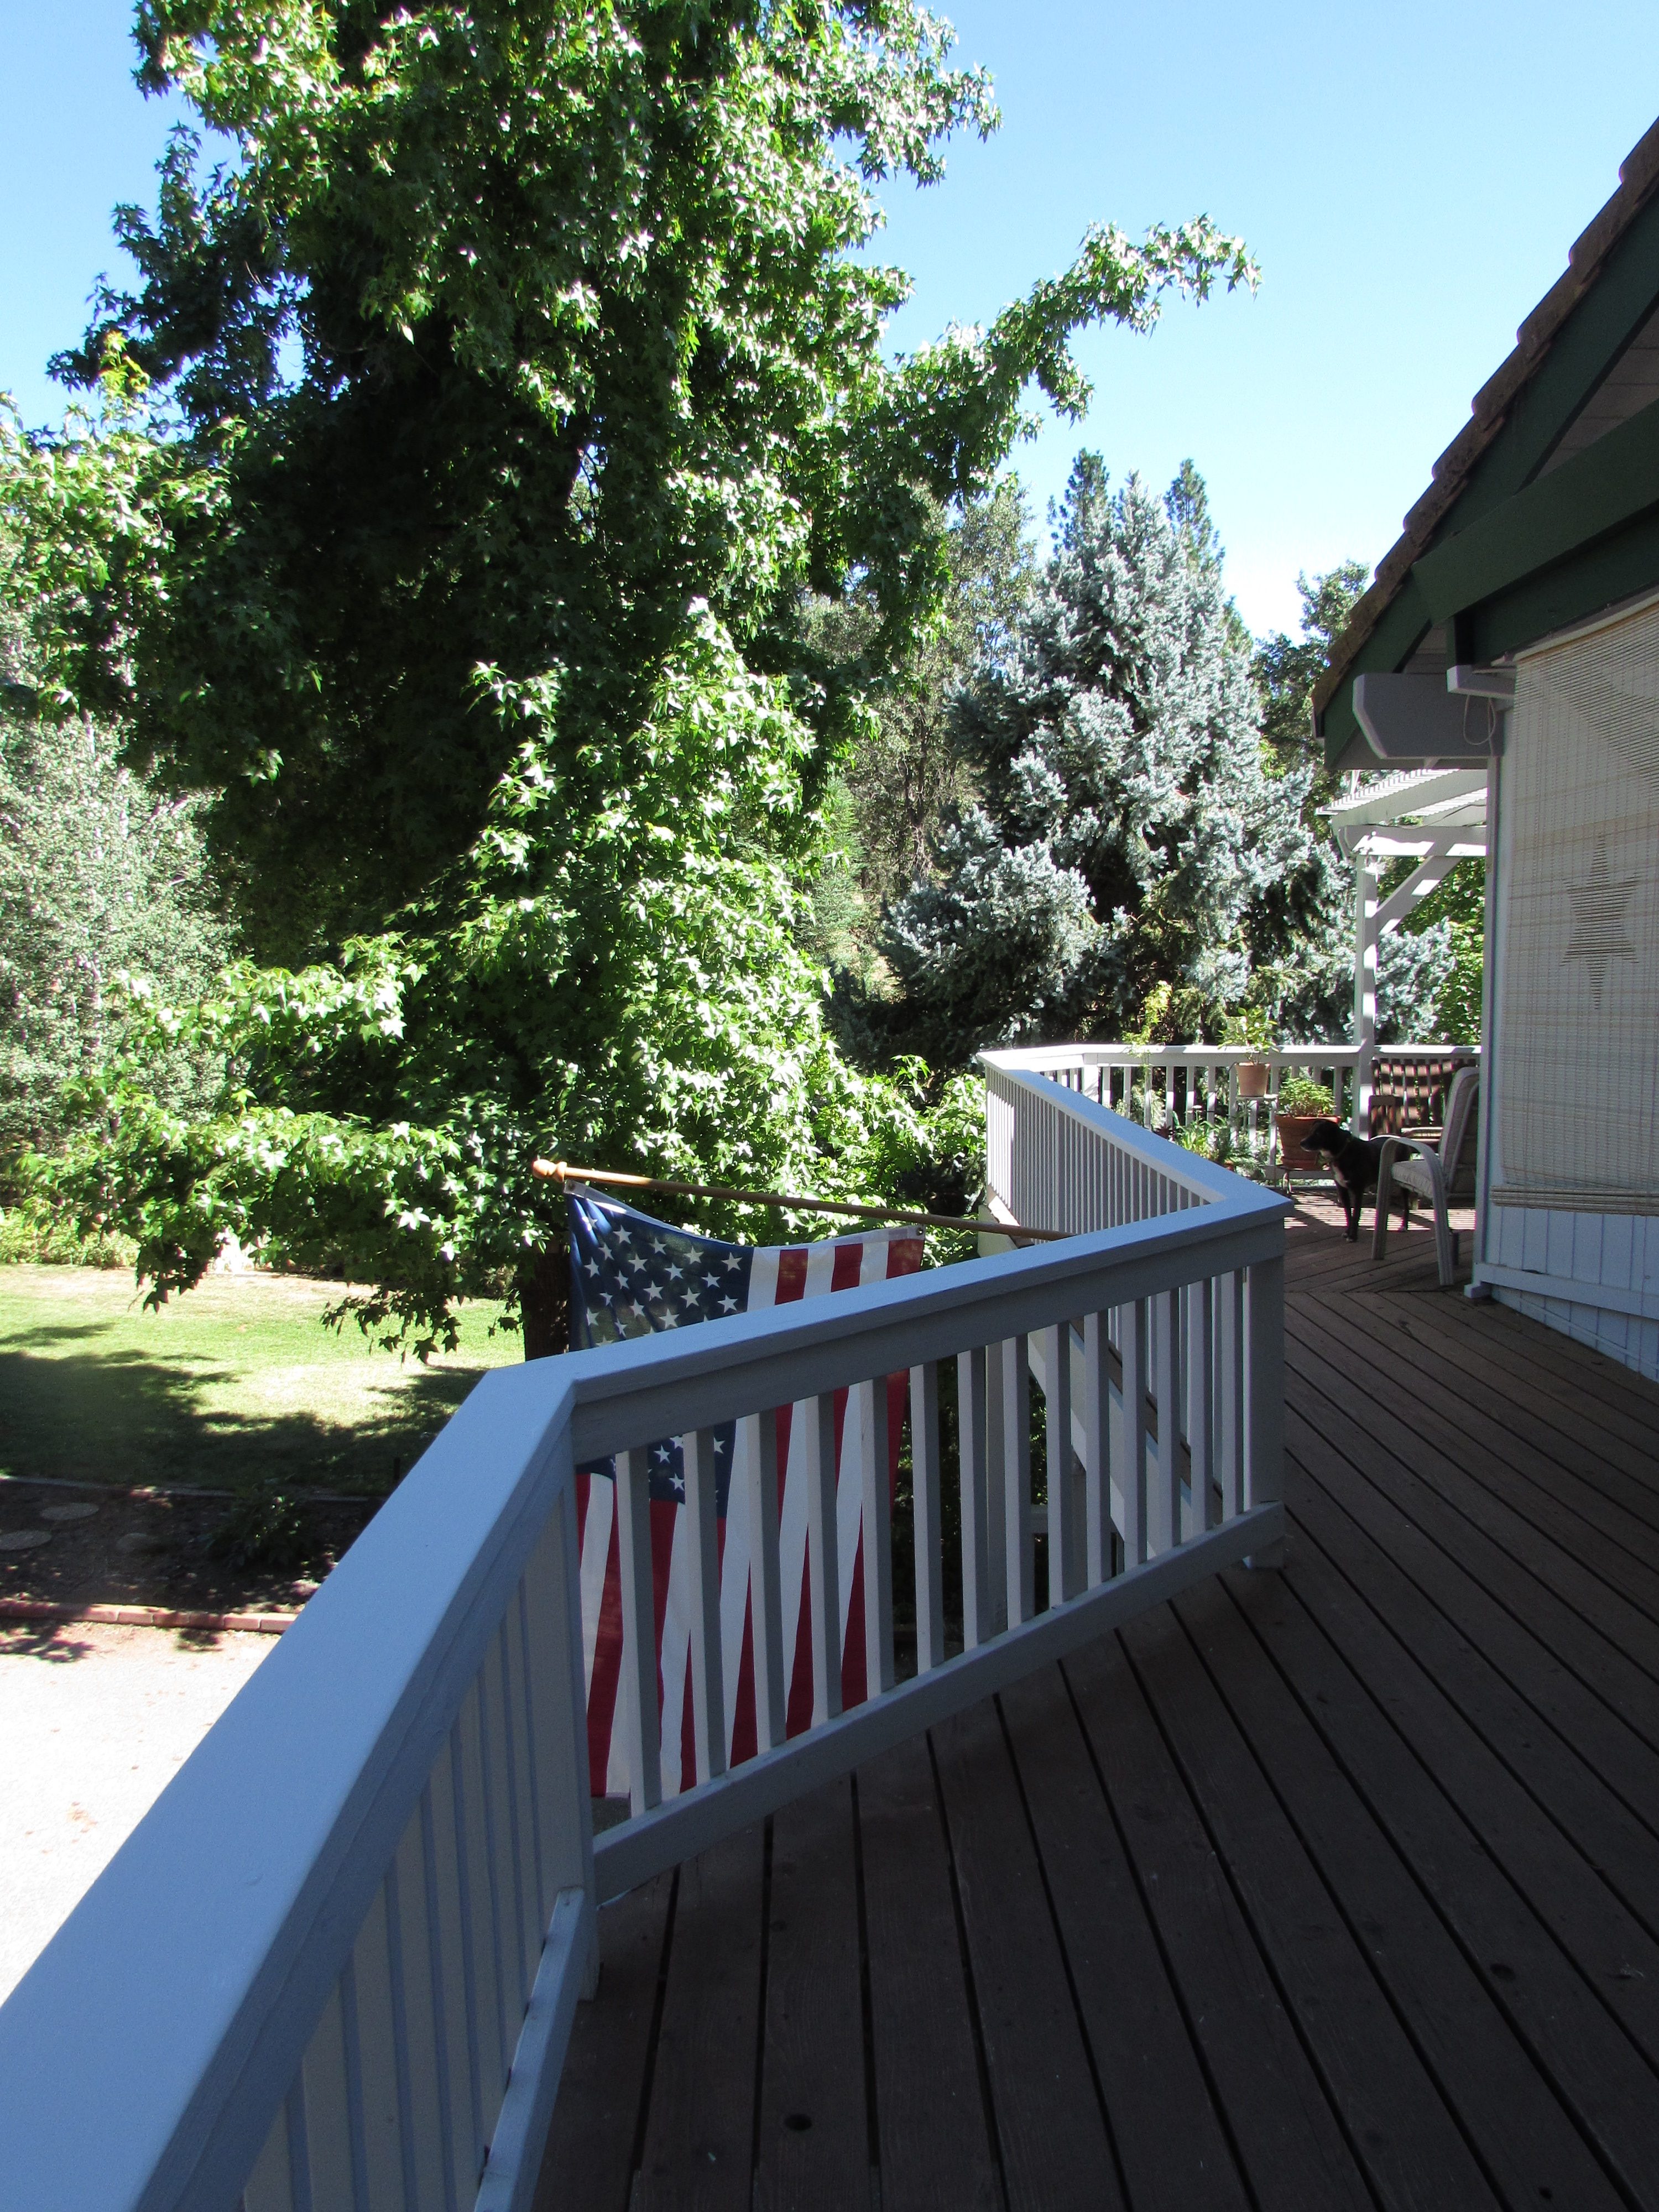
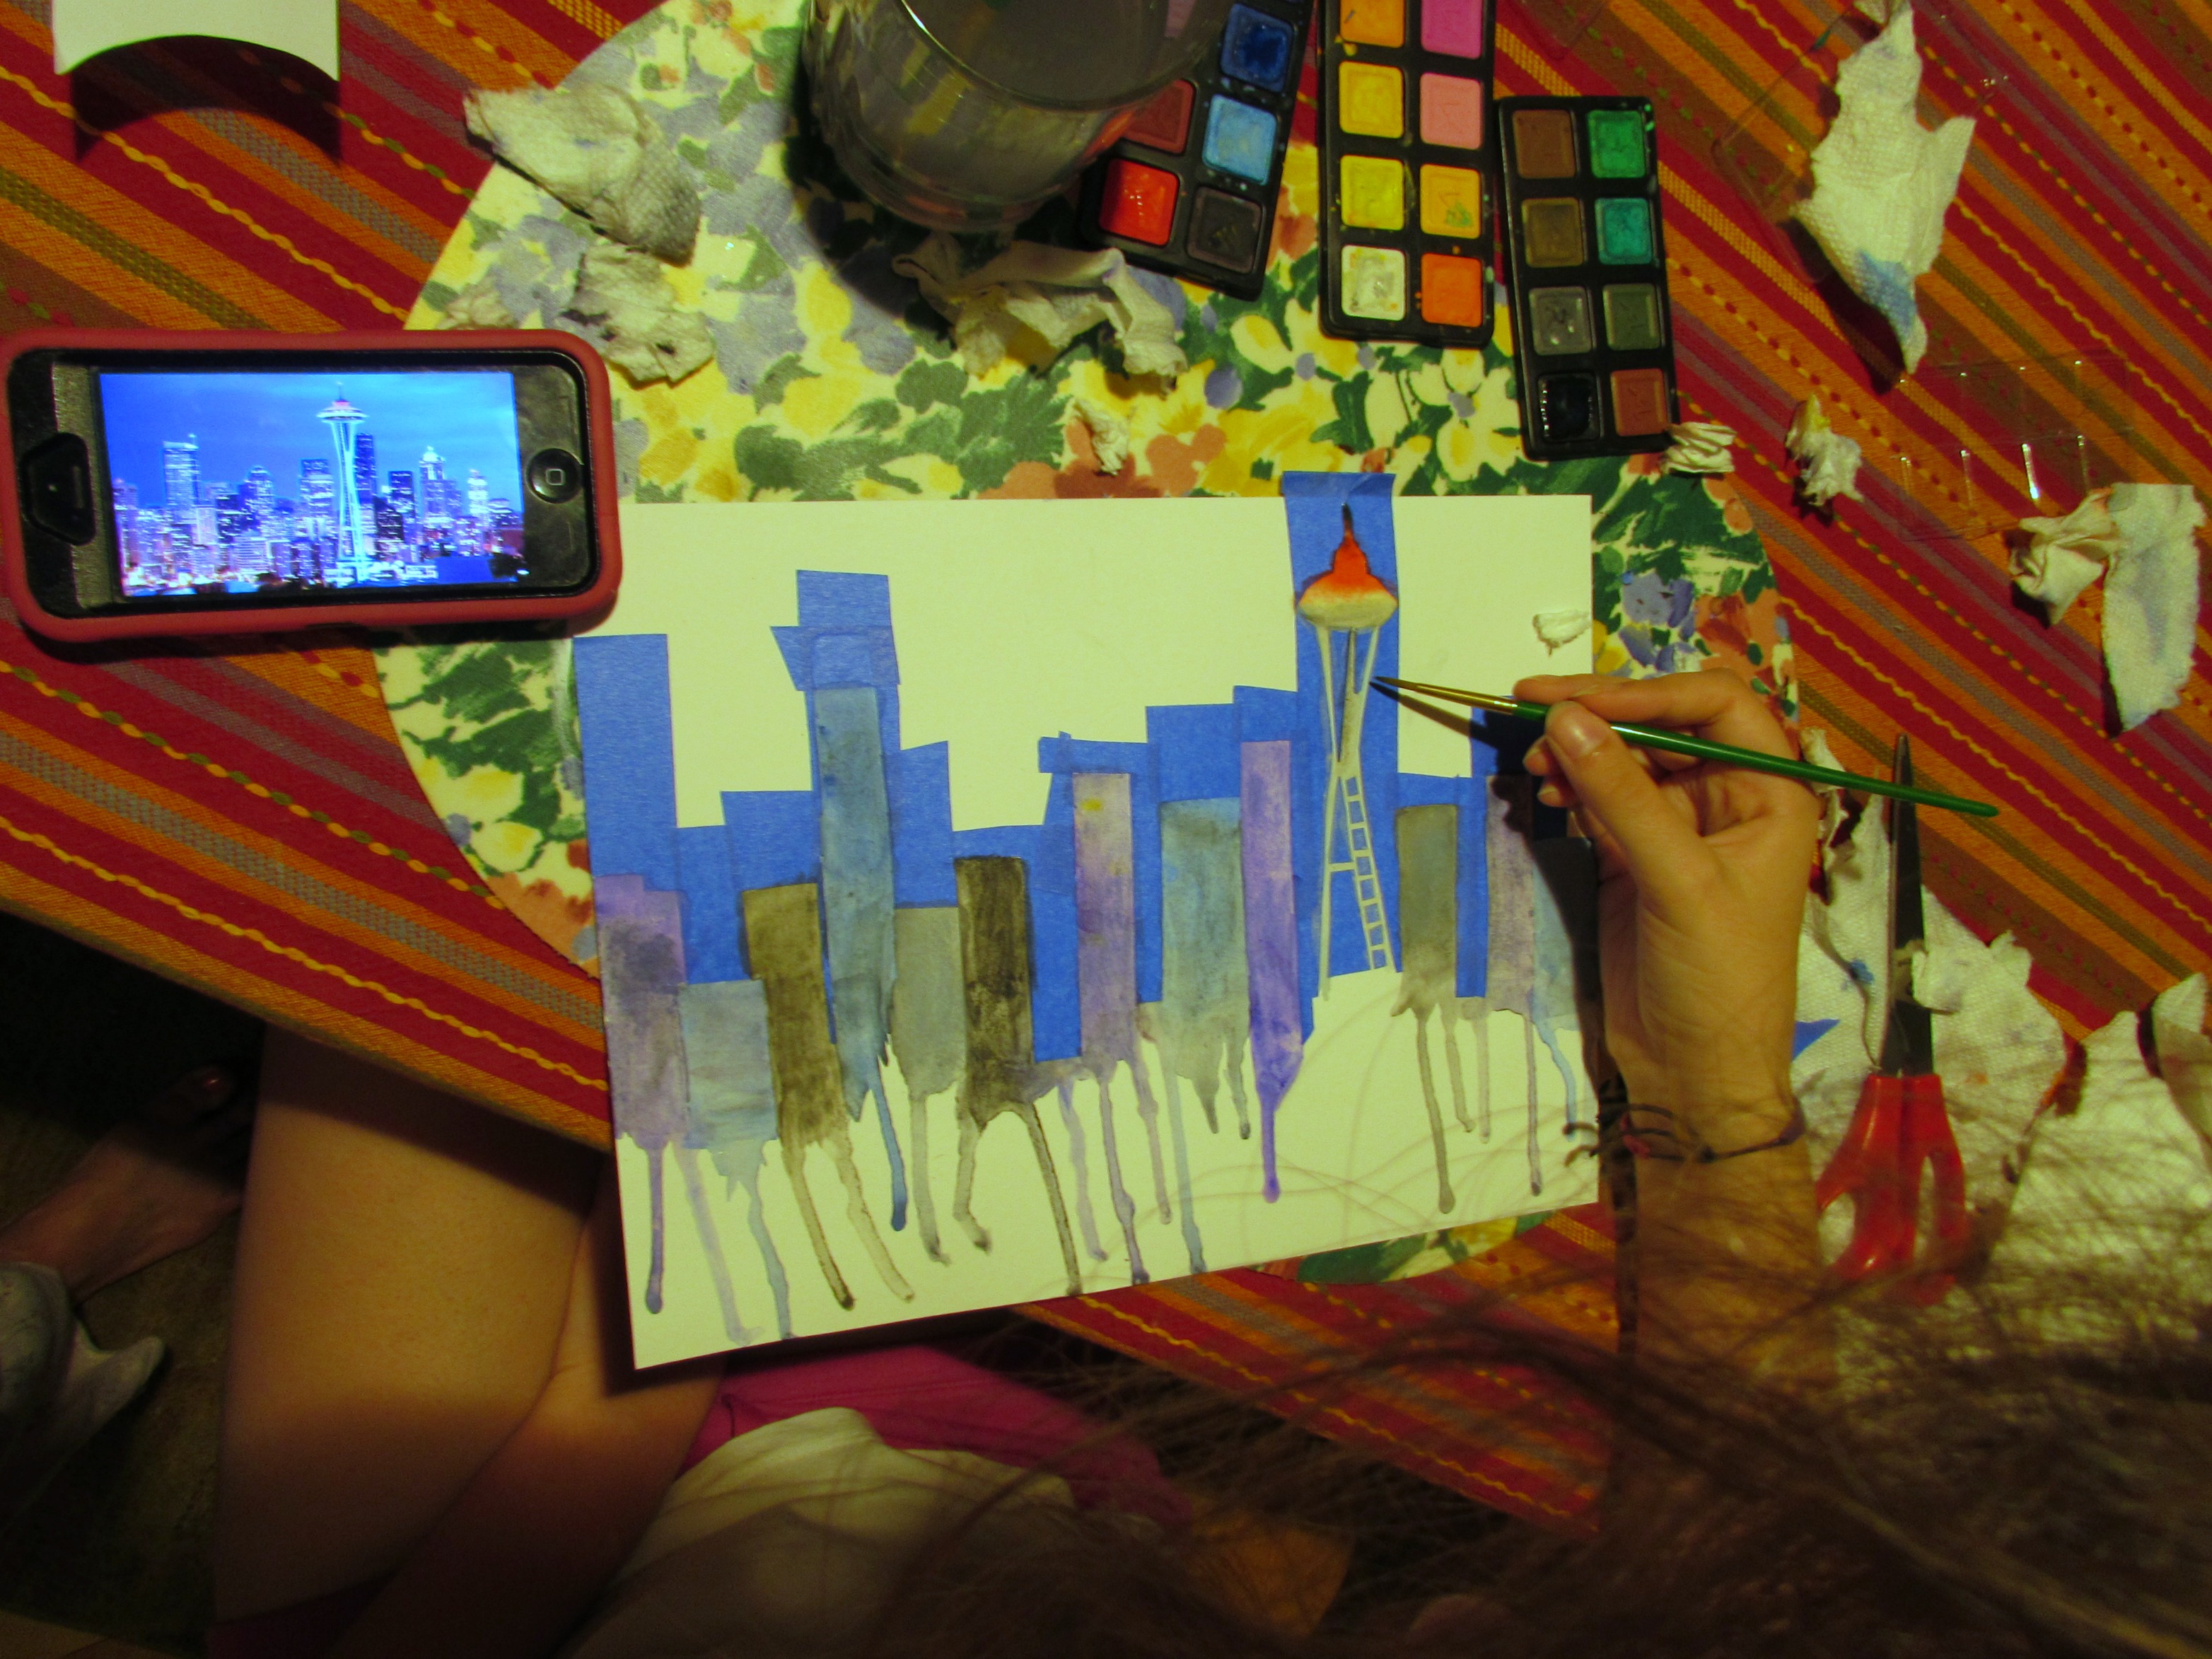
This is the hottest part of our summer thus far with triple digit heat all week and into next. We were able to escape some of the heat while at the coast for a few days. Now that we are back home,  Julia and I have been hunkered down enjoying the AC. It is just awful outside. Julia has been trying out some fun techniques with her water colors, making stencils with painters tape. This one is an interpretation of the Seattle skyline with the Space Needle featured.

IMG_6900

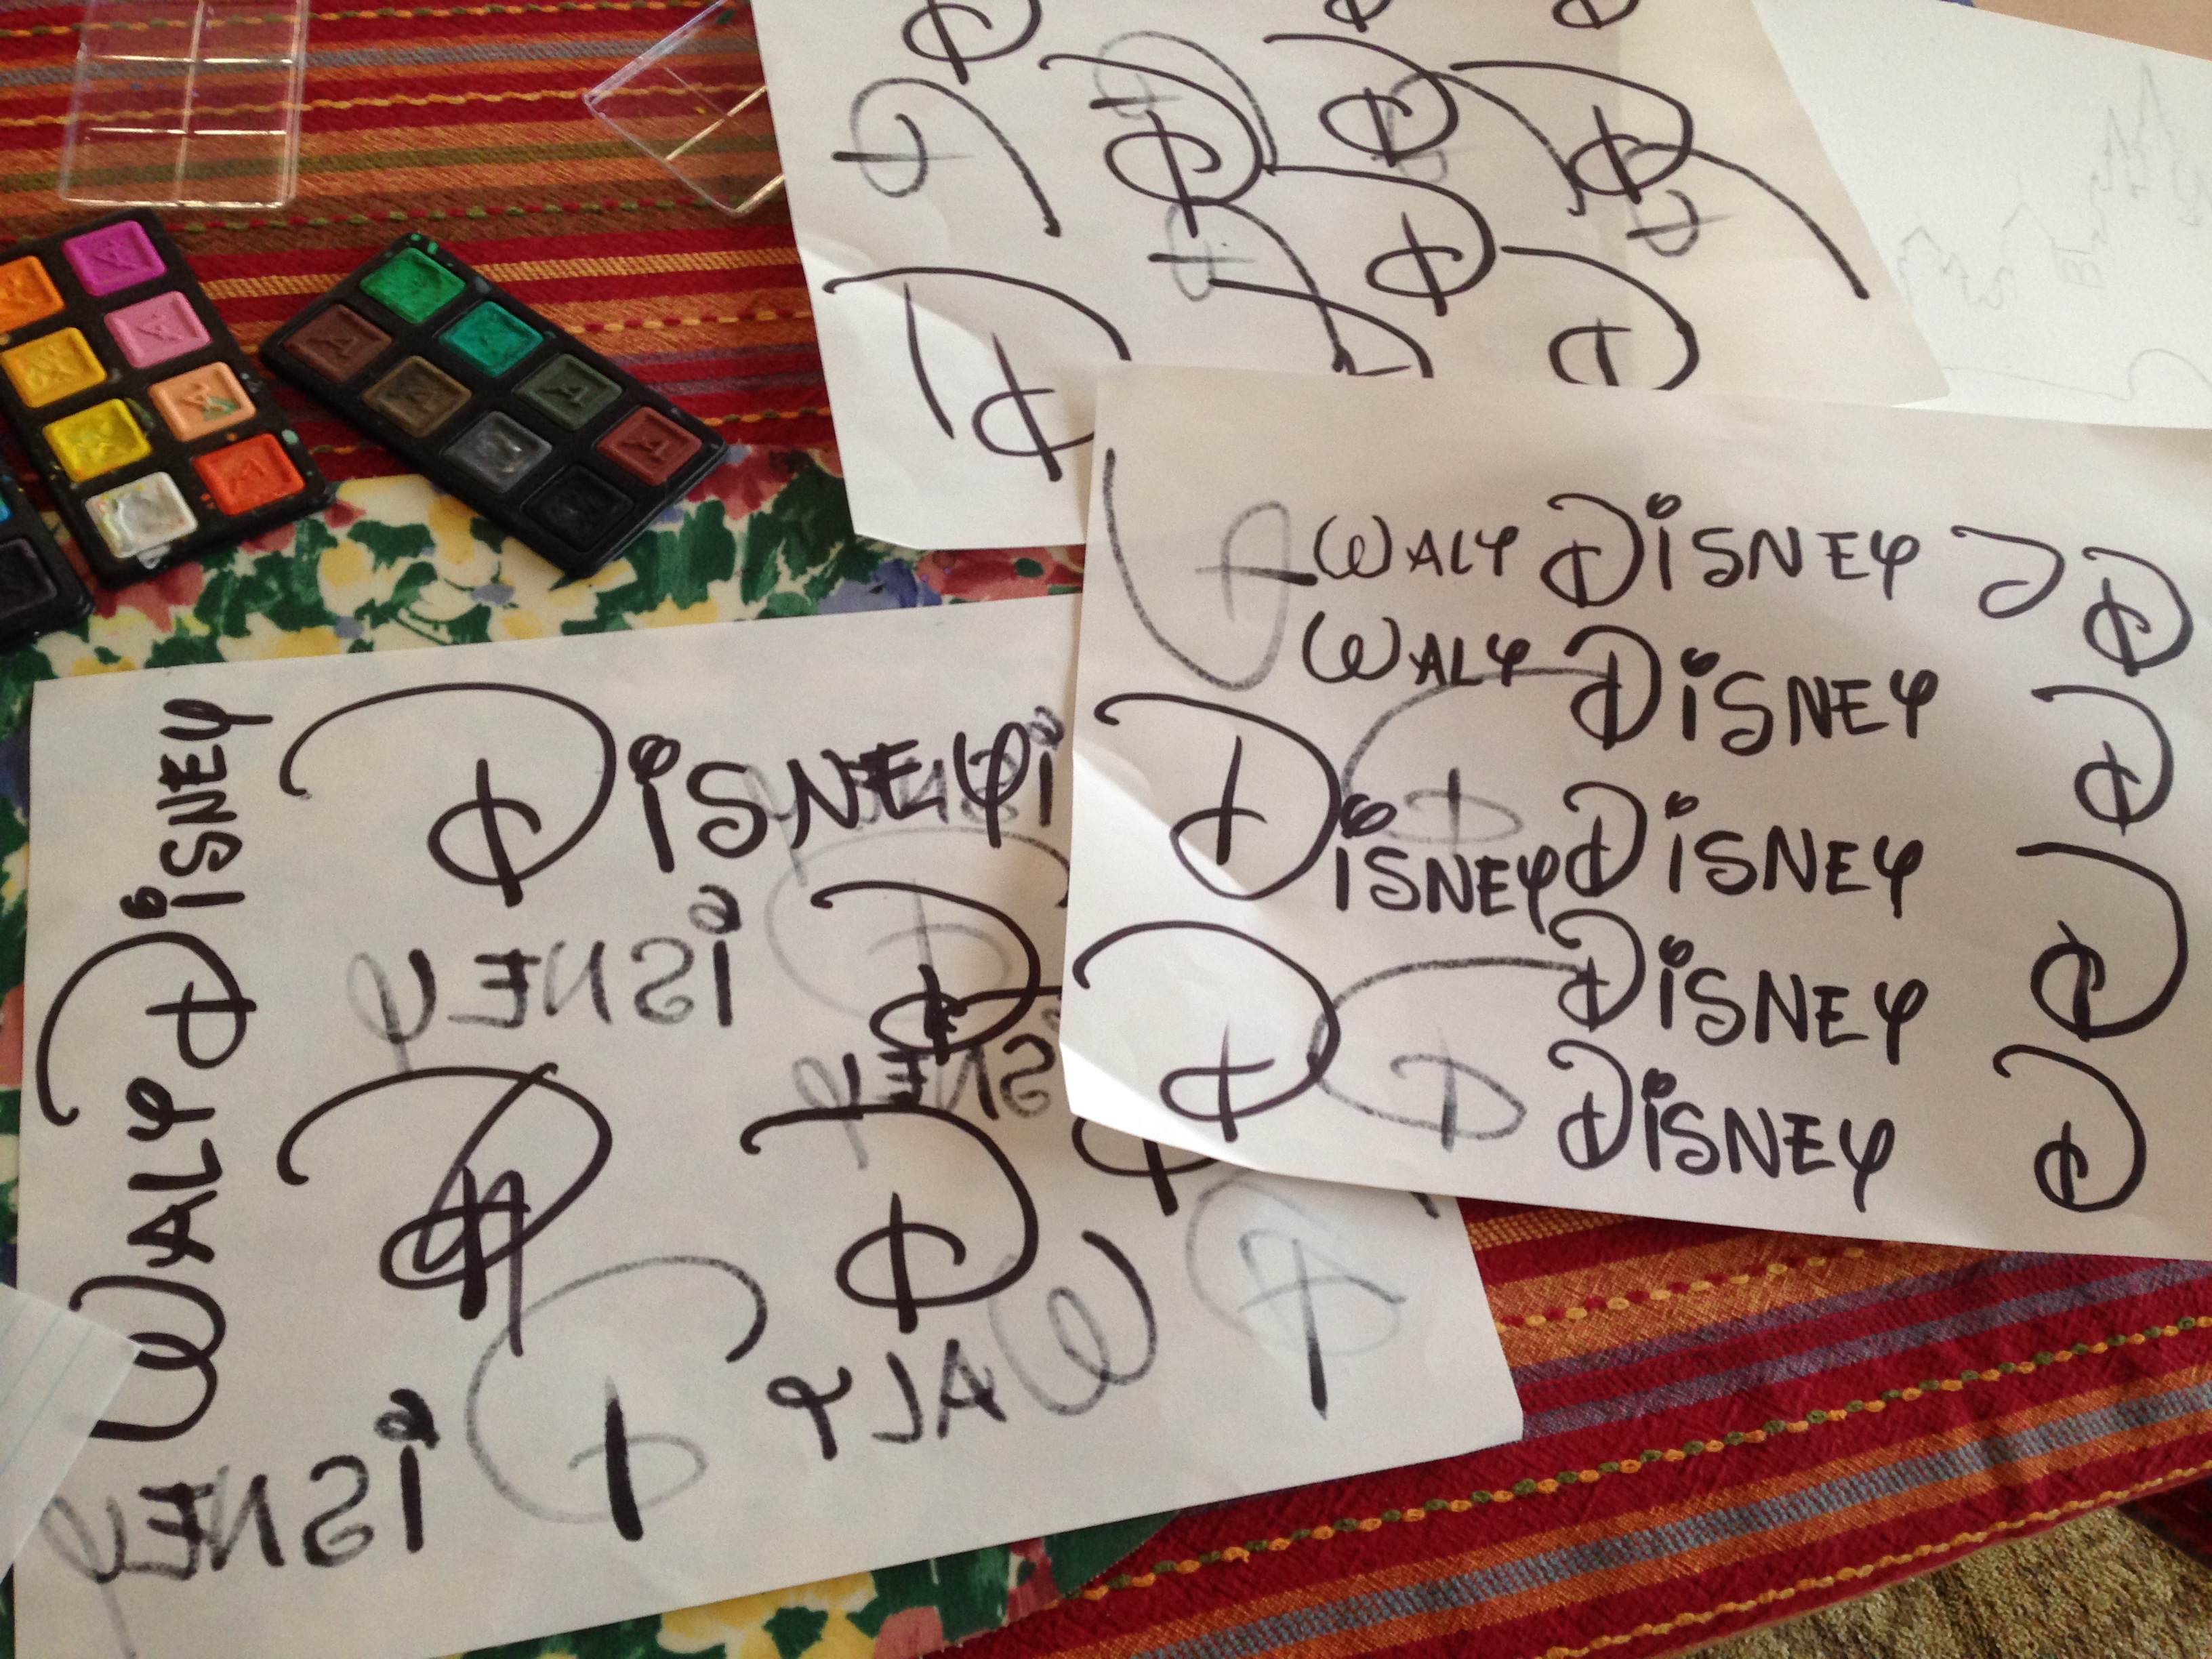
She is also working on some lettering. Yesterday she was channeling Walt Disney.

IMG_3691

I am pleased to see  her enjoying other activities and relying less on technology. Three more weeks and school resumes. Hard to believe but summer is winding down. Hope you are staying cool these days!

Linking to Oh Scrap and Crazy Mom Quilts, both of which are listed at the top of the page, under Link Ups.


Needle and Foot blog, podcast and newsletter recommendations

Podcast and Newsletter Review

Lately it seems that almost every blog I open has a pop up asking if I would like to sign up for the related newsletter. I rarely sign up for them. My email fills up fast enough and what with reading and commenting on blogs, I don’t really need to start adding newsletters to filter through. Except for one. There is one newsletter that I do subscribe to and I truly look forward to receiving it each week. It arrives on Wednesday at 10:00 am PST, like clockwork. This is the newsletter that is published by Abby Glassenberg of While She Naps.


I am not sure exactly when I began reading Abby’s weekly newsletter but it has been quite a while now.  I haven’t a clue how she finds the time, being a full-time mom to three children, pattern designer, blogger, and book author but each week Abby puts together an amazingly helpful and interesting newsletter.  She gives a rundown on the most current happenings in the crafter’s world and provides tips and links that are very relevant to blogging. It is basically a one stop shop for all things crafter, blogger, and social media related. I appreciate that while she naturally uses the newsletter as a place to introduce her most current blog post and what her next podcast will include; it isn’t just an advertisement for While She Naps. Abby curates a fantastic selection of links each week and I don’t think, even one time, she has included a link that I have already seen somewhere. I have come to the conclusion that Abby must run on very little sleep which is how she is able to spend so much time on her patterns, blog, podcasts and newsletter. She often publishes new opportunities for bloggers (that’s how I found out about Blogging for Books, the source of the books I have recently reviewed) as well as an abundance of useful information on blogging tools and the best use of the latest social media tools. I am so grateful for this weekly flow of information.

Since her blog and newsletter apparently doesn’t consume all of Abby’s time, she also has a weekly podcast. I only recently started listening to it. I have such a love of podcasts and had gotten into a routine of listening to my favorites. (If you want ideas, see this post.) For whatever reason, I finally listened to one of Abby’s. I am so glad I did. She has an affinity for selecting very interesting people to interview so my time spent listening is well worth it. Working my way through her library of podcasts while sewing over the past couple of weeks, I have listened to many wonderful discussions. Here are some examples.

  •  Malka Dubrawsky – Malka is one of my favorite fabric designers. In fact I used her line of fabrics in the Aurifil Block of the Month quilt I did a while back. I love her sense of color. Listening to her talk about her process of dying fabric, designing fabric, and running her business was a treat.
  • Alisa Burke – Alisa is a talented artist and the interview covered her decision to leave her day job and live her dream of being a full-time artist (in addition to a homeschooling mother) and the challenges she faced and successfully dealt with.
  • Amy Marston – the publisher at C&T Books. Hugely interesting discussion of what it is like to publish a craft book, what the company looks for, and how the process works. Even though I don’t have any desire to do something like this, it provided great insight into what the quilters who do publish books go through to get to their goal. Tons of work and not always a huge financial return. If nothing else, it has taught me to buy a quilter’s book directly from their website as that is where they get the most return (as opposed to buying it at Amazon.)
  • Stephen Fraser – one of the founders of Spoonflower. Great discussion of how Spoonflower got their start, what it is like to work there, how they choose employees, the work environment, where that technology is heading and even a fun talk about the esthetics of the Spoonflower offices.
  • Etsy – Abby has interviewed several people that work for Etsy. As an Etsy seller, these episodes are relevant and helpful for me. Her very direct interview style gets right to the topic at hand so I learn something each and every time.

There are so many more. I strongly encourage you to go to Abby’s podcast archives and browse the many episodes. You will surely find one (or twenty) episodes that will appeal to you. A unique feature of Abby’s interviews is the recommendation topic at the end of the episode. She asks the person that she is going to interview for their recommendations on books, podcasts, videos, websites, anything really – and they all discuss their favorites for just a few minutes when they wrap up the interview. I have a little notebook on the sewing table and it is filled with my penciled in notes from these discussions. Maybe someday I will have some time to check out all of the suggestions! There is only so much time in the day. Abby has somehow managed to turn her day into a much more efficient twenty-four hours than mine!

Stash Update

I have had some really good luck in the thrifting department lately. Of course, this was just after making the vintage patchwork quilt!  When I saw these on the shelf at our local shop I decided to add them to my collection.

IMG_6791

I love the colors – especially the one on the far left and the green on the far right.

IMG_6794

Even if I don’t use them right away, they belong with all the others I have collected. For those of you that might want a piece or two of these, I have cut some fat quarters and added them to my  shop. Sold as single fat quarters or a bundle, they are a bargain.

I also spotted a bundle of blue fabrics that I couldn’t pass up ($5.00 for the bundle… What quilter would pass that up?). These cuts are 1/2 yard to one yard each totaling over five yards of fabric.


Moving on to fabrics a bit more modern, I received my order from Green Fairy Quilts. Honestly, they ship faster than any shop I know. It always amazes me how quickly I receive an order from them. I got two large pieces of Kona,  one in Fig Tree Cream and the other in Stone. These will be for the wedding quilt for my nephew. (I really need to find a name for this project!)  Since I was shopping, and since there was a sale, and since I have never, not even once, bought any mini charms, I chose two packs.  Once of Chic Neutrals by Amy Ellis and the other is Black Tie Affair by Basic Grey. They are both really nice lines and will be fun to make a mini or table runner with.

IMG_3680

Finally, I was lucky enough to win a giveaway on Instagram a couple of weeks ago. Brooke (@sillymamaquilts) hosted a giveaway and I won a charm pack of Pixie Noel fabric, designed by Tasha Noel. This line is adorable and I am happy to have this little win to play with. I will have no trouble using this sweet charm pack up on a fun holiday project.

FullSizeRender

Clearly I have lots to work on but the wedding quilt is my priority for now. These other bits will just have to wait for a while.

Five Reasons to Repeat a Pattern

I don’t know that I have ever made the same quilt twice. Wait, maybe that isn’t entirely true. I have definitely made the same quilty gifts in multiples. Like the Christmas table runners I made for my family one year. Or the zip pouches I made for gifts last year.  But not full quilts. Those have always been different. There are so many amazing quilt designs out there and I haven’t yet repeated one.

Clothing patterns? Those I will repeat. Time after time after time. When my kiddos were tiny I would make flannel pj’s for them, using the same pattern until the pieces were so pin marked I would have to tape them together. My Washi dress? Just repeated that one and I am so glad I did. Here are my thoughts on why.

  1. The first time I use a pattern I have to learn the pattern. Even though I have been sewing for so many years (44-ish years?) it takes a minute to just look at the pieces, read the directions and figure out the process.  Using the pattern a second (or third, or fourth) time that process is complete and doesn’t need to happen again.
  2. Of course, the cost of the pattern. I think I paid about $12 for the Washi pattern, I am not sure. So why not distribute that across a few garments? Kind of like dollar cost averaging in the stock market. 😉 Make it once and you have spent $12 plus the cost of fabric and notions for the one garment. Make it three times and you are at $4 plus fabric and notions for each garment. Might as well get as much bang for your buck as possible.
  3. My confidence level increases with each garment. Going in the second time, I knew where the problem areas might be and already had solutions for those. For instance, in the first Washi dress, I found that the elastic bobbin used while shirring the back would need to be reloaded with each stripe of shirring. I still don’t understand why but at least, this time, I didn’t have to fool around to figure out a solution. It makes for a more peaceful sewing experience.
  4.  With the extra confidence in the pattern, I can challenge myself in other ways. For this dress, I chose a knit fabric. I wasn’t sure what it would mean to make a pattern designed for woven fabrics with a knit but I felt good about trying it because I was already familiar with the pattern and how it fit me. I would not have done this the first time using the pattern because I wouldn’t have felt confident in the result.
  5. There are so many variations to be had. For the second dress, I chose not to cut the dip in the neckline. I was concerned that with a heavier fabric (knit vs cotton) the neckline would not lie flat with that cut out. I used the scoop neck version instead. Also, I tried it without the sleeve cap, didn’t like it and put the little sleeve on in the end.

Here is the finished Washi, version two!

IMG_6823

Just as I hoped, it is very comfortable. (For me the goal is almost always comfort.) The knit washes well. (I did prewash it as knits have a strong tendency to shrink.)

IMG_6834

The drape is very soft. After washing and drying it, there was no issue with wrinkling.

IMG_6834.2

The shirring wasn’t as tight with this version. I suppose that has to do with the knit vs cotton issue but I am not sure? If I make it again with a knit, I would play with the stitch size a bit while shirring it. Also, with the stretchiness of the knit it feels a bit too big. So if I do a repeat, I will cut it down a bit, especially in the bodice.

I also learned a bit more about sewing with knits. I wasn’t sure how to finish the seams since I don’t have a serger machine. Looking through some great garment sewing websites, I found one that instructed me to use a tiny zigzag stitch on all of the straight seams (like the side seams.) This sort of intimidated me but it worked out wonderfully.

IMG_6800

This tiny zigzag stitch made a big difference in how the dress hung. The seams didn’t get wavy because the zigzag stitch allows for some movement with the stretch of the knit. Also, I sprayed the hemline with starch before hemming it. Adding that extra structure made for a nice flat hem.

Besides finishing up the dress, I also finished painting the caps of the deck railings. I am so happy because it is supposed to really heat up over the next week or so.

IMG_6841

Lots and lots of painting!

IMG_6840

For now, the painting project is a finish and it looks so much better. Don’t you love checking something off the list? Especially something you really didn’t want to do in the first place?? Me too.

Have a good weekend everyone. Stay cool during this oh-so-hot part of July.

Linking up all over the place. See the links at the top of the page, under Link Ups.

christmas-in-july

In case you are wondering what is going on at Craftsy this weekend, here is the latest. It is Christmas in July at Craftsy and they are offering great deals (up to 60% off!) on kits and supplies so you are able to start working on holiday gift items ahead of schedule. You’ll be ready when the season rolls around. Sale begins today, 7/22/16 and runs through Sunday, July 24th. Check it out!

I am a Craftsy affiliate! Thank you for any purchases made via my blog as I will receive a small commission.


Weekly Planning

Last week I hosted To-Do Tuesday for Christine at Stitch All the Things. This was good for me as it gave me a reason to organize my thoughts and make a plan for what I would accomplish that week. List making tends to keep me on task and it worked well last week. I didn’t put very much on the list because my first priority was to finish up the vintage quilt for my guest bed. That took a bit of time but I did finish it. I also finished item two, cut out the second Washi dress I wanted to make and number three, select a book for the Fall Book Share (which I am loving and will tell you about soon). Done and done!

This week, I have ambitious plans.

  1. Finish painting the deck railings for the upper deck of our house. The caps on the railings are forever exposed to cold winters and very warm summers. The wood is constantly contracting and expanding so the paint doesn’t hold well.  I am currently scraping, priming and painting them. Just the caps though. Not each picket because that would take about 907 years and I don’t have the patience. This is an early morning job though because it gets really warm out there after about 10:00 am.
  2. Continue working on my Mighty Lucky Quilting Club challenge for July. This month the challenge was developed by Cheryl Arkinson who is a very talented quilter. I am enjoying this month’s challenge. To be honest, I have been really disappointed with most of the previous month’s challenges. But this one is fun. She talks about creating with only one fabric, using a directional print or large focus fabric. Here is where I am so far.IMG_6836If you follow me on Instagram, you might have seen a post about this. I love where it is headed. Putting all of these blocks together creates an effect that is almost dizzying. Remember the vintage pink striped pillow cases from two weeks ago? This is the same fabric and I will make a throw pillow with this. A modern project to put on my vintage bed. I think it will finish at 21″ square – I can’t remember for sure. My quandry is the same as usual, how do I quilt this? I am at a loss. I want to retain the effect of the stripes, but how? I would really appreciate ideas on this one.
  3. Finish and take photos of the second Washi dress – I’m almost there.
  4. Prep a project for hand stitching. We are going to spend a few days on the coast soon and I want to have something to bring along. I started last night. Remember the Row By Row project I bought in Maine? The two outer blocks are traditional log cabin and I have those about half way there. The center block is a wool applique and I want to work on it during our trip. All that I need to do is finish cutting the shapes and fusing them in place.
    IMG_6835

5. Finally, if there is time, and there might not be, I picked the fabrics for the quilt I am going to make for my nephew’s wedding gift. I didn’t have all of the solids that I need so I took advantage of a sale over at Green Fairy Quilts, Judi Madsen’s online shop, and ordered some Kona solids. But I definitely have enough here to start cutting. It is all set up on the dining room table so I can do a bit of cutting here and there. I am pretty excited about this project. This is the first one that I designed myself, using the Quiltography app. (If you are unfamiliar, see this post.)IMG_6839

That is more than enough for this week. Wish me luck and then tell me what is on your list. Also, if you have a second, take another look at my dizzy stripes and tell me how you would quilt it.

Linking to Let’s Bee Social and To-do Tuesday – find the links at the top of the page, under Link Ups.

Neverending FMQ Practice

It has been a long while since I have done any free motion quilting. I had the itch a few days ago. Of course that itch wasn’t big enough to get me to baste and quilt either of the two quilt tops that are waiting patiently for me to finish them. I wanted a quick fix. Know what I mean?

I have a drawer where I toss extra HST blocks that seem to accumulate from time to time. I sewed a dozen together and ended up with a cute little block.

IMG_6818

I quilted every inch of it with little flourishes in the triangles and flowers in the center of the four diamonds. At first I didn’t plan to bind it, since it was just a quick practice piece. But is that fair? To just throw it away??? I think not. Leave it in the sewing room cluttering up my desk? Nope, that doesn’t work either. I can always put it under a vase of flowers. So I trimmed it to 12″ square and found a little scrap of polka dots to use as binding. The binding was actually the hardest part. I cut it too narrow and it pulls in spots.

IMG_6817

Stitching this was so gratifying. One evening of play and practice.

IMG_6819

I switched between blue and cream thread but didn’t change the bobbin. It looks kind of funky on the back side.

IMG_6822

Now that the itch to FMQ has been scratched, it is time to move on to something else. Hope you are all enjoying some time at the sewing machine.

Linking up with Muv at Freemotion Mavericks because I haven’t done that for a while and I have been missing her lately. 🙂

Quiltography App Review

I spent $14.99 the other day and it is turning out to be a great investment. I finally quit being stingy and purchased the Quiltography app. Quiltography is an app used for designing quilt blocks and quilts. I have mentioned in many posts that I cannot easily conceptualize design in my head. For example, the lovely secondary patterns that are created by combining blocks or even when the same block is set side by side?  Those are a trick for me. If I look at a block I often cannot see the patterns that will be created in this manner. This makes it difficult to plan a quilt.

Like many quilters, I do love graph paper. I scribble on it all the time, take notes and measurements, count blocks and figure out how many of each piece I will need. But My planning is not always correct. In fact, it is oftentimes incorrect. Plus it takes such a long time to do this. Sometimes I start one sketch and halfway through it I can finally see what the resulting quilt would look like, only to see it isn’t the effect I wanted in the first place. Argh! To illustrate my severely lacking sketchbook skills, here is a sip of truth tea.

image1 (1)

Using Quiltography, I can place blocks side by side, can design my own blocks if I don’t want to use one of the many blocks they in the library and all of this takes just minutes. (By the way, this is not an affiliate post.) Additionally, when the user is planning a project, she can upload pictures of the fabrics that are to be incorporated. At first I thought this would be cheesy but it isn’t. I took a few pieces of fabric and took a quick photo, just using the iPad camera. That way they were already in my camera roll file and very accessible. Having the real fabrics is going to be very helpful. Just in case you are wondering, while I am fairly comfortable on a computer,  I do not think this is a difficult tool to learn to use.

Once the fabrics are loaded, it is quite simple. Choose the block(s) you intend to use and load them with your fabric choices.

quiltography 5

In the block above, I have loaded the first two fabrics (the green and the pink). The next step would be to choose a fabric for the lower right triangle. Then I would save the block and it would be available to use in a quilt design. On the right side of the screen, you can see the wheel that shows available fabrics that might be selected to populate the block.

When arranging the layout for a quilt, the user can add sashing, borders, or cornerstones to their heart’s content. You can easily set the number of rows and columns as well as the block size. The blocks can be flipped horizontally or vertically, rotated or, set on point.

Once the design is as you want it, the app determines the yardage needed of each fabric. It does not break down the block and give you cutting instructions. The quilter has to break it all down. (This is not EQ7 – it is a $14.99 app, after all.)  However, it absolutely does the part I need. It creates a visual for me. That is huge.  Here are examples of the first few quilts I sketched out, mostly in order to learn how to use the app. Most of the fabrics I used were loaded on the app, only a couple of them were loaded with my photos.

quiltography 1

Off to the right, the wheel that displays any blocks you have made. (That same wheel displays fabric choices when designing a block.)

quiltography 3

The picture above shows a combo of quarter square triangles and friendship stars. When the blocks first populated the design, the quarter square triangles were all oriented in one direction. By rotating them on every other line, a good secondary pattern developed.


Finally, this design was made while playing with HST’S and Flying Geese blocks. I like the angular, southwestern look of it.

I am quite certain I will get my money’s worth on this purchase. There are some things that would be nice to have, but like I said, for $14.99, it is full of functionality. I love it so far and hoped to share it with you in case it would be helpful for some of you. If you have any questions about it, feel free to leave them in the comments and I will get back to you.


Vintage Heaven

It’s finished! The bed in my sewing room is currently sporting a gorgeous quilt made of vintage sheets that I have collected, thrifted and received as gifts over the past two years. I love it and the springlike, feminine look it brings to the sewing room. I am calling this one “Romantical” which is how one loyal reader described it when I posted last week. What a cute word.

yellow picture edited

Quilting this  went so fast since I did straight line quilting on both diagonals of the quilt. Because I was stitching across seven inch squares, it was not a problem to just eyeball it. No marking made for very fast stitching. For a short time I considered quilting only one of the diagonals. But it was finished so fast and quickly became evident that it really wanted to be quilted in both directions.
After receiving such helpful input on selecting the binding via comments on last week’s post, I went with the pink striped binding. I debated cutting the binding strips on the bias since I had enough fabric to do so. But that would have created some waste so I decided against it. Look at it though! It looks great, especially next to the squares of the same fabric. I had another one of those fortunate occurrences when the fabrics line up just so, as though I worked diligently to make it happen. But you and I both know me better than that. Happy coincidence!

yellow 2


Do you see the sweet backing I used? It was a queen size flat sheet that was brand new. The little floral is so pretty and works well with the binding too.

yellow 3
My quilt model and I went outside to take some photos. It was mid-afternoon and the sun was a bit too bright. The pictures are fun even though the colors of the quilt look a bit washed out.

IMG_6759

My model was in rare form so I took advantage.

IMG_6765

This was such a simple and satisfying project. Having a quick finish like this has left me in the mood to tackle something that takes a bit more thought. My nephew is getting married in September so I think a quilt is in order for him and his bride. I have a couple of months to work on it which is plenty of time. I have two stacks of fabric pulled and I keep deliberating between them. I’ll show you the pull once I make some decisions.

Thanks to all who left comments on yesterday’s post about social media. It made for good discussion. If you haven’t had a chance to read it, check it out and let me know your thoughts.

Linking today with my favorites, Amanda Jean over at Crazy Mom Quilts and Sarah at Confessions of a Fabric Addict. Links to both can be found at the top of the page, under Link Ups.

Social Media Thoughts

Social media is such a big part of life these days. It was such a short time ago that people didn’t spend so much of their time on Facebook, Instagram, Twitter, Pinterest, Snapchat, Periscope, and of course, blogs.  To some extent, I enjoy all of these. Well, not really. I don’t use Snapchat or Periscope and only rarely look at Twitter.  As a blogger and Etsy Shop owner, it is pretty much mandatory that I maintain a presence on Instagram, Facebook and my blog. But wow, it can be such a time suck. Trying to balance how much time to spend on social media vs time spent actually creating isn’t easy. I try to minimize time on media or I lose out and don’t have enough time to create which is what this is really all about for me.

Blogging was substantially more popular before the advent of Instagram and Snapchat. I can see that it has declined over the past couple of years. My conclusion is that blogging takes longer. Instagram gives the user immediate gratification. Post a picture and followers start liking it. Learn the right hashtags and more people notice.  And so it goes. However, that is the crux of the issue.

Because of smart phones and the many outlets of social media, people are relying on instant gratification. This immediate response, constant exchange of information, colorful screens, videos etc have been shown to reduce the overall attention span of users. I actually had an interesting conversation with Julia yesterday. She has always been an avid reader. Since she was very young, she has loved books. This summer, when she has so much free time to indulge her love of books, she hasn’t been reading. She received a stack of books for Christmas and her birthday but hasn’t touched them. When I asked her why, she said that she kept trying different books and none of them held. her. attention. Right away, we sat and had a chat about the use of her phone and iPad and how it is such a distraction. I explained what I have been reading about shortened attention spans. She went in and picked up another book and started reading. I was thrilled to see her on the couch with a book and, soon after, to hear her talking about the plot, the author and how much she liked the book.

Back to my original point though, I am a tiny bit disheartened to see some decline in the blog world. For me, I think of Instagram as a quick conversation. Meeting someone on Instagram is akin to those days when you stop somewhere to grab a cup of coffee and as you walk out on to the sidewalk paper cup in hand, you see an acquaintance. Hellos are exchanged and a quick, enjoyable visit occurs. Along these lines, meeting someone by reading their blog and conversing back and forth over time is like walking into the coffee shop, seeing a dear friend and sitting down together with your mugs (not the paper cups) and chatting for an hour. The relationship is deeper and, for me, much more gratifying.  I will continue to use Instagram, as I do enjoy seeing photos of work that others are involved in. But it is certainly a different experience. I much prefer blogging. So I continue to write and take photos and publish blog posts because I really enjoy and appreciate the relationship I have with my online community of friends.


Guest Host – To Do Tuesday Link Up

This week I am helping out by hosting the To Do Tuesday Link Up.  This is a weekly link up that many quilters use to organize their time and better accomplish projects (both quilty and otherwise) during the week. Sometimes it is a matter of organizing and planning all of the other things life requires in order to carve out a bit of time in the sewing room. This link up is usually hosted by Christine over at Stitch ALL the Things.  She is a bit overwhelmed as she works on one house in Oregon and plans her transition back to another house in Arizona. Somehow I don’t think time in the sewing room is in the cards for her right now. In fact, I don’t know that a sewing room exists yet in her Oregon house!

Let’s see. There is always plenty to be done each week but here is the short list.

  1. Work on quilting and binding the vintage sheet patchwork quilt that I showed you on Sunday. I really want to get this one on the bed in my sewing room. It has such a summery feel to it and I don’t want to set it aside, finish quilting it on October and then not use it until next season. So, this is numero uno.
  2. Cut out another Washi dress.  In June I finished my first Washi dress and I love it. It is such a comfortable dress. I want to try making it with a piece of deep goldenrod yellow knit fabric that I have. I am almost certain that when finished, it will be akin to wearing jammies all day. The pattern is that comfy and made in a knit, it will be even more so.  At the very least, I hope to get it cut out. If I spend any time sewing it, so much the better.
  3. Pick out the book for the Fall Book Share here at Needle & Foot.  I recently wrote a review of Vinegar Girl and invited any interested readers to sign up to share the book this summer. There are six of us sharing Vinegar Girl. This is how it works – I sent off the book to the first person after writing a tiny blurb on the inside front cover of the book. I included three fat quarters of fabrics chosen because they are somehow related to the story. The person that received it has four weeks to read and then send it on with their opinion written in the book and three more fat quarters that they feel are related to the story. On and on it goes until the last person has it and returns it back to me.  I am happy with the response to this idea and will host it again beginning in September. I haven’t yet picked out the book but I better get going so I can read it first and then gather a group of readers for the next round. If anyone has a suggestion for a good (fiction) book I would love to hear about it. Leave ideas in the comments.

OK – that is it for this week. The quilting is a big one (literally, queen size) which will take most of my sewing time. How about you? Are you feeling overwhelmed? Need to get organized? Let us know what you have on your plate this week.

To-Do-Tuesday-Button-200-x-200


Rules:

  1. Link up to this To-Do Tuesday blog post using the InLinkz linky below. Don’t forget: you can link up Instagram photos! The link up is open all week, and you can link any post for the week even if it’s written on the prior Sunday or Monday. It simply needs to be related to setting, working on, and/or completing your weekly goal(s).
  2. Try to visit at least one or two other blogs and leave a nice comment.