Monthly Archives: May 2016

Stepping Stones Finish

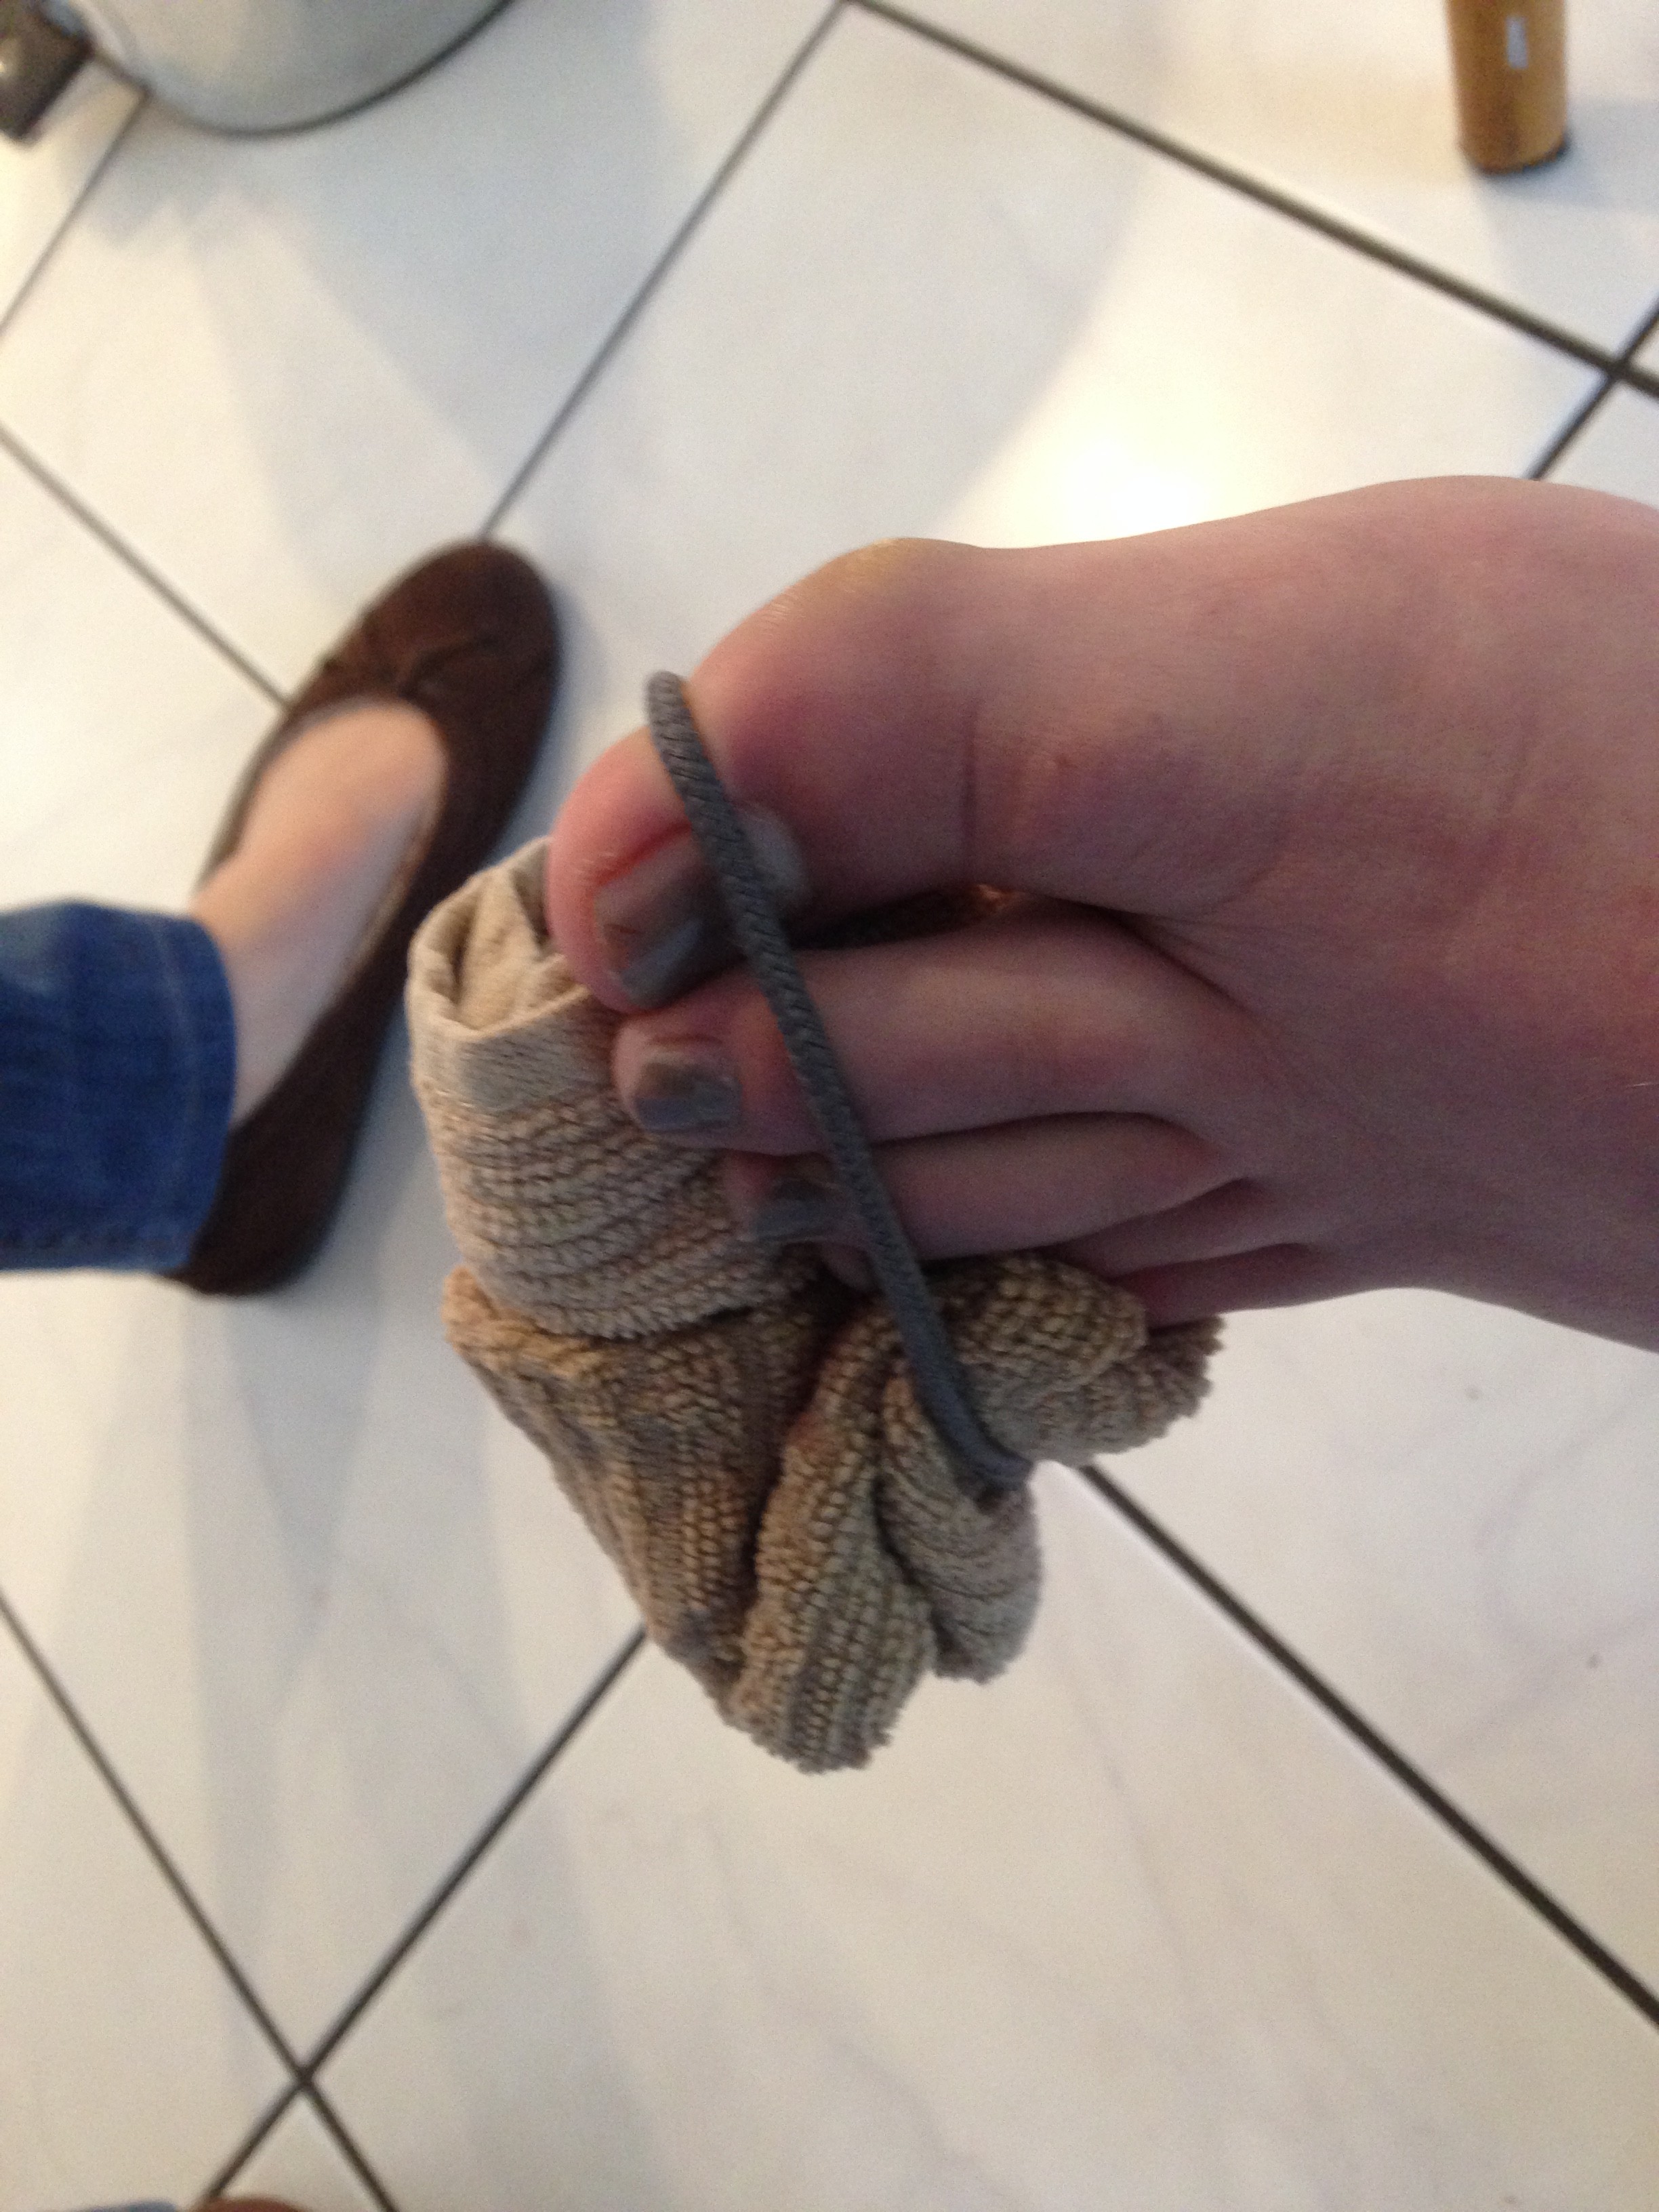
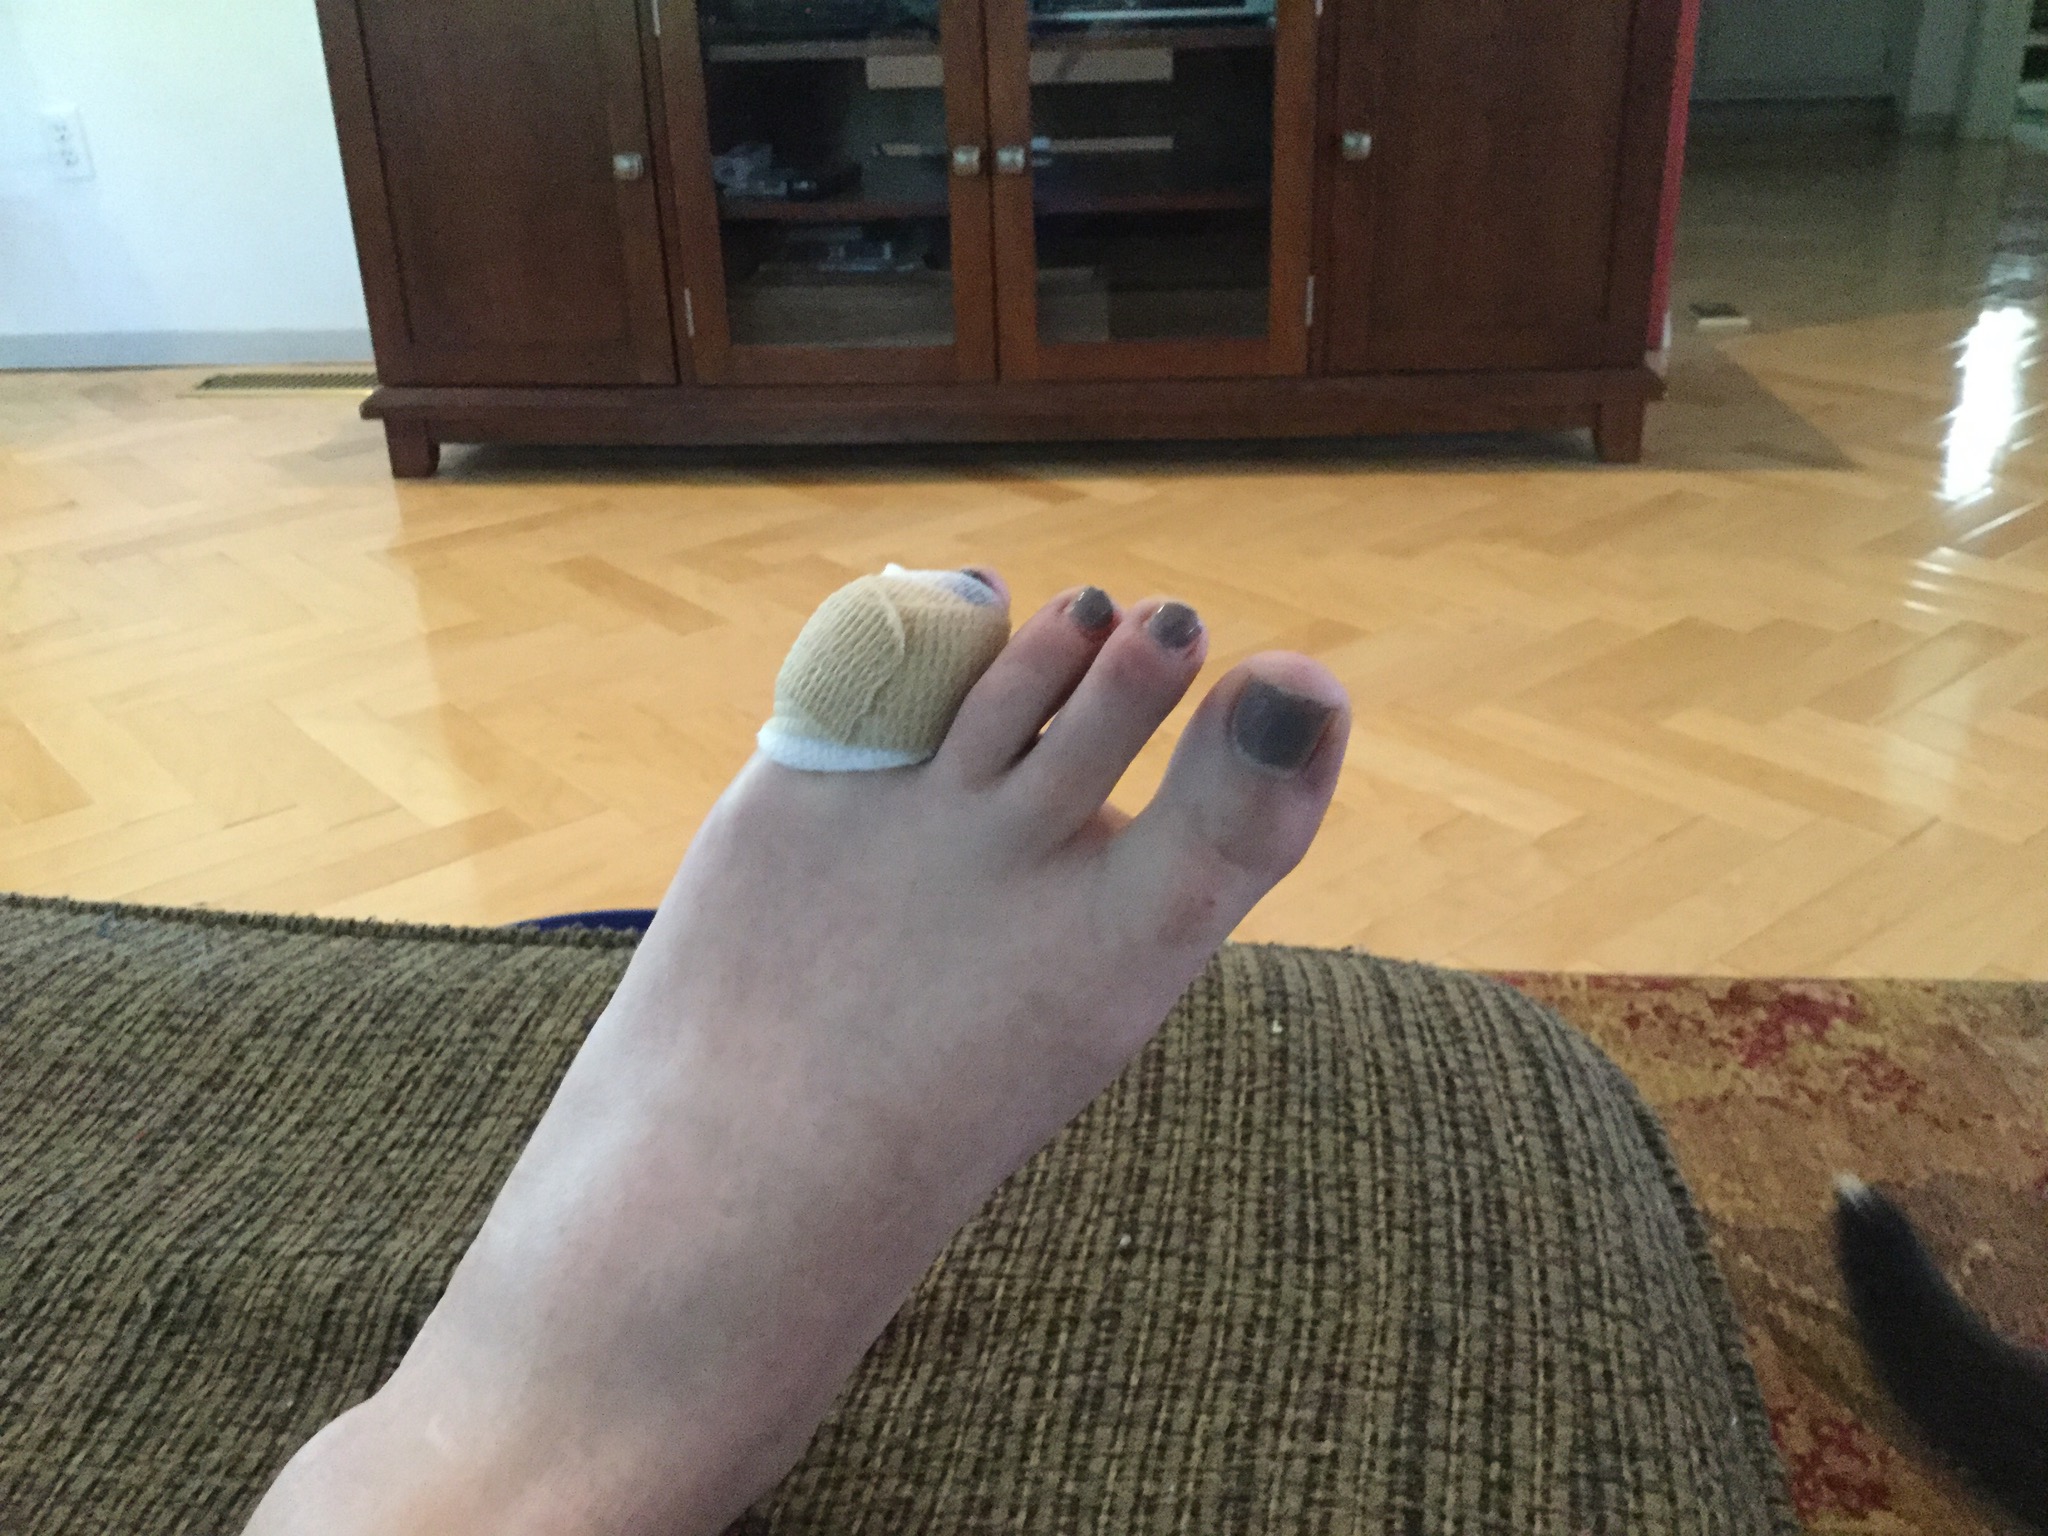
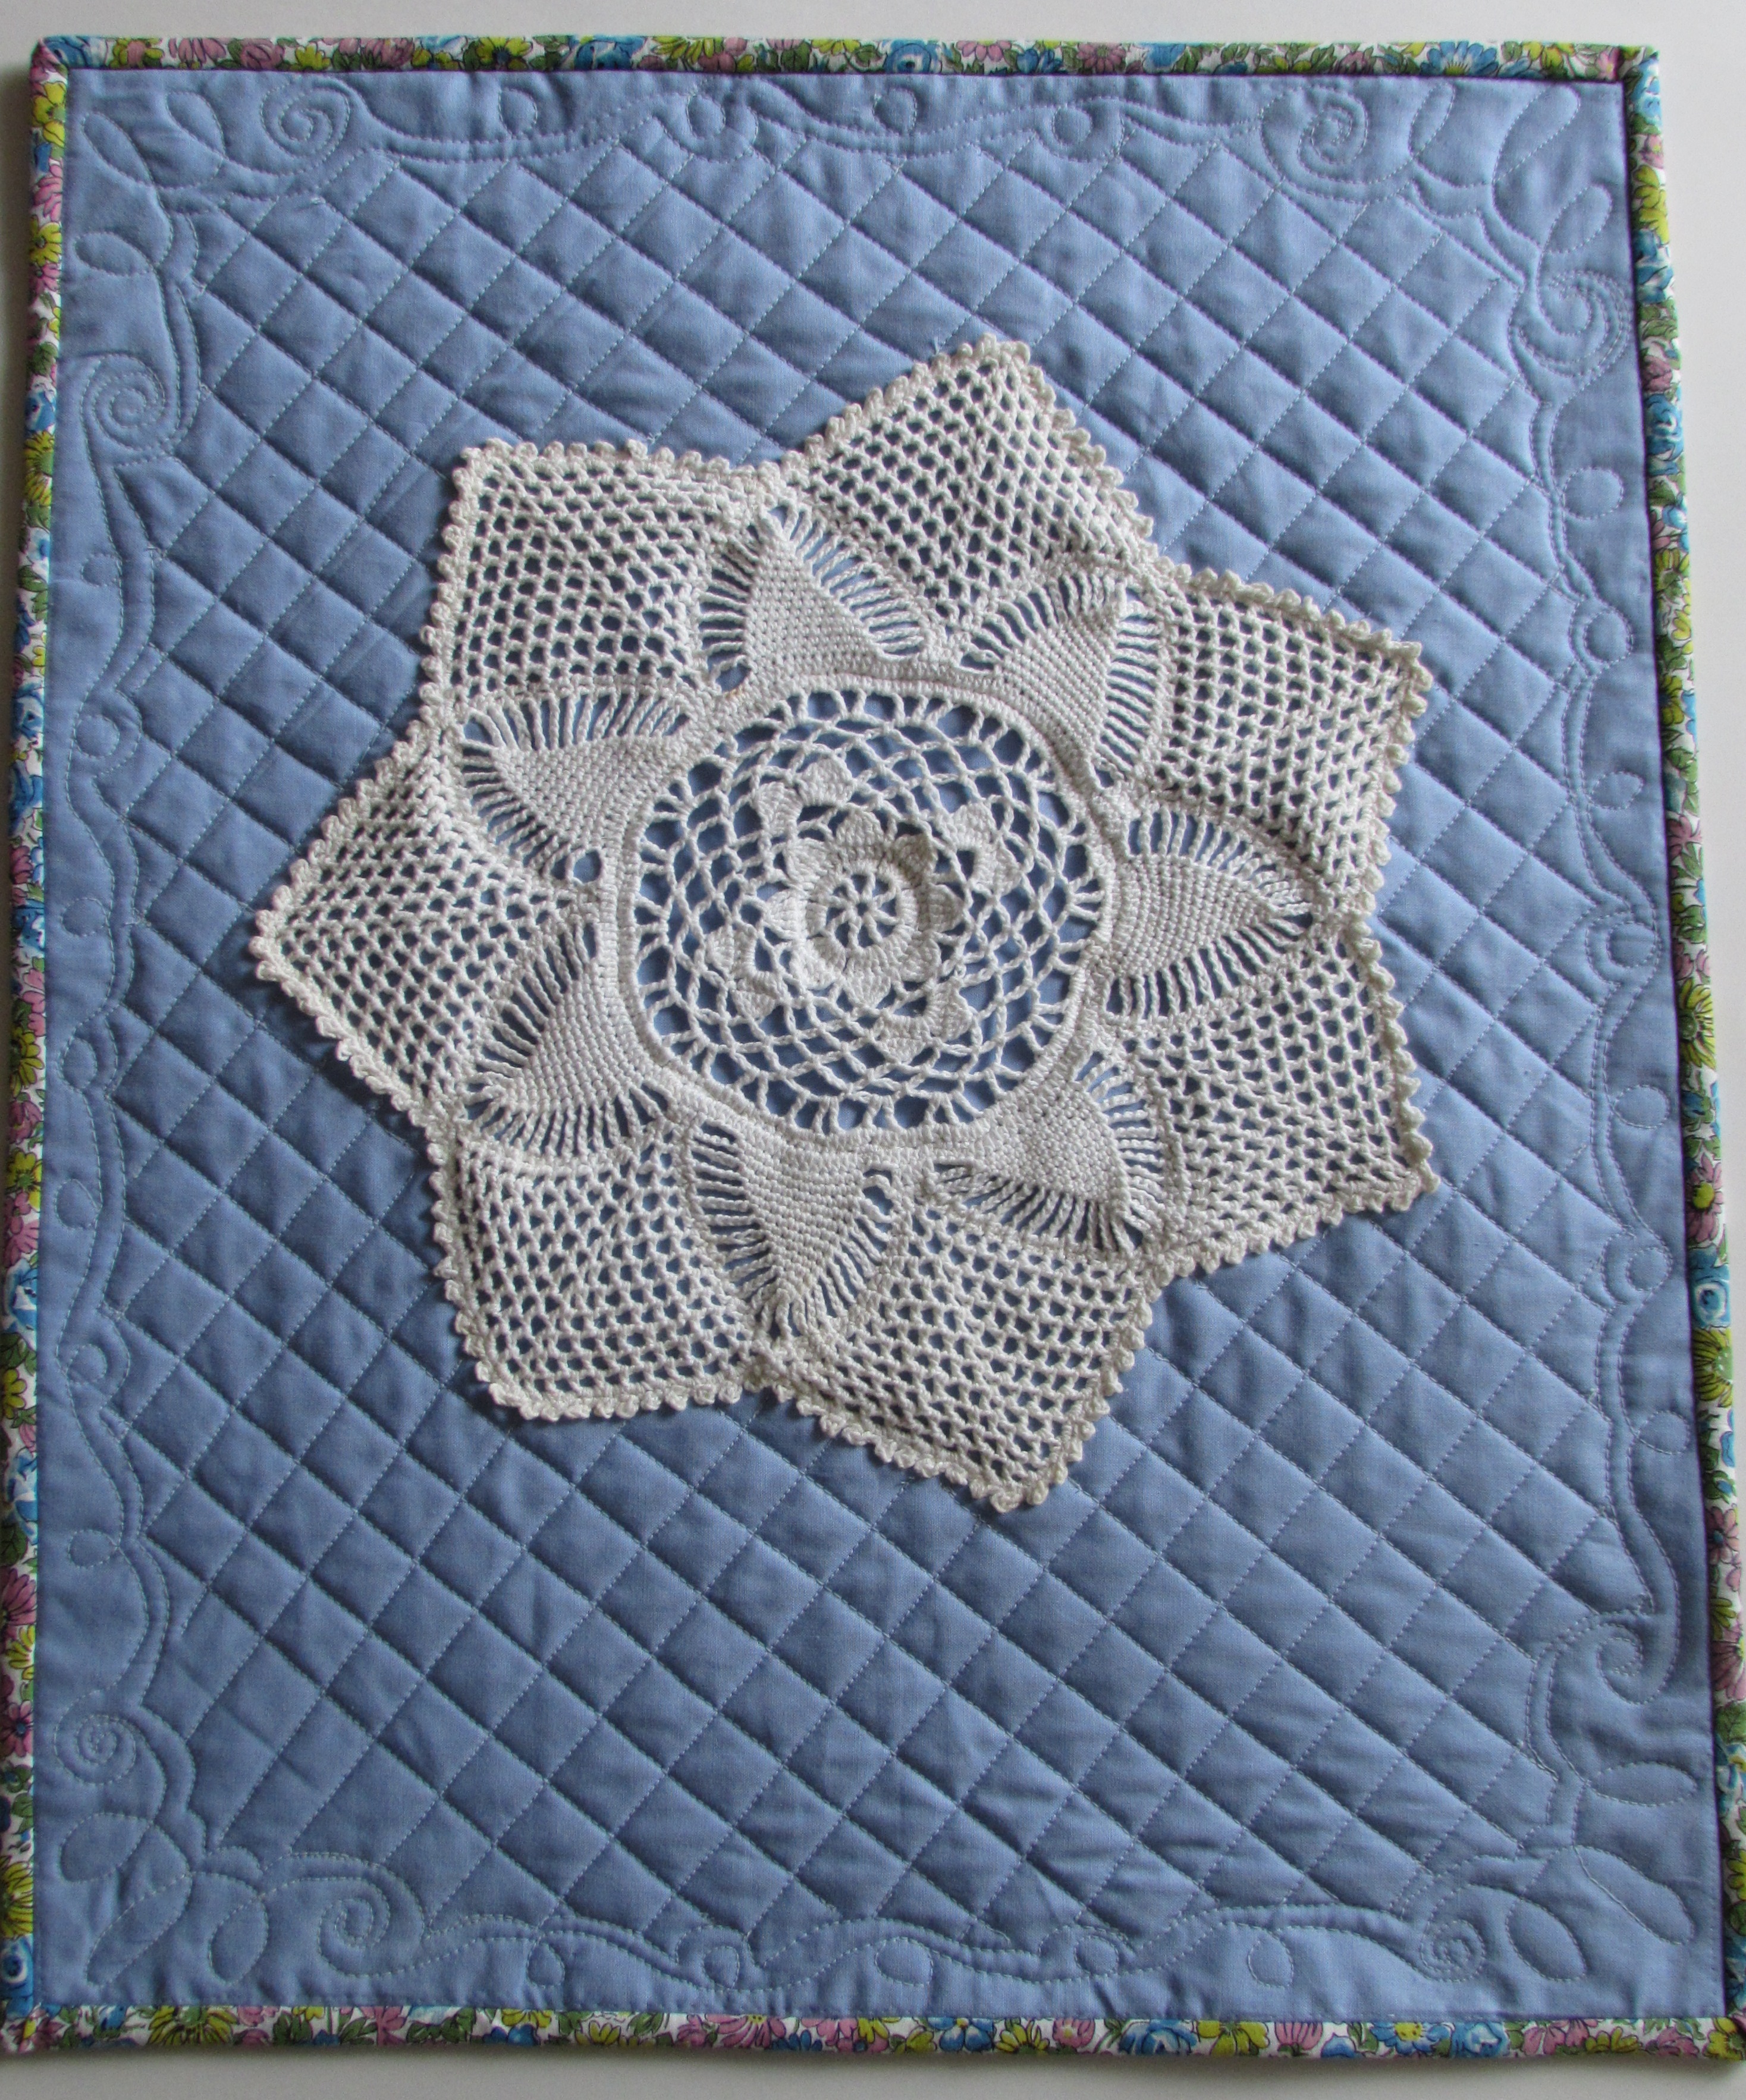
It seems like I finished this quilt a while ago. You might remember that I made this as part of a quiltalong with Jennifer from Inquiring Quilter. Probably two weeks ago I finished up the quilting and got the binding stitched about 75% of the way. Then it sat there. I was distracted by purses and other fun projects. Yesterday afternoon I was able to stitch that last bit of binding down while Julia rested that poor pinkie toe of hers and it is now complete.

img_20160526_5255

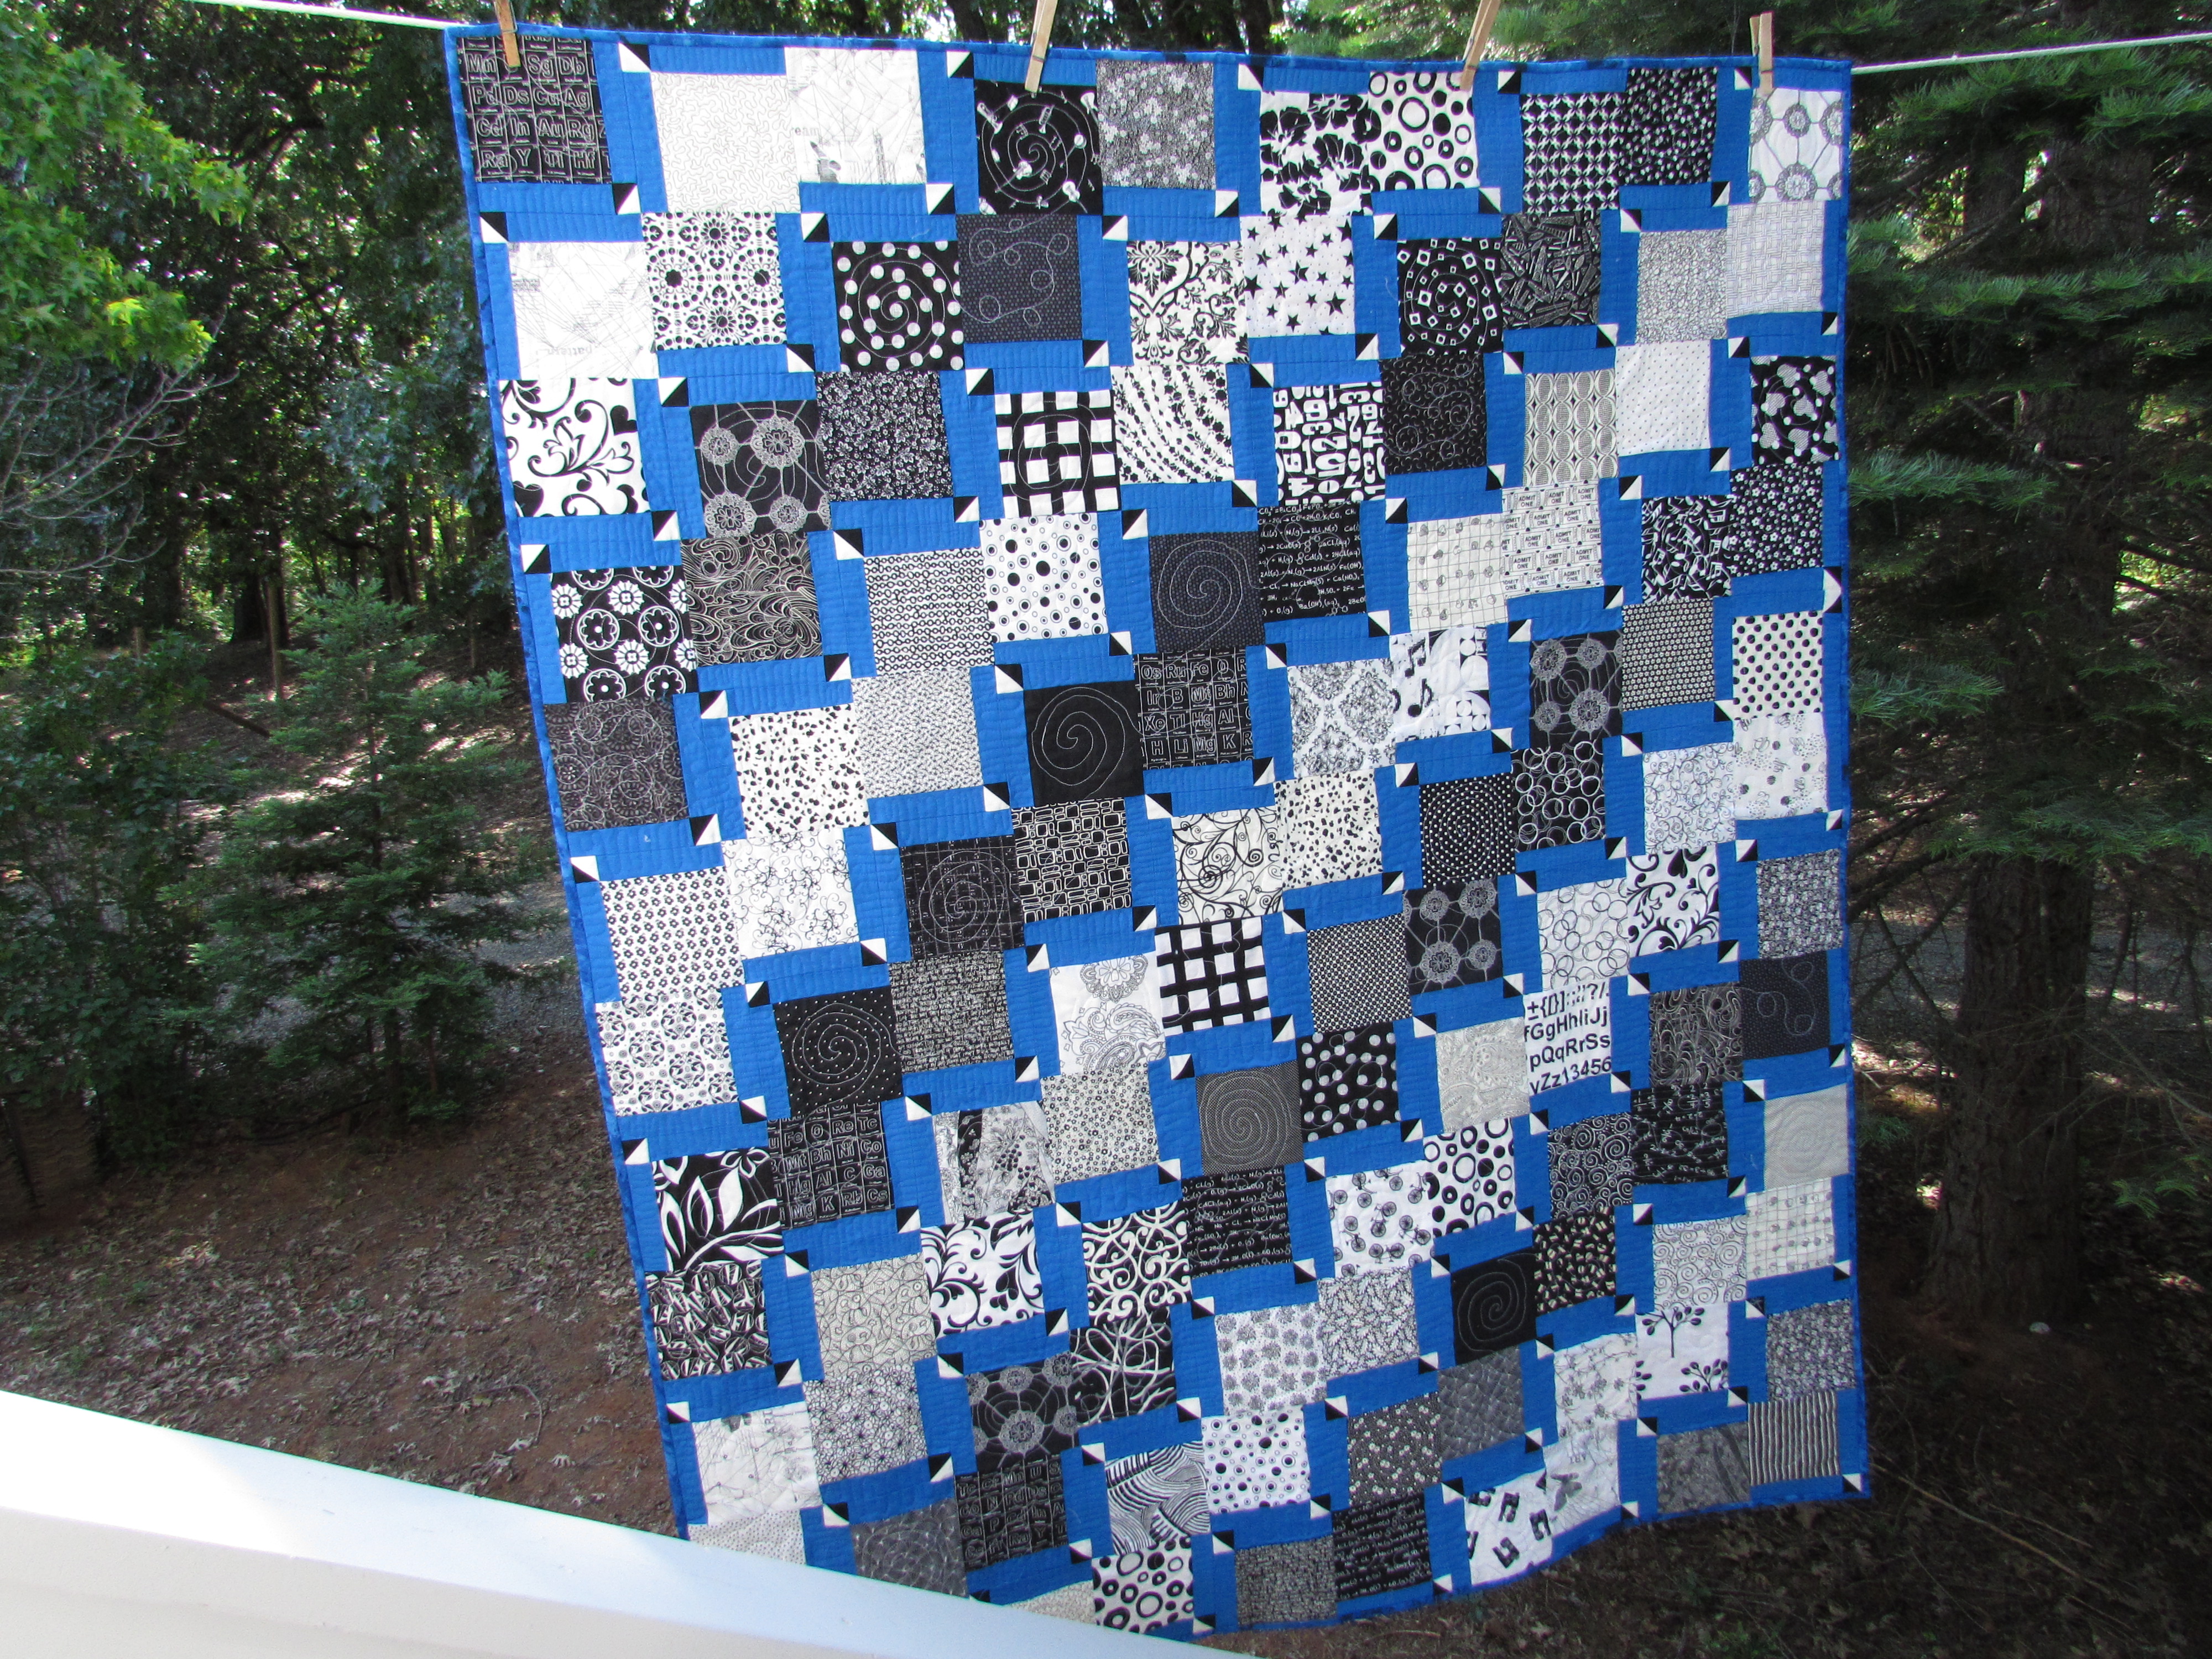
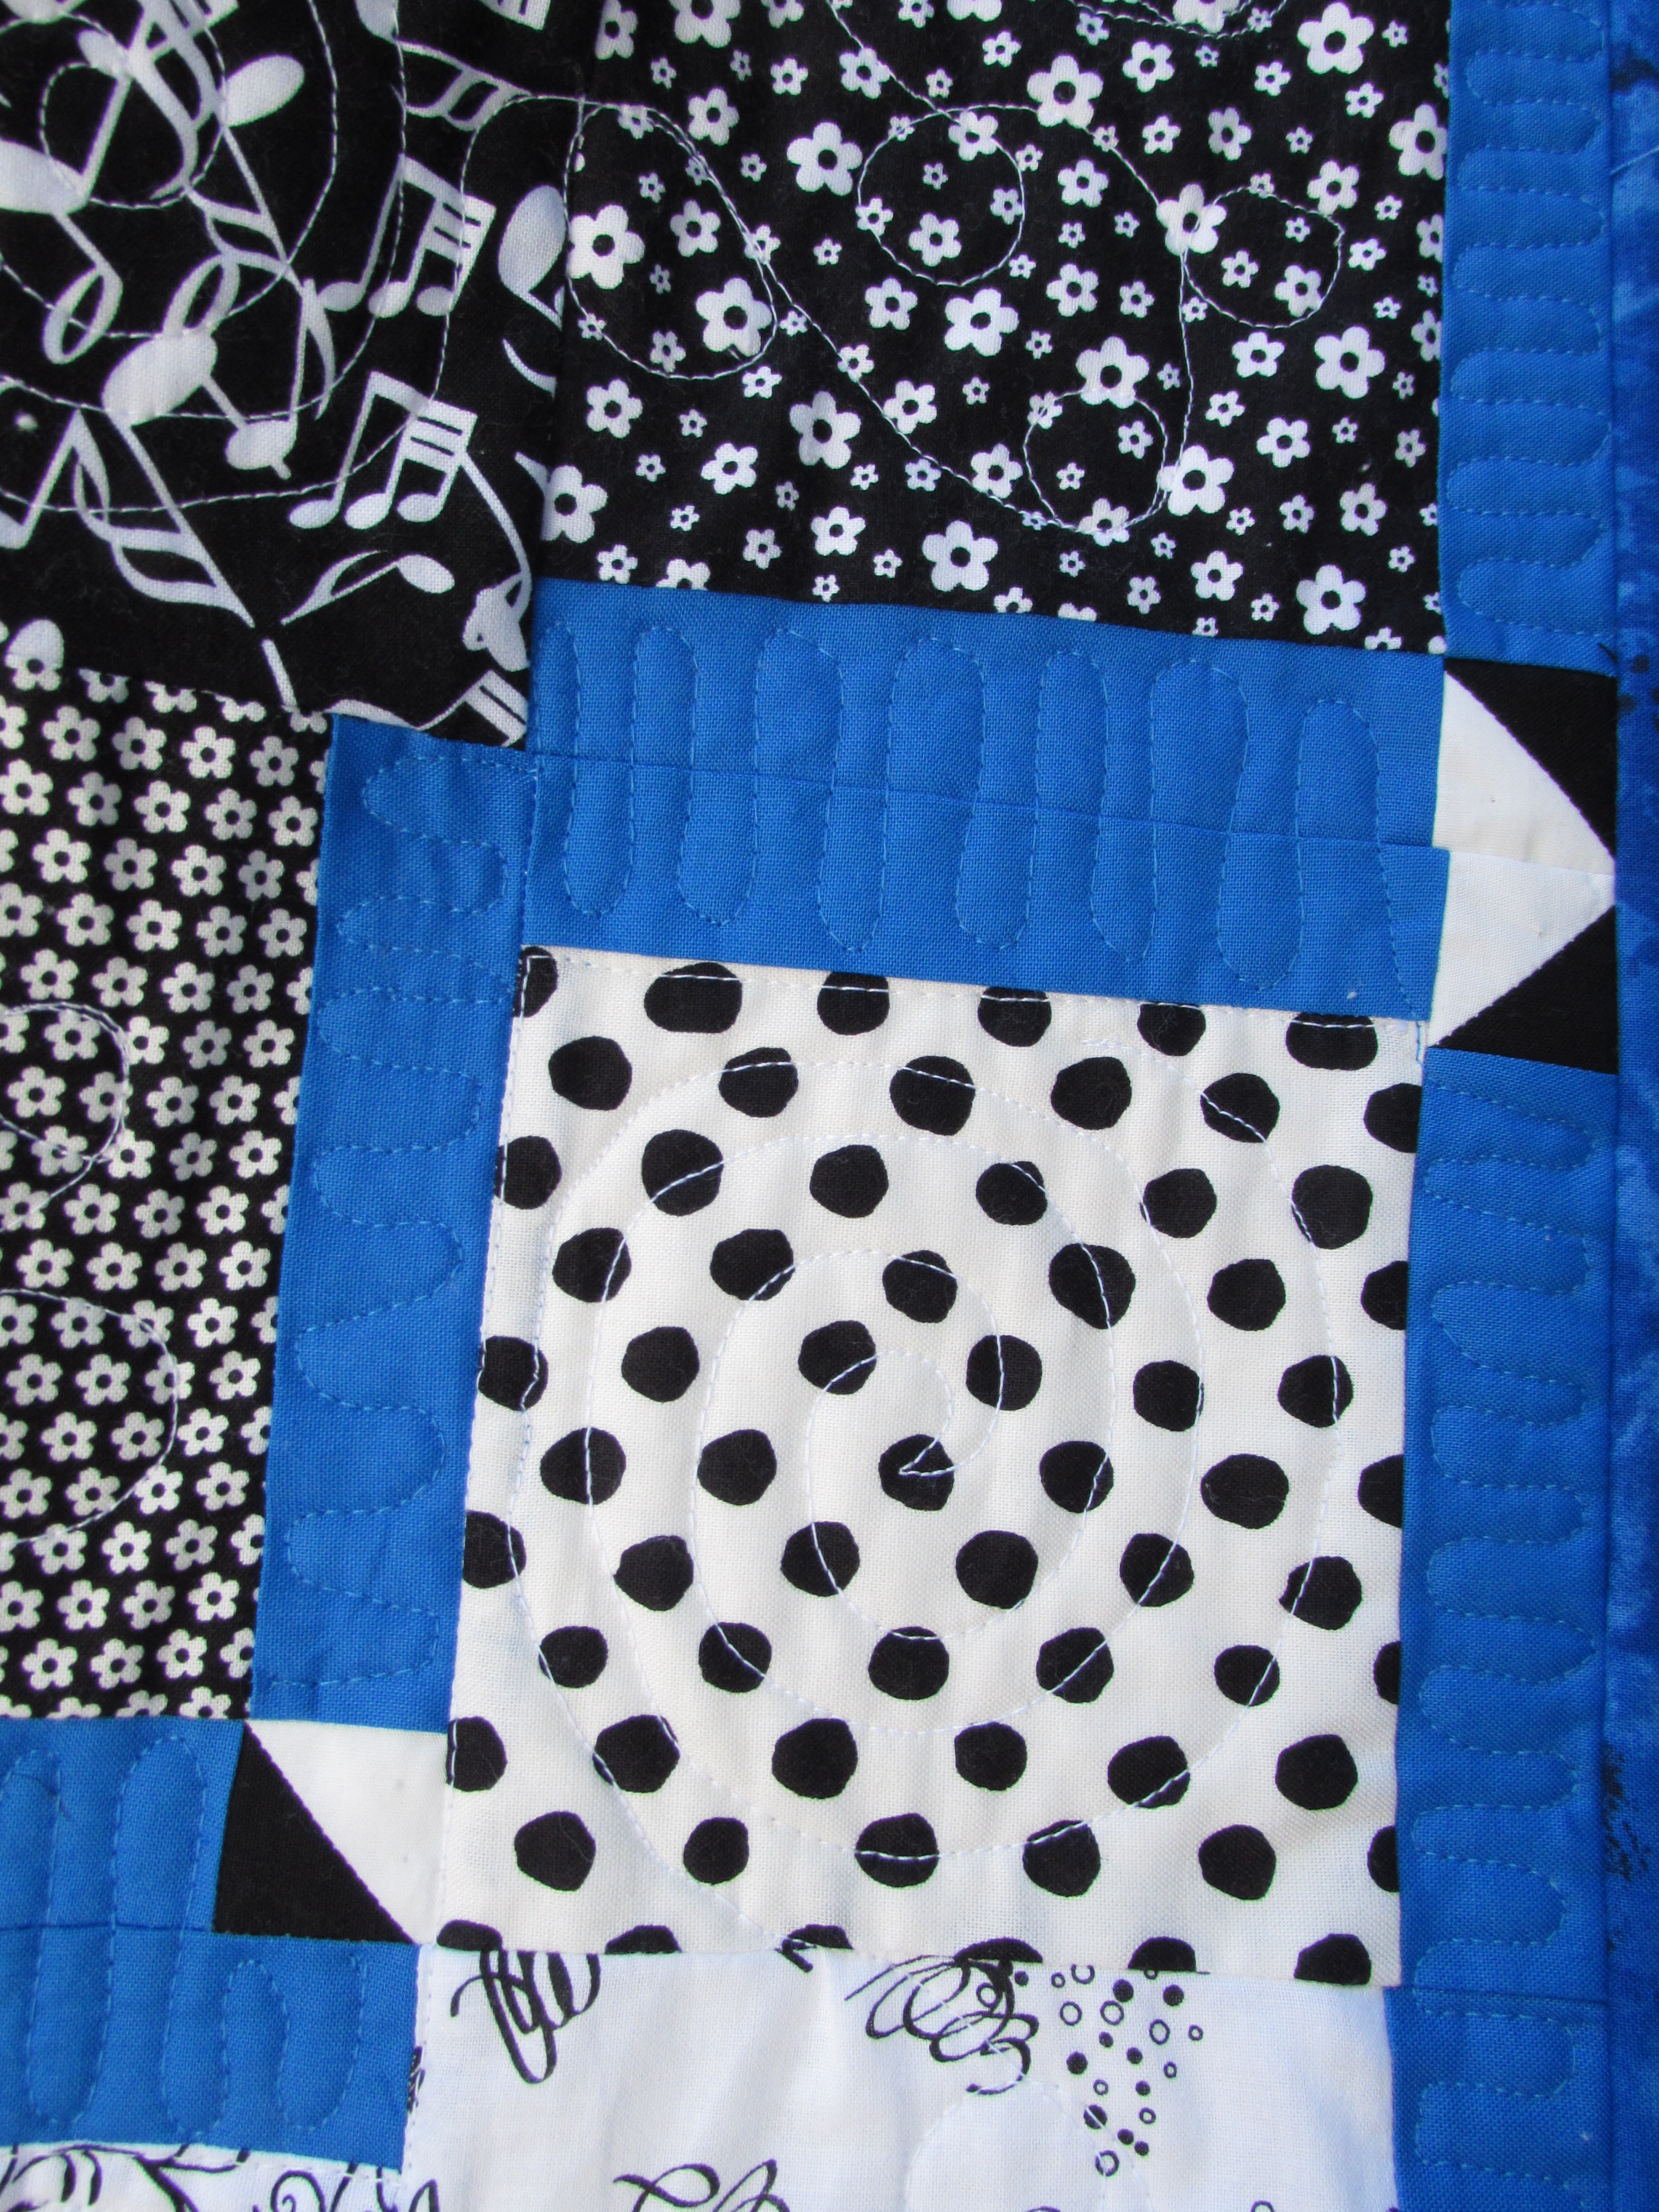
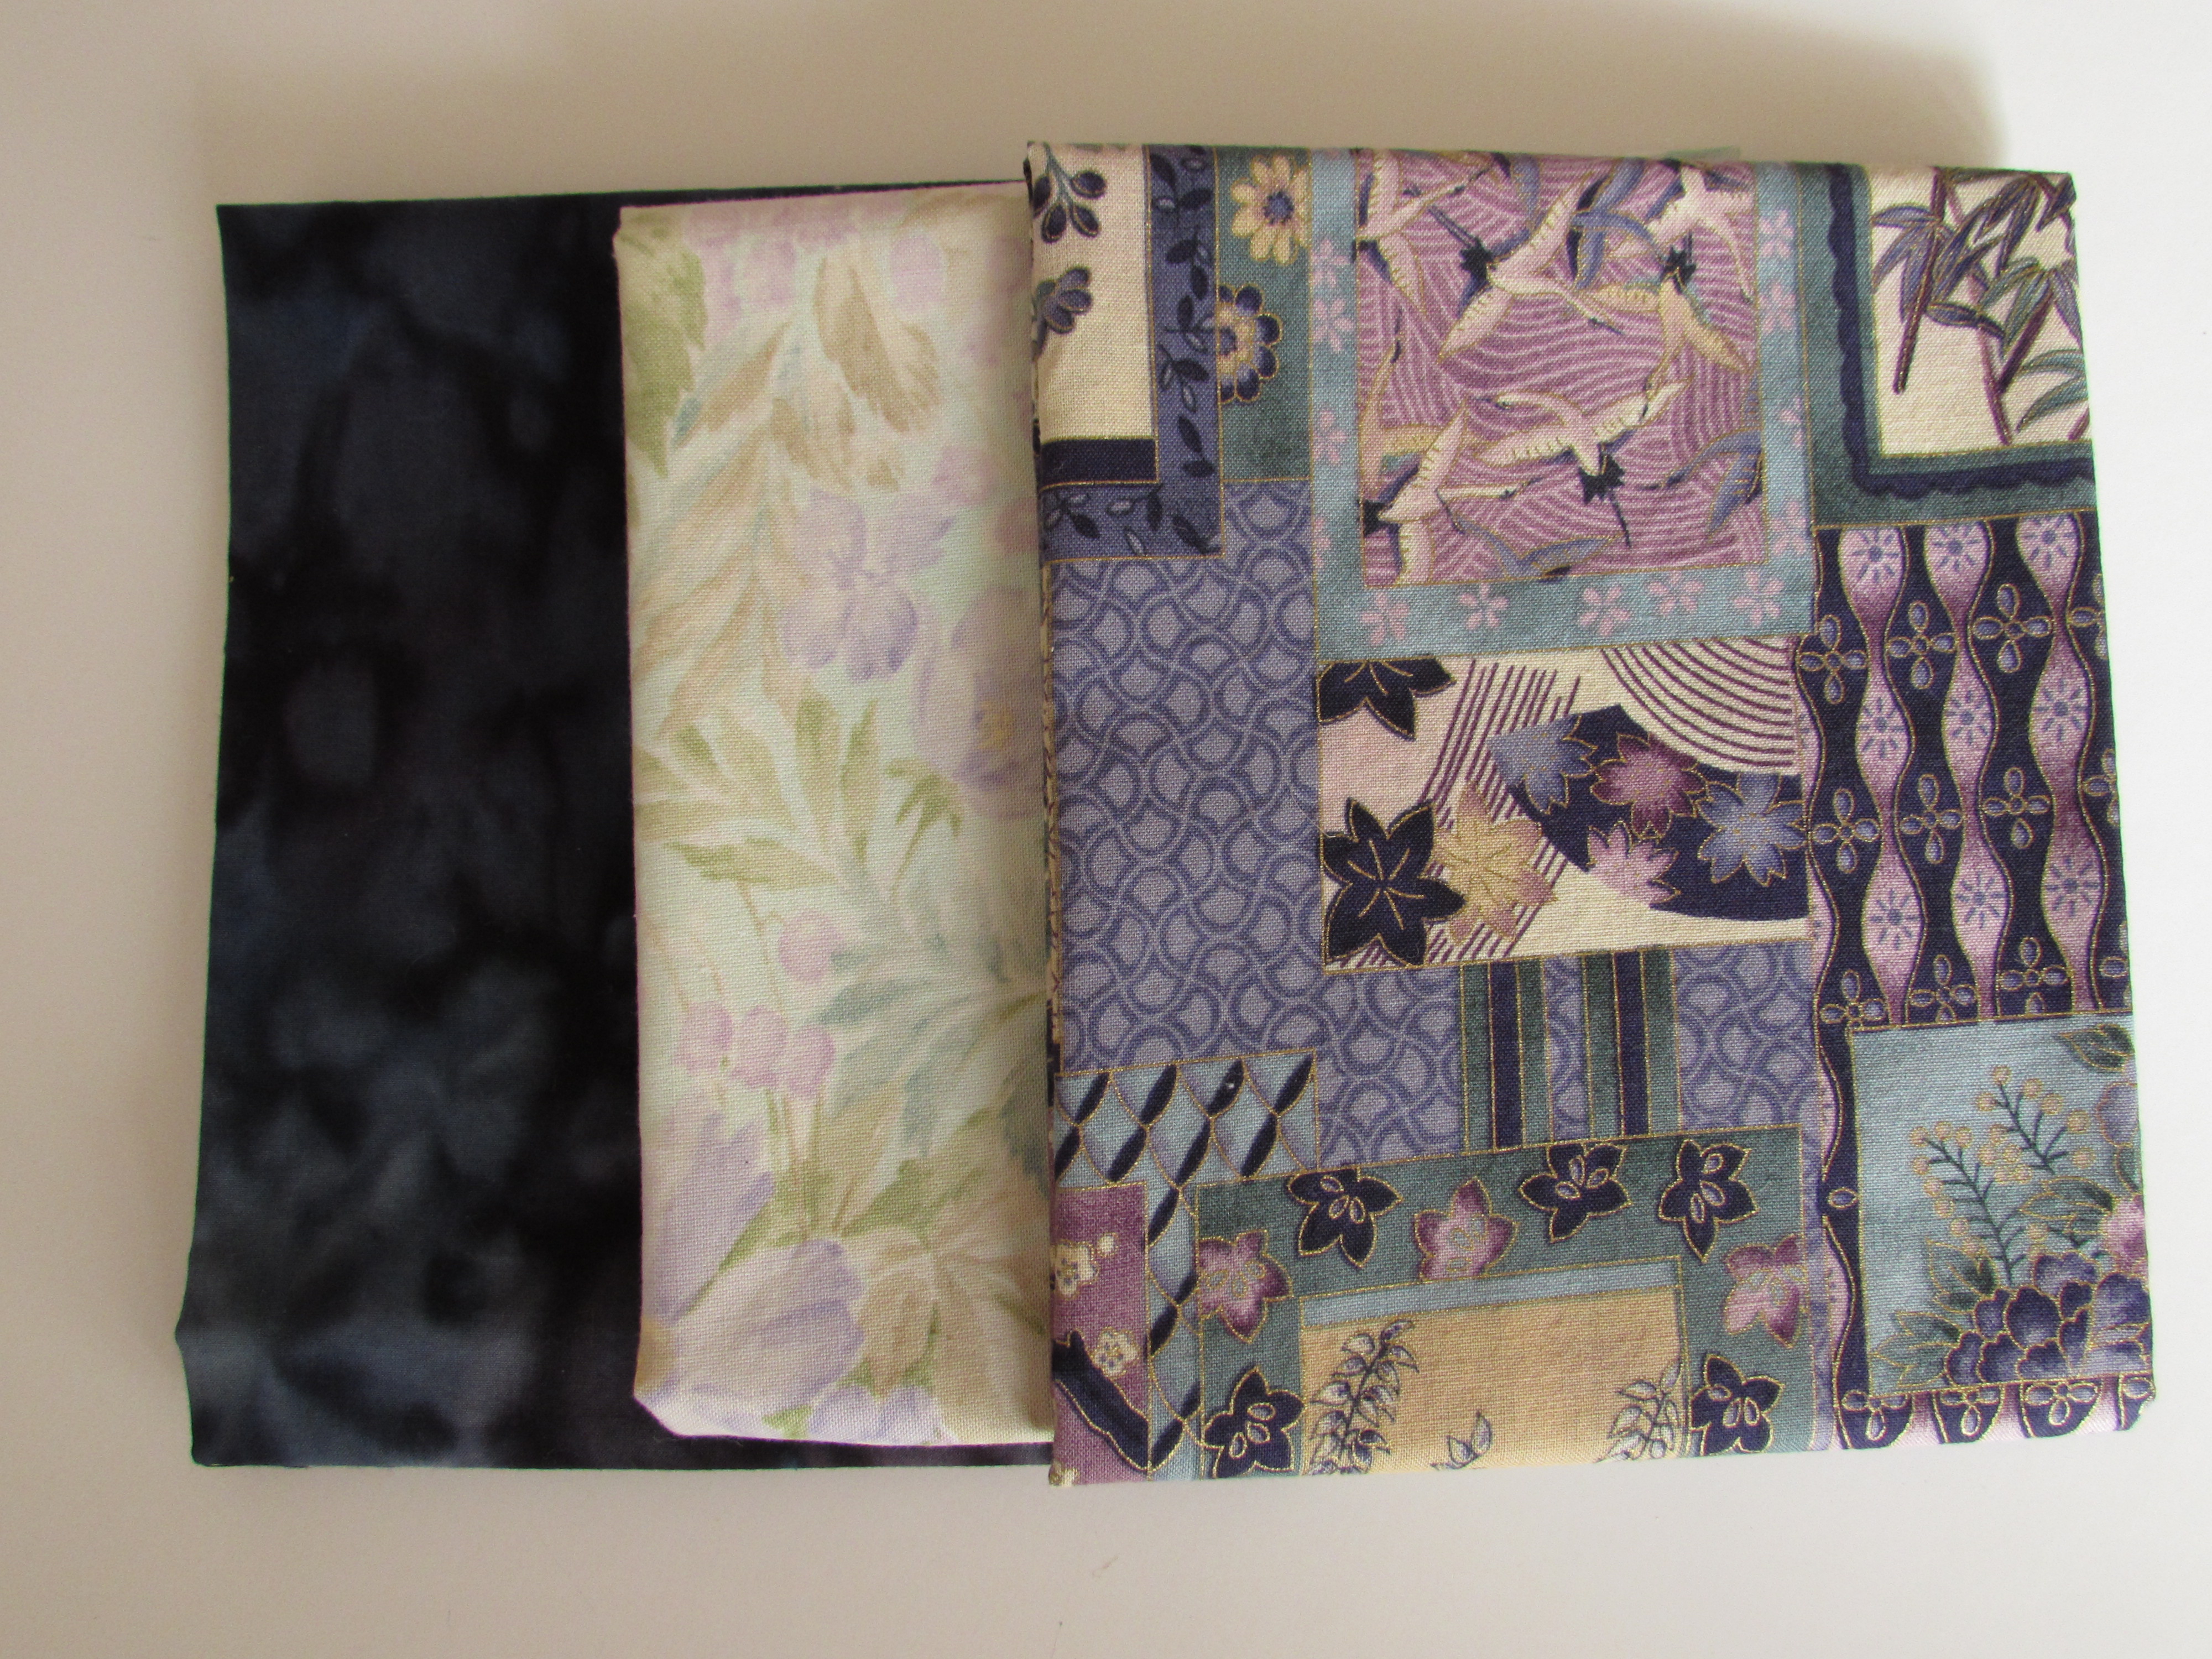
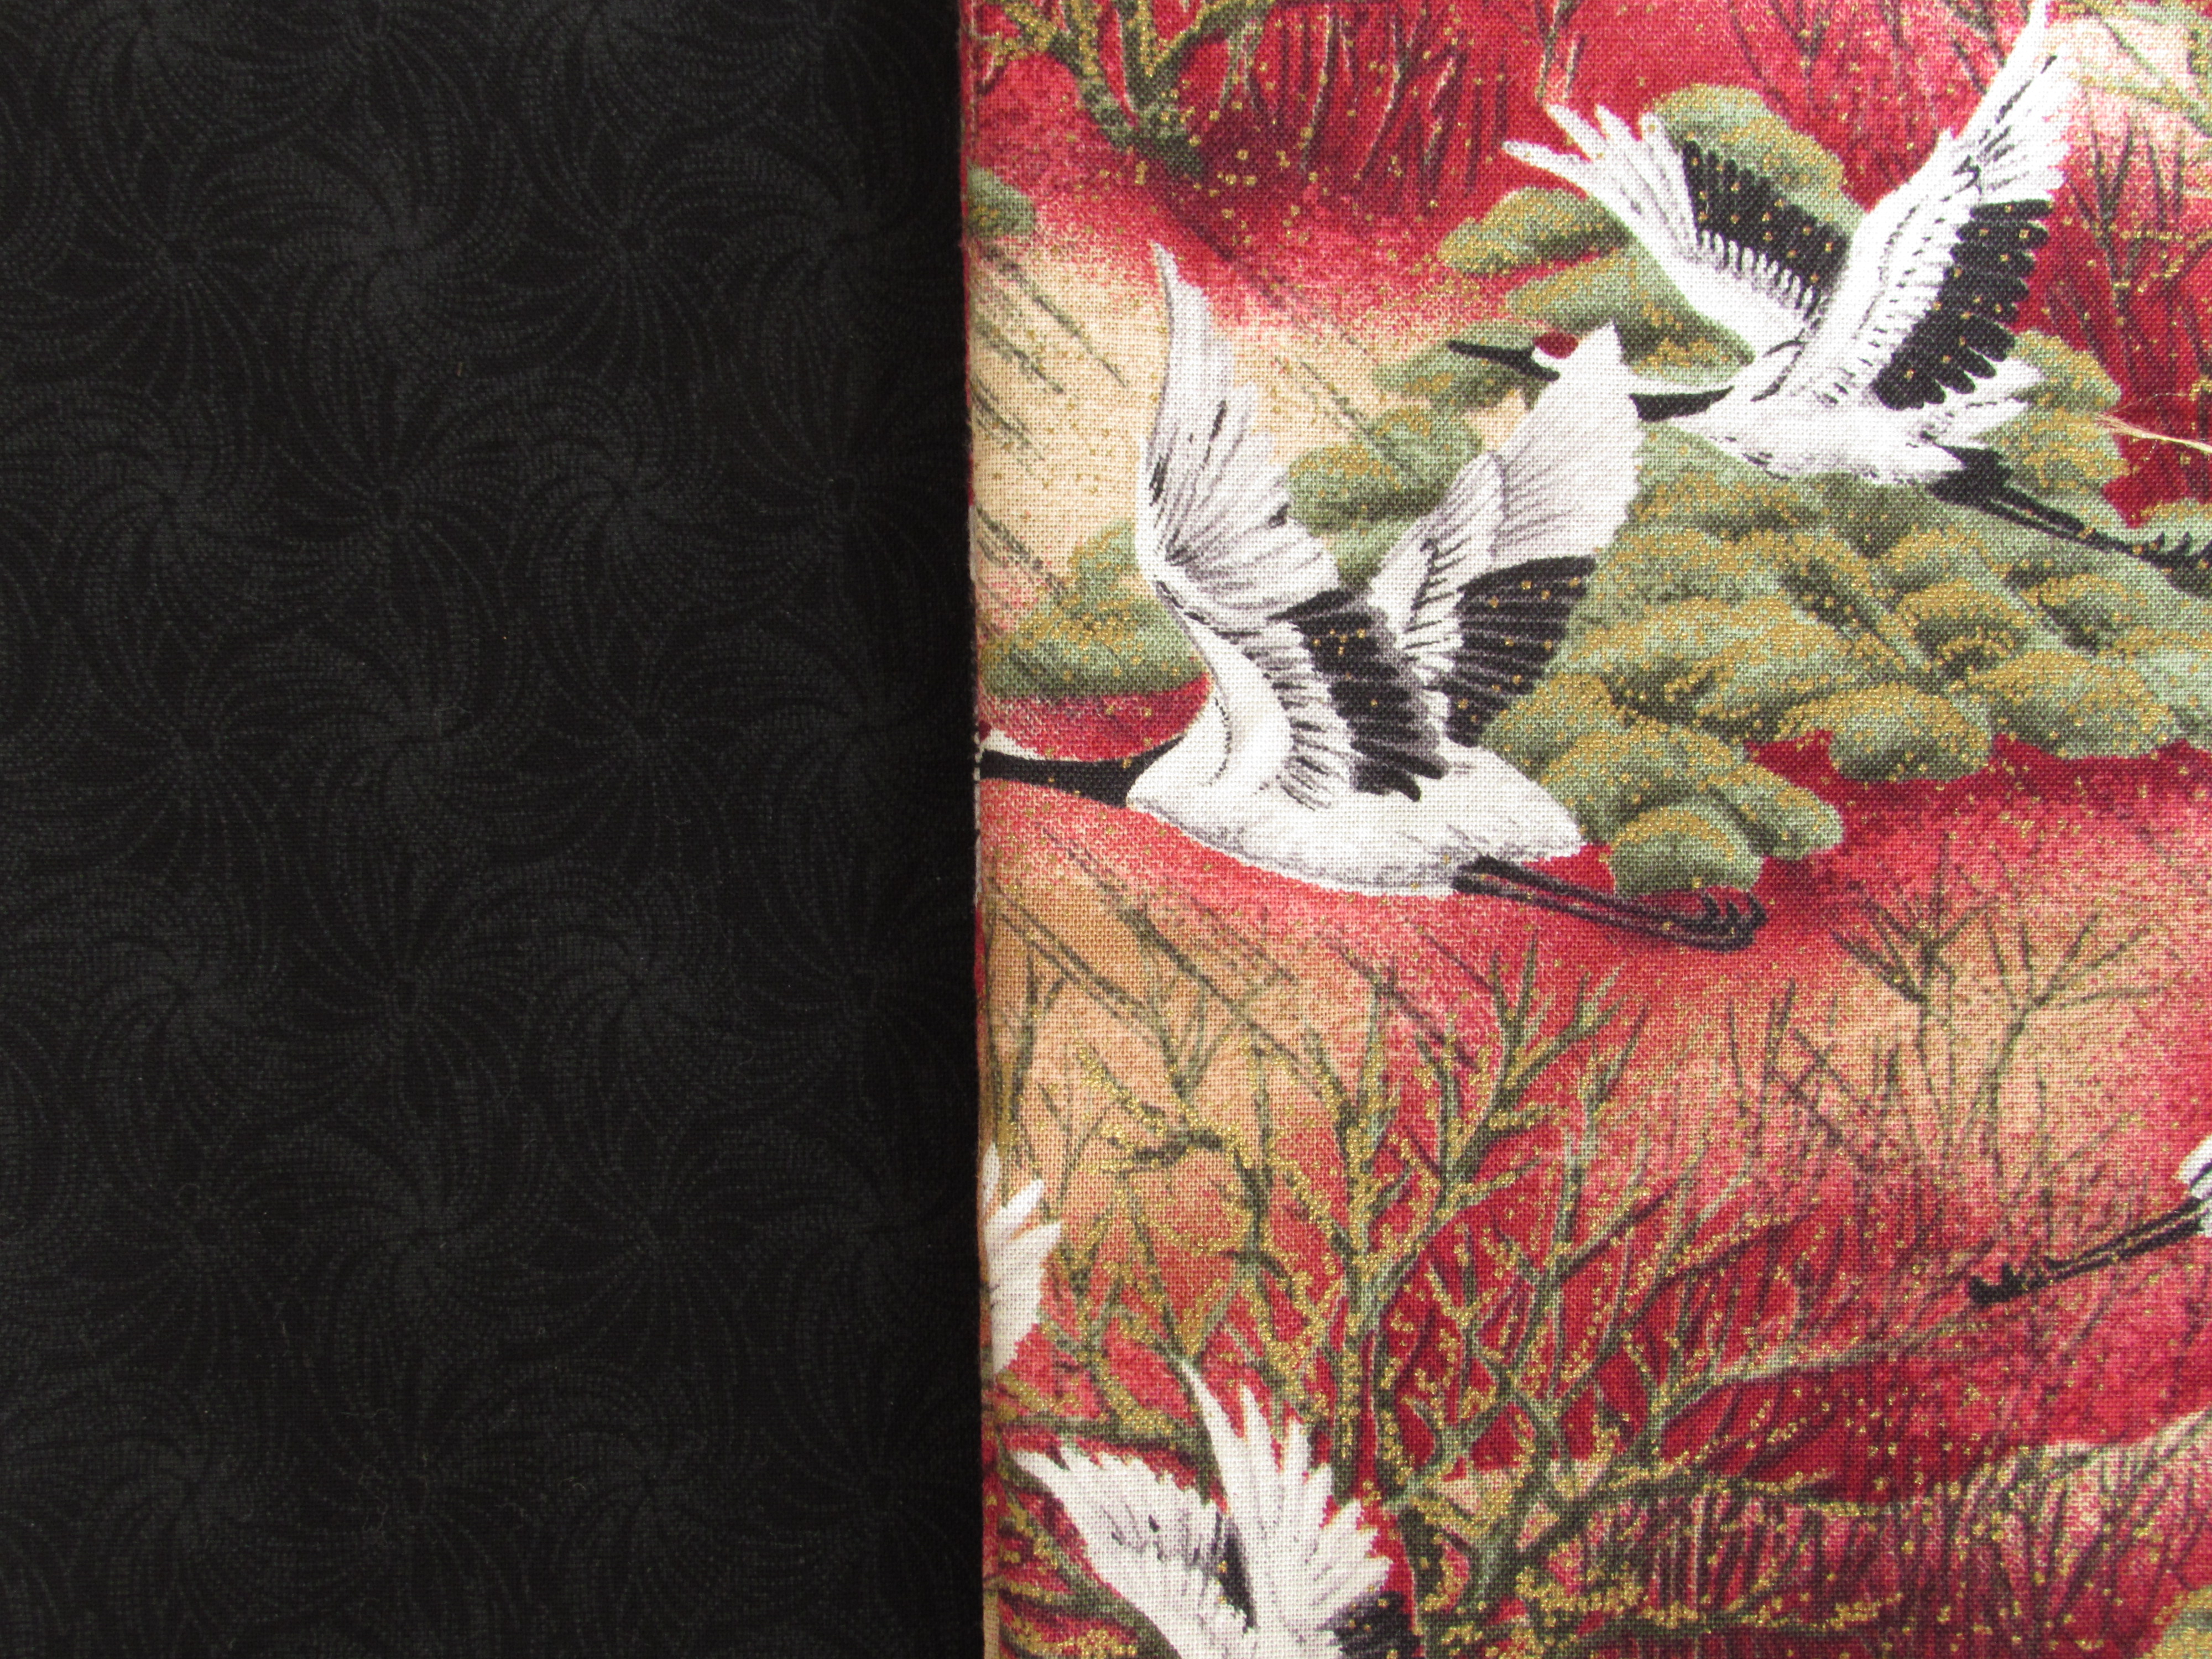
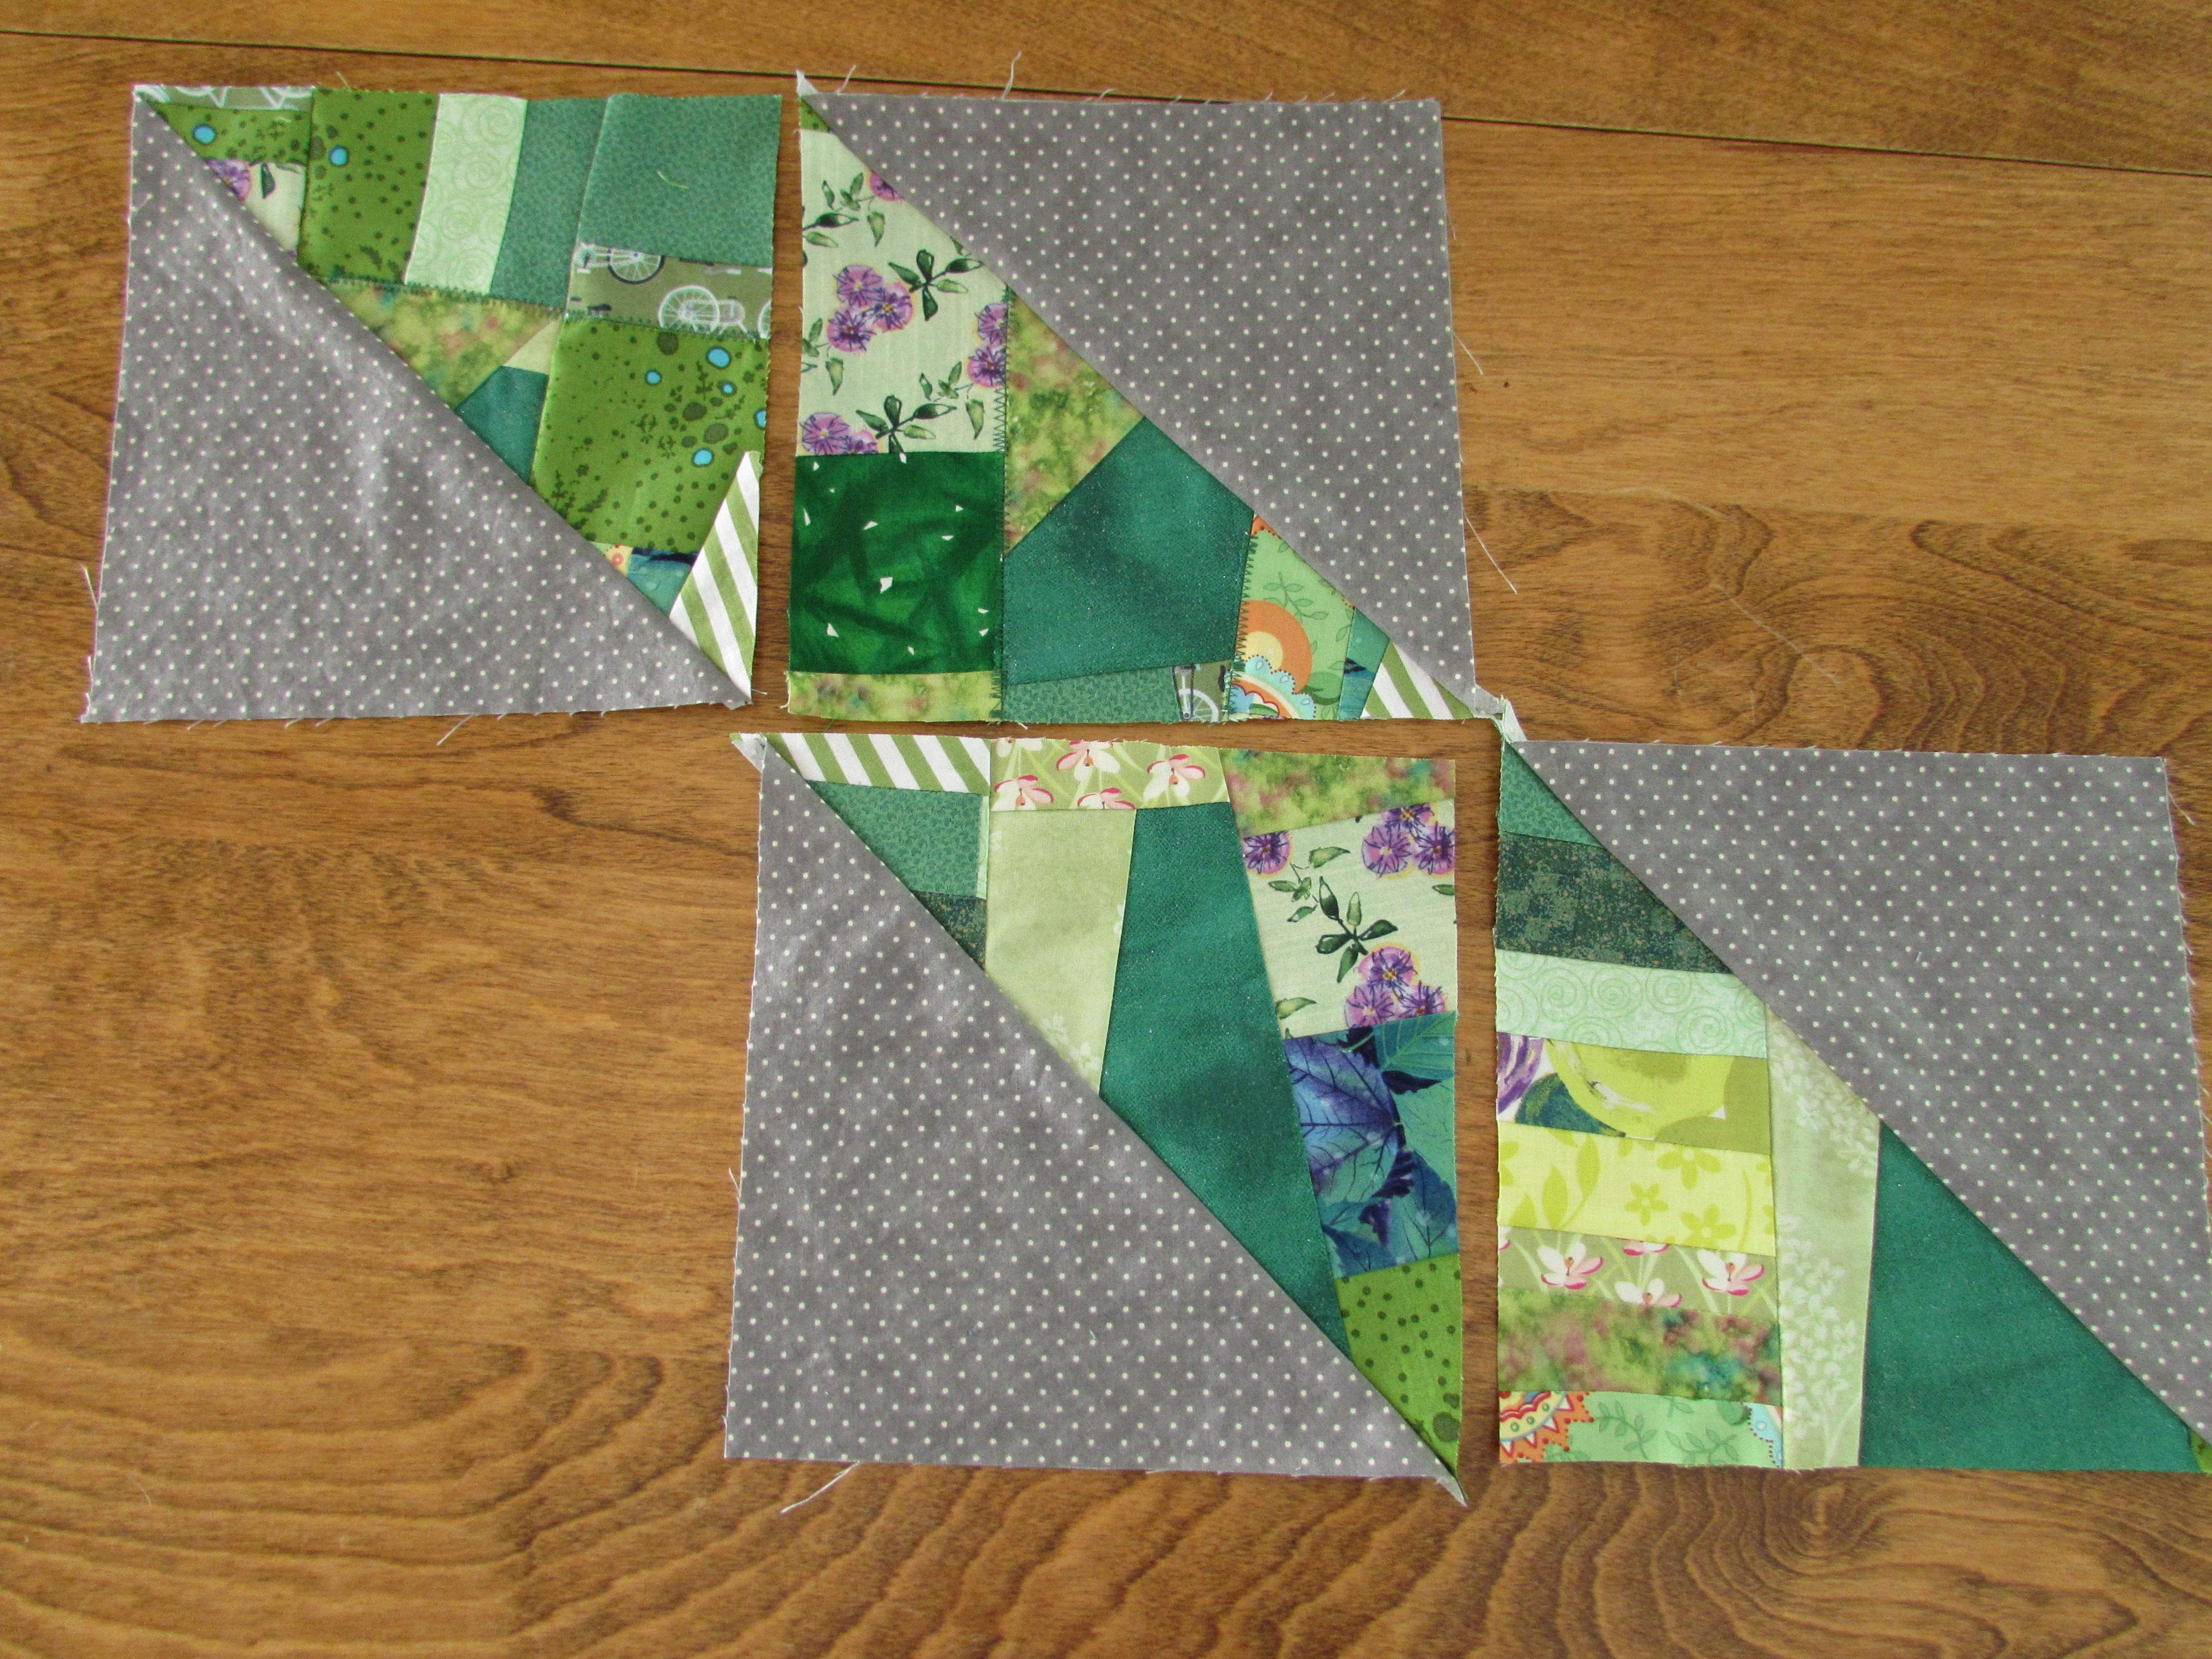
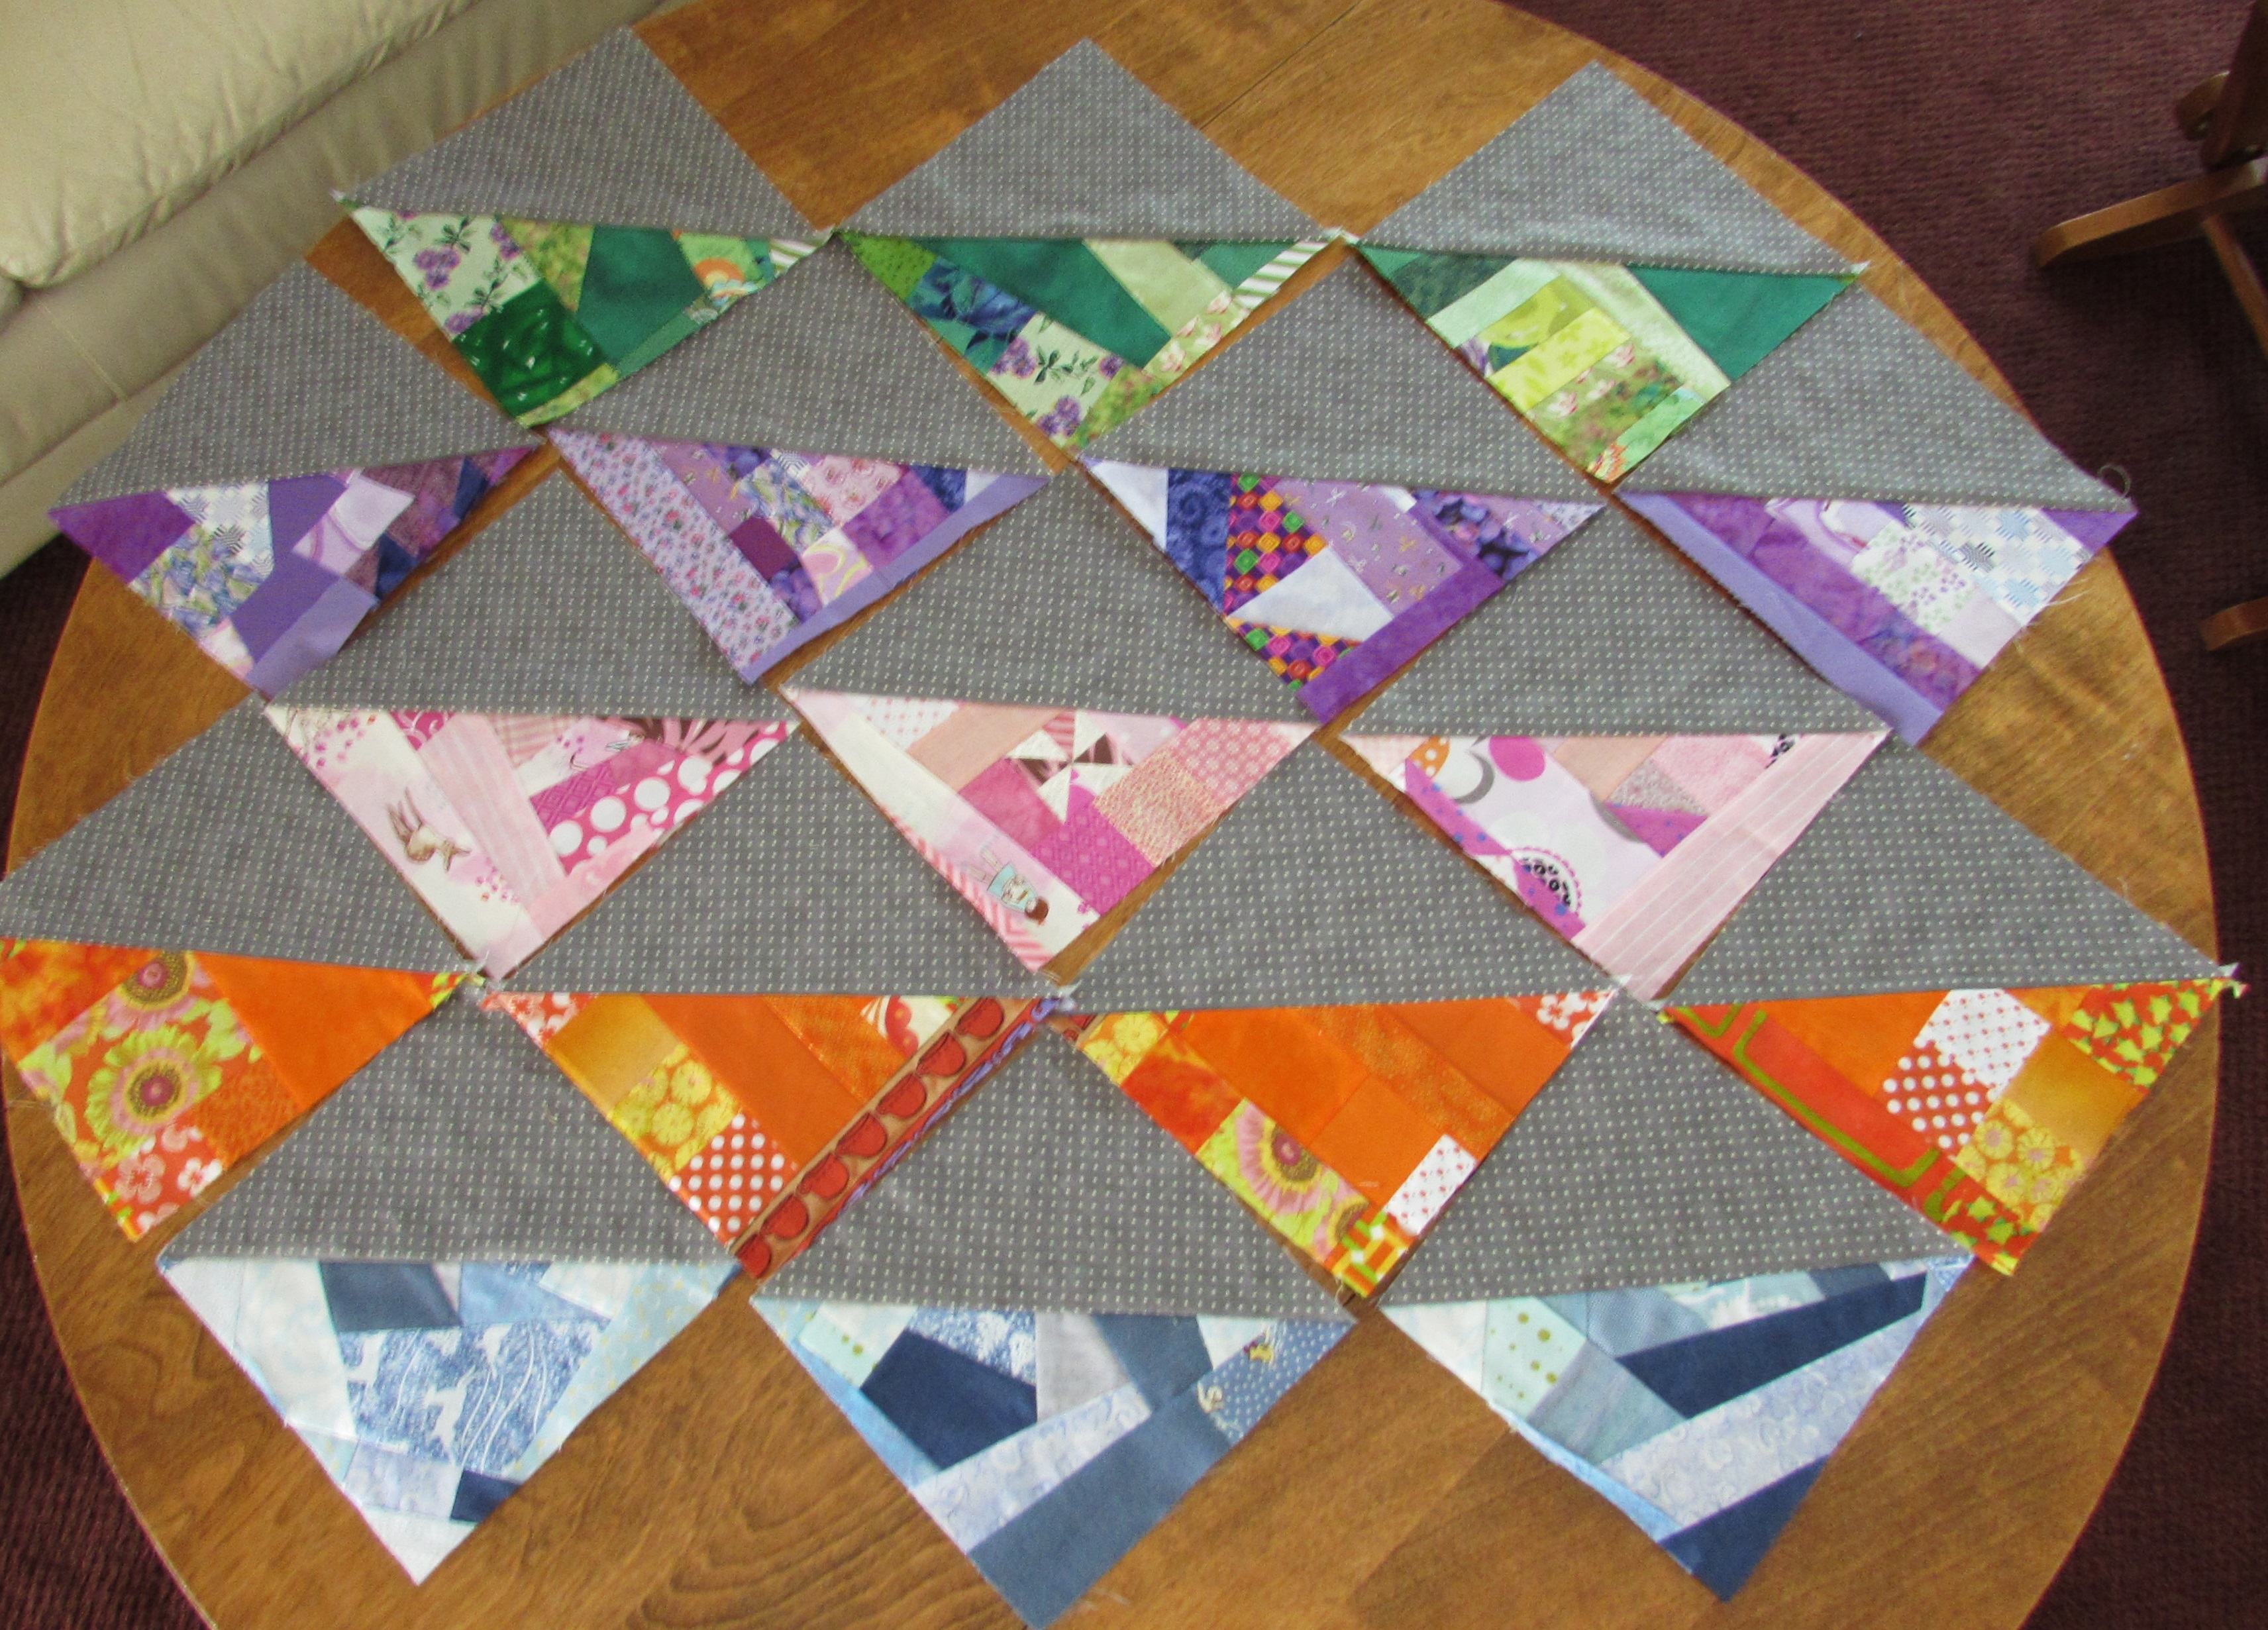
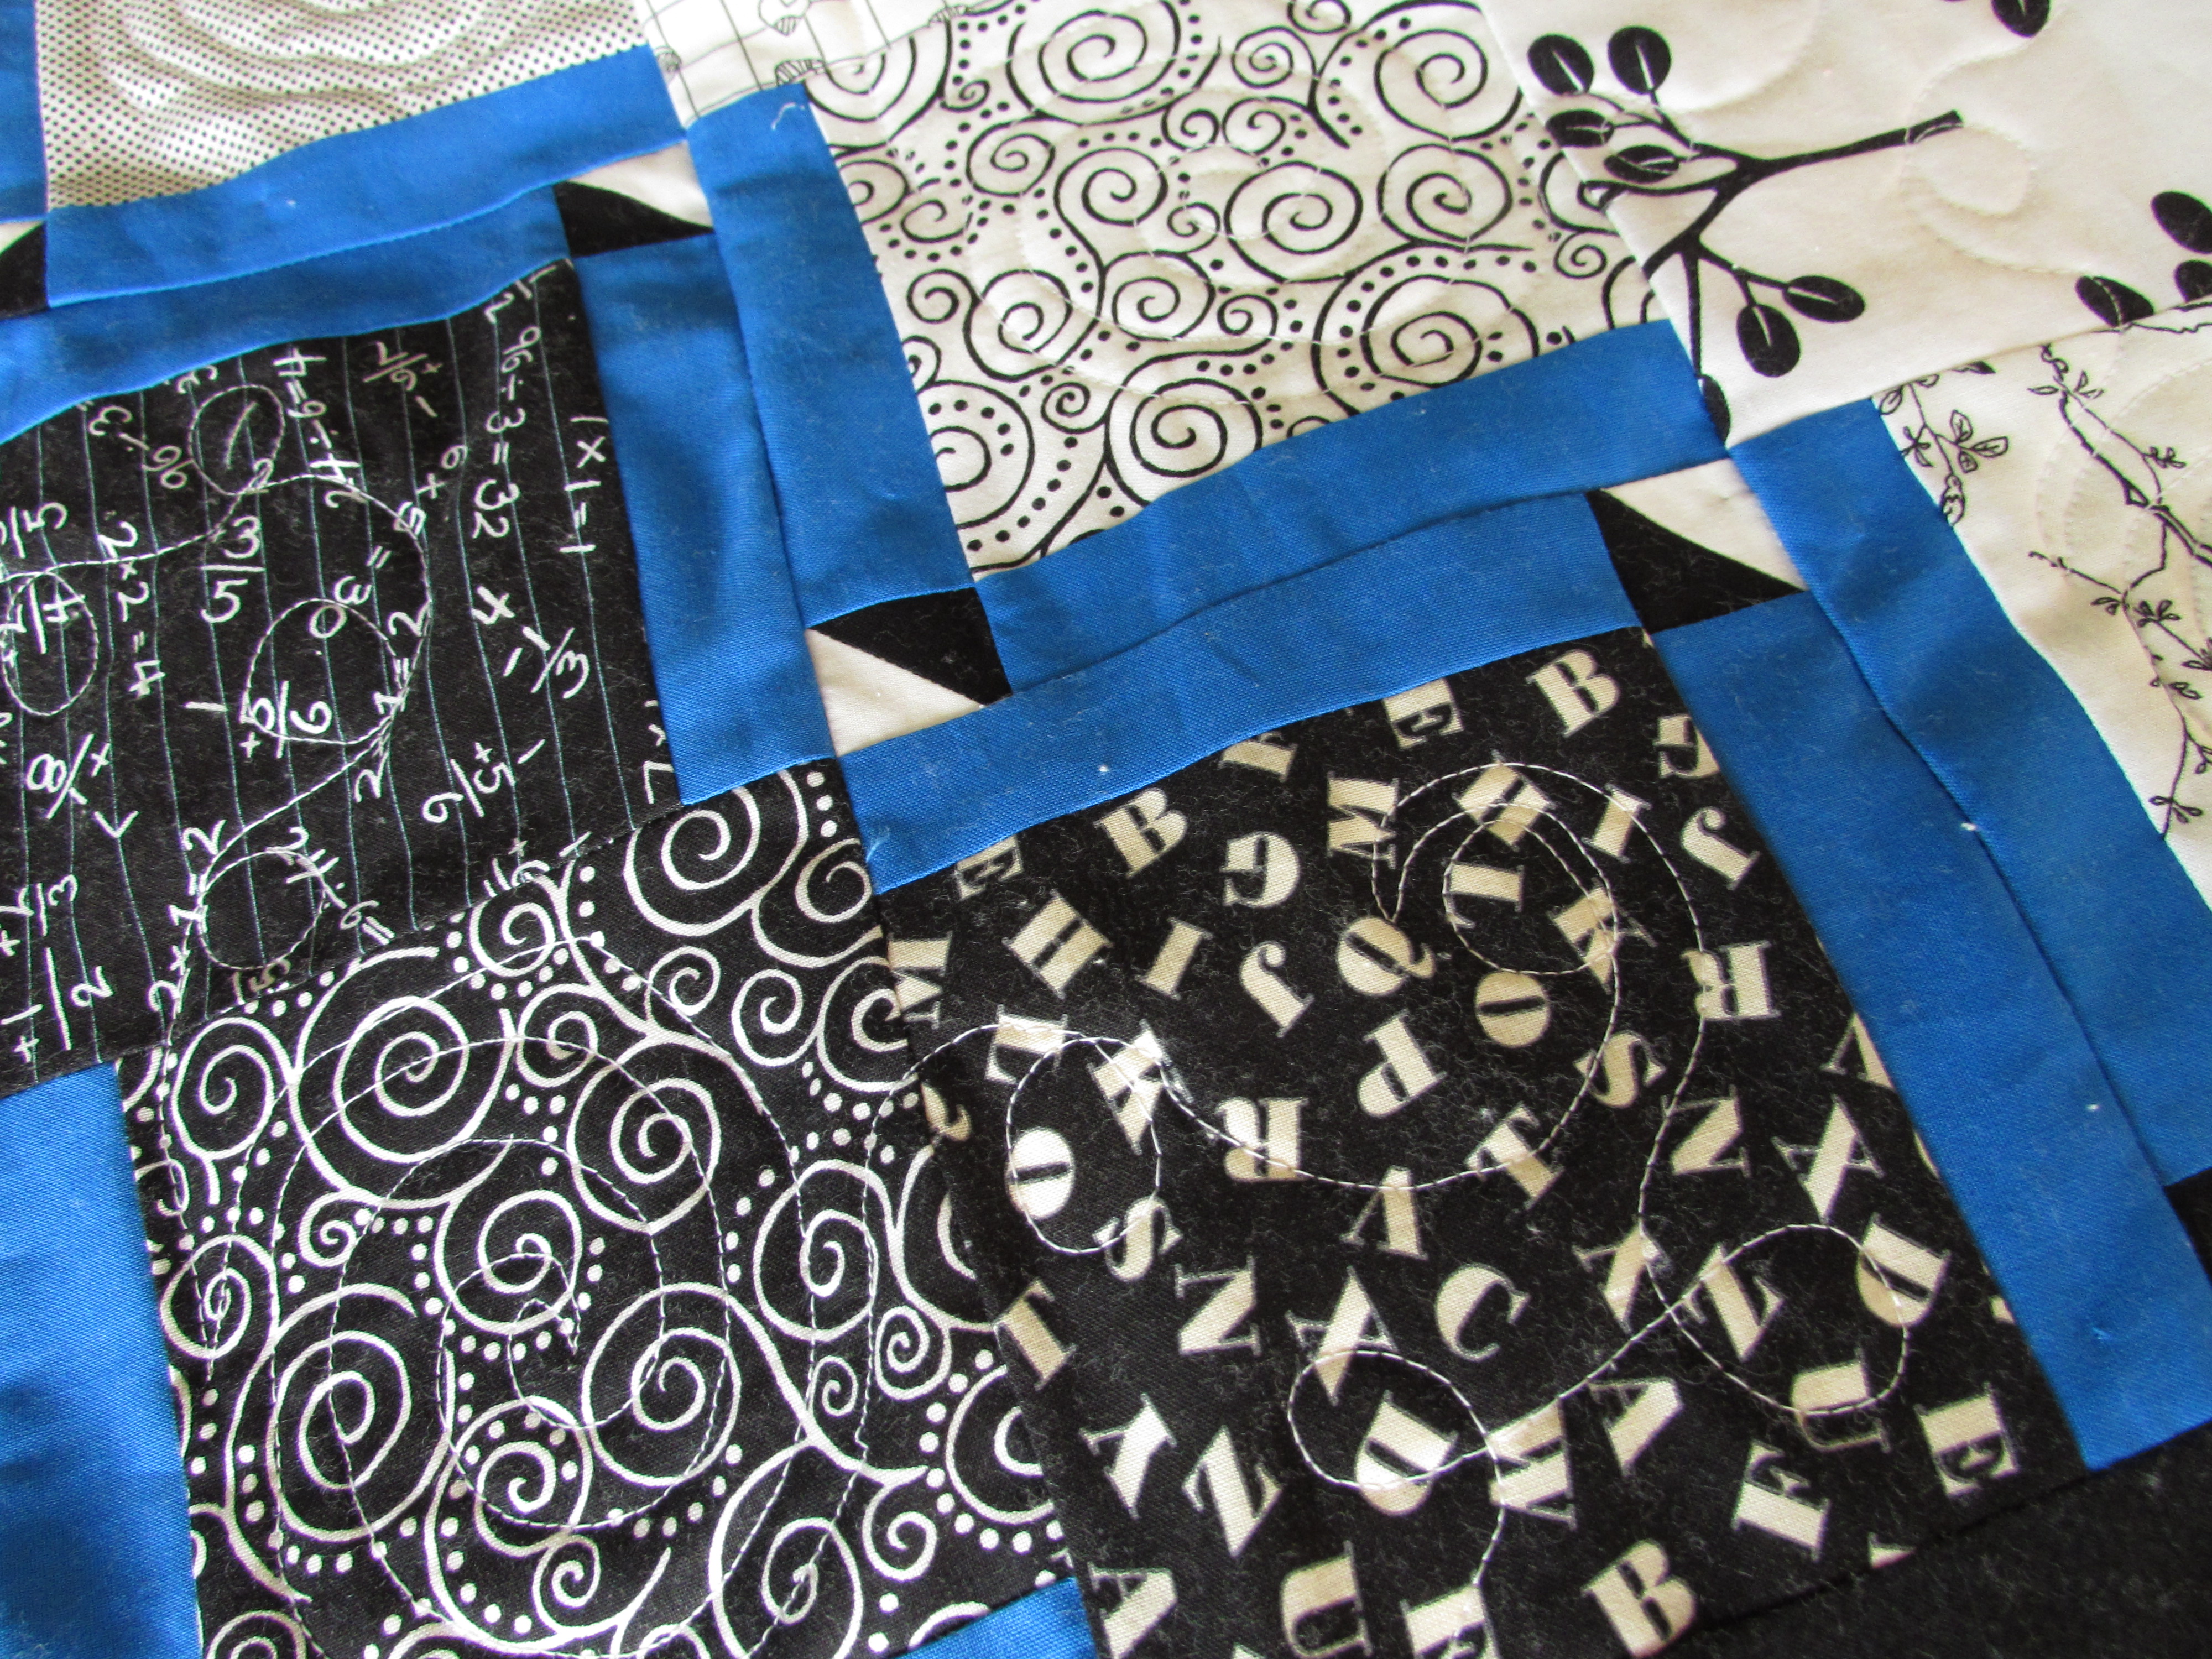
The movement caused by the diagonal placement of the charms and those cute little HST’s make this quilt. The black, white and cobalt blue also worked very well together. (Though if I were to do this again, I think I would bind it in black. )

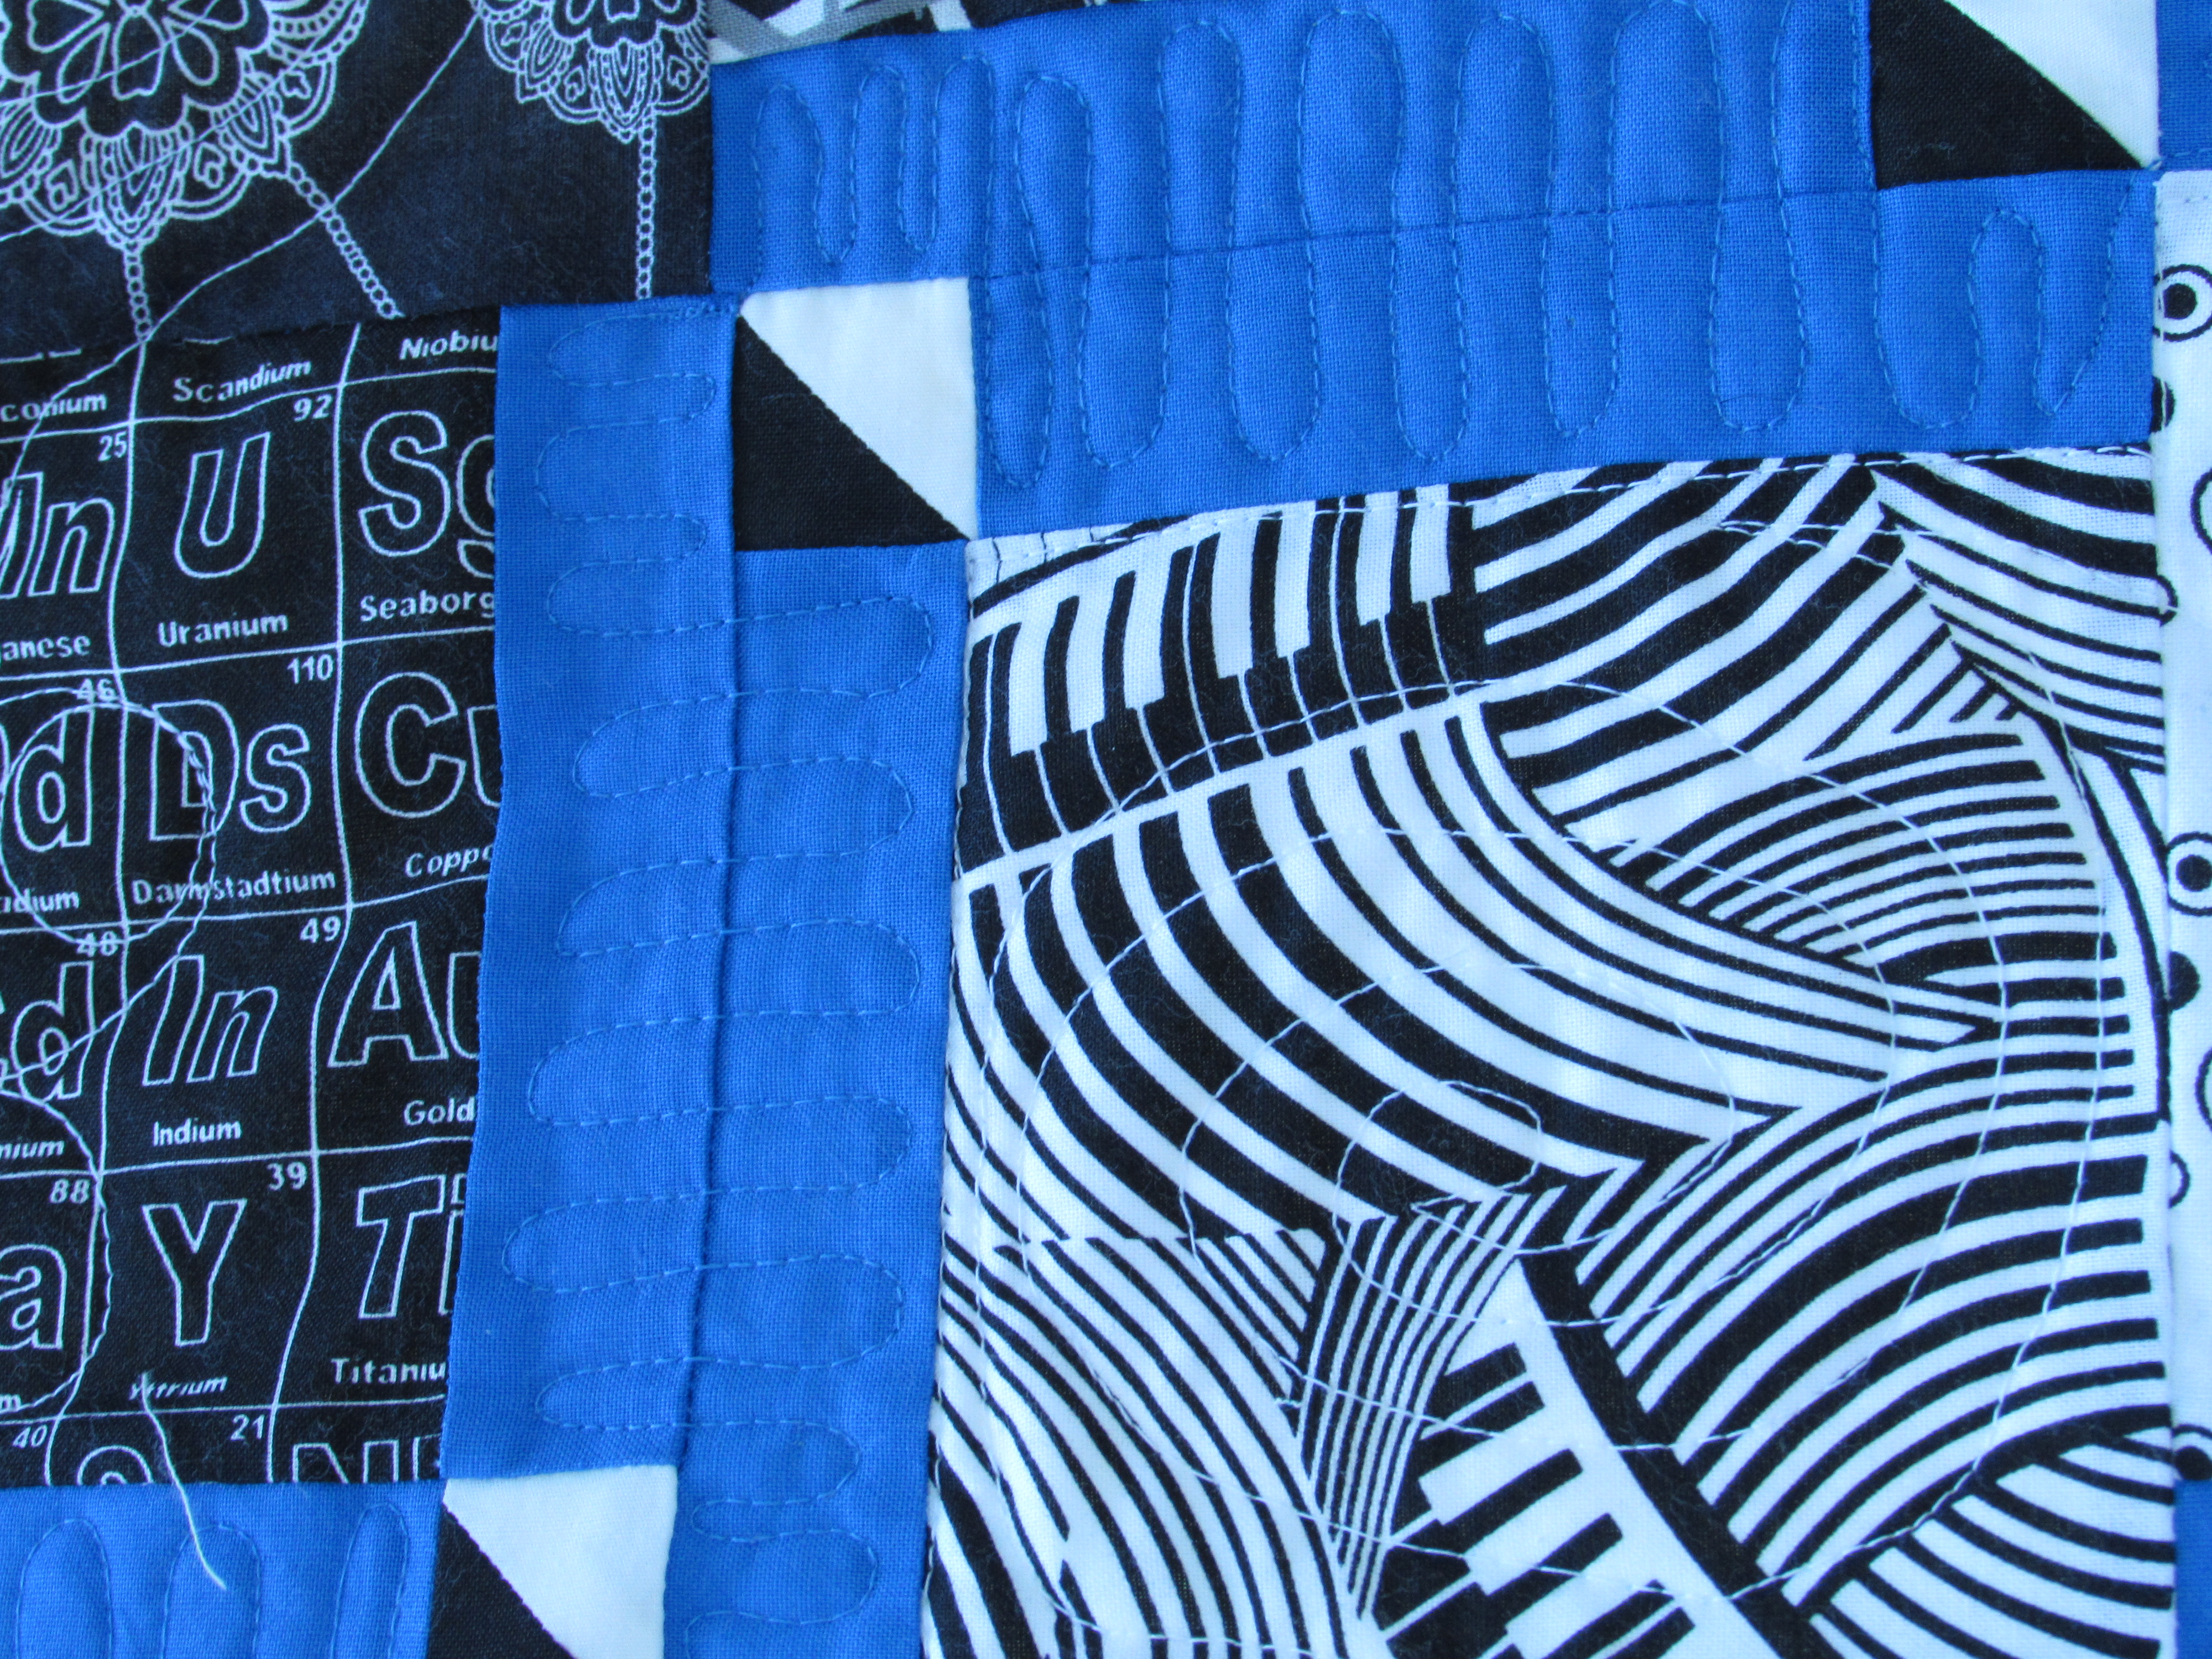
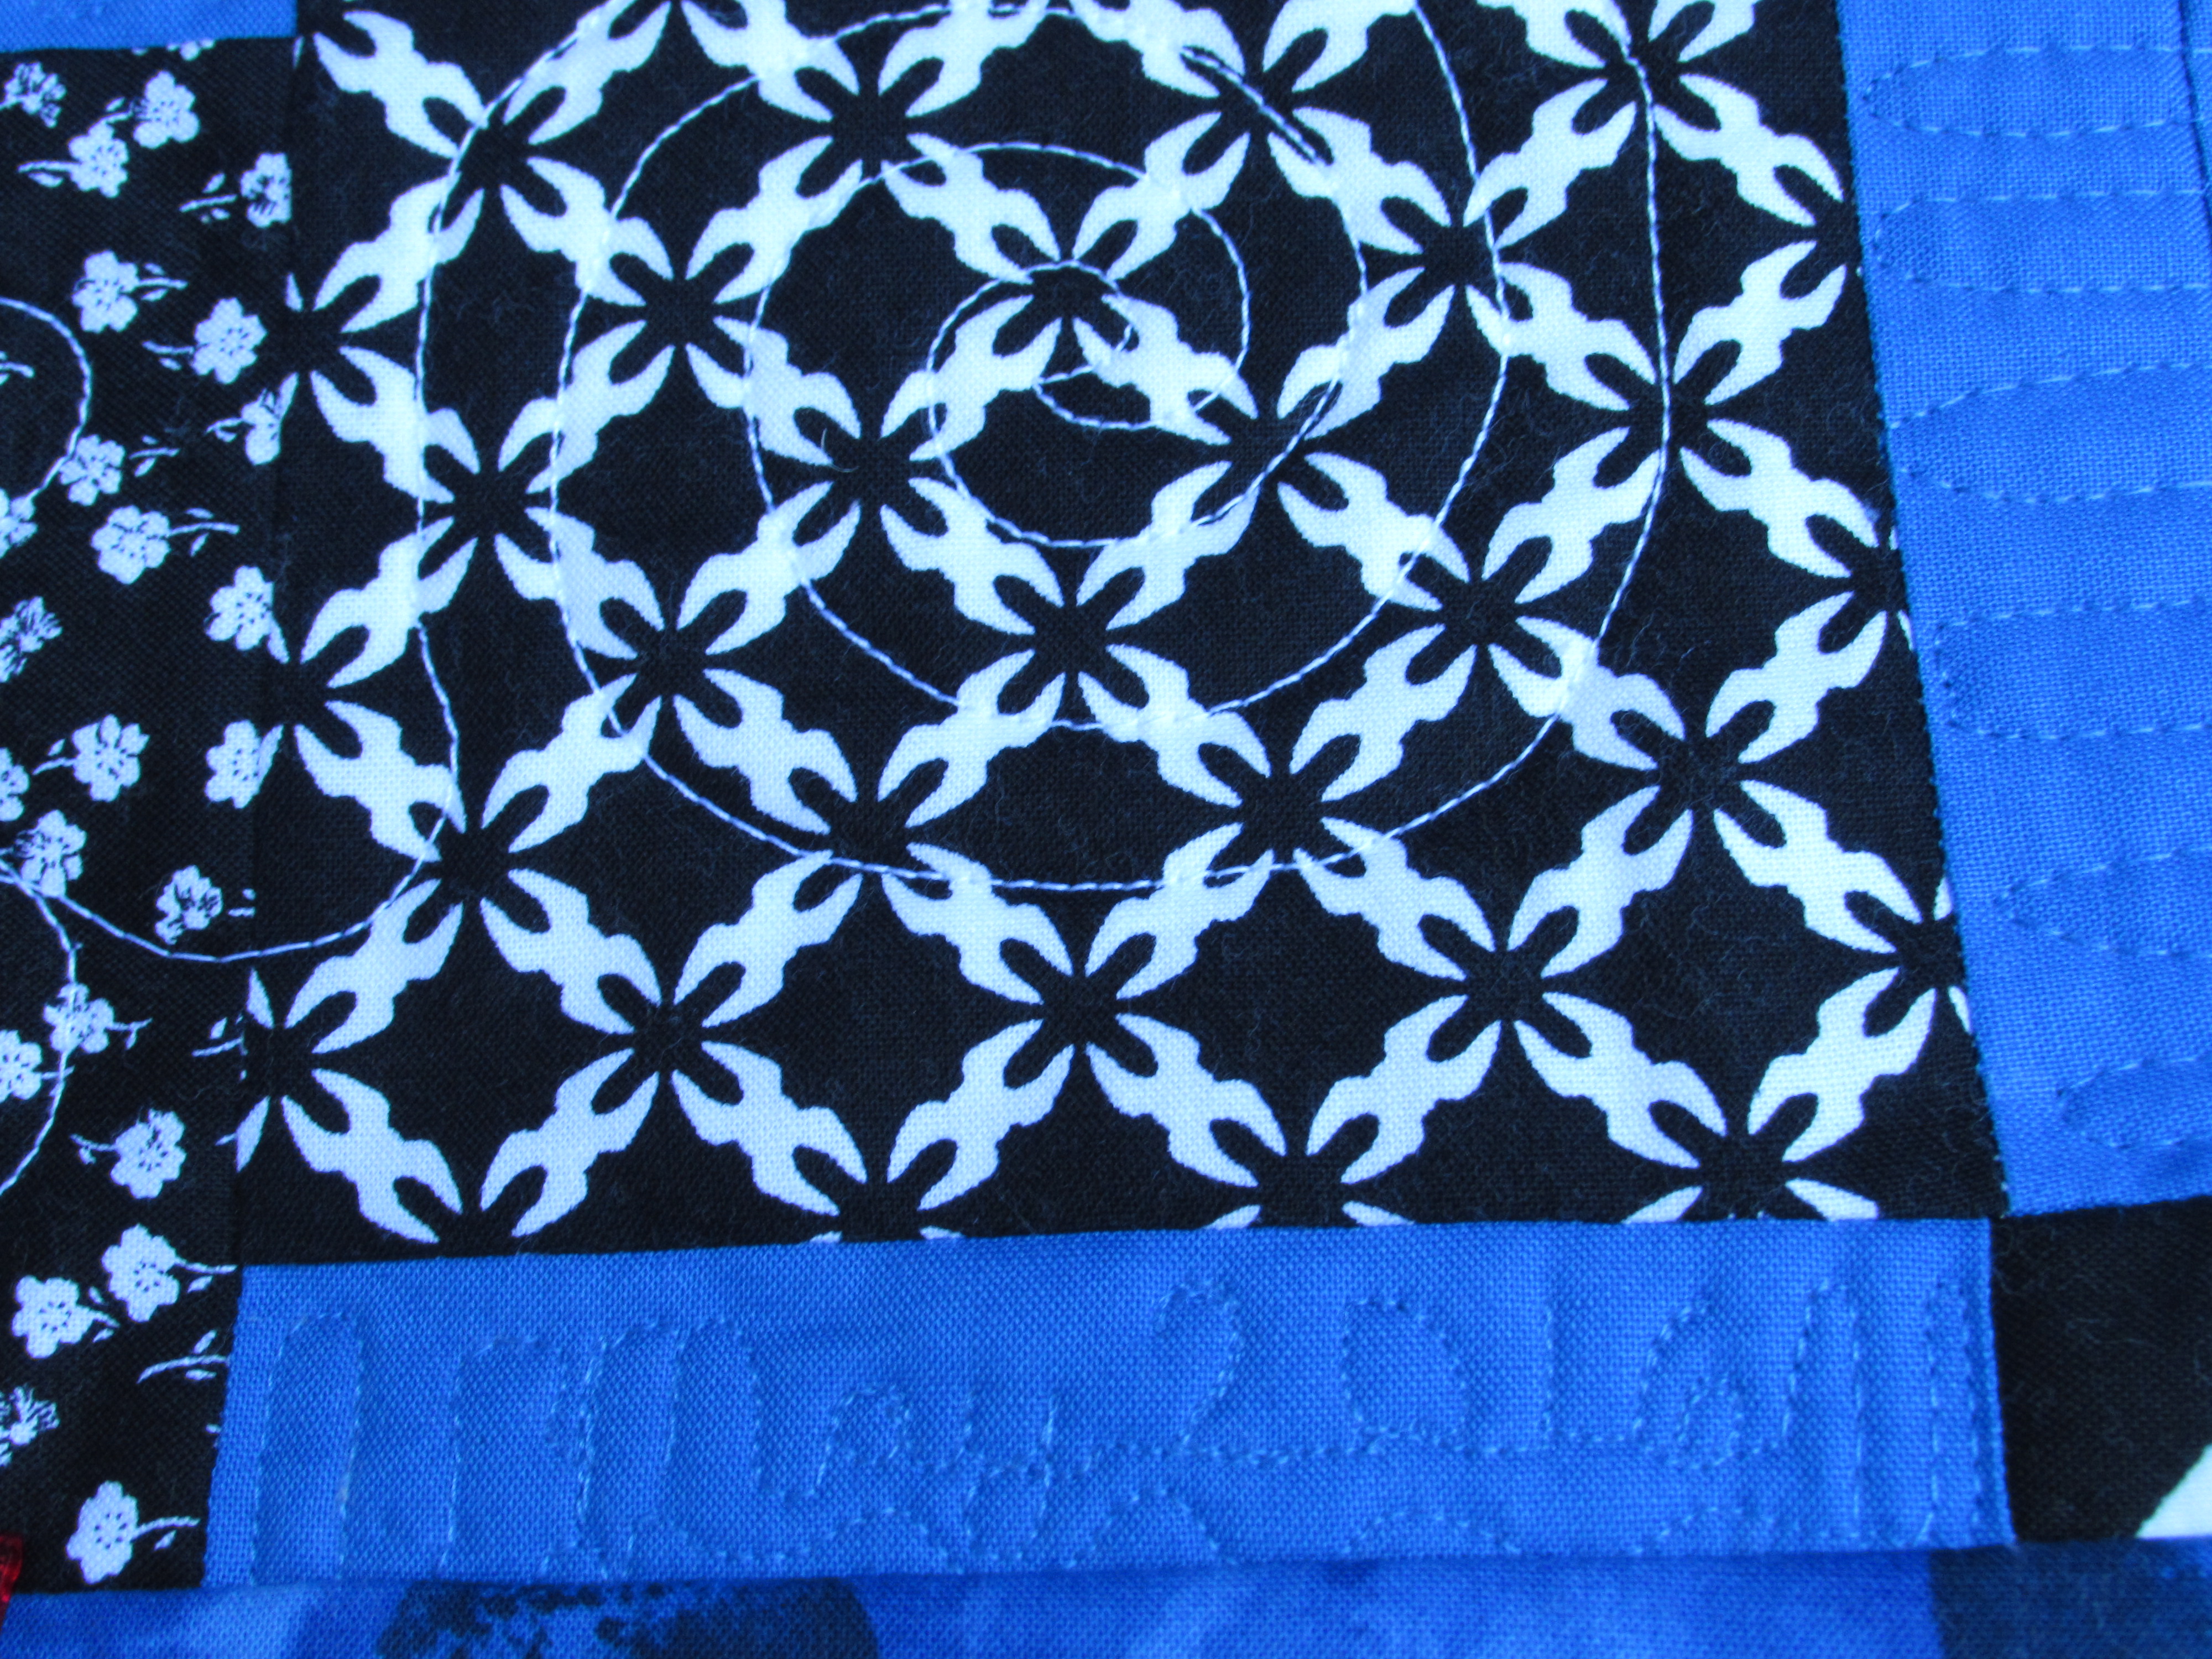
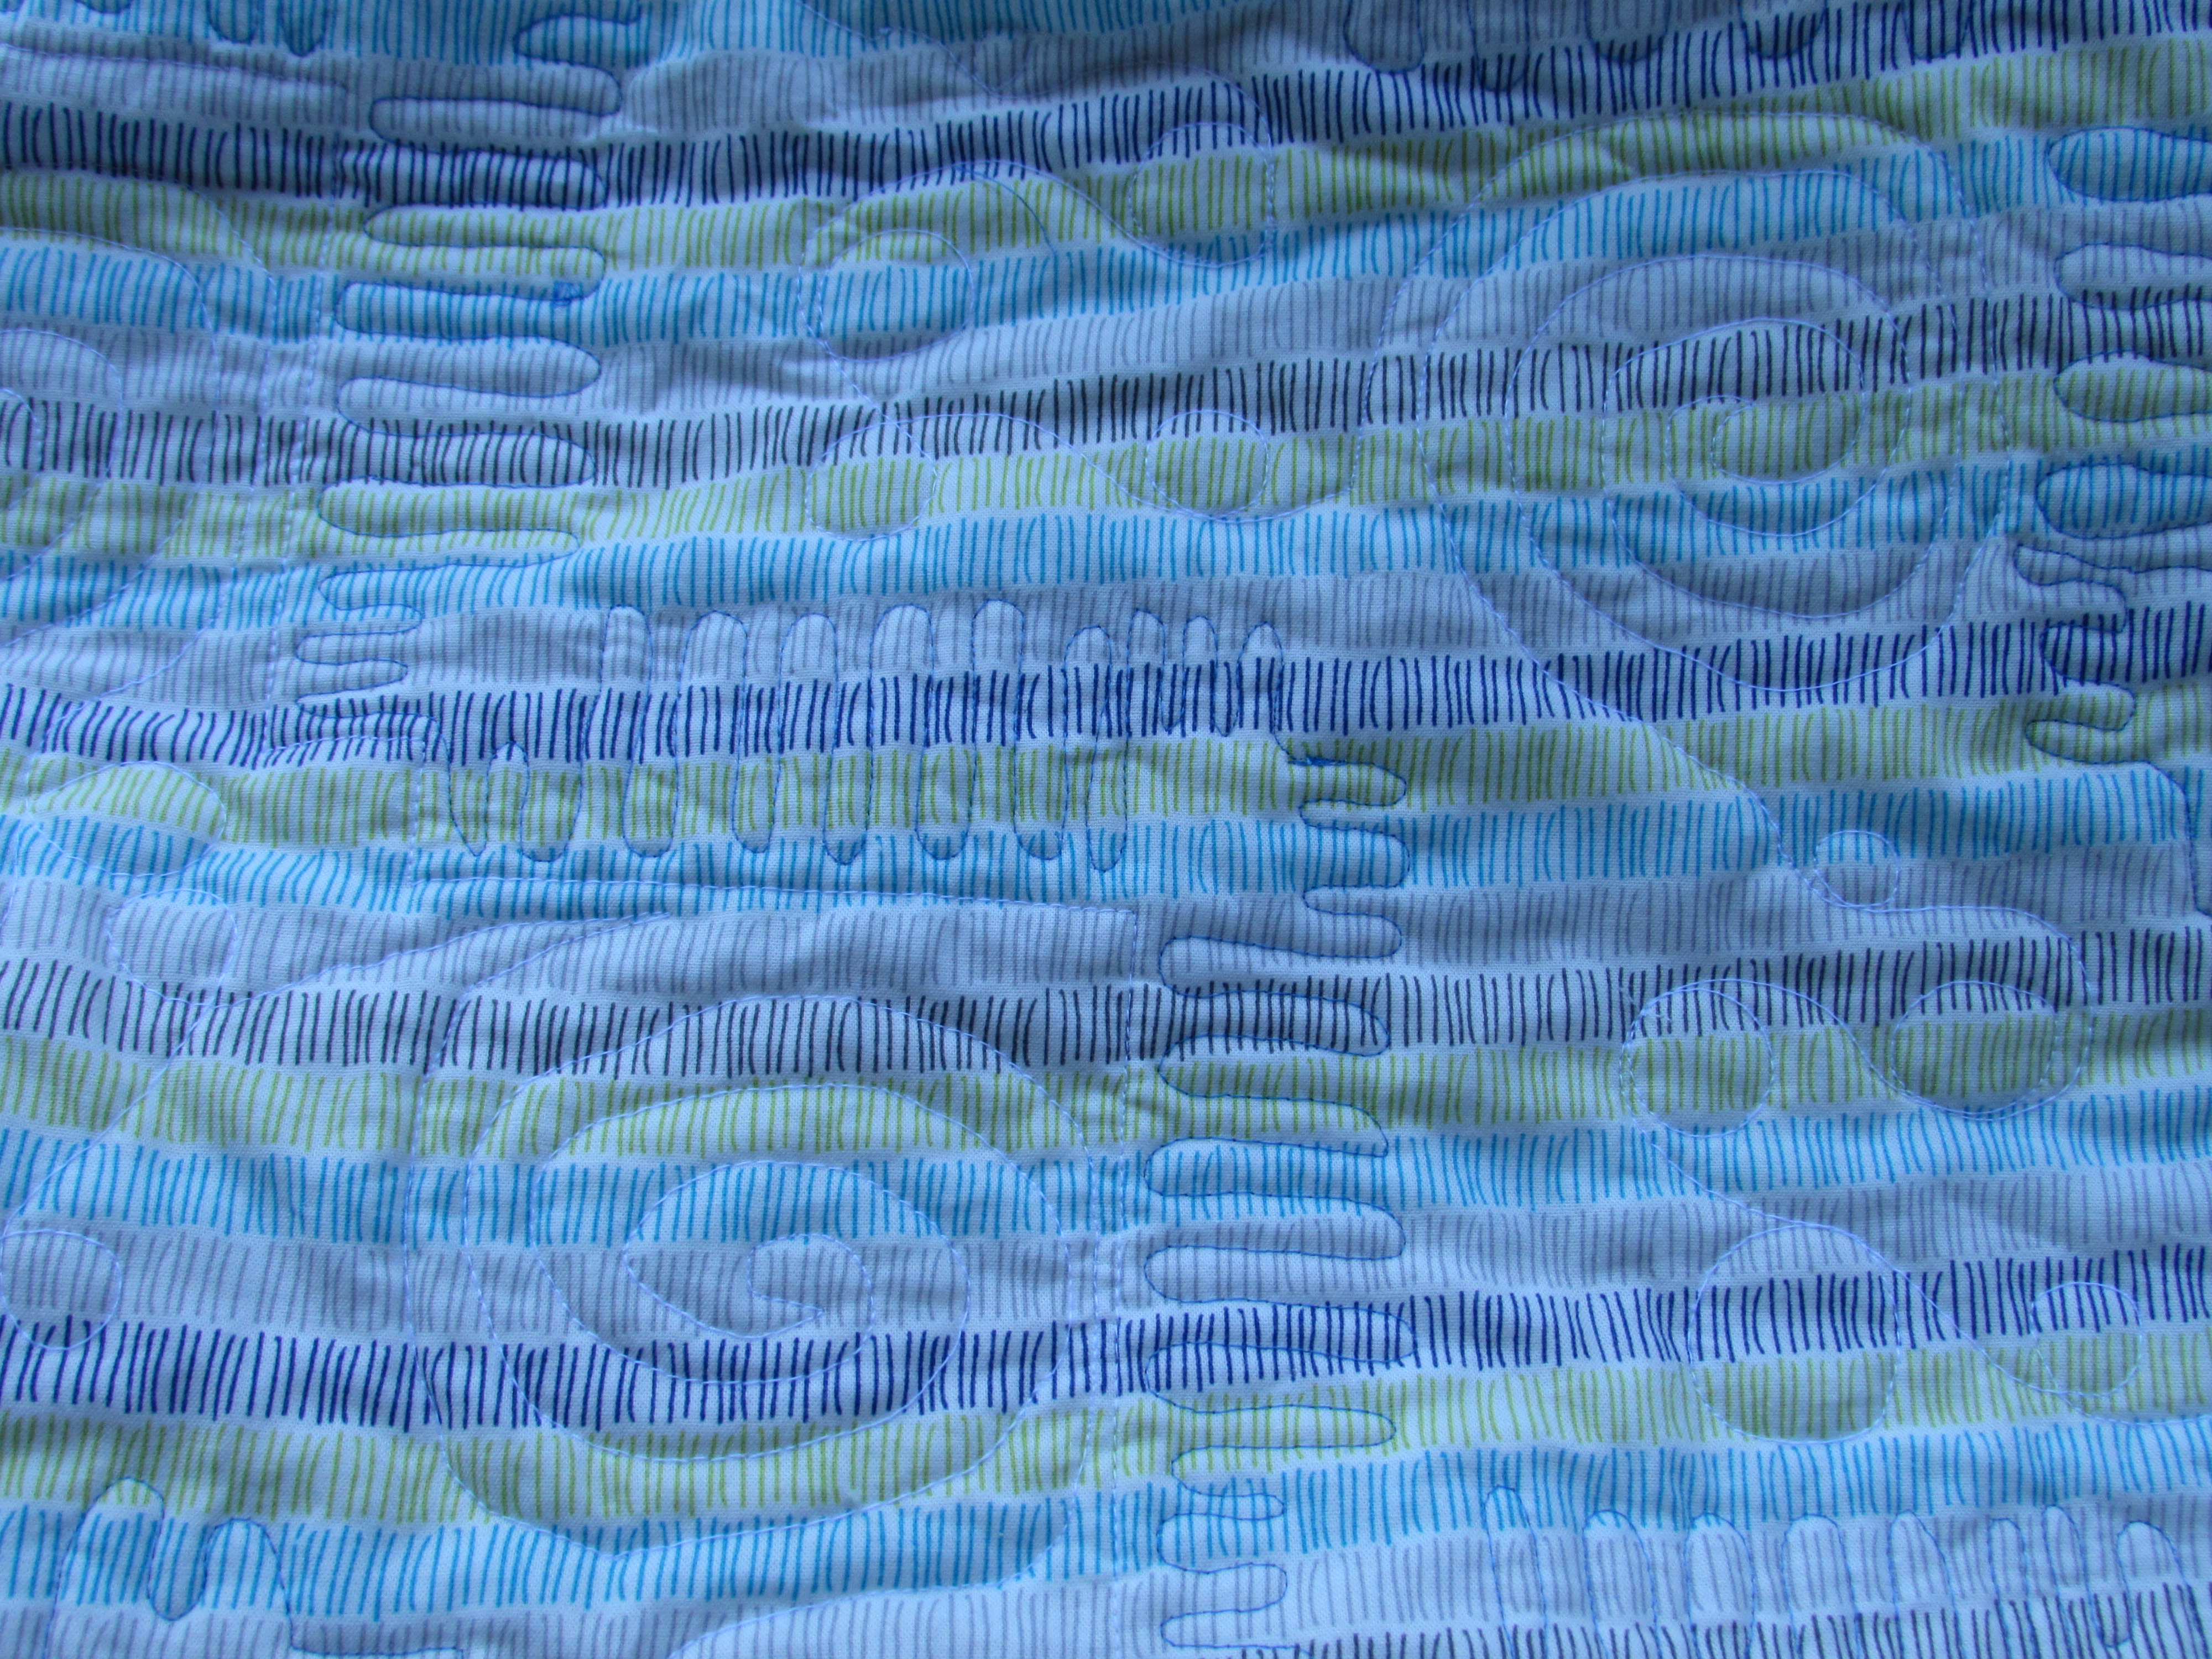
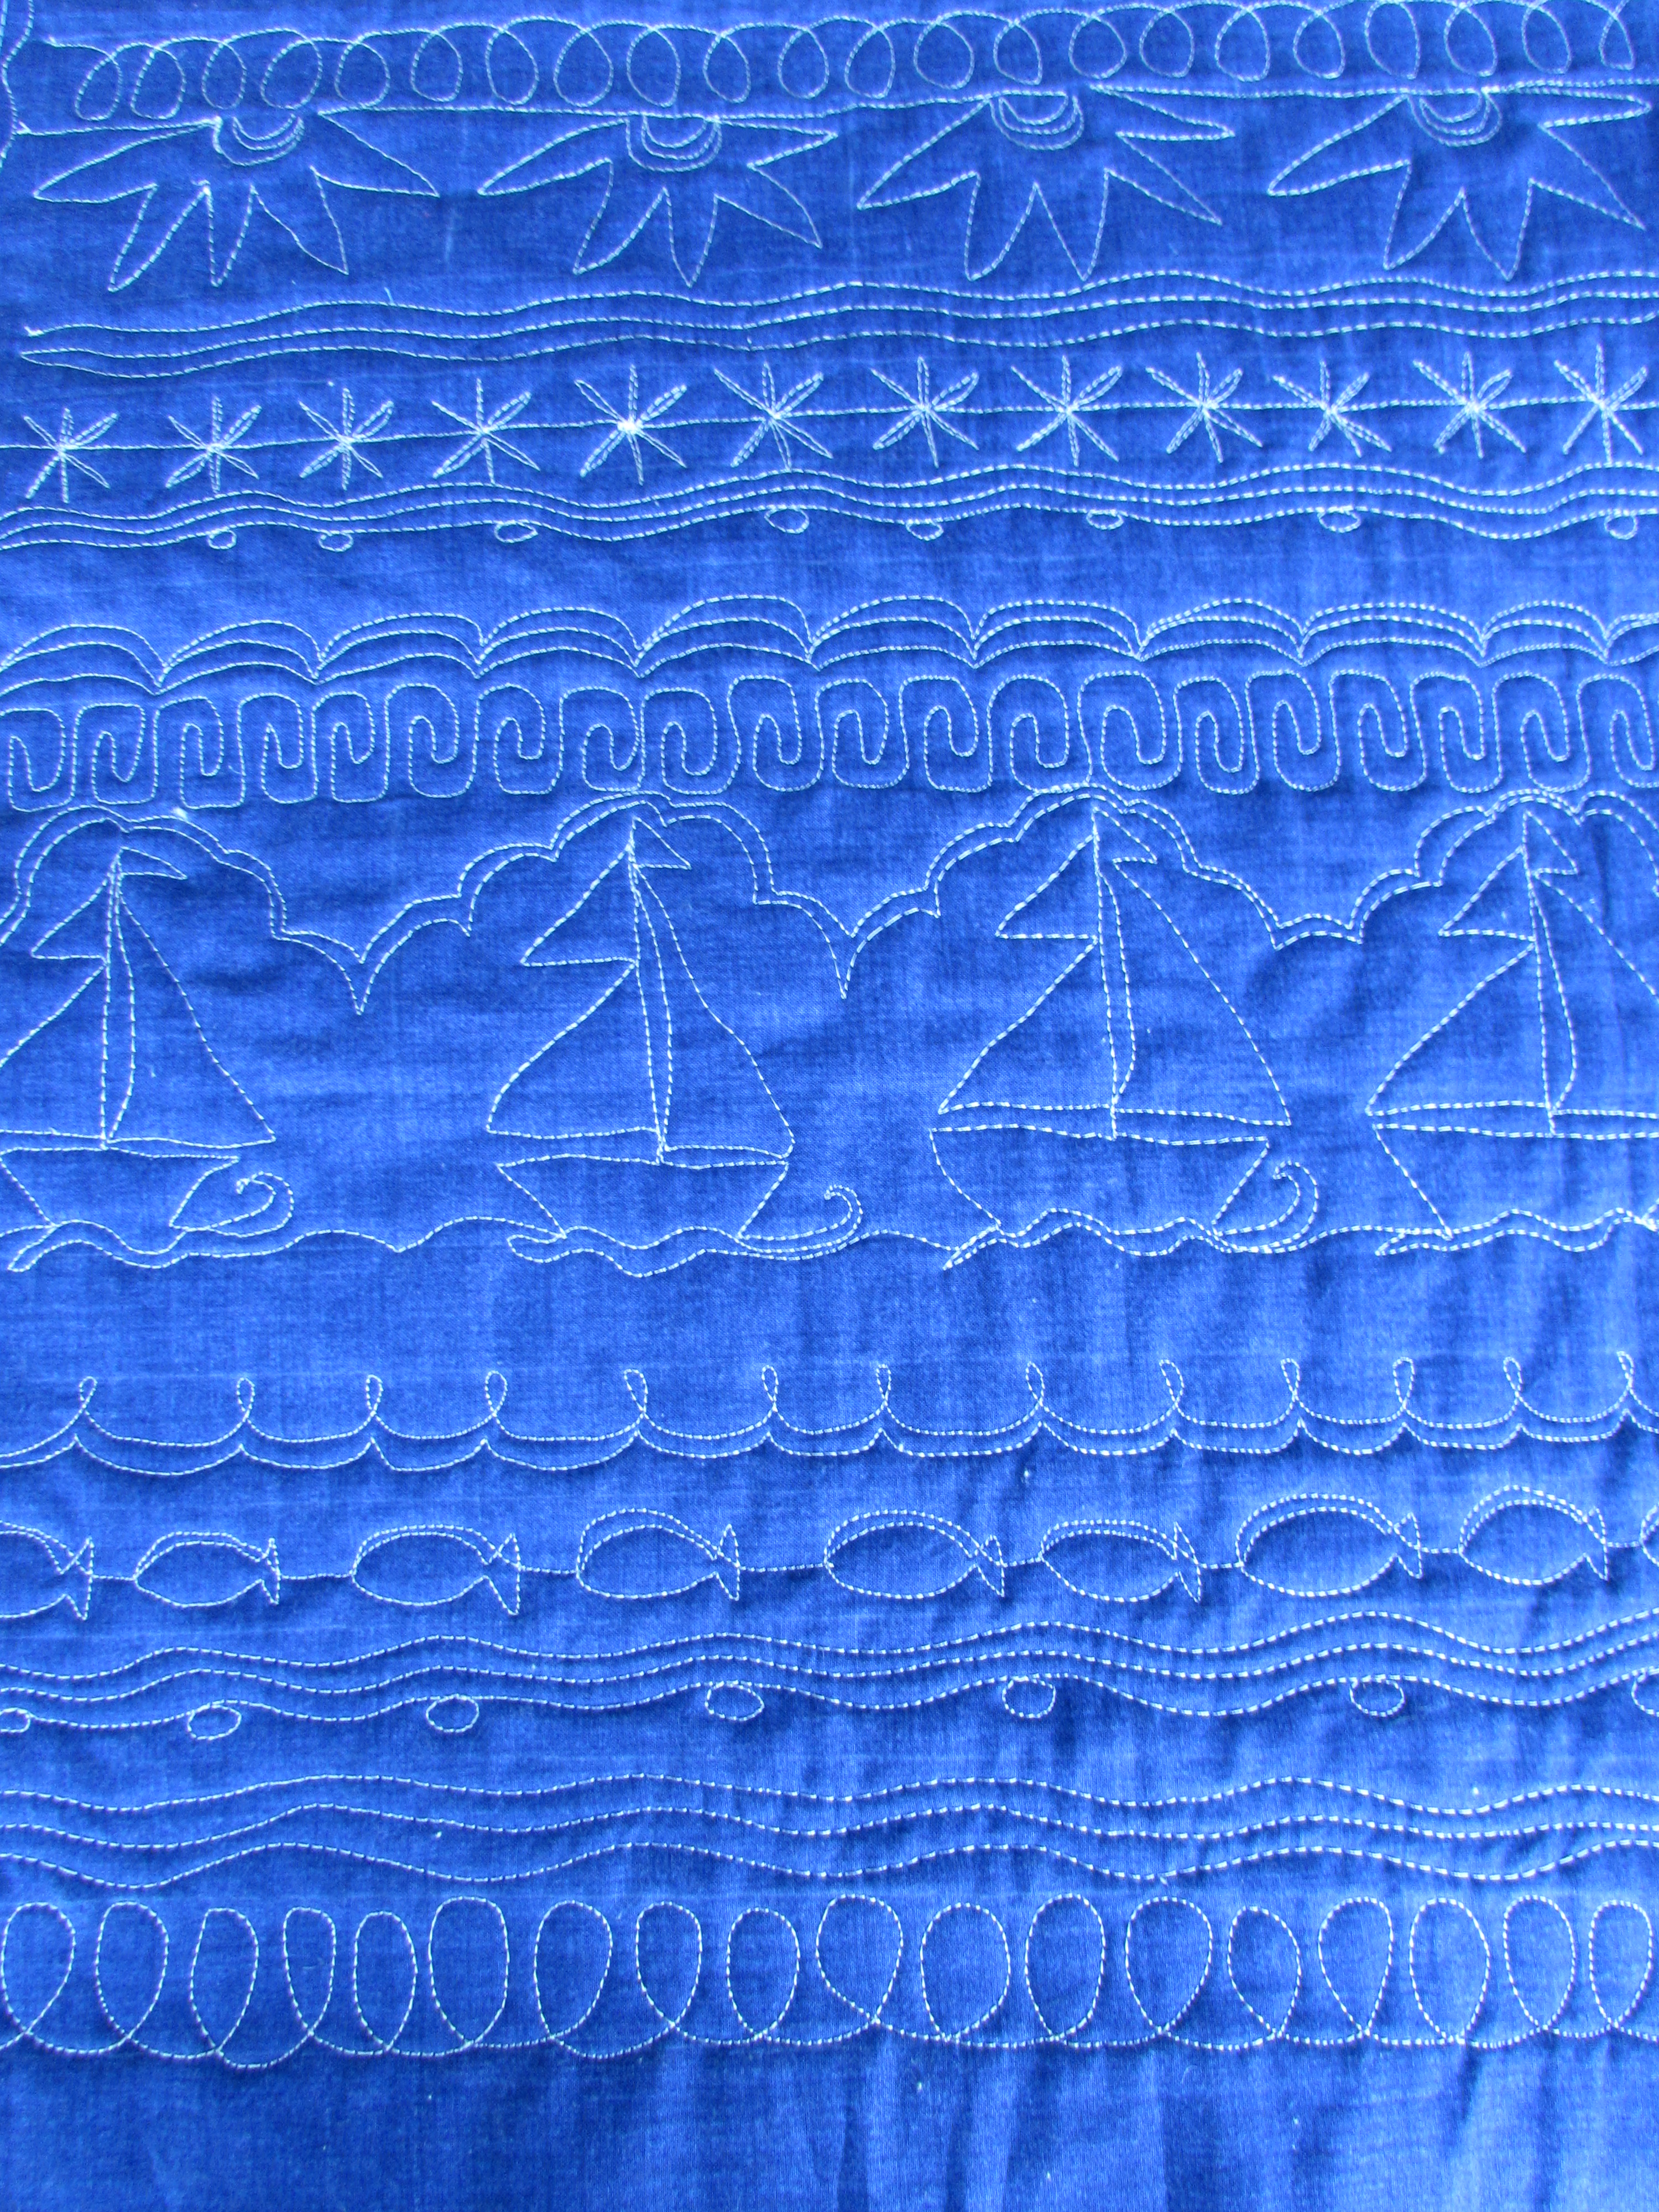
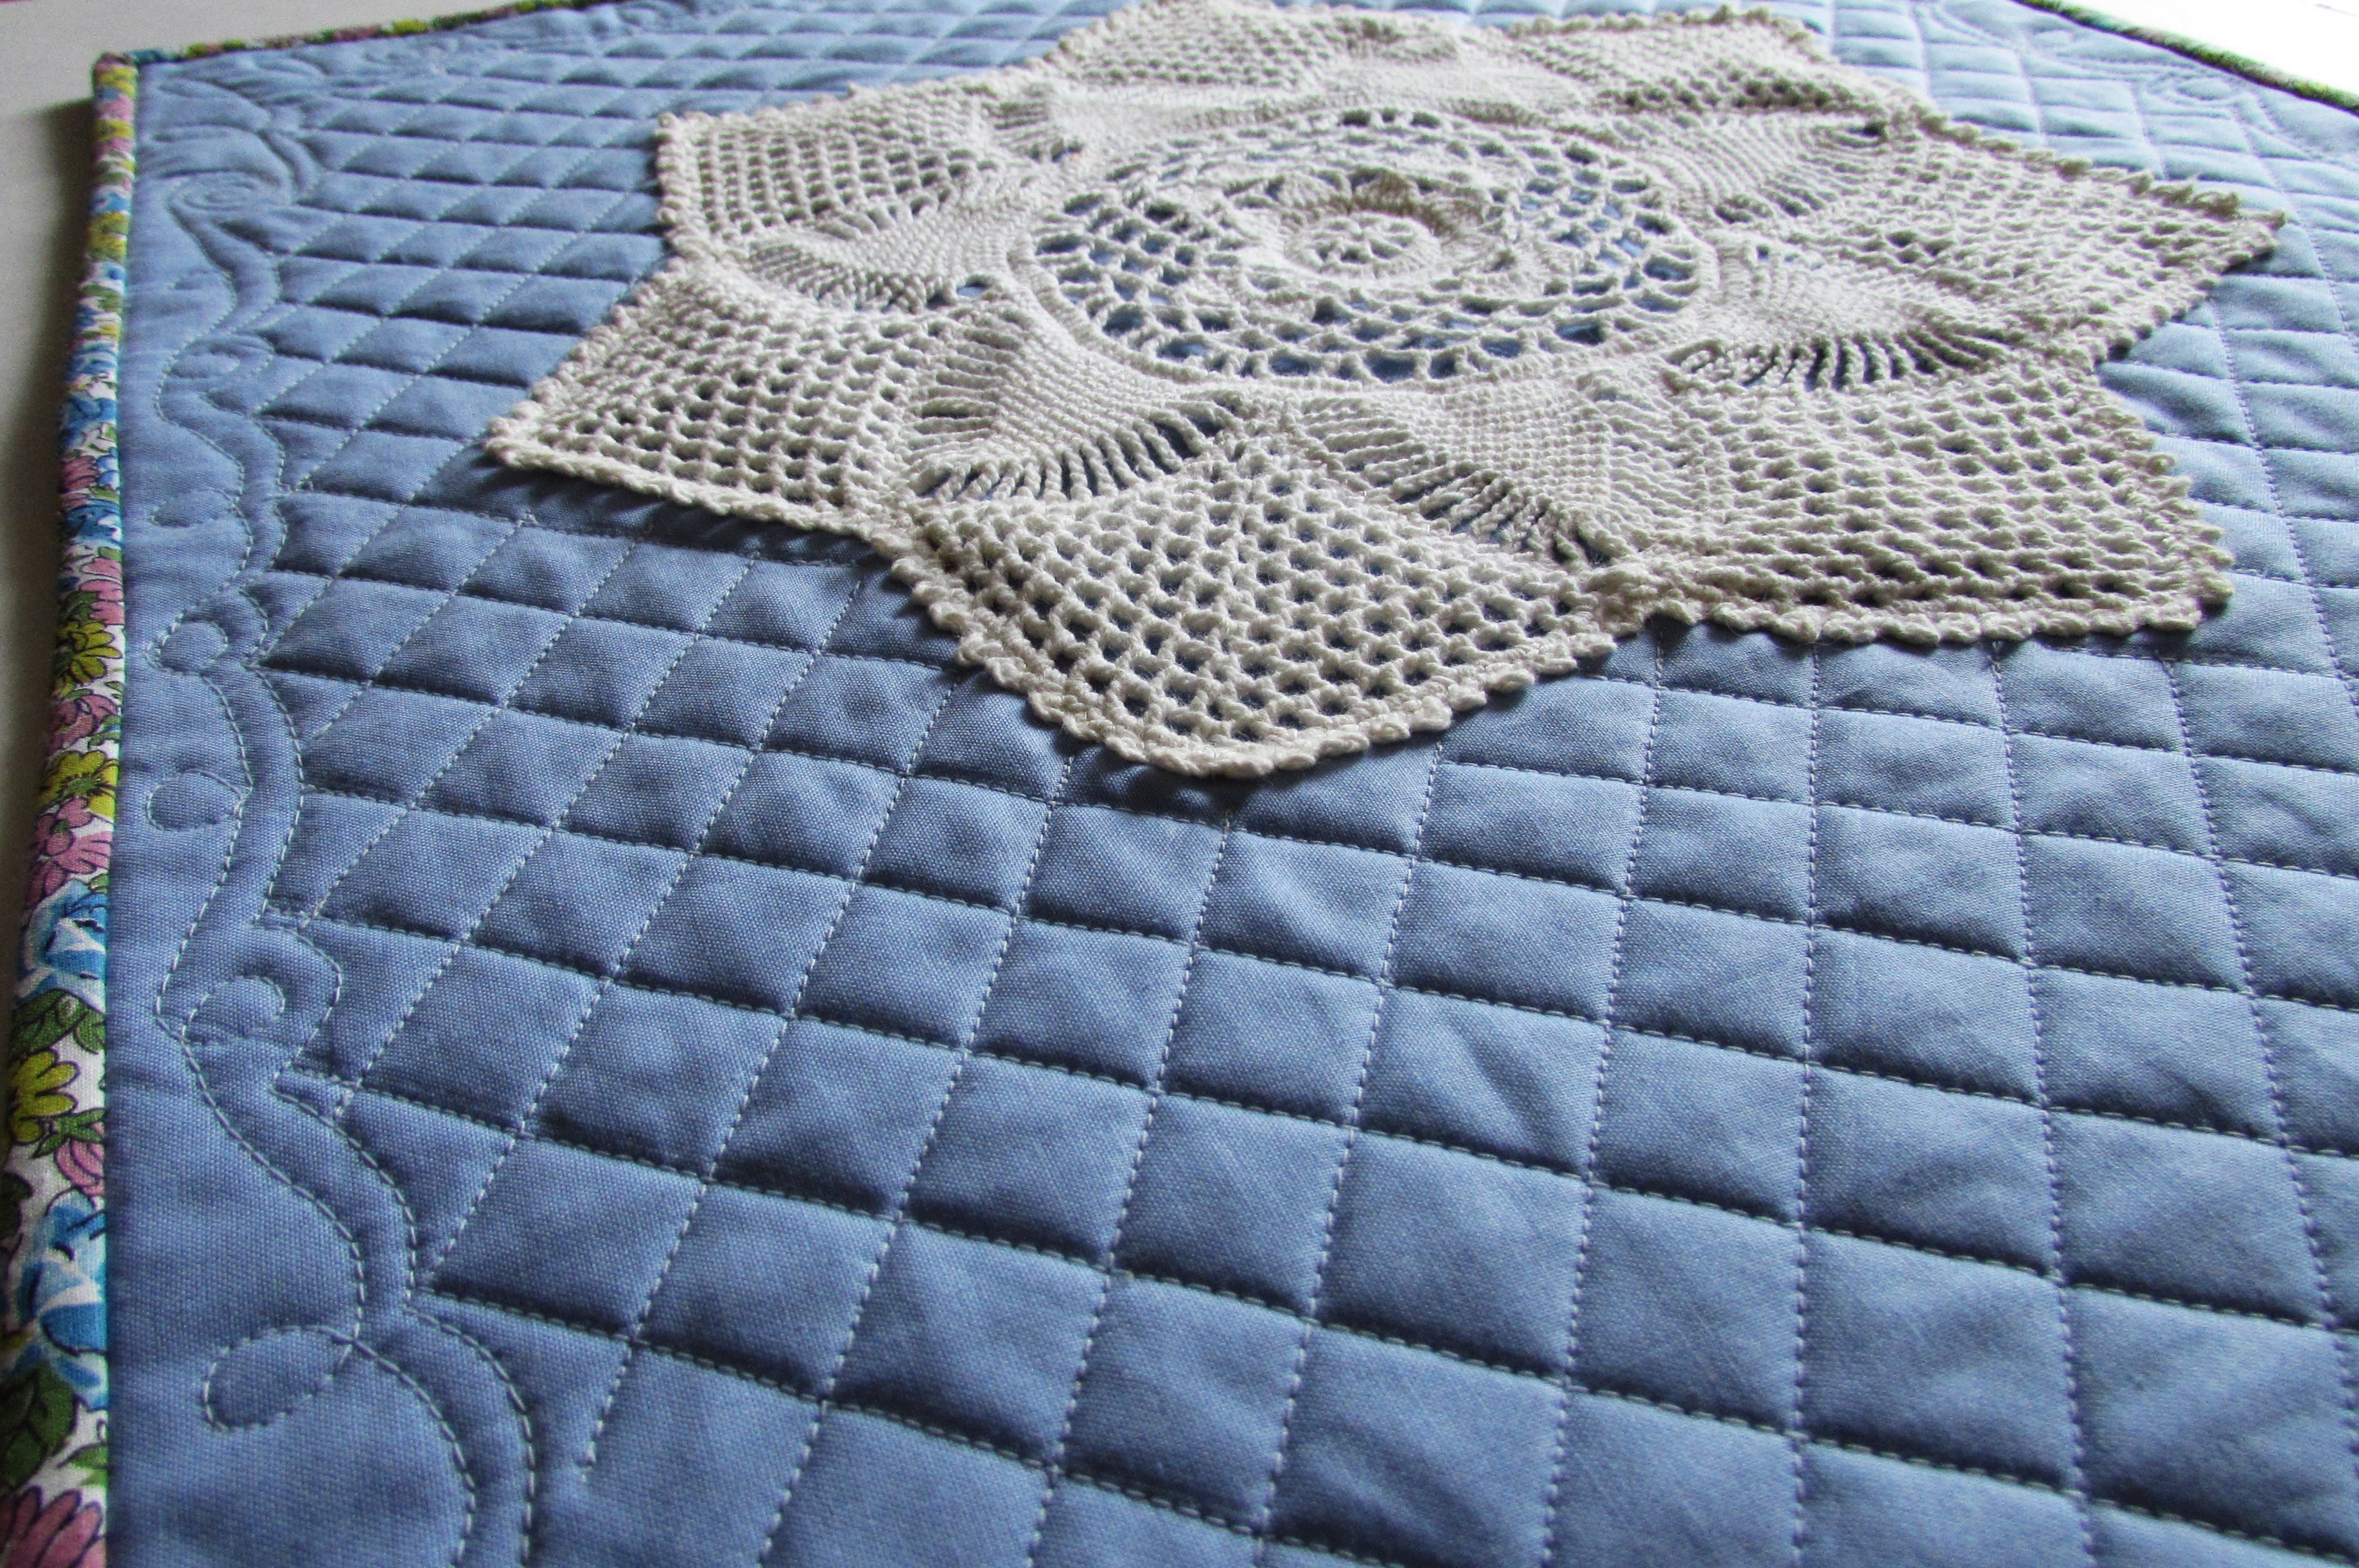
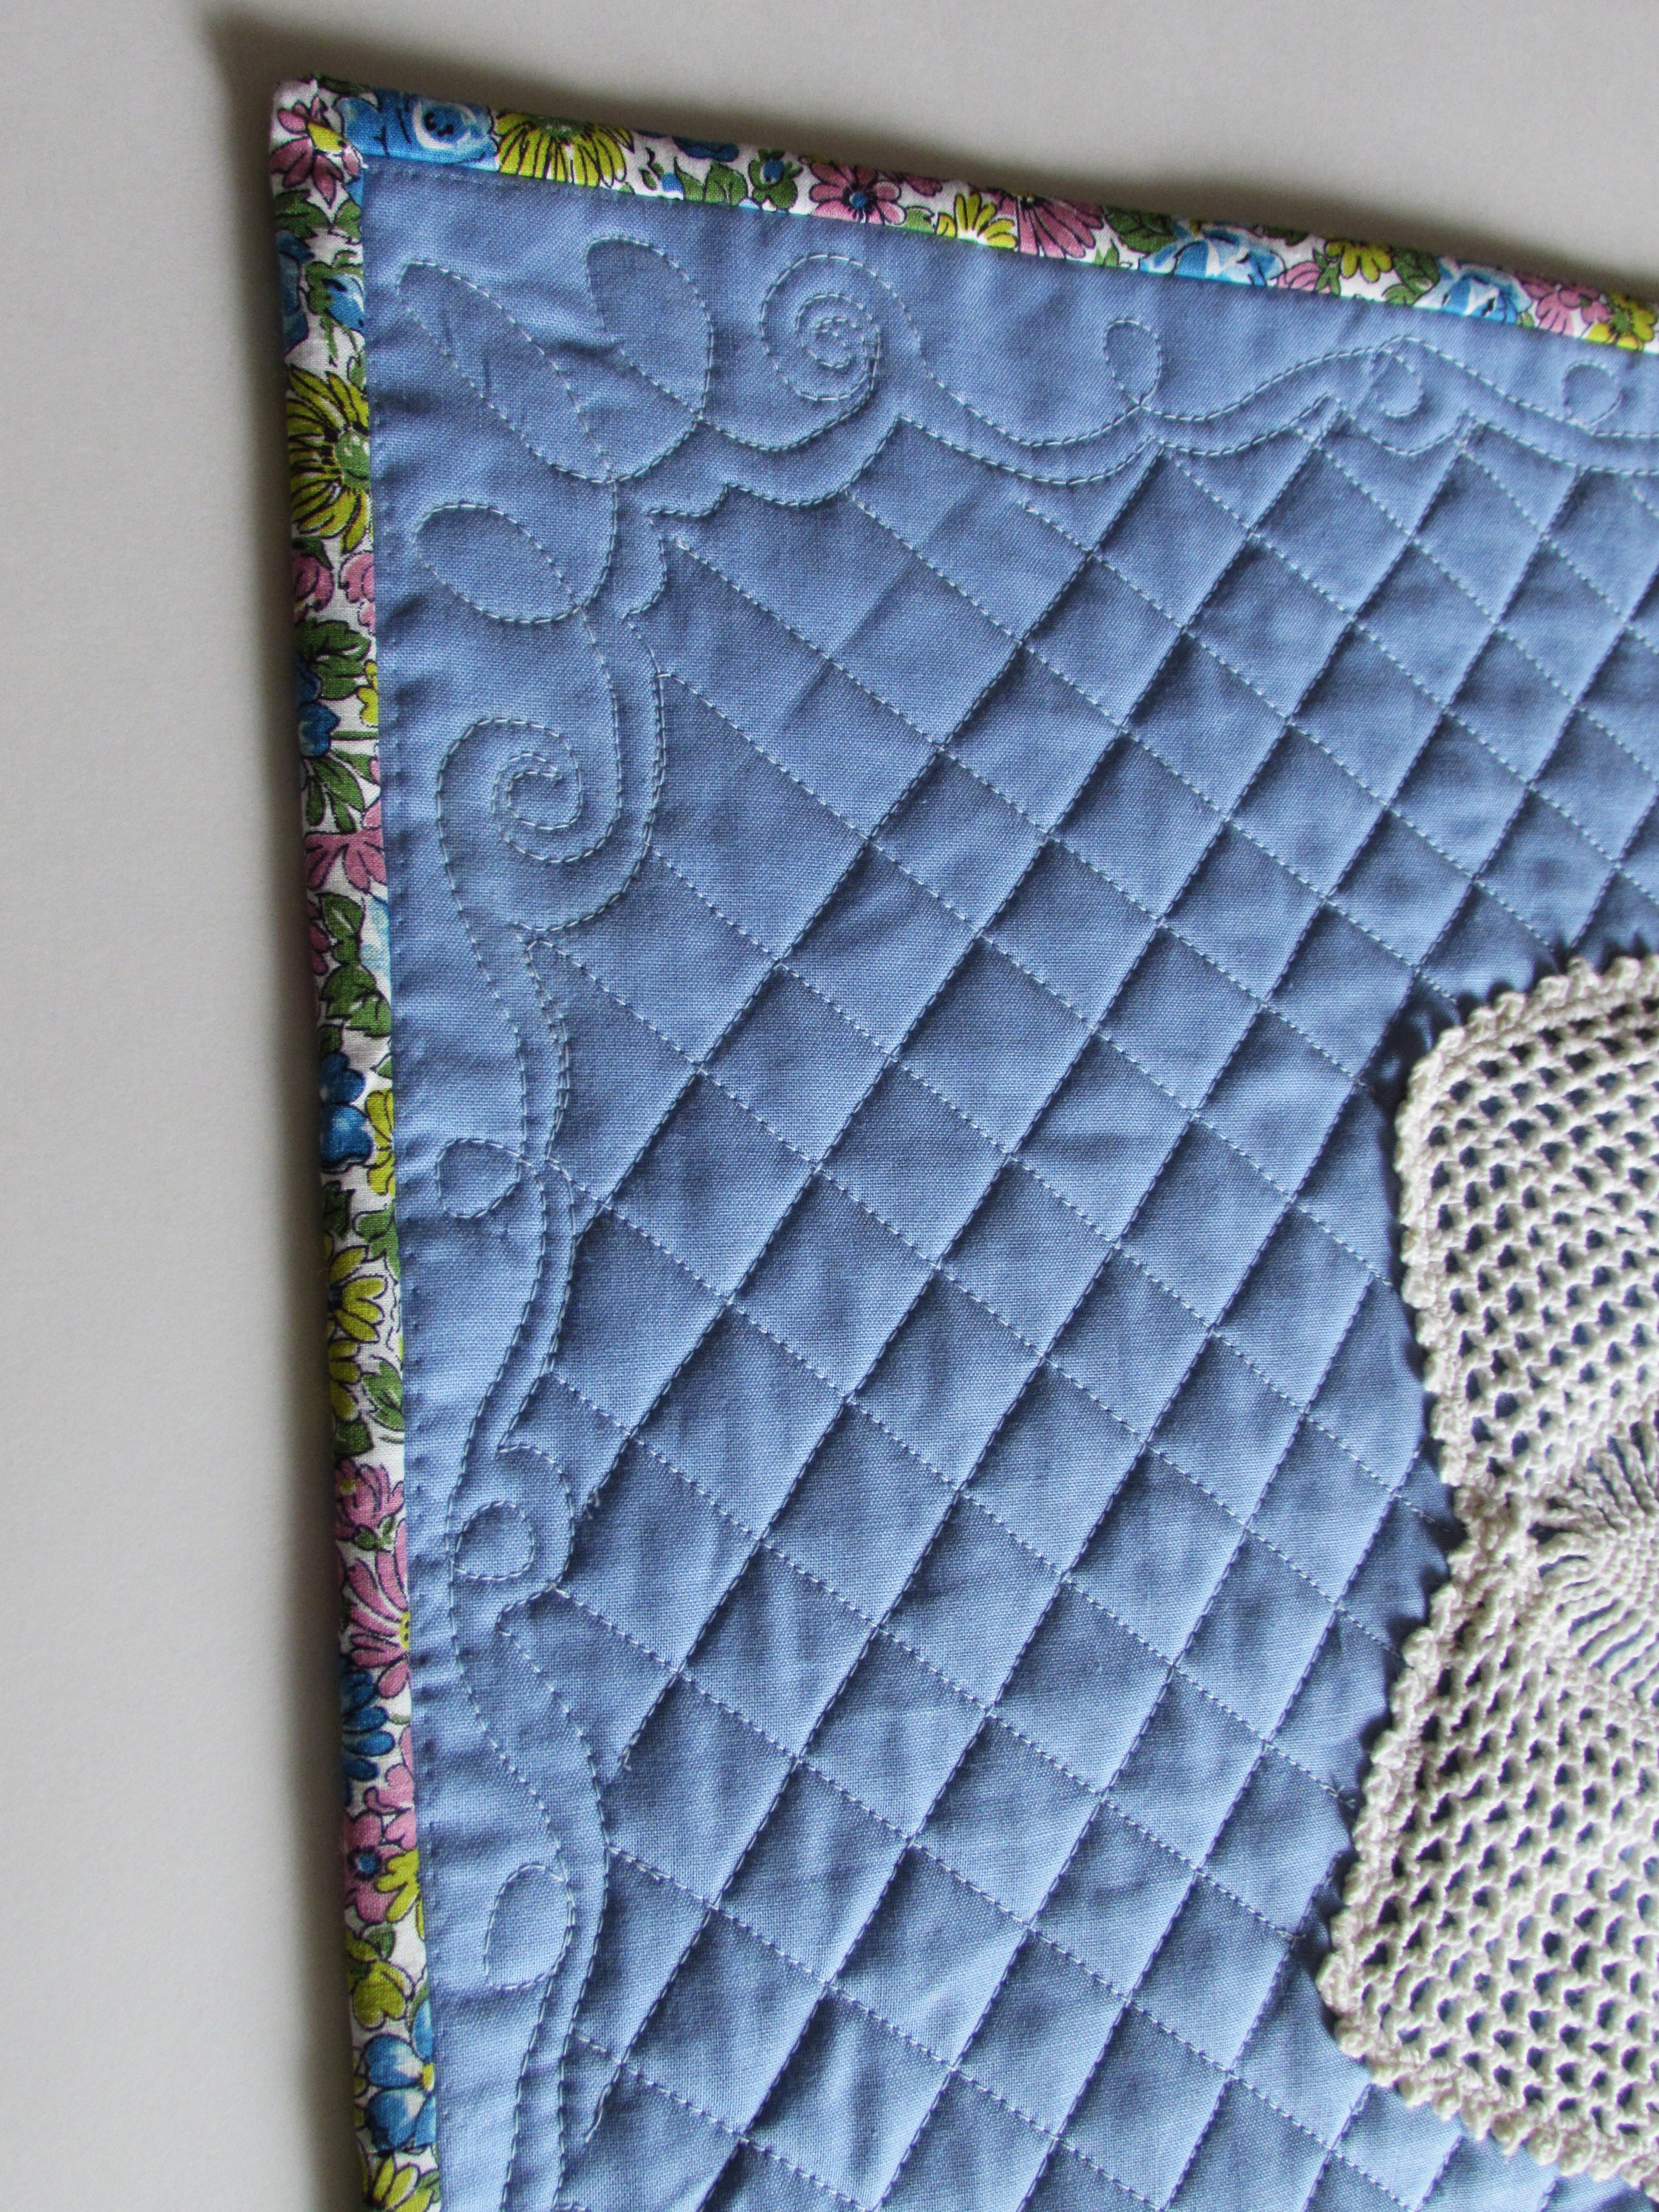
All of the quilting is curved (rather than angular) which complements the angular structure of the charm squares, borders, and HST’s. As far as my FMQ goes, this looks reasonable but is still not where I want to be. The only way to get there is to continue practicing, which is the plan! I look forward to washing this and letting it crinkle because that will hide some of the jitters in my stitching.

img_20160516_5157

Because I am lax in my use of quilt labels (meaning I label about 1 out of 12 projects) I stitched my initials on one of the HST’s.  At least that will give someone a hint as to who made this.

img_20160516_5160

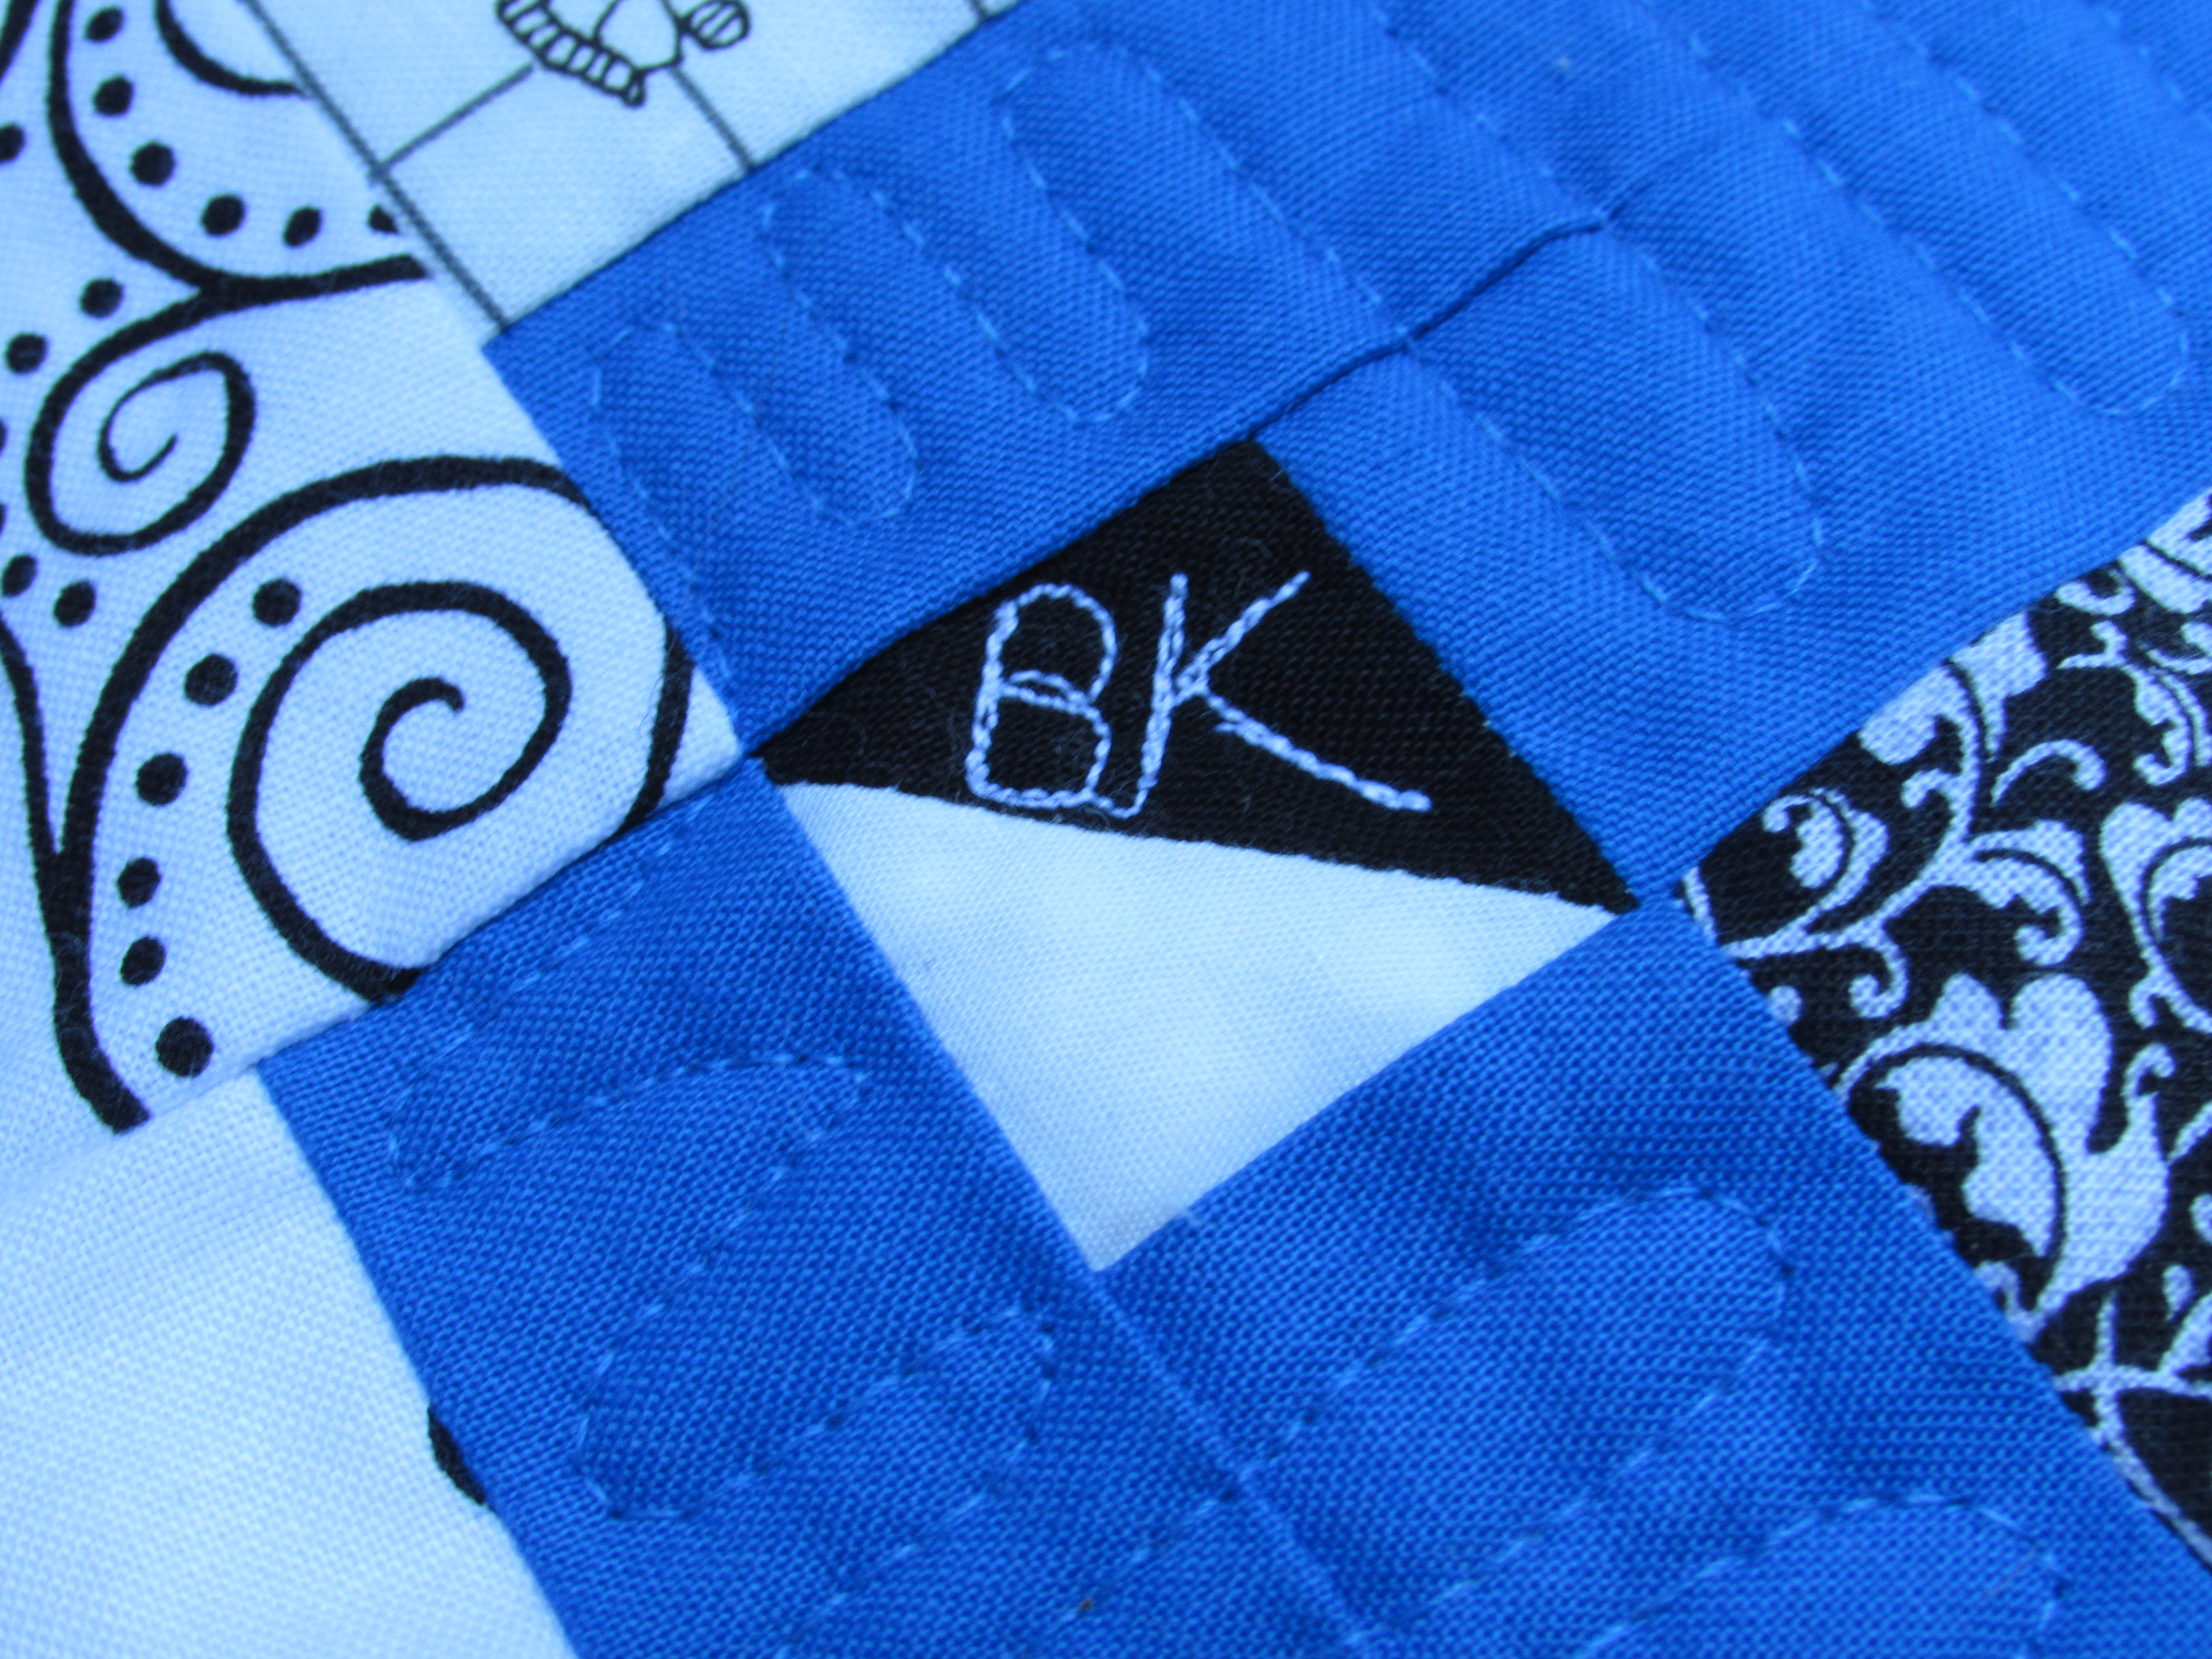
I also put the month and year in. This was kind of funny though.  I was stitching the binding down and saw that I had left one bit of blue border empty so I took it over to the machine and quickly filled it in. I like it!

img_20160516_5159

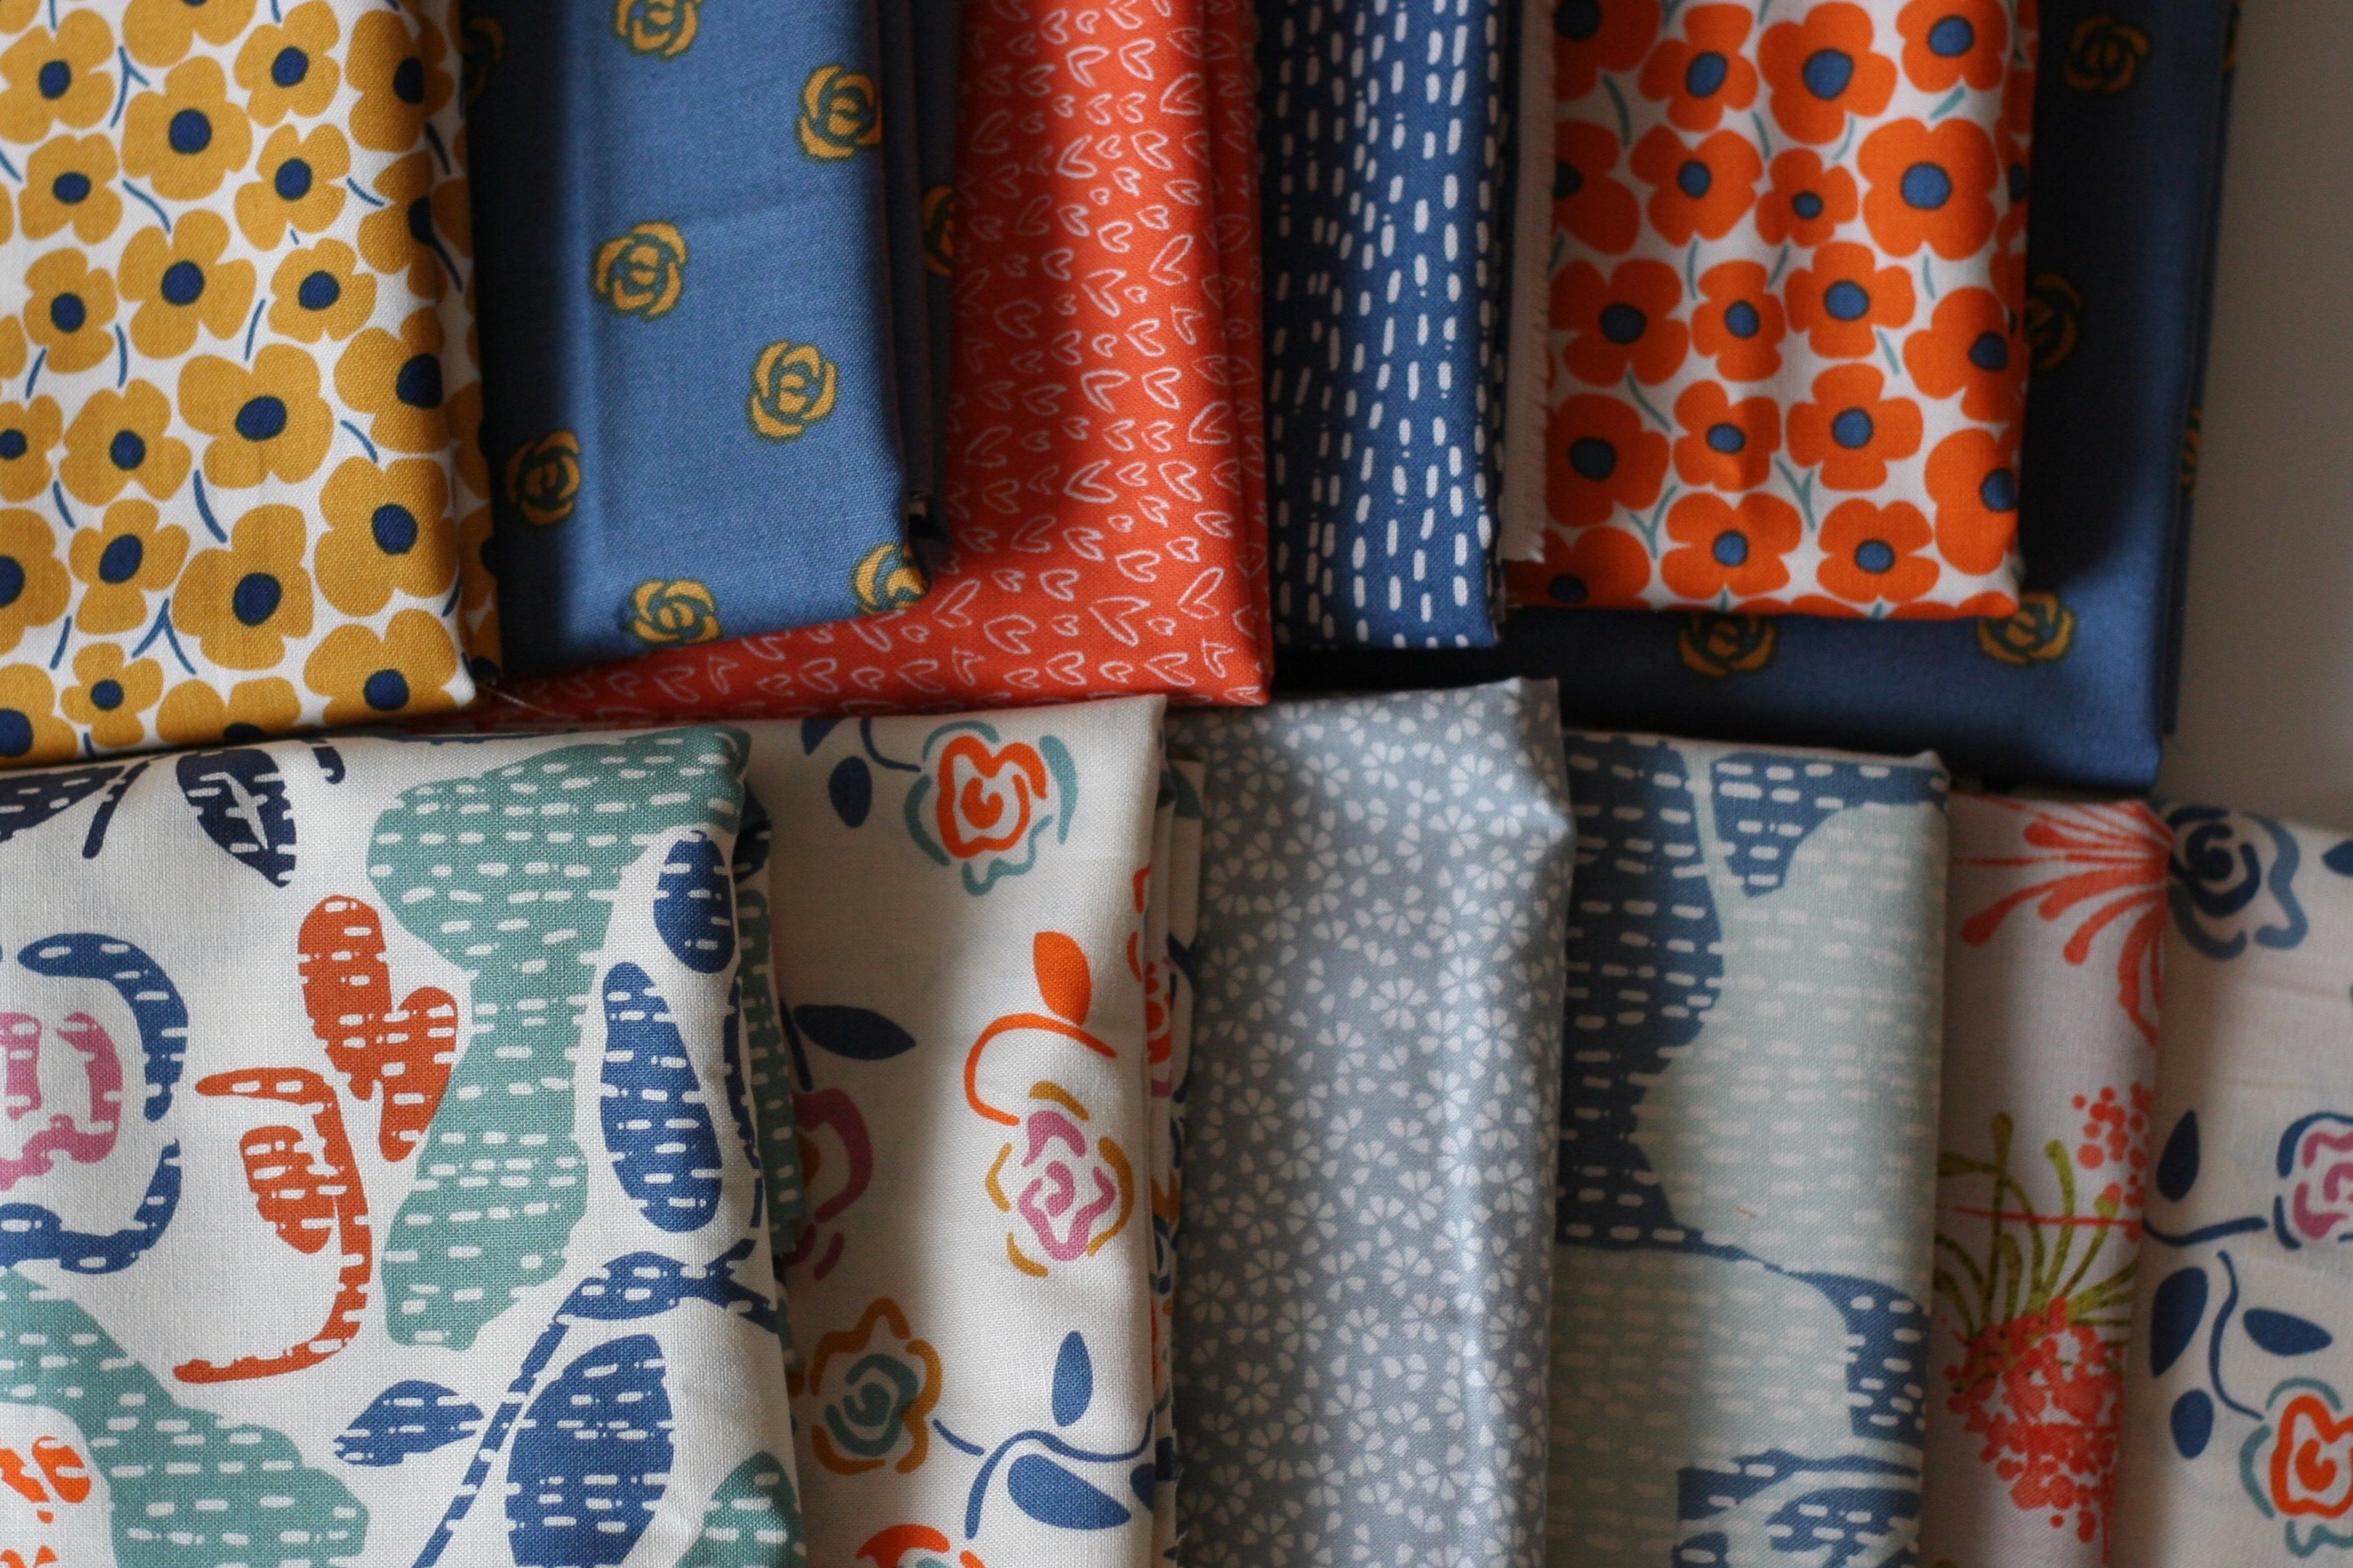
For the backing I chose a print from the Good Neighbors line designed by Amanda Jean Nyberg of Crazy Mom Quilts. I am very happy with this fabric as it has a nice feel to it and the price is right (as it is with most of the fabric over at Connecting Threads.) It has a bright bit of color to it and the pattern hides some of the FMQ wiggles too.

img_20160516_5163

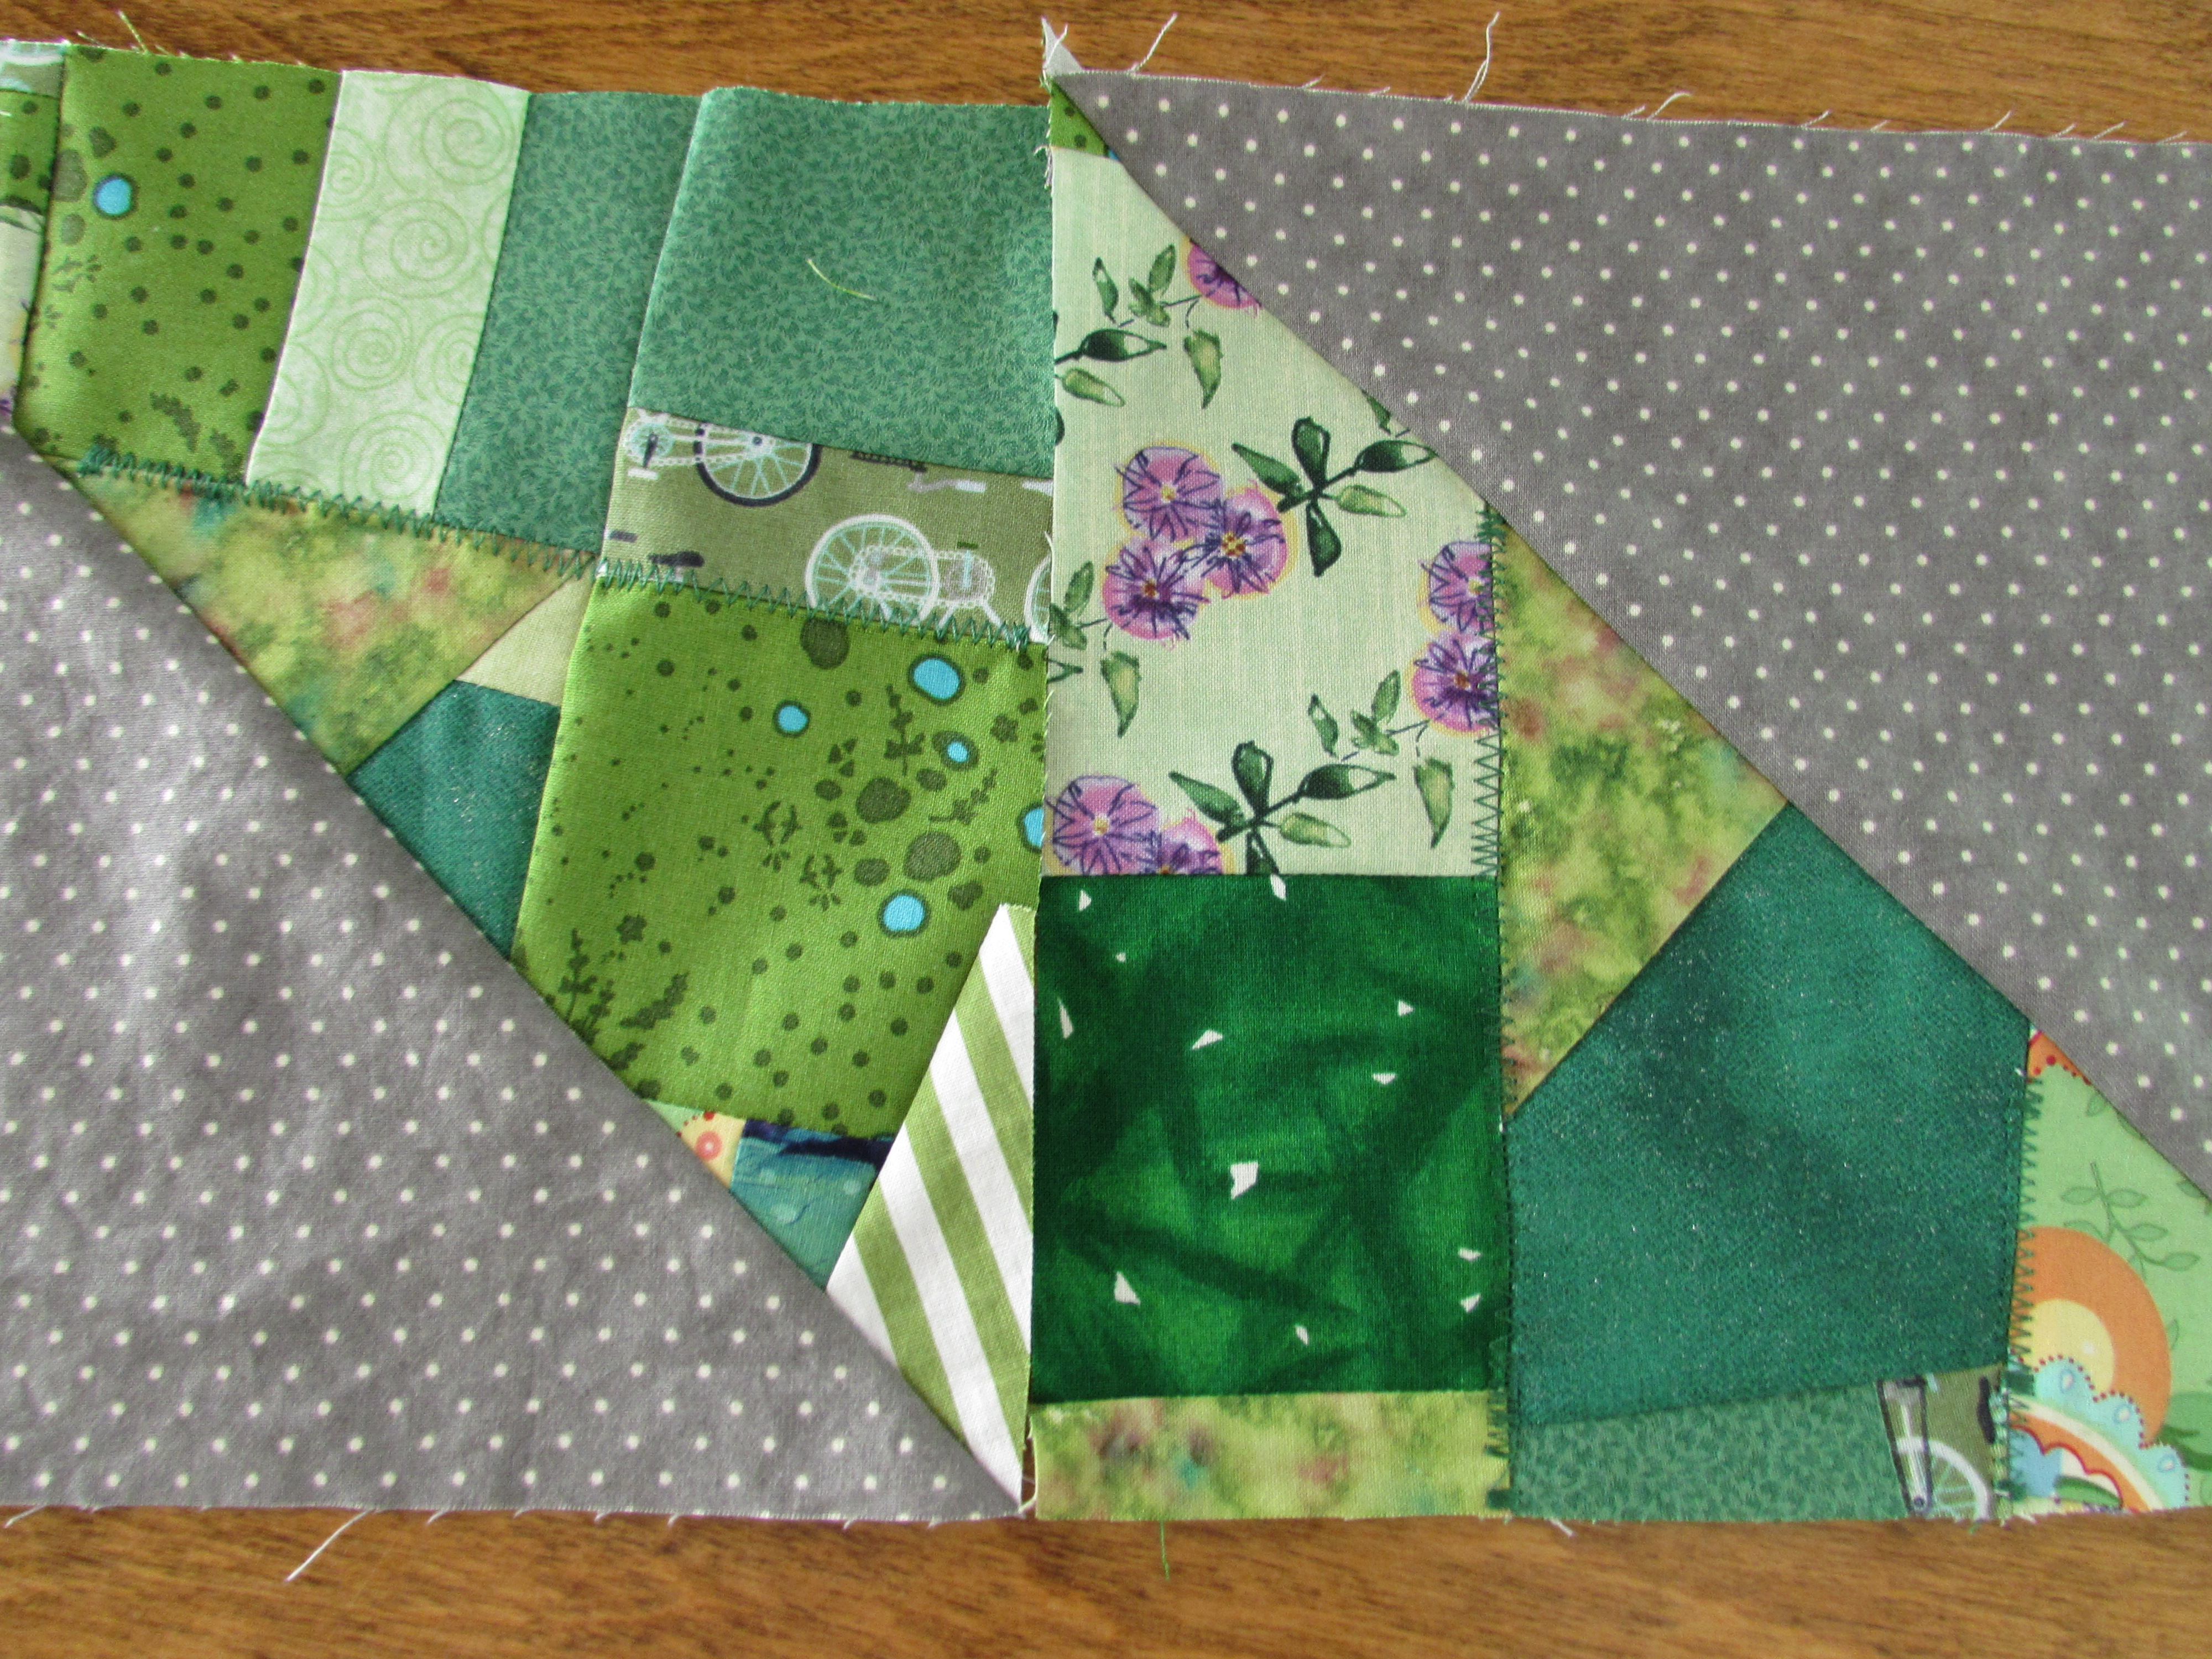
Finally, as with Amish tradition, there is one mistake. Look at these HST’s! The block was stitched incorrectly but I didn’t notice this until I was quilting up to these HST’s. Ah, well, this is testament to the imperfection of our craft!  Or, another way to look at it: ‘A diamond with a flaw is worth more than a pebble without imperfections.’ (Chinese Proverb)

img_20160526_5259

This was a fun experience, between the social aspects of the quiltalong, using these particular colors (which I have wanted to do for quite a while), and furthering my FMQ just a bit, it was very satisfying. Hopefully you are enjoying your projects too. If you are in the US, have a great Memorial weekend. We are supposed to have some hot weather over the next couple of days – here comes summer!


Linking to my usuals! Check them out at the top of the page, under Link Ups.

241 Bag, Version 2

Prologue:

This morning I was feeling highly productive. Before 9:00 am I had taken photos of this great 241 totebag (with the help of my totebag model) and written this  post for you. In the middle of reviewing the post, checking for typos, etc, Julia walked up to me and said, “I stubbed my toe”.  I looked down and saw this horrific baby toe that was bleeding far more than I was comfortable with. I got a (clean) kitchen dishrag and did some high-quality first aid.

image1

Once we had the first aid under wraps (ha ha ha!), I scurried around collecting a ton of fruits and veggies that I was supposed to plate and serve to the senior class at 12:30 today, while they were taking turns presenting their senior projects. (I had a deep suspicion that I wouldn’t be there to serve them). Once the food was in a cooler and one shoe on Julia’s good foot, we got her in the car and headed to urgent care.

They were great. Got her right in (probably out of concern for the gross looking dishrag her foot was wrapped in. When the nurse took it off to clean her toe, he looks at me and says, “uhh, do you want this back??” I declined it.) A couple of hours and three stitches later, we are back home and she is on the couch (where she spent Saturday, Sunday and Monday for illness) doing homework. Poor thing is spending quite a bit of time on the couch and missing a whole lot of school this week. It really hasn’t been a great couple of days for this girl!

IMG_6484


And now that this is all taken care of, we can talk about my second 241 totebag!!

Let me tell you, the second time using a pattern is so much easier than the first! I made another 241 totebag this week and it came together incredibly quickly. I had the process down from the first time I made the bag. (You can check the first one out here.) This one is a keeper – a little selfish sewing for me!

img_20160525_5249

For this bag, I used more of my Allison Glass Field Day collection (the daisy print) and I had a big piece of Kaffe Fassett shot cotton (the solid rust piece). They look great together.

I was bold enough to put in a zipper pocket for this bag. I had a seven inch zipper in my collection of thrifted zippers ( I love finding these in thrift stores and can usually get zippers for 25-50 cents each.) The pattern calls for two zip pockets with them both installed on angles, vertically. I decided I only wanted to tackle one zipper and put it in horizontally. It wasn’t hard to put in this pocket though I am not completely satisfied with the corners – it was difficult to get them to lay flat enough. This is most likely because I didn’t clip the corners close enough. It’s hard to decide how close to clip toward the stitching.

img_20160525_5251

As before, I put in a clip to hold my keys and a slip pocket with velcro closure on the inside of the bag.

img_20160525_5252

I had two scraps of Allison Glass that worked for the lining of the exterior pockets and even though no one will see it, it makes me happy! Love it when the small scraps are usable and it adds a bit of interest to the purse.

img_20160525_5253

I have a bit of a purse addiction and this is going to be a perfect addition to my collection!

Linking to the usuals which can be found at the top of the page, under Link Ups.

If you are looking for classes or patterns to get you going on making a tote bag, check out Craftsy. Loads of classes and patterns to learn from!

craftsy pic

(This is an affiliate link, meaning if you click through and make a purchase, I will be paid a small amount in return.)

Thrifting Success & Another Pattern

We had one of those weekends where things didn’t go as planned. Julia had invited several girl’s for a sleepover on Saturday night to celebrate her 15th birthday. Friday afternoon she started looking a little peaked and by Friday night she was feeling lousy. Saturday morning she cancelled the sleepover and parked herself on the couch, where she has spent the vast majority of the weekend. Poor girl – feverish, headache and all congested. No fun.

So, instead of celebrating her birthday, I snuck out to get her some dvd’s and run a few errands.  I passed a thrift store that supports our local Hospice organization and saw that they had a bunch of office/desk chairs out front. I have been sitting on an older chair that is fairly uncomfortable. I ran in and bought one of their chairs – very comfy and it doesn’t have any arms so it can hug up close to the machine. Yay! While there, I had to at least take a quick peek at their little craft area. Sometime there is fabric there, sometimes not.  I happy to see a few bundles of fat quarters on the shelf which I promptly purchased, brought home, washed, dried and ironed them. I was on a roll!

Love these autumnal prints. Especially the gray/rust piece at the far right.

img_20160522_5231

Here is another bundle.

img_20160522_5229

The black batik and the Asian looking print on the far right are great – the piece in the middle is only so-so.

img_20160522_5230

These two are nice additions as well. Black is always quickly used and I love the geese on the right. Eight fat quarters for about 50 cents each. Score.

I also want to share my May is for Makers pattern for this week. It has been years since I have made a dress but the time has come. I chose the Washi pattern. You may have seen this floating around for a bit. The Washi dress was designed by Rae who blogs at Made by Rae.

washicoversquareI love the neckline and the side pockets on the dress and the fact that the back is shirred with elastic thread. It looks like it will be very comfy which is what I am all about. My list of projects is growing really fast so I’d better get busy!

I need to get to work on:

  • Washi Dress (though I don’t have the fabric for that yet)
  • Fleur Mini
  • 241 Tote for myself (I started pulling fabric for that today)
  • Finish sewing the binding on the Stepping Stones Quilt (almost done!)
  • Prewash fabric and start cutting out the Courtyard Tiles project with my Dear Stella fabric

Ok, get ready, get set, go! What is your list looking like these days?

Check out “Link Ups” at the top of the page to see my favorite places to link to.

Cutest 241 Totebag Ever

Last weekend I finished up the 241 bag that I have been working on. The bag was made as a gift to my niece for her eighteenth birthday. Somehow I forgot to get a photo of Maddie with the bag at the party last week. She loved it though which made me very happy!

Making this bag in tandem with Tami from Sew Much for Free Time was really fun. Neither of us has seen the final project for the other yet and I look forward to popping over to her site to see her bag. I hope you will take a peek as well.

As is usual for Noodlehead patterns, this one was easy to follow and the result is exactly what I had hoped for.

img_20160509_5102 - Copy

This is the second bag I made using a tutorial or pattern of Anna Graham’s. The first was a tote for my mother-in-law. You can read about that here. Anna’s patterns are filled with small details that make for a stylish bag. For instance, I love that the side pockets have a fullness to them. They are fused with interfacing and cut so that they extend a bit from the side of the bag, making them really roomy.

img_20160509_5101 - CopyThe pattern calls for a magnetic closure but I didn’t have one. Fearing I would (yet again) lose my self-control if I returned to Ben Franklin, I searched through my buttons and found a cute wooden toggle button. Using a small rectangle of the contrast fabric, I made a loop and stitched it to the top of the bag.

img_20160509_5104I sewed the button to the other side and it works like a charm. Remember I also added a key chain link to the inside so that Maddie can hook her keys to it and find them again easily. I forgot to take a photo of the key fob that I made but it was made with webbing and the small floral print used on the side pockets. (It was just like the one I made for my sister and talked about in this post.)

img_20160509_5106Anna’s pattern calls for the handle strap to be made from a six-inch wide strip that is interfaced and folded. I wanted to make the handle with two different fabrics so I modified that and used two 3″ strips. Then I fused the interfacing to one side and sewed them, right sides together. After turning the strap right side out, I pressed and topstitched the edges. Another slight modification was to extend the length of the straps. My niece is about 5′ 7″ and the strap seemed too short. I didn’t notice this until after I had cut the straps so I just cut a few more three-inch strips and added on to the length. Just because I thought it looked fun, I used the opposite fabric on each end. If you look at the top picture, you can see the different fabrics. The inner strap on the left is floral and on the right is the big print. On the outside it is just the opposite. The handle looked so fun like this and I would definitely do that again. (These little changes are one of the best parts of making things rather than buying ready-made. Each project is uniquely its own!)

As luck would have it, since I certainly didn’t try for this, the outer seam on the bottom matched up almost perfectly.

img_20160509_5108

I love when this happens! If I actually try to match it up, I usually meet with less success. At any rate, this bag was a huge success. I highly recommend the pattern for anyone with at least some sewing knowledge. It could be a bit of a challenge for a person who is new to sewing.

I hope Tami and I will think of another project to sew together. We had a lot of fun with this one!

Linking to all the usuals. Find them at the top of the page under Link Ups.

Craftsy’s birthday celebration continues through Sunday, May 22nd. Classes are on sale for 50% off! Buying a class enables you to watch each lesson as many times as you like, when it is convenient for you! The newest class taught by Amy Smart, of Diary of a Quilter, is released and on sale.

unnamed (1)

(Because I am a Craftsy affiliate, I will receive a small payment for purchases made by clicking through from my blog.)

Emerald Green

Green is by far, my favorite color. I love all shades of green so it was very easy for me to sit down this morning and pull out my green scrap bin to make my RSC16 projects for the month of May.

IMG_3383

I decided to make my blocks for the Gemstones quilt first. You might remember that this pattern was designed by Cynthia over at Quilting is More Fun Than Housework. I’m not sure why, but I hadn’t thought to chain piece these blocks before. This morning I had a revelation though and zipped through the blocks in no time at all.

img_20160518_5177

Love the emerald tones in these blocks. I wanted to use only greens that evoked an emerald gemstone so my options were a bit limited. They look so pretty though!

img_20160518_5180

When I was taking photos (which is becoming a challenge as the blocks stack up) I noticed that I stitched the sashing to the wrong edge of these blocks. I will have to rip those seams and fix that.

Next I moved on to my scrappy blocks that were inspired by Victoria Findlay-Wolfe’s book, 15 Minutes of Play. These blocks are so satisfying. It is playful and freeing to make these because there is really no right or wrong. I branched out and used different shades of green for these, reaching for whichever scrap seemed to fit.

img_20160518_5170

Now that these scrappy blocks are accumulating, it is fun to play with the HST layout. Endless possiblities.

img_20160518_5174

Here is another idea.

img_20160518_5175

The scrappy HST’s remind me of crazy quilts. I am playing around with adding some random stitching to the scrappy side of the HST to give it more of the crazy quilt look. What do you think? I did a few zig zag seams on two of the HST’s. I could also do a blanket stitch which would be characteristic of those quilts. Also, if I do this, maybe I should use some Sulky Rayon threads so that there would be that great sheen Sulky has as well as add more body to the stitching. Opinions please? Finally… should I do these little stitches now or when I actually quilt it? If I do it now, I will have to figure out how to quilt it such that it doesn’t interfere. I could focus the quilting on the polkadot side of the HST’s. Decisions, decisions, decisions!

img_20160518_5171

Glad to have my scrappy green projects checked off the list for this month! Though I must say, it didn’t make the slightest dent in my green scrap bin. Not one little bit.

Linking to my favorites. Check them out at the top of the page, under Link Ups!

Craftsy Update:  In a continued celebration of their birthday, Craftsy is offering some of their most popular classes for 50% off. Sale begins Wednesday, May 18th and runs through Sunday, May 22nd! Check them out. I have taken some quilting classes purchased at Craftsy and feel that that the caliber of the classes is first rate! (I am a Craftsy affiliate, meaning if you click through my link and make a purchase, I will receive a small payment.)

unnamed (1)

Lots Going On!

The week is starting out with a bang! Yesterday I was scheduled to have some dental surgery today and I really, really, really wasn’t looking forward to it. Imagine my joy when the dental office called to reschedule my appointment (hopefully in another decade, another century, as far out as I can schedule it!) Anyway, Ray had taken the day off because he expected to be driving the patient home and rolling his loopy wife out of the car and into bed. Since we didn’t have to do this, we opted for a drive up to Downieville and a hike.

DV hikeThese poppies are just everywhere. Last year when they all went to seed, I collected tons of seed pods and tried to start them in our garden. Not one plant came up. I am not sure why but I am going to give it another try this fall. I know they are grow happily up here as they are just covering everyone’s yards and hillsides. I love the drama of these vivid red poppies.

dv hike 2

Really deep and crystal clear, the river is running so fast.  Ray and I are curious to see how high it remains this summer. Last year, with the drought, it ran quite low. I suspect this summer will be a different story. Monday was a totally different day than the one I expected. Hurray for small blessings like dental appointment cancellations!!!

This weekend I was able to catch up on the FMQ quiltalong that I have been doing with Lori at The Inbox Jaunt. This project just gets cuter and cuter.

img_20160516_5164

Those sailboats make this whole project shine! I love them and kind of want to make something for a child that features the boats. I think they are just adorable. It is with mixed feelings that I watch for today’s post from Lori. This week we will be quilting the last row and adding some finishing touches. Overall, this was a fun way to practice my FMQ.

In support of the May is for Makers theme this month, I purchased my second indie pattern of the month. Yikes, it was hard to choose. It sort of reminds me of when my youngest son was little. (Ok, even now at 25 years old, he is still like this.)  He had such a hard time making choices – picking out an ice cream flavor took such a long time. The donut shop was even worse. When he grew to be a teenager, I dreaded the hours we would spend shopping when it was time to get new shoes. It looks like the apple doesn’t fall far from the tree. Here I was, shopping for a pattern-just for fun, no parameters. I was buying a pattern only because I wanted to support someone in their creative efforts. And I just COULDN’T DECIDE! Finally, I made my choice and bought a newly released pattern from Kirsty over at Bonjour Quilts. It is called Fleur.

FleurMiniCoverSmall

This mini finishes at 11″ square though she also sells a pattern for a jumbo size Fleur which works into a queen size quilt. I am thinking this mini would look great with four blocks so that it finished at 22″ x 22″. It is a sweet, summery look and will be fun to put together.

Finally, guess what! I am working on my first tutorial for Sew Mama Sew! I am excited about it and a little nervous because I really want to get all the details written up clearly and concisely. The tutorial is for something I have made so many times that I can do it without thought. Now I am making a few of them and trying to take good notes of the steps necessary. It posts in three weeks so hopefully I will have it all worked out by early next week.

I hope your week has started out as happy as mine!!

Linking to my usual favorites. Check them out at the top of the page, under Link Ups.

Craftsy Update:  In a continued celebration of their birthday, Craftsy is offering some of their most popular classes for 50% off. Sale begins Wednesday, May 18th! Check them out. I have taken some quilting classes purchased at Craftsy and feel that that the caliber of the classes is first rate! (I am a Craftsy affiliate, meaning if you click through my link and make a purchase, I will receive a small payment.)

unnamed (1)


Spring Blossoms and a Finish

Oh my gosh, my garden is exploding right now. Our property looks its absolute best in spring and fall.  We have gorgeous flowers this time of year, including iris, roses, clematis, peonies, columbine and coral bells. Once the heat arrives everything begins to look stressed and overheated (including me.) When fall comes along, all of the dogwood and maple trees give us a wonderful show of color. The property was the main draw when we bought this place, the house was definitely secondary.

After a recent rain, our roses just shimmered.

image

So many gorgeous colors.

image

Completely surrounded by six foot tall deer fence, we don’t have issues with the bajillion deer and rabbits that wander through our property each day.

image

Up against the south wall of Ray’s shop we have a few climbing roses and this year, they are just monstrous. This picture was in the middle of the day and doesn’t do them justice. They are gorgeous. Ray had to actually reinforce the trellis they are on; it seemed like the weight could cause them to break away from it.img_20160503_5035

Back to the subject at hand, sewing!  Last week I shared a bit of a project that I was working on. It was a gift for my mom for Mother’s Day. She and I both like vintage pieces and I managed to swipe a crocheted doily from her house when I was there a couple of weeks ago.  I thought it might look pretty quilted to a simple rectangle to be used under a vase of flowers.

img_20160507_5049

Overall, I am very pleased with how this turned out. Because I was sort of creating without much of a plan, there are things I would do different the next time around. To make this, I made the quilt sandwich and pinned the doily to it. Using a zig zag stitch and my walking foot, I stitched around it in three places. First I stitched the innermost circle, moved outward to the next circle, and then I stitched around the first set of petals. Finally, I stitched around the outer edge. My mistake was adhering the outermost edge before I did the cross hatch quilting. I was constantly butting up to the edge of the doily. If I had left that edge loose, I could have stitched right under it, backtacked, and snipped my threads. It would have been so much easier.Lesson learned.

img_20160507_5048

After I stitched the doily, I began working on the framework of the FMQ. I did the little scrolls and loops all the way around the edge (leaving about 1/2″ to use for squaring up and binding). After the first pass, it looked too sparse so I echo quilted the little scrolls and loops. Were I to have the chance, I would add more detail to this section. It is a little narrow for the scale of the mini. Finally, I worked on the cross hatch lines. For this, I used my trusty Hera marker. Wow, I love that thing. I could mark one whole quadrant at a time and the lines stayed visible. No ink or chalk to deal with made this so easy! I made 3/4″ blocks in the cross hatch which worked out well.

img_20160507_5050

The binding came from my stash of vintage fabrics. Remember the story I shared about the wonderful woman in Downieville who gave me her mother’s fabric stash from 1940-1950? This piece was from that amazing gift. It is a sweet print that adds a pop of color to this mini. The fabric was only 32″ wide, selvedge to selvedge which confirms it’s age. (I have actually been dying to start another project with these fabrics. So many project, so little time, right??)

This mini was a sweet project and I think Mom really liked it. It fits her house just perfectly.

I will finish this off by showing you the baby geese that we have been watching. They live up on our pond and are just adorable. Ray took this shot from our deck with a telephoto lens.  The geese are very protective and no matter how quiet we try to be, we cannot get very close to the family.

img_20160508_5089

Linking to my favorites. Find the links at the top of the page under Link Ups.


Remember:  In celebration of their 5th anniversary, Craftsy will hold a great sale of kits and supplies beginning today and running through the 15th. Kits are a great way to buy coordinating fabrics at a wonderful price – even if you decide to use it for something other than the pattern it is sold with. Check it out here!

may craftsy


Weekly Wip Update

Let’s start off with the fun fact that this is my 200th post. That is sort of cool. 🙂

The last week didn’t include as much sewing time as I would have liked. I lost a couple of days because I was down with a bug. I managed to watch a few episodes of Downton Abbey though so it wasn’t a total loss. (I just discovered the show a few months ago and luckily, Amazon streams it. I have been devouring this soap opera lately, with the Dowager Countess being my favorite character.)

The days that I was able to spend time sewing were mostly productive. I made a few new French Press cozies for my Etsy shop. Beyond that, I started quilting my black and white Stepping Stones quilt. So far, I am quilting along the diagonal, following the black and white squares. I have not touched the tiny HST’s or the blue strips. My thought is to finish the black and white charms and then decide what, if anything, to do with the other smaller parts.

I am using white thread and the quilting is coming along nicely. However, the white stitching doesn’t show up well for pictures.

img_20160509_5110

I have been alternating quilting a large spiral and then in the next square quilting a loopy design.

img_20160509_5109

I have quilted about 1/3 so far. Other projects beckoned though and I set this aside for a few days.

I have been having a blast working on my sewalong with Tami of Sew Much for Free Time. Every time I make another friend via this blog, I am just blown away by the ease of the relationship. By now we have been emailing back and forth with progress pictures and ideas. It is so much fun. Our 241 Totebags are swiftly moving toward completion! Working with a friend has kept both of us on track and has somehow made the project seem to come together quickly.  This is my second project using a Noodlehead pattern or tutorial and the directions are just wonderful. So far, I have constructed the entire outer bag and have been working on prepping the inside portion.

image

These prints are bright, fun and maybe a little wild but I think they are perfect for the intended recipient.

For the inside, I added one of my Needle and Foot labels. I have just a few left as I normally put these on product that goes into my Etsy shop.

img_20160509_5096

There are options for zipper pockets on the outer portion but I politely declined the option. (Read, I was too lazy to fuss with a zipper.) I did add a square of Velcro to the patch pocket on the inside (I was feeling guilty.)

img_20160509_5097

Finally, I made a little attachment to hang a  key chain holder. I love these little guys; saves so much time not having to hunt to the bottom of your bag to find your keys. There is a coordinating key fob in the works.

img_20160509_5098

Because there will be a bit of tugging each time the keys are hooked and unhooked, I fused some stabilizer to the back for support.

img_20160509_5099

The lining portion of the purse and the shoulder strap should go together quickly. I’m pretty excited about the whole thing and have a feeling I will make another one for myself.

Yesterday I posted a progress picture on Instagram and guess who commented? Um, Anna Graham, from Noodlehead. Looks like we are sewing buddies now. 😉

image

.What a great project this has been. I am going to have to find another fun sewalong/quiltalong type of activity after this. If you have a minute, check out Tami’s progress. Seeing the same pattern come together in two very different colorways is very interesting. They each look very unique.

Linking to Linky Tuesday, Let’s Bee Social and Sew Cute Tuesday! All links are found as always, at the top of the page, under Link Ups.

Craftsy Update:  In celebration of their 5th anniversary, Craftsy will hold a great sale of kits and supplies running May 12th through the 15th. Check it out here!

may craftsy

(I am a Craftsy affiliate and will receive a small payment for any sales that occur via my blog.)

The Saga Continues

Remember the tale of the quilter who needed a piece of velcro and her ensuing trips to Ben Franklins? As happened with “If You Give a Mouse a Cookie”, there is a sequel which must be shared. After the success of Laura Numeroff’s first book , the sequels began popping up with regularity. There was “If You Give a Moose a Muffin” and “If You Give a Pig a Pancake” among others.  Here is the next chapter to my story, If You Give a Quilter a Bargain.

At the end of the first chapter of this story, you might remember that this quilter had returned to Ben Franklin to pick up a piece of Allison Glass fabric to add to the pile being used to make a 241 totebag. While there, an amazing discovery was made where the whole Asuka line by Dear Stella was found on the $5.99 table. I thought that was where the story would end. But no, it was not to be.

Last week the May is for Maker’s challenge was brought to the forefront of the quilty blogger community and everyone was joyfully diving in to buy patterns designed by individual makers (as opposed to those working for large companies.) This blogger happens to love a good cause. Especially a cause that is supported by shopping.

In my related post last week, I stated that I would buy a pattern to use to make a quilt with the Dear Stella fabric. It took a lot of shopping to finally settle on the pattern I wanted to make. There are endless numbers of gorgeous patterns to be had on Etsy and Craftsy both. So many great designs that it was very hard to choose. I started looking at the blogs of my favorite quilters who also sold patterns. I did web searches. I went to my lovely Etsy shopping app and my Craftsy shopping app. Finally I had to just put away my iPad to let my brain settle down, knowing that once I did so, the right pattern would rise to the top of the frenzy.

It did. Here it is; Courtyard Tiles by Kelly Young of My Quilt Infatuation. One of my parameters for choosing a pattern was that it have a large scale design because some of the Asuka pieces have large focus prints. Also, because I am making this for a queen size bed, I didn’t want to piece something too fussy with loads of points to match, angles to cut, etc.

courtyard tiles pattern

This pattern will be great from both angles – not a lot of fussy piecing, and plenty of room for the fabrics to shine. I love that the blocks give an impression of a curve but really they are pieced with rectangles and small triangles to create that curved look. Here is where the saga continues. Looking at the requirements for the queen size, I found I needed another 1.5 yards. Yep, I had to go back to Ben Franklin’s.

image

Fortunately for this shopper, there were still a few pieces of the Asuka line left. There were also a few pieces of Dear Stella that coordinated with the Asuka line. No longer were they all stacked together nice and neat. That’s ok – the thrill of the hunt makes it that much more satisfying. I started searching.

I found several pieces that I had not purchased during my last trip. The orange flowers with the blue centers, the larger scale print (on the bottom to the far left) and the gray dot (on the bottom, middle of the row). I also bought a bit more of two pieces that I already had.

image

I have enough of the print fabrics to begin piecing the quilt. I have not yet purchased the background fabric. I can’t decide what color I want to use.  Currently, the choice is between a very pale gray or a crisp white. My decision is complicated by the fact that some of these fabrics show a creamy white and others have a very crisp white. Oh, how I struggle with color! If you have any input, I would appreciate hearing your thoughts.

Of course, I would be lying if I said this was the end of my story. Once the decision is made about the background fabric, there is still the backing fabric and the binding to be selected. No, this story has only just begun. I am excited to get going on it, but first I need to finish up a few projects that are close to completion.

Linking to Sunday Stash and Main Crush Monday. (You’ll find these links at the top of the page, under Link Ups.)


Mid-week WIP Update

Lots of projects in various stages in my sewing room this week. It is actually kind of fun to have multiple things going on. I sew a while, cut for a bit, practice a little FMQ – none of it feels tedious because I am moving back and forth between projects.

My main sewing machine is being very cranky right now so I am sewing on my smaller machine. I love this machine though – the tension is not sensitive and it sews like a little work horse. Much like The Little Engine That Could, this machine just keeps going (I think I can, I think I can.) I really miss the needle down feature and the thread cutter on my bigger machine though. Makes such a difference when I am sewing for a long period of time.

Anyway…  Here is what’s going on:

I am working on my 241 tote bag that I mentioned in this post last week. This project has become so much fun because after reading that post, Tami from Sew Much for Free Time commented that she was also going to make a 241 tote. We did a bit of emailing back and forth and decided we would have our own little sew along. After working on my Stepping Stones quilt though the quilt along at Inquiring Quilter, I found I really enjoy the social aspect of the project. I love seeing everyone’s progress, having others to ask questions and get input, and seeing the fabric choices and how much that changes the pattern that we are all using. I think working on this tote with Tami will be the same. We set up a few deadlines for progress and hope to finish up together. It is low key though. If life gets in the way, so be it. We are just enjoying our virtual time sewing together! If you want to see Tami’s progress, hop over.  We are just getting started. Anyone that wants to, is more than welcome to join us. Leave me a comment if you want more info.

By today, we are both aiming to have our bags cut out and pieces prepared. I spent yesterday morning prepping everything. I plan on using these Allison Glass fabrics.

img_20160423_4915

The pattern seems very straight forward so I doubt there will be much difficulty makijng this bag. I traced my pieces with a chalk marker and cut from there. Printing the pieces on regular printer paper made for thick pieces. I didn’t want to pin and cut them because there might be some inaccuracy. Tracing the pieces was quick. (When I was cutting pieces, I took the pictures under the kitchen lights which distorts the color.)

img_20160503_5013

Once the pieces were cut, I fused the interfacing to the outer pieces.

img_20160503_5015

I’m really excited about this project. It is going to be perfect for my niece’s birthday gift.

Besides working on prepping the bag, I also did some FMQ on the Mystery quilt along that Lori Kenedy is hosting over at the Inbox Jaunt. This week we were instructed to quilt little stars and suns. Lori calls them Spirograph Suns though we did a simplified version of them. The motif is so fun and you’ll find the tutorial here.

img_20160503_5020

We only have a few more sections to quilt and I think I will be a little sad to see this finish up. I love that the structure of this QAL only requires I quilt two lines each week. Not time consuming but it forces me to practice two new motifs each week.  (Also, take a look at my fish.  I feel like I stitched my fishies going upstream. Shouldn’t they should swim from left to right…. I must have gotten turned around (not all that unusual for this quilter.) 😉

img_20160503_5022

My Stepping Stones quilt is basted and ready to be quilted. I am looking forward to the weekly post tomorrow as she plans to give some ideas on possible quilting motifs for this pattern. Choosing how I will quilt something is still a challenge for me but maybe I will be inspired by Jennifer’s post tomorrow.

Finally, I am working on a mini that I will share later this week. It is going to be cute though. Here is a sneak peek.

image

I am going for an old-fashioned, vintage feel and I think it is coming together well.

OK – what do you have going on in your sewing room? i would love to hear.

Linking this post up with all sorts of fun sites. Take a look at the list. You’ll find it at the top of the page, under Link Ups.

**************************************************************************

Just in case you need an idea for Mother’s Day gifts (for a friend, your mom, even yourself  – even if you aren’t a mom!)  Craftsy has awesome classes and I can’t imagine a crafty mom who wouldn’t love one (or two, or three…) Classes last longer than flowers and they are way more affordable! Click here to check it out.

MothersDay (2)Craftsy