Monthly Archives: June 2014

My First Quilt

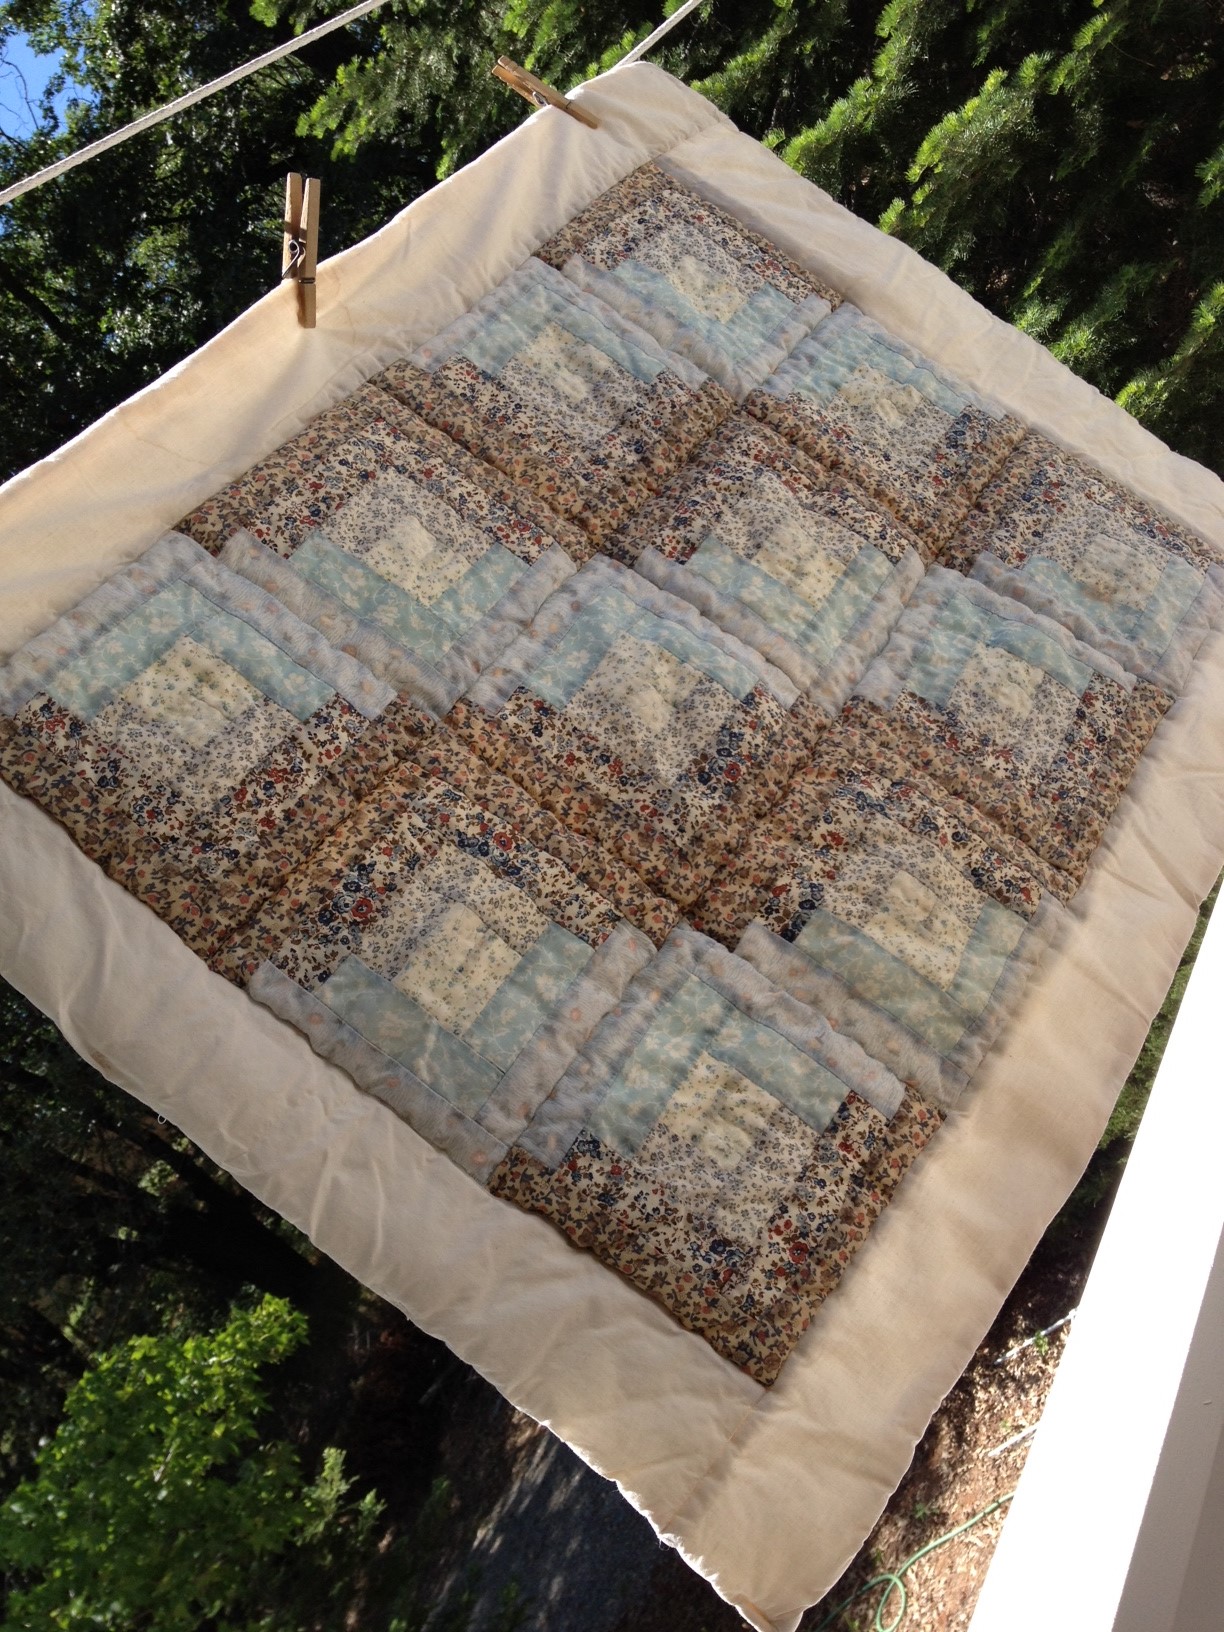
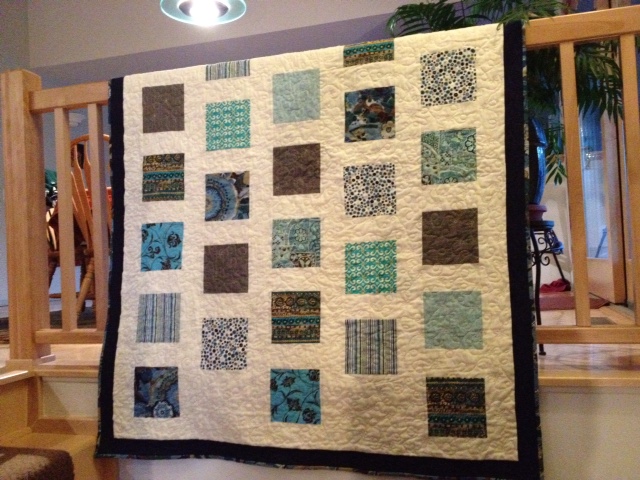
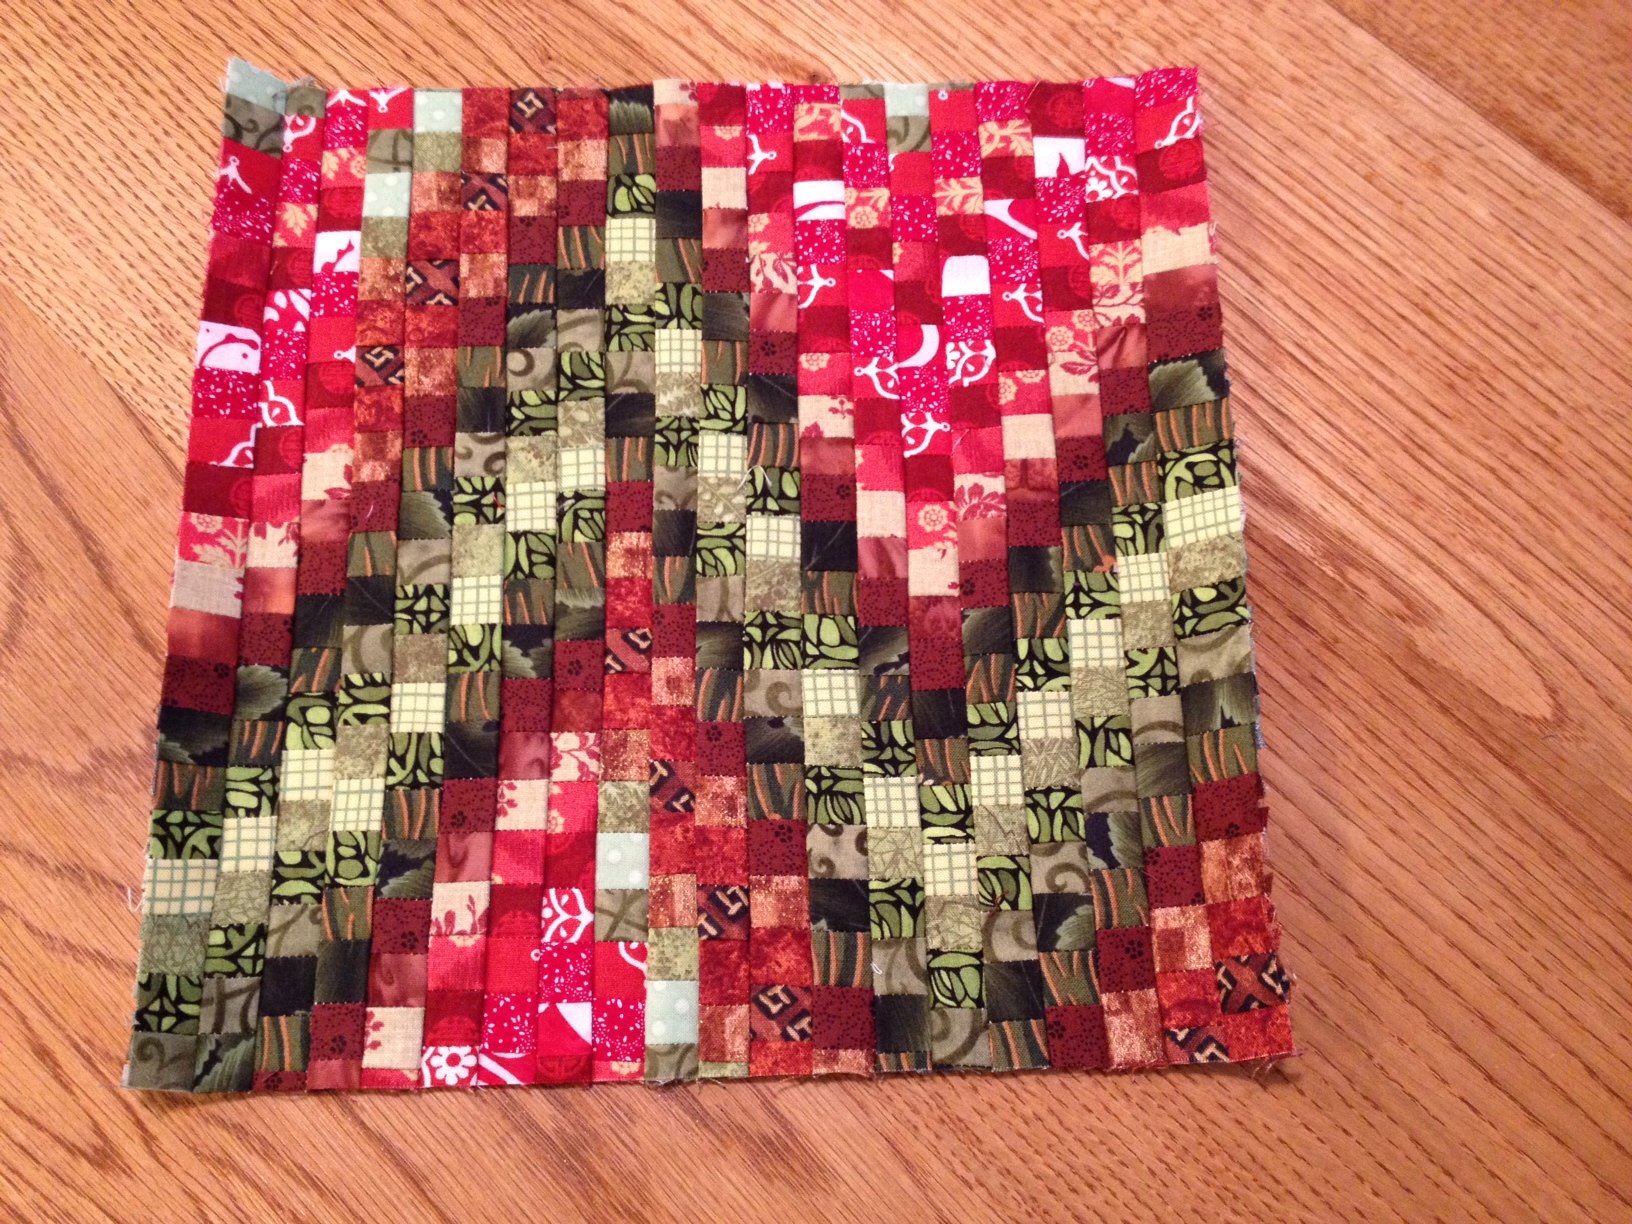
The first quilt I ever made was back in high school, meaning it was a very, very long time ago…. It was my senior year and I was taking a sewing class.  I don’t really remember how I got the idea to make the quilt but somehow I figured it out and decided to make it with log cabin blocks.  I knew next to nothing about quilting and didn’t really ask anyone how to do it.  I was just winging it.  Looking at the quilt now, this is painfully apparent!

I chose to use blues and browns for the color schemes.  I didn’t know that it would be best to use fabrics that were all one weight.  Instead, I chose cottons of all sorts, mainly based on whether I liked the colors and patterns.  Unfortunately, I used some very thin, lightweight cottons.  Over the years, these wore out quickly.  To make each block I used a sort of quilt-as-you-go method that I made up. (Not like I invented it but I had no instruction so I had to figure this out on my own.) I cut a block of muslin as a backing and centered a small square on it.  Then I created each block by sewing strips around and around that center block. This was a huge project at the time. I decided to make the quilt for a queen sized bed. If I was going to make it, I wanted to be able to use it for a long time. After weeks and weeks, I finished all of the squares. I sewed them together and, not surprisingly, my corners didn’t match.  At the time, I wasn’t really aware that they should.  Blissful ignorance!

This was back in 1978 and the batting that I was familiar with was mainly fluffy polyester. My Grandma Josie was looking at my quilt top and told me I should fill it with a blanket so it would be warmer. Once again, I didn’t know any better!  She gave me a huge and extremely heavy wool blanket. Ever obedient, I used this as the filling of my quilt.  I used a (very) thin muslin as the backing. All together this quilt weighed about twenty pounds.  Definitely warm and with the wool blanket in the middle, not easily washable! I had no idea about machine quilting, the only thing I had heard of was tying it.  So I tied it with yarn at each corner of the squares, nothing in the centers. It was so heavy and the muslin so thin that the yarn ties broke free from the muslin.  Really the backing floated freely and the quilt top was tied to that oh-so-heavy woolen blanket!

I loved this quilt and used it for years.  I even took it to college with me.  A queen sized, woolen filled, heavy-as-lead quilt to college on the central coast of California.  The weather is usually in the 70’s there so you can bet I was nice and warm at night.  Plus, I had to fold the quilt to fit it on my single size bed in the dorms.  Doubly warm! After college it was our quilt in my first home when I got married.  Here is my first baby snuggled into the quilt when he was just a few weeks old.  So, circa 1985.  Clearly this was taken before moms were taught to put their babies to sleep on their backs.  This poor little guy is face down, on a quilt, and….. on a waterbed. Yikes!! But just look at him….. so sweet.

quilt with andrew-3

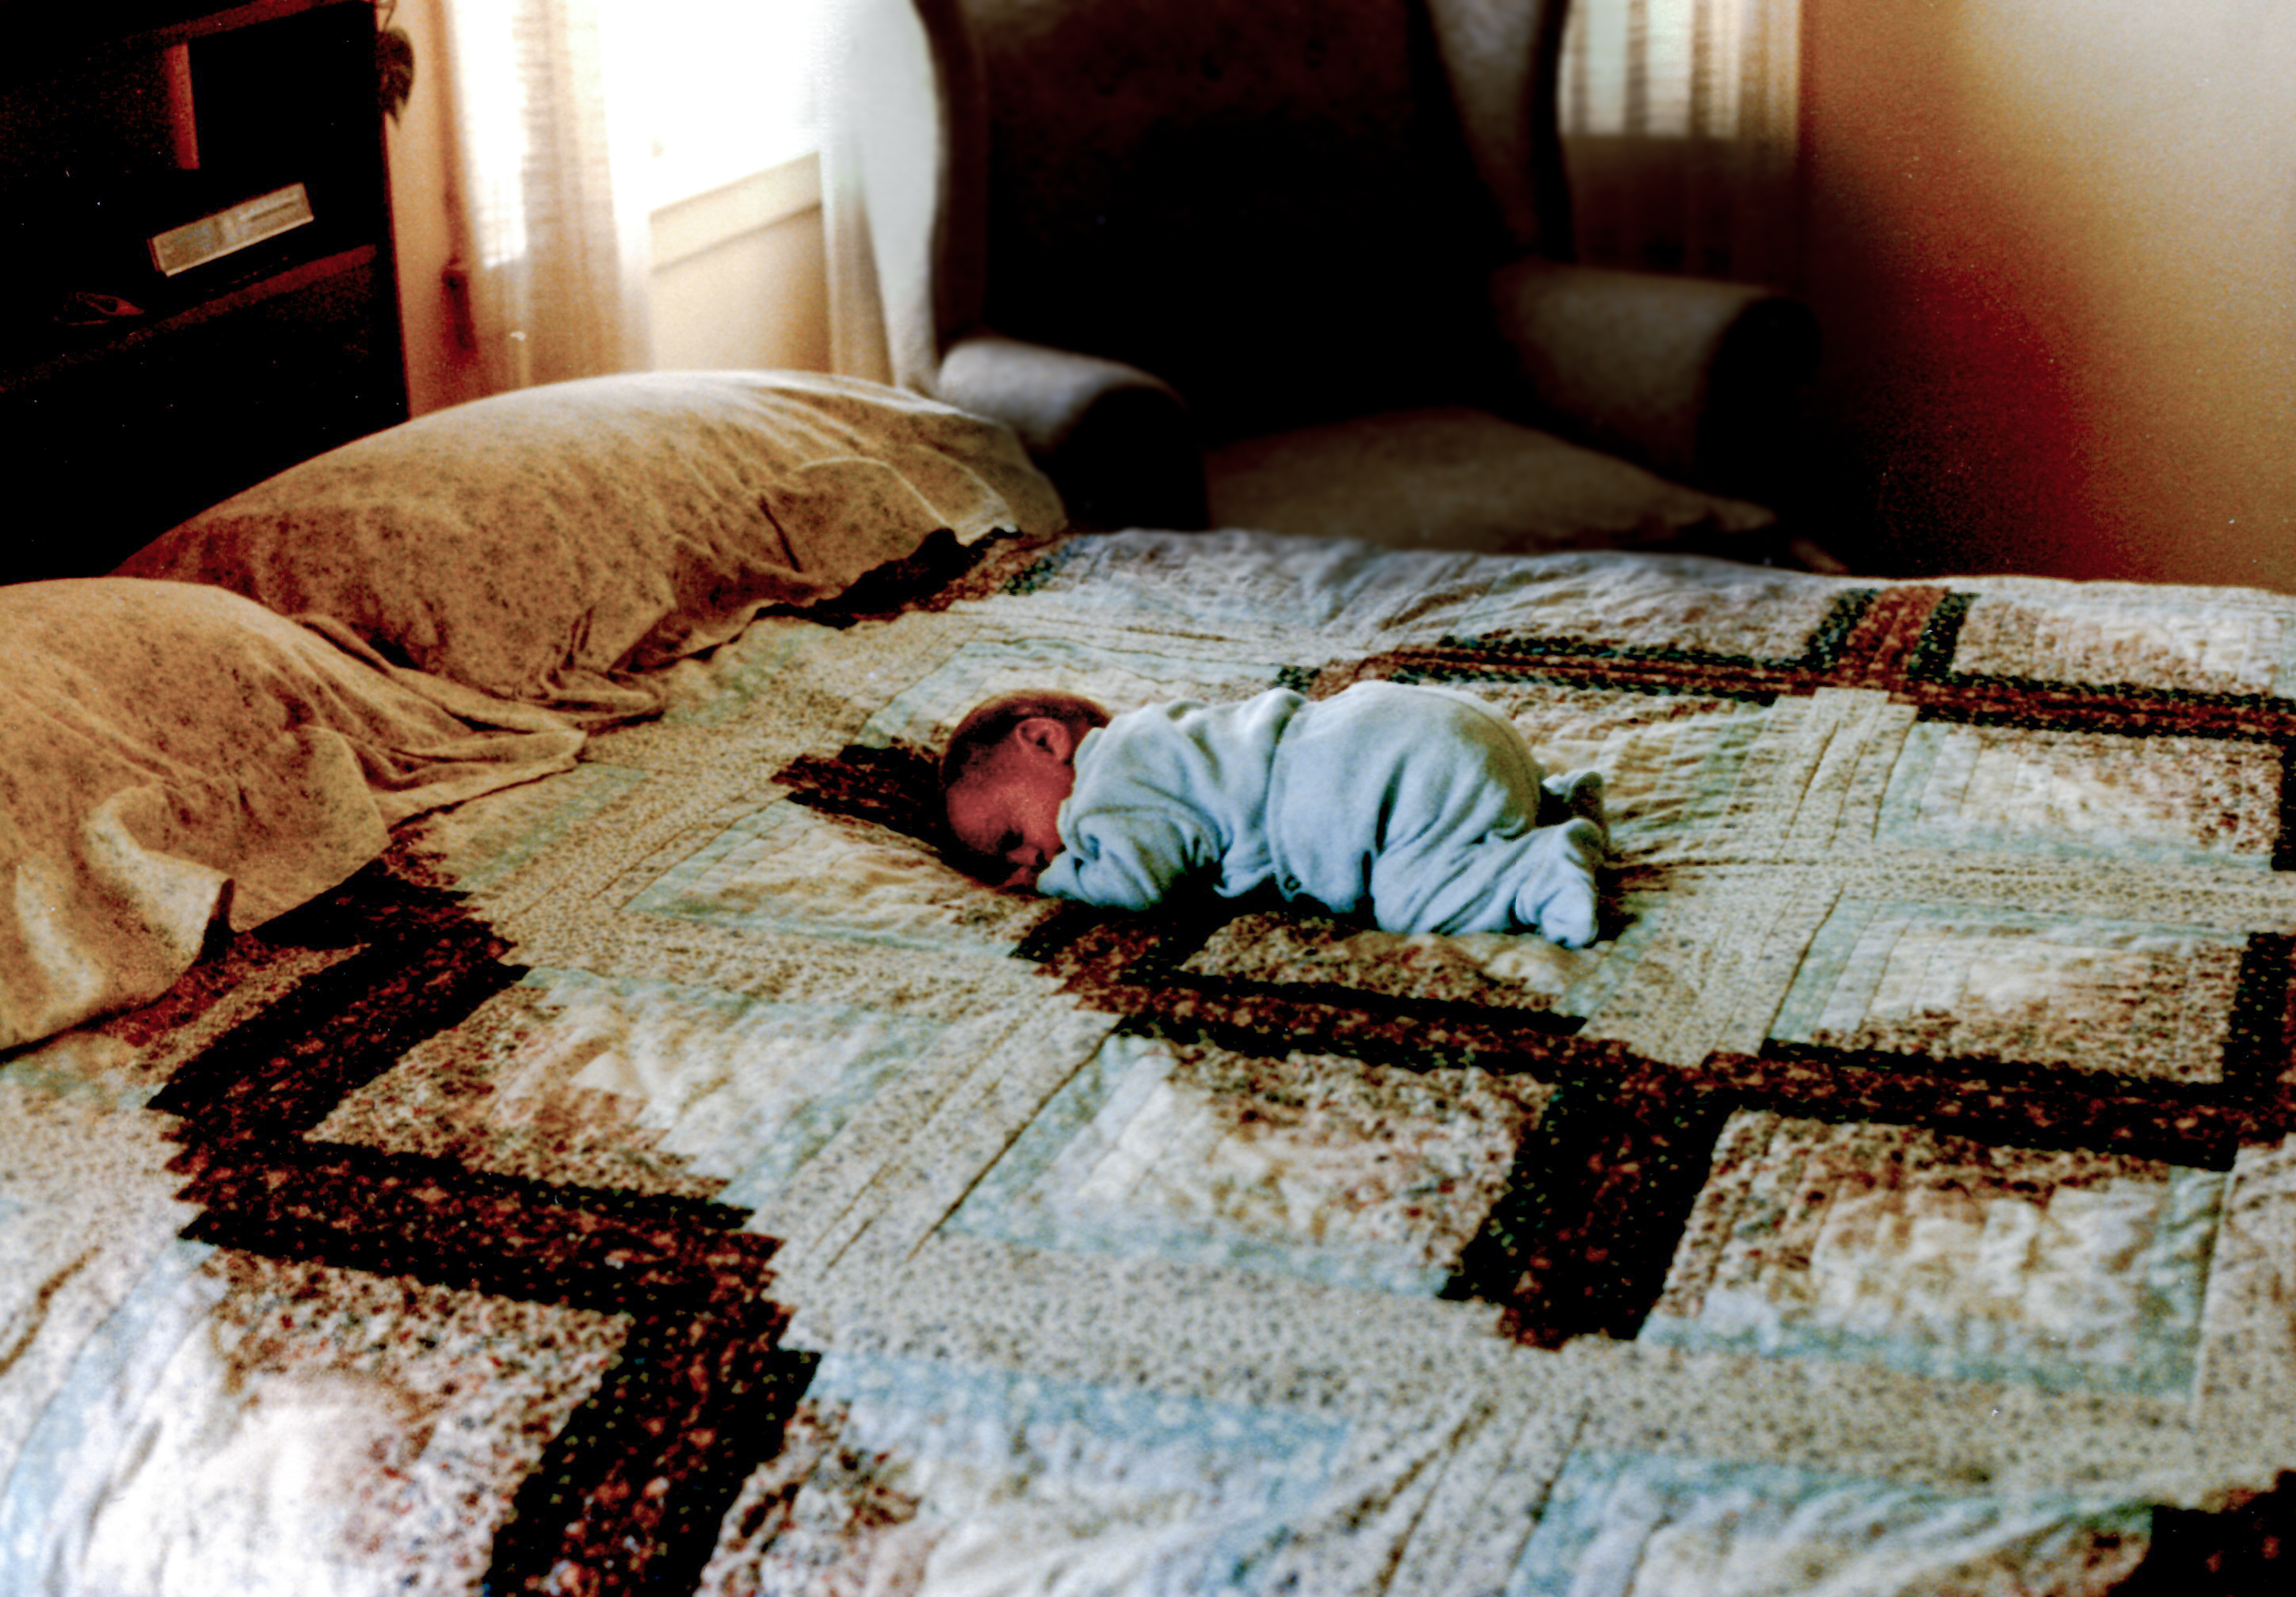
The next baby came along in 1987 and yep, still face down but on a regular mattress by now. This quilt was so loved.

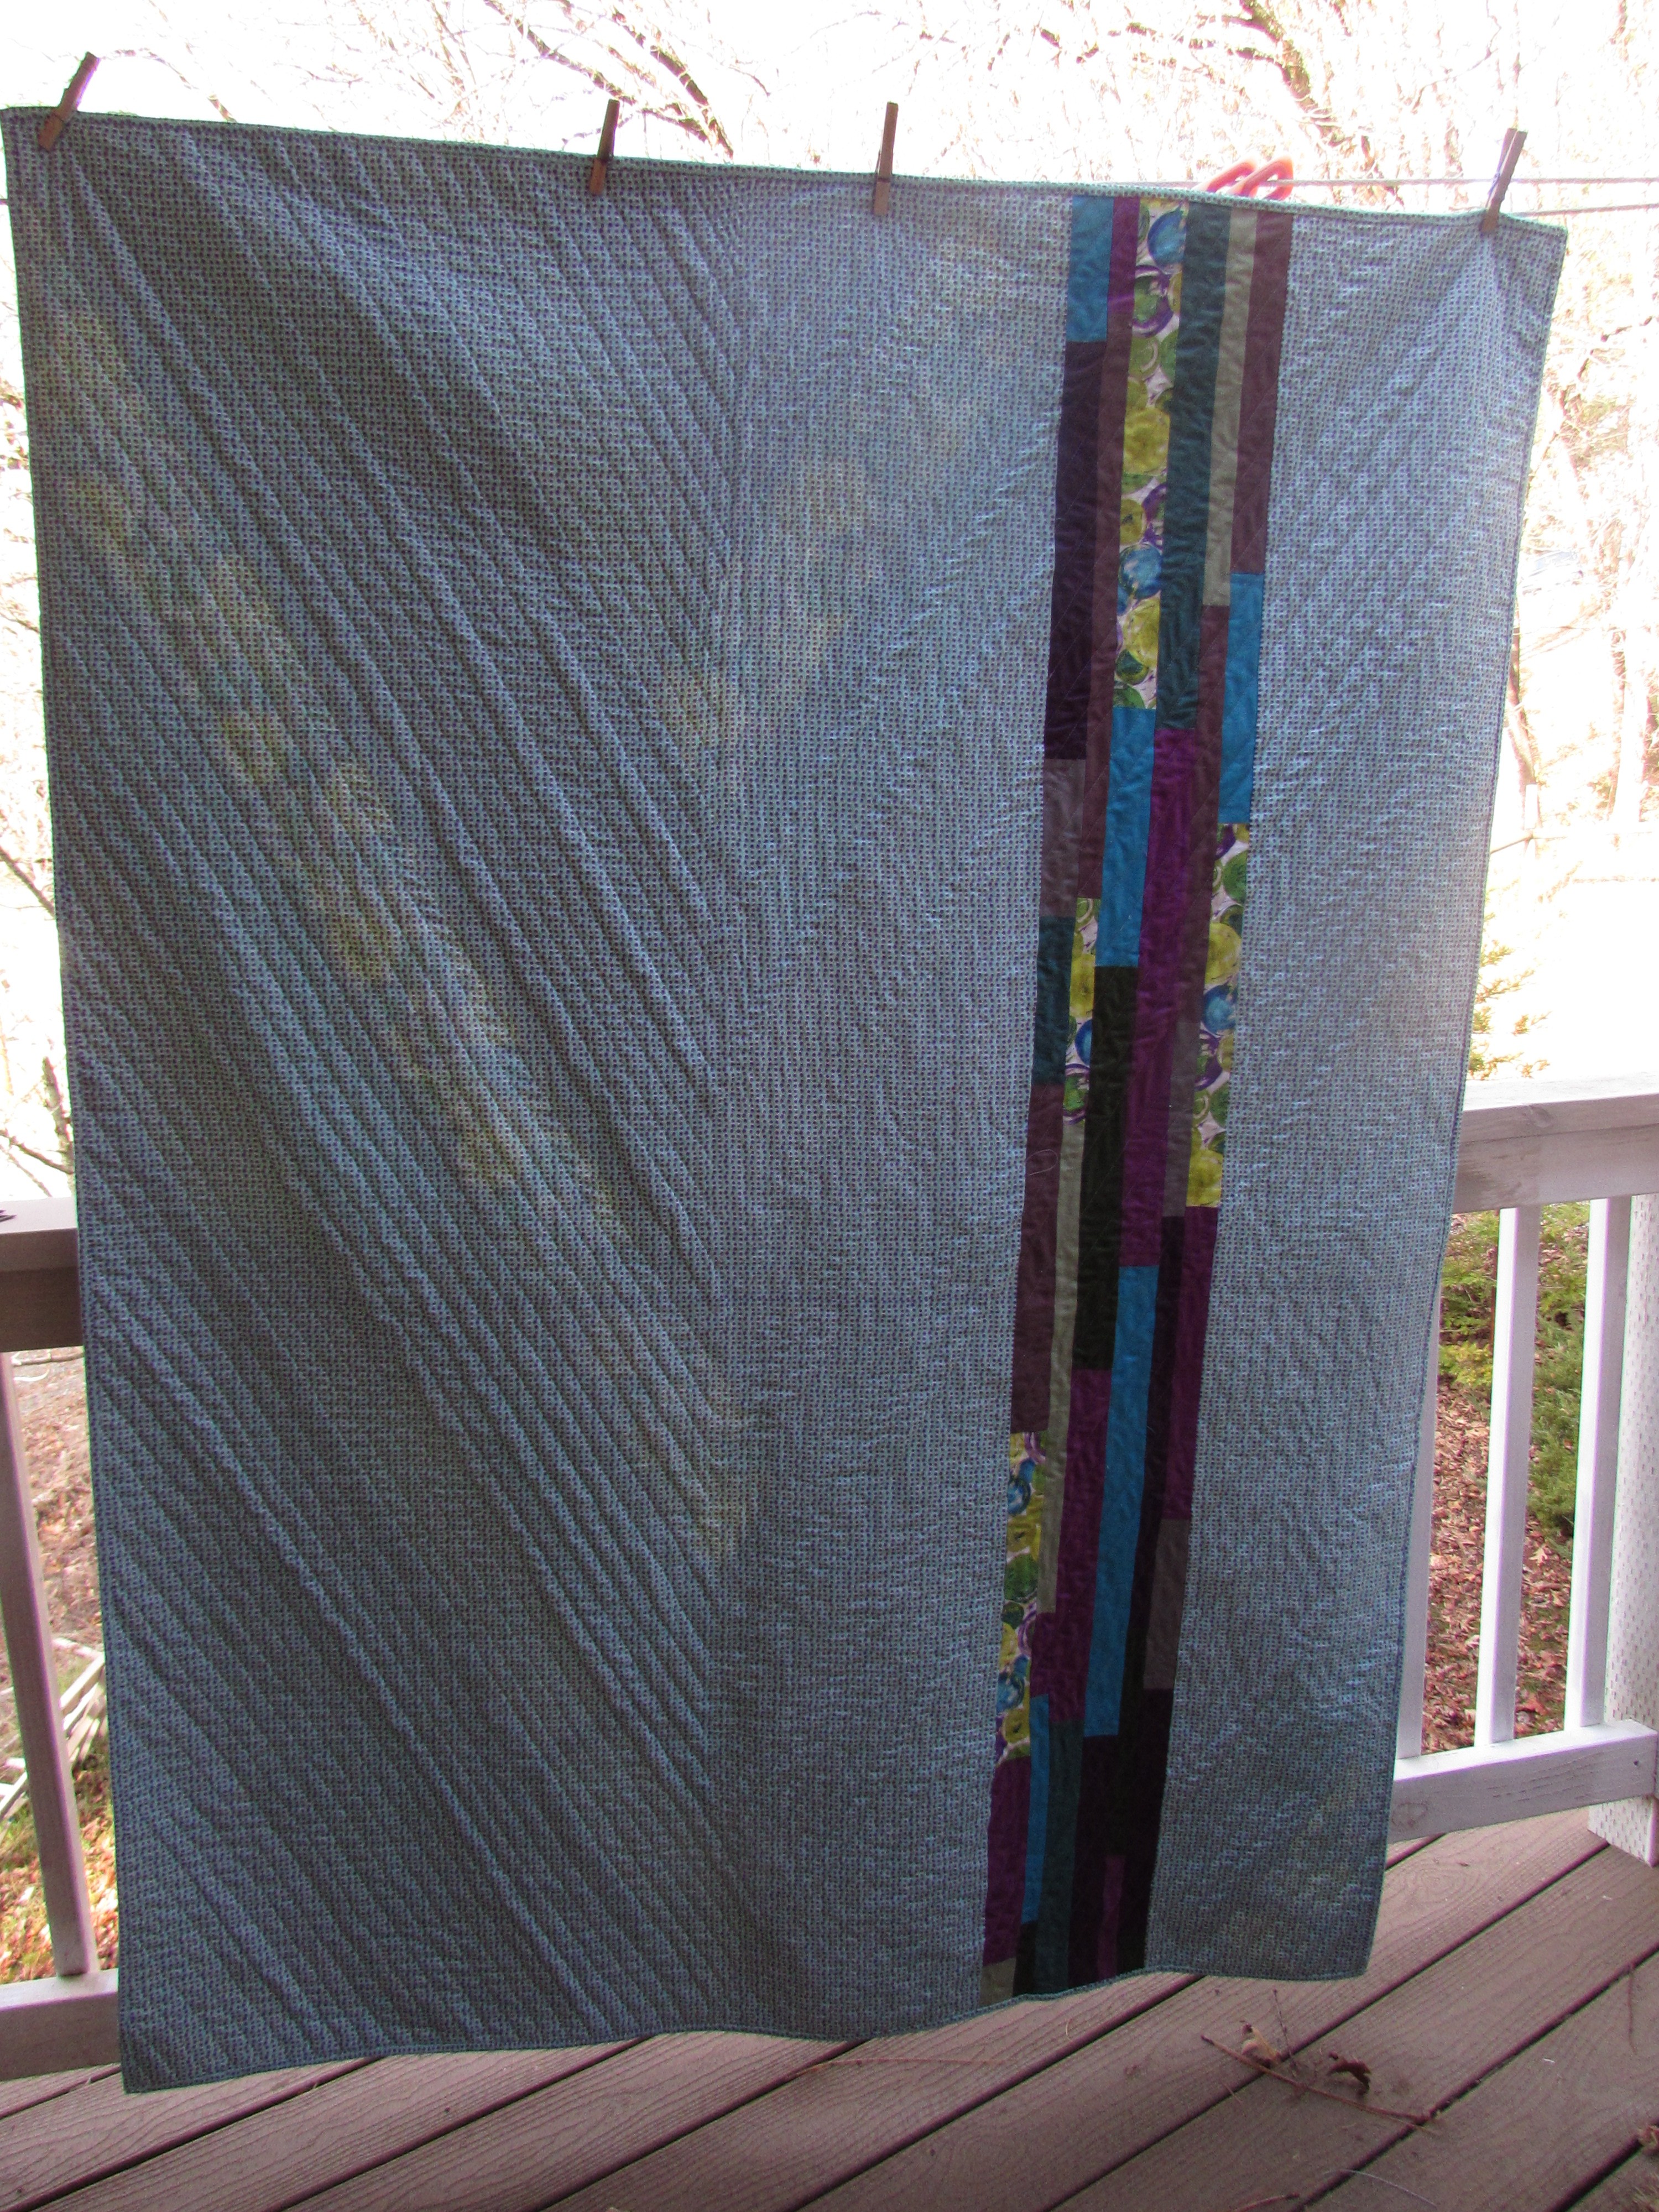
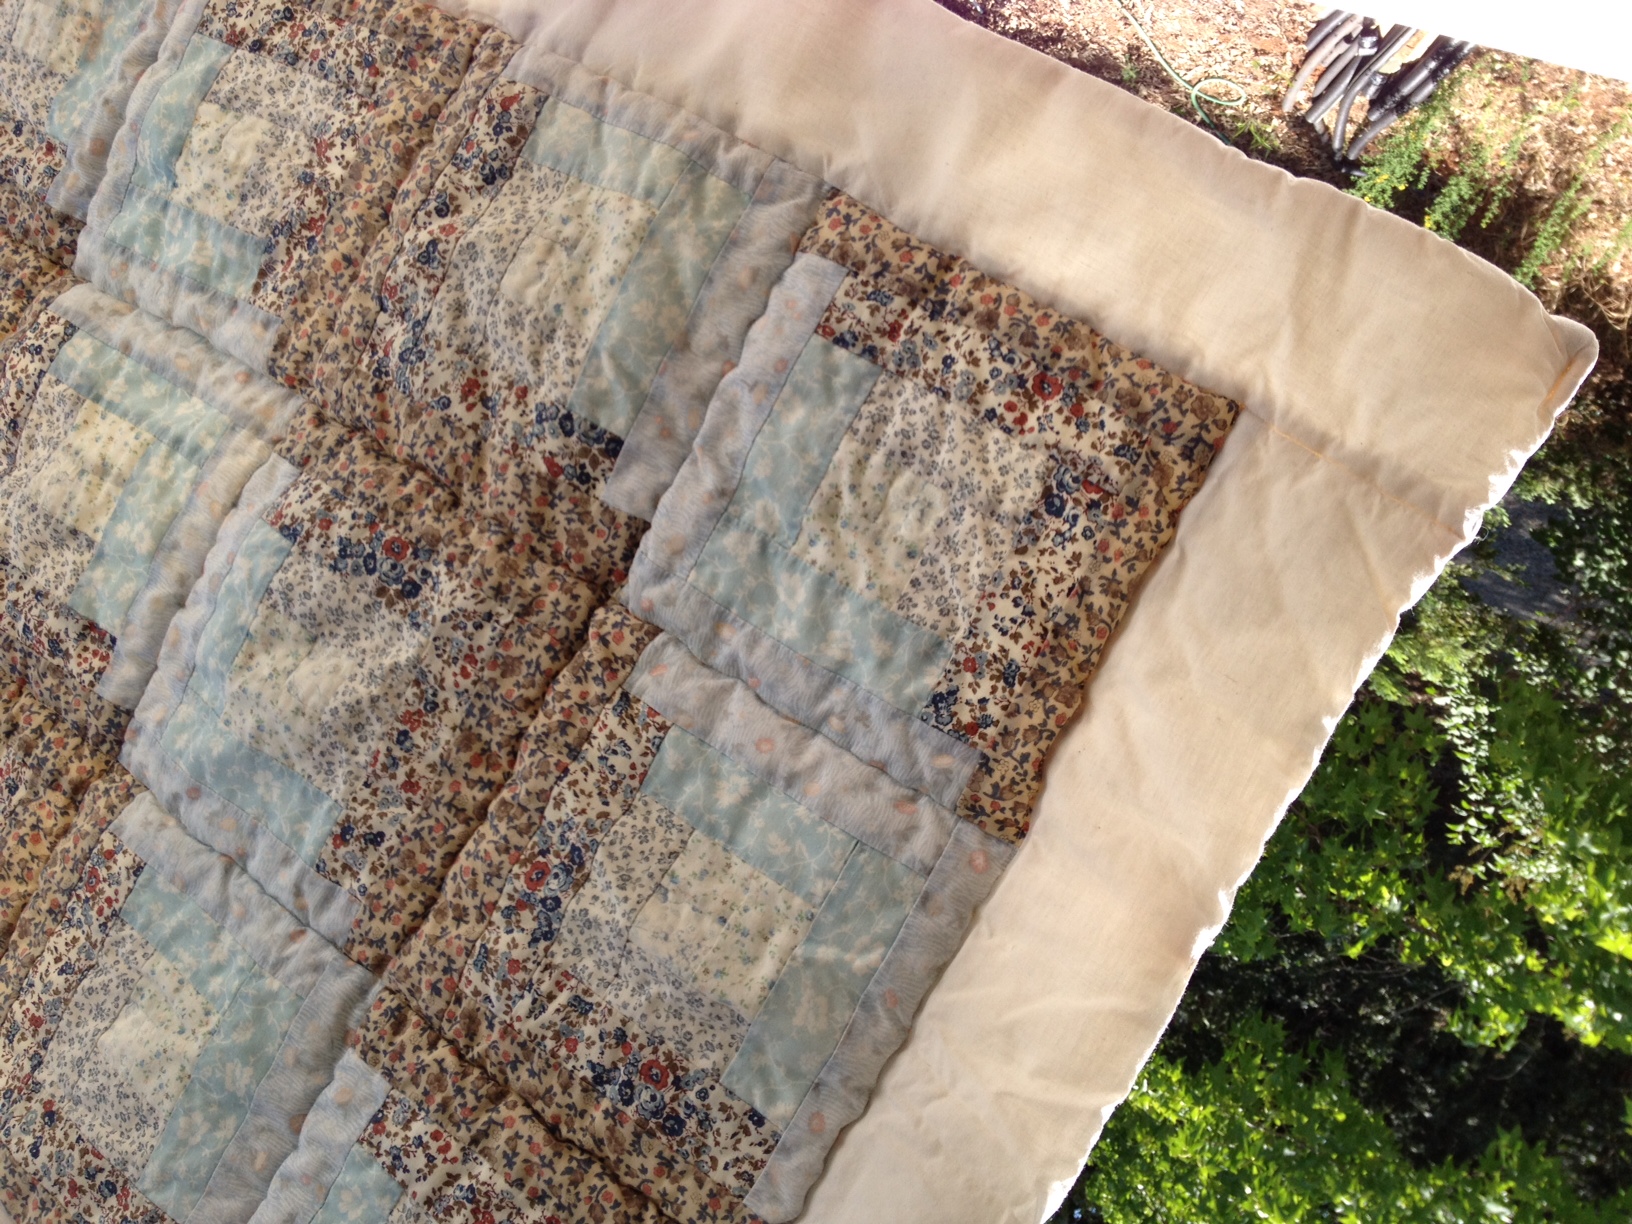
Over the years, the quilt has completely worn out.  I am now taking it apart so I can try to restore it.  I removed the ties and that weighty woolen blanket and I can now work on the top.  I think I will be able to replace some of the frayed strips. I will find some neutral fabrics that looks relatively similar. I am going to have to fuse the strips in place and applique the edges. Then I plan to create a new backing and use cotton batting in between.  I will machine quilt the top pretty tightly so that the worn strips will be held in place.  Can’t wait to give it a makeover!

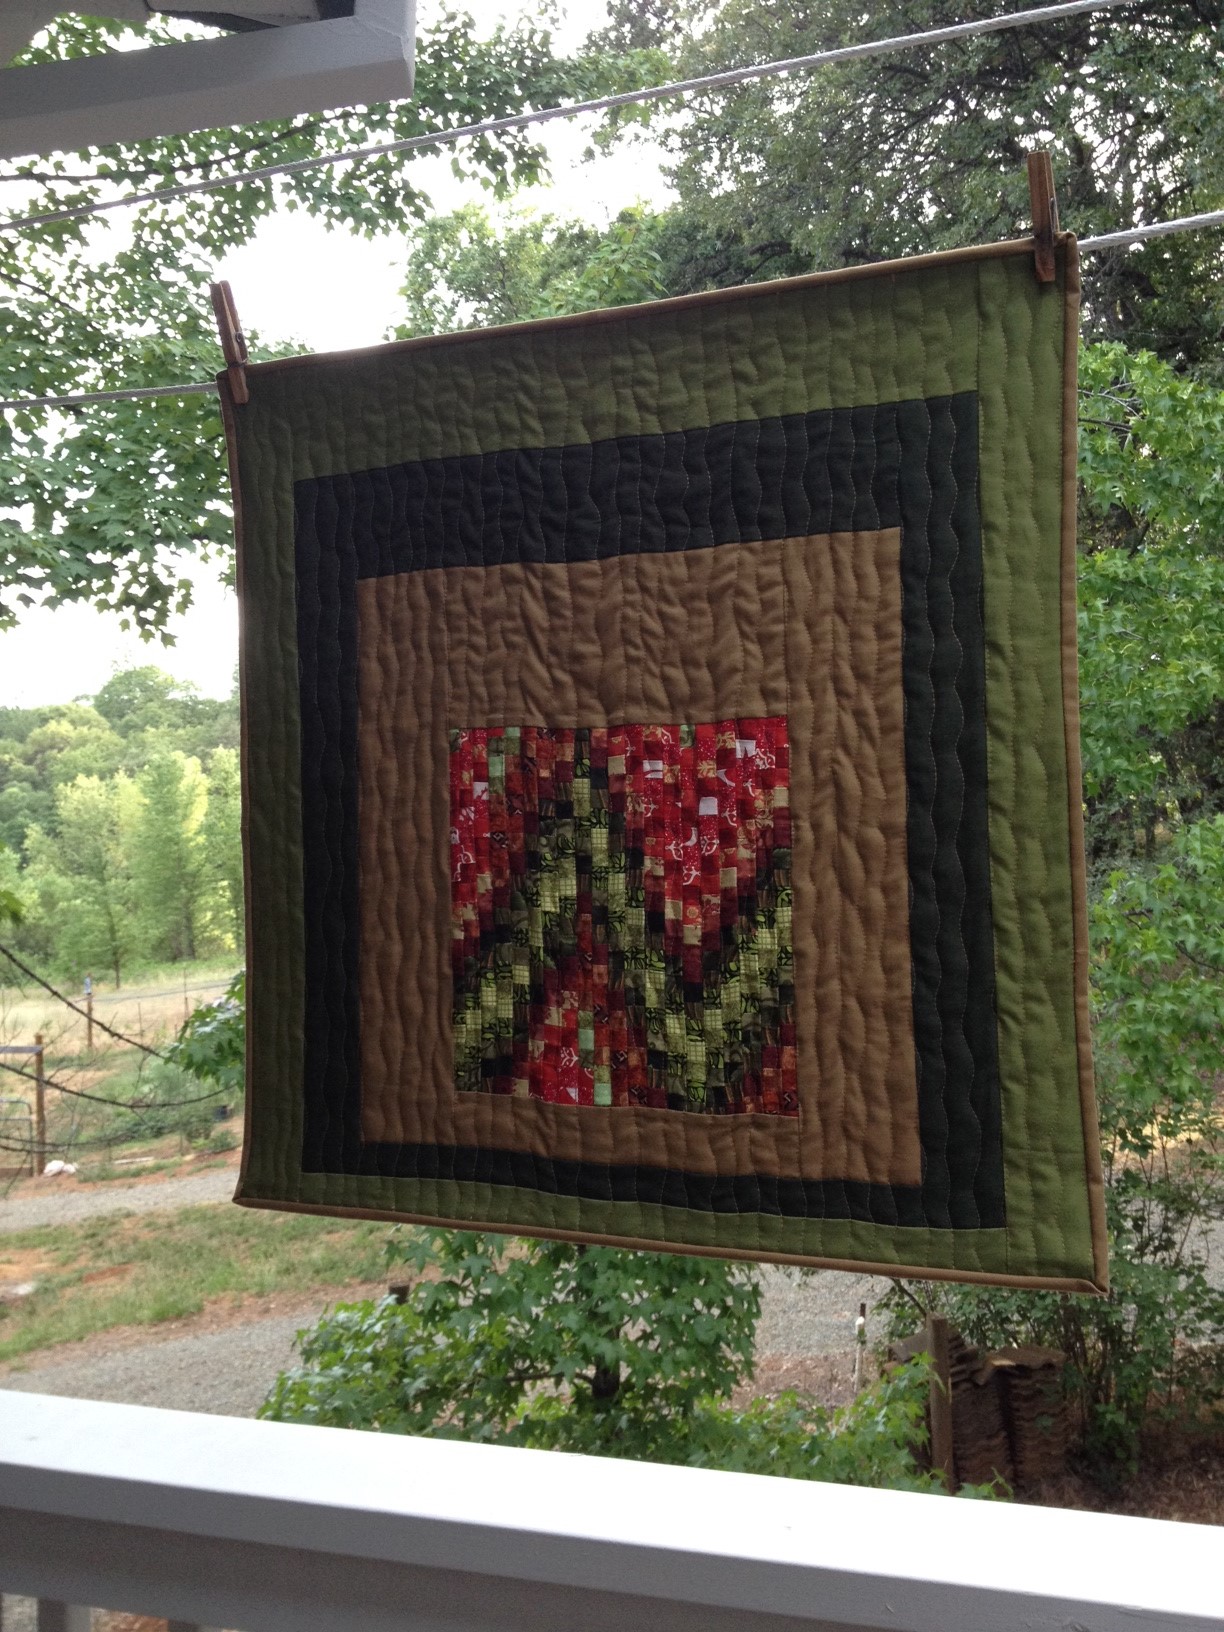
With the scraps from the log cabin quilt I also made a tiny log cabin quilt for my babies to use.  I loved that it matched our quilt.  When each of my boys were newborns they used the quilt while they were still cozied up in the cradle that my father made. This quilt was filled with a puffy, poly batting and then stitched in the ditch for quilting.  No binding – I didn’t know about these details.  I just made it “envelope” style, sewing it right sides together and then flipping it right sides out.

BABY QUILT 1


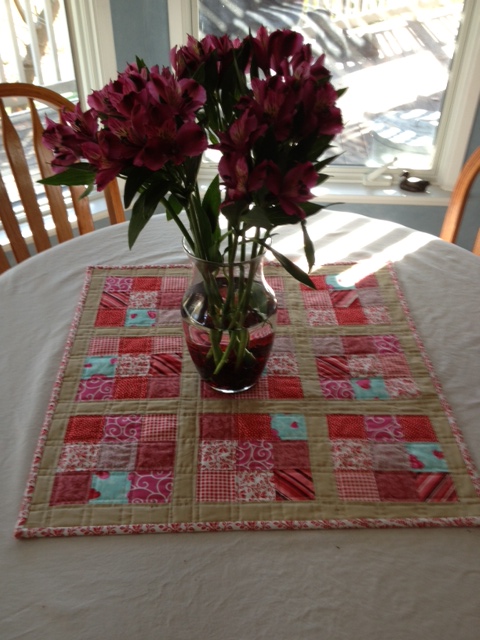
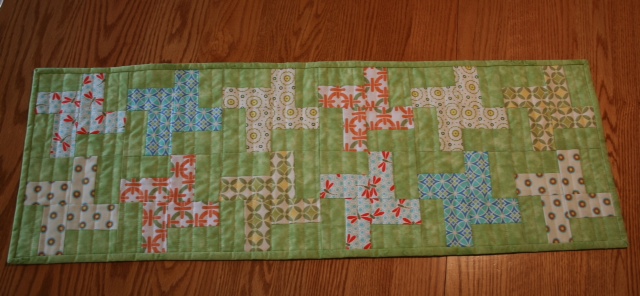
After the first quilt, I made two more simple patchwork quilts in the late 1970’s.  These were filled with a poly batting and hand tied with yarn.  Both have worn out completely.  I wish I had pictures of them.  Fast forward 35 years and I am, once again, happily immersed in this quilting hobby of mine.


Linking up with Richard and Tanya’s LAFF, CrazyMomQuilts, and Link a Finish Friday.

Aurifil Block of the Month

I have never taken part in an on-line bee or a block of the month quilt activity. Not for any real reason, it just hasn’t happened.  Well, I decided to join up and do one. I follow Amy Smart’s blog, Diaryofaquilter, avidly.  I love her style and her genuine speak. She has wonderful tutorials. When I first got started quilting I stumbled on to her website and I never left. My first few projects were items made from her tutorials.

Like this tabletopper:

Valentine Table Topper (Amy Smart Tutorial) February, 2014

Valentine Table Topper
(Amy Smart Tutorial)
February, 2014

and this little table runner:

Pinwheel Tablerunner April, 2013

Pinwheel Tablerunner
April, 2013

If you are new to quilting or want info on the basics, I cannot recommend her enough!

Anyway…. lately Amy has written some posts about the Block of the Month activity sponsored by Aurifil Thread. They are featuring various designers each month and along with an interview of that designer, they post the block that the designer created for this activity.Amy is one of the designers that was featured and interviewed by Pat Sloan. You can read about it here and here and here. The more I read about it, the more I saw the look of the different blocks, the more I wanted to do it.  Really, by making one 12 1/2″ block per month, you’ll end up with a quilt at the end of the year.  What’s better than that? It doesn’t really get in the way of other projects that are in progress.  It all started back in January so I am a wee bit late to the party. But, better late than never!  This week I got everything together and started.  I chose to use a collection of fabric called Stitch in Color, designed by Malka Dubrawsky for Moda.  I saw pieces of this on clearance (the line came out in 2012) during a shop hop I did earlier this year and snatched them up. I love the bright colors. Plus it is wayyy out of my norm for colors and value. Much bolder than what I usually choose. I supplemented the set with a solid white and solid orange, as well as the blue stripes and dragonfly fabric.  I don’t think I have enough of Malka’s line to do all twelve blocks and really, I wanted some solids in there.

What do you think??

aurifil stitch in color fabs


I have finished four of the blocks so far.  The thing that pleases me most is that my triangles worked well and my points line up!!  Yay – that is something I have been working on.  These blocks were a great place to practice. It provides the opportunity to make blocks that are different and it is kind of fun to make something where you don’t know what the finished result will be (since you don’t see all of the blocks at once). I look forward to placing the blocks come December!

See??

aurifil 4 blocks


I love how this is coming together.  The colors match absolutely nothing in my house but I am keeping this one anyway.  It is going to be so bright and spirited.  Just in case anyone out there decides to join up, I will tell you that the March block, called Borders (upper left block) was designed to by 12 x 12.  The rest of the blocks are 12 1/2″ square.  So I will have to modify it and add a 1/2″ border to it so it fits with the rest.  Luckily it is an easy one to fix! If you participate, post pictures of your blocks to the Aurifil Flickr site.  They are randomly picking one participant per month and sending a box of Aurifil thread.  Ahhh…. love that stuff and it is spendy.  I can only hope – pick me, pick me!

If you are making blocks, leave me a comment and a link so I can see yours!!

Linking up to WIP Wednesday at Freshly Pieced as well as Let’s Bee Social at Sew Fresh Quilts. Also linking to Needle and Thread Thursday at My Quilt Infatuation.


Donation Quilts

I have been a volunteer with our local food ministry (www.interfaithfoodministry.org) for a long while now. As with any non-profit, we are constantly fund raising to keep the ministry going.  We have had several fund raising dinners at local restaurants and along with the dinner we usually hold a raffle or silent auction.  I have donated three quilts over the past 18 months for these events.  It has been great practice for me and the quilts are popular items that have raised money for a cause that is near and dear to my heart.

The first quilt I made was a simple one that was based on a tutorial at Crazy Mom Quilts called “Fair and Square”. The pattern was very easy to use, which was a good thing since this was one of my first quilts! It was made using scraps I had on-hand with the exception of the sashing and the backing. This was the first quilt that I free motion quilted and I did it with random loops.  It turned out decent, considering it was the first one!

The front:

ifm donor quilt frontI pieced the back with fabric I had left over.


ifm quilt back

Quilt number two was one of my favorites.  I love both the pattern and fabric. The pattern is called Doubly Charming and was provided by Teresa at Sewn Up By Teresa Down Under. I love this pattern. It came together easily. It uses three charm packs. I chose “Eat Your Fruits and Veggies” by Pat Sloan for Moda. The colors were so bright and cheerful. I quilted it with straight diagonal lines which basically outlined the squares.  I also tried tracing a sunrise and quilting that design on the setting triangles. That worked really well. I machine quilted the binding.


Oh So Charming Donation Quilt September, 2013

Sept 2013 002

Here is the back:

ifm quilt 2 back


FInally, the third quilt.  For this one I used a tutorial at Crazy Mom Quilts (she has the best tutorials!!) called Zig Zag Quilt. I love this pattern for it’s chevron look but no piecing of triangles needed! So simple.  The fabric line was called Beyond the Gate by Jill Finley for Henry Glass & Co. This was such a fun project. I love the look of this quilt – it’s very soothing. I quilted the colored rows with gray thread and used white on the white rows. The gray looked fine with the green and blue rows but stood out a bit too much against the yellow rows.

20140422_0637


20140429_0655


and now the back side……….

20140422_0638

Love putting this quilty hobby of mine to good use for a good cause!! Anyone else making donation quilts? Comment with some links so I can see them!

Linking up to Anything Goes Monday at Stitch by Stitch, Linky Tuesday at Freemotion by the River, Show and Tell Tuesday at Fresh Squeezed Fabrics, and Sew Cute Tuesday at Blossom Heart Quilts.


Garden Patch

If I had to name a quilter that I would most love to take a class from, I might just name Jacquie Gering. I love the work she does.  Her style is so crisp and clean. Her use of color is exquisite. (She was, in fact, recently named 2014 National Quilt Teacher of the Year!)  She blogs over at Tallgrass Prairie Studio and has a book out that she co-authored with Katie Pederson of SewKatieDid, titled “Quilting Modern”. I purchased this book a while back and have recently finished my first project from the book. This book is a great tool as I work to learn more about the world of modern quilting. There are some clear cut (no pun intended!) explanations of the use of color as well as how to do improvisational piecing.  I haven’t really done any improv piecing and will use this book to get me going in that direction. I think Quilting Modern is  perfect for the beginner quilter as it contains abundant information about the basics of quilting.

qm

For my first project, I chose a wall hanging that is named Fiesta Wall Quilt in the book. It is a piece that involves a strip pieced square as the focal point and then some large borders around it.  I loved this process.  The strips are pieced into a large square and then narrow strips are sub-cut from that block.


The narrow  (pieced) strips are then arranged in a way that pleases the quilter. Once that arrangement is done, those strips are sewn back together. It was easy and really, kind of fun to do.

garden patch strips


Garden Patch middle

In the book, they have a much more random placement of their colors. I liked this crooked path arrangement so chose not to have such a random style. I used shades of green and tan for the borders. The quilting was done with a walking foot and wavy lines. There was some pull on the fabric (in the center above the pieced square) that I am unhappy with. I picked those seams several times but couldn’t fix it. Reading Amanda Jean’s tutorial, at CrazyMomQuilts, on finishing a quilt, I learned that this can sometimes be alleviated by quilting the piece from top to bottom with each line.  I was quilting in both directions (top to bottom and bottom to top). Next time, I will give that a try and see if the results are better.

Here is the finished quilt.

quilt

Linking up to TGIFF and MyQuiltInfatuation and ReallyRandomThursday at Live A Colorful Life.  Also linking to RichardandTanyaQuilt, Link a Finish Friday and Finish It Up Friday at Crazy Mom Quilts. And finally, linking to ConfessionsofaFabricAddict.


A gift to cherish

I received a really special gift in the mail a few weeks ago.  It was from my middle child, Kyle, who now lives in Chicago.  We had been talking and emailing about the idea of my starting this blog.  I had explained what I wanted to do with it and had told him the name. He liked the story of how NeedleandFoot came about (which was blogged here).

Kyle has been teaching himself to carve over the past year or so.  He has made some pretty amazing items. He lives in a 4th floor apartment near the University of Chicago and has relegated a small corner of his living room to be his workshop. After talking about the story behind NeedleandFoot, he decided to carve something to commemorate the beginning of this blog.  He called me on Mother’s Day and told me that he was working on something and it would be mailed out shortly. I was thrilled to receive this handmade pincushion in the mail about a week later.

pincushion

shoe pic 3

The shoe is reminds me of the story of The Elves and the Shoemaker. He carved it out of basswood and it looks just like an old fashioned shoe.  I love the details such as the heel and the look of the boot having been worn and conformed to the foot. He then made a pincushion out of a really heavy muslin.  (He hand sewed it since he doesn’t have a machine.) He lettered the name of my blog on the cushion. I believe he is in the hopes that I will use it as it is intended rather than tossing pins all over the floor for my wonderful husband to step on.  This was such a cool gift. So far it hasn’t migrated into my messy sewing room yet and I have yet to stick one pin into it.  It sits in the living room where it can be admired by others. I will treasure it always.


Linkin up to Anything Goes Monday at Stitch by Stitch and Show and Tell Tuesday at The Ties That Bind as well as Linky Tuesday at Freemotion by the River.

Birthday Quilts

Around December of last year I was (like most of you) planning some quilting goals for the upcoming new year. I wanted to be sure that I made some progress and improved my skills this year.  How better than by making quilts!? My thought was that I would make birthday quilts for three certain woman. I have three sons and each one has a significant other.  One has been married four years now.  The middle son has been partnered with his girlfriend for almost four years. My youngest son has been in a relationship with his girlfriend for about seven years now (since they were 15 or 16 years old!)  These women are such a part of our family and I thought it would be fun to make each of them a quilt for their birthday.

The first birthday, Kelly’s, was in mid-January. I started to work on hers just before Christmas.  Because I had such a short timeframe, I chose a simple pattern.  I used a stash fat quarters from Jeni Baker’s Color Me Retro line. I loved this fabric and thought it suited Kelly perfectly.  After consulting with my son, he agreed! (I won this fabric from a giveaway at Diaryofaquilter.com quite a while back.  It was the first giveaway I had EVER entered and I couldn’t believe it when I got an email from Amy Smart that I won.  Of course I have entered a billion giveaways since then and never won again! But this was quite a prize.) For the pattern I chose to use “Tifton Tiles”. It was a tutorial at SewLuxFabric.com. I didn’t follow it exactly but the tutorial was really helpful in that it provided the basic measurements that I needed for the piecing.  I added white sashing between the rows to add a bit of definition to the quilt. I think the quilt turned out very pretty.  I made a pieced backing, which I love to do – it adds character to the quilt. I quilted it with an argyle, or cross hatch, pattern of straight lines. I think this was the first larger project on which I used straight line quilting.  I was so thrilled when I happened upon Jacquie Gehring’s tutorial that talks about using painter’s tape for your guide.  It changed my world – no more trying to draw lines or eyeball it and being so disappointed with the result! If you haven’t tried this, give it a go.  It is a fantastic method.

Here is the front:

20140115_0583

Here is the back.20140115_0579


And a close up of the argyle quilting pattern.

20140115_0587


The second birthday was slated for the end of February.  Once I finished Kelly’s I had to get right to work on Naomi’s (my daughter-in-law.)  I wanted to try making a quilt with solids.  I hadn’t done this yet.  Working with Andrew, I chose Naomi’s color palette.  Once I picked the colors I wanted, I decided it did need one print to add some interest.  I can’t remember what line the piece was from.

I used a tutorial for a braided, striped pattern at www.anneandwill.com. I love the end result that I got but this was tough for me. As I mentioned in an earlier post, I have difficulty with spatial relationships and when I was working on this quilt this whole issue reared its ugly head. The premise of the tutorial is that you keep building the quilt by adding rows at an angle and making each successive strip long enough to be able to cut a square perimeter when you are finished. Here is a picture of the quilt top before I squared it off for making the quilt sandwich. (My devoted husband is there in the corner – he is a great help with things like squaring the quilt tops. In this shot I think he was distracted by something on tv! Really, he is so good about helping with this process. 🙂

20140126_0589


You can probably see that I cut the bottom strips way too long. I just can’t always visualize this stuff – so I had a lot of waste with this quilt.  No, not waste – usable scraps!! I used a great deal of it when piecing the back.

Here is the  (finished) front:

20140220_0605


I quilted this one with straight line quilting echoing the V in each stripe.  Again, I used Jacquie’s painters tape method.  So much easier! I used a gray thread which blended well with each stripe. I love that about the color gray – it sort of mimics the color of the fabric that I quilt with it.

And, finally, the back:

20140220_0606The sun wasn’t in the best position for this picture so you can sort of see through the backing.

Once I washed this it softened and became beautifully crinkled.  I wanted to wash it (using Color Catchers) to be sure the vibrant colors wouldn’t run.

So, two of the three birthday quilts are finished.  I am not going to post anything about the third quilt as I have yet to give it to the recipient.  (Actually I have yet to make it!  I cut the pieces this week though so I am ready to start it.) It will be ready for a certain someone’s July birthday!!

Linking up with Kelly’s Needle and Thread Thursday at www.myquiltinfatuation.com. Also over at TGIFF.

Also linking up with Amanda Jean at CrazyMomQuilts.com.


Material Matrix Project

Over the past two days I have been working to complete a project that I started a few months back. I was fortunate enough to take a class from the talented Sandra Bruce. She teaches a method that she calls “Material Matrix”. She takes a photograph, enlarges it and overlays a grid on it. When you have the grid, it breaks down the photo into squares which you then replicate with fabric. She is an amazing artist and you can see her work here. This project was really difficult for me. In some ways I am proud of it – mainly that I finished it!  It was so frustrating. I have difficulty with spatial relationships/spatial perception. So when I was trying to make a square, it often came out as the mirror image of what I needed.  The curves made me crazy and you can see from the picture, I was not hugely successful. It is a bit uncomfortable to post work that you feel is less than awesome but this is a part of the progress. I am working on quilting it which defines the shapes a bit. Here is the work, created by Sandra, that we were striving to replicate in class. sew readyfinished copy-filtered .After lots of work, here is what I have completed thus far. pincushion 1   Thinking about what a process this has been I realize it was a great learning experience. Some of the 2.5″ squares are made up of four or five smaller pieces. I have never worked with such tiny piecing and it was clumsy for me.  I think it (like everything) is just something that requires practice. I look forward to finishing the quilting. I will use a facing to bind it and will hang it proudly (and with more than a little relief!) in my sewing room. If you want to see something amazing, check out the self-portrait that Sandra did.  It is huge (80×80″) and very detailed. It required 1600 pieced squares. Best yet, it looks just like her!!

Post Update: I wanted to show the piece now that it is quilted, bound and hanging in my sewing room. I was supposed to embroider the pins but never got around to it so I stuck real ones into the piece!  🙂     Such a learning experience!!

my finished matrix

Linking up with ihavetosay.com for Show and Tell Tuesday; Sew Cute Tuesday at BlossomHeartQuilts; Fabric Tuesday at QuiltStory, and at Linky Tuesday FreeMotionByTheRIver.

First a little story….

I have a quick story to tell.  On Saturday I had to go to our hospital lab for a routine blood draw.  I had to fast so I was there first thing in the morning (I’m not big on fasting). I got in and out of the lab with relative speed and was just leaving the parking lot when something caught my eye.  There was a mama quail leading her six chicks across a parking space.  If you haven’t ever seen quail chicks, they are very tiny.  Here is a photo that I found here to show you how tiny the chicks are. This is the size of the covey that I saw.

quail

When the mama got to the curb, she jumped up to the sidewalk to lead them to a bush (for safety I would imagine.)  The chicks just stayed put on the road.  She looked back at them as though calling them to her.  None of them moved.  They couldn’t yet fly and couldn’t jump the curb as she did.  Here is the amazing part. (I wish I had taken pictures but I didn’t want to get out of the car and get close, they were already having enough difficulty without my scaring them).  The mama jumped back down and went back to her chicks.  She then led them to a nearby speedbump which they all walked up to the top of.  From there they were up high enough and could jump the curb and follow her to safety under the bushes.  It was amazing and so sweet to watch.  I love witnessing little parts of nature like this.

And on to the subject at hand…. This quilting obsession has come over me in a slightly overwhelming fashion. My evenings are now spent reading quilting blogs (there are so many incredibly talented quilters out there that have wonderful blogs), cruising around Pinterest pinning myriad quilts, tutorials, quilt blocks, inspirational art quilts, quilt backs and borders, free motion patterns and tips. The wealth of quilting information to be found through Pinterest is never-ending. (Follow me here.) If I am not on my iPad reading about quilting, I am at the sewing machine working on something. I didn’t use to be this way. I used to have balance in my life! This quilty obsession sneaks up on a person, takes over slowly and before you know it, you’re hooked. Here’s how I remember it:
About three years ago I was wandering around our small downtown area in the Sierra Foothills town of Grass Valley. My daughter and I were window shopping and I walked by a little fabric store (sadly it is no longer open – it was a great shop.) In front of the store there was a small display of about 20 bolts of fabric that were on sale. A set of fabrics in various shades of turquoise and browns caught my eye. We kept walking but when I got home I kept thinking of that fabric. (It all comes down to the fabrics, right?) It was on sale, couldn’t do too much harm to go back and purchase some, could it? (I had no idea!) I got it into my head to make a quilt for my queen size bed. I had made a few quilts way back when (another story for another post) and thought maybe it would be fun to try making one again. I drew a basic design with six inch squares, a border, and some binding. With limited knowledge (no pattern, no knowledge of all the blogs and tutorials that could have helped me) I began. I bought the fabric, estimating what I needed as best I could. No surprise that I had too much of some and not enough of other prints.
I started to cut my squares. No rotary cutter, no mat, no ruler. Yikes. I had a t-square, scissors and a pencil. I sat on the floor at the coffee table and hacked away at that fabric. Surprisingly, the squares were consistent for the most part. I sewed the top together; that was the easy part. I had no idea what to do next. I made my very first trip to our LQS and was immediately befriended by the owner. She said to “stitch in the ditch”. She explained how to make a quilt sandwich and how to roll the sides up so I could quilt it on my home sewing machine and off I went. Quilting it was arduous and frustrating. Stuffing that queen sized quilt through the small throat on my Janome was not easy. But I finished it. I was so proud of it.

P1050777

Once I finished that quilt I kept thinking about how fun it was and that I wanted to do more, to learn something more than “stitching in the ditch”. I saw a post on the website of our LQS advertising a beginner’s free motion quilting class. I signed up. Looking at the supply list, I realized that I was somewhat out of my comfort zone. Listed as necessary were a darning foot and a walking foot for the sewing machine. I had no idea what these were; I only knew I didn’t own either one. After googling both of them I was able to order the items. I showed up for class and had so much fun. My machine was less than cooperative as were my hands. It was awkwardly reminiscent of being in 3rd grade and trying to learn to write in cursive. One of the hand-outs that I received in this class included a list of internet quilting resources. (Now that I consider it, this list was really the beginning of the craze.)
As I started checking out each of the sites that were listed, one thing led to another. This whole new quilting language became a part of my daily reading. Fat quarters? Charm squares? Block of the month? Half square triangles, paper piecing, and flying geese? Low volume, high volume and blenders? Quilt alongs? Blog hops, shop hops, giveaways? Quilting styles, both traditional and modern; especially the clean lines of the modern quilts!! It was madness and I loved all of it. Looking at the gorgeous quilts posted on Flickr was (and still is) inspirational. I have absolutely become obsessed with the process, the fabrics, the design and the resulting quilt. It is a blast.
It is my goal to use this blog to journal my progress as a quilter, share information I have found useful, and to make some friends in the quilting world. Hope you’ll enjoy my blog and will come back to visit!

A bit of sunshine

I have been working on lots of projects lately that are for charity or for family gifts. I decided to take a break and make something quick and bright for our house. With lots of yellow scraps on hand, this was a breeze to make. The table runner was copied from a picture I had seen on Pinterest. It comes from a book titled “Set the Table”, published by Martingale. I based the runner on the picture but figured out the piecing myself.  Not rocket science here.  Lots of 2 1/2″ strips to cut. The white strips were cut to four lengths (3″, 4″, 5″, and 6″ Then I laid them out in the order I thought looked best. I wanted a total width of 14″.  Once I had the white strips laid out, I just trimmed the correct yellow strip to the approximate length.  After all the rows were made, I sewed each to the other. Taking pictures of your layout before sewing the pieces is helpful.  Much quicker to refer back to the pictures and keep your original plan intact.

photo (2)


The top went together very fast.  I found a bright striped fabric to use as the backing. The match isn’t perfect but I really didn’t want to purchase anything for this project.  I quilted it with straight line quilting, using random widths.  I quilted it a bit tighter on the center white strips and more loosely on the yellow/orange strips. Looking at it now I think it would have been better to be more consistent between the color areas.

With each project I create, I hope to learn something new or improve the way I do something. With this project I learned to machine sew the binding.  Binding gets a bit tedious and for some items I think it is perfectly acceptable to machine sew rather than hand sew it.  Especially for an item like a table runner that will likely be washed regularly.  Anyway, using trusty ole Pinterest, I set out to find a tutorial on machine binding.  I came up with several.  I ended up using one from Christaquilts.com and another found at Fromthebluechair.com. Both basically had the same idea but the tutorial at Christaquilts.com showed a great way to attach the two loose ends once your binding is sewn on. I have had a heck of a time getting my bindings to lie flat once I join the two ends (beginning and finish).  Christa’s method is awesome and this is the first time I have been really happy with the way the join looks on my binding.  So thanks Christa!

The stitching on the binding looks fine.  It is going to take some practice to become adept at this but I think for the first time, it turned out nicely.

20140605_1017

Here is the finished runner!  Perfect for summer.

20140605_1013

And the back side with the bright stripe. Like I said, not a perfect match but good enough for this project.

20140605_1018

Love having a quick finish for this week.   Linking up to TGIFF at www.glorybequilter33.blogspot.ca.  Also linking to RichardandTanyaQuilt, Link a Finish Friday! And finally, linking to Amanda Jean at Crazymomquilts.com!!

Yay – my second blog post ever!!

Needle and Foot.com? How the name came to be.

Several weeks ago my oldest son and daughter-in-law were here for a weekend visit. They live in Delaware so we don’t see too much of them.  I treasure the times when my kids are at home. Anyway, we were talking about my quilting craze and started discussing the idea of a website to be used to journal my quilting projects.  Andrew is my go-to guy for technical help and he was willing to help me get something going. As we talked, we were trying to think of names for my proposed site.  Andrew was looking up our ideas to see if the domain was available.  My husband joined the conversation and said, “you ought to call it Needle In Foot”, with more than a bit of sarcasm in his voice.

Why is it that if there is a pin or needle on the ground, he is the one to step on it and get that surprising poke in the foot? I am in my sewing room on a daily basis. I have never stepped on a pin.  He comes in now and then to see how I am doing in there.  If a pin is on the floor, he is the one to step on it.  This also happened when I was a teenager sewing at my childhood home.  At that time, the sewing machine was kept in my parents’ bedroom.  I am one of six girls and most of us were interested in sewing.  There was always someone on that machine. Again, sooo many pins on the floor.  It never failed that my father would be the one to step on a pin and get that poke in the foot.

At any rate, I laughed when he suggested the name.  But the more I said it, the more I liked it.  ‘Needle In Foot’ soon became Needle & Foot. I love the reference to the presser foot on the machine as well as my foot that is constantly keeping the needle in motion.  The picture on the banner of the website shows the presser foot and needle on an antique sewing machine that I have.  It belonged to my boys’ great-grandmother, Ada. It is in beautiful shape and still sews a straight seam.  Andrew took the picture for me and I love it.

That’s the history of the site thus far! I am looking forward to journaling the projects I am working on and sharing them with other quilters.