Tag Archives: stitch in the ditch

Honeymoon Quilt Finish

A couple of months ago my husband and I celebrated our 17th anniversary. This week I finished a quilt made with fabric purchased on our honeymoon on the island of St. John. It may have taken me 16 years to think of how I wanted to use the fabric but once I got going, it didn’t take too long to finish it up. I posted earlier about making the quilt top in August of last year. Because I wasn’t sure how I wanted to quilt it, I set it aside (for nearly a year!) Come January of 2015, I set a goal to finish this quilt up and I did it. This finish means that I do not have any unquilted tops lying around. Yahoo!

This project was fun to plan. I have been reading about whether to stitch in the ditch before starting to FMQ. Honestly, this sounded like a whole lot of extra work. I decided to compromise and I stitched the perimeter of each nine patch. I thought this would stabilize the quilt and hopefully, reduce and puckers on the backing. It is so irritating when you flip the quilt over to check on it and there is a fold. Between pin basting and ditch stitching I was hoping for a better back. Some quilters think it holds the quilt square and prevents distortion. Others say it makes the FMQ work look better. I do think it helped. My quilt stayed square and often, it doesn’t. I didn’t have a single pucker on the back. The only thing is that on the back of the quilt, the ditch stitching is very visible so one has to take that into account when planning the quilting. It doesn’t show much at all on the front. As for any benefit to the look of the quilting on each nine patch, I didn’t notice a huge difference. In fact, after I had quilted about 65% of the project, I noticed that I had skipped ditch stitching one block. That block really didn’t look noticeable different from the others. So, I think it is good forquilt stabilization and keeping square but doesn’t noticeably enhance the FMQ.

IMG_20150618_3476

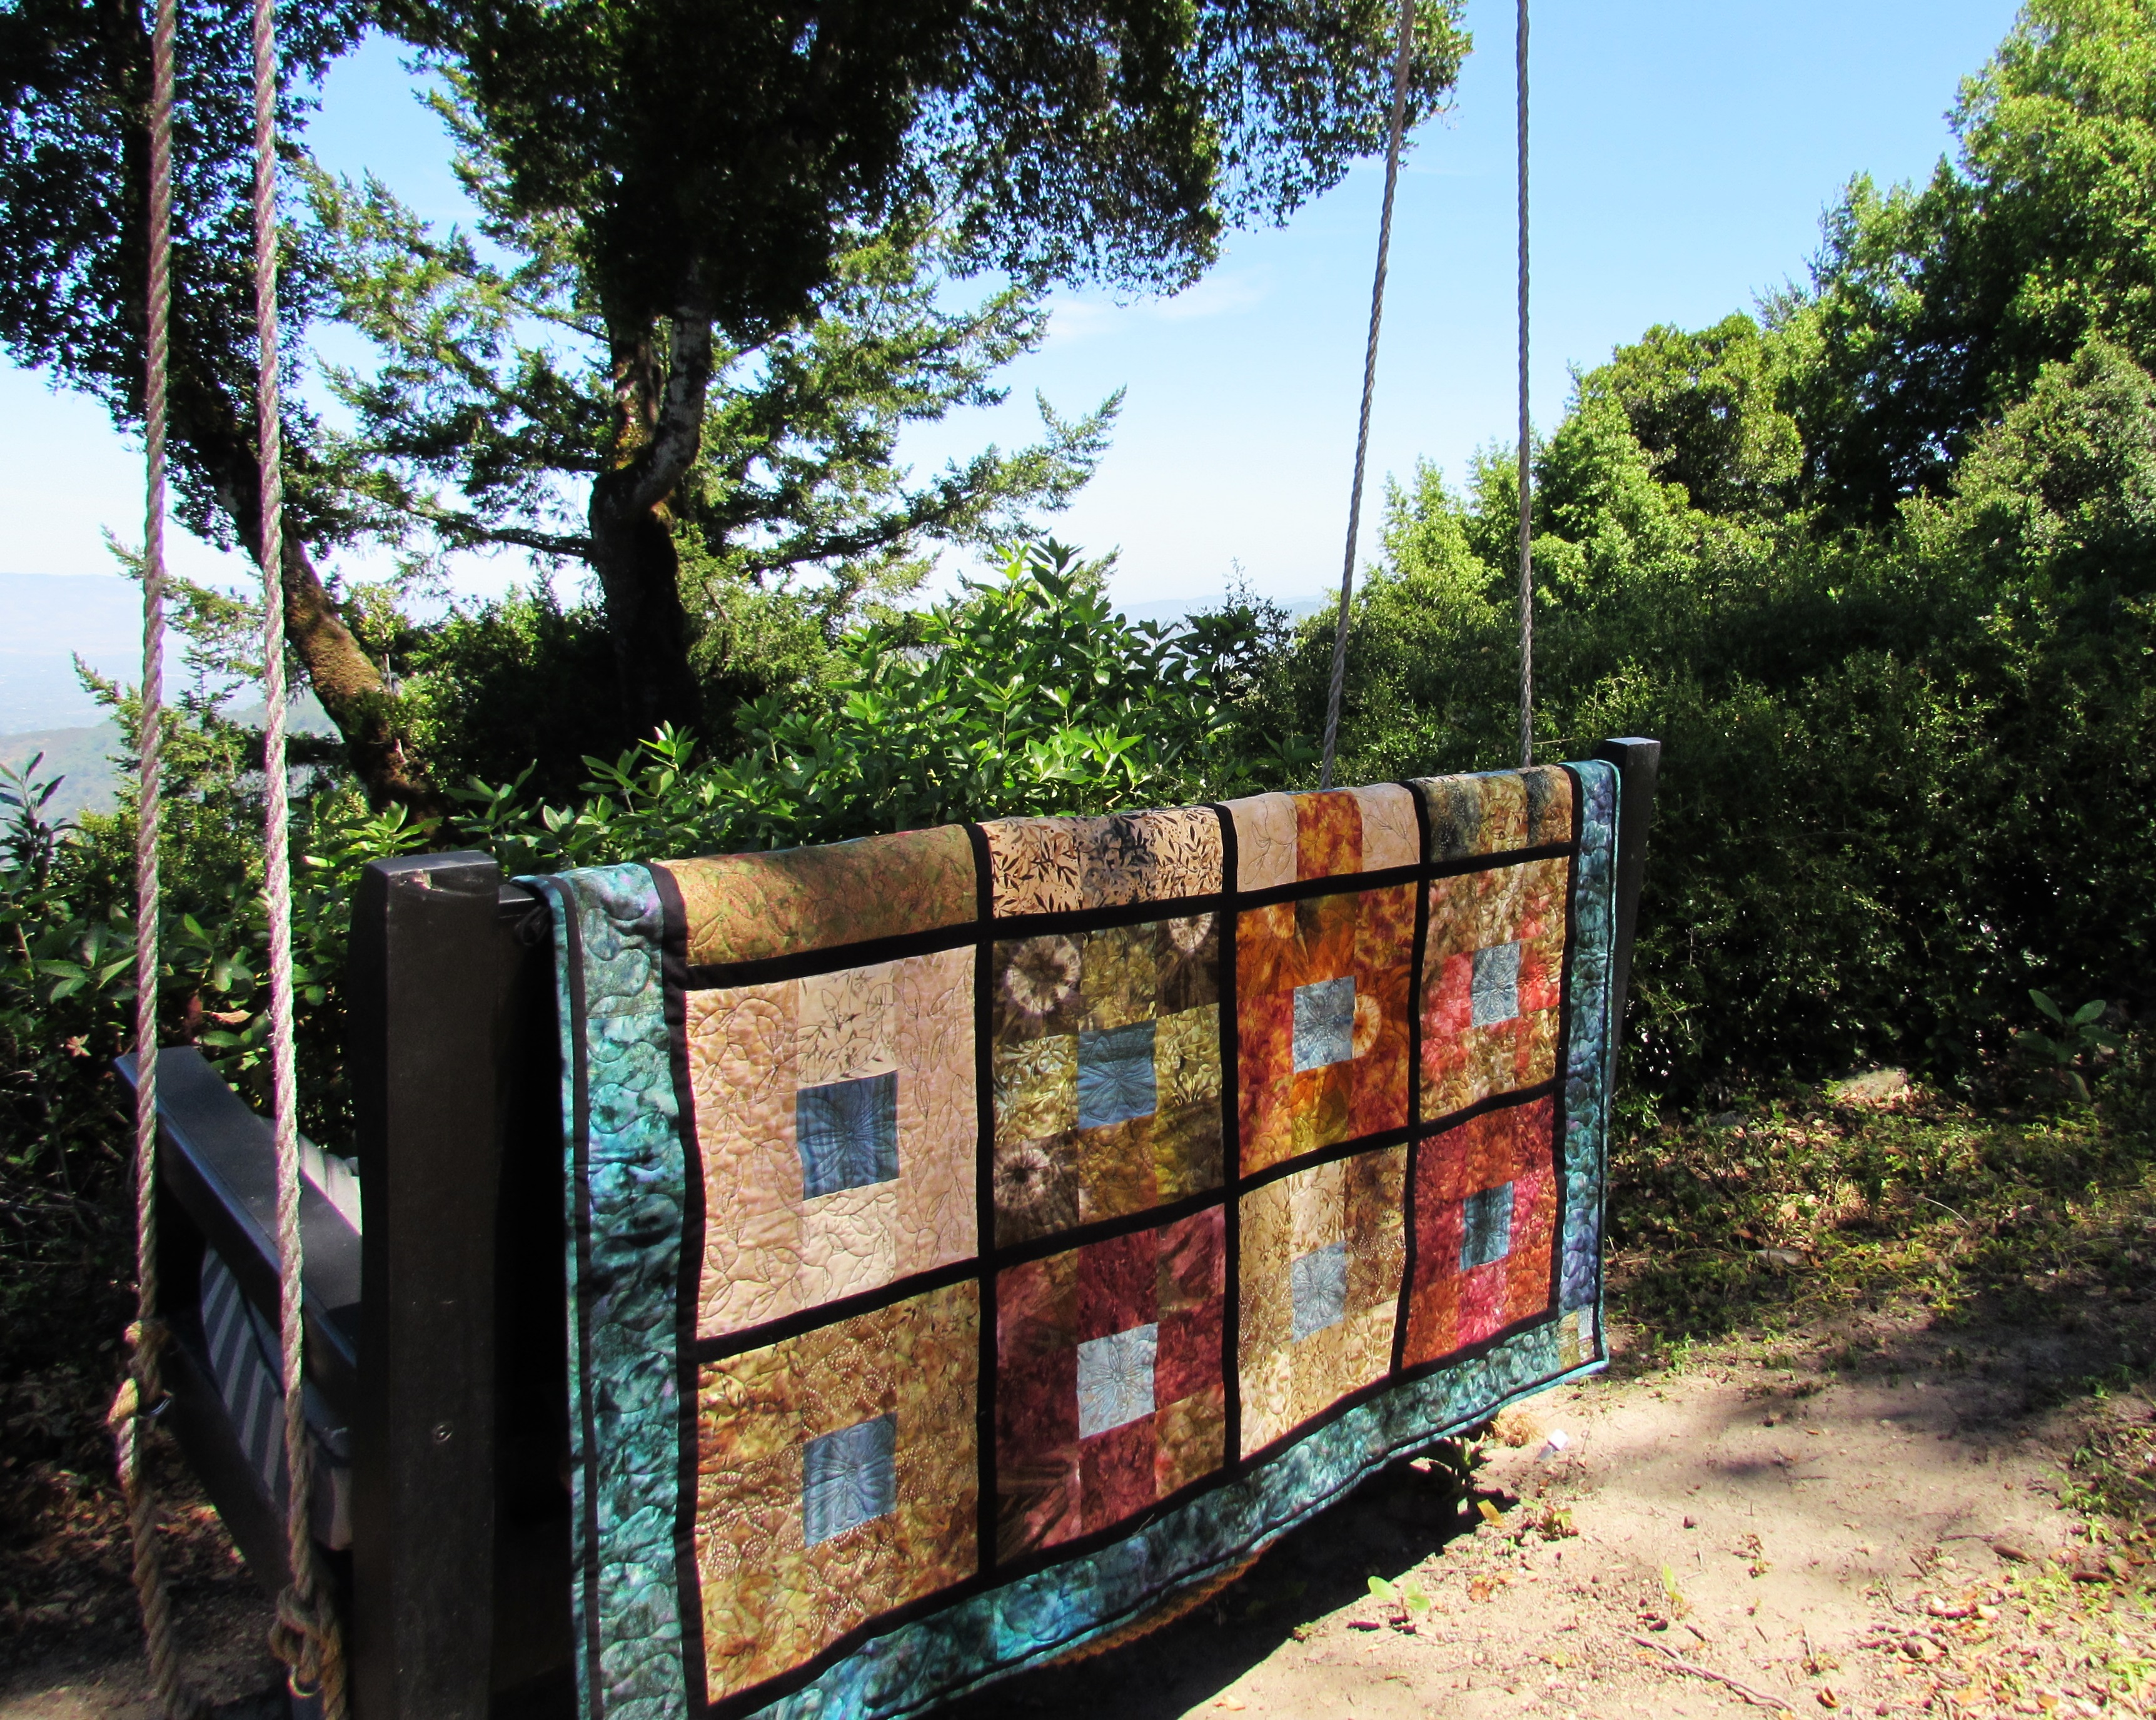
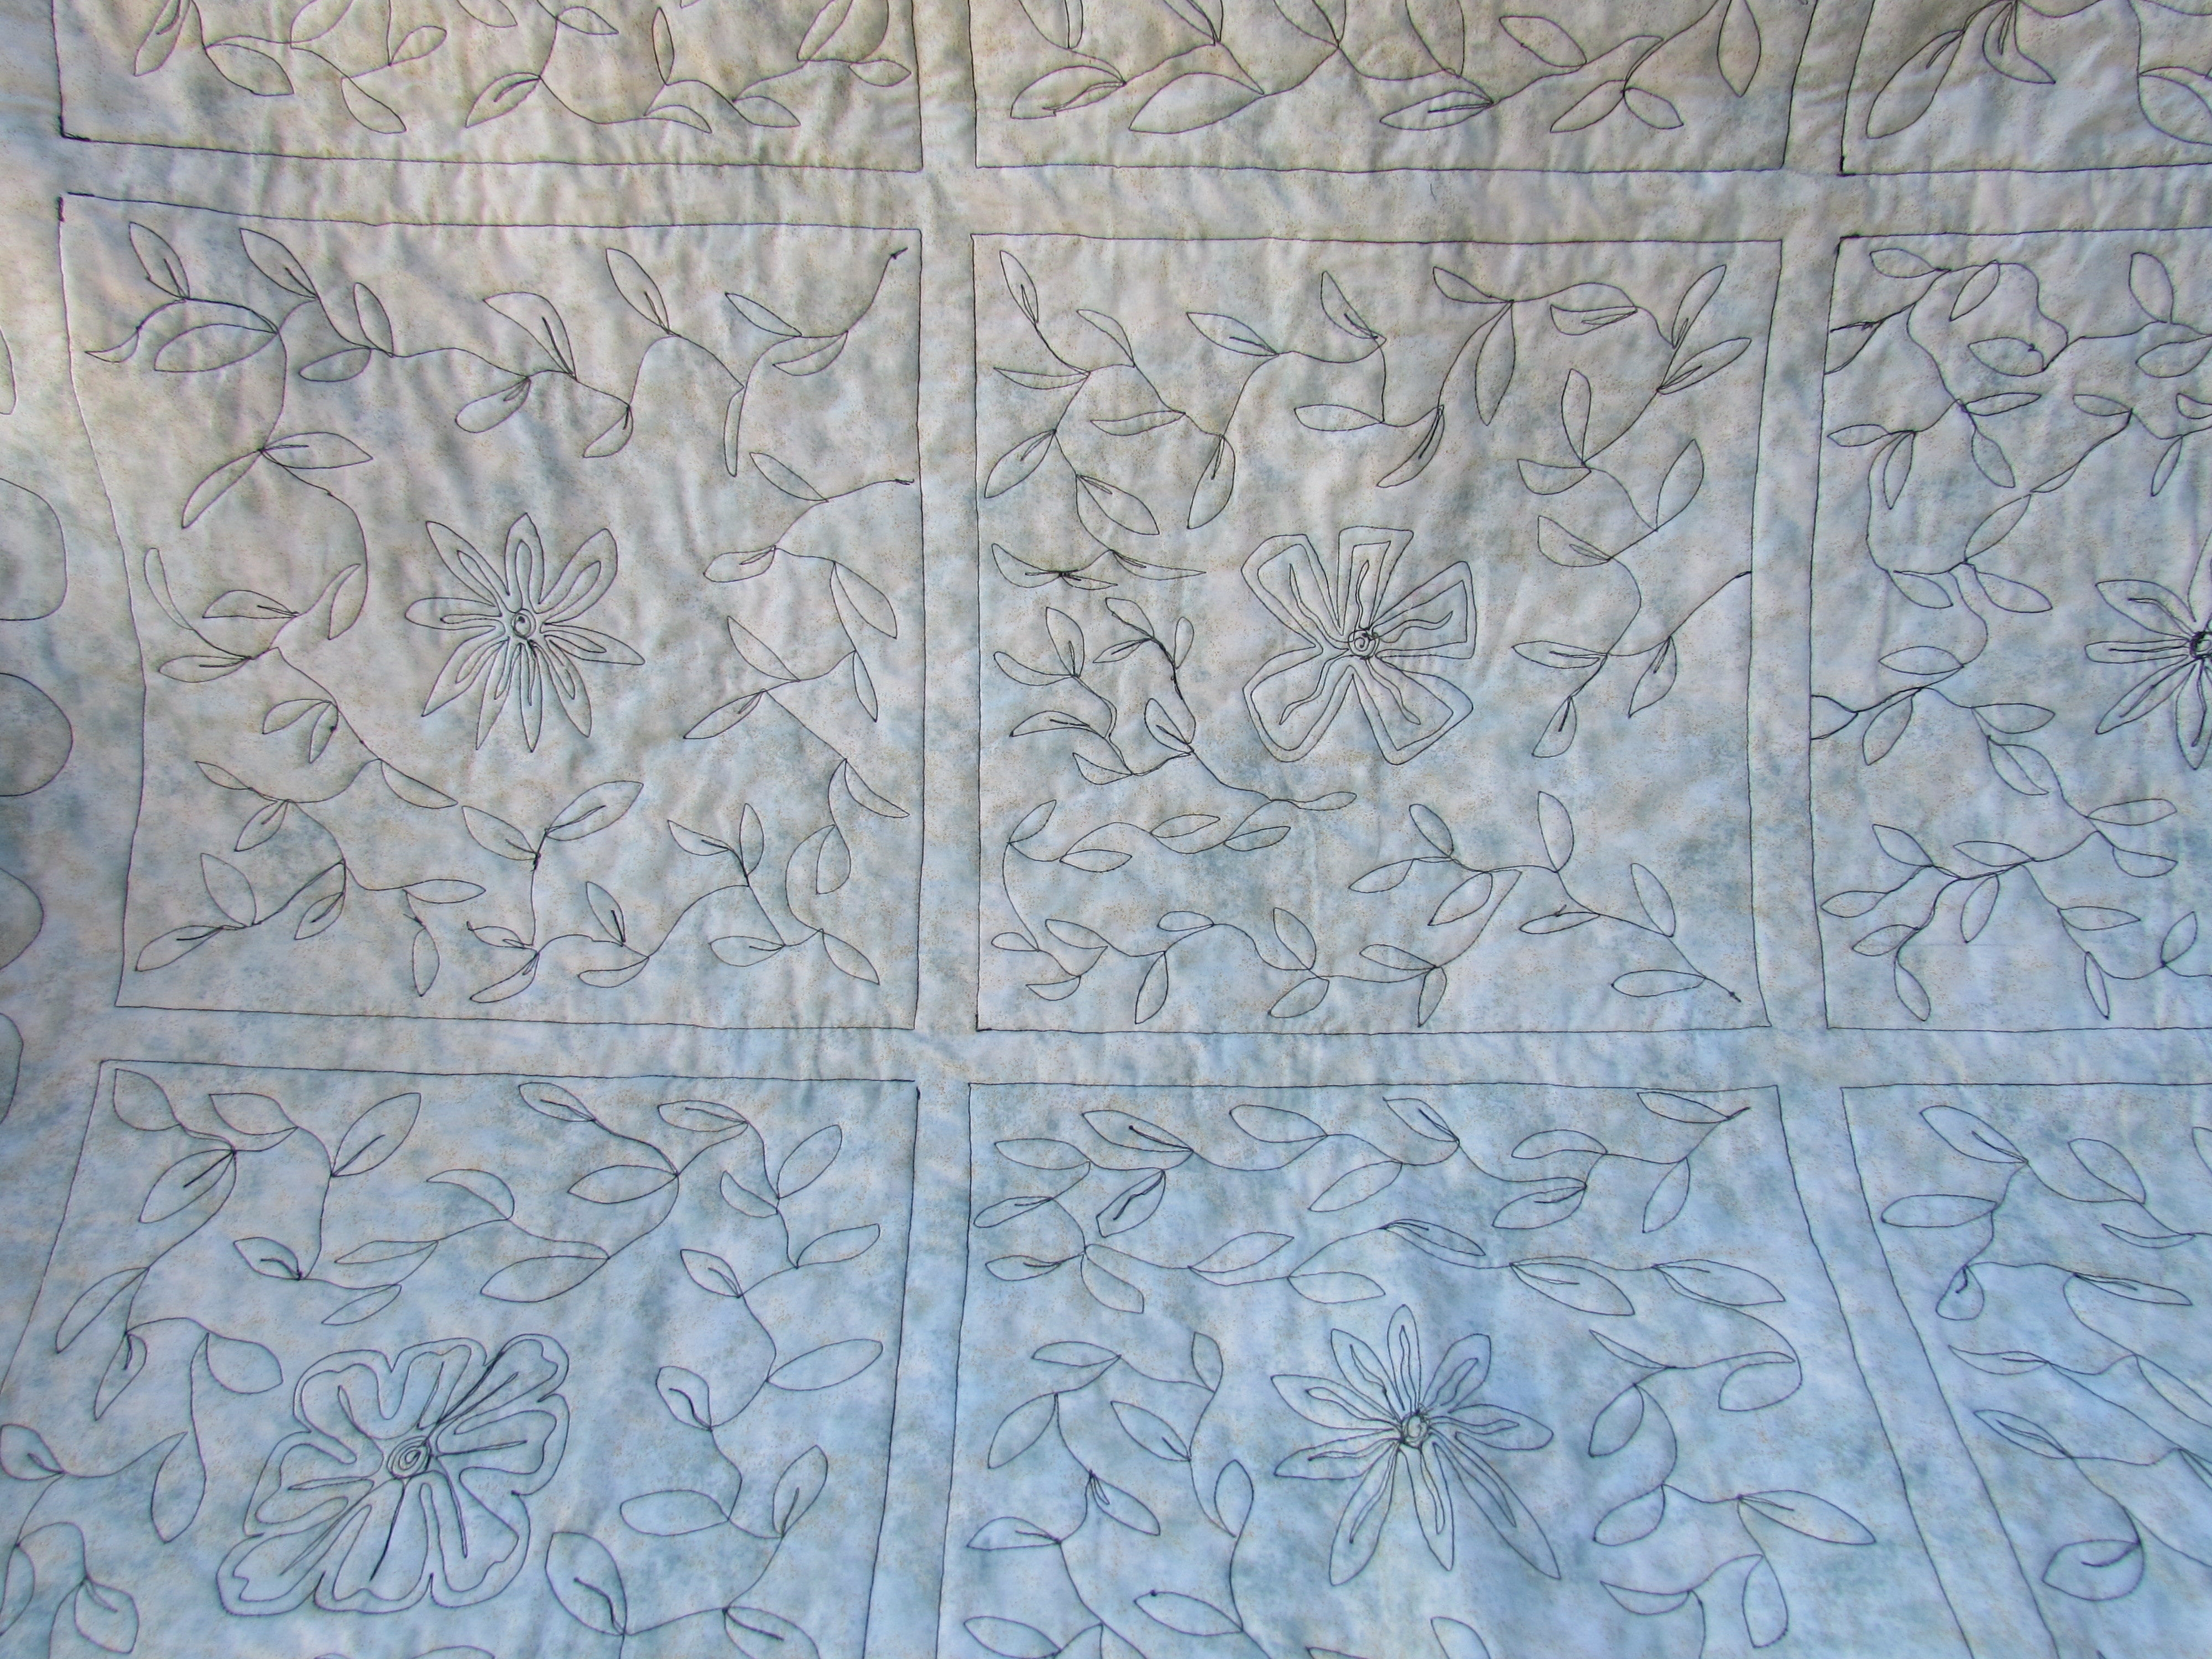
I took a look at some quilting sites (mainly Lori Kennedy’s site, The Inbox Jaunt) to get inspiration. I knew that I would do an all over FMQ pattern but wanted just a bit more detail than that. Each of the nine patch blocks have a blue center. Starting with that, I quilted a large flower in the center of each blue square.

IMG_20150618_3479

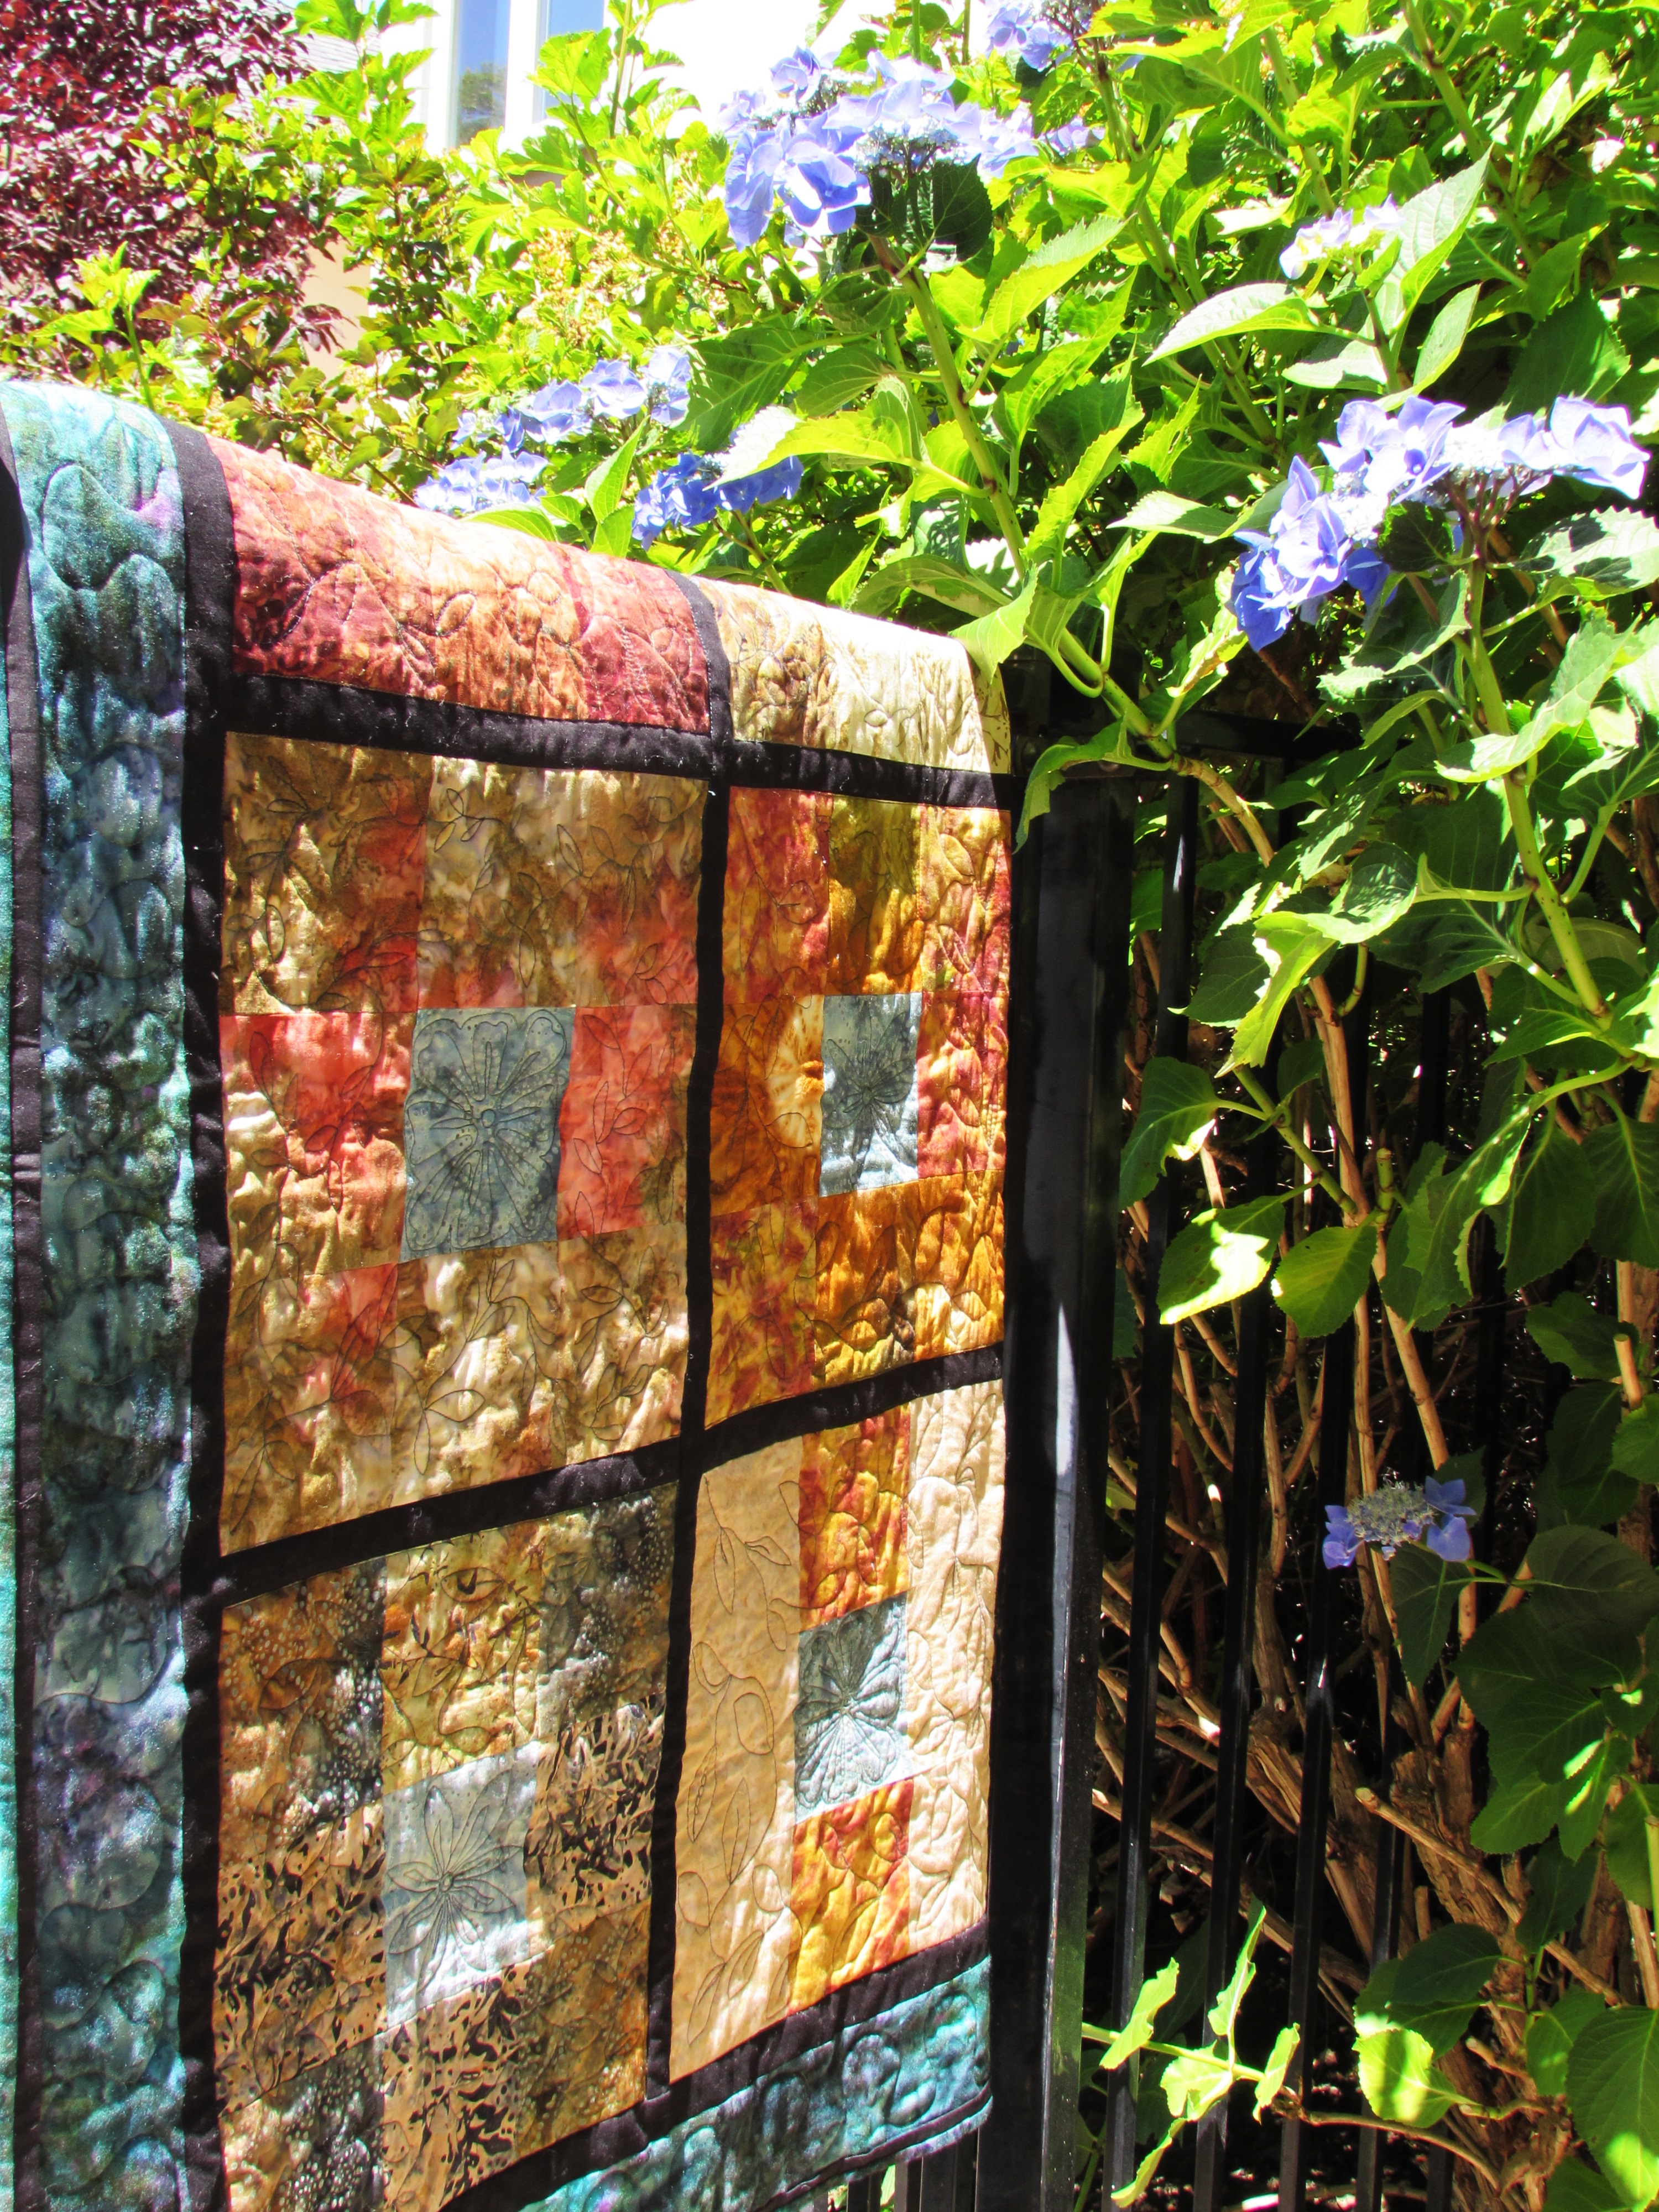
I decided that leafy fines would complement the flowers. Using a variegated green YLI quilting thread, I FMQ’d leaves of various sizes on each block. I left the black sashing plain.  Because the backing is a light green batik, the FMQ stitching really shows up on the back. Not sure if this is good or bad!  For the most part, I am happy with the stitching. Why is it that my eye goes to the little tension blips and the occasional jittery stitching instead of the overall look? For those of you that quilt on your domestic machine, how to you handle the starts and stops? Look closely at the squares that I ditch stitched, see the dark spots at one corner where I stopped and started? I chose to reverse a few stitches rather than knot and bury tons of threads. Not sure I like how this looks. What is the consensus? Do you back tack stitches or knot and bury threads? I know which is cleaner but yikes, burying all of those threads is time-consuming.

IMG_20150619_3486

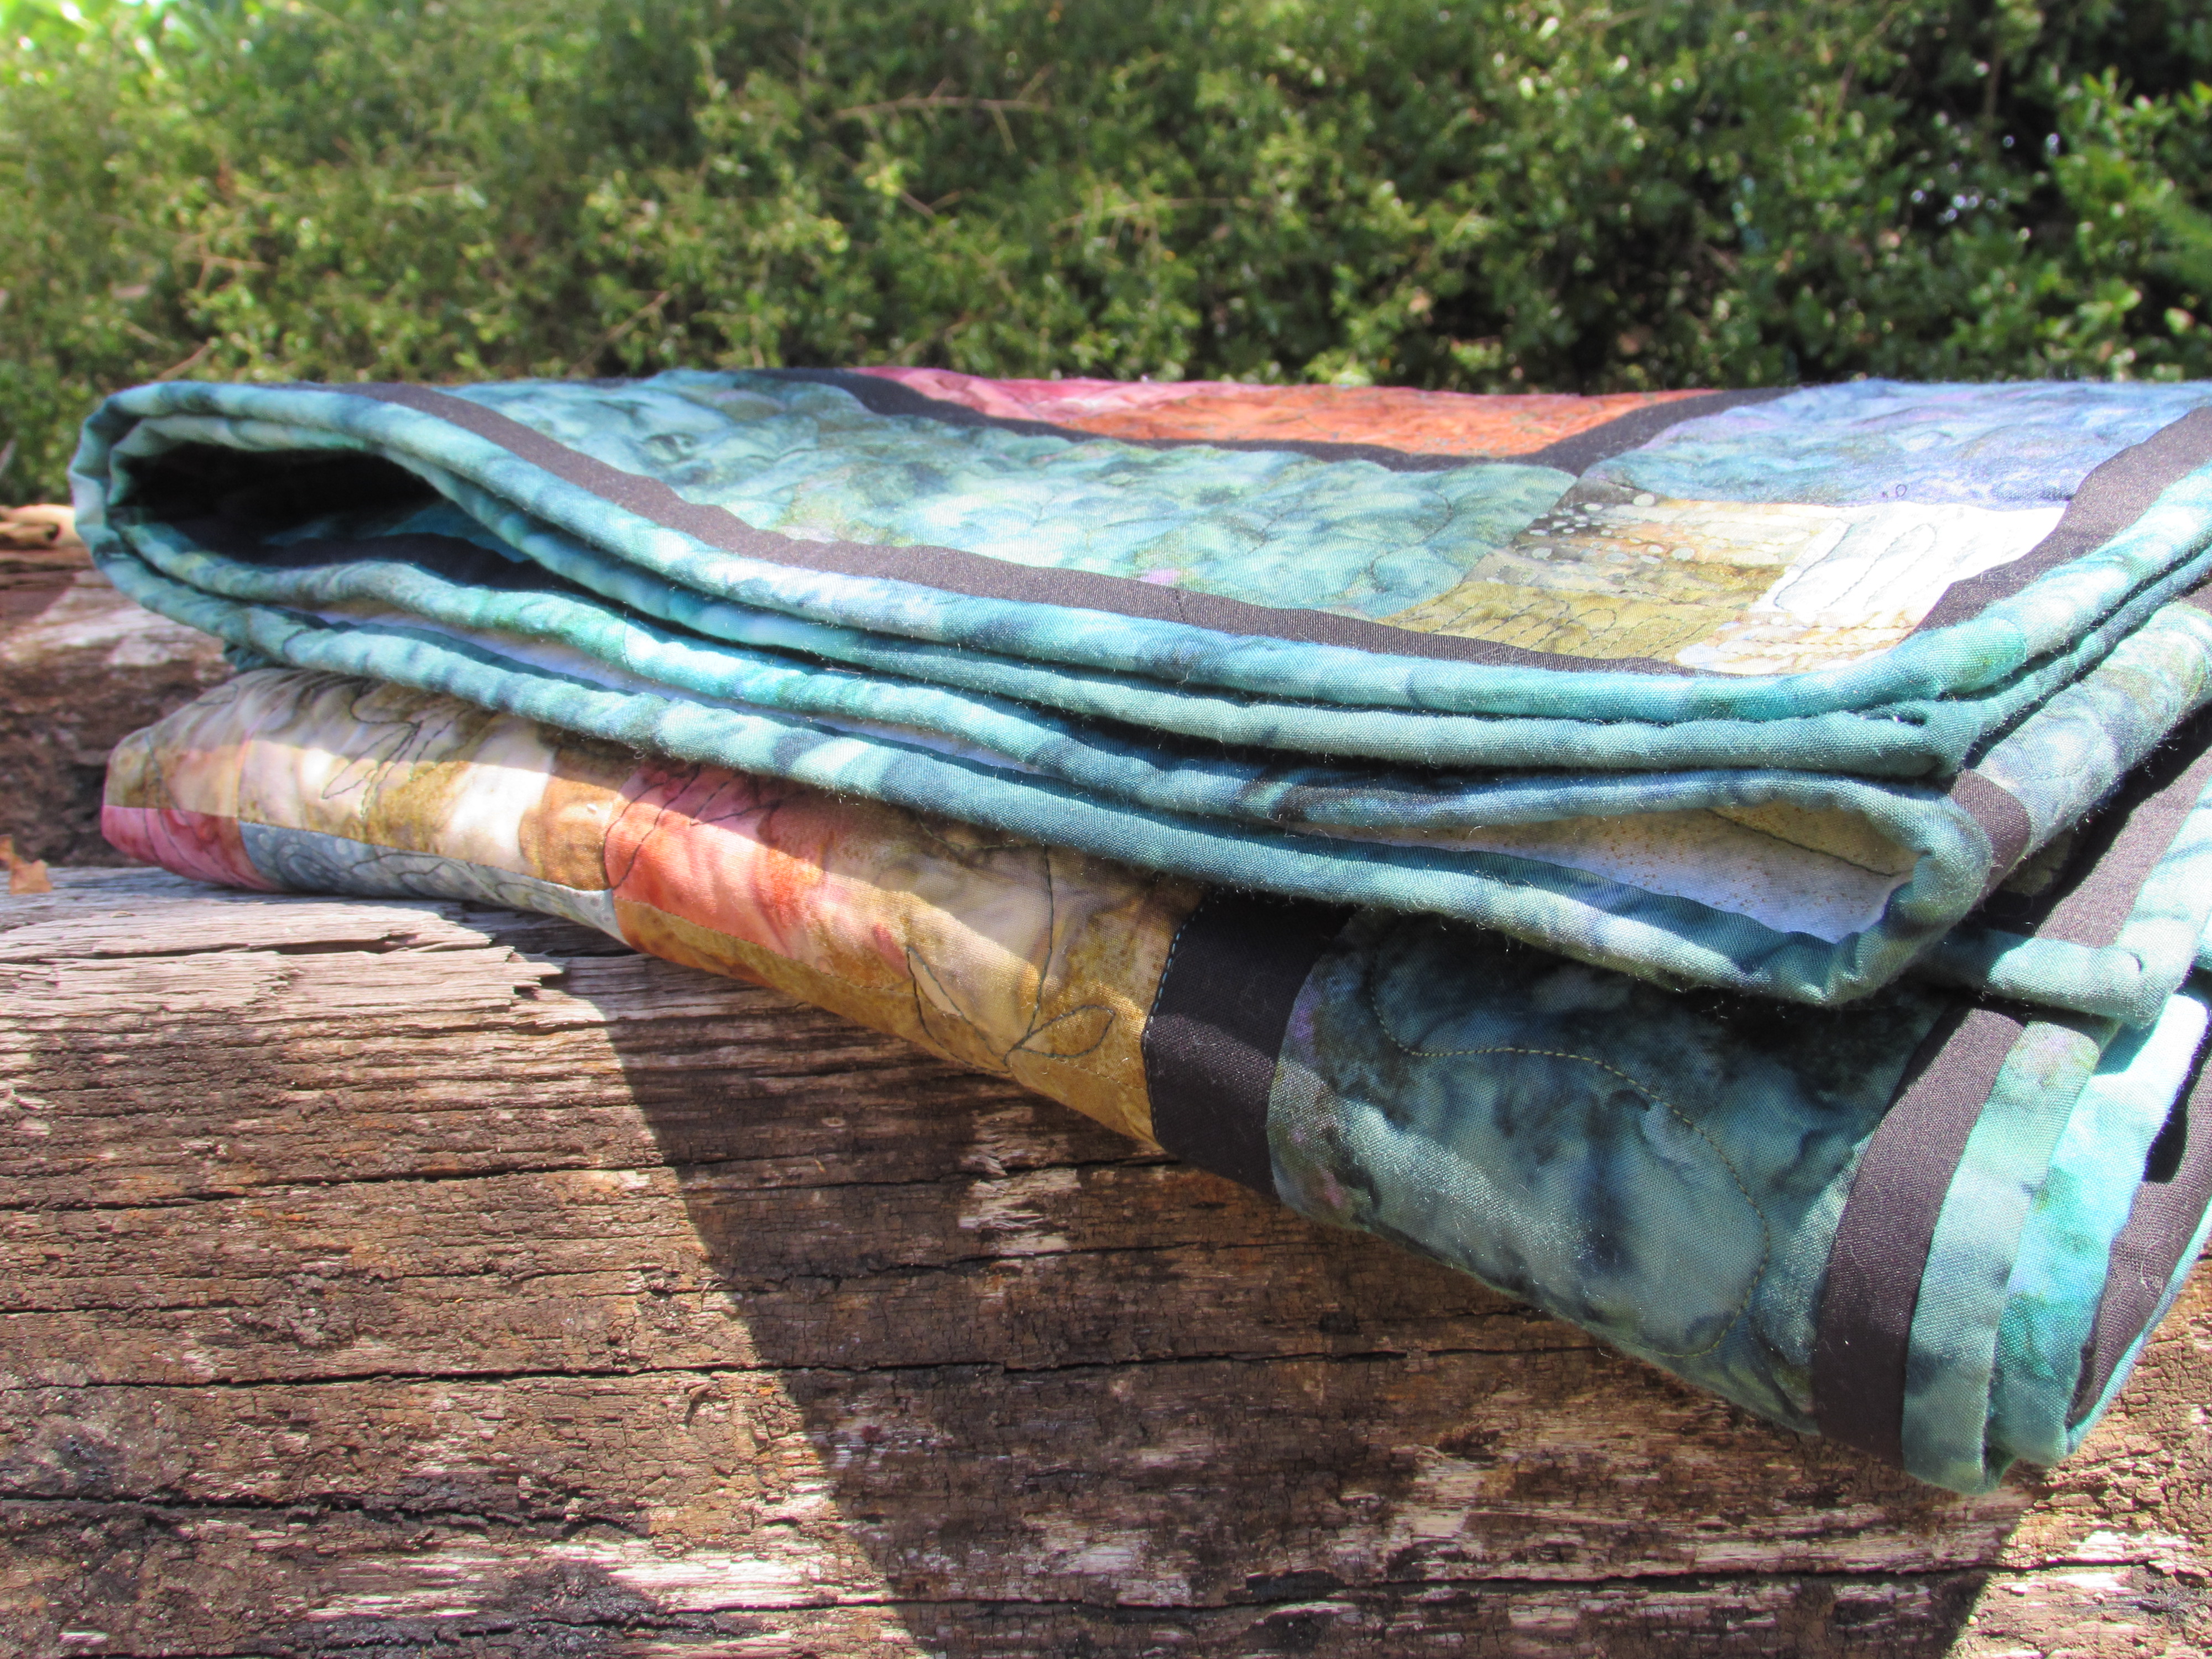
The binding is, as usual, one of my favorite parts. I used the honeymoon batik for the border and also for the binding. To add some depth, I attached a black flange to the perimeter of the quilt before binding the quilt. I love the ‘something extra’ that this flange adds to the quilt.

IMG_20150618_3478

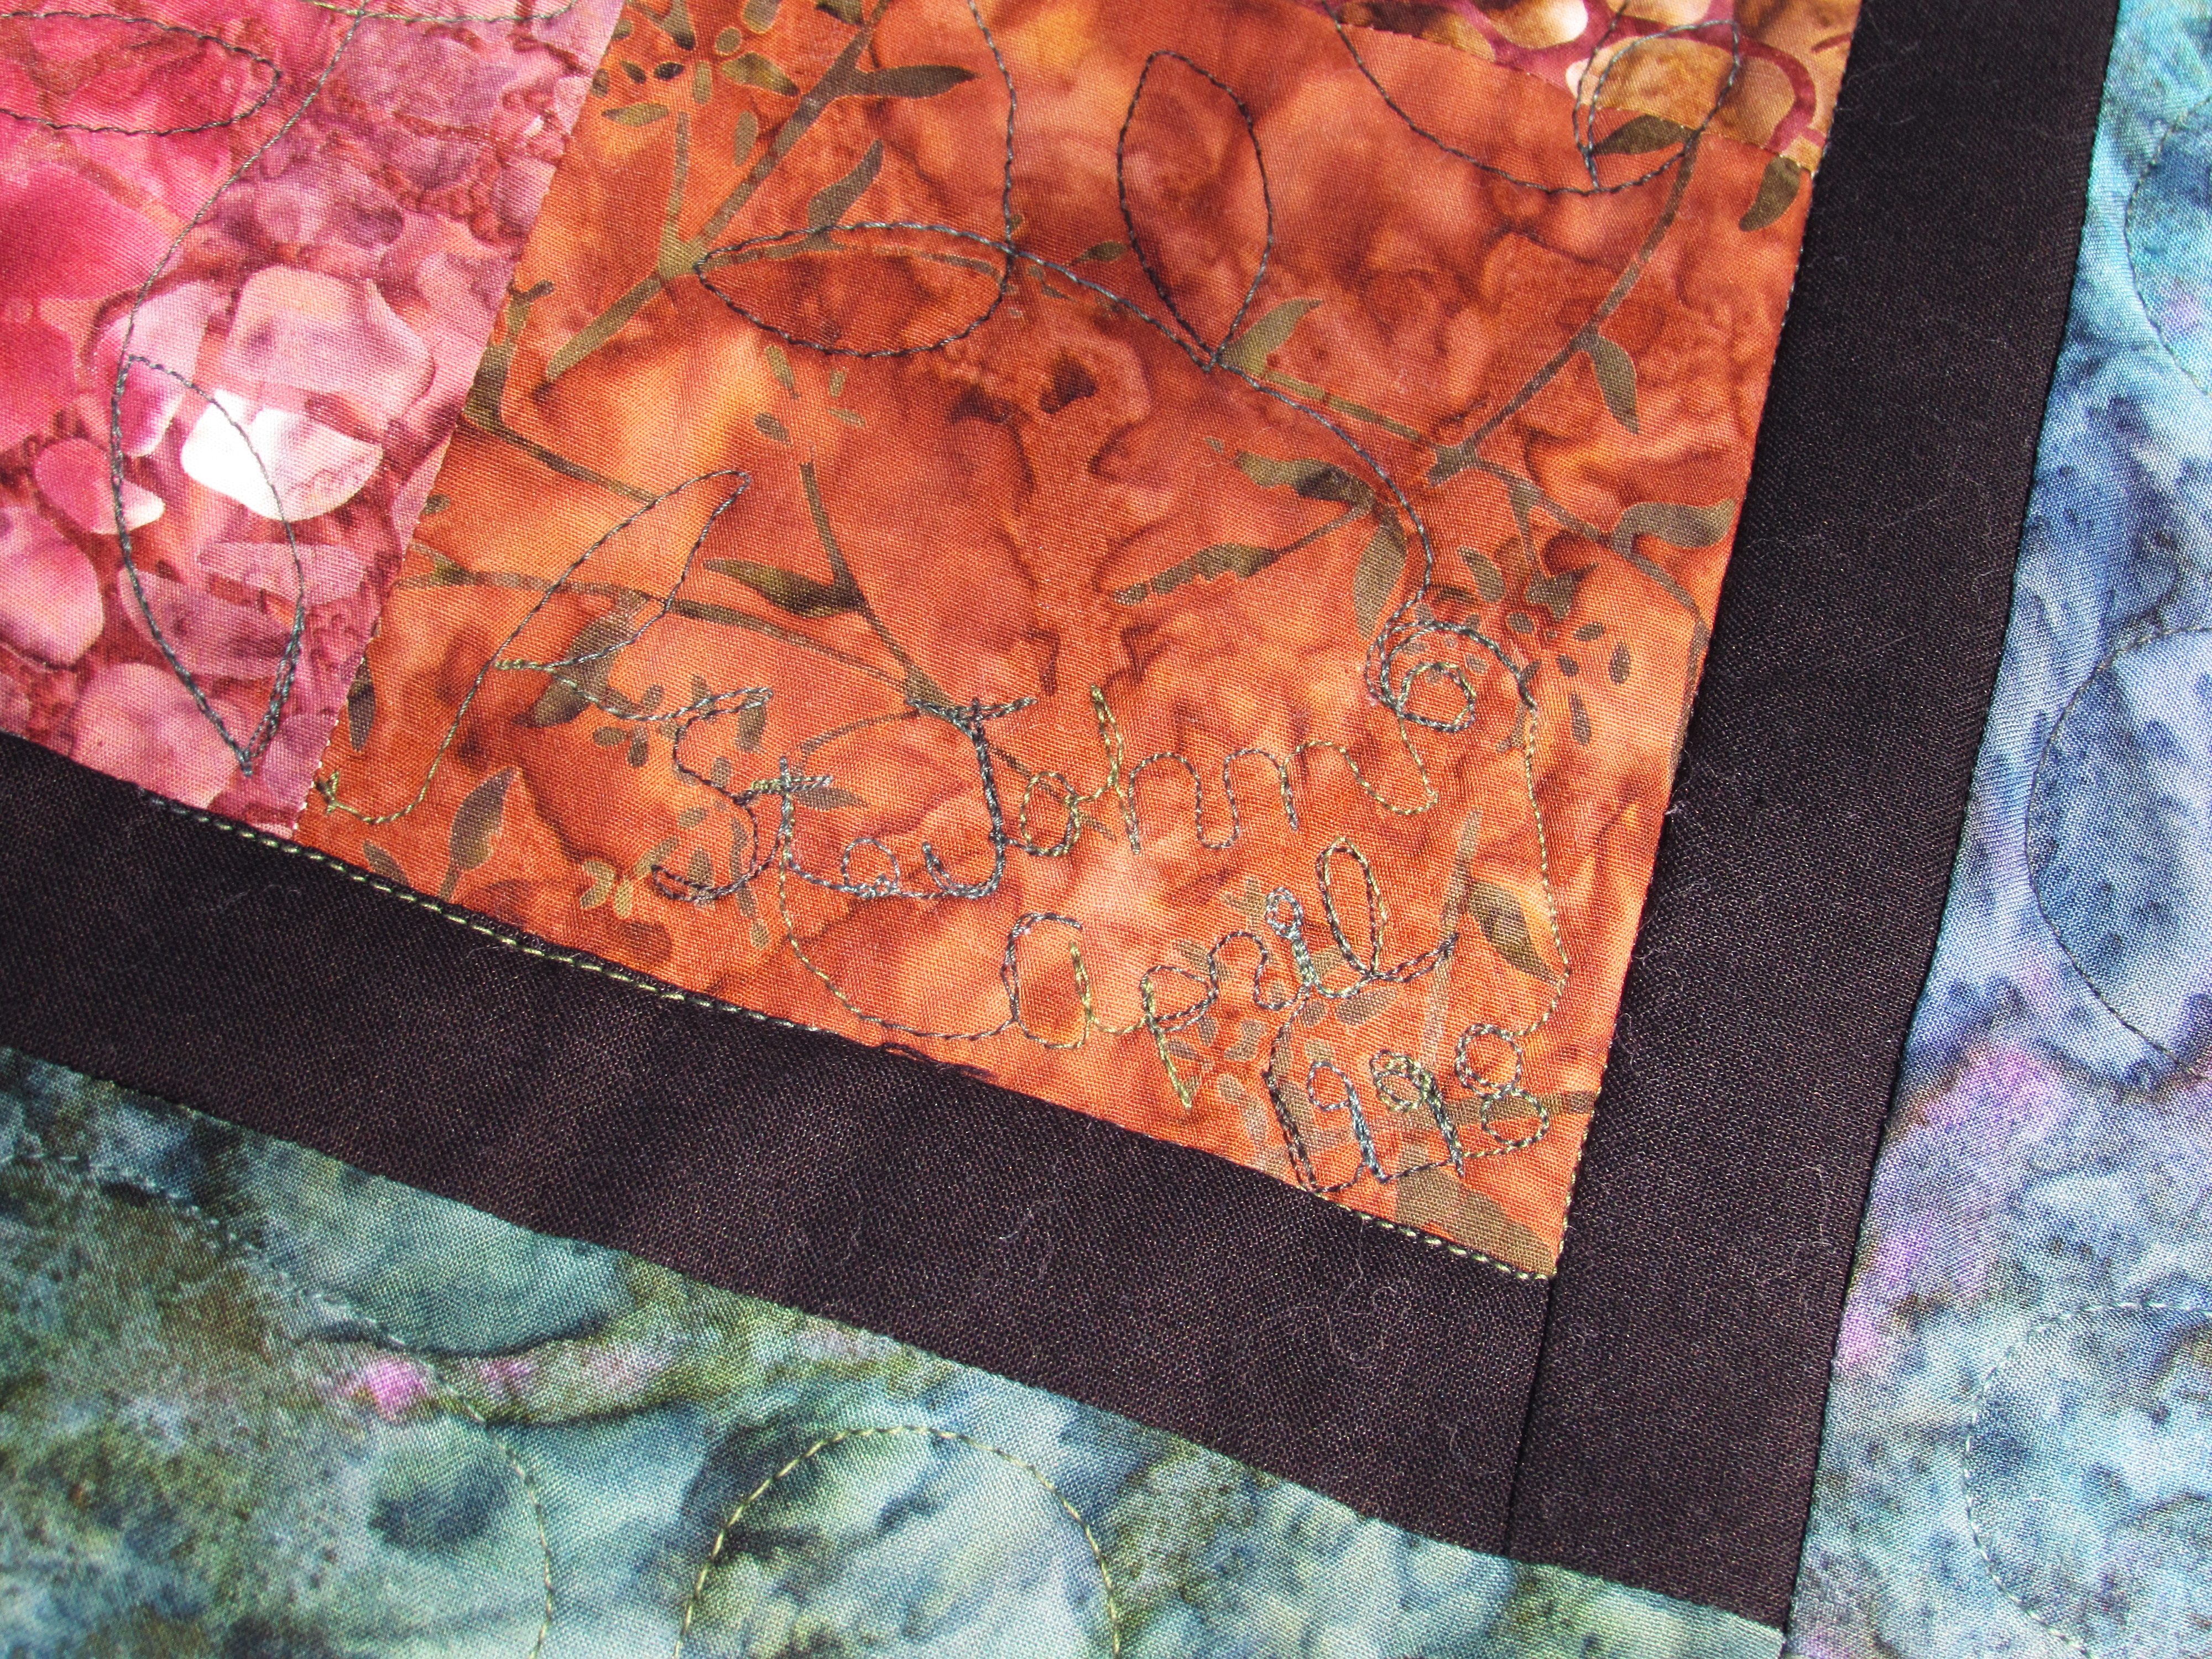
To honor our honeymoon, I tried stitching St. John as well as April, 1998 on a corner of the quilt. Kind of difficult to see but it was a good addition.

IMG_20150618_3477

When I was binding it, I came upon my two ends that needed to be joined and sighed my heavy, here-we-go sigh. I hate attaching the tails of the binding. This time I looked to Rita over at Red Pepper Quilts. On the off chance that there is someone who hasn’t heard of Rita, she is an amazing quilter who has the most amazing sense of color. Her quilts are bright, happy and so vivid. Truly amazing. If you haven’t looked at her work, now is the time. She has numerous tutorials, several of which talk about binding. This is the one that I used. The result was good so I will refer back to her measurements next time.

I can check this goal off of my 2015 list and move on to another one! I think the next goal I need to work on is some quilt restoration. I have two quilts to restore and I want to get one of them going soon.

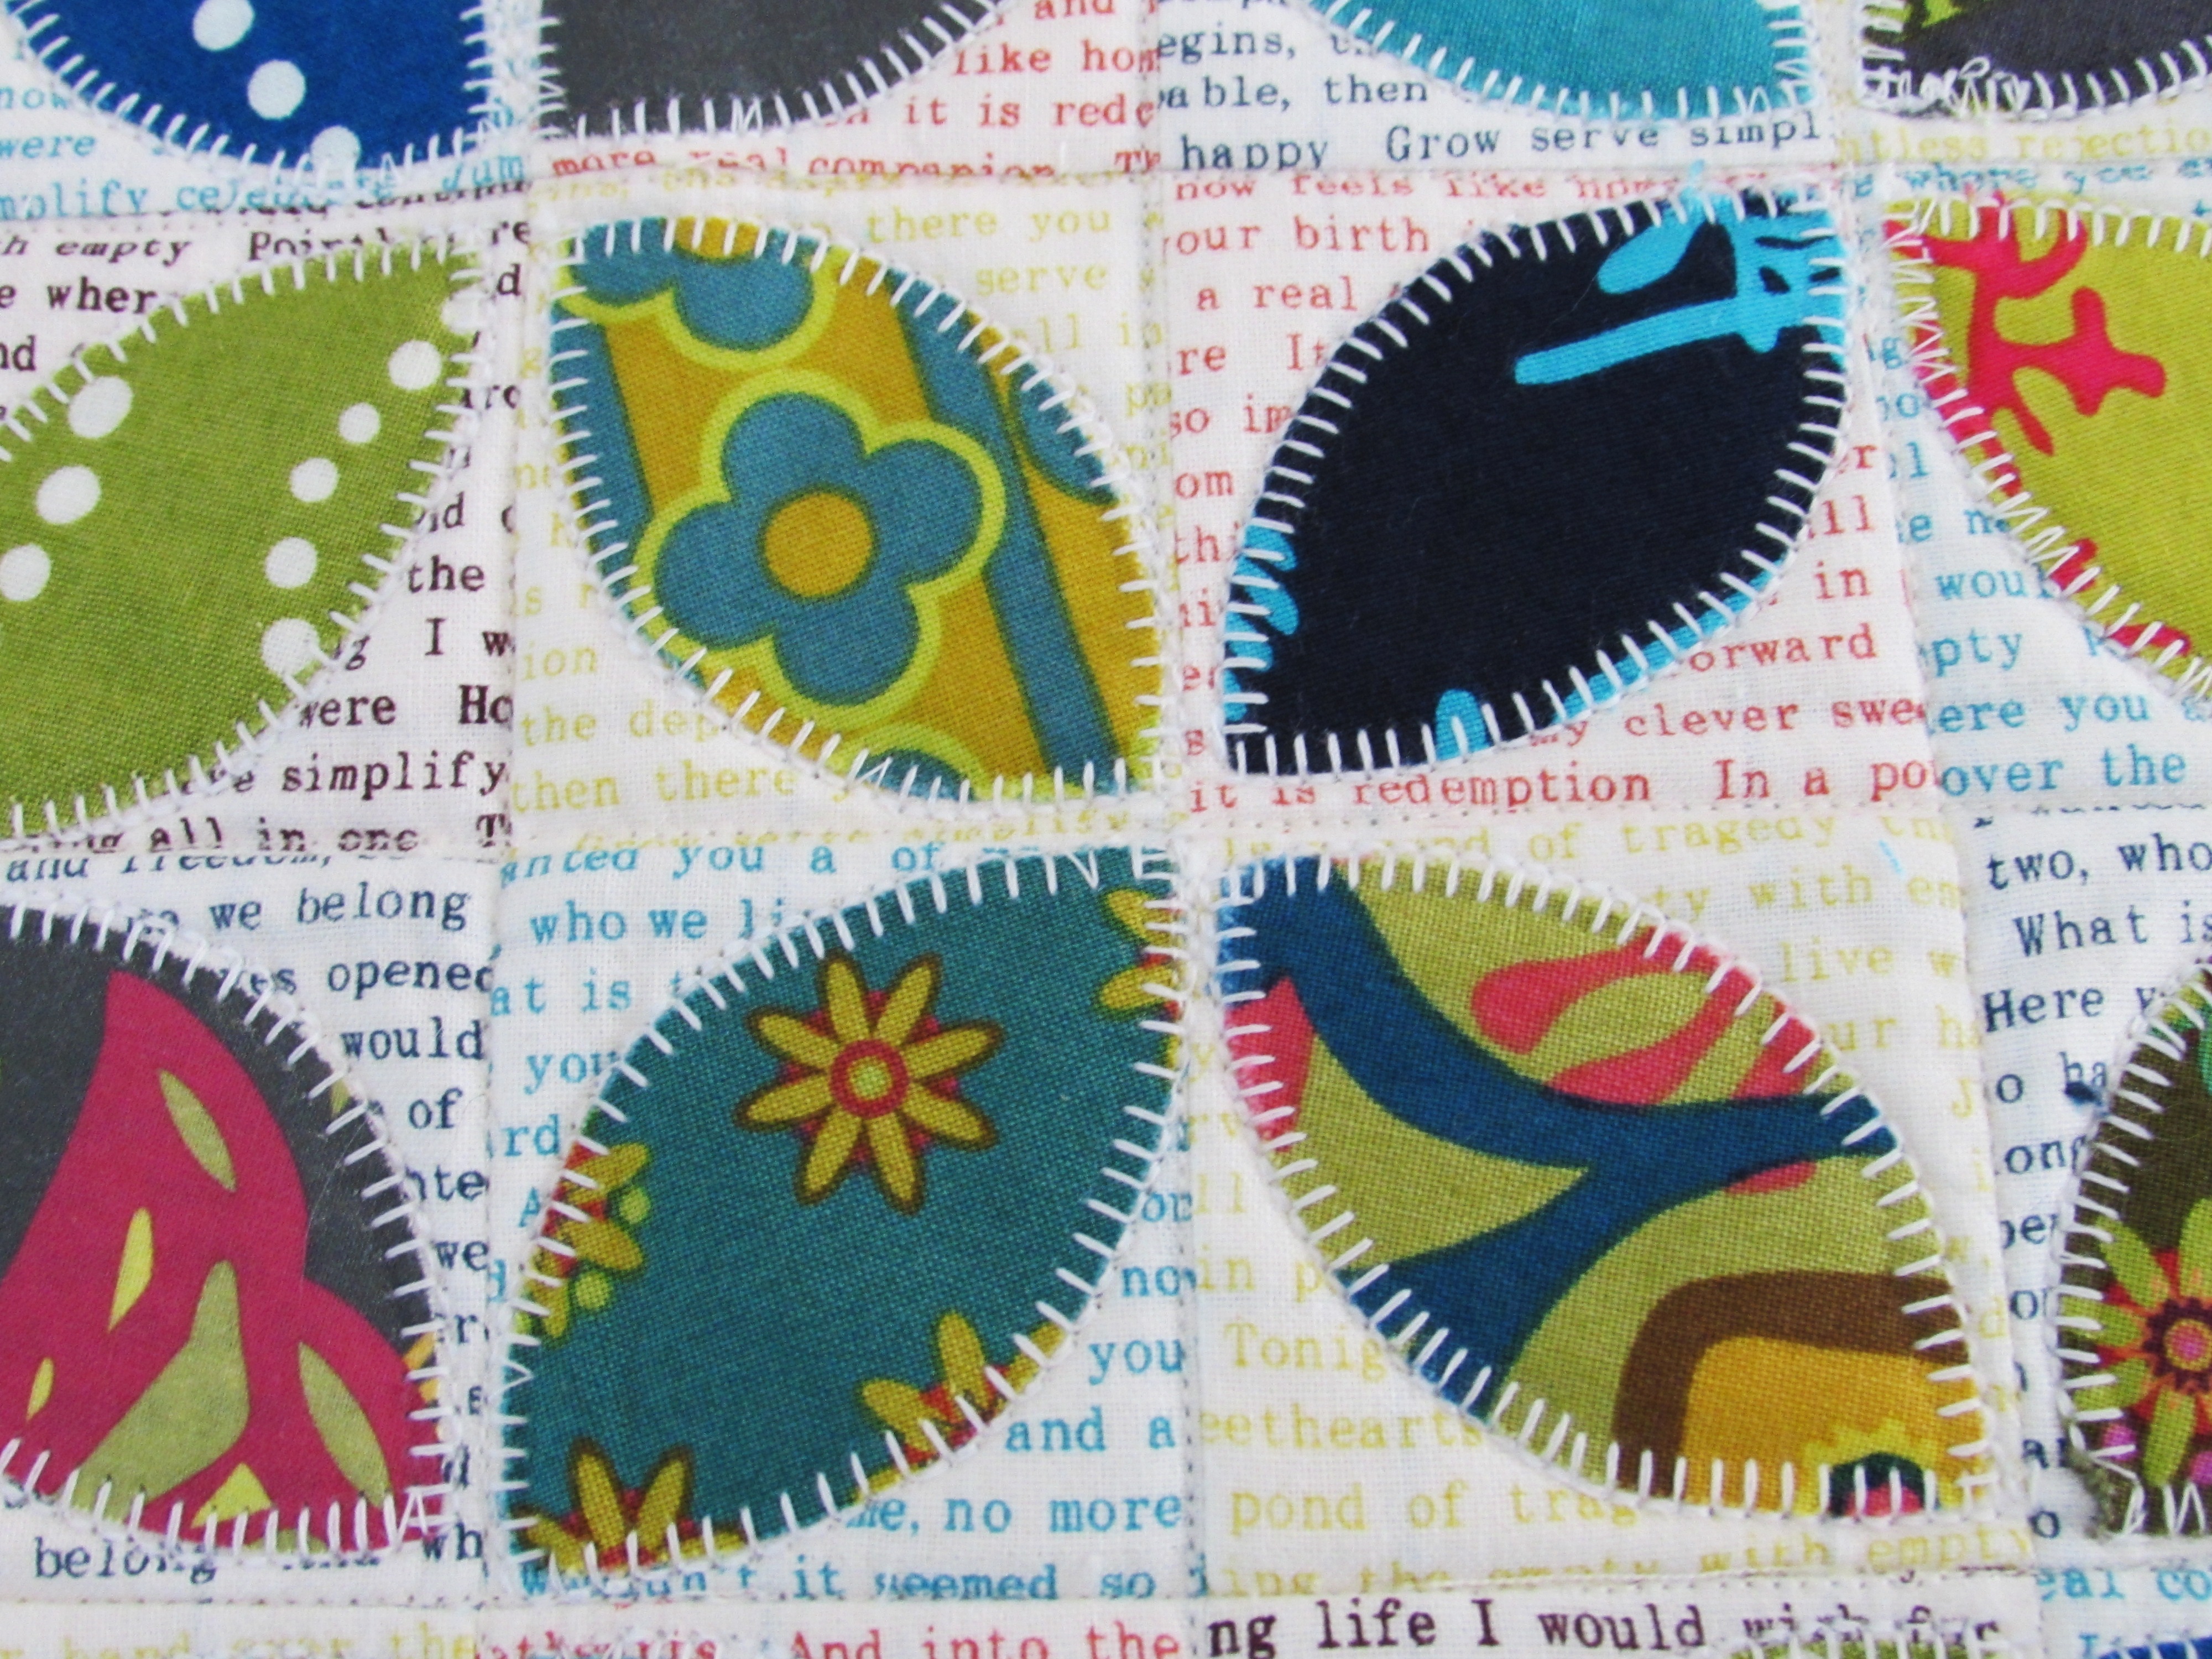
Finally, remember the Allison Glass mini swap that I participated in? I blogged about the mini that I made here. There were a few comments asking me to post the mini that I received. Wow, I can’t wait to share it. It is gorgeous. I am so grateful to my partner for putting so much effort into this project!

IMG_20150616_3470

My partner outdid herself with this. I love the text print that was used as the background on each 2″ square. She appliqued the orange peels with a blanket stitch which was brilliant.

IMG_20150616_3471

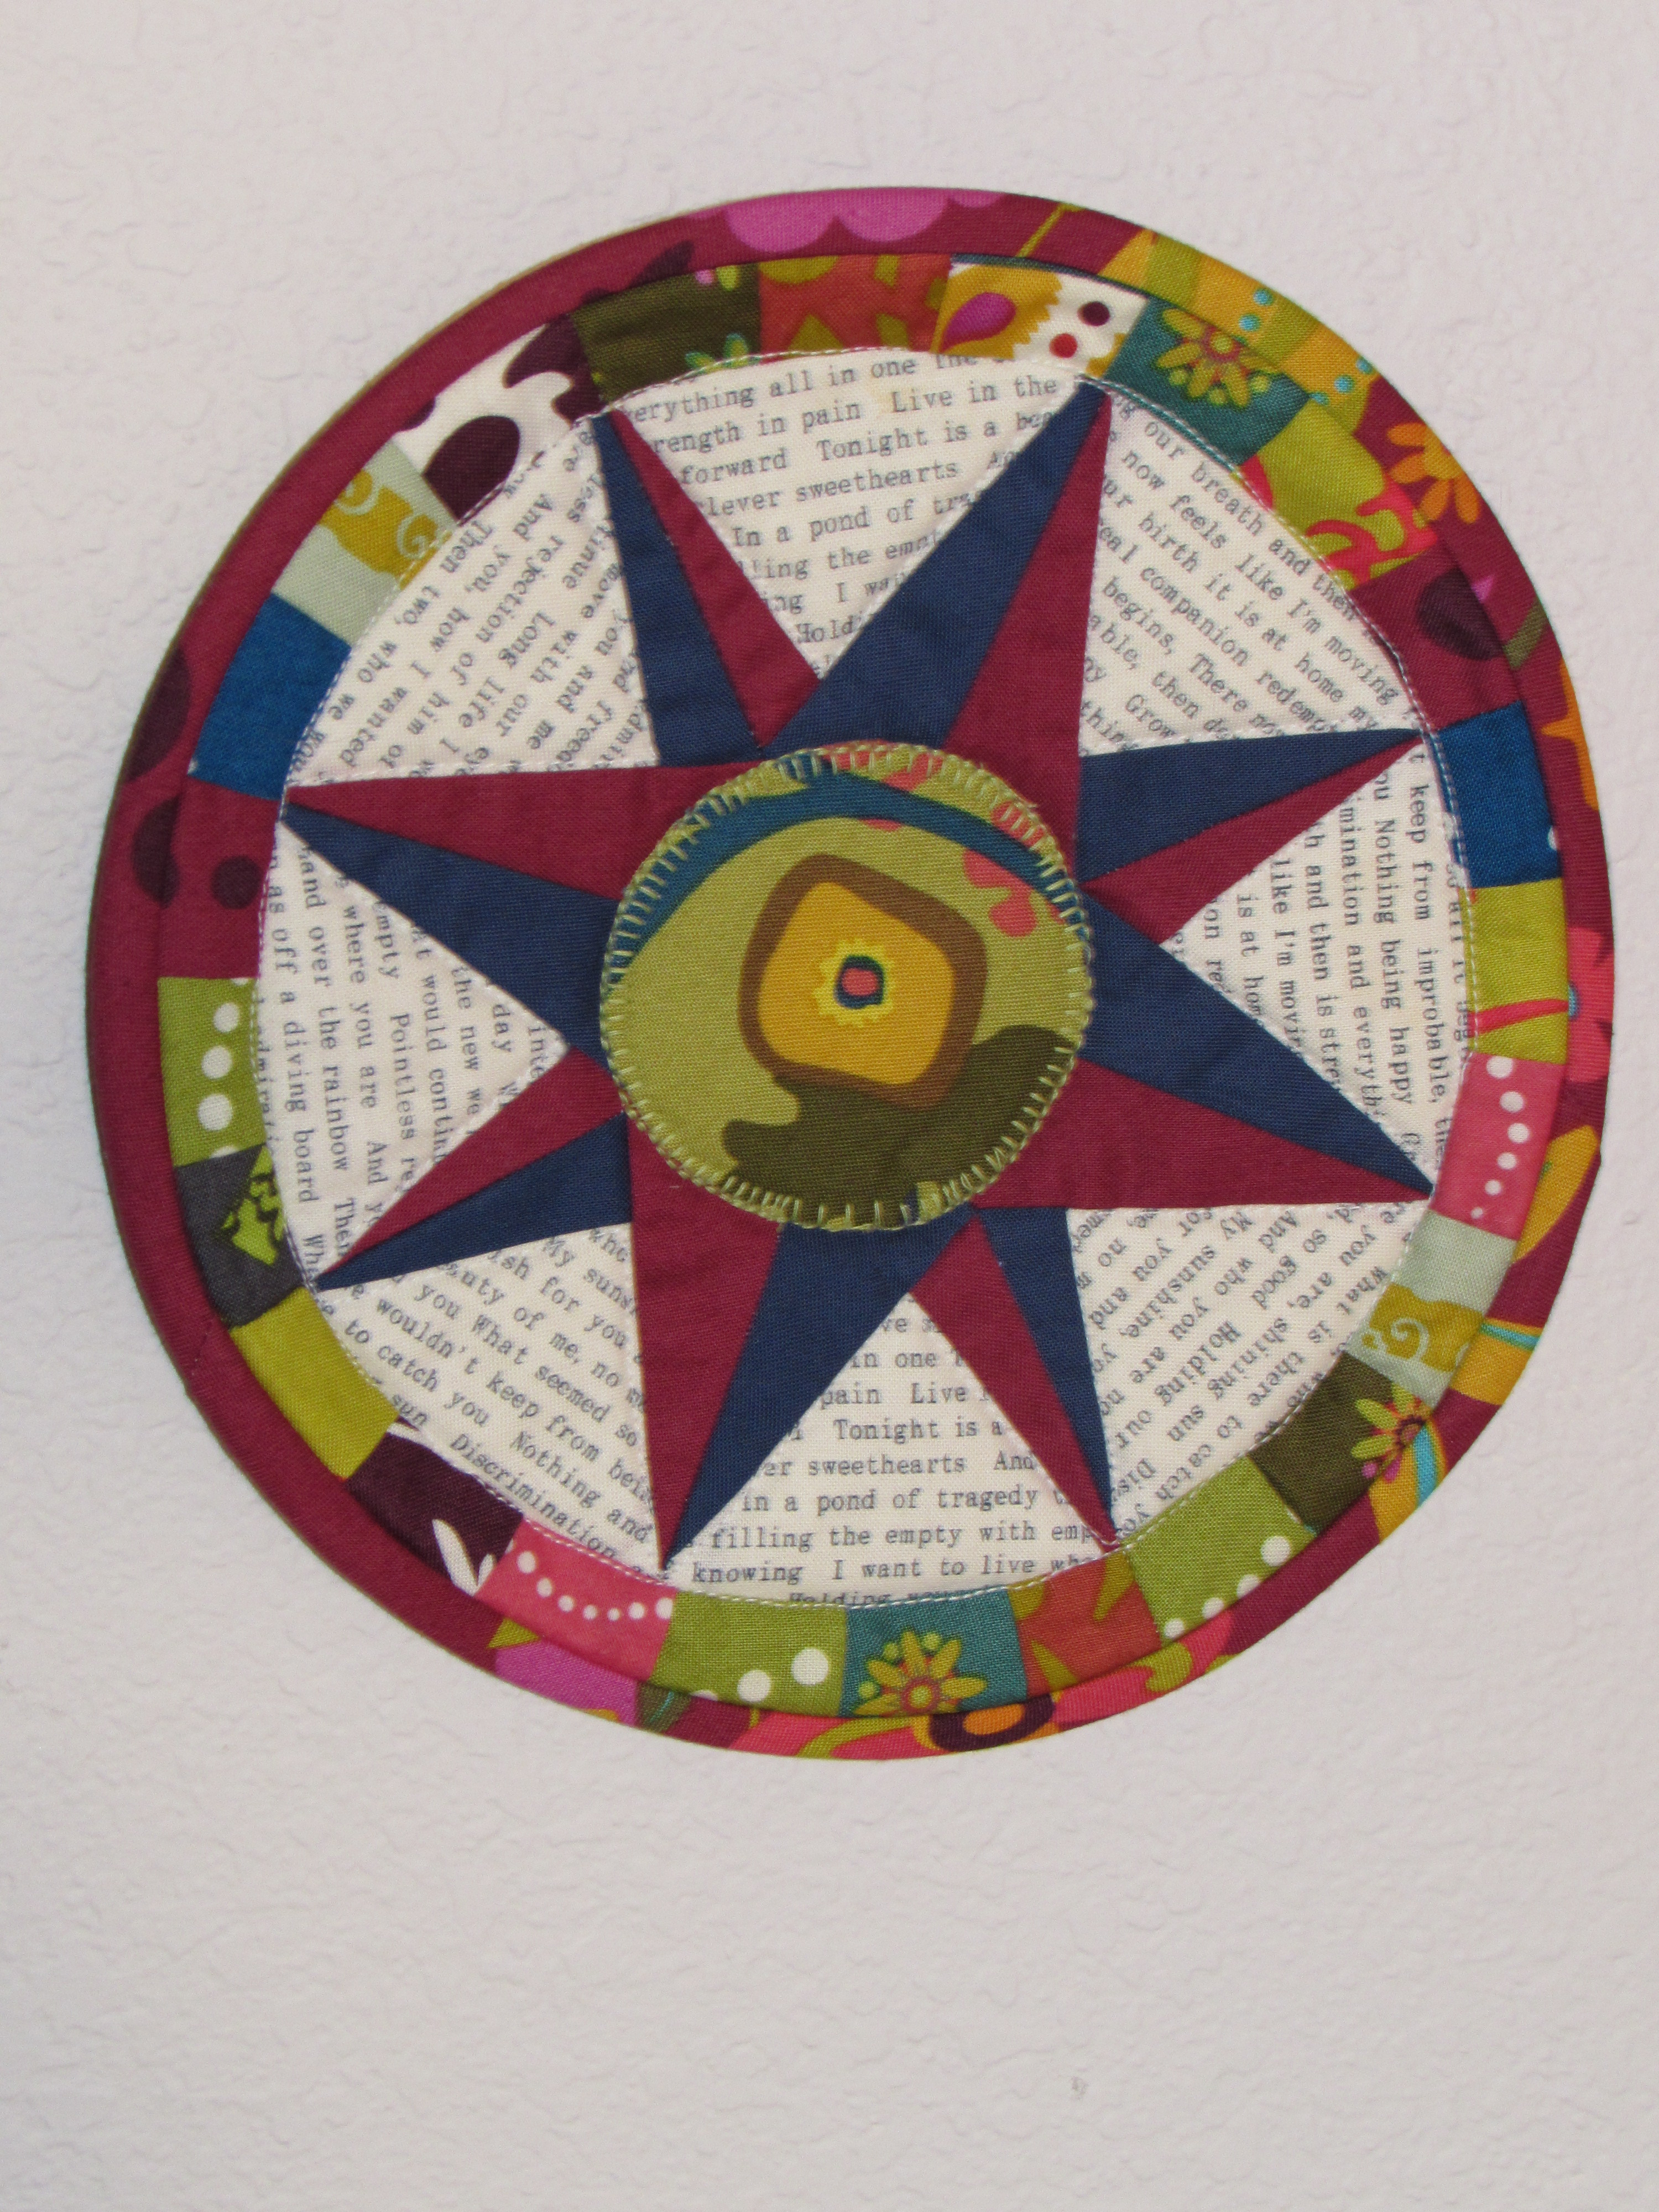
She also made this smaller mini. I think it is intended as a pot holder but I am hanging it on the wall. I don’t want it soaked with food splatter, which we all know would happen.

IMG_20150616_3469

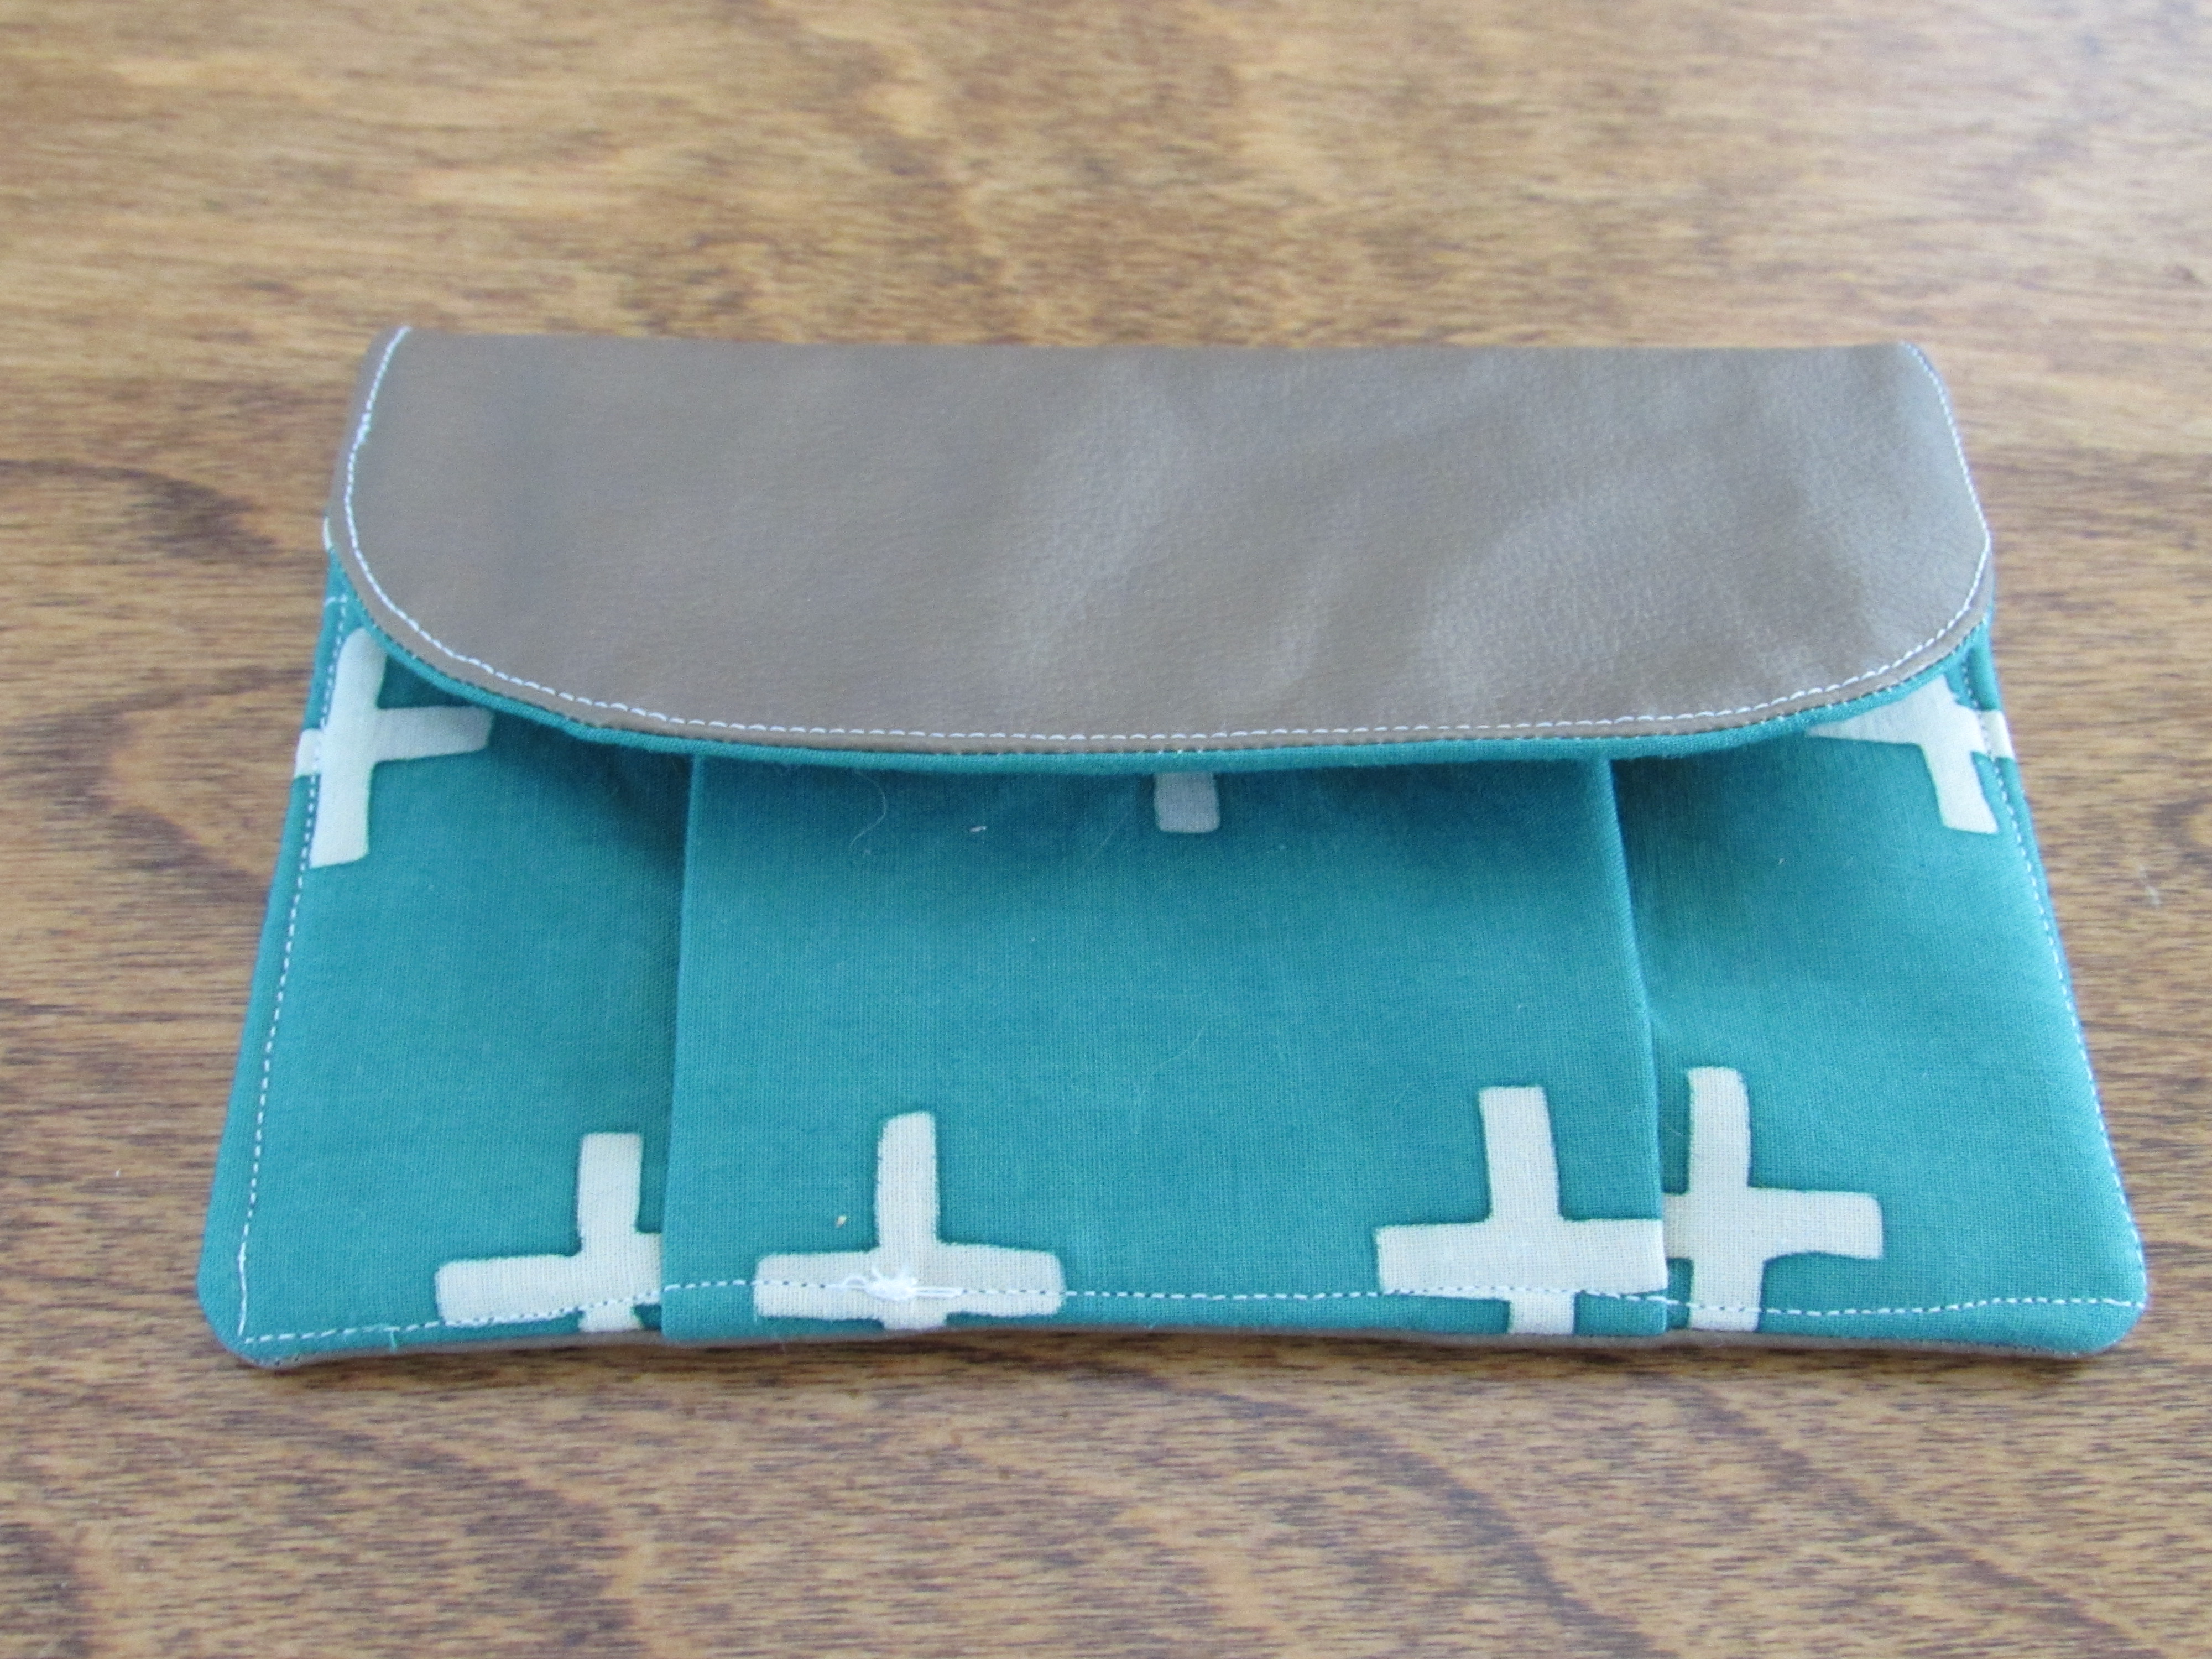
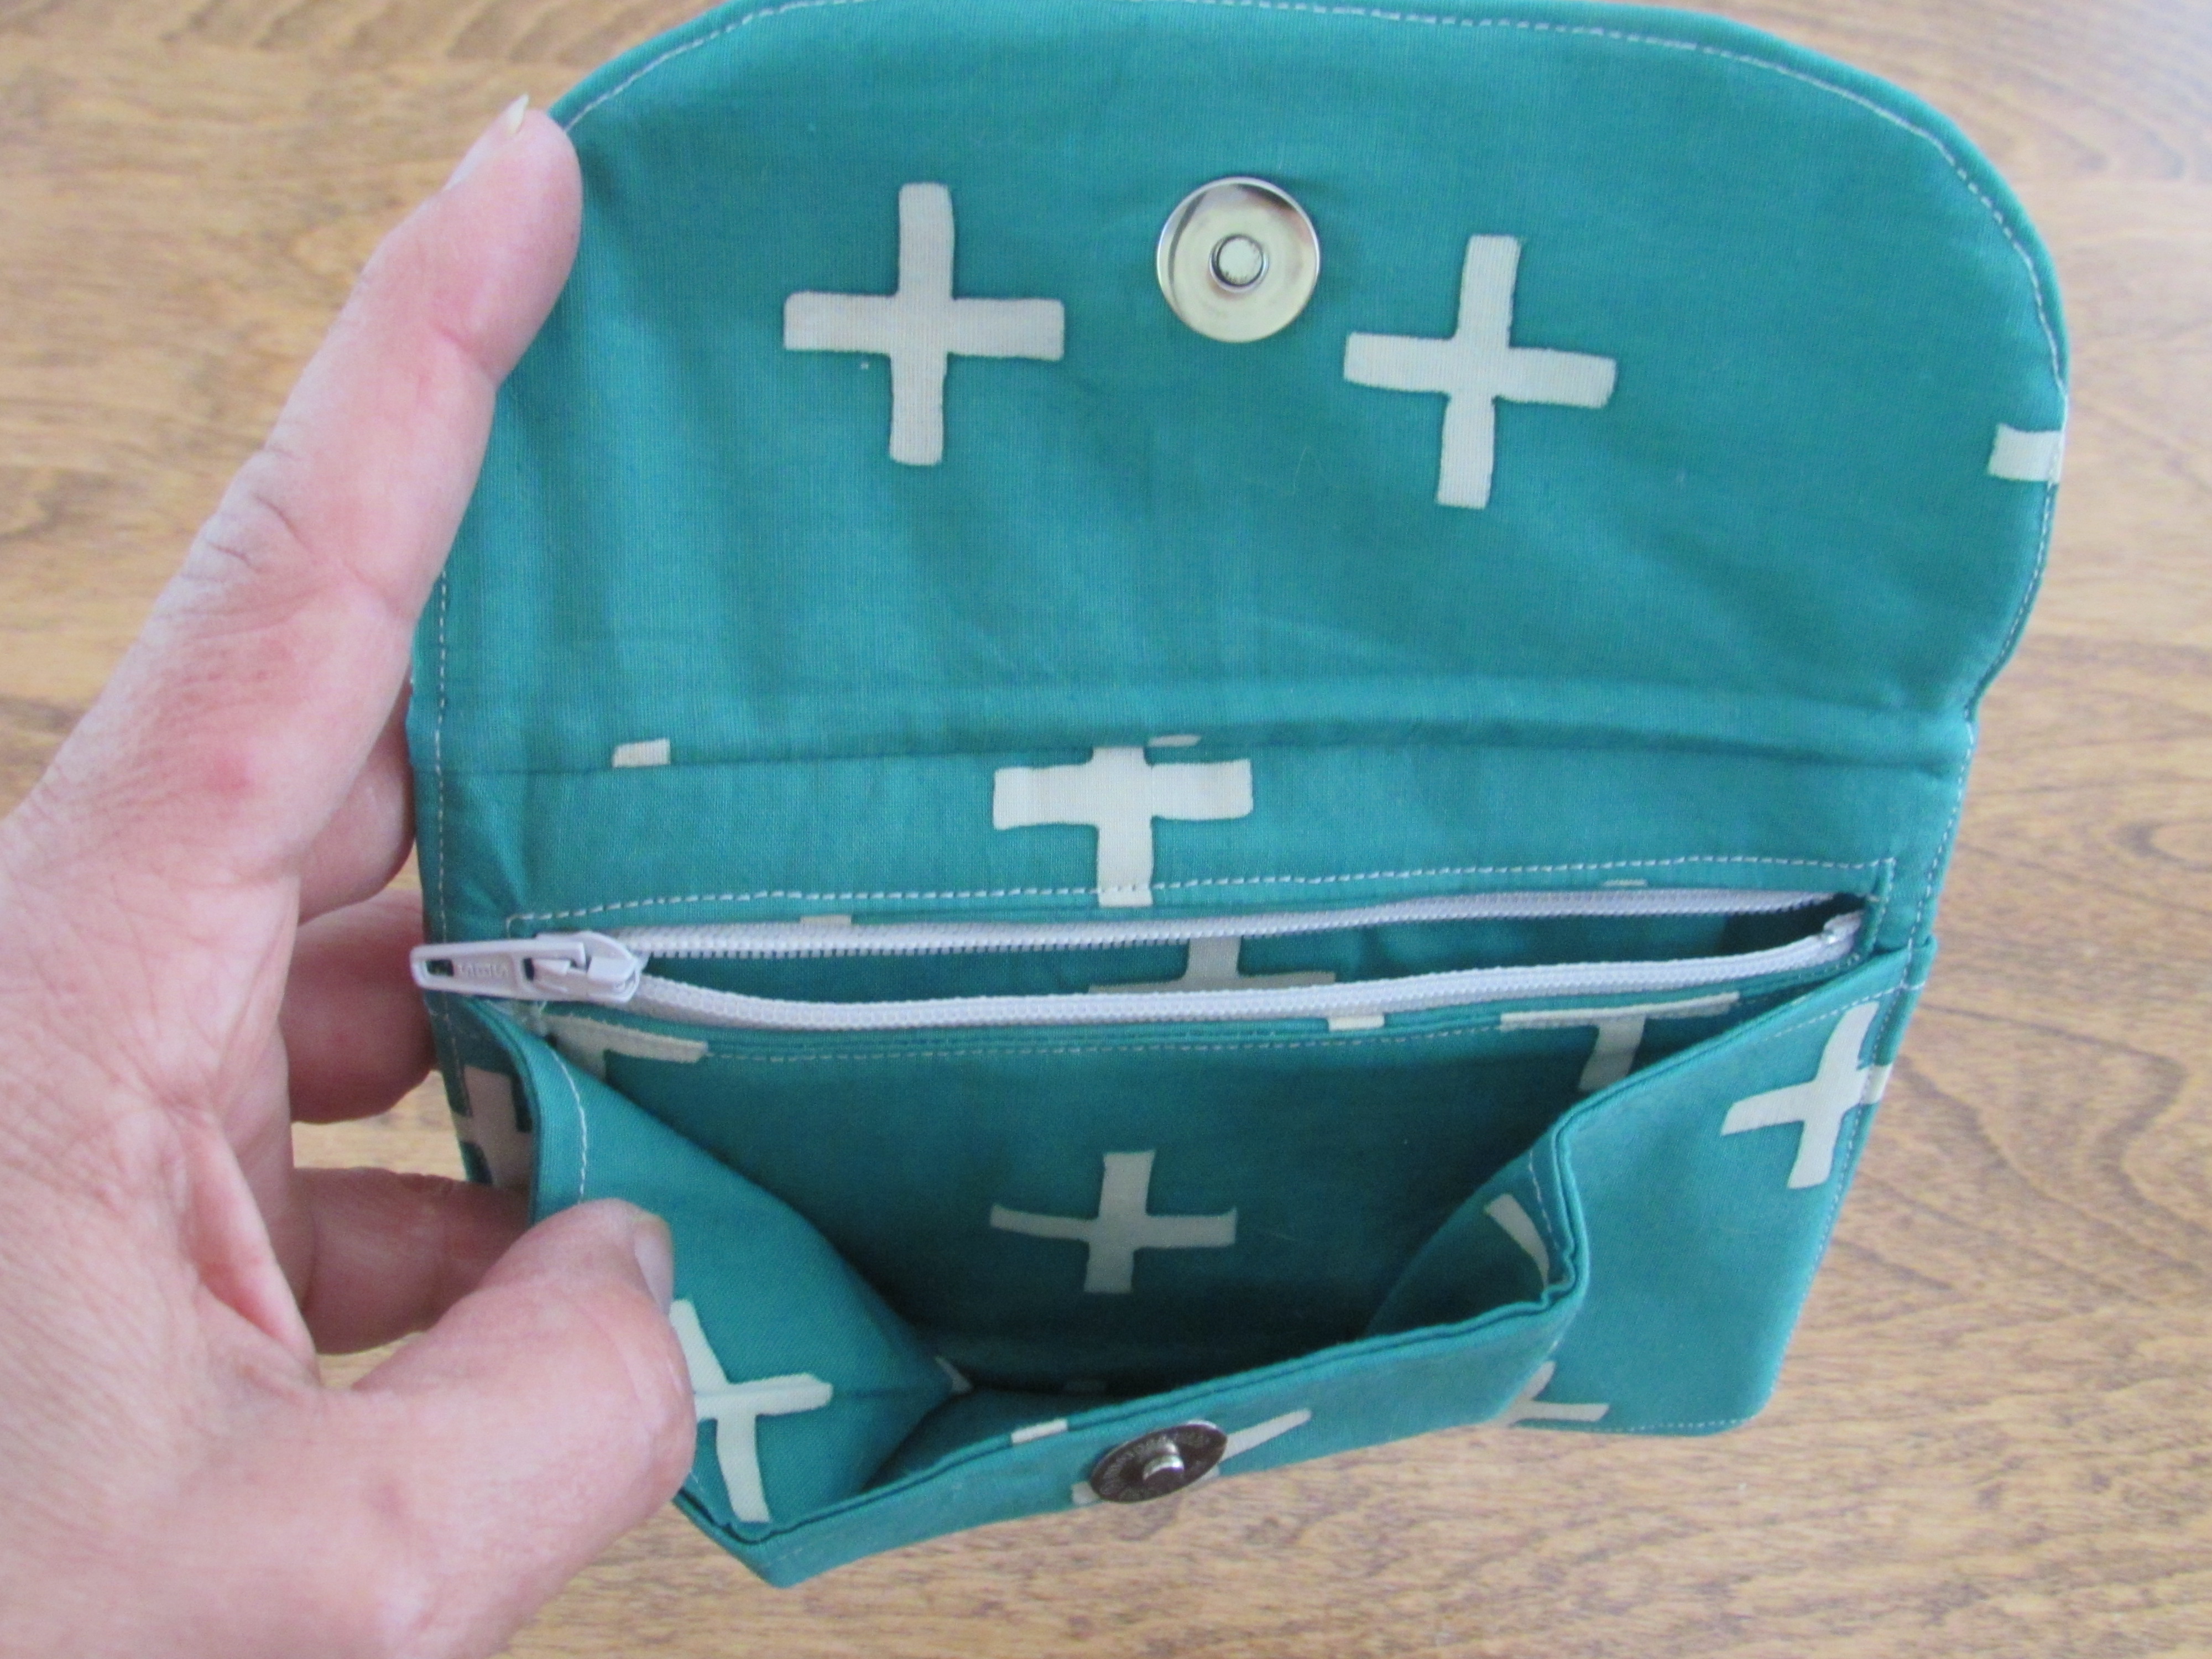
I also received this sweet wallet. Hand-made and so well done, it is lovely.

IMG_20150616_3472

IMG_20150616_3473

The swap was fun and I am thankful that I gave it a try as it pushed me quite far out of my comfort zone. Also, I am truly grateful for the work my partner put into the items I received.  That being said, I am not sure I will do another one for a while. I could see participating in one each year. They are quite time-consuming and it set my nerves on edge trying to think of what my partner would want, based on the few hints we are given. The process is a good way to get to know other makers though. It is really a big deal on Instagram and there is a swap for just about anything crafty.

Hope you all have something fun planned for the upcoming weektend.

Linking to Freemotion Mavericks, Quilting Jetgirl’s Thankful Thursday, Let’s Bee Social and Finish It Up Friday. Also with Sew Bittersweet Designs for the June ALYOF Link up.


First a little story….

I have a quick story to tell.  On Saturday I had to go to our hospital lab for a routine blood draw.  I had to fast so I was there first thing in the morning (I’m not big on fasting). I got in and out of the lab with relative speed and was just leaving the parking lot when something caught my eye.  There was a mama quail leading her six chicks across a parking space.  If you haven’t ever seen quail chicks, they are very tiny.  Here is a photo that I found here to show you how tiny the chicks are. This is the size of the covey that I saw.

quail

When the mama got to the curb, she jumped up to the sidewalk to lead them to a bush (for safety I would imagine.)  The chicks just stayed put on the road.  She looked back at them as though calling them to her.  None of them moved.  They couldn’t yet fly and couldn’t jump the curb as she did.  Here is the amazing part. (I wish I had taken pictures but I didn’t want to get out of the car and get close, they were already having enough difficulty without my scaring them).  The mama jumped back down and went back to her chicks.  She then led them to a nearby speedbump which they all walked up to the top of.  From there they were up high enough and could jump the curb and follow her to safety under the bushes.  It was amazing and so sweet to watch.  I love witnessing little parts of nature like this.

And on to the subject at hand…. This quilting obsession has come over me in a slightly overwhelming fashion. My evenings are now spent reading quilting blogs (there are so many incredibly talented quilters out there that have wonderful blogs), cruising around Pinterest pinning myriad quilts, tutorials, quilt blocks, inspirational art quilts, quilt backs and borders, free motion patterns and tips. The wealth of quilting information to be found through Pinterest is never-ending. (Follow me here.) If I am not on my iPad reading about quilting, I am at the sewing machine working on something. I didn’t use to be this way. I used to have balance in my life! This quilty obsession sneaks up on a person, takes over slowly and before you know it, you’re hooked. Here’s how I remember it:
About three years ago I was wandering around our small downtown area in the Sierra Foothills town of Grass Valley. My daughter and I were window shopping and I walked by a little fabric store (sadly it is no longer open – it was a great shop.) In front of the store there was a small display of about 20 bolts of fabric that were on sale. A set of fabrics in various shades of turquoise and browns caught my eye. We kept walking but when I got home I kept thinking of that fabric. (It all comes down to the fabrics, right?) It was on sale, couldn’t do too much harm to go back and purchase some, could it? (I had no idea!) I got it into my head to make a quilt for my queen size bed. I had made a few quilts way back when (another story for another post) and thought maybe it would be fun to try making one again. I drew a basic design with six inch squares, a border, and some binding. With limited knowledge (no pattern, no knowledge of all the blogs and tutorials that could have helped me) I began. I bought the fabric, estimating what I needed as best I could. No surprise that I had too much of some and not enough of other prints.
I started to cut my squares. No rotary cutter, no mat, no ruler. Yikes. I had a t-square, scissors and a pencil. I sat on the floor at the coffee table and hacked away at that fabric. Surprisingly, the squares were consistent for the most part. I sewed the top together; that was the easy part. I had no idea what to do next. I made my very first trip to our LQS and was immediately befriended by the owner. She said to “stitch in the ditch”. She explained how to make a quilt sandwich and how to roll the sides up so I could quilt it on my home sewing machine and off I went. Quilting it was arduous and frustrating. Stuffing that queen sized quilt through the small throat on my Janome was not easy. But I finished it. I was so proud of it.

P1050777

Once I finished that quilt I kept thinking about how fun it was and that I wanted to do more, to learn something more than “stitching in the ditch”. I saw a post on the website of our LQS advertising a beginner’s free motion quilting class. I signed up. Looking at the supply list, I realized that I was somewhat out of my comfort zone. Listed as necessary were a darning foot and a walking foot for the sewing machine. I had no idea what these were; I only knew I didn’t own either one. After googling both of them I was able to order the items. I showed up for class and had so much fun. My machine was less than cooperative as were my hands. It was awkwardly reminiscent of being in 3rd grade and trying to learn to write in cursive. One of the hand-outs that I received in this class included a list of internet quilting resources. (Now that I consider it, this list was really the beginning of the craze.)
As I started checking out each of the sites that were listed, one thing led to another. This whole new quilting language became a part of my daily reading. Fat quarters? Charm squares? Block of the month? Half square triangles, paper piecing, and flying geese? Low volume, high volume and blenders? Quilt alongs? Blog hops, shop hops, giveaways? Quilting styles, both traditional and modern; especially the clean lines of the modern quilts!! It was madness and I loved all of it. Looking at the gorgeous quilts posted on Flickr was (and still is) inspirational. I have absolutely become obsessed with the process, the fabrics, the design and the resulting quilt. It is a blast.
It is my goal to use this blog to journal my progress as a quilter, share information I have found useful, and to make some friends in the quilting world. Hope you’ll enjoy my blog and will come back to visit!