It is all about Christmas prep this week. I feel like an elf in Santa’s workshop except rather than making toys, I have been creating items for my shop. This is the biggest shopping time of the year and I try to take full advantage of it with regard to my Etsy shop.
A friend asked me to make a set of burp cloths to gift to a friend at her work. It gave me a push to add some new baby items to my shop. Sewing with these soft flannels is a blast. Putting on a little music and creating little cuties for babies makes for a lovely afternoon. If I had to pick a favorite, it might just be the duck and dots print. I love yellow and gray together.
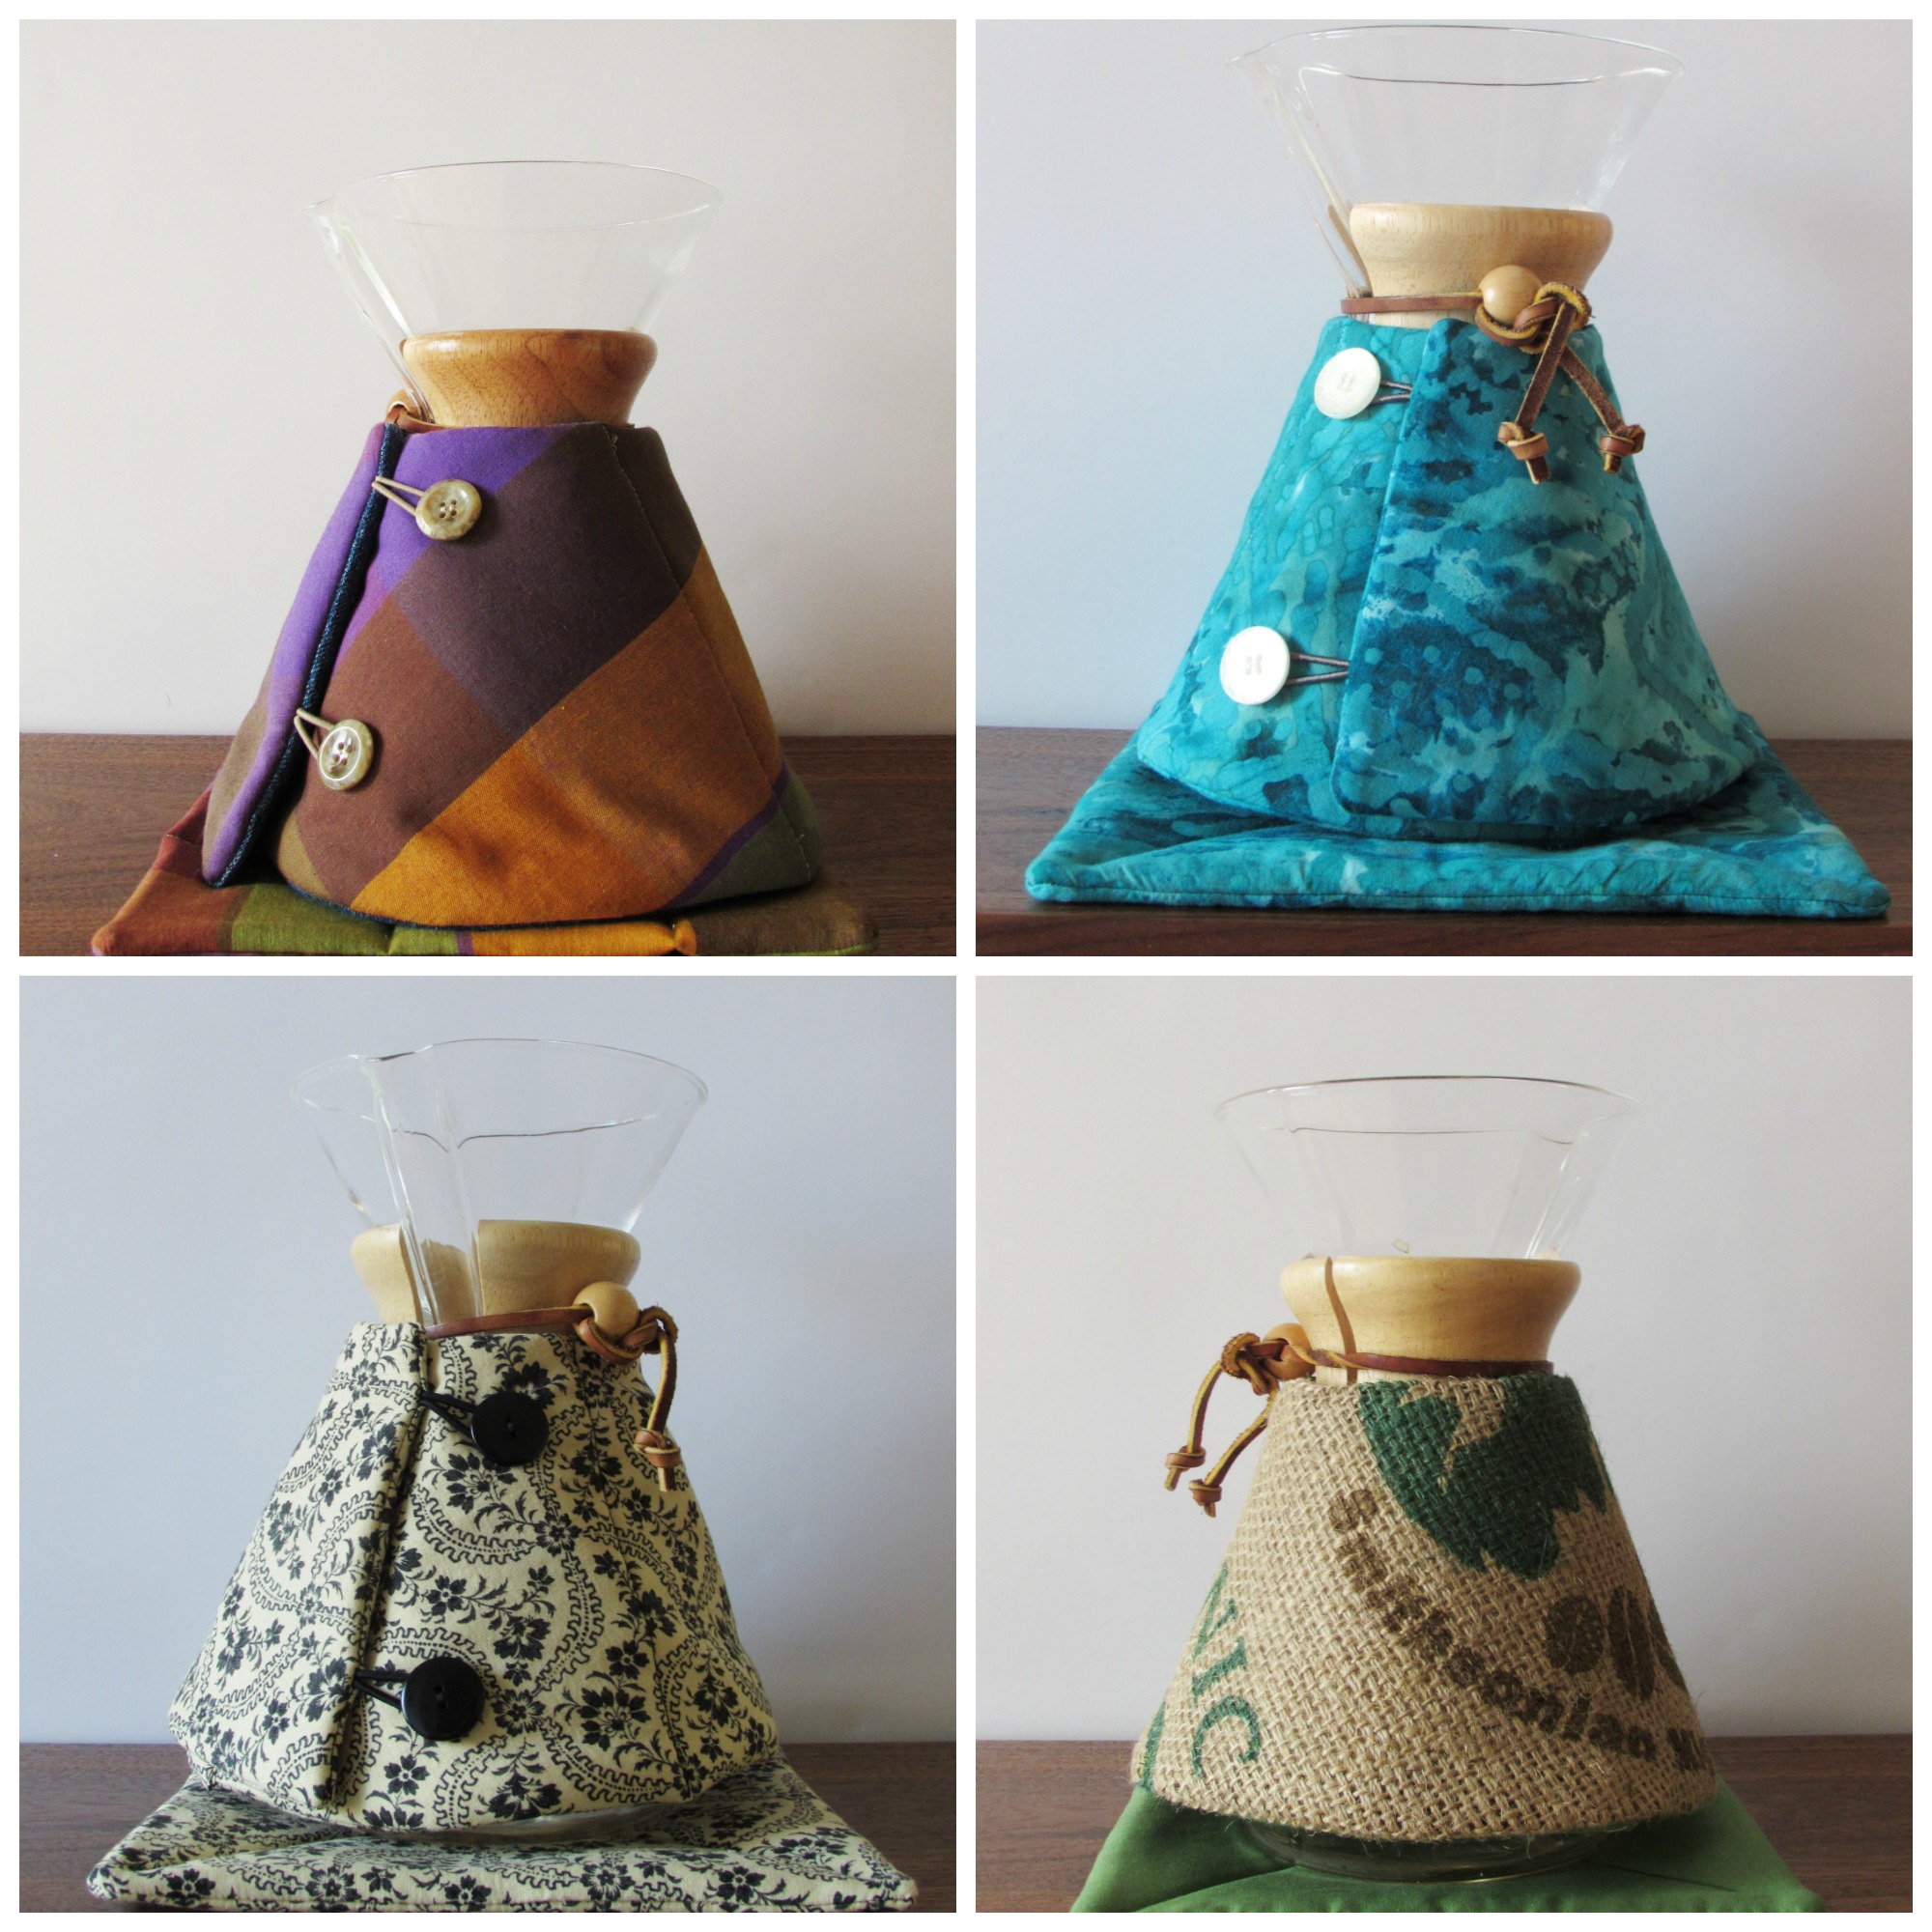
Here are a few of the Chemex Cozies I have recently listed. It is a challenge to be sure that I have lots of colors and choices available. The upcycled burlap pieces sell very quickly but they are a beast to create. There is always so much mess from cutting and stitching burlap; it just flies around the sewing room and fills my sewing machine with debris. As for colors, it feels like deep colors and basic patterns sell best. Also batiks – those are usually snapped up quite often.
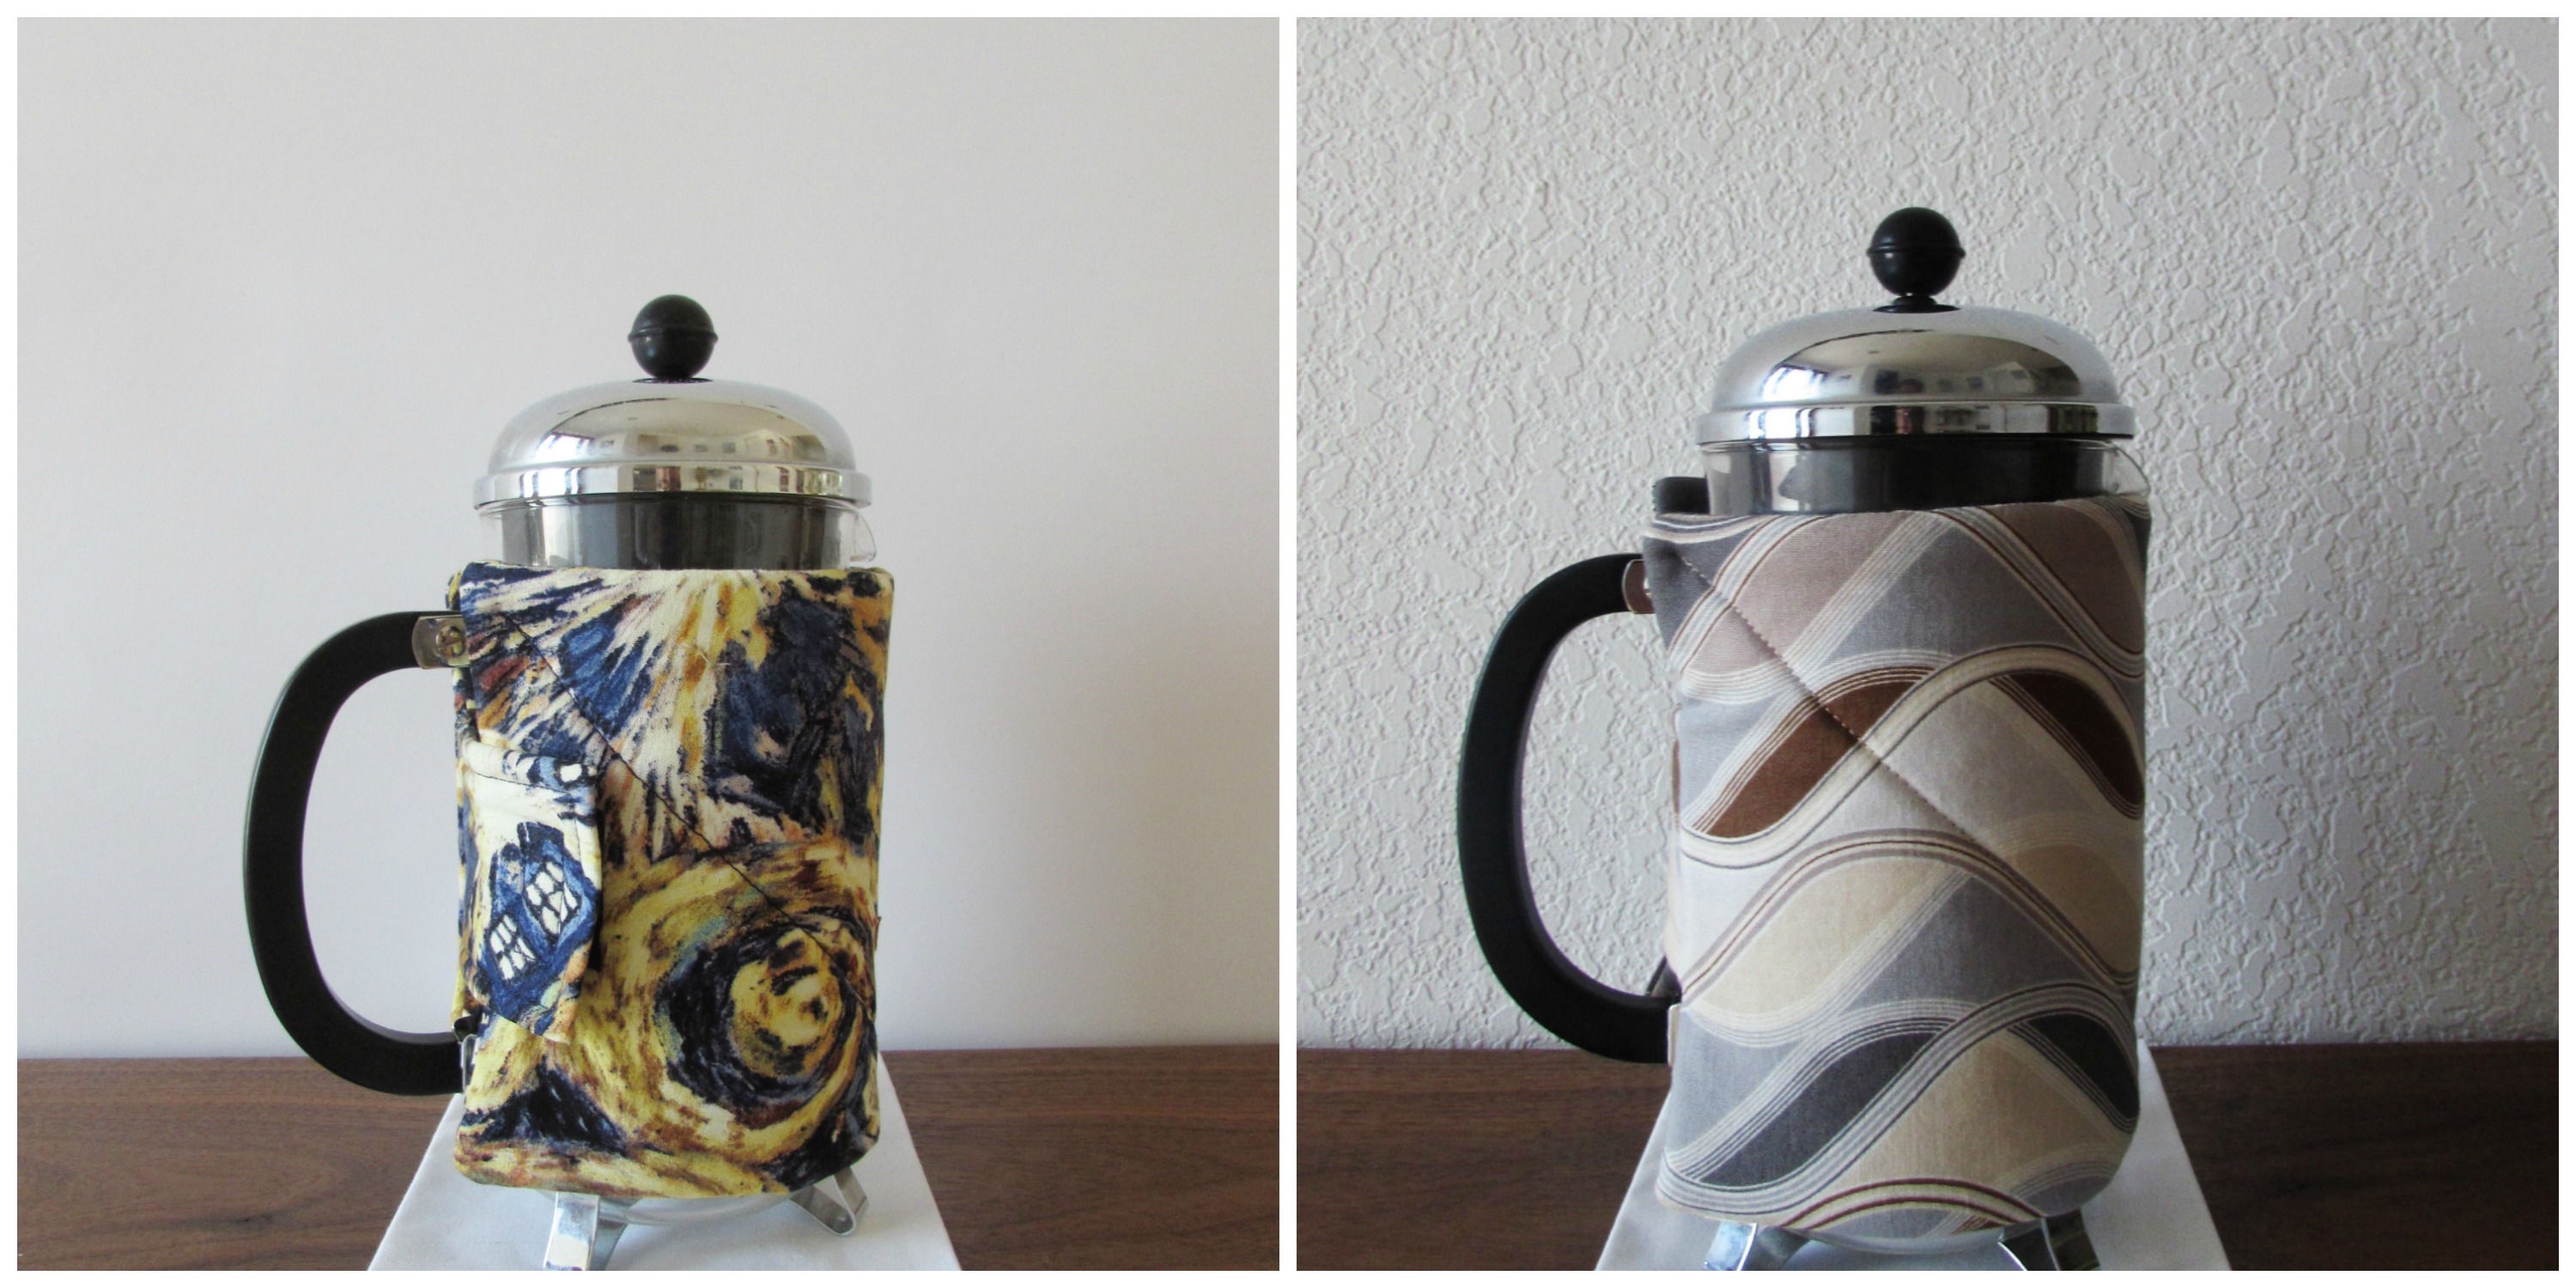
French press cozies are another strong seller in my shop. (Remember I wrote up a tutorial if you would like to make some for Christmas gifts – they are a fast project for the coffee lover in your family.)
I am also working on a baby quilt — I cut into a bundle of Maureen Cracknell’s Fleet & Flourish line. It is going to be adorable. I think I may soon share this as a finish. We will see. Our house has been passing this winter germ fest to anyone who enters. Julia had it and then I caught it and it turned into pneumonia. Now Ray has it. Ick. Don’t come near Grass Valley or we might infect you! Hoping you all are staying healthy this season and enjoying whatever time you can find in your sewing room!
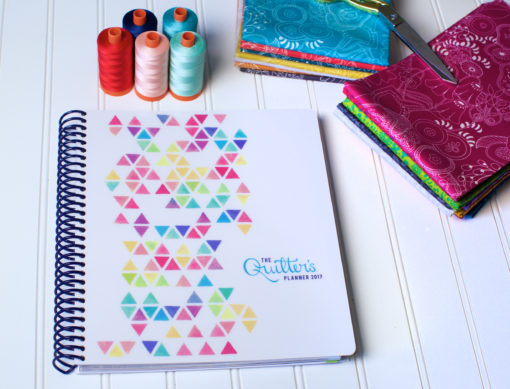
Remember, I am hosting a giveaway where one lucky person will win a copy of the 2017 Quilter’s Planner. Be sure you have entered as this is one very cool prize! The giveaway will remain open through Wednesday Evening (tomorrow). Good luck! I will post the winner on Thursday morning.
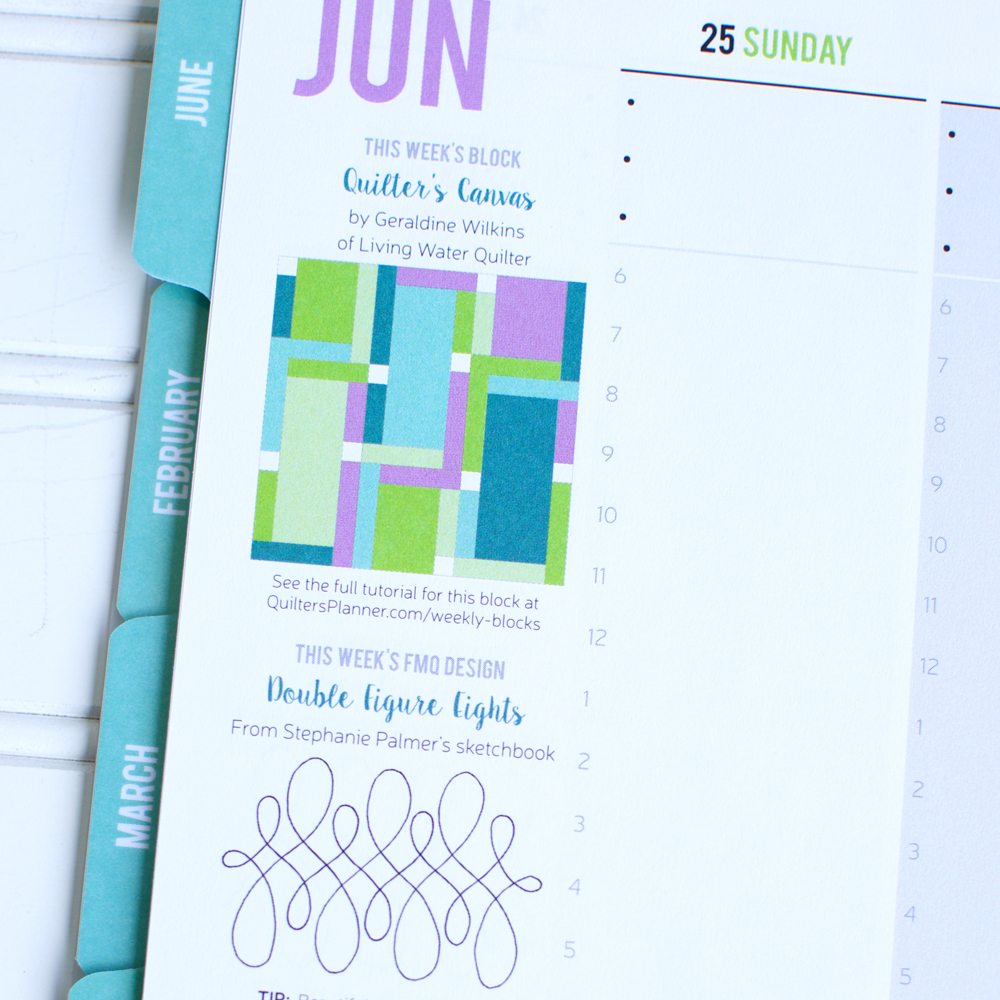
I doubt there are many of us in the quilting community who have not heard about the Quilter’s Planner. This calendar was developed by Stephanie Palmer of Late Night Quilter in 2015. She worked furiously to put out a great product for the calendar year of 2016. I purchased one from her for 2016 and used it extensively throughout the year. (I wrote about that one here.)
The planner for 2016 was such a great tool. But Stephanie wanted to know how she could improve it. She did a survey, talked with the many quilters that were actively using the planner, and then implemented the suggestions she heard in this new version. The resulting planner is greatly improved. Here are some of my favorite features of the planner:
A monthly look at the calendar and then individual weekly pages.
A FMQ motif is included with each weekly page and Stephanie has written a tip or two for practicing with the motif.
Each of the blocks from the 2016 New Blogger Block Hop are included with links to a full tutorial for the block. (Mine is featured the week of April 2nd!)
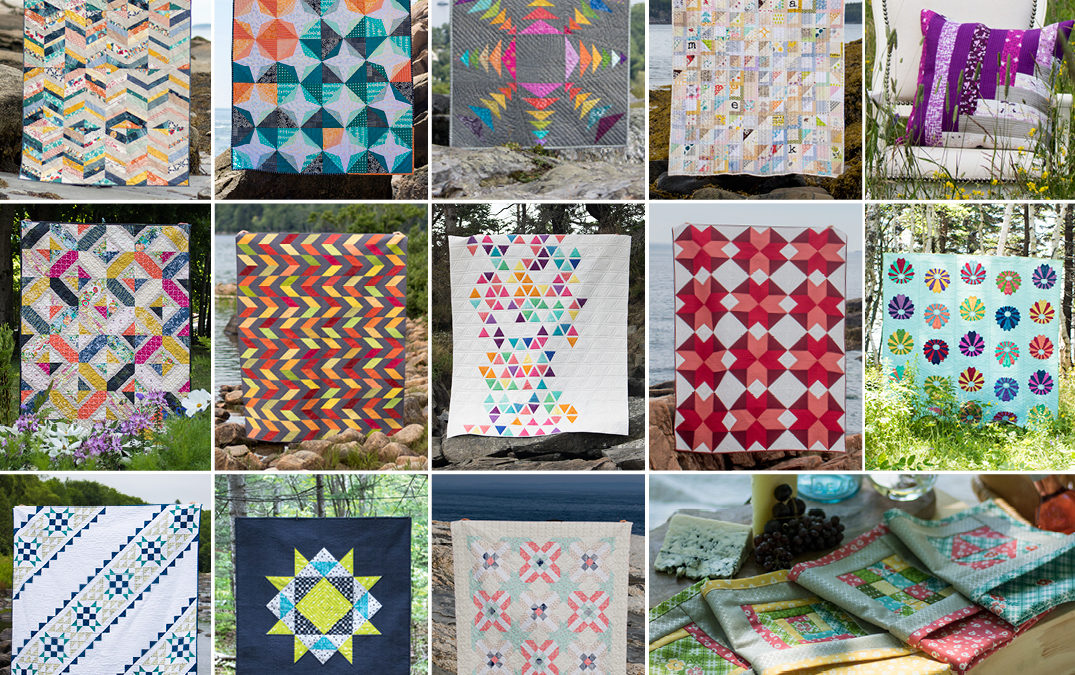
Quilt Patterns! So many gorgeous patterns – some complex and some simple projects, designed by the likes of Yvonne Fuchs, Amy Smart, Chery Brickey and Rita Hodge, among others.
Each weekly page contains several separate areas for the list makers in the group. I use that section religiously. There is a personal section that I use for projects and goals for my home, a work section where I outline blog posts I want to publish that week, a quilting to-do list where I jot down what I hope to accomplish in the sewing room that week. You know I love a list and the satisfaction gained by checking things off the list!
The reference section is awesome and the graph paper for sketching out a project is wonderful. I used nearly all of the sketch pages last year and I am sure I will this year.
I could go on and on about the planner but I will move on to the giveaway now. Stephanie generously offered a copy for one lucky reader. As we move toward the new year, it is a great time to think about what we have accomplished in 2016 and what we hope to accomplish in 2017. This tool will help you do just that.
To enter the drawing for your own copy of the Quilter’s Planner, leave me a comment with a hint on staying organized (whether it be for life in general or in the sewing room). Due to the cost of postage for this gorgeous book, this giveaway is open to US readers only. My apologies. I will leave the giveaway open through Wednesday, and will email the winner on Thursday.
Giveaway is now closed!
Good luck everyone!! Remember,if you are not the lucky winner, there is still time to order one from the website. I think this would be an amazing gift to give or receive over the holidays! Check it out here!
Thanksgiving was a wonderful day for our family. I hope it was the same for yours. There is much to be grateful for, not the least of which is our on-line quilting community. Now there will be the transition into the Christmas holiday season. I am hoping I can convince Ray to put up our outdoor lights this weekend. I think, of all the holiday decorations, the outdoor lights are my favorite. I like to get them up as early as possible so we can enjoy them for as long as possible.
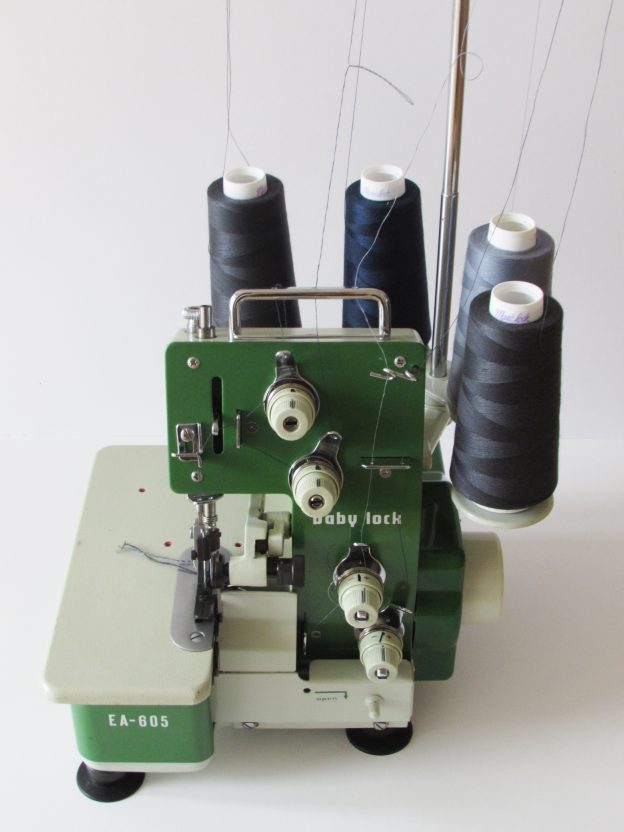
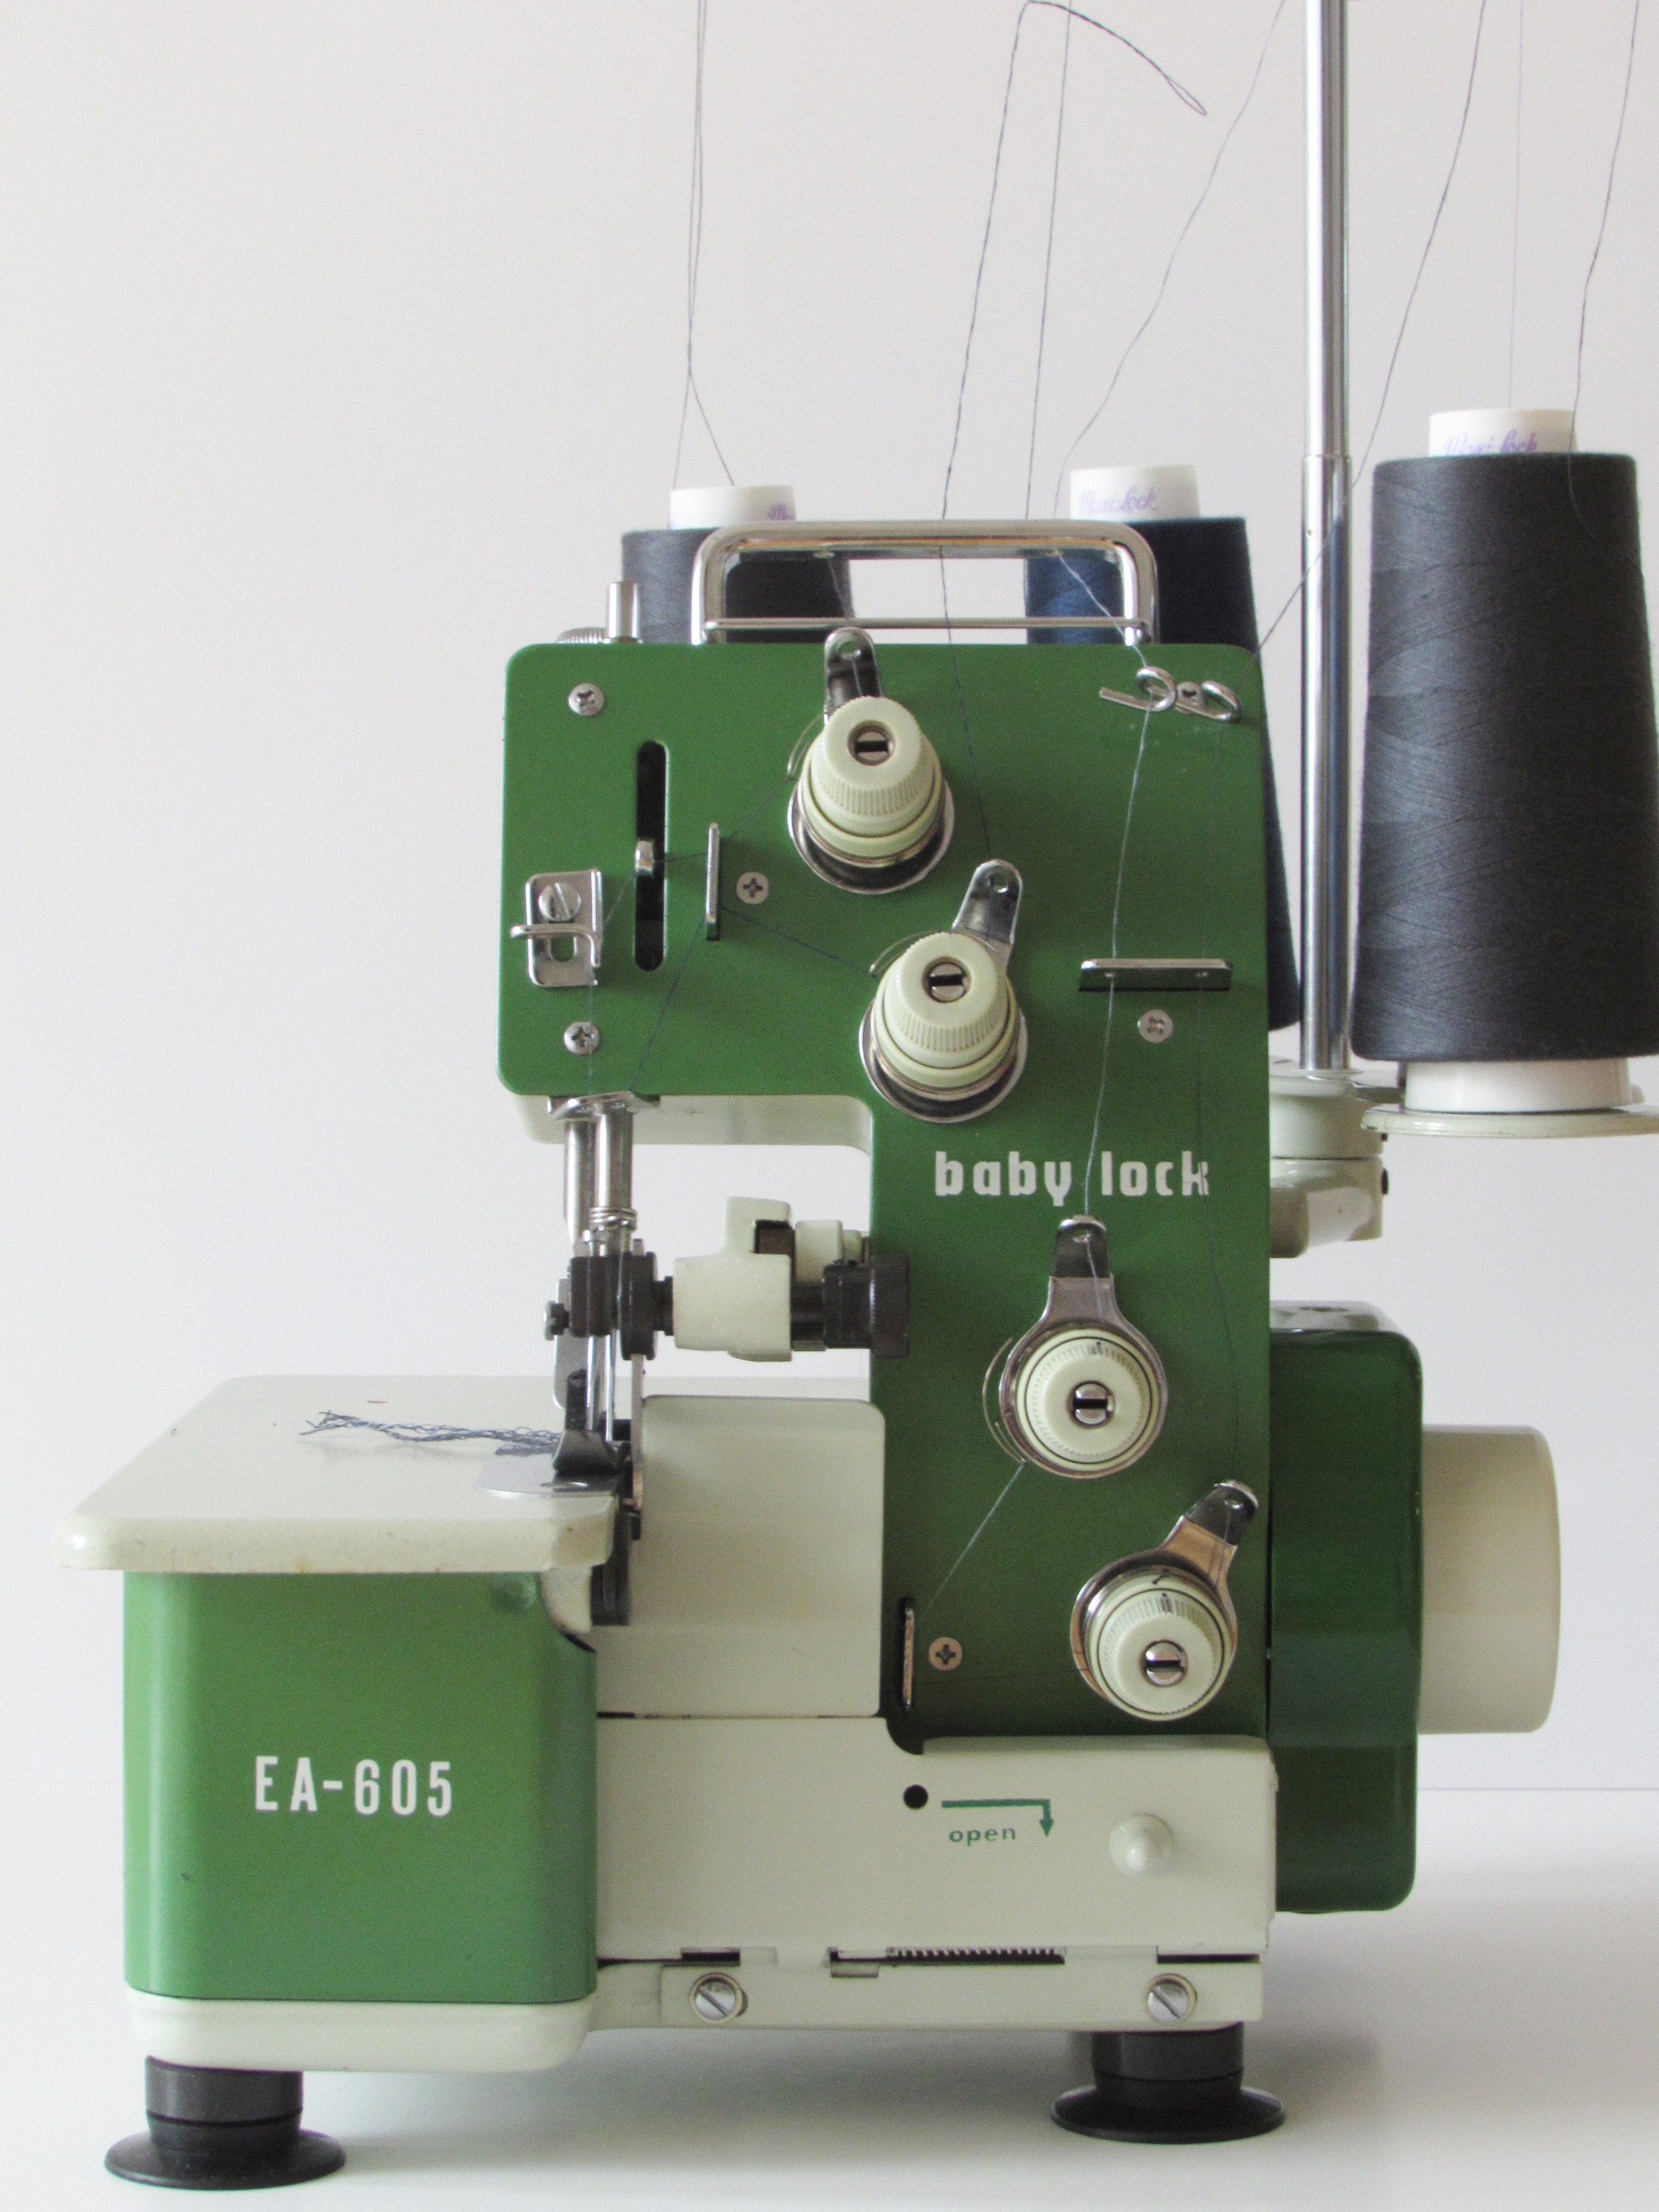
I have a new toy to share with you! The back story is that my father-in-law shares my love of thrift stores. We both enjoy the hunt as one never really knows what might be found on any given day. In October, my father-in-law called me and said he was at a thrift store and was looking at a sewing machine. He said he didn’t really know what it did but it looked interesting and was in great shape. I asked a few questions and figured out it was a vintage Baby Lock EA-605 serger. I think the model was made in the late 1970’s. It is a heavy little guy, being made of metal rather than plastic. When he said the machine was priced at $25, I asked him to grab it for me. He brought it over a few weeks ago when we were celebrating my birthday. (This was a mighty fine quilty birthday!)
Actually, the serger won’t be used for quilting. In case you aren’t familiar, sergers are used to create a finished seam. There is a blade and four lines of thread. There are threads entering from above and below, though there is no bobbin. As the seam is created, the blade trims the excess fabric close to the finished edge. It is oh-so-cool! Having never used one, I signed up for a basic serger class at a little fabric shop in town. That helped me figure out some of the basics but there is still much to be learned. This particular machine is designed for woven fabrics, not knit fabrics. However my serger class instructor thinks I might be able to get a decent result with knits, so I will have to give it a try.
Because the machine needed a few adjustments I took it to our local sewing repair genius. Deby was able to clean and adjust everything and it runs so smoothly now.
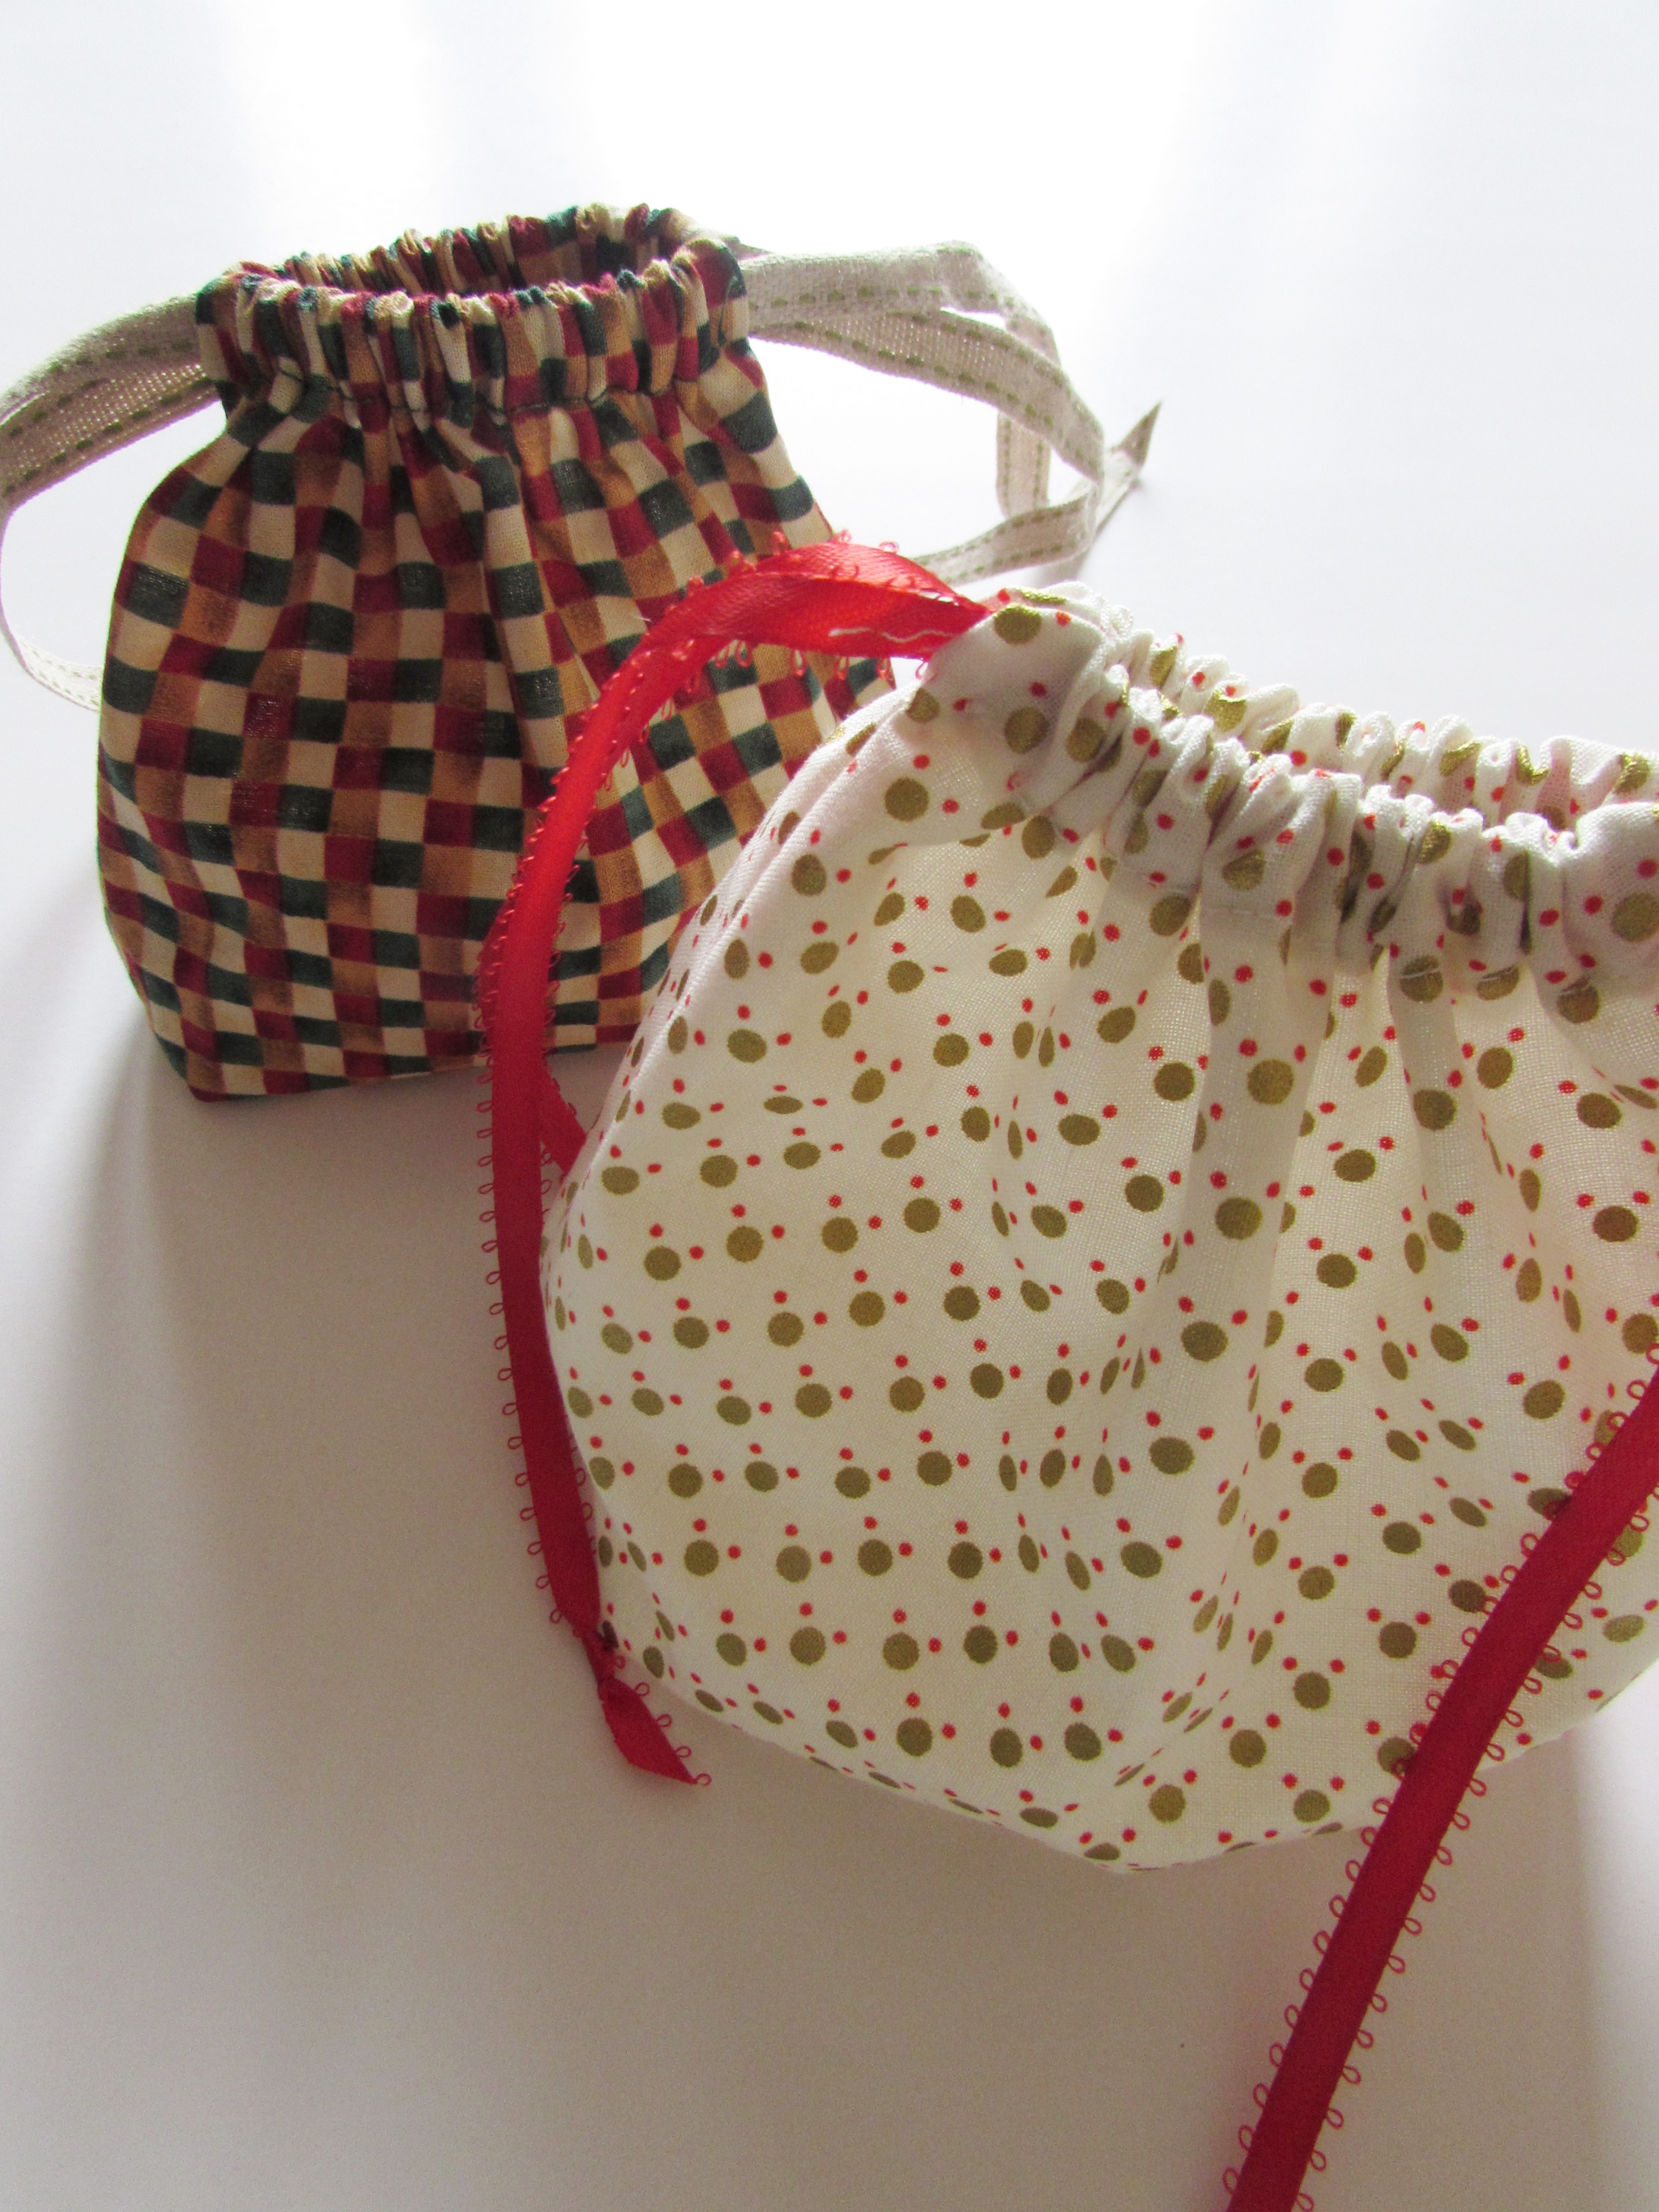
I wanted to practice on something simple so I made some Christmas themed drawstring bags. I have made a few each year for the past two years and have quite a collection now. I love not having as much paper to throw out come Christmas morning. I had a stack of vintage Christmas fabrics to use as well as loads of ribbon for the drawstrings.
I think the tiny ones are just adorable.
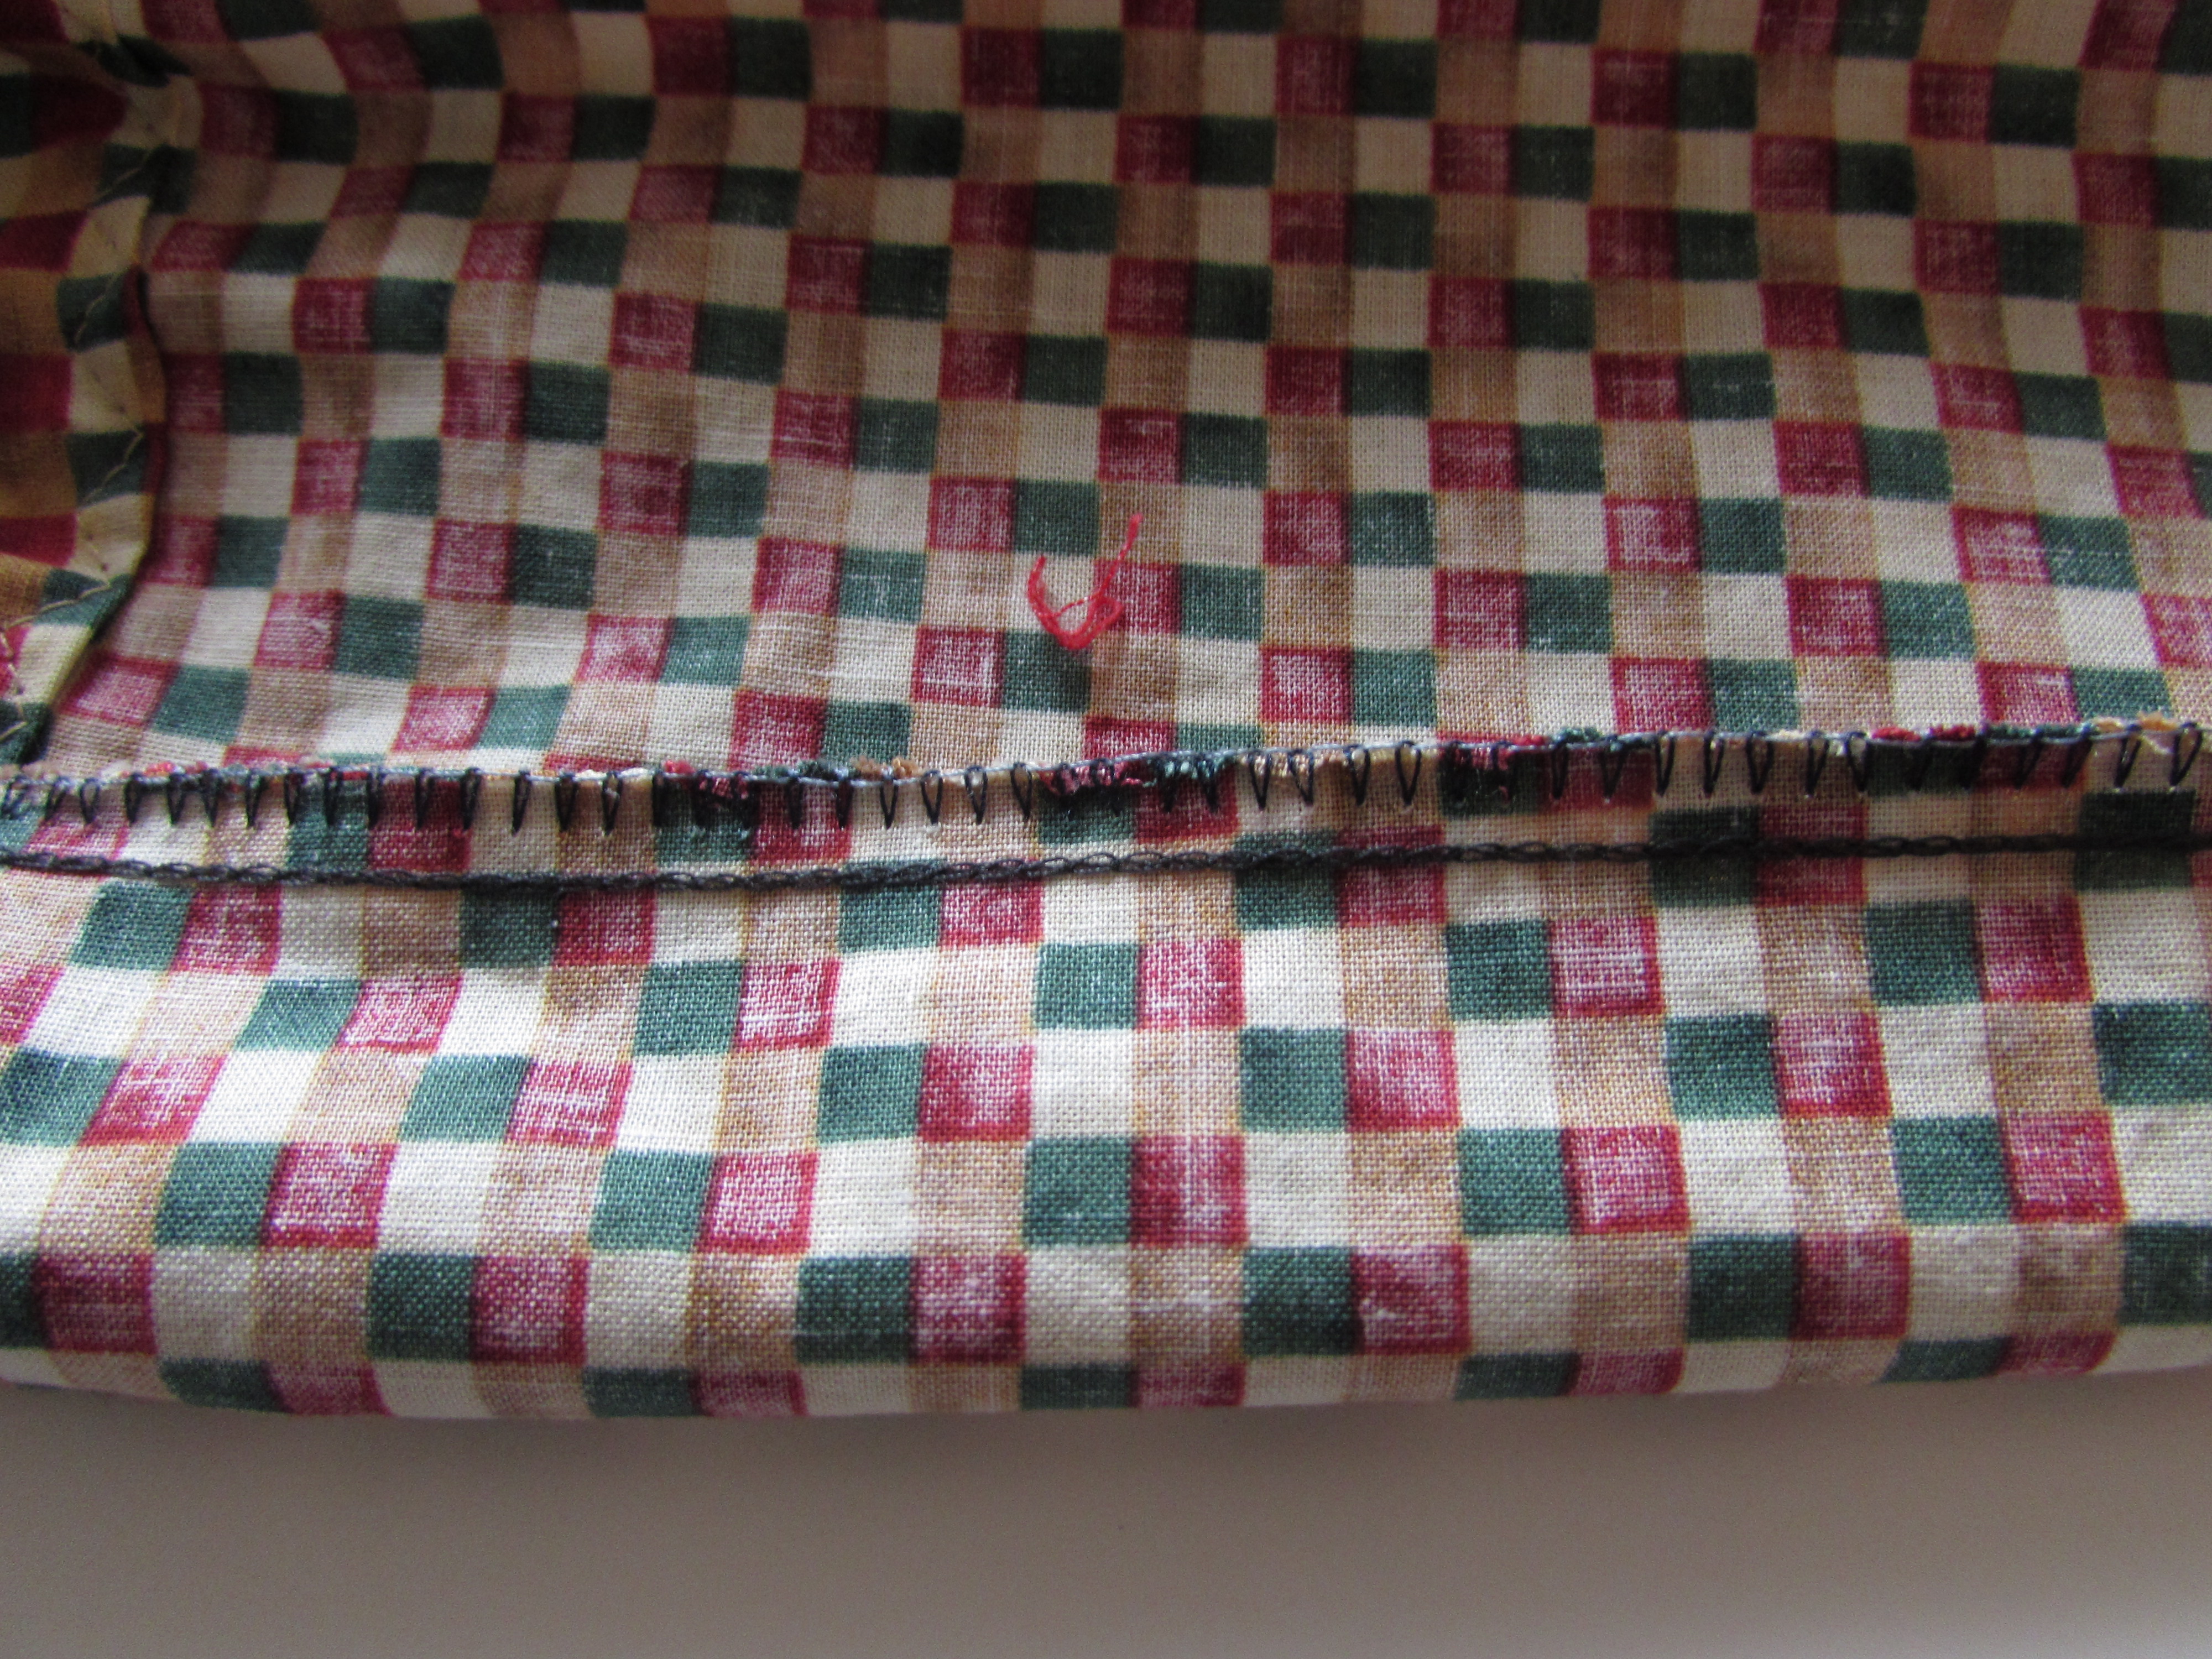
I turned this one inside out to show you the finished seam from the serger. I didn’t use the serger for the casing that the ribbons threads through. I switched over to the regular machine for that. Check out the clean finish on that seam. So great! I will practice a bit more and then try something simple like pajama pants.
If by chance you also have a serger, I would love to hear about any resources, blogs or uTube videos you might have found helpful for learning to use a serger. Leave details in the comments.
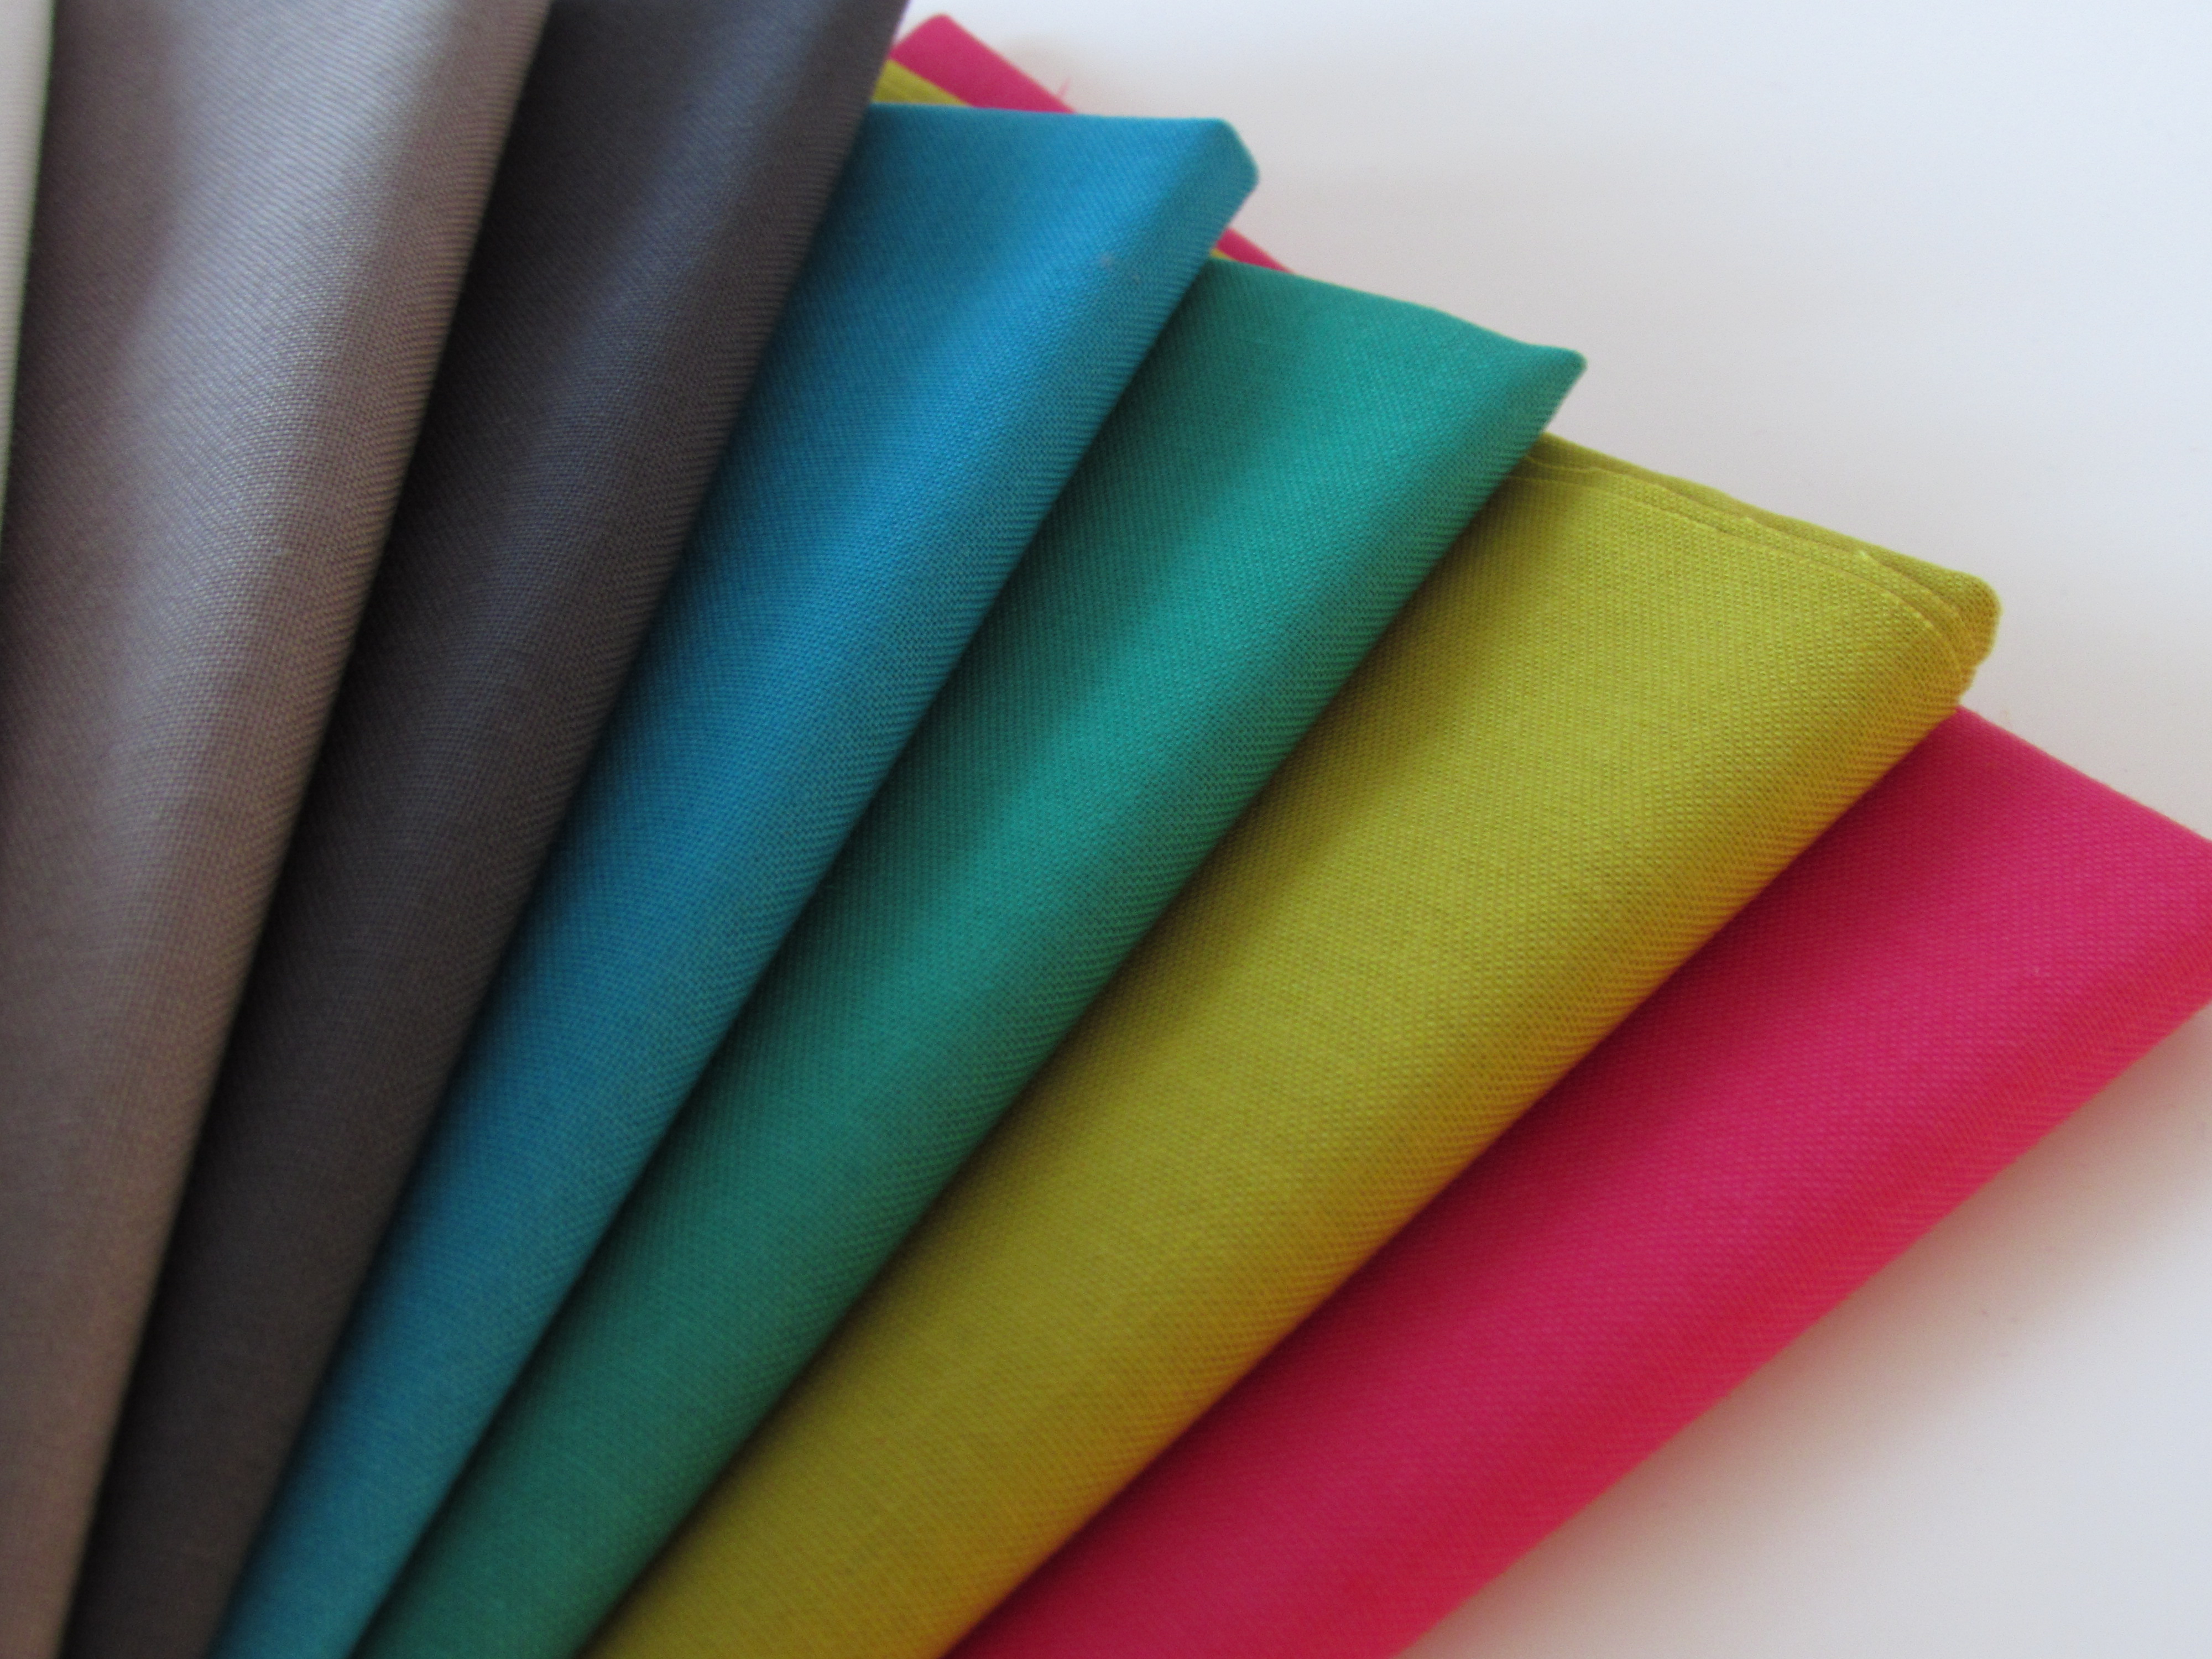
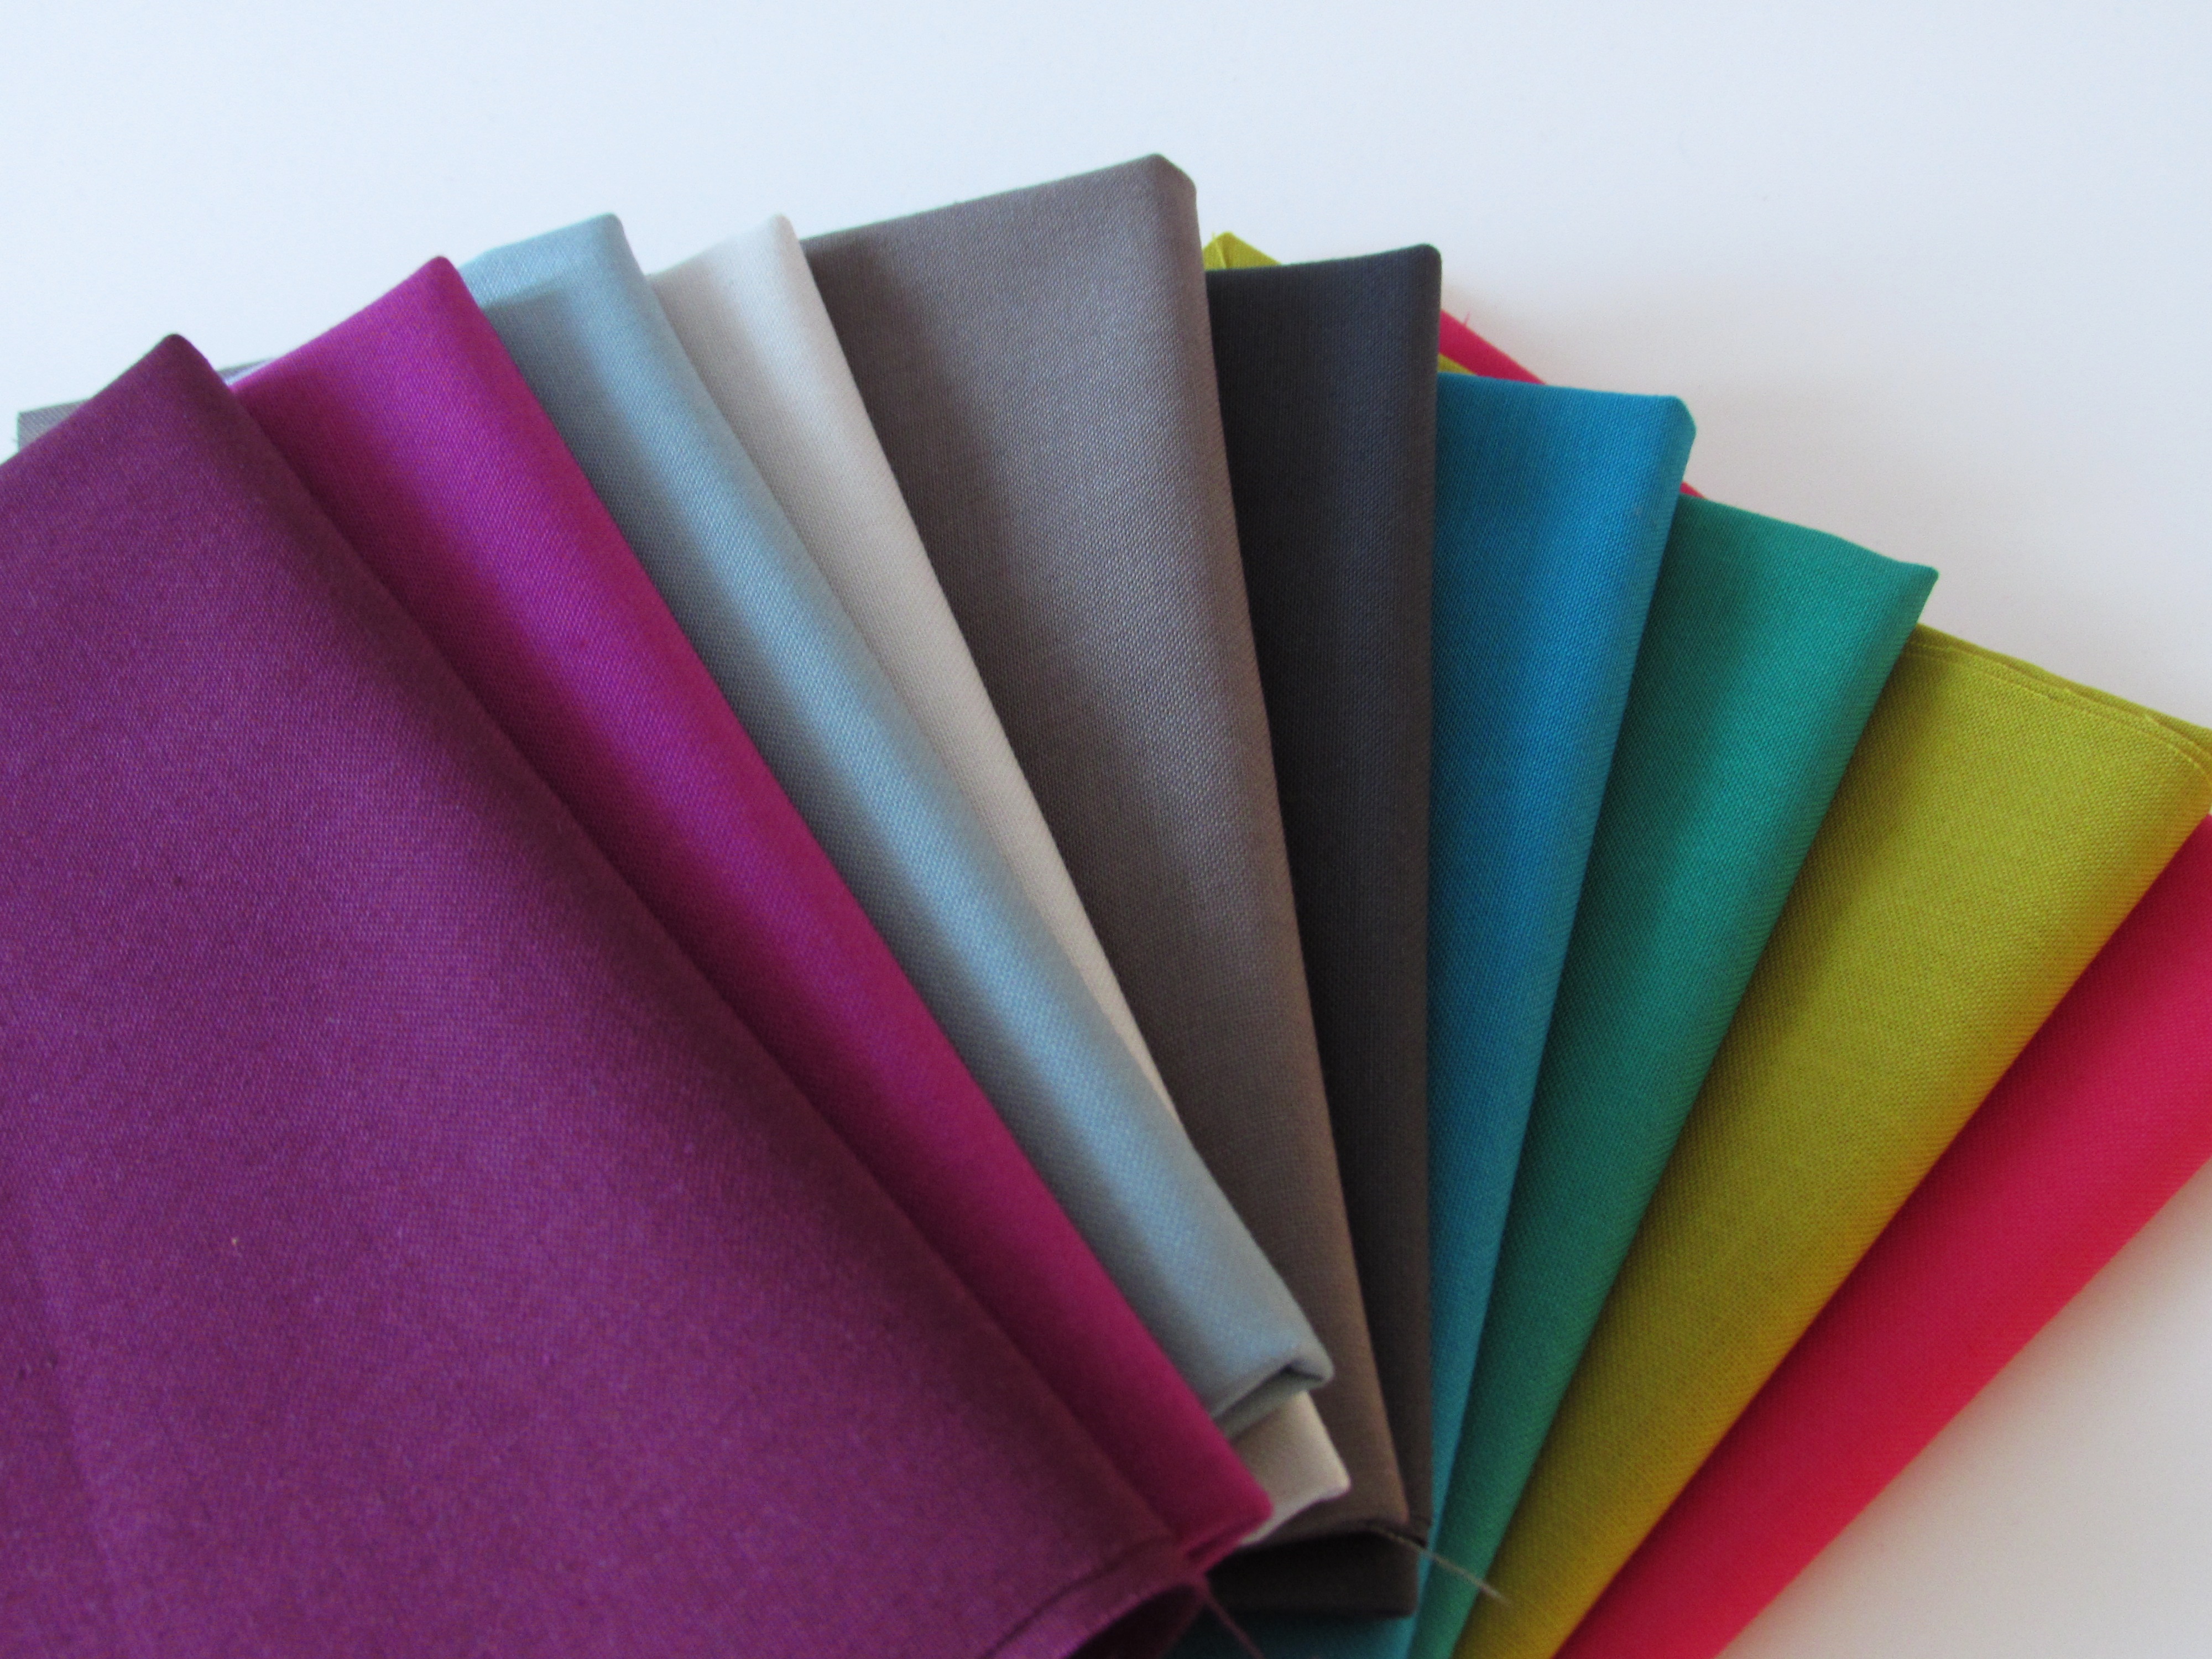
Finally – Craftsy has gone all out for Black Friday this year. Beginning on Thursday, 11/24/16 classes are $17.99 each. Fabric and notions are all on sale as well. I am quite curious about the Boundless line of solids. I took a look and the prices are amazing. Solids, in a rainbow of thirty different colors, are available in pre-cuts such as layer cakes and jelly rolls, as well as yardage.
This is an affiliate link, meaning if you make a purchase after clicking over from my blog, I will receive a stipend.
I am linking up with a few favorites this week, including the Elm Street Quilts ‘Bag It’ event. Find out all about them at the top of the page, under Link Ups.
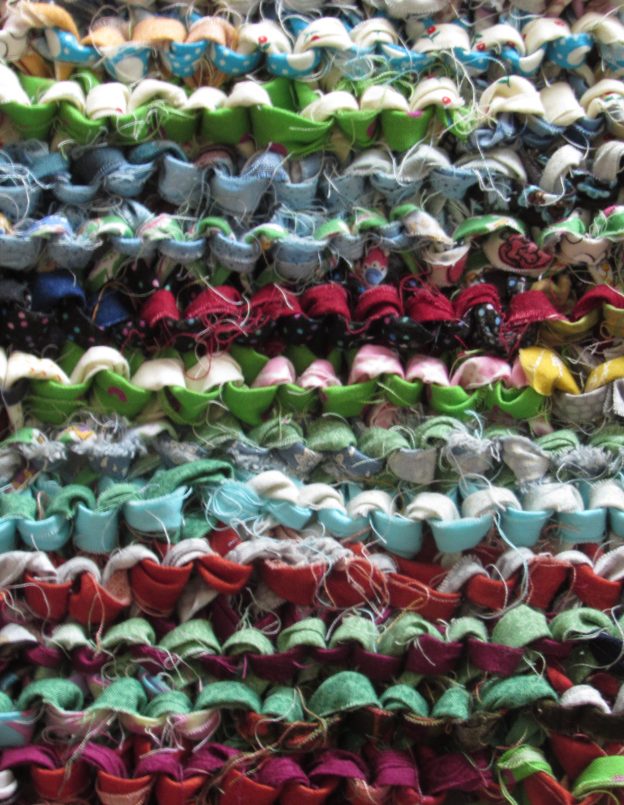
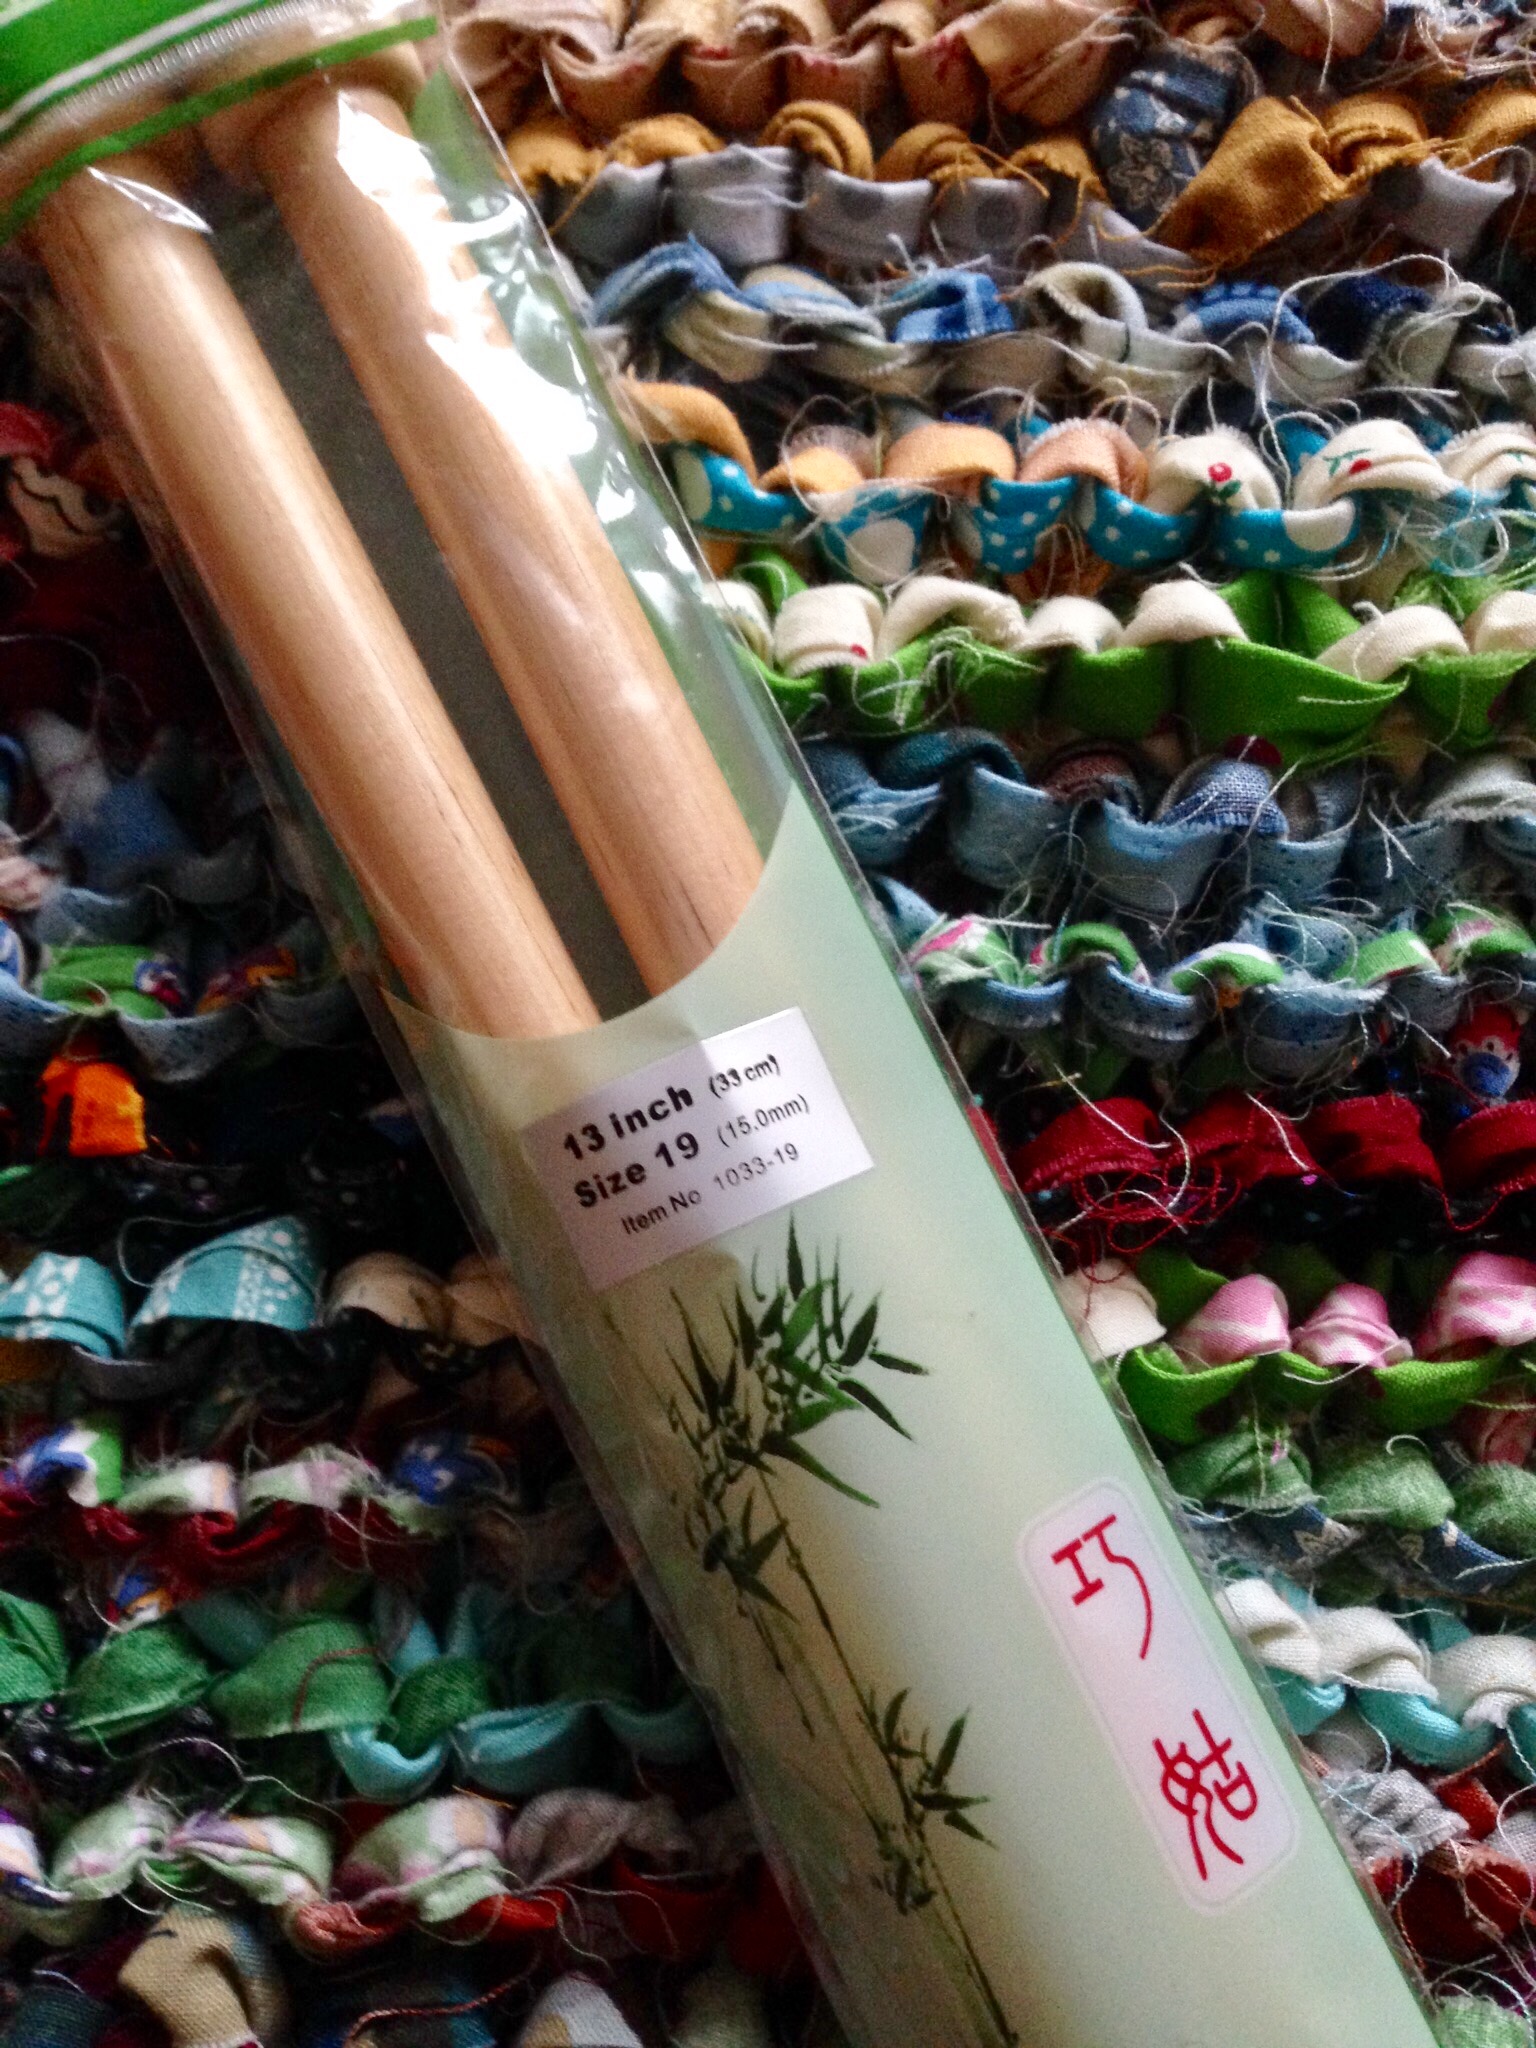
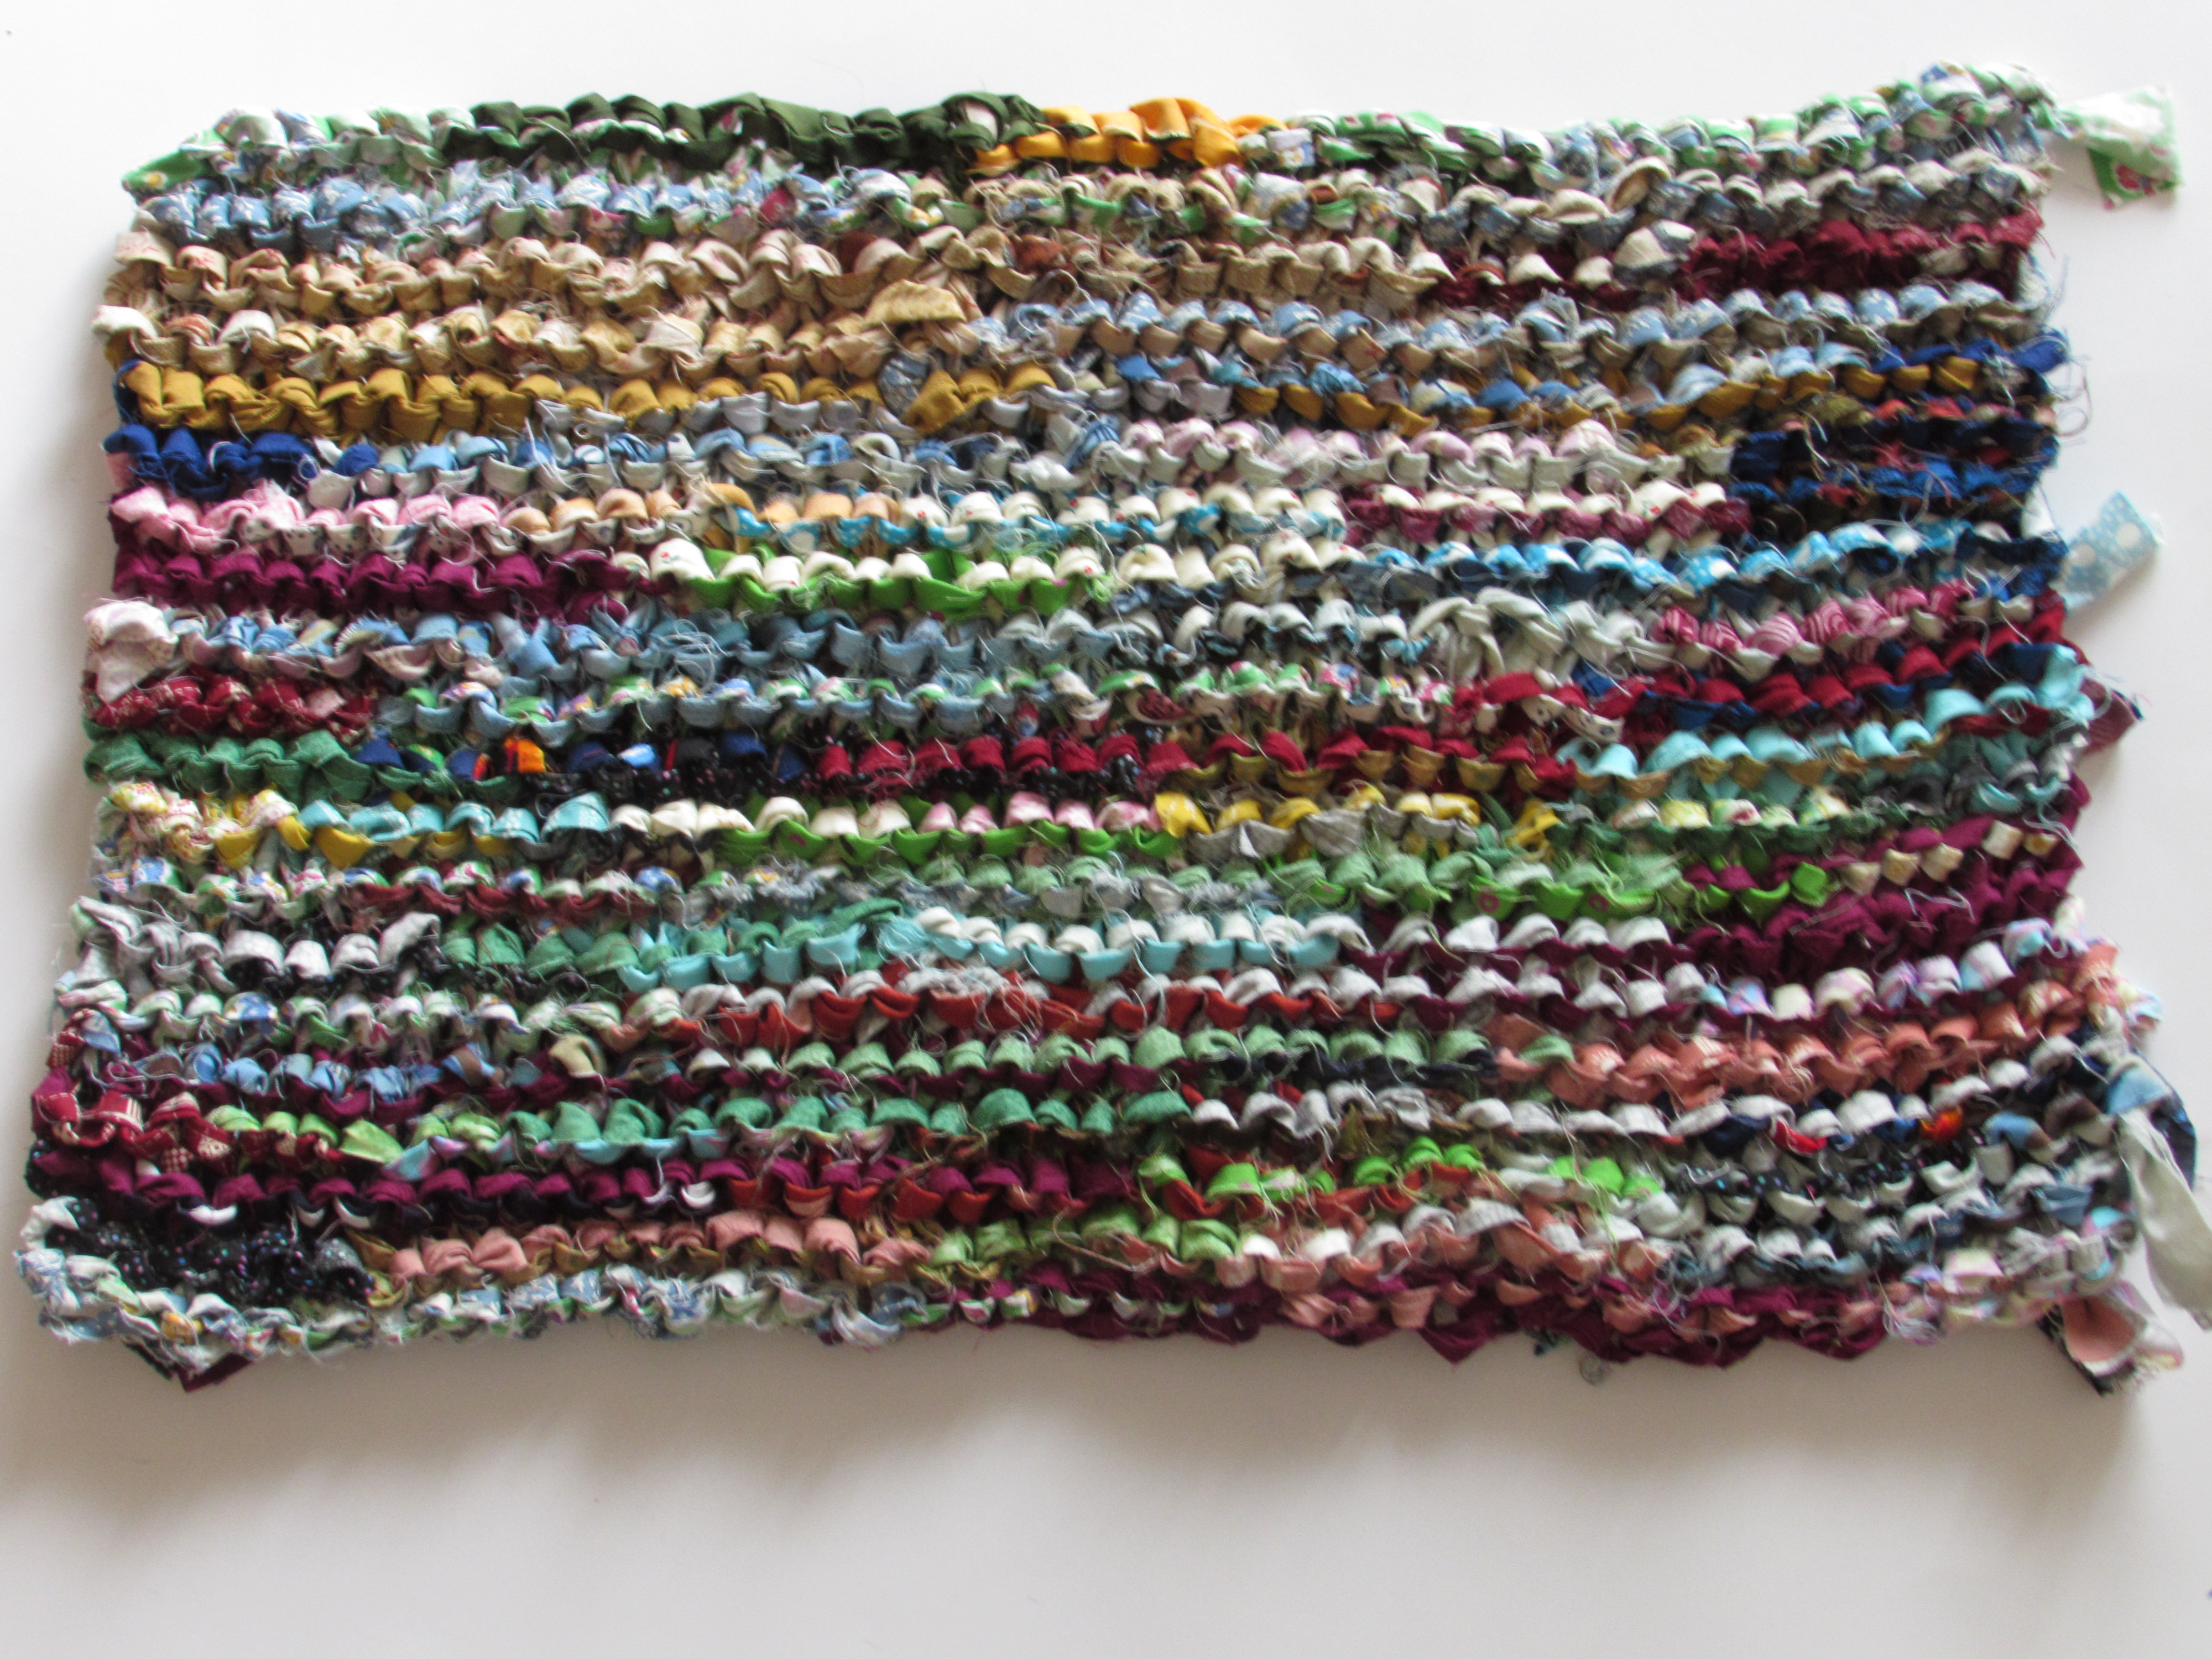
Last month I started knitting a rag rug from my bin of scrappy strips. What a fun project. Using a tutorial from Crazy Mom Quilts, I cast on about 35 stitches (I can’t remember for sure) and used size 19 needles that were 13 inches long.
This worked well though once the rug got going, I wished I had longer needles. I was really scrunching the project when I got to the end of a row. It was a bit awkward, partly due to using such fat knitting needles and maybe even more, the fact that I rarely knit anything. I really enjoyed crafting in a way other than sewing.
This is a tiny rug, finishing at 13″ x 22″. It will be used in the bathroom in our Downieville house. This bathroom is very tiny (maybe six feet by seven feet?) so this will look really cute in front of the sink.
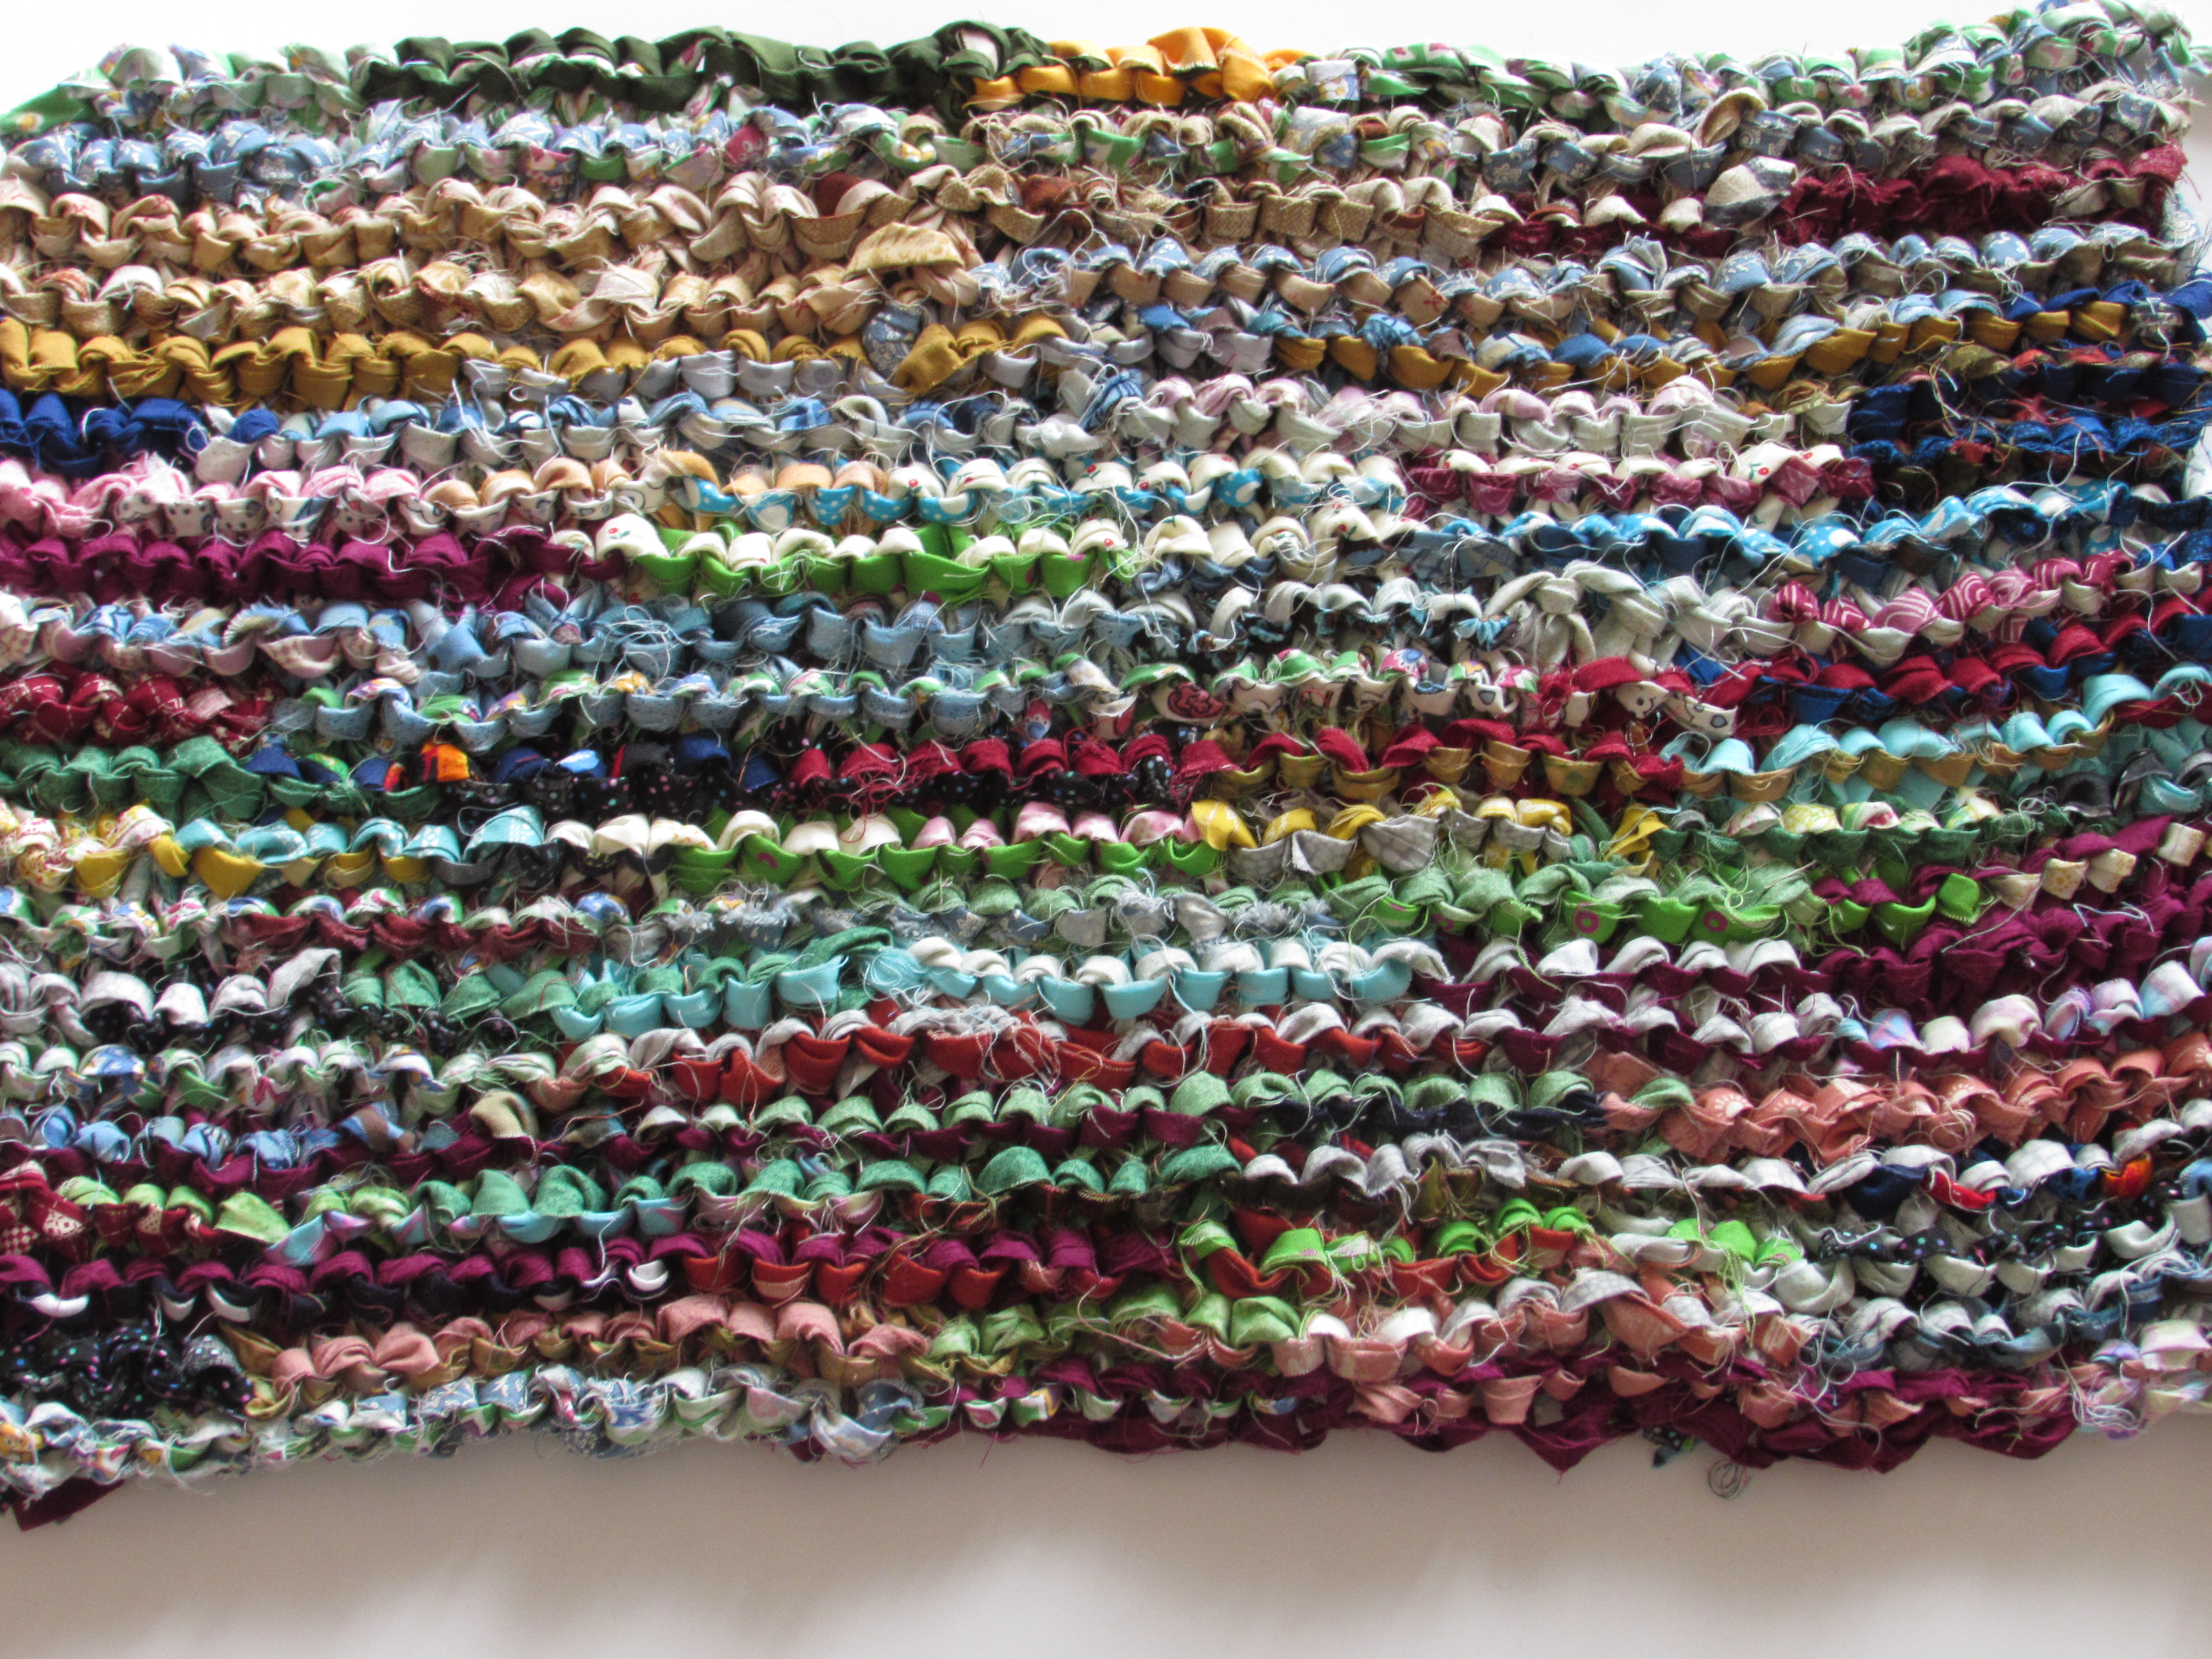
I pulled the knots (where I joined one strip to the next) to the back of the rug. I am not sure if I should trim the strands to be closer to the knot or if it even matters. The rug feels really nice, sort of spongy, when I stand on it. When I first started, I was using strips that were anywhere from WOF (width of fabric) to about 15 inches long. The shorter strands started to annoy me as it made for more knots to deal with. Eventually, I restricted myself to longer strips that were WOF. I actually used every long strip I had in the bin which is nice. It is amazing to look at the reduction of strips in the bin. So many strips went into this project, making it a great scrap buster. Lots of the strips I had saved were 2 1/2 inches wide and I cut them in half so I was knitting with 1 1/4″ wide strips. As I knitted, I would fold the strip in half, wrong sides together, so I would end up with the “good side” of the fabric showing, rather than the inside. I didn’t work too hard at this for the solids (since it didn’t really matter which side showed) but if it was a print I would try to keep the good side showing.
I stopped knitting when I ran out of strips. I thought about cutting some from yardage so I could continue but that seemed silly (creating scraps from yardage??) Honestly, I am kind of sad to be finished with this because it was a nice evening project. I will let the strips build up again, and you know they will, because then I can make another one. 🙂
I am not sure I will write another post this week, so I want to wish all of the readers in the US a wonderful Thanksgiving. And to the readers outside of the US, I wish you a week of peace and joy as well. Happy Thanksgiving.
Finally, remember that this week there is a wonderful event going on over at Mari’s site, The Academic Quilter. I hope you will check it out – Mari is doing a HUGE destash and donating all proceeds to one of three charities. I did some shopping this morning. She is a generous soul and I love the way she structured this to benefit both the buyer and the non-profit.
Finally – Craftsy has gone all out for Black Friday this year. Beginning on Thursday, 11/24/16 classes are $17.99 each. Fabric and notions are all on sale as well. I am quite curious about the Boundless line of solids. I took a look and the prices are amazing. Solids, in a rainbow of thirty different colors, are available in pre-cuts such as layer cakes and jelly rolls, as well as yardage.
This is an affiliate link, meaning if you make a purchase after clicking over from my blog, I will receive a stipend.
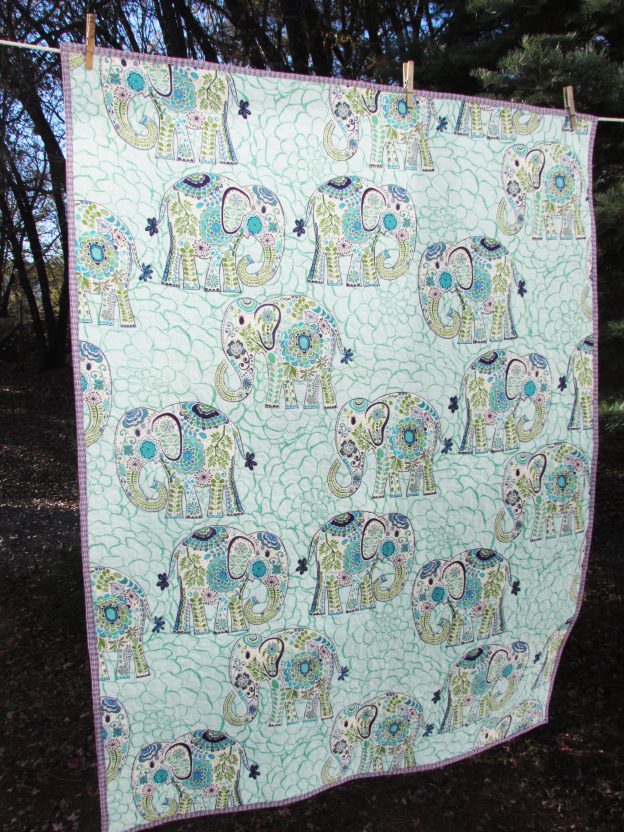
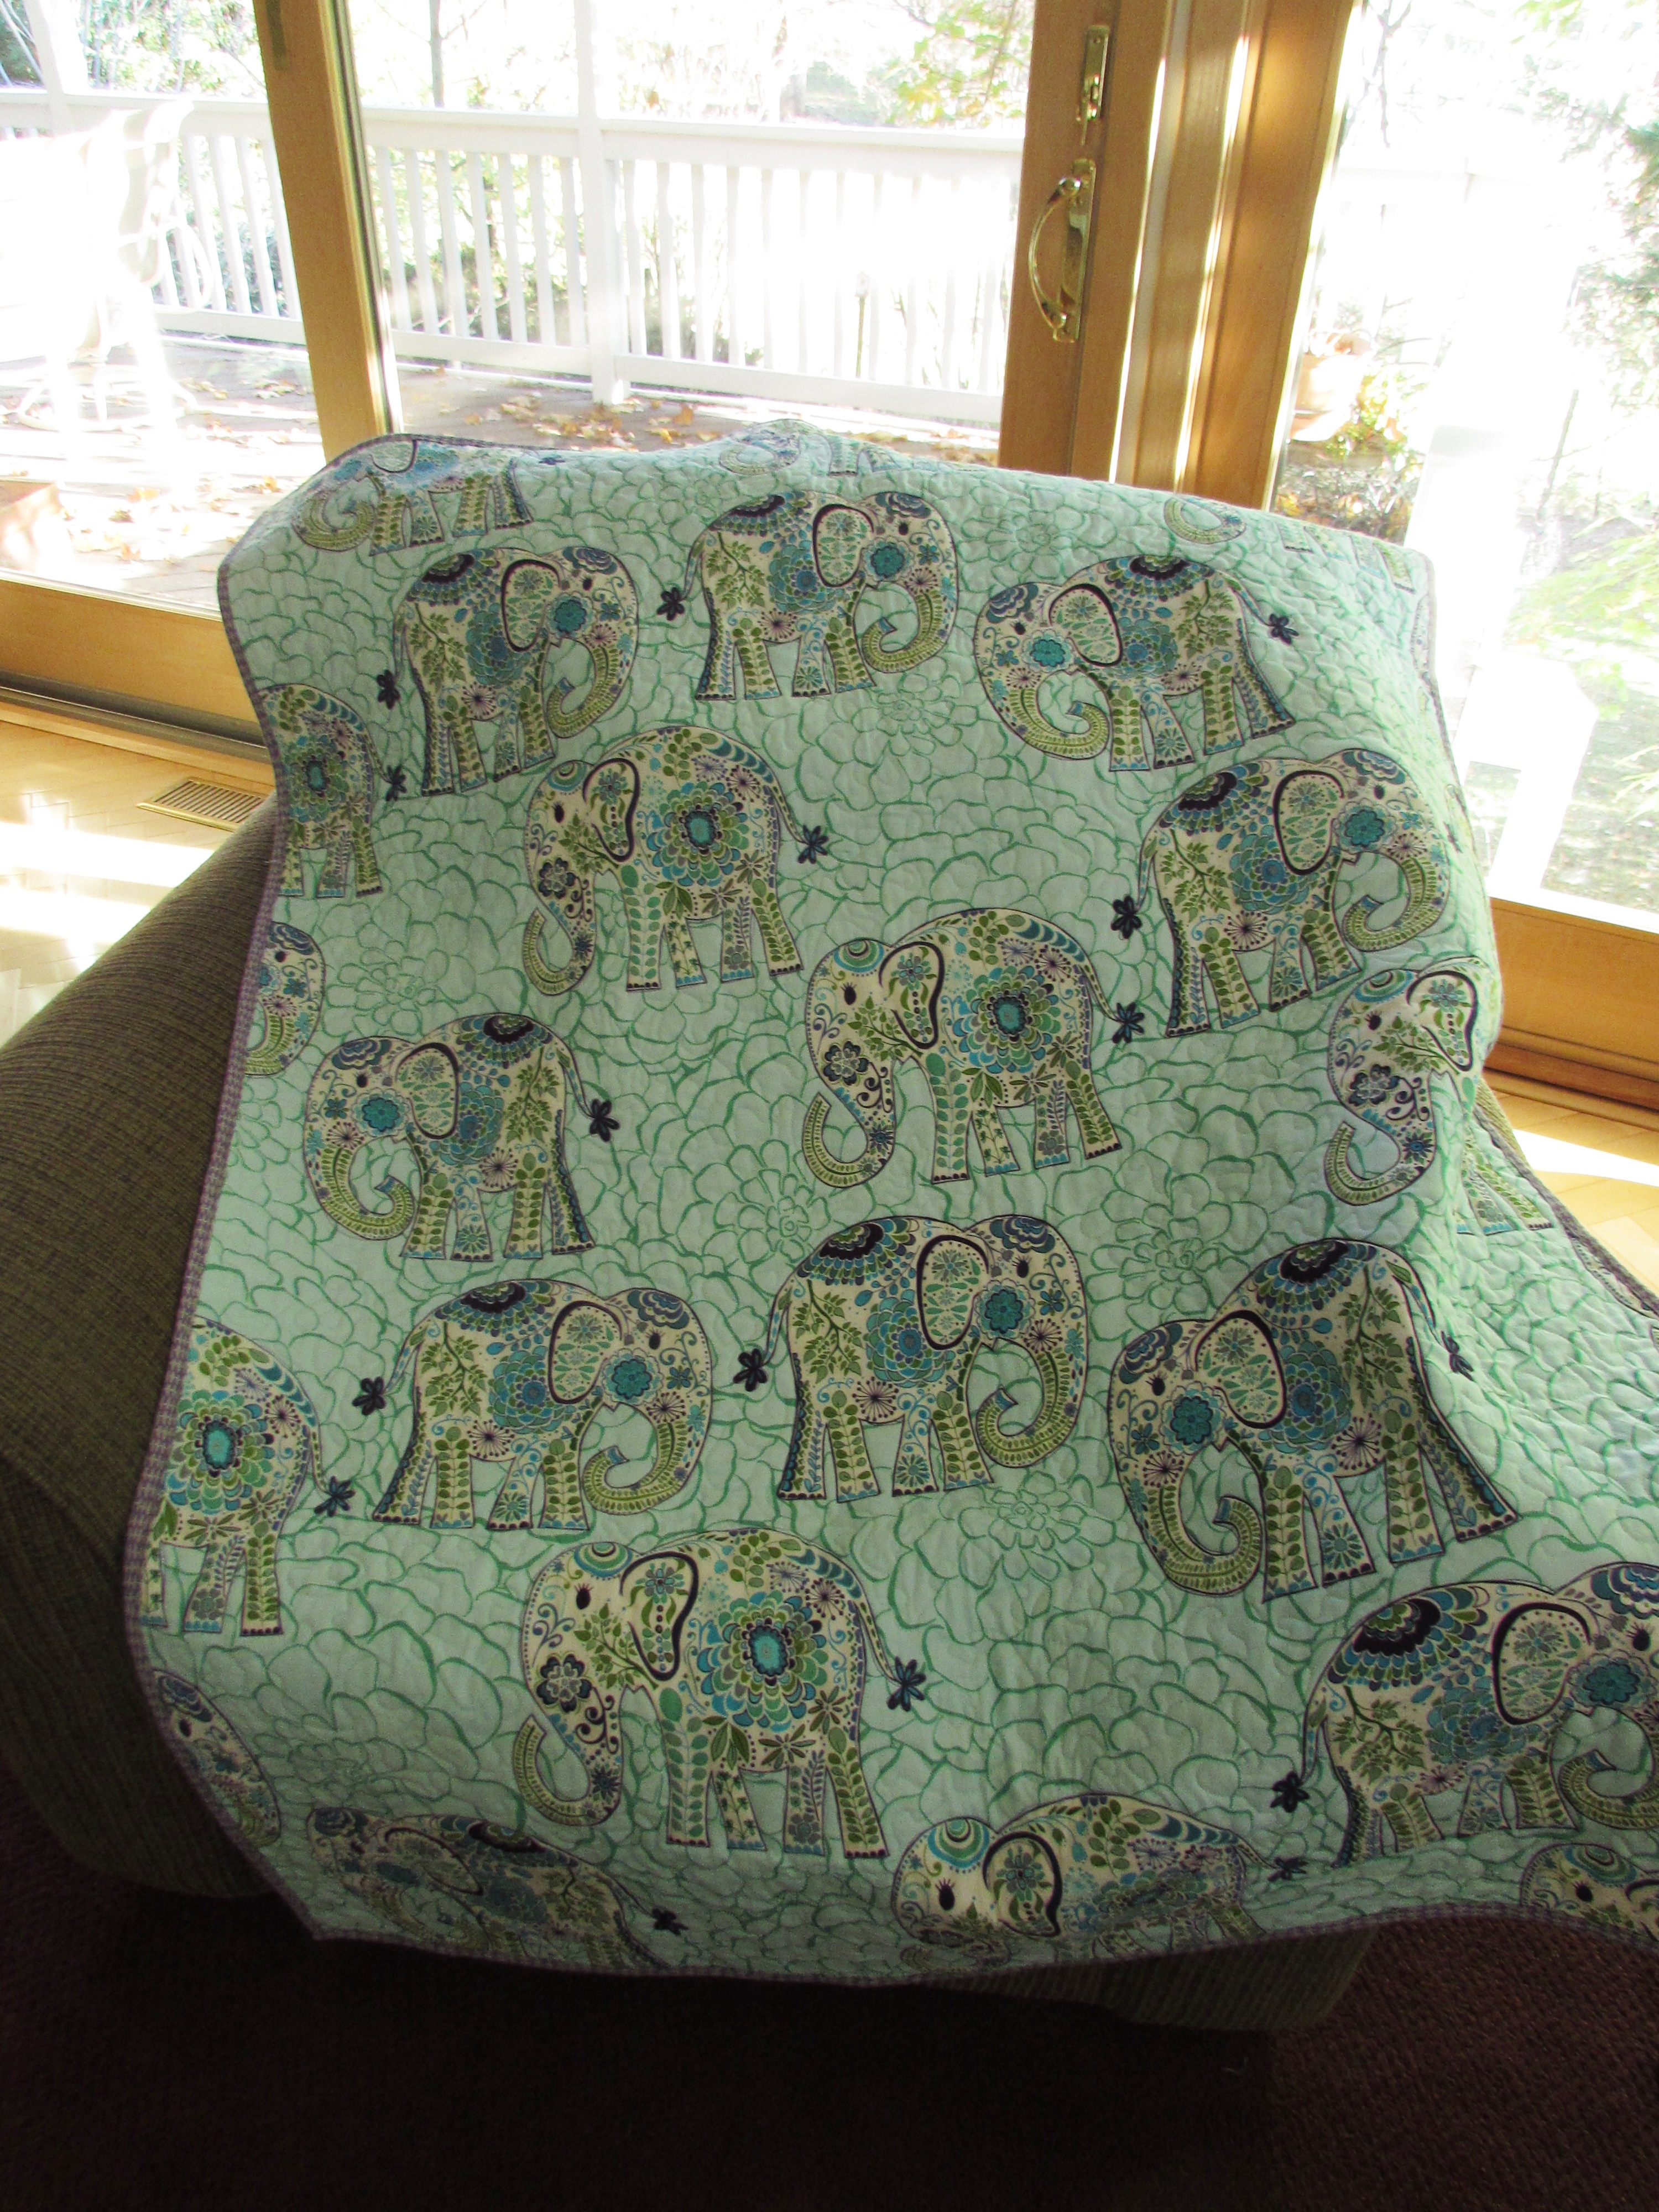
This week I finished up a baby quilt that I started about a month ago. It was a very simple and fun project but it took a bit to get it going. A while back, my niece called me and asked if I would make a quilt for her to gift to her best friend who is soon to have her first baby. We talked for a while about what she wanted. Greens, lavender and grey were the colors she was looking for and the nursery features elephants as a theme.
My niece then sent me some links to quilts she saw on Pinterest. Back and forth we texted, looking at all sorts of ideas. Finally she decided that she really wanted a quilt made from Valorie Wells’ Marrakech line. This was going to take some searching as this adorable fabric is out of print now. I searched extensively on-line without any luck. I continued the search by reaching out on Instagram and Facebook without any luck. Still determined, I kept looking. My next approach was to look at Etsy sellers that were selling items made with this fabric. Once I found a seller, I emailed the person asking if they had any of the fabric remaining in their collection. Mission accomplished! I found a seller that had the fabric and she sold me a 1.5 yard cut. Bingo! Thank goodness for the internet and for the generosity of that Etsy seller.
When the fabric arrived, I started to think about quilting it. I reached out to Yvonne of Quilting Jetgirl because she has done some amazing quilting and I like her style. She gave me several ideas to think about. It was such a tough decision. I kept thinking it was an opportunity to really practice some cool quilting. But take a look at the fabric. It is crazy busy – colorful, lots going on in the print, and those amazing elephants. The fabric is the star of this project. I realized the quilting isn’t even going to show. I finally decided to just keep it very simple.
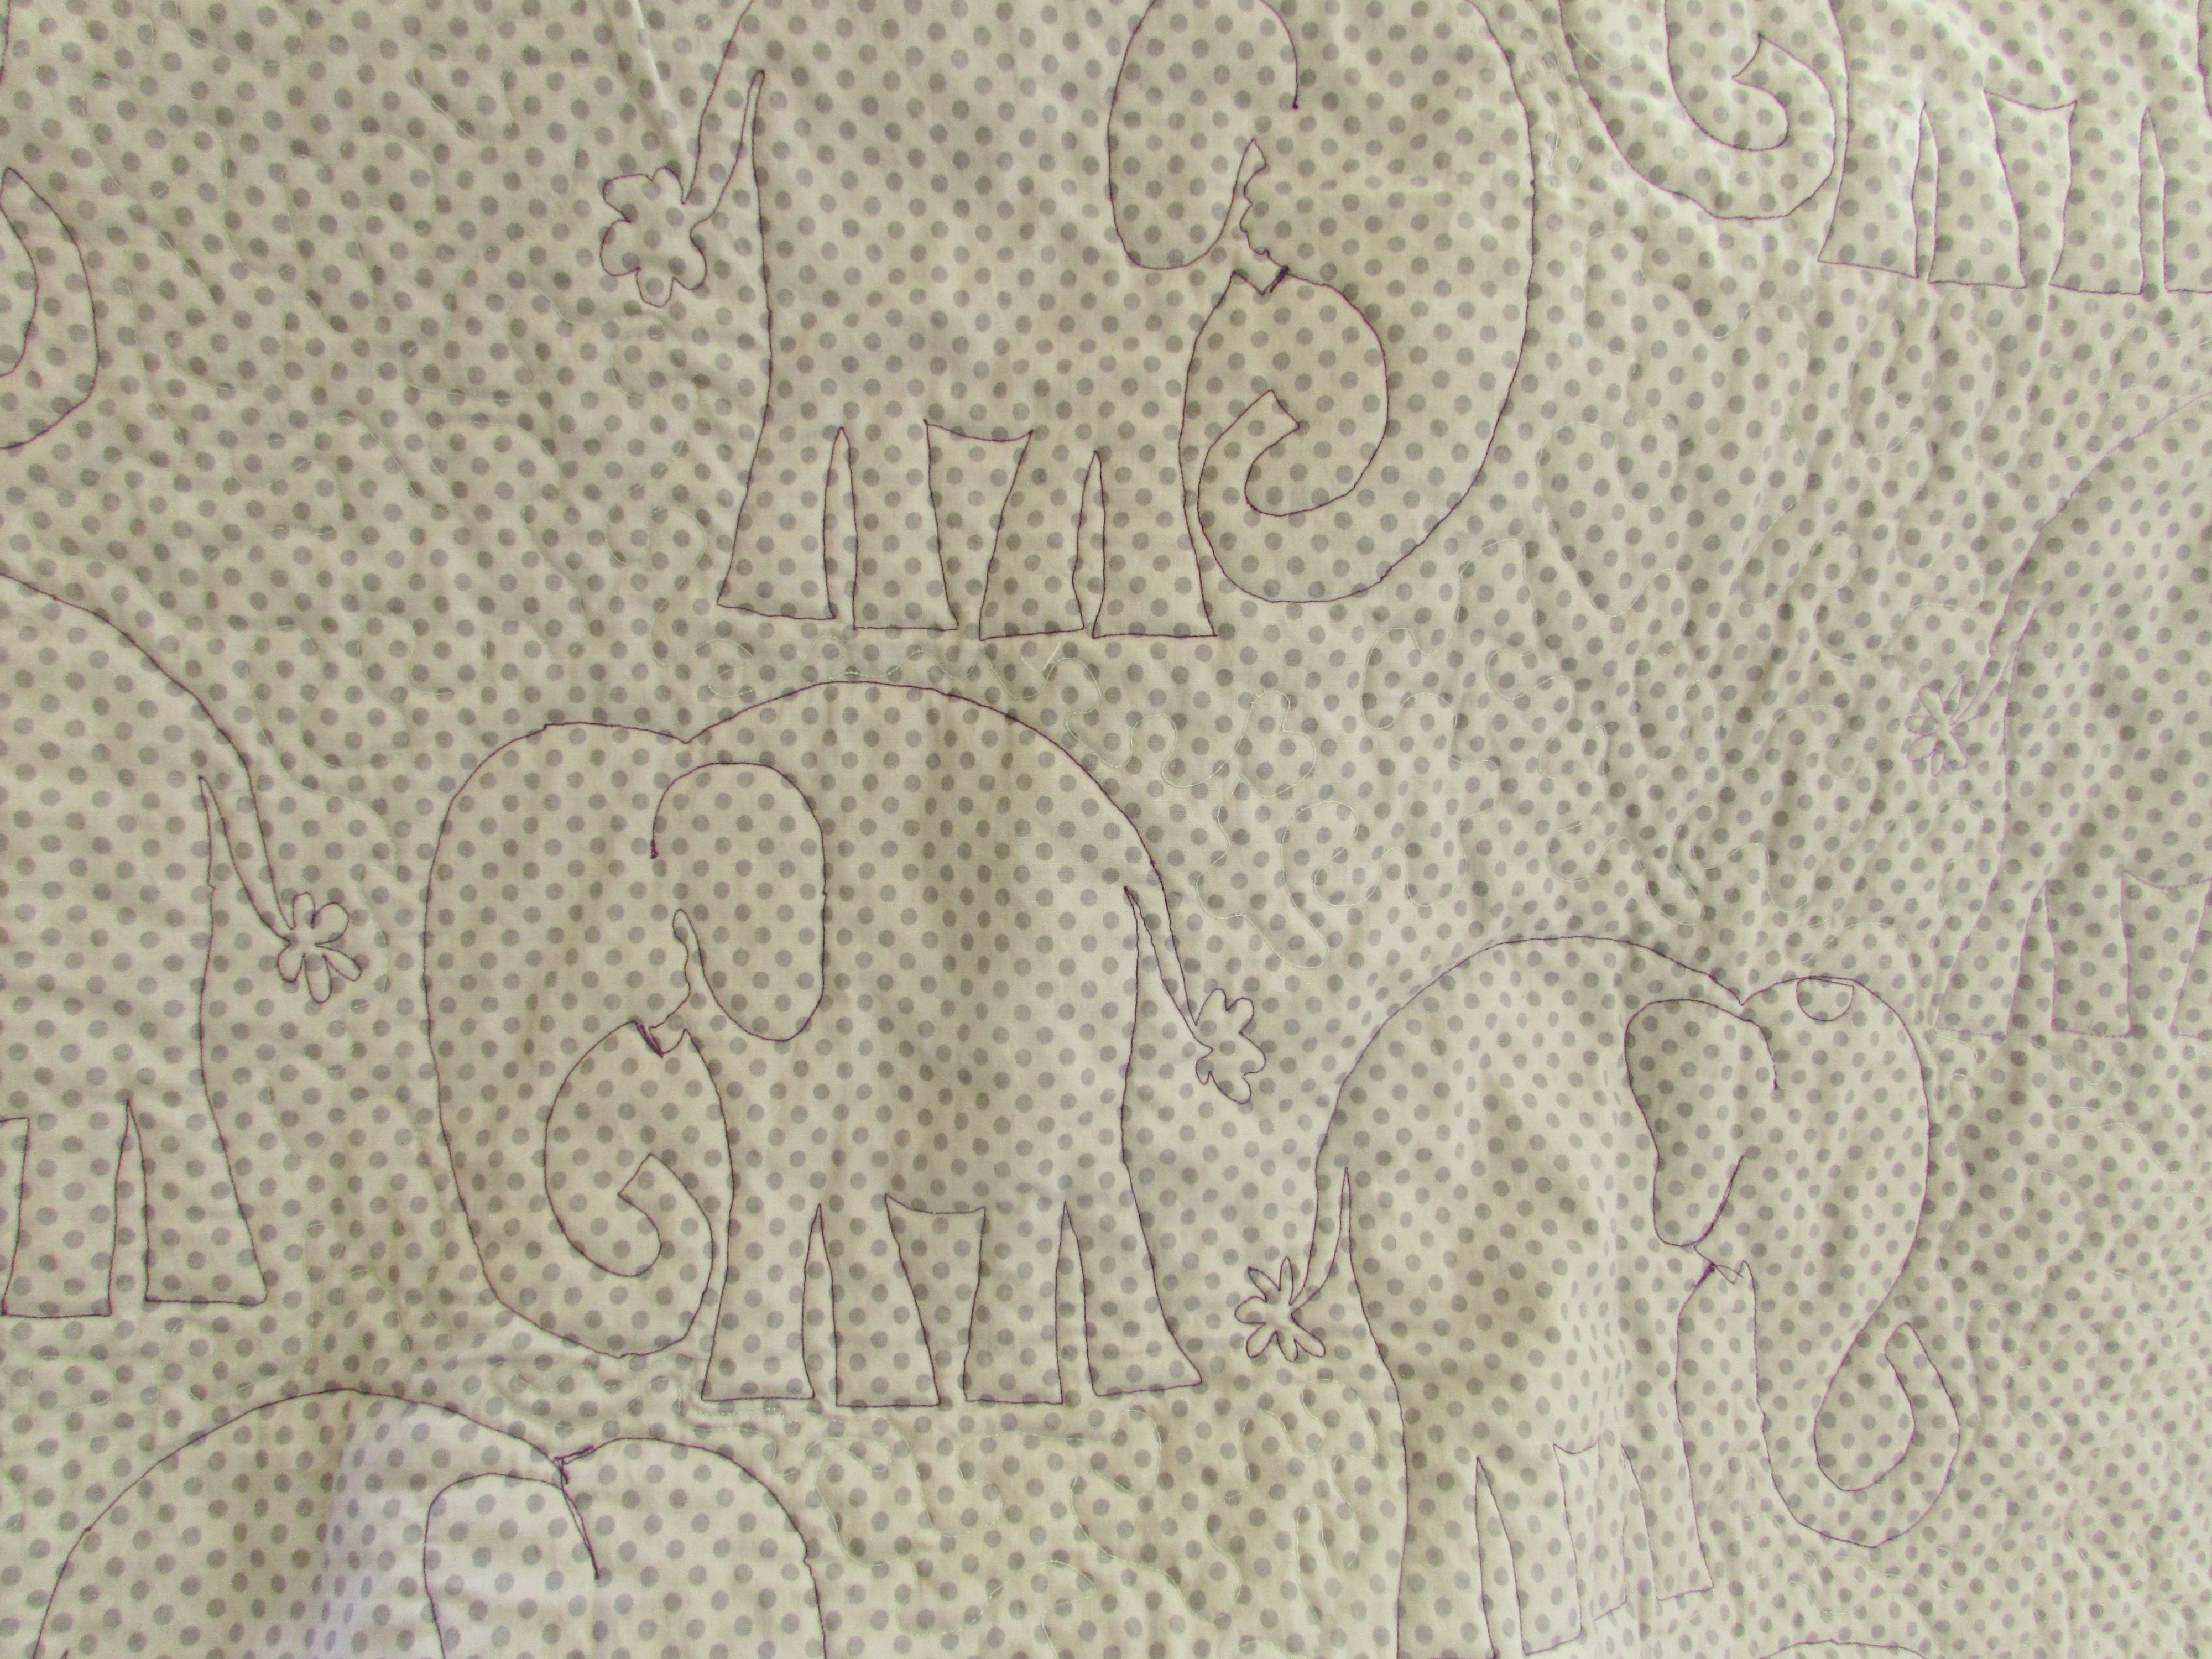
To select a backing fabric, I took pictures of several fabrics that I thought worked well. My niece chose a basic gray polka dot. Once that decision was made, I got the quilt basted and ready for quilting. Using a pale green Mettler thread, I did a loose meander all around the elephants. It was a breeze and really enjoyable to quilt over those flowers and in between the elephants.
Once that was done, I outlined each elephant with purple. It is quite difficult to see from the front but the quilting does show nicely on the back.
I have never made a quilt using a piece of fabric for the top (as opposed to piecing it) but it works perfectly in this situation. Cutting up a fabric with this scale of print just wouldn’t make sense.
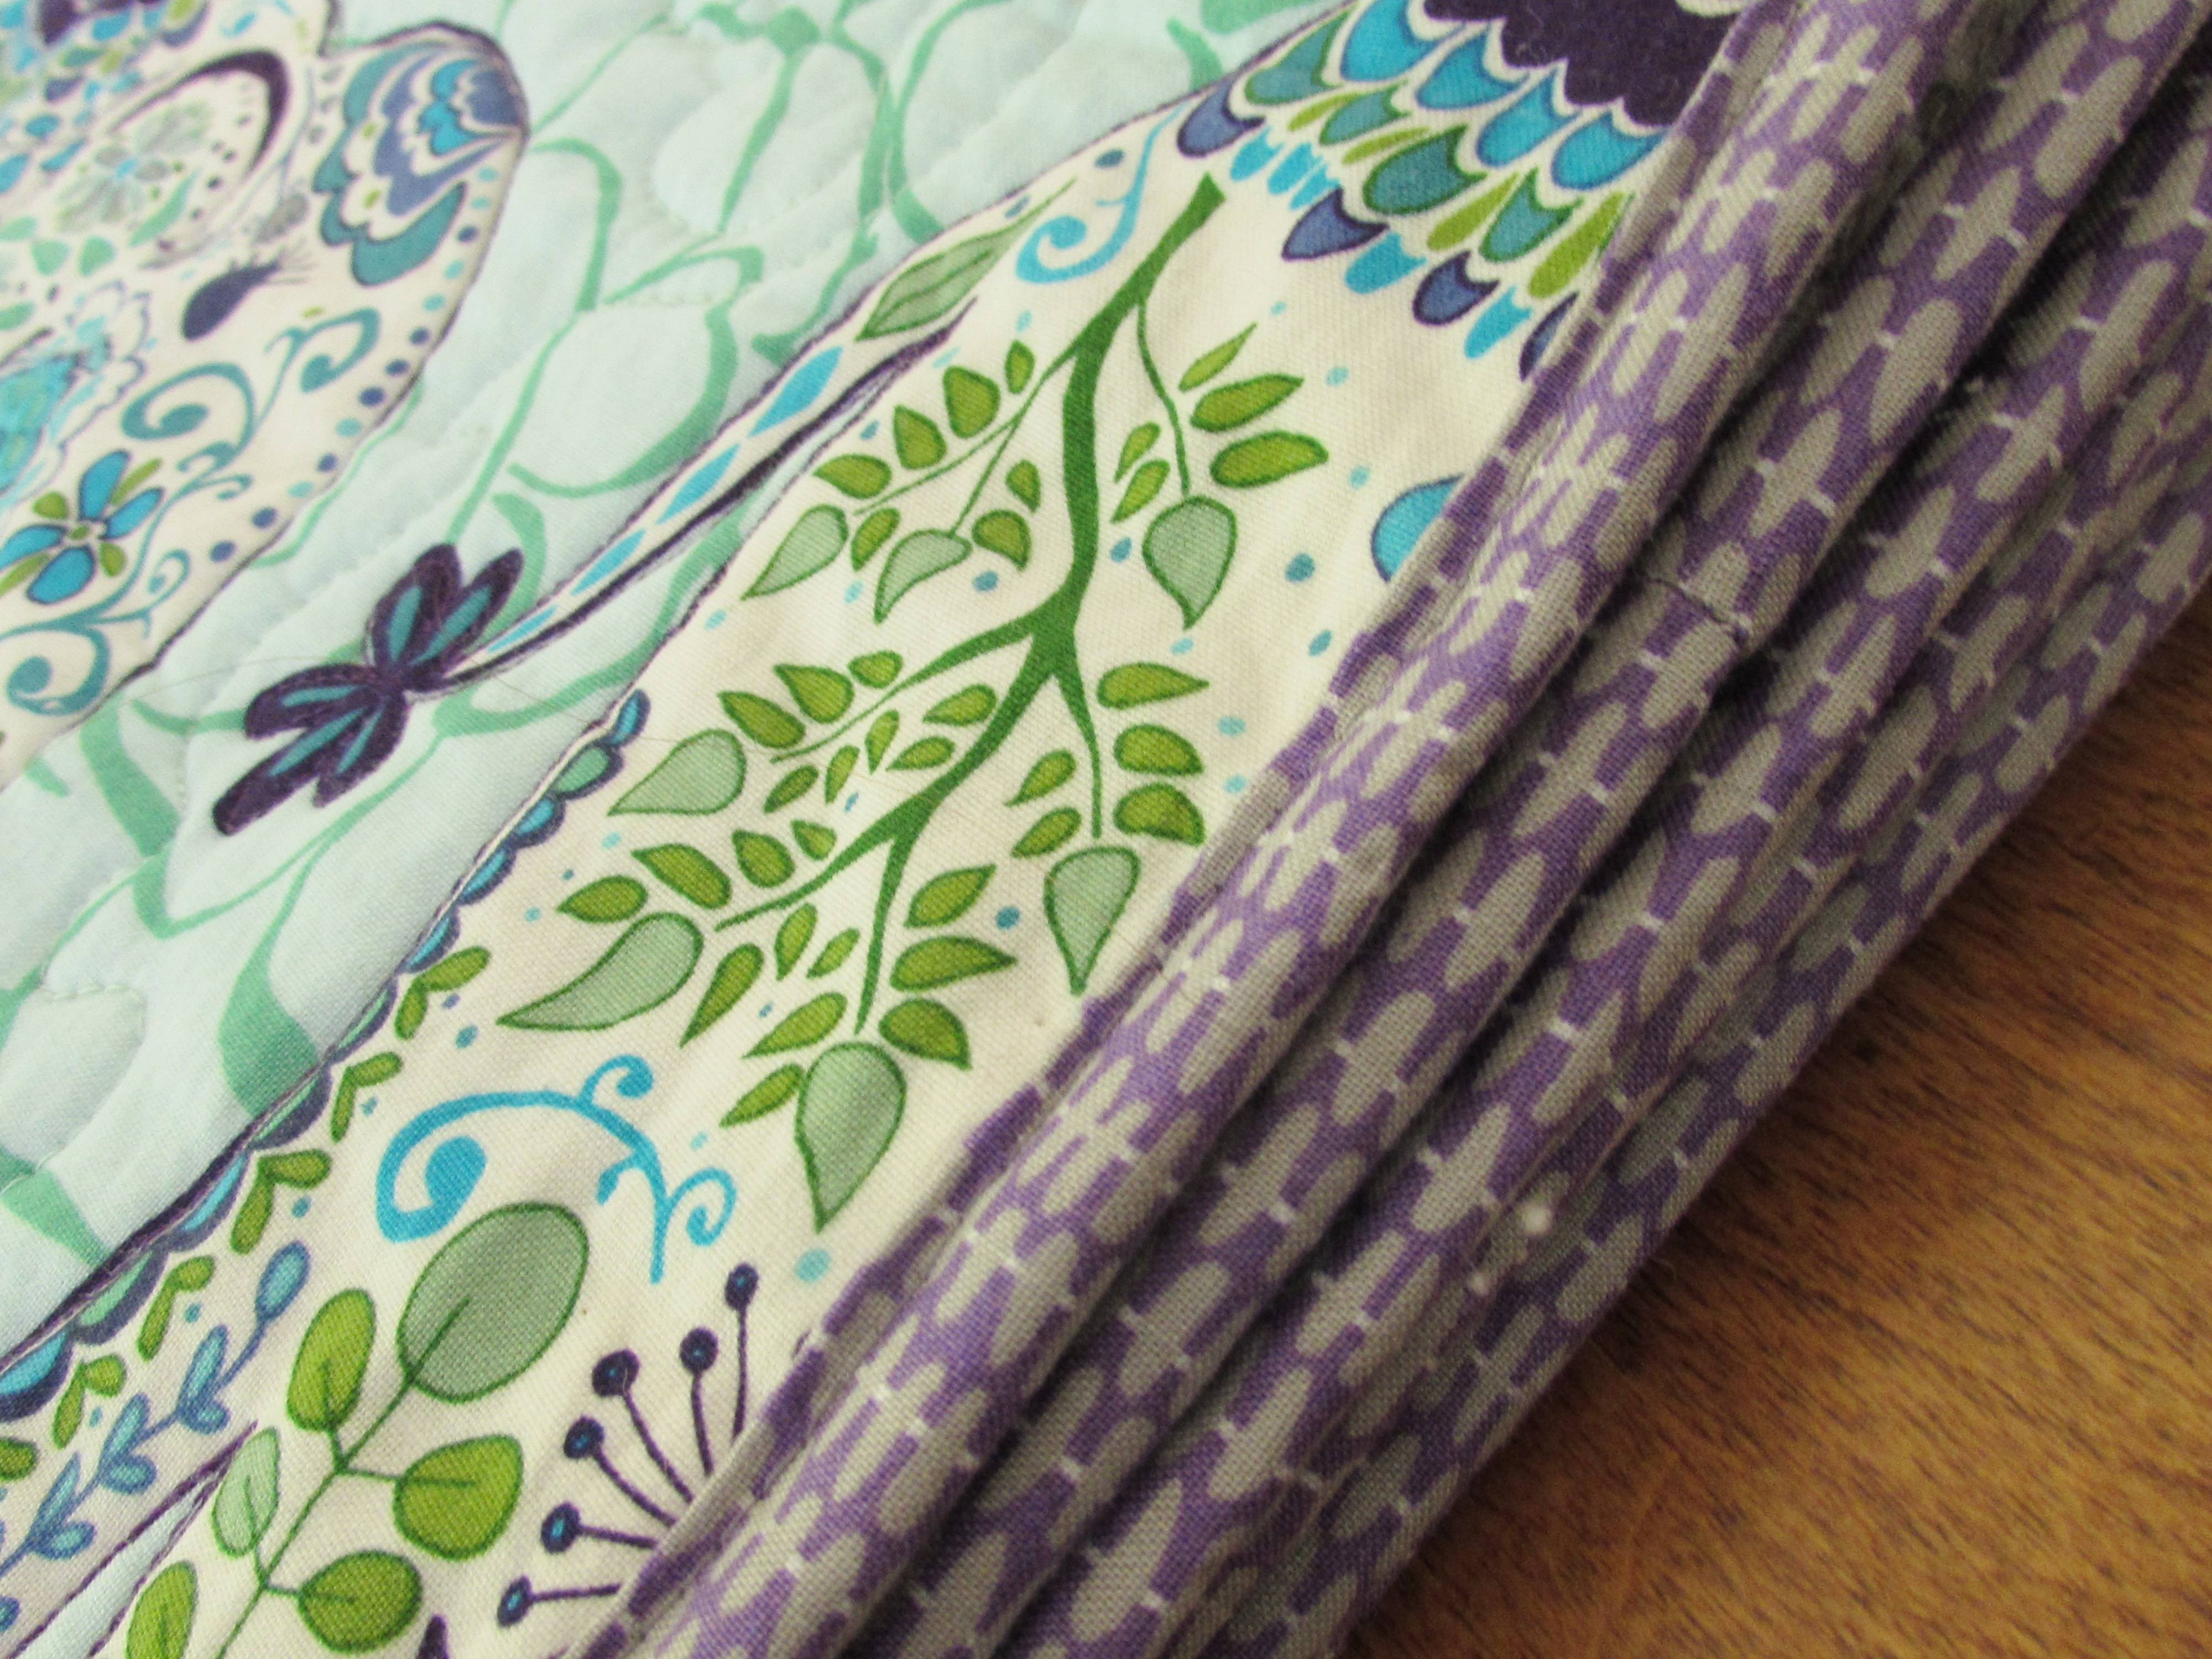
I used this purple print for the binding. I bought it on a sale table and never thought to look and see what it was? But it’s cute and it works.
I hope my niece is pleased and that this quilt is loved and used by sweet Olivia who will be born in a few months. I can happily check this off of my Q4-FAL list for the link up at She Can Quilt.
Hoping you all have a great weekend. We have rain in the forecast which is always nice. I am hoping to do some preparation (aka house cleaning) for the upcoming Thanksgiving holiday.
Linking up with my usual favorites. Find their links at the top of the page, under Link Ups.
This week I have continued to work on the challenges set forth in Amanda Jean Nyberg’s lesson for the Mighty Lucky Quilting Club. She suggested a few ideas for creating fabric pulls; not so much to create an actual project, rather just to go through the exercise of gathering fabrics for a certain element. This has been a lot of fun, not as easy as one would think, and a total mess making experience in the sewing room!
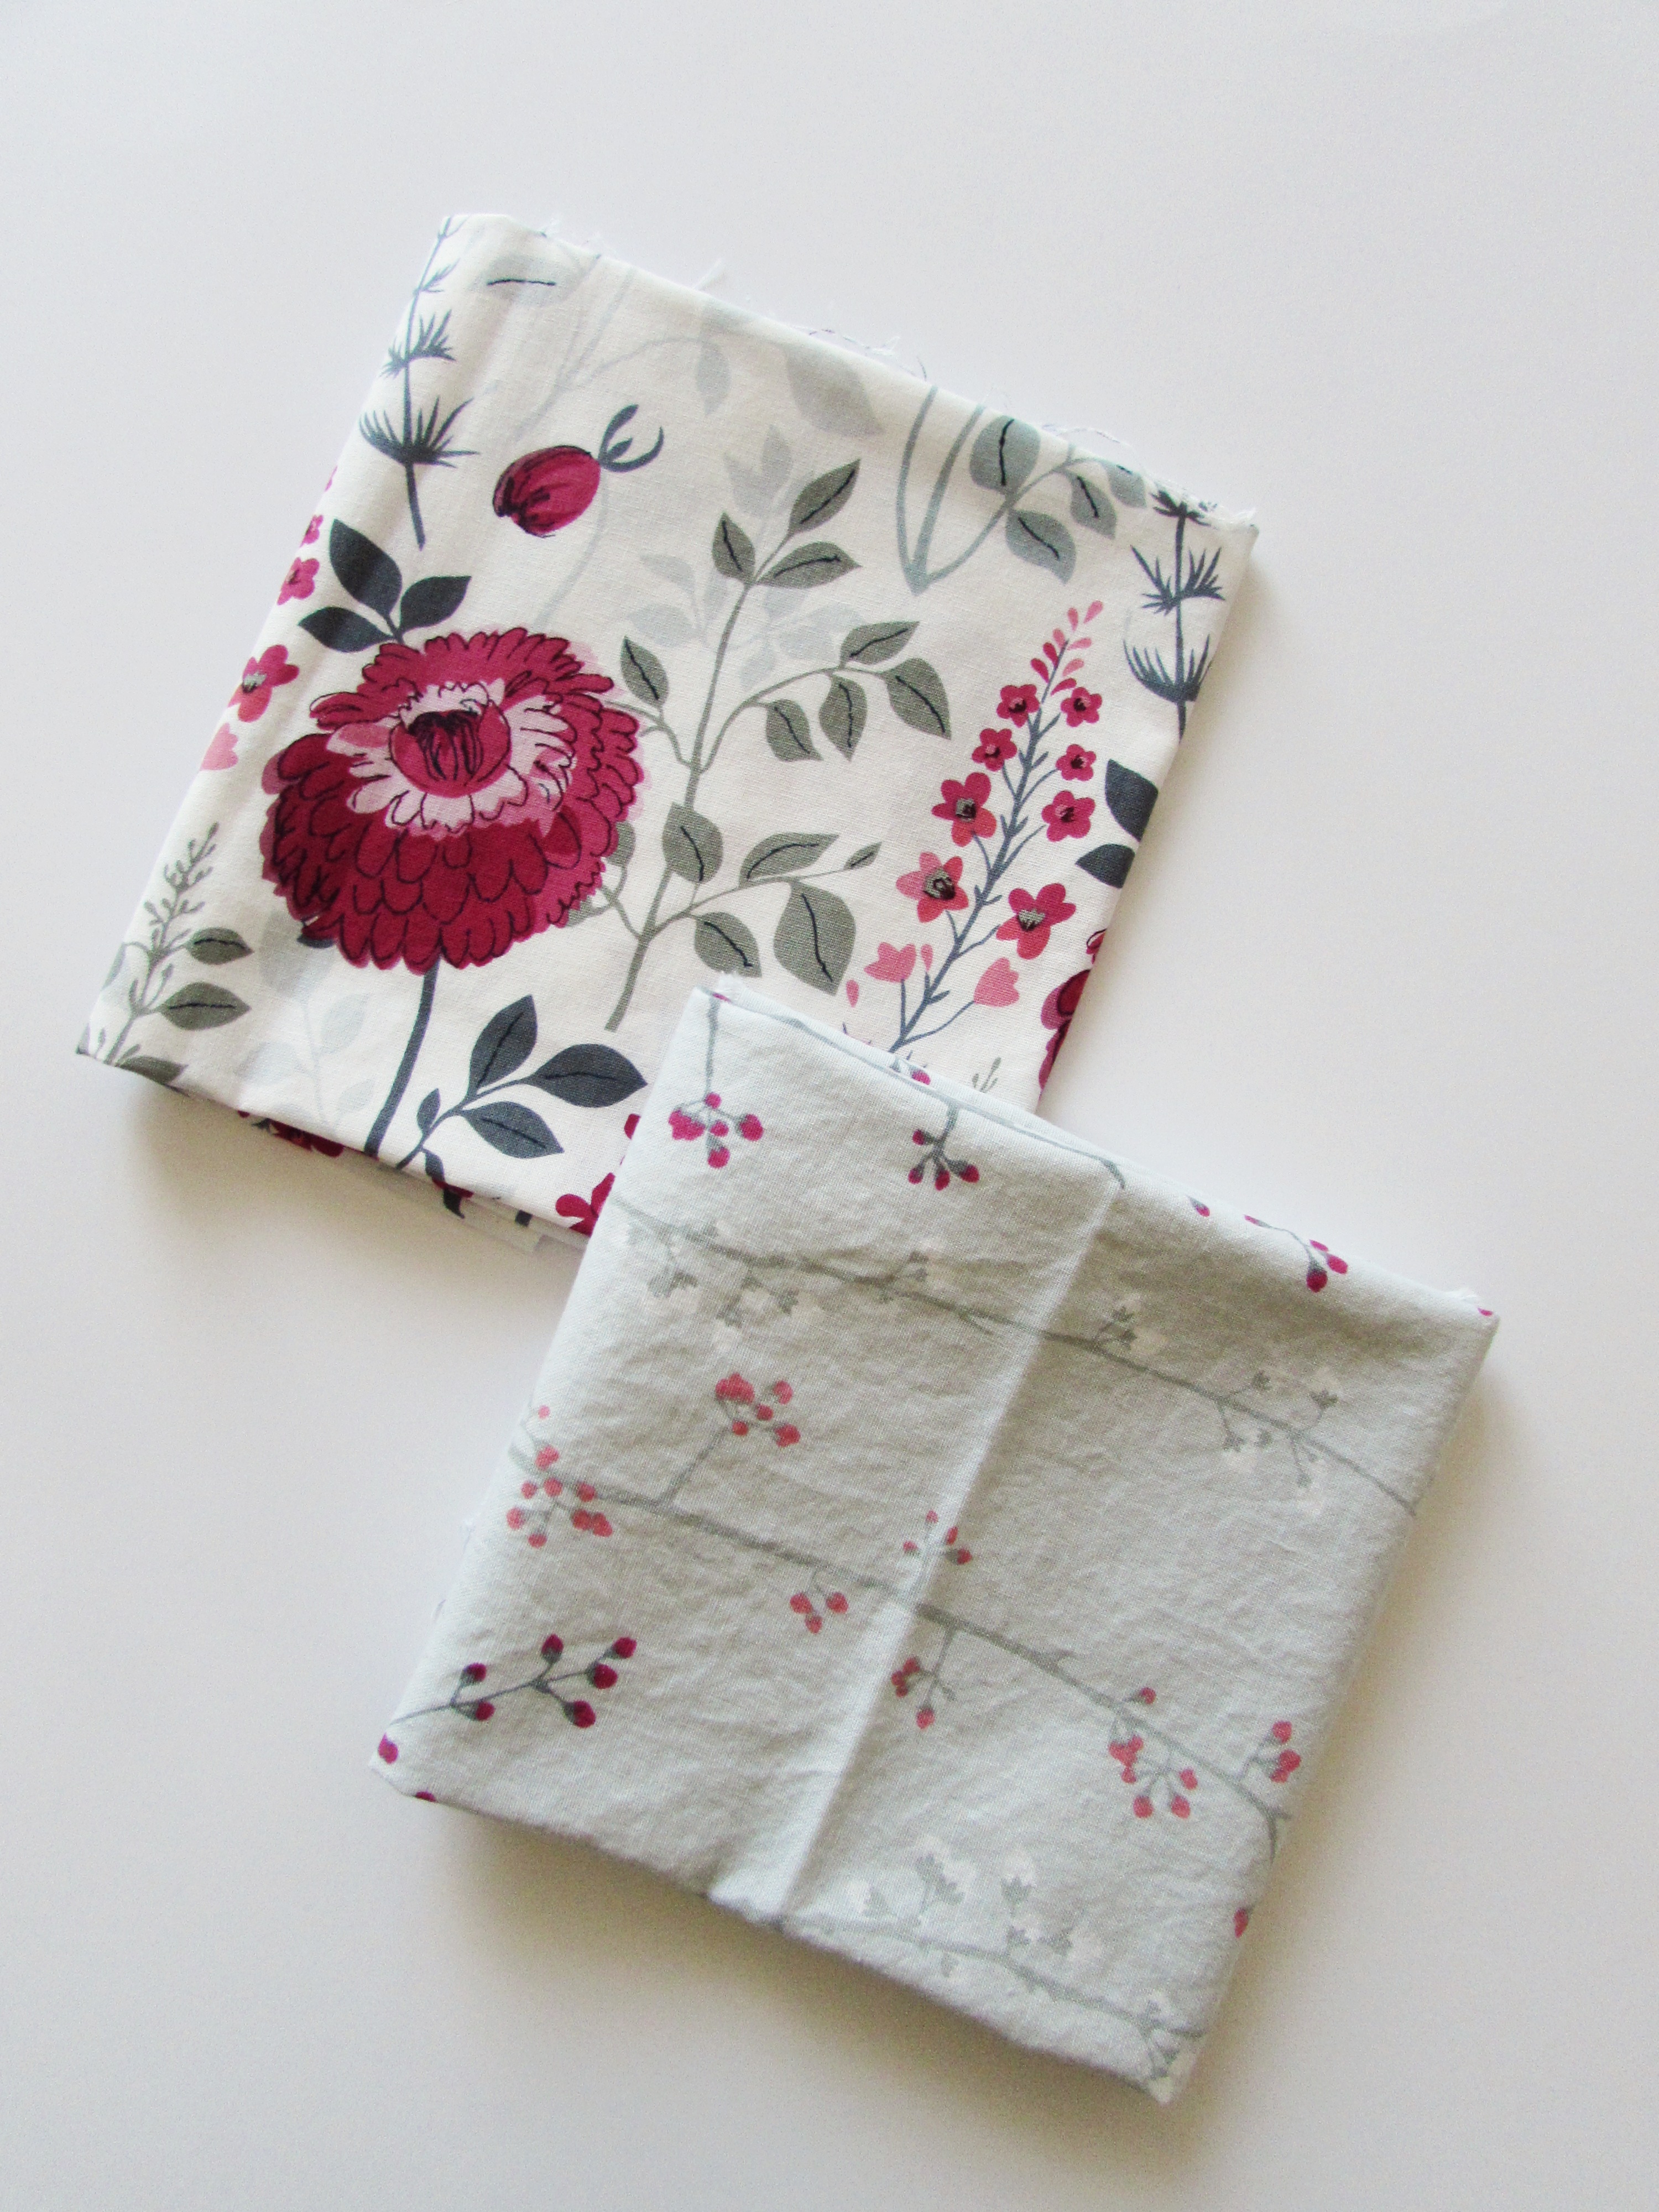
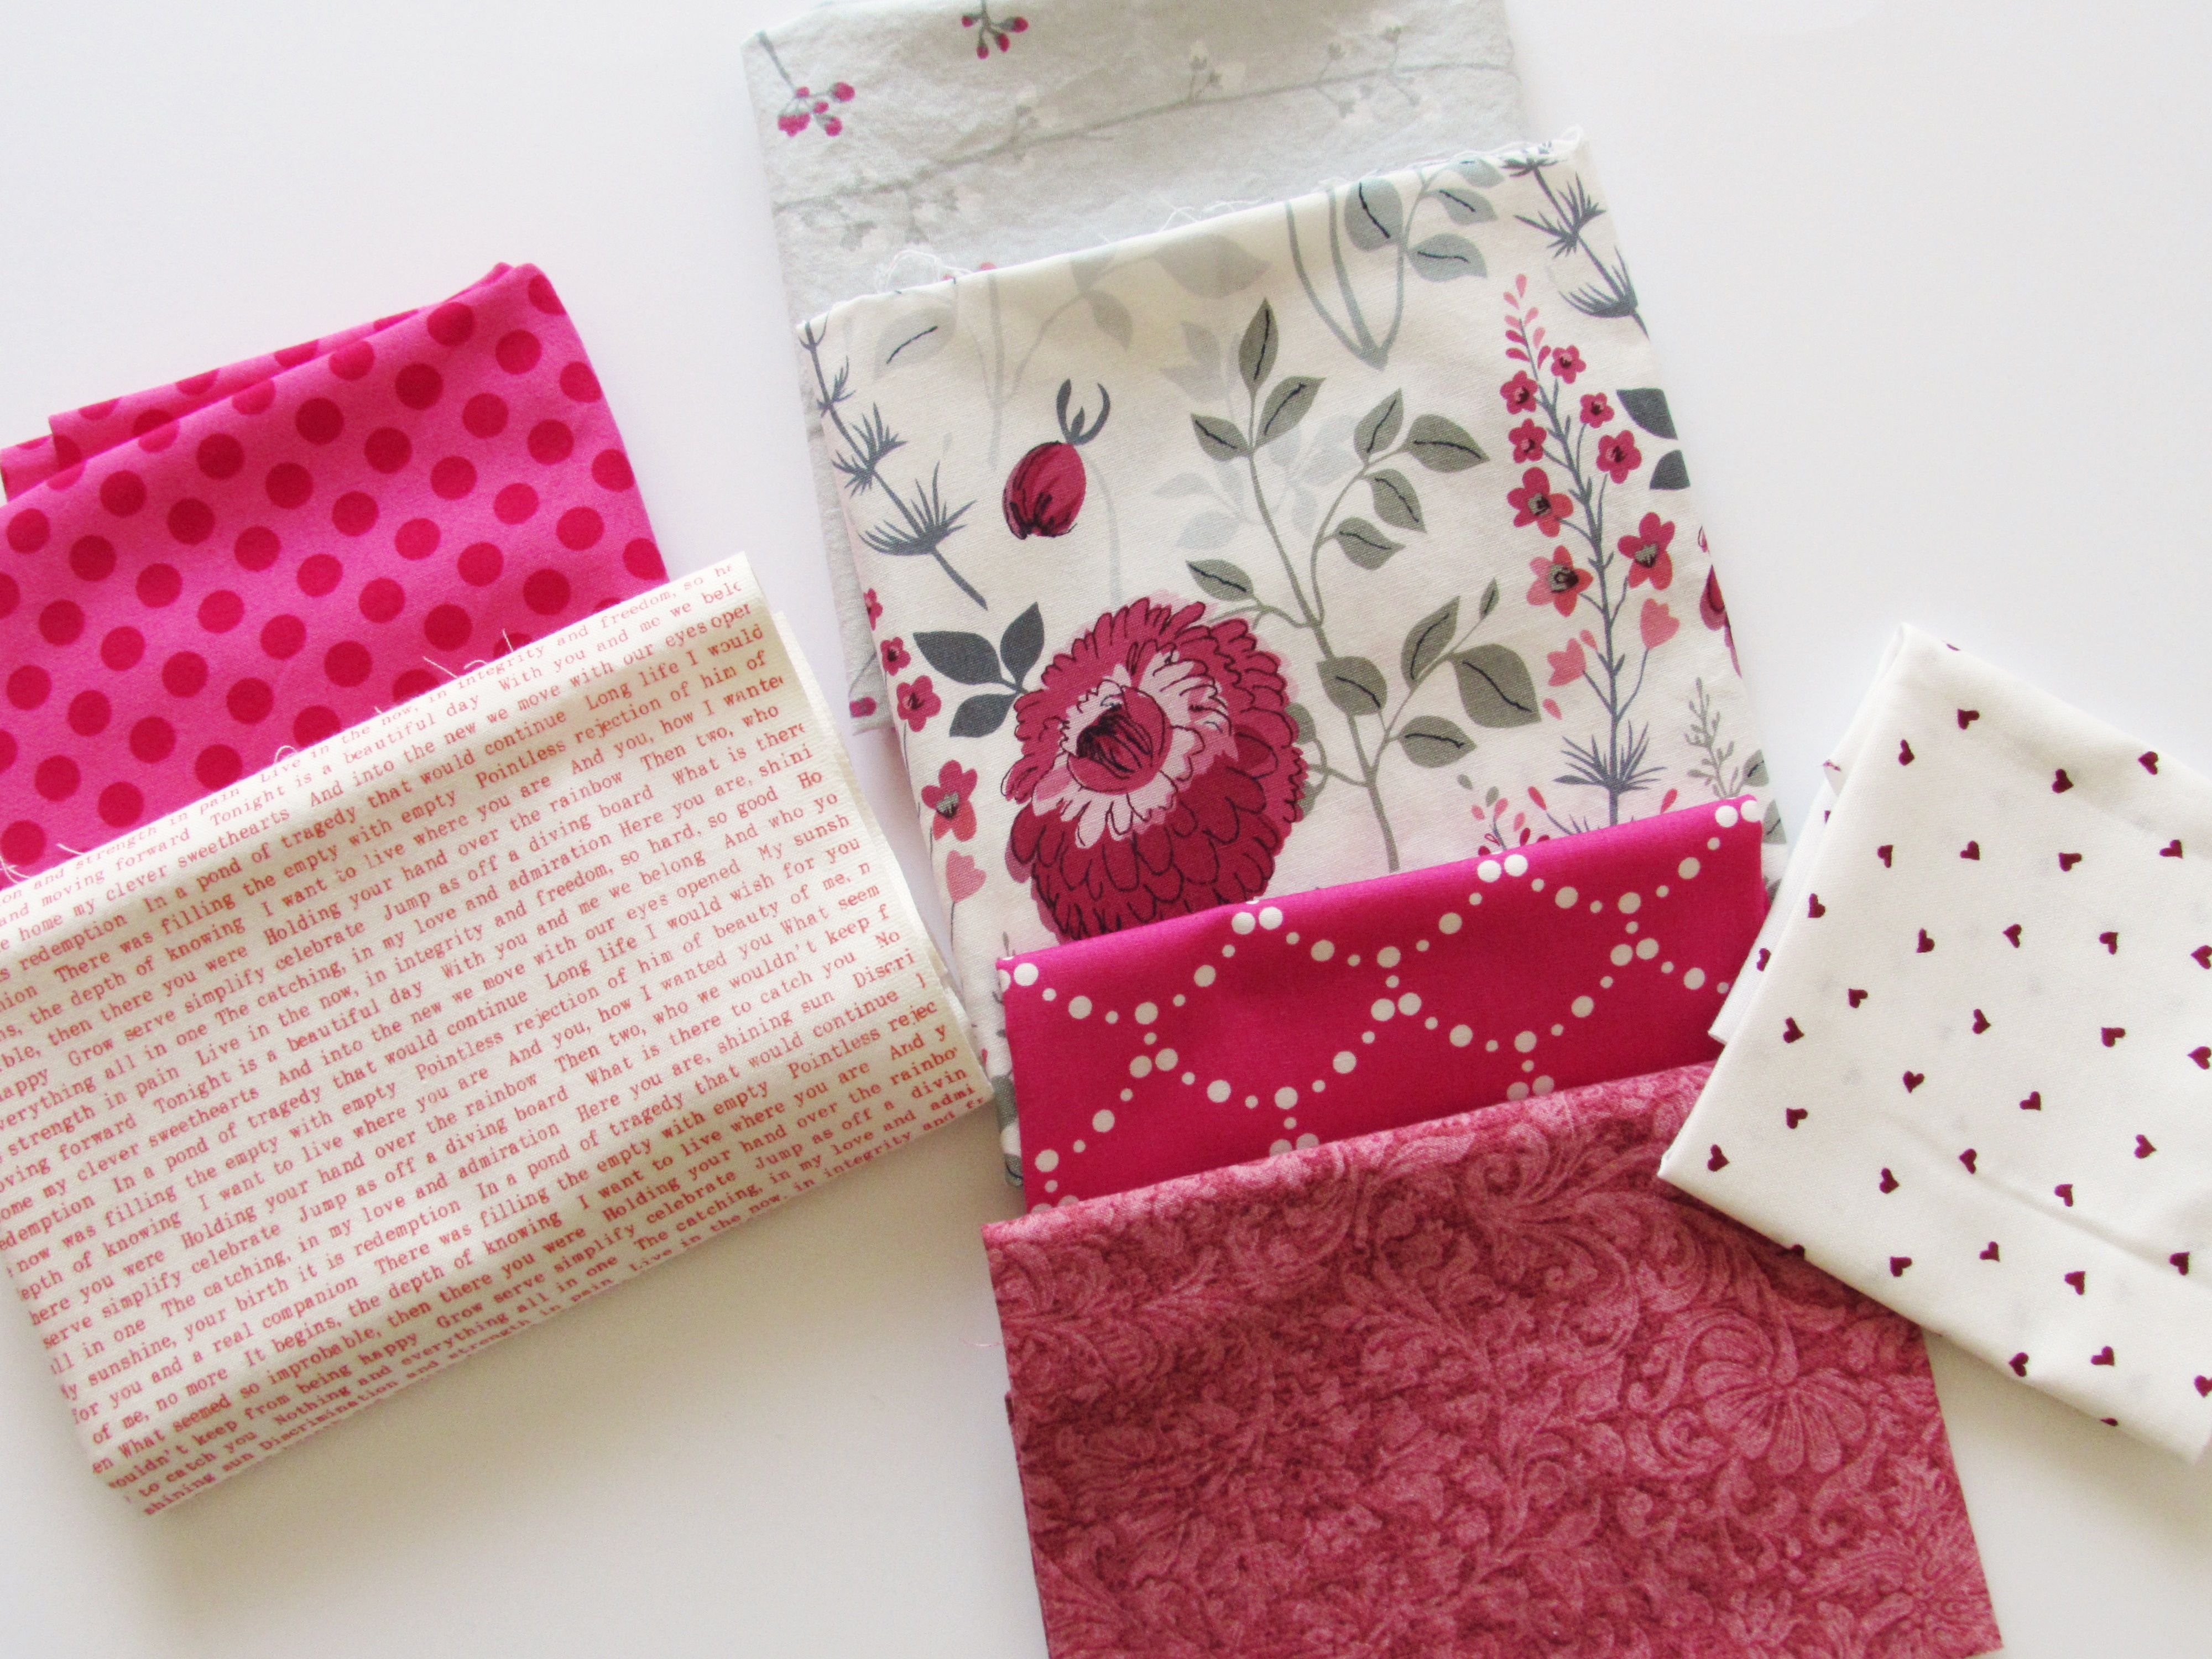
For one pull, I selected two pieces of fabric and pulled a selection that would work with them. This is the fabric I selected as the basis.
Both of these fat quarters are Dear Stella prints. I bought them a long while back and they sit, along with so many others, waiting to be used. For the initial pull, I just quickly selected pieces of yardage or larger scraps in grays, blues and greens that might work with them.
Next, I pulled some pinks and reds that complemented the fabric and added different scale and density to the mix.
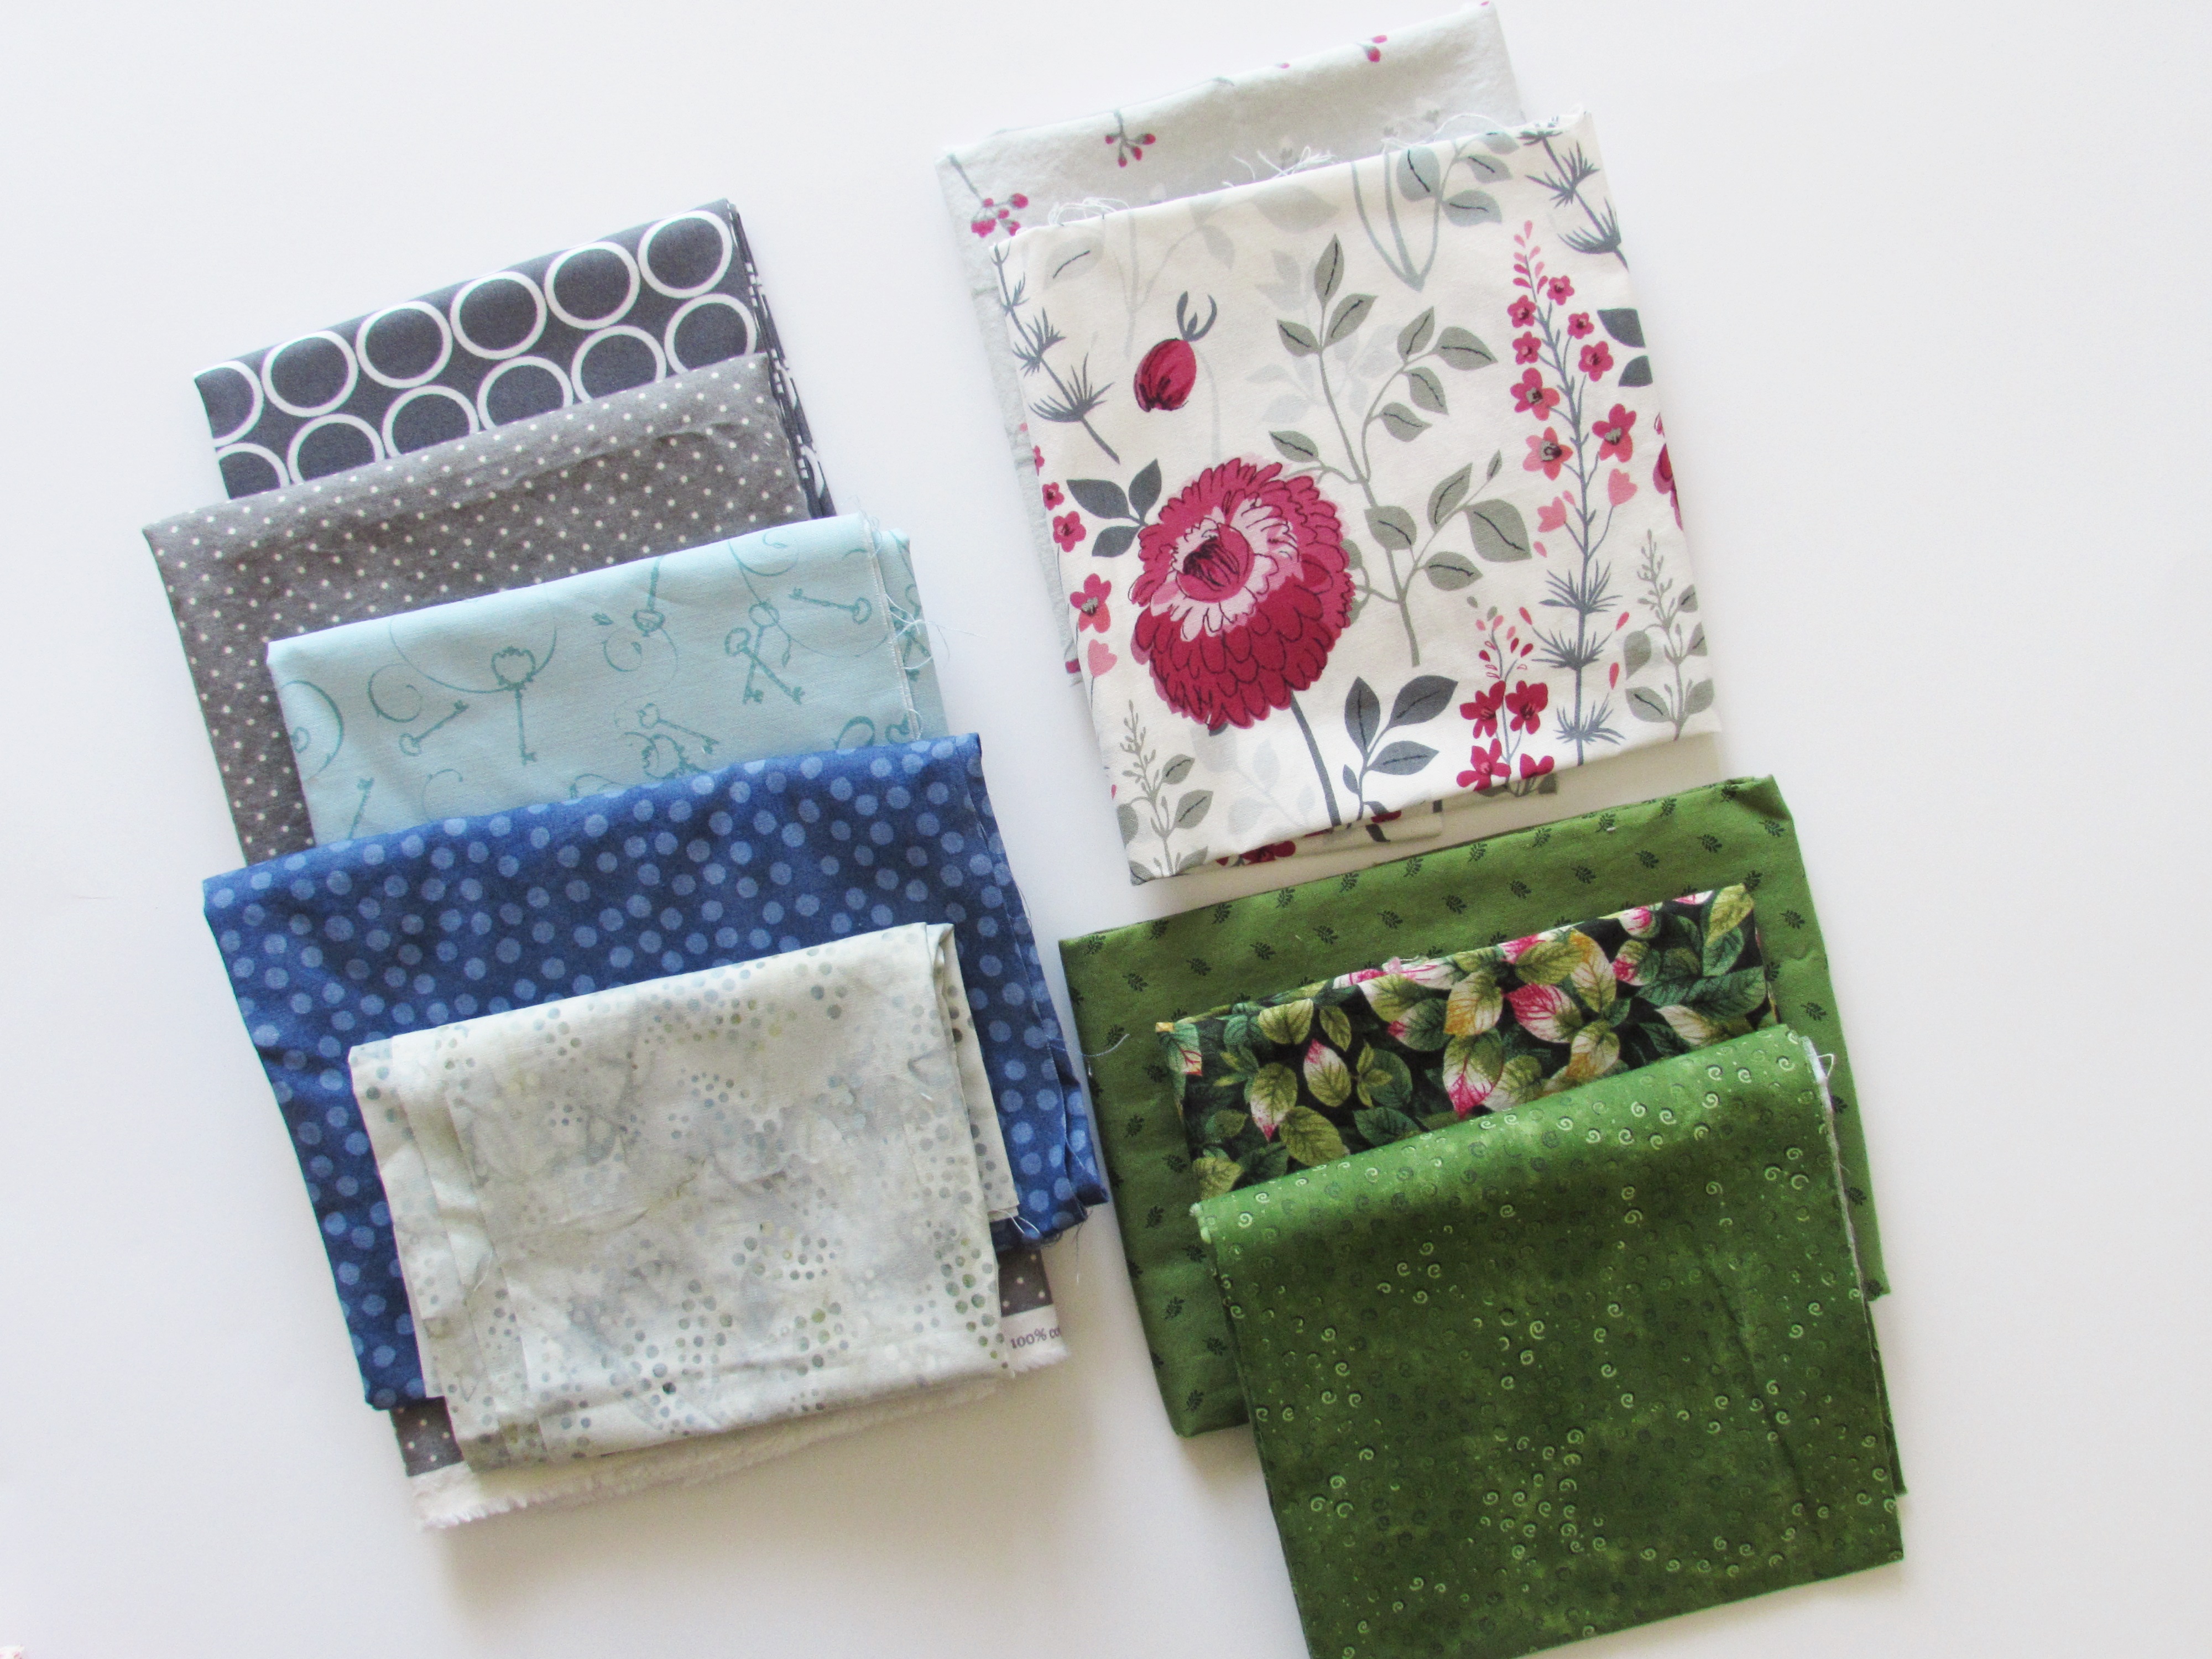
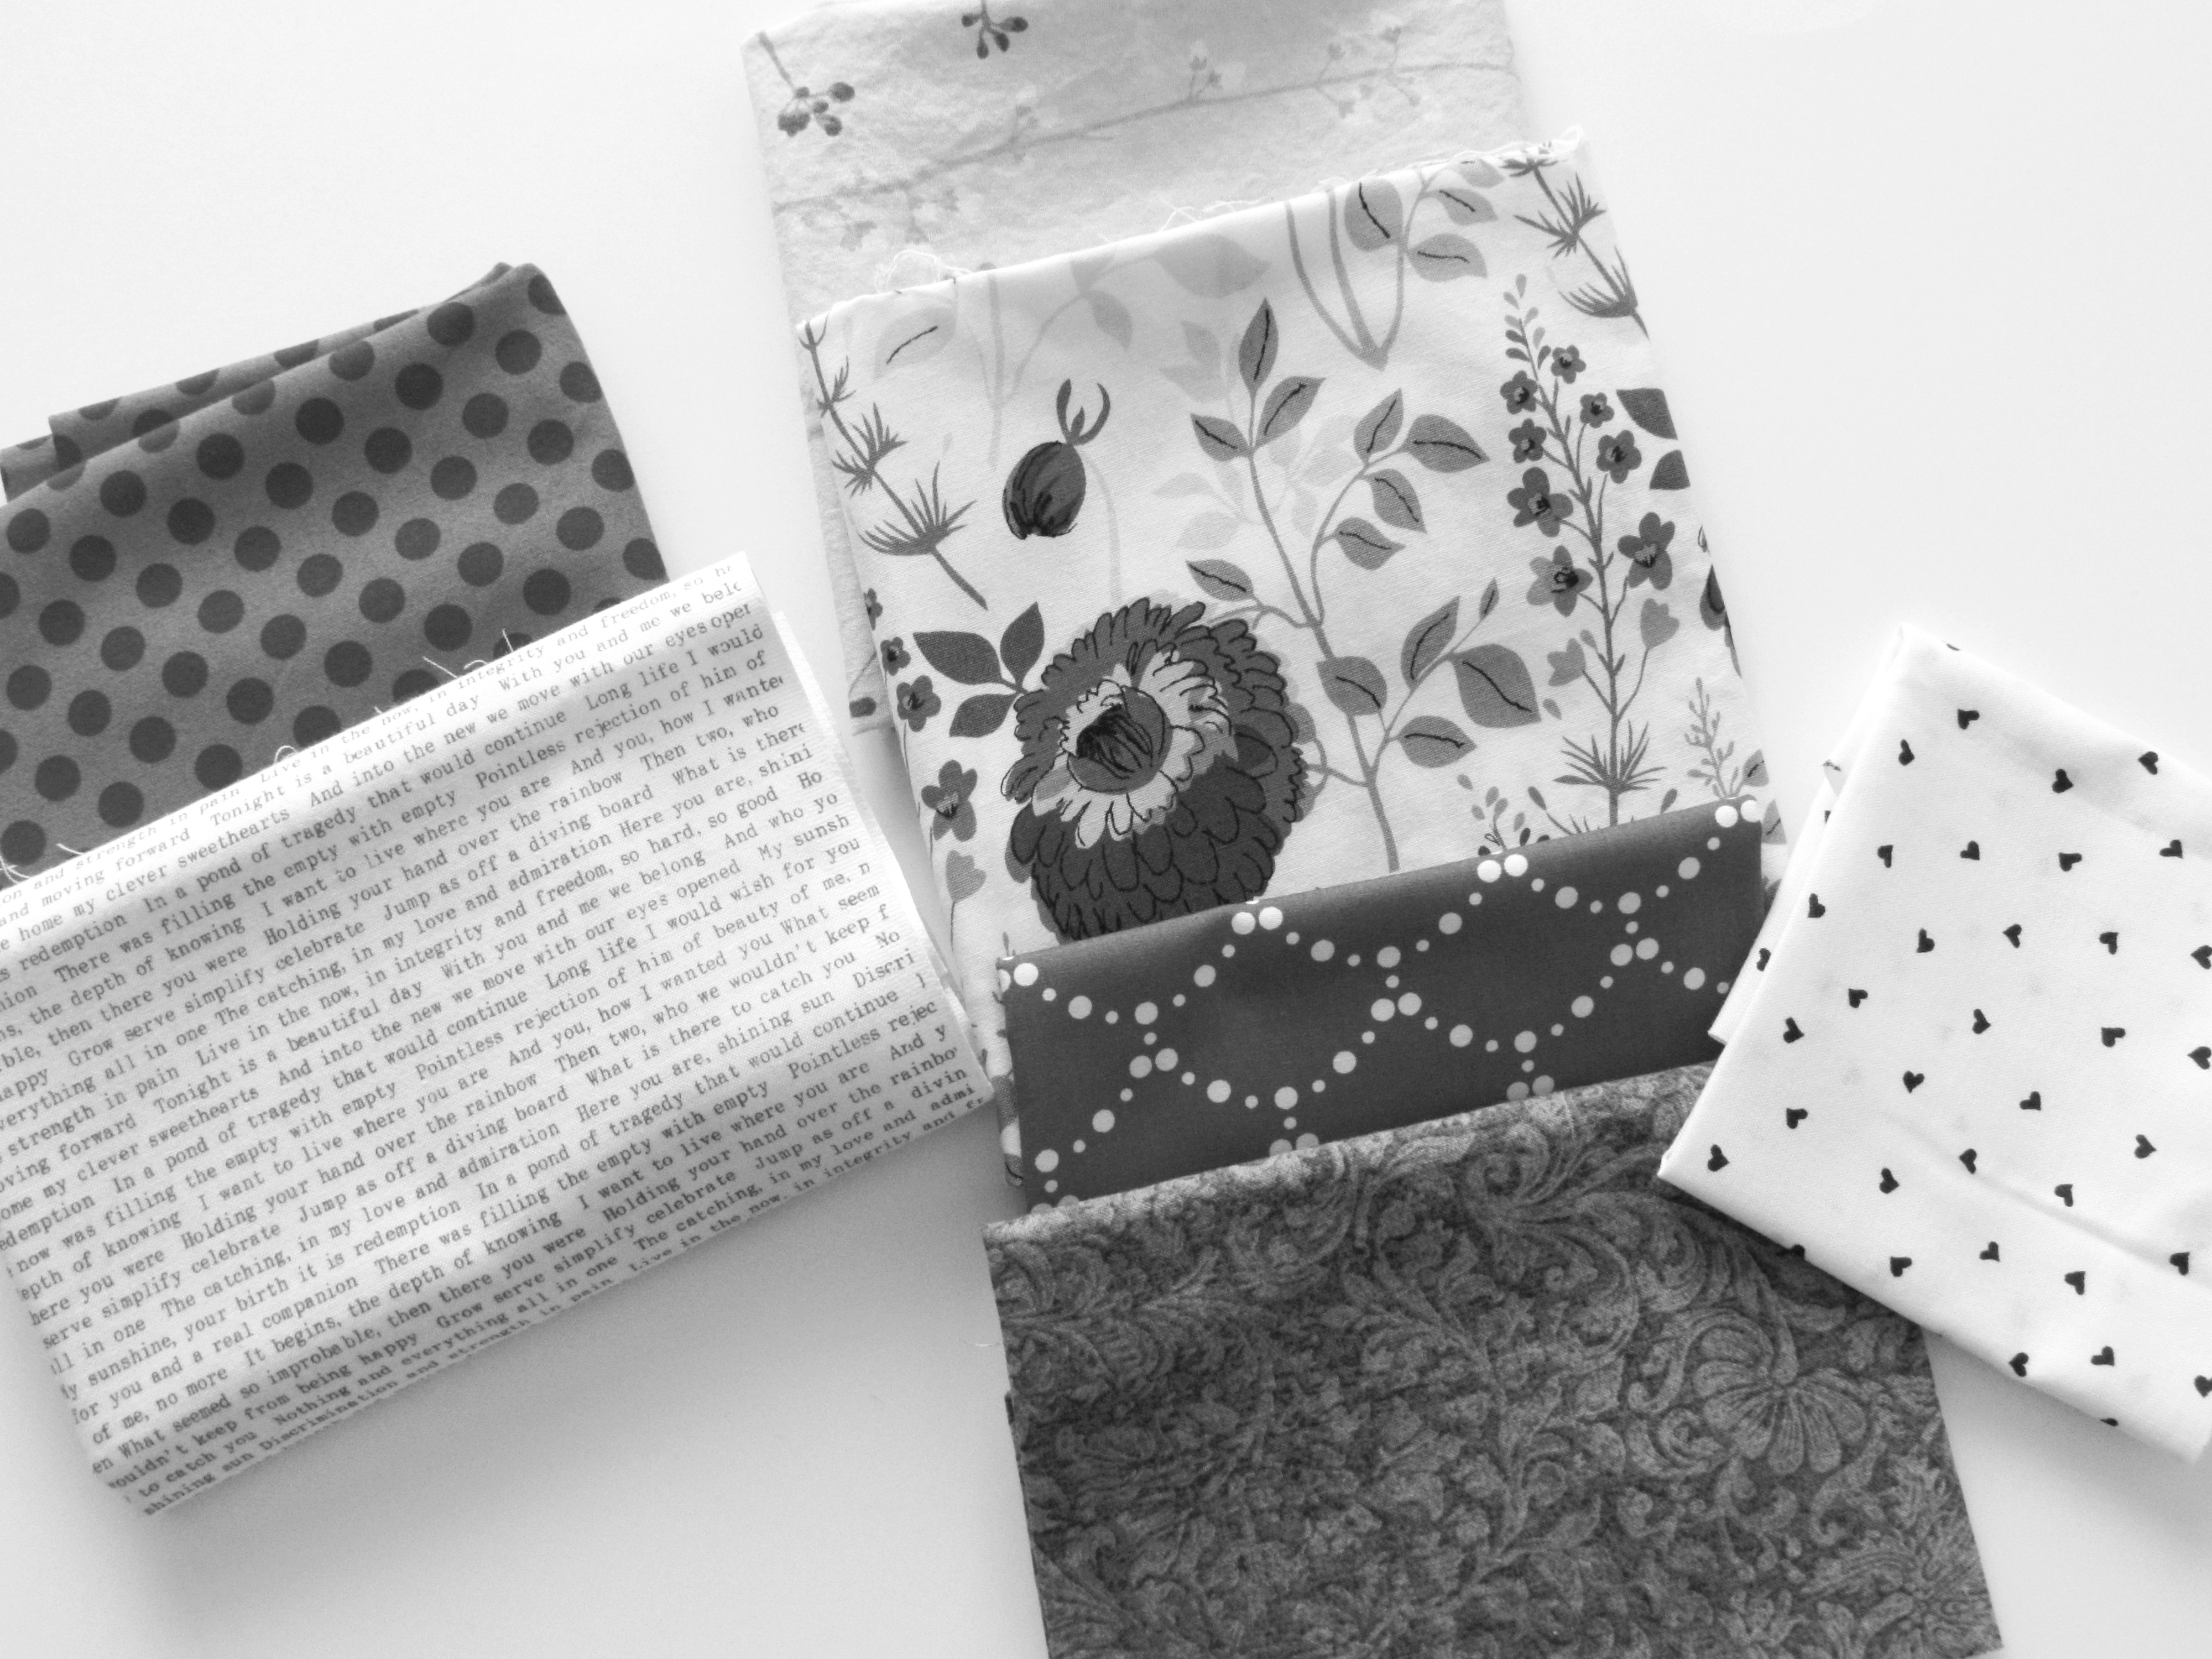
I also took a quick minute to put a grayscale filter on the pictures to check for value differences.
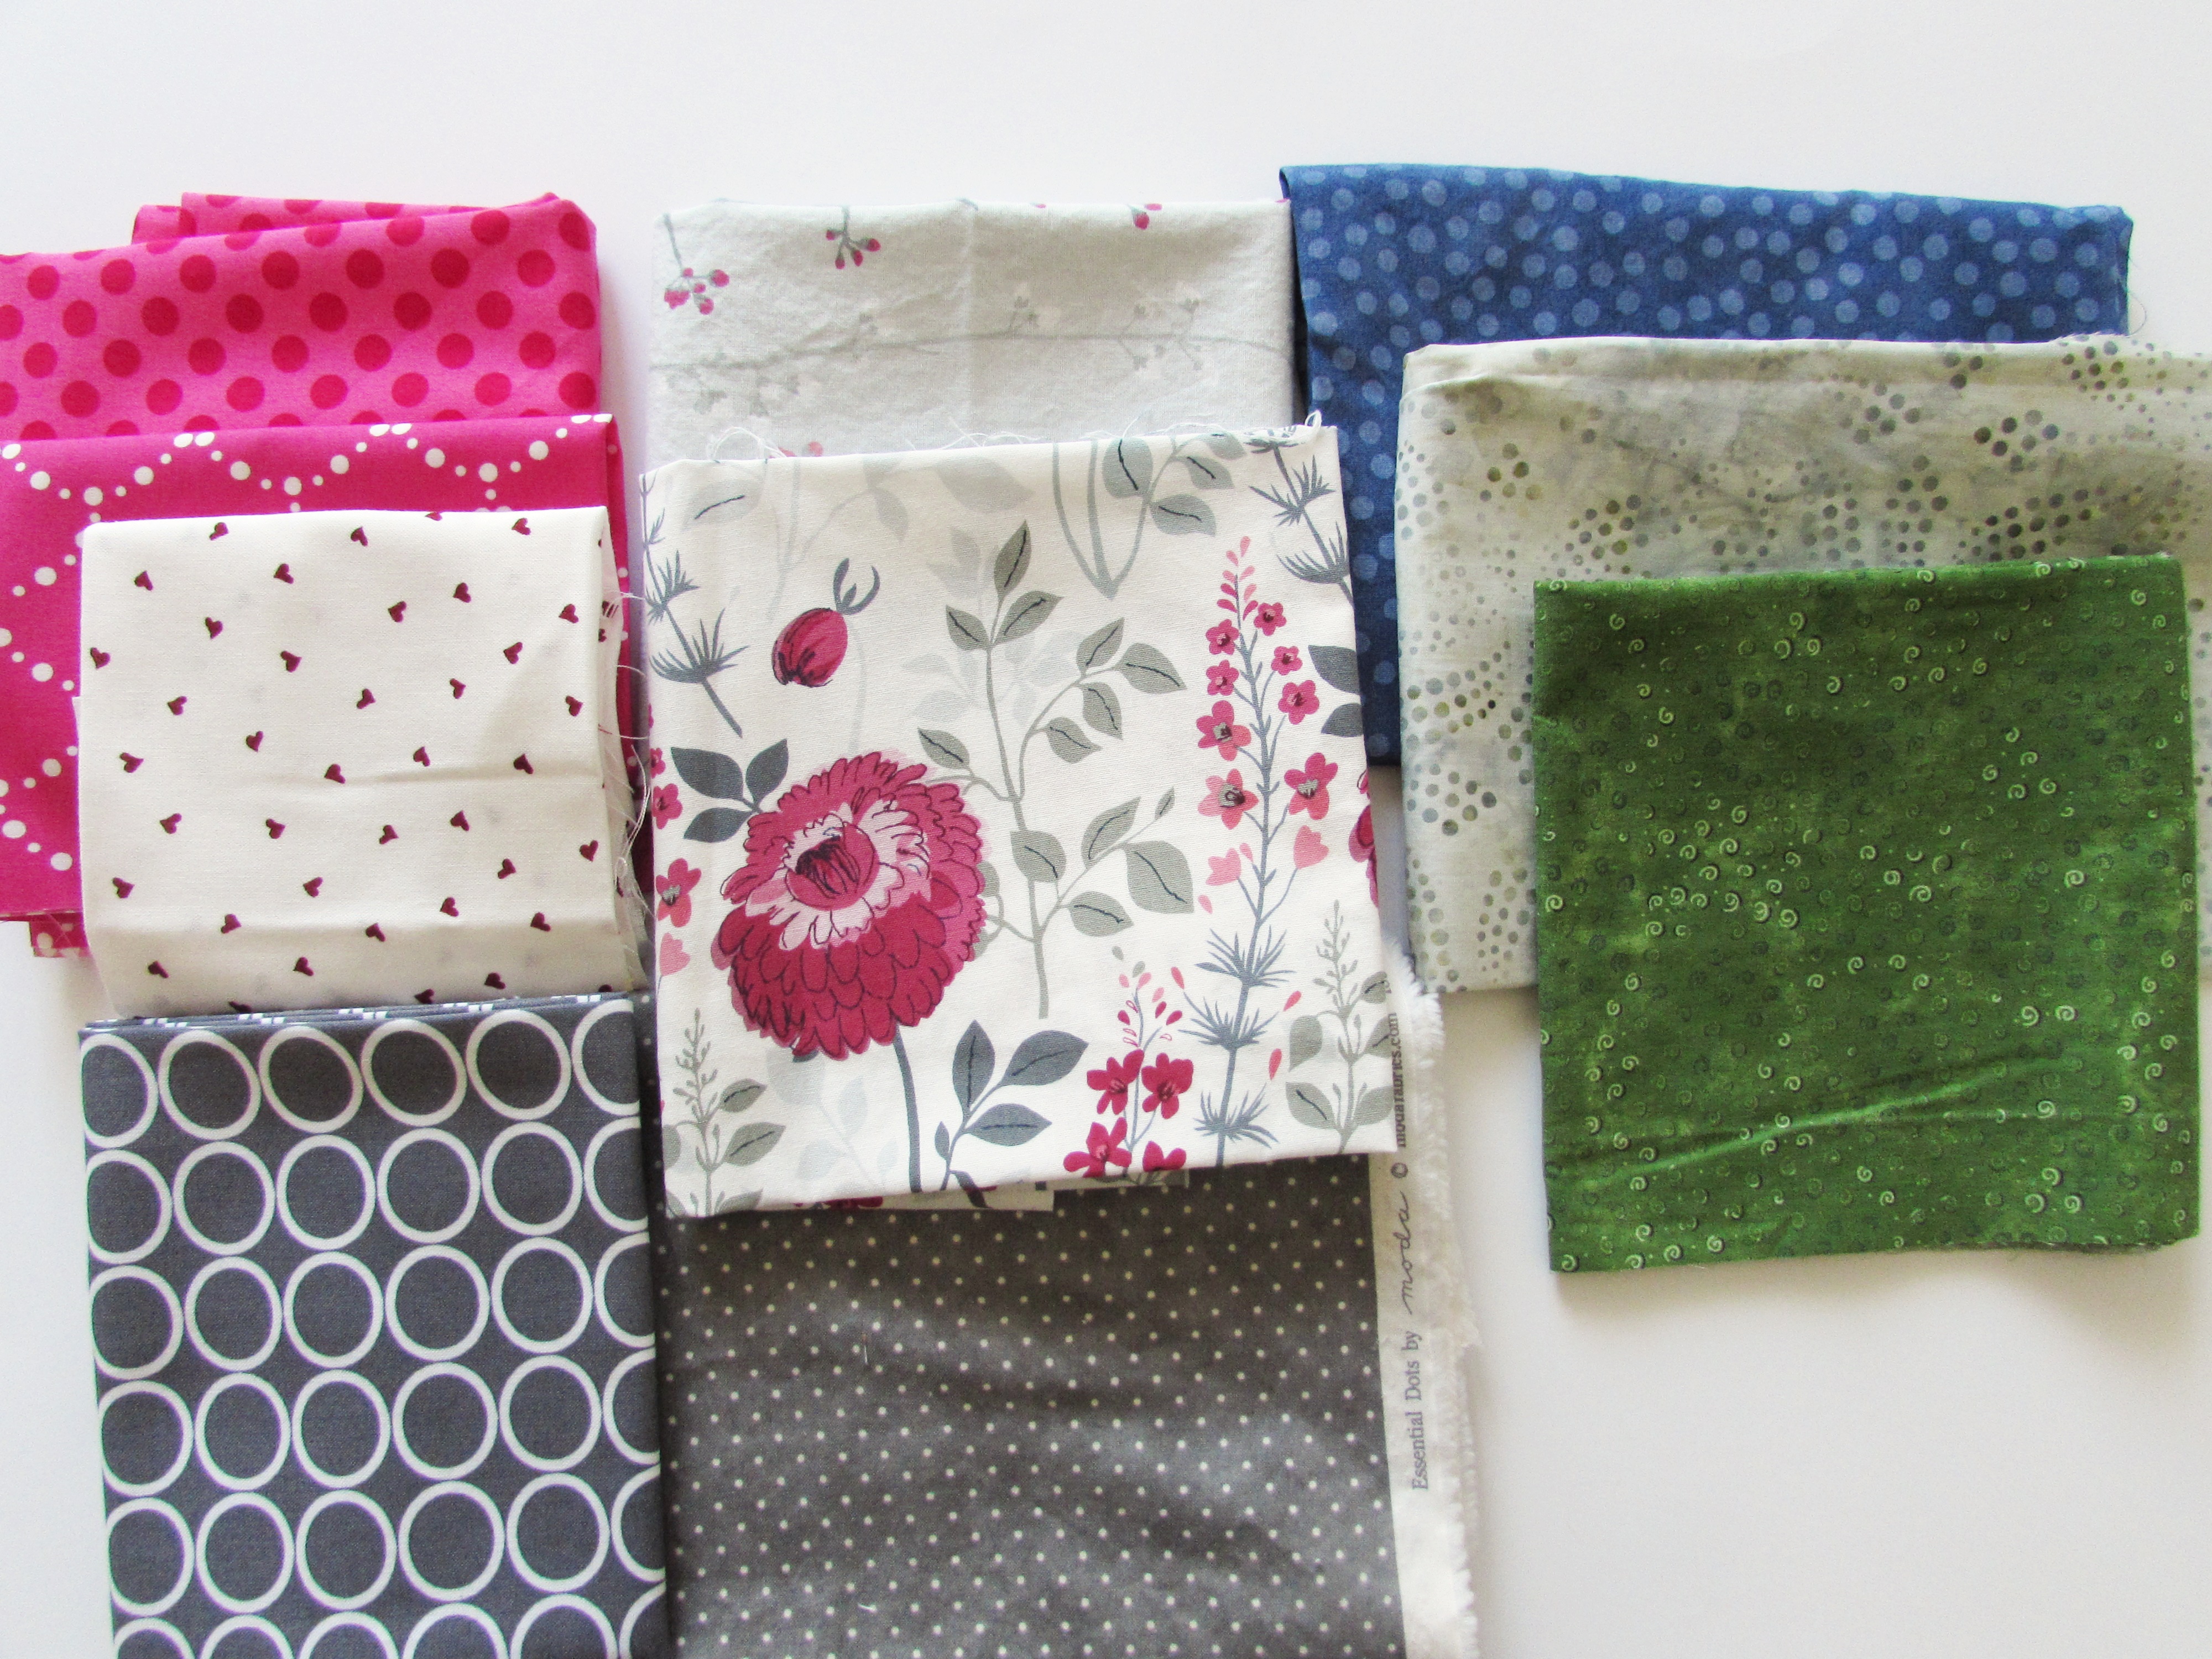
Finally I just put them all together and took out those that were misfits. The Allison Glass text print was a red that leaned to orange. I wanted reds that leaned to pink. The green floral print looked weird and the Henry Glass light blue print (with the keys on it) was the wrong shade. Ultimately, I kept these in the group.
This would be a fun pull for a project, right?
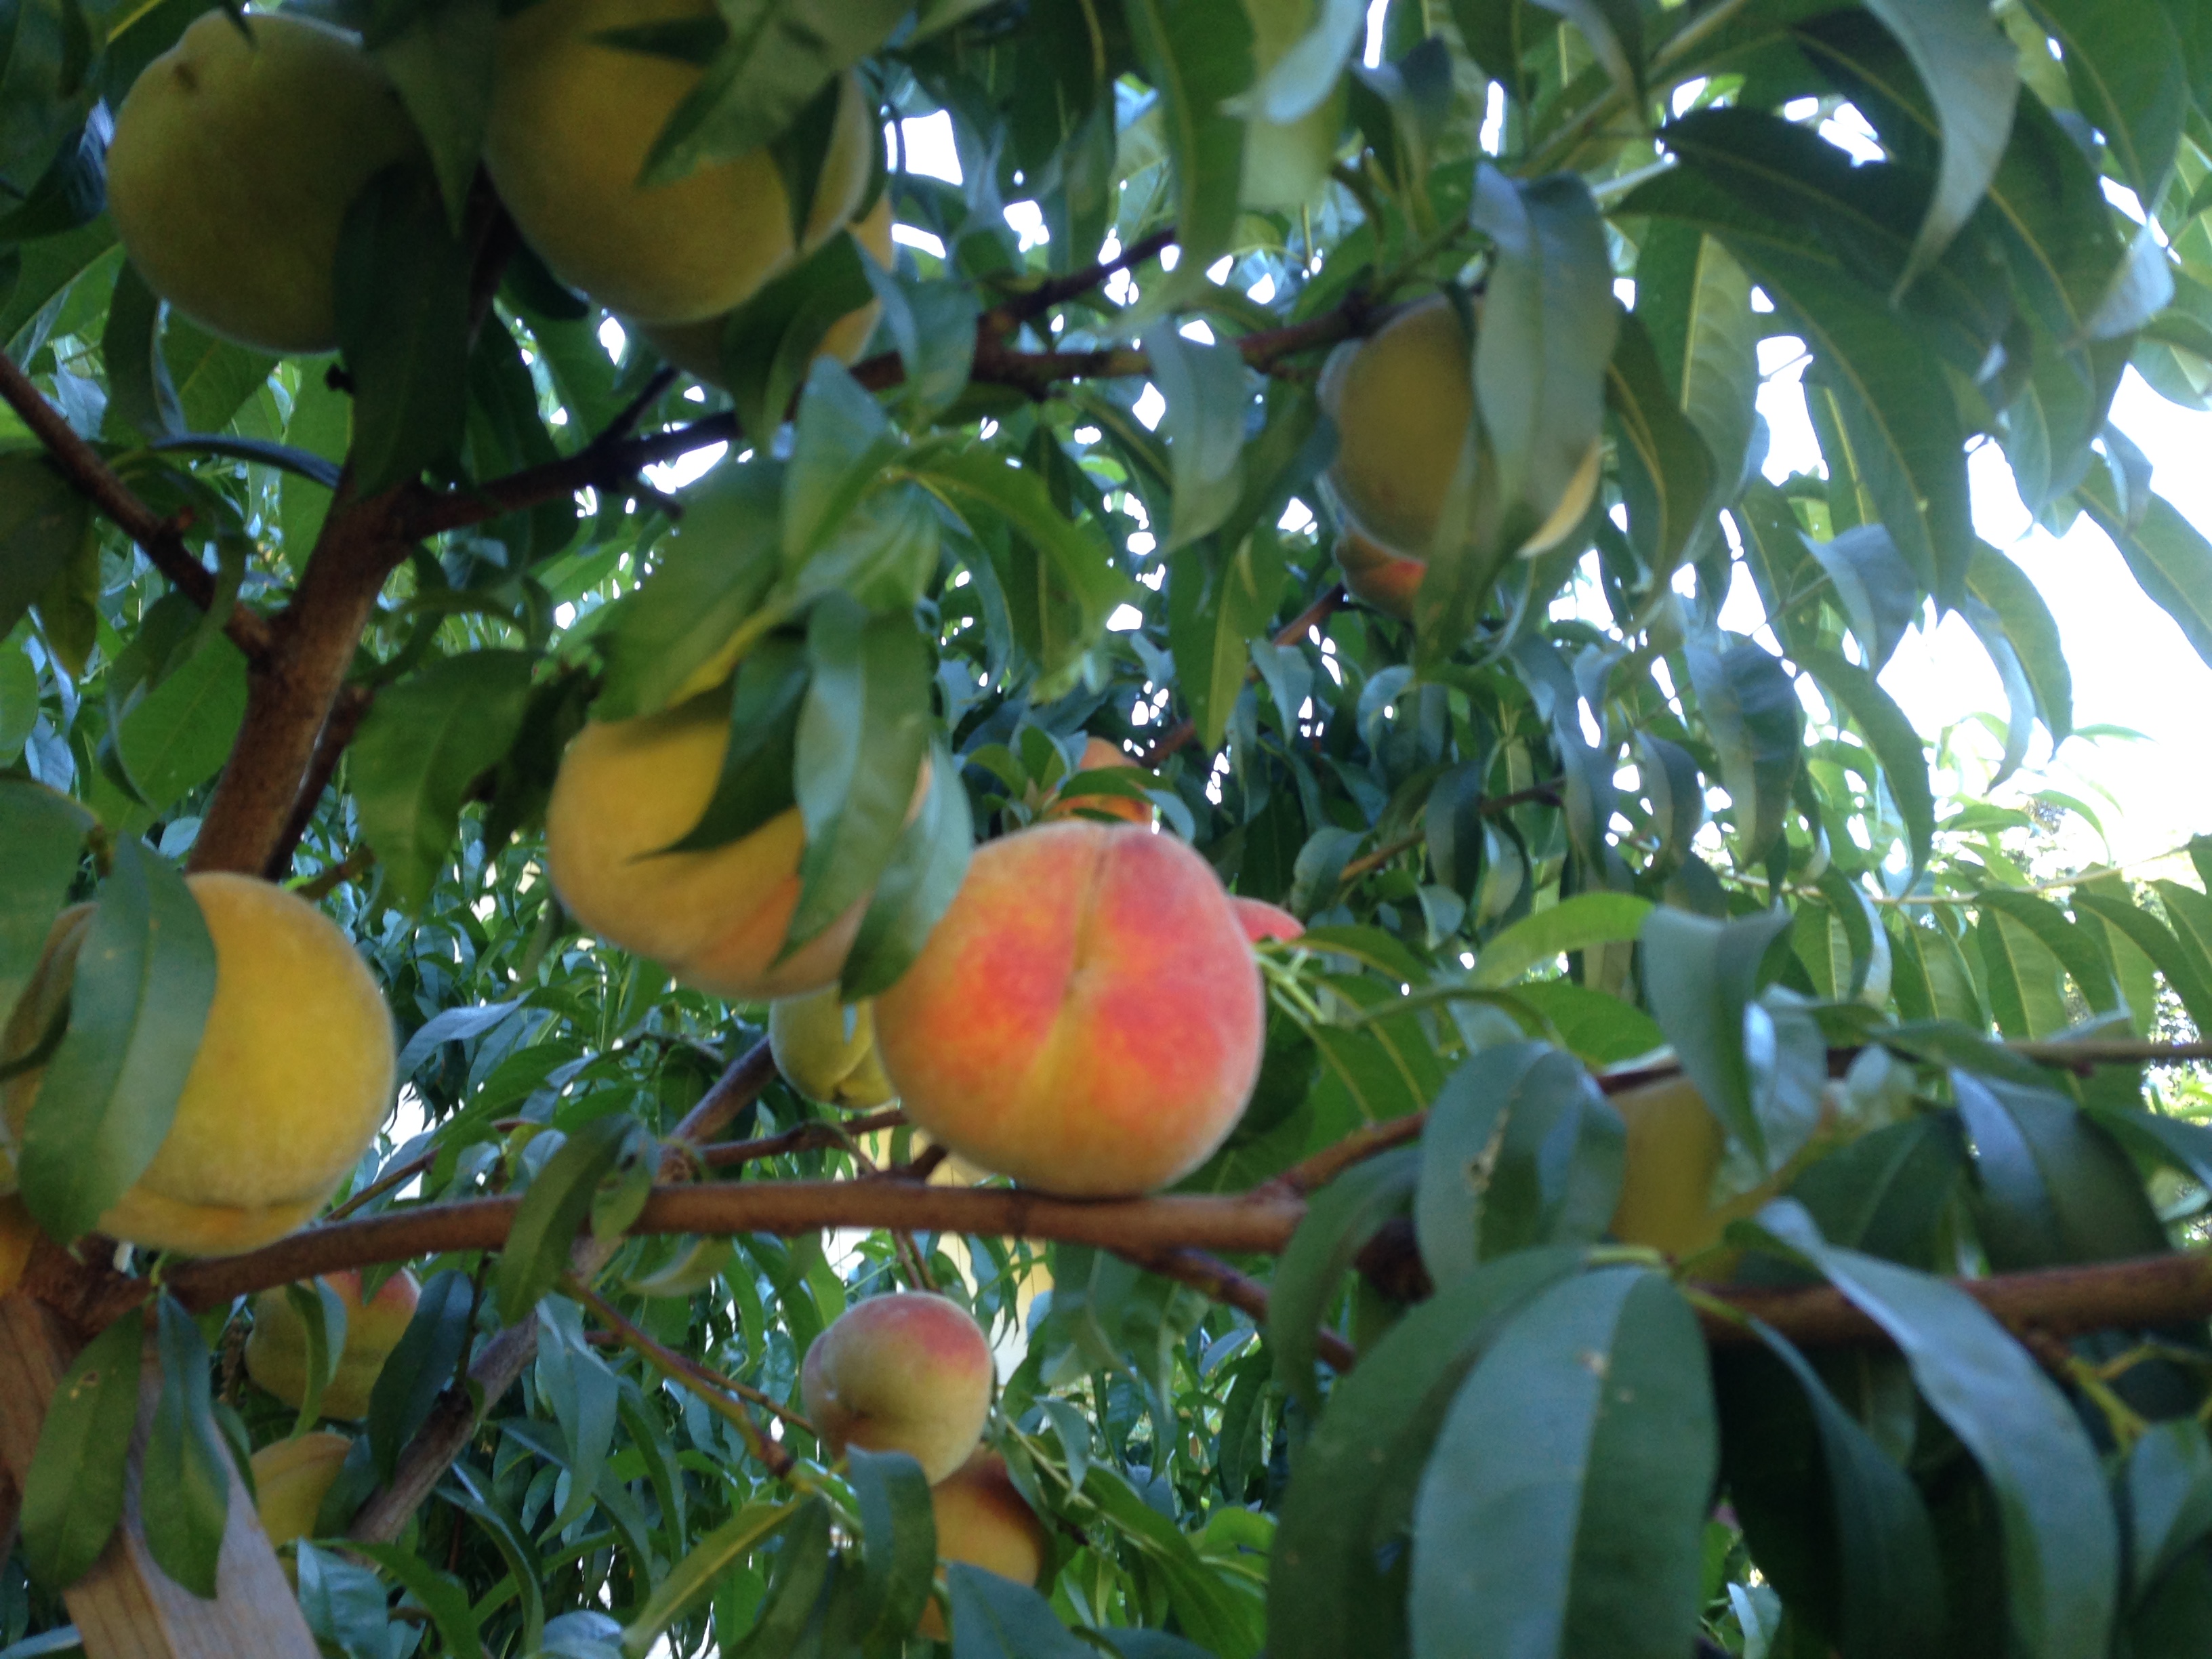
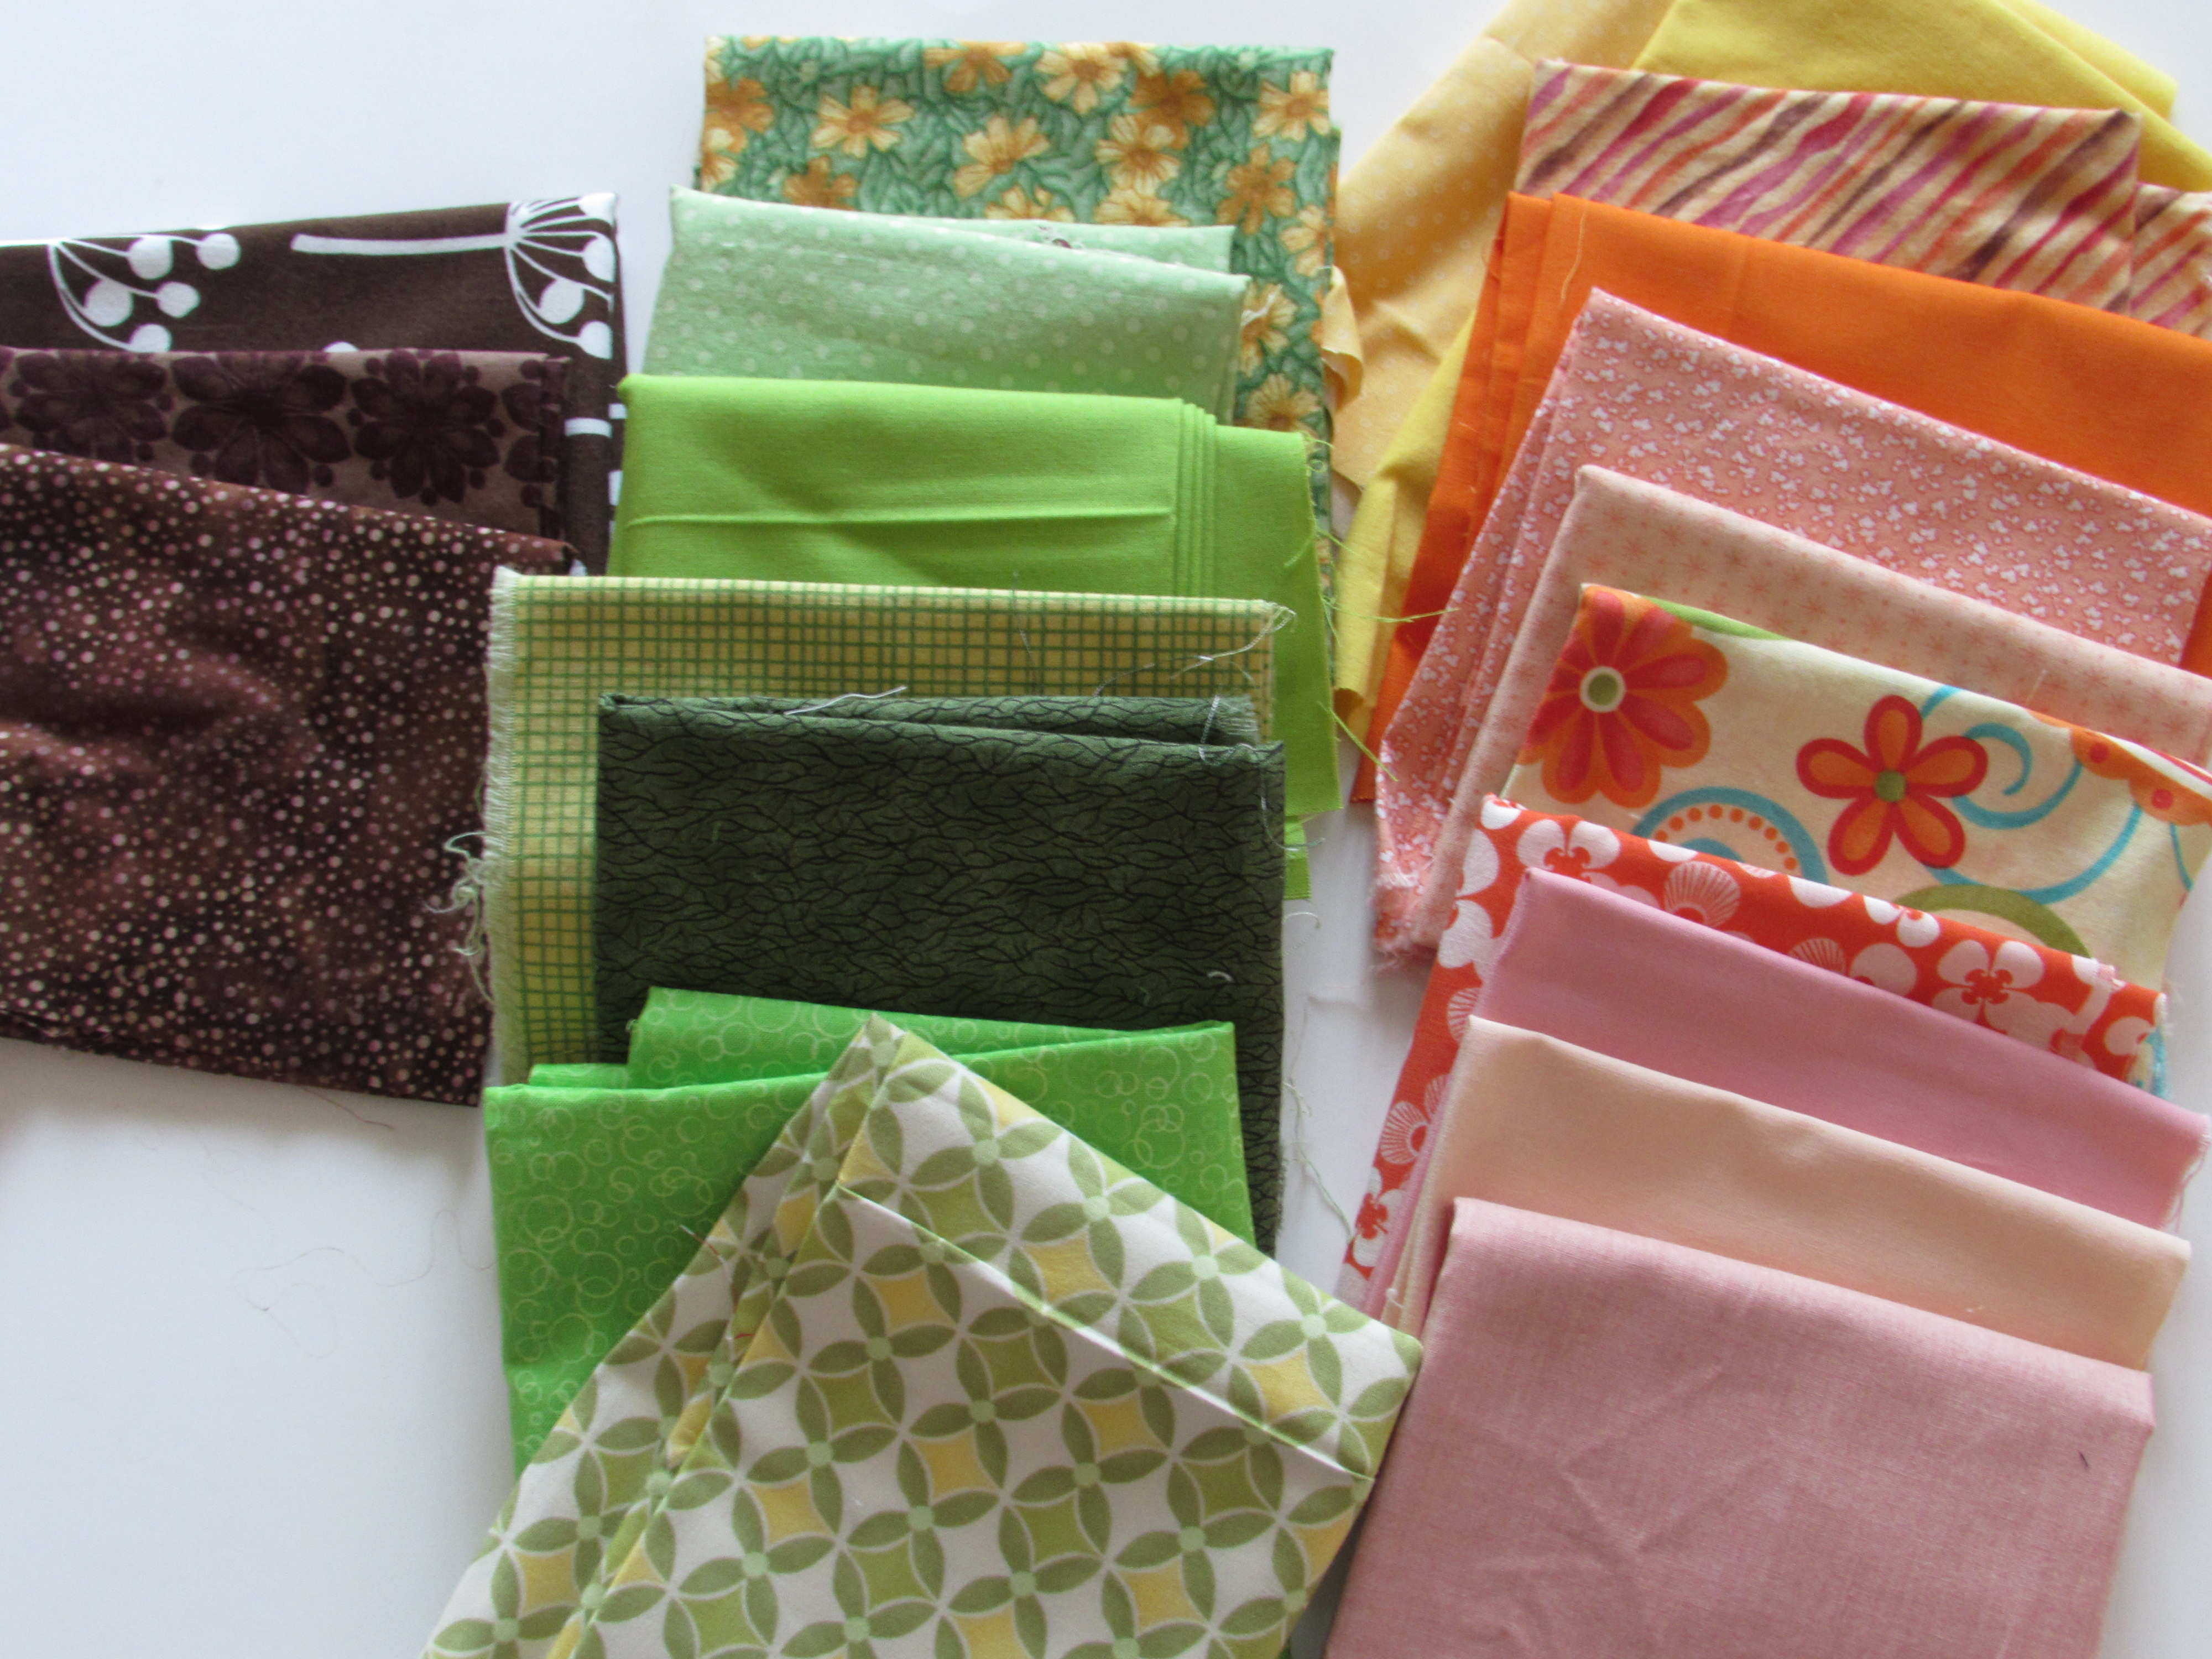
Another idea from Amanda was to take a pretty photograph and develop a pull around it. I chose this picture from our peach tree last summer because there are a limited number of colors in it.
I thought it would be a good challenge to work out a grouping with greens and orange to peachy tones. Here is the first pull.
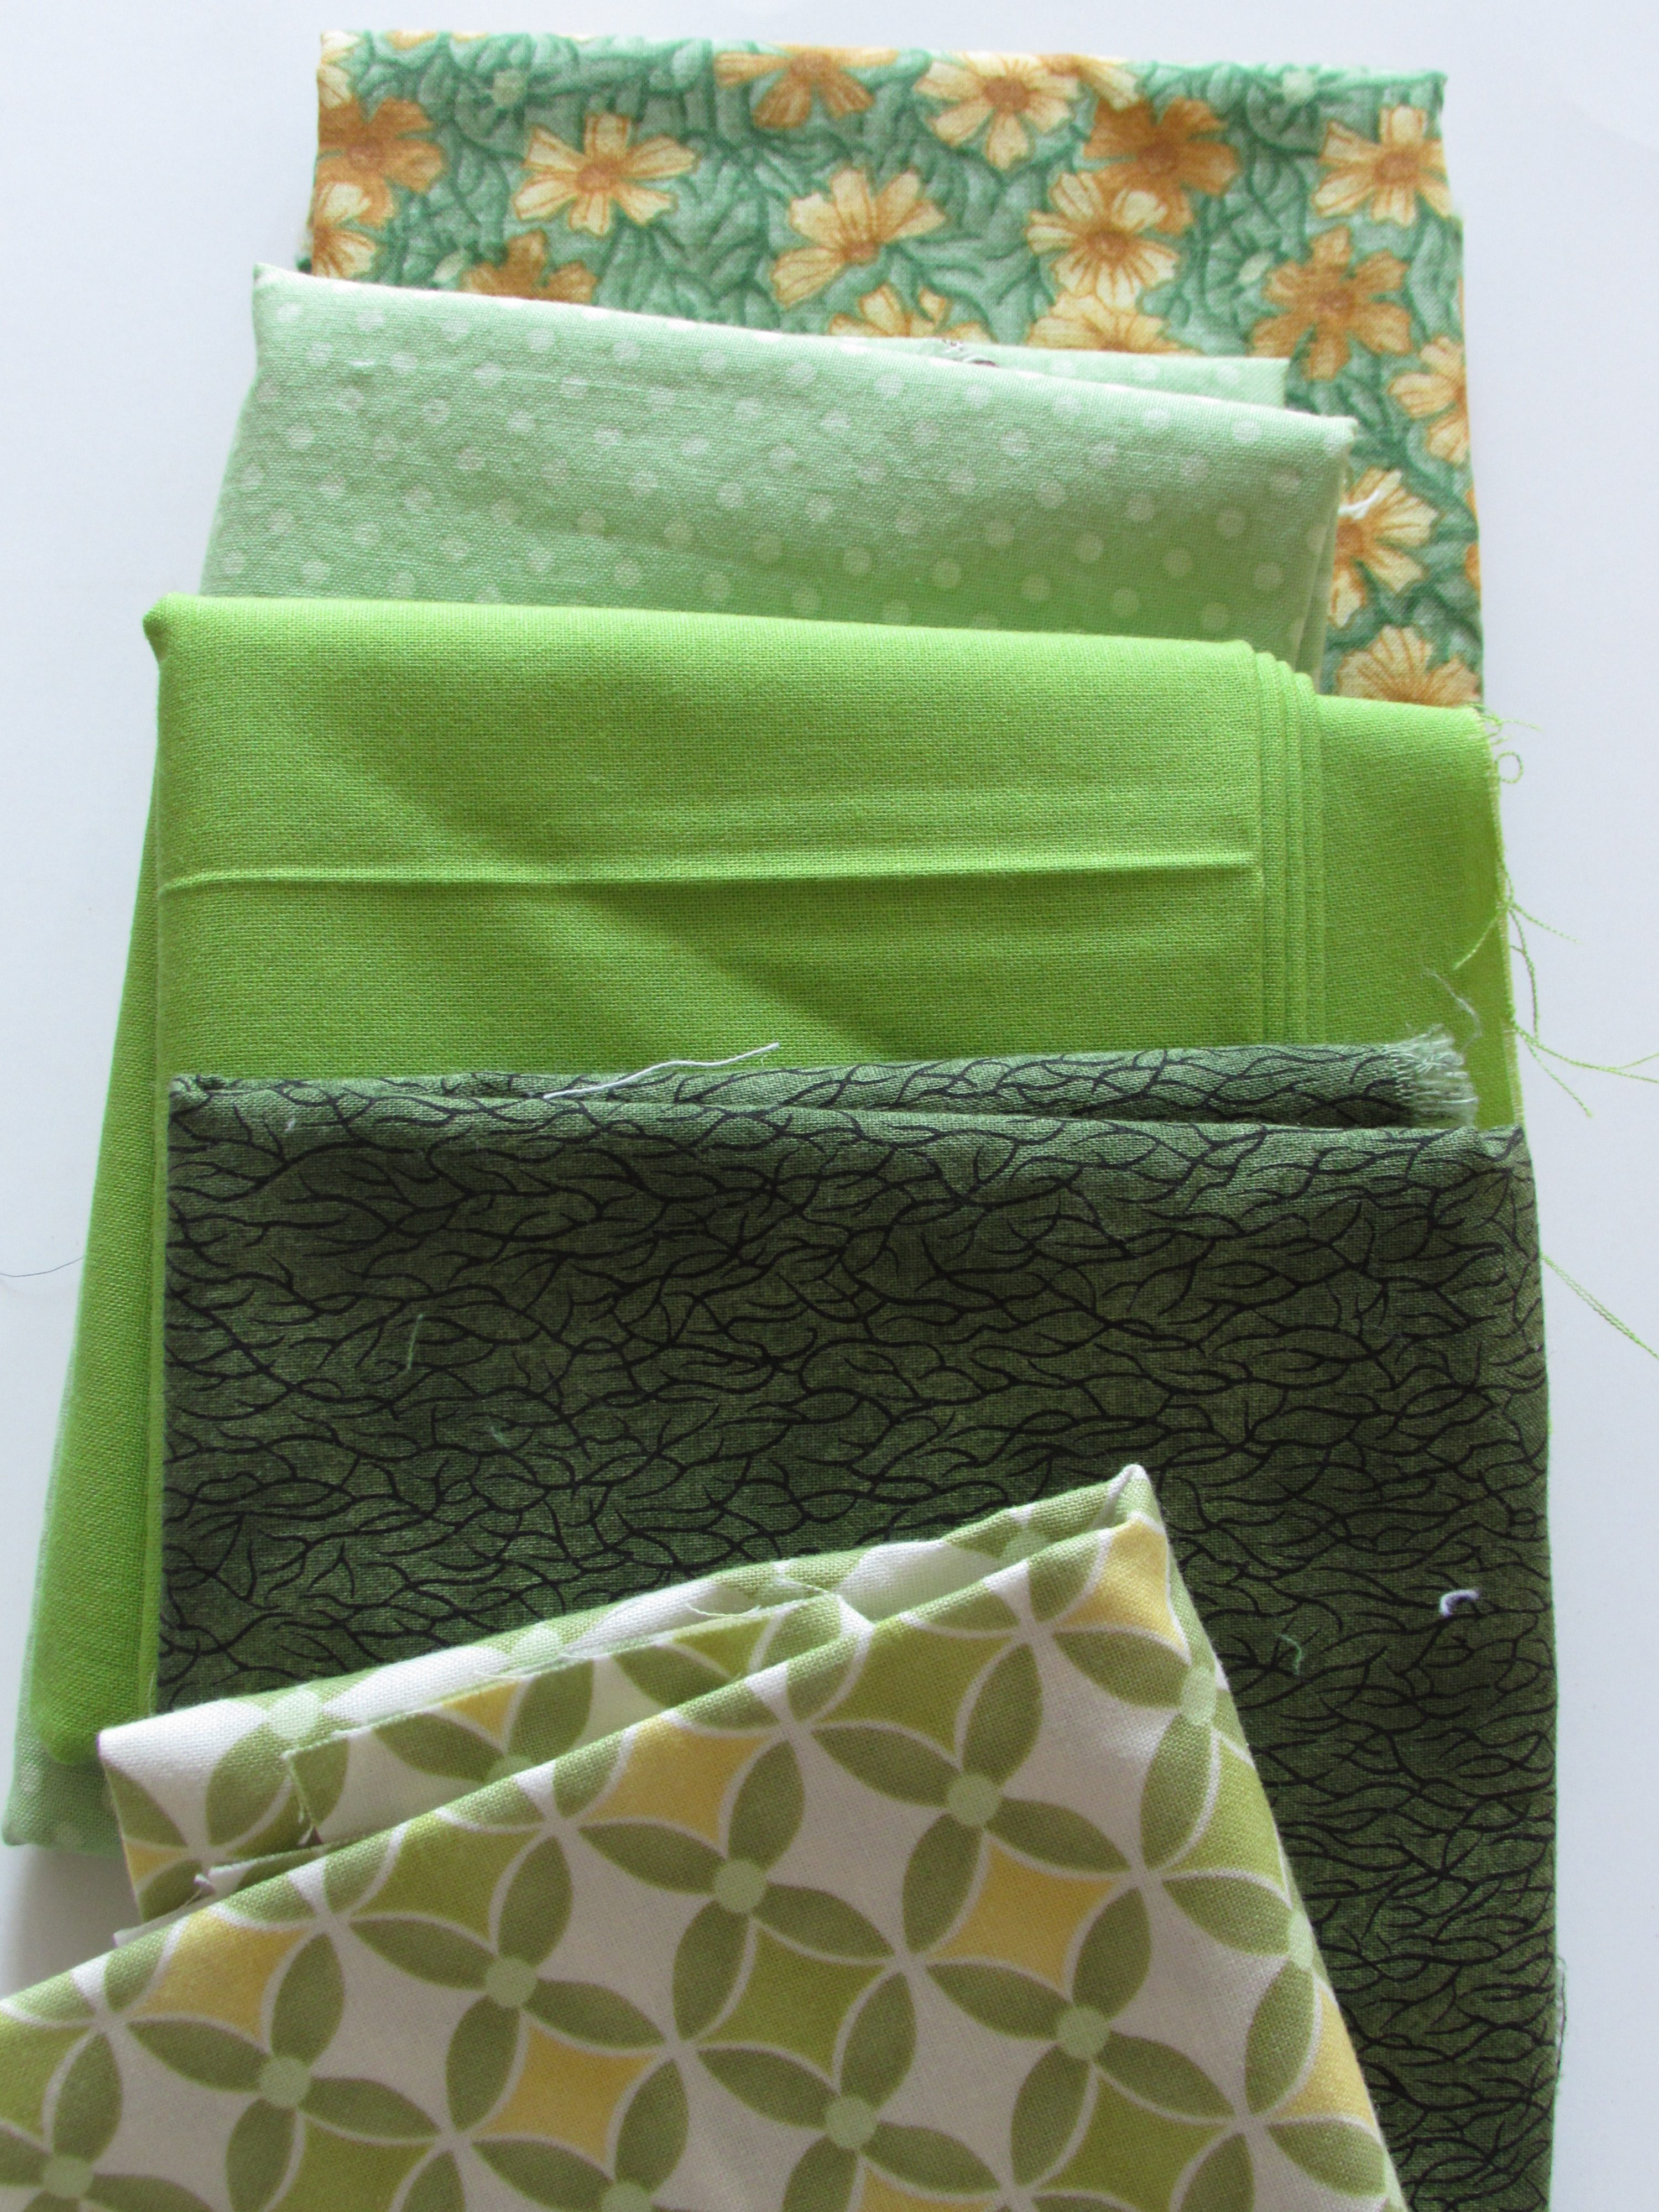
Working quickly, so as not to overthink it, I removed both the brightest green and the green/yellow check – both shades were wrong. That left this set of five greens.
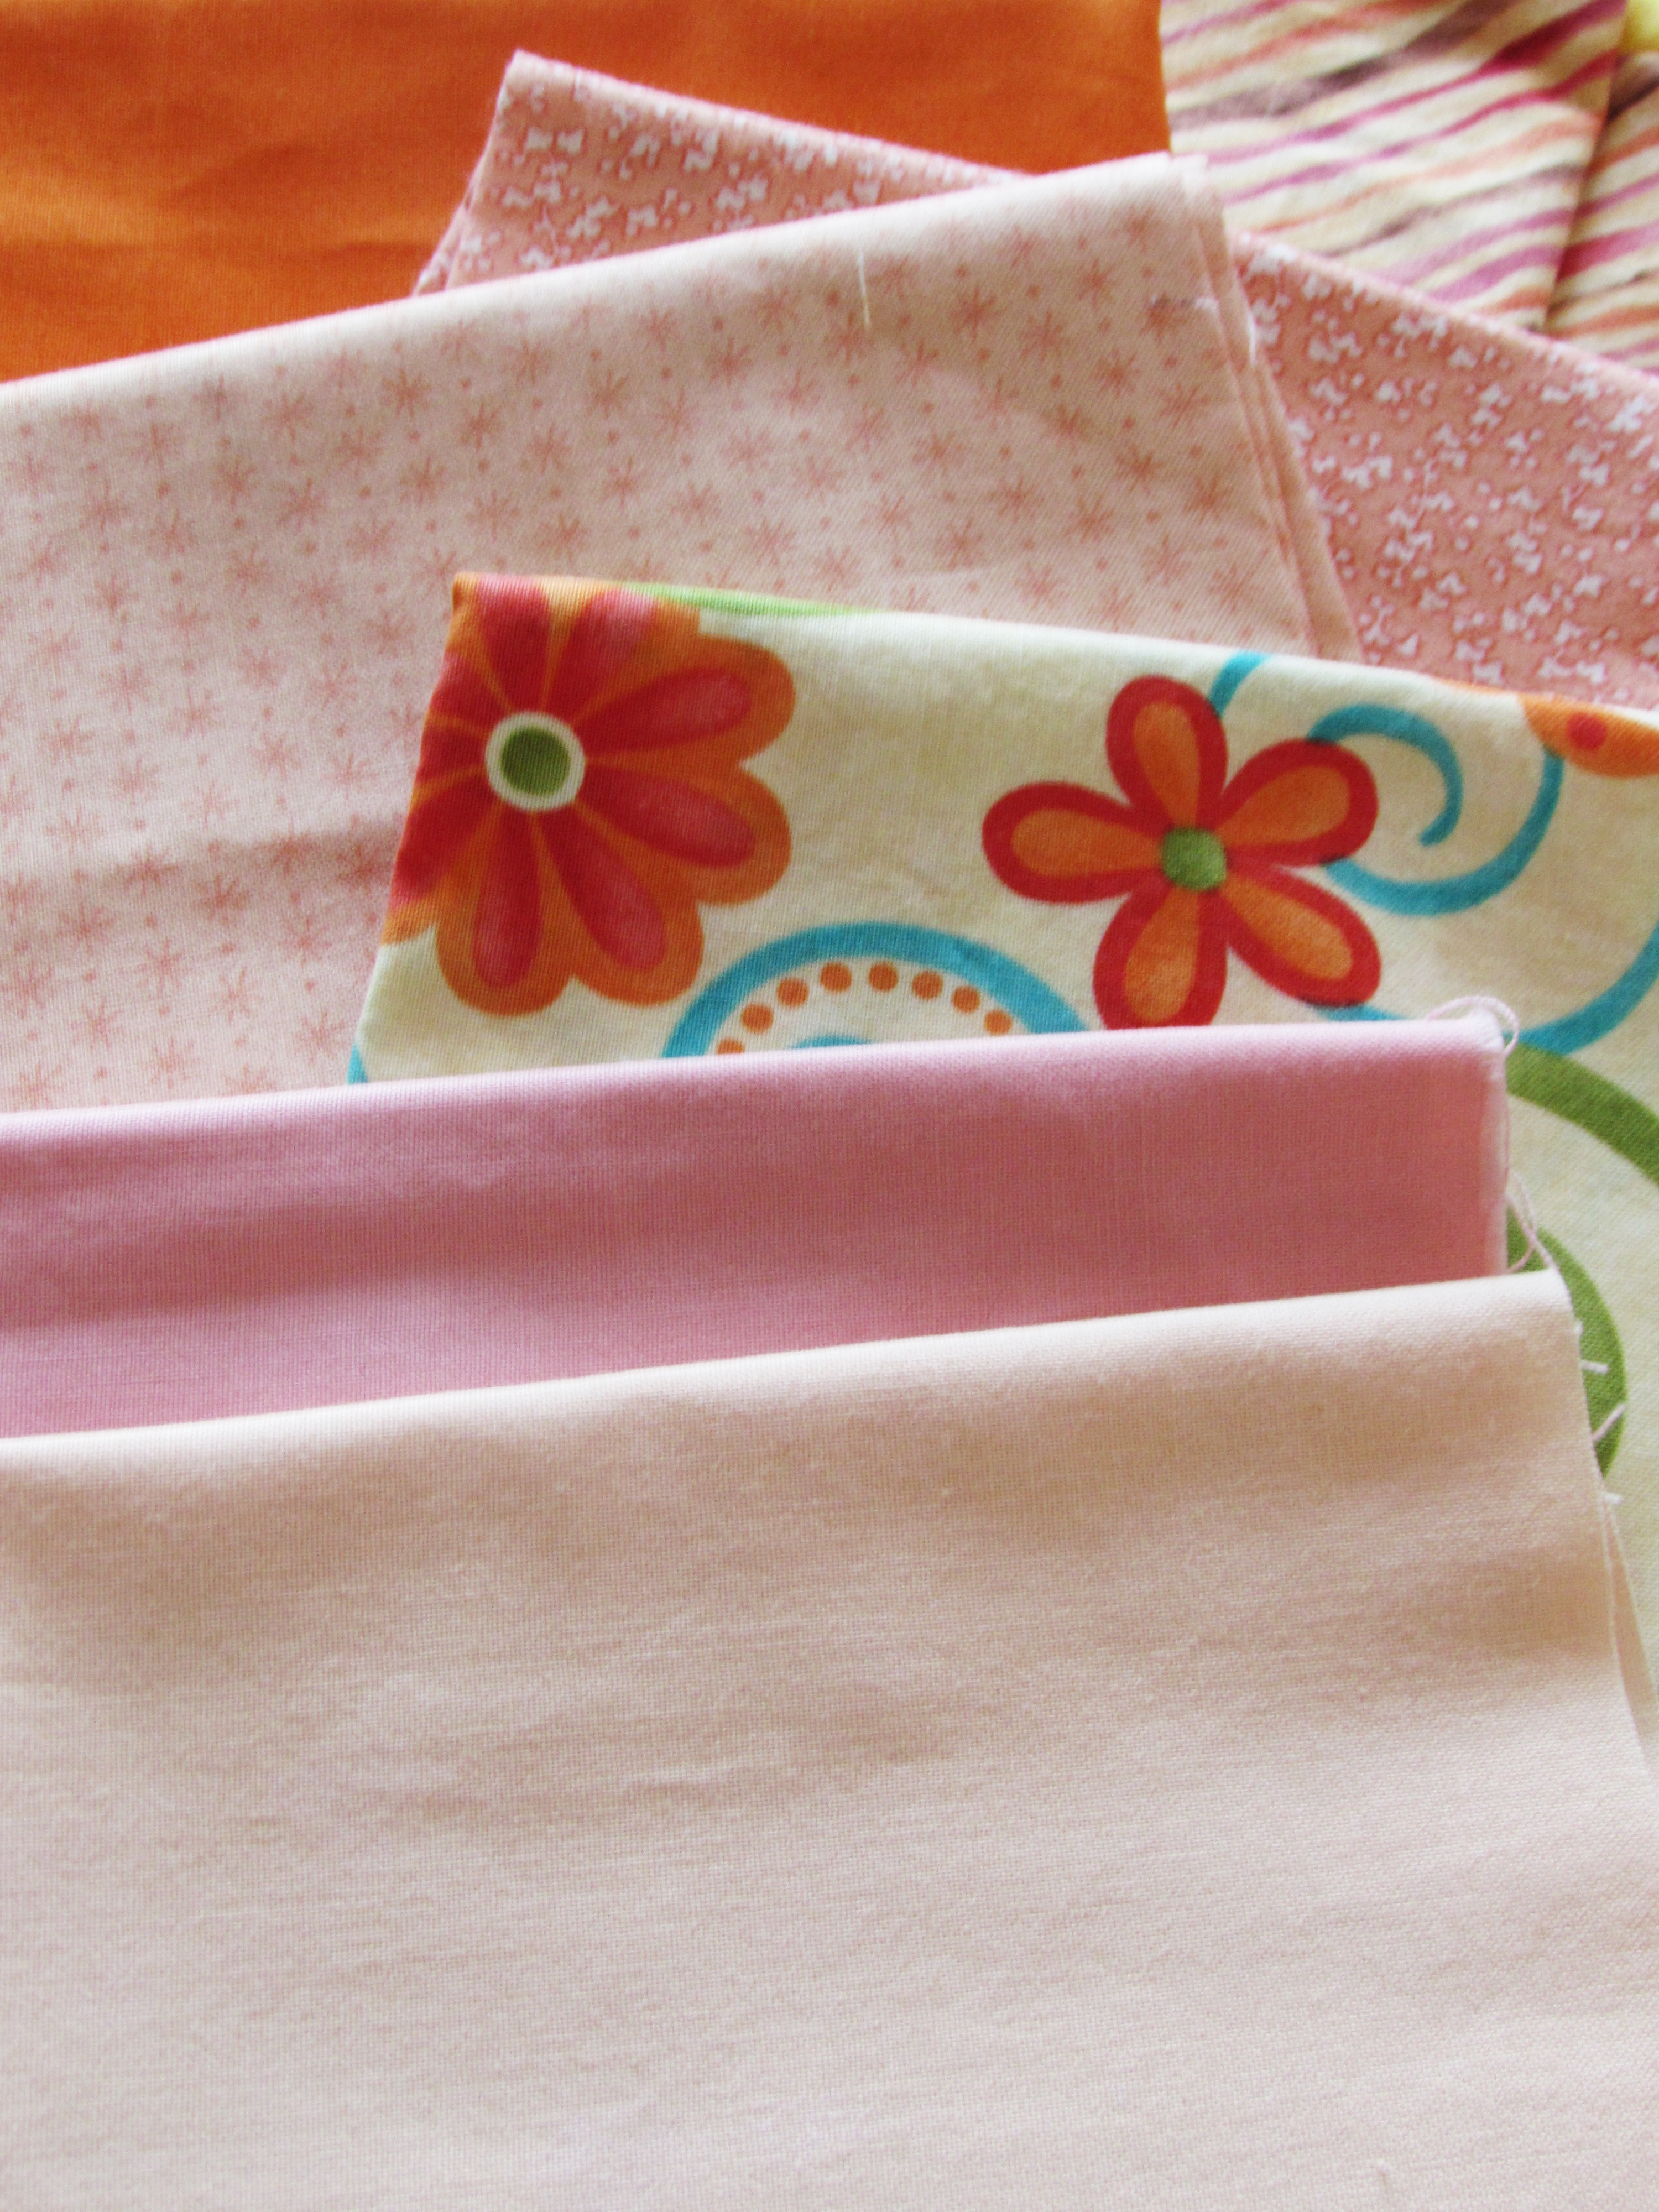
Next I pulled the from the orange, yellow and peach grouping, leaving these.
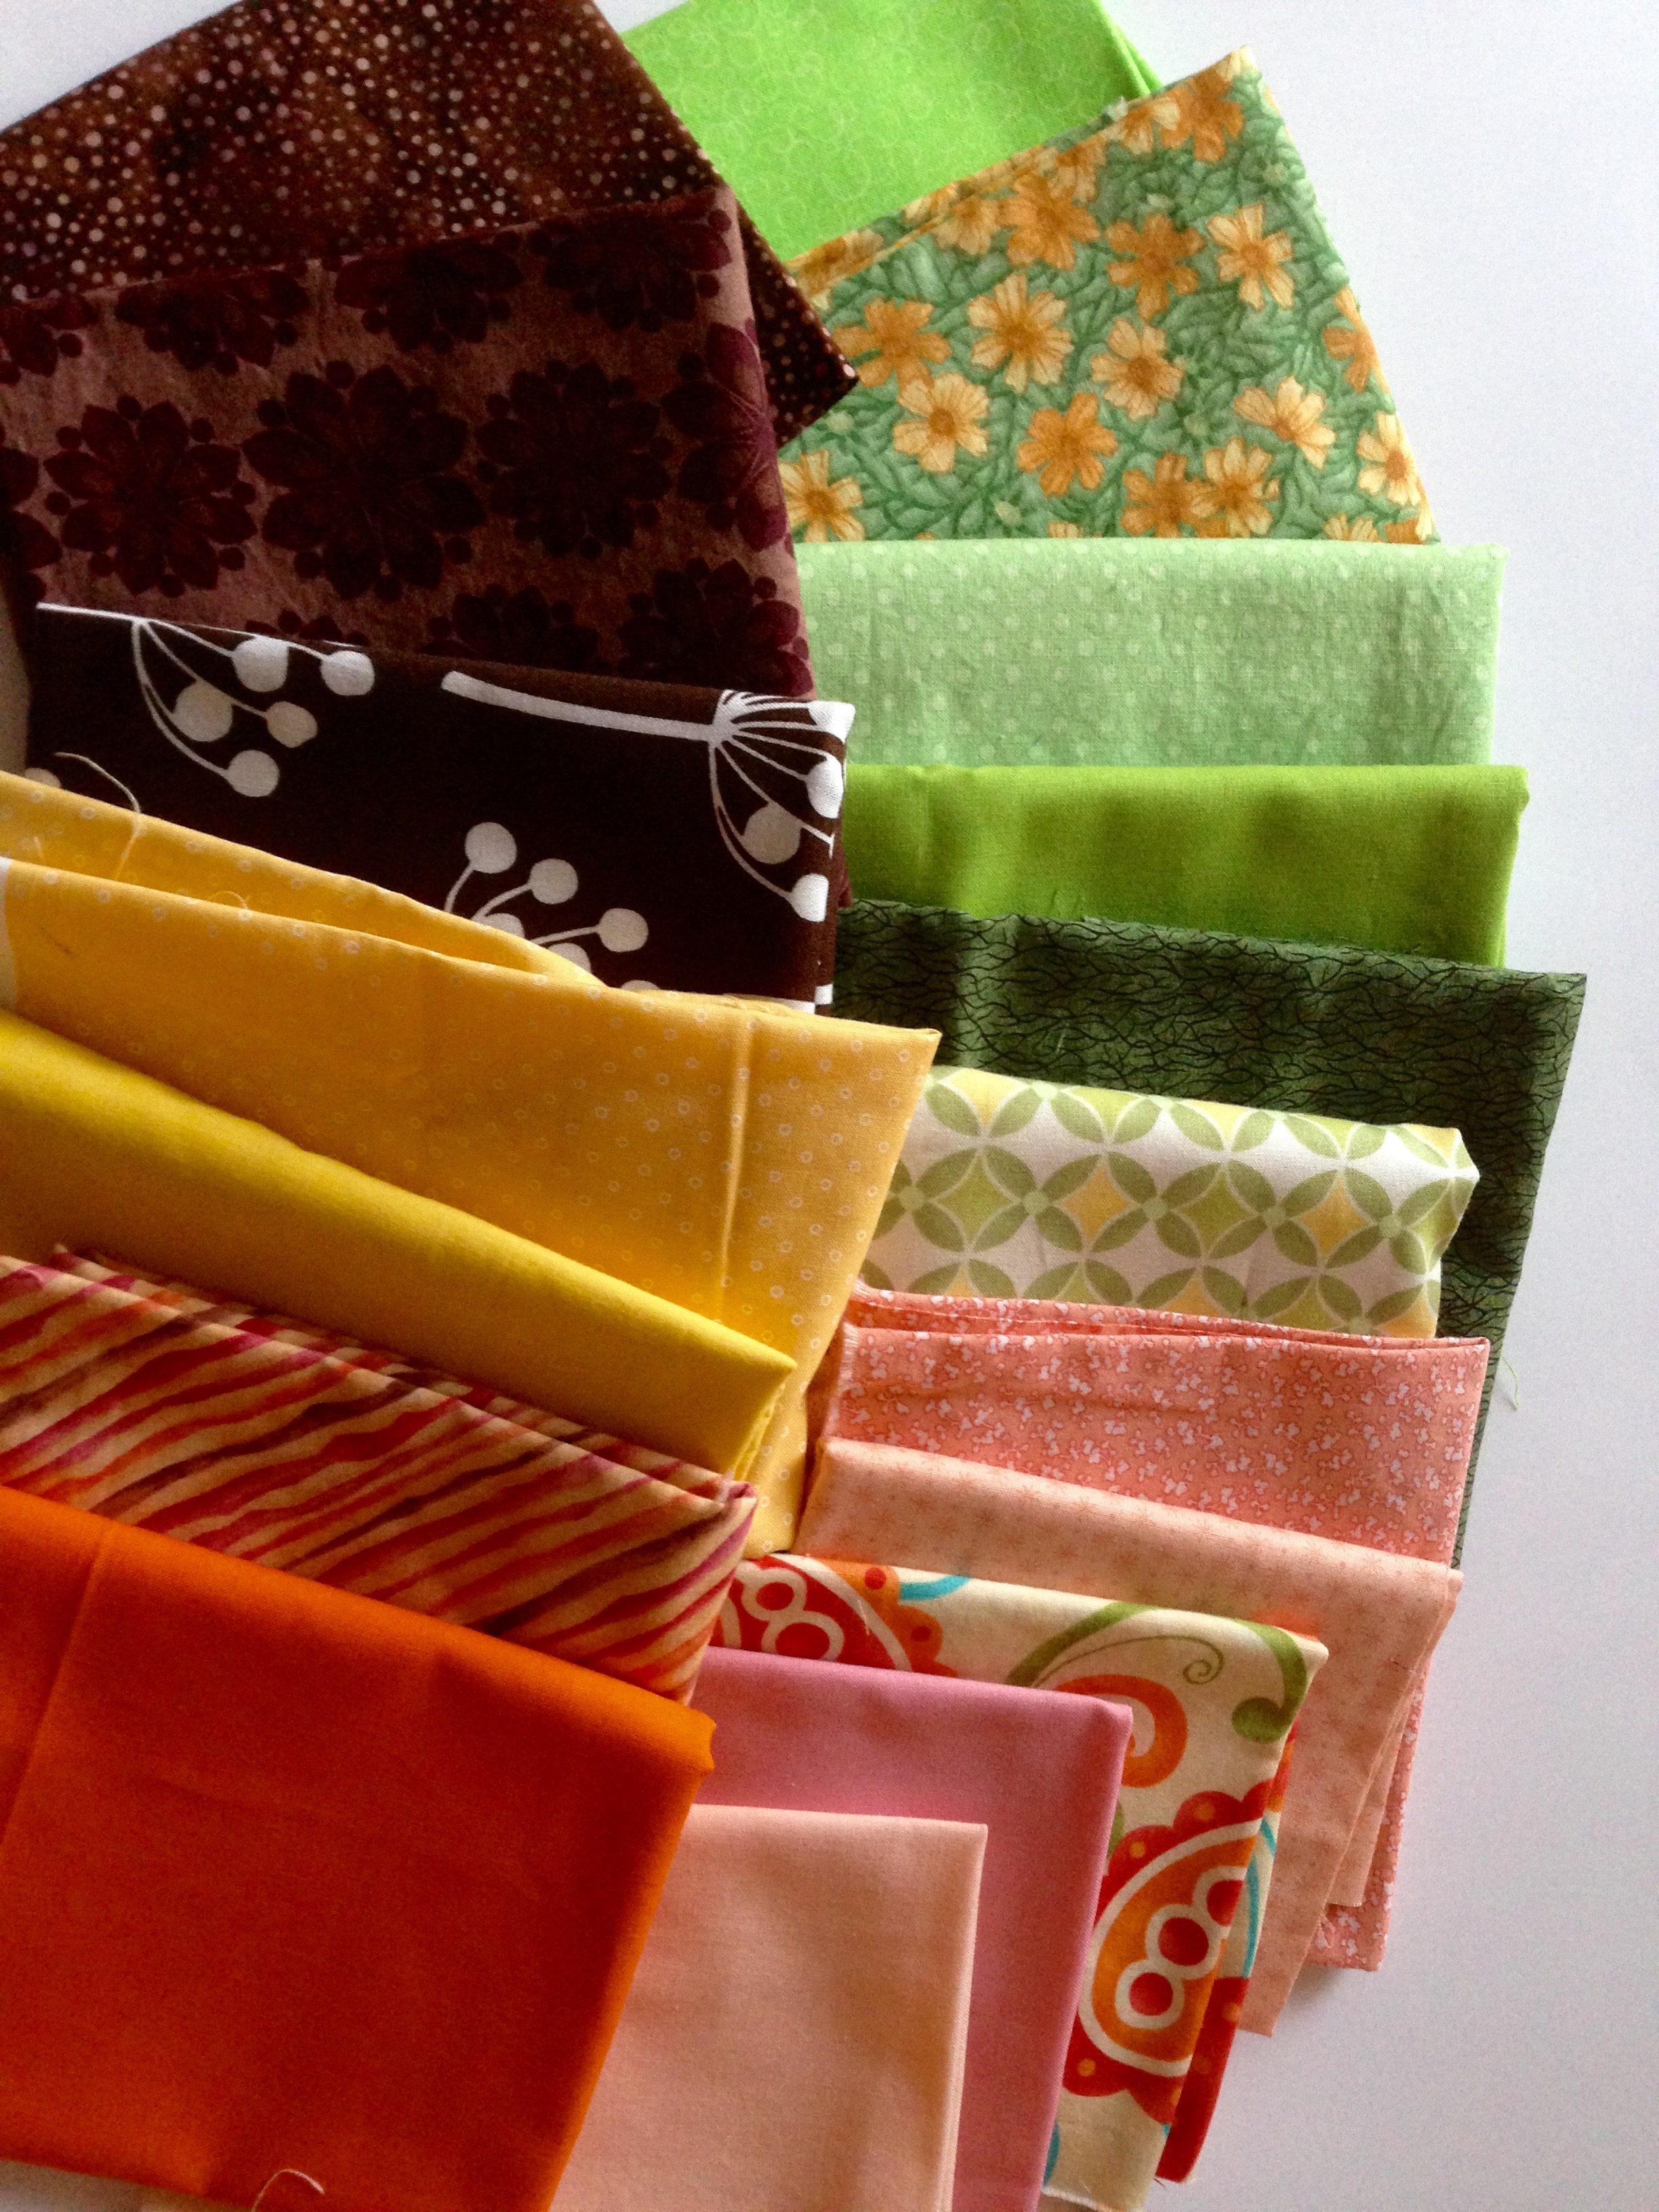
All three of the brown fabrics were kept, making this the final pull.
This is a good pull of cohesive color, different values and large to small scale fabrics. It was very easy to sort through, leaving me convinced that it just takes practice. I doubt myself when I am putting colors together but these little exercises have really been helpful. I think the second pull is more interesting than the first. What could be added to the first one to make it more exciting??
Playtime is over and I forced myself to put all of these pieces back where they belong and get back to the sewing machine. It was fun though and an easy task to do while I endured a wicked cold that Julia so lovingly shared with her mama.
A few more quick things… I want to share what I think is a really cool event that is coming up next week. Mari, of Academic Quilter is holding a Gratitude Sale. She has decided to do a huge destash (after recently moving, she unpacked her quilting stash and realized there are lots of pieces of fabric that she doesn’t want or need, as well as quilting books and notions). Rather than do a destash sale on IG, she wants to hold a “sale” where the buyer selects the items they are interested in, contributes to a charity and once Mari sees the receipt, she will ship off the fabric. I think this is hugely generous on Mari’s part. She has a list of three very deserving charities for you to choose from. She asks that the buyer pay for the shipping which won’t be terribly expensive with the use of the flat rate envelopes that the post office offers. If you think about it, purchasing fabric in this fashion has now made it a tax deductible event. It’s absolutely a win-win. Mari’s sewing room will be less chaotic, your stash will grow, charities will be supported, and you have another tax deduction come April 15th. I can’t find a problem in any of it! Check out Mari’s sale, running for the duration of next week! See you there. 🙂
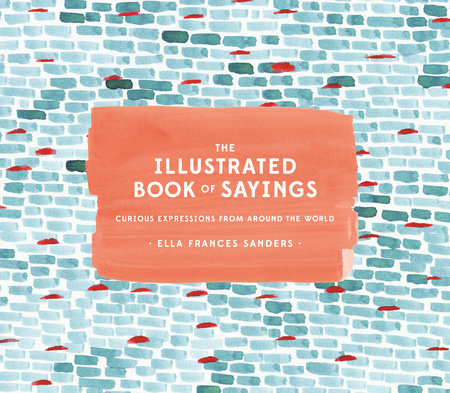
If you want an idea for any book lover on your Christmas list, I just read the sweetest book.
Provided to me for review by Blogging for Books, I read through this book in an enjoyable afternoon. Light and interesting, this book takes approximately 50 sayings from various cultures and explains them to the reader. Ella Sanders, the author of the book, does an excellent job of tying the phrases to a similar phrasing used in the English language. It was entertaining to get this small glimpse into other culture’s idioms and colloquialisms and gave me a bit of insight into what that culture values as important. She chose a collection of phrases and proverbs that are sometimes humorous and always very descriptive. Where possible,Sanders gives a bit of history around how the saying came to be. I think this is an excellent book to gift to a lover of language and vernacular. The illustrations are adorable and the brevity of each page (there is a different colloquialism on each page) makes it a fun book for the coffee table.
Another book I just finished is The Girl on the Train, by Paula Hawkins. I picked up a copy at the thrift store and it grabbed me from the very beginning. Have you read this? It was a thriller that is along the lines of Gone Girl. Crazy good and on the dark side, this was a gripping read. Just a suggestion if you are in need of a suspenseful, somewhat twisted, read. It has been made into a movie which was just released. I haven’t seen it yet though.
Linking to Lorna at Let’s Bee Social today as well as a few others. Find the URL’s at the top of the page, under Link Ups.
Who wants to see all of the fabric that I acquired through one means or another over the past week or so?? Of course you do. Here we go!
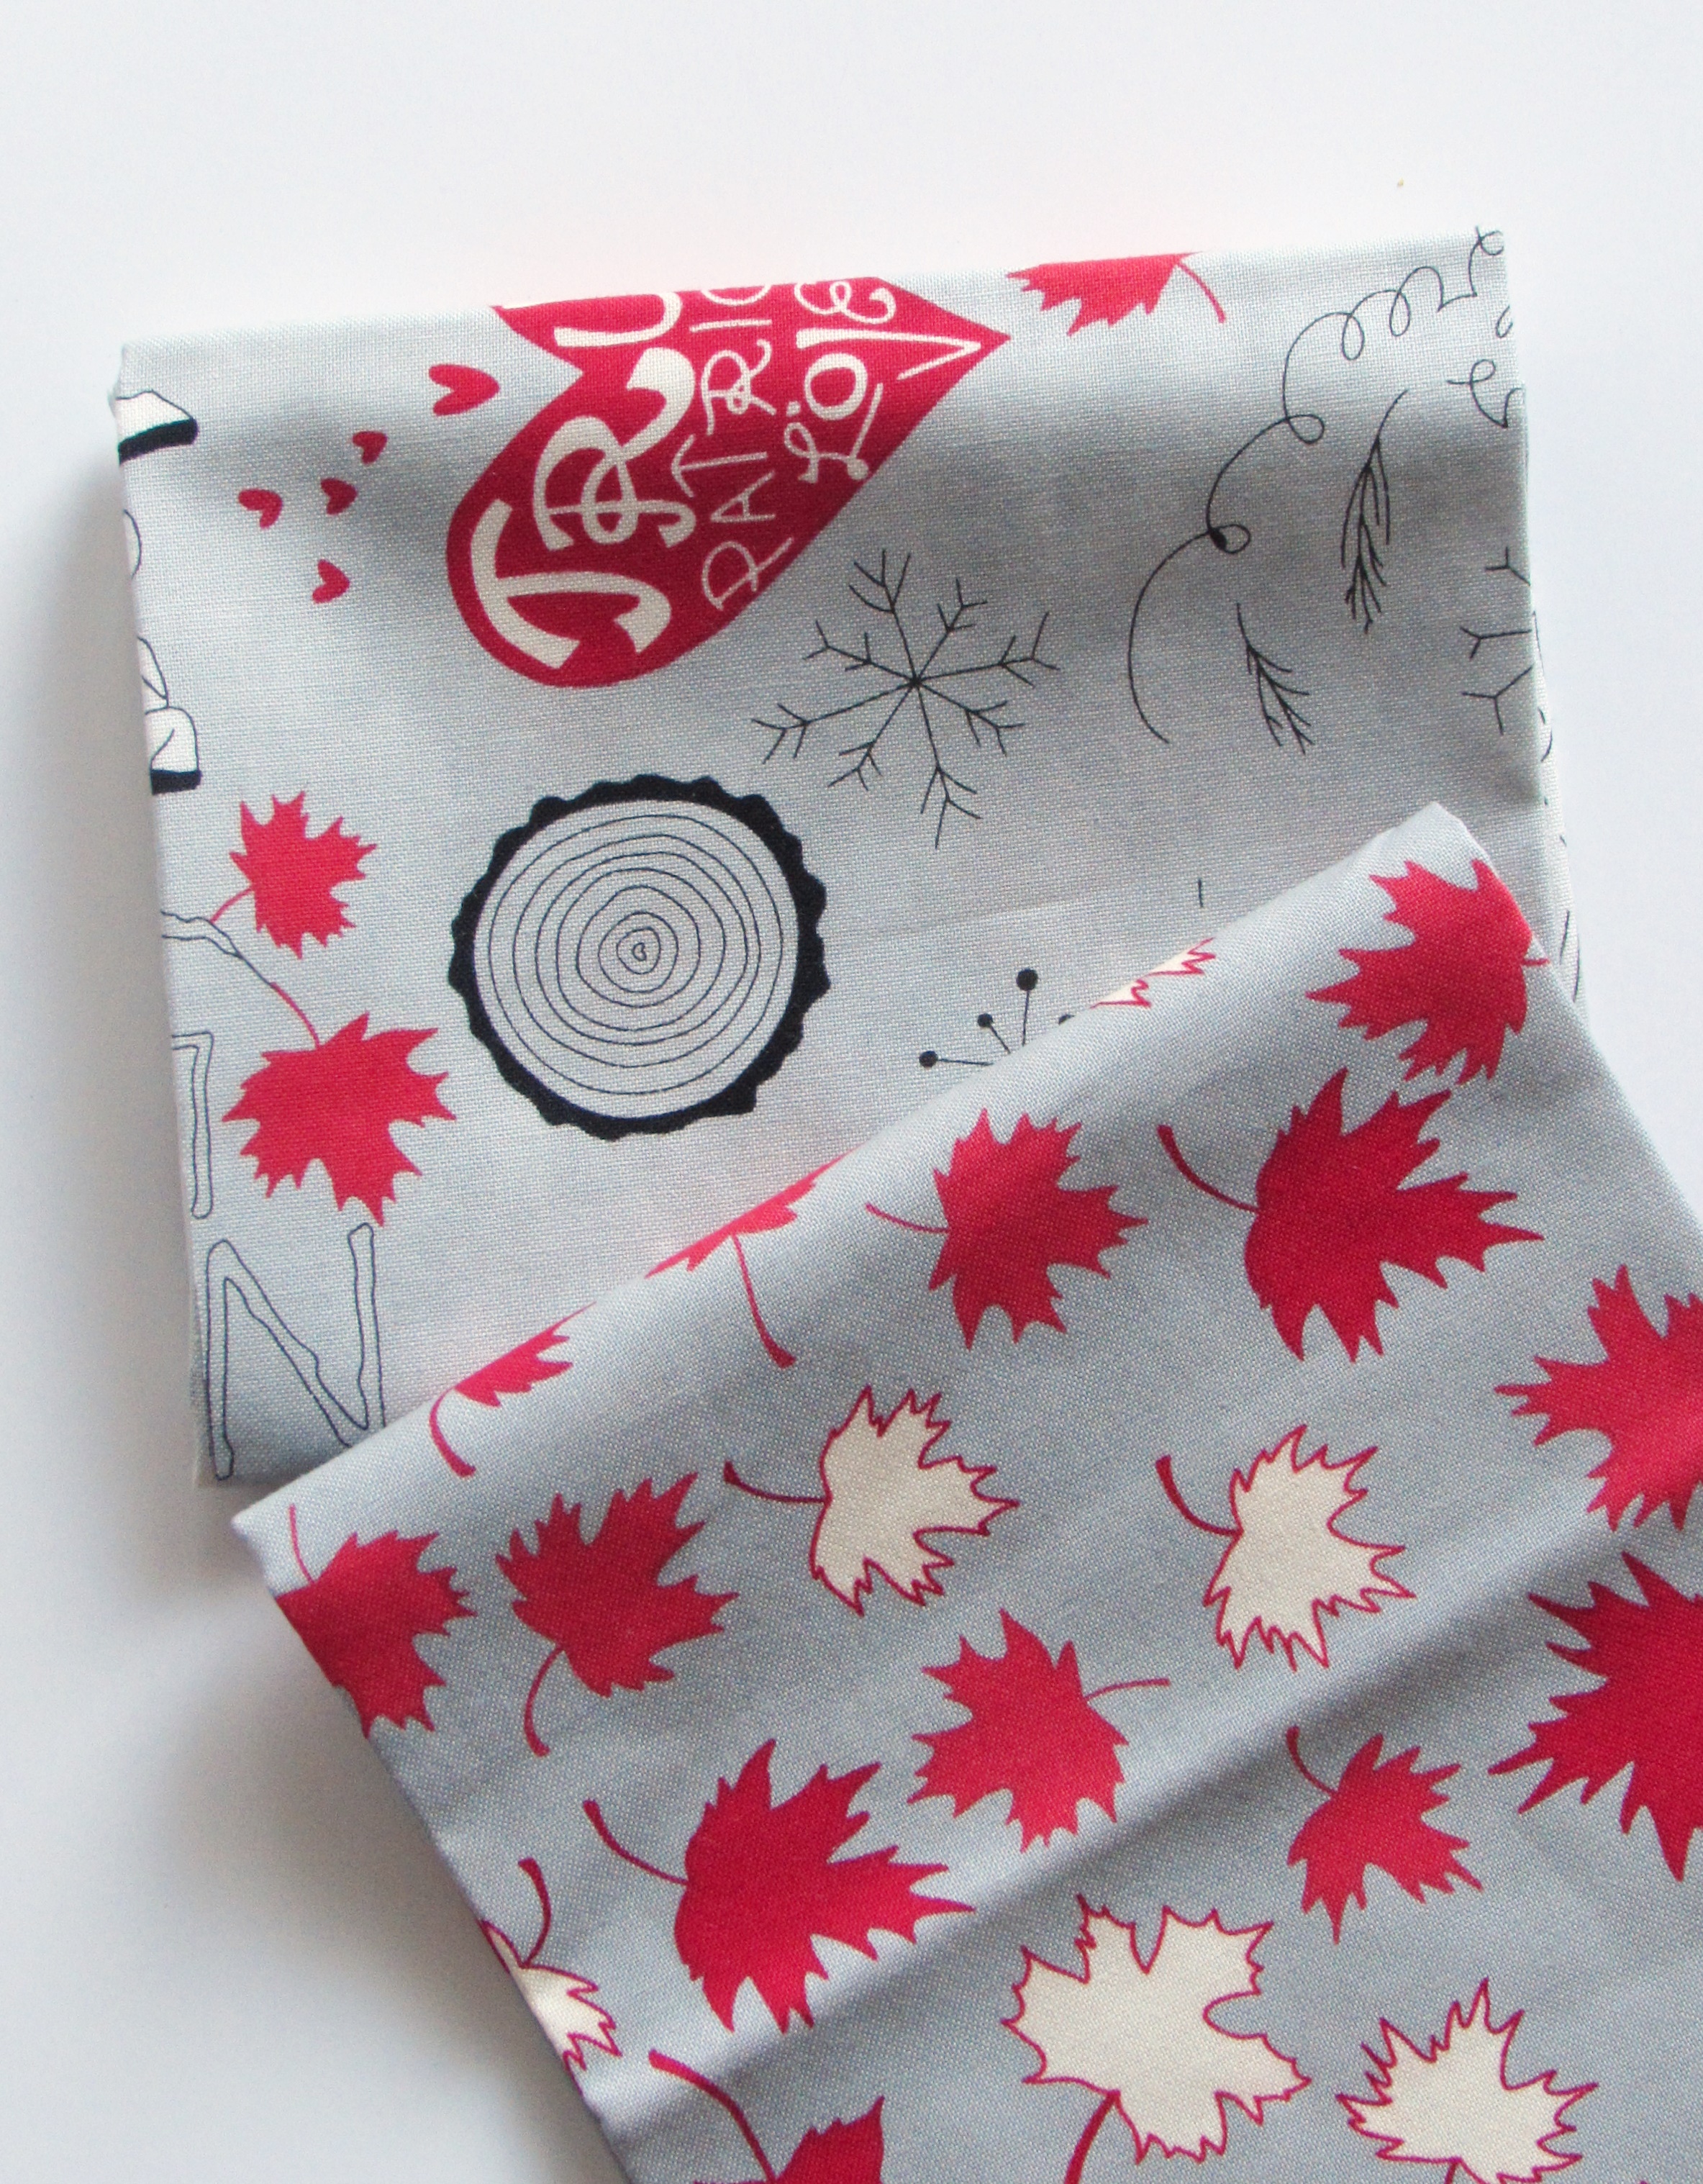
These two fat quarters arrived all the way from Fabric Please in Ontario. They are part of a line called With Glowing Hearts. I plan to participate in the Sew Fresh Quilt Bee, hosted by Lorna of Sew Fresh Quilts. She is heading up a bee where we will contribute blocks (or quilt tops if one is so inspired) as a way to participate in Canada’s Big Quilt Bee. I’m not Canadian but wanted to contribute to Lorna’s bee because the quilts from the event will be donated to Ronald McDonald Houses. I am a big fan of Ronald McDonald Houses and want to help. Everyone participating in this will be making slab blocks and each block must contain at least a bit of one of the fabrics from With Glowing Hearts. So, I ordered two fat quarters and will get to work making slab blocks. Also, because Kate from Smiles With Kate wanted to participate, I just sliced off a 5″ strip from each of my fat quarters and sent them to Kate in the UK. Isn’t it awesome? We can all participate in these events from whevever we are. Order fabric from Canada, ship to California, make blocks and return them to Ontario. Then send off a bit to the UK where she will make a few blocks and return them to Ontario. All of these blocks will be combined and lovely quilts created for people that are in need of a quilty hug. That makes me happy.
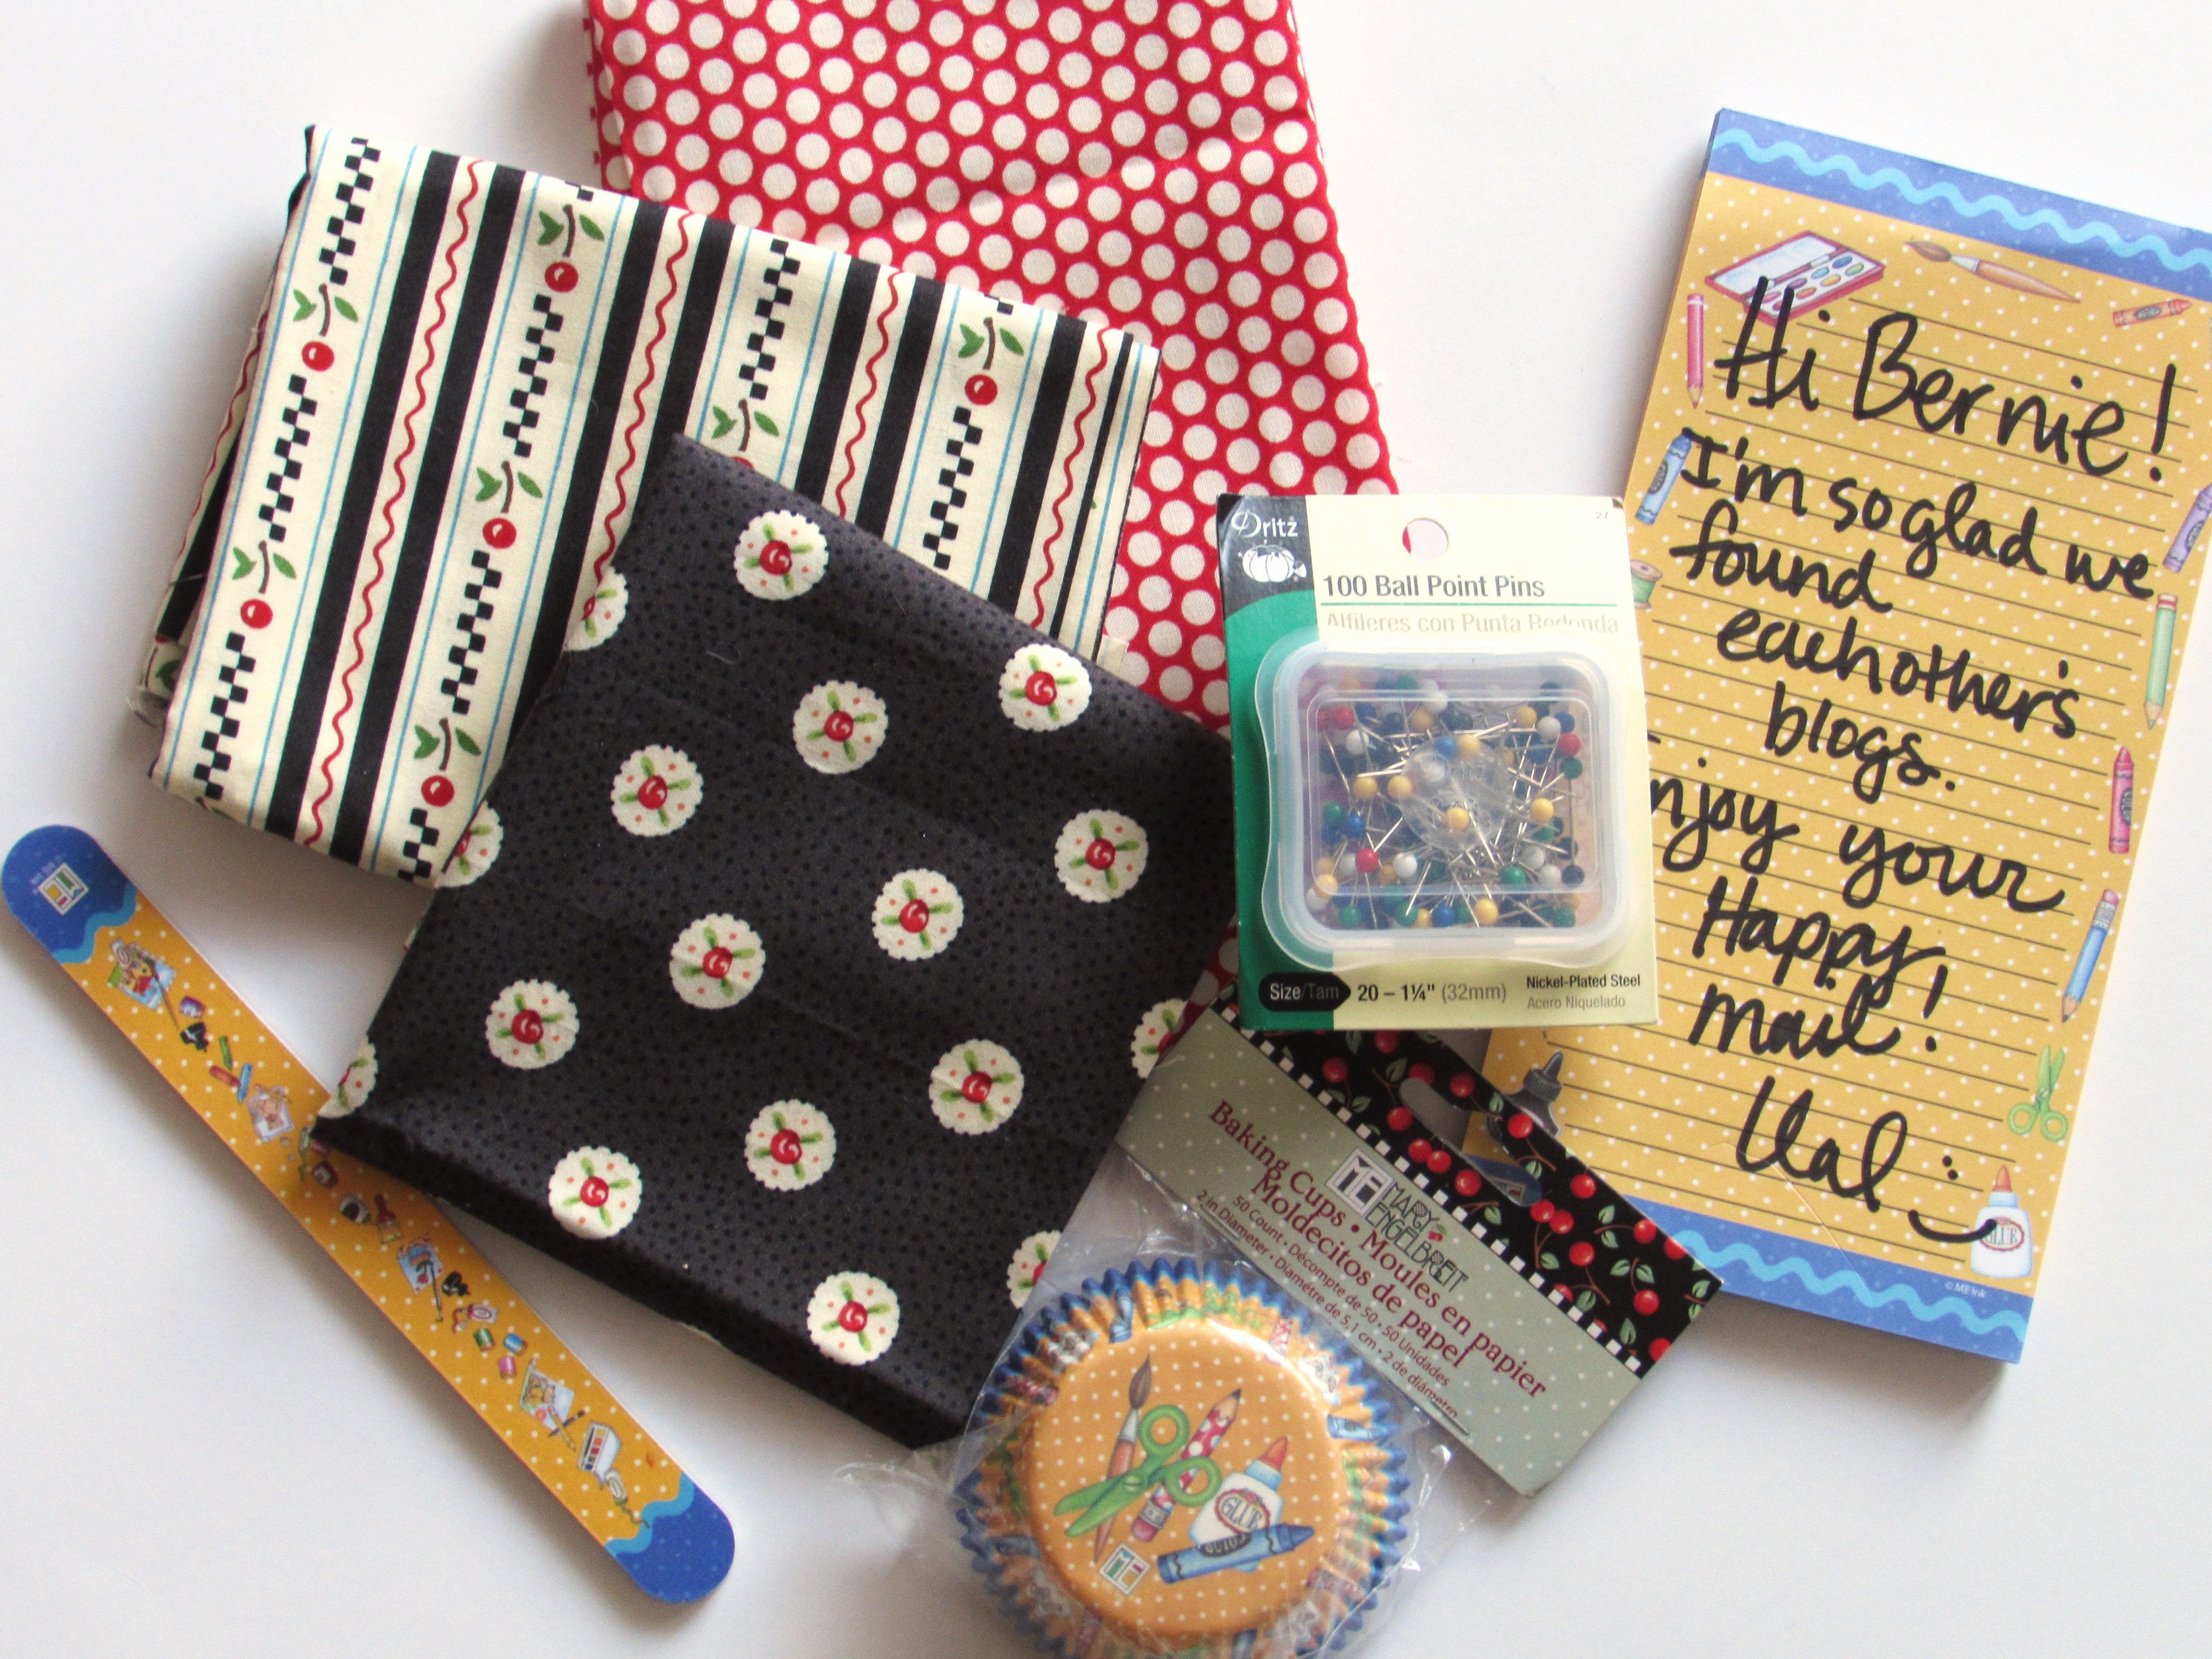
Know what else makes me happy? Winning a giveaway! Even better is when you receive an email on the morning of your birthday telling you that you won. Yep, that is all kinds of happy. I entered the giveaway at Val’s Quilting Studio. Val is the wonderful host of Tuesday Archives – a fun place to link up our older blog posts, depending on the weekly theme. Anyway, she held a giveaway of some Mary Englebreit fat quarters and other fun Mary Englebreit items. On my birthday a few weeks back, I sat down with my coffee and checked email. There was a note from Val for lucky me. I won and all of these treasures arrived in the mail. 🙂
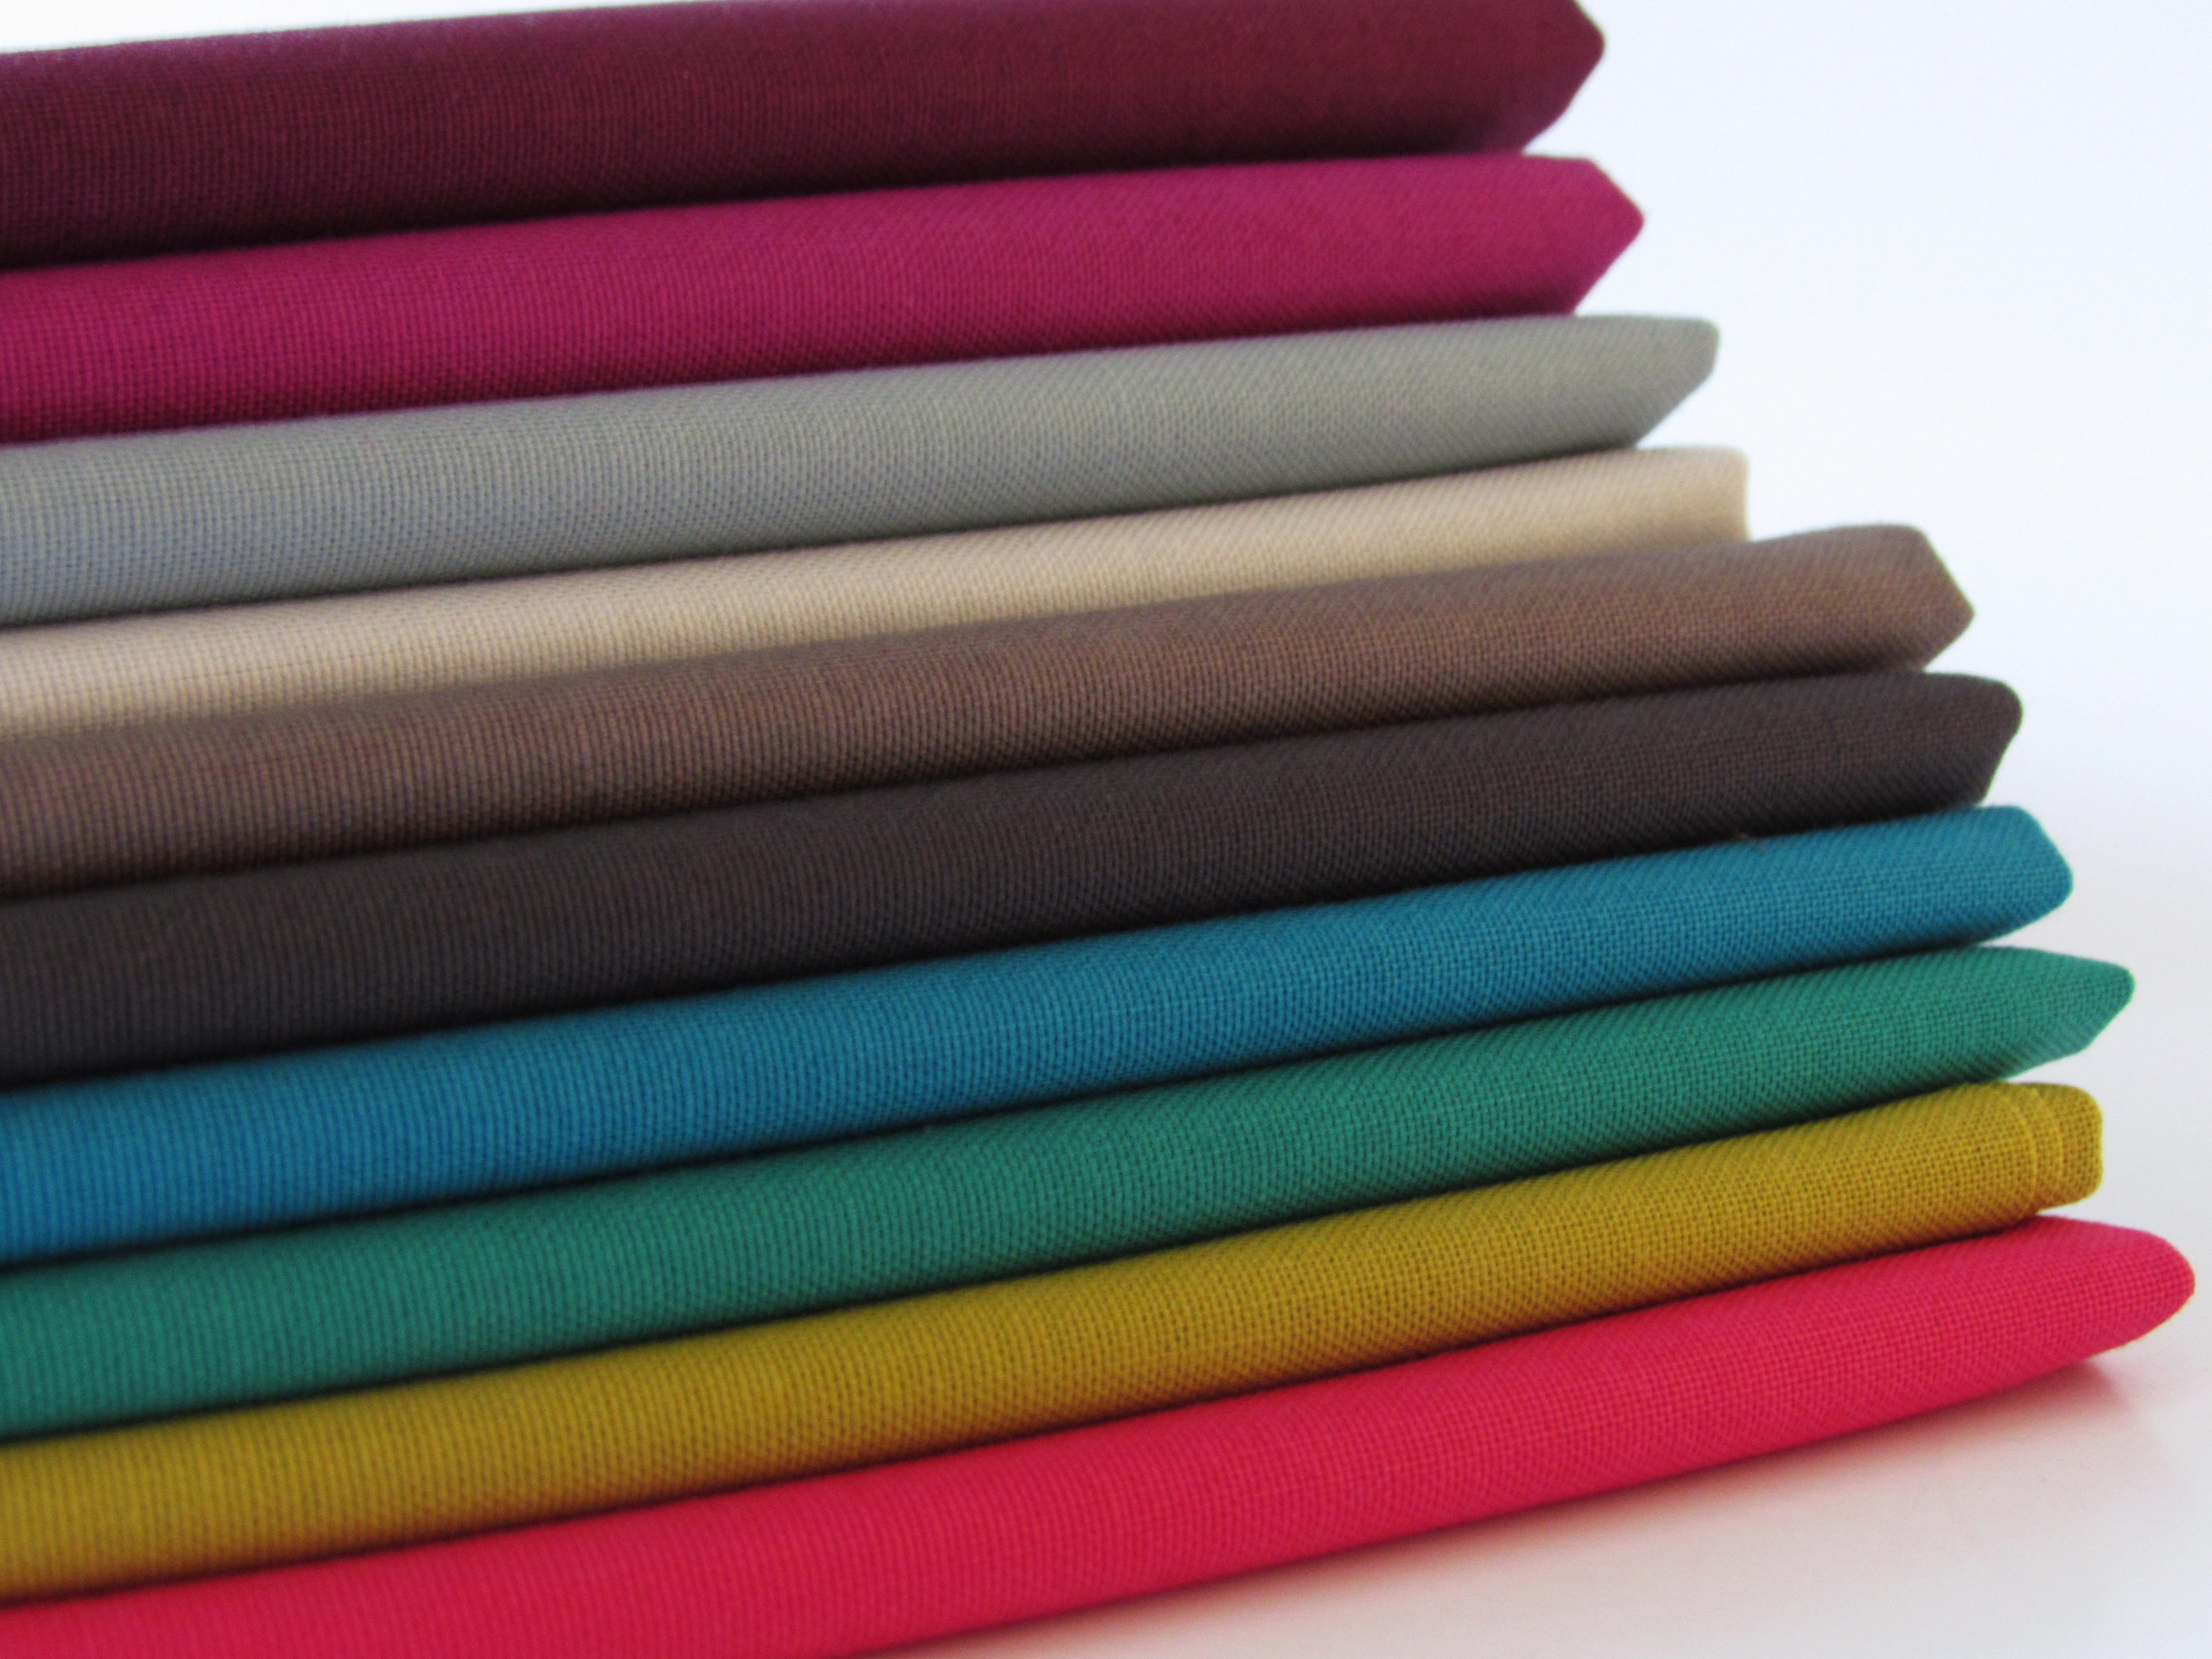
Wait though, there’s more! Also for my birthday, my middle son, Kyle gave me a three month subscription to the Pink Castle Color Inspirations Club. This means that each month I will receive a curated collection of RJR Cotton Supreme solids. I am not embarrased to say that I was a bit giddy when I received this gift. My solids are lacking and this will certainly help with the situation. My boys have been such great fabric enablers over the past few years. I have received lots of fabric surprises from them. If you want to read more about these guys, click here and here.
This month, the folks at Pink Castle outdid themselves. The colors they put together are gorgeous.
I cannot separate them and put them with the other solids. No, they are the elite of the bunch and will be shamelessly put in a place of honor on the shelf – off on their own.
Don’t you think I should make something with just this bundle? They work so amazingly well together. How could I not?
Certainly I can come up with something that would be deserving of this assortment of sumptuous color. If you have any ideas, I am open to them. Leave me a comment. I am already excited to see what the colors will be next month!!
Just as an aside, while I am thinking about Pink Castle. I listened to a great interview with Brenda Ratliff, owner of Pink Castle on Crafty Planner the other day. If you aren’t familiar with Crafty Planner podcasts, they are wonderful. Sandi Hazlewood, the host of Crafty Planner, does excellent work selecting artists in our crafting community to interview. I believe she publishes a podcast each week. Listen to a few and you will be hooked… just warning you now.
Linking up with Sunday Stash and Main Crush Monday. Links to both are at the top of the page, under Link Ups.
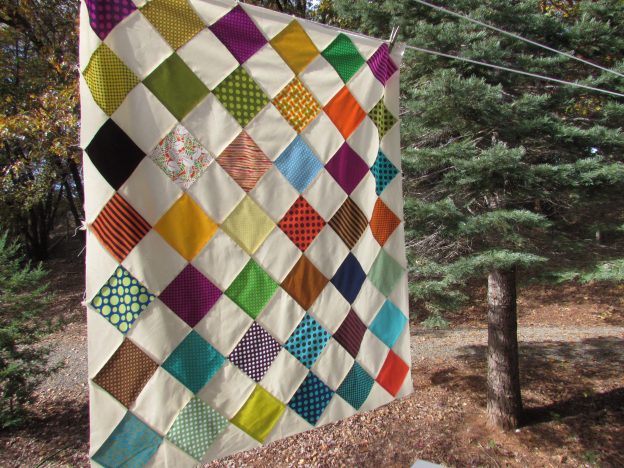
I love this quilt. It is simply sweet and joyful. It came together quick as anything and that is satisfying too. My niece is expecting her third child in January. She is such a wonderful mom to her two daughters. She has a huge balancing act to juggle these days with a busy career as an attorney in the Bay Area, mom to two girls ages 3 and 5 and a baby due in a few months. As with their first two babies, they have chosen not to find out the gender of this baby so I kept this project unisex as far as color schemes go. I am excited to meet this baby and especially to hear the name that she/he will be given. My niece’s husband is from Ireland and their girls have beautiful Irish names (Ciara and Roisin). I expect this baby will have an equally special name.
For the first time, I used Hobb’s Heirloom batting, an 80/20 cotton and polyester batting. It has a different feel; lighter in weight and a bit puffier. I stippled it with a wide, open pattern to keep that lofty feel.
Another satisfying bit about this project is that it required not one trip to the store. I had every bit of this in my stash. From charm squares to background fabric and from backing to batting and binding – it was all from my stash. That is fantastic. All too often I end up buying fabric for this or that and to just pick from what I have and get a sweet quilt as a result; that is what it is all about. (Lately, I have really been thinking about the amount of fabric I have accumulated over the past three years. It is time to use it. There are so many pretty projects waiting for me in that closet!)
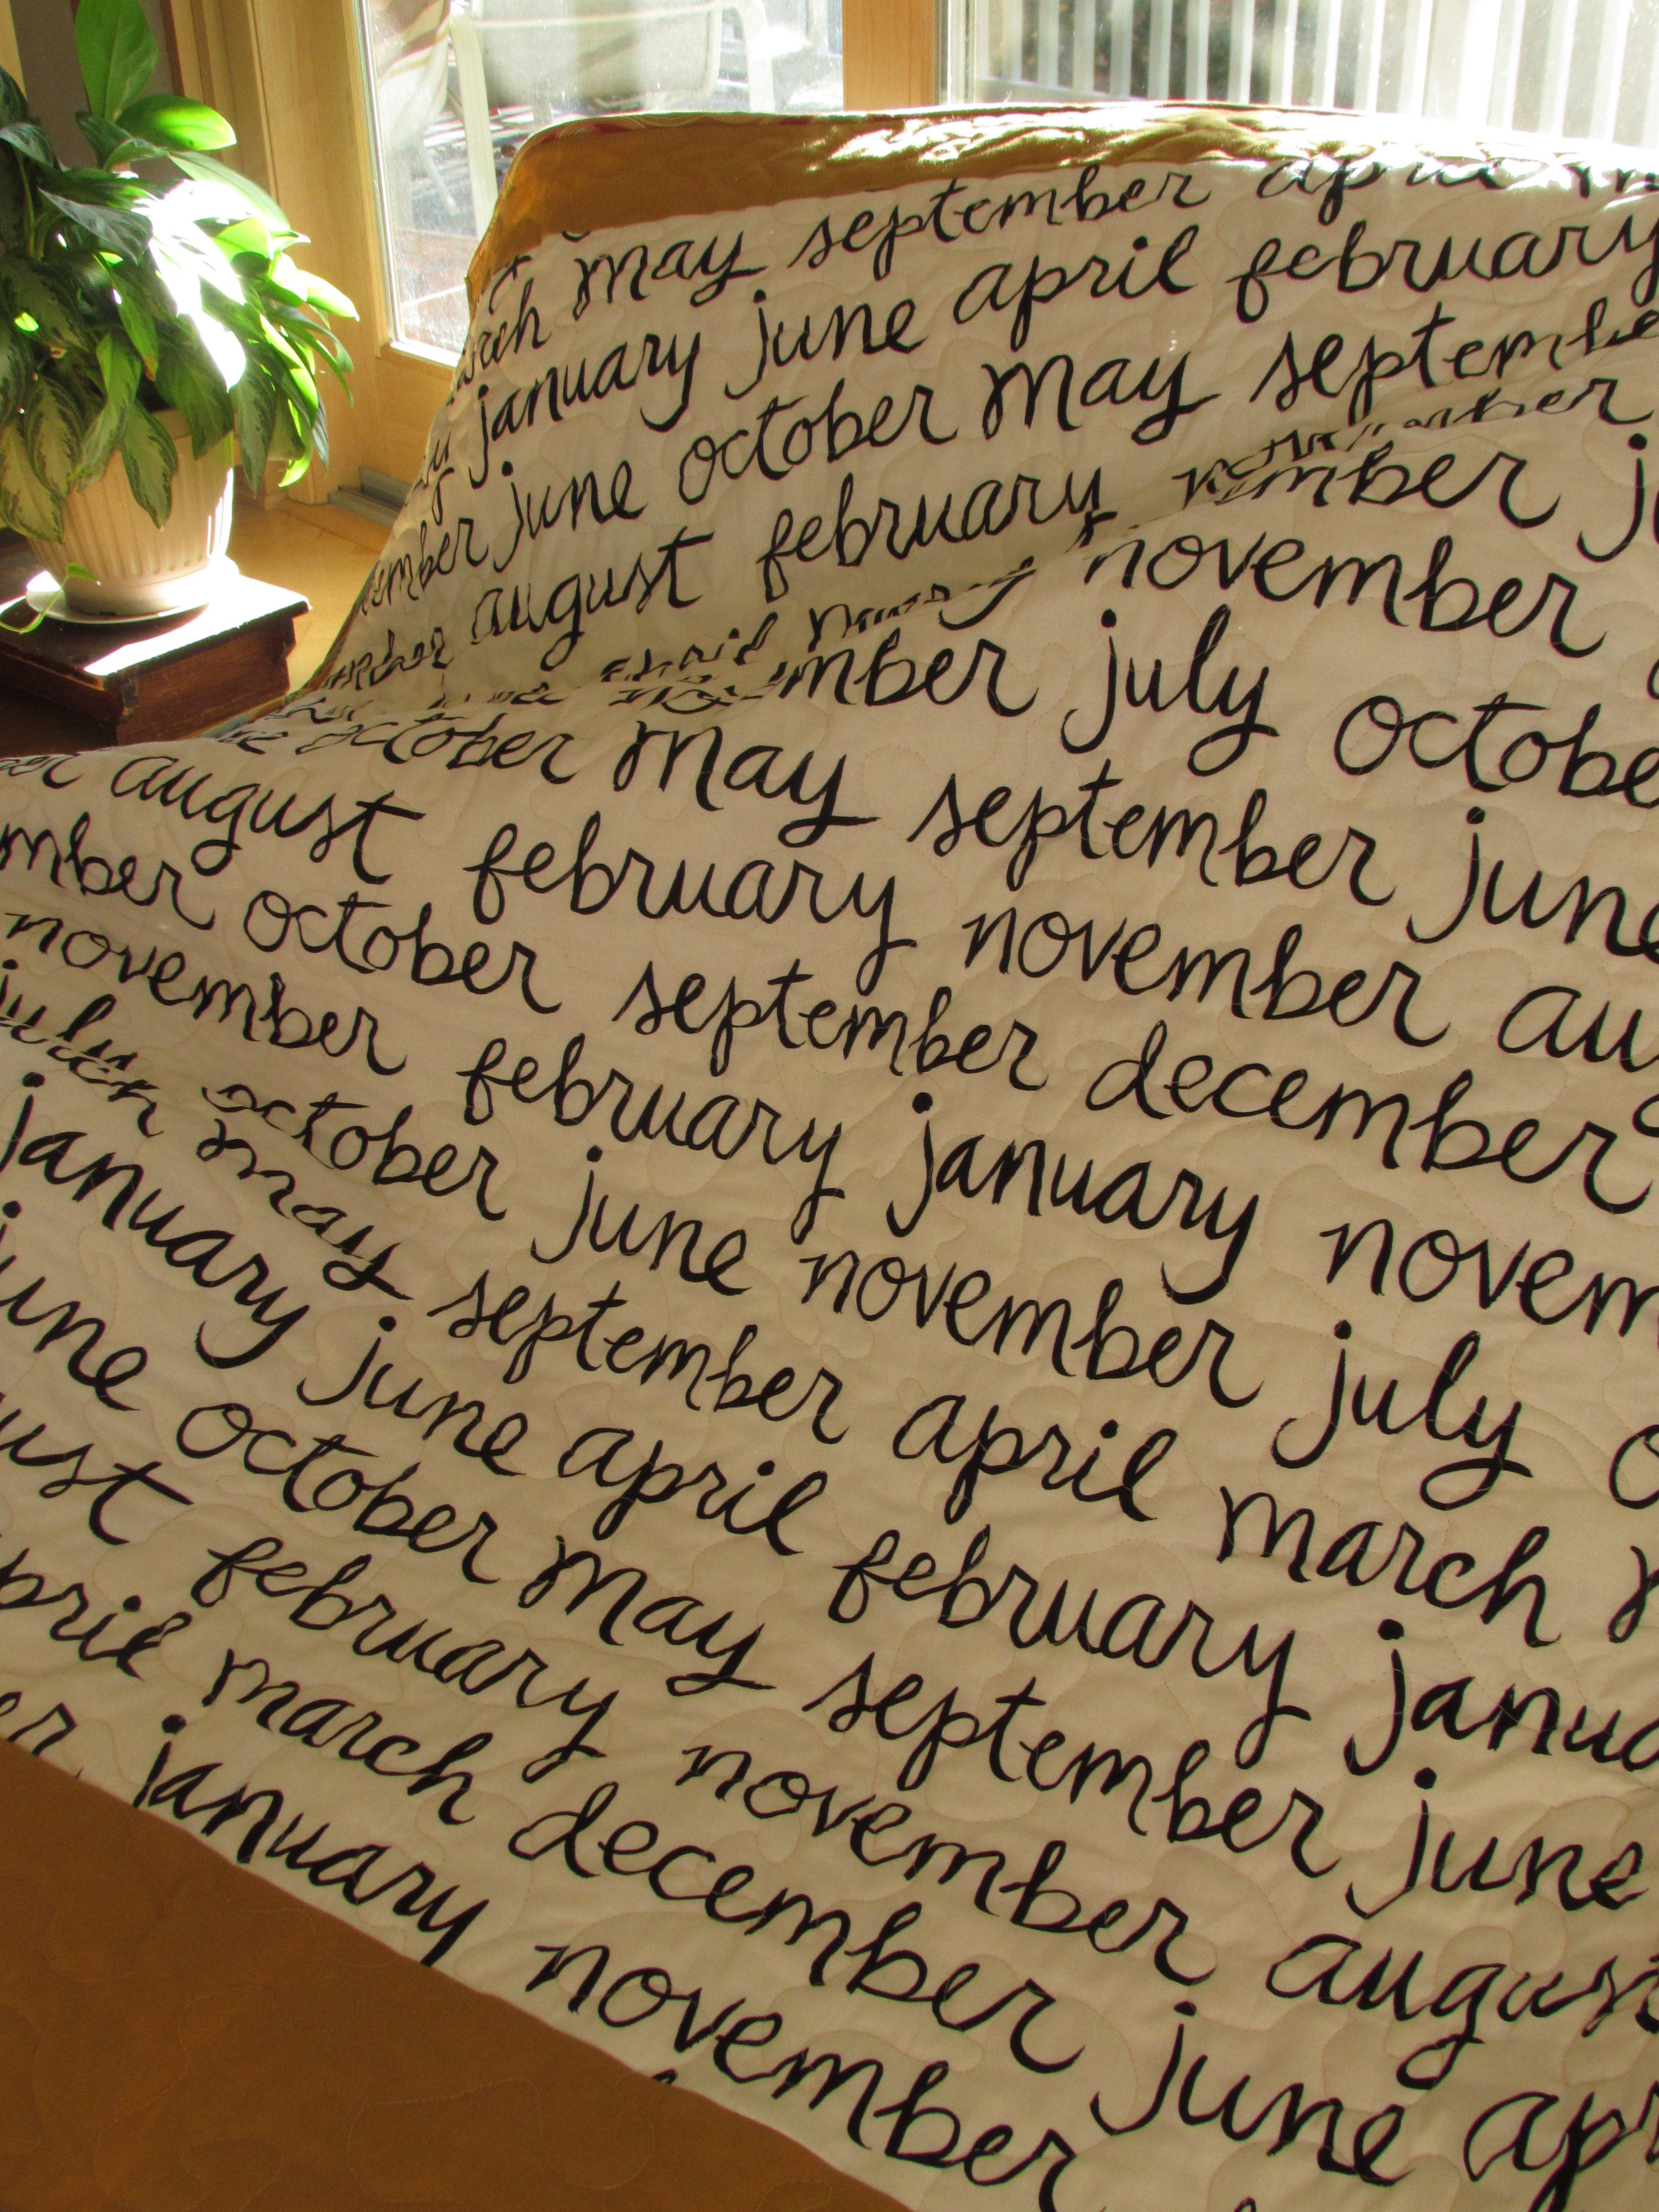
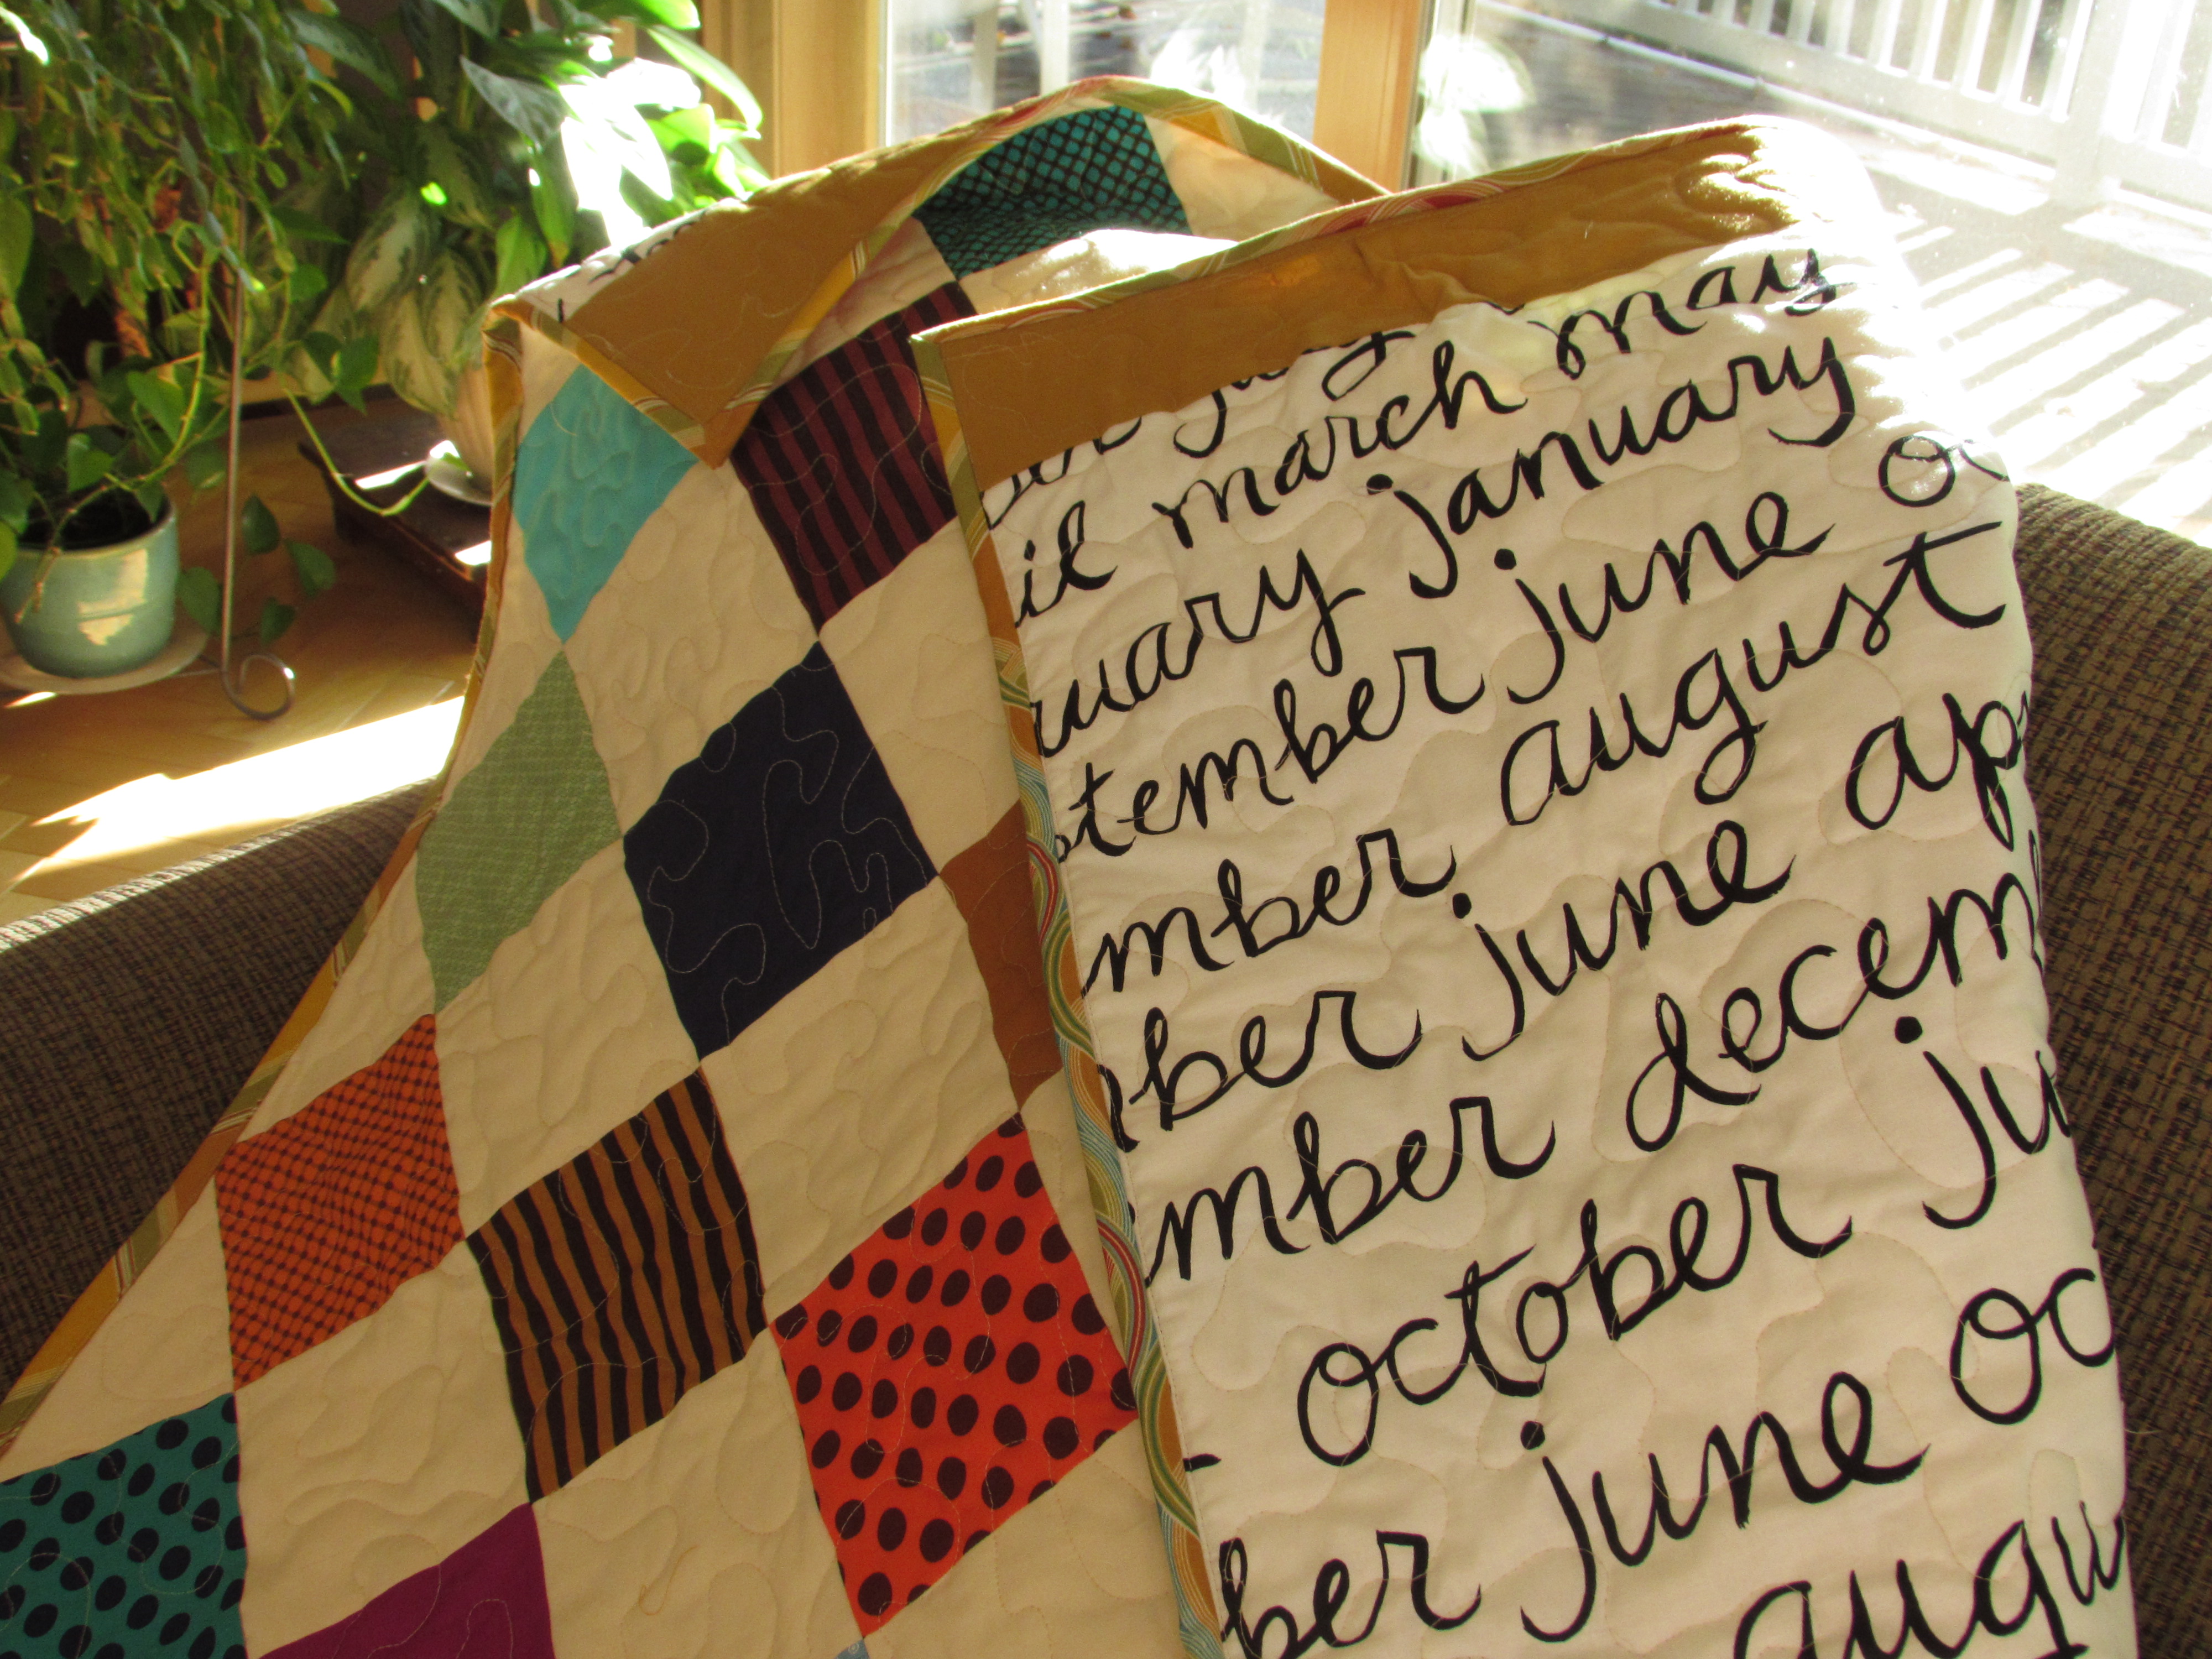
The backing is a cute text print that has been languishing on the shelf for a good two years. It is from a line called 8 Days a Week and was put out by Windham fabric. I only had one yard of it so I added a top and bottom border in this pretty cheddar yellow solid that I thrifted a while back. I think it is adorable and this baby will be one step ahead learning to read cursive at such an early age. 😉
The binding is a Riley Blake print that I purchased a while ago on a whim. Fortunately, the colors worked perfectly with this quilt. More of that cheddar yellow, some blue and green tones that are just right.
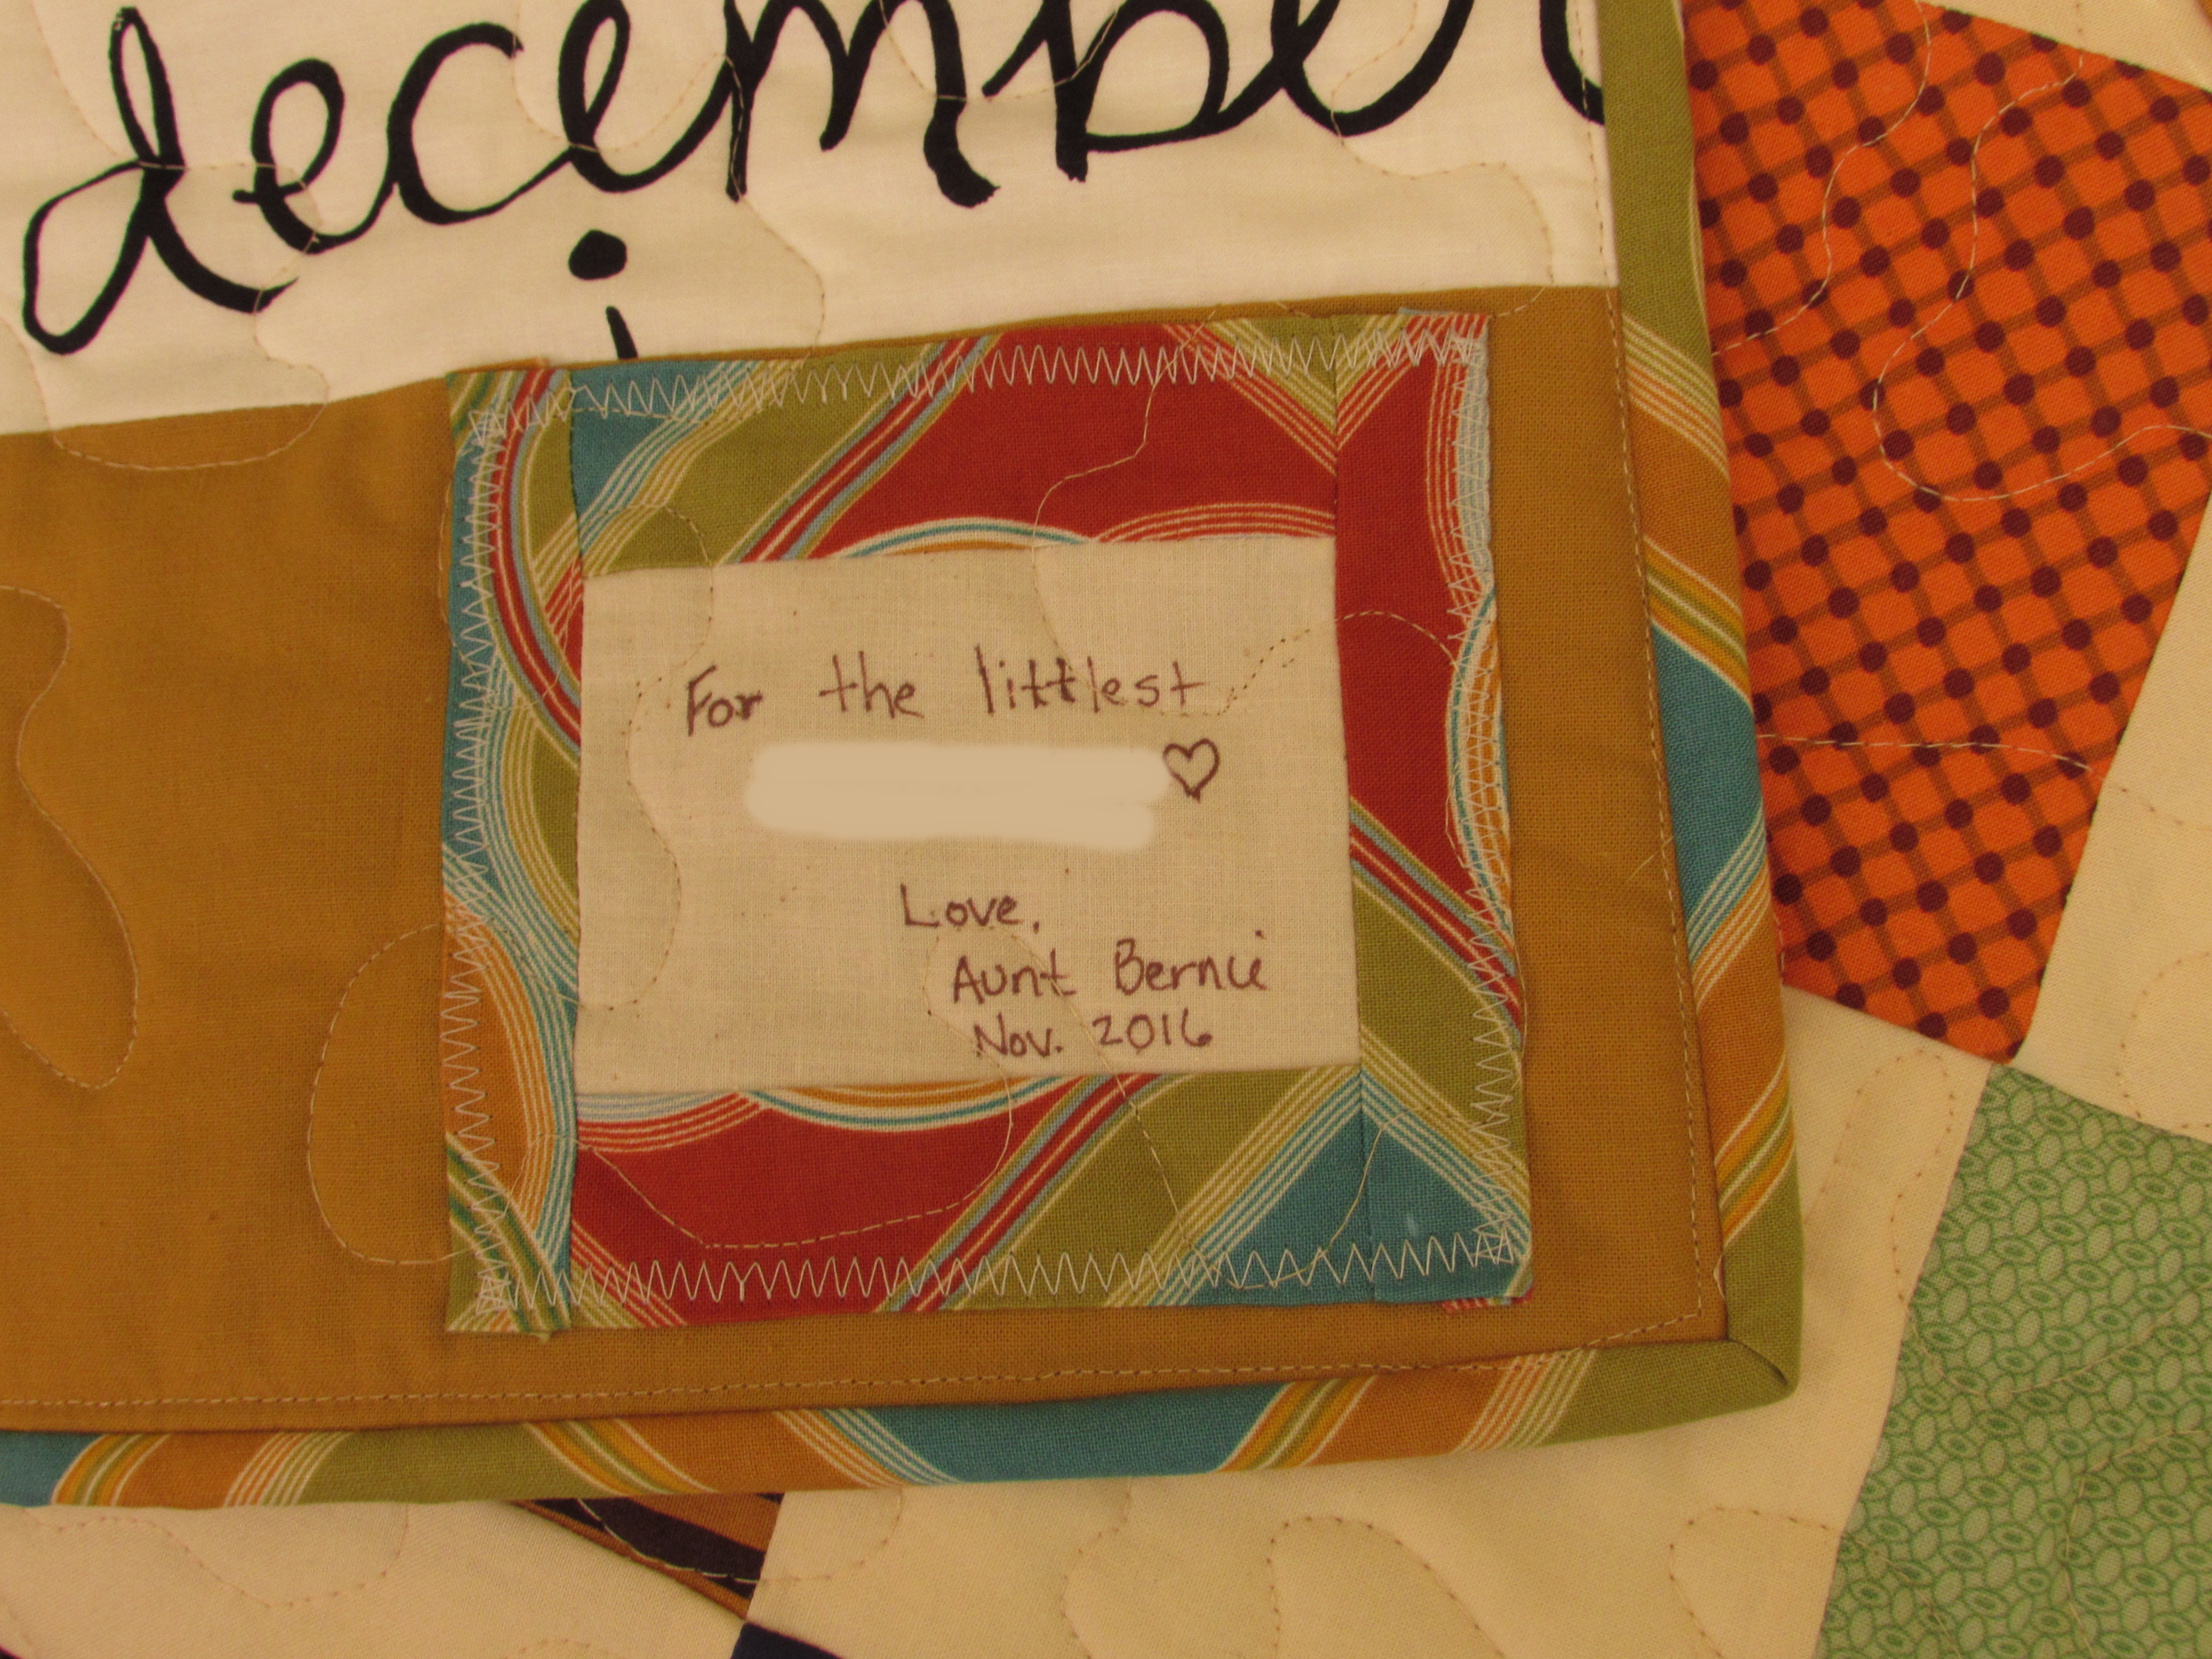
The icing on the cake is that I actually labeled the quilt. (I never think to do this!!) I framed the label with the binding fabric. (I blurred out their last name for privacy.)
And now comes the part where I tell the maddening part of this whole project – it is that darn quilty math. When I cut the triangles for the side setting and corner setting triangles, I cut them too small. I didn’t see this until after I quilted the whole thing. So every. single. point is cut off with from the binding. Go ahead, take a look – it’s quite apparent. I feel terrible because while this child will be able to read cursive and recite the months of the year, he/she won’t know that a square has four points…. Ok. That is enough negativity. It is a sweet quilt and I know my niece will love it. That is all that matters.
Linking to my favorites – find them at the top of the page, under Link Ups.
That’s the truth, right? If the colors don’t work, the quilt doesn’t work. This has happened to me more than I like to think about. Color doesn’t just happen. So, this month’s Might Lucky Quilting Club challenge resonated with me. Taught by Amanda Jean Nyberg of Crazy Mom Quilts (which I know you already knew!) the lesson is all about color, scale and value. At the risk of repeating myself, I have great admiration for Amanda’s sense of color, her use of every.single.scrap of fabric and her down to earth style of communicating. Her blog is one of the first that sucked me into this awesome on-line community.
I joined the Might Lucky club in January and I will be honest with you. I am not thrilled with it. I was hoping the monthly lessons would speak to me – some did, but most? Not so much, until this month. This month Amanda explains selecting colors, working with value and scale, and making the quilt more interesting. It made sense to me. I am only beginning to play with her ideas.
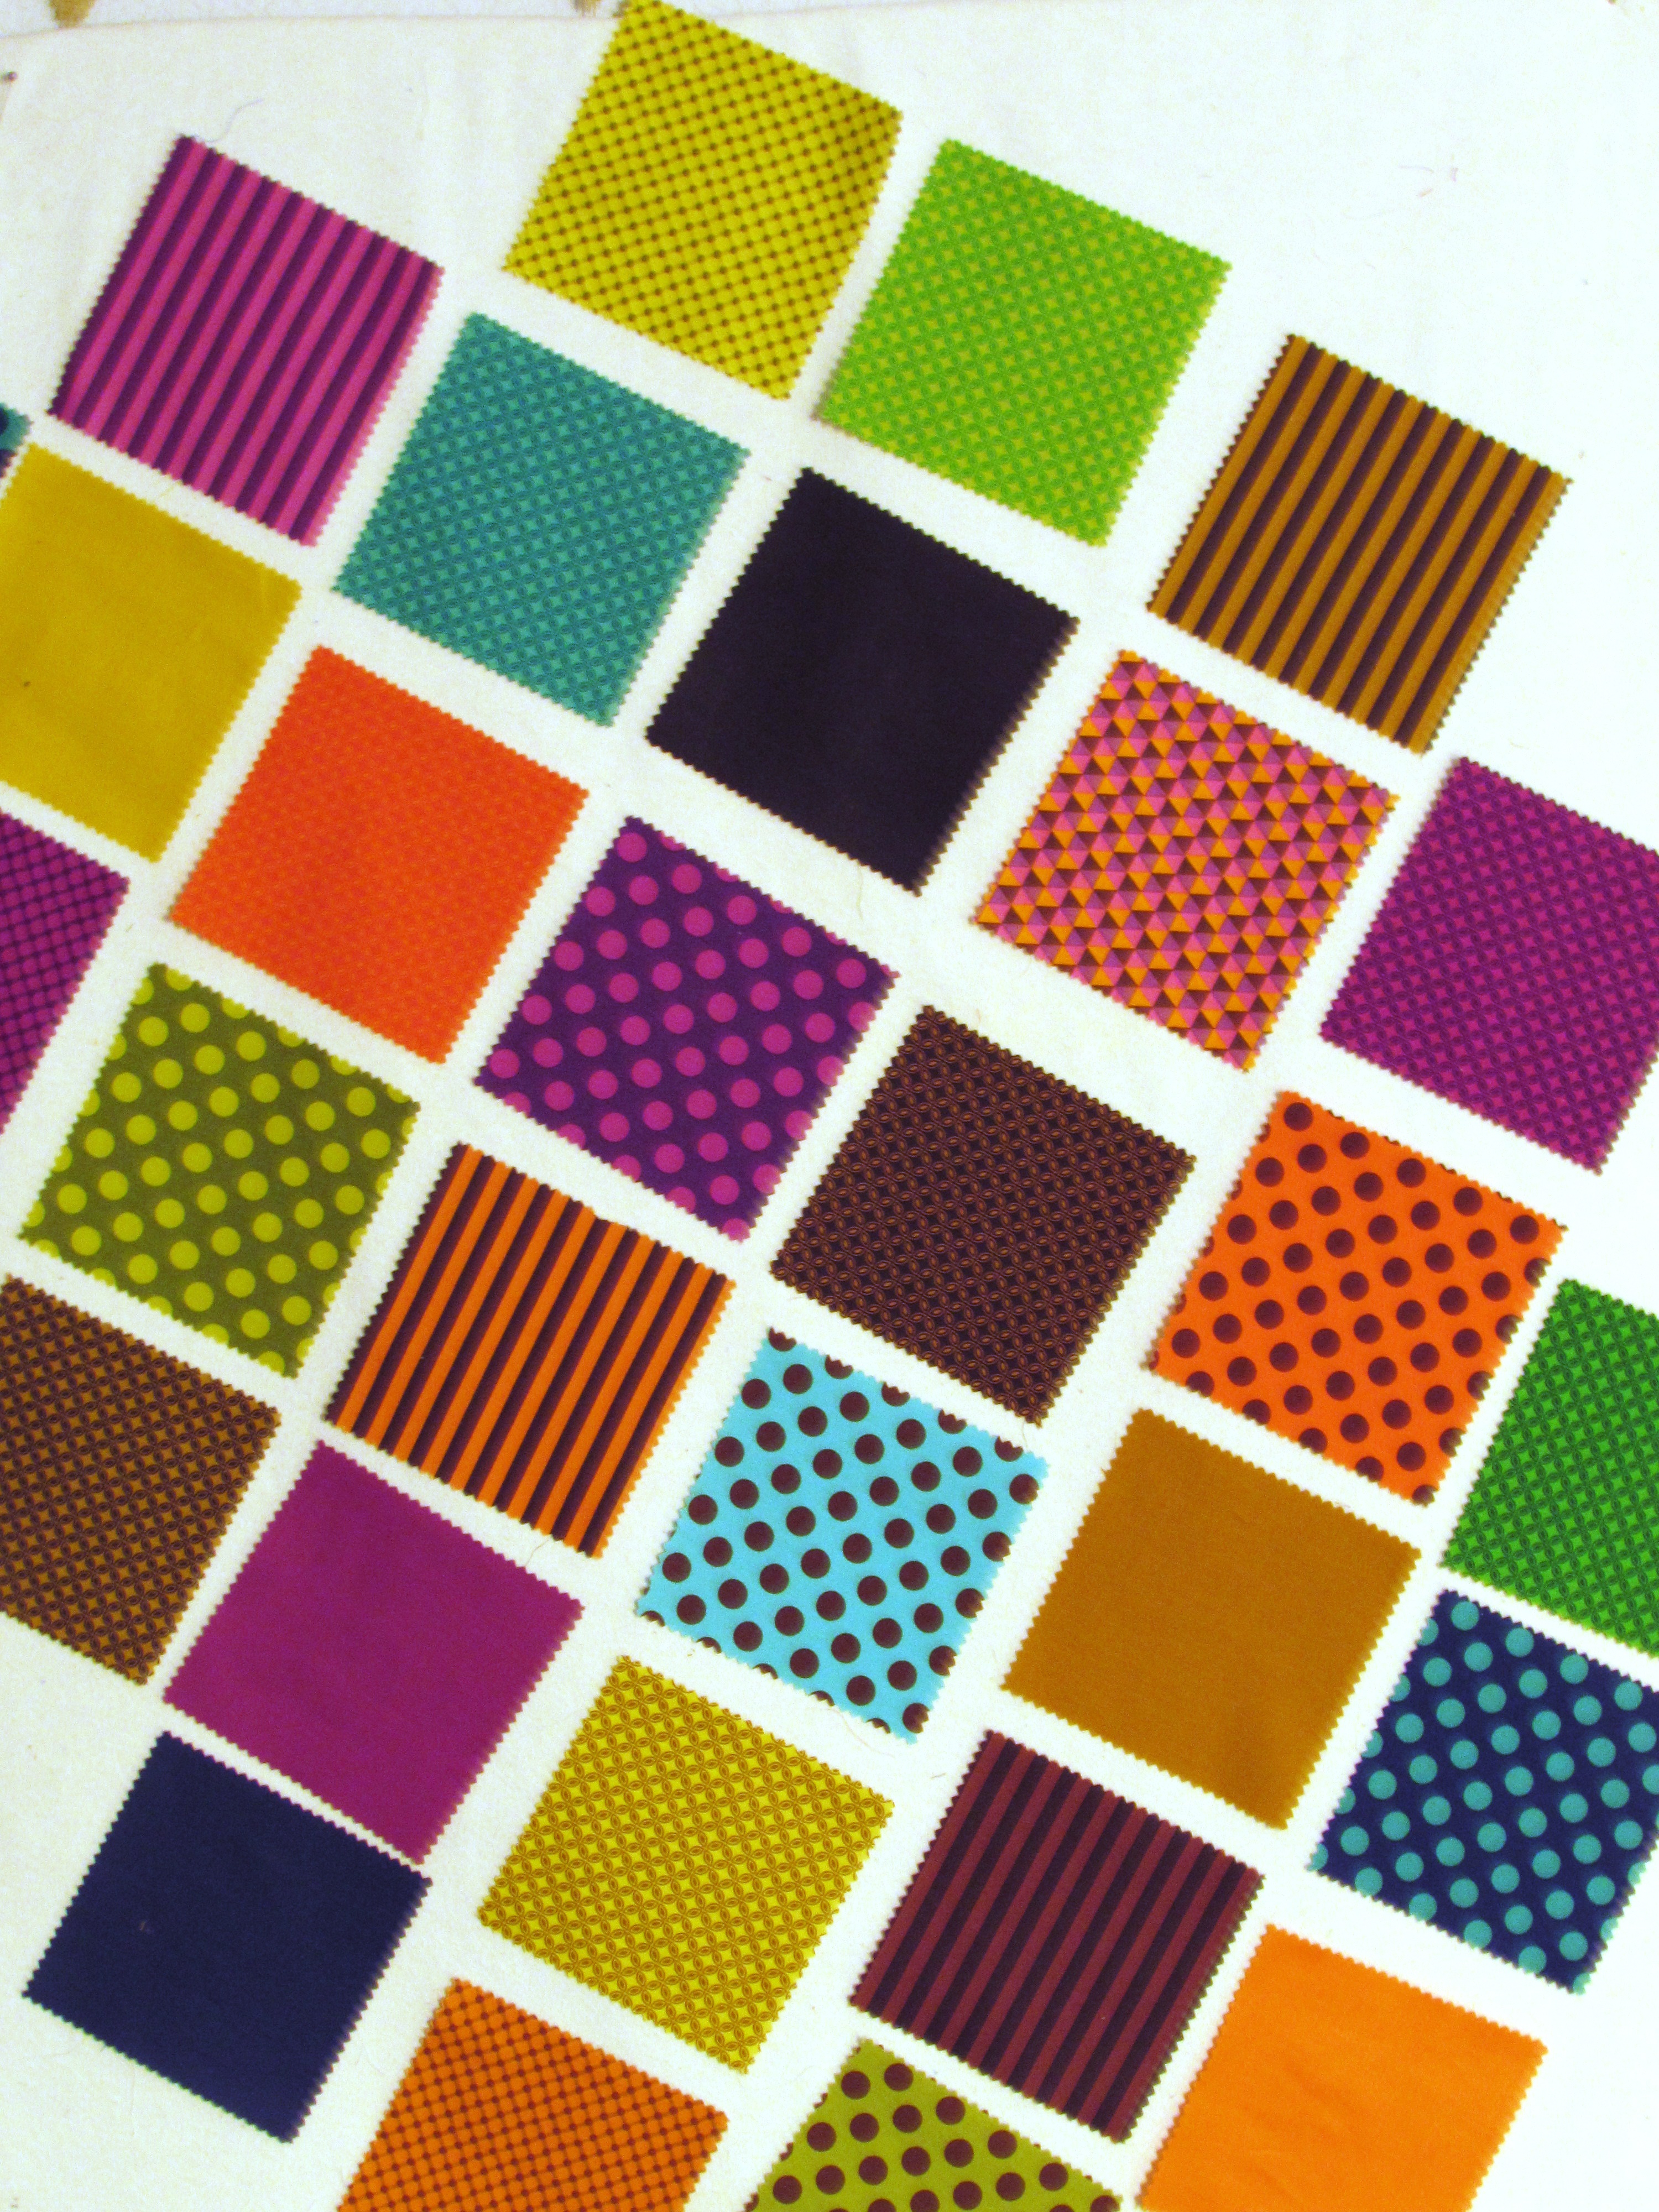
I have a huge collection of charm squares. Some I have purchased, some were cut from my scraps, and some have been won in giveaways. One collection that I have been holding on to is the Michael Miller Gem Tones pack. I received this one for free from Alyssa at Pile O’ Fabric. Last year, over Thanksgiving weekend, Alyssa had a huge Black Friday sale. I ordered a number of basics from her. Somehow her inventory was off and there were a number of items I ordered that she couldn’t ship to me. (She was also hugely pregnant at the time and having a tough pregnancy – just to further explain.) She kindly refunded my money on the items that were not available and then threw in this charm pack – which was above and beyond, right? I liked the colors in it, mostly deep jewel tones with the addition of some orange and brown. It was quite bold. But there were thirty charms total and I had only one pack.
Reading Amanda’s lesson, I decided to start pulling from my other charm squares and build out the collection.
Above is the original set of charms. I apologize – this photo is blurred and I didn’t see that until it was too late. Whoops. It is a nice set – good colors, but all seem similar in value (light vs medium vs dark) I pulled all sorts of other charms to see what else I could add in.
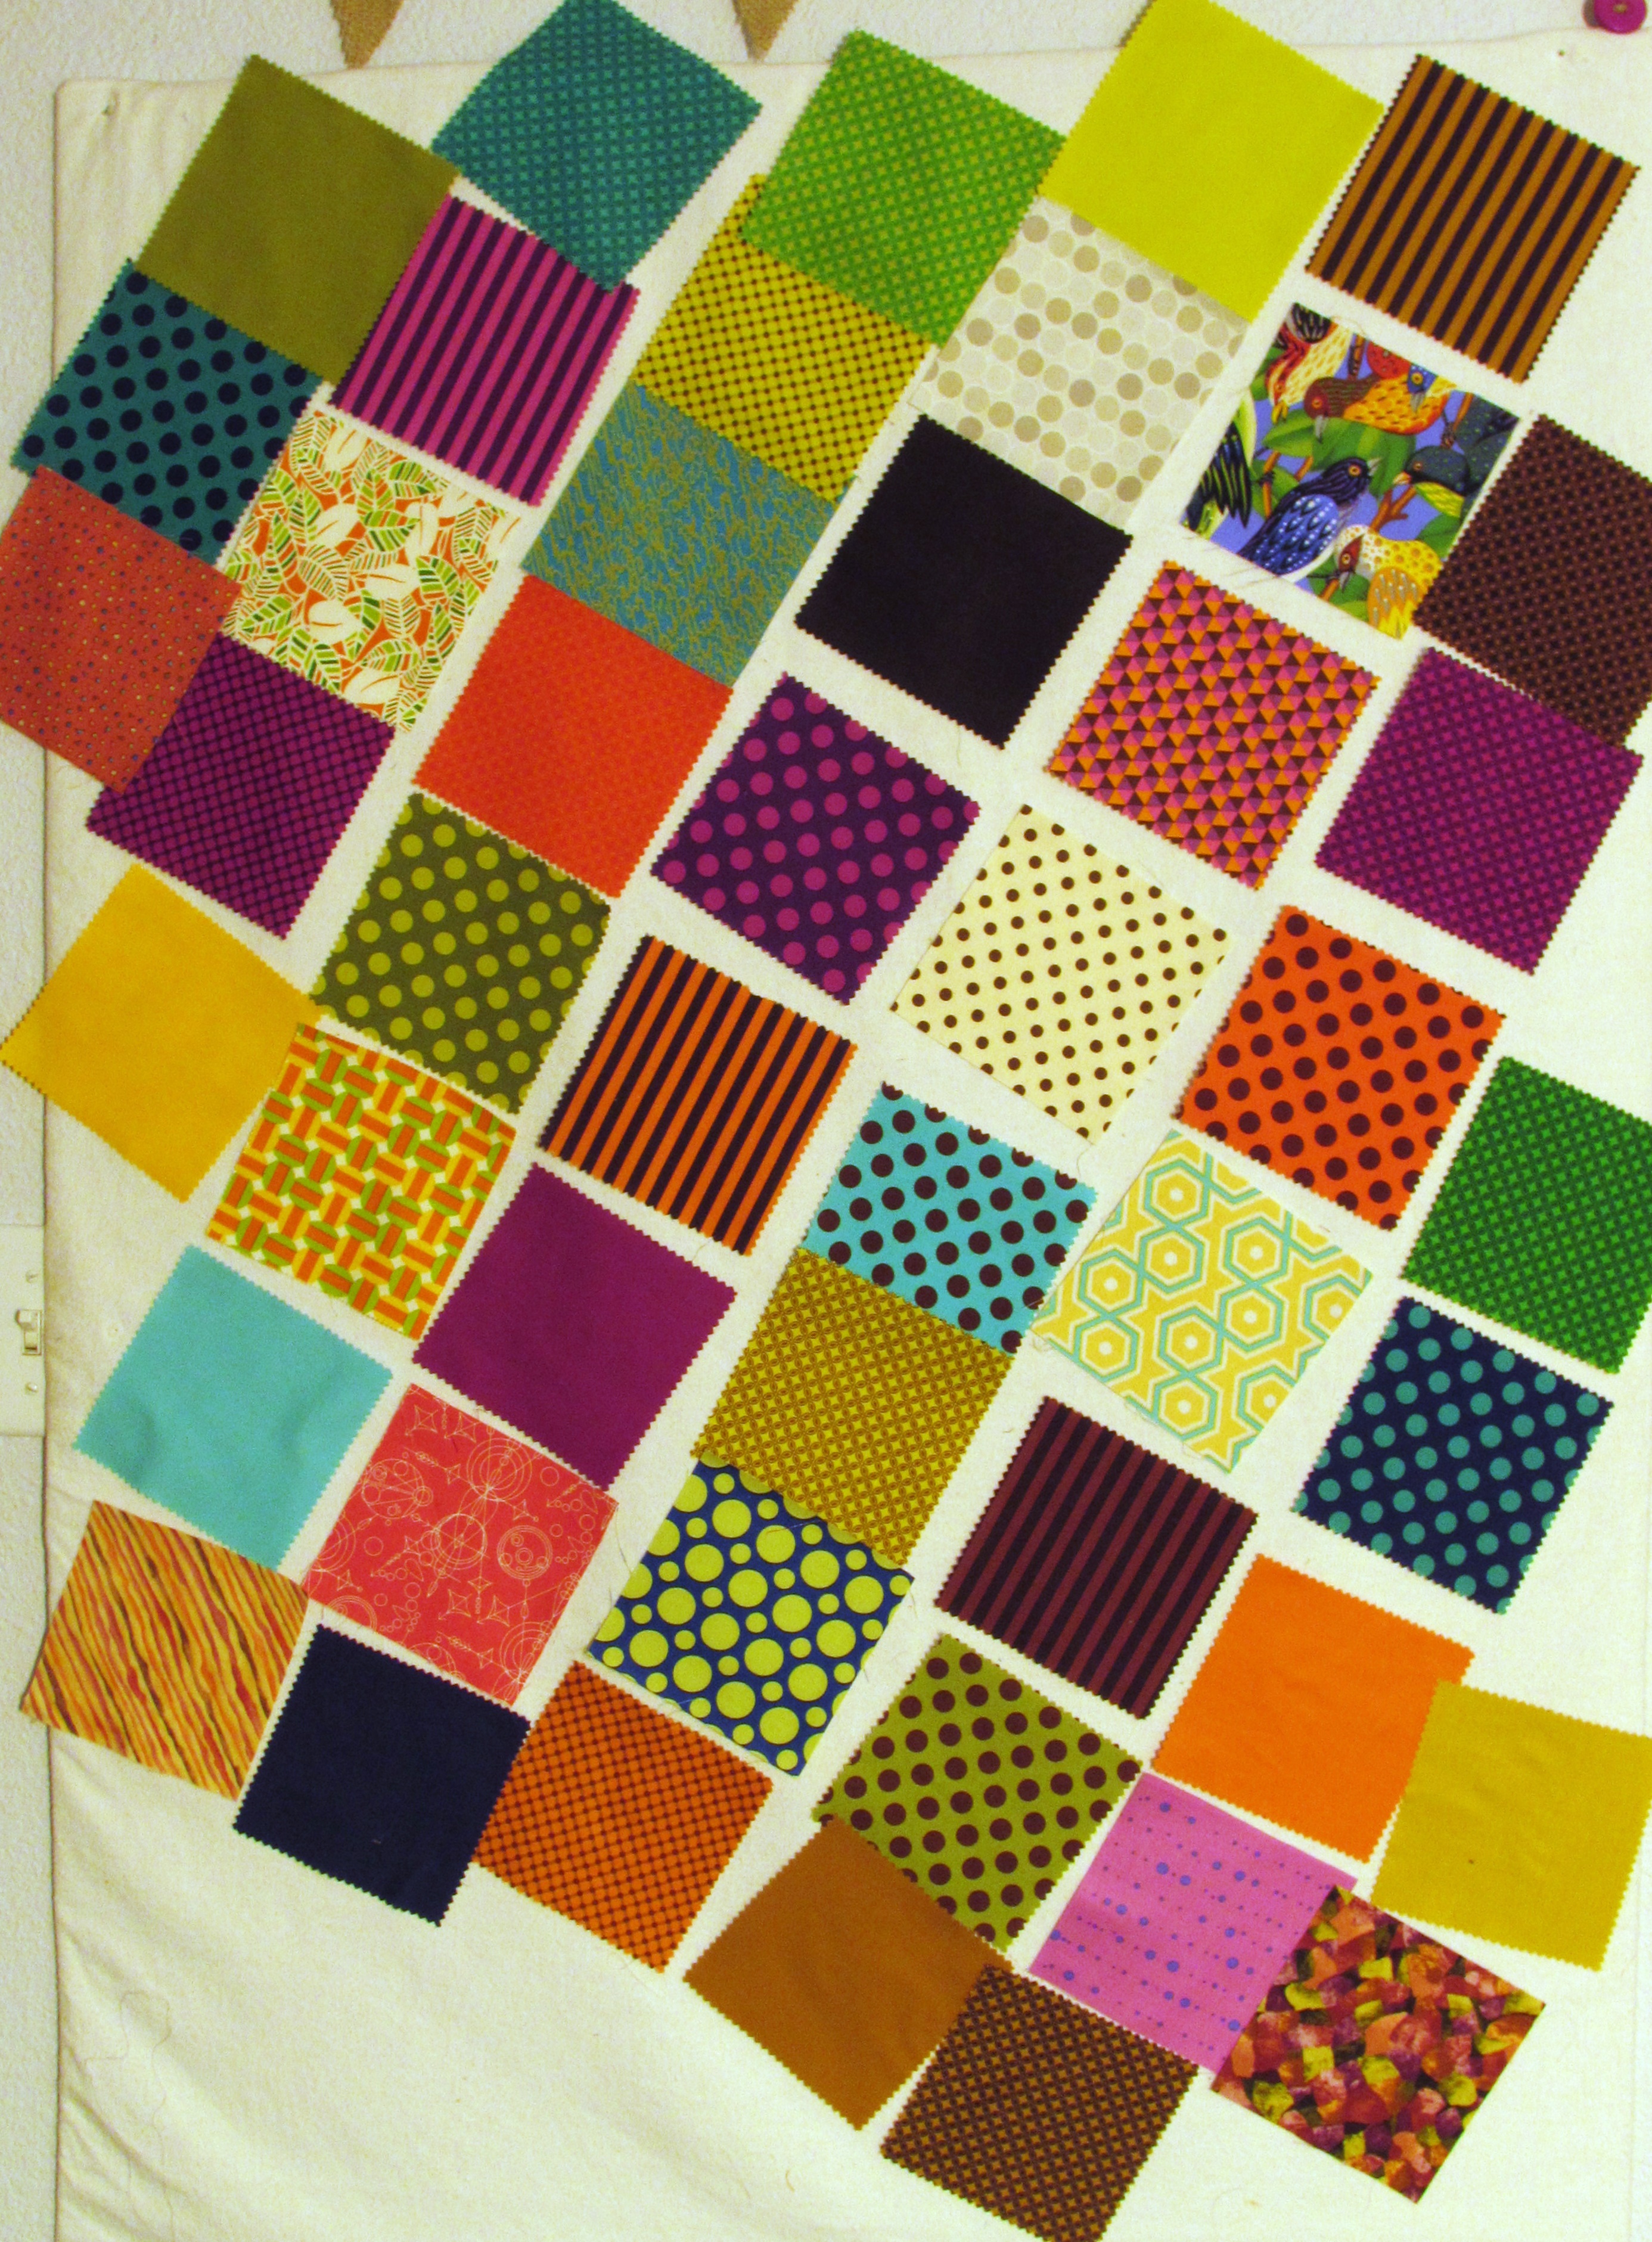
Some of these worked and some (most) did not. But when I added the two lighter dotted fabrics (center and upper right) I saw that it would help to add a lighter set of charms to brighten the darker Gem Tones kit. I took out most of the squares I had tried, leaving some of the solids and just a few prints. Then I cut a pile of charms from a Kona cream color that I had leftover from my Harmony quilt top.
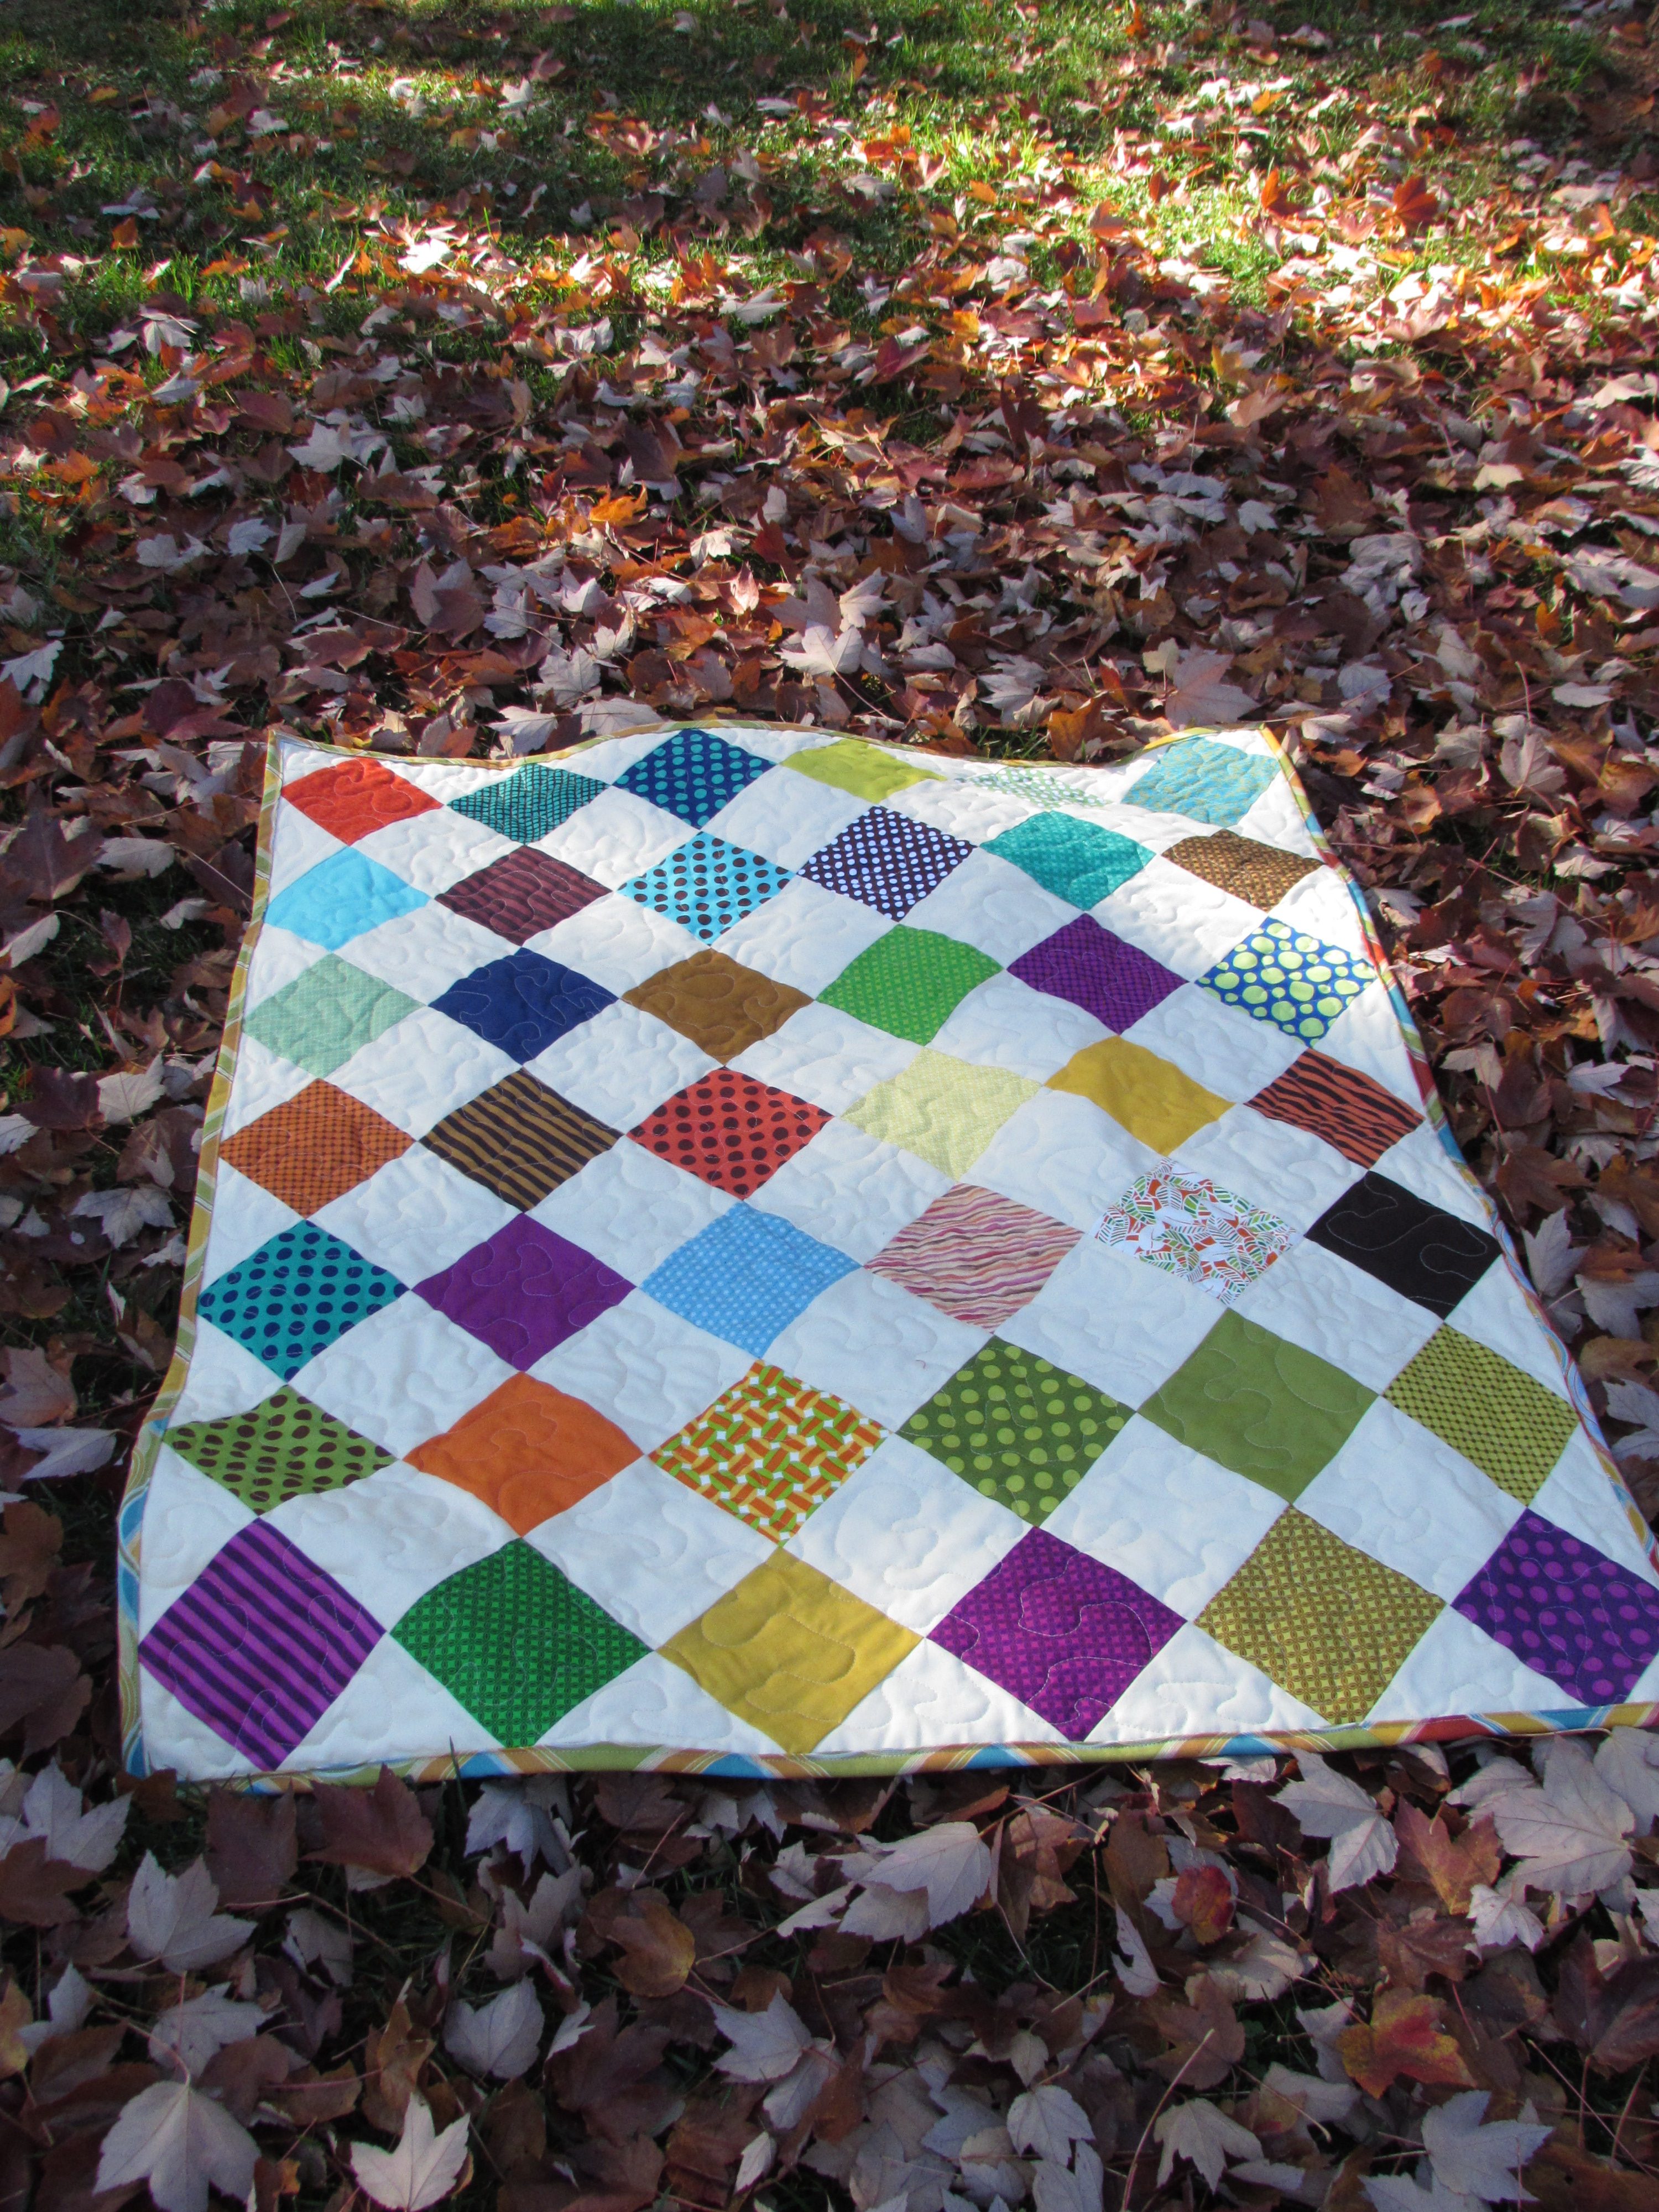
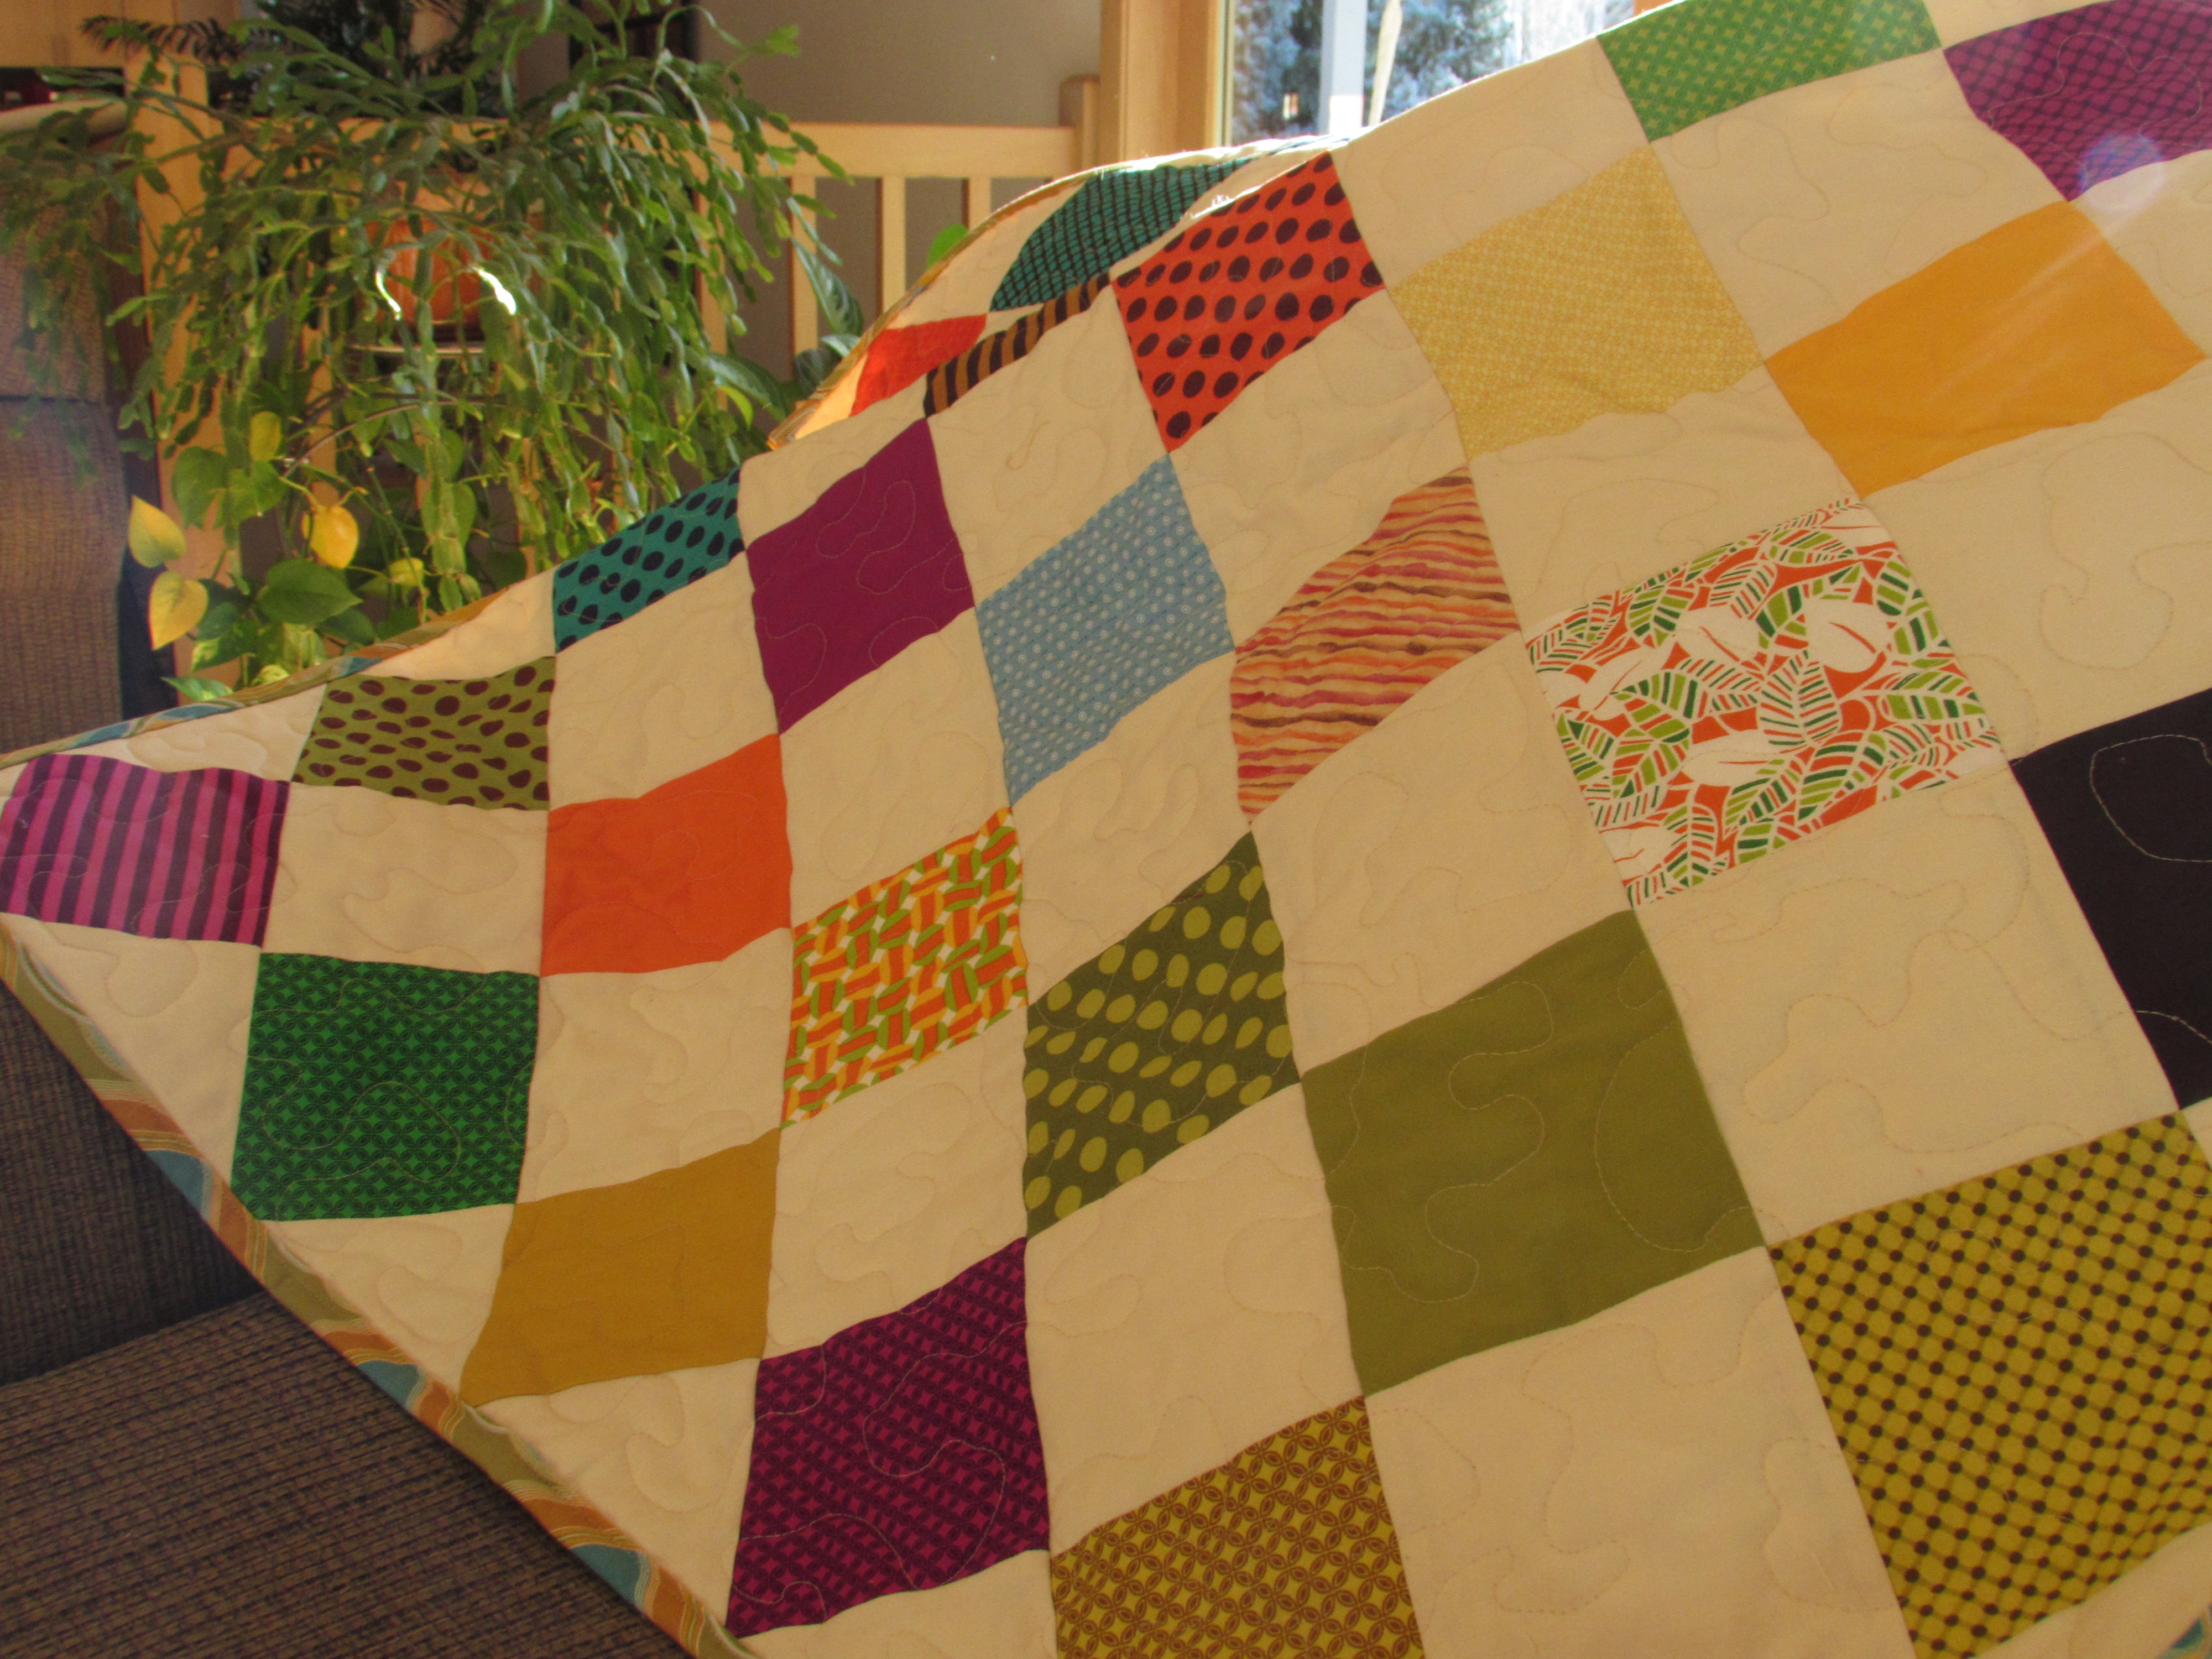
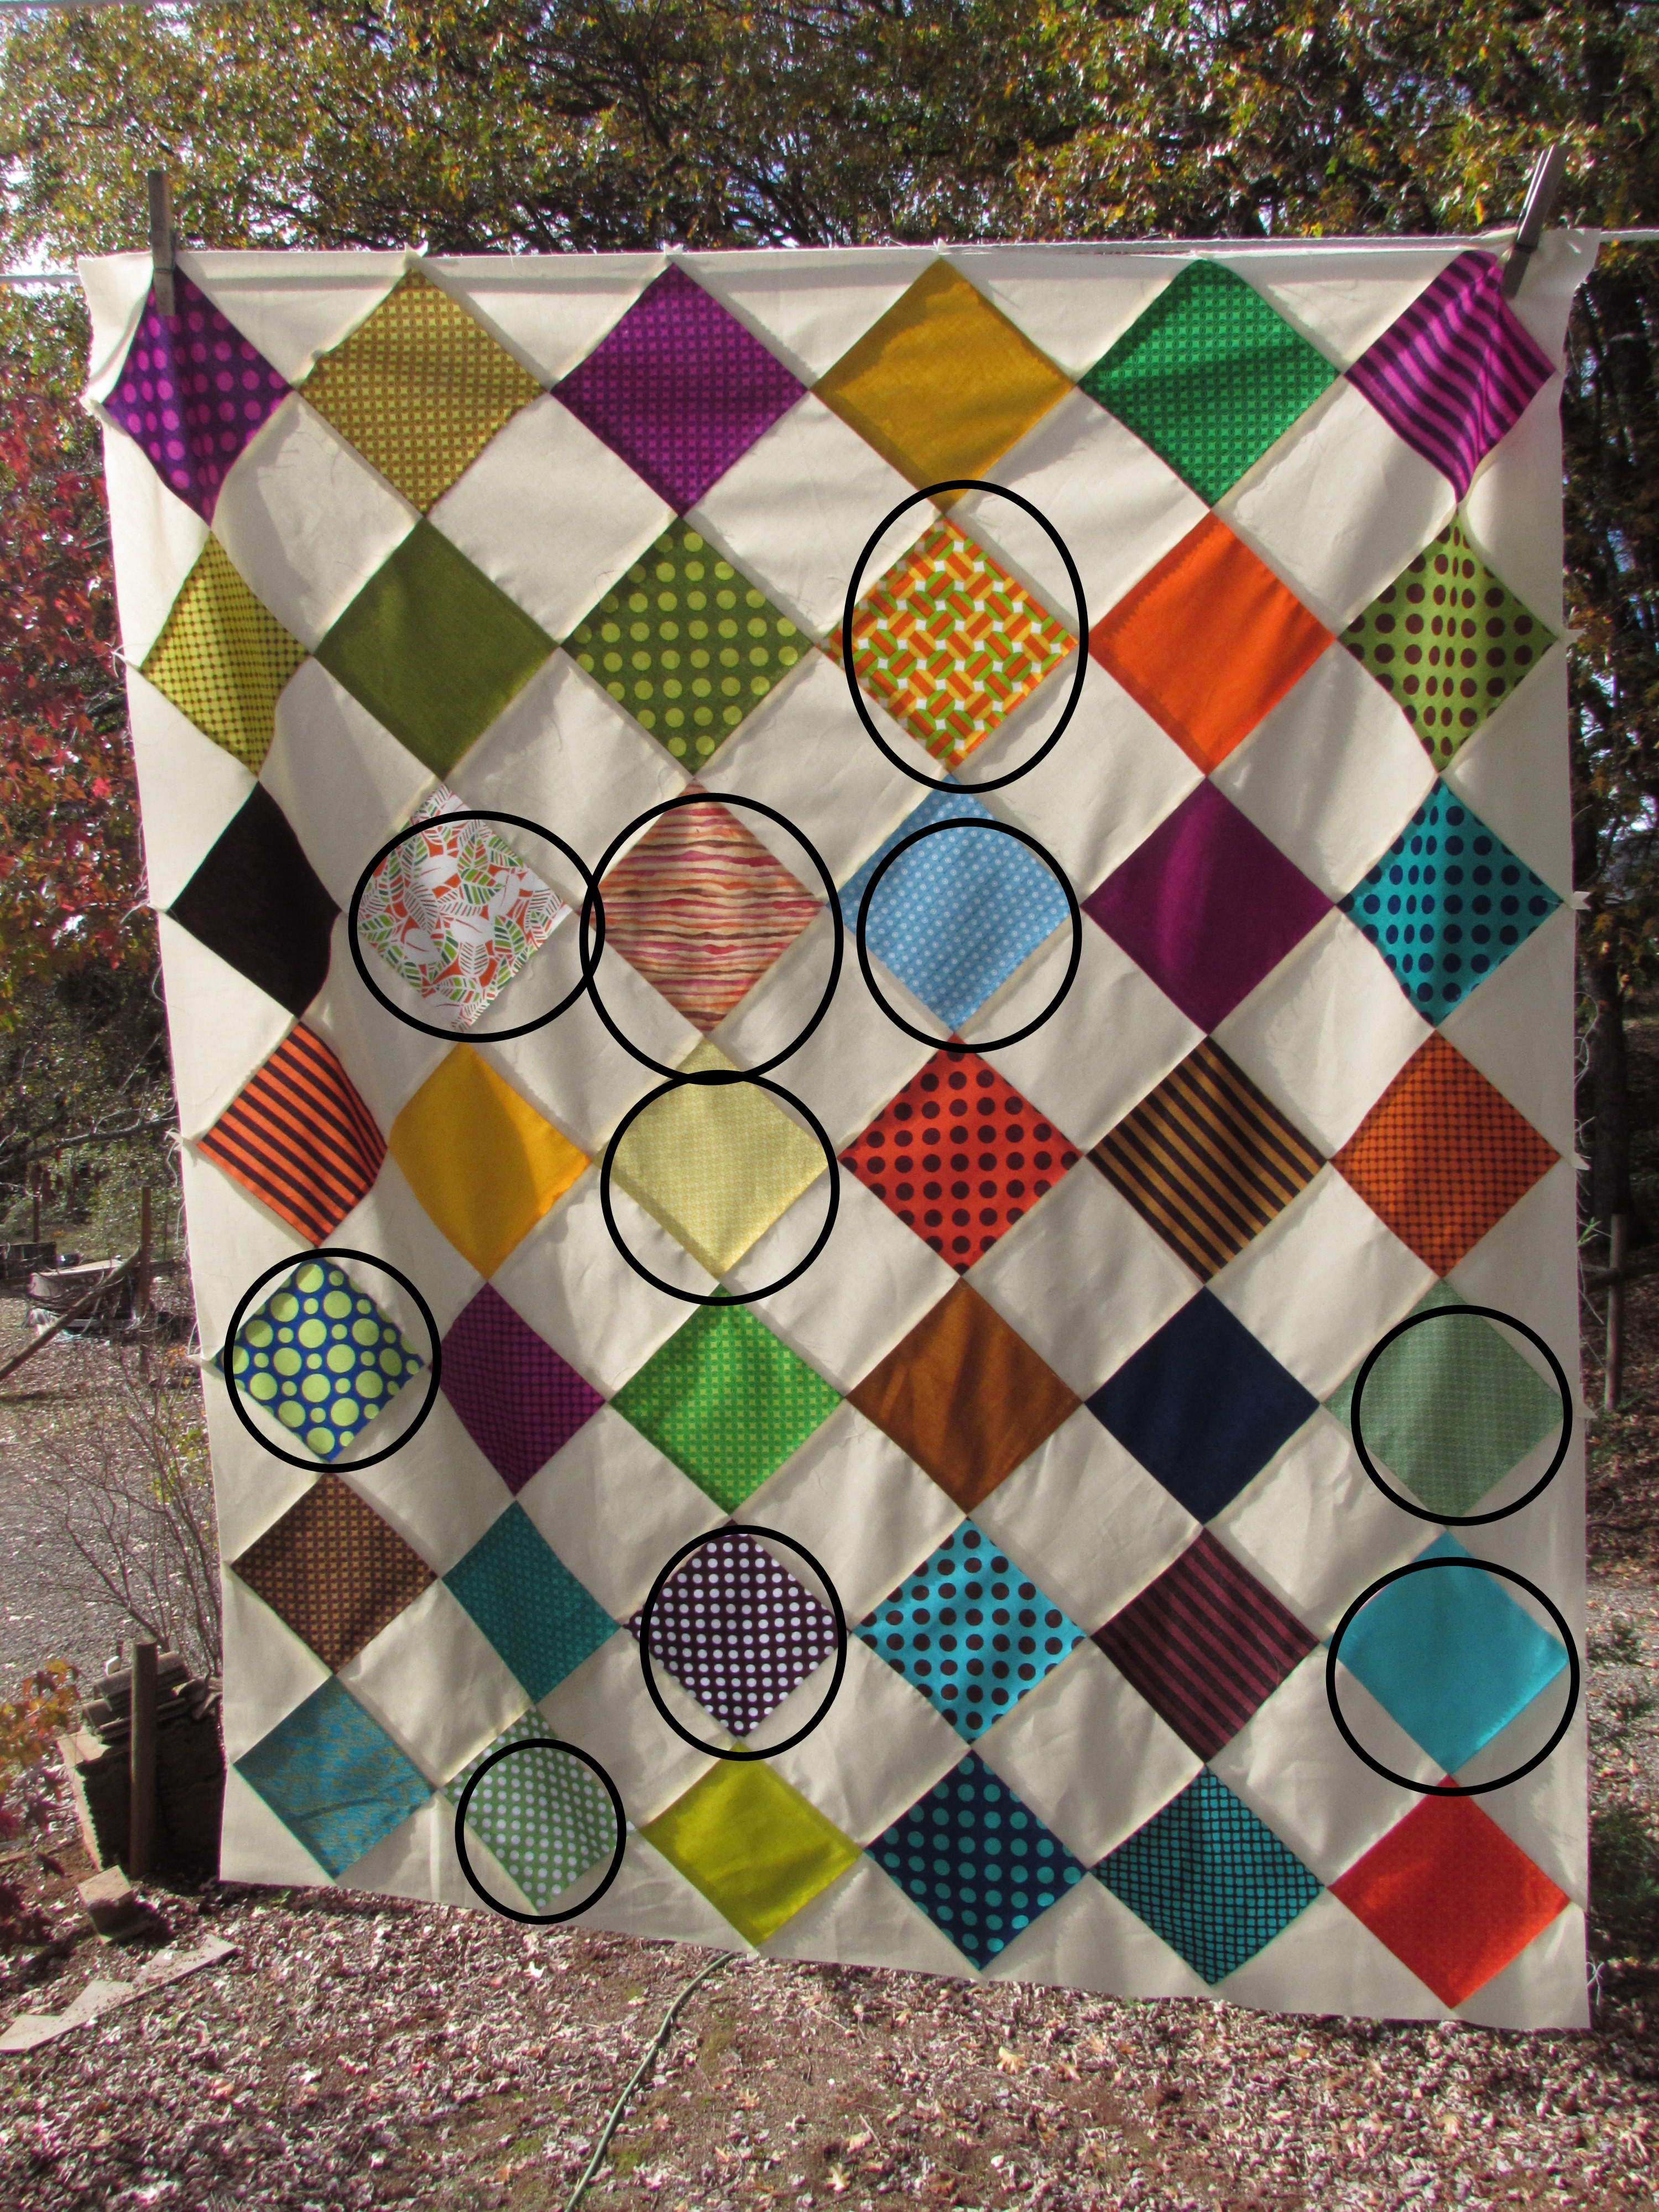
This worked well. It makes each of the charms stand on their own and the colors seem to become more vibrant when not adjacent to each other. I love the simplicity of patchwork but thought it made things a bit more interesting to put the blocks on point.
I circled some of the blocks that were added from my charms (that were not part of the original set. I think I succeeded in adding some lighter values and a few prints that changed the scale a bit. I love the look that resulted from playing with these charms. The quilt will be a gift for my niece who is expecting her third child in January. I want to get it finished up as I will see her over the Thanksgiving holiday.
This was a good exercise for me. Amanda’s lesson includes a few more ideas for curating fabric pulls. I would like to make some time to do those exercises (not necessarily even to create a quilt with – more for practice). It is a great way to learn and goodness knows, there is plenty of fabric in my sewing room to pull from. 🙂
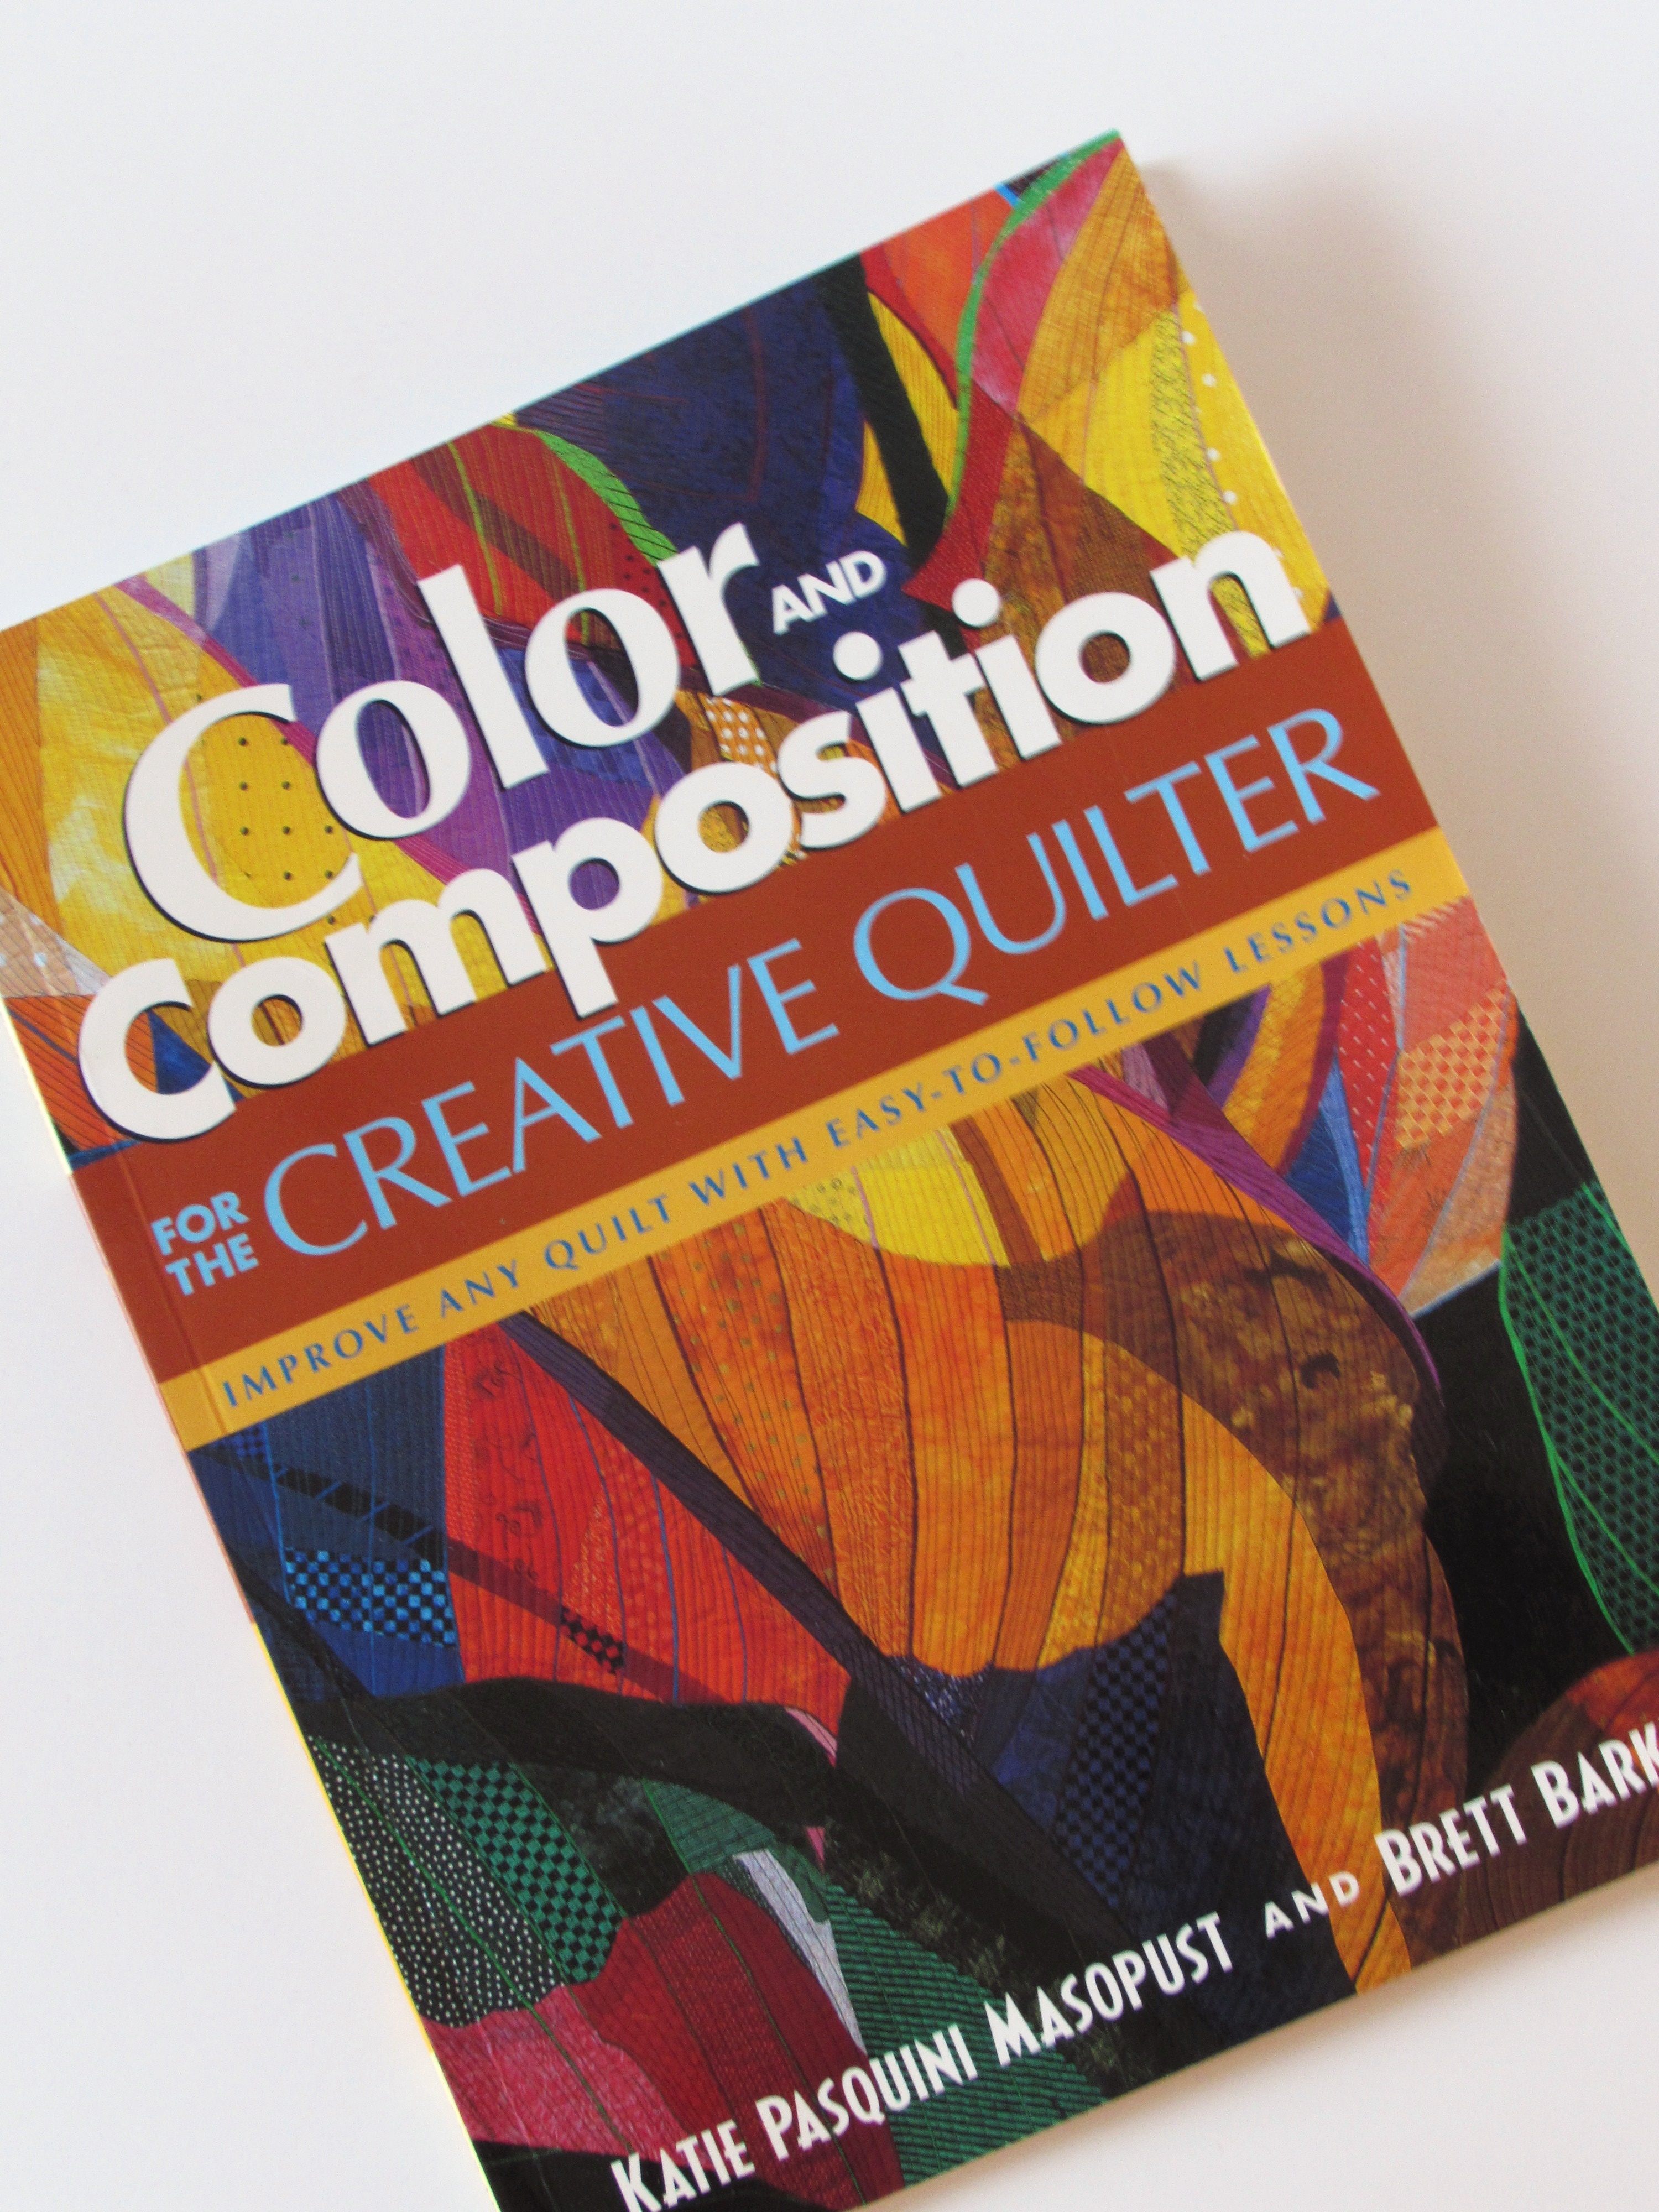
To the same end, I have been reading this book that I picked up for a dollar at the thrift store a couple of weeks ago. It is really an interesting explanation of right and left brain processing and how to encourage your artistic abilities.
Written in 2005, by Katie Pasquini Masopust and Brett Barker, this book has a series of lessons to help the reader understand color, perspective and value. The language they use is relatable (which so often isn’t the case for me). I think the right/left brain information is so interesting. They talk about the left brain being so controlling and the difficulty in turning off the negative self-talk that we constantly play in our minds as we quickly dismiss our abilities. This is something we should all work on, right?
Color– it’s all about color for now. There is so much to learn and, thankfully, so many fun ways to put the learning into practice.
I am sharing this post by linking up with lots of fun places. Find them at the top of the page, under Link Ups.
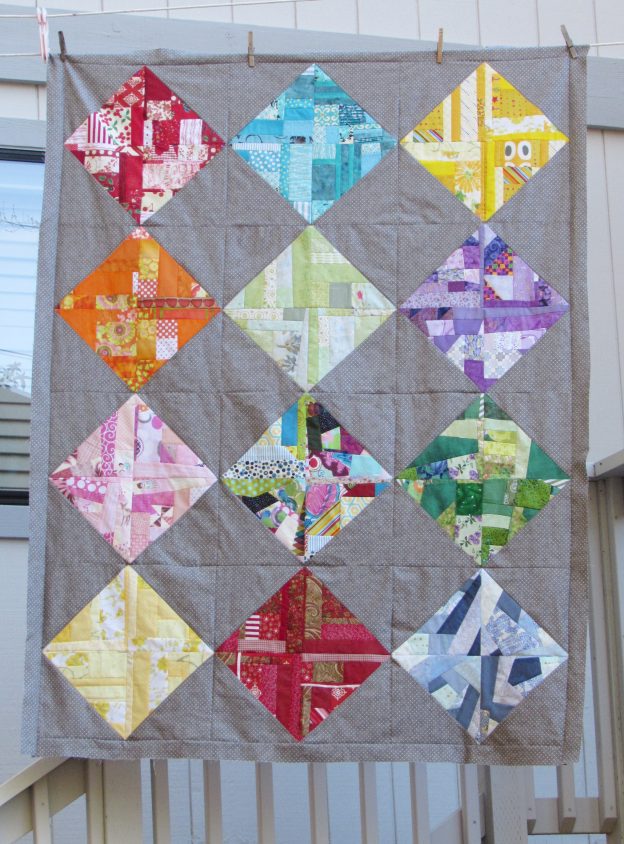
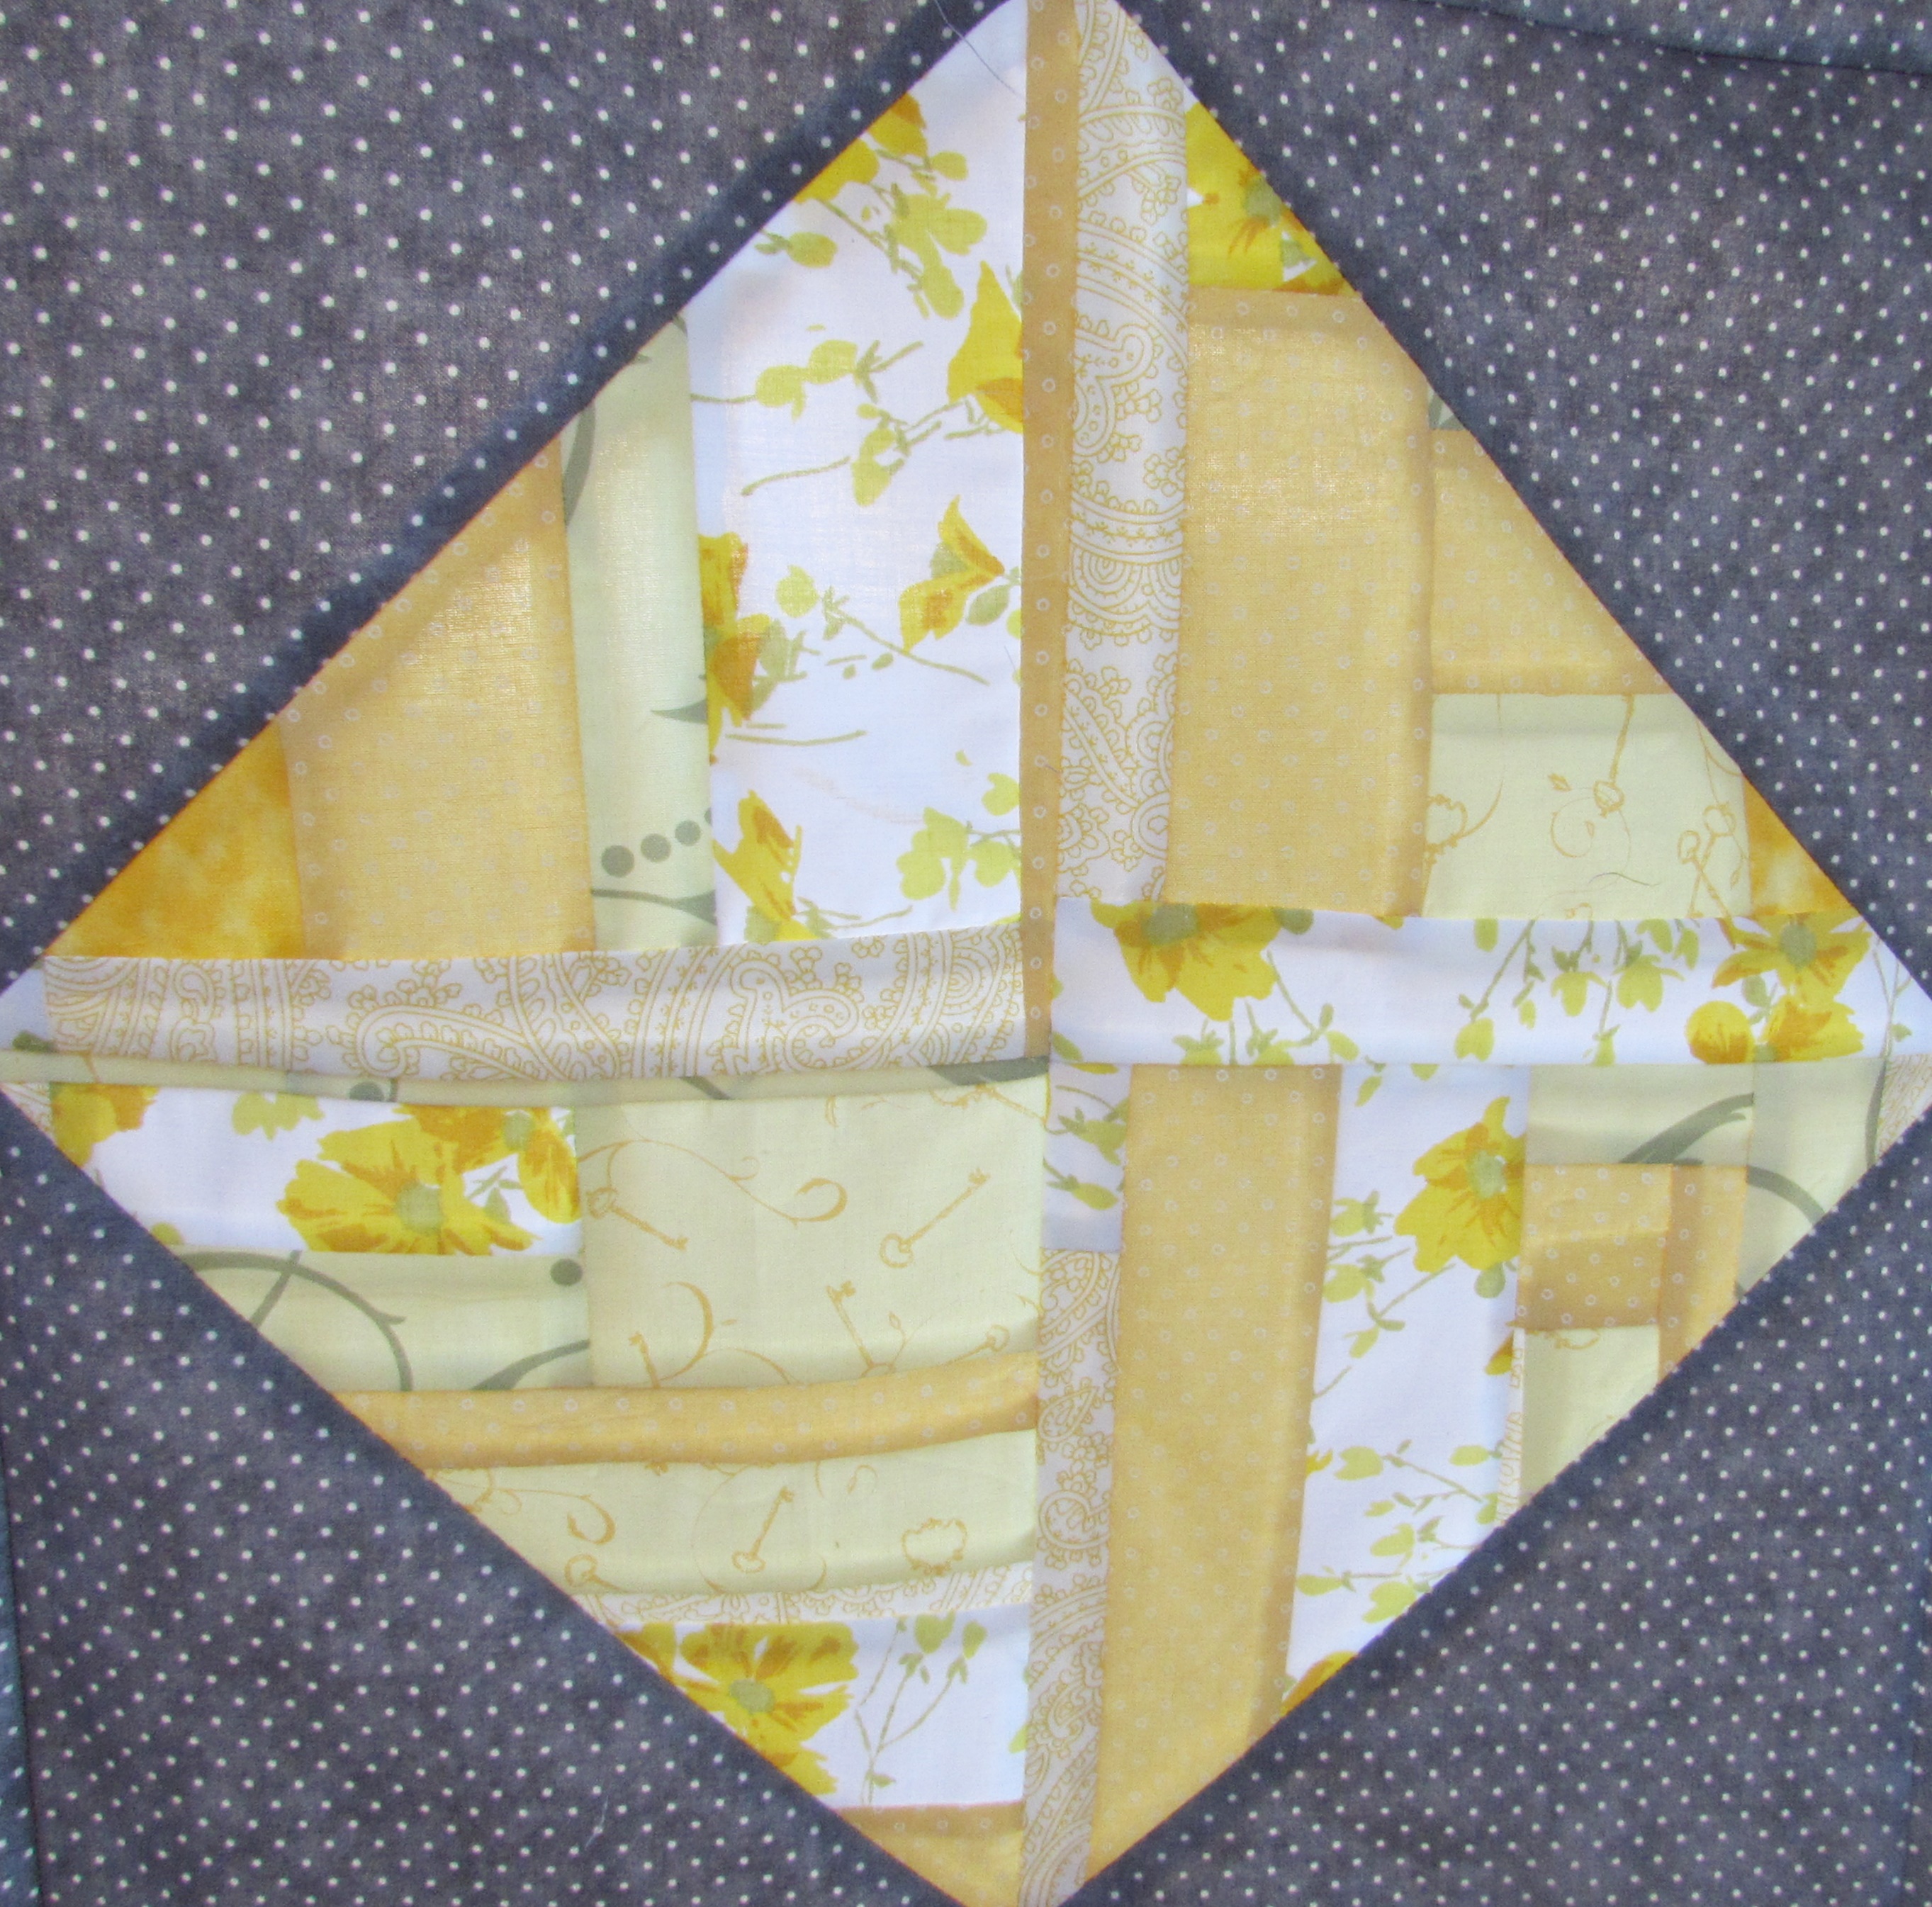
Over the last couple of weeks I have been working on my scrappy HST project. You might remember that I have been making fabric with my scrap bins and then pairing the made fabric with a deep gray polka dot and creating HST’s. Last time I posted about this project, I mentioned I wanted to make two more sets to complete the quilt top.
I made a pale yellow set.
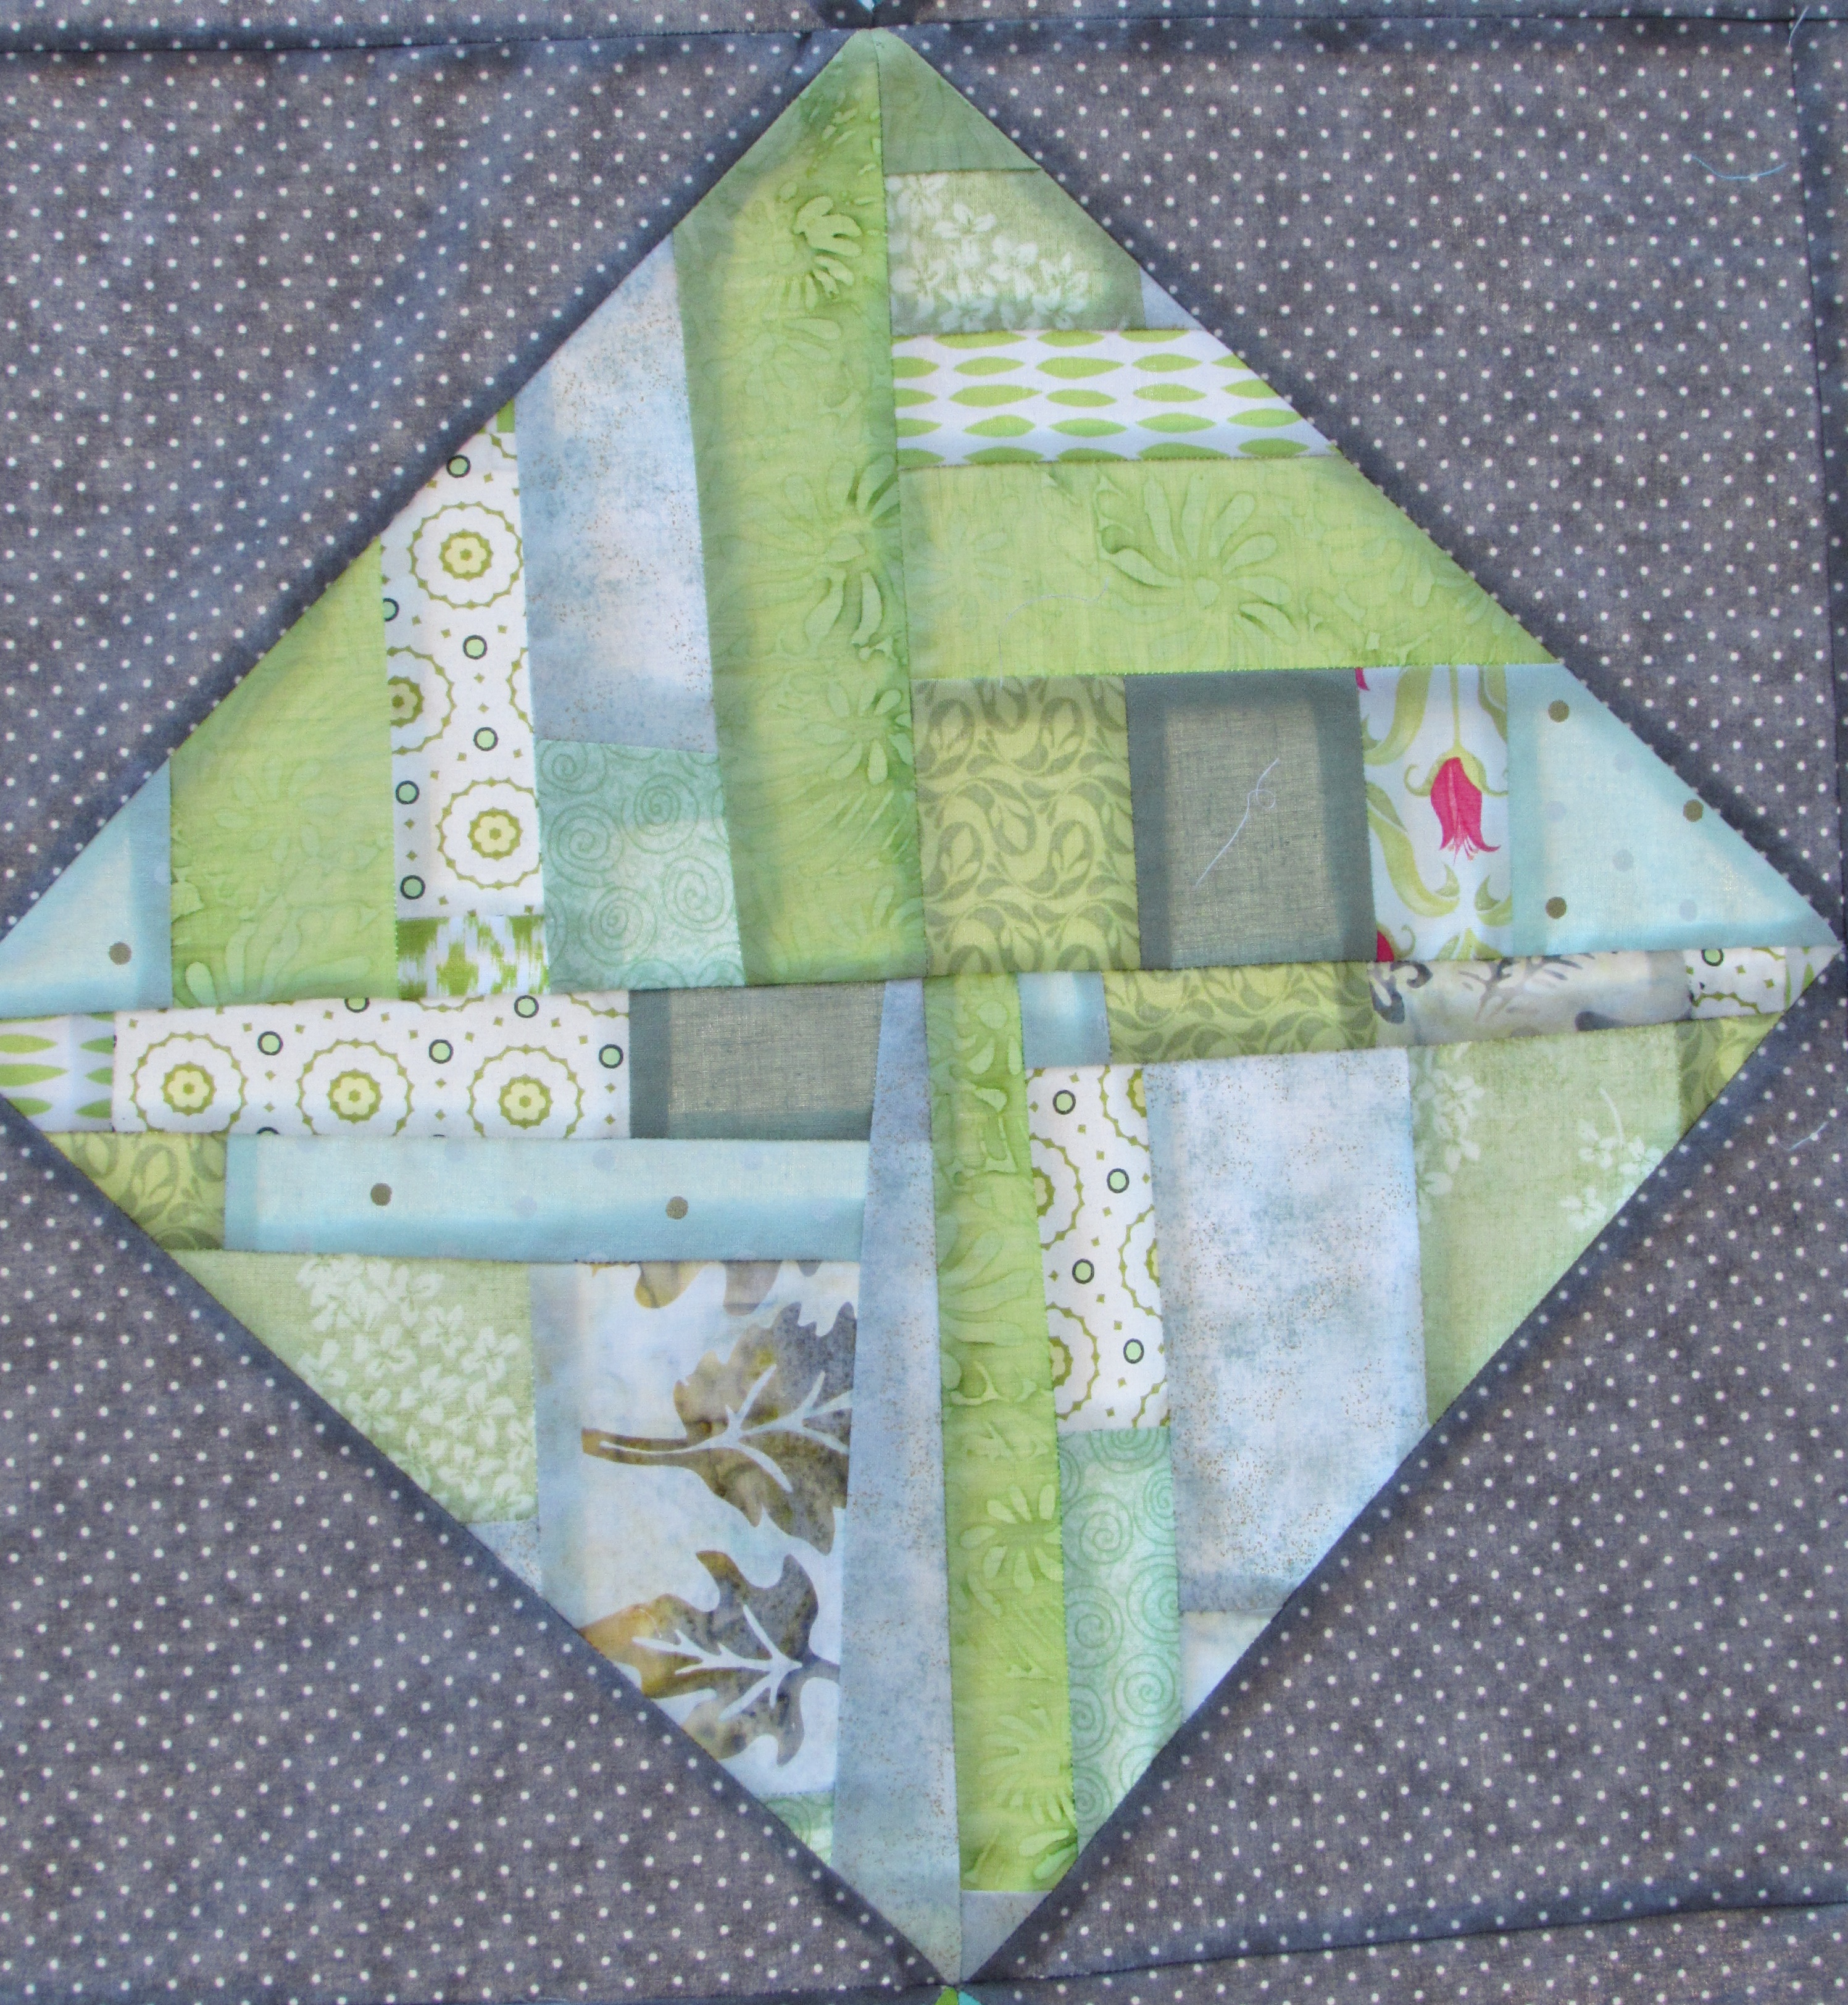
After that, I stitched a light green set of blocks.
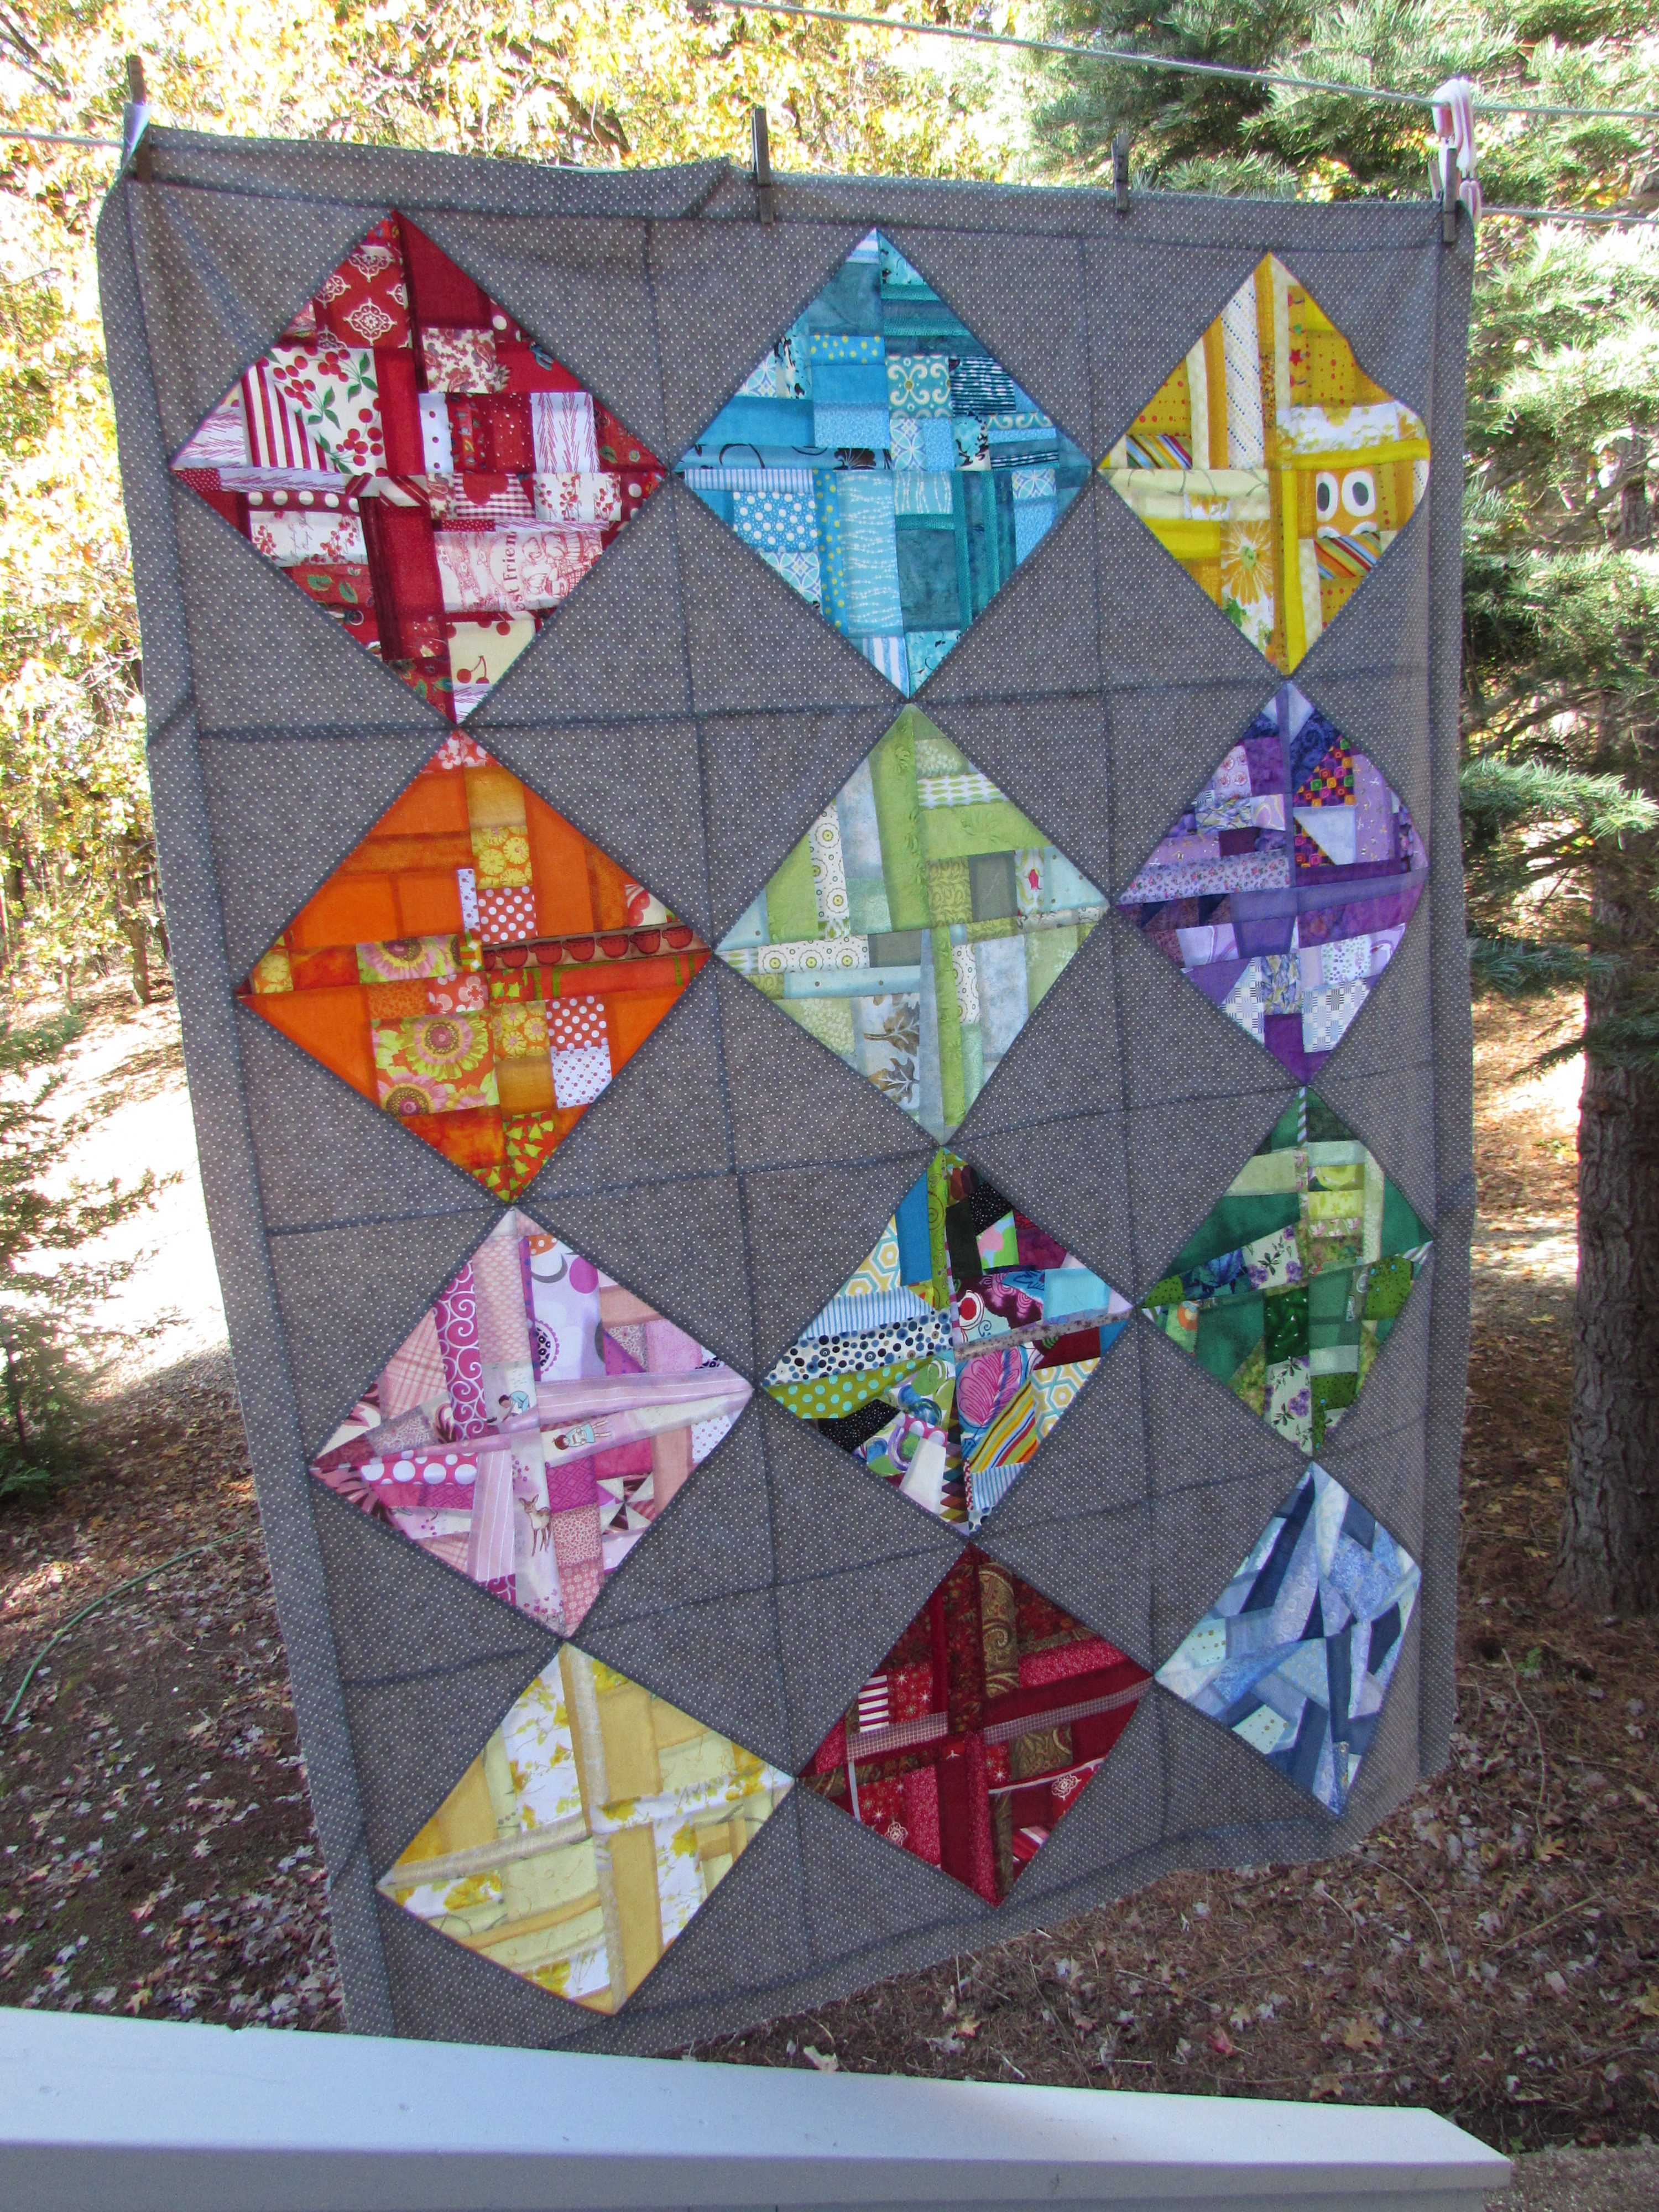
I am quite pleased with the effect of these scrappy blocks now that they are sewn together. There are so many fun bits of fabric to look at and enough different values within the quilt top to make it really interesting. The two shades each of blue, yellow, red and green are really nice.
It isn’t quite big enough though. I added a two inch border to frame it in gray. Now I am going through the chunks of scrap left from trimming the made fabric. I want to make a scrappy border with these pieces. I am thinking it will be about 3 to 4 inches wide, depending on what the scraps look like. There isn’t going to be quite enough so I will have to build them up – this is certainly not a problem. If you could only see my scrap bins!
For now though, I am setting this aside. It is nearly finished and won’t take very much time to do that last border. However, I have a few gifts that I am working on and hope to have completed by Thanksgiving. Always something to work on, right?