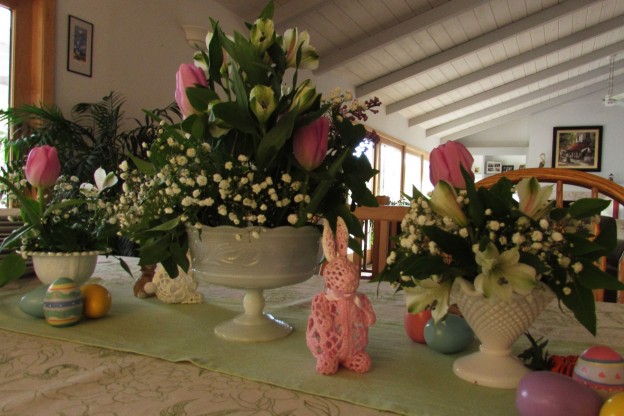
Hi: This year Easter was at my house. We celebrated with my husband’s parents, brother, sister-in-law, their two girls plus two more family members. It was such a lovely day. Lots of good food, pretty weather and visiting with family.
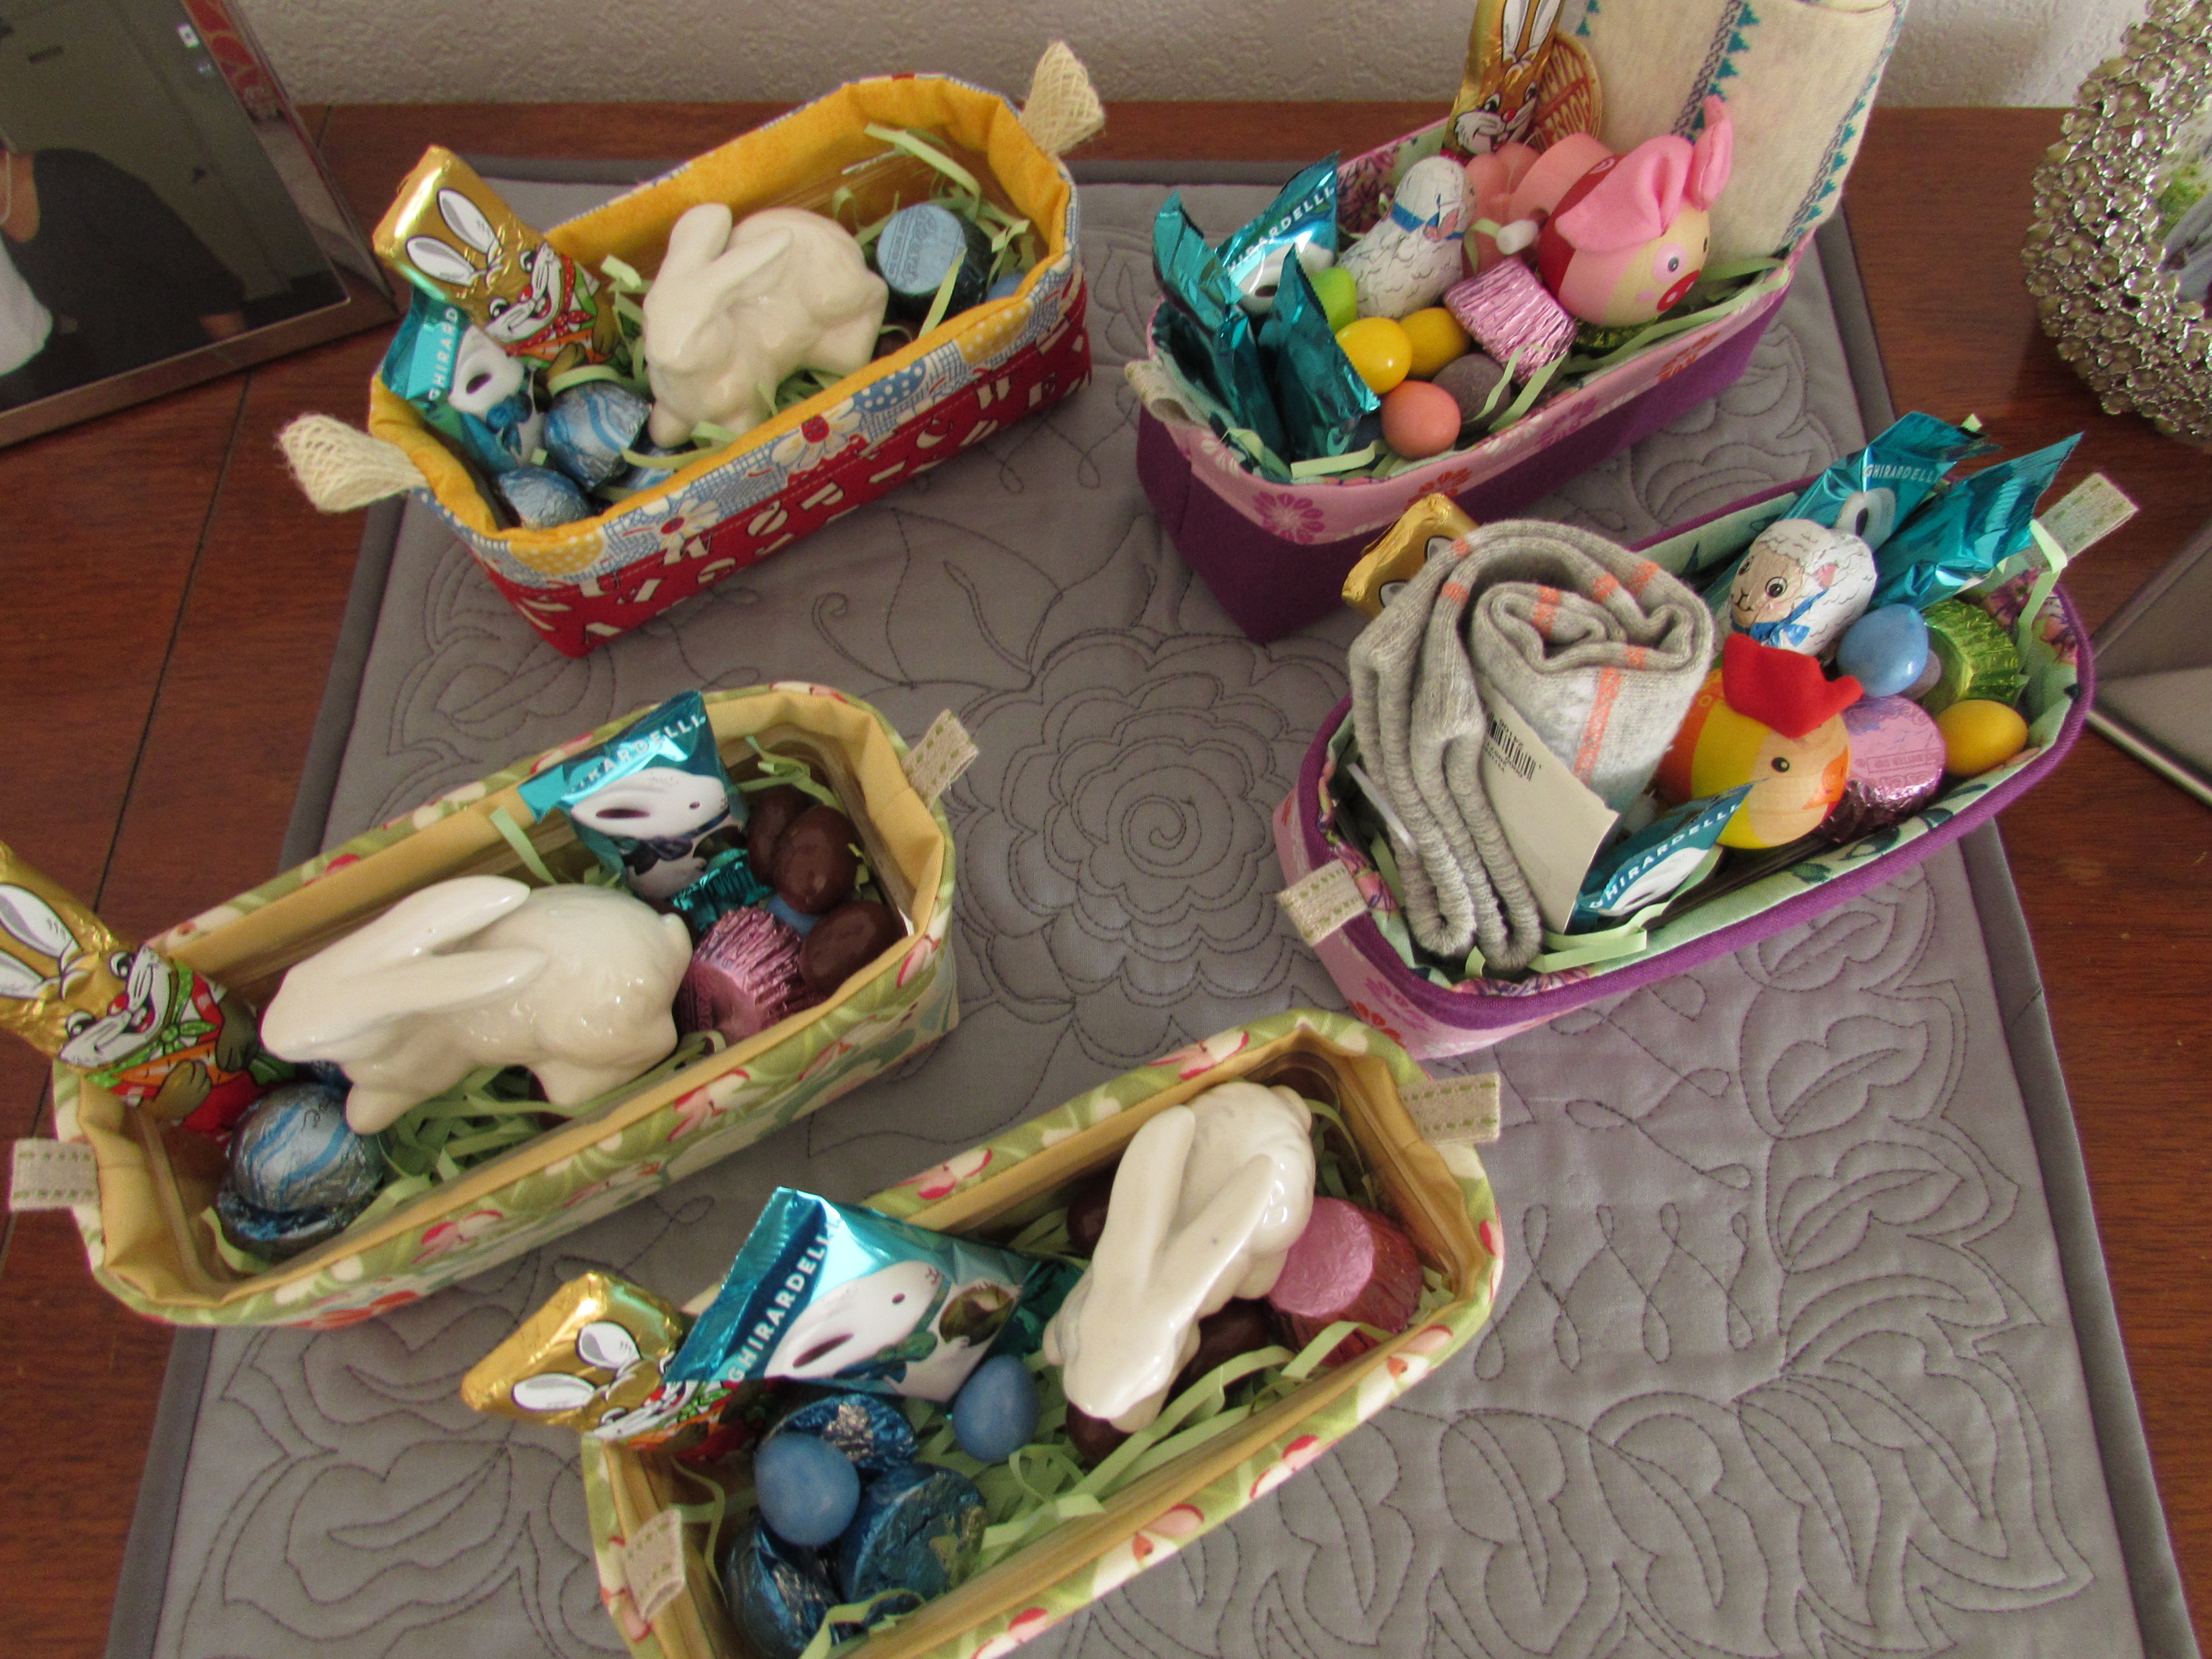
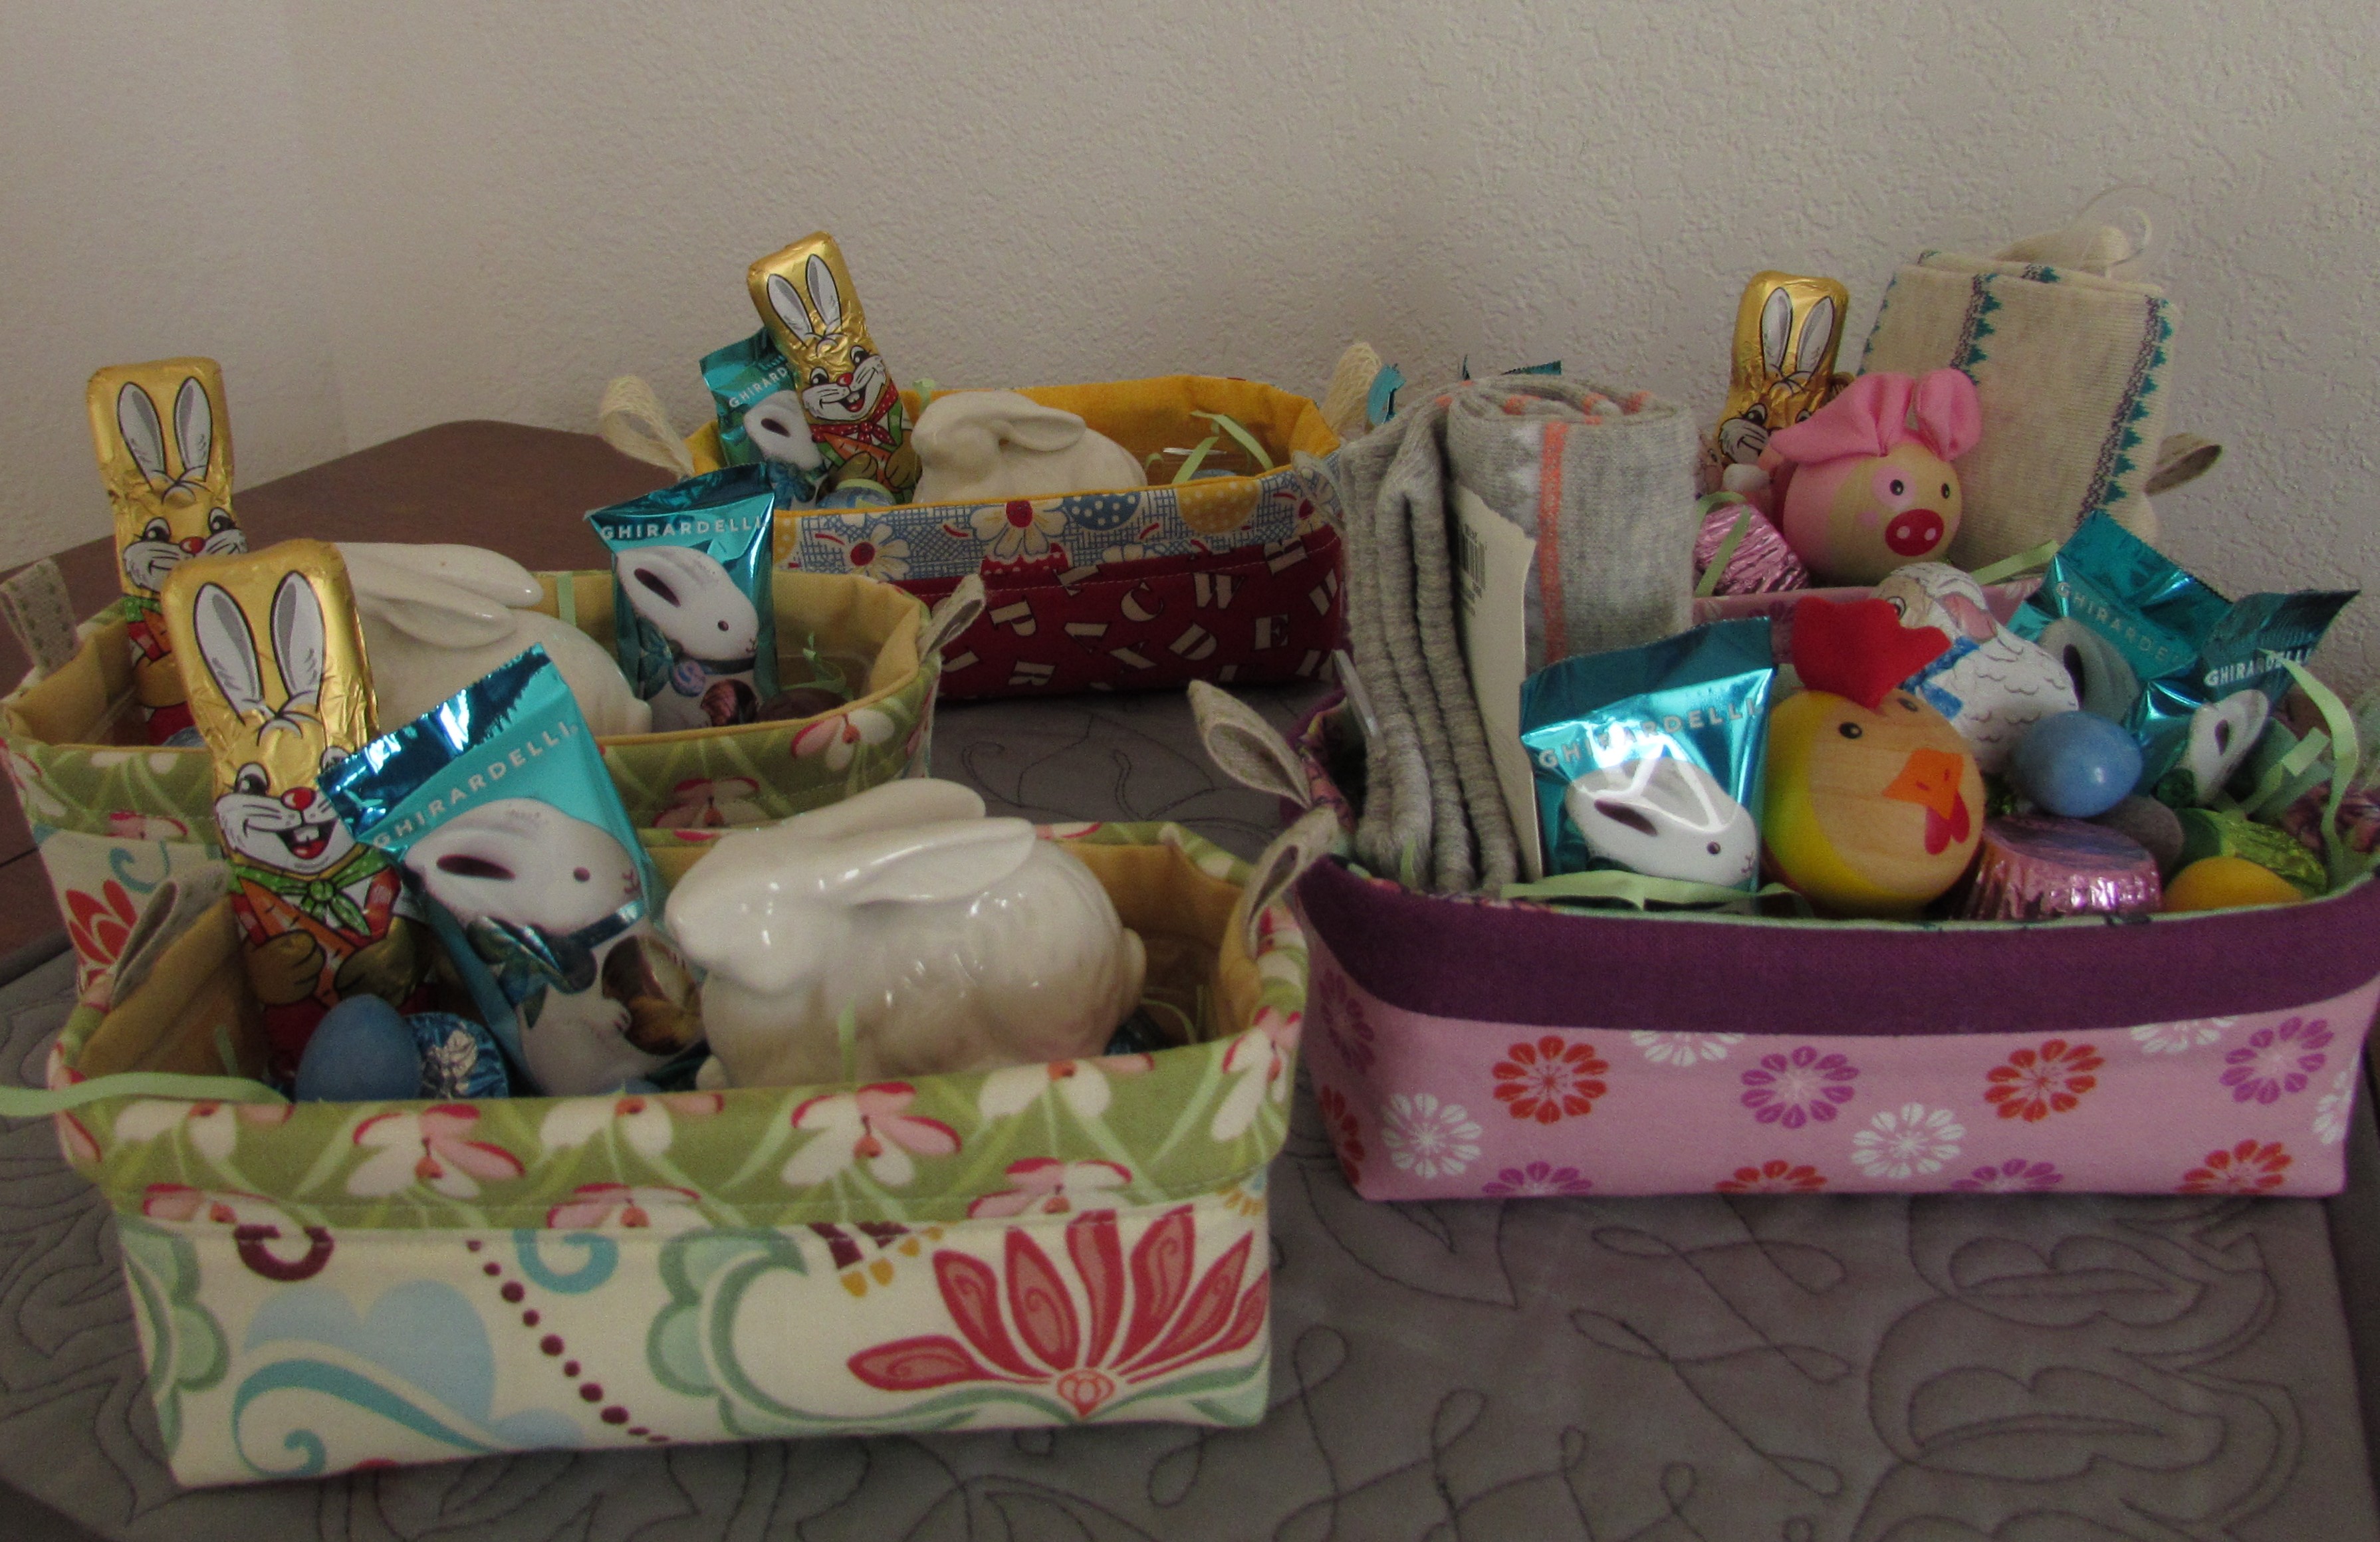
I decided to make Easter gifts for the women that were coming (five in all). Have you seen all the pixie baskets floating around on Instagram? The tutorial is by Heidi over at Fabric Mutt. It is a simple project and it took very little time to make five.
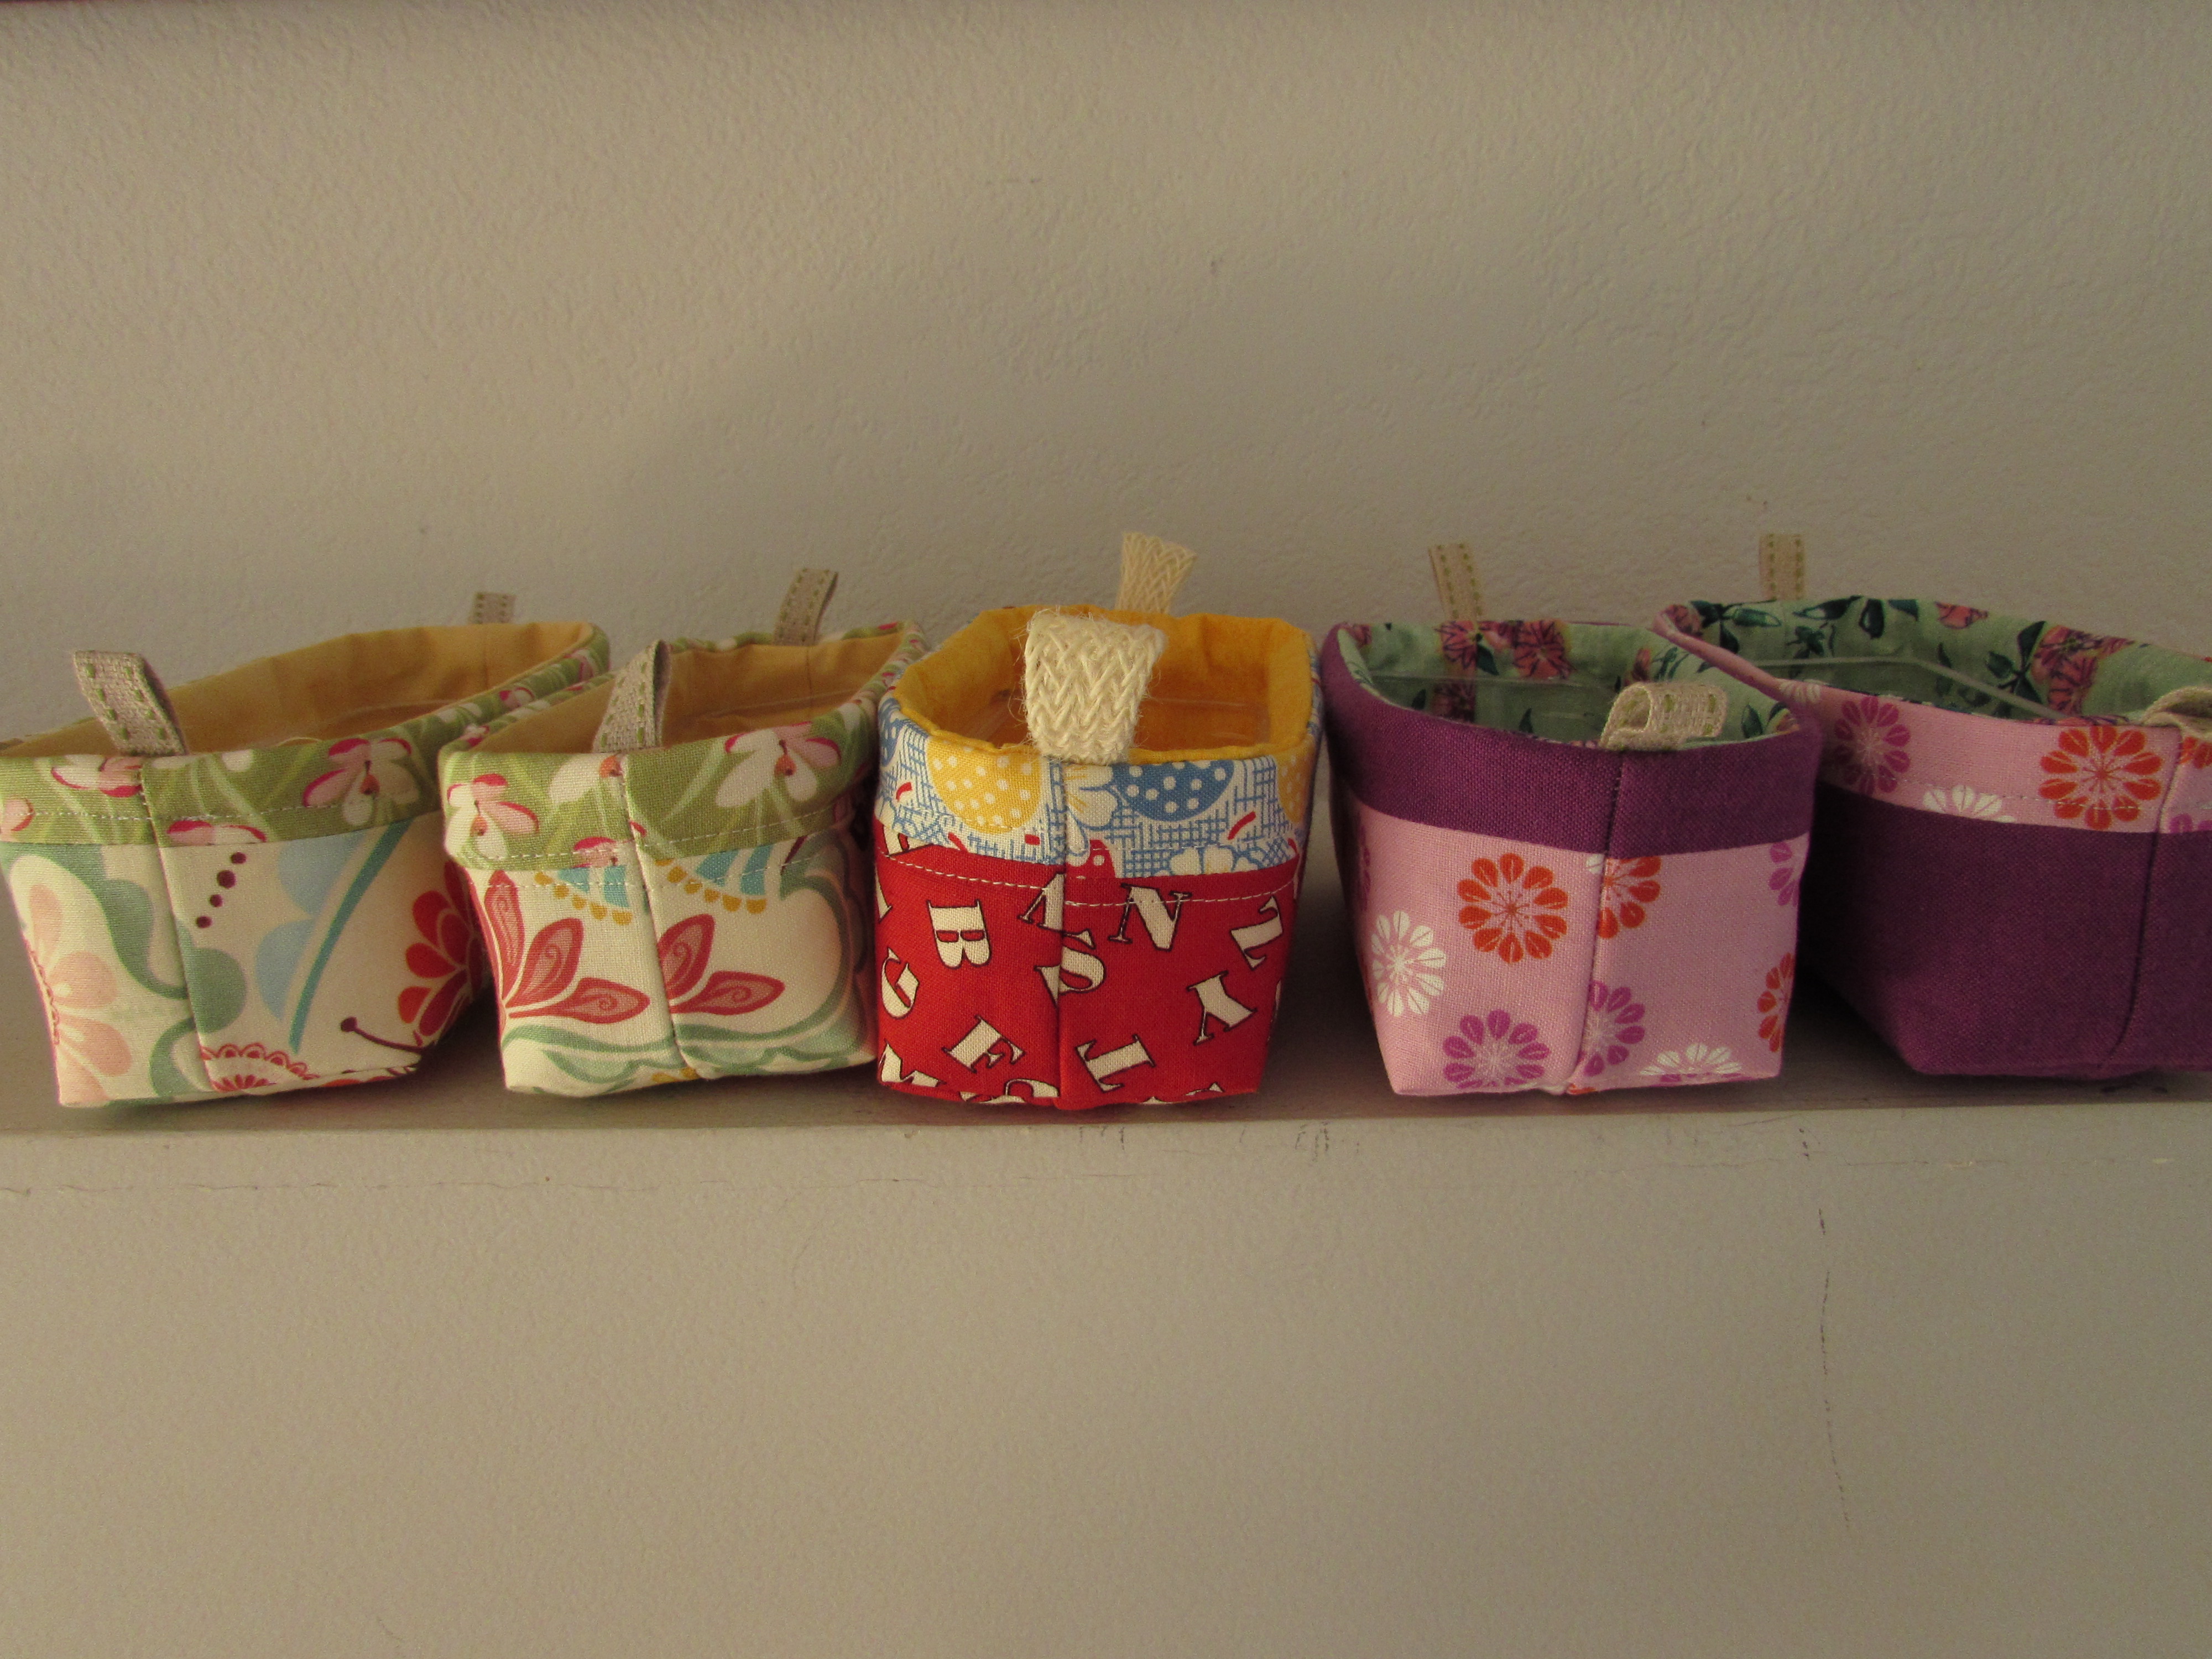
I love the little accents such as the border around the top and the little tabs on each end.
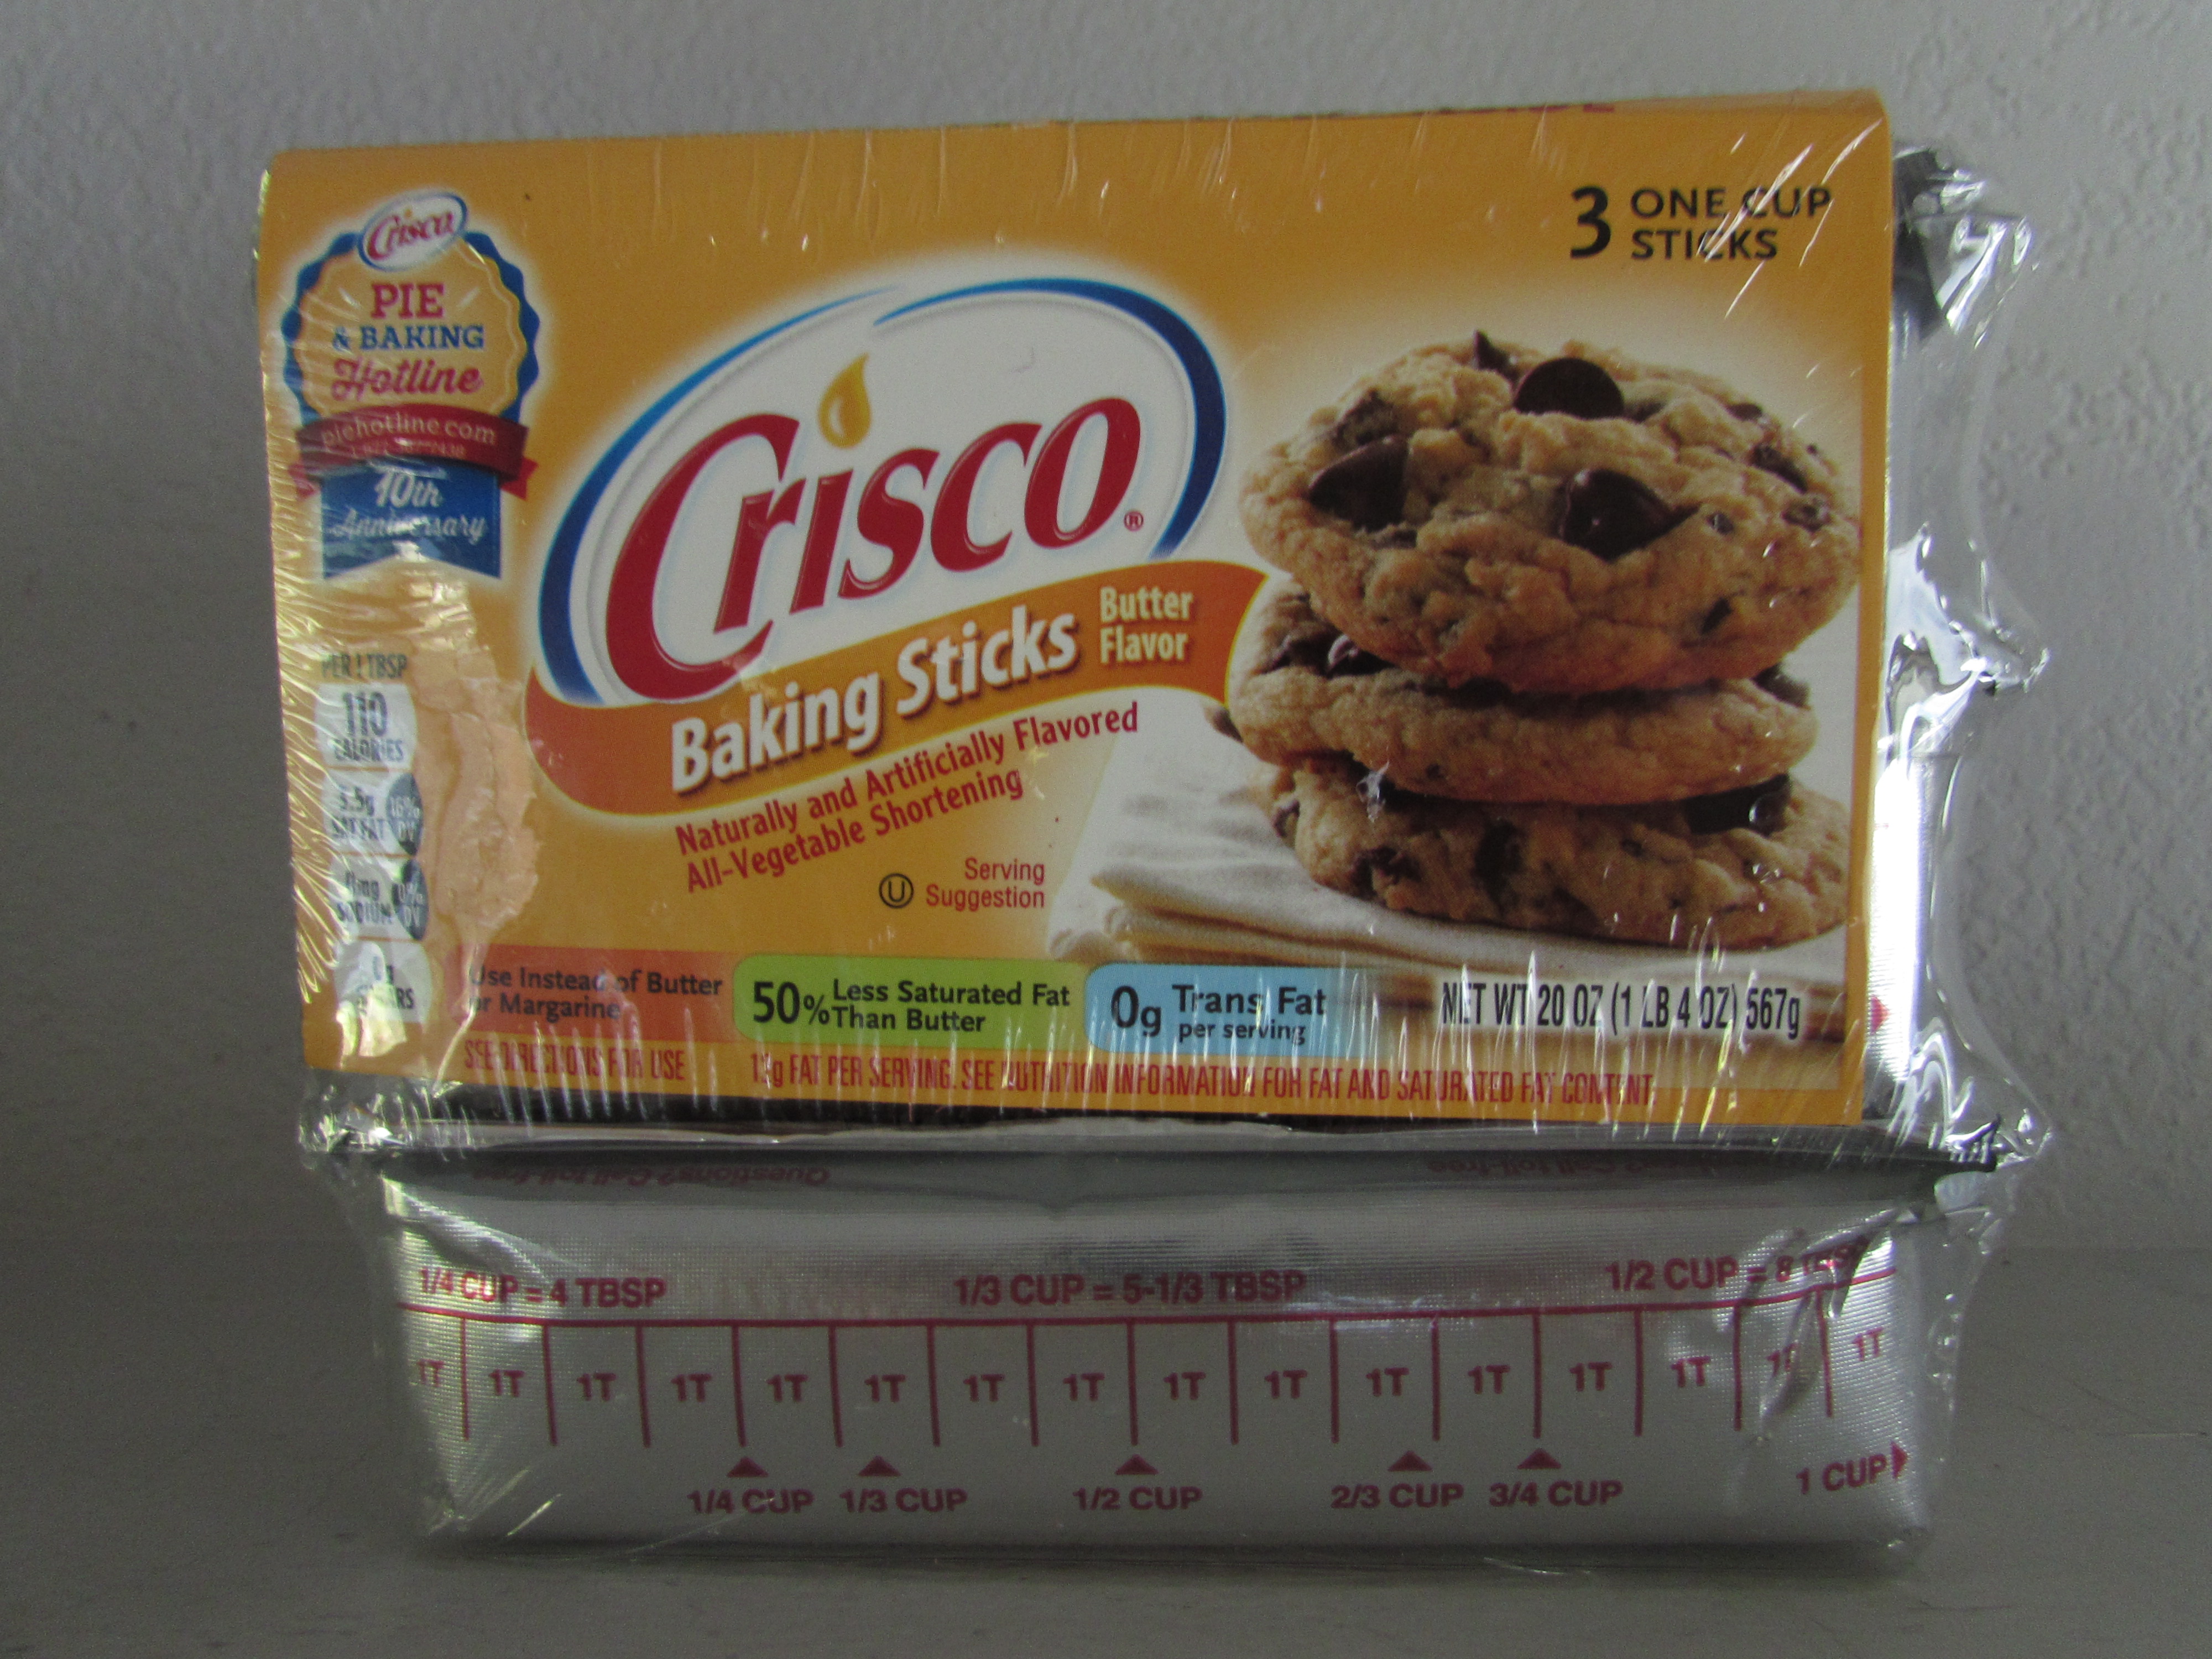
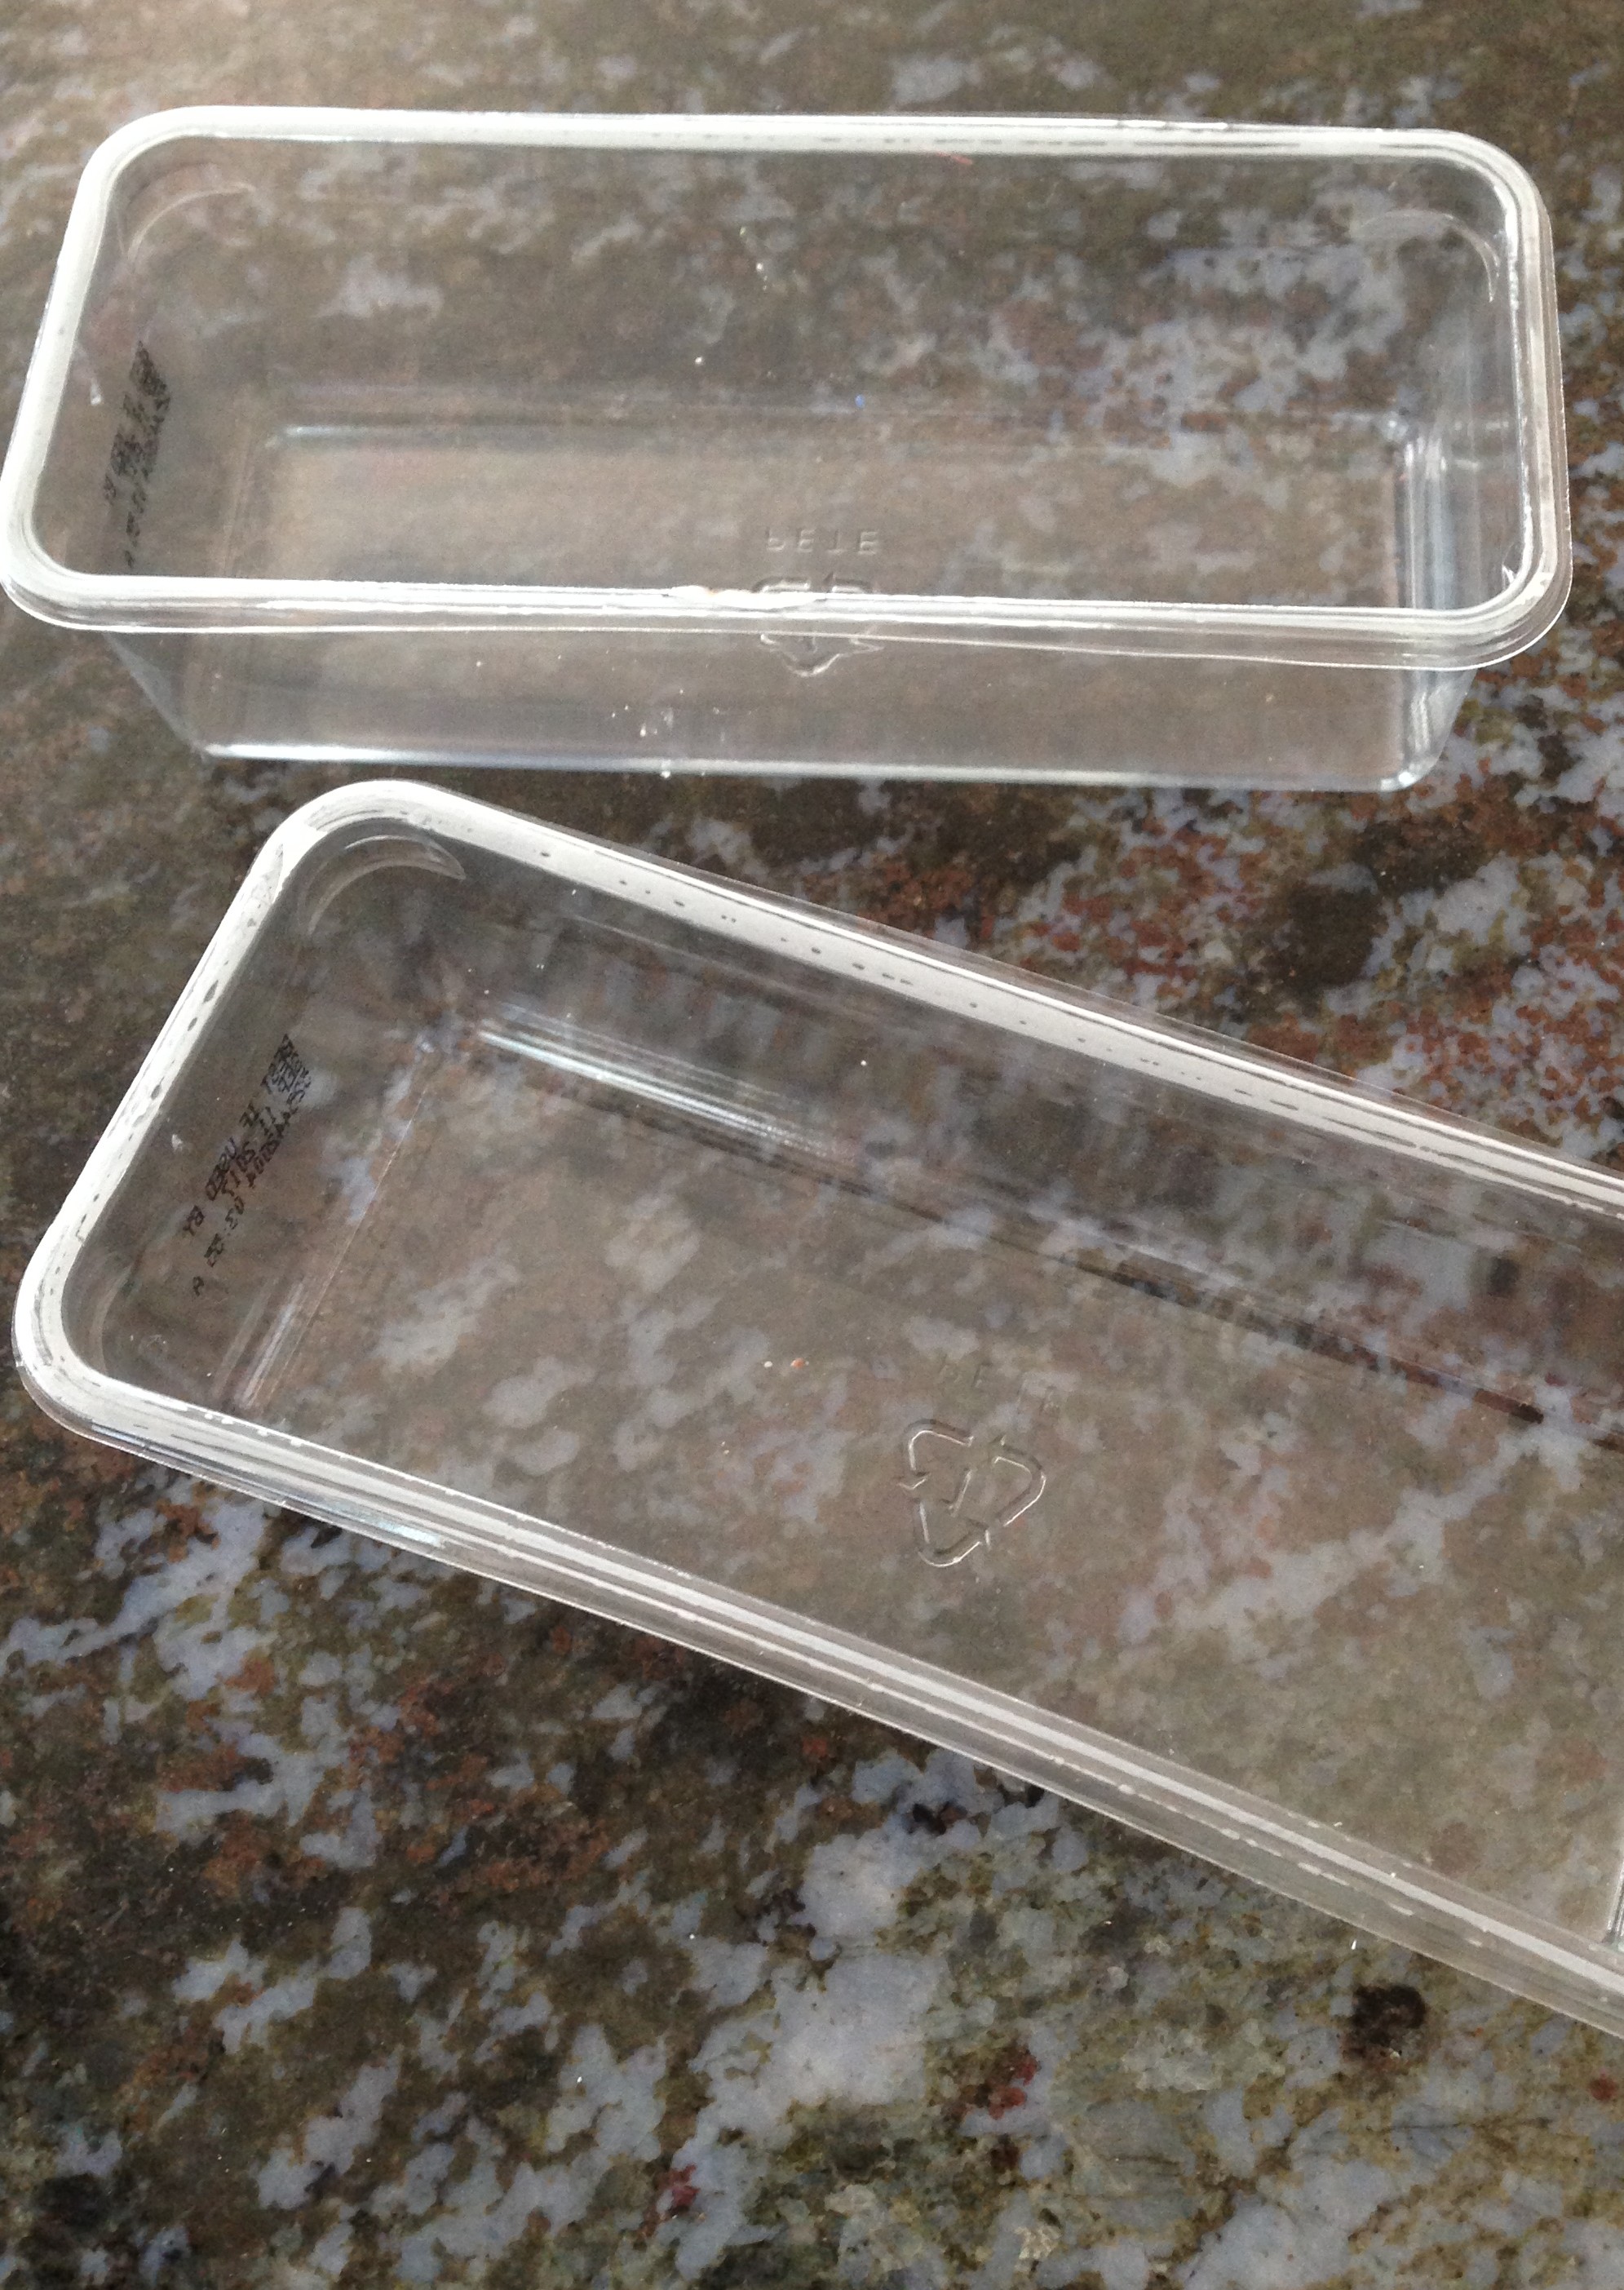
I did make a few changes. When I made the first one, I happened to make cookies the same day. Because Ray doesn’t tolerate dairy products well, I often use butter flavored Crisco when making cookies. In case you don’t use it, the cubes of shortening come in these little plastic tubs. They are nearly the same size as the pixie baskets. I thought it would be nice to place the tub in the finished basket to give it a better shape.
Heidi’s tutorial instructs you to cut pieces to a length of 8″ when making the baskets. In order to use the little plastic inserts, I had to increase the length to 8.5″. These little inserts create wonderful structure for the pixie baskets. I used fusible batting which was a breeze. Finally, I topstitched 1/8″ above and below the seam connecting the main exterior fabric and the upper trim piece. It was a nice finishing touch.
These were so fun to make and fill up for my guests. I think they were well received too!
I could see using these for all sorts of things. Different holidays, Christmas, teacher gifts, etc would be great times to make these. You can see the red one in the back is made from American Jane scraps with the alphabet on it. My sister-in-law teaches kindergarten and I thought this would be fun for her desk.
Lots of sewing going on these days. Just finished the quilting on the Square Dance quilt. Time to trim it and square it up. Then I will get the binding done.
Have a nice weekend all!
Linking to my favorites – check out the list at the top of the page, under Link Ups.
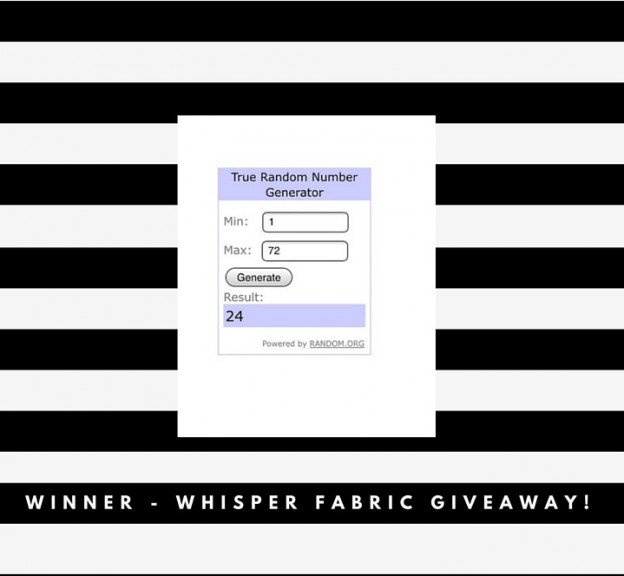
Good morning! I want to announce the winner of the giveaway sponsored by Brewstitched! Drawn by Random Number Generator, the winner is 24, Tami from Sew Much for Free Time! Thanks to all who entered! If you didn’t win today, remember that you can still have 10% off of your order through the end of tomorrow by using coupon code NANDFMARCLUB10!
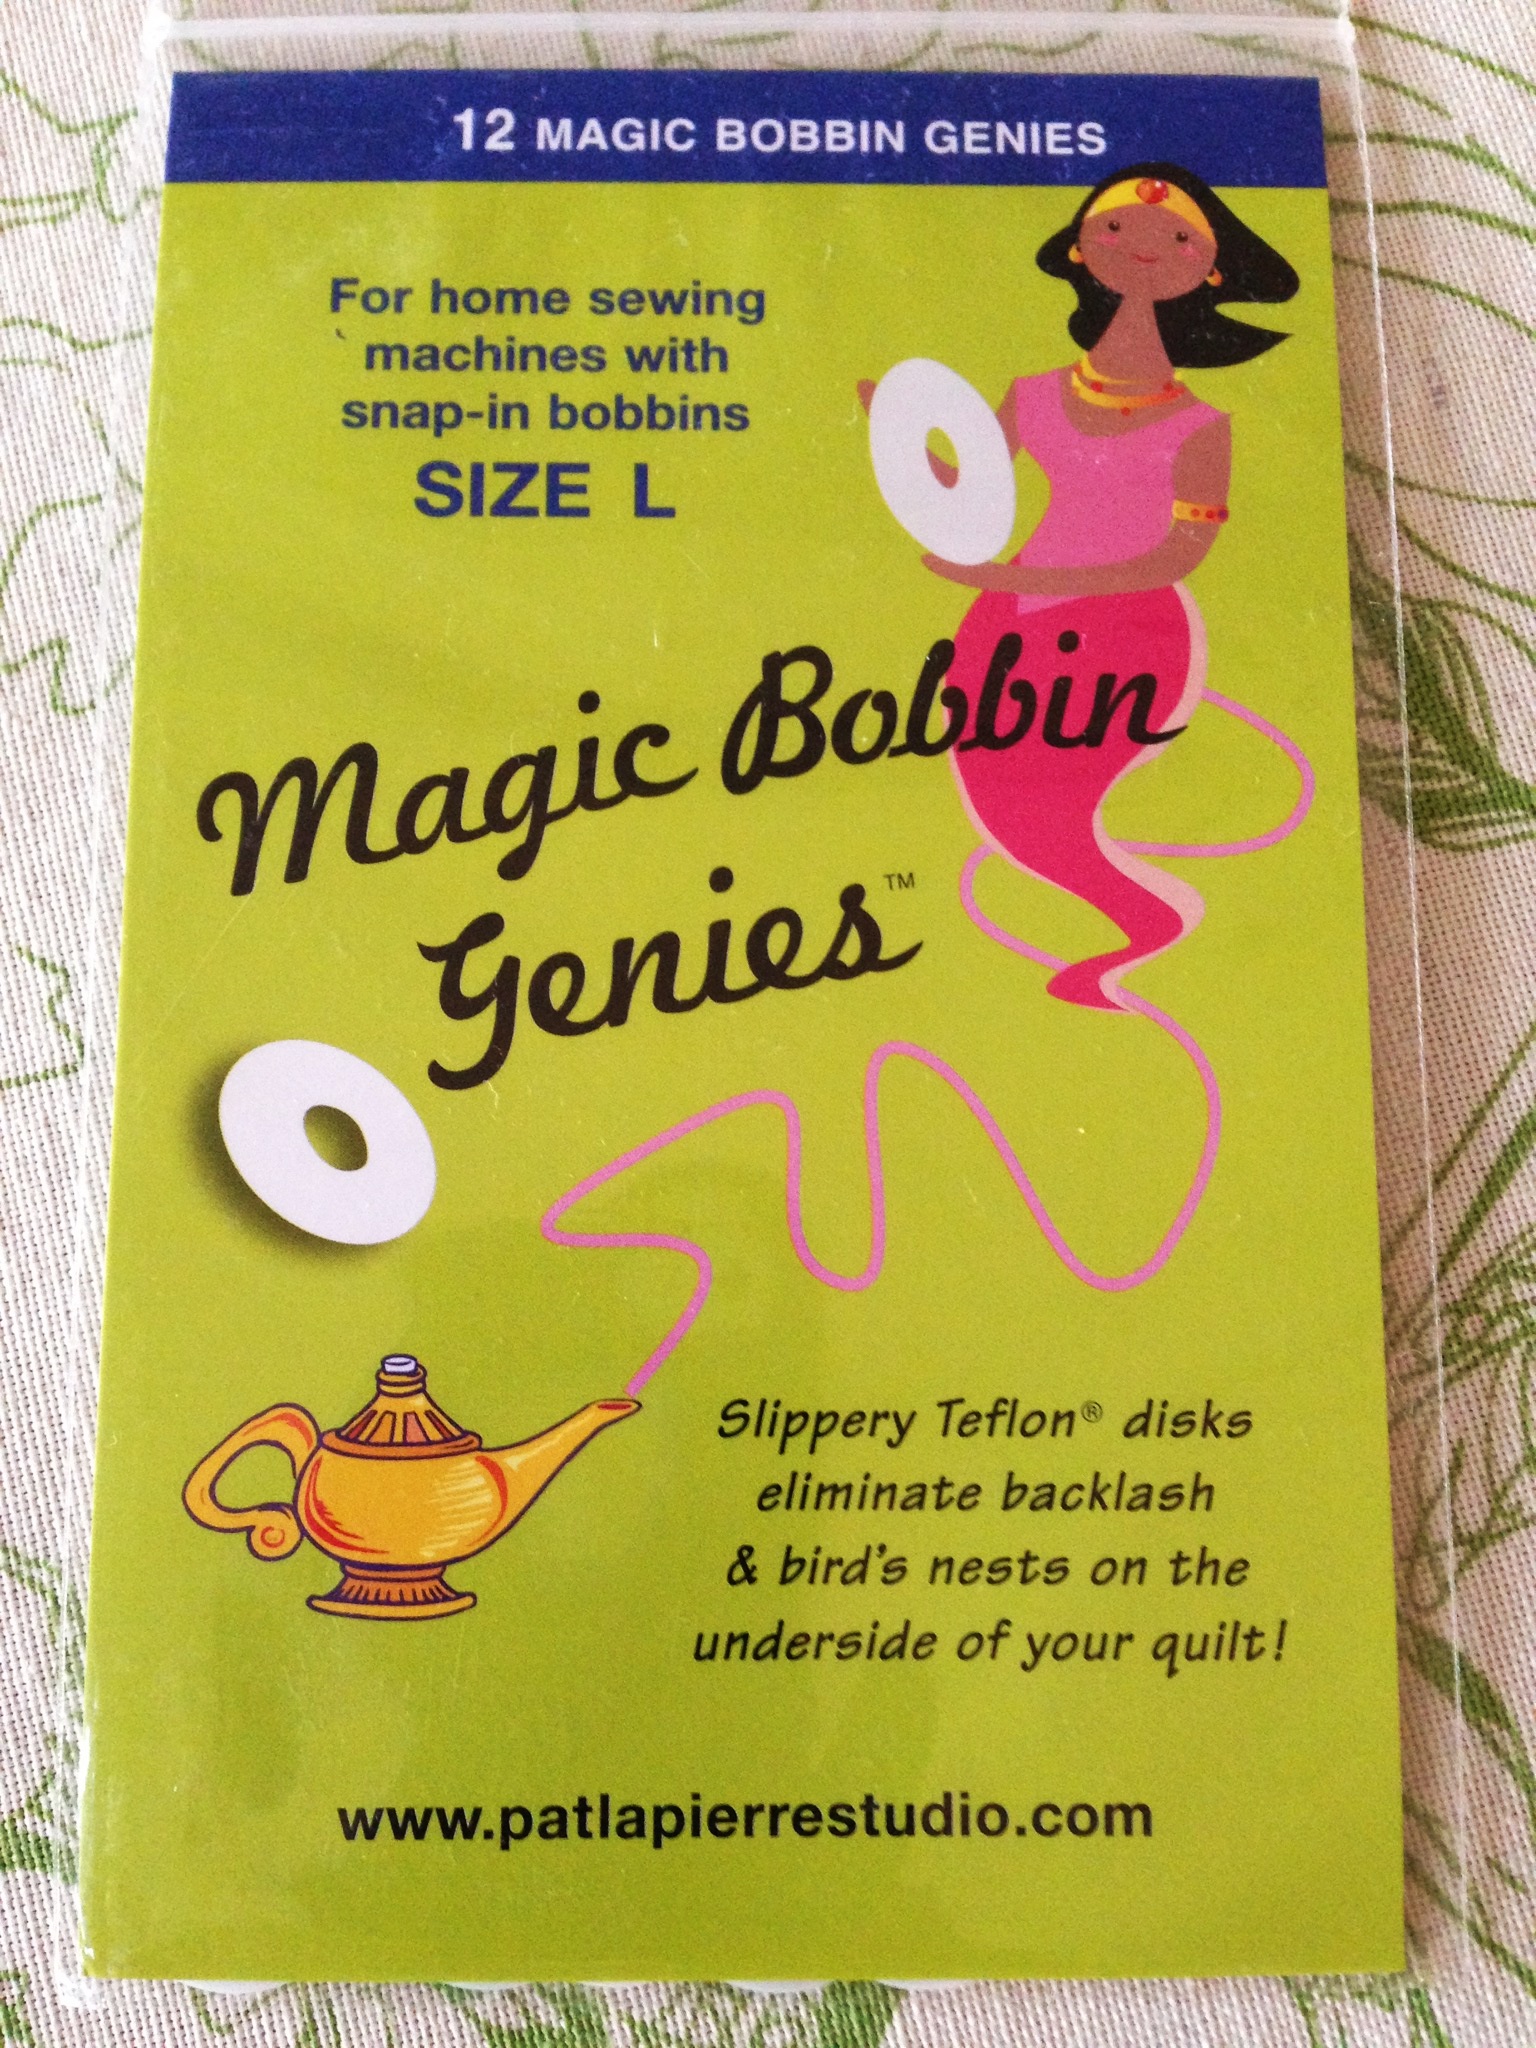
Here is my tip! I have been working on quilting my Square Dance quilt for the past week or so. My machine has been giving me all sorts of grief, not the least of which is eyelashing on the back side. It has been really frustrating. Consulting the wizard of all things, Google, I have read a fair amount on technique and the speed of one’s hand movements related to the speed of the needle. I also came across quilters who touted these Magic Bobbin Genies. These are small washers made of teflon that are dropped into the bobbin holder, underneath the bobbin. I gave them a try and they are very helpful. It didn’t solve the problem 100% but certainly improved the stitching by quite a bit.
I am not totally sure why these work. My best guess is the washer provides a slick surface on which the bobbin can spin. This is not an affiliate post, I am just spreading the word in case it might be helpful to you. They come in packs of 12 which seems to be a lifetime supply! I am not sure how long they last but it seems like there isn’t much wear and tear on the little discs. I didn’t pay close attention when I ordered and ended up with Size L. The package says they are for machines with snap-in bobbin cases. I have a Janome and my bobbin drops in. At any rate, the washer fits perfectly and definitely improves the quality of my stitching.
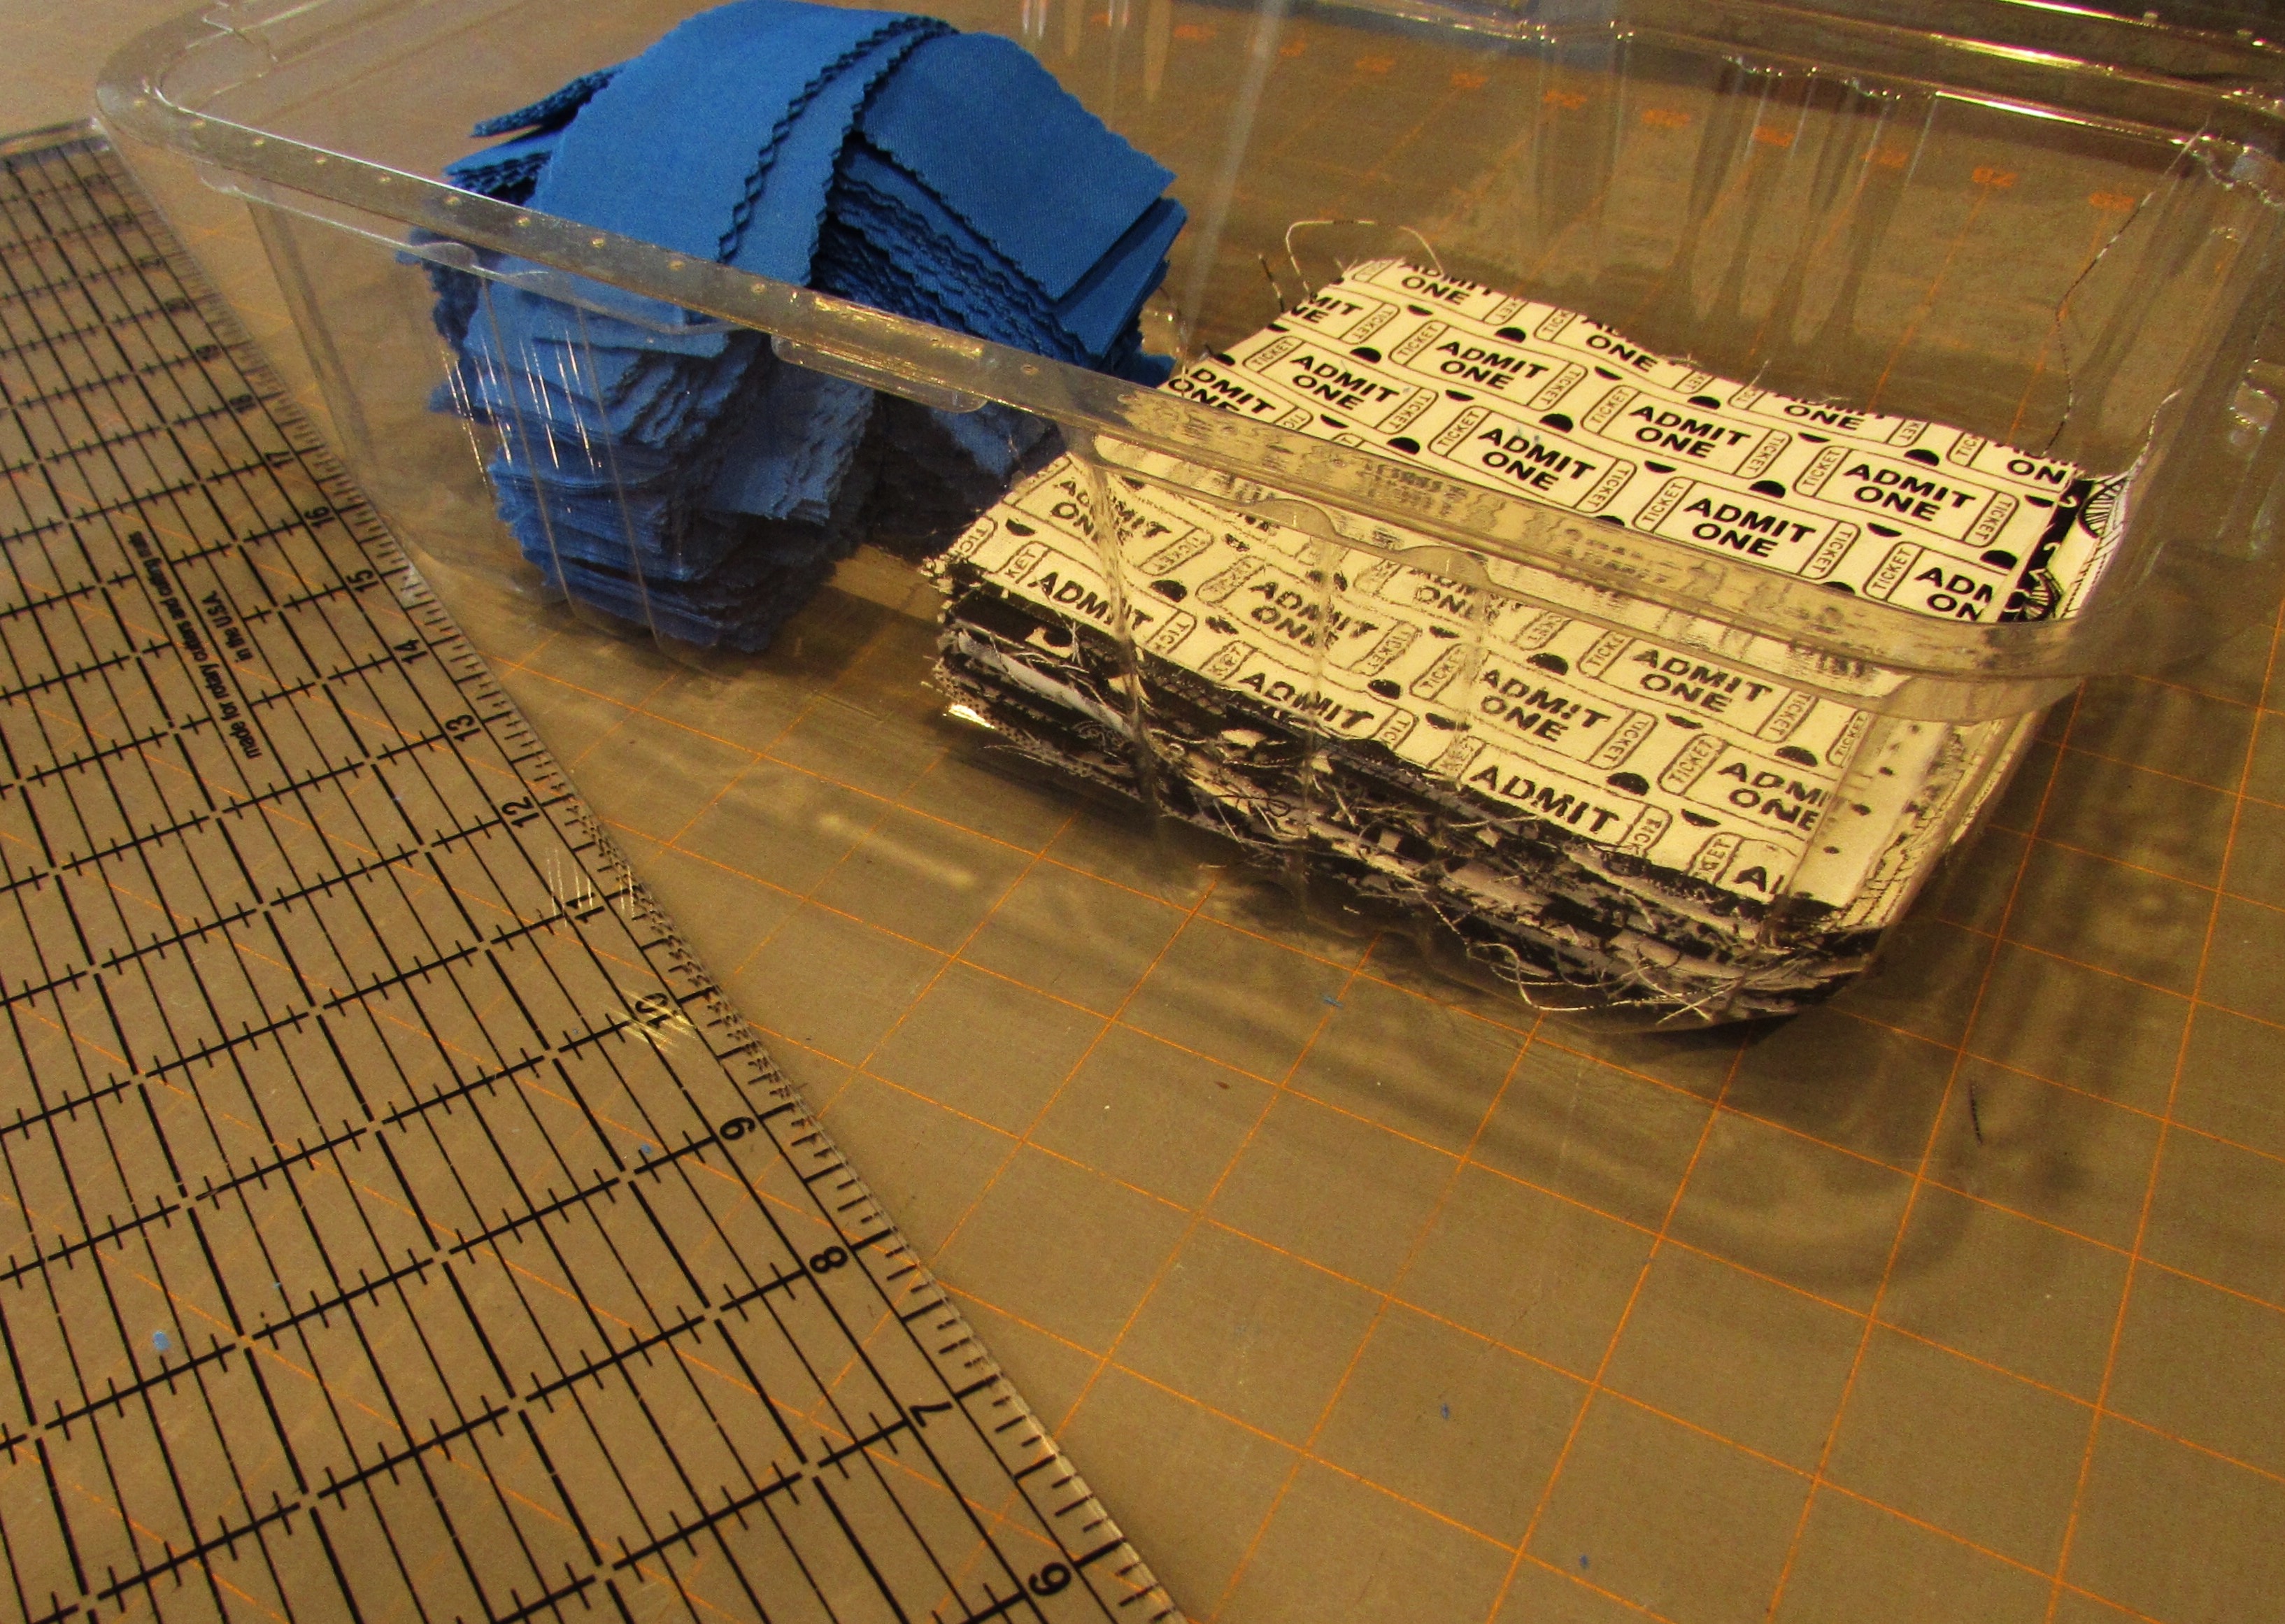
Now that I am nearly done qulting my Square Dance quilt, it seems a good time to begin something new. Seems like I haven’t started a new quilt for a while now. Several weeks ago I was perusing blogs and came across a quilt along that was sorting soon. I have never followed along with a QAL and it sounded like fun. I liked the pattern (called Stepping Stones) and thought it might be fun to meet more of the online quilty community. Jennifer, over at The Inquiring Quilter, is hosting the QAL. It is definitely not too late to join if you are interested. Other than the social aspect of making the quilt with a group of quilters that are working from the same pattern, there is the benefit of having a schedule to work to each week. I am really enjoying seeing the fabric choices that the others are using for their quilt. As for mine, I have had a collection of black and white charms in my stash for a while now. I didn’t have quite enough for the project so I found more on Etsy. The charms will be bordered with 1 1/2″ strips. If ever there was a time for pre-cuts, it is this quilt. I found a honey bun in royal blue at Missouri Star Quilt Co. This was my first order from Missouri Star and I smiled when I read their shipping notice. Someone over there is a very creative writer! I also smiled when I was ordering my blue strips and I saw their Daily Deal with a package of Kaffe Fassett charms for $2.00. Score. And so my stash continues to grow, bit by 5″ bit.
Time to sew. I have been neglecting my Etsy shop and need to make a few new Chemex cozies today. I also need to work on about a billion little HST’s for the quilt along. Hope you will carve out a few minutes to sew as well.
Linking up all over the place. Check the tab, Link Ups, at the top of the page for details!
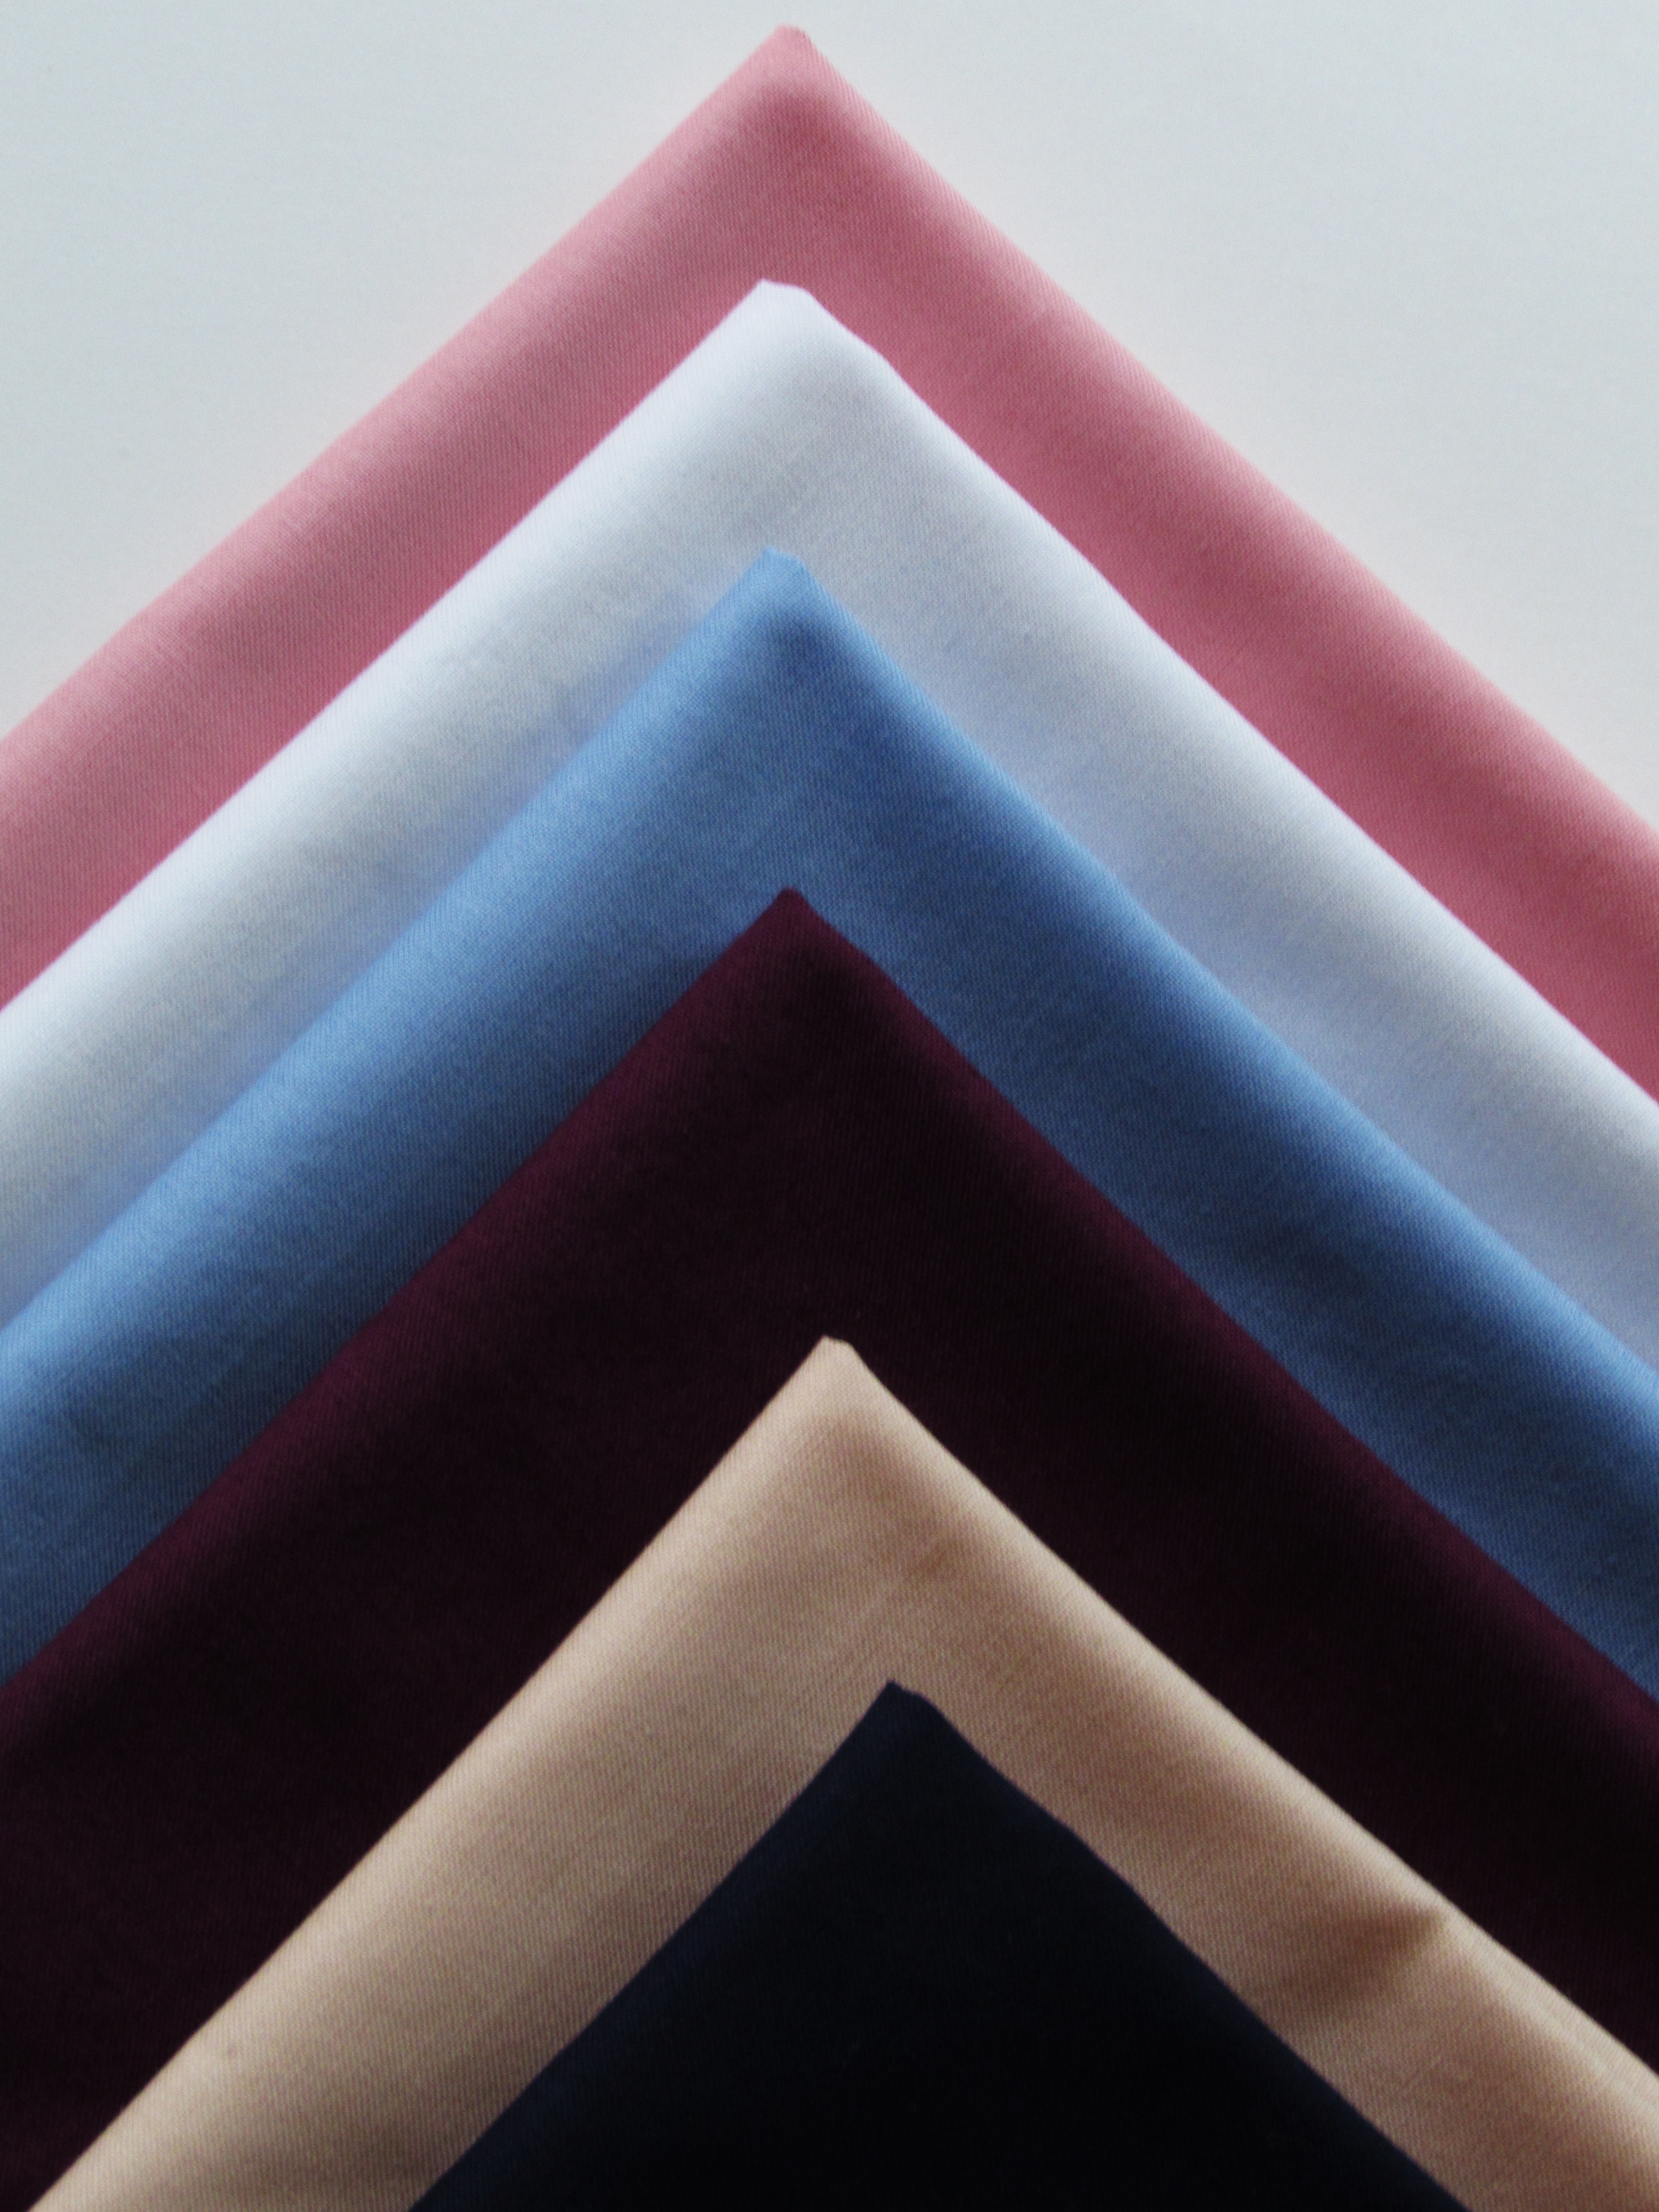
Today marks the first day of the Paintbrush Studio 2016 New Block Blog Hop! Last year I participated in a block hop that was sponsored by Fabri-Quilt. This year I am participating again, except Fabri-Quilt is now known as Paintbrush Studios. The fabric company has provided each of the participants with a set of fat quarters and we created a unique block using their curated bundle of gorgeousness, Painters Pallette. This three day event is led by Yvonne @Quilting Jetgirl, Cheryl @Meadow Mist Designs, and Stephanie @Late Night Quilter.
Each participant is to make a block which finishes out to 12″ square (12.5″ unfinished). The blocks are sent to the team lead, Yvonne of Quilting Jetgirl, who will then assemble them into at least two donation quilts. The fabrics this year are exceptional. Wonderful colors and the hand of the fabric is lovely. I did prewash mine to prevent any issues with potential bleeding from the darker colors. However my color catcher came up clean and there wasn’t any color issue.
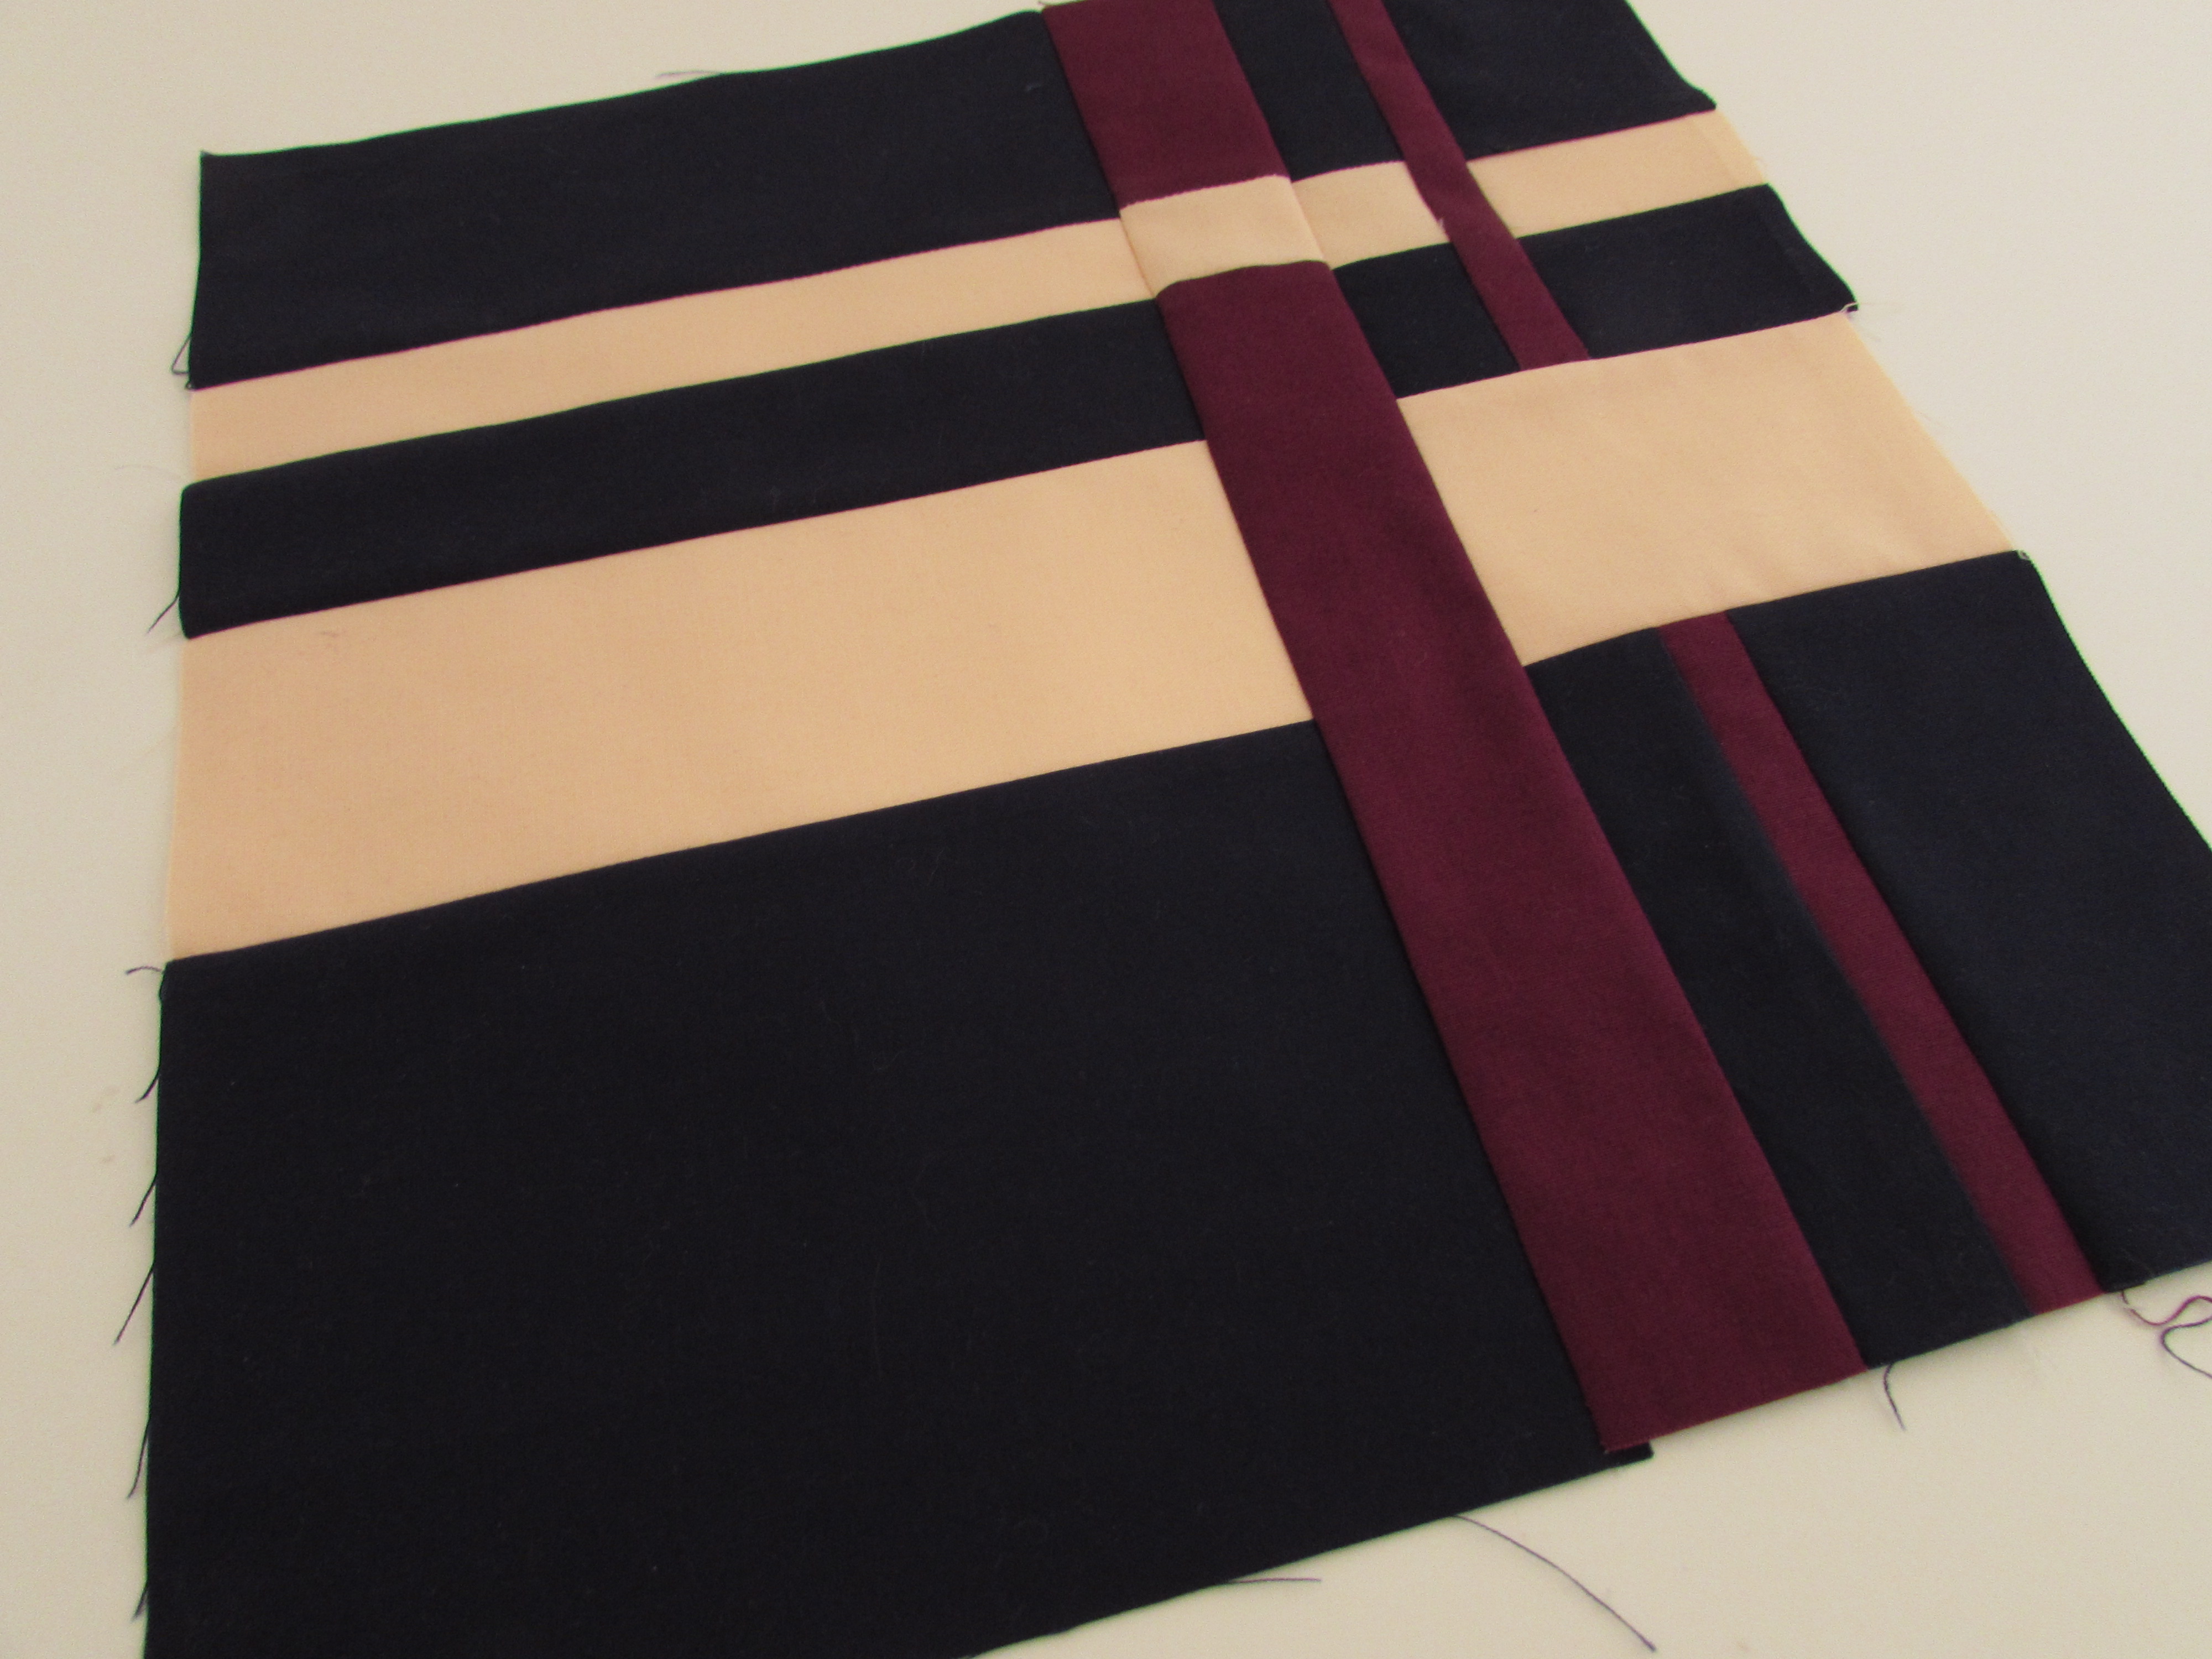
To create my block, Intermingled, I took inspiration from Alissa Carlton’s book, Modern Minimal. I love this book – the quilts are modern with clean lines and are uncomplicated. My kind of projects! She has a quilt in this book which served as inspiration for my block. I emailed Alissa and checked to see if I could replicate her quilt as a block. She was so kind as to reply right away (this was a few days before QuiltCon and I was amazed that she answered so fast!) I am not always sure of the etiquette so I think it never hurts to go the extra mile and ask for permission. Anyway, Alissa created this design as a bed size quilt and I reduced it to block size (with a few additional modifications.)
While this block does require a fair amount of piecing, it is not difficult to create. There are no points to match up and it comes together quickly.
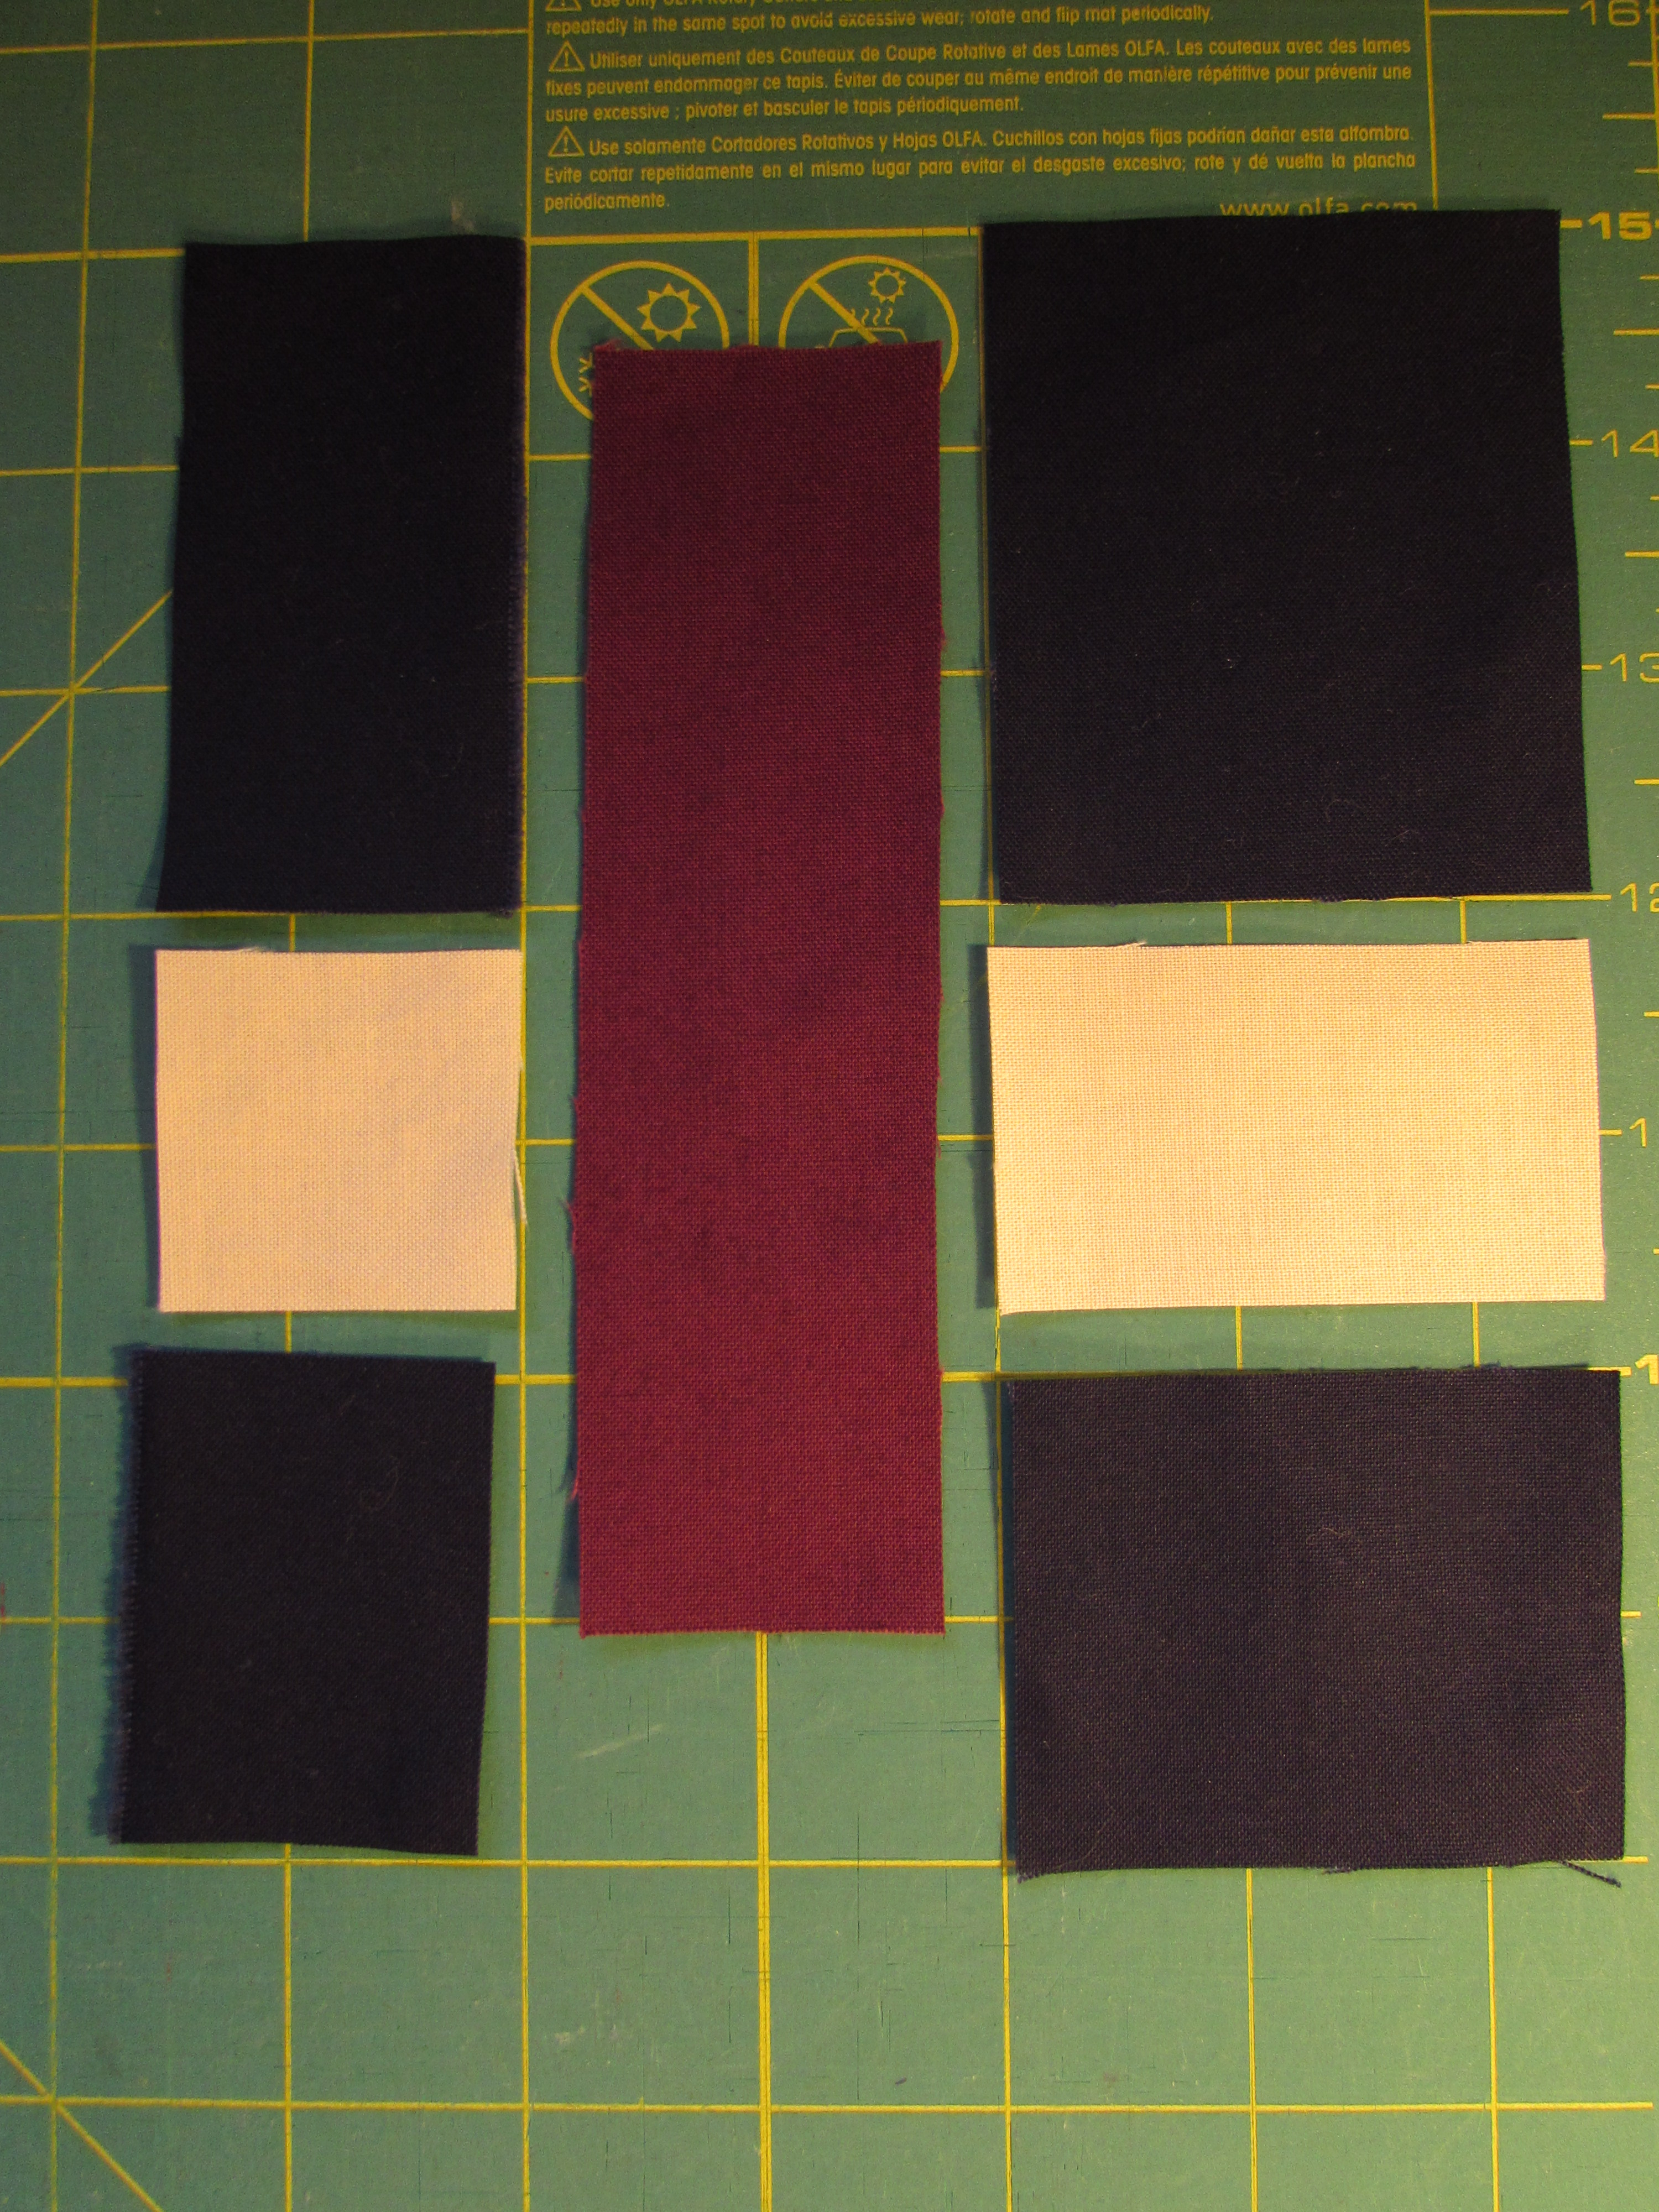
I have attached a full PDF document that contains the cut list for the size of each piece, as well as assembly directions. For the purpose of this post, however, I will show basic pictures of how the block goes together.
I made this block in three sections. The first section is the left side of the block.
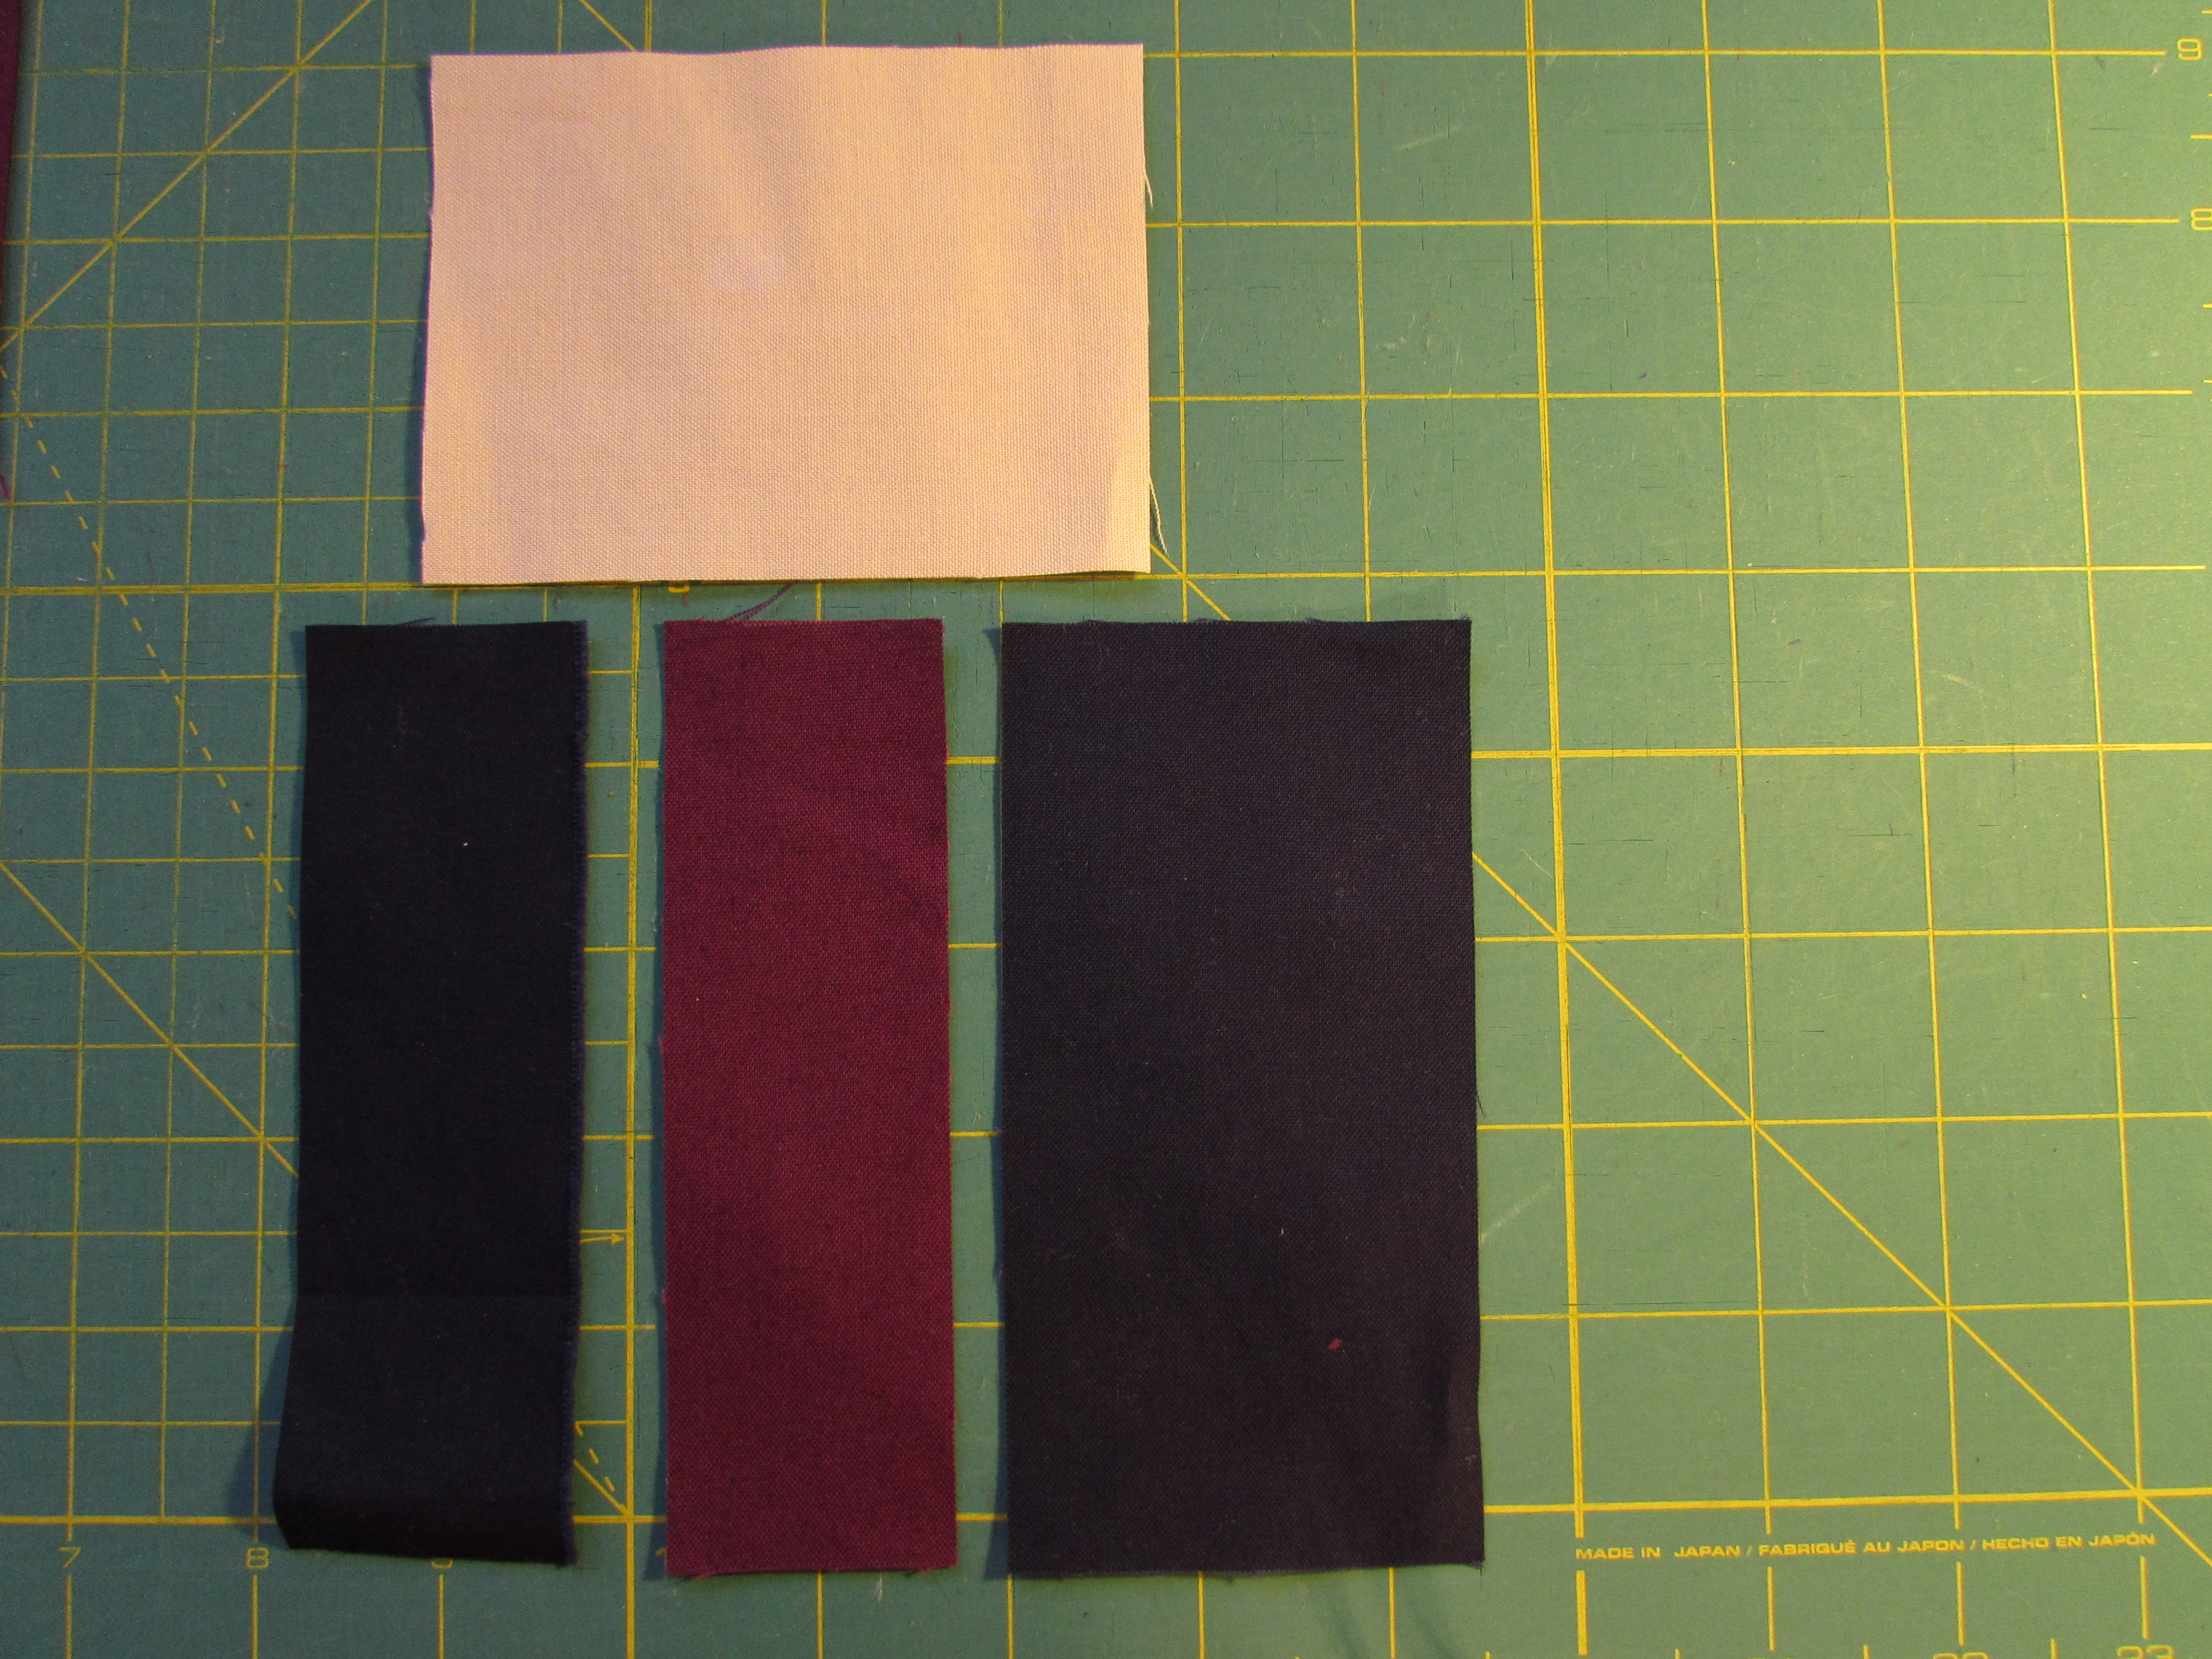
These pieces are stitched to form the first panel. The middle section of the block looks like this:
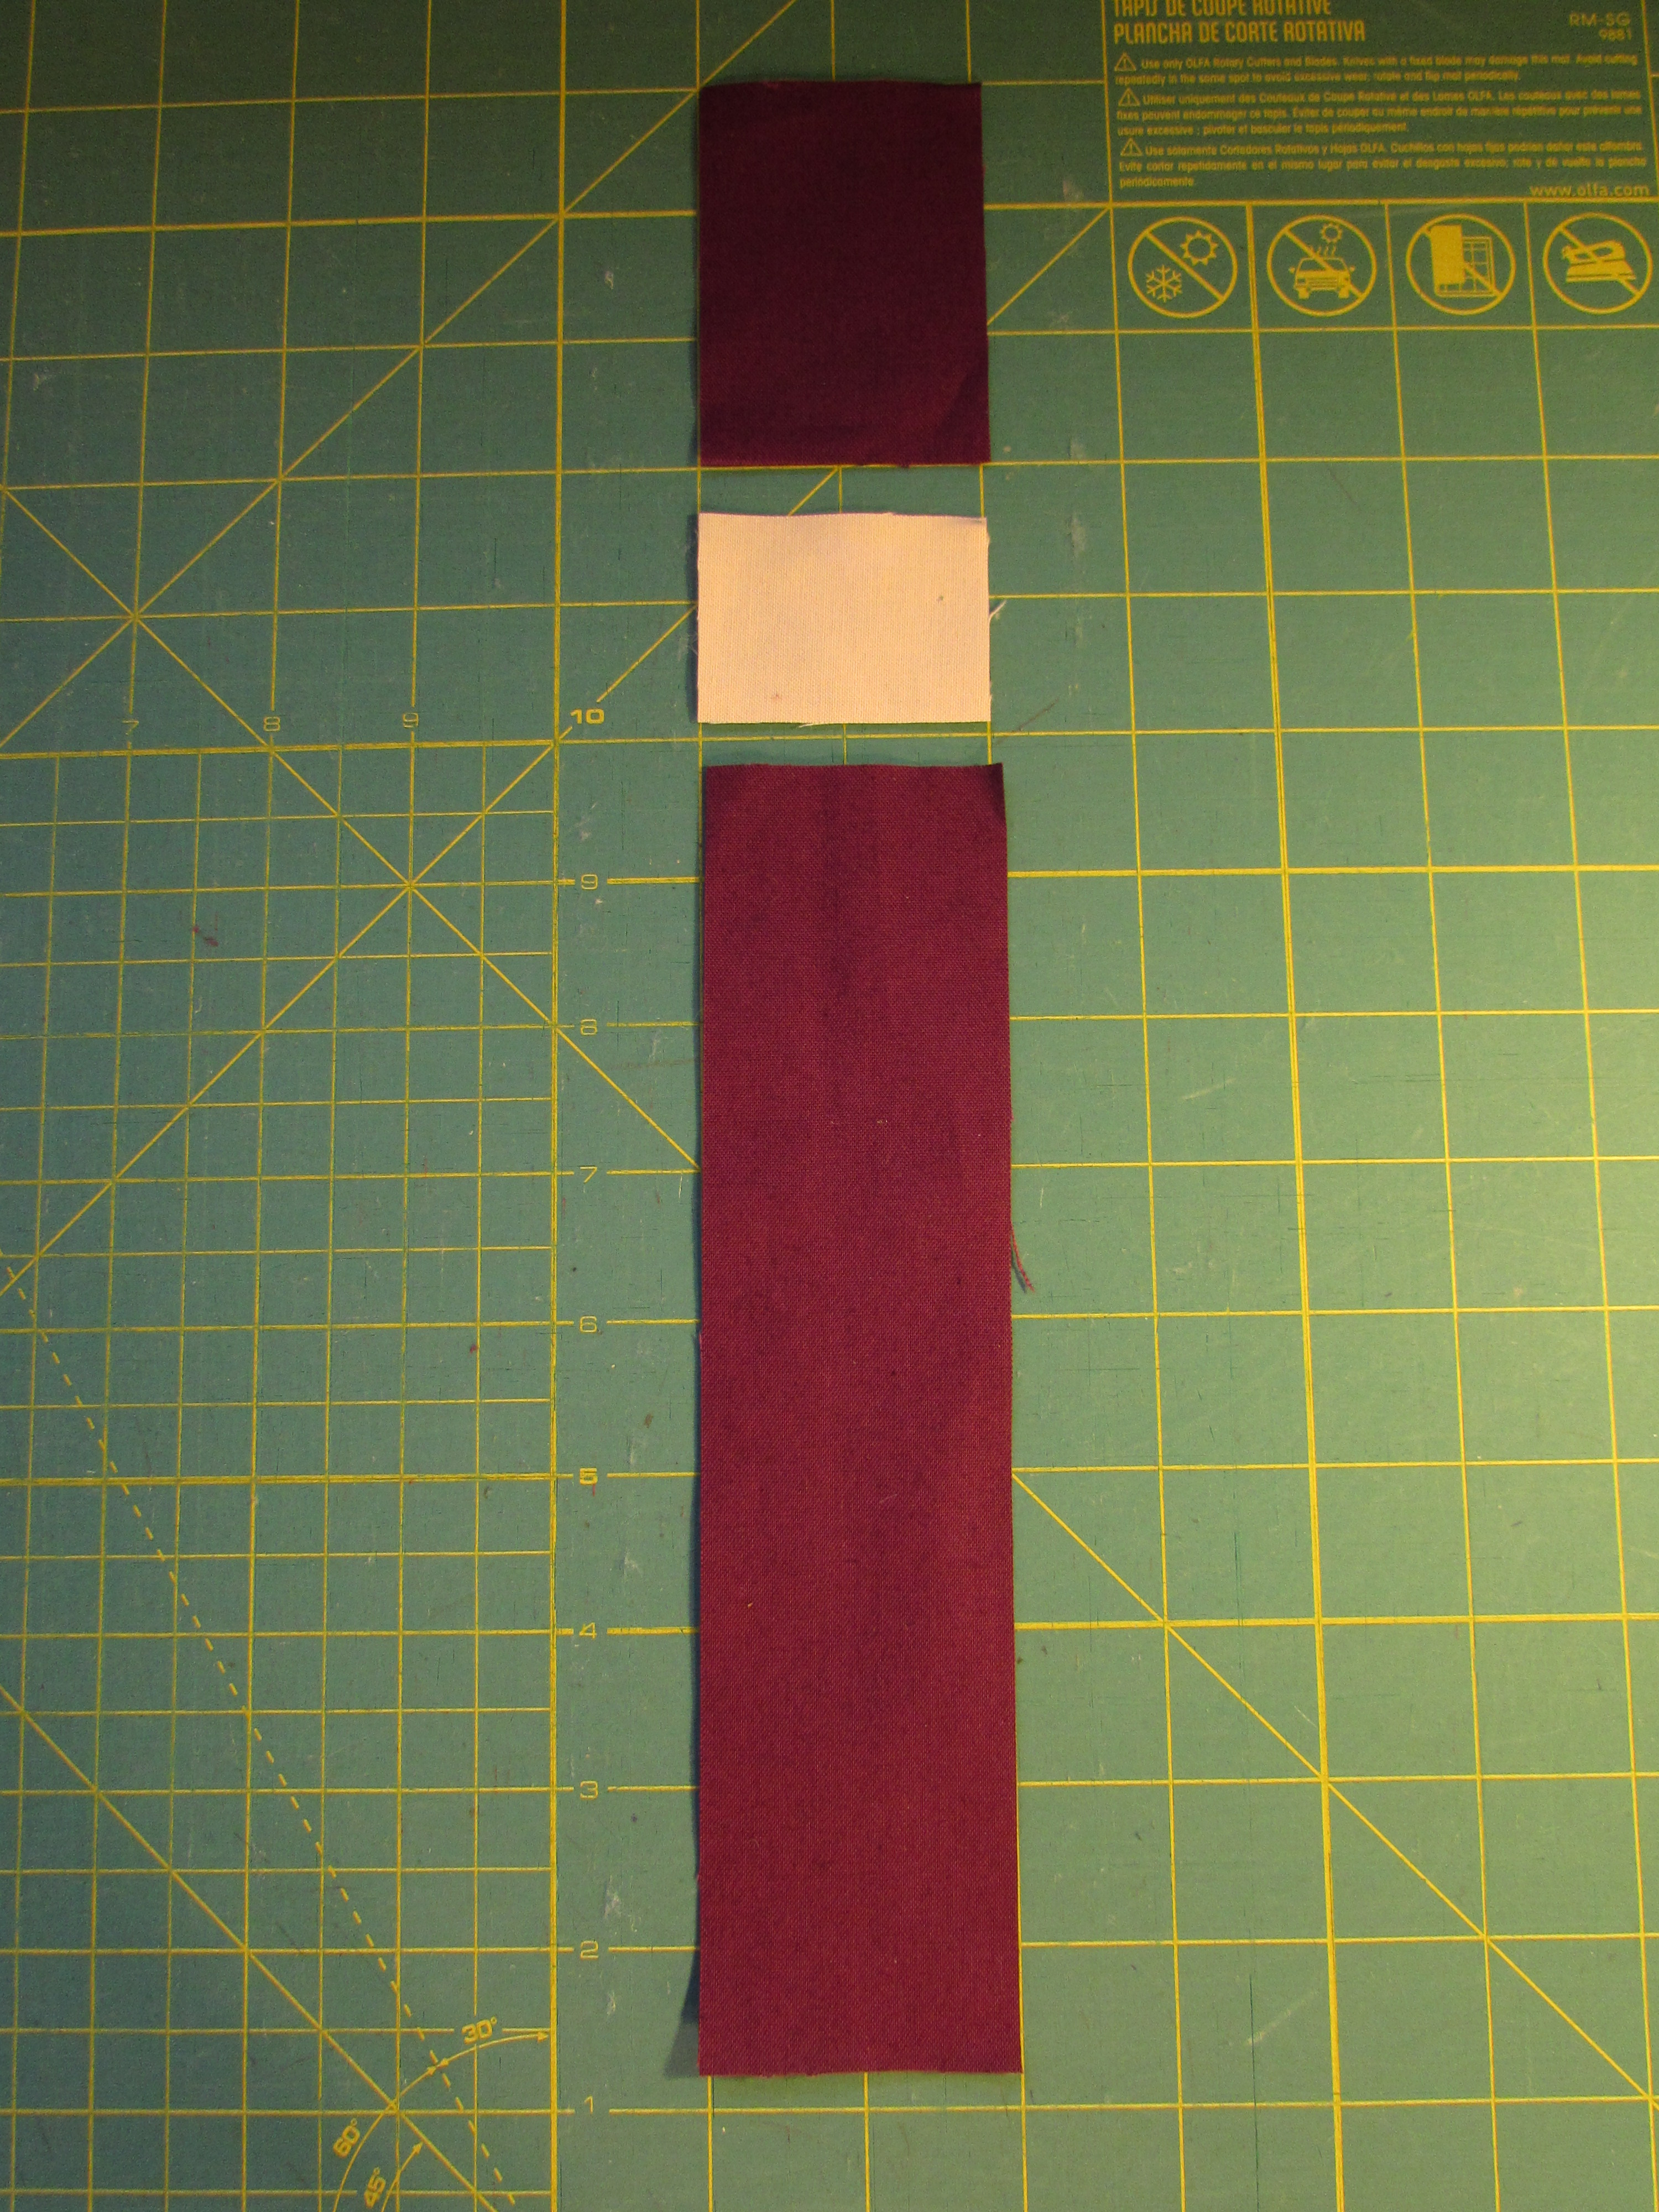
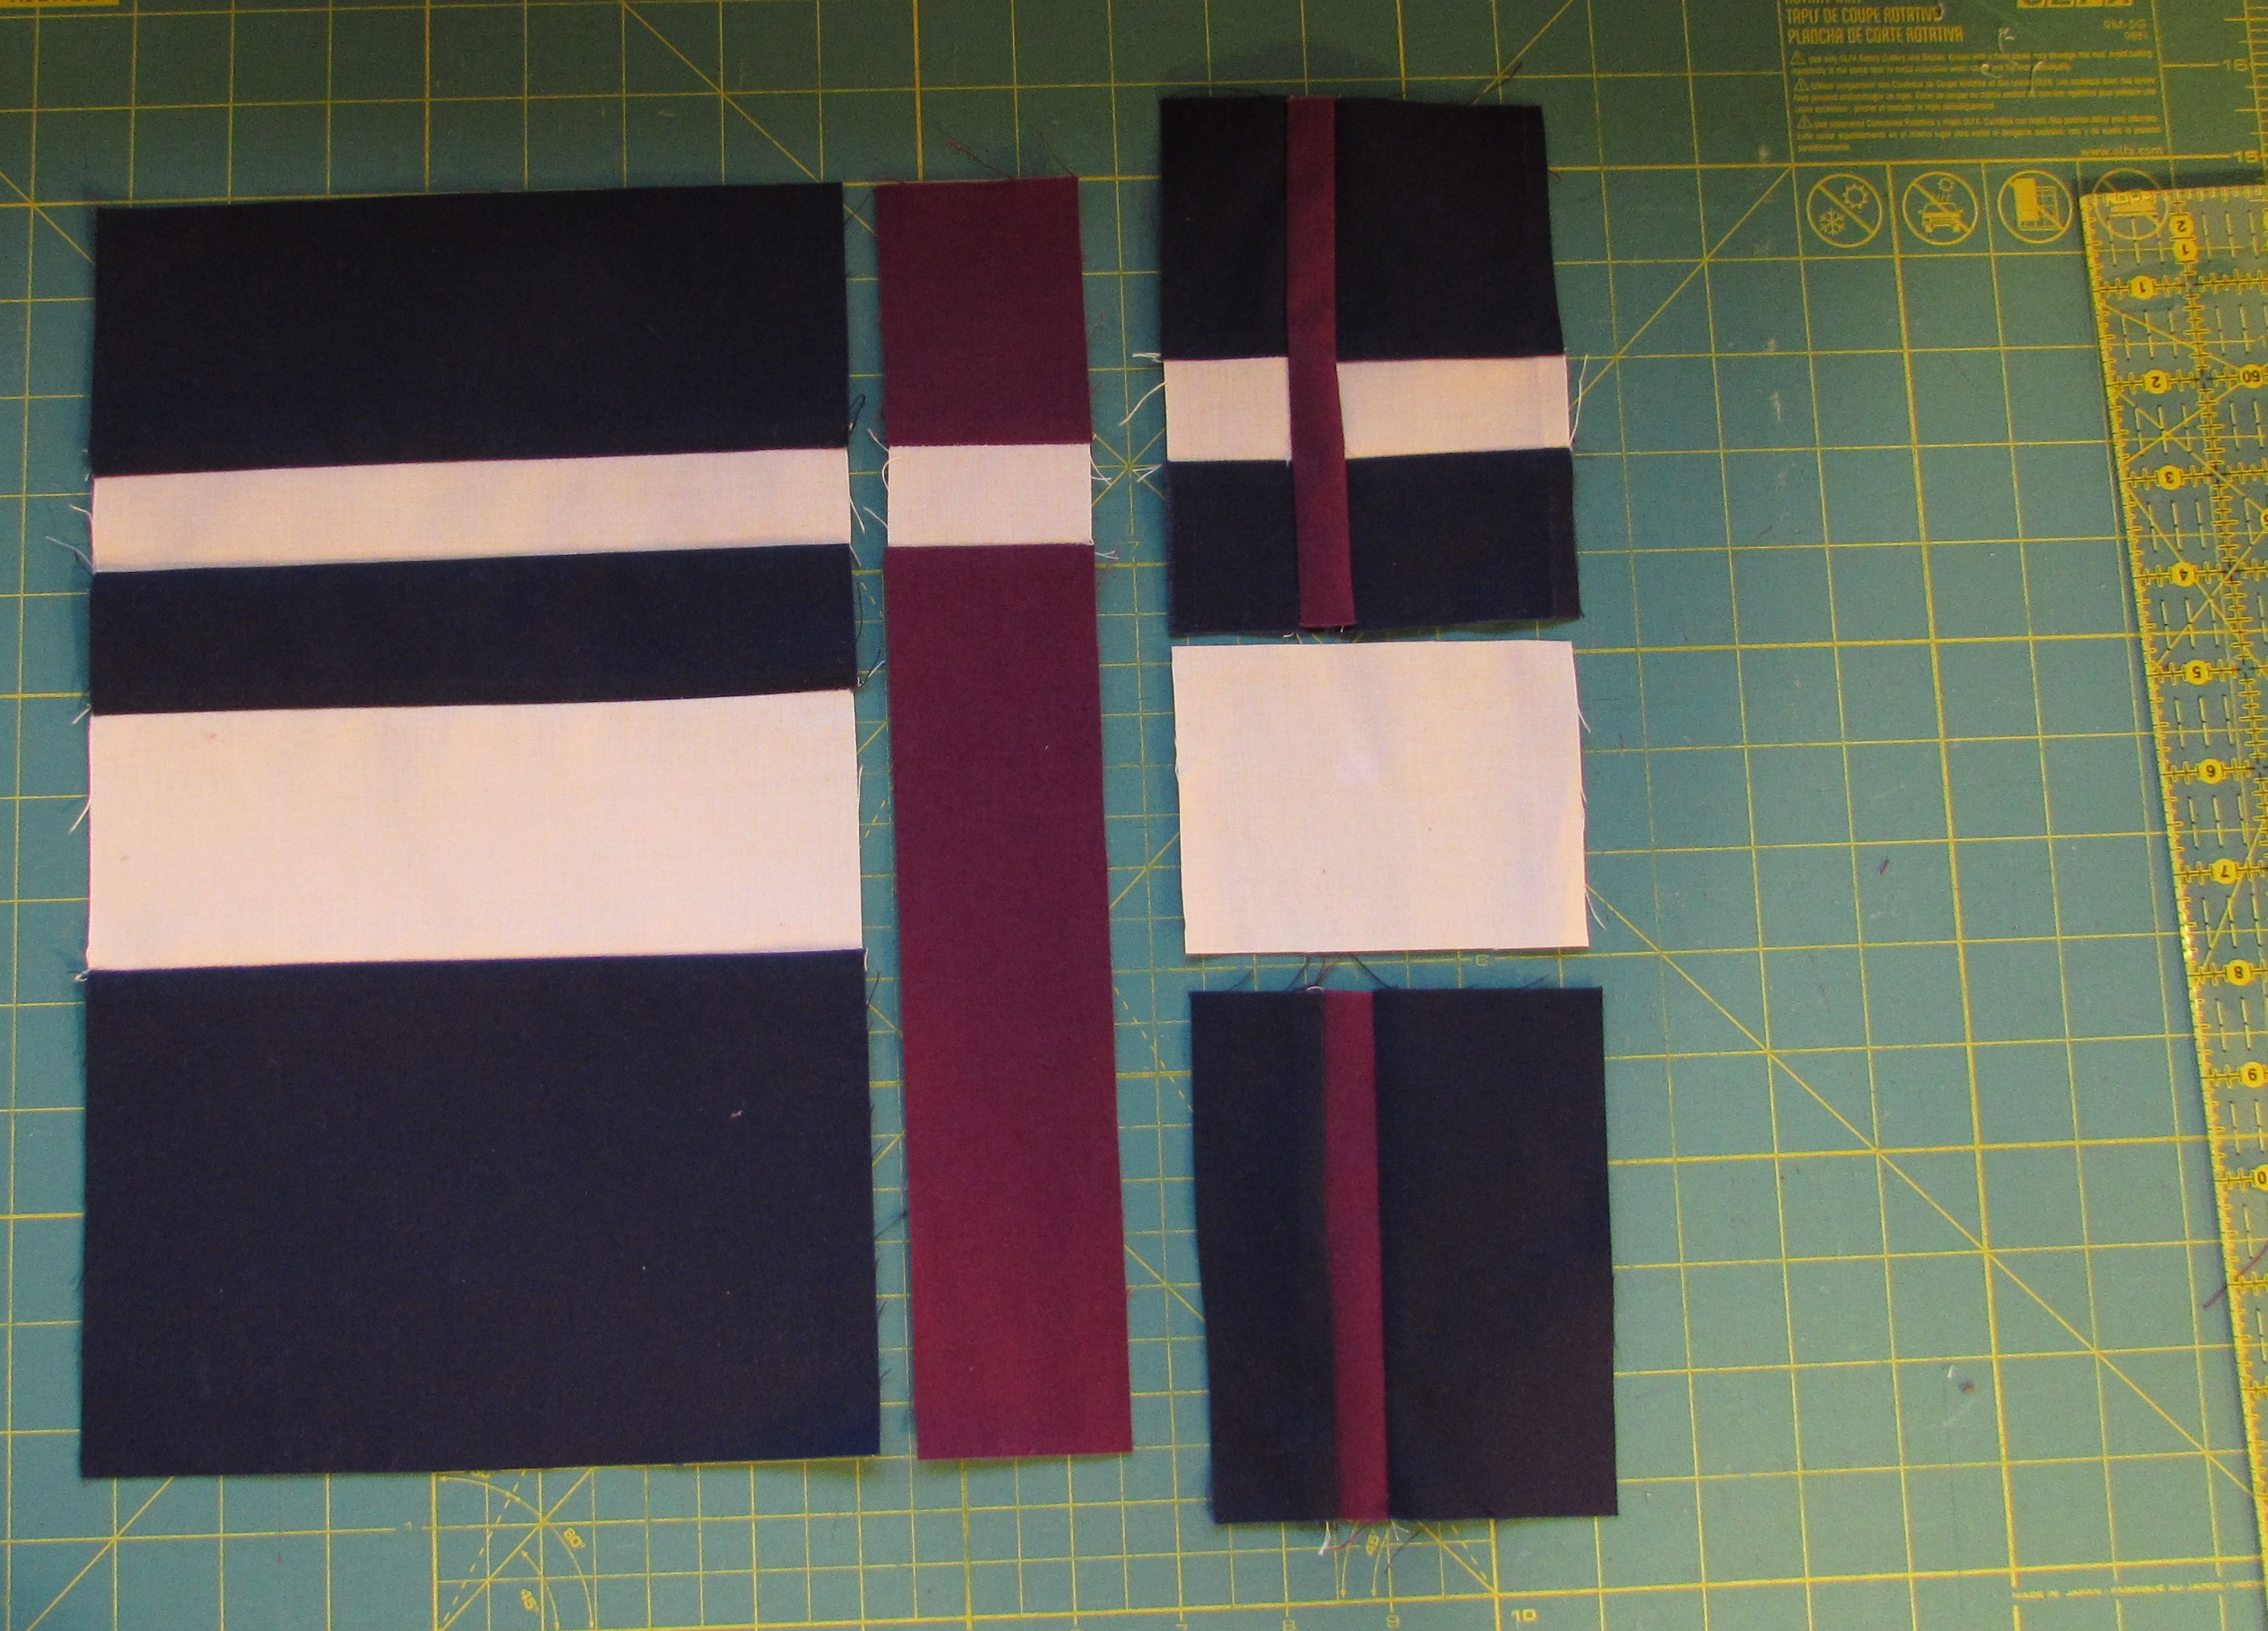
It only takes two quick seams to assemble the middle panel. The third panel requires some piecing. Here is the upper portion of the third panel.
Here is the lower portion.
Once each panel is assembled, it looks like something like this. At this point, the sections of the third panel need to be stitched together.
Once each panel is complete, they are joined together along the length. Here is the finished block.
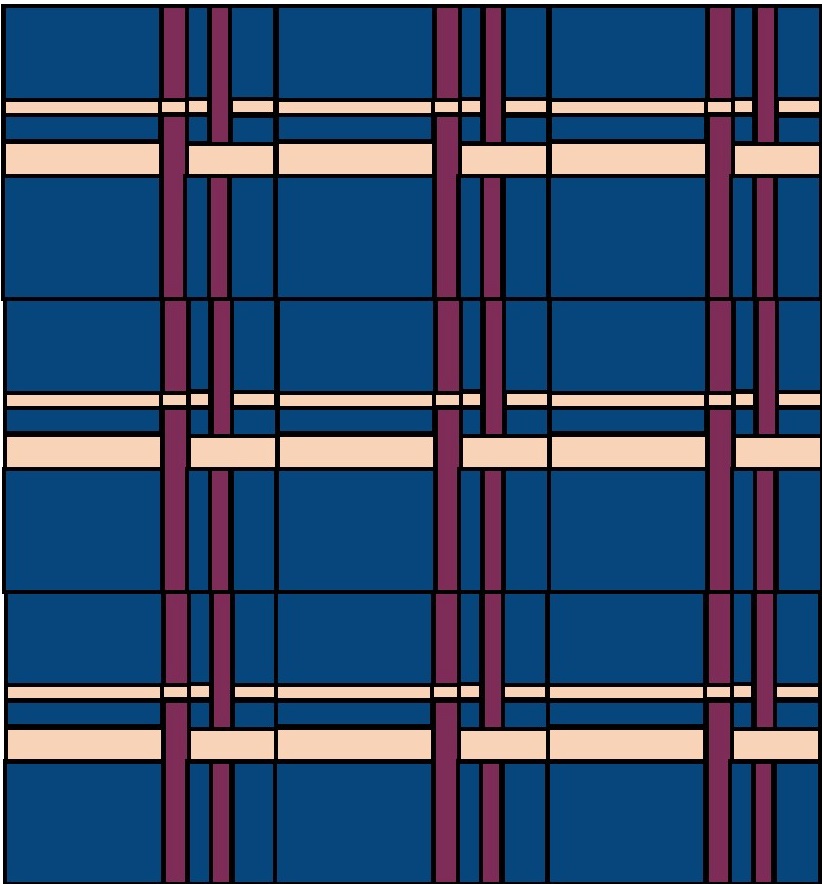
Placing these blocks side by side in a quilt might look like this:
Download the instructions and cut list for Intermingled here – Intermingled Tutorial
There are over 35 block tutorials that will be posted during this blog hop. Wouldn’t a modern sampler quilt with a dozen of your favorite blocks be a great project? Today’s hop includes the following quilters. Be sure to take a look – these talented quilters are sure to inspire you!
Have you all been looking for little signs of the arrival of spring? Living in California, spring is noticeable early on. My daffodils are done blooming and our fruit trees are leafing out, with all of their blossoms raining down. It is definitely spring here.
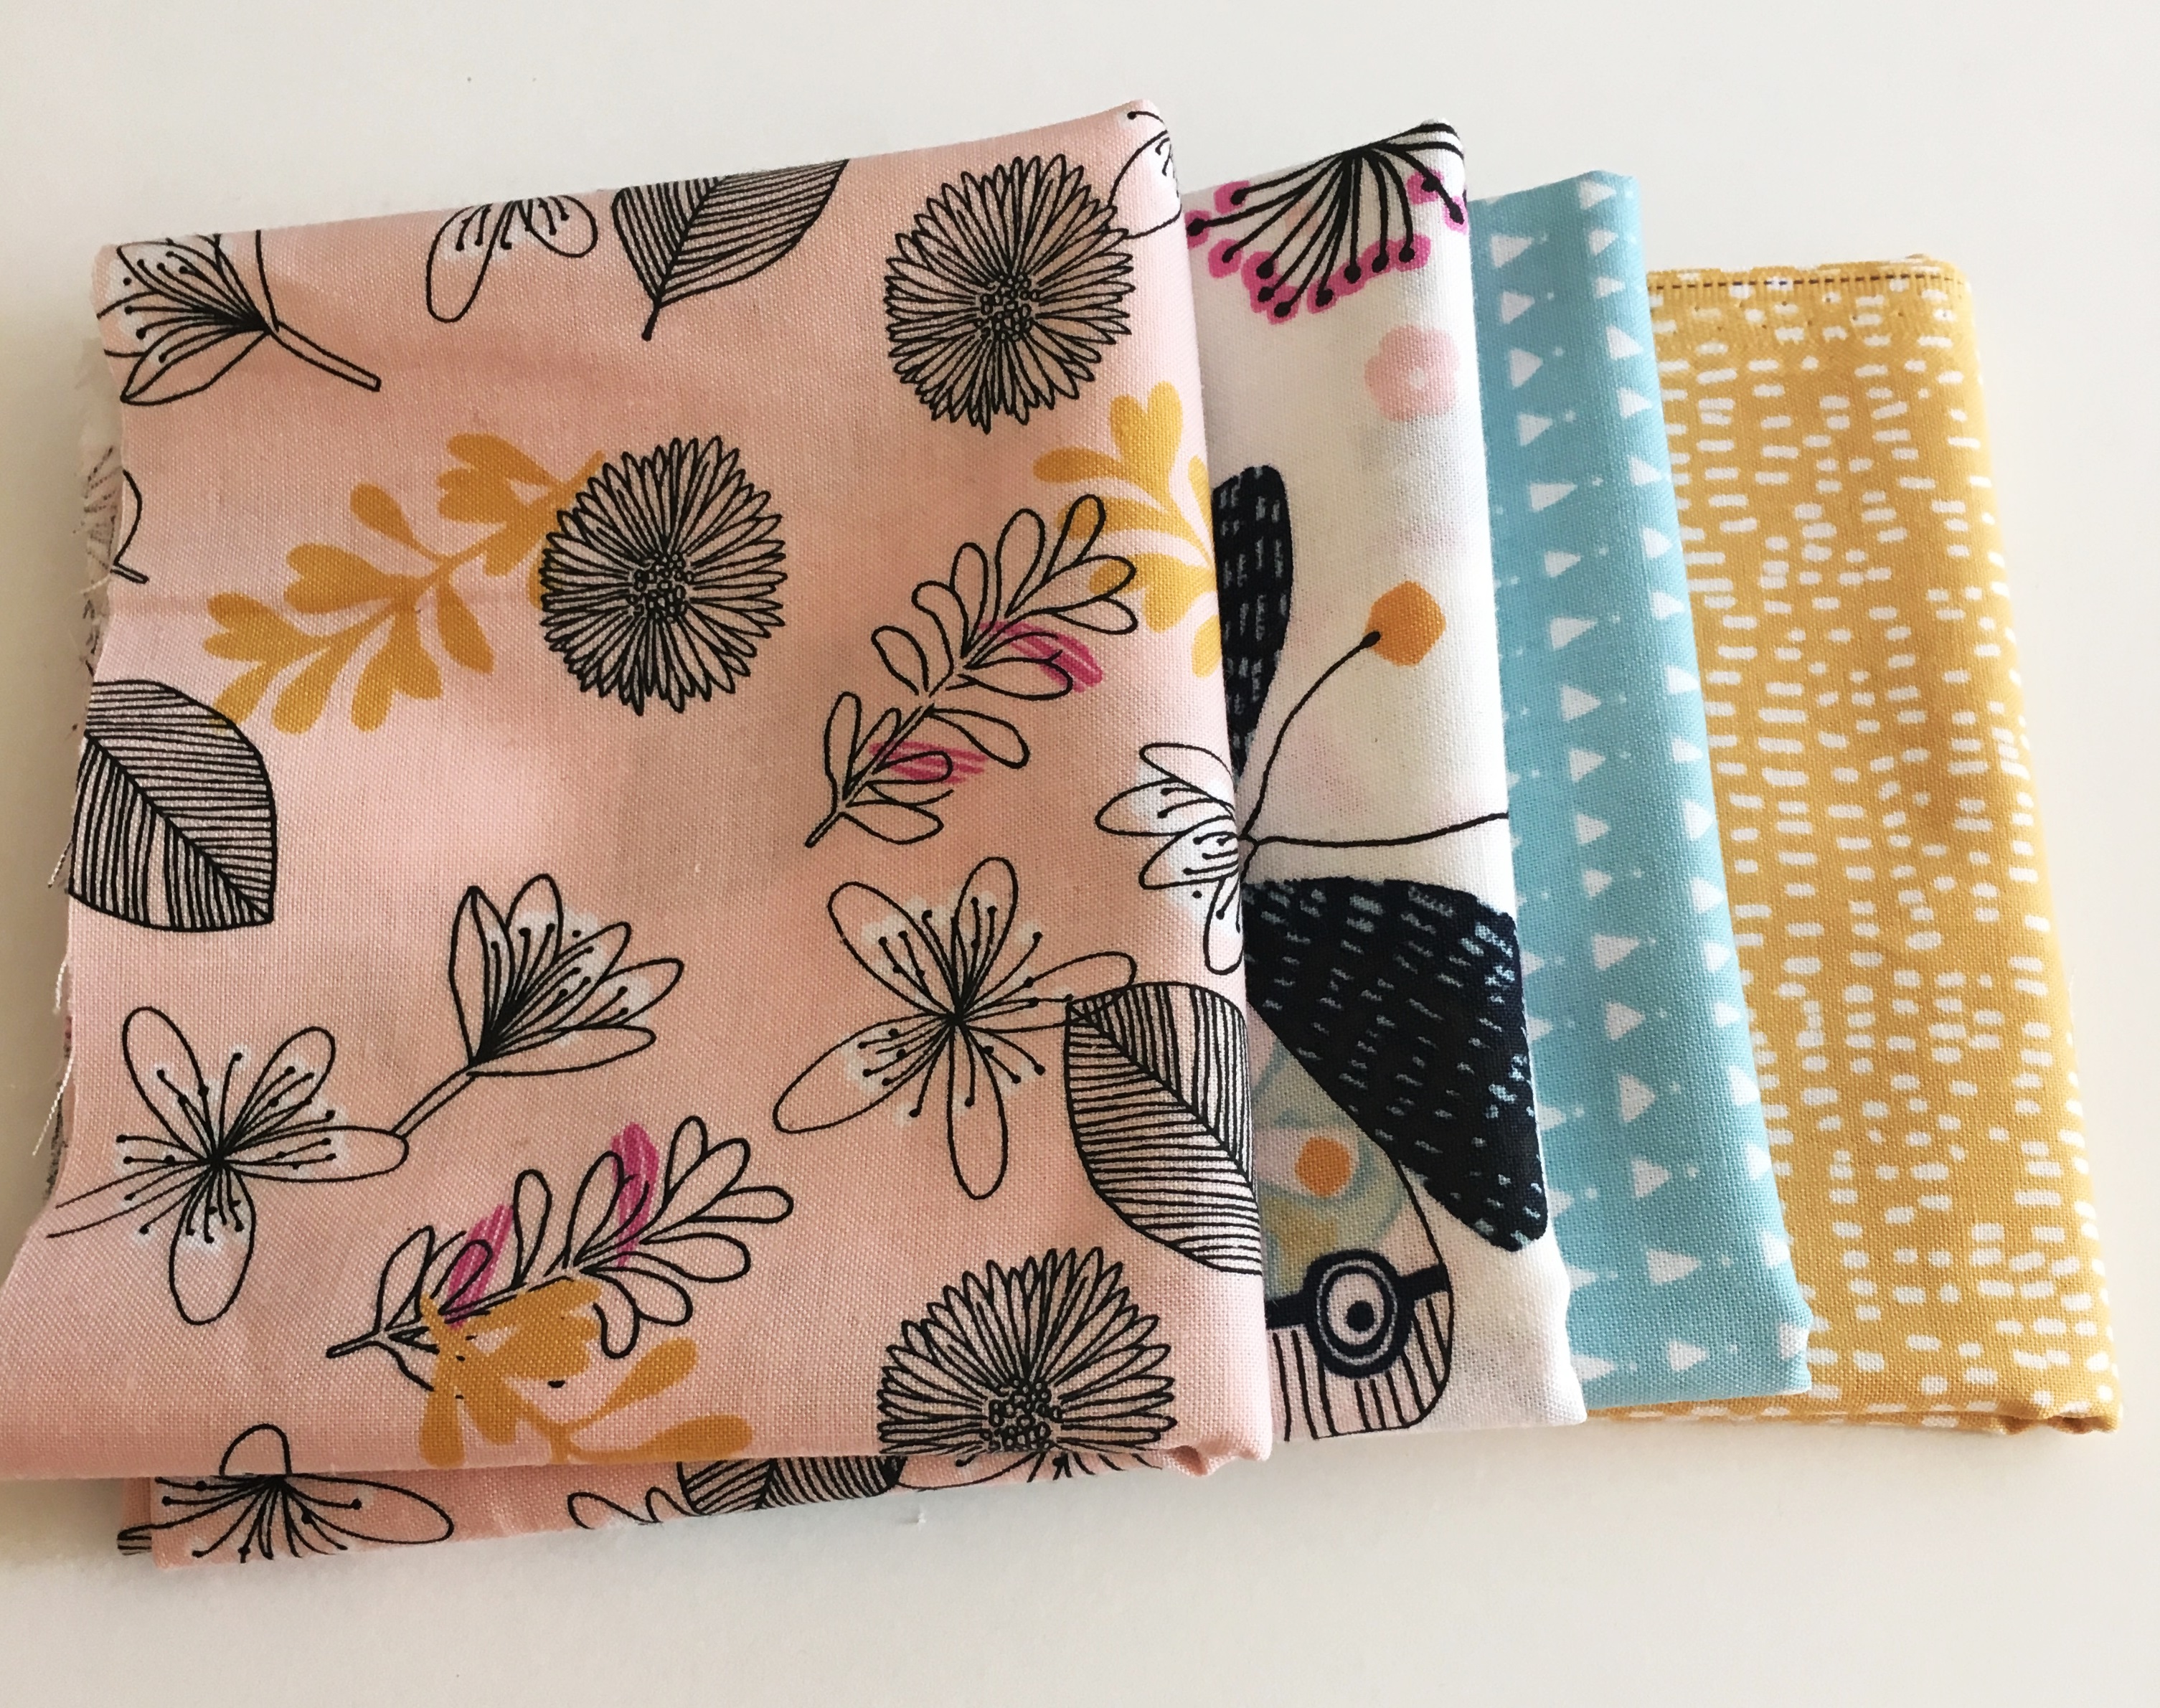
Another sign of spring is the gorgeous Windham Fabrics collection, Whisper, which was recently released and is now shipping at Brewstitched. I love the gorgeous pallette used in this line. Soft, muted shades of blue, pink, and mustard yellow are used in this springtime collection. The fabric features various florals and sweet butterflies for a truly feminine feel. Sheryl, the owner of Brewstitched, would like to give four fat quarters to a lucky reader!
For those of you living in cold weather country, this is the perfect way to bring a bit of spring to your sewing room!
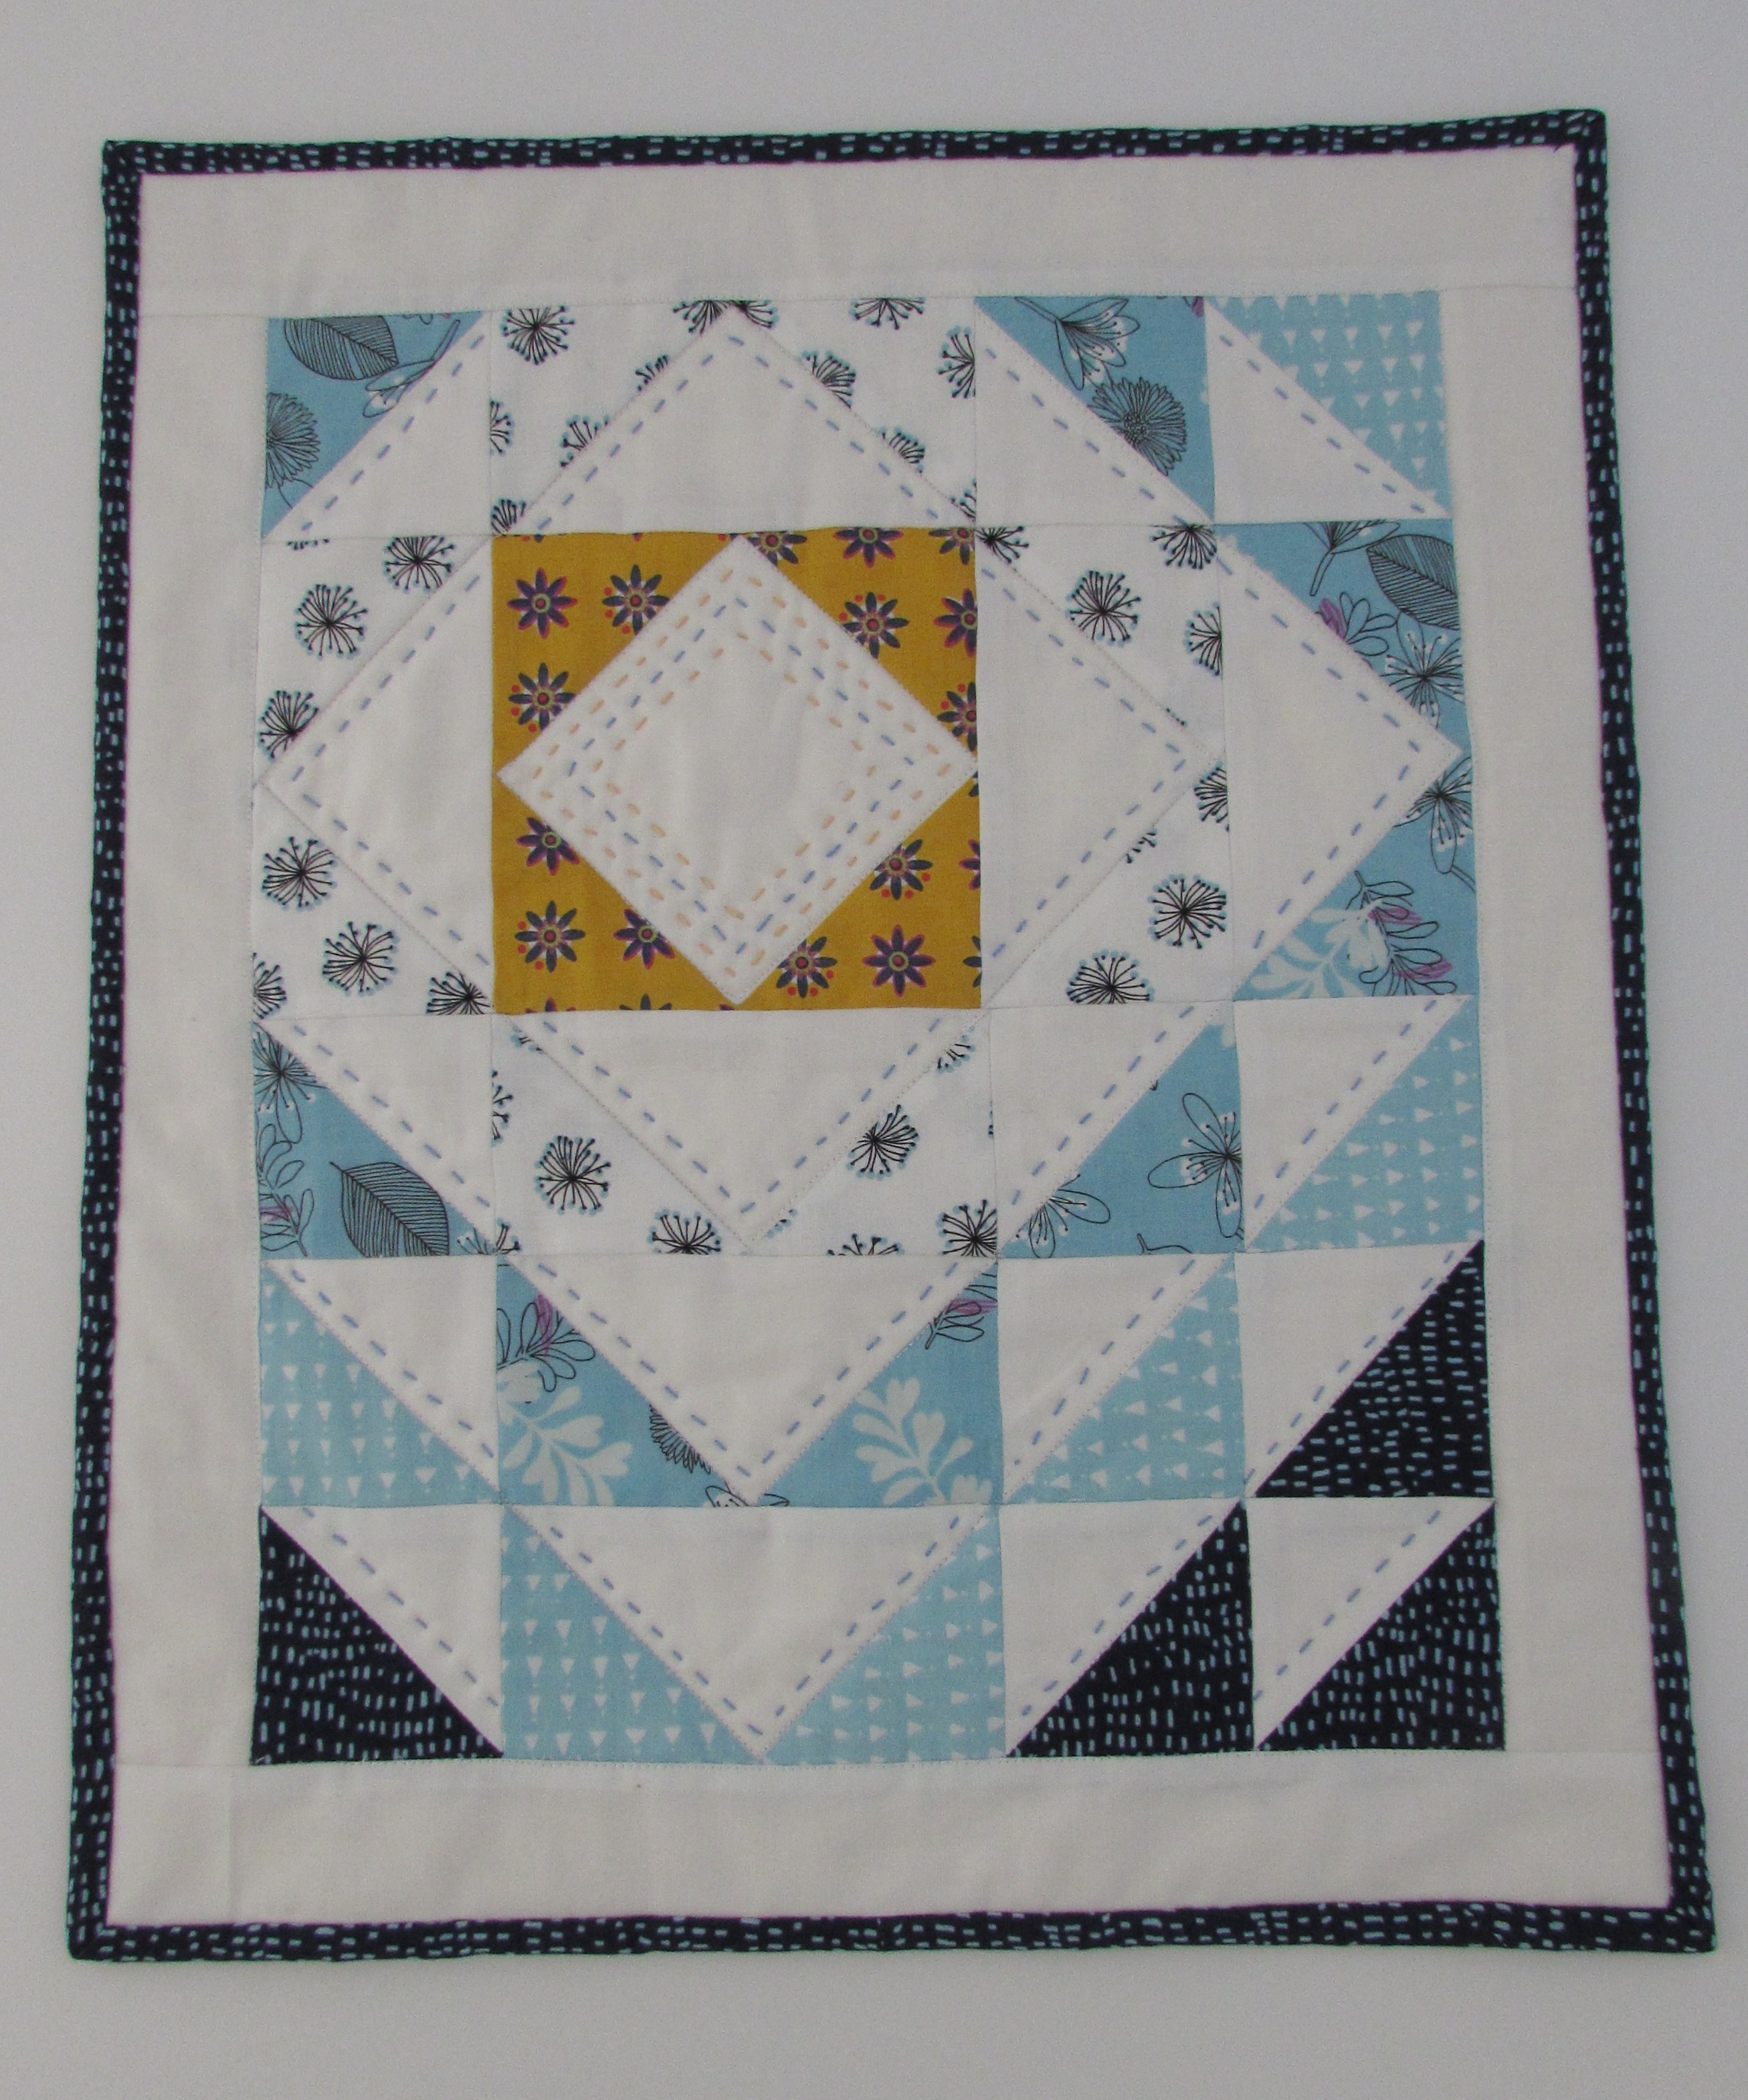
Sheryl sent me a few fat quarters of Whisper to play with. I immediately thought of our Downieville house. It could certainly use something cute hanging on the walls.
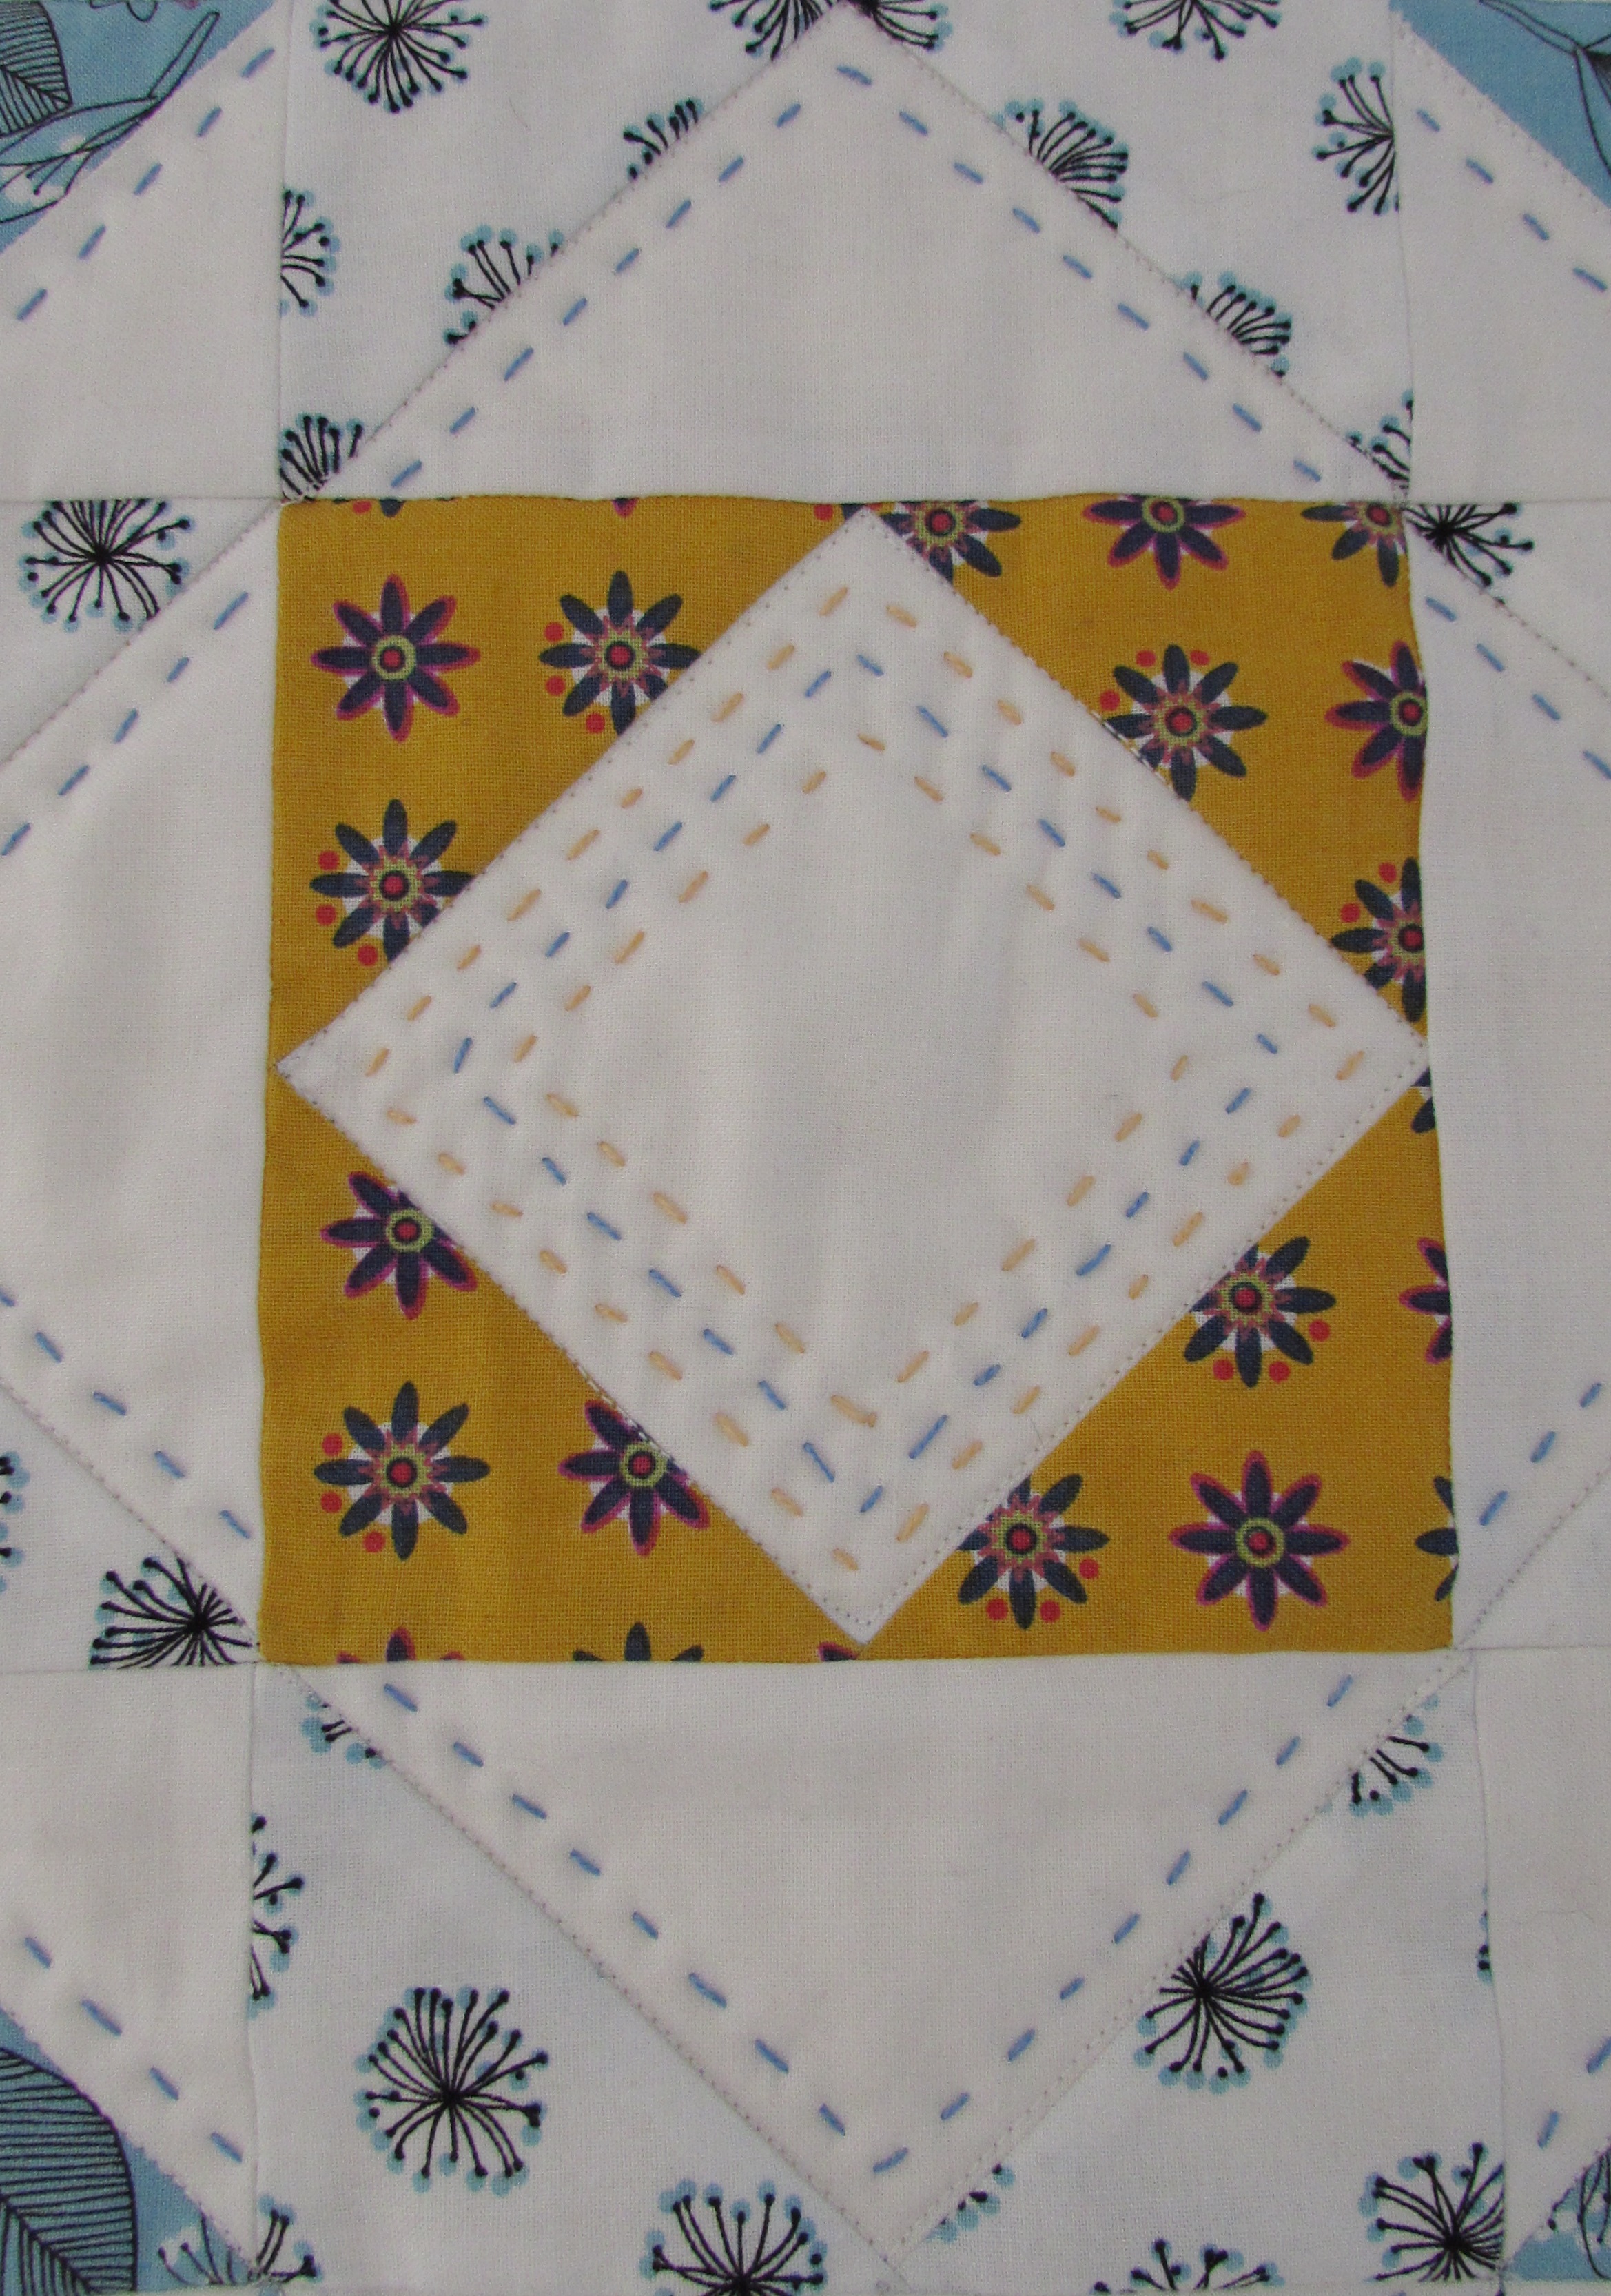
The pattern for this mini is one that I downloaded last winter during the Aurifil Designer Mini series. It was designed by Kim Jolly over at The Fat Quarter Shop. It’s been on my list to make for a while now and this was just the right opportunity. I added a scrap of bright yellow to make the center pop a bit.
One of the reasons I wanted to make a simple project was to practice some hand quilting. I have some spools of Pearle cotton floss that I have been itching to use.
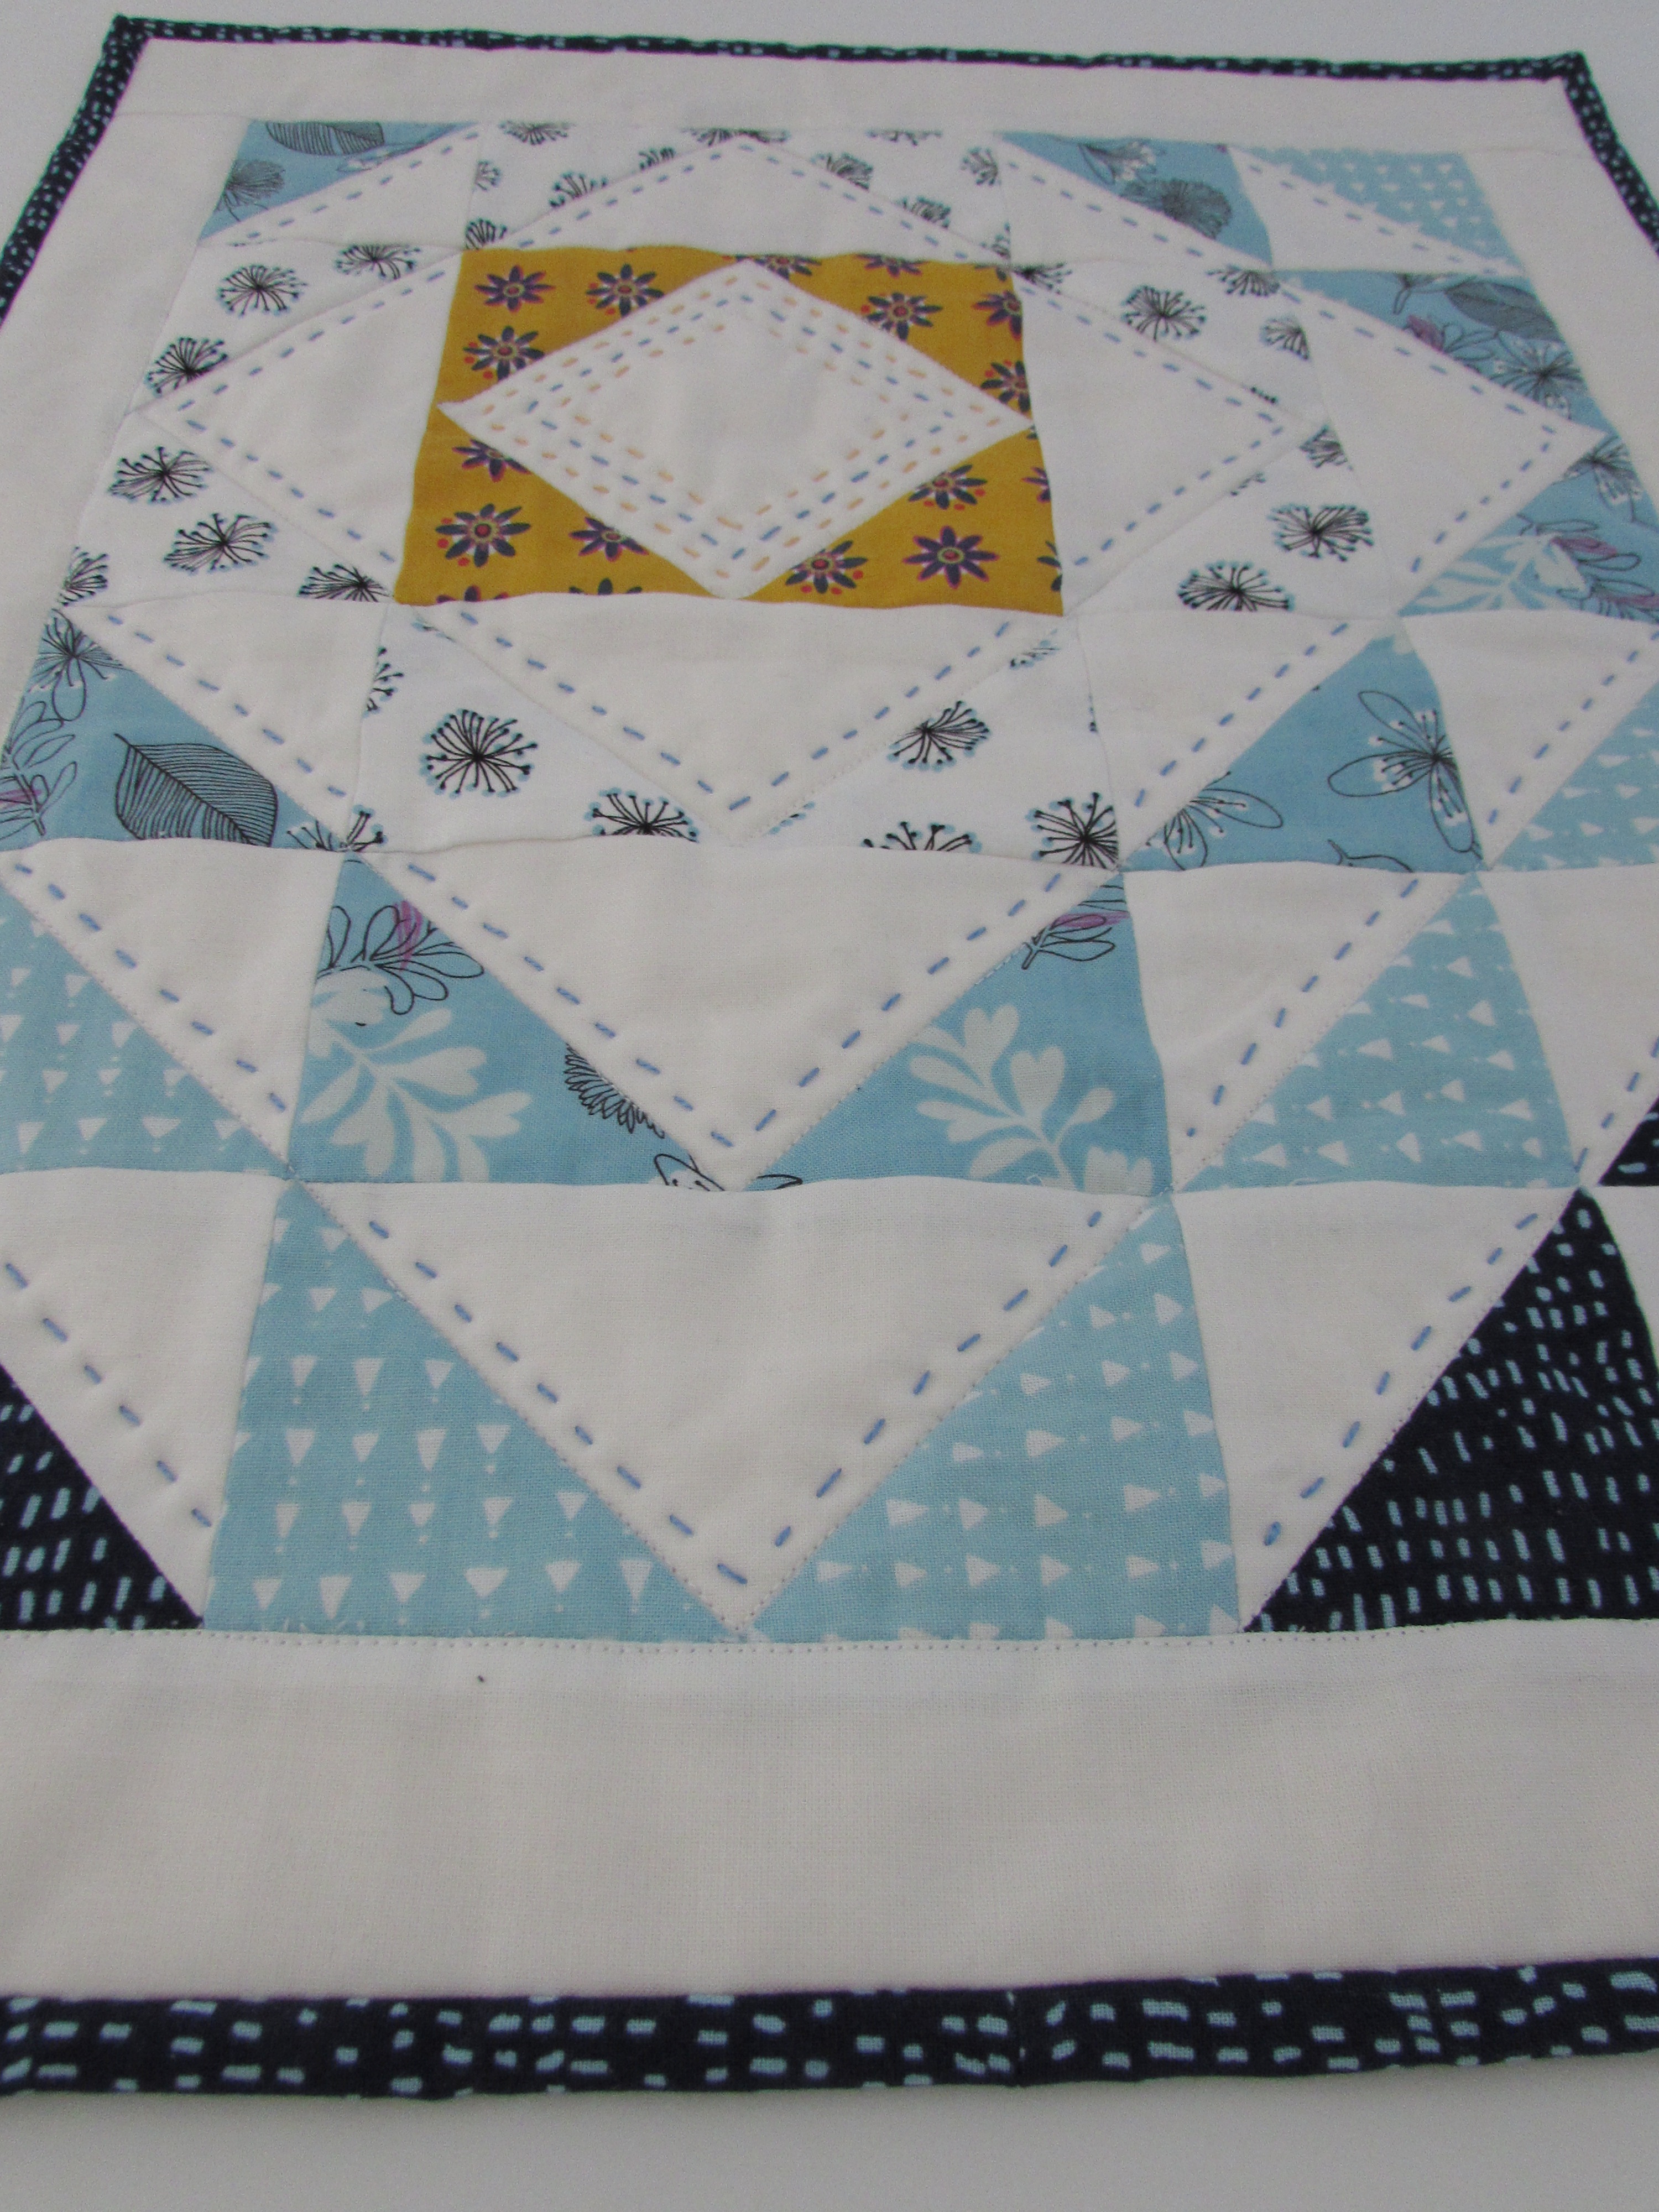
I ditch quilted in several of the seams so that I wouldn’t have to worry about things slipping around as I hand quilted. Adding a bit of hand stitching makes just about anything look that much sweeter.
Stitching with Pearle Cotton was a treat. I will definitely keep practicing to increase the consistency of my stitching.
OK – Back to the Whispergiveaway! In order to enter, please take a peek over at Brewstitched. Sheryl has recently added some wonderful new fabrics to her shop. She is carrying the entire line of Whisper and I happened to notice she now has several pieces of the crazy popular Cotton and Steel line, Bluebird. So hop over and then come back and tell me about your favorite. Spring is here and it is blissfully evident over at Brewstitched!
If you follow me, you are welcome to comment a second time telling me how you follow. Are you following Brewstitched on Facebook or Instagram? If so, that is worth a third entry. Be sure to let me know how you follow them.
This giveaway is open through March 29th. The winner will be announced first thing, March 30th! Make sure to leave an email address if you are a no-reply blogger. In the event that someone is picked and I cannot email them, I will draw another winner. Due to the cost of shipping, this giveaway is open to US residents only. Good Luck!
GIVEAWAY IS NOW CLOSED.
Remember that Needle and Foot readers have a discount this month over at Brewstitched. Enter coupon code NANDFMARCLUB10 for 10% off your order through the end of March!
Linking to my usual parties – all links are listed at the top of the page under Link Ups.
Because it just isn’t enough that we celebrate quilting on a daily basis with our online community, we honor it today with National Quilting Day! I hope you are finding a few minutes to sew or, at the very least, take some time to curl up with a quilt today!
I did a little practice session (actually it took a few sessions) of free motion quilting. It’s been a while since I last sat down and focused on it. Really, when it is truly a practice session and I don’t have a lot invested in the outcome, it is very fun. FMQ is a skill (like most) that will never improve unless one invests the time.
My main issue is the whole look-at-every-wiggle obsession that I have. I have heard it so many times; when we sit at the machine to quilt, our line of sight is up close and personal. The finished product is usually viewed from a distance which improves the look of things tremendously. As I played with this practice piece, I made many wiggles and hops that I was unhappy with. However, for the most part, I left them as they are. My strong dislike for the seam ripper makes it easier for me to ignore the less than perfect stitching. I don’t need to make it perfect. I just need to keep stitching. If I spend lots of time ripping things out, the joy is lost; given up to the pursuit of perfection when really, good is enough for me.
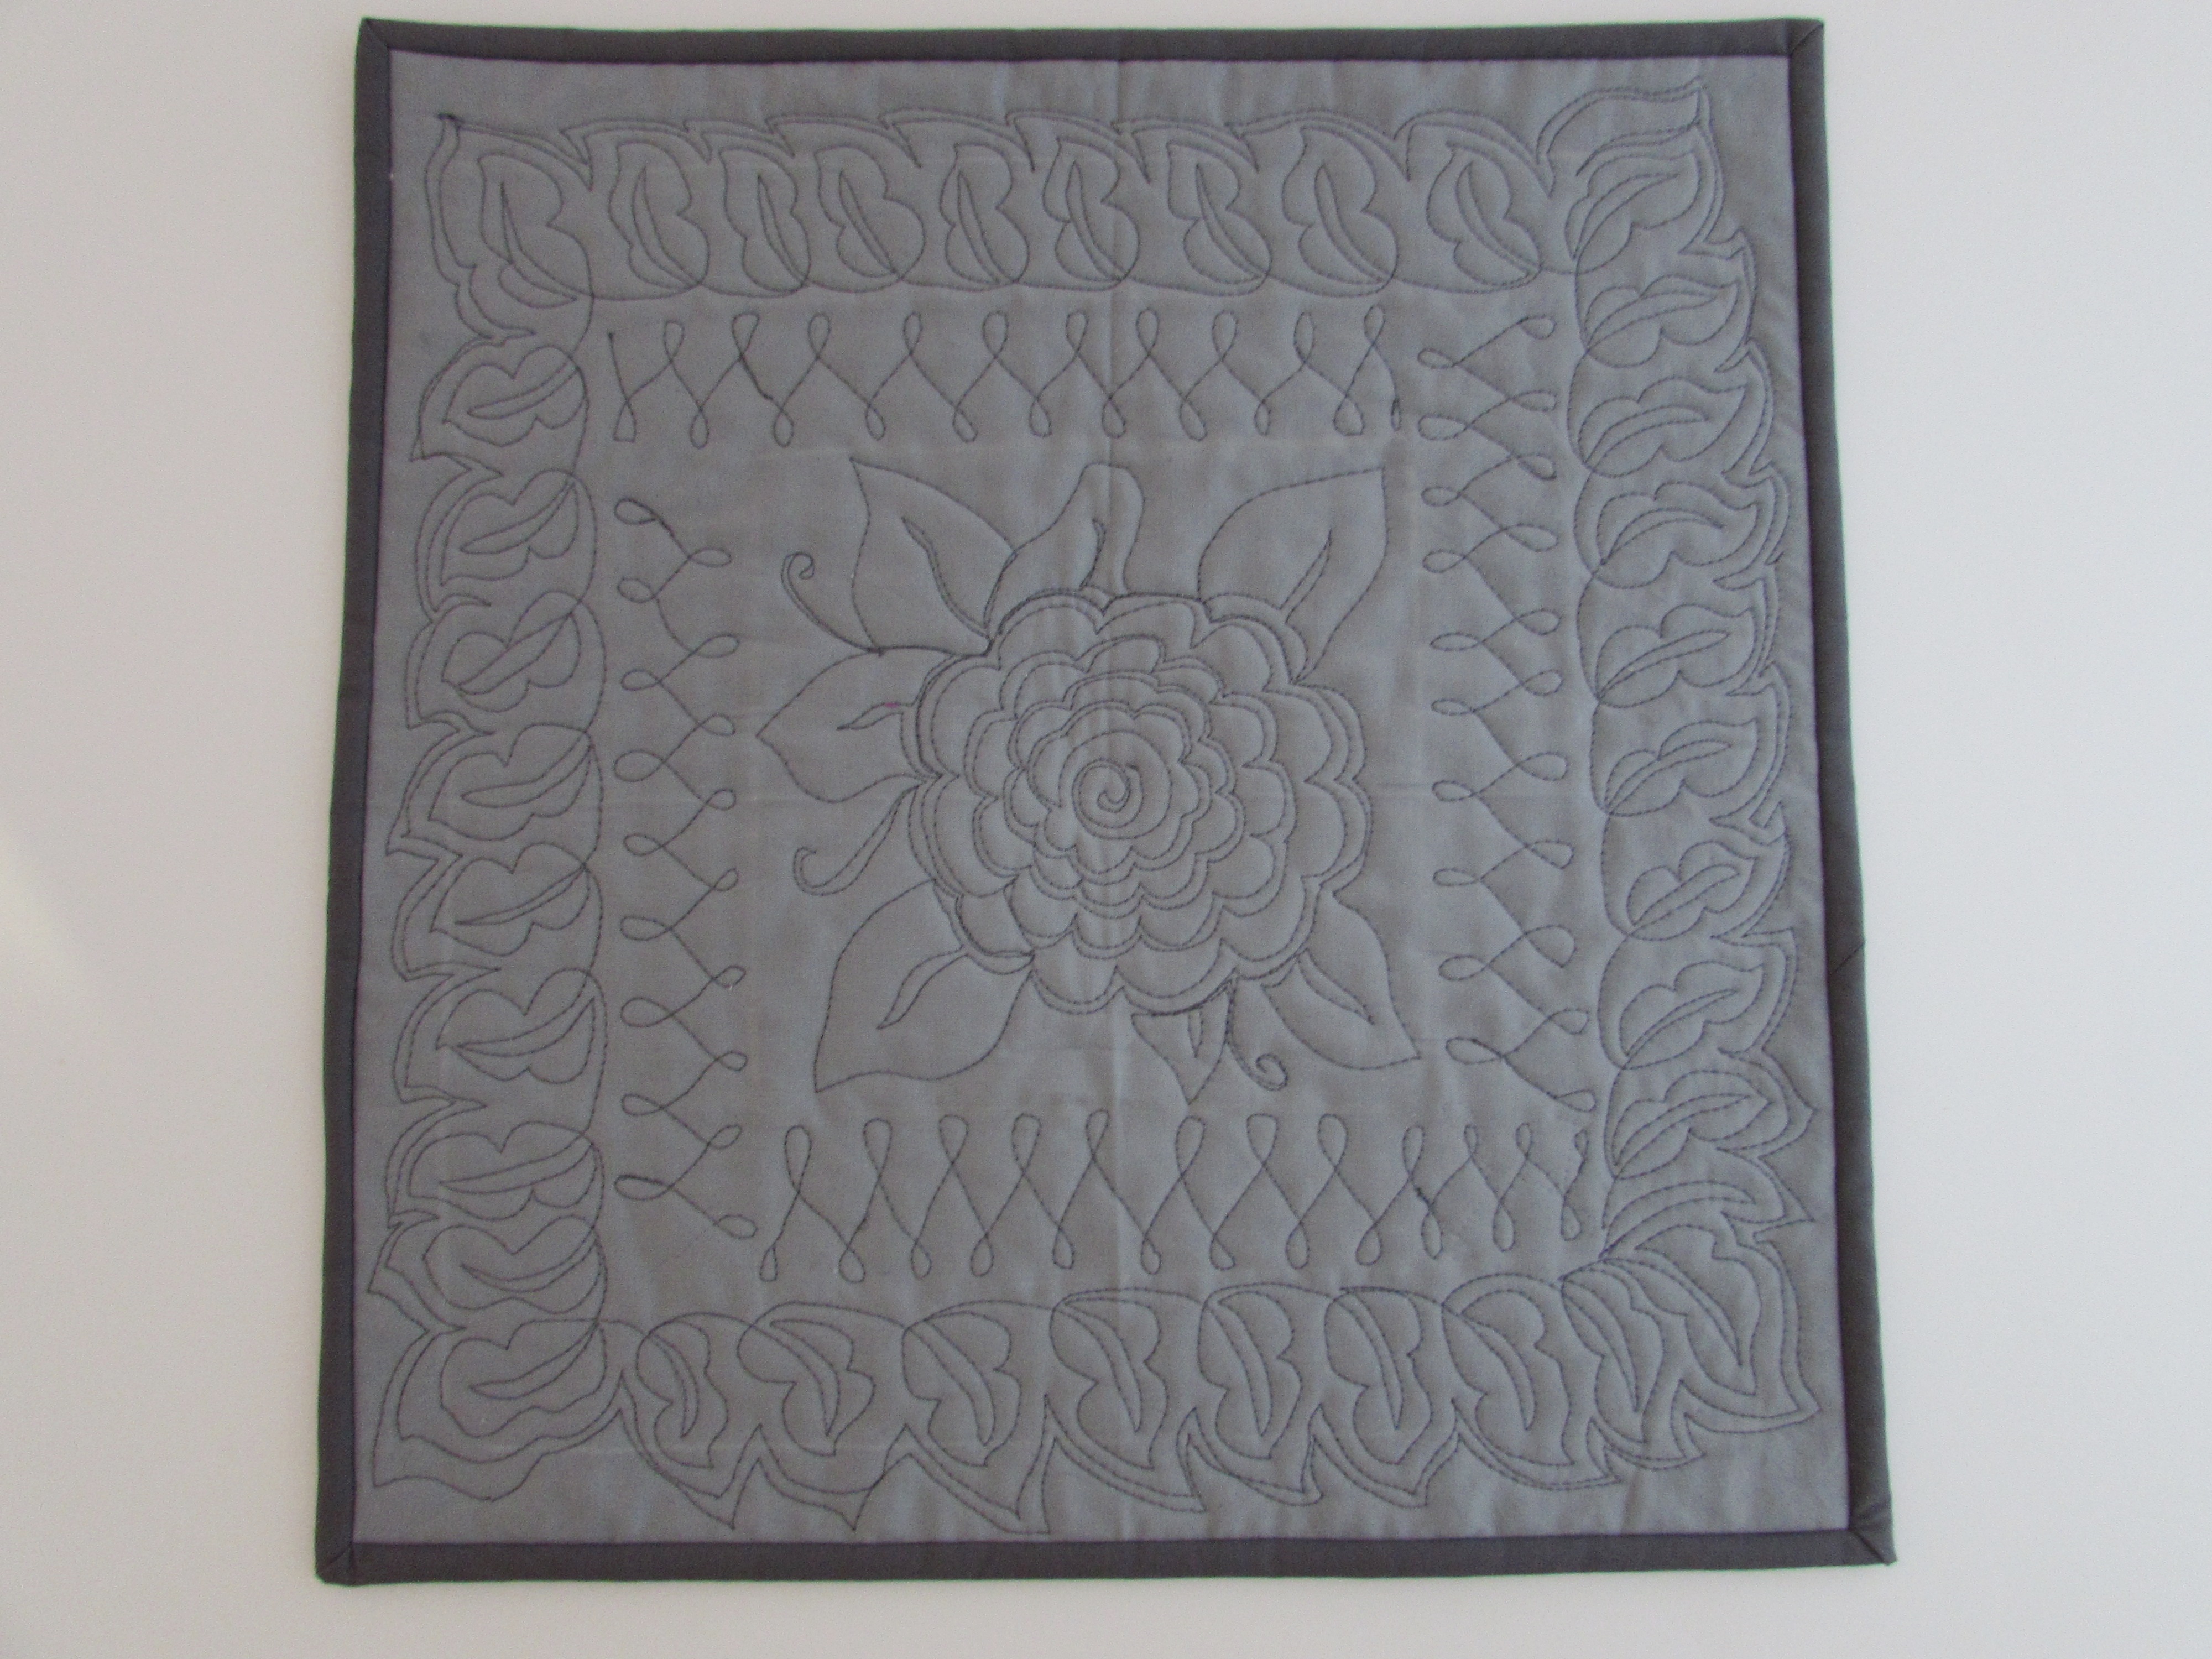
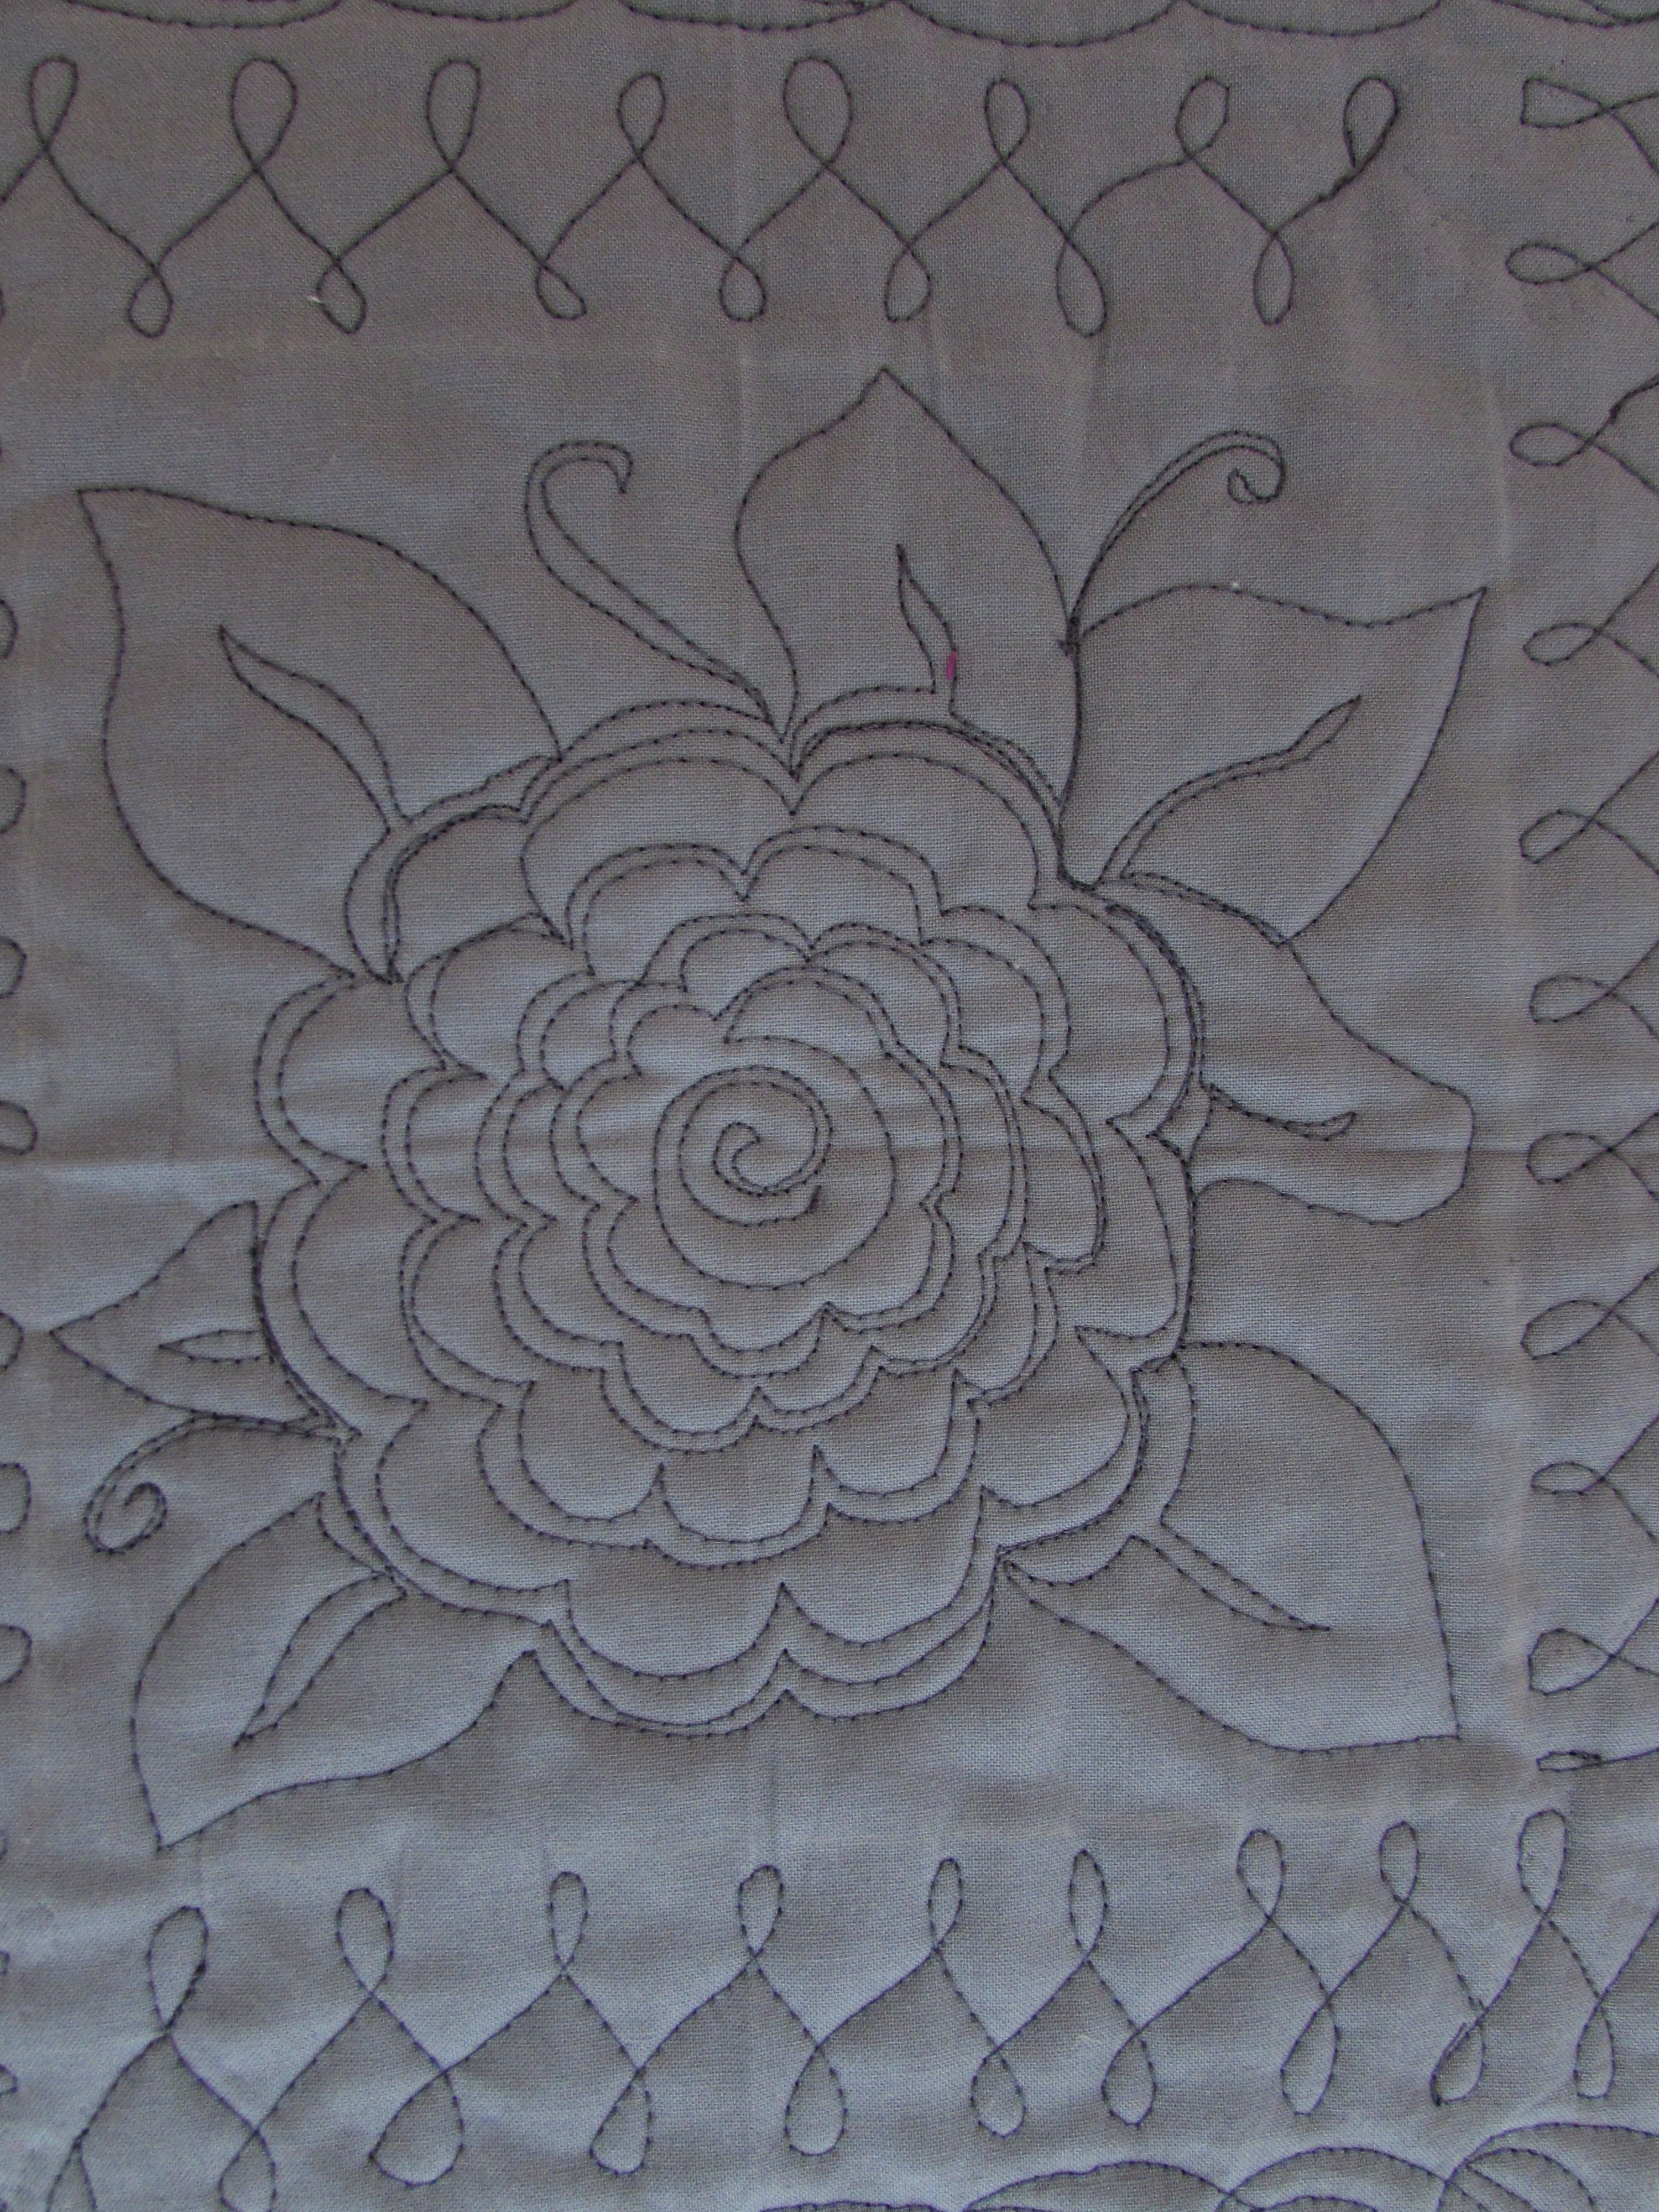
As expected (and hoped for) I learned quite a bit with this piece. First of all, in a Craftsy class, Machine Quilting Wholecloth Quilts with Cindy Needham, she suggests folding your practice piece in half and ironing a line and then folding one more time (so you have 4 quarters) and ironing again. You end up with the center marked well and four gridlines to guide you. The lines are still slightly visible on this piece. Following that I worked on the flower in the center. The tutorial for this motif was taken from Lori Kenedy’s site, The Inbox Jaunt. The name of the motif is Claire’s Peony. This flower is really fun to do.
I bordered the flower with a simple twist. Here comes lesson number two. I found out that I had no idea how to deal with the corners. This design doesn’t really lend itself to turning a corner. I tried, oh, I did try! With this one, I used my seam ripper and tried a few times to find a way. After a couple of tries, I just went end to end and gave up on the turn. It isn’t award winning but then, this isn’t going to a show, it’s practice. So I am fine with it.
The outer border is inspired by another of Lori’s tutorials, The Maypop Leaf. I doodled this one for a while on paper (actually I draw anything first, before stitching) but it is still a bit rough. Again, practice, right? I felt like it needed one last bit so I echoed the leaf border a couple of times.
I was going to toss this into a pile of odds and ends but after looking at it for a while, I decided to keep it. I like the way it looks as a whole so I put a quick binding on it and kept it. It finishes out at 15″ x 15 1/2″ (I know – where did that extra 1/2″ come from???) Keeping these is a good thing – as I progress, it is nice to look back and see how far I have come. You know, the hardest part of writing this post is to keep the critcism of this practice session to a minimum. I feel like if I am going to share these projects, I need to zoom in and explain or defend every mistake. But I am not going to. It isn’t perfect but it is certainly good enough.
Linking to Freemotion Mavericks and other assorted wonderful linky parties. Info on all of them are listed at the top of the page, under link ups.
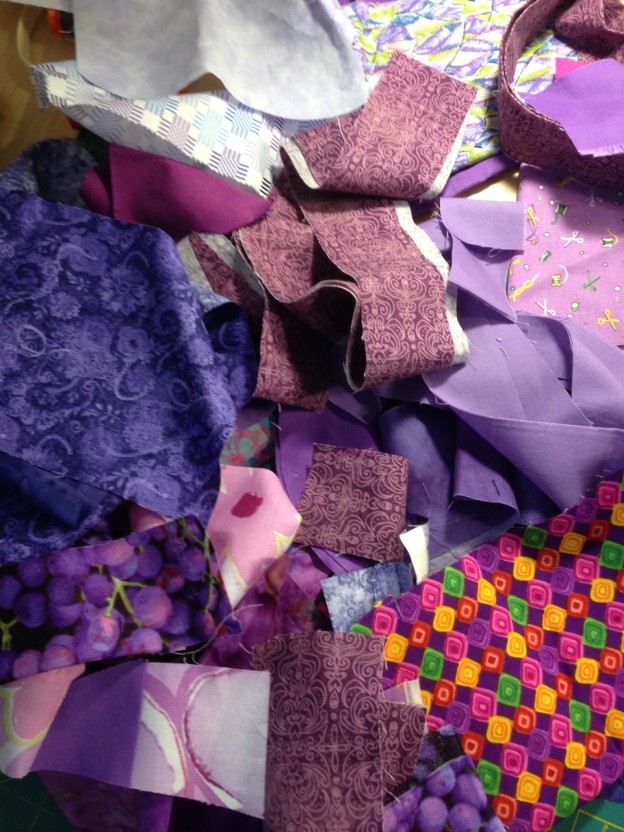
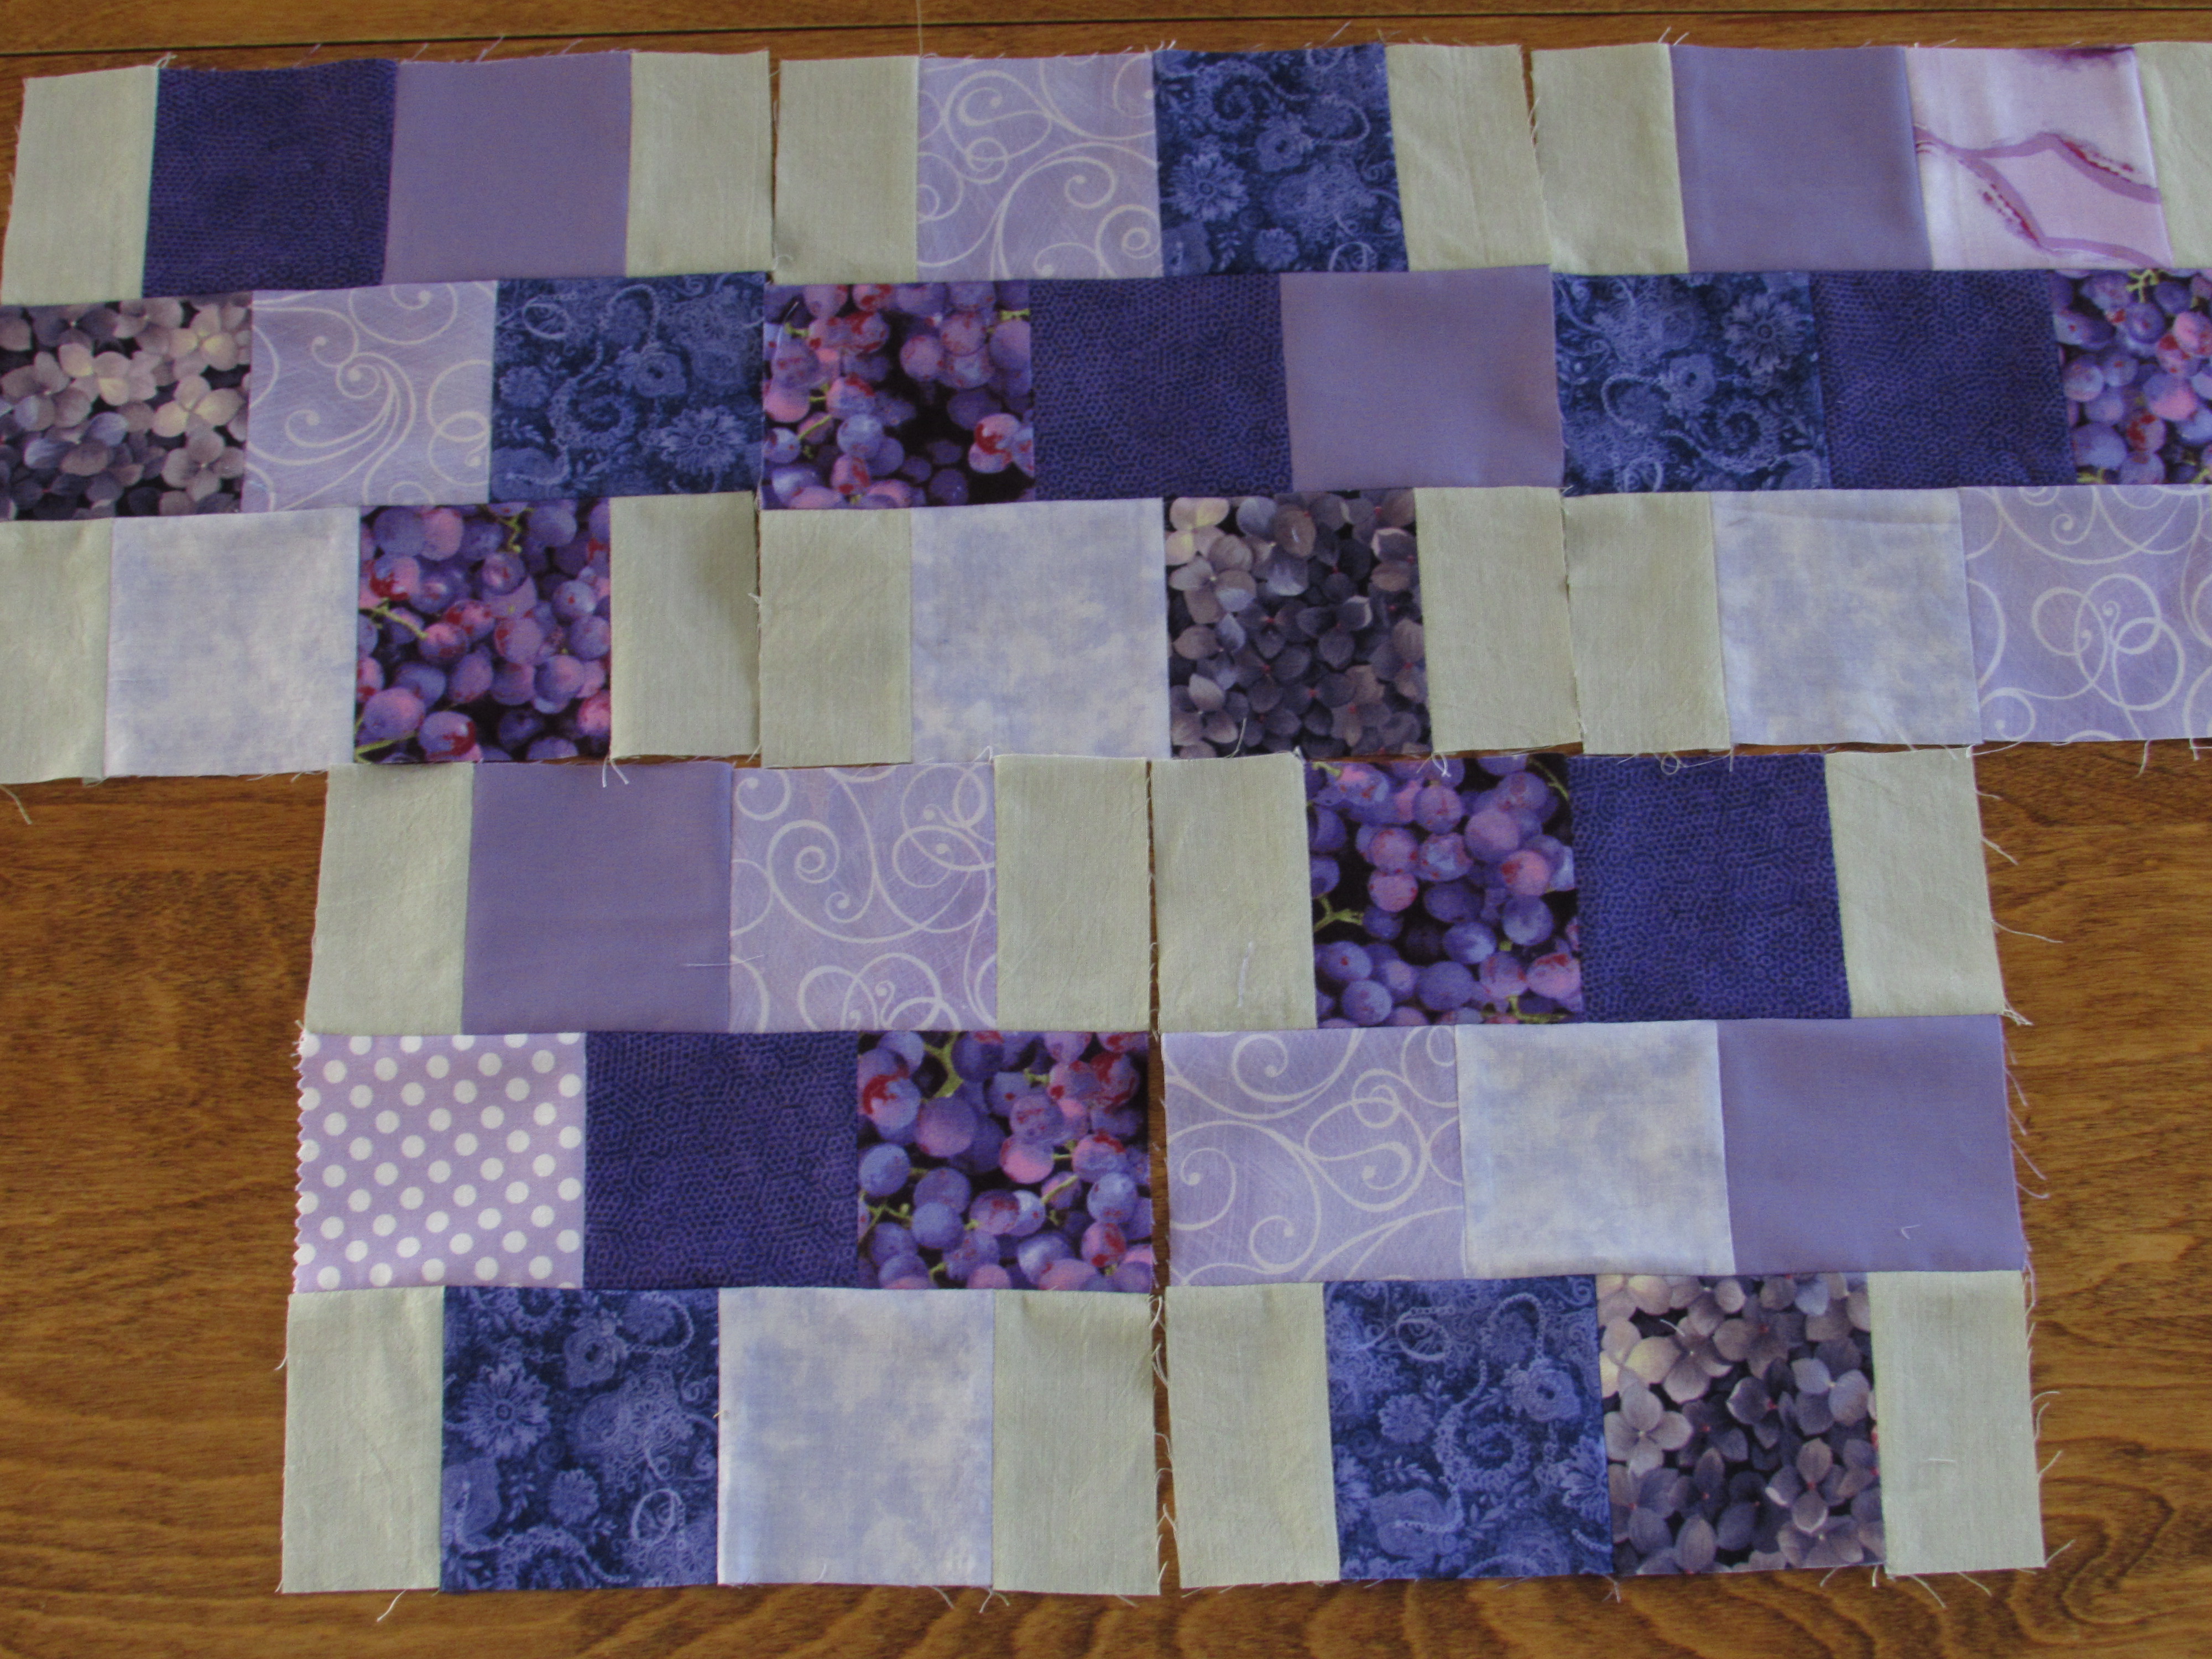
This week I discovered that I have almost no purple fabric; scrappy, yardage or otherwise. I don’t know why. The purple section on the shelf is nearly empty and my purple scrap bin is the same. I will soon have the pleasure of shopping for a few purple blenders to build things back up. But first, let me show you what I managed to cobble together for the RSC16 for the month of March.
My blocks for the Gemstone quilt are starting to accumulate. Here are the newest additions in all their purple splendor.
This quilt is going to be so pretty. The first three months look wonderful together. Remember that each block will be sashed in the pale green so they will be floating on the green background.
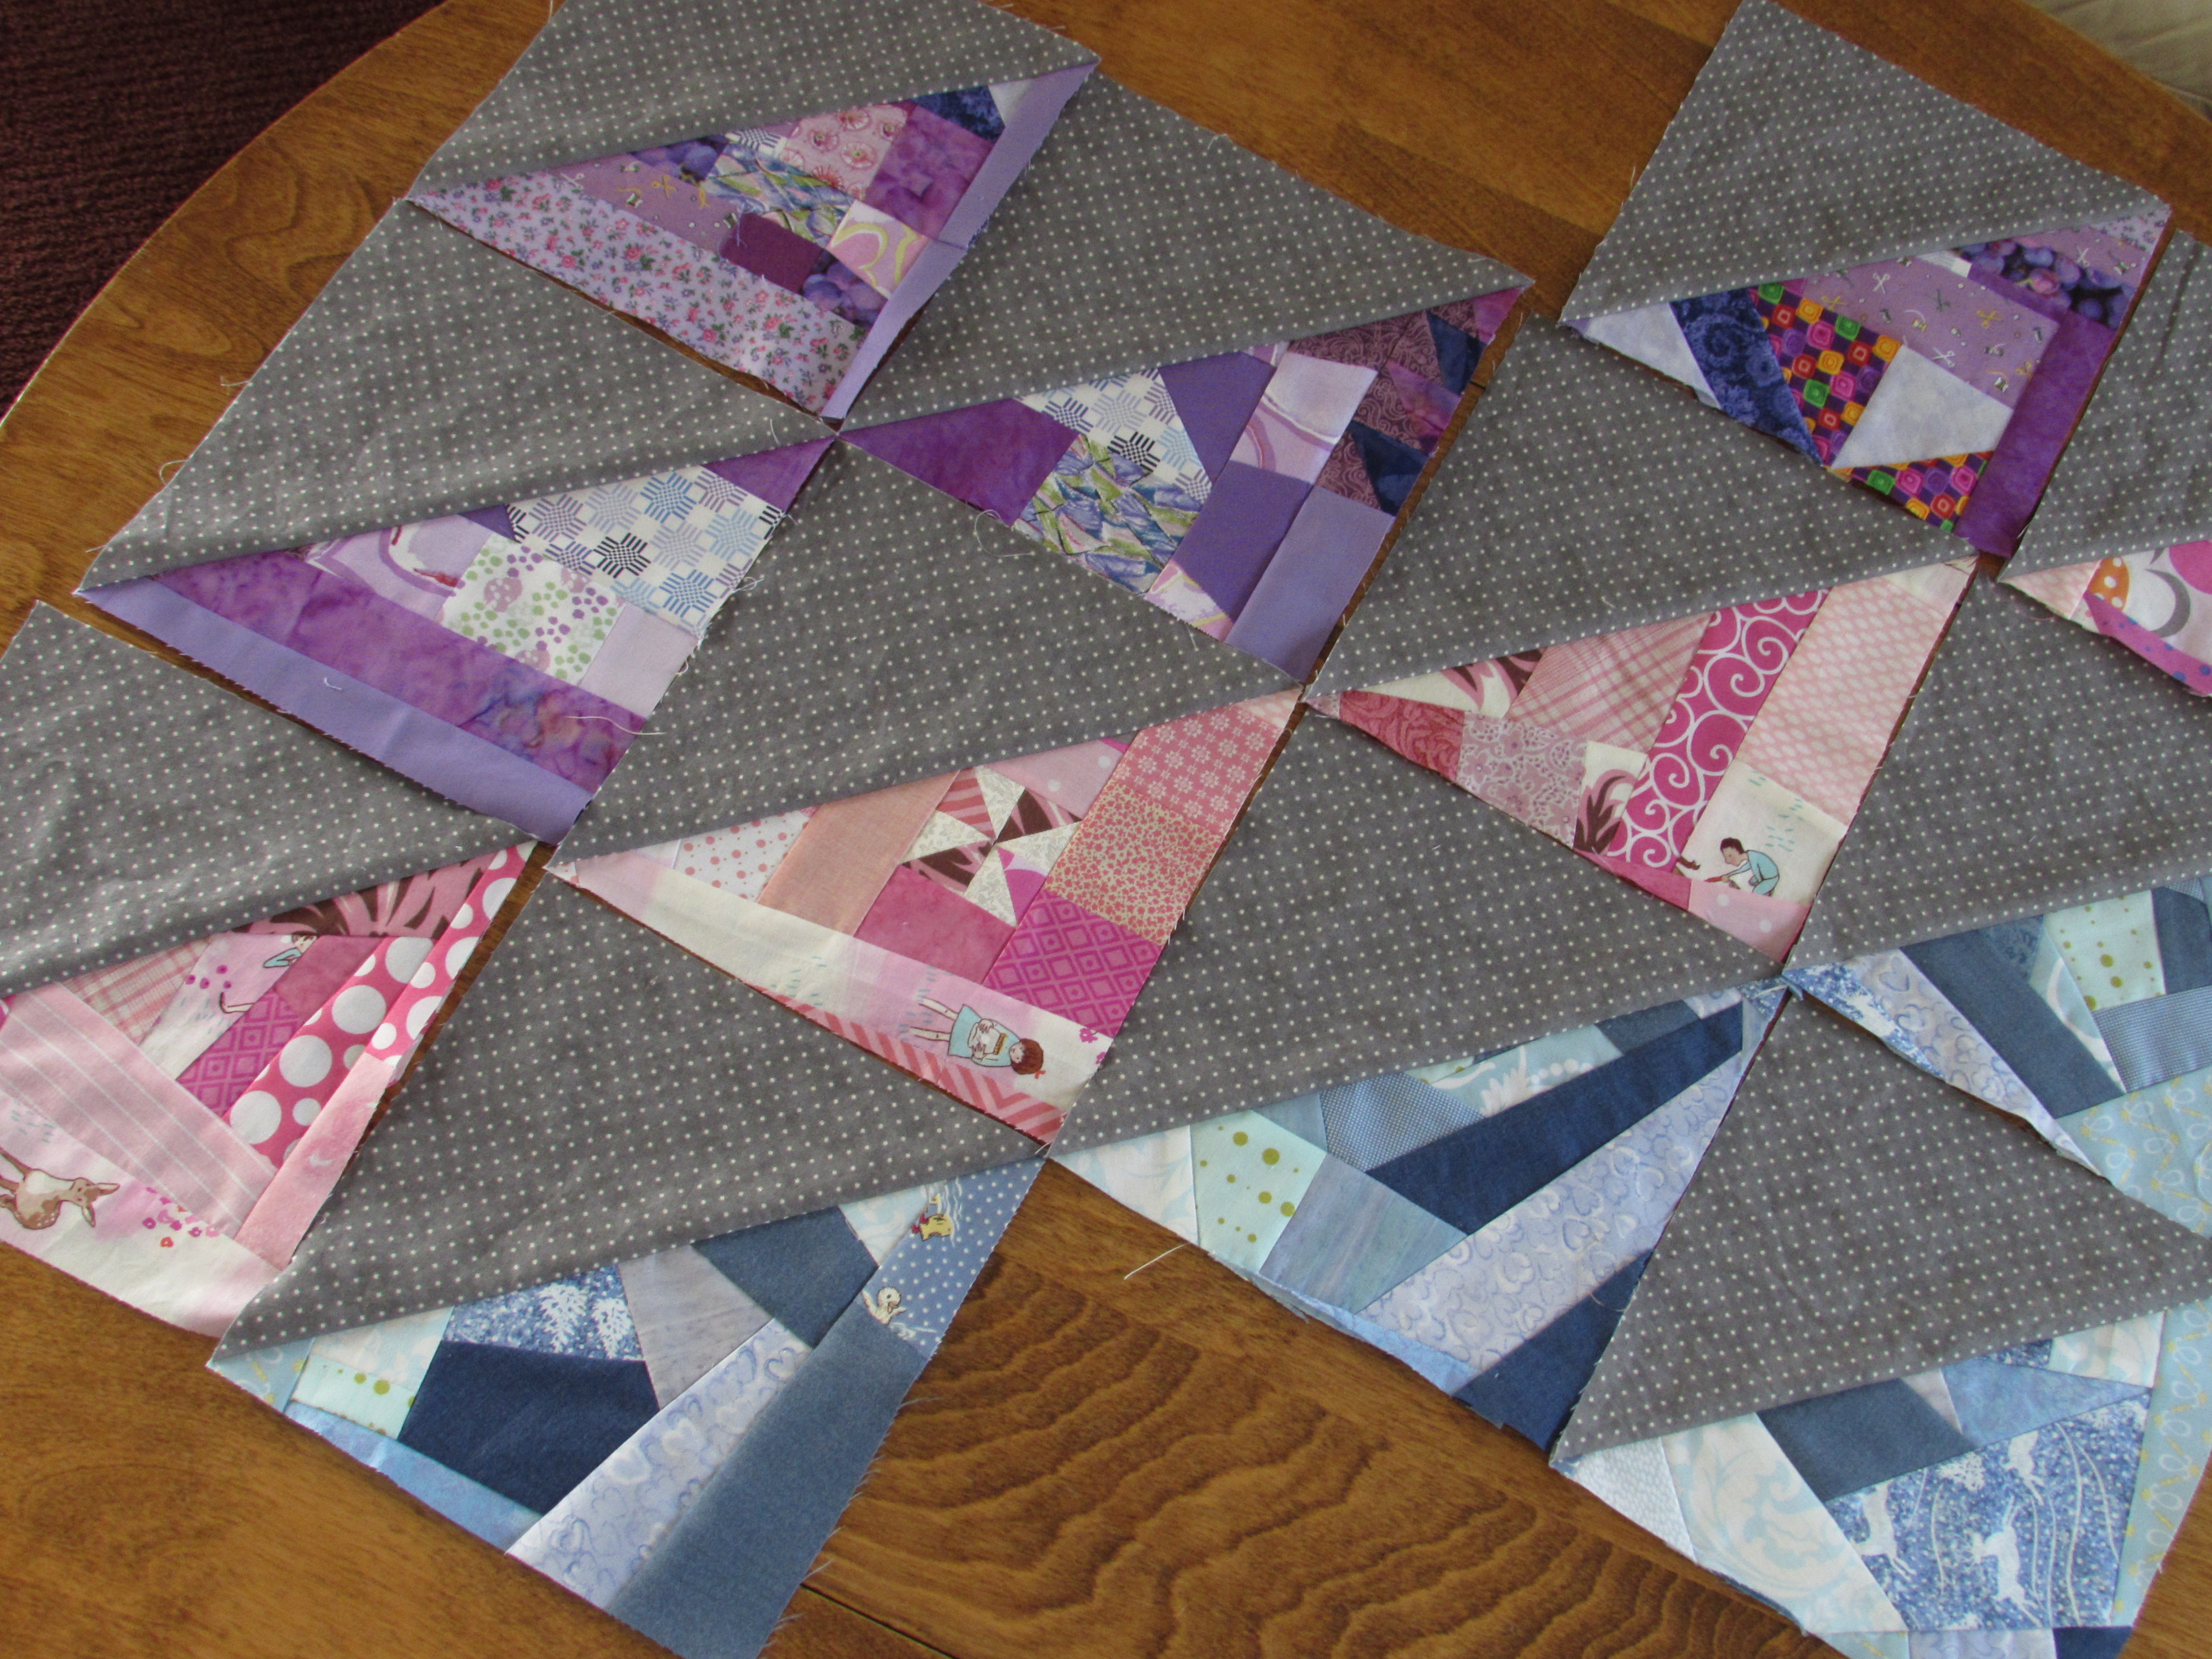
Because most of my purple scraps are strings of various widths, it was easier to work on my improv project. I made a slab of purple fabric using all sorts of tiny pieces.
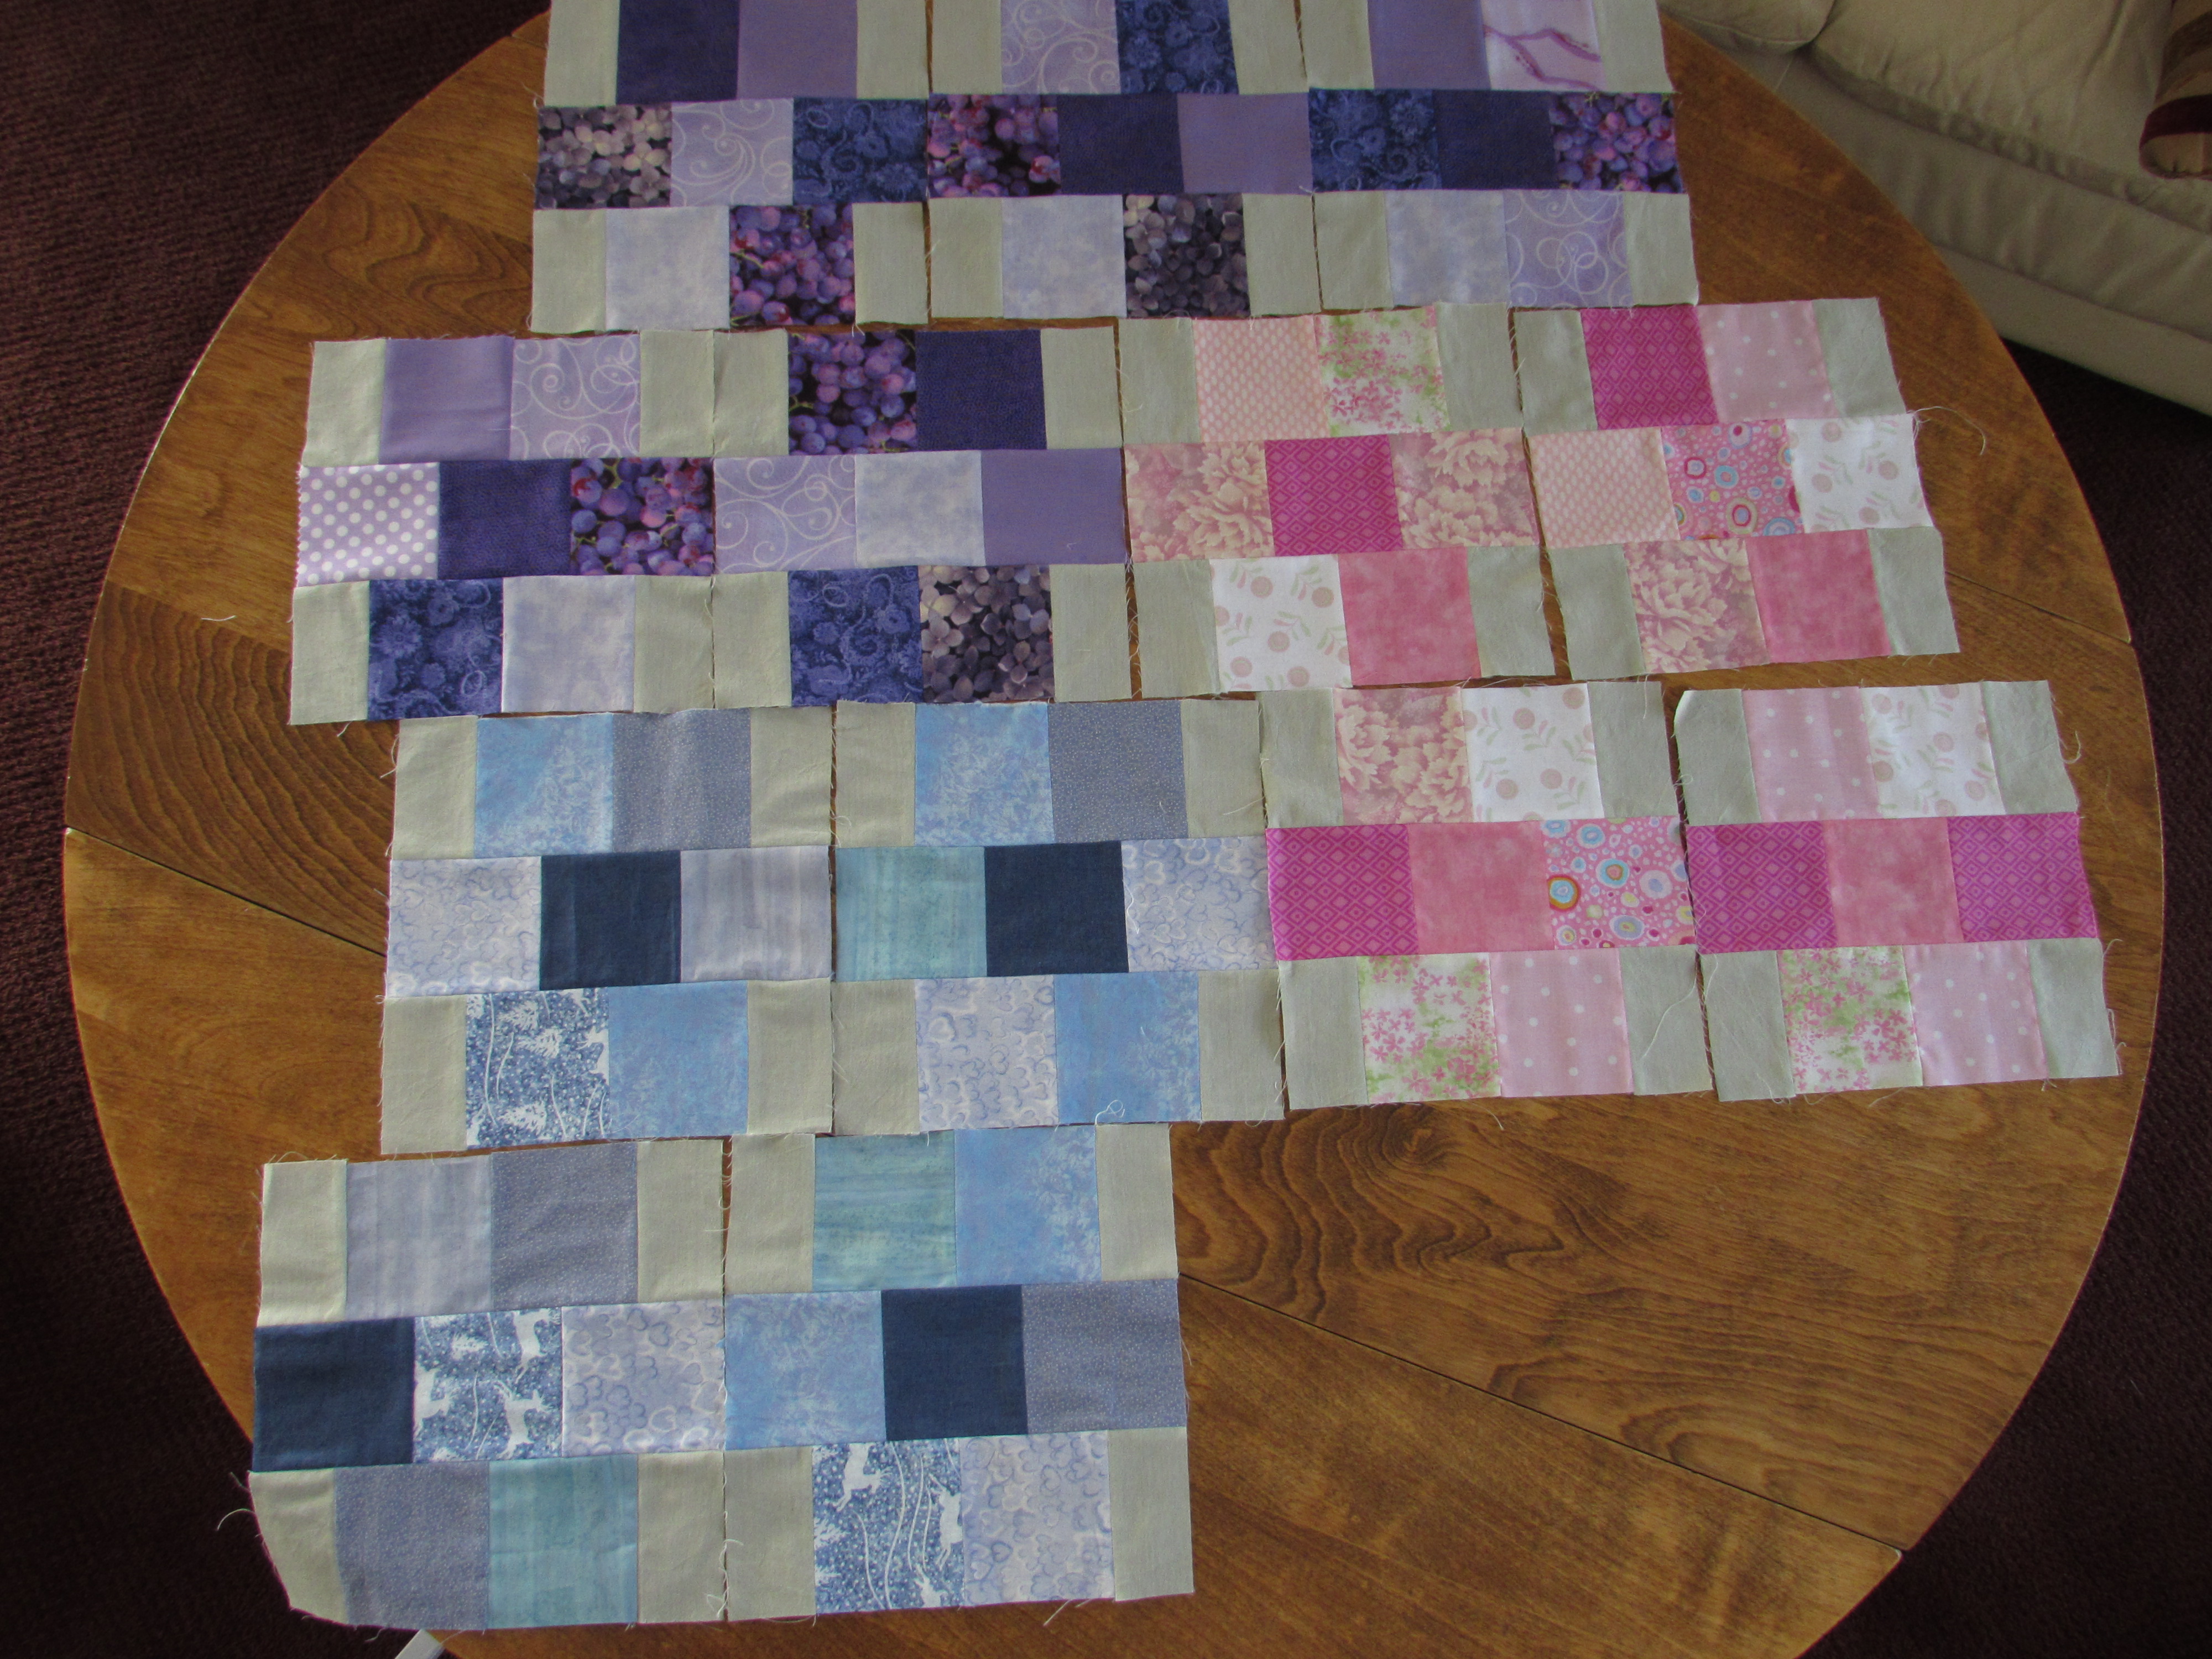
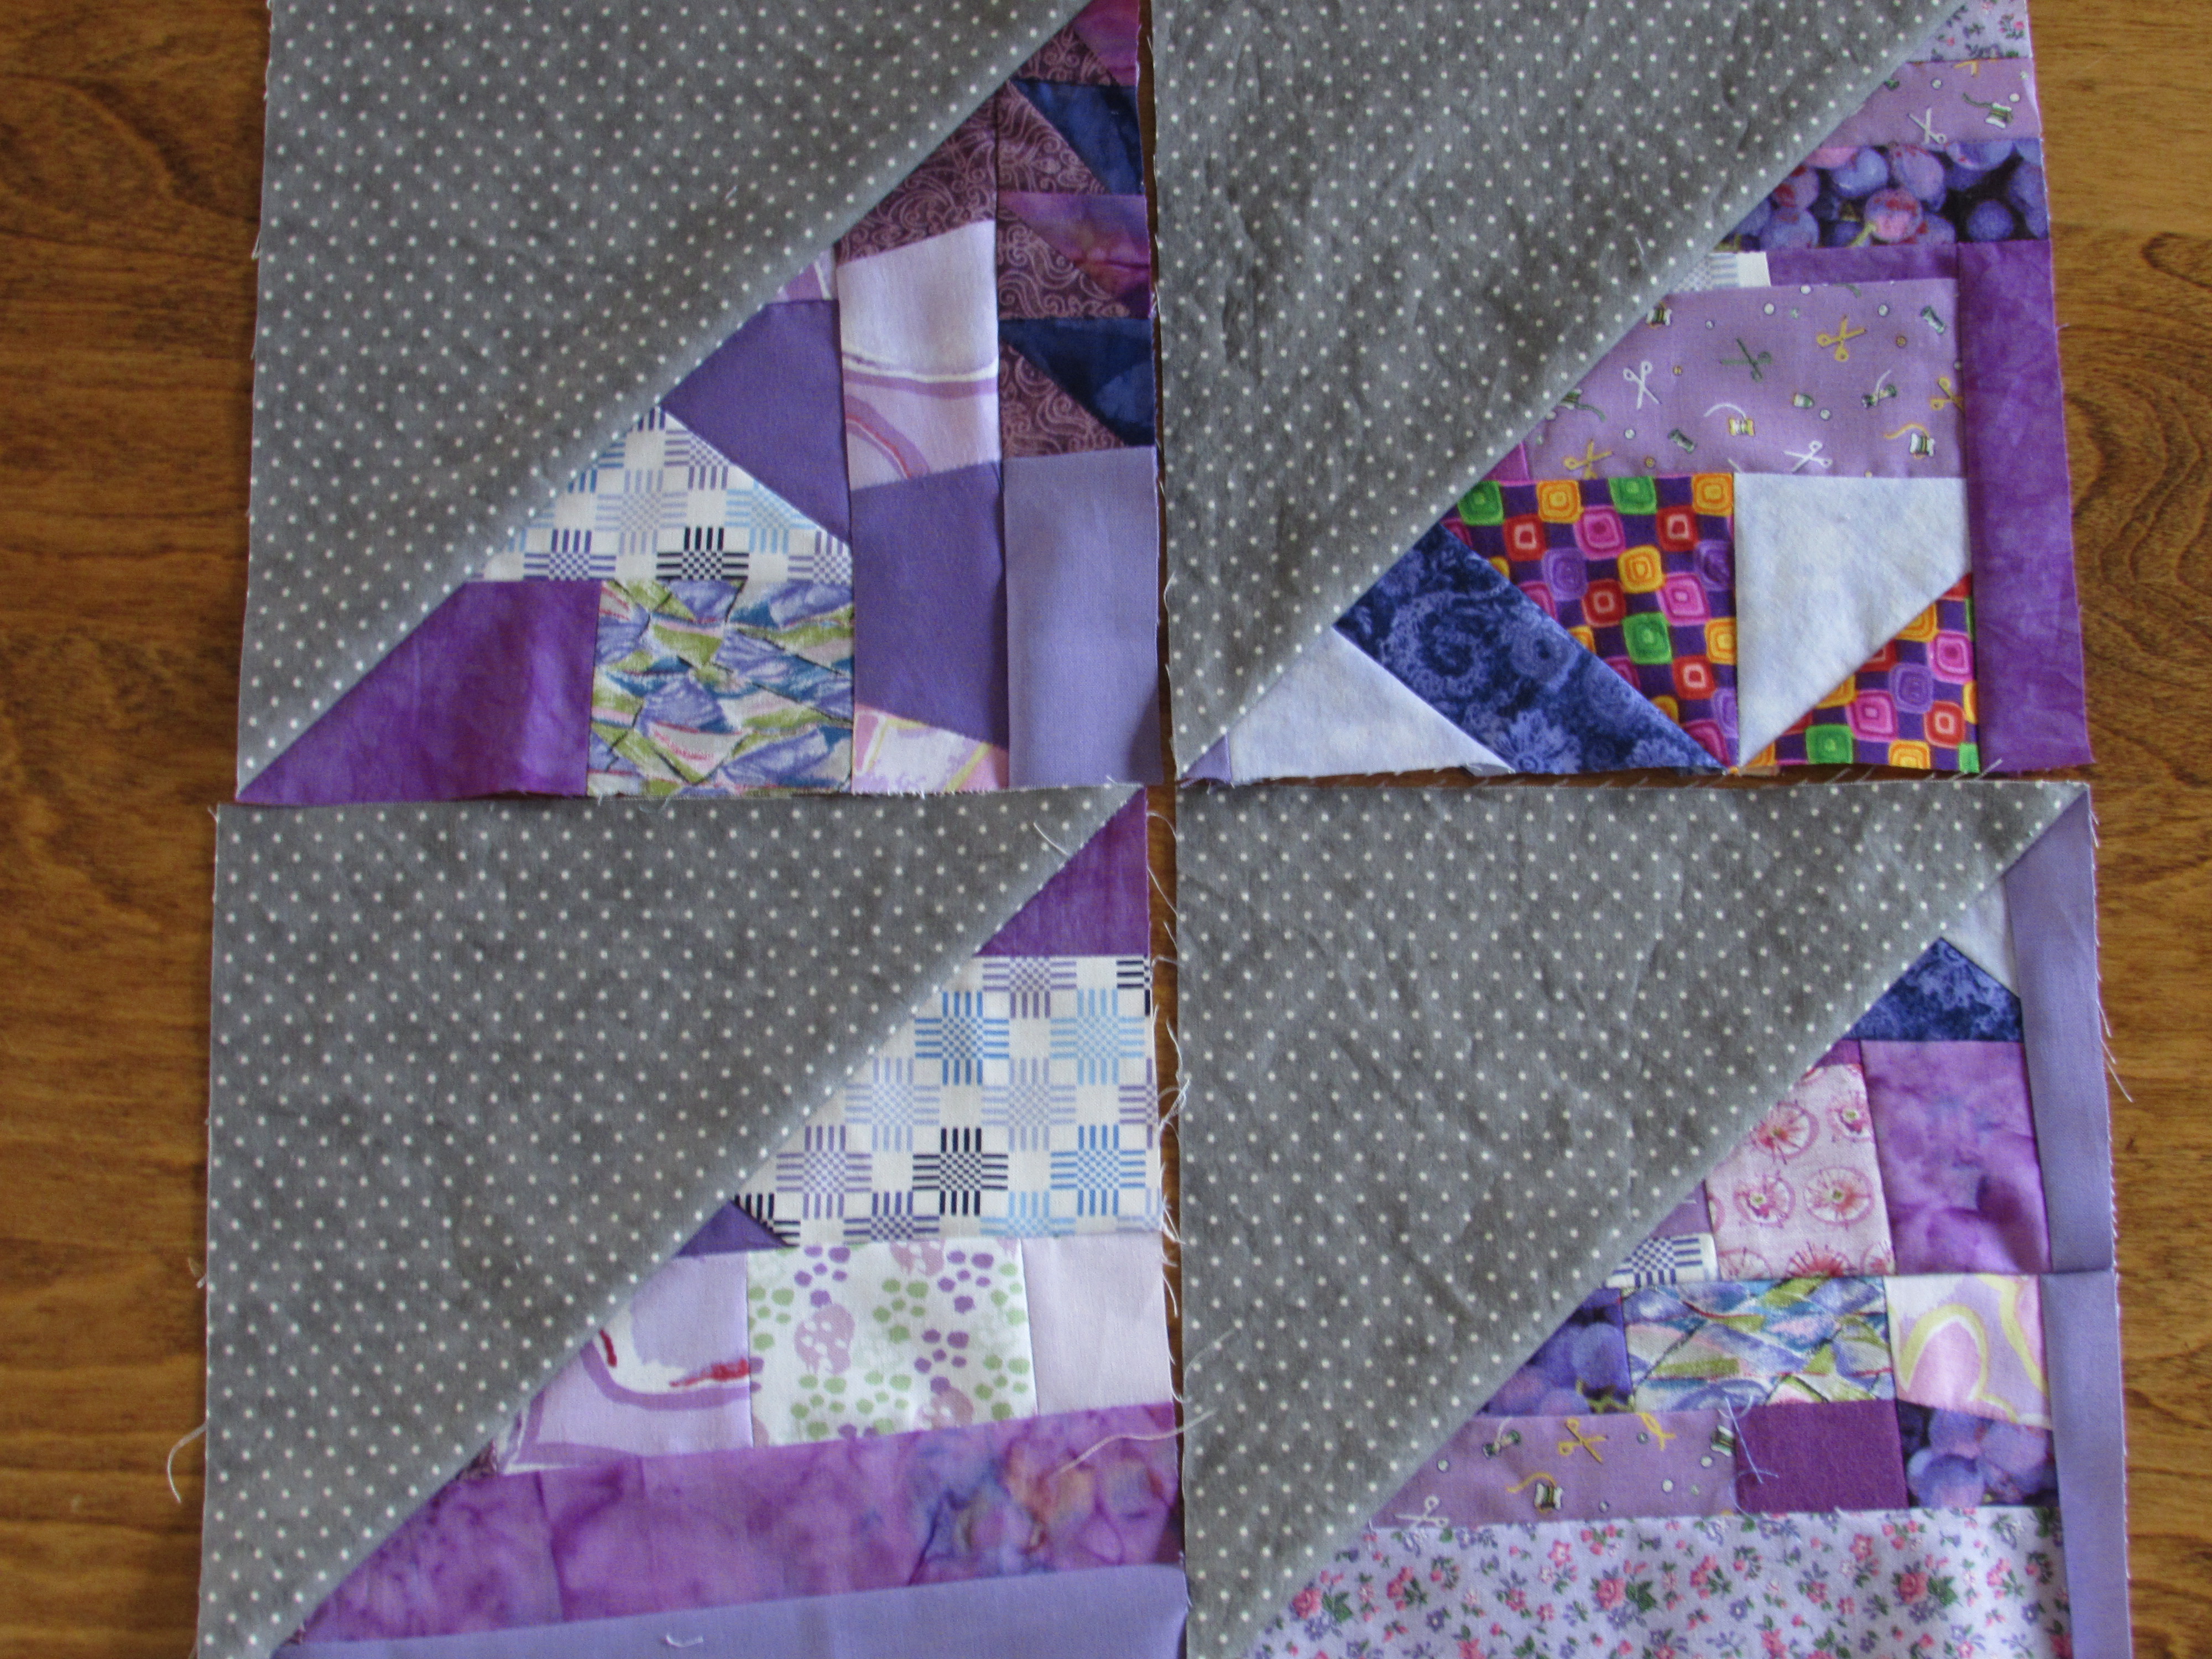
Check out my teeny tiny HST’s on the lower right. Those were fun to put together. Once I had the slab done, I decided to start making blocks out of the slabs I had made thus far. I wasn’t sure what size I wanted to cut them to, so I practiced with an old rainbow slab I made a while back. I am going to make HST’s which will combine the made fabric and a simple gray polka dot fabric. Once I decided on the size block (9″) I started cutting the blue, pink and purple slabs. You’ll notice a substantial color difference in both of these shots. The photo above was taken on a rainy day when I had to rely on terrible lighting. The shot below was taken today with wonderful sunlight streaming in. The color below are much more accurate. (Thankfully so.)
I am loving how these are coming together.
I was careful to preserve the parts of the made fabric that I wanted to show up in the HSTs. My little girl, the pink pinwheel, the tiny purple HST’s, and the little deer on the edge of the other pink HST. For now, I am going to aim for four or five blocks from each color, which will give me about 50-55 blocks. Then I can lay them out and see what it still needs. I have plenty of the gray dot fabric for the project.
Cutting the made fabric slabs left me with a number of large scraps. I will hold on to these and can stitch them back together as needed for extra blocks when I lay this out.
Linking up with my usuals, including Oh Scrap and So Scrappy and looking forward to seeing what everyone is doing with their purple scraps this month!
I love to help. Doing something to help another makes a person feel good inside, it is gratifying. Quilting to help others is like the perfect combination for me, adding even more value to my favorite pasttime. I have donated six quilts over the past couple of years. However, donating a whole quilt takes a fair amount of time. Donating a few blocks here and there takes almost no time at all and gives me with a sense of participation and satisfaction. Remember when I posted about making the heart blocks for victims of the fires in California last summer? That was a very easy, satisfying project to contribute to. Here is another.
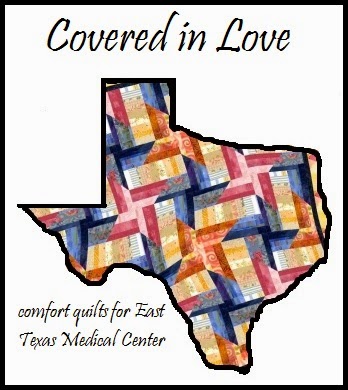
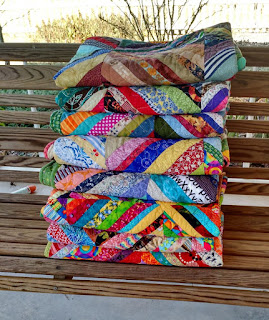
Reading through my blog feed on Bloglovin last week, I stumbled across Kat & Cat Quilts, a blog that was new to me. (It is amazing how many quilt blogs are out there. So much to read, so much inspiration to take in.) Anyway, this blog, written by Kat, sponsors an ongoing project called Covered in Love. Kat is a nurse in a med-surgical unit at East Texas Medical Center. She supports the dying process for some of her patients. Knowing the comfort it provides the patient, and the family of that patient, she tries to provide a quilt for patients nearing the end of their life in the hospital. As the family transitions and grieves the loss of their loved one, they are able to keep the quilt as a treasure to bring them comfort. Below are seven quilts that were made with the blocks donated in October, 2015.
This is no small undertaking for Kat and while she does have quite a number of quilters that donate blocks, she spends a lot of time piecing and quilting and finishing these wonderful quilts. I believe she has some quilters that help with this as well.
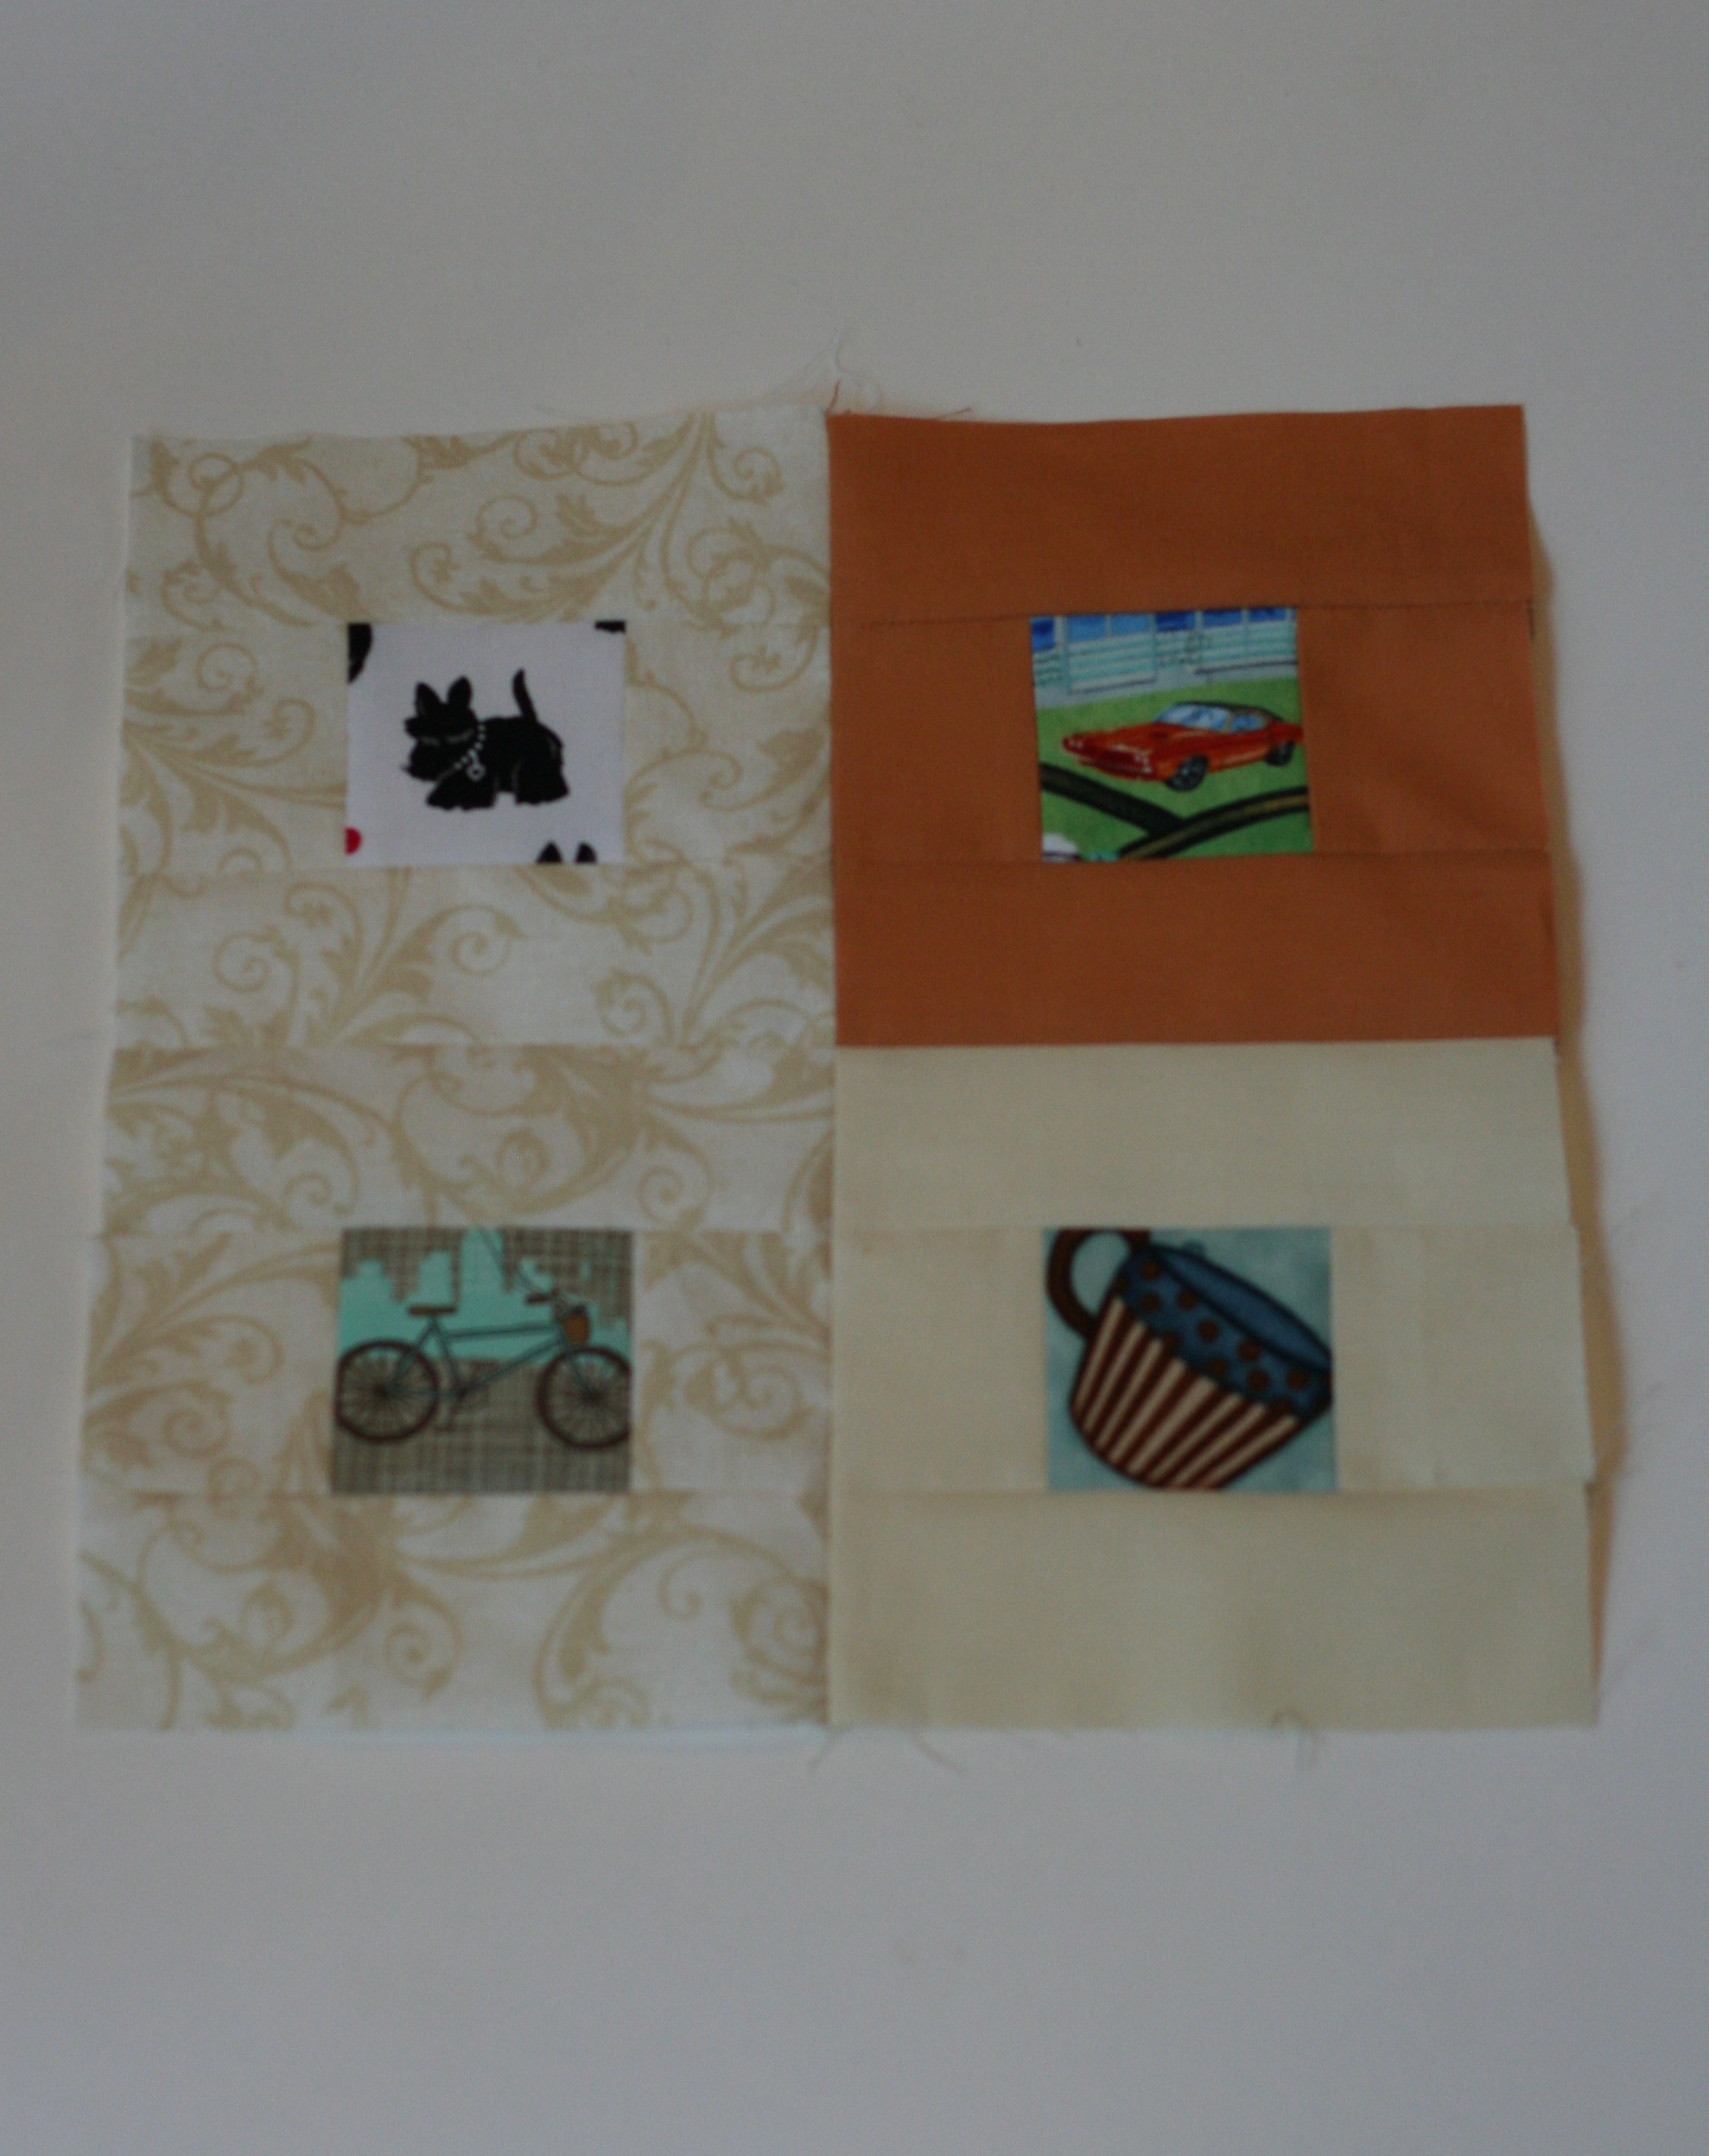
Each month she specifies the block she will be working with, provides a tutorial and the color scheme. This month she is asking for simple I-Spy blocks, using adult themed novelty fabrics in the center. For a quick look at the tutorial, click here. I jumped in this month and made two blocks to contribute.
These are a breeze to cut and piece. My only issue was my lack of novelty prints. I was really scrounging to find fabric that I could fussy cut and get a 2 1/2″ center block from. My stash includes lots and lots of juvenile prints but not many for adults. I shipped two blocks off to Texas with the hope that they are included in a quilt for one of the patients at East Texas Hospital.
For the bicycle fabric, I cut into a piece of fabric I have been hoarding from Kate & Birdie, called Bicycle, in the Bluebird Park line. I love this line and haven’t decided what to do with it yet. What? Make a quilt with it? Hmmm…. maybe I will. 😉 For now though, I have cut off a corner and fussy cut two bicycles from it. They look so sweet.
I wanted to share this project with you in case you want to participate. We all follow our list of favorite blogs and I am very happy to add Kat & Cat Quilts to the list. If you are aware of other projects like this, I would love to hear about them. Leave a quick comment for me.
Last weekend was the best. I mentioned in a post last week that five of my (six) sisters were coming for the weekend. No spouses or grandkids were on the guest list so Ray and Julia took off for Downieville for a couple of nights.
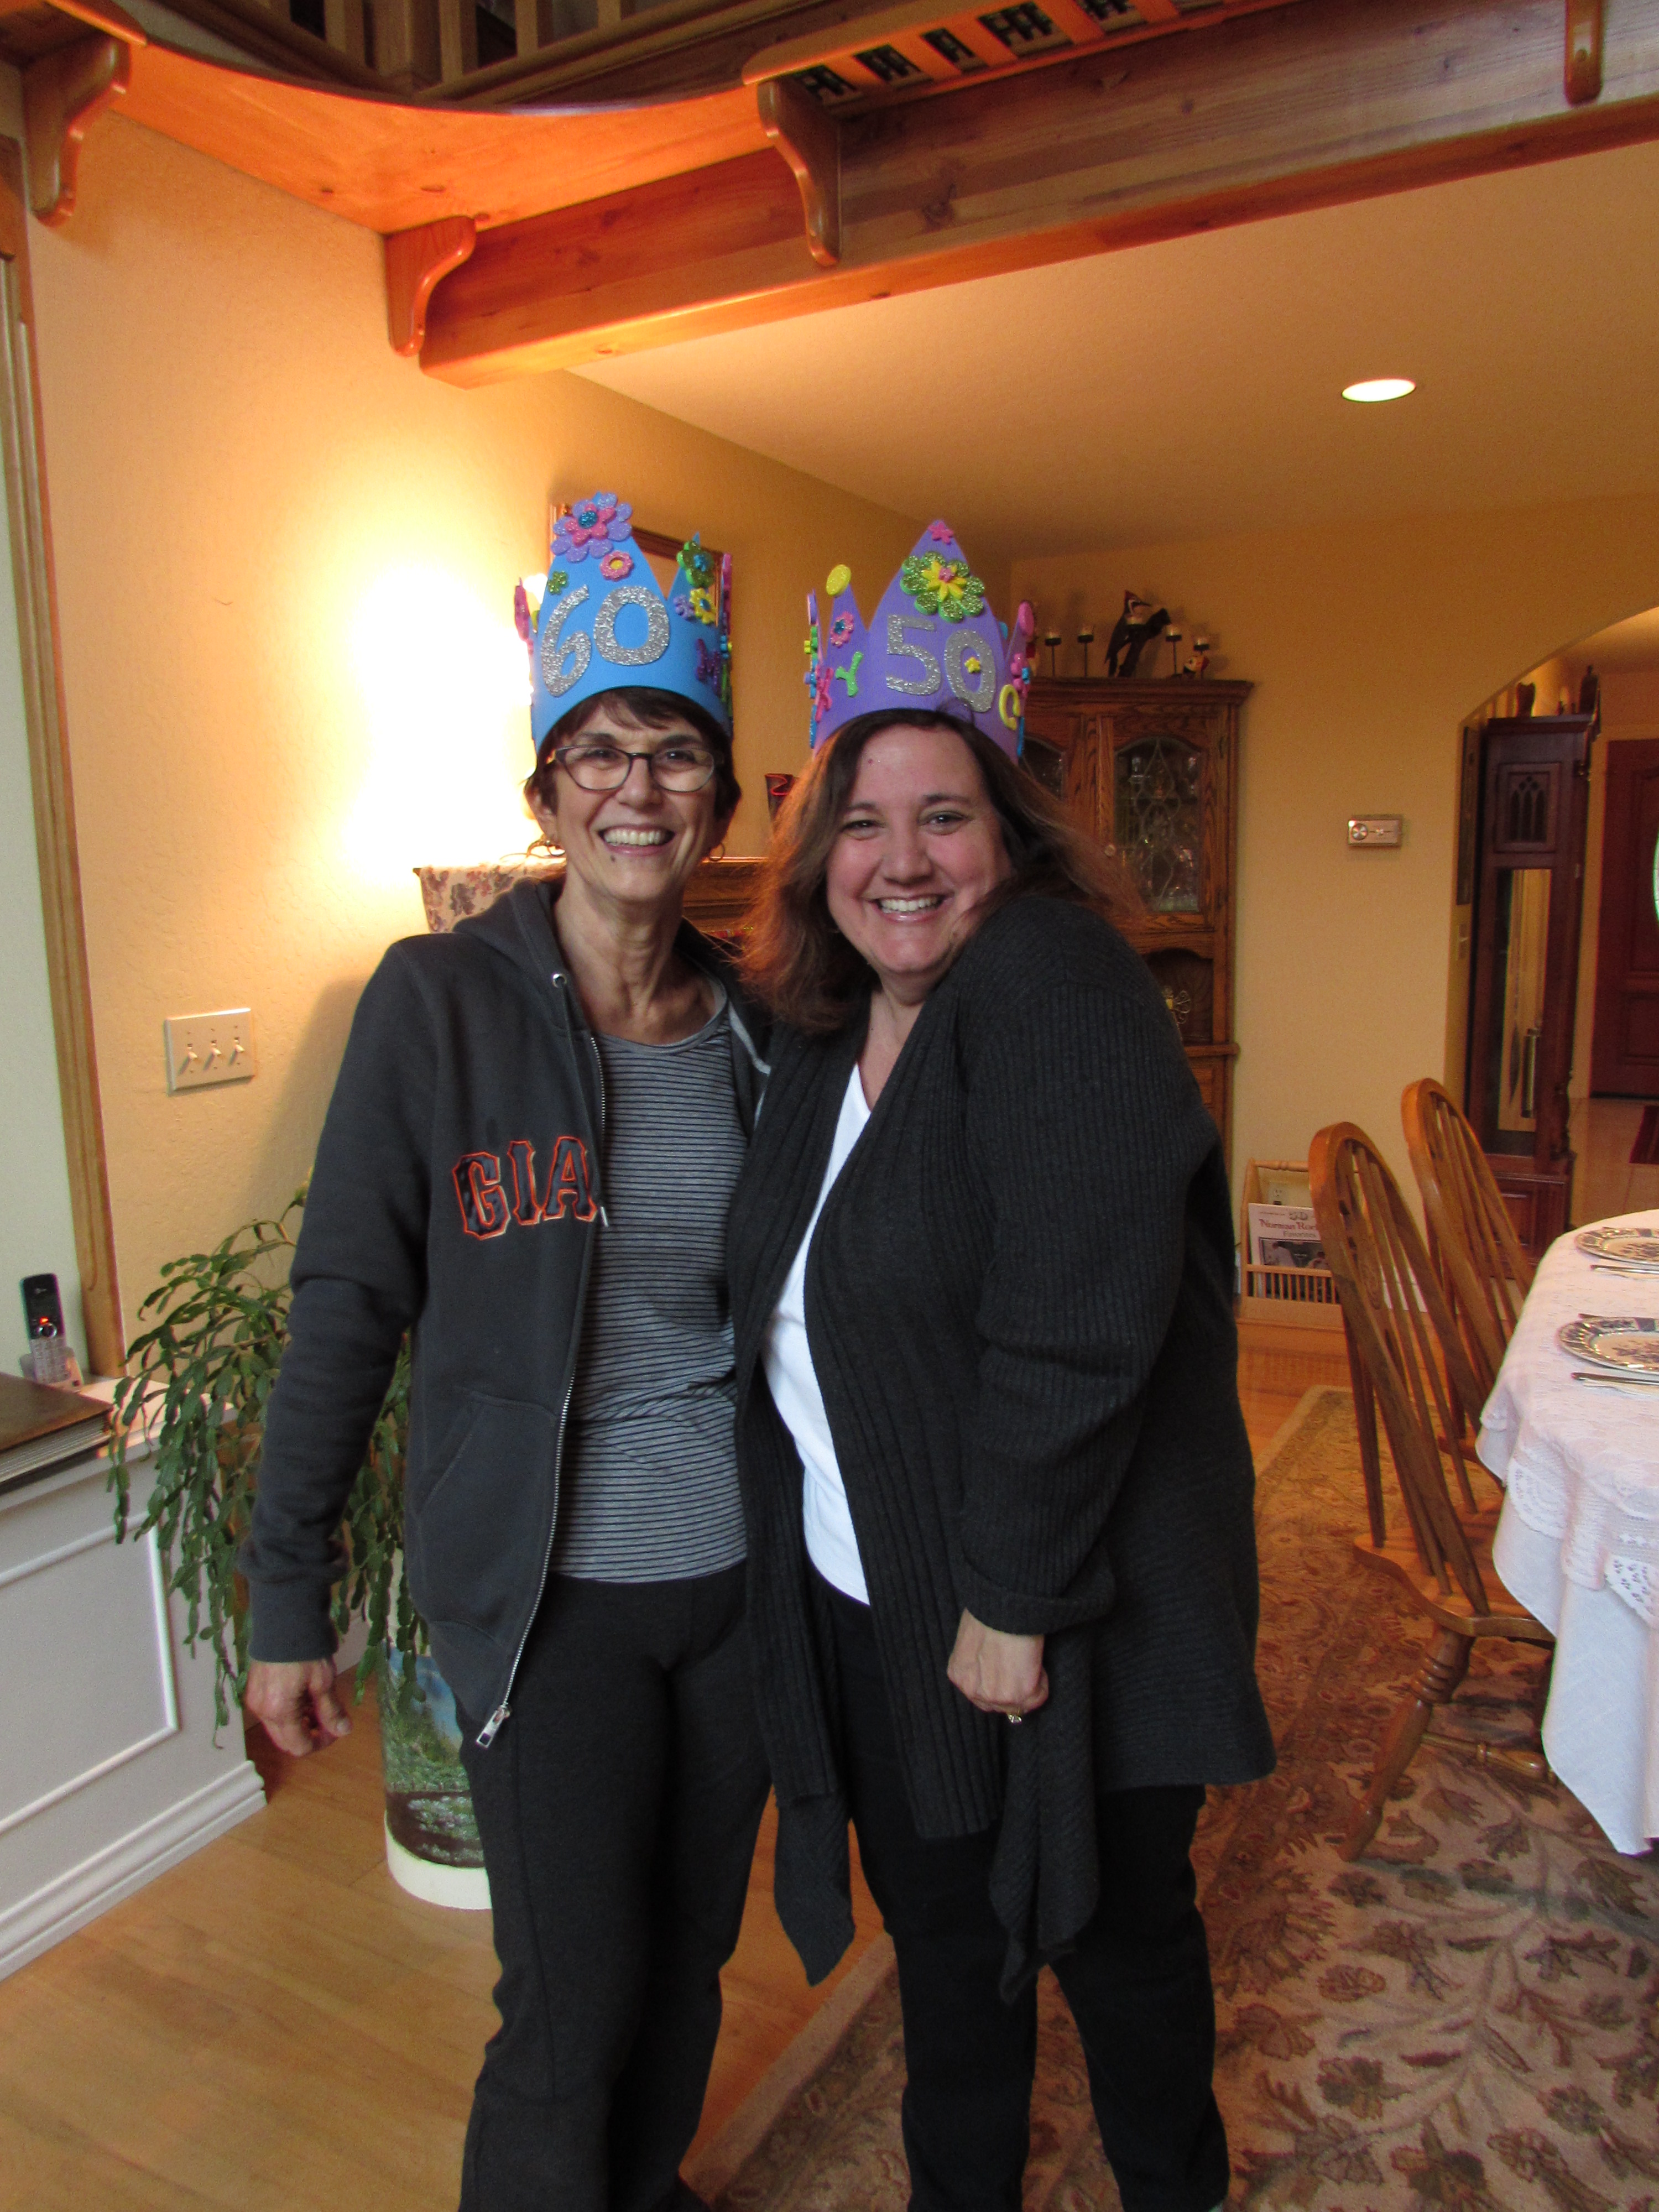
A few of my sisters and I, plus my parents, were in cahoots, planning a surprise birthday party for two of my sisters. Tina turns 60 this year and Alicia, the youngest, turns 50. When I look at that sentence, it doesn’t seem at all possible that the youngest in our family is 50. In my head we are all still 30-something. The passage of time is crazy hard to wrap my head around. We have always celebrated the 50th in a big way and we needed to do this for Alicia too. We told Tina about the surprise for Alicia but we also (secretly) planned a party for her. The surprise party was perfect – neither suspected a thing.
Trying to figure out a theme for Alicia’s 50th party, I came up with a “50 Shades of Gray” party. Not having ever read the book, I was going for the number 50 and the kind of raunchy theme that the the title implies. We agreed that the five of us would each bring ten gifts, some silly and some not, that were either gray in color or wrapped in gray/silver paper. That way she would have 50 gifts to open. It was so much fun to pick things out. Everyone went crazy with it. Lots of silly things and some pretty gifts too.
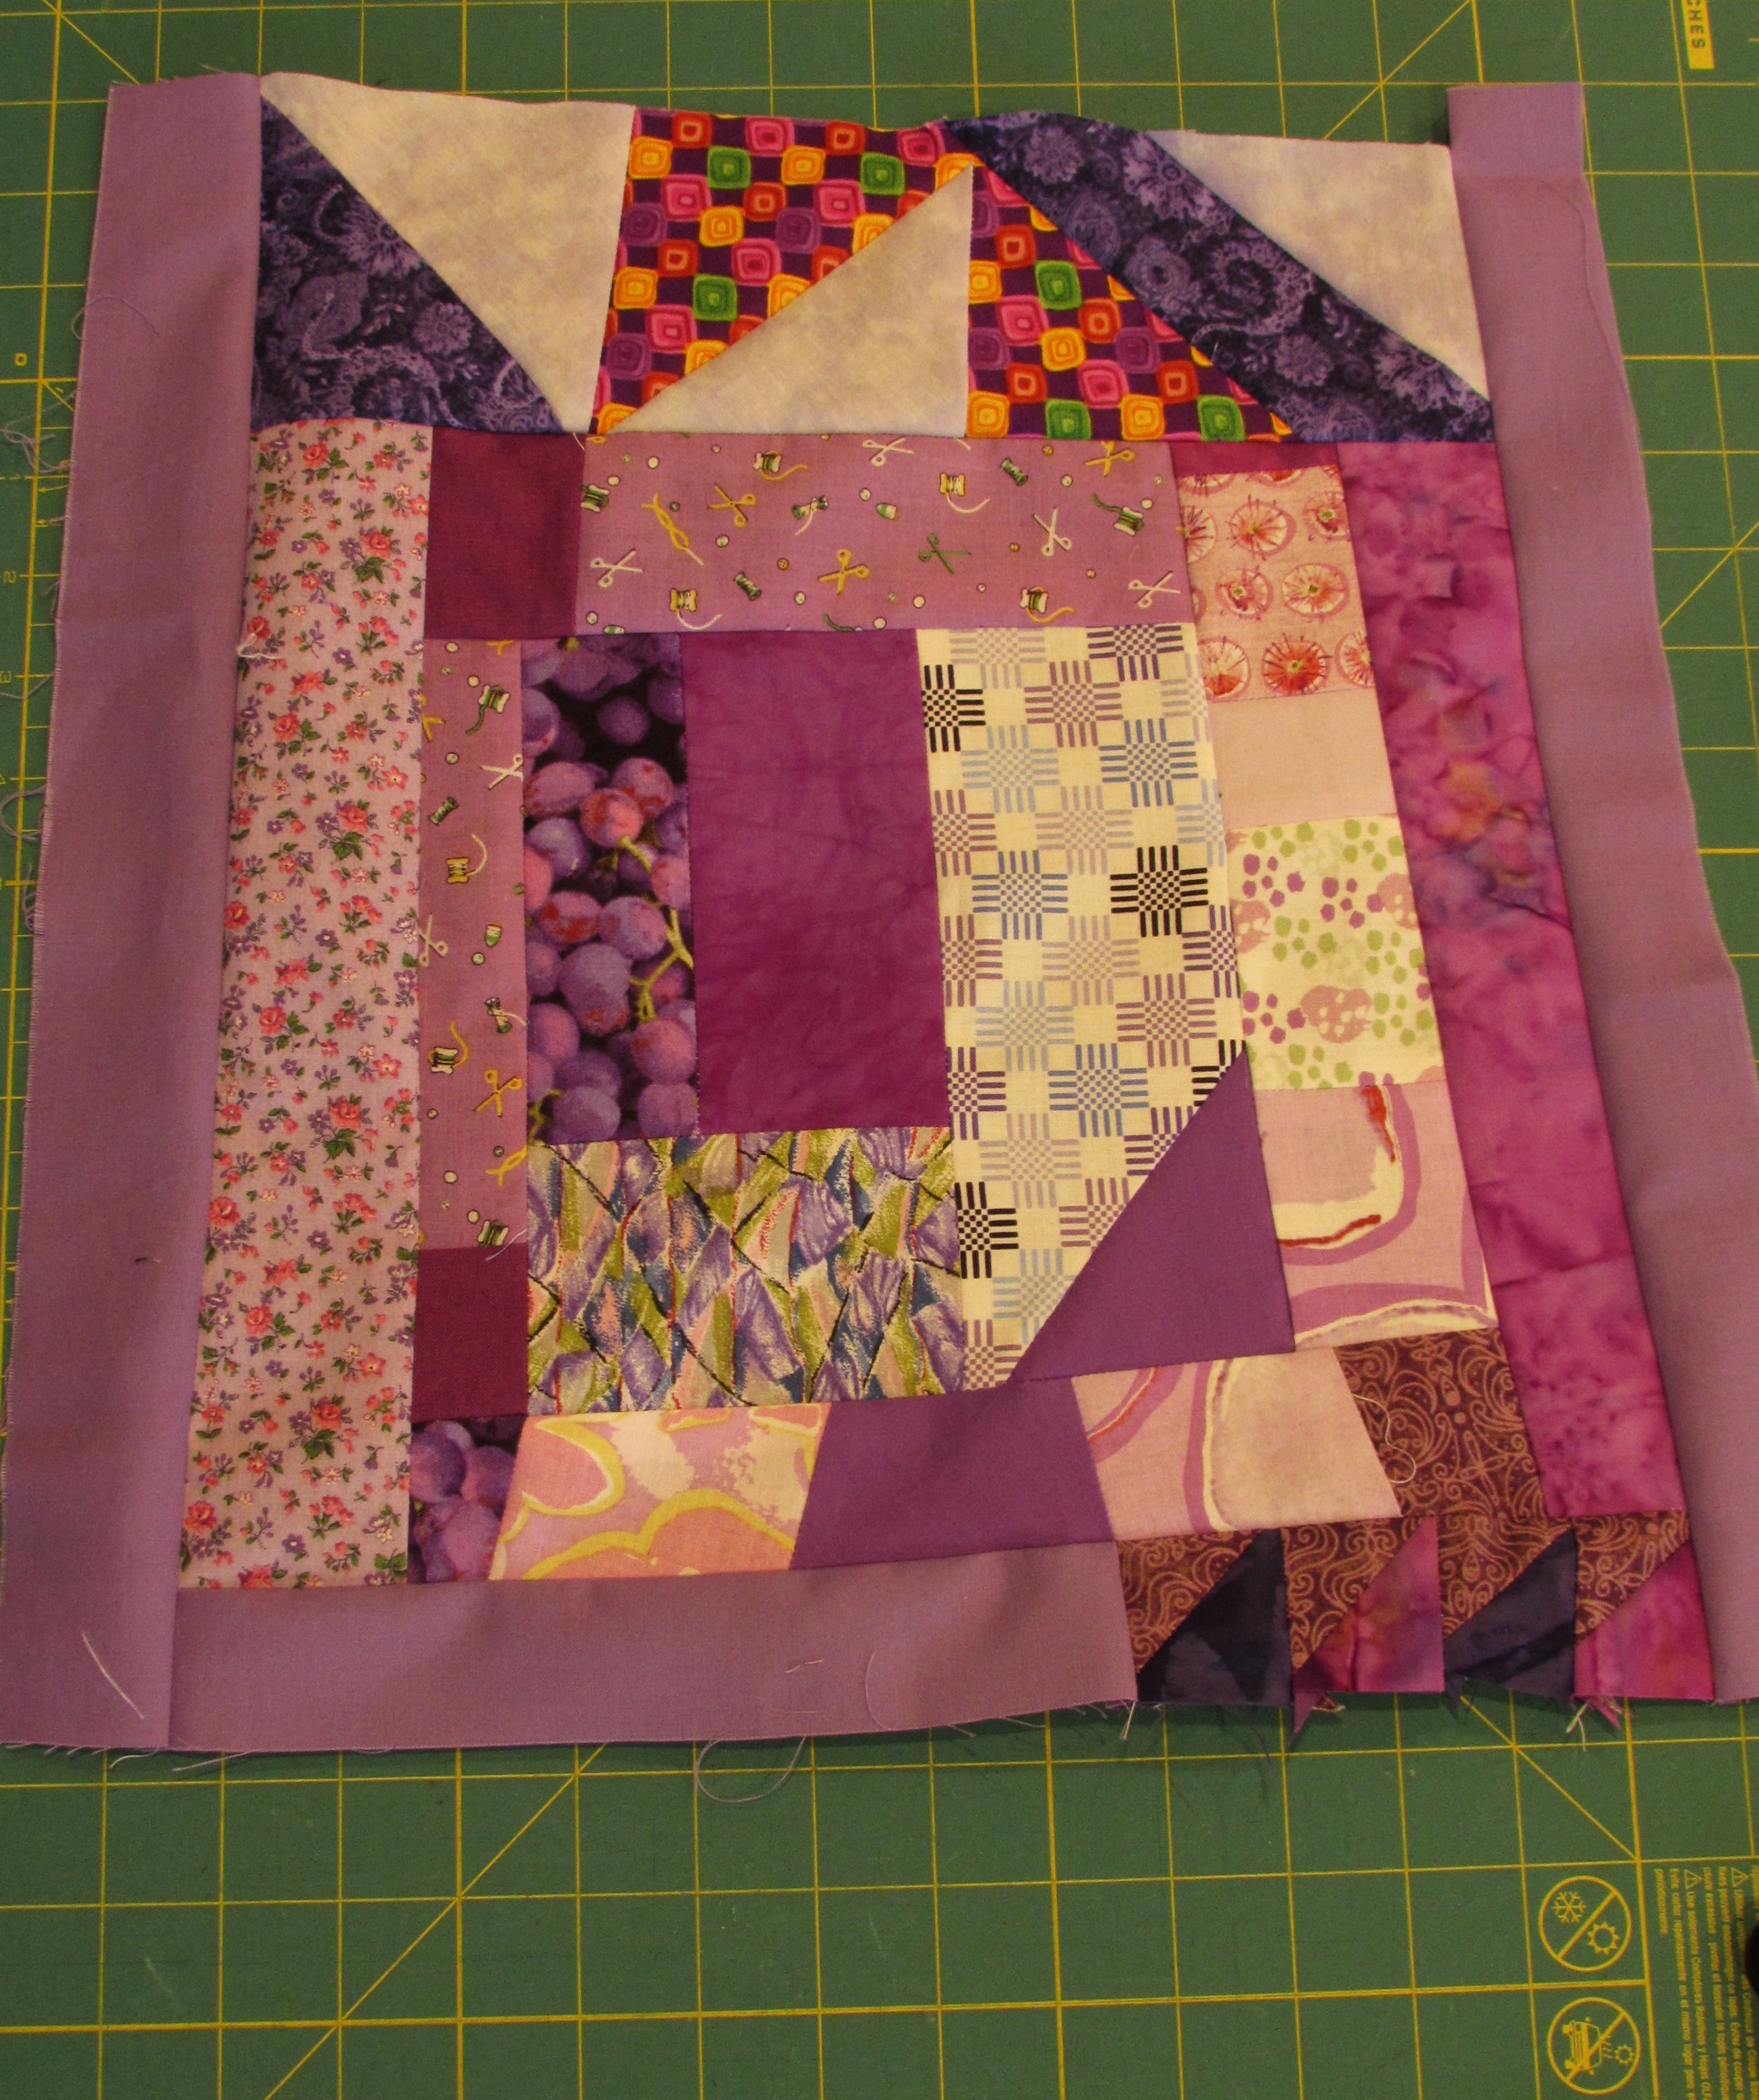
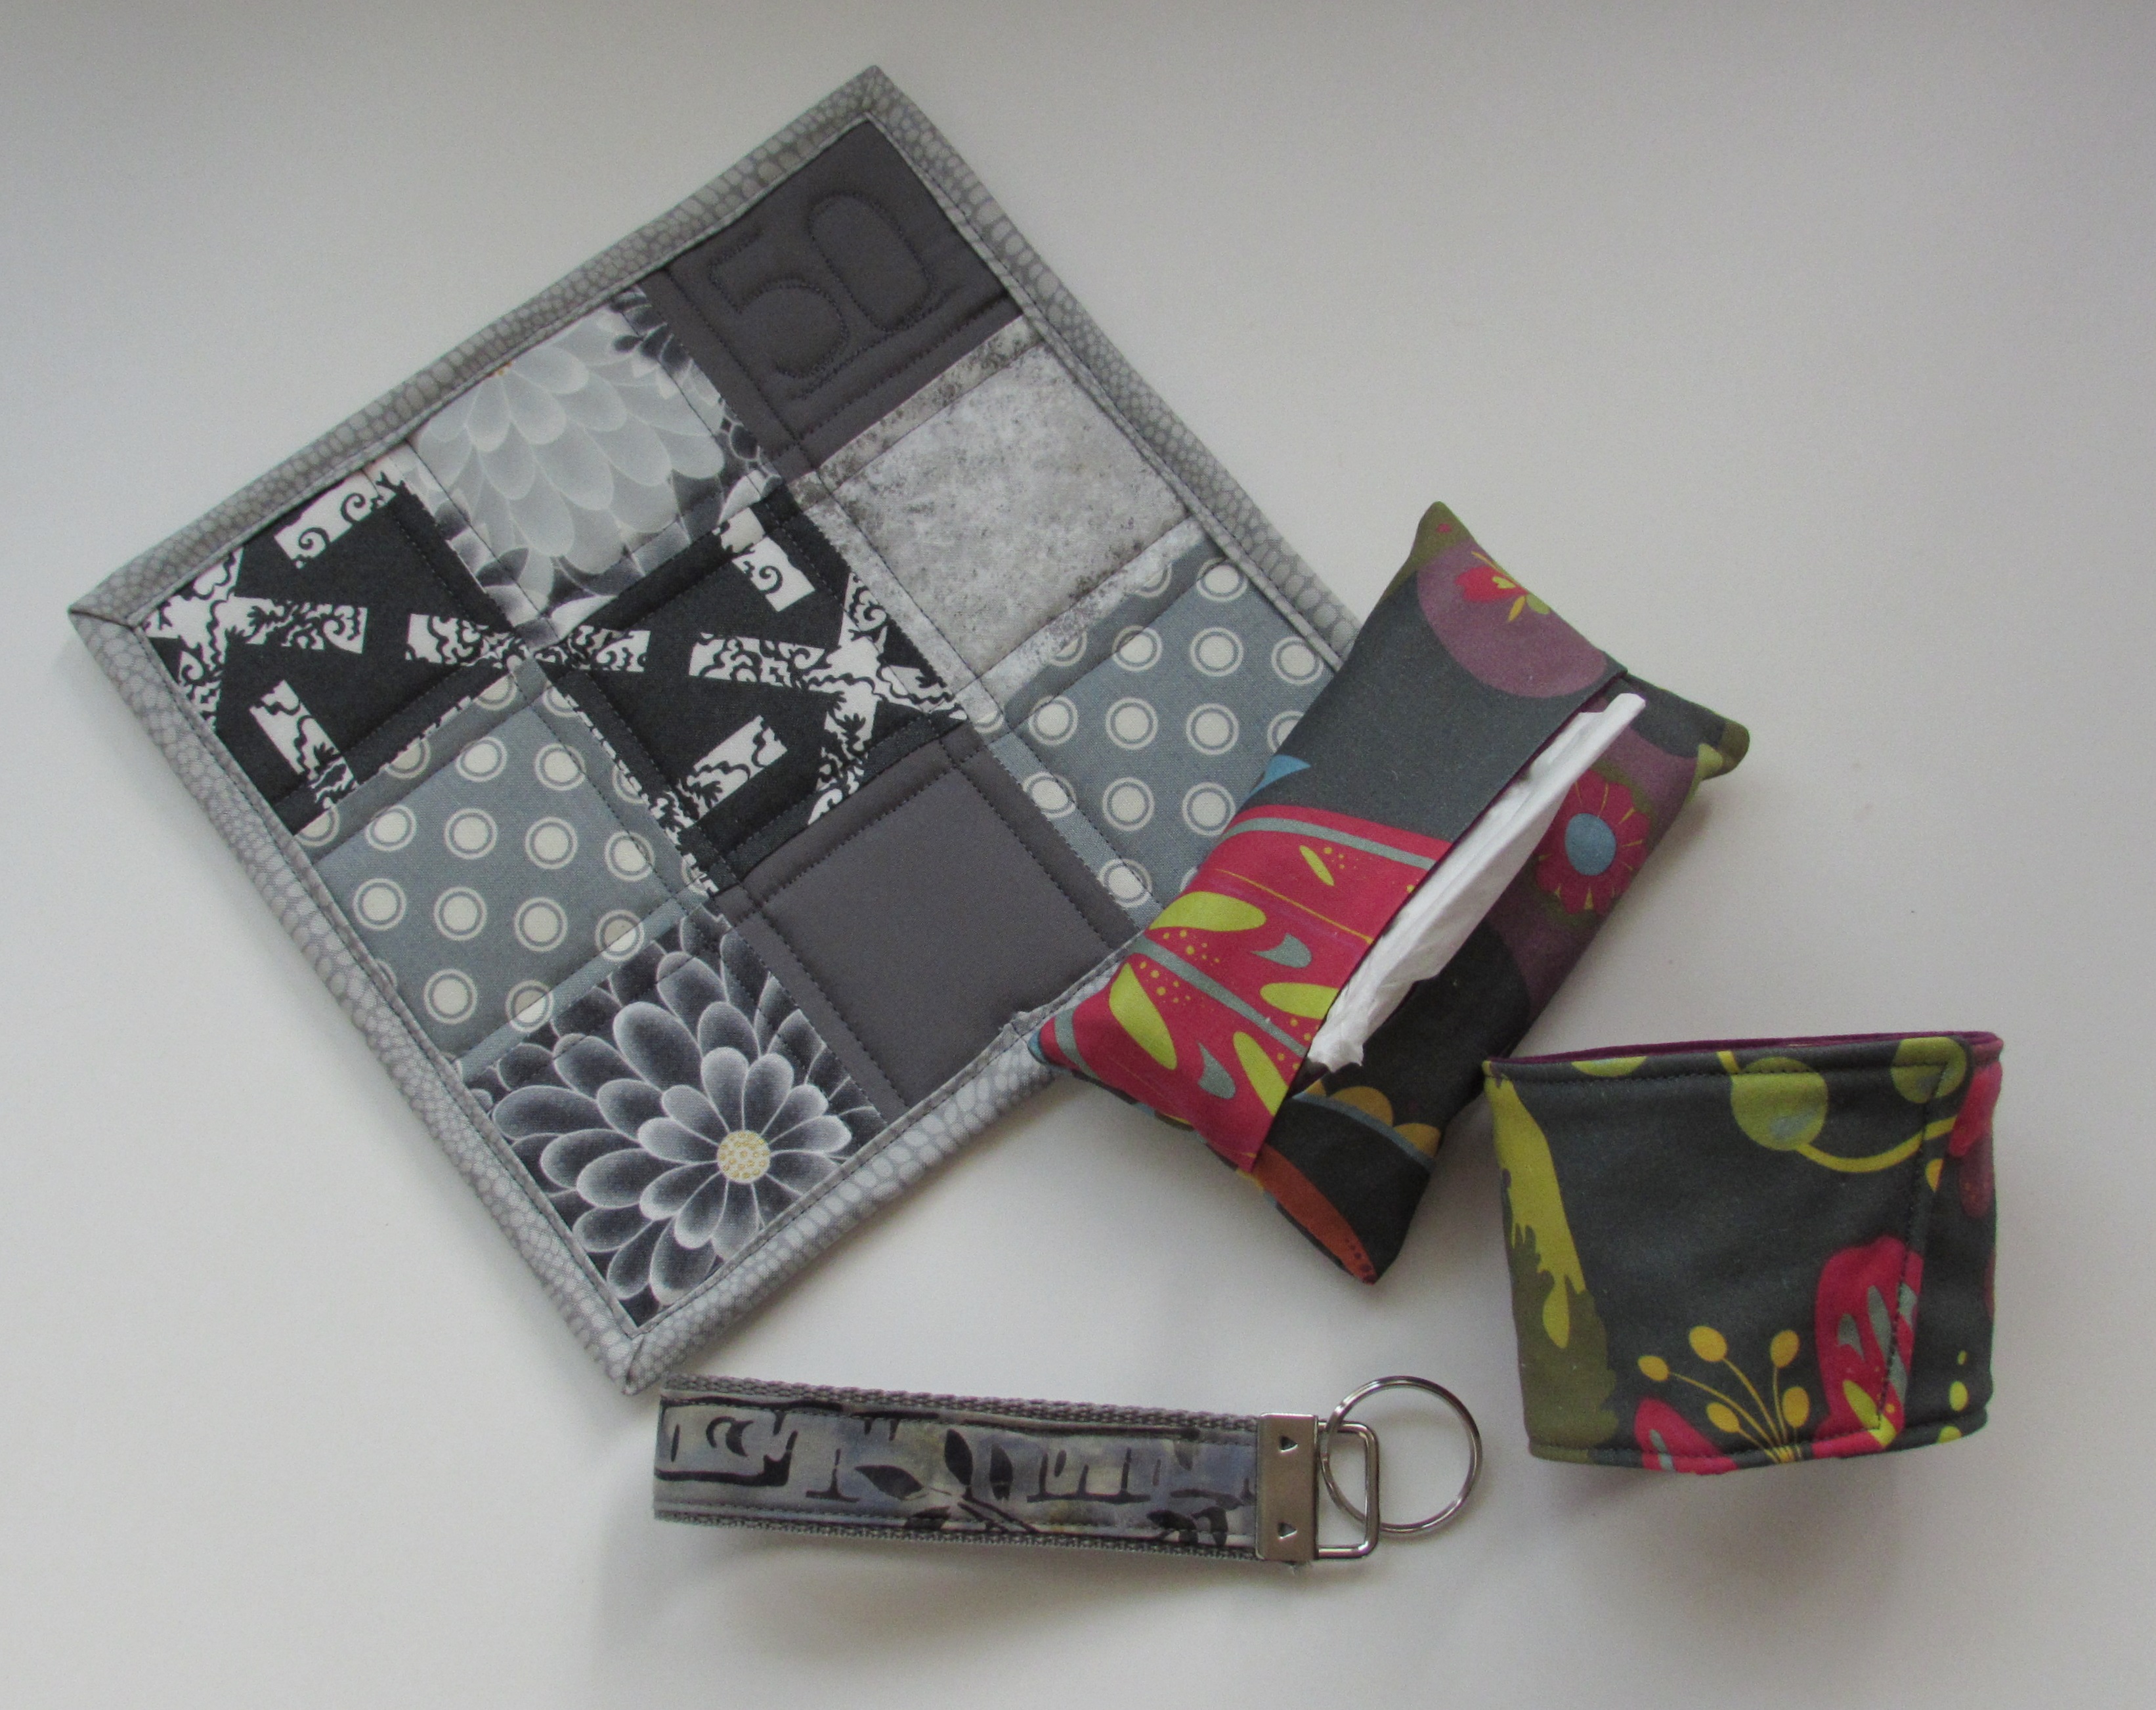
Being fabric obessesed, I headed for the sewing room and, digging through my gray scraps, made a few items.
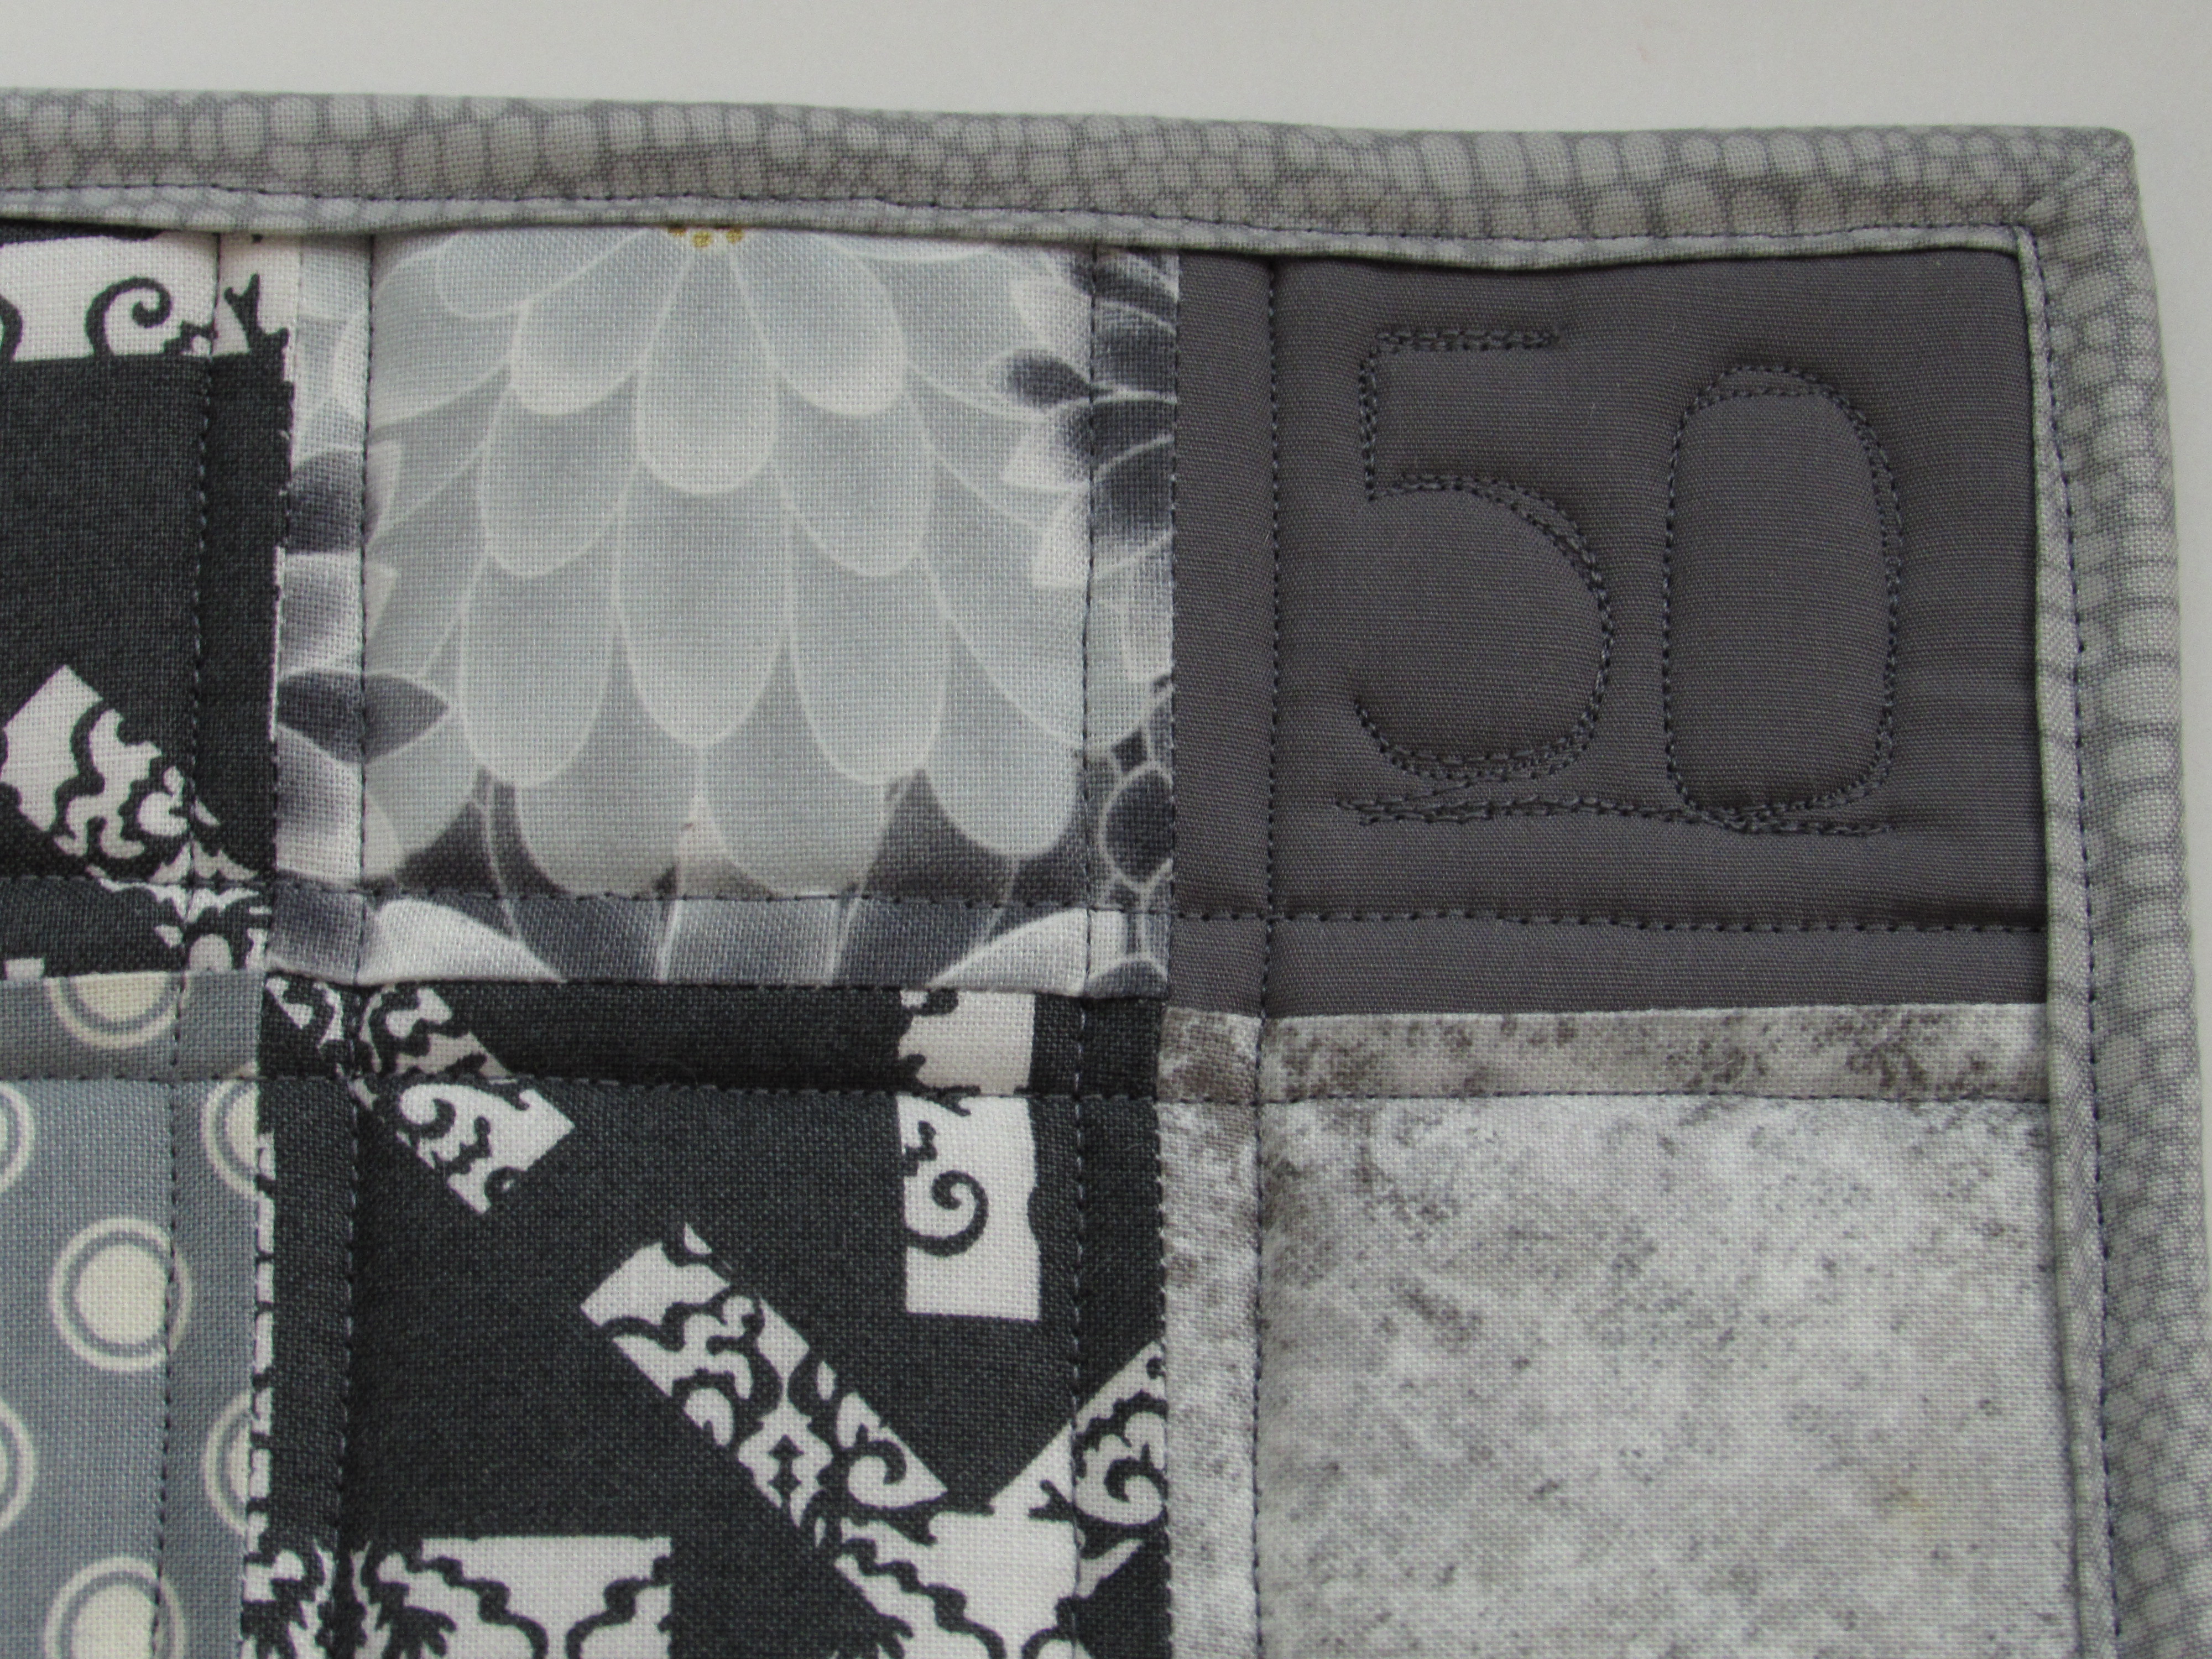
The potholder has a “50” FMQ’d into the upper right corner.
The key fob was fun to make. A few months ago I bought a bag of the hardware pieces and hadn’t done much with it until now. Also made a cozy for her coffee when she is out getting coffee, as well as a tissue holder for her purse.
I did have to part with some of my Allison Glass scraps but Alicia is worth it. 🙂
Here are the 50 items all together. Some of the highlights were: socks – lots of gray socks, Grey Goose vodka, two pretty gray mugs, bracelets, a knit beanie, flip flops, Earl Grey tea, denture cleaner, silly magnifier glasses, a book on becoming a mother later in life and a pregnancy test kit (apparently my mom is still hoping for more grandchildren??? Pretty sure that isn’t going to happen!), pretty gray towels, a picture frame and loads more. One of my favorite gifts was a plain, gray rock from my sister’s yard, all wrapped up. It cracked me up – look for it in the center on top of some cupcake liners (which were silver of course.) I also loved the tshirt in the front on the left. Awesome. It was so much fun.
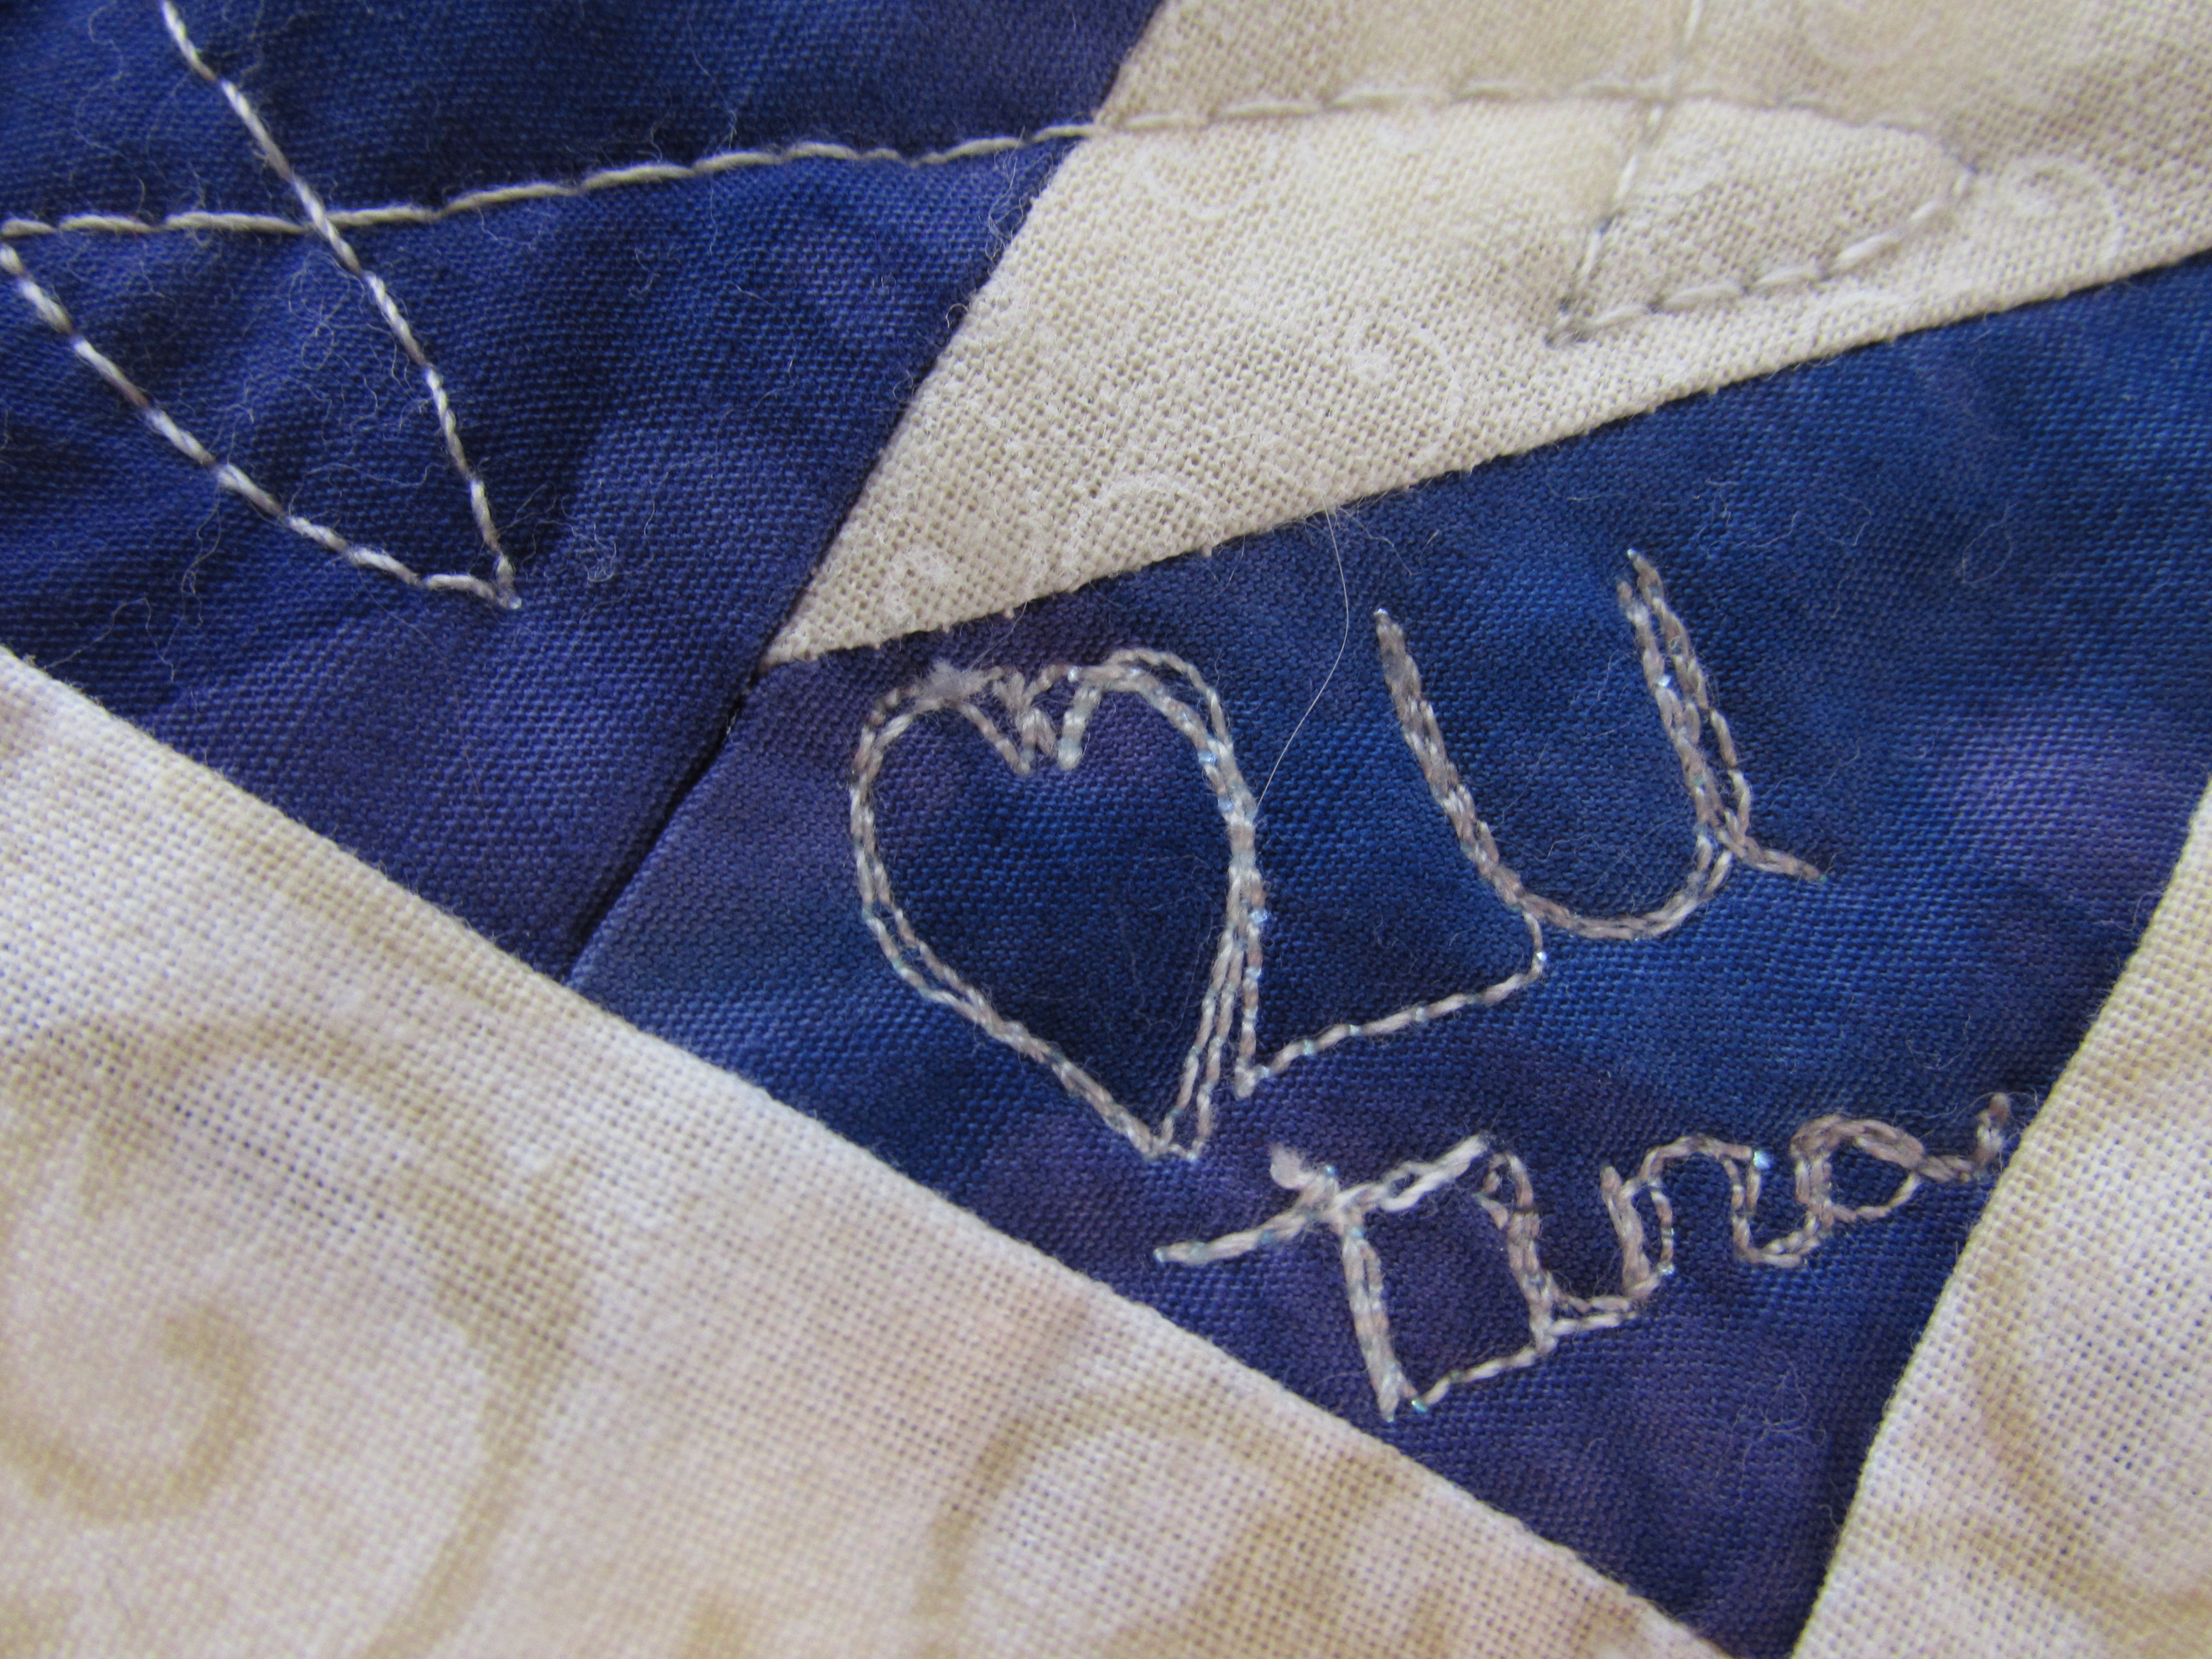
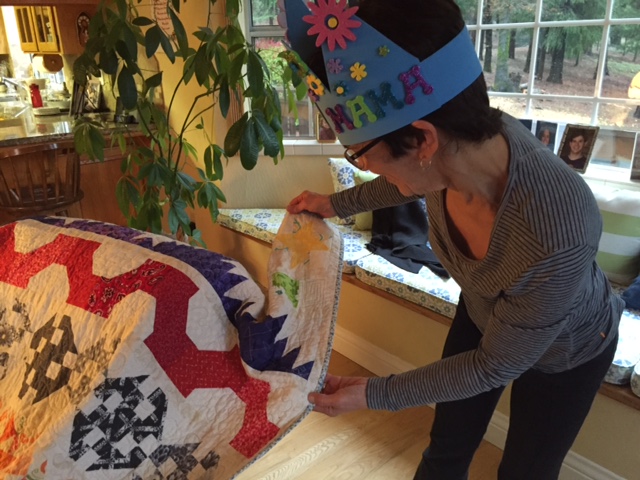
For my sister, Tina, we honored her 60th with more traditional gifts. I had been planning for quite a while to give her the Classic Stitches row quilt. She had commented several times that it was her favorite of the quilts I had made. When I quilted it, I even wrote a little note to her in one corner. (I didn’t ever post about that for obvious reasons.)
Receiving the quilt was a huge surprise for her and it made me so happy to see that she loved it.
Note the gorgeous birthday crown she is wearing. My sisters and I got a little crazy with some glue and stickers and made these gorgeous birthday crowns for the girls.
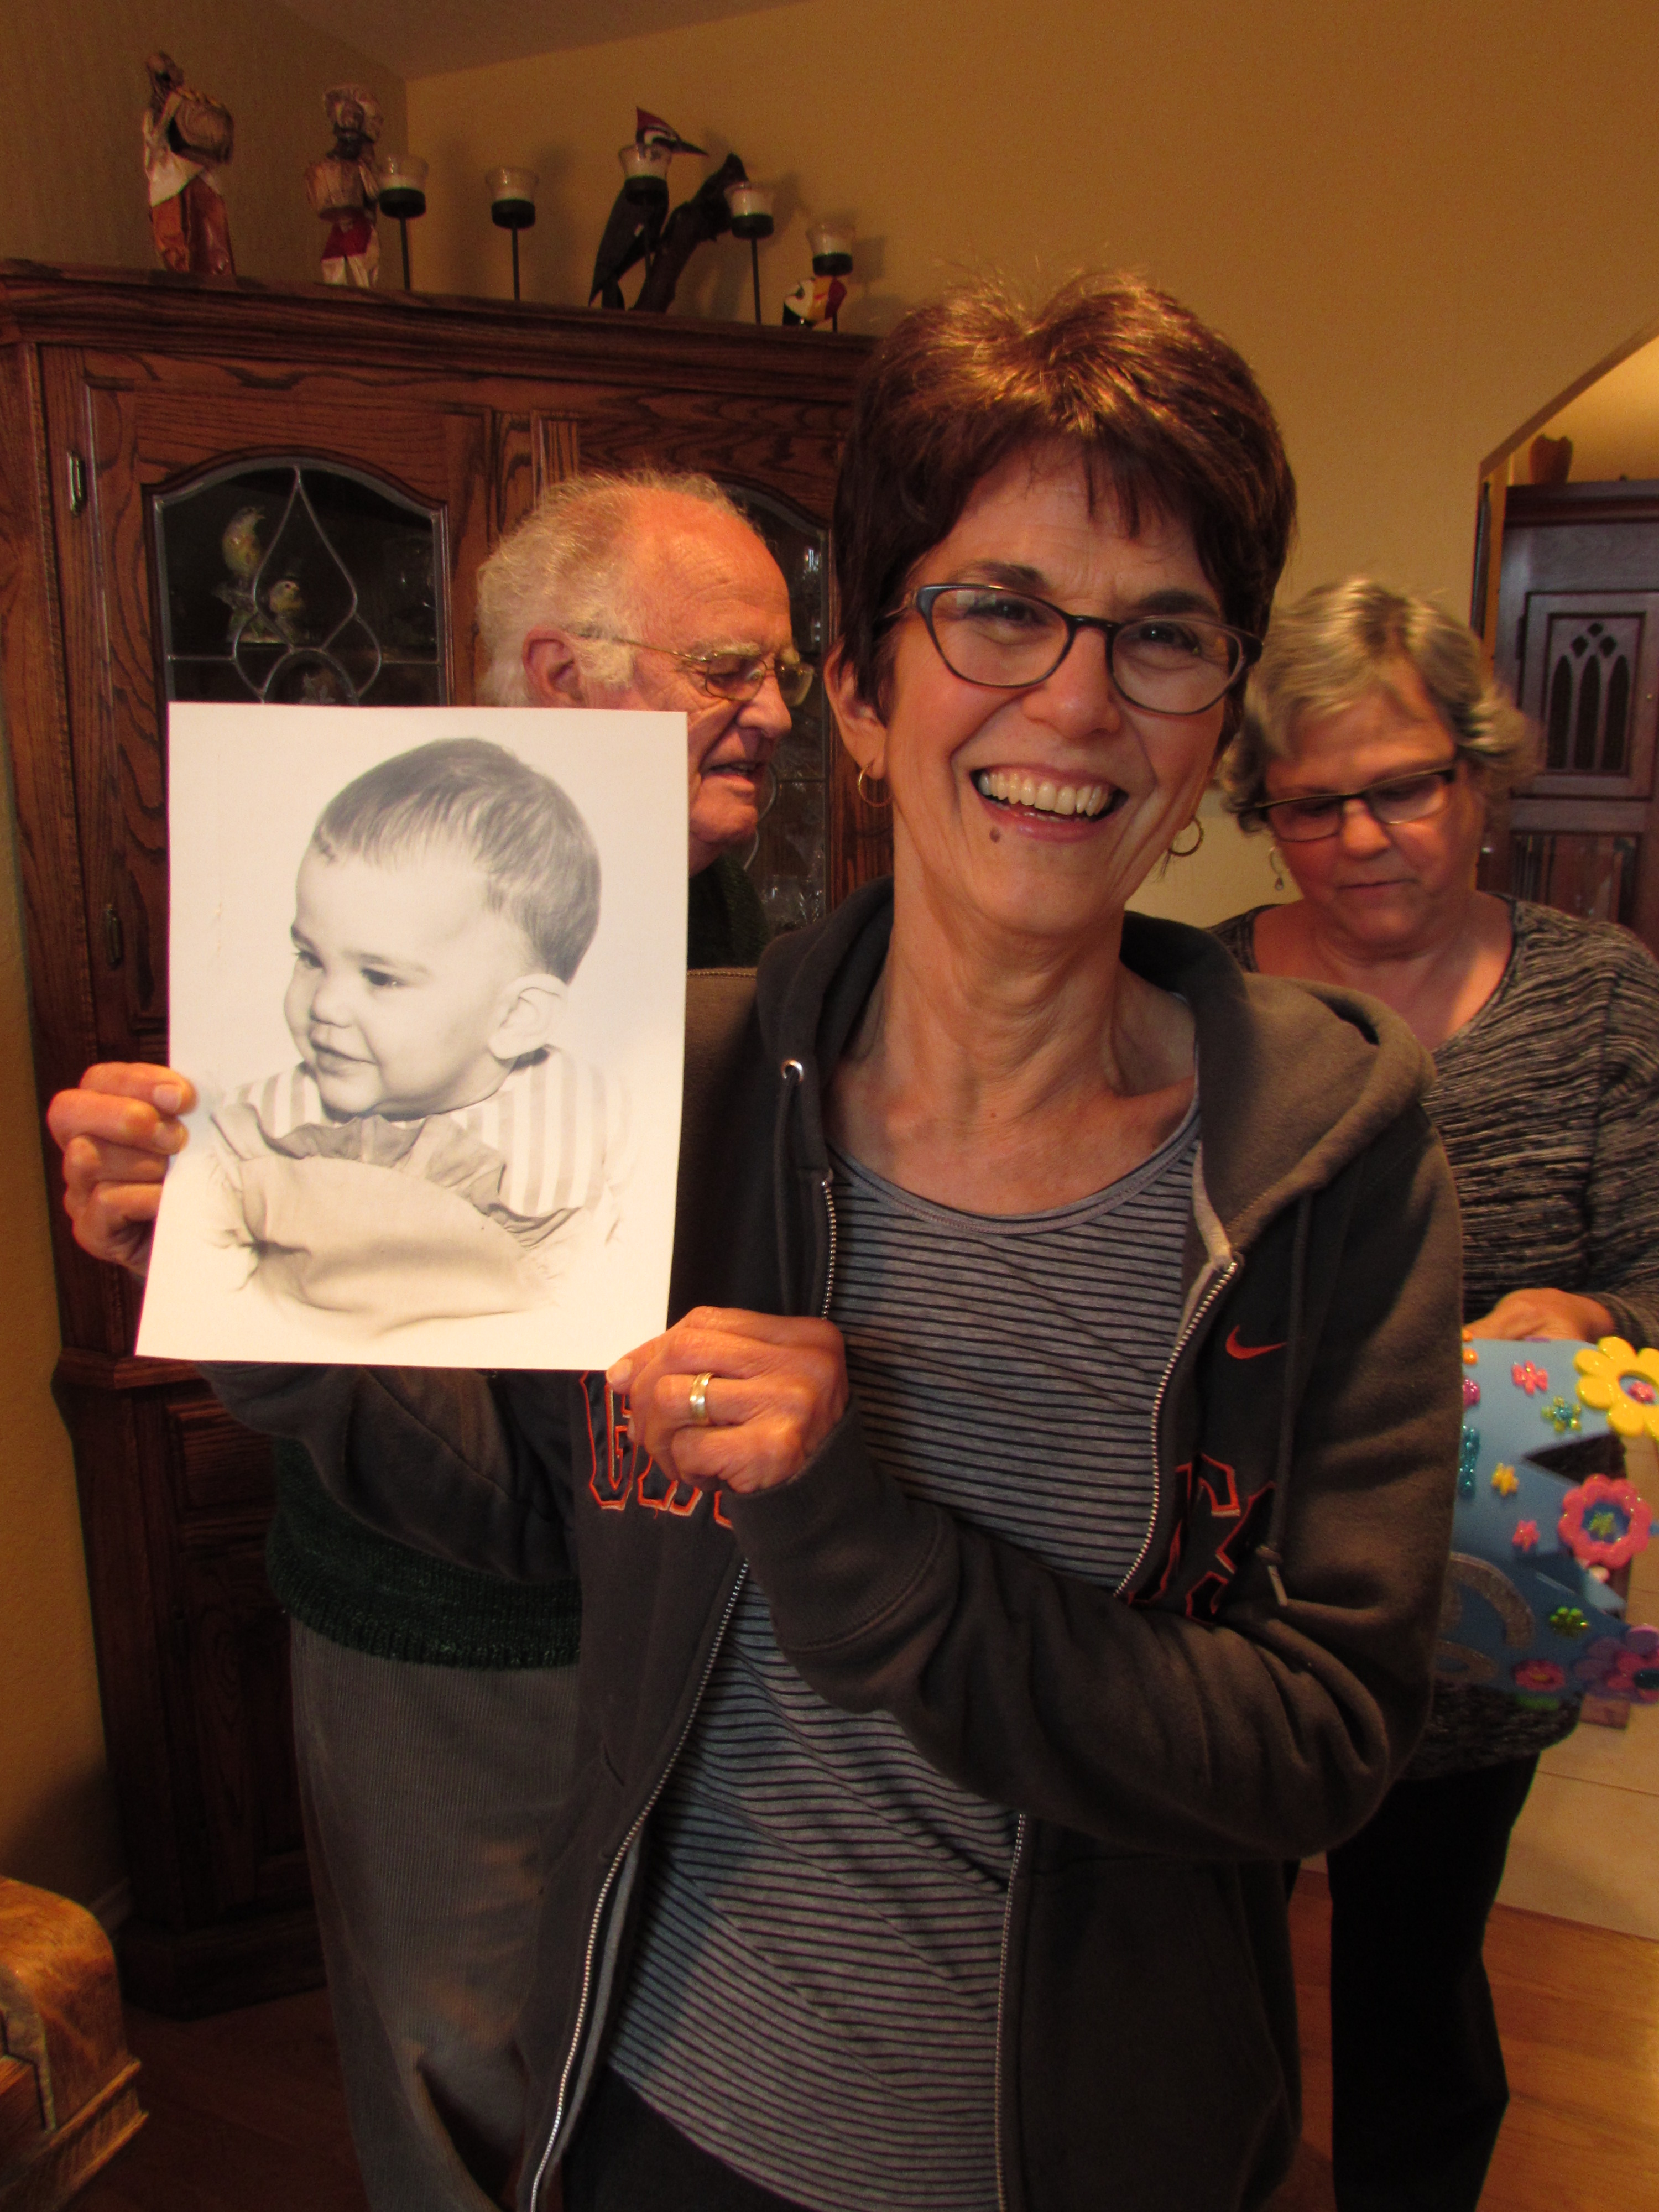
Mom and Dad did a great job setting up the party at their house with delicious food and festive decorations. Mom pulled out their baby pictures and I got a quick picture of each sister with her baby photo.
It was a perfect party that could only have been improved if the sixth sister were able to make it. We missed her. It is so hard to get everyone here at the same time.
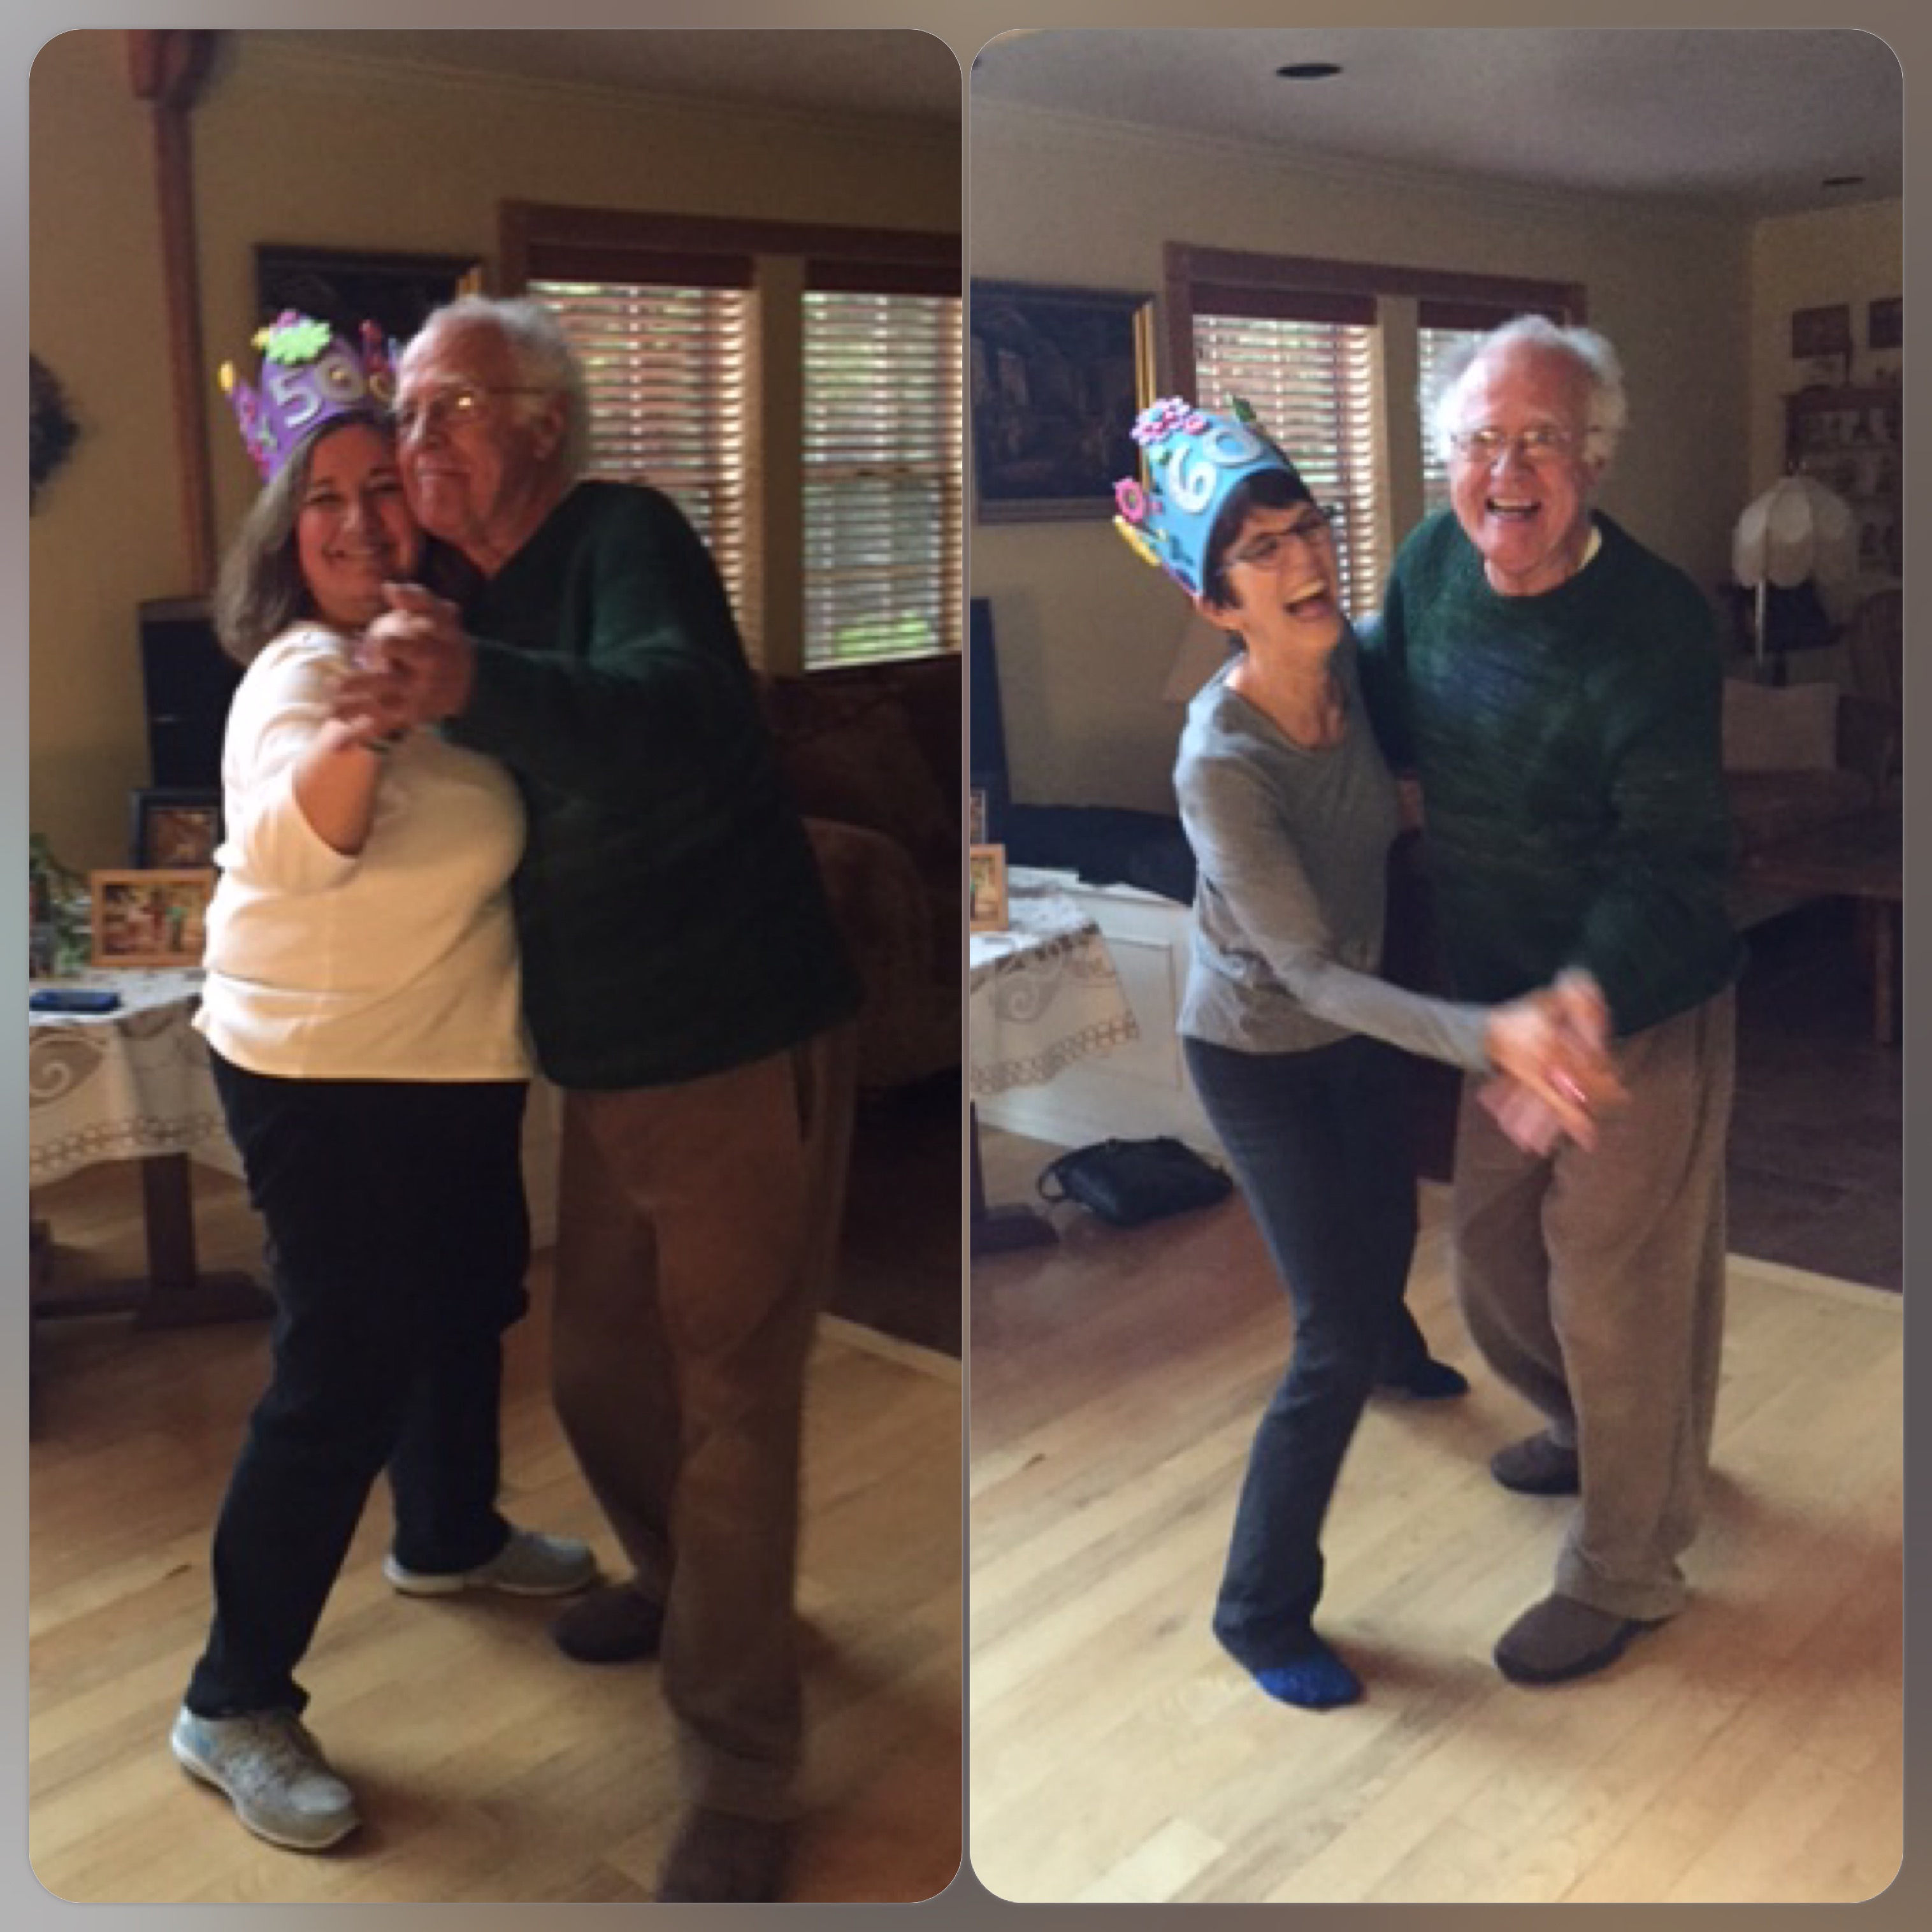
We also made a playlist of fun songs from our childhood in the 1960’s. Dad danced with each of the birthday girls.
We went back to my house on a stormy night and promptly lost power for the next 11 hours. Kind of a pain when you live in the country and rely on a well for water. At least it was later in the evening and we slept during most of the outage. The next family get together is one where I will be the missing cog on the wheel. There is a bridal shower for two grandchildren that are getting married. My family will be on vacation at the time though. Like I said, it’s always hard to find a time when the eight of us can be at the same place, at the same time. So it is important to revel in those times when we are (mostly) together.
Linking up with the usual suspects whose links are listed at the top of the page, under Link Ups.
I am not one for leaving projects unfinished. An exception to the rule, but I don’t have a huge stack of unfinished quilts in my sewing room. Putting in the time to cut a billion pieces of fabric and then stitch them together, only to leave them languish in a pile just isn’t my deal. (No offense intended. Like I said, this is the exception to the rule; many (most?) quilters have stacks of UFO’s. So it’s me, not you, ok?
I am chomping at the bit to cut into my stack of Pat Bravo fabrics that I received for my birthday last fall. I have a plan for a plus quilt and all the fabric is just sitting there, waiting so patiently. First though, I decided I had better finish one of two projects that are near completion. I started this quilt almost two years ago. I had attended a local quilt guild meeting and we had the opportunity to listen to Sandy Klop talk about her American Jane fabrics. She did a great trunk show. I got totally sucked into her adorable lines with their Americana feel and bought several 1/2 yard cuts.
I quickly cut into them, with the intention of making a traditional quilt that I had tagged in an old copy of QuiltWorks magazine. Designed by Debra Feece, it is called Square Dance. Basically a simple quilt using squares and strips. I worked on it for a while and somehow it was pushed aside until last week.
The pattern is so simple. One would think that my blocks would have been the precise 9 1/2″ square that they were supposed to be. Ha. Not so. When I took the project out to finish, the blocks looked off to me. They measured anywhere from 9 1/8″ to 9 5/8″. Didn’t I bother to use a ruler to cut my strips? Maybe I forgot what a 1/4″ seam looked like? Who knows. But I was able to get them to a mostly consistent 9 1/8″ and they went together nicely.
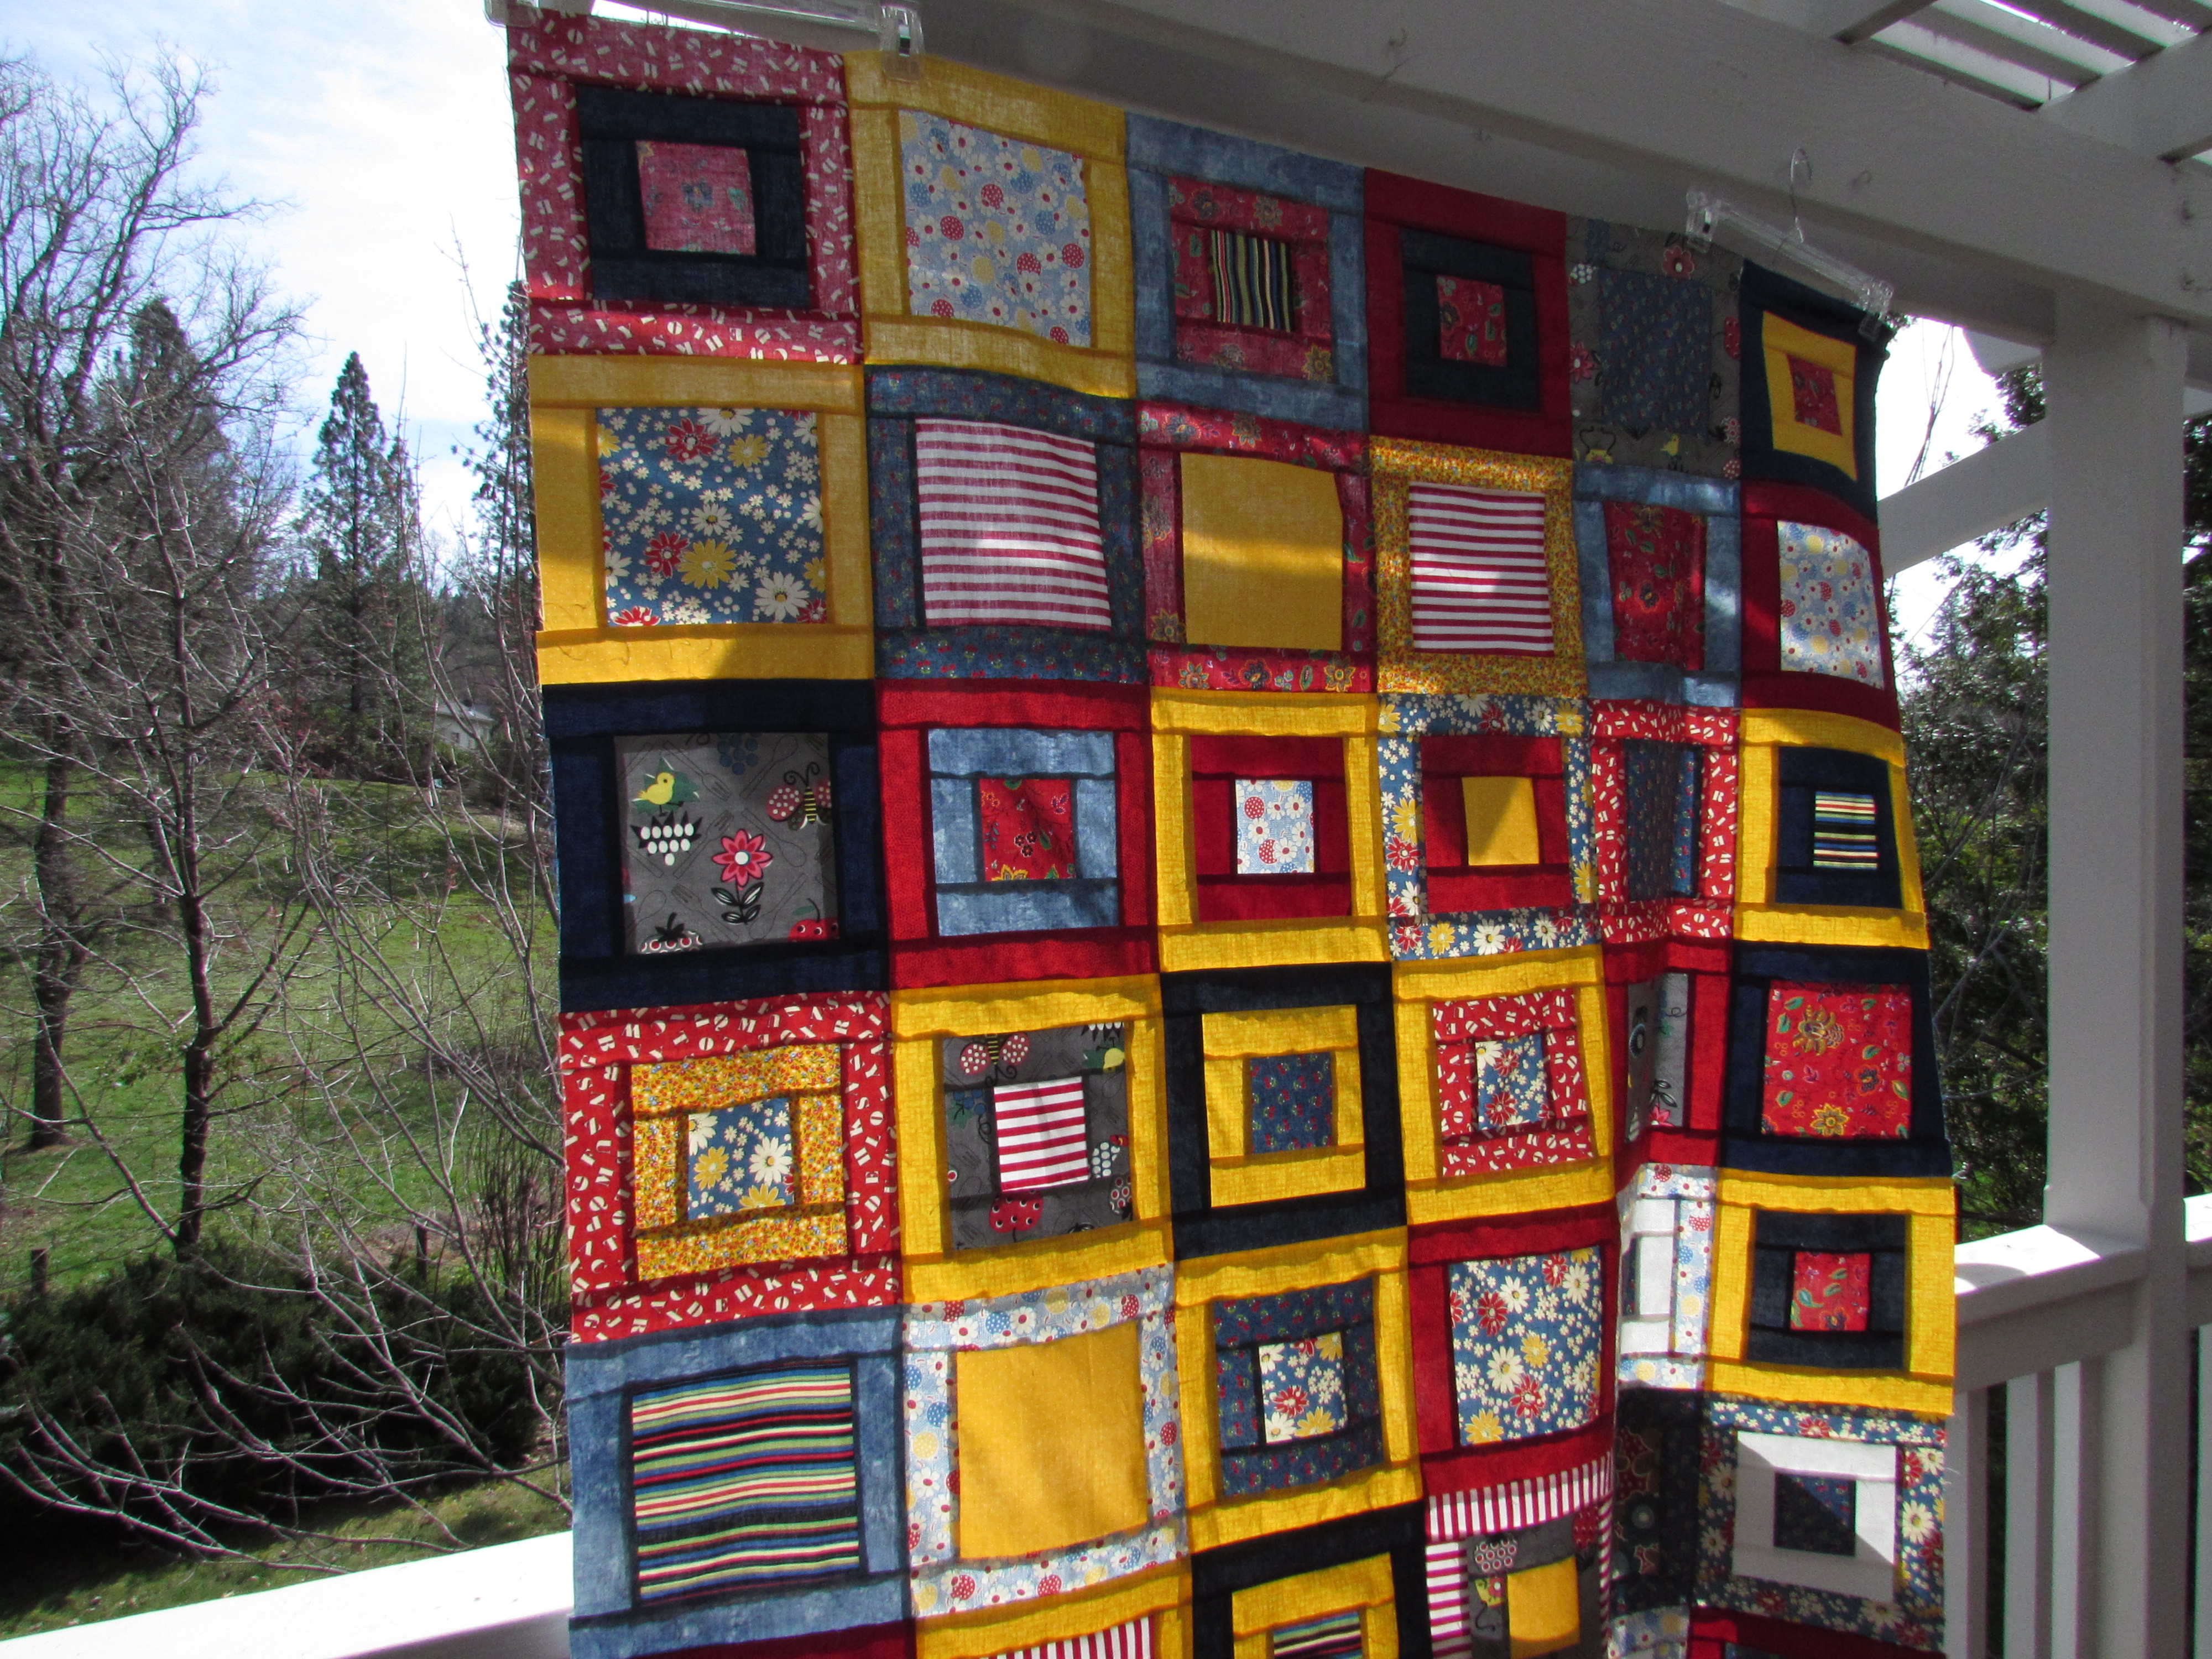
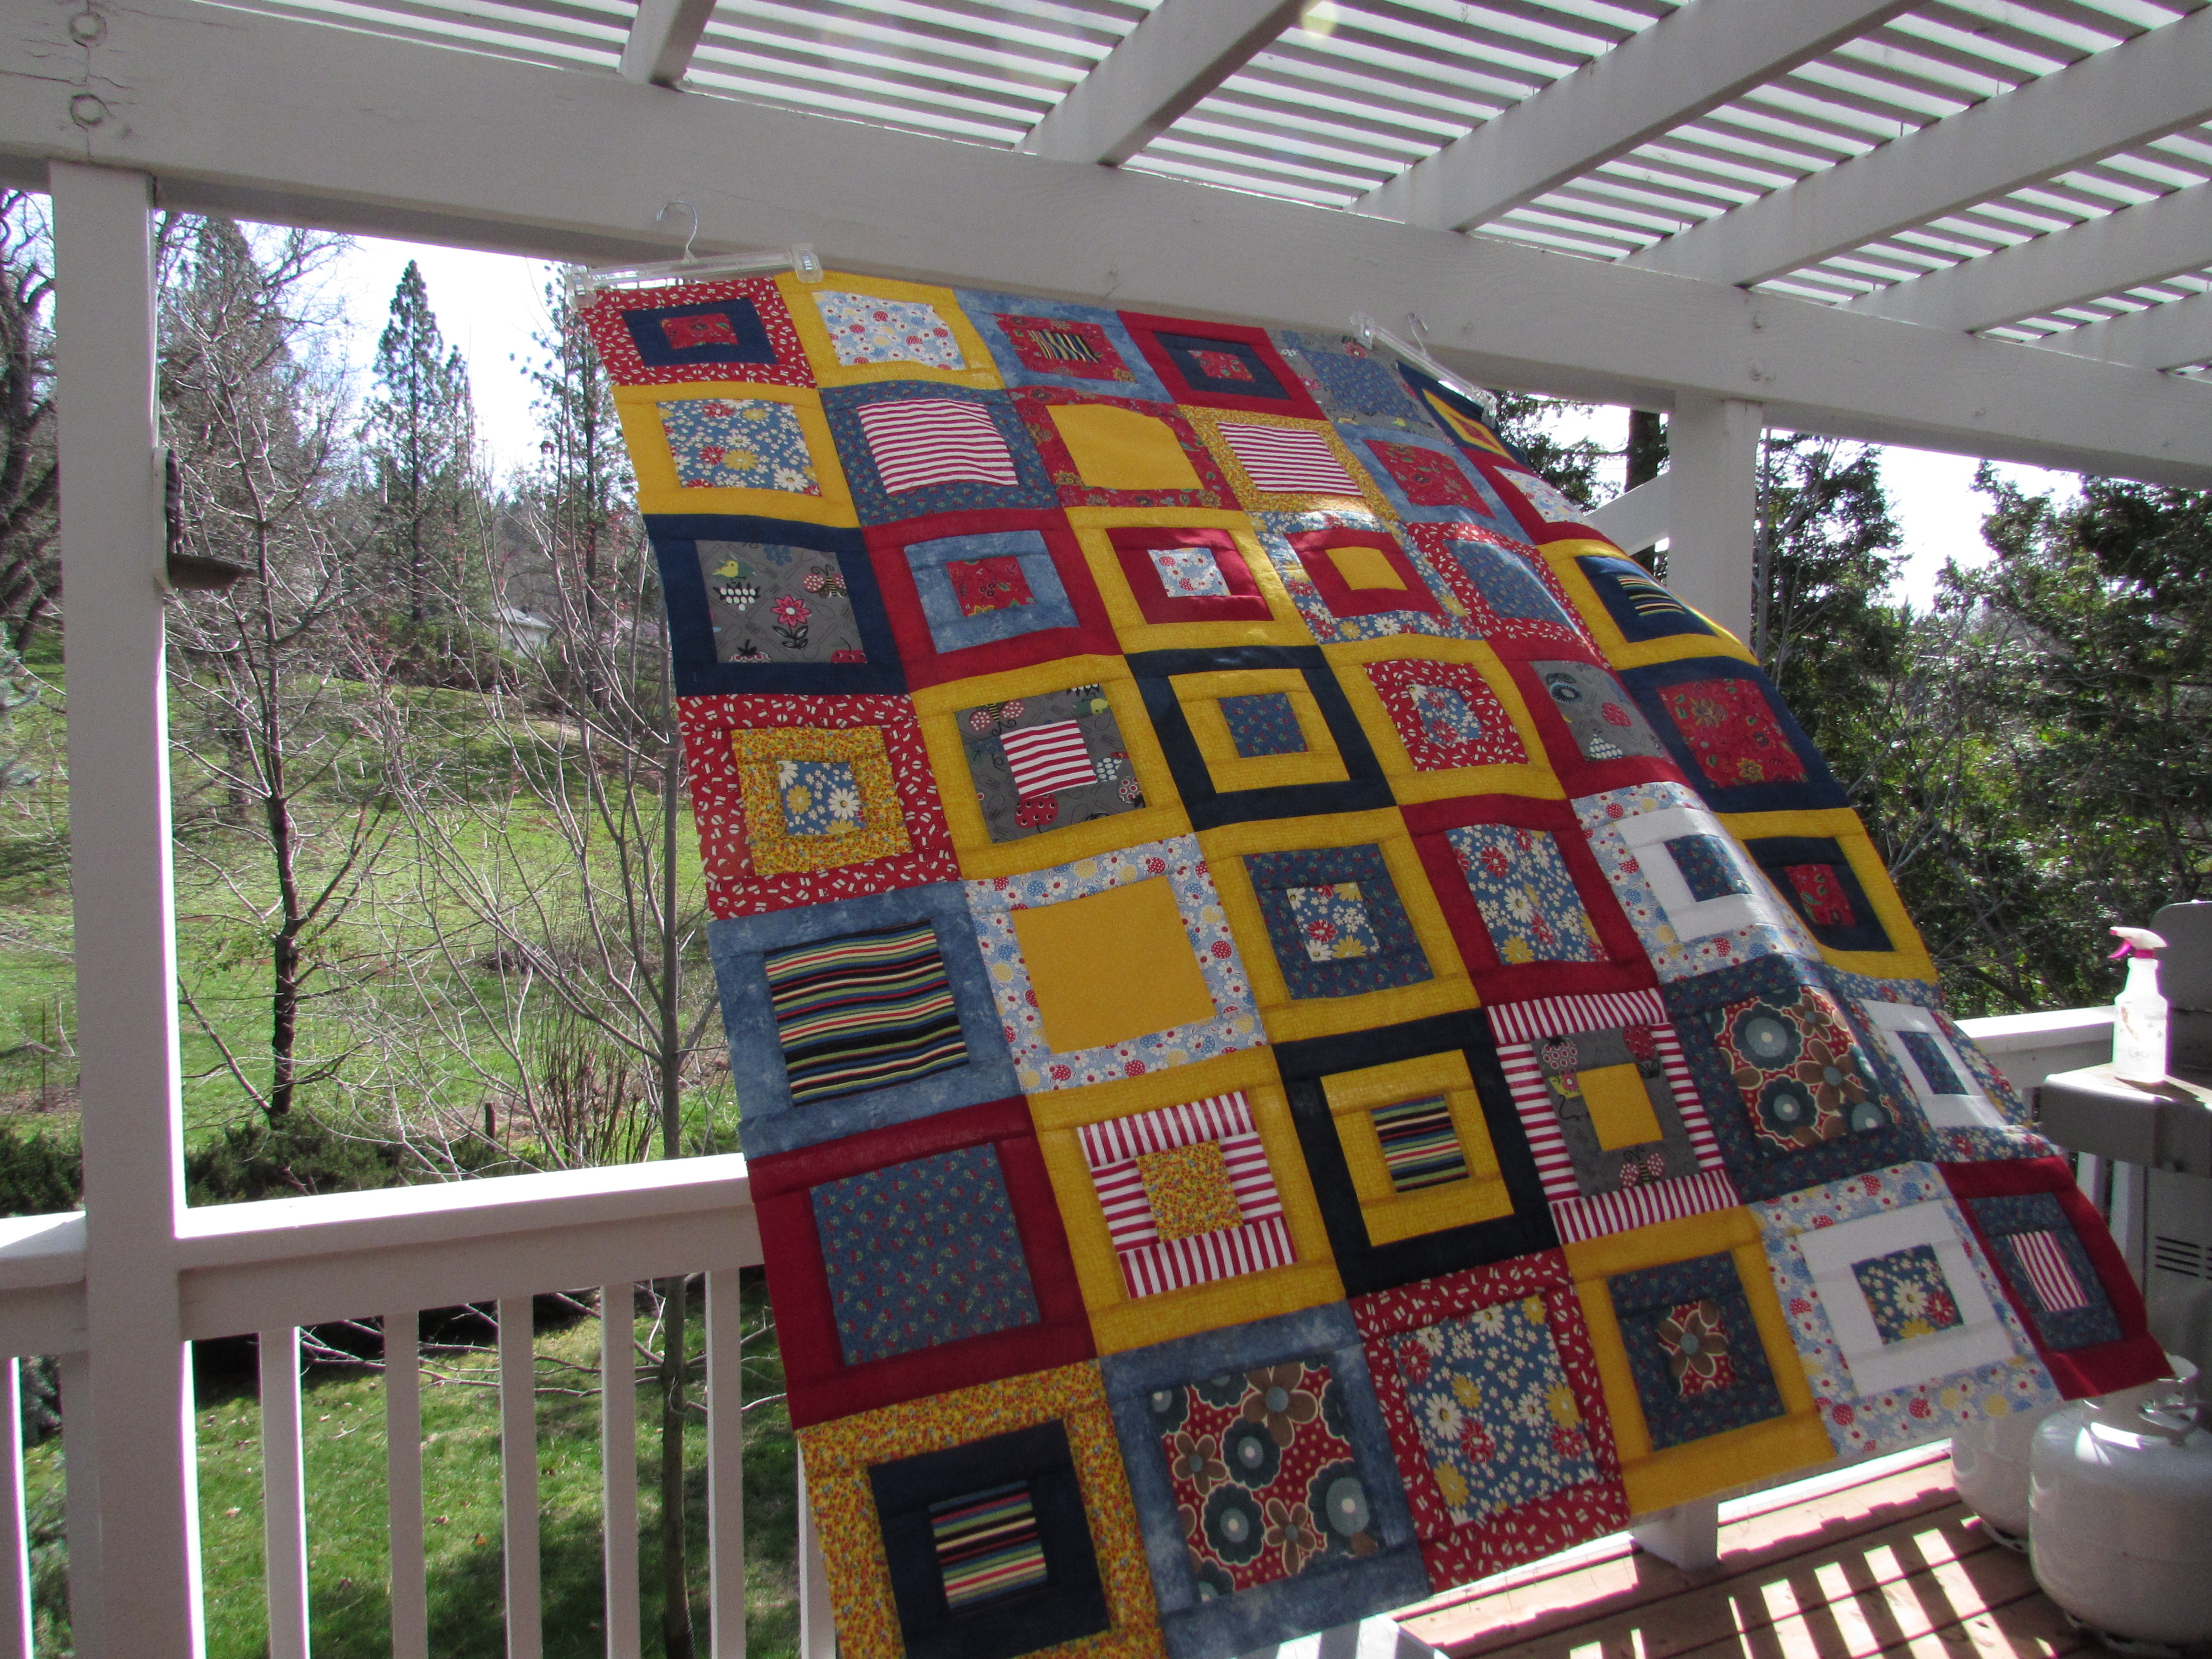
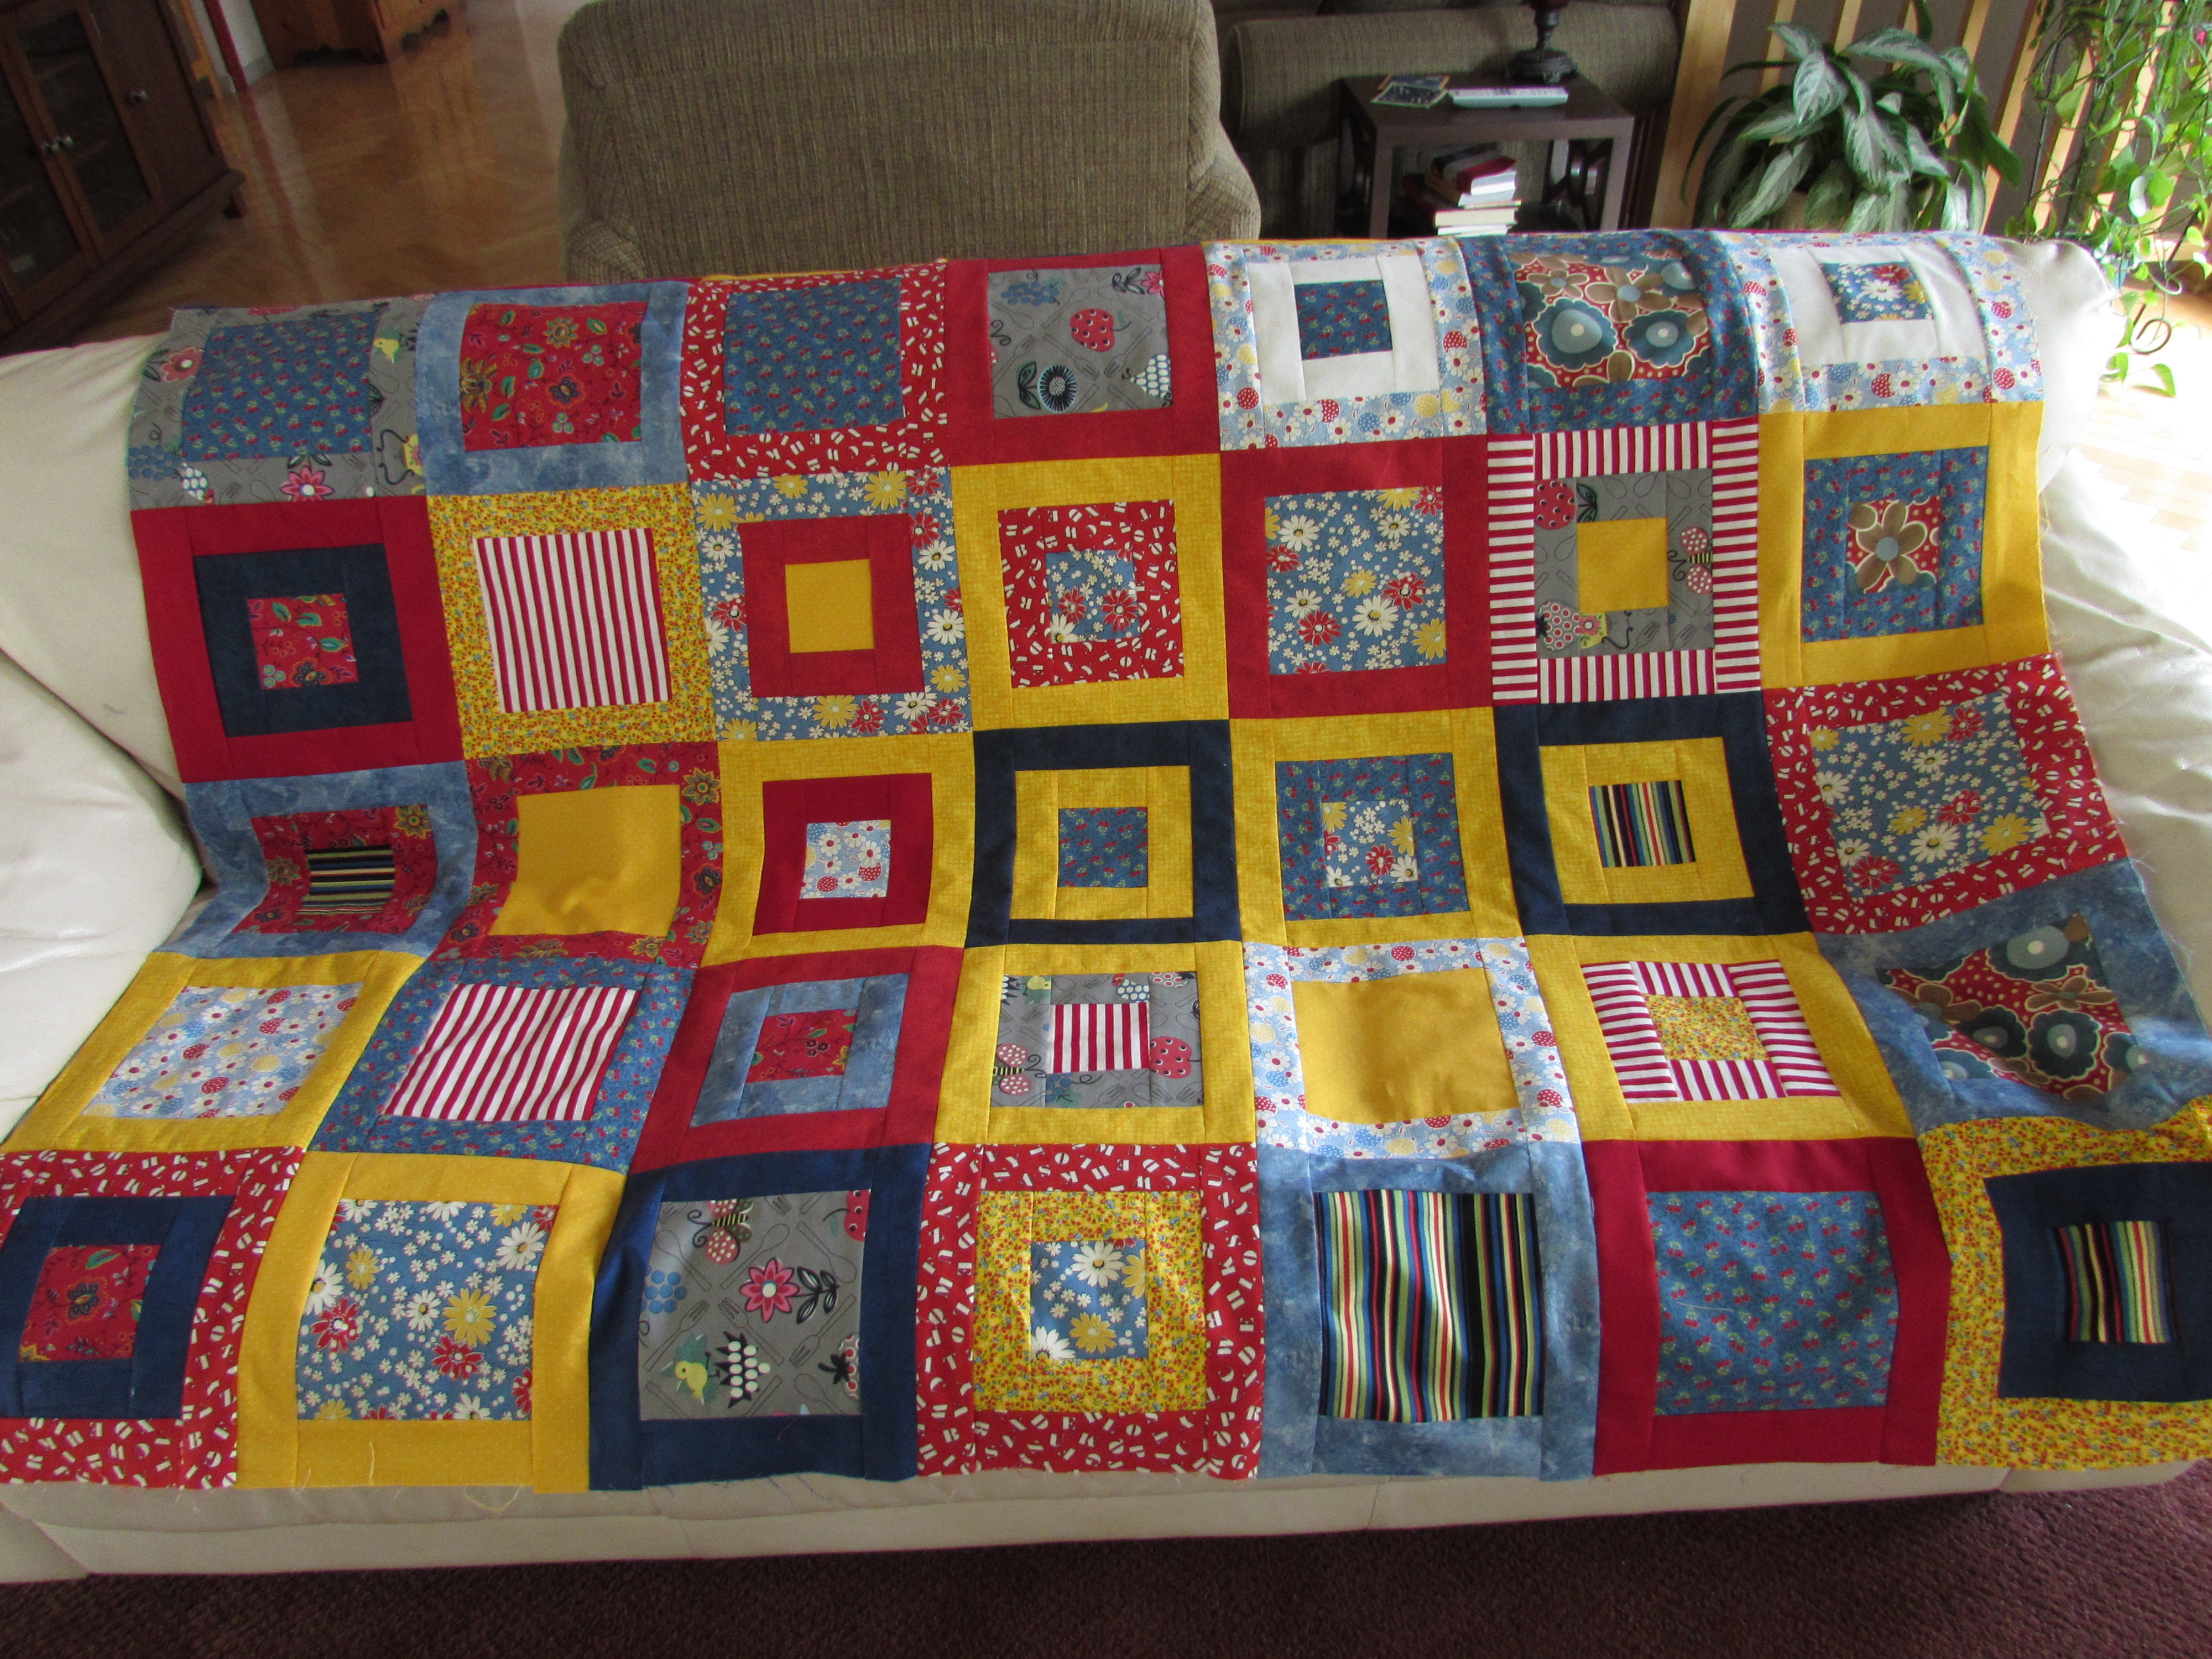
I think this quilt top is adorable. I haven’t made anything with such a Folk Art feel to it. Ray came into the sewing room the other night and said it looks patriotic. Made with (mostly) the three primary colors, it is so cheerful.
There is a lovely breeze out today (which is hopefully blowing a storm my way – we are supposed to be heading into a rainy spell) which made taking photos kind of tricky. Here is one in the house where there is significantly less breeze!
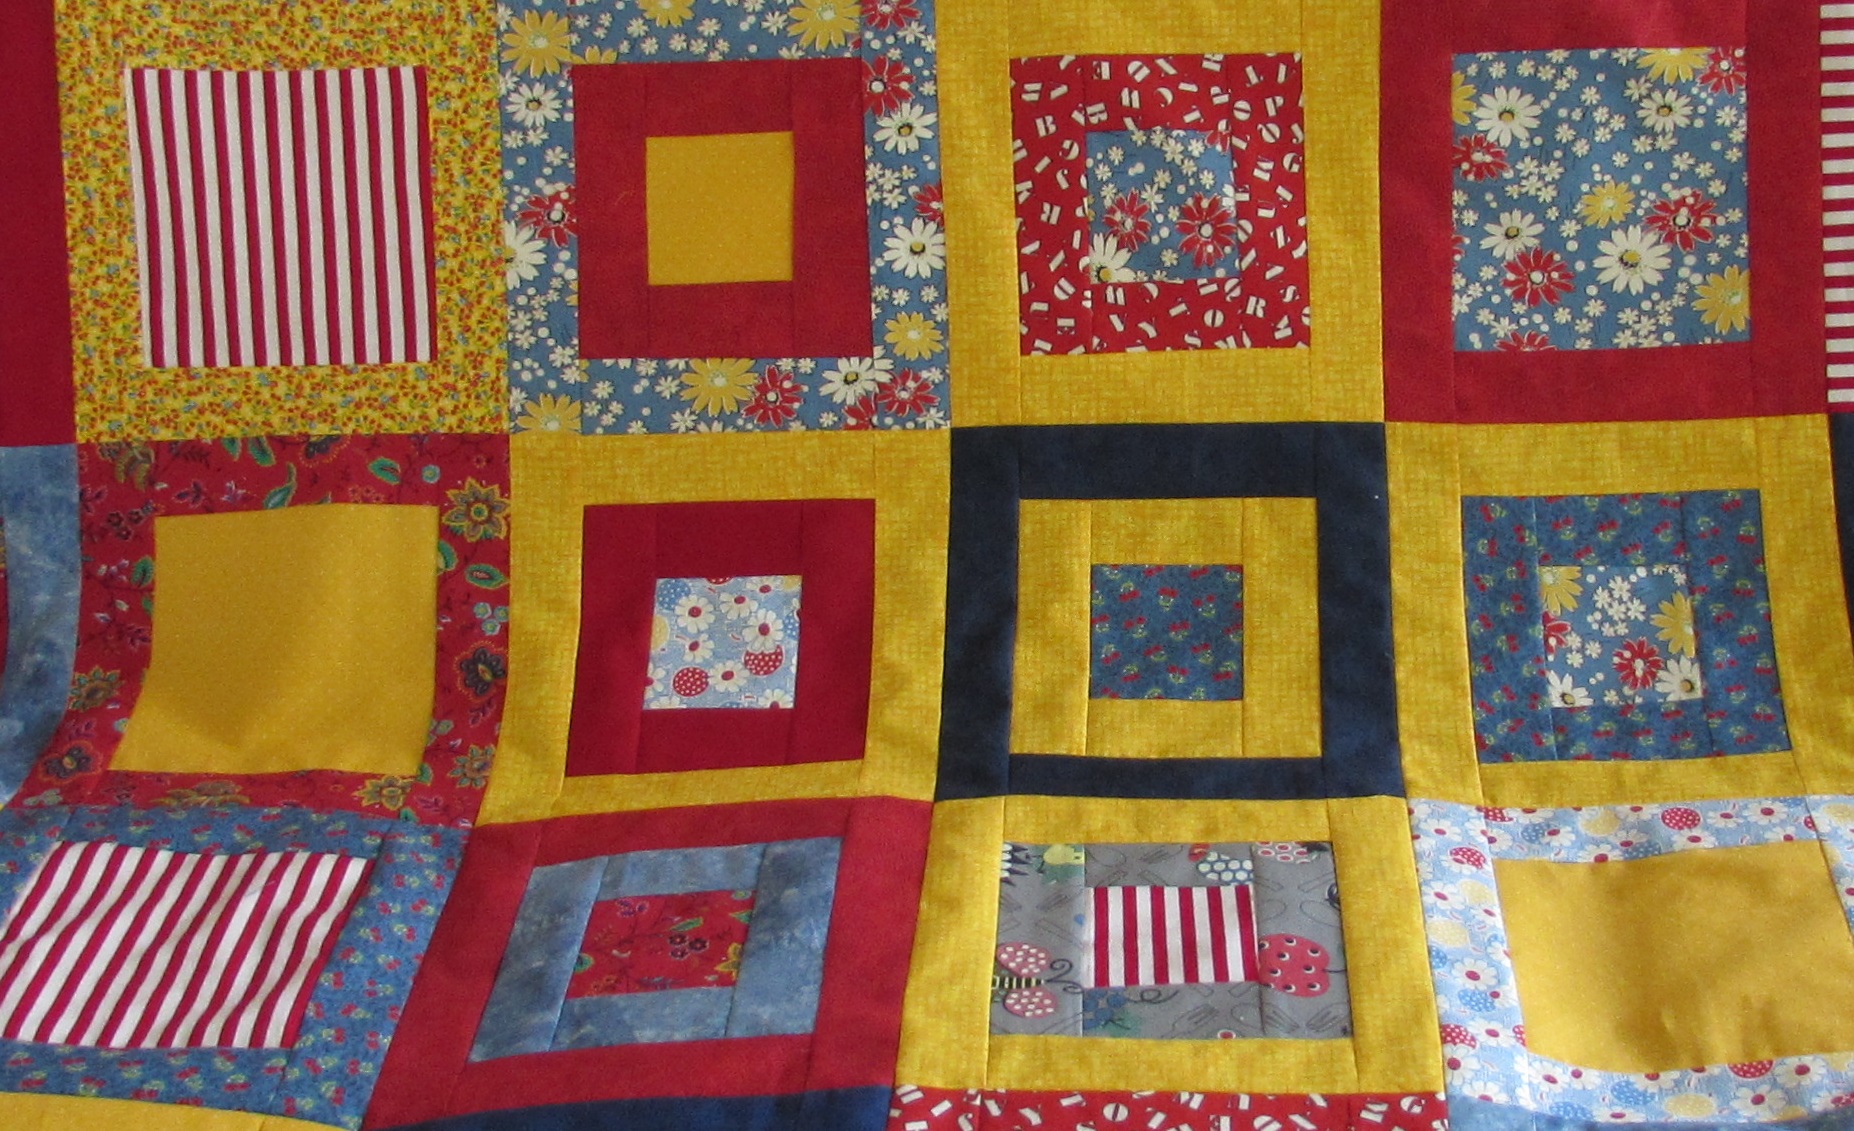
I love the red and white stripes and the red alphabet print. Traditional and so dang cute.
I am anxious to get this one basted and ready to quilt. I pieced a backing with my leftovers plus a couple of pieces from my stash. I just need to buy the batting. The squares will be fun to quilt over using a spiral or loopy pattern.
Hopefully I will be back soon with a full finish on this one. This weekend is going to be a no-sew weekend. My sisters (well, 4 of the 5) will be here for the weekend. Yay!!! I can’t wait to see them. Ray and Julia are on their own up in Downieville this weekend while we all stay here and hang out. Hope you are having a wonderful week with at least a bit of time spent at the sewing machine.
Linking to: Finish it Up Friday, Can I Get a Whoop Whoop, Let’s Bee Social – all of which can be found at the top of the page, under Link Ups.


