After finishing my last quilt, I made a plan to make a bunting with the name of my second grand daughter on it. Her father made mention (not so subtly) that I made one right away for the first grand daughter but have not made one for the second who is now six months old. (I am fairly certain the baby hasn’t yet noticed this injustice but still.) Well, it still hasn’t happened.
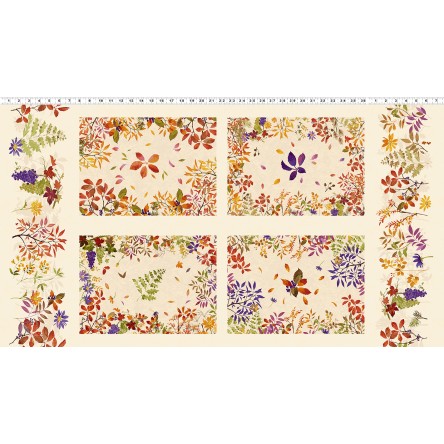
I had ordered some fall fabrics from Clothworks and they arrived last week. One of the bolts has a panel for making placemats and I really like the colors of the fabric. The line is called Autumn Air and was designed by Jim Ishikawa. They are just perfect for my dining room.
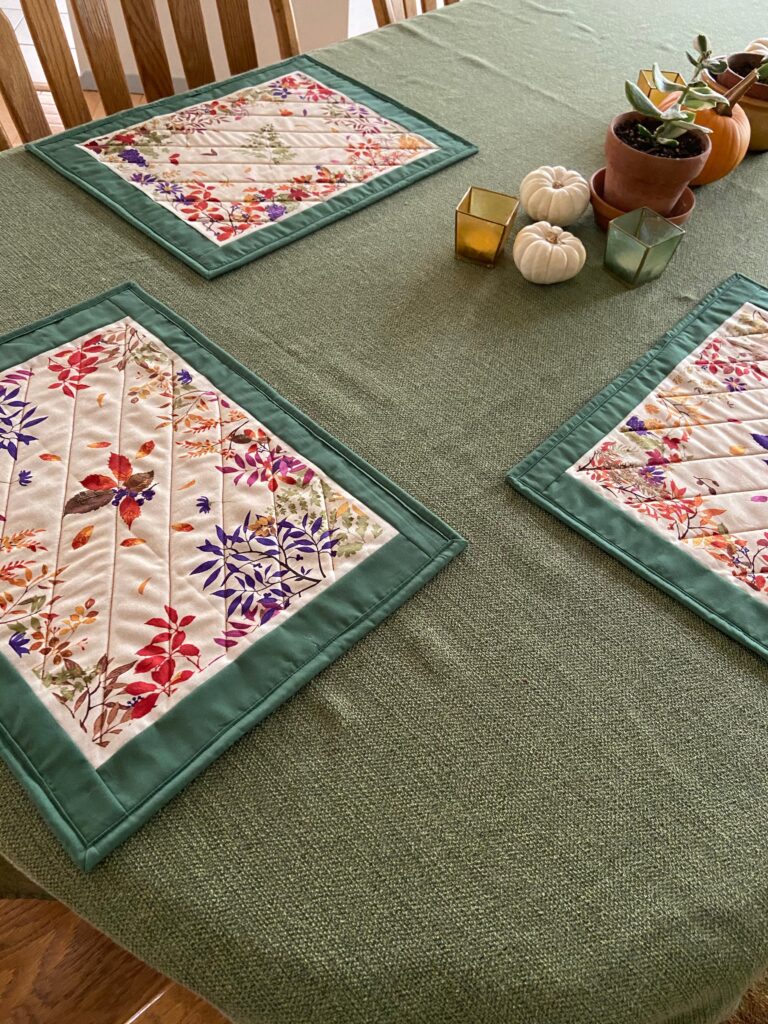
The panel includes four placemats as well as some extra floral print. I cut off the floral print and set it aside for a future project. After looking at the solids I had on hand, I decided to go with green. Adding some borders was quick and then I cut a tone on tone cream color fabric for the backing.
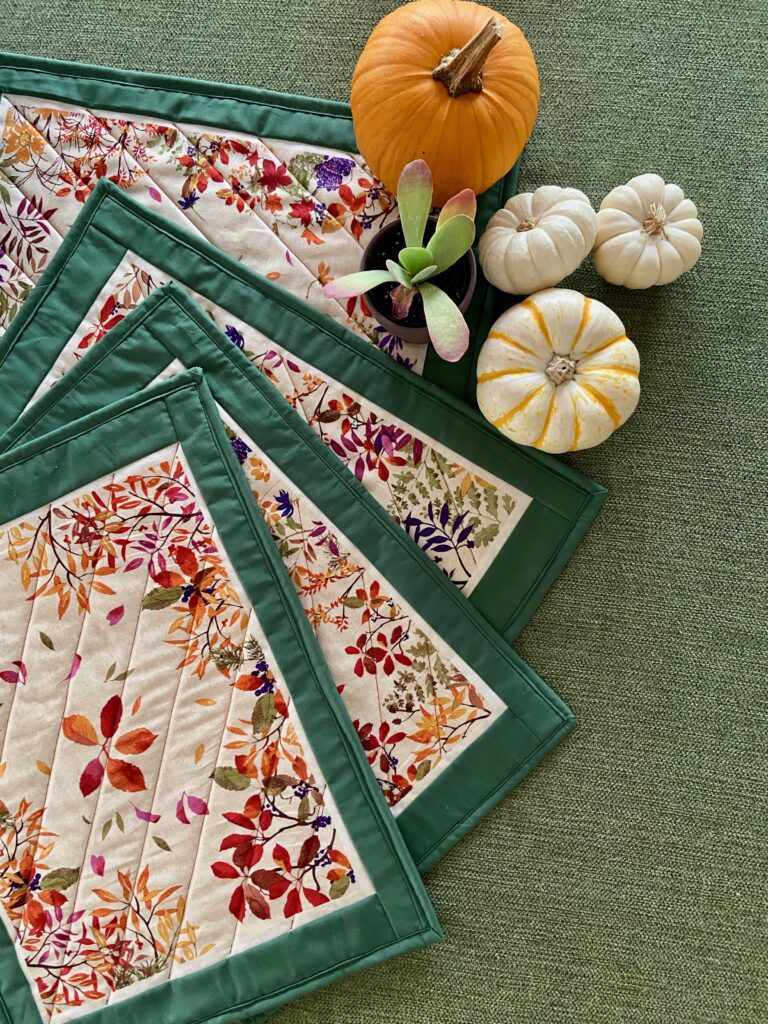
For quilting, I did diagonal lines, 1.5 inches apart on the floral section. I left the borders unquilted. With the borders, the mat finishes at 13″ x 17″. I think these are super and will be perfect to use each fall.
This quick make was quite satisfying. I am so over summertime and hot weather (it is 86 degrees and still smokey outside as I type this.) Using fall fabrics allowed me to pretend it was cool and crisp outside (as long as I didn’t look out the window anyway.)
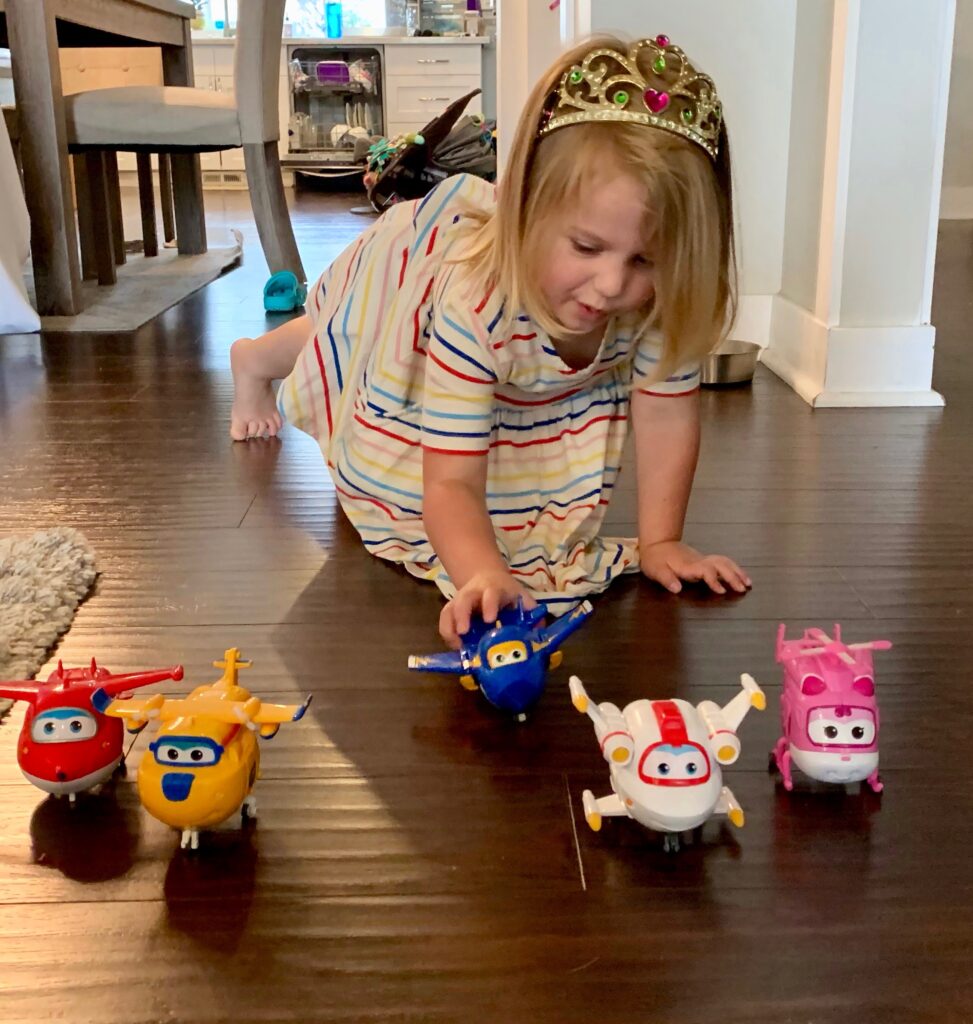
My sweet girl and her new toys.
I will leave you with this to make you smile. My grand daughter’s little friend has a really cool older brother. You know how cool a six year old can be! He wanted some new Matchbox cars and his mother said he could sell some of his current toys at a garage sale to make money for what he wanted. My grand daughter went ‘shopping’ there and snagged these new toys. She was thrilled. Most of her things are still in storage until they move into their new house and I am sure she was bored of the same toys she has been playing with in the rental.
We are going to head up there soon to help watch the kids while they move to the new house. My husband is going to help out with a few electrical projects before they move in. Hurray for another visit with my favorite girls! (I know, I know…. I had better go work on that bunting. I don’t want the baby to learn to spell before her name is up on the wall.)
Between the Covid safety measures and the wildfires out here, our family is basically stuck inside and at home. The smoke continues to pollute the air and our Air Quality Index has ranged from 175 to 352 (the highest I have seen it) over the last month. (As a point of reference, 0-50 is considered healthy, clean air). In our area, the fire that started this mess began on August 14th. Fortunately, that fire has been dealt with but there are myriad other fires up and down the whole west coast, keeping the air very unhealthy.
Having to stay inside so much gets boring and the three of us get antsy. We have been trying to do projects, read a lot, watch tv and play an occasional card game to pass the time. Over the weekend we got crafty! Want to see what we made?
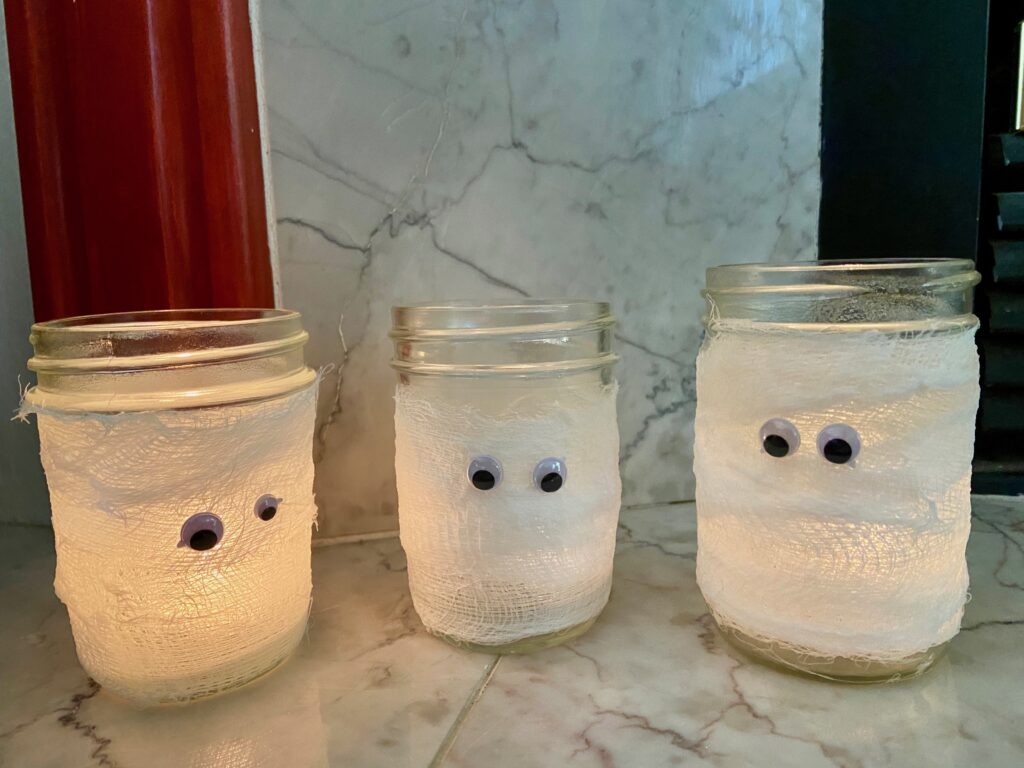
The first project were these silly mummy jars. Julia and I thought they would be fun to have out for Halloween. The project is so simple and if you have small children, it is perfect for them. You only need a few clean jars, some Mod Podge, cheesecloth, and wiggly eyes.
Cut the cheesecloth into strips approximately 1 1/2″ wide. Maybe two strips per jar? Paint the outside of the jar with a coat of Mod Podge. Wrap the strips around the jar as you might wrap a mummy. Haha – like I would know how to wrap a mummy. Then paint another coat of Mod Podge over the wrapped jar. Let dry. The next day we used a hot glue gun and attached the wiggly eyes. Julia’s boyfriend decided one of our mummies needed to have crazy eyes so he used two different size wiggly eyes.
They are quite cute when lit up.
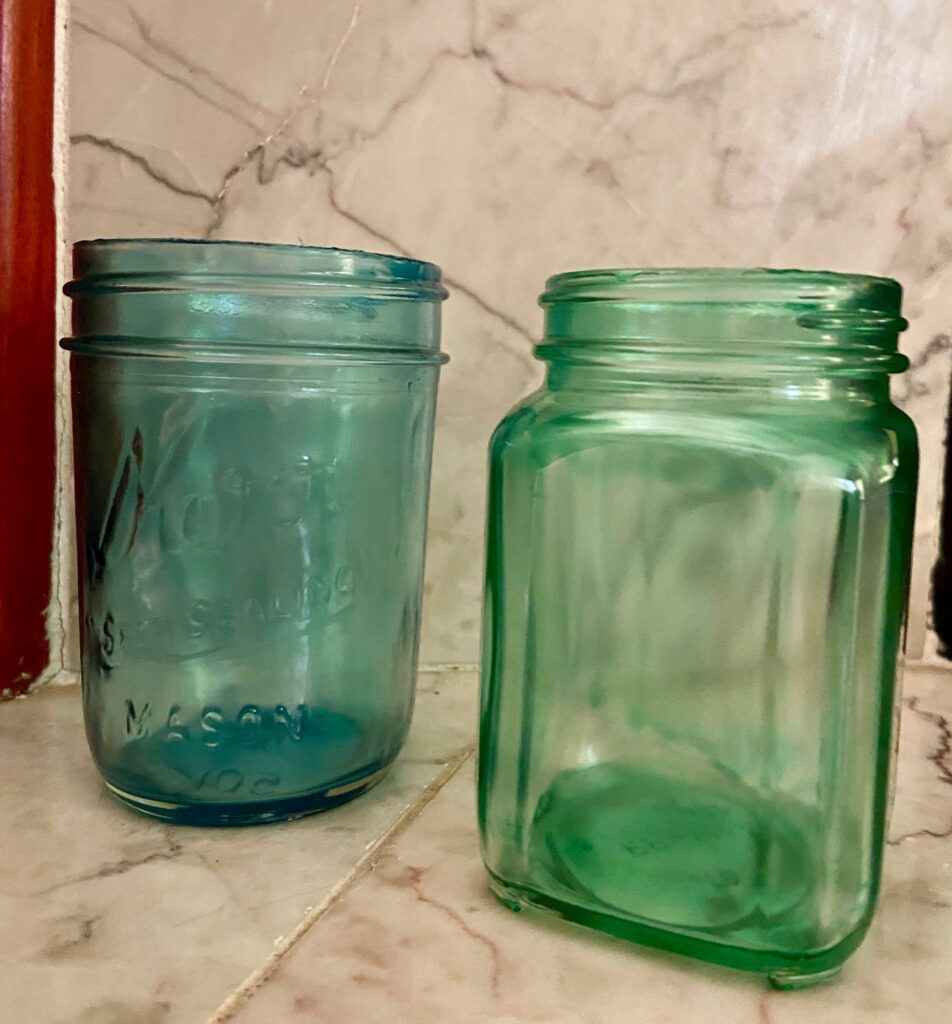
Moving on, and in keeping with the Mod Podge crafting, Julia and I colored two jars. I really love these!
Another simple project, you only need two clean jars, Mod Podge, and some food coloring. For these jars, pour about 2 tablespoons of Mod Podge into a little bowl. Add the color you want (remembering not to add too much!) and about a teaspoon of water. Mix until the color is distributed – we used a toothpick to mix ours. Pour the colored glue into the jar and start to rotate your jar slowly, letting the glue run over all sides of the jar. Once the inside of the jar is well coated, drain the Mod Podge out. If you are going to make more jars, drain back into your bowl. Since we didn’t want to make more than one each, we drained the jars over the kitchen trash. Hold it upside down for a minute or so to let it drain. Then invert it on to a tray with waxed paper on it. Let the jars stand upside down for an hour. After that hour passes, bake the jars – standing right side up – for an hour at 225 degrees. They dried clear and hard.
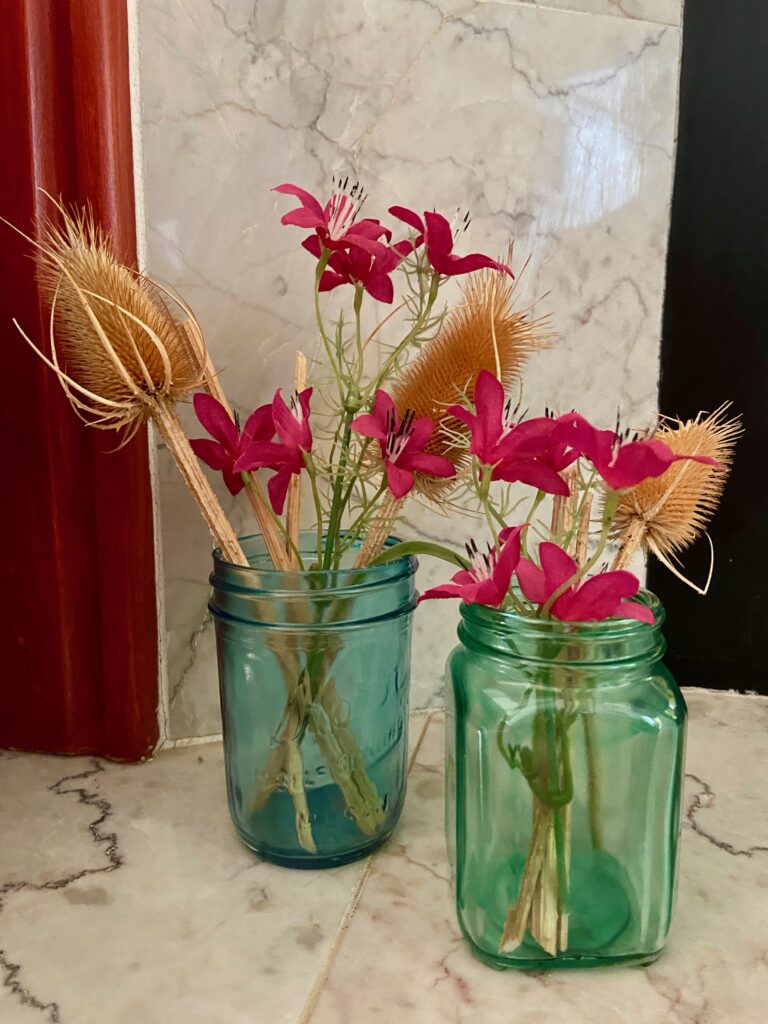
I don’t know that I would put water in them as I am uncertain if that would eventually wash out the finish we made. But they look cute with dried flowers.
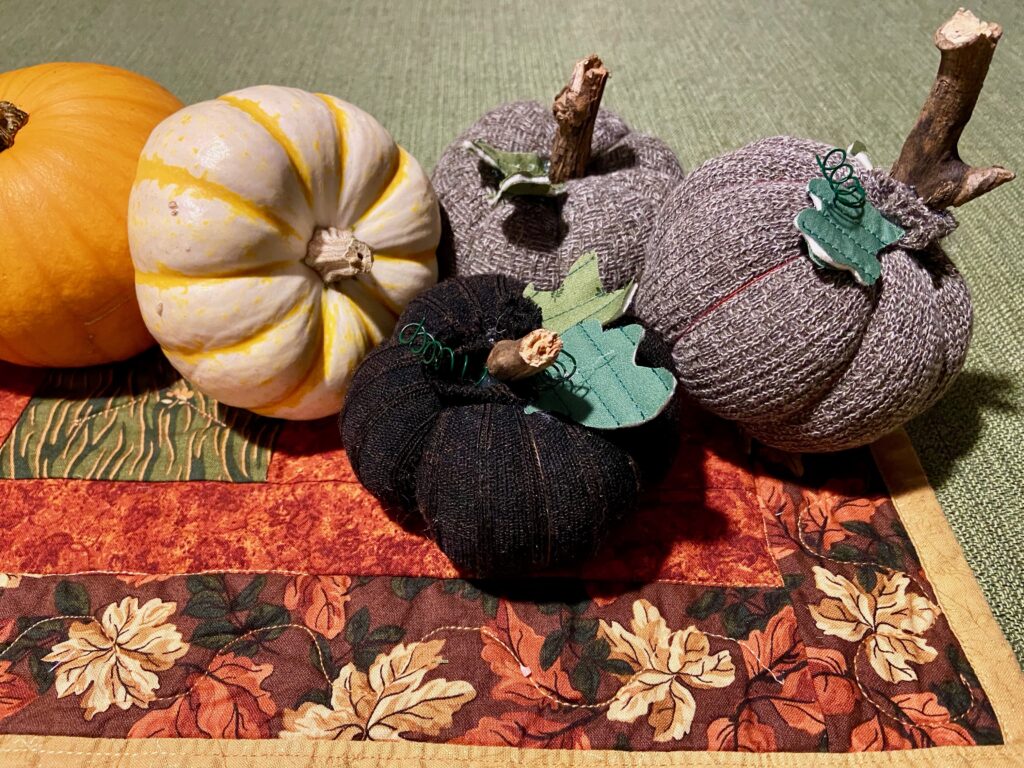
Moving on Julia wanted to make some soft pumpkins. We had everything we needed though the only appropriate socks we found were from Ray’s drawer. I am not a fan of the darker colored pumpkin. I do like the lighter colors though.
To make these we used a tutorial found at A Well Purposed Woman. I won’t go into the details since we really followed her instructions completely. This was a lot of fun to do together. Julia had the great idea to wrap floral wire around a pencil to make the little curlicue ‘vines’ we glued at the top near the stems. I like the fact that the instructions told us to put 1/4 cup of dry rice in first and then the polyfil stuffing. This weight at the bottom really makes the pumpkins sit nicely. If I were to do this again, and thrift stores were a feasible option, I would look for some socks with better colors or a knit sweater that could be upcycled. However, considering we were only using what we had at home, I call this a success.
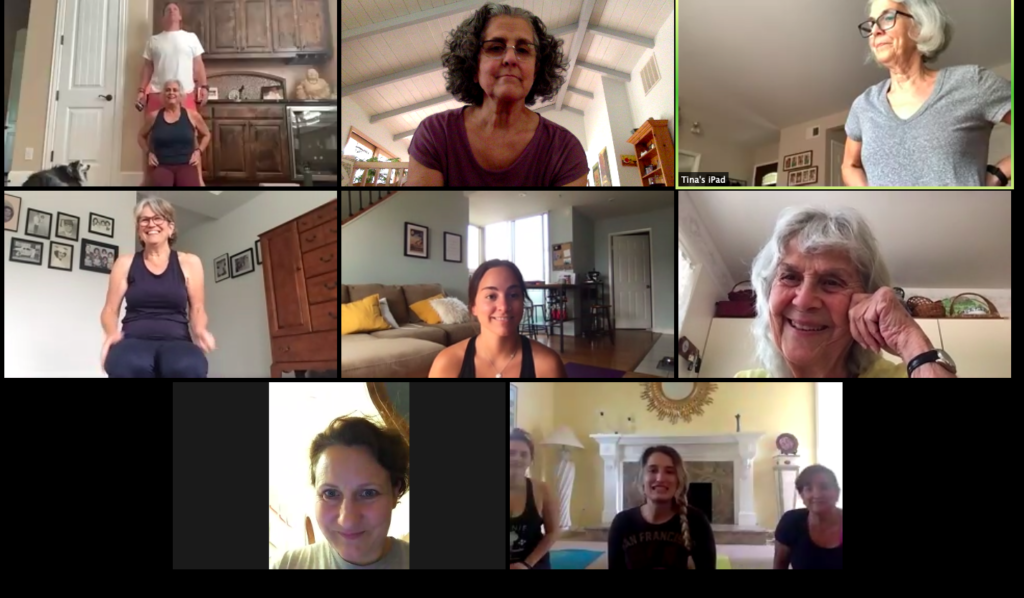
One more fun thing to share – my sister, Juanita, is a yoga instructor who lives in Texas. With all of the travel restrictions in place, my family (like yours I am sure) is unable to be together. To allow family members to be able to spend time together, my sister has been teaching a yoga class via Zoom on Sunday afternoons. The link goes out to everyone in the family and whomever is available joins in. I took a screen shot over the weekend to share with you.
This doesn’t even show all of the family that participated. I couldn’t fit everyone on my screen. But it is such a great way to spend an hour together. Do a little yoga and then we all visit for a few minutes. It is just real life connected virtually. During family yoga this past Sunday, my sister in the upper right corner had her 16 month old grand daughter in and out of the room and my niece, bottom row, far left had to stop to help her three year old put her pants back on. It all makes us laugh and we (sort of) get to be together.
It takes some effort and a bit of creativity but I am glad we can find ways to stay connected. I hope you are able to as well!
Yep – it’s true. I have another finish to share. The very small, almost non-existent, silver lining to the fires and smoke we are experiencing is having to stay inside. The smoke is thick and the air very unhealthy so we have been indoors continuously for a long while. This means I can sew!
OK – I started this quilt ages ago. The fabric was leftover from the twin size quilt I made for Julia’s bed in our Downieville house (which we sold this summer.) I made that quilt back in early 2016.
Downieville Quilt
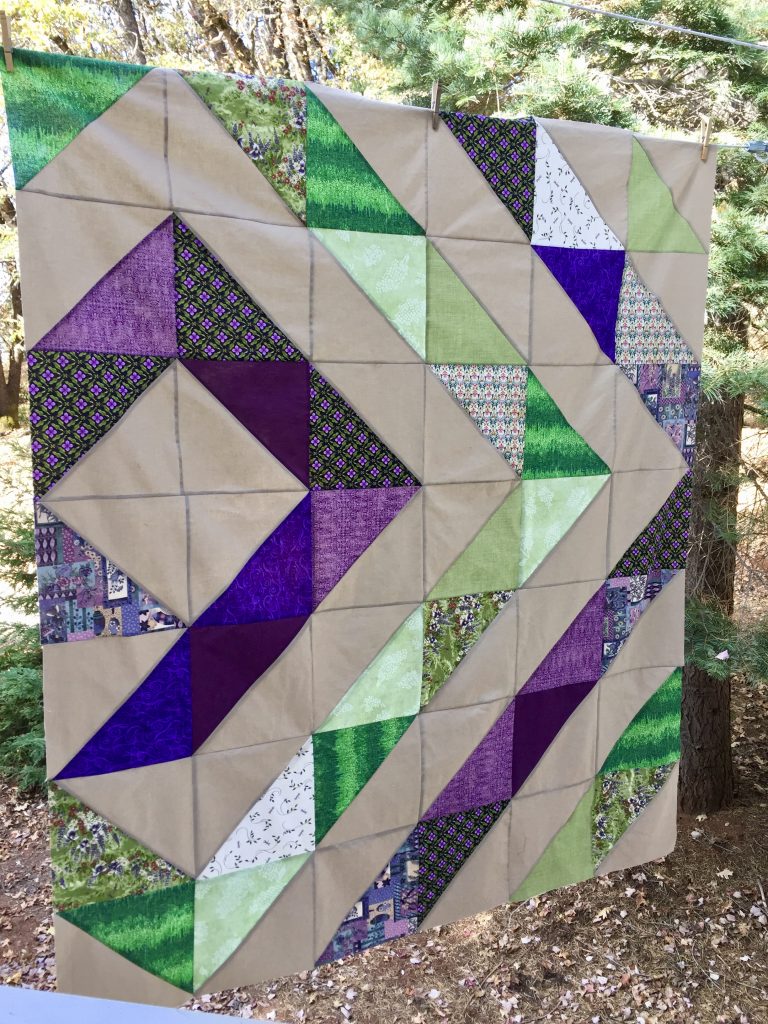
This was a huge quilt as I wanted it to hang over the edge of the bed by a ways. I had planned to make two matching quilts for that bedroom but the second one never happened. However I had already cut many squares intending to make the second one. I decided to use the leftover fabric to make a Mercyful quilt for the families at Mercy Hospital in Sacramento. I matched up a number of the squares, making sure each was partnered with the tan solid and made large (10″ finished) half square triangles with (some of) the leftovers.
Quilt Top Completed!
I made the quilt top in November 2018 and promptly stashed it away – for almost two years!! Why?!?
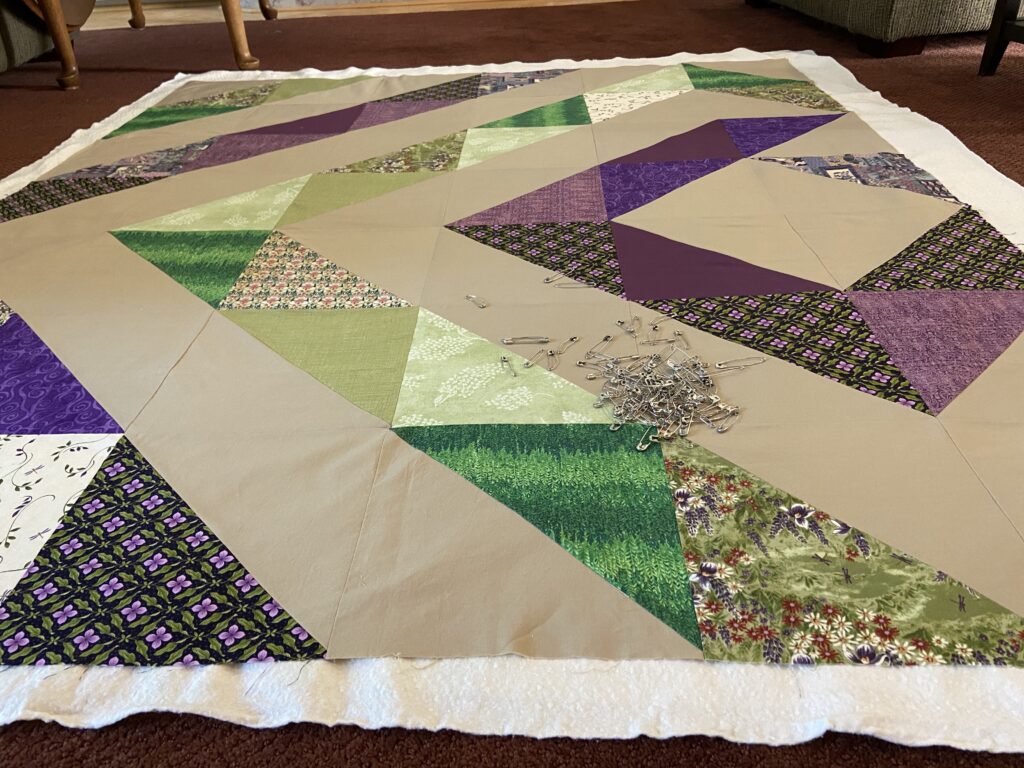
Basting the top – Finally!
In my last post, I shared I was basting the top and planning to finish it up.
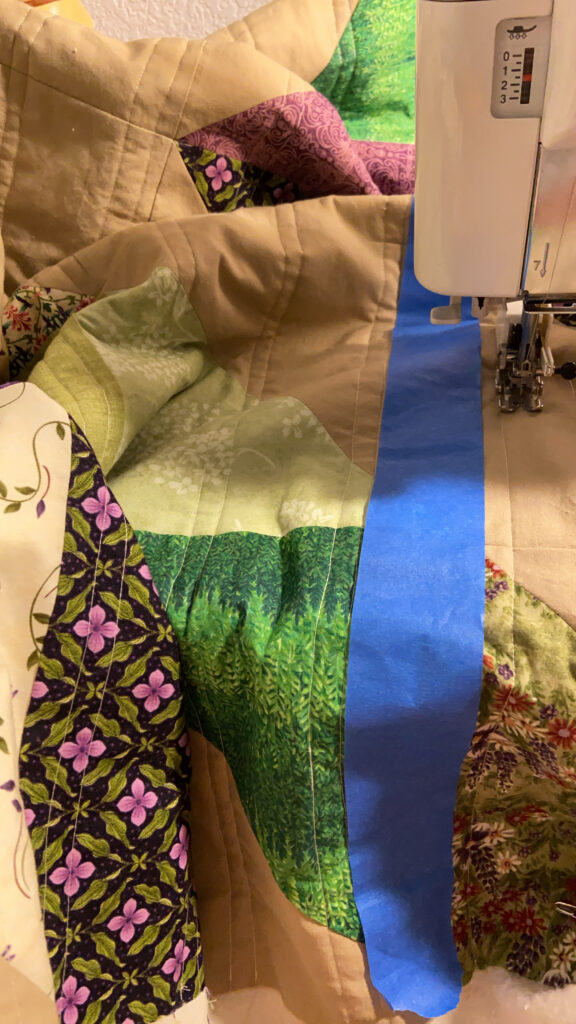
Marking my lines with painter’s tape.
After some thought, I decided to go with simple straight lines for the quilting. Marking the quilt with wide painter’s tape, and starting from the center, I did a two lines of stitching with my walking foot. I used the width of the walking foot to mark off the separation for the second line in each set. This, naturally, went very quick.
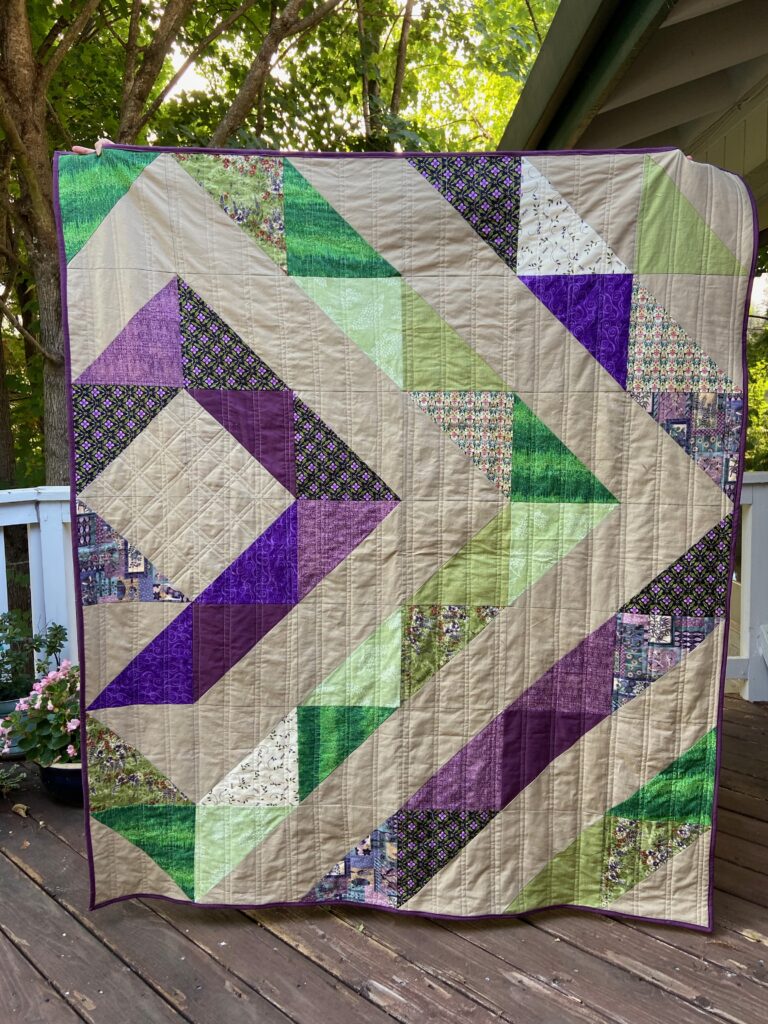
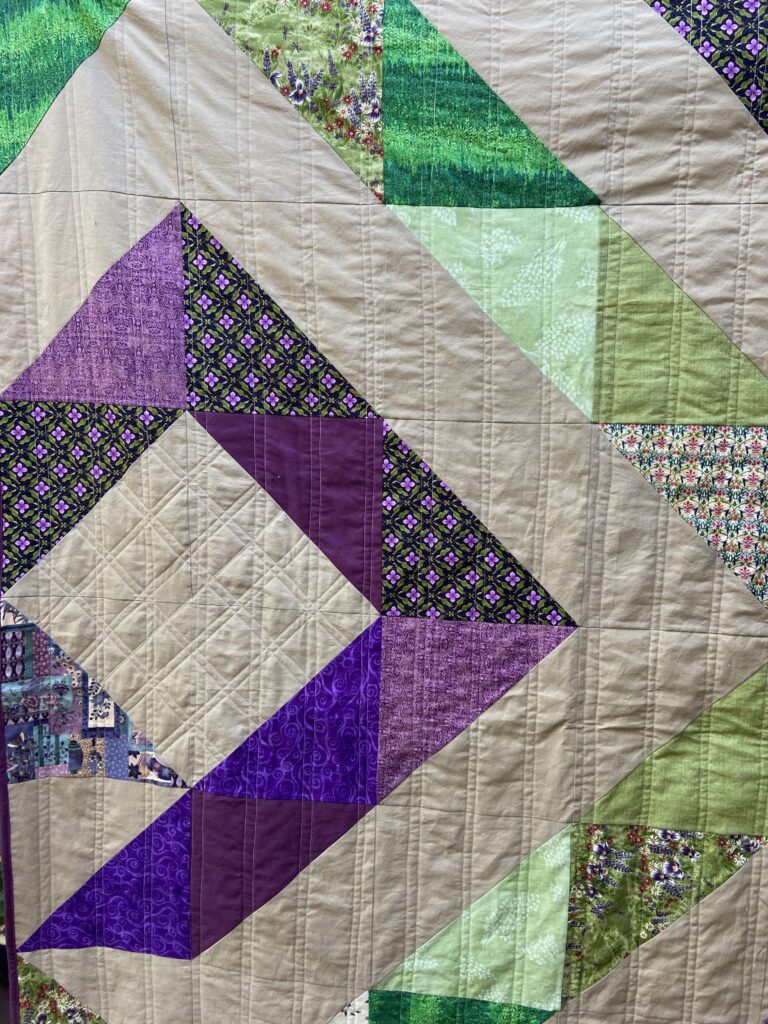
My quilt holder, aka Julia, and I took some quick photos on the deck. Didn’t want to stay out long because it was too smokey! I am so pleased with the way this quilt looks.
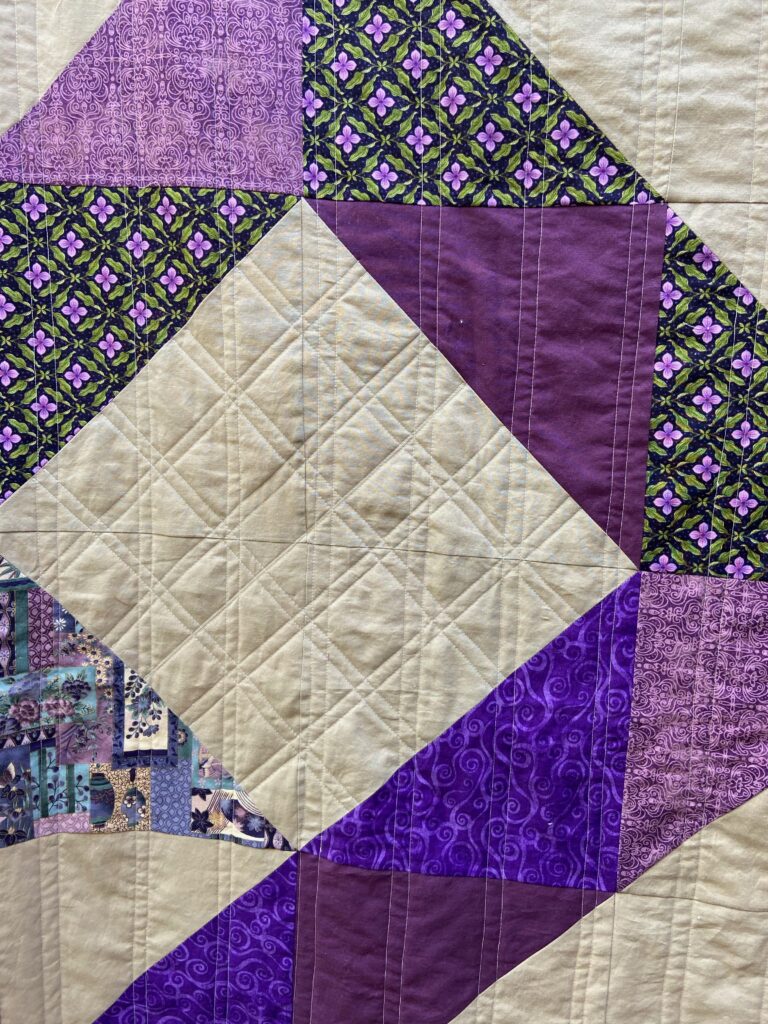
For the off-centered diamond, I did some extra quilting on the diagonal. I didn’t measure this accurately and my center line is a bit funky. Such is life. I am not overly bothered by this.
The overall effect is good and as we know, I am not one for precision.
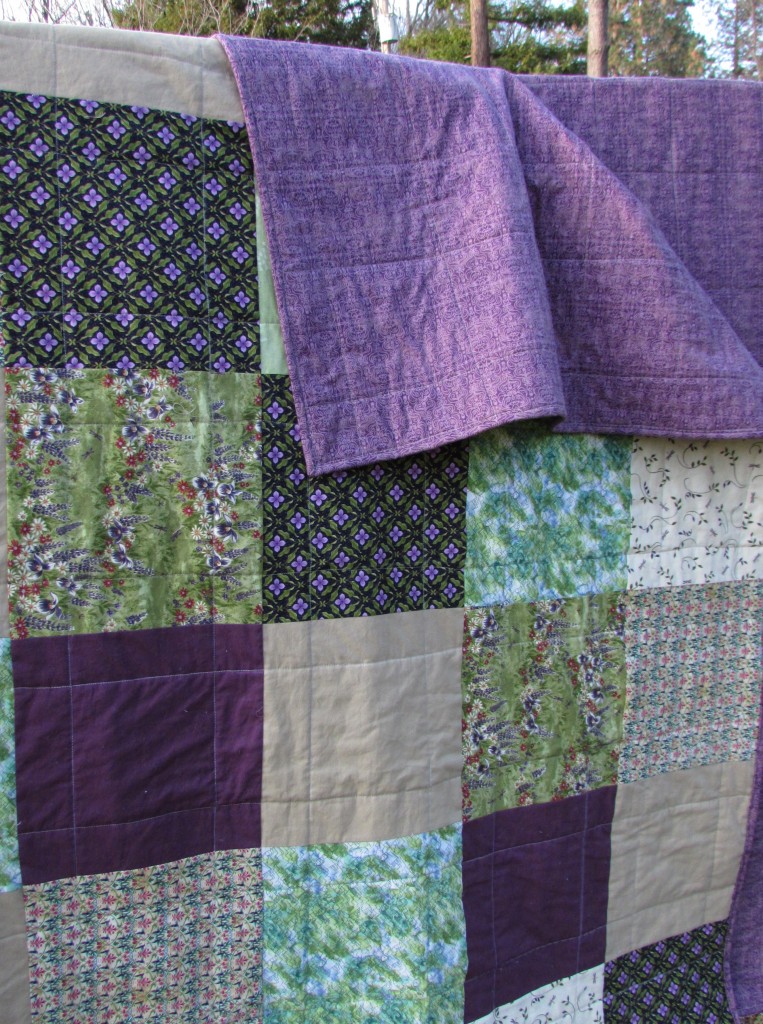
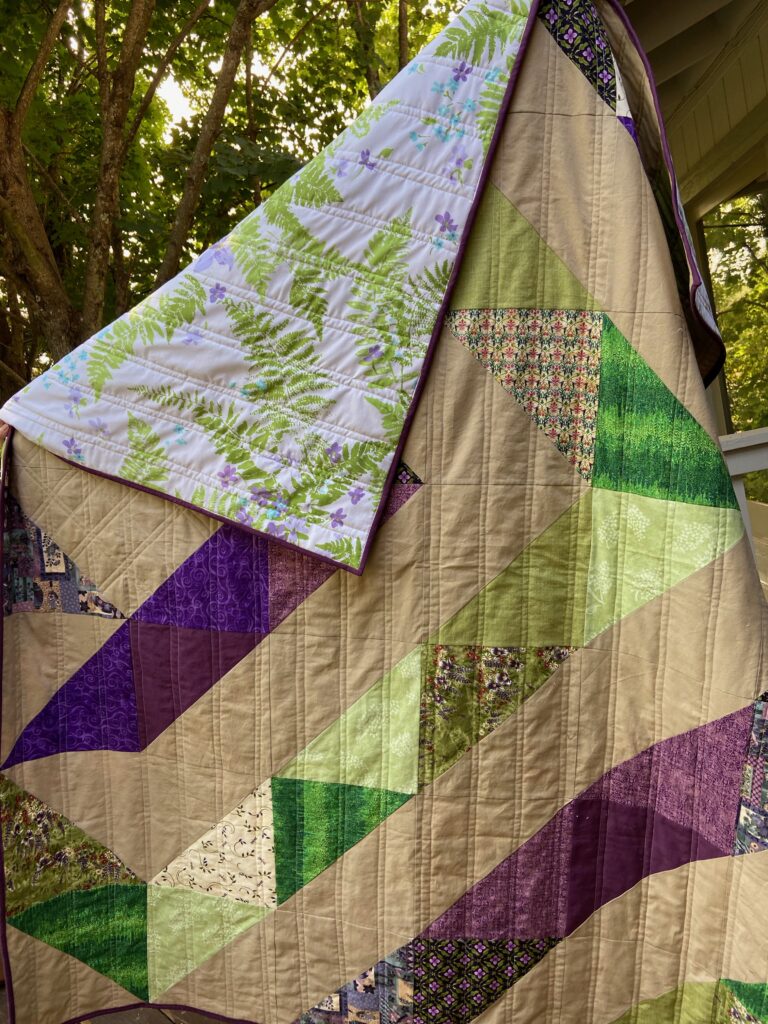
A peek at the backing.
For the backing, I used one of the vintage sheets I have stashed. I know many quilters dislike backing with sheets but I have not had a problem with it. They quilt up fine and I have washed the finished quilts (those I have kept) many times without issue. I love how the soft purple and greens complement the darker shades in the quilt top.
This quilt is headed to Mercy Hospital and I hope the family it is given to will take comfort from it.
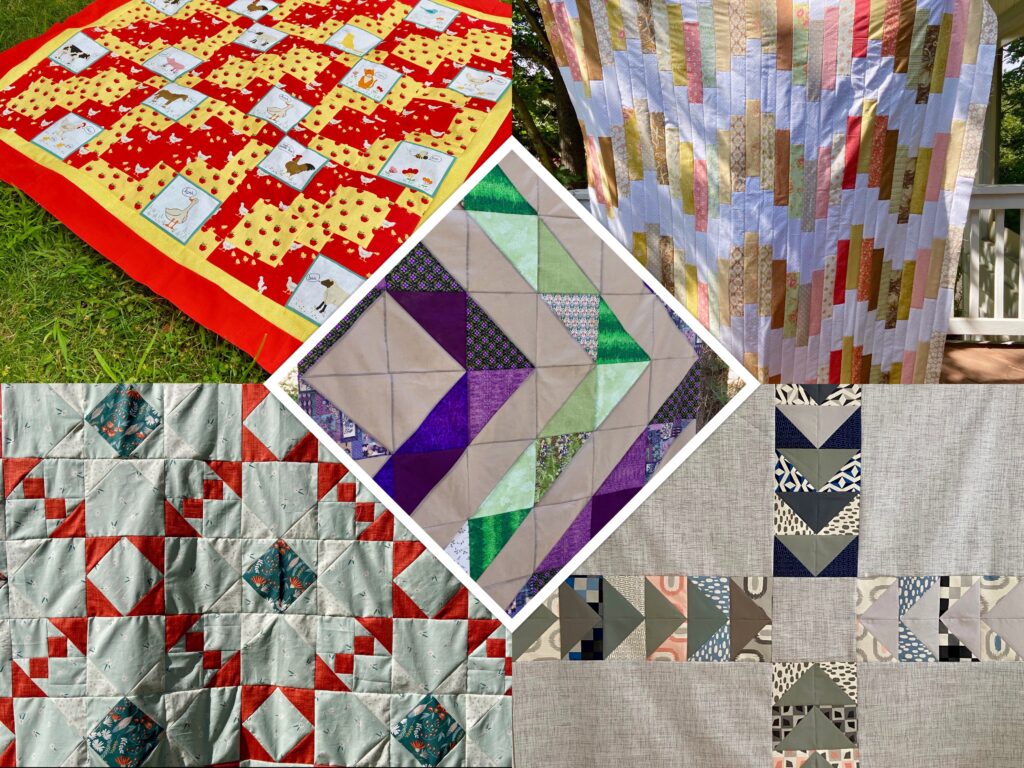
Unfinished Quilt Tops
About two weeks ago, I made this collage of the unfinished quilt tops I have. I have finished two of them since then which makes me so happy. I haven’t decided which one I will tackle next. I think I need to decide on backings and see what I have available.
For my next project, I need to make a bunting (with the letters of her name) for my youngest grand daughter. When we were up in Seattle, my son reminded me I had made one for older sister before she was born yet this baby is nearly 6 months old and I haven’t made hers. Yikes. Better get on it!!
Take care everyone. If you are affected by the fires (and pretty much everyone in the west is) please take care and be safe. If you have extra rain, please send it to us. We are all in dire need.
I am in a quilting and reading phase. Quilt a little, read a lot, quilt some more. There are always so many projects to make and books to be read, am I right?
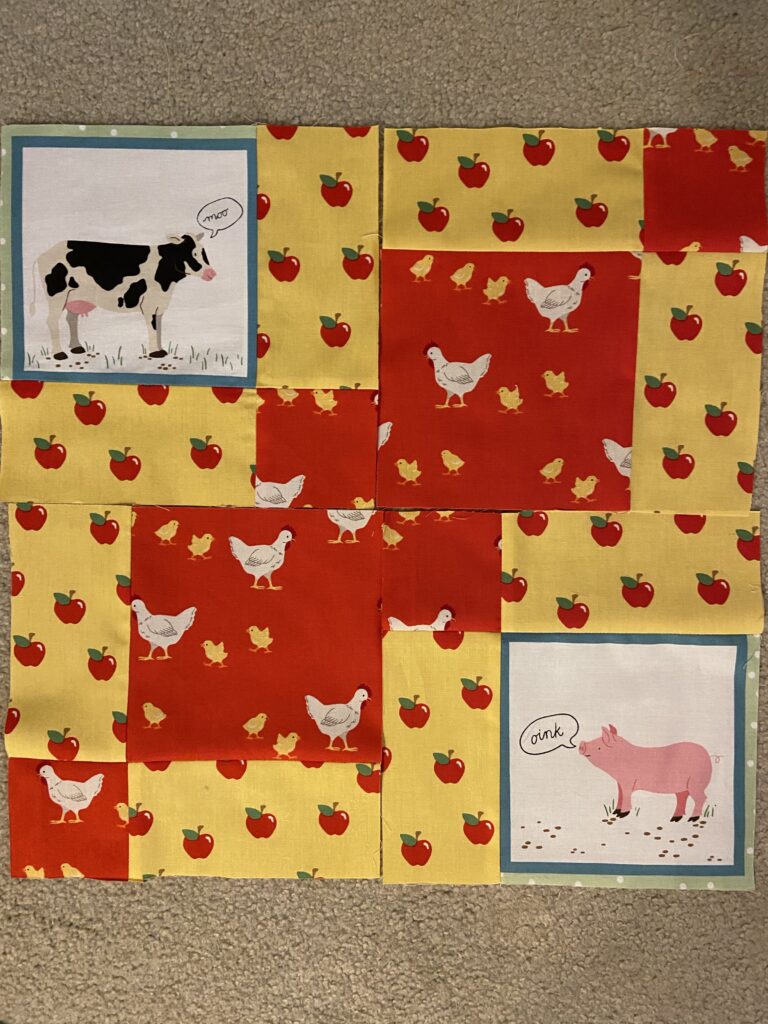
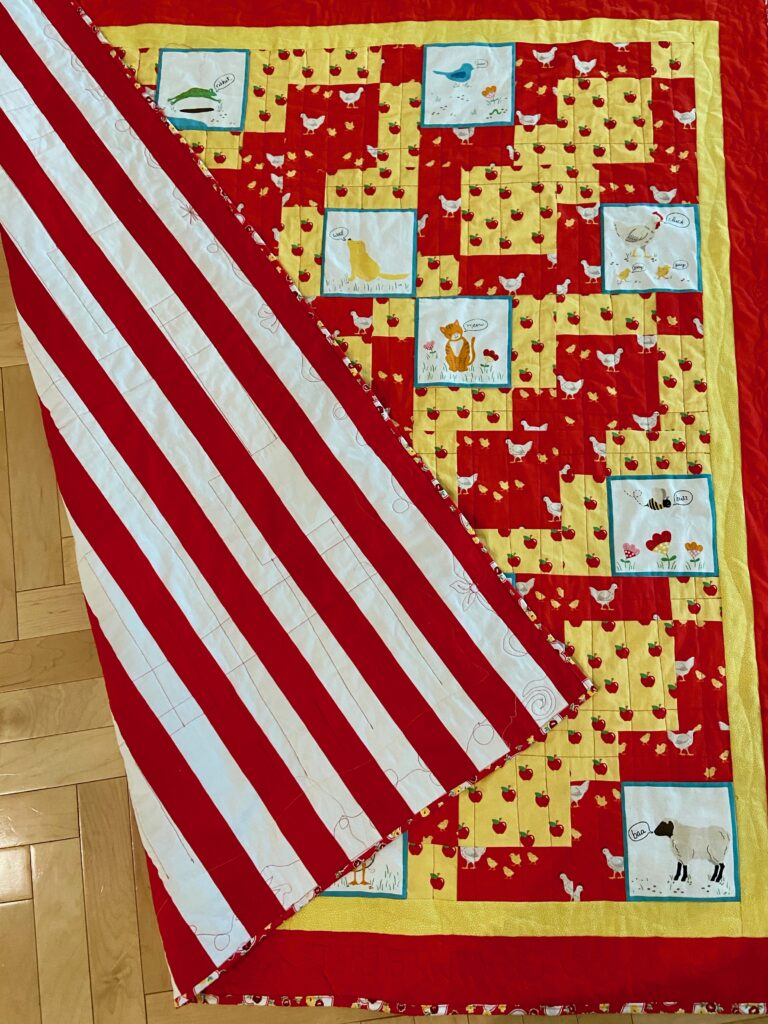
But – the sewing! I have been getting lots done. Today I will share this cute picnic quilt I made for my grand daughters. I carried this line of fabric (it is all gone – sold so fast!) and before I sold out, I stashed away some of the red and yellow yardage as well as a panel of the animals.
I love seeing red and yellow together. It makes for a really cheerful combination. I need did use the green fabric with this project. I decided to save it for another day.
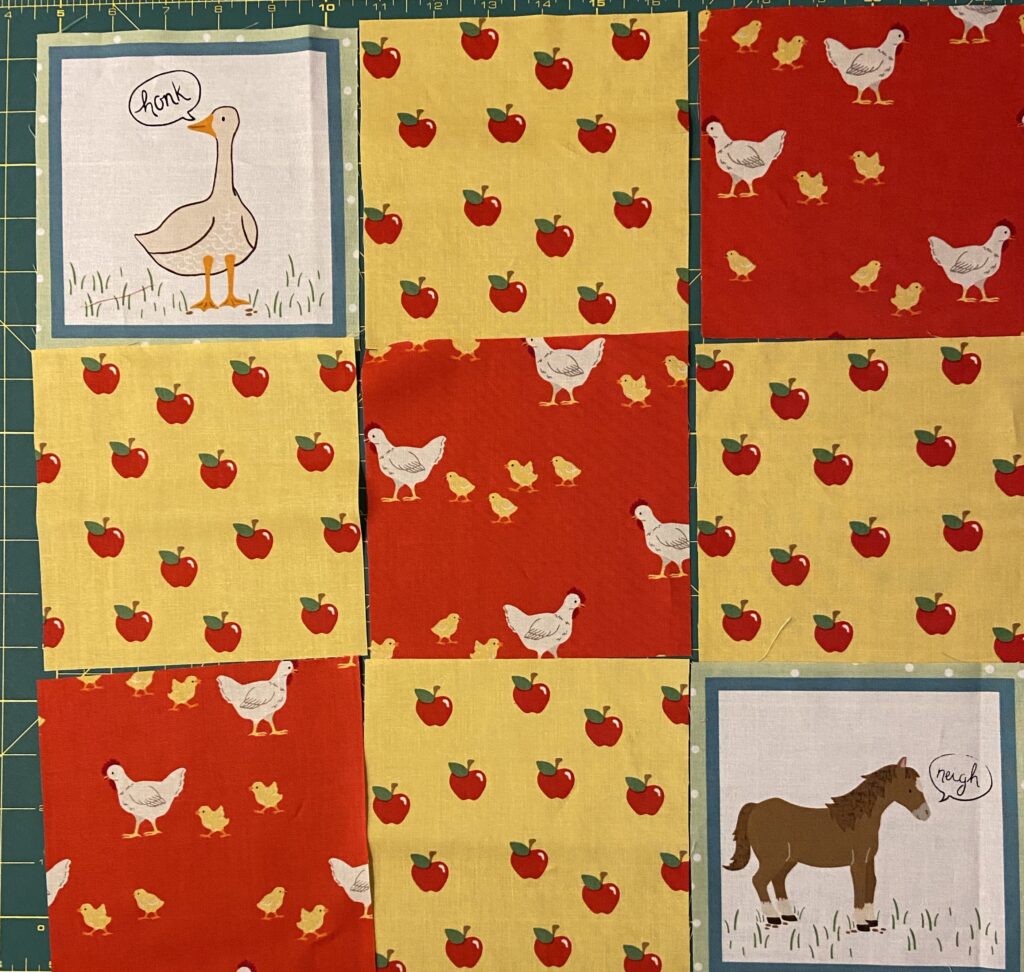
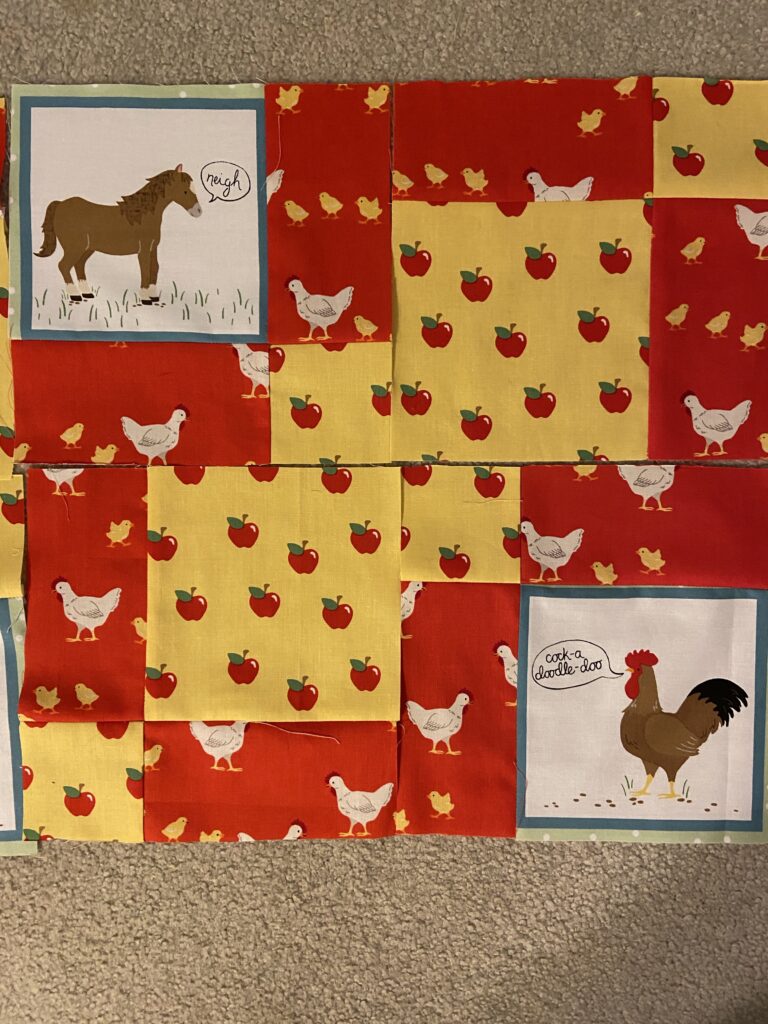
I started to make nine patch blocks last January and split them up, sewing them back together for a disappearing nine patch design.
Some had red centers.
Some had yellow centers. But once made, the blocks were always set aside for some other project.
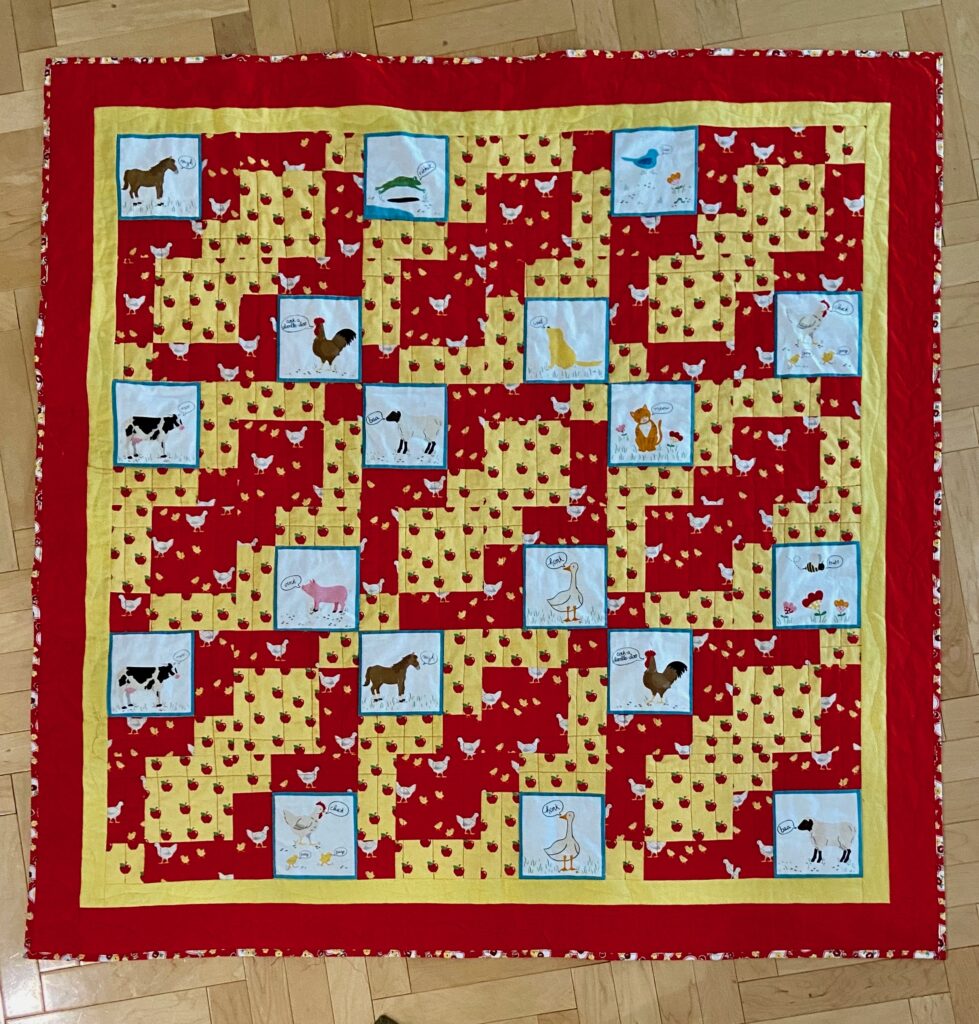
Well my son and his wife recently bought a house outside of Seattle and we have been calling it “the Farm House”. It isn’t really a farm but it is on 1.5 acres and has a lot of raised beds, greenhouses, and a chicken coop. So, farm enough in our opinion.
I decided I needed to finish the quilt so the girls could sit on it outside and eat a snack or bring their lunch outside. The three year old is always filled with energy and I know she will love their big yard. This property is perfect for them.
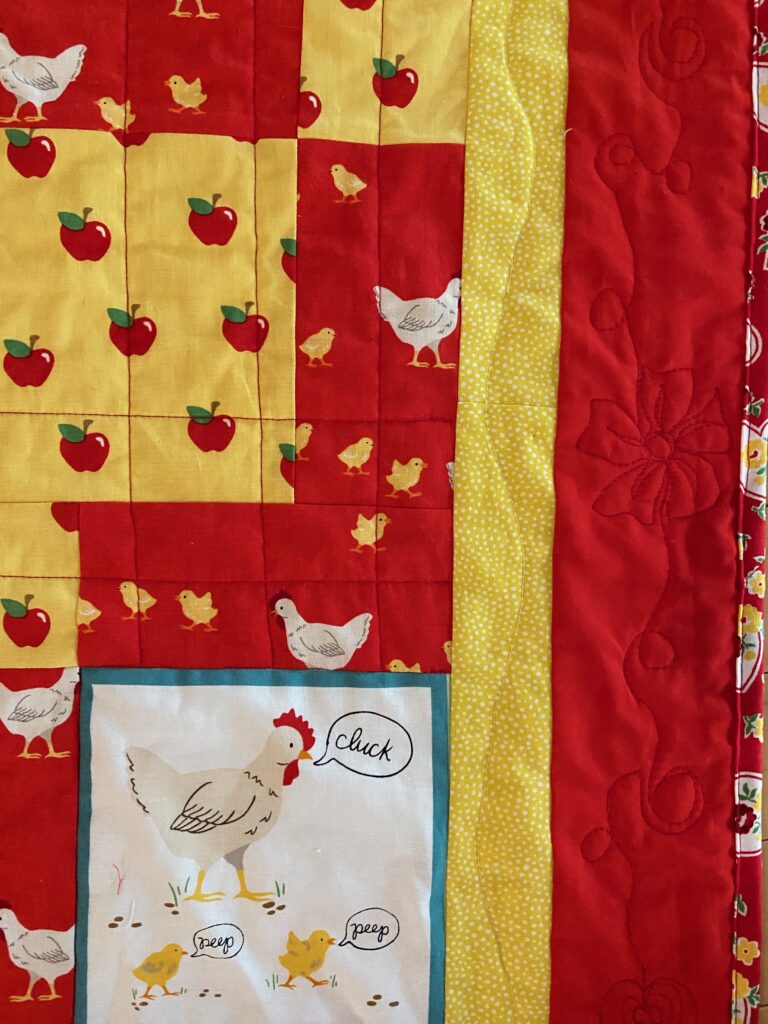
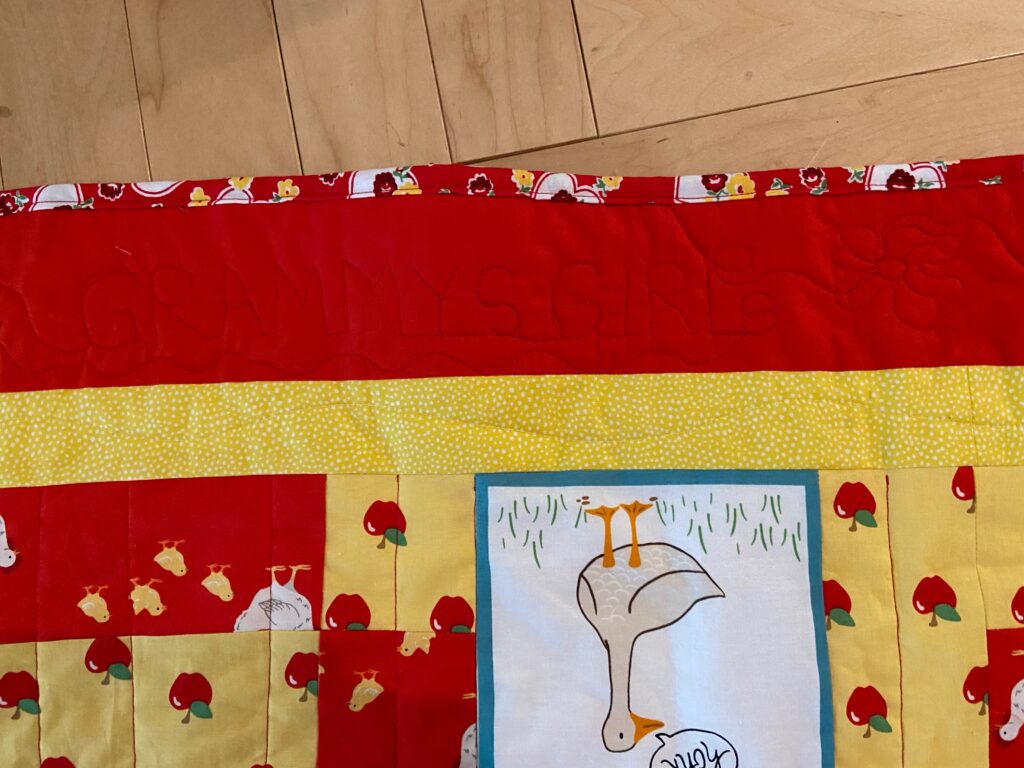
I had some fun quilting this. In the center, I stitched in the ditch around the white animal squares. Then I used vertical and horizontal straight lines at various intervals. In the yellow border I just did a wavy line through each one.
I played with the red border. I did swirls, hearts, flowers and whatever else came to mind. On two corners I put the girl’s names which was fun. On the bottom border I stitched “Grammys Girls” but wasn’t thinking of the orientation so it is upside down. Sigh. Not a huge deal but I do wish I had thought to flip it before I stitched the words. Not enough to spend the time unpicking the stitching though. Haha.
The backing is a super wide stripe from Michael Miller. My sister was clearing her sewing area a couple of years ago and gifted me this piece and a few others. I knew it would come in handy at some point. The binding is a repro feed sack print I have in the shop. I like the little flowers framing the quilt, though this picture doesn’t really show the binding off very well.
I ran into a snag when I washed the quilt last night tho. The red bled onto the white animal squares. (I was too annoyed to take any pictures.) Ugh. I haven’t experienced this and was a little freaked out. Both Wendy of Pieceful Thoughts and Jan of Colorful Fabriholic recommended this method by Vicki Welsh to removed the red. By the time I asked these lovely women, I had already cold water washed it twice and rinsed it two more times. After reading Vicki’s method, I chose to alter it a bit. My washer is large and the quilt is about 50 x 50″ so not terribly big. I put it in the wash on the “deep water wash” cycle with hot water. The hot water was the part that scared me but Vicki says that is what needs to be done. Before I put the quilt back in I decided to spray each of the white squares liberally with OxyClean stain remover. I didn’t rub it in aggressively but I did sort of massage it into the stained areas. Then I used a fragrance free “free and clear” type of laundry detergent and put in more than I normally do. Once the machine was filled with hot water I stopped the cycle and let it soak, making sure it was all under water. Finally I let the machine finish its cycle and ran it through a couple of extra rinse cycles since there was a lot of soap in there. It worked! The animals are back in their little white squares as opposed to the pale pink squares that I saw last night. Phew! Thank you Wendy, Jan and Vicki!!
Now that this is finished, I have moved on to another quilt top. I basted it yesterday and plan to quilt it this weekend. It is miserably hot and smokey outside – I did get a little yard work done early this morning but will be inside all afternoon. We don’t have any plans for the long weekend. Hope you are all well. Enjoy your long weekend and make sure to spend a little (or a lot) of time sewing!