Tag Archives: walking foot

Could it be?? Another Finish?

Yep – it’s true. I have another finish to share. The very small, almost non-existent, silver lining to the fires and smoke we are experiencing is having to stay inside. The smoke is thick and the air very unhealthy so we have been indoors continuously for a long while. This means I can sew!

OK – I started this quilt ages ago. The fabric was leftover from the twin size quilt I made for Julia’s bed in our Downieville house (which we sold this summer.) I made that quilt back in early 2016.

Downieville Quilt

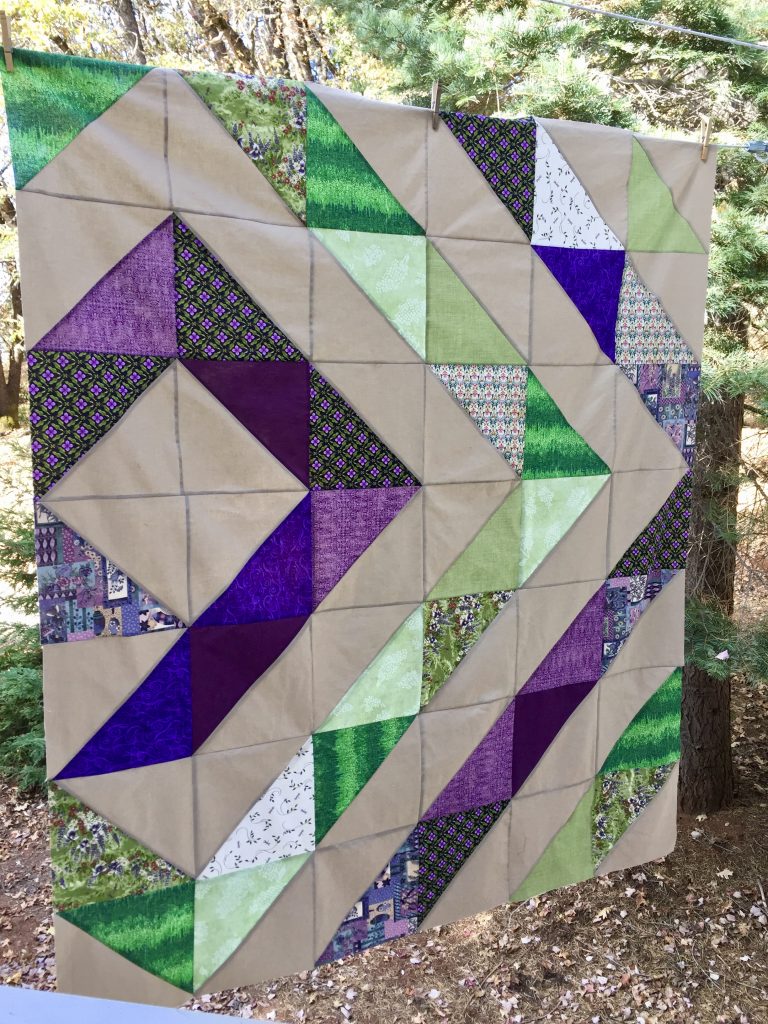
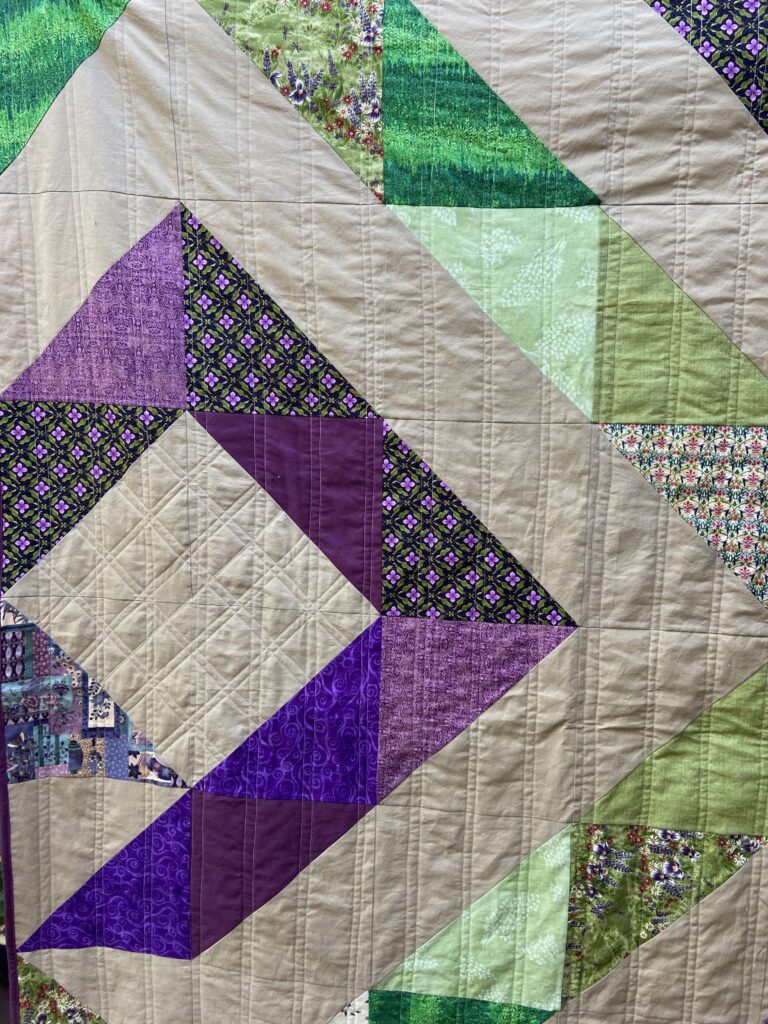
This was a huge quilt as I wanted it to hang over the edge of the bed by a ways. I had planned to make two matching quilts for that bedroom but the second one never happened. However I had already cut many squares intending to make the second one. I decided to use the leftover fabric to make a Mercyful quilt for the families at Mercy Hospital in Sacramento. I matched up a number of the squares, making sure each was partnered with the tan solid and made large (10″ finished) half square triangles with (some of) the leftovers.

Quilt Top Completed!

I made the quilt top in November 2018 and promptly stashed it away – for almost two years!! Why?!?

Basting the top – Finally!

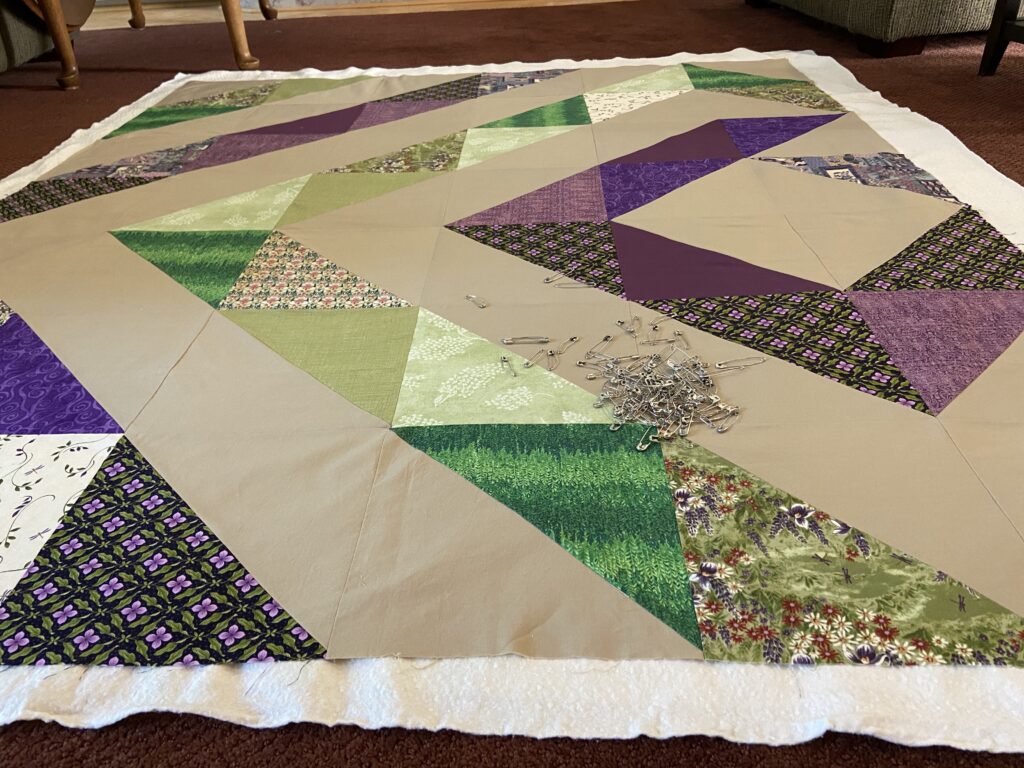
In my last post, I shared I was basting the top and planning to finish it up.

Marking my lines with painter’s tape.

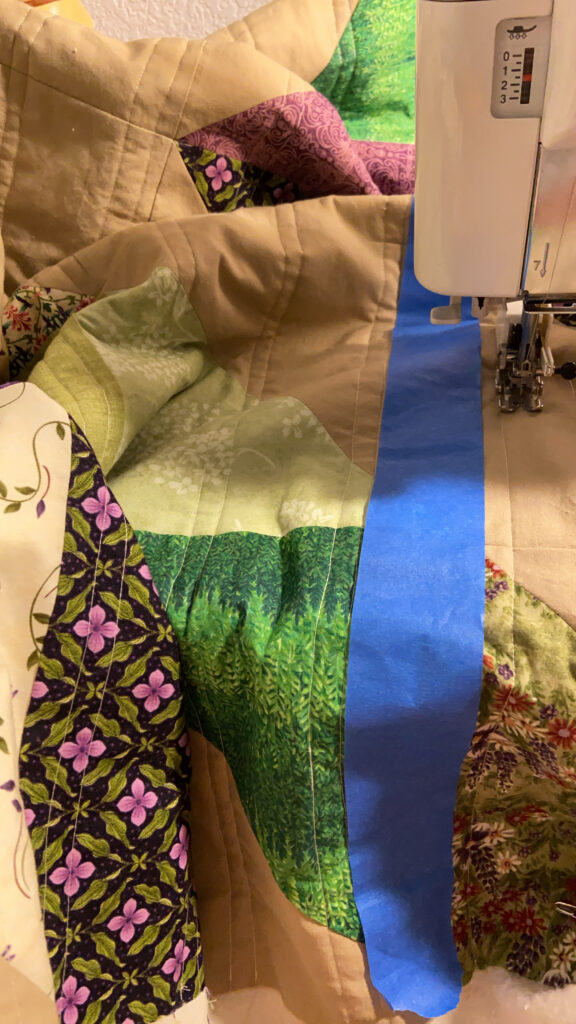
After some thought, I decided to go with simple straight lines for the quilting. Marking the quilt with wide painter’s tape, and starting from the center, I did a two lines of stitching with my walking foot. I used the width of the walking foot to mark off the separation for the second line in each set. This, naturally, went very quick.

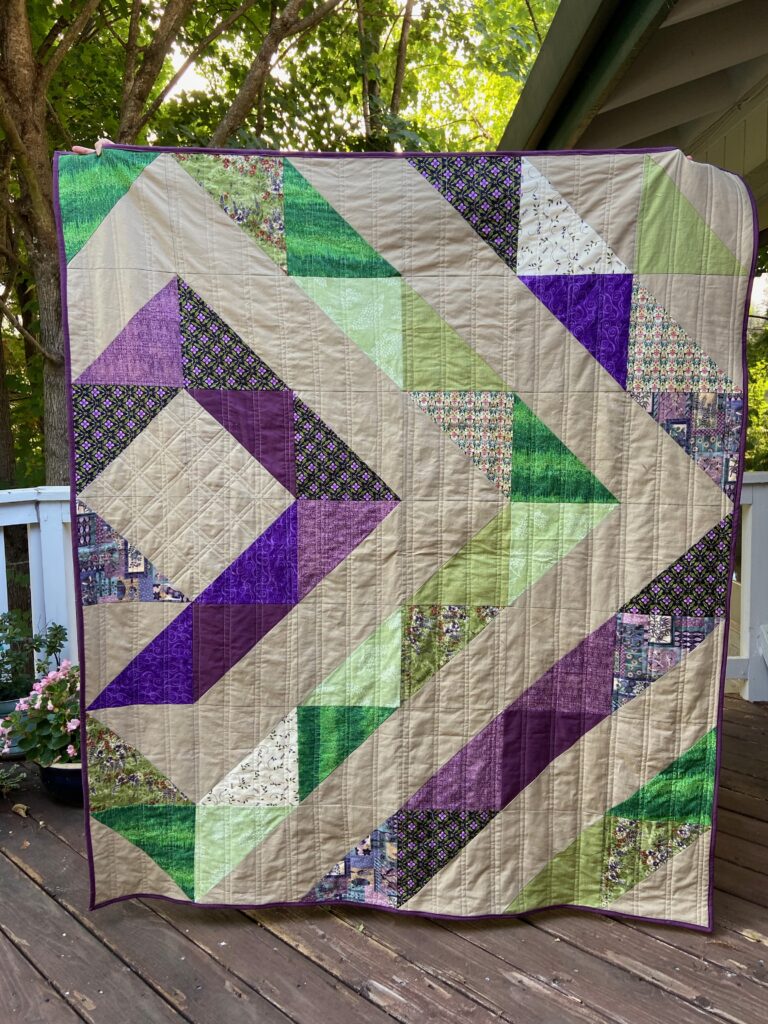
My quilt holder, aka Julia, and I took some quick photos on the deck. Didn’t want to stay out long because it was too smokey! I am so pleased with the way this quilt looks.

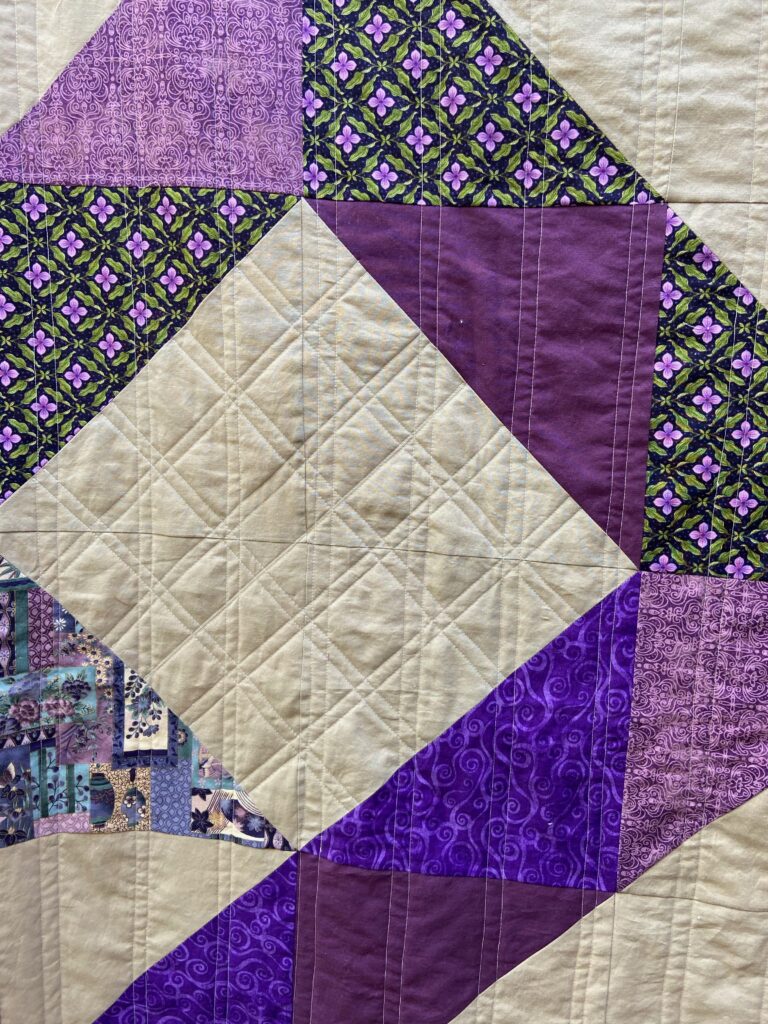
For the off-centered diamond, I did some extra quilting on the diagonal. I didn’t measure this accurately and my center line is a bit funky. Such is life. I am not overly bothered by this.

The overall effect is good and as we know, I am not one for precision.

A peek at the backing.

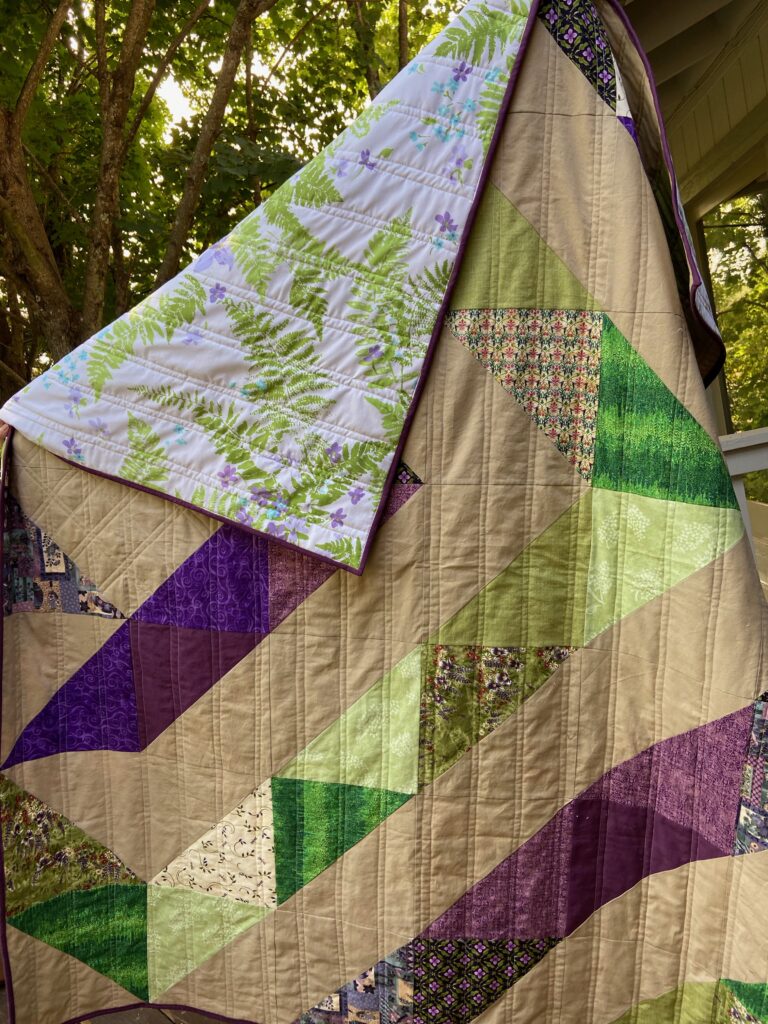
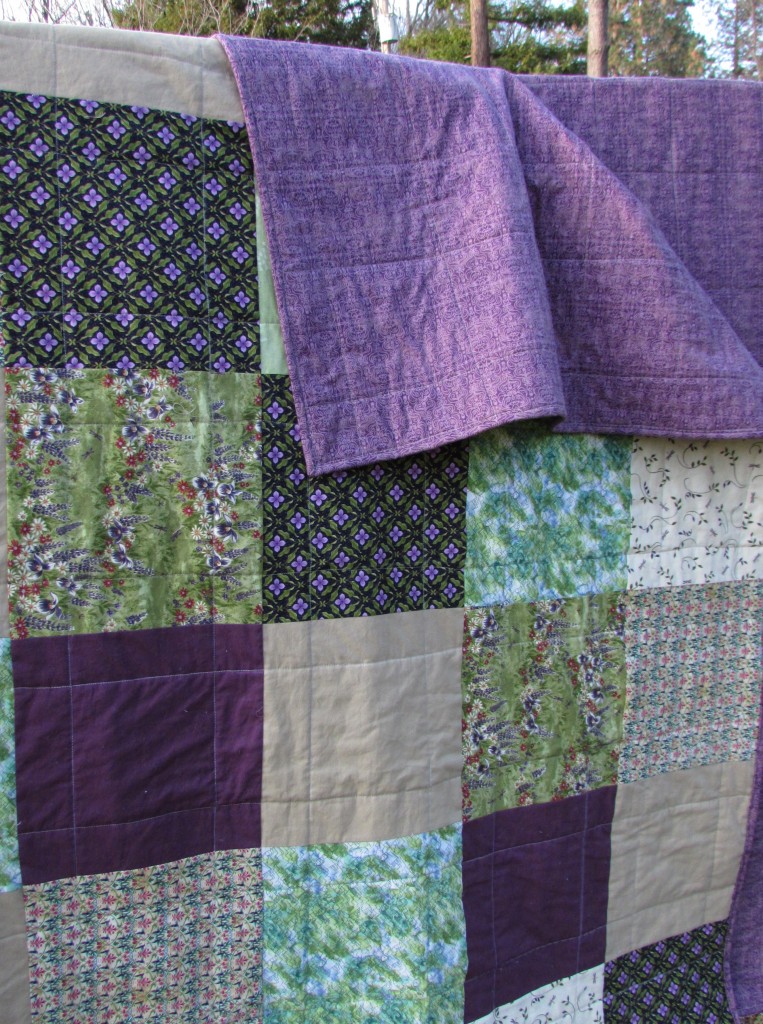
For the backing, I used one of the vintage sheets I have stashed. I know many quilters dislike backing with sheets but I have not had a problem with it. They quilt up fine and I have washed the finished quilts (those I have kept) many times without issue. I love how the soft purple and greens complement the darker shades in the quilt top.

This quilt is headed to Mercy Hospital and I hope the family it is given to will take comfort from it.

Unfinished Quilt Tops

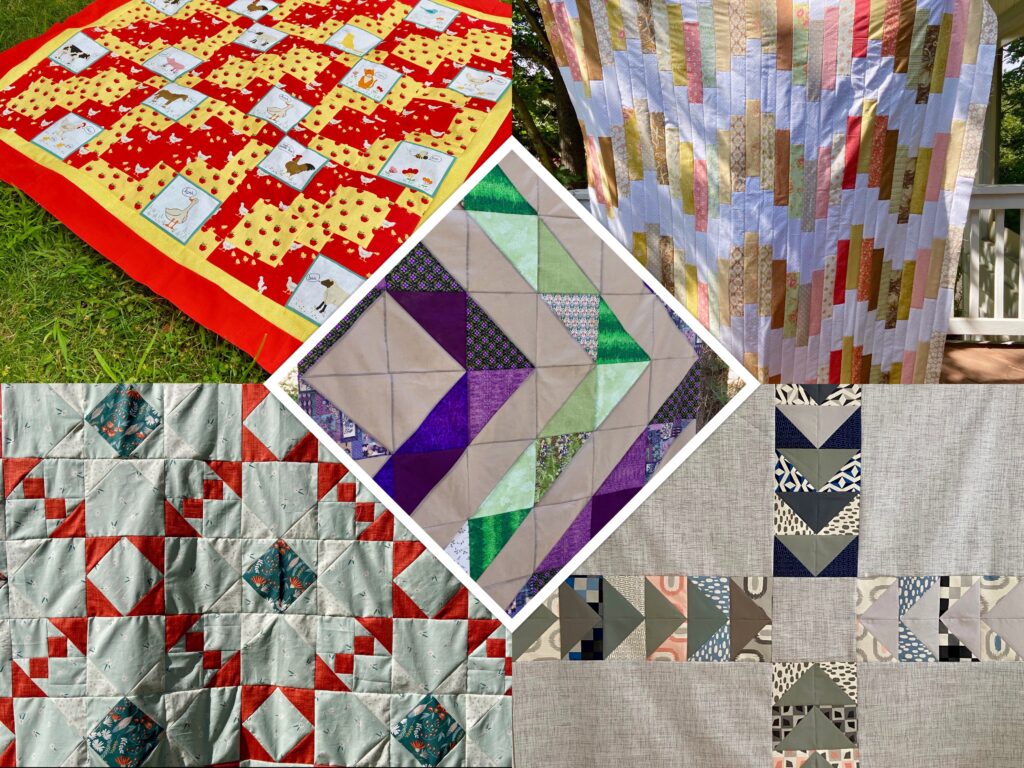
About two weeks ago, I made this collage of the unfinished quilt tops I have. I have finished two of them since then which makes me so happy. I haven’t decided which one I will tackle next. I think I need to decide on backings and see what I have available.

For my next project, I need to make a bunting (with the letters of her name) for my youngest grand daughter. When we were up in Seattle, my son reminded me I had made one for older sister before she was born yet this baby is nearly 6 months old and I haven’t made hers. Yikes. Better get on it!!

Take care everyone. If you are affected by the fires (and pretty much everyone in the west is) please take care and be safe. If you have extra rain, please send it to us. We are all in dire need.

Sharing at:

Brag About Your Beauties, Finished or Not Friday, UFO Busting, and Can I Get a Whoop Whoop

Relief Quilting Tutorial – Thread

I really enjoyed playing with relief quilting when I made my FABRIC mini quilt a couple of weeks ago. So much so that I decided to make another one! I took plenty of pictures while making it so I could post a tutorial. I hope you will give it a try. The effect is wonderful and it is such an easy process.

This time I wanted to try stitching the word on a piece of fabric with fusible stabilizer and then building the quilt from there. It worked out wonderfully. Since I already had one mini that said FABRIC, I decided to make another that said THREAD. This idea was inspired by a comment left on the first post by Diana, of A Red Delicious Life.  She mentioned wanting to make one to hang above her thread. I decided to do the same. Now I have one to hang above the closet where I store fabric and another to hang above the thread collection hanging on the wall in my sewing room. Thanks Diana!!

Let’s get started.

I am going to provide the sizes that I used but this is so flexible. Increase or decrease as you like. My quilt finished at 11″ x 23″ so if you want a different size, adjust accordingly.

Materials List:

  • Background Fabric: one rectangle measuring 7″ x 19″
  • Heavyweight fusible interfacting: one rectangle measuring 7″ x 19″
  • Scraps for your border
  • Stencils for tracing the word THREAD. I used letters that were 3″ high.
  • Frixion pen or similar fabric marking pen
  • Binding fabric:  Two strips that are 2 1/2″ by 42″ (Width of fabric)
  • Quilting thread.  I used YLI thread in a variegated green and loved it!

IMG_7181Take your background fabric and fuse the stabilizer to the wrong side of the fabric. Follow manufacturer’s instructions if you are not familiar with this process.

Trace the word on the fabric with the fabric safe marking pen of your choice. I didn’t leave very much room between the letters because I liked the way this looked. You could certainly adjust this to your taste. Also, I didn’t leave a ton of room on either side. Again, adjust as needed by cutting your background wider if you like.

IMG_7185

Using a walking foot, begin stitching long straight rows above, below and between the letters. I didn’t stitch the outline of the letters. This happens later on when you are quilting everything together. For now, just fill in every bit of space above, below and between each letter. You might choose to use a free motion foot for the little openings within a letter (e.g. the A and the D) so you don’t have to start and stop, twisting the fabric. I kept working with the walking foot because the block is small and easily rotates. Each time I came to the botton or top and needed to move to the next line, I very slowly stitched one stitch over, sometimes doing so by manually turning the wheel on the machine so I moved just one stitch. This kept my rows extremely close together. If you have a needle down function, this helps. Just go one stitch and let the needle stay down while you turn the piece. Now and then, the width looked to wide to me and I would back up and fill in with another line of stitching. Remember you will be viewing this from a distance and it looks much better that way. While stitching, you are looking at it from 6-8″ away and you’ll see every wobble. Not a problem. You are going for the overall effect.

IMG_7186

See how the word starts to come to life? I love that! Now keep on stitching!IMG_7206

Making good progress here.  The word is complete and it is time to begin working on your border.

I made an improv border by taking squares and rectangles in my color scheme (basically greens, purples and blues) and built four pieces, two for the ends and two for the top and bottom. I didn’t worry about size too much. I made them a bit longer than the side I wanted to sew them to and since I wanted to have them trim out to 3 inches, I made sure the whole thing measured wider than 3 inches.  Note:  If you are not comfortable with this scrappy improv process, I recommend grabbing a copy of 15 Minutes of Play by Victoria Findlay Wolfe at your library. She does an excellent job of guiding you through.  Alternatively, Amanda Jean Nyberg at Crazy Mom Quilts did a Quiltalong last summer called Scrap Vortex. In this post, she talks about building with scraps. It might be of help to you.

After playing with them on the design wall, I trimmed each to a width of 3″. I sewed the top and bottom borders on first and then added each side.

The next step is to make a quilt sandwich with your top, the batting and your backing fabric. I pieced the batting from scraps I had. Just pin it around the border tightly since you are going to quilt in the center first. My batting was just barely bigger than the top but since it was such a small piece I felt ok with that. Normally I use batting that is a good two inches larger than the top all the way around.

Continue to use your walking foot and slowly stitch around each letter. It is a bit like connecting the dots as you want to trace over the place where you stitched over to the next line. Just move slowly and turn frequently (with your needle down while turning) when stitching over a curve.

I love the way the letters come to life when quilted to the batting.  Next I moved on to the border. I love the little spools of thread that I quilted on the first piece and carried them through to this piece as well. Considering the thread theme of this project, it worked well.

IMG_7287

With each spool, I filled in the top and bottom so they would show up a bit better. If you like this idea, take a look at this tutorial of Lori Kennedy’s over at the Inbox Jaunt.

IMG_7286

The spools are whimsical and they add a bit of movement to the quilting as the ‘thread’ flows off each spool.

Once you complete the quilting, trim, square and bind. Finished!

IMG_7298

Isn’t this adorable?????

IMG_7289

And both of them together?? All kinds of cuteness. What fun (and easy) projects both of these were. I have the sleeve sewn on to FABRIC but still need to make a sleeve for THREAD. They will be on the wall soon. I’ll post a picture next week.

I hope my explanation is helpful. If you make one, let me know. I would love to see it!

I’ll be linking to the usuals which can be found at the top of the page, under Link Ups.