Tag Archives: tutorial

Tutorial – French Press Cozy

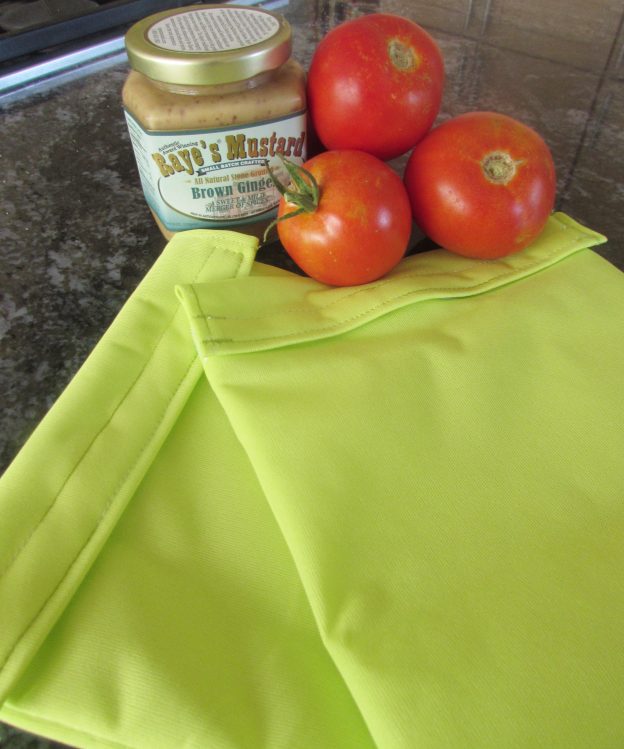
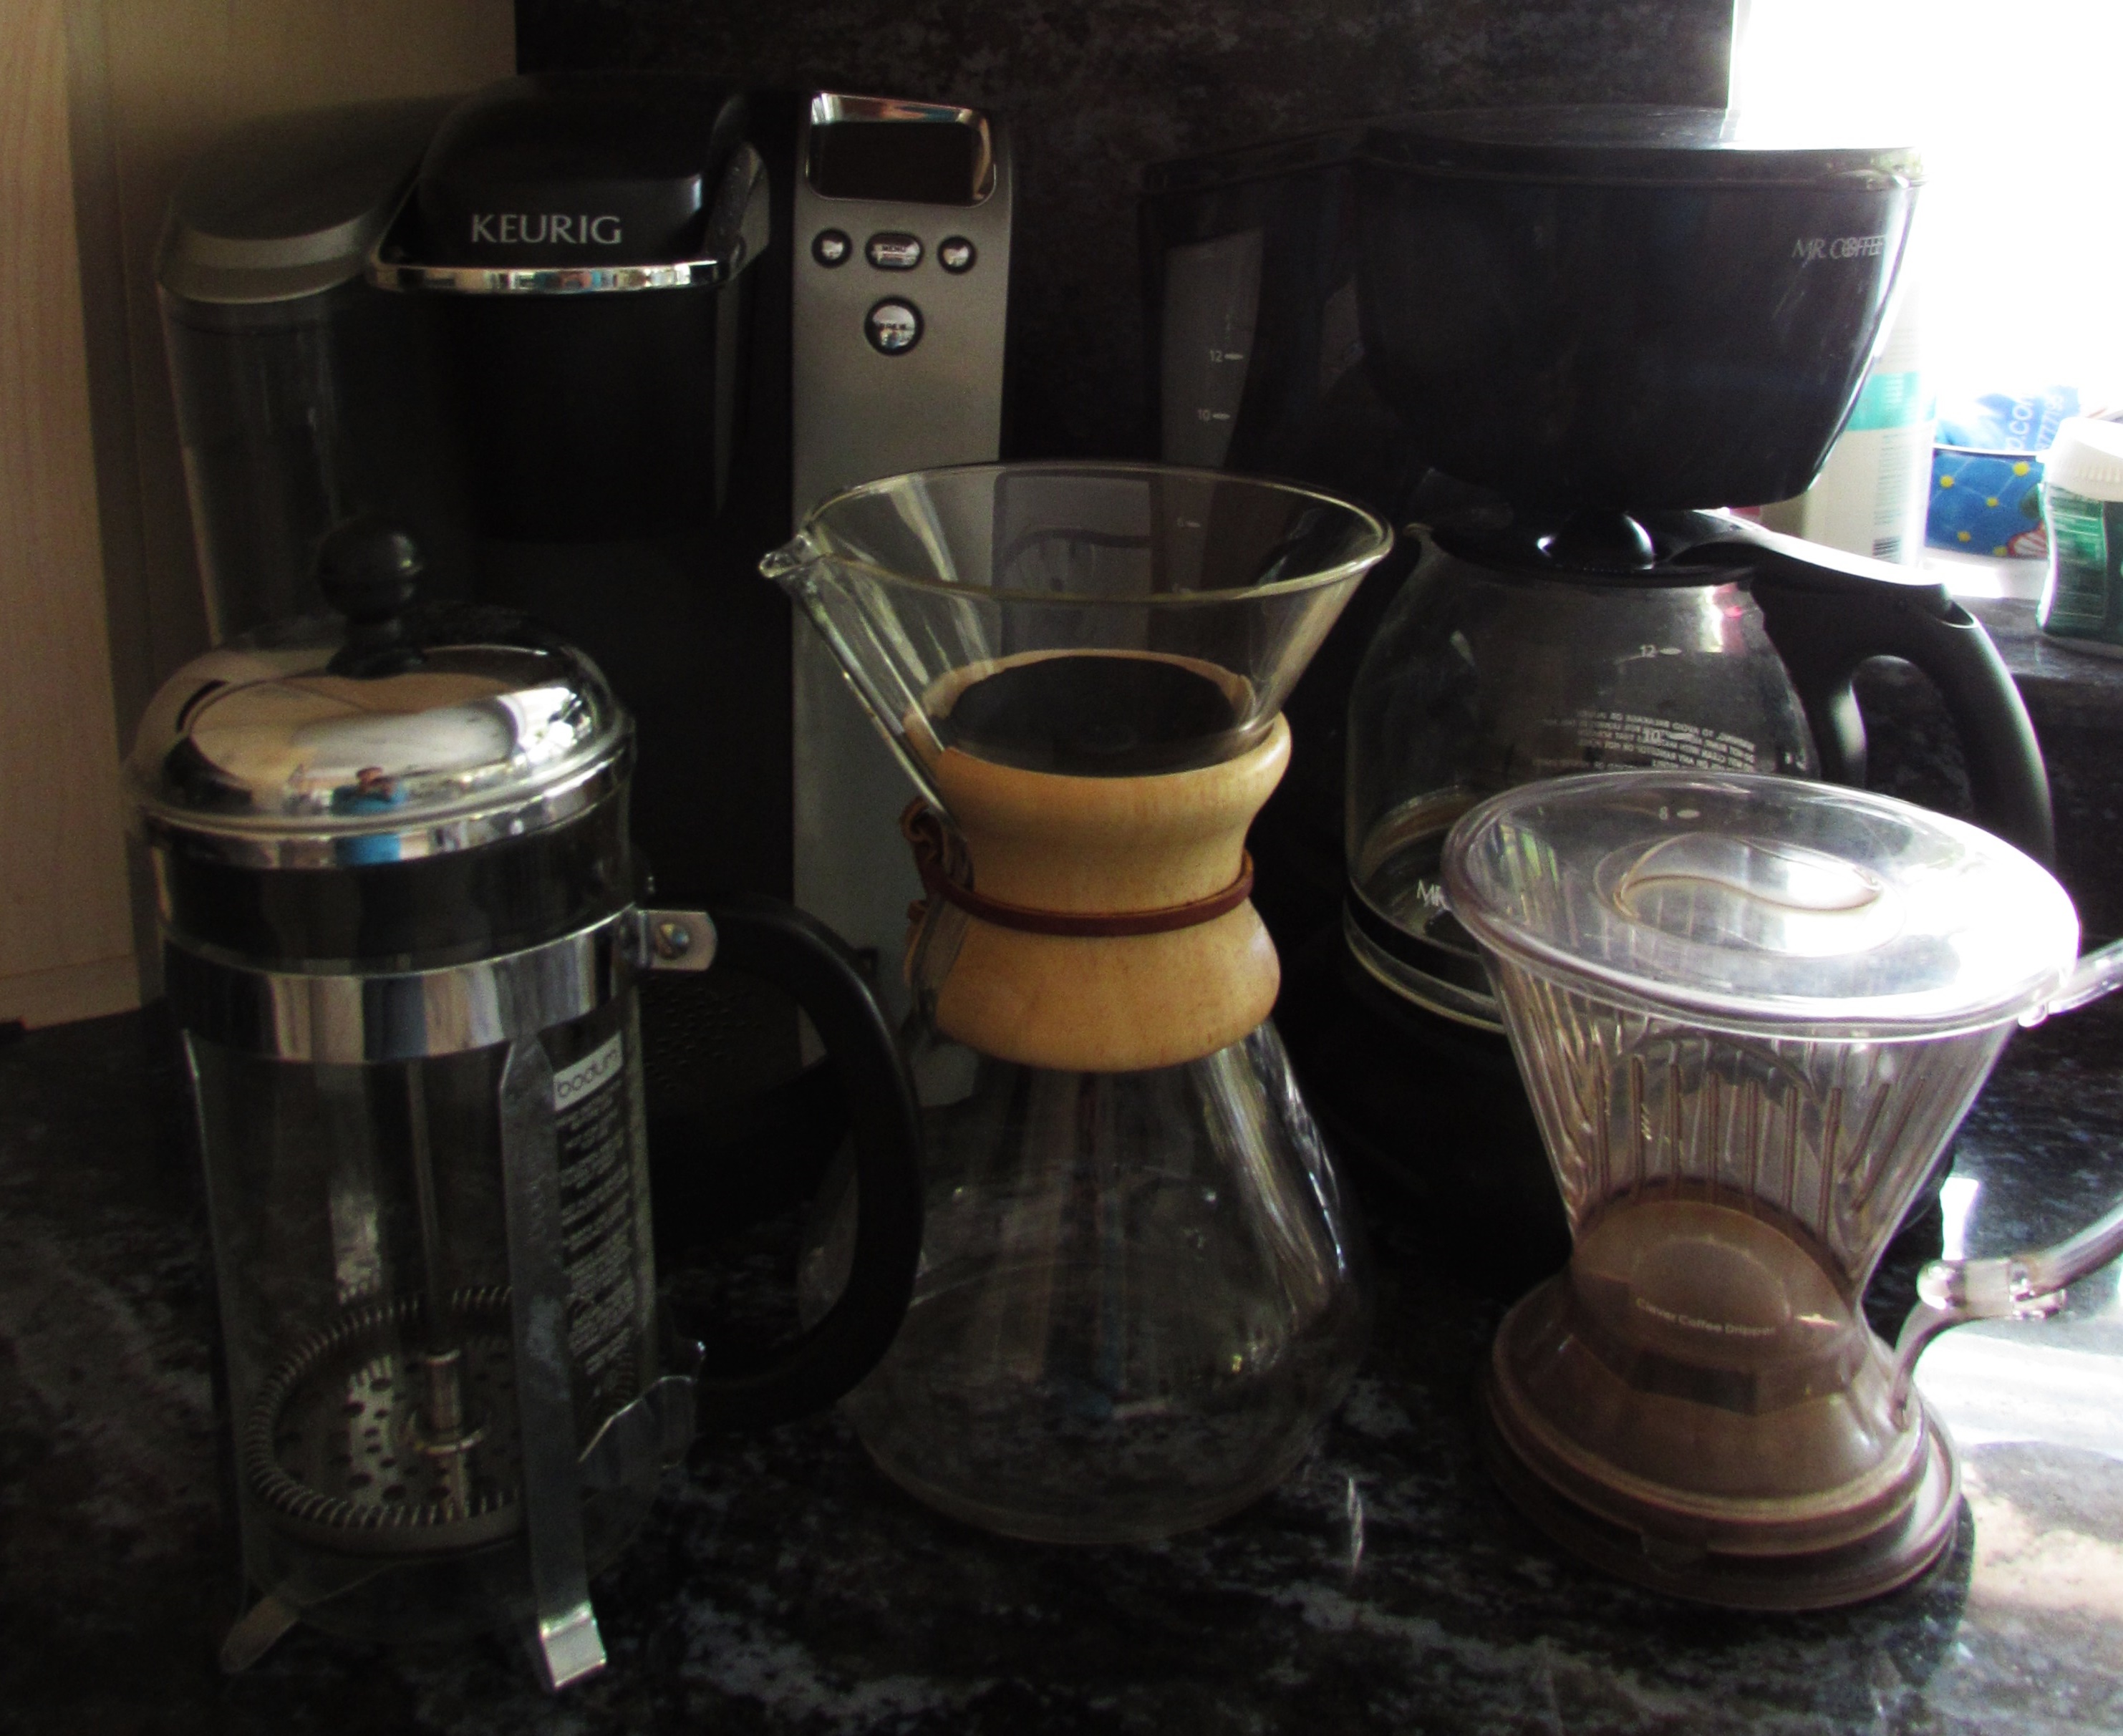
Today I want to share a quick and easy project with you. I have a bit of an obsession with coffee. Currently I have five different methods of coffee brewing in my kitchen. I am always trying out some coffee gadget or method to look for the best cup. I have a Chemex pot, a Keurig, a regular drip coffee maker, a Pour-over, and a French Press. I like all of them and they each have a place in my very deep and sustaining relationship with coffee.

Is there such a thing as too much coffee??

Is there such a thing as too much coffee??

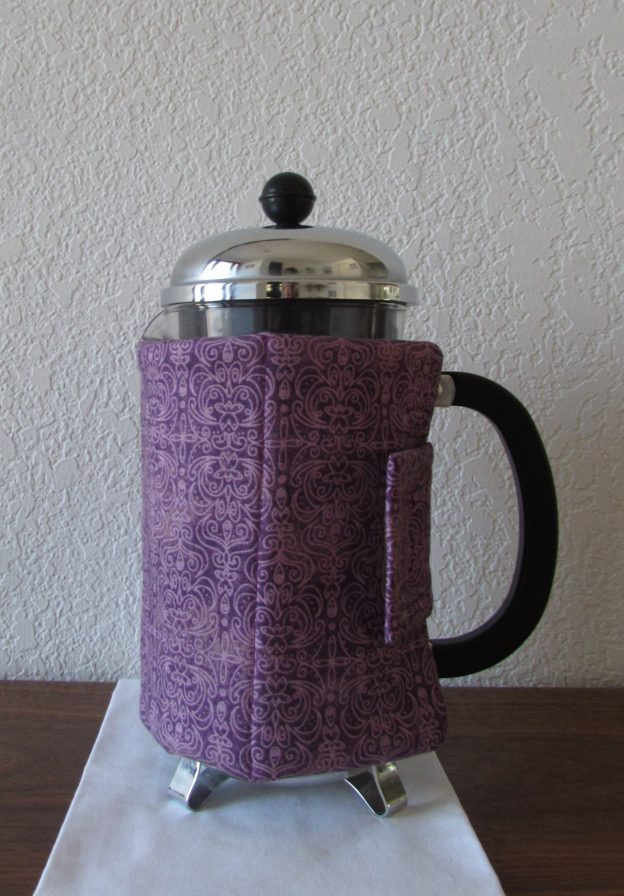
If you asked most coffee lovers, the problem with the French Press and the Chemex is the coffee tends to cool off quickly. I like my coffee near the boiling point, really hot, so I use a cozy wrapped around the pot to insulate it. I have been making cozies for both French Press pots and Chemex pots for a while now and selling them in my Etsy shop. I thought it would be fun to share a tutorial for making a cozy for a French Press with you today.  If you are a user of a French Press this will keep your coffee much warmer. Or, you could make one as a gift for the French Press lover in your family.

Let’s get started.

Materials List:

  • 1 Fat Quarter
  • 1 Batting scrap, at least 7″ x 13″
  • 1 Insul Bright scrap, at least 7″ x 13″
  • 1 scrap batting or Insul Bright, 3.5″ x 3″
  • Velcro, coordinating color, 1.5″ x 1″

Notes:

  • Use a 3/8″ seam allowance unless said otherwise.
  • Right sides together means to put the print part of the fabrics (the good side, the outside) against each other – so the you can see the wrong side of the fabric on the outside.

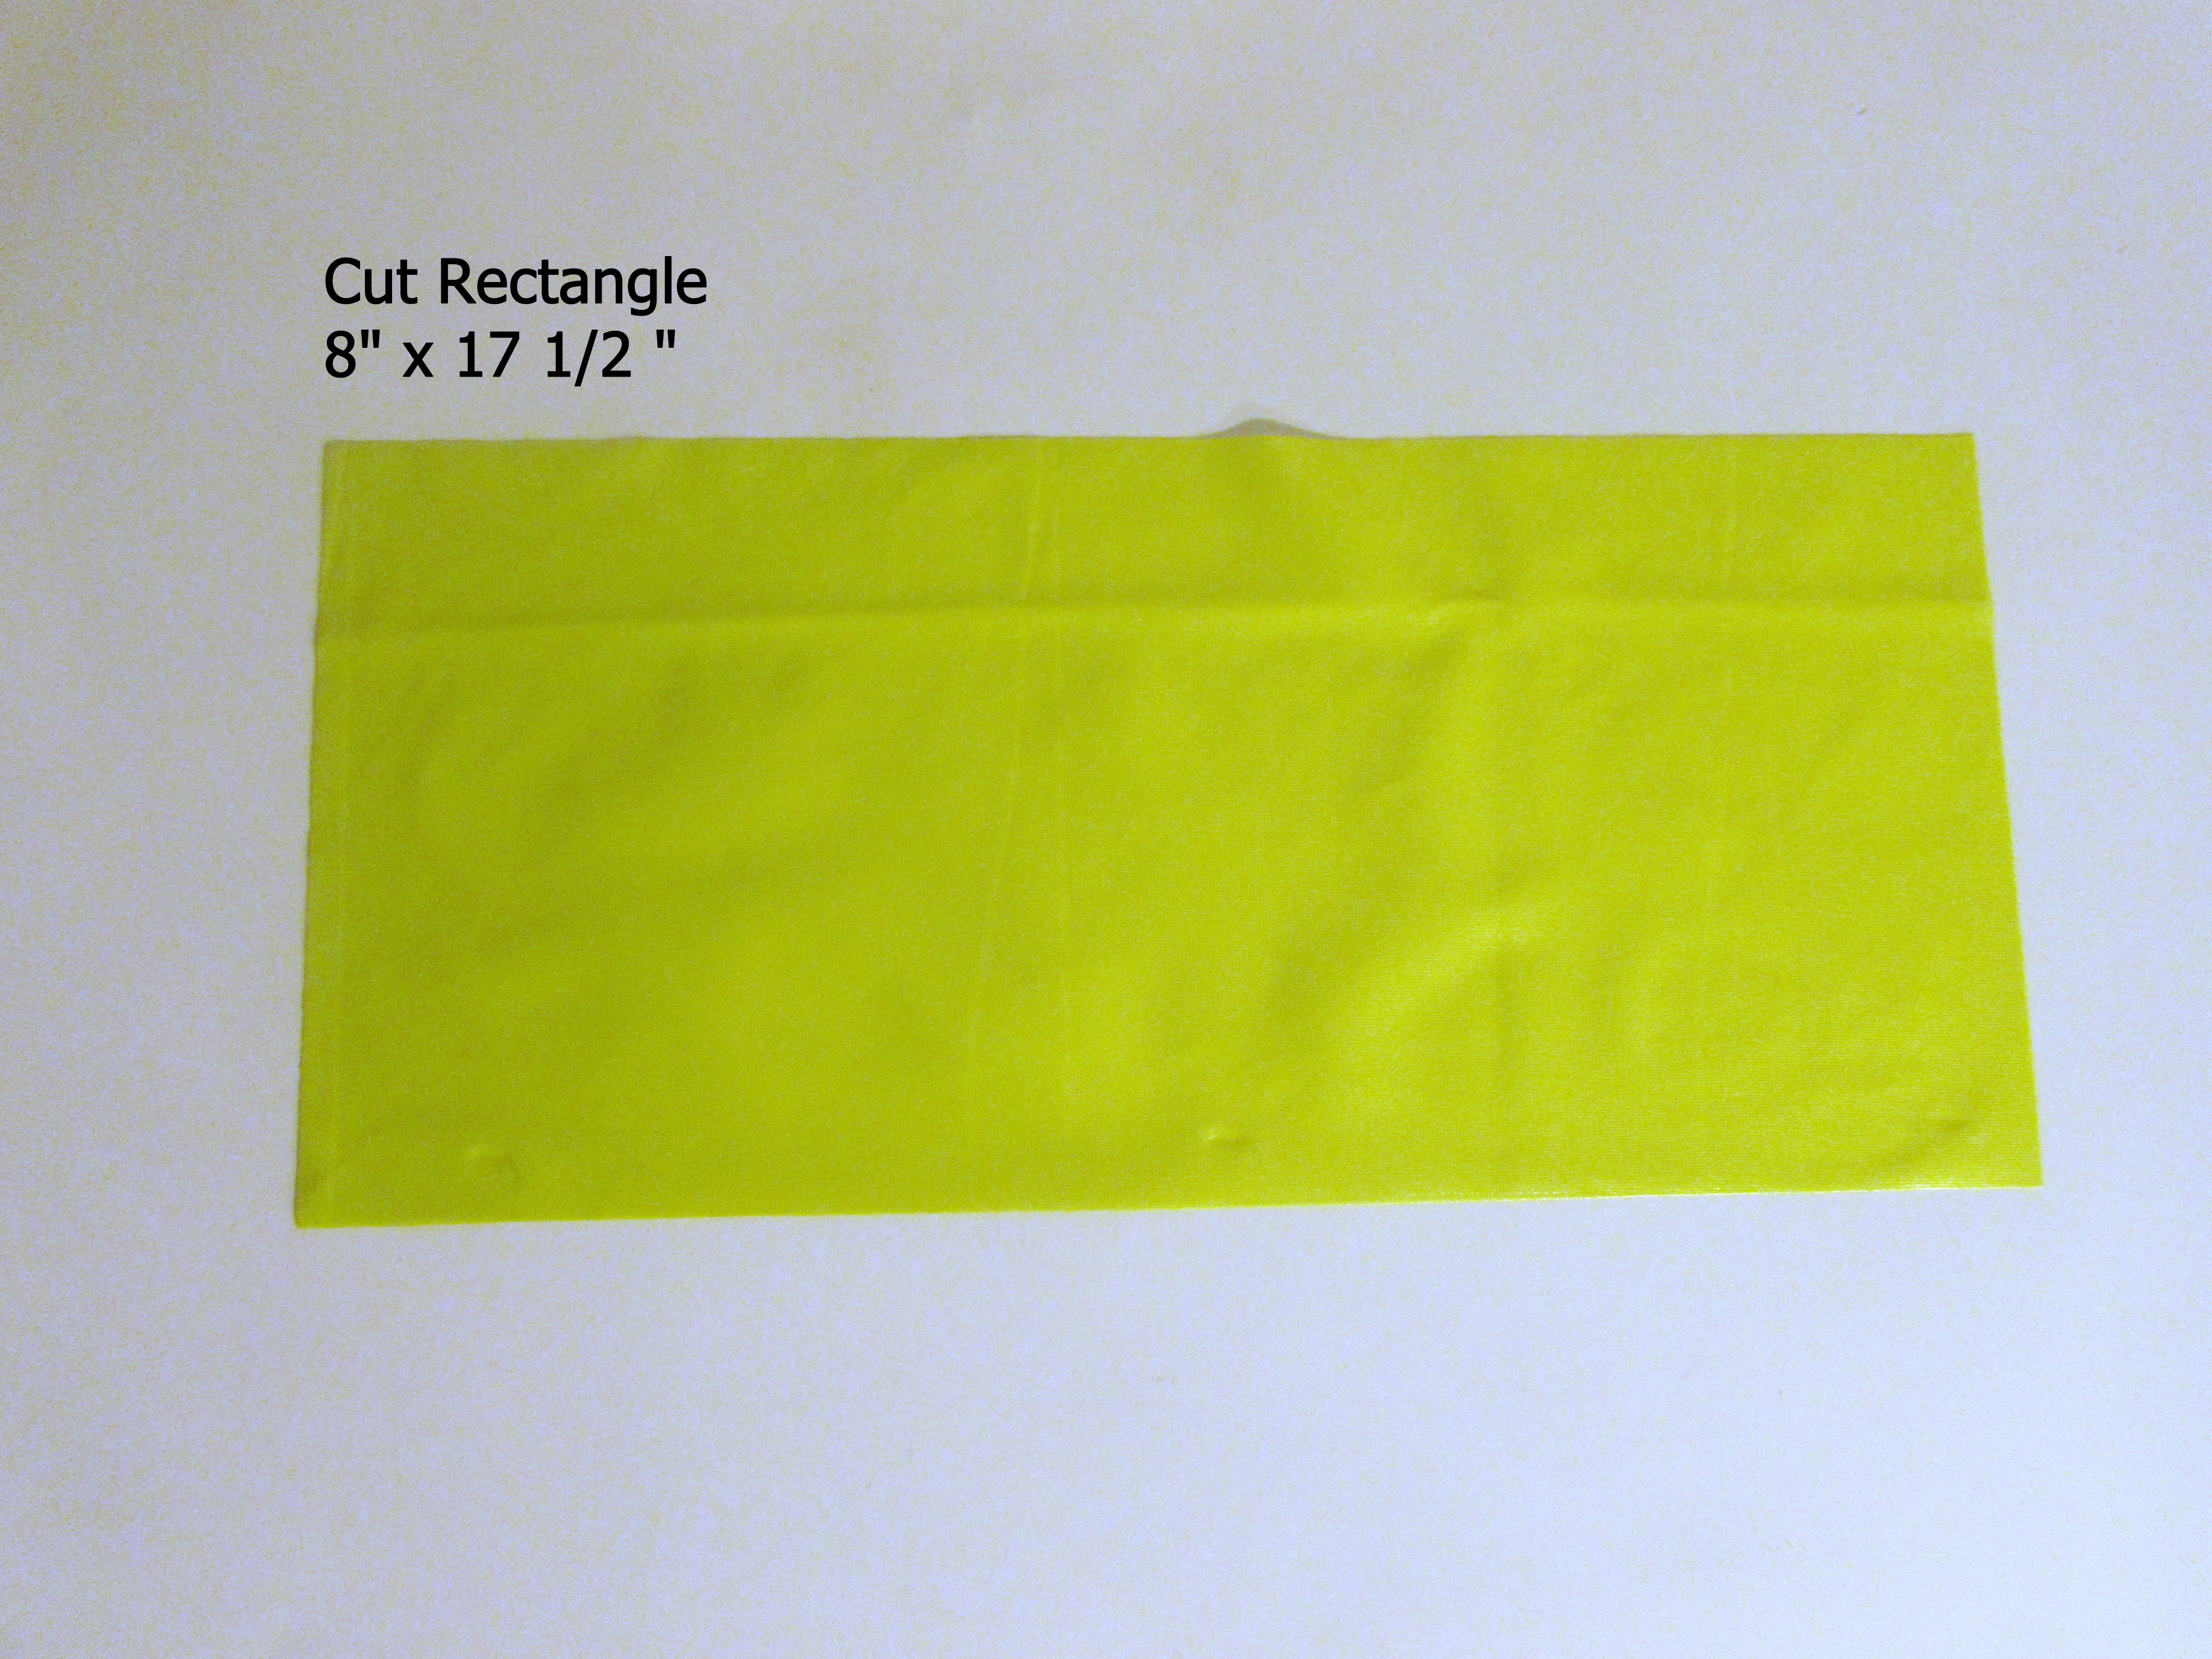
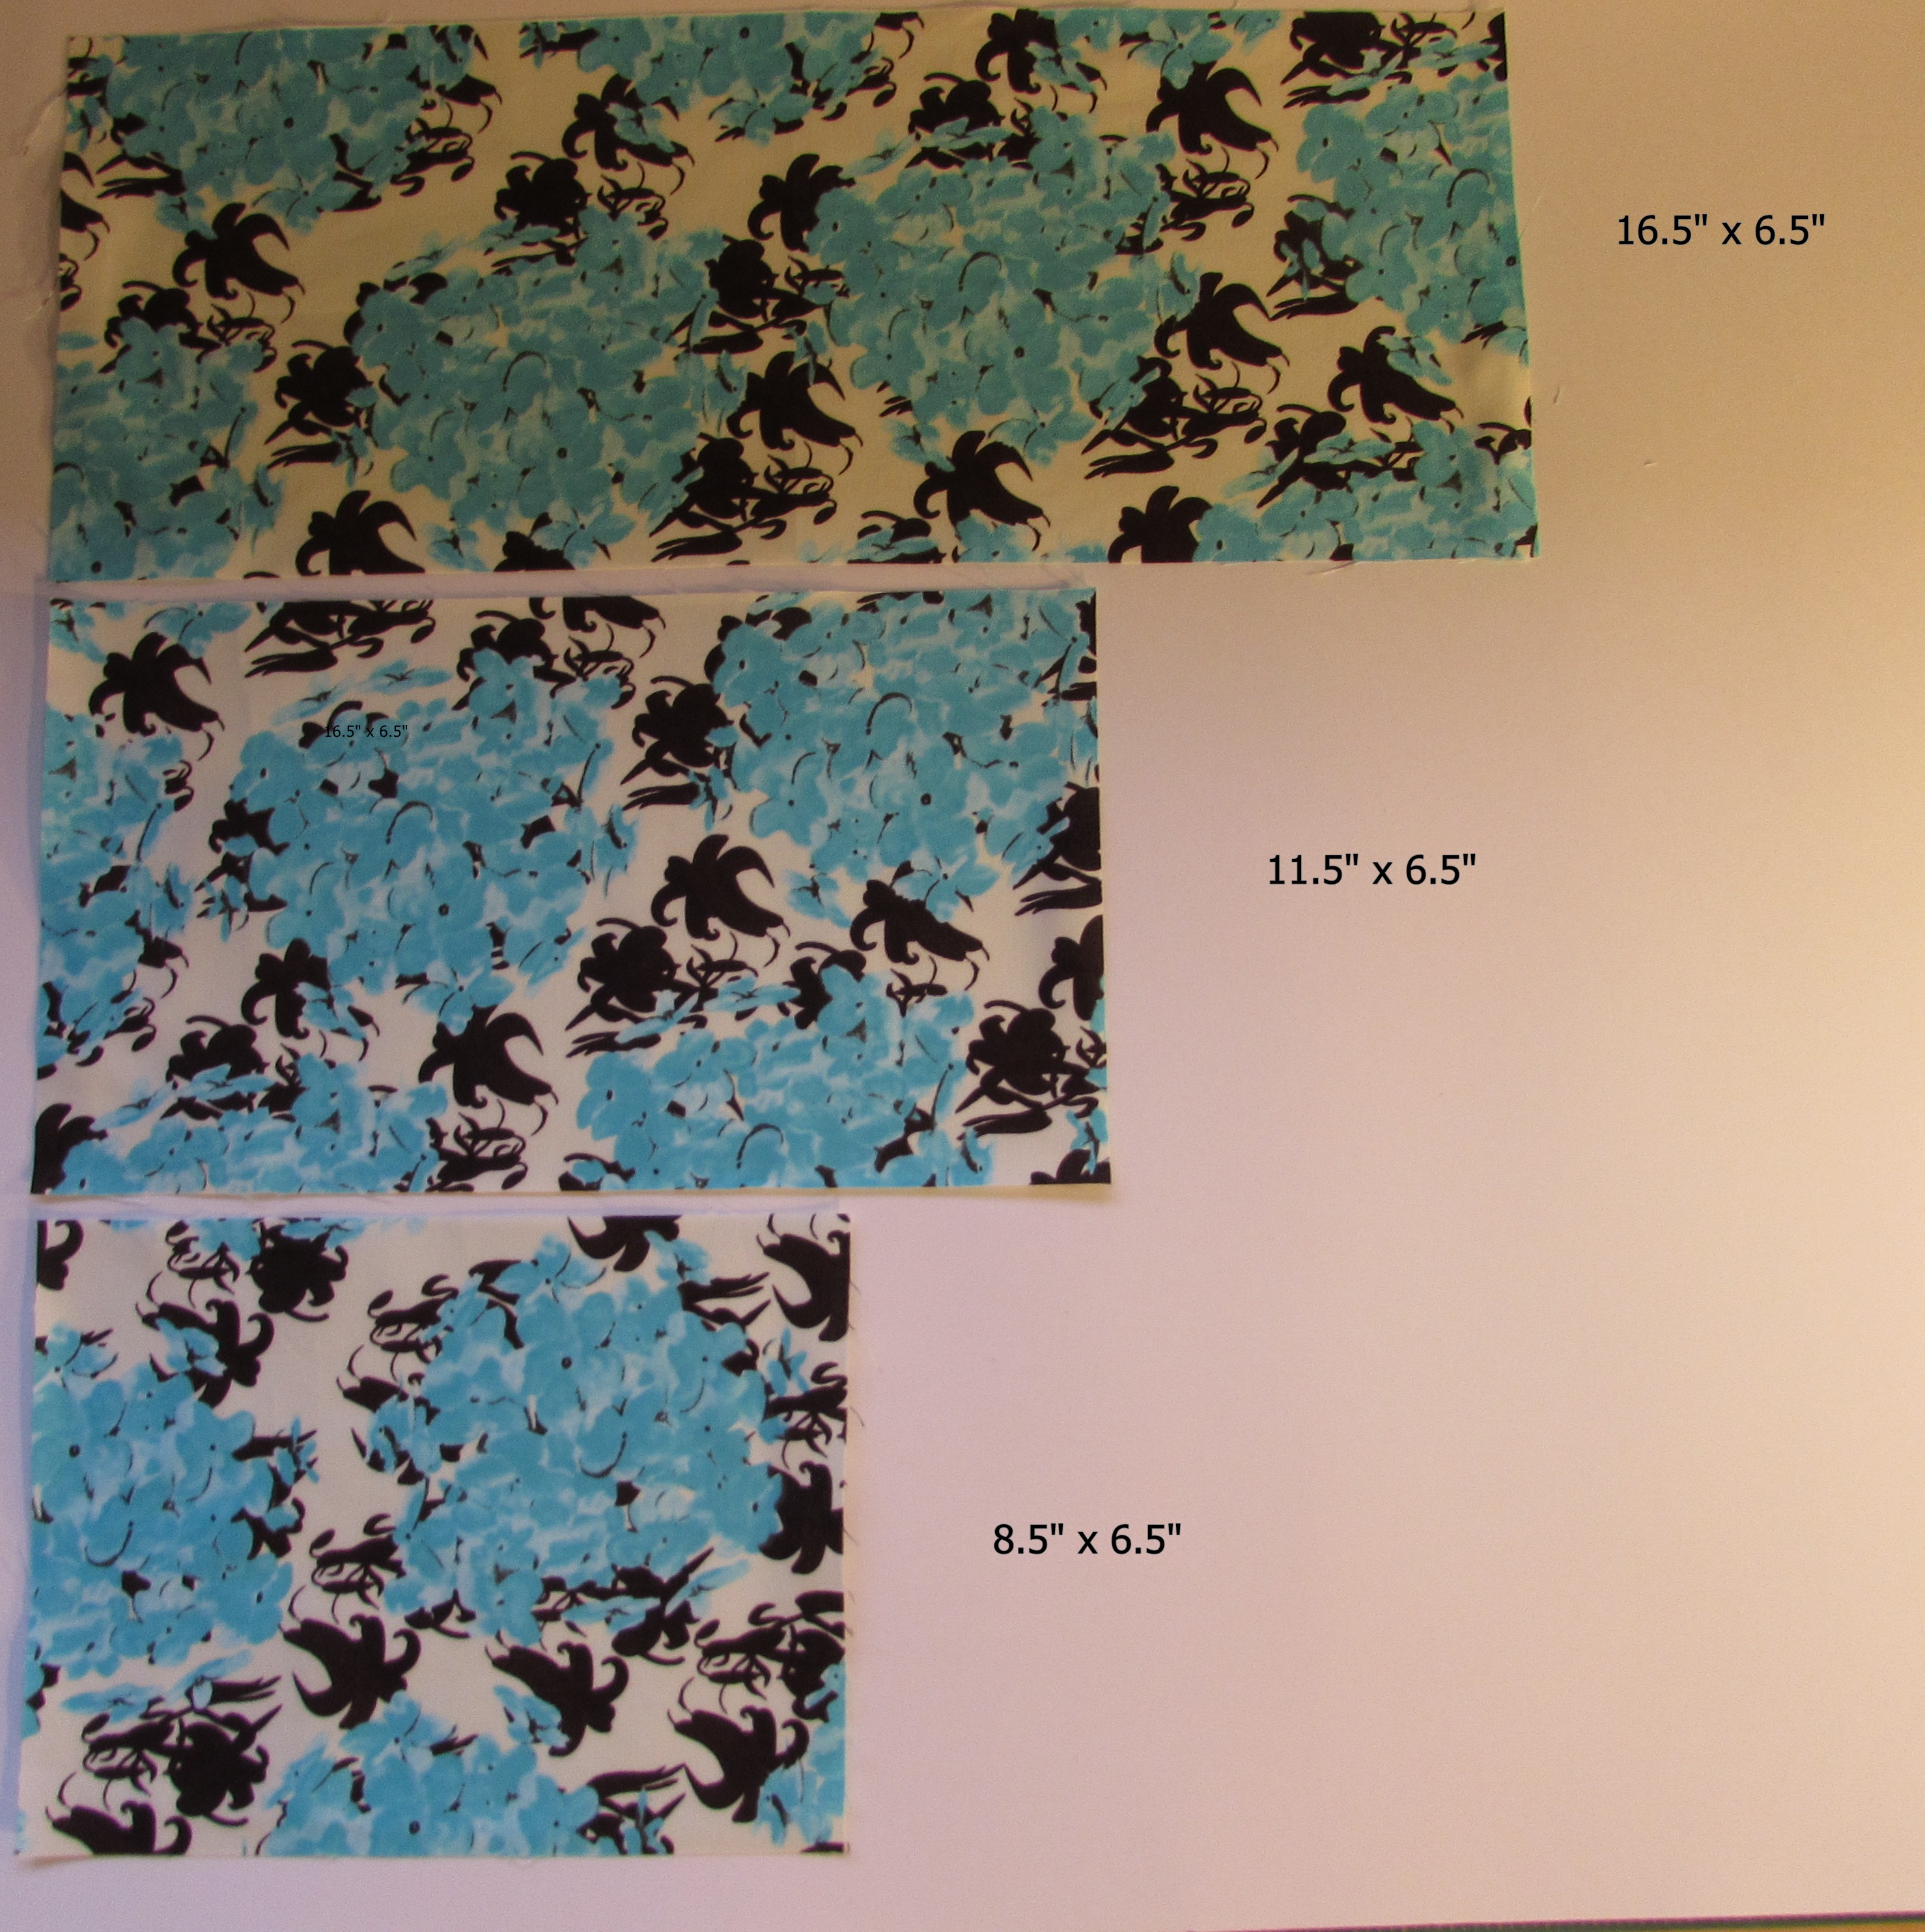
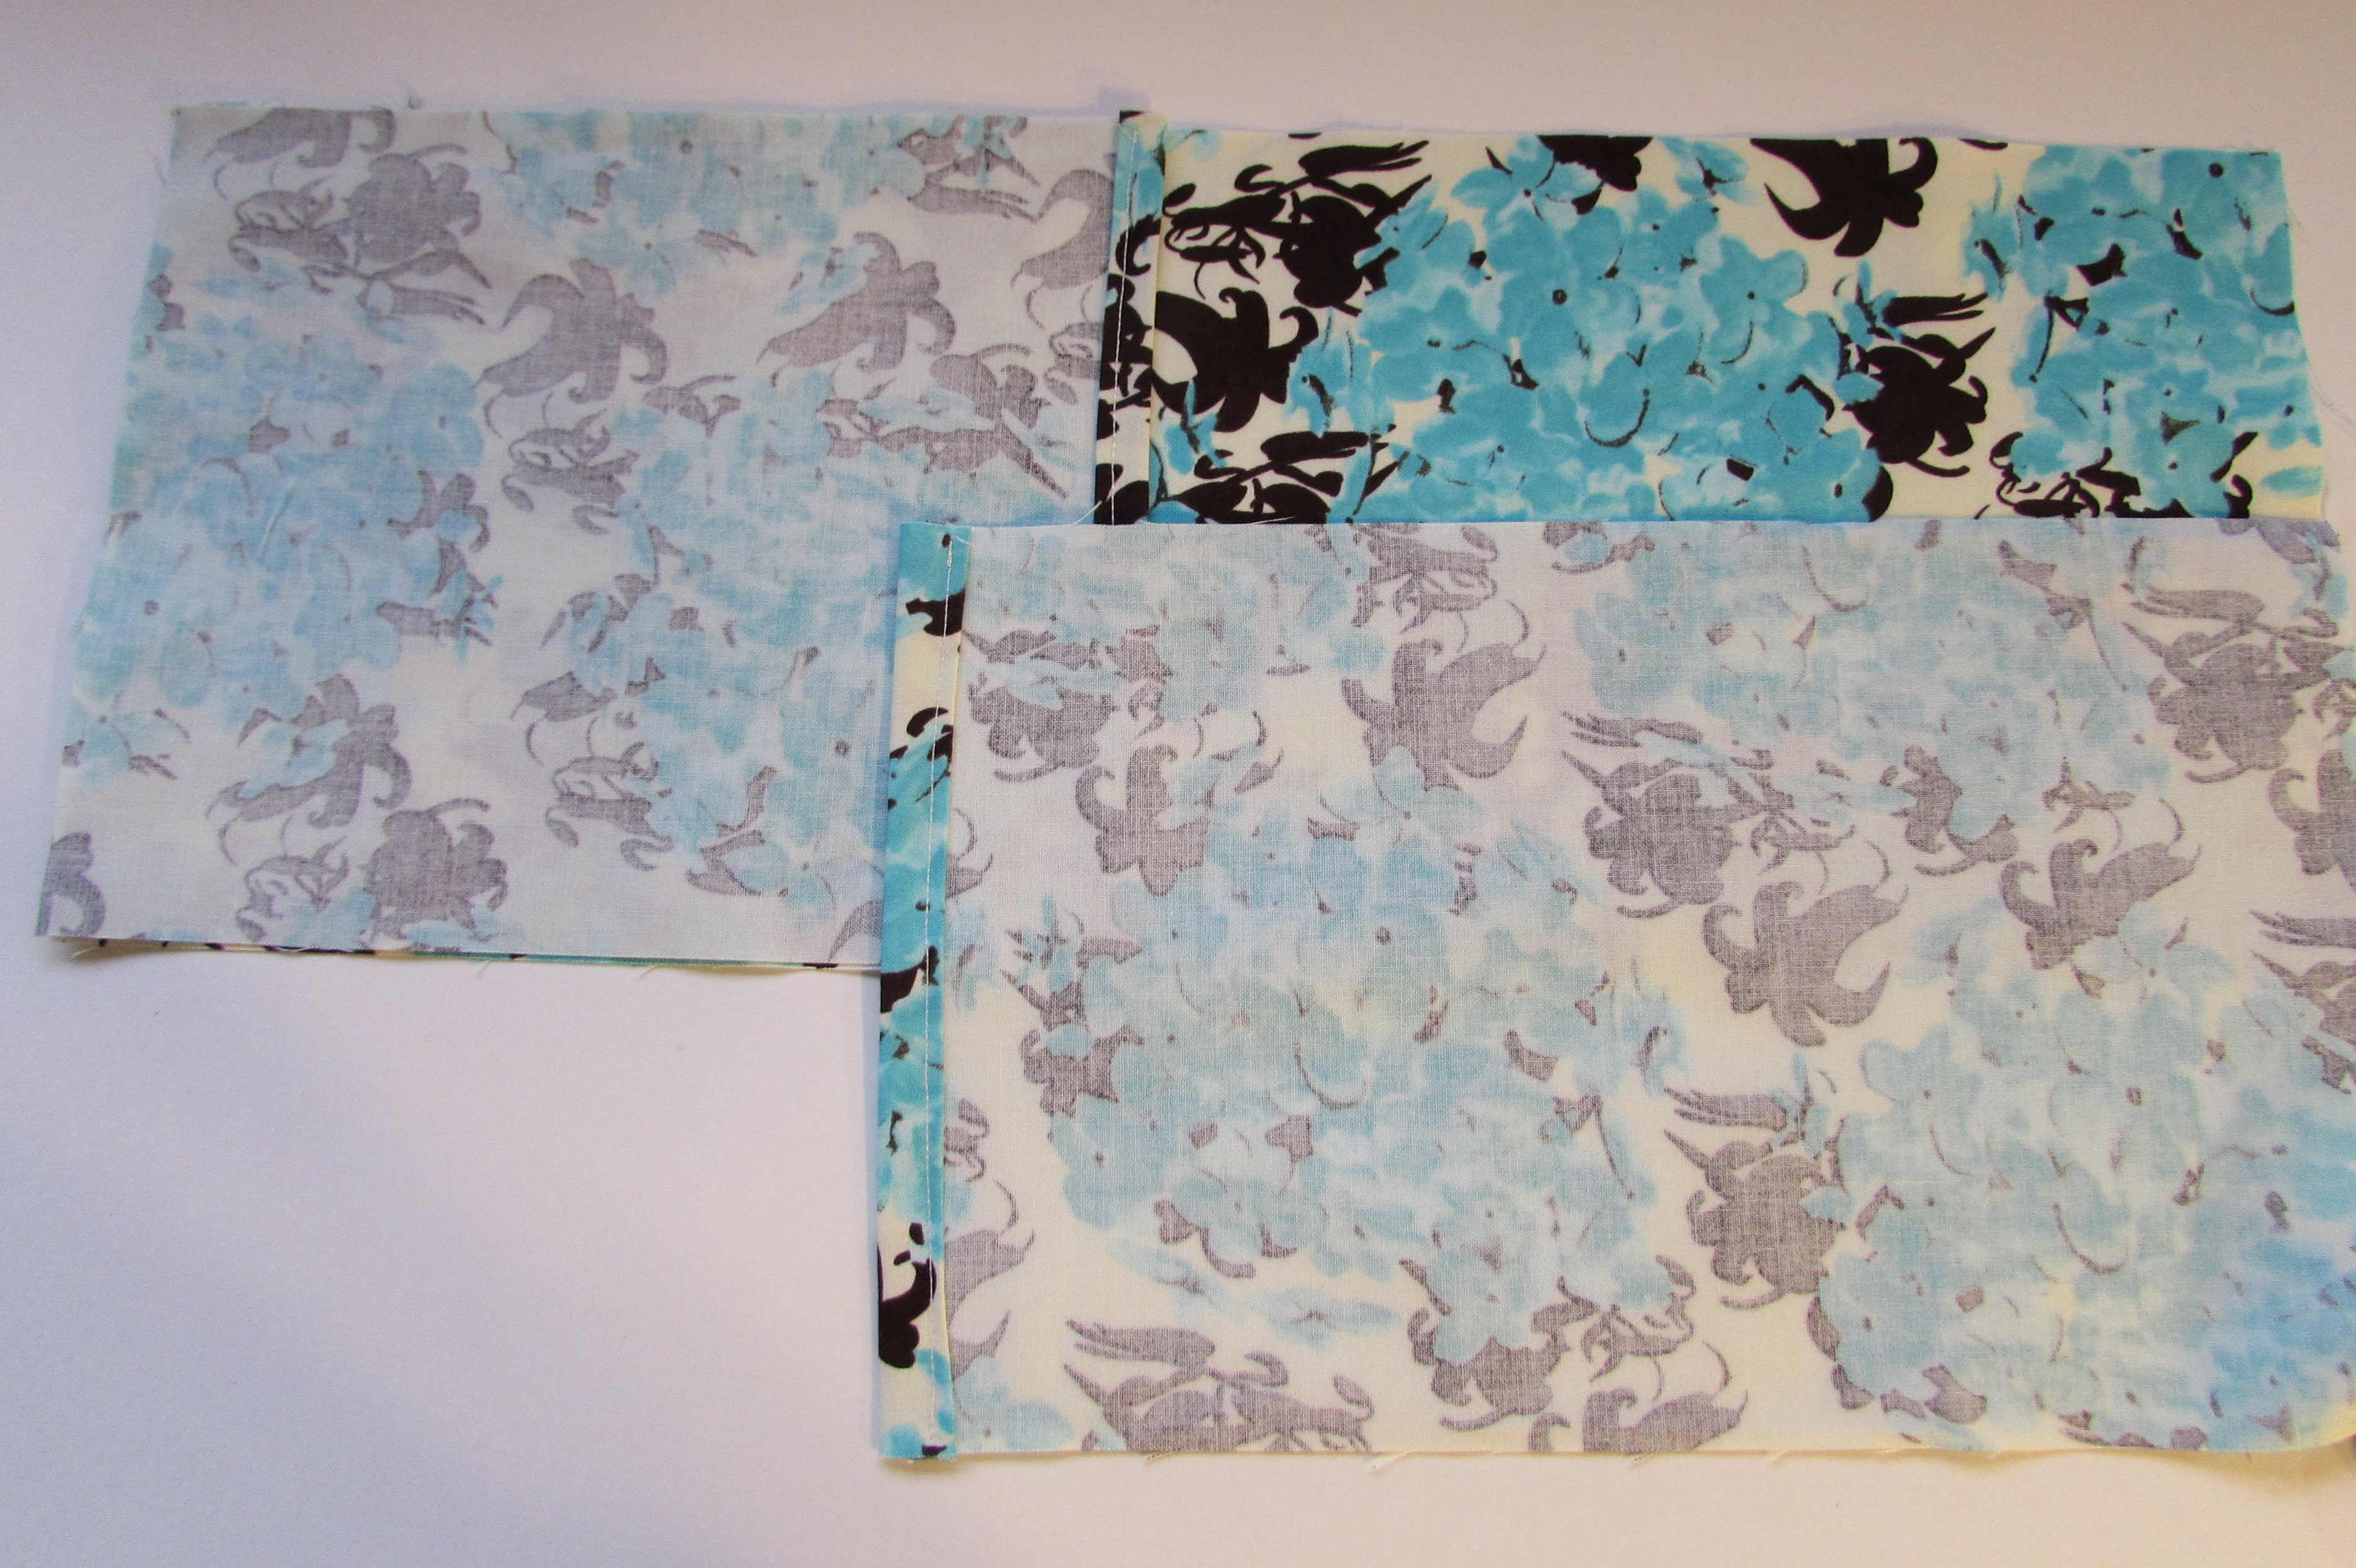
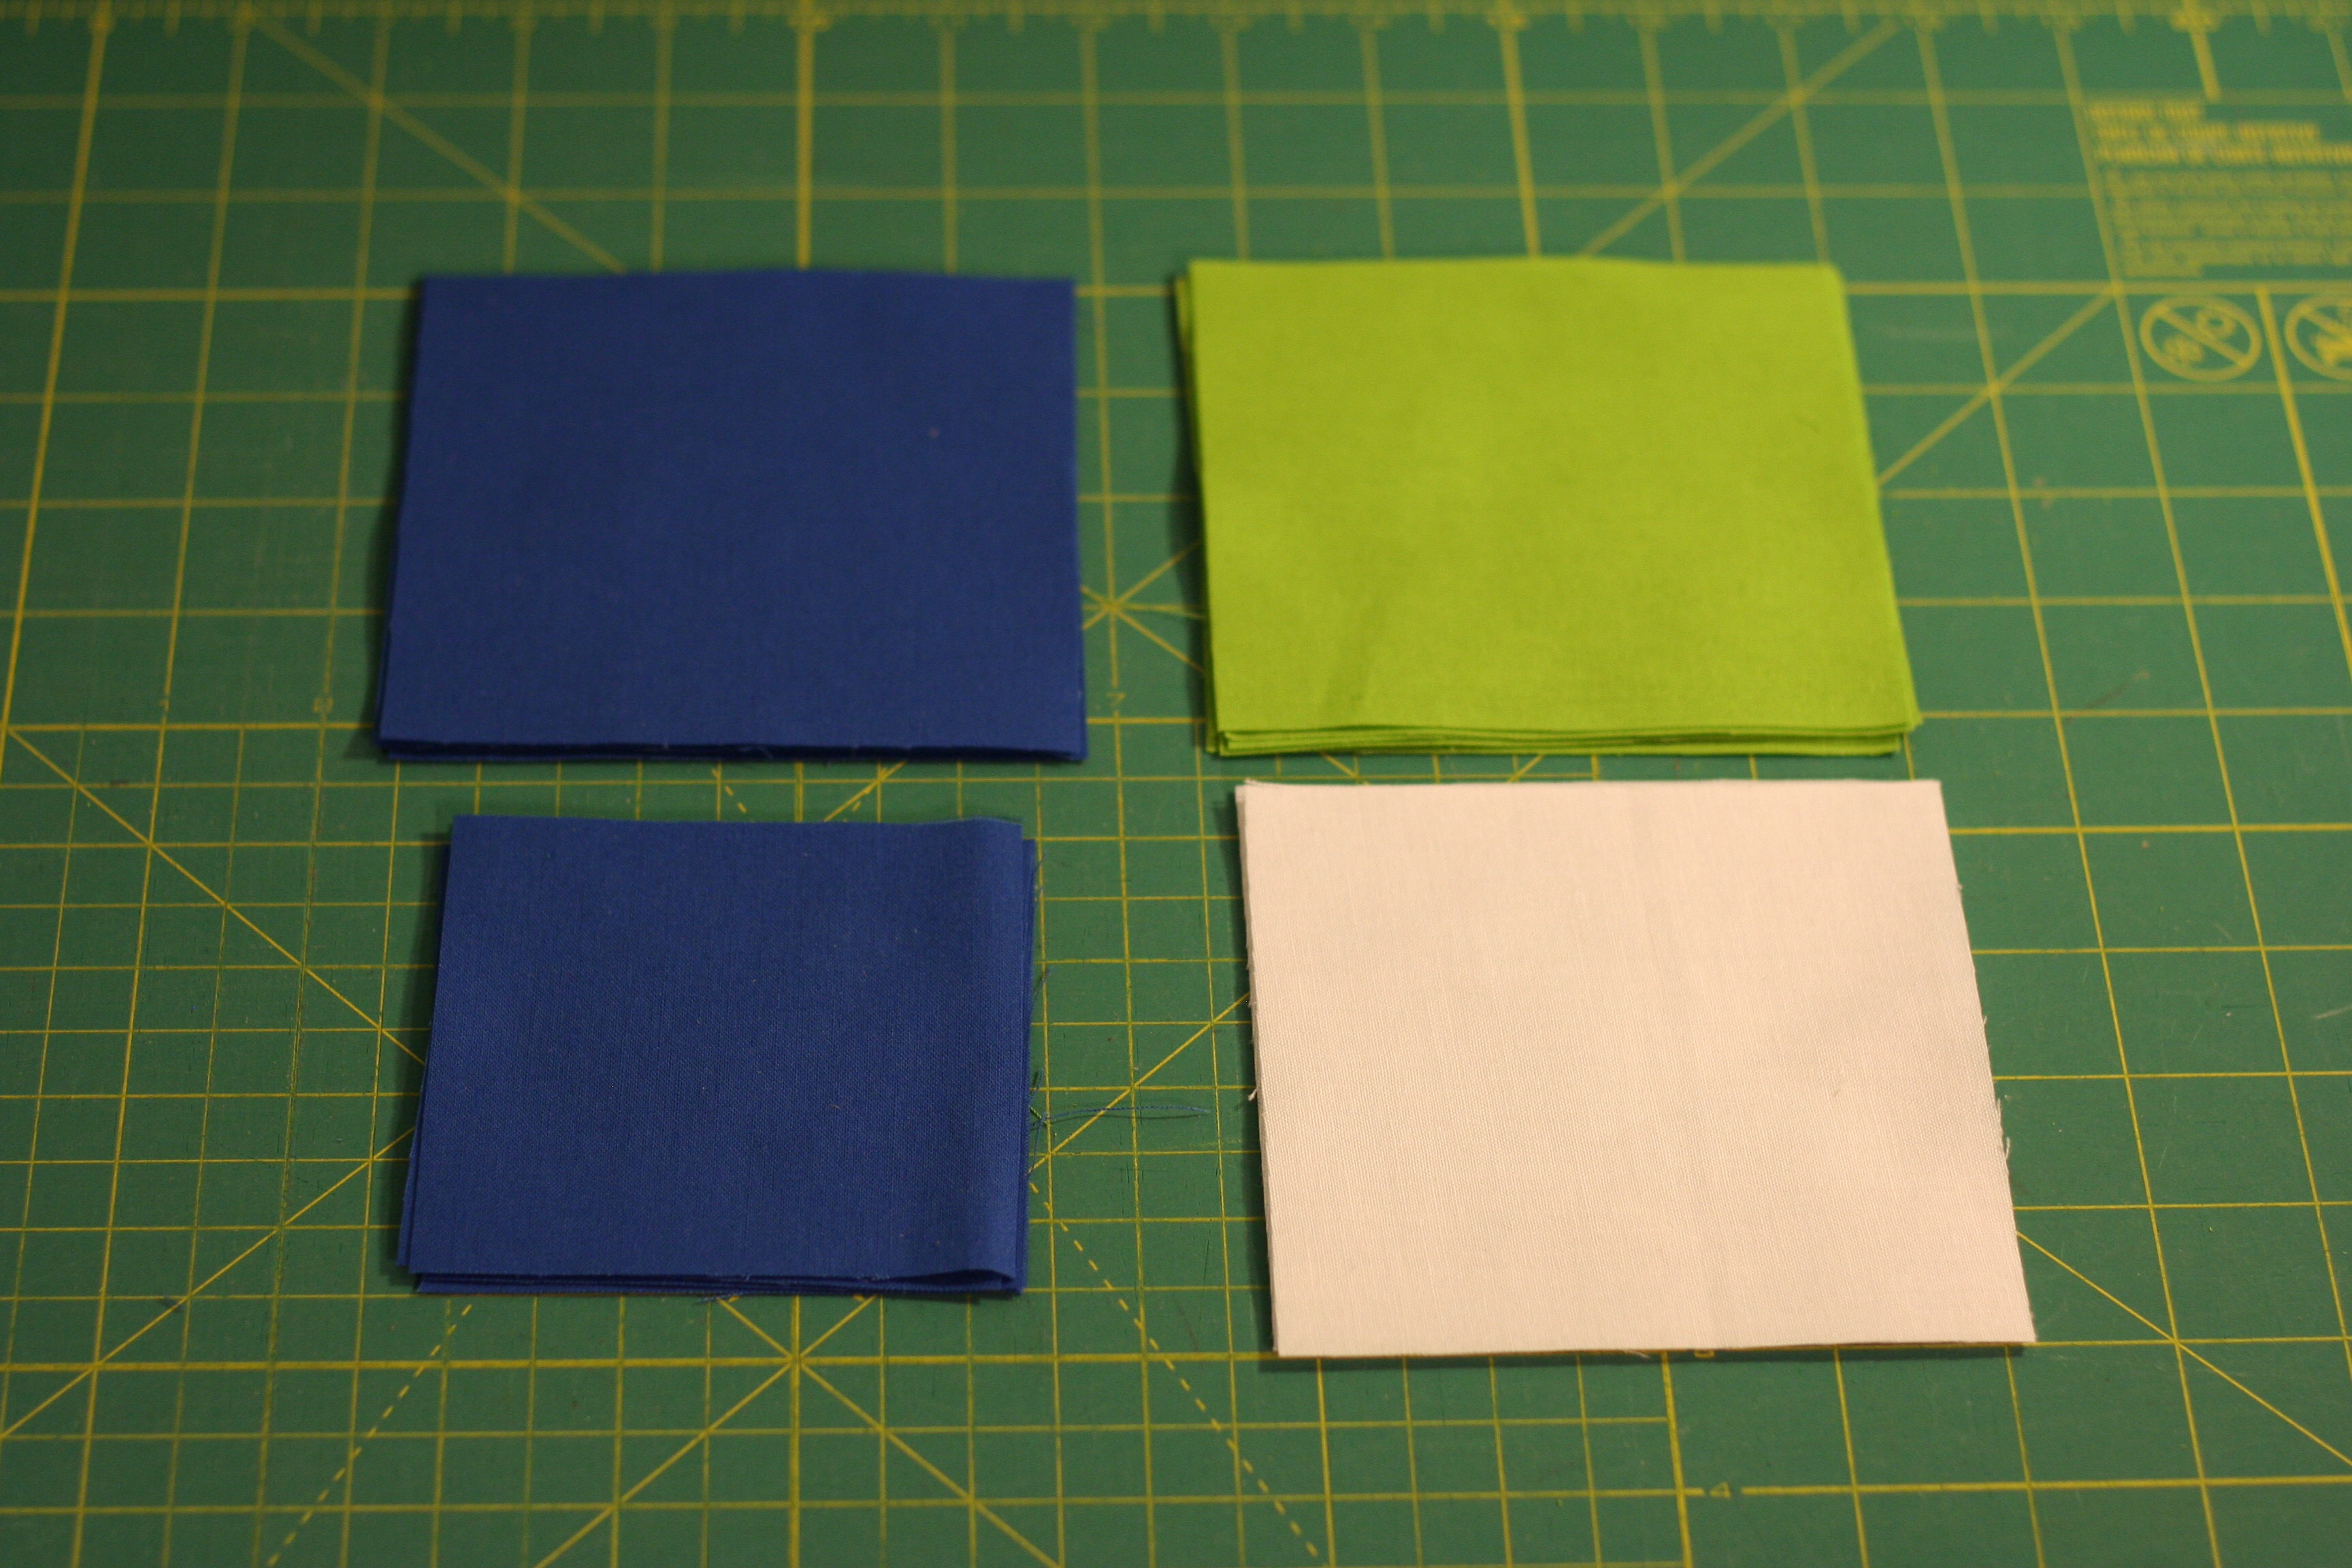
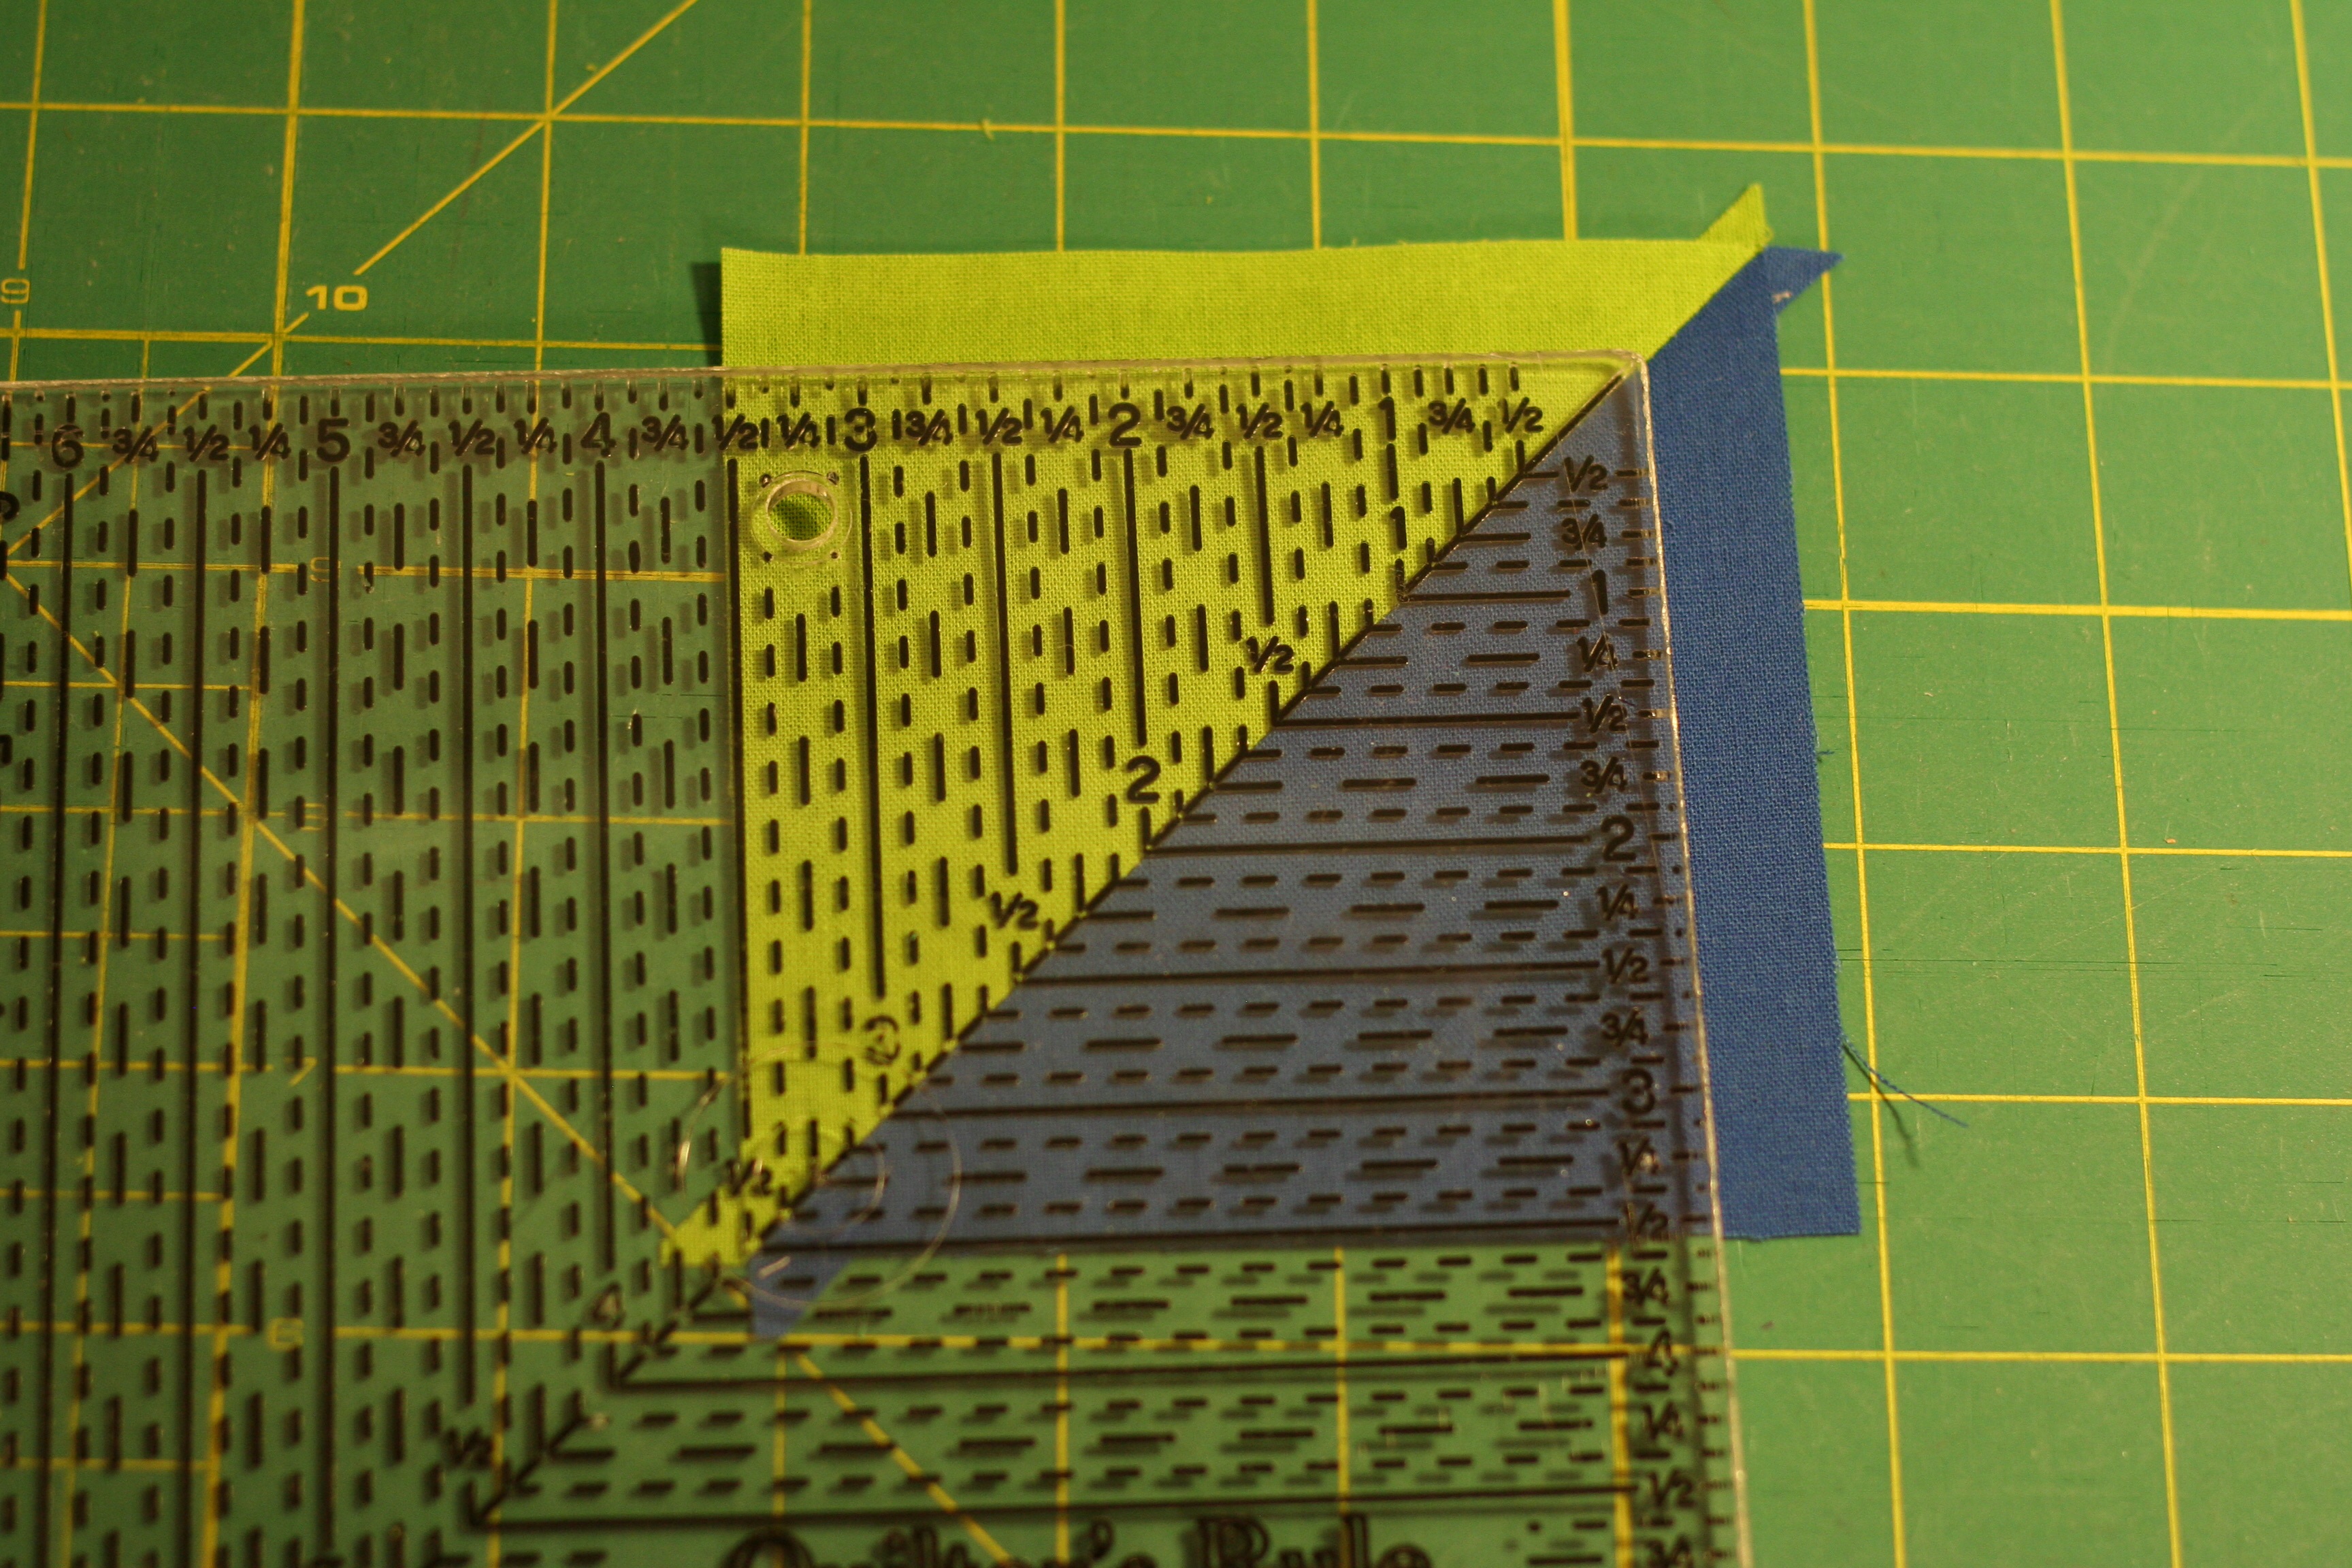
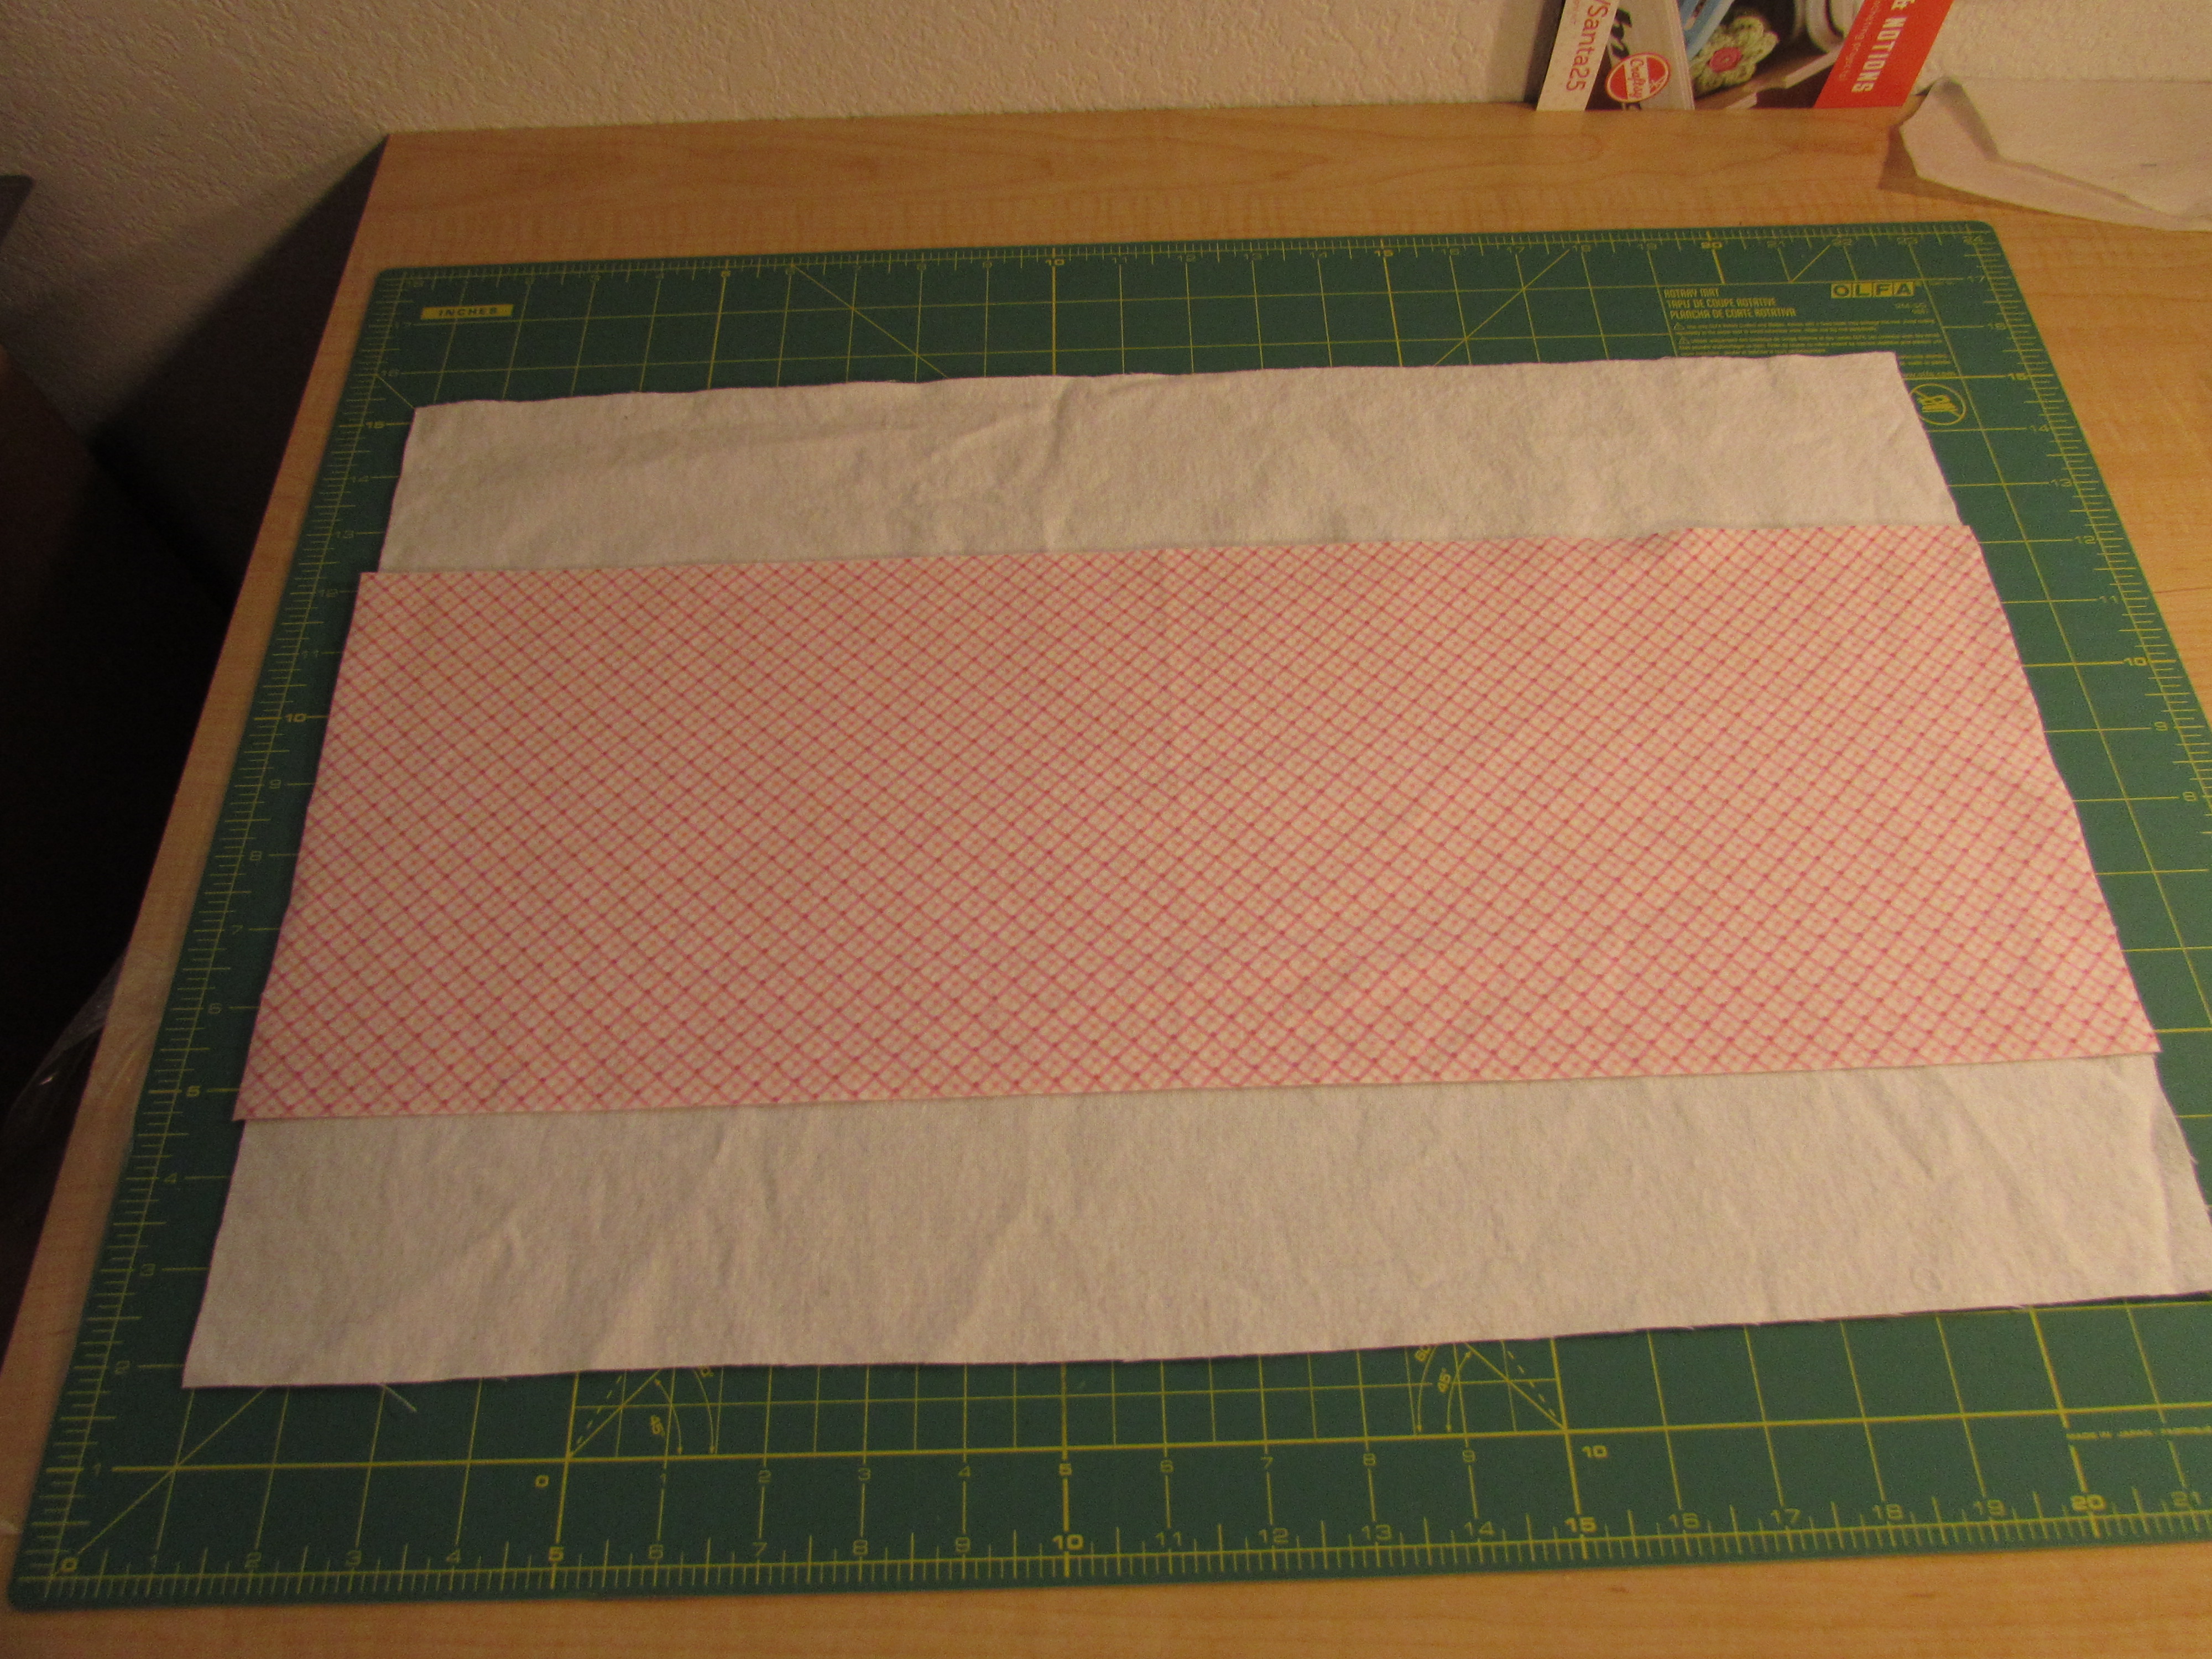
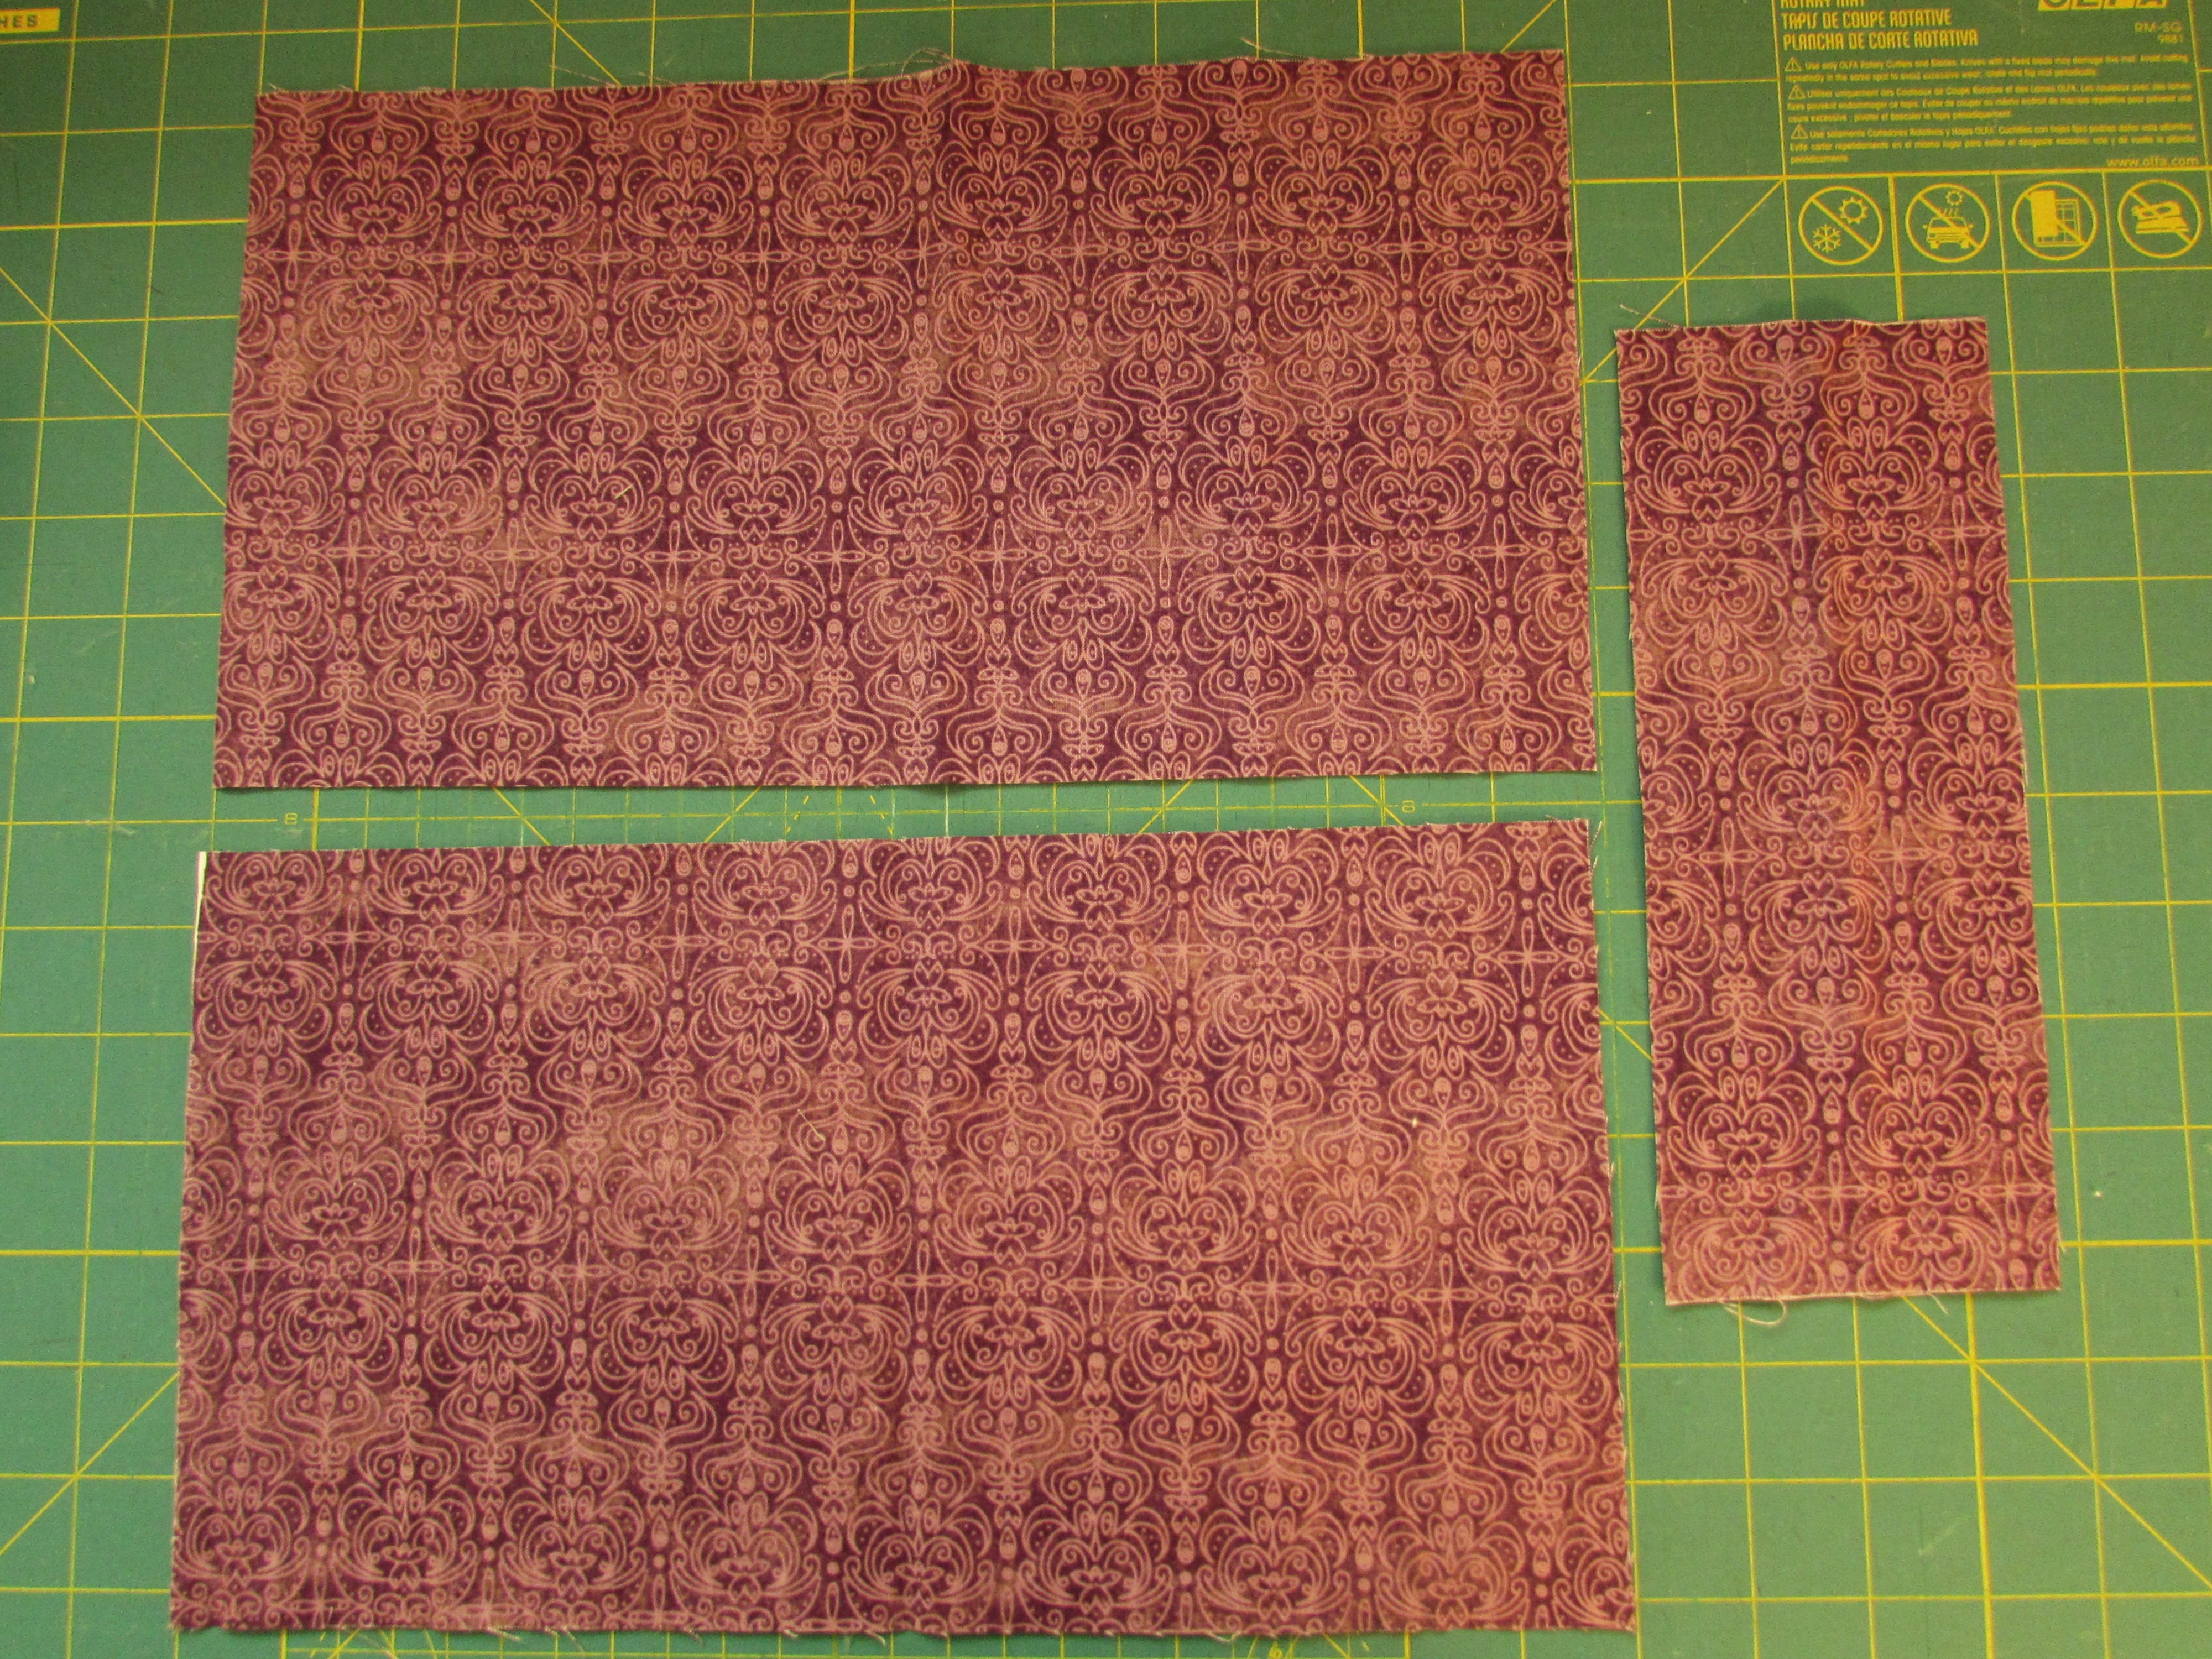
Cut three pieces from the fat quarters. Two at 7″ by 13″ and one piece that is 3″ x 7″.

img_7551

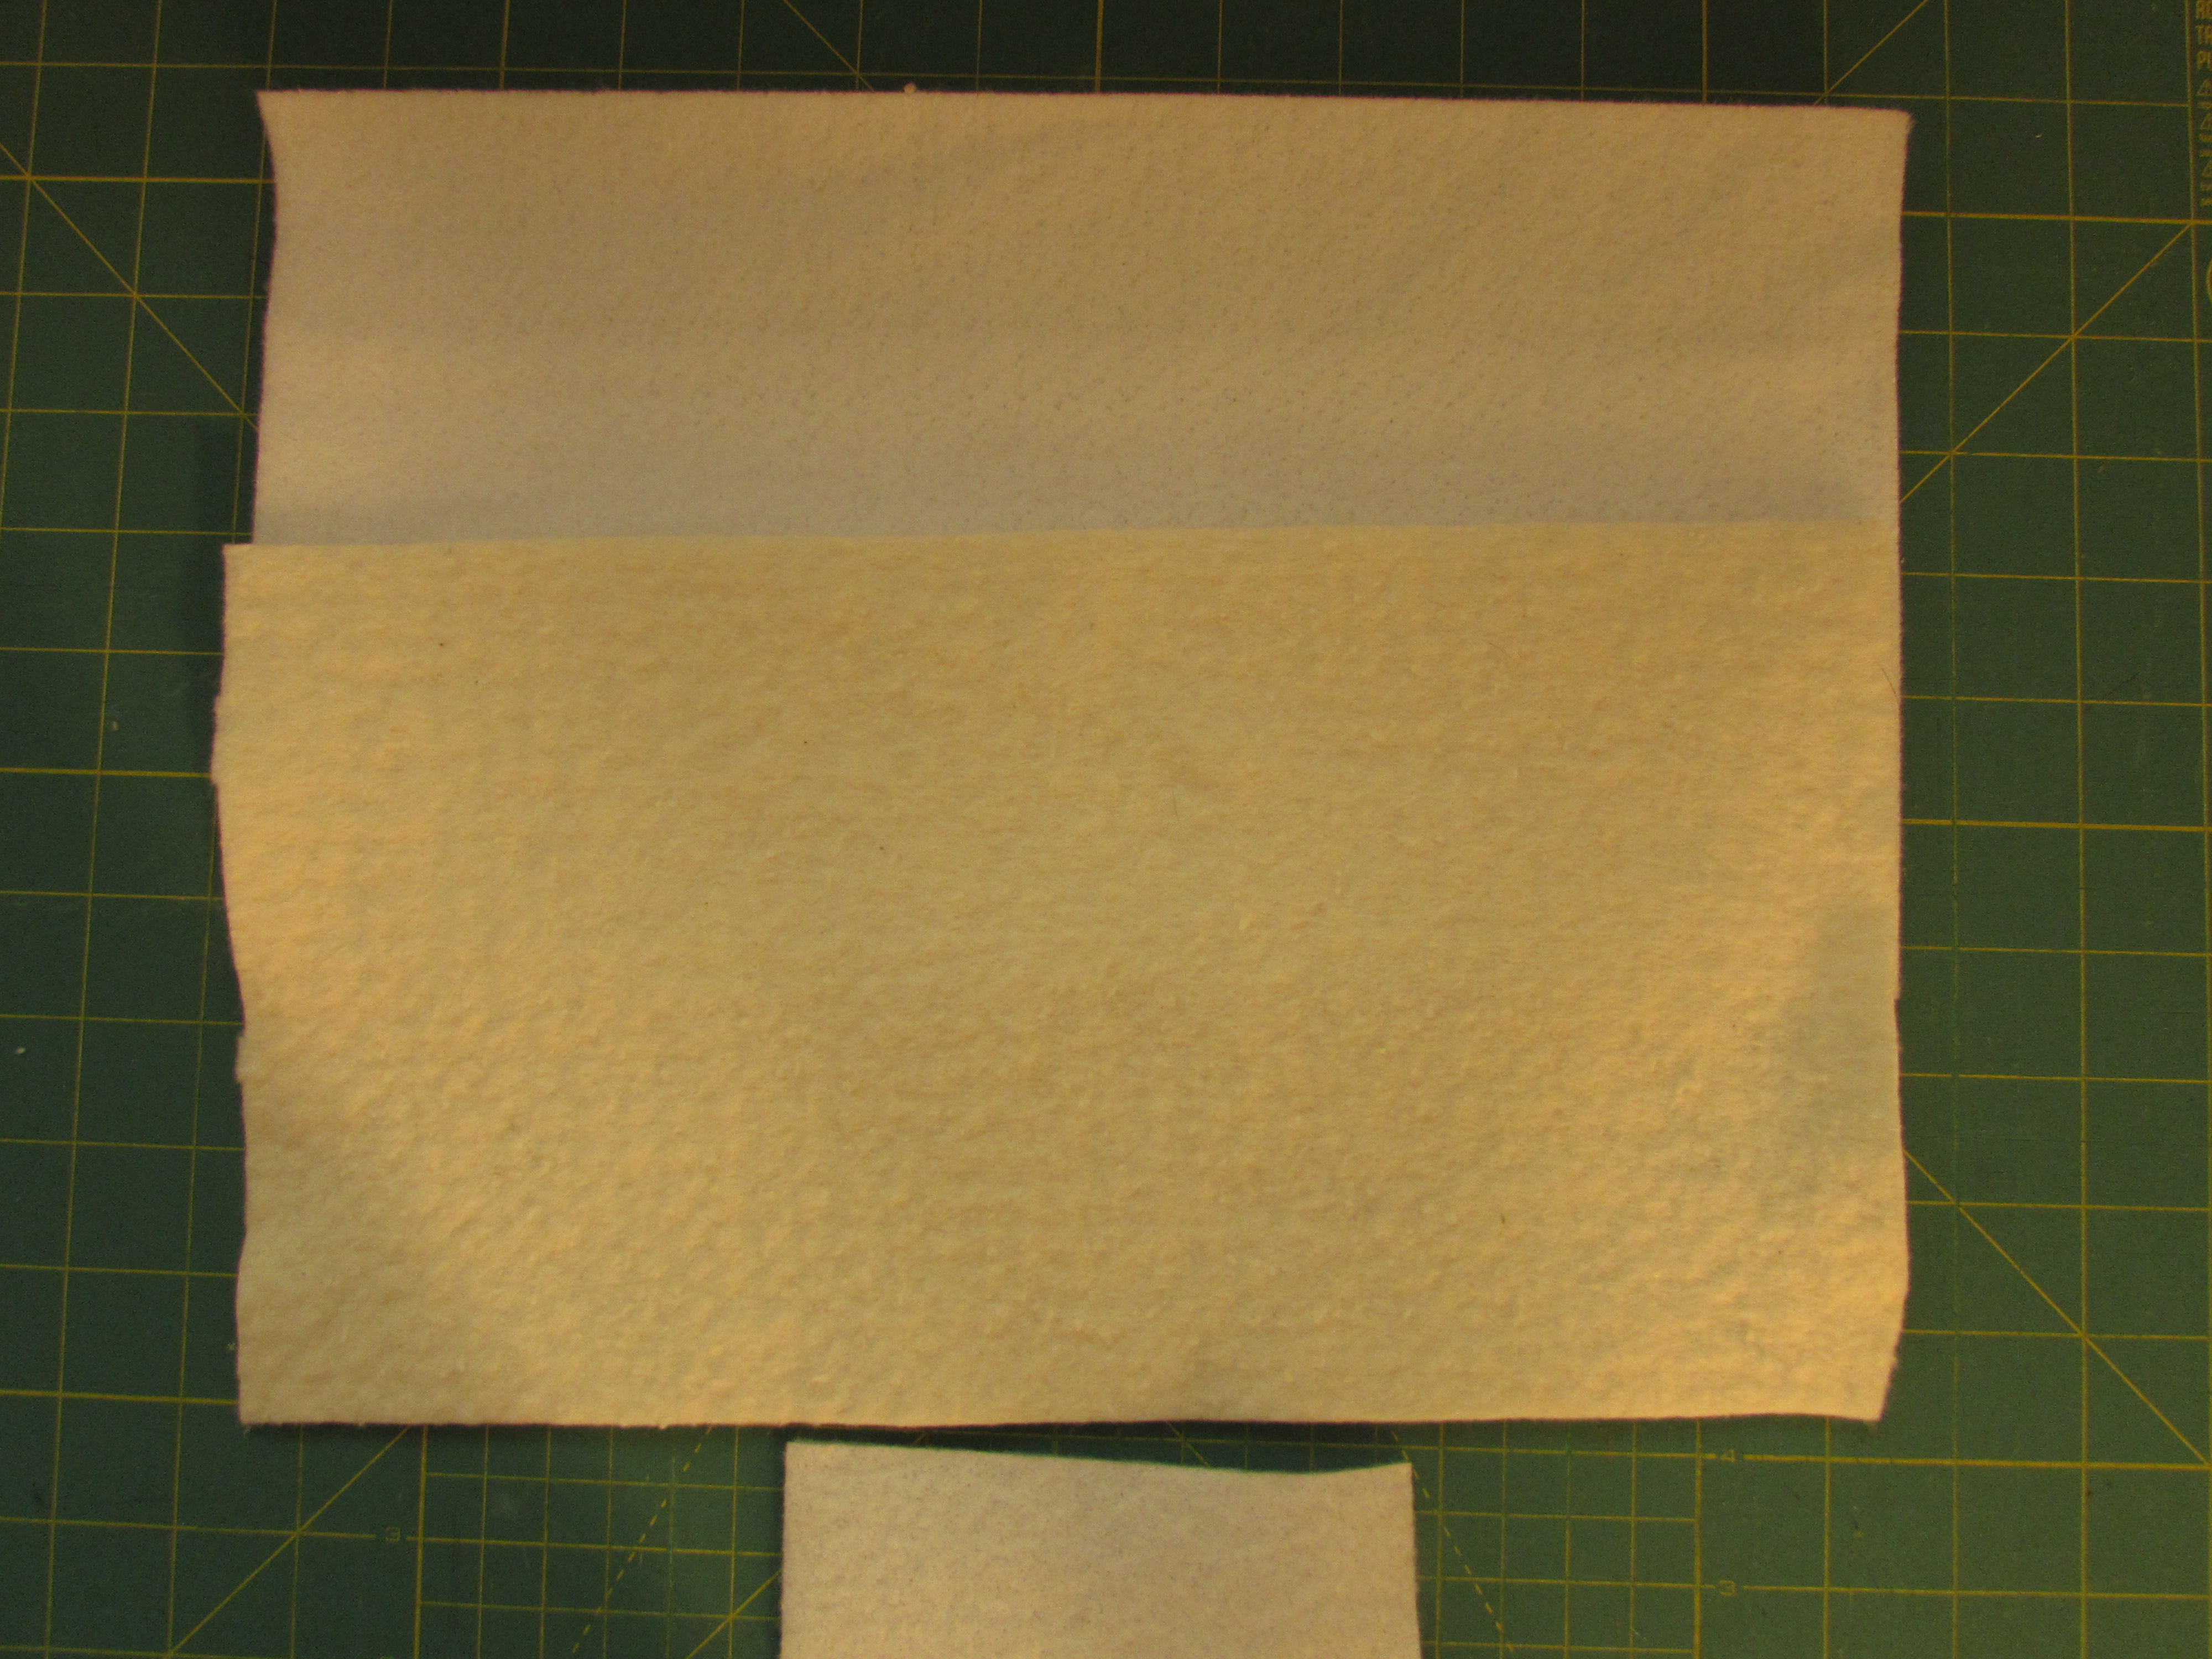
From your batting and Insul Bright scraps, cut one piece of each at 7″ x 13″ and one (you may use either batting or Insul Bright for this one) at 3″ x 3.5″.

If you aren’t familiar with Insul Bright, it is a batting made with polyester fibers that insulates items to stay warm. It is used for things like hot pads, trivets, cozies and can actually be used to line clothing. It is washable but is not microwave safe. There are strands of a metallic, mylar substance in it for the insulative properties.

img_7549

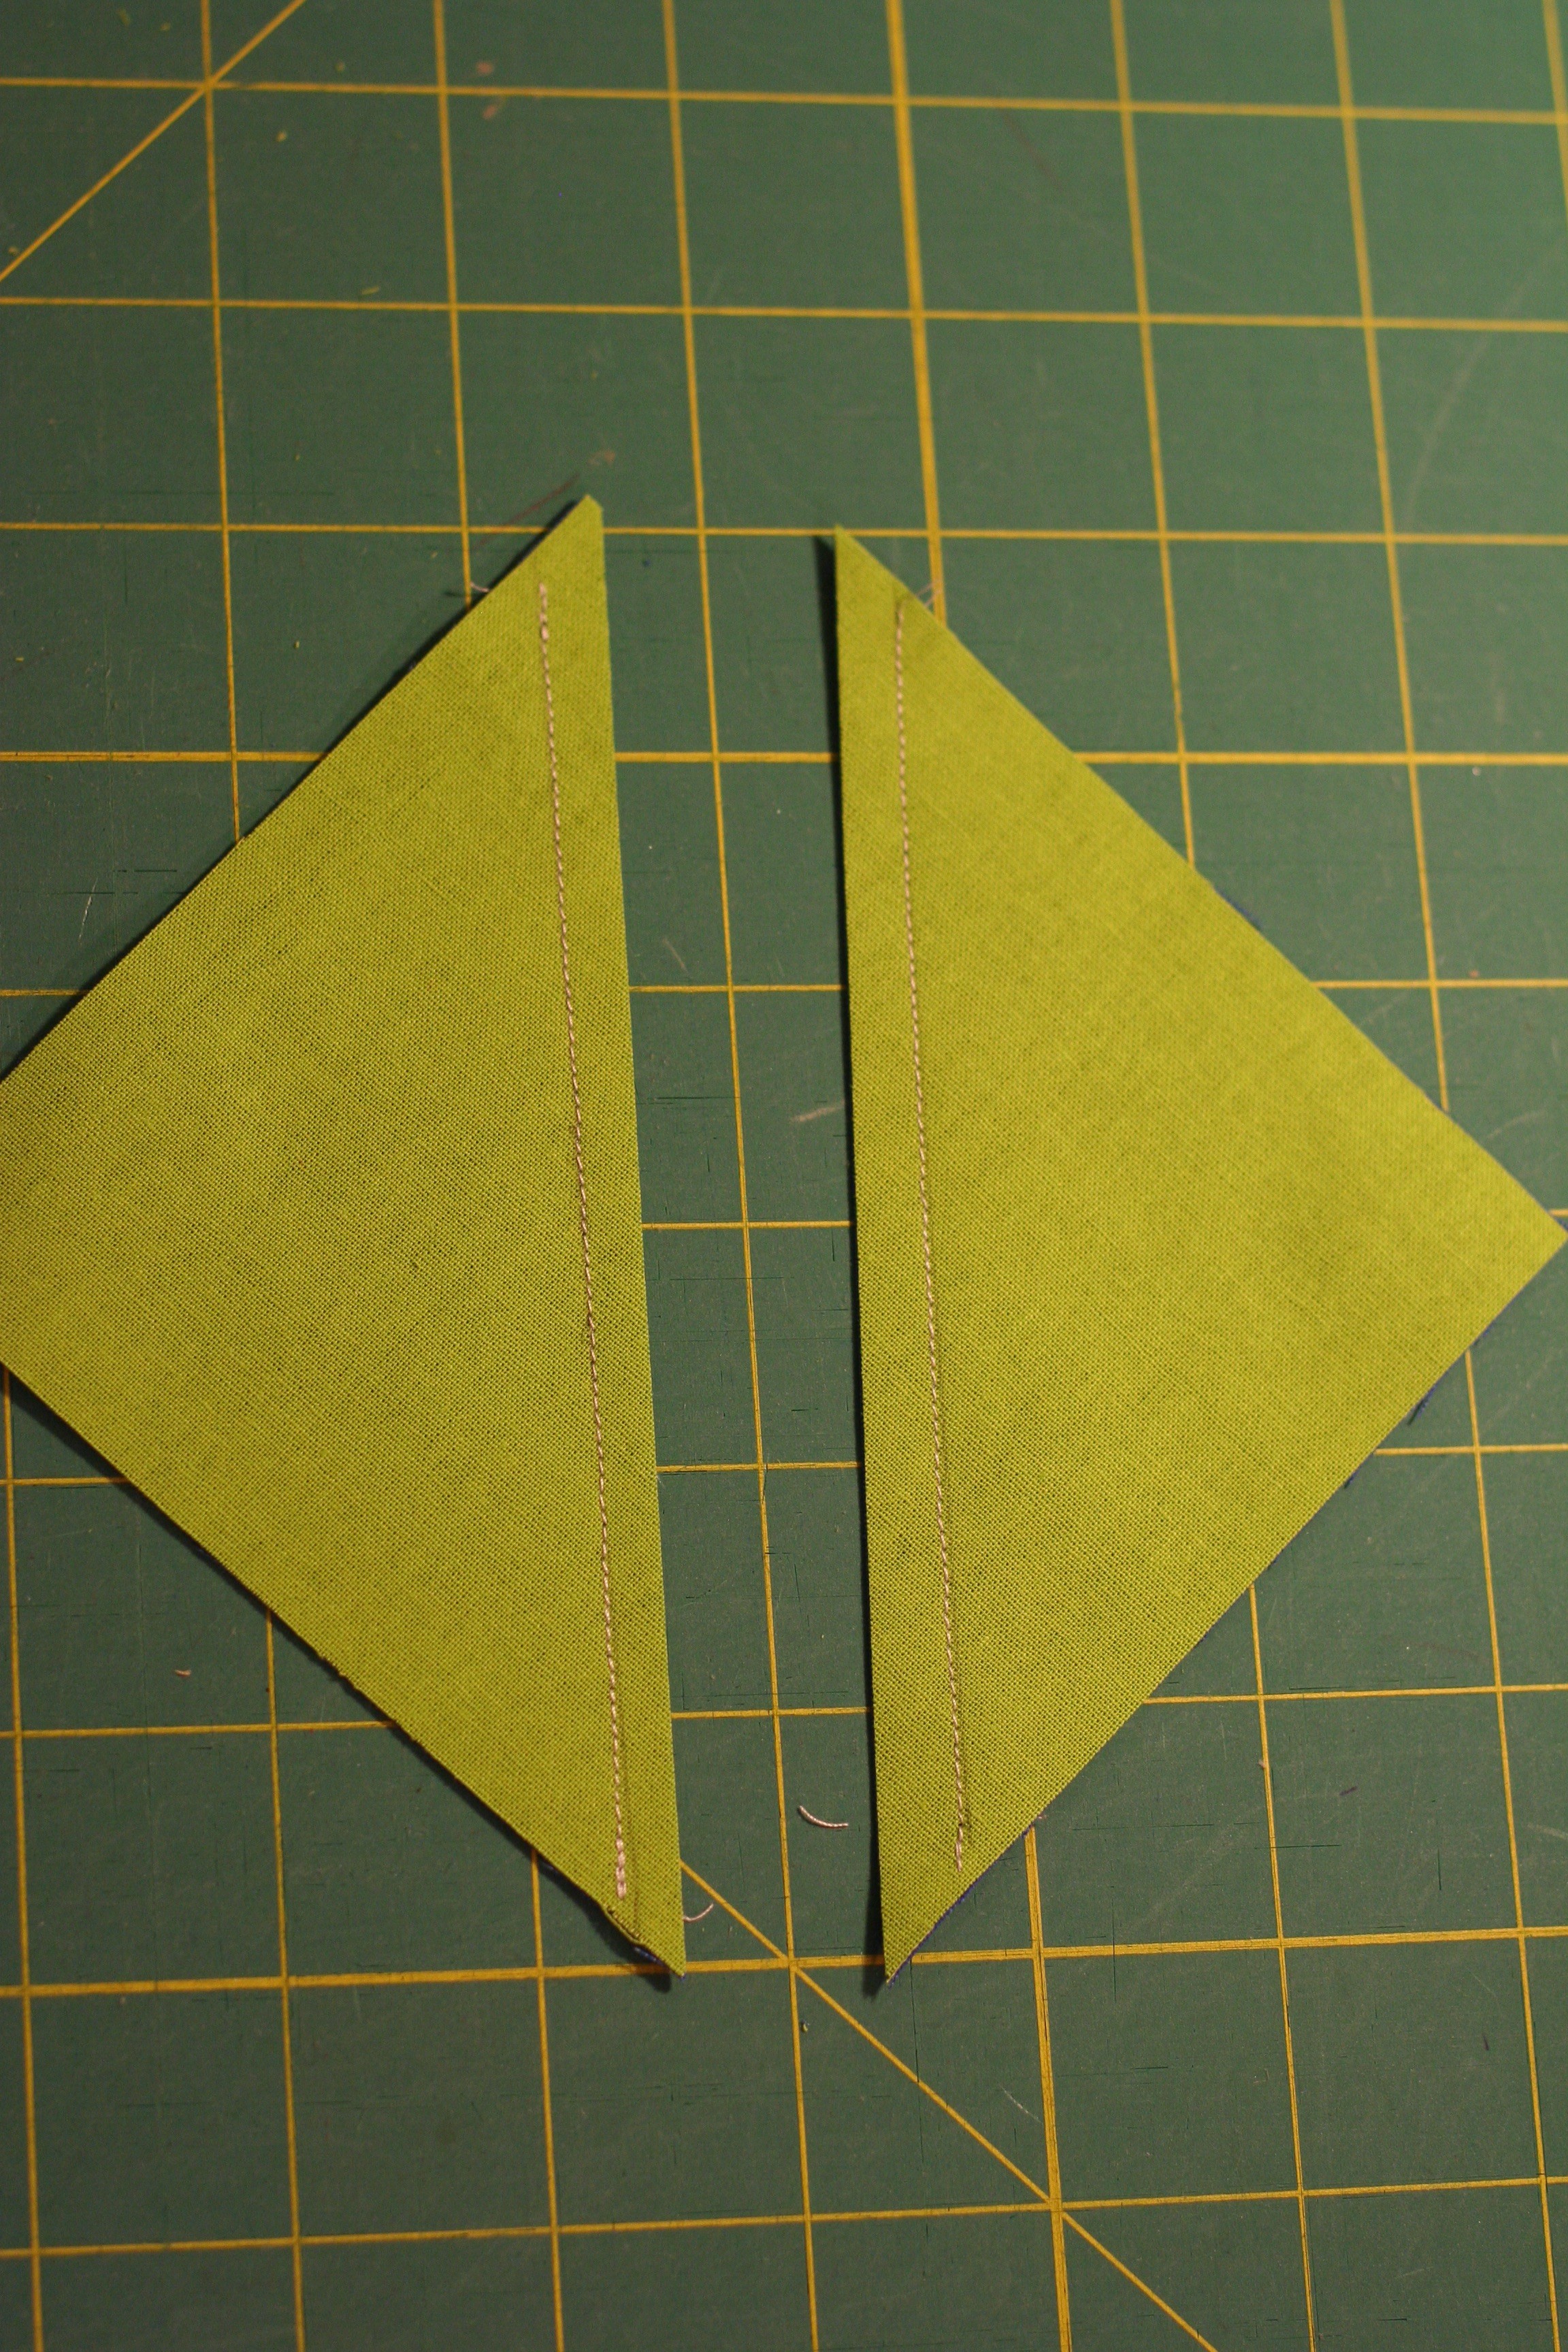
Let’s begin by making the tab.

img_7554

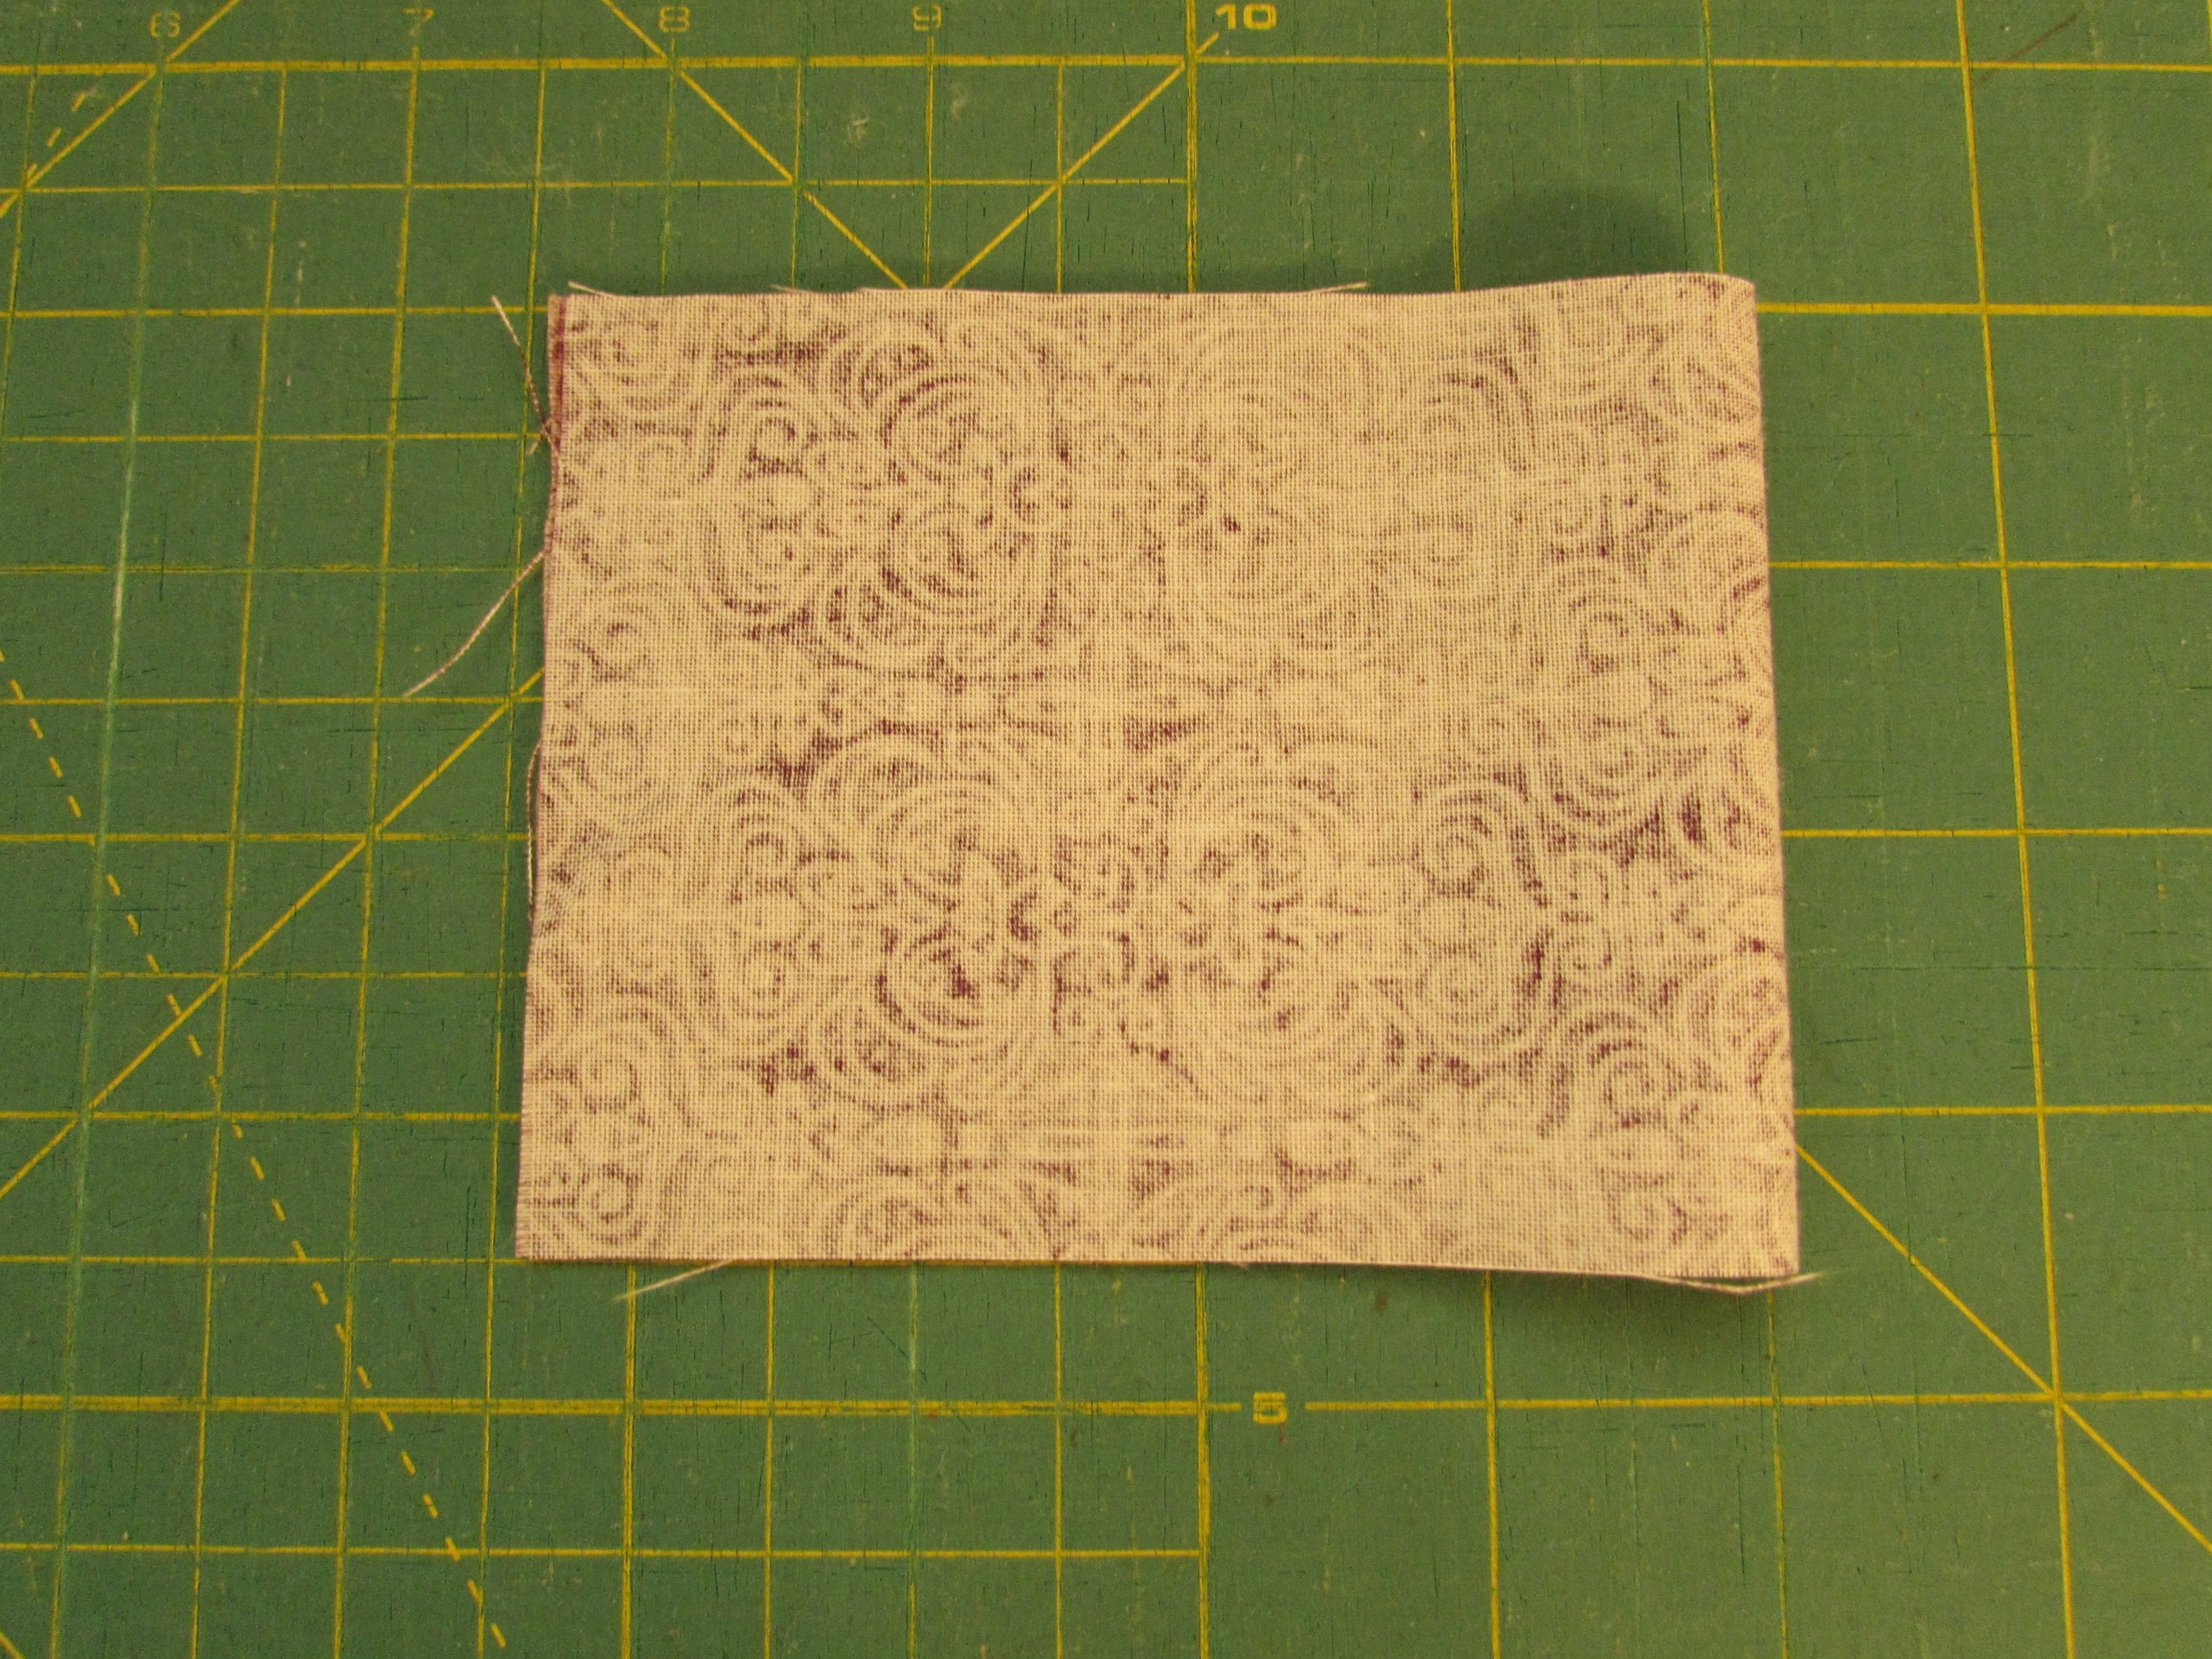
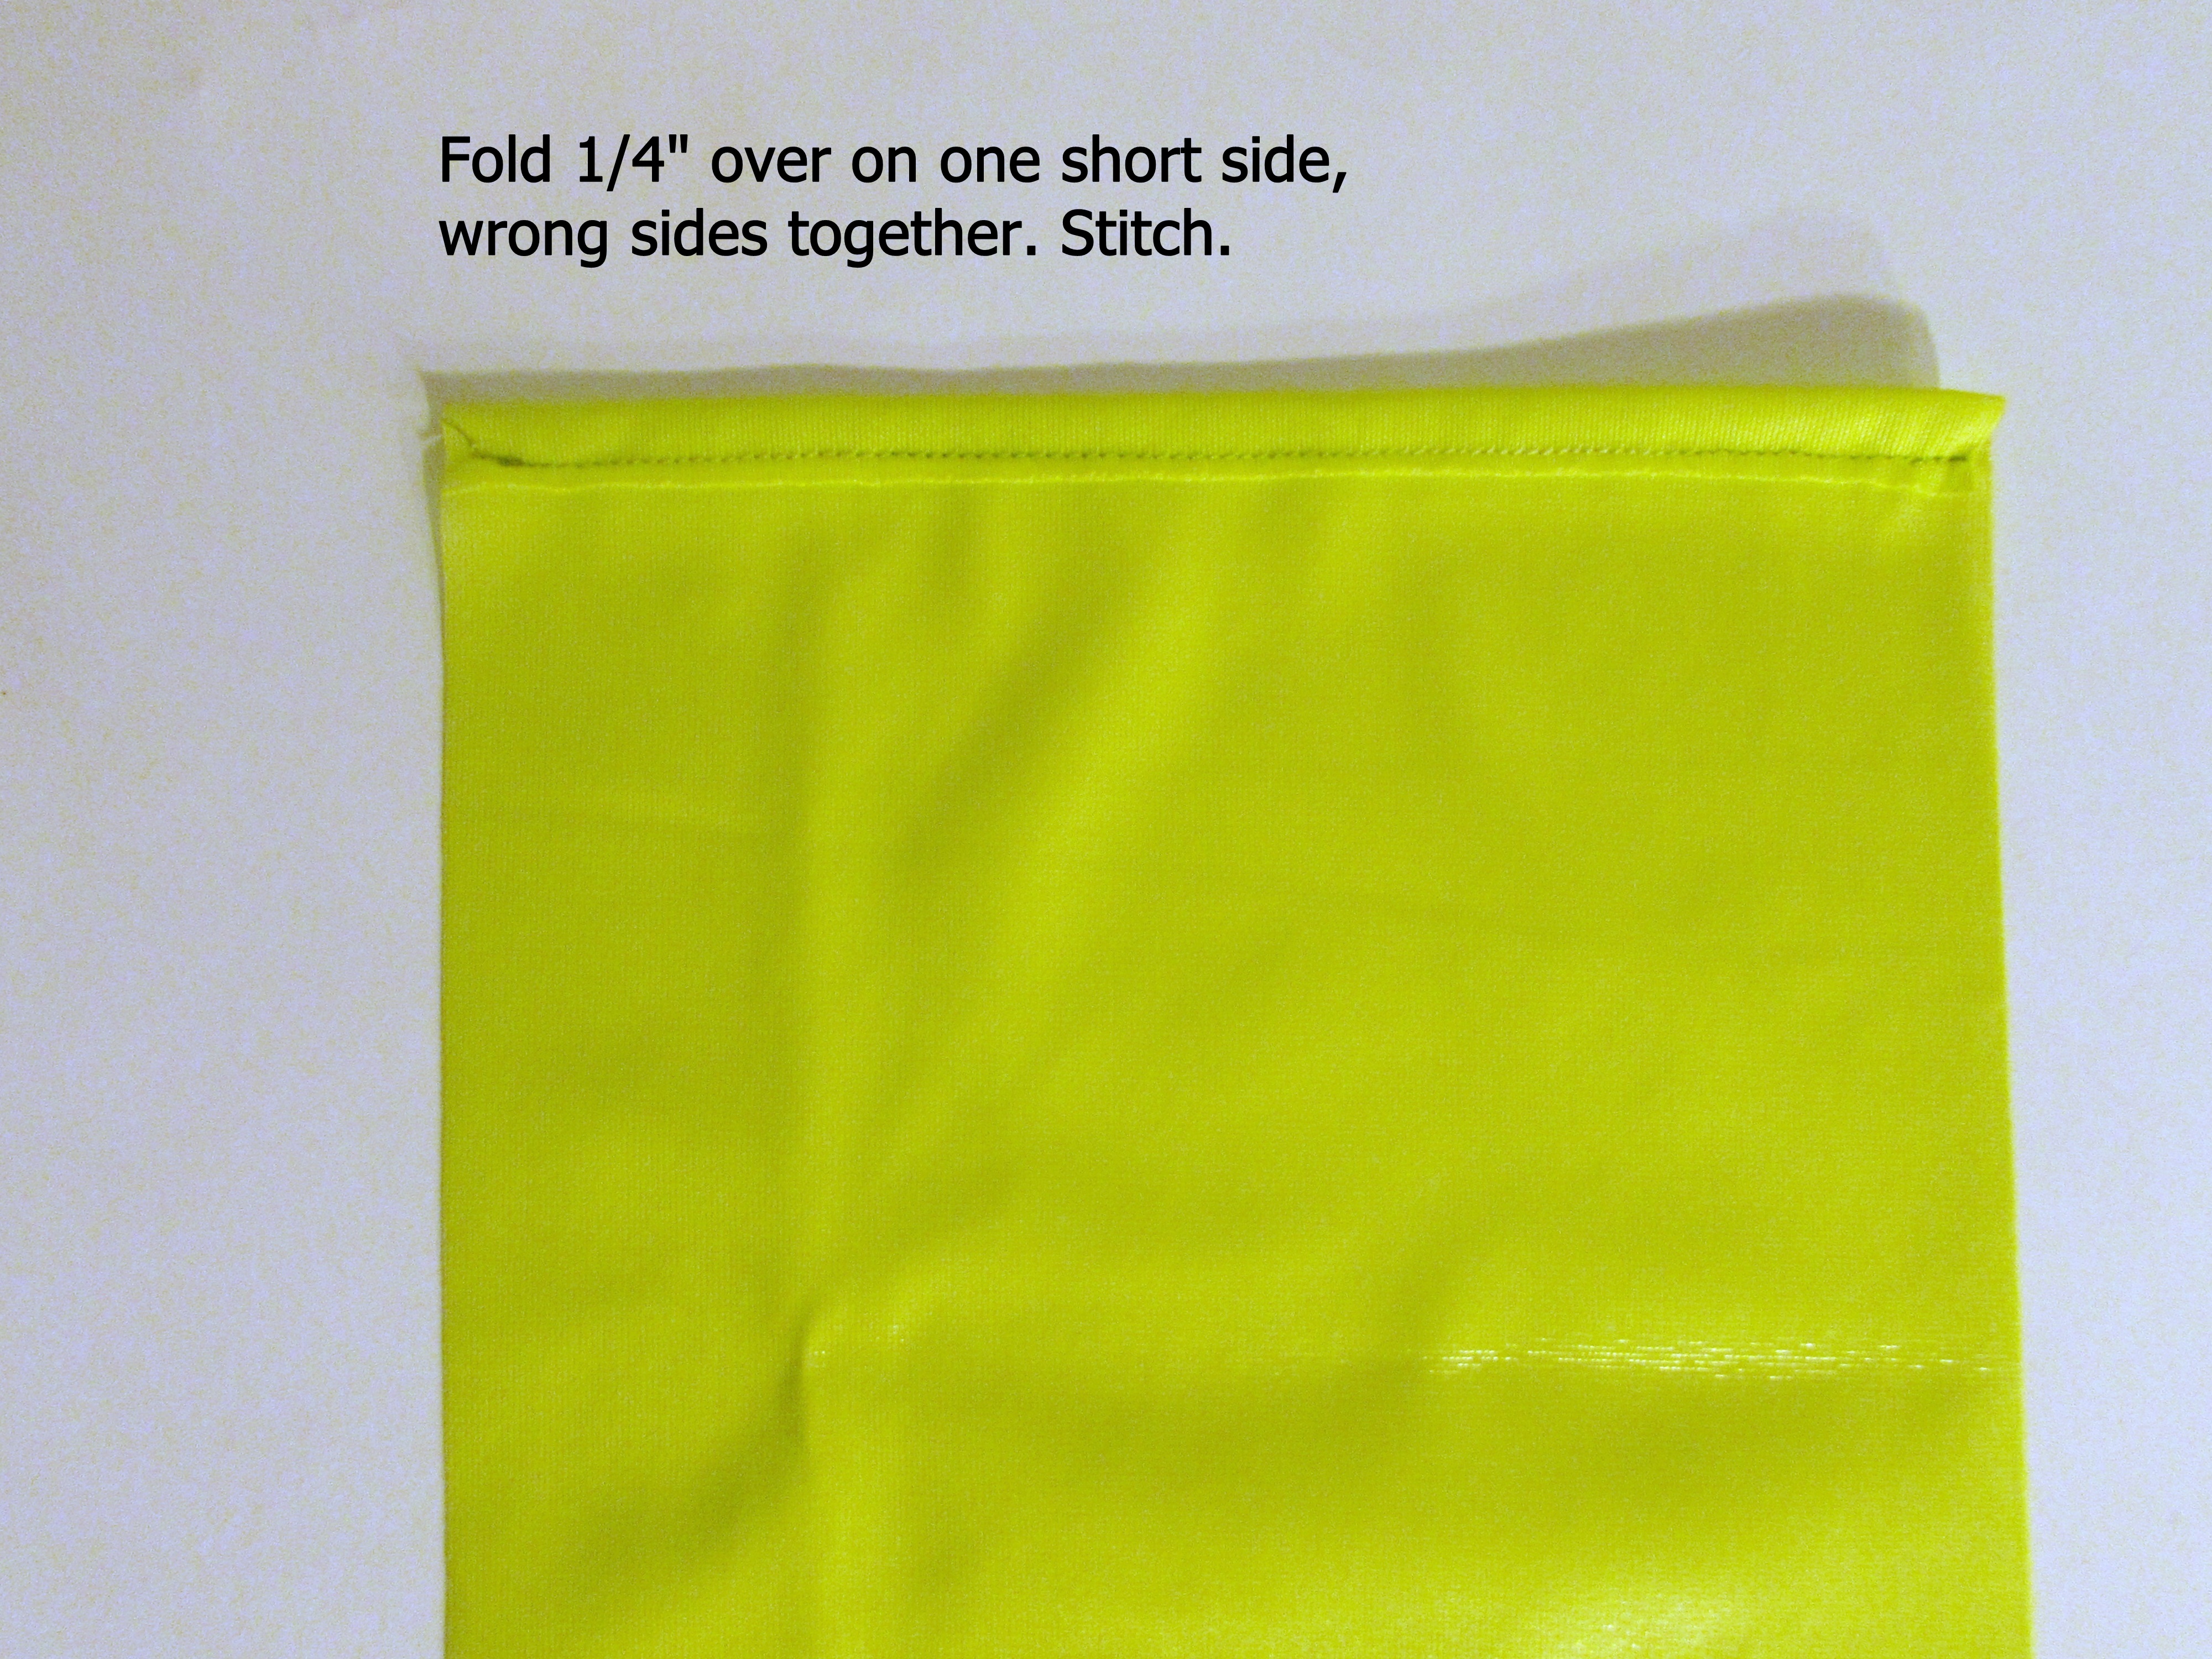
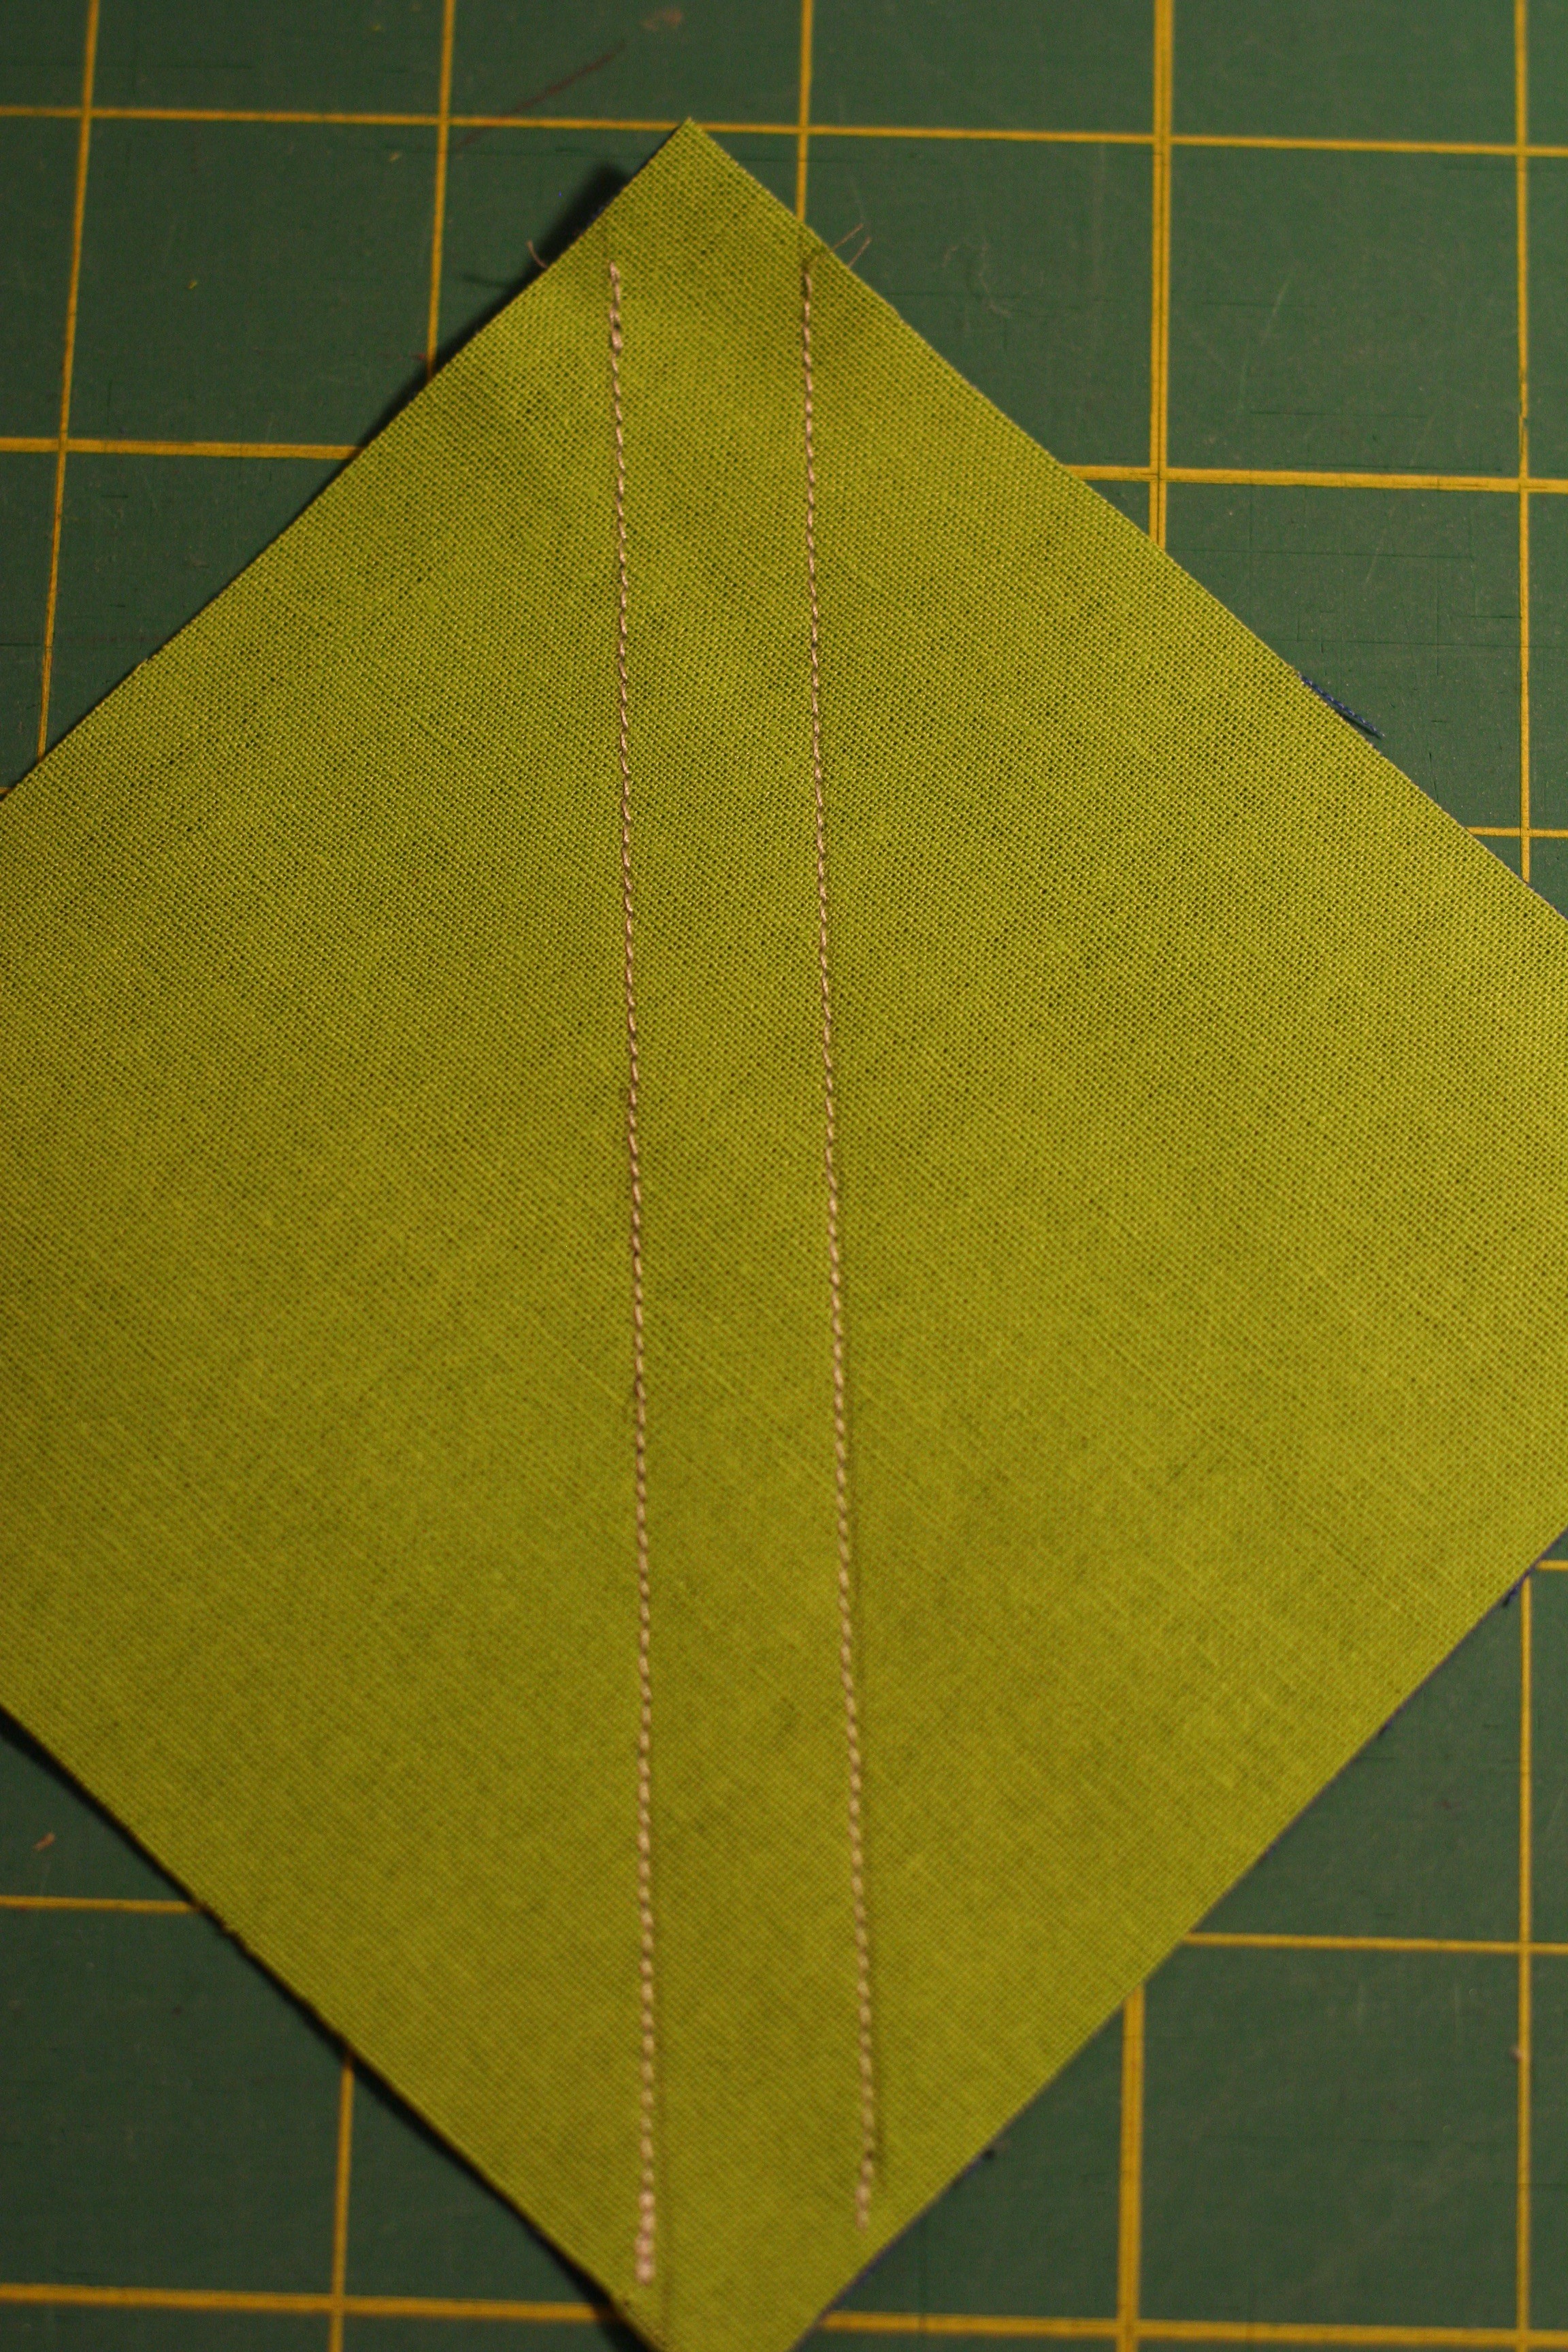
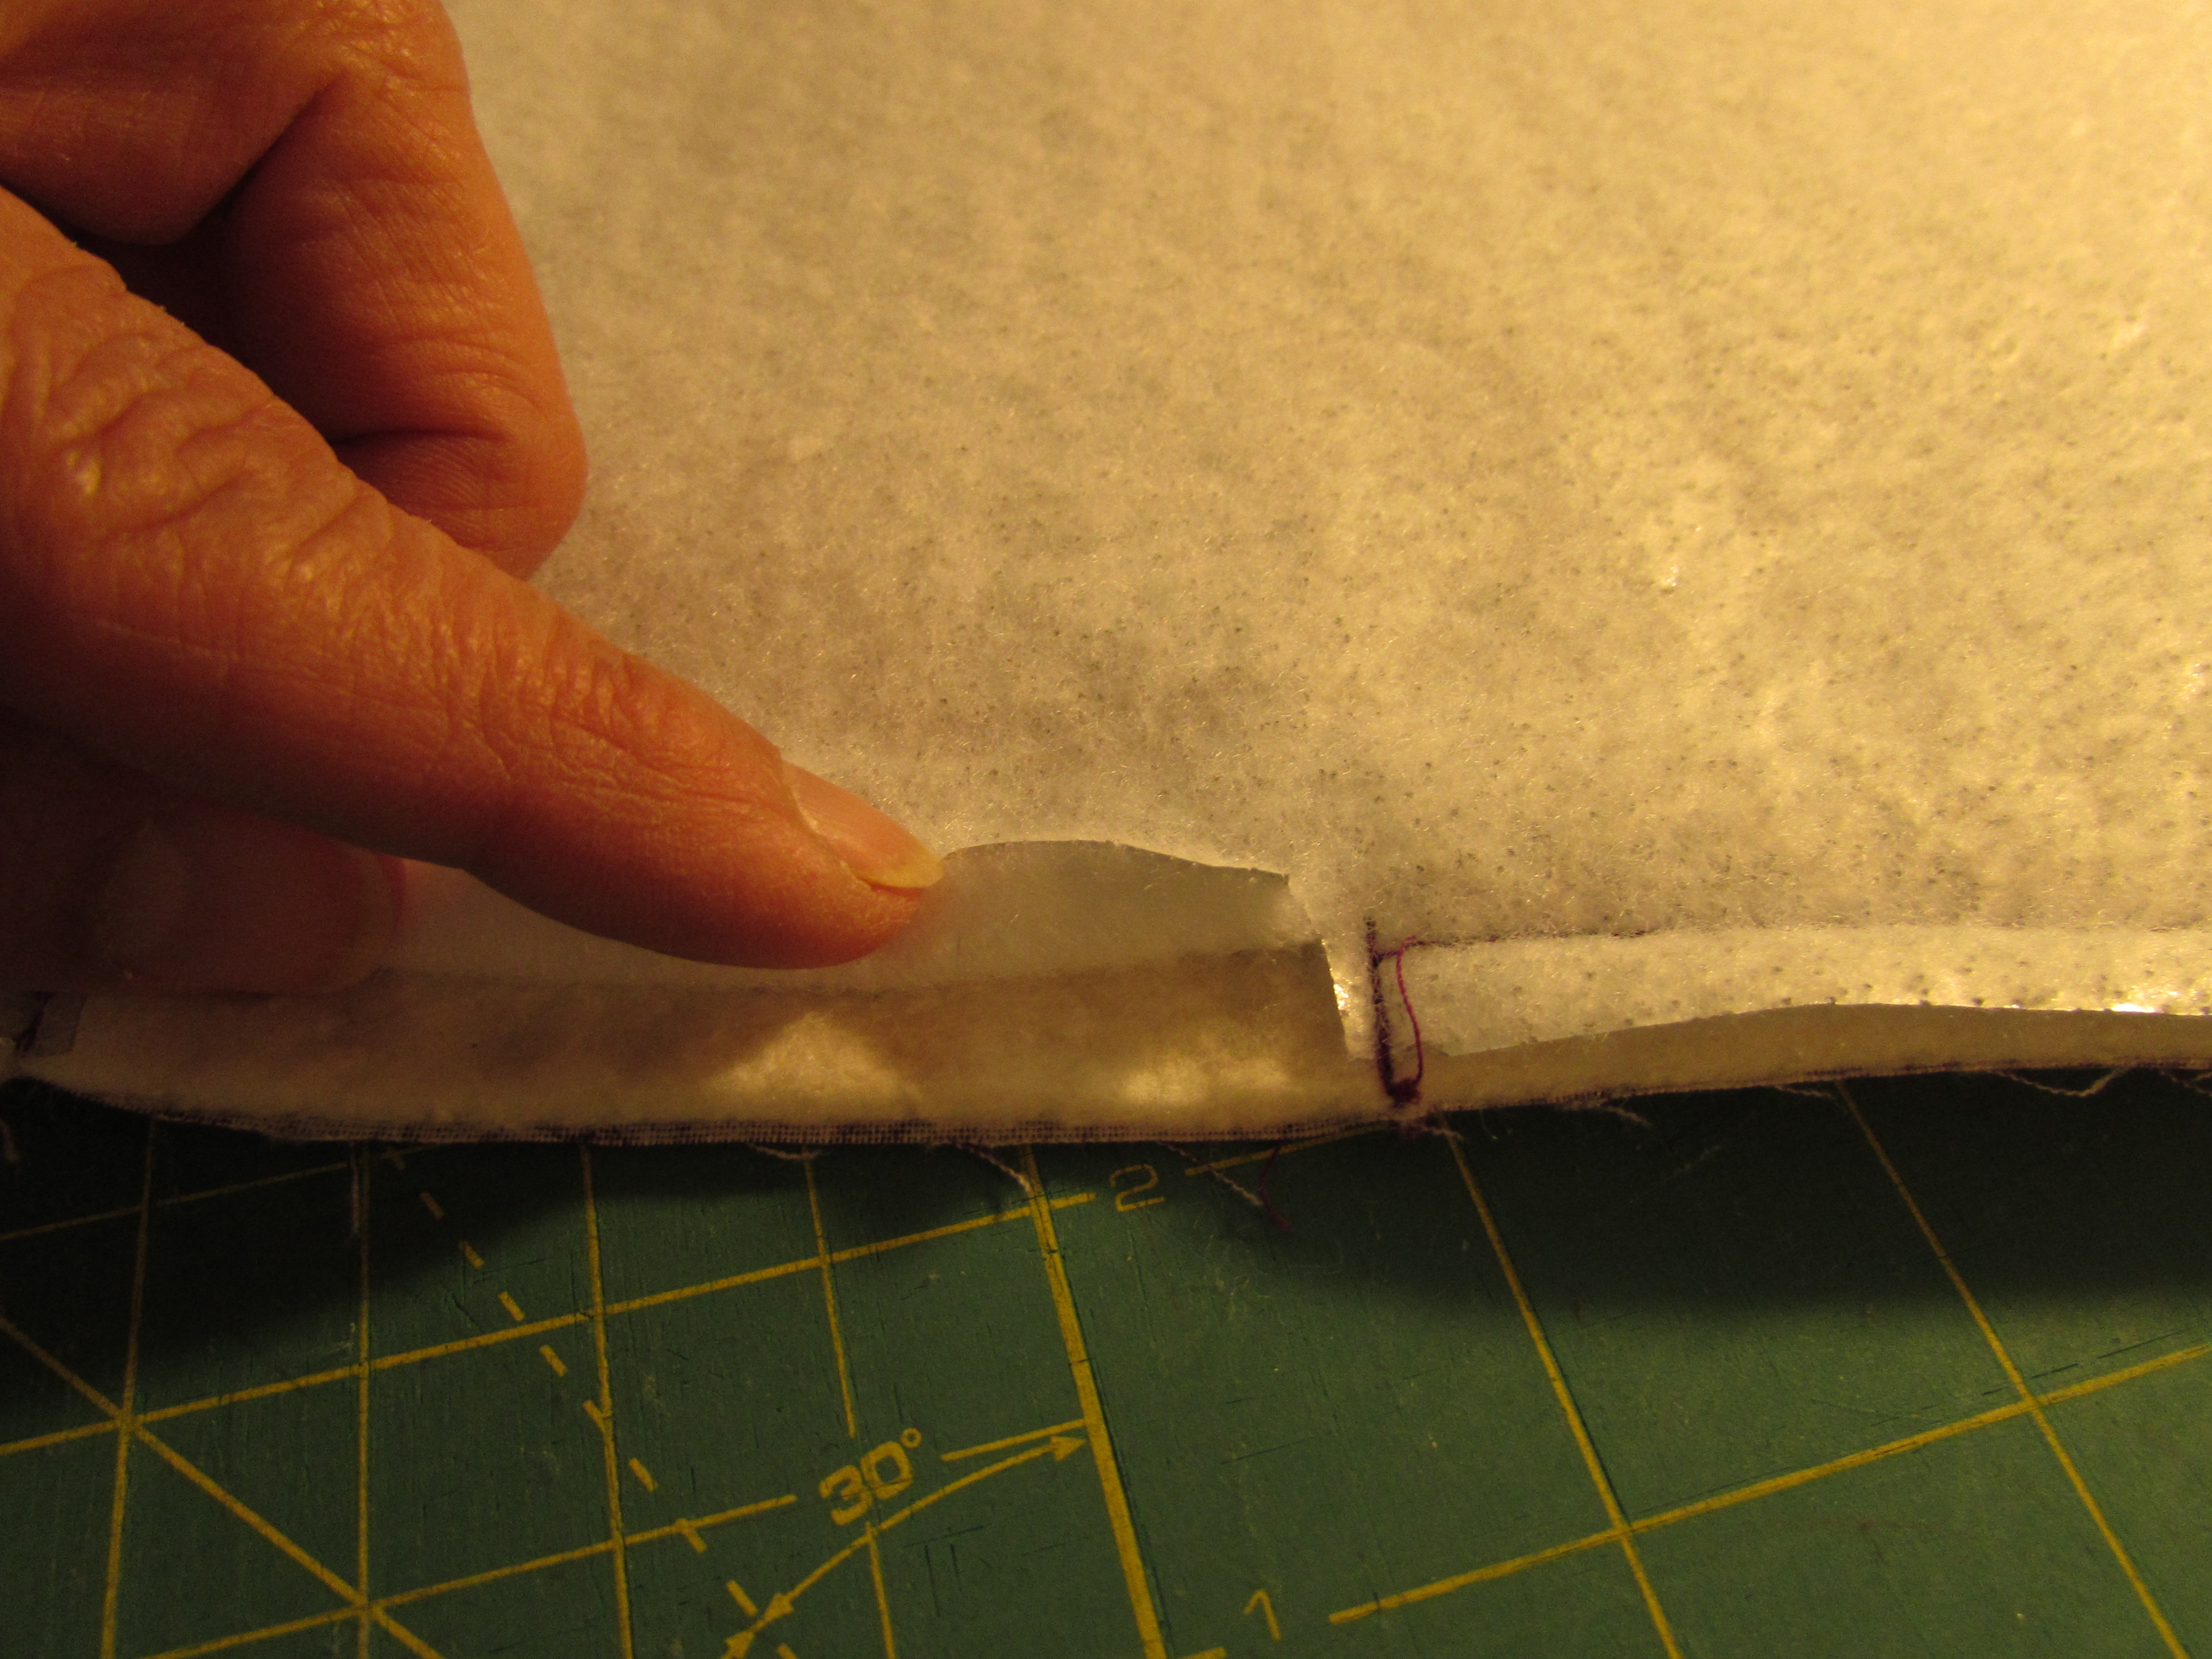
Take the smaller rectangle and fold it in half, right sides together. Then place your small rectangle of batting on top of this and pin.

img_7553

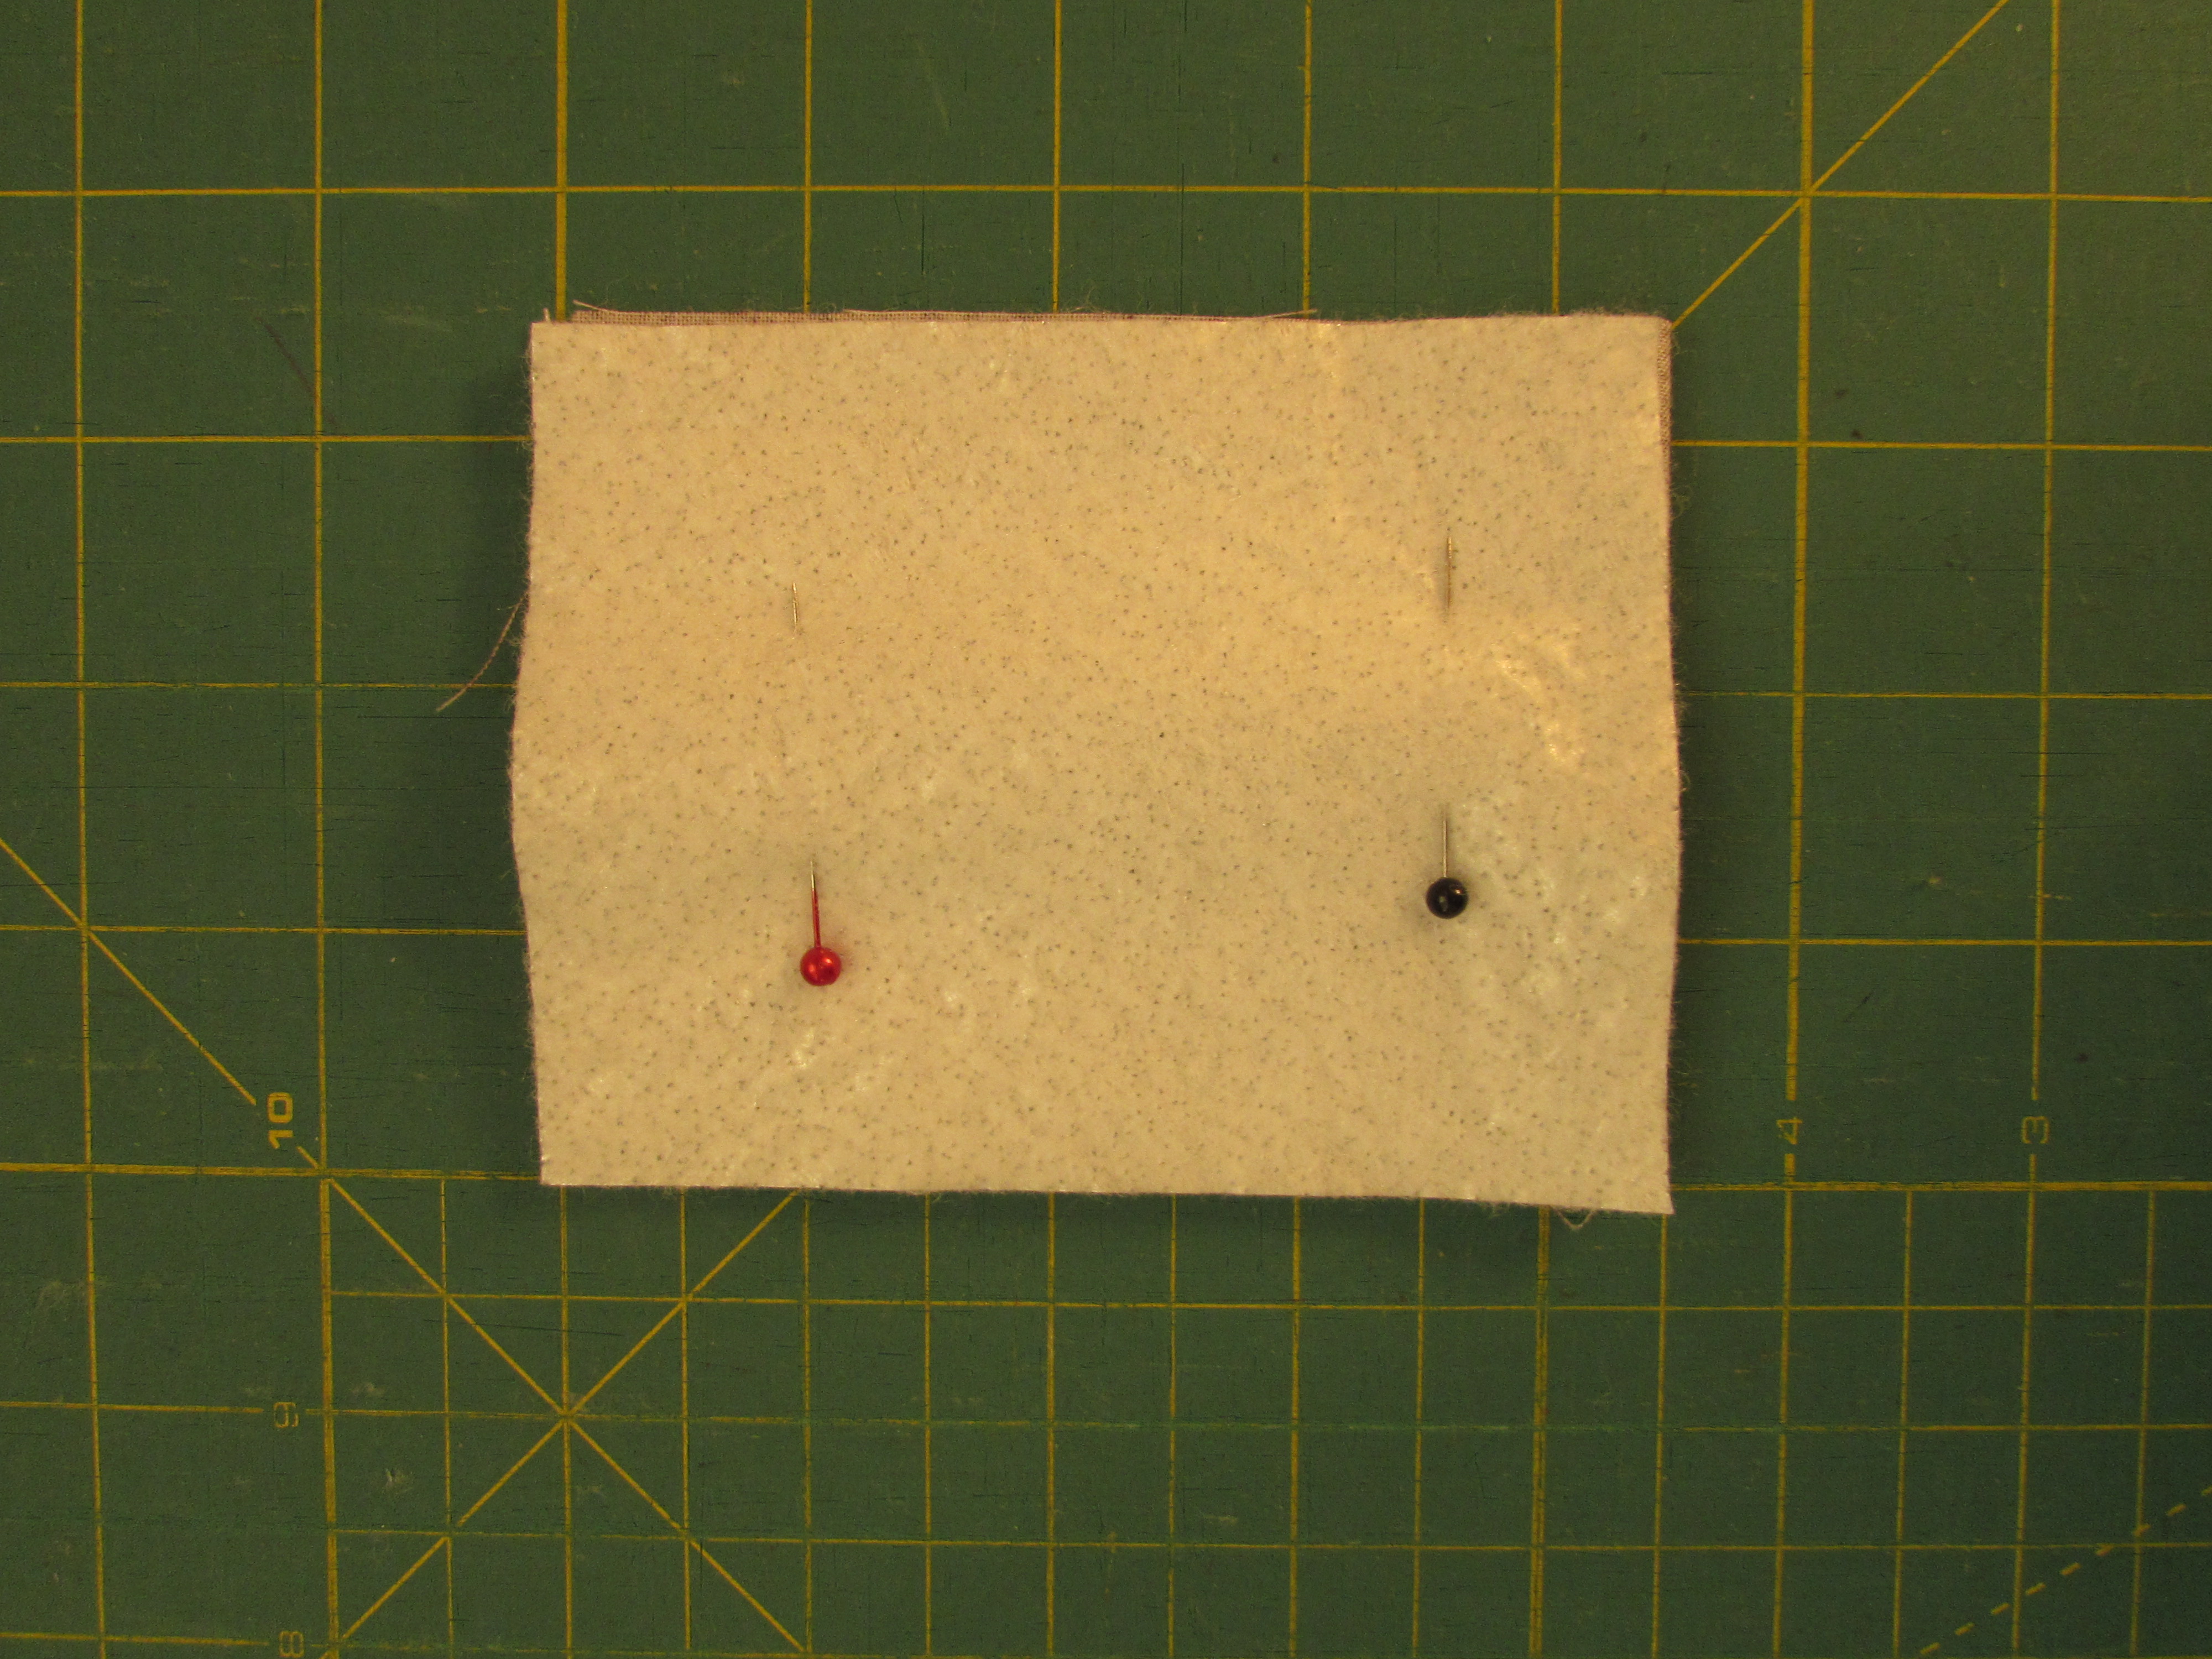
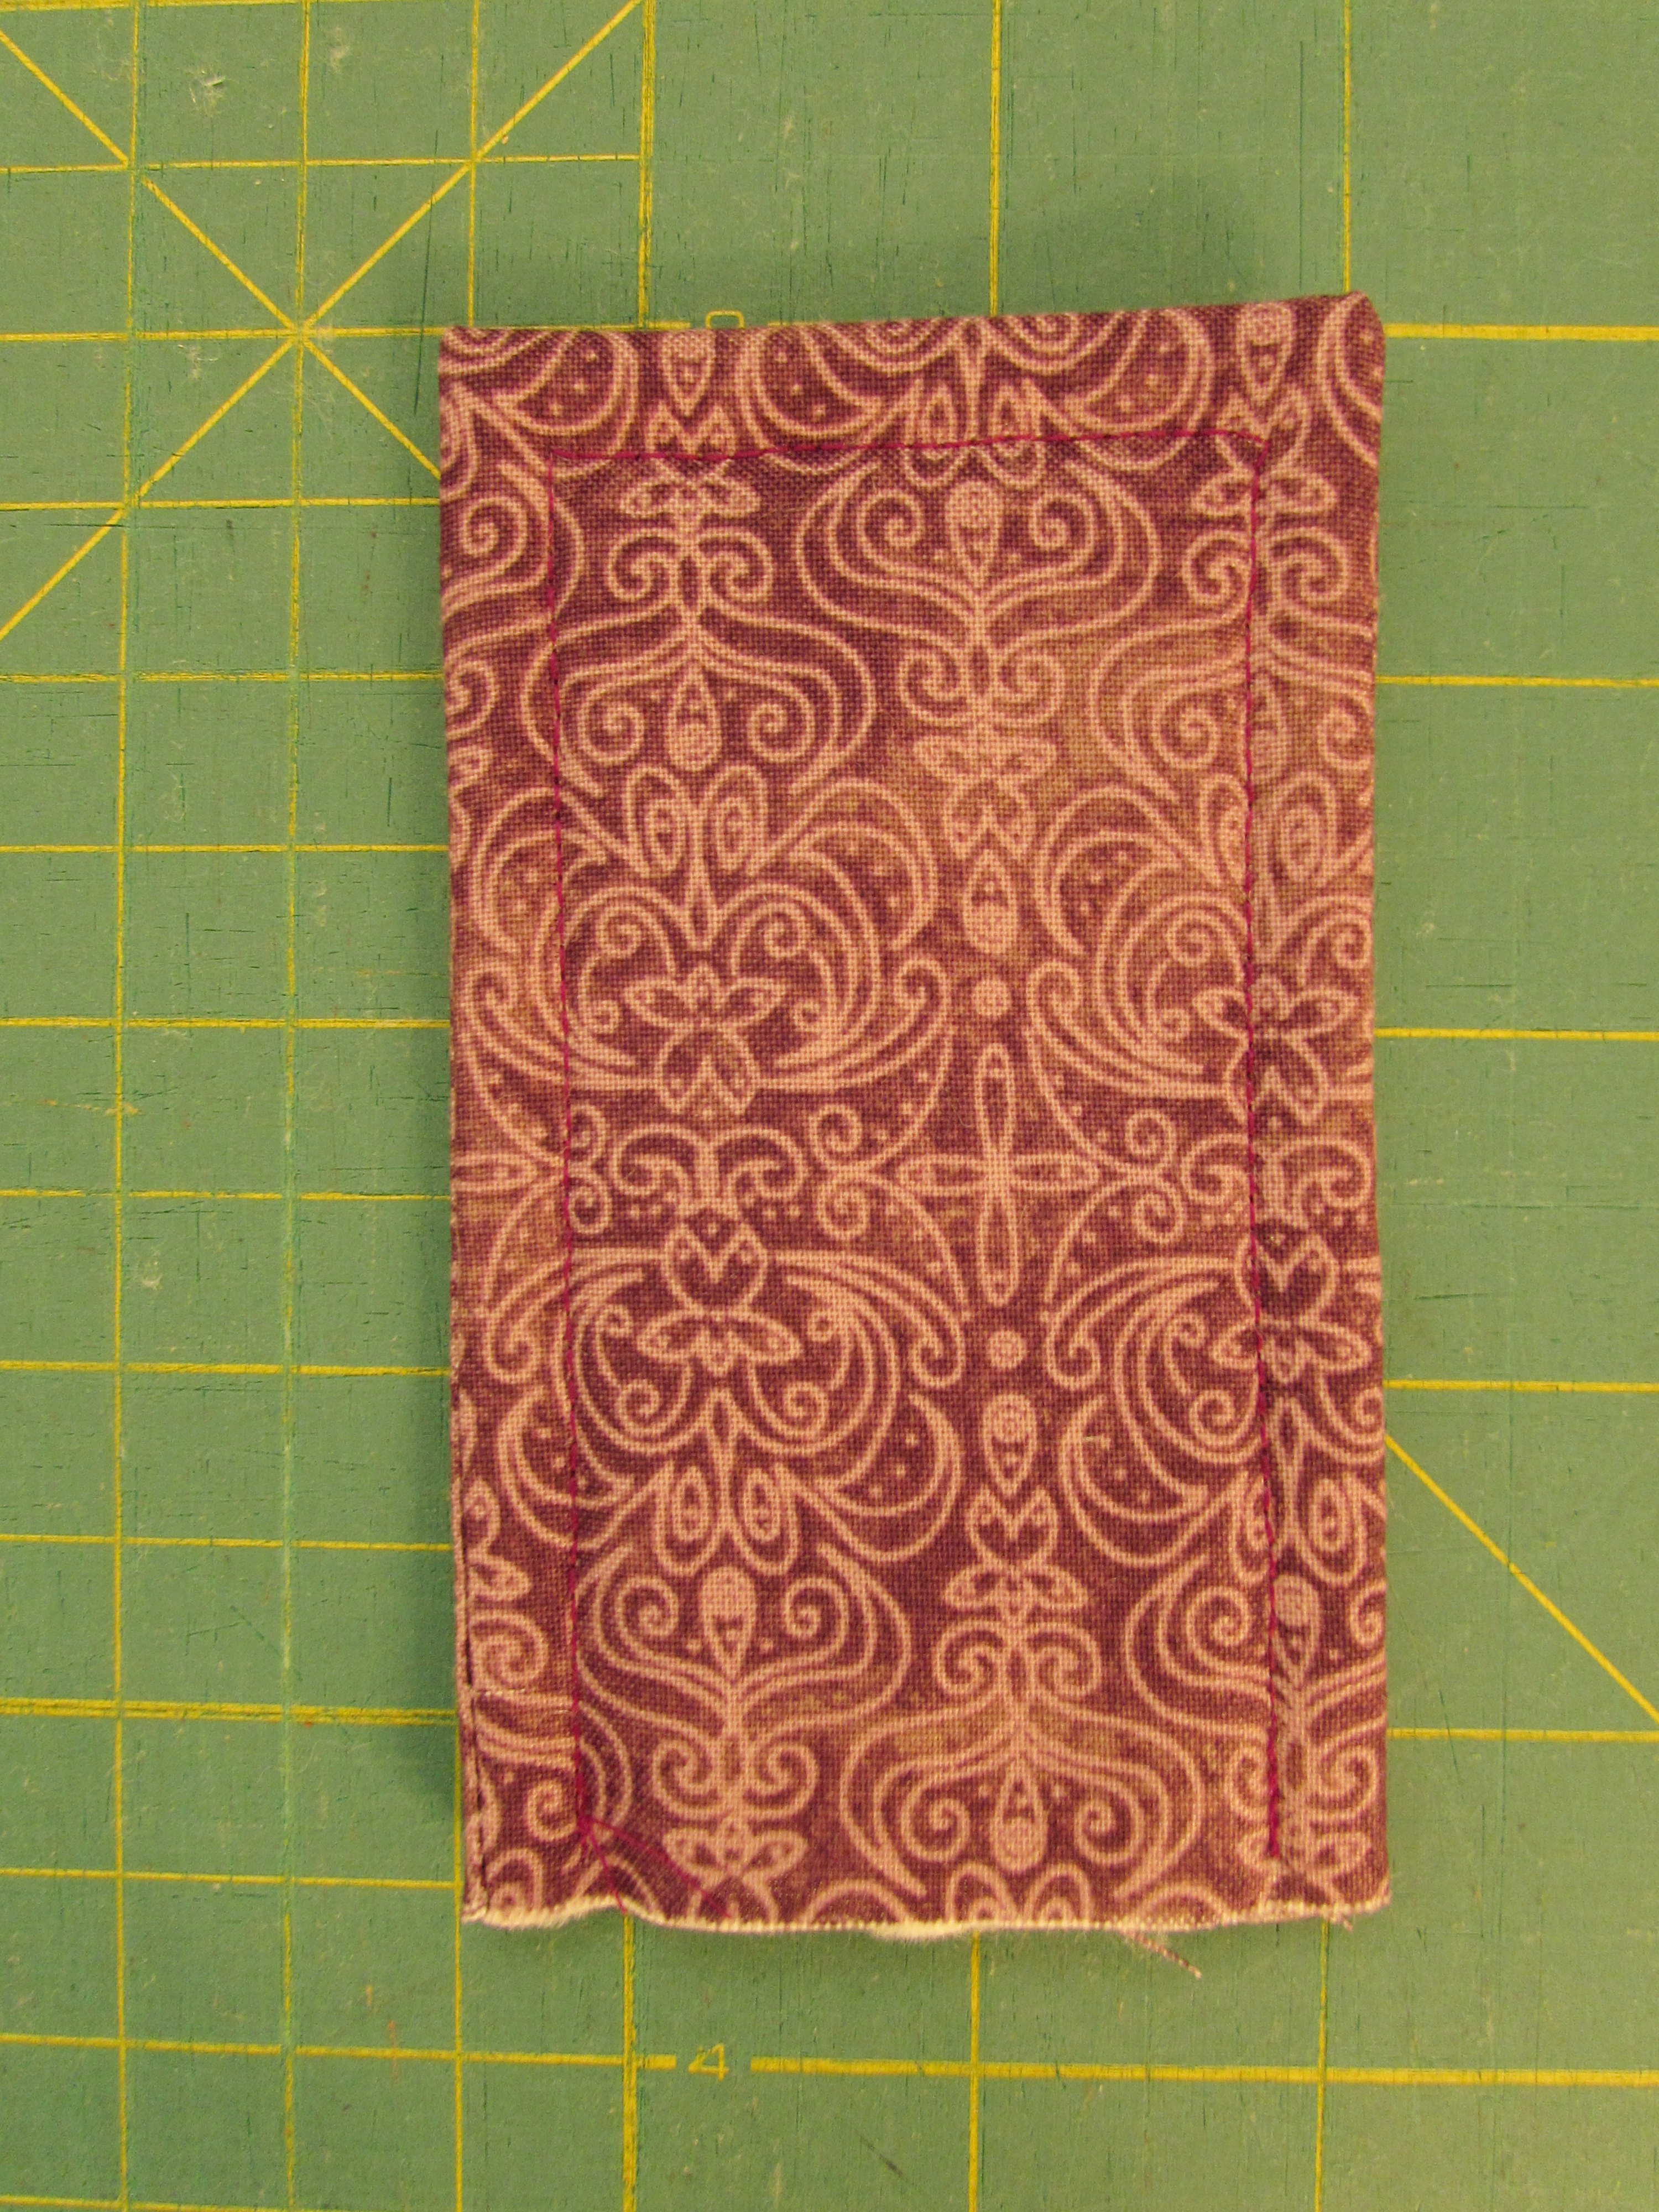
Stitch along both long sides, leaving the short end open. Trim the corners at the end where the fabric is folded – not the open end. This will make your corners less bulky when you turn it right side out.

img_7555

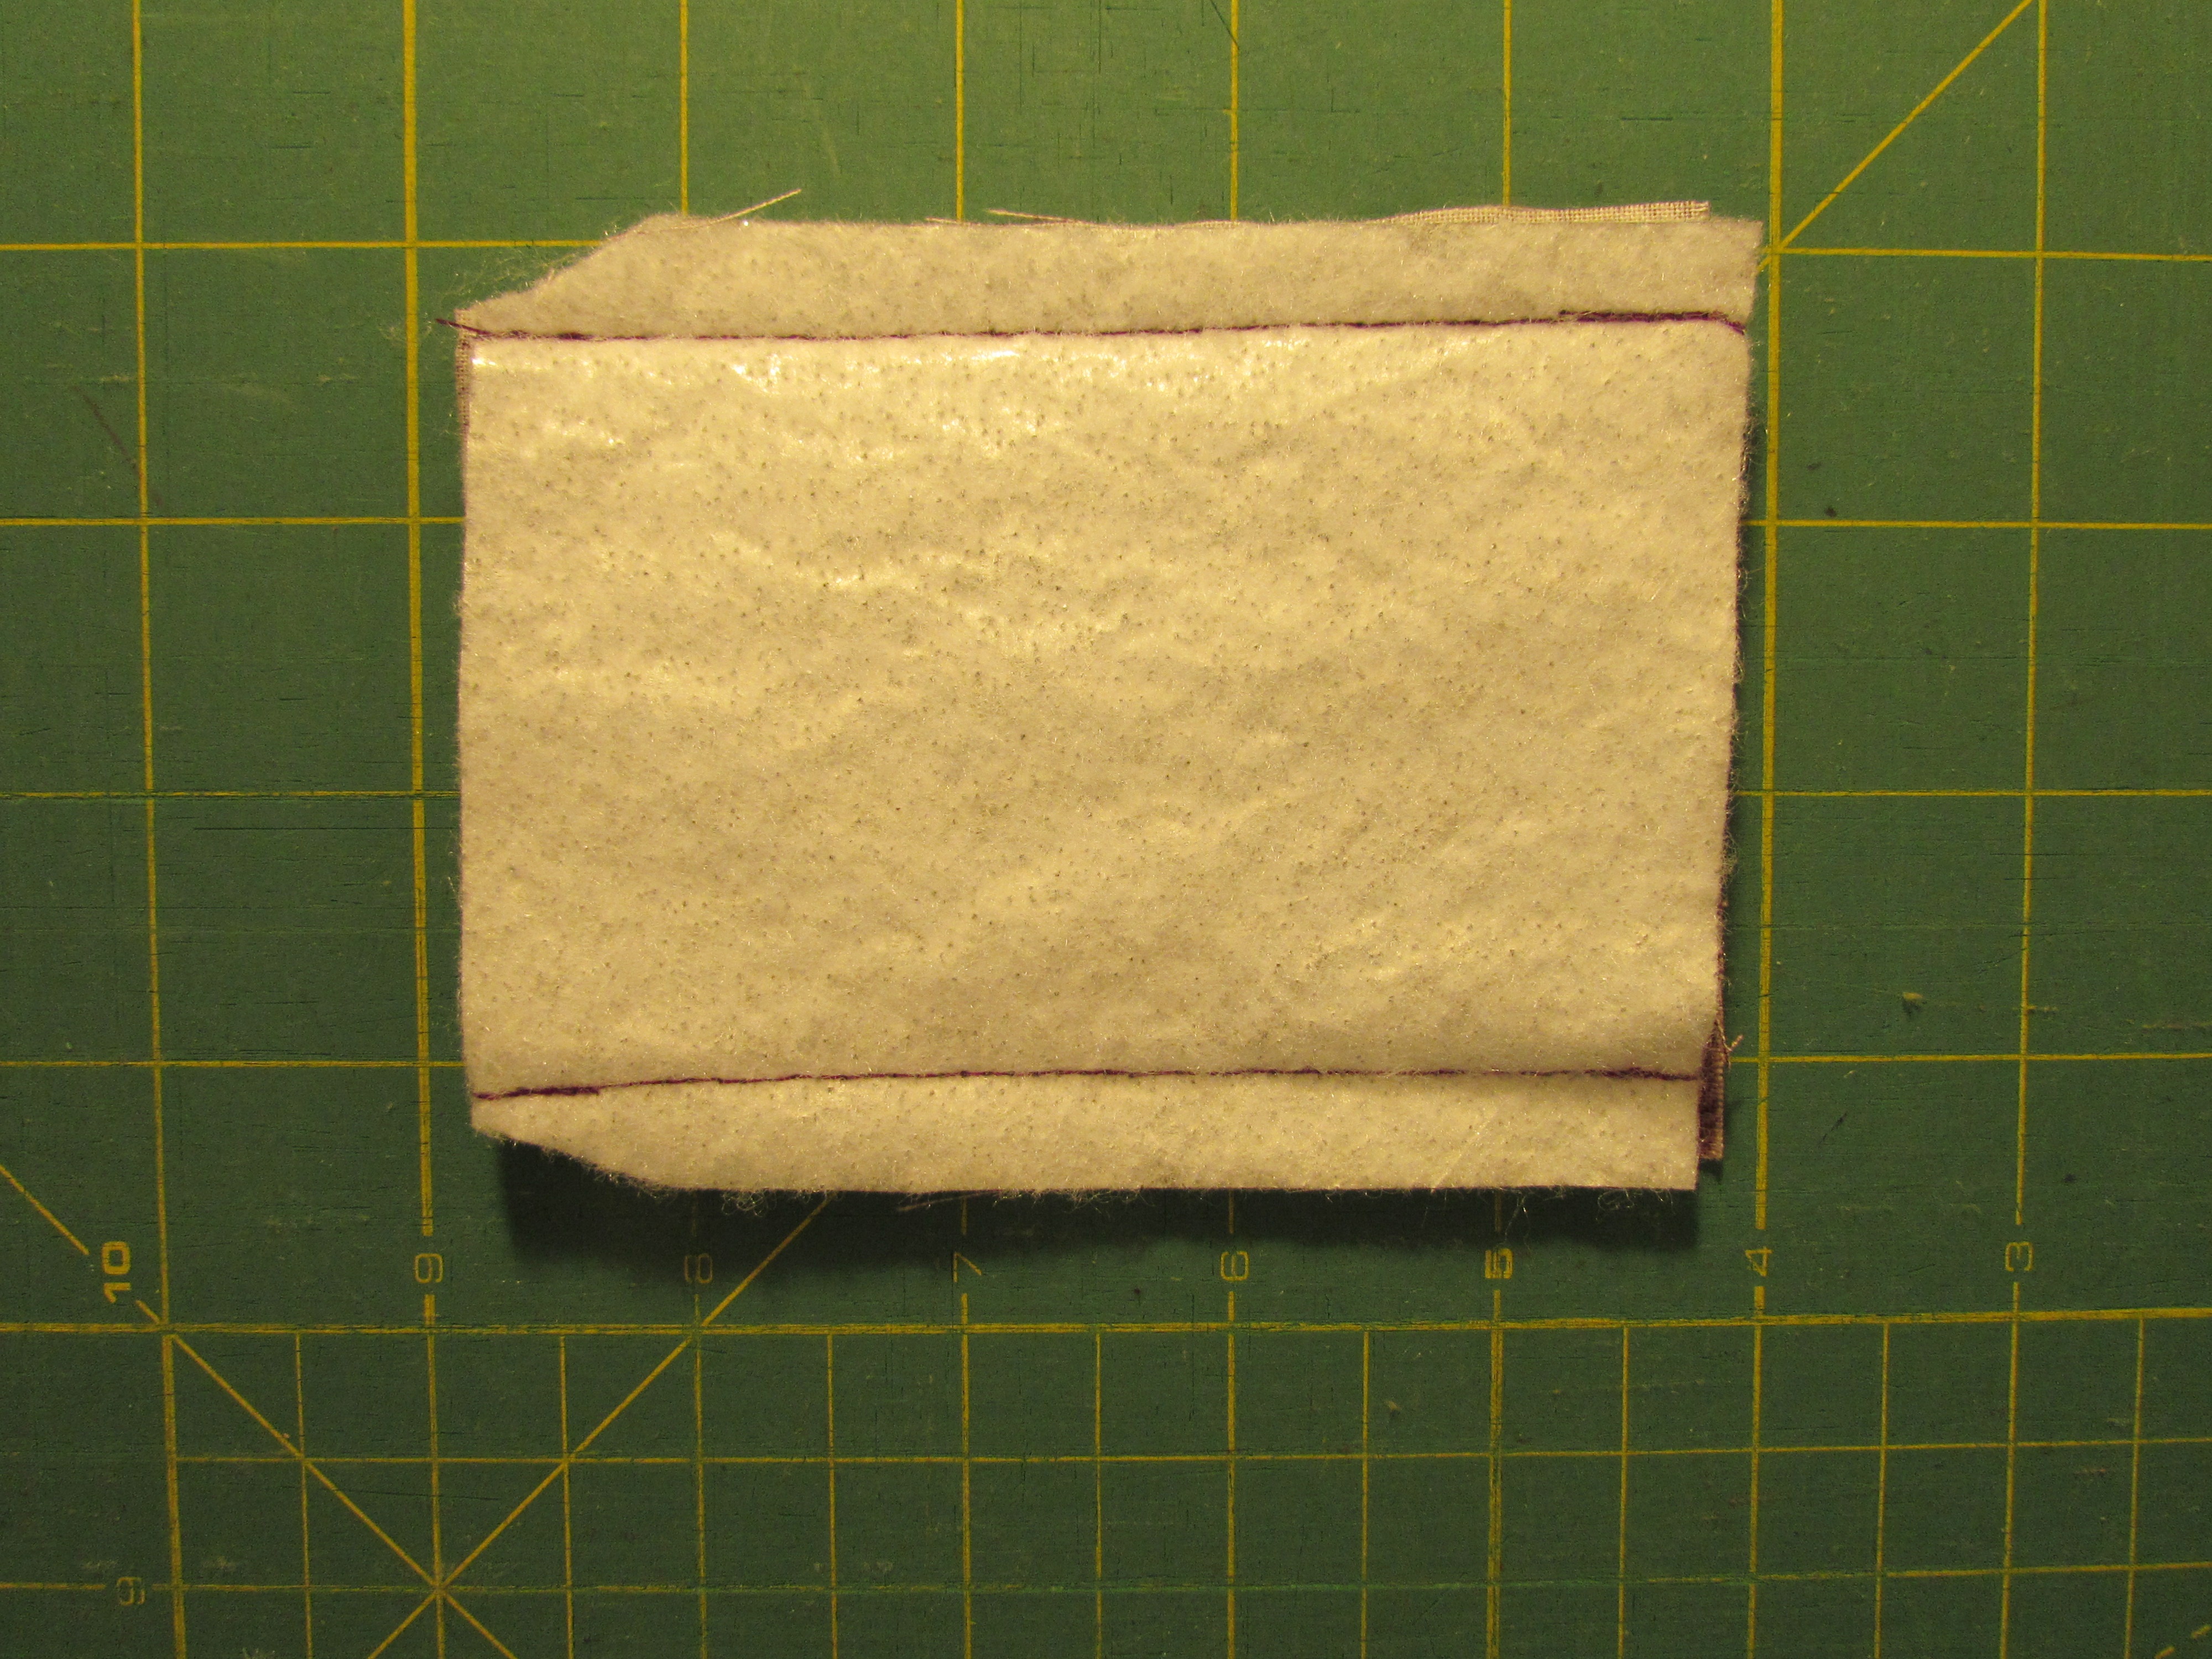
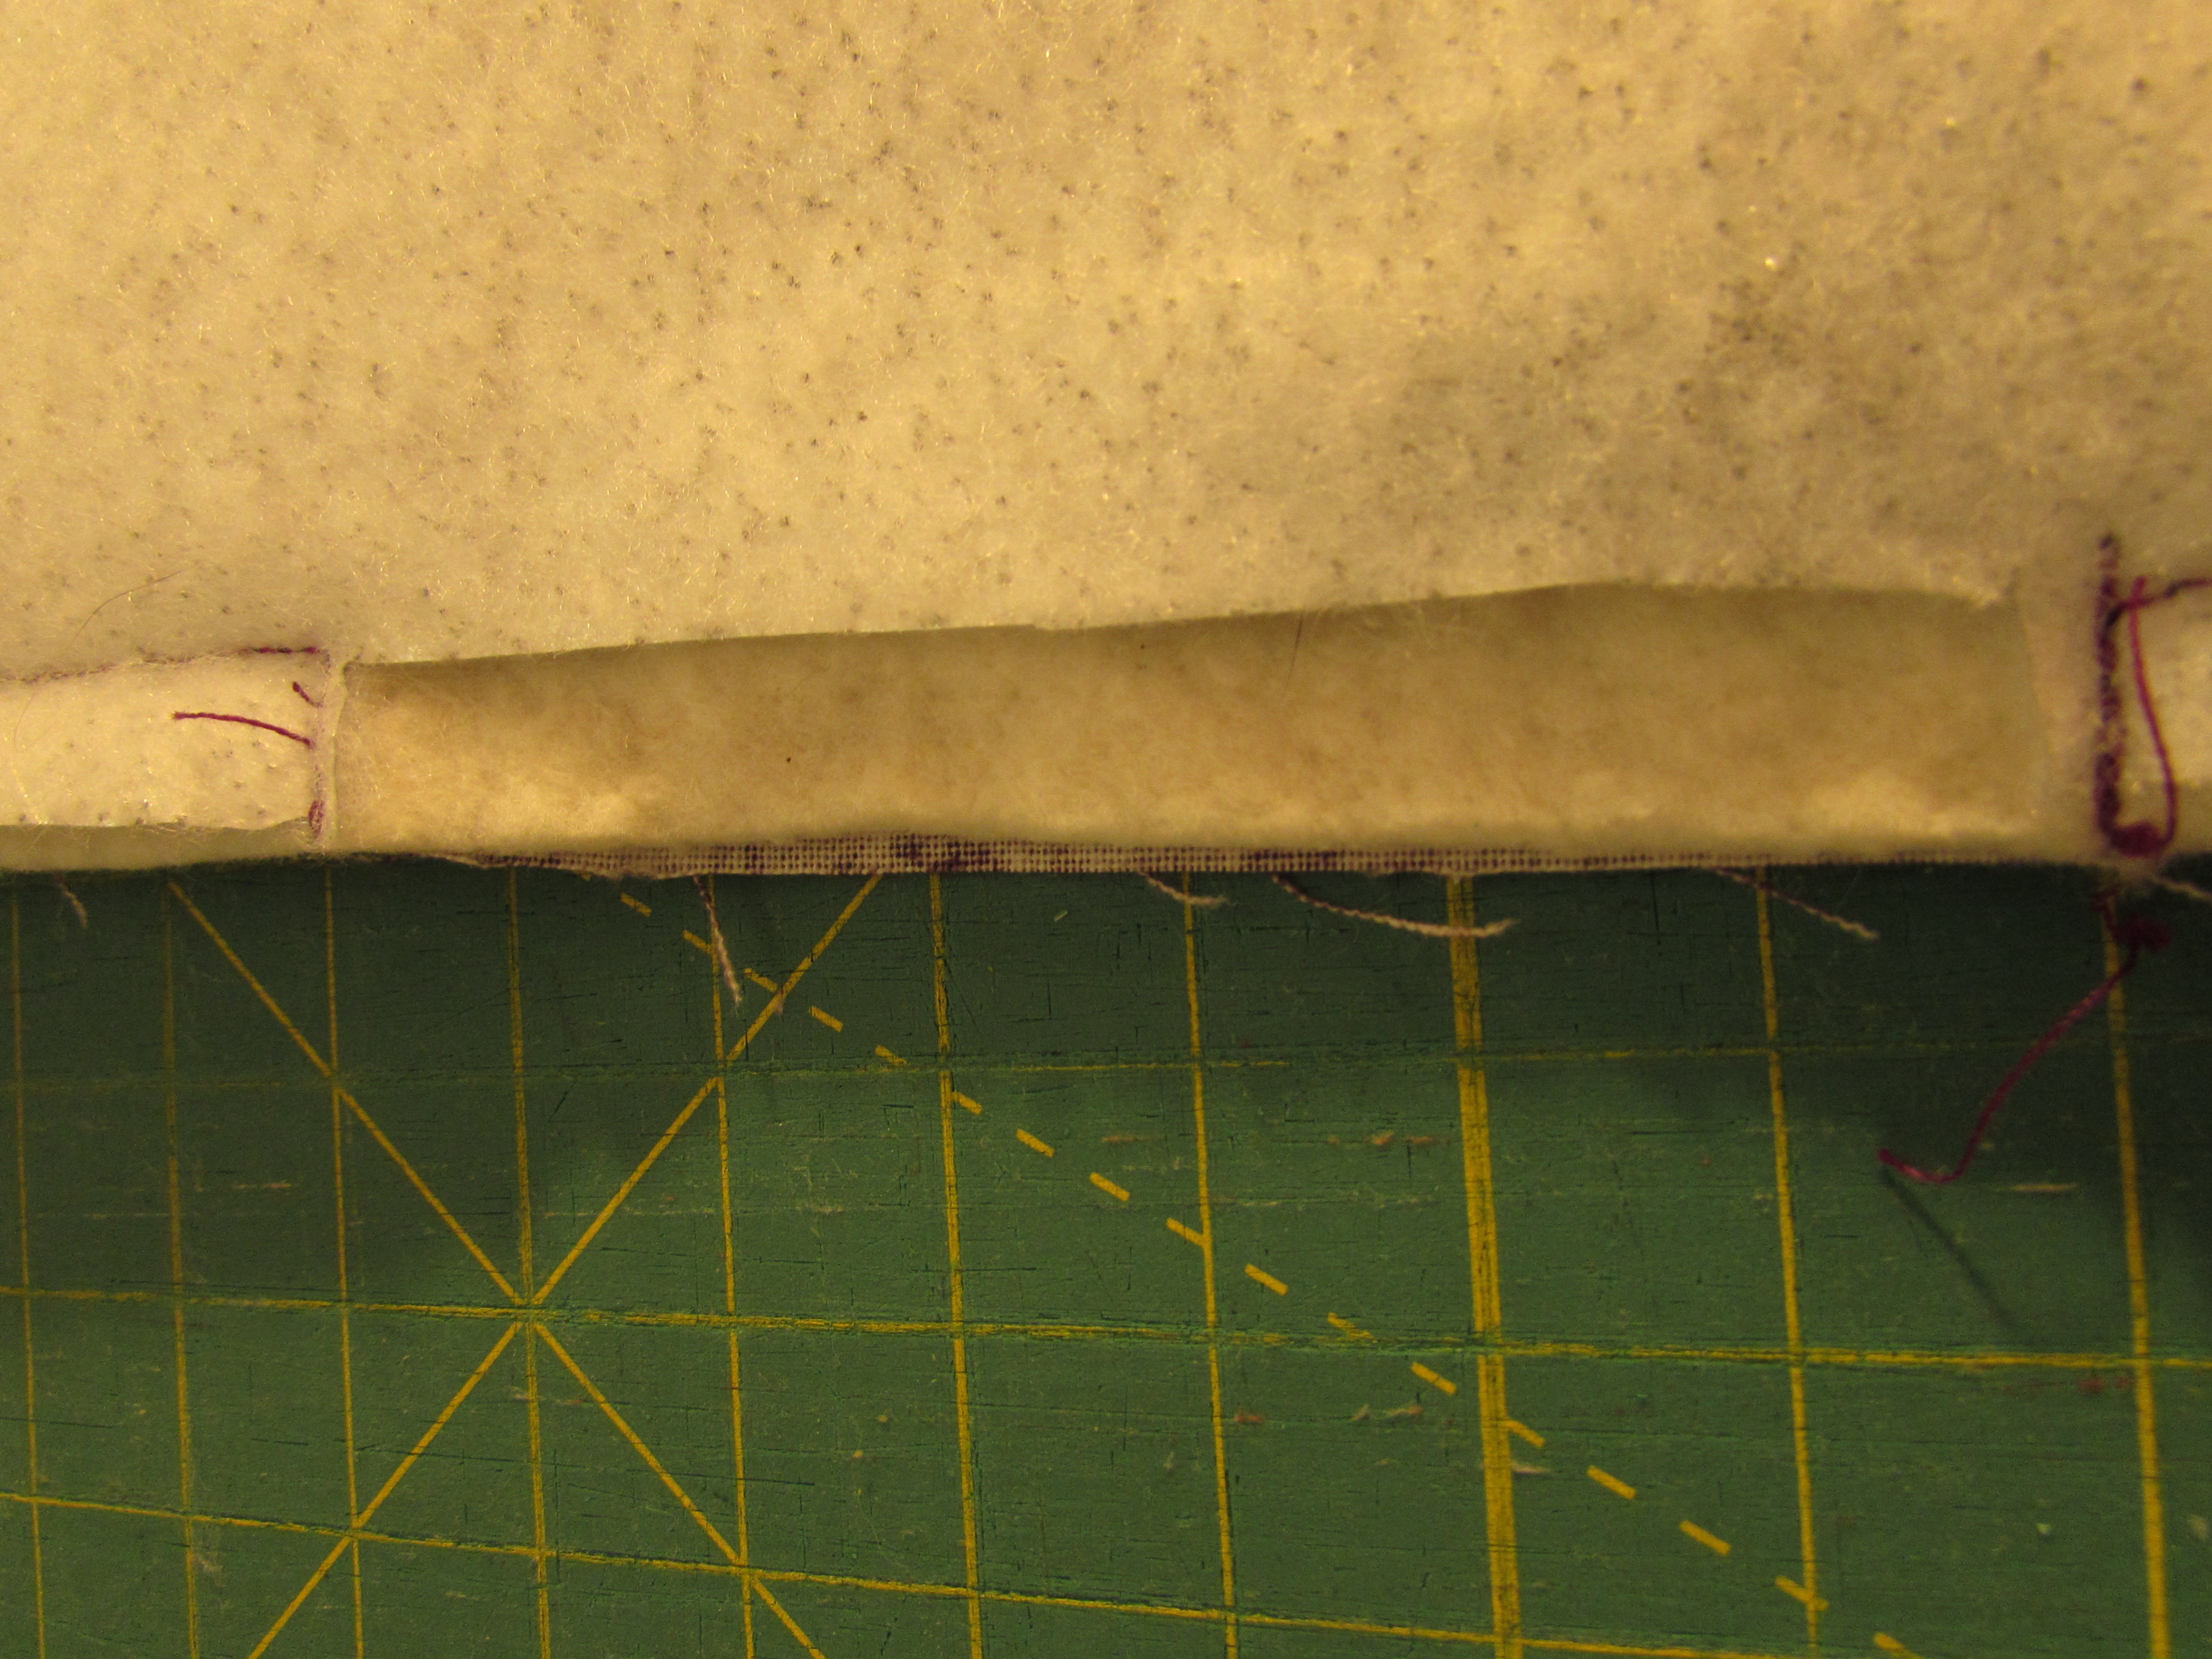
After turning it right side out, use a wooden chopstick or the round end of a pencil to poke the corners out – be gentle here so you don’t make a hole.  Top stitch around the edge at 1/4″ allowance.

img_7556

Use a fabric marker to make a tiny dot at the center of the short, open end of the tab. Set this aside for a moment.

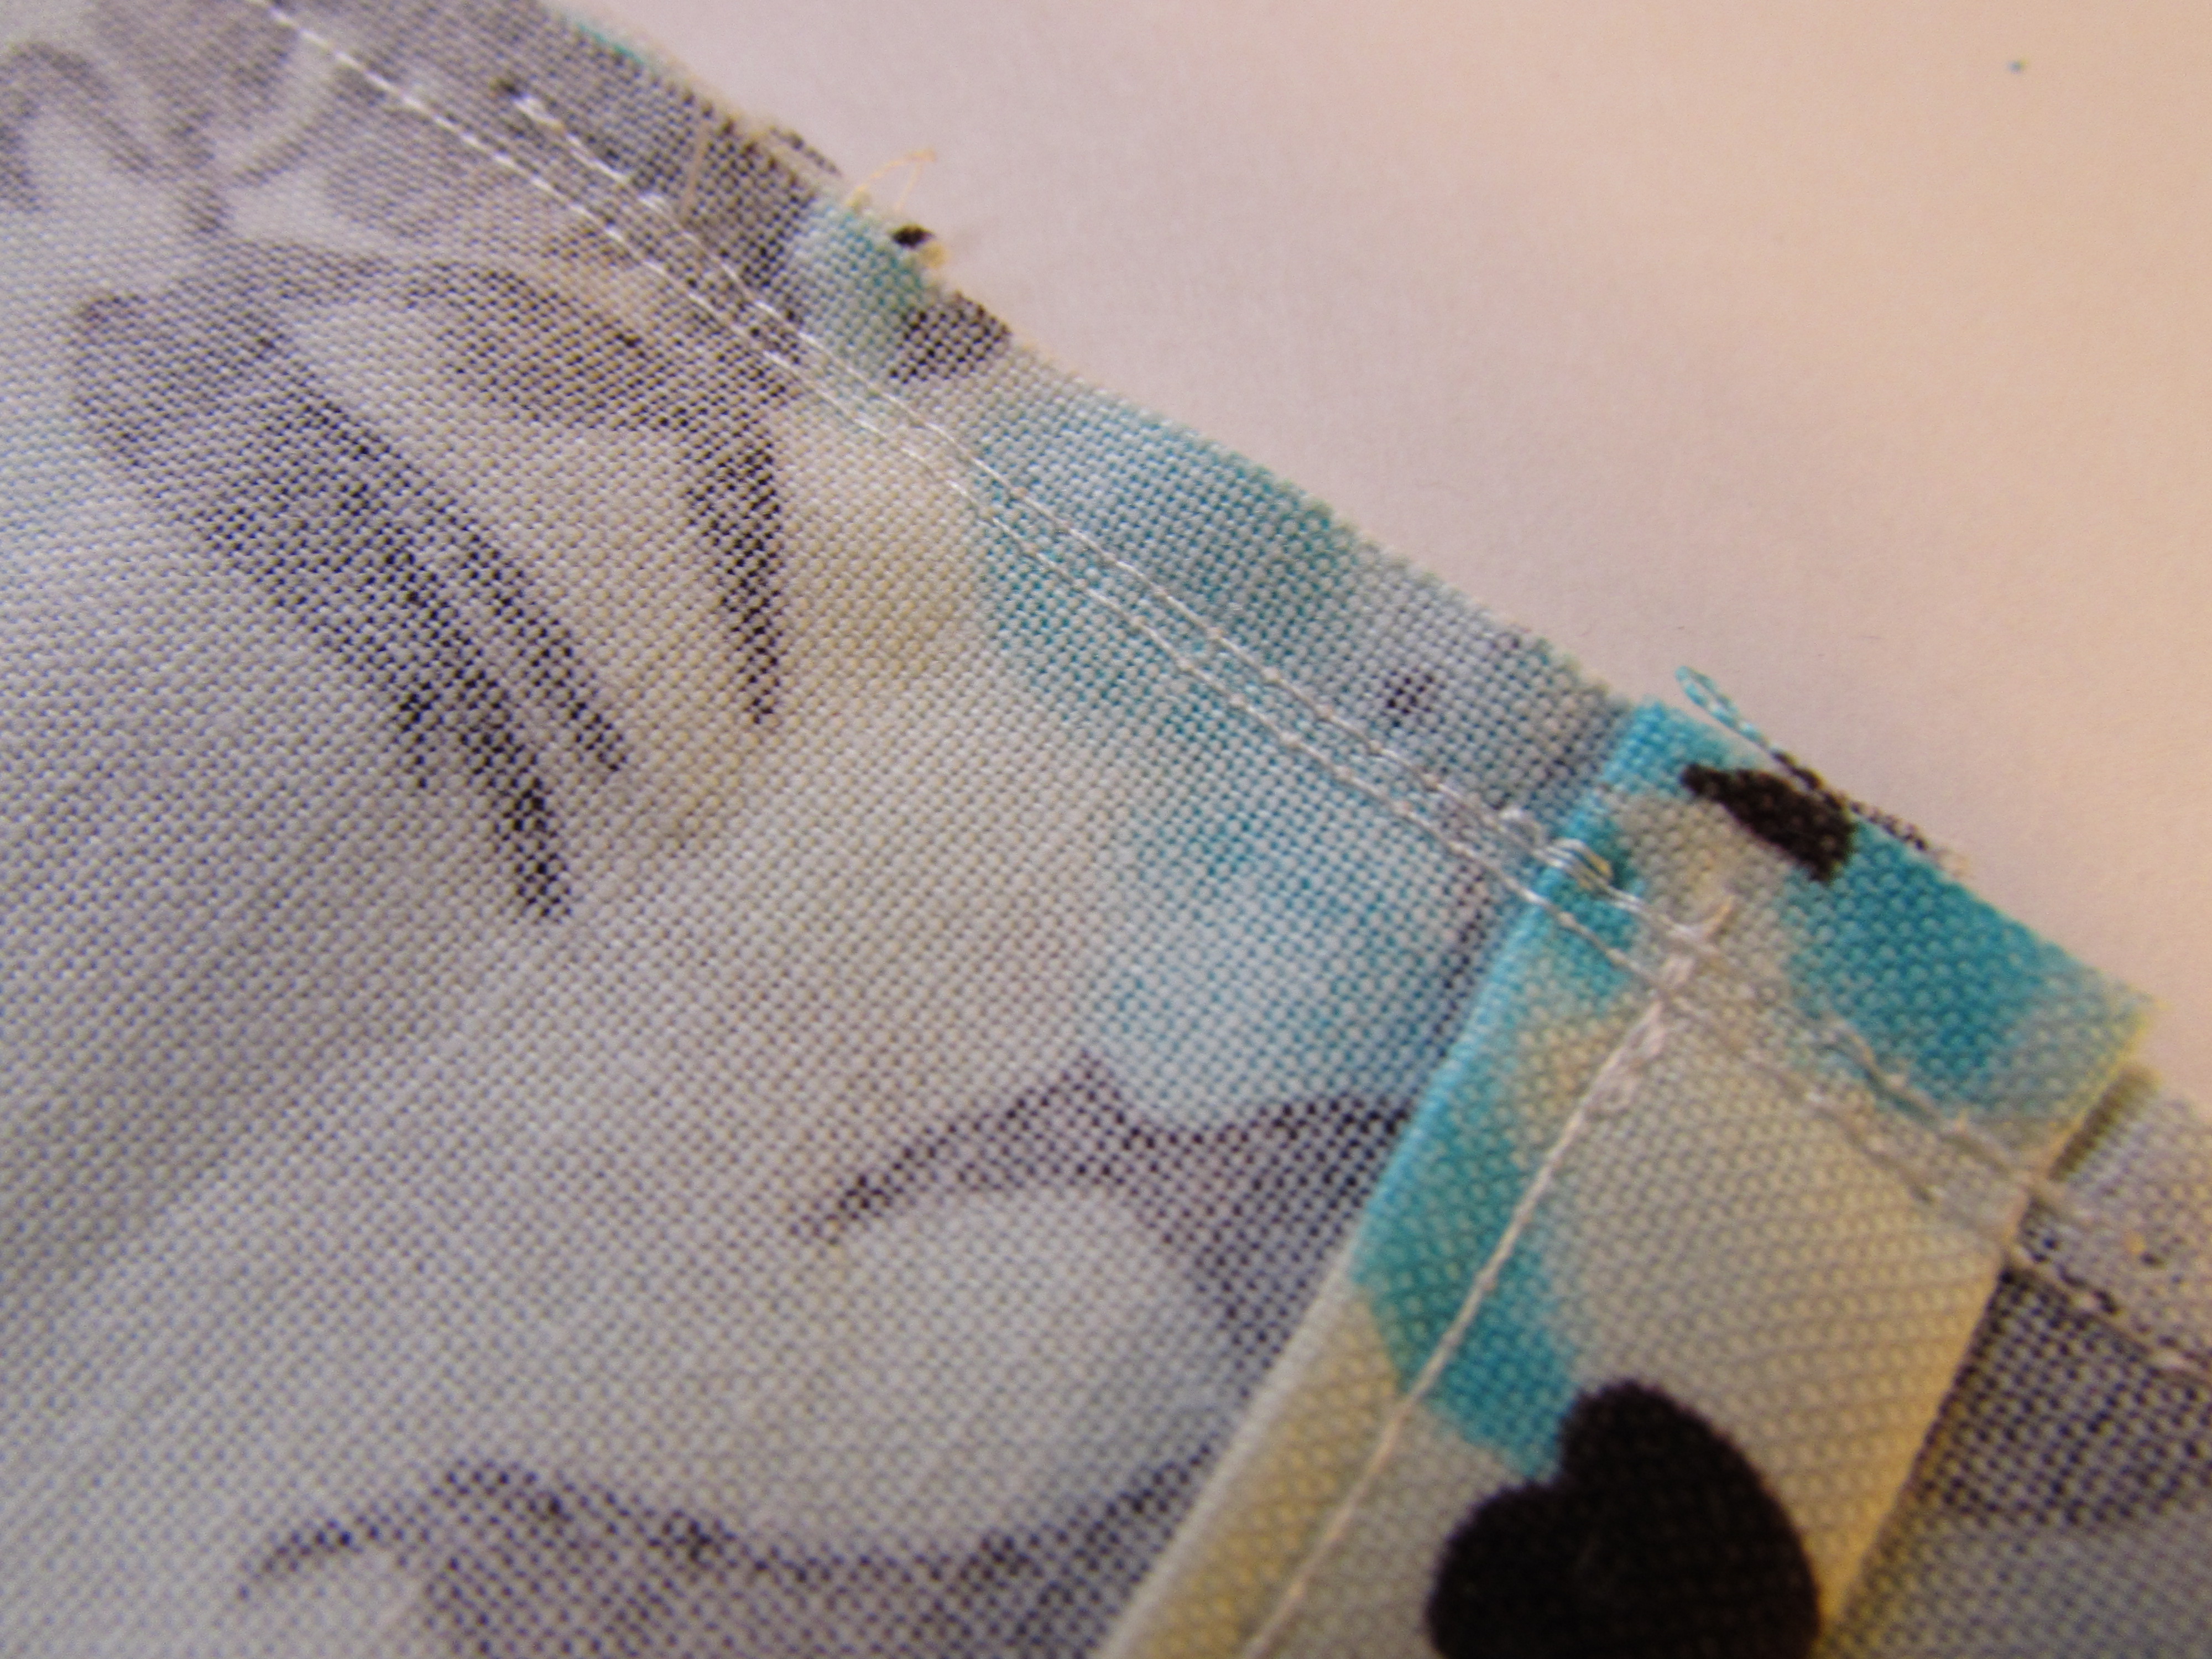
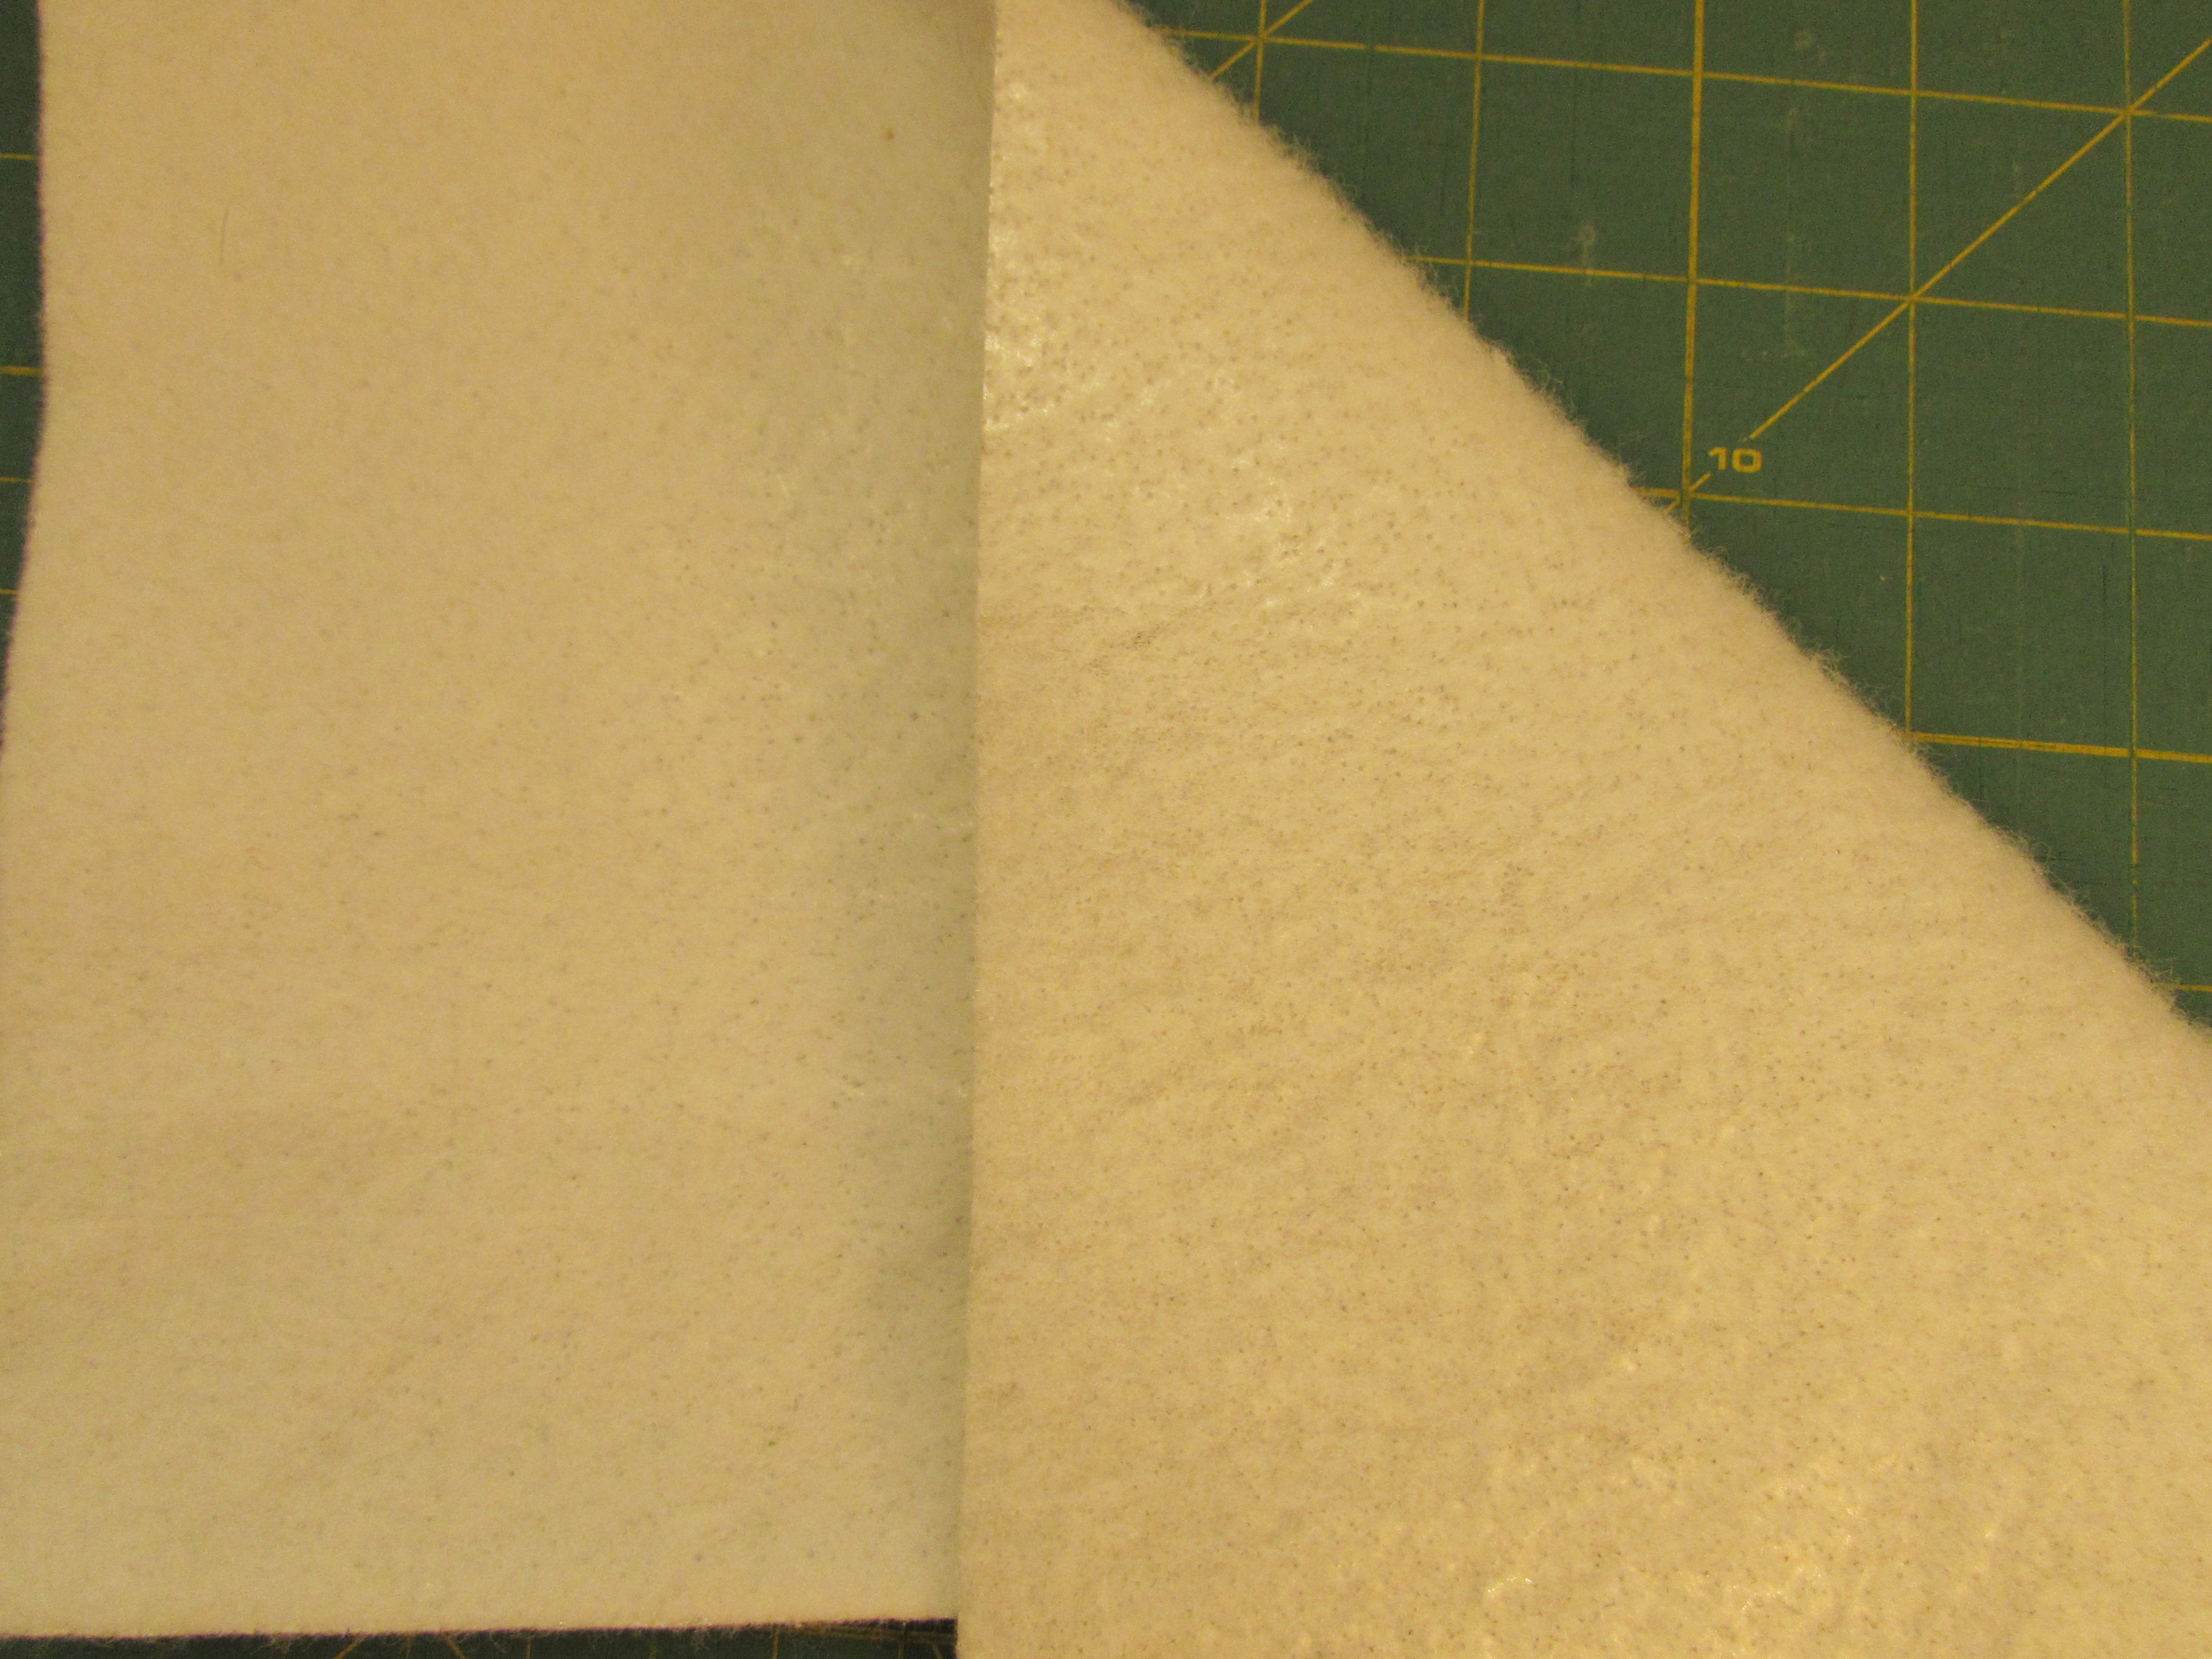
Take a look at your piece of Insul Bright. You will see that there is one side that is a bit shinier than the other, where the metallic bits show – in the photo below, the shinier side is on the right. When using Insul Bright, that side should be placed so that it is touching the inside of the fabric. We will be layering fabric, batting and Insul Bright. For better insulation, the shiny side should be in contact with the fabric, not the cotton batting. This isn’t hugely important though. The manufacturer states that it will only provide slightly better insulation.

img_7552

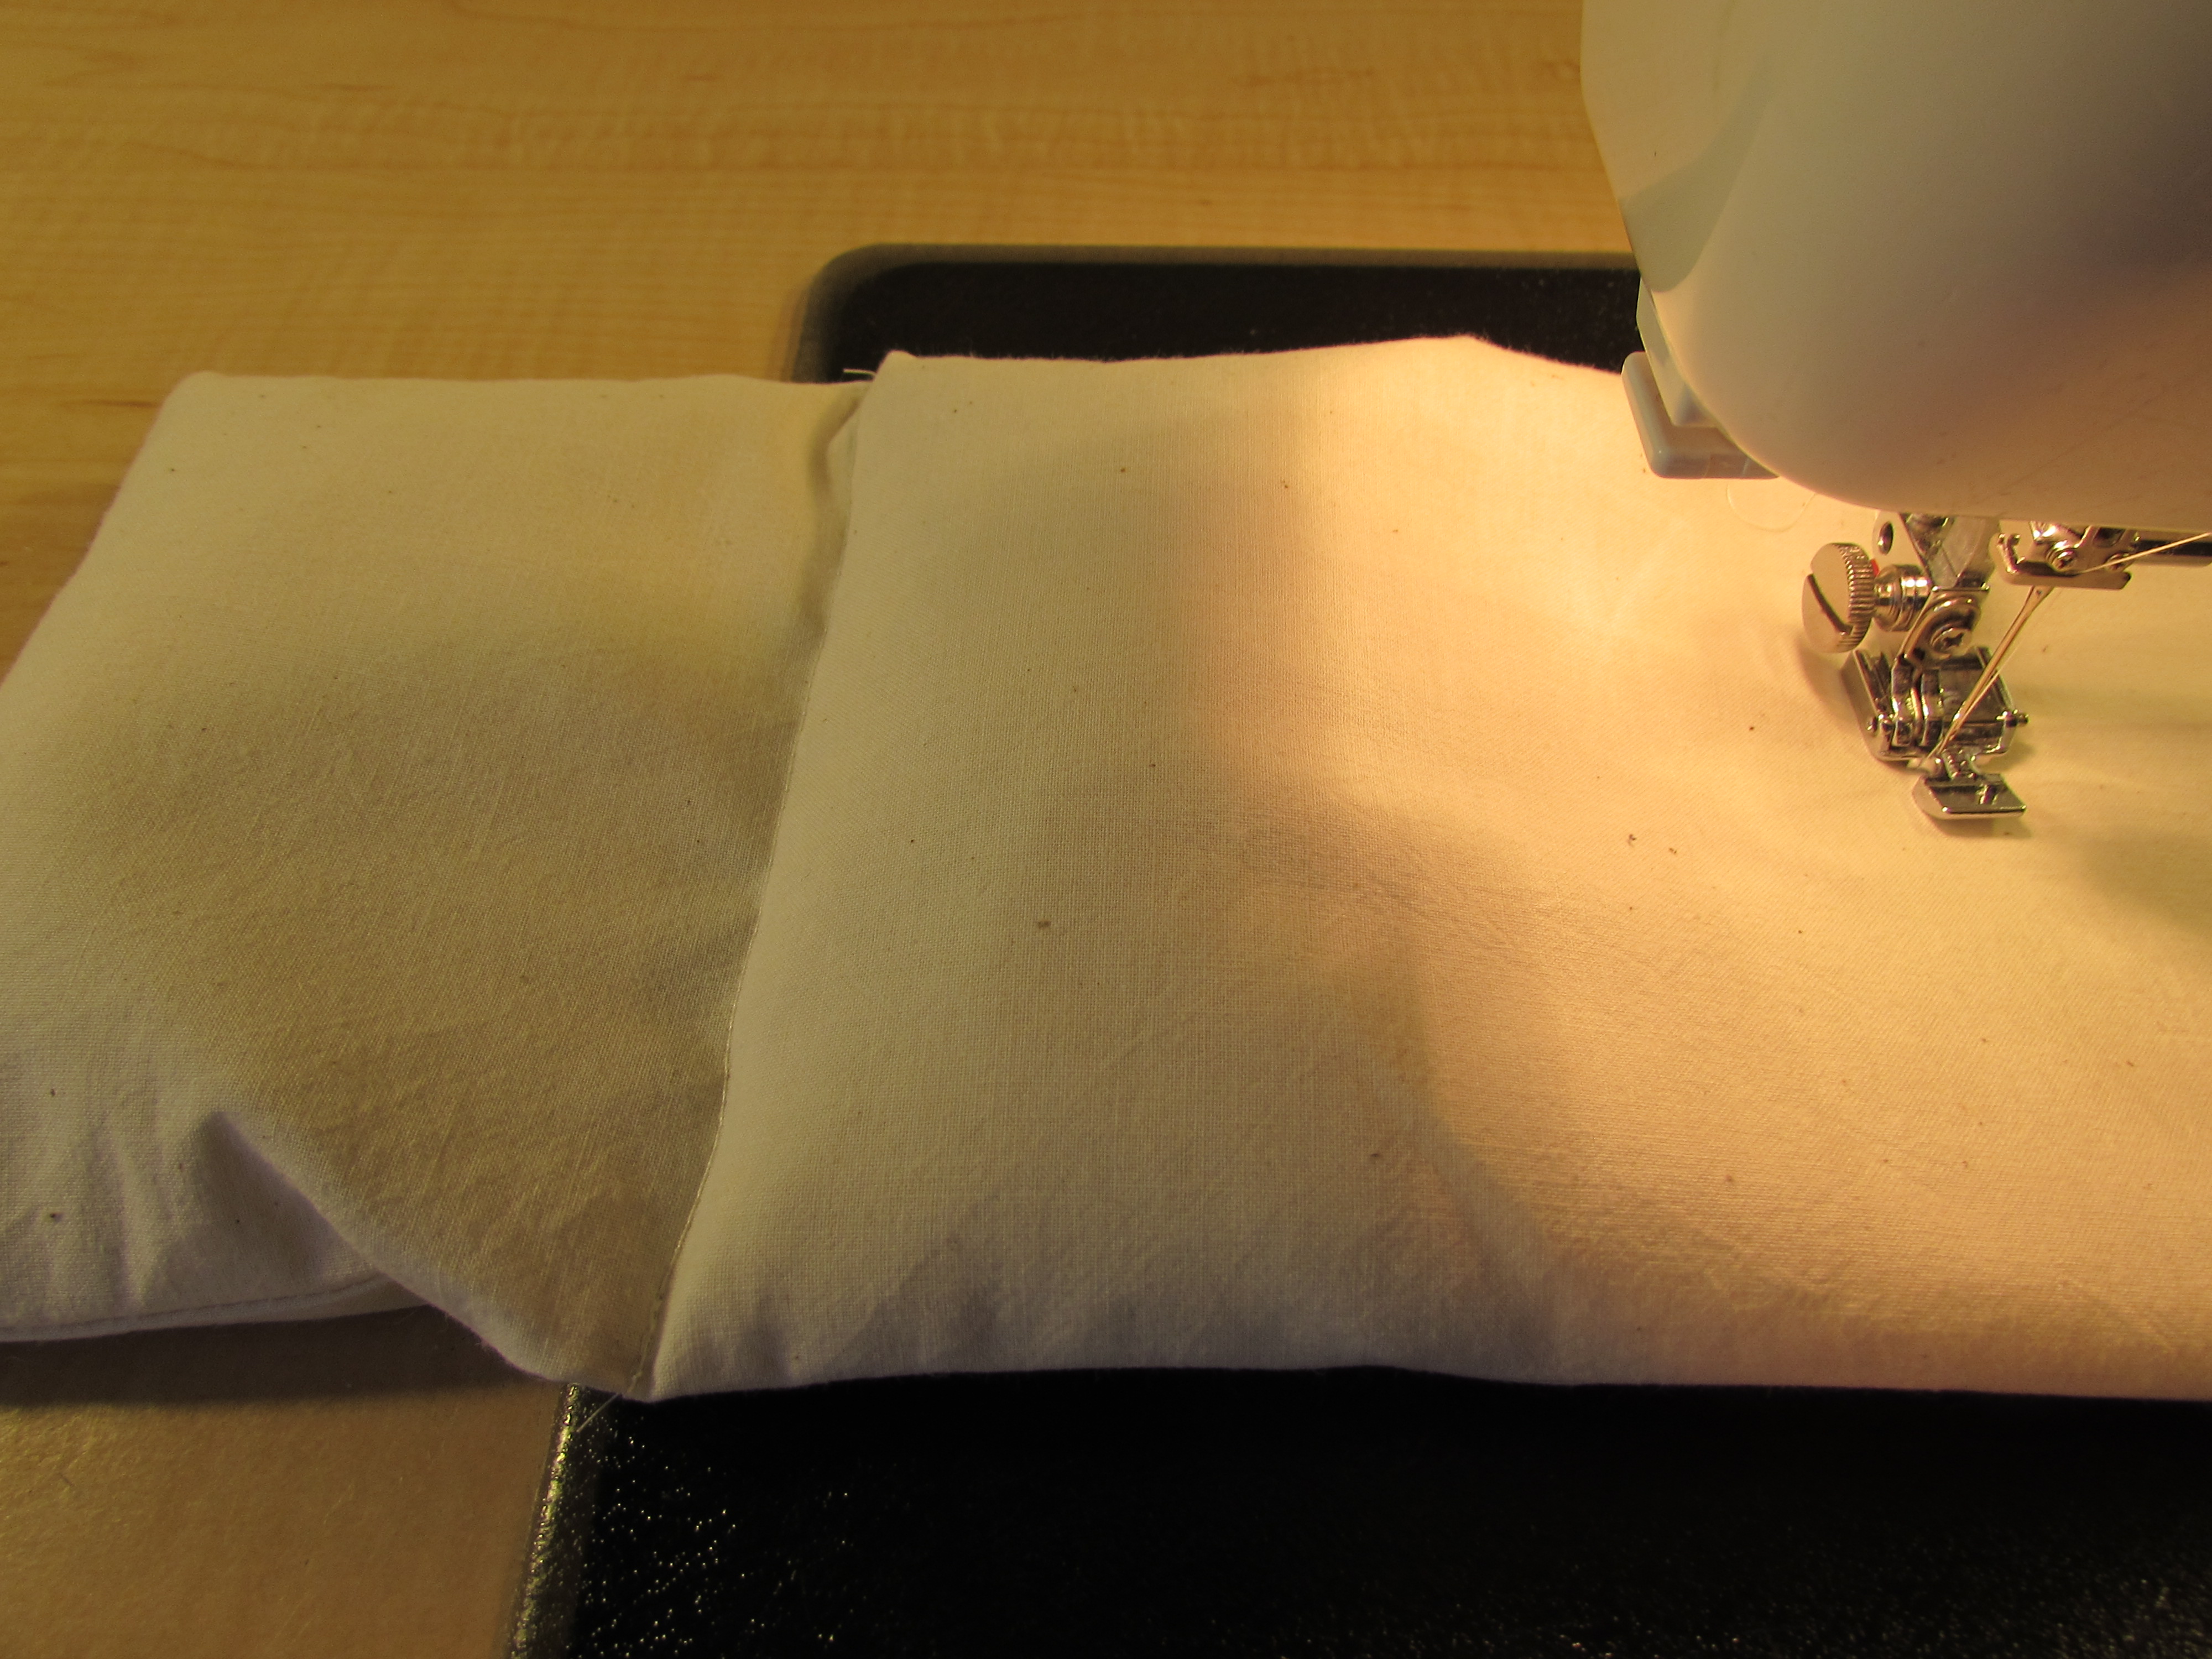
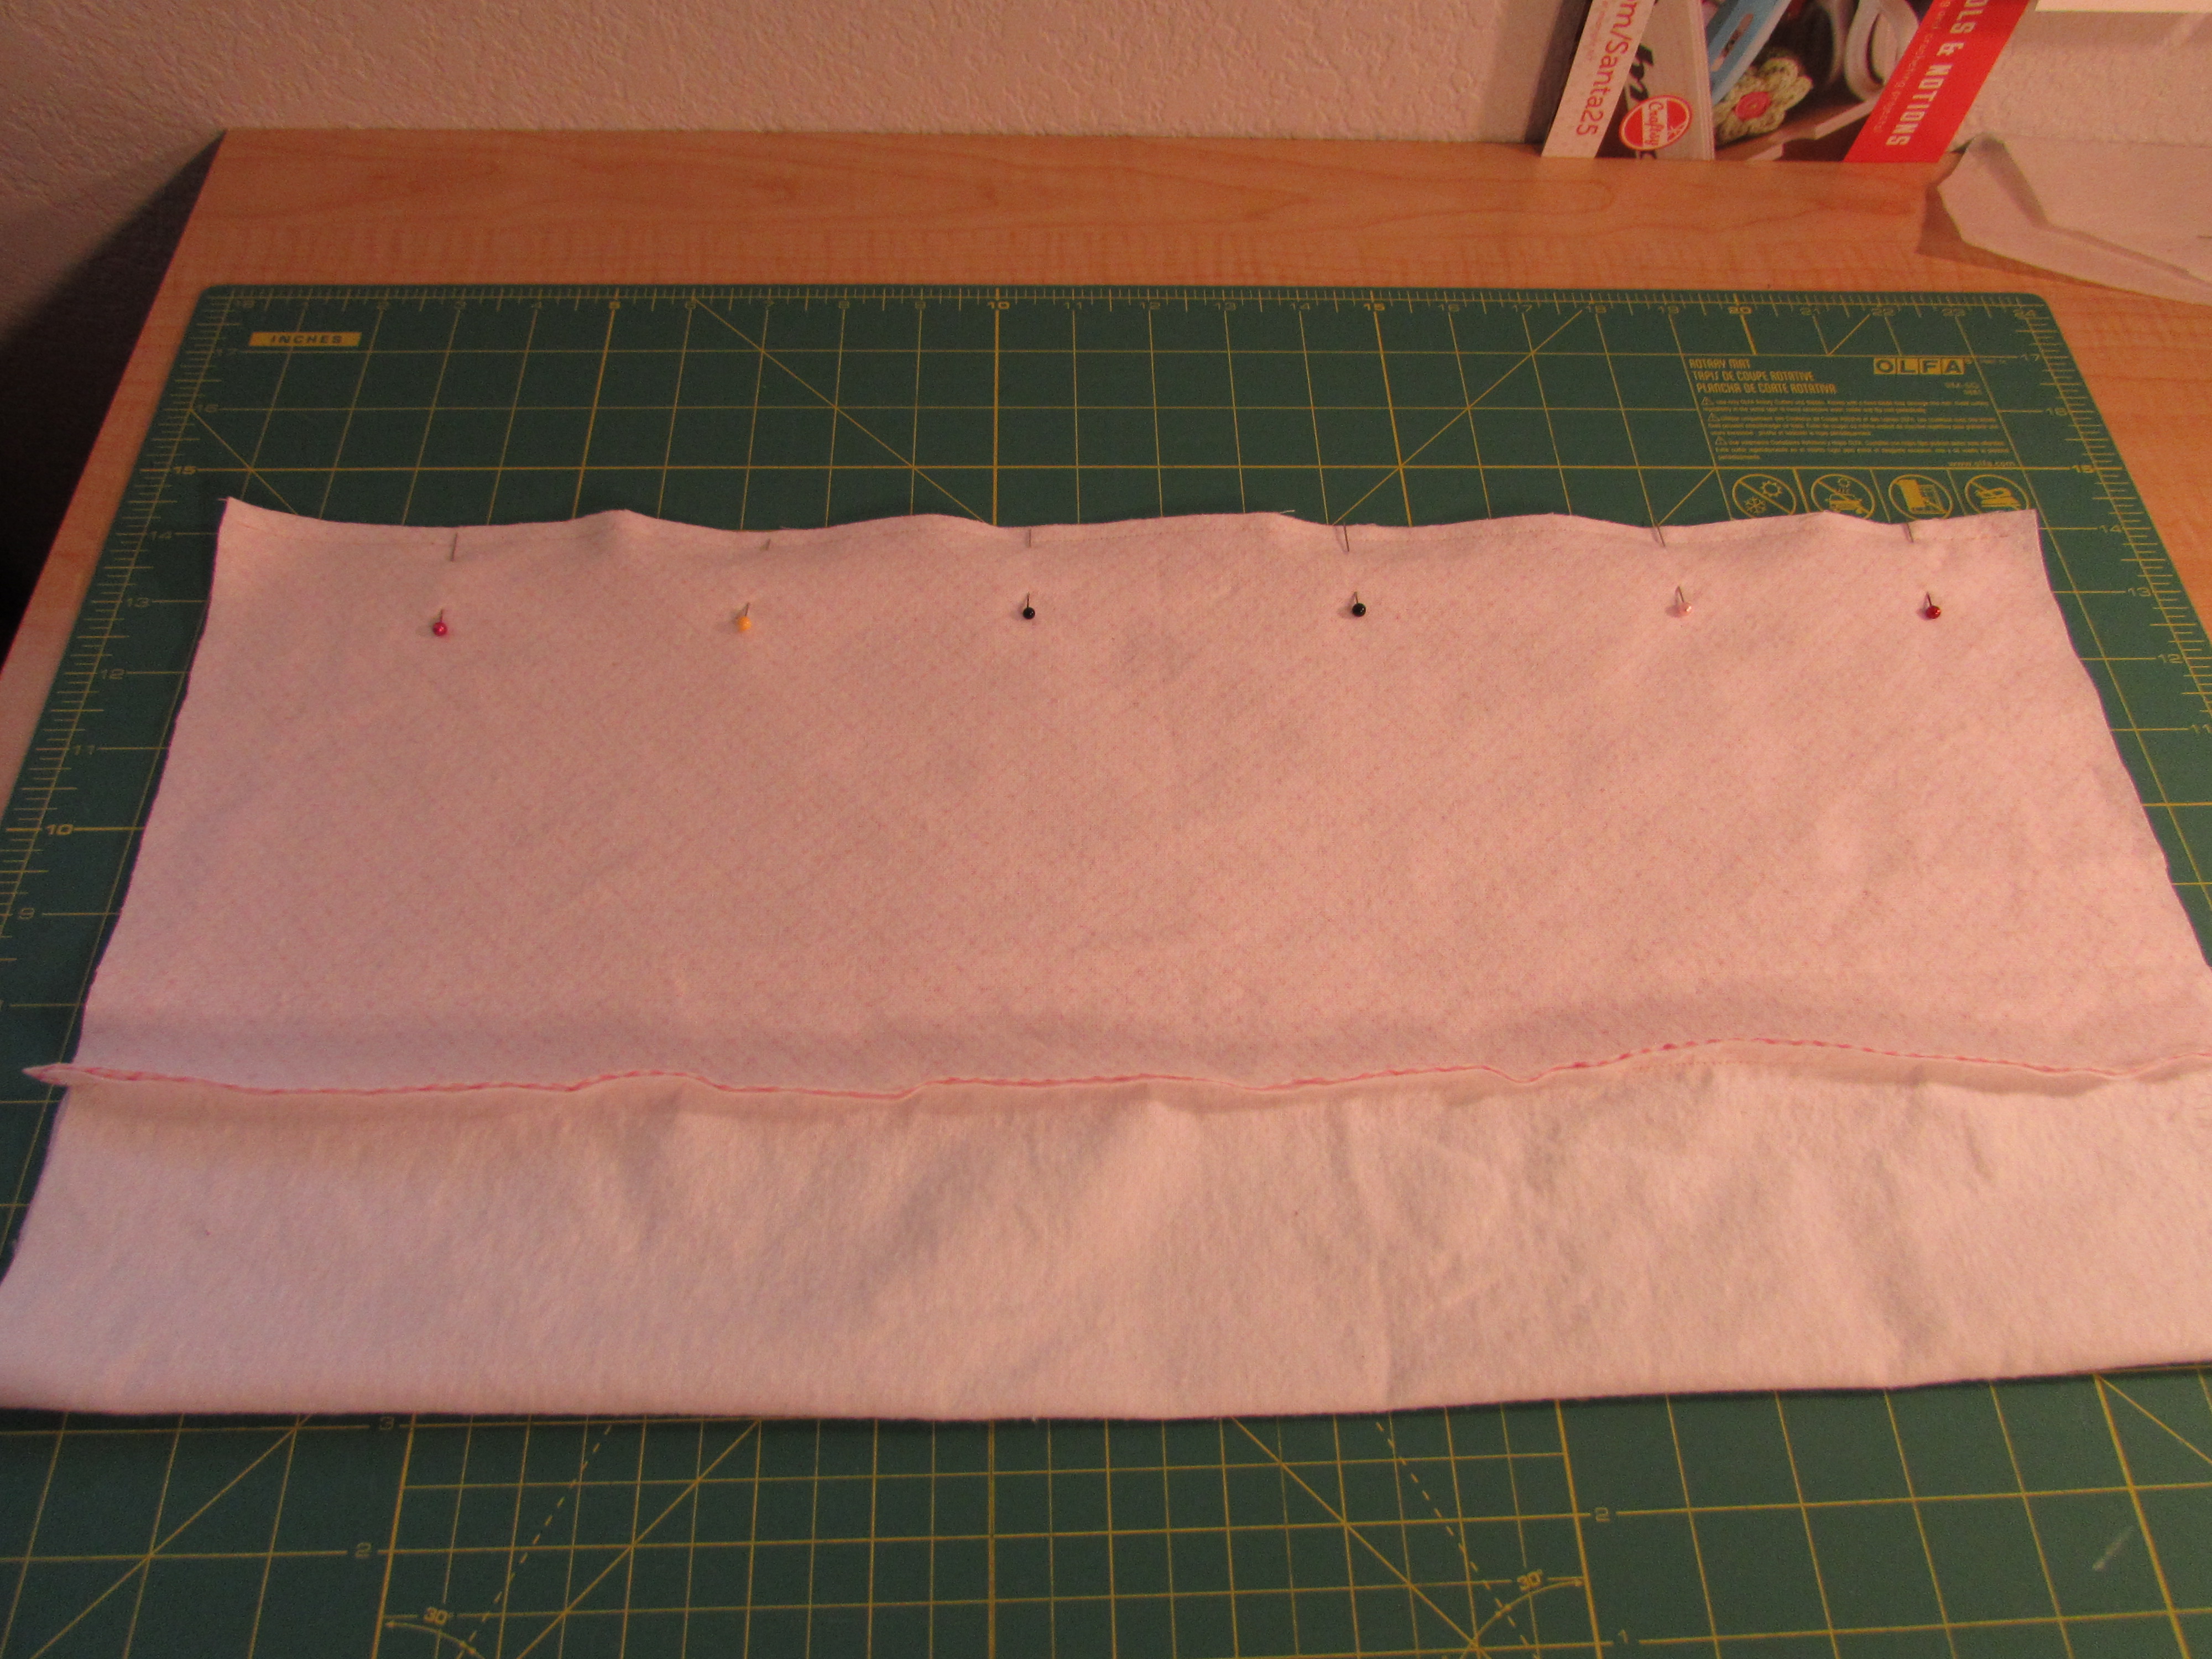
Let’s assemble the layers for the cozy. Place the Insul Bright on the bottom side with the metallic, shiny side facing down on the mat. Next place your cotton batting on the Insul Bright. Finally place your two fabric rectangles, right sides together, on top of the cotton batting.

img_7561

Pin the edges tightly so the layers don’t shift. Next mark a small dot at one of the short ends center point. You will match that dot to the center dot on the tab.

img_7557

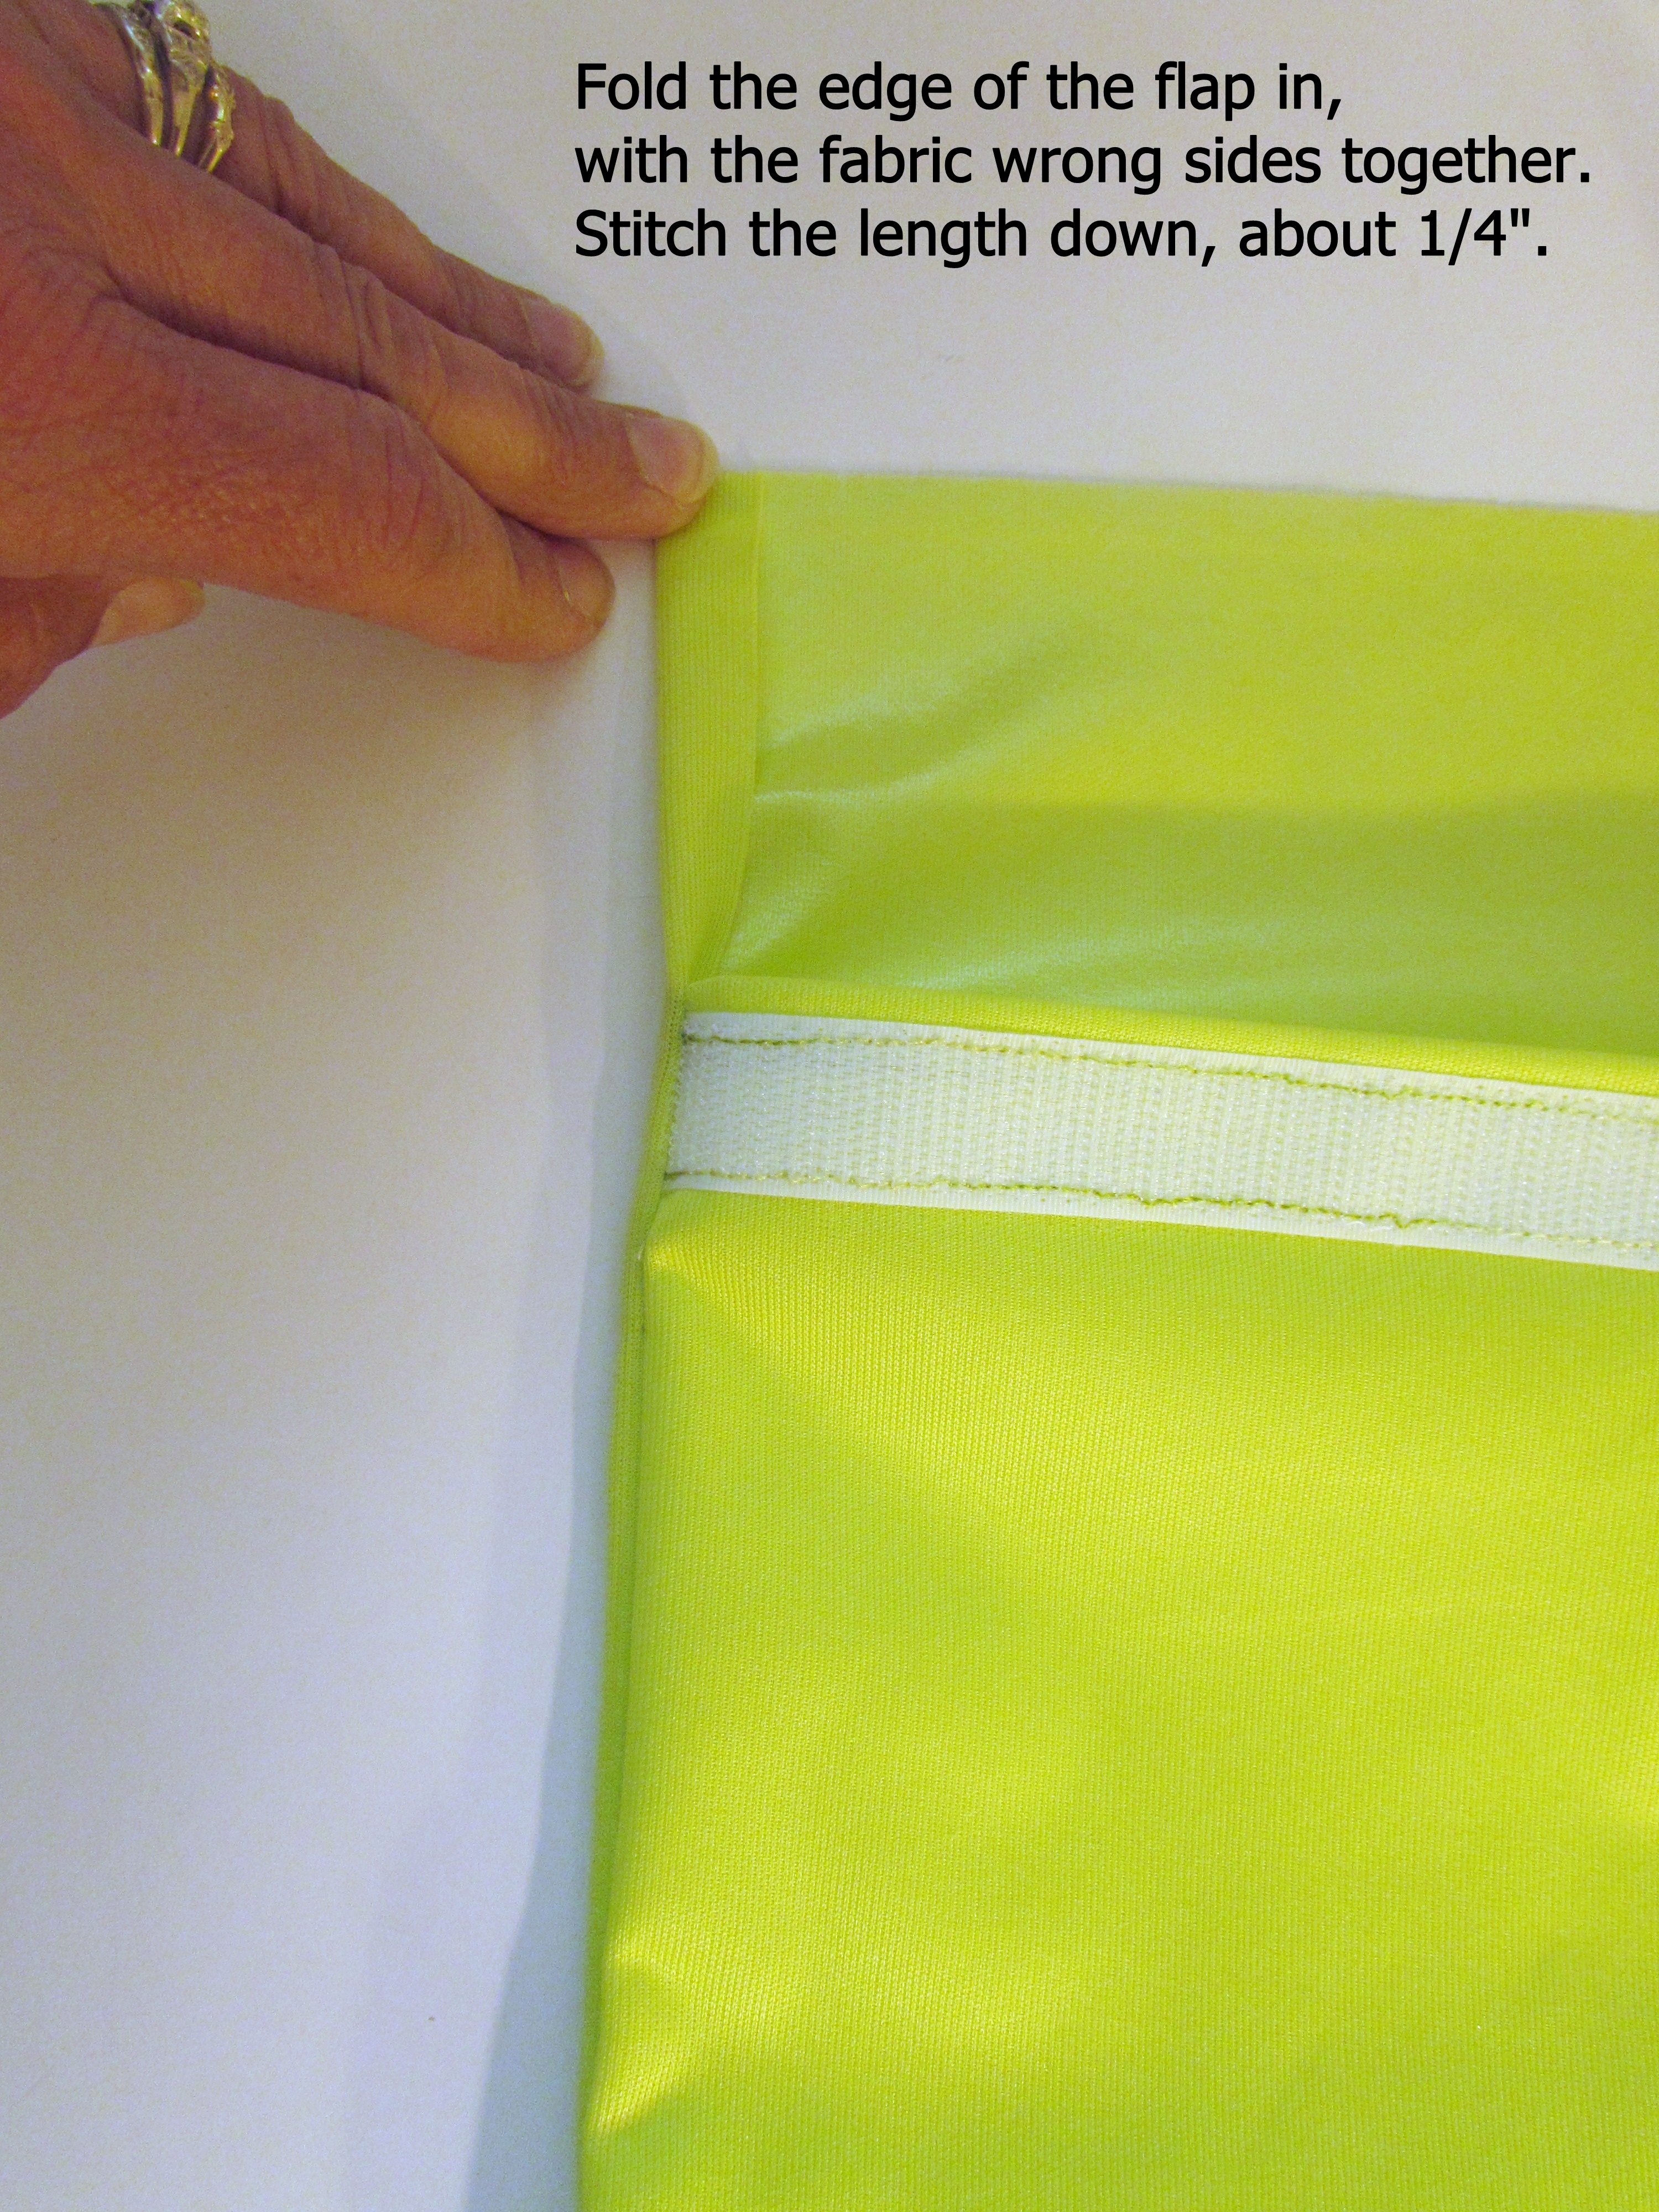
Fold back the top layer of fabric a few inches and insert the tab between the two fabric layers matching the center points on the large rectangle and the tab.Once you slip the tab between the layers of fabric, make sure you have that raw edge of the tab aligned with the short side of the cozy, NOT the finished end. You will stitch the tab to the bottom layers (which would be both battings and one fabric layer). Stitch it with 1/4″ seam allowance so this seam won’t show later on.

img_7559

Unfold that top layer so it is now covering the tab. Pin securely.

img_7561

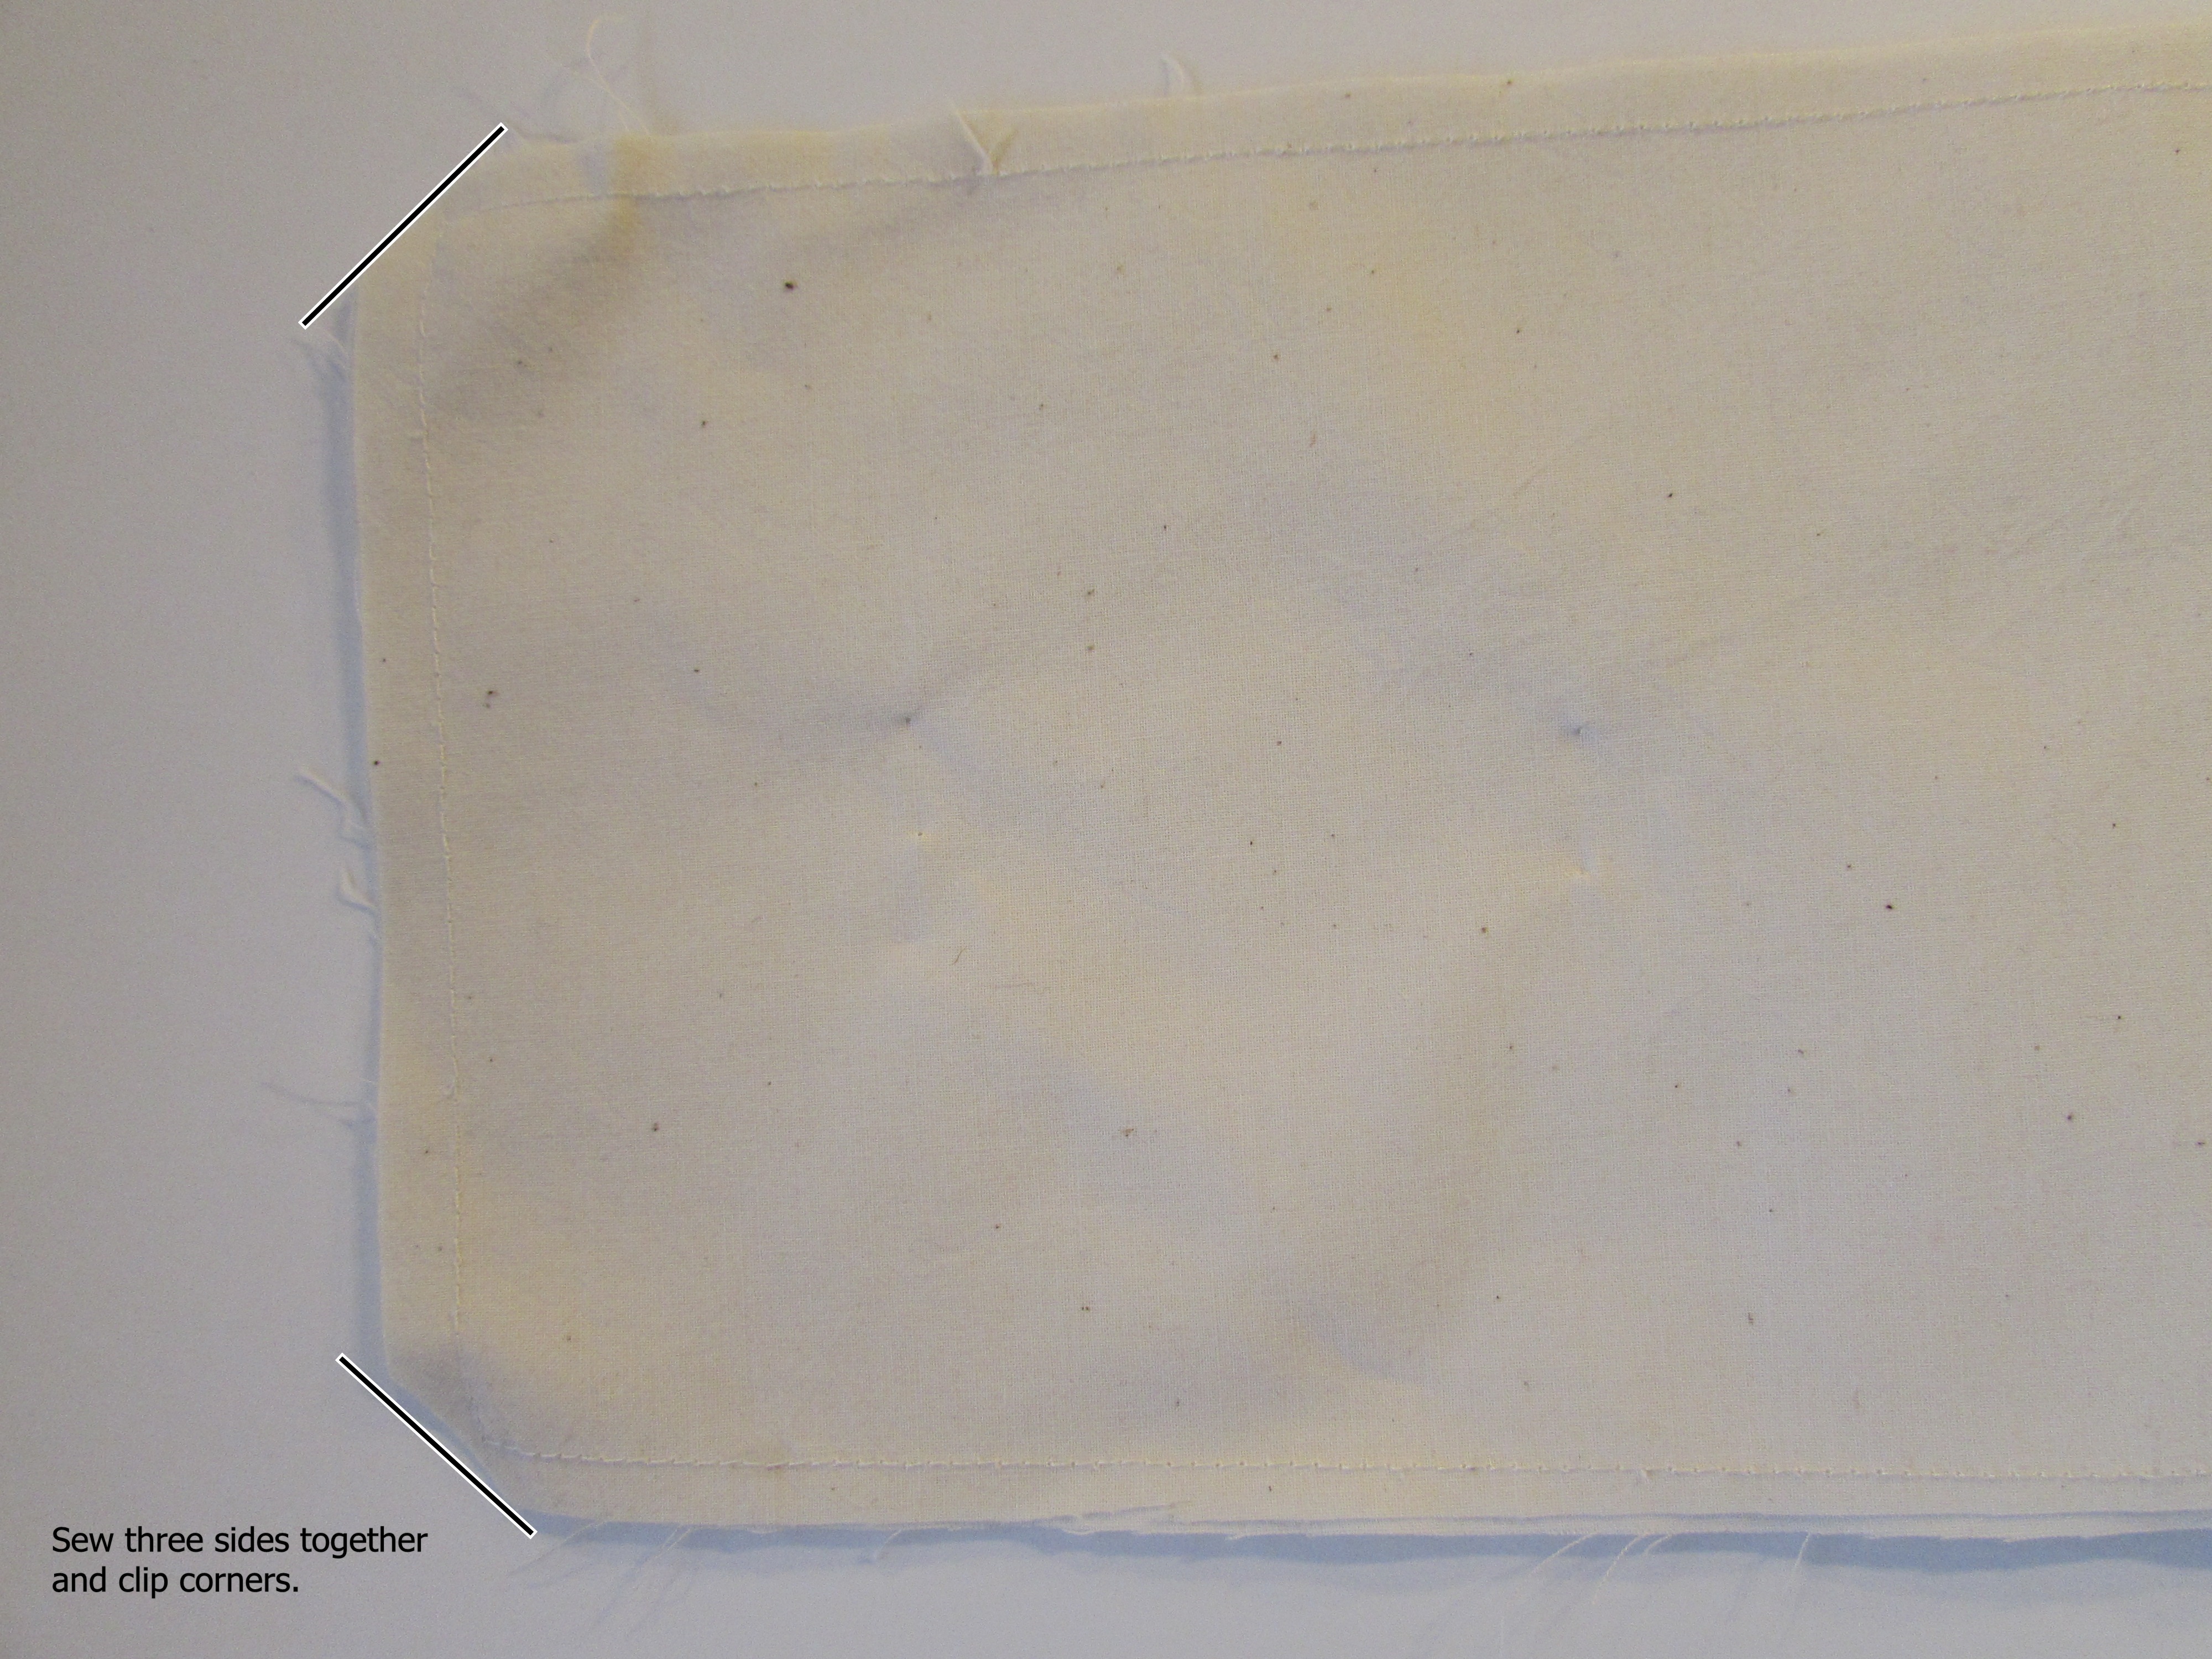
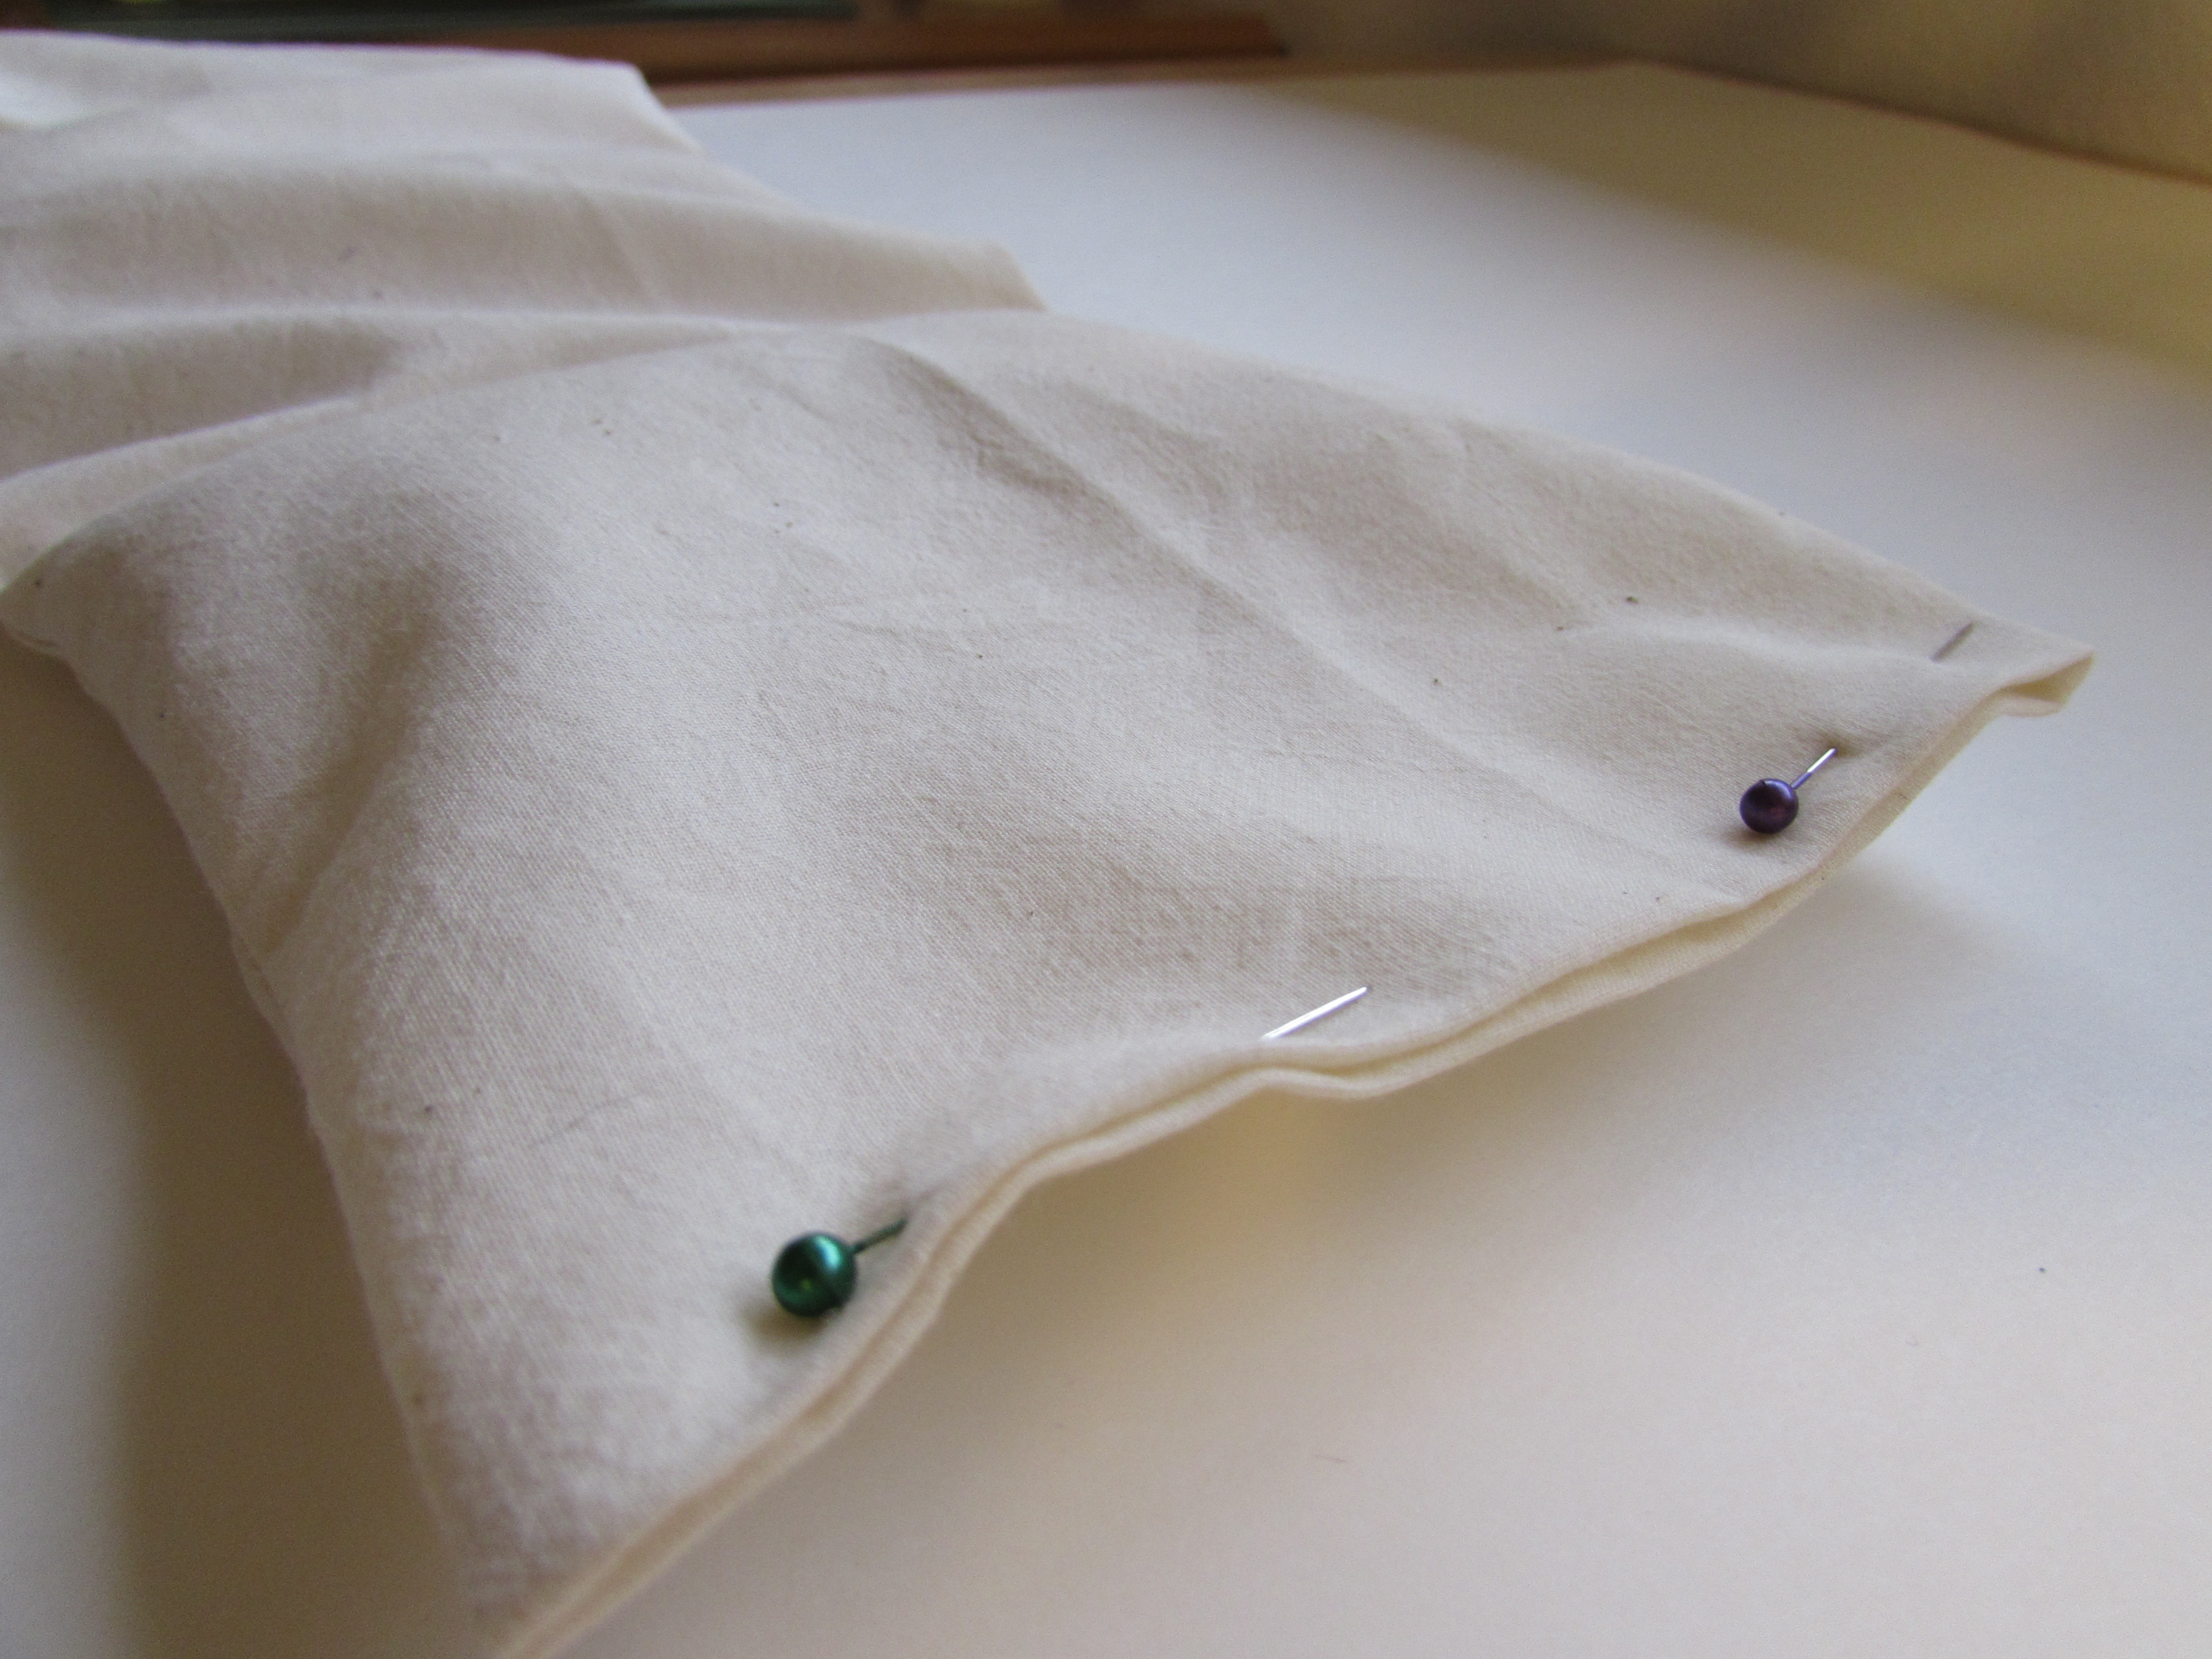
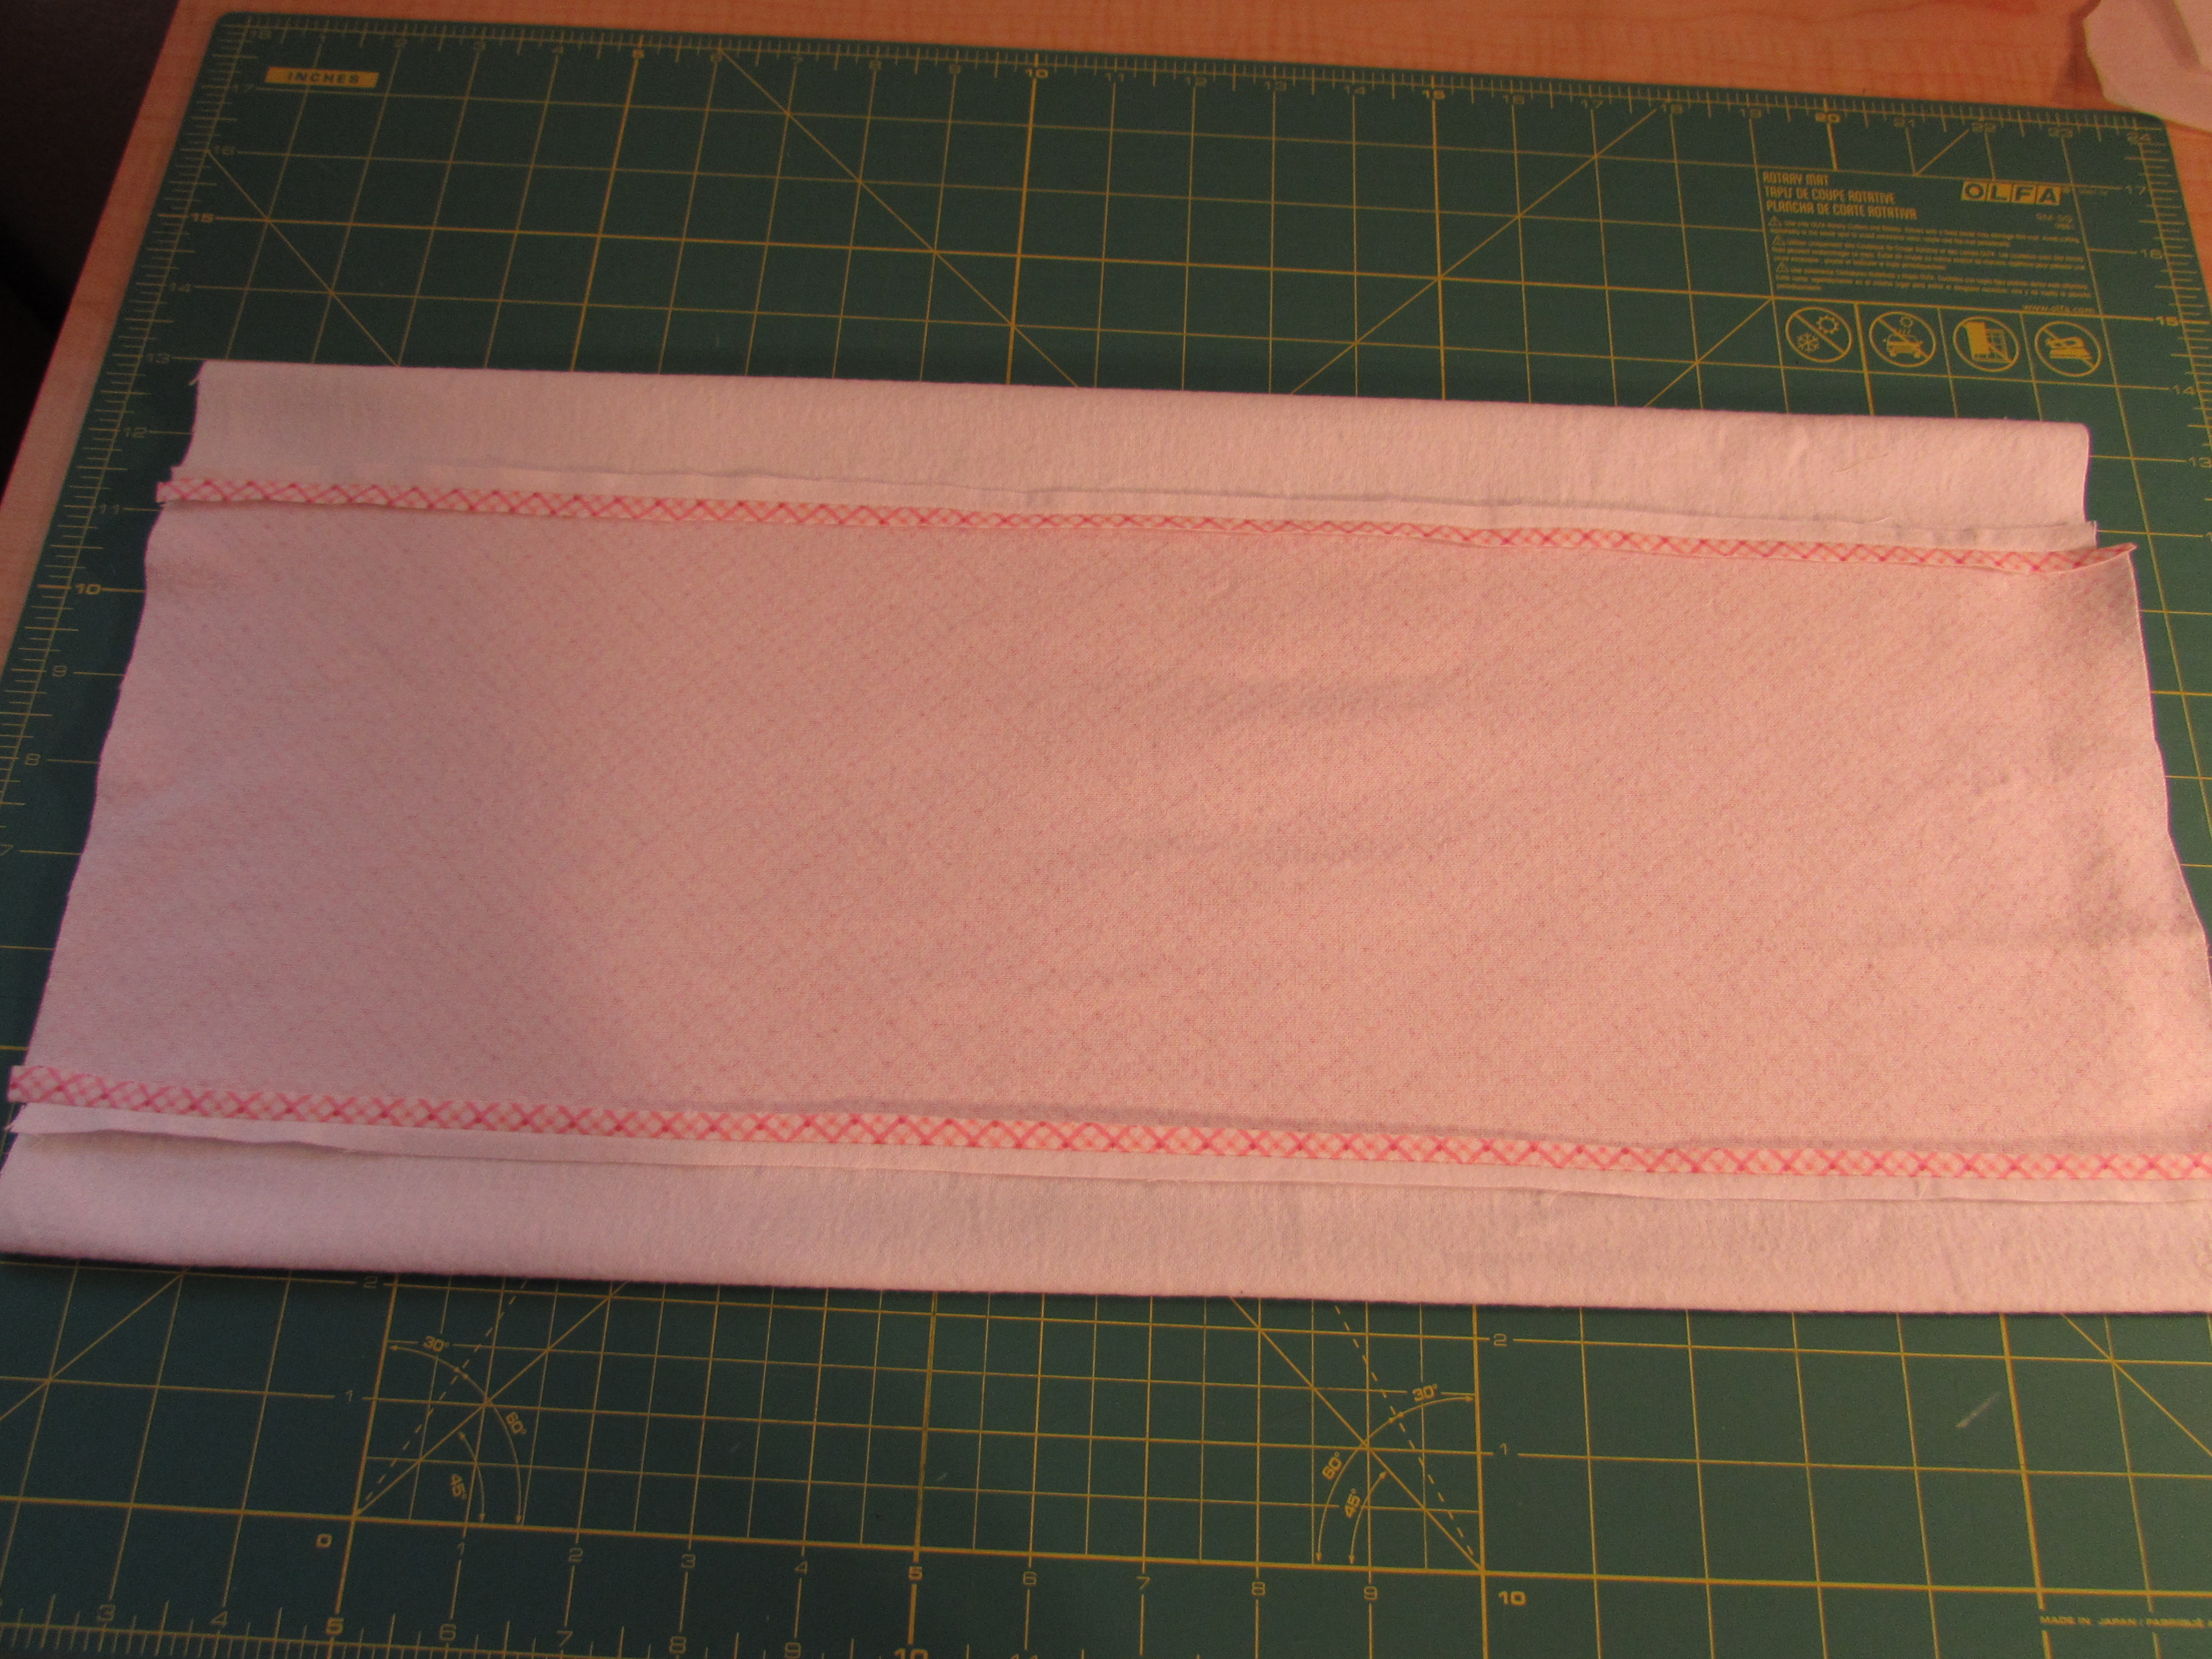
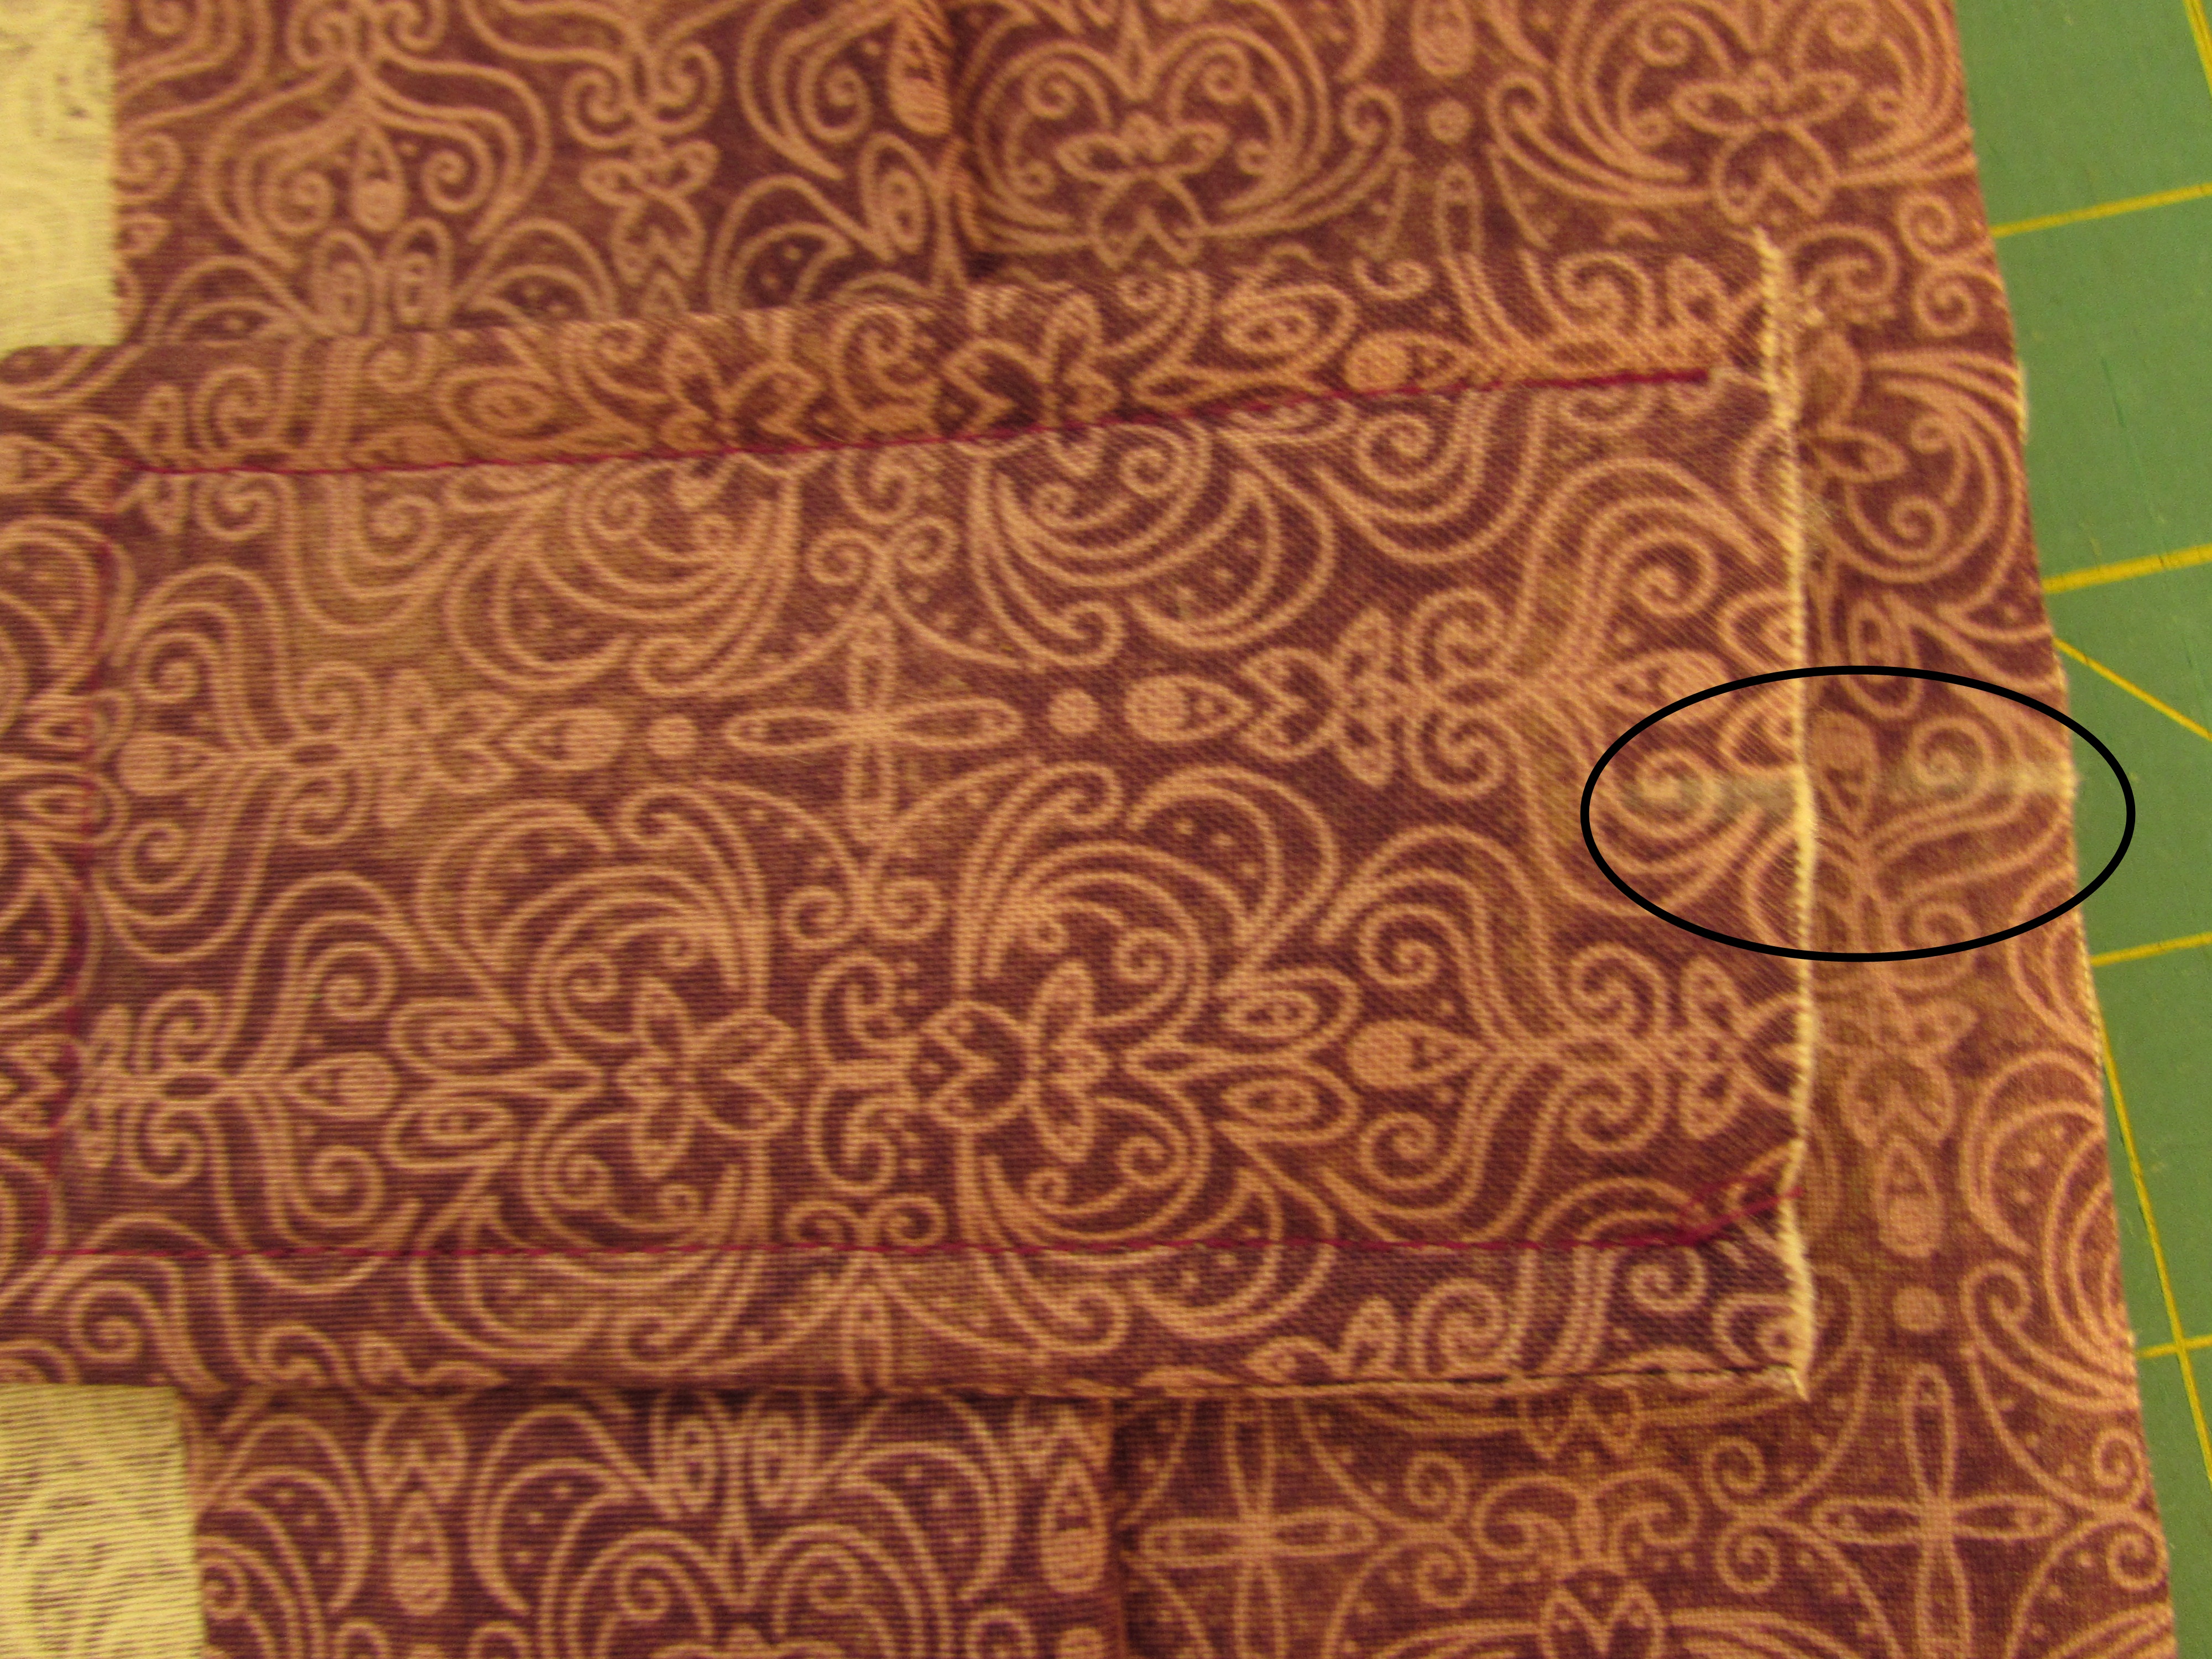
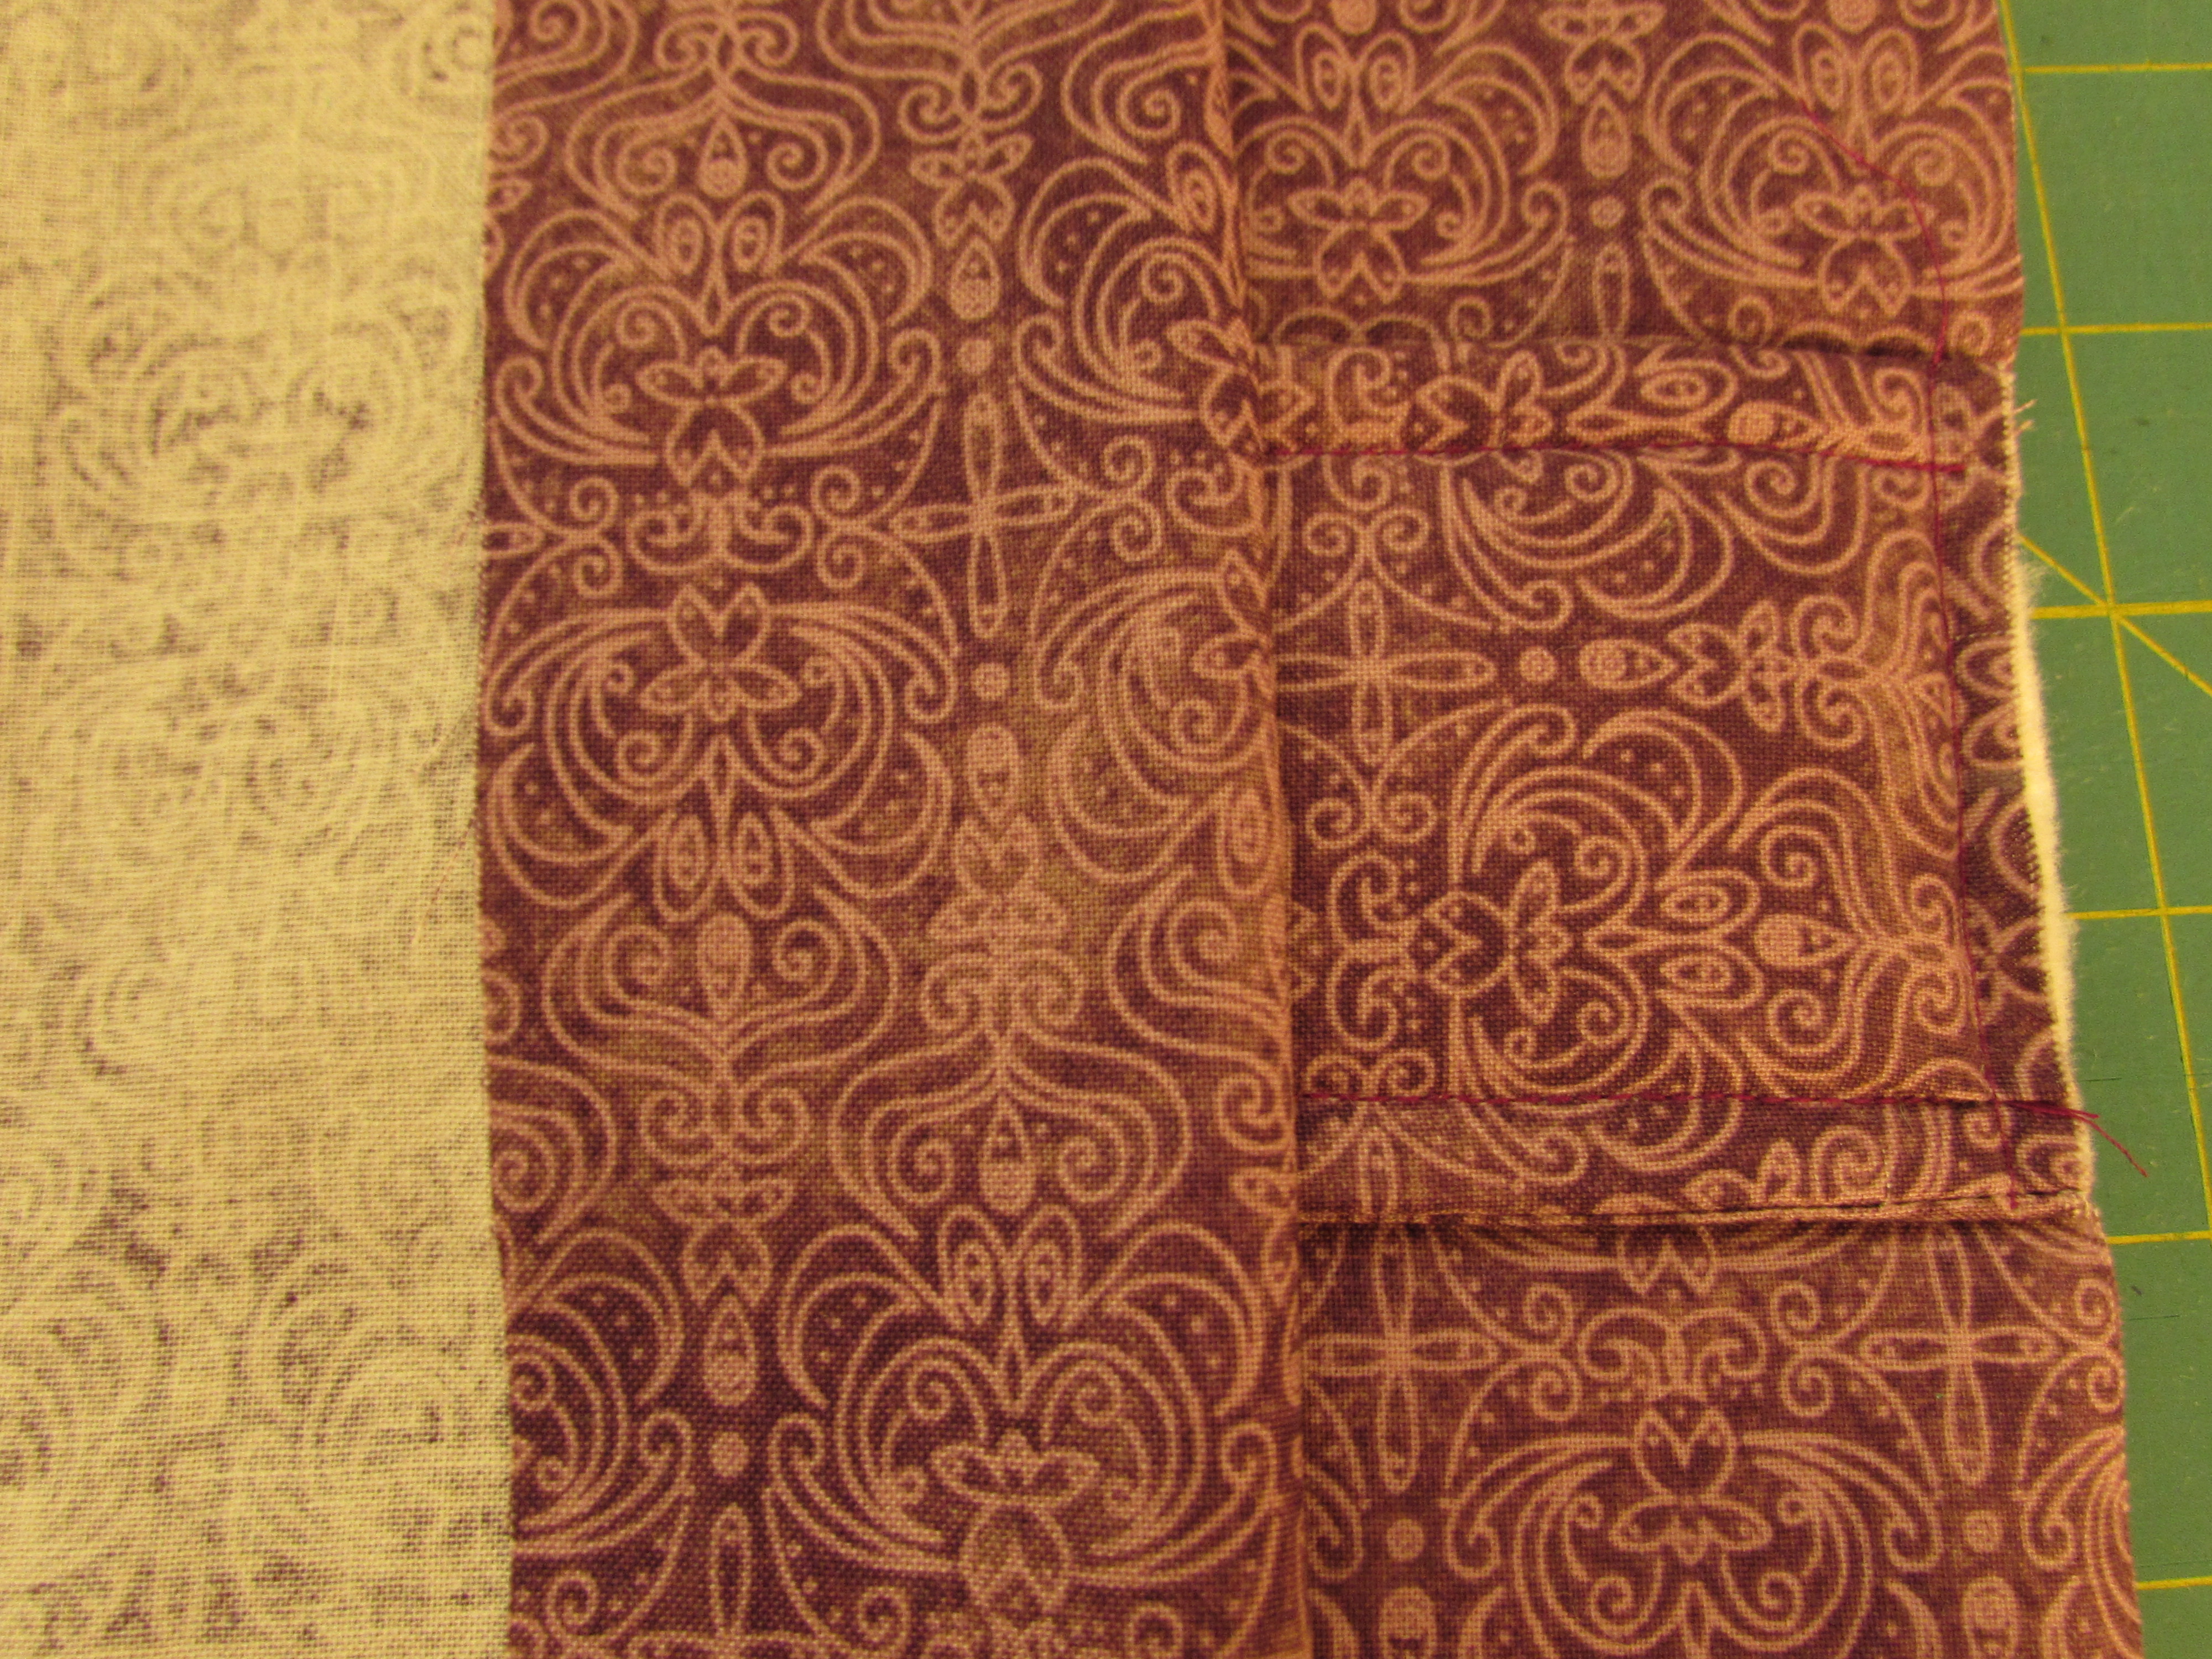
Starting on one of the long edges, stitch all layers together, around all four edges with a 3/8″ seam allowance. Leave one 3″ opening on one of the long sides. Remember when you are beginning and ending this seam to stop at the opening with your needle down, pivot the fabric and sew off the edge. Reverse stitch about three stitches so that your seam holds while you turn your project right side out.

img_7562

Very carefully, take your scissors and make a small cut in the Insul Bright. It should be only as deep at those stitches you just made. Clip each side and then trim that piece off. This will remove some of the bulk from that seam when you close it up. You will also need to trim each of the four corners, just like we did with the tab, taking care not to snip too closely to the stitching.

img_7563

Now turn everything right side out by gently pulling the piece through that opening. It takes some patience but just work it through the opening.  Then use your fingers to slide the batting layers into place and flatten them. Sometimes they get a wave or lumpy feel from turning it right side out but you can just massage everything flat.  To have nice crisp corners, use your chopstick, or the round end of a pencil, and push the corners out.  I roll the finished edges between my fingers a bit to get a nice flat edge. Then press everything with steam. Carefully fold in the opening seam and hand stitch it closed. Use a hidden stitch, such as the ladder stitch. (If you need a tutorial on the ladder stitch, click here.)

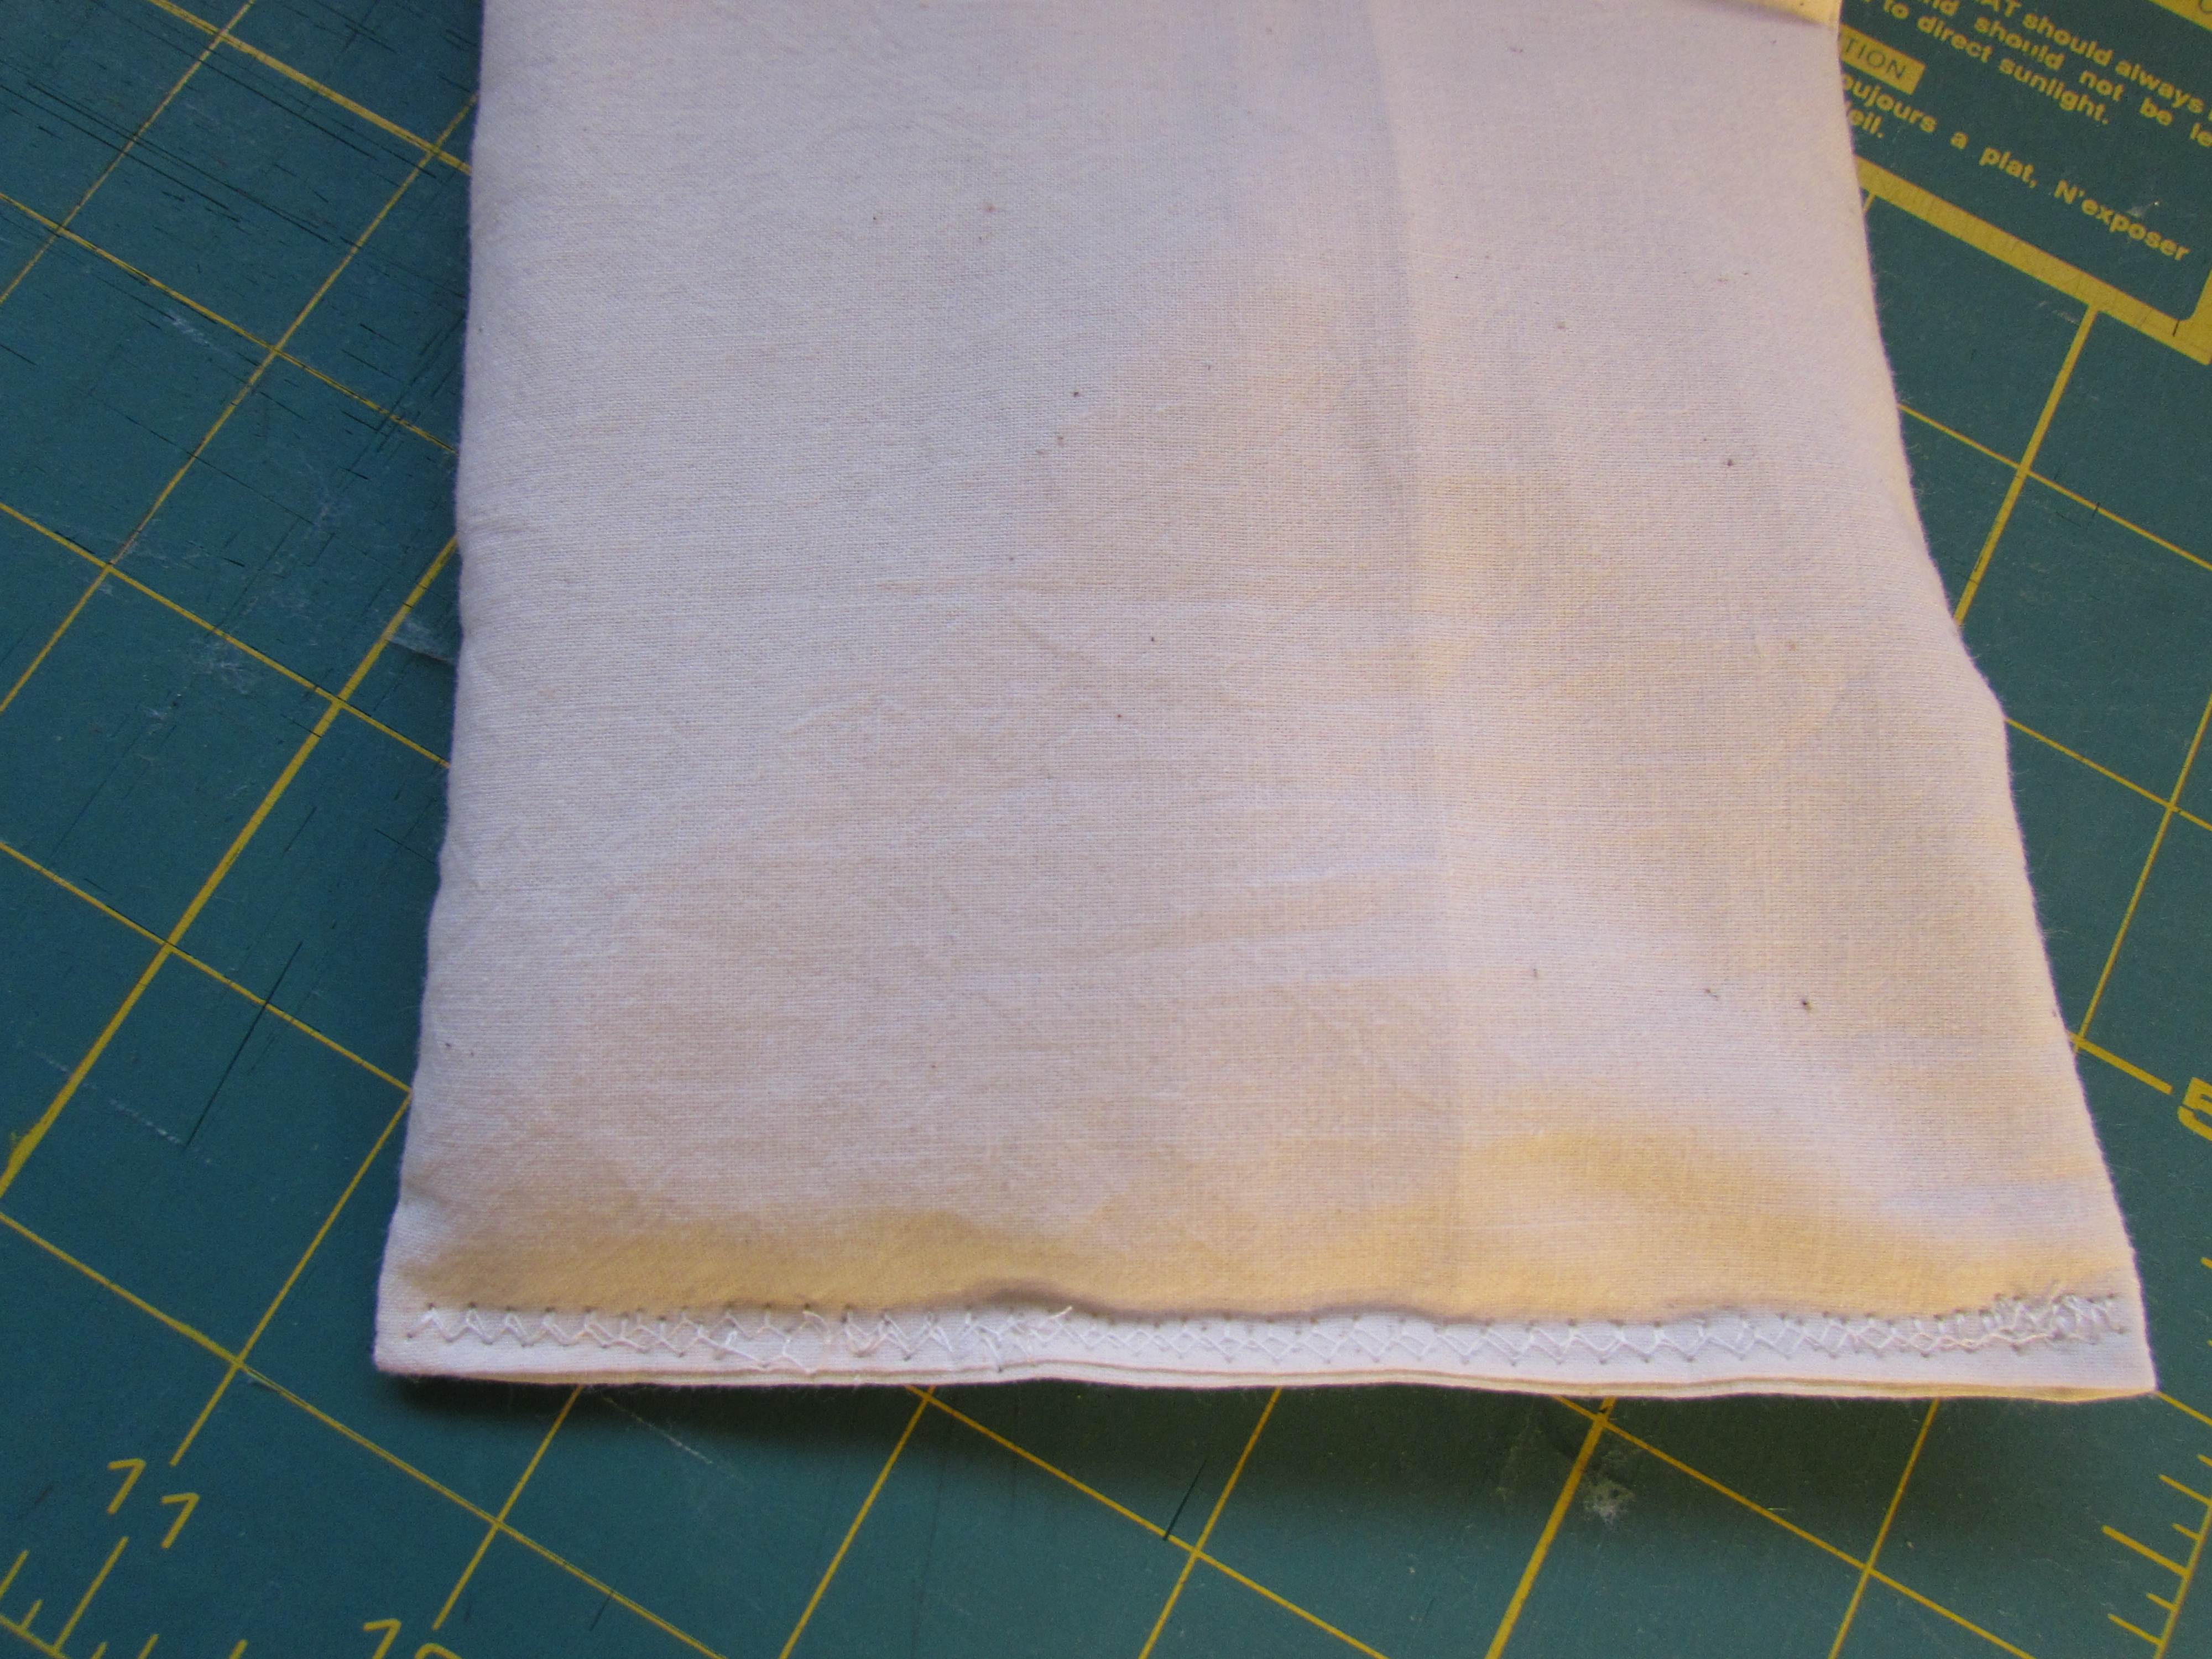
Using your walking foot, quilt a few lines through all layers to hold everything in place. The quilting can be as you like; this piece was quilted with three seams across the rectangle.

img_7565

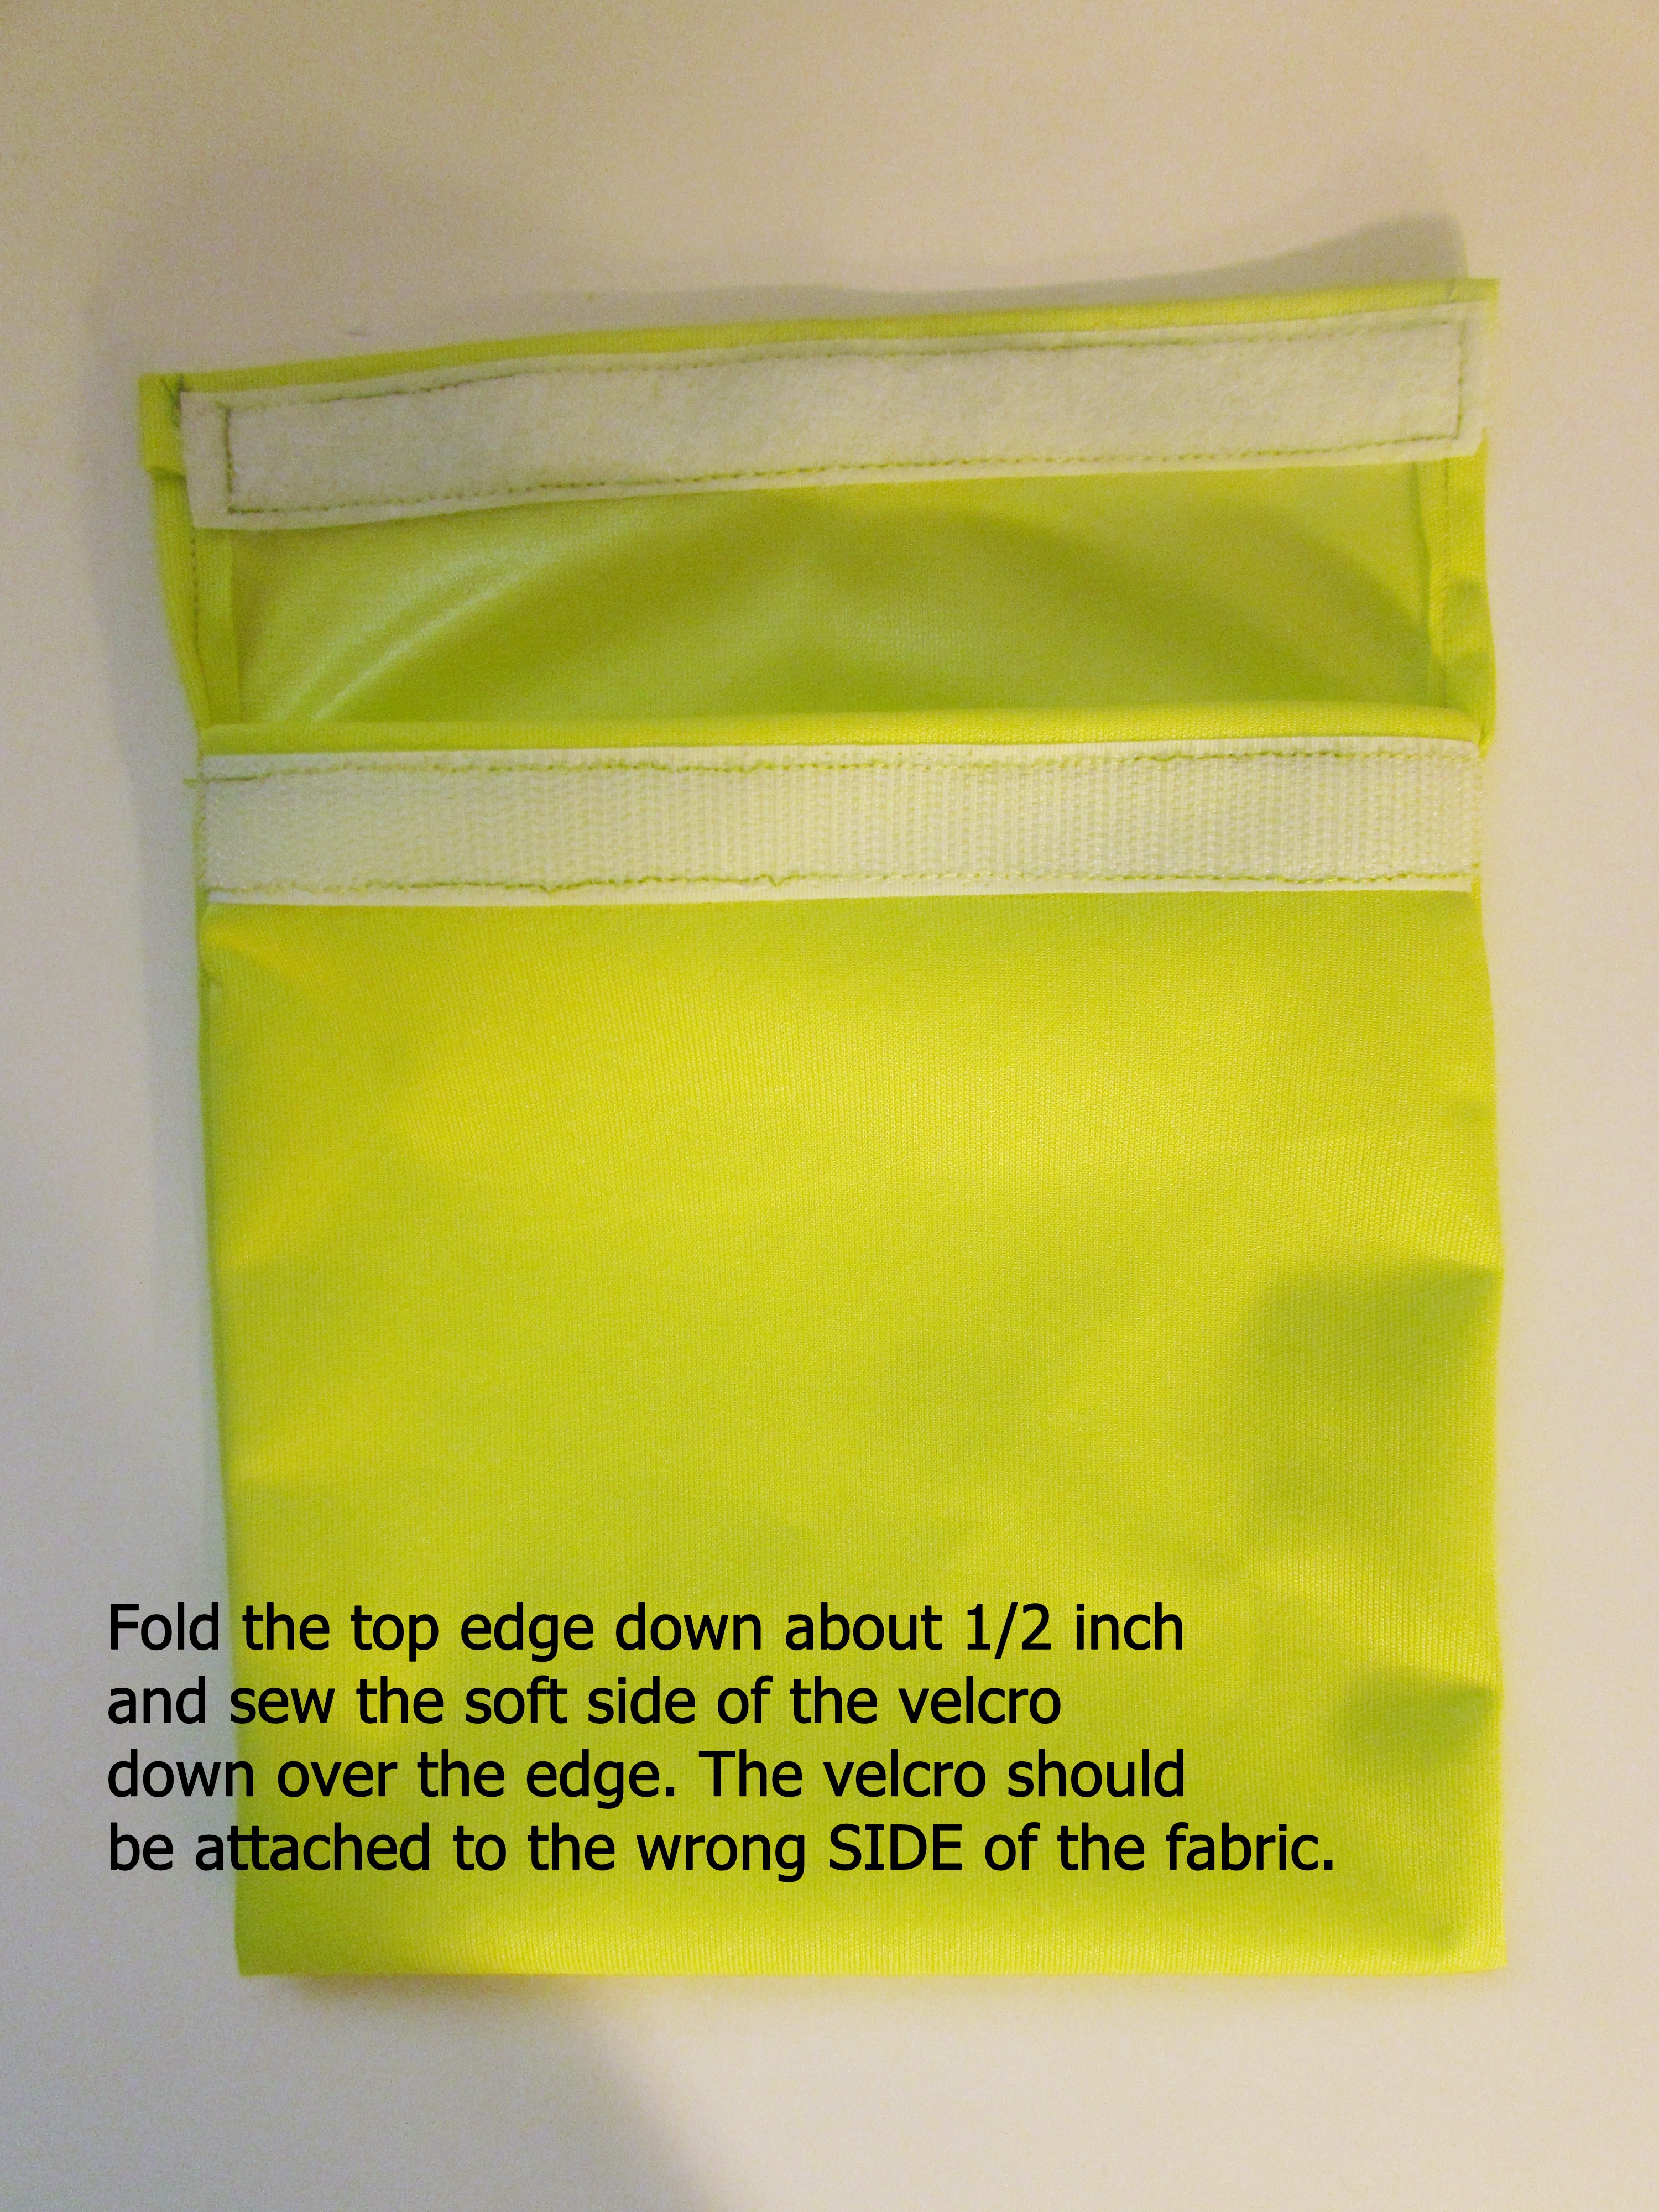
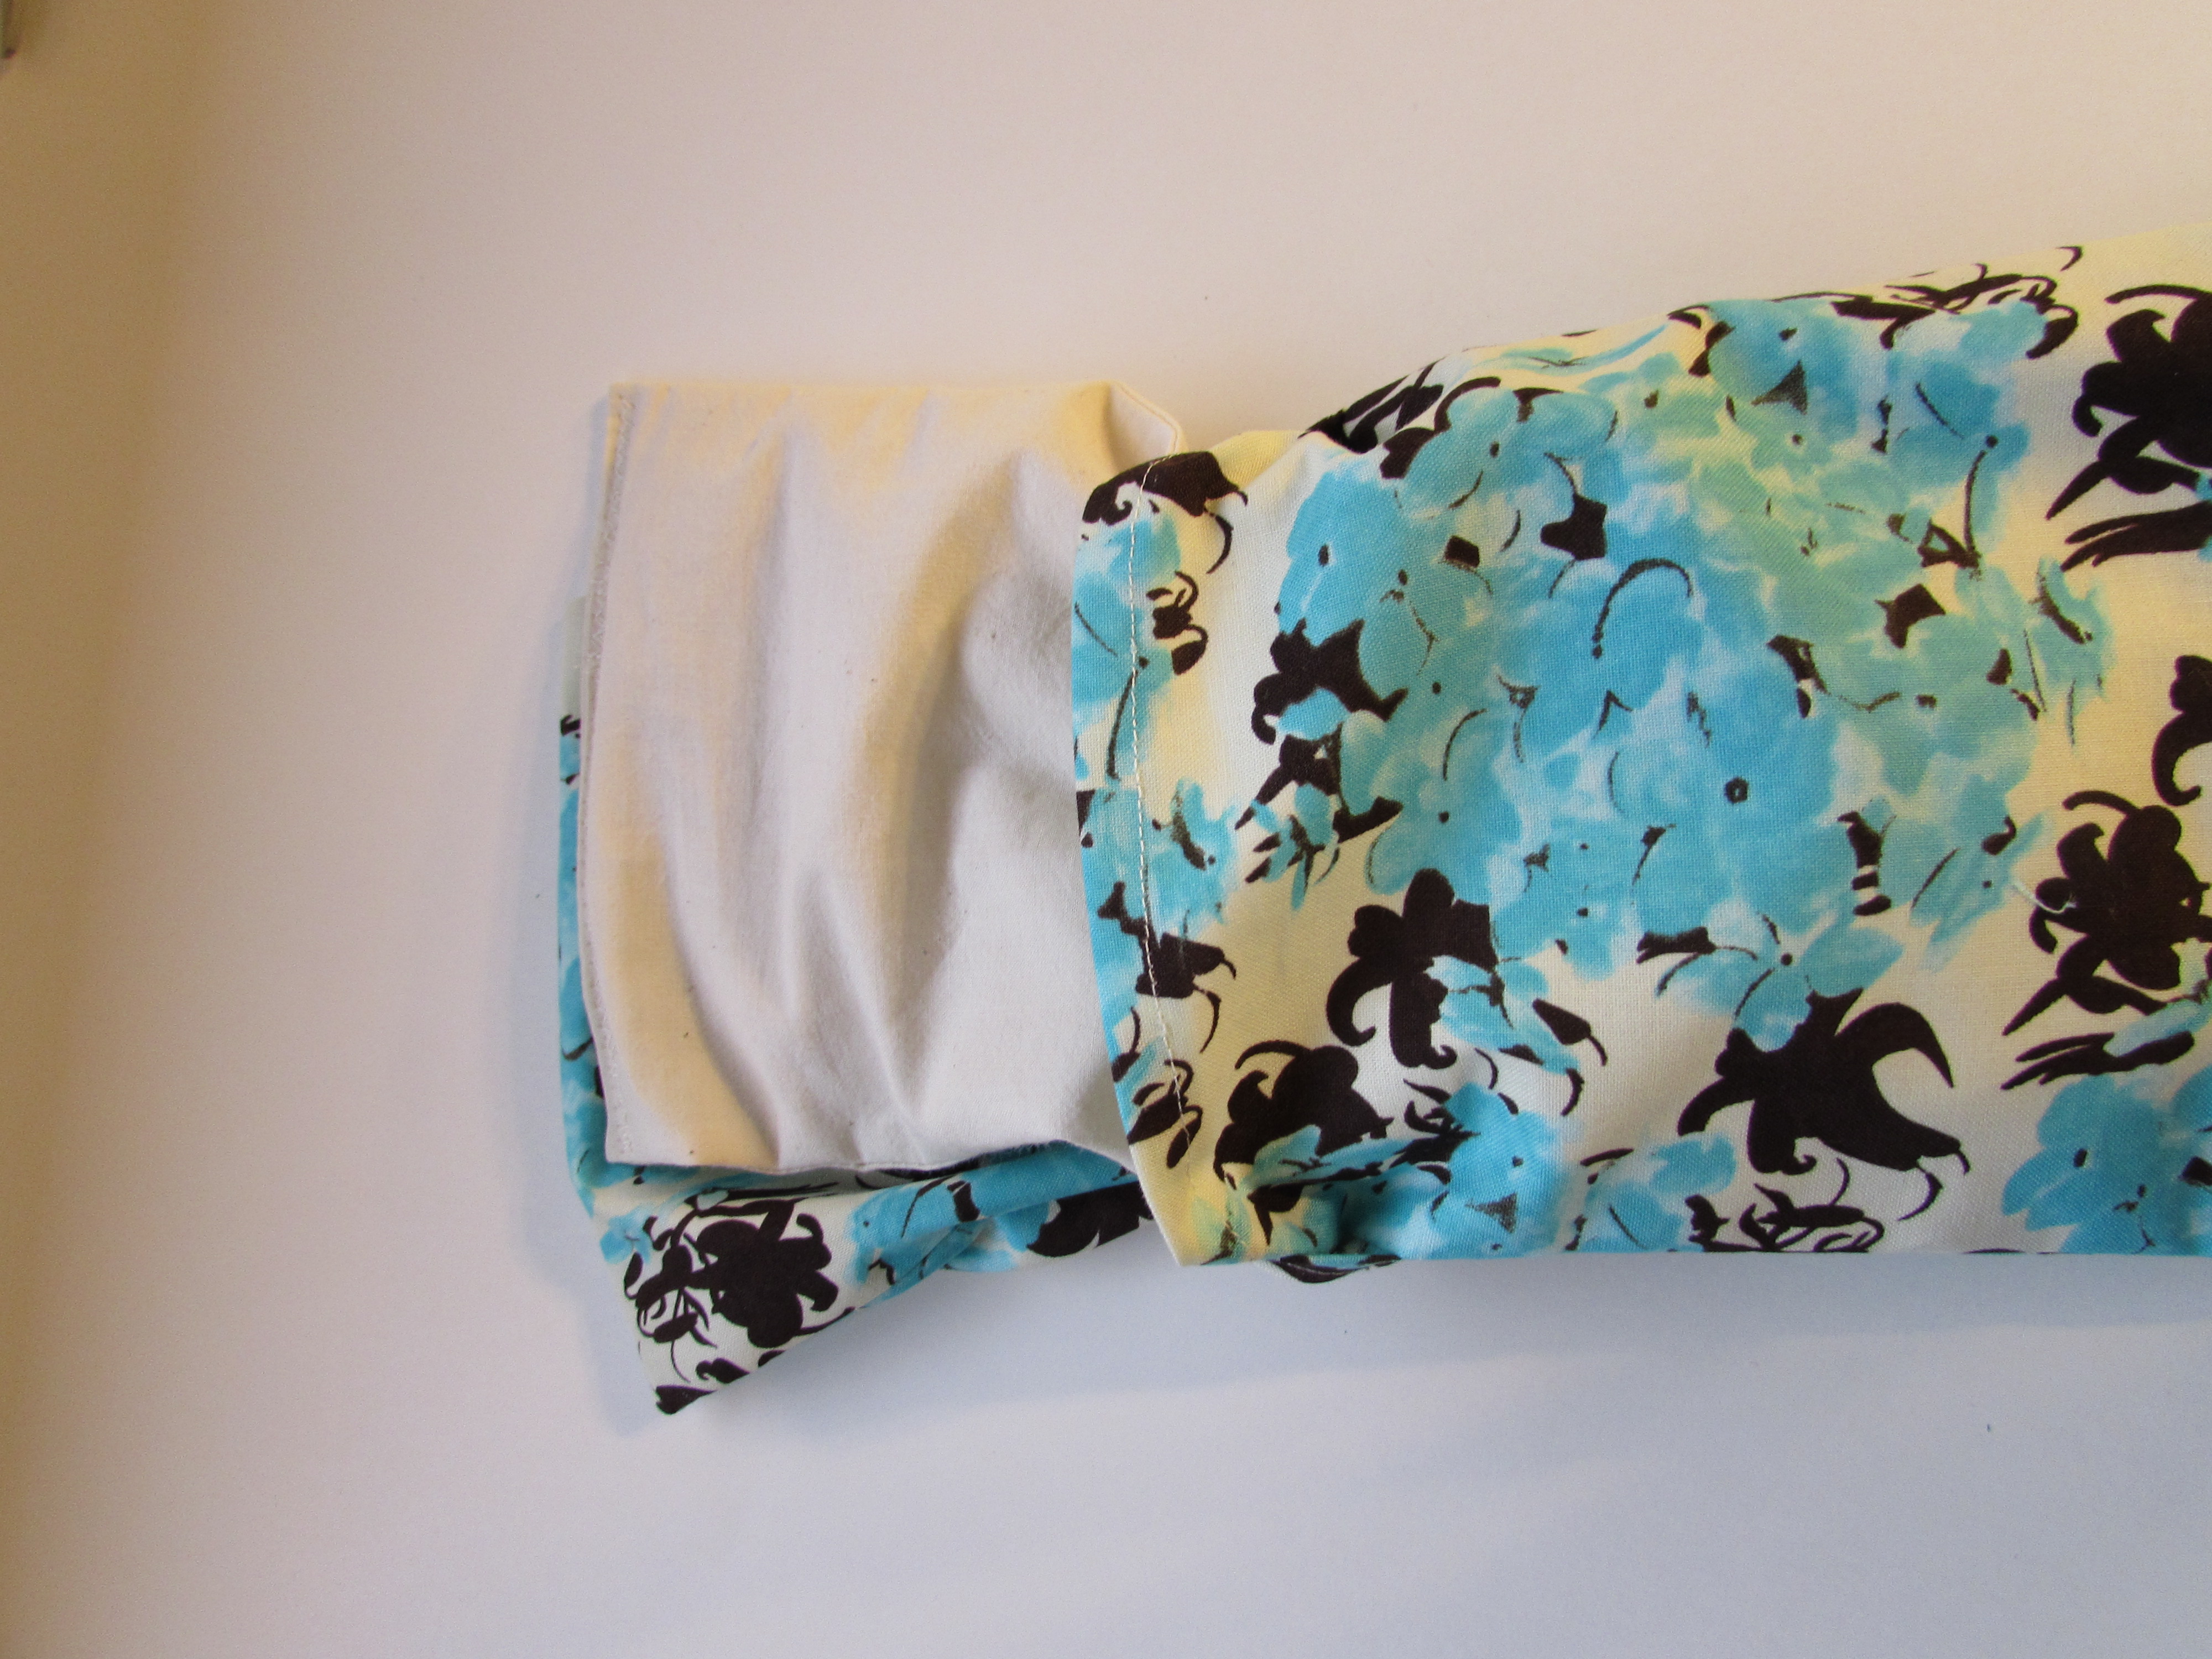
Finally – last thing to be done is to add that small piece of velcro to the tab and the body of the cozy. You will see the velcro is on one side of the tab and the opposite side of the body. The velcro cannot be on the same sides or the closure won’t work! Usually, I sew the piece to the tab first and then line up the body to mark where the second piece goes.

img_7569

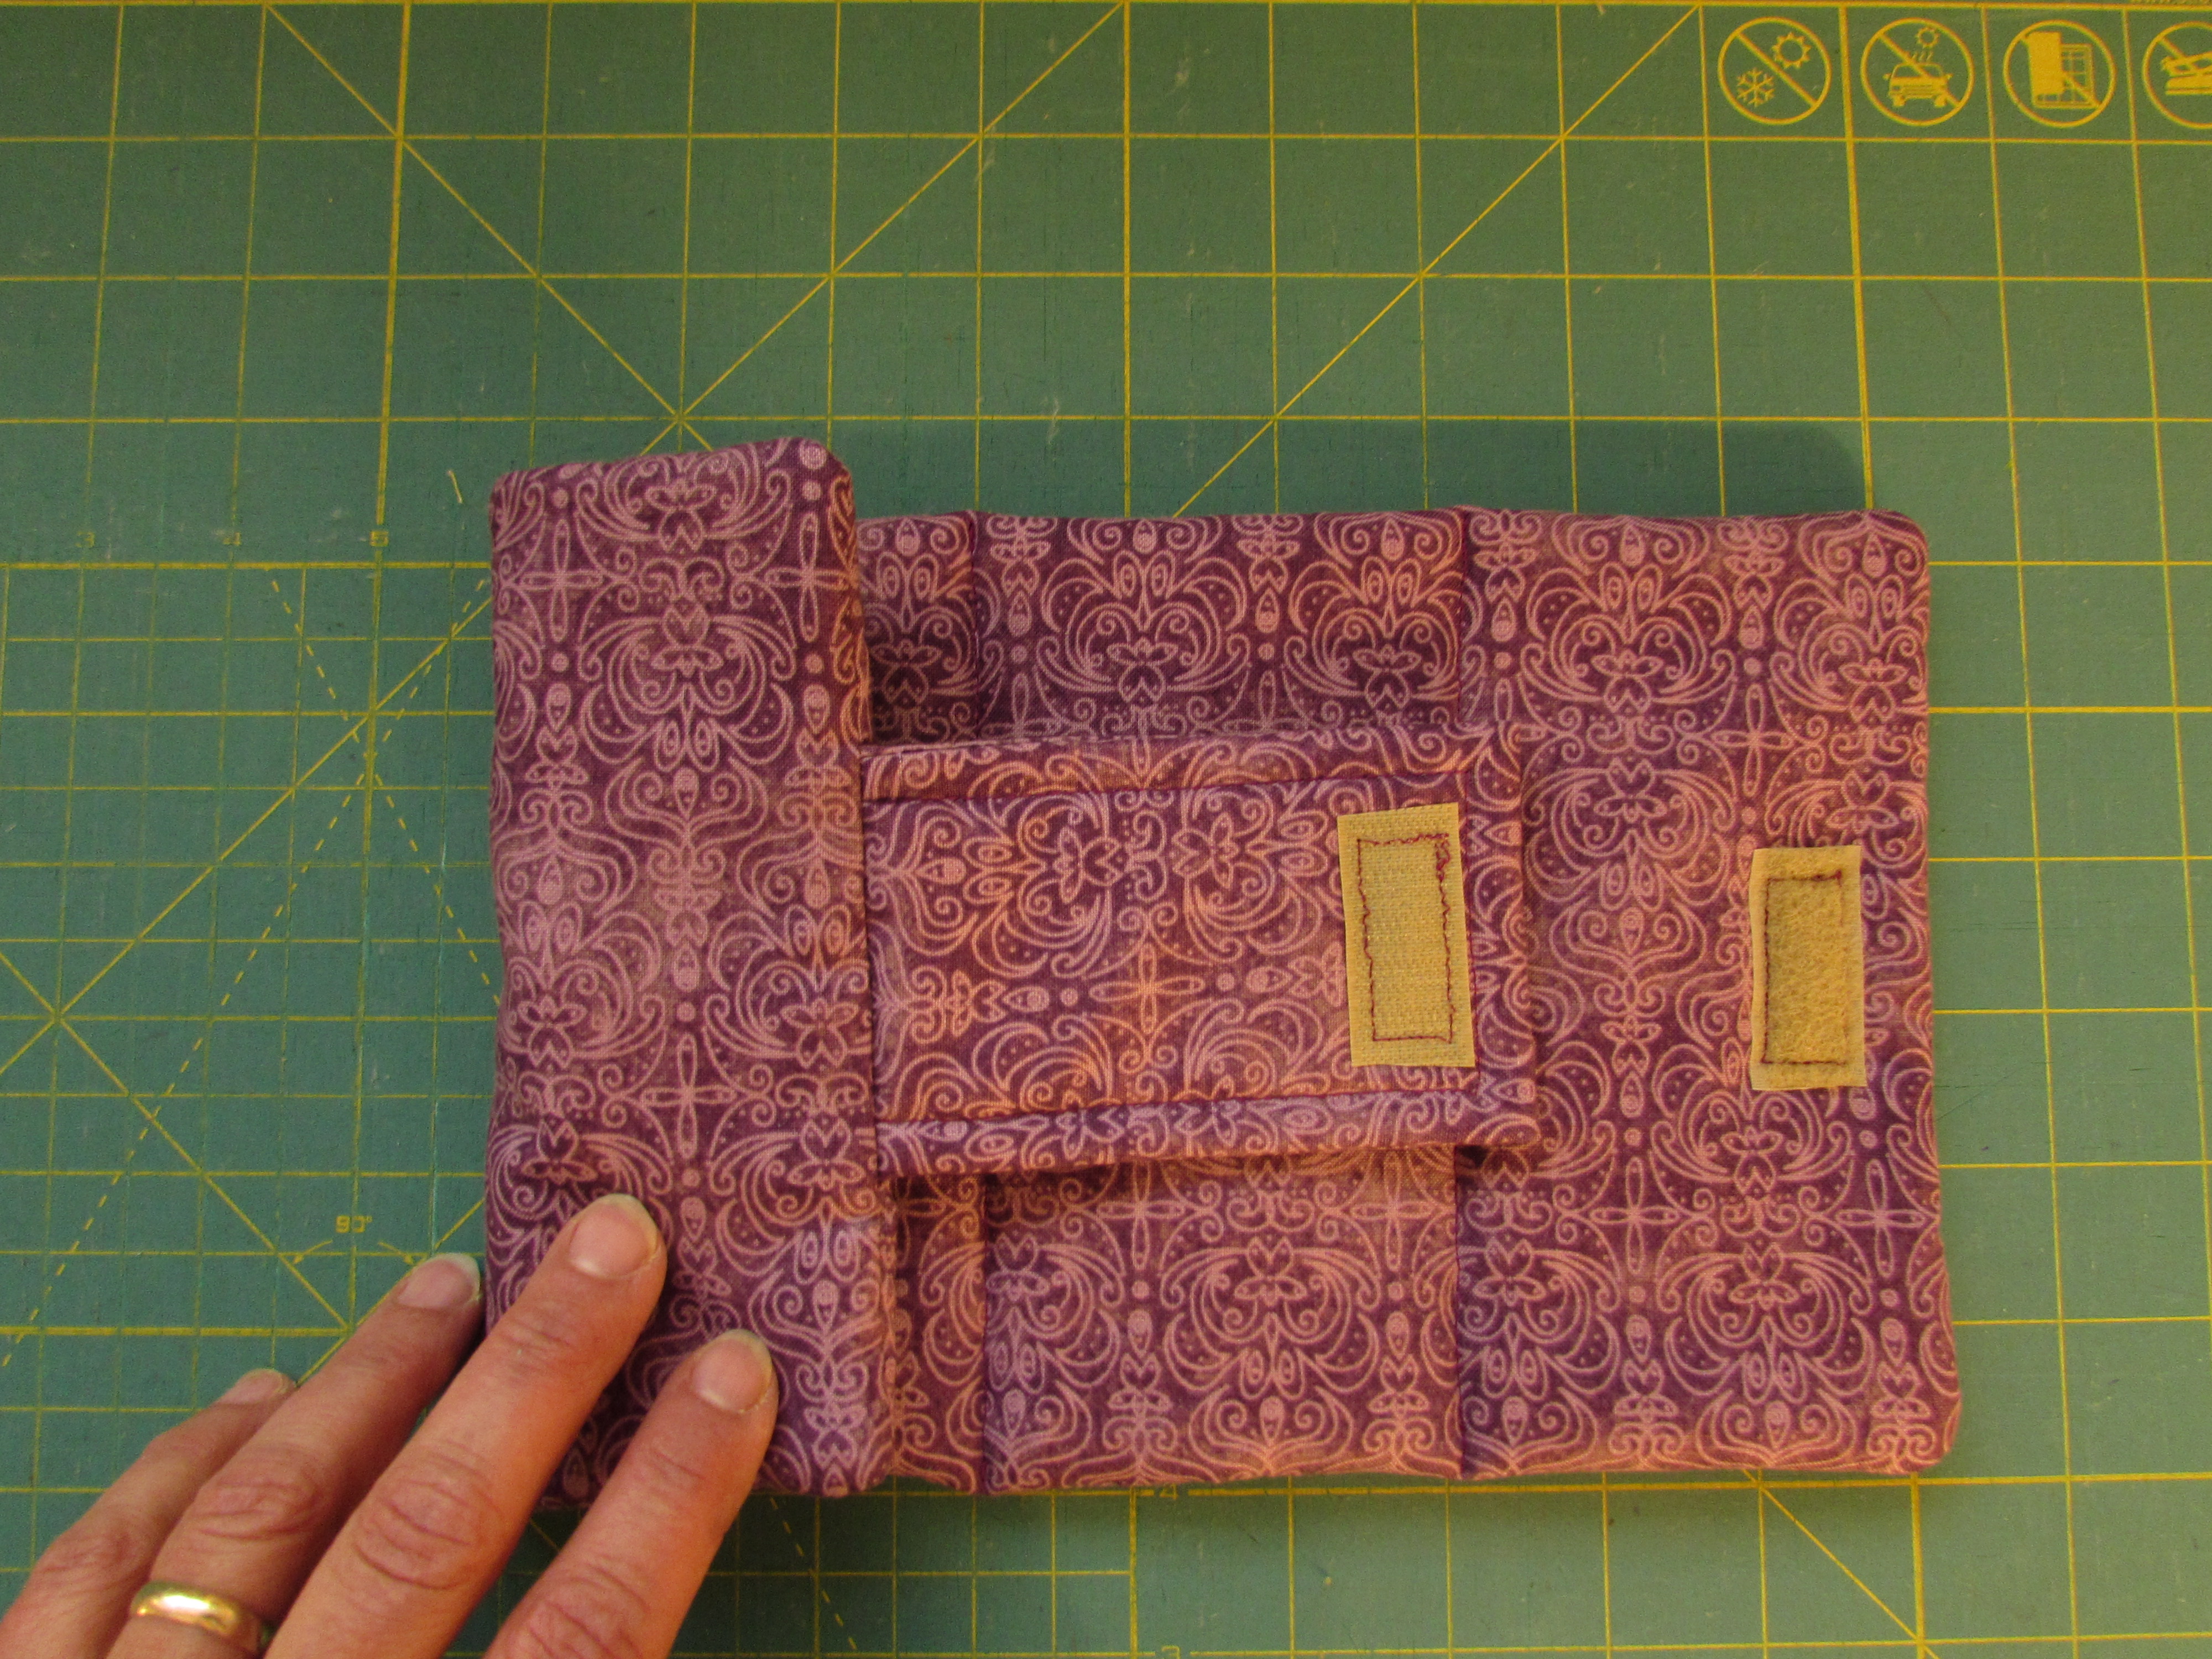
See how the two pieces line up correctly?

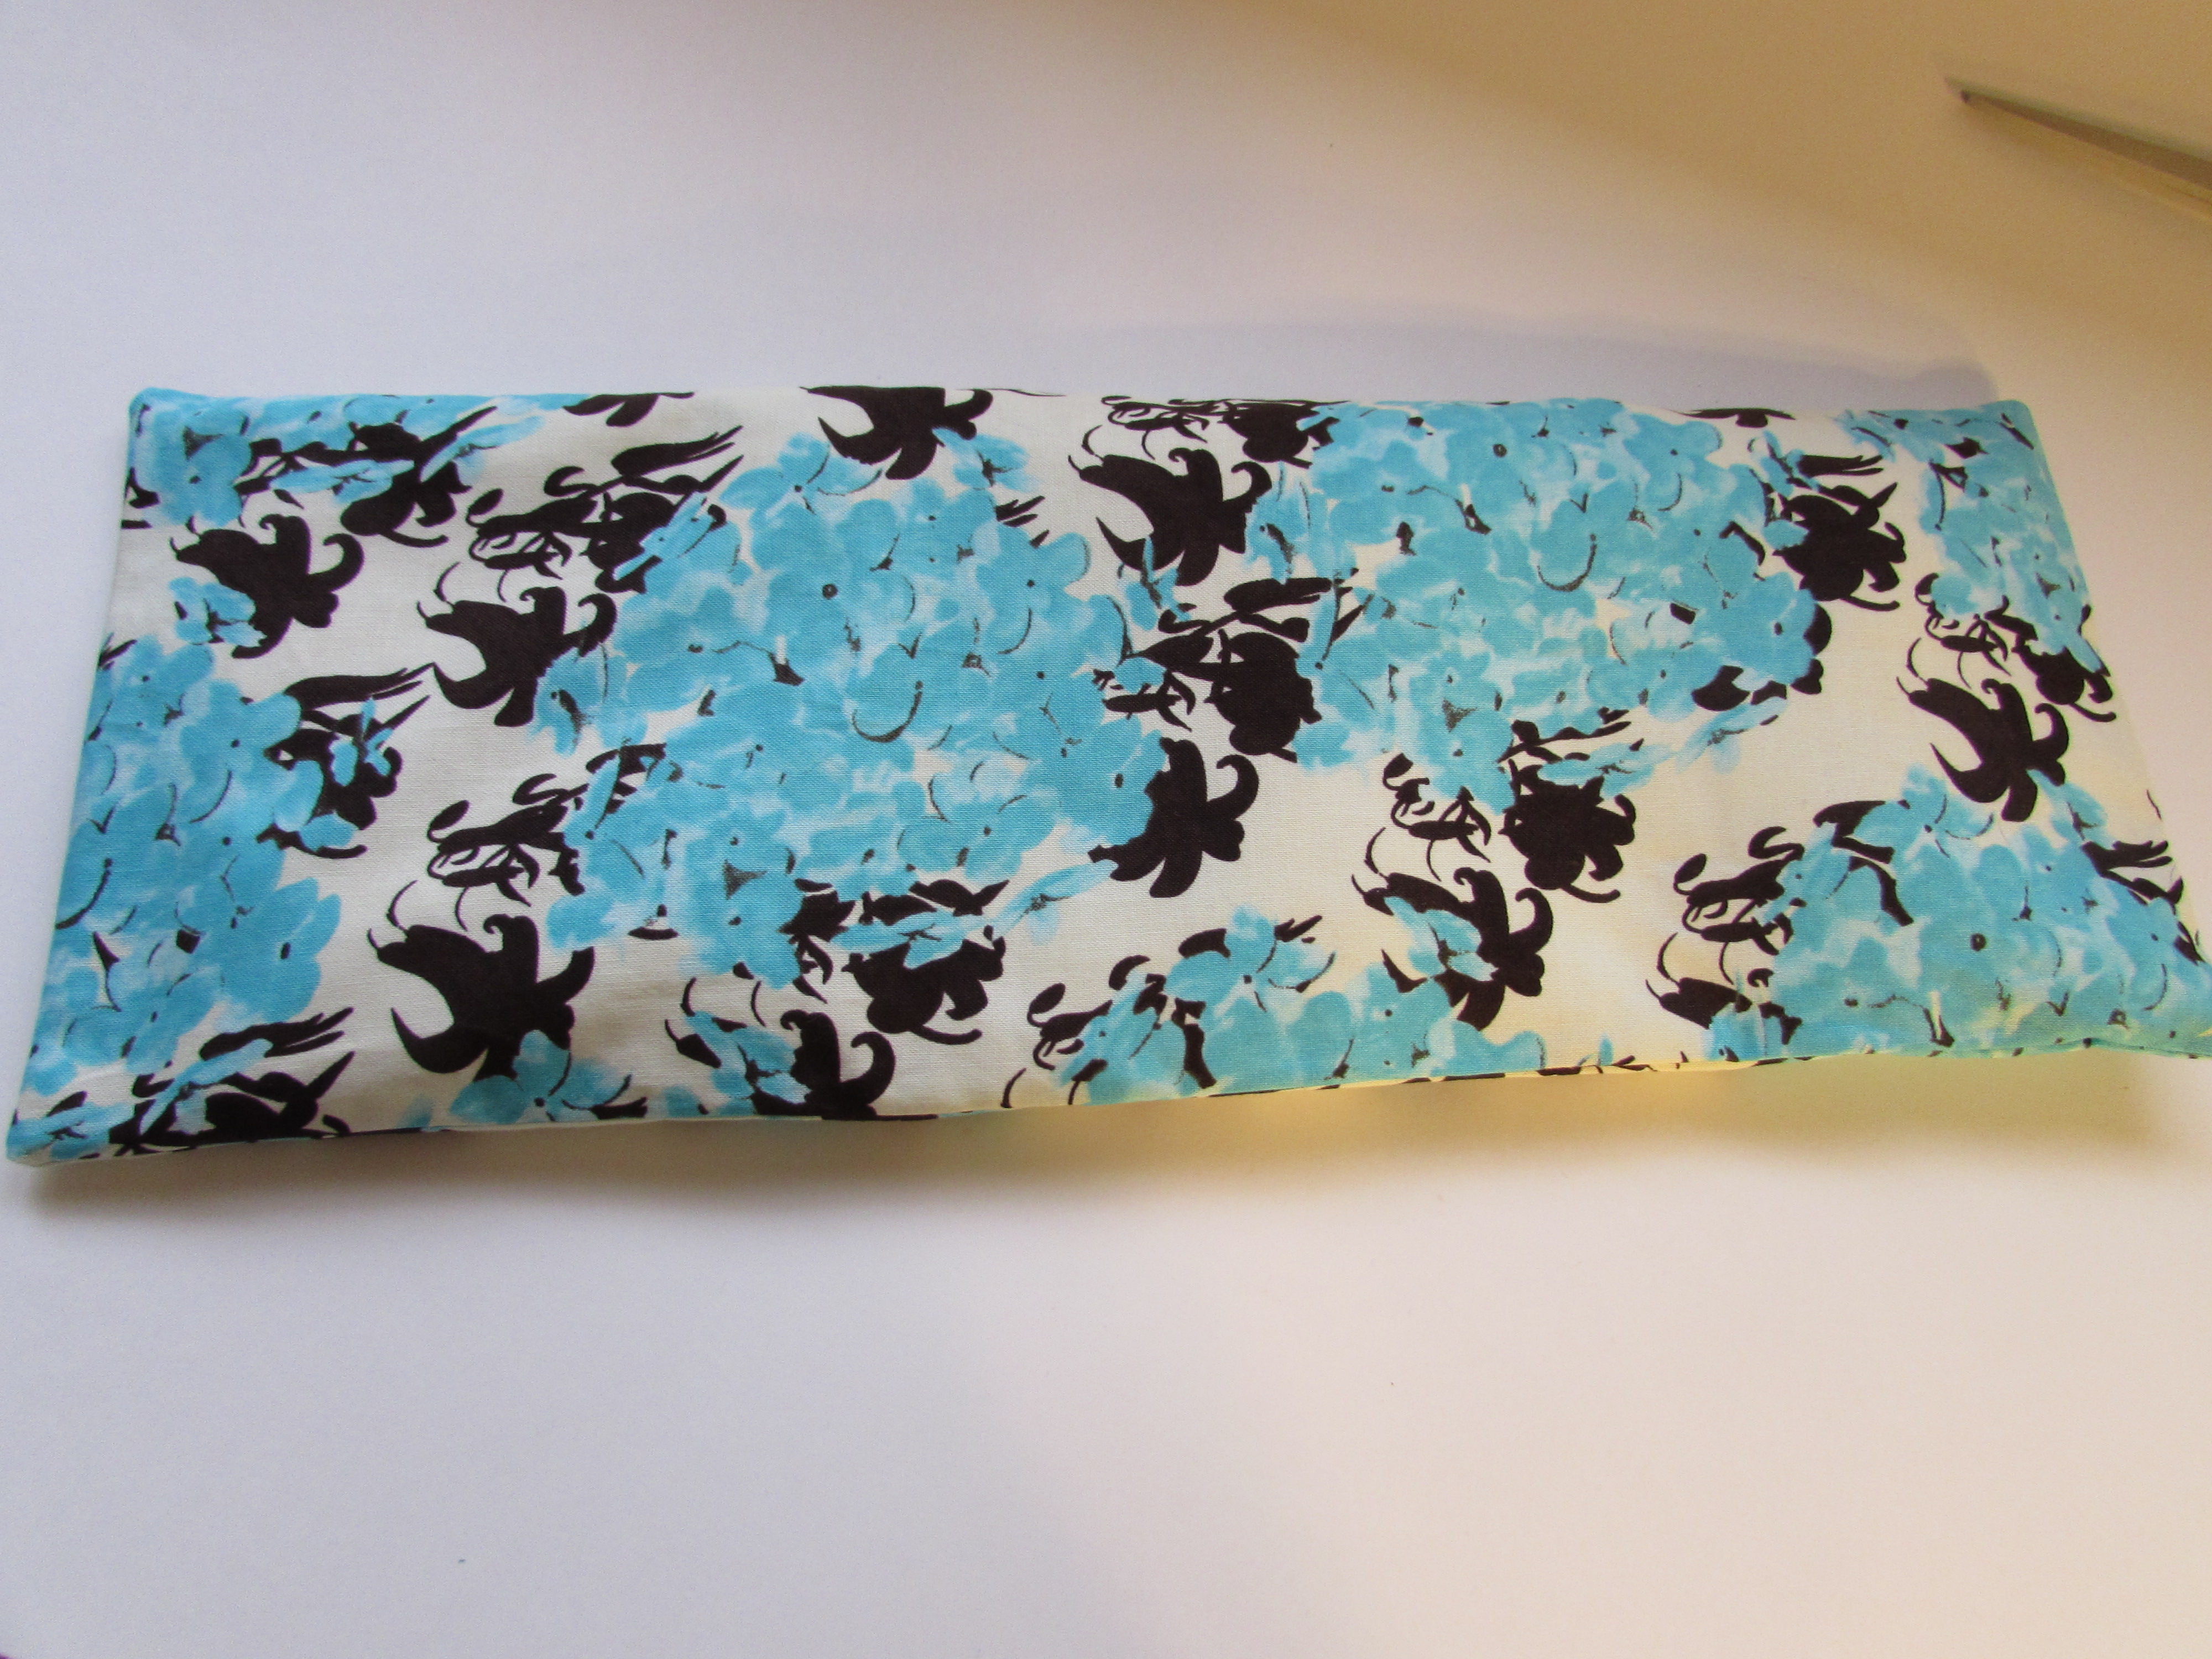
That’s it – easy, peasy. I hope I covered each step without going into too much detail. The finished cozy should measure about 6″ x 12″ (without the tab) depending on your seam allowance. I sized this to fit the 8 cup Bodum French Press. If you have a different model, you will need to measure the height of your carafe to get the height of the cozy. Then measure the circumference of the carafe to get the finished length of the rectangle. (This is easily done by using a cloth measuring tape and measuring around the body of the carafe.) If you carafe is narrower, or skinnier, than the Bodum, adjust accordingly.

img_4003

Should you have any questions, leave them in the comments and I will help you figure it out. If you get a chance to make one, I would love to see it. Post it on IG with #needleandfootcozies. Enjoy your coffee hot, as it is meant to be enjoyed!

Linking to my usuals – see the list of linky parties at the top of the page, under Link Ups!


Relief Quilting Tutorial – Thread

I really enjoyed playing with relief quilting when I made my FABRIC mini quilt a couple of weeks ago. So much so that I decided to make another one! I took plenty of pictures while making it so I could post a tutorial. I hope you will give it a try. The effect is wonderful and it is such an easy process.

This time I wanted to try stitching the word on a piece of fabric with fusible stabilizer and then building the quilt from there. It worked out wonderfully. Since I already had one mini that said FABRIC, I decided to make another that said THREAD. This idea was inspired by a comment left on the first post by Diana, of A Red Delicious Life.  She mentioned wanting to make one to hang above her thread. I decided to do the same. Now I have one to hang above the closet where I store fabric and another to hang above the thread collection hanging on the wall in my sewing room. Thanks Diana!!

Let’s get started.

I am going to provide the sizes that I used but this is so flexible. Increase or decrease as you like. My quilt finished at 11″ x 23″ so if you want a different size, adjust accordingly.

Materials List:

  • Background Fabric: one rectangle measuring 7″ x 19″
  • Heavyweight fusible interfacting: one rectangle measuring 7″ x 19″
  • Scraps for your border
  • Stencils for tracing the word THREAD. I used letters that were 3″ high.
  • Frixion pen or similar fabric marking pen
  • Binding fabric:  Two strips that are 2 1/2″ by 42″ (Width of fabric)
  • Quilting thread.  I used YLI thread in a variegated green and loved it!

IMG_7181Take your background fabric and fuse the stabilizer to the wrong side of the fabric. Follow manufacturer’s instructions if you are not familiar with this process.

Trace the word on the fabric with the fabric safe marking pen of your choice. I didn’t leave very much room between the letters because I liked the way this looked. You could certainly adjust this to your taste. Also, I didn’t leave a ton of room on either side. Again, adjust as needed by cutting your background wider if you like.

IMG_7185

Using a walking foot, begin stitching long straight rows above, below and between the letters. I didn’t stitch the outline of the letters. This happens later on when you are quilting everything together. For now, just fill in every bit of space above, below and between each letter. You might choose to use a free motion foot for the little openings within a letter (e.g. the A and the D) so you don’t have to start and stop, twisting the fabric. I kept working with the walking foot because the block is small and easily rotates. Each time I came to the botton or top and needed to move to the next line, I very slowly stitched one stitch over, sometimes doing so by manually turning the wheel on the machine so I moved just one stitch. This kept my rows extremely close together. If you have a needle down function, this helps. Just go one stitch and let the needle stay down while you turn the piece. Now and then, the width looked to wide to me and I would back up and fill in with another line of stitching. Remember you will be viewing this from a distance and it looks much better that way. While stitching, you are looking at it from 6-8″ away and you’ll see every wobble. Not a problem. You are going for the overall effect.

IMG_7186

See how the word starts to come to life? I love that! Now keep on stitching!IMG_7206

Making good progress here.  The word is complete and it is time to begin working on your border.

I made an improv border by taking squares and rectangles in my color scheme (basically greens, purples and blues) and built four pieces, two for the ends and two for the top and bottom. I didn’t worry about size too much. I made them a bit longer than the side I wanted to sew them to and since I wanted to have them trim out to 3 inches, I made sure the whole thing measured wider than 3 inches.  Note:  If you are not comfortable with this scrappy improv process, I recommend grabbing a copy of 15 Minutes of Play by Victoria Findlay Wolfe at your library. She does an excellent job of guiding you through.  Alternatively, Amanda Jean Nyberg at Crazy Mom Quilts did a Quiltalong last summer called Scrap Vortex. In this post, she talks about building with scraps. It might be of help to you.

After playing with them on the design wall, I trimmed each to a width of 3″. I sewed the top and bottom borders on first and then added each side.

The next step is to make a quilt sandwich with your top, the batting and your backing fabric. I pieced the batting from scraps I had. Just pin it around the border tightly since you are going to quilt in the center first. My batting was just barely bigger than the top but since it was such a small piece I felt ok with that. Normally I use batting that is a good two inches larger than the top all the way around.

Continue to use your walking foot and slowly stitch around each letter. It is a bit like connecting the dots as you want to trace over the place where you stitched over to the next line. Just move slowly and turn frequently (with your needle down while turning) when stitching over a curve.

I love the way the letters come to life when quilted to the batting.  Next I moved on to the border. I love the little spools of thread that I quilted on the first piece and carried them through to this piece as well. Considering the thread theme of this project, it worked well.

IMG_7287

With each spool, I filled in the top and bottom so they would show up a bit better. If you like this idea, take a look at this tutorial of Lori Kennedy’s over at the Inbox Jaunt.

IMG_7286

The spools are whimsical and they add a bit of movement to the quilting as the ‘thread’ flows off each spool.

Once you complete the quilting, trim, square and bind. Finished!

IMG_7298

Isn’t this adorable?????

IMG_7289

And both of them together?? All kinds of cuteness. What fun (and easy) projects both of these were. I have the sleeve sewn on to FABRIC but still need to make a sleeve for THREAD. They will be on the wall soon. I’ll post a picture next week.

I hope my explanation is helpful. If you make one, let me know. I would love to see it!

I’ll be linking to the usuals which can be found at the top of the page, under Link Ups.

Reusable Lunch Bags – A Tutorial

I am all about reusing and recycling.  We try to minimize our garbage by recycling everything, composting all that we can and feeding many of our kitchen scraps to our chickens. As for single use plastic (e.g. zip lok bags), I really try to avoid them and when I do use them, I wash them and re-use them again and again because plastic just doesn’t break down or biodegrade. To that end, we have been using reusable bags for packing school and work lunches for the past several years. At this point they are looking pretty grungy.  As usual, I hopped on Amazon to order some. Looking at the price ($25.90 for only three bags) and the simplicity of the bags, I decided to make them.

I wrote a tutorial for these bags a few months ago but had purchased the wrong fabric and found out it wasn’t food safe. I asked readers if anyone knew of a food safe fabric and lucky for me, Gayle of Pedal Sew Lightly, responded right away with a link to Wazoodle.

I quickly purchased a piece of PUL from  that measured 18 x 60 inches (one half yard) and a strip of velcro for less than $15.00. Thus far, I have made three reusable bags (sandwich size) and I have plenty of fabric to make a few more. Yay for knowing how to sew, right?

These are extremely quick and easy to stitch up. Here are the instructions.

Materials required for one bag:

  • PUL fabric:  8 inches x 17.5 inches
  • Thread
  • Velcro: 8 inch strip that is one inch wide

Note: PUL is very slippery fabric. I used a walking foot when sewing because having the extra traction of the walking foot made it so much easier to stitch. Maintain a light hold on the back side of the fabric, as though you are guiding it through the machine. Hold it but don’t pull on it.


  1. Cut your rectangle of fabric.

IMG_7244


2. Finish one short edge.IMG_7245

3. Fold right sides together, leaving about 3 inches extending above the opposite side. Stitch sides together with a 3/8″ seam, catching each edge of the velcro in the side seam. Then turn the bag right side out.

IMG_7264


4.Finish the each side of the flap by folding over 1/4″ to the inside and stitching.

IMG_7257

5. Fold over the top of the flap, bringing it to the inside. Sew the velcro to the inside of the flap, on top of the part you folded in. You may choose to pin this but I just stitched slowly and held it on top of the folded piece. It is a bit tricky because  the PUL is slick so take your time and stitch slowly.

IMG_7259


Finished! Not so hard, right? The first one took a few minutes as I got used to working with the PUL.  The following two took less than 20 minutes each to make – these bags are that simple.

IMG_7260

Let me know in the comments if you have any questions. Hope you will make a few of these and reduce the need for zip lok bags, thus reducing the amount of plastic in our landfills.

Linking up to my favorites. For more info, click on Link Ups at the top of the page.

Easy Valentine’s Day Project

Two weeks ago I made some bookmarks to go with a tote and books that we gave to my mother-in-law for her birthday.  The bookmarks go together in a matter of minutes and are a great project if you have children that are feeling crafty. They would make a sweet Valentine for a friend. I made them with 2″ wide strips of scrap fabric, ribbon and iron-on denim.

I have four children, three are boy.  When they were little, their clothes were basically held together with iron-on denim patches. We lived on a vineyard and the boys (often) lived in the dirt.

muddy ian

This stuff came in handy over and over again.IMG_20160202_4540

Now that I don’t have any grubby boys wearing out their jeans at the knee, I can use it for crafts instead.

To make the bookmarks, cut a few 2 inch strips of fabric and as many 2 inch strips of the denim. Mine were six inches long but they could be whatever length or width you choose, as long as they are the same.

IMG_20160202_4543

The iron-on denim will give the bookmark plenty of body. However, this pink strip was fairly thin, so I applied a scrap of iron-on interfacing to the back. (As an alternative, if you have denim scraps laying around, you could use the denim scraps and adhere them to the other fabric with Wonder Under.)

Once the interfacing was applied, I used a glue stick to adhere a piece of ribbon to the top of the strip. The ribbon could be any length or width you happen to have. Whatever looks nice, works fine.

IMG_20160202_4548

Preheat your iron so it is good and hot and do not use steam. After you have the ribbon glued down, place the iron-on denim and the outer fabric with the ribbon together, wrong sides touching. With a very hot iron, press them together, applying light pressure to your iron.

IMG_20160202_4550At this point, you might choose to call it good. If it isn’t going to be washed, the adhesive on the denim will probably be enough to hold them together. I like to run a stitch around the perimeter just to be sure. Sometimes I will use a zig-zag stitch or a decorative stitch on my machine. Other times, I just use a straight stitch.

IMG_20160202_4554If you have pinking shears, it is cute to pink the edges too.

After making several of these, my needle did collect some of the sticky adhesive residue. Just a little warning. I used an old needle to make these and then tossed it.

  
This is a fun activity for kids. This idea might come in handy for a scouts project too. Hope you will enjoy making a few!

Linking to Connie at Freemotion by the River, Stephanie at Late Night Quilter, and Alyce at  Blossom Heart Quilts.


Tutorial – Heat Pack with Rice

You might remember that I posted about making a few heat packs for Christmas gifts this year. I had initially made one for myself a long while back and it is used frequently by all three of us. They are very quick and easy to make so I thought I would share it here. It only requires a bit of fabric and some rice. The outer layer is removable for laundering. Here you go!

Supplies:

  • 1 Fat Quarter of fabric for the outside (or a scrap of equivalent size, 18 x 22″)
  • 1 piece of muslin or other inexpensive, plain fabric to contain the rice.
  • Dry rice, approximately 3 cups
  • Thread

Cut the outer fabric as follows:

  • Rectangle, 16.5″x6.5″
  • Rectangle, 11.5″x6.5″
  • Rectangle, 8.5″x6.5″

IMG_20151230_4380

Cut the lining fabric, or muslin, into two rectangles, each measuring 16″x6″.

Let’s make the rice-filled lining first. Use a 1/4″ seam allowance throughout the project.

Pin the two rectangles of lining fabric, right sides together. Sew around three of the sides, leaving one end open. Be sure to sew the two long sides and one of the short sides. Before turning it right side out, carefully trim the corners, making sure not to clip your stitches. (I should have photographed the muslin against a color other than white!)


IMG_20151230_4384

Turn the bag right side out and press. I use a chopstick to carefully poke the corners out from the inside.

IMG_20151230_4386

Now you will fill the bag with rice. I like to make three sections and fill each with about 3/4 cup of rice. You can do this with more sections or even no sections. If you choose to leave it undivided, with just one section, fill it with the rice at this point. I like the feel of the sections and think it lays nicely when divided.

For the first section, fold the top of the bag back and carefully pour in 3/4 cup of rice.

IMG_20151230_4388

Smooth all the rice to the end and stitch across the width of the bag, close to where the rice is. I use a zipper foot to do this though it isn’t absolutely necessary.

IMG_20151230_4389Create a second section in the same manner and stitch it. (I don’t measure the three sections precisely. I just estimate it.)IMG_20151230_4390

After putting in the last portion of rice, shake it to the bottom of the section and press the raw edges to the inside, taking care to make them relatively even. This isn’t going to show and certainly doesn’t need to be perfect.

IMG_20151230_4392

To close it up, I use a zig-zag stitch and run it over the end two times so the rice stays where it is supposed to!

IMG_20151230_4394

OK – the inner bag is done and now you just make the outer cover. It is basically like making a pillow cover with an envelope back. So easy.

For the back side, take the two shorter pieces and finish one short edge of each. Turn 1/4″ over and finger press. Turn it again and press with the iron.

IMG_20151230_4397

Layer the three pieces, right sides together, as follows. Long piece on the bottom, Short (8.5″x6.5″) piece next and on top of that the longer (11.5″x6.5″) piece. Pin securely, especially where the two shorter pieces overlap.

IMG_20151230_4399Sew the entire perimeter of the case. Take two passes over the sections where the backing pieces overlap so they are strong.  That is where the most stress is when you take the rice bag in and out. As with the lining, trim the corners carefully and turn right side out. Use the chopstick carefully to create nice corners.

IMG_20151230_4400

IMG_20151230_4403

Take the rice pack and insert. It takes a bit of wiggling to get it all inside the cover.

IMG_20151230_4404

Ta Da! All done.


IMG_20151230_4405

The amount of rice that is put into the liner affects how malleable, or flexible, the rice pack is.  When I made the first one I put too much rice and it felt stiff and quite heavy. You can play around with it and see what feels best for you. To use, just put in the microwave and heat for a minute. Check to see if that is warm enough for you. Of course the timing will depend on your microwave, but it can get very hot so be careful. This bag can also be put in the freezer and used as a cold pack. These are great for icing or heating muscle aches, sprains, and warming cold toes in the winter.

Hope you’ll give it a try. Leave any questions in the comments or send an email and I will get back to you. I haven’t written very many tutorials, so if something is unclear, or I left out a step, please let me know so I can update this.

Linking to my usuals.  Freemotion by the River, Let’s Bee Social and Crazy Mom Quilts. T hese links are listed at the top of the page, under Link Ups.

Fabri-Quilt New Block Bloghop

As part of the New Bloggers Bloghop that I have been participating in this summer, we are each to design a quilt block using selected fabrics given to us by Fabri-Quilt. We each received fat-eighths of these luscious pieces.

IMG_20150803_3649Our task was to come up with a fun block that finished out at 12 & 1/2″. We were also to develop a tutorial in case anyone would like to make the block. Today is the first day of the hop and there is a great list of quilters that will blog about their block today. The hop continues for another three days (through Thursday) which means loads of block ideas. This week is a huge opportunity to pin upwards of 60 tutorials for fresh, new quilt blocks. Think of the sampler that could be made from this hop! I am so looking forward to seeing what my hive mates came up with. After making our blocks, we sent them to Stephanie at LateNightQuilter. One of the leaders of the New Blogger Bloghop, Stephanie is organizing the construction of several charity quilts from our blocks. These quilts will be gorgeous and will go to a few lucky recipients.

On to my block! I posted earlier that I had been playing with several ideas for a block. I made a modified plus block but didn’t like it in the 12 1/2″ size. It was too “chunky” looking to me.  Then I played with a herringbone block. It was ok but not great. Finally, when I was working on my blocks for my row quilt, I took a stack of HST’s and kept laying them out in different patterns. This is the one I liked most. There are unlimited ways that HST’s can be assembled which is what makes them so much fun to work with.

Creating this block is so simple. Here you go!

Cutting List:

  • (4) 3 & 1/2″ squares of background fabric
  • (4) 4 & 3/8″ squares of background fabric
  • (6) 4 & 3/8″ squares of middle fabric
  • (2) 4 & 3/8″ squares of the center fabric

image

Process:

Start by creating the HST’s. Just in case you are new to quilting, HST is the acronym for a half-square triangle. There are many ways to create a half-square triangle. My favorite way is this:

Place one piece each of the background fabric and the feature fabric right sides together. Place  your 1/4″ seam marker, on the diagonal, corner to corner,  and trace a line along each edge.

image

This quarter inch seam marker is 1/2″ wide and give you two lines to trace, which you will then use to stitch a seam. (If you don’t have one of these handy little tools, they are very inexpensive. Here is a link.)

image

Once you have both seams stitched, slice it in half, right down the center of those seams.

image

This gives you two HST’s. Press them open. (Pressing open or to the side is a matter of personal preference. I usually press open.)

image

The block will need to be squared up (trimmed to size).  Using a square ruler, trim the block to a finish of 3 & 1/2″.

image

Repeat this process with each of the half square triangles, giving you 12 HST’s that measure 3 & 1/2″ each. Look at the colors in that stack of trimmings, so pretty!

image

At this point you can lay your squares out in rows of four.

image

Assemble the rows and stitch each of the squares together.

image

Then stitch the rows together.

IMG_20150828_3727

Ta Da!! Isn’t this the cutest? Double Diamonds!

Think of all of the inspiration to be had with all of these new ideas over the next few days. Be sure to pop in and take a peek. Pin as many as you like for future reference. I plan to! I have a board on Pinterest for quilt block inspiration. Feel free to follow it if you like. Today my blog hop partners are the following:

Host – Yvonne @Quilting Jetgirl
Kelly @Quilting it Out
Martha @Once a Wingnut
Irene @Patchwork and Pastry
Cassandra @The (not so) Dramatic Life
Andrea @The Sewing Fools
Silvia @A Stranger View
Wanda @Wanda’s Life Sampler
Sandra @Musings of a Menopausal Melon
Vicki @Orchid Owl Quilts
Jess @Quilty Habit
Diana @Red Delicious Life
Chelsea @Patch the Giraffe
Margo @Shadow Lane Quilts
Renee @Quilts of a Feather

In addition to all of these tutorial posts, there will be several giveways this week for a set of 1/2 yard cuts of the fabrics we used. To enter the giveaway, go visit Quilting Jetgirl. While the colors in this set are lovely, they are very bold and saturated. Were you to win this set, I strongly advise that you prewash with like colors (e.g not red and white together!) and dry them. That way any possible color bleeding or fabric shrinkage will happen before you cut and sew!


Tutorial for Embellished Onesie and Burp Cloth

This weekend my sister asked me if I would make something for her to give as a baby gift. Her yoga  teacher is expecting a little girl in October and she wanted to bring something to her before she goes on maternity leave from the yoga studio. I had made some burp cloths and embellished some onesie tshirts for little boys (which are in my Etsy shop) but had not yet made anything for baby girls.  After talking a bit and looking at ideas on Pinterest, Tina decided she wanted something simple and soft. Here is a photo of the end result. I think it is just adorable.

20140824_1568

I thought I would take some pictures as I made the items and create a tutorial.  These are such cute gifts and sew up in no time at all. They are great ways to use scraps if you have any flannel scraps accumulated.

Ok.  Here we go!  My apologies in advance for the pictures.  They aren’t the greatest.

Here is a shopping list for you:

  • Onesie (they come in a package of five so you will have plenty to make for gifts.) For the onesie, I used size 0-3 months.  The newborn size was sooo tiny (5-8 pounds) so I chose these which are just a tad larger so the baby could wear it for more than three days before outgrowing it!
  • White flannel rectangle, cut to 21 1/2″ x 13 1/2″
  • Accent flannel rectangle, cut to 21 1/2″ x 7 1/4″
  • Ribbon trim, 1 1/3 yards
  • Lace trim, just a scrap if you have it.  You will need about 9 inches.
  • Water soluble glue stick.

I prewashed everything and dried it in the dryer.  Both the flannel and the onesie did shrink quite a bit.  Before prewashing the flannel I ran a stitch the length of the raw edges. This prevents it from fraying too much.  Otherwise, flannel has a tendency to fray quite a bit when washed and that is just annoying.  All those threads to deal with plus you lose a bit of fabric that way. Once all is prewashed, press your fabric and the onesie.

Let’s start with the onesie.

The lace that I used was ruffled on one side.  I took two pieces that were 4 1/2 inches long and put them side by side.

20140824_1539

Overlap the straight edges and fasten them with a pin and/or a bit of glue from a washable glue stick.

20140824_1541Run a stitch down the center to hold them together.  I used a small zig zag stitch. Fold over one end of the lace and hand stitch it to finish the raw edge.  I just did a running stitch along the end.  It was nicely camouflaged by the lace. Repeat with the other end.

20140824_1545Center the lace on the front of the onesie.  Tack it down with the washable glue stick.

20140824_1546

Cut a piece of ribbon that is 1/2 inch longer than the finished lace.  Turn under each end 1/4″ so it matches the length of the lace.  Tack this down the center of the lace with the glue stick. Set this aside and let the glue dry for about 20 minutes or so. By the way, I use the glue stick instead of pins because when I am working with such a tiny pieces, the pins are just too big.  They can make the ribbon and/or lace buckle up.  The glue stick allows it to lay nice and flat when you are stitching and it doesn’t move around like it would when removing the pins. (The picture below was taken before I turned under the ends of the ribbon.)

20140824_1547Once the glue is dry, stitch a straight stitch down either side of the ribbon and across each end.  That’s it!  All done.  Let’s work on the burp cloth now.

Lay the white flannel on your work table.  There was not a right side or wrong side to the flannel that I used.  If yours has a right side, lay it right side up. Make sure that your accent piece is the same length as the white flannel.

20140824_1549

Turn the accent piece over so that the right side is down, against the white flannel.  Line up one of the edges of the accent piece with one of the edges of the white flannel. (We are going to sew both sides together, creating a tube made of the white piece and the accent piece.)

20140824_1551Stitch a 1/4″ seam, joining both pieces of fabric.  Press your seams, open or to the side, whichever you prefer.  Then line up the other two edges in the same way and stitch a seam, joining them.

20140824_1554Again, press your seam.  To do this, I just moved the seam to the center of the “tube” so I could lay it down and press it.  The next step is to center the accent fabric on the white fabric.  Do this while the pieces are still right sides together (seams are still showing). To be honest, I just eyeballed this but if you wanted, you could measure the amount of white fabric that shows on each side of the accent fabric and make sure it is equal.

20140824_1555


Once you have the fabric centered to your liking, you need to pin the end together.  Stitch that end closed with a 1/4″ seam.

20140824_1557

Then you will sew the other end.  However for this end, leave an opening of about 3 or 4 inches in the center.

20140824_1558

Use this opening to turn the burp cloth right side out. Once you turn it right side out, press the whole cloth.  Turn in the open ends and pin shut.  You can hand stitch this opening or top stitch the whole perimeter of the burp cloth, catching the open section at that time. I chose to top stich the perimeter.  Unfortunately, I didn’t choose to take a picture at this point. 😉

The next step is to cut two pieces of ribbon that are 1/2″ longer than the burp cloth.  Turn under the ends and, again, use a swipe of your glue stick to tack the ribbon down to the burp cloth.  Center the ribbon over the seam that joins the white flannel and the accent fabric.  Let the glue dry for a bit and then stitch down both sides of each piece of ribbon, as well as across the top and bottom edges of the ribbon.

Finally I always stitch down the center of the burp cloth. This will help the burp cloth keep its shape after being laundered.  I run a seam from top to bottom, beginning just below the top stitching that runs around the perimeter of the cloth. Hoping you can see the seam in the picture below.20140825_1598

Hoping this  tutorial makes sense to you.  If you have any questions, leave them in the comments and I will get back to you. If you make these items, let me know. I would love to see a picture.

Linking up to Freemotion By the River, Sew Cute Tuesday, Fabric Tuesday, Let’s Bee Social, Anything Goes Thursday, Finish It Up Friday, TGIFF and finally Confessions of a Fabric Addict.  These are all wonderful link-ups.  Take a peek to see what others have been working on this week.  The links are all listed at the top of my page, under Link Ups.