Monthly Archives: April 2017

No Scrap Left Behind – Blog Hop

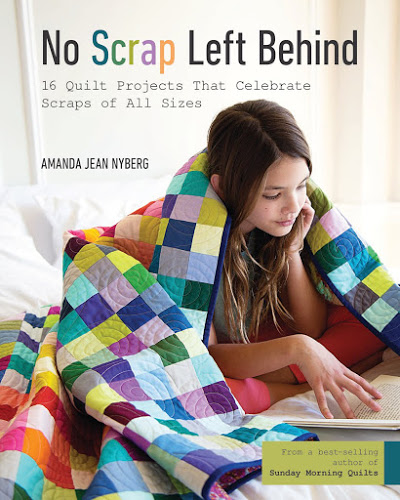
I am thrilled to be a participant in the Blog Hop celebrating the new book No Scrap Left Behind. This book, written by Amanda Jean Nyberg of Crazy Mom Quilts, is an excellent book. The second book for Amanda Jean, she includes 16 projects which are sure to inspire you to pull out your scrap bins and start creating. You might be familiar with her first book which she co-authored with Cheryl Arkinson, Sunday Morning Quilts. I have that one as well and love them both!

Amanda Jean is the queen of scrappy quilting – if you are not already familiar with her work, please check out her blog.  This blog was one of the first ones I discovered back when blogging was becoming such a resource for information and tutorials.  I remember one of the first quilts I made was based on her (free) pattern, Fair and Square.  Since then, I have been a loyal follower who has learned an incredible amount by reading Amanda Jean’s blog.

Back to the book, I ordered this just as soon as it was released. After reading through it, I was pleased to find out the quilts were divided into sections. Some quilts use strings, some use squares and others, triangles. There is also a section on tiny bits and pieces where she outlines the methods to made adorable pin cushions. (Next to her scrappy quilts, I think Amanda is known for her deep affection for pin cushions and polka dots!)  Another facet of the book is Amanda’s explanation of color with some of the projects. She designed quilts that are great examples of projects using different scales, or sizes, of pieces as well as a broad selection of color and value.  The explanation of fabric and color selection is clearly written and very helpful. She gives several ideas for alternate ways to make the projects which enables the reader to find just the right project.


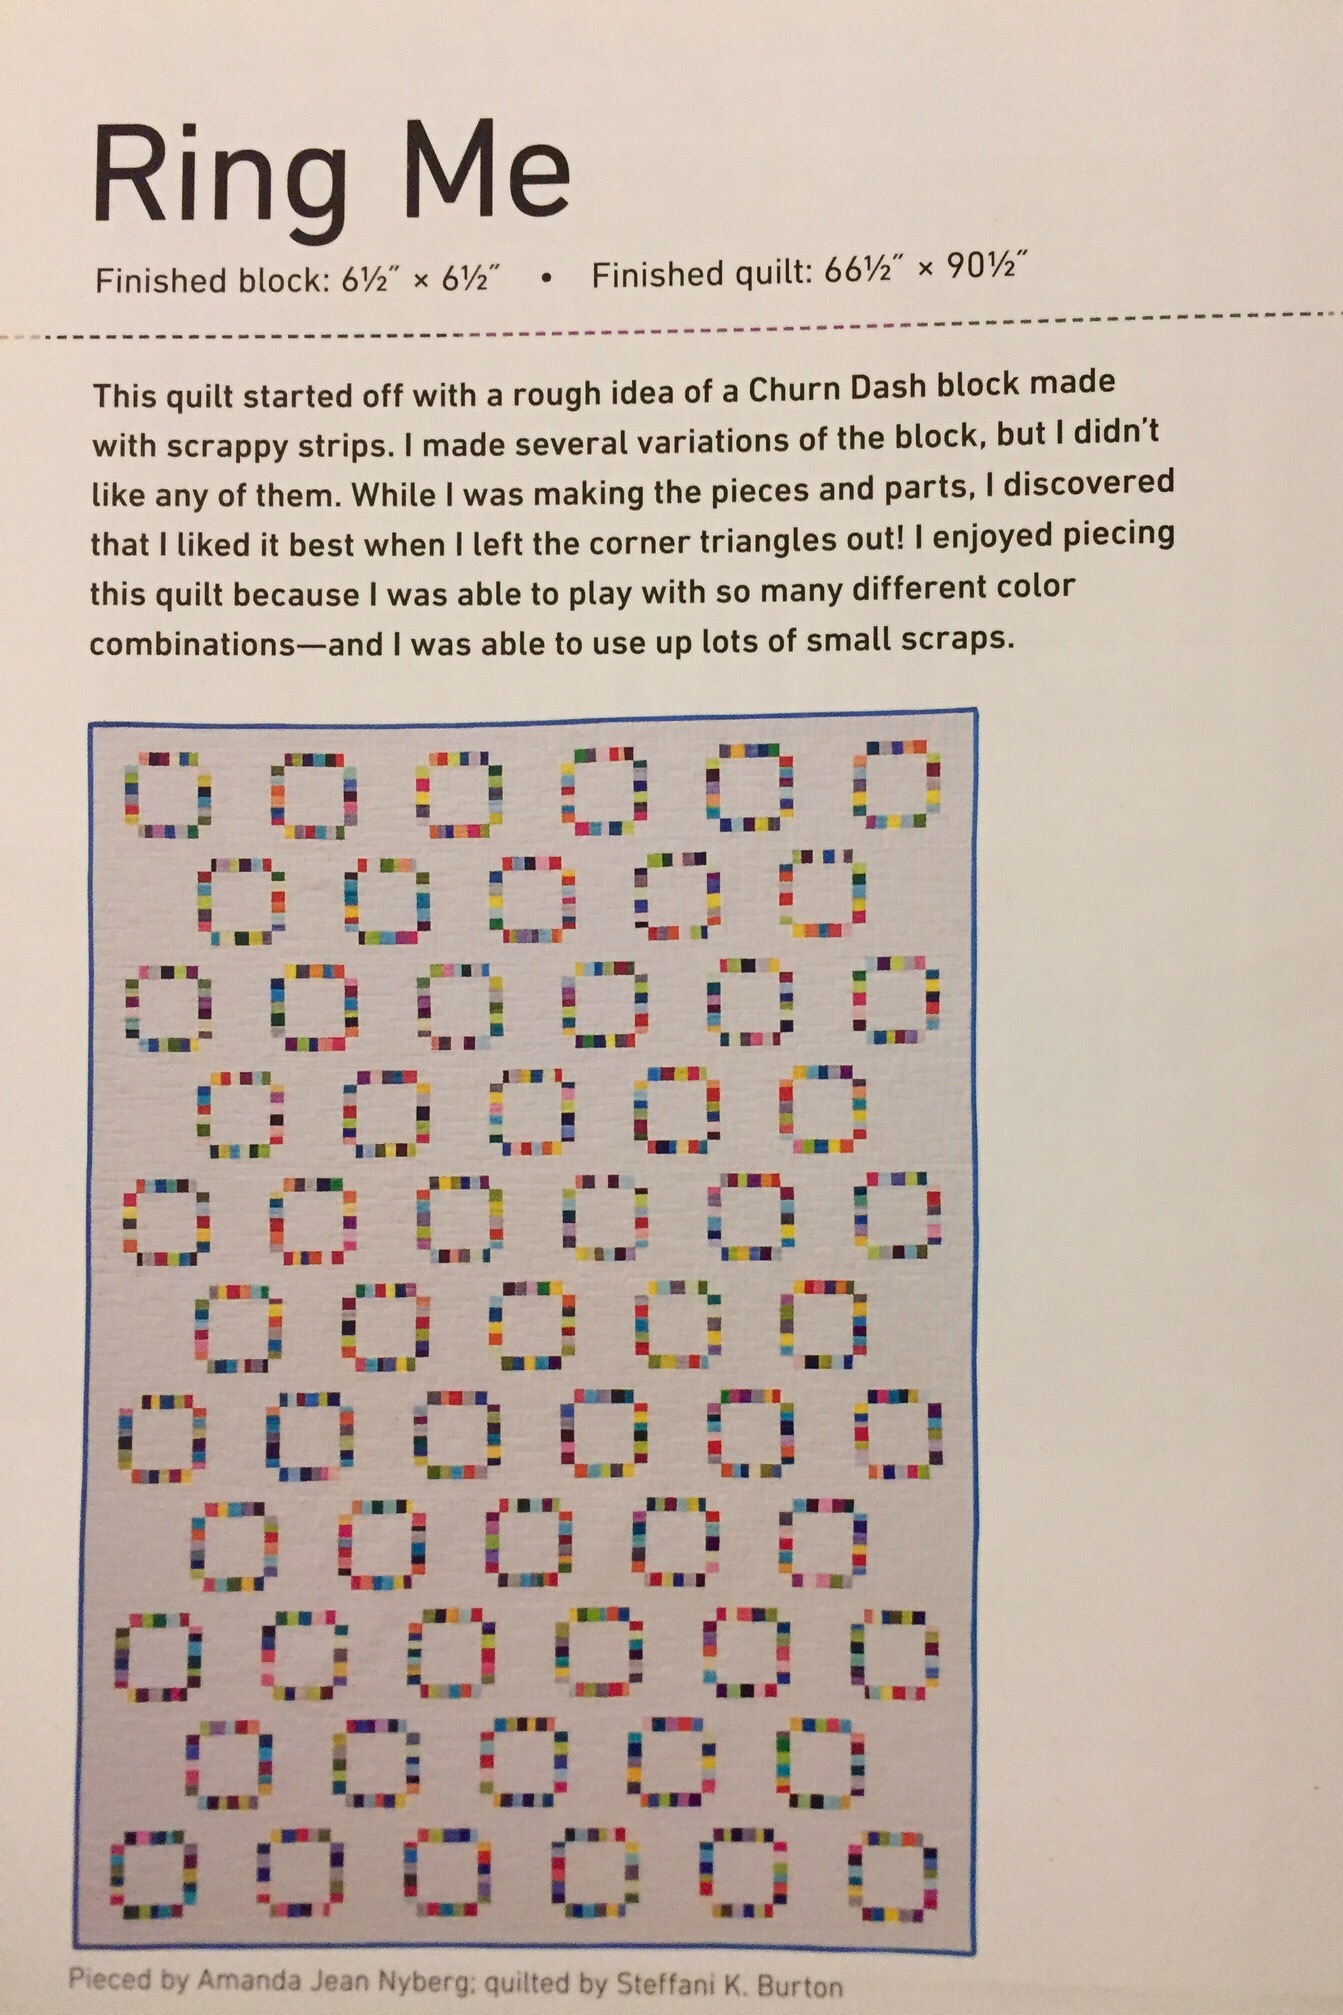
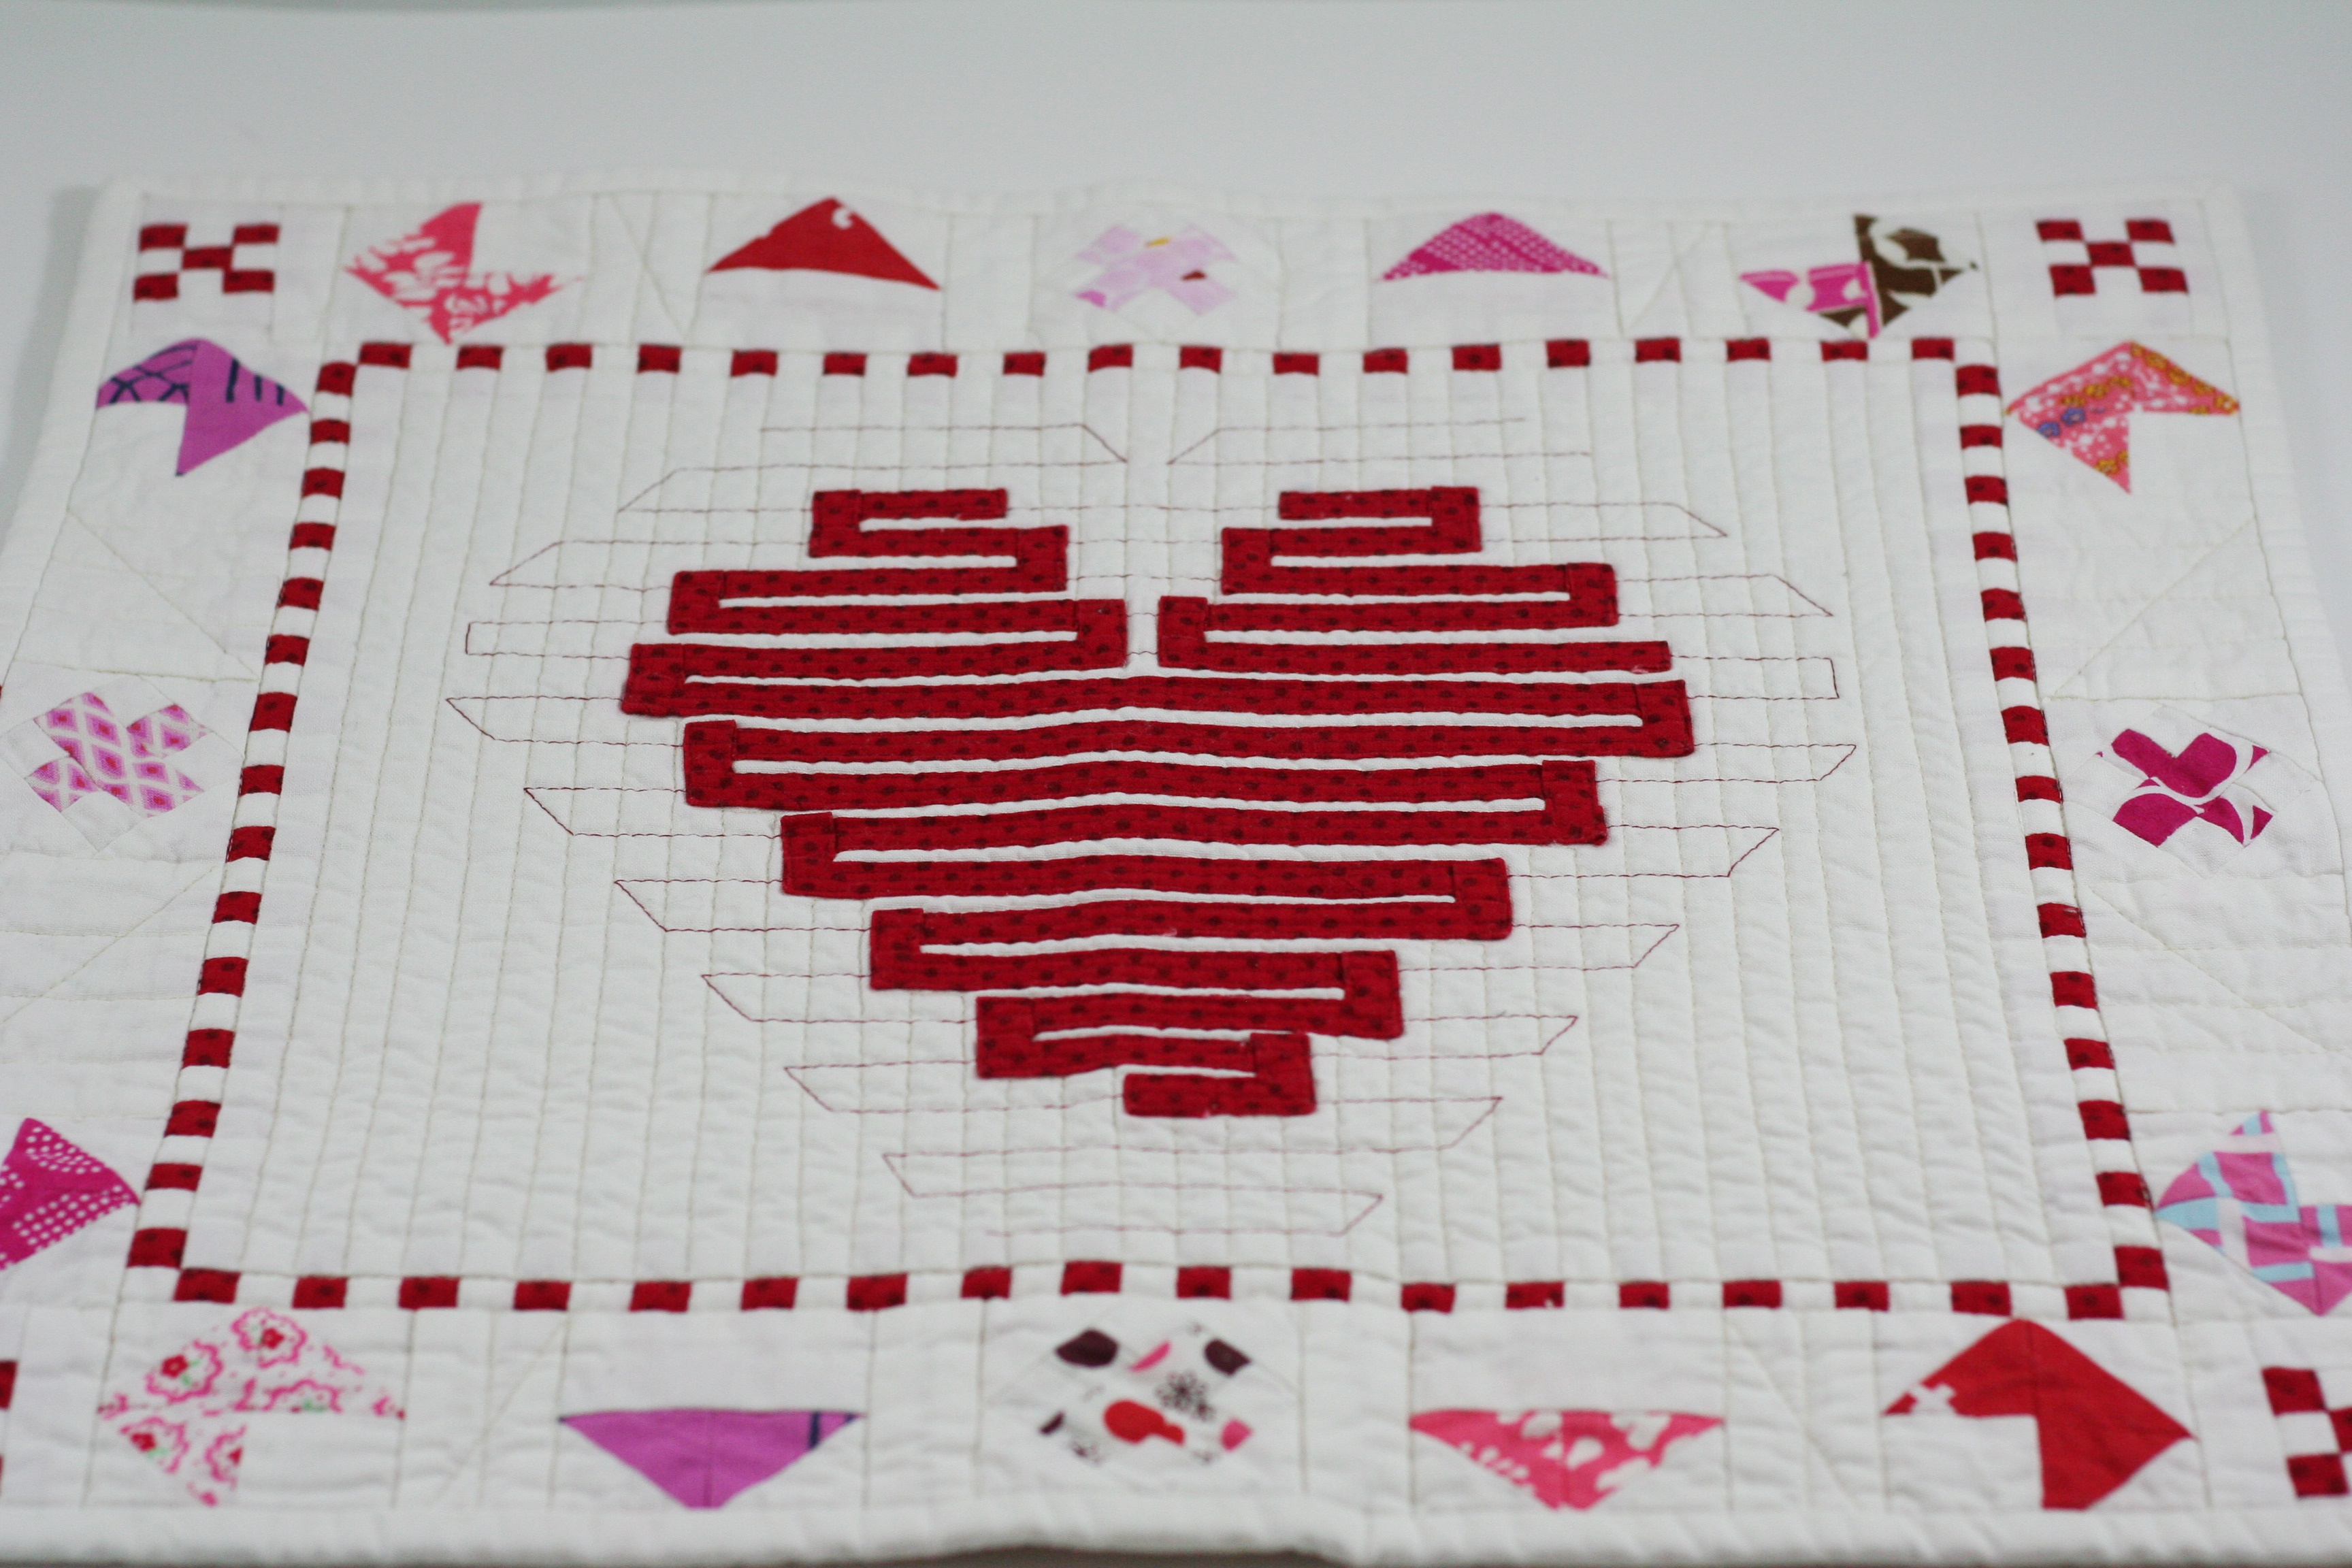
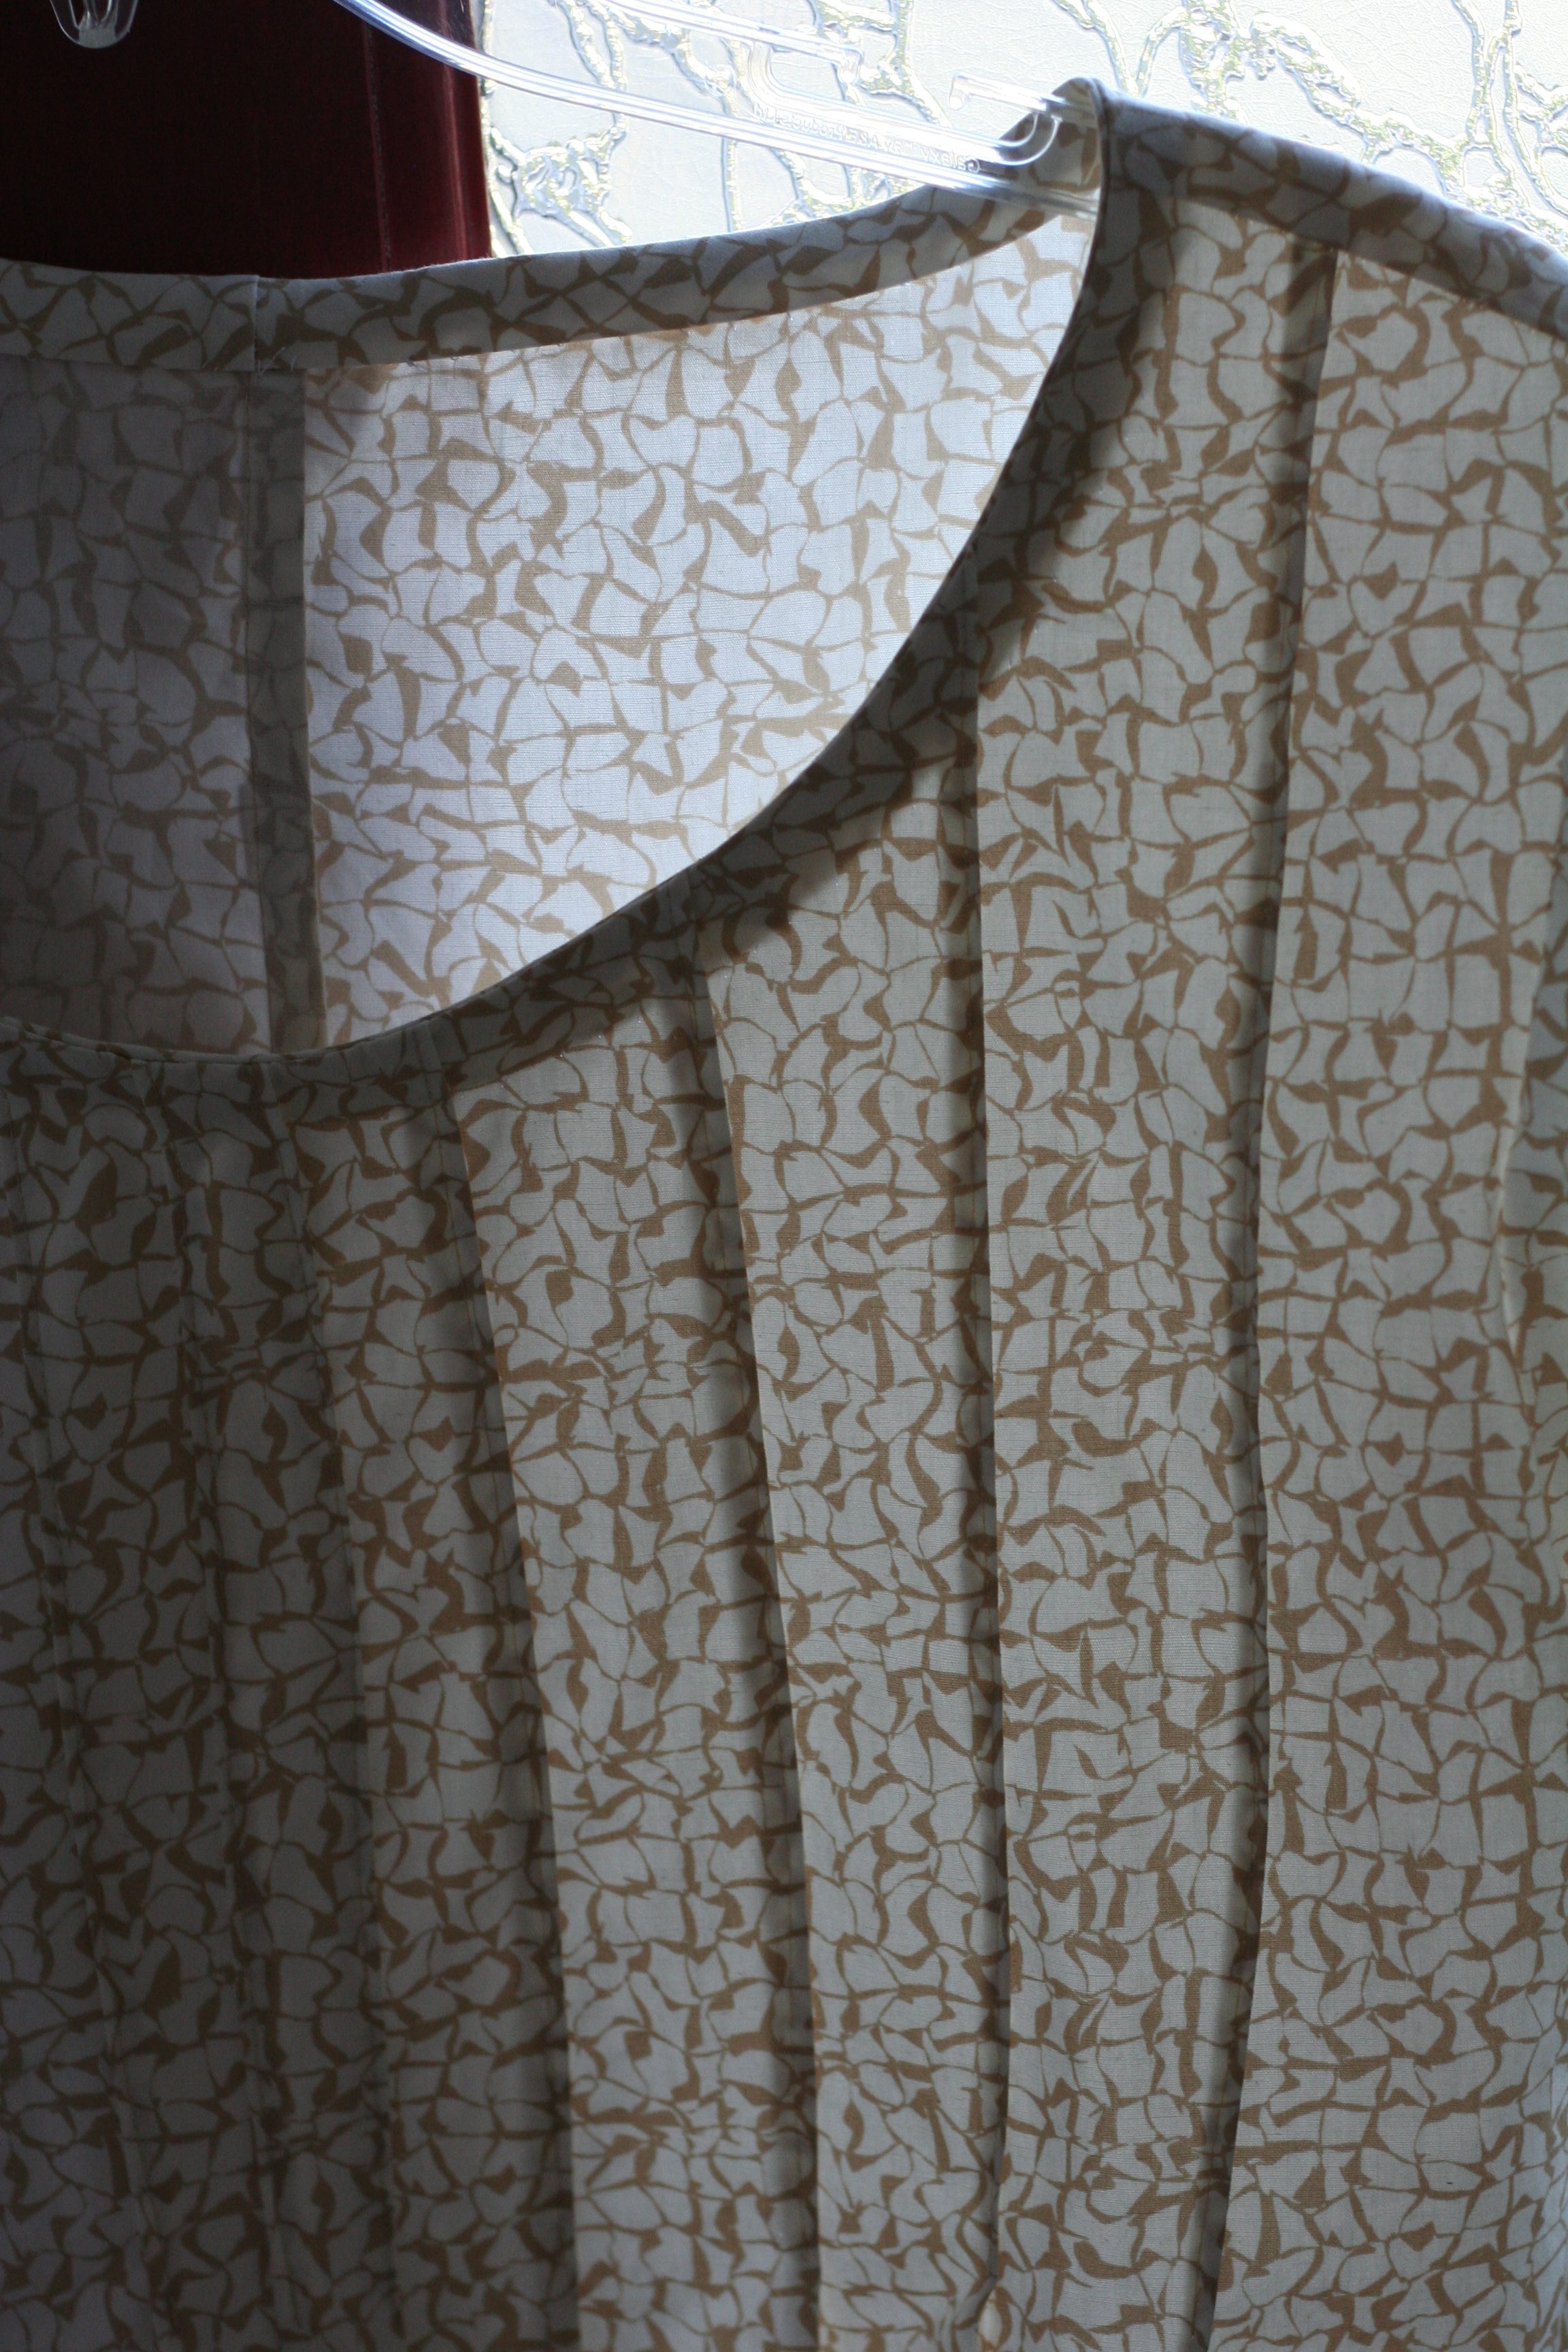
Looking through the book, I was tempted by several different patterns. For the purposes of this hop, I chose to make the Ring Me quilt. I love the effect of the stripped piecing and the open, solid background. Trying to stick with using my stash, I chose to use a gray background. I had a large piece of Bella solid in Graphite and love the depth it gives the quilt.

I must admit, I was overly confident when I told Amanda that I would be able to get the quilt top finished for the hop. It looked so simple when I looked at the pattern. And it is simple!  But oh my gosh, it is a fair amount of piecing going on there! Losing just over a week to my Vermont trip earlier this month didn’t help matters either. For a few days I tried to push myself toward a finish but I (thankfully) decided to slow down and just share my progress for this post. I really like how this is coming along and didn’t want to hurry it and end up with a lesser finish.

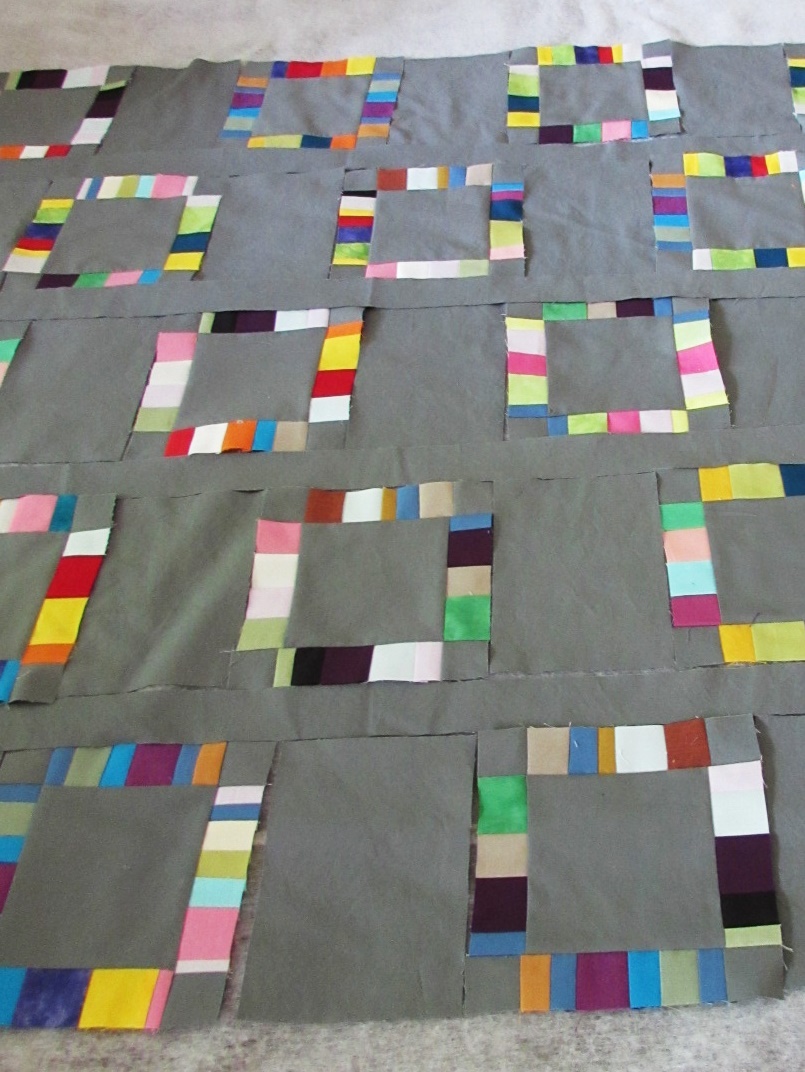
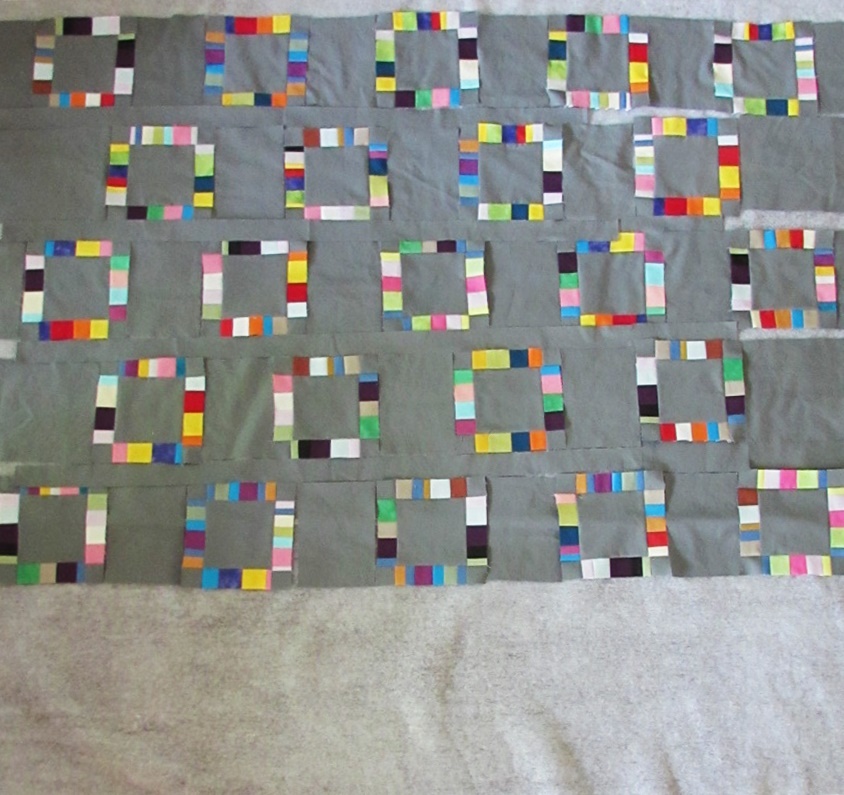
For now, progress shots will have to do. Like I said, the pattern is quite simple. I strip pieced the colorful rings around the solid gray blocks. The only trouble I had was the strips are prone to stretching. When using scraps, they are cut every which way and not always with the grain of the fabric. Attaching the two strips to the top and bottom of the block was fine. The problem seemed to occur when I added the background squares to the pieced strips. I think I am too careless with the iron and you know what those rock star quilters are always preaching, “press, don’t iron”.  I was ironing and it stretched the strips and I would end up with corners that don’t quite line up. For the most part, I don’t think the lack of precision there will really matter. The overall effect is still going to be good.  Once I realized the problem, I started to watch this part of the process and be more careful with the iron. This is helping and my precision is improving.

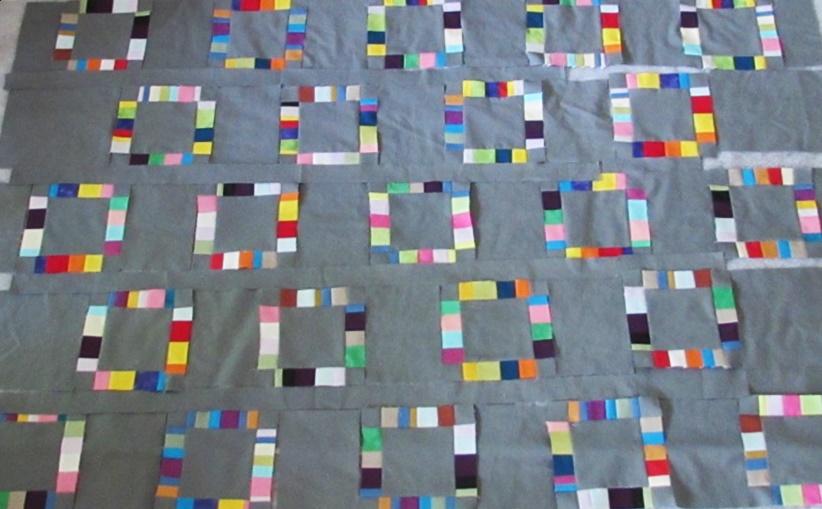
Finally, I love the exercise in color this quilt provides. As I grouped strips and stitched them together, it was satisfying to try different colors together. As I have mentioned in prior posts, color can give me trouble at times. This was a nice side benefit to this project. At any rate, I love the quilt so far and should finish it up soon. You can expect another post when I have a finish to share!

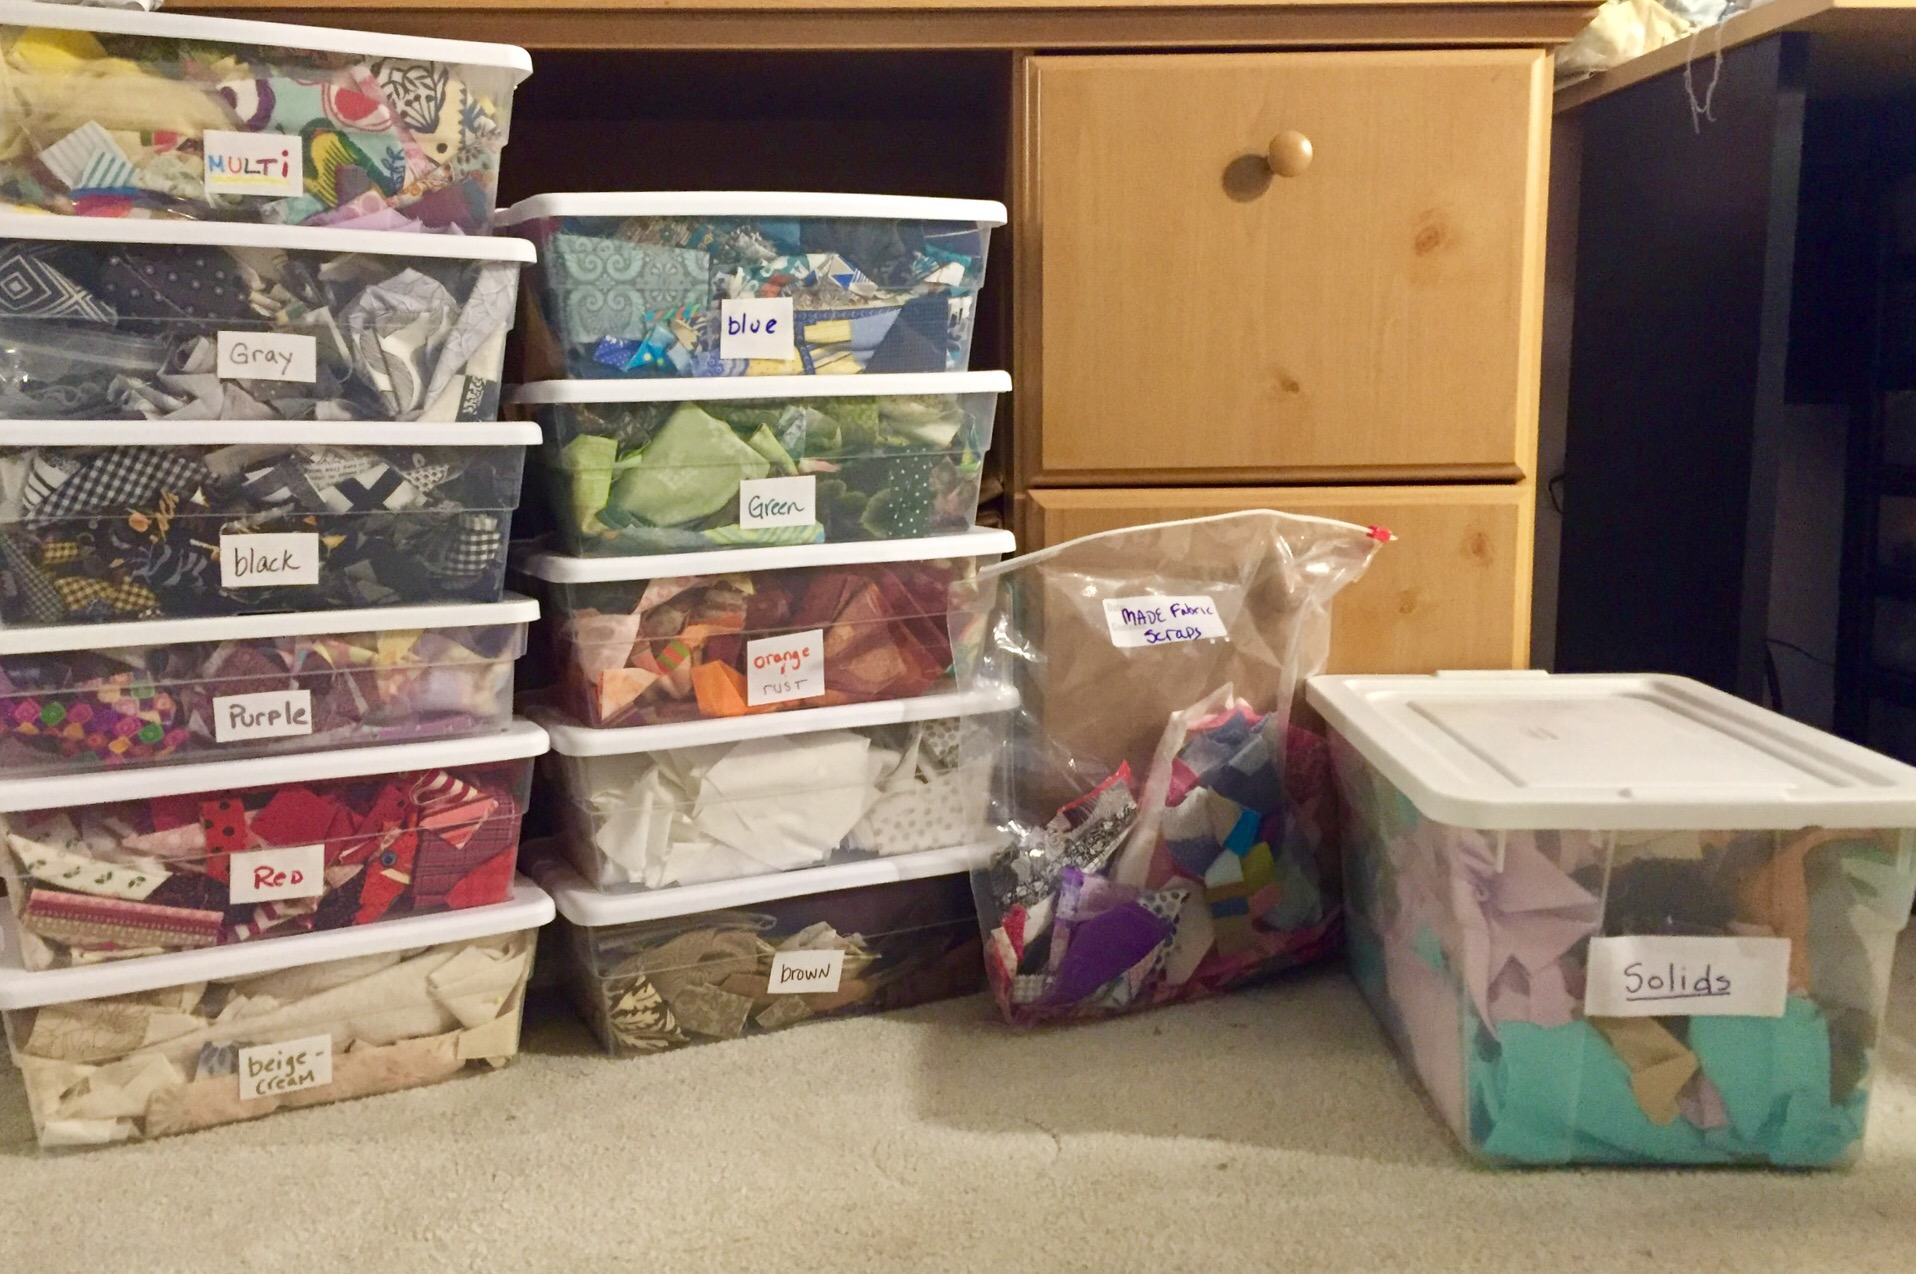
As part of the hop, we were also asked to share our scrap sorting and storage methods with you. Being a fairly organized person, I do have all sorts of scraps sorted and stored. My scraps that are less than say the size of a fat eighth, are sorted by color and kept in shoebox size bins.  Each are labeled by color which probably isn’t entirely necessary since I can basically see through the bin enough to know what is in there. The shoe box size is really not big enough and currently my blue and green bins hardly close since they are just bursting with scrap. My solid scraps, of all colors, are kept in a separate tub. Until this project, the solids tub was overflowing. It will close now but still, it is quite full. Do you see the large zip lok bag between the print and solid scraps? That contains my extra bits and pieces of improv or ‘made’ fabric.  These are left over trimmings from improv projects and certainly couldn’t be tossed!


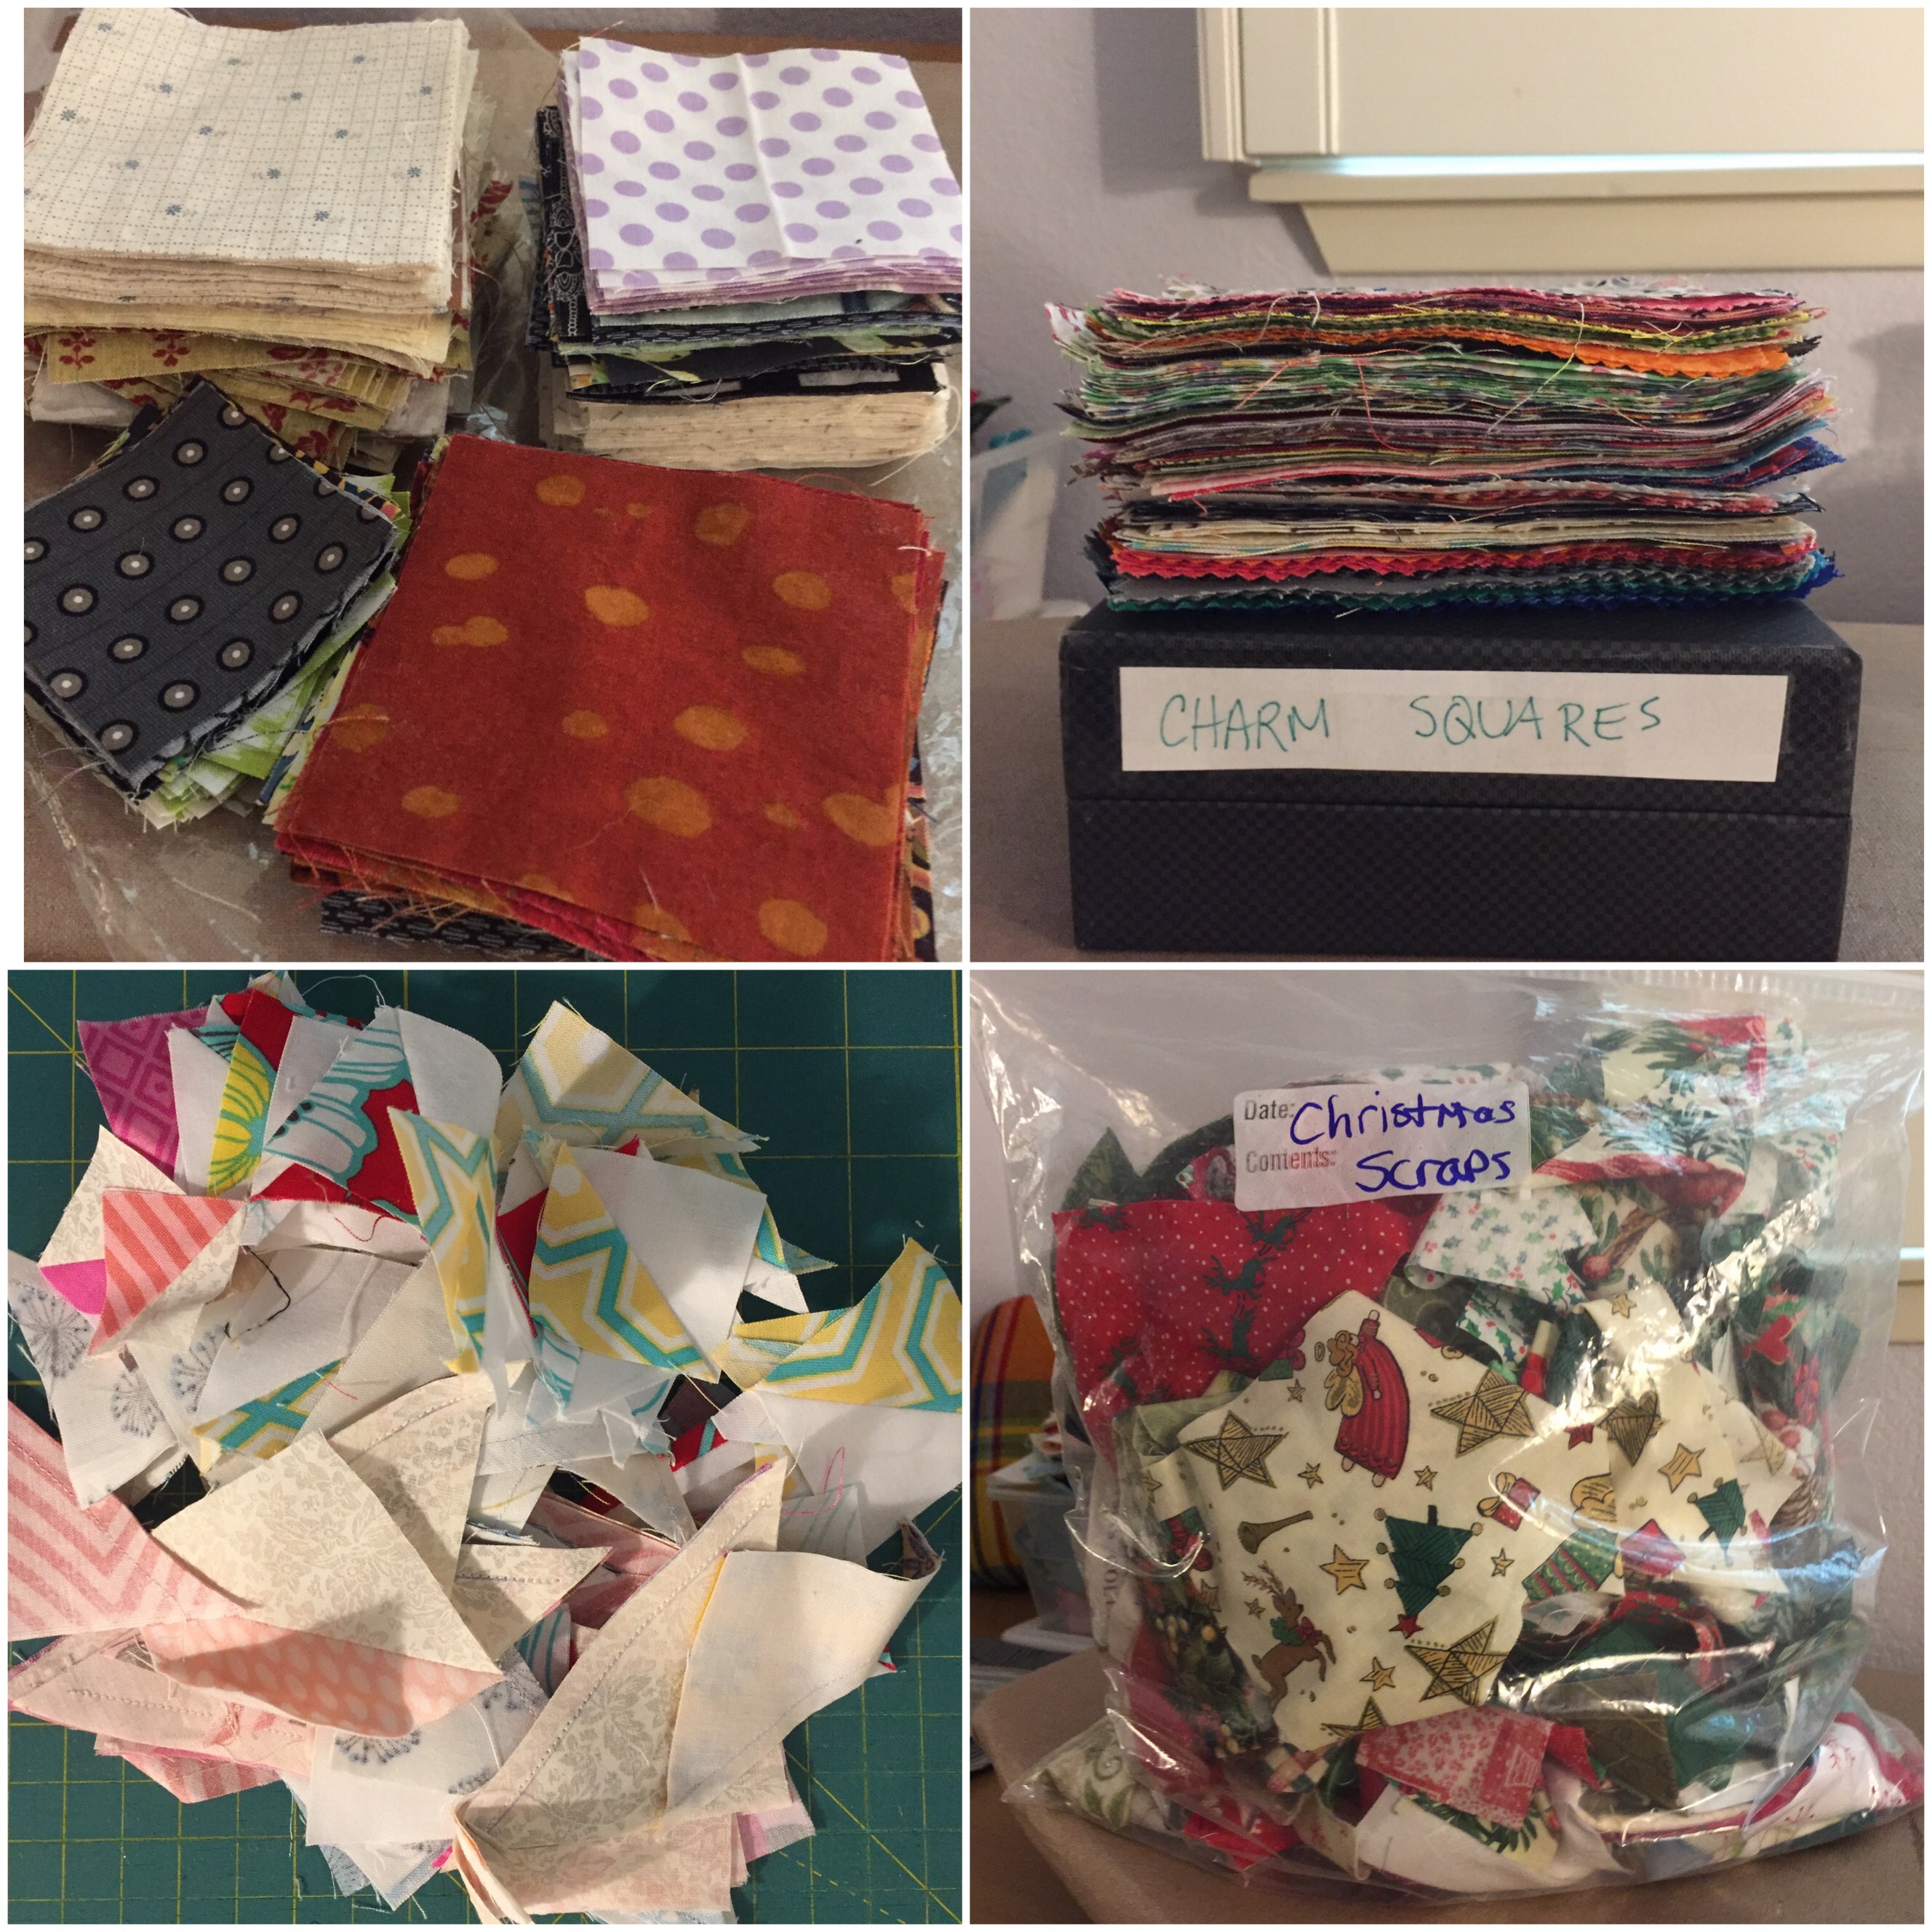
This isn’t all though, nope not by a long shot. I also have zip lok bags for squares. When I am cutting and happen to remember, I will cut my scraps into squares. I cut charms (5″ squares) as well as 3 1/2″, 3″, 2 1/2″ squares.  Those are just stacked by size and kept in a bag.  Well, except for the charms, which are kept in a box and marked. Trimmings from flying geese blocks, you know, those tiny HST’s, are in their own bag too. Finally, I keep holiday fabric scraps in their own (very large) bag.


Reviewing all of this, I am not sure whether it is the sign of a very organized quilter or someone who may end up on the reality TV show, Hoarders. Is this a problem — is an intervention needed??? Will I ever use these bits and pieces? I hope so and having both of Amanda’s books, Sunday Morning Quilts and No Scrap Left Behind, should help me use them.

Do you have a similar problem? Are you a scrap hoarder like the rest of us? The first step is always admitting the problem, right? The second step is to win this book!  C&T Publishing and Amanda Jean have offered a giveaway for each blog on the hop. If the giveaway is won by a USA participant, they will receive a paper copy. International winners will receive an e-book.  Either way, this is an excellent book to add to your library!! To enter the giveaway, please share your scrap busting habits or your scrap storing and sorting methods. Help us out here. Some of us are drowning in scraps.  Help!  For an extra entry follow me on Instagram, Facebook or the blog and then let me know how you follow.   The giveaway will be open through the weekend and a winner will be selected Monday morning, May 1st. Good luck!

NOTE: this giveaway is not closed. Thanks to everyone for participating!

There are many more chances to enter the giveaway to win a copy of this book! Here is the schedule for the hop. I hope you will check out the other projects and interpretations of the quilts in this book. You will surely be inspired.

Monday, April 24th Mary Kolb
Tuesday, April 25, Lee Monroe
Wednesday, April 26, Sandi Hazlewood
Thursday, April 27, Bernie Kringel — You’re here!!
Friday, April 28, Erin Cox
Monday, May 1, Katherine Greaves
Tuesday, May 2, Tracy Mooney
Wednesday, May 3, Cheryl Arkison
Thursday, May 4, Debbie Jeske
Friday, May 5, Amy Smart


Note: There are affiliate links in this post, meaning if you click through and make a purchase, I will receive a small payment as part of the sale.

Three Babies with Three Quilts

This is a quick post to bring a little smile to your day. Over the past several months our family has grown by three.  It has been wonderful to welcome the three newest members to the family. This brings the great granchild count up to 12 for my parents. Quite the family my parents started; they had six girls and the six of us had a total of 21 children between us. Now there are 12 great grandchildren (so far!)

When I found out about all of the babies to be born in the beginning of 2017 (we had one born in January and two born in March) I got busy making some quilts. Now that the babies are here and the quilts are gifted, I want to share photos of these sweet babies and their quilts.

This little guy was born January 17th. He has the lattice quilt I made for him last fall. (Read about details for this one here.)  Isn’t he adorable? Have you seen such a cute smile? His two older sisters dote on him. This lattice quilt was based on this tutorial.

My sweet grand daughter was born next, on March 7th. She is so darn cute. This girl got a quilt of HST’s based on the Simply Snuggly pattern. More details on this project can be found here. Her presence in this world means I will be traveling to Vermont when I can and enjoying the stream of photos her parents share with me in the meanwhile. She just started to smile last week and it melts my heart to see those smiles.

Finally, the third baby, this adorable girl was born at the end of March. She also has two older siblings, a brother and a sister. I made her the rainbow star quilt using the When You Wish pattern by BonJour Quilts. For details on this quilt click here. I really loved making this one and will definitely use this pattern again.

Hope you enjoyed these sweet pictures. I love seeing the babies with the quilts. Makes me smile. 🙂


Sweet Tweets Blocks and a Quilt Top

Yesterday I had the pleasure of introducing you to Kim Schaefer in my third Meet the Designer post. I hope you enjoyed getting to know her.  I have been playing with the fabrics in her Sweet Tweets line and have a few things to share with you.

First off, I have been making these cute stuffed blocks. I have shared a couple of photos on Instagram so you probably have seen these in process. I used a simple tutorial provided by Abby Glassenberg at While She Naps.

Cutting the panel into blocks, I used four critters and two black and white squares from the Cheerios fabric for each block. I experimented a bit with the blocks. I made two of them bigger, utilizing the full size of the critter block and for the third one, I cut it down a bit so the block would be smaller. Two of the blocks are lined with fusible interfacing. It was only because I forgot that I didn’t line the third one. As a result, it is a bit on the mushy side – I like the result much better when the fabric was fused to the interfacing to give it some body.

Also, I only put one noisemaker rattle in each block and now I wish I had put two. (Actually, as I type this, I realize it would be so simple to open up the block again and add another rattle. I will do this because I think they don’t make enough noise with just the one rattle.)

On one of the blocks, I lined one side with a clean piece of a potato chip bag. Abby had a list of suggestions for variations to try and I thought this sounded fun. It gives that block a crackly sound when it is manipulated. It was very simple to just wipe down the bag, cut a square and baste it to one of the sides. I did put the print side facing inward to the center of the block, just in case in might have shown through the fabric.

After making the blocks, I was on a tear and decided to make a baby quilt with some of the critter blocks from the panel. I started this on Tuesday afternoon this week and it came together quickly. I didn’t have a pattern in mind and decided to just put borders around each critter and sash them in one of the brighter prints from the Sweet Tweets line. I think it is just adorable! Panels can sometimes be difficult to utilize but this one lends itself to a number of projects.

Each critter block was cut to a 6″ square and I bordered it with the black and white Cheerio print. That brought the blocks up to 8″. Next I sashed them with the Hip to be Square print in Rainbow. Like I said in my previous post, I love the bright colors with the black and white print. With just the rainbow sashing, the quilt top is a bit too small for a baby quilt. It currently measures 24″ x 36″. Adding the rainbow sashing print around the outer edge of the quilt will help grow it just a bit.

I have a bolt of this adorable border print coming in. I didn’t buy it with the first shipment of the line and think it is a great addition to this collection. I am not sure how I will cut it up but it will make a cute border and then hopefully the quilt top will be big enough.

I think this line is great for kids. However the black and white prints and the rainbow prints are versatile in their own right.  Great stash builders, for sure.  Reminder that they are on sale in my shop through this Sunday, April 23rd.

Hope you all have a great weekend.  Julia is finally getting her piglets this weekend. She is so excited. That is what we have planned, how about you??

Linking to my usual favorites, including Finish it Up Friday at Crazy Mom Quilts.


Meet the Designer – Kim Schaefer

Welcome to the third post in my Meet the Designer series at Needle & Foot. If you missed the first two interviews you are welcome to check them out. In February I had the pleasure of getting to know Sarah Golden, a designer for Andover Fabric. In March I wrote two posts about my experience getting to know Maureen Cracknell.  This month I have the honor of introducing you to Kim Schaefer, also a designer for Andover Fabric. Kim has a style that could be described as whimsical. I very much enjoy her designs. Her most recent line of fabric is called Sweet Tweets and I have a selection of it available in my shop. Let’s get to know Kim!

Kim started designing fabric with Andover in 2006 with her first collection, Fat Cats. Prior to working for Andover, Kim was a designer for Erlanger (which is no longer in business.) It was fortunate that Kim had impressed one of the sales reps who worked for both Erlanger and Andover. He was able to introduce Kim to Andover and thus began her relationship with them. It is always something to look back at one’s path and see how each decision or choice made has lead us to the next opportunity, right? Anyway, Kim speaks very highly of Andover, and especially of their design director, Kathy Hall. She is grateful to work with a company who has such a strong commitment to quality.

Growing up as the middle daughter in a family of three girls, Kim was taught to sew early on, maybe around the age of eight or nine years. Her mom and grandma both worked with her. She has fond memories of this and says her mom was so patient and was often called upon to untangle bobbin disasters when Kim was sewing. Kim went to college at a university in Wisconsin, majoring in Fine Arts with an emphasis on Fibers.  Kim’s father lamented never having a son and was very happy when Kim had four sons for him to do “boy things” with. They worked on cars and motorcycles together and went on camping trips, things she and her sisters had little interest in as kids.

Kim’s Quilt for QVC Channel

In 1983 she took her first quilting class – it doesn’t take too much imagination to guess what happened next! She was hooked on quilting and by 1989 was actively selling her quilts. In fact at one point, she had an order for 400 of the same cute birdhouse themed quilt for QVC (tv shopping channel) Kim says it took forever to make these and then they sold in three minutes!! Can you imagine? I am sure she never wants to make that particular quilt again!!

Just a few of the books Kim has authored.

I am in awe of Kim’s productivity as her talents are quite diverse.  She designs fabric for Andover, as I mentioned above.  Currently she is working on a line with a Halloween theme called Fright Night which releases in June, 2017. Additionally, she is a very prolific author and has published thirteen books already. She currently works with C & T Publishing and her range is wonderful. She has written books on baby and toddler projects, modern quilting, seasonal projects as well as scrappy quilting. Any of these would be a great addition to a quilter’s library. Click through here for more information or if you would like to purchase a book.  (Affiliate Link) Upon hearing about all of these books and the numerous fabric lines, I asked her about balancing her work and her home life, and she replied she has been asked that question often and “all I can say is it somehow just works out. I feel so blessed to be able to do what I love, and I truly enjoy each aspect of my job. I work hard and am fortunate enough to work for two great companies who have never pressured me. I am the happiest at home in my studio creating, it hardly feels like work when you’re living your dream. I am a lucky lady.” She clearly appreciates the blessings of working for such great companies and being able to utilize her passion in these artistic ways, designing fabric and quilts as well as writing books.

Asking Kim about her design process, she explained that once she has an idea in mind it’s hard to stop thinking about it. (Does that sound familiar!?) First she draws rough sketches on graph paper, then moves to pencil drawings of actual size and scale on water color paper. Her work is hand painted using water color dyes or gouache.  (I wasn’t familiar with the term gouache but it seems it is a water color paint which has been thickened with a gum, or glue-like, substance.) The painting time depends, of course, on the complexity of the design, but Kim often stays at it until it’s finished, even though, as she says, “at the end of the day sometimes I think my hand might fall off my arm.”  🙂  To begin the design of a fabric line, she usually begins with the feature or main fabric. Then she designs the coordinating pieces.

With Sweet Tweets, she created the adorable panel first and then worked on the rainbow themed prints as well as the black and white pieces.

I have to say when I selected Sweet Tweets as a juvenile line to carry in my shop, it was because of the bright, cheerful pieces which are accented with black and white prints. I love brights with black and white – it makes for a really striking combination. Kim also enjoys this mix and explained that much of her work is influenced by the wonderful, colorful, folk art carved wooden animals from the Oaxaca area.   When she was in college, she had the opportunity to spend a semester in Mexico and her work is still influenced by the folk art from this region.

I asked Kim about other places she has traveled and she told me about her all-time favorite trip. Forever wanting to see Paris in the spring, she was finally able to make the trip a few years ago. She and her husband visited Paris and took in the art, architecture, the cheese, and chocolate croissants! She loved every bit of it. After Paris, they went to London where her son was finishing up a semester abroad. After a few days playing tourist, they all returned home together.

Kim enjoys reading and gardening when she gets a minute away from her studio. Asked whether she enjoys sewing clothing, Kim said she hasn’t really pursued it. She did make Halloween costumes for the boys when they were small but there just isn’t enough time in the day to try everything.  Again, sounds so familiar, doesn’t it?

It was great to get to know Kim better. I really enjoy her fabric and her whimsical style. I am looking forward to taking a peek at the next two lines she has coming out. Aside from the whimsical pieces, she also has a great line of black and whites as well as a line of textured solids called Brushline, which is just gorgeous.

This week in conjunction with this Meet the Designer post, I have marked the Sweet Tweet line down 15% in my shop.  Hop on over and take a look. I have yardage as well as a cute fat quarter bundle of the three black and white prints that I am carrying. No need for a coupon code as the prices have been adjusted. The sale on the Sweet Tweets fabric will run through the weekend with prices back to normal Monday, April 24th.

Tomorrow I want to share some cute projects I have been working on with these fabrics. Hope you will come back and check them out!  See you then. 🙂

Back to the Real World

I don’t know if it is the same for you, but it is always with mixed feelings that I end a trip or vacation. Julia and I had such a wonderful time in Vermont. The week seemed to fly by and it was difficult to leave. Having my kids living so far from California isn’t the ideal situation but it is what it is, right? While I was a bit sad to leave them, and especially my sweet grand baby, I was happy to come home. I love my home and was more than happy to see my husband after ten days apart.

As for my grand baby, since I know you are all dying to hear, she is just adorable. I loved having the opportunity to spend a long stretch of time with her. She is full of all that newborn wonder that just melts a person’s heart. Her little cooing sounds when she is nursing, the happy smile she does when she is dreaming (what do newborn babies dream about anyway?) and the adorable cat-like stretches she does when she is waking up – the stuff newborn babies are made of. Ahh, I do love babies. She does have a touch of colick and can be quite fussy during the late afternoon and into the evening. Her parents handle these episodes with such patience. I am really proud of both of them.

When I got home, this was the first thing I saw as I drove up to the house. Isn’t it great? I ordered this banner a few weeks ago from Vistaprint. I will be a fabric vendor at our local quilt show in May and wanted to have something hanging at the back of the booth so shoppers would know the name of my shop. I am thrilled with how well it turned out. These pictures don’t do it justice. Ray hung this for me as a surprise but it was very gray and cloudy out and we took it down right away so it wouldn’t be rained on.

The size is 2 1/2 feet by 6 feet.  It seems big to me but I am a poor judge of these things. Ray thought it was perfect so I am going with his opinion. We will see when I get the booth set up.

I also came home to a lot of happy mail. There was a lovely thank you note from a reader that won some fabric. How sweet of her to send a real note.  It is a treat to receive a real card when email is usually the way we communicate these days. The card featured a very pretty crazy quilt picture.

After opening the card from Gloria, I opened a package sent to me by Jayne of Twiggy and Opal.  I cannot even describe my surprise to see this gorgeous mini quilt. Jayne enclosed a note saying this was just a little gift for me. Really? For me? Just because???  I am beyond happy to have this quilt. I watched Jayne’s progress on this project on her Instagram feed.  (Side note: do you follow Twiggy & Opal on IG?  If not, hop over there and follow her. She is just a constant source of inspiration. I love her feed.)  Anyway, I loved this project from the beginning.

I love the quilts Jayne designs. It seems like (and I may be totally wrong) she starts with an idea and it just organically evolves while she is sewing.  From what I saw on her IG feed,  Jayne made the bias strips she used to create the heart in the center. Then she started creating little (teeny, tiny) pieces to use in the border.  The nine patch block on the left side of the photo above measures just under one inch. I have no words. It is adorable.  The little HST’s to the right are also just under an inch. Yikes. My fingers are too clumsy for such miniature piecing.

She must have done some strip piecing for the nine patch and then also used it for the checkered border.  That isn’t a striped piece, it is pieced! I just love her straight line quilting and also the quilting she did over the bias strips to emphasize the heart shape.

It is already hanging in my sewing room. I love having this treasure from Jayne and will think of her when I see it. It is such a special gift.

I have so many blog posts to catch up on this week. I didn’t read too many while I was away last week. There is so much going on right now. The New Quilt blogger Blog Hop is on going and there are lots of new bloggers to befriend. Check out the links at Quilting Jetgirl, Cooking Up Quilts and She Can Quilt.  I will have a new Meet the Designer post up in a few days. This one will feature Kim Schaefer, a designer of cute, whimsical fabric lines for Andover. Hope you will come back Wednesday to get to know Kim. Until then, happy sewing to you!!

Spring Break

Springtime is here and our yard is showing off it’s gorgeous colors. The photo is from last spring because I am still in my PJ’s and didn’t feel like going outside yet!  But this isn’t too far from the truth. The maples need to leaf out a bit more but lots of things are blooming.

I just want to tell you I was so excited to read all the great comments on the blog and Instagram about the proposed Sew Along for this summer. It is definitely on!! We will have so much fun working through this project together. I appreciate all of the enthusiasm and suggestions. Keep it coming. I decided rather than answer each comment, I would just put up this quick post.

Since there is a lot of interest, I will start the planning process. When I have a few pattern suggestions I will put up a post and we can do an informal vote and see which one is most popular with the group. Things I heard from various people – you want a simple pattern, want to go slow and learn as a group, want options for sleeves or sleeveless, and lots of you want help fitting patterns.  I will be the first to say, I am not an expert seamstress by any means. However there are a few tips I can give. We might start with a post on measurements and fitting before we even begin. That way when it comes time to cut your pattern out, you may feel a bit more confident.

For now, be thinking of what else you might want from this sew along. Thank you for joining in. I think I better go and see if there are some prizes to be won. What is a blog event without a prize or two? I will keep you all posted on the developments of this event. It might be helpful to follow me on Facebook and/or Instagram as I will post things there as well.

The coming week is spring break for my daughter.  She and I are leaving tomorrow for a trip to Vermont to meet Baby Girl, the newest (and possbilty cutest) member of the family. I will not be posting until after Easter. I hope everyone has a lovely holiday if it is one you choose to celebrate. I’ll be back in about ten days and look forward to catching up with everyone then.

Proposed Sew Along

Hi Everyone.  I am pleased, and somewhat surprised, to see the wonderful response I got from yesterday’s post about the blouse I made. I also posted it on Instagram and got quite a bit of discussion going there as well. It seems like numerous readers are interested in trying to sew a simple blouse.

How would you feel about my hosting a sew along?  I would need some time to plan it out but I think I could get it going and host it in the summer – maybe begin the event at the end of June?

Here is the basic structure I am thinking about:

  1. I will select a few patterns, post the list of suggestions and take input – we can decide as a group which pattern to make. Then we would wait for a week or two while people purchase their pattern.
  2. I will prepare the “lessons” so that we can work together slowly and go through the steps to make the shirt or blouse.
  3. First post would be about selecting fabric and listing any notions we might need.
  4. 2nd post would be fabric prep.
  5. 3rd post would be cutting out the pattern
  6. 4th post would be first steps in sewing
  7. 5th post would be second steps in sewing
  8. 6th post would be finishing steps (eg finishing, hemming, details to polish the project)
  9. 7th post we will share photos of how gorgeous we look wearing the new top. We could link to the blog or I could set up a little Facebook group so we can share as we go.

I think this would be such a fun thing to do with whomever is interested. Please let me know in the comments if this strikes your fancy. If say, more than one person (?) is interested – we are on!  Would you like to stretch a bit and learn something new? Want to get to know your fellow lovers of fabric and sewing? Here is your opportunity!! If for some reason, June isn’t going to work for you, the sew along posts will live for eternity here on the blog. You can always come back to it when you have the time. I will be happy to answer questions via the comments.

Spring Blouse Finish with Butterick Pattern B6024

Ever since I received these bolts of fabric designed by Sharon Holland, I have wanted to make a shirt with one of them. They have such soft colors and the fabric feels silky smooth which just seemed perfect for a blouse. The line is called Gossamer and I love the pallette Sharon used for them. If you want to take a peek, I do have them listed in my shop. Click here.  🙂

Gossamer Fabrics by Sharon Holland

I chose to use Diaphonous Sand which is second from the bottom. It is very neutral and should work with any of my pants (especially since most of them are denim jeans!!) I poked around looking for a pattern thinking surely one of the 200 or more listed in my shop should work. Oh no… I had to order one instead! Kind of silly I suppose, but I really liked Butterick B6024.

I mixed up the versions just a bit and used the front from Version A, the sleeves from Version D and the back from versions B/C.  I wanted the straight hemline in the back, short sleeves and the series of pin tucks detailing the front. Luckily it is quite simple to switch out the pieces of each version to get just what you want.

I posted this project over on Instagram just as I got started. I was a bit worried the pin tucks would make the front of the shirt too full and give it a maternity top look. Definitely not a good look to wear at the wise age of 56.  But it worked out well. I did taper the sides just a tiny bit.

It hangs straight enough which takes care of the is-she-pregnant look I was trying to avoid. I did decrease the length about an inch but I don’t know that it was really necessary.

The back is simple – no detailing to speak of.

I finished most of the seams using french seams. I love the polished look french seams provide. The pin tucks are not terribly difficult. The require a bit of fiddling to get them folded and pinned just so but then it is just a matter of top stitching them down. It has been really satisfying to make a few shirts. Just in time for Spring too!