Category Archives: Product Review

Quilts, Projects and a Fun App

The Mercyful Quilts continue to arrive! I have a large stack of quilts to deliver to the hospital and I know they will be thrilled to have them.

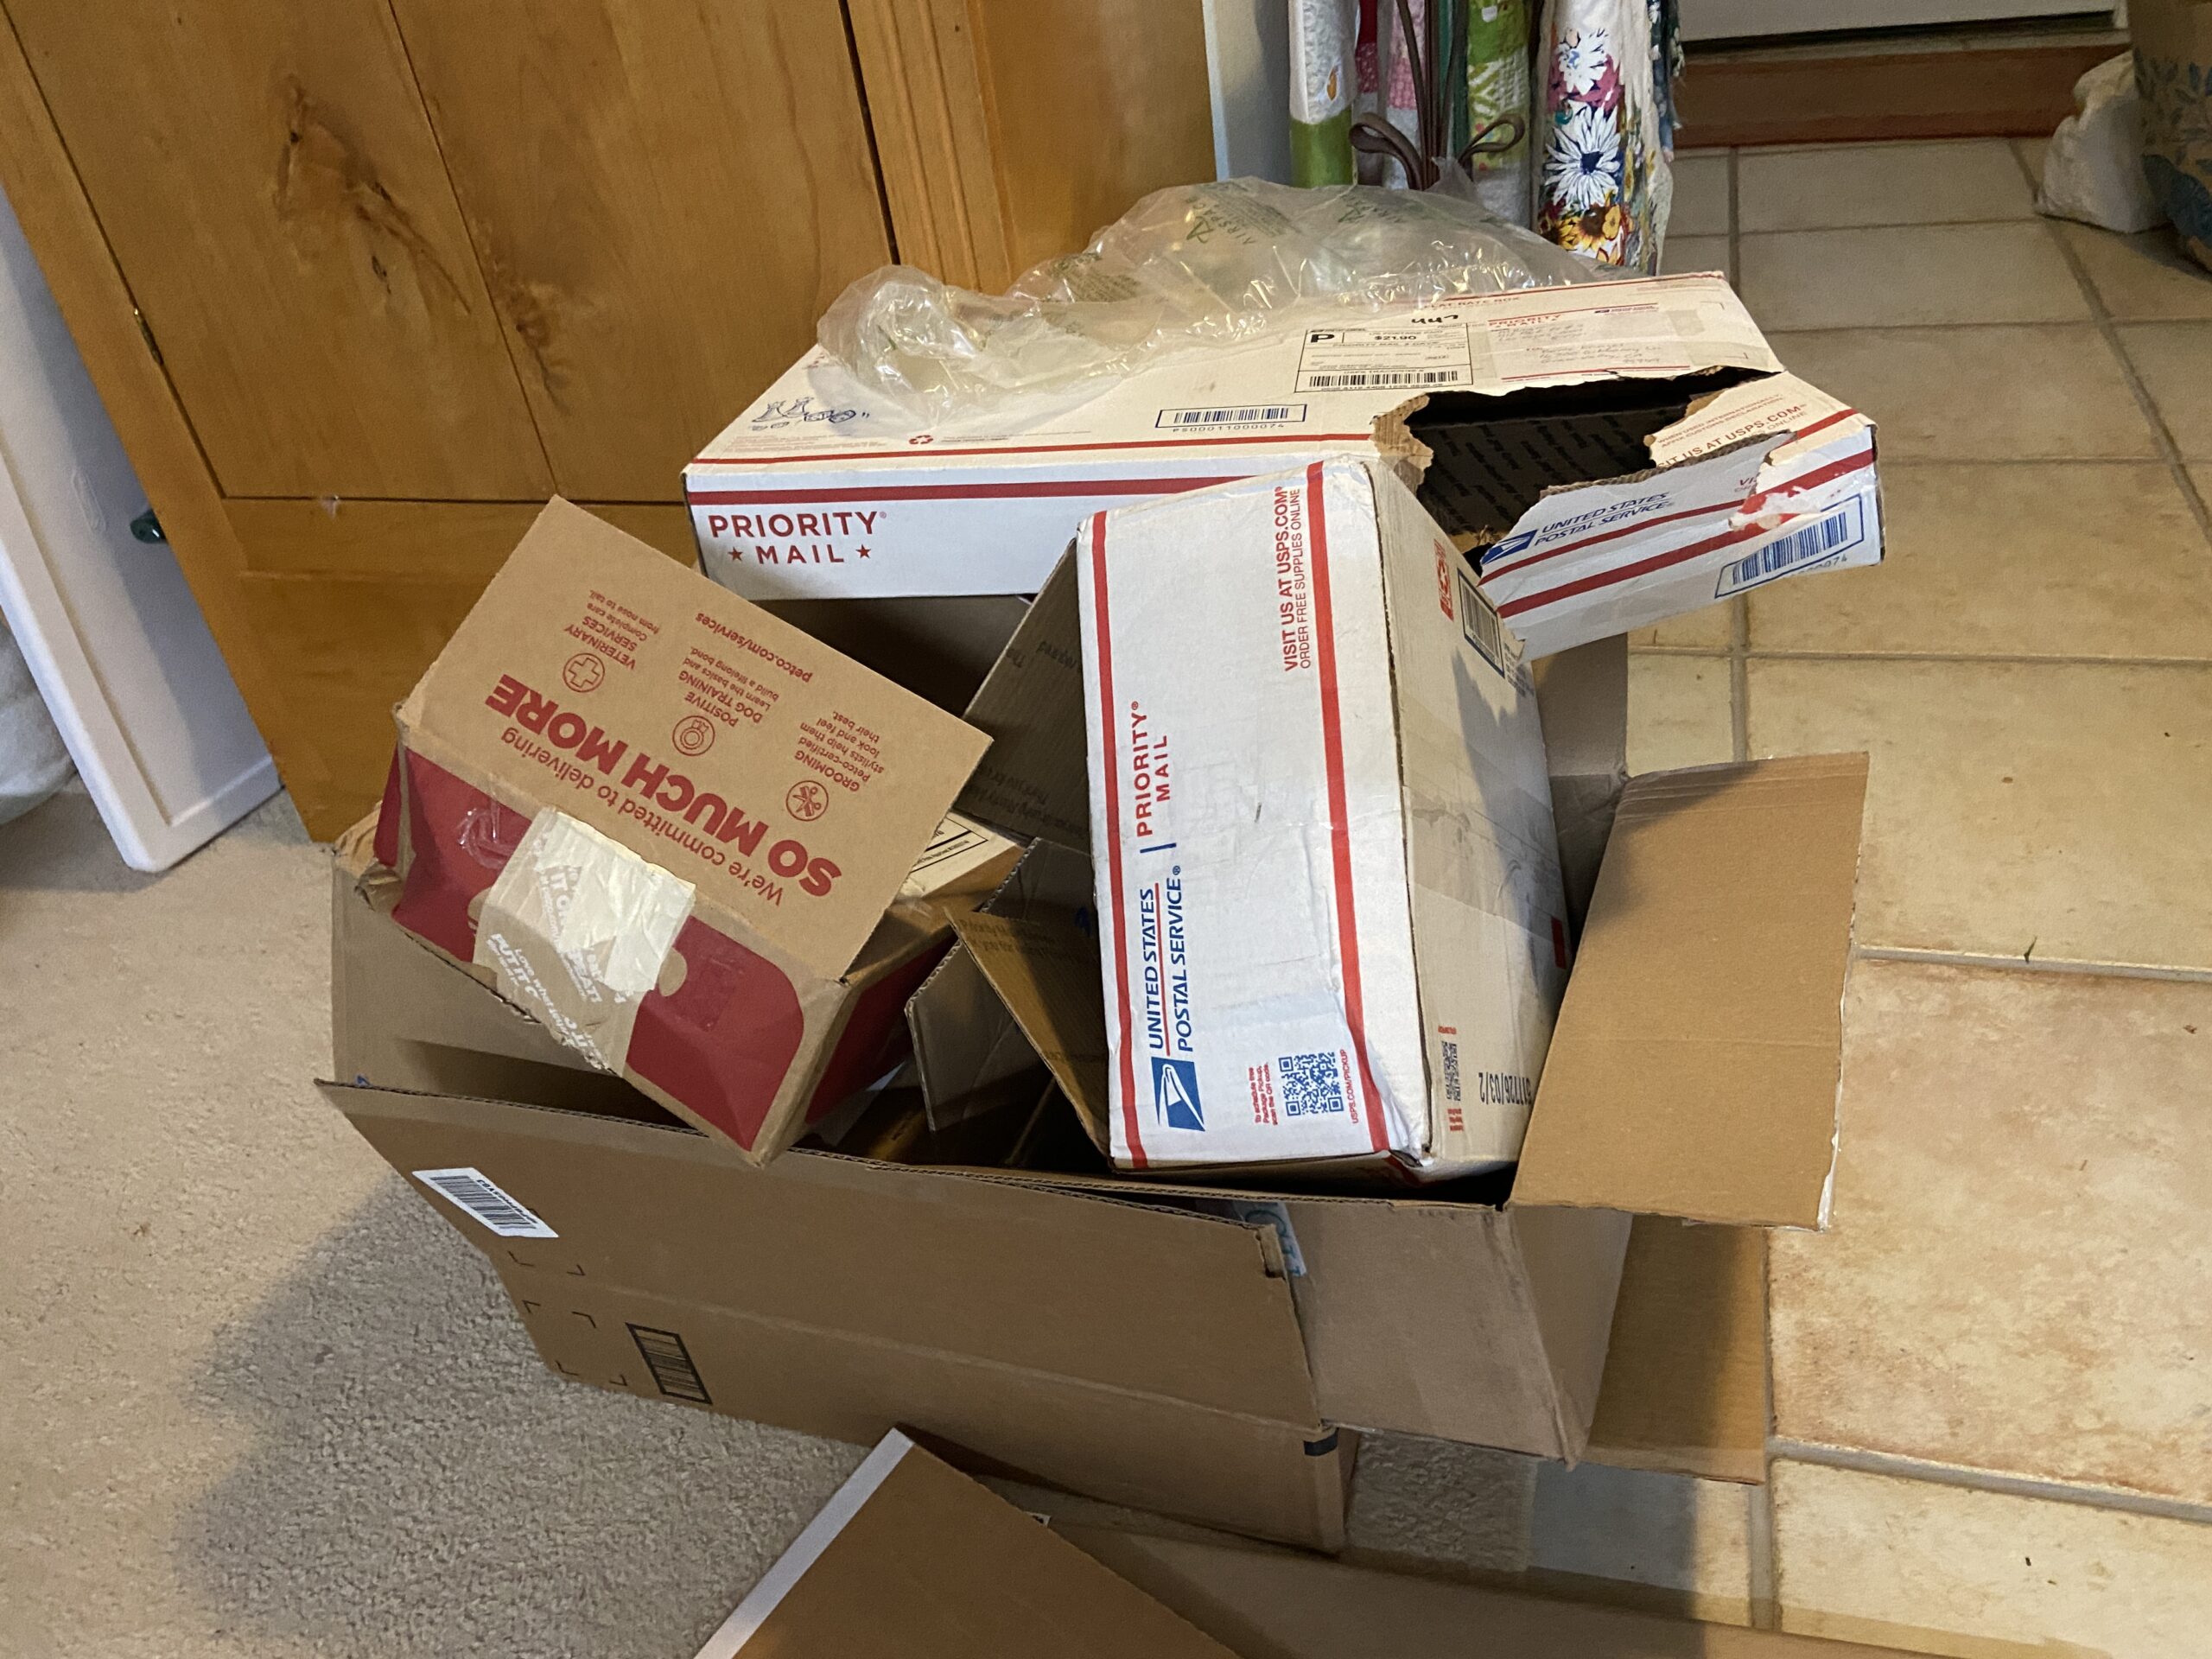
Lots of boxes to recycle as I open the beauties!

Pieced by Tina C from Delaware.

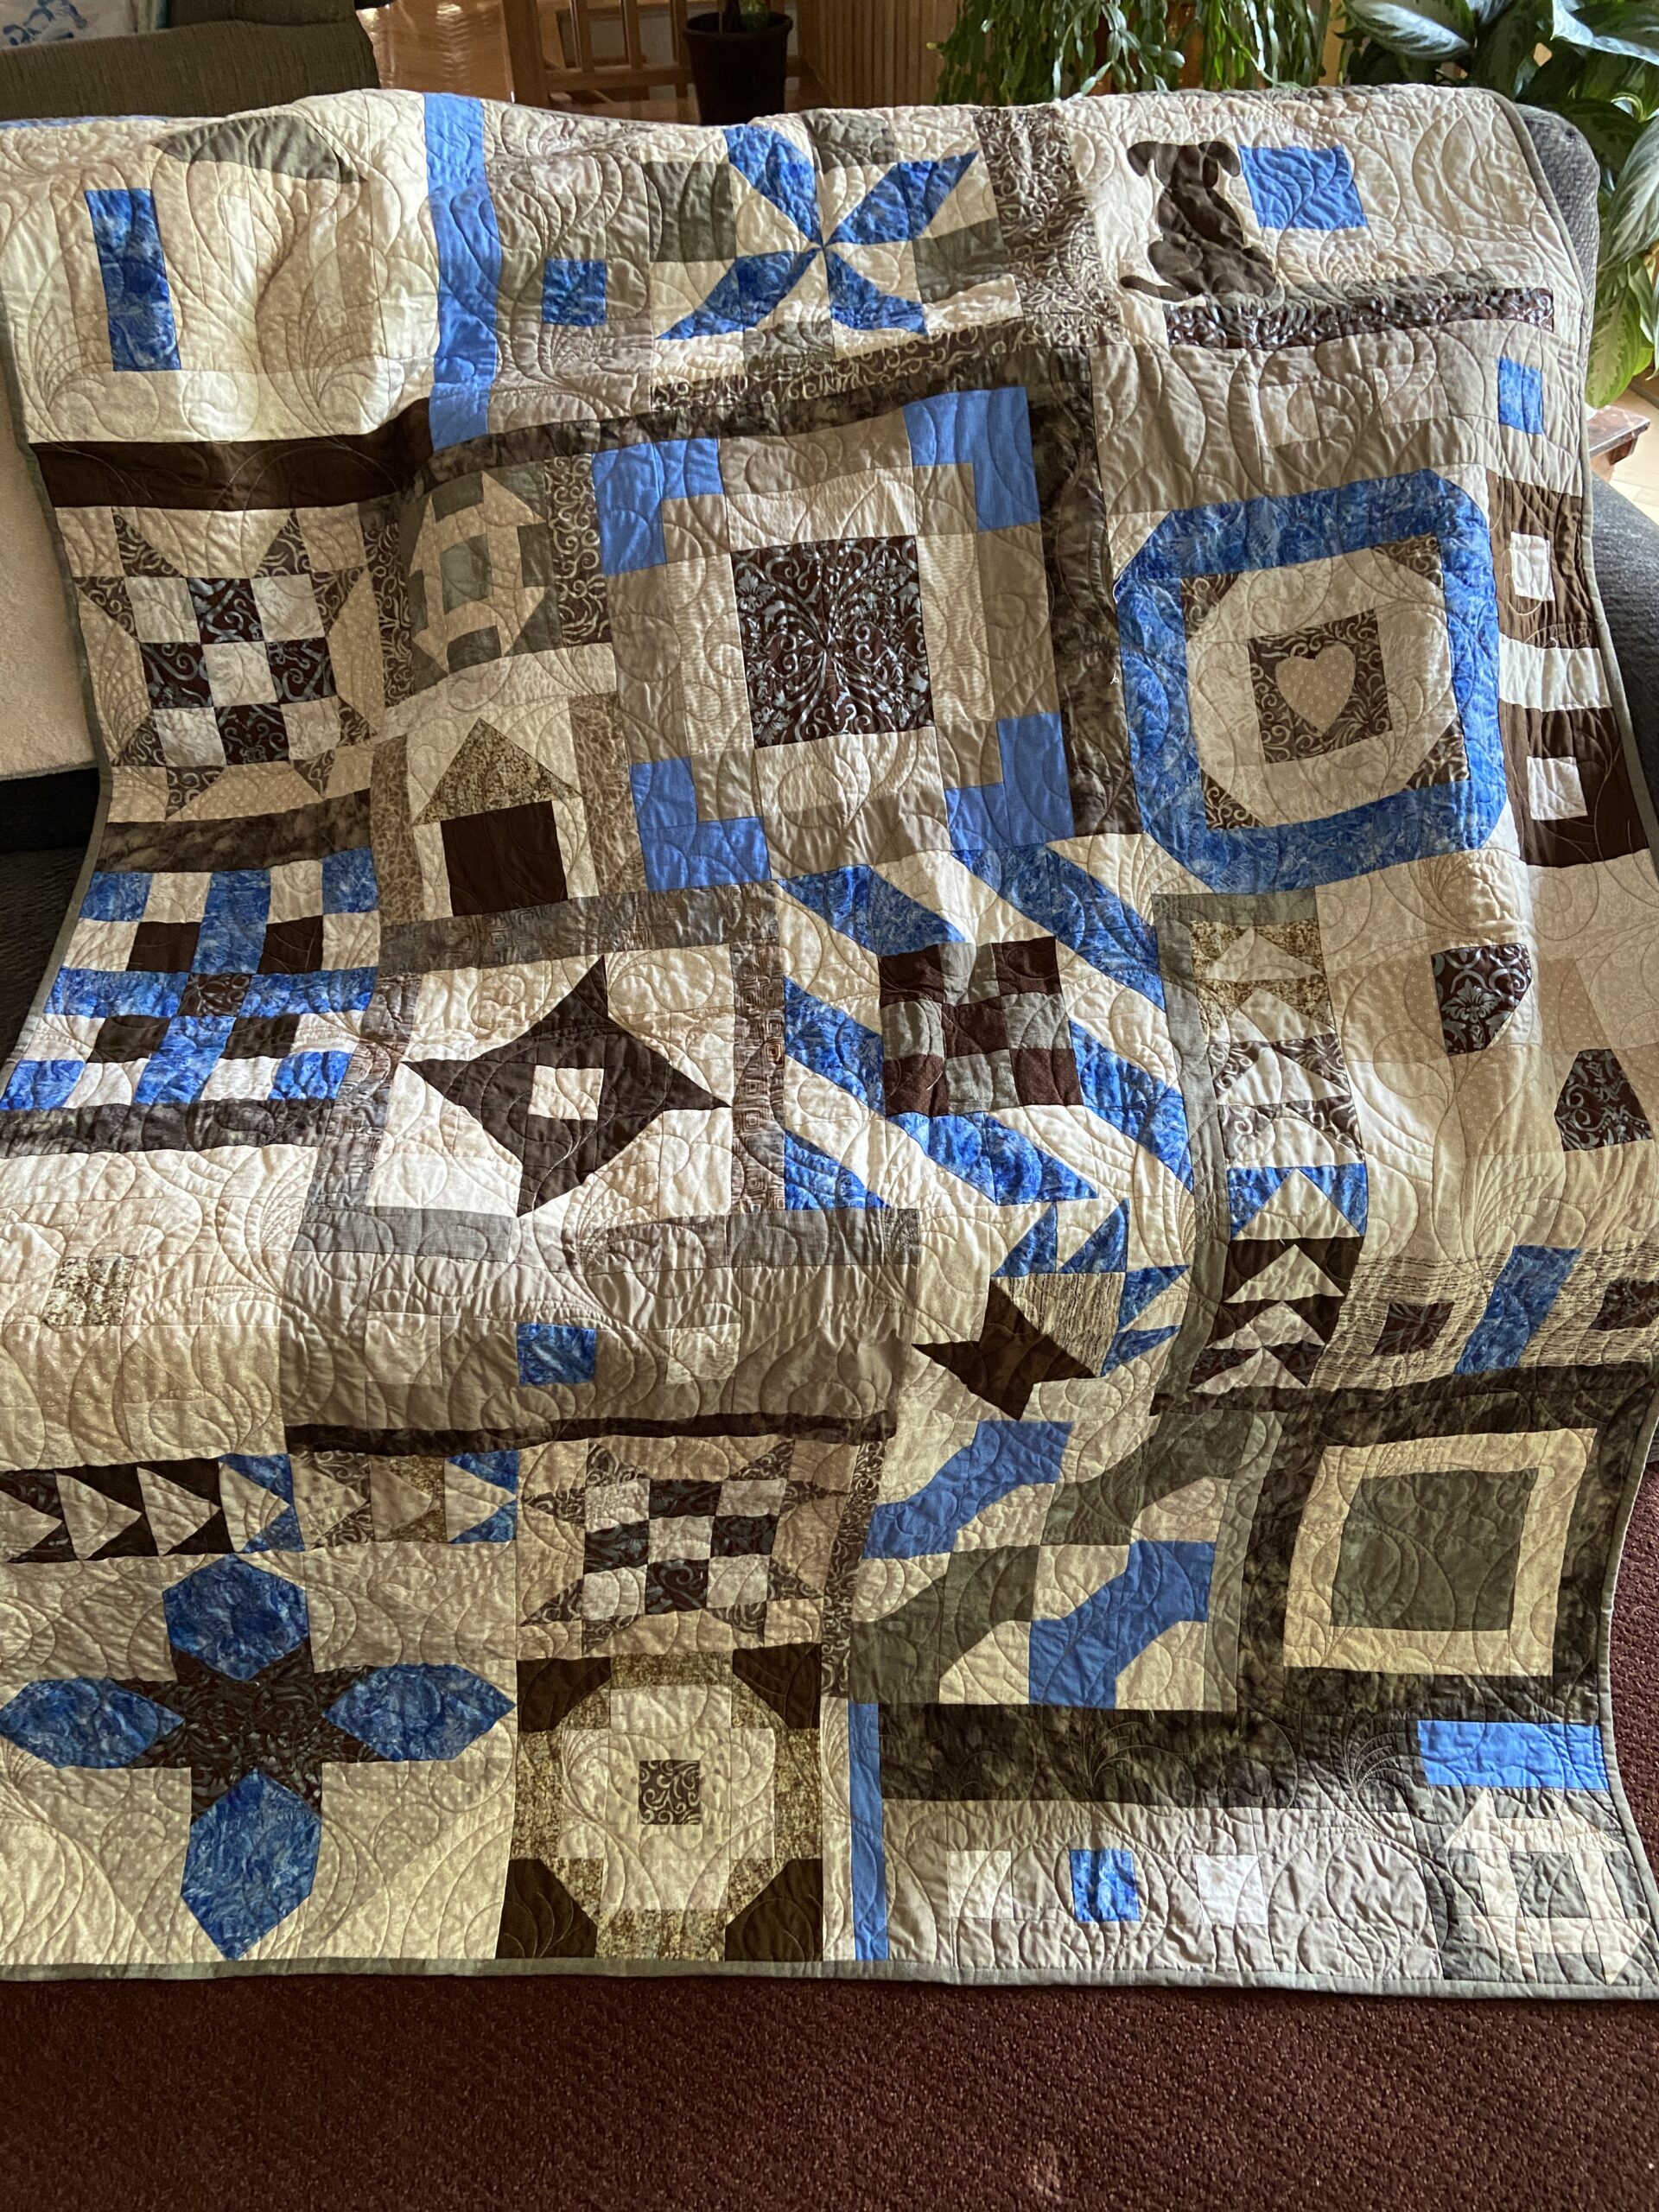
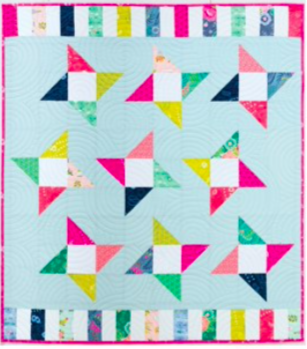
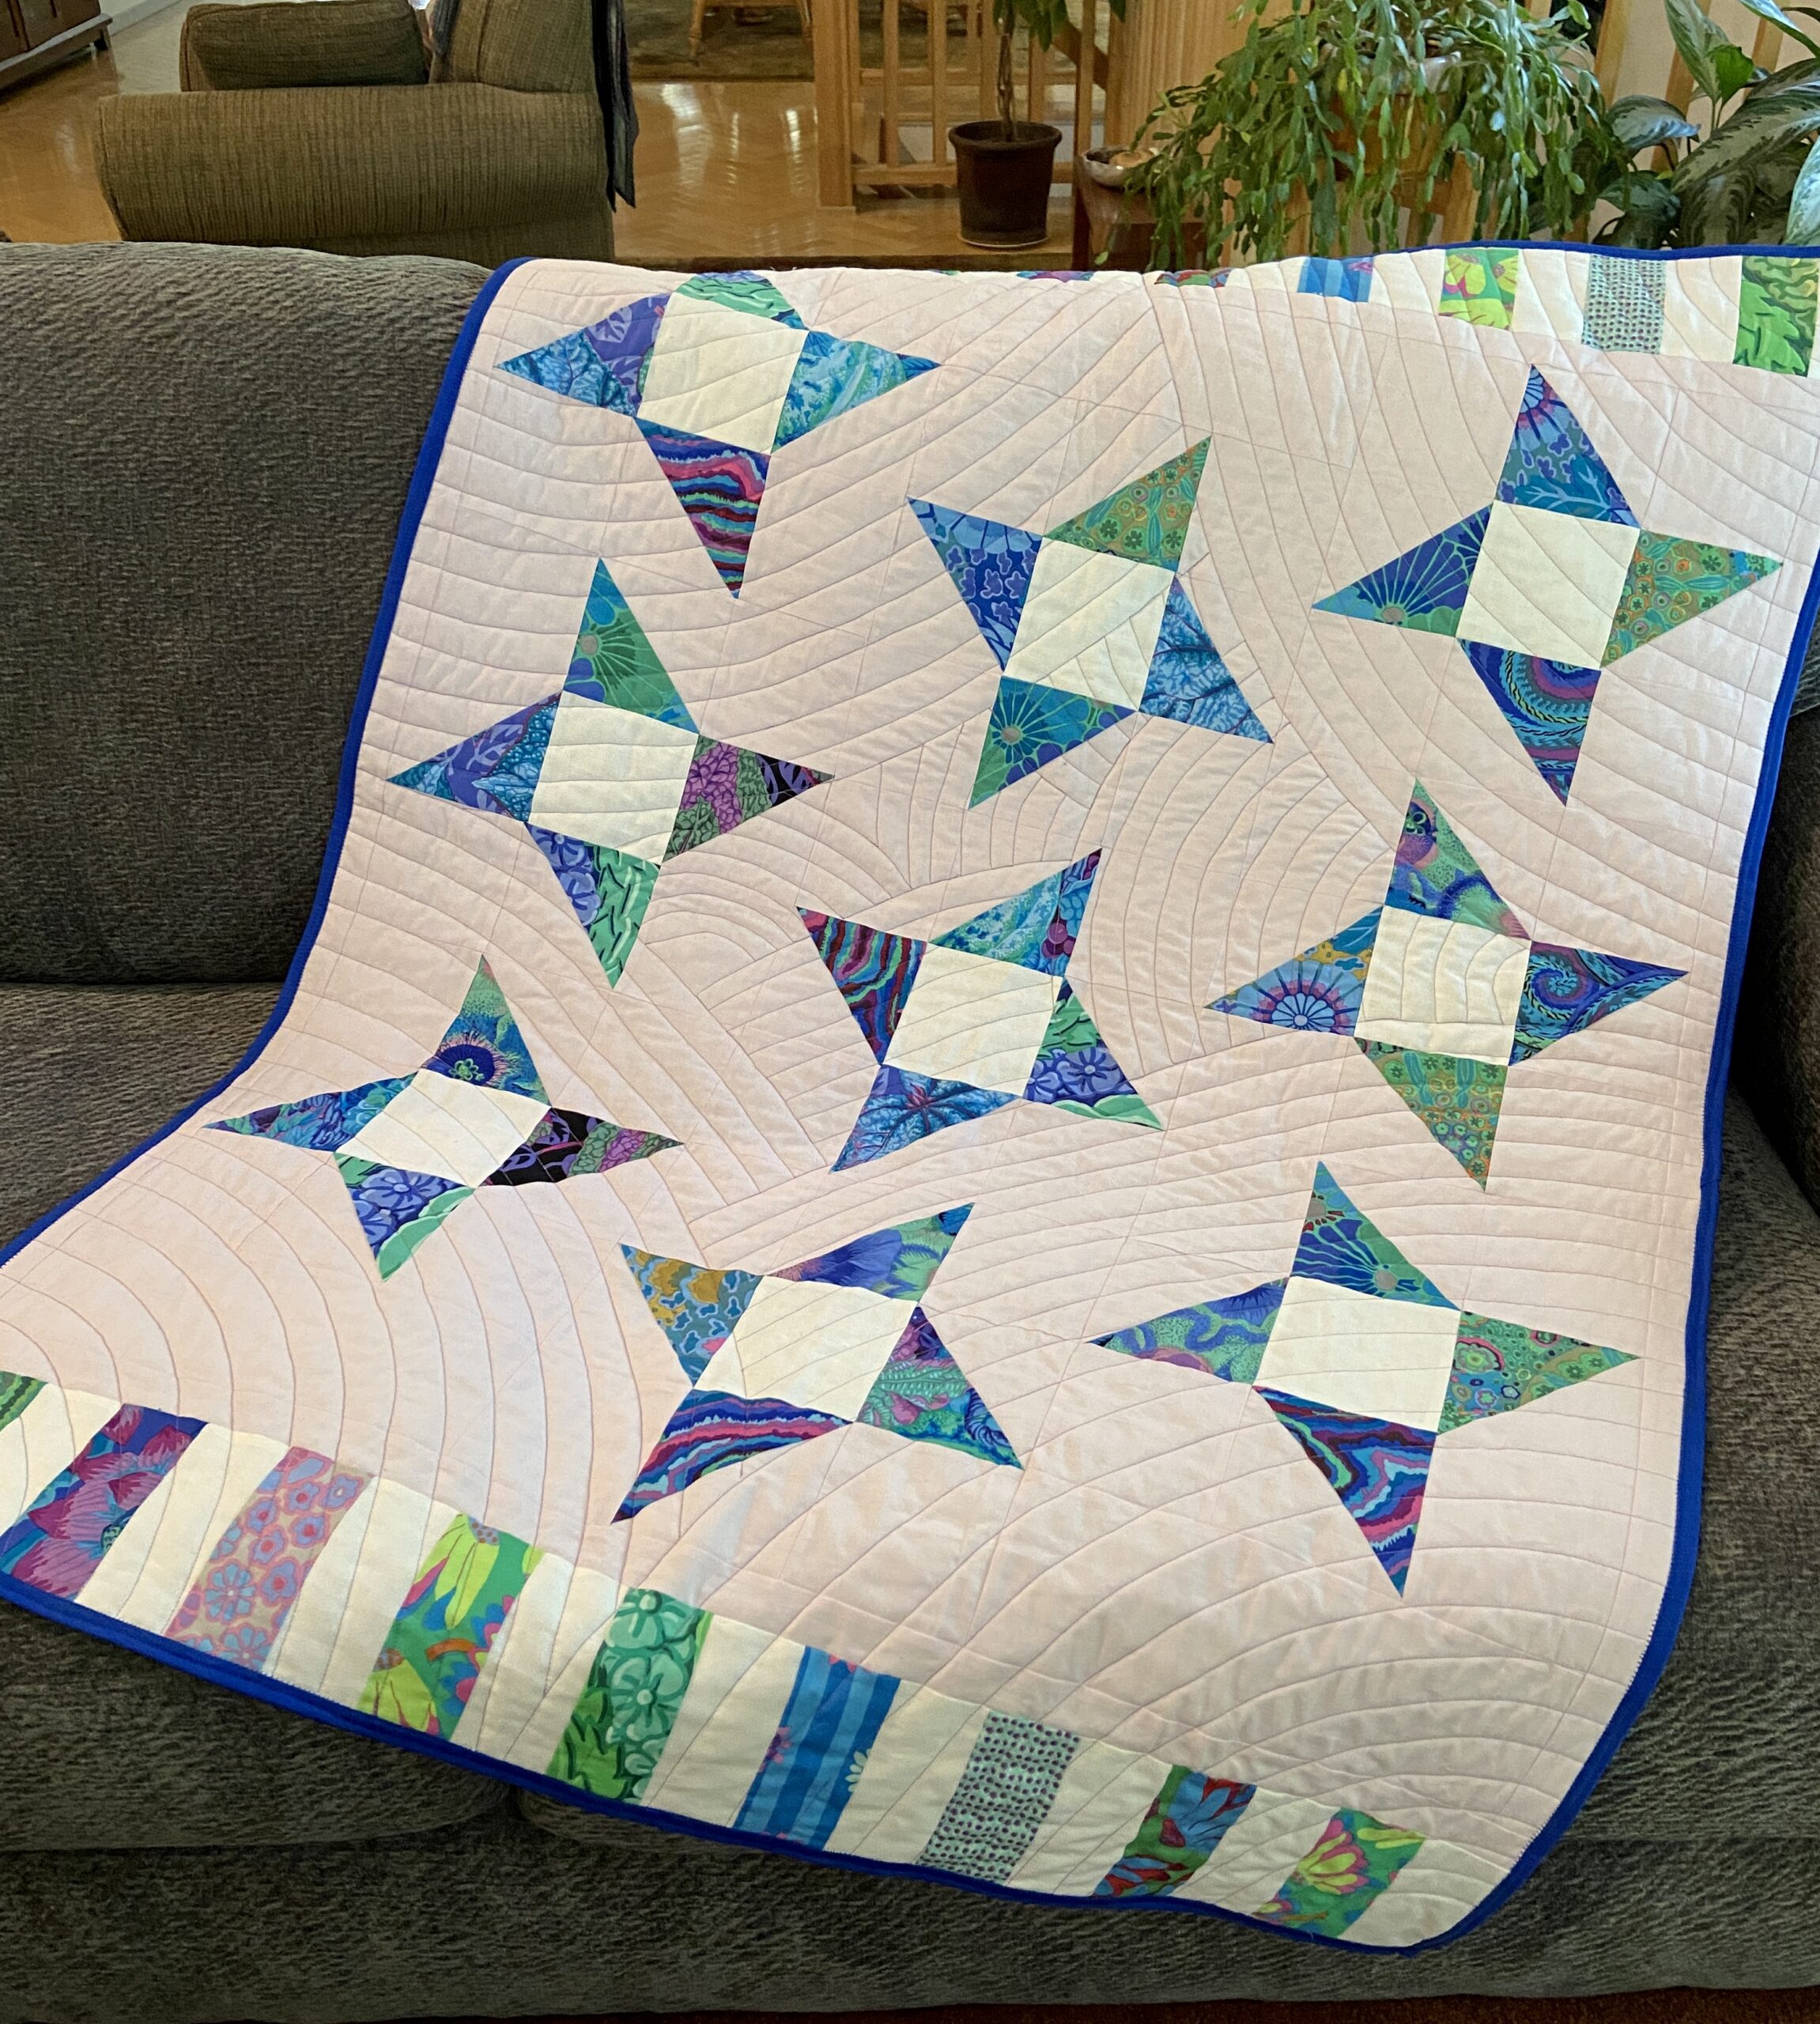
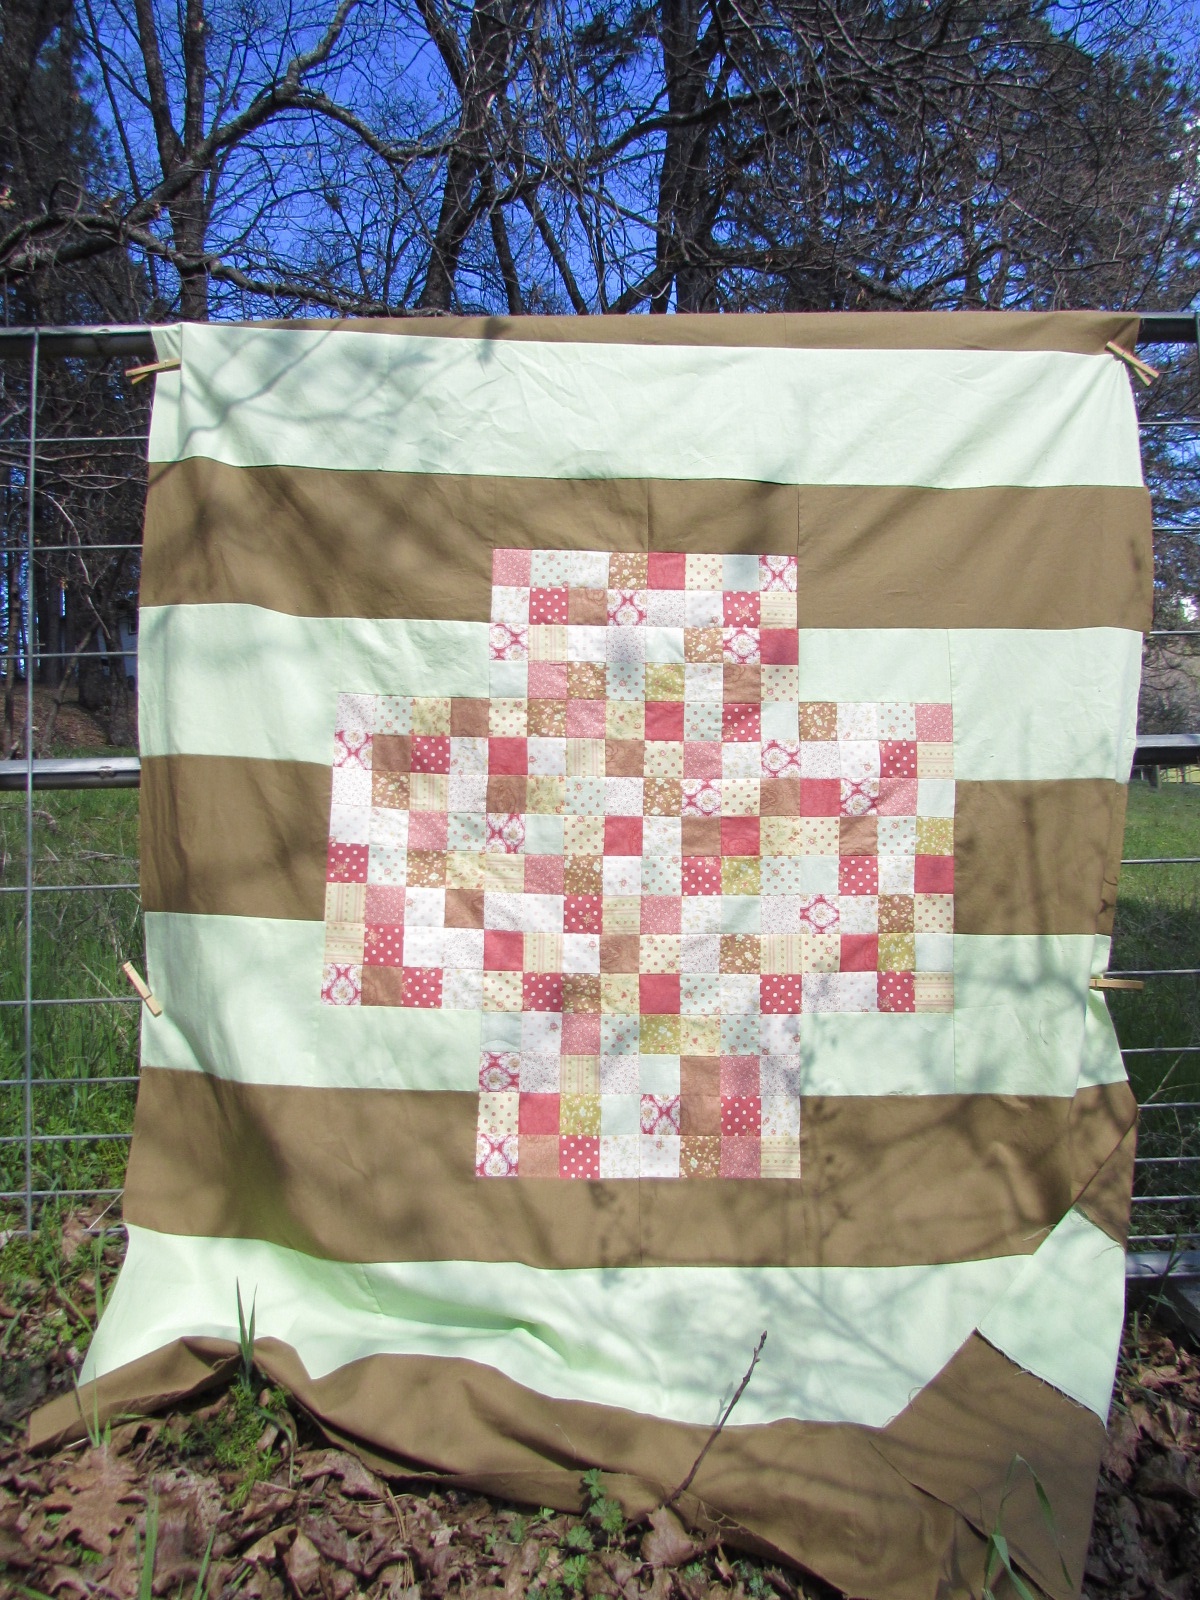
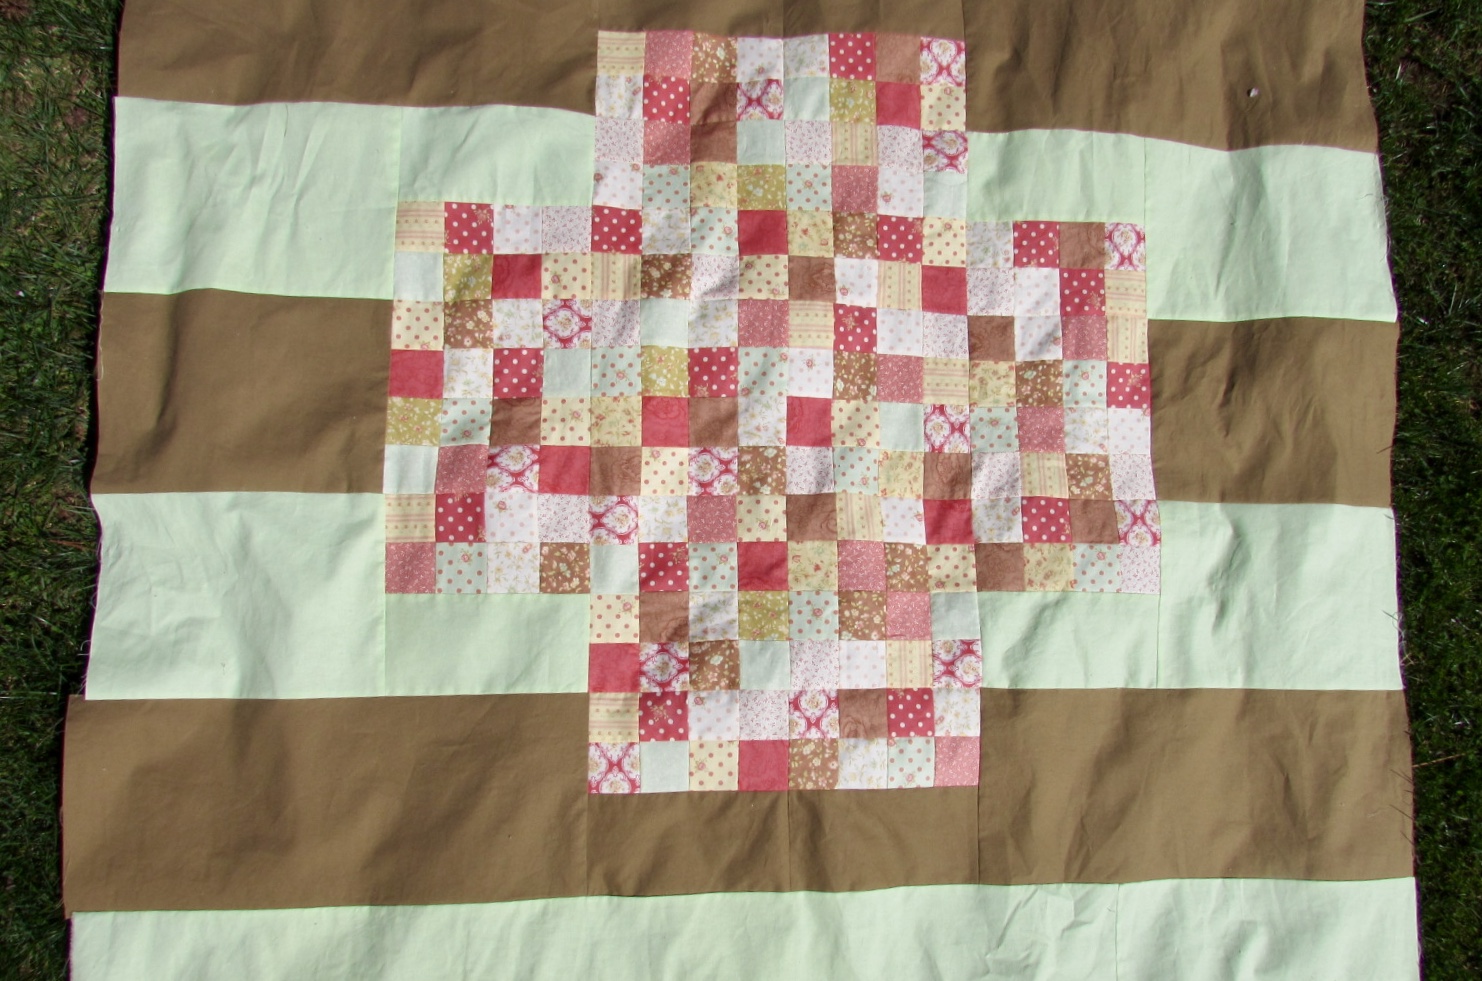
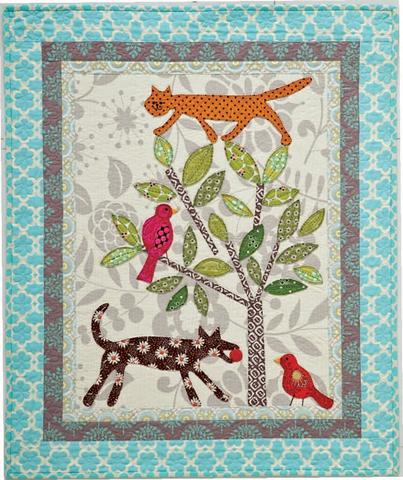
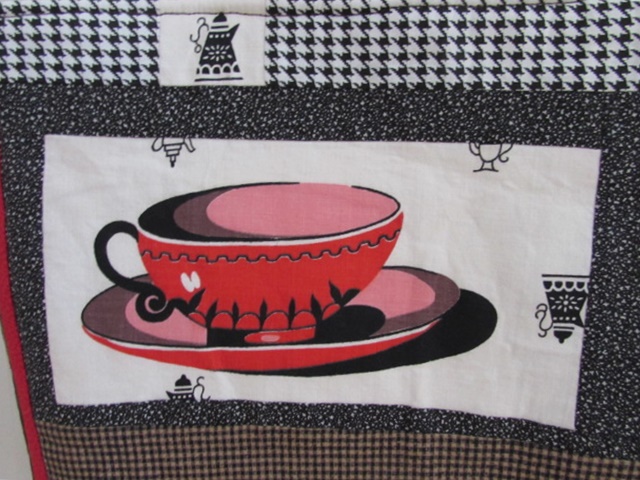
Most of the quilts are from the Positivity QAL, hosted by Sew Preeti Quilts. However I also received two quilts from Tina C in Delaware. Tina has contributed to Mercy before and she is a fantastic quilter. I really like this sampler in particular though.

Isn’t this the cutest?

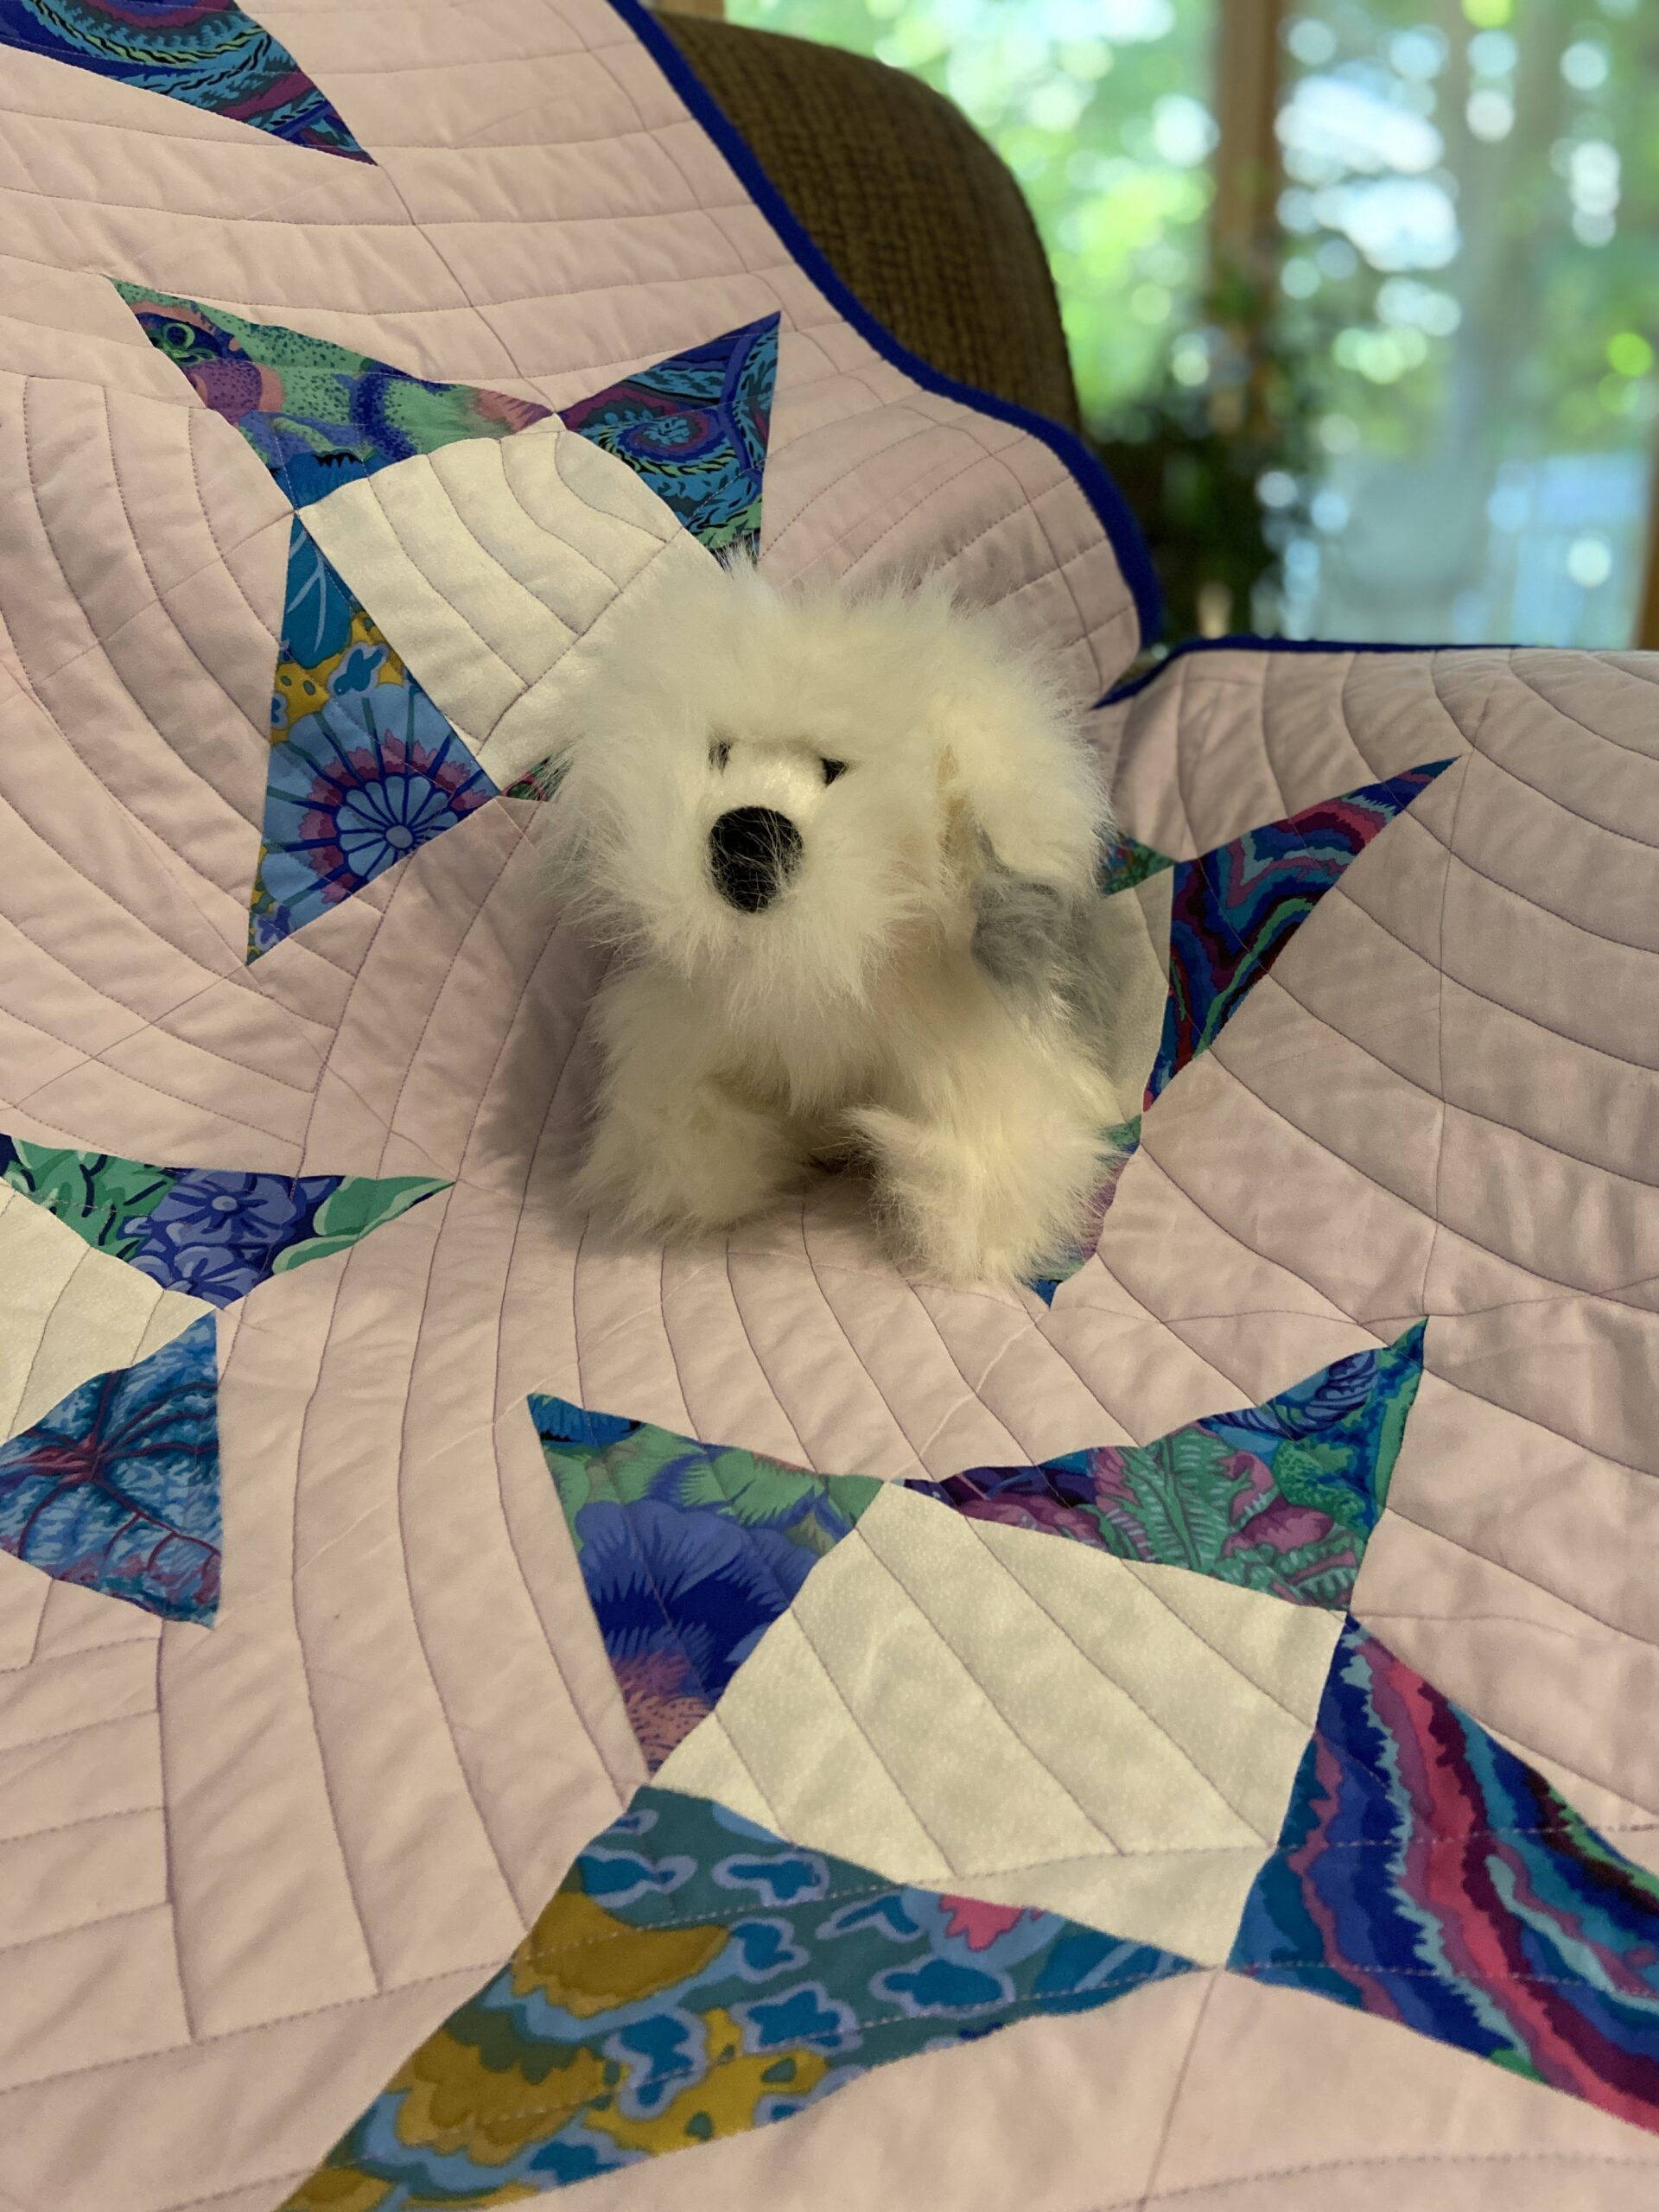
Up at the top, there is the sweetest pup appliquéd to the quilt. It is about ten inches tall and such a fun surprise when you look through the quilt.

Also made by Tina C.

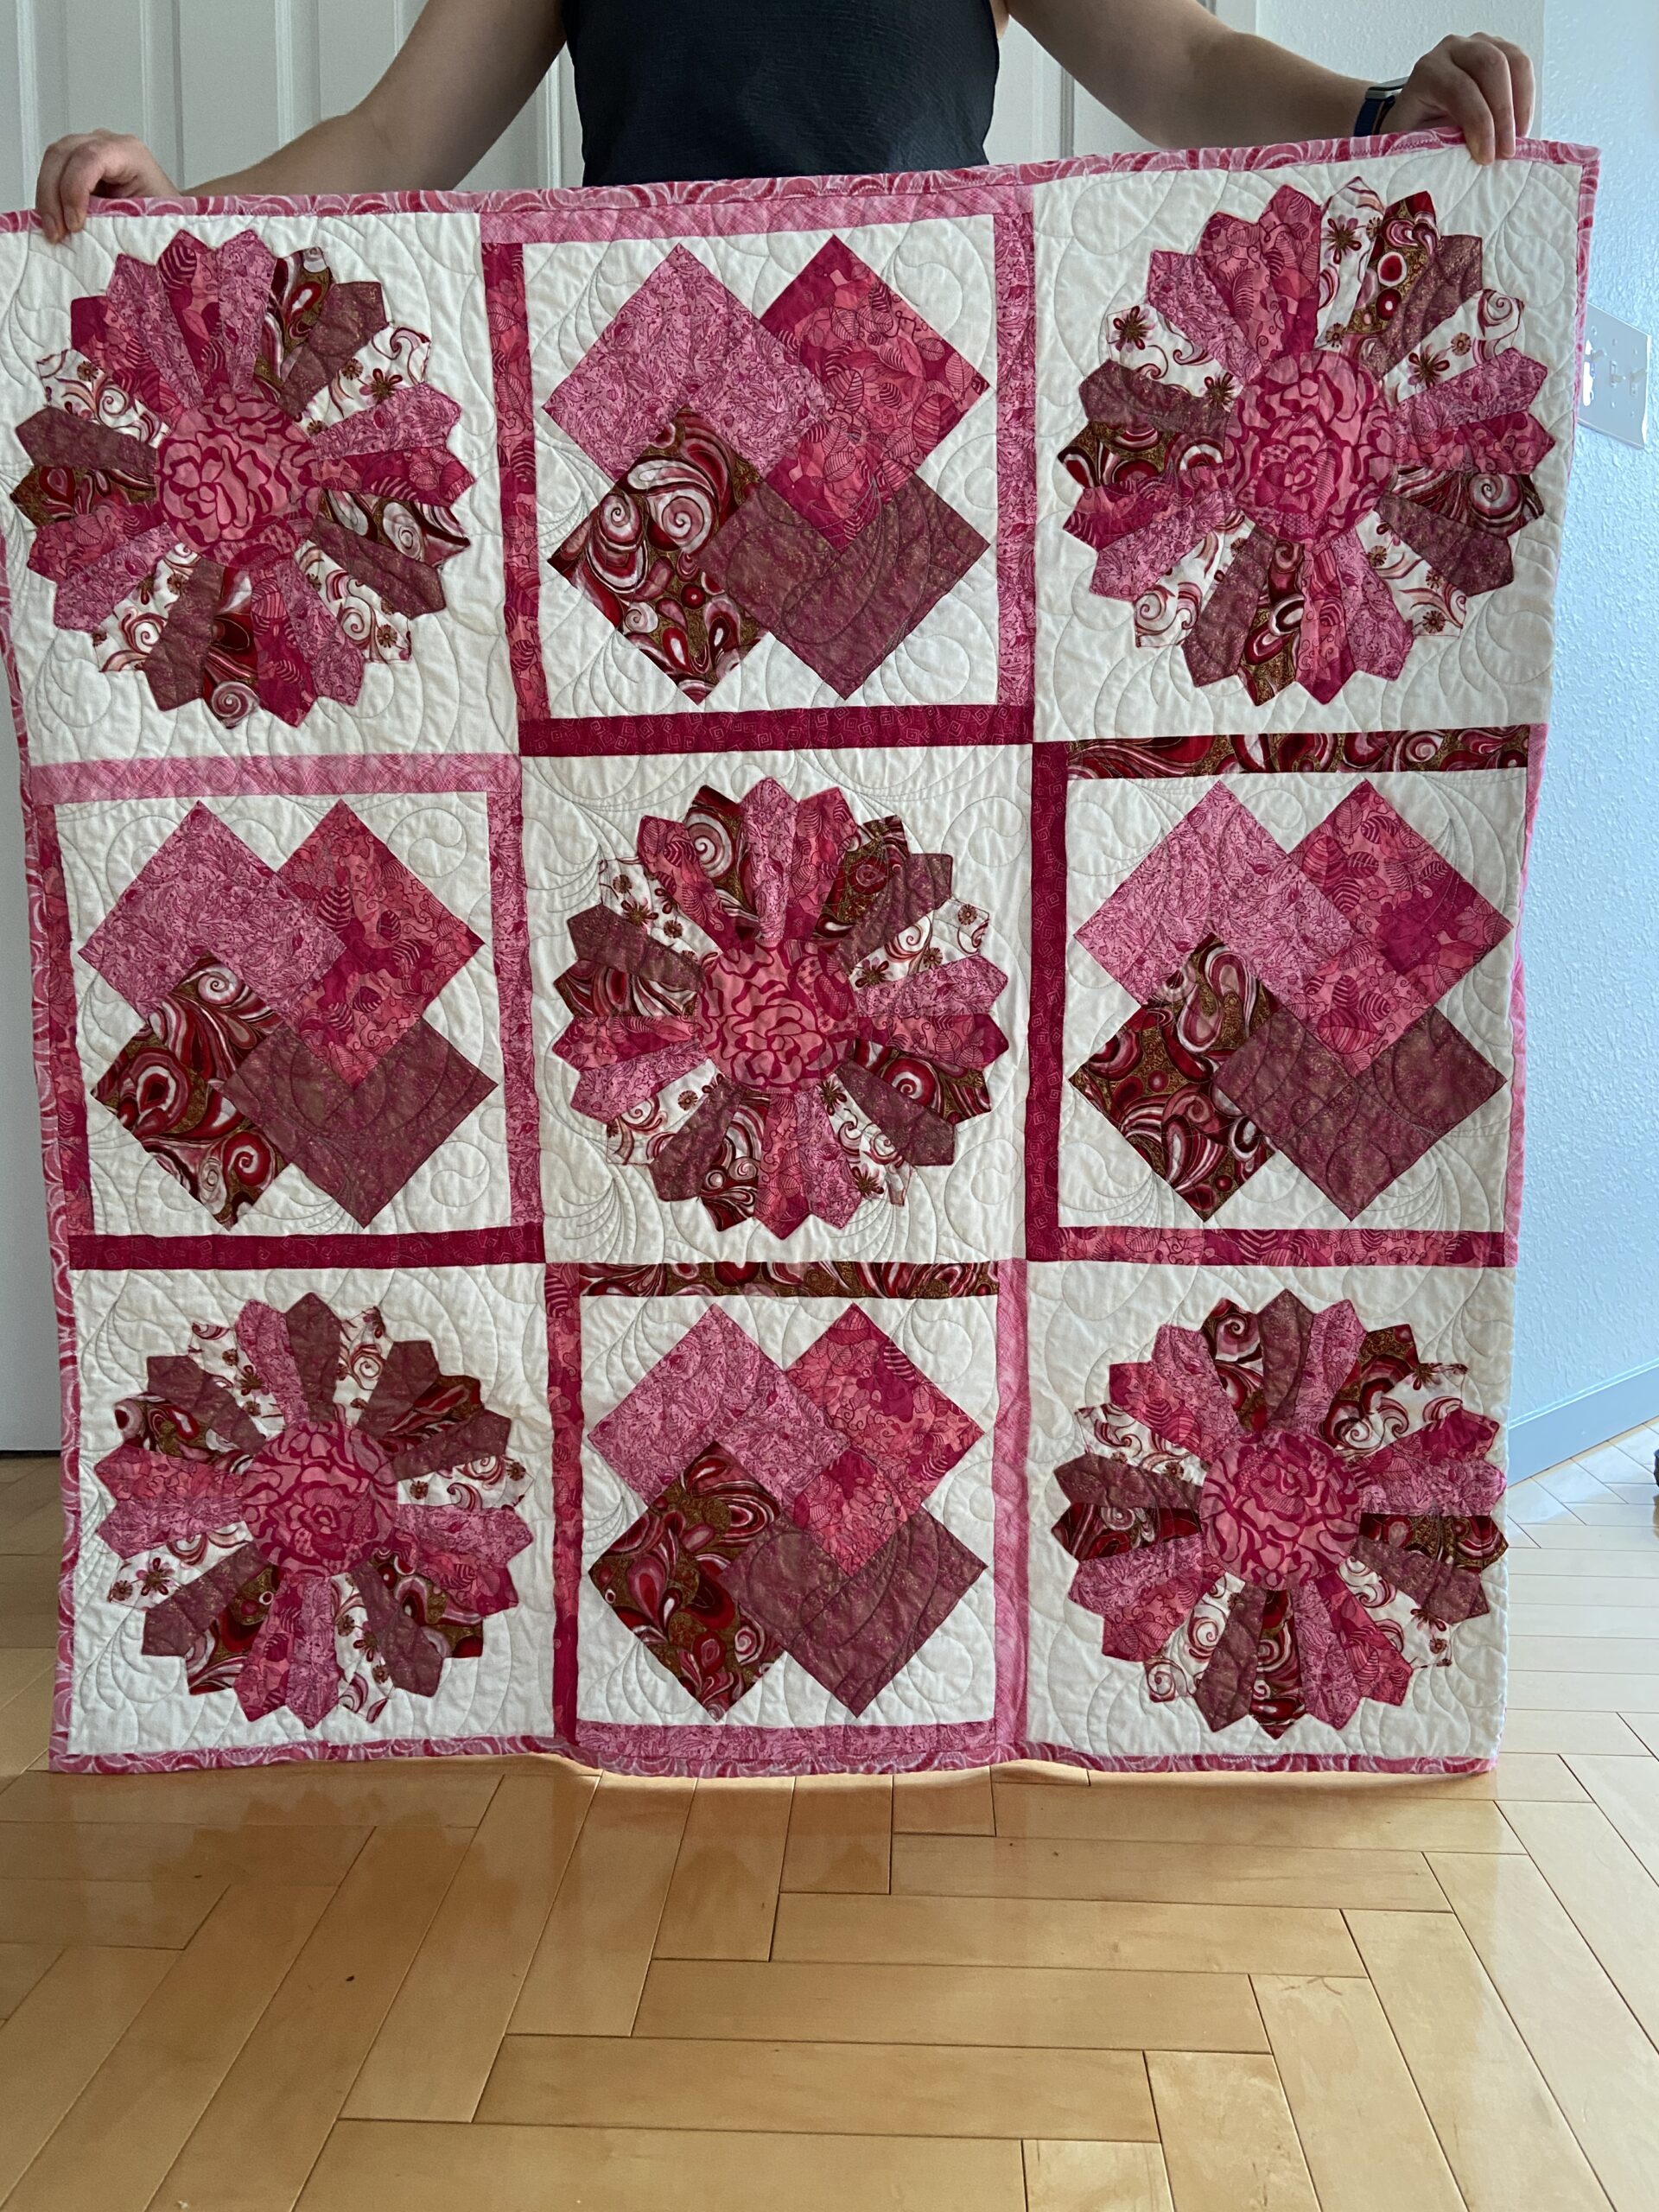
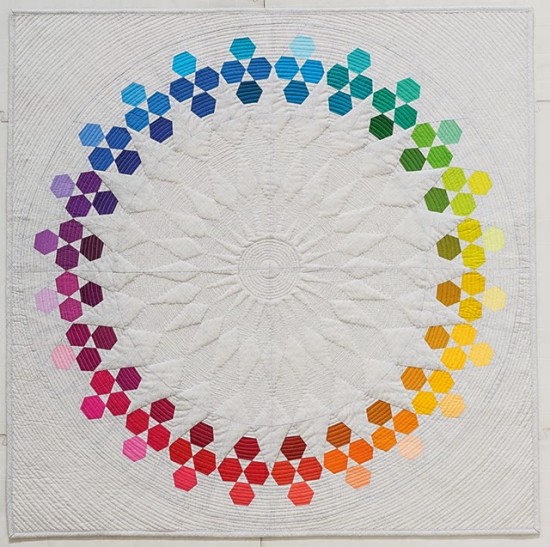
This smaller lap quilt is a pretty one. I do love Dresdens! This will be so sweet for a petite patient.

From Wendy!!

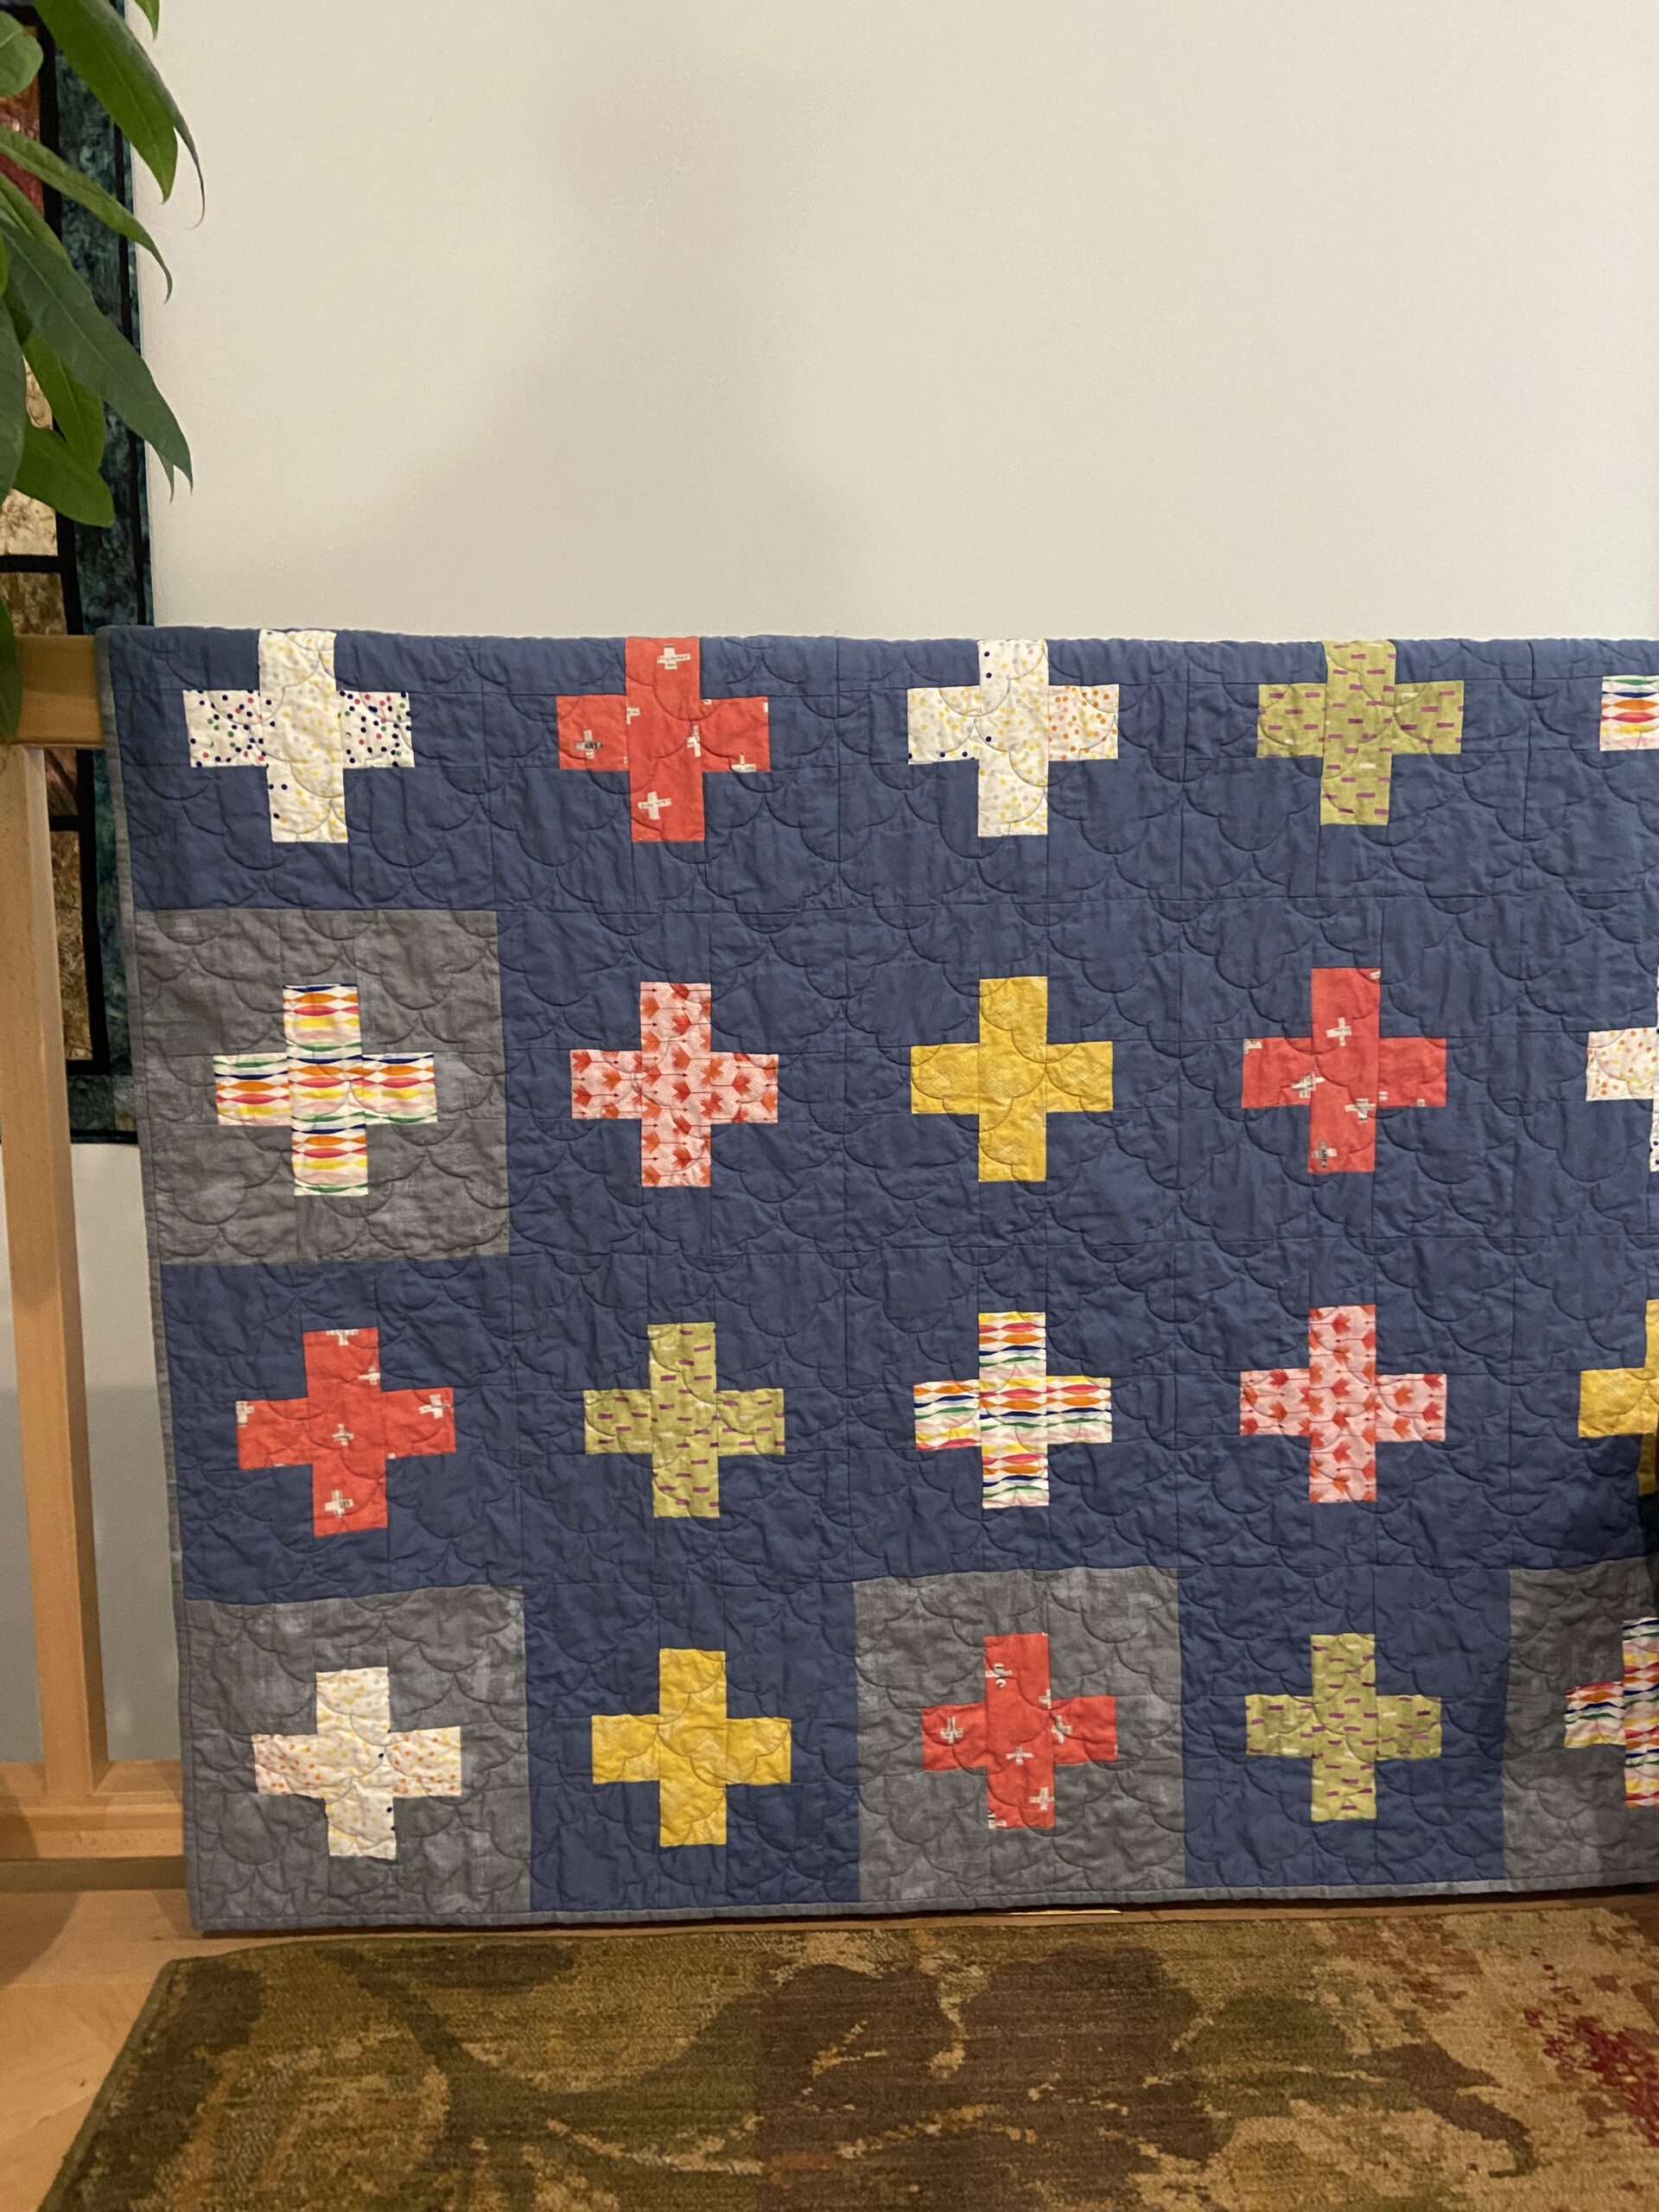
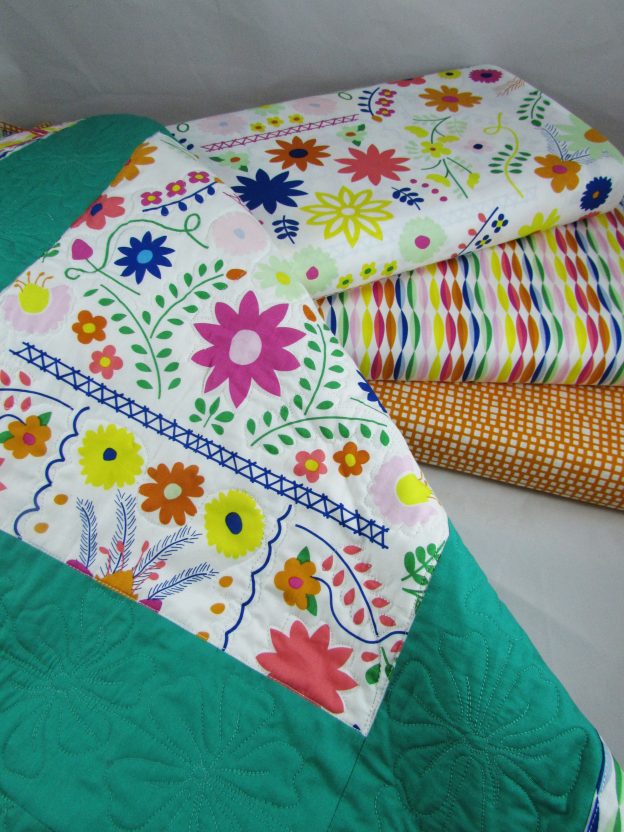
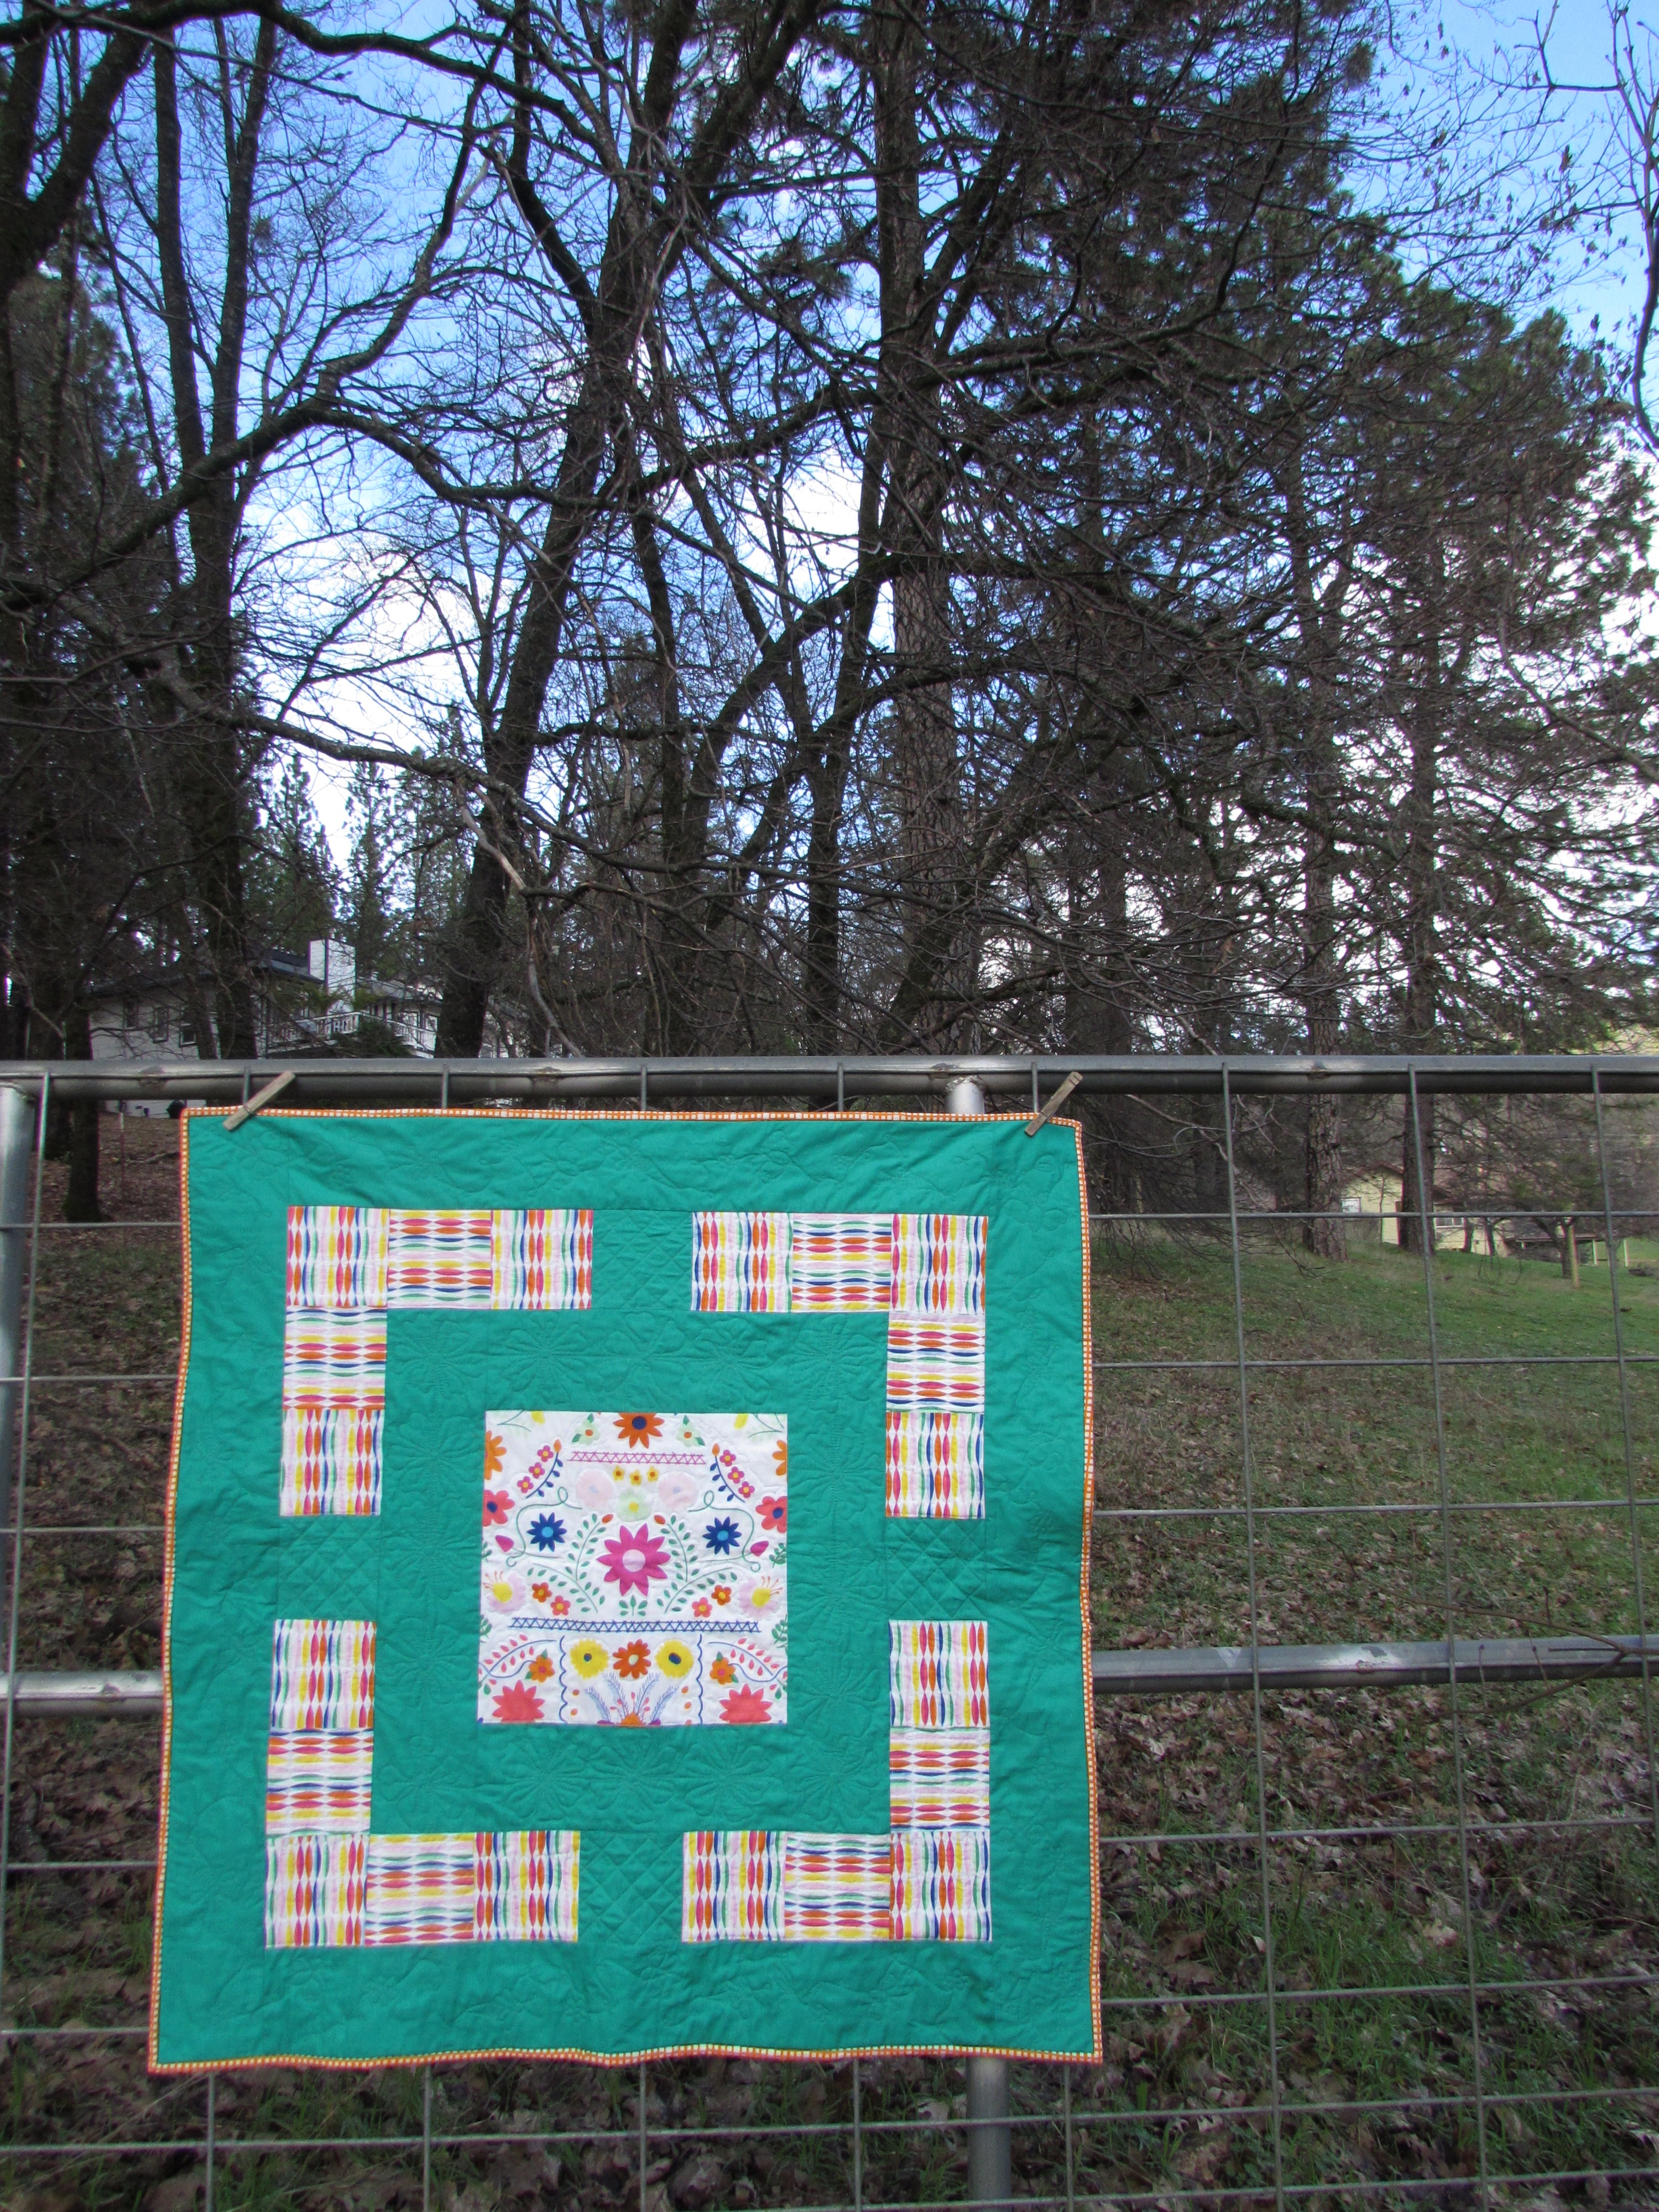
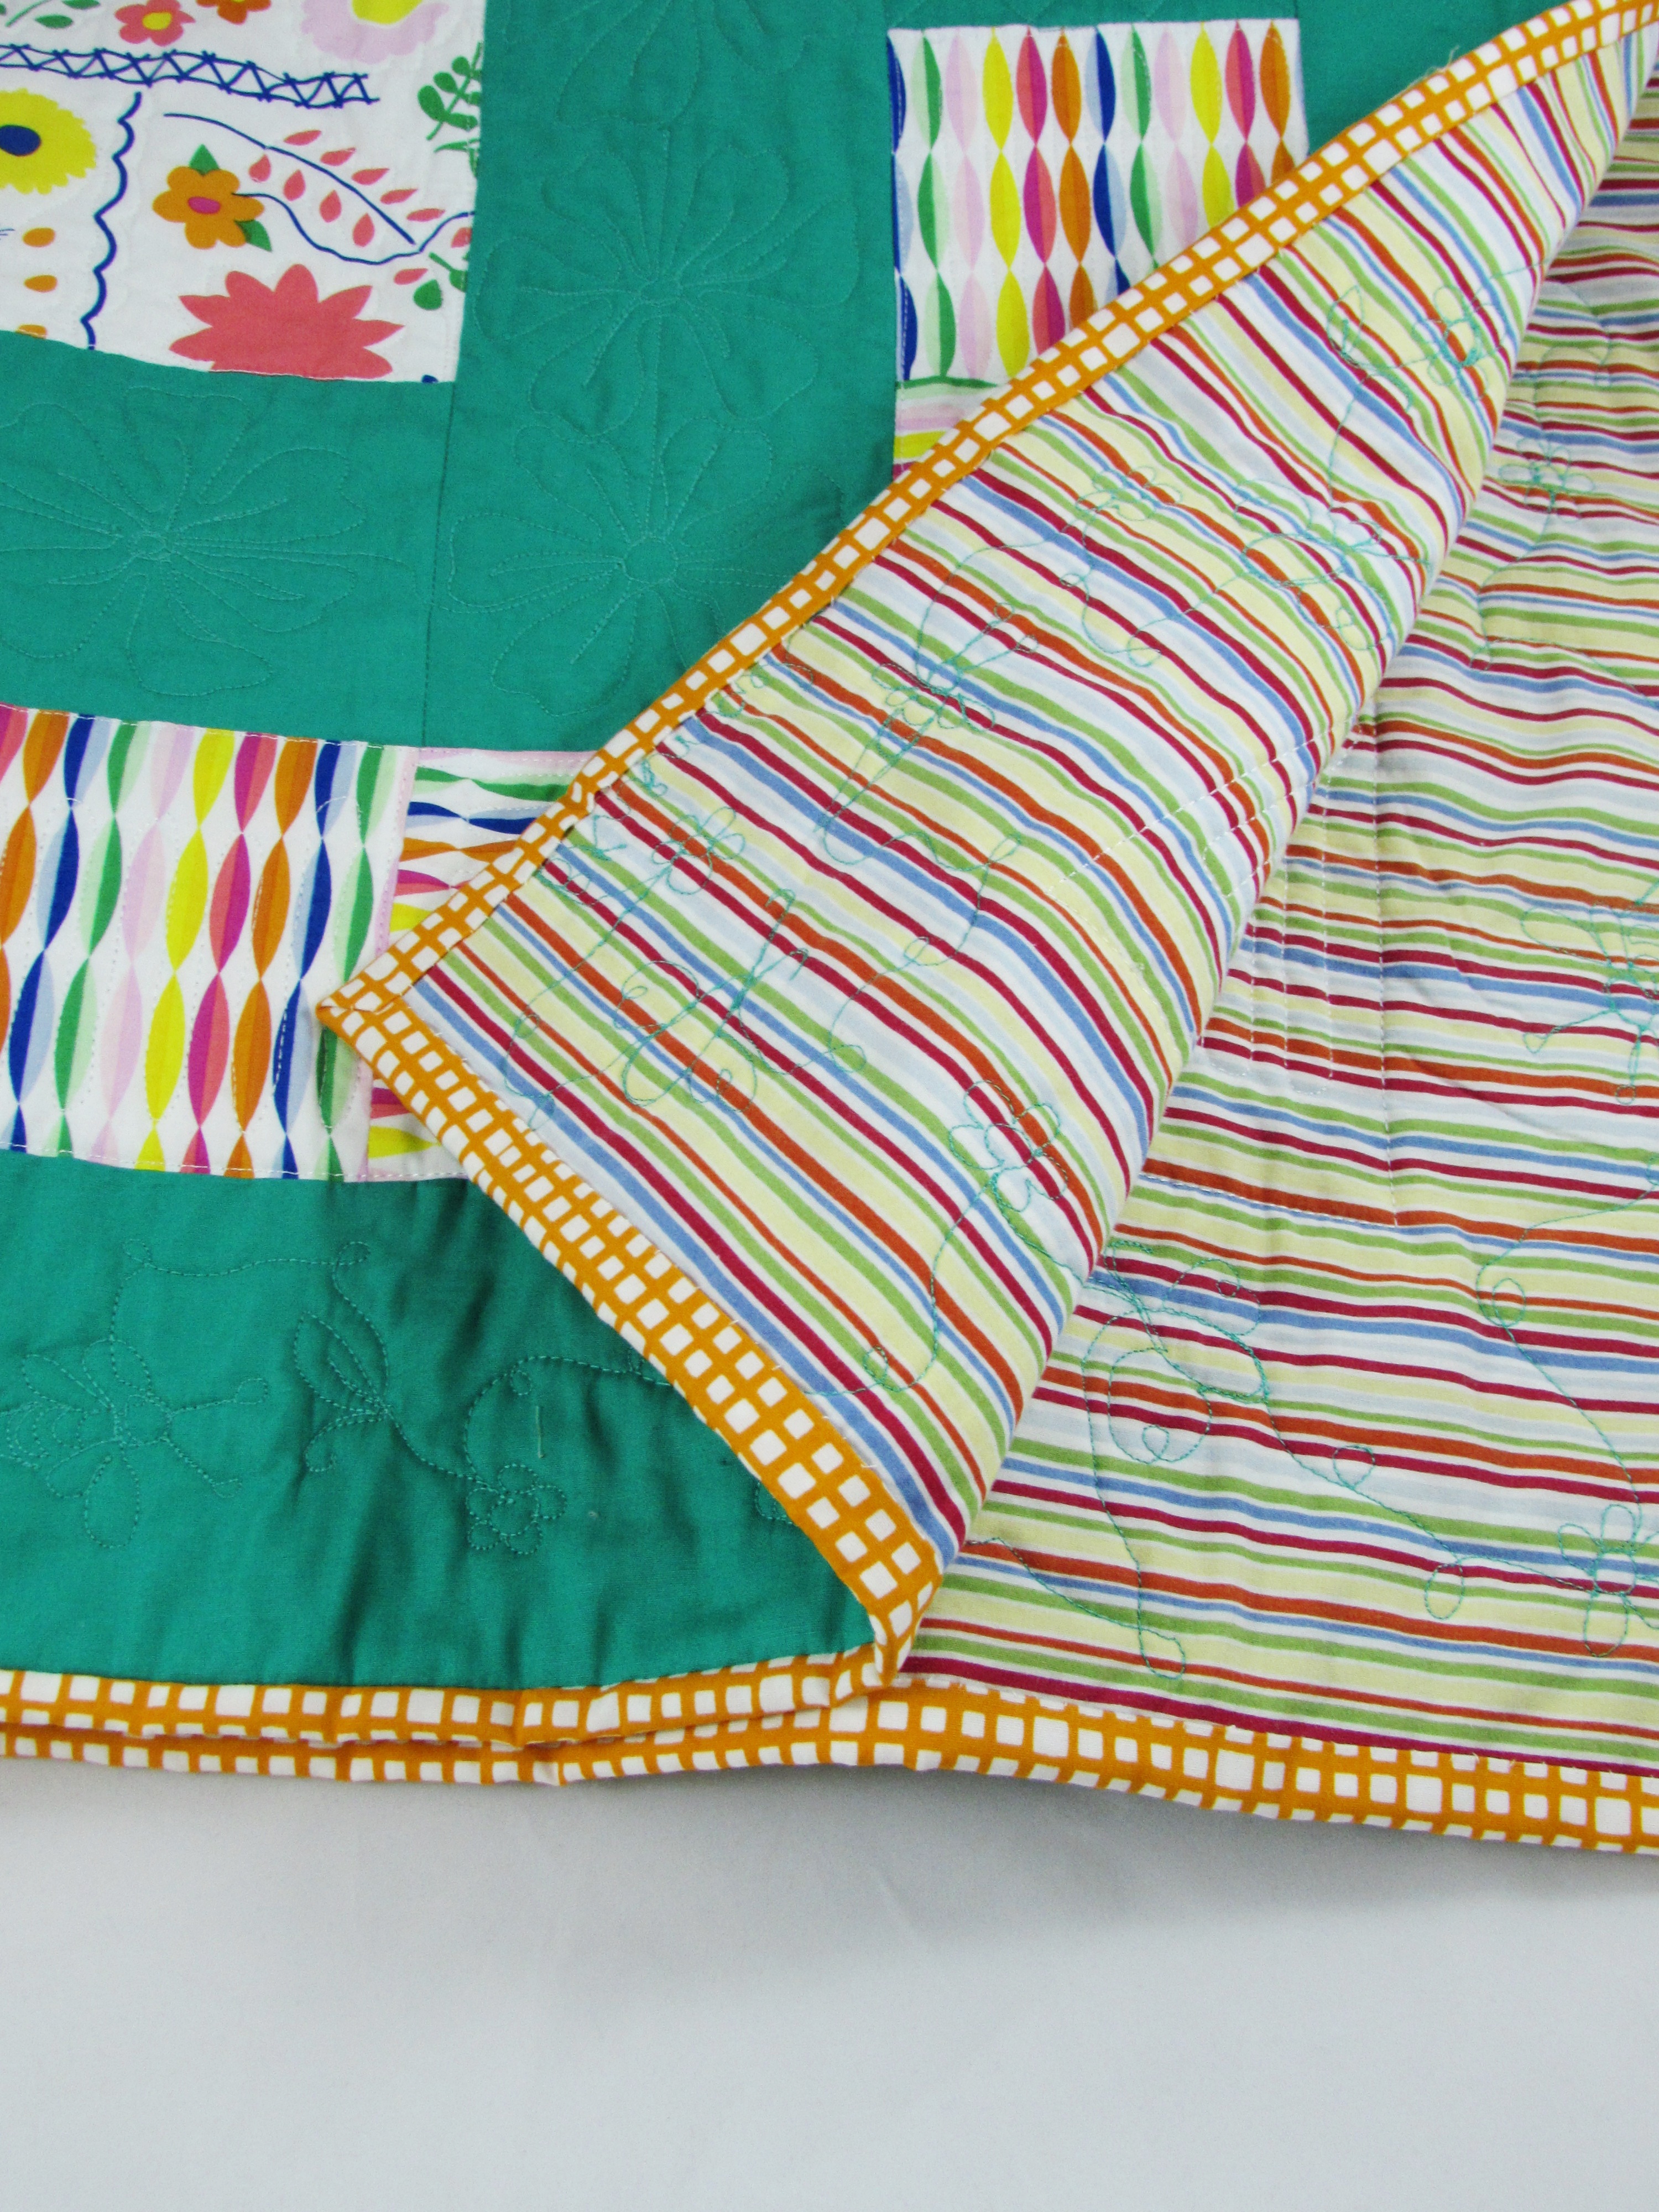
This Positivity quilt was sent to us from Wendy of Pieceful Thoughts. This one is particularly fun for me because she used a bundle of fat quarters from my shop. A couple of years ago I held an event selling a series of blogger bundles and Wendy collected them. This bundle was curated by Quilting Jetgirl. It is fun to see the bundle made into a quilt.

Made by Mary R in New Mexico

This quilt came at the same time as Wendy’s which was sort of fun because they have a very similar vibe.

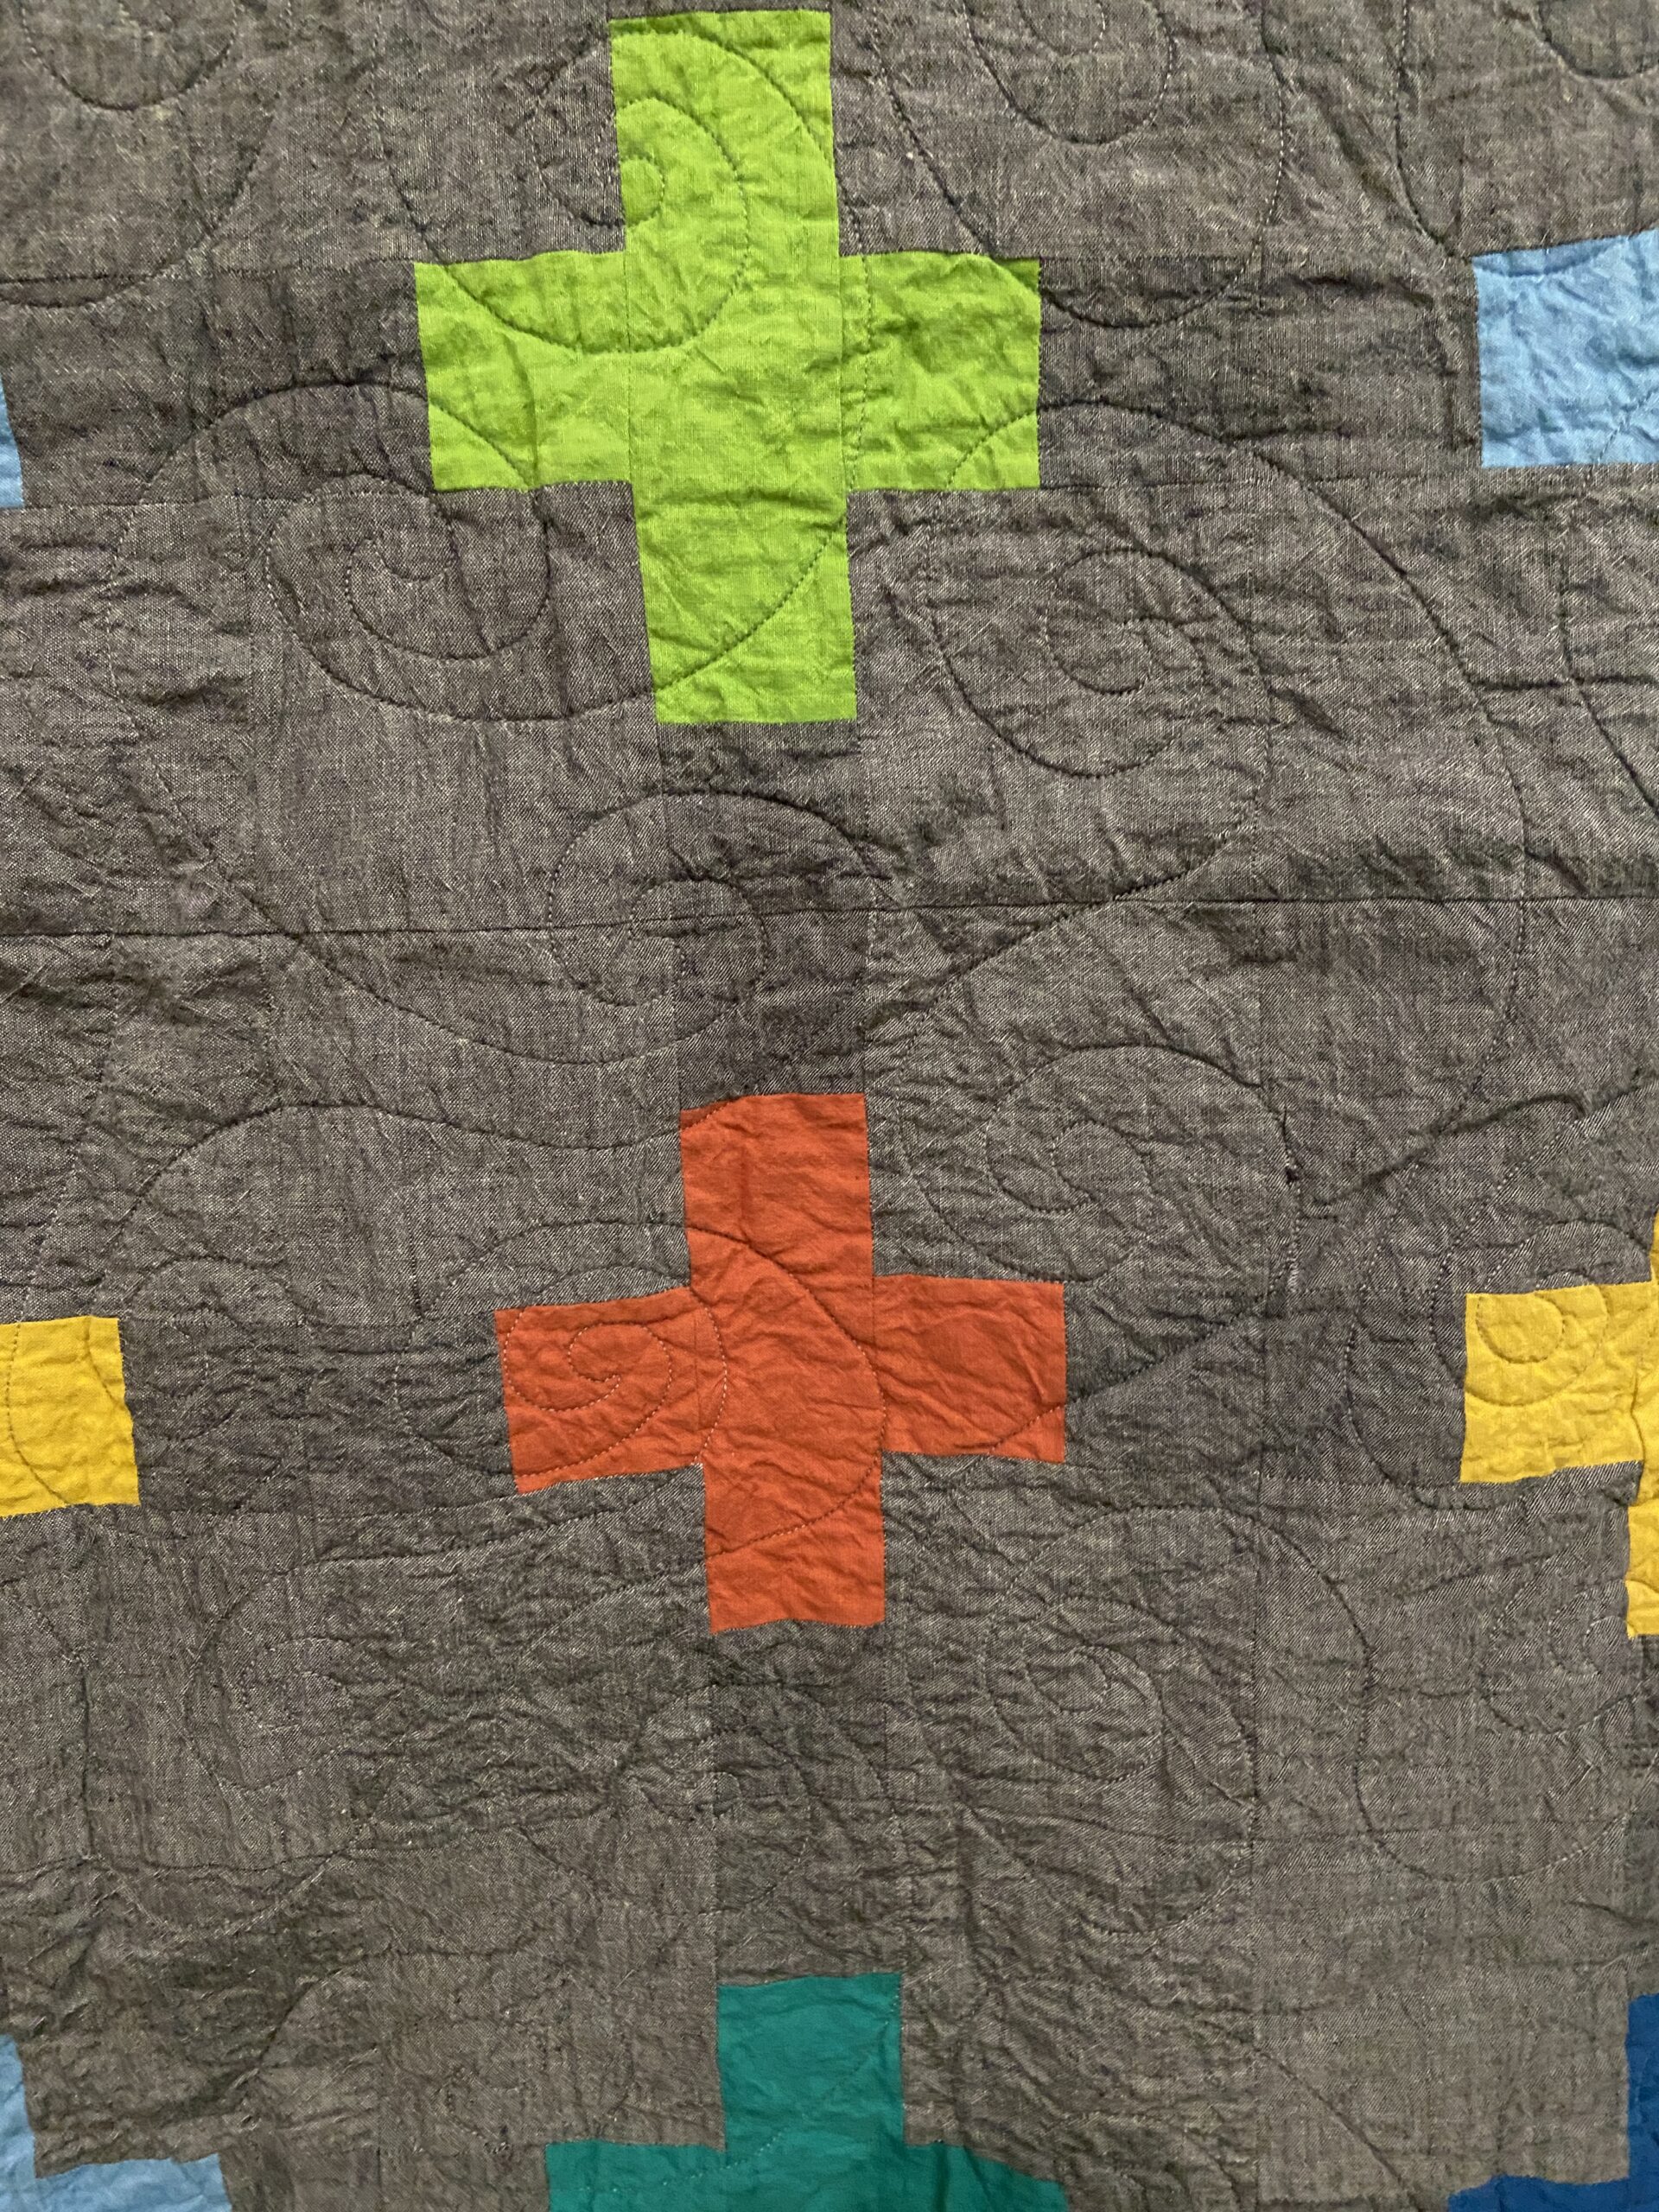
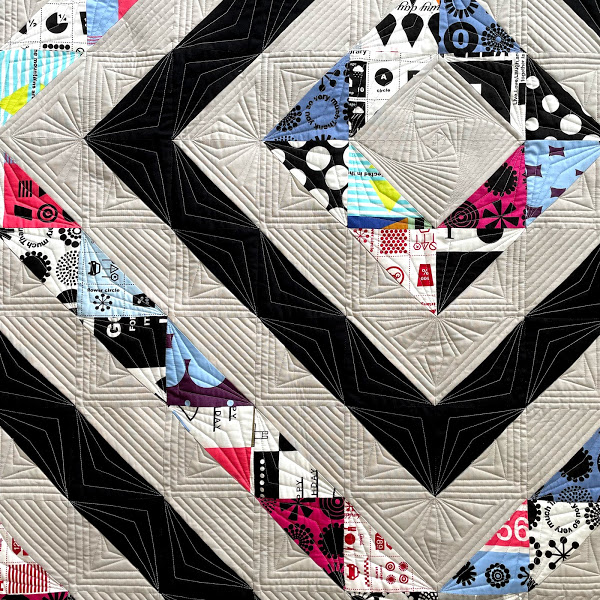
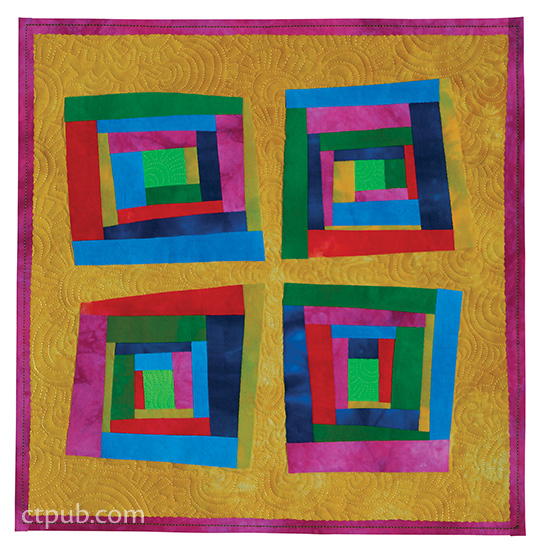
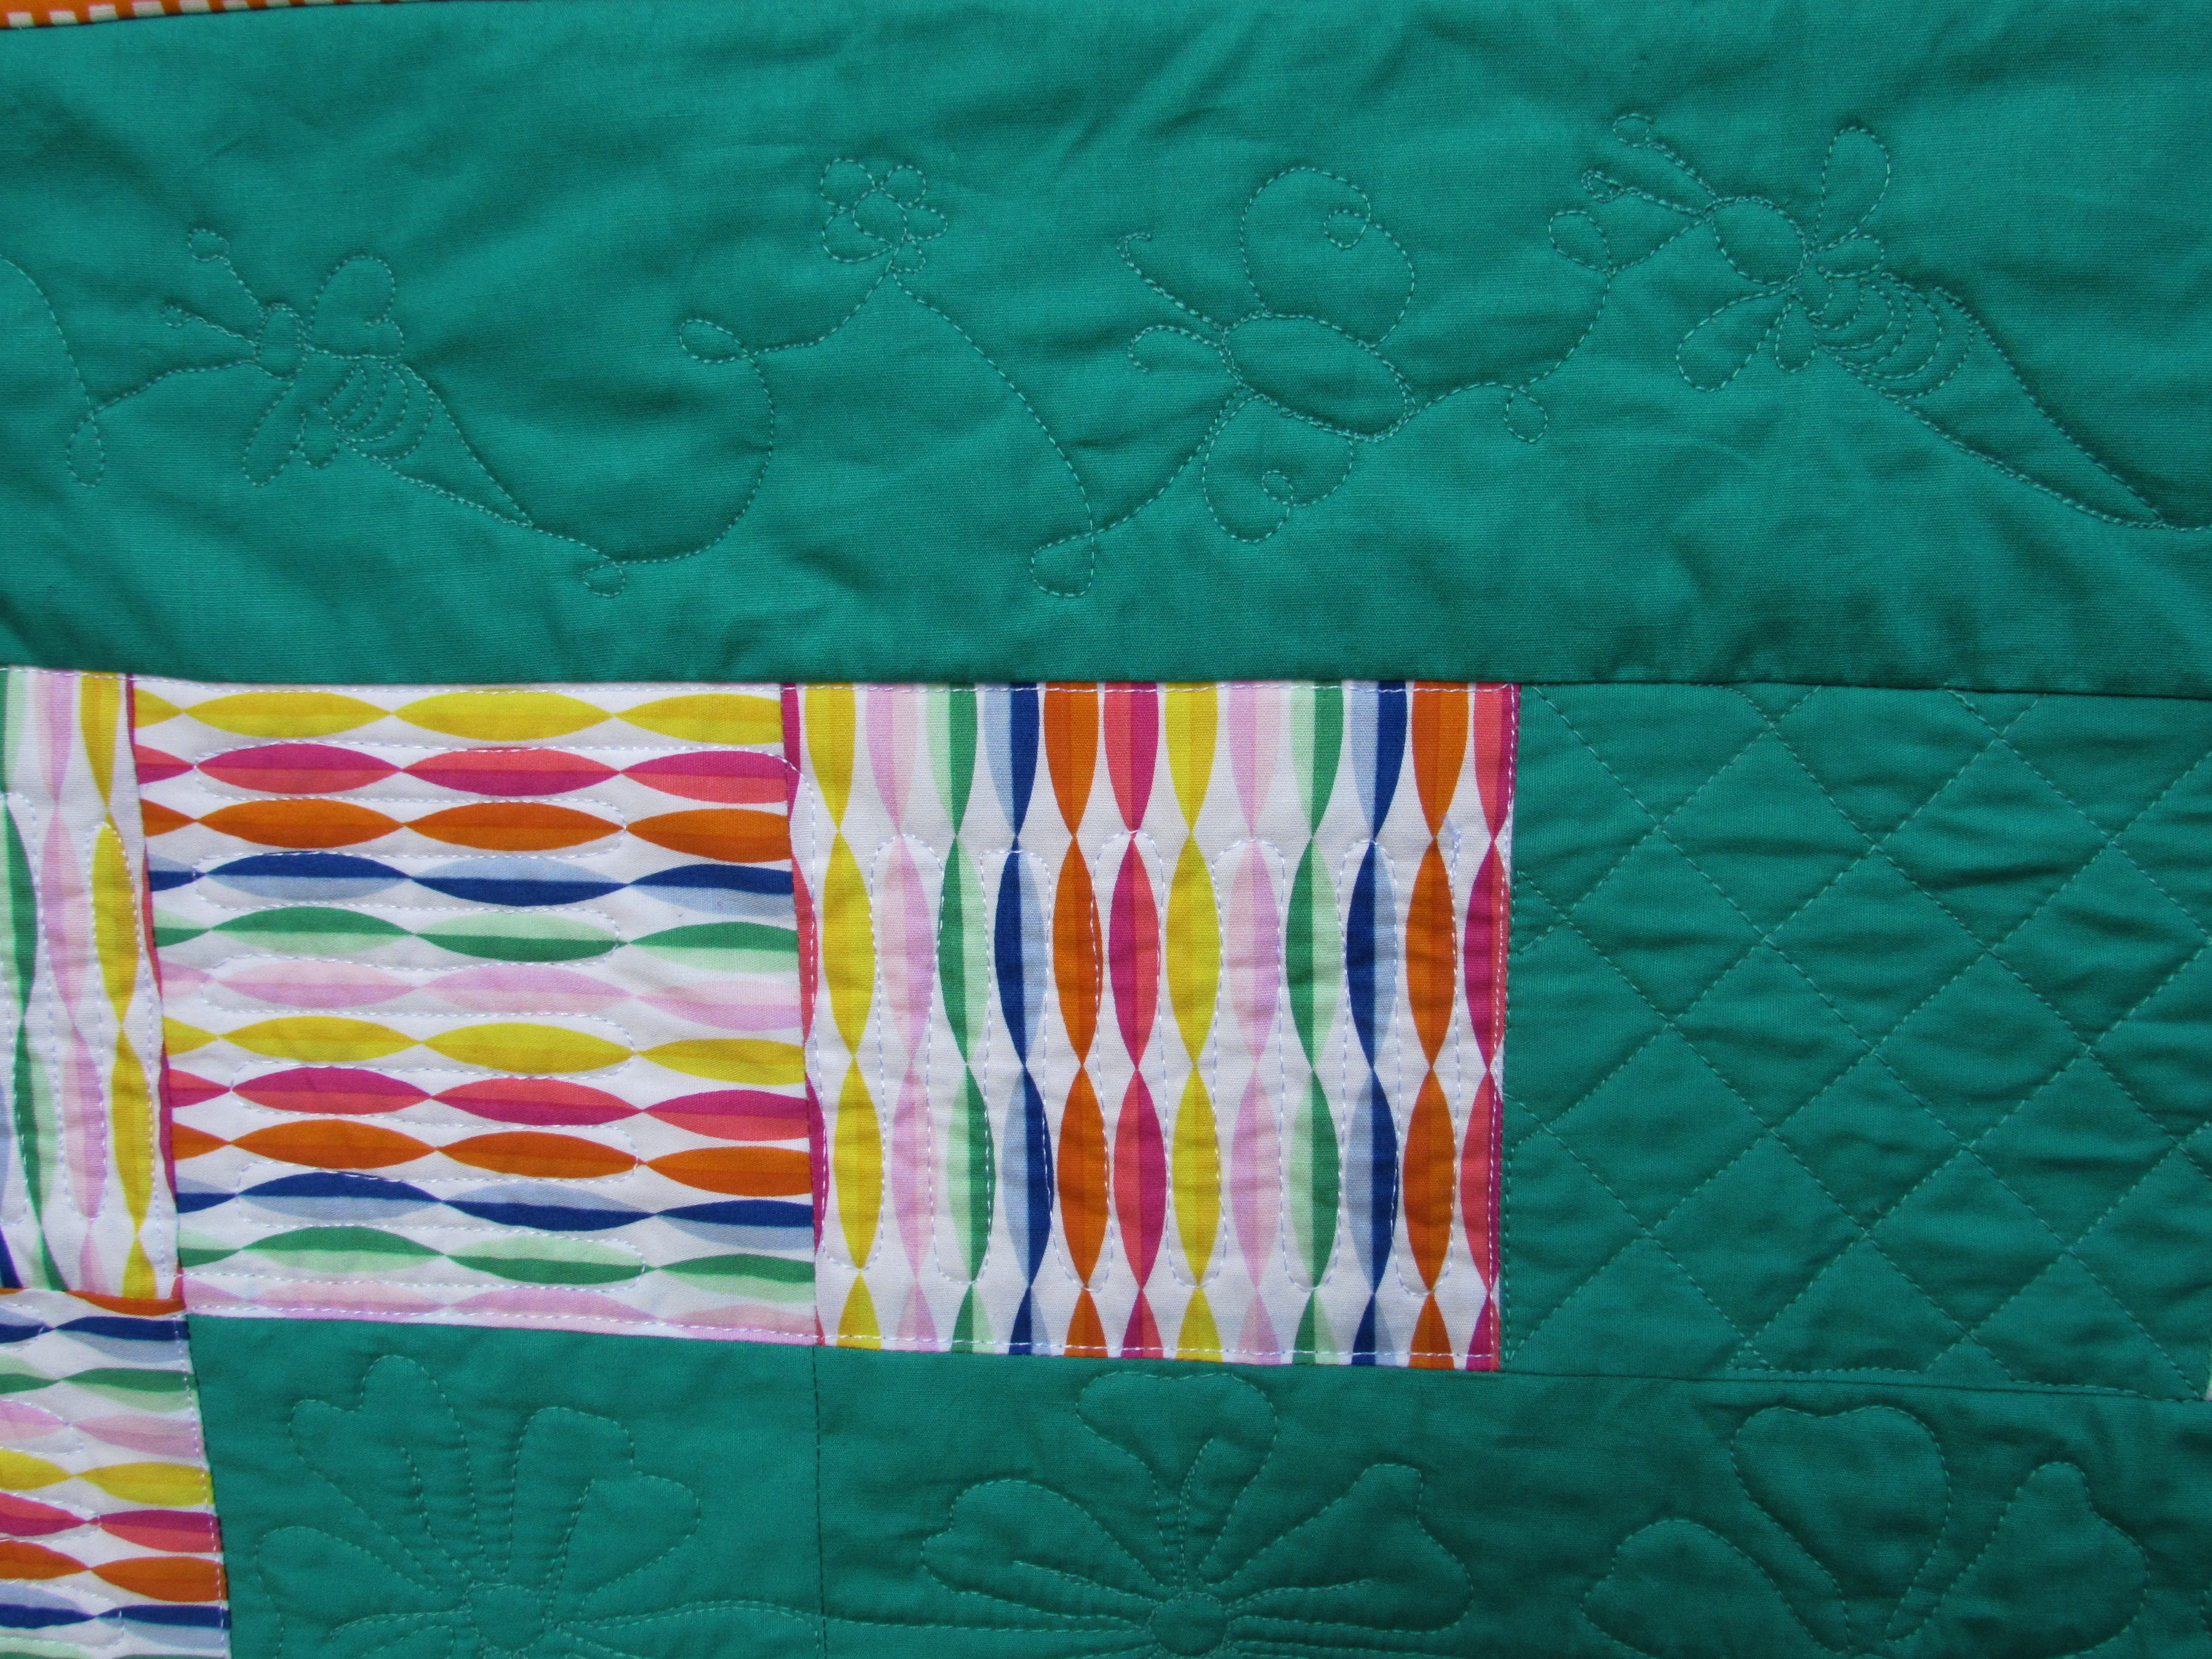
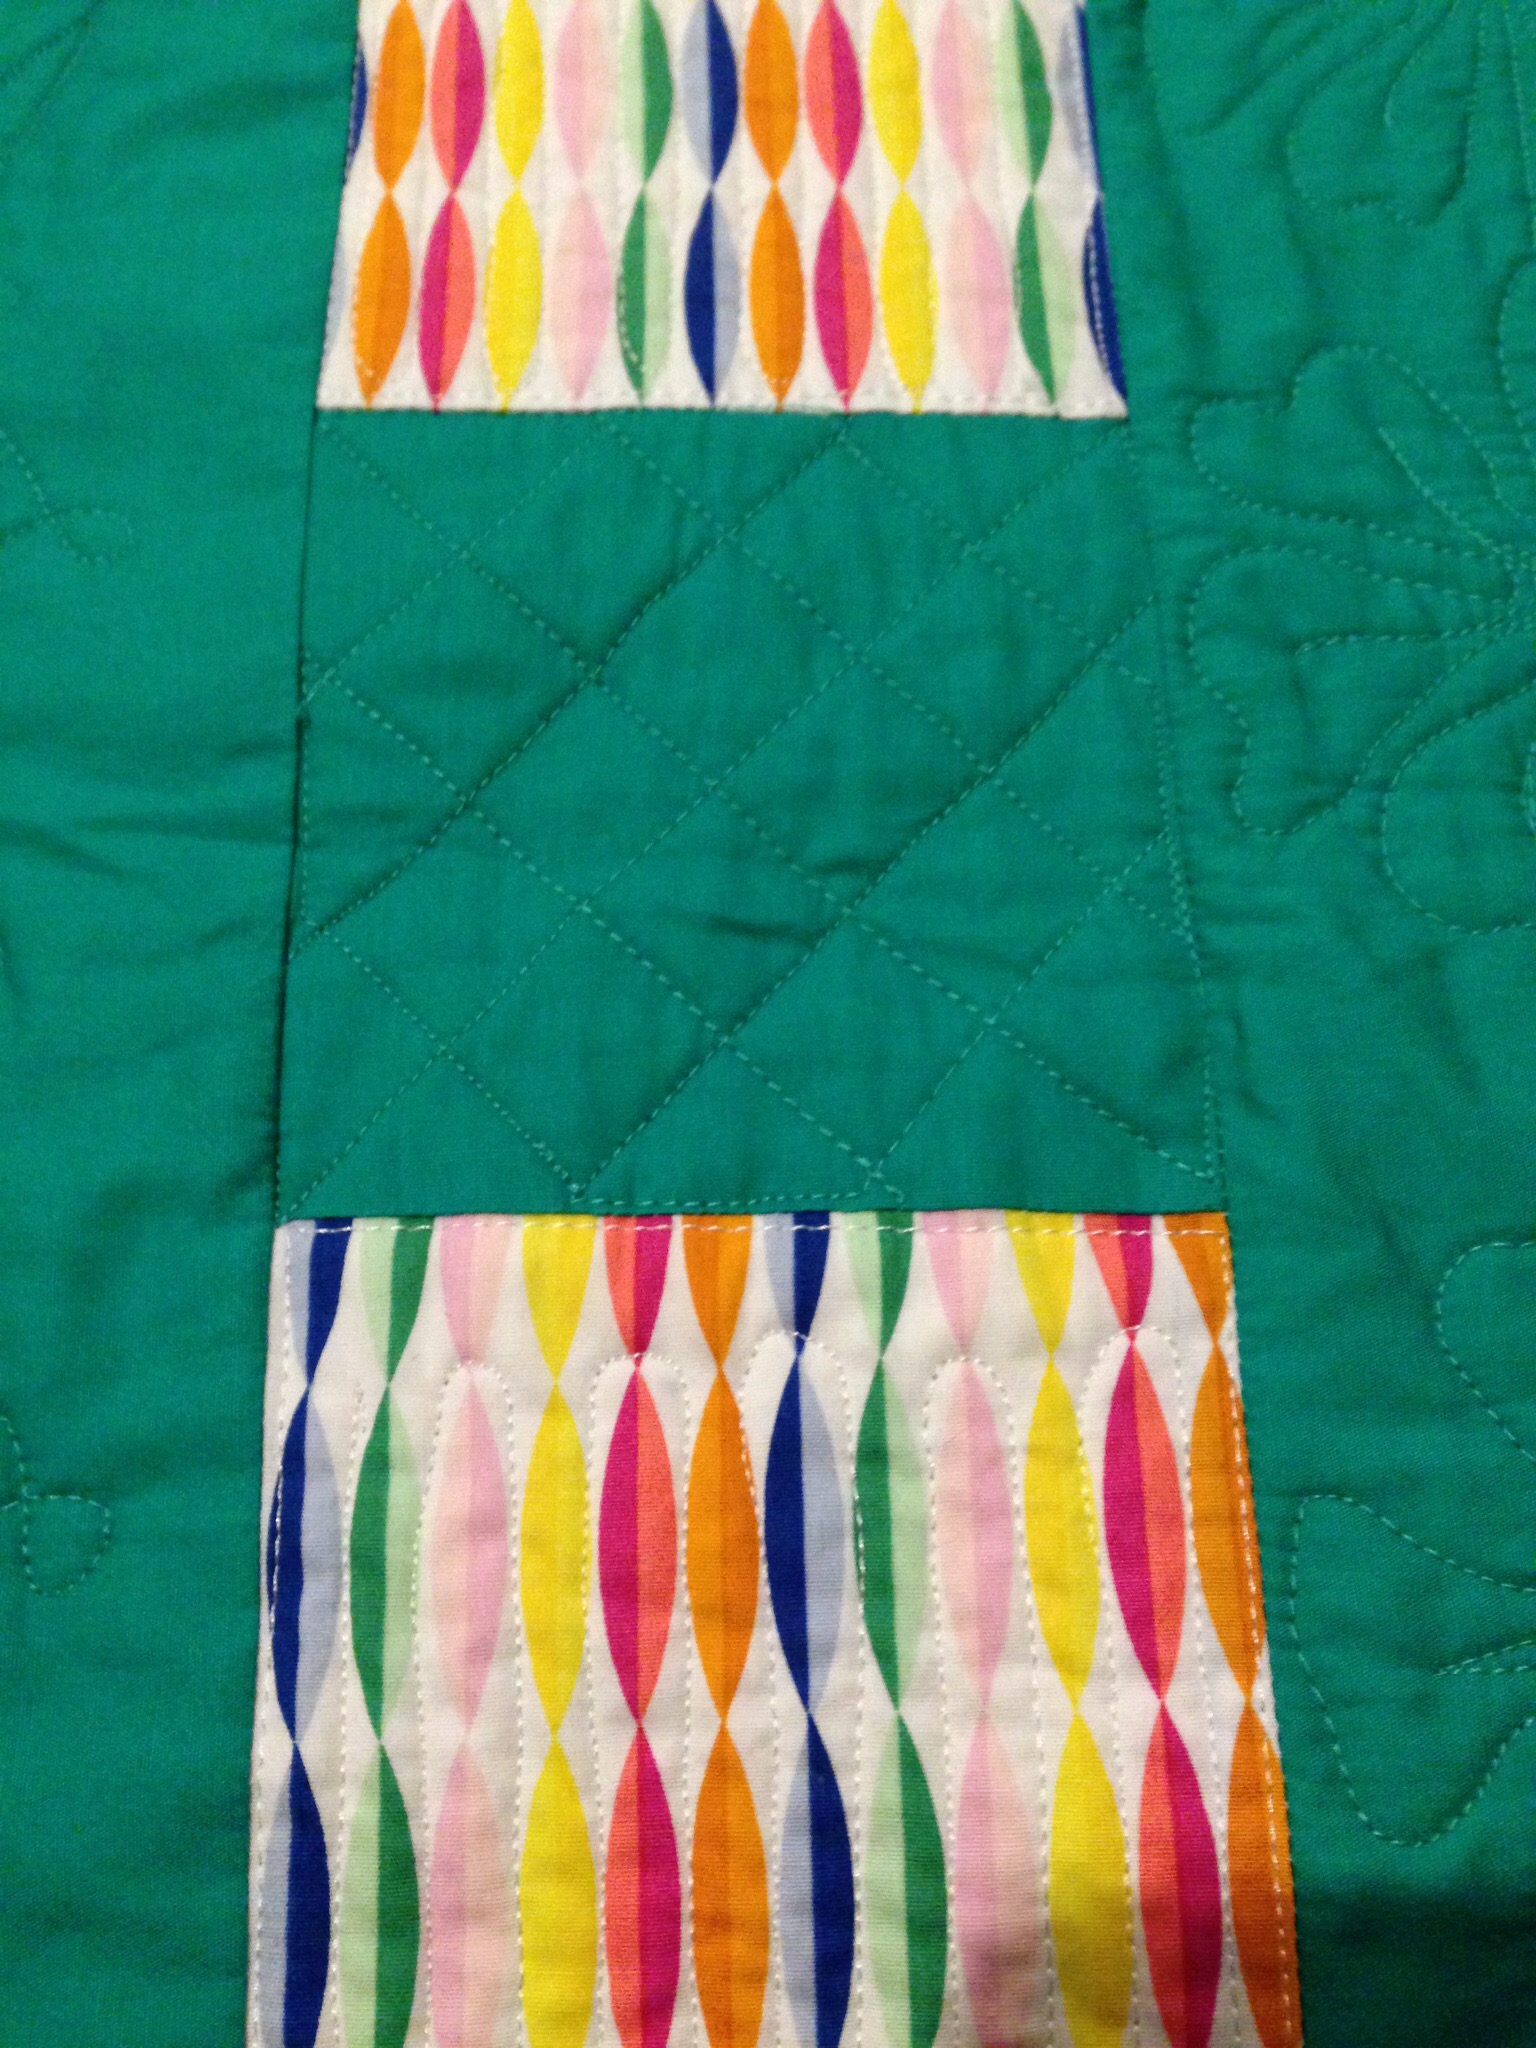
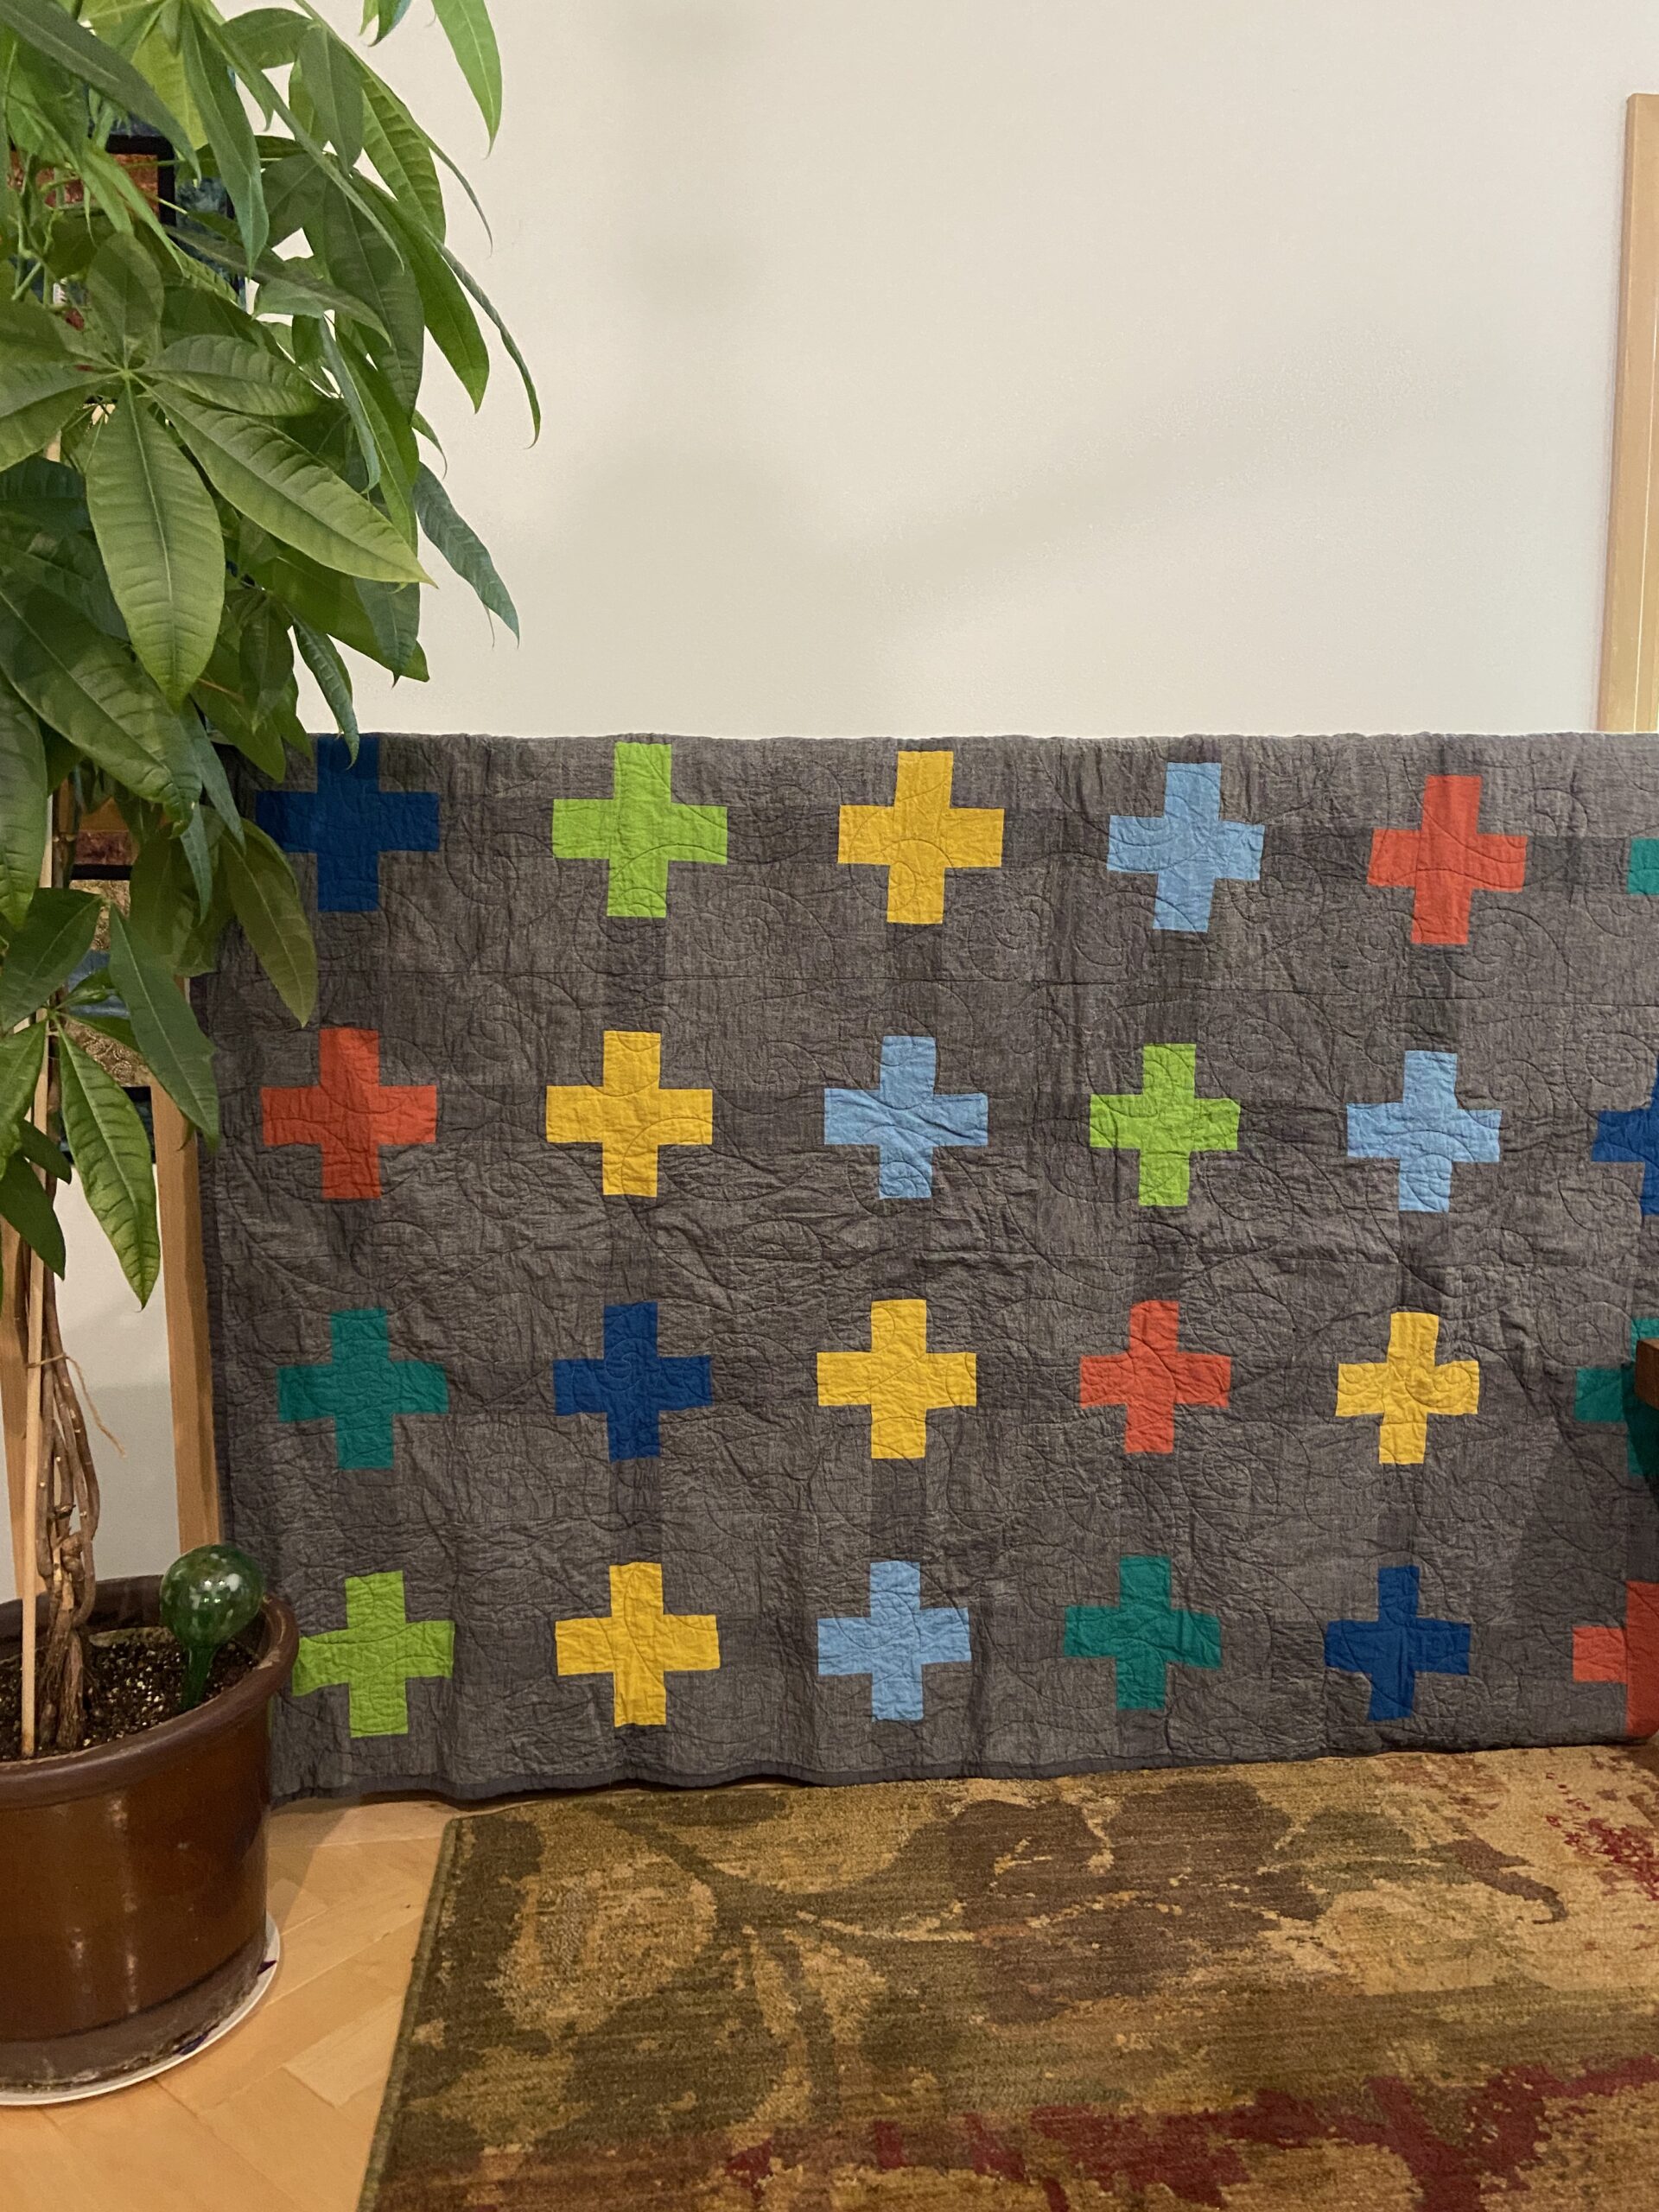
With Mary’s quilt, there is such a subtle shade difference in the strips connecting the pluses. Isn’t that a cool design? Your eye is really drawn to the pluses. Great idea Mary!

There are so many more quilts and I will share more in the next post. I am so grateful to Preeti for cooking up this event and have heard rumblings she may do it again next year! Prize winners for the finished quilts will be announced on Monday, the 6th of September. If you (like me) didn’t finish your quilt yet, that is ok too! Finish it when time allows because Mercy Hospital is always in need of quilts. We will welcome it at any time.

Painting is not nearly as fun as quilting

As for me, I continue to be distracted from the sewing room. This week my husband painted the master bathroom. It looks so fresh – we have been wanting to clean up this bathroom for a long time now. I painted these cabinets for him out in the garage. We shared the painting duty on the bathroom door because I was waylaid by a migraine. The cabinets and the door are back in place and the bathroom looks wonderful!

Time to clean those boots!

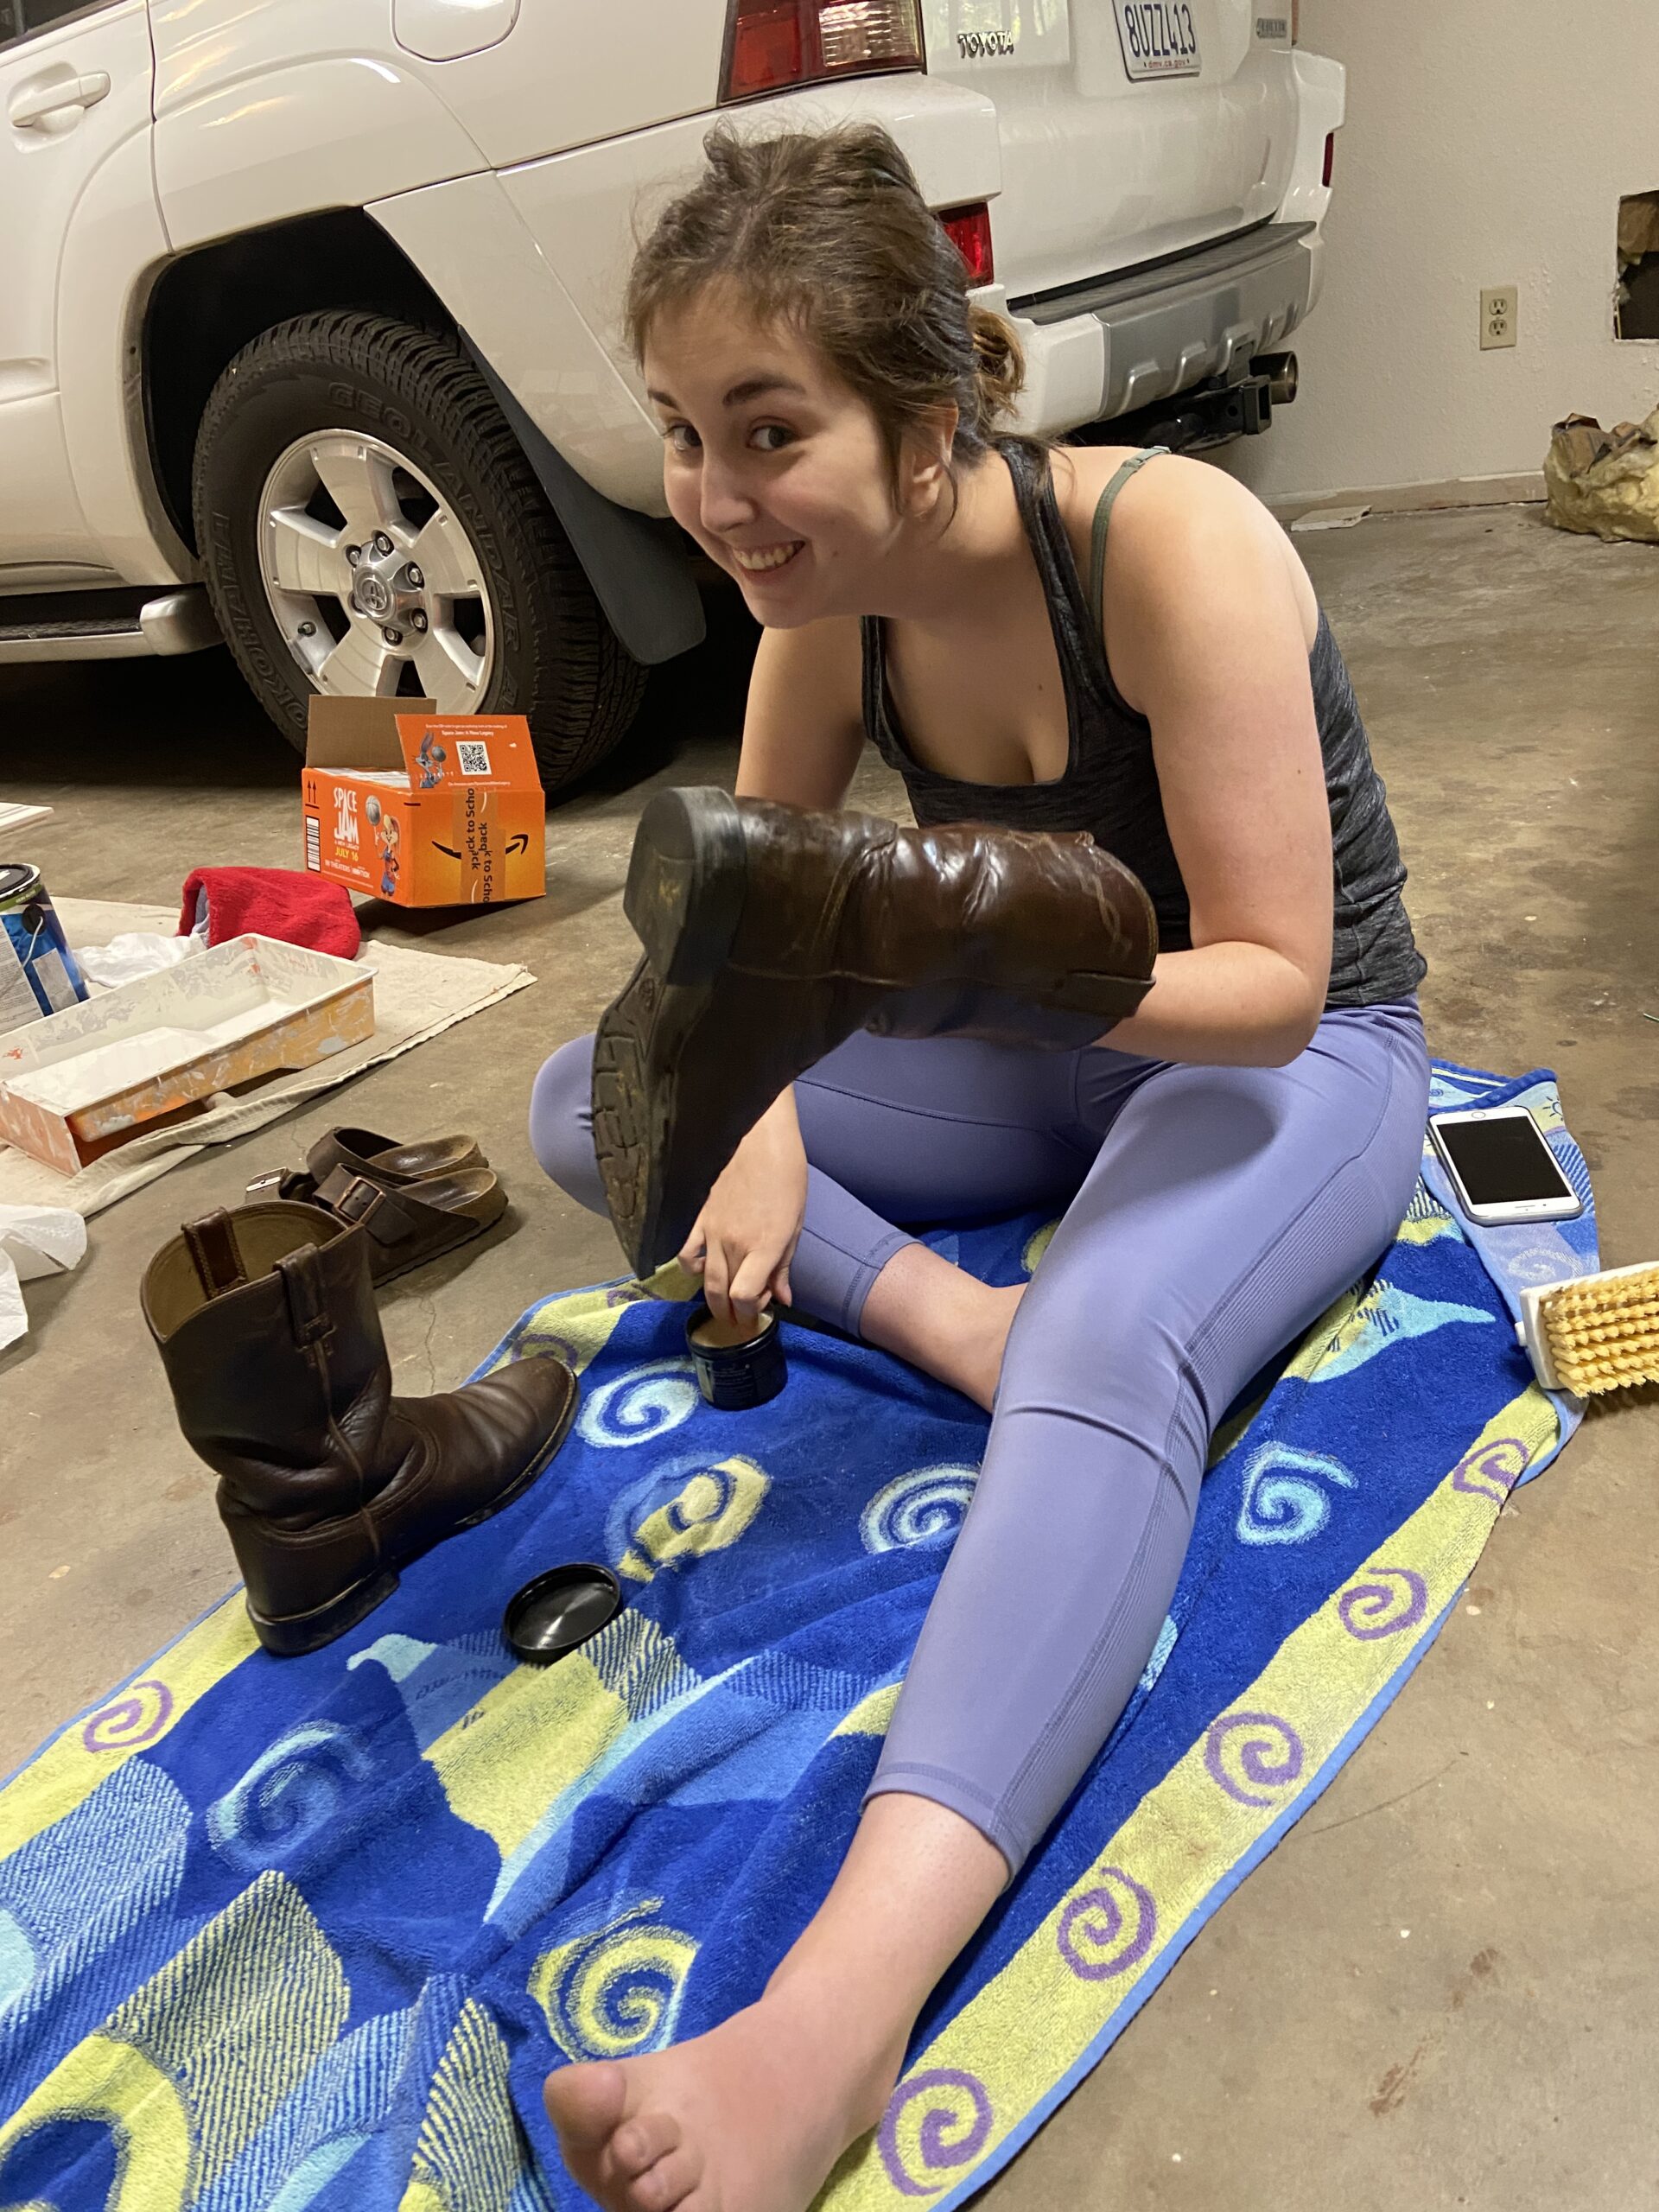
Julia is getting ready for college to start up this year. She goes back on campus which will be so much fun. She has been packing and organizing her things. Her boots are ready to go for her beef production lab this quarter. in the upperclassman housing, she has a suite with three other women. They will share the common space and kitchen. Julia has collected quite a set of kitchen supplies through hand me downs from her older brothers so she will have a nice kitchen set up. We take her down to campus in another ten days or so.

Playing Memory together

I have been meaning to share this fun app for quite a while now. This is something I really enjoy using with my grand daughter. For the past year or so, we have played together, read books, had silly conversations and colored pictures using the Caribu app. It is a really nice way for me to stay in touch with her. I love getting a text from her (on my son’s phone of course) asking if I have time to play Caribu with her. (By the way, this is not an affiliate link – just a very cool product that I wanted to share with you.) Caribu has games, books, drawing, worksheets, addition and subtraction, matching, working with sounds and numbers, and mazes – plus more I am not remembering at the moment.

Peter Rabbit – a classic!

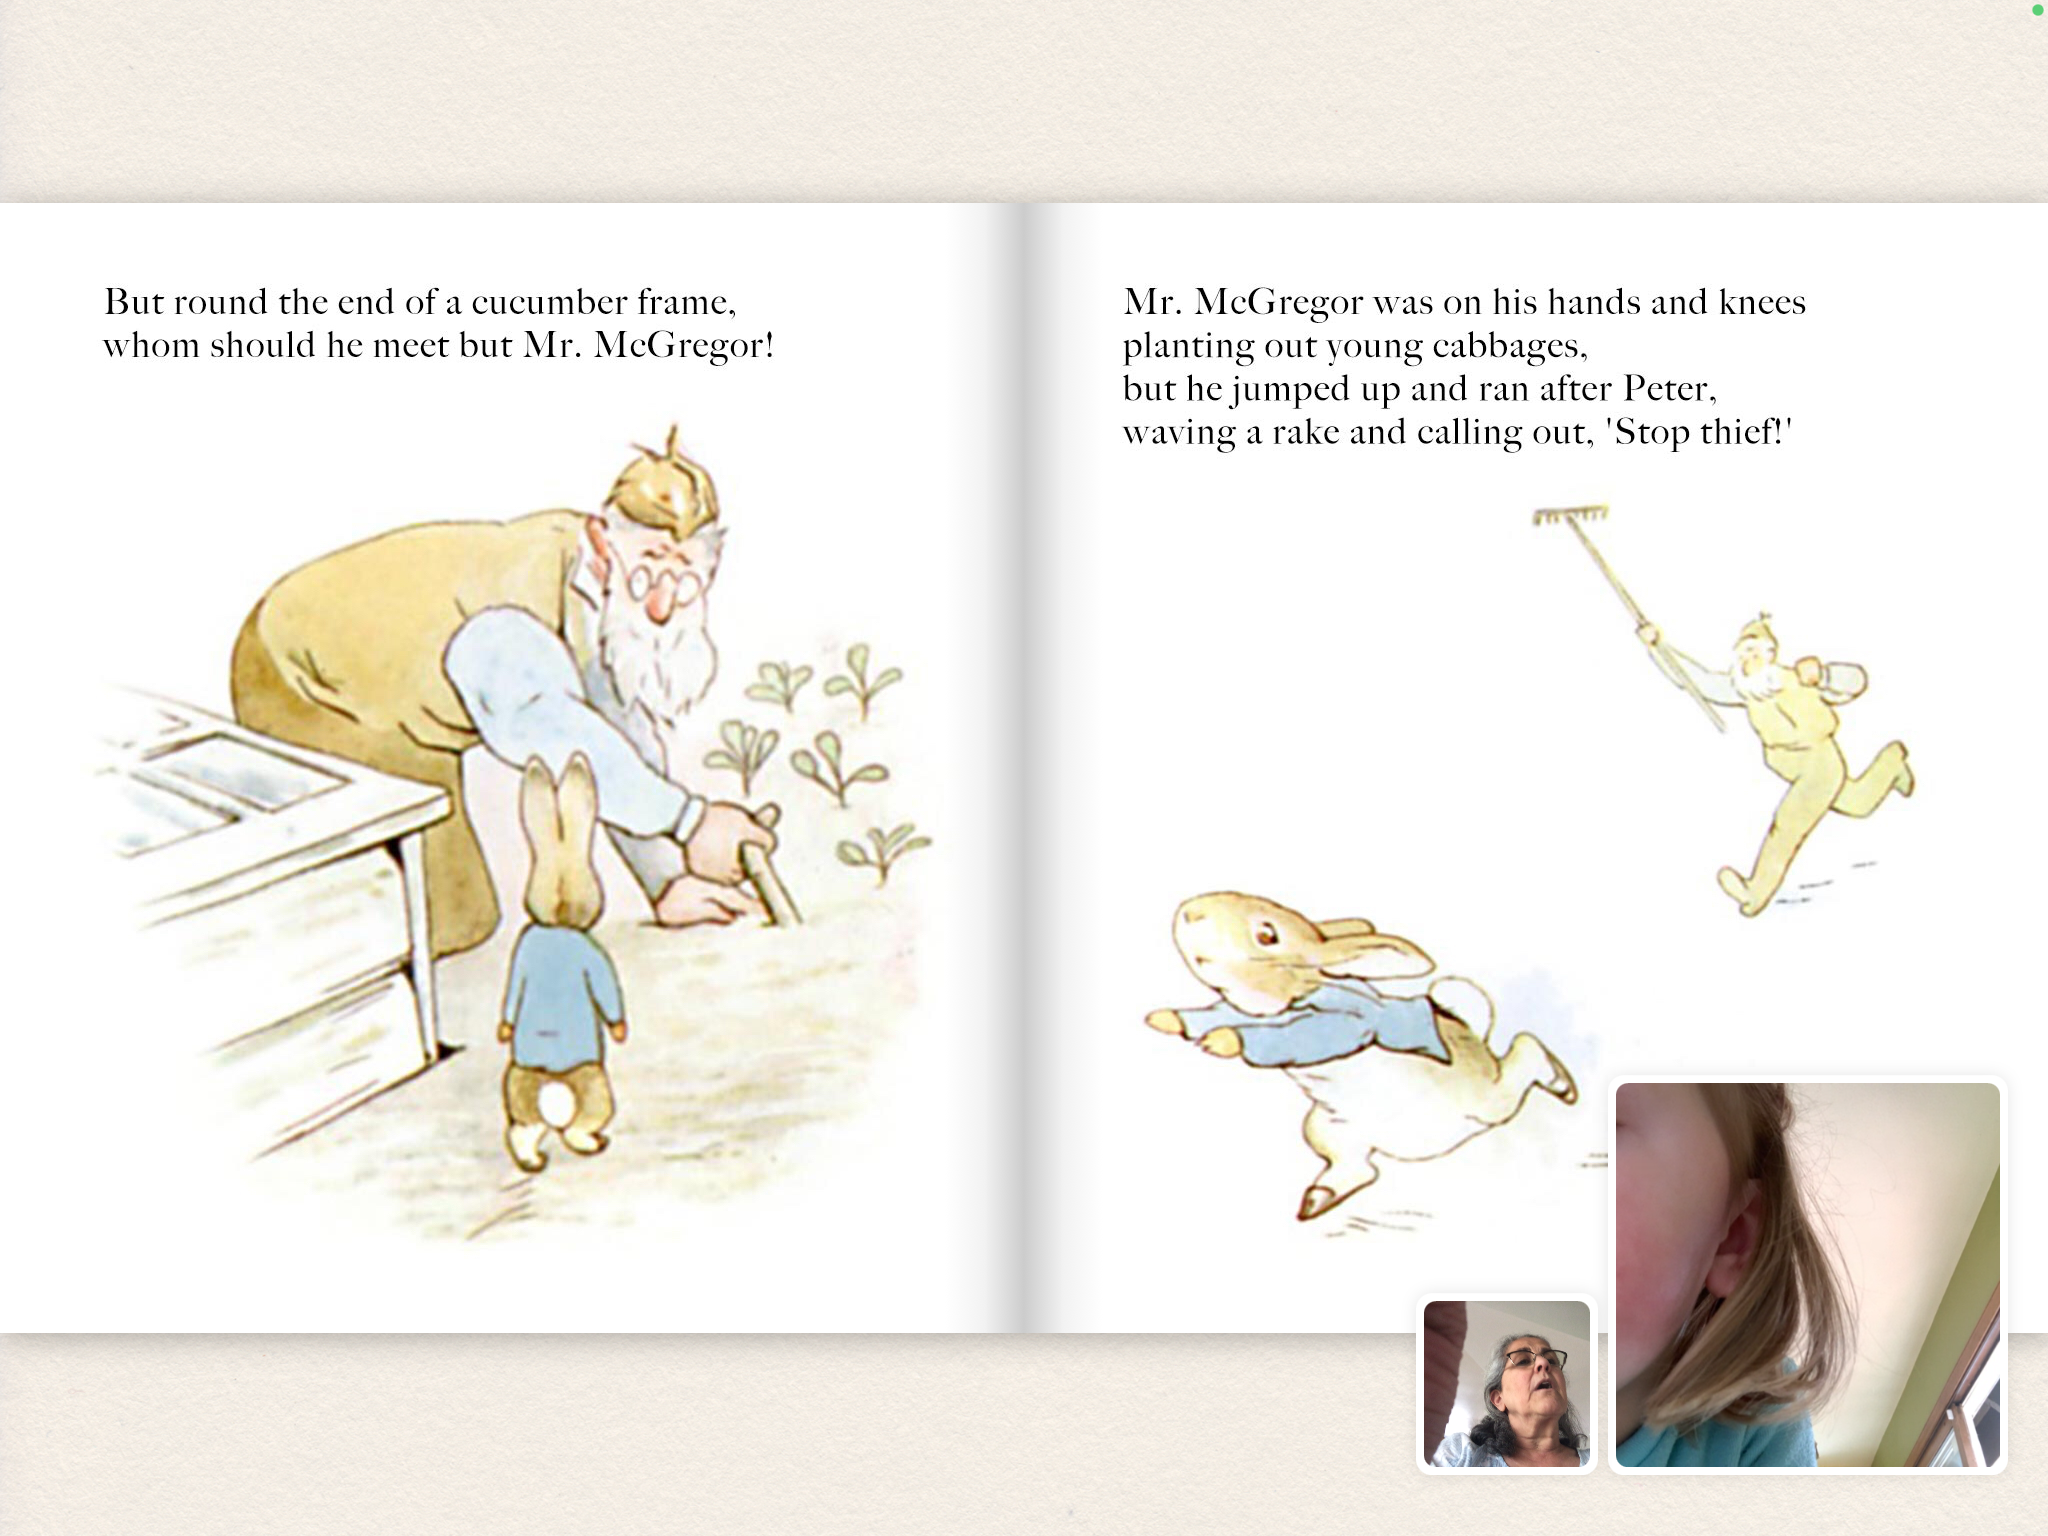
There are a large number of books to read and they are divided into age groups or subject categories. The selection of books isn’t exactly Newberry quality. But for our purpose, it is fine. She loves picking books out. Right now Angelina Ballerina is one of her favorites and we read them quite often. The user can mark something as a favorite so it is easy to find again.

A delicious ice cream cone.

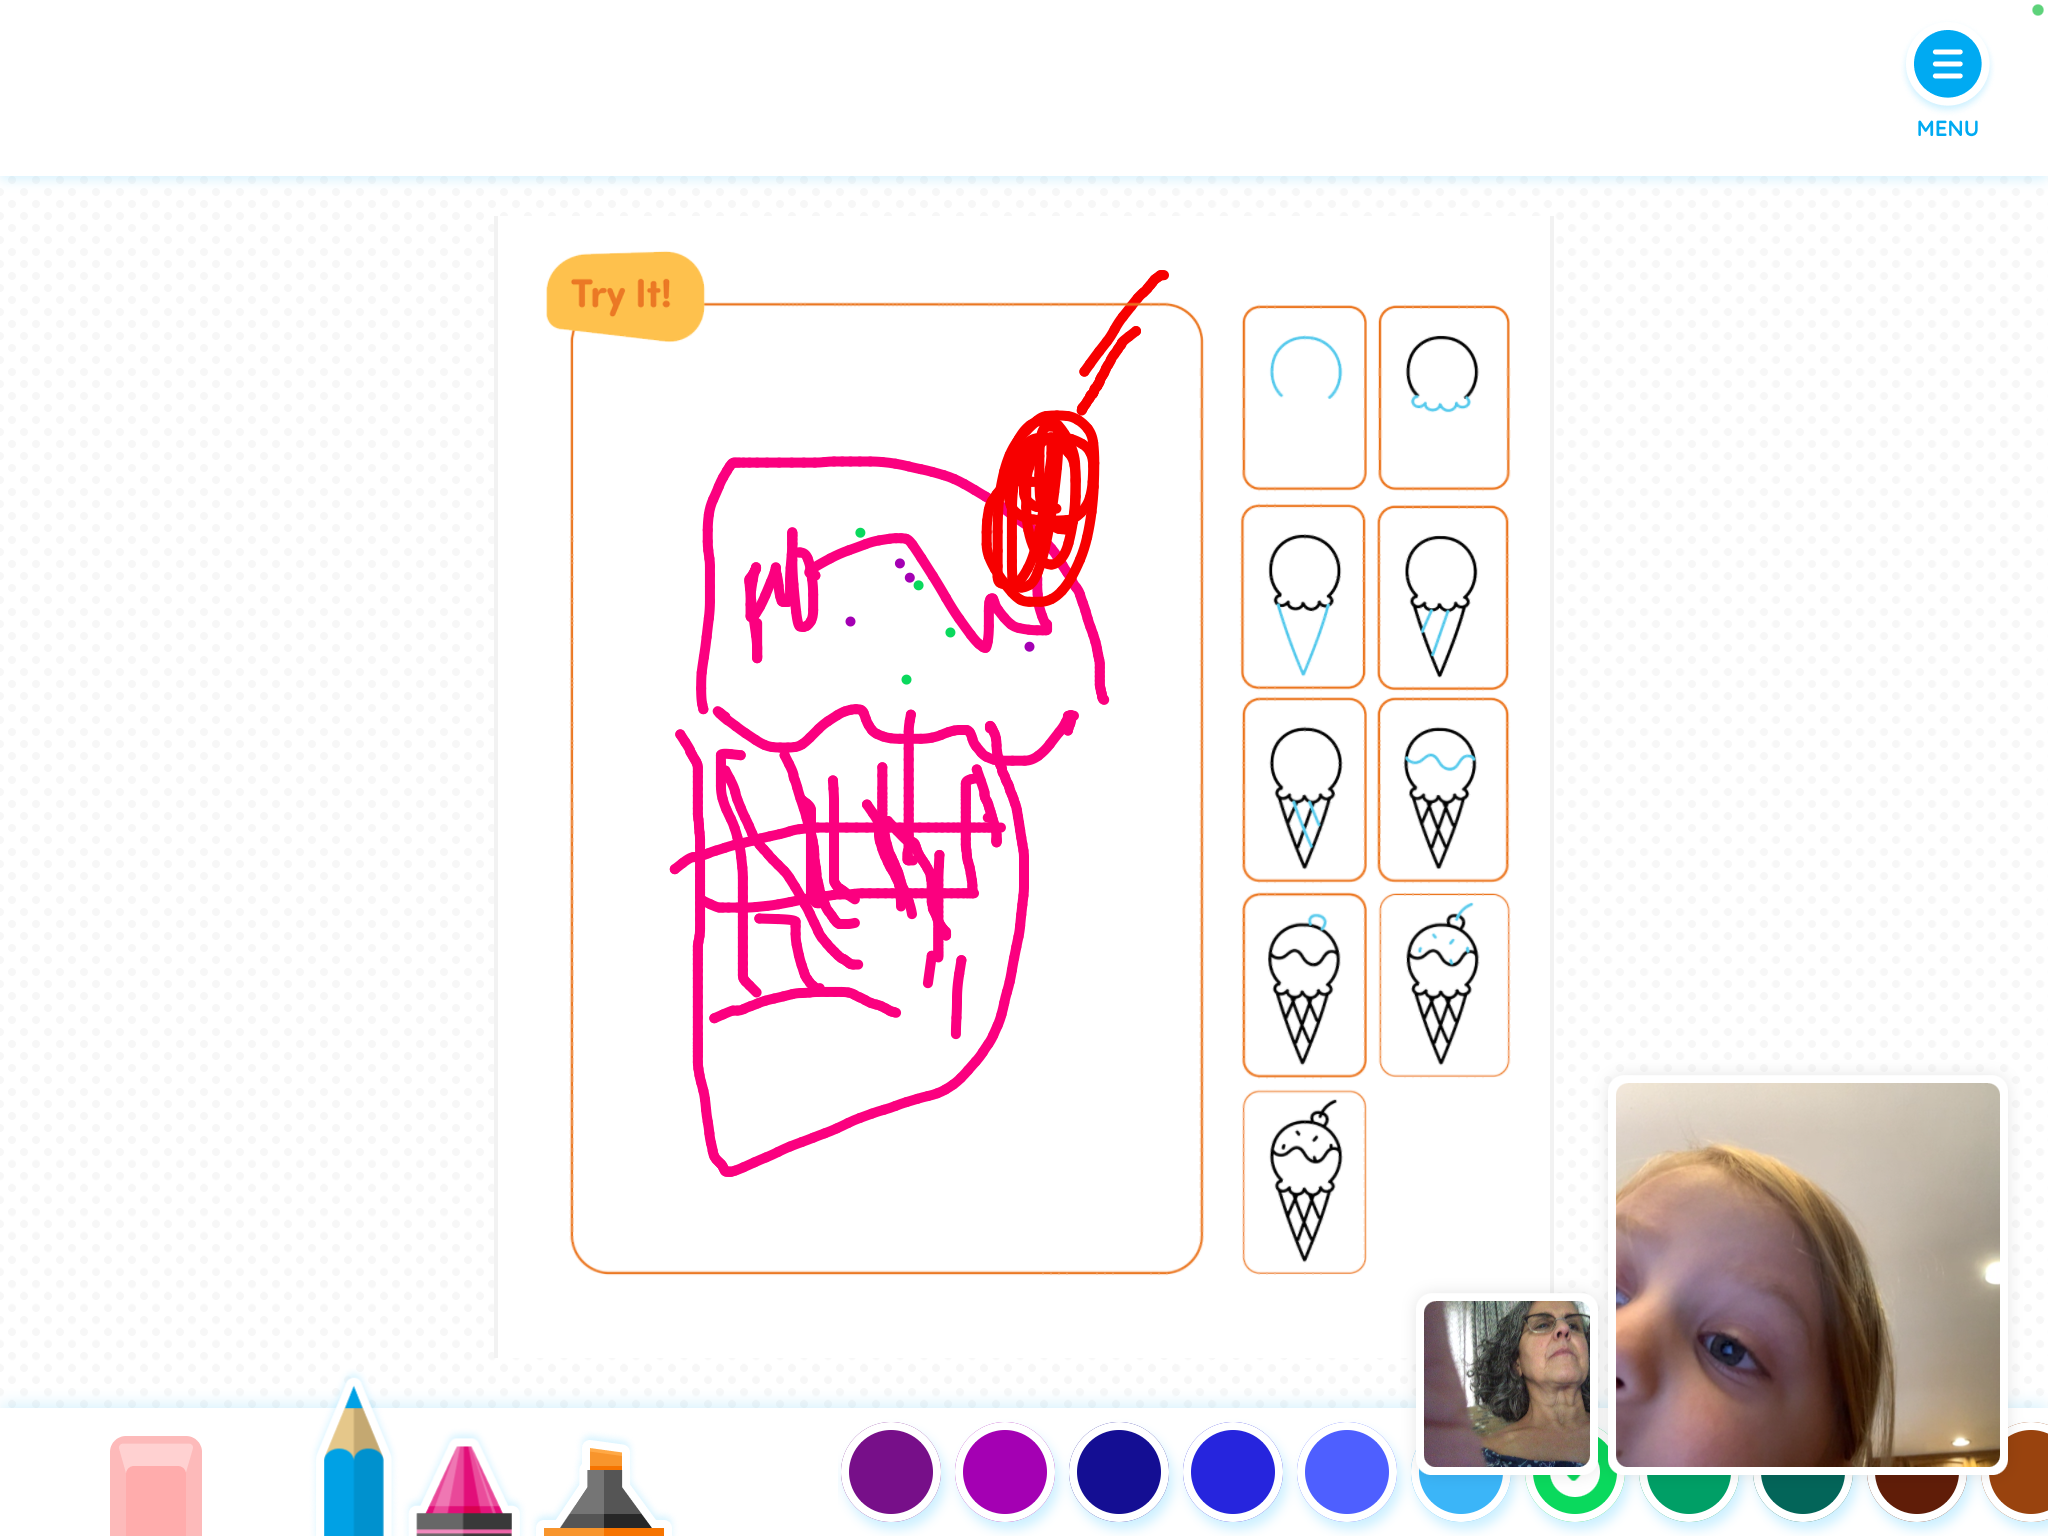
Drawing is another favorite. At four years old, she usually needs me to draw the item first and talk about each step so she can relate it to the pictures on the right. Then she tries to do it herself. I love seeing her facial expressions as she works on her drawing.

We spend a lot of time together this way and it is really a special way for her to have time with her Grammy. She has some older cousins who also read books on Caribu to her. There is a subscription fee which can be paid monthly or annually. The free version is available but is very limiting because you can only do a few activities each month – but if you want to try it out, that is a great way to do it. One suggestion, it is nice to look through some of the activities ahead of time. Once we get on the computer together, H is so excited and doesn’t want me to have to ‘figure out’ where something is, or how it works. It is easier to take a quick peek at the screen before we start a call. I have found it works better on a tablet than on my laptop (though I am not sure why?) Enough on this – I think it is a fun time spent with H and if you have a distance grand parenting thing going on and want to have another way to stay in touch with your grandchildren, give it a try.

My shop inventory is disappearing quickly – It looks so strange downstairs with only a few shelves of fabric left. At 40% off, there are still some bargains to be had. I expect I will be officially retired by mid-September. Woohoo!!!

Just One Charm Pack – Blog Hop!

Finally! Today is my day on the blog hop celebrating the release of Cheryl Brickey’s second quilt book, Just One Charm Pack. I have been waiting to play with this book for quite some time. I loved her first book Modern Plus Sign Quilts and knew this book would be at least as creative. Cheryl’s patterns are not new to me. I have made three so far (Postage Plus, Pike’s Peak and Flock of Geese.) Additionally, I have carried her patterns in my shop for a long while and they are very popular. (Note – all quilt patterns, including Cheryl’s, are currently 25% off and have free shipping in the US. Take a peek!)

Just in case you are new to Needle and Foot via Cheryl’s book celebration, welcome! I have been quilting on and off since 1978. Well, I made several quilts in 1978 and 1979 and then didn’t begin again until 2011. But as with most quilters, once the bug bit, I started quilting with a passion! Please take a minute to poke around my blog and visit. I have also had an on-line fabric shop for the last (almost) five years. I am in the process of retiring so all fabric there is on sale. If you’d like to check it out, click here!

Some time ago, Cheryl invited a group of quilt bloggers to make a quilt from the new book and share it upon the release of the book. We were able to choose which quilt we wanted to make and I chose the Ninja pattern which is based on a variation of the Friendship Star block.

My version of the Ninja quilt was made with 1/2 of a Kaffe Fassett charm pack that I had left from an earlier project. I was thrilled to see I could complete a quilt with just that small stack! I had both the white and the lavender solid fabric in my stash so it was a breeze to pull fabrics for this quilt. The lavender background is actually a solid cotton voile. I hadn’t made a quilt with cotton voile and have to say, I love the extra soft feel it has.

Piecing the quilt was very simple and because of Cheryl’s clear, concise instructions, there were no issues when putting the top together. By off-setting the placement of the Friendship Star blocks, there is nice movement to the design. I played around with ideas for quilting it until I took a closer look at the sample quilt in the book. It was quilted with concentric circles. The curved lines looked so perfect with the angular design. Not willing to free motion quilt that many circles, I chose to use my walking foot and do a pattern similar to a Baptist Fan. It was so simple to just begin in a corner and work to the center. Once I hit the center (or close to it), I just started another corner. Filling in between all four sections was the last step.

The quilt is backed with a dark purple flannel and the quilting shows nicely from the back side.

This cute little quilt (about 36″ x 50″) will be sent to a friend of the family. They just had their first baby, a girl named Natalie. I hope they will enjoy it and use it to pieces!

By the way, the patterns in this book are all traditionally pieced which means no paper piecing. For me, that is a big win! Another win, in my opinion, is that the quilt designs appear to be quite easy to enlarge. It would be no issue to just make more of these blocks and add to the width of the top and bottom border to make this a larger, lap size quilt.

Now that I have shared the quilt I made, I wanted to also show you a peek at some of the other patterns. Honestly, Cheryl designed some really fun, easy patterns.

Pieced by Cheryl Brickey, quilted by Carol Alperin

This quilt is named Fishies, rightfully so, don’t you think? I love the look of the school of fish all traveling together. So sweet.

Pieced and quilted by Myra at Busy Hands Quilt

This pattern is called Ships Ahoy. It was made by Myra of Busy Hands Quilts. Her colors are perfect for a bright addition to a nursery and that quilting is gorgeous. You can read more about her process here

Pieced and quilted by Liz, Savor Every Stitch

Finally, I have to share this version of Cat’s Eye. It was pieced and quilted by Liz at Savor Every Stitch. Just spend a minute adoring the quilting. Liz has such talent. To see more photos and read about Liz’s process, click here.

No doubt there is a quilt for everyone in this book. I encourage you to take a further look by following along with the blog hop. It began on July 15th and goes through July 29th. Cheryl will be posting the newest quilts on her site daily so you can read along.

ABOUT THE BOOK

Each pattern in the book uses a single charm pack, an additional fabric (called fabric A in the pattern) and a background fabric).  The book is the Hamburger Helper for charm packs, stretching one into a full quilt 🙂

You can grab a copy of Just One Charm Pack Quilts on Amazon or get a signed copy in Cheryl’s shop.  

As a bonus, if you purchase a signed copy from Cheryl’s shop, you can get one additional free stand alone pattern (digital or printed) by adding the book and a stand alone pattern ($12 value) and then using the coupon code HOPPATTERN (through the end of the hop 7/29) during checkout.

Beneath Missouri Stars, from a Quilting Cozy Series

UPDATE: The giveaway is now closed. I have emailed the winner, Darlene H, to let her know. Thanks everyone for entering. I hope you will encourage your library to carry Carol’s books and/or head over to Amazon and get one for yourself!

I am not sure you remember but about two years ago, I reviewed a book called Tie Died which is the first book in a large series authored by Carol Dean Jones. At that time, it was my first experience with these cozy mysteries. I had a lot of fun participating in the blog hop promoting these books for Carol and CT Pubs. Even better, because of the event, Carol and I became acquainted and now enjoy a nice friendship.

Some months ago, I found out Carol would be publishing book 11 in her series this spring. Titled Beneath Missouri Stars, I hoped to review it. I contacted C&T and they agreed to provide me with a review copy of the book.

The book is really fun. If you aren’t familiar with cozy mystery novels, click here and read my first review where I explain what cozy mysteries are all about. There is some order to the Quilting Cozy series of books but I didn’t really have any problem reading number one and then jumping to number eleven. Lots had happened to the main characters (Sarah and Sophie) in between but the author does a wonderful job of telling you just enough so the reader can fill in the blanks.

In Beneath Missouri Stars, Sarah and Sophie are trying to solve a mystery (typical for these two best friends) which revolves around the murder of a young girl. The crime occurs when a popular country western singer is in town to perform. As Sarah and Sophie work to solve the mystery there is (as always) a sub plot involving a quilt or two. I love how the author (who is also a talented quilter) weaves the quilting tales into these books. There are quilt shops, club meetings at the local quilt shop, community service projects and more. Drawing on her career in geriatric social work, the author also touches on various issues that often arise with older people. This is done with sensitivity and sometimes a bit of humor. The book is well written with several twists and turns to keep the reader engaged.

When Sarah, the protagonist, decides to make a quilt emulating the night skies of Missouri, she ends up with the beautiful dark blue quilt featured on the cover of the book. Of course, behind the scenes, Carol (the author) actually designed and made the featured quilt using the traditional Missouri Star block. Looking at this quilt and the pattern for it (which is included in the book) I was quite taken with it. Two tone quilts (blue and white in this example) are a favorite of mine.

After reading the book, I emailed Carol and suggested we work on a kit for this quilt. The look of lap size (54″ x 72″ finished) quilt is dramatic, just like a starlit night sky. She agreed it would be fun so the two of us got to work. When Carol made her original version, she used squares from two layer cakes as well as a bit of extra yardage. I tried to emulate this and thought it might be nice to offer layer cakes in the kit. But it would have required two full layer cakes to have enough fabric which would have made the kit quite expensive.

Deciding against using layer cakes, we chose beautiful yardage from a PB Textiles line called Spring Blue and a very dark blue background from Terra by Norm Wyatt. It works so well together and while the quilt isn’t scrappy, the effect is much the same.

Included in the kit are three fabrics from Spring Blue, a light, medium and dark print. These work to make up the blocks and the setting triangles used to put the blocks on point. The medium blue print is also used as the binding.

Included with the fabric in the kit is a copy of the book which has been signed by the author. The Quilting Cozy books are a great deal considering you get a novel and a pattern for just a bit more than the price of many quilt patterns. The number of kits is limited so most likely they will not last long. If you want to see the details of the kit, you will find it here.

To celebrate the release of Carol’s 11th book in the series, I have a signed copy to offer as a giveaway prize!! I am excited to share this book with all of you and to send a copy to one lucky winner. Carol’s series is entertaining with fun characters and lots of quilting fun. How can you go wrong with that??

To enter to win the autographed copy of the book, please leave a comment and tell me if you have made a ‘two color’ quilt before. If so, what colors did you use? If not, what colors would you choose to make one with. I love blue and yellow, red and white and also blue and white. I think limiting the colors of a quilt creates a very dramatic look. The giveaway is open until Friday of this week. I will select a winner and notify the person by email. Make sure you are not a no-reply commenter.

Congratulations to Carol on the success of this fun series of cozy mysteries. I hope we haven’t heard the last about Sarah and Sophie!!

Introducing the Nido Wool Pressing Mat – Product Review

About two weeks ago, I was contacted by Winnie and Tyler, owners of Nido Goods. This shop has just begun and they sell a fantastic wool ironing mat. When they asked me to review their product, I was happy to do so. I have been reading about these mats a bit on-line and wondered if they were worthy of the fuss generated recently.

Guess what? They are! My sewing area is contained in my guest room. Luckily, I don’t have guests all that often. But it does mean the queen size bed takes up a good portion of the room, so space is tight. I have a laundry room which is next door to the guest room and that is where my ironing board is. Yes, you could say having to walk to the laundry room is a good thing because it gets me off my bum and walking a bit when I am sewing. But when I am piecing blocks it is annoying. I used to have a wooden, table top ironing board but it took up too much space. I also made an ironing mat with Insul bright and that silver color fabric one uses to make an ironing board cover. However it heats through and gets the table top really hot. (I think I should have used a lot more Insul Bright in the filling). Anyway, I was pretty excited to have a mat sent to me.

I had read that there might be an odor when ironing on wool, especially if using steam. The steam can make the wool a bit moist and possibly cause an odor. I found little odor, if any. The bit I did smell made me feel a bit nostalgic. When I was a girl I attended a private Catholic school which meant I wore a wool, plaid, pleated uniform through 8th grade. As soon as we were old enough to (sort of) do a decent job of it, my mom had us ironing our uniforms after she washed them. (Remember there are six girls and that was a lot of pleats for her to press!) So the smell of the mat reminded me of pressing the uniform skirts. But truly, it is a very light scent. Not a problem at all.

It measures 13.5 x 13.5 inches which is a great size since the largest block I usually do is 12 inches. Using up just 13.5 inches of space is really efficient as far as my sewing space goes. If taking a class, this would be a perfect tool to bring. The care instructions advise not folding or rolling the mat. But with a 13.5 ” square, it will fit into a tote bag without a problem. This will help avoid the lines that often happen at the ironing boards when taking a class!

As I was writing this review, I wondered what the word Nido meant. When I was on NidoGoods.com, I found out it means ‘nest, a structure, place or home where one finds comfort’. I love that! As I was emailing back and forth with Winnie and Tyler, I asked a few questions about their business. I thought it might be nice for you to read the conversation as it took place. These two are so fun to work with.

How did you start this business? Tyler and I had been thinking about starting an online business for a little while now. Meanwhile I recently started quilting in my free time. I am beginner so I don’t have a proper workspace. I started using our dining room table and had to constantly go back and forth to our ironing board. So basically I thought there has to be a better way and stumbled across wool ironing mats and our business was born.

Do you make the mats yourself? Do you outsource them? No, we do not make the mats ourselves. The product is manufactured in China and is made from 100% New Zealand wool! We had several manufacturers send us samples based on our specifications. We then spent the next few weeks testing them to ensure that we chose the best of the best. 😀

Do you plan to make different sizes? We are currently in production of a larger 17×24 inch mat and are considering other sizes. If you have any thoughts on additional sizes we would love to hear them!

How did you choose wool used in the mat? What makes wool the right fabric? There were two major factors that we were focused on – performance and odor. When it comes to performance, we chose wool because it retains the heat very well which allows heat to be delivered from both sides. Also, we have a nice wood dining table so we wanted to make sure that it didn’t get damaged! The wool also creates some friction allowing for grip so things don’t slide around when pressing. The odor was a concern as well, as some of the samples released a not-so-great smell with steam and heat. We were determined to find the best combination of the two and we couldn’t be happier with our product! 

Other things to share? We are brand new small business owners and very excited to get our product out on the market. If any of your readers have any questions or concerns feel free to contact us directly at [email protected]

As a small business owner, I enjoy supporting other small businesses. Nido Goods has a great product to offer and will soon have another, larger mat available too. I would love it if you would check them out and give their mat a try. These mats are sold on Amazon and, in fact, today happens to be the second day of the Amazon Prime sale! The mats are on sale today only for $24.99 which is nearly 25% off the regular price of $32. You do not have to be an Amazon Prime member to take advantage of this price. If you are reading this post AFTER the Amazon Prime sale ends, you can take advantage of a special discount offered to readers of Needle and Foot! Use code NEEDLEFOOT when ordering and you will receive 20% off. Thank you Nido Goods!!

Modern Plus Quilts Blog Hop

The release of Modern Plus Sign Quilts, written by Paige Alexander and Cheryl Brickey is being celebrated with a blog hop this week and next. I am so happy to take part in celebrating this book.  I have long been a fan of plus quilts and made one a while back.  I called it Positively Floating and you can see it here. Adding a book devoted to modern interpretations of plus quilts is the perfect thing for my collection of quilting books.

There are a couple of things I really appreciate about this book. One is the ease of most of the patterns Paige and Cheryl designed.  I am not usually one for fussy quilts with tons of pieces to cut and points to match up.  While there are some advanced, challenging patterns in the book, there are also lots of options for simpler designs. Also, there is a nice write up on the history of plus quilts which I really enjoyed.  Finally, with many of the patterns, the authors included an illustration of a suggested layout for cutting the pieces such that you get the most out of the fabric needed. This is really helpful for me as I just don’t have a strong ability to see spatial relationships and often (more often than you’d think) will cut my pieces and find I don’t have quite enough fabric.  This is because I don’t always choose the most efficient cutting plan.  Part of me attributes this to the fact that for years I sewed clothing, not quilts.  Clothing patterns always show the best way to lay out the pieces on the fabric – so I never had to figure this out for myself.  Anyway, I think this was a great addition to the quilt book and you don’t see it in many books that are published.

Let’s move on to the quilt I made.  This is the pattern called Postage Plus.  It is based on a postage stamp quilt (basically small patchwork) used to build the plus.  The oversized plus is set into a bold pattern of stripes.  This gives a very modern result.  The book shows a quilt with a gray and white background which is looked really clean.  When I chose to make this pattern, it was so I could use up an older Moda jelly roll that I purchased from a destash last year over at Academic Quilter.  Using strip piecing with a jelly roll made this quilt a very simple project to assemble.

The quilt came together so quickly.  I love using the stripes to bring out the brown and green shades in the patchwork. The colors make me think of ice cream for some reason.  Lime sherbet or coffee ice cream, which would you choose?  I would go for coffee ice cream every time!

You might notice I am sharing a quilt top, not a finished quilt.  If you are a fan of Instagram, you probably saw the posts where I was unhappily removing a large amount of long arm quilting gone bad.  Ugh!  I took this quilt top and loaded it on a long arm at my friend’s house.  For whatever reason, I couldn’t use her machine and obtain a good result.  It just looked horrid. I am far from a perfectionist and will often leave issues such as wobbles, mistakes, or points that don’t quite work out in the quilt. (Maybe I am too lazy to fix things like this). But this was bad.  Even the lazy quilter in me couldn’t just ignore it.  So I stopped, after quilting about 25% of the top, removed it from the frame, took it home and unpicked it.  Really, it wasn’t too awful a task and I am happy I fixed this.

I am eager to load it on the machine at the same shop where I have been renting time.  I have an appointment on Friday of this week and will be able to quilt this up then.  Off topic here, but take a look at the blue skies we enjoyed yesterday.  It was a gorgeous day and I am lucky to have taken photos then.  Today it is fierce, pouring rain – not a day to be outside.  Sure changed dramatically over night!

In closing, I strongly recommend Modern Plus Quilts.  The book is top notch with creative patterns of varied complexity , nice tips and clear information – a book well done.  The blog hop goes on all of this week and through next week.  Paige and Cheryl are offering giveaways each day so be sure to hop over there and enter the giveaways.  Lots of fun happening in blogland these days!

Below is the schedule for the hop
Monday, March 12
     Cheryl @Meadow Mist Designs
     Paige @Quilted Blooms
Tuesday, March 13
     Signature Plus
          Soma @Whims and Fancies
          Ann @Brown Paws Quilting
          Kitty @Night Quilter
     Tribal Plus
          Sophie @Luna Lovequilts
          Afton @Quilt Mod
          Shelley @The Carpenter’s Daughter Who Quilts
Wednesday, March 14th
     Plus Surround
          Jayne @Twiggy and Opal
          Jen @A Dream and A Stitch
          Abigail @Cut&Alter
     Kaleidoscope Plus
          Yvonne @Quilting Jetgirl
          Sandra @mmm!quilts
          Karen @Run Sew Fun
Thursday, March 15th
     Postage Plus
         Linda @Flourishing Palms
         Bernie @Needle and Foot
         Liz @Savor Every Stitch
         Stacey @Stacey in Stitches
     Rick Rack Runner
         Michelle @From Bolts to Beauty
         Patty @Elm Street Quilts
         Melanie @A Bit of Scrap Stuff
Friday, March 16th
     Row Addition
          Myra @Busty Hands Quilts
          Izzy @Dizzy Quilts
     Transparency Chains
          Christa @Christa Quilts
Monday, March 19th
     Faceted Rings
          Jessica @Quilty Habit
          Cindy @Hyacinth Quilt Designs
          Jennifer @Inquiring Quilter
     Petal Plus
          Julie @The Crafty Quilter
Tuesday, March 20th
     Message in a Bottle
          Tish @TishNWonderland
          Judy @Sew Some Sunshine
          Emily @The Darling Dogwood
     Cute as a Button
         Wanda @Wanda’s Life Sampler
          Karen @Tu-Na Quilts, Travels and Eats
          Katherine @Sew Me Something Good
Wednesday, March 21st
     Celestial
          Anja @Anja Quilts
          Kate @Smiles From Kate
          Sue @Sevenoaks Street Quilts
     Pinwheel Plus
          Carole @From My Carolina Home
          Alison @Little Bunny Quilts
Thursday, March 22nd
     Intertwined
          Debbie @Esch House Quilts
          Laura @Slice of Pi Quilts
          Beth @Cooking Up Quilts
     Bear Claw Plus
          Janice @Color Creating and Quilting
          Joanne @Quilts by Joanne
Friday, March 23rd
     Cheryl @Meadow Mist Designs
     Paige @Quilted Blooms

Linking to my favorites. Find them at the top of the page, under Link Ups.

This post contains affiliate links which means if you make a purchase by clicking on them, I will receive a small payment. This does not change the purchase price to you in any fashion.

Make Wall Quilts – Book Review & Giveaway

Today I would like to share a book review with you.  C & T Publishing asked me to review one of their new books, Make Wall Quilts: 11 Little Projects to Sew (Make Series). In a nutshell, I would say I love everything about the book except for the title.  The title didn’t grab me and as I clicked on the link to the book, I was going in with a negative attitude.  Luckily the actual book is wonderful.  I suppose this means one shouldn’t judge a book by its title!

This book is a compilation of eleven different wall, or mini, quilts.  Each is from a different, well known quilt designer.  There are projects from Camille Roskelly, Kim Schaefer, Rebecca Bryan and Heidi Staples in the book as well as several others.  Taking projects from books previously published by the designers is a genius idea as it provides a variety of styles in one book.  You probably know just from reading the names above that the book contains modern and traditional projects made with a variety off techniques.  I am a fan of reading quilt books (no surprise there!) but each one usually has a particular theme or style to it.  With this book, the quilter can try a variety of styles and techniques. The projects are not large which means they are easily accomplished.

Well, all except one!  For me the Huckleberry Quilt designed by Rebecca  Bryan looks challenging and maybe out of my skill range.  But this is a good thing – it further affirms the book has something for everyone from the beginner to the more experienced quilter.  The fact that this riff on a color wheel requires 72 different color fabrics is enough to intimidate me.  I have enough difficulty choosing color and if I had to choose 72 different solids I might go right over the edge. But while you are here, take a look at the quilting on this piece.  Stunning!

The reader might choose to make a modern applique project or a traditional one. I really like the look of this quilt designed by Jennifer Dick, appropriately called Mod. Again just take a look at the quilting here. Gorgeous!

Quilters who favor traditional applique might enjoy this one.  Called Outside In, this project was designed by Becky Goldsmith. It is a larger piece, finishing at 30″ x 36″ but very doable.  I love the cat at the top.  She has attitude.

Quilters without improv piecing experience might like to learn from the Lazy Log Cabin project designed by Laura Wasilowski. The blocks in the piece are six inches with the total quilt finishing at 17″ square.  It is Laura’s use of bold color which makes this project stand out to me.

Most of the projects in this book could easily be expanded to a larger size quilt if the reader wanted to make a baby or lap size quilt with the project.  This further exemplifies the flexibility of the book.  I really give high praise to C & T for curating this great selection of projects and publishing them in one book.

C&T has generously offered a copy of the e-book to give away to one lucky reader. But if you are not the winner, I do recommend purchasing this book, either for your library or as a gift.  It is a lovely collection of a variety of projects, truly a something-for-everyone kind of book.

To enter to win a copy, please leave a comment on this post.   Tell me what your favorite quilting technique is at the moment.  Is it EPP, paper piecing, improv piecing, traditional block piecing, applique? What do you enjoy most?  Giveaway will be open until Friday and I will pick a winner on Saturday.

If you would like to purchase the hard copy of the book, it is on sale at Amazon for a steal of a price! (Affiliate Link)

I doubt I will post again this week so let me wish you a Happy Thanksgiving. I do love this time of year. Celebrating gratitude for all we are blessed with feels good and reminds us that even if we are enduring difficulty, we still have much to be thankful for.

Note:  Needle & Foot is an Amazon Affiliate meaning if you were to click through and purchase the book, I will receive a small stipend for the purchase.

Fussy Cutters Club, Book Review and Giveaway!

Today is my day to post a review and host a giveaway of a fun new quilt book.  If you are here for the first time via the blog hop, welcome!  The book of the day is Angie Wilson’s Fussy Cutter’s Club published by C&T Publishing.  You may know Angie as she is the queen of online quilt alongs and swaps. She thrives on leading large groups of quilters through complicated projects such as her current QAL making Jen Kingwell’s Gypsy Wife Quilt – not for the faint of heart for sure.  For more info on the events she is currently leading and has done in the past, click here.

It was about two months ago when I was invited by C&T Pubs to review Angie’s upcoming book.  Right away I was intrigued by the title of the book and the gorgeous cover.  I know we aren’t supposed to judge a book by its cover, but come on.  Look at this cover!  It just pulls the reader in at the get go.  Angie’s reputation for mad skills with fabric play and use of color assured me the book would be worth the time to read, review and create with.

The premise of the book is to learn to look at your stash with a new perspective – Angie teaches the reader to use your fabric by cutting into it and emphasizing the bits you love the most.  The book is well written and the instructions for each of the 14 projects are precise and easy to understand.  Angie takes the reader through the design process, how to best use your fabrics, color theory and more, prior to introducing projects. She really did a great job with this book.  The projects range from the very simple to quite complex (again, look at the cover!)

For my project, I chose to make the tote bag.  Angie rated it as an Intermediate project but with her clearly written instructions, I didn’t have any trouble. Following Angie’s thoughts on color for this project, I chose a limited palette.

My bag is built around a piece of vintage fabric I have from the 1950’s.  It is  a kitschy print featuring red, brown and black kitchen appliances, clocks and coffee cups.  I loved the idea of using vinyl for the bottom of the bag (looks great and gives durability) and found this textured vinyl at Ben Franklin.  Once I had my focus fabric and the vinyl, the rest of the fabric was pulled from my scrap bins.

Since the red coffee cup was the primary focus, I decided to use mainly black, brown and white with the occasional pop of red. Most of my fabrics had a vintage look to them except the coffee themed text prints.  Those are clearly current and modern but I liked the idea of including the coffee text with the other fabrics, to further the coffee theme of the bag.   The main fabrics I fussy cut were the coffee cups and saucers, the text prints, and the tiny black coffee pots on the vintage fabric.

Making the slabs for the outside of the bag was really fun – I have improv pieced in the past, but it has been a long while.  Putting these scraps together was very satisfying.  I did reduce the size of the bag by a few inches in width and length. I am fairly short and the bag seemed like it would be too big for me at the original size but breaking it down to reduce it was easy.

The two main slabs and the vinyl bottom are assembled here

I learned quite a bit about fussy cutting.  Like anything, the more you do it, the better it becomes. Looking back, I feel I should have trimmed the bits I fussy cut closer in. I left too much peripheral pattern and that detracts from the focal point.  Note the cup and saucer below.  I think if I would have trimmed it down a bit and removed the little bits of coffee pots, it would have been much cleaner. In the picture above, take a look at the text print.  Were I to do this again, I would not allow the other words to appear. I really only wanted the word “coffee” to be the focus.  But live and learn (or sew and learn?).  Next time I will remember these bits and pieces that really make a difference in a project.


When assembling the bag, Angie’s instructions called for me to line the outer pieces with fusible interfacing and then to apply fusible batting.  I was skeptical at first but it really makes the structure of the bag a nice combination of crisp and soft (does that make sense?)  The addition of the fusible interfacing gave it a nice shape. Once I had those layers assembled, I used simple straight line quilting to hold all three pieces in place.

Her pattern calls for fabric straps but I had plenty of the vinyl so I decided to make the straps with that instead. I like the look of it and was pleasantly surprised that my machine had no issue stitching through several layers of vinyl. (I did use a heavy duty jeans needle.)

My model shows just how cute this tote bag is!

Overall, it was a great project and I felt the book was a great inspiration  to look at my fabric with a different perspective.  The tote is really fun (as you can see with my always available bag model.) It traveled with me to Vermont last week and when combined with the cross body bag I made, it was the perfect set up.

This is just one example of the projects that Angie designed for her book.  There are thirteen others though, including pillows, coasters, minis and zip pouches. To take a look at some of the projects, here is a list of the bloggers celebrating this new book.  Check them out for lots of inspiration as well as several chances to win a copy of the Fussy Cutters Club book!  As with most book giveaways, if the winner is international, an e-book will be provided.  If in the states, you will receive a hard copy of the book.

To enter to win, please leave a comment telling me your current go-to quilt book (I guarantee if you purchase or receive this book, it will be right up there on the list!) I will leave the giveaway open through Saturday, October 28th and will announce a winner on Sunday.


Linking up with lots of my favorites – most are listed at the top of the page, under Link Ups.  Also linking to Elm Street Quilts annual Bag It event.  Check that out here!

Making Connections; Quilting Book Review & Bloghop

About two weeks ago, I was contacted by C&T Publishing asking if I would provide a review of one of their newest quilting books. Always up for learning something new or reading pretty much anything about quilting, I was happy to help.

The author, Dorie Hruska, is a long arm quilter, mom, and blogger.  She has her website,  Forever Quilting, set up as both her blog and her professional site for her long arm business. I really enjoyed looking at her gallery to see the work she has done for others. Her quilting style is lovely with many intricate patterns.

The book, Making Connections, is all about free motion and long arm quilting. The goalof the book is to help the quilter choose a motif or pattern for the quilt and then to set a travel path up for moving around the quilt in the most efficient manner, with the least amount of starts and stops possible.  This is really appealing to me. Like many of you, I struggle with how  to quilt something once that quilt top is done.

Reading this book through, I noticed two things that I really liked.  It is written as a workbook with very clear illustrations and directions. The practice builds in complexity as the reader learns the steps.  Also, there are lots of grids printed in the book to draw on.  The grids are bigger than graph paper but not quite big enough. When I practiced, I copied the page and enlarged it on our printer.  Finally, the book is printed in landscape orientation, not portrait. This makes it much easier to use as you don’t have the binding on the left side making it awkward to draw.

I took away a few really helpful ideas from Dorie’s book:

  1. Doodle the design before quilting.  I know this, we all know this, but it helps so much! There is such muscle memory in free motion quilting and by drawing it several times over, that routine settles into our brain before we begin quilting.
  2. While doodling the design and then while quilting, think, or say, the pattern you are moving in to keep you on track.  For example, Up, Down, Over, Up, Down, Over – or whatever works.  When Dorie maps out a path in the book, she sets this up for the quilter. As a beginner quilter at best, this was pretty helpful.  Seems so simple, but that little mantra was kinda cool. 🙂
  3. Don’t try to quilt the whole design in one pass.  Dorie layers the design so you might do one pass, the come back and add a layer to add another detail.  I get this and think, eventually, it will be helpful to me.  I am not quite there yet.  Some of the designs she illustrates for the reader are quite complex. She does use different colors so you know which pass you are working on each time. Also, she numbers the path so you can see what direction she is taking you in. This is quite helpful.

Note the complexity of the design, stitched in several passes.

The method used in this book is based on grids.  The perfect example is basic patchwork, or nine patch blocks, where there is an obvious grid.  The more experienced quilter would be able to apply it to more complicated blocks.

I didn’t have a quilt top on hand that would work for this so I didn’t actually quilt anything.  I did do some drawing to get that path ingrained into my brain though.  After drawing a bit, I made a quilt sandwich with some scraps of fabric and batting.  I drew a 3″ grid on it to practice.  Once I got going, my sewing machine gave me fits.   So, I had to quit and I took the machine in for service.  I have been putting it off and now it was sending me very clear messages that it wasn’t going to perform well! But ugly as the stitching was, the idea worked – I knew how to move along the design without getting stuck in a corner somewhere.  This methodology requires planning though.  It isn’t one where you move freely around on the quilt top, filling in sections as you go along.

If I were asked, I would tell the readers this is probably a book for an intermediate quilter. I think I could follow it for the basic design and travel flow but I don’t think, as a beginner, I could layer the designs and achieve a nice result.

Overall, I enjoyed the book and think it is a valuable resource for my library.  As I continue to practice, this will be very helpful.  Dorie and C& T Publishing have generously provided a book for me to giveaway to a lucky reader.  If the winner lives in the US, a hard copy will be sent.  For winners outside of the US, an Ebook will be provided. For those of you that want to go ahead and purchase the book, it is available through C&T Pubs or directly from Dorie’s website (she will send an autographed copy!)

To enter to win, please leave a comment on this post.  If you follow me on Instagram or Facebook, you are welcome to leave a 2nd comment for another entry.  Sign up for my newsletter (which is sent out every month) for another entry.  (Sign up form is at the top of the page on the right side.)  That is three possible chances to win!!

THIS GIVEAWAY IS NOW CLOSED.

For even more chances, please visit the other bloggers involved in this hop.  Lots of gorgeous quilting has been done to display all this book offers. Go check it out!  Here is the schedule:

BLOG HOP SCHEDULE

Friday September 1st

C&T Publishing Blog@ctpublishing on Instagram

Monday September 4th

Holly Anne Knight Blog@stringandstory on Instagram

Susan Arnold Blog@quiltfabrication on Instagram

Tuesday September 5th

Becca Fenstermaker Blog@prettypiney on Instagram

Teri Lucas Blog@genqmag on Instagram

Wednesday September 6th

Sherry Shish Blog@poweredbyquilting on Instagram

Pam Morgan Blog@sweetlittlestitches on Instagram

Thursday September 7th

Katy S Blog@katyquilts on Instagram

Laura Piland Blog@sliceofpiquilts on Instagram

Friday September 8th

Suzy Webster Blog@websterquilt on Instagram

Bernie Kringel Blog@needleandfoot on Instagram  — You’re here!!!

Monday September 11th

Jamie Mueller Blog@sunflower_quilt on Instagram

Nancy Scott Blog@masterpiecequilting on Instagram

Tuesday September 12th

Sherri Noel Blog@rebeccamaedesigns on Instagram

Anorina Morris Blog@sameliasmum on Instagram

Wednesday September 13th

Yvonne Fuchs Blog@quiltingjetgirl on Instagram

Barbie Mills Blog@thequiltingmill on Instagram

Thursday September 14th

Afton Warrick Blog@quiltingmod on Instagram

Kathy Bruckman Blog@kathyskwiltsandmore on Instagram

Friday September 15th

Susan Arnold Blog@quiltfabrication on Instagram

Dorie Hruska Blog@foreverquilting on Instagram

No Scrap Left Behind – Blog Hop

I am thrilled to be a participant in the Blog Hop celebrating the new book No Scrap Left Behind. This book, written by Amanda Jean Nyberg of Crazy Mom Quilts, is an excellent book. The second book for Amanda Jean, she includes 16 projects which are sure to inspire you to pull out your scrap bins and start creating. You might be familiar with her first book which she co-authored with Cheryl Arkinson, Sunday Morning Quilts. I have that one as well and love them both!

Amanda Jean is the queen of scrappy quilting – if you are not already familiar with her work, please check out her blog.  This blog was one of the first ones I discovered back when blogging was becoming such a resource for information and tutorials.  I remember one of the first quilts I made was based on her (free) pattern, Fair and Square.  Since then, I have been a loyal follower who has learned an incredible amount by reading Amanda Jean’s blog.

Back to the book, I ordered this just as soon as it was released. After reading through it, I was pleased to find out the quilts were divided into sections. Some quilts use strings, some use squares and others, triangles. There is also a section on tiny bits and pieces where she outlines the methods to made adorable pin cushions. (Next to her scrappy quilts, I think Amanda is known for her deep affection for pin cushions and polka dots!)  Another facet of the book is Amanda’s explanation of color with some of the projects. She designed quilts that are great examples of projects using different scales, or sizes, of pieces as well as a broad selection of color and value.  The explanation of fabric and color selection is clearly written and very helpful. She gives several ideas for alternate ways to make the projects which enables the reader to find just the right project.


Looking through the book, I was tempted by several different patterns. For the purposes of this hop, I chose to make the Ring Me quilt. I love the effect of the stripped piecing and the open, solid background. Trying to stick with using my stash, I chose to use a gray background. I had a large piece of Bella solid in Graphite and love the depth it gives the quilt.

I must admit, I was overly confident when I told Amanda that I would be able to get the quilt top finished for the hop. It looked so simple when I looked at the pattern. And it is simple!  But oh my gosh, it is a fair amount of piecing going on there! Losing just over a week to my Vermont trip earlier this month didn’t help matters either. For a few days I tried to push myself toward a finish but I (thankfully) decided to slow down and just share my progress for this post. I really like how this is coming along and didn’t want to hurry it and end up with a lesser finish.

For now, progress shots will have to do. Like I said, the pattern is quite simple. I strip pieced the colorful rings around the solid gray blocks. The only trouble I had was the strips are prone to stretching. When using scraps, they are cut every which way and not always with the grain of the fabric. Attaching the two strips to the top and bottom of the block was fine. The problem seemed to occur when I added the background squares to the pieced strips. I think I am too careless with the iron and you know what those rock star quilters are always preaching, “press, don’t iron”.  I was ironing and it stretched the strips and I would end up with corners that don’t quite line up. For the most part, I don’t think the lack of precision there will really matter. The overall effect is still going to be good.  Once I realized the problem, I started to watch this part of the process and be more careful with the iron. This is helping and my precision is improving.

Finally, I love the exercise in color this quilt provides. As I grouped strips and stitched them together, it was satisfying to try different colors together. As I have mentioned in prior posts, color can give me trouble at times. This was a nice side benefit to this project. At any rate, I love the quilt so far and should finish it up soon. You can expect another post when I have a finish to share!

As part of the hop, we were also asked to share our scrap sorting and storage methods with you. Being a fairly organized person, I do have all sorts of scraps sorted and stored. My scraps that are less than say the size of a fat eighth, are sorted by color and kept in shoebox size bins.  Each are labeled by color which probably isn’t entirely necessary since I can basically see through the bin enough to know what is in there. The shoe box size is really not big enough and currently my blue and green bins hardly close since they are just bursting with scrap. My solid scraps, of all colors, are kept in a separate tub. Until this project, the solids tub was overflowing. It will close now but still, it is quite full. Do you see the large zip lok bag between the print and solid scraps? That contains my extra bits and pieces of improv or ‘made’ fabric.  These are left over trimmings from improv projects and certainly couldn’t be tossed!


This isn’t all though, nope not by a long shot. I also have zip lok bags for squares. When I am cutting and happen to remember, I will cut my scraps into squares. I cut charms (5″ squares) as well as 3 1/2″, 3″, 2 1/2″ squares.  Those are just stacked by size and kept in a bag.  Well, except for the charms, which are kept in a box and marked. Trimmings from flying geese blocks, you know, those tiny HST’s, are in their own bag too. Finally, I keep holiday fabric scraps in their own (very large) bag.


Reviewing all of this, I am not sure whether it is the sign of a very organized quilter or someone who may end up on the reality TV show, Hoarders. Is this a problem — is an intervention needed??? Will I ever use these bits and pieces? I hope so and having both of Amanda’s books, Sunday Morning Quilts and No Scrap Left Behind, should help me use them.

Do you have a similar problem? Are you a scrap hoarder like the rest of us? The first step is always admitting the problem, right? The second step is to win this book!  C&T Publishing and Amanda Jean have offered a giveaway for each blog on the hop. If the giveaway is won by a USA participant, they will receive a paper copy. International winners will receive an e-book.  Either way, this is an excellent book to add to your library!! To enter the giveaway, please share your scrap busting habits or your scrap storing and sorting methods. Help us out here. Some of us are drowning in scraps.  Help!  For an extra entry follow me on Instagram, Facebook or the blog and then let me know how you follow.   The giveaway will be open through the weekend and a winner will be selected Monday morning, May 1st. Good luck!

NOTE: this giveaway is not closed. Thanks to everyone for participating!

There are many more chances to enter the giveaway to win a copy of this book! Here is the schedule for the hop. I hope you will check out the other projects and interpretations of the quilts in this book. You will surely be inspired.

Monday, April 24th Mary Kolb
Tuesday, April 25, Lee Monroe
Wednesday, April 26, Sandi Hazlewood
Thursday, April 27, Bernie Kringel — You’re here!!
Friday, April 28, Erin Cox
Monday, May 1, Katherine Greaves
Tuesday, May 2, Tracy Mooney
Wednesday, May 3, Cheryl Arkison
Thursday, May 4, Debbie Jeske
Friday, May 5, Amy Smart


Note: There are affiliate links in this post, meaning if you click through and make a purchase, I will receive a small payment as part of the sale.

Knock Knock, Who’s There?

I had a finish this week! Remember I did some pattern testing for Sarah of Sarah Goer Quilts? I was able to quilt and bind it over the last week or so. The quilt is just adorable.  If you would like a copy of this pattern, click over to Sarah’s blog and sign up for her newsletter. I just read the second newsletter and I am enjoying them.

This quilt has been a multi-faceted project for me. It began with pattern testing the new pattern for Sarah. I made the quilt with fabrics from the Fiesta Fun line (which I just happen to carry in my shop!) I chose the Fiesta Fun fabric so I would have something to display the brightly colored fabric. When I looked at the quilt top, I knew it would be a fun one to quilt. The quilt is filled with big open spaces to play with. At about the same time Fil-Tec provided me with a lovely spool of white Glide thread to play with.

I decided to quilt the floral block and the striped blocks with the white spool of Glide.  Wow. I loved it! Glide is a polyester thread with a very pretty sheen to it.  It was a dream to quilt with – honestly, just amazing. It is very clear where the thread earned its name – I felt very little pull when I was quilting. I will absolutely stock up on a few more colors. Ok – back to the quilting. For the floral block, I basically outlined some of the flowers and leaves. Very simple and quite fun. For the striped blocks (made with the adorable Happy Streamers fabric from Art Gallery) I followed the pattern of the stripes, stitching on the white space between the streamers. When the fabric is as busy as this Happy Streamers is, I think it works well to keep the quilting simple.


Then I worked on the green background. I used a spool of Mettler thread to quilt this because I had a spool that worked well. Honestly though, I am not a huge fan of quilting with Mettler. It gives off quite a bit of lint and I fight the tension more when I use Mettler. But I had a good time quilting this. For the inner border I used large, free form flowers.

On the outer border, I did a an organic wavy vine with small flowers, bumblebees and butterflies.

For the bees and butterflies, I found inspiration at The Inbox Jaunt. Lori Kennedy has a vast library of tutorials for different quilting motifs. I think the bees and butterflies are so cute. Some of the butterflies are a bit lopsided, which adds a lovely touch of whimsy to the quilt (right?). Finally, on the block between each section of directional fabric, I quilted a cross hatch pattern.

The backing was cut from a sheet that I thrifted a long while back. I think the bright, primary colors work well with the top.

The binding is a cheerful print from Art Gallery, Squared Elements in Mandarin. Guess what? I have it in my shop! 🙂

I am happy to call this one done. Bright and colorful, perfect for these gray, rainy days we have been having. (But I am not complaining. I welcome the rain!!)

I would like to thank everyone for your support of my shop. I really appreciate it. The discount code for Needle and Foot readers is good for just a few more days. Enter  NANDFREADERS15 follow meand receive a 15% discount on orders of $5.00 or more. This code is valid through February 12th.  Next week there will be a giveaway on Instagram. If you , keep an eye out for that. If you don’t, now might be a good time to start!  😉

Linking to my favorites. Check the list at the top of the page, under Link Ups.