Category Archives: Tote Bags & Purses

Pretty and Pink

When I started to collect my thoughts for this post, I realized that pink is a common theme with the projects I intend to share. This is strange because it isn’t one of my favorite colors. Hence the title to the post. Let’s see what I have been working on.

Another Mercyful Quilt!

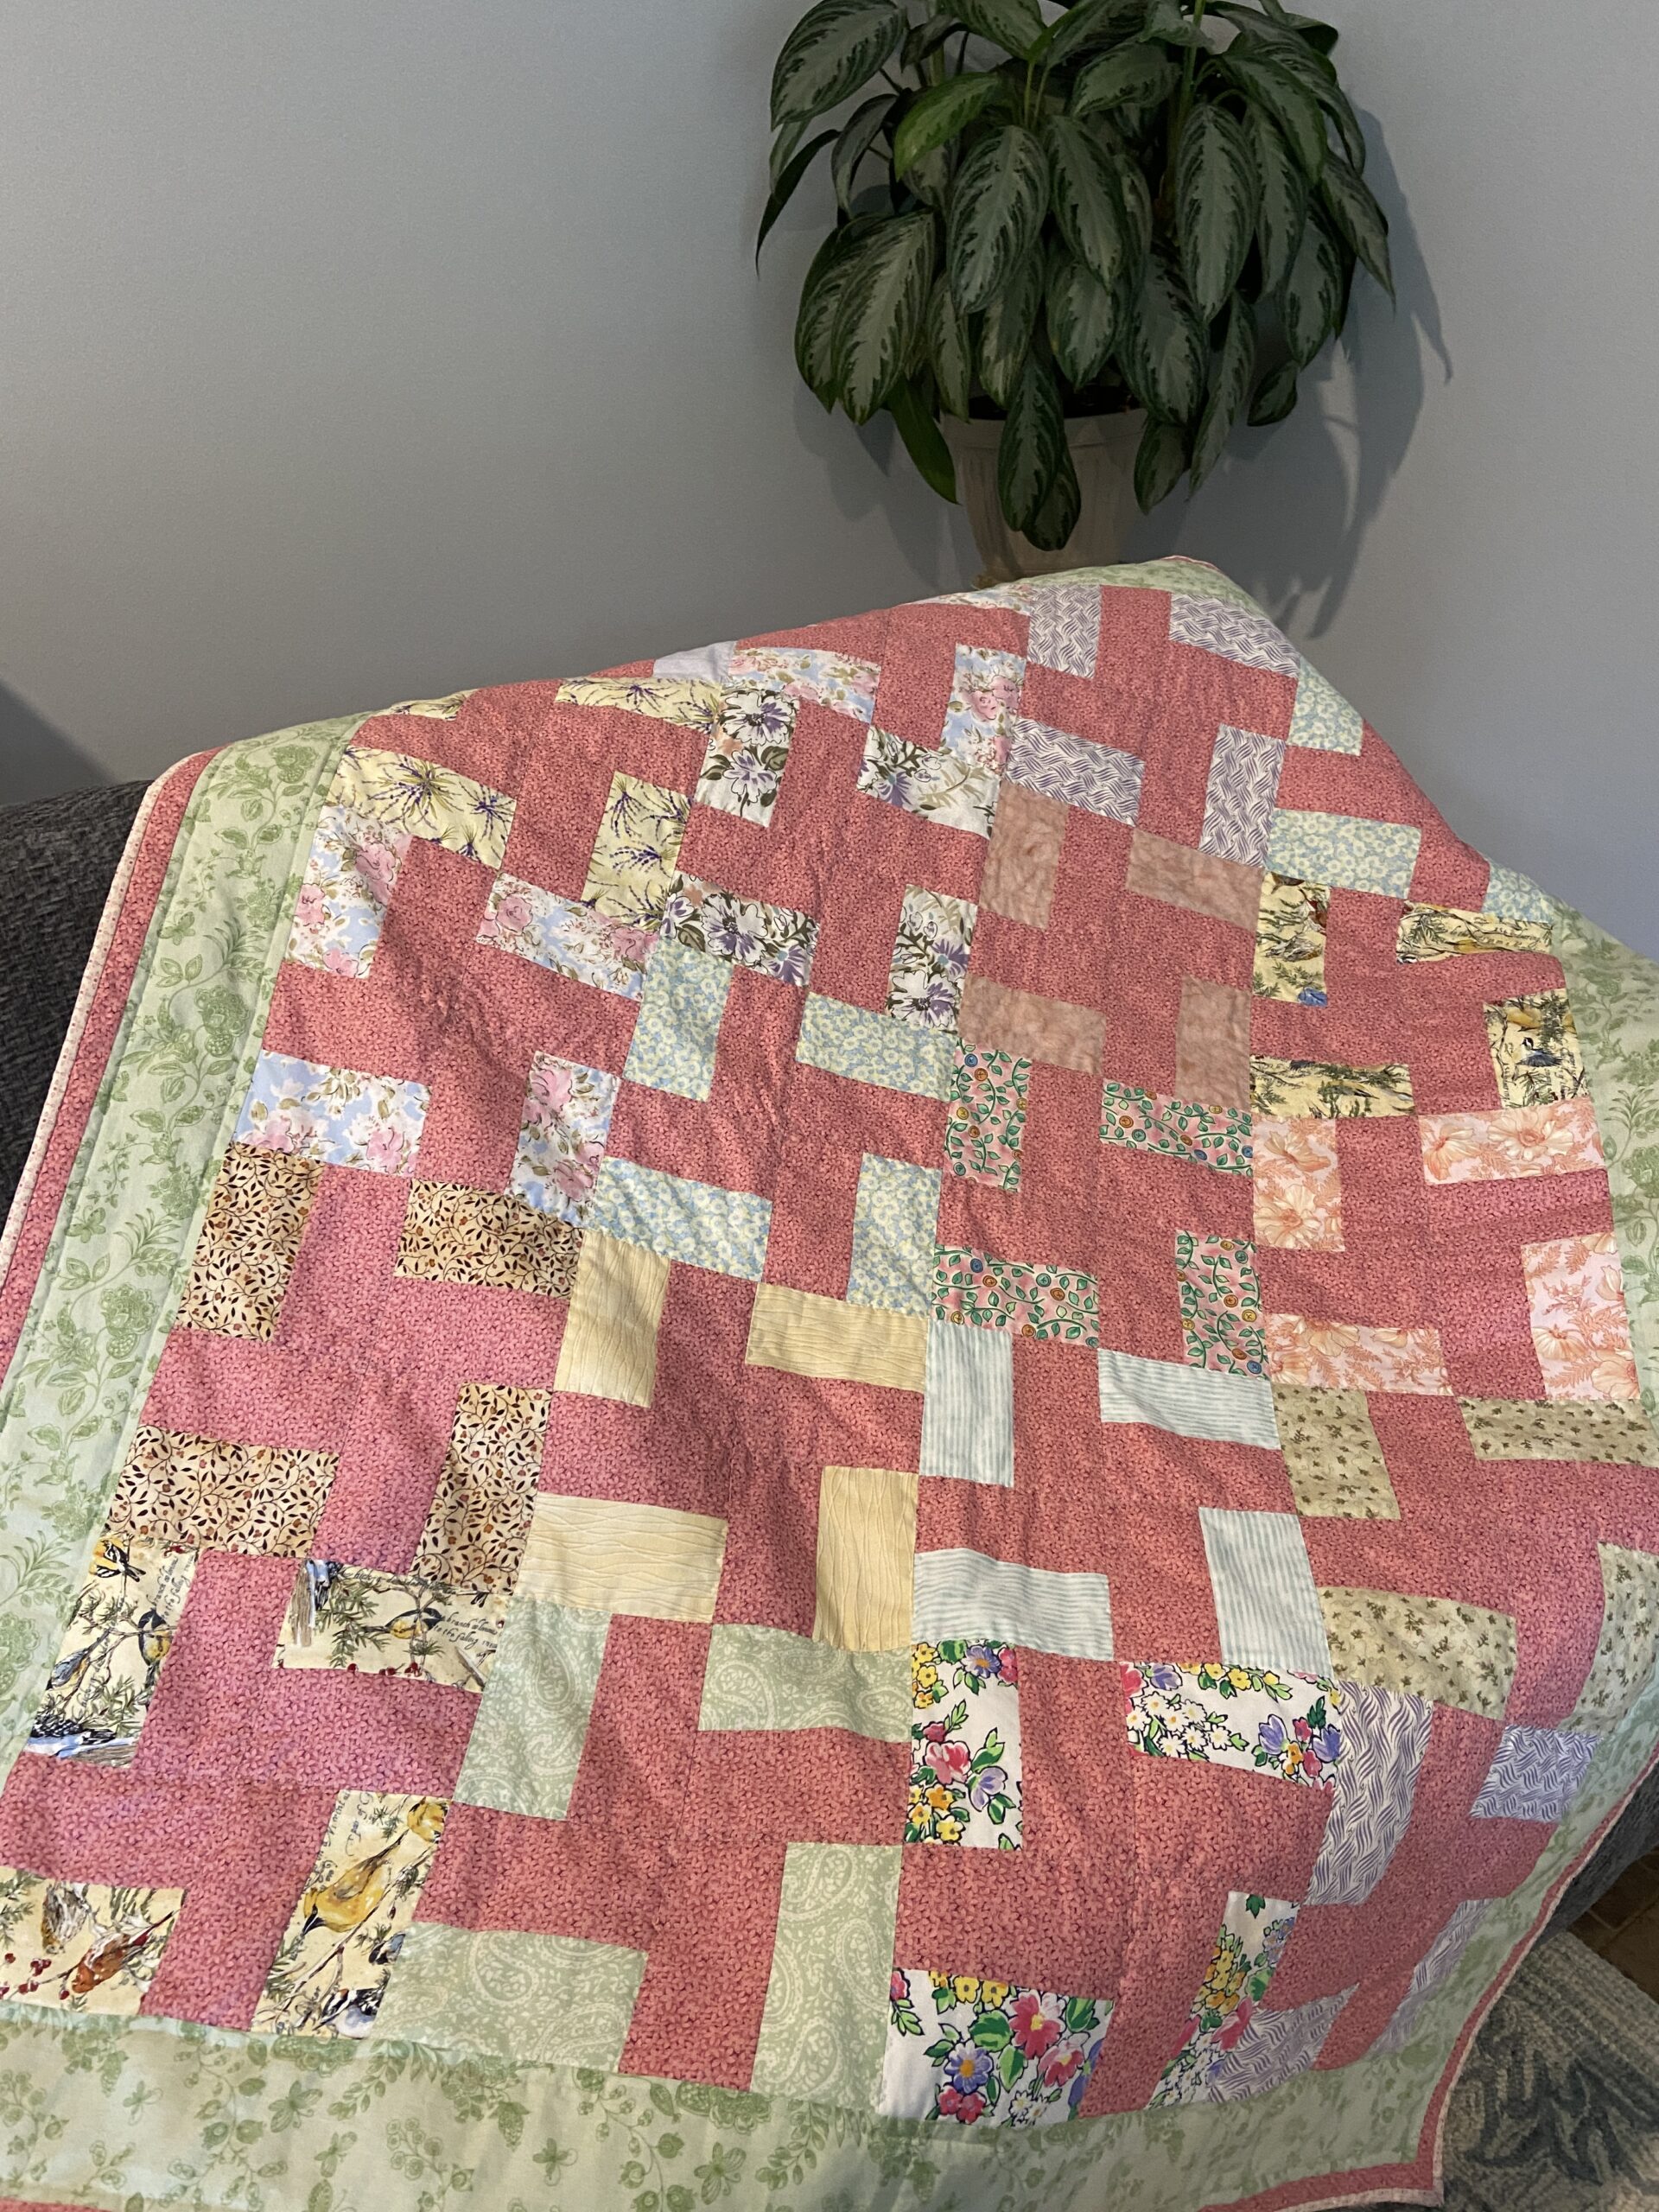
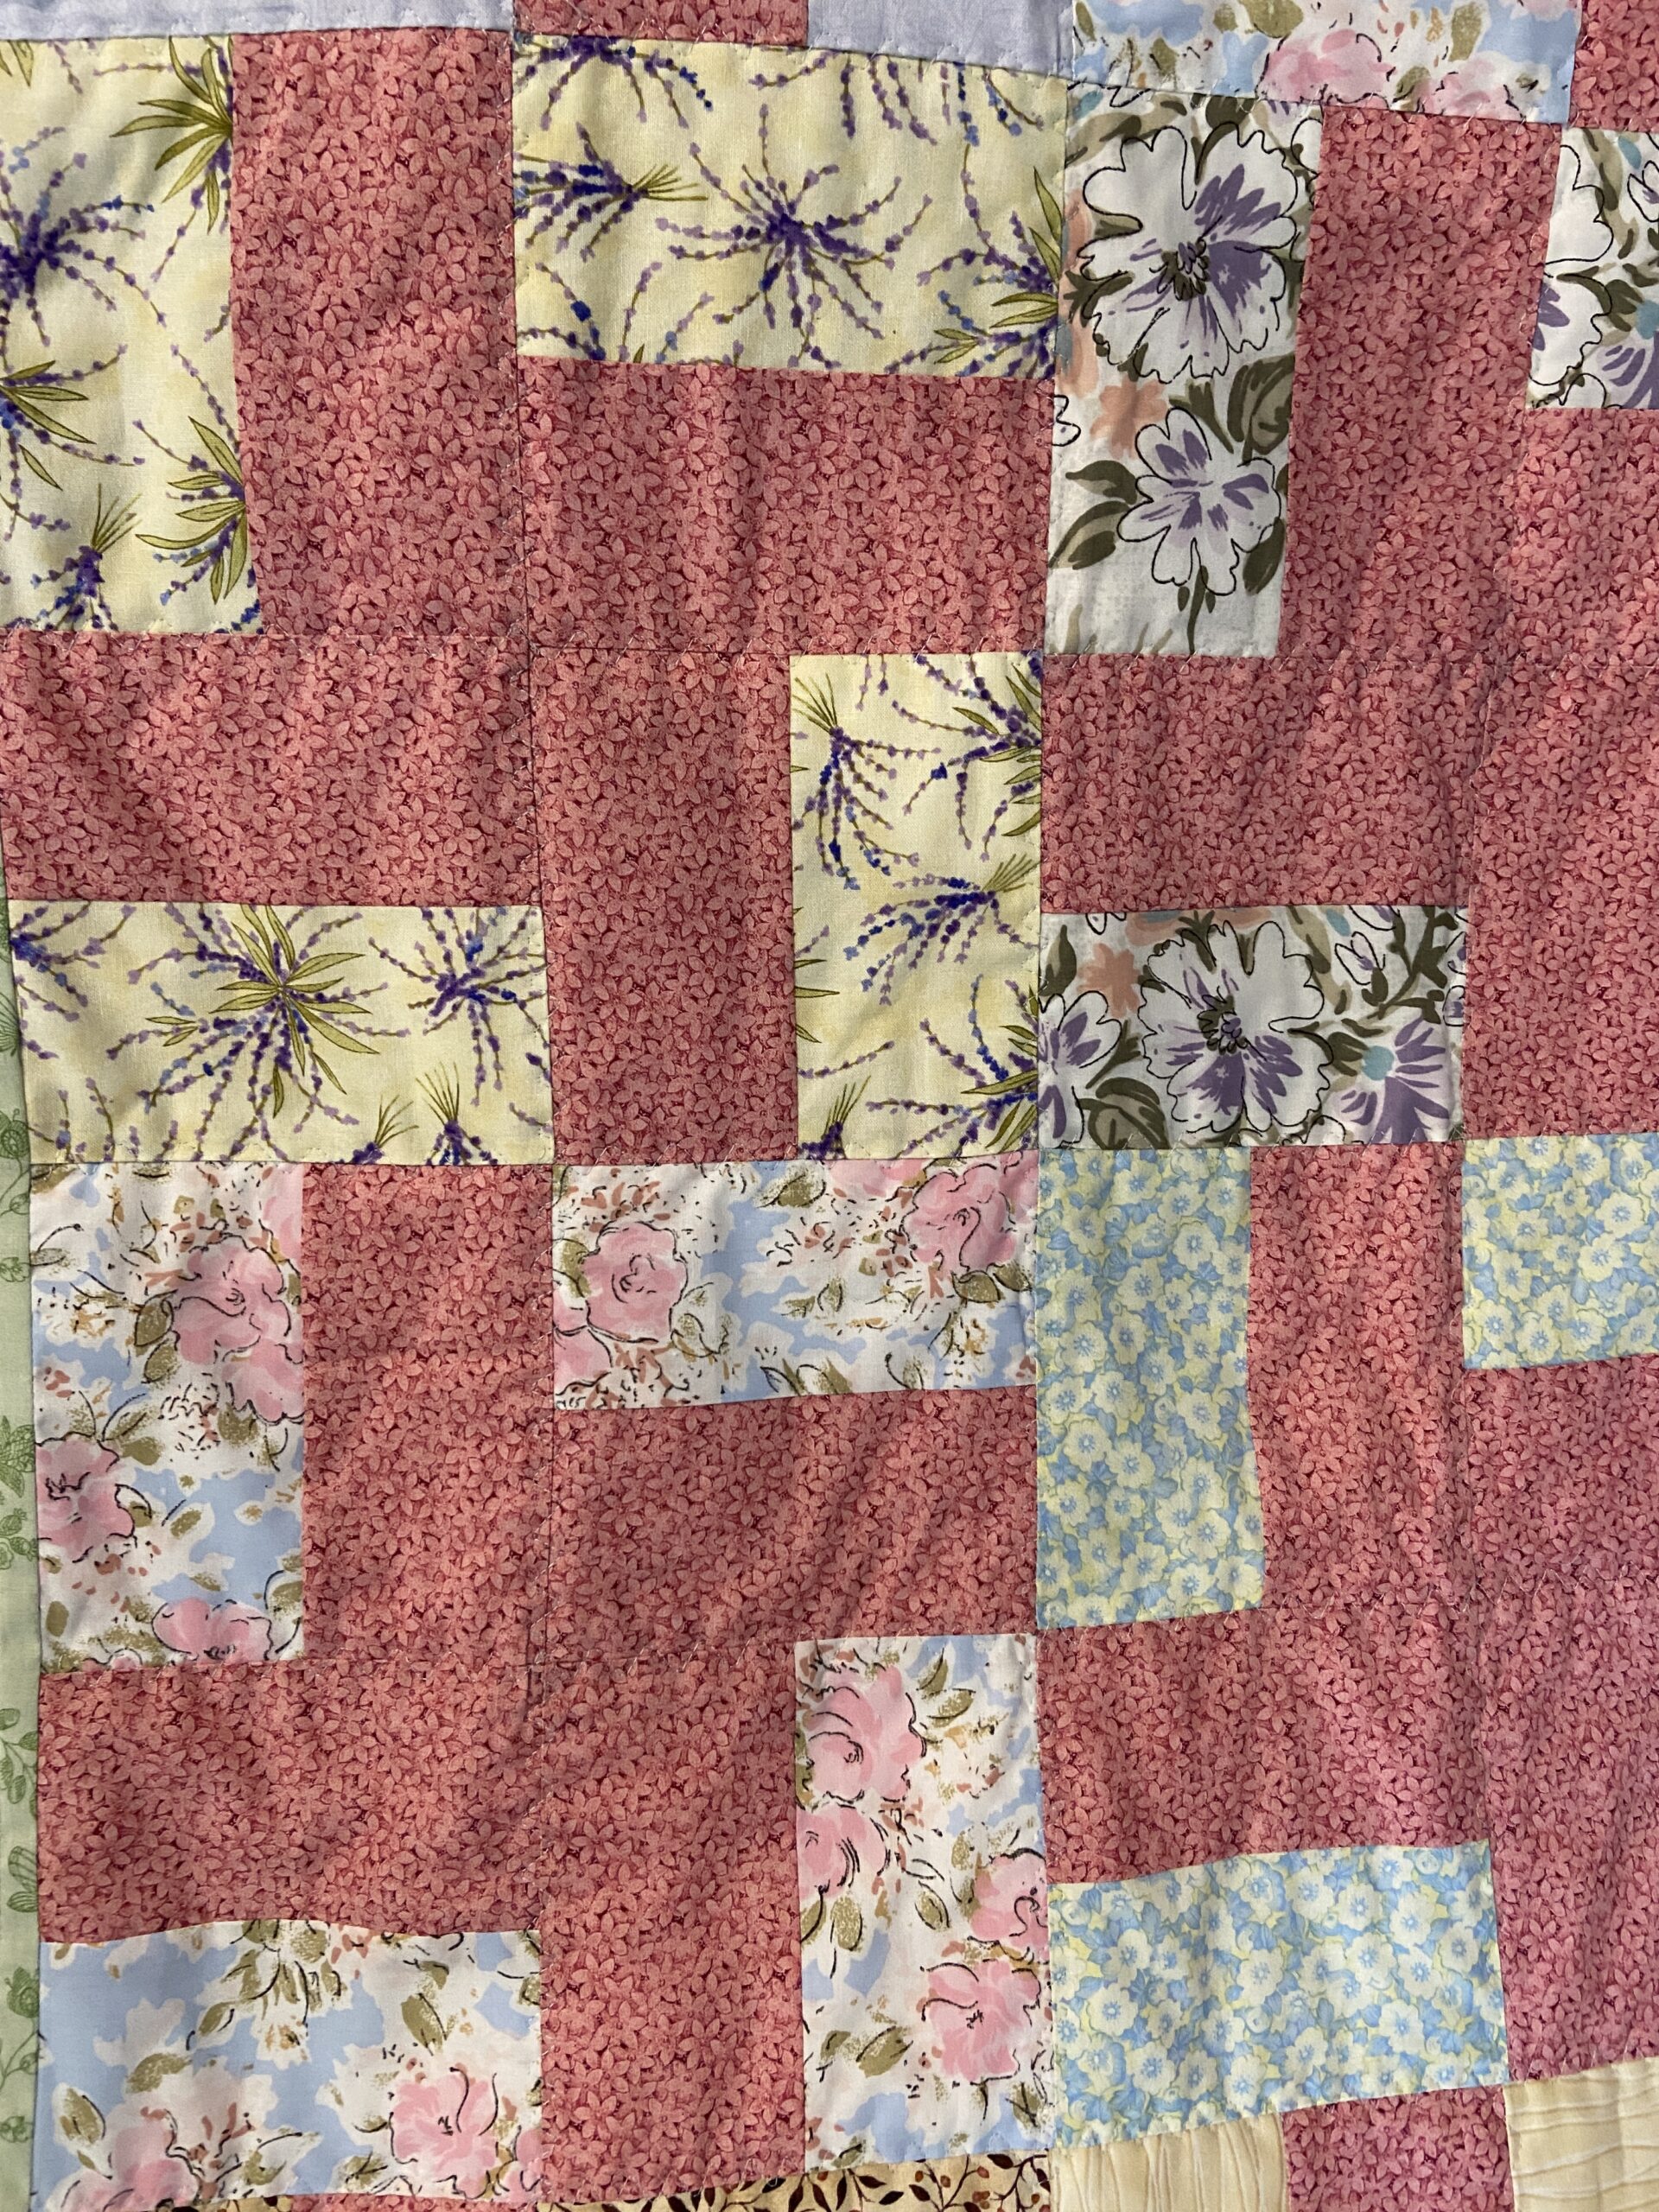
Remember I shared about a quilt show and lavender festival I attended earlier this summer? While at the show, I picked up an almost finished quilt top because I knew it would be sweet as a Mercyful quilt. Then center was complete but smaller than I wanted so I added two borders.

Two borders made this just big enough.

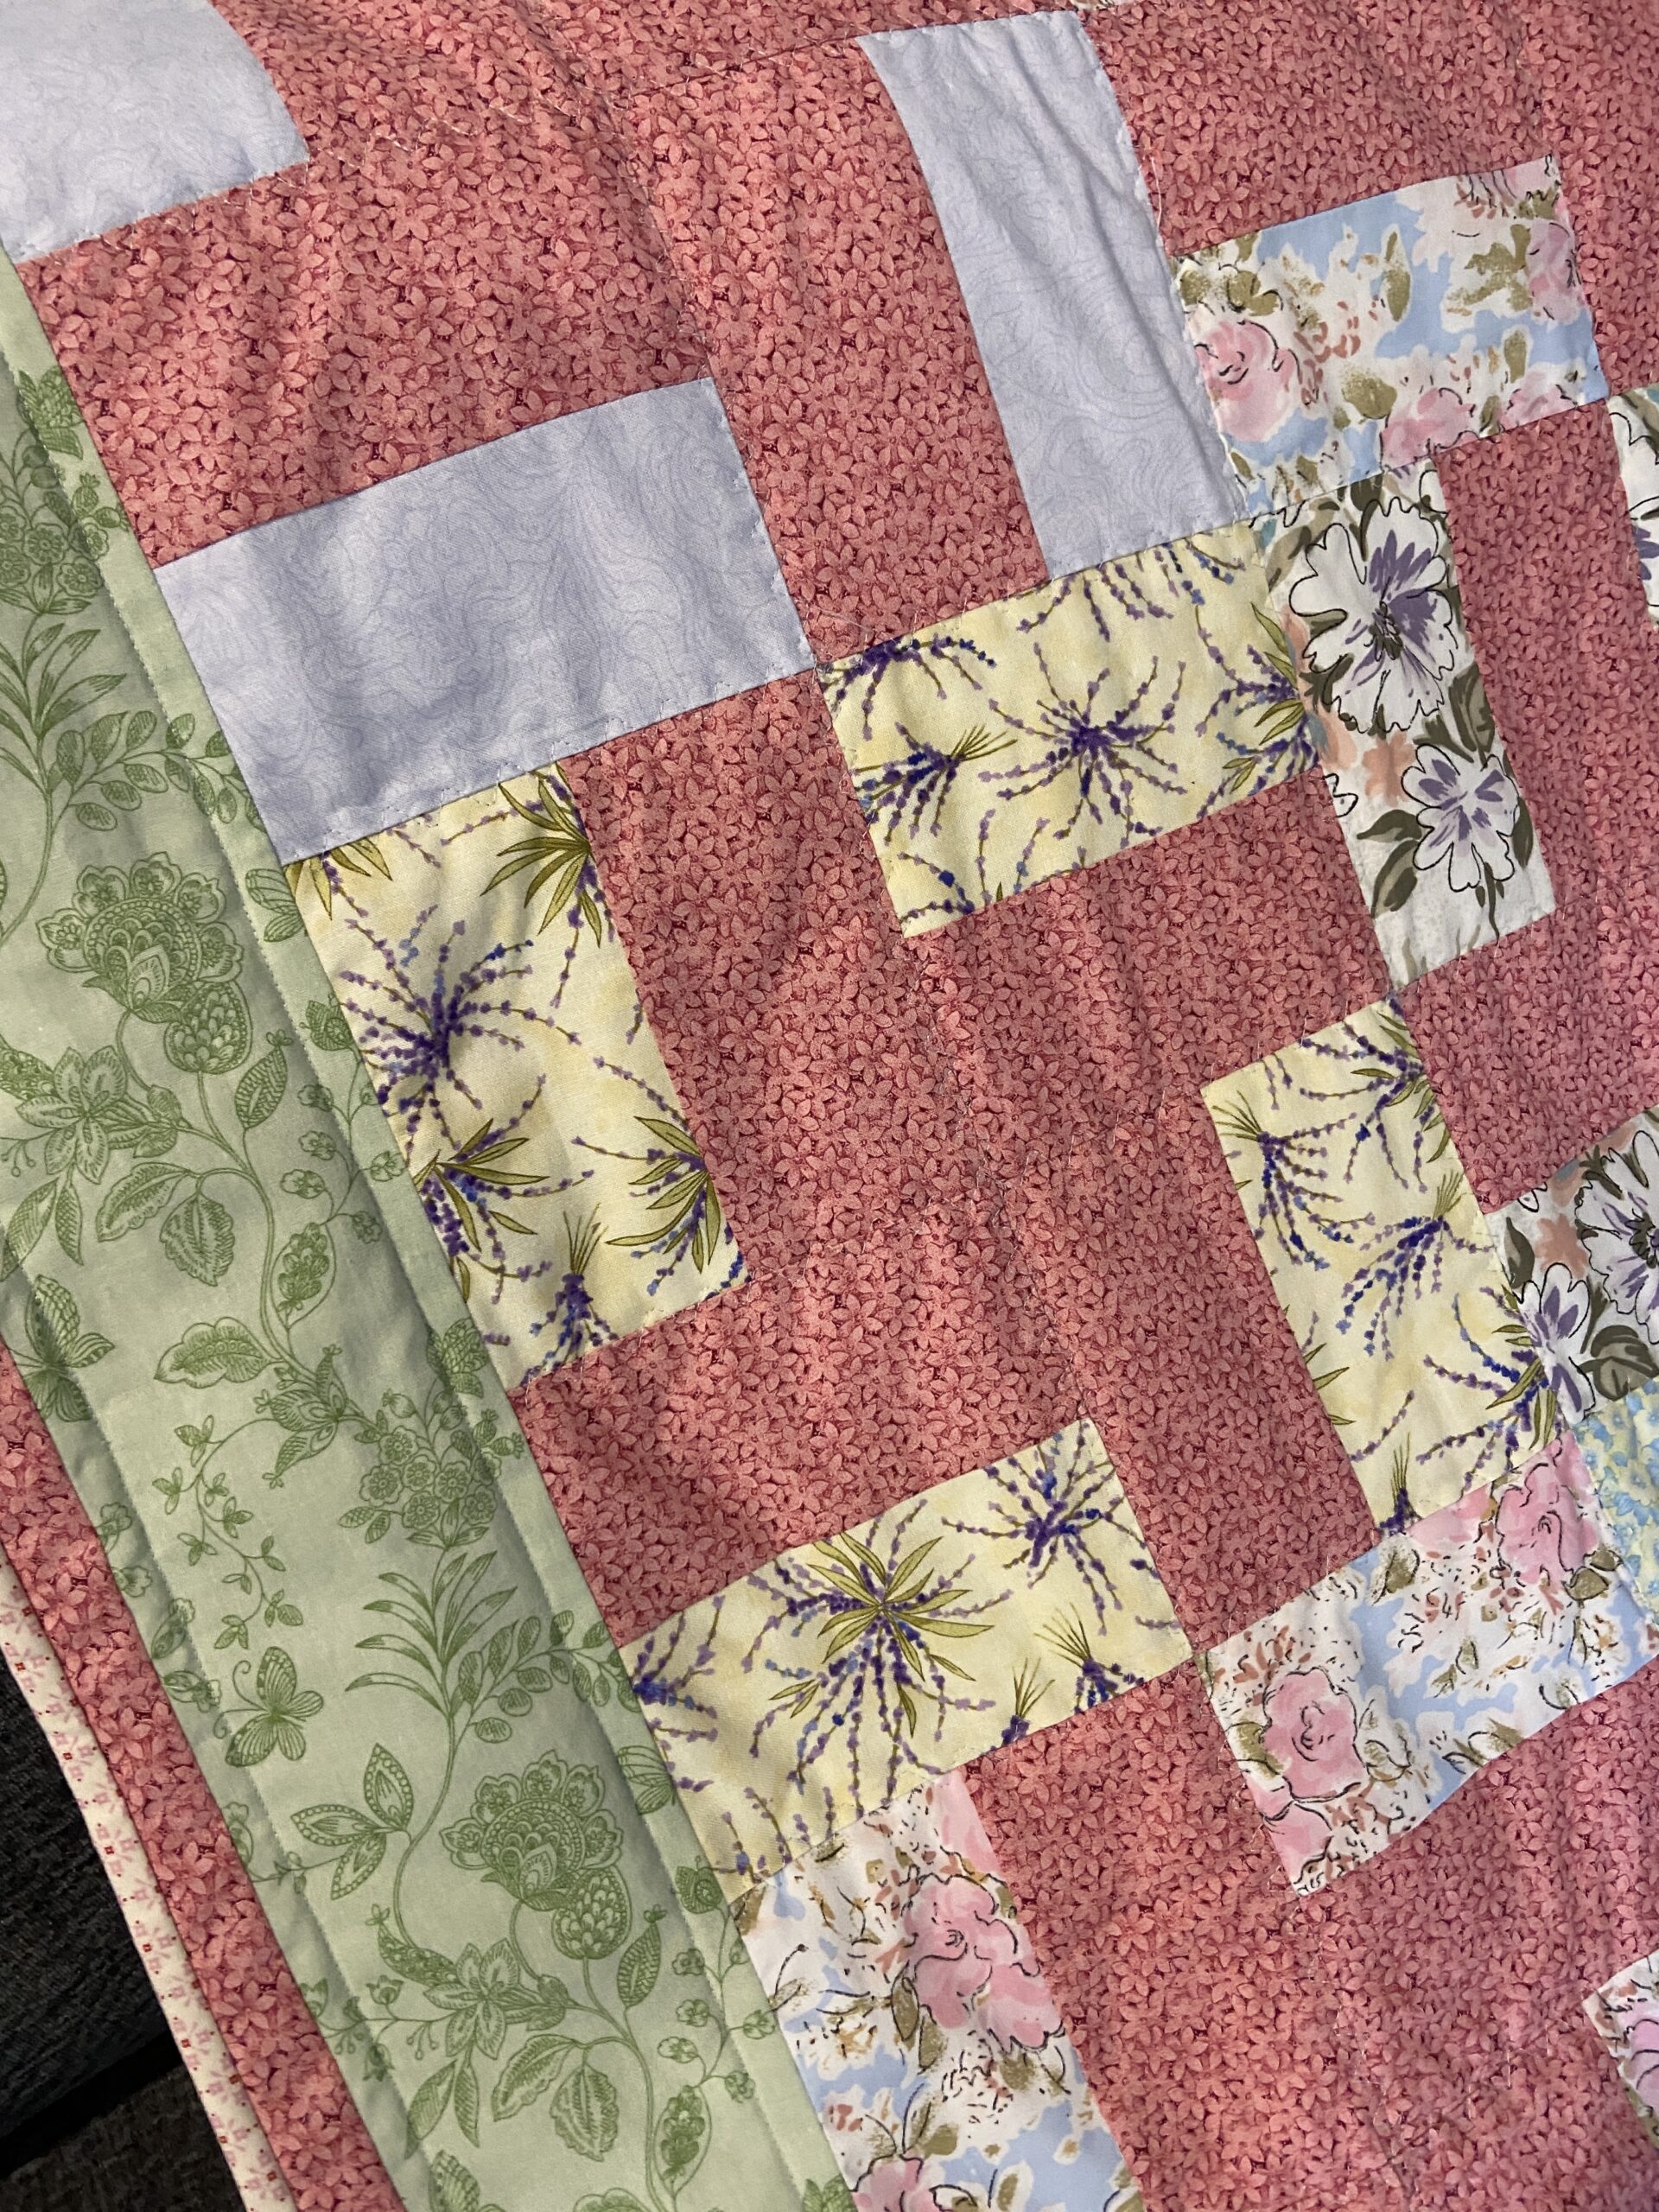
Quilting this was a quick effort using a serpentine style straight stitch following the lines of the blocks.

Sweet pastel colors.
Super soft voile backing.

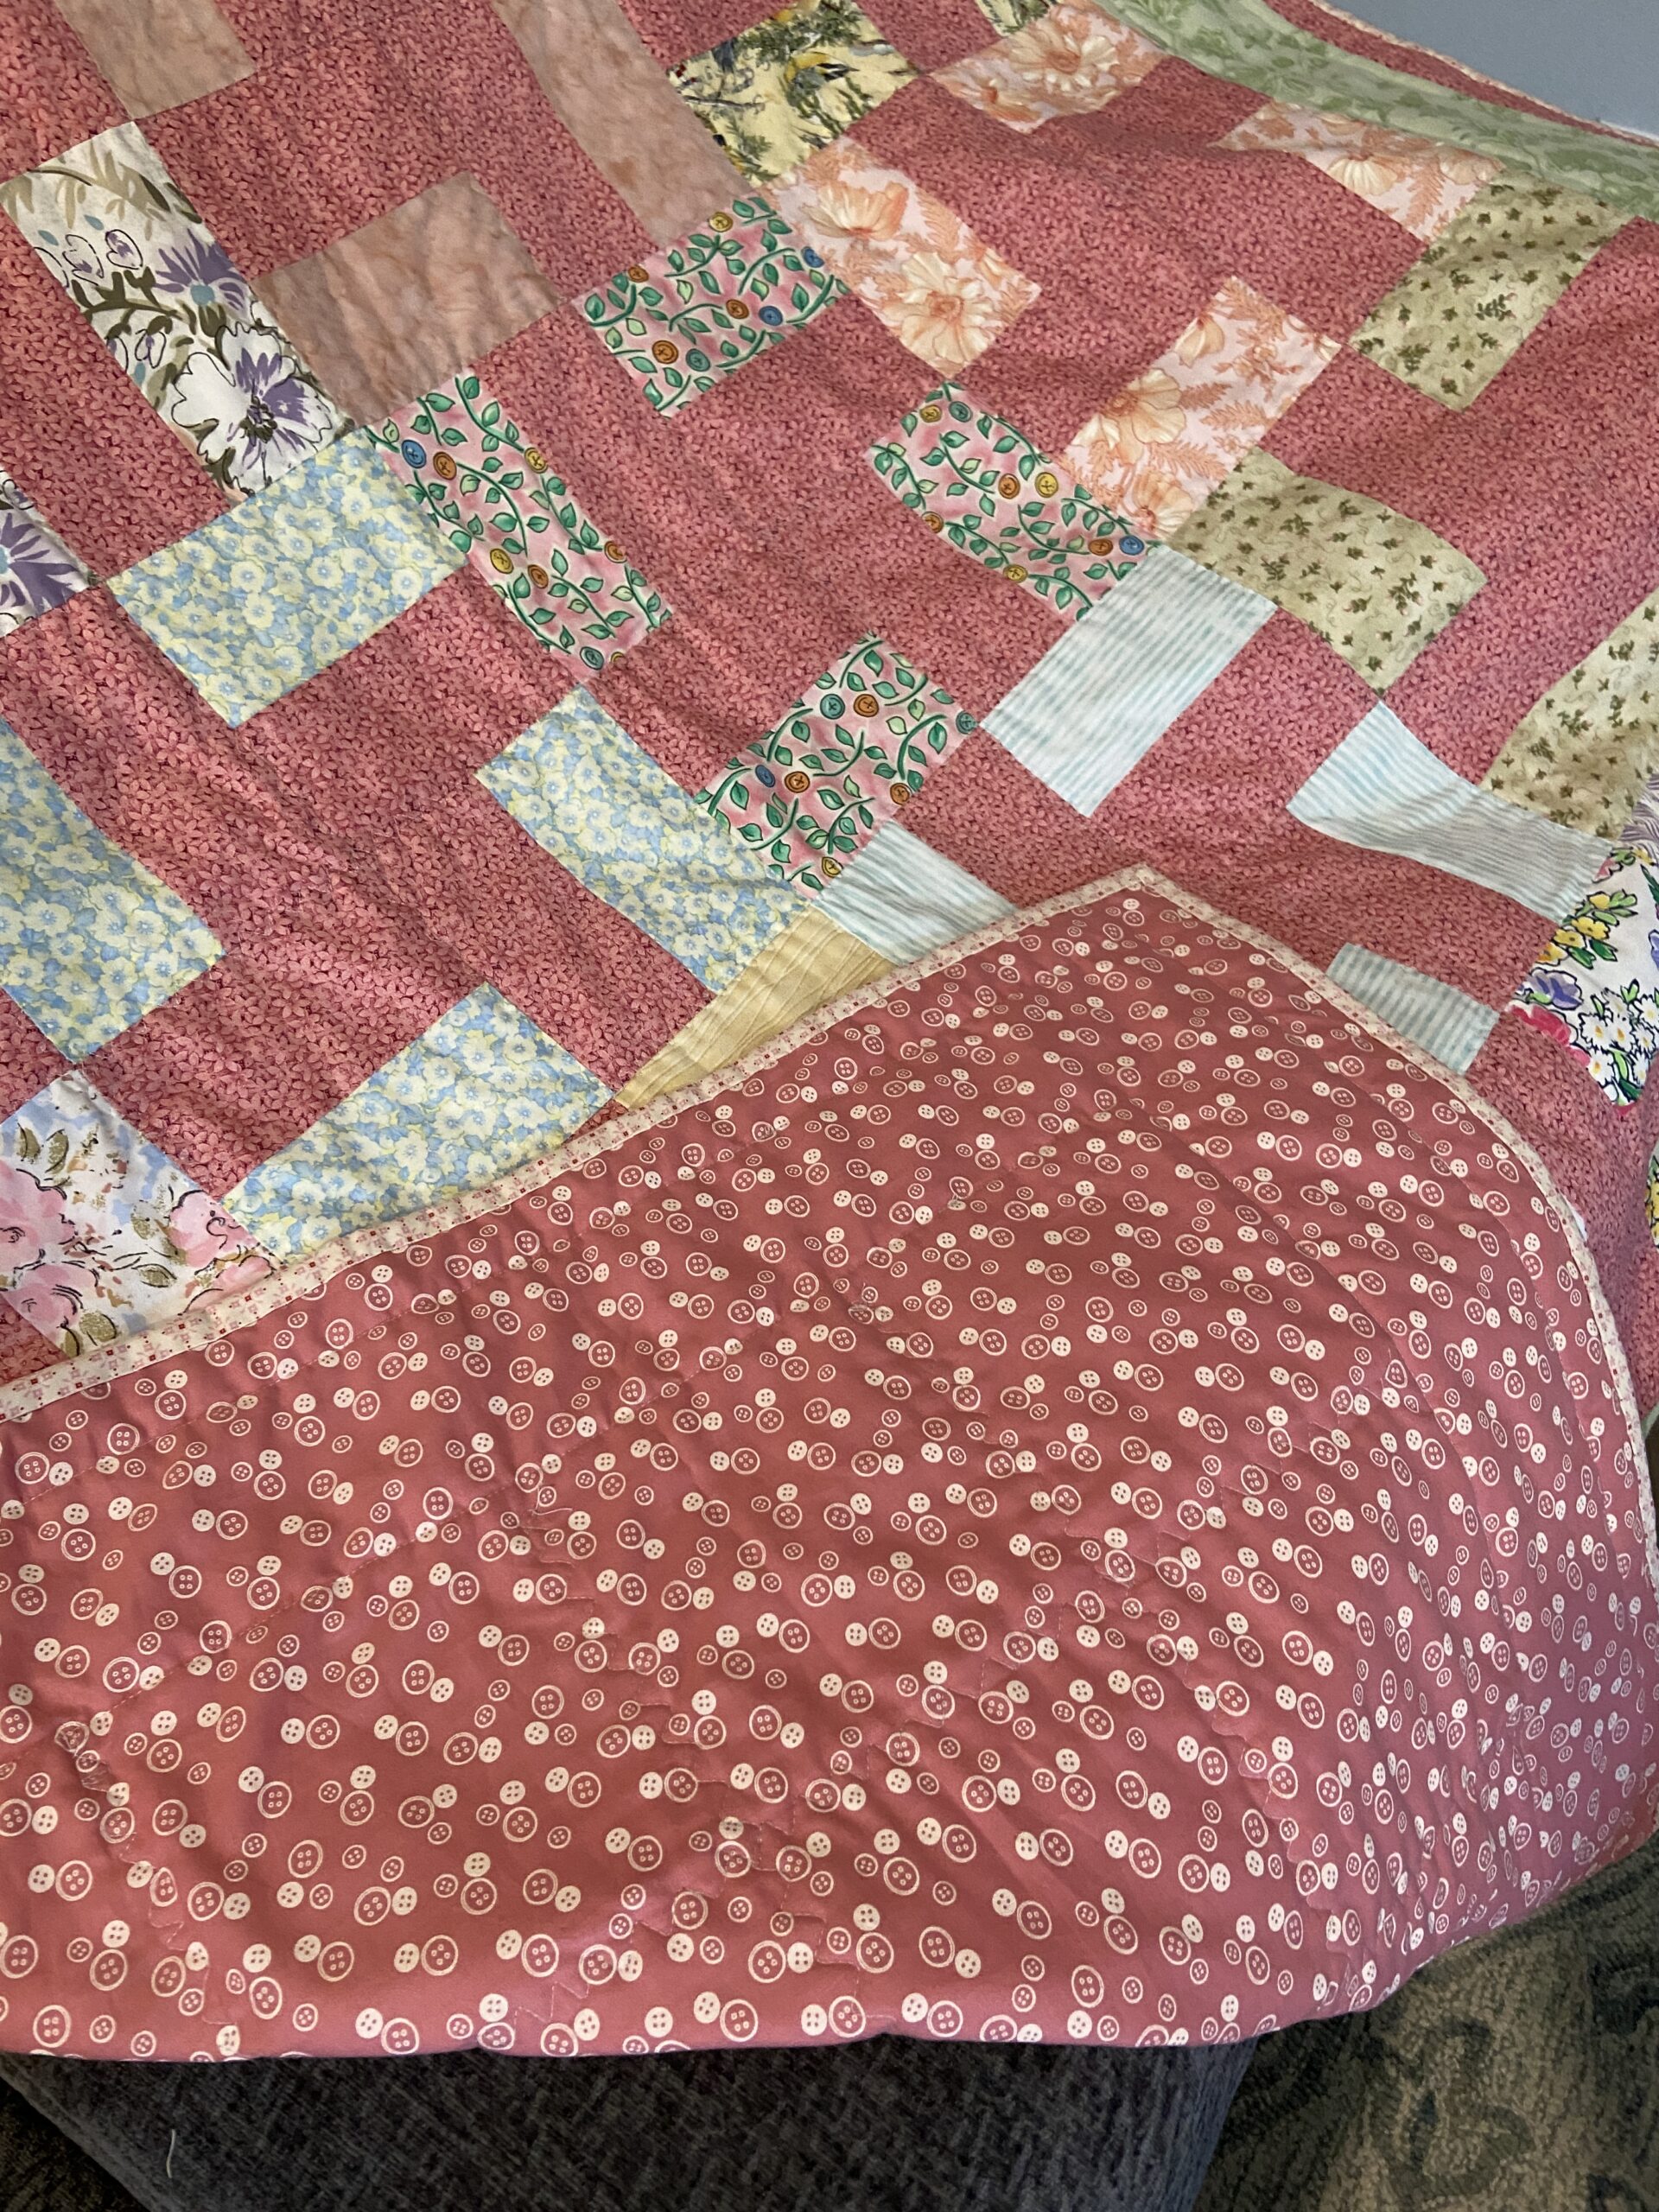
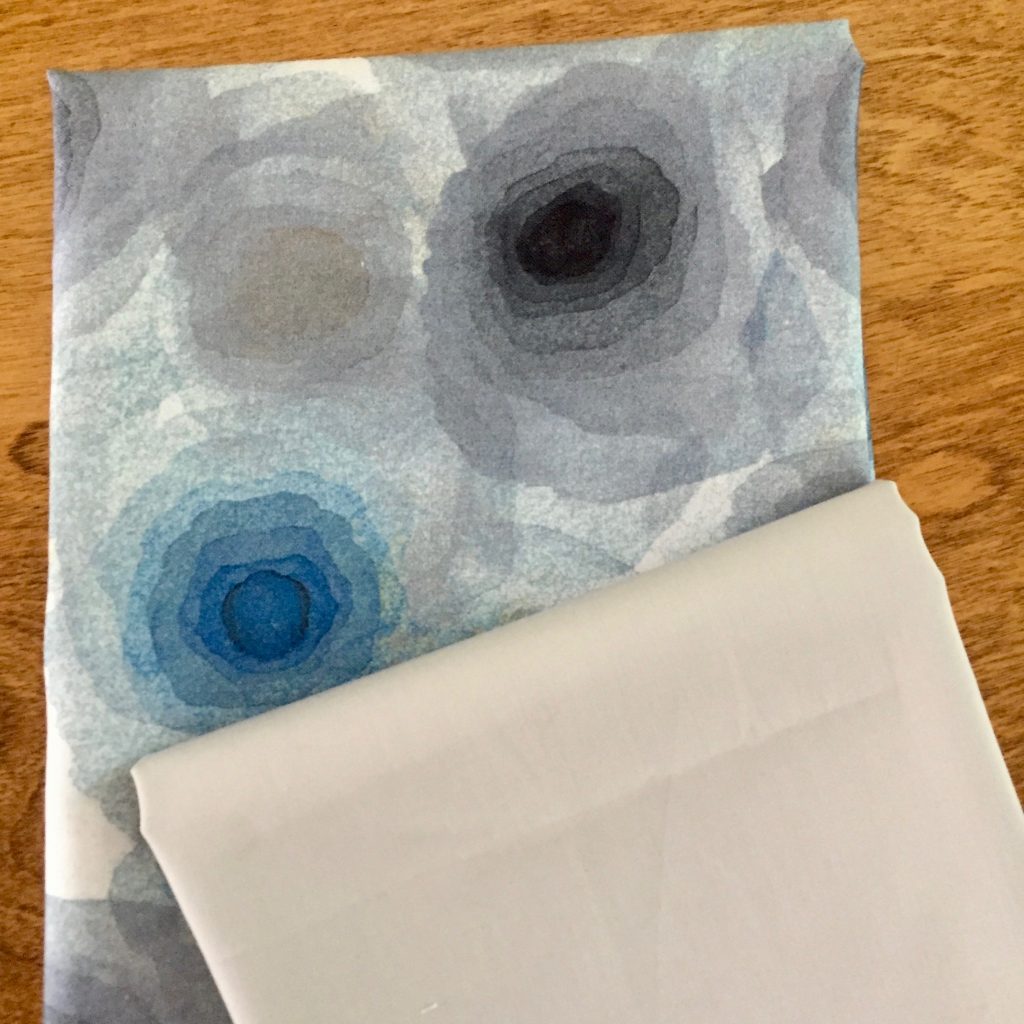
What makes this quilt for me is the backing. I have a few pieces of 60″ wide voile made by Frou Frou. It is so silky soft. It was a trick to make this work because the quilt is nearly 60″ wide. Using an excessive of pins when basting (to make sure it didn’t shift while quilting it) worked though. I used a sweet pink floral for the binding. It is ready to be sent off to Patty for Mercy Hospital.

Totally different feel with this project!

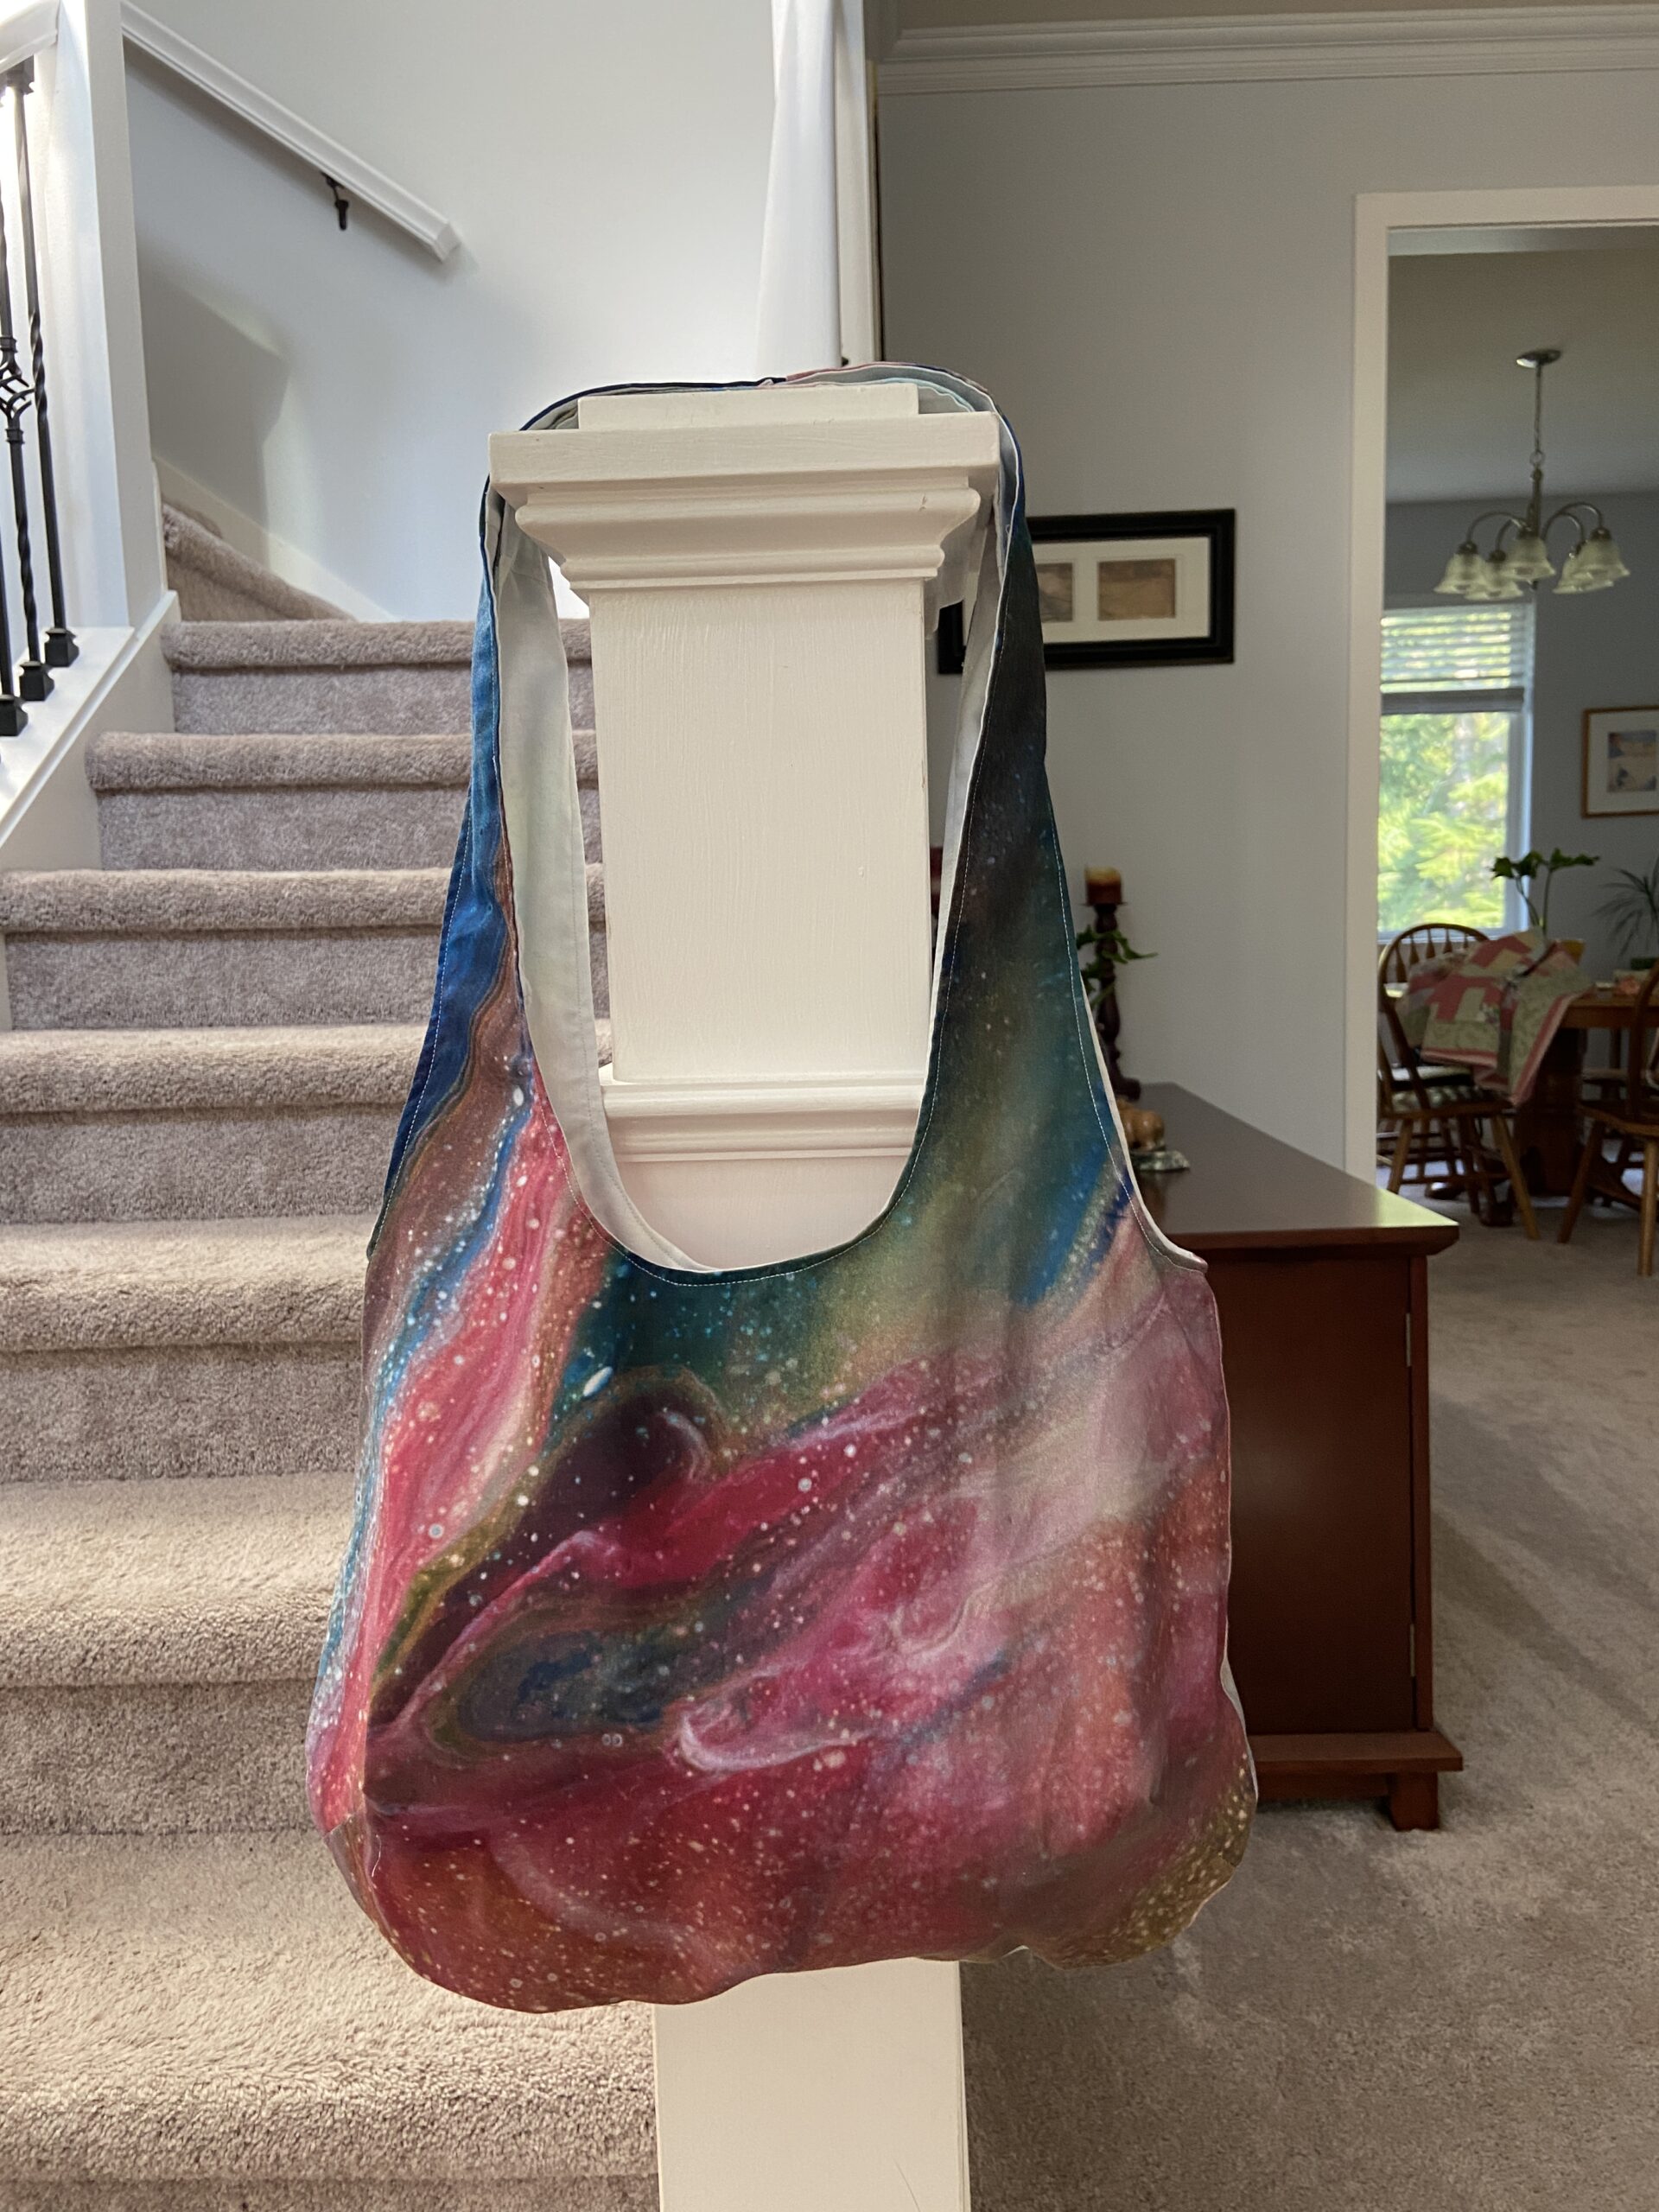
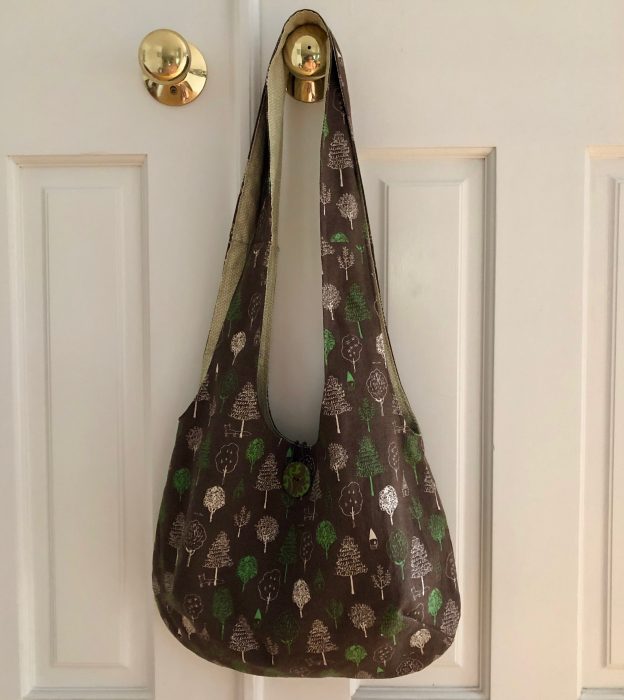
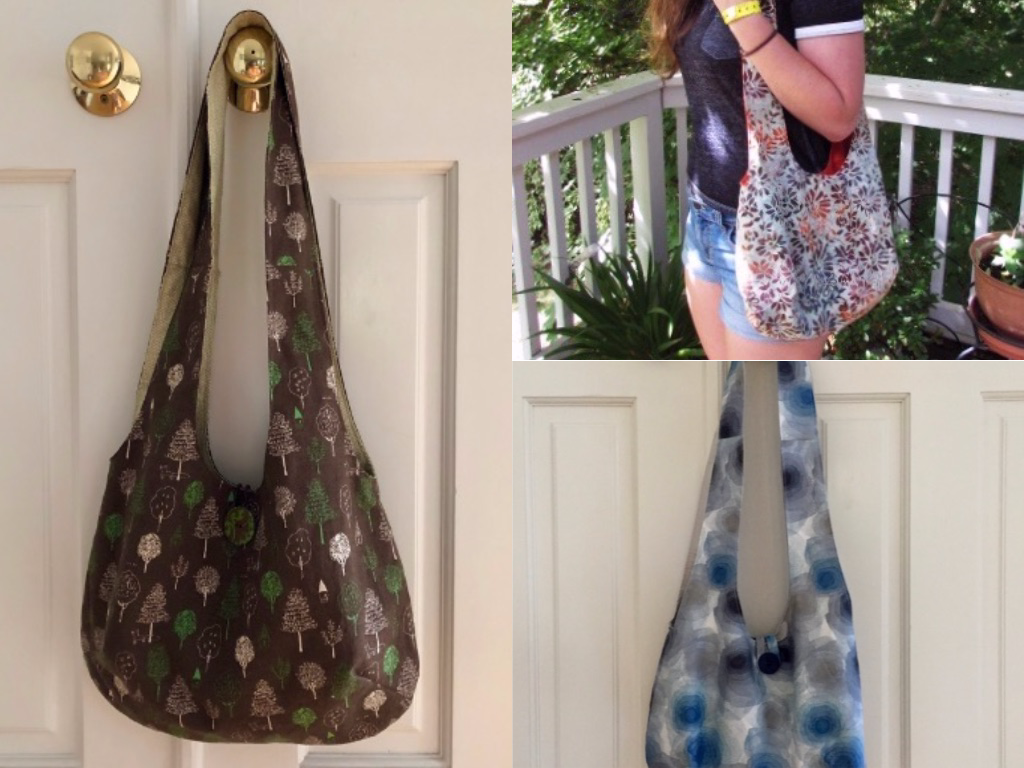
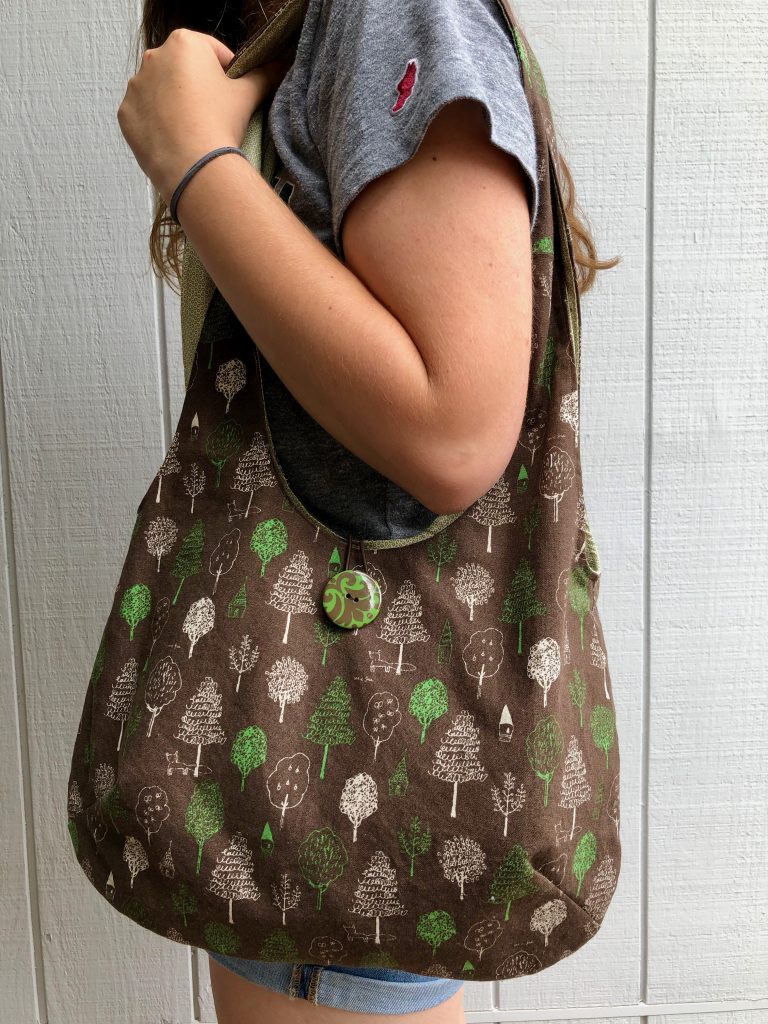
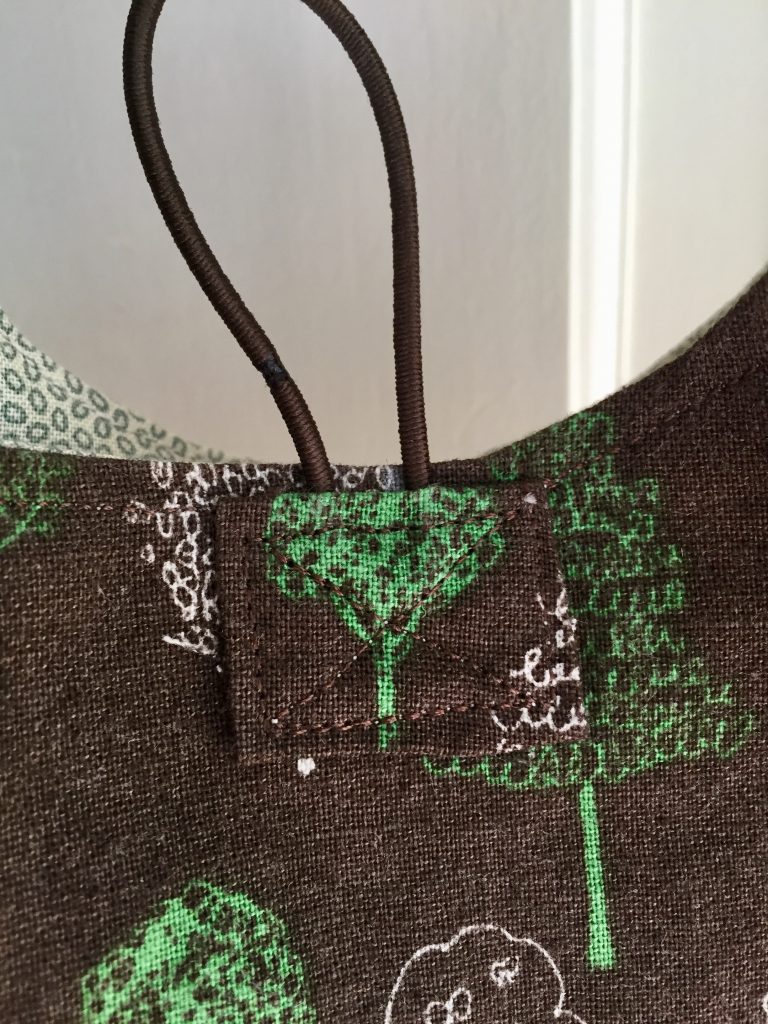
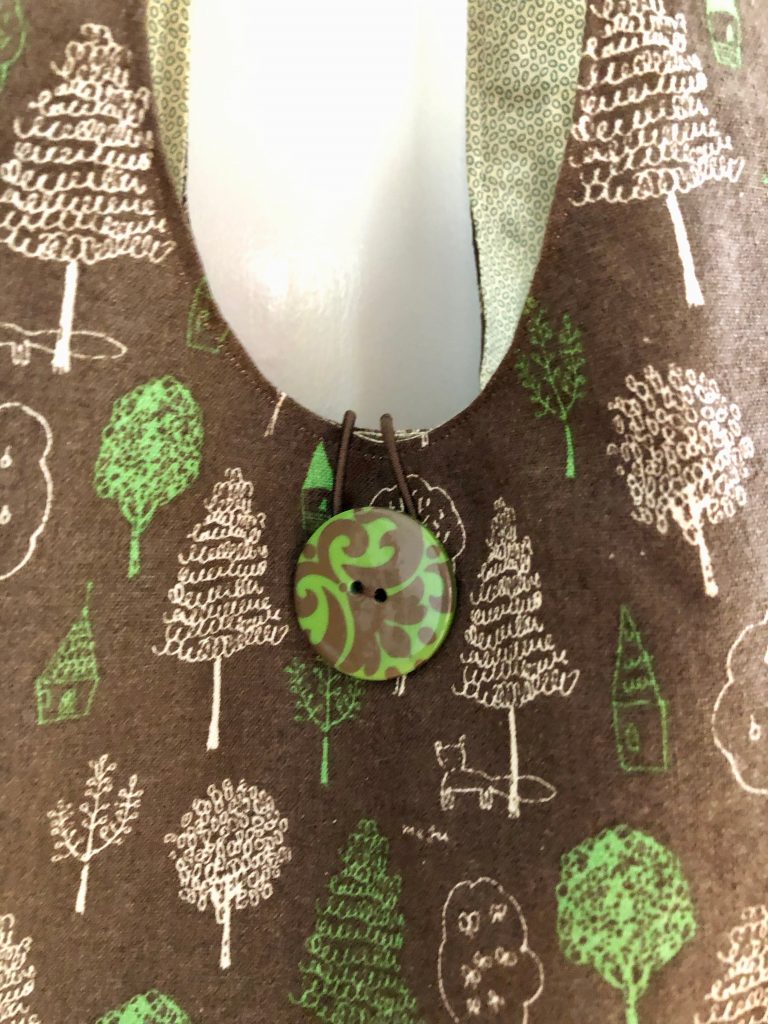
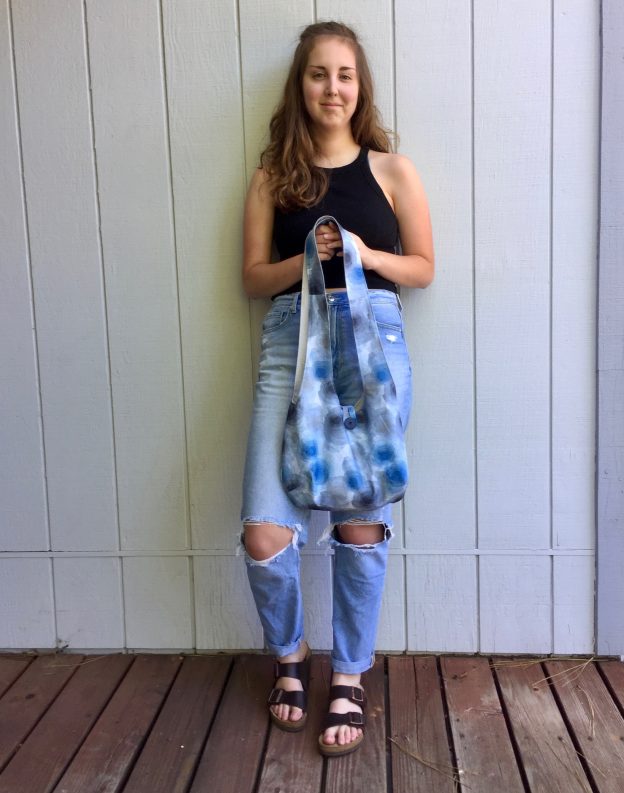
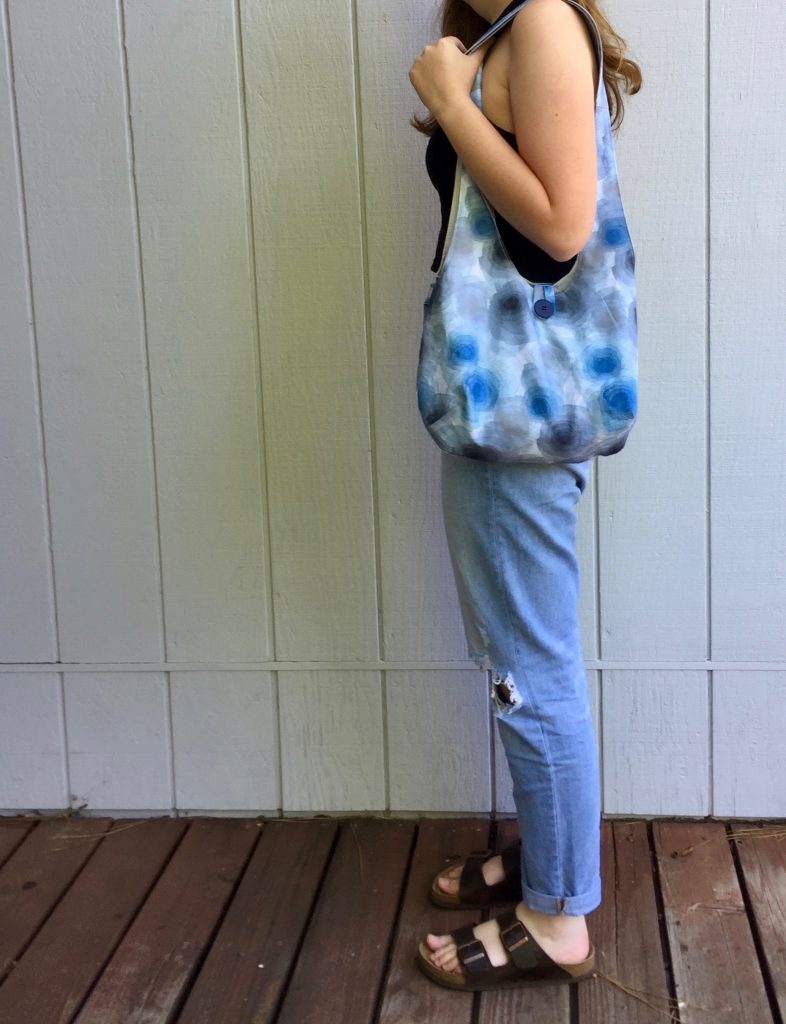
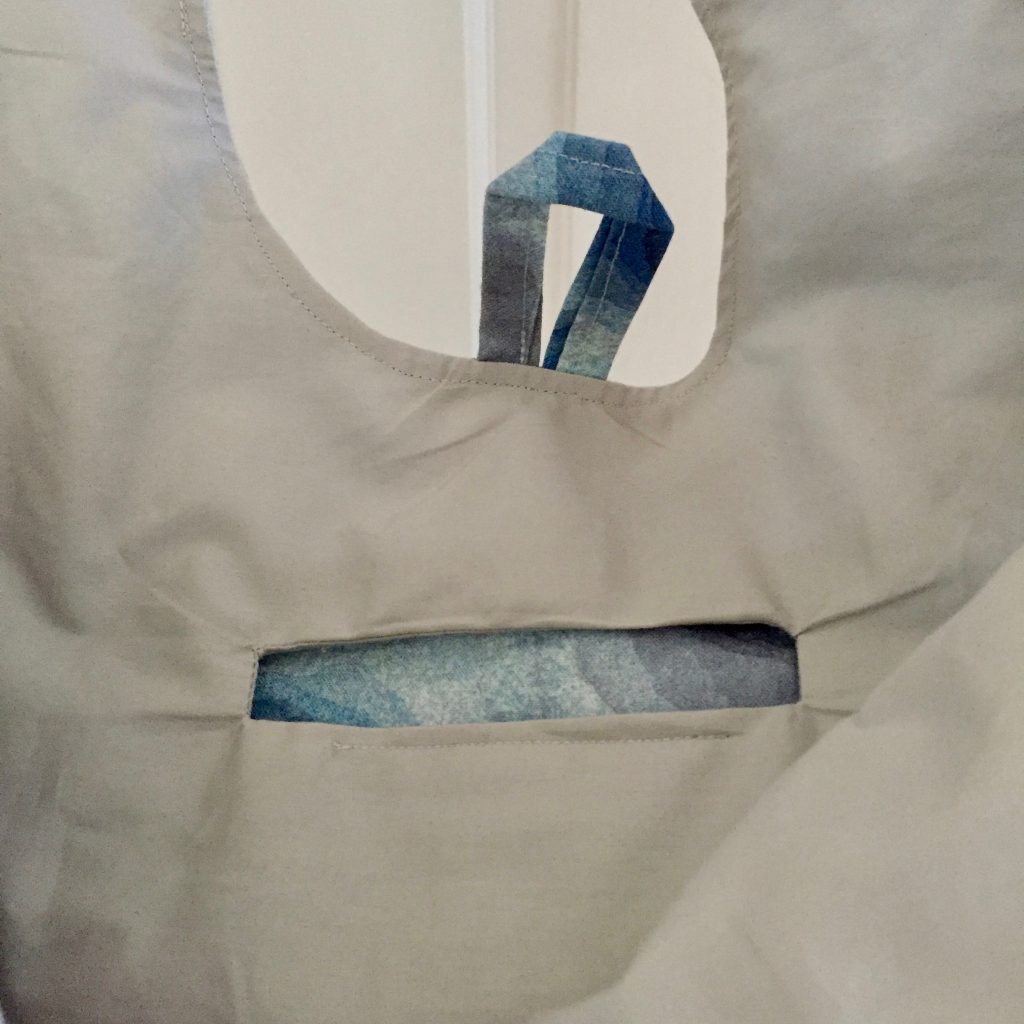
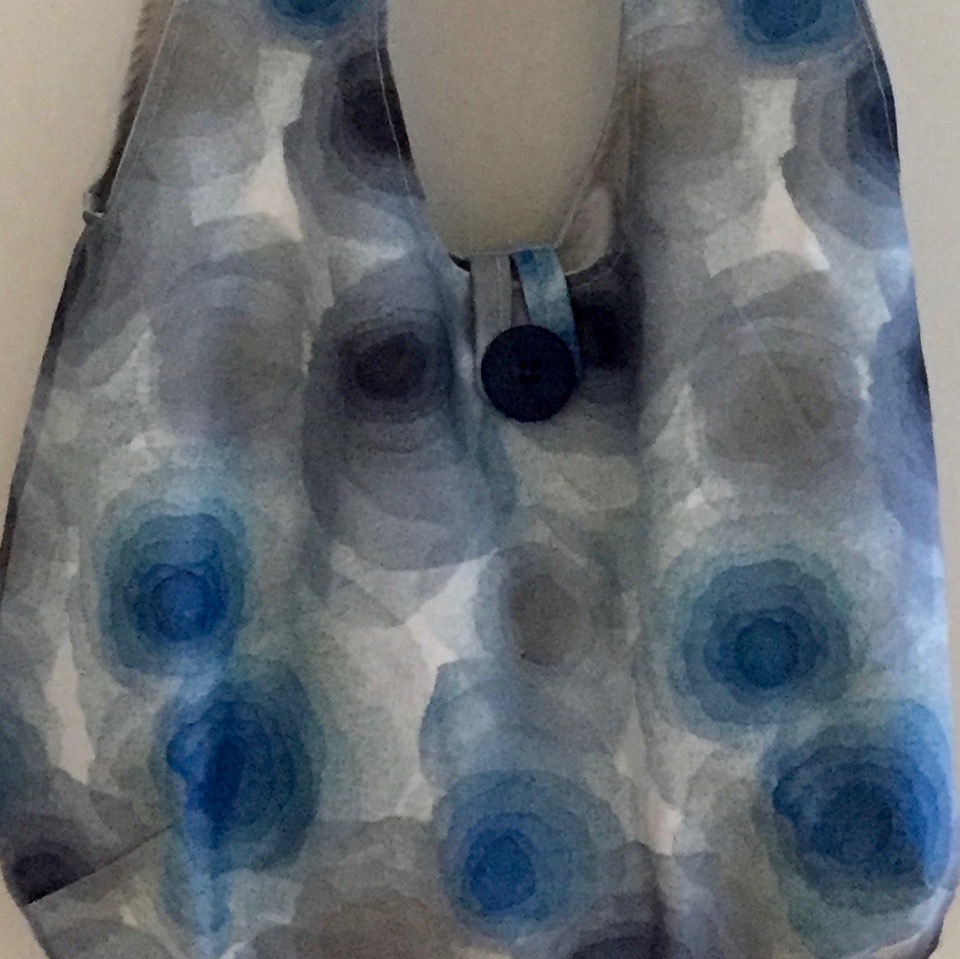
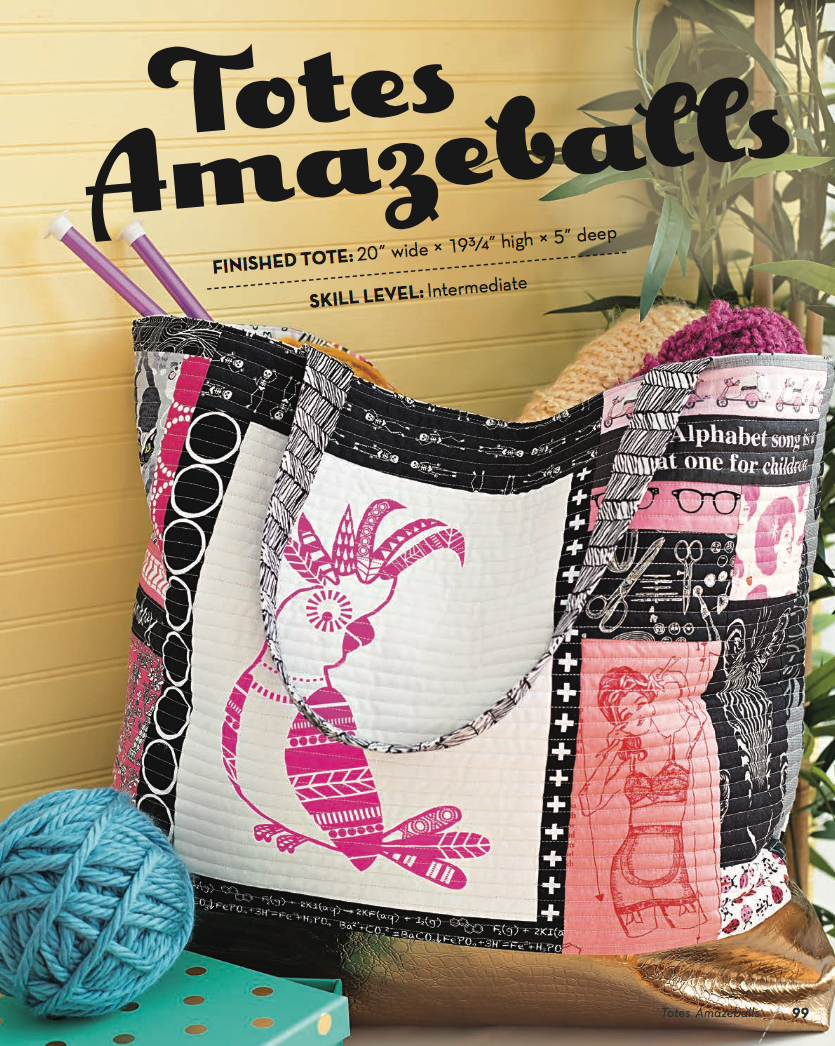
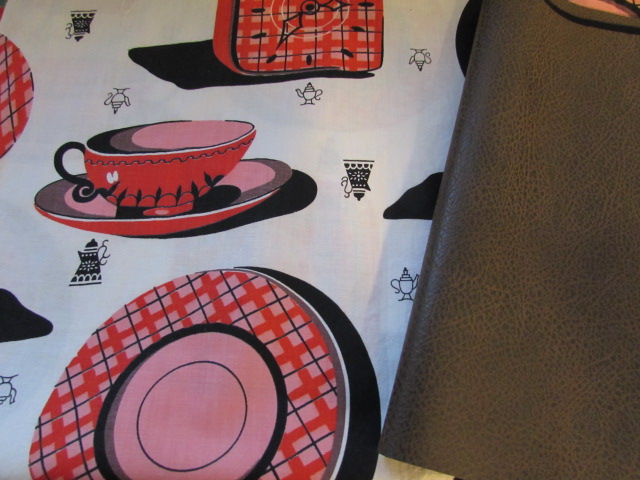
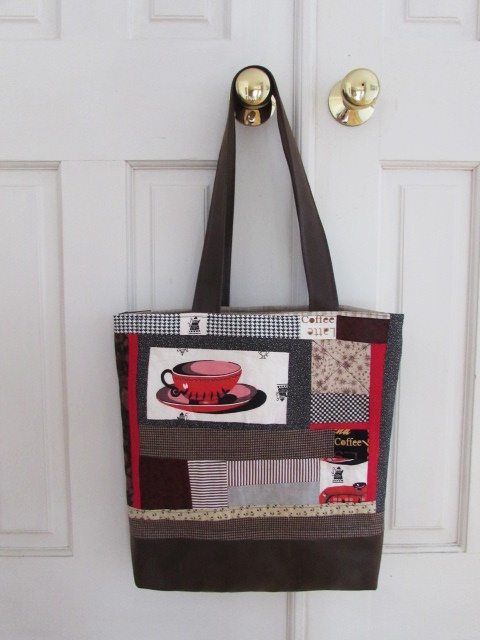
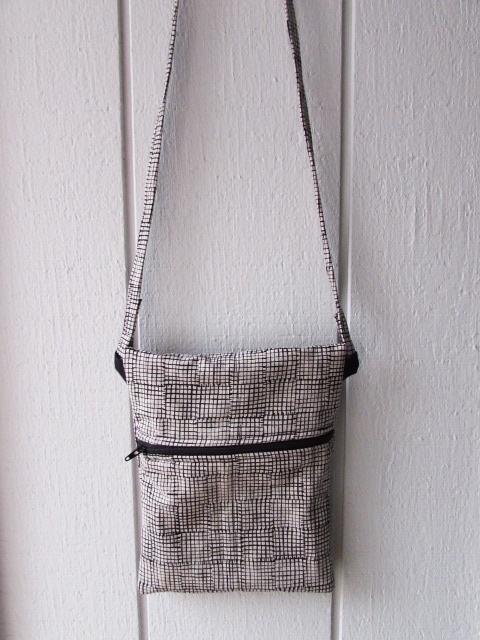
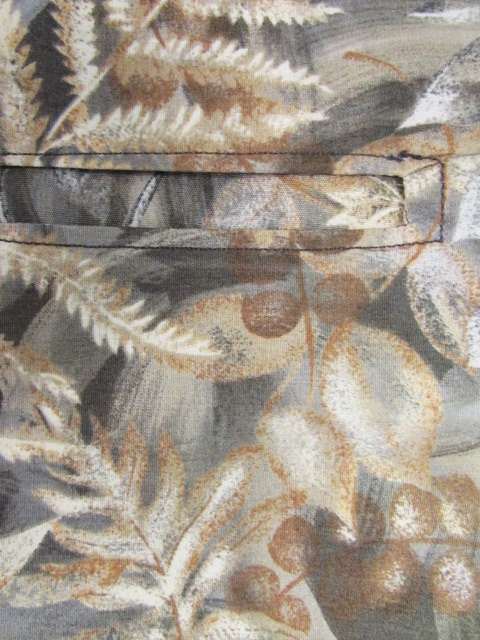
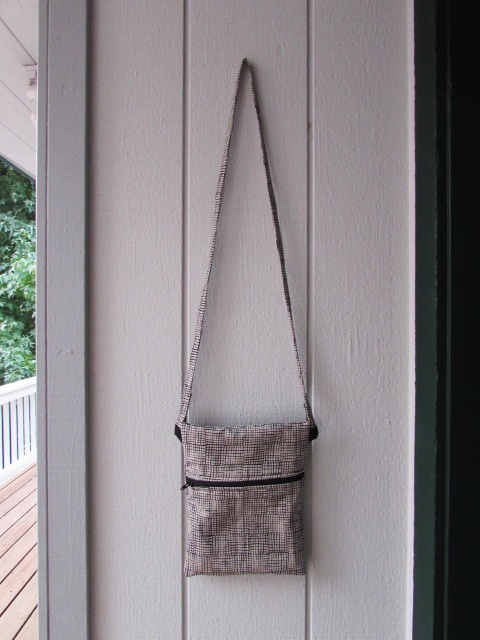
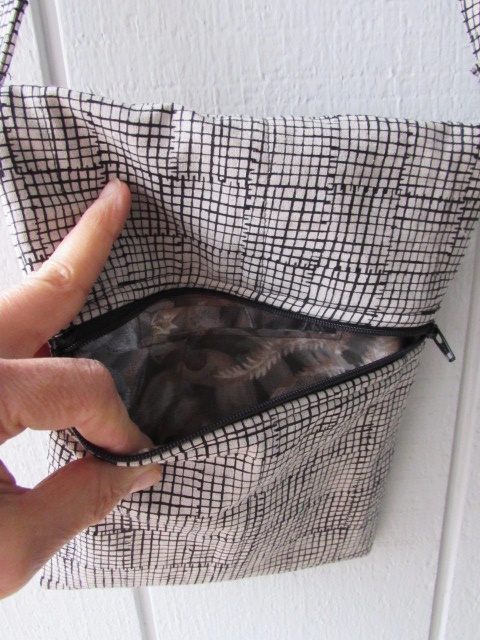
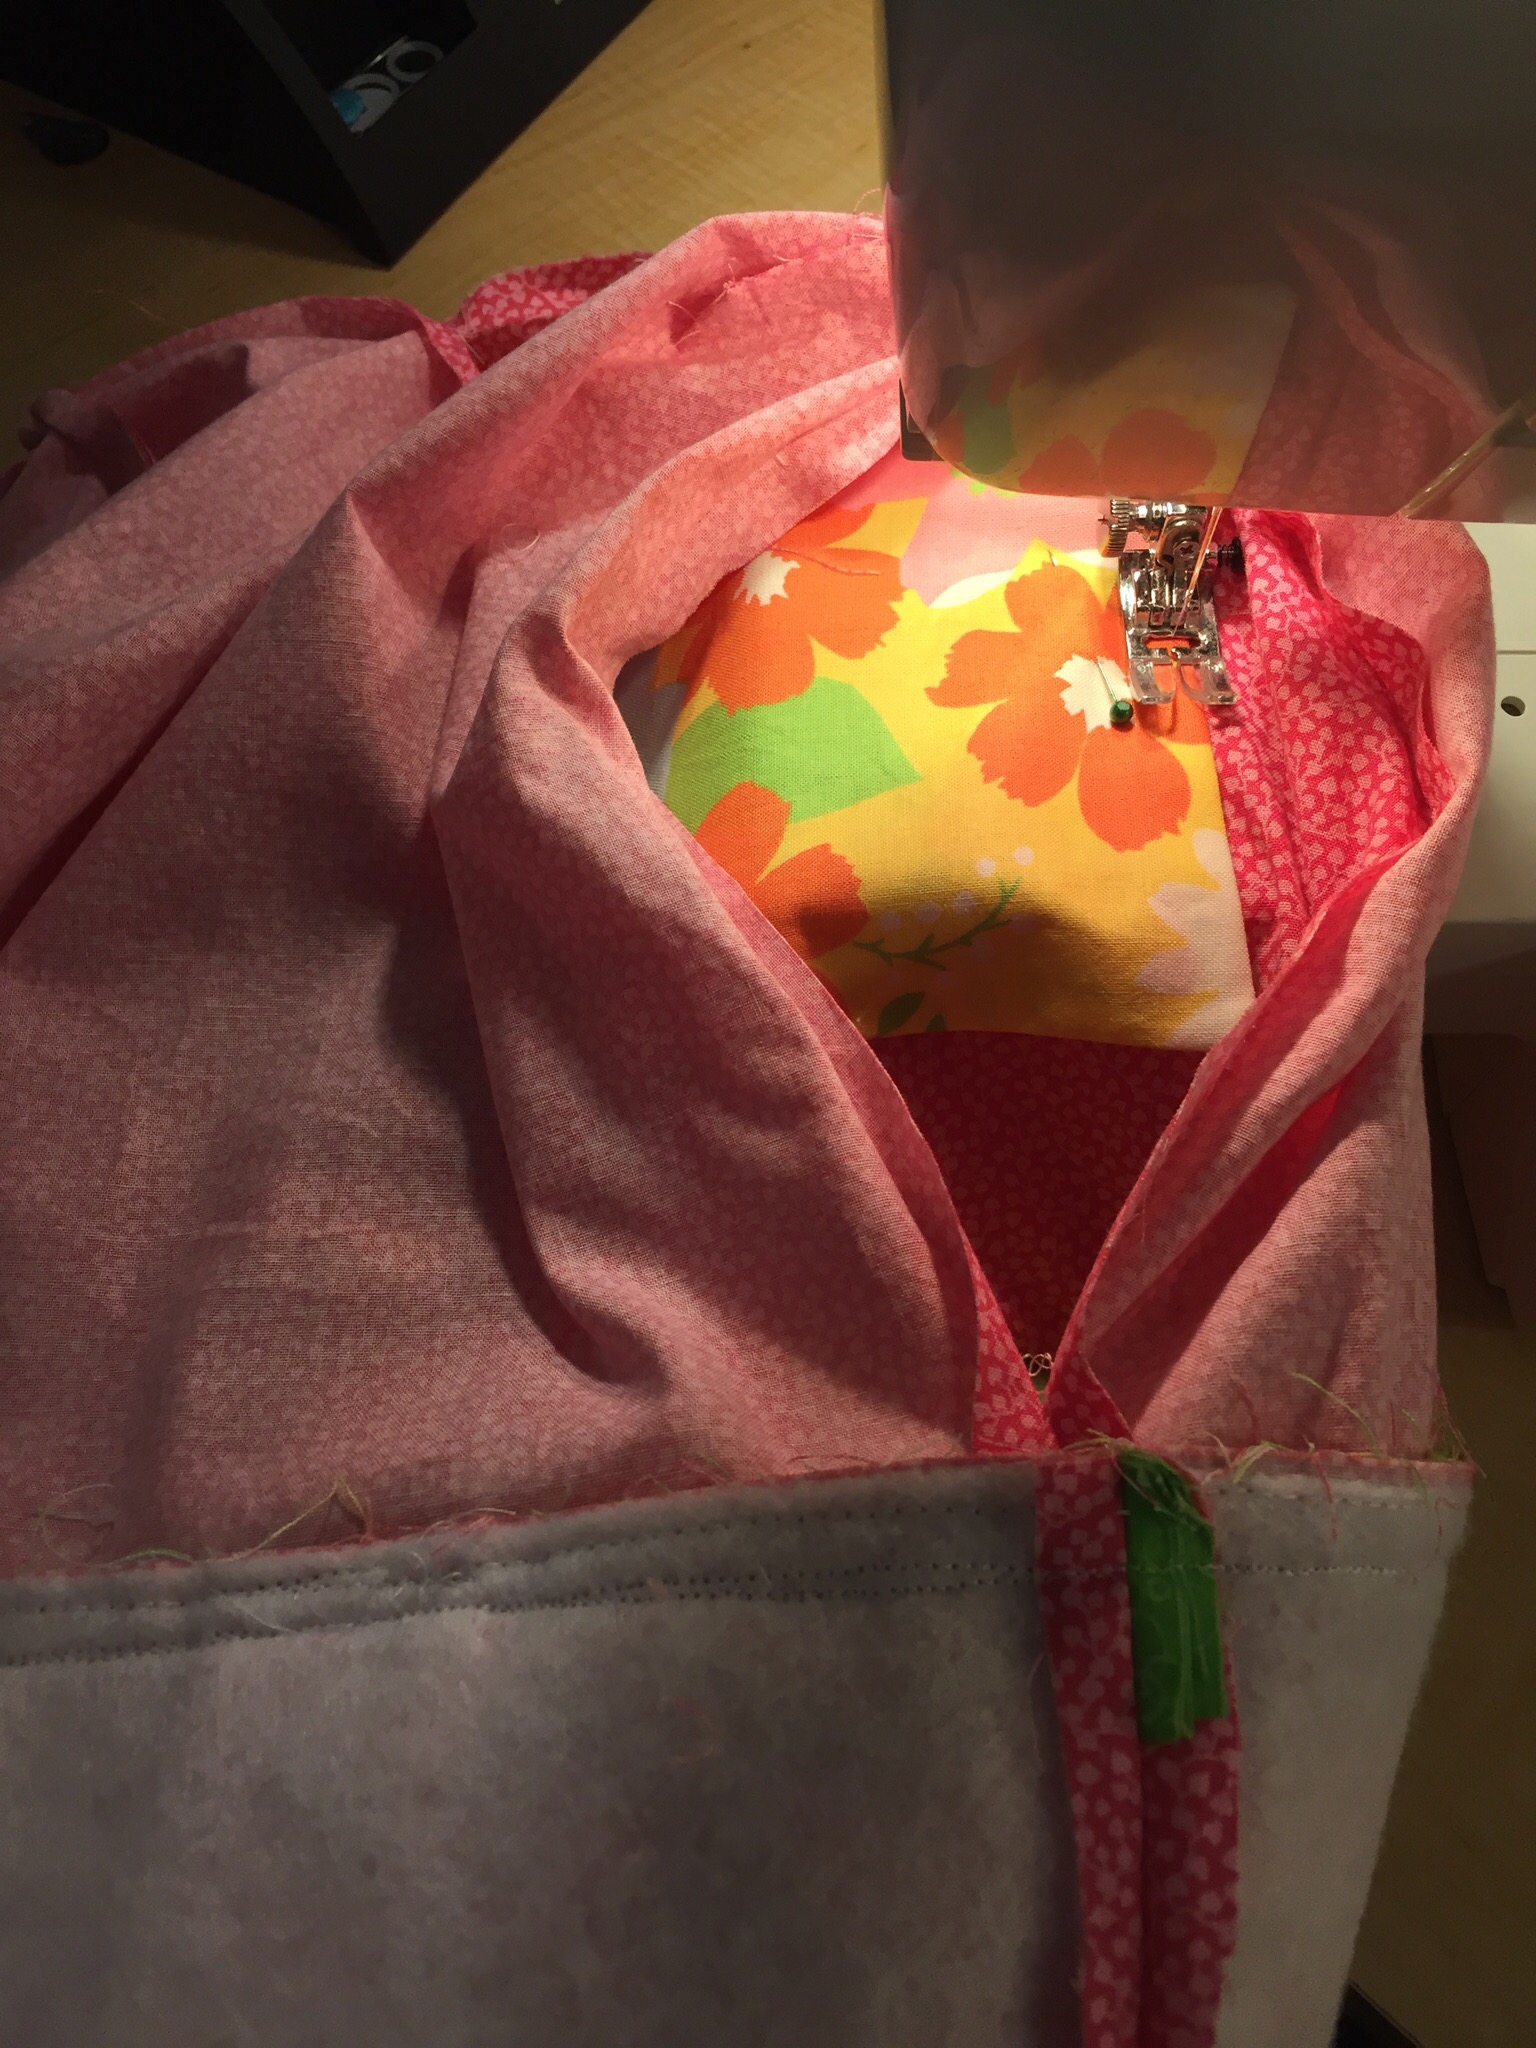
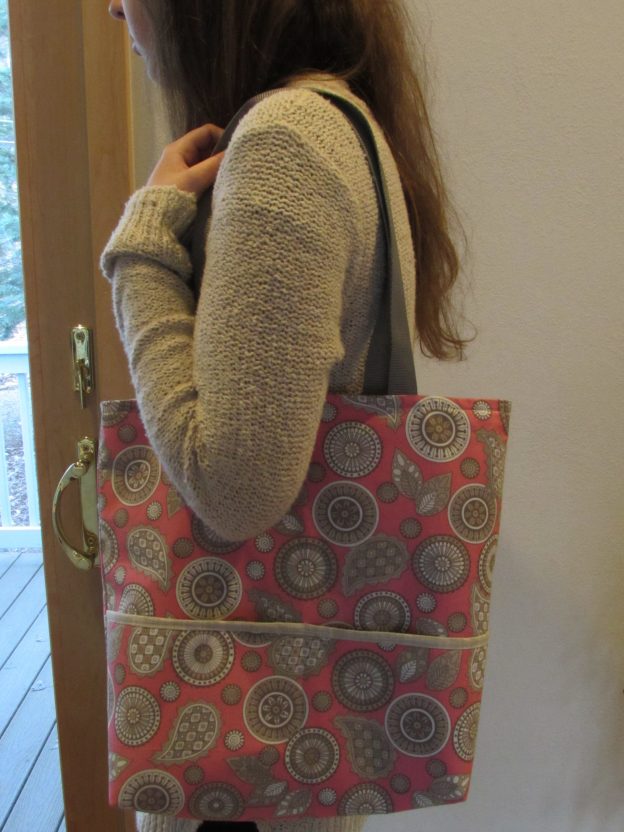
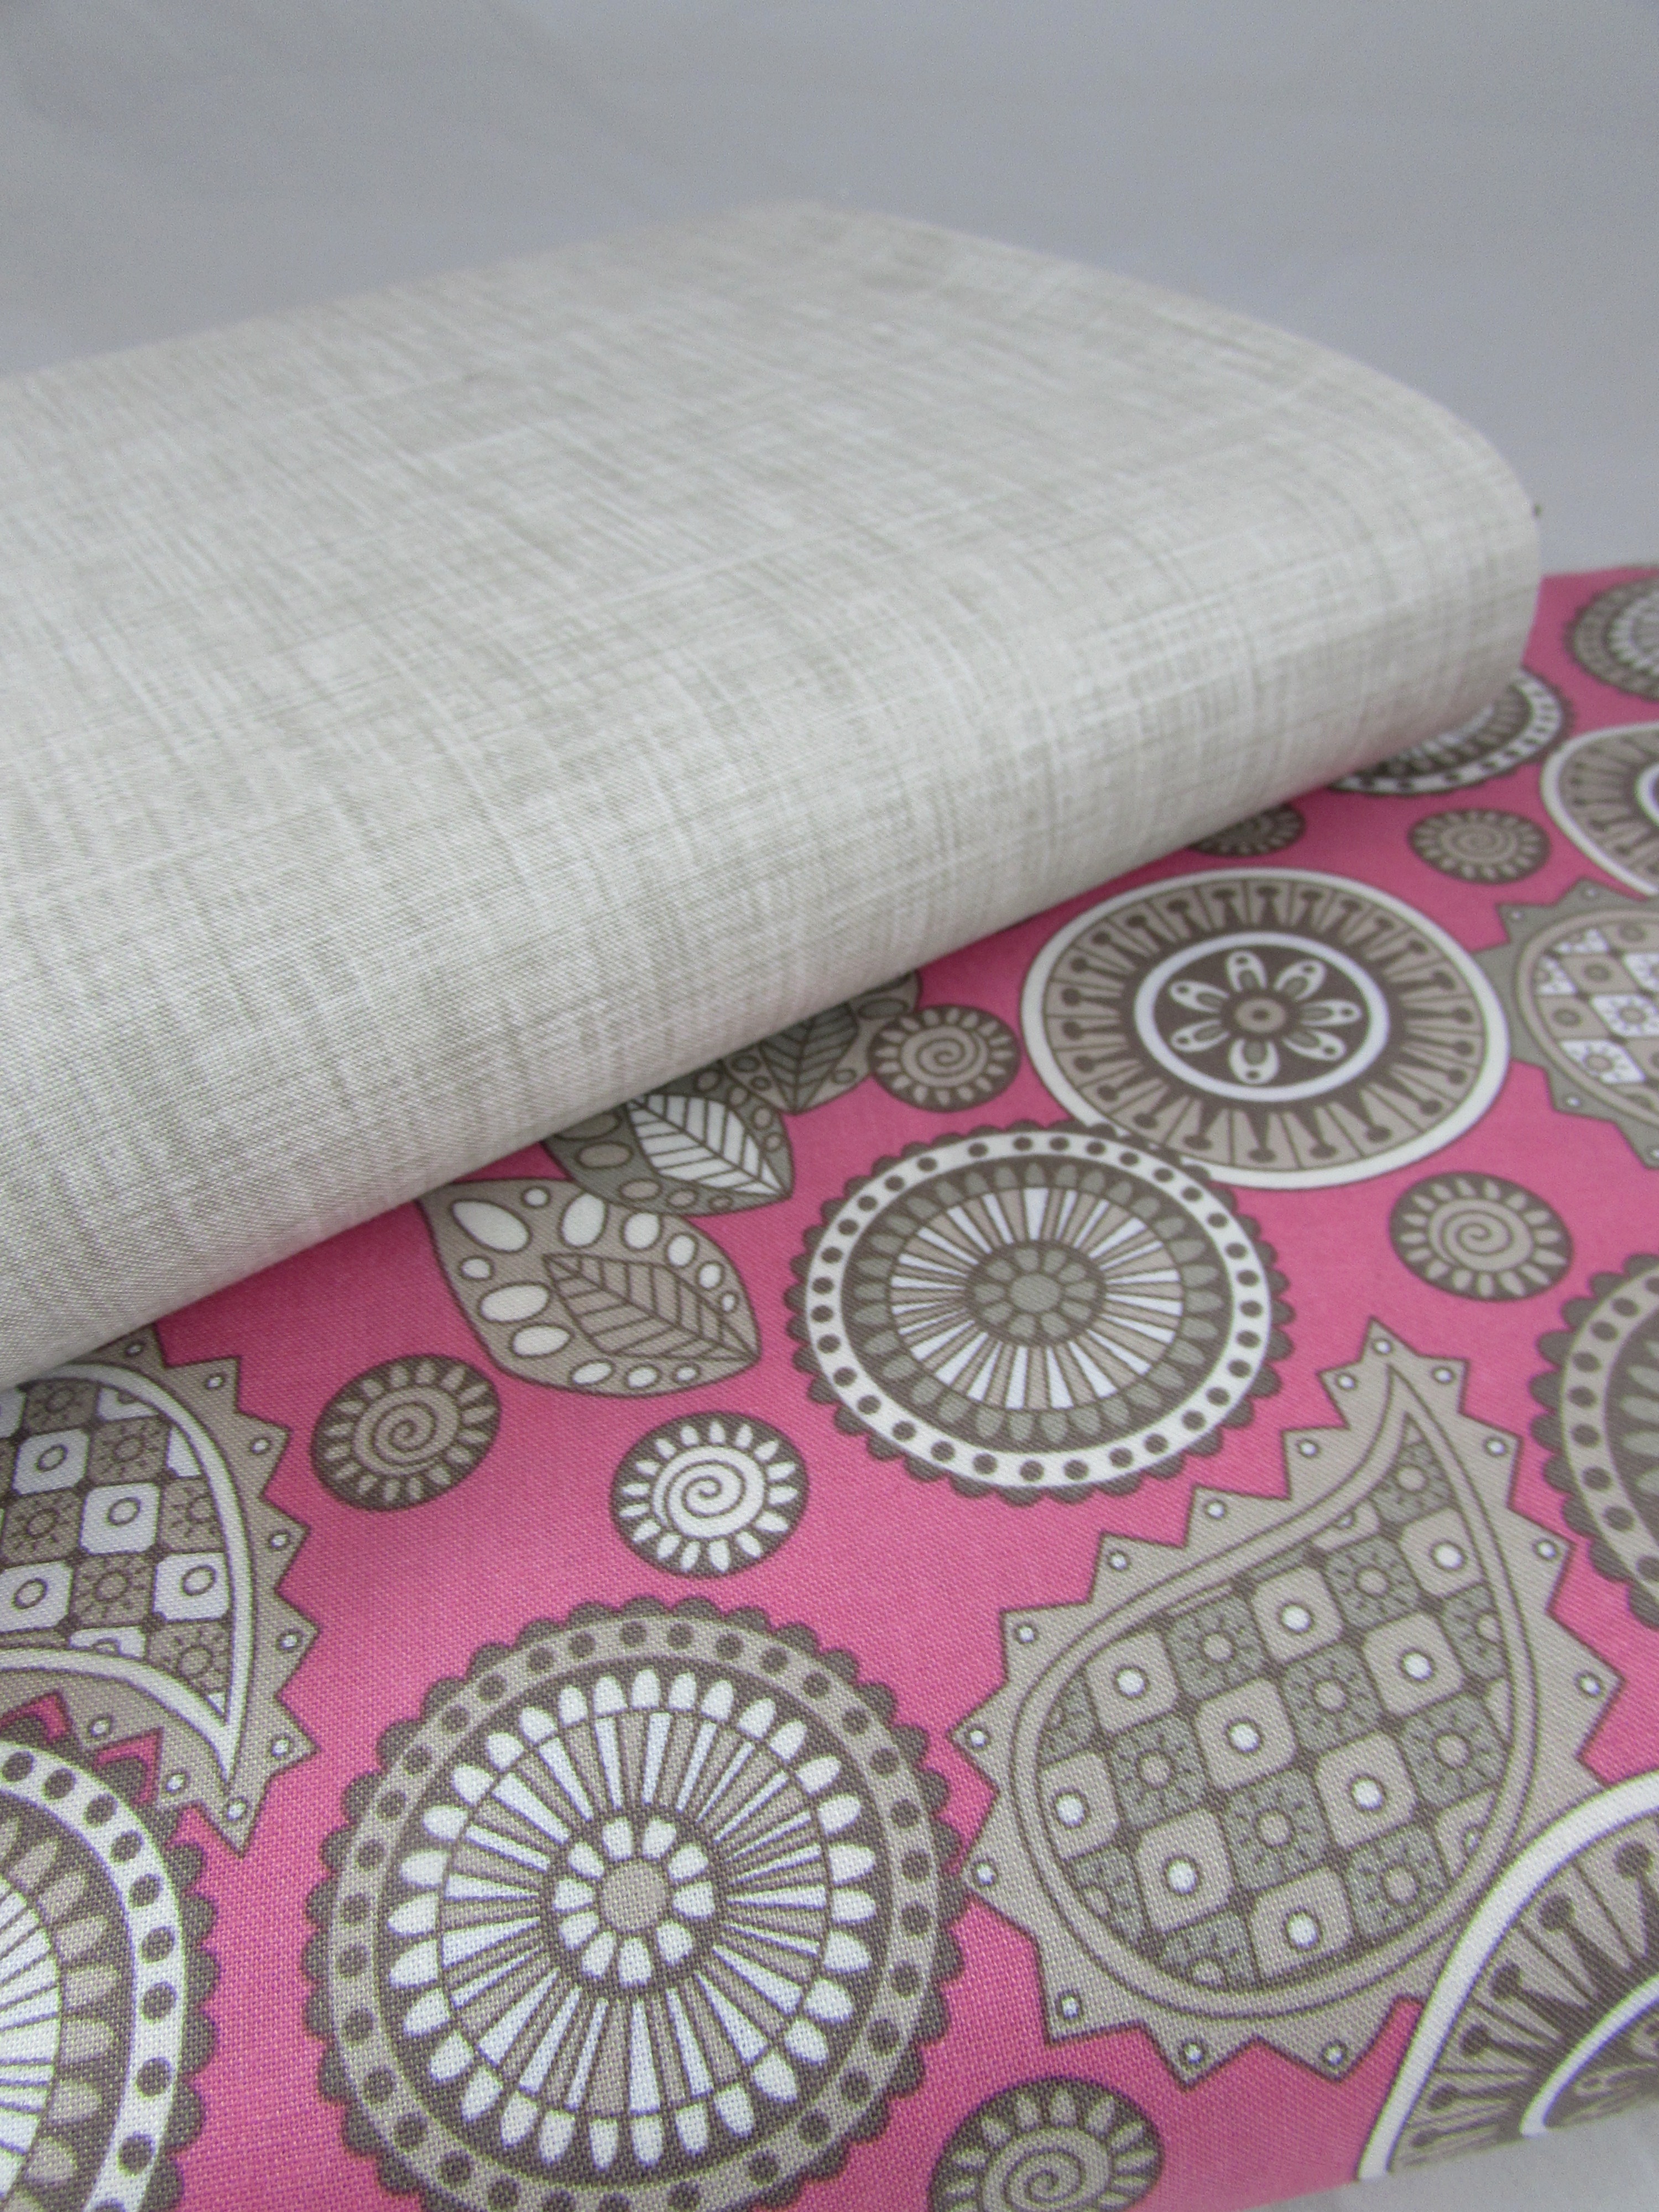
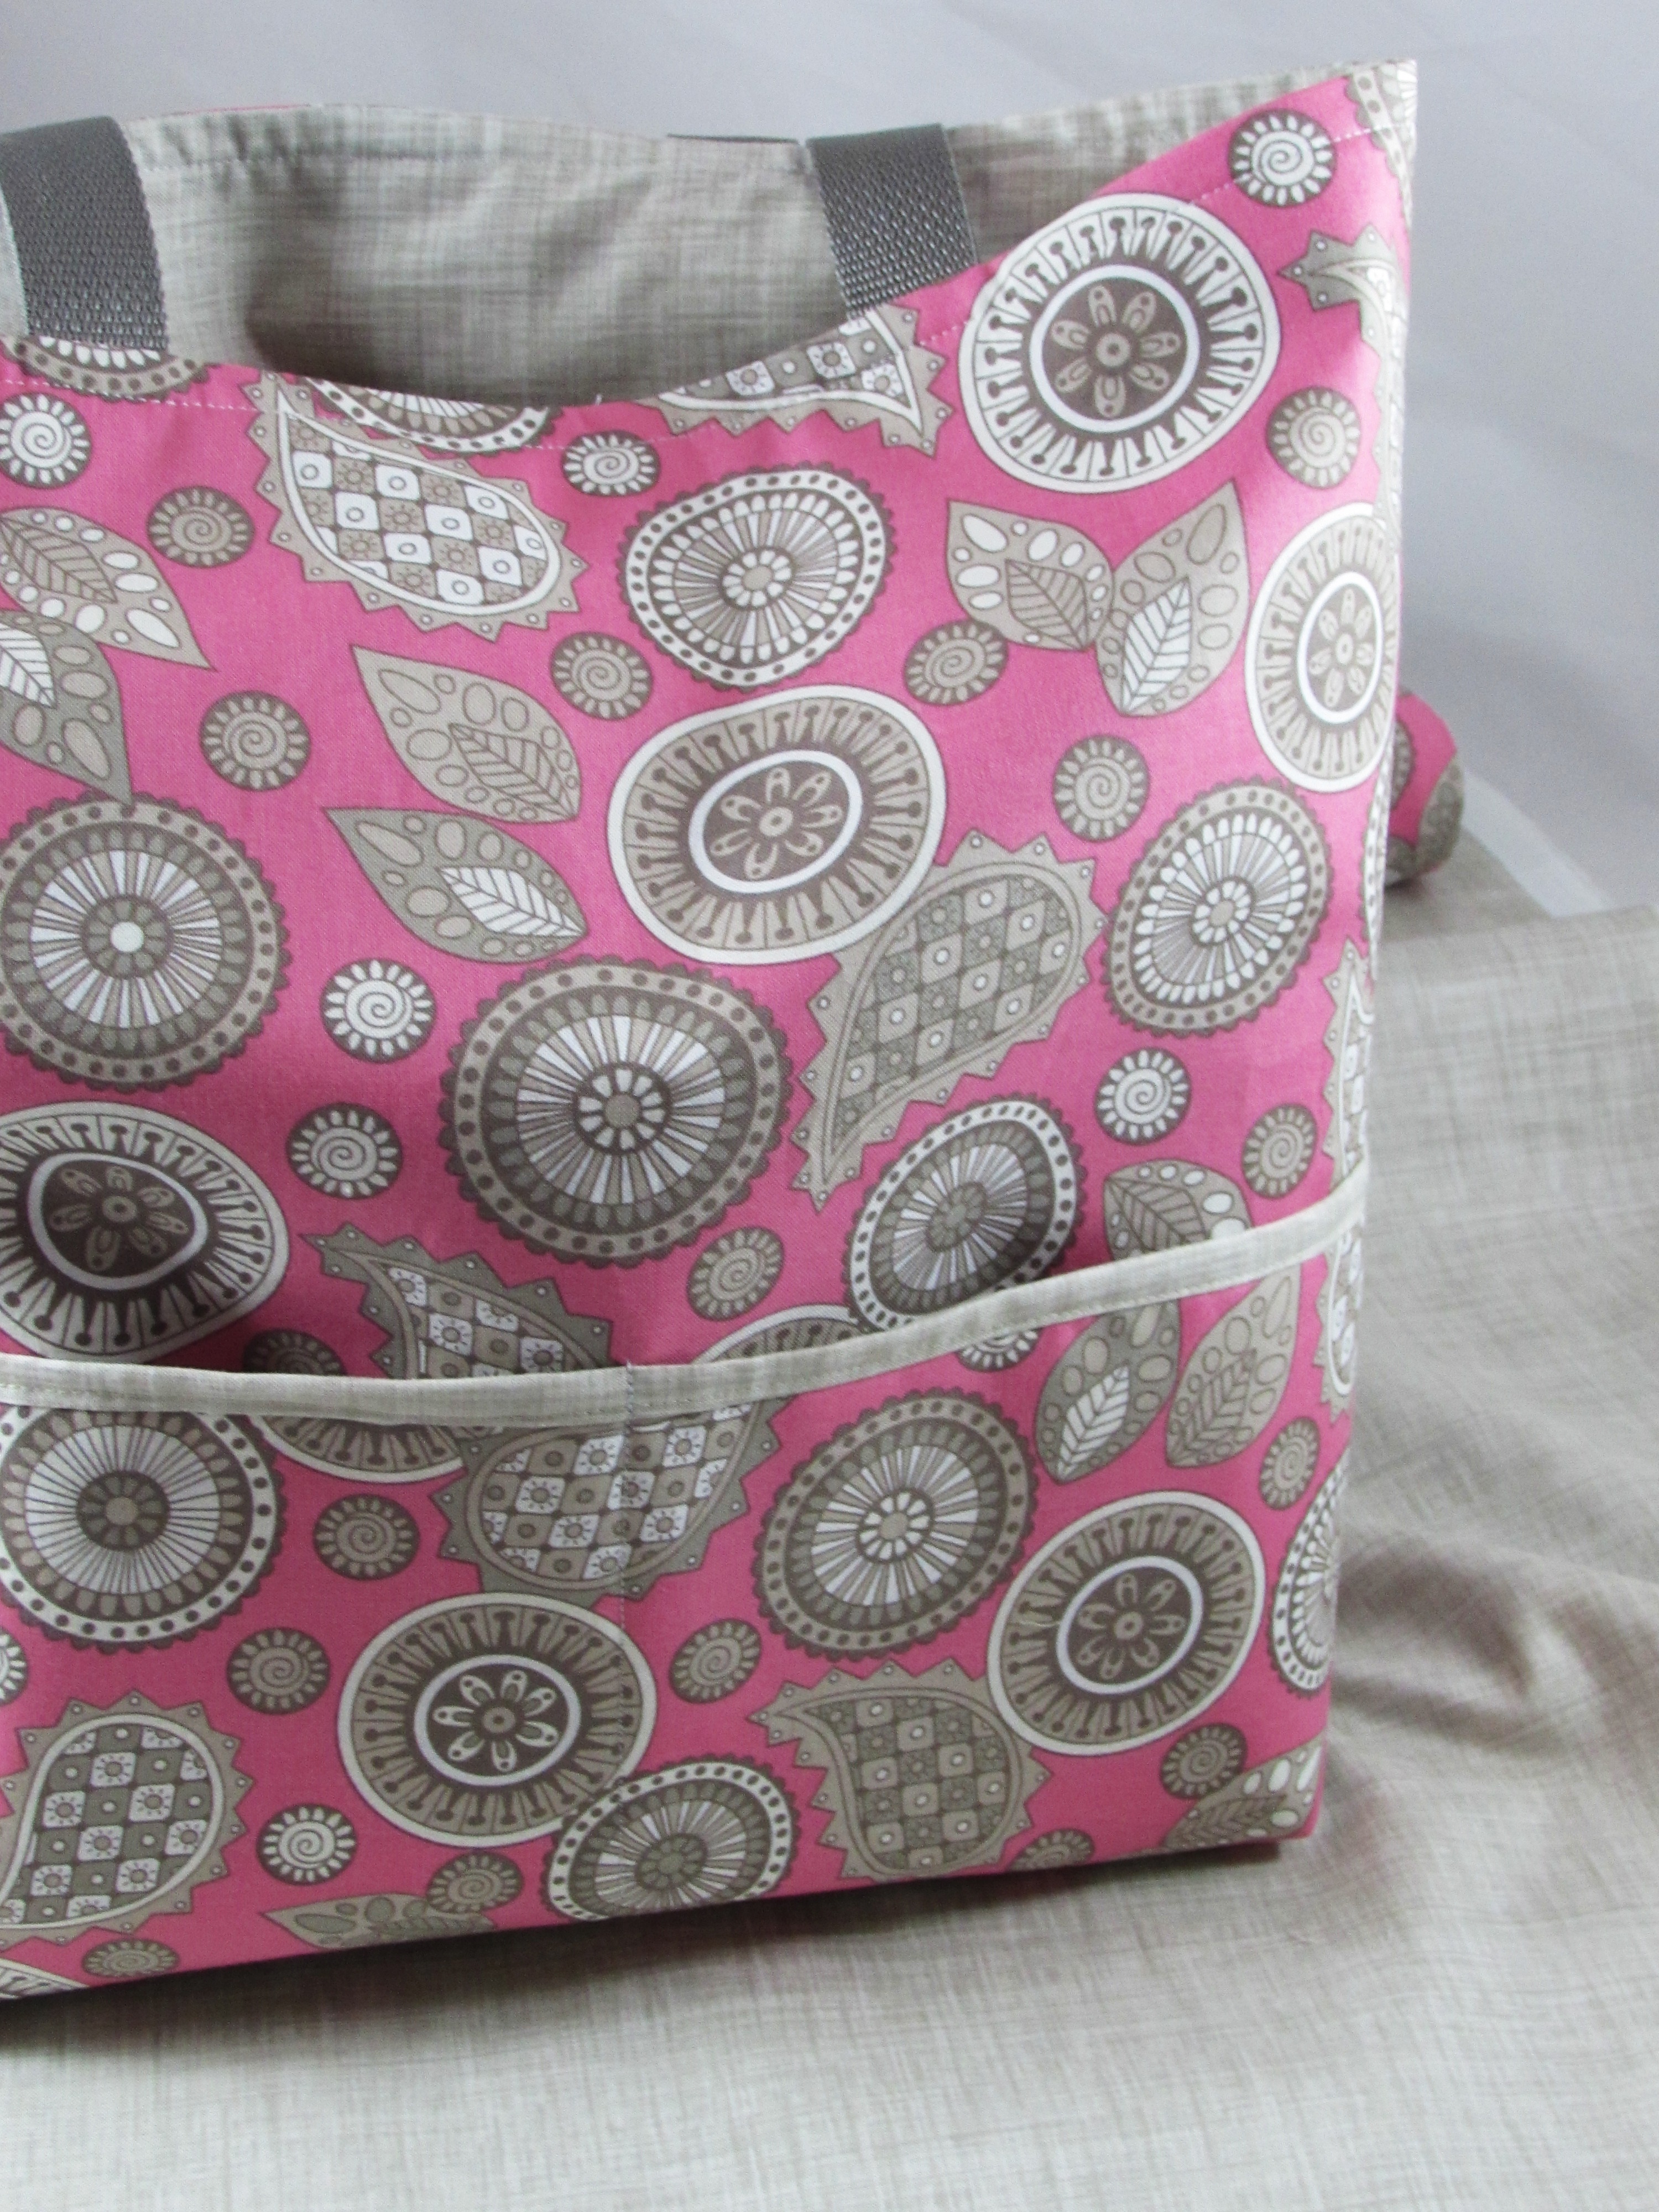
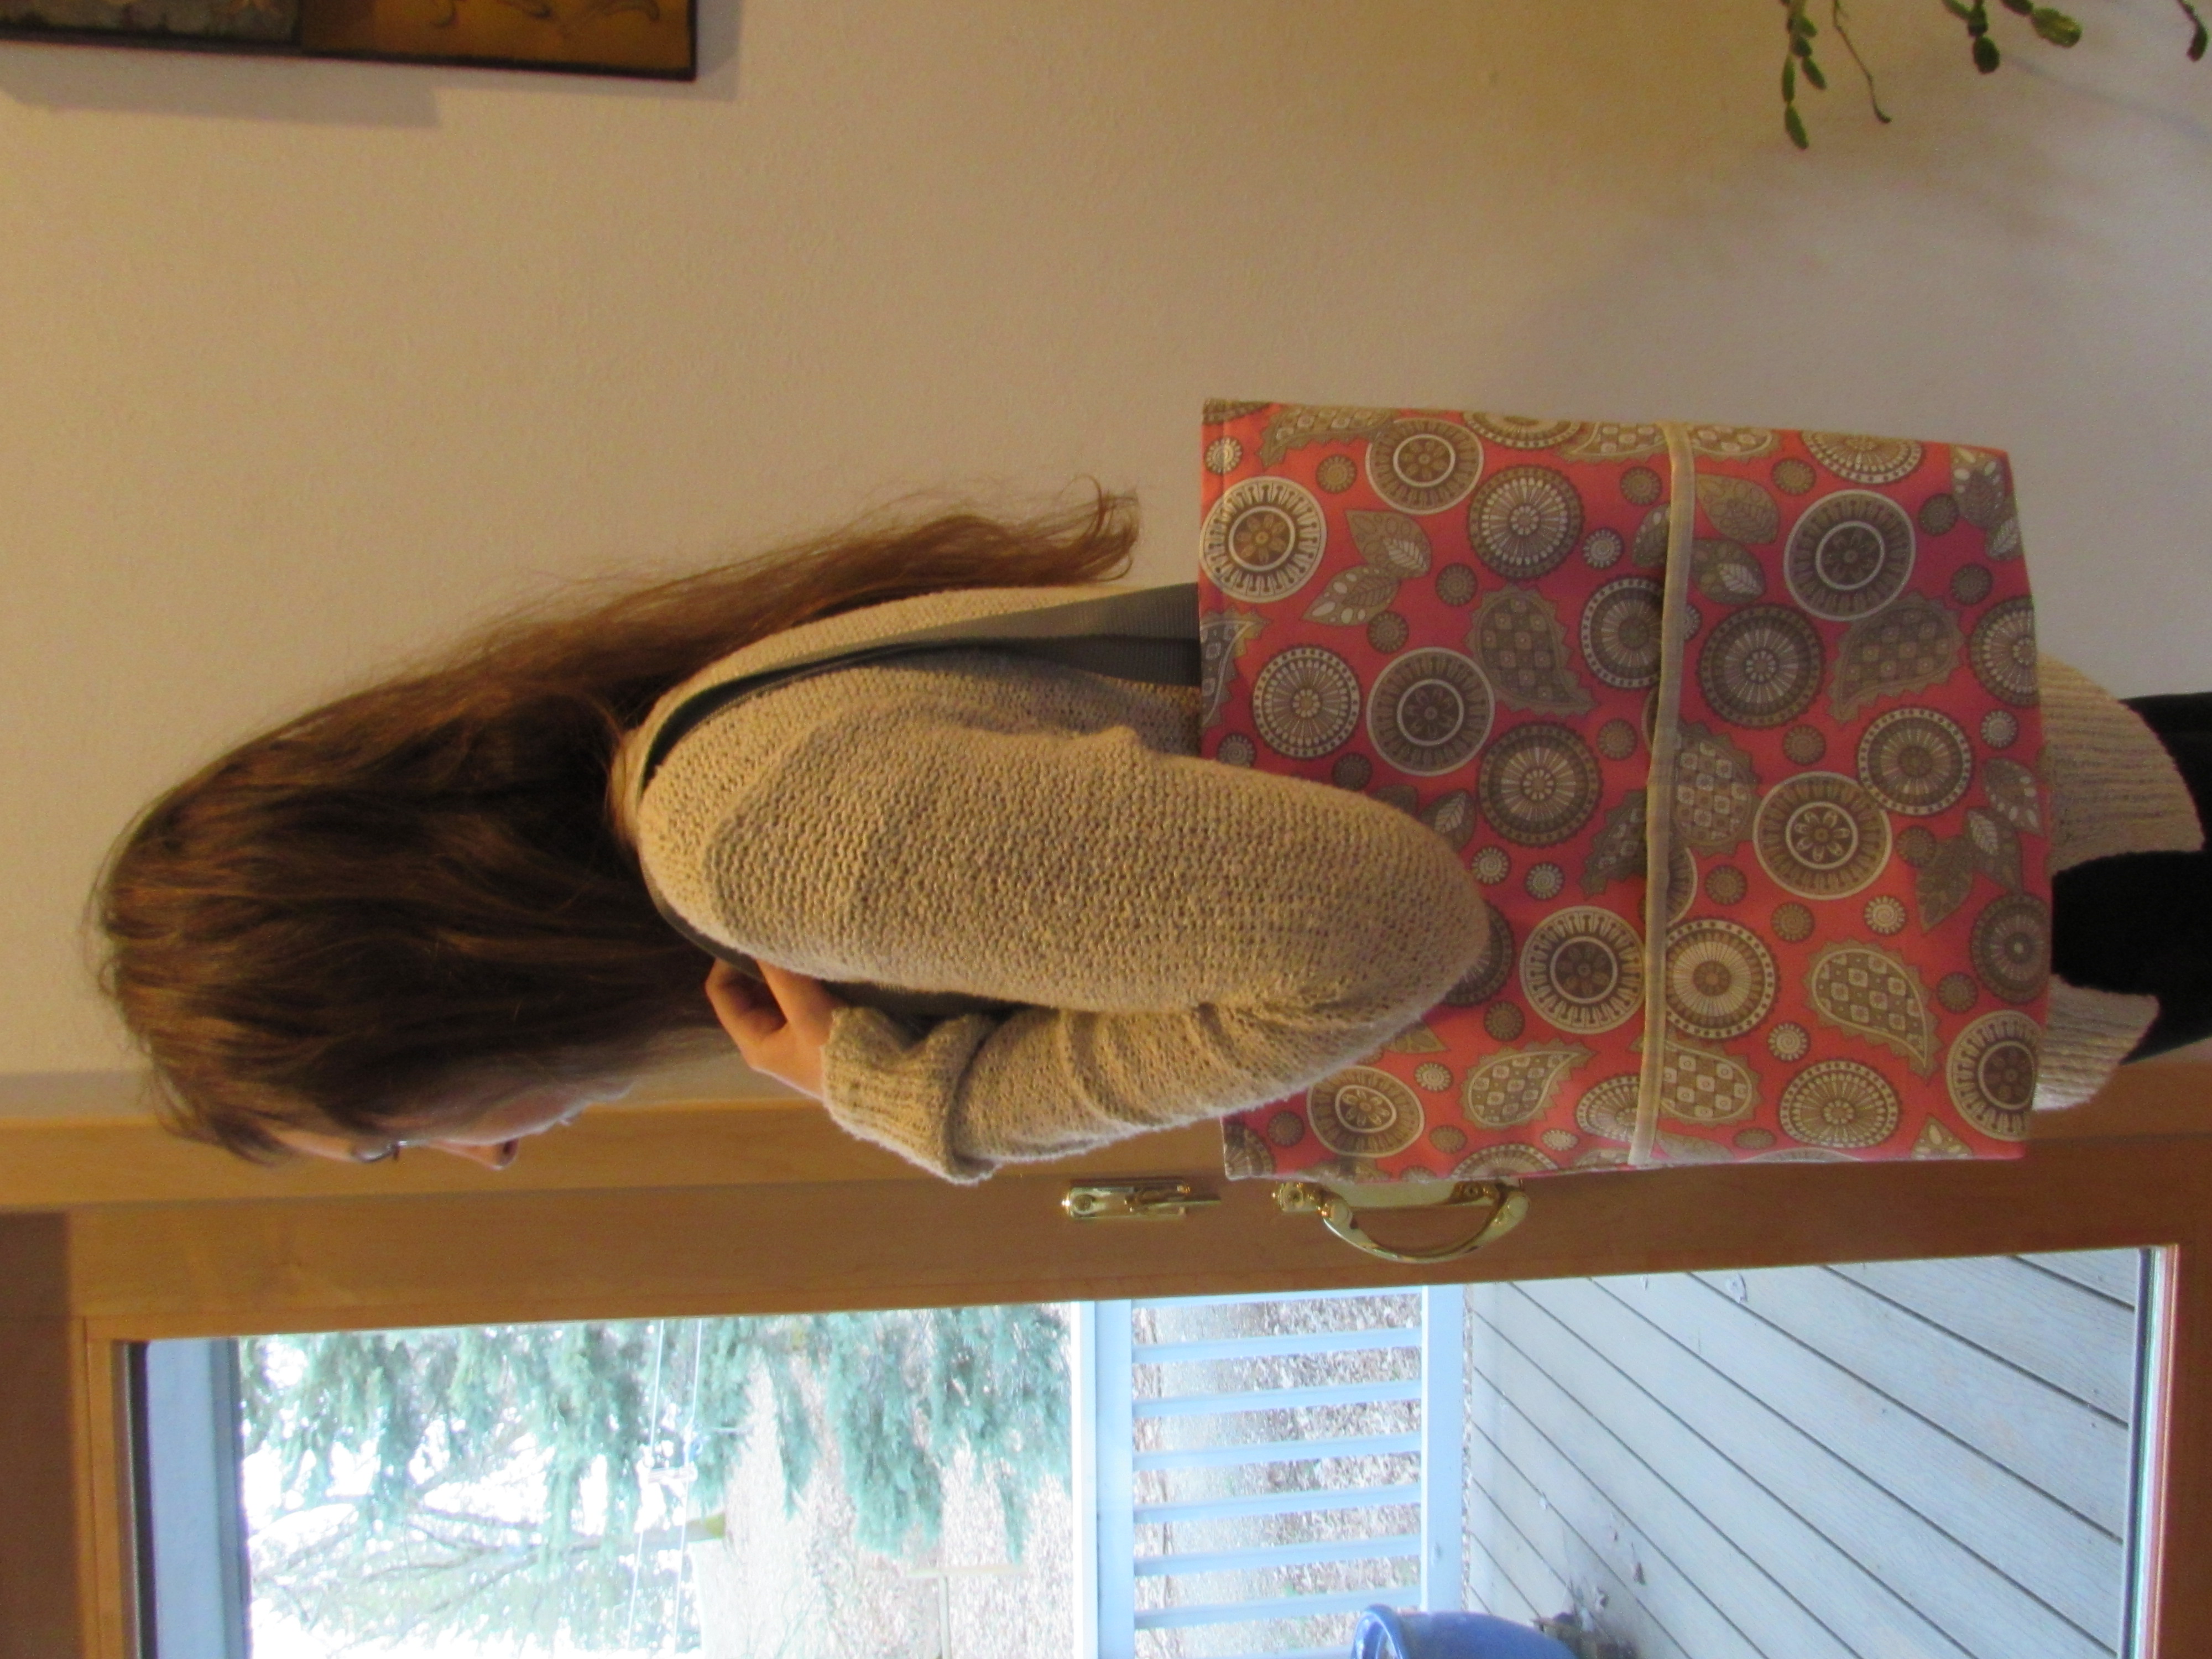
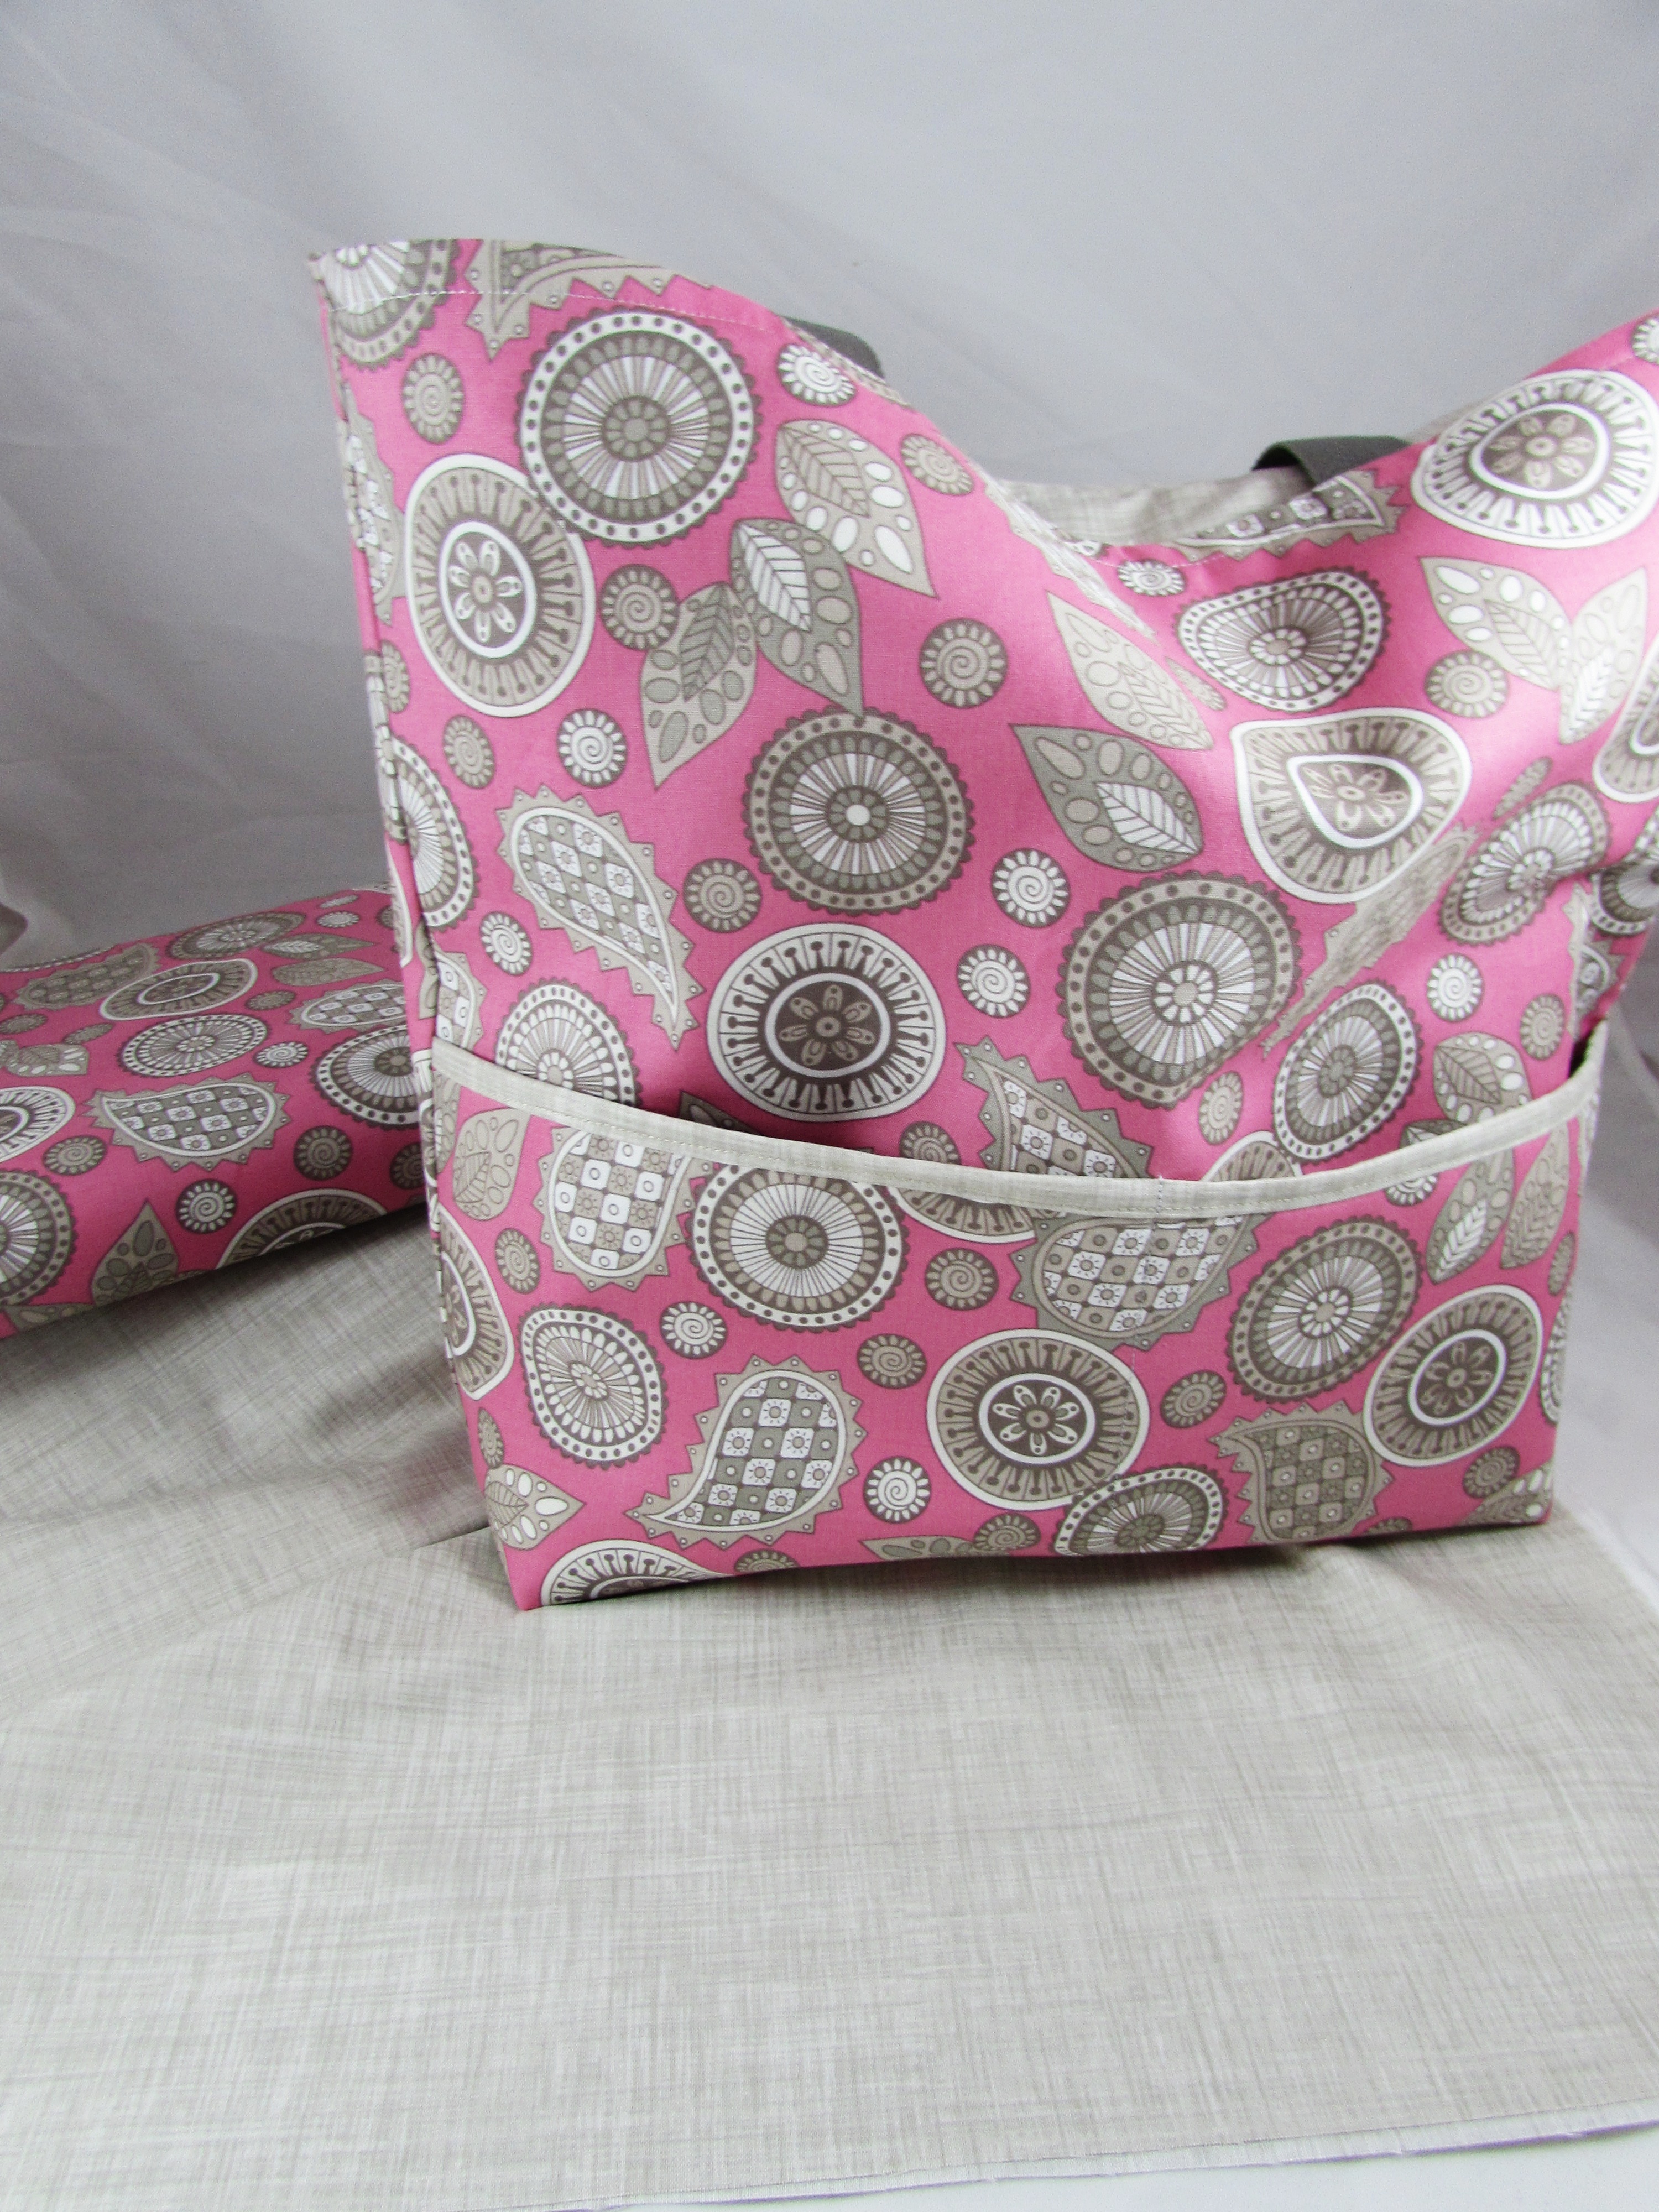
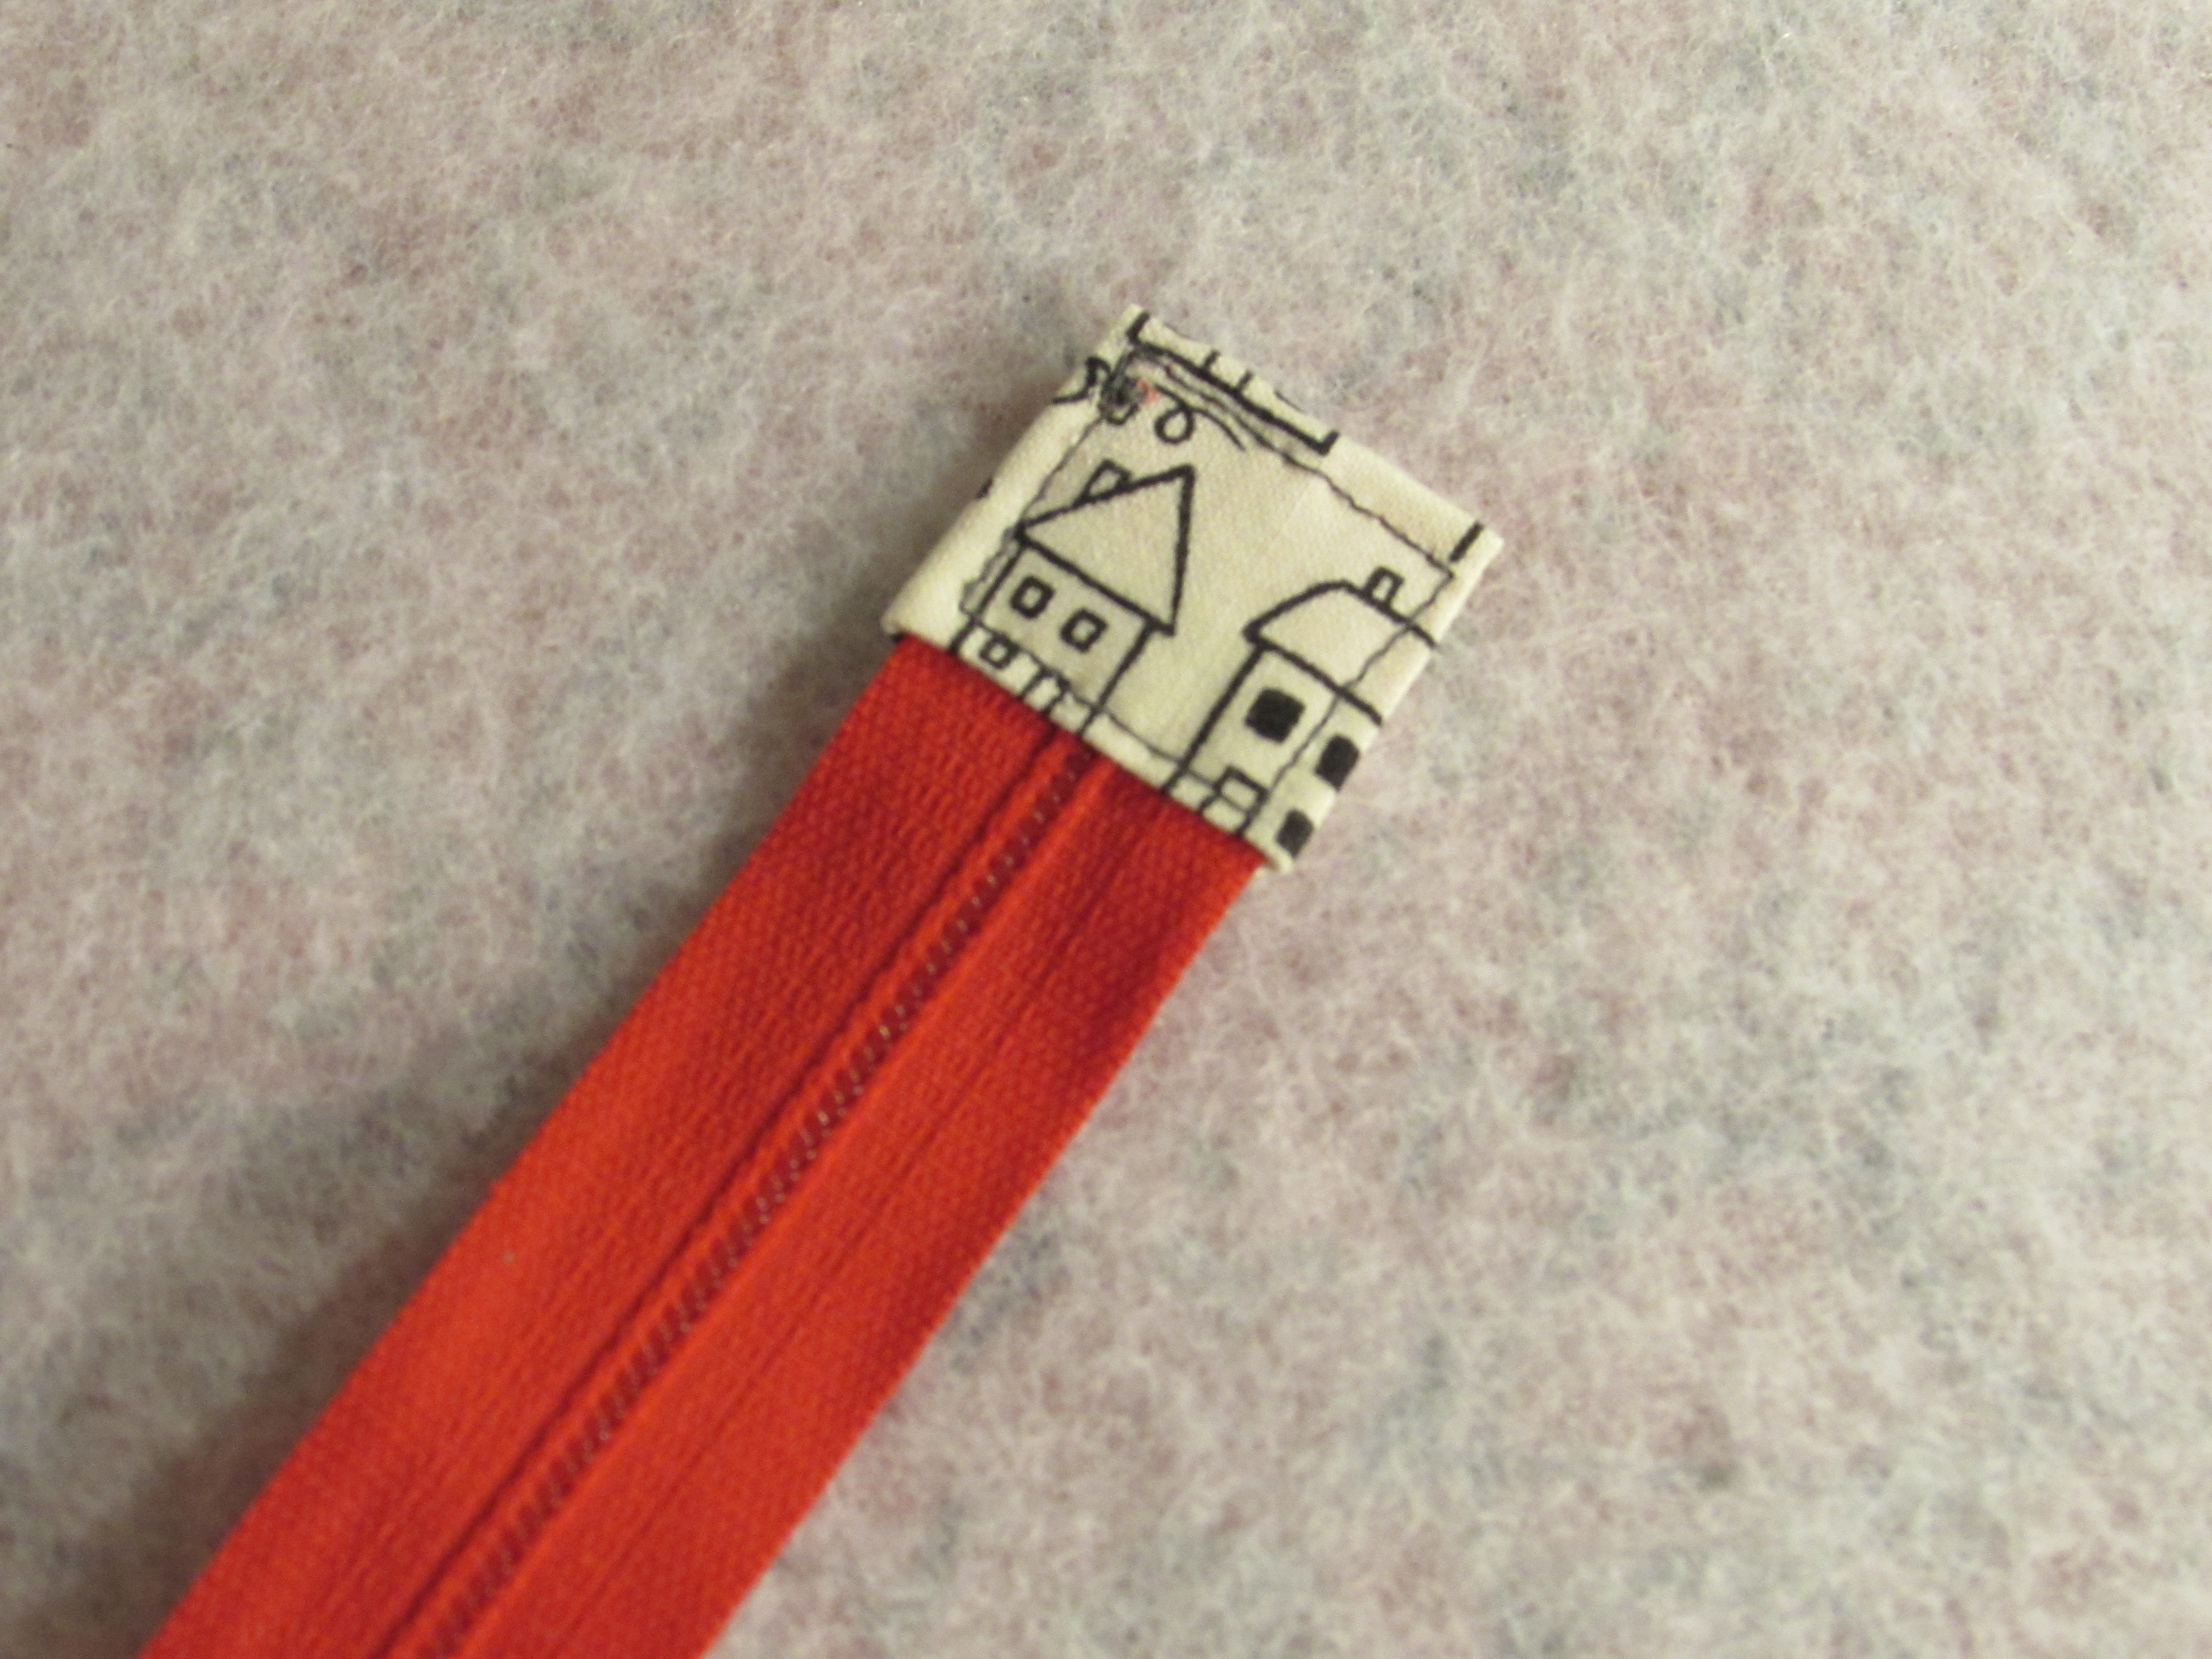
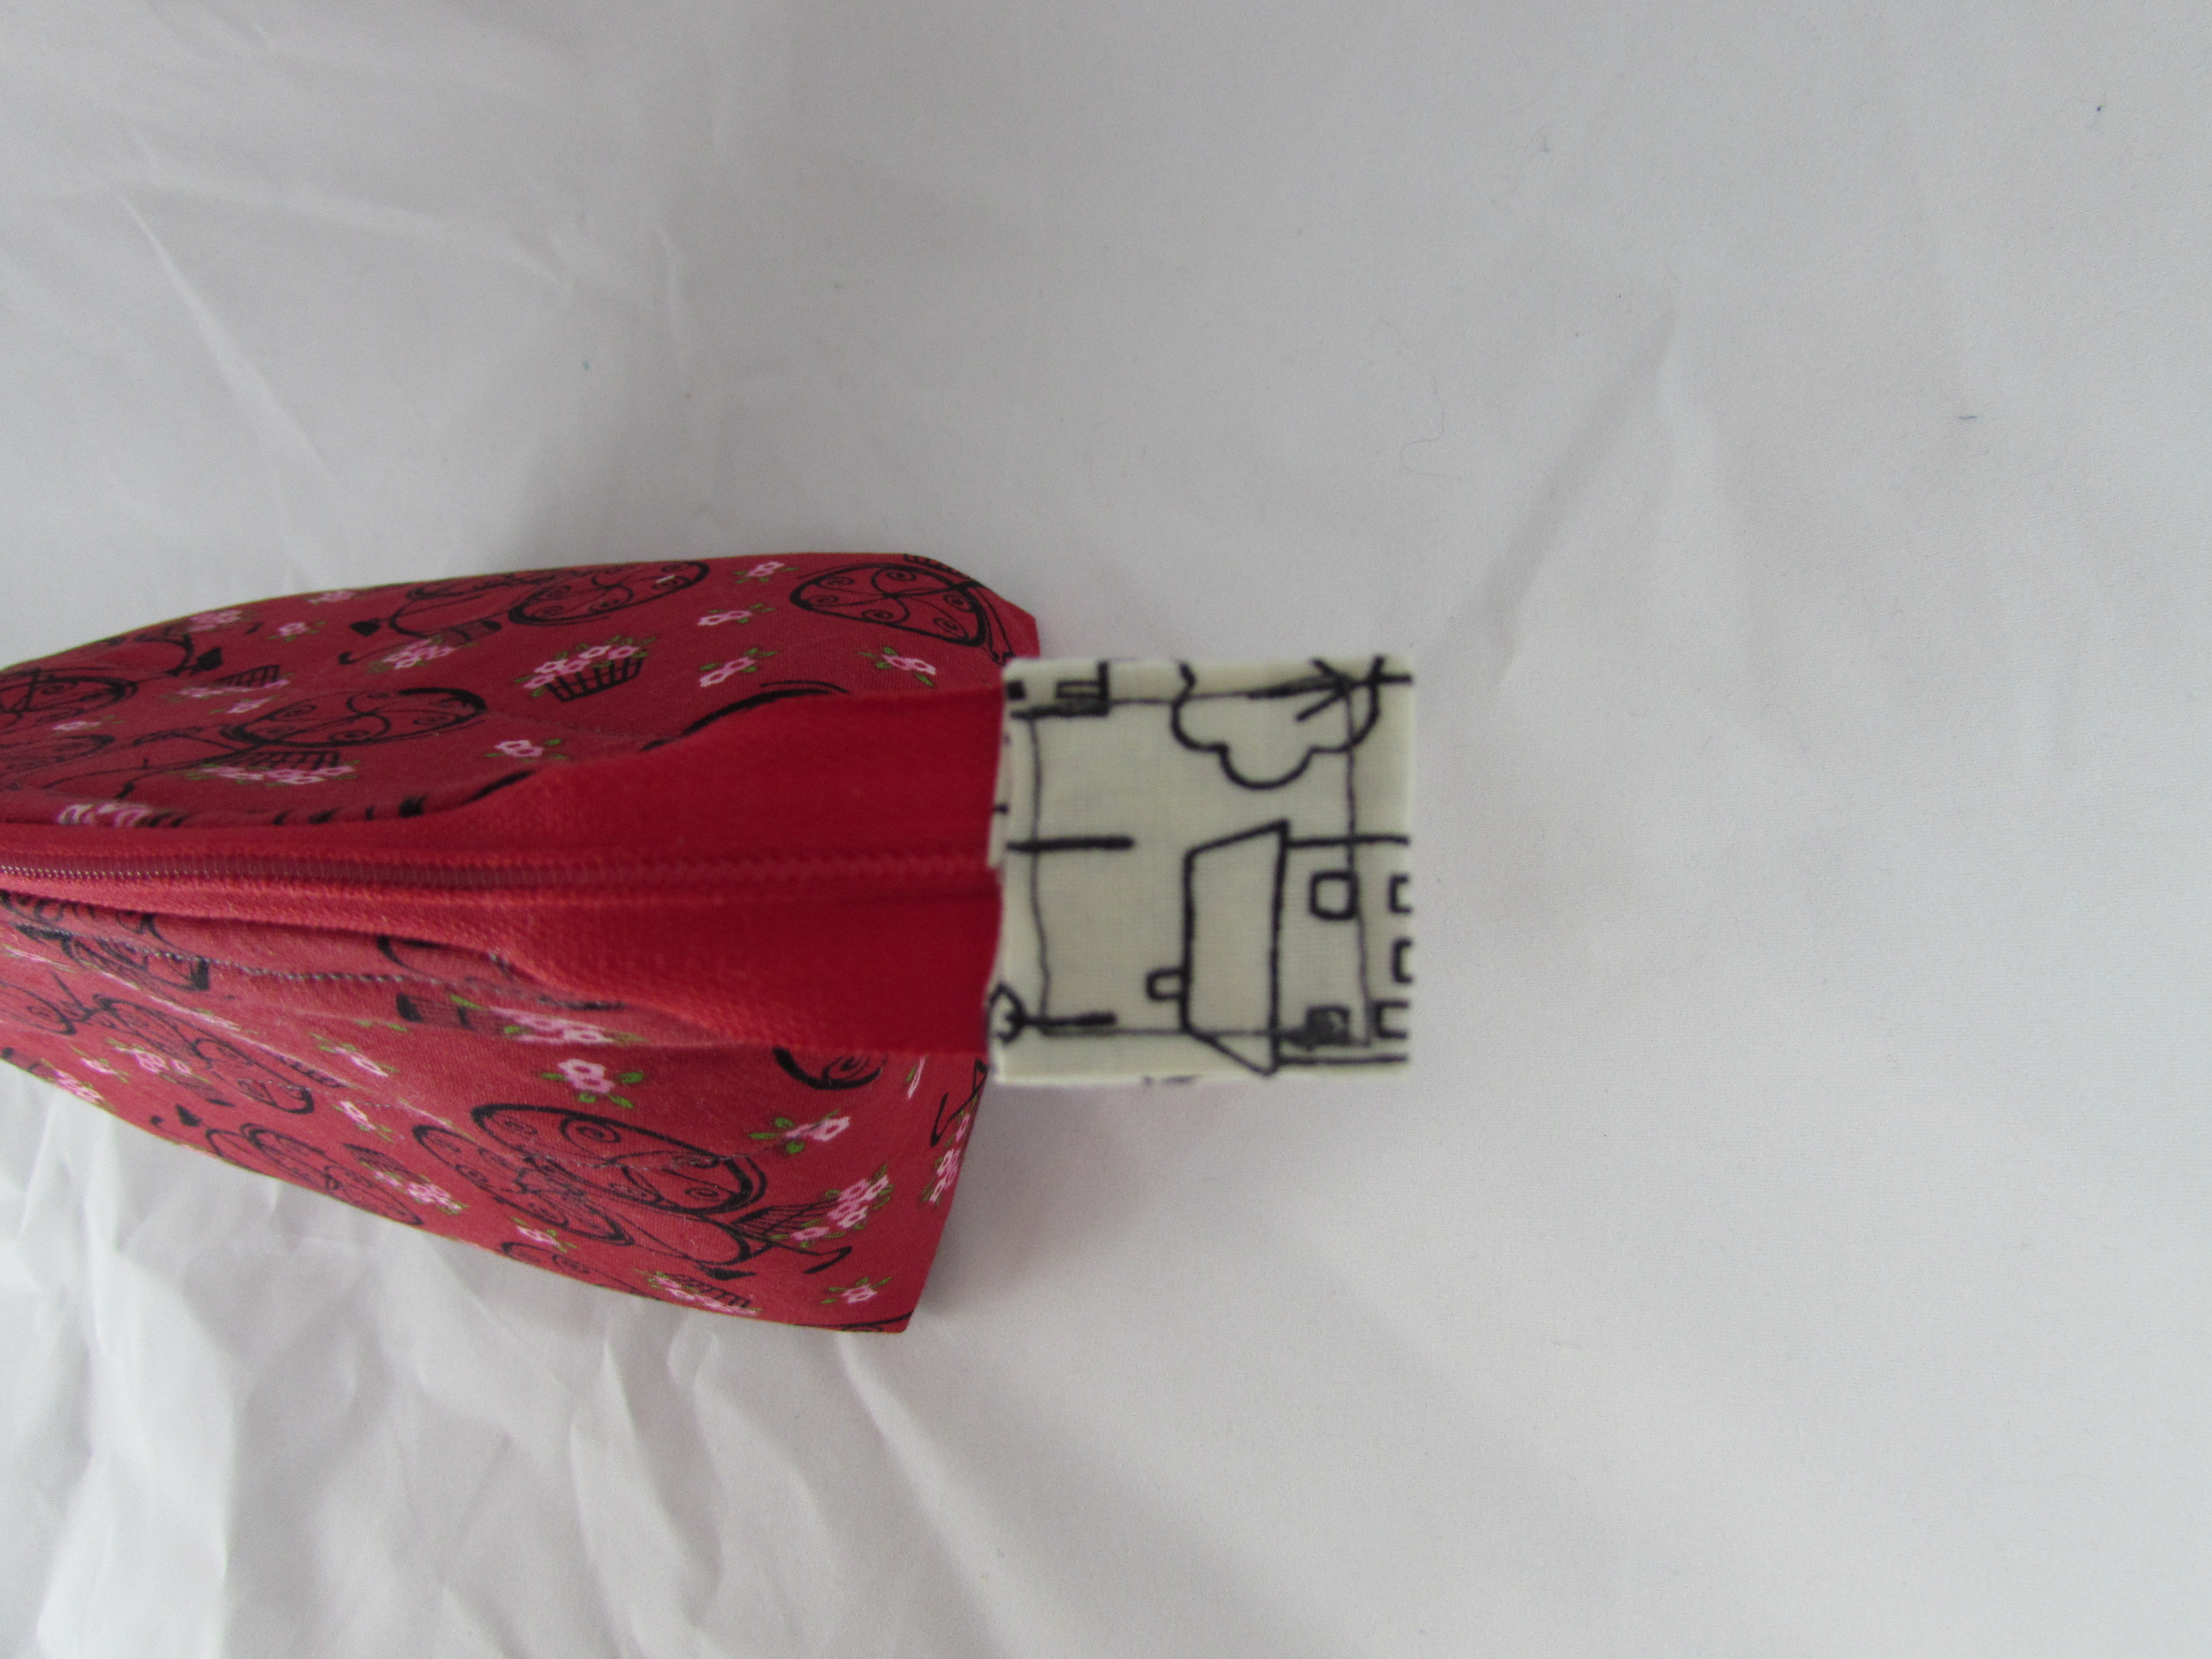
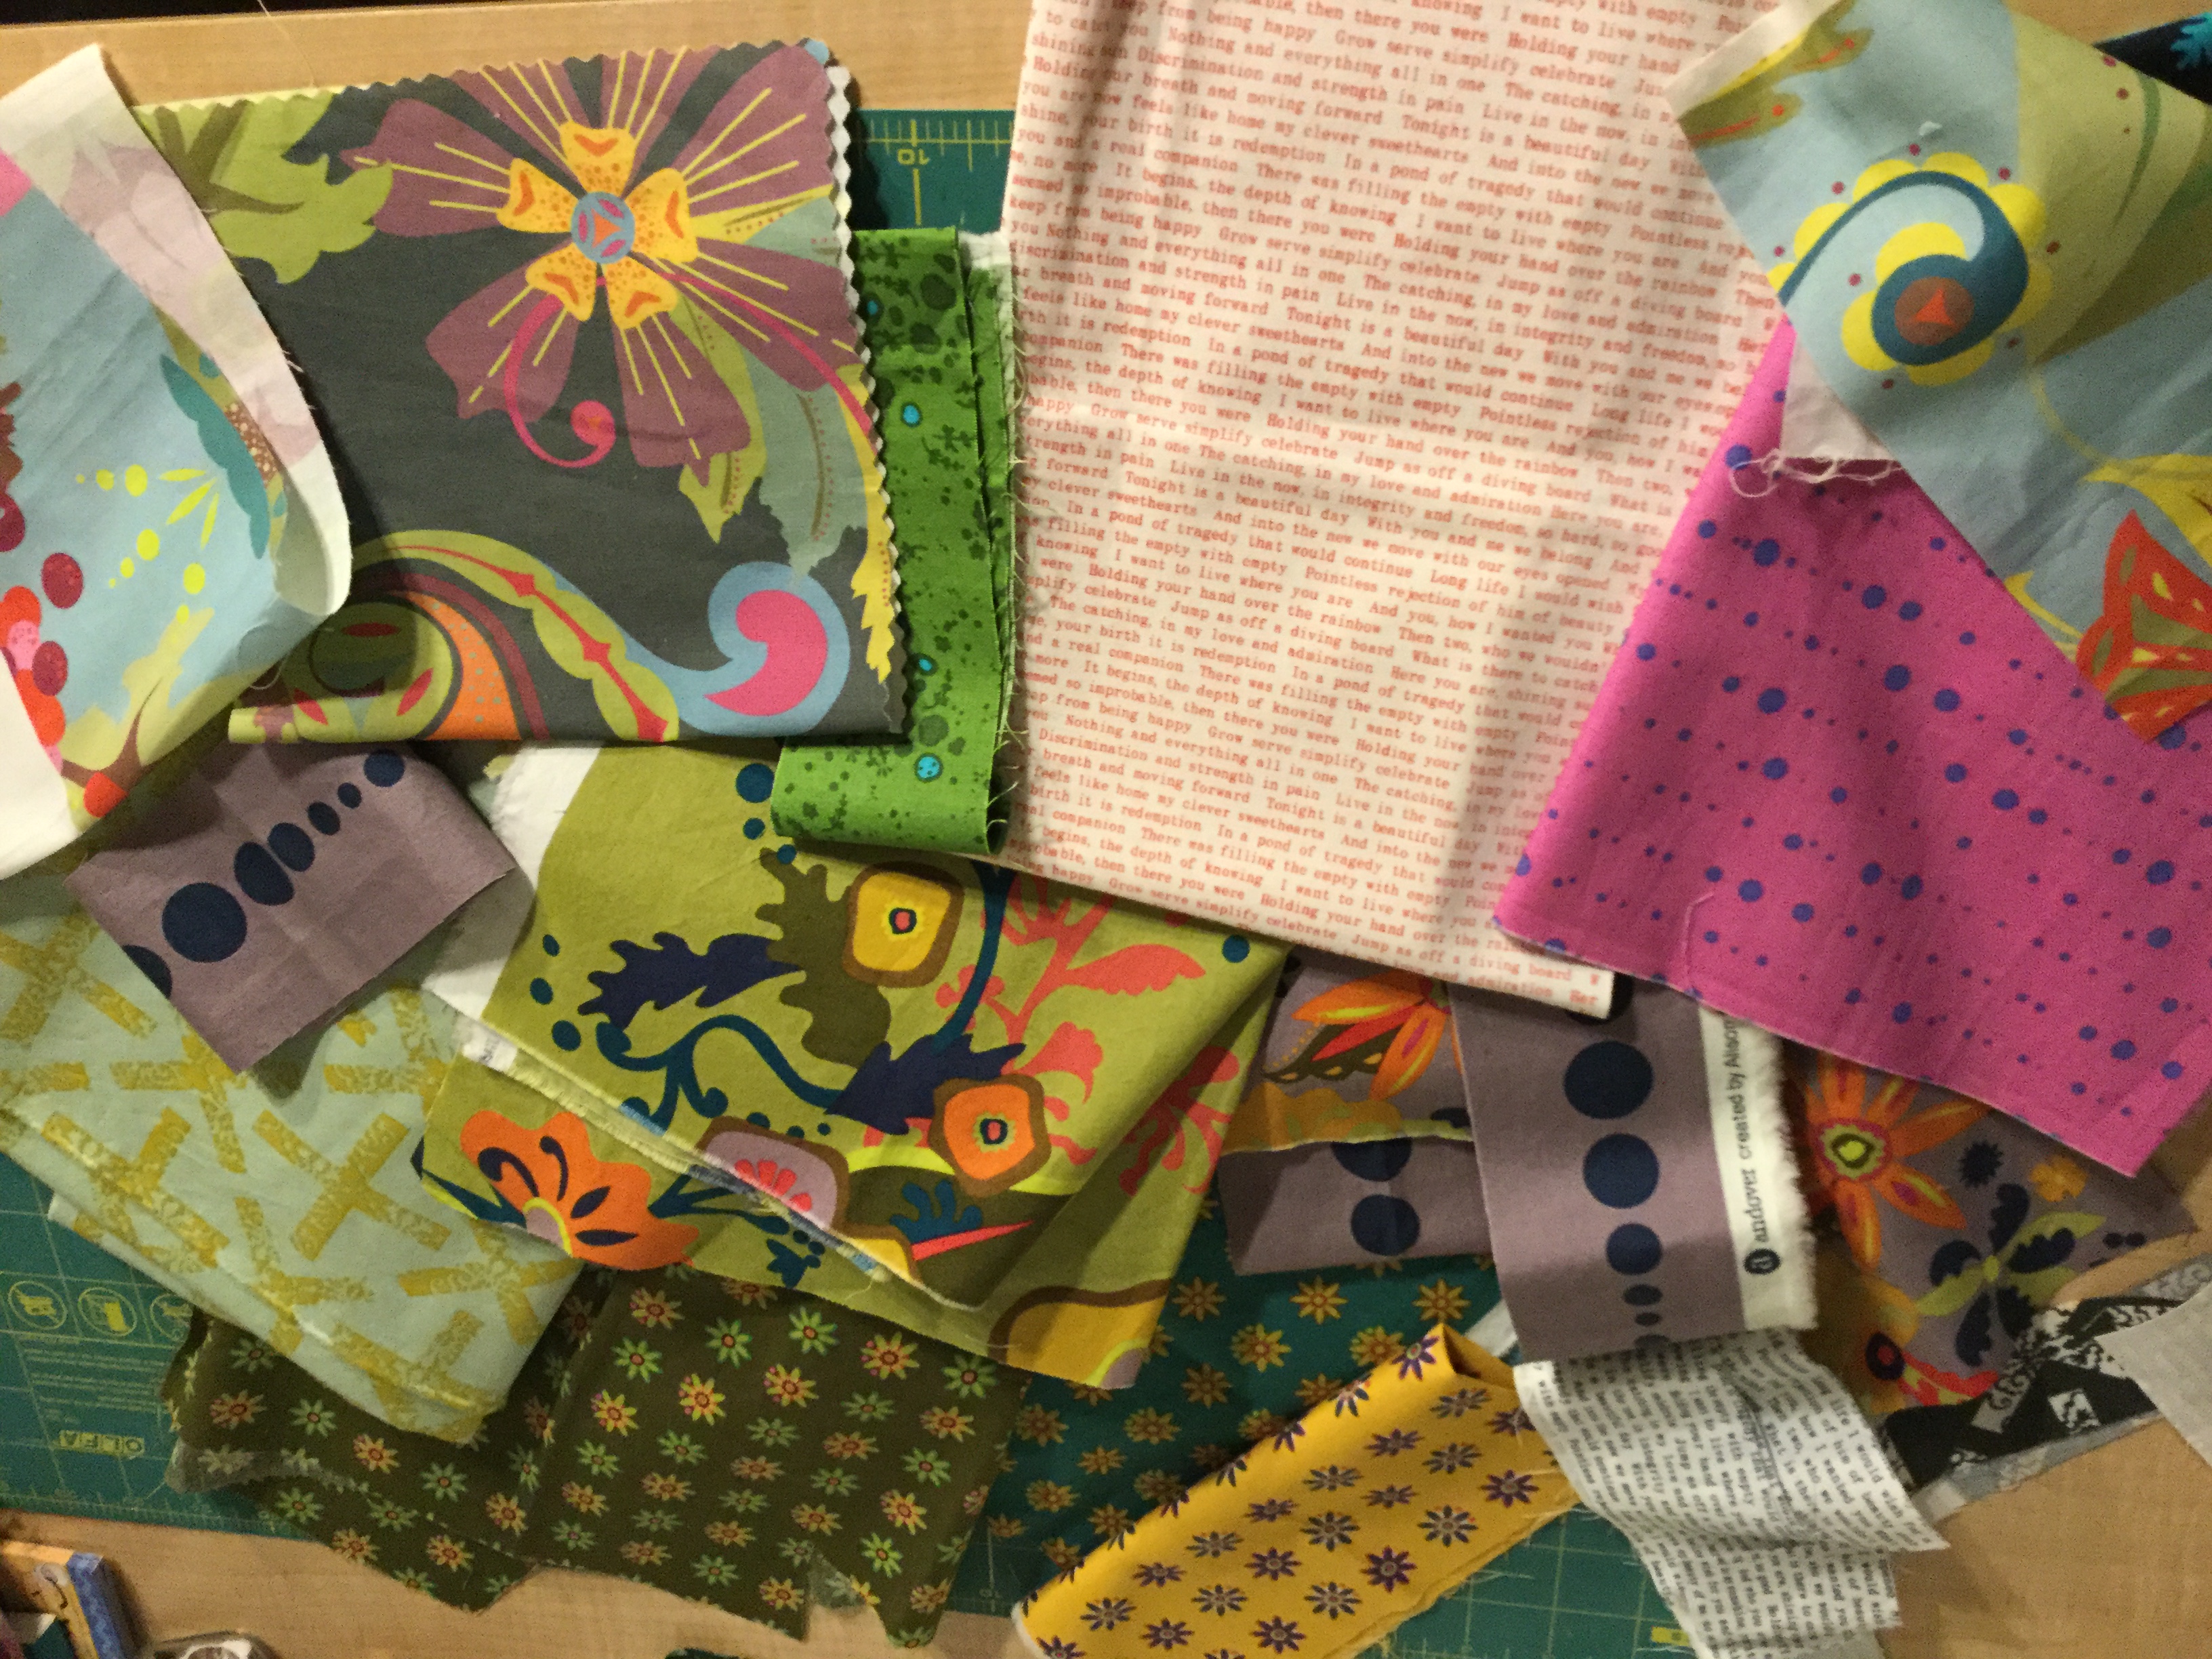
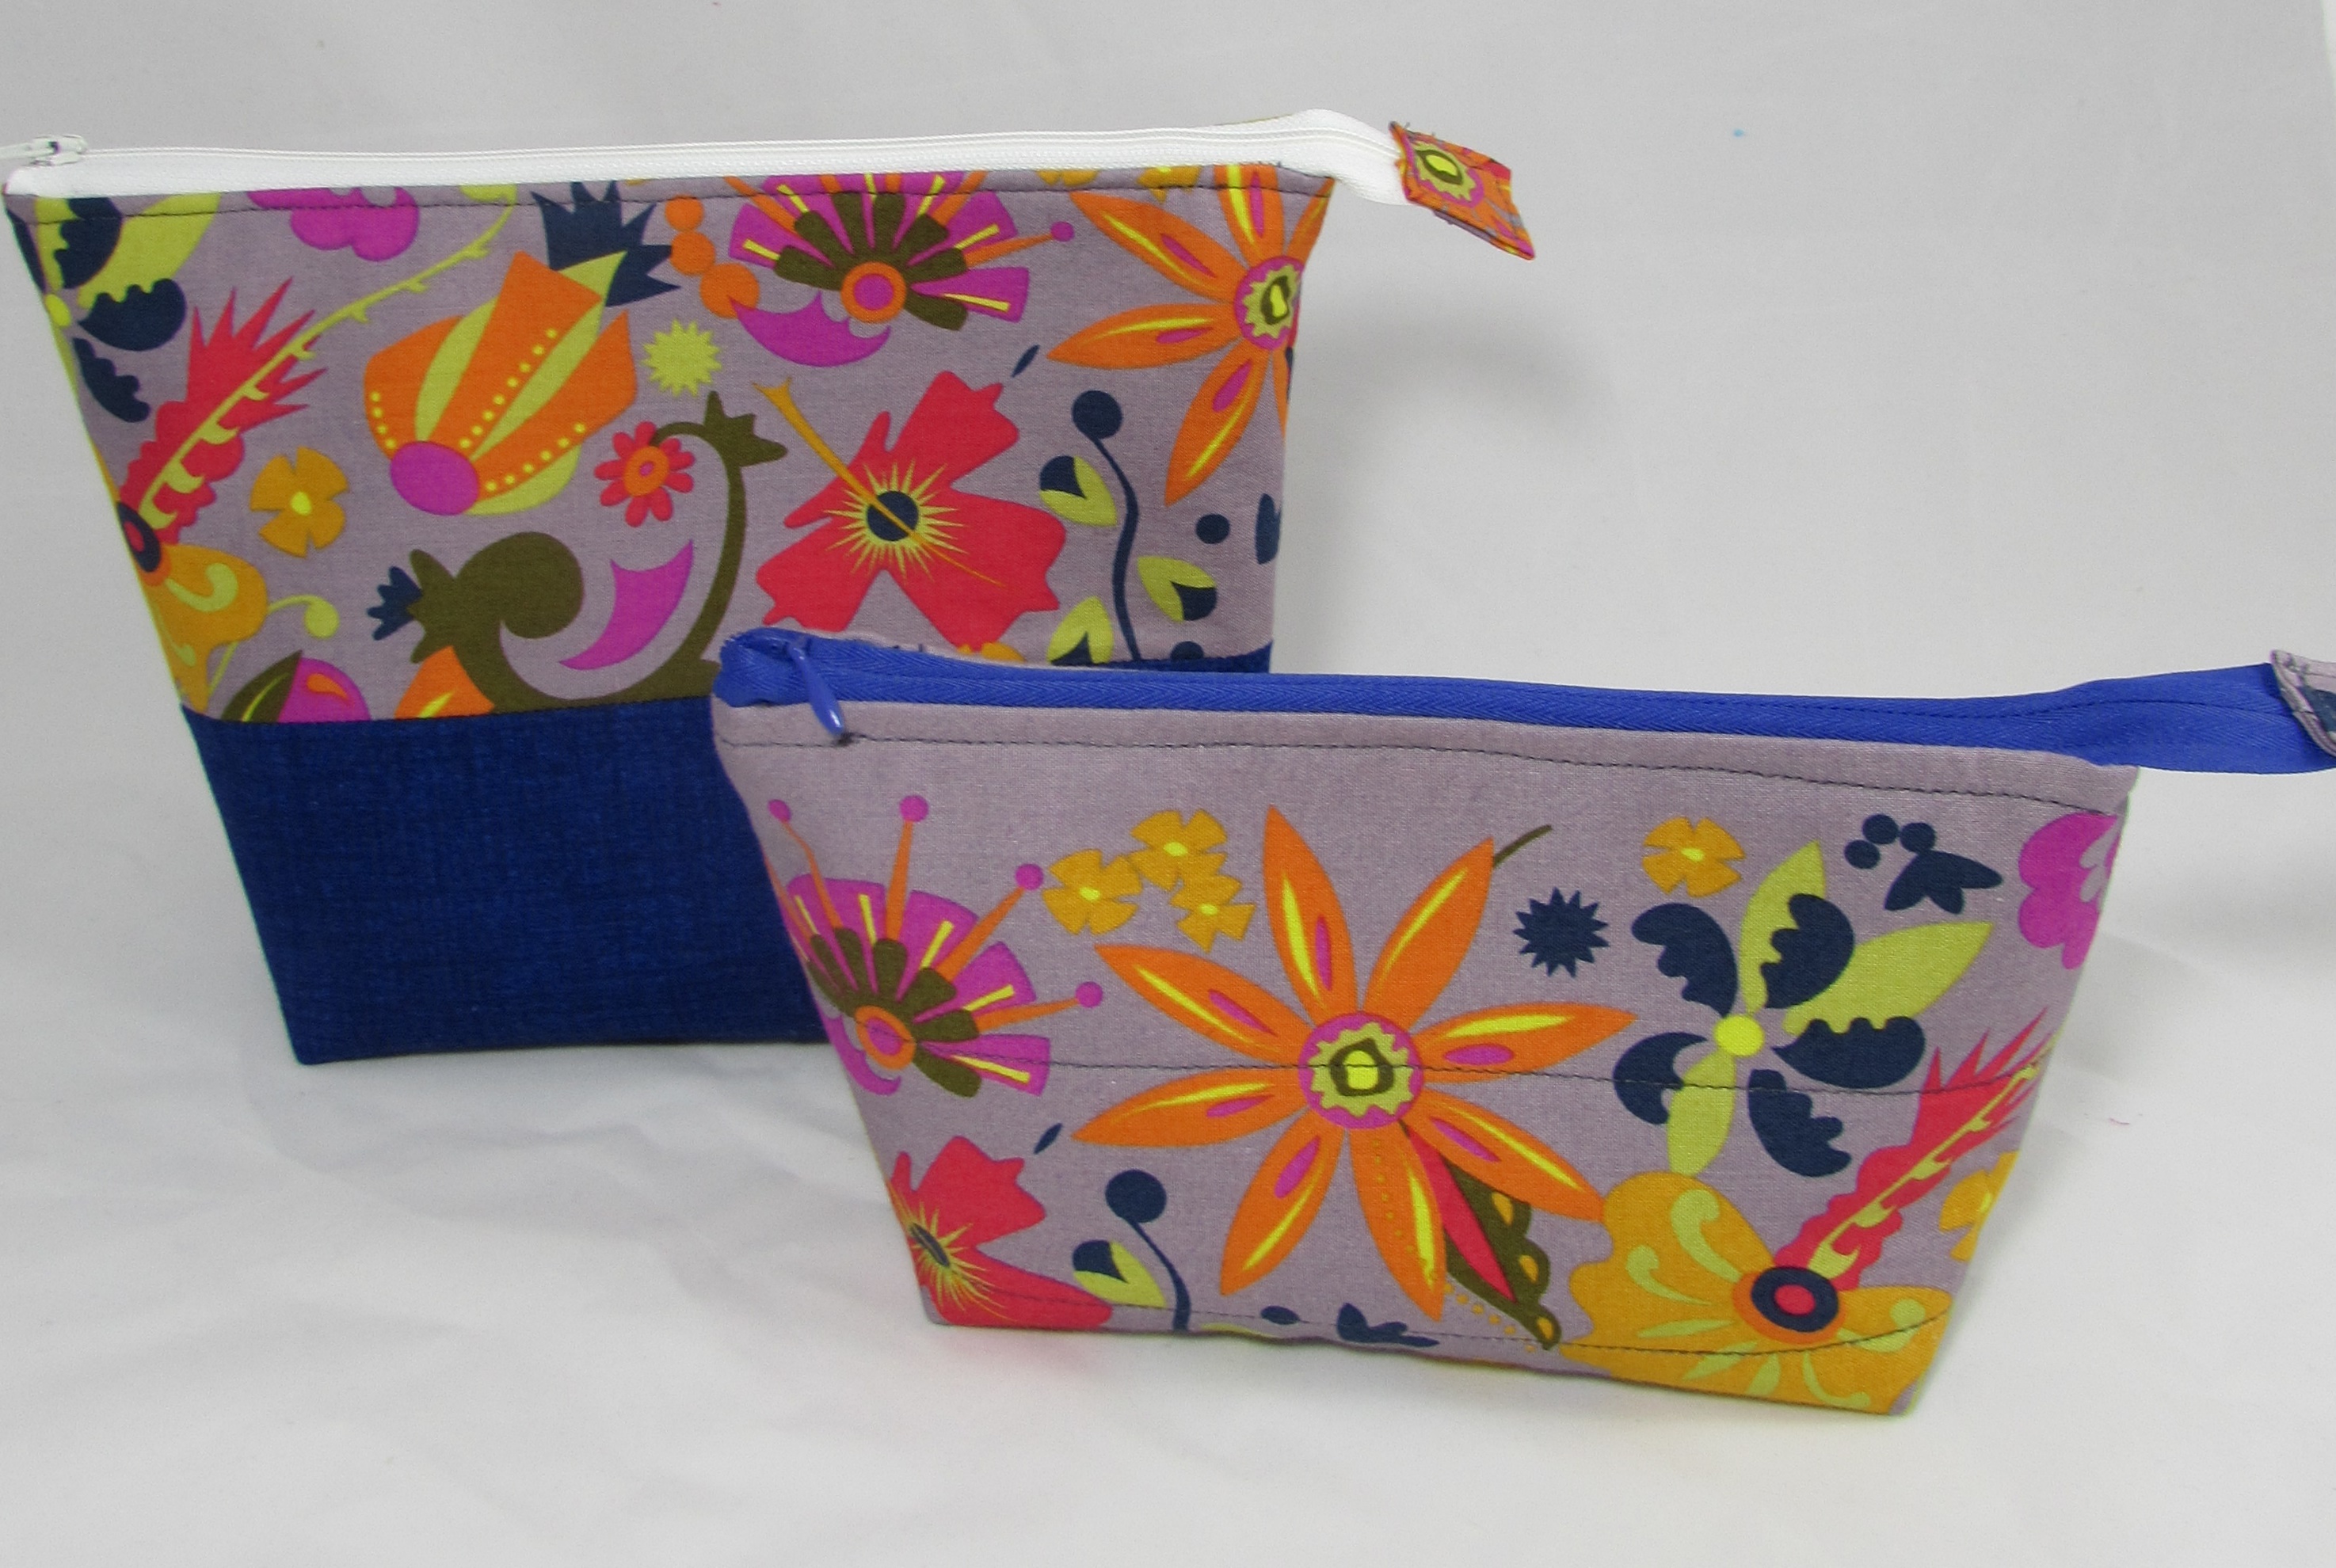
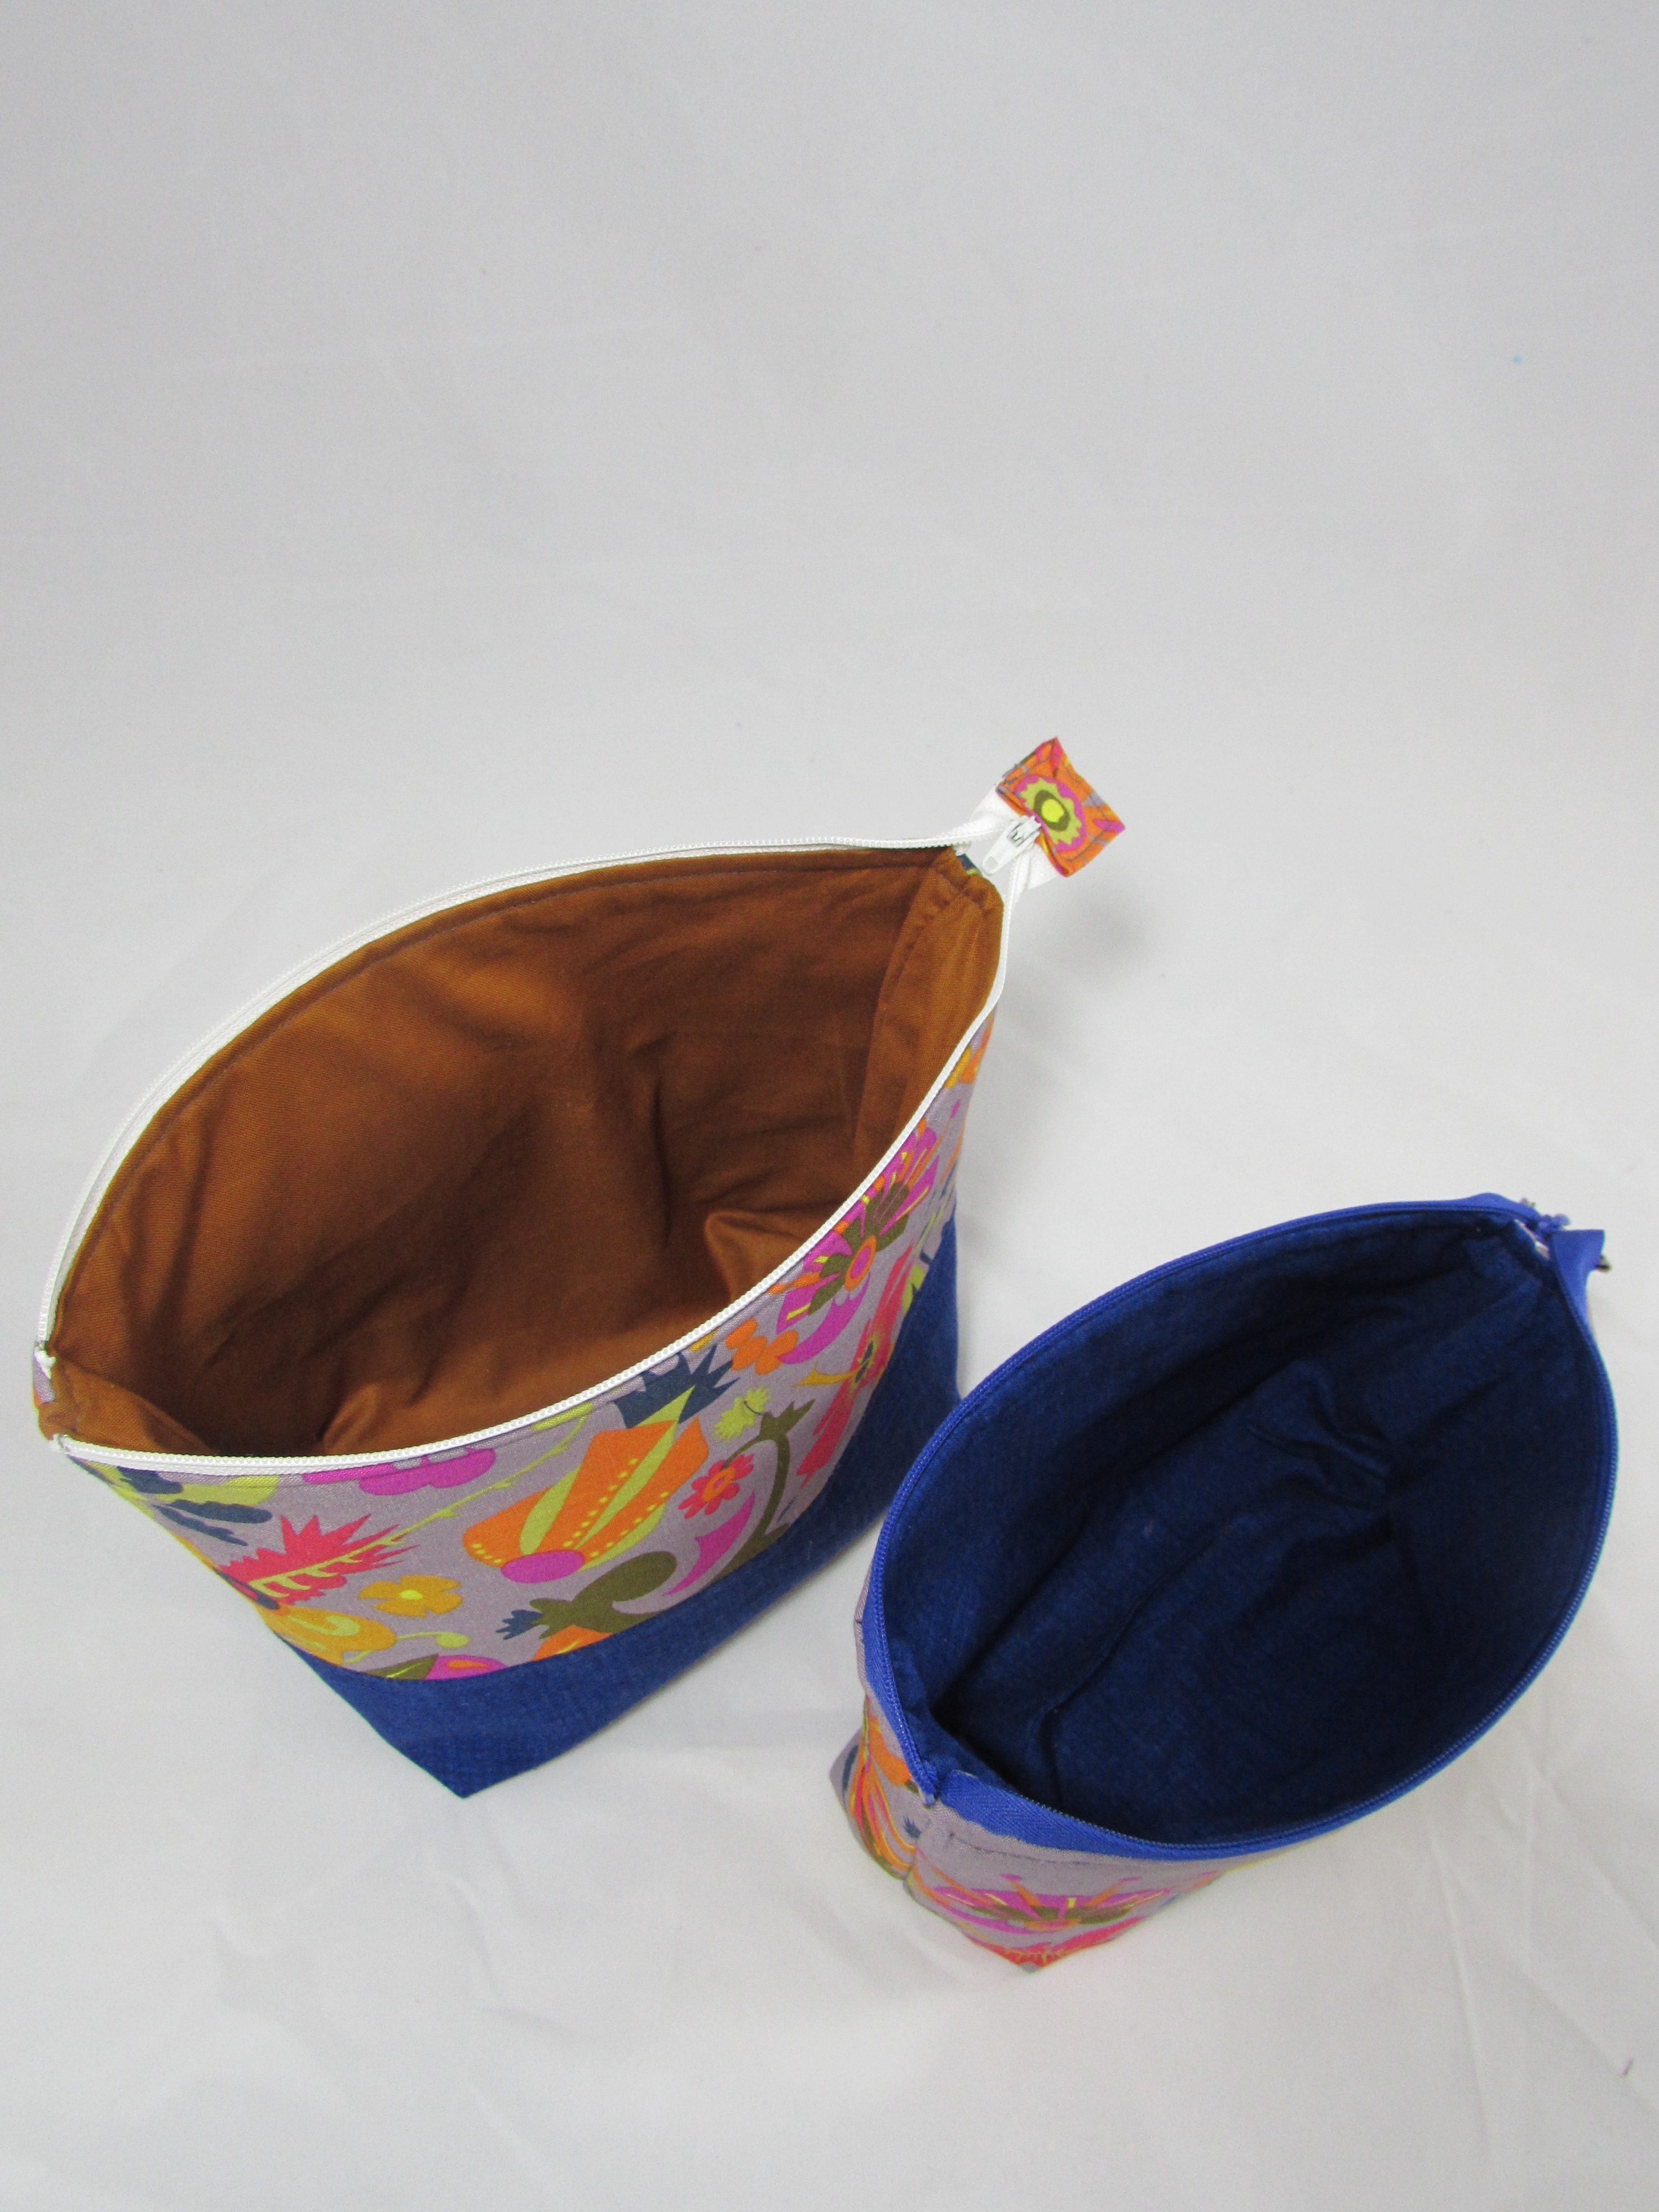
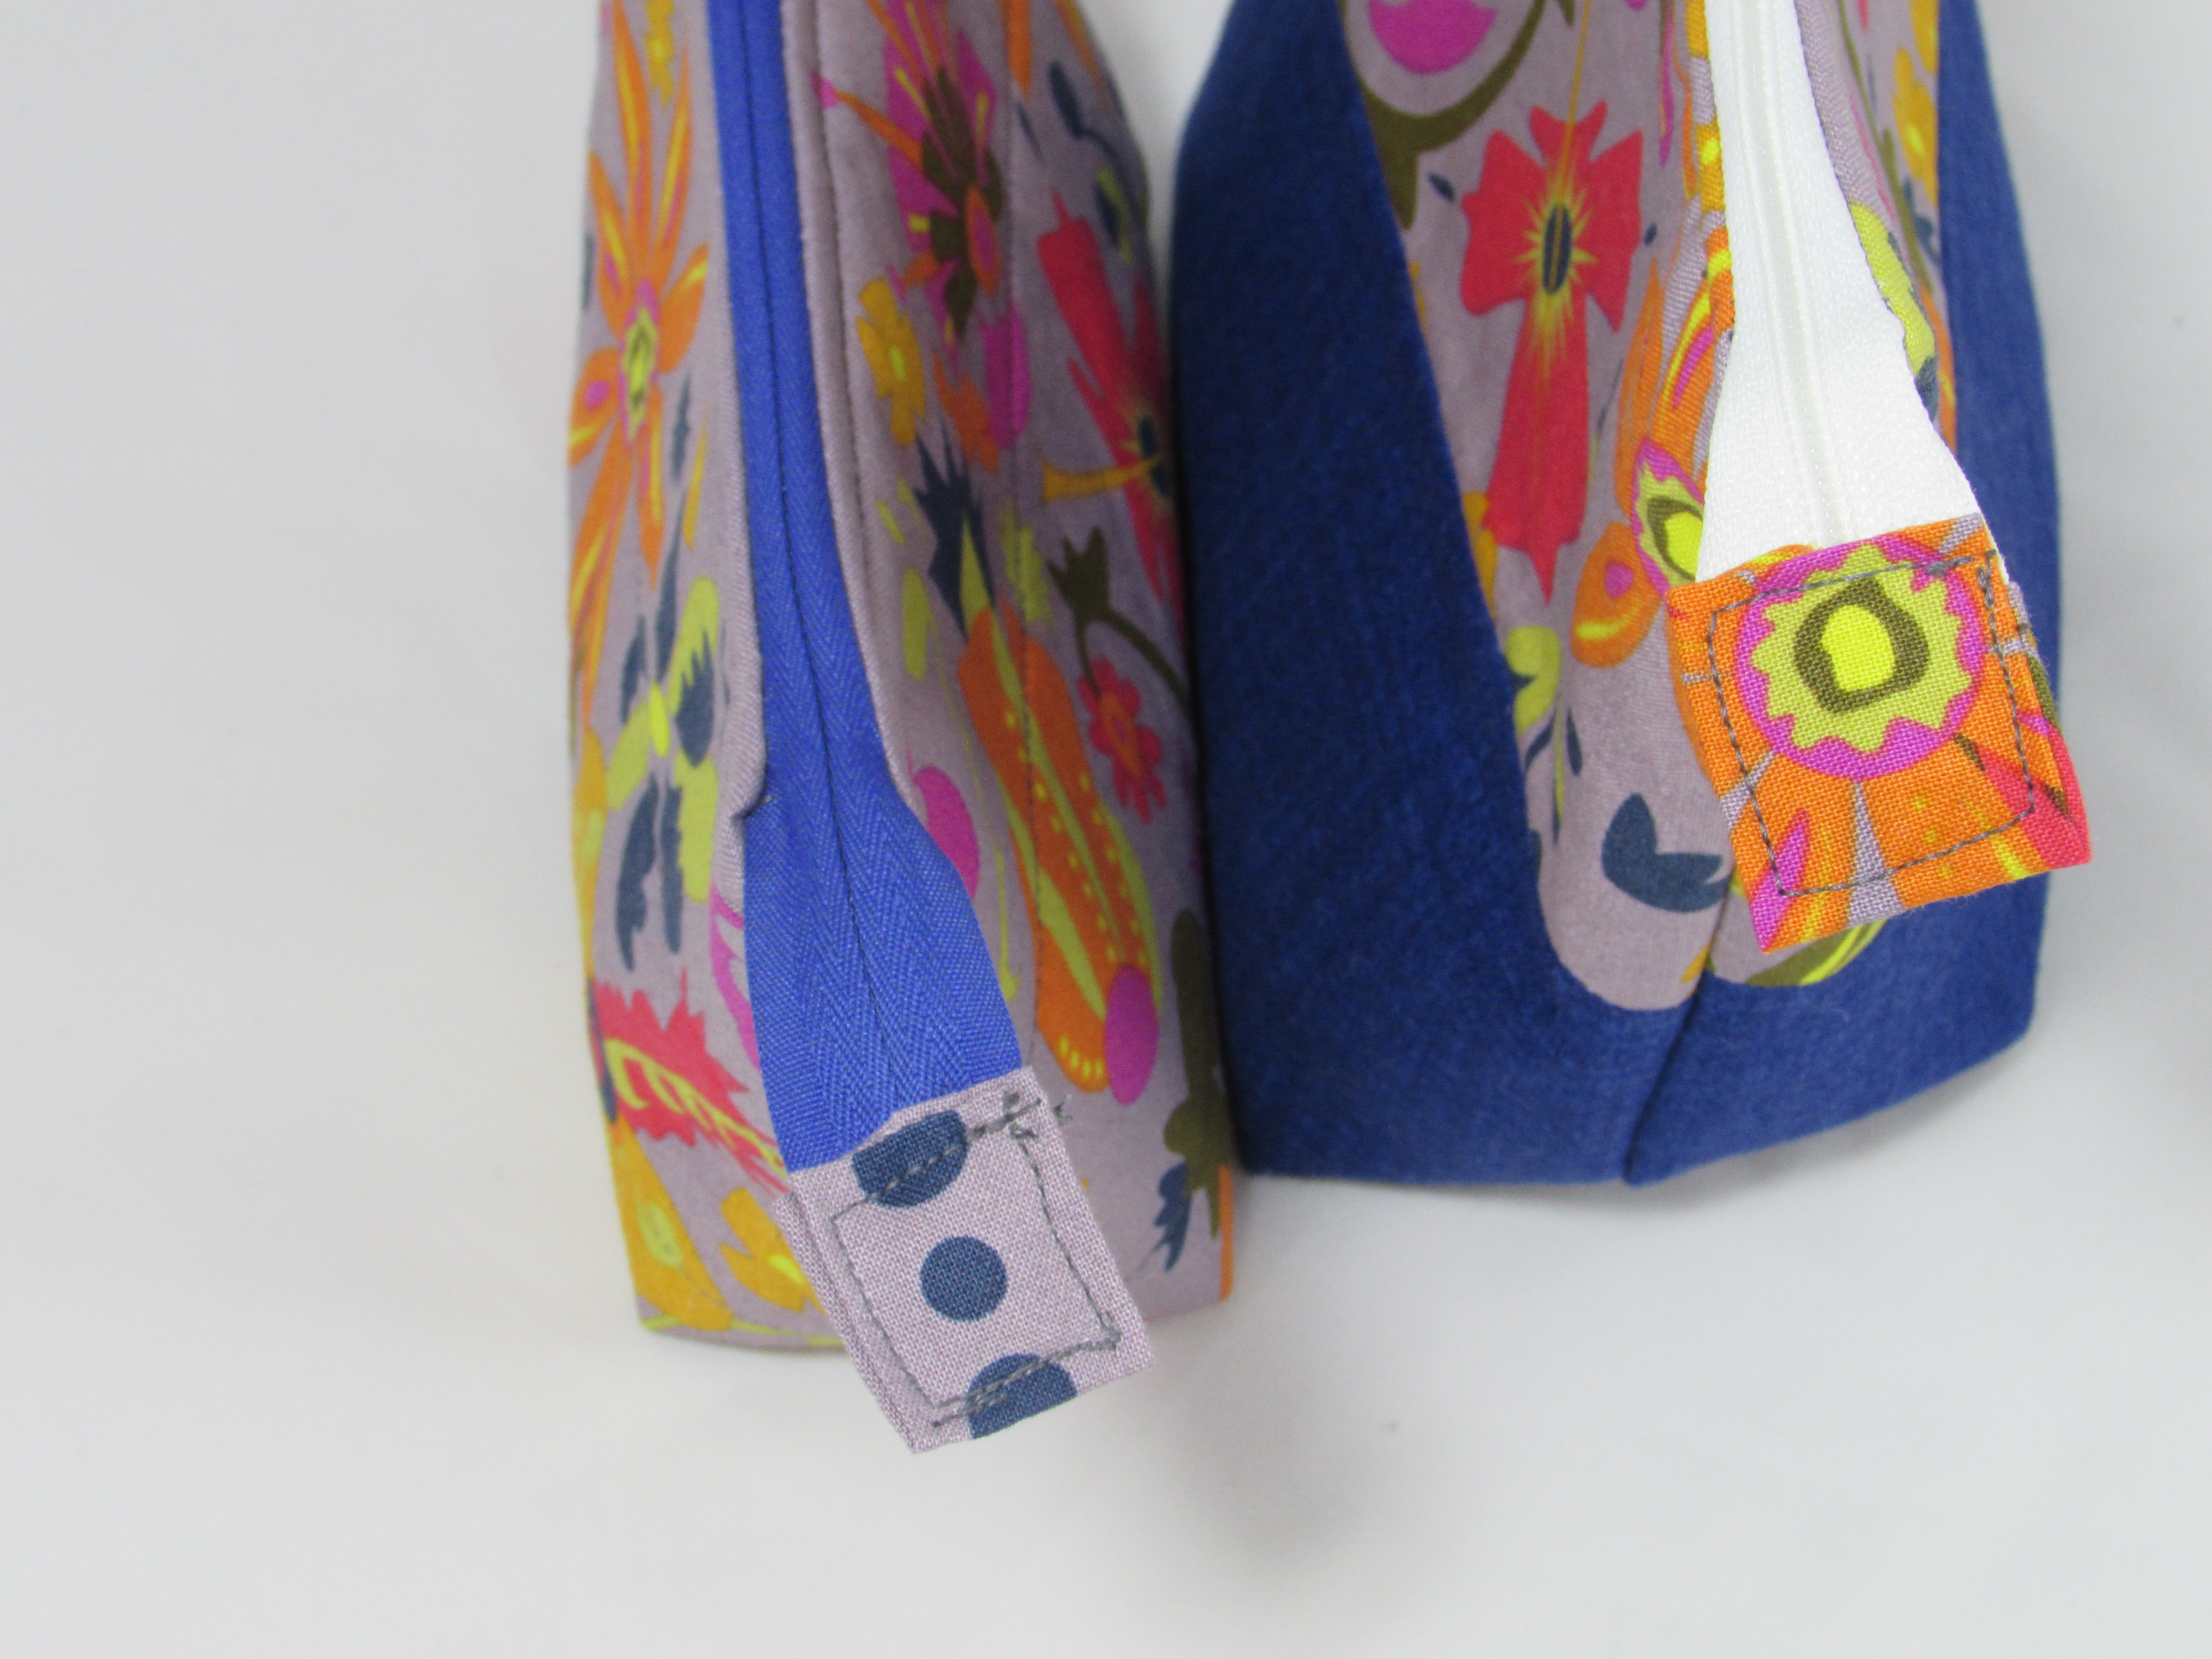
Before Julia went back to California in July, she asked me to make her another bag. She wanted the same pattern as the previous two I made for her. (When this girl finds something she likes, she sticks with it!) I have used this reversible bag tutorial at Very Purple Person. I believe this is the fourth bag I have made with this pattern. Julia shopped my fabrics and found this piece; a fantastic print designed by Ocllo Mason for QT Fabrics. I received it as a sample when I had my shop (I do miss those occasional freebies!). It looks like a galaxy and the colors are so rich.

The other side of the bag.

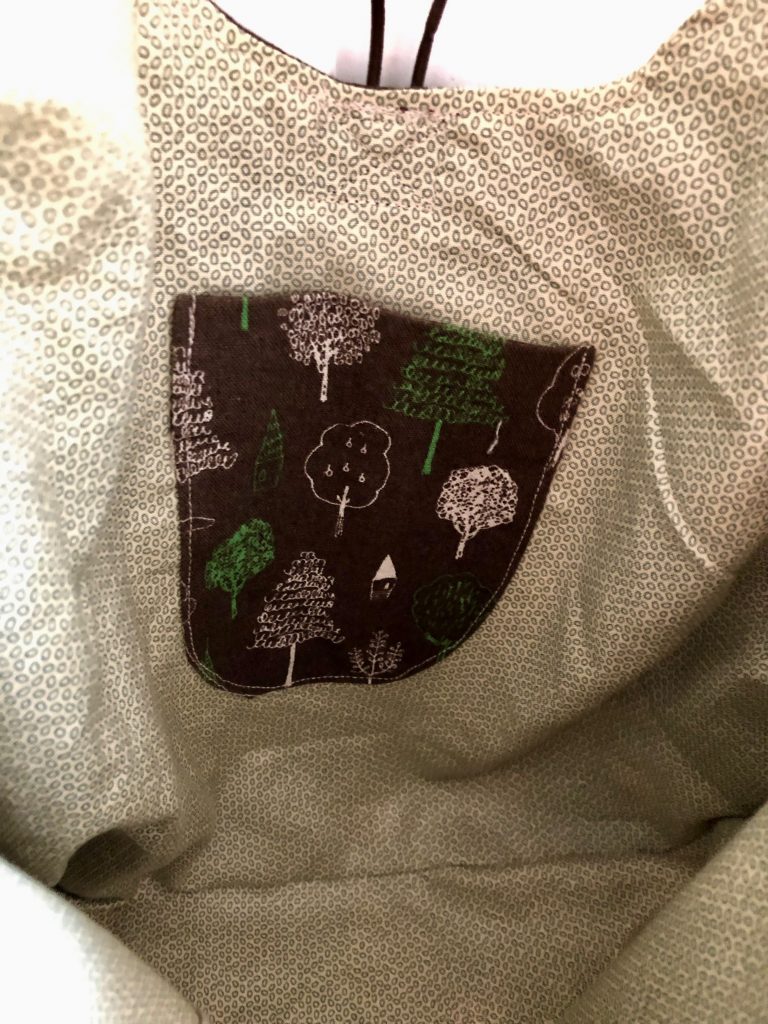
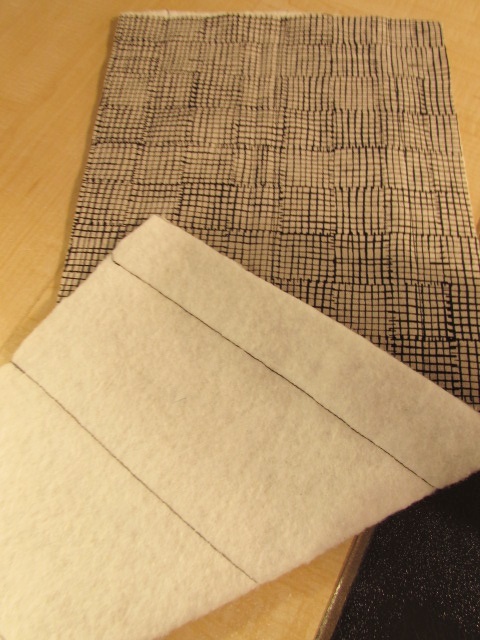
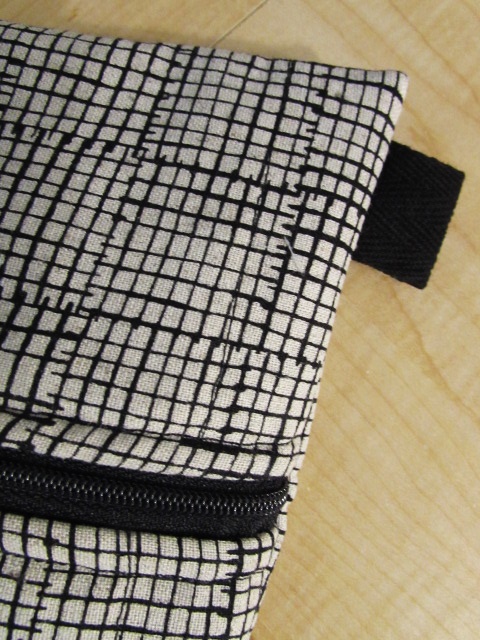
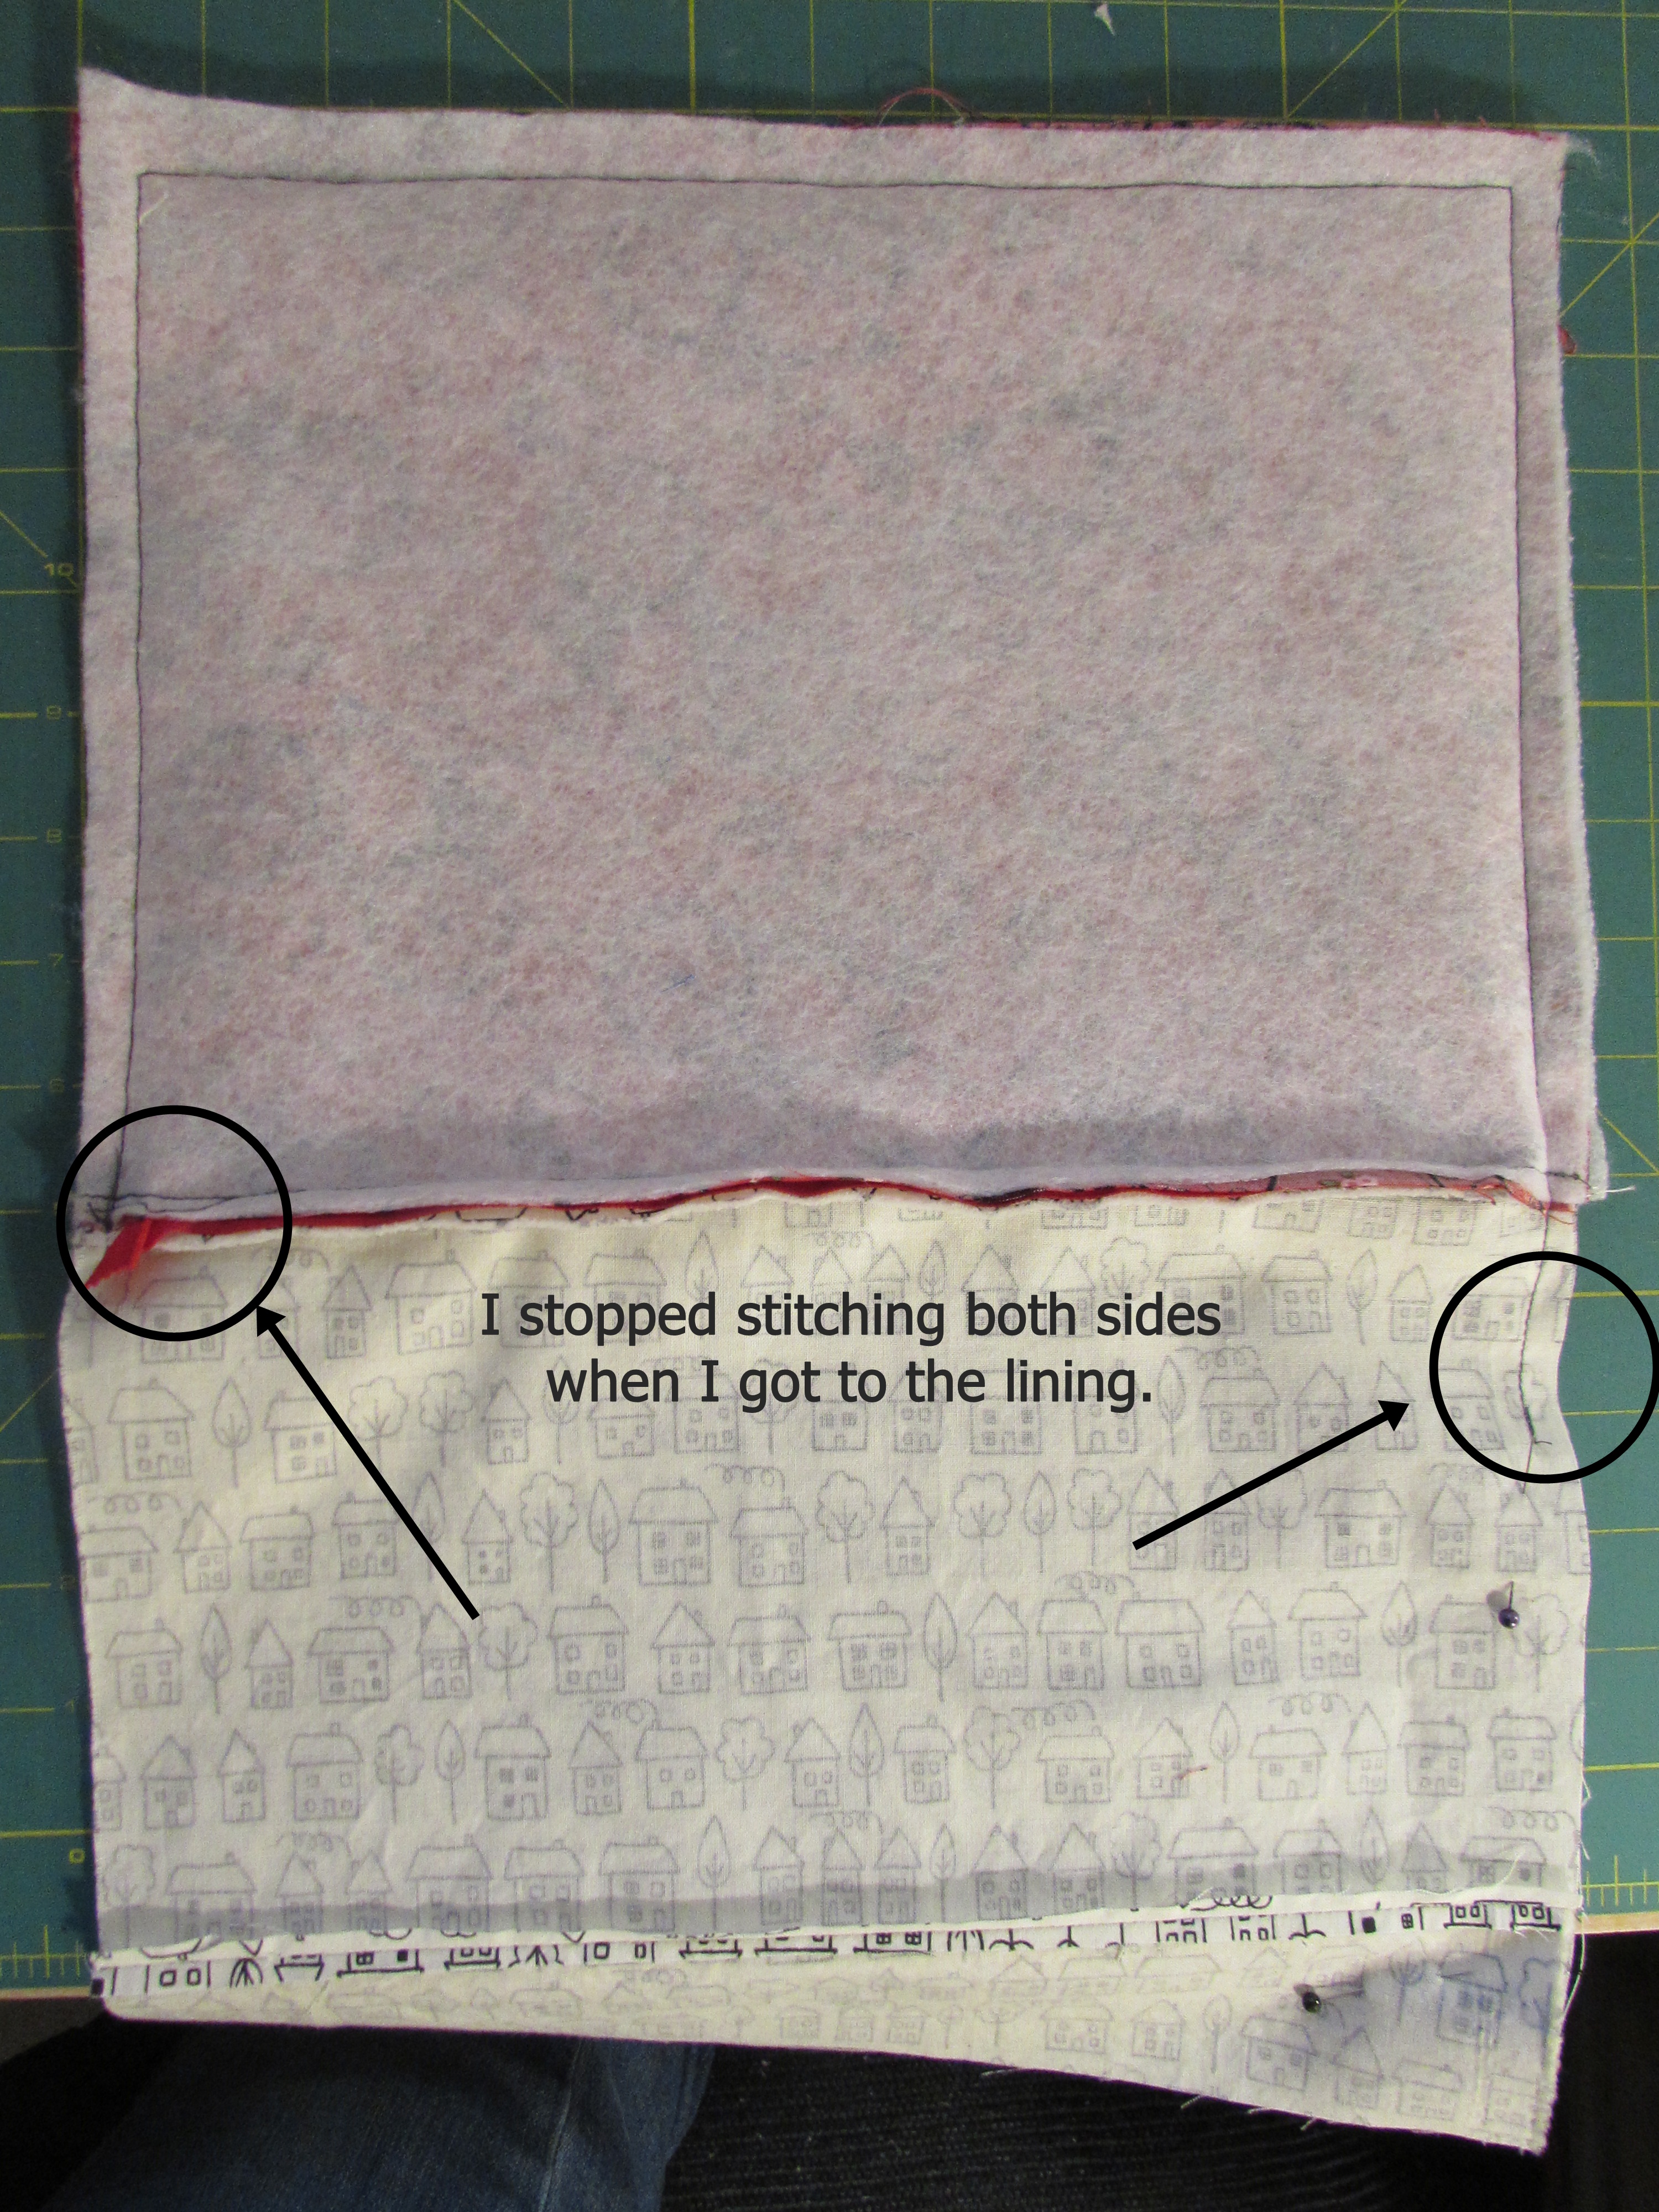
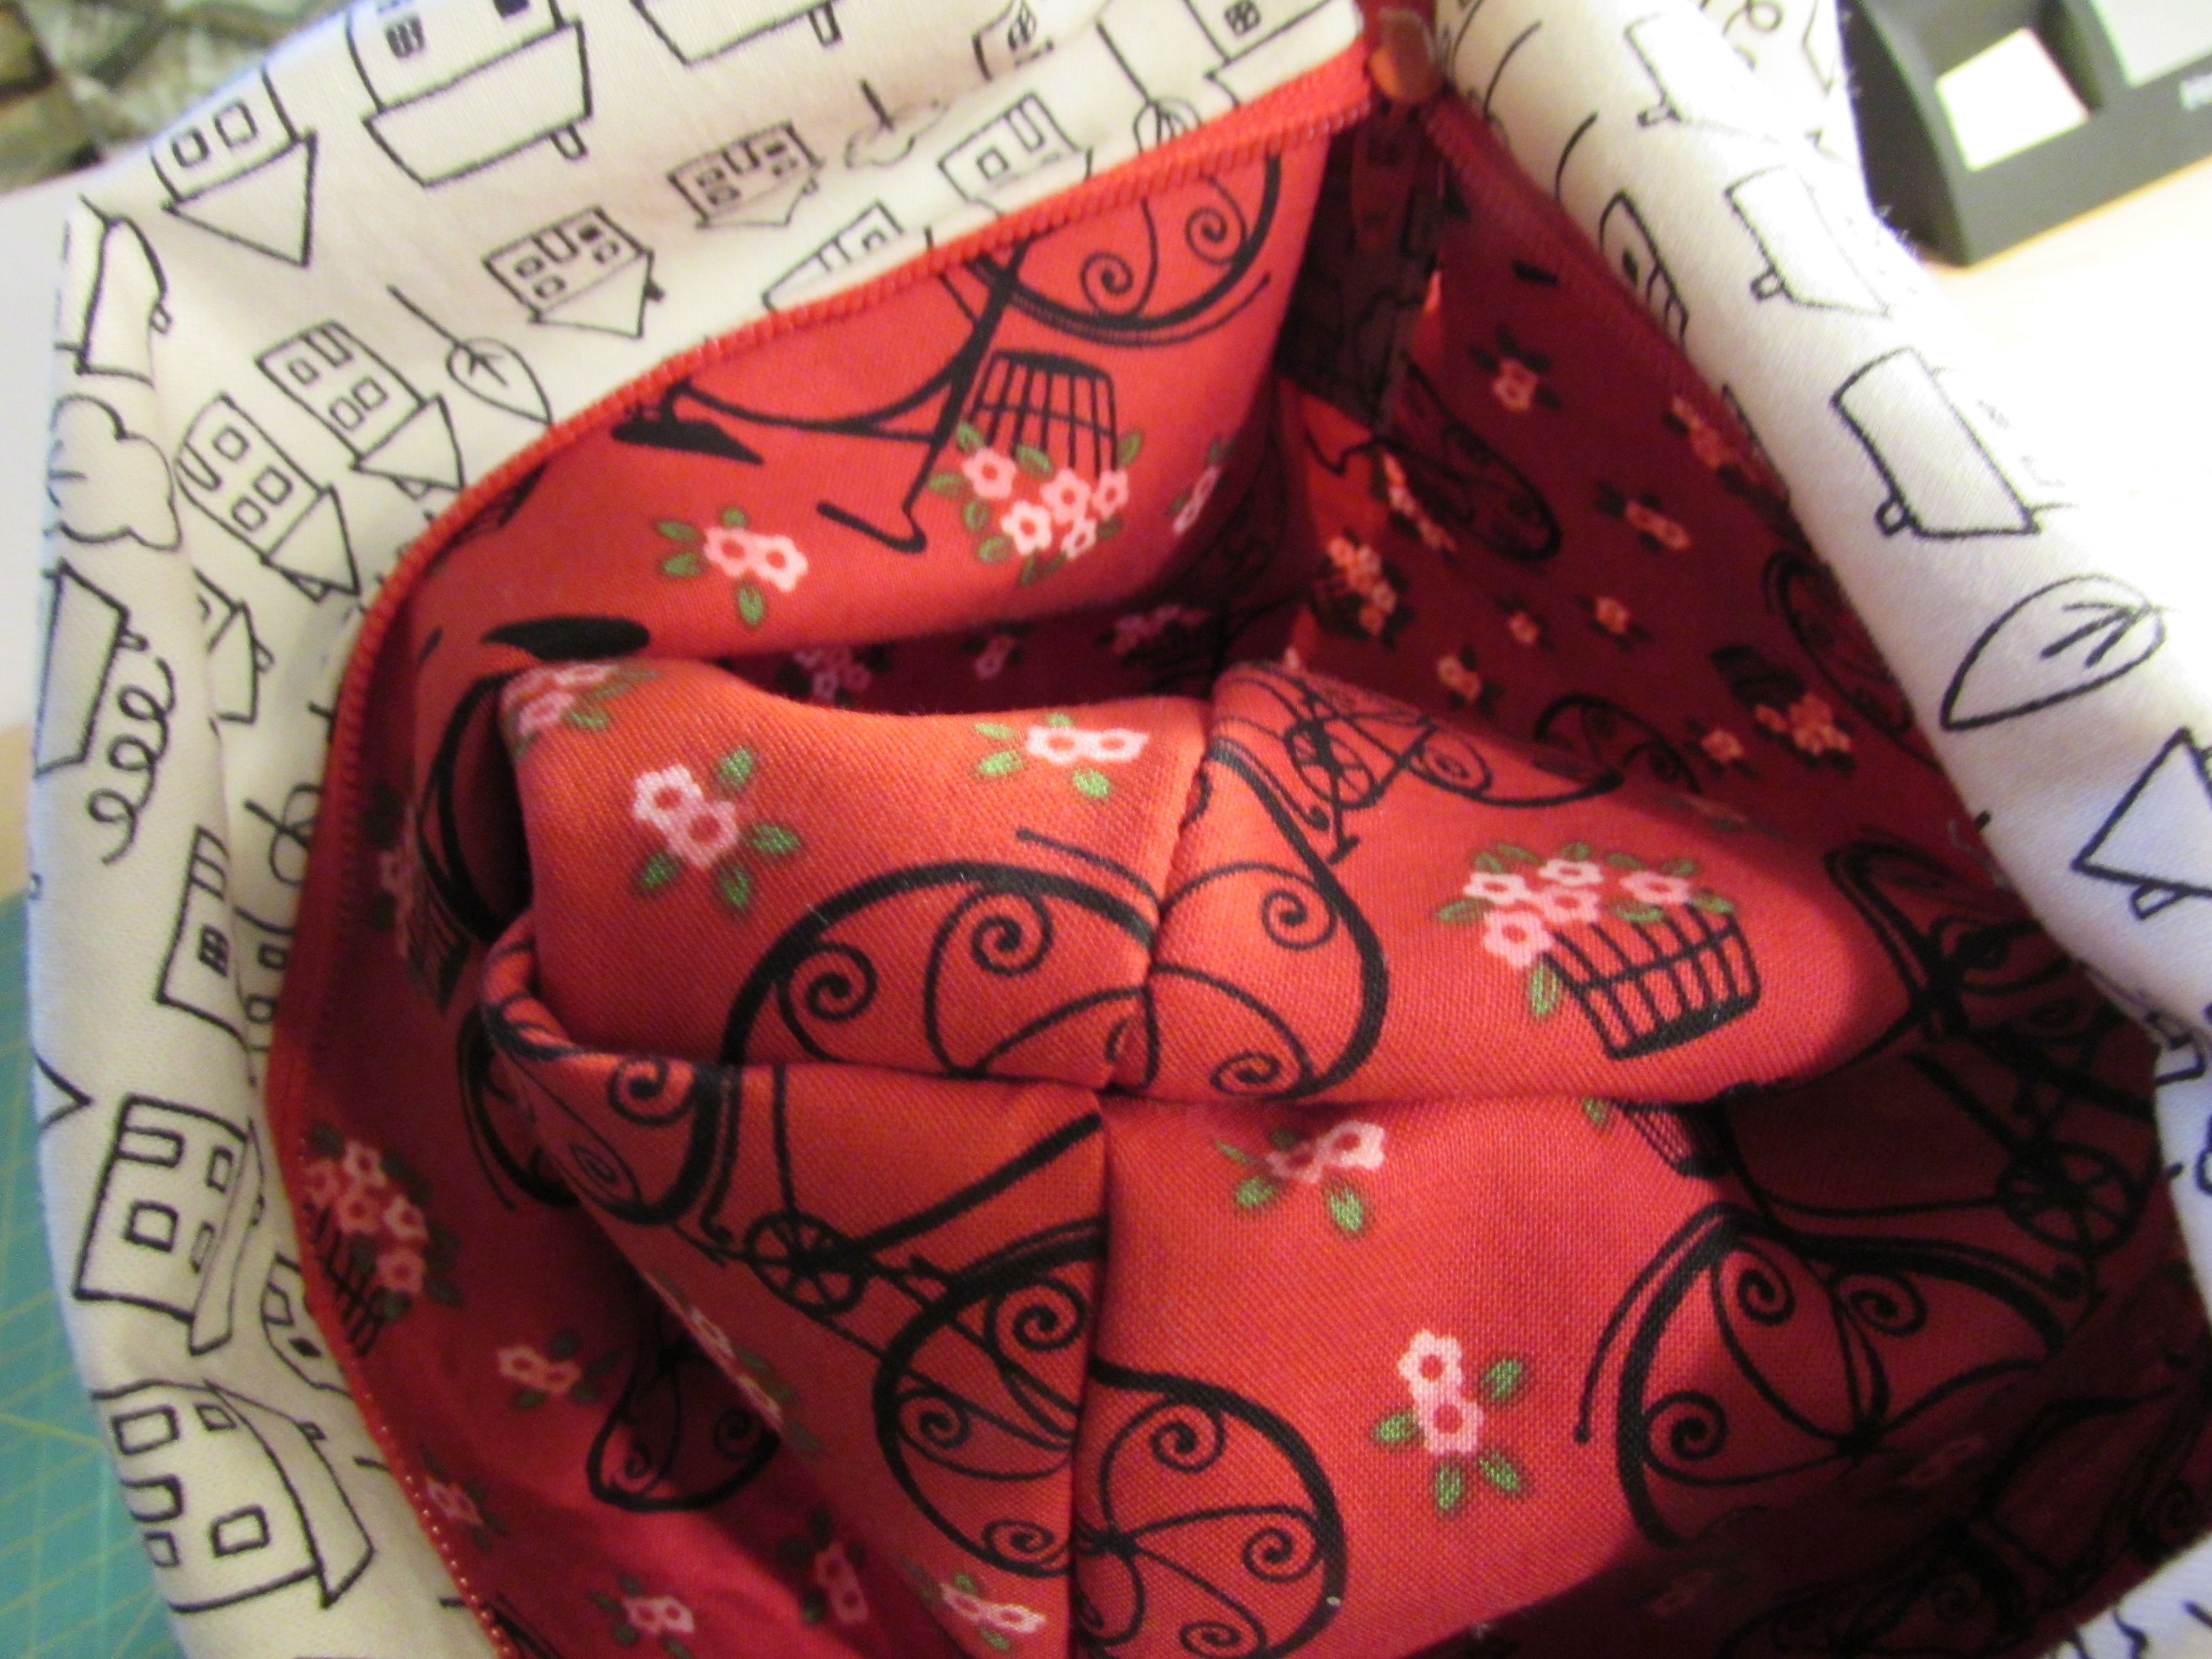
Julia helped me to center the pieces for the bag so she would have two distinct patterns, one for each side. She chose a pale white tone on tone fabric for the lining.

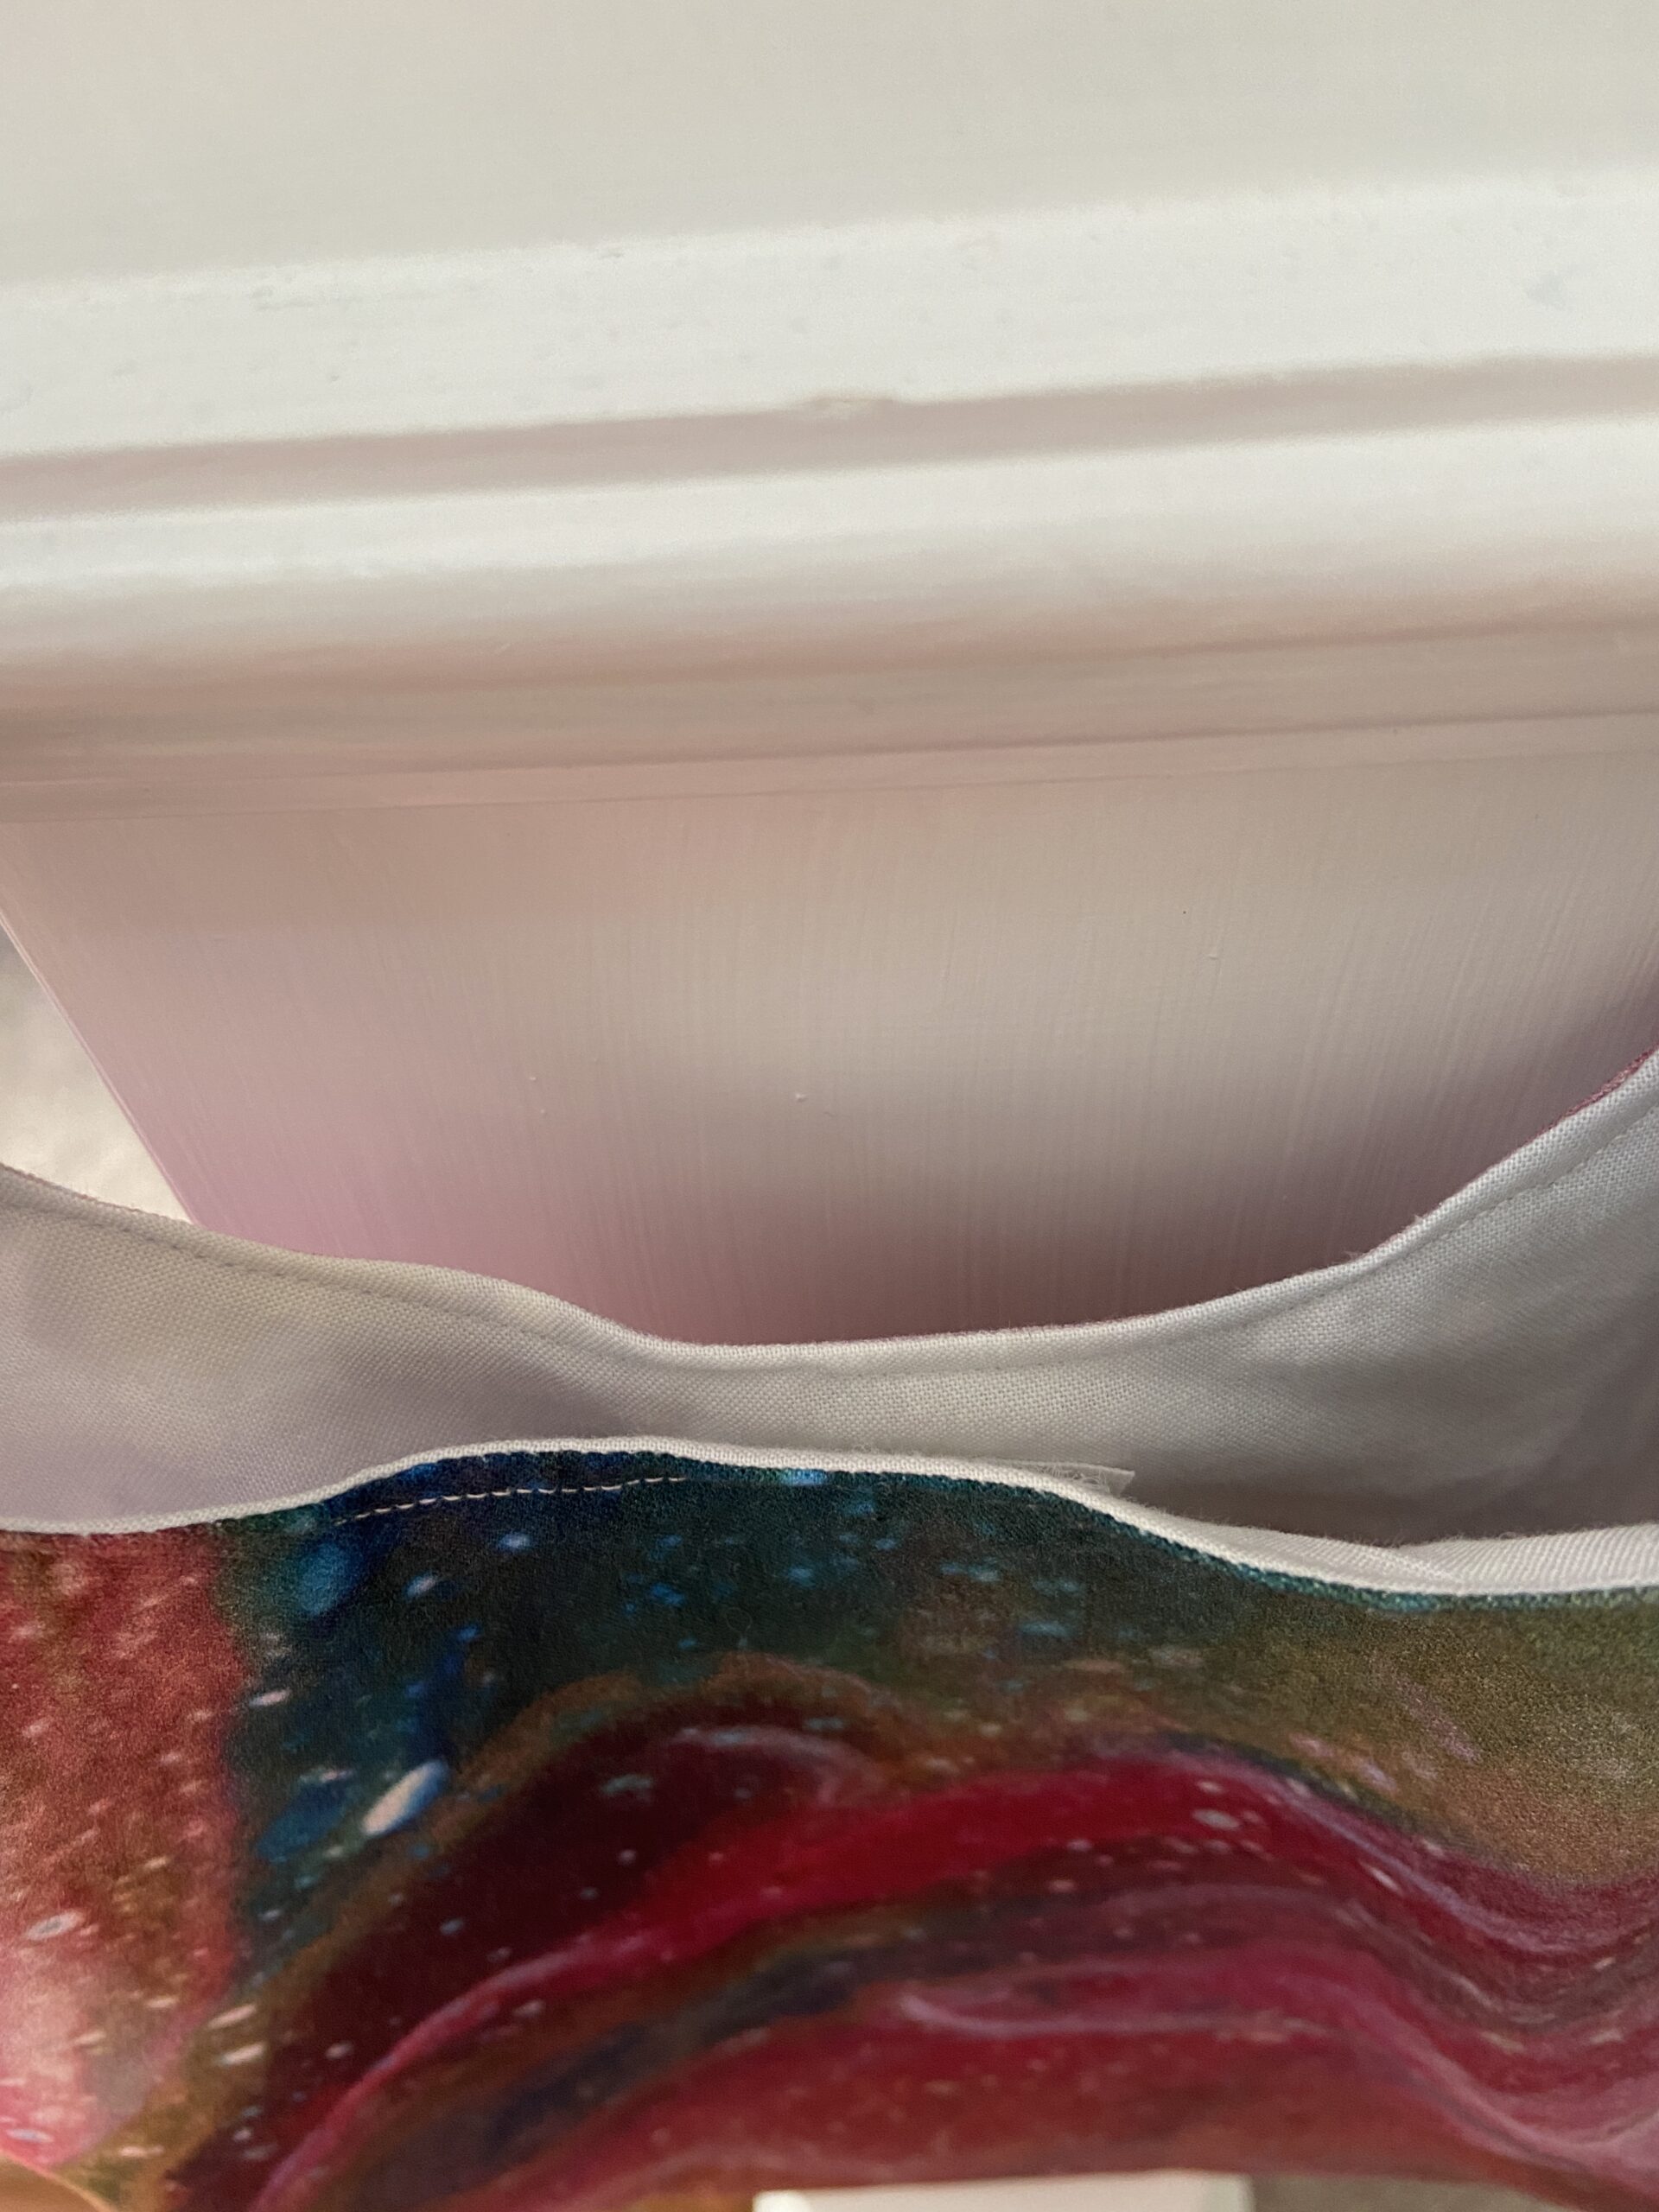
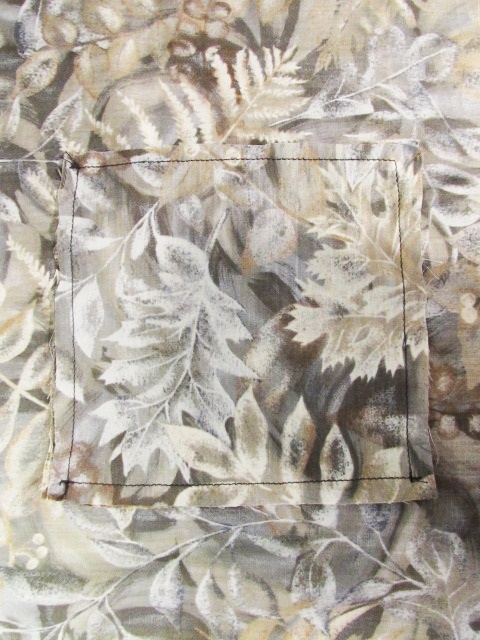
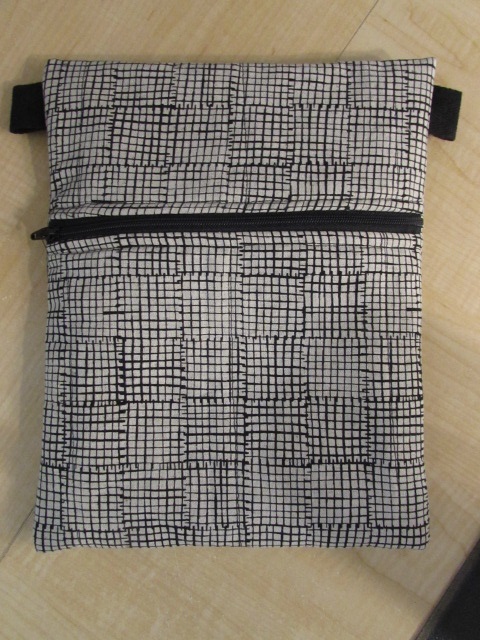
This girl loves simplicity so there is one medium size pocket inside with a velcro closure as well as a velcro closure for the main bag. Easy peasy. I just mailed off a few things to Julia the other day and this bag is included in the box.

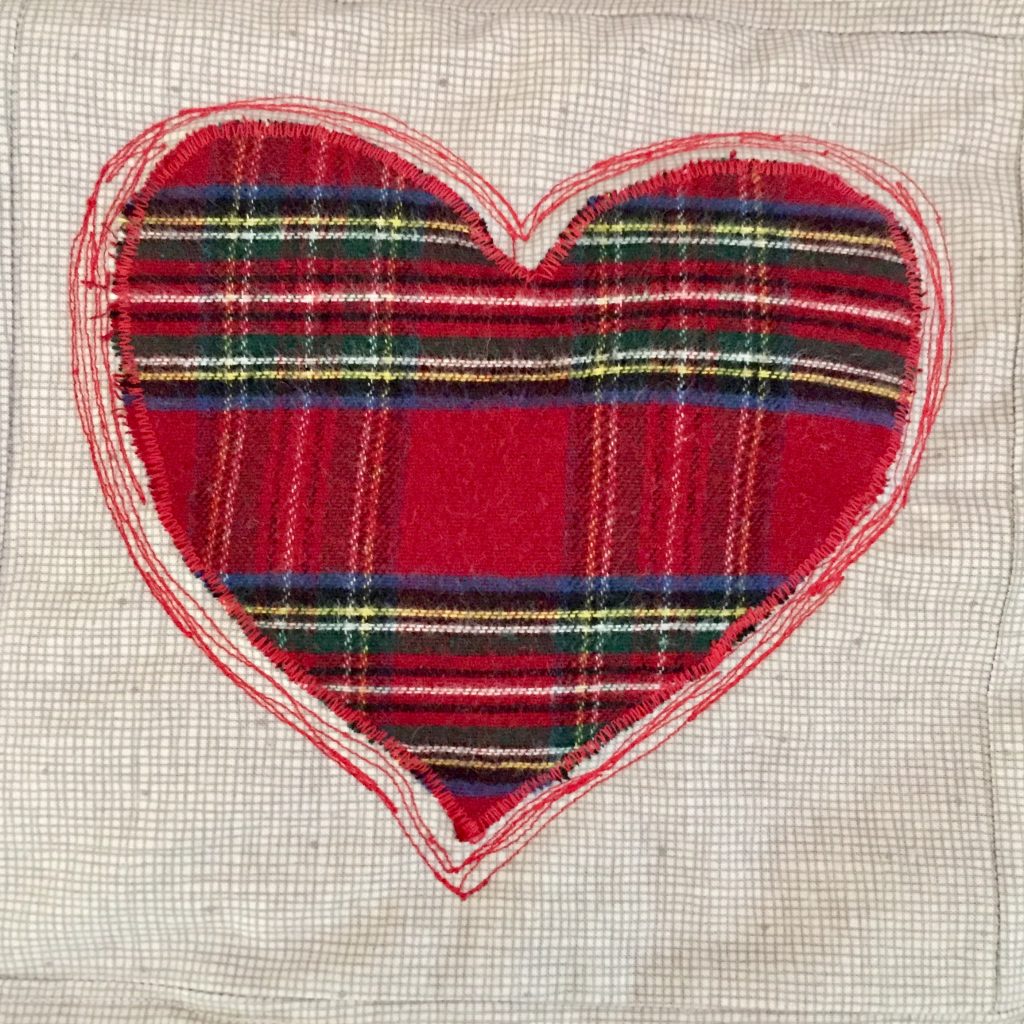
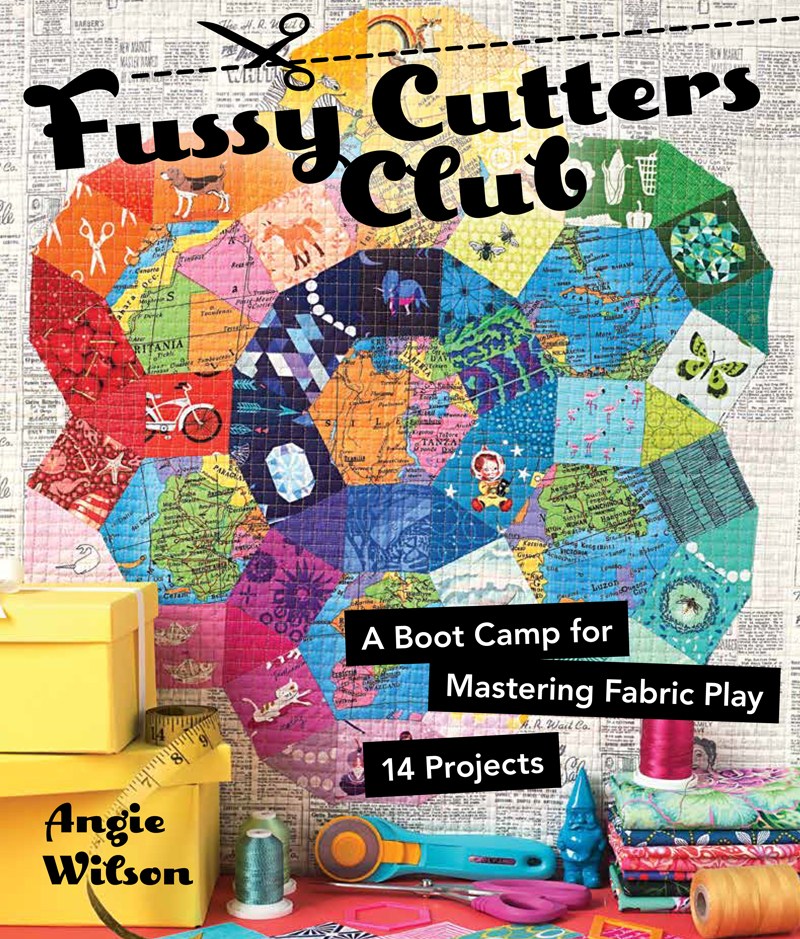
Final project for this post! At the same quilt show I mentioned earlier, I also picked up a few books. This little pamphlet by Moda Fabrics was one of those. It contains super simple ideas for using up 2 1/2″ squares. I often cut my scraps this size and knew it would come in handy.

Bonus HST’s

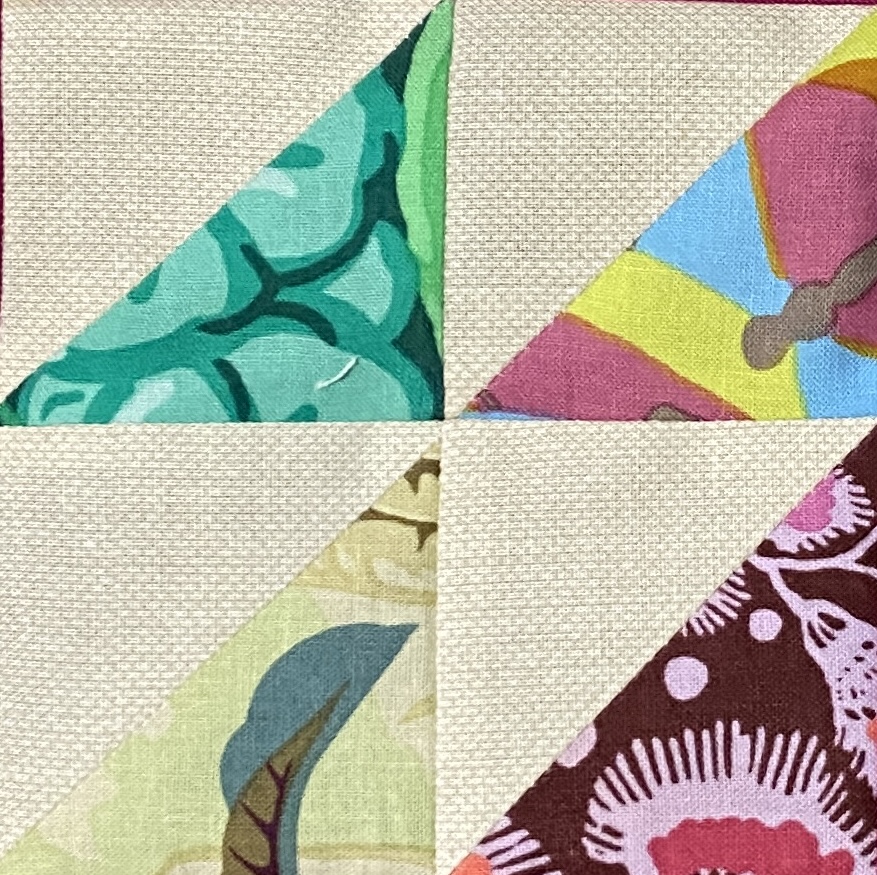
I have several sets of those bonus HST’s from making flying geese blocks. If I can remember to just stitch them before trimming the corners, they are almost ready to go for use in a new project.

Set on point with a deep background.

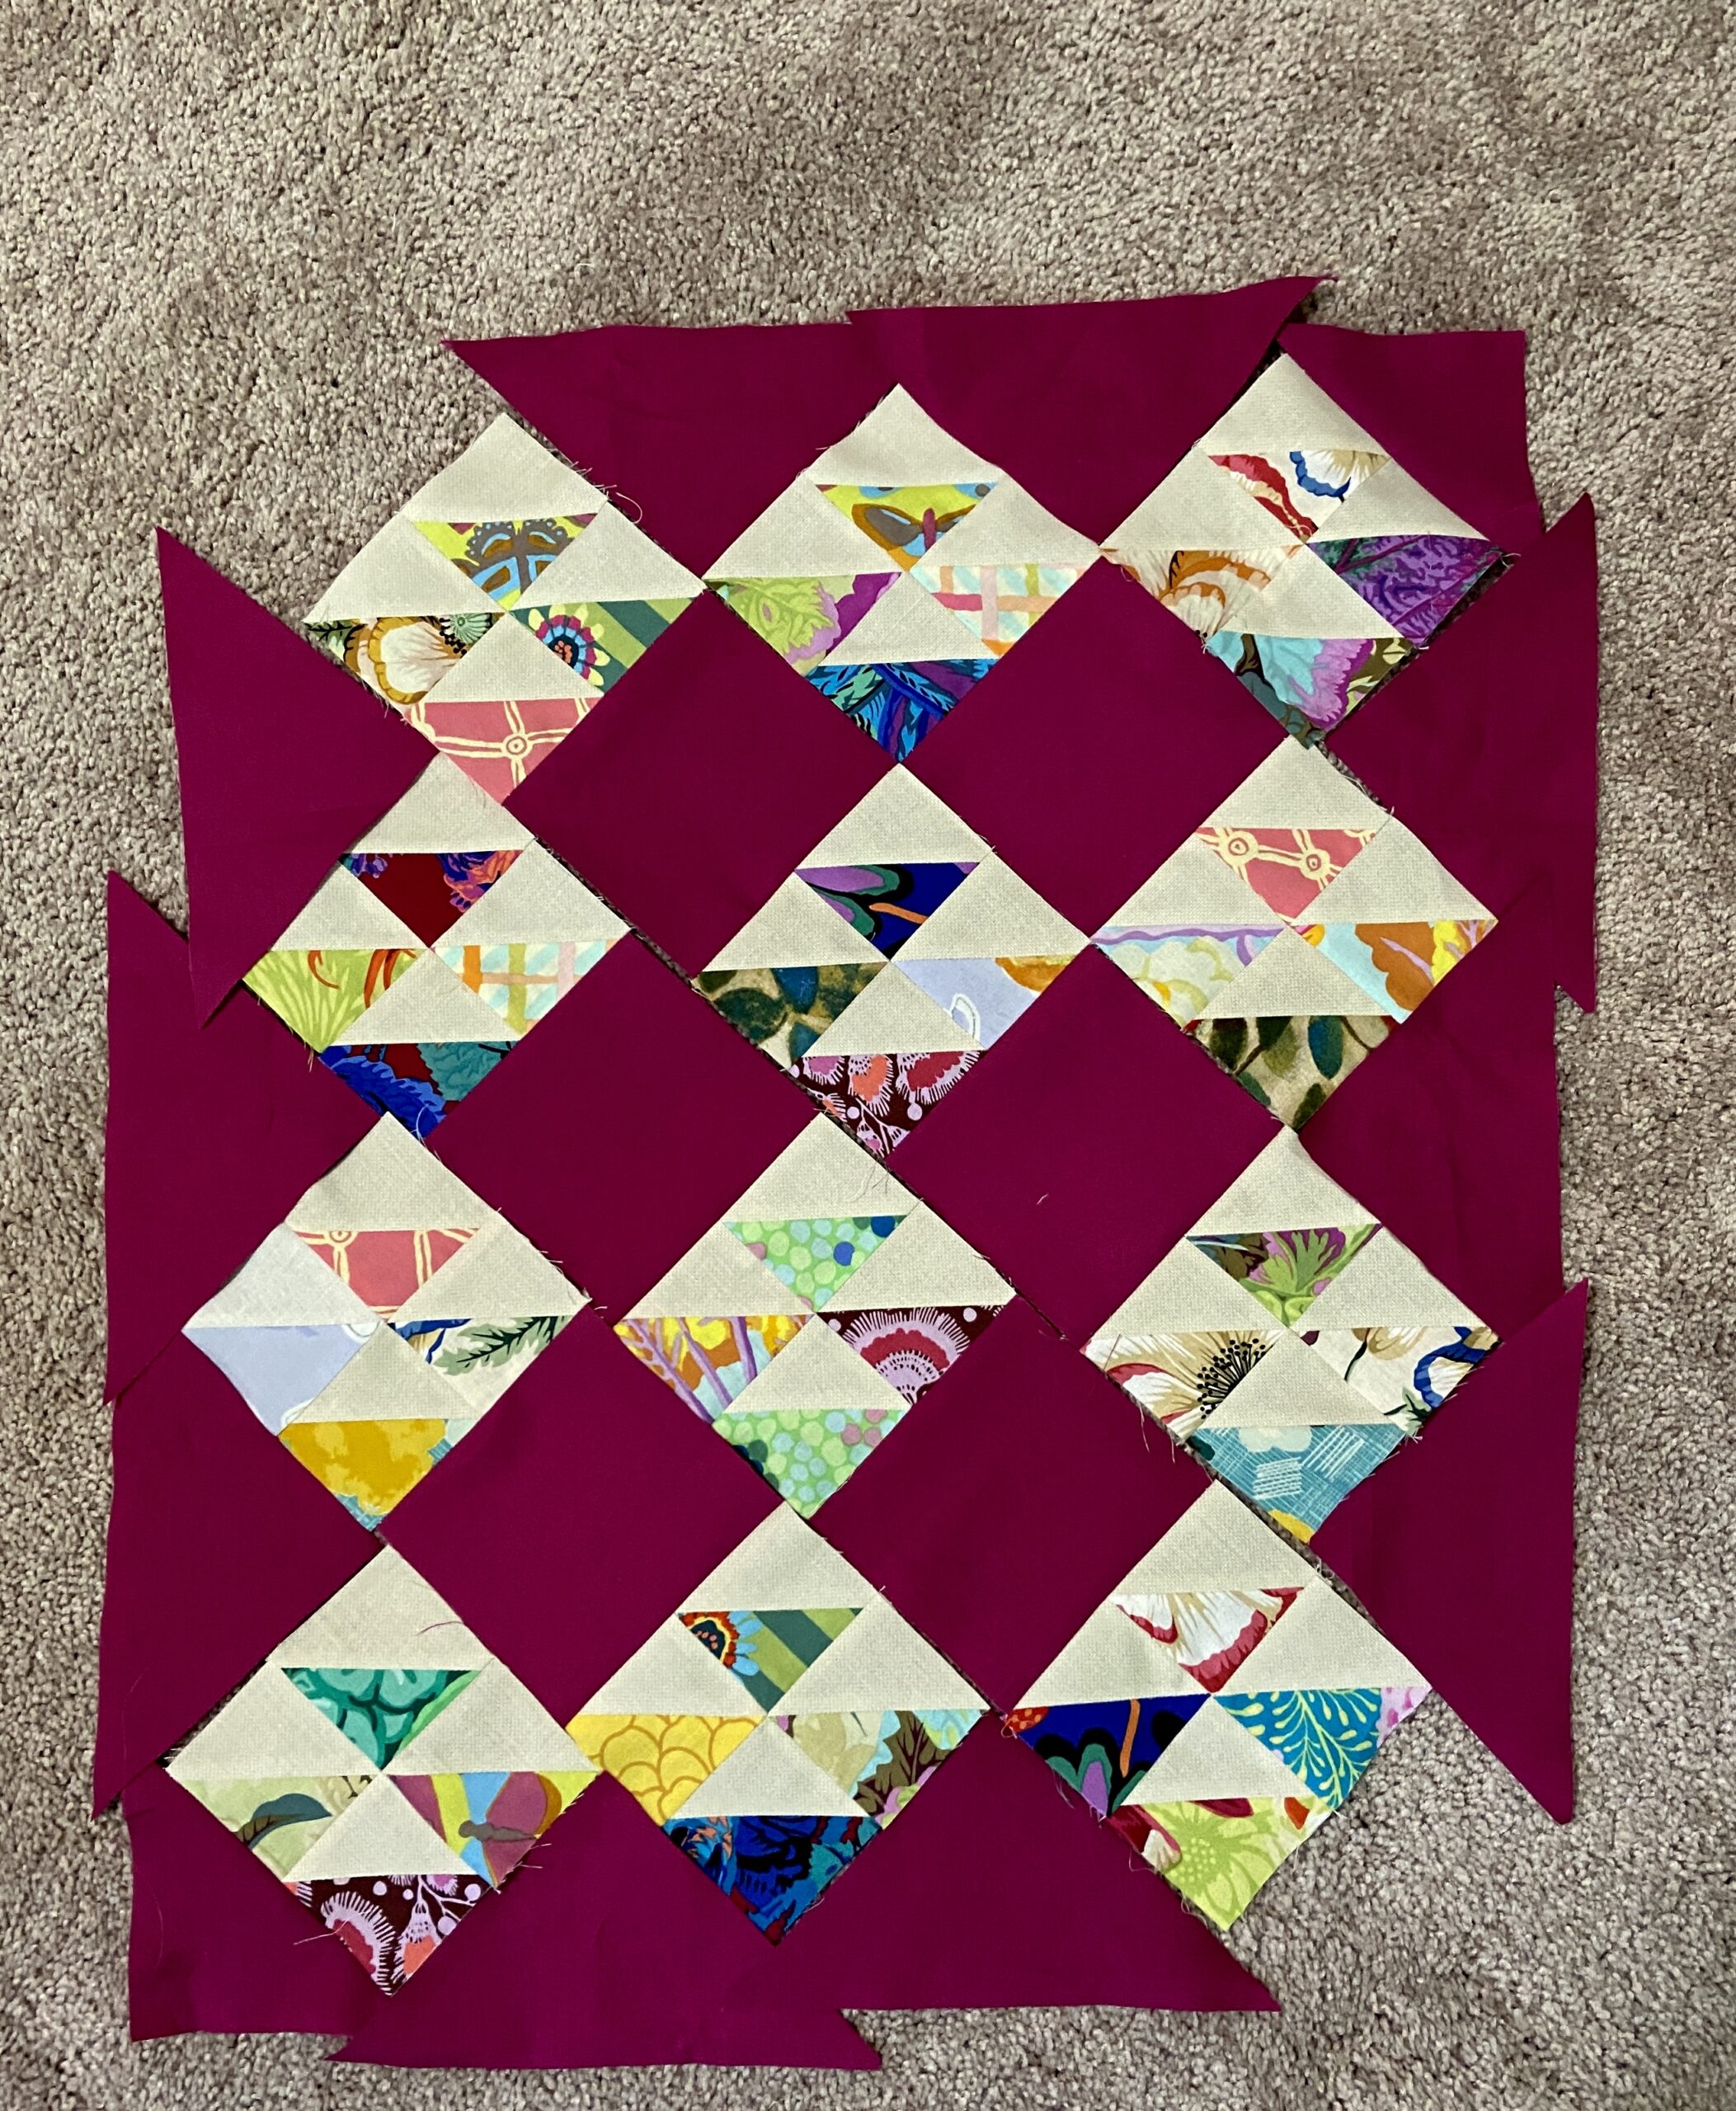
OK – this project is only sort of pink. But the background (while it doesn’t photograph as such) is fuchsia and there is pink in some of the HST’s so I decided it still fits.

Hand quilting hearts on the solid squares.

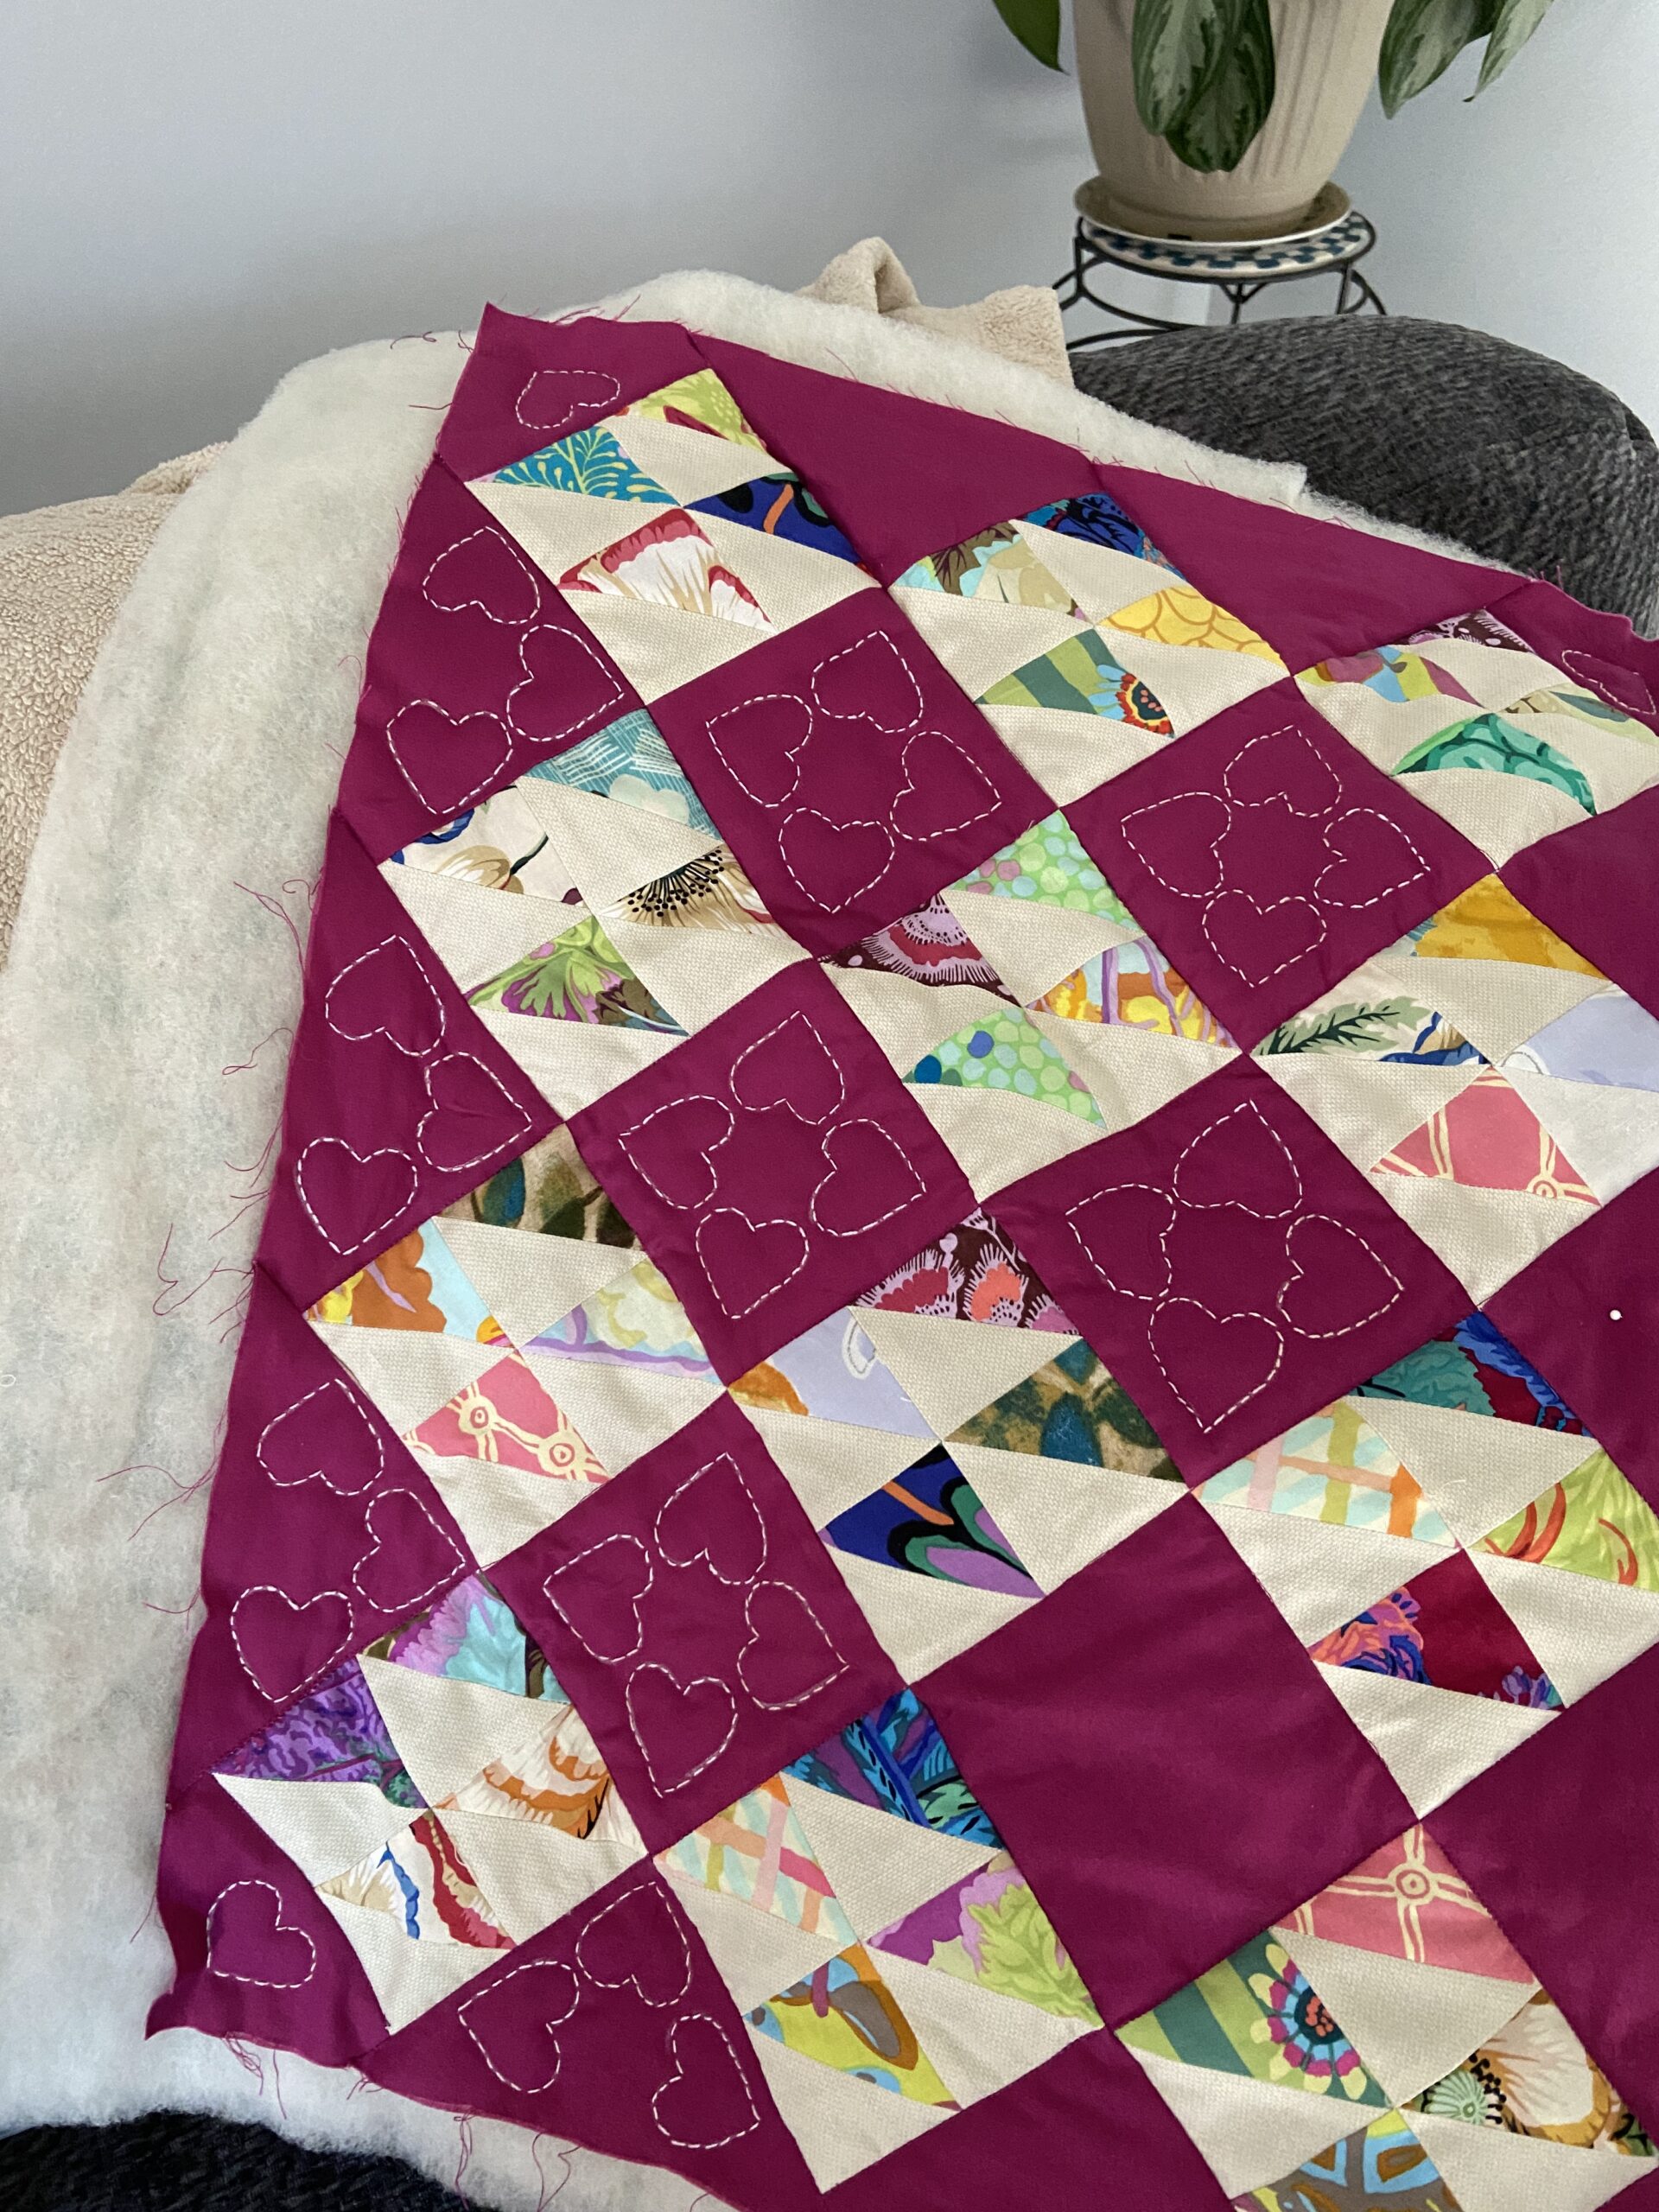
The quilting is a lot of fun and nearly complete. The trick will be binding it and not catching any of the hearts in that process. I kind of wish I had added a small border to help with this but I didn’t have enough of the background fabric. I’ll just have to go slowly (not my forte!)

OK – those are the projects I have been working on – and two are even finished! Woot! Here is my closing picture of my girls. Little sister sure misses H during the day. Kindergarten is a full day program in their district and A is so excited when her big sister gets home!

In the ‘live’ version of this picture, A is running toward her big sister. It is adorable!

Hope everyone is looking toward a fun weekend. I know so many parts of the country are dealing with this horrible heat wave. Because it is super difficult to cool off in many parts of the US; I think staying inside and sewing is the only sensible solution. 🙂

A Linen/Cotton Version of the Hobo Bag

I told you I wanted one of these shoulder bags for myself! I have made two for Julia which you can see here and here. The pattern is a freebie from Very Purple Person.

They are so fun to make, don’t take too much time and not a lot of fabric so why not? It is a great way to use this sweet Japanese fabric that was given to me by my friend Patty. She vacationed in Japan about a year ago and when she returned she sent me five pieces of fun fabrics. Three of them were a beautiful cotton-linen blend and I have been holding on to them and thinking of how I wanted to use them.

Each cut is 1/2 yard and I was happy to be able to squeak a bag out of this one! I had to piece the shoulder strap a bit but you can’t even see it. The fabric has a great weight to it. I washed and dried it first because I suspected there would be some shrinkage. It was minimal though. Rather than sewing a gusset into the bottom of the bag for width, the designer simply used two wide darts at the bottom corners of the outer and interior fabrics. Very easy!

As usual, I added two interior patch pockets. Purses need pockets to keep the little things from always ending up at the bottom of the bag. The lining is an older print that has been in my stash forever. How great to use it up and have one less piece in the pile!

A simple hair elastic was added to loop around the button as a closure. I did this after the fact (meaning I forgot to stitch it in while constructing the bag.) But this was not a big deal. I basted the elastic (with my machine) where I wanted it. Then I folded up a square of fabric so no raw edges showed and stitched it over the bottom of the elastic. Let’s call it a design element, shall we?

This button has been in my button jar for a very long while and it is perfect! I am happy to add this bag to my collection. A selection of different purses is fun to have – I am one who changes them out all the time. This one will be great for the fall which is just around the corner! If you are intimidated by making a bag, this is the pattern to try. It truly is simple. The most difficult part is turning the whole thing right side out as you pull it through the shoulder strap as it is bulky and can feel awkward. If you try it and have any problems, email me. Happy to help.

Adding a pocket or two to the interior (or exterior) is simple as well. Here is a link to a great tutorial if you need more information. Again, if you need help, send me a note.

Finally, I have a great giveaway happening on Instagram today and tomorrow. Be sure to click over and check it out!!

Love this New Purse!

This is the second purse I have made for Julia. When she asked me to make her a new purse, she said she wanted the same pattern as the first one. This was fine with me because I really love the pattern. It is a free tutorial found over at Very Purple Person. The intention is to make a reversible bag but Julia wanted an interior pocket so this one isn’t truly reversible.

It is a great looking hobo style bag. Very casual and soft. Julia didn’t want any sort of batting or interfacing in it so it hangs with a cute slouchy look.

I did put the pocket on the interior. The corners are a bit puckered though so not my best pocket ever. It is nice and deep which means it will hold plenty of the small items that end up at the bottom of the purse.

The first purse didn’t have any sort of closure so this time, I added a fabric loop and a nice big button. She also likes longer straps than the pattern calls for so with both purses, I added a 15 inch strip to the straps.

What makes the bag though is Julia’s fabric choice, Harmony with Nature. I really love this print. It has a great watery look to it. The gray circles have this taupe color in the middles looks like wet sand. The lining is called Mystic Gray and is a Pure Solid by Art Gallery Fabric.

I am thinking I will make a bag for me. This pattern is simple and shows off fabric nicely. I think it took about an hour to sew (other than cutting pieces out) so it is a quick finish. It would be fun to have a new bag for fall.

Shop Update

Just a little news about my shop! I have changed my shipping policy a bit and wanted to share that with you. Orders that are $35 and more will ship free in the USA! Orders less than $35 still ship for a flat rate of $6.99. Also, many items ship free regardless. Examples are most notions and the quilt patterns I stock. Hope you will check this out! Makes your online shopping really economical. 🙂

OK – that’s it for now. Hope you are working on a fun project or two. Have a great week all!

Linking up at a few different sites – including the Meadow Mist Designs Favorite Finish Monthly Link-Up.

Sewing, Baking, Napping and More

Lots going on around here lately. My husband has finally decided he is ‘done’ renovating our little house in Downieville and it is listed for sale. We bought it some years ago after I saw it for sale during a quilting retreat up in the mountains. We have enjoyed many weekends up there and Ray has really outdone himself with updating it. I suspect it will sell easily and make someone very happy.

A “Before” photo

This is a shot of the living room when we were first looking at the house.

The same angle with Ray’s updates!

Want to see more? Here is the kitchen when we toured it the first time.

The “Before” shot of the kitchen.
And the kitchen as it looks now. I love it!

In some ways we are sad to give this little house up but we are also ready to be responsible for just one house again. Life is always changing!

I did bits of sewing here and there over the past week but mostly I was napping and dealing with a long migraine cycle. Ugh, that is so frustrating. Started Sunday night and here it is Friday and I am not so sure it is over yet. Such a waste of time – dragging around and not accomplishing a whole lot. I am so fortunate that reading does not bother me when I am sick – many migraineur’s cannot read because of strong sensitivity with their eyes. I have a hard time looking at the computer, I think it is because of that little bit of movement that one’s eyes track while looking at a screen. But the T V and books are ok. Anyway, lots of napping and I am crossing my fingers it is over with soon. I did my second monthly injection of Ajovy yesterday. My neurologist said some people experience a benefit right away and it can take others 3 or 4 months to notice a difference. Maybe this month will be better!

The sewing I did do was mainly working on my friend Susie’s memory quilt. I got it basted (Julia helped me crawl around on the floor for that!) I quilted straight lines through the sashing and have been thread sketching an echo of sorts around the two plaid hearts. I think it lends a rustic simple look which is perfect for the mood of this quilt. Next, I plan to work on the short sashing strips between the four patch blocks. Then I need to decide what I want to do with the four patch blocks. I am just taking it easy and enjoying the process.

Julia has asked me to make her a new purse. The last one was made in fall of 2017 and it is looking a bit worn. I love her fabric choices! The blue and gray fabric just arrived last week and I am happy to cut into it and give it a try. It is called Harmony with Nature and was designed by Norman Wyatt. She chose the Mystic Gray (an Art Gallery Fabrics Pure Solid) for the lining.

Sam’s Jersey Quilt; November 2017

My sister asked me (a LONG time ago) to make a hanging sleeve for a quilt I made for my nephew. Remember his baseball and football jersey quilt? She wants to hang it on a wall in his room. I finally cut a few strips of this gray dot and will get that off to her in the mail.

Today is my husband’s birthday. I just finished making him a chocolate cake with chocolate frosting. To keep it dairy free, I used coconut cream instead of butter for the icing – it is yummy and I was licking my fingers the whole time I frosted the cake! I used coffee for the liquid instead of milk or cream because the coconut is fairly sweet and I thought the coffee might cut that a bit. He requested enchiladas from our local Mexican restaurant which is a treat for me. No cooking!! Then we eat cake. Probably way too many calories after a week of napping but such is life.

Hoping all of you are enjoying summer. Have a wonderful weekend and if it is hot outside (it is in the high 90’s here!) now is the time to enjoy the cool of your sewing room and make something!!

Fussy Cutters Club, Book Review and Giveaway!

Today is my day to post a review and host a giveaway of a fun new quilt book.  If you are here for the first time via the blog hop, welcome!  The book of the day is Angie Wilson’s Fussy Cutter’s Club published by C&T Publishing.  You may know Angie as she is the queen of online quilt alongs and swaps. She thrives on leading large groups of quilters through complicated projects such as her current QAL making Jen Kingwell’s Gypsy Wife Quilt – not for the faint of heart for sure.  For more info on the events she is currently leading and has done in the past, click here.

It was about two months ago when I was invited by C&T Pubs to review Angie’s upcoming book.  Right away I was intrigued by the title of the book and the gorgeous cover.  I know we aren’t supposed to judge a book by its cover, but come on.  Look at this cover!  It just pulls the reader in at the get go.  Angie’s reputation for mad skills with fabric play and use of color assured me the book would be worth the time to read, review and create with.

The premise of the book is to learn to look at your stash with a new perspective – Angie teaches the reader to use your fabric by cutting into it and emphasizing the bits you love the most.  The book is well written and the instructions for each of the 14 projects are precise and easy to understand.  Angie takes the reader through the design process, how to best use your fabrics, color theory and more, prior to introducing projects. She really did a great job with this book.  The projects range from the very simple to quite complex (again, look at the cover!)

For my project, I chose to make the tote bag.  Angie rated it as an Intermediate project but with her clearly written instructions, I didn’t have any trouble. Following Angie’s thoughts on color for this project, I chose a limited palette.

My bag is built around a piece of vintage fabric I have from the 1950’s.  It is  a kitschy print featuring red, brown and black kitchen appliances, clocks and coffee cups.  I loved the idea of using vinyl for the bottom of the bag (looks great and gives durability) and found this textured vinyl at Ben Franklin.  Once I had my focus fabric and the vinyl, the rest of the fabric was pulled from my scrap bins.

Since the red coffee cup was the primary focus, I decided to use mainly black, brown and white with the occasional pop of red. Most of my fabrics had a vintage look to them except the coffee themed text prints.  Those are clearly current and modern but I liked the idea of including the coffee text with the other fabrics, to further the coffee theme of the bag.   The main fabrics I fussy cut were the coffee cups and saucers, the text prints, and the tiny black coffee pots on the vintage fabric.

Making the slabs for the outside of the bag was really fun – I have improv pieced in the past, but it has been a long while.  Putting these scraps together was very satisfying.  I did reduce the size of the bag by a few inches in width and length. I am fairly short and the bag seemed like it would be too big for me at the original size but breaking it down to reduce it was easy.

The two main slabs and the vinyl bottom are assembled here

I learned quite a bit about fussy cutting.  Like anything, the more you do it, the better it becomes. Looking back, I feel I should have trimmed the bits I fussy cut closer in. I left too much peripheral pattern and that detracts from the focal point.  Note the cup and saucer below.  I think if I would have trimmed it down a bit and removed the little bits of coffee pots, it would have been much cleaner. In the picture above, take a look at the text print.  Were I to do this again, I would not allow the other words to appear. I really only wanted the word “coffee” to be the focus.  But live and learn (or sew and learn?).  Next time I will remember these bits and pieces that really make a difference in a project.


When assembling the bag, Angie’s instructions called for me to line the outer pieces with fusible interfacing and then to apply fusible batting.  I was skeptical at first but it really makes the structure of the bag a nice combination of crisp and soft (does that make sense?)  The addition of the fusible interfacing gave it a nice shape. Once I had those layers assembled, I used simple straight line quilting to hold all three pieces in place.

Her pattern calls for fabric straps but I had plenty of the vinyl so I decided to make the straps with that instead. I like the look of it and was pleasantly surprised that my machine had no issue stitching through several layers of vinyl. (I did use a heavy duty jeans needle.)

My model shows just how cute this tote bag is!

Overall, it was a great project and I felt the book was a great inspiration  to look at my fabric with a different perspective.  The tote is really fun (as you can see with my always available bag model.) It traveled with me to Vermont last week and when combined with the cross body bag I made, it was the perfect set up.

This is just one example of the projects that Angie designed for her book.  There are thirteen others though, including pillows, coasters, minis and zip pouches. To take a look at some of the projects, here is a list of the bloggers celebrating this new book.  Check them out for lots of inspiration as well as several chances to win a copy of the Fussy Cutters Club book!  As with most book giveaways, if the winner is international, an e-book will be provided.  If in the states, you will receive a hard copy of the book.

To enter to win, please leave a comment telling me your current go-to quilt book (I guarantee if you purchase or receive this book, it will be right up there on the list!) I will leave the giveaway open through Saturday, October 28th and will announce a winner on Sunday.


Linking up with lots of my favorites – most are listed at the top of the page, under Link Ups.  Also linking to Elm Street Quilts annual Bag It event.  Check that out here!

Cross Body Bag for Travel

Most of the time, I use a big purse. I carry all sorts of stuff, probably more than I really need to. But that doesn’t work as well when I am traveling.  If I bring a tote bag or backpack on a plane (for a book, iPad, food etc) it becomes cumbersome to also have a purse.

I decided to make a slim, simple cross body bag for these, not-very-frequent, travel days. This way I will have a purse with my wallet and phone in it while I am traveling and it won’t take up tons of room in the carry-on bag. Brilliant, you say? Aw, shucks…

I chose the Grid fabric from Sarah Golden’s Maker Maker fabric.  It is a wonderful cotton and linen blend with great texture. Andover makes it and I have a selection in my shop.  I washed the fabric before I started so it would soften up a bit.

When I was thinking about this project, I decided to model it after the 30 Minute Pouch on KelbySews.com.  I have made tons of these as gifts.  One Christmas I gave them to a number of my friends, my sisters, my mom and mother-in-law. You can check those out here.  Anyway, I thought if I just made it substantially larger, added an interior pocket, and loops for a strap, it would be a cute bag.  Guess what?  I was right!  It turned out great.  Here are some photos of my process.

I cut the exterior piece, the batting and the lining all the same size, 9″ x 20″.  Then I quilted the batting to the exterior piece with three seams.  The quilting doesn’t show at all, black thread on a black print, but it held the batting in place while making the bag.

The interior pocket came next.  It is a bit of a trick to explain but I took a 5″ square and placed it on top of the lining piece, right sides together. I drew a rectangle toward the top, on the back side of the square and stitched around that rectangle.  Next I clipped out the interior of the rectangle so I could turn the fabric to the other side of the lining.

Finally, I took a second 5″ square and sewed it to the flap of fabric that was now on the wrong side of the lining.  (I know this is hard to follow and if anyone wants further info, I can write a tutorial.  It is a nice way to add a pocket to any bag you are working on. Let me know if you would be interested.)

Interior pocket sewed to lining fabric.

Once the pocket was in place, I set the zipper – I won’t go into detail here because I used the exact process described in the KelbySews tutorial. It is very simple.

Before sewing the side seams, I placed two loops of twill tape, one on each side, to be stitched into the side seam. Then I sewed the side seams.

This bag has exposed seams (the lining doesn’t hide them) so I did run a tight zig zag stitch along each side to finish the fabric.

Once the bag was flipped right side out, it looked like this.

The final piece was to make a long strap. I pieced together two lengths of fabric that were two inches wide. By pressing the raw edges to the center first, then pressing the whole strip in half, and finally stitching the strap all the way down the length of it, I quickly had a shoulder strap. I looped one end through each of the twill tape loops and stitched them together.  This means it isn’t adjustable.  If you wanted something more flexible, you could buy the hardware to make a little looped finish on the end of one strap.

Peeking at the interior of the bag.

The lining was a scrap from a thrift store but I love it with the Grid fabric.

For measurements, in case you are curious, the bag finishes at 8″ wide, 10″ tall, with a strap that is 50″ long.  I think the size is just what I wanted.  The only change I would make is to move the zipper up about two inches so I would have a bit more usable space inside the bag.  The most functional space is below the zipper and it would be better to have less space above the zipper.


The Best Kind of Sewing

I know I am not alone when I say I love to sew for a cause. There are so many people less fortunate than us, people who are dealing with all sorts of hardship. Quilting and sewing cannot fix these things, but it can show others how much we care. One such cause is Sadie’s Dream for a Cure. Founded in 2012, this organization provides tote bags filled with toys, crayons, games and stuffed animals to children who are battling cancer. Sometimes the child regularly endures long IV infusions or hospital stays in an isolation room while their immune system is severely compromised from their treatments. These bags bring a little happiness to a scary time for a child.

This organization has several options for how we can help. They will provide an entire kit to a person wanting to sew a bag. These kits contain the fabric, fusible batting and the label for the front. Alternatively, they will send you just the label, if you would like to rather use your own fabric. I thought it would be a good use of some stash so I requested just the label. Finally, if you don’t have time to sew just now, they keep a wish list on their website of items they need for filling the bags. Here is a link to check it out.

Bags are donated to hospitals all over the country. Some of the bags are filled with adult items for parents who find themselves suddenly experiencing an extended stay at a pediatric hospital. The adult bags are stocked with toiletries and snacks.

Before I go any further, I need to make a clarification. I didn’t make all four bags shown at the top of the page. I first heard of this project on Instagram when The Quilter’s Planner announced a sew along to make these bags as a group. They did a few posts explaining the steps along the way. I didn’t join in with the sew along due to some timing issues. However, I did pass the idea along to my sister. She also loves to sew and I was fairly sure she would want to make a bag or two. Turns out she made three! Hurray for the kindness of others.

It has been fun to receive pictures of the bags my sister made over the last week or so. She did this cute one with bugs — perfect for the budding entomologist.

Who wouldn’t love the colors in this purple and blue bag? The fabric choices are perfect. It would work for a child or an adult.

For the third bag she used this sweet multicolored fabric with little cupcakes.

My bag is pink with a floral print used for the pockets and the trim around the top. I added a pop of green for the accent strip. When I was making it there was one hiccup.  After I attached the lining to the outer bag, I noticed I had forgotten to put the pocket on the lining (for the inside of the bag). Dang it. I decided to unpick the stitches on the side seam and carefully insert the pocket and try to stitch it down. It was kind of silly but it worked.

I am pretty happy with the final results! Fun, bright colors make for a cute bag.

These bags are fun to make and a simple way to help out a family going through a rough time. I enjoy bag making anyway so this was a pleasant way to spend an afternoon.

Just a quick note – I want to let you know I have begun a newsletter to keep readers posted about my fabric shop. I will be sending it out about every eight weeks or so and it will contain information on new arrivals and fun promotions for my newsletter subscribers. If you are interested, there is a sign up form on the right side of the page.

Linking up to Crazy Mom Quilts and TGIFF.  Hope all of you have a fantastic long weekend for the Memorial Day holiday.


A Fresh New Totebag

I am loving having all of these gorgeous bolts of fabric downstairs. I like to look at them, rearrange them, sell pieces to my wonderful customers and best of all, make stuff with them. I know, it probably isn’t the path to becoming rich – using up my own inventory – but it’s all just sitting there, taunting me, calling out to me. My willpower only goes so far. I am human after all.

When I was in the process of selecting this first round of fabric purchases, I tried very hard to make sure that the lines I bought were able to intermingle. I like offering choices and having pieces that work well together. This pink paisley print is actually from the Modern Tykes line (from Henry Glass). The line is a set of adorable juvenile prints. But this paisley holds its own. It is a deep pink with gray and taupe accents. Pink isn’t usually my color but I like this one. I also carry a selection of Color Weaves – a textured solid made by PB Textiles.  The gray piece works perfectly with this paisley print.

I love both of these fabrics together and thought they were a good choice for a springtime tote bag.  I used (for the second time) the tutorial,  Summer Madras Tote by Anna Graham (Noodlehead.com). (Here is the first one I made, in case you want to check it out.) It is a very simple bag that takes maybe an hour to put together. The tutorial is very easy to follow. I like the outer pockets finished with a bit of trim.


This bag is roomy and will be perfect for shopping or filling with fresh produce at the farmer’s market. I have a feeling I will get plenty of use out of it!

I have a second bag in the making as well. This one is based on a tutorial by Beth at Cooking Up Quilts. For this, I will use a piece of fabric from Maker Maker, by Sarah Golden.  I have been wanting to try a recessed zipper and her tutorial makes it look simple. That remains to be seen!

I also finished the baby’s quilt this week. I sent it off to my kids and will share a post on that next week. The baby is due any day now.  We are all so excited to meet her.

Wishing you all a wonderful weekend. I am experiencing QuiltCon vicariously through all of the posts on Instagram. So many amazing quilts!!

Today is the last day for the sale on Maker Maker fabrics. I have each piece marked down by 15% – no coupon code needed.

Linking to my usuals – check them out at the top of the page, under Link Ups.

Third Time is a Charm

You know I had to do it, right? This morning I made a third Open Wide pouch. I wanted to test out the ideas I laid out in yesterday’s post. Guess what? The worked out quite well (if I do say so myself).  For this pouch, I made the medium size again, with the pouch finishing at 6.5 x 6 inches.

The first change I made was to finish the end of the zipper prior to stitching it to the fabric. So much easier! Sewing this little 2×3 inch rectangle of fabric was much simpler without having the little pouch dragging around while I manipulated the zipper under the presser foot of the machine. Score!

The second change was to leave the lining open, or unstitched, while I boxed the corners of the outer fabric.  Again, much easier.

I had everything pinned together as normal and started on one side, by the zipper. I continued up the edge, across the width of the bag and down the other side until I was back at the lining fabric.  Then I was able to box the corners and could peek inside to see that the seams were lined up properly.

Once I had the two outer corners boxed, I finished sewing the lining together. I left the usual opening at the bottom of the lining and then boxed those two corners. Bingo. It worked just fine.

I forget what this fabric is even from, but isn’t it sweet. I love these little houses. I wish I had another piece, but I don’t…. such is life. 🙂 I think it is adorable with the sweet bicycles on the outer fabric.

Here is the finished tab once the bag was assembled.

While it isn’t perfect, it is much better than the first two attempts. Yep, practice certainly makes better. I think three pouches is enough. I need to move on to something else now.

But I want to share two more things before I finish up.  First is this silly picture of Julia. I love this picture. I think is is reminiscent of a grumpy Mrs. Claus the way she is peering at me above her glasses and the Santa hat is pulled down so low.  I think I took this when we were decorating the house for the holidays a couple of years ago. It makes me smile every time.

The next thing is the little wool Christmas ornament I made. I bought the kit when I was in Maine over the summer. It is really adorable. Nothing terribly difficult about it but I enjoyed making it. I like the little beads that were included with the kit. They are just the perfect amount of bling. 🙂

Ok, that’s enough for now! I have a pile of gifts to be wrapped so I had better get busy with them. Oh wait… I have one more thing.  Yesterday the power went out and it was a pain.  I had cookies in the oven baking, raw cookies on the counter waiting for their turn.  Julia ended up studying for her Chemistry final by candlelight and the flashlight on her phone.  It was only 4:30 in the afternoon but it was so gloomy out that the house was dark (and we have huge windows in this part of the house!)  Luckily it was only out for a couple of hours.

Julia finished her finals today (I am going to brag and tell you she got a 94% on that Chemistry final.) It is officially Christmas break. I am not sure if I will post much over the holidays but please know that I wish everyone a wonderful Holiday season, whichever way you and your family celebrates.

Linking to Crazy Mom Quilts.

Open Wide Pouch and Alison Glass Combo

Today was one of those days where I had plenty of things I should be doing but I sewed instead. I couldn’t get in the mood for anything on the neverending ‘to-do’ list. I just felt like sewing. Which is fine. I thoroughly enjoyed the afternoon. It is pouring rain outside; so dark and cloudy it looked like evening by 2:00 in the afternoon.

Last night, I decided to pull out my dwindling collection of Alison Glass scraps. You know I love her fabric – I have used it to make a mini for an Alison Glass swap as well as two purses. Yvonne, over at Quilting Jetgirl, has been playing with, sewing with, collecting and posting about Alison Glass lately and it got me in the mood. She is hosting a little Alison Glass celebration in January and there just might be a prize of a huge set of fat eighth’s to be won.  All of this set off a bit of an Alison Glass frenzy in my sewing room. 🙂

Thinking about what I wanted to make, I ruled out any sort of mini quilt or table runner. Rather, I wanted to make a tote or a zip pouch. I poked around on my Pinterest boards and found the tutorial for the Open Wide zip pouch from Noodlehead.com.  Anna Graham is the blogger and pattern designer behind Noodlehead. You might remember that I made her 241 Totebag three times over the past year. Her patterns and tutorials are wonderful. I really like the look of the Open Wide pouch.

I made two of them this afternoon. They are that simple!  The first one was the middle size pouch that measures about 6″ x 6 1/2″. I decided to have a different fabric for the base of the bag. The second pouch was made with the smallest measurements, finishing at 4.5″ x 5″. I really like the method Anna uses for these pouches. She boxes the corners quite deep which creates a very wide bottom of the pouch, in relation to the length at the top. Because of this, the pouches open wide.  This little variation is such a simple way to get this result.

I found two challenges with this pattern. The biggest of which (for me) was boxing the corners of both the outer fabric and lining fabric without being able to peek in and see if the seams were all lined up correctly. Anna’s instructions call for sewing the lining and outer fabric together, leaving an opening in the bottom of the lining to turn it right side out.  Prior to turning it right side out, you box all four corners. It worked, but I would like it better if I could see what I was doing. I think it might be possible to stitch the outer fabric and stop. Then box the corners while still being able to look inside and see that it is all lined up. After that, one would continue to sew the perimeter and finish the lining.  Boxing the corners of the lining doesn’t matter as much since they don’t show.  Of course, I didn’t think of this until after I completed two pouches.  😉

The second challenge is not a huge deal. Anna has the tail end of the zipper extend beyond the end of the zip pouch. It adds a nice touch to the finished bag. But I had a hard time getting a decent result. It was sort of fiddly and I ended up unpicking the stitches on each of them and trying to get a better finish.  They still don’t look great. I think I would play with this next time and try to come up with a different way to finish off the end of the zipper. It doesn’t look like it should be so hard but it was difficult for me to keep the little folds in place and move the zipper around, dragging the pouch along with it. I wonder if I could have finished the end of the zipper before I even began sewing the pouch together. Questions, questions…. I think I need to make a third pouch and test out these ideas.

Anna lists fusible interfacing as optional for the pouches. I used a fusible batting. I like the bit of heft it gives the bag. When I made the second one, I decided to quilt two horizontal lines on each of the pieces of outer fabric. It looks cute and will make sure the batting stays nice and flat against the outer fabric. Overall, the pattern is great and it was a fun project for this afternoon. I love the look of the floral fabric (from the Field Day line) and the deep blue fabric together. I got my Alison Glass fix and now I can move on to the next project!

If you are a fan of her fabric, you might want to join in with the Link Up that will be happening over at Quilting Jetgirl.  I think it is good that I made my project early. Yvonne will be hosting the event for the last two weeks of January which is going to be a busy month for me. My son is getting married on January 14th so we will have all sorts of fun happening in January and, most likely, my sewing time will be a bit limited.

Linking up with Crazy Mom Quilts and Confessions of a Fabric Addict this week. Links are available at the top of the page, under Link Ups. Also linking to the Bag It link party at Elm Street Quilts.