Monthly Archives: August 2014

Tutorial for Embellished Onesie and Burp Cloth

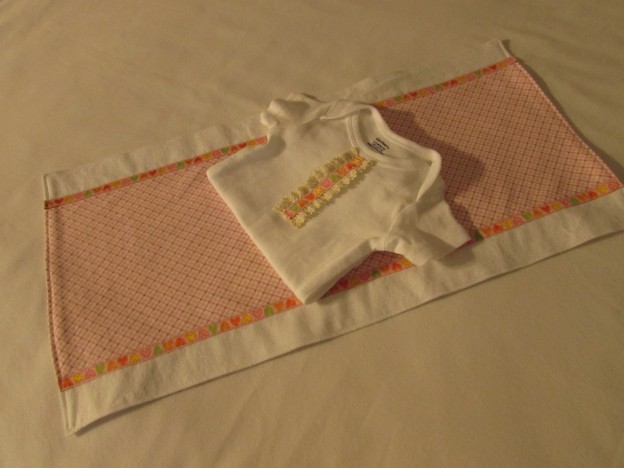
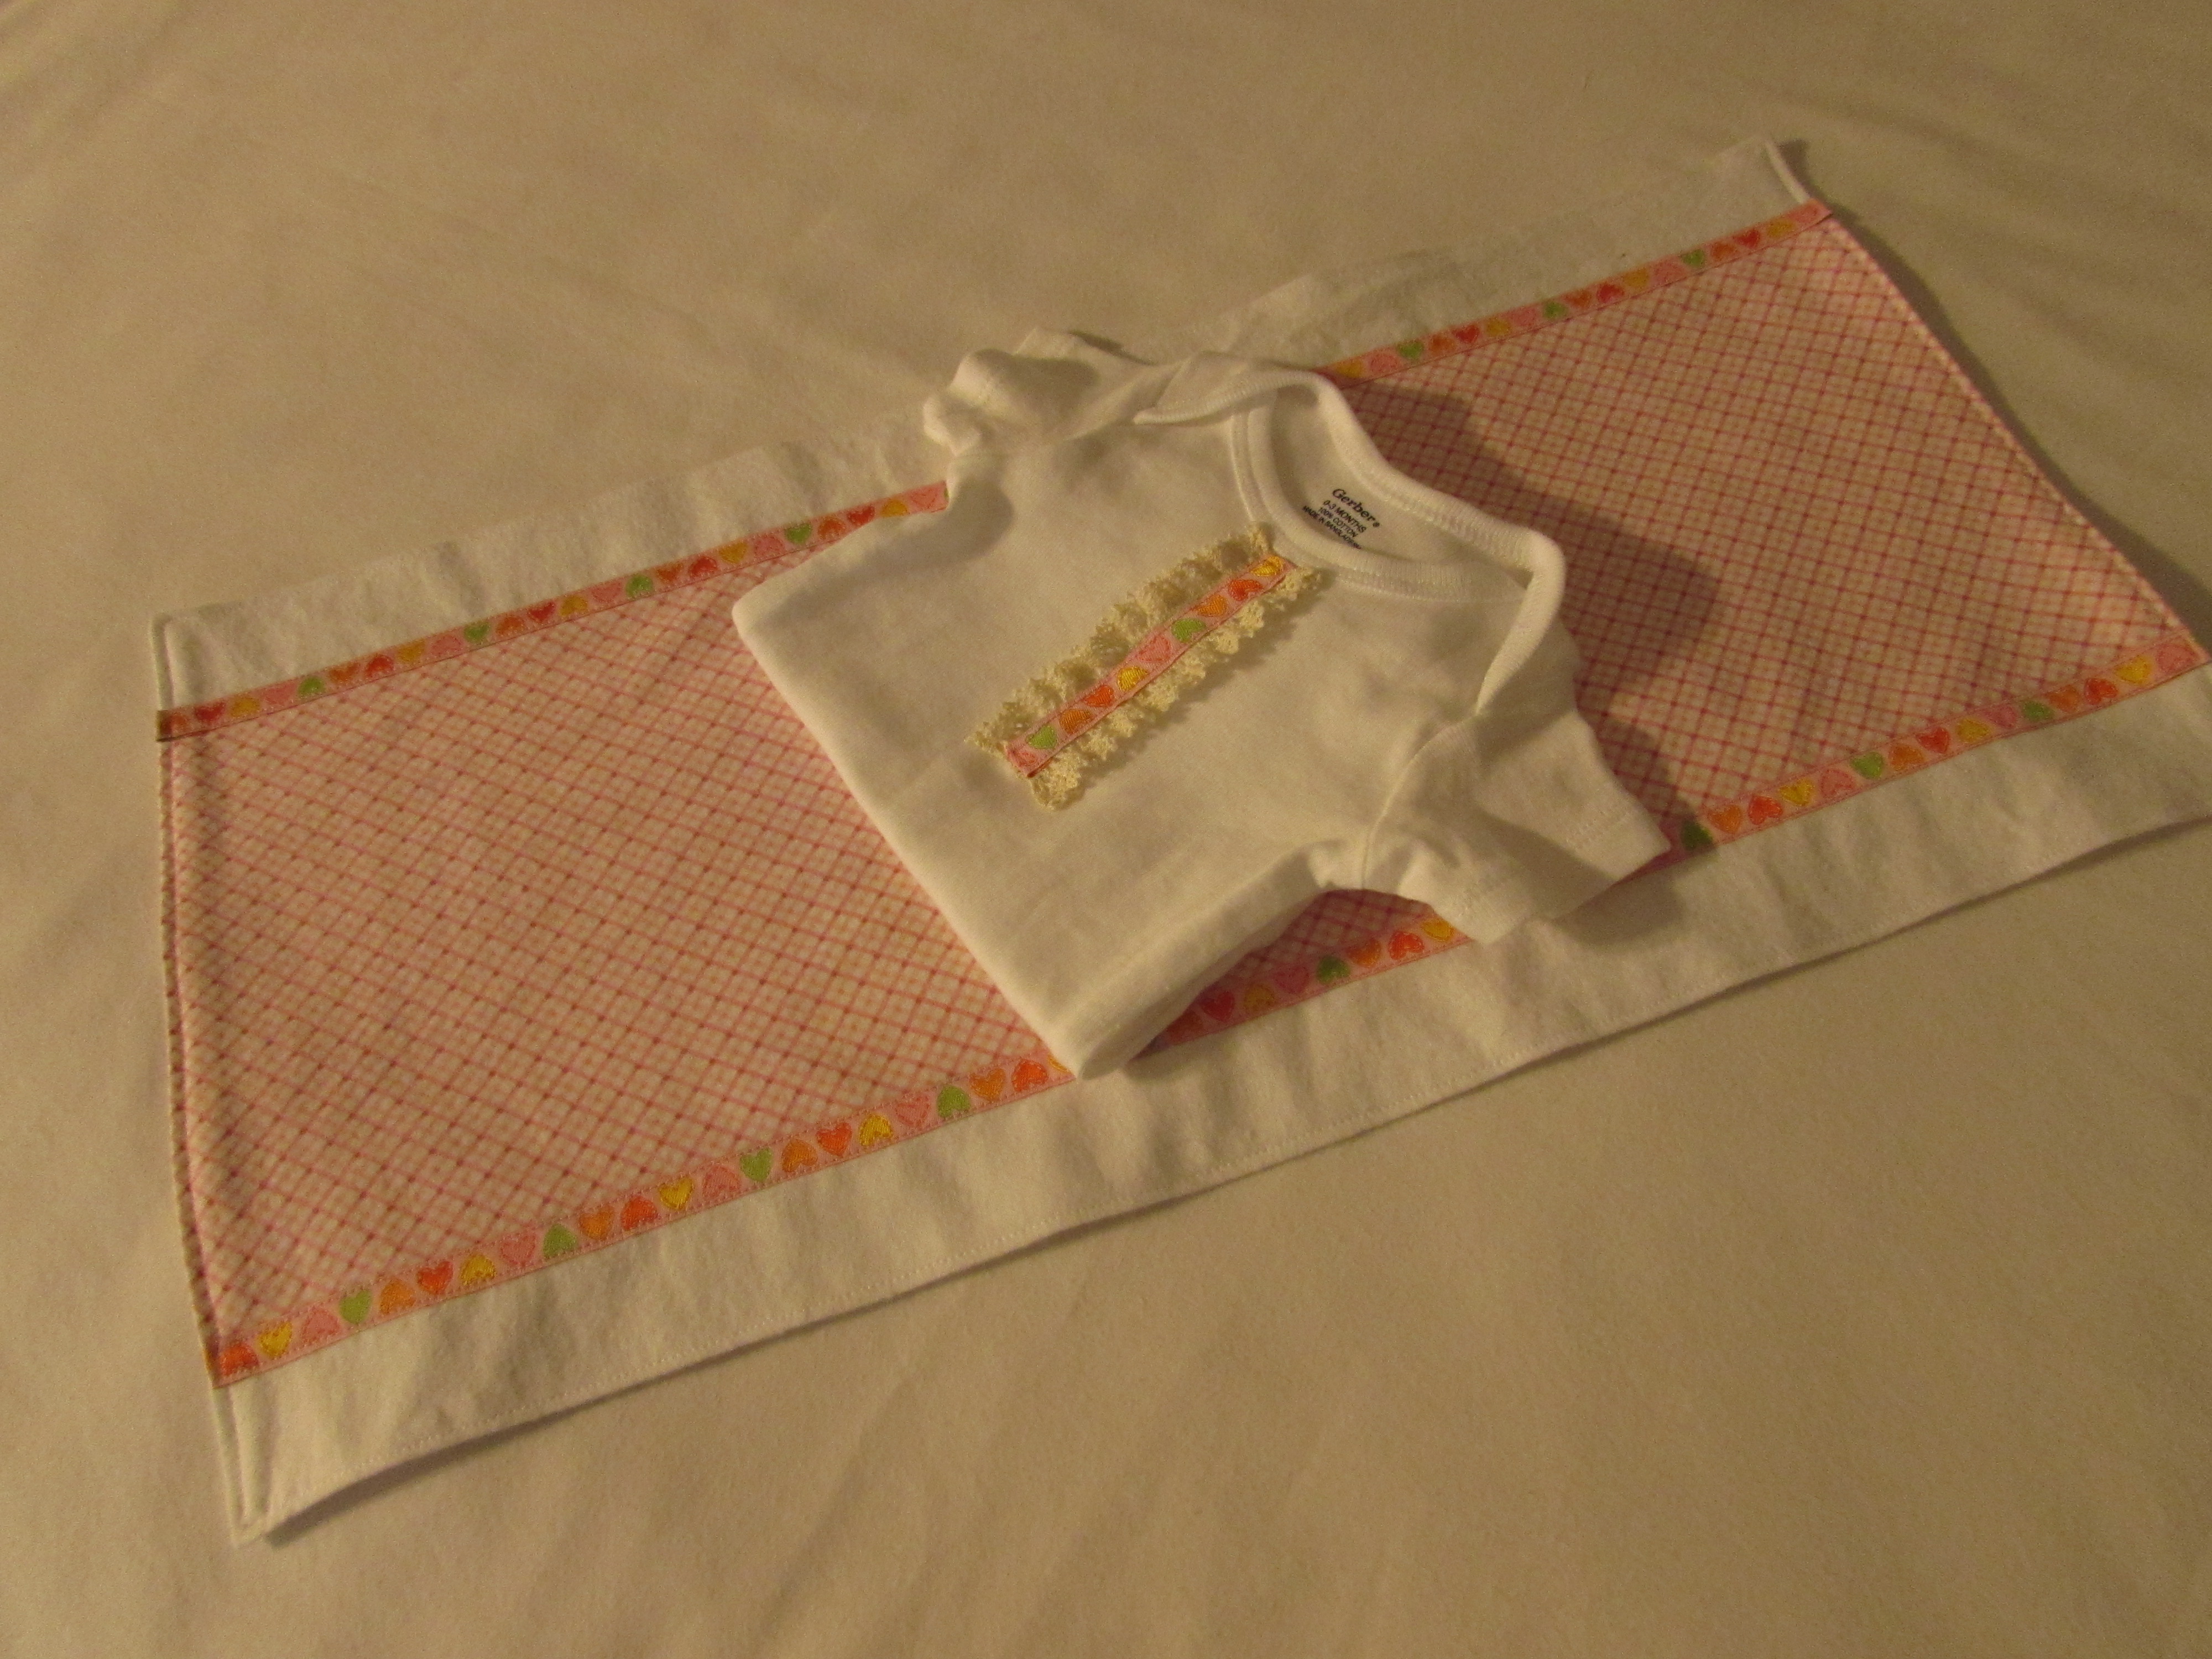
This weekend my sister asked me if I would make something for her to give as a baby gift. Her yoga  teacher is expecting a little girl in October and she wanted to bring something to her before she goes on maternity leave from the yoga studio. I had made some burp cloths and embellished some onesie tshirts for little boys (which are in my Etsy shop) but had not yet made anything for baby girls.  After talking a bit and looking at ideas on Pinterest, Tina decided she wanted something simple and soft. Here is a photo of the end result. I think it is just adorable.

20140824_1568

I thought I would take some pictures as I made the items and create a tutorial.  These are such cute gifts and sew up in no time at all. They are great ways to use scraps if you have any flannel scraps accumulated.

Ok.  Here we go!  My apologies in advance for the pictures.  They aren’t the greatest.

Here is a shopping list for you:

  • Onesie (they come in a package of five so you will have plenty to make for gifts.) For the onesie, I used size 0-3 months.  The newborn size was sooo tiny (5-8 pounds) so I chose these which are just a tad larger so the baby could wear it for more than three days before outgrowing it!
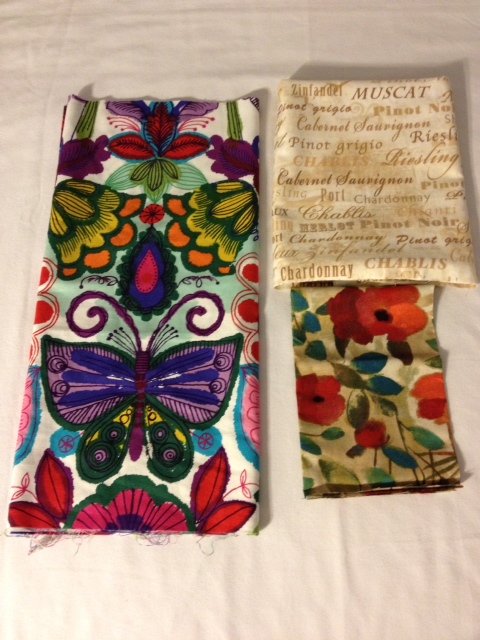
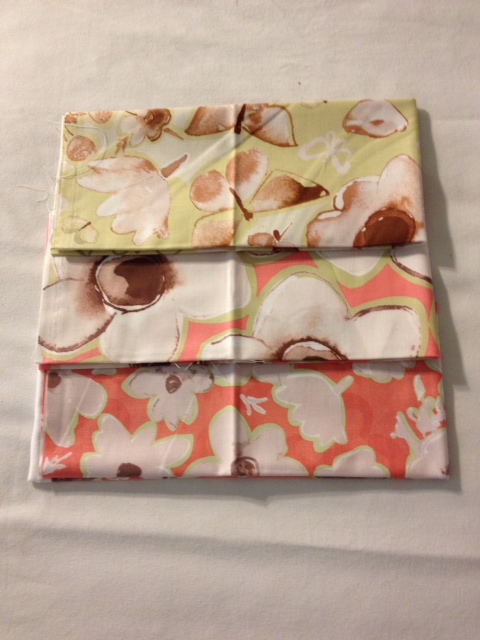
  • White flannel rectangle, cut to 21 1/2″ x 13 1/2″
  • Accent flannel rectangle, cut to 21 1/2″ x 7 1/4″
  • Ribbon trim, 1 1/3 yards
  • Lace trim, just a scrap if you have it.  You will need about 9 inches.
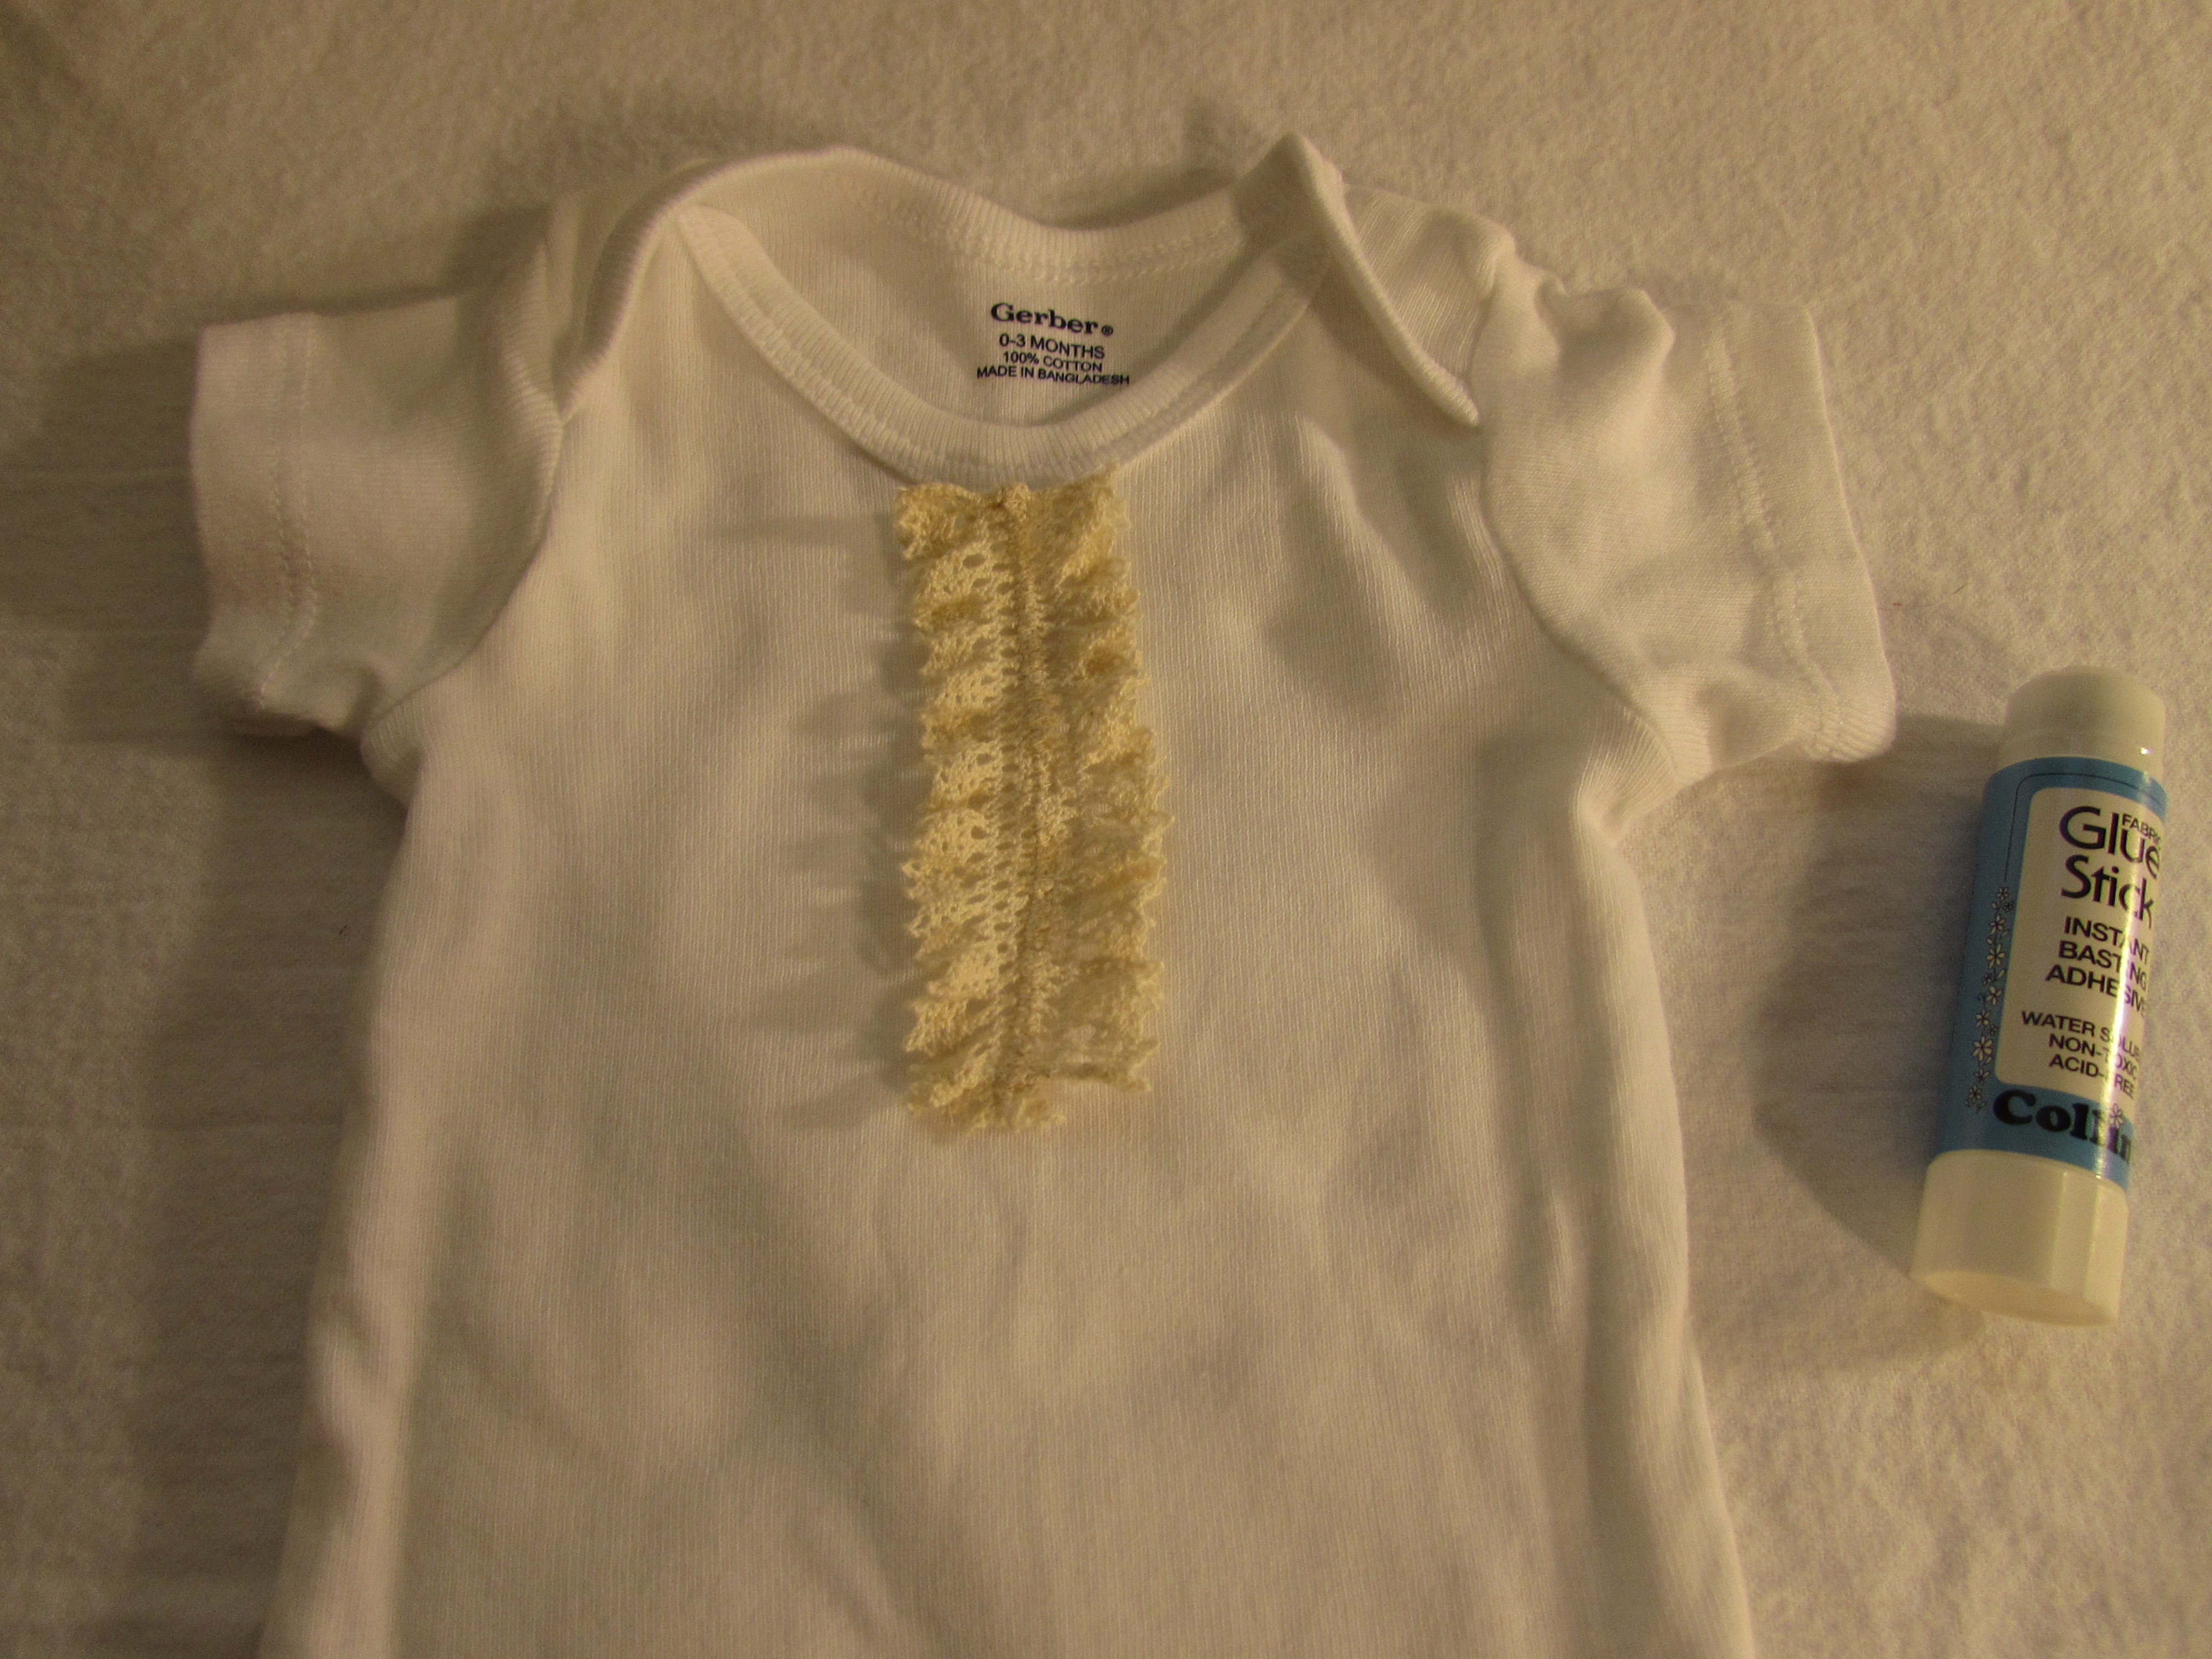
  • Water soluble glue stick.

I prewashed everything and dried it in the dryer.  Both the flannel and the onesie did shrink quite a bit.  Before prewashing the flannel I ran a stitch the length of the raw edges. This prevents it from fraying too much.  Otherwise, flannel has a tendency to fray quite a bit when washed and that is just annoying.  All those threads to deal with plus you lose a bit of fabric that way. Once all is prewashed, press your fabric and the onesie.

Let’s start with the onesie.

The lace that I used was ruffled on one side.  I took two pieces that were 4 1/2 inches long and put them side by side.

20140824_1539

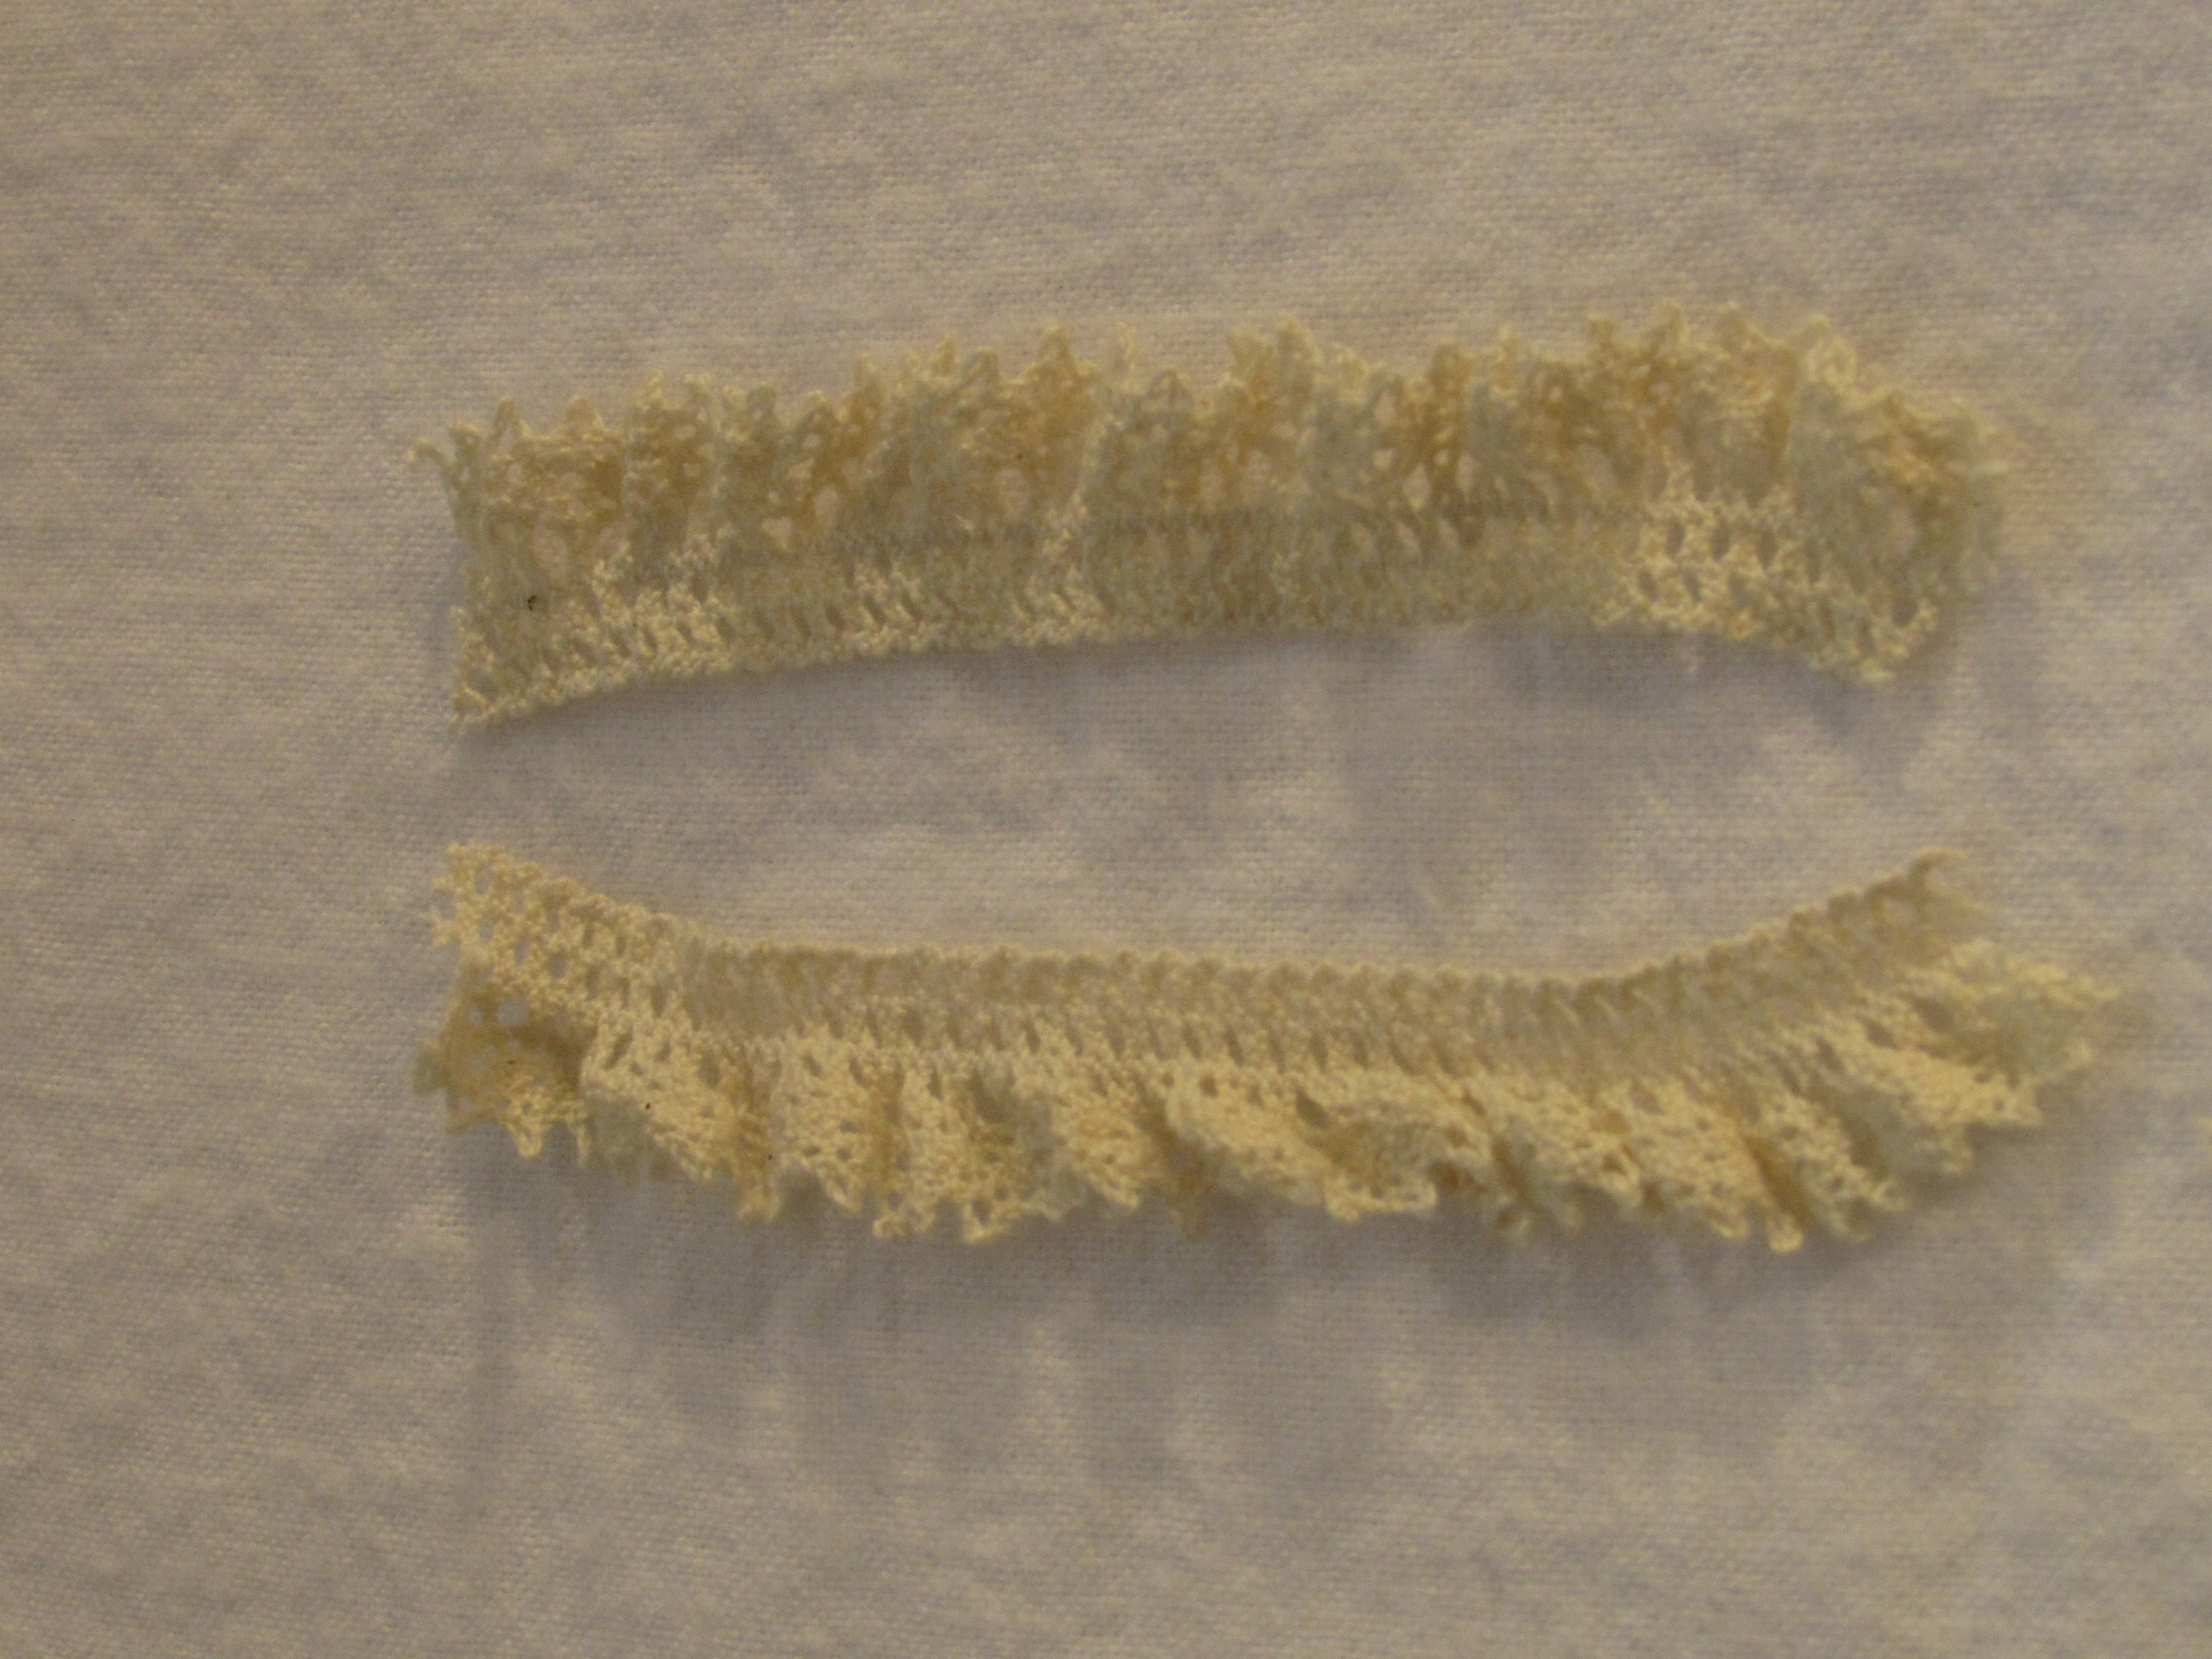
Overlap the straight edges and fasten them with a pin and/or a bit of glue from a washable glue stick.

20140824_1541
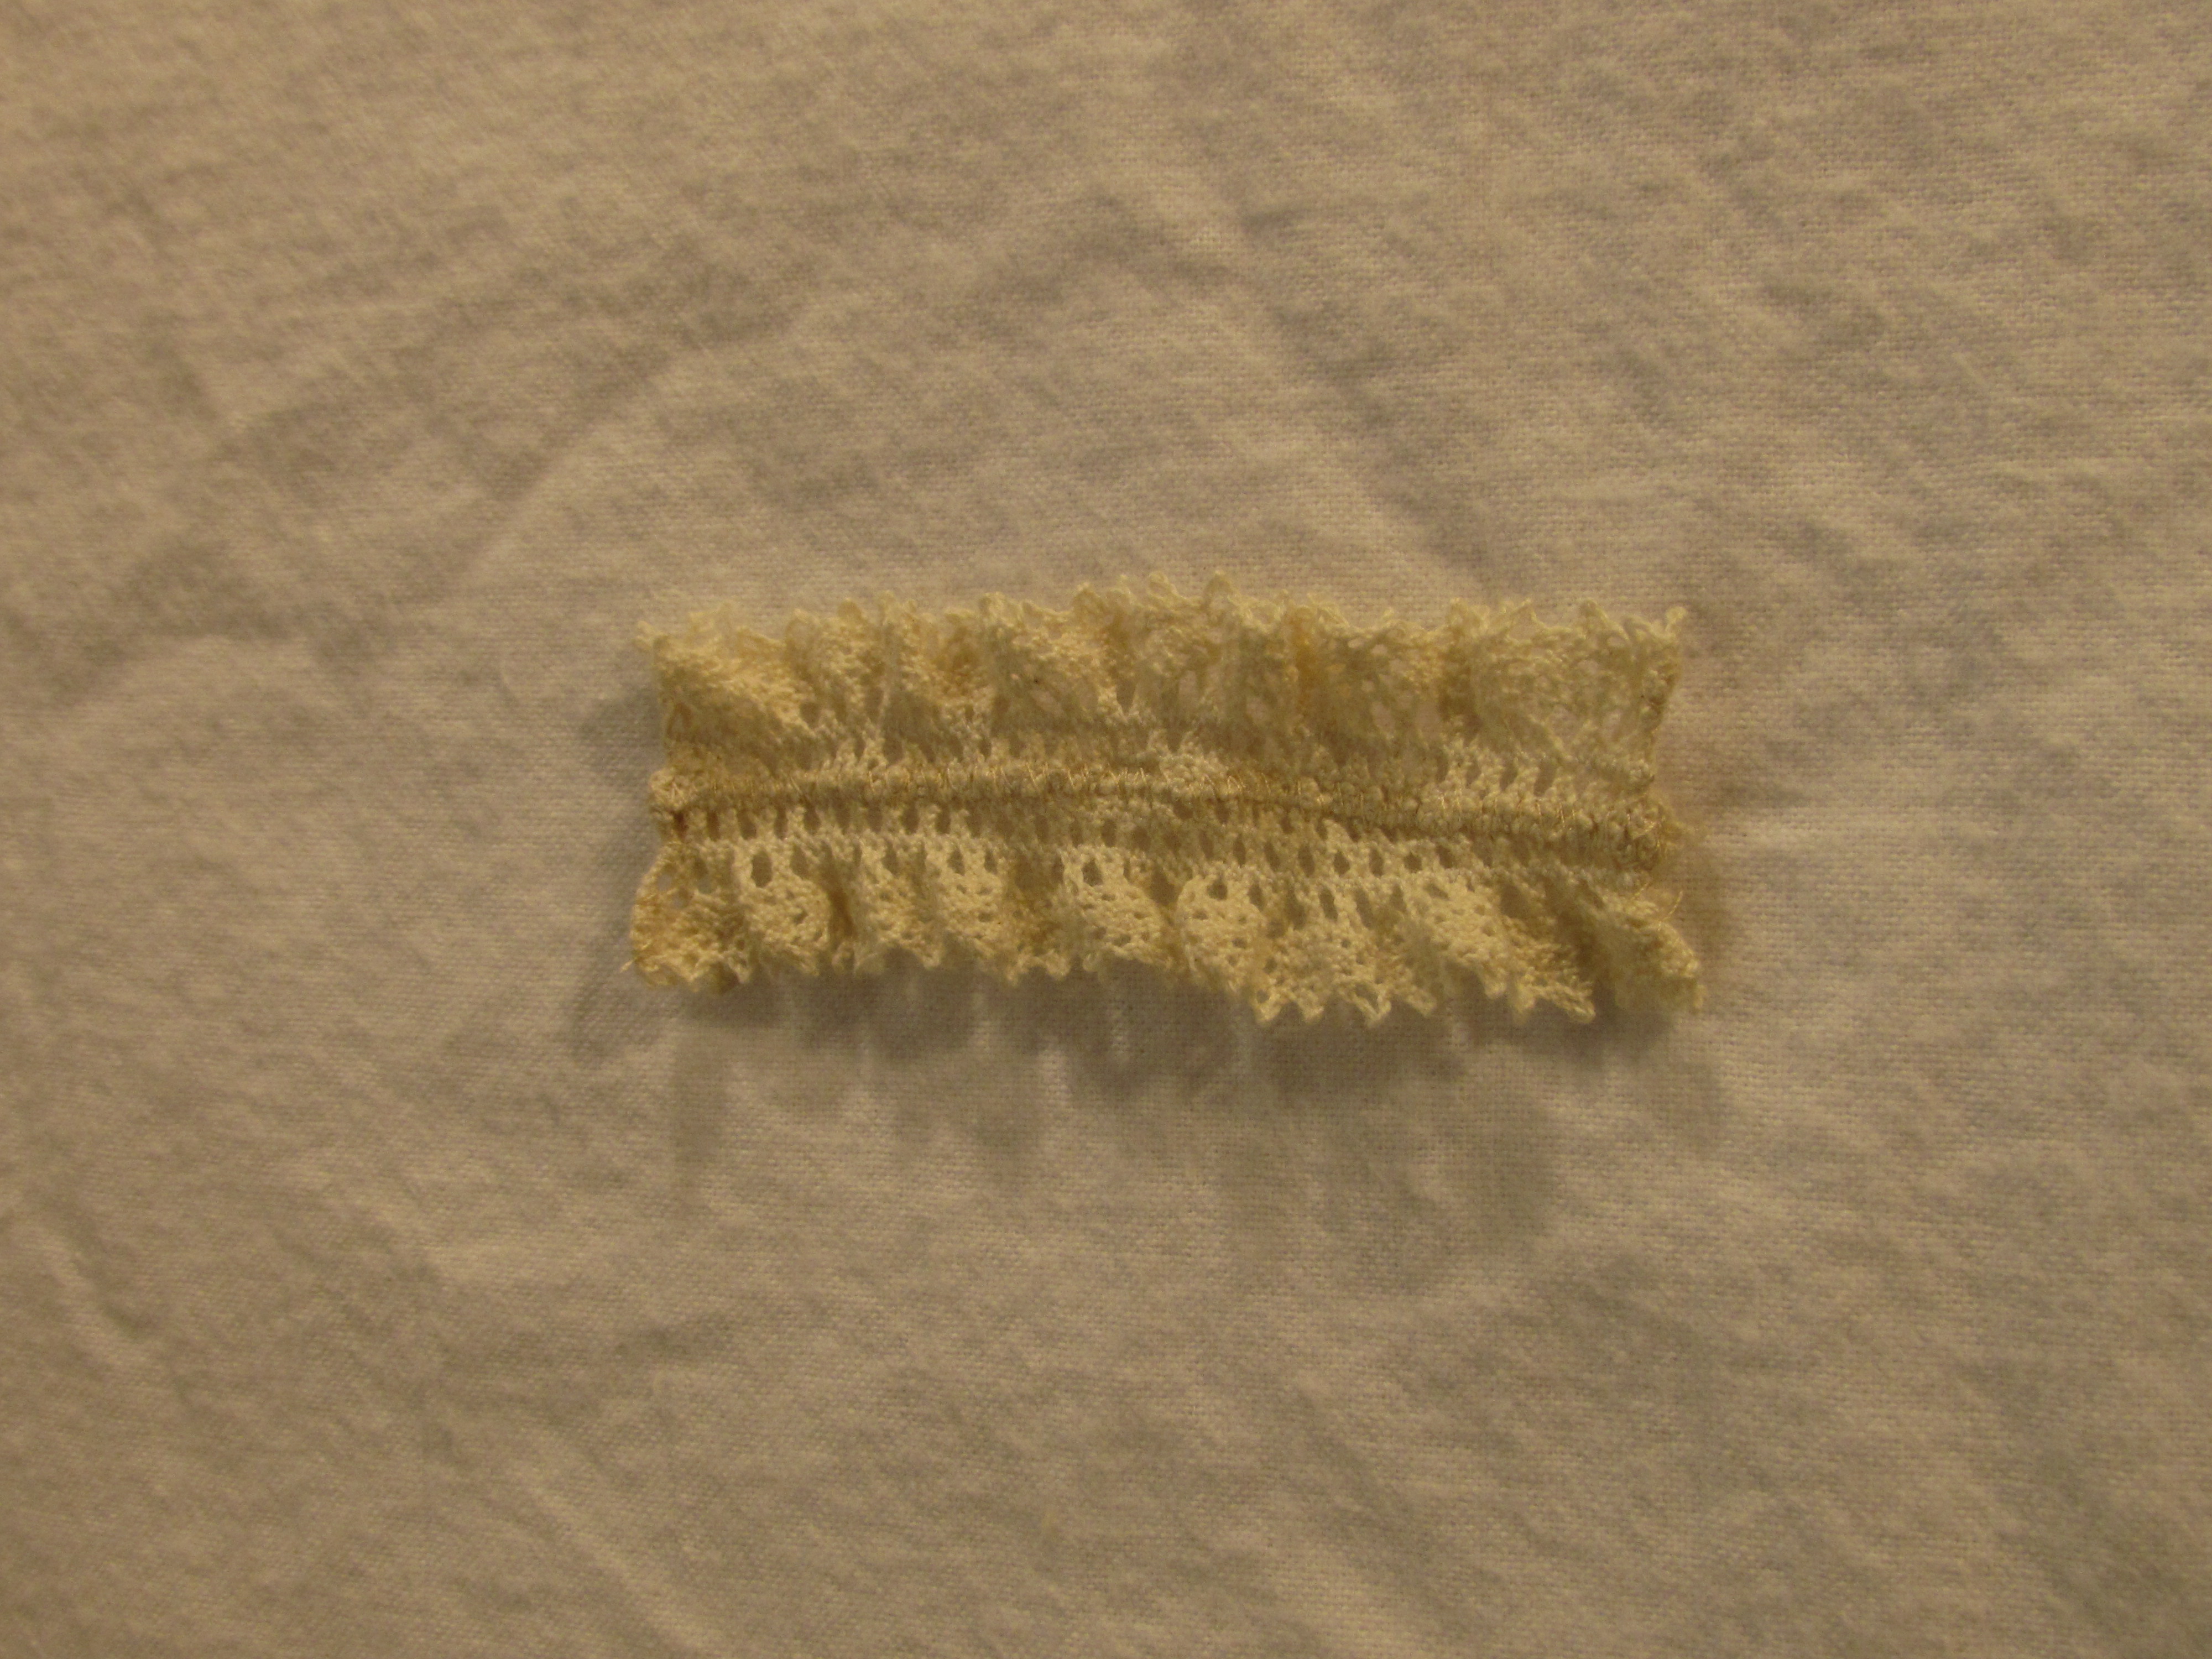
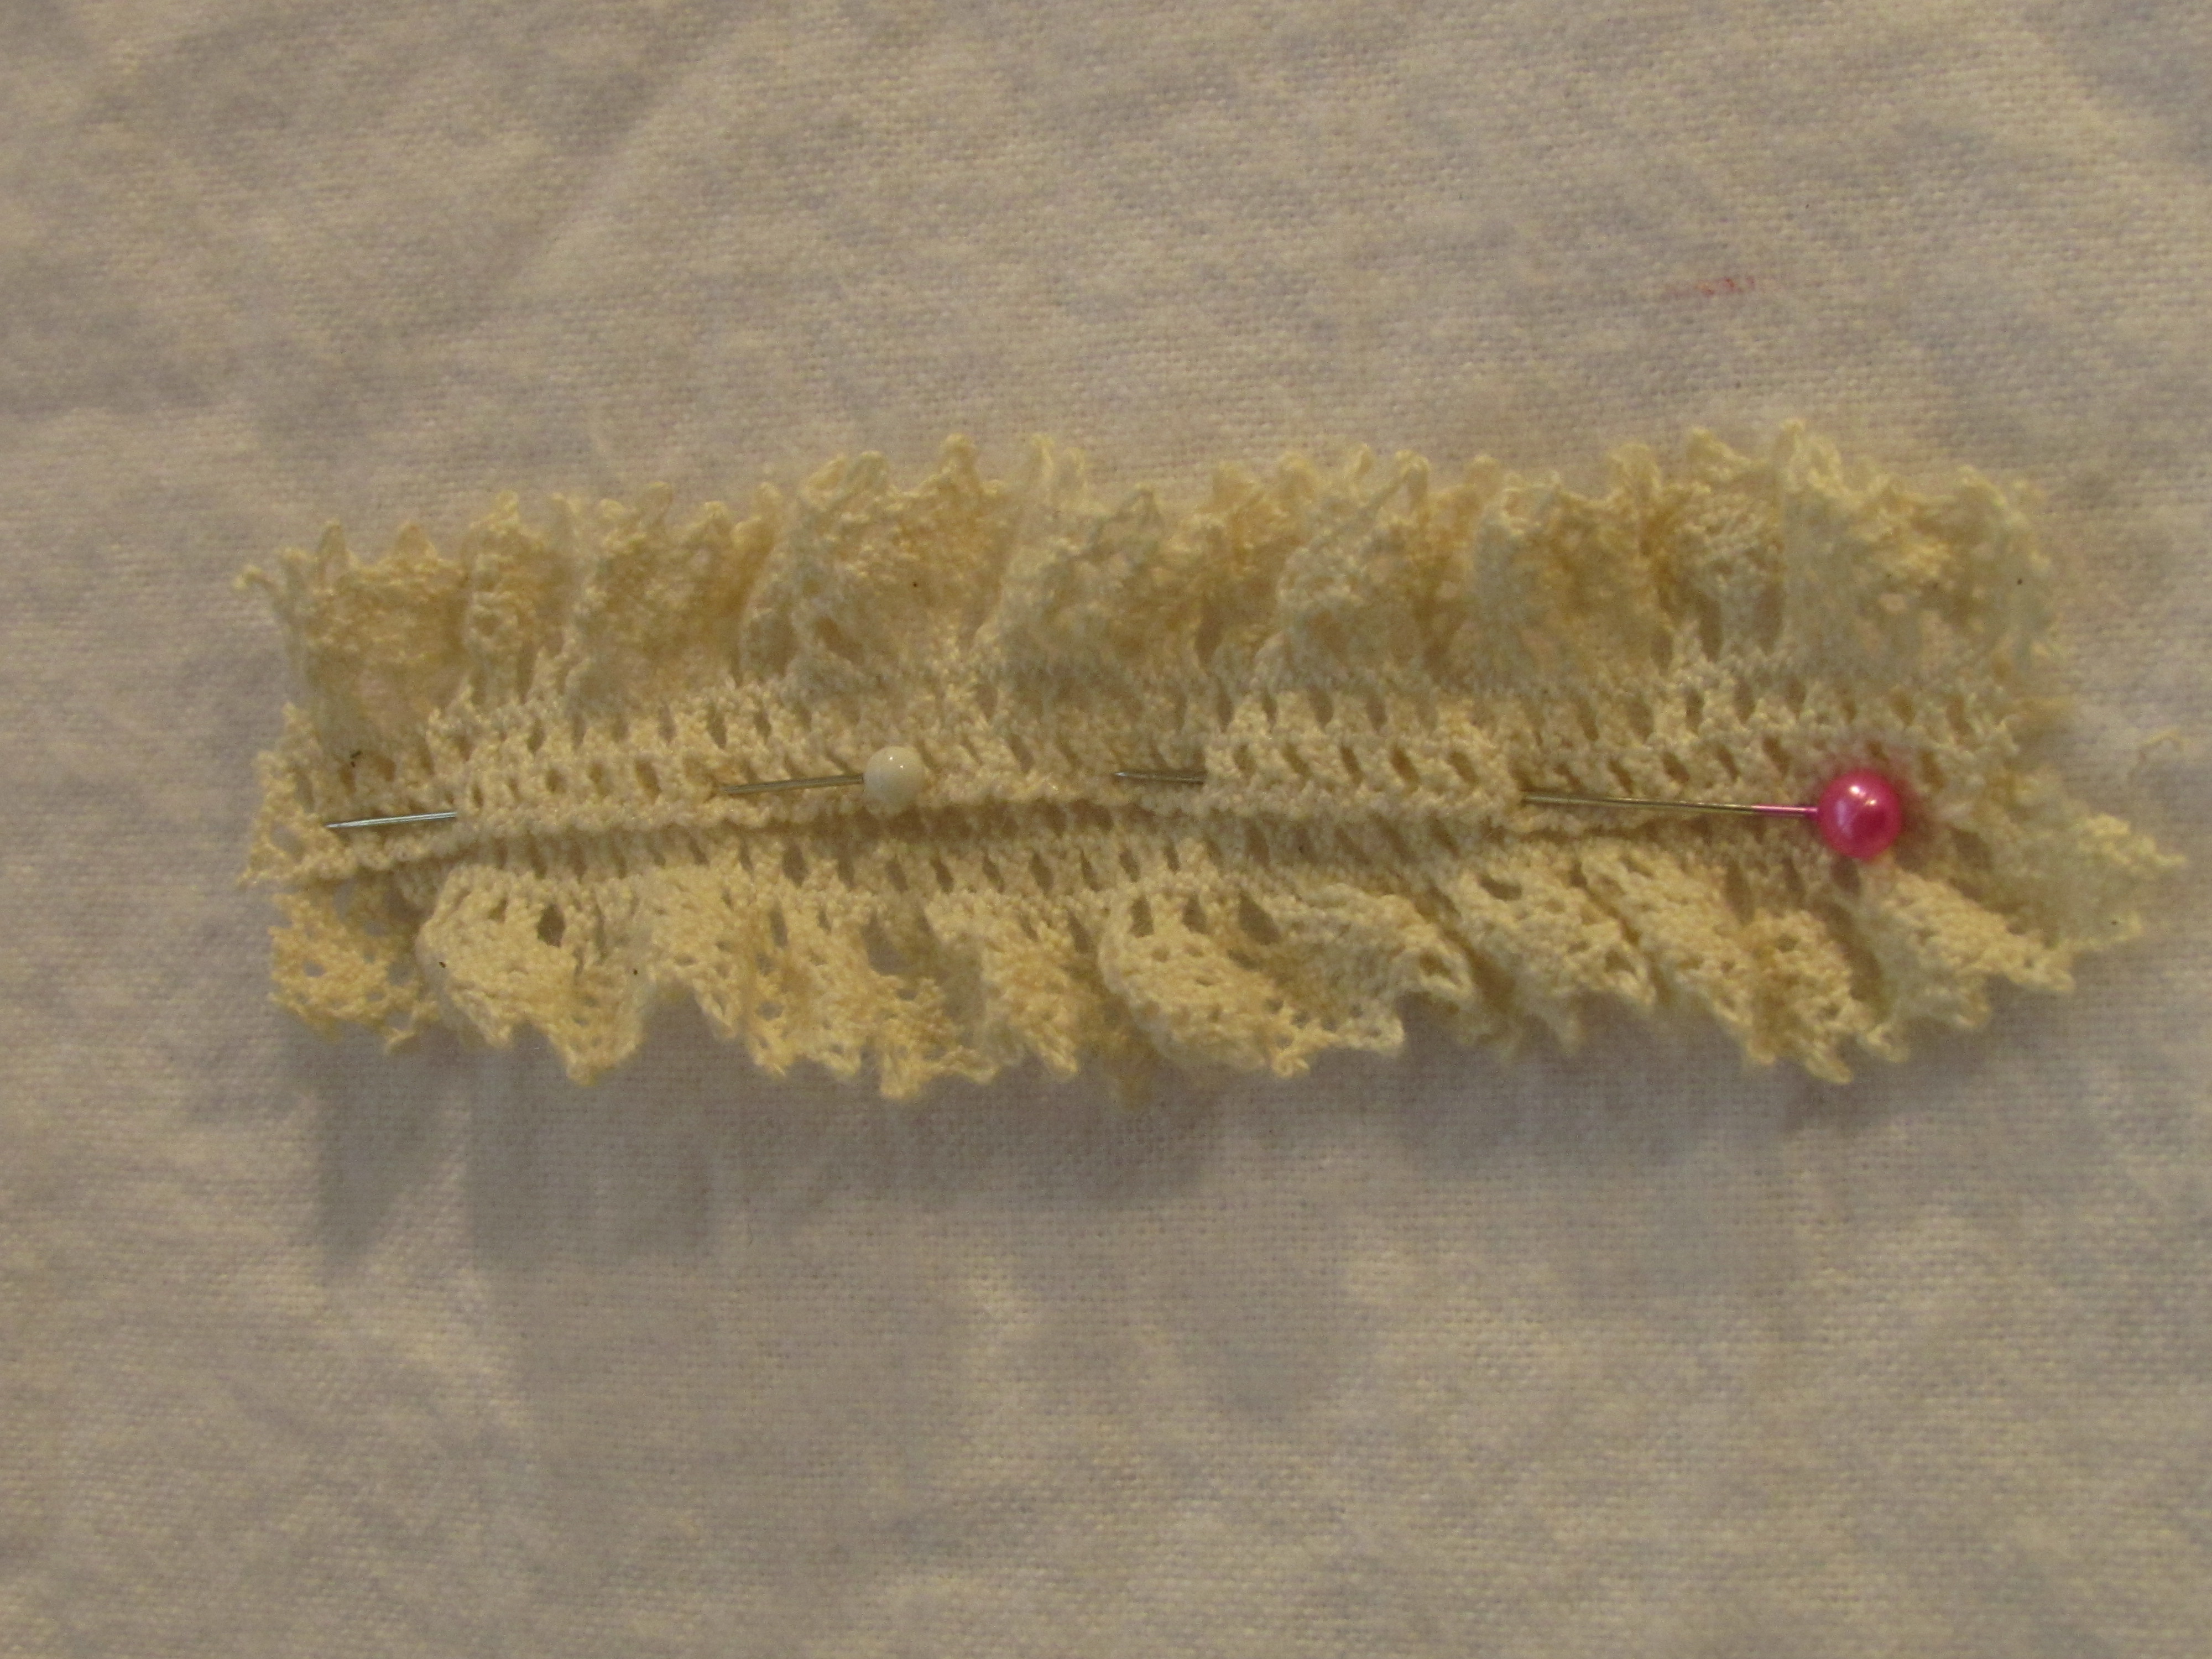
Run a stitch down the center to hold them together.  I used a small zig zag stitch. Fold over one end of the lace and hand stitch it to finish the raw edge.  I just did a running stitch along the end.  It was nicely camouflaged by the lace. Repeat with the other end.

20140824_1545Center the lace on the front of the onesie.  Tack it down with the washable glue stick.

20140824_1546

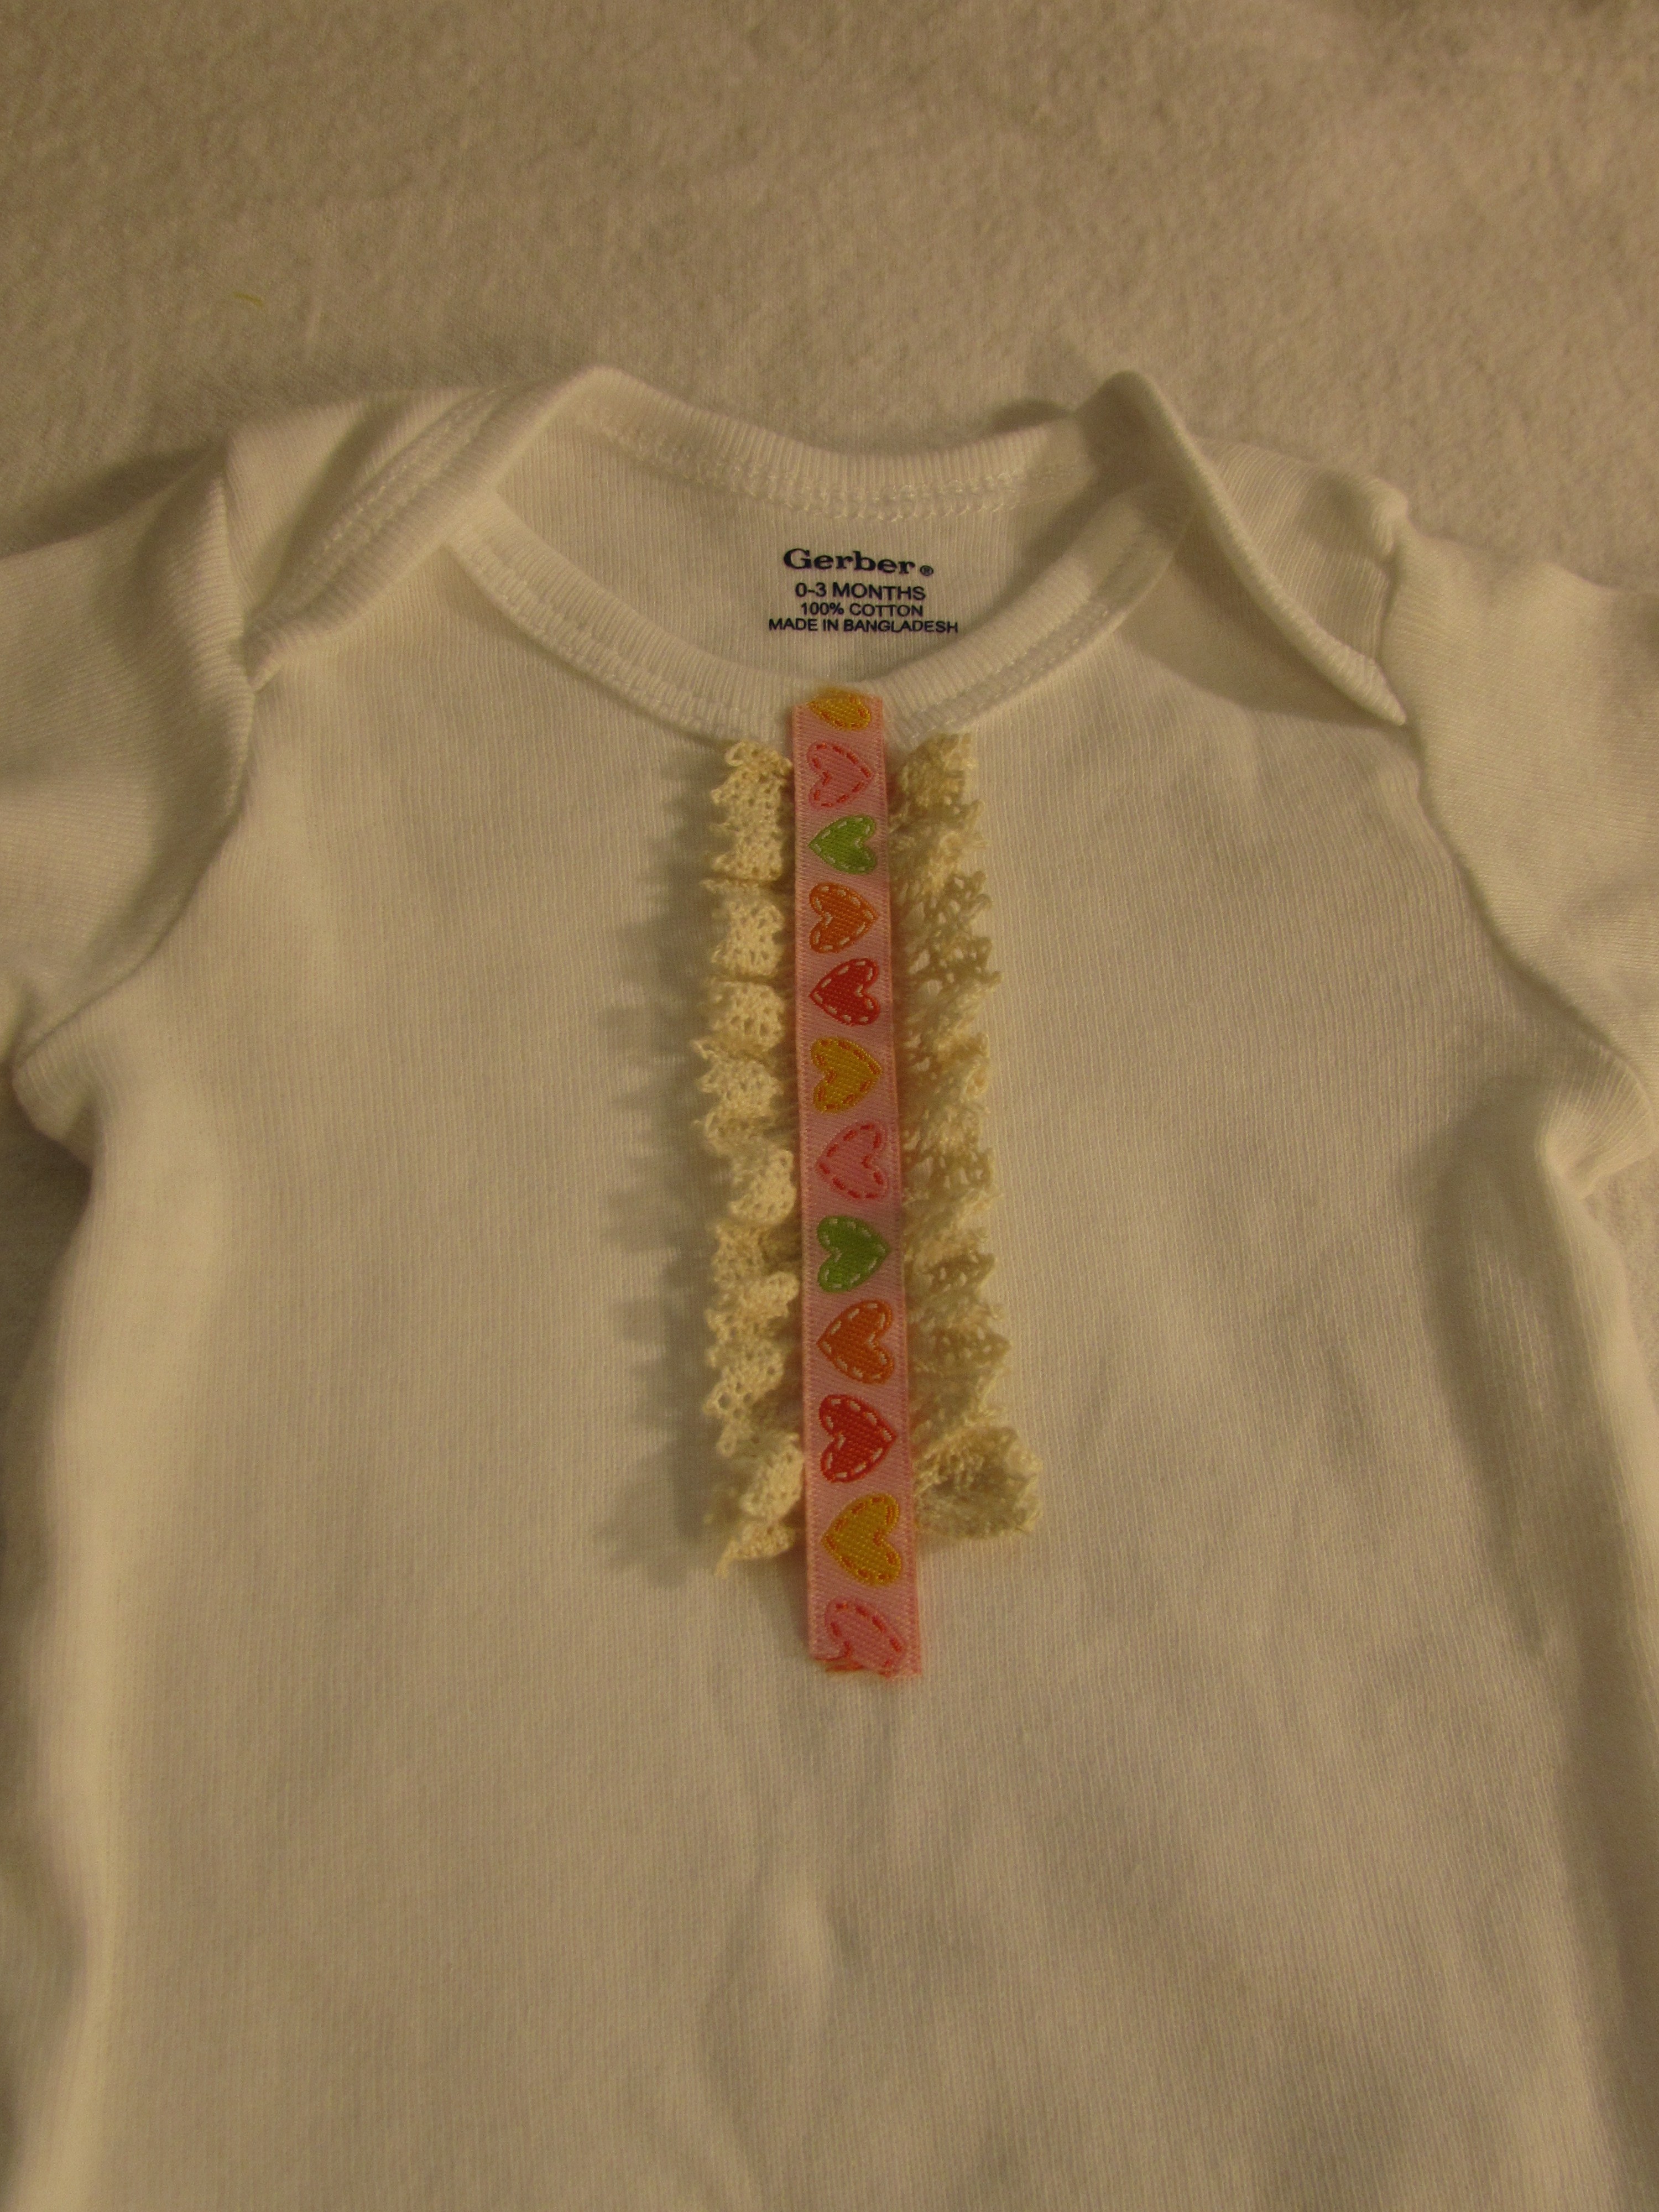
Cut a piece of ribbon that is 1/2 inch longer than the finished lace.  Turn under each end 1/4″ so it matches the length of the lace.  Tack this down the center of the lace with the glue stick. Set this aside and let the glue dry for about 20 minutes or so. By the way, I use the glue stick instead of pins because when I am working with such a tiny pieces, the pins are just too big.  They can make the ribbon and/or lace buckle up.  The glue stick allows it to lay nice and flat when you are stitching and it doesn’t move around like it would when removing the pins. (The picture below was taken before I turned under the ends of the ribbon.)

20140824_1547Once the glue is dry, stitch a straight stitch down either side of the ribbon and across each end.  That’s it!  All done.  Let’s work on the burp cloth now.

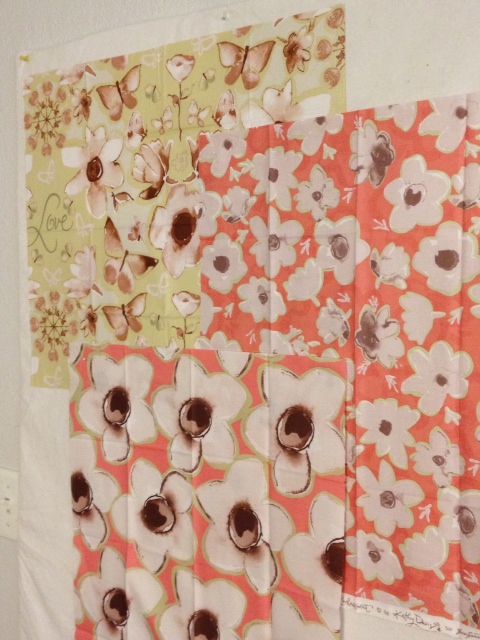
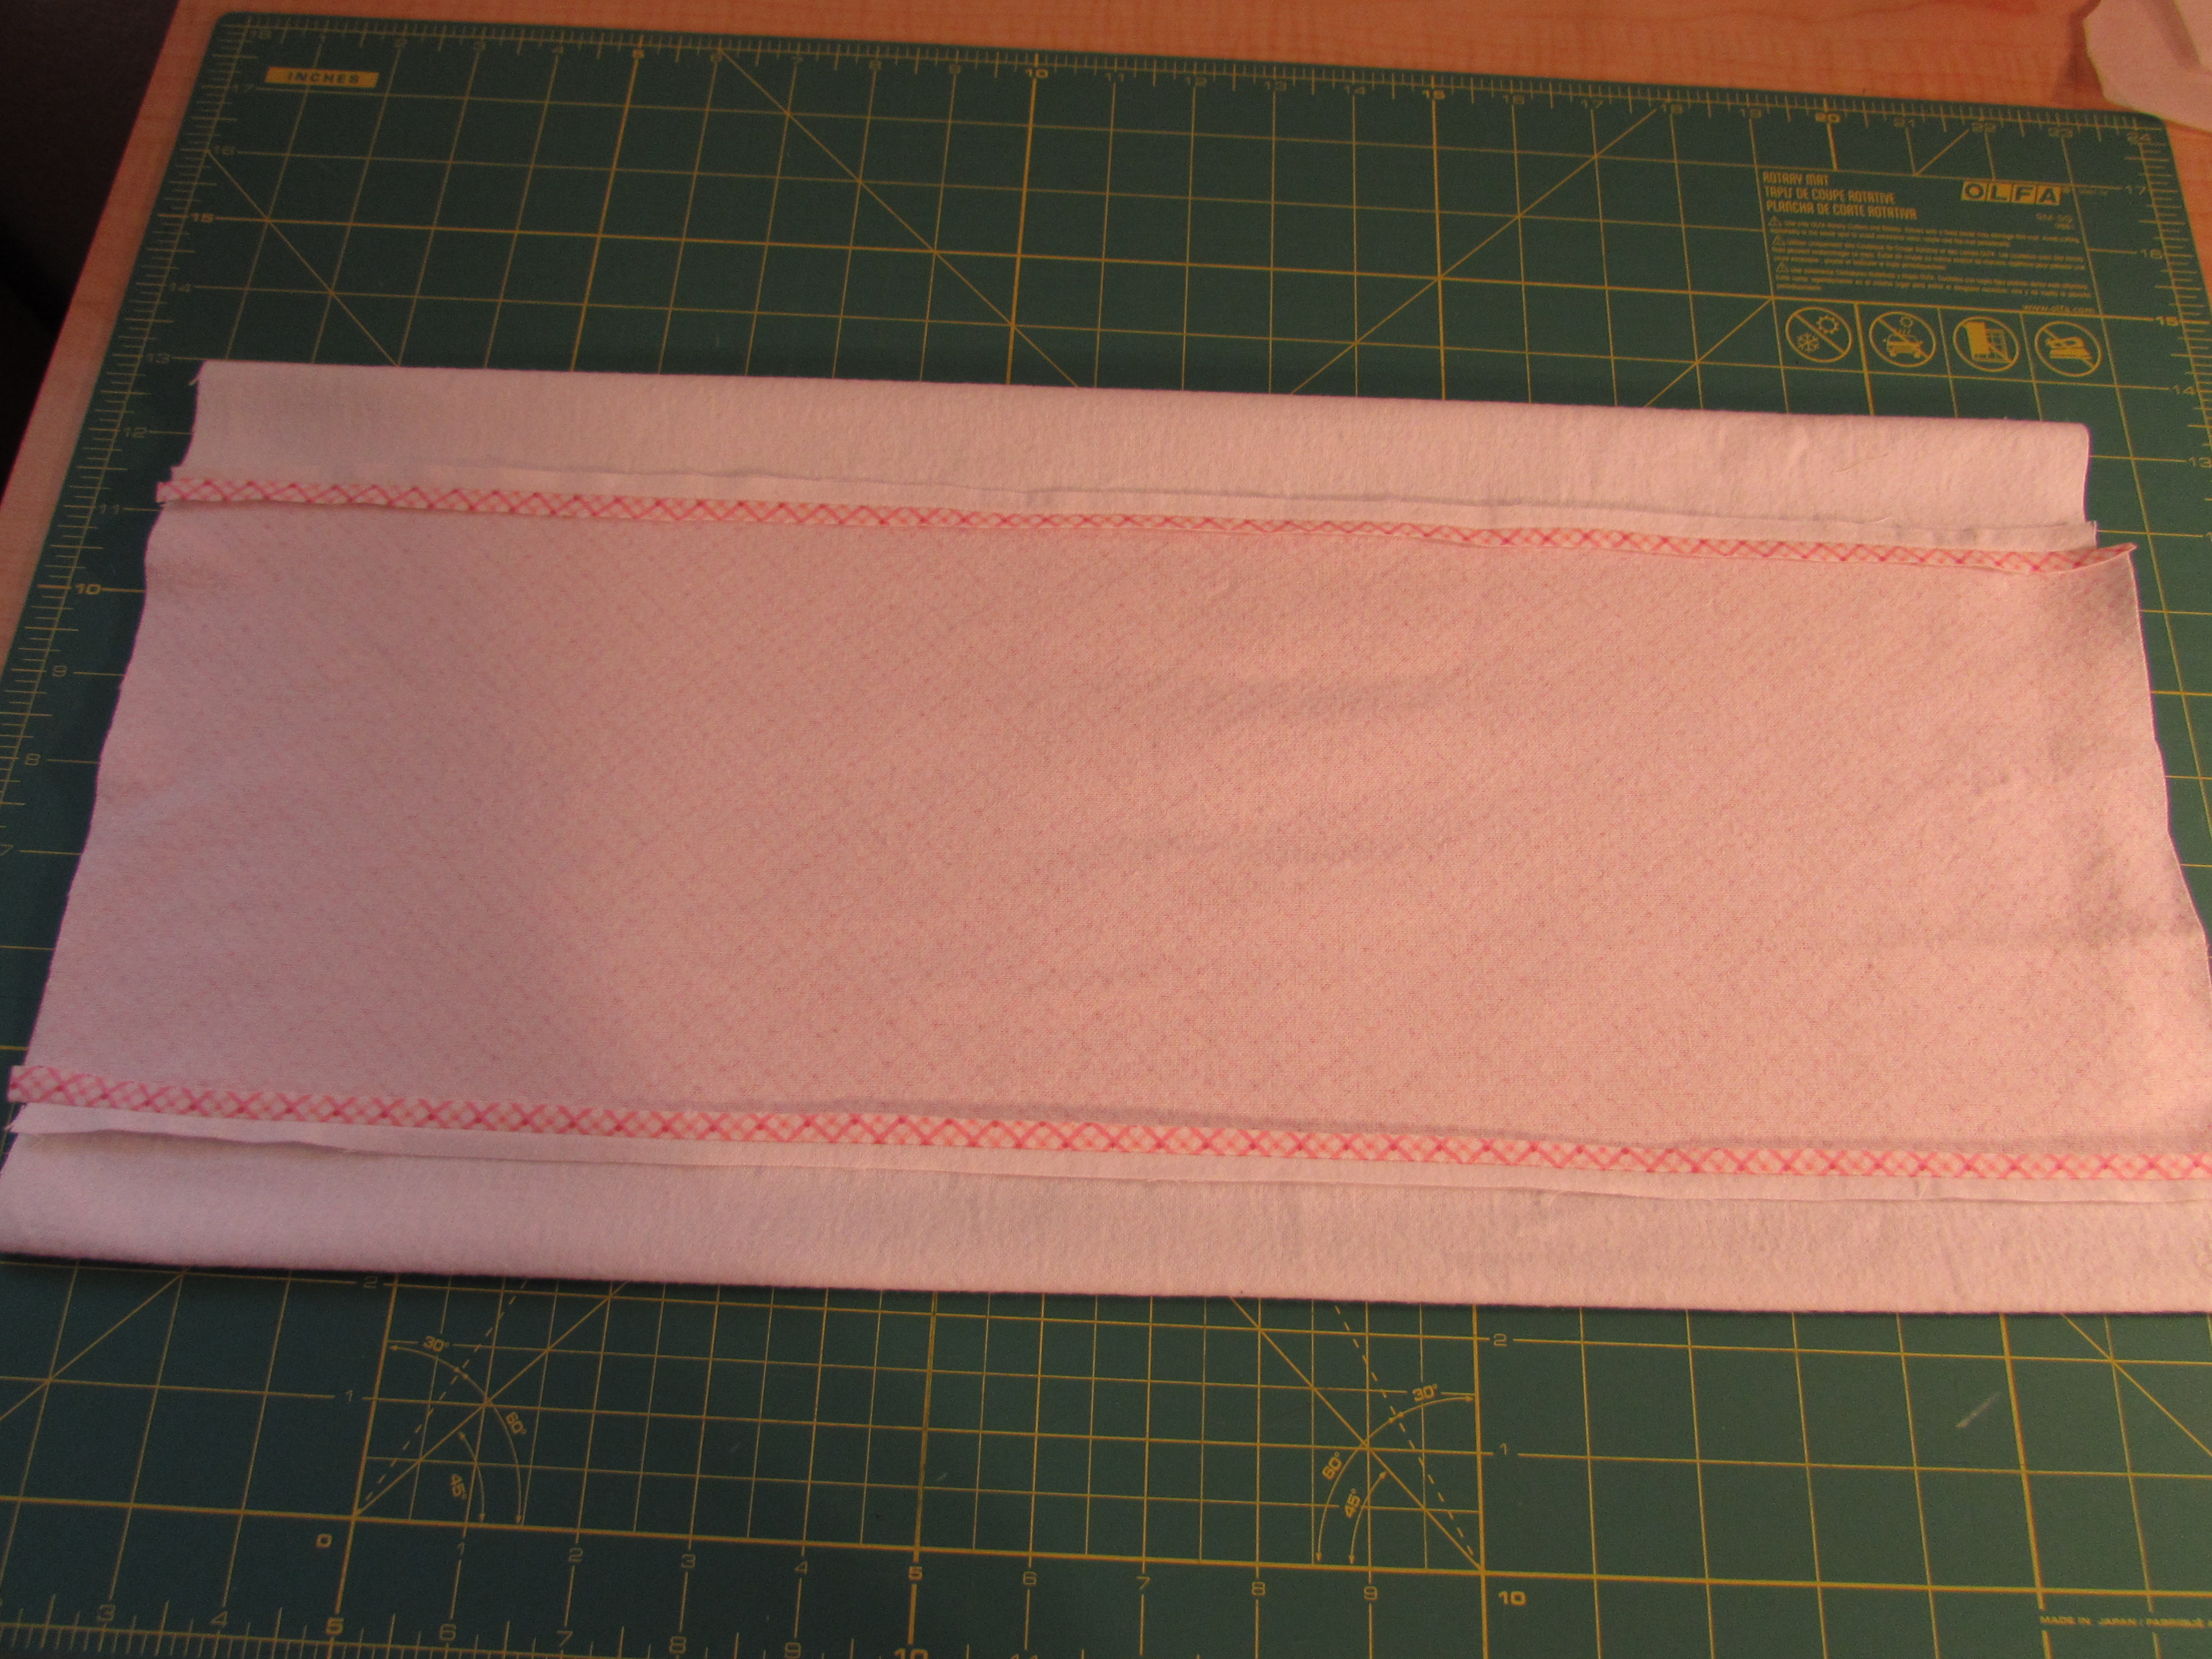
Lay the white flannel on your work table.  There was not a right side or wrong side to the flannel that I used.  If yours has a right side, lay it right side up. Make sure that your accent piece is the same length as the white flannel.

20140824_1549

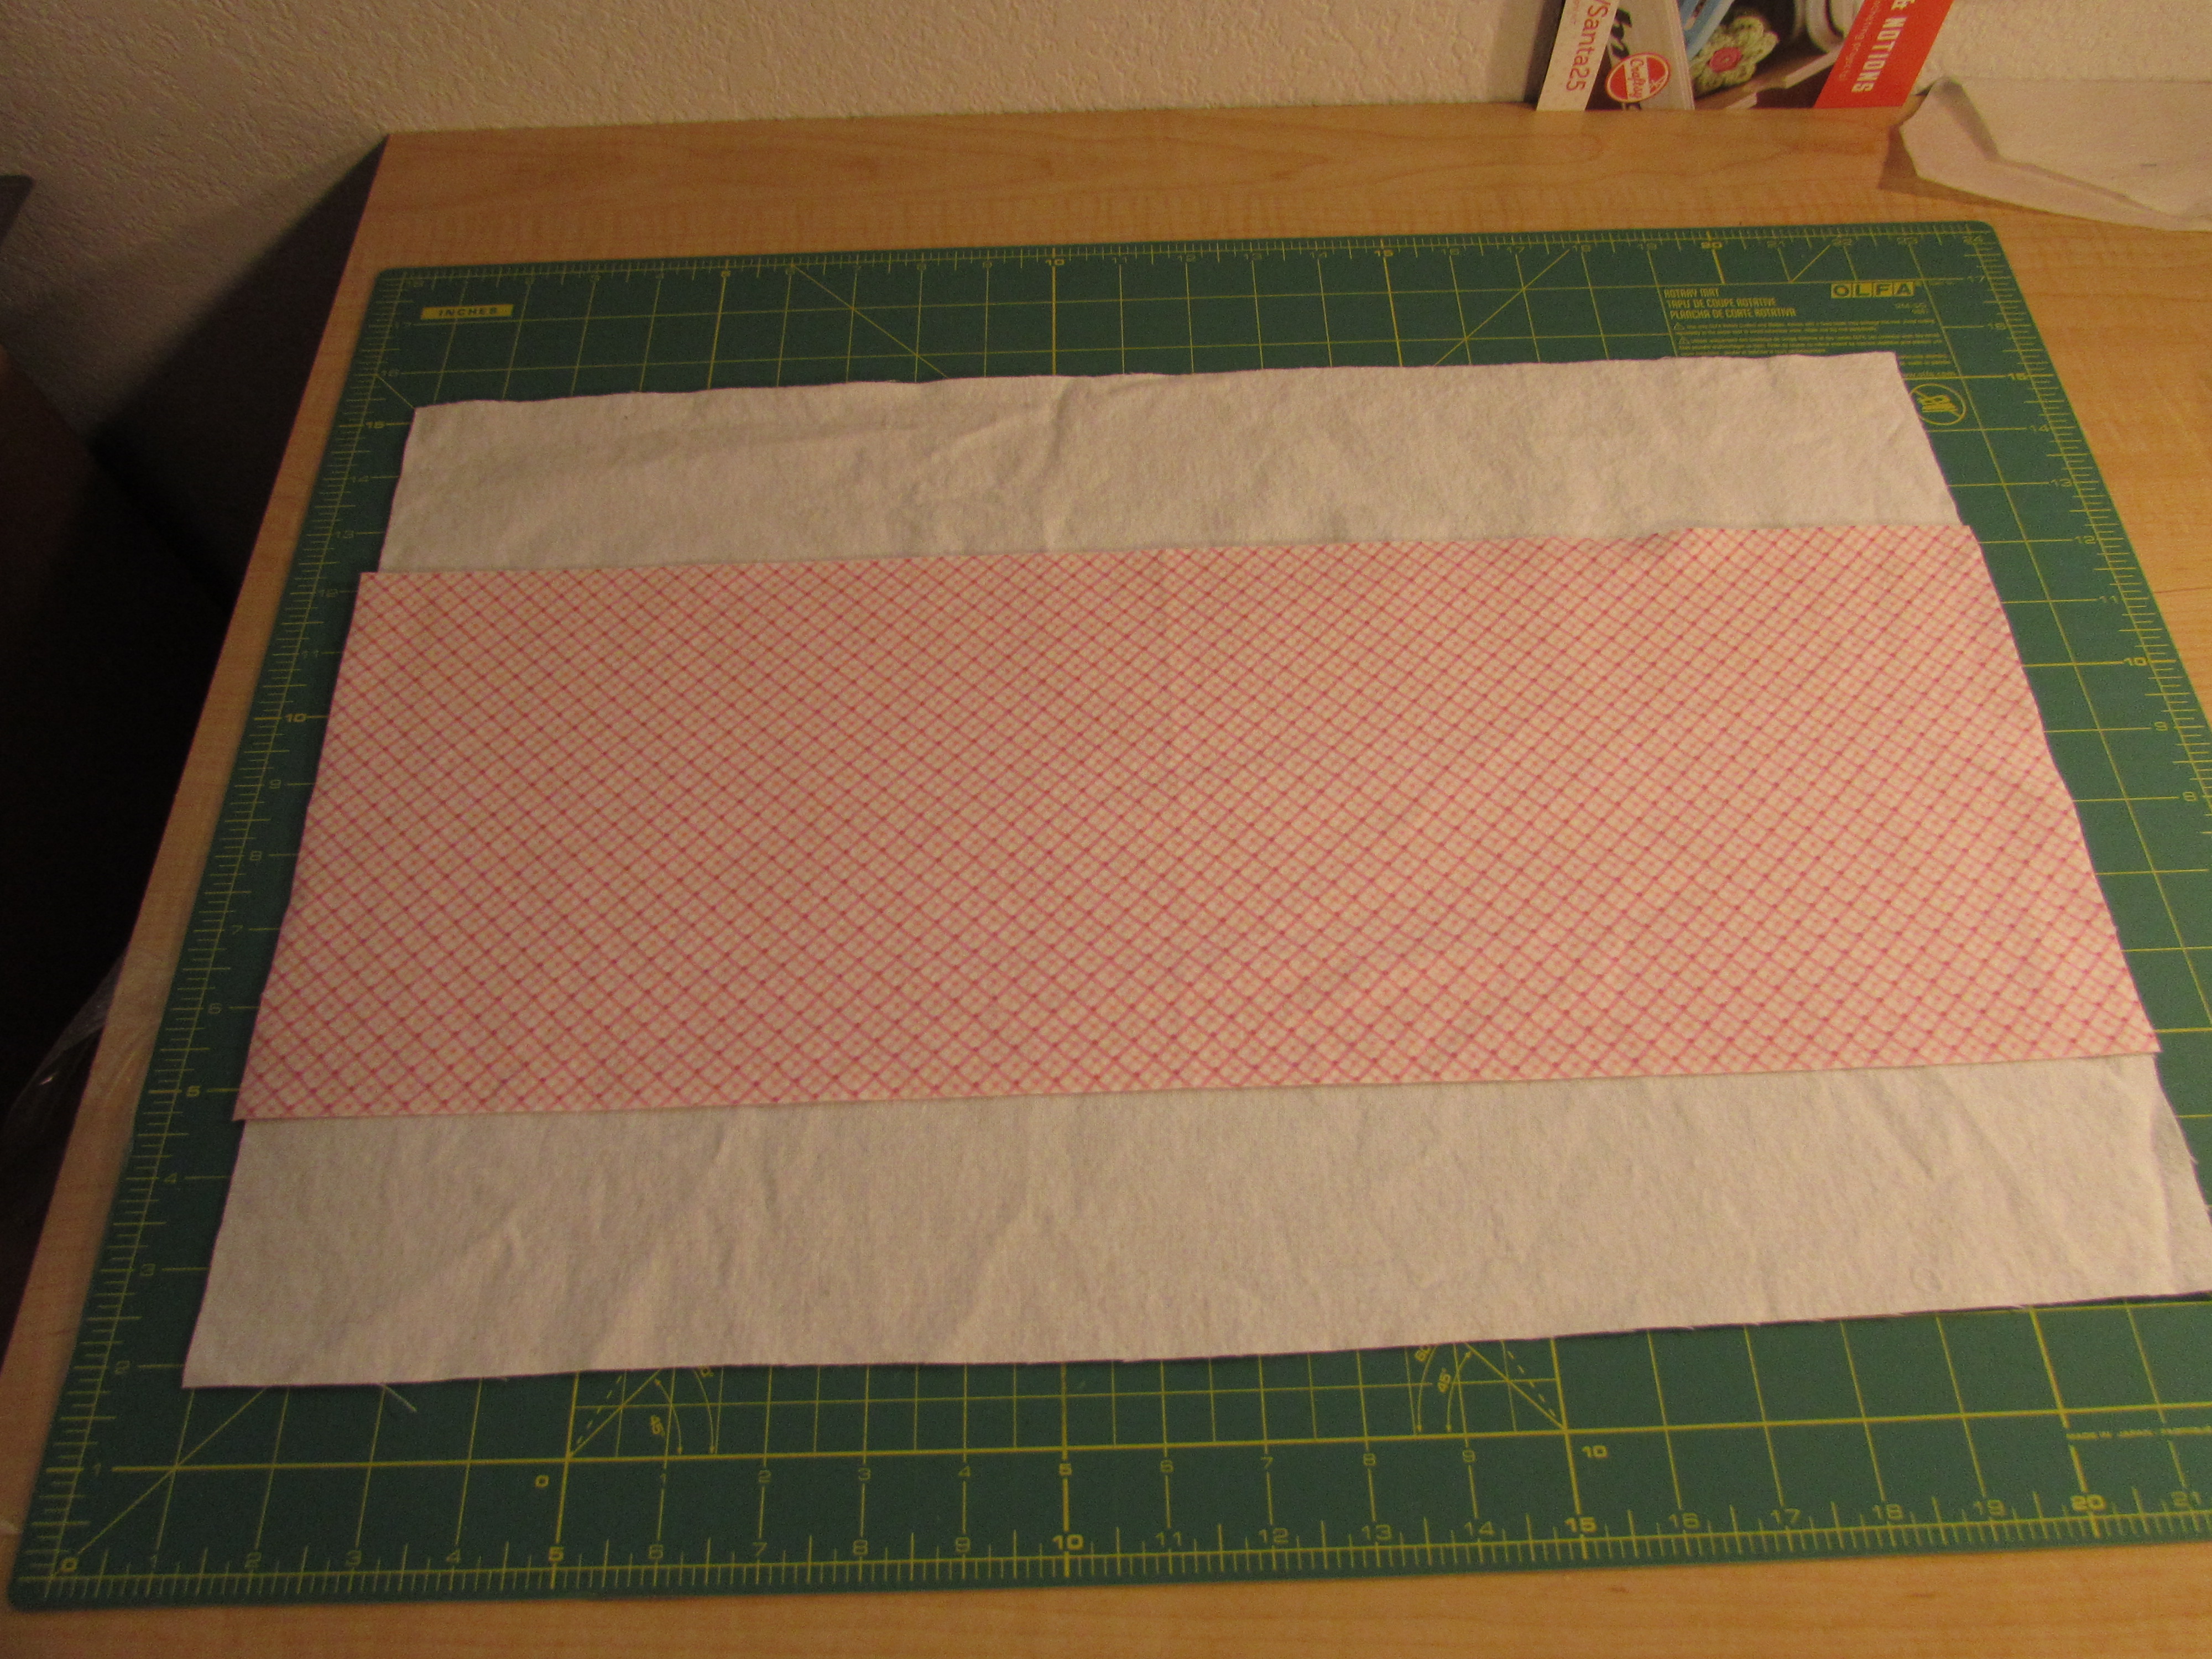
Turn the accent piece over so that the right side is down, against the white flannel.  Line up one of the edges of the accent piece with one of the edges of the white flannel. (We are going to sew both sides together, creating a tube made of the white piece and the accent piece.)

20140824_1551Stitch a 1/4″ seam, joining both pieces of fabric.  Press your seams, open or to the side, whichever you prefer.  Then line up the other two edges in the same way and stitch a seam, joining them.

20140824_1554Again, press your seam.  To do this, I just moved the seam to the center of the “tube” so I could lay it down and press it.  The next step is to center the accent fabric on the white fabric.  Do this while the pieces are still right sides together (seams are still showing). To be honest, I just eyeballed this but if you wanted, you could measure the amount of white fabric that shows on each side of the accent fabric and make sure it is equal.

20140824_1555


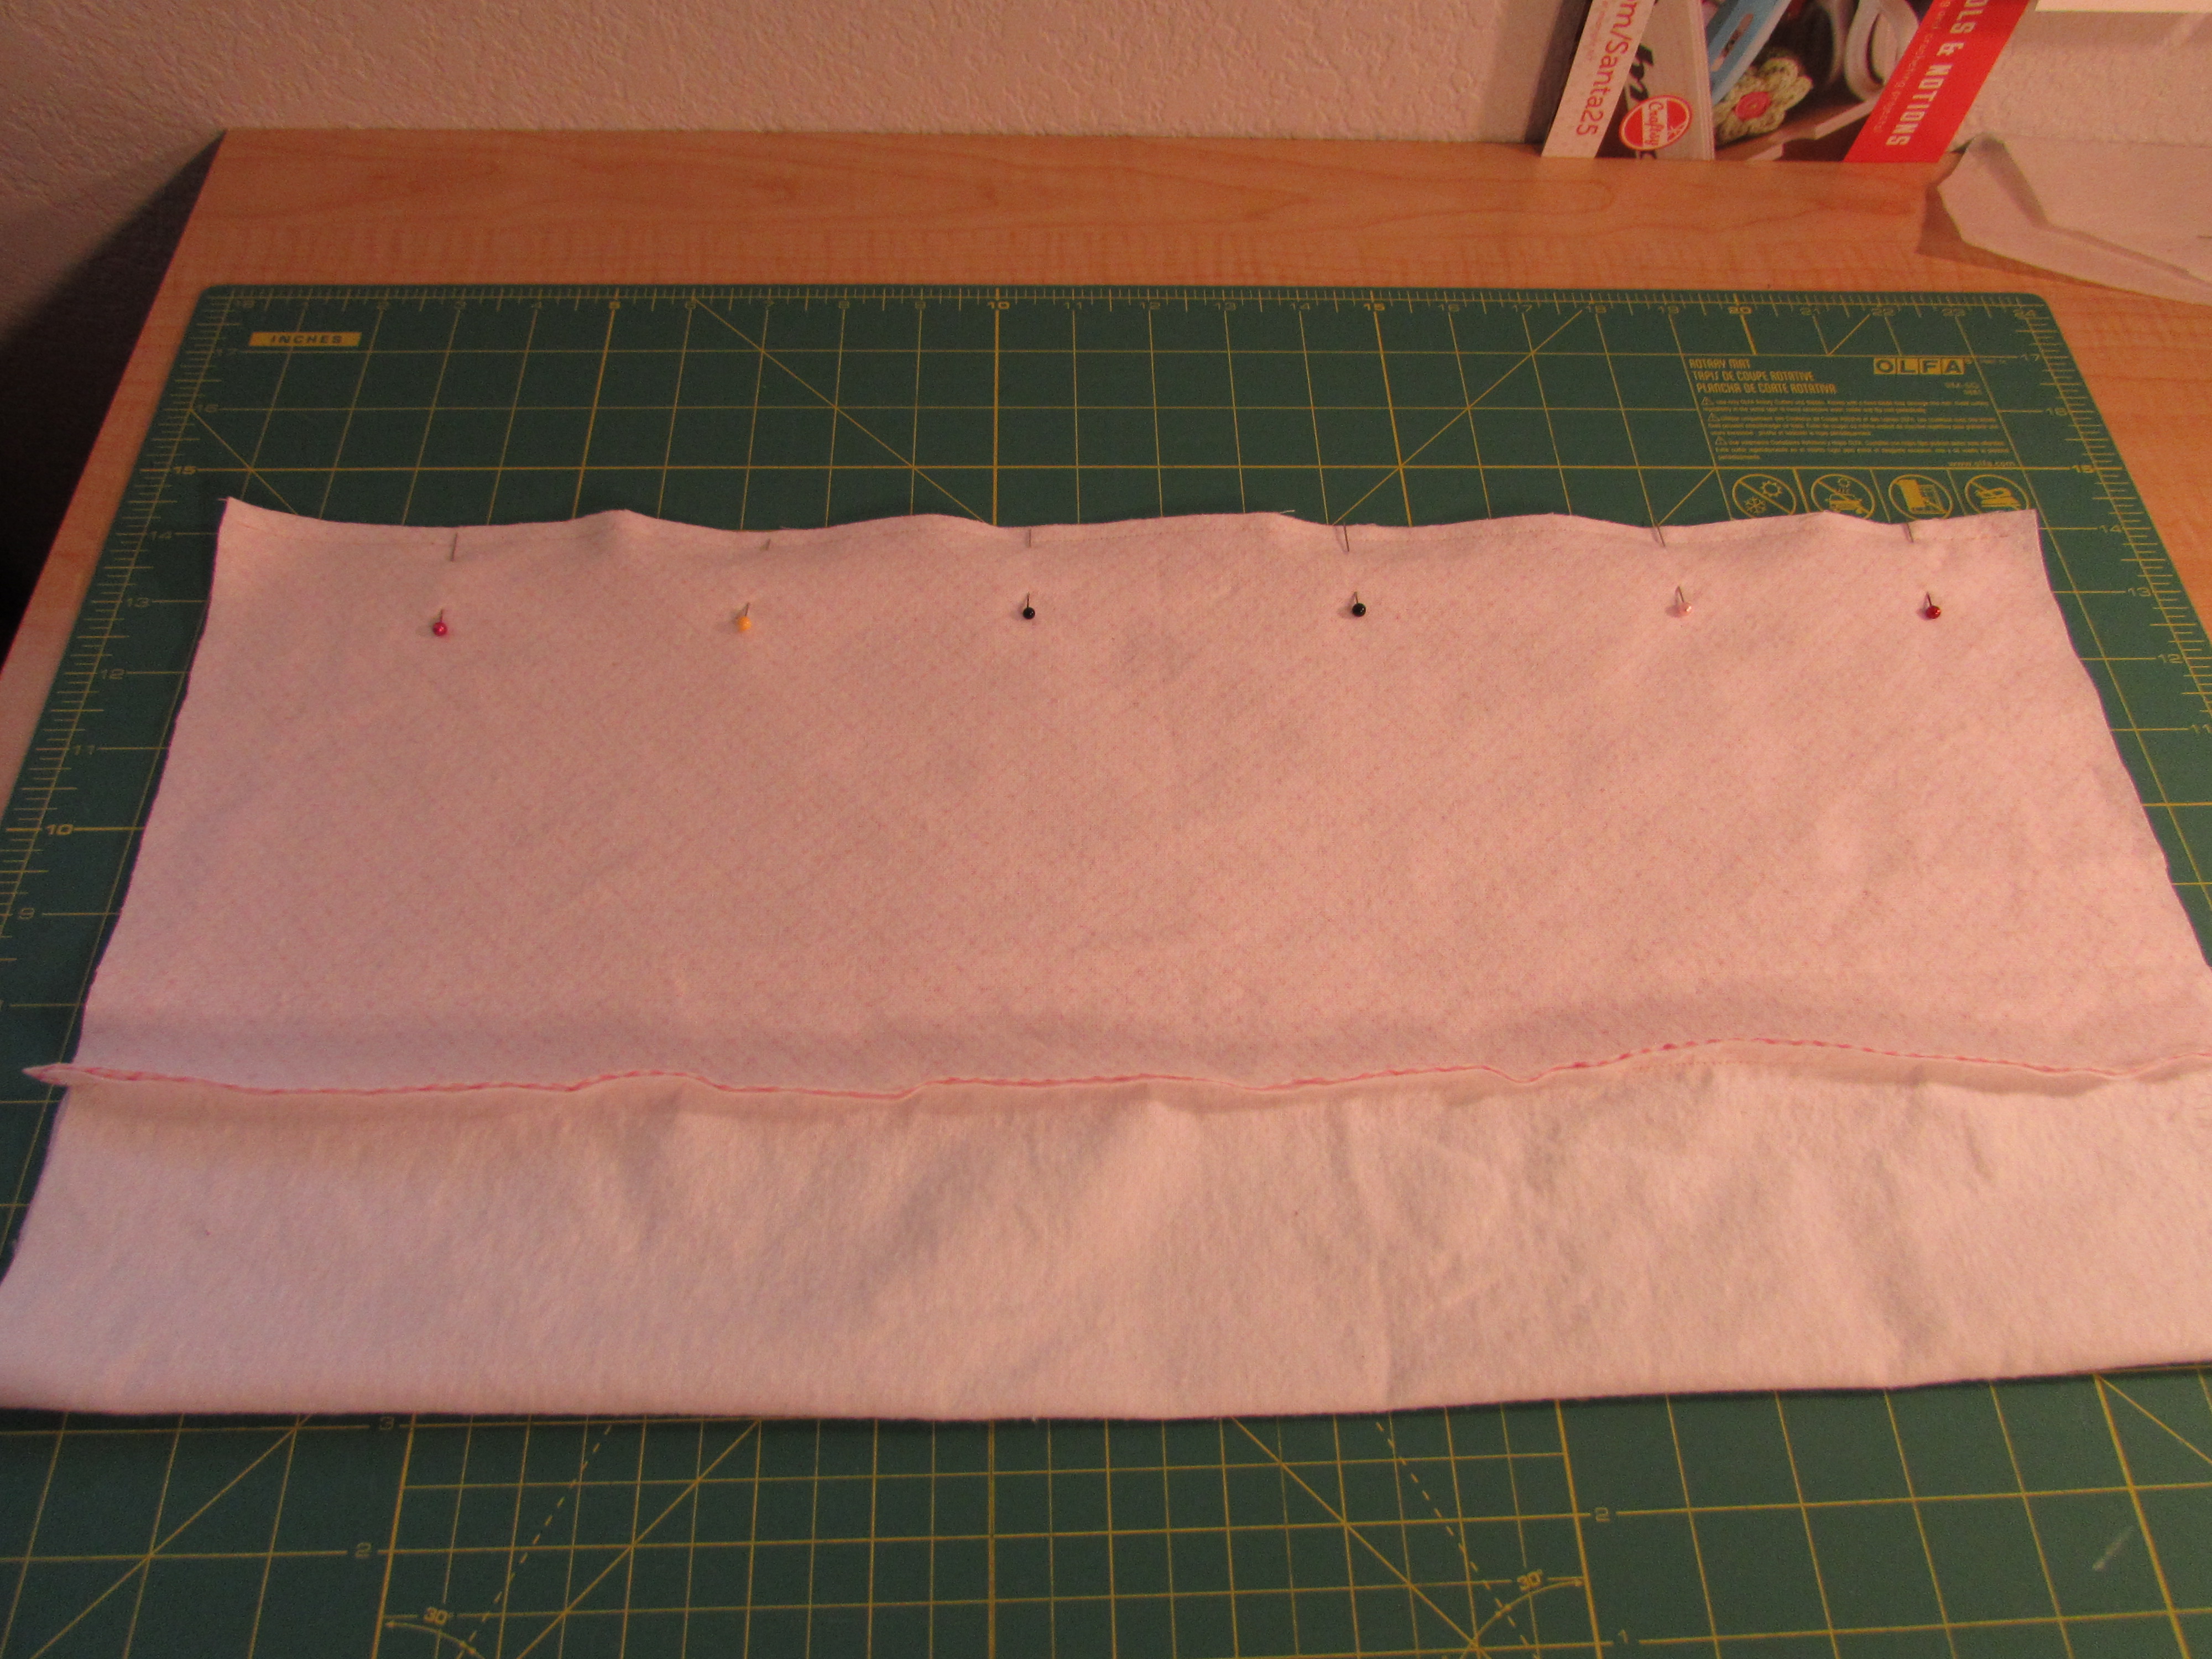
Once you have the fabric centered to your liking, you need to pin the end together.  Stitch that end closed with a 1/4″ seam.

20140824_1557

Then you will sew the other end.  However for this end, leave an opening of about 3 or 4 inches in the center.

20140824_1558

Use this opening to turn the burp cloth right side out. Once you turn it right side out, press the whole cloth.  Turn in the open ends and pin shut.  You can hand stitch this opening or top stitch the whole perimeter of the burp cloth, catching the open section at that time. I chose to top stich the perimeter.  Unfortunately, I didn’t choose to take a picture at this point. 😉

The next step is to cut two pieces of ribbon that are 1/2″ longer than the burp cloth.  Turn under the ends and, again, use a swipe of your glue stick to tack the ribbon down to the burp cloth.  Center the ribbon over the seam that joins the white flannel and the accent fabric.  Let the glue dry for a bit and then stitch down both sides of each piece of ribbon, as well as across the top and bottom edges of the ribbon.

Finally I always stitch down the center of the burp cloth. This will help the burp cloth keep its shape after being laundered.  I run a seam from top to bottom, beginning just below the top stitching that runs around the perimeter of the cloth. Hoping you can see the seam in the picture below.20140825_1598

Hoping this  tutorial makes sense to you.  If you have any questions, leave them in the comments and I will get back to you. If you make these items, let me know. I would love to see a picture.

Linking up to Freemotion By the River, Sew Cute Tuesday, Fabric Tuesday, Let’s Bee Social, Anything Goes Thursday, Finish It Up Friday, TGIFF and finally Confessions of a Fabric Addict.  These are all wonderful link-ups.  Take a peek to see what others have been working on this week.  The links are all listed at the top of my page, under Link Ups.


10 Quilty Secrets

I have had a lot of fun reading through the posts that are cropping up in the quilty blog world titled 10 Quilty Secrets.  It is so funny to read everyone’s true confessions.  Here are my deepest, darkest quilty secrets. secrets badge 1. I have absolutely no interest in hand quilting any of my projects. Or hand piecing for that matter.

2. I am not a fan of hexagons and don’t see myself using them in any quilts.

3. I am afraid of paper piecing.  My brain just doesn’t really get it.  I read the directions and think, “what??” (I need to force myself to work on this because I like so many of the paper pieced projects that I see out there.)

4. Quilt math scares me. Like I wouldn’t want to rely on my math to actually buy yardage for a project.  Isn’t that why there are computer programs to do that though??

5. I have pinned more than a lifetime’s worth of quilting projects on Pinterest and I cannot stop.  CANNOT.

6. What is the deal with Liberty Fabrics?  Am I missing something because I just don’t love them like the rest of the world does.

7. My stash is predominantly shades of green. Lots and lots of green.

8. I always thought I would only work on one project at a time. (I secretly scoffed those who have 29 million WIPS in their sewing room.) I no longer scoff.

9. A year ago I had no idea what low volume and high volume fabrics were.

10. I try to like wonky piecing but honest and truly, I just don’t like it.  I think I am supposed to but it isn’t working for me.

11.  Bonus confession:  I am my own worst critic (that isn’t unusual though.) I always find fault with my work so I never enter it in any sort of competition.  Cannot stand the idea of some judge picking it apart.  It is bad enough that I pick it apart!!

And now you know it all! I feel so relieved to have gotten this out into the open. Linking to 13 Spools as she is the start of all of this!

Lil’s Quilt

This is the tale of my niece and her tshirt quilt.

Long ago and far away (like last April and about 175 miles away….)  a very sweet girl contacted her adoring aunt and asked for a favor.  She had recently graduated from high school and was getting ready to go to the Culinary Institute in Napa Valley, California. While in high school this lovely girl, let’s call her Lil, had been on the Dance Team all four years.  She loves dance and competed while on the team.  She is the first cutie on the left.

lil dance pic 3

Dance is Lil’s thing and she hated to see it end – it puts her in her happy place.  (Though it looks torturous to me. Ouch.)

lil dance pic 4

Apparently being on dance team for four years means you will amass a collection of dance tshirts.  Lil became very attached to these tshirts as they held such fond memories for her. She didn’t really want to wear them anymore but didn’t want them to just sit in a drawer.  She texted me one day…. “Aunt Bernie, I saw something on Pinterest, it’s a tshirt quilt. (It all starts with Pinterest, right?)  I wondered if you would make one for me.”  (She had asked her mom but, let’s be honest, her mom would only be able to do this if she could figure out how to make it with duct tape and a stapler.  She may be the best mom ever, but not a sewist, that mom.) I had never made a quilt with knit fabric before so I saw it as a potential learning experience for me and a way to win points as super-aunt at the same time. Sure, I told her, love to.  I immediately received text after text telling me how wonderful I was for doing this.  Immediate gratification for me, that’s for sure.

Within a few weeks I received these (sorry, lousy quality on this photo). It was a bit daunting to look at these and try to figure out where to start.  Luckily, there is an excellent tutorial (yay Pinterest) from Cindi at Seamstobeyouandme.com.  It is really detailed and the process is pretty much foolproof.

lils tshirts

After washing the shirts and lightly pressing them, I used the method described in the tutorial and cut them into equal squares.  Two of the shirts were tiny and I couldn’t get a big enough square (without using the sleeve, which would have left a big seam across the square) so I did have to piece them a tiny bit.  It wasn’t difficult though.  The squares then had to be reinforced with fusible interfacing or the knit would stretch too much while sewing, and then quilting this project. Really, the pressing, squaring, cutting and fusing took the most time.

lils tshirts cut

She had given me thirteen shirts and two of them had a back side that I thought she would want to preserve.  So I did 15 squares and made 5 rows of three squares each. I found a black fabric with tiny polka dots in pink, green, blue and purple and thought that would be a good match for the tshirts she had given me.  I created a sashing around the blocks to set each one apart from the other.

20140721_1411

I had quite a bit of scrap that I used for a pieced border.  I needed to add some width since the layout was 3 x 5 squares.

20140721_1403

When quilting this I decided to do it as a sampler.  I FMQ’d each square with a different pattern so that I would get in a lot of practice. (In retrospect, if doing this over again, I would quilt this with less density.  I think I quilted it a bit too tightly and it gave it a stiffness that I was not all too happy with.) Because some of the logos were so big, I felt like I needed to really quilt it up around the logo.  Looking back, I could do a lot less and get a good result.  I also quilted a wavy line through the sashing.

20140713_1390

Lil asked for a flannel backing (“to make it snuggly”) in either black or blue.  So I came up with this:

20140713_1387

For me the absolute best part of making this quilt was GIVING this quilt to Lil.  She was so grateful and left a voicemail on my phone that will never be deleted.  Soooo sweet.  Isn’t she?

lil quilt pic

By the way, dance team may be over but the dancing continues.  Now, aerial style.  Yikes!!!

lil dance pic 2

Love this girl!

Linking to the following: Linky Tuesday, Sew Cute Tuesday, Fabric Tuesday,WIP Wednesday, Let’s Bee Social, Needle and Thread Thursday, TGIFF, and finally, Finish It Up Friday. All of these links can be found at the tab at the top of my page, under Link Ups.  Check them out and see all of the amazing projects people are working on!

Cigar Ribbon Quilt

Recently I took a day trip with my wonderful friend, Sophia. We went to the  Crocker Museum in Sacramento to see a quilt exhibit that they have (runs through September 1st so if you are a local you can still catch it).  The exhibit was amazing.  Most all of the quilts were created in the late 1800’s and early 1900’s.  The handwork left me in awe.  Such beautiful and precise stitching on some of these pieces.

While I was there I learned that some quilts were actually made of silk cigar ribbons.  These are silk ribbons that were used to tie a bundle of 25-50 cigars together for sale.  (They are not the little wrappers on the individual cigars).  The ribbons were considered advertisement as they had the brand printed on them. As was common back in these days, women saved everything that might be useful in some way. These ribbons were usually made in gold and yellow tones but sometimes printed on red or green.  The women would save them and might trade with each other to get a good collection going.  Then they were stitched into something. The silk was very thin and the quality was mediocre at best so the quilts often wore quickly.  I happened to get a quick picture of one at the exhibit, before the docent told me no picture taking. (Why can’t we take pictures of these gorgeous quilts???  No flash was being used so I don’t think it would disturb others that were looking at the quilts.  Certainly can’t reproduce these beauties.  I didn’t understand it and the docent had no good reason, other than “that’s the policy”. I am not too fond of those kinds of rules.  That docent was all over me after that and there was no further picture taking!!)  Anyway, I did get this one picture.  Not great photographic quality but it shows what I am talking about. This quilt looked as though it would crumble if handled.  So light and thin but really beautiful.

cigar quilt

I love the history to be learned about all of these quilts.  I was also thrilled to see a quilt by Anna Williams. You probably know, but she was an African American quilter from Baton Rouge, LA. She learned to quilt as a child and made the most amazing crazy quilts. She saved her scraps in a refrigerator box (that could be quite a stash). When she began a quilt she would take the larger scraps and cut them down as needed. These pieces were tiny! While she did start out hand stitching her quilts, she switched to machine quilting later on to increase her productivity. Truly amazing work! She died in 2010 and her quilts have been shown in many exhibits. I so wish I had a picture of the one  (small) quilt that was on exhibit but I don’t.  Just sweet memories of it! Here is an example of one of her quilts that is on display at the Brooklyn Museum:

110 West 80 St-4R, NY, NY 10024


Quilting has such a rich history.  I kind of want to go back to the Sacramento exhibit one more time.  (Maybe that docent won’t be there and I can another get a picture or two!) Also on the list for exhibits is the San Jose Museum of Quilts and Textiles.  That is only about 175 miles from me and would be a fun road trip.  Up for this Sophia???

Such a fun weekend and a giveaway!

First of all, you might remember that a couple of weeks ago I went to see my son in the Central Valley.  He is all set up in a nice apartment and I left feeling like I wanted to make something for him. He recently bought some furniture and I thought a new pillow for the couch would be a good project.  I used scraps that I had and a pillow form that was sitting there waiting to be used.  After piecing the strips, I did some quick straight line quilting that is maybe 1/2″ apart.  I didn’t mark anything, just eyeballed it. The back is an envelope style backing.  It came together so quickly and I bet I have enough fabric left to make another for him.

pillow ian 2


Last post I mentioned that I was leaving for our annual sisters’ weekend.  As always we had such a great time. We don’t see each other often enough, especially considering I don’t live all that far away from three of my sisters.  Life just gets in the way. Anyway, the weekend was mostly comprised of visiting, eating, visiting and then eating again.  (Really, what more do we need??) One of my sisters lives in Colorado and brought each of us a pair of crazy socks.

20140808_1528On Saturday afternoon we took a trip to a quilt shop in Sunnyvale, CA.  It was called Eddie’s Quilting Bee.  This was really indulgent of my sisters since I was the only one that really wanted to check the place out.  (They’re so good to me!) Eddie’s shop was fairly well stocked.  I wasn’t crazy about the way it was organized, or laid out, but I found a few treasures nevertheless.

photo 4 (11)


The really bright piece with the butterfly showing in the center is from a line of Alexander Henry fabrics called ‘Querida’.  It has a Latin flair and the colors are amazing. I don’t have a true plan for it but wanted to have it anyway.  The piece with the text will be used as the backing for a table runner.  Love the wine themed words.  Finally there was a little fat eighth in a basket for a buck and I love the colors.  Just another addition to the stash.

I have a really challenging game for you. 😉 This is where the giveaway comes in!

My sisters and I took a selfie (and being that all of us are way too old to be taking selfies, the quality is less than perfect) in front of Eddie’s Quilting Bee. Can you figure out which one is me?

photo (15)

photo 3 (23)

Here is a version of the picture with numbers.  To enter the giveaway, leave a comment with the number that corresponds to the picture that you think is me.  If you want to have another entry, you can follow me on Bloglovin and leave a comment that you did so (or if you already do, just let me know that).

The giveaway stays open until Saturday, August 16th. At that point,I will use some sort of really scientific method to pick the winner.  🙂   I have three really pretty fat quarters for the winner.  They are  watercolor inspired, muted florals from Kathy Davis’ line called Enchantment that was designed for Free Spirit.  Take a look.

fq giveaway 1


fq giveaway 2

Remember to make sure I have a way to contact you if you are selected!  Leave an email address in the comment if you are a no-reply blogger.  Giveaway is closed (I’m number 4).  Lucky winner is Judy V.!!

Linking up with Anything Goes Monday, Sew Cute Tuesday, Freemotion by the River, Fabric Tuesday, WIP Wednesday and Let’s Bee Social.  Also with Needle and Foot Thursday, TGIFF, and Finish it up Friday.  All of these wonderful link-ups are listed in the tab at the top of the blog.


Summer is Winding Down

This summer flew by.  I knew it would because we had a lot of different things scheduled when it started.  That usually makes time go by (too) quickly. This week and last were filled with appointments for my 8th grader that are easier done during summer.  The dentist, the orthodontist and the optometrist.  When I took her for an eye exam (she usually only has the quickies that they do at school) and found out that she is near-sighted. She and I were both so surprised. He asked her if she has to squint a lot or if she had trouble reading the board at school.  She innocently says, “No squinting but I can’t read the exponents during math.” I looked at her and wondered why she didn’t ever mention this??  The doctor said that when this happens gradually the person just doesn’t really notice.  Now she is happily wearing glasses and keeps lowering them on her nose, looking ahead without them, then through the glasses.  Comparing the difference with awe.  So funny. 20140730_1481   In between all of that I got loads of time at the sewing machine.  Hurray!! Here are some of the things I worked on. First off was this little baby boy quilt.  Puppies and boys, perfect fit, right? I used a simple patchwork of charm squares for the center.  Borders of navy blue were added, as well as a stripped border made from the leftover charm squares. 20140805_1522This was inspired by a photo I saw on Pinterest. Very easy to do. I didn’t really do any math beforehand; rather I just built it as I went along. The fabric is called “Here Boy” by Abi Hall, designed for Moda. This line is adorable.  It features puppies, dog bones and bouncing balls.  The colors are bright and happy, blues, orange, reds, green and yellow. 20140805_1521 I backed it with a dark navy and white oversized polka dot.  For the first time, I didn’t use a pieced backing.  The dots are very sweet on their own. Finished it off with a crazy bright orange binding. I love the contrast. I bound it as I usually do by machine stitching to the front and hand stitching to the back.  I am wondering though, if I should machine stitch both sides.  Seems like a baby quilt is going to be laundered often.  Would it hold up better if I machine stitched the binding on both sides? Give me your thoughts on this please!

Also got some time to work on my RSC14 blocks.  I finished the red blocks that were scheduled for July. I love the cherry fabric scraps. They were from a bag of scraps that my neighbor gave to me. (What a fun bag to look through!)

20140805_1509 I also finished the bright greens that are the color for August. Looking through my strips, I didn’t have tons of bright green but was able to find enough to do these two blocks. 20140805_1508 So, I still have to catch up and finish March, April, May and June.  Here is what I’ve got so far. 20140805_1507  This weekend I am off with my sisters for our annual “sisters’ weekend”.  Cannot wait!! Hope you all are enjoying the tail end of summer.

Linking with Linky Tuesday @ Freemotion by the River, WIP Wednesday @ Freshly Pieced, Fabric Tuesday @ Quilt Story, and Let’s Bee Social @ Sew Fresh Quilts.  Also to Needle and Thread Thursday, Crazy Mom Quilts’ Finish It Up Friday, Can I Get a Whoop Whoop, and TGIFF which is at QuiltMatters today. Links to all of these are listed at the top of my page under the Link-Ups tab

Guest Post

Today I had the honor of hosting Sew Cute Tuesday for Alyce at Blossom Heart Quilts.  She is taking a little time with her kiddos this week and wanted some help.  Check it out here.  If you want to link up your work, this is such a fun, supportive place to do that on Tuesdays!  Take a look at all of the gorgeous work that is shared at Sew Cute Tuesday.

Sew-Cute-Tuesday

Friday Finish!

The past week was a busy one and I didn’t spend lots of time at the sewing machine. I spent several days visiting with my son who lives in the Central Valley.  Soooo hot there. I lived there years ago and acclimated to the heat back then.  Now?  Not so much. While I was there I made a trip to the local quilt shop in Turlock, CA — called “Cloth and Quilts”.  It was really well stocked and the people were so friendly. (But then, isn’t that always the case?  They are quilters, after all.) I was fairly disciplined and only picked up two pieces of yardage and three fat quarters.  Not too bad at all.

Even with being gone for a few days, I did manage to finish a baby quilt that I have been working on.  I posted about it earlier here. I am so pleased with the final result! The colors are adorable and overall it is a sweet little quilt that will, hopefully, make some new mama out there very happy. I did five inch squares on point with white sashing.  I also appliqued a heart to one of the squares on the front and then did a pieced backing with three more appliqued hearts.  Love these accents!

20140730_1466

The print that I used for the backing was leftover from another project.  I can’t remember the name of it but I love the floral print.  They look like hydrangea blossoms to me but who knows??

20140730_1469

I quilted it on my machine with a large, loose stipple.  It was a breeze to quilt up. Then bound it with a dark purple piece.

20140730_1471

Just had some labels made and tucked one at the bottom edge.

20140730_1473


A finish for this Friday – Yay!  The quilt is listed in my shop on Etsy waiting for the right person to come along and snap it up.


Linking to Crazy Mom Quilts and TGIFF.