Monthly Archives: May 2018

boatneck t-shirt

Boatneck T-shirt Finish

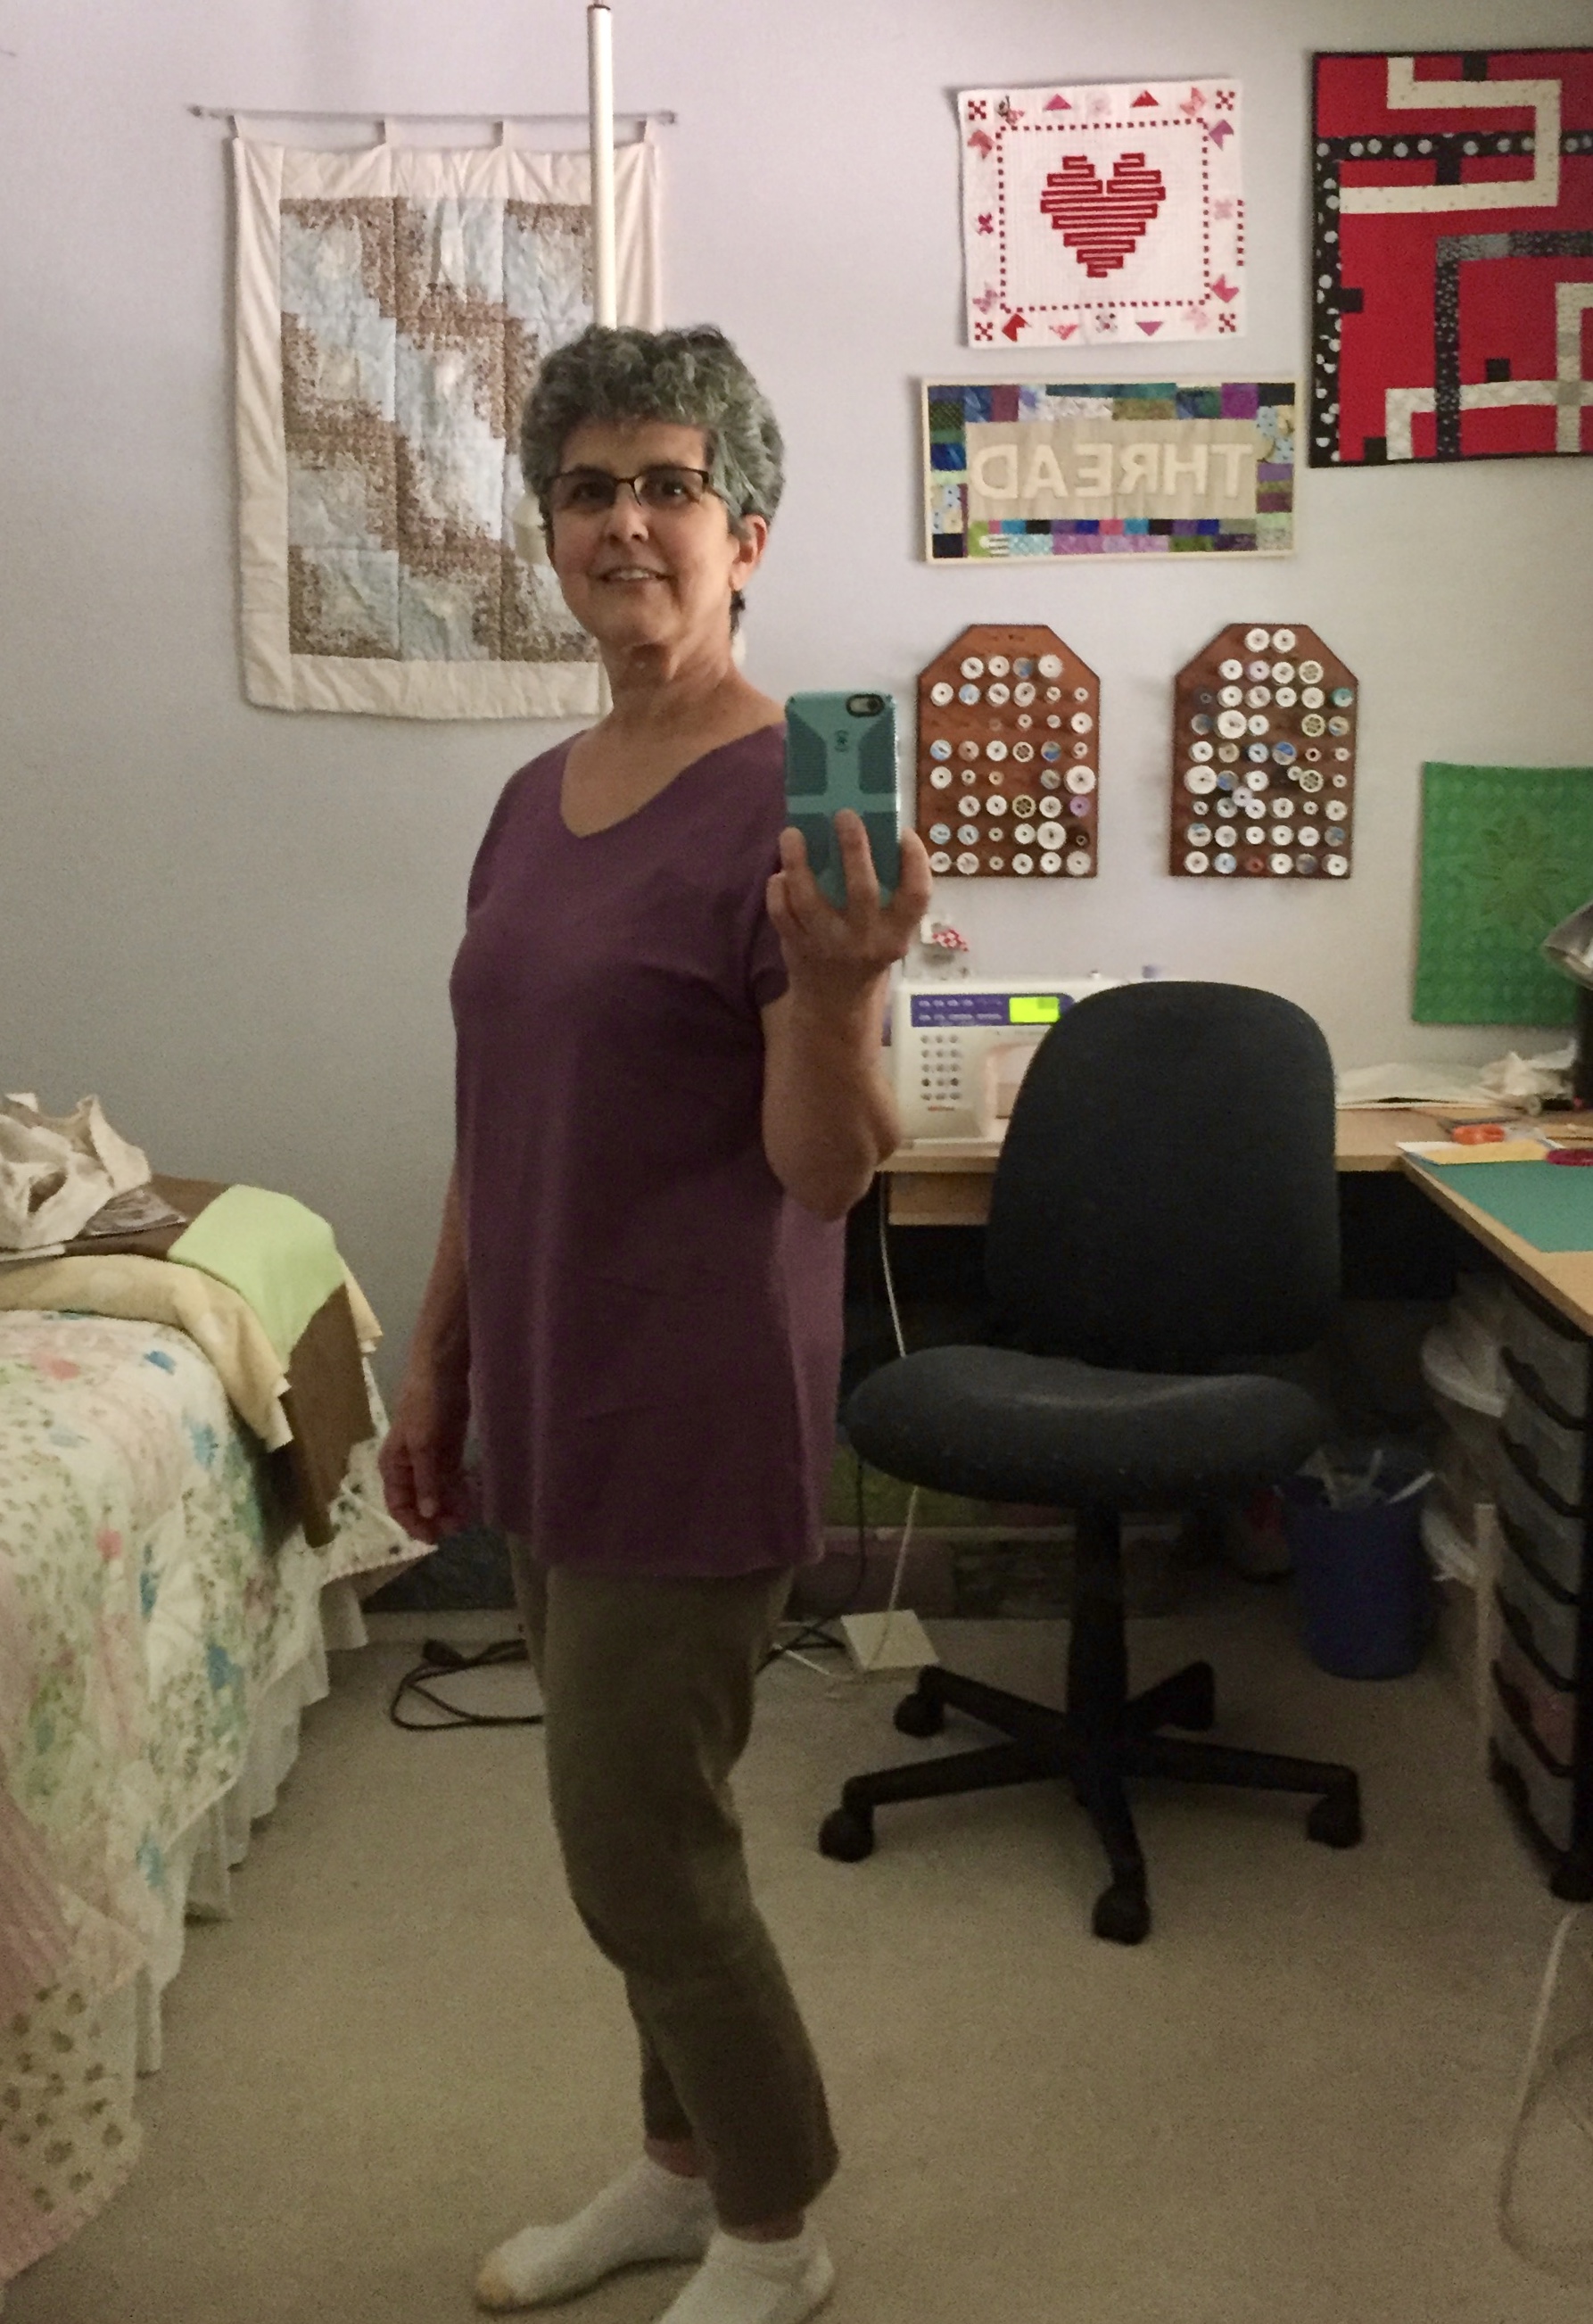
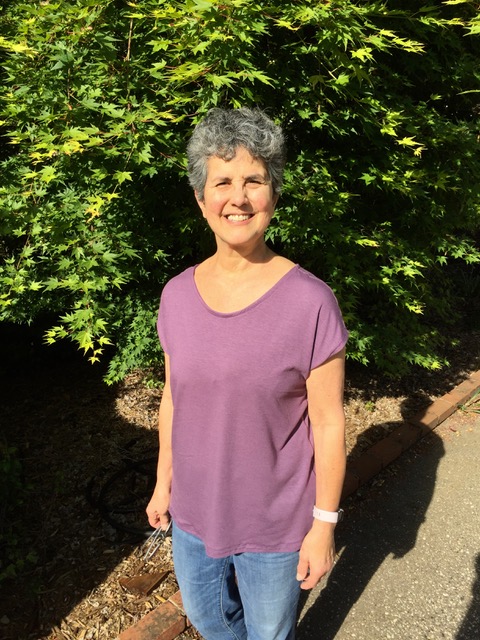
Today is the last day of May, which means it is also the last day of Me Made May for this year. I had hopes of making one new garment each week.  While I didn’t quite get there, I am close!  I made a mauve t-shirt, a black and white t-shirt dress, a boatneck tank top and almost finished a pair of pants.  Not too bad!  I also cut out a pair of shorts but didn’t get farther than that. It was really a fun series of projects and I feel like my rusty garment sewing skills are improving.

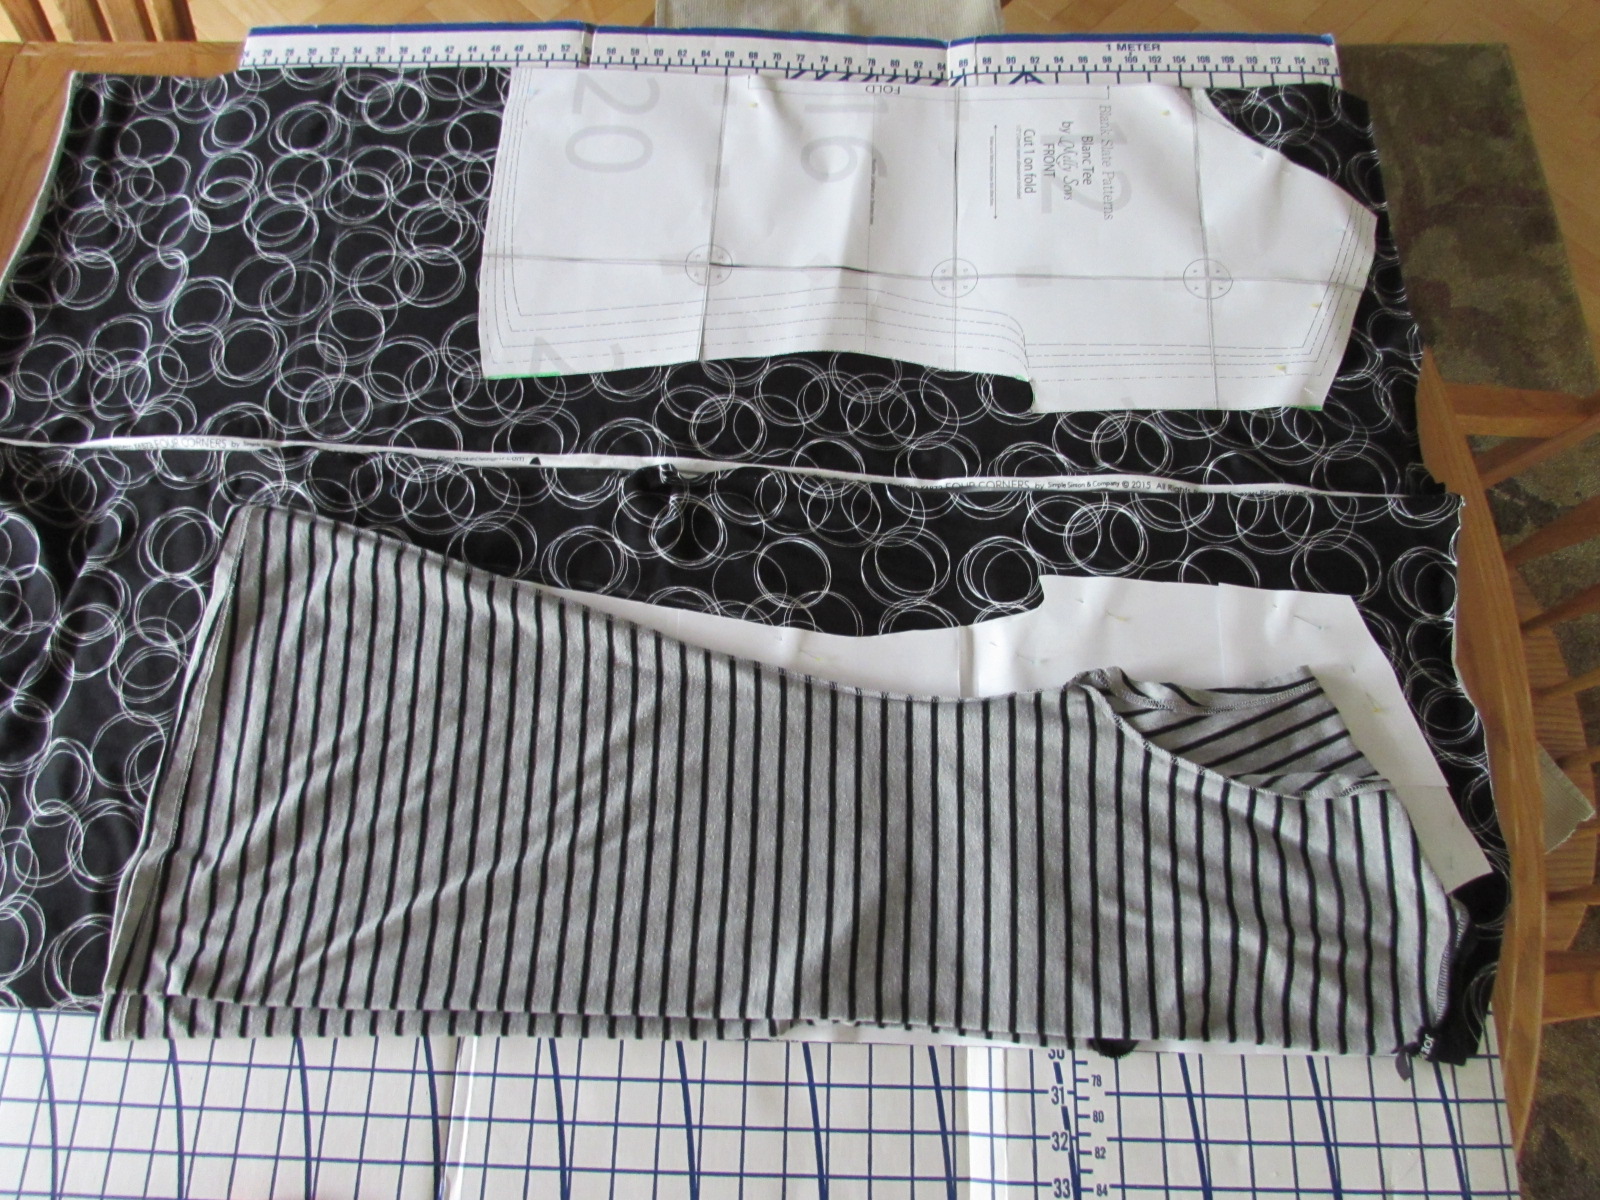
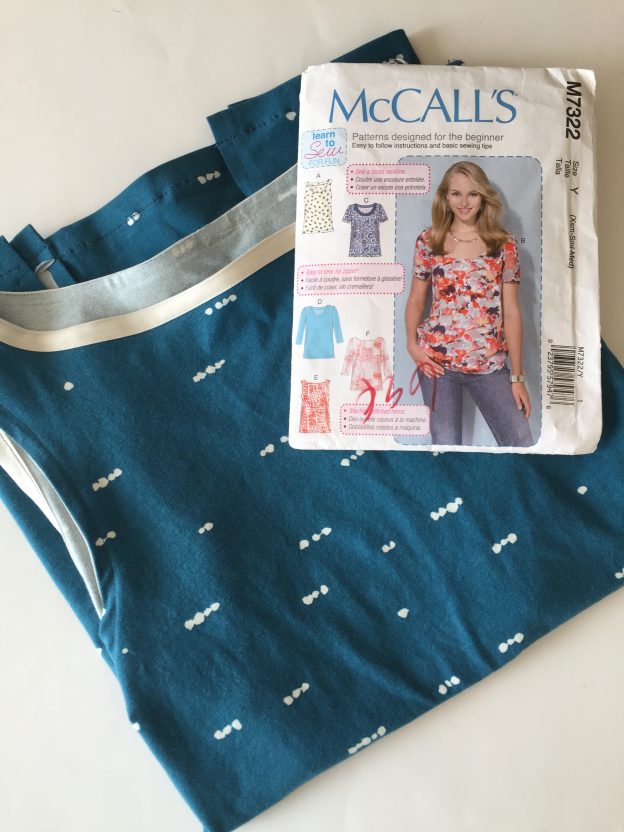
Let’s take a look at the simple tank top I made.  In actuality, it wasn’t as simple as I had hoped!  Combining a McCall’s pattern (M7322) with a great piece of knit fabric called Morse Dot Blue, I cut out a boatneck tank top. The knit is from Art Gallery Fabric (it is available in my shop) and is just lovely – great quality and feels so comfy.  I chose to make a size large because I thought it would be easier to size down than up and my measurements showed me to be between a medium and a large. I also skipped cutting out neck and armhole facing pieces as I don’t like having that extra fabric to tuck into place. It is a cleaner, simpler, finish to bind the arms and neckline with bias tape.

It became apparent right away that the shirt was going to be too boxy in shape.  I decided to cut in the armholes to give it more shape at the shoulders.

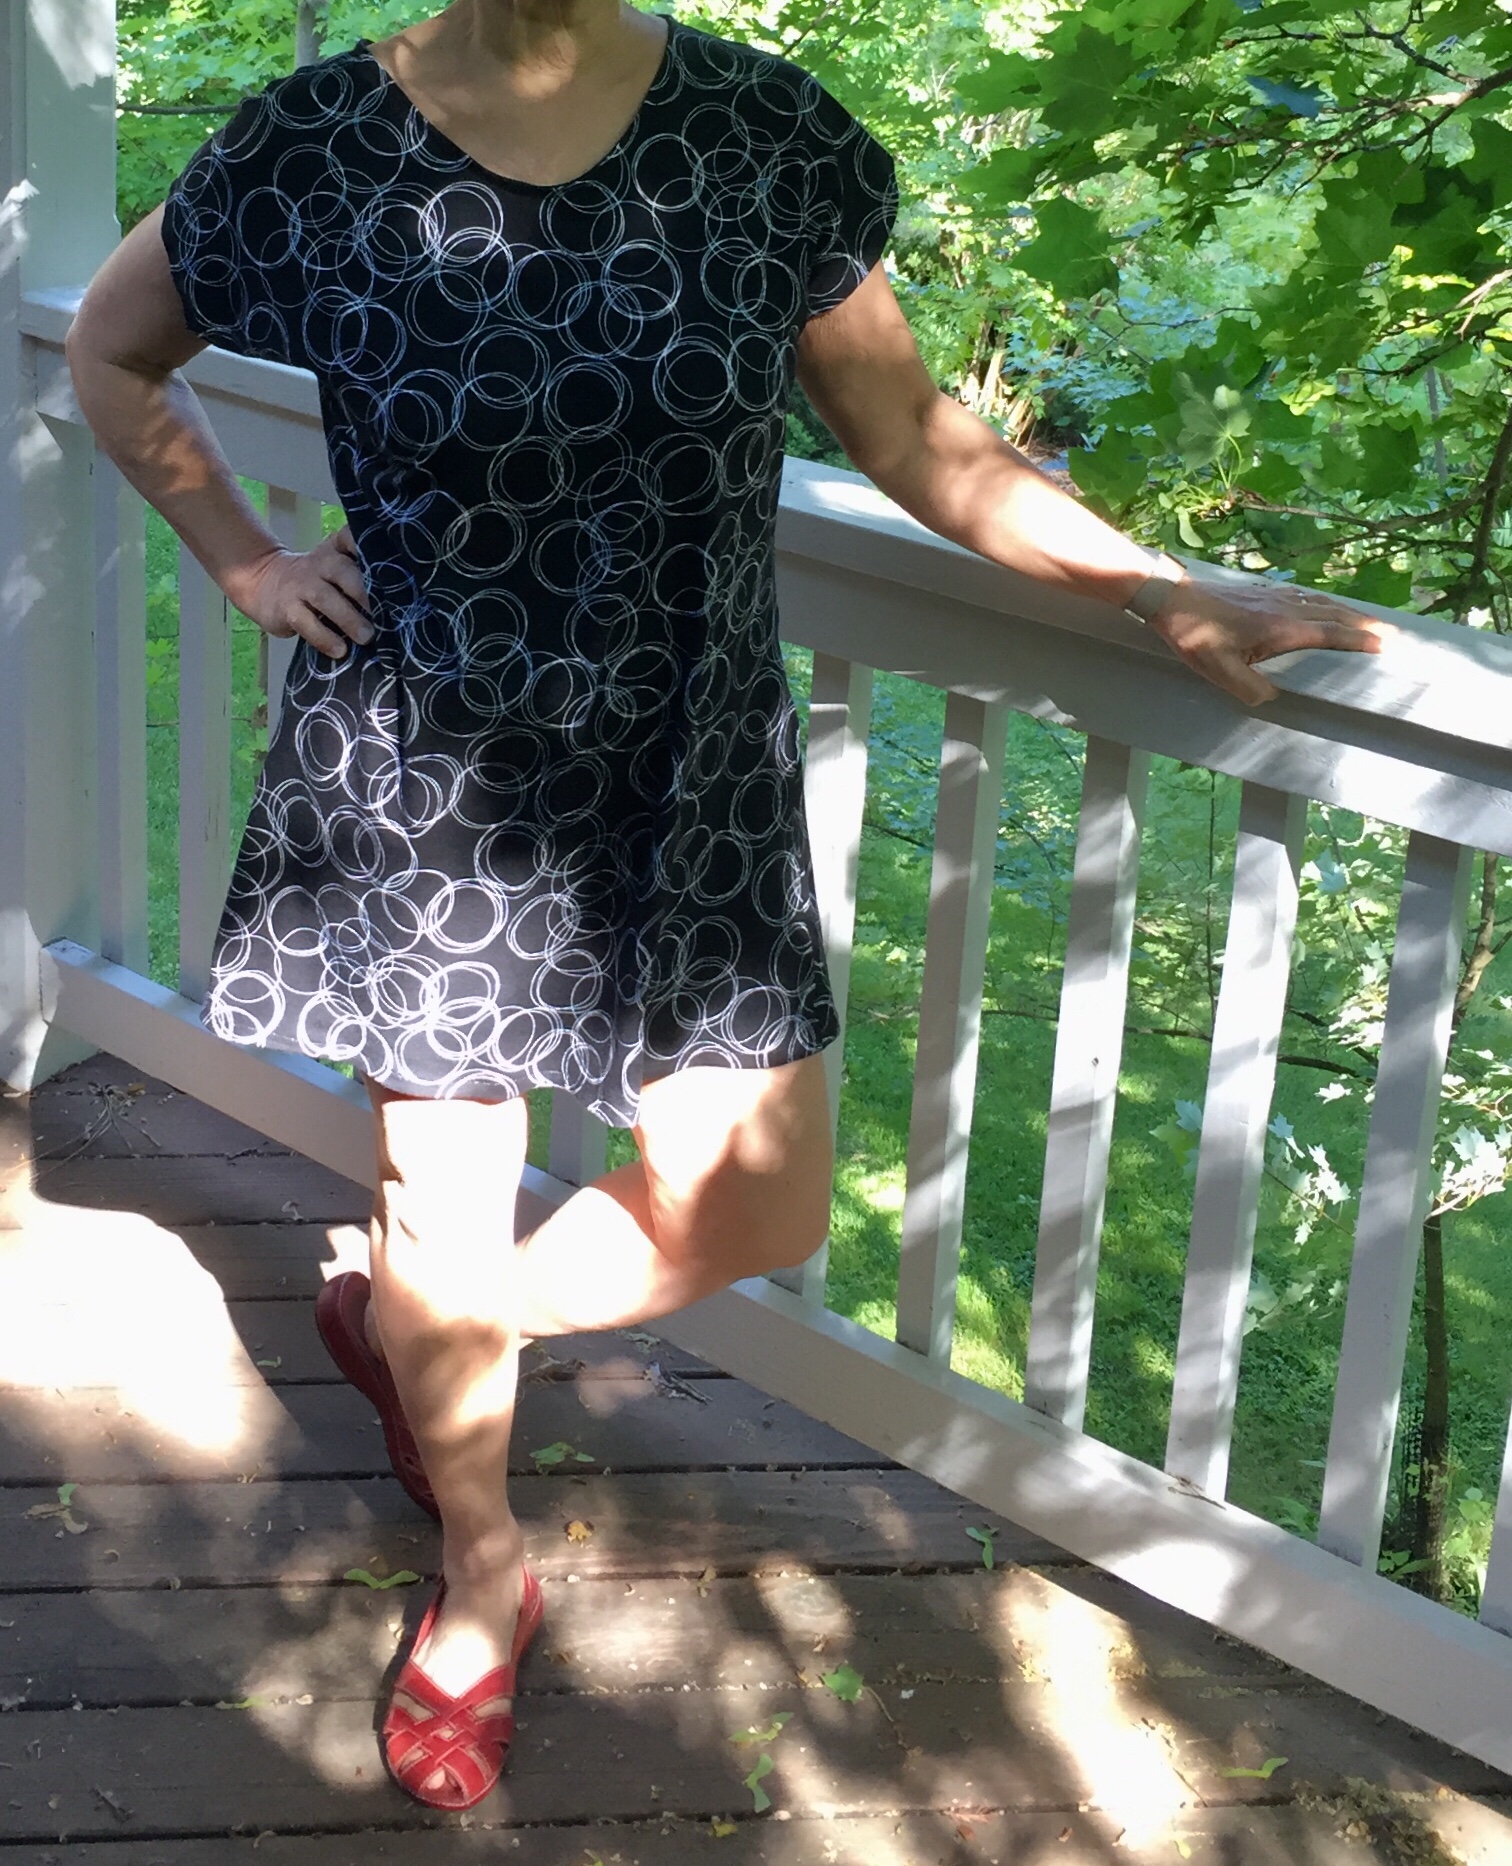
Yikes, the armholes look terrible!

When I did this, it made the armhole openings too big.  Look at the photo above and you’ll see they are cut too deeply.  Somehow I didn’t notice how far off the fit was until taking photos! The camera doesn’t lie.  🙂

Ugh, at this point, the armholes and shoulder seams were sewn with a stretch stitch and then a zig zag beyond that. Determined to fix this, I decided I would need to take a wider seam at the shoulders to lift the shirt and then tighten up the underarms. This photo is a close up and you can see how tiny the seams of the stretch stitch are.  I couldn’t unpick these without damaging the fabric, plus it was taking forever to rip out the seams.  Instead, I decided to cut the shoulder seam off completely and restitch it.  The seam binding finish wasn’t as clean but it worked.  For the underarm, I cut a narrow strip out of the first three inches of the seam and sewed it back together on an angle.  Not pretty but at least it was served the purpose of closing up that armhole a bit.

boatneck t-shirt

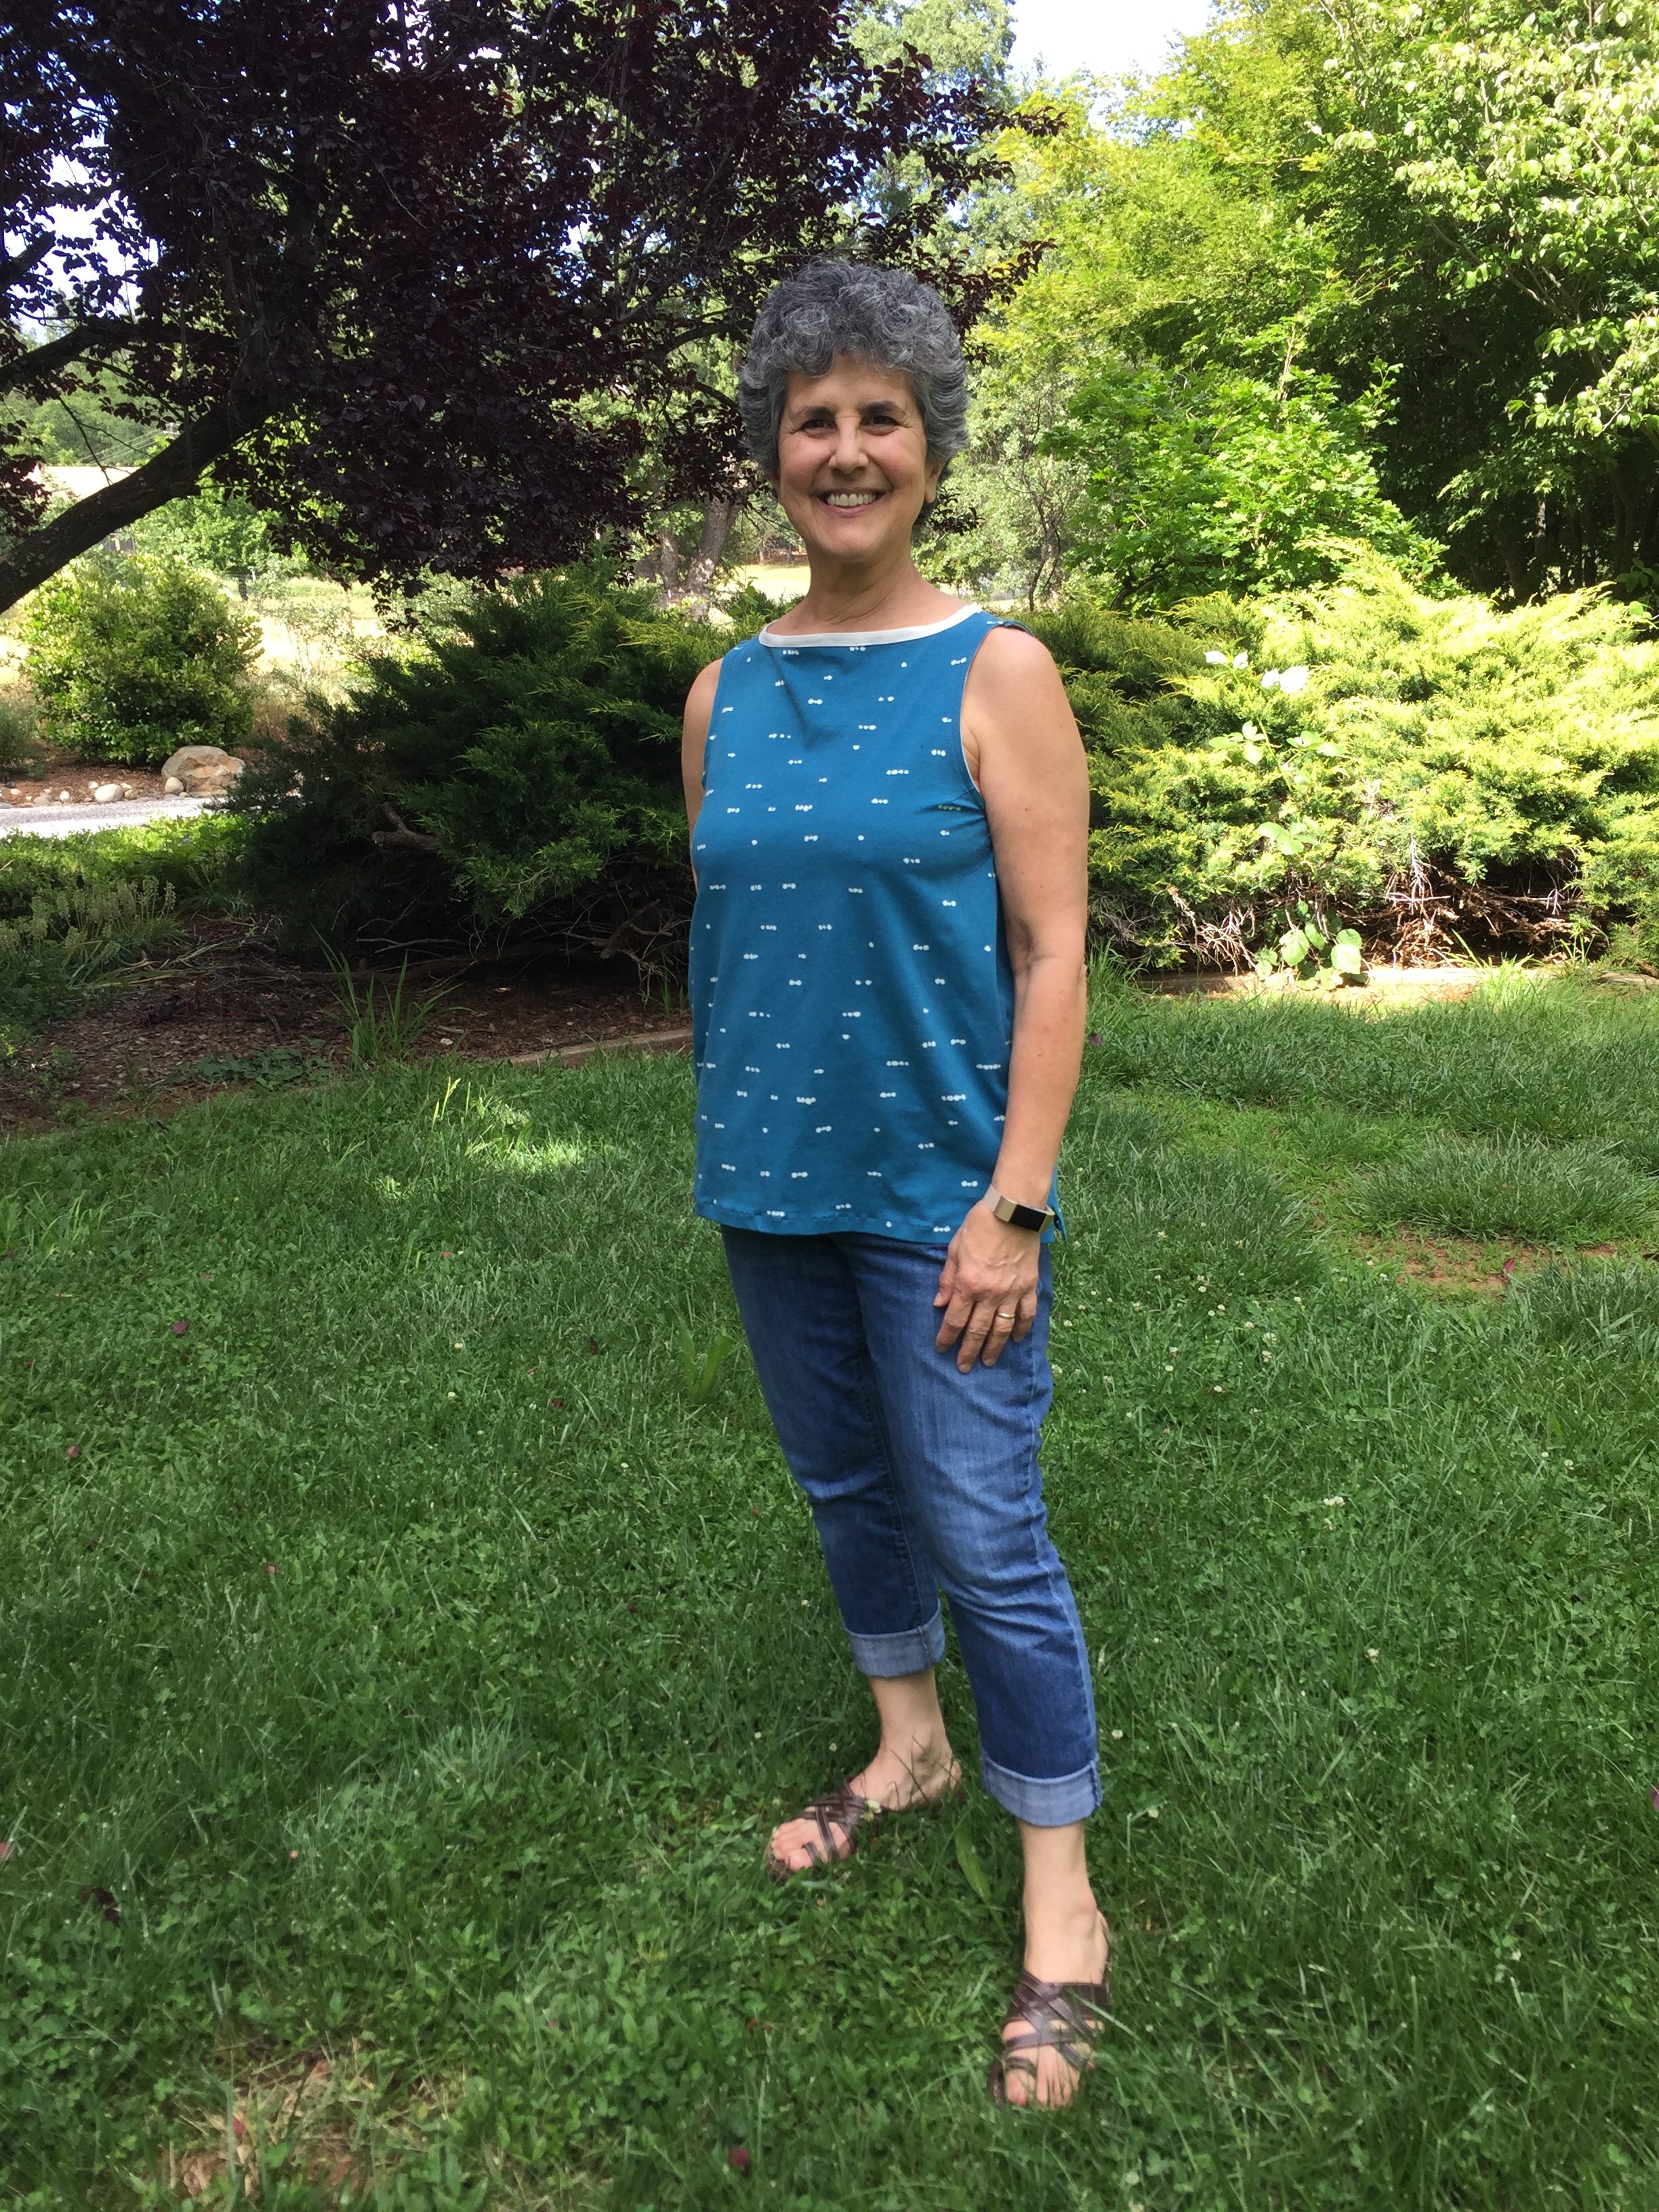
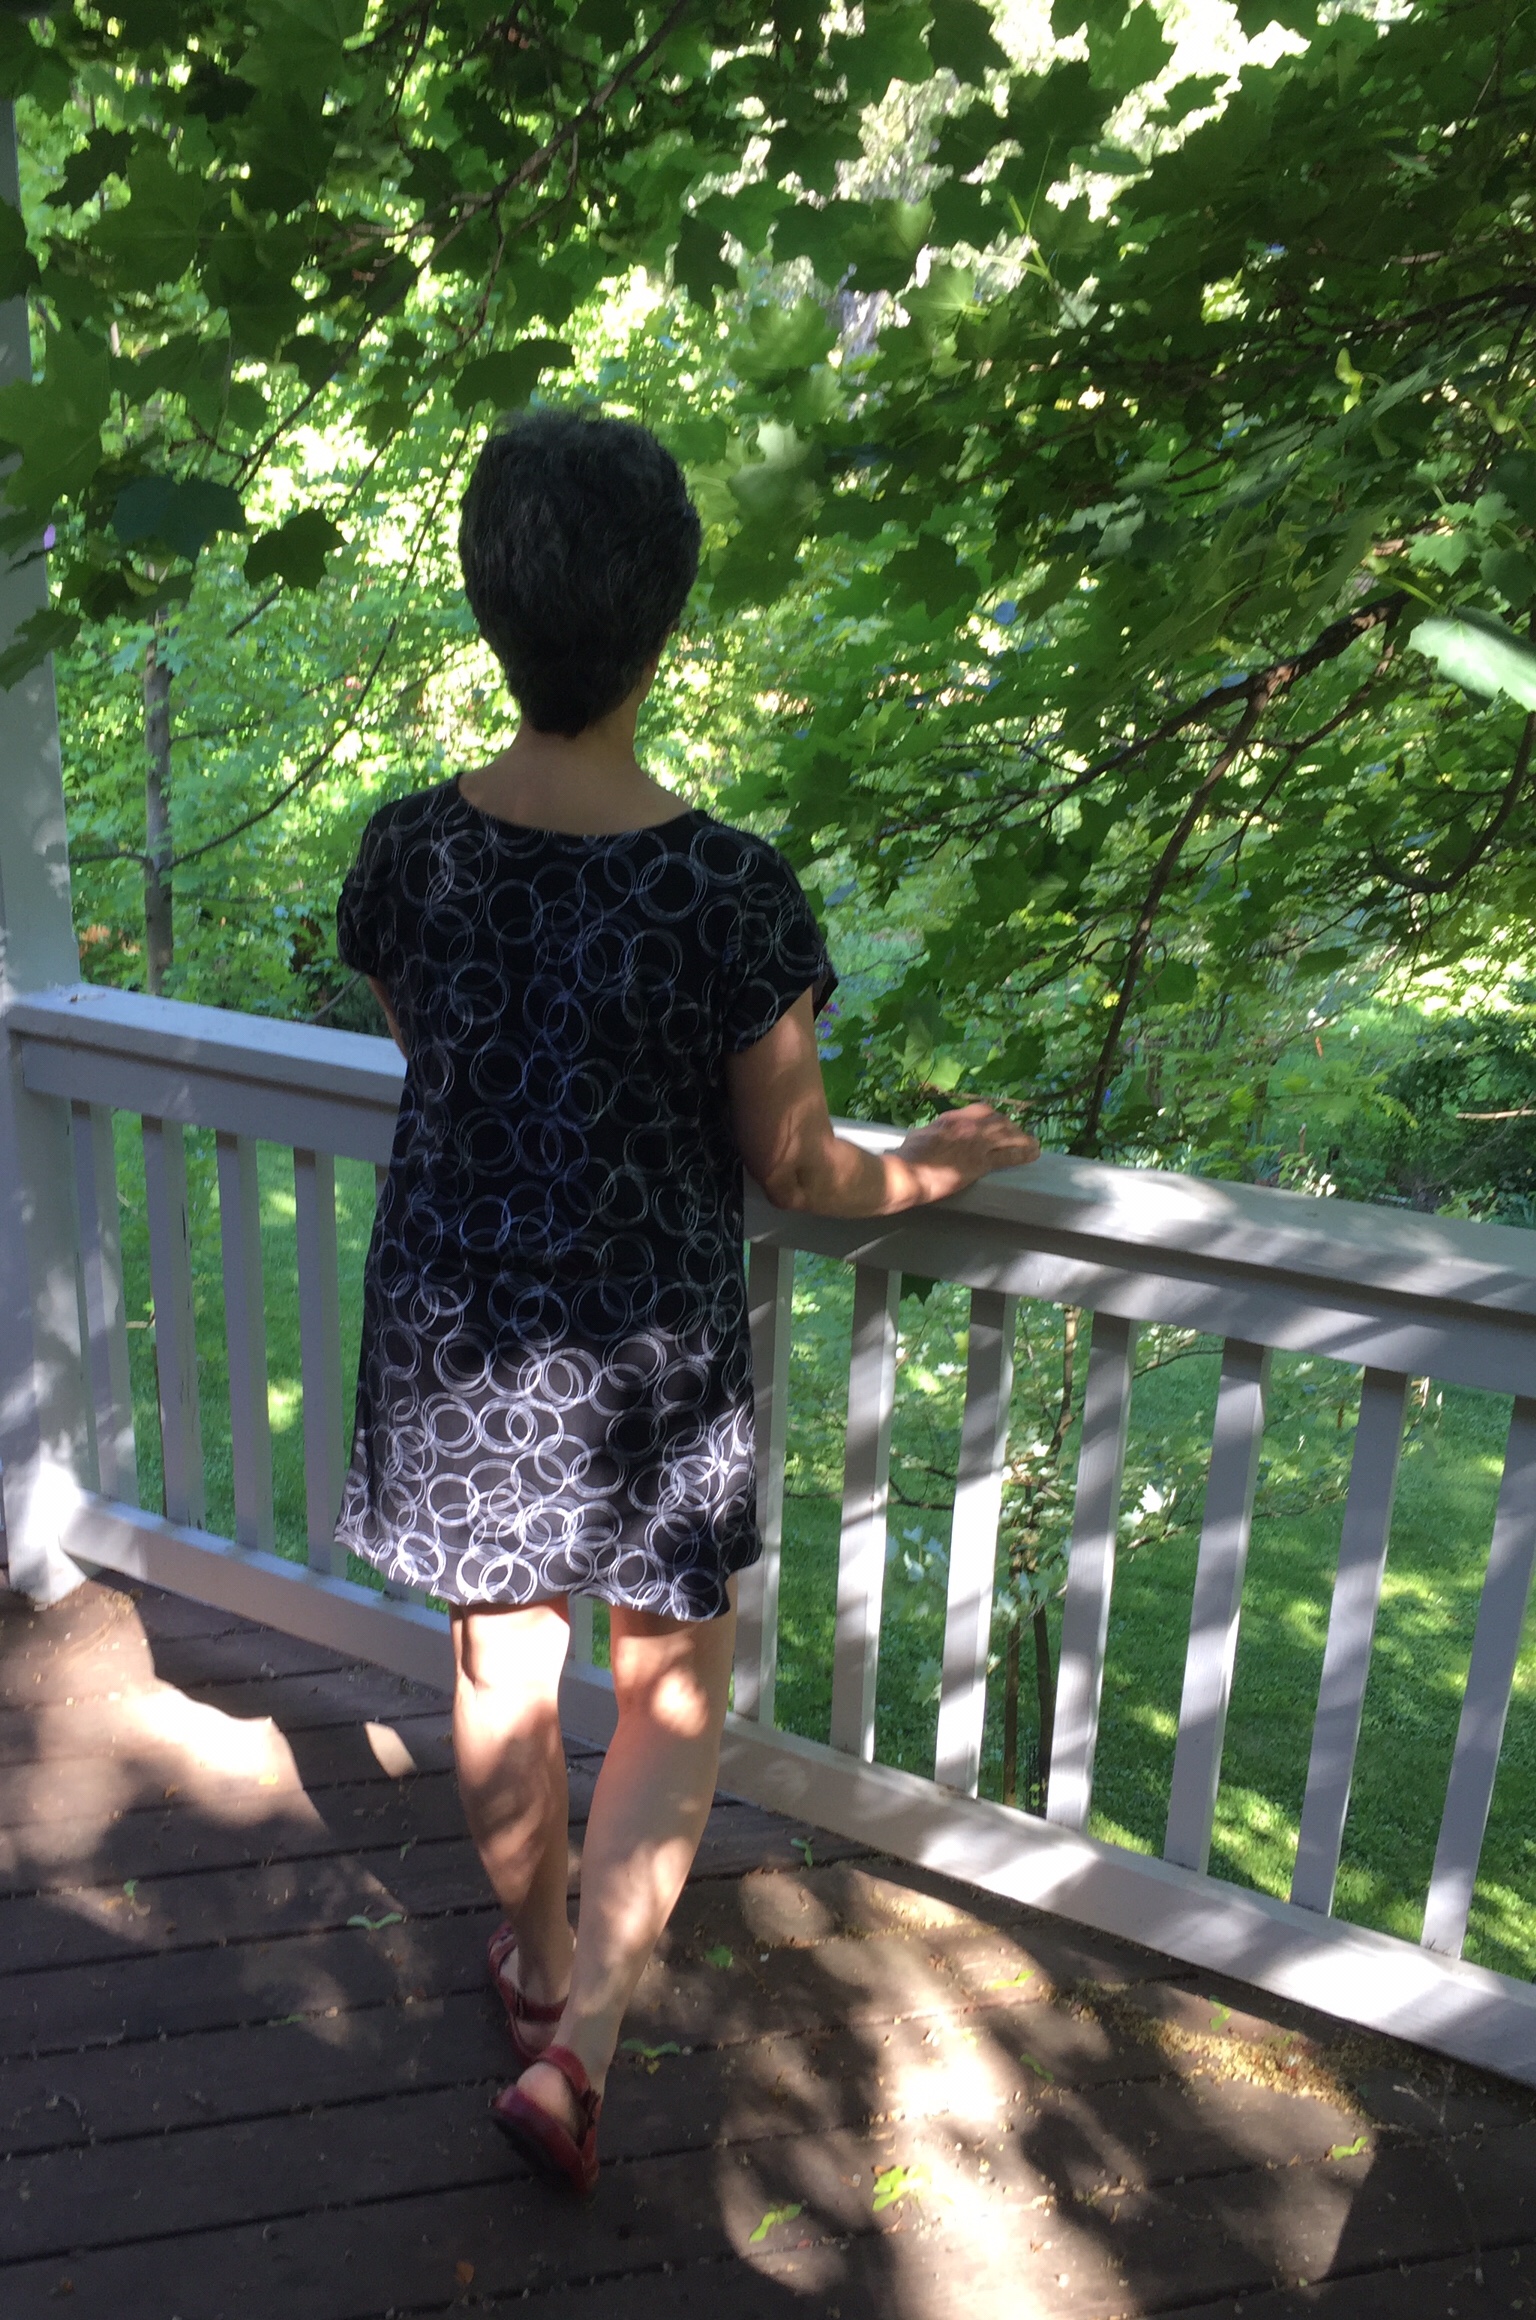
Looking back, I should have taken a picture with my hand on my hip again so you could compare, but it does fit much better.

boatneck tank

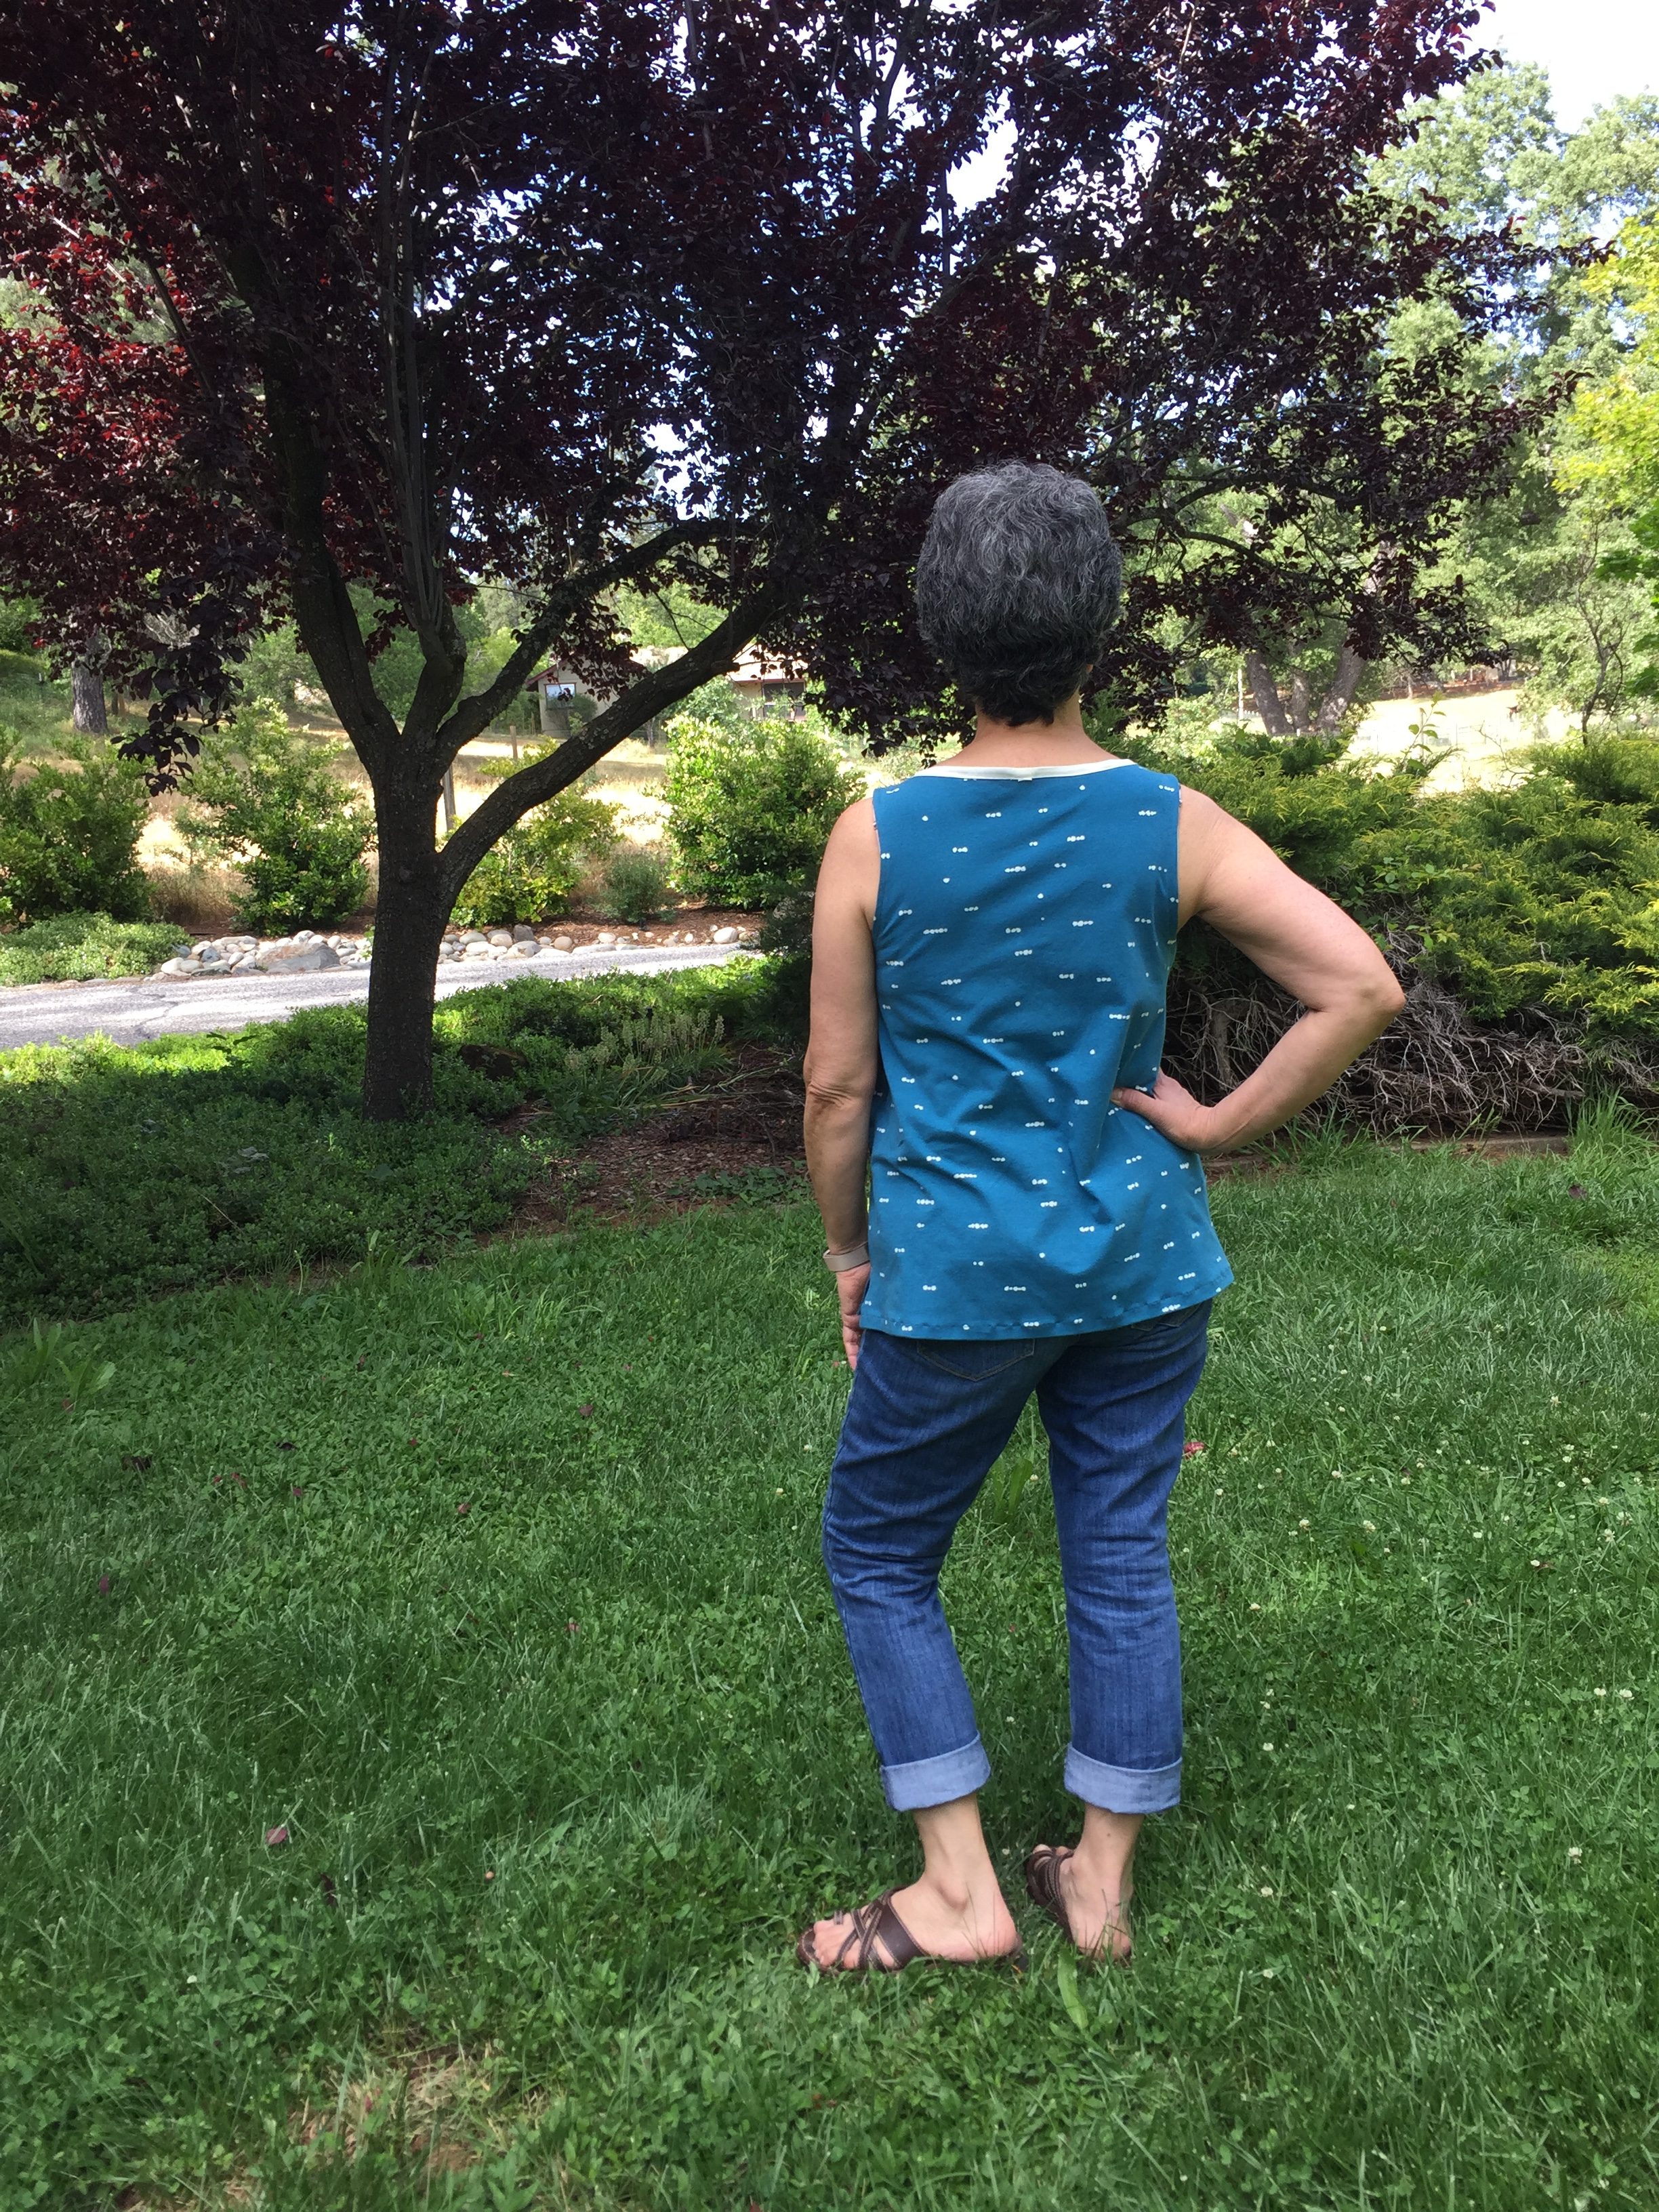
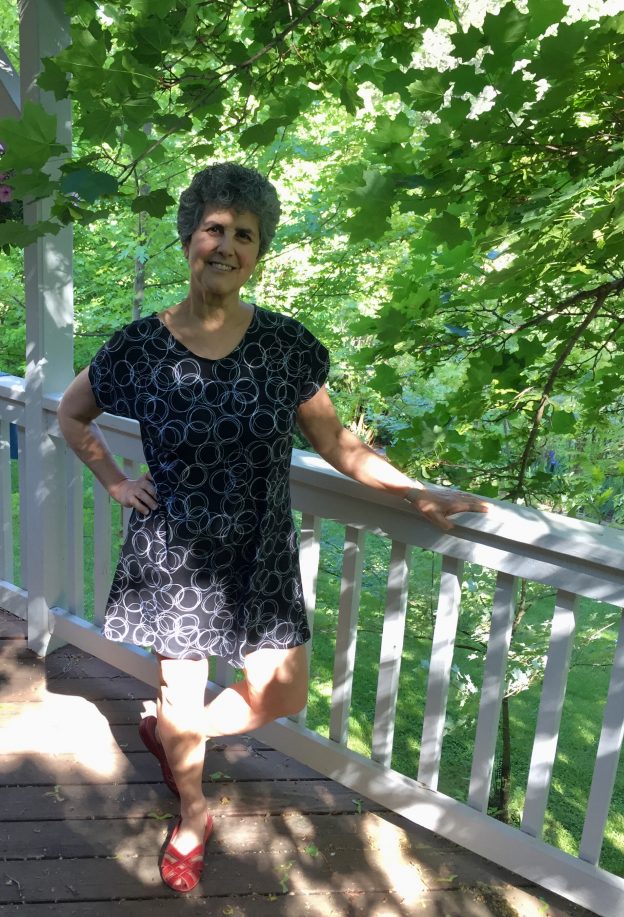
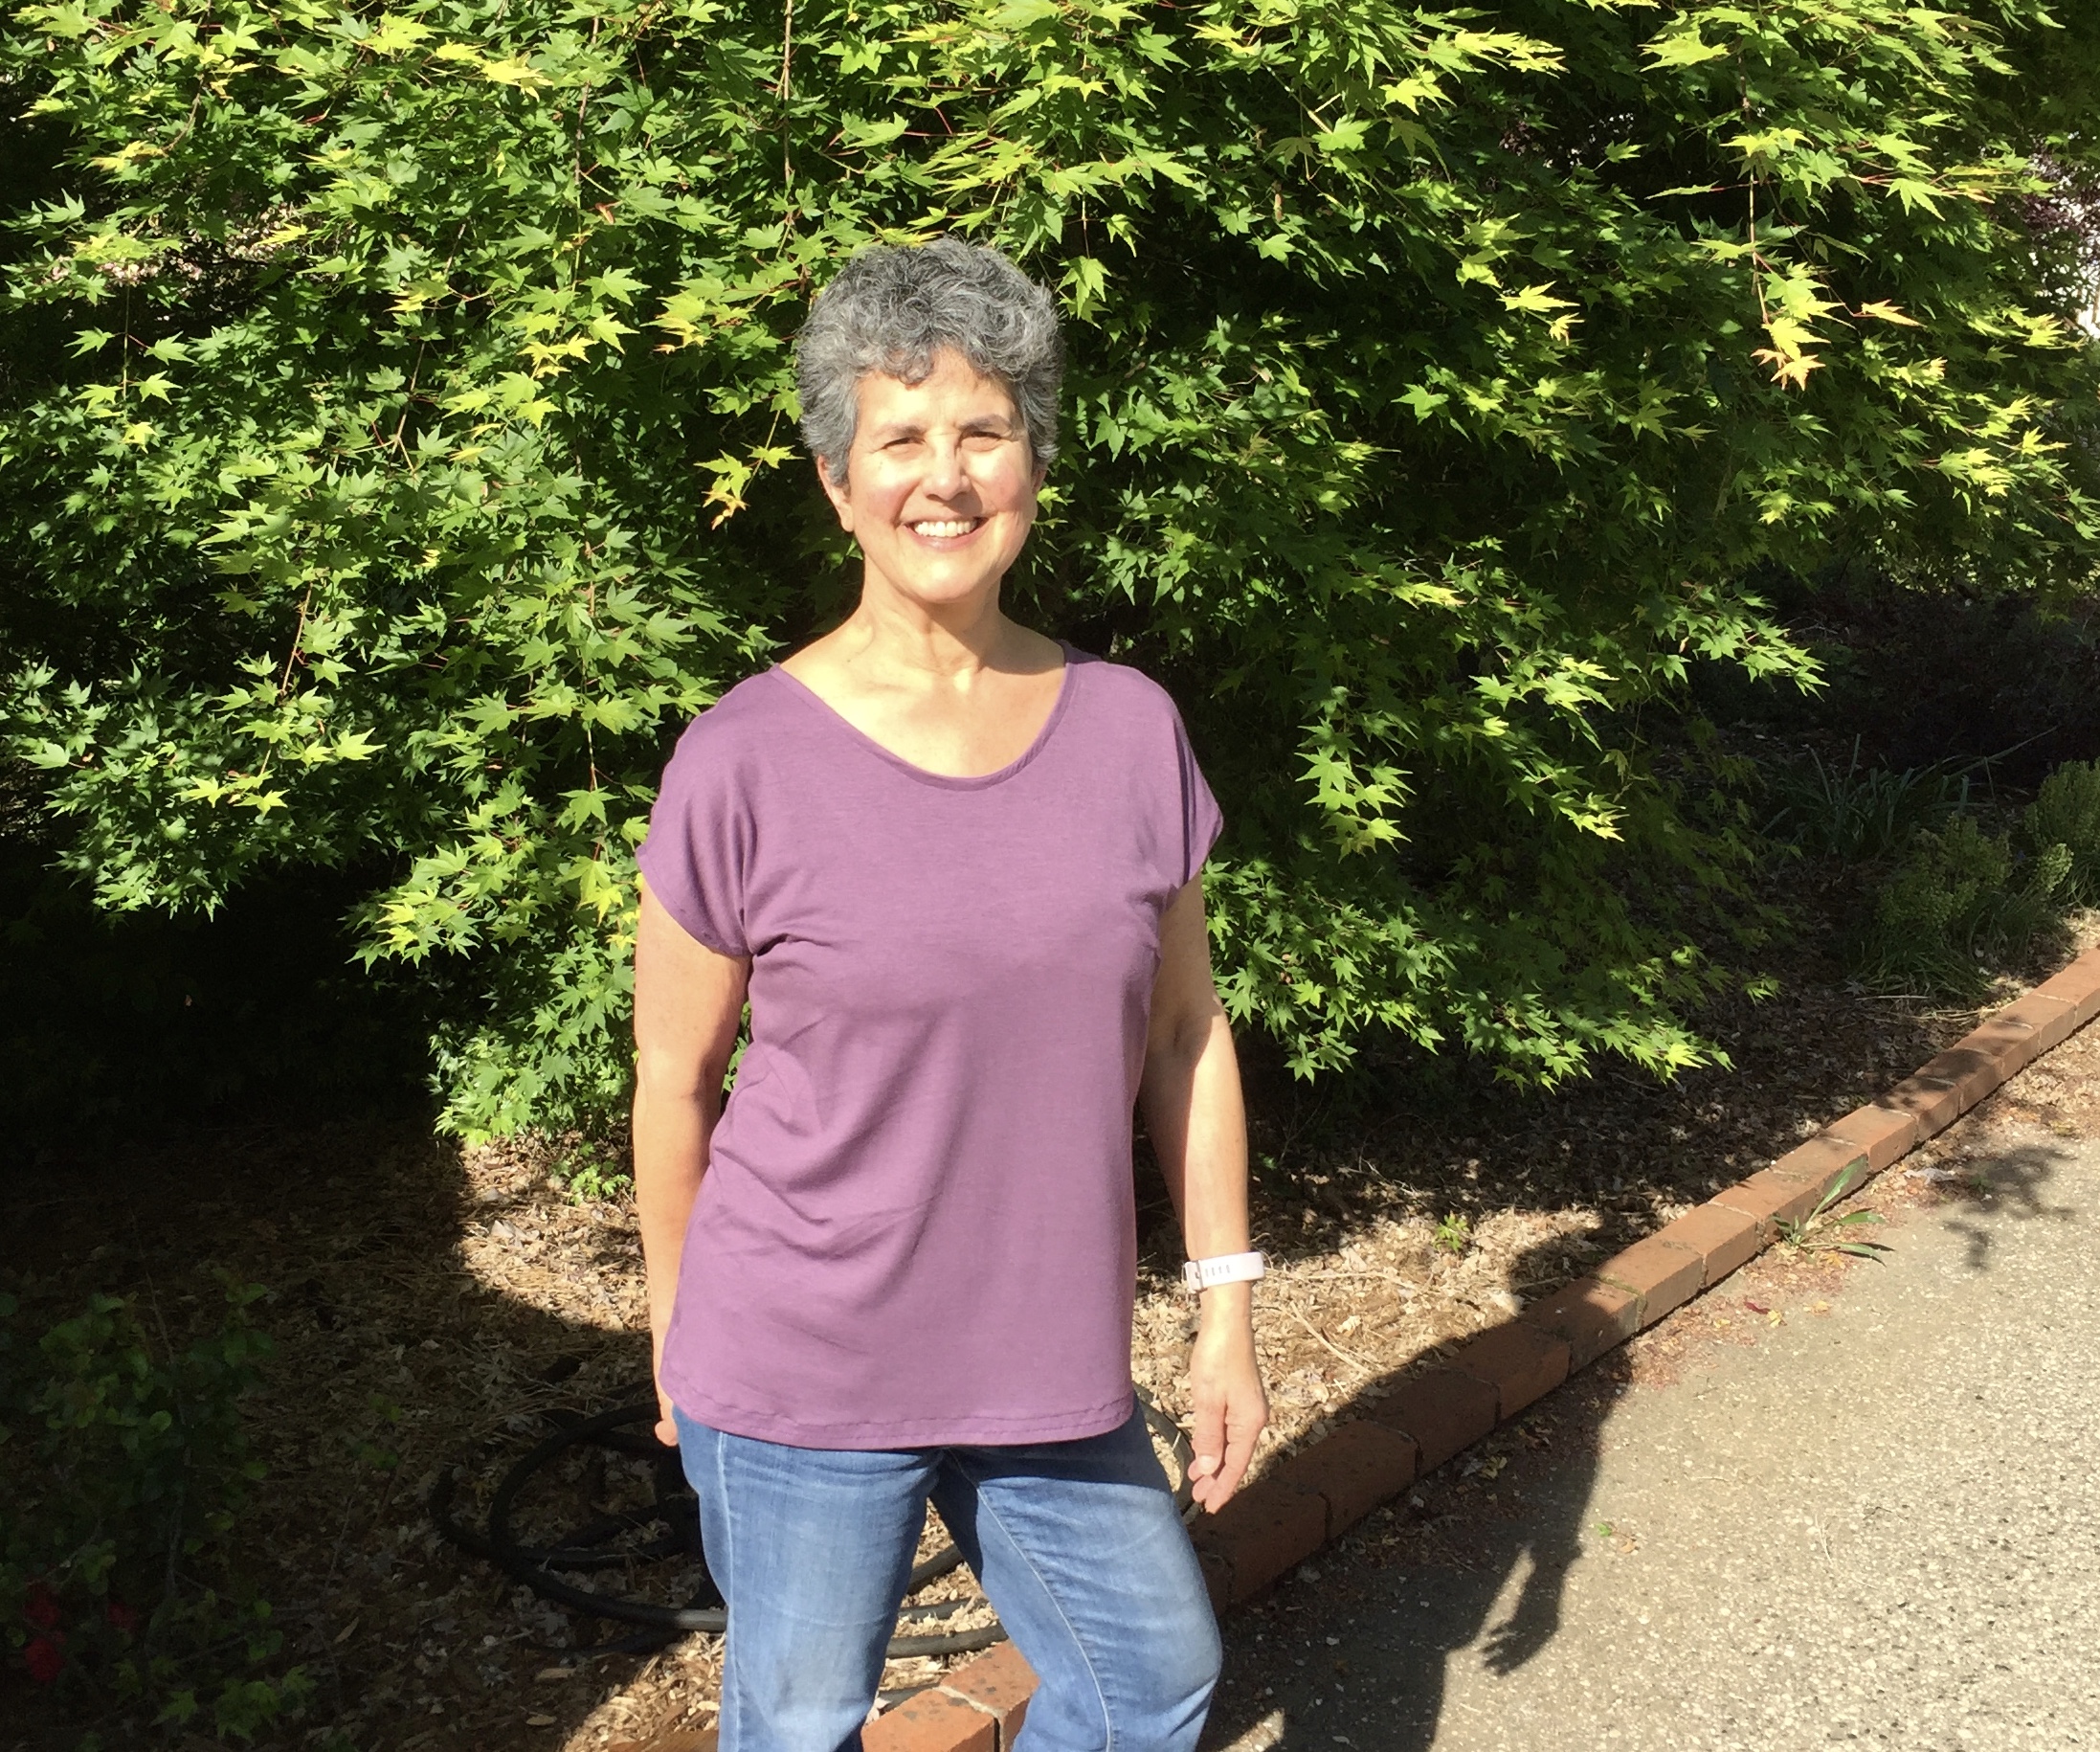
The fit is so much better with those two alterations. The shape of the armhole is what I was going for in the first place.  Side note, looking at the pictures, one has to wonder how on earth did my hair get so gray!? When Julia took the photos for me, I specifically asked her to make me appear taller, less gray and about 35 years old.  She promised to do her best but I am pretty sure I look at least 57 and barely 5’4″ in all of these shots.  (It is so weird to post pics of myself – Sigh…)

As I made these changes to the shirt, I pondered why I was willing to spend the money and more importantly, the time, to make such a simple shirt.  I can pop into Target or Ross and pick up a tank top for not a lot of money and no time at all.  Sewing something for myself is satisfying and I enjoy the challenge.  It makes me so happy to see a resurgence of interest in sewing, both in quilting and garment sewing.  Seems like the high school Home Ec classes I took are a thing of the past (unfortunately) so it is nice to see the hobbies being taken up.  Hopefully this means they will be taught to others and passed along to new generations of kids and grandkids.

The pants I made are pretty cute.  Once I hem them, I will share them with you.  The shorts will be set aside but not for too long.  I want to have them to wear this summer.

Linking up with my favorites.  To see the links I use, go to the top of the page and click on Link Ups!

Newsletter!

Have you signed up for my newsletter?  It is published every month or so and is full of information about my shop, new arrivals, sales, and events.  Click here to sign up!

SaveSave

Playing Catch Up

Well, I did great for the first three months of the year. My two RSC18 projects were worked on each month and one was finished in time for the next.  Somehow April and most of May slipped by and I didn’t work on either of them. Knowing myself, I figured I had better get caught up.  Once I am too far behind, it becomes very easy to talk myself into skipping it altogether. We know what happens next don’t we?  The blocks I did make end up in orphan block land, a very sad place to be.

While I am not totally caught up yet, I feel much better with the progress I made. To remind you, I am sewing along with Angela and Mari’s Squared Away BOM and I am making nine patch blocks for a separate project.  April’s color was yellow with a touch of gold. The block tutorial for the month was the 4X Star, also known as the Carrie Hall block.  These made for super easy piecing  as only squares and a handful of HST’s were required for each one.  I love both of these blocks – note that I used the same golden fabric for the four squares in the center but it looks quite different on each one. I was having a really tough time finding scraps of yellow for April because I only had such a small amount of yellow.  Mentioning this to Mari, she sent off a huge packet of yellow scraps. Though her idea of scraps might be different then mine because she generously sent a number of fat quarters. So, Mari’s tutorial, Mari’s fabric….. I wonder what it would take to get her to come to California to cut my pieces and stitch them up? Thank you Mari!

May’s color is pink and rose.  This was easier for me as I have plenty of pink scraps in my stash.  I don’t know if I really went with rose but I like the combinations I came up with thus far.  The block for this month is by Nancy Cabot, called Baton Rouge Square.  Mari describes it as a package with ribbons tied at the top.  I like that! Again, these are easy blocks to construct as long as you watch the direction of each HST.   At this point, I still need to make one more of each block for both April and May, and I will be good to go.  June’s block will pop up on Saturday so I better get these done!

Here is a shot with all of my Squared Away blocks to date.  Looking good, with the exception of the missing pink and yellow blocks!  I am thinking of placing them on point and sashing them with a gray that is a tad darker than the background color I am using. But there is plenty of time to figure out those details.

Finally I did make a few nine patch blocks.  I haven’t made the wonky stars in pink yet, but these are quick and simple to put together.

Now I am off to the sewing room to make a custom Chemex Cozy for a customer in Virginia. Time to get busy.  Also, come back on the first of June as I have some updates about my shop to share with you.  Until then, happy sewing!

Linking to Let’s Bee Social and Needle & Thread Thursday.  Info on both of these is found at the top of the page, under Link Ups.

Have you signed up for my newsletter?  It is published every month or so and is full of information about my shop, new arrivals, sales, and events.  Click here to sign up!

SaveSave

T-Shirt Dress Finished!

Inspired by all of the wonderful makes being shared on Instagram this month for the Me Made May event, I made a simple t-shirt dress last week.  Three weeks ago or more, I spied this black and white knit fabric at Ben Franklin’s.  It was 20% off which made it a good deal.  When I first saw it, I thought it would be a cute t-shirt.  However, once I got ready to cut it out, I realized I had more than enough for a dress.

t-shirt dress

Because I liked the fit of the Blanc t-shirt I made with that mauve fabric, it seemed reasonable to just extend the length of the pattern and create a dress. I figured if it didn’t look right, I could trim the length and wear it as a shirt.  Once I had the pattern pieces and fabric laid out, I took an old t-shirt dress I have worn for the last couple of summers and put it on top to determine the length and width of the lower part of the dress.

After cutting it out, it is just a couple of seams to put it together.  The neckline is finished with bias tape and each seam is finished with a wide zig zag stitch. (I know, I should have used the serger but it is in the shop.  A story for another post!)

Once I had the shoulder seams together, I slipped it on and saw the length was a bit shorter than I wanted.  I debated adding a block of solid black to the bottom for length but honestly, I didn’t feel like driving to the store.  (Living where we do, a run to Ben Franklin is about a 20 mile round trip.) Instead, I finished the hemline with the same black bias tape.  That way I didn’t lose any length to turning under the fabric for a hem.  It worked really well and made it just long enough to wear.

Overall, I like the dress.  The fit isn’t perfect but I will enjoy wearing it. I have really been enjoying making things to wear lately. Me Made May was a great way to jump back into garment sewing.  How about you?  Do you have the itch to make something too? I have a pair of pants in process that I am unsure about.  The seem like they are going to fit well but the fabric is very soft and I fear they are going to look like pajama pants.  If this is the case, well I guess I will have a new pair of pj pants! We shall see.

I am linking up with all sorts of fun linkys.  Please check them out at the top of the page, under Link Ups!

SaveSave

SaveSave

Hands 2 Help 2018

Hands 2 Help is a very popular on-line quilting event hosted by Sarah of Confessions of a Fabric Addict.  This event was first held in 2011 and seems to grow in popularity each year.  The “rules of the game” are simple.  Make a quilt and donate it.  Sarah always rounds up several worthy organizations who love receiving handmade quilts.  The quilter is also free to choose to donate to an organization close to her heart.  I participated in 2016 but not 2017.  This year I signed up again.  My plan was to donate the Postage Plus quilt I made for the Modern Plus Quilt blog hop a few months back.  One thing after another has gotten in the way of any attempt I made to get the quilt top finished up.  At this point, it is clearly apparent it won’t be done by the end of the week (when the event concludes.). This doesn’t mean I can’t finish it and donate it still, it just means I need another way to fulfill this particular commitment.

I thought about it and decided to donate two baby quilts I made last year.  Both of these were made as samples for fabric I carried in my shop.  I think they are adorable and will be loved by a child somewhere. Rather than send them both out of the area, I want to donate one to Little Lambs in Utah and the other to my local chapter of Project Linus.

This is the quilt I will send to Little Lambs Foundation.  It was made with a panel from a fabric line called Shine.

If you want to read more about this project, click here.  I think this one is really sweet. I had a lot of fun quilting it and used it as a display in my booth at several quilt shows. The fabric is so sweet with the cats and owls, sunshine and clouds.

The second quilt will be donated to Project Linus, Featuring bold colors in black, white and rainbow, the quilt was made with a panel from Sweet Tweets.

For more details on this quilt, click here. This line was really fun and sold out incredibly fast.  While I had it, I used the quilt as a sample in my booth.  I think the birds and critters are so much fun for children of any age.  It is a bright, cheerful quilt. This fabric is, unfortunately, not printed any longer or I would still stock it.  I just love it.

It is such a challenge to get everything done that one wants to.  I can’t kick myself for not finishing things as I had planned.  It is a constant battle fto figure out the best way to stay organized and do as much as I can.  The Postage Plus quilt will get finished and it will also go off to a good cause, just not this week!  Thank you Sarah for your wonderful work organizing this huge event.  I know it takes so much of your time and you reach many people as a result. You are such a generous soul.  There are so many gorgeous quilts being donated this year.  If you want to see some, click here and be inspired!

Linking to Confessions of a Fabric Addict.

SaveSave

SaveSave

Collecting Florals

Have you seen the gorgeous floral collage quilts popping up lately?  I have seen a number of them at the last couple of quilt shows I have attended.  One was a dressmaker’s form made of flowers and at the last quilt show, there was a really pretty rooster wall hanging made of floral fabrics collaged together.

The patterns are the work of Laura Heine.  The more I see these, the more smitten I become.   She has designed all sorts of patterns that utilize this collage method.

Potpourri Collage Pattern; Giraffe on Newsprint Fabric Background

I love this one. The giraffe was created against a background of Carrie Bloomston’s Story Newsprint fabric.  This is one of my very favorite Bloomston fabrics. (If you want a better look at it, click here because I carry it in the shop.). It makes a fantastic background for this design.

Laura doesn’t just use animals (though she has many) but also cars, campers, birthday cakes, pin cushions and even Santa.

She uses the collage technique across all sorts of fun themes.

Last week, while I was shopping at Ben Franklin, I picked up three floral pieces, just 1/4 yard each. I’ve decided to start collecting florals and to attempt one of these patterns. I think smaller floral pieces are adequate and in fact, I could have even bought an 1/8 yard cut. These three are really pretty florals and the colors vary greatly.  I did that intentionally as I don’t have any plan yet so I am unsure if I will only use certain colors or the whole rainbow.

This particular Timeless Treasures fabric is so pretty. It looks like a water color to me.  Cutting it up for the floral bits will be perfect for this sort of project.

When I got home and went to put these away, I decided to do a quick scan and pull any florals I already had.  To no one’s surprise, I had plenty!  Isn’t it amazing what we have tucked away, here and there!

Florals, florals, and more florals.

Reds, purples, teals, blues, pinks and greens.  All kinds of flowers!

Before I go any further with this, I need to pick which pattern I want to attempt.  Then I need to do some research and see whether anyone has any tips on these patterns.  In fact, have any of you tried one of these?   If so, I would love to hear your thoughts on the pattern and the collage process.  I don’t think I should purchase anymore florals until I have a plan. Also, I have a few things in the works that I need to finish up before starting this.  It is fun to look forward though and add this project to the list (the long, never-ending list!)

Linking to Molly Sparkles Sunday Stash link up as well as Main Crush Monday!

Juanitas runners

Finally! My Sister’s Project is a Finish

Last November (a full six months ago) my sister asked if I would make two small runners to put in the window boxes in her flat in London.  She shares her time between Colorado and London due to her husband’s career. Once their kids were up and out, it became possible for her to travel back and forth so she could actually spend some time with her husband.  It is an exciting time for her as she makes new friends and learns to live the city life.

When they rented a little flat, she started to fix it up and make it feel like home.  She has plants in the windows and wanted a runner to put under them. The window sill is about 14″ x 36″ and the runners measure  12″ x  35″.  They (hopefully!) will fit just fine.

It was fun to pick colors for these.  My sister asked for teal and some red.  I sent a few ideas and we ended up with this combination of Sashiko Florette (teal), Corsage Charm, Terra Firma Sunlit, and Kohkhloma Burgundia for the pop or red.  All of these are Art Gallery fabrics from my shop and as always, even though they are from three different lines, they look great together. 

This simple pattern was inspired by Anorina’s tutorial over at  her blog, Samelia’s Mom.  I made it a bit smaller and only made three blocks for each runner. It came together quickly.

While I did use the same fabric for each, I reversed the red fabric with the light blue floral on each runner, just to mix things up a bit.  I looked at this project as a great opportunity to practice some free motion quilting.

For the four inch square blocks on both pieces, I quilted a large flower.  The other sections were filled in with loops, squiggles and leafy vines.

Juanitas runners

When I put these side by side, I could picture it as a larger quilt and it would look great.

When I was just about done quilting these, I remembered I wanted to quilt a word or something more personal on the runner. But seriously, I was at the very end! I managed to squish in the word sister. Not terribly creative but i didn’t think of it in time.

Anyway, it took far too long to make these little guys but they are done and ready for the mail.  My sister is heading back to England soon so frugal side motivated me to get them done and in the mail so I will be mailing them to Colorado and not to England.  Saves a couple of dollars….

Now that I can check this project off the list, I am ready to move on to something else.  Much as I am itching to start something new, I will be disciplined and pick up one of my unfinished projects and get going!

However, sewing will have to wait until next week.  This weekend is going to be busy with my husband continuing to pull out that lower deck.  This afternoon I had a dumpster delivered for the huge piles of scrap wood that are piling up on the property. Hope you have an equally fun weekend planned!! Whatever is on the agenda, enjoy your weekend.

SaveSave

SaveSave

May Blogger Bundle with Jayne Willis

Today I am going to share a cheerful bundle curated by Jayne Willis of Twiggy & Opal.  Before I jump into that though, let me introduce Jayne.  Actually she likely needs no introduction because I suspect you are already familiar with her spectacular modern quilts. I am not sure exactly how Jayne and I became friends but we have been following each other’s blogs for quite a long time.  She was one of the team of bloggers who supported the opening of my shop about 18 months ago, which was such a nice thing for her to do.

When I think about Jayne’s work, I am really impressed by her improvisational work, the clean lines she uses when she designs a piece, the quilting she does, and the determination she shows from start to finish on a project. I love following along on Instagram as she creates something. She often shows progress shots and the finished project never ceases to amaze me.  She is really a talented quilt artist. I grabbed a quote from her About Me page on her blog that says it well.  “My process may be a little unconventional—I let the fabric speak to me and rarely know where a design will take me from start to finish!”

OK, let’s take a look at the bundle she curated.  I was not at all surprised to see Jayne select black, white and brights for her bundle.  She is the queen of color and she uses it well. What did surprise me was how well the the blues in Flourish and Rainbow Vines (both made by Andover) worked together. Just look at the darker blue leaf on Rainbow Vines – – it is nearly identical to the background blue of Flourish.  These details are what make Jayne’s pull attractive!  I also love that by including the Rainbow Vines fabric, she chose a bright print that has a strong black accent.

Adding Panda Patches and the Basic Circles , Jayne pulled the bundle together – sort of like highlighting the whole collection with black.  Next Jayne selected two soft yellow prints which added a burst of spring to the bundle.

These fabrics are all about spring!  I encourage you to hop on over to Jayne’s blog where she will share the bundle and a project she has in the works.  I guarantee a dose of creative inspiration if you do! Also be sure to enter her giveaway to win a fat quarter bundle for yourself!

If you love this bundle as much as I do, it is available in my shop. I have fat quarter bundles as well as 1/2 yard bundles.  Both will be on sale for 20% off through tomorrow night (Thursday, May 17th). Also, if you are interested in yardage of any of these fabrics, all of them are available in the shop!

Hopefully you are enjoying the bundles that have been shared each month!  It is great fun for me and I learn something about color each and every time!

Linking up to my favorites.  Check them out at the top of the page, under Link Ups.

SaveSaveSaveSave

SaveSave

SaveSave

SaveSave

SaveSave

Springtime

We had a really fun weekend. Lots of chores but also a good dose of family time.   Have to balance things out, right?  The biggest project happening at our house is ripping out the lower deck.  On the east side of the house we have decks that run the length of the house both upstairs and downstairs.  My husband has had his eye on the lower deck for a while now because he knew the redwood was getting old and starting to rot.

He talked to a cement contractor and they came up with a plan to pour a patio and get rid of the redwood deck.  If you have a wooden deck, you know how much maintenance they can be – it is a ton of work to keep the railings painted. Especially in our climate where the summers are quite hot and winters very cold.  The paint just peels constantly with the contraction and expansion of the wood each season.

To save on the cost, Ray is tearing out the deck and getting rid of the piles of wood he is removing.  It is a lot of work, but also a lot of money saved. My father came over Saturday to help with stacking the bad wood and cleaning any re-usable boards (pulling the nails and stacking in a different spot.) My job was to clean the junk off the deck, and provide lots of water and lunch.  (I know, I got off easy!)

By Sunday afternoon, Ray had made significant progress.  He thinks he is just over 30% done.  He has two more weekends to finish and then they will start to build the patio in the beginning of June.  I am really excited about this project. It is going to be so pretty. We have mature rhododendrons, camellias and azaleas that will form a lush border along the edge of the patio.

Other activities this weekend included celebrating Julia’s birthday and Julia’s Junior Prom.  She went to prom with a group of kids in her class and had a wonderful time. I am sharing a picture of Julia and her sweet friend, posing with their shoes.  My daughter is very pragmatic and said she didn’t want to wear heels because they would hurt by the end of the night. Try as I might, I couldn’t convince her otherwise (she is a person who knows her mind and this is actually something I admire in her!) What do you think?

Julia fears the cake is a disaster!

For her birthday, Julia asked for a vanilla cake with strawberry filling and chocolate frosting.  I got to work on what turned out to be one of the ugliest cakes ever made!  (More importantly, it tasted delicious). The problem was I tried to split the round layers and the cake crumbled.  I had cheated and used a cake mix (c’mon, it was such a busy day!). Making a cake from scratch would have resulted in a denser cake and probably would have split fine.  This cake was too light and didn’t hold up to ‘construction’.

We were laughing so hard at this point.  It was hysterical.  Once I got to this stage, I put it in the fridge for a while to let it firm up a bit before icing it.  Also, I was praying that somehow a miraculous repair would occur and the cake would no longer look such a mess!

Icing the cake helped a little bit but If I am honest, the cake ended up looking like a six year old made it. The walnut cake plate Ray made for me added some beauty to an otherwise ugly dessert!

No matter though, it tasted really good and we had fun singing to Julia for her 17th birthday. As always, I found myself wondering how 17 years could possibly have gone by.

Each year on Mother’s Day, I have conflicting feelings of joy and bittersweet nostalgia.  Back in 1994, my first husband (my boys’ dad) passed away suddenly from an aneurysm in his brain stem.  He was only 36 and it was tragic beyond description. I haven’t ever mentioned it here. because how does one fit this sort of story in?  Anyway, to make awful things even worse, he died on Mother’s Day. For his mother, this was truly awful.  Time went by, I remarried and we had Julia.  When I found out I was due the second week of May, it sort of nagged at me. I kept thinking I didn’t want her to be born on May 8th because that was the day my husband passed away. One day I was talking about this fear to my mother in law (the second one, I am lucky to have two great mother in laws!). She very wisely told me I shouldn’t worry.  She said the birth of this baby was going to take this sad time of year and make it joyful.  She was exactly, completely, and utterly correct and I am forever grateful to her for her wise words. Celebrating Julia’s birthday each year, sometimes actually on Mother’s Day, has turned the whole thing around and made this a very joyful season for me.

I hope you also had a great weekend. I haven’t done any sewing since last week.  Yesterday was spent with a migraine so I am hoping today or tomorrow I will find my way into the sewing room. I have projects all over that I want to be working on!!  Just look at the mess that is my sewing space!  I need to take control in there and get things cleared up.

Tomorrow I will share the May Blogger Bundle.  Curated by Jayne Willis of Twiggy & Opal, it is another beautiful bundle!  See you tomorrow.

SaveSave

SaveSave

SaveSave

SaveSave

SaveSave

Little Pillowcases

About a month ago, my daughter in law texted me to ask if I would make some small pillowcases for my grand baby.  She has recently taken to sleeping with a tiny pillow (which is so darn cute!) So a few cute pillowcases were needed.  Of course I am happy to make whatever I can.  I am unsure why I didn’t get these done sooner because they are so simple.

Hannah pillowcase

Serenghetti Beasties

I made two – each one quite different from the other.  The first one is made with some fabric by Clothworks. It is an organic cotton and the line is called Serenghetti Beasties.  (It is available in y shop and you can find it here.) I love the name! There are all sorts of safari animals like giraffes, zebras, hippos and lions on a crisp white background.  This fabric is so nice and soft, making it perfect for a pillow case.

The back is a coordinate from this line.  The dusty blue and white triangular pattern has little pops of yellow. I made standard, envelope style pillowcases and both finished at about 14 1/2″ x 19″.

Here is the second one I made.  I thought I would choose something more girlish in style.  This is also an organic line but it is produced by Windham Fabrics.  The line is called Paint the Town and it just came in about a week ago. It has a heavier weight to it but is still soft and cozy. There are masses of flowers and a sweet gray kitty hiding among the blooms. (Look for her next to the blue flowers.) This piece looks a bit like a watercolor to me. I think this will be a fun one because the kids have two cats. My sweet grand daughter really loves the cats and I am hoping she might have fun looking for the kitty when she uses this.

When I made this, I ran into a bit of a snag. The fabric is directional, with each kitty facing the same way.  I didn’t cut a piece large enough to have the cats going the right way on both the front and back.  So, I cheated and on the back side the kitties are going the wrong way.  I thought about it for all of 10 seconds and decided it wasn’t necessary to cut more fabric. (Really, I am supposed to sell the fabric, not consume it all myself!)

These were really a quick make.  Cut, sewn and finished in a little over an hour.  I did finish the seams with a zig zag stitch so they won’t fray with a lot of laundering.  They should hold up well and be nice and cozy for my girl.

I am linking up to all sorts of places.  Check them out at the top of the page, under Link Ups.

Also, if you haven’t yet signed up for the Needle & Foot newsletter, I hope you will.  It is sent out about every six weeks and contain updates on the new fabrics or events going happening in the shop. You can sign up by clicking here or using the link at the upper right side of the page.

Have a great weekend everyone!

Me Made May

Do any of you follow, or get involved in, Me Made May each year?  This event is one to encourage garment sewing and was started years ago.  Now in its ninth year, it is a very popular sewing celebration that happens on many social media platforms. It is the creation of Zoe from So Zo, What Do You Know.  She is a sewist living in the UK and she often blogs about garment sewing and sustainable sewing.

Me Made May is a unique event in that each participant really sets up their own challenge.  Many, many of the sewists will challenge themselves to wear only their handmade clothing each day of the month (some even take it as far as handmade underwear, camisoles and/or bras).  Others may set a personal challenge to wear something handmade once each week.  Others might set out to create some handmade garments during the month.  There really isn’t a right or wrong way to go about it.  I also like that there is no judging, no voting, no huge prizes driving everyone. People share their makes, their sewing ideas and plans with each other – usually on Instagram #mmm18 or #memademay2018 or by blogging.  (Just to give some perspective on the size of this event, it began 6 days ago.  As of this writing on Sunday afternoon, there are over 4,000 posts in#memademay2018.) It celebrates a mutual love of sewing – be it incredibly intricate and fitted garments, or a basic t-shirt.

blanc t-shirt

Which is exactly what I made last week!

Several months ago, I thrifted a bolt (yep, I have a lot of it) of this mauve stretch knit fabric.  I had no idea what I would do with it at the time but I figured I would think of something.  The fabric in general is in great condition.  There are a few spots on the selvage that have a small hole which don’t really cause any issue since they are on the selvage. Thinking I wanted to make a t-shirt, I scouted the internet and posed the question on Facebook, asking for pattern recommendations. One pattern designer that was recommended is Blank Slate Patterns. I liked both the look and simplicity of the Blanc T Shirt.  You can buy the pattern, or if you are a member of their Facebook group, it is a free download.

blanc t-shirt

The pattern has two pieces. Well actually, it is a pdf download and there are 20 pages to print. But 16 of those pages create two pattern pieces. It is sized from XS to XL.  Really, this is a simple process – just takes a little bit of tape and scissors. Not a big deal.

I decided this first round would be a practice session.  I purposely cut it out as a size large because it is easier to size down than up. Plus I was hoping for a loose, kind of flowy look?  Is flowy a word?  Probably not but you know what I mean.

It takes no time to sew front to back. Once I tried it on and decided I liked the fit, I ran a loose zig zag stitch over each seam to finish it off.  Really I should have set up the serger to do this and get a nice finish but you know… it was in the closet…. the sewing table was a mess…. it just seemed like to much work. Maybe next time.

After finishing the seams, all that was left was a bit of finish works. Hemming the bottom and the sleeves came next.  Finally I finished the neckline with purchased bias tape. The only hiccup in the project was the bottom hem.  I ran two lines of stitching and there are several wobbles in the second line.  I am not sure why it happened.  It doesn’t bother me enough to rip it out though. If I were to want a double stitched line I think I would try using a double needle.  I bought one a long time ago but have not yet practiced with it.

blanc t-shirt

I love these little projects because of the quick finish. It is really satisfying to cut out a couple of pieces and then have a t-shirt to wear the next day.  I am going to make one more in this pretty black knit that I bought.  My plan after that is to make something a bit more challenging. I have two patterns sitting out that I keep looking at and debating which to try first.  Stay tuned for more in Me Made May!

Linking up all over the place.  Check out the link parties I enjoy!  They are listed at the top of the page, under Link Ups.