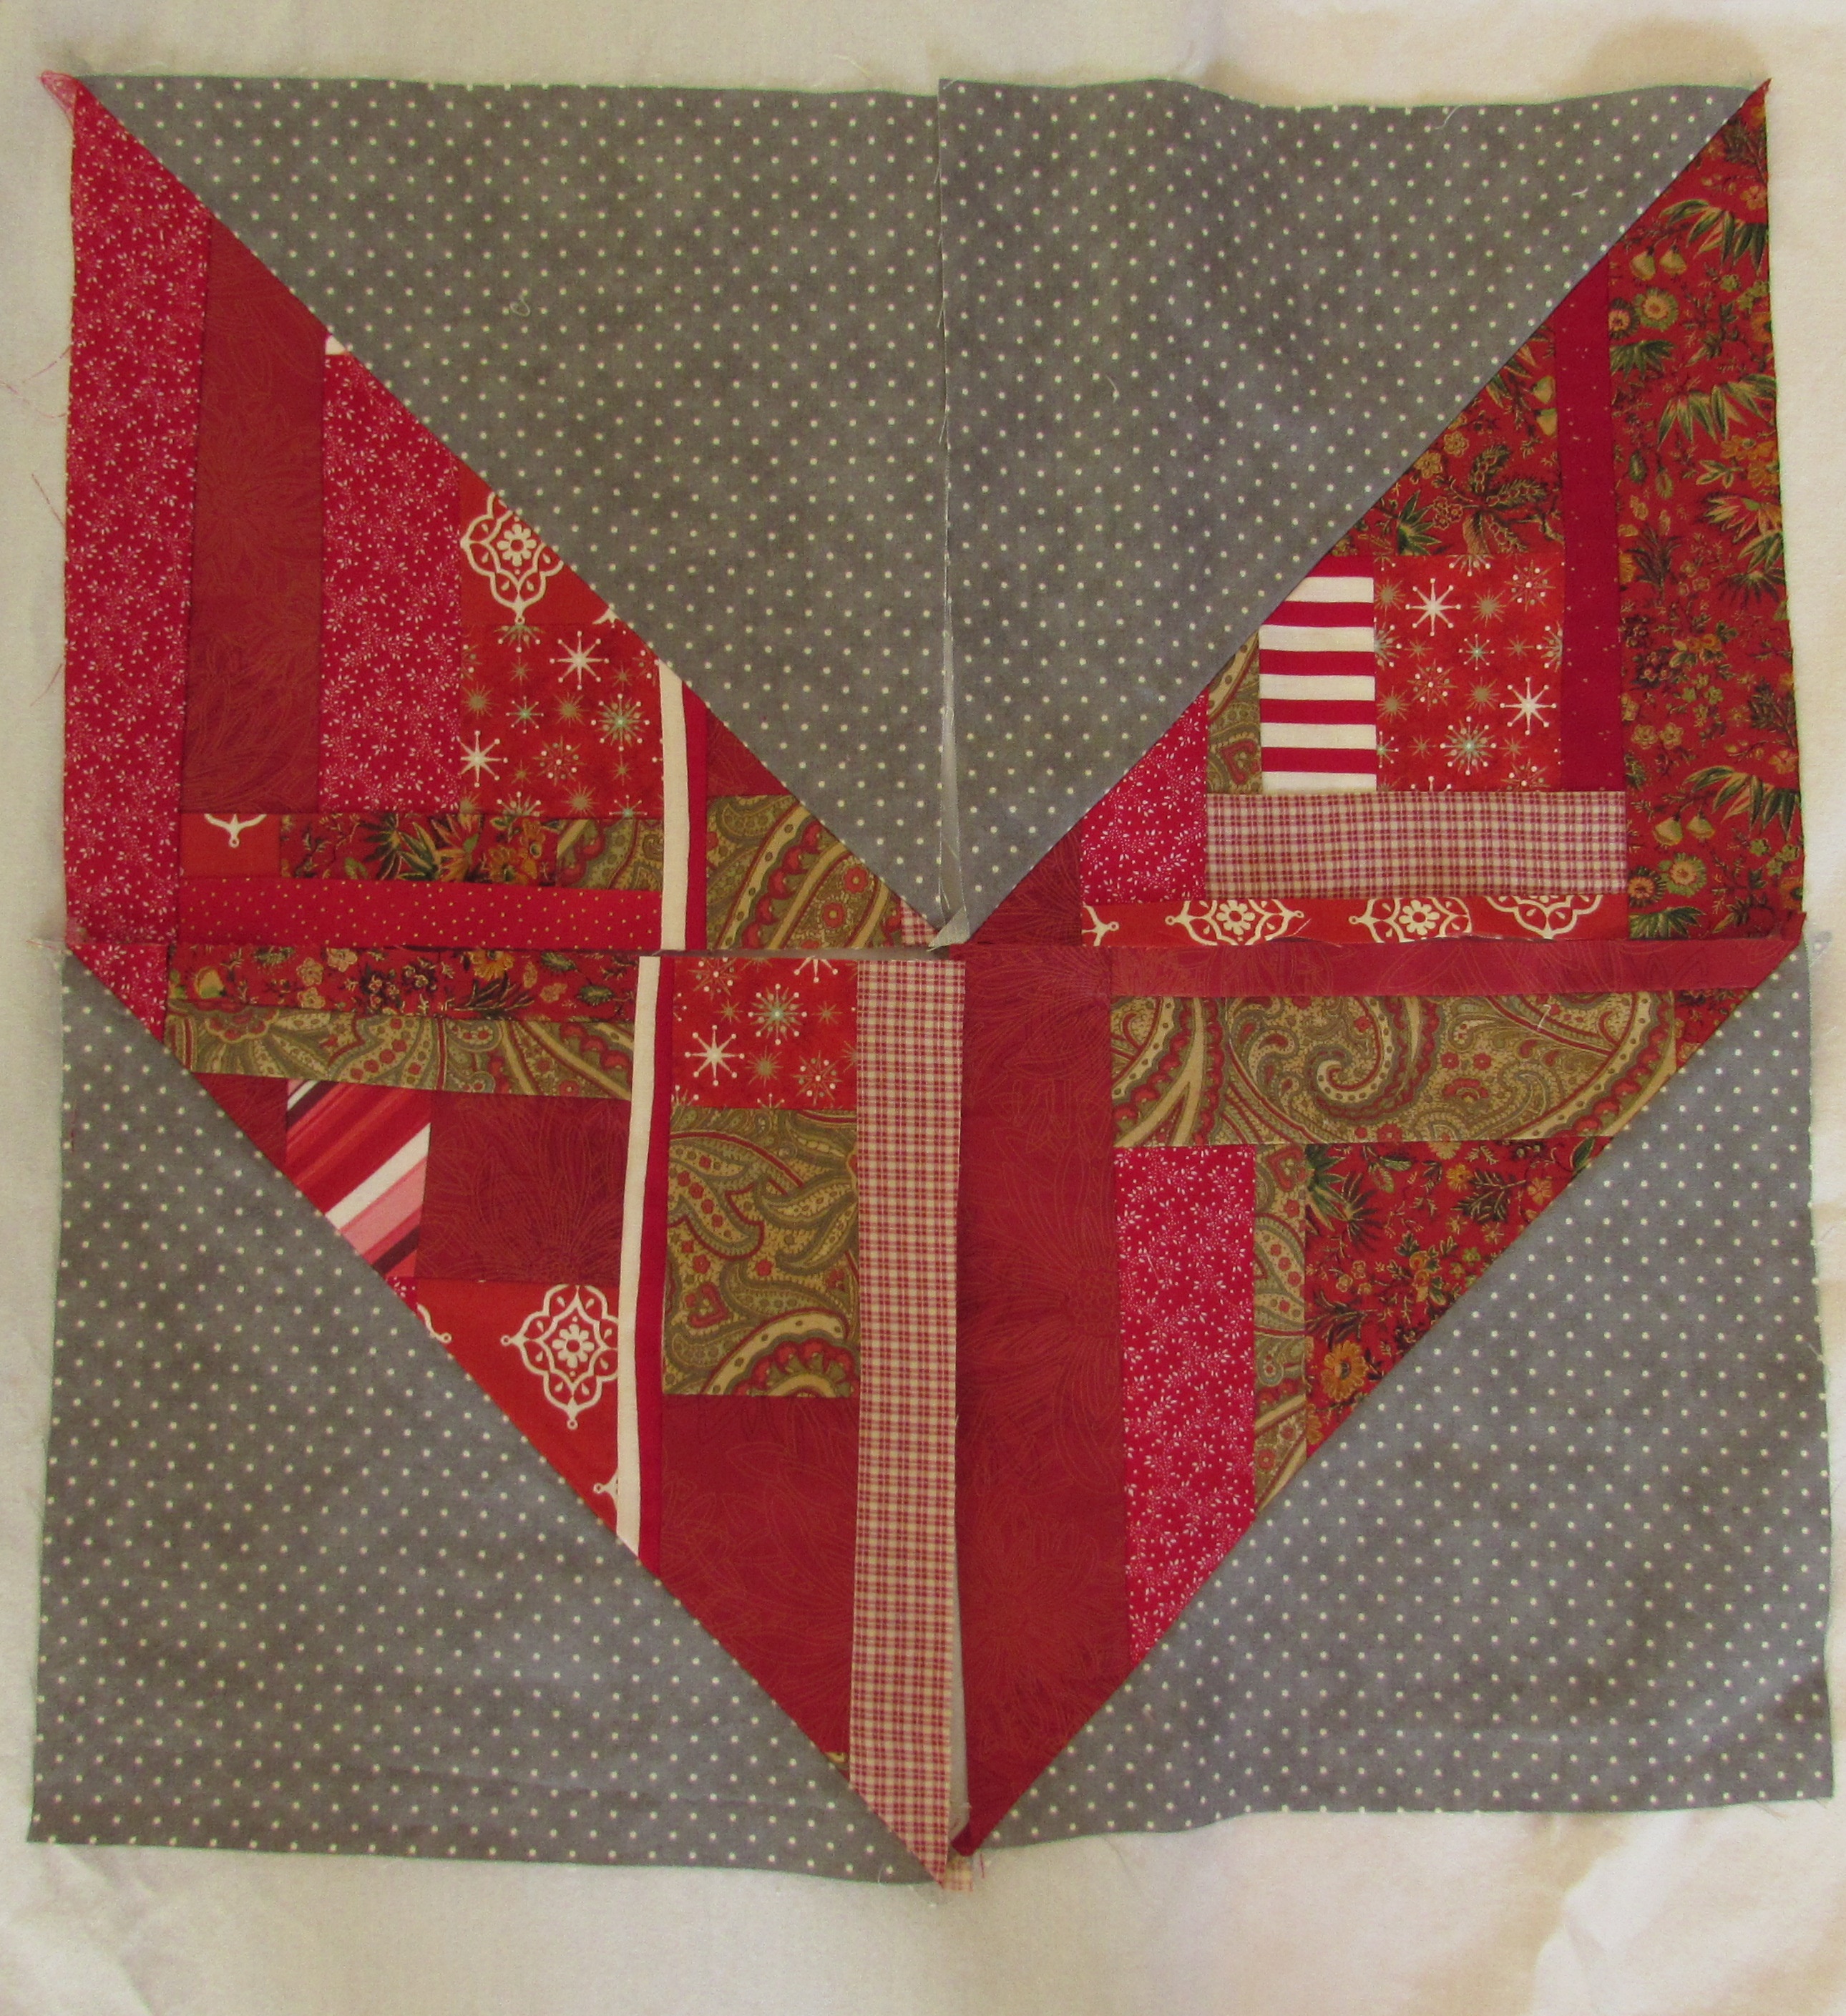
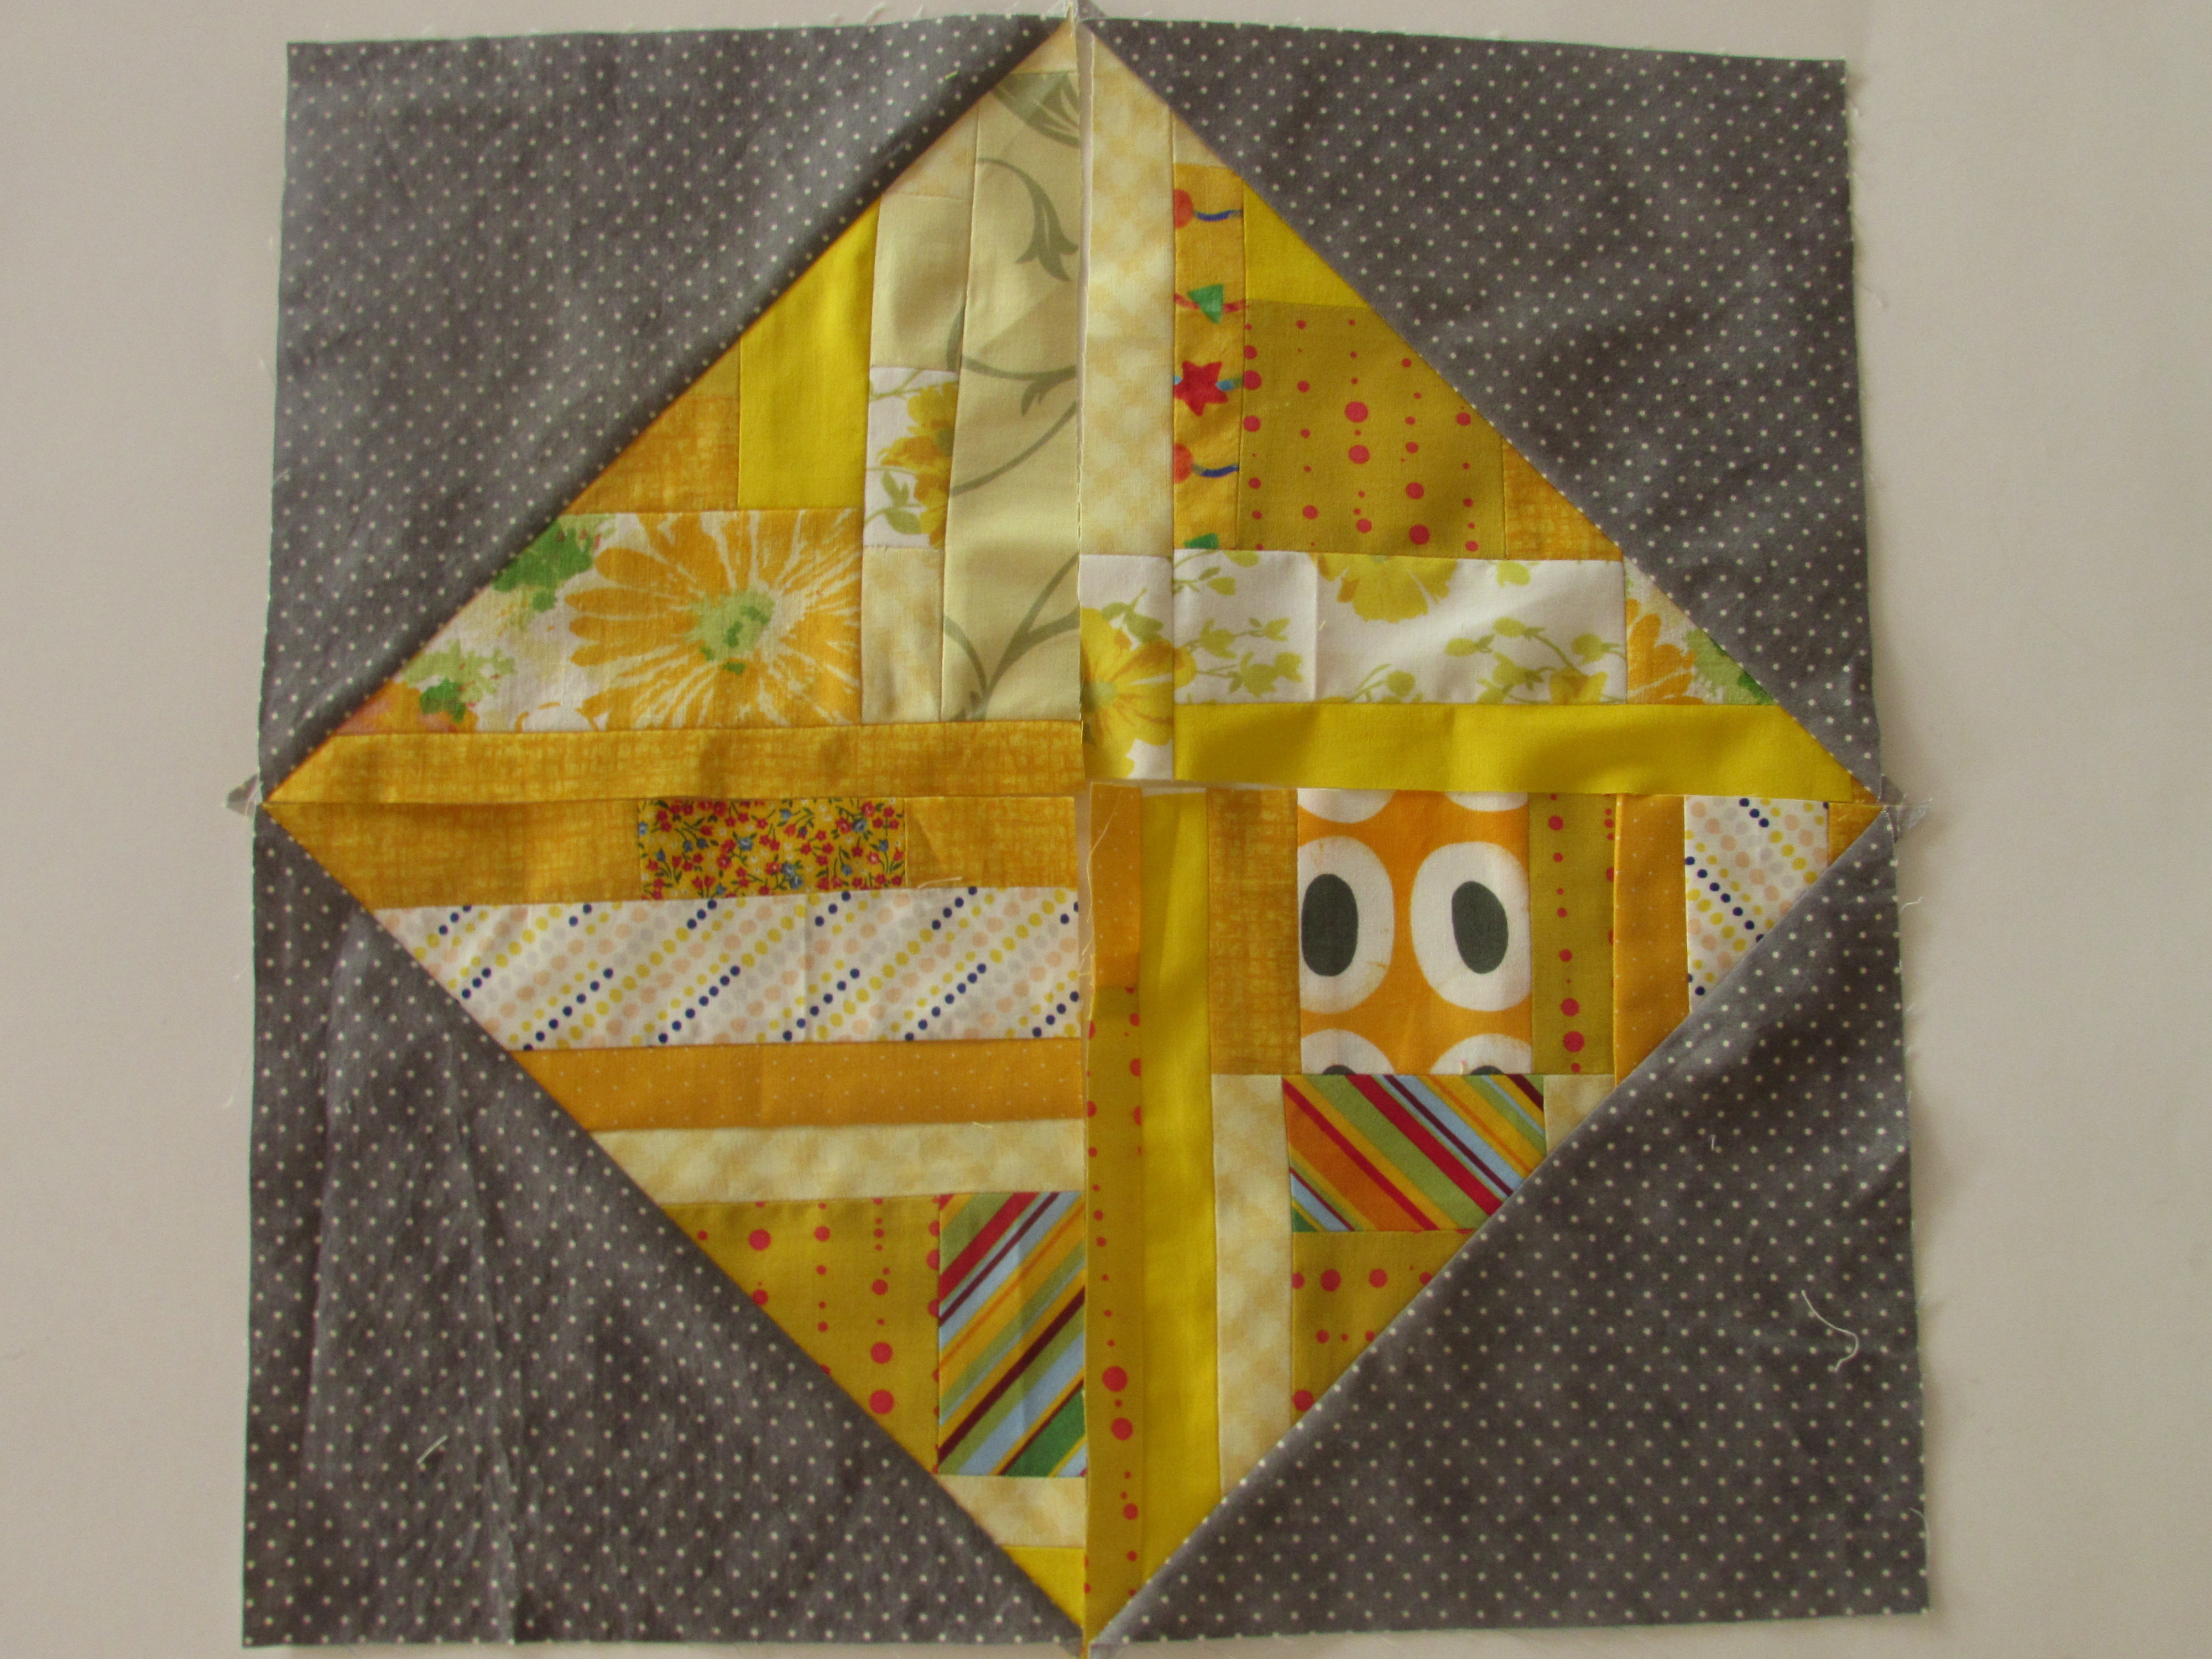
As with last month, I finished my scrappy blocks just in the nick of time. I finished with only one day to spare. September has come to a close. Time moves at a dizzying pace sometimes. Anyway, I played with some deep red scraps and added gold accents where I could as this was the RSC16 color scheme for September. This is a combination I really like. It worked better for my scrappy HST’s than it did for the gemstone project. The gemstone project requires I cut 3 1/2″ blocks and I didn’t really have very many deep red scraps that were big enough. I had tons of strings though which I used for the scrappy HST’s. Here you go. Take a look.
I love these colors. They add a richness to the project. What do you think?
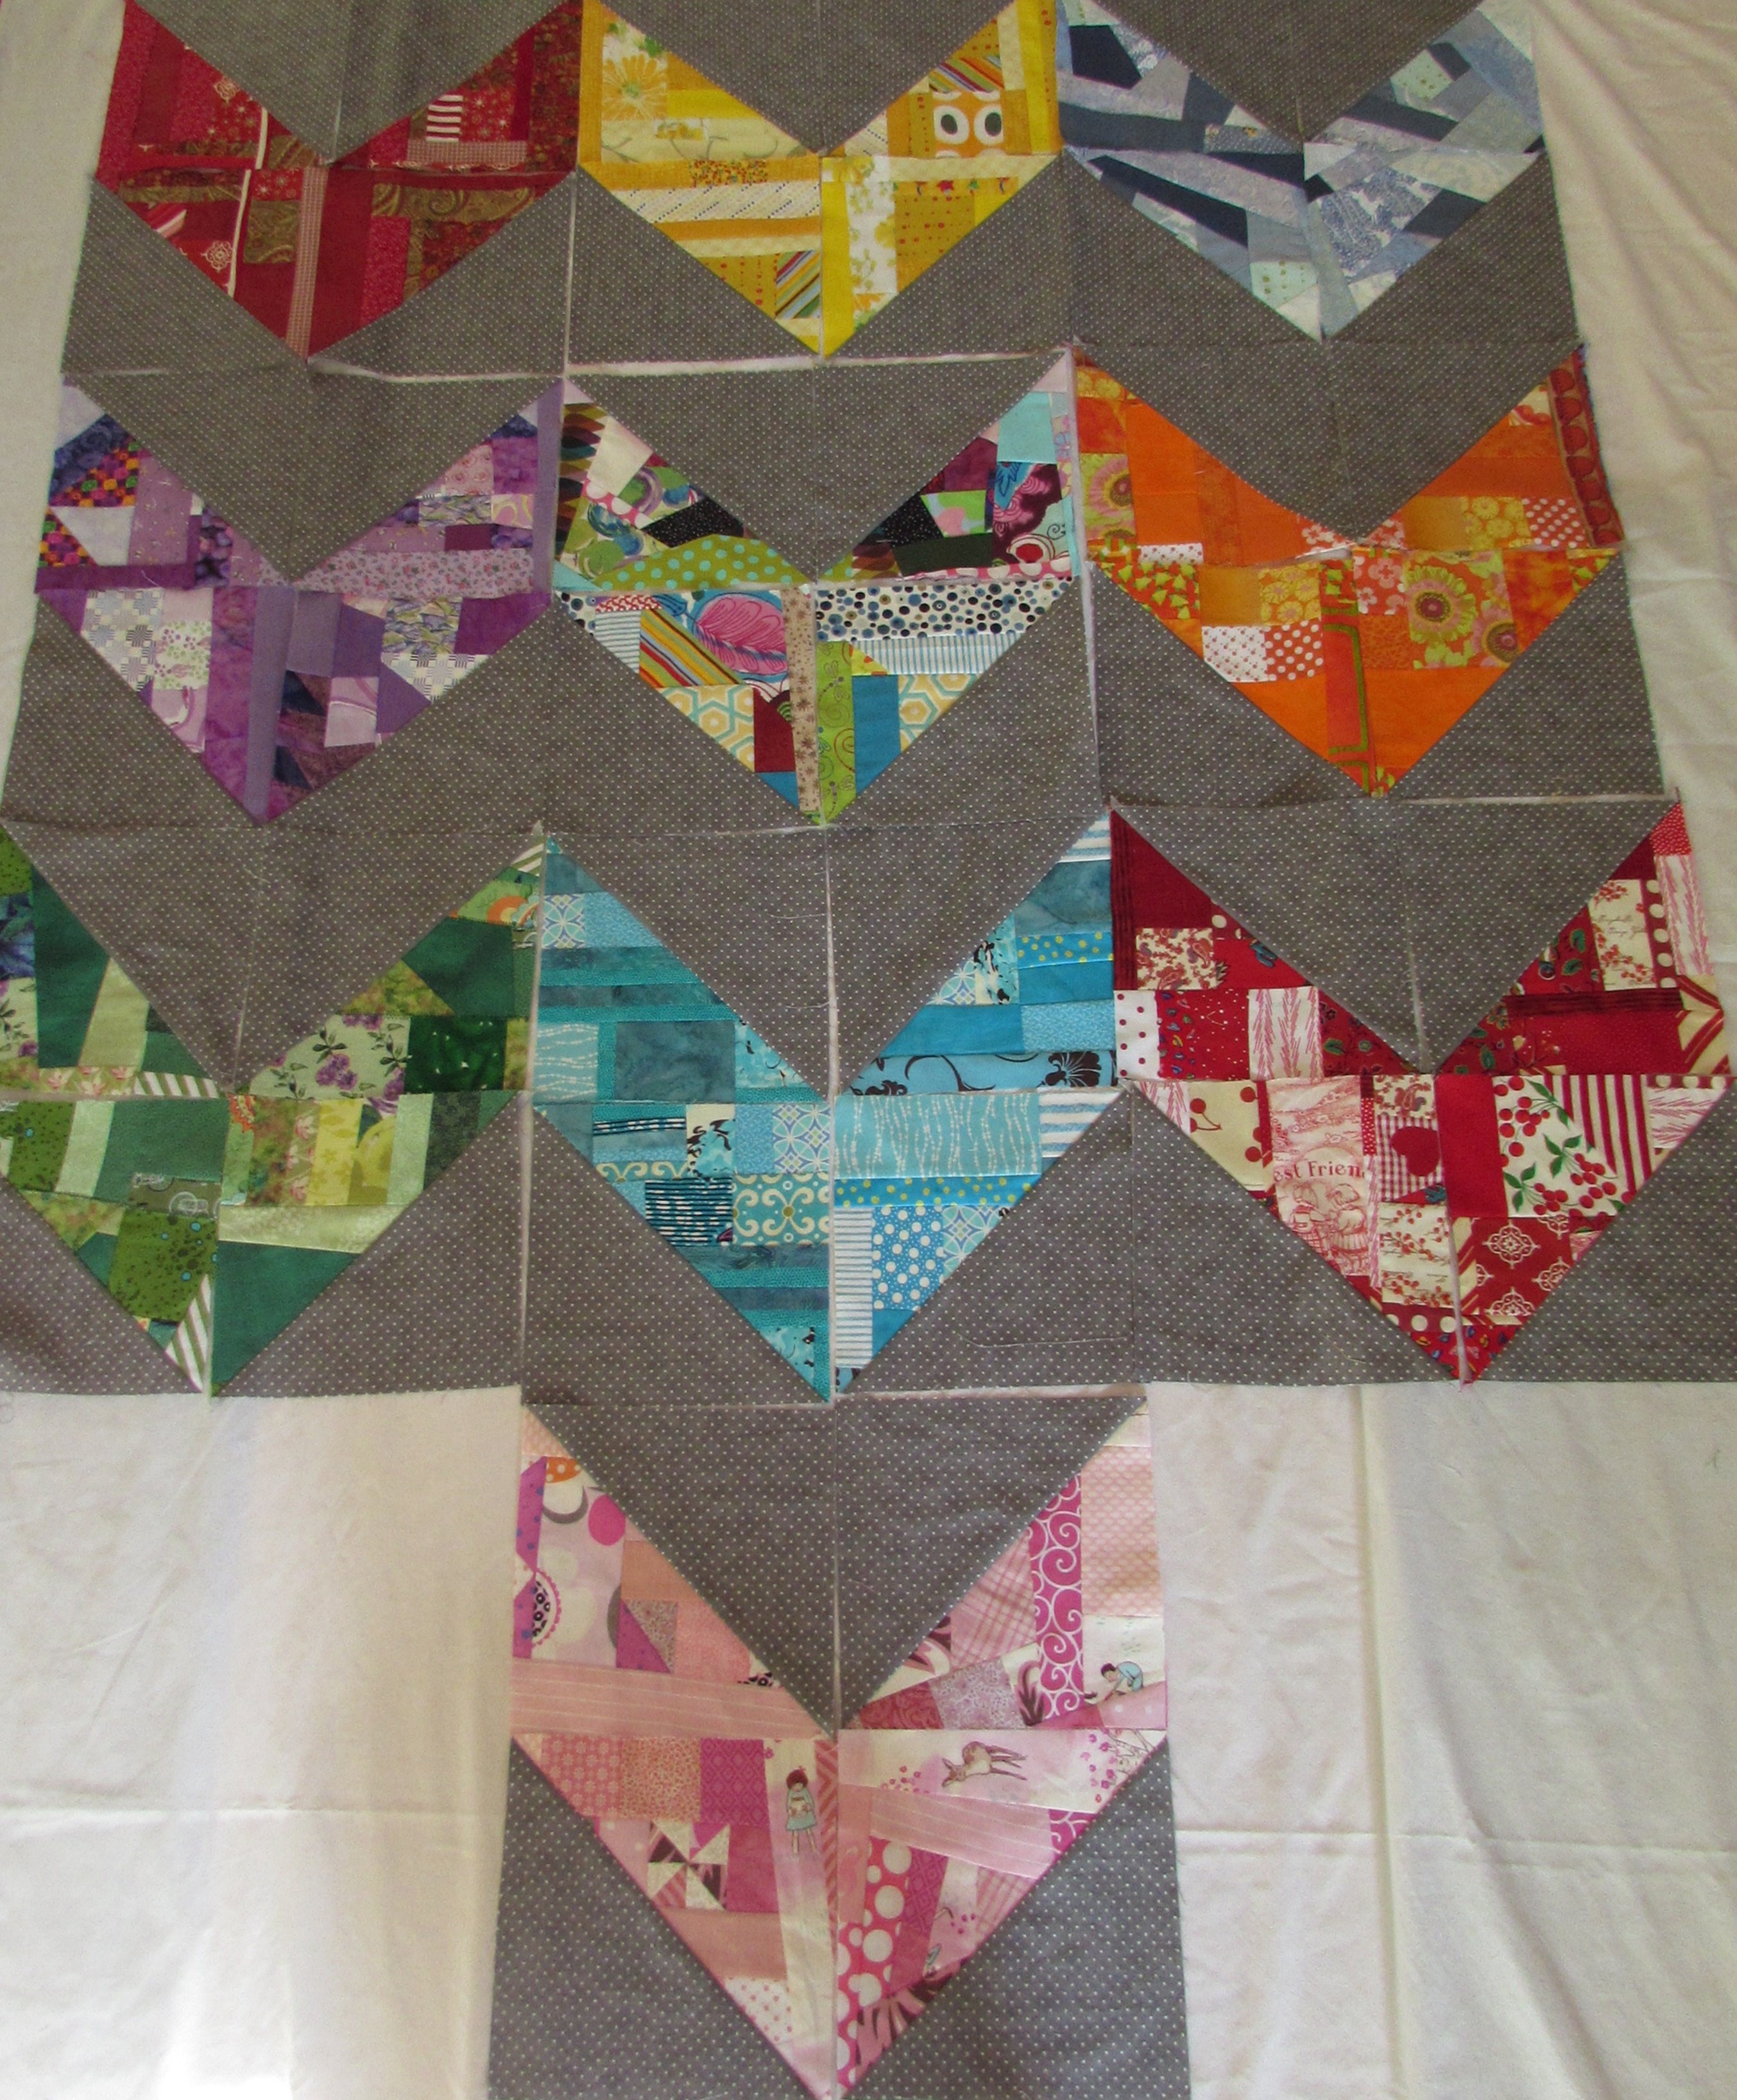
I was playing with these blocks on Tuesday when Julia was recuperating on the couch. We looked at colors trying to decide the last two colors to finish this off. Of course I don’t know what the October color will be for RSC16 but I think I am going to do a set of deep purple blocks and a set a very pale yellow. (Unless, of course, Angela comes up with some crazy colors for the month of October that appeal to me more. We shall see. Also, I cannot decide if I should keep the multi colored scrappy blocks that are in the center. Do those stay or do they go?
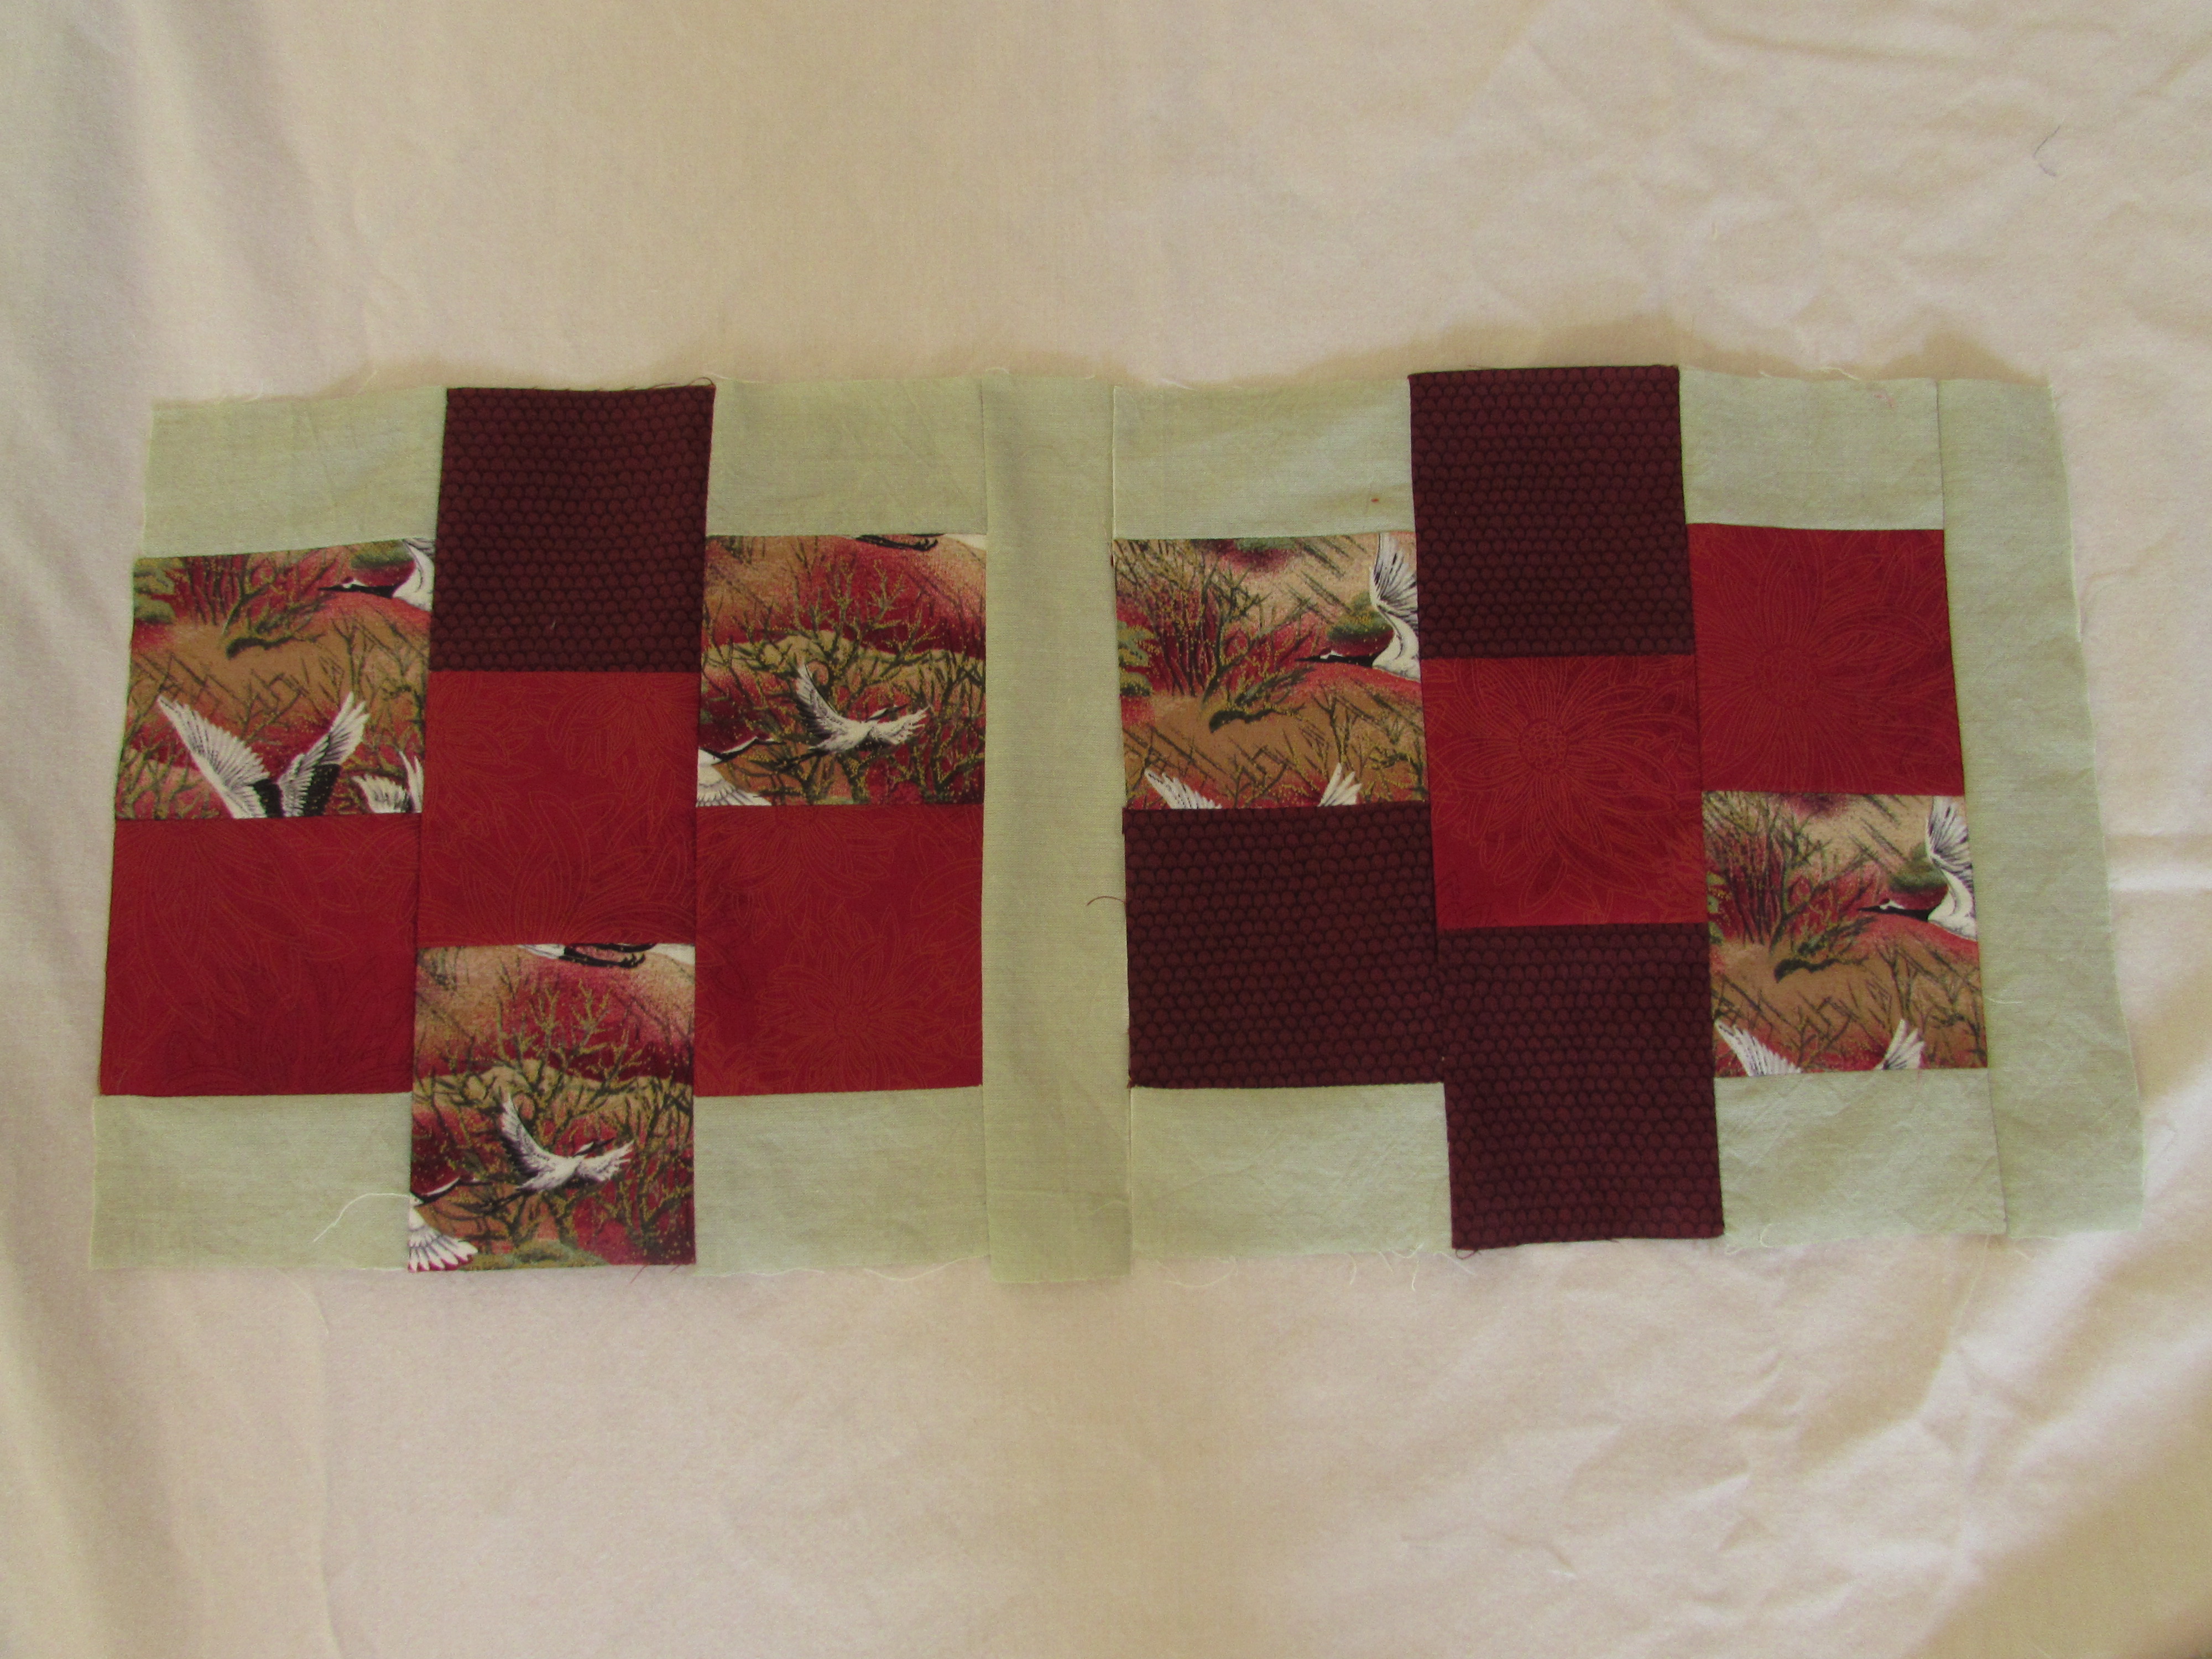
As I said, I didn’t have much to work with for the Gemstones quilt. I do like the blocks but was only able to make two.
Here is the sum total of what I have thus far.
I definitely want to add some deep yellow blocks to this. I don’t know if I have the right scraps and may have to splurge on a fat quarter or two to supplement. Kind of silly to buy pieces for a scrappy project but I think it is calling for yellow. Also, it might need some blocks with a deep, midnight blue. Do you agree??
Glad I am keeping up with these, though just barely! I look forward to finding out the color for October and deciding if it works for either project, now that I am coming close to completing both of them.
Happy weekend everyone!!
As always, I’m linking up all over the place. My favorites are listed at the top of the page, under Link Ups.
Here is an early morning update for you. This has been a crazy week. Last weekend we were up in Downieville working on the house while Julia traveled with the tenth grade class to Ashland, OR (about a five hour drive) to attend the Shakespeare festival. She had a great time up until early Sunday morning when she woke with a nasty stomach flu. After talking with the mom’s and her principal who were taking care of her, it was decided she really couldn’t do a long drive to come home. My husband drove up to Ashland and they hunkered down in a hotel until the worst was over. Then they drove home on Monday afternoon. She has been recuperating but it looks like she is going back to school today – luckily she has a light morning so she will just go for the afternoon classes.
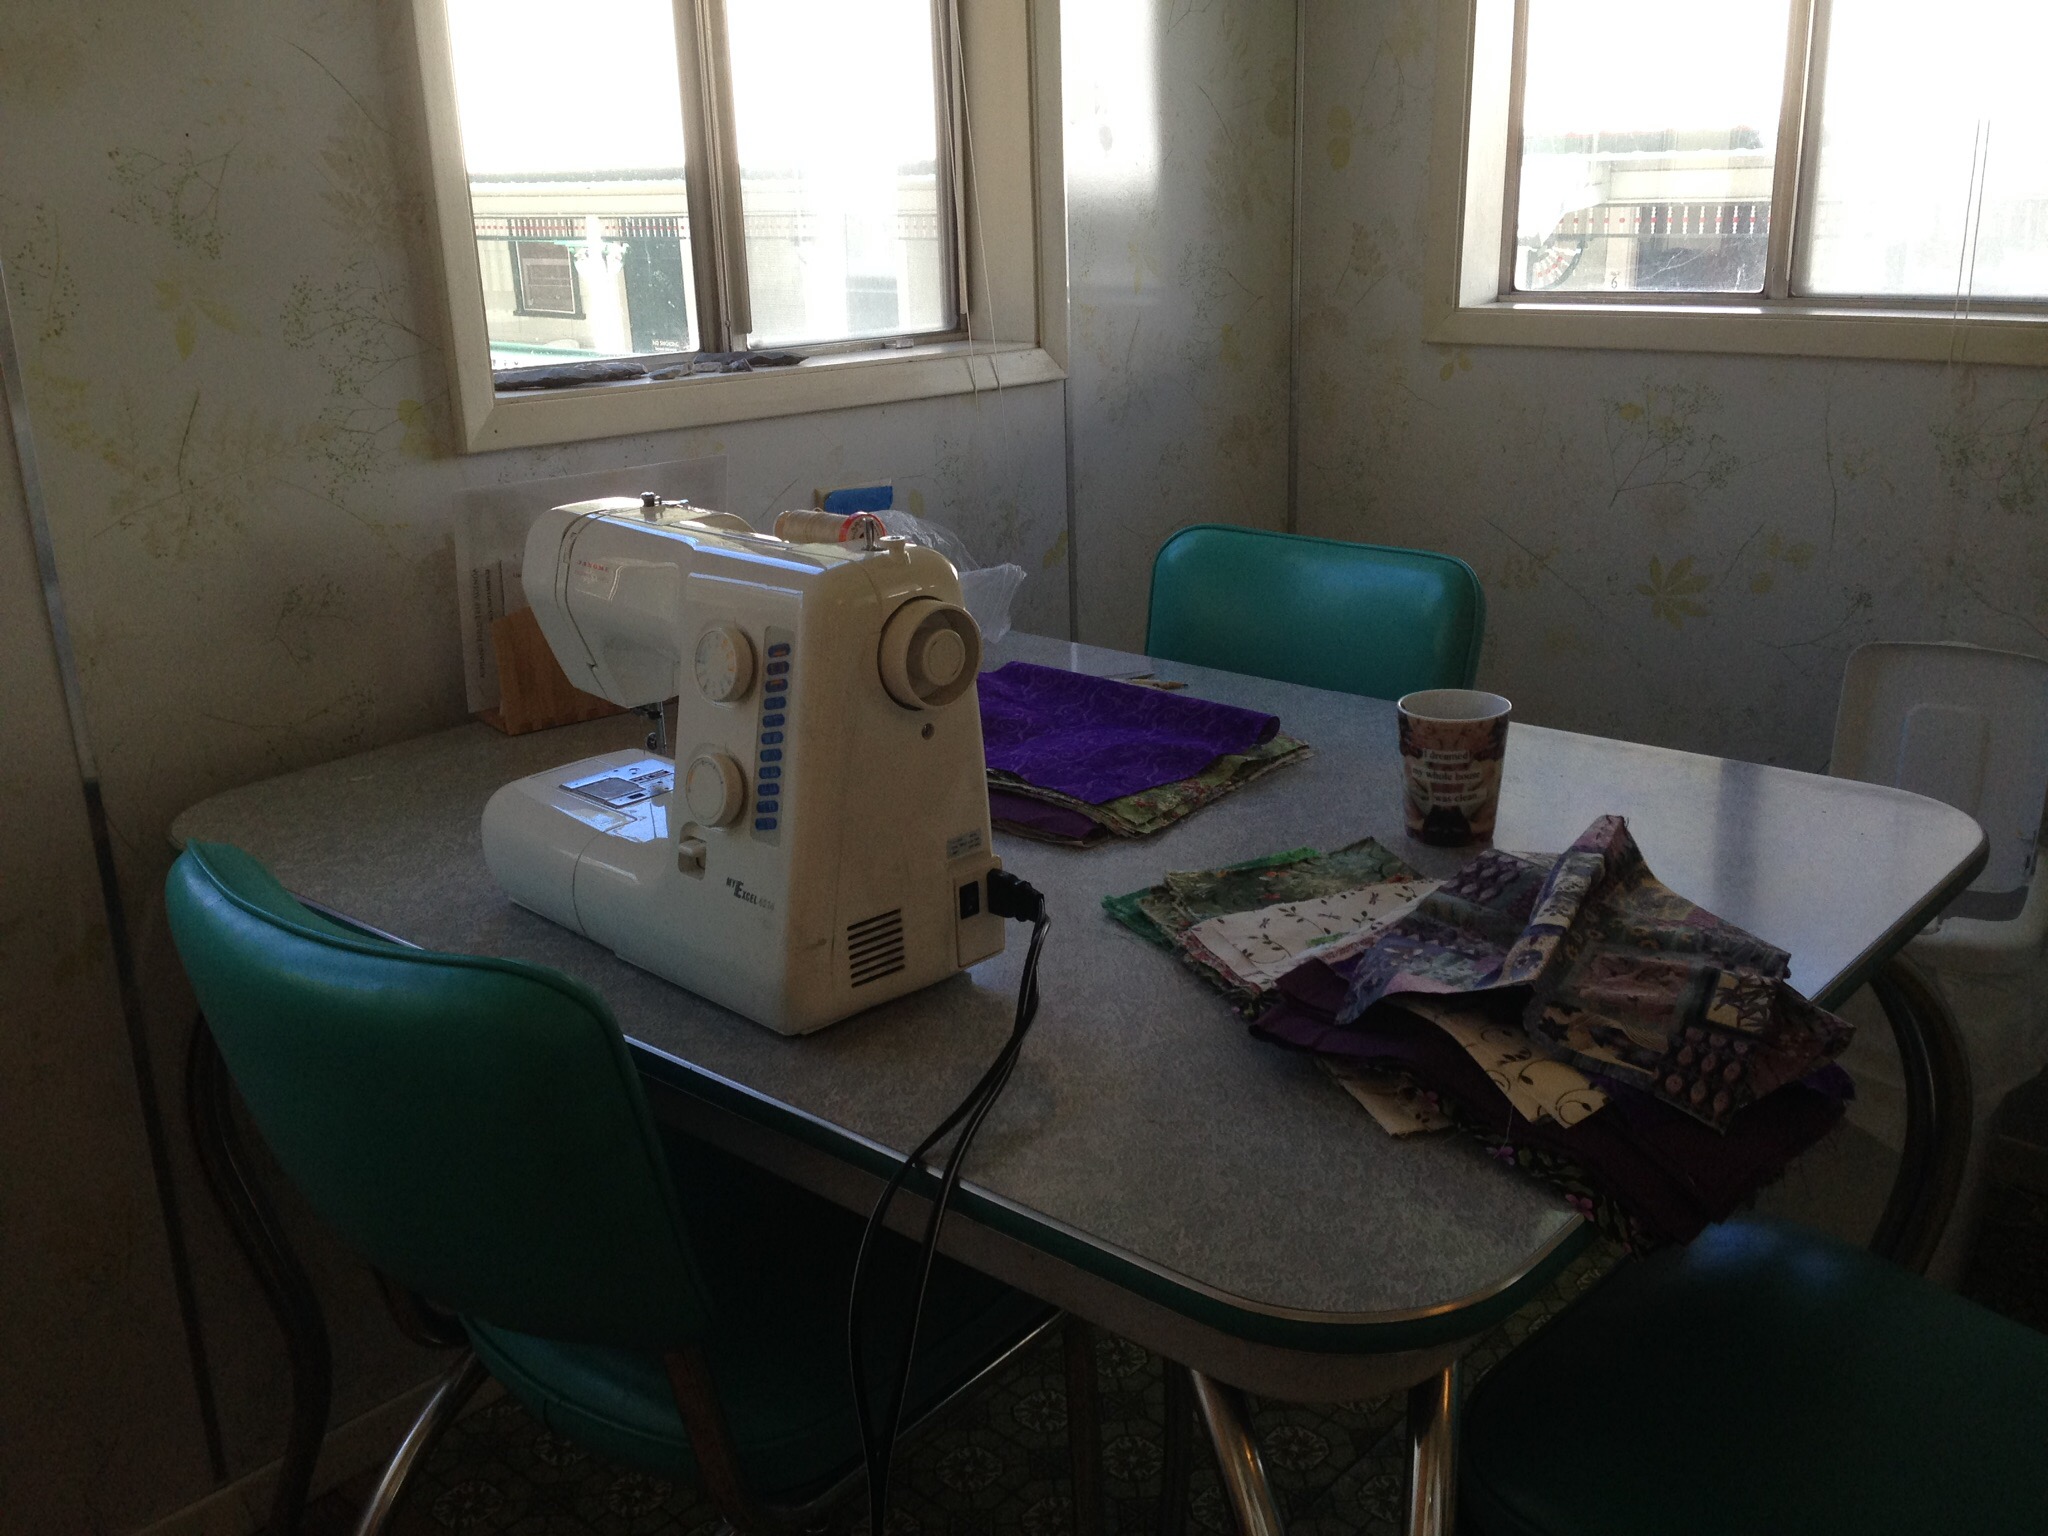
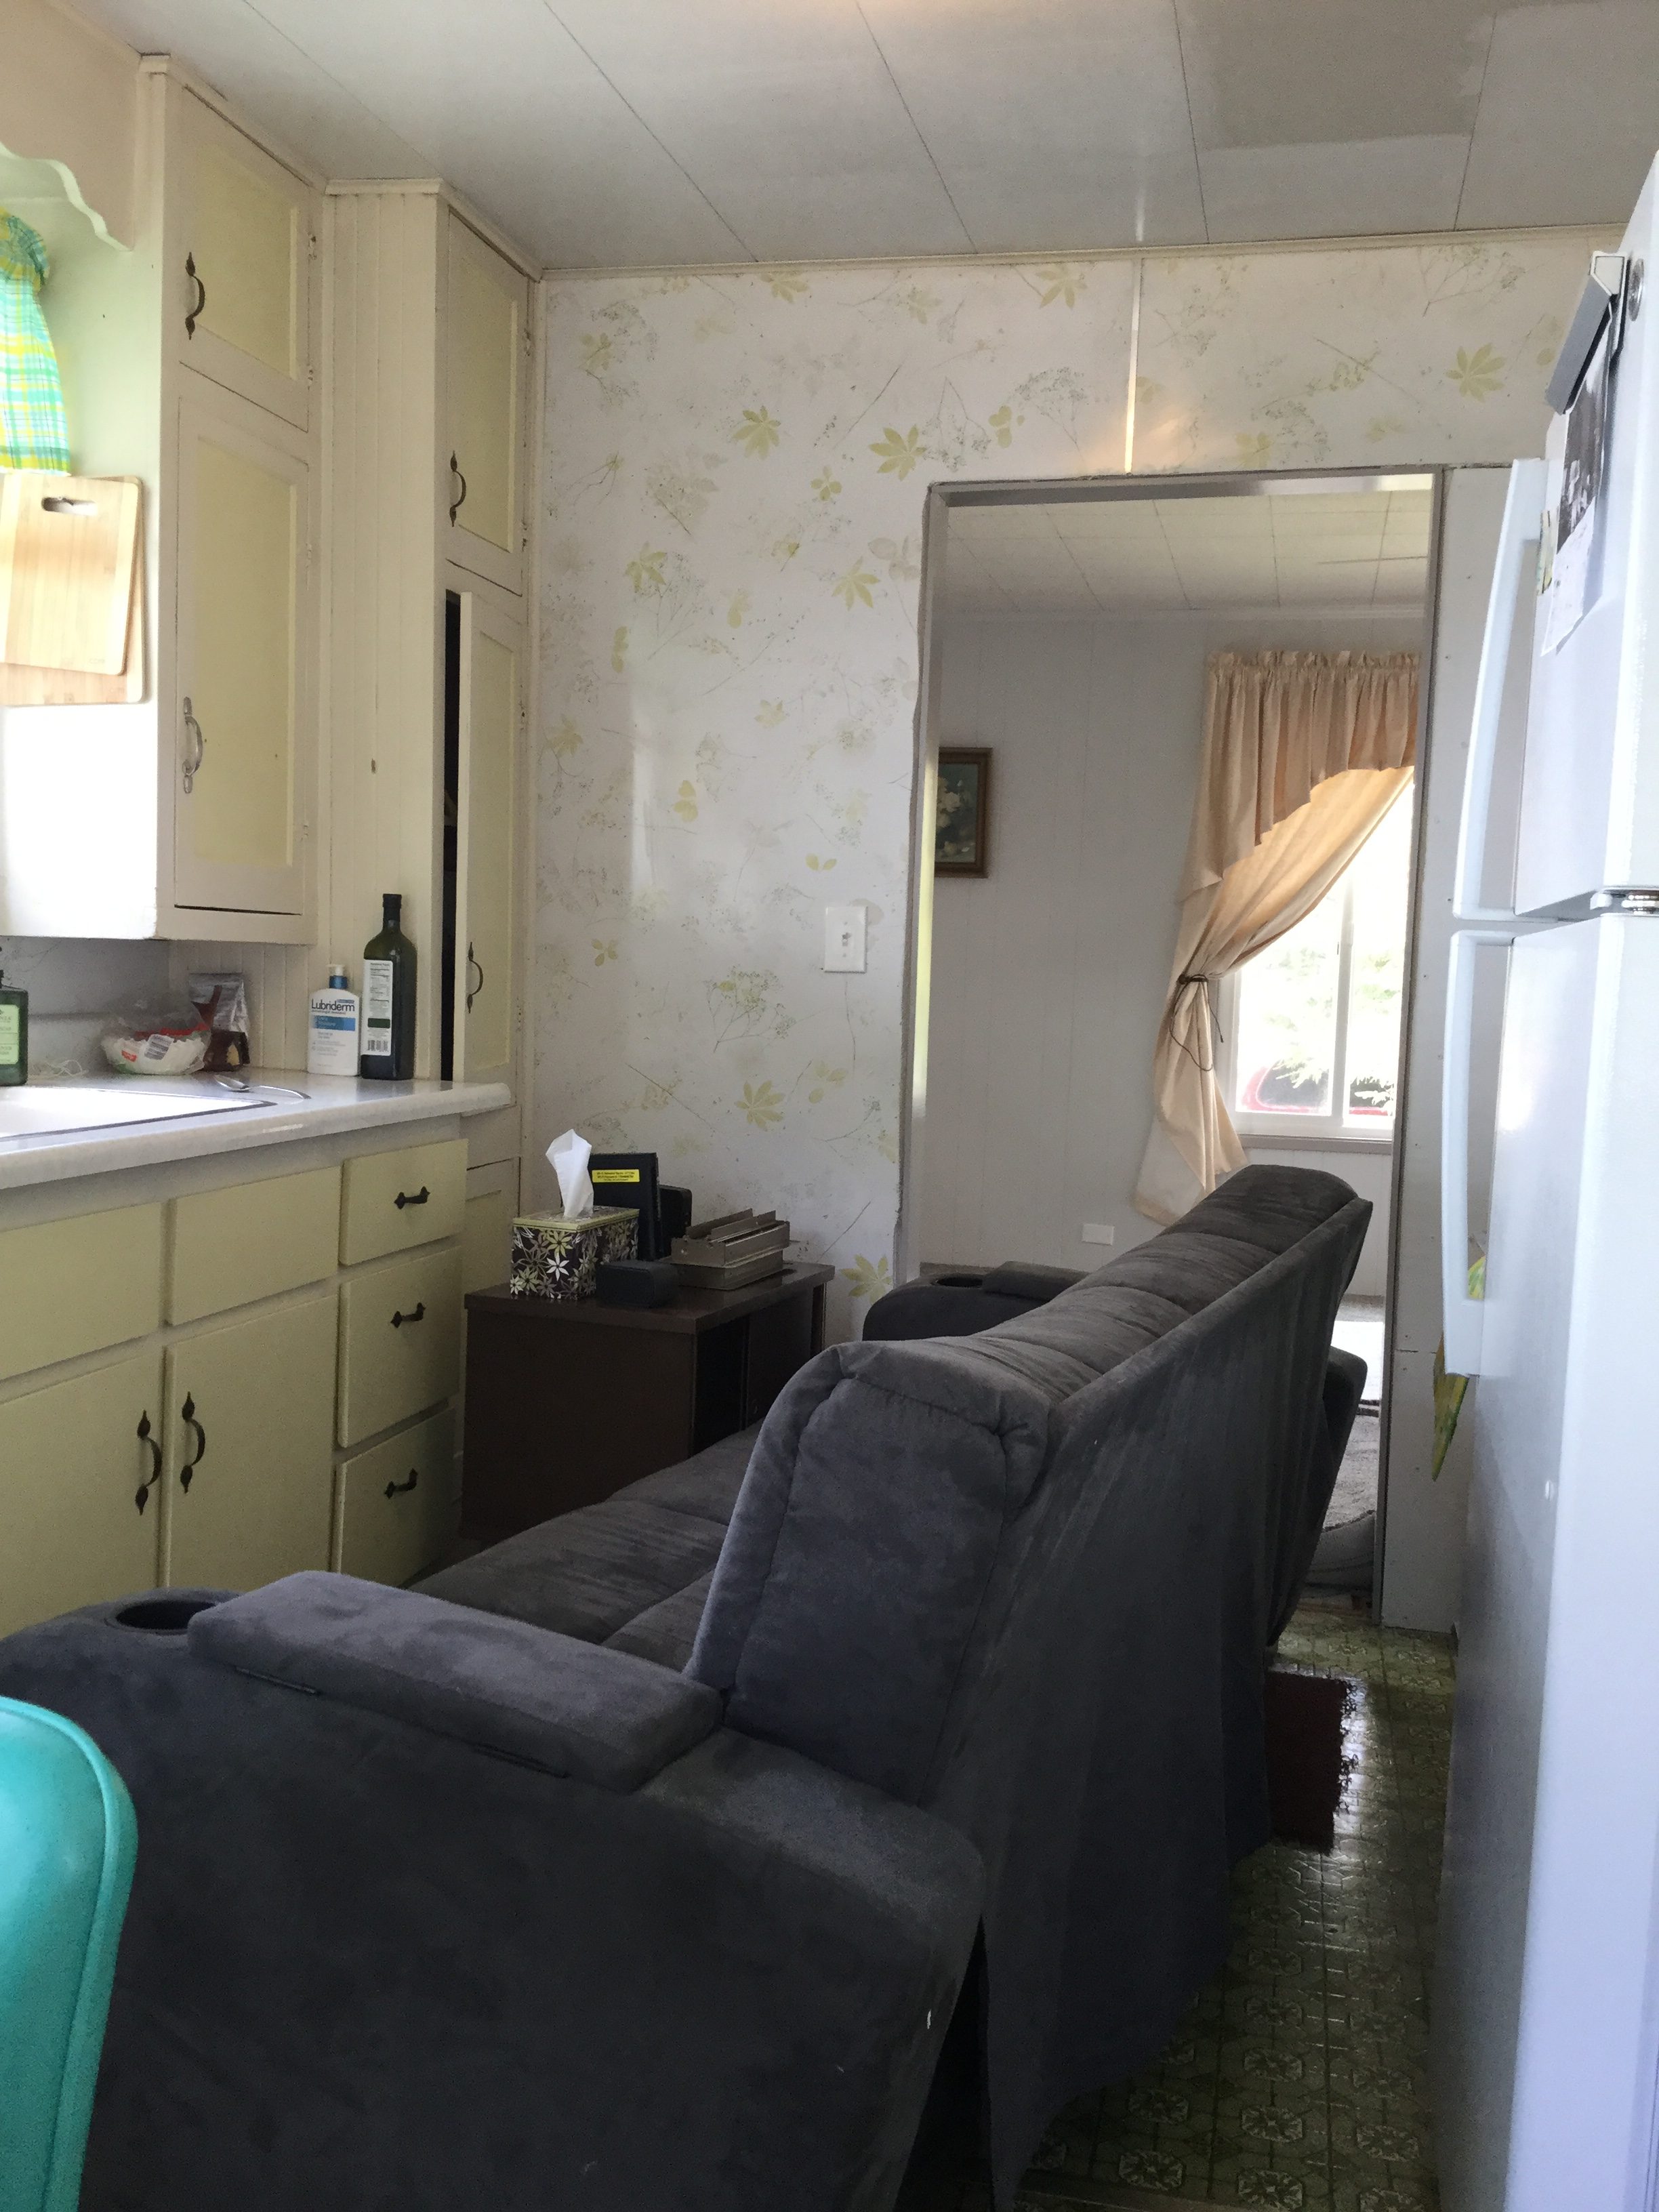
Until it came to an abrupt end, we were making good progress on the living room in Downieville. This room has been fun because it really only needed some paint, new trim and carpet. Friday last week was the day of the carpet install. I drove up in the morning to let the installer in. Remember the house is very tiny (approximately 700 square feet) and I knew I would be stuck either in the kitchen or bedroom while he was working on the living room. I brought my little sewing machine and set up shop in the kitchen. (Don’t you love the little kitchen table? I found it on Craigslist and I am crazy about it.)
It was nice to be able to sew while he was working in the living room but it was quite cozy in the kitchen! There was no other spot for the couch so he pushed it through to the kitchen. Of course because it almost didn’t fit, there are new scratches in the paint of the door trim, but that can be taken care of later.
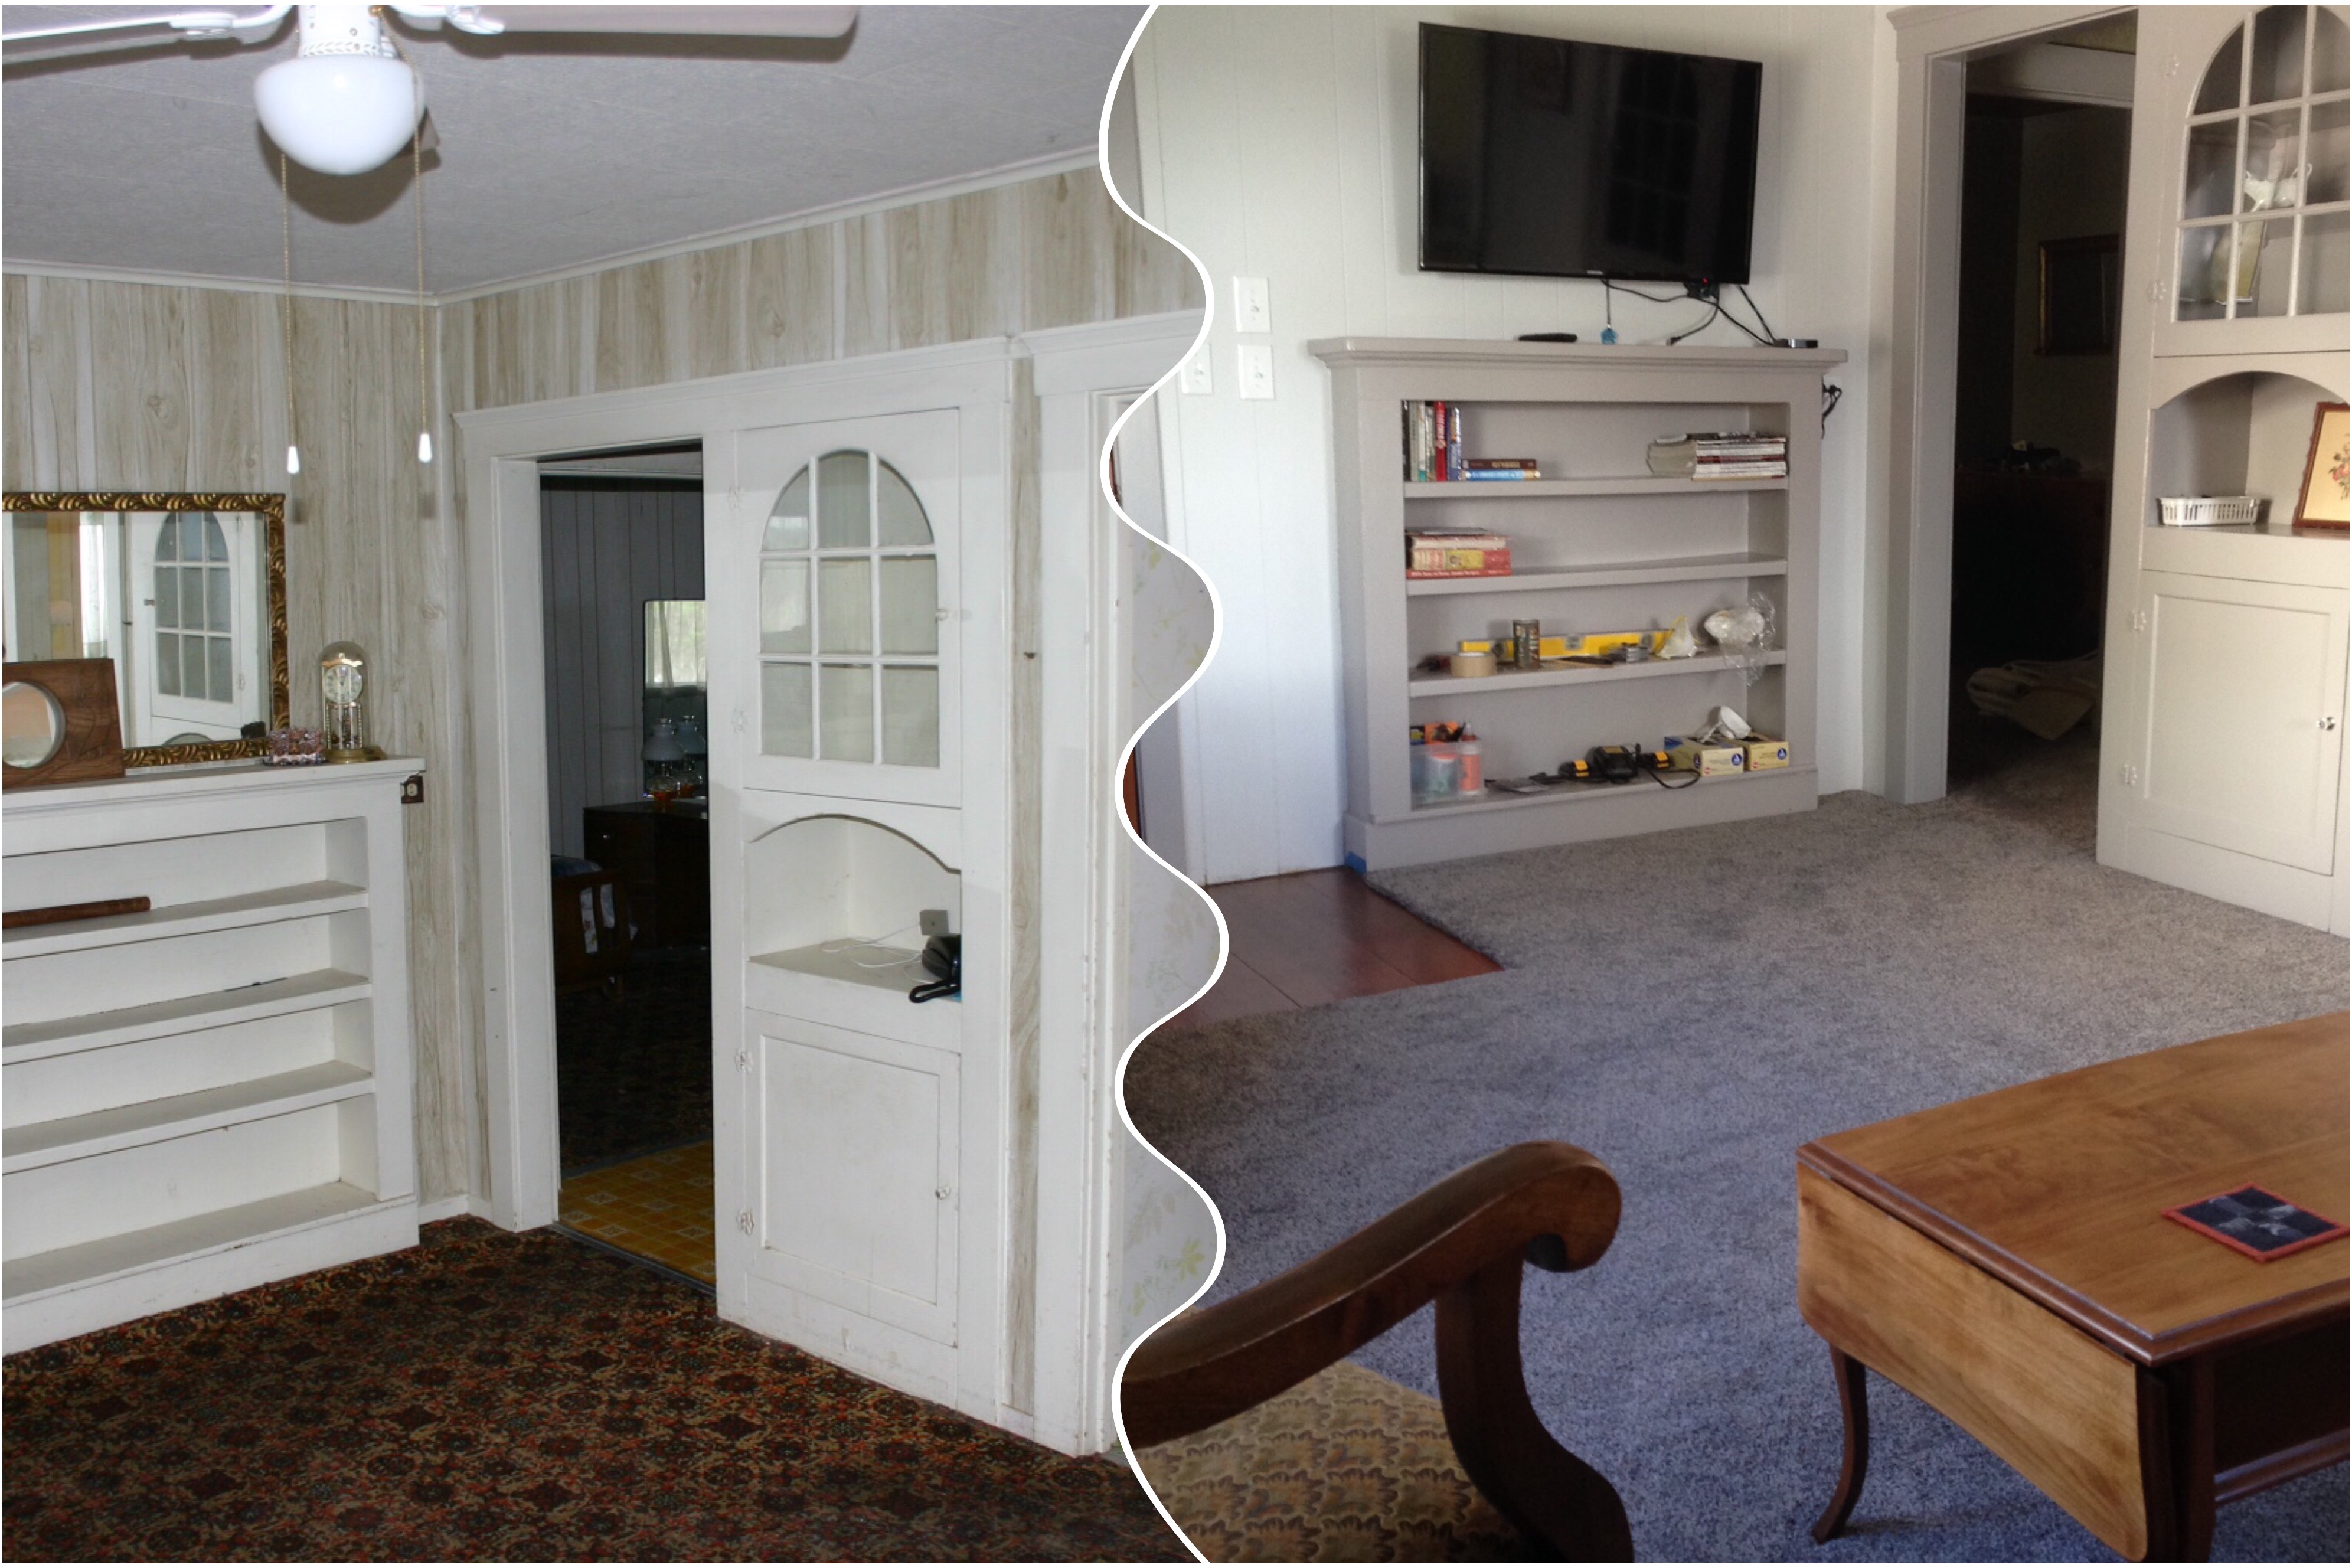
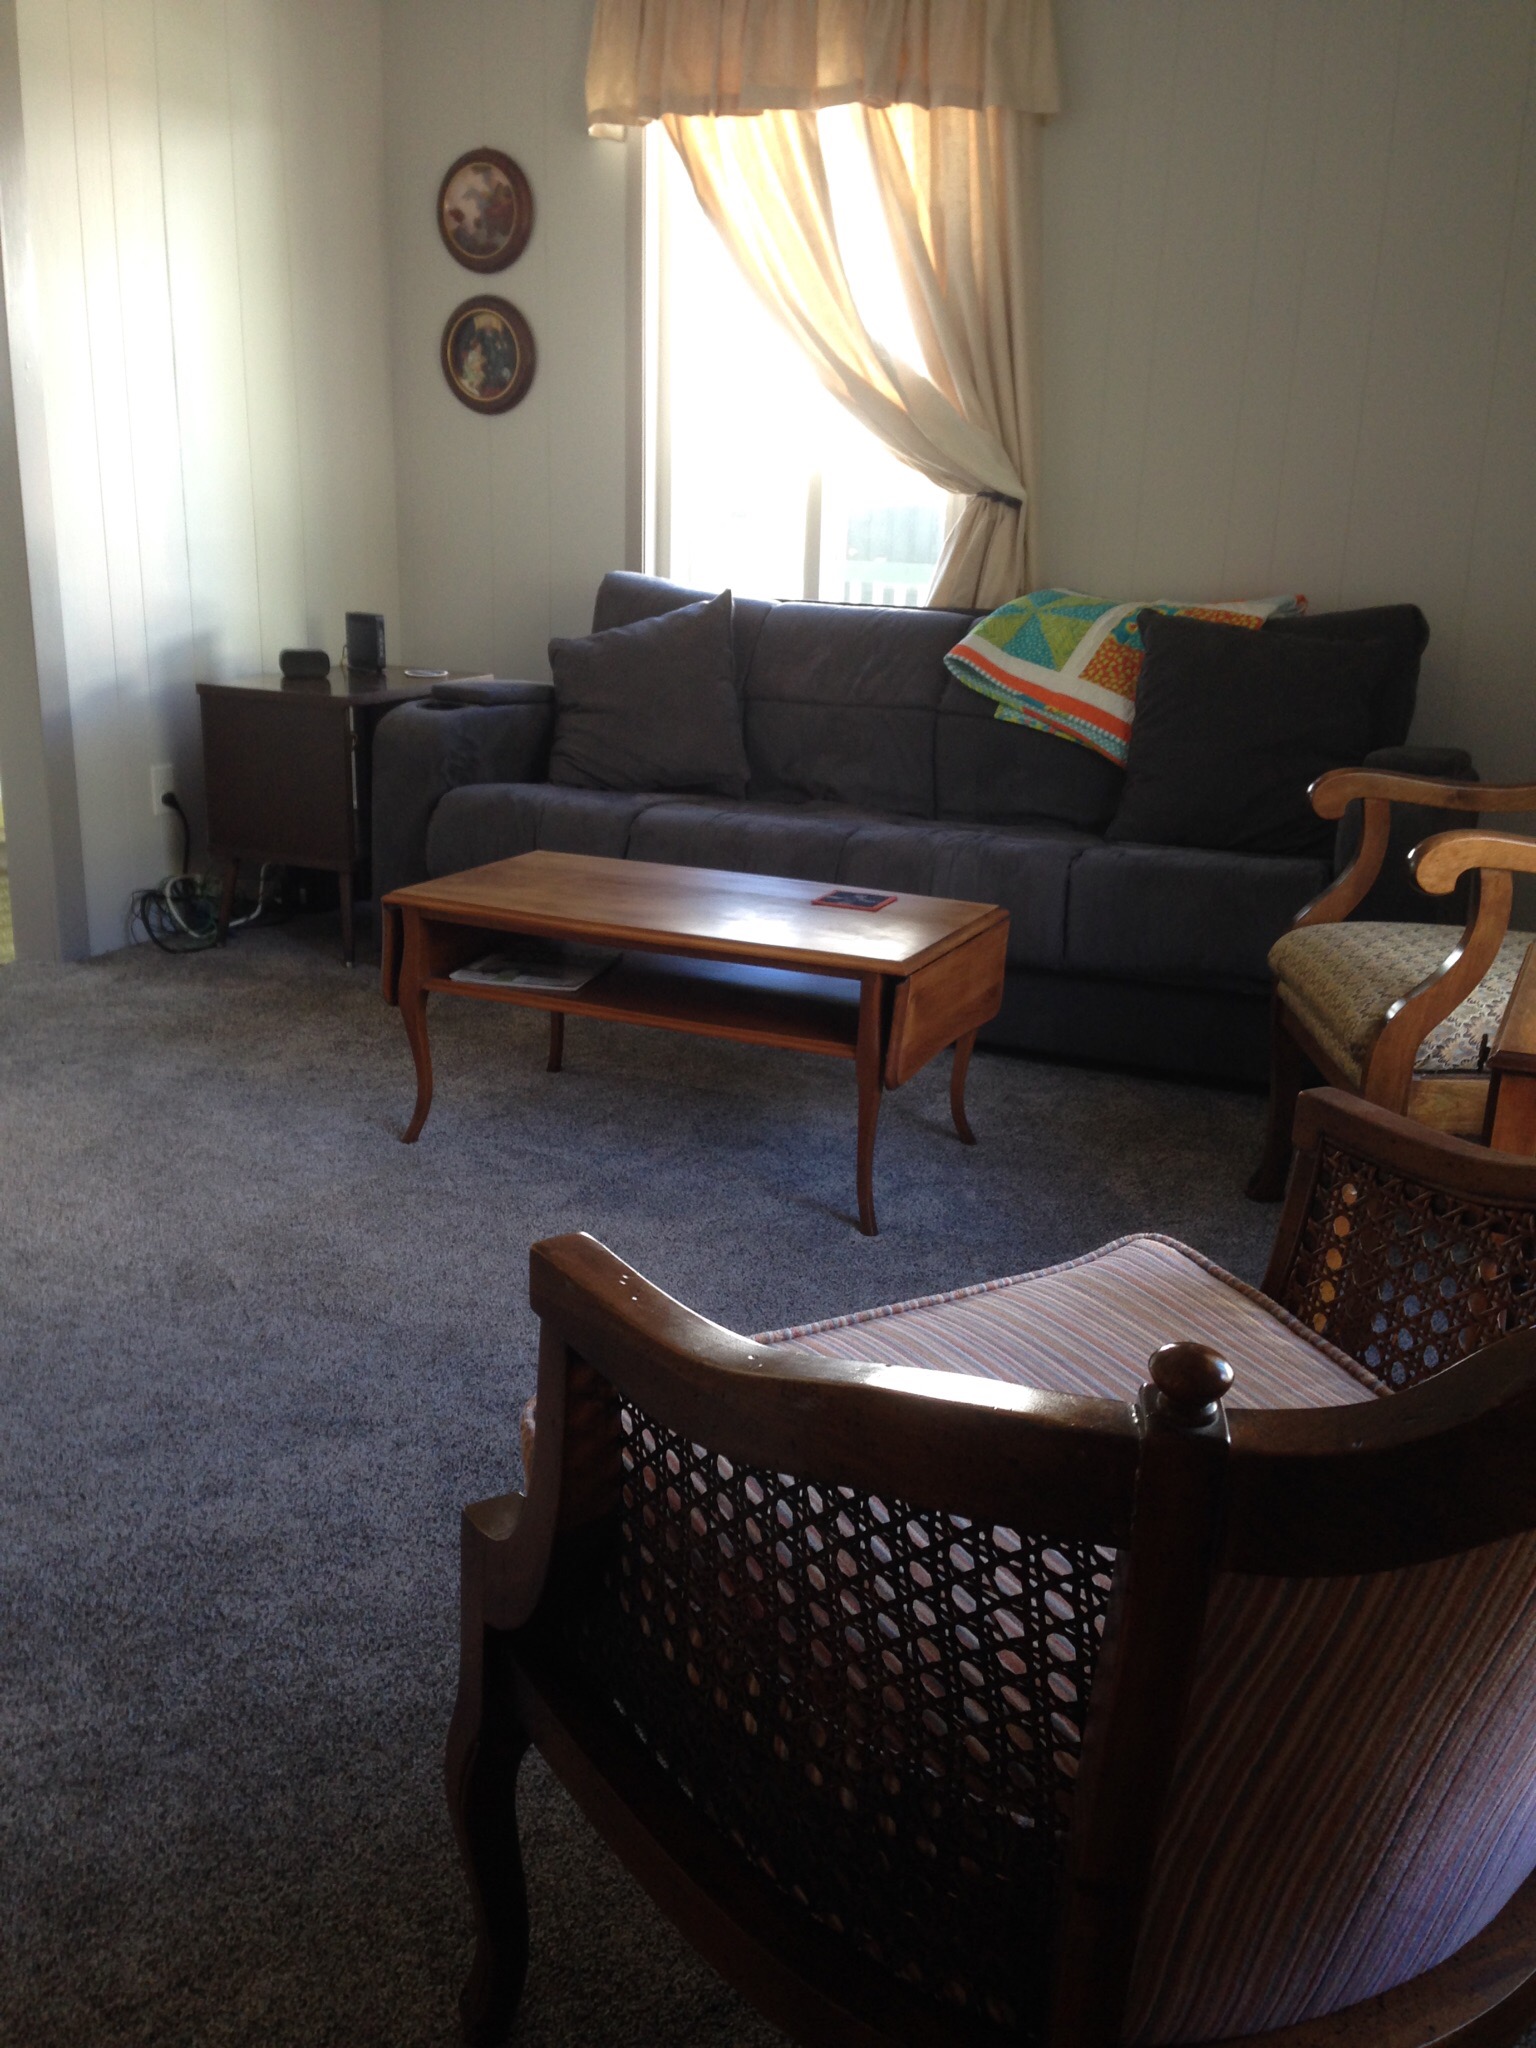
Here is a before and after shot of the living room. The left side is how it looked when we bought the house and the right is current.
Here is another angle on the current living room. We primed and painted the paneling and Ray put new crown molding up around the walls. Ray also refinished a portion of the original hardwood flooring in front of the door so we don’t walk in right on the carpet. Hopefully this will lessen wear and dirt on that portion of the carpeting.
Since the picture was taken, Ray also got the baseboard installed and we hung some pictures. It looks so sweet now.
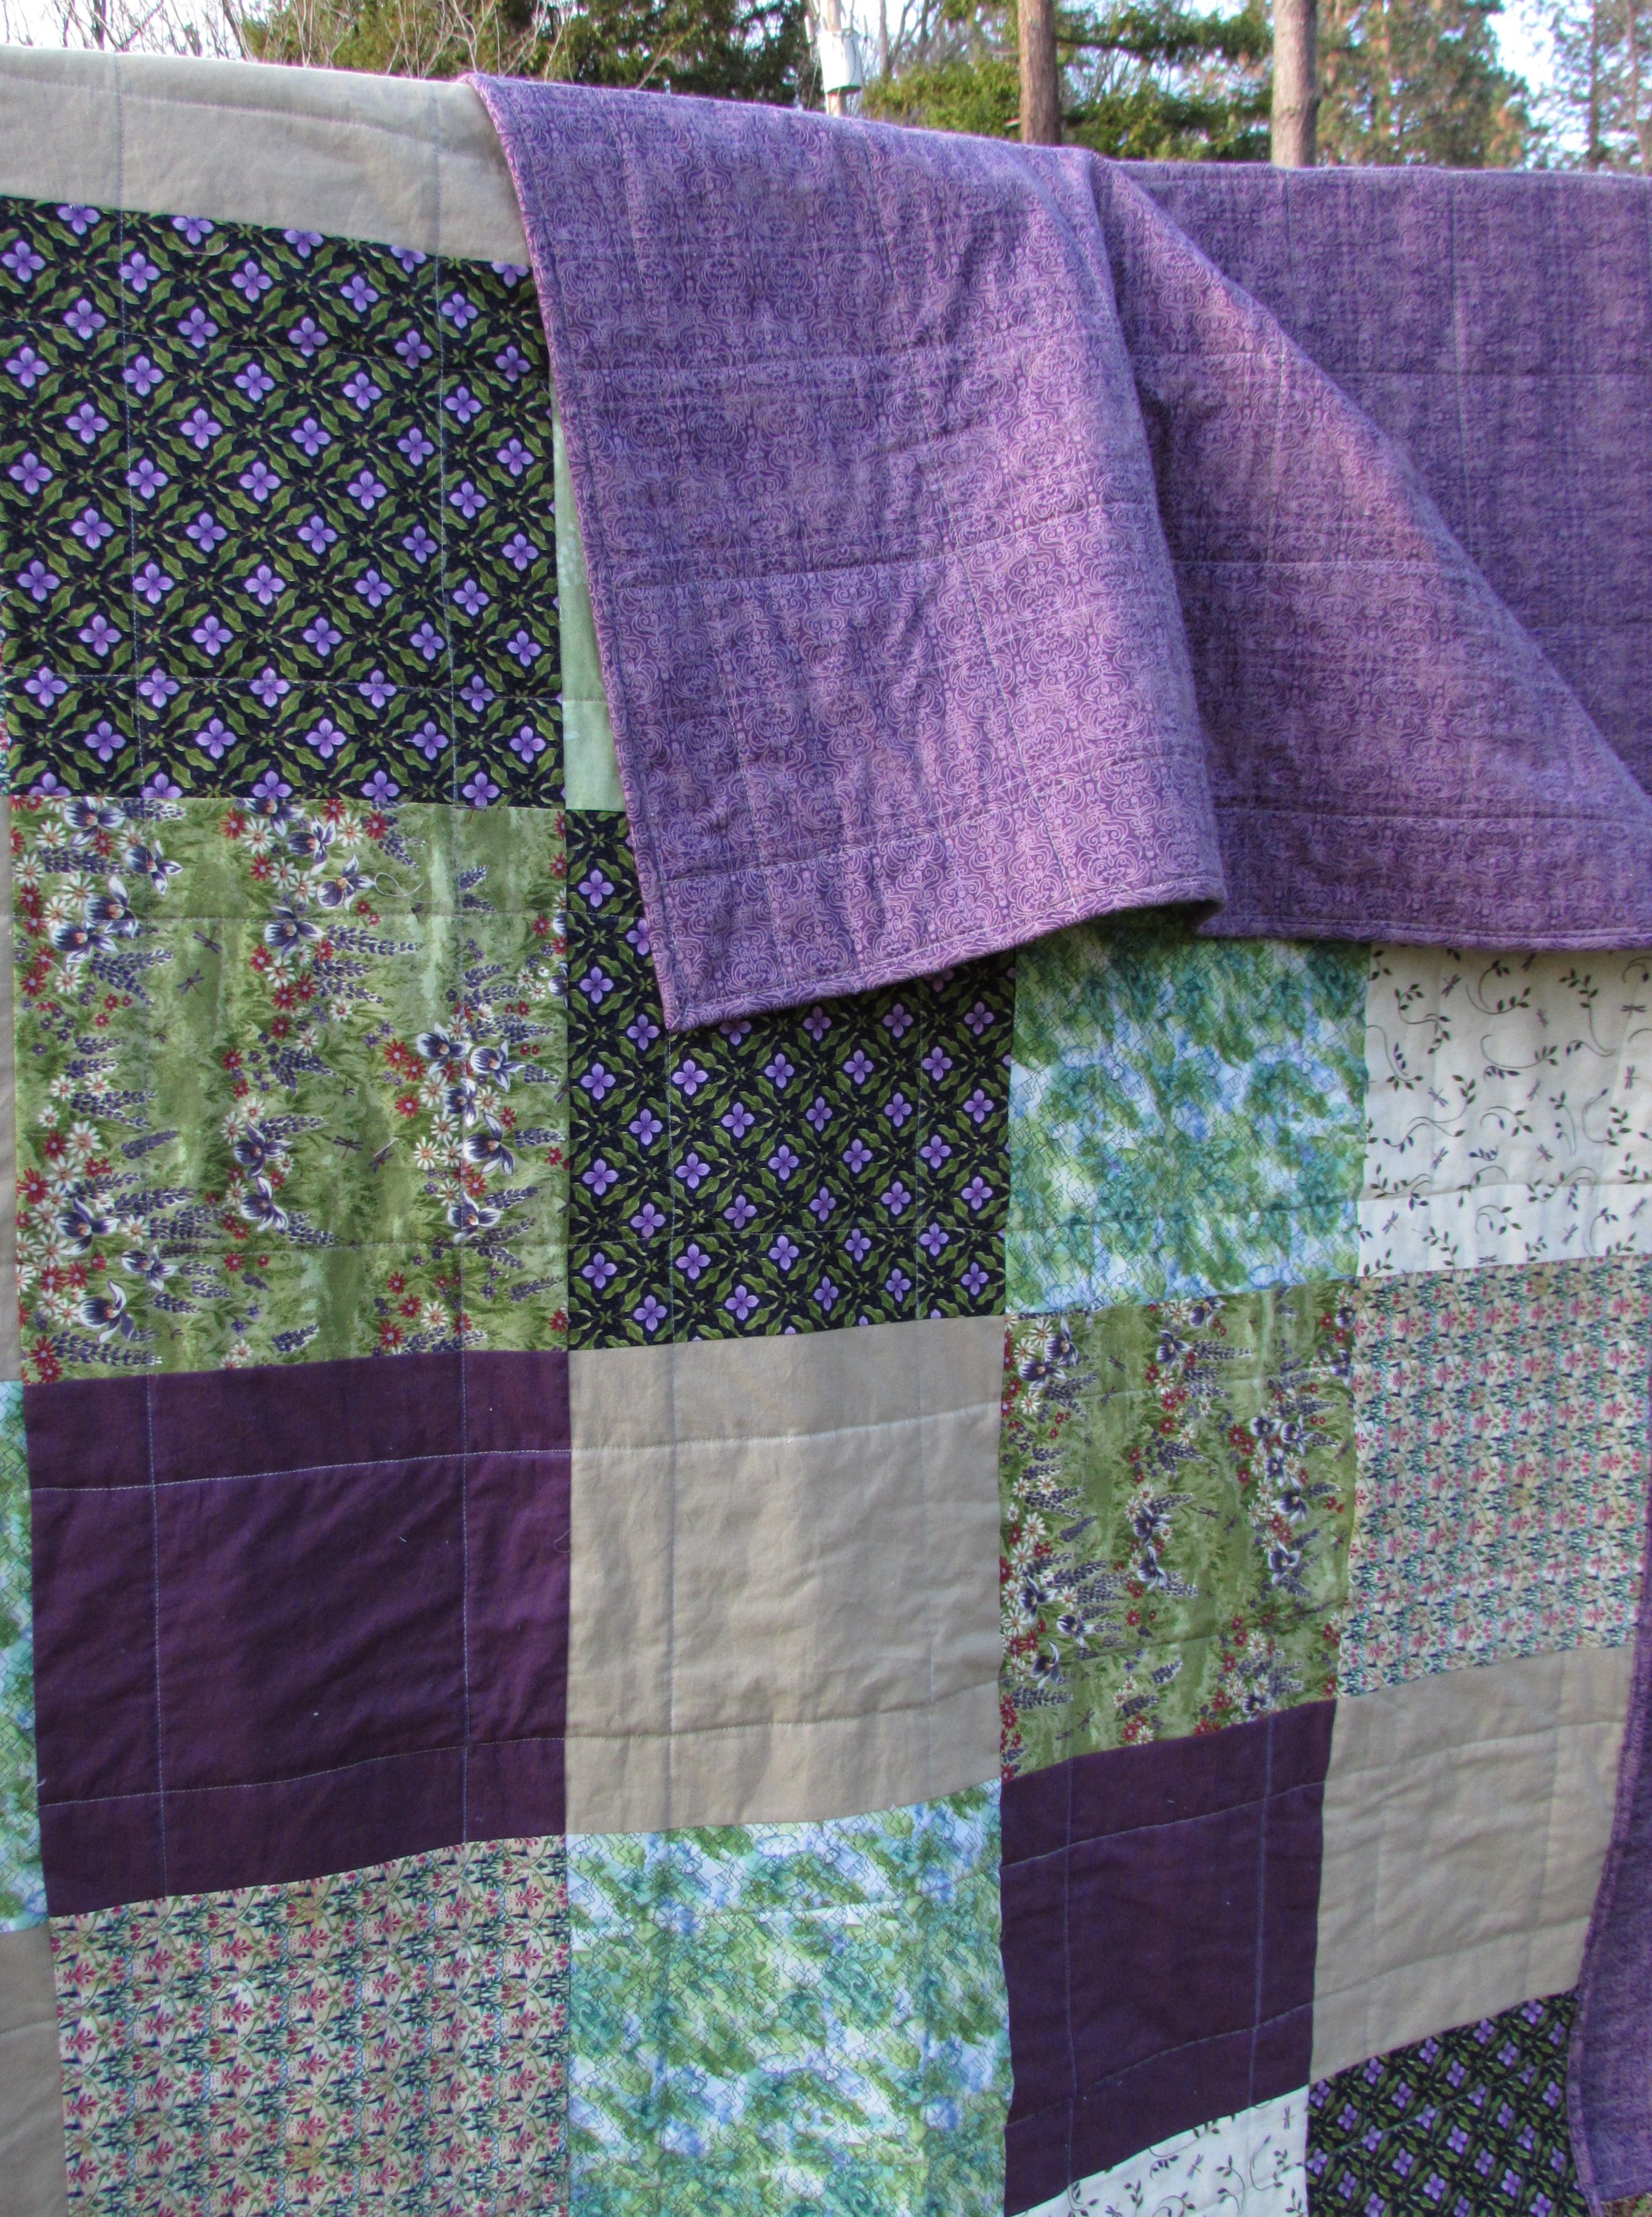
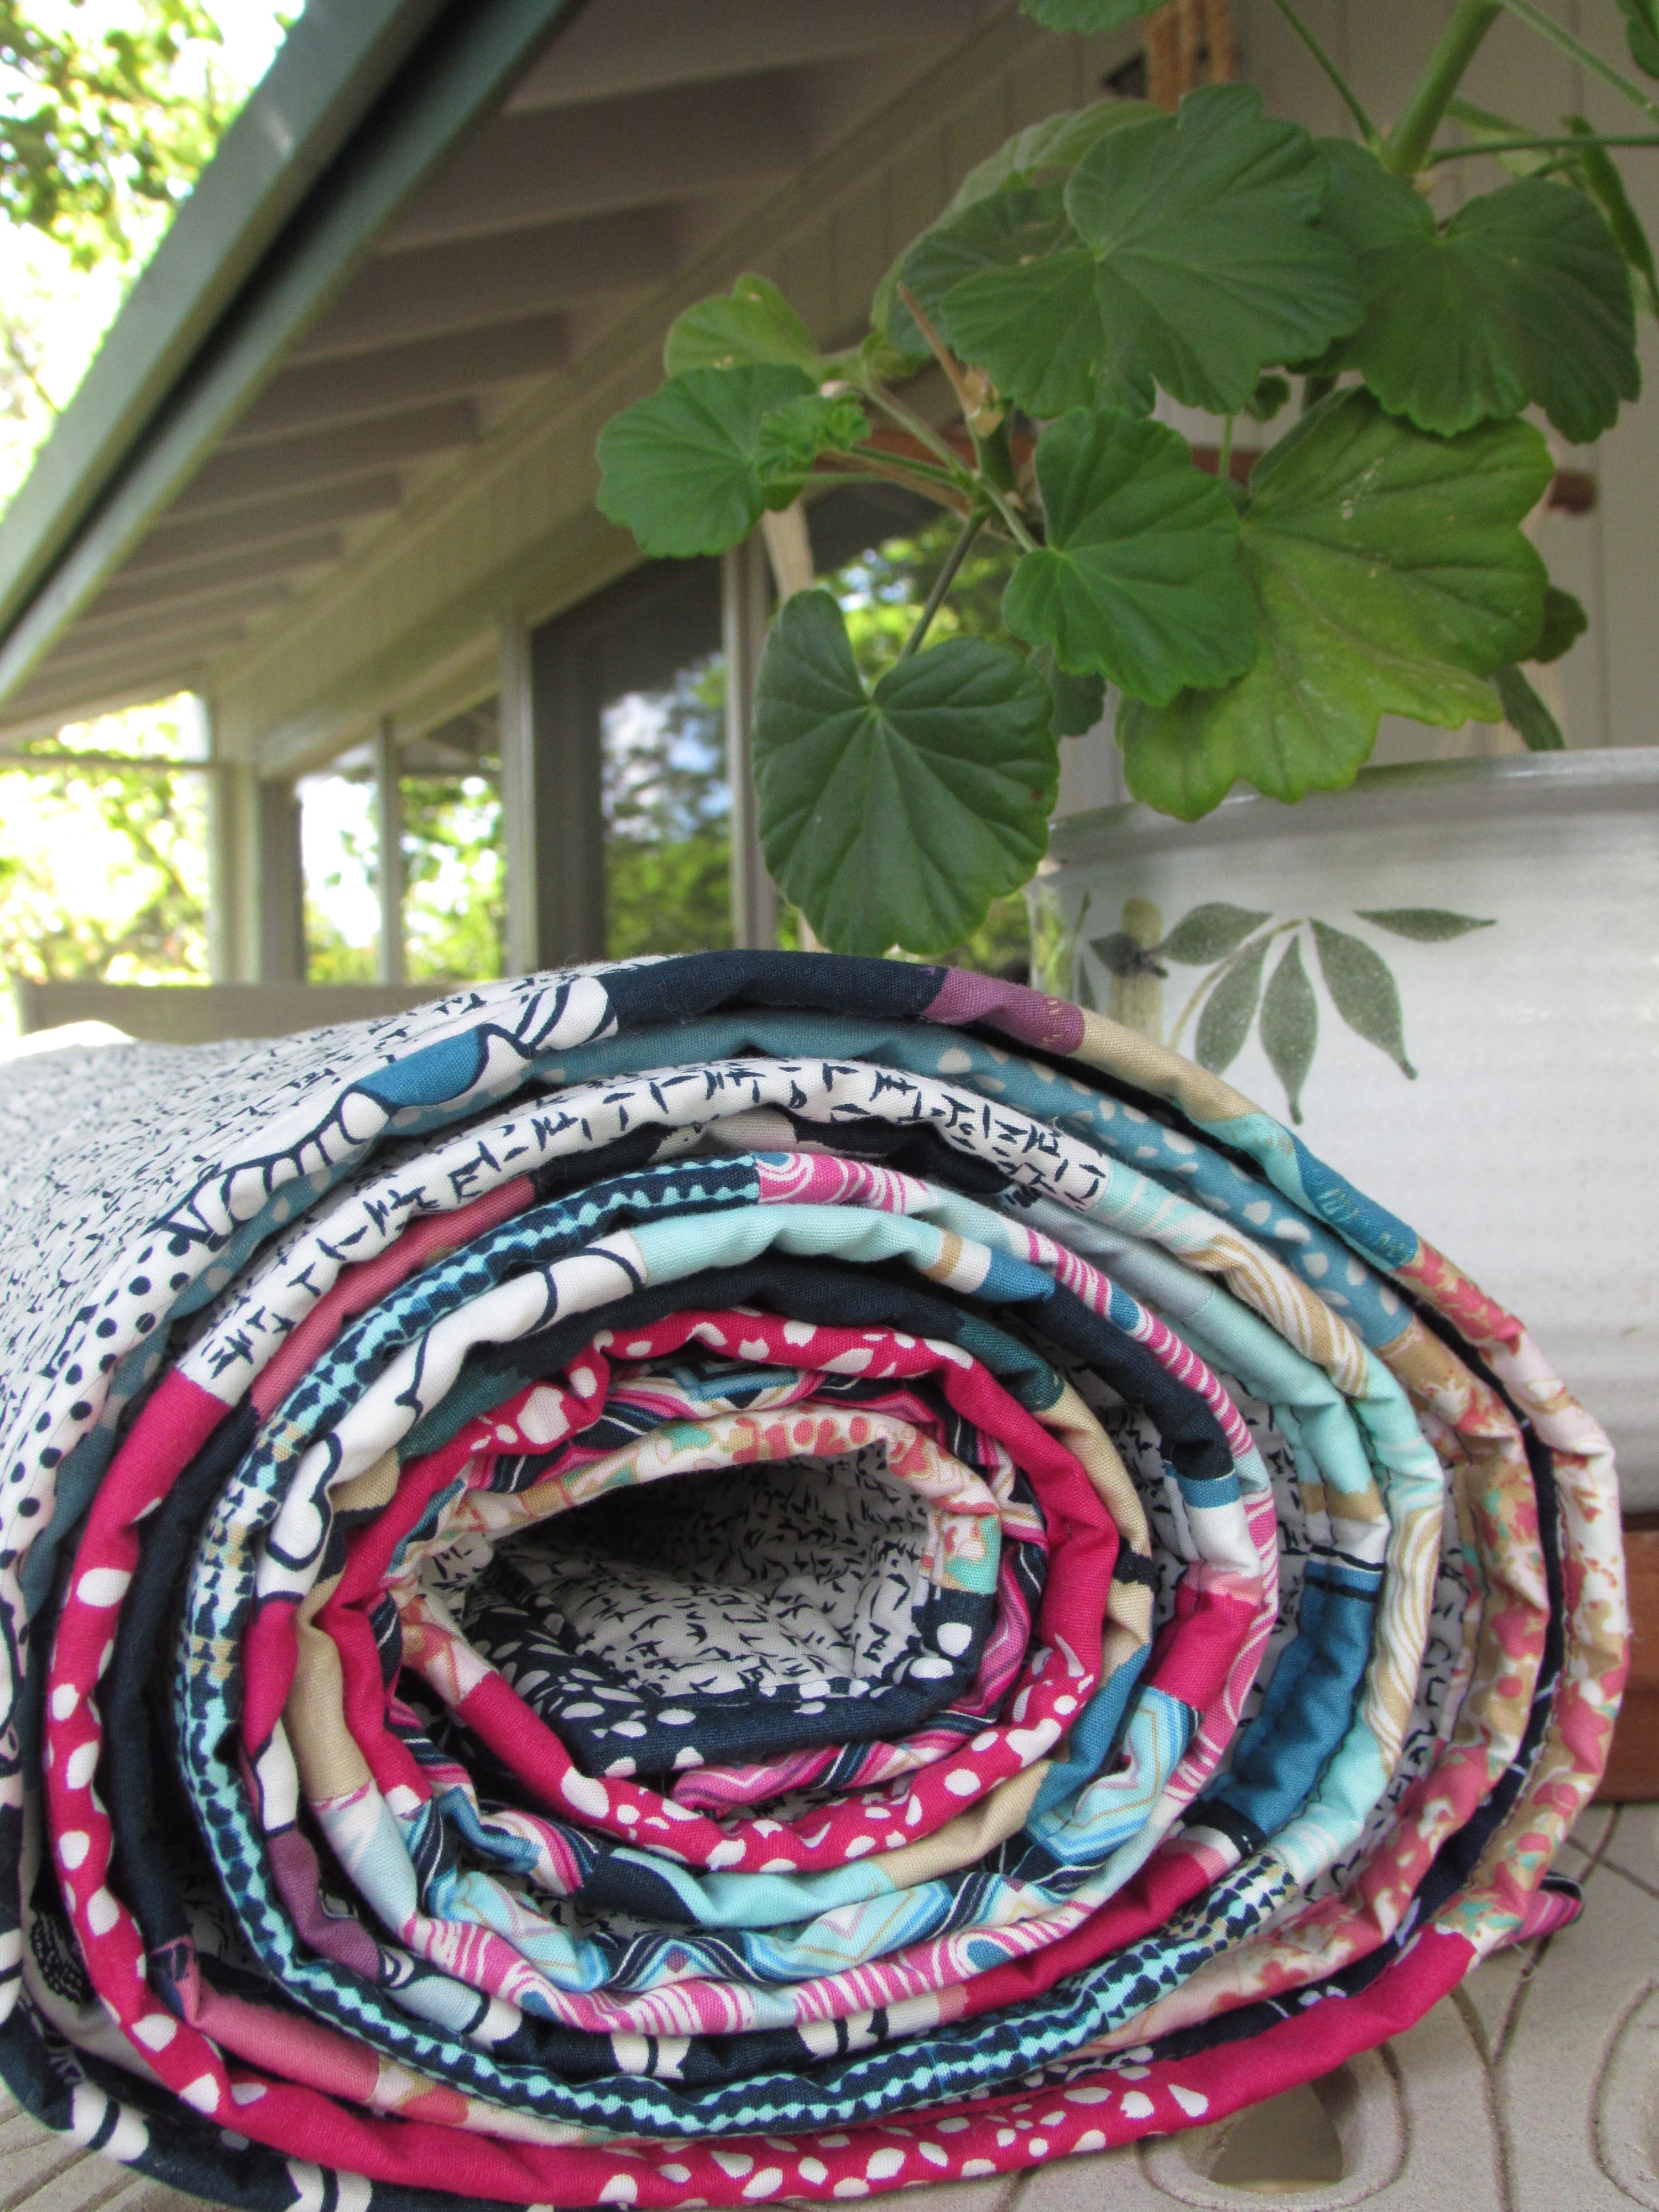
While I was trapped in the kitchen with only my sewing machine and a pot of coffee, I worked on the second quilt for the downstairs bedroom in Downieville. Remember this was the first one I made. I finished this one last February – you can check out this post for the details.
Downieville Quilt #1
It is a basic patchwork using 10″ blocks. I thought it would be fun to make this one with the same fabric but a different pattern. (For the first one, I was in a hurry to get it done for winter as it gets really chilly in that bedroom.) Since I have time to complete this one (the second twin bed isn’t used all that often) I changed it up a bit and made large half square triangles using the tan solid as half of each one. I have about 40 blocks done so I am almost half way to a quilt top.
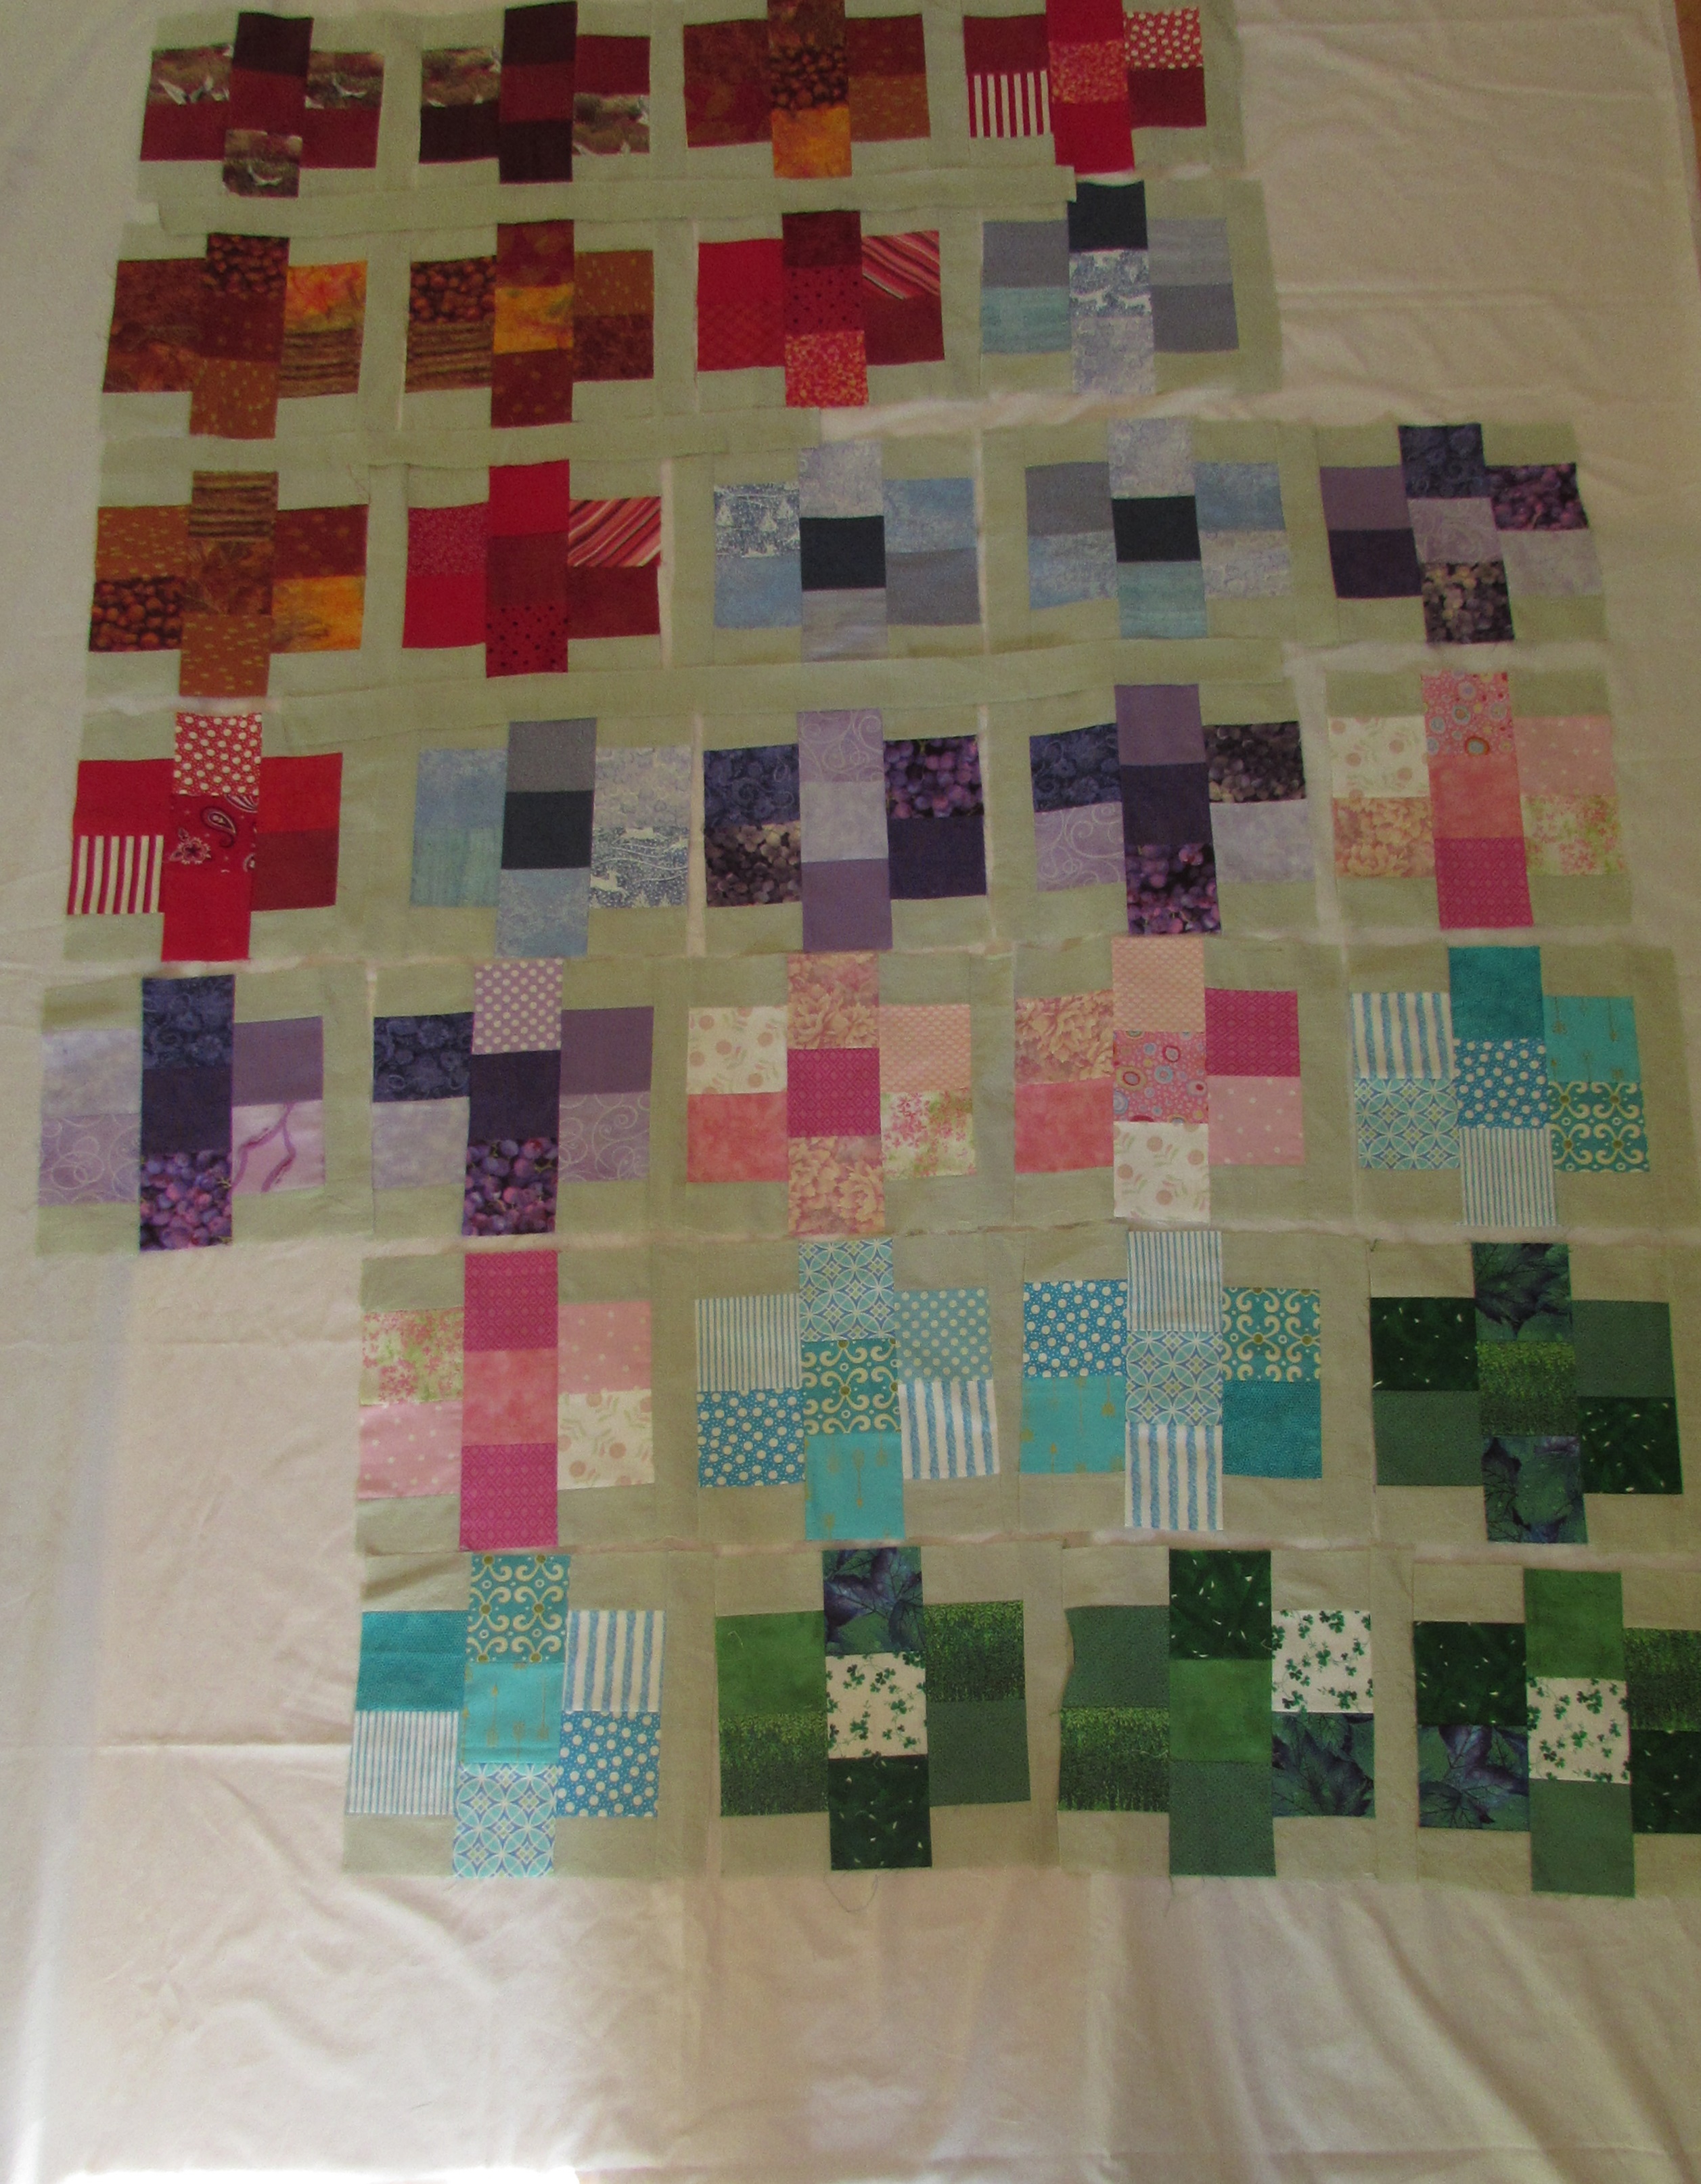
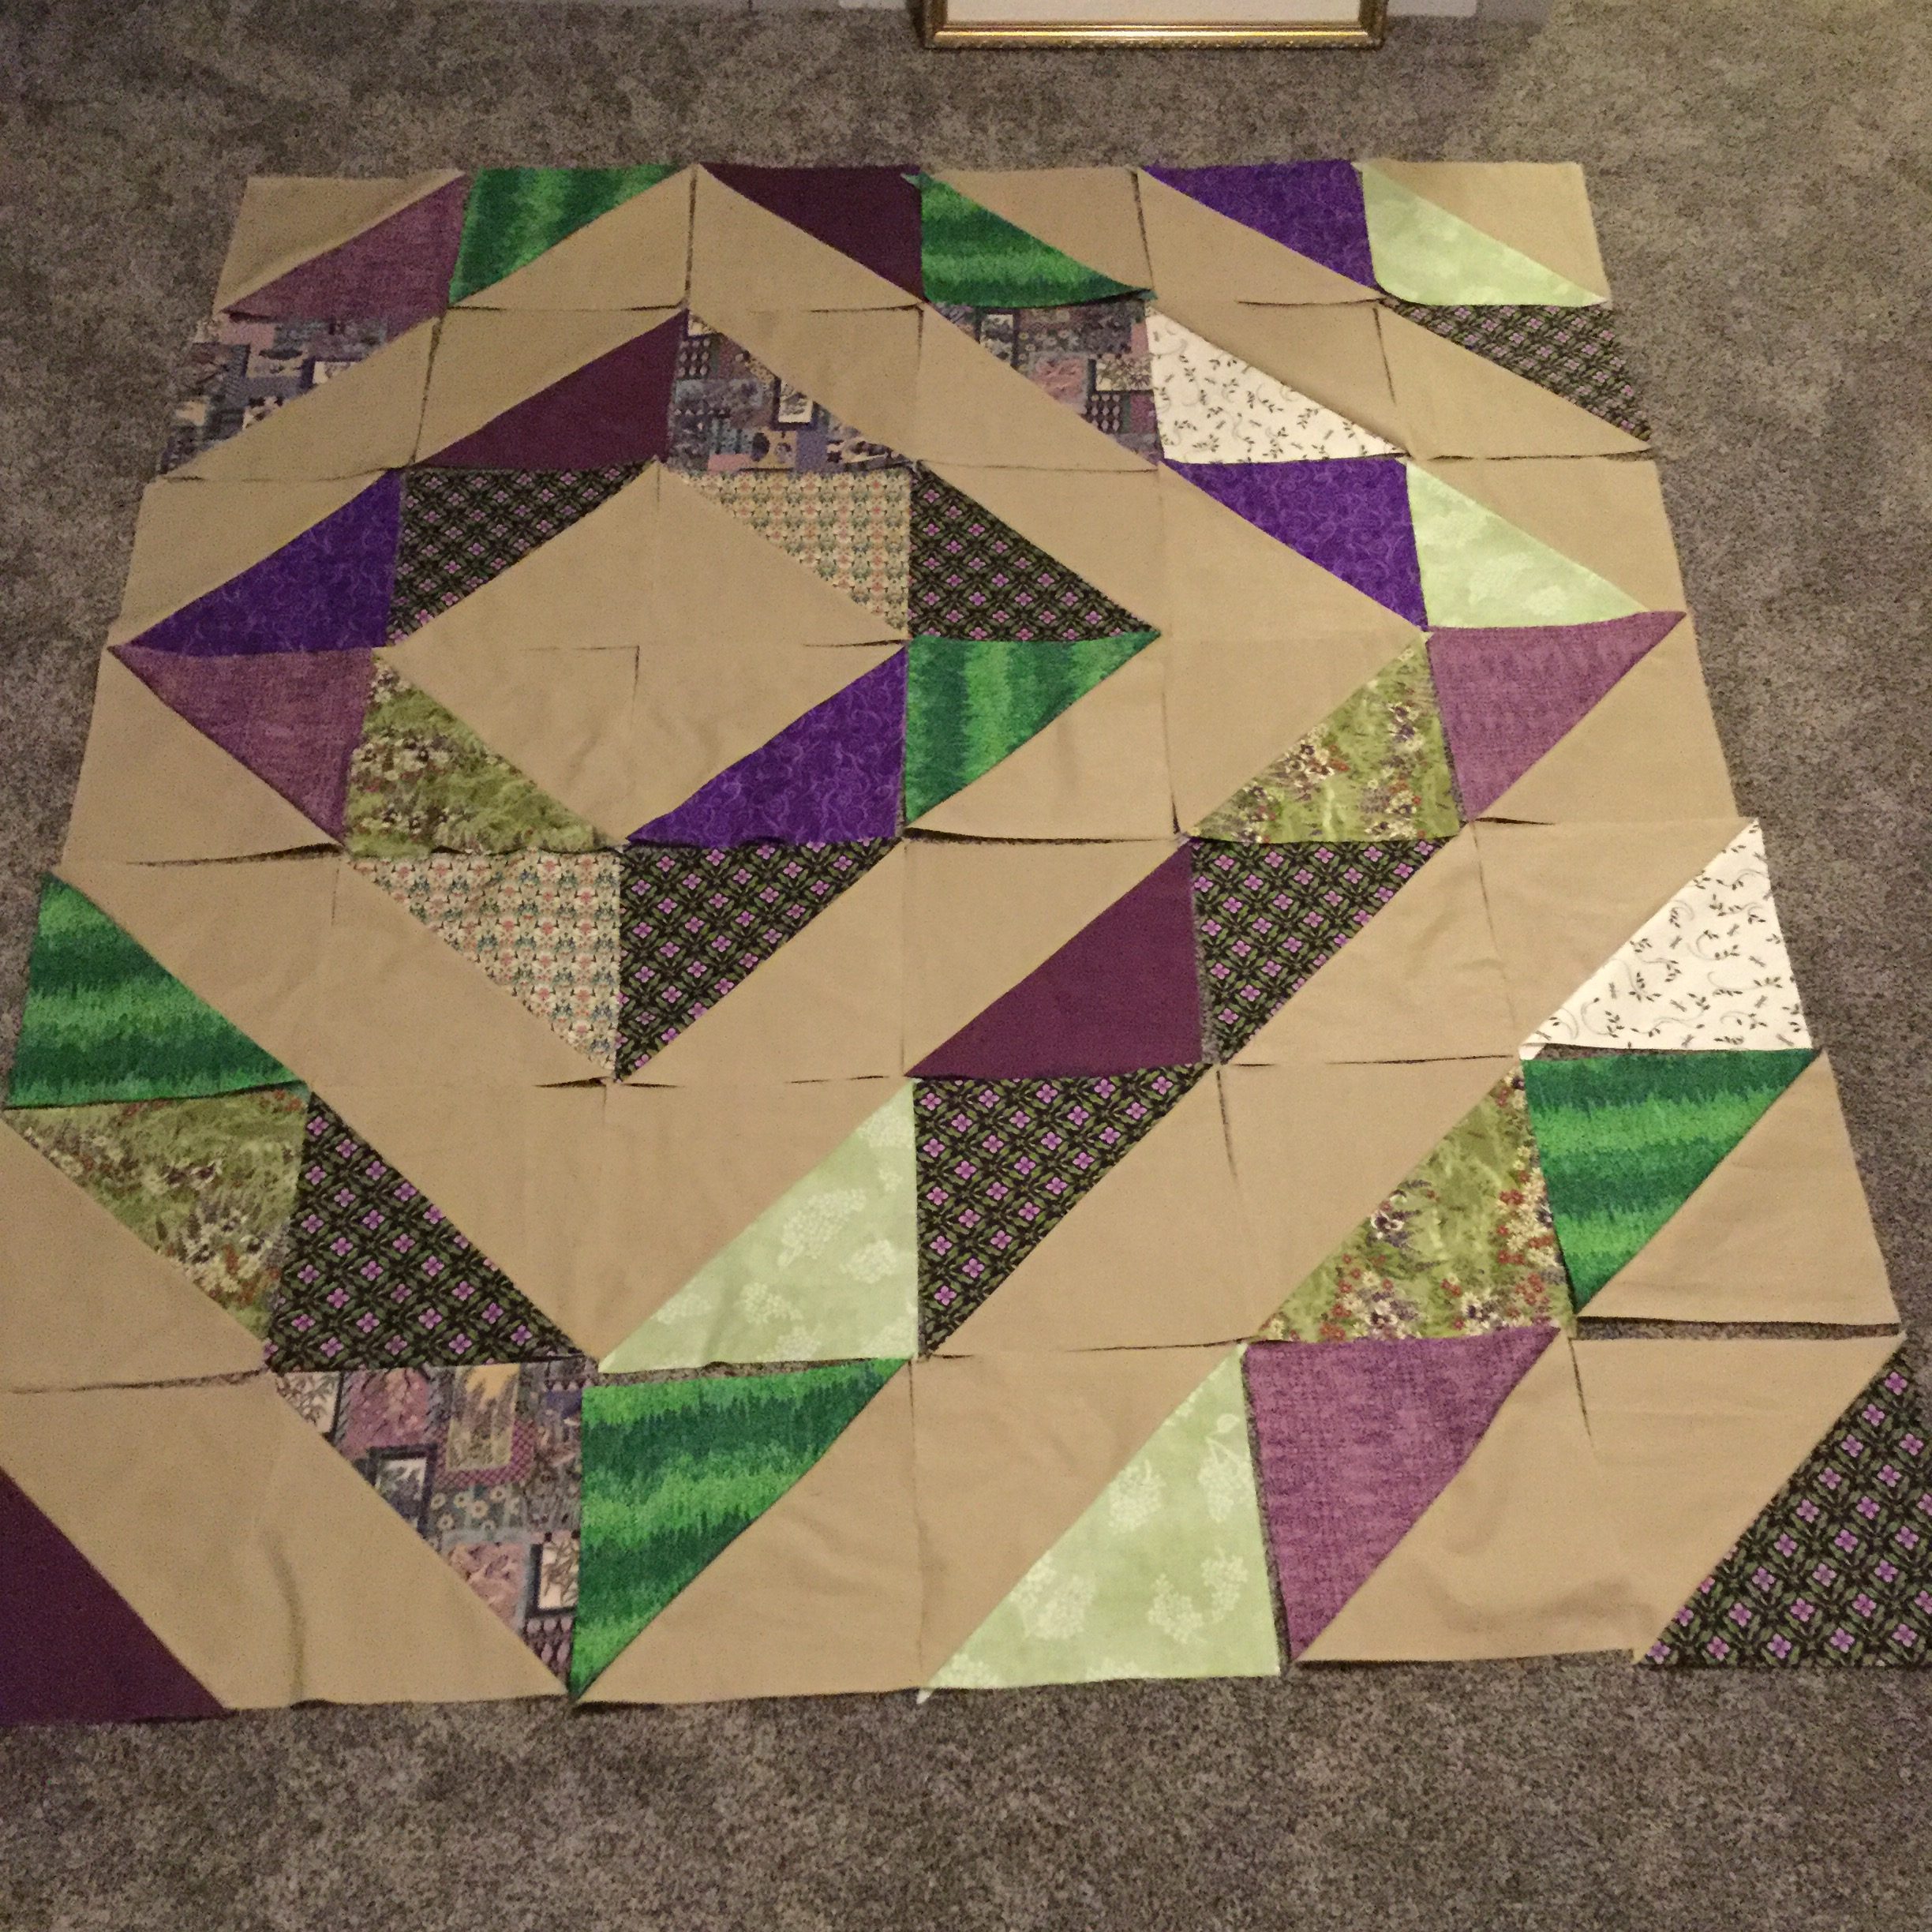
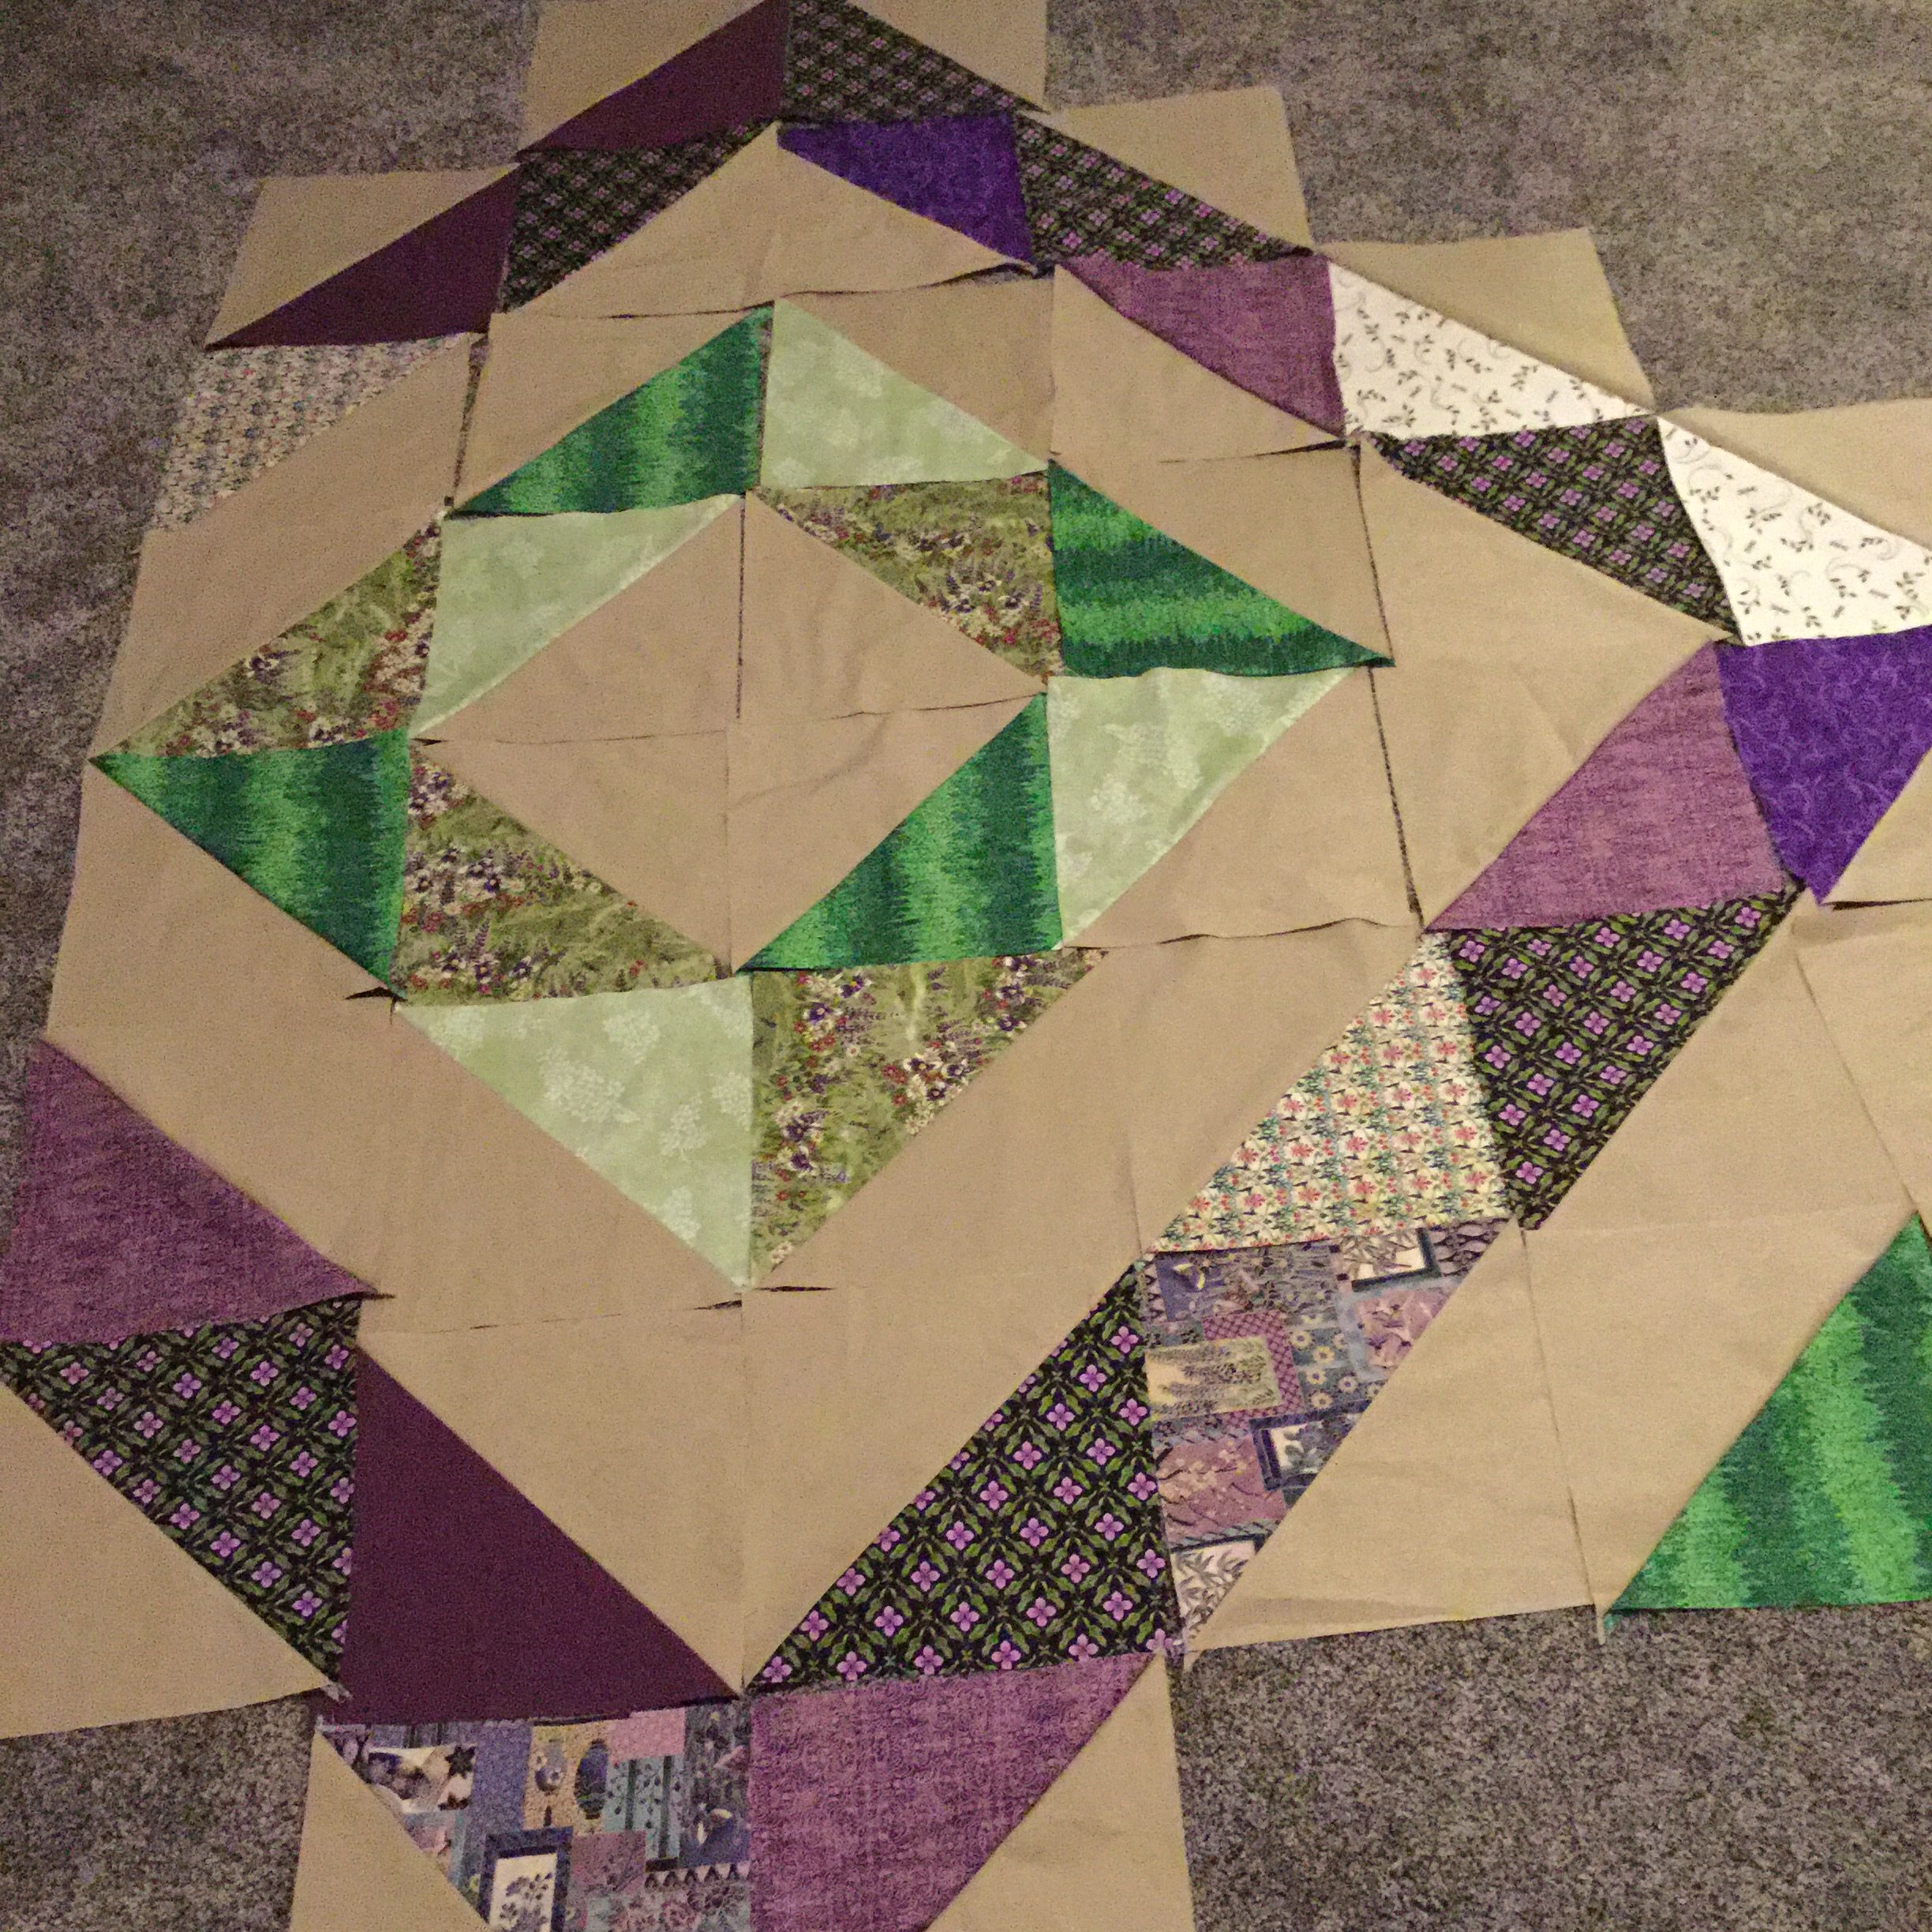
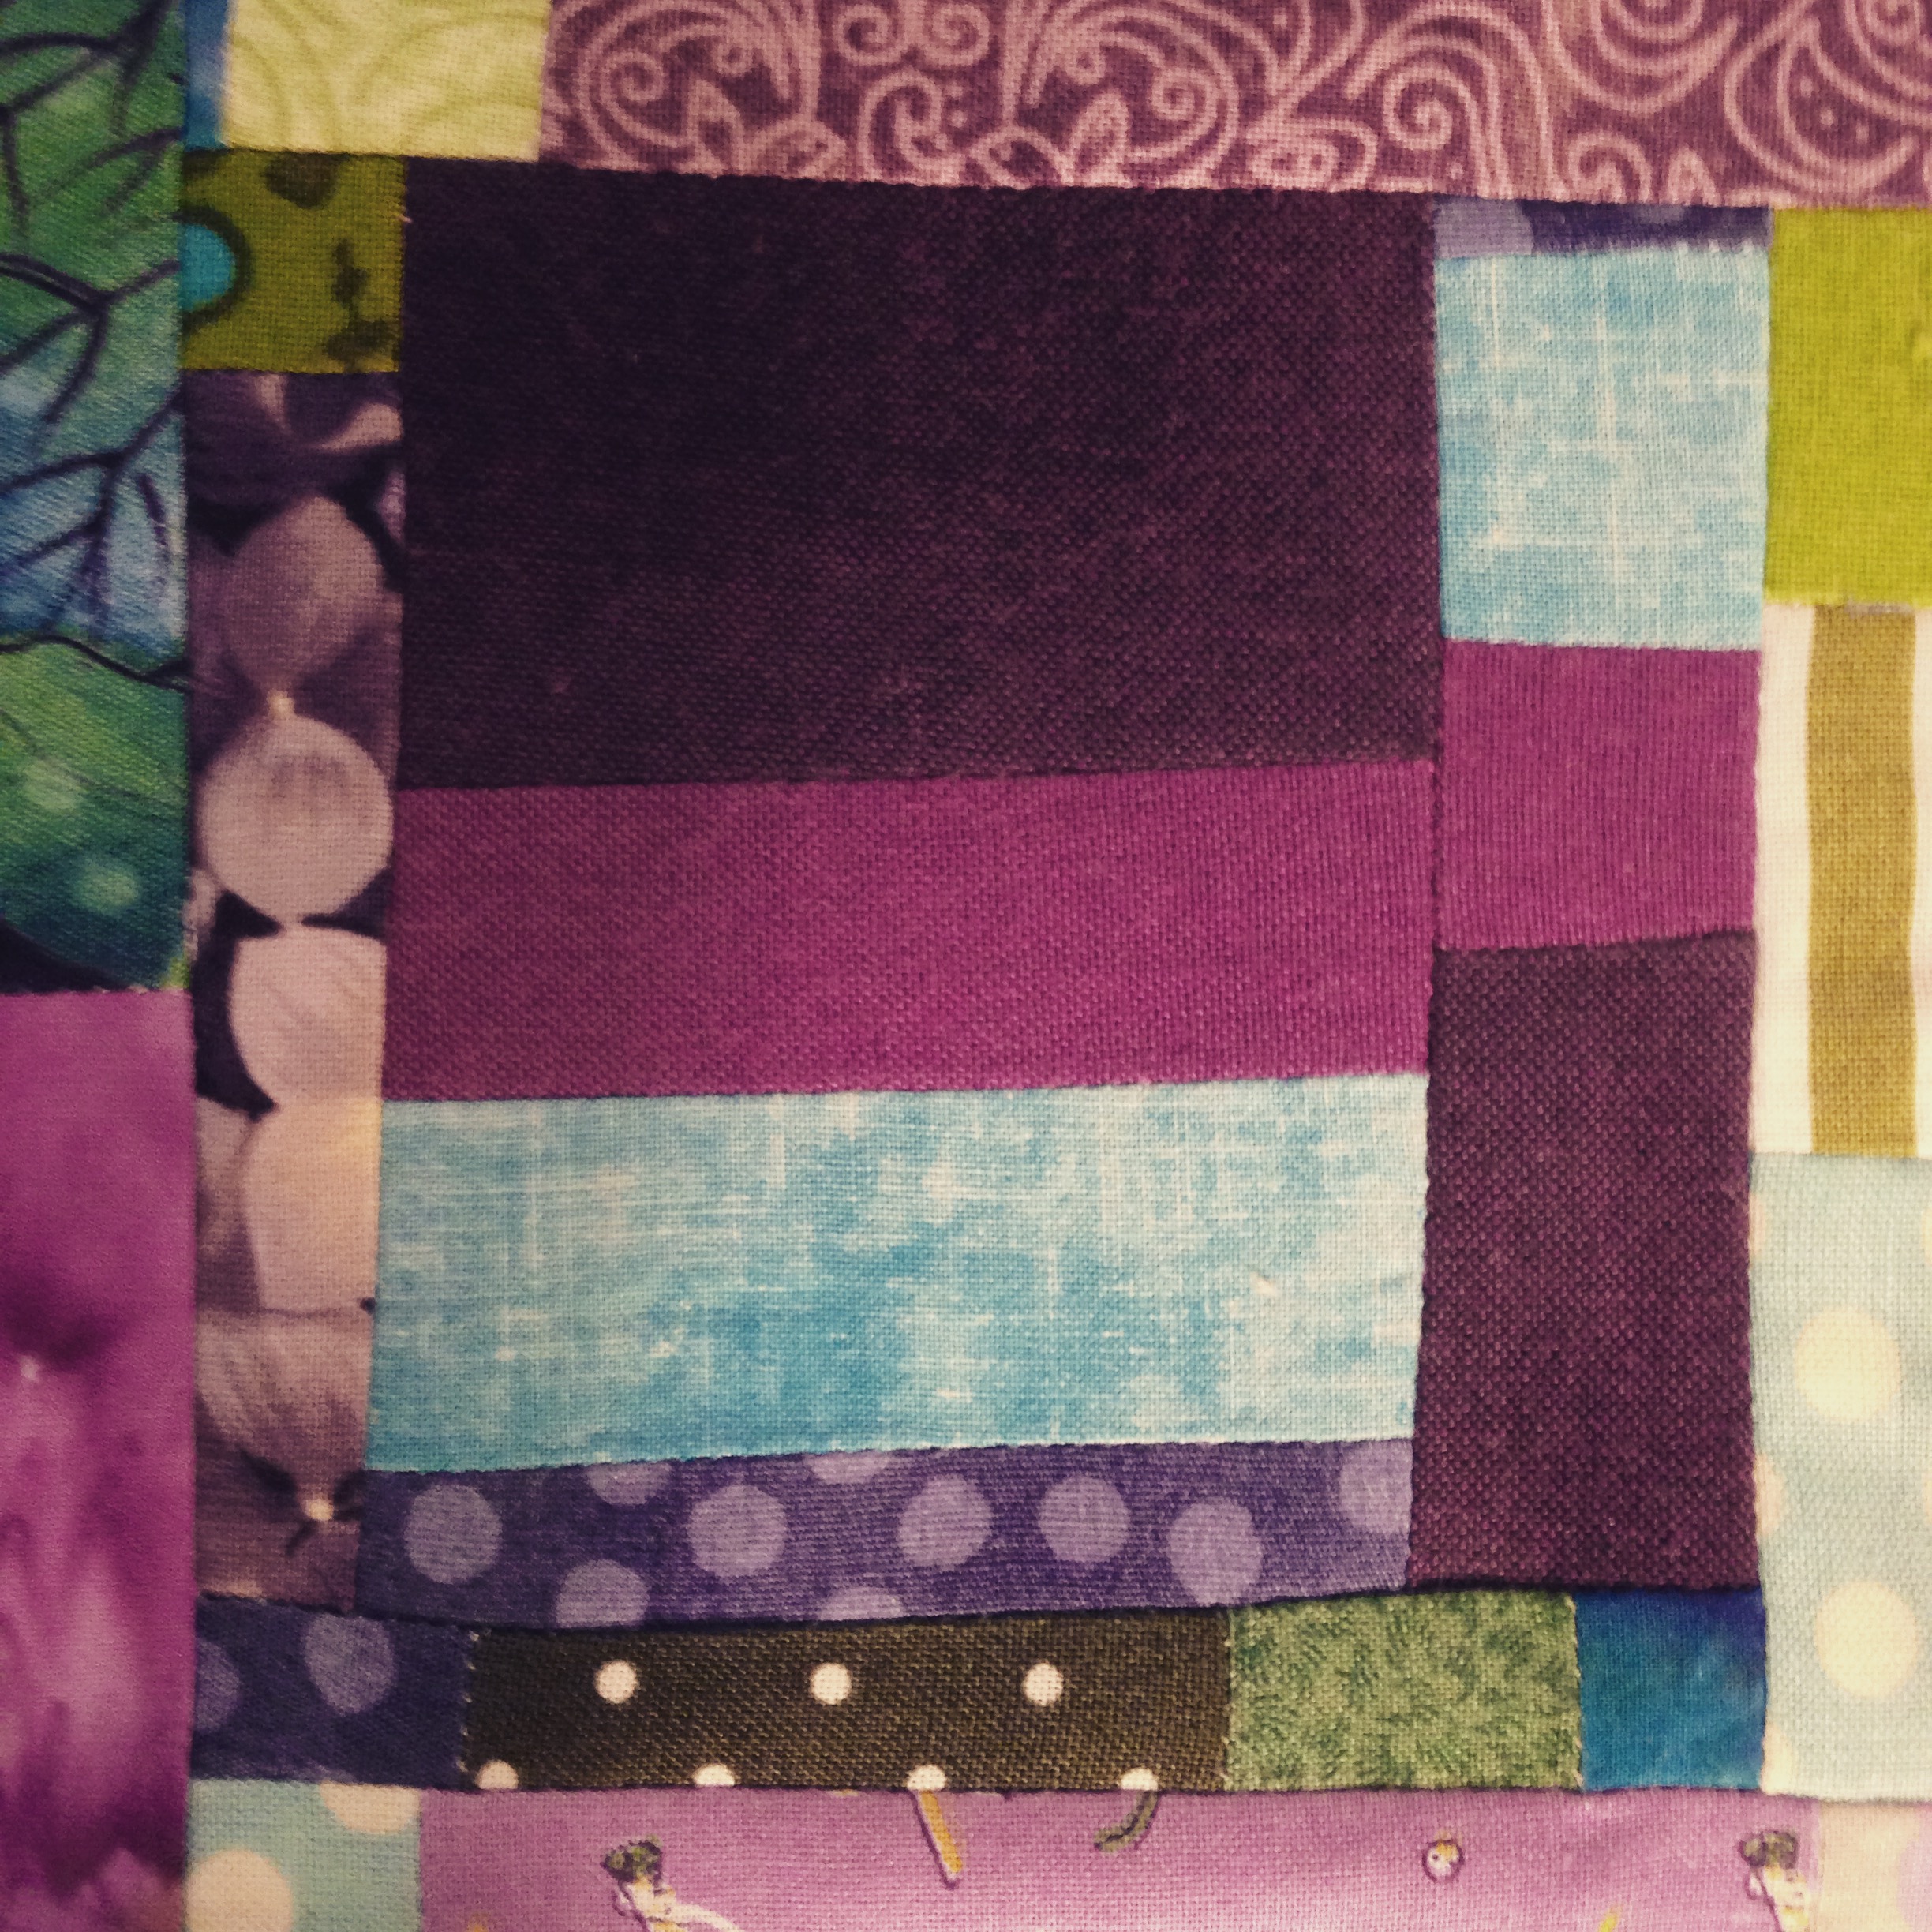
The layout above mixes the green tones and the purple together in a scrappy fashion. Here is a shot with the colors separated out in a more orderly layout.
At this time, I have more purples completed than green. I love the green tones though and look forward to playing with this when I get a few more completed. I am leaning toward the layout with alternating colors. The rest of this should go together in no time at all. The little downstairs bedroom will then have warm, coordinating quilts.
Hope everyone is finding some time to sew and staying healthy!!
Reminder: next week is the Handmade Halloween event here at Needle and Foot. You are invited to link up new and old posts about all things spooky! Quilts, costumes, decorations that are for Halloween will create a fun source of inspiration for readers. The link up will open on Tuesday, October 4th and stay open through Friday, October 7th. I have tons of prizes from Craftsy, C&T Publishing (makers of your favorite craft and sewing books) as well as Sew Fresh Quilts. I can’t wait to see what everyone comes up with!!
Linking up with Let’s Bee Social, Needle and Thread Thursday and Can I Get a Whoop Whoop this week. Links to all three can be found at the top of the page, under Link Ups.
We had a few days of fall weather this week – it was mostly a teaser. The highs dropped to the mid 60’s which was so nice. Now it is heating back up. I am trying to be patient. I know fall is just around the corner.
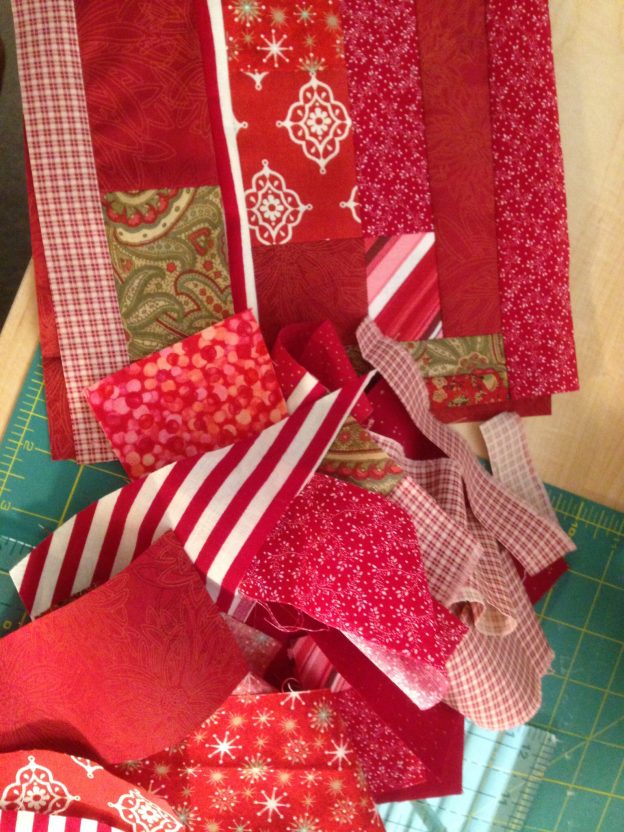
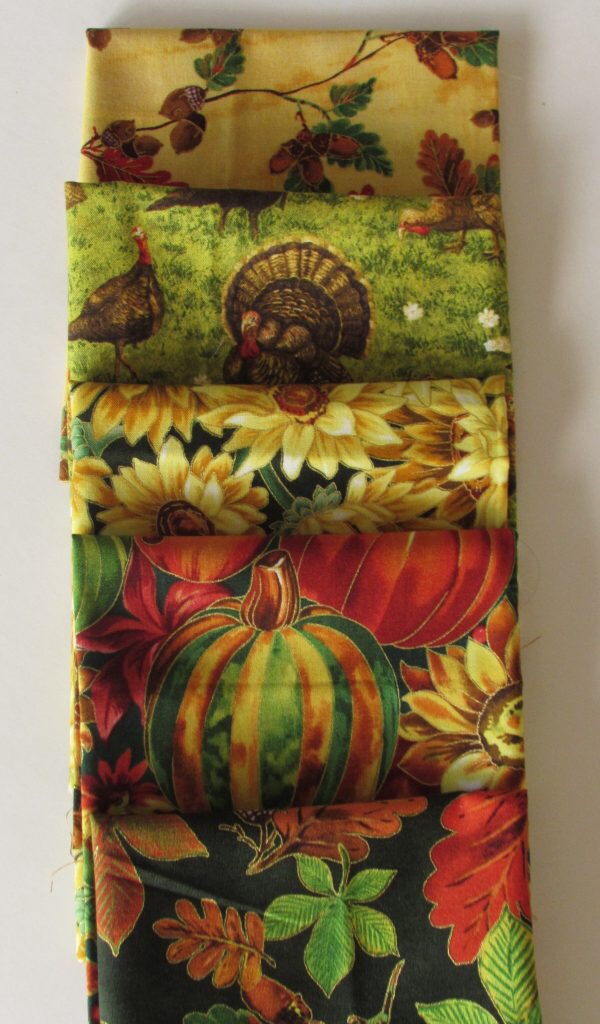
To get in the mood, I have been playing with a bundle of fabric that screams Autumn.
I love the theme of Thanksgiving that permeates this line. The sunflowers are so pretty, such a deep yellow. The pumpkins provide deep green and orange accents and the turkeys are adorable (much more so than the turkeys that roam in our neck of the woods!)
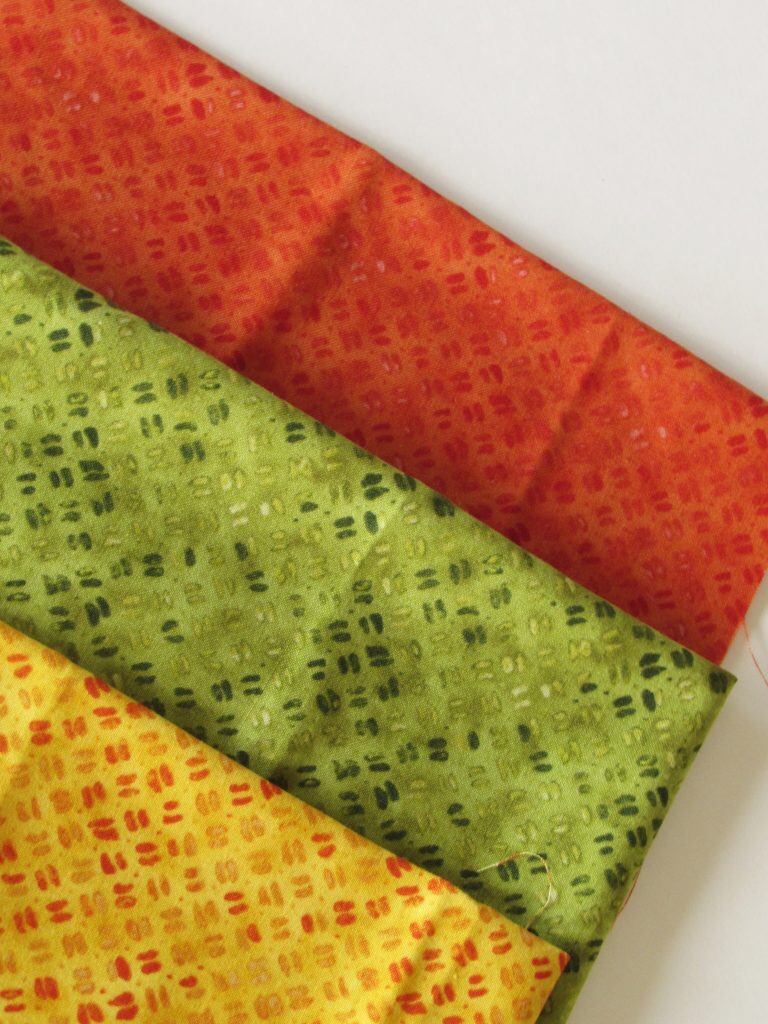
There are three blenders, green, yellow and orange in the bundle.
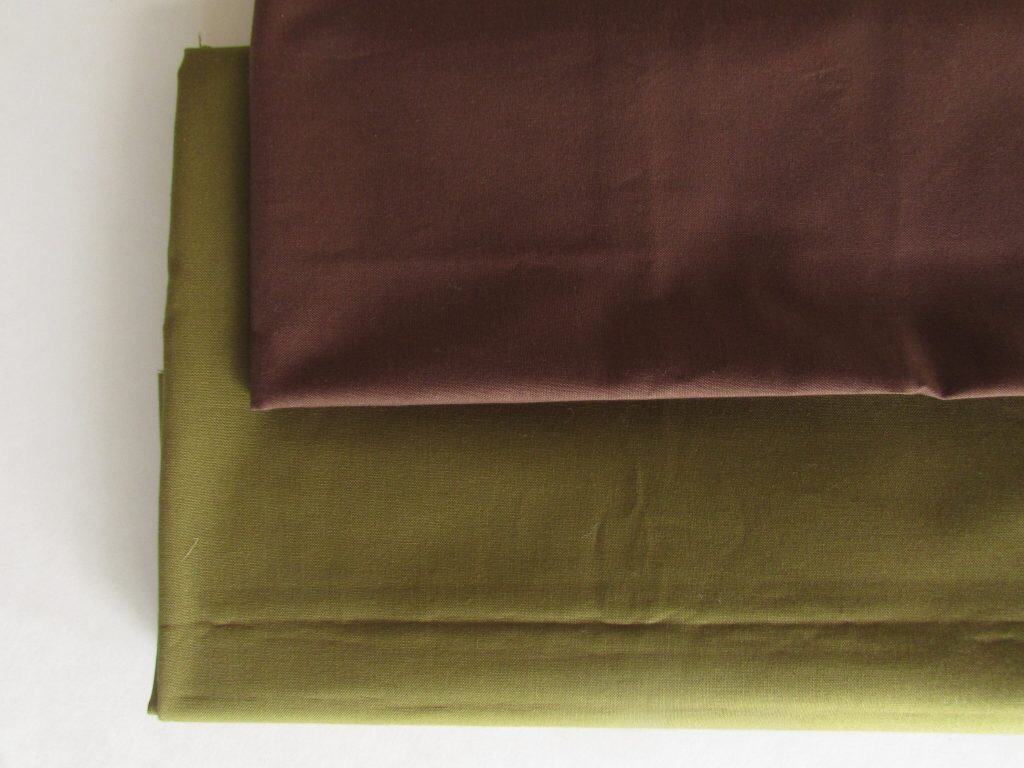
Above is some additional yardage that I need for this upcoming project. These two are a nice pine green and a deep brown.
The bundle is called Golden Harvest and was provided to me by Paint Brush Studios. They are sponsoring a blog hop that I am hosting at the end of October. I am so excited to start the project for the hop – pieces have been cut but I haven’t done a lot of piecing as of yet.
Along with Needle and Foot, there are four more quilters participating in the hop. Mari (Academic Quilter), Janine (Quilts From the Little House), Tish (Tish in Wonderland) and Sandra (MMM Quilts). If you’d like to see the fall beauties they will be working with, hop on over and take a look. Otherwise, we will be back to share finished projects with you in about four weeks. Till then, happy quilting!
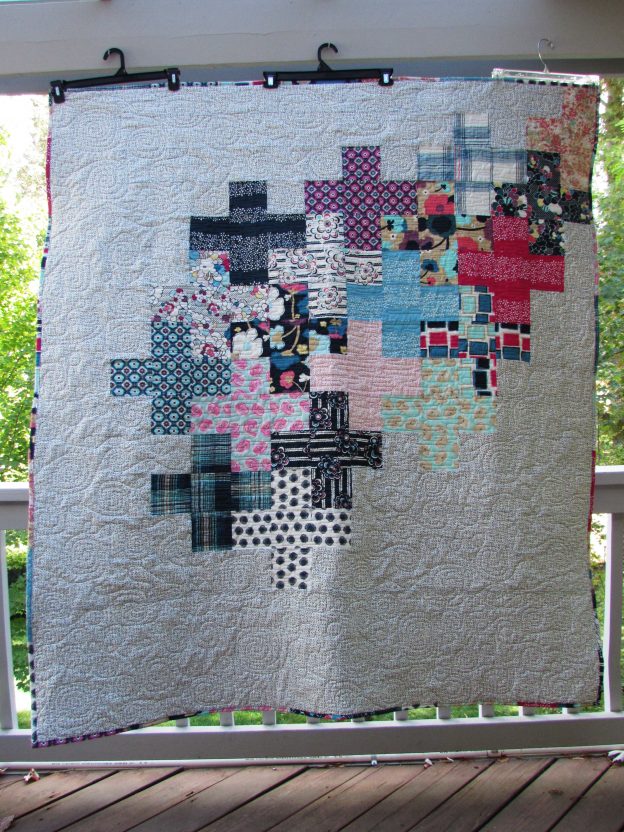
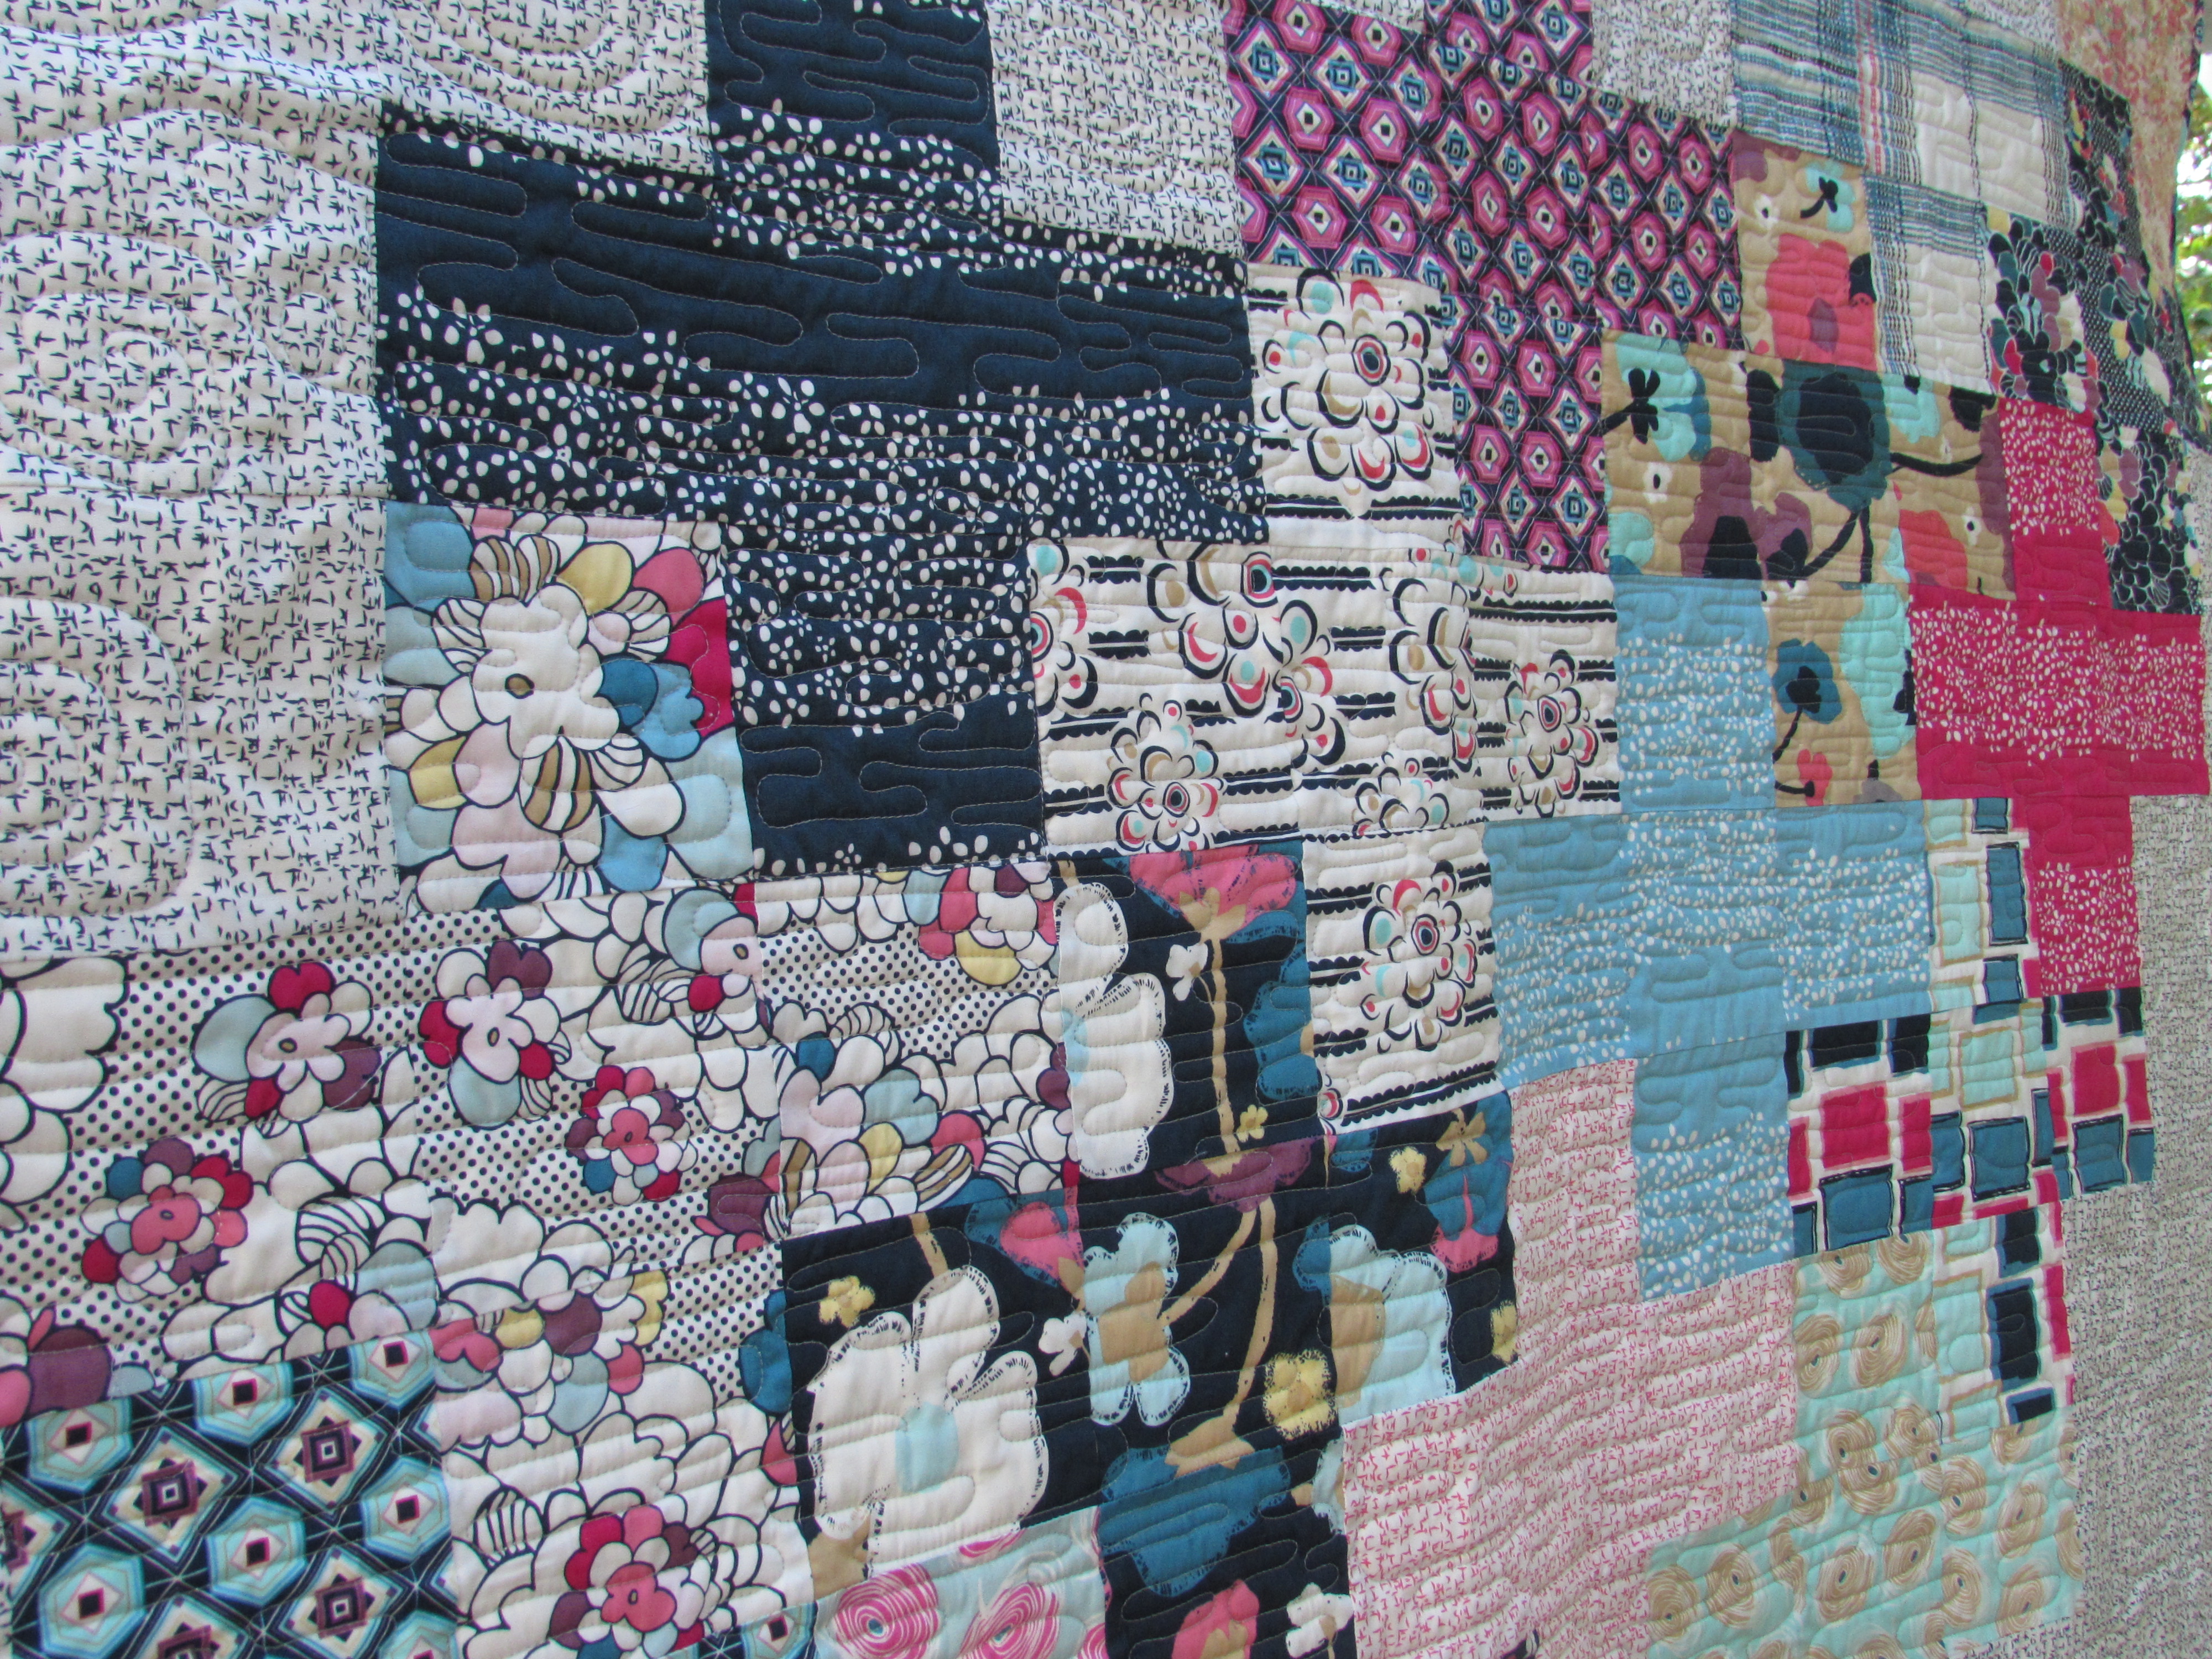
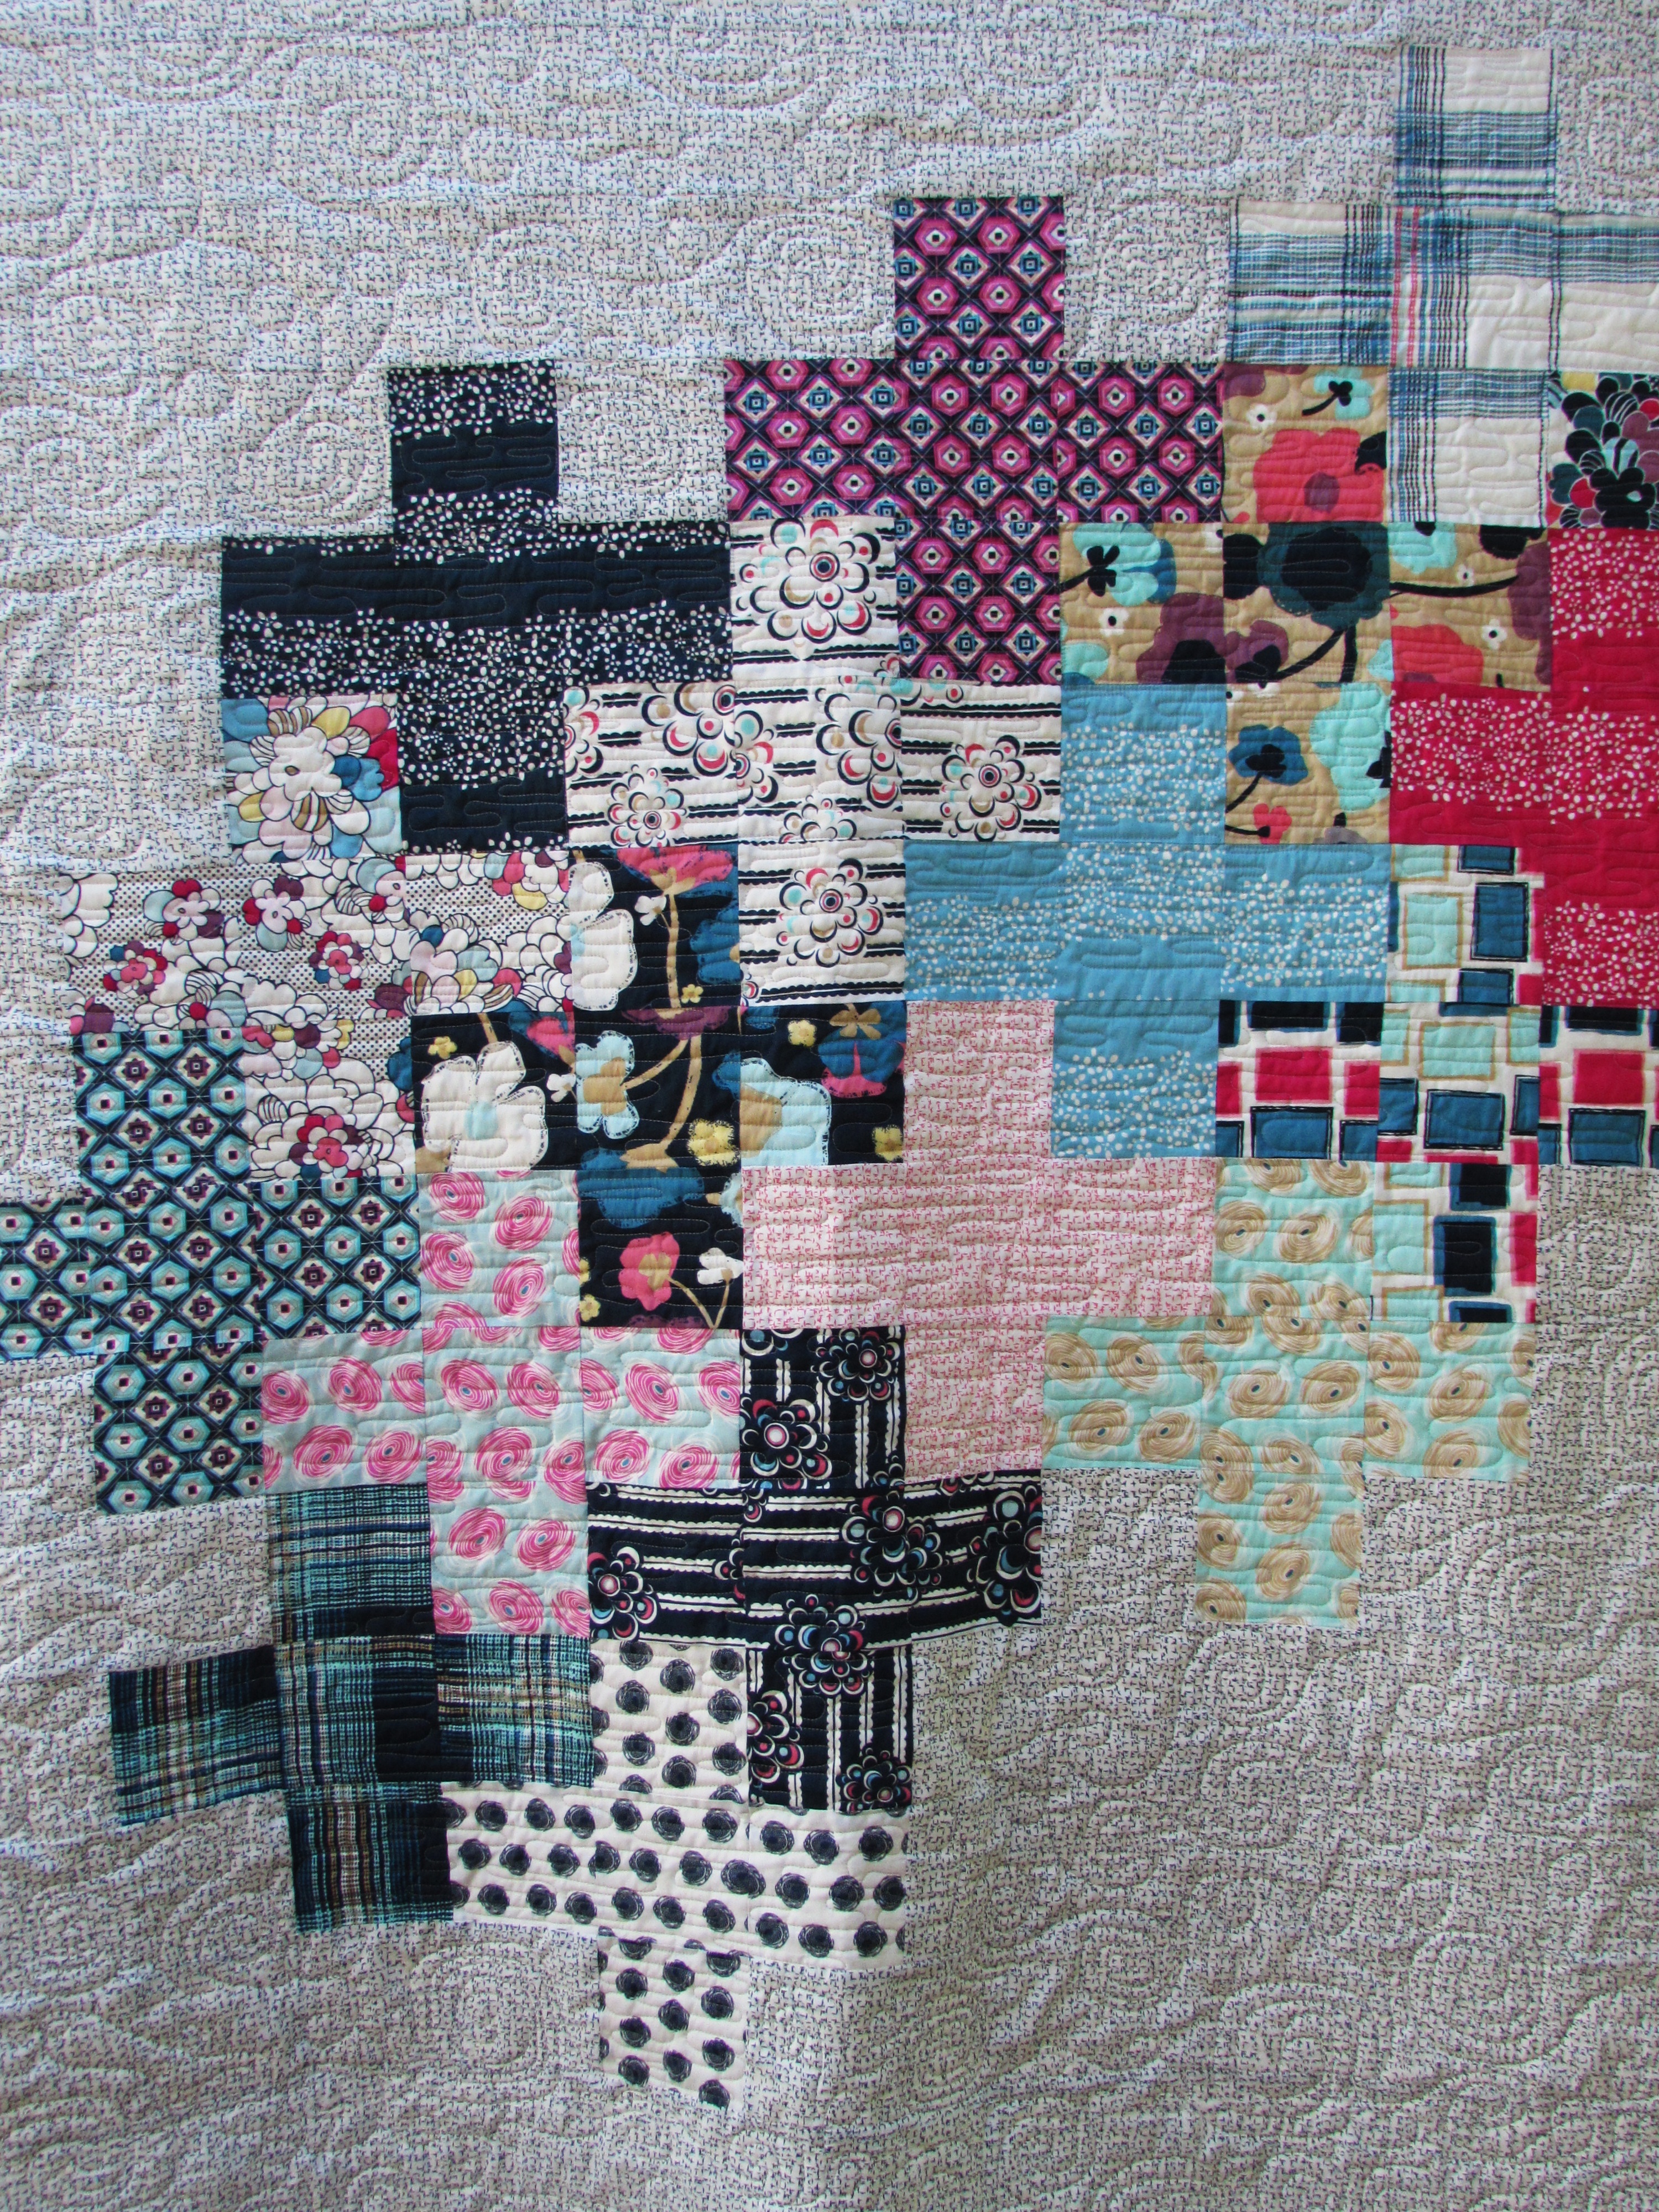
Earlier this summer I made a plus quilt using the Art Gallery Dare fabric line, designed by Pat Bravo. I set it aside for a while, as most of us tend to do. After taking the long arm class, I decided to quilt this one for my second round of practice. Thursday last week found me at the Sew-So Shop ready to load the project on the machine.
When I arrived, I was told that the owners would be running a bit late due to a family emergency. There was another woman, a very experienced long arm quilter (Diane), who was there to pick something up and she offered to help me get everything set up. I felt so fortunate to have run into her because she taught me a great deal in the 15 minutes that we worked together. It was so helpful! We got the backing, batting and quilt top loaded and straight.
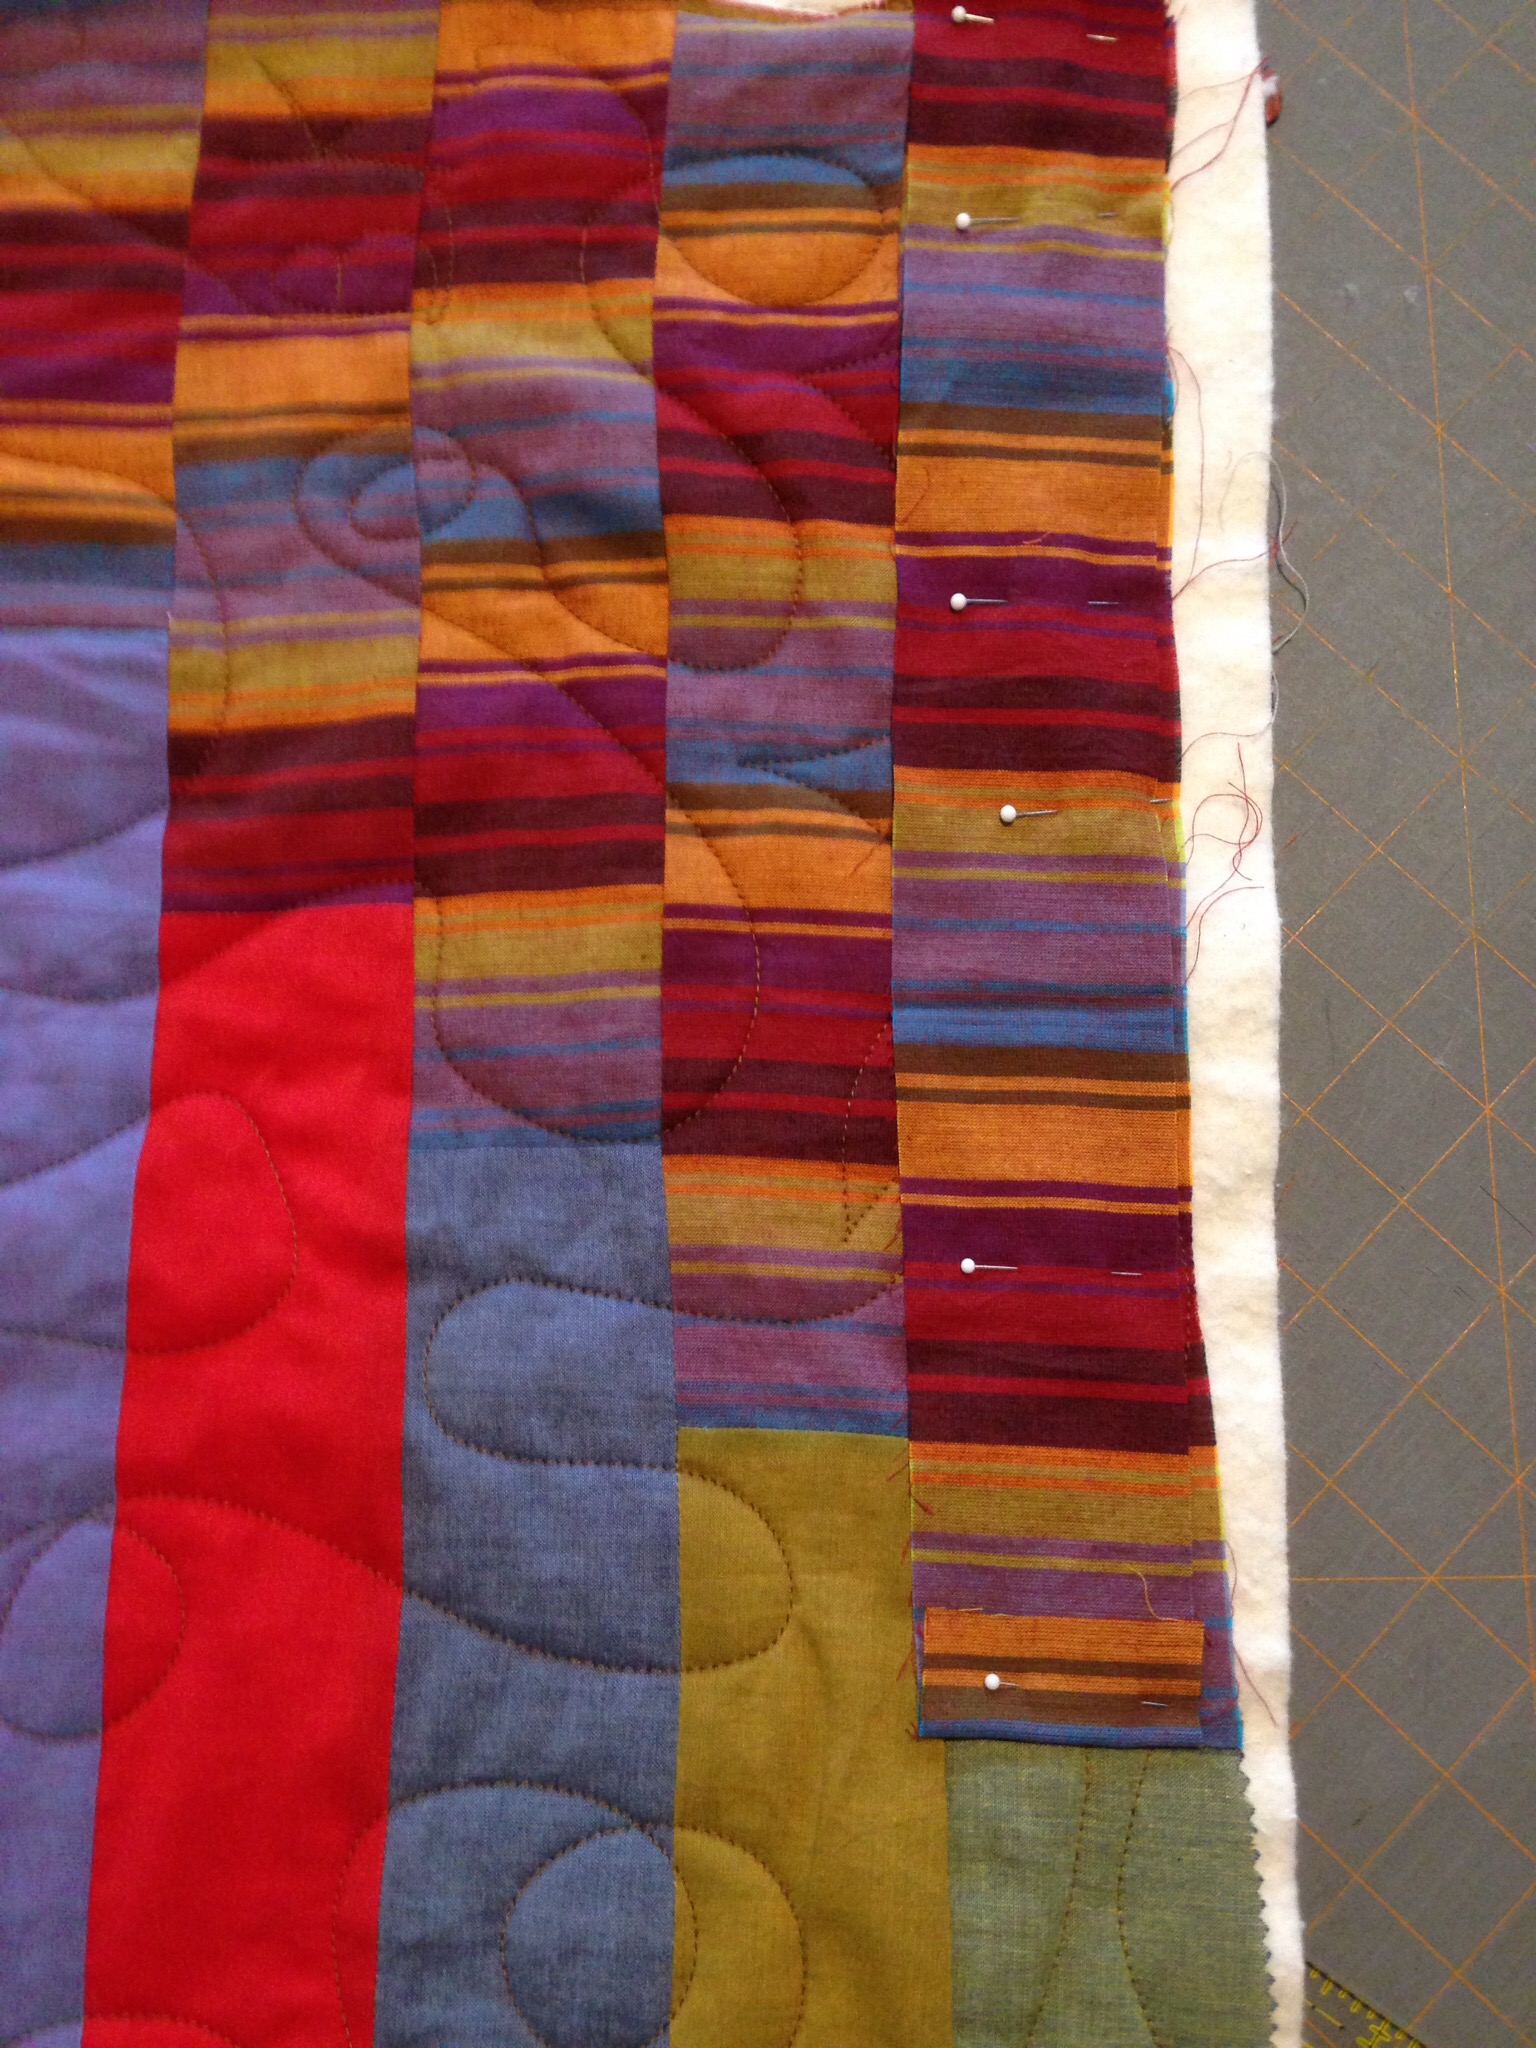
I talked with Diane about my plan to quilt this. I wanted to do simple spirals in the negative space and something linear within the pluses so they would be differentiated from the background. She and I scribbled on paper for a bit and decided on a flow of linear lines that look like water flowing. This would allow me to leave the machine free (as opposed to setting the channel locks for straight lines) and would give me a relaxed pattern to stitch. It worked perfectly (well, nothing is perfect but overall, it was very successful!)
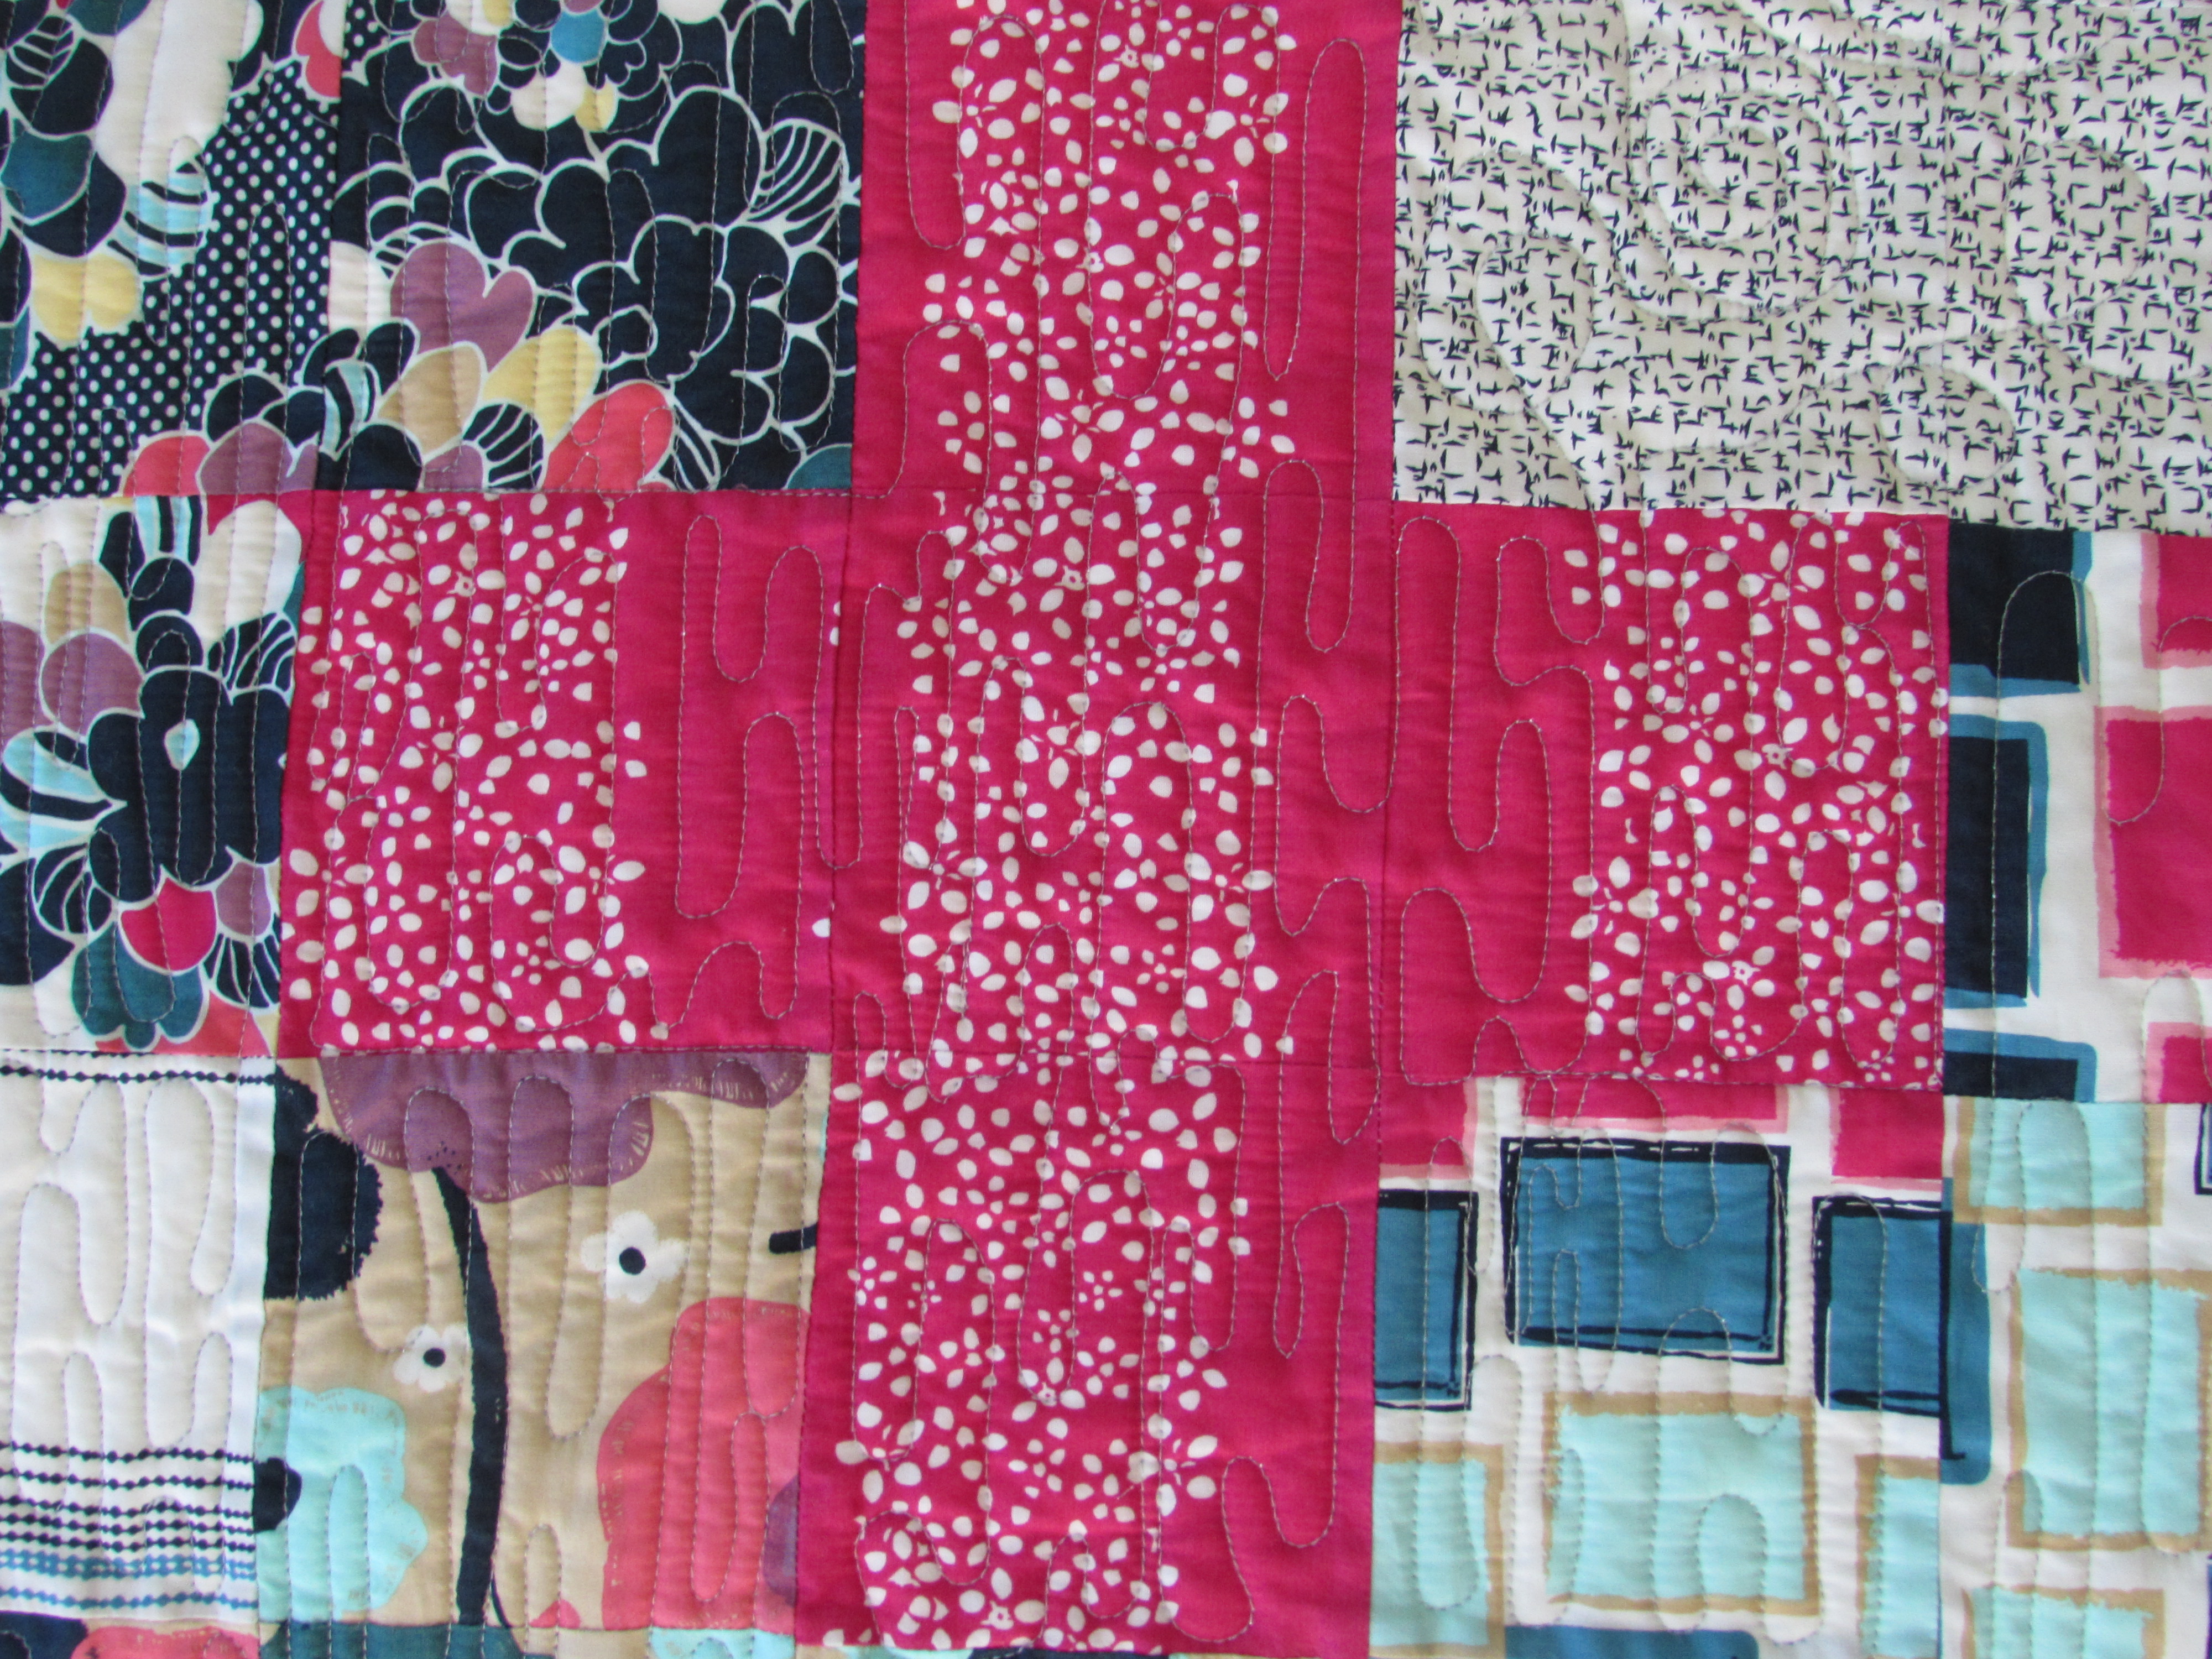
I love the flow of these soft linear curves. At first I tried to treat each plus as a separate entity but it didn’t seem to make a difference so I relaxed on that and let the lines flow over the edge of one fabric and on to the next.
I love this motif – I don’t think I have used it prior to this but I will definitely use it again. It was really relaxing to stitch.
For the negative space, or the background, I did large, loose spirals and loops. My goal was to work on my speed control and precision so I picked a simple motif. Looking back, I wish I would have selected a darker gray thread because the quilting hardly shows up. I was not feeling very confident about my abilities so I picked a light thread, in case the stitching wasn’t the best.
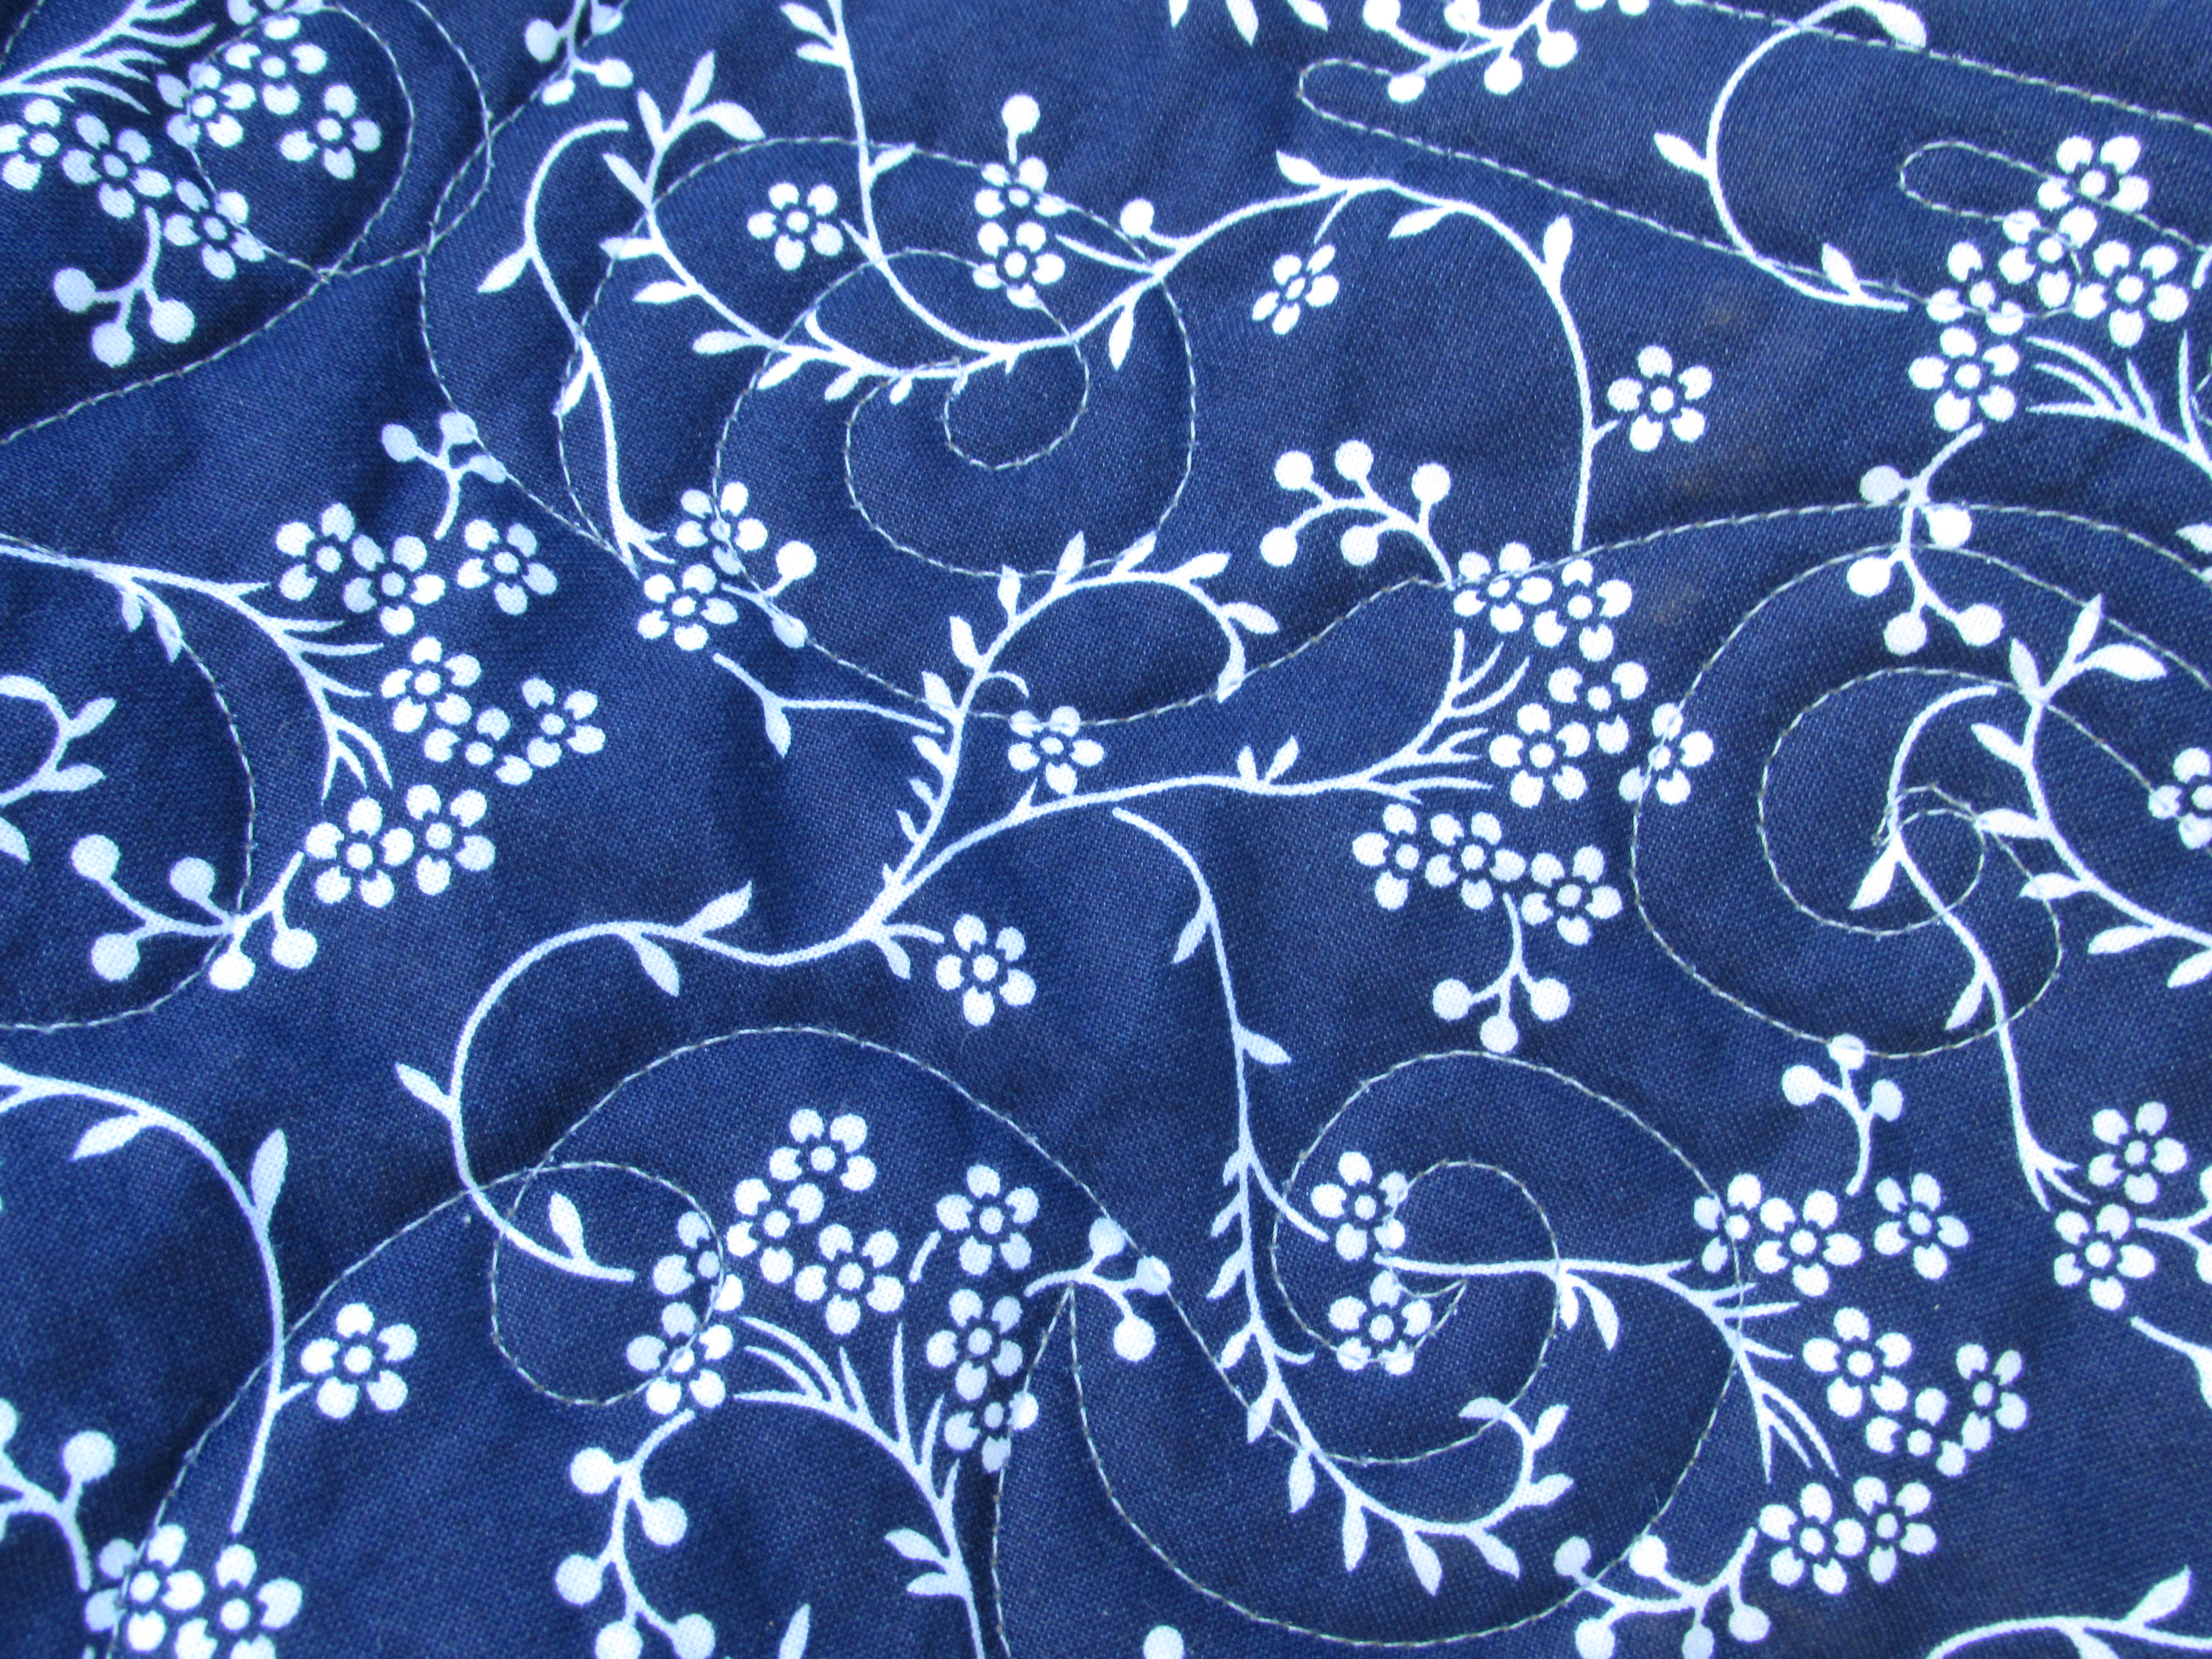
The stitching shows up better on the back. For the first time, I bought a wide back cotton for the backing. This was so convenient! I had begun to piece a backing using the leftover Dare fabrics but when I decided to do this on the long arm, I nixed a pieced backing. I have enough going on loading the long arm without having to worry about a potentially wavy or ‘un-square’ backing (is that a word?). Using a wide back fabric eliminated all of those possible issues.
Since I had already pieced strips of the scraps, I decided to use that as the binding. I sliced the strips into 2 1/4″ strips for the binding. You know how much I love a scrappy binding.
As with each long arm experience before, I do have a question. The finished quilt has a bit of a wave to the center of it. (Look at the photo at the top and you’ll see it.) I feel it was flat and square when I started to quilt it. My question is, do you think this is because I quilted the Plus section more tightly than the negative space? It definitely has a stiffness to the Plus area. When I did the surrounding area, I kept it loose so the whole quilt wouldn’t be stiff but maybe I should have been consistent all the way through? Looking for some advice here. Yvonne….. Help please! 🙂
Oh how I have enjoyed learning about and using the long arm. I have one more finished quilt top to do so I will set up some time for that project soon! It has really helped me to get some projects finished up that were languishing a bit.
Couple of reminders –
The voting begins for the Quilt Bloggers Festival on Sunday! Go take a look and choose your favorites — so many gorgeous projects have been entered.
Handmade Halloween is coming soon! I hope you are checking your blog history for fun posts to link up that will inspire readers to make something for Halloween! If you don’t want to link an older post, you are welcome to write a new one. Lots of fun prizes have been provided by Craftsy, C&T Publishing, as well as Lorna from Sew Fresh Quilts. Come back and join the party October 4th!! Be sure to let me know if you have any questions!
Craftsy has a sale going on this weekend. All classes are less than $20 (except for those in the Great Courses line.) Take advantage and learn something new!! There is always something new to learn. (Note, I am a Craftsy affiliate.)
Linking up to my favorites. See the tab at the top of the page, Link Ups, for more info.
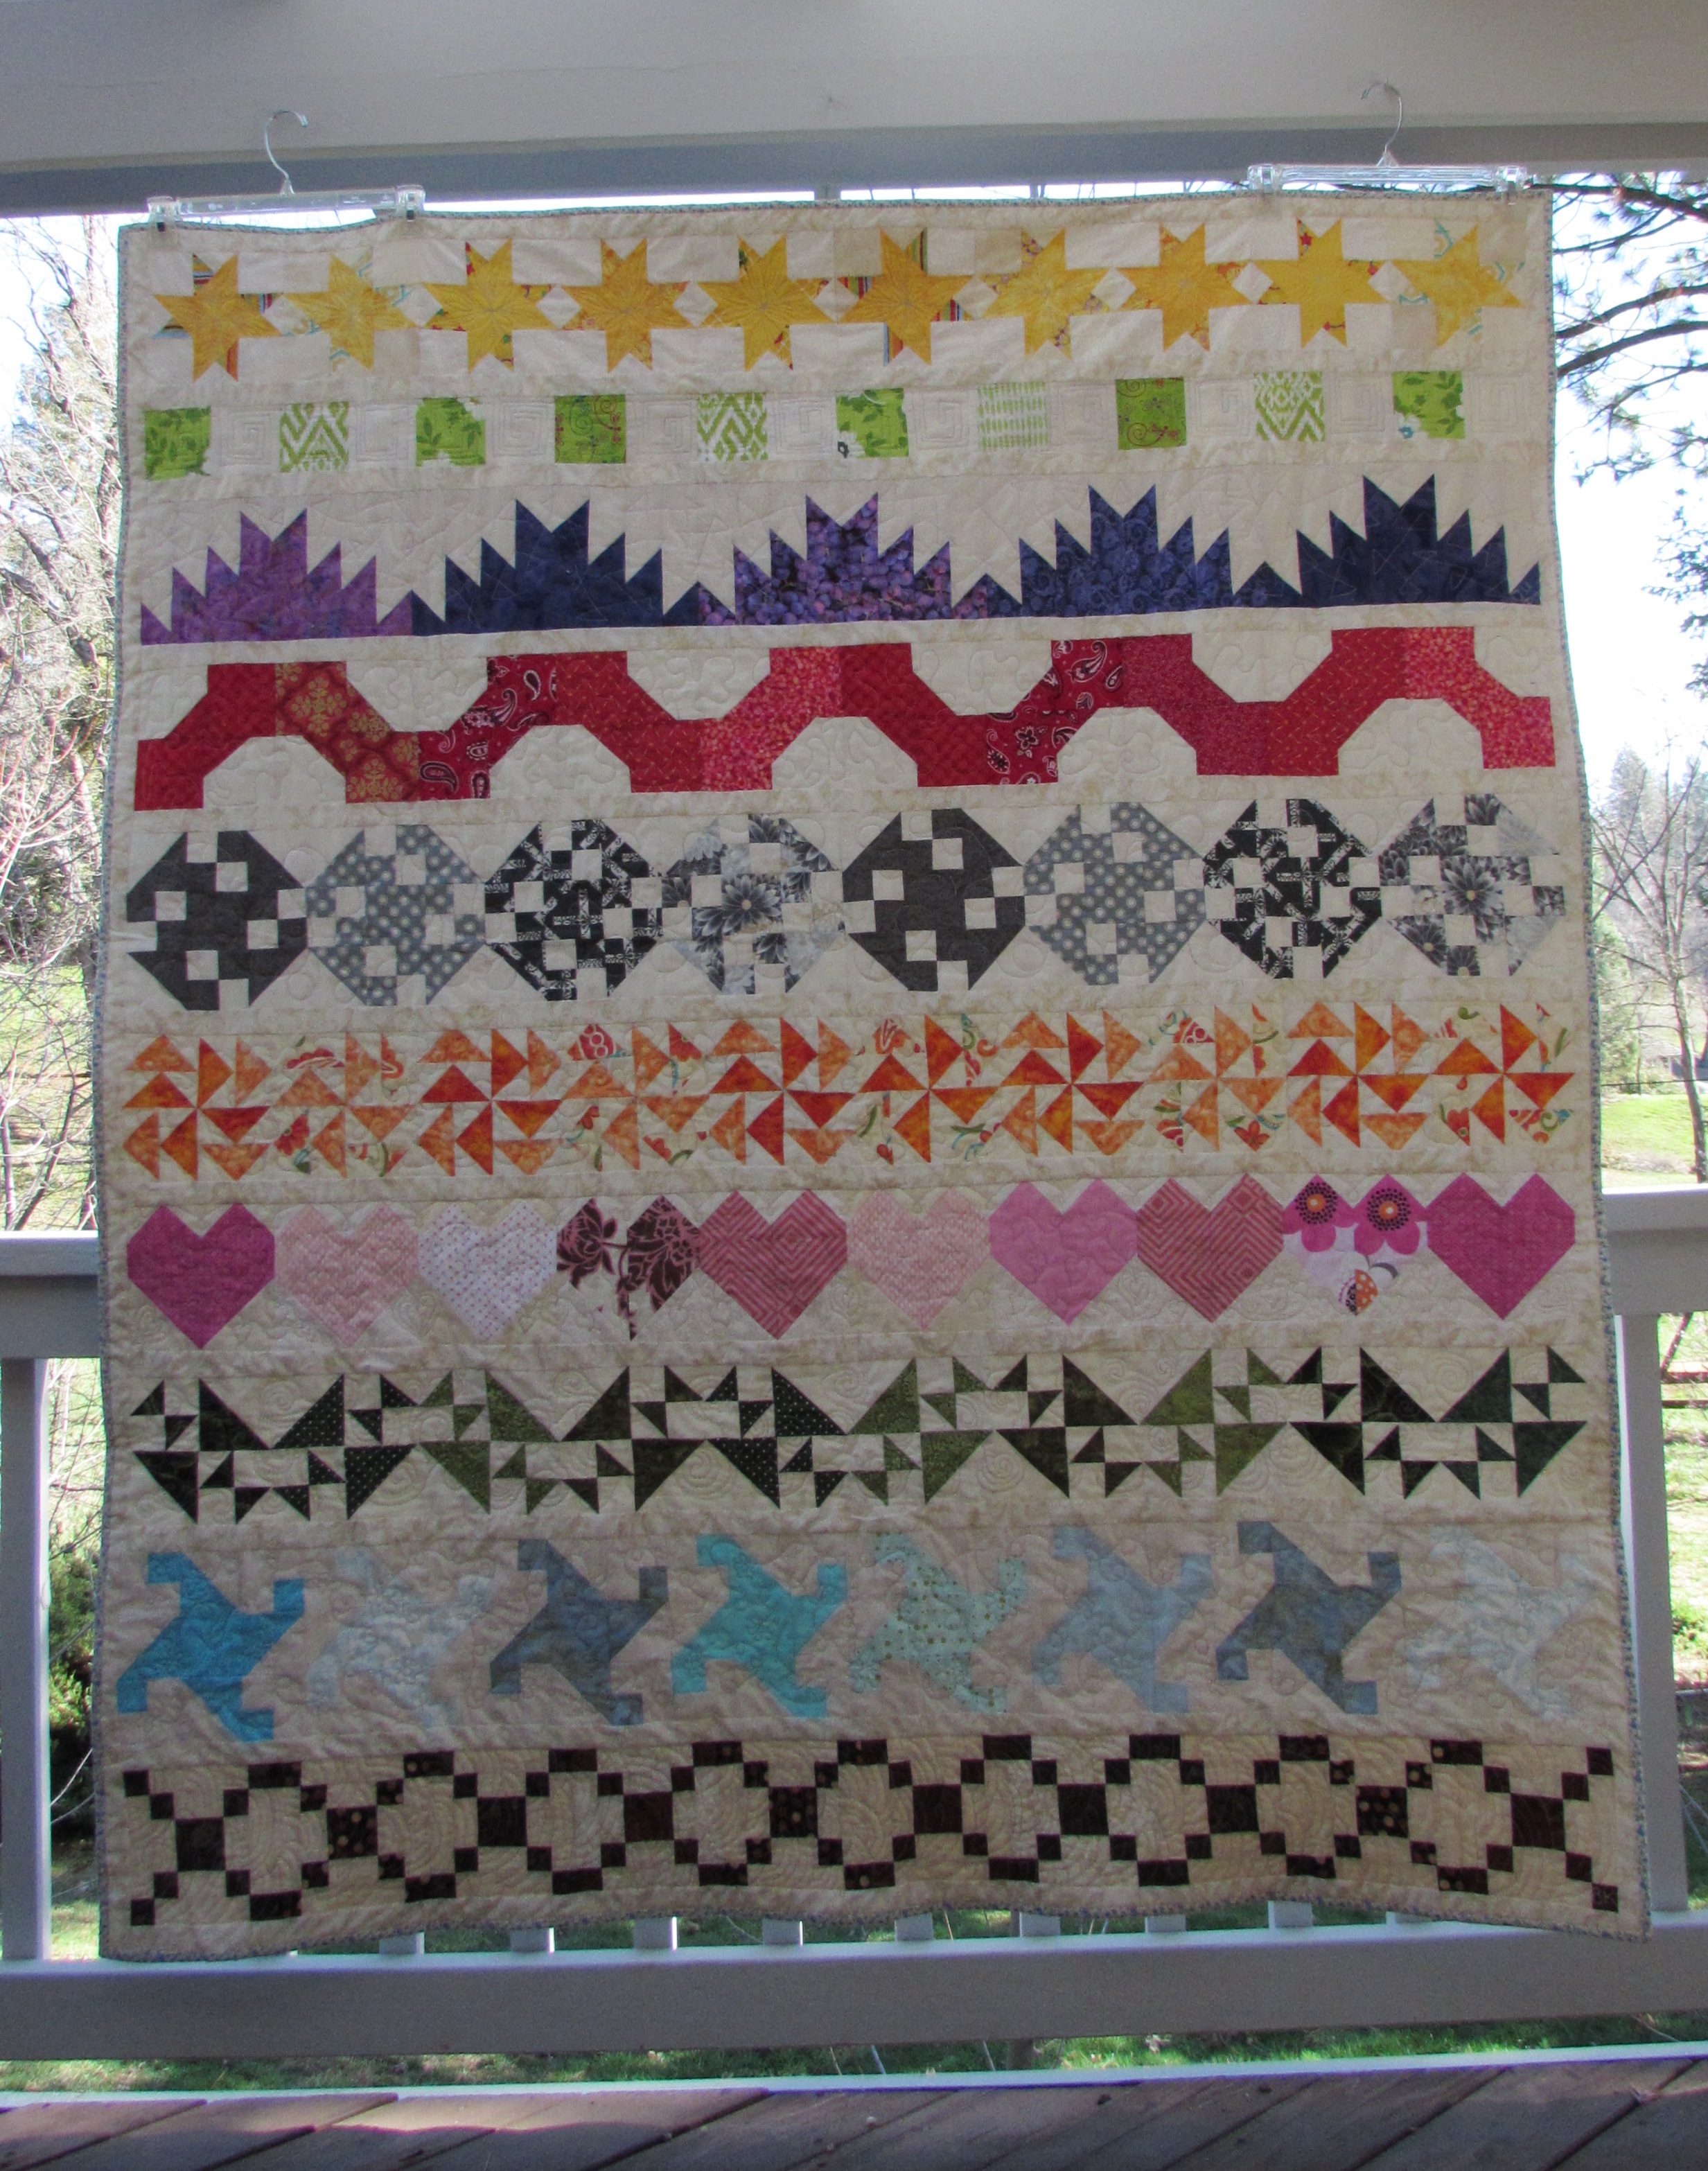
This post serves as my second entry to the Blogger’s Quilt Festival hosted by Amy’s Creative Side. The requirements are that we write a new post to share each entry (blogger’s can enter two separate categories). I am entering my Scrappy Row quilt in the Home Machine Quilted category.
Rainbow Scrap Row Quilt, February 2016
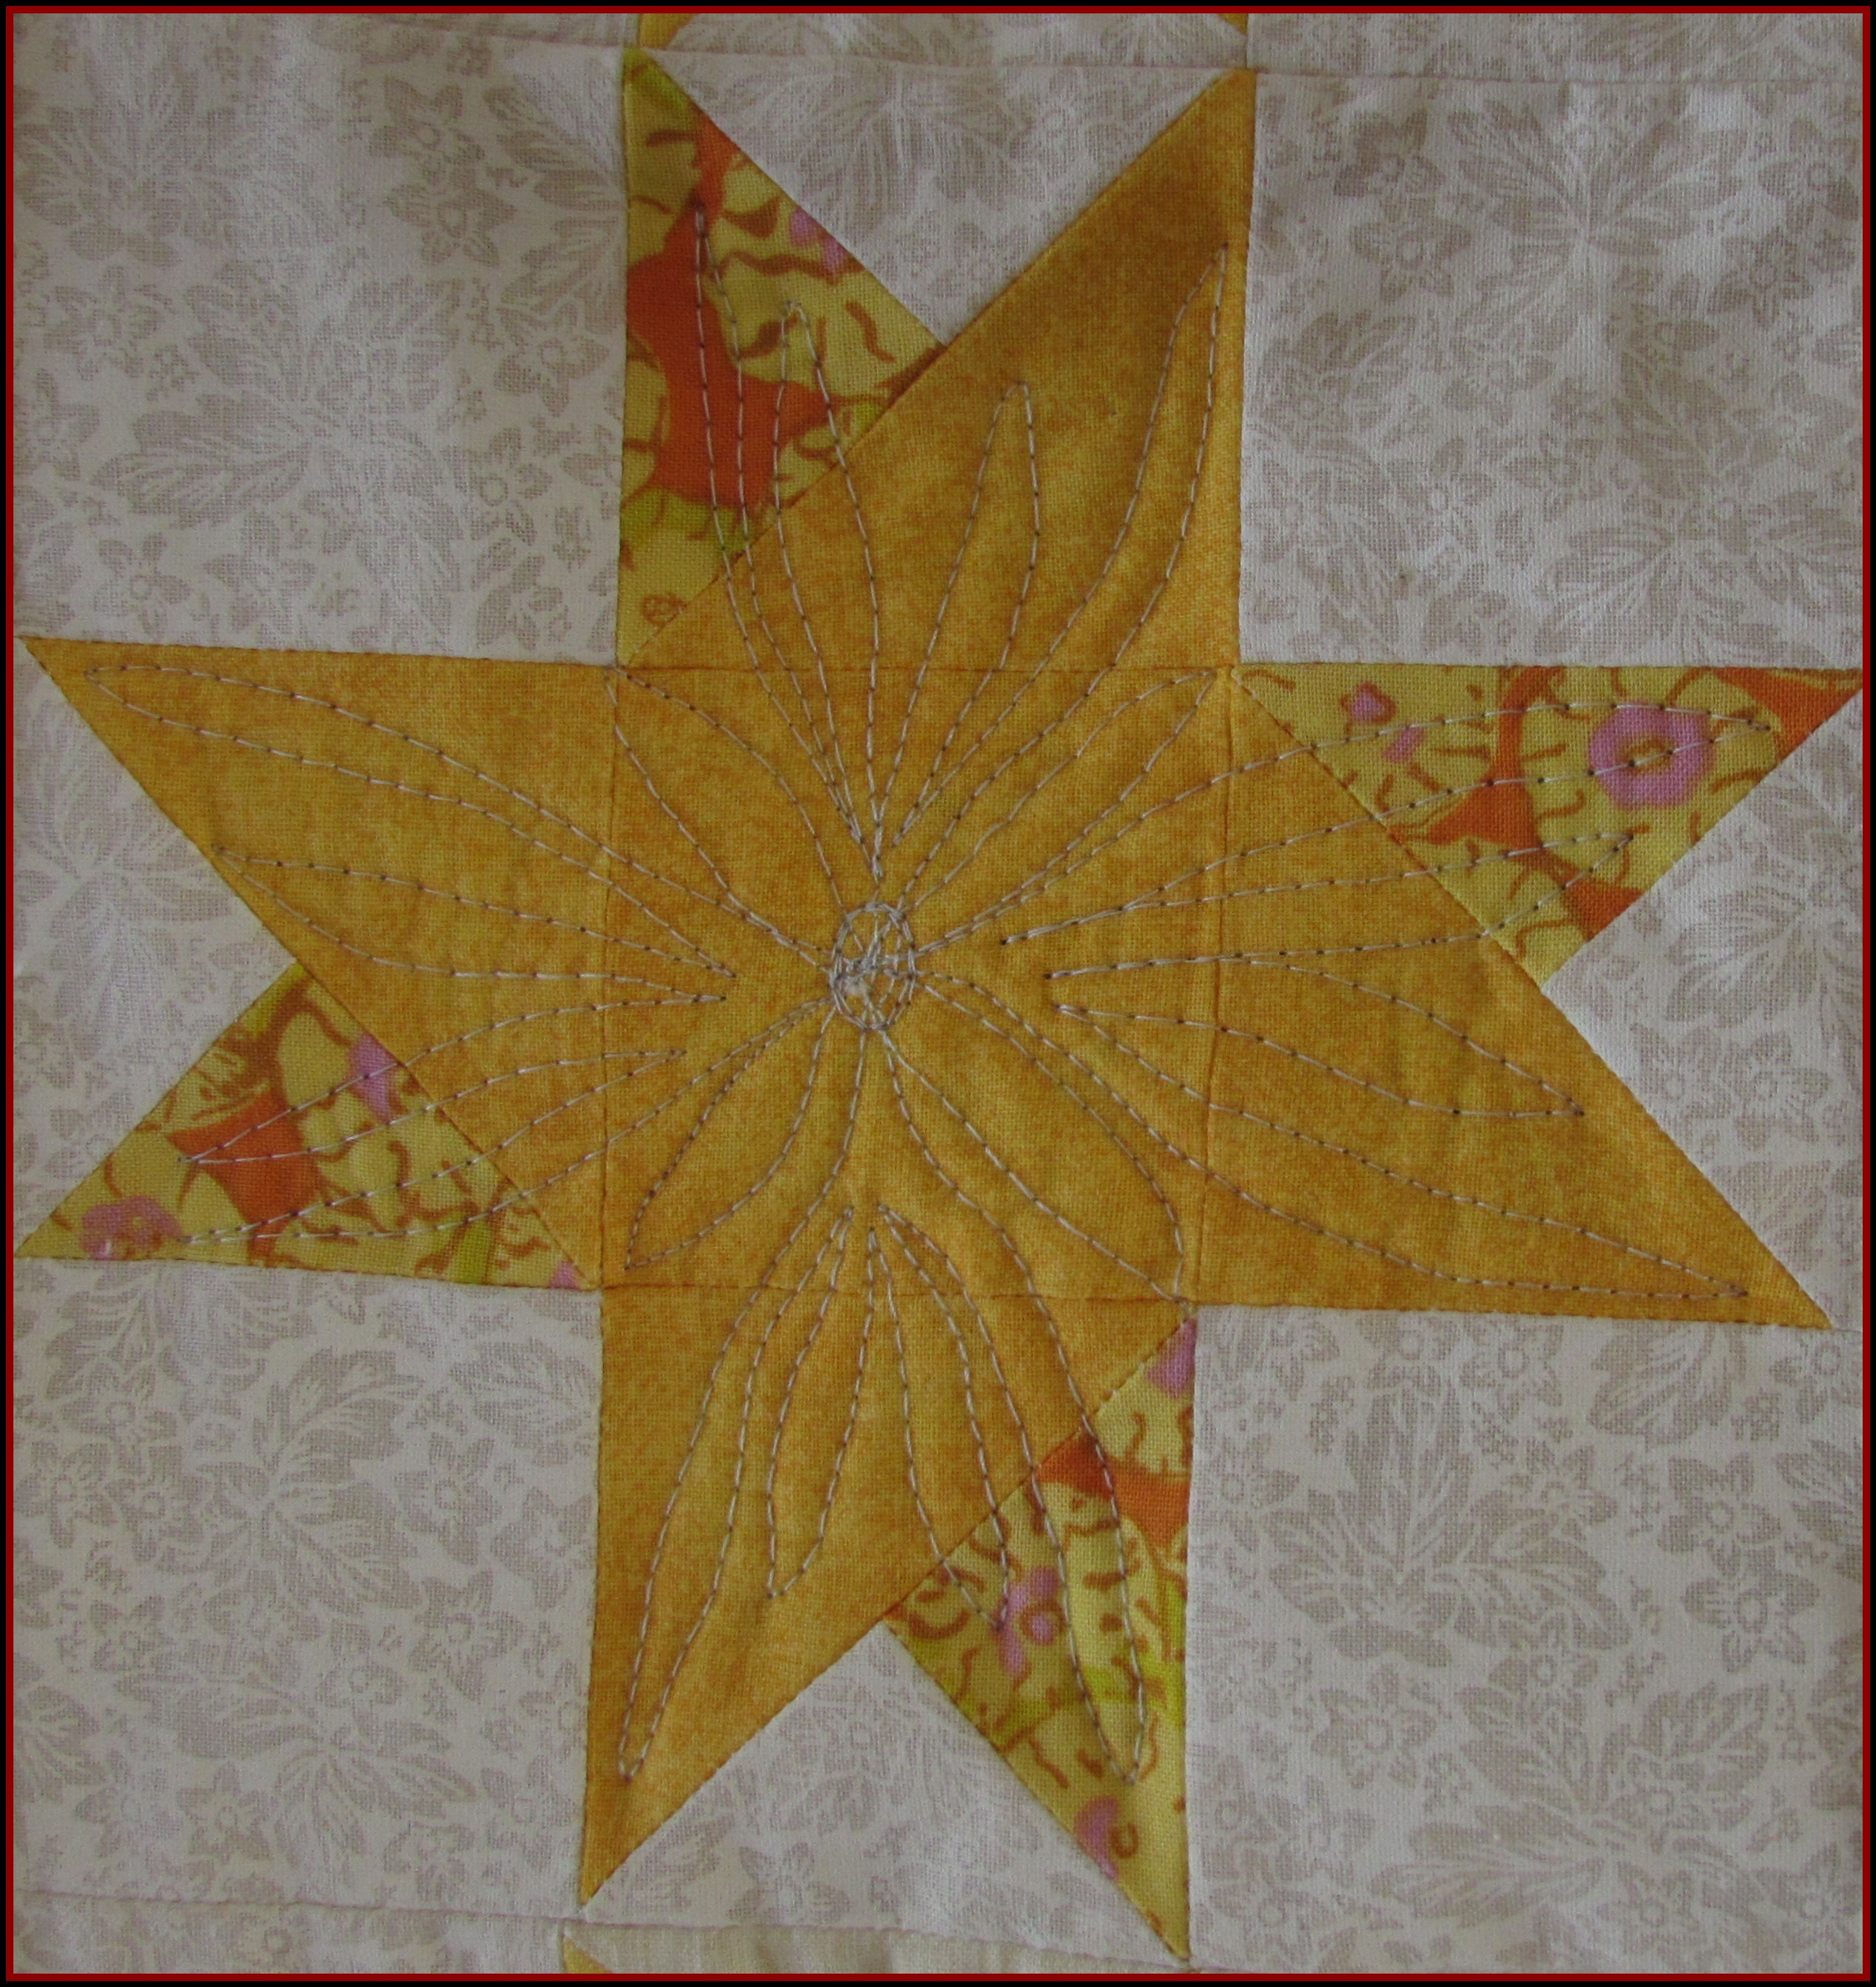
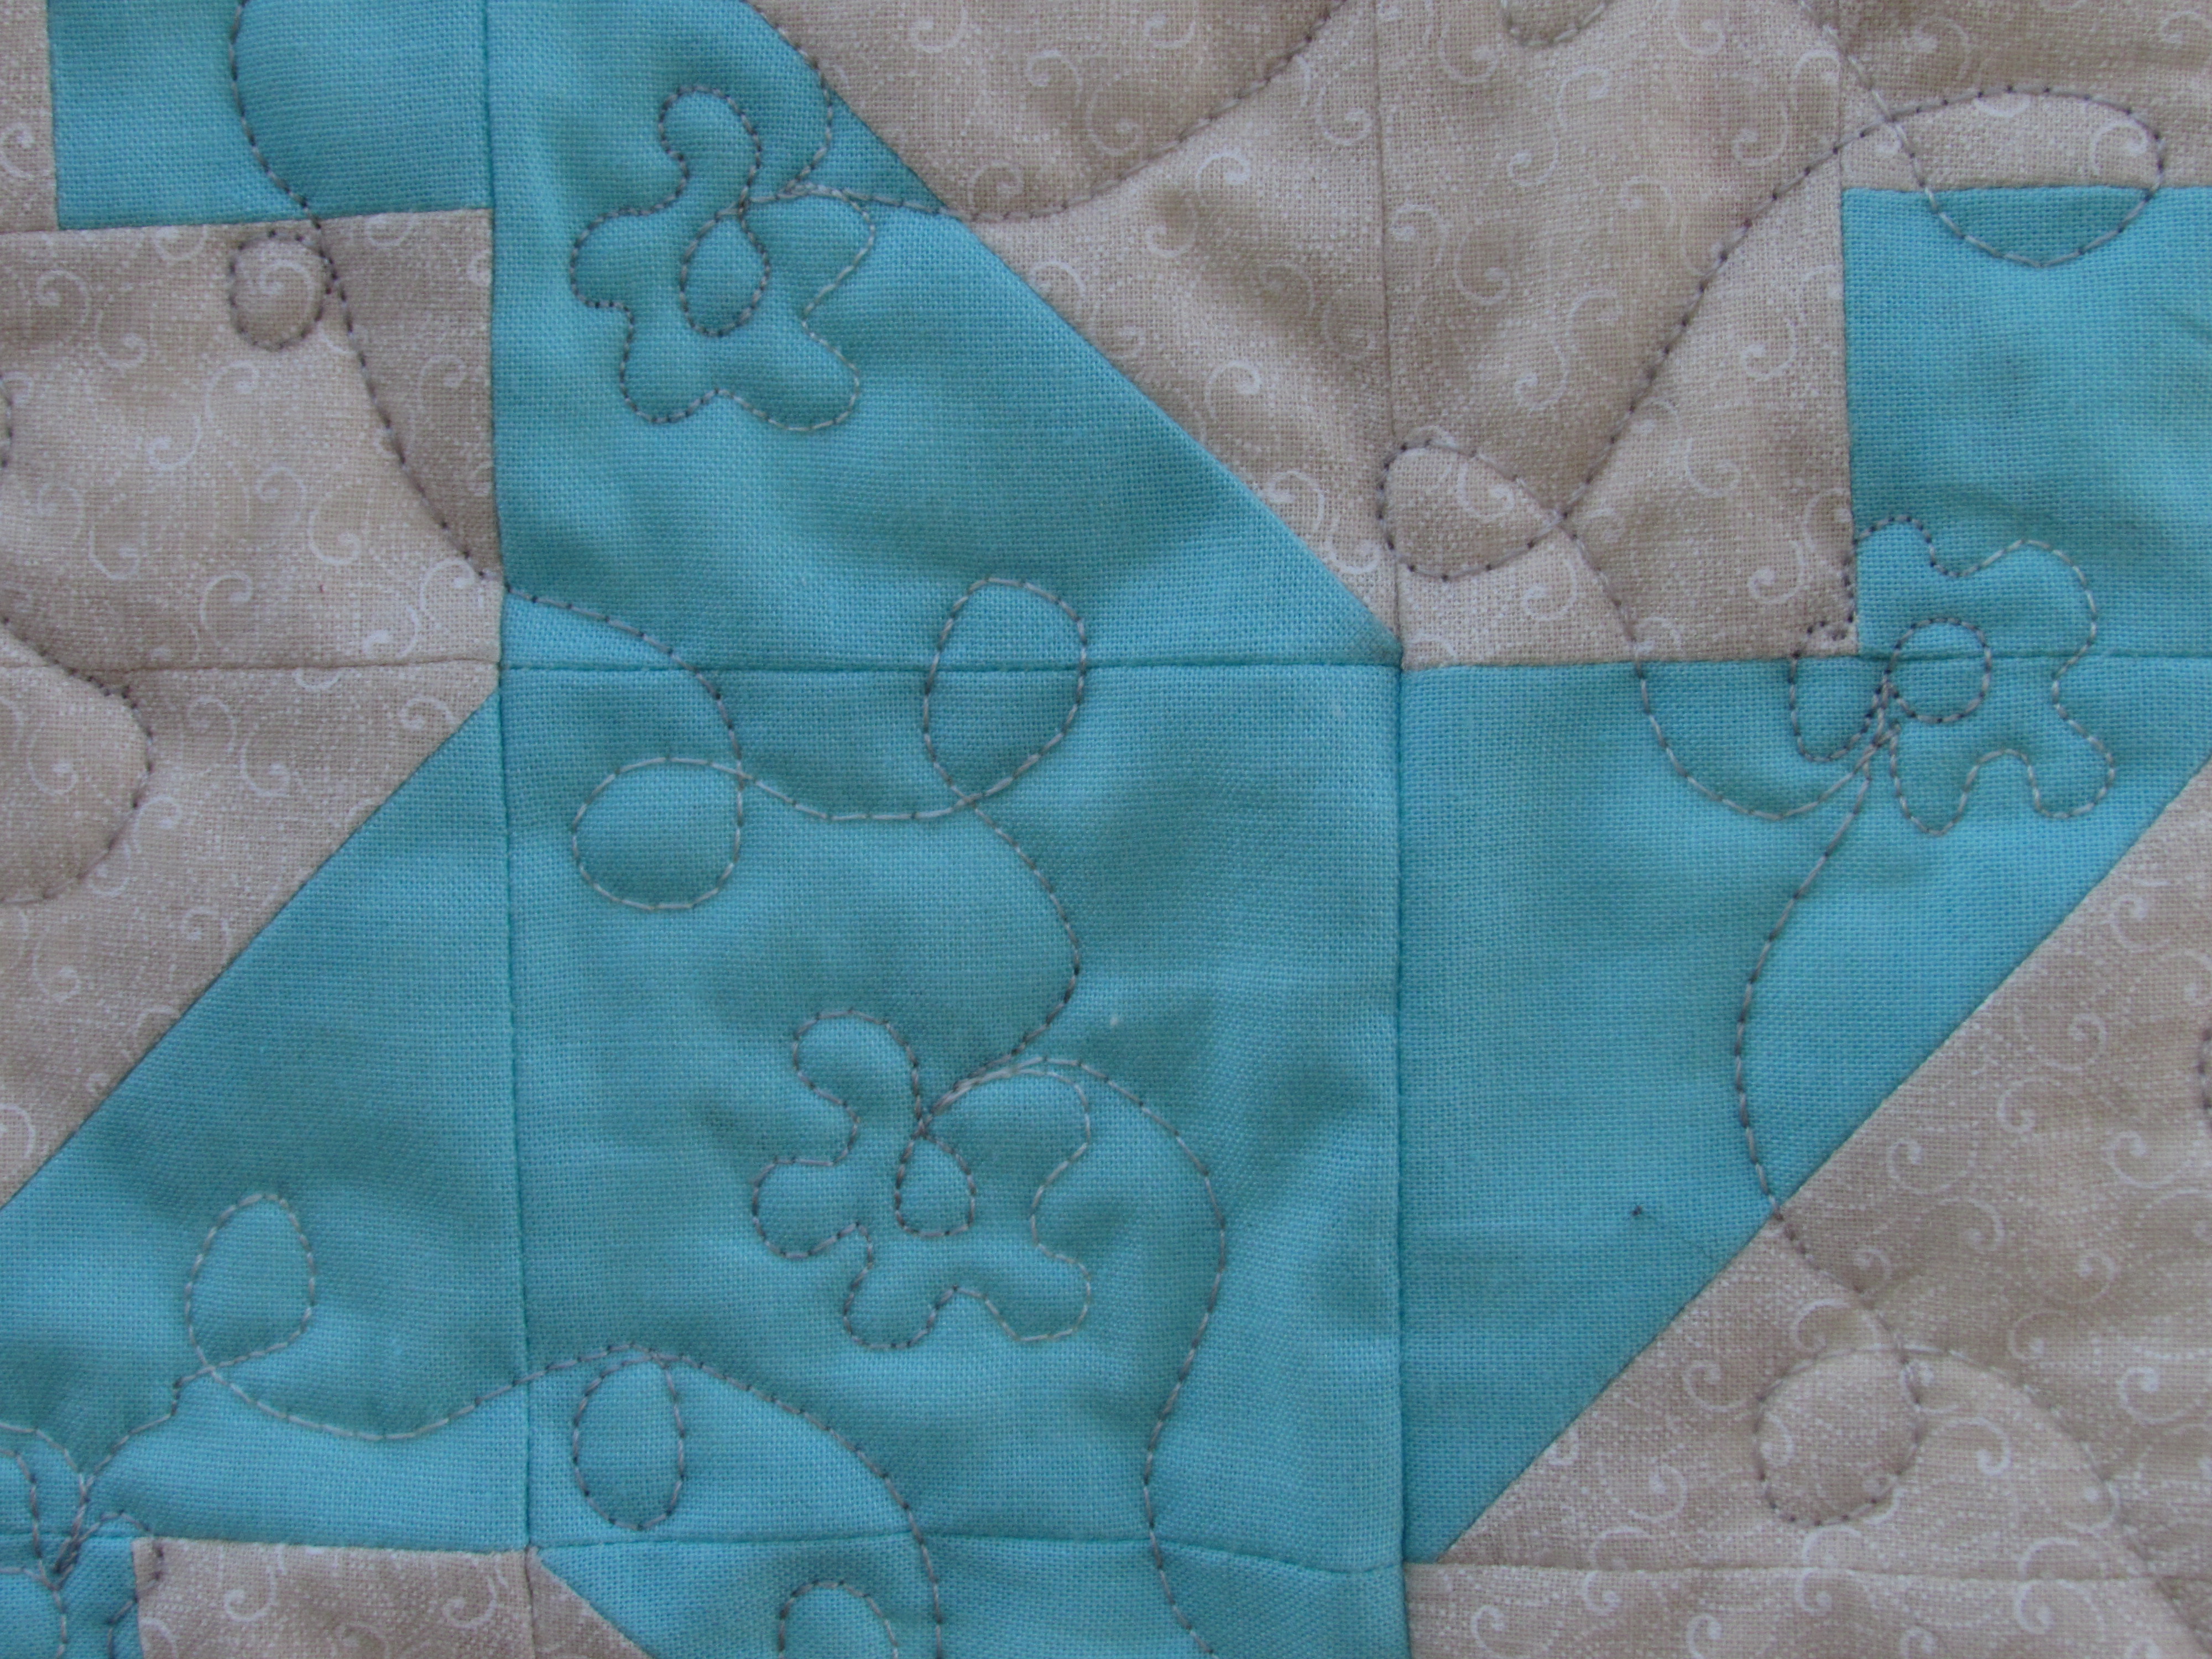
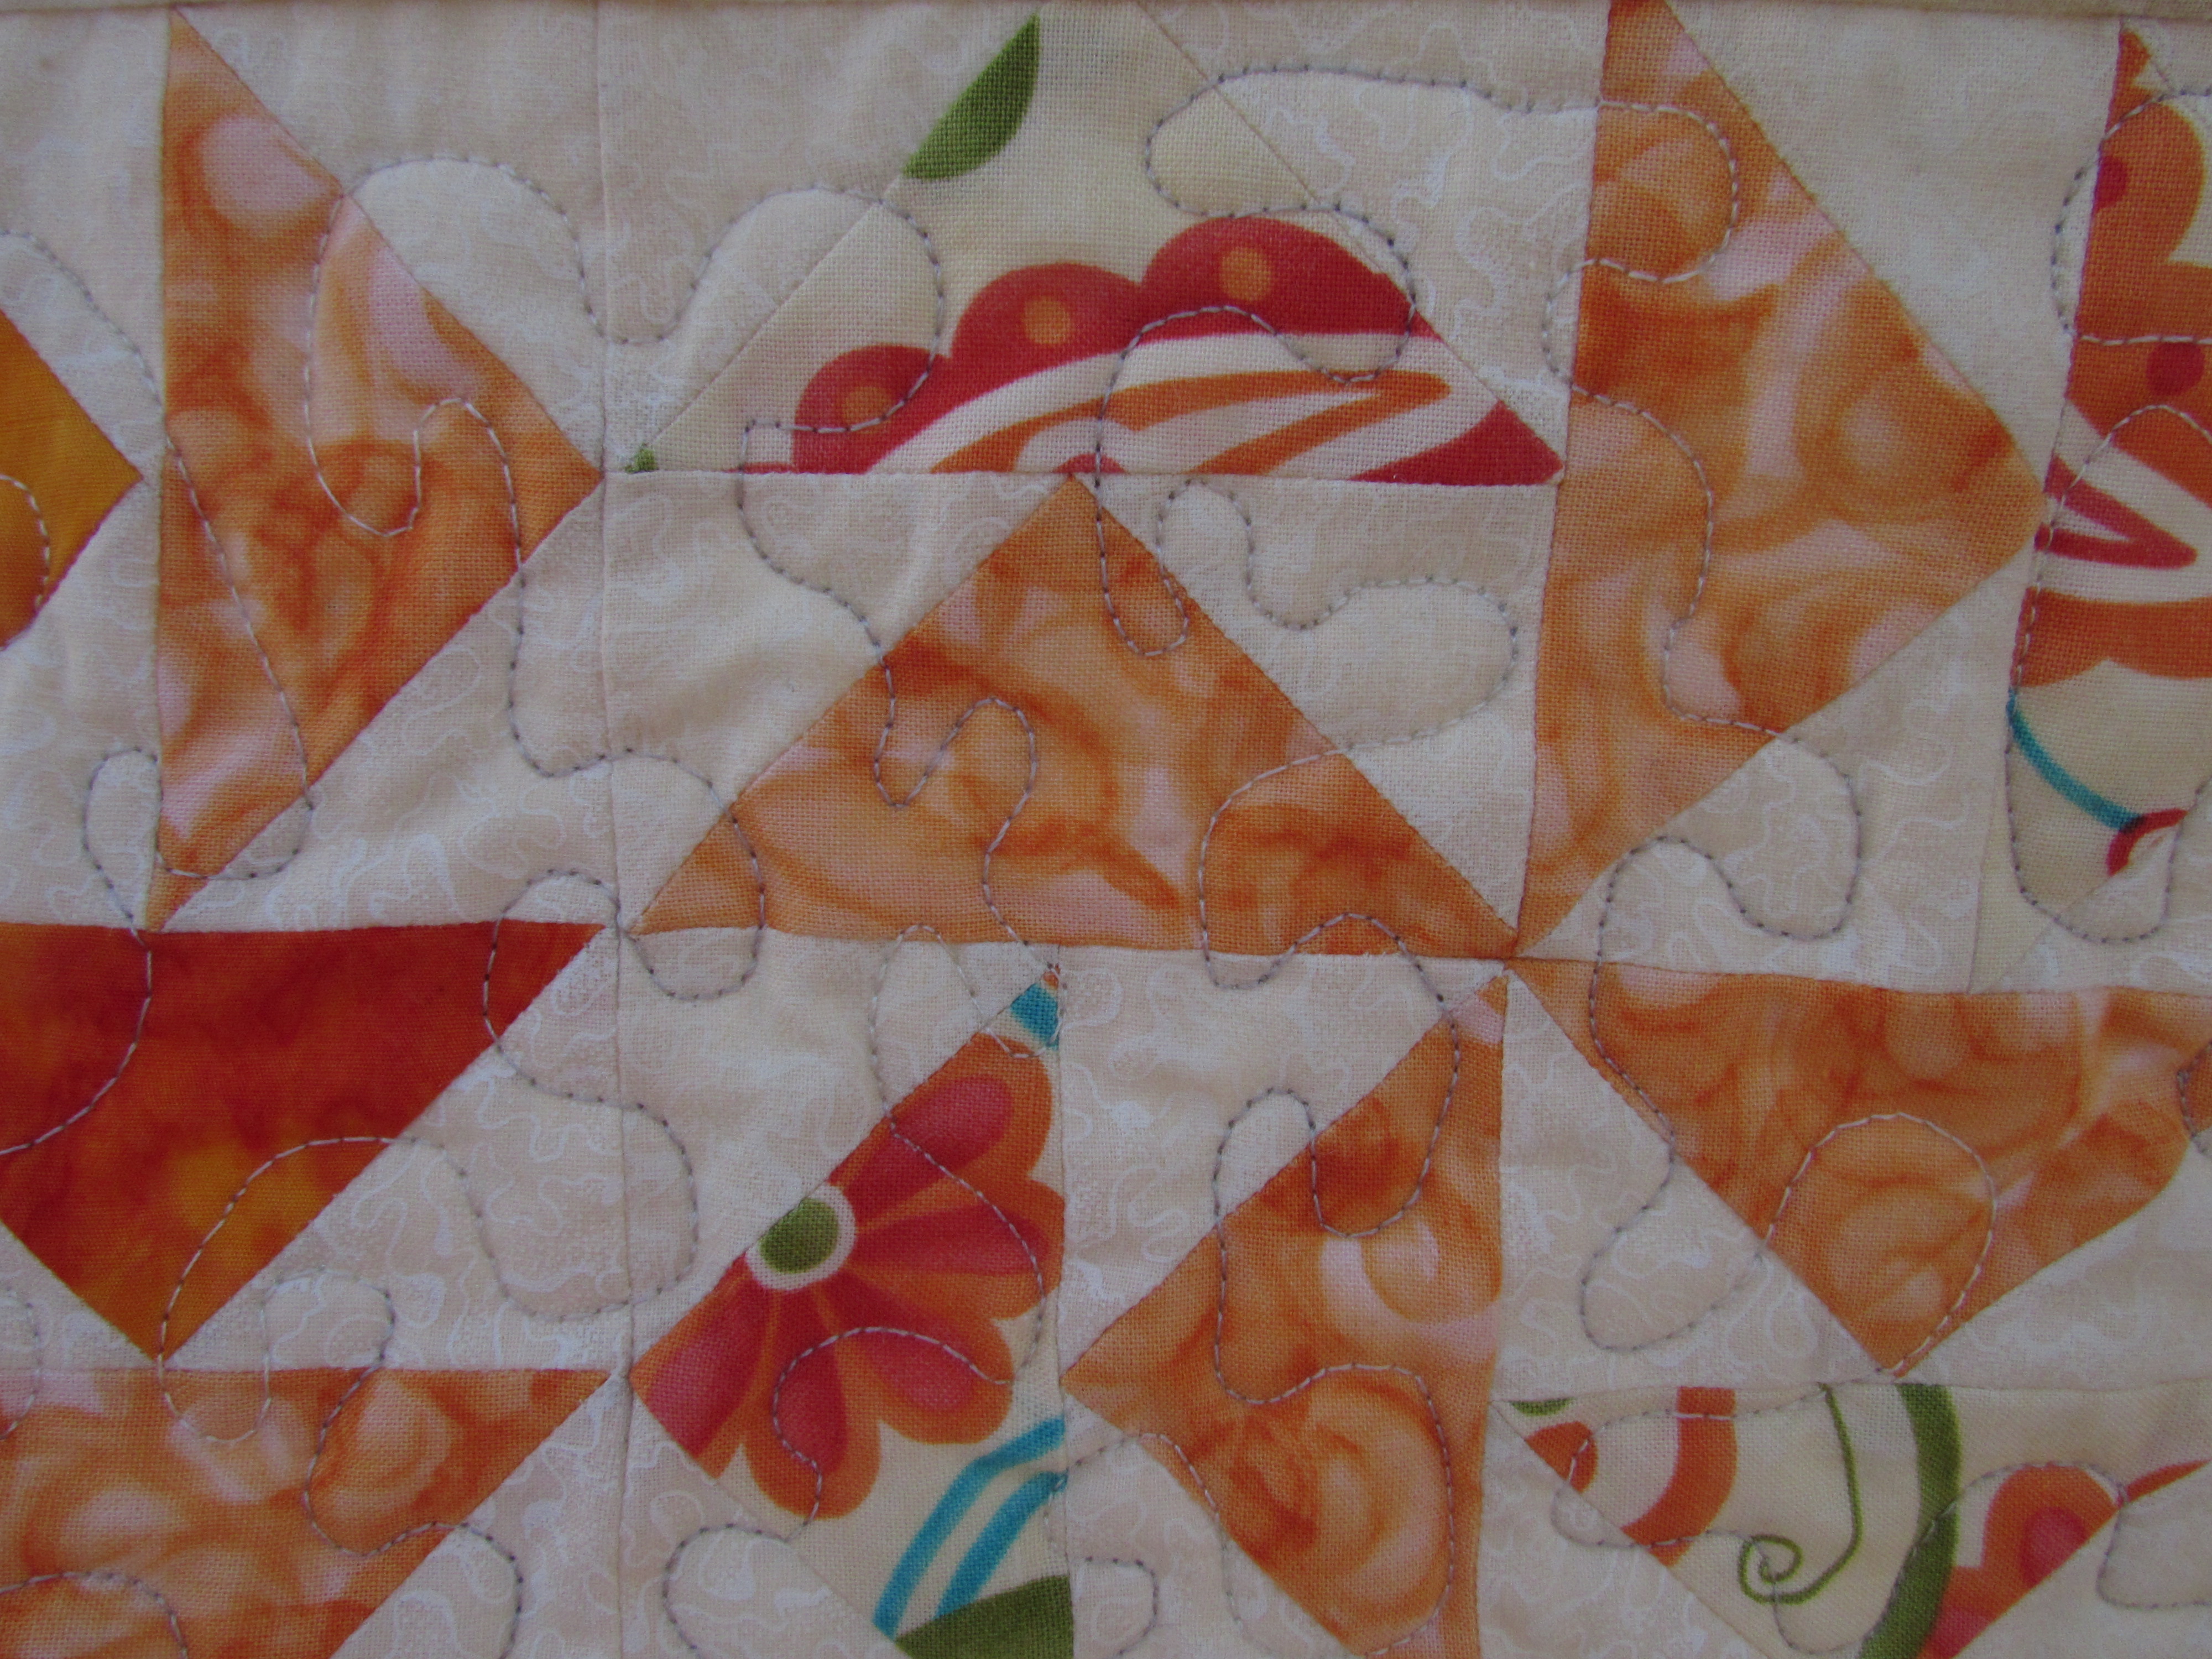
I made this row quilt by following along with the Classic Stitches BOM, hosted by Mari at Academic Quilter throughout 2015 (great tutorials for each row are available on her blog). I spent a great deal of time quilting it at the beginning of 2016. I decided I would quilt each row with a different motif. Here are a few examples.
For the yellow stars, I used a large flower that extended into the points of the star.
The brown Pennsylvania blocks are sporting Baptist Fans and my initials down in the corner.
The blue waterwheel blocks have a flow of meandering loops and flowers.
The green row of Crosses & Losses blocks is quilted with a spiral motif.
These Dutchman’s Puzzle blocks are my favorite row. I did a tight stipple here as the row wasn’t entirely flat and required a lot of quilting to tame it down.
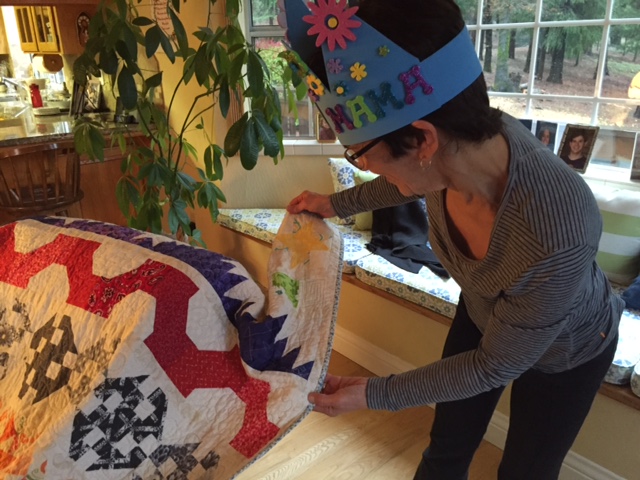
This quilt was gifted to my sister Tina (the one sporting her birthday crown!) for her 60th birthday. It was very fun to make and even more rewarding to give!
I hope you will pop over to Amy’s to check out the entries in the Quilt Festival. She hosts this event each fall and I have come to look forward to it – lots of inspiration and always one or two new bloggers to befriend. This year is the first time I have entered though. Voting begins Sunday the 25th!
It is likely that you all have been seeing the posts about the Blogger’s Quilt Festival that is currently going on at Amy’s Creative Side. This event is such a great source of inspiration. All kinds of quilt bloggers link up their favorite projects within the categories that Amy had set up (e.g. large quilt, small quilt, original design, art quilt, scrappy quilt, etc) I have not participated before but have enjoyed looking at the work of so many talented quilters. Viewers can vote for their favorites in each category and prizes are generously awarded. There are also some prizes awarded in a drawing of all those who enter.
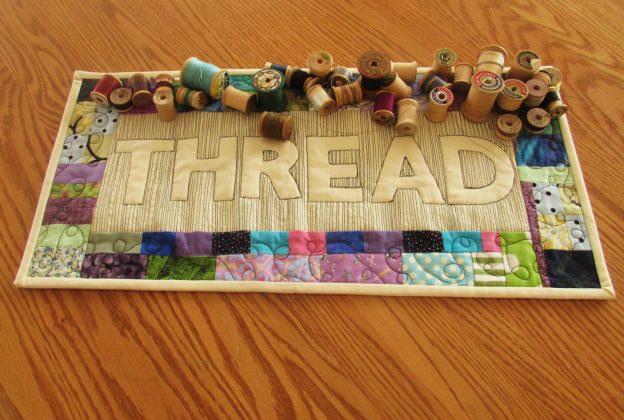
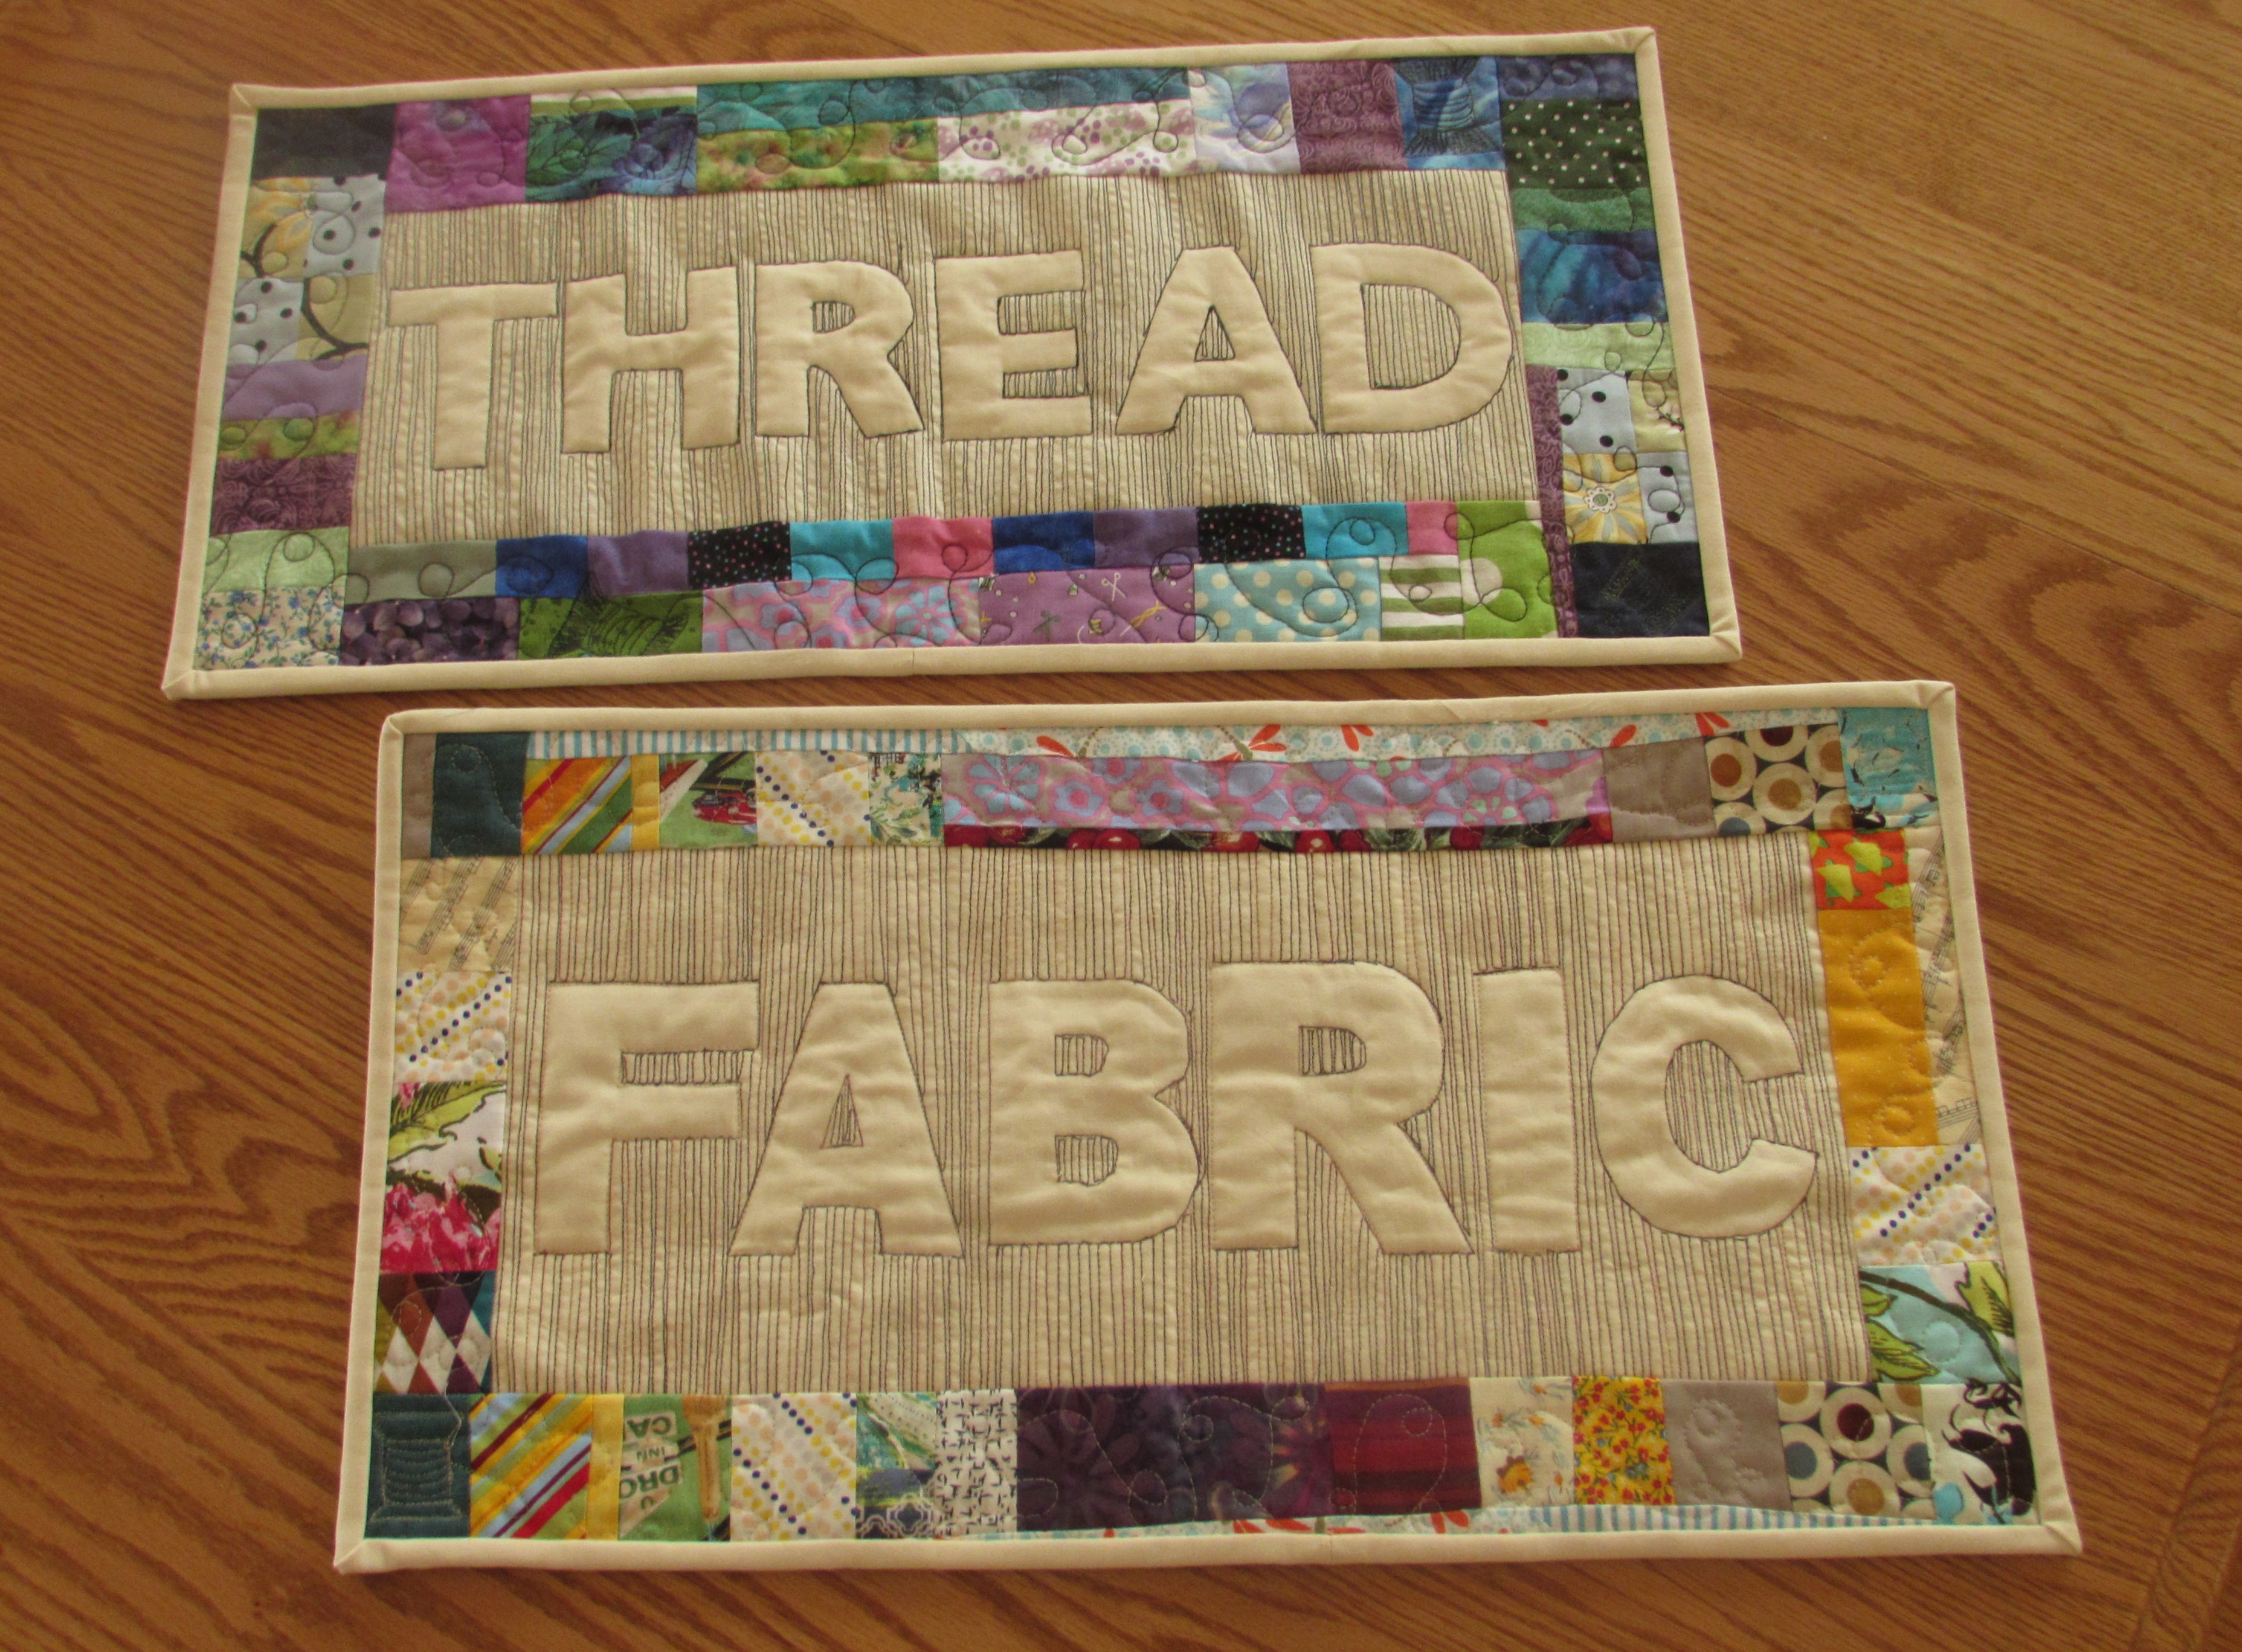
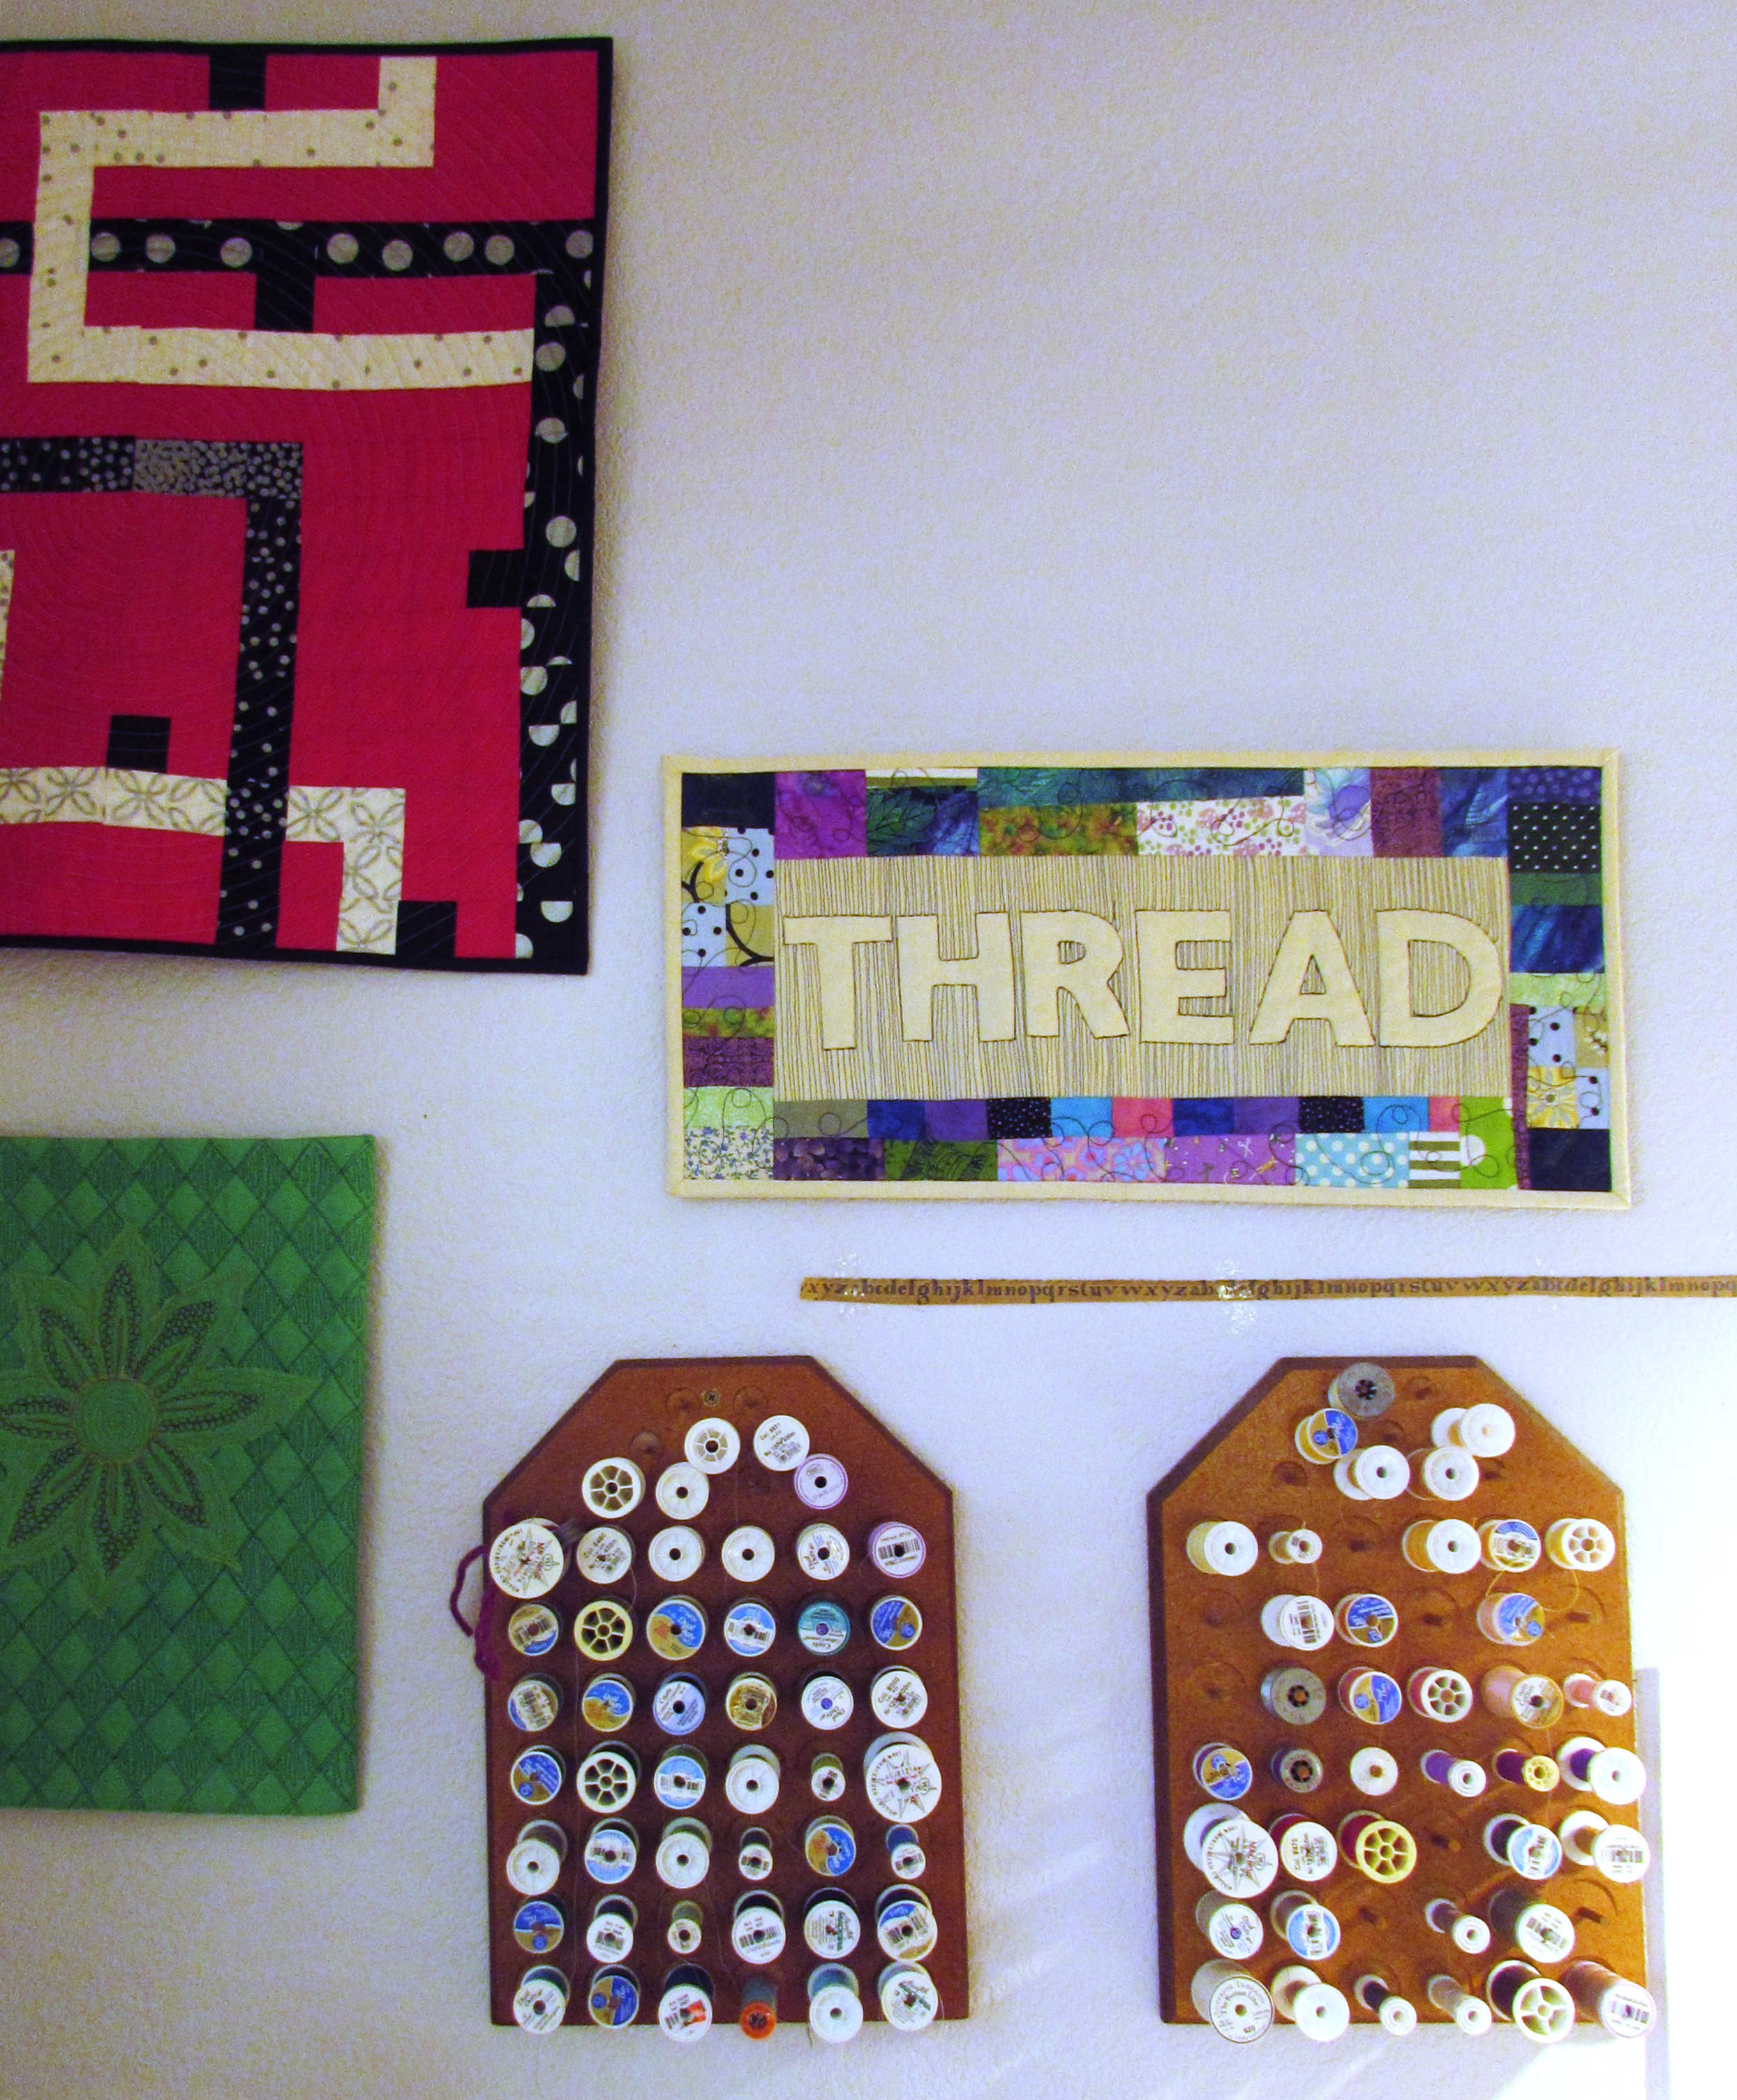
This year I am going to enter my THREAD quilt in the mini quilt category. You might remember this project because it was quite recent. If you are new to the blog and want more details, click here. I made a set of two that hang in my sewing room but only THREAD is being entered. I just love seeing both of them together though!
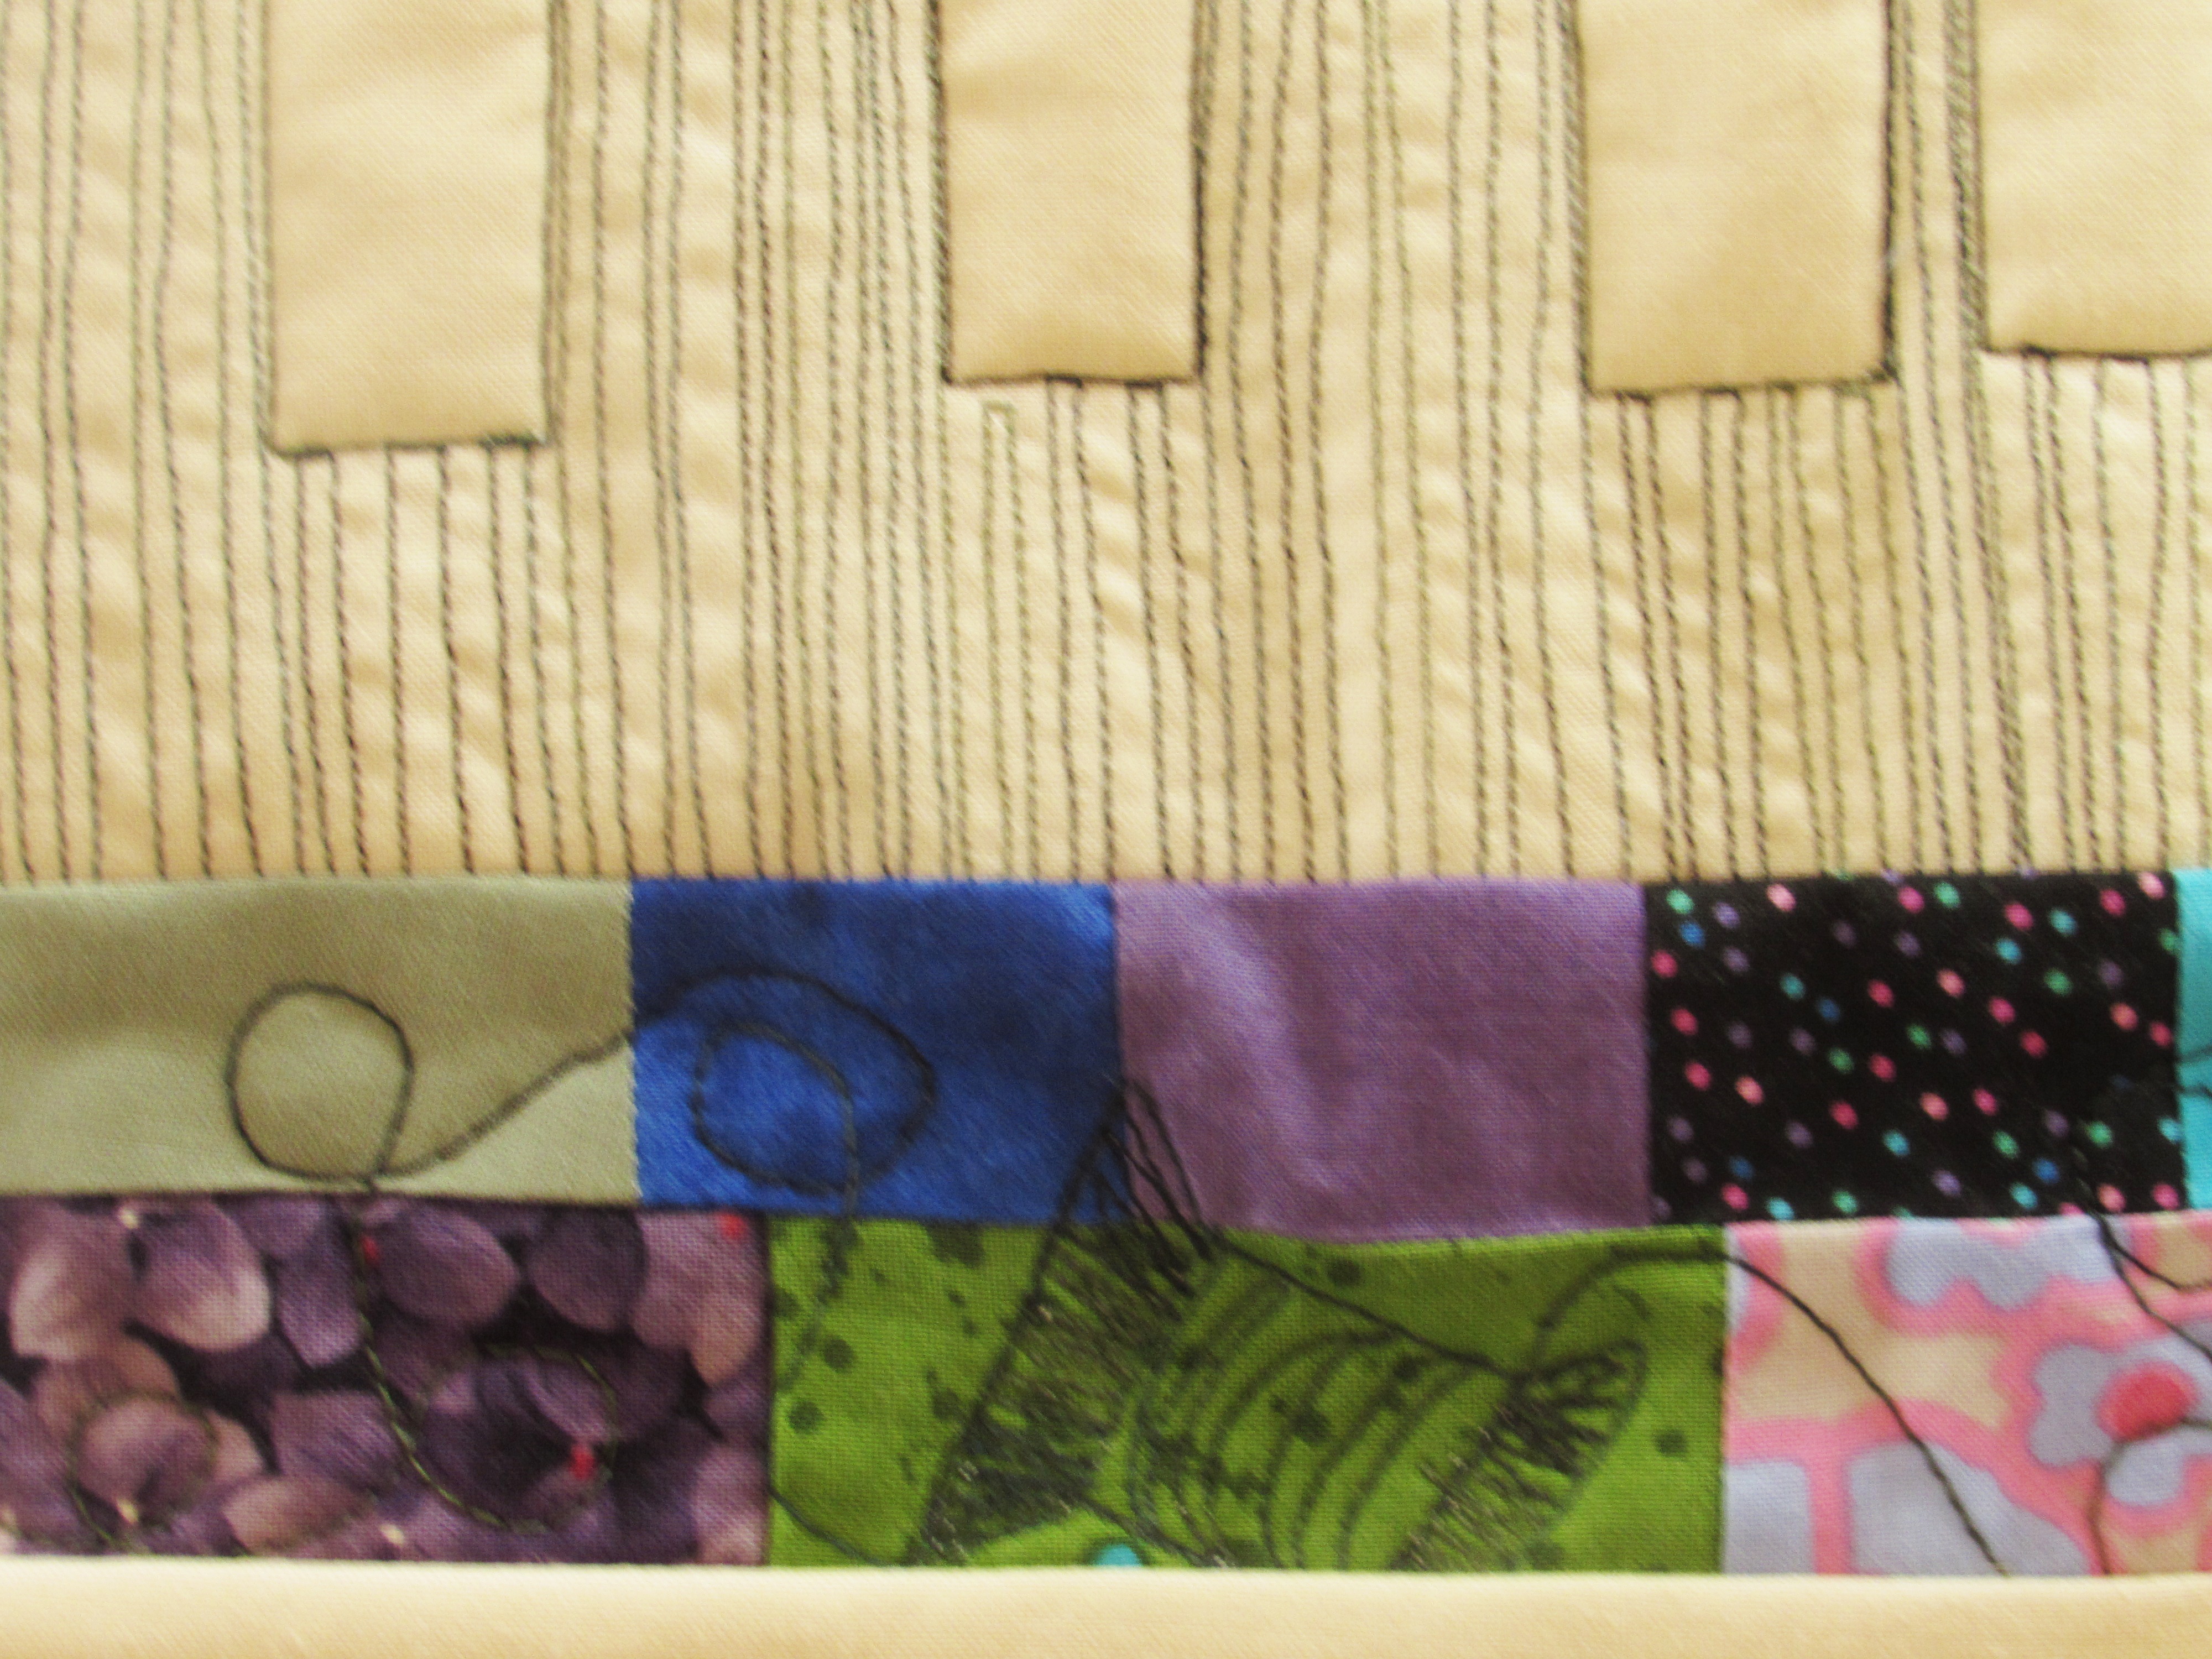
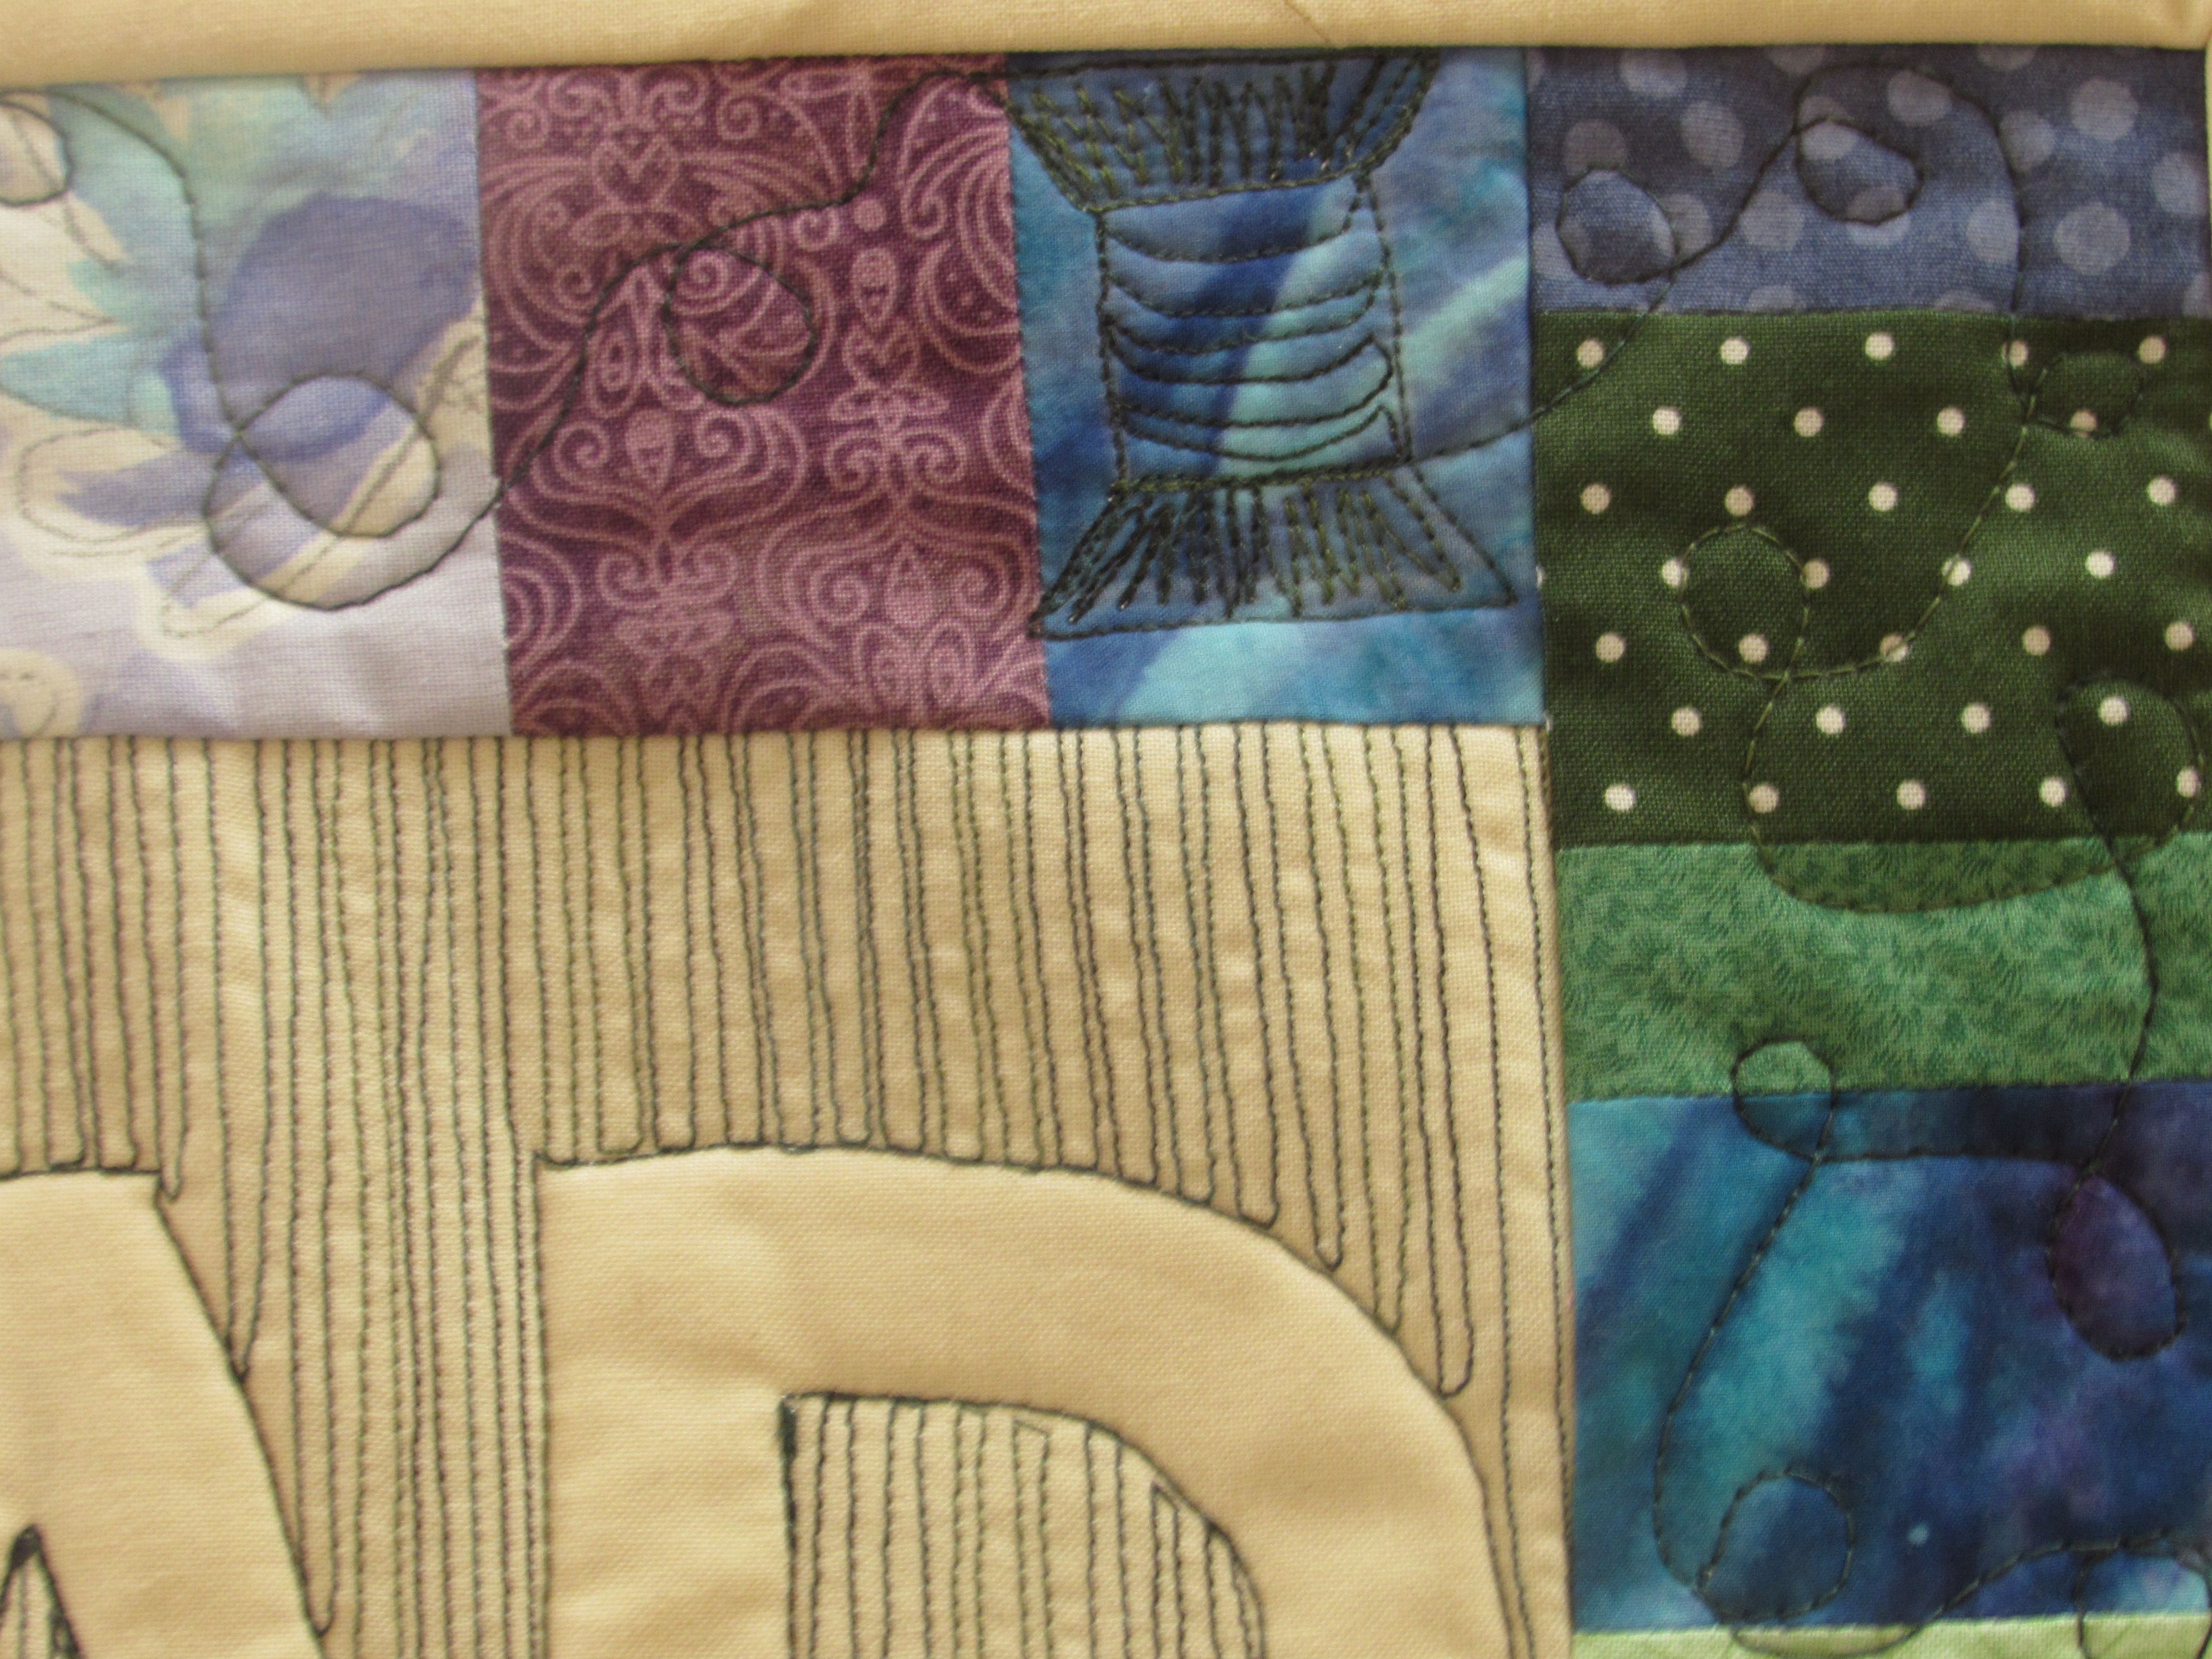
I had so much fun quilting this. There are a few spools incorporated into the border quilting.
If you are interested in trying to make one for your sewing room, I have a tutorial written up for you. It is a very simple process to relief quilt the word on the center. Of course you could swap the word out for anything. QUILT, CREATE, IMAGINE – any of those would be fantastic.
I hope you will check out the entries over at Amy’s. If you are interested, there are a few more days where the festival is open for bloggers to link to. Voting doesn’t open until Sunday, the 25th. It is worth popping over to Amy’s — there are so many wonderful quilts to ooh and ahh over. Have fun!!
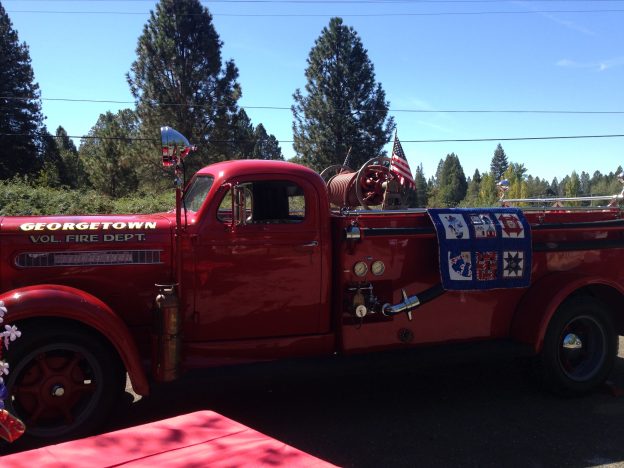
This weekend I had the opportunity to go to a small quilt show in the town of Georgetown, about an hour drive from home. The Georgetown quilt guild is small with about 30 members. They put on a quilt show each year, which is no easy feat with a small group! Last year the show was cancelled at the last minute because it was very smokey in the area, due to a wildfire. Their show is held in the park which makes for a really nice morning.
This year the show featured Lynn Wilder, of Sew’n Wild Oaks. She is a talented pattern designer and teacher that lives in Northern California. She has a book out on ways to simplify quilt math and was doing short demos throughout the day.
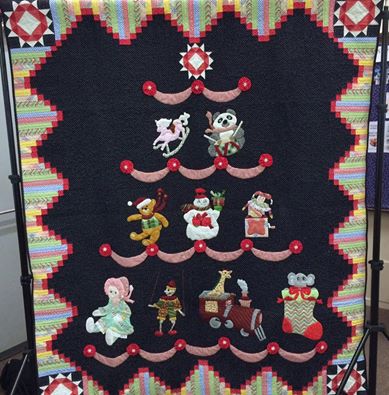
This year’s opportunity quilt for the guild was made with Wilder’s Toyland pattern. It was an adorable holiday quilt to raffle off. Funds from their annual raffle go to the Volunteer Fire Department, a wonderful cause. There were a number of quilts that guild members had made using this pattern and it was fun to see each quilter’s interpretation and color choice.
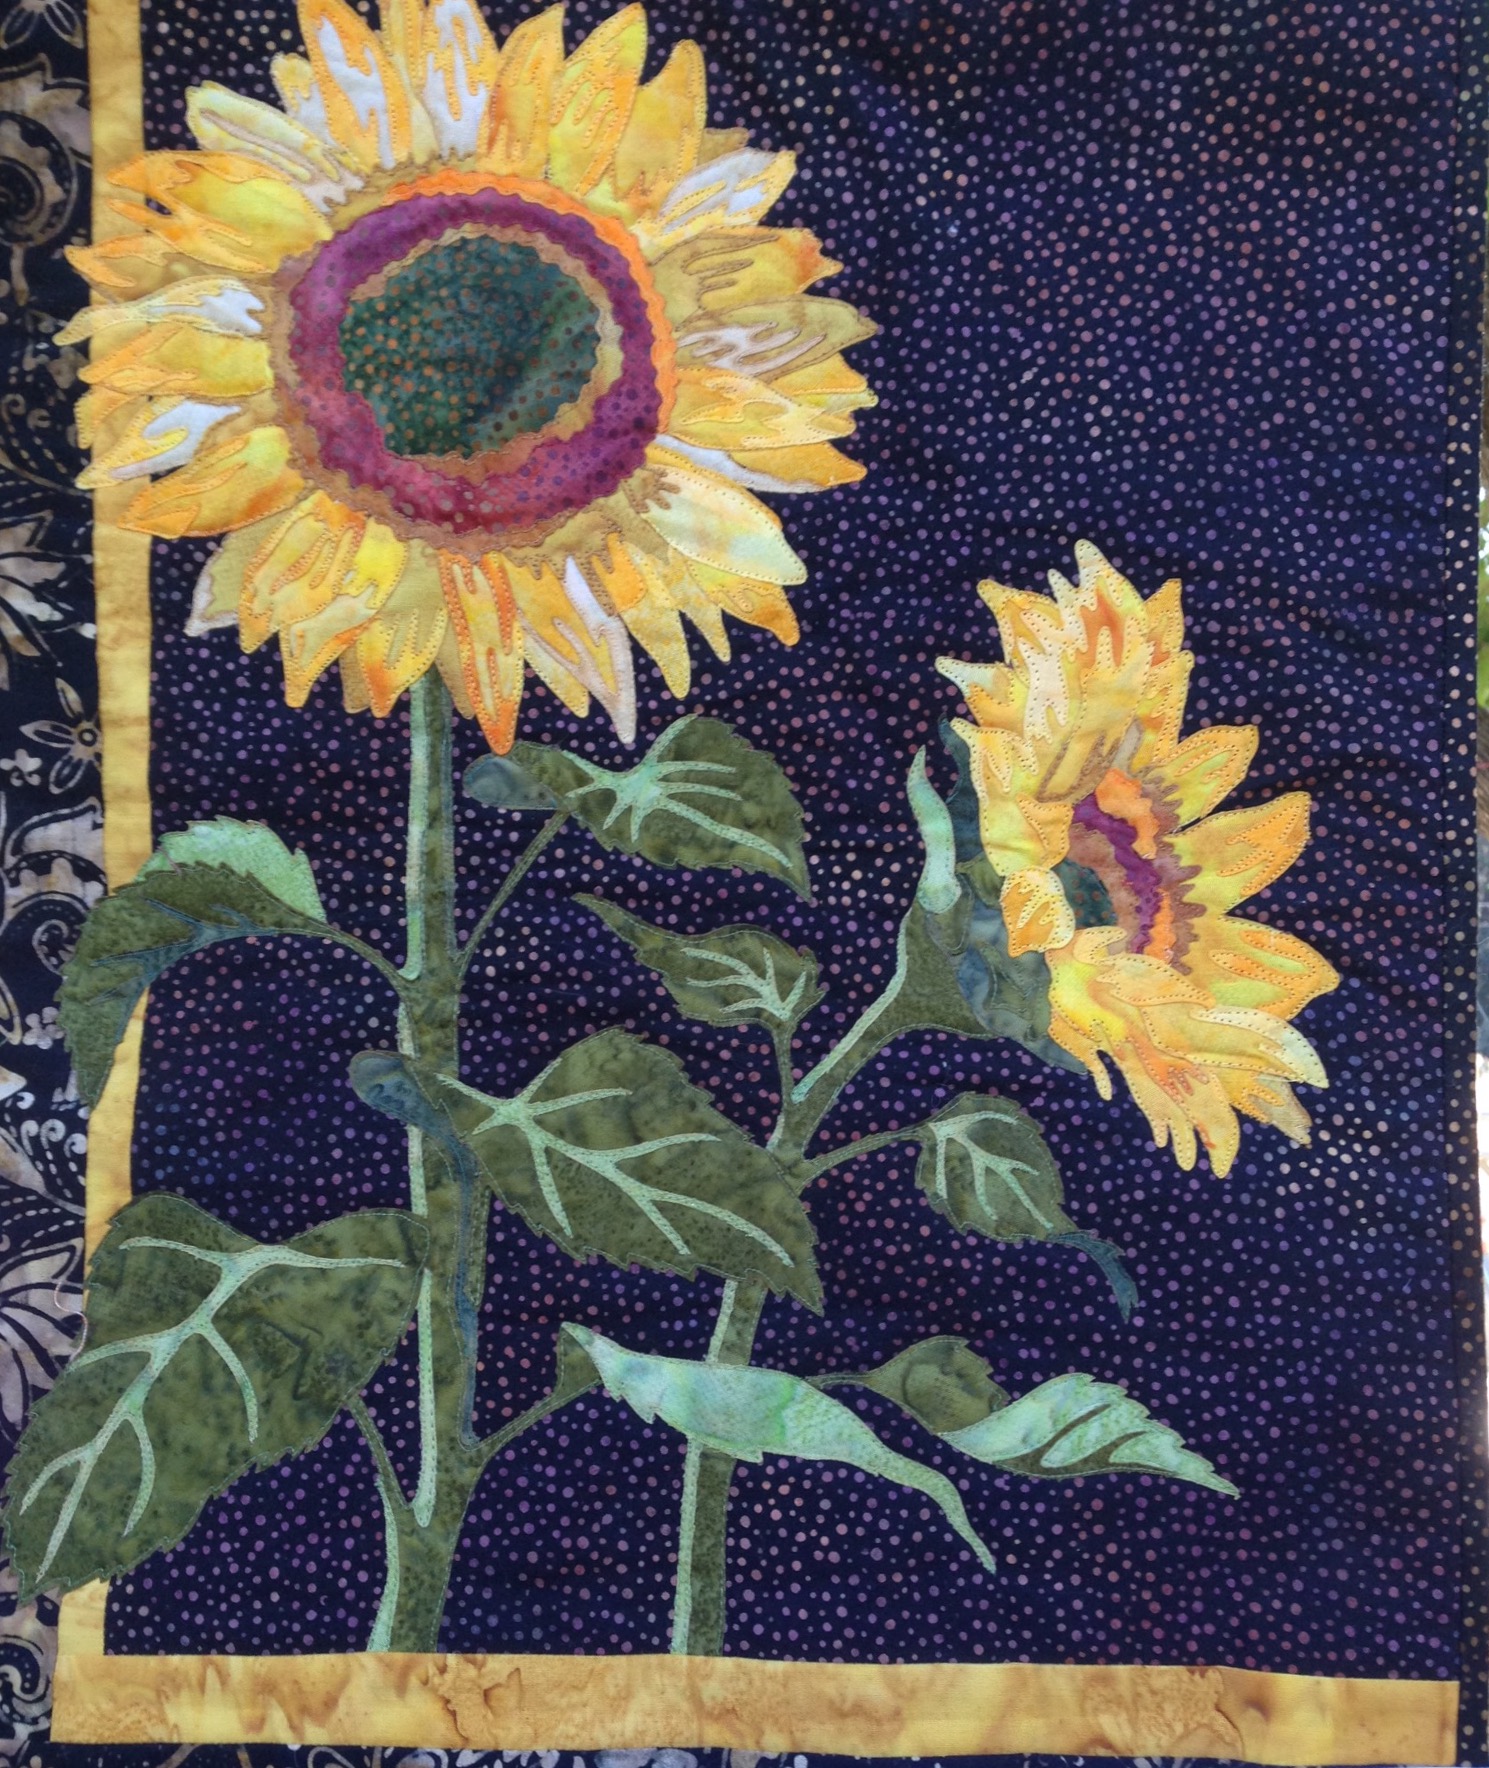
The show is not juried but visitors do vote for their favorites. Here are two of mine. This sunflower is a mini but I loved it. I took a close shot to save for inspiration.
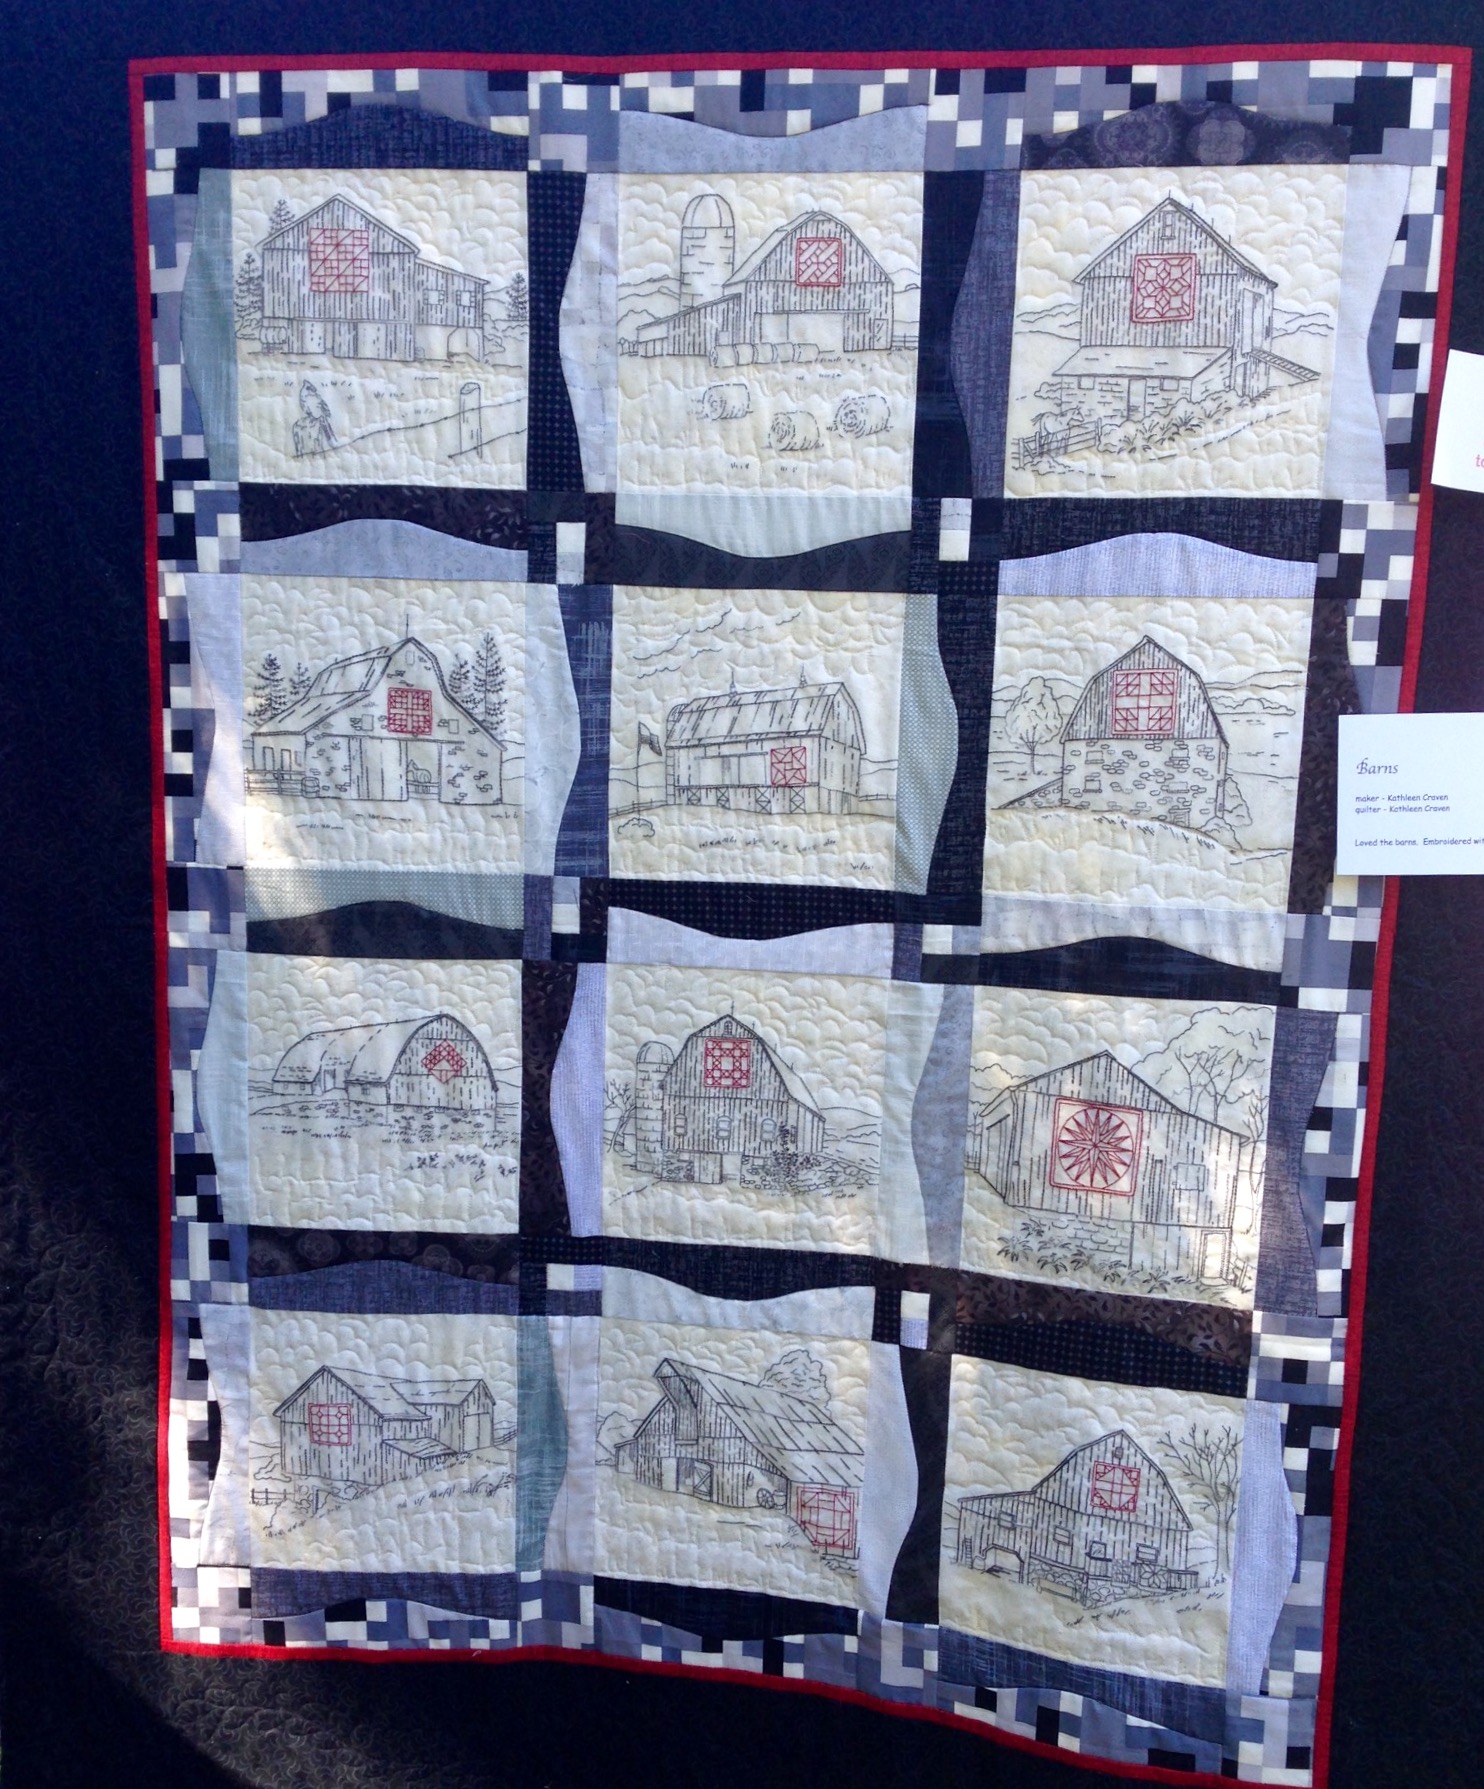
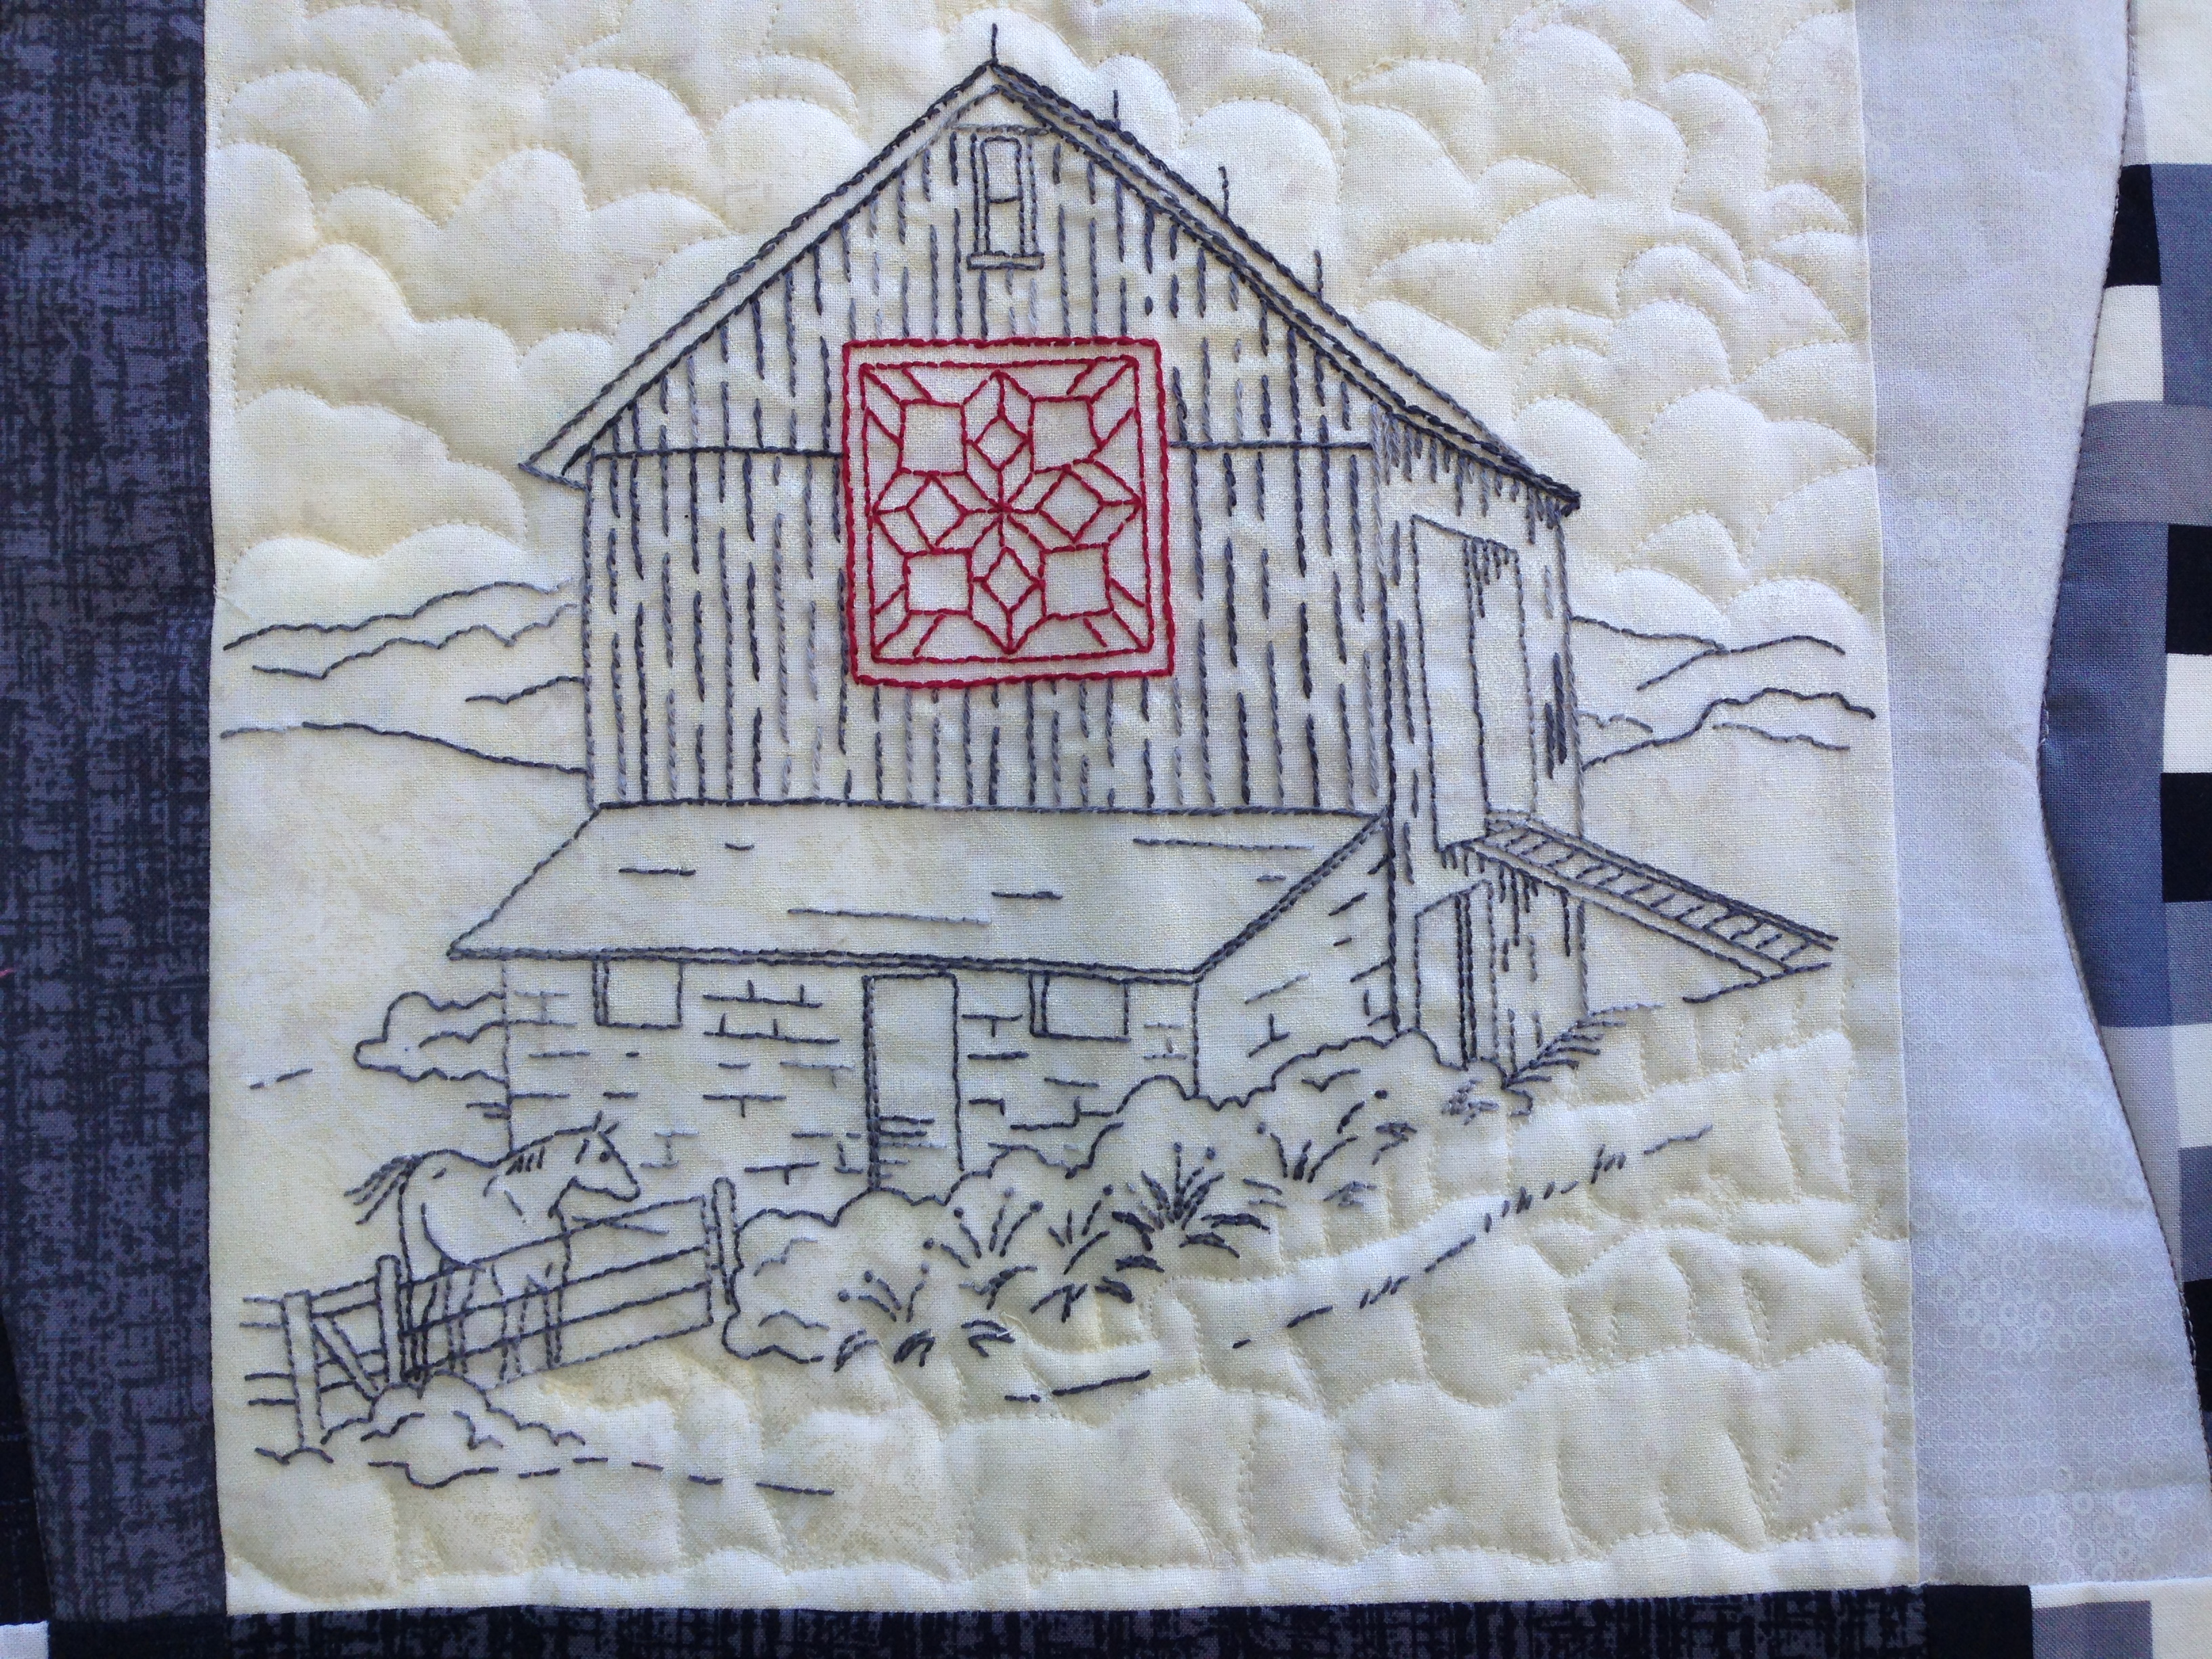
I am a huge fan of barn quilts and this interpretation caught my eye.
Each block was embroidered and the stitches were lovely. Very precise. Love the way she used the FMQ in the background to show clouds or to define the ground.
What would a quilt show be without a fun table full of fabric to rummage through? I did my fair share, you know, to support their volunteer fire department.
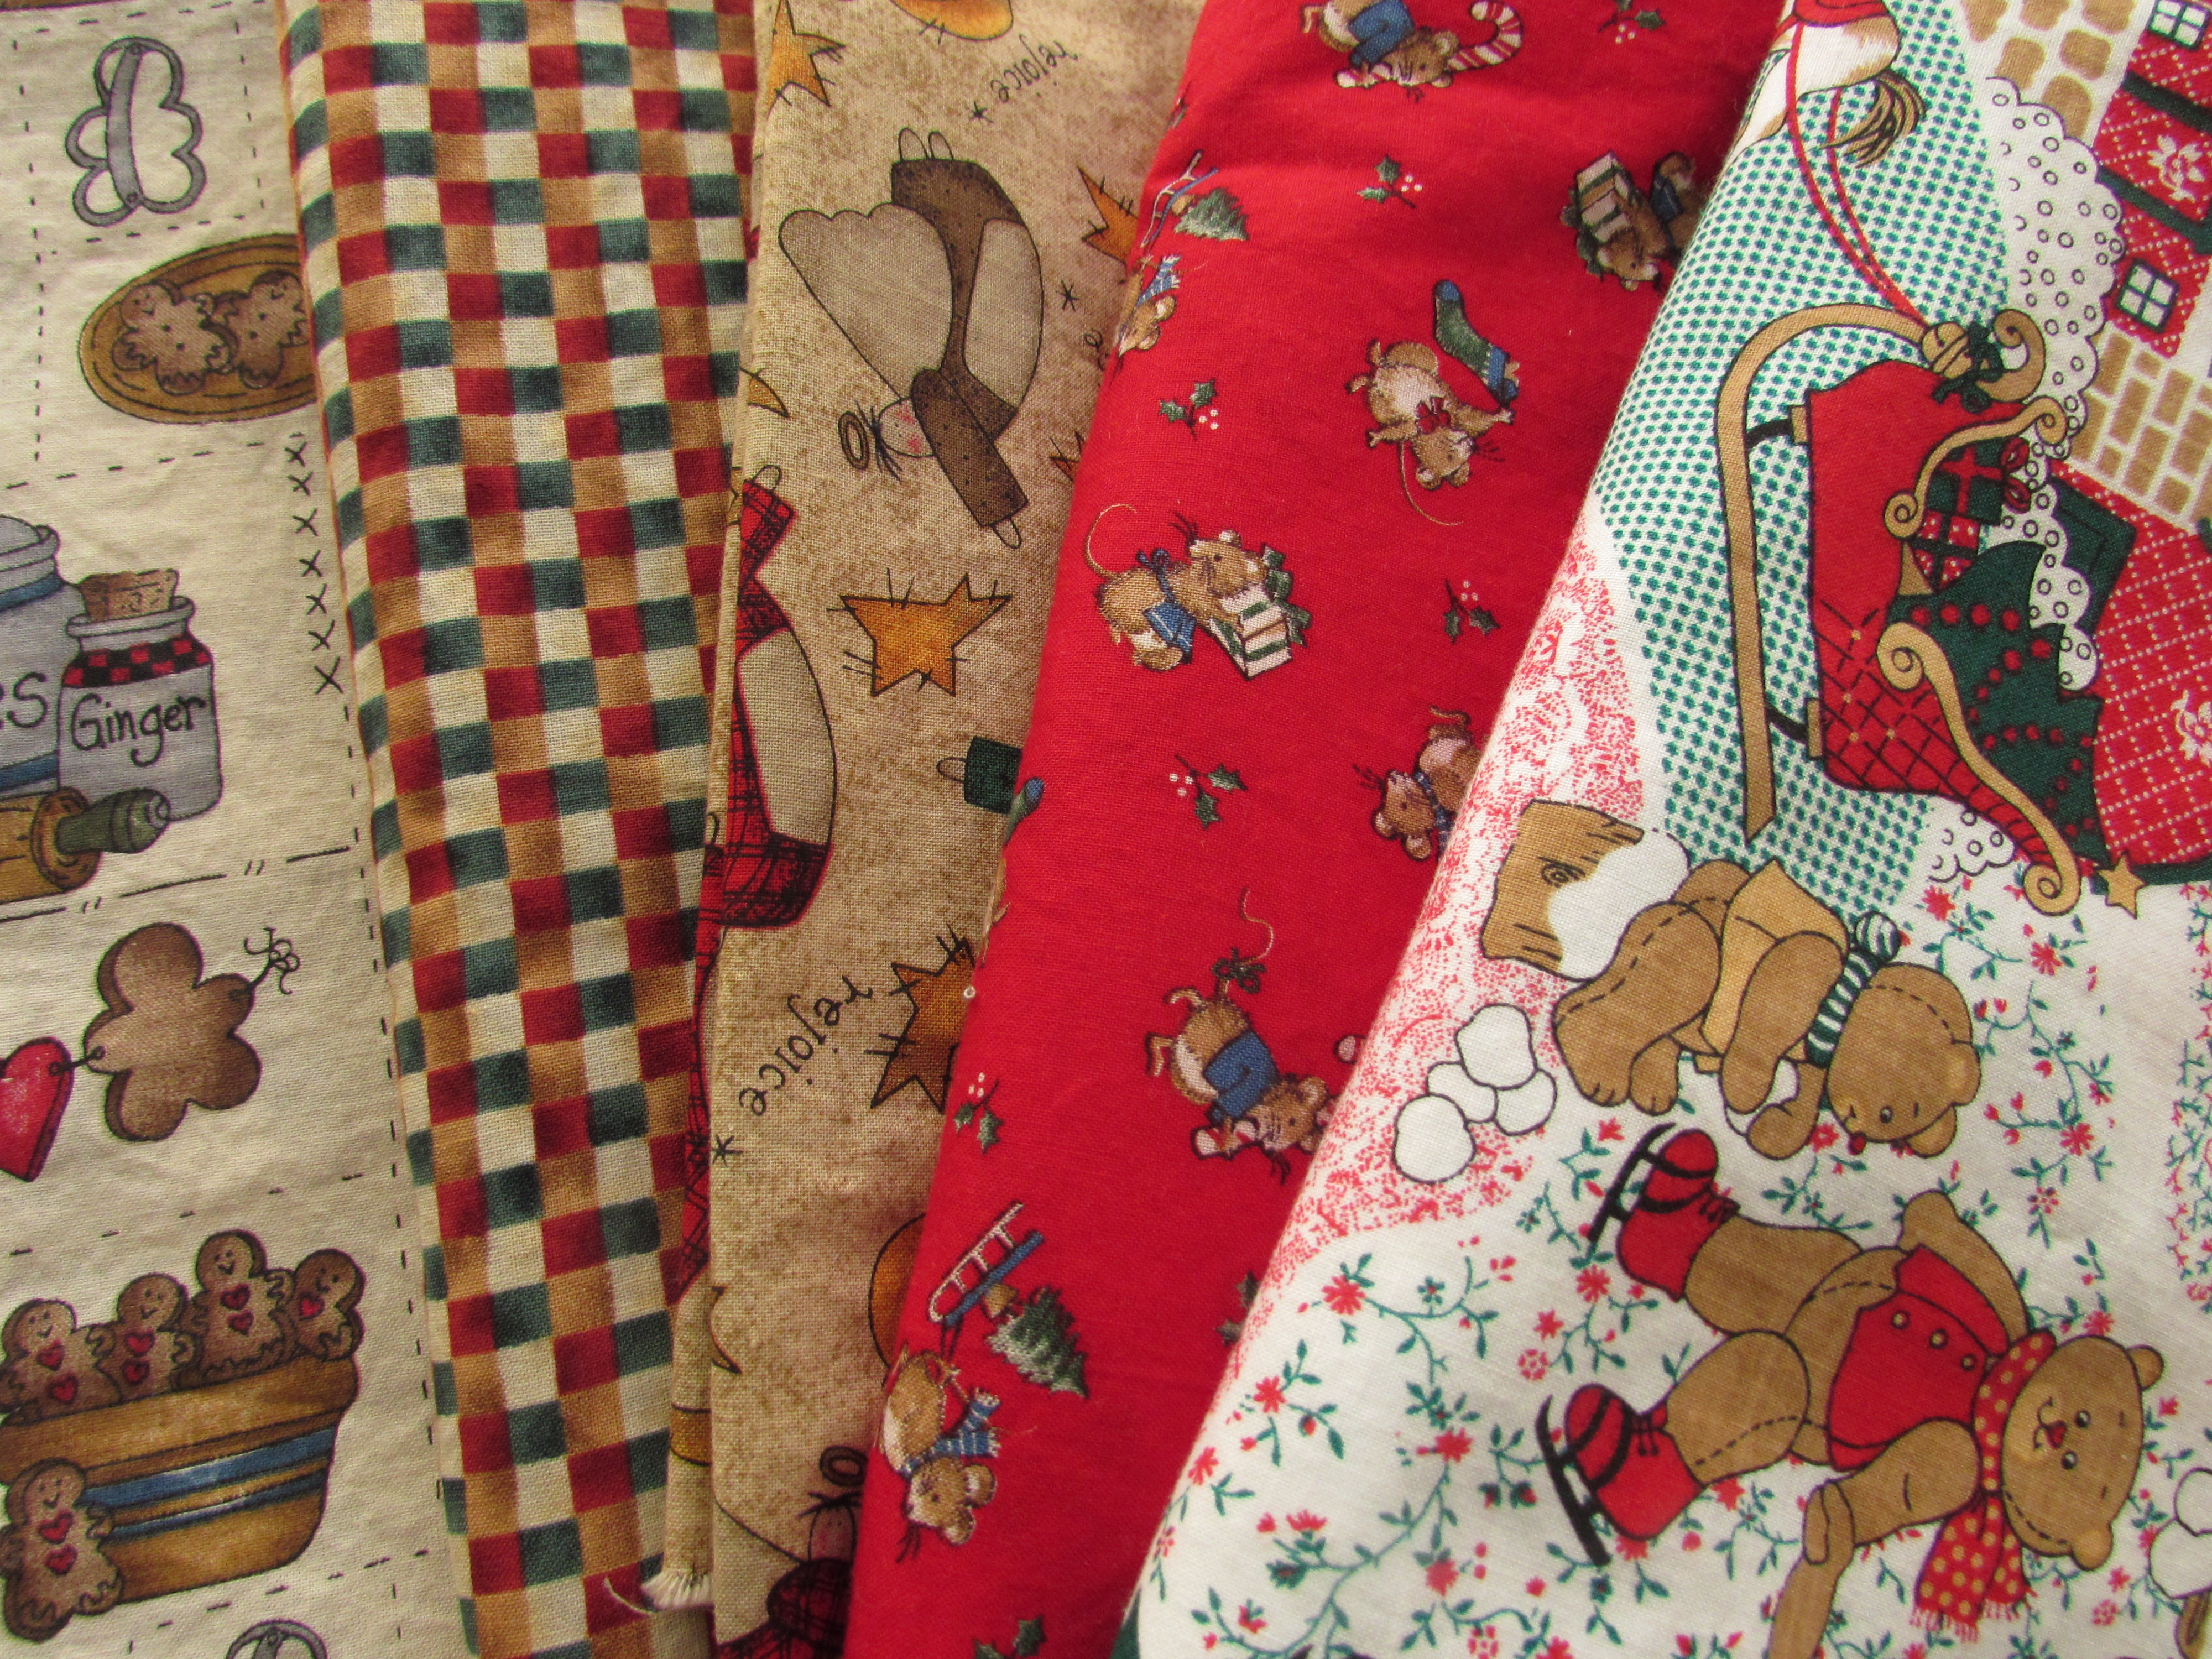
There was a fun assortment of Christmas fabric that I plan to use to make more reusable gift bags. I have done this for the past two years and love getting away from so much paper at the holidays.
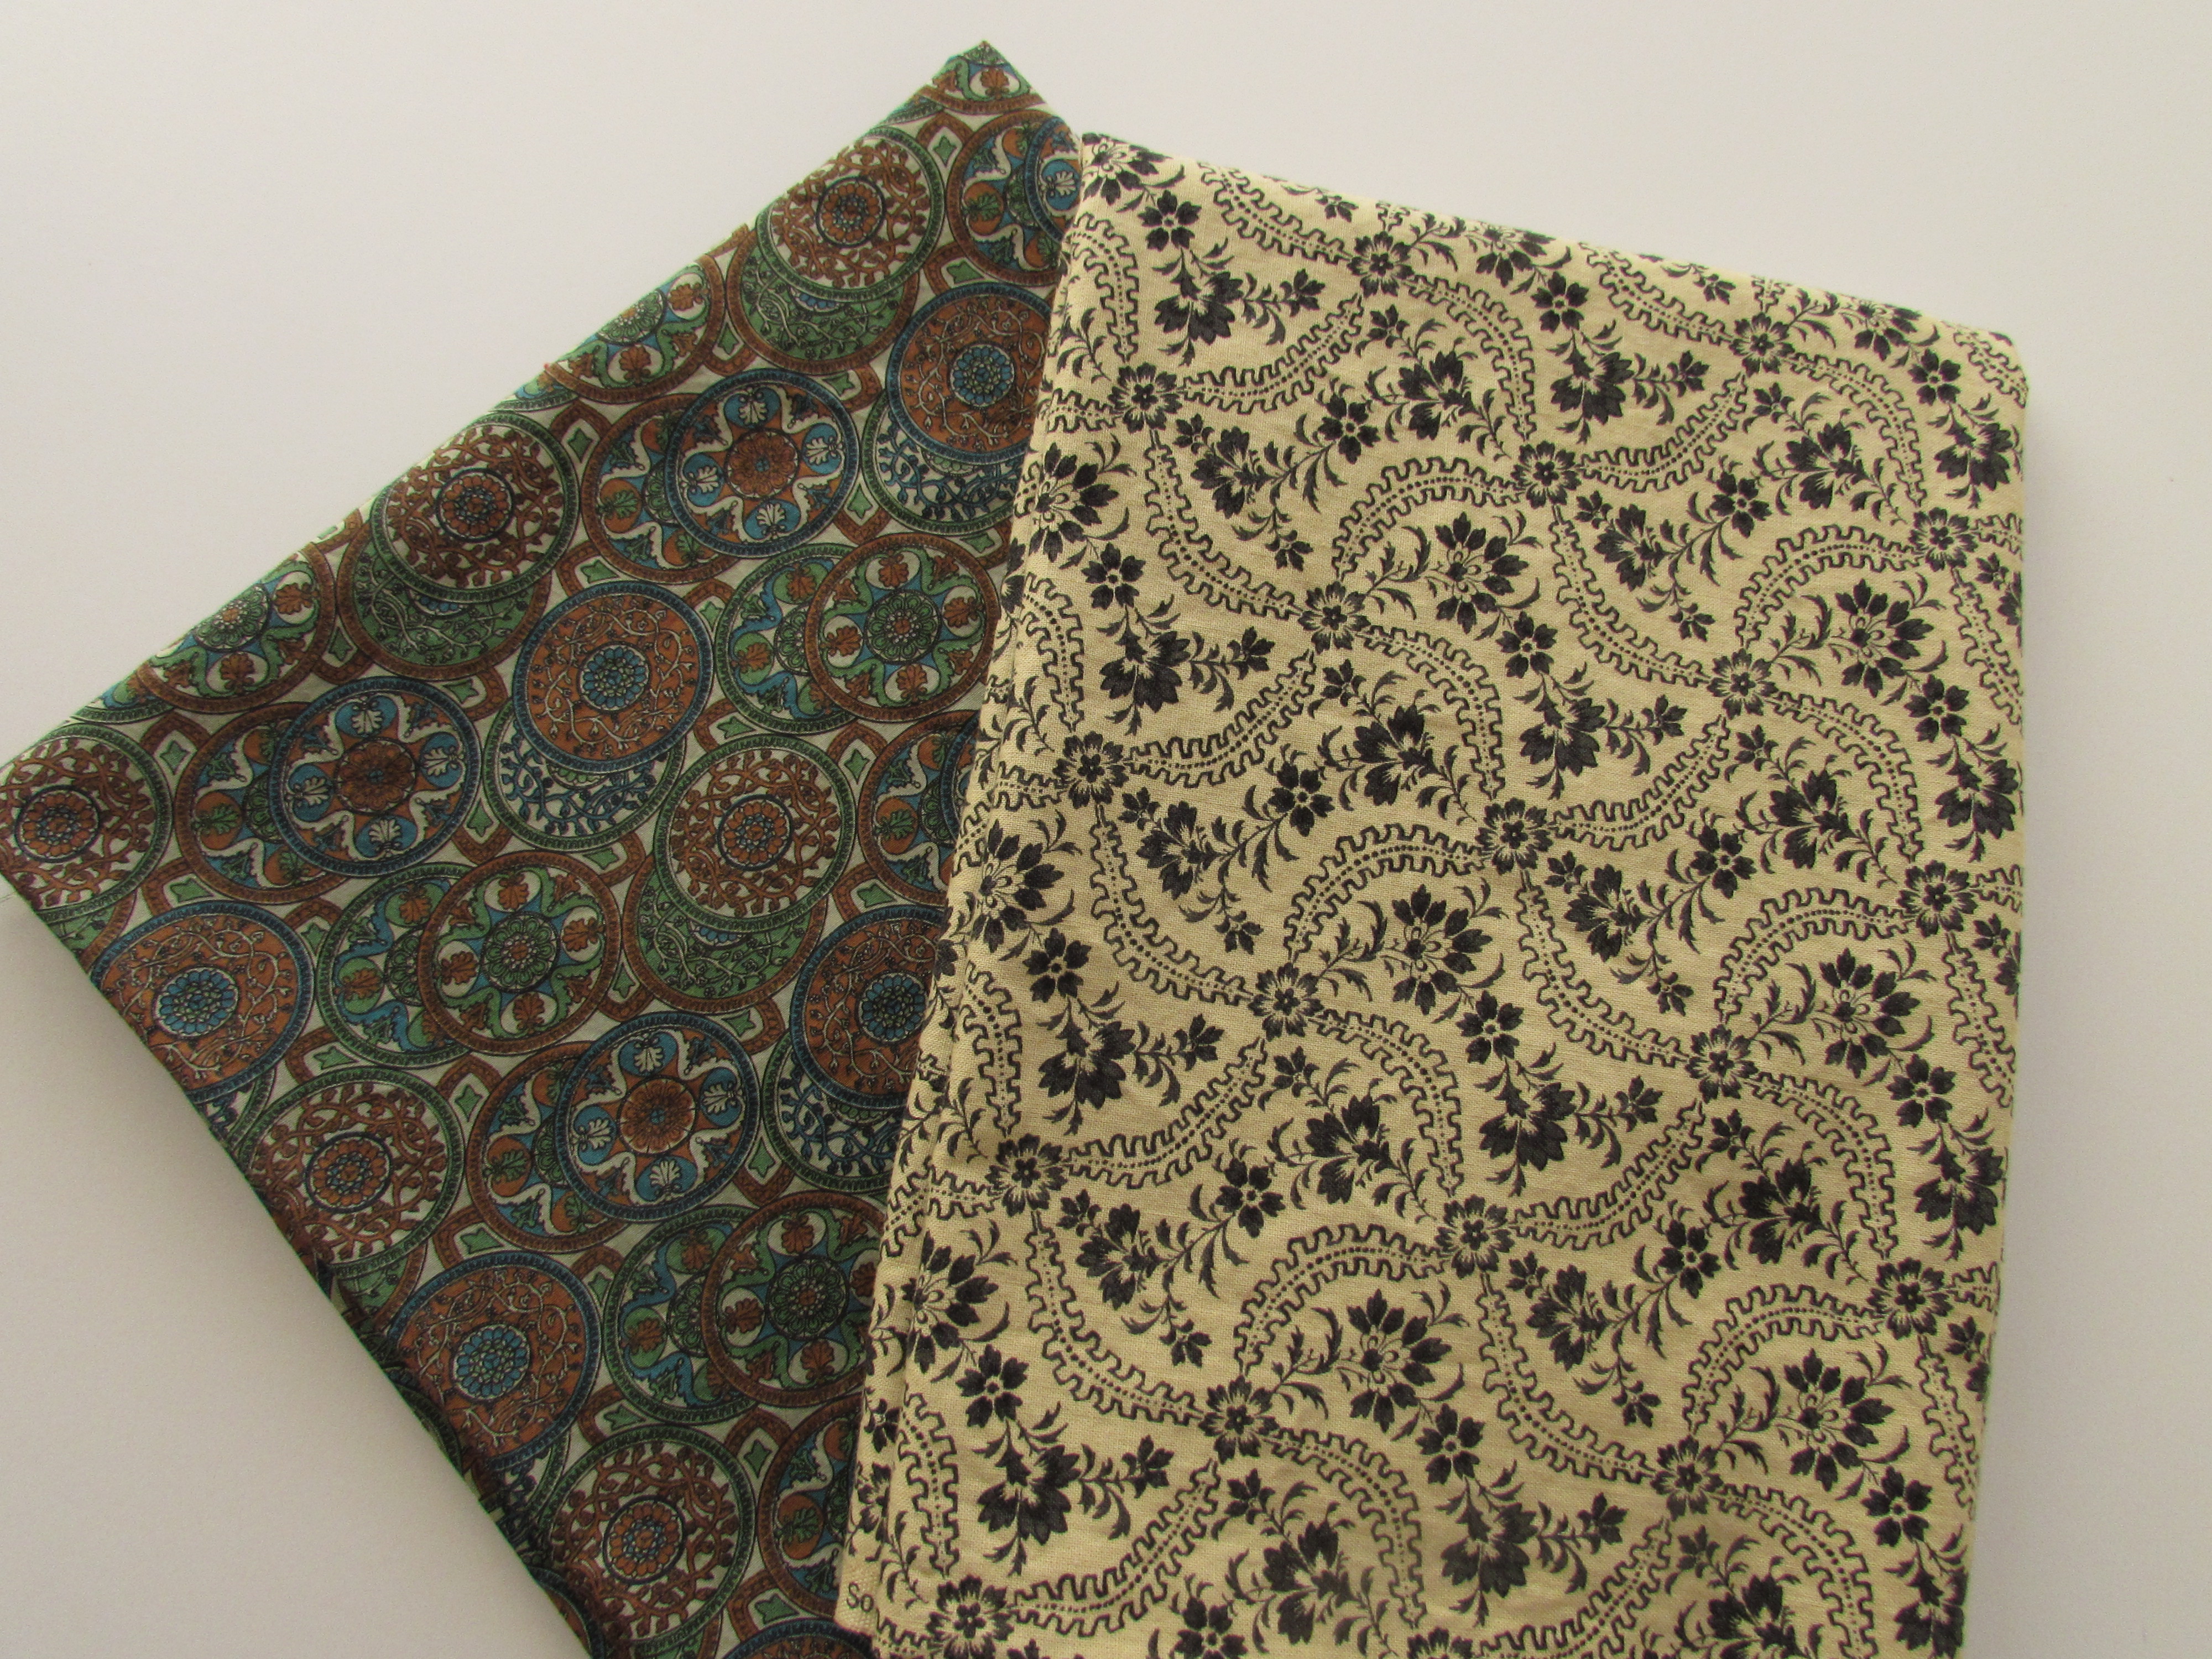
These two prints are just pretty. Especially the green and brown fabric on the left.
I found a book on the symbolism of quilts used during the Underground Railroad era. I picked that up as well and read most of it yesterday. I love learning about the meanings behind the blocks. There are a lot of patterns and instructions for making a sampler quilt with the blocks in the book and while I am not sure if that will happen, reading about the history is very interesting.
This week I need to set all of this aside to work on product for my Etsy shop. I did a bit of sewing yesterday but today I plan to devote the afternoon to it. Julia has a group of girls coming over this afternoon to work on a project and this is a great way to stay out of their way. Have a great week everyone! Linking to day with Main Crush Monday and Sunday Stash (albeit one day late!!) Links above under the Link Ups tab!
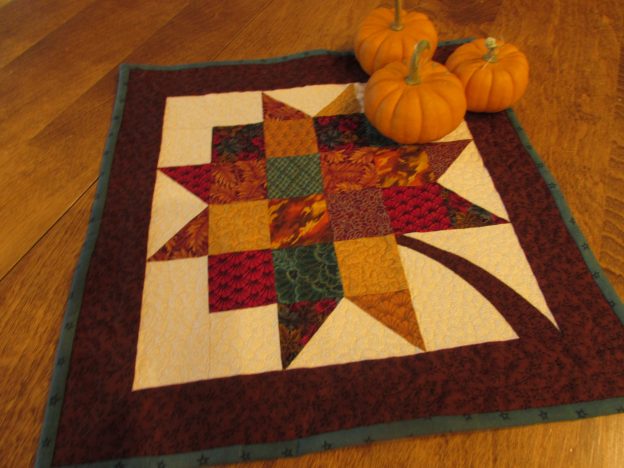
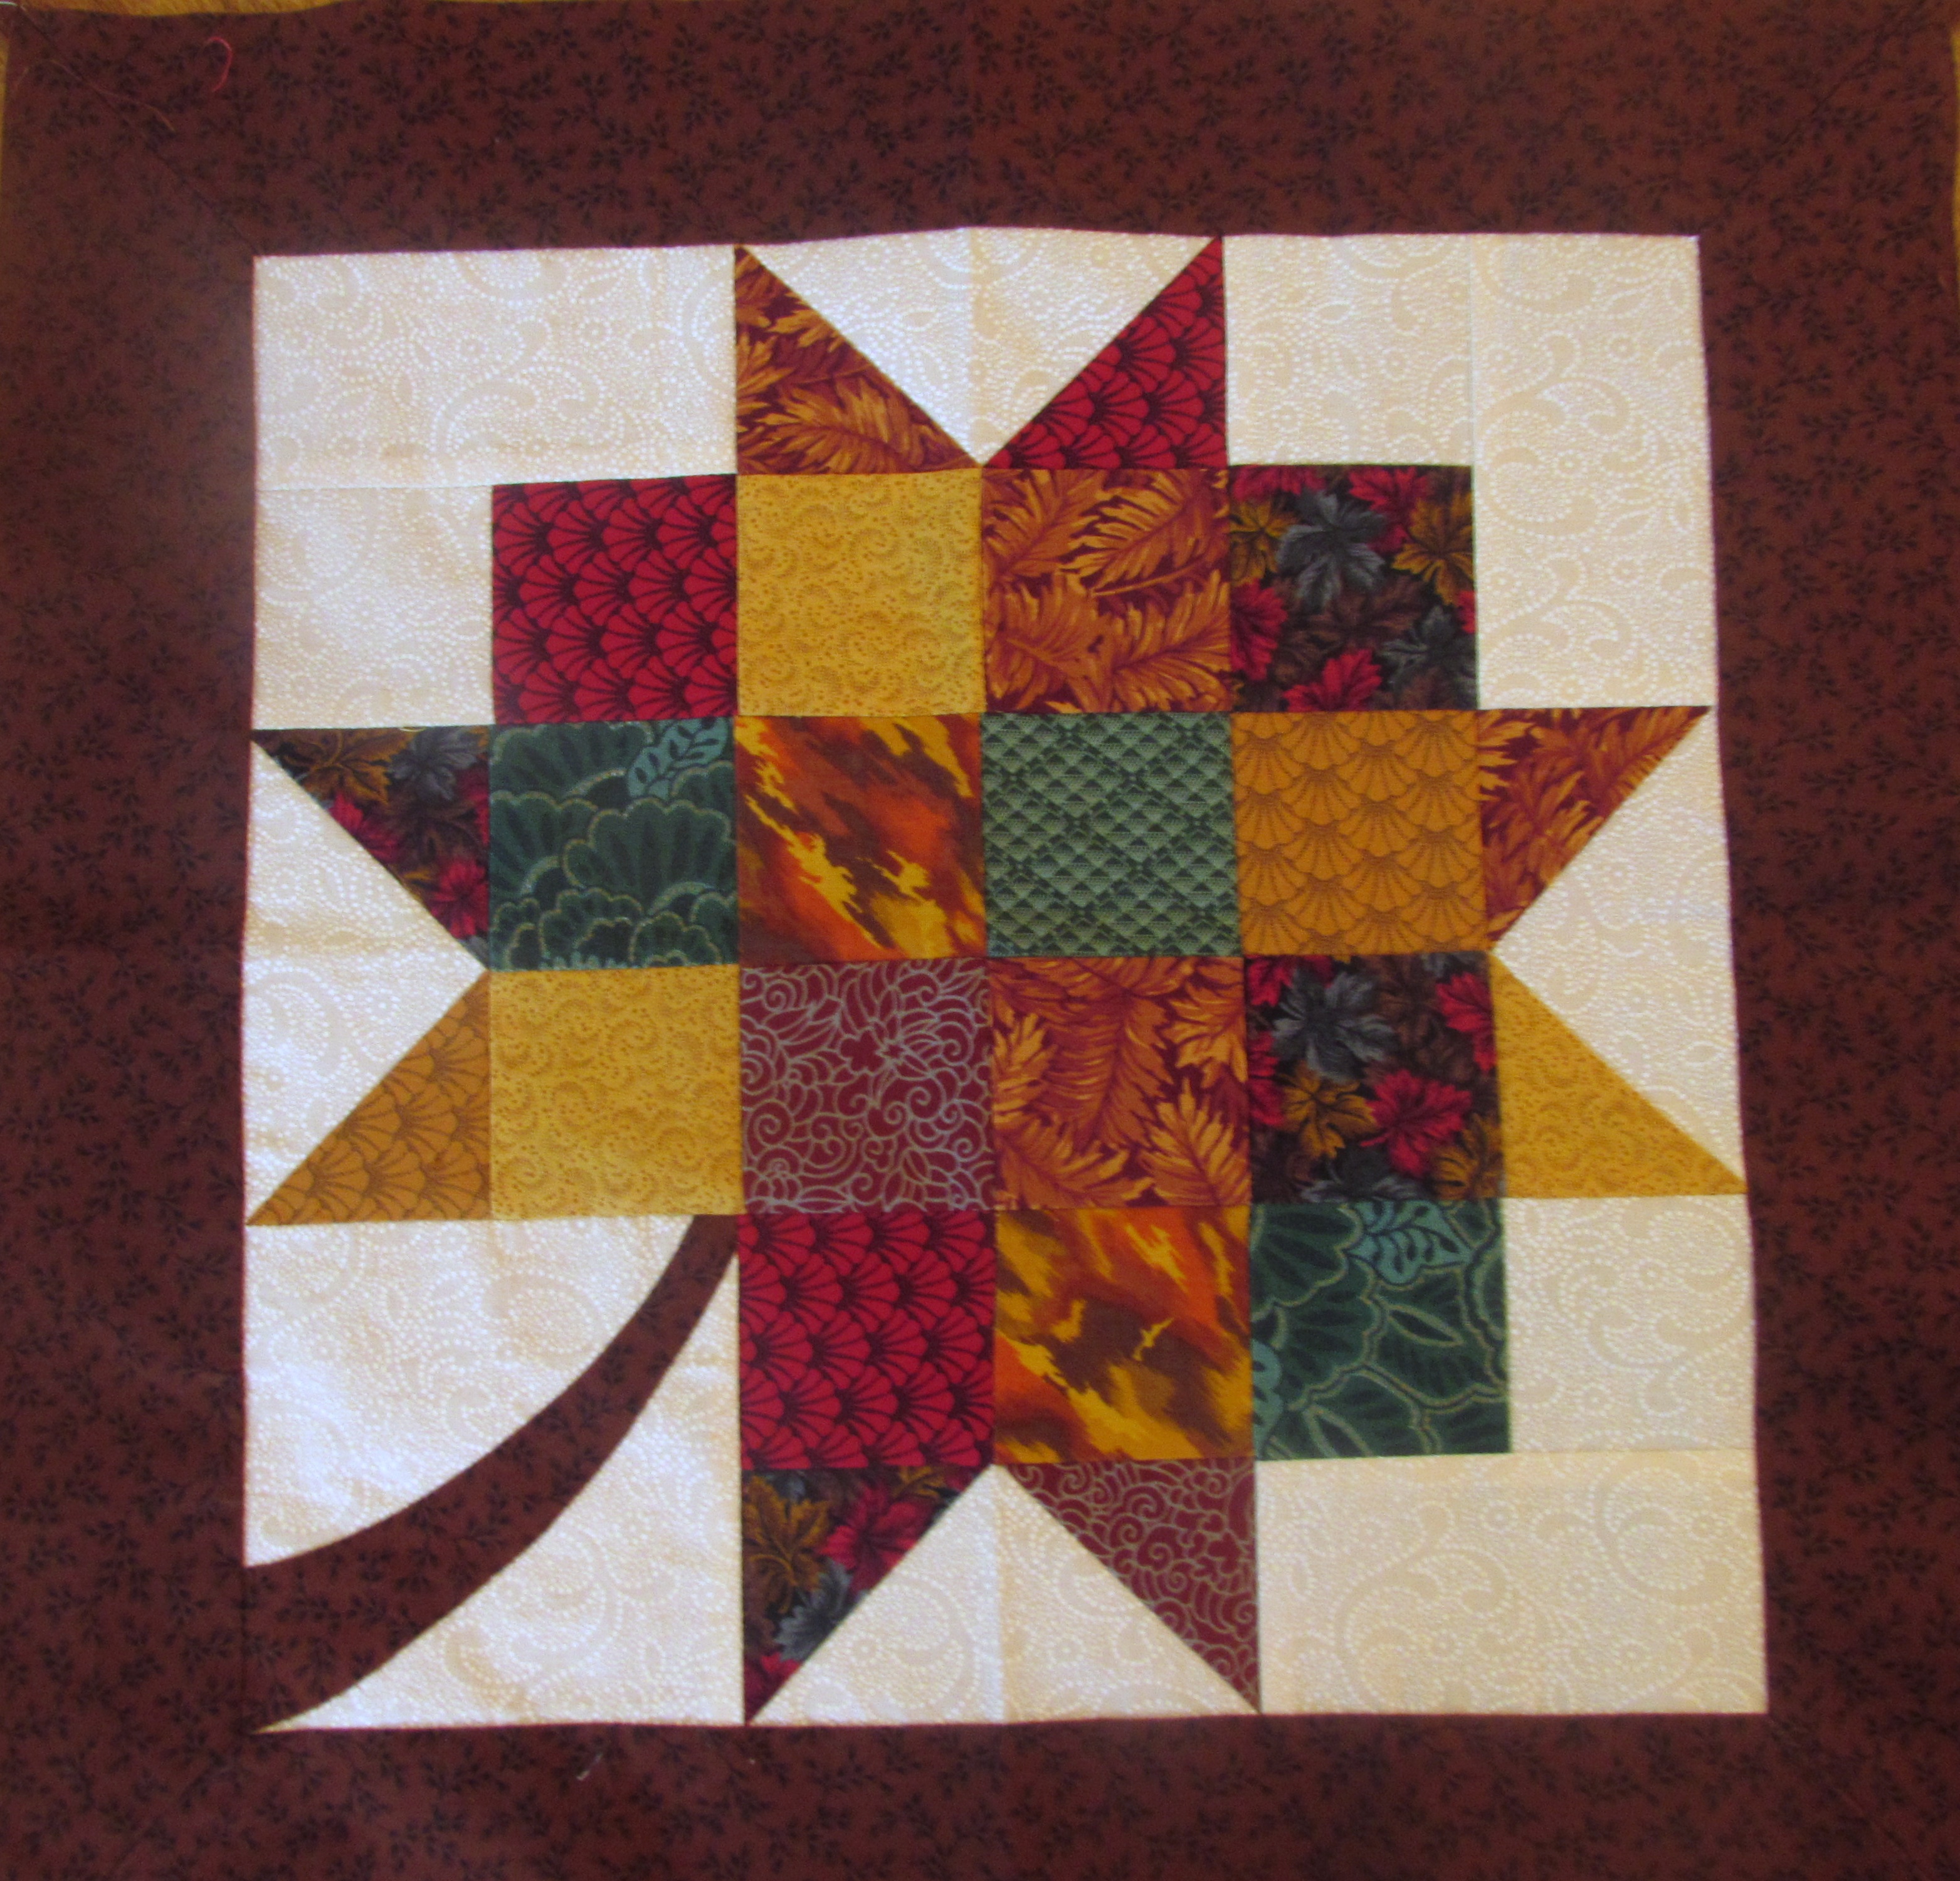
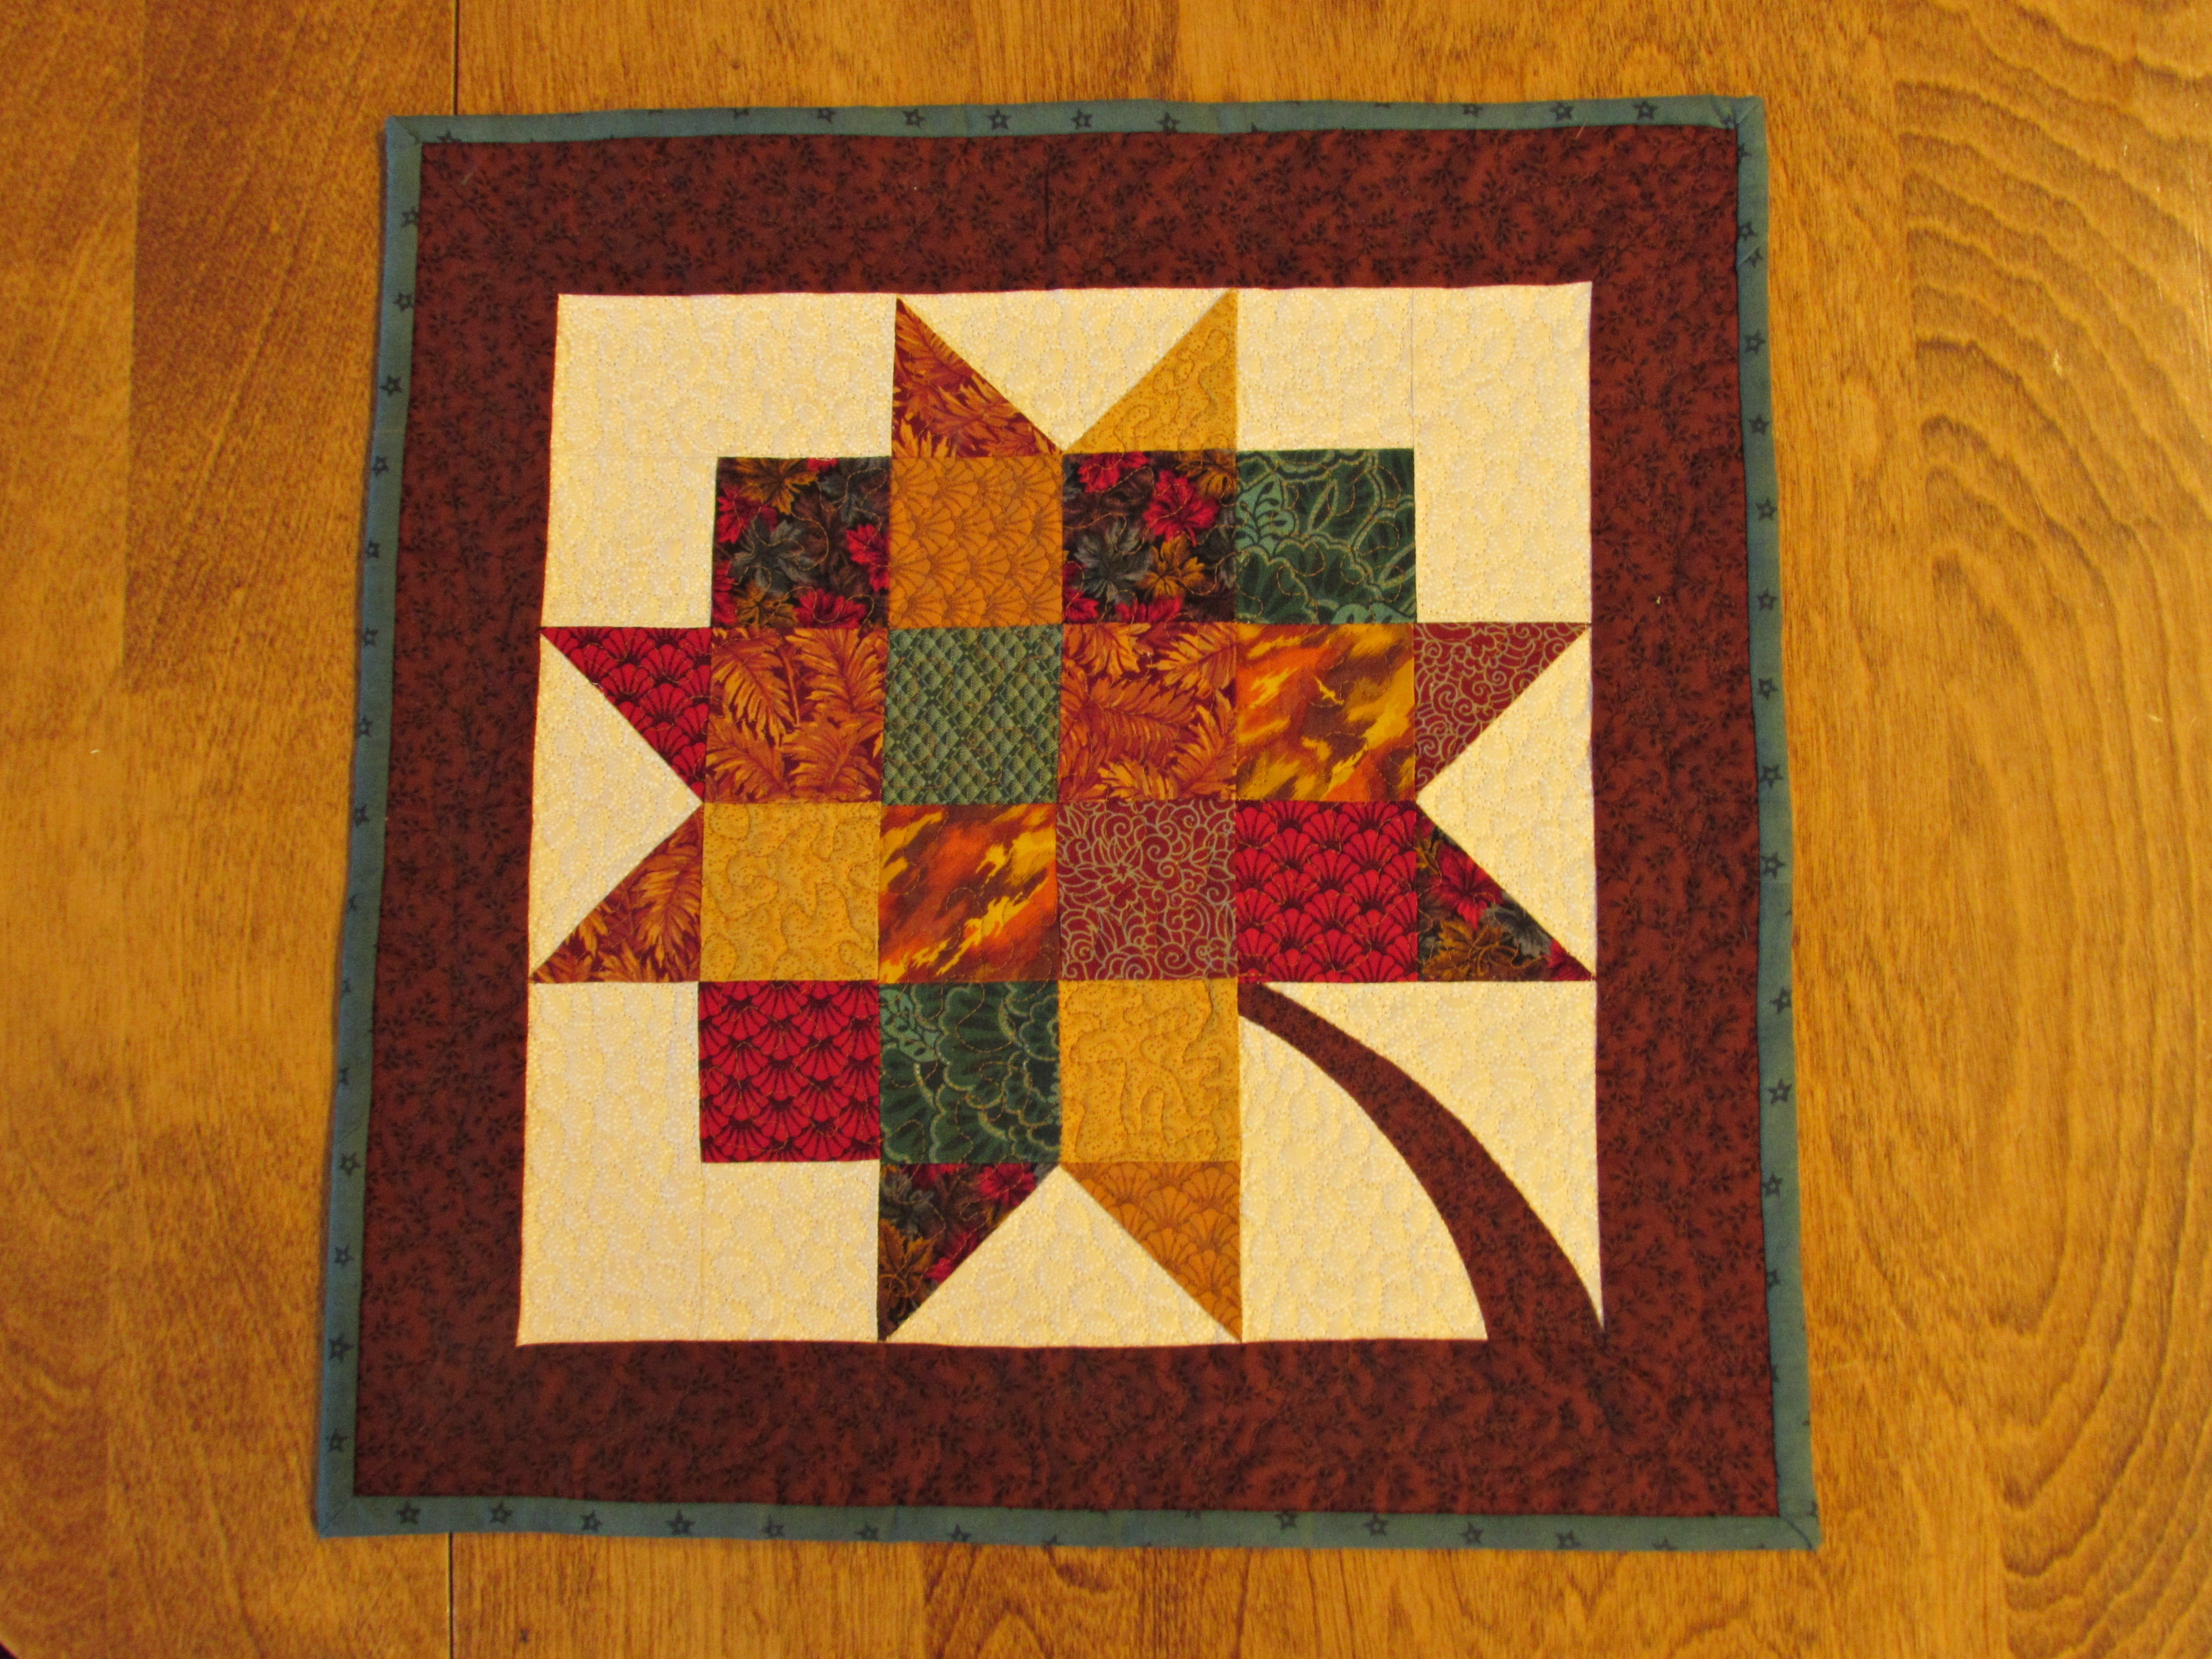
Remember this little orphan block that I scored at a thrift store a couple of weeks ago?
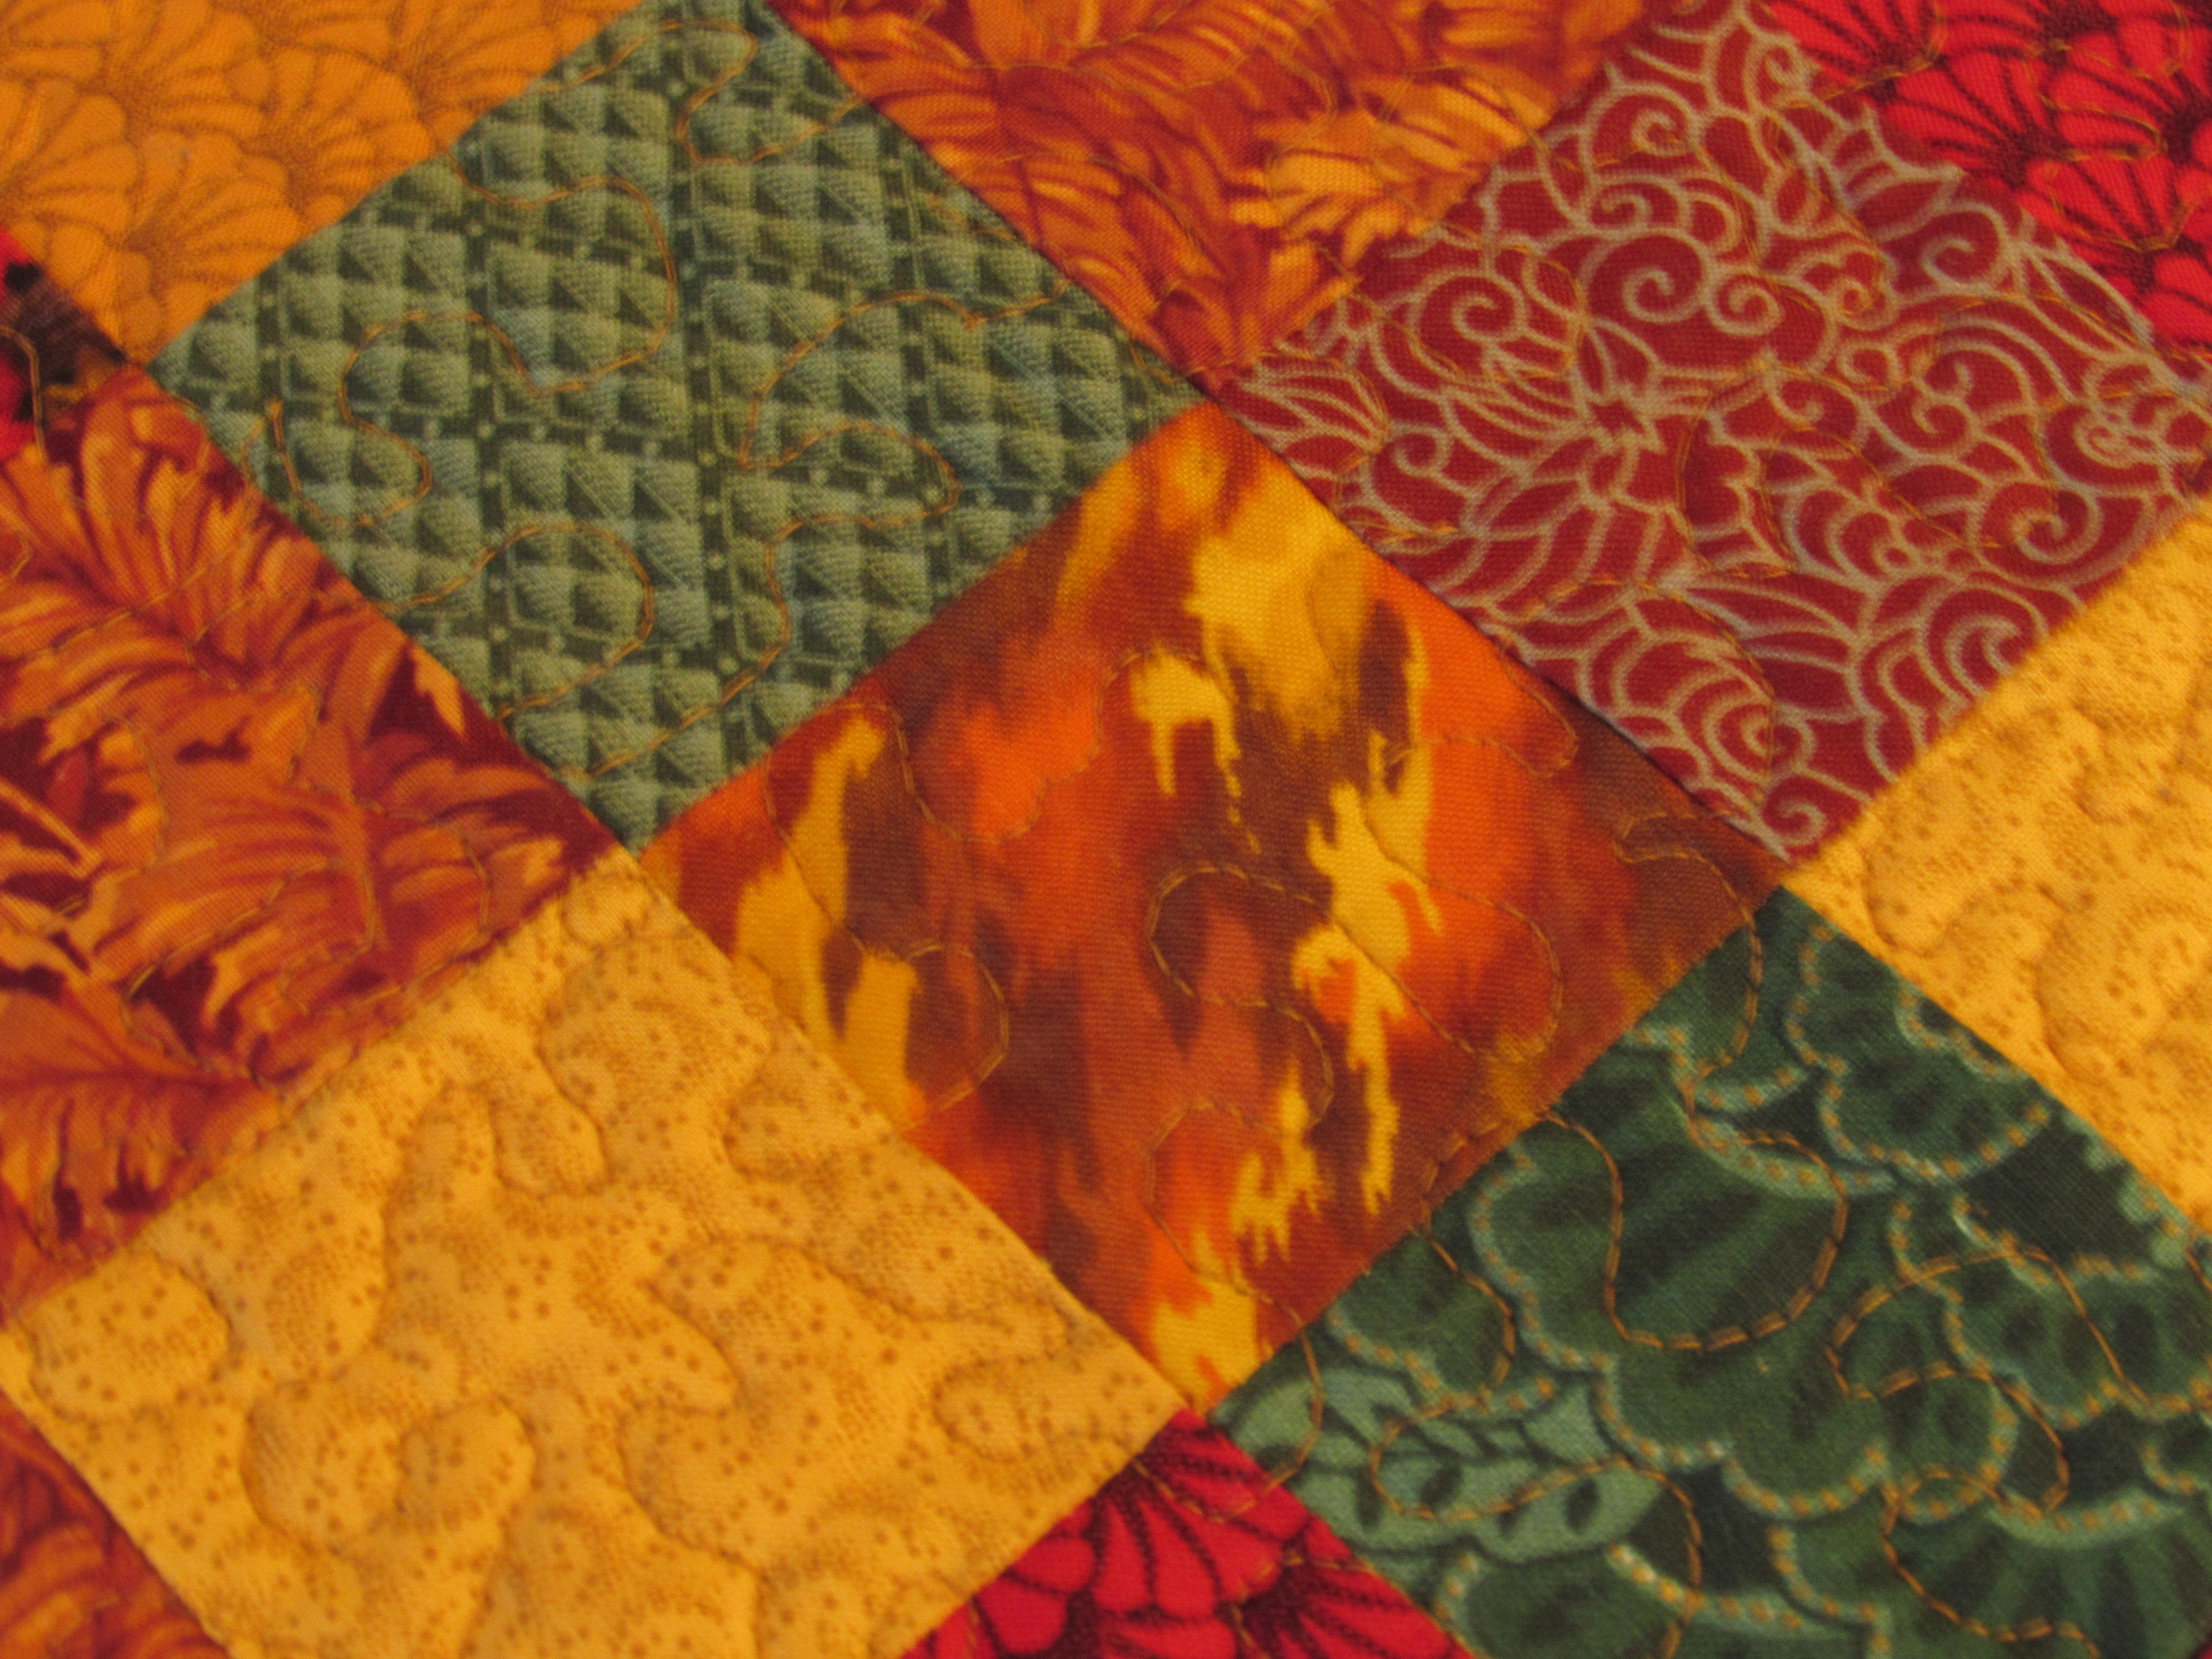
I spent a fun afternoon quilting it up. I used a rust colored thread for the main leaf portion and quilted it with a tiny stipple. These little stitches look so darn cute.
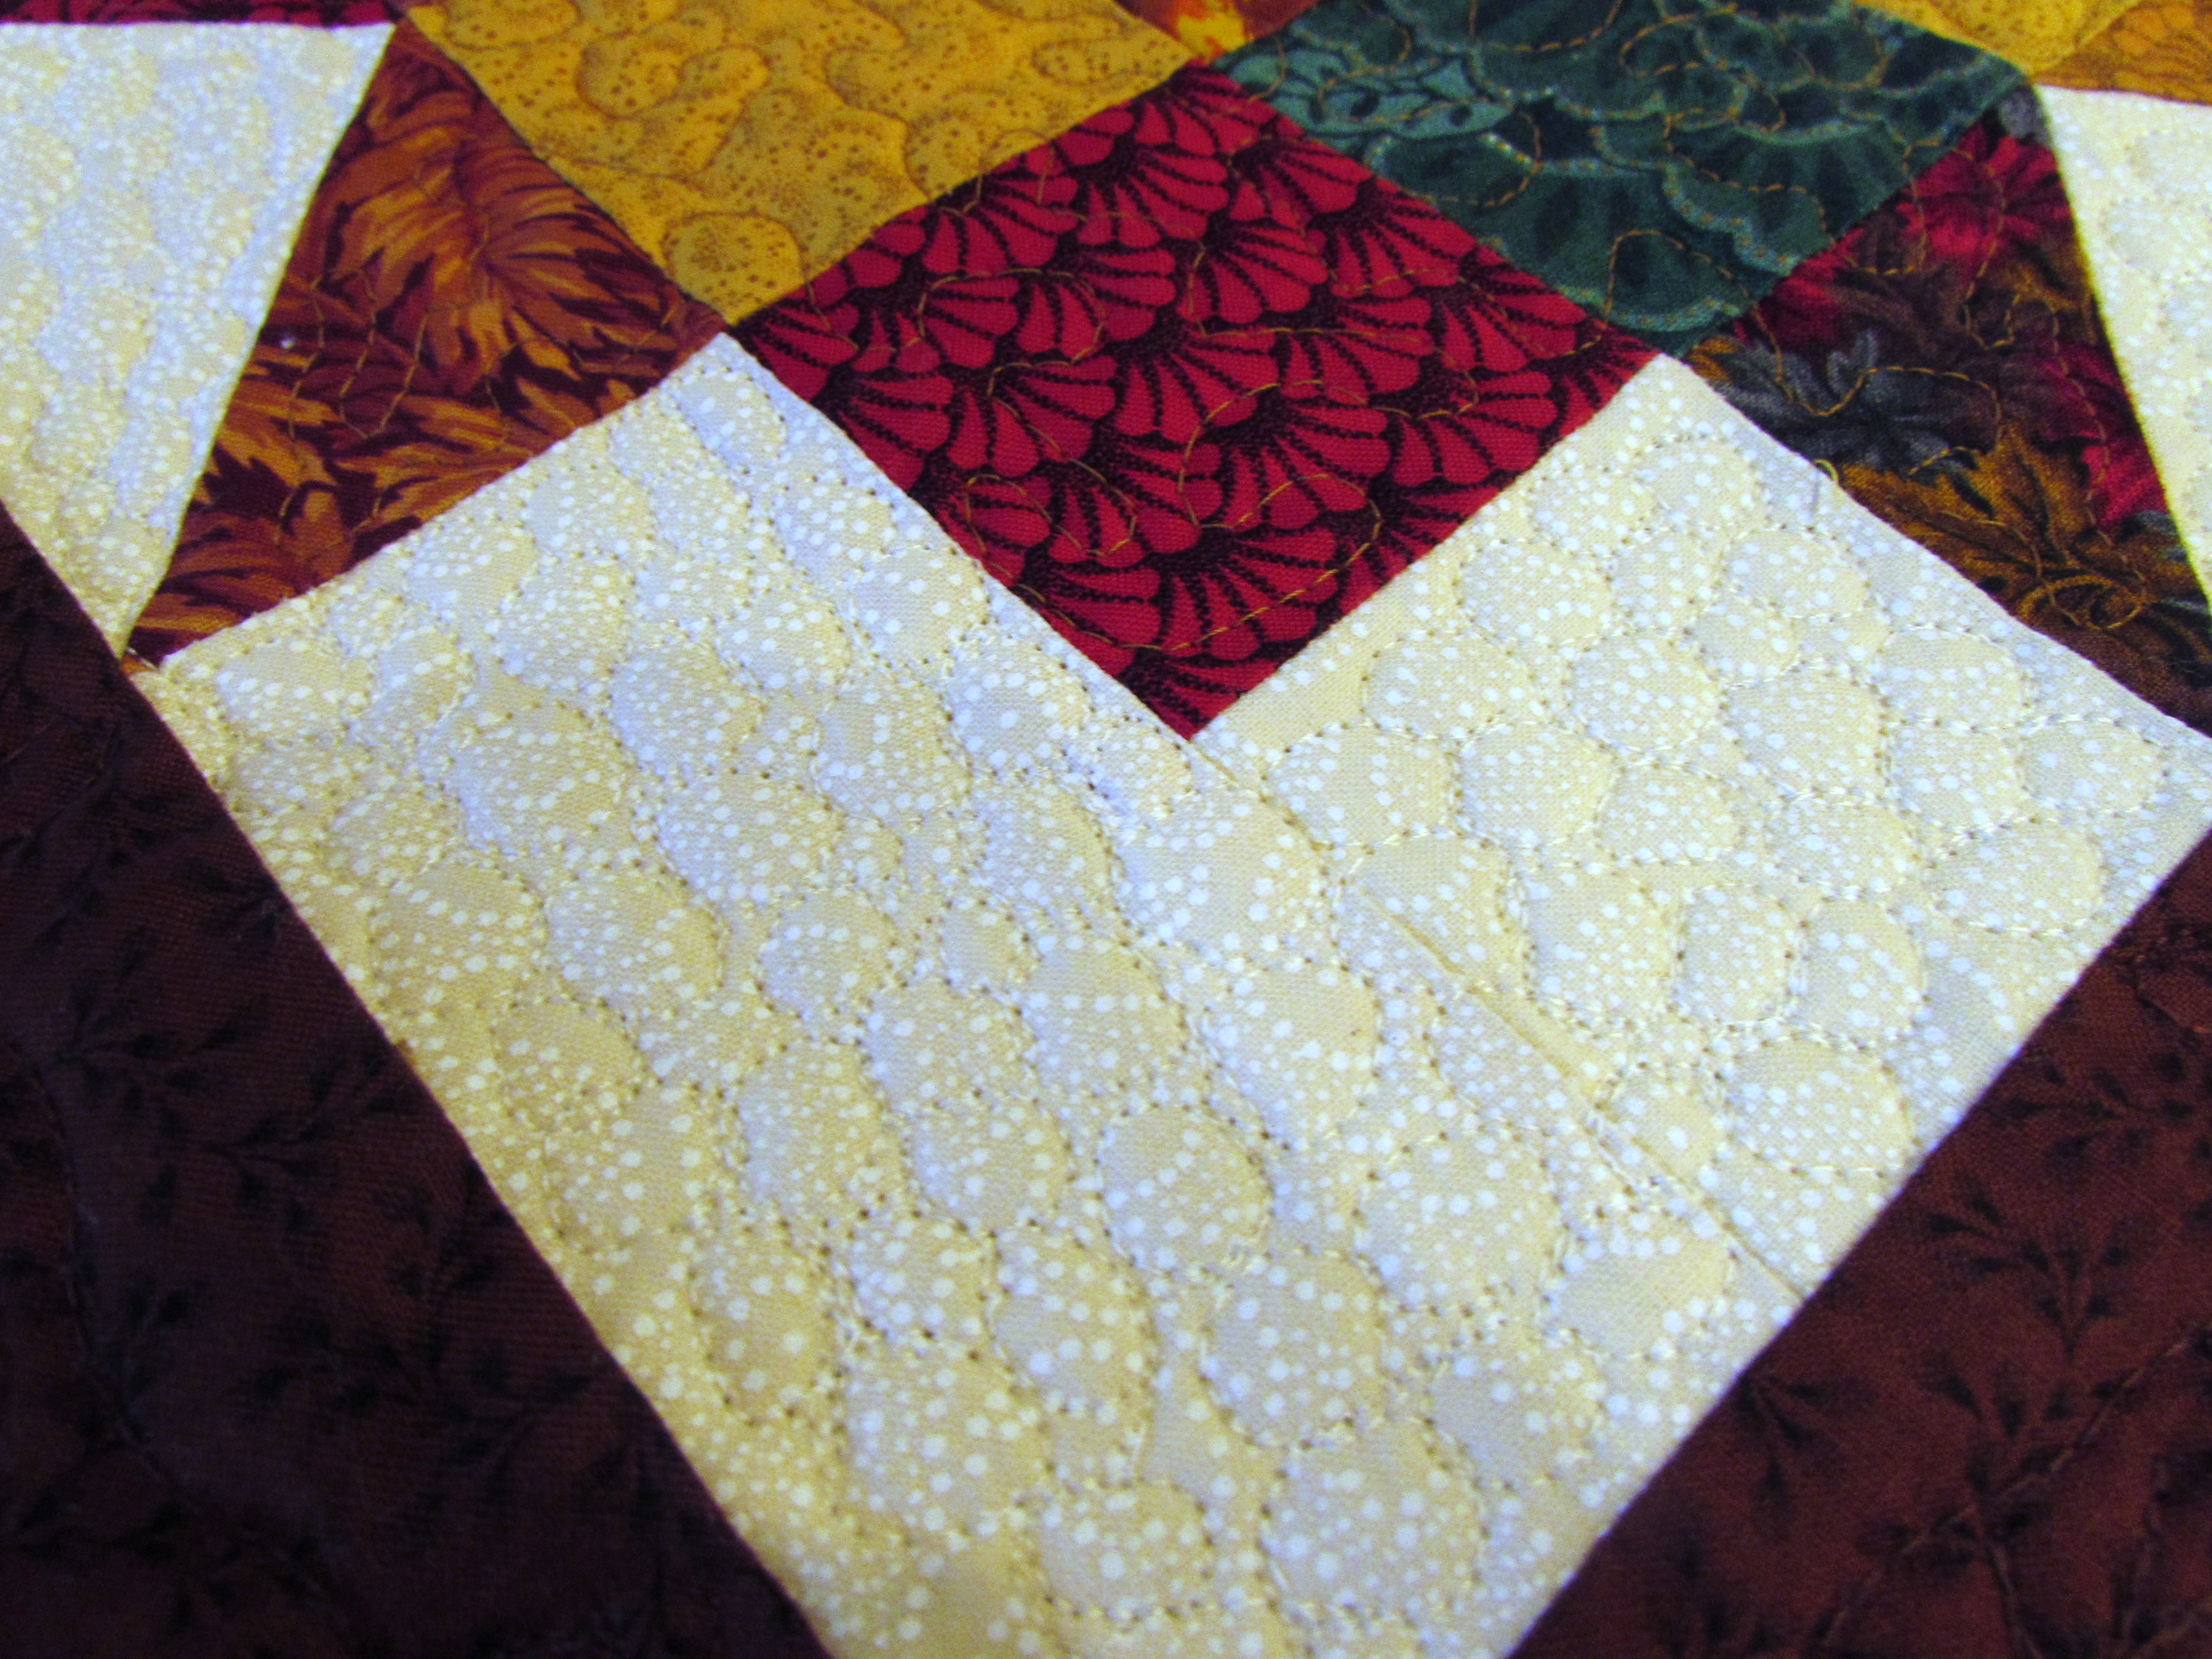
For the white background, I pebbled away for about one-half hour and filled it up. Sometimes it is so satisfying to work on a quick project. When I first started to pebble the white portion, I quickly remembered that I don’t really like to FMQ pebble patterns and thought I would regret it. But with such a tiny project it didn’t really matter. I was done before I could even get annoyed with the tedium.
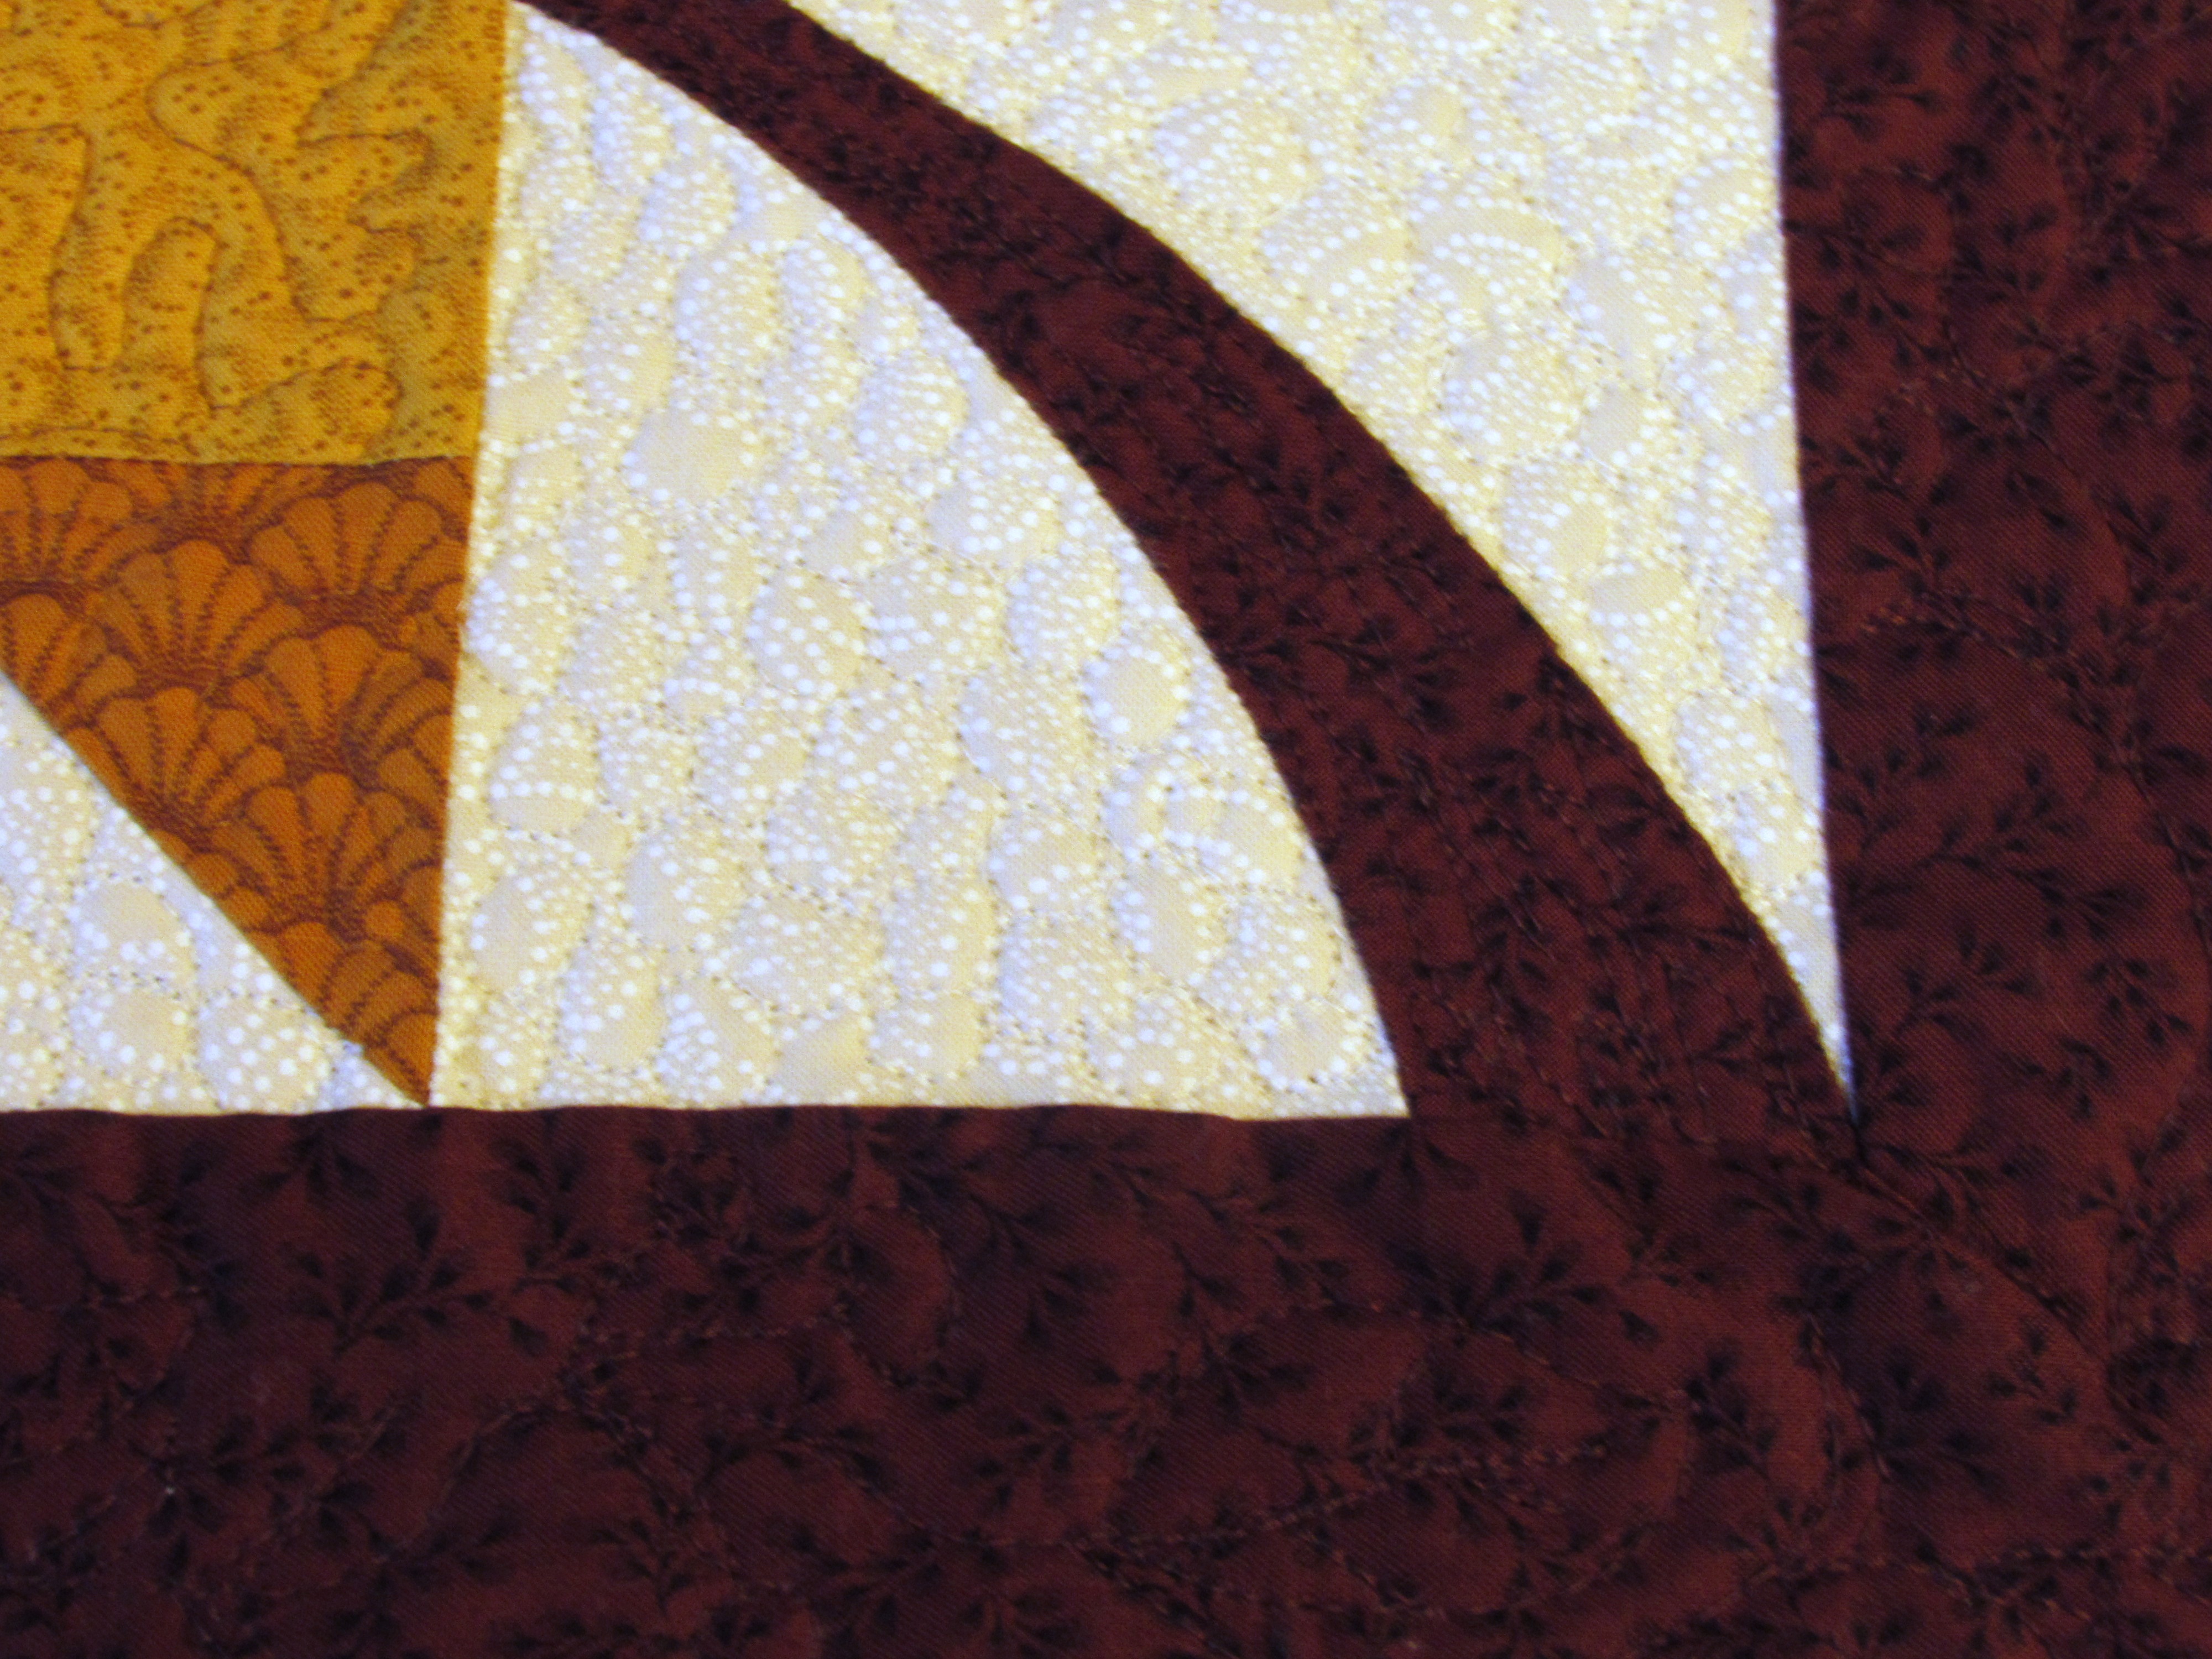
For the border I quilted little leaves and berries but it is nearly impossible to see because the thread matches too well. It was good practice but really, I have to look very closely to see it. Kind of funny.
The dusty green binding wraps it all up into a sweet little mini. Perfect for fall.
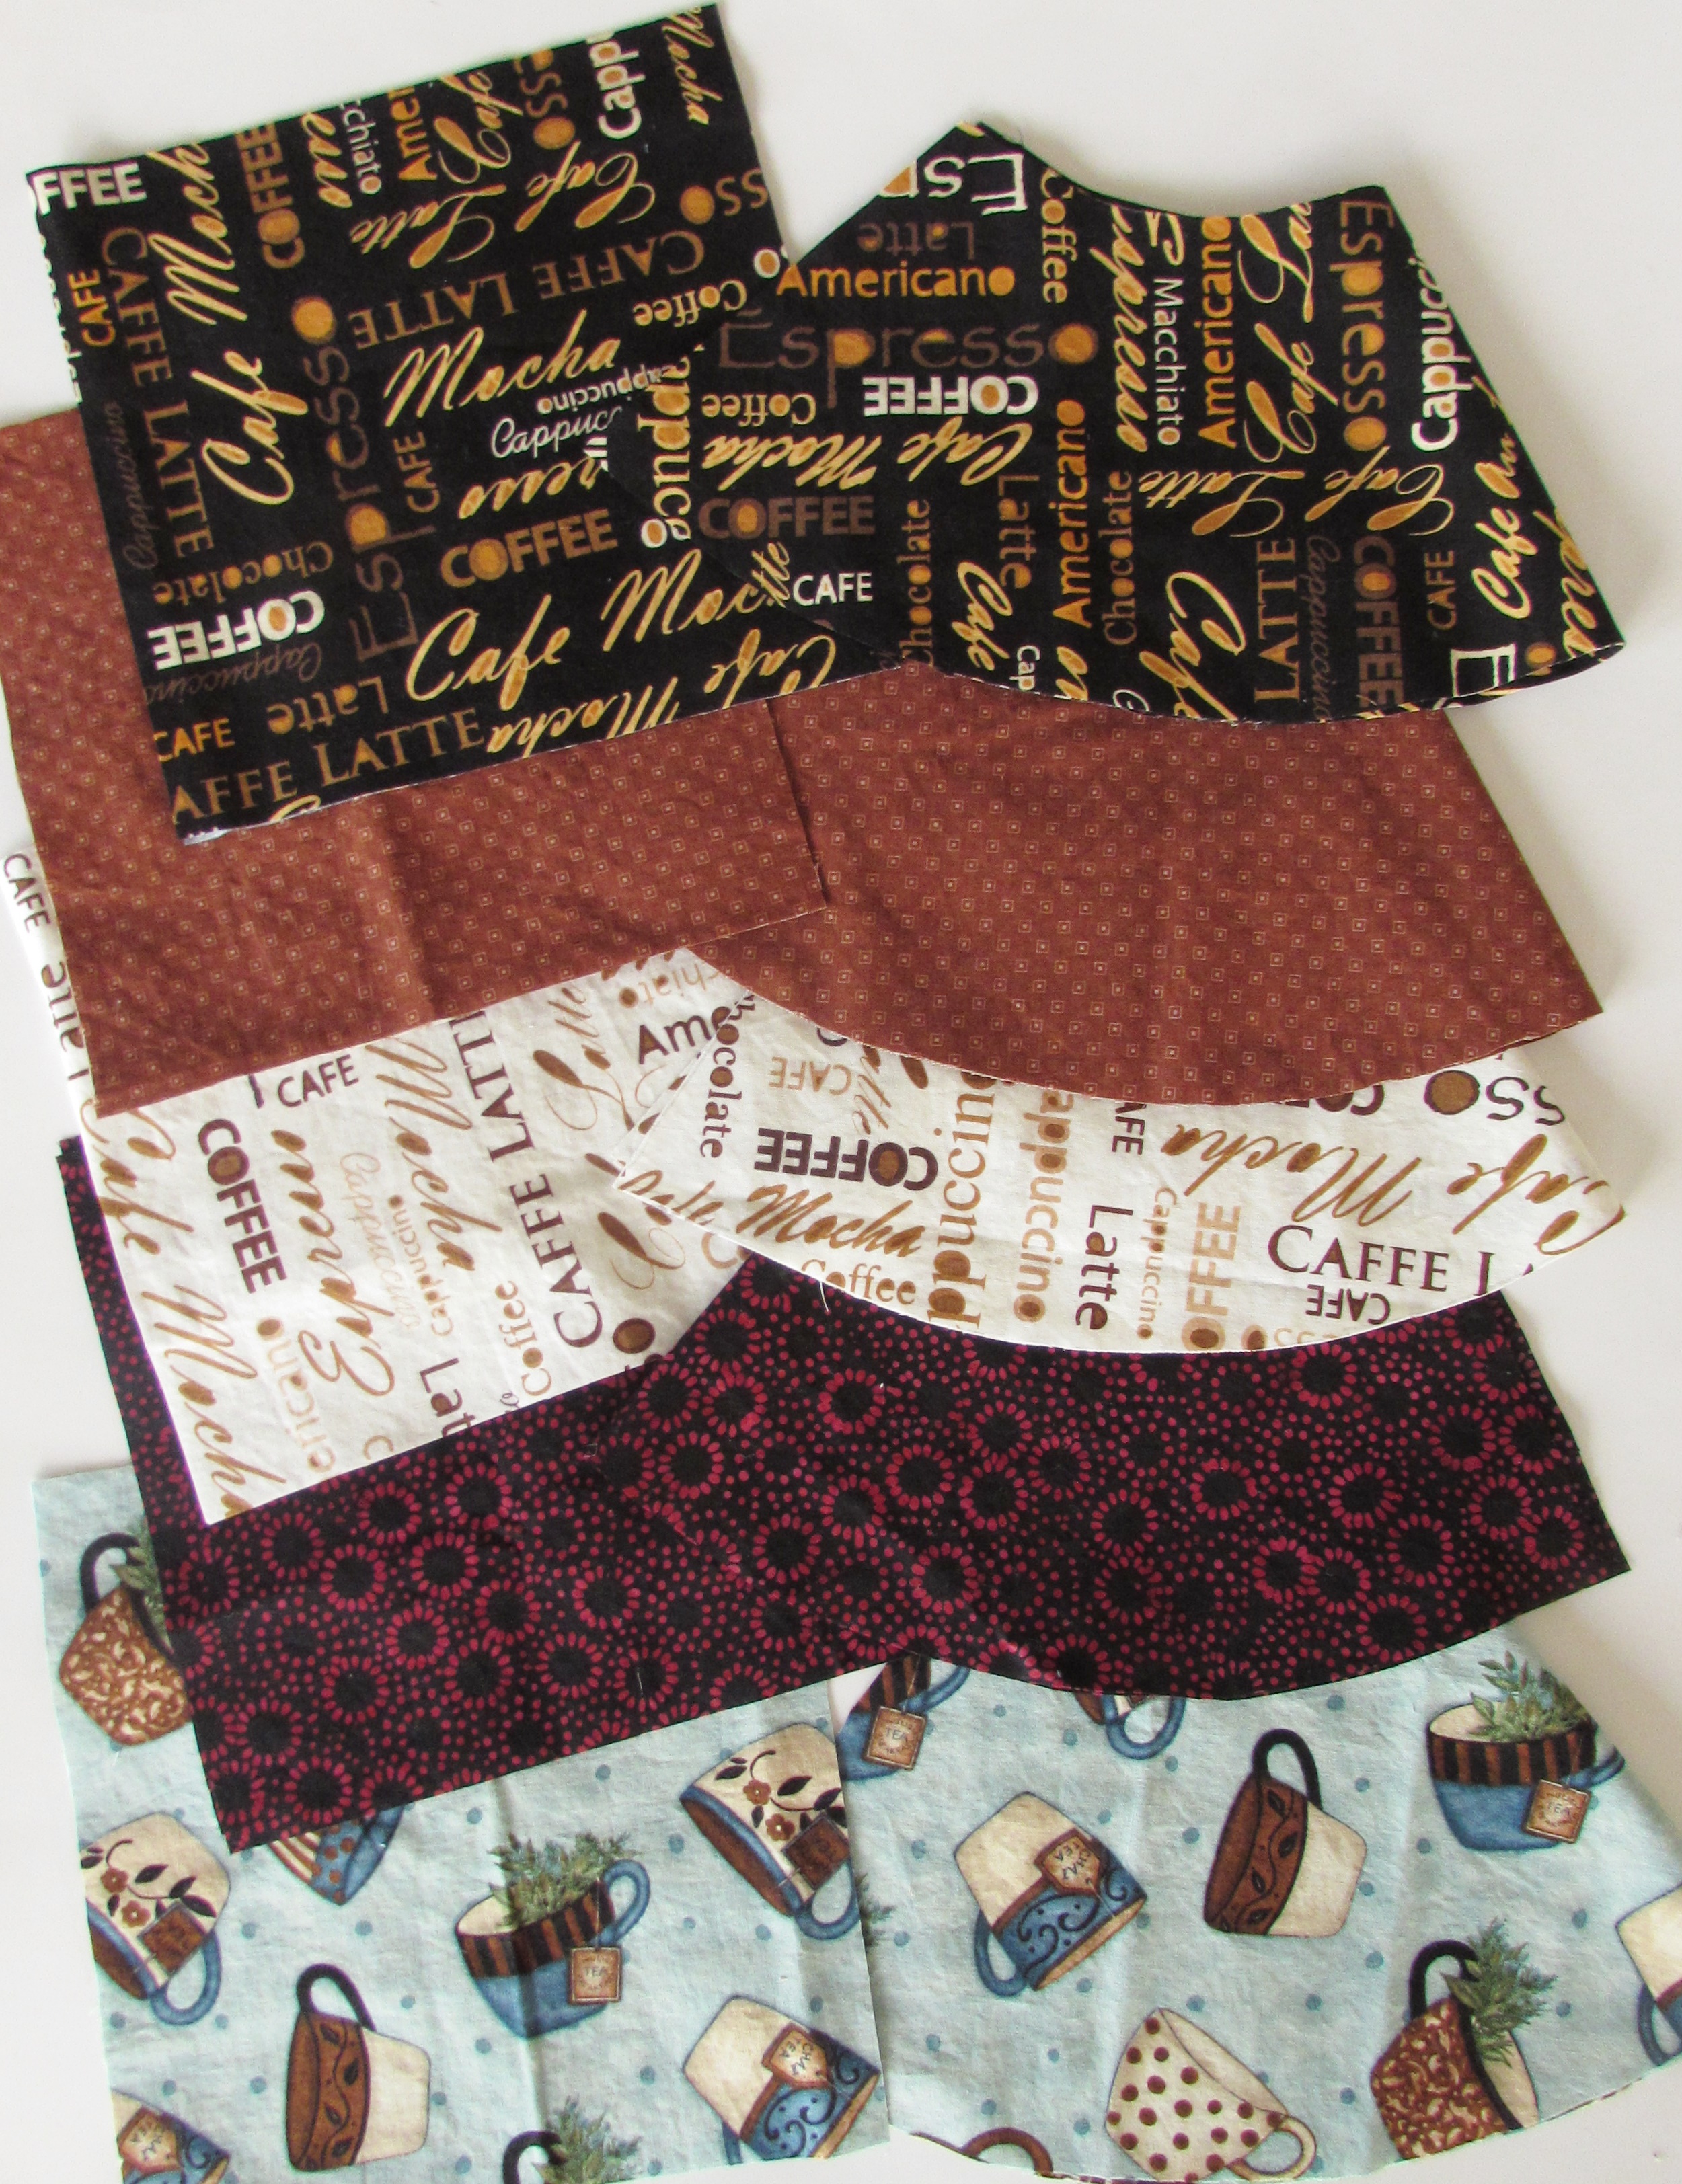
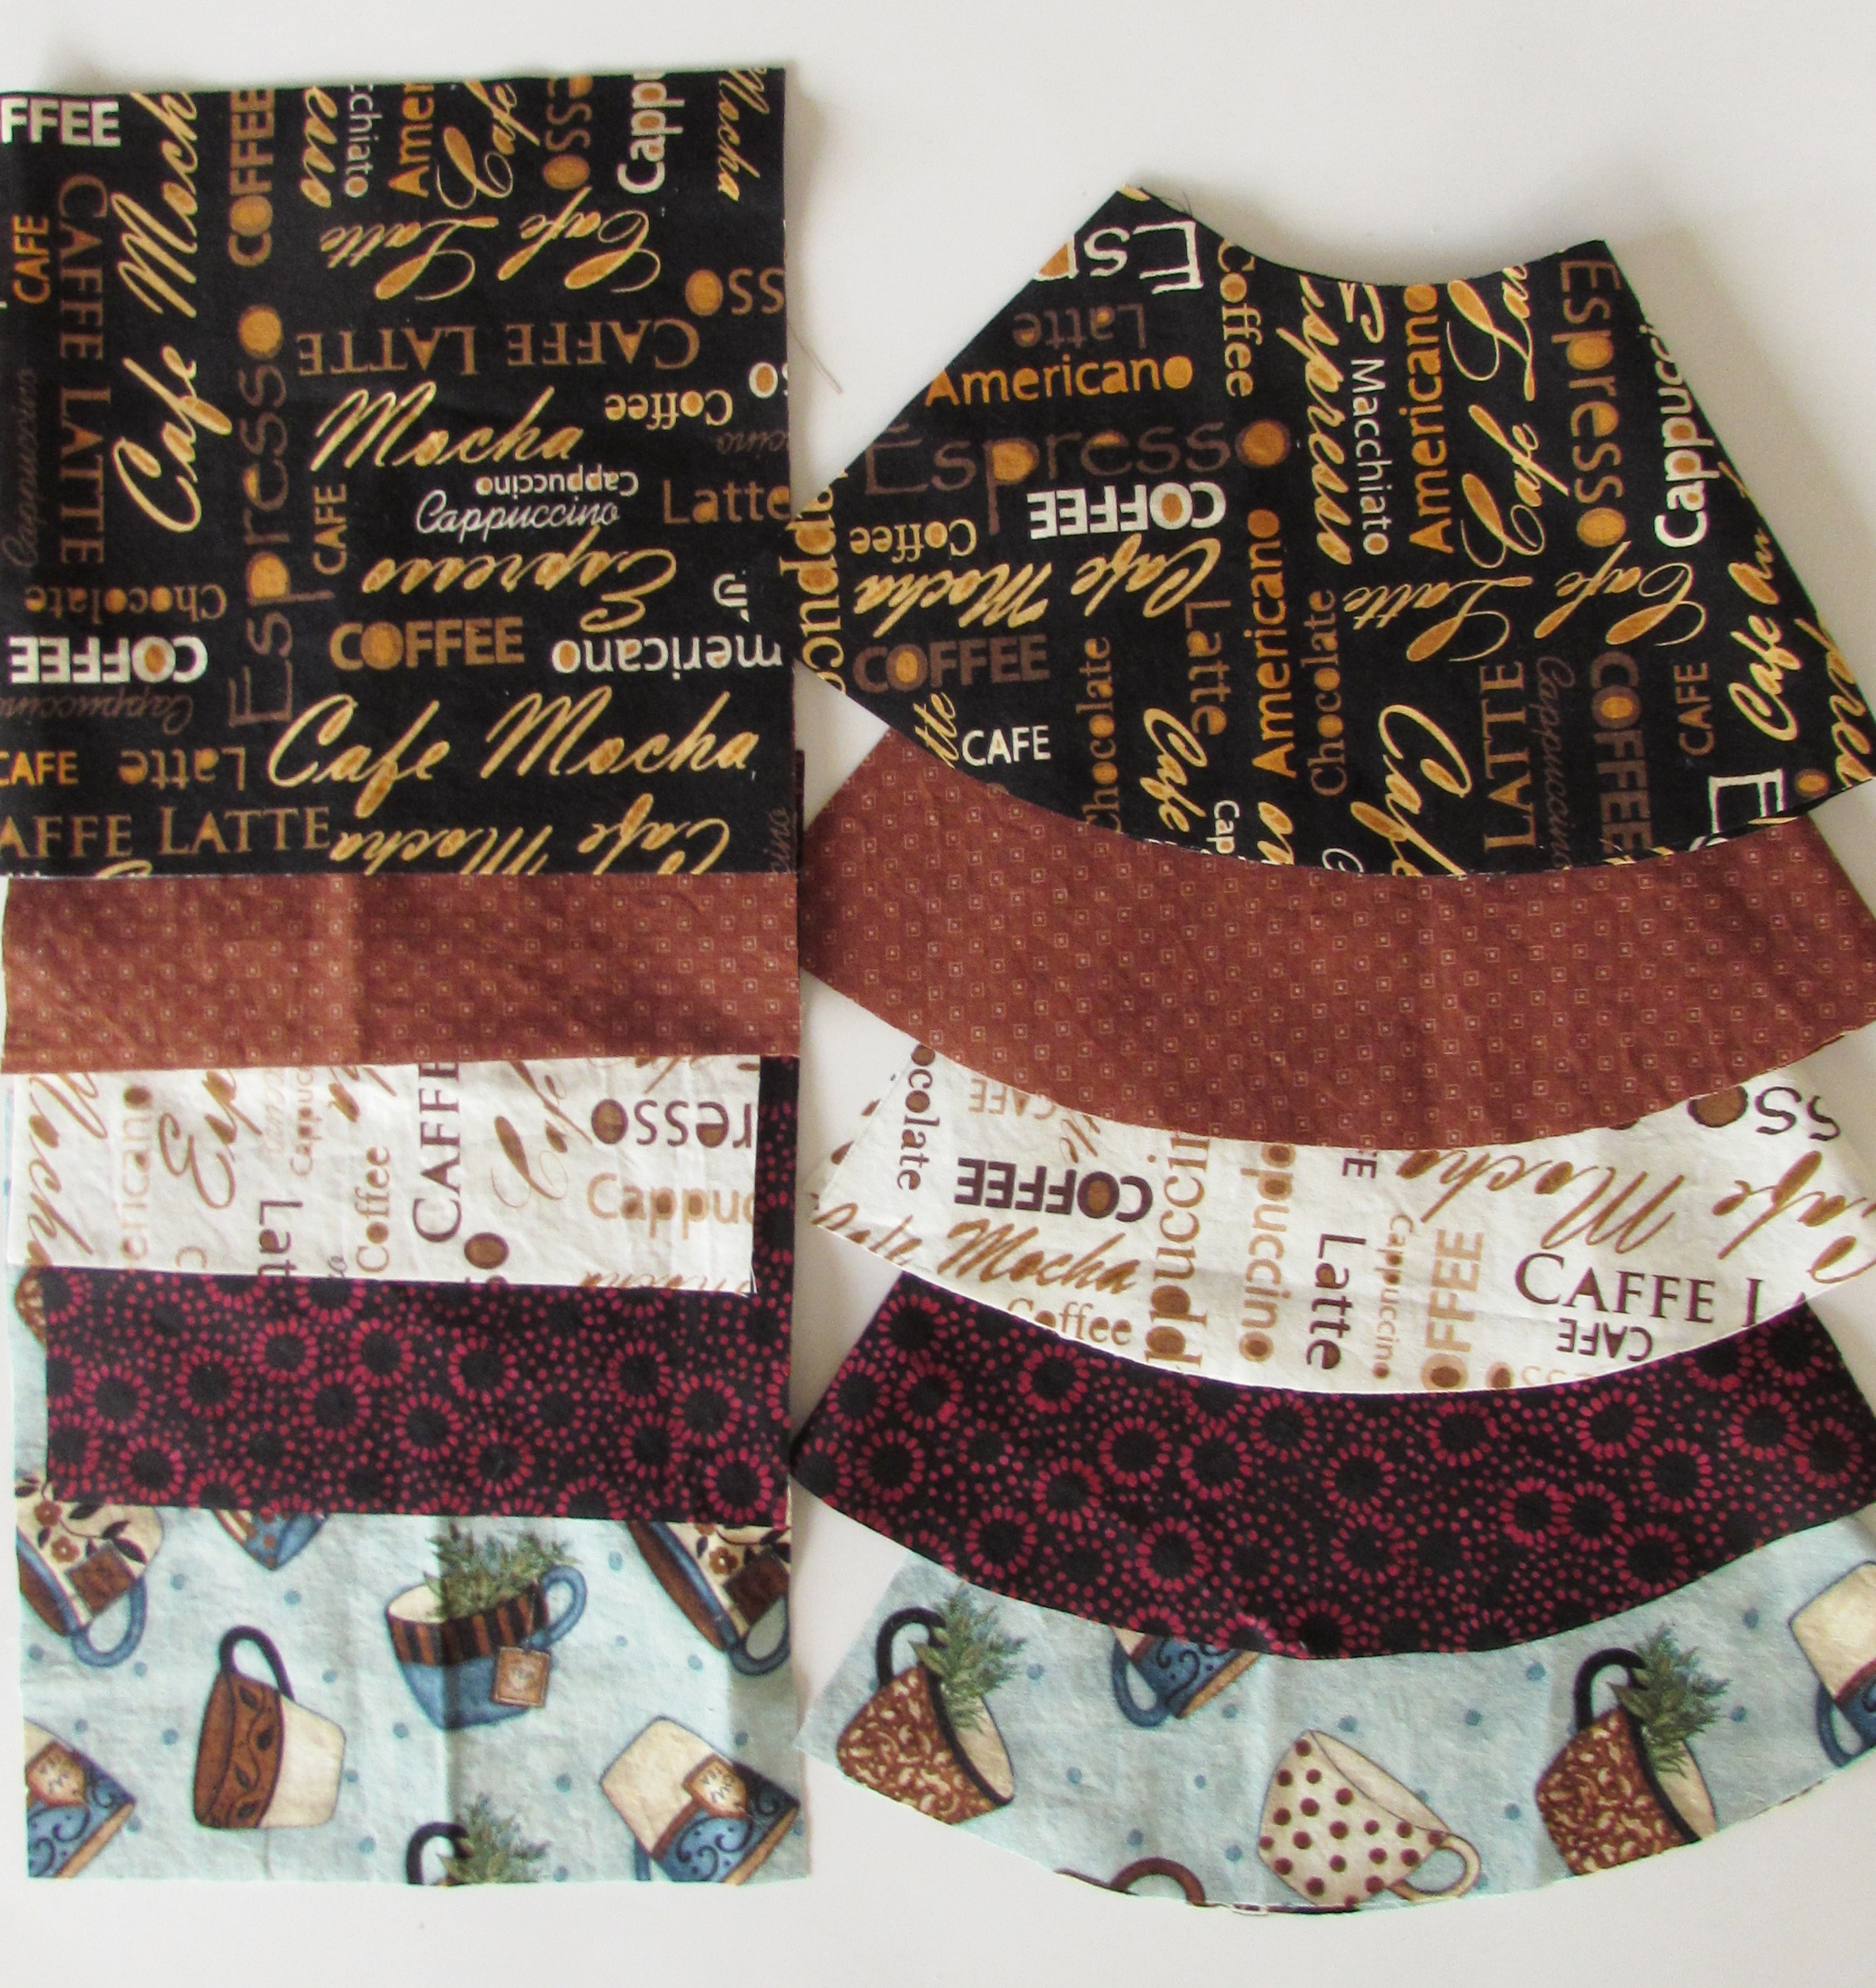
Now that we are approaching fall, I need to start getting my Etsy shop stocked for the holidays. The Chemex cozies that I make are definitely my best seller around Christmas which means I need to get busy. Yesterday I cut fabric for five covers.
Selecting the fabrics is fun but also a bit of a challenge. Looking back at what has sold well over the past two years, the favorites are definitely gray, blue, black, and red tones. Also, the two fabrics with the coffee theme text prints (in cream or black) are usually good sellers. These are the last two I could cut from that fabric so I need to purchase more of it.
I love to make a few with novelty fabric. I have done some with bicycles for coffee drinking cyclists and another one with Marvel comics on it which made someone very happy. Last Christmas I had a custom order for a cozy made with Star Wars fabric. I am debating making a few fun ones like this but choosing a theme is hard, kind of a guess as to what will sell – if you have any suggestions, please feel free. I truly love your input. For now, these will get me off to a good start.
Have a wonderful weekend everyone! Remember, I am hosting Handmade Halloween on October 4th!! Link up any blog posts, new or old, that are related to Halloween – costumes, decorations, quilts, even fun recipes. Let’s make it a fun round up of all things Halloween! I will tell you that I have had some really nice prizes offered in support of this party. Go write a post and come back and link it up. This will throw your name in the draw – maybe for a win! See you then.
Linking up today with the best of the best. See the top of the page, under Link Ups.
This is a good weekend to shop Craftsy! They have some great discounts on kits and supplies for their End of Summer Clearance. Take a look. This sale runs through Sunday night, 9/18/16.
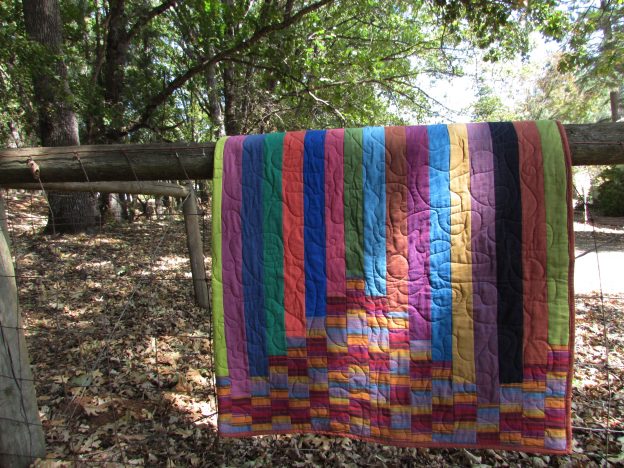
Last week I spent several hours practicing on a long arm machine. I decided to work on a quilt top that I made last fall. Using Kaffe Fassett stripes and solids, I made a strip quilt last fall. As often happens, it was put aside and left untouched for almost a year. By the time I finished this quilt top, it was distorted and nowhere near flats. Not sure if you remember this one, but here is the first post if you want the back story. In that post I mentioned that I had put some of the strips together incorrectly and had to do a bit of seam ripping to fix it. I think I handled the strips too much and they really stretched. If you haven’t handled Kaffe Fassett shot cottons, they are very soft. This makes for a cozy quilt but using a jelly roll of this was harder than I expected. Of all my quilts, I am sure this one has the most technical flaws. But it is also one of the prettiest because of all the color.
Fast forward eleven months, I decided to finally finish it. The colors are gorgeous and it deserves to be used. I knew it would never be a quilt to brag on but oh, it is so soft. Quilting it on my machine or the long arm was going to be problematic either way. I figured if I took it to the shop, they might be able to help me to make it as good as possible. When I showed it to the owner, he said I could choose to make it flat and out of square (by a long ways) or I could square it and there would be some big folds that I would just have to quilt down. Without much deliberation, I chose to smooth it and deal with squaring it up later. The larger goal was to practice with the long arm. He helped me load it and played with it to get it as flat as he could.
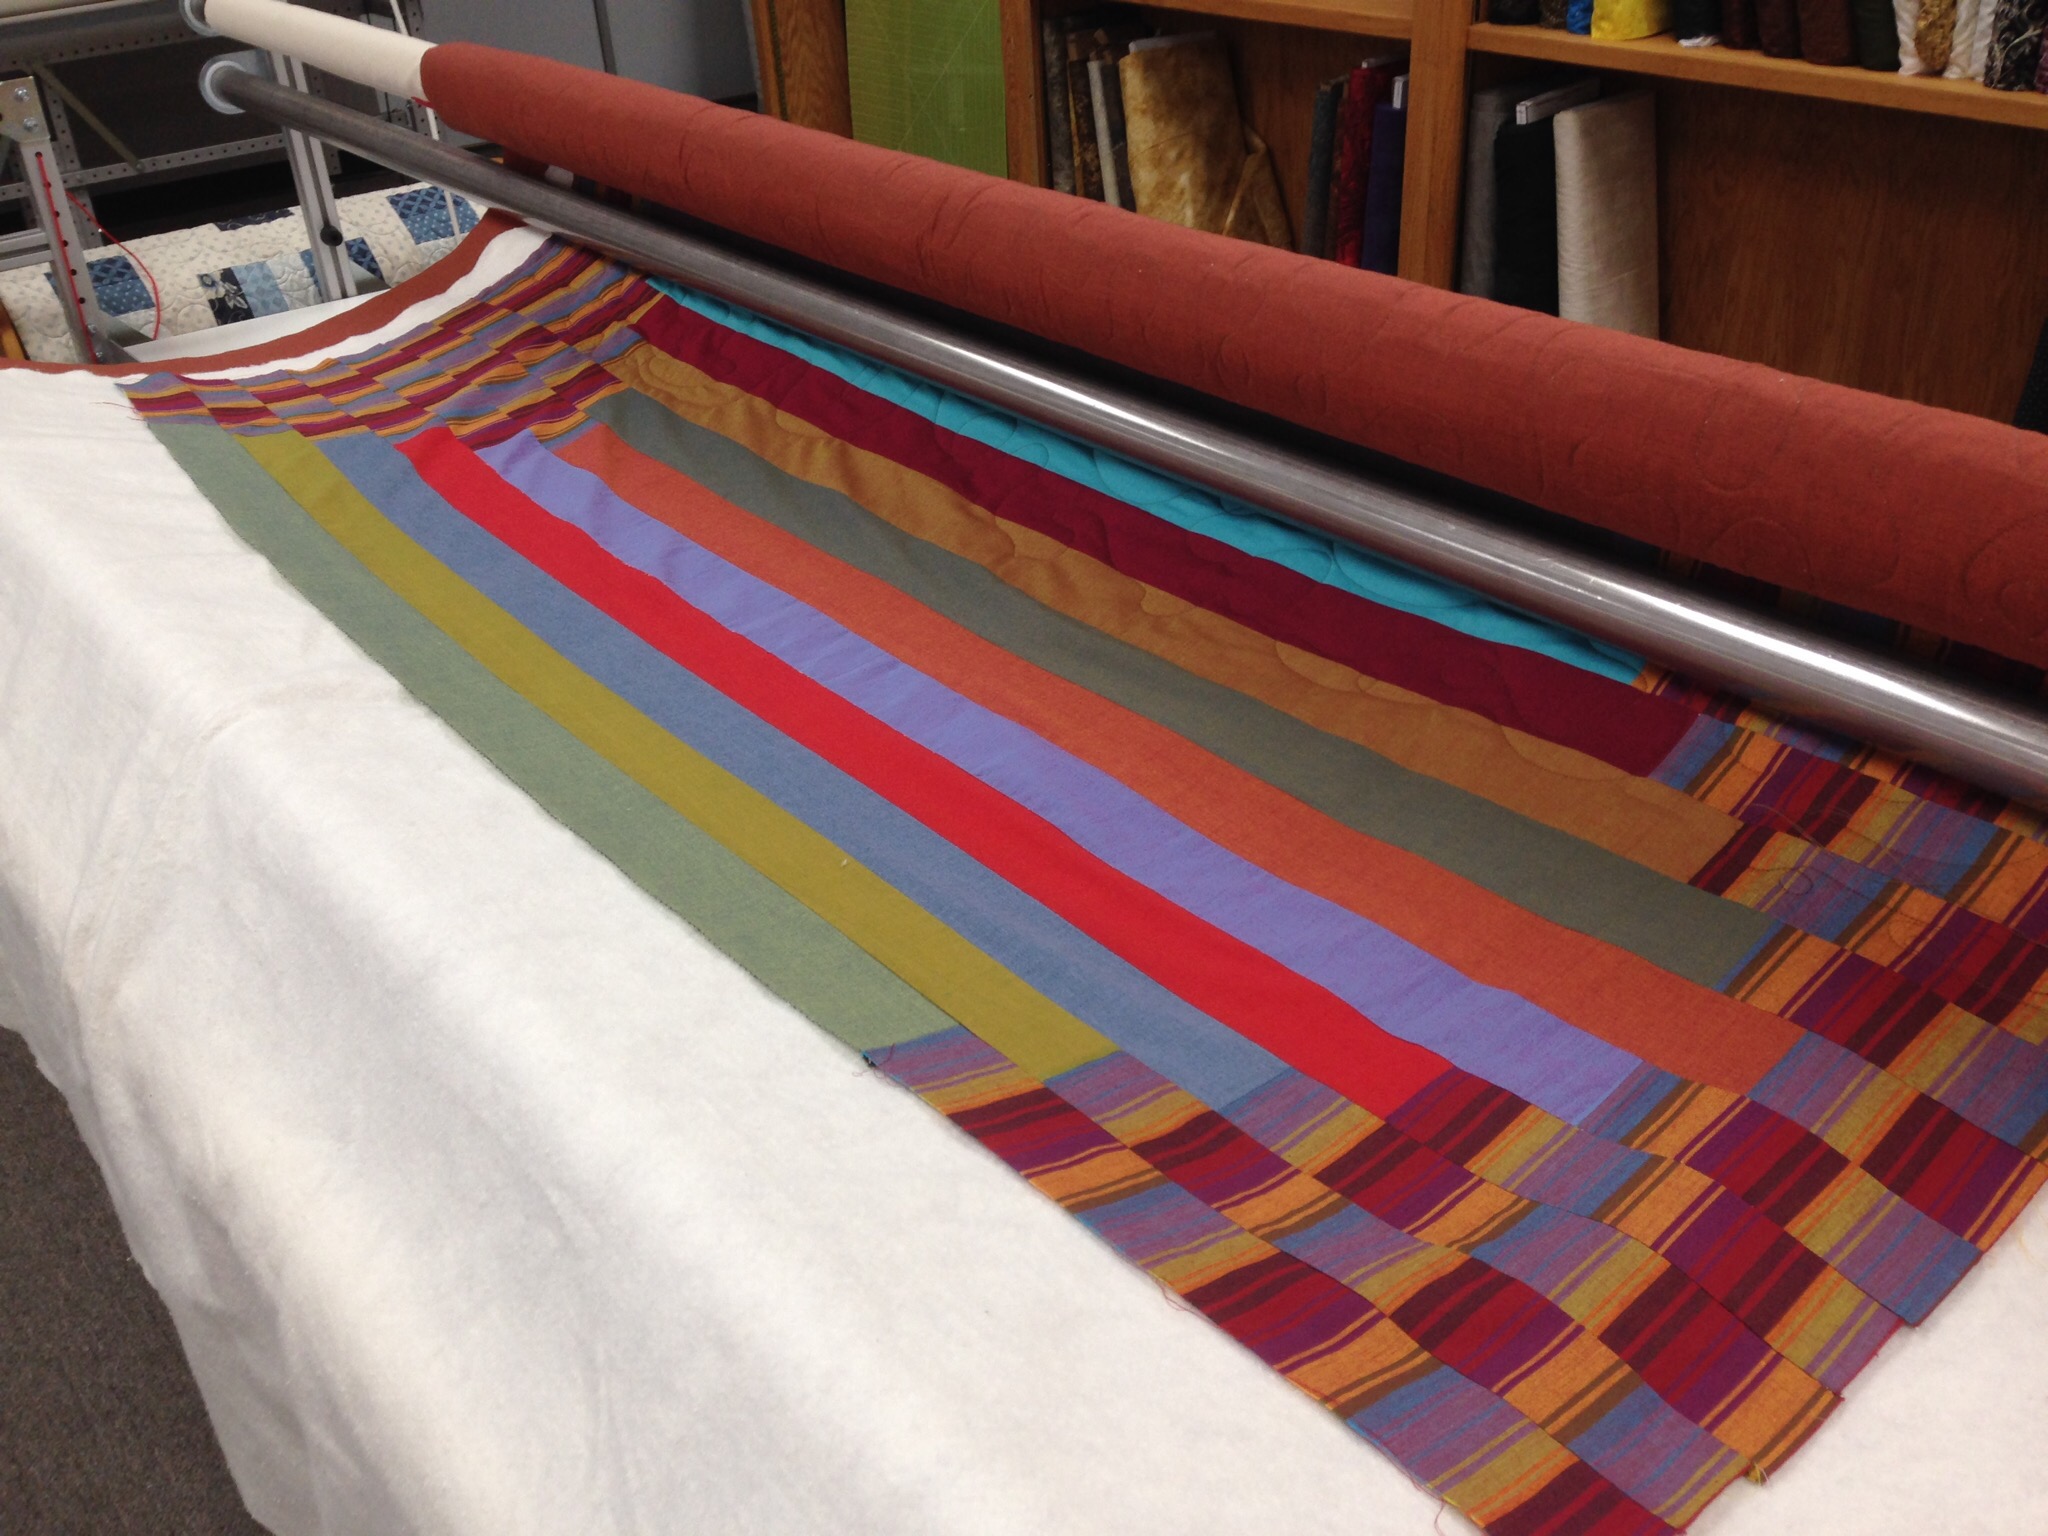
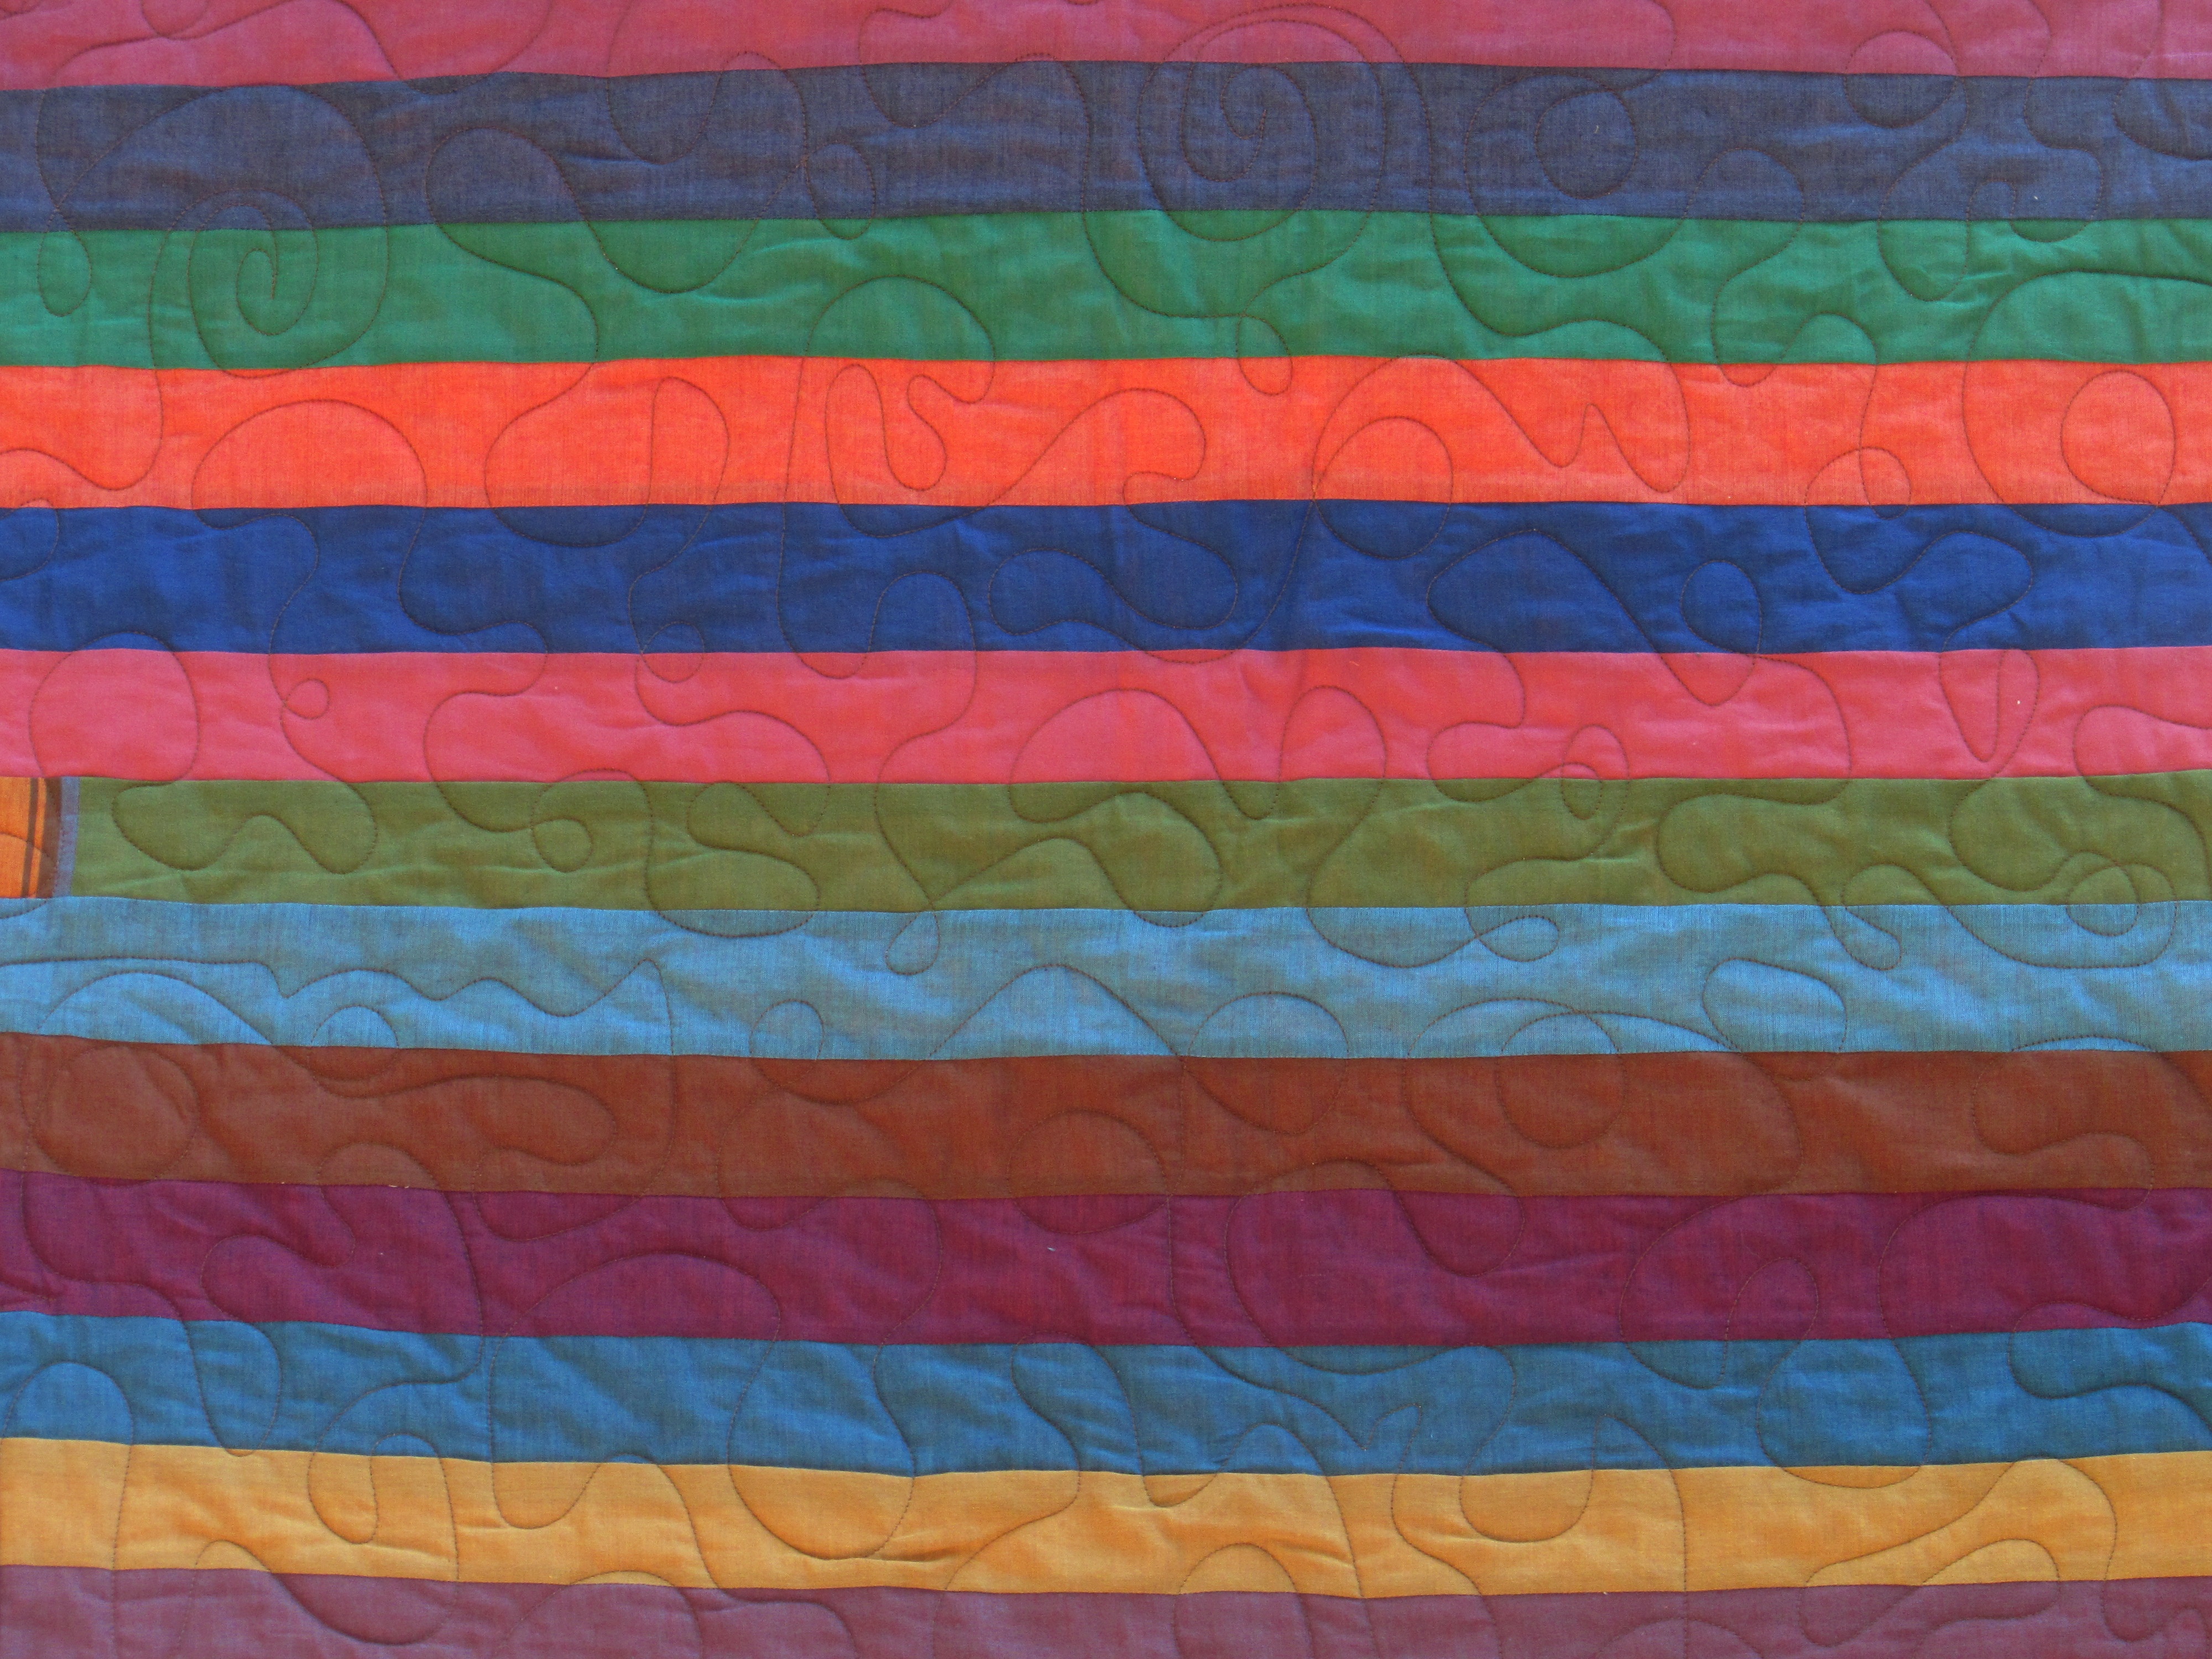
I didn’t have much of a quilting ‘plan’ in my head with this. More important was learning to use the machine and get the feel of it. The speed picks up on the machine and it is difficult to get into a rhythm that isn’t too fast and allows me to have good control over moving the needle. I did a random stipple with a few loops here and there. It was so much fun. I loved the freedom of movement since I wasn’t dealing with the weight of the quilt. When I think back on how it felt when I was guiding the needle, I am certain I was going to fast. My concern was if I slowed down, my stitch length would shorten and be inconsistent. Plus I would just forget and my speed would increase!
Speed was my primary problem. Second to that was judging how close I could quilt near the top and bottom bars. I found myself going too close and getting trapped in places. There is no reason to go that close; it is cleaner to stay a couple of inches away from the top bar and bottom. But I would get my speed going too fast and dang it, I would find myself trapped again!
Even laying it as flat as possible, there are a few significant puckers. It couldn’t be helped. I think using the long arm to quilt it was much more successful than my home machine would have been. I could look ahead and as I moved the quilt over the bars I gently finessed it as flat as possible. Now, remember he said if I went for smooth and flat, it would be warped and out of square? Oh my, he was right. 🙂
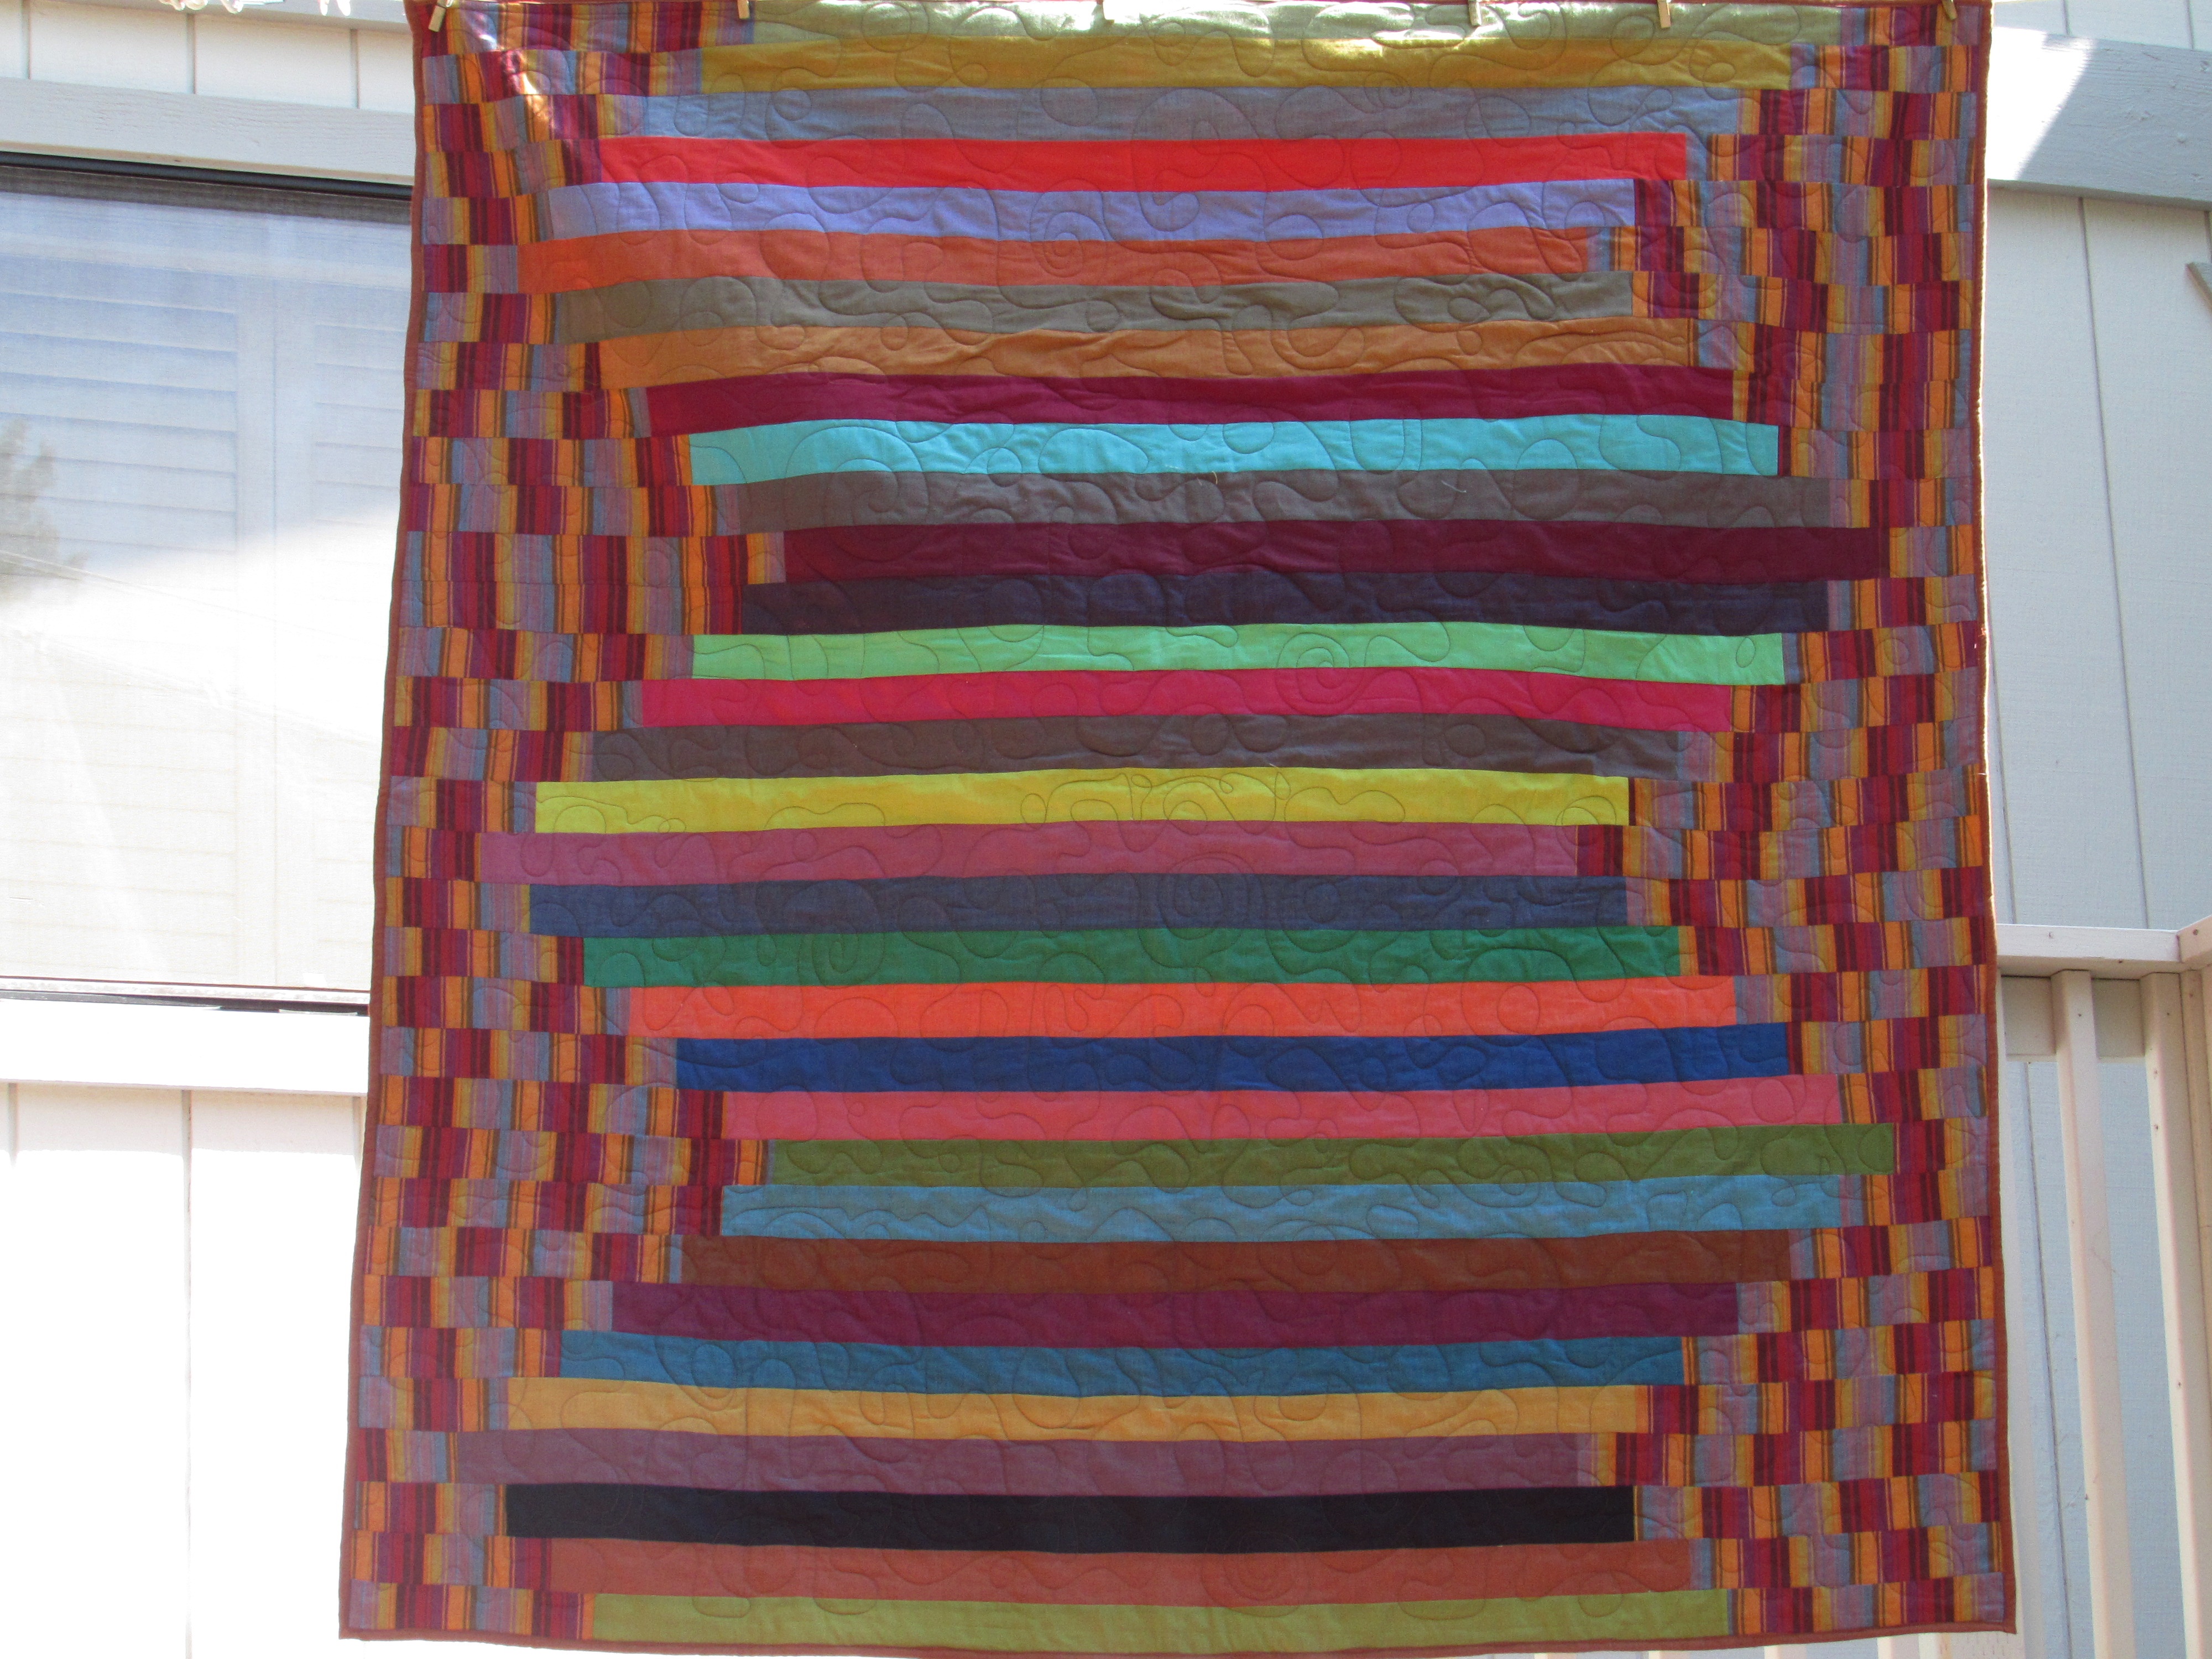
When I got it home I trimmed the excess batting and backing away with scissors, just to see what I was dealing with. Then I did a few dramatic, heavy sighs and asked Ray for help. I knew he would have a solution. The issue was that if I cut it square, it would be so obvious due to the linear pattern of the stripes. Both the top and bottom green stripes would have been sliced at strange angles. Ray suggested taking some of the striped fabric and enlarging the width at the bottom of the stripes. This would give a bit of an illusion of a straight line and I would be able to keep the full width of both green stripes. (I am married to a genius.) I never even thought of it. I have quite a bit of the striped fabric left over. There was no problem cutting a piece and matching the stripe up completely.
Most of the extra width is covered by the binding. It was a simple solution and I am so pleased with the result. As I said earlier, this quilt is filled with flaws. But when I look at it I am quite happy with it. The colors are lovely and the feel is so soft. Learning to use the long arm feels a bit like going backward. I am just getting some confidence with my free motion skills on my domestic machine and now I am back at square one, learning to quilt all over again!
On Thursday this week, I will be back in the shop. I am going to quilt my plus quilt. Hopefully I will be able to control my speed a bit. I am going to try to be diligent about leaving myself space at the top and bottom bars. My plan is to do loose spirals in the negative space and straight line quilting within the pluses. I think (I hope?) that is a reasonable goal for me at this point. Any hints or tips on my long arm practice sessions are more than welcome! Also, while I am thinking of it, do I do all of the straightline quilting and then go back and do the spirals or do I just do whatever shows up within the space of the bars and keep moving it in the one direction? Inquiring minds need to know!
Linking to all of the awesomeness that is listed at the top of the page, under Link Ups.
This is a good weekend to shop Craftsy! They have some great discounts on kits and supplies for their End of Summer Clearance. Take a look. This sale begins Friday, 9/16/16 and runs through Sunday night, 9/18/16.
My sewing room is basically made up of bits and pieces that eventually come together to form something pretty – I don’t mean this to sound all philosophical. I am not like that. I mean to say it is a mess and I spent some time organizing and realized there are all sorts of fun bits in there that I want to play with. I have picked up a few things thrifting, made a few fun things and finished some others.
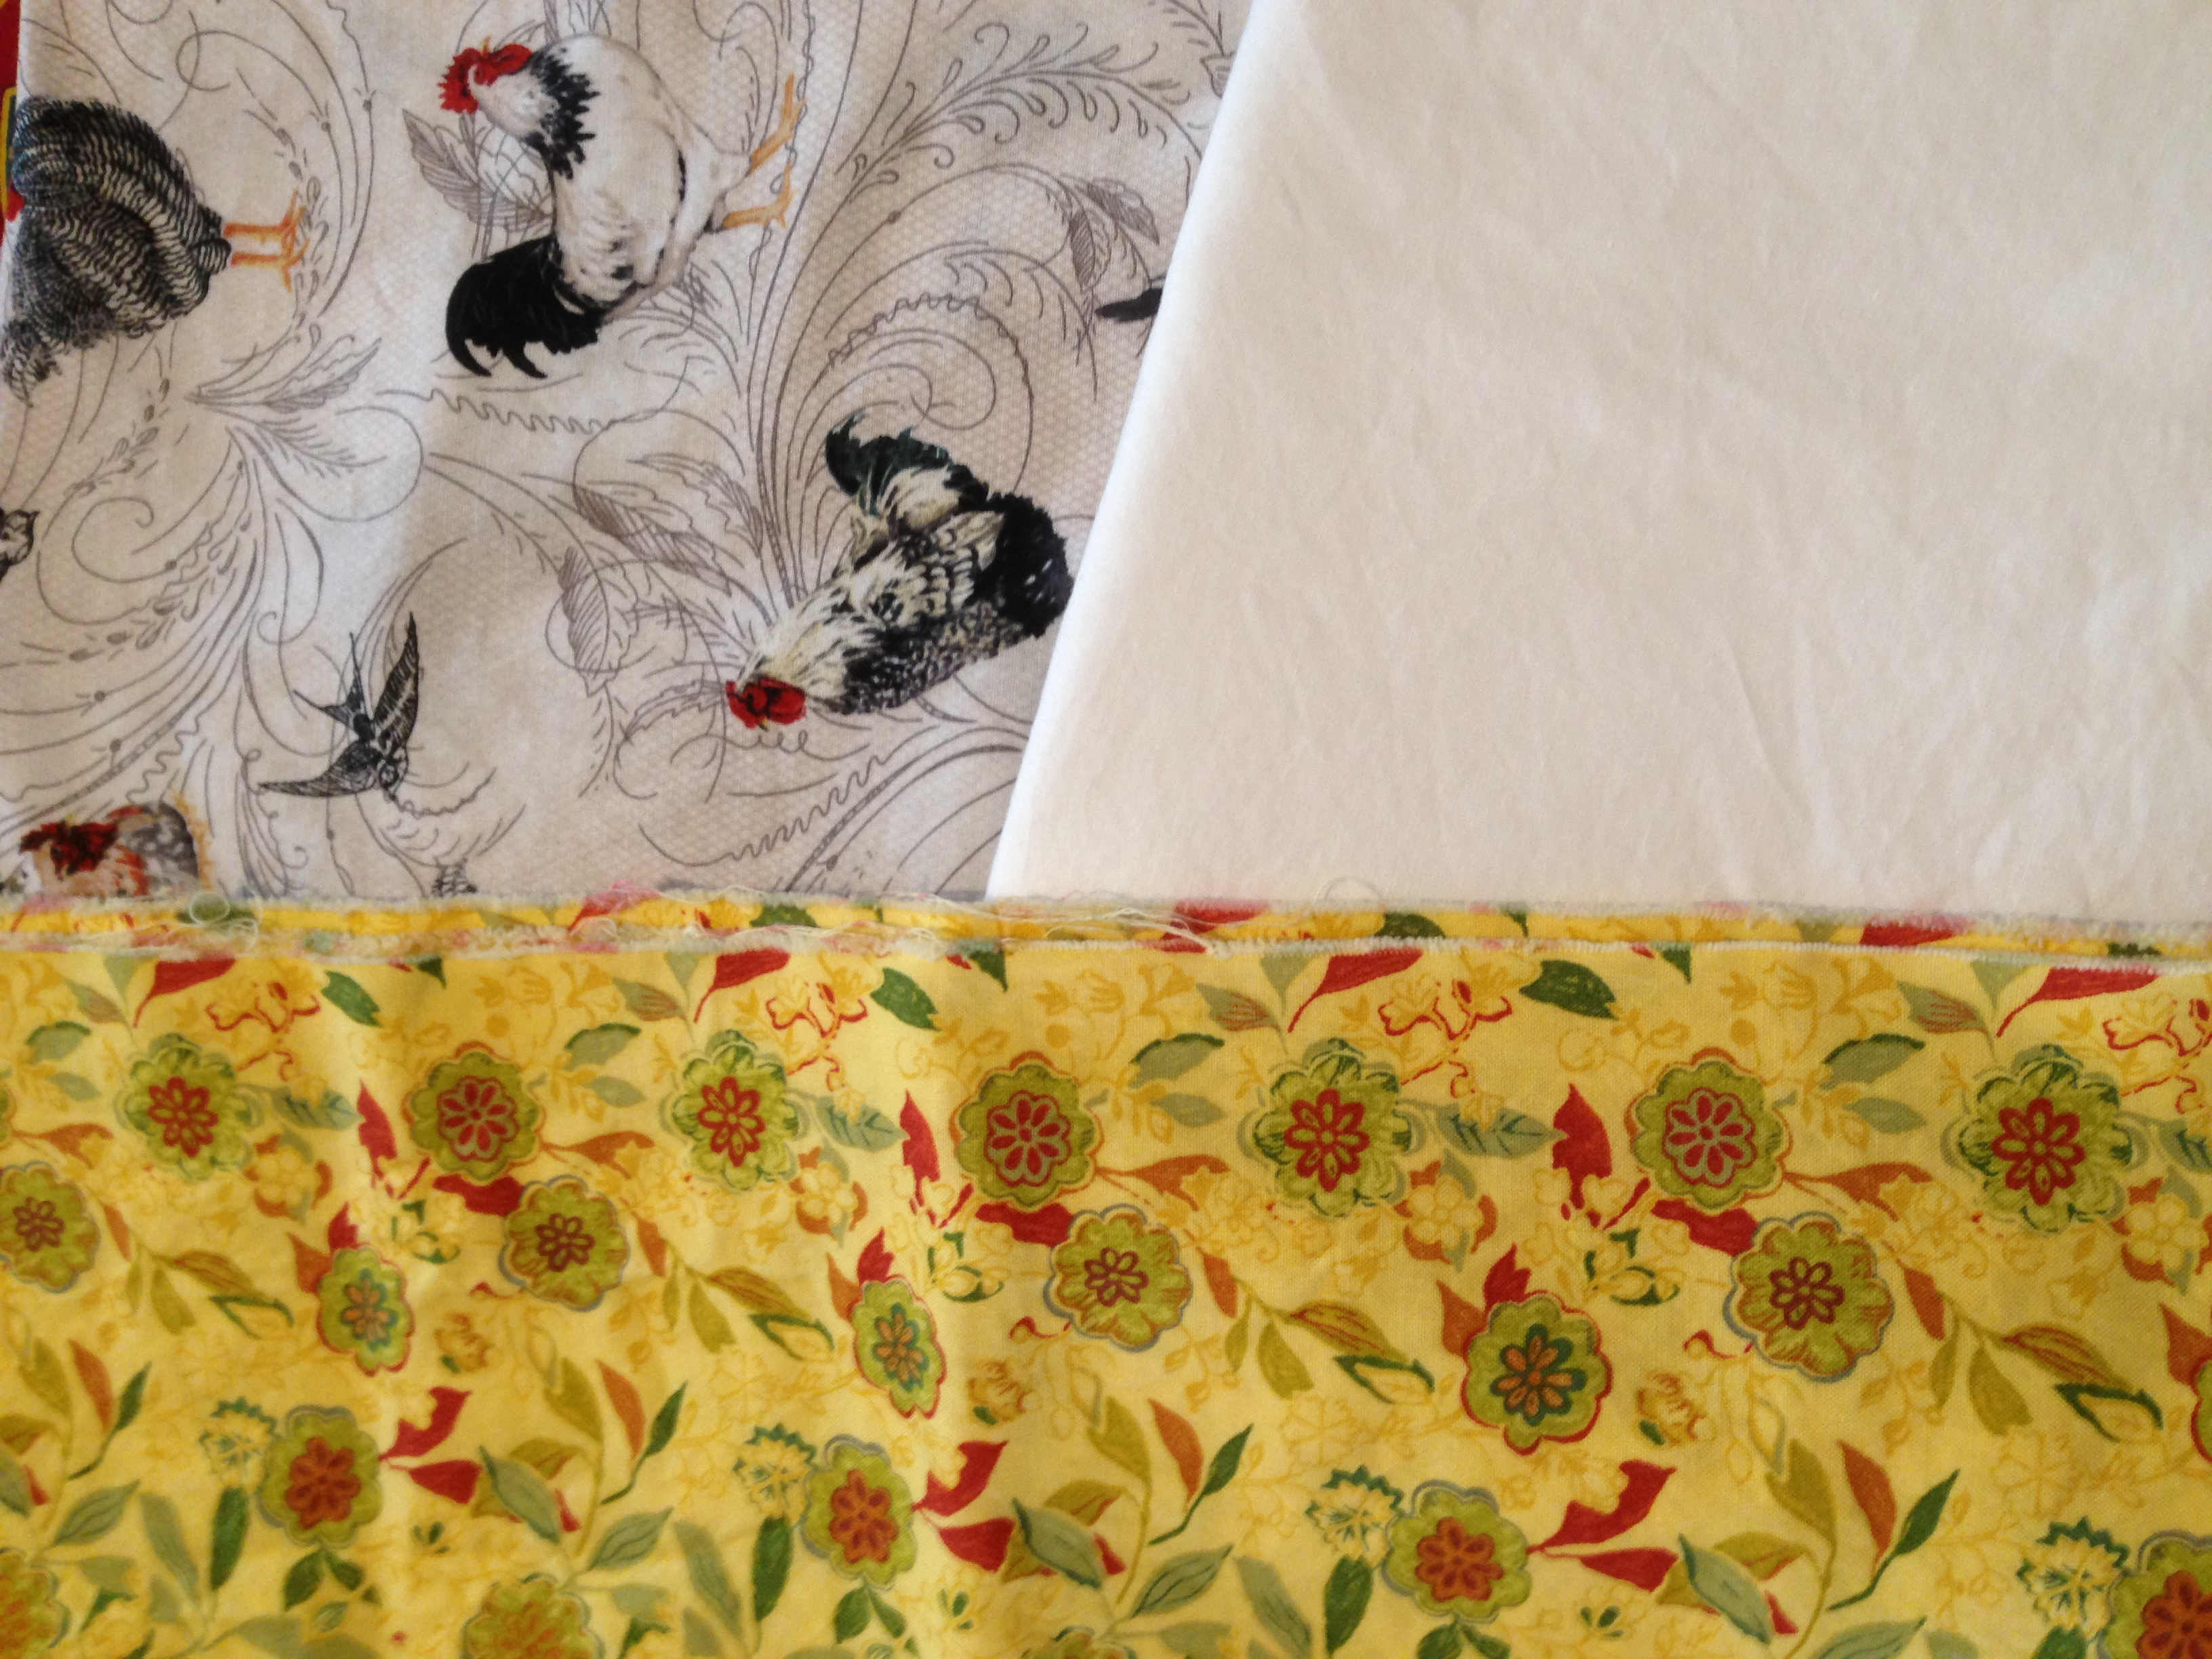
As far as thrifting goes, here are the most recent finds. This little stack of bits was a cute one. I love the roosters and the piece of white is totally clean and quite large; and really,- who doesn’t want extra white fabric on the shelf? The yellow bit is about 7″ by 42″ and my yellow scraps are next to nothing. These are washed and put away for now.
This block was in a bin and looked so forlorn. It was a dollar and I wondered who pieced this with such nice points and didn’t want to keep it. I usually imagine that these things come from a lovely woman’s quilty UFO pile and get donated when she can no longer sew. Take a look at the beautiful curve she did with the stem, it is lovely. I will make a little table topper with it because it is 14″ square and deserves to be finished.
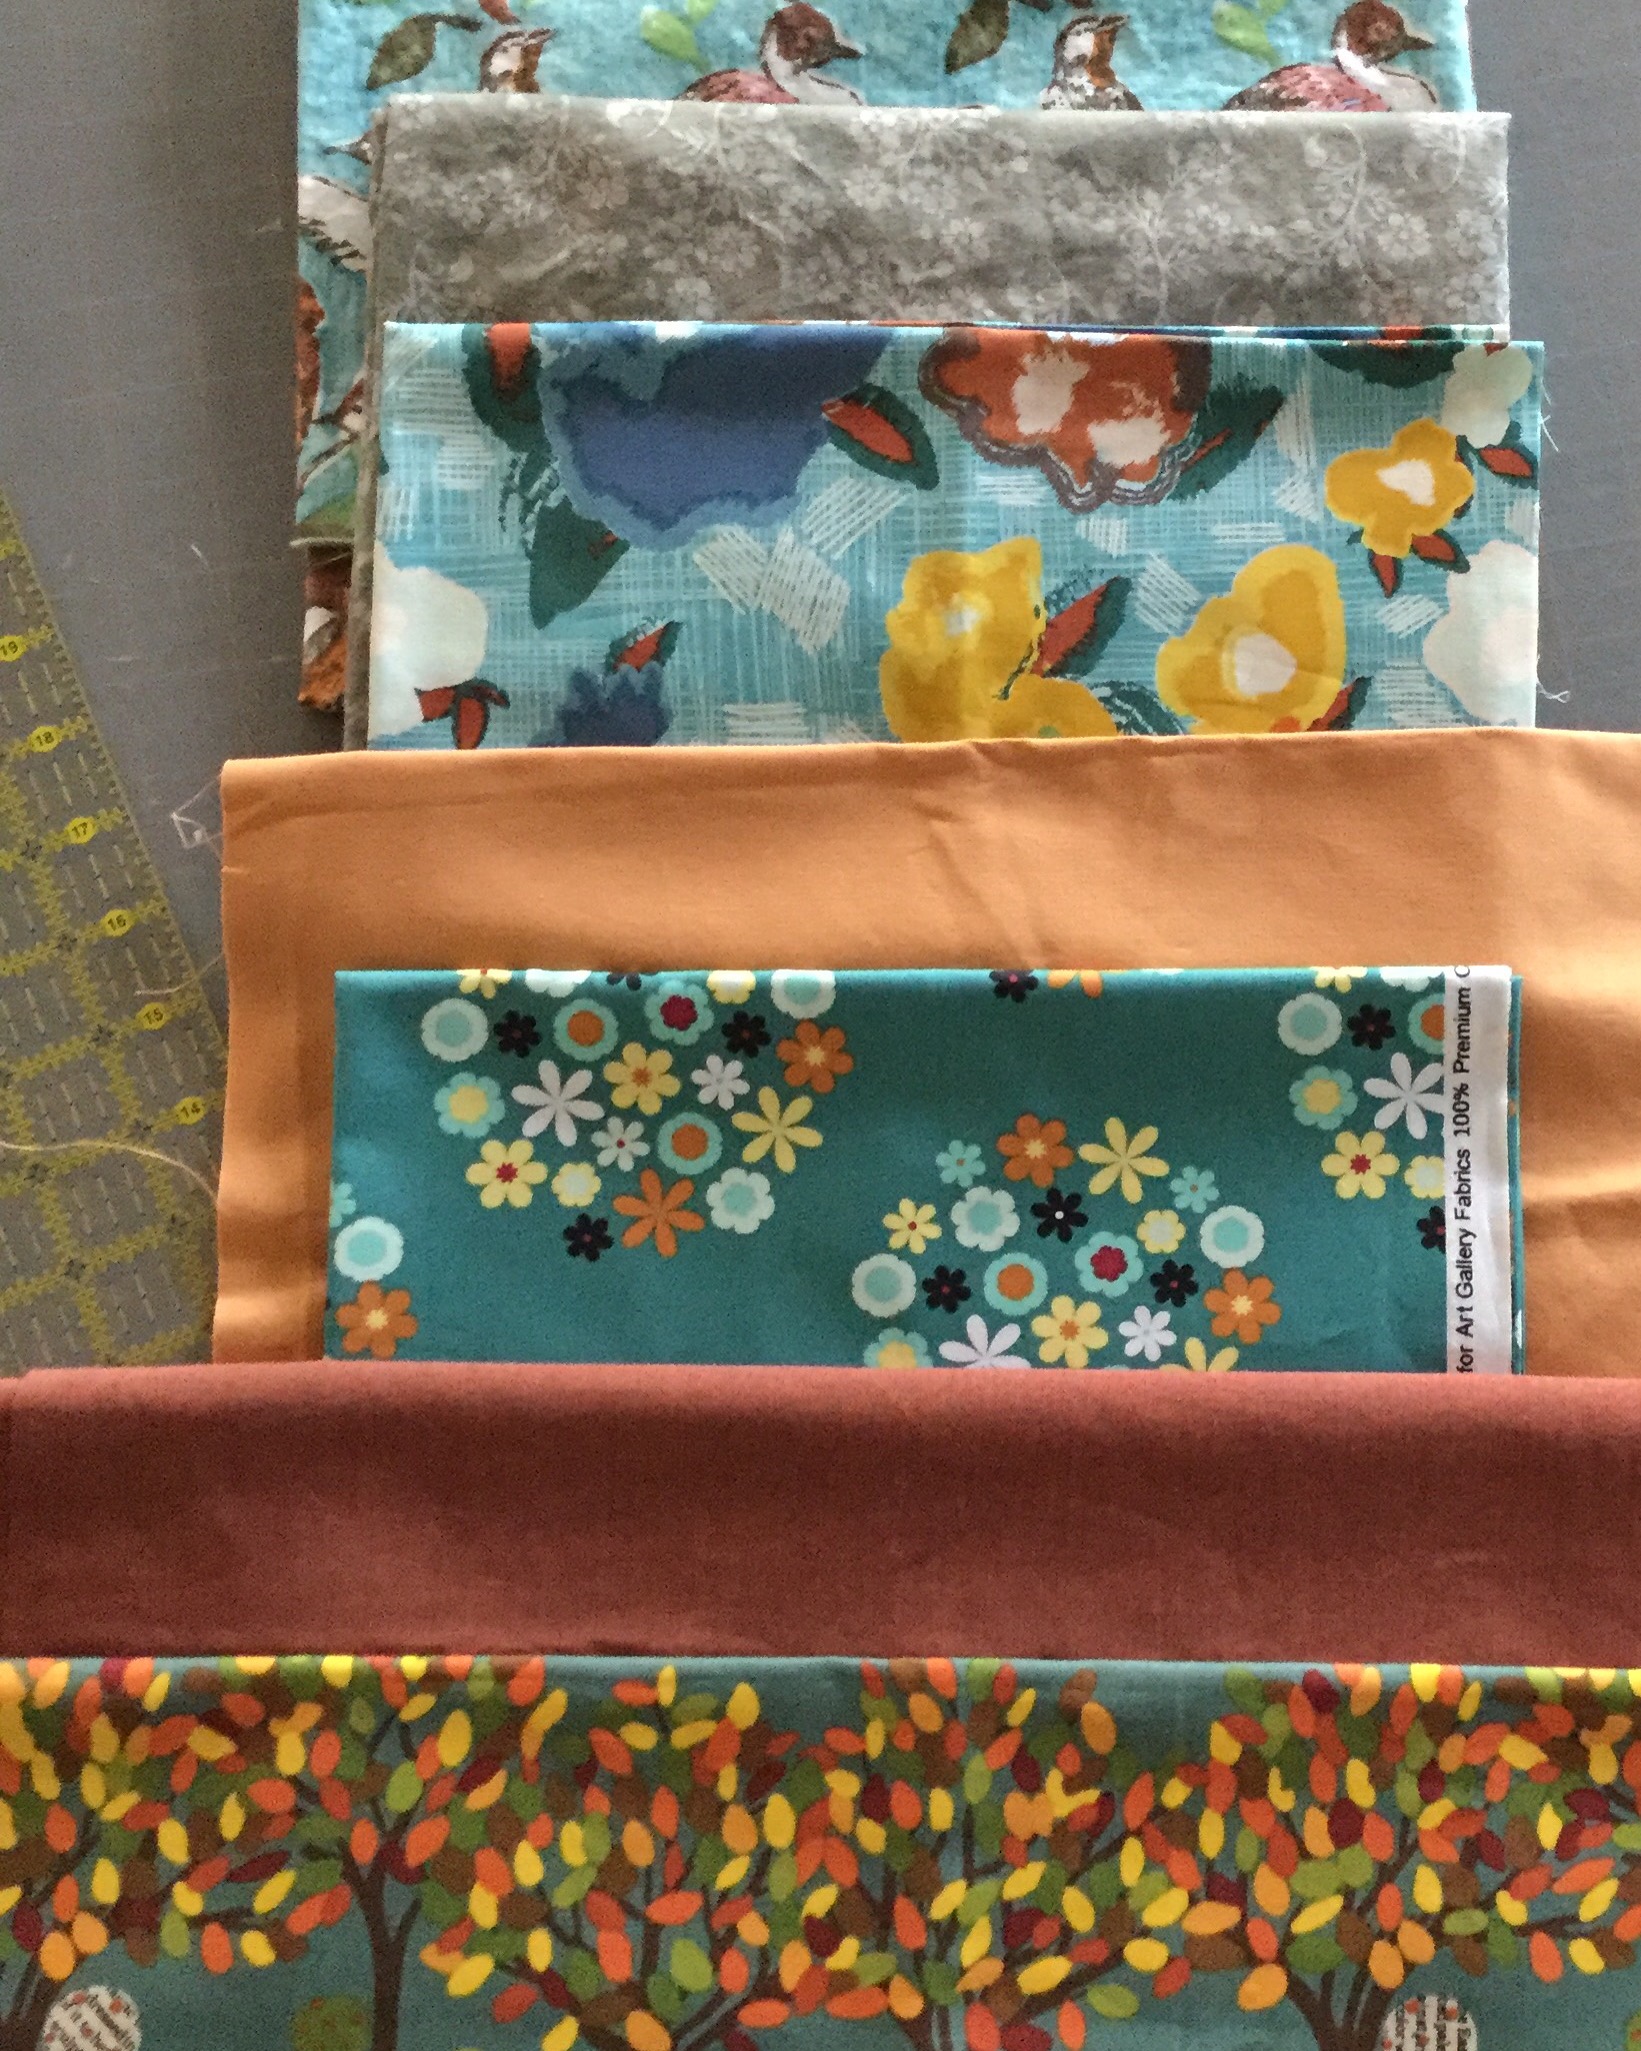
When I was cleaning up, I somehow ended up with this pull from my stash. I kept seeing pieces that needed to be together. I don’t have a project in mind for it but if I put them back in their color area, they wouldn’t become used together and they should, don’t you think? Pieces are anywhere from fat quarter to 1/2 yard in size. I just love this autumnal bundle. When I put the photo on Instagram last night I was asking what other colors might need to be added. My IG/blogging friend, Gloria, suggested deep brown and I agree. I have a nice dark brown in the solids stack and will pull it to see if it belongs with the others. Am I crazy to just pull it and let it sit there until I figure out what to make with it? Do others do this? I have projects lined up right now and don’t “need” another but still??
Here is another little bit. This is a six-inch square made up of leftover pieces when I was making the border to surround my THREAD mini quilt. I didn’t want to throw them away. It will adorn my design wall for now, waiting to become something else. It is so cute.
Speaking of the THREAD mini, I put sleeves on both minis and got them hung up. My thread collection is a mess. I have some on the wall, as you can see. The pegs on these two spool hangers are too short for my Aurifil and Connecting Threads collections. So I have bins of those two and another of gorgeous, shiny spools of Sulky. What is the solution here??
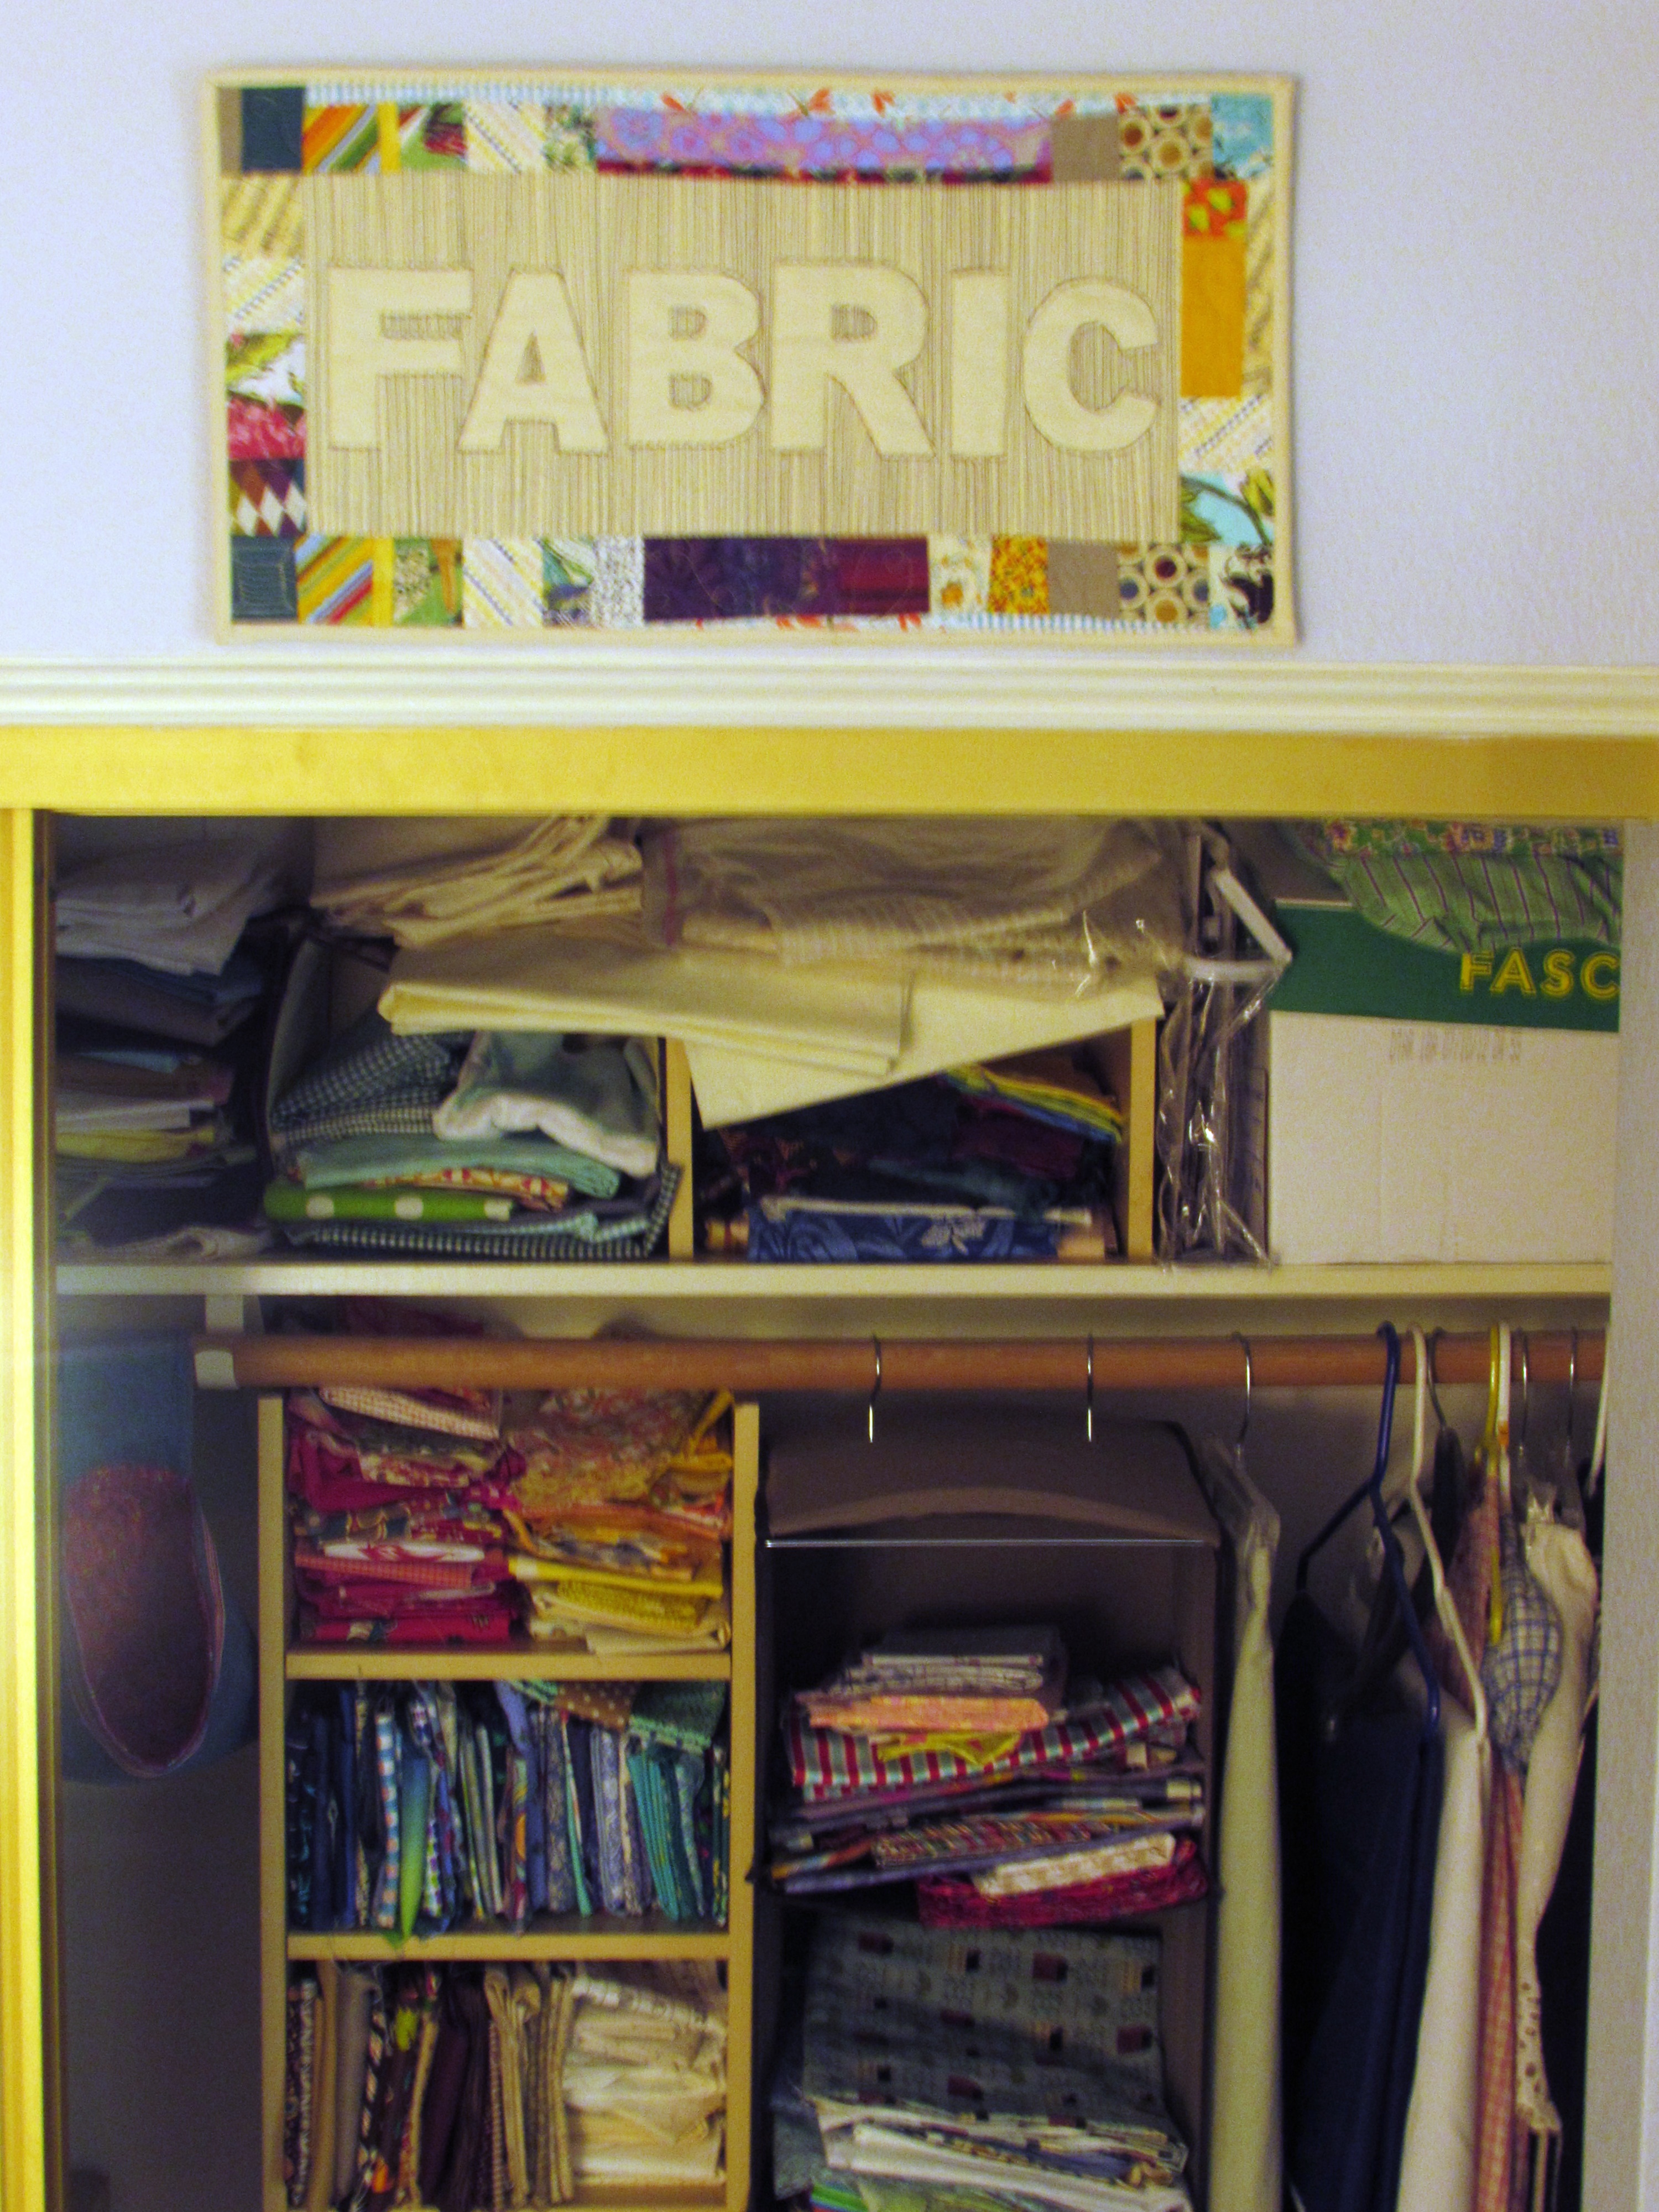
This picture shows the slightly ridiculous state of affairs in the closet that holds my fabric. It was either show you the truth or close the door which is a mirror and show you me taking a picture, standing on a chair, in my nightgown. The decision came quite easily.
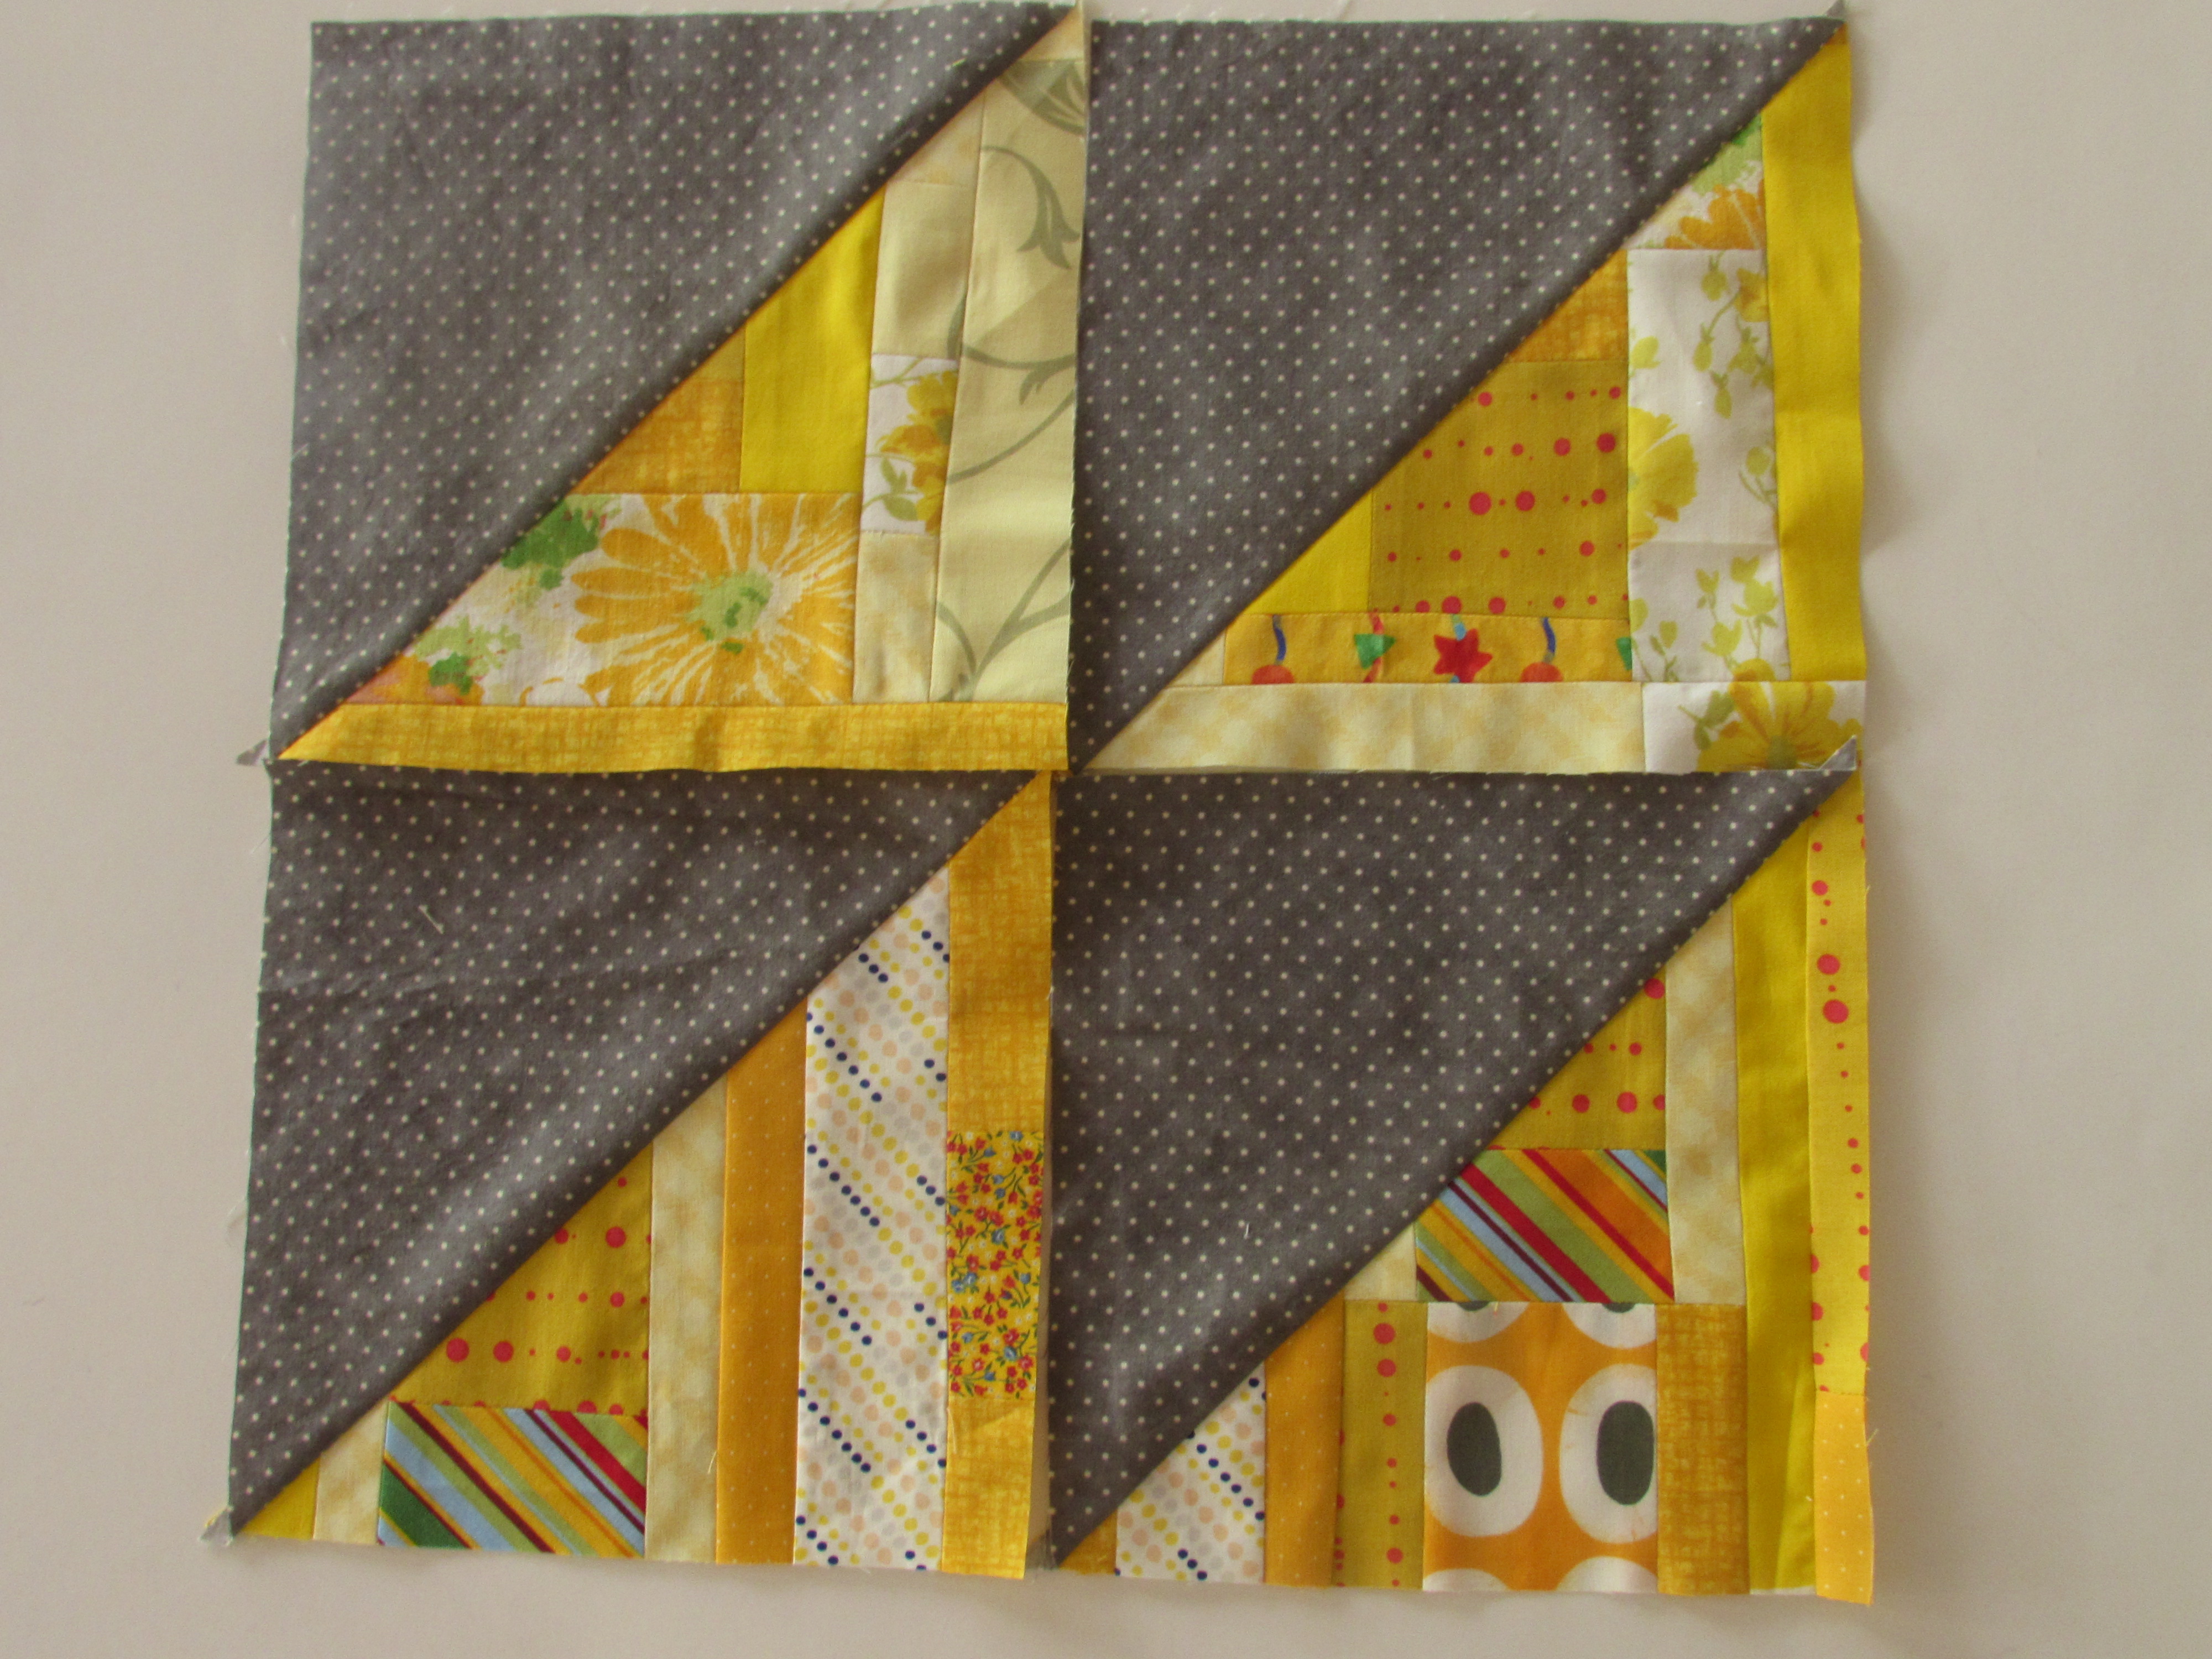
Lest you worry that I didn’t make any progress on my scrappy projects during August, let me assure you I did. But barely….hardly any….almost none. I made four scrappy HST blocks. Except, once again, I veered from the RSC16 color of the month and used yellow scraps instead of a second round of purple. I think I can no longer call this a RSC16 project. They are so cheerful – I was too pressed for time to lay them out with all the others though.
I will have to lay them out this month though and take stock to see what colors I need to finish it up. There are three months left and while it sounds like forever, we all know it will pass far too quickly! I also need to double up on the Pretty Gemstones project and do two colorways for that.
Finally – oh, you are going to be so proud of me for this one. I took a ton of bits and pieces – namely the receipts that support my Etsy shop – and got them organized into a spreadsheet for the 2016 tax year process. Oh my gosh, you don’t know how happy this makes me. To have eight months all organized – Paypal and Etsy reports downloaded, numbers entered in Excel. Amazing!! My usual process is to complete our personal taxes, and then become angry with myself because there are twelve months of nonsense to compile to figure out the numbers for my little business. Last year I was kicking myself over and over for having it in such a messy state. But, look! It is September and 3/4 of it is done. OK, I will stop bragging now.
There you have it. A whole lot of minutiae – somehow having written this up makes me feel like I took care of lots of loose ends. Simple pleasures, right?
Linking up to my favorites – please check out the tab at the top of the page, Link Ups, for all sorts of fun linky parties.
Also, if you haven’t popped over to check out the $5 Blowout Sale at C&T this weekend, please do. Lots of great sewing and crafting books to be had for only $5 each.