Category Archives: Long Arm Quilting

Scrappy HST Finish

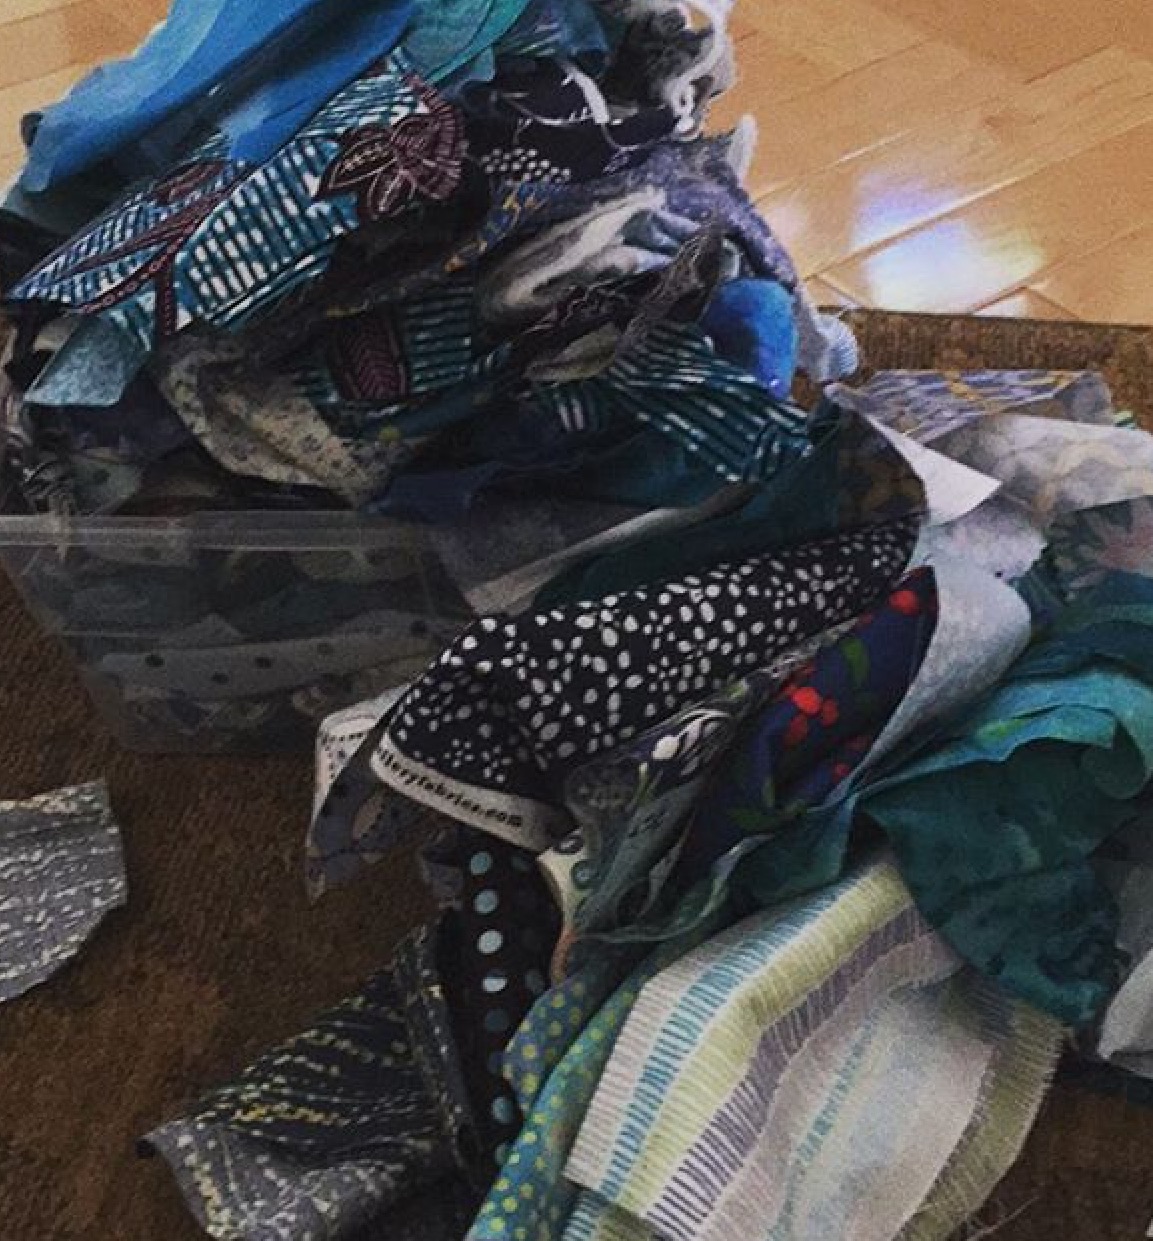
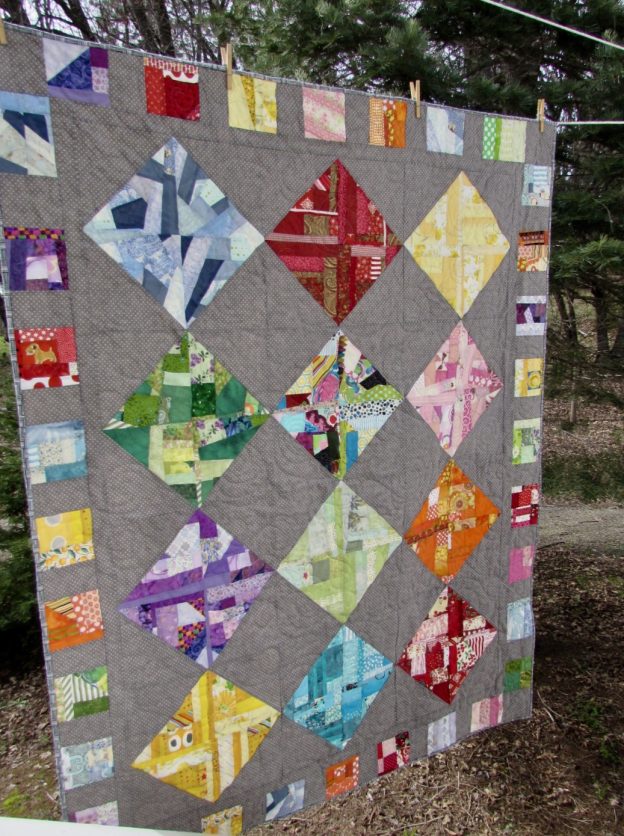
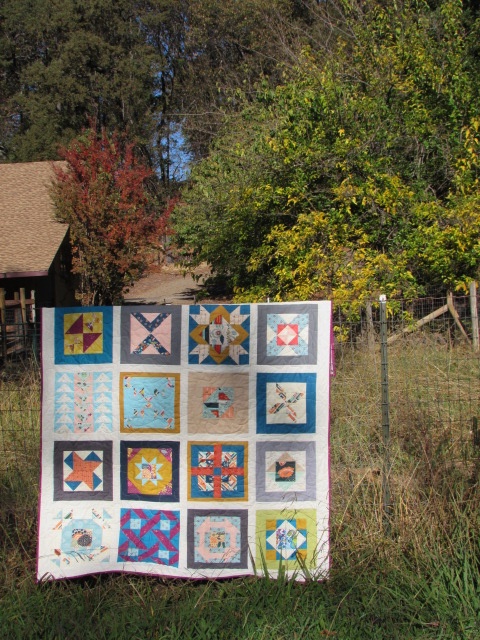
This finish was long in the making.  I started making large (9″ square) scrappy HSTs in the beginning of 2016 as my RSC16 project.  They were a lot of fun to make and I easily finished the quilt top by the end of the year. Then I promptly pressed it, hung it neatly in the closet, and closed the door. It languished for all of 2017, poor ignored quilt top.  I think I left it there because I felt it was too small and I wasn’t sure what to do with it.

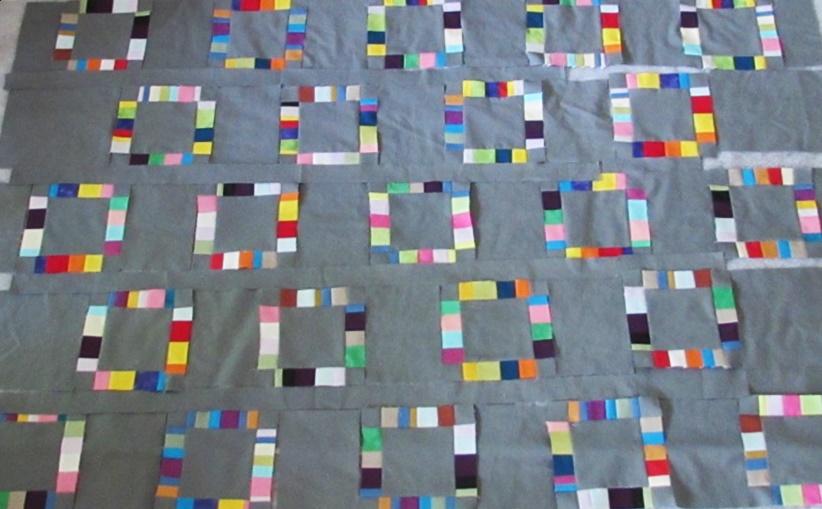
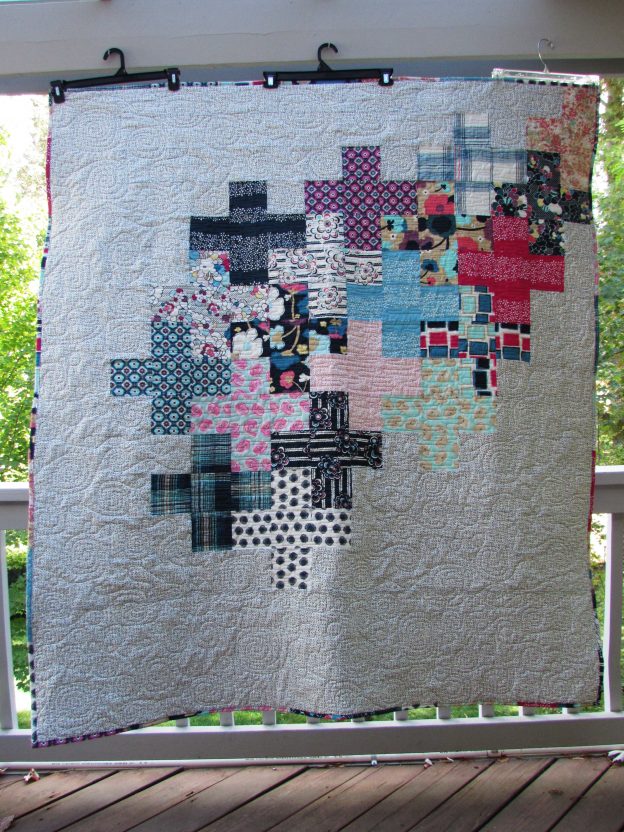
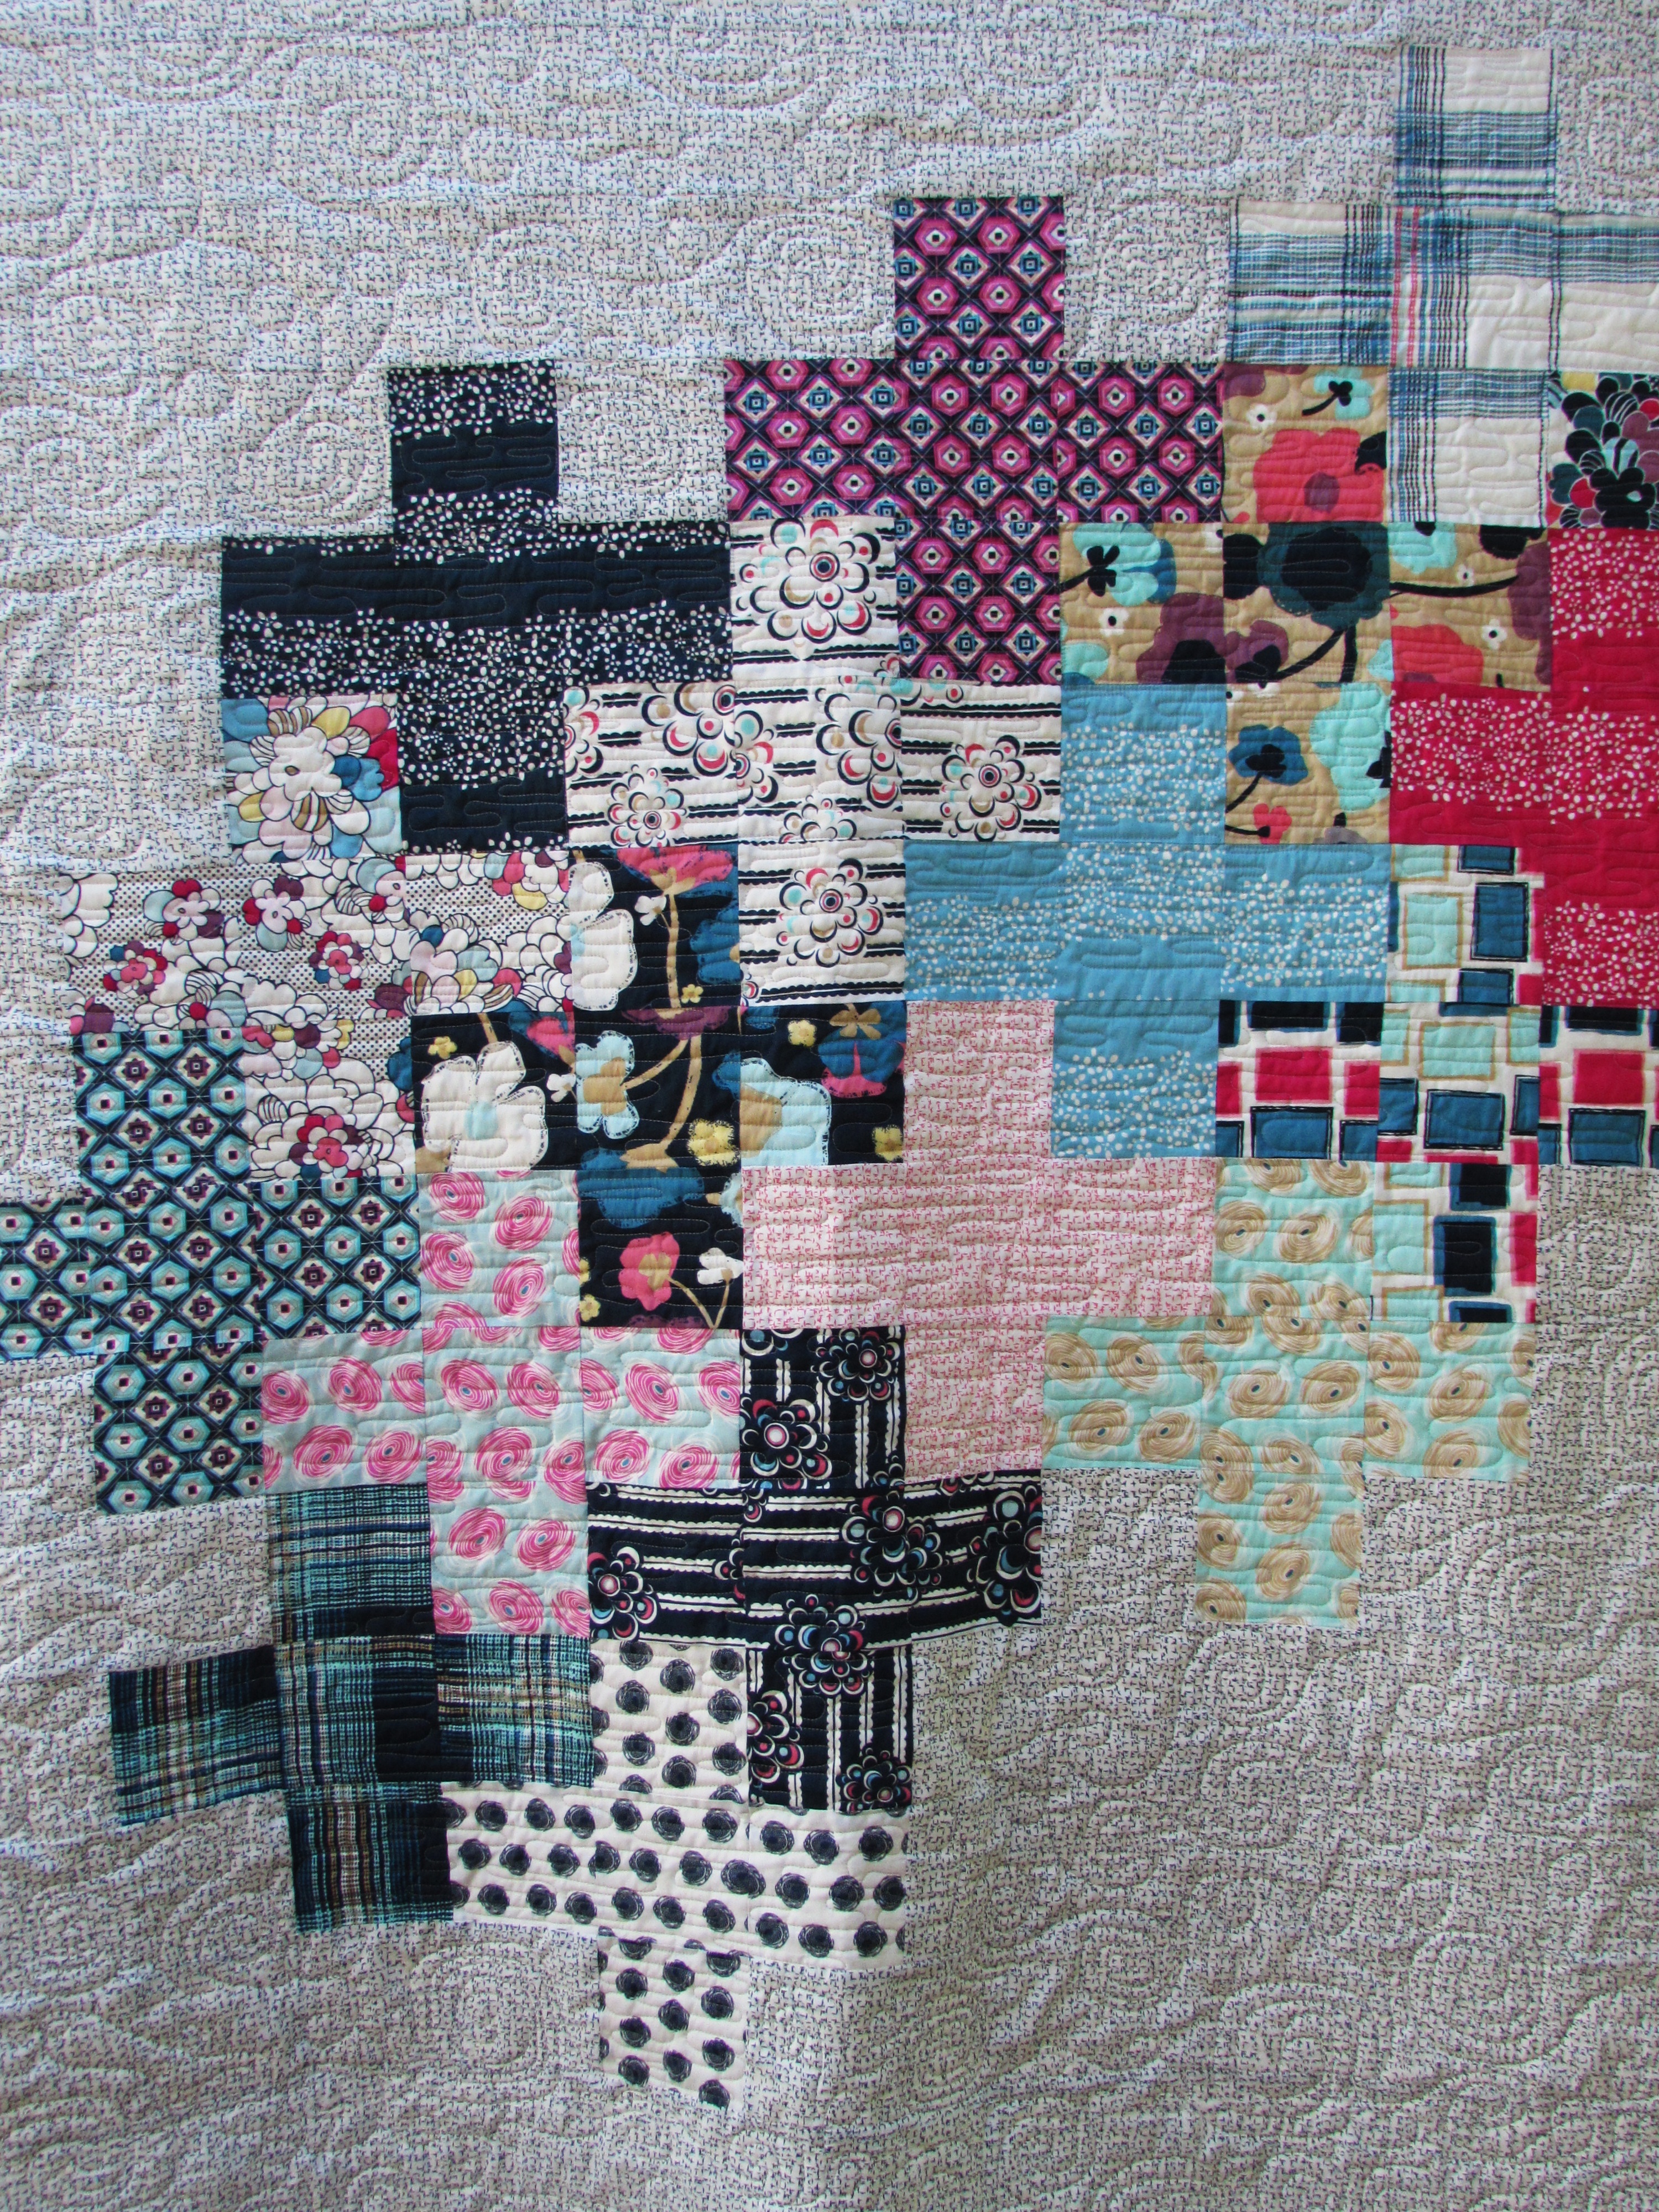
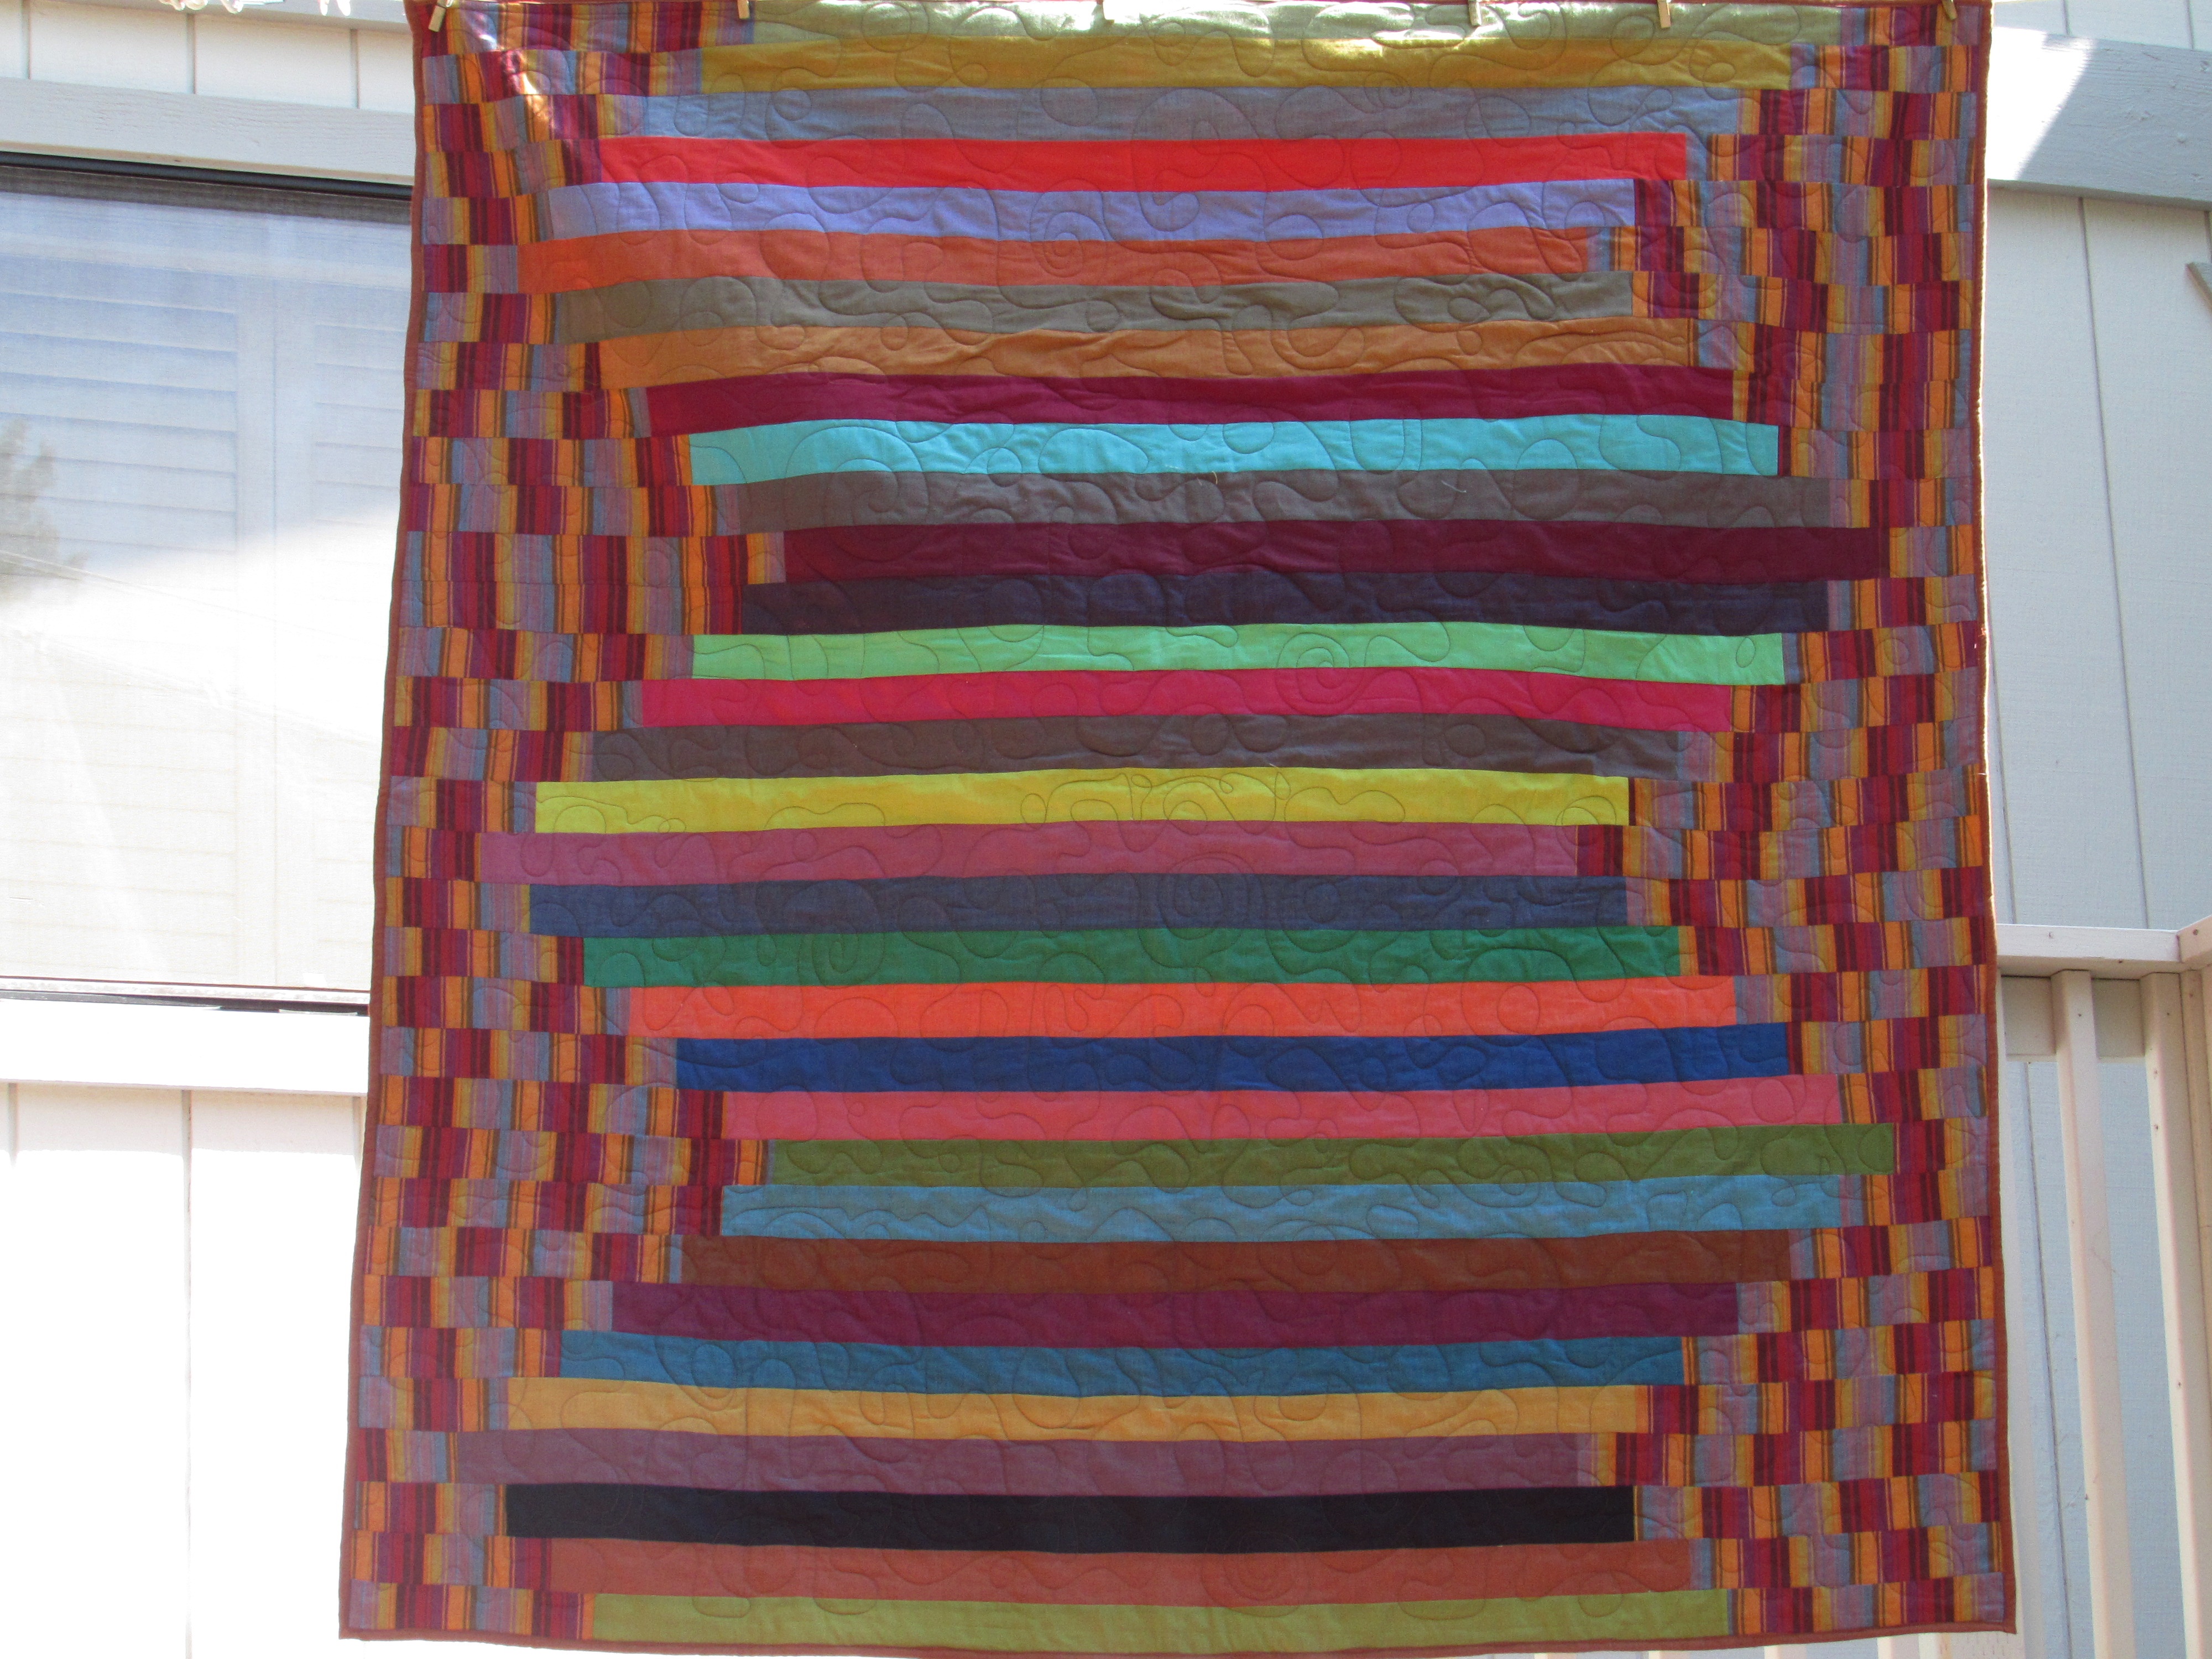
At the beginning of this year, I decided to make a stack of 5″ squared scrappy blocks.  Without any plan, I figured I would somehow use them for a border.  After making the blocks, I figured out the size rectangles I needed to space between the squares to create the border.  For the most part, this worked ok.  But you know me and quilt math…..  When I laid out the border and it looked like I would be coming up short, I just expanded one or two of the scrappy blocks to compensate.  I hope this doesn’t offend anyone.  It doesn’t bother me. 🙂

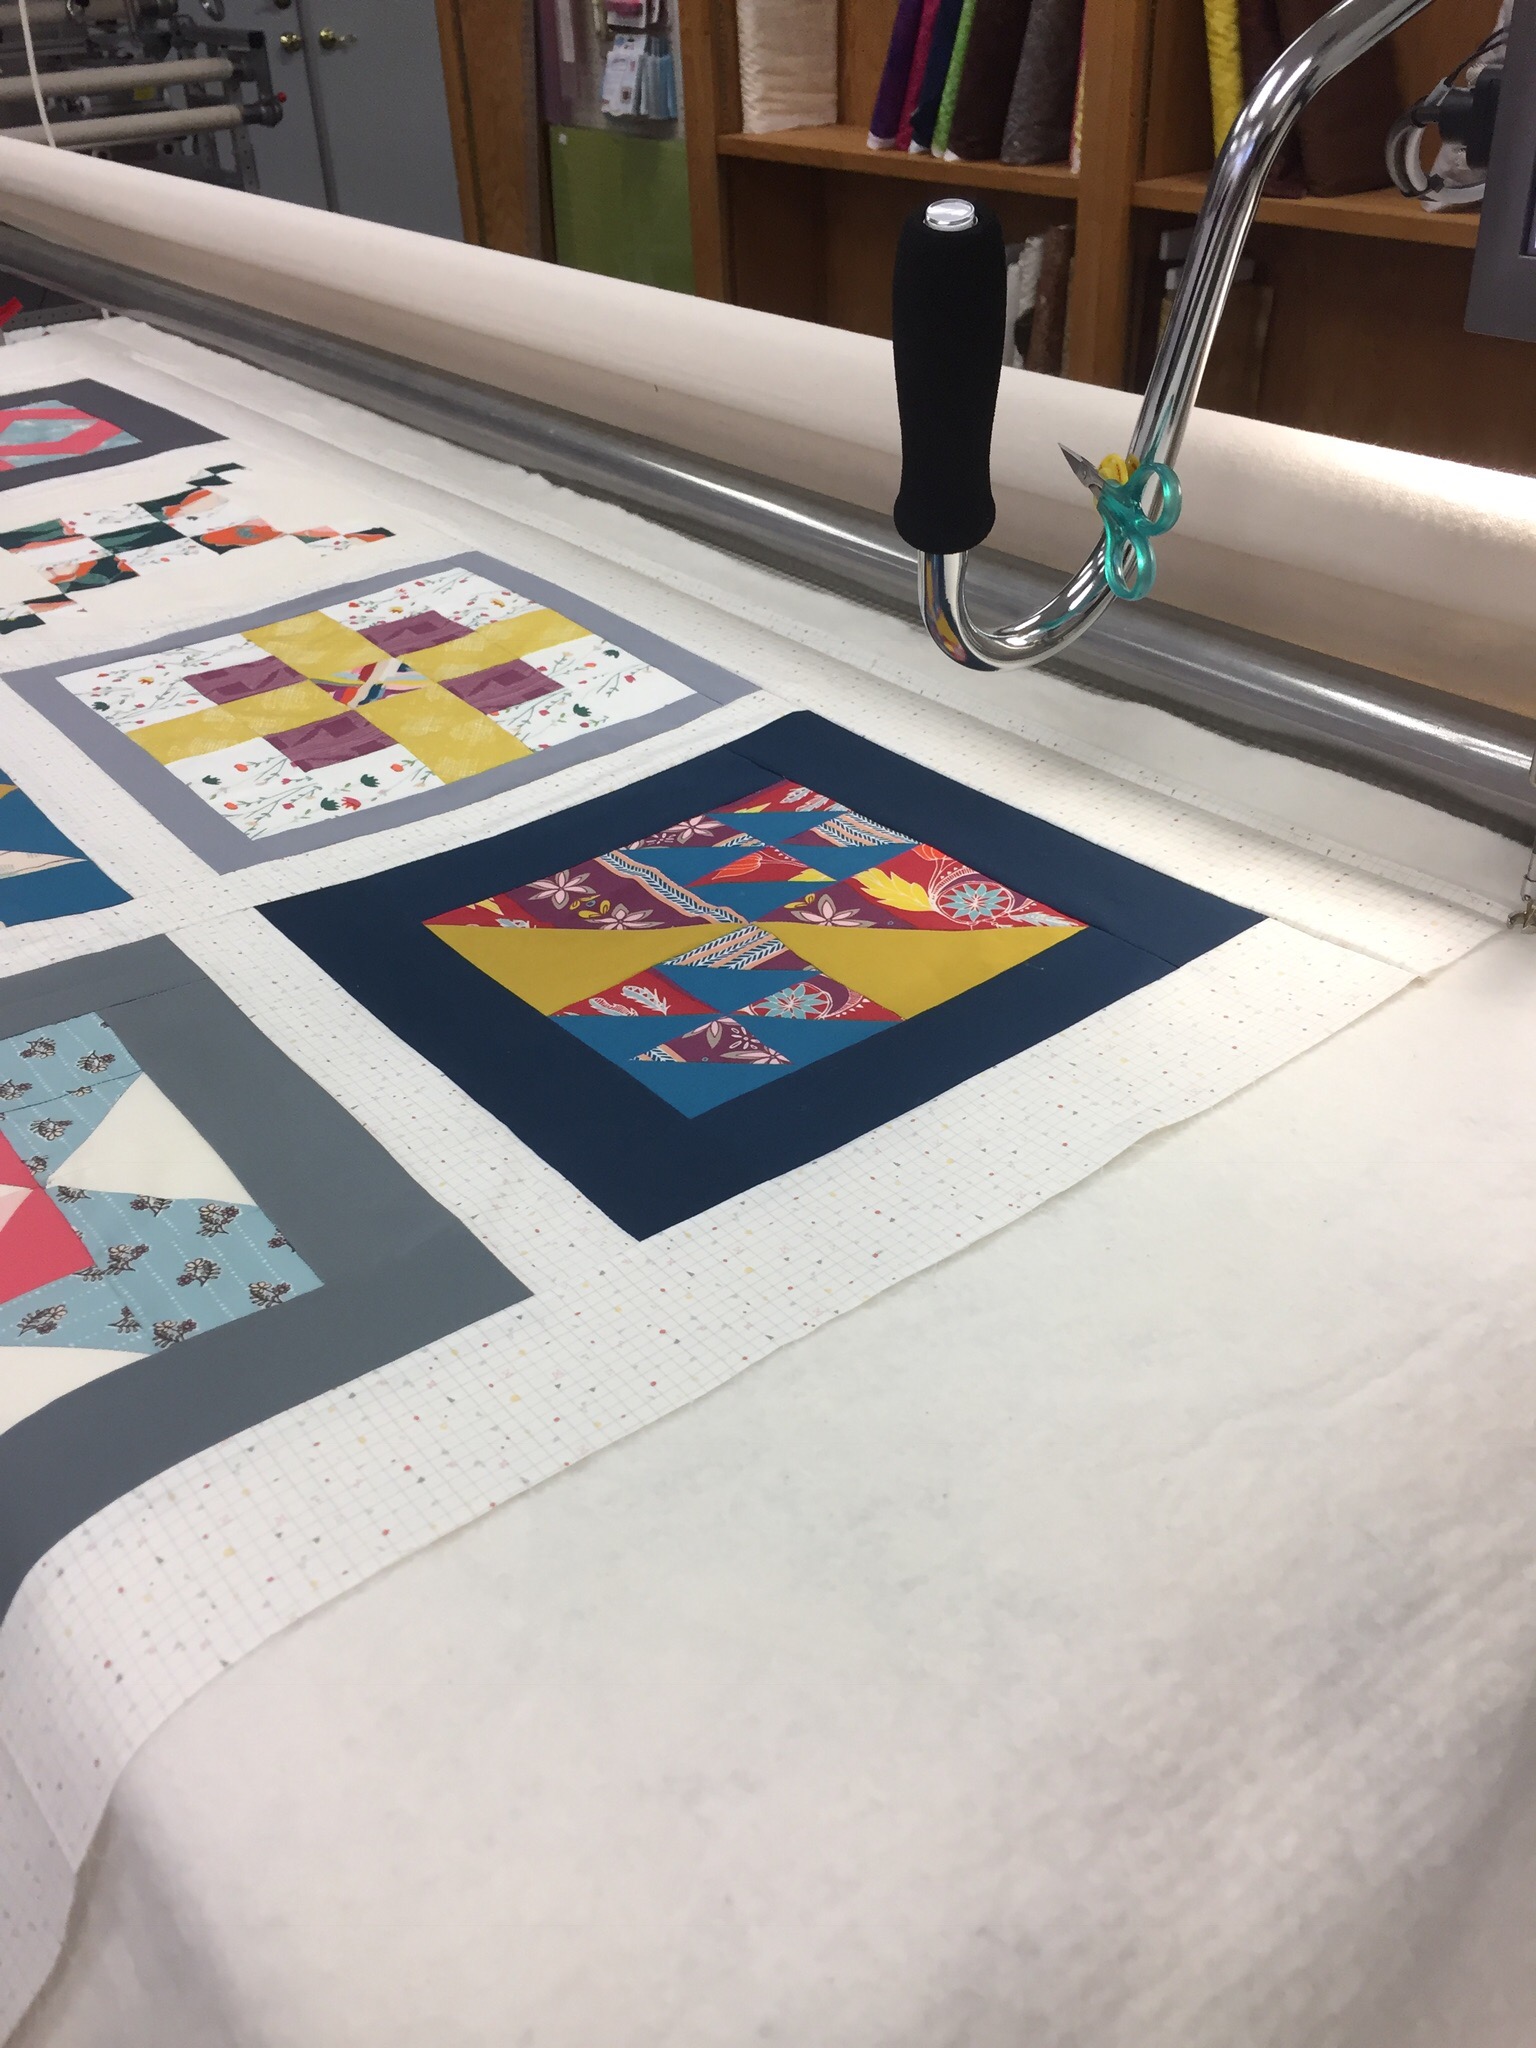
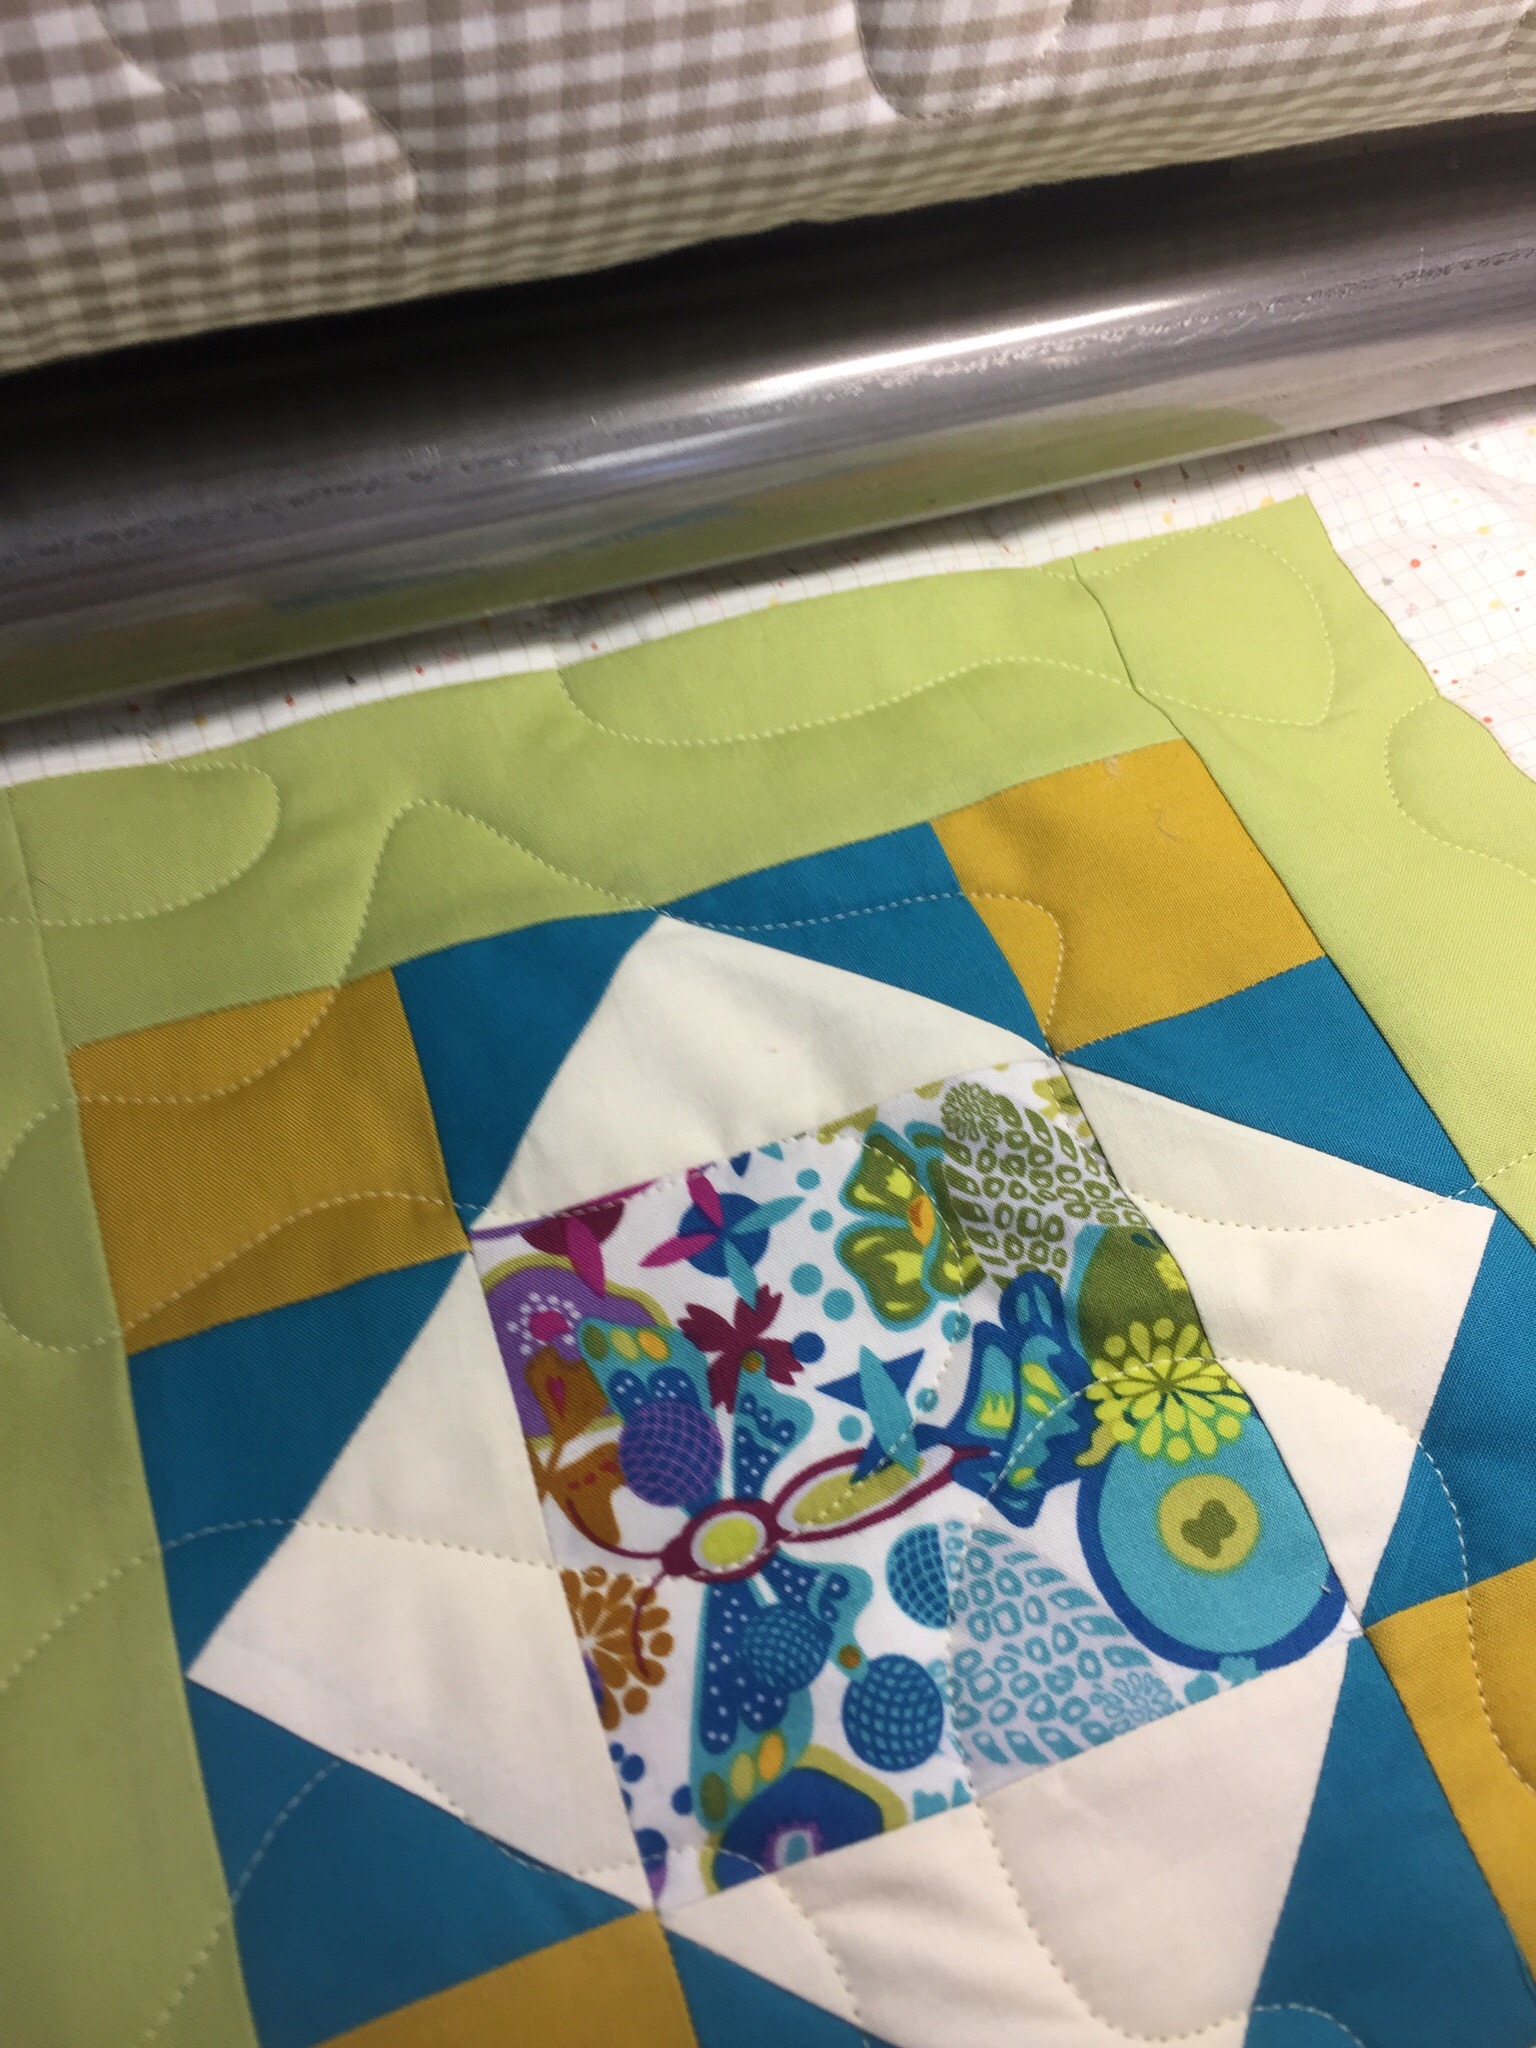
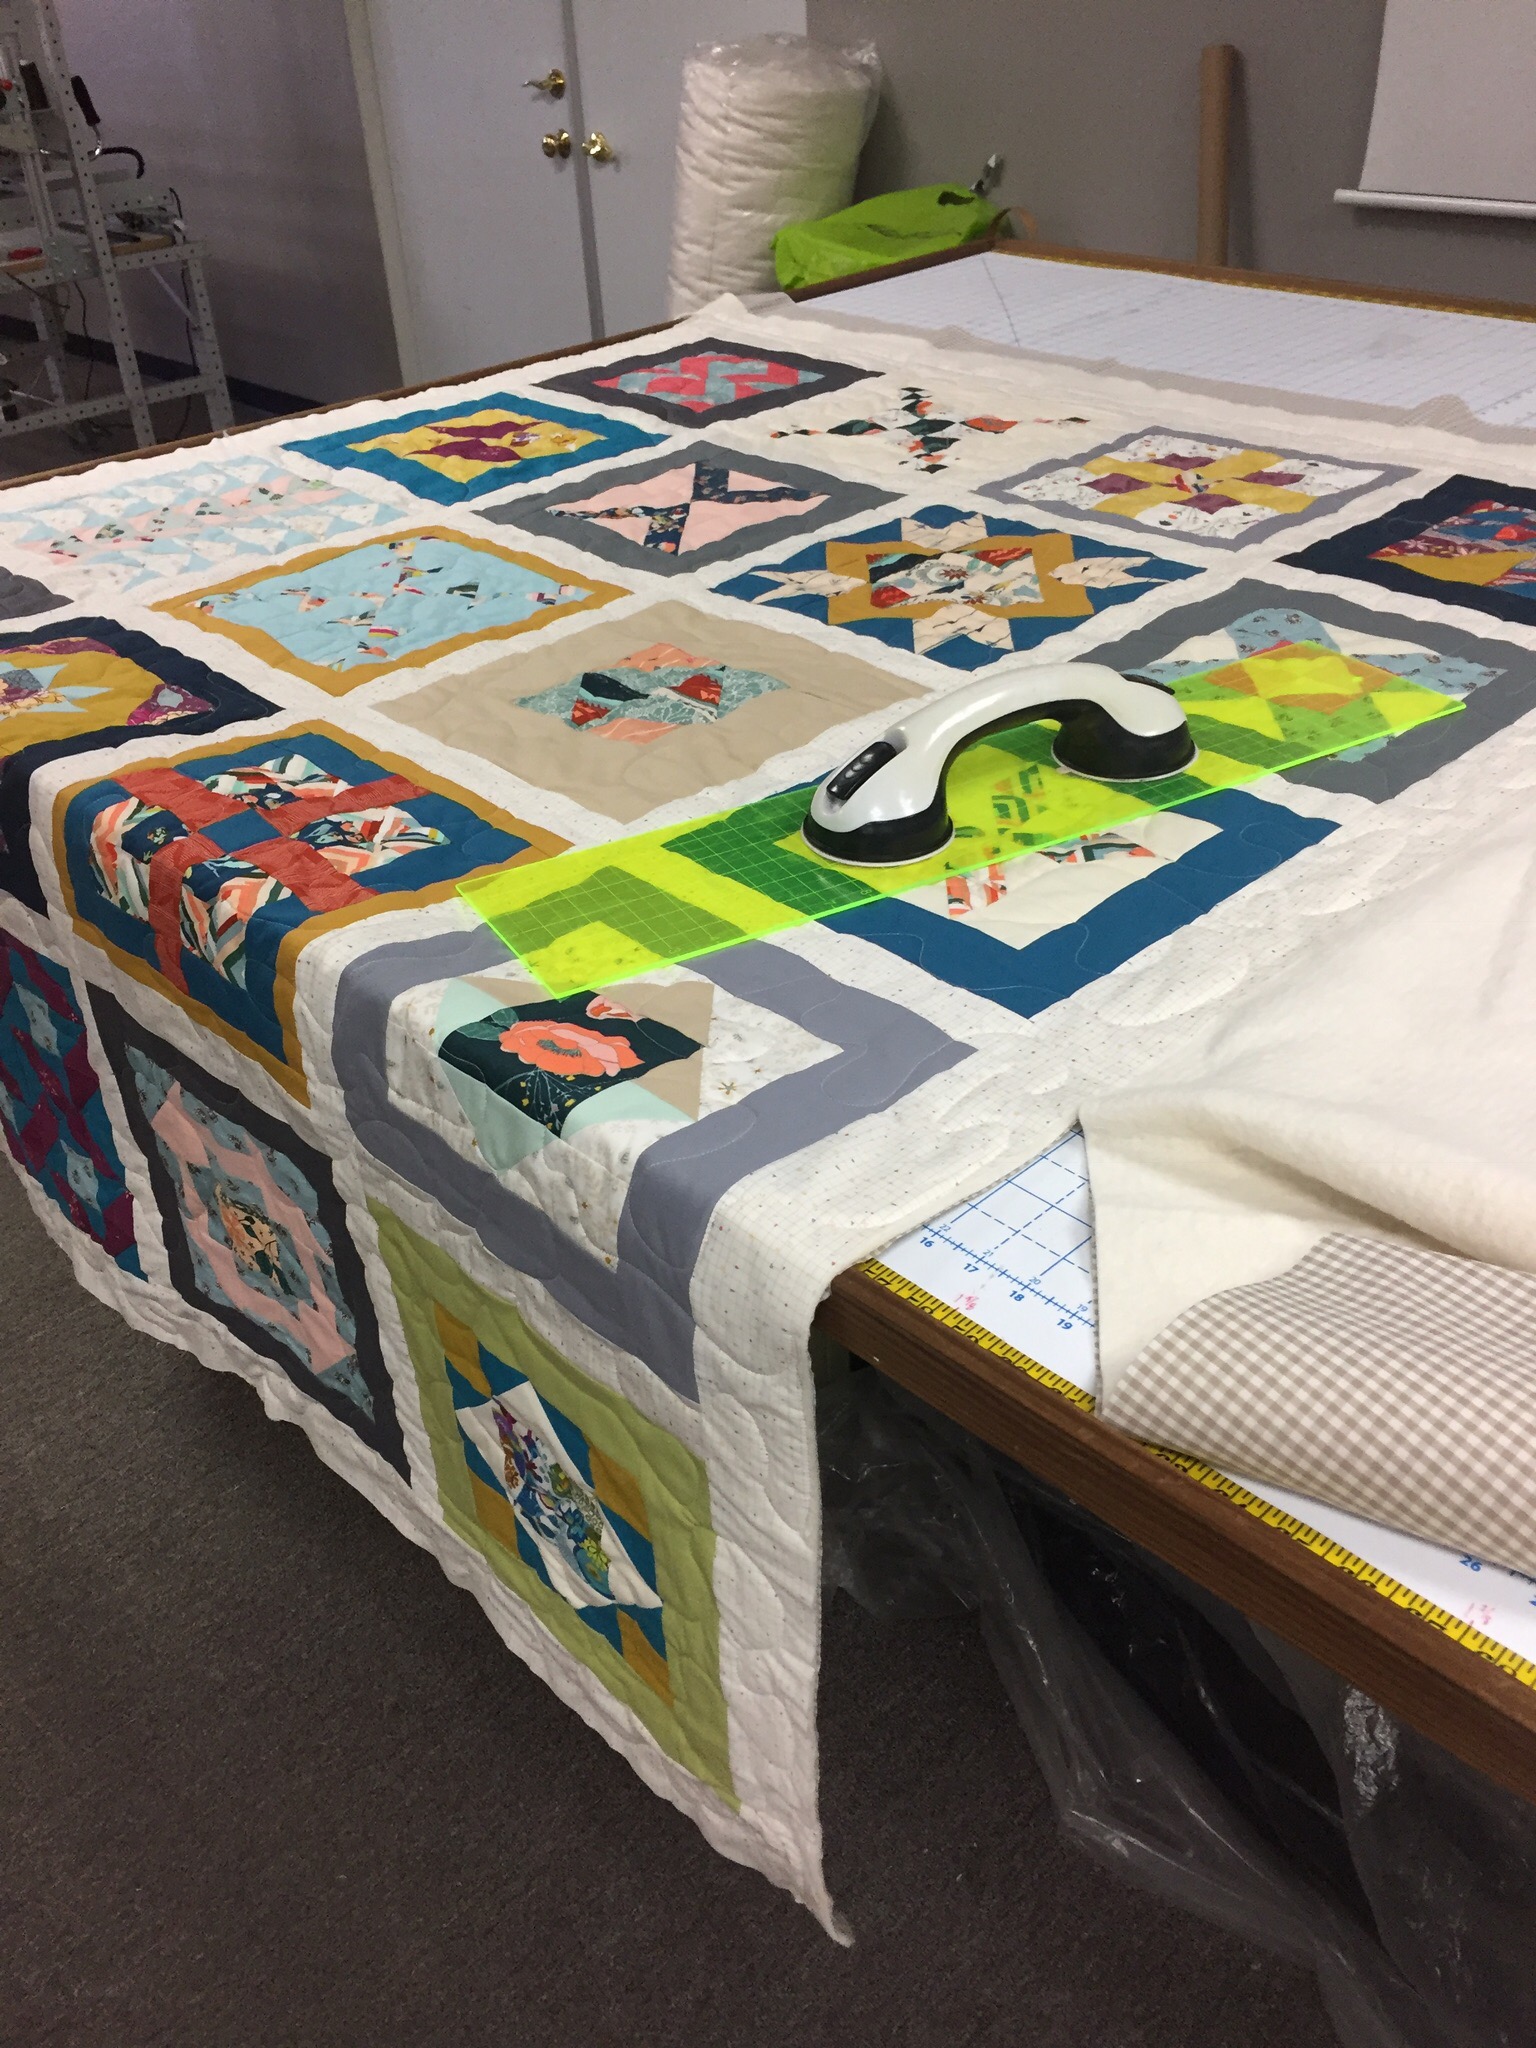
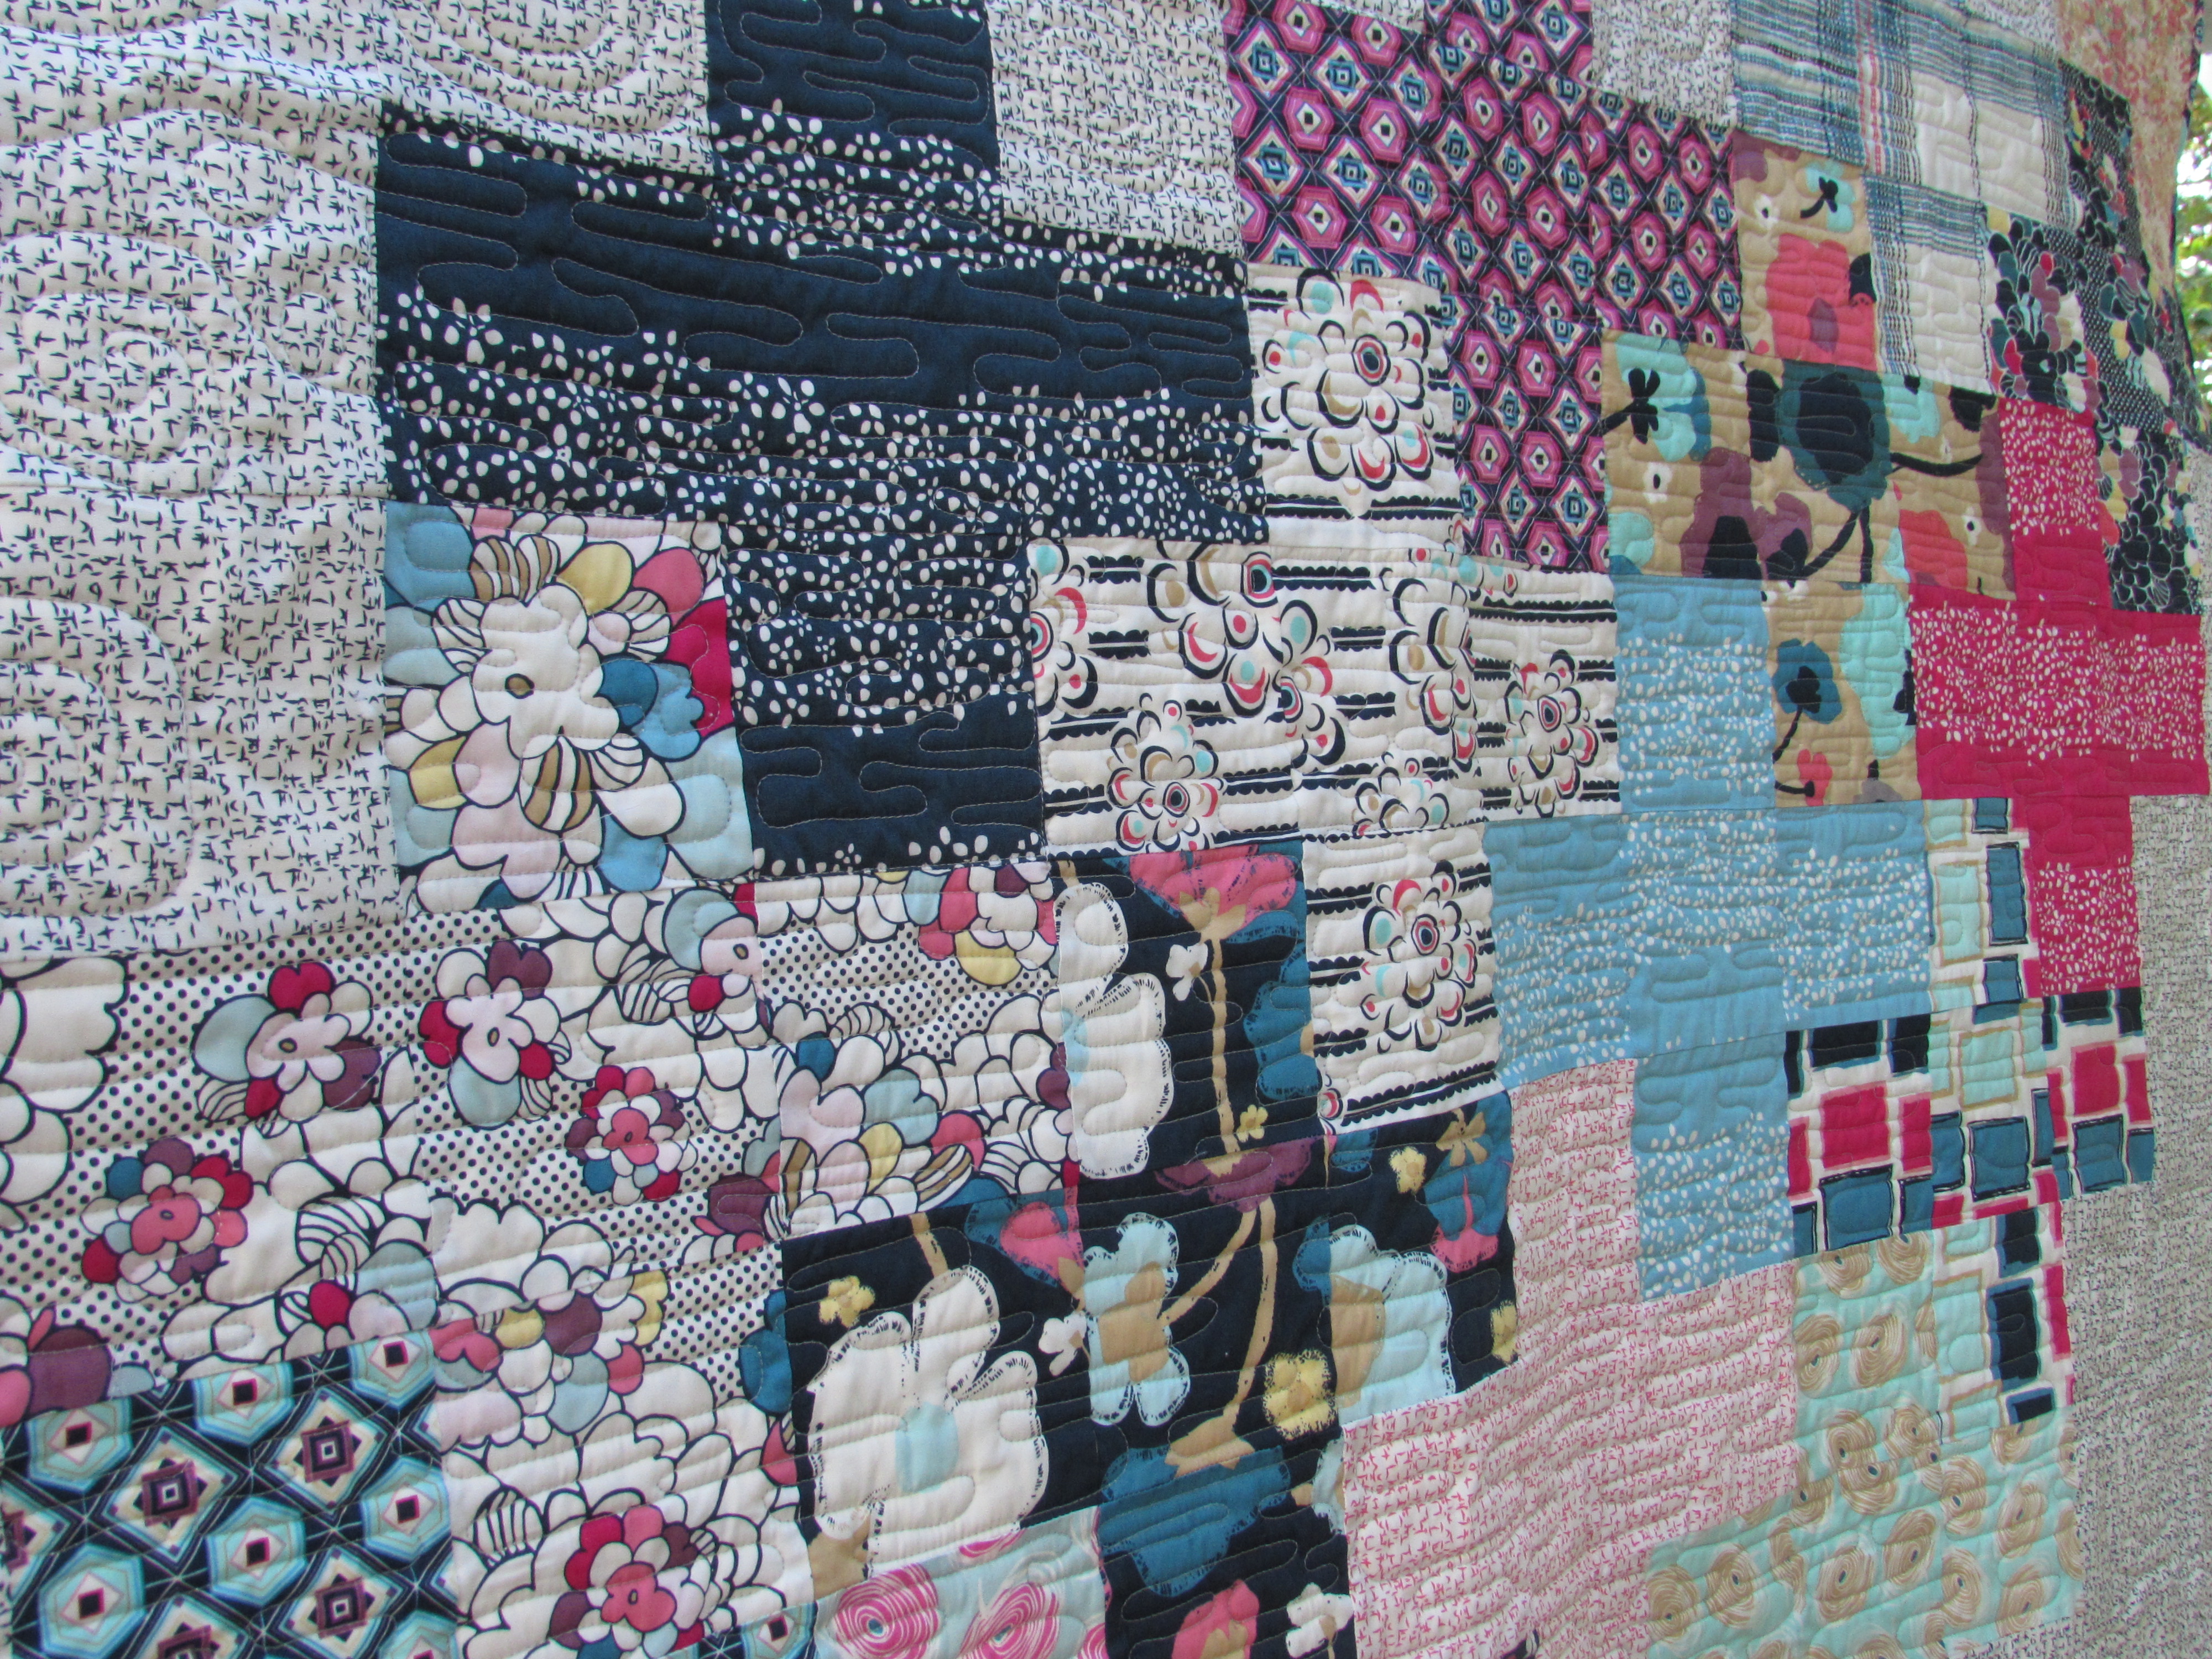
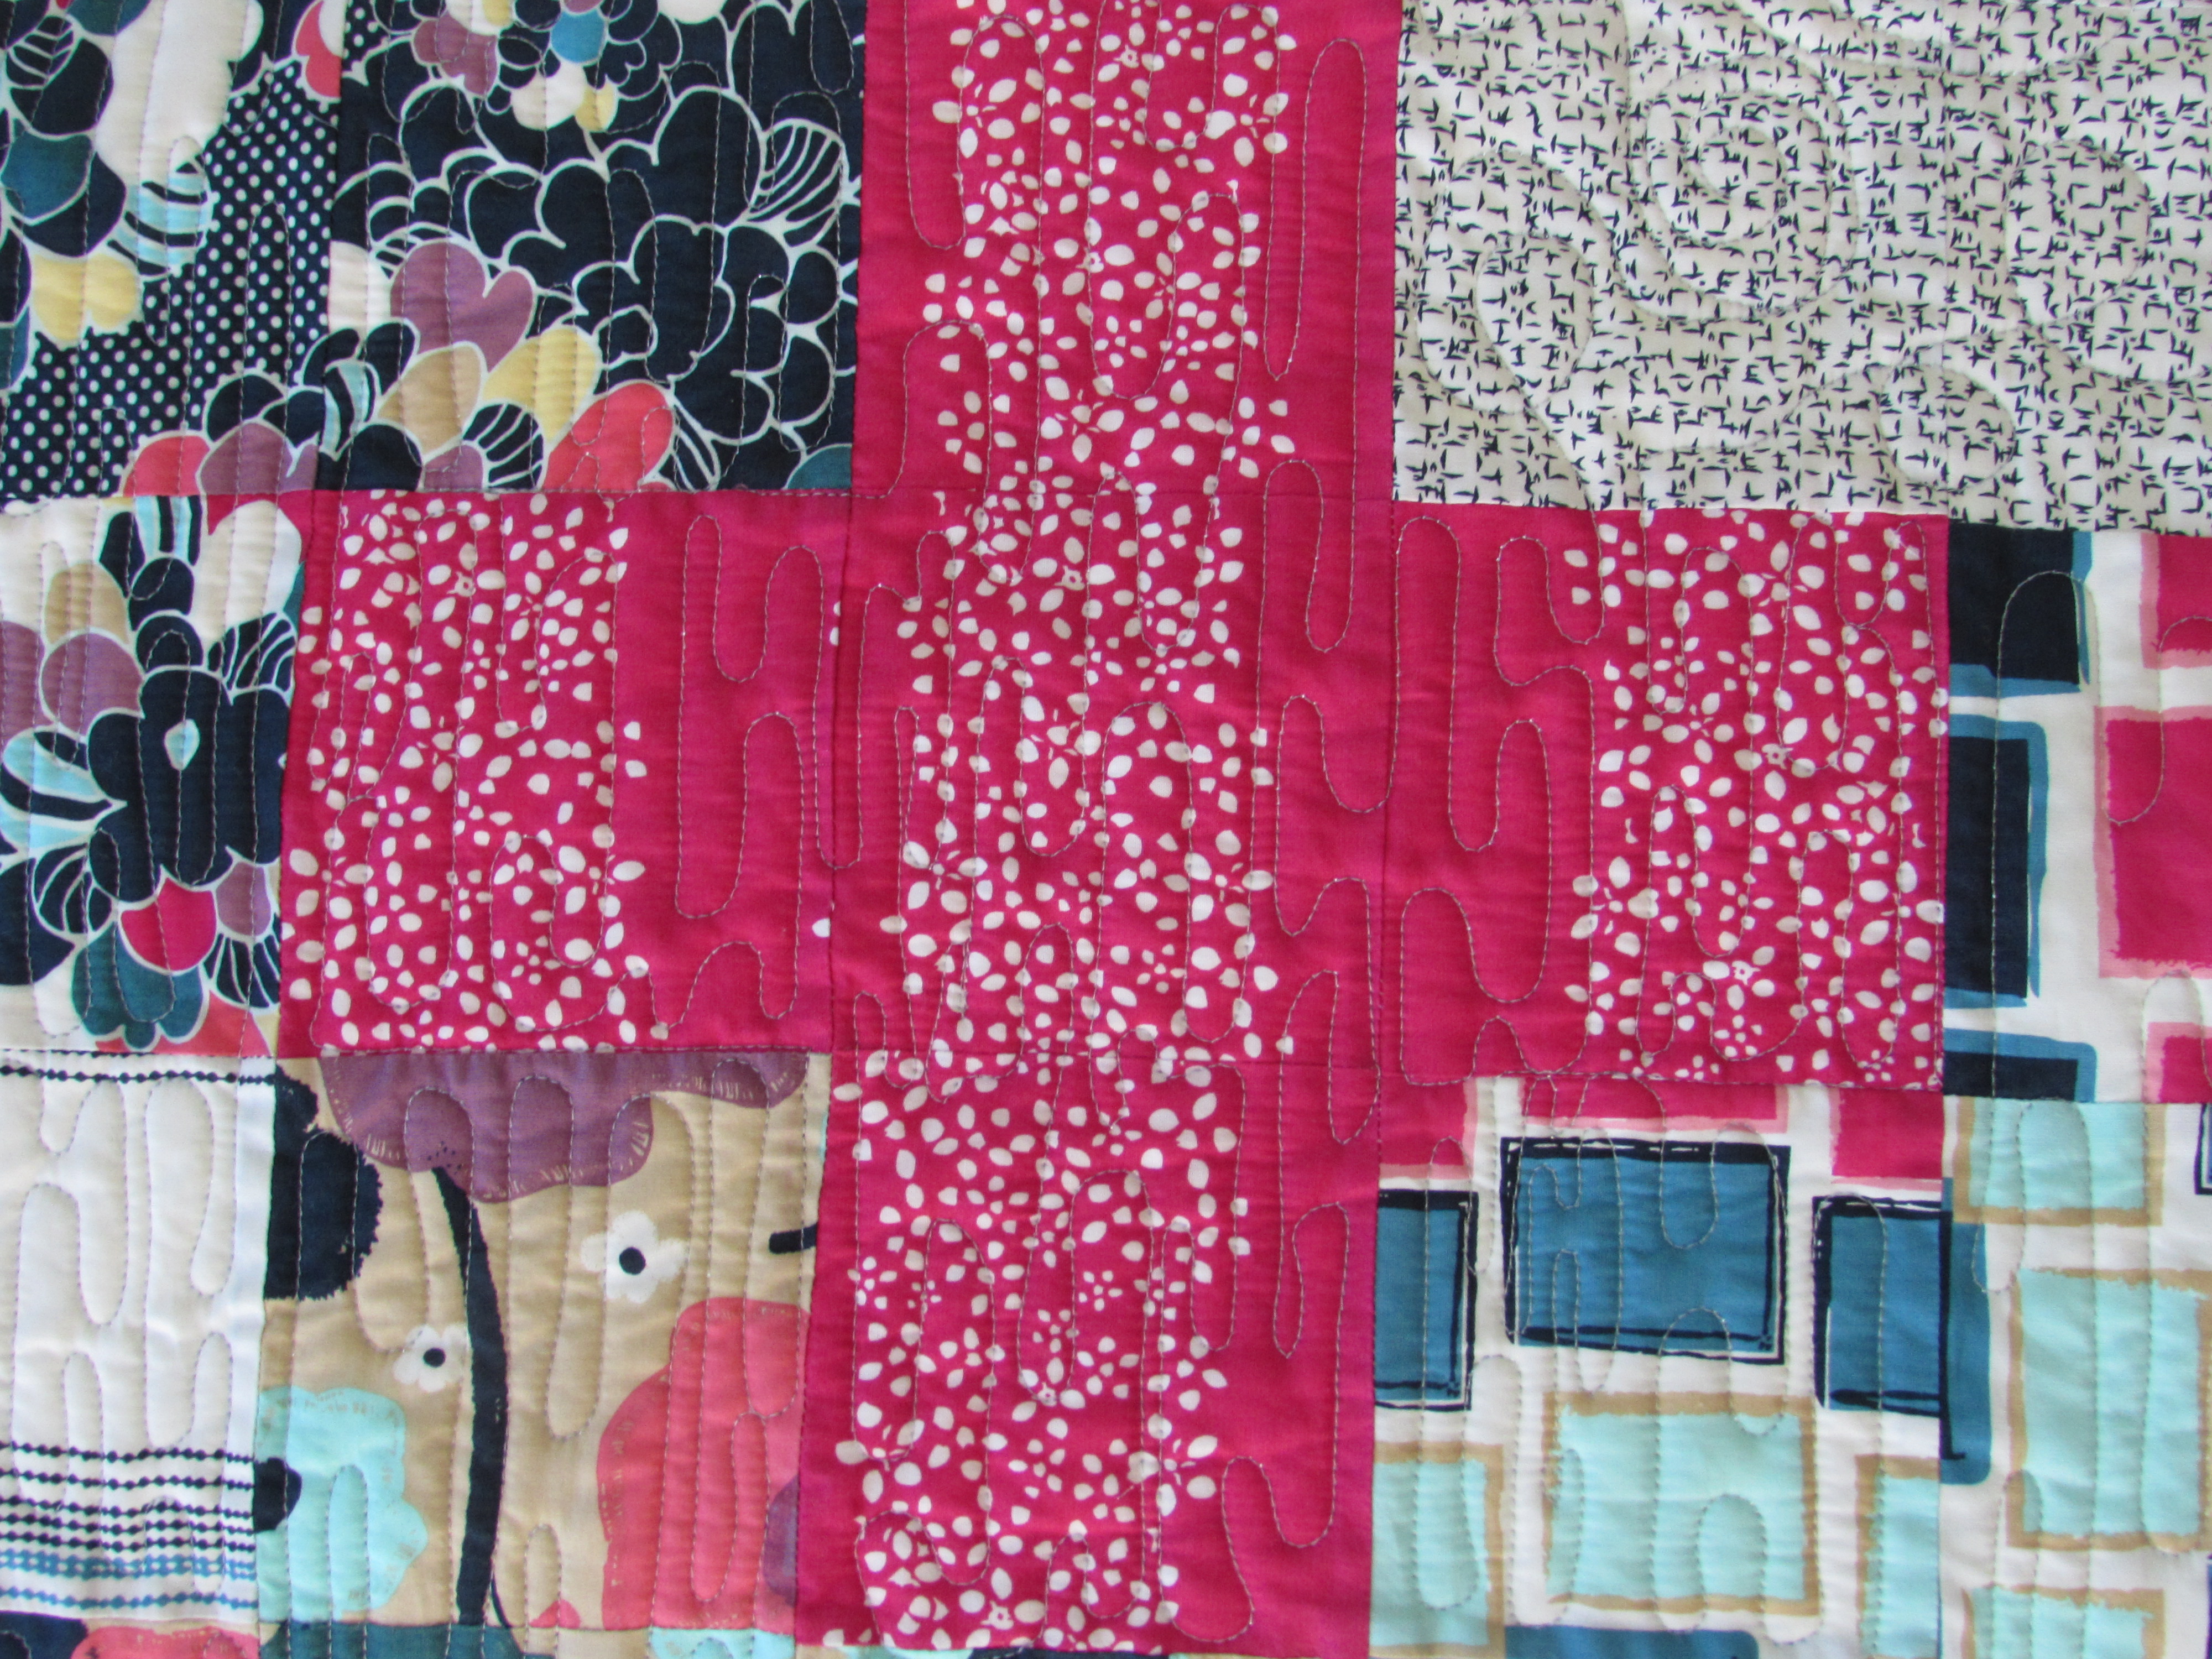
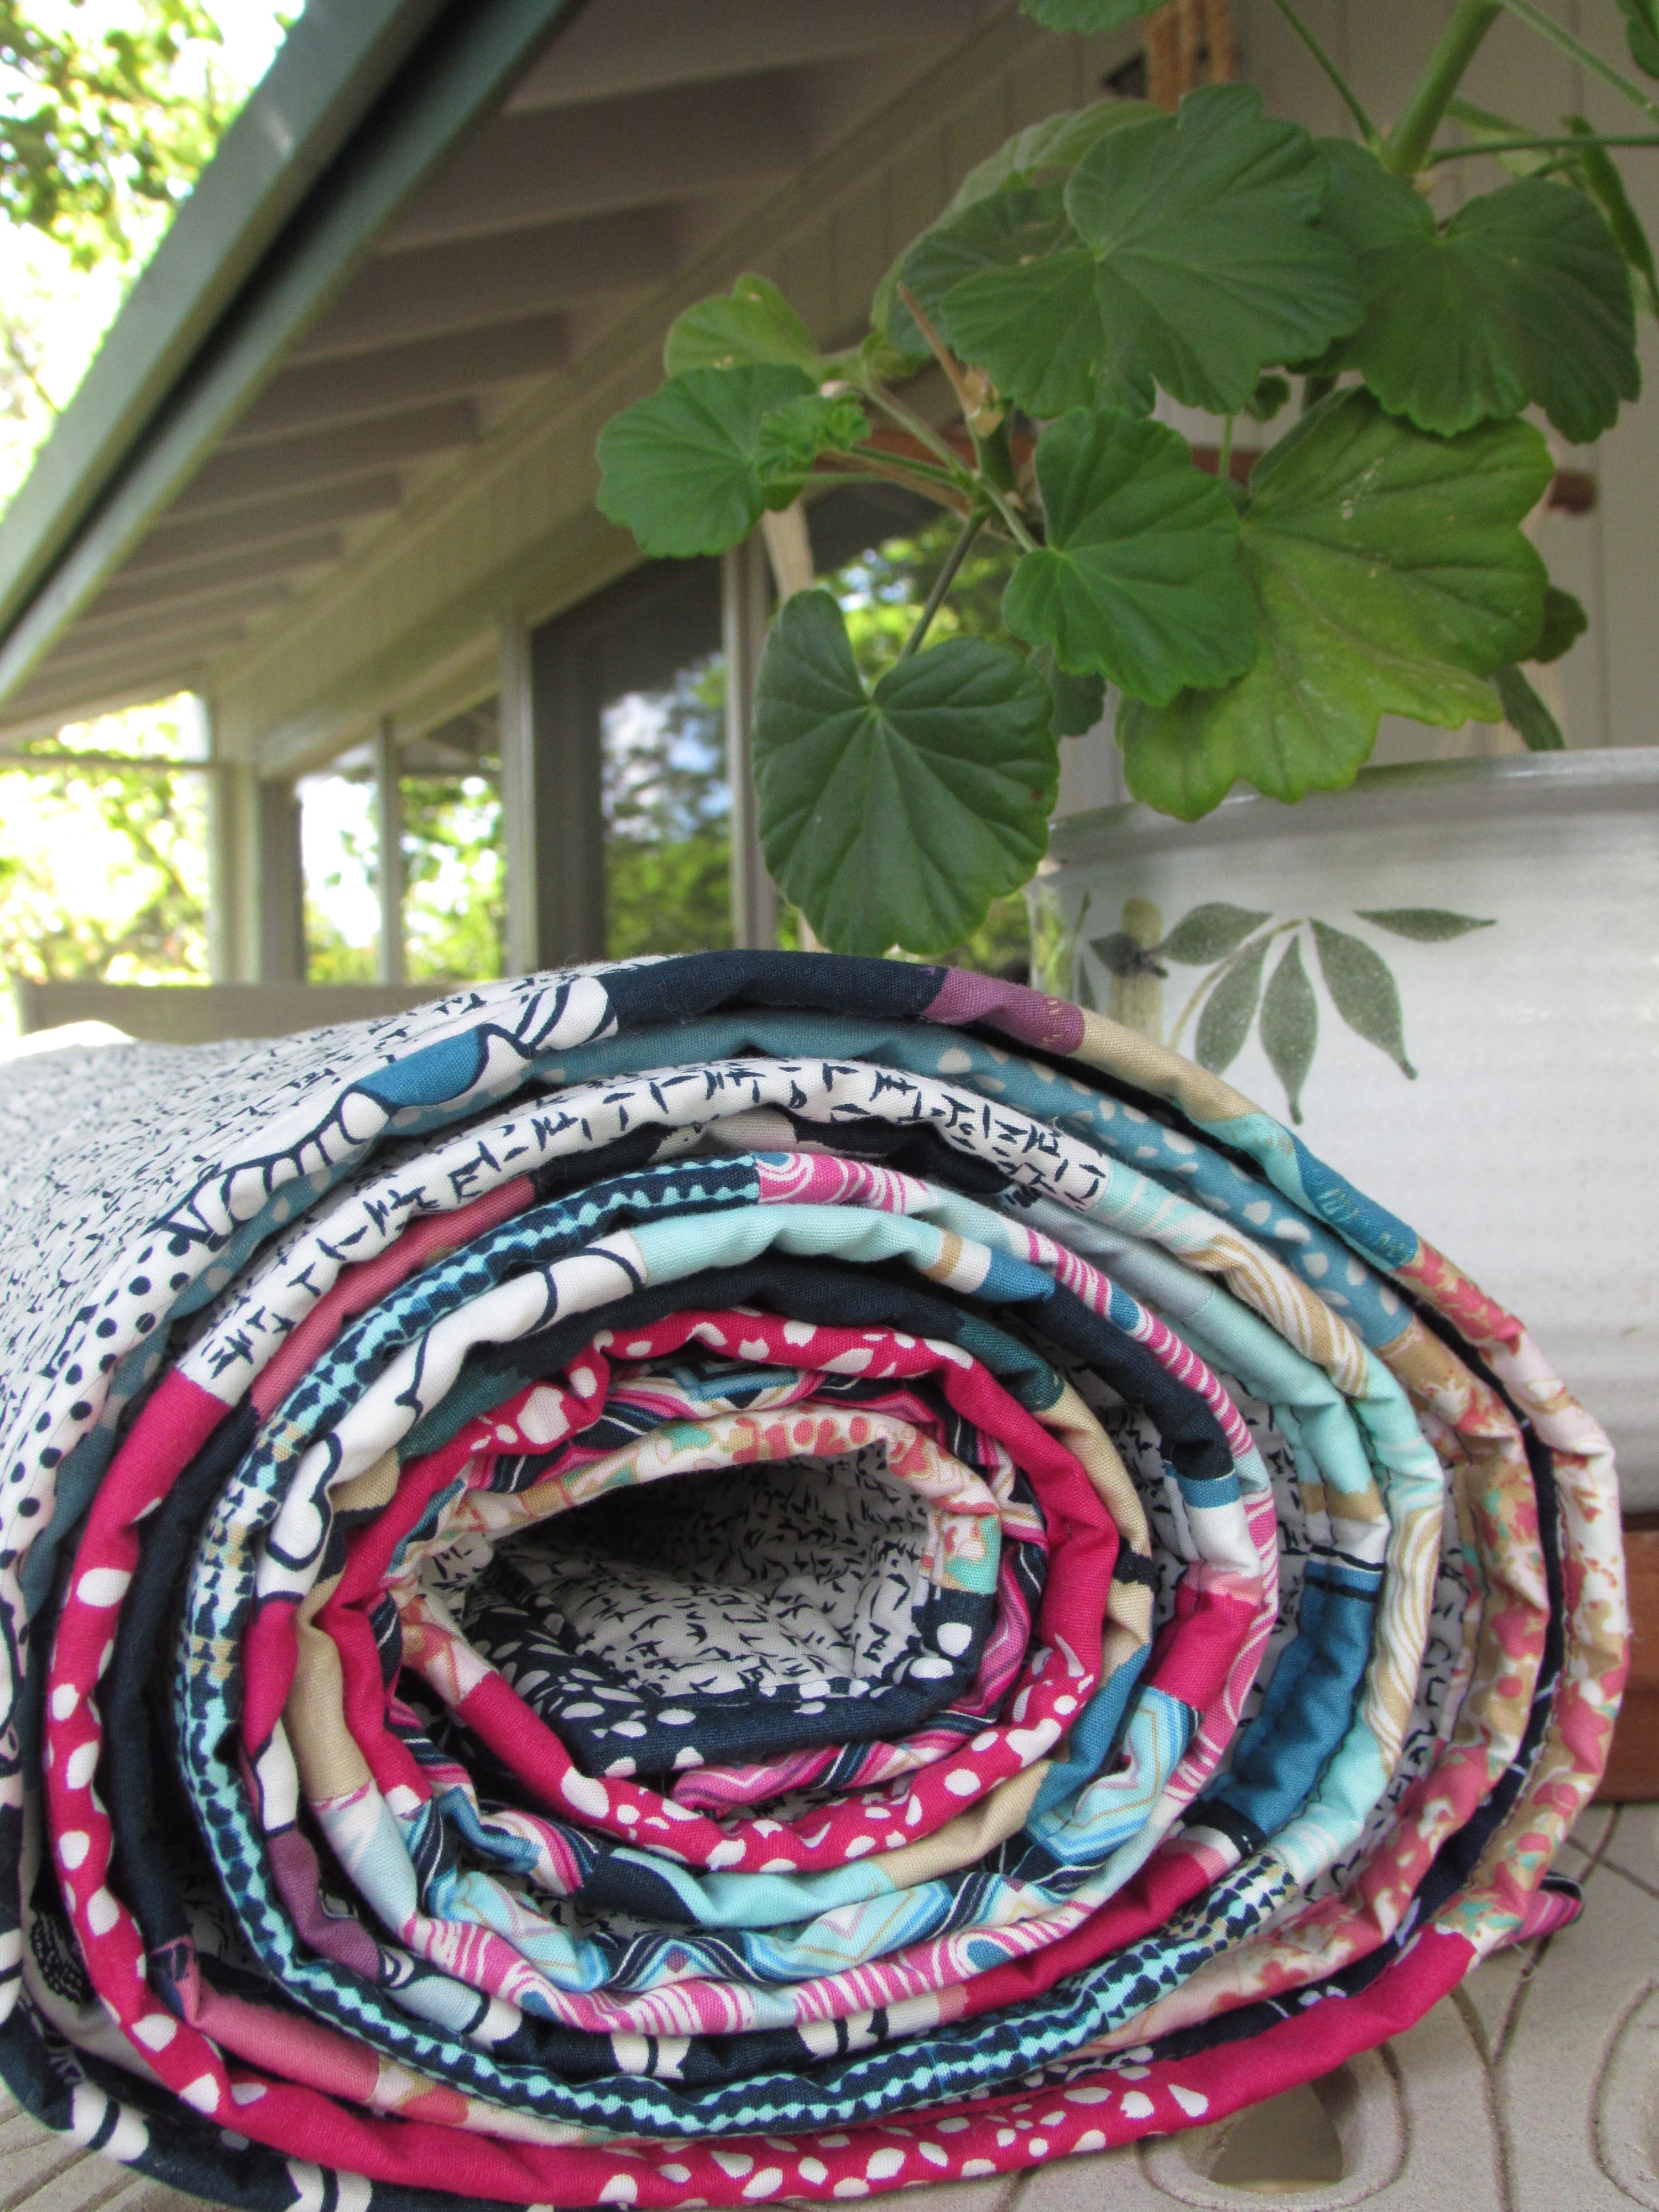
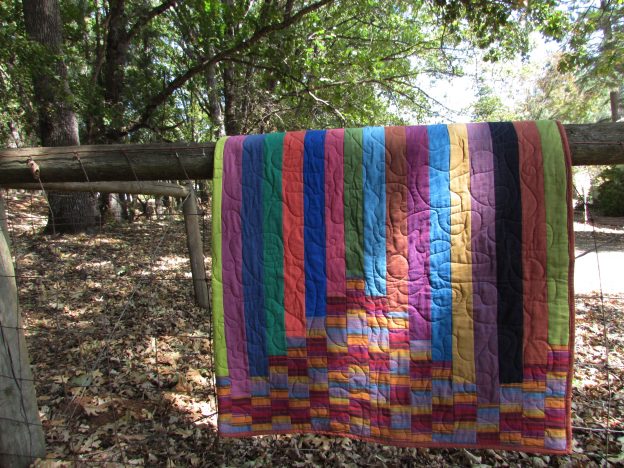
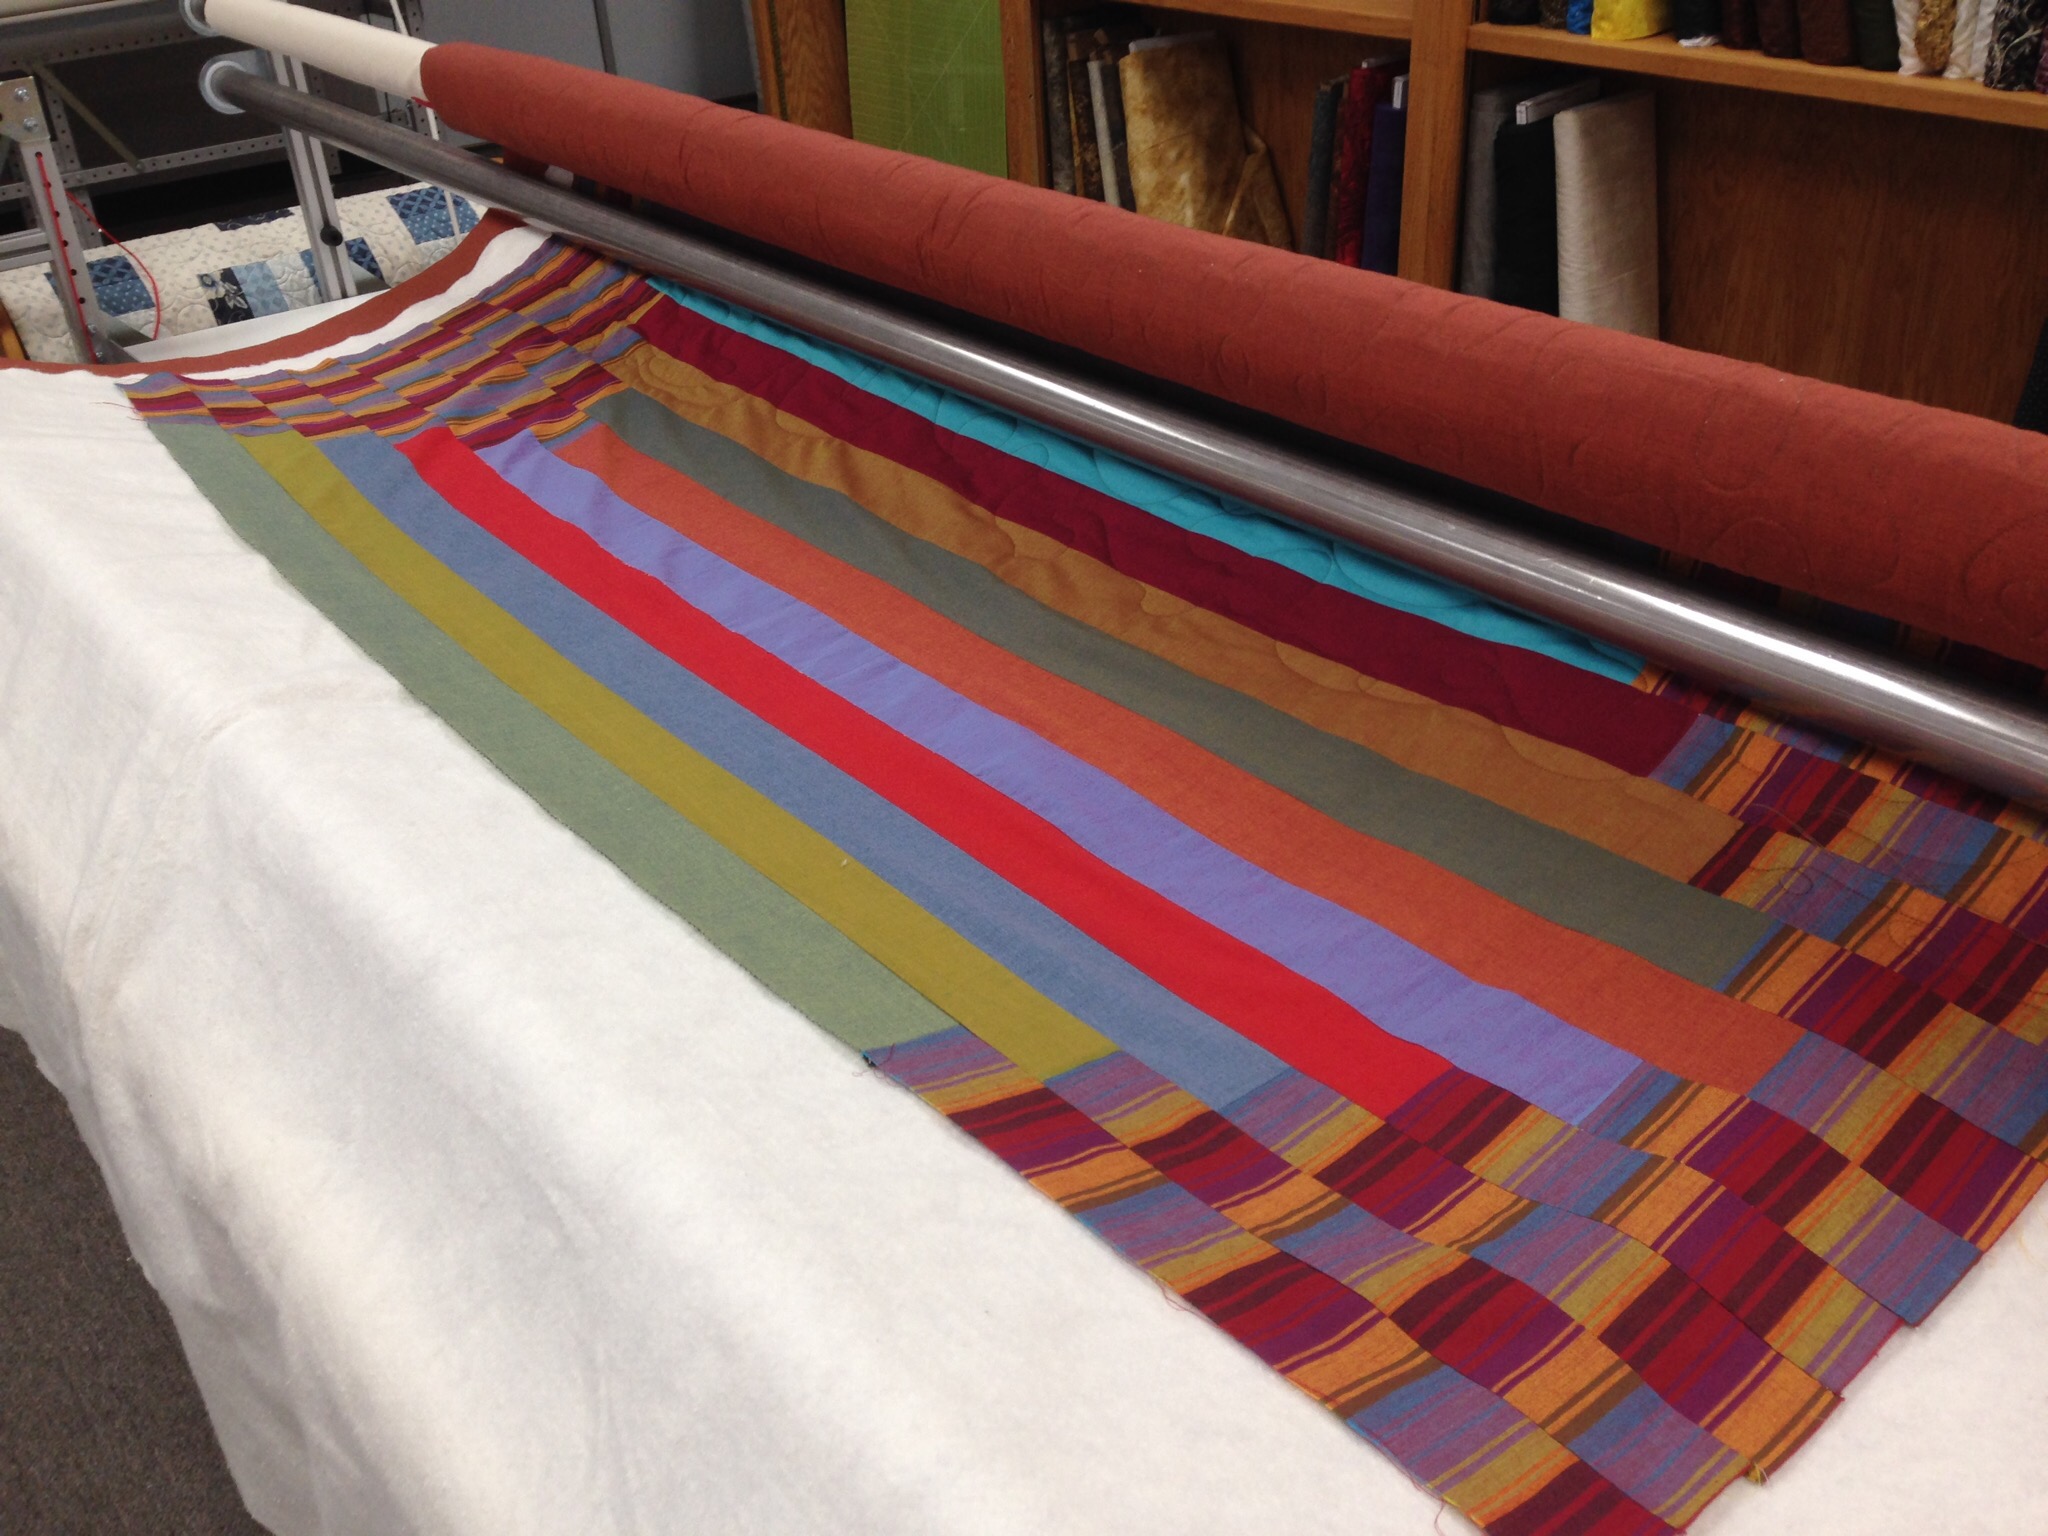
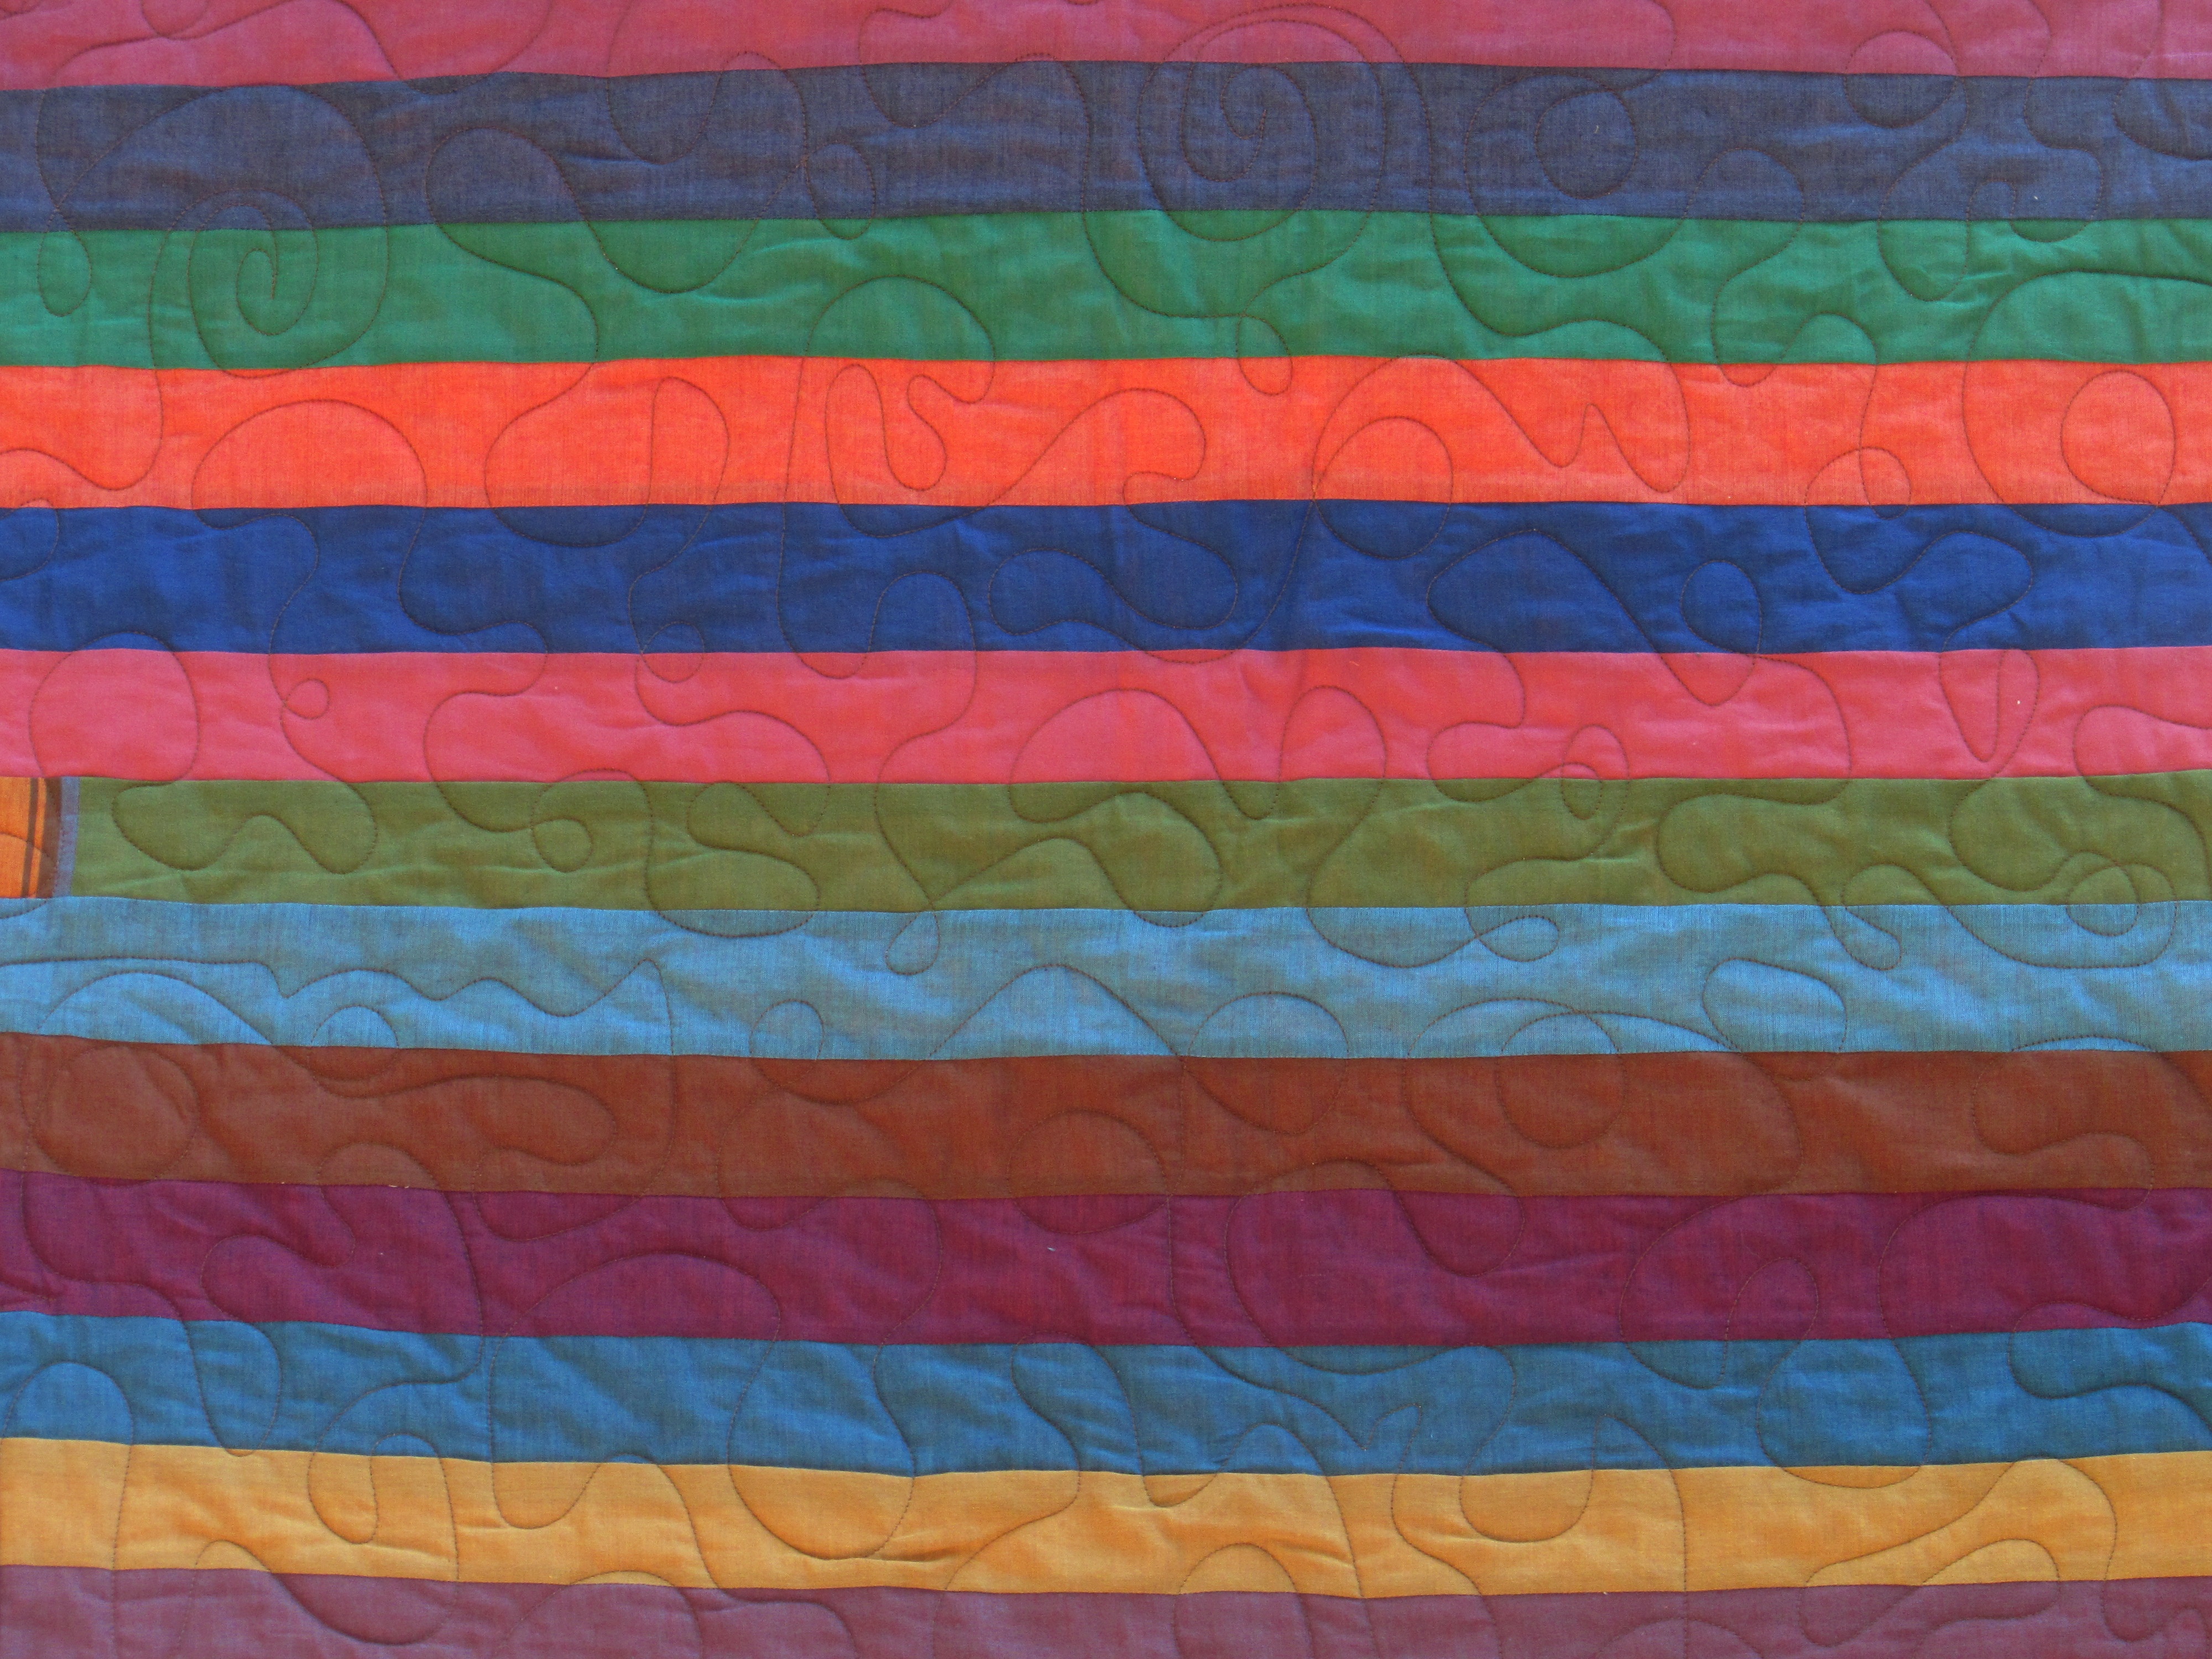
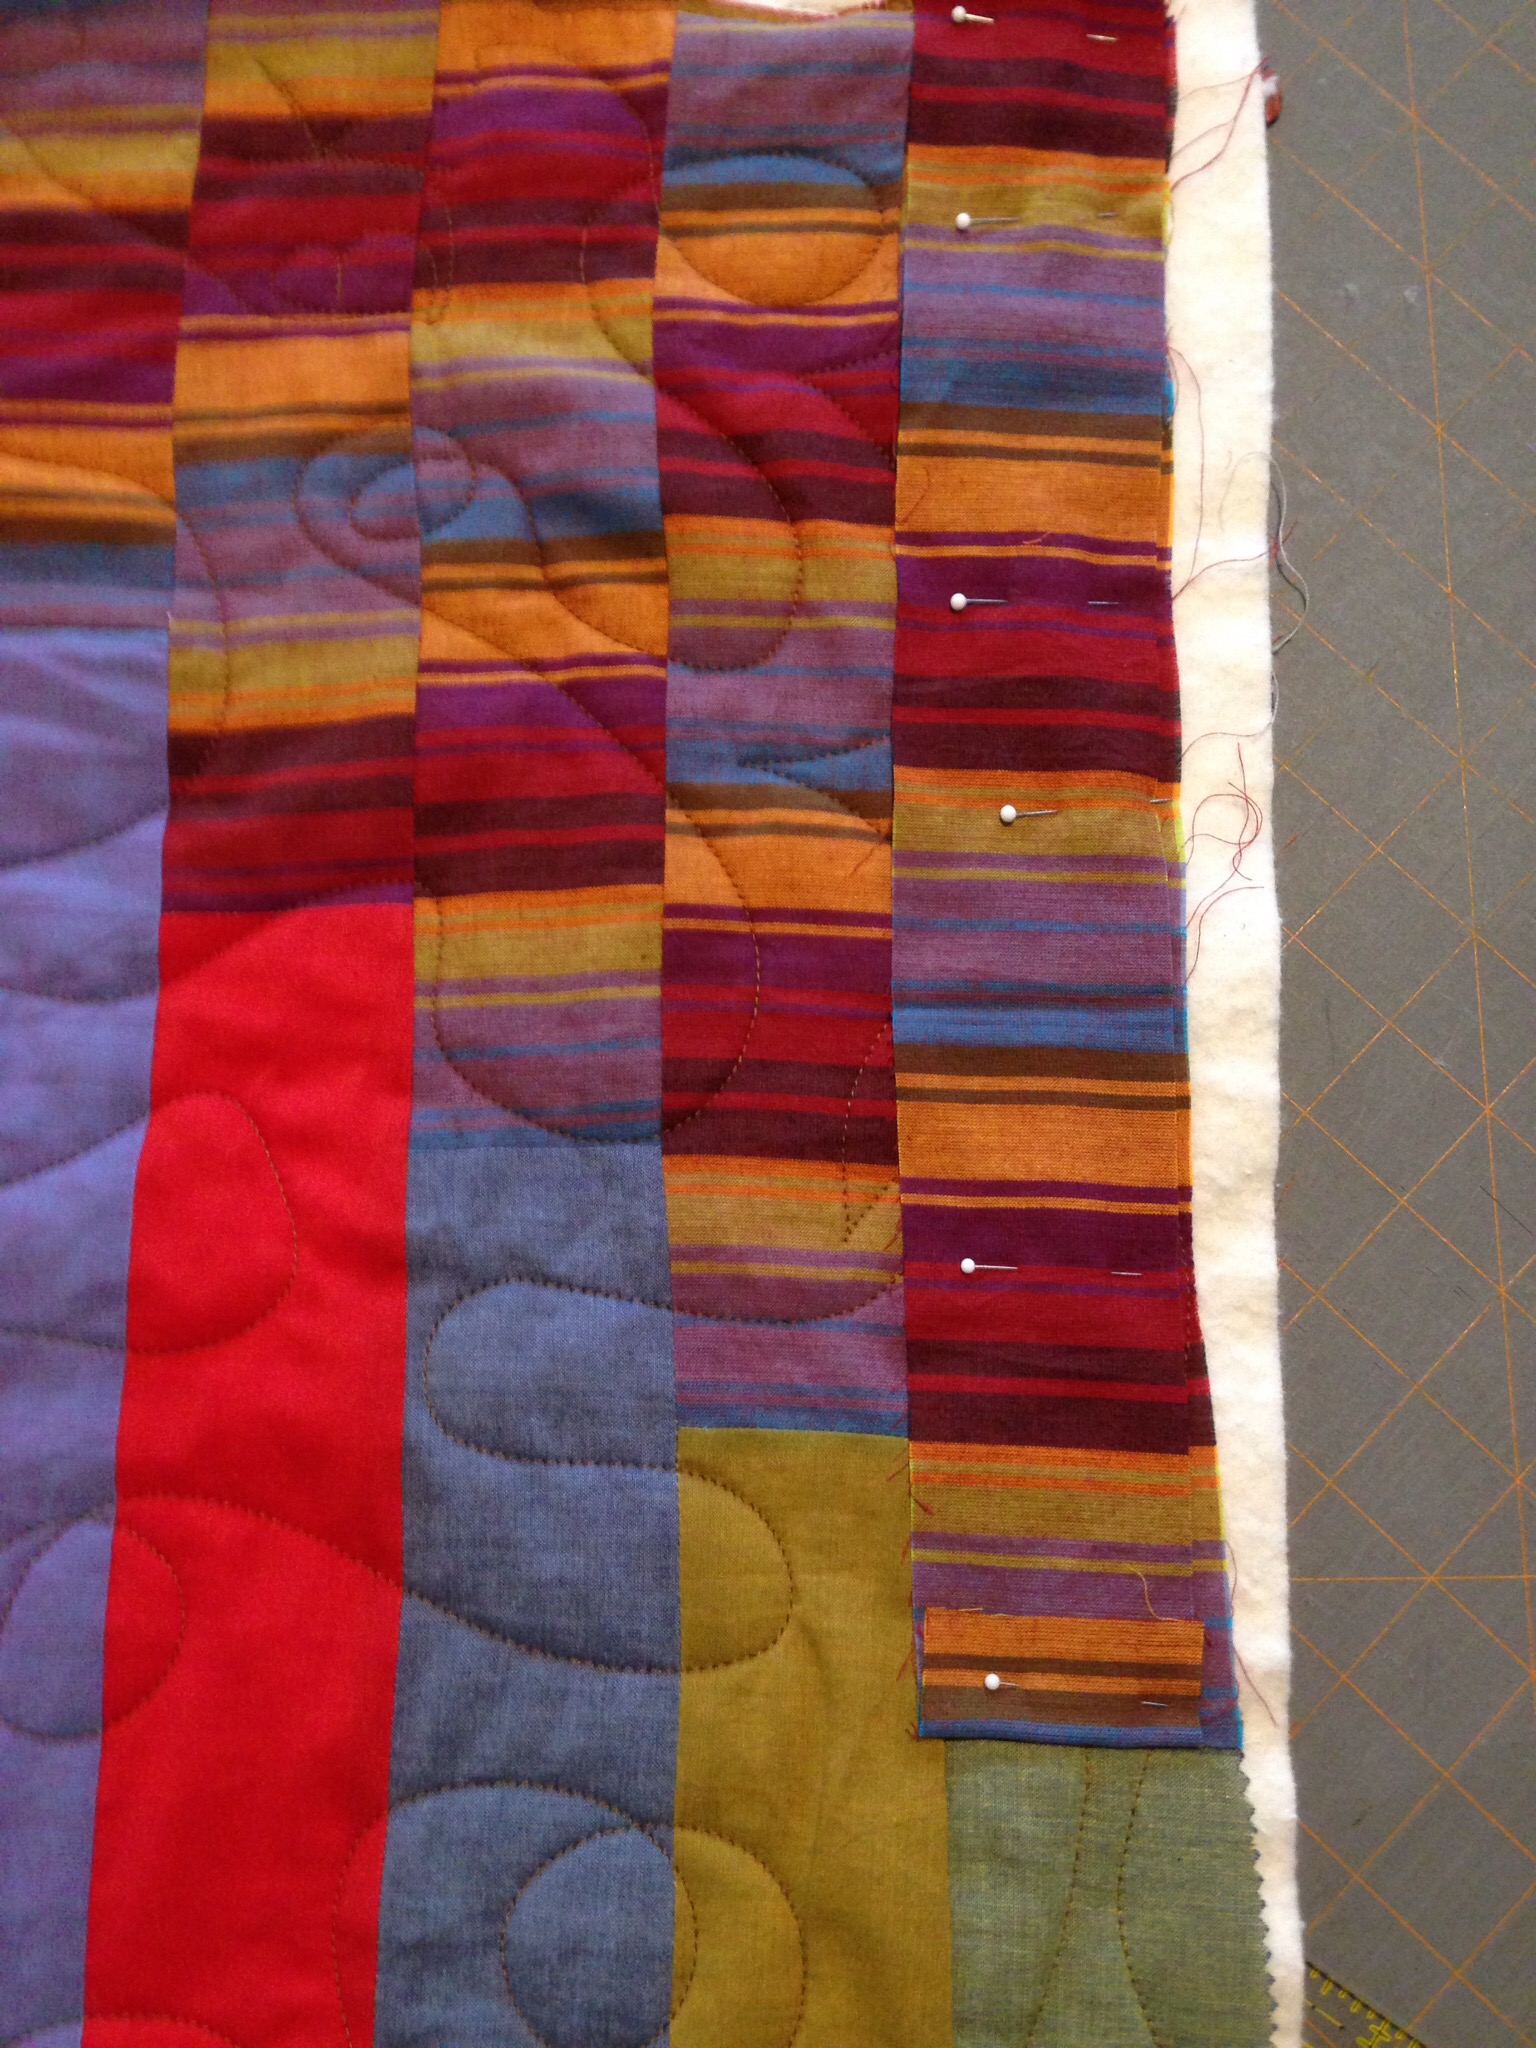
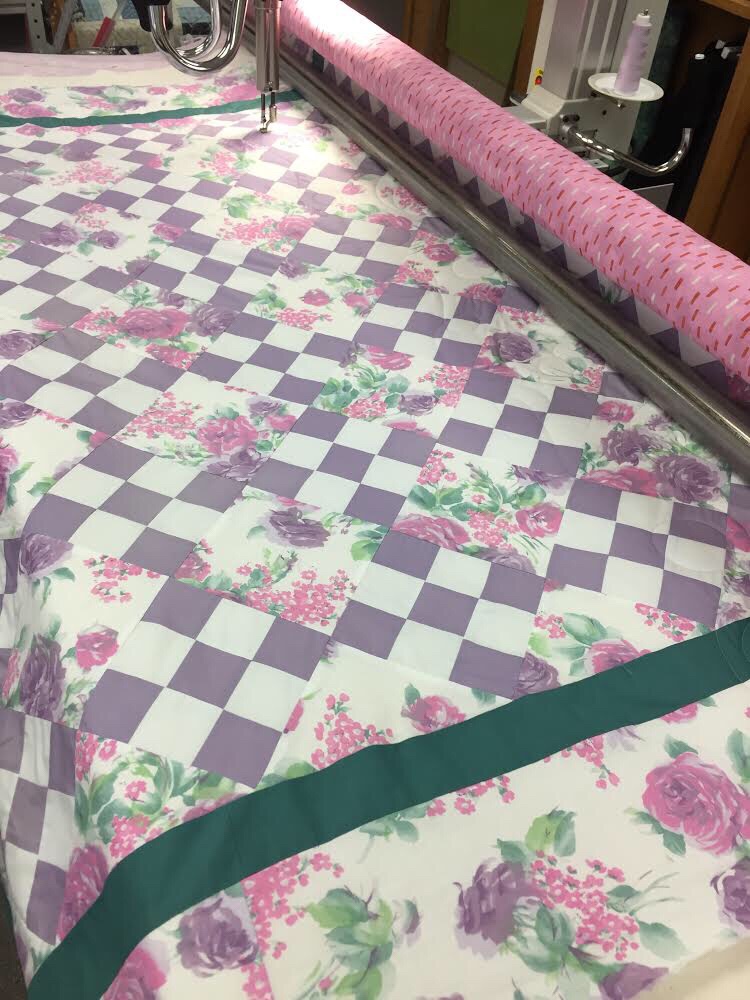
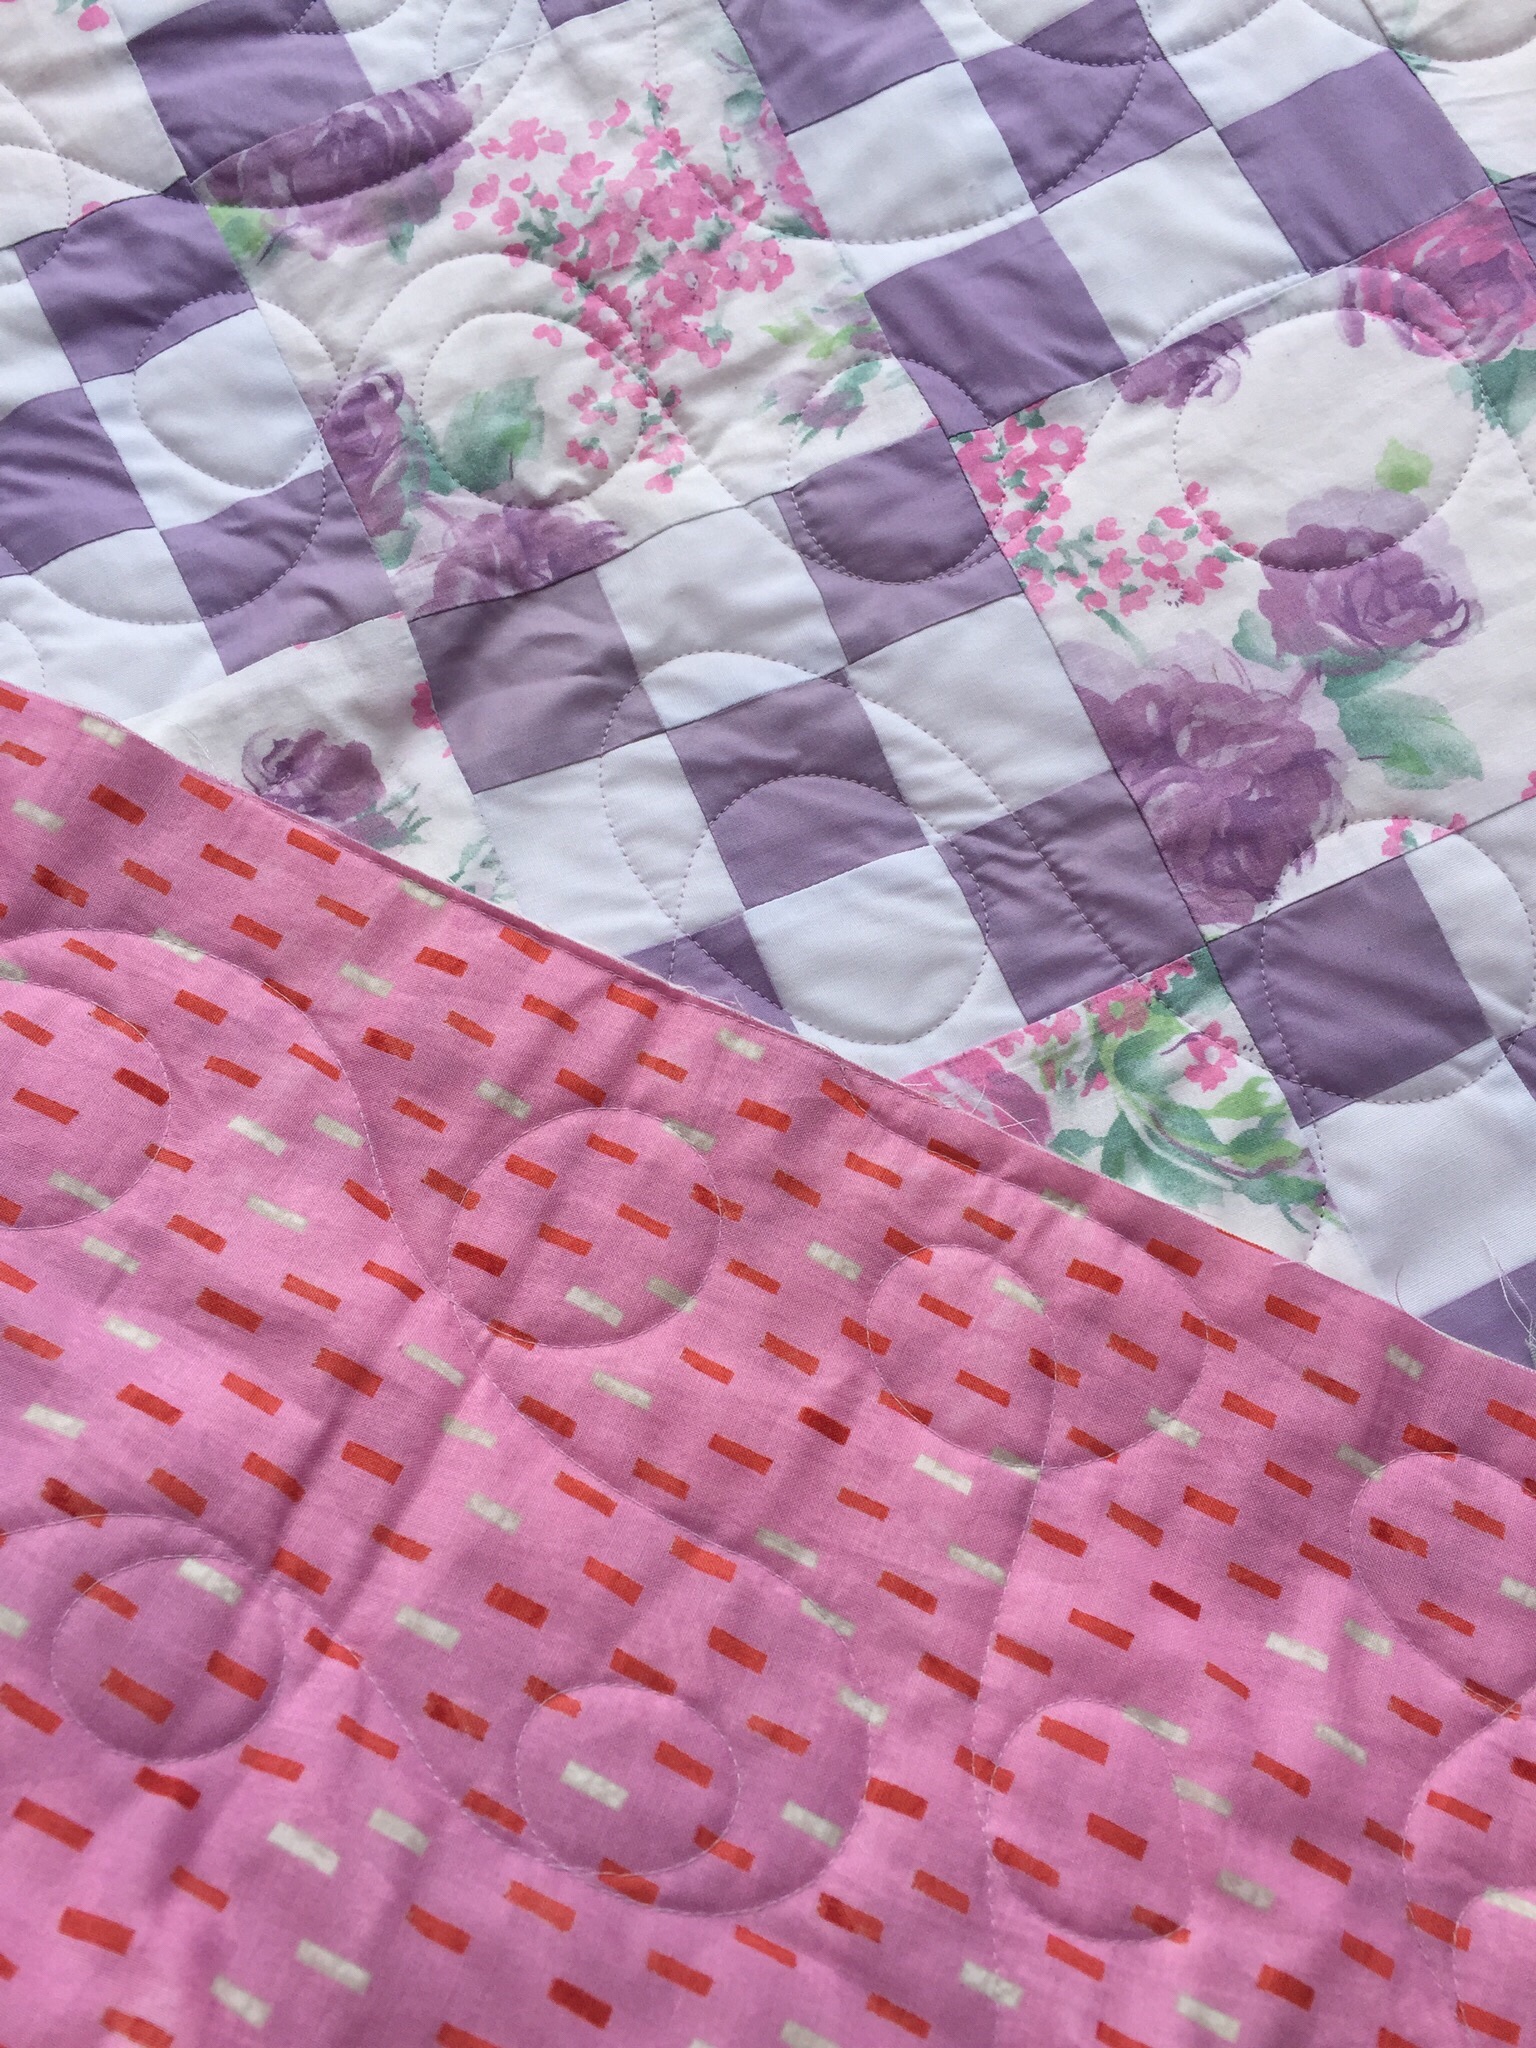
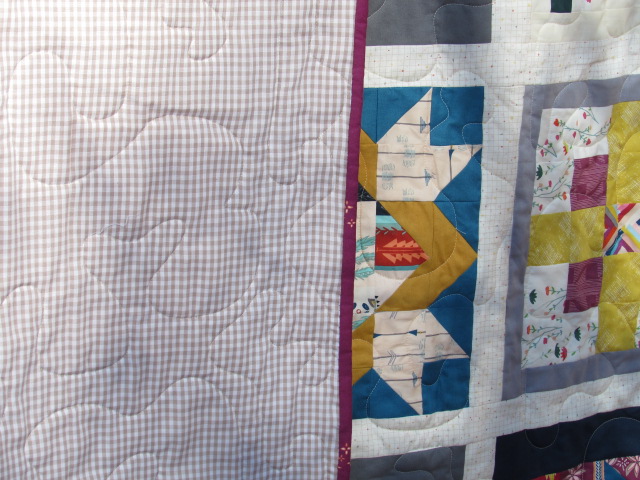
In fact, I love it.  I am wild about this quilt.  It is my kind of project. Imperfection works in this sort of quilt.  I am pleased with the colors, the polka dot background which provides a nice spot for the eye to rest, the border of gray dots between the HST’s and the scrappy border – all of it!  This one took a long while to come together, but it was worth the wait!scrappy HST 
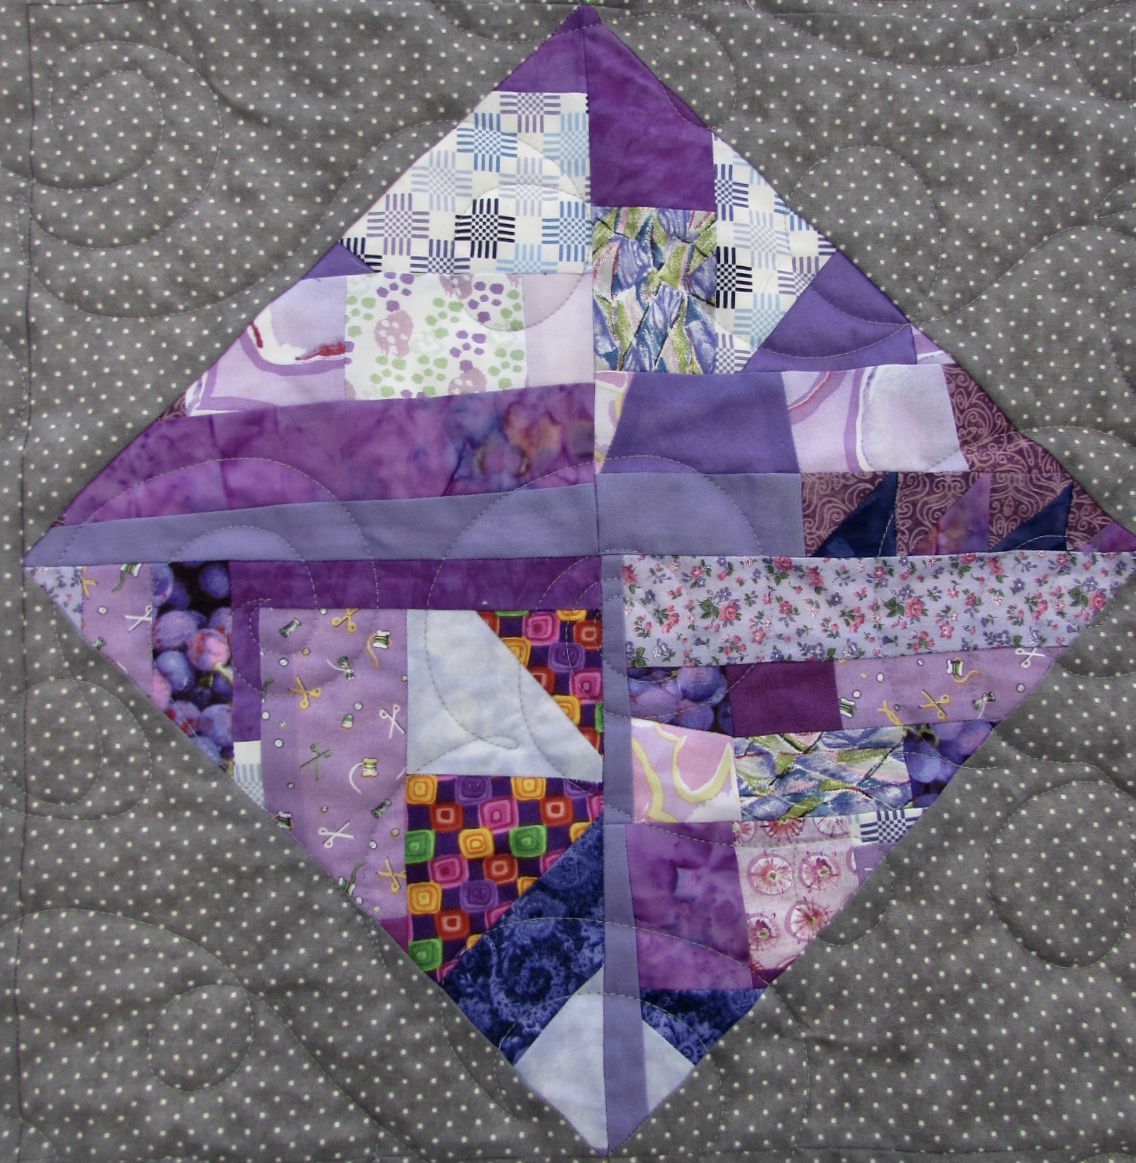
I took it to the long arm shop and quilted it with a meandering loopy motif.  Some little spirals, some large loops and some small ones. It left the quilt with a nice, cozy drape. This was a lot of fun to quilt and took no time at all.

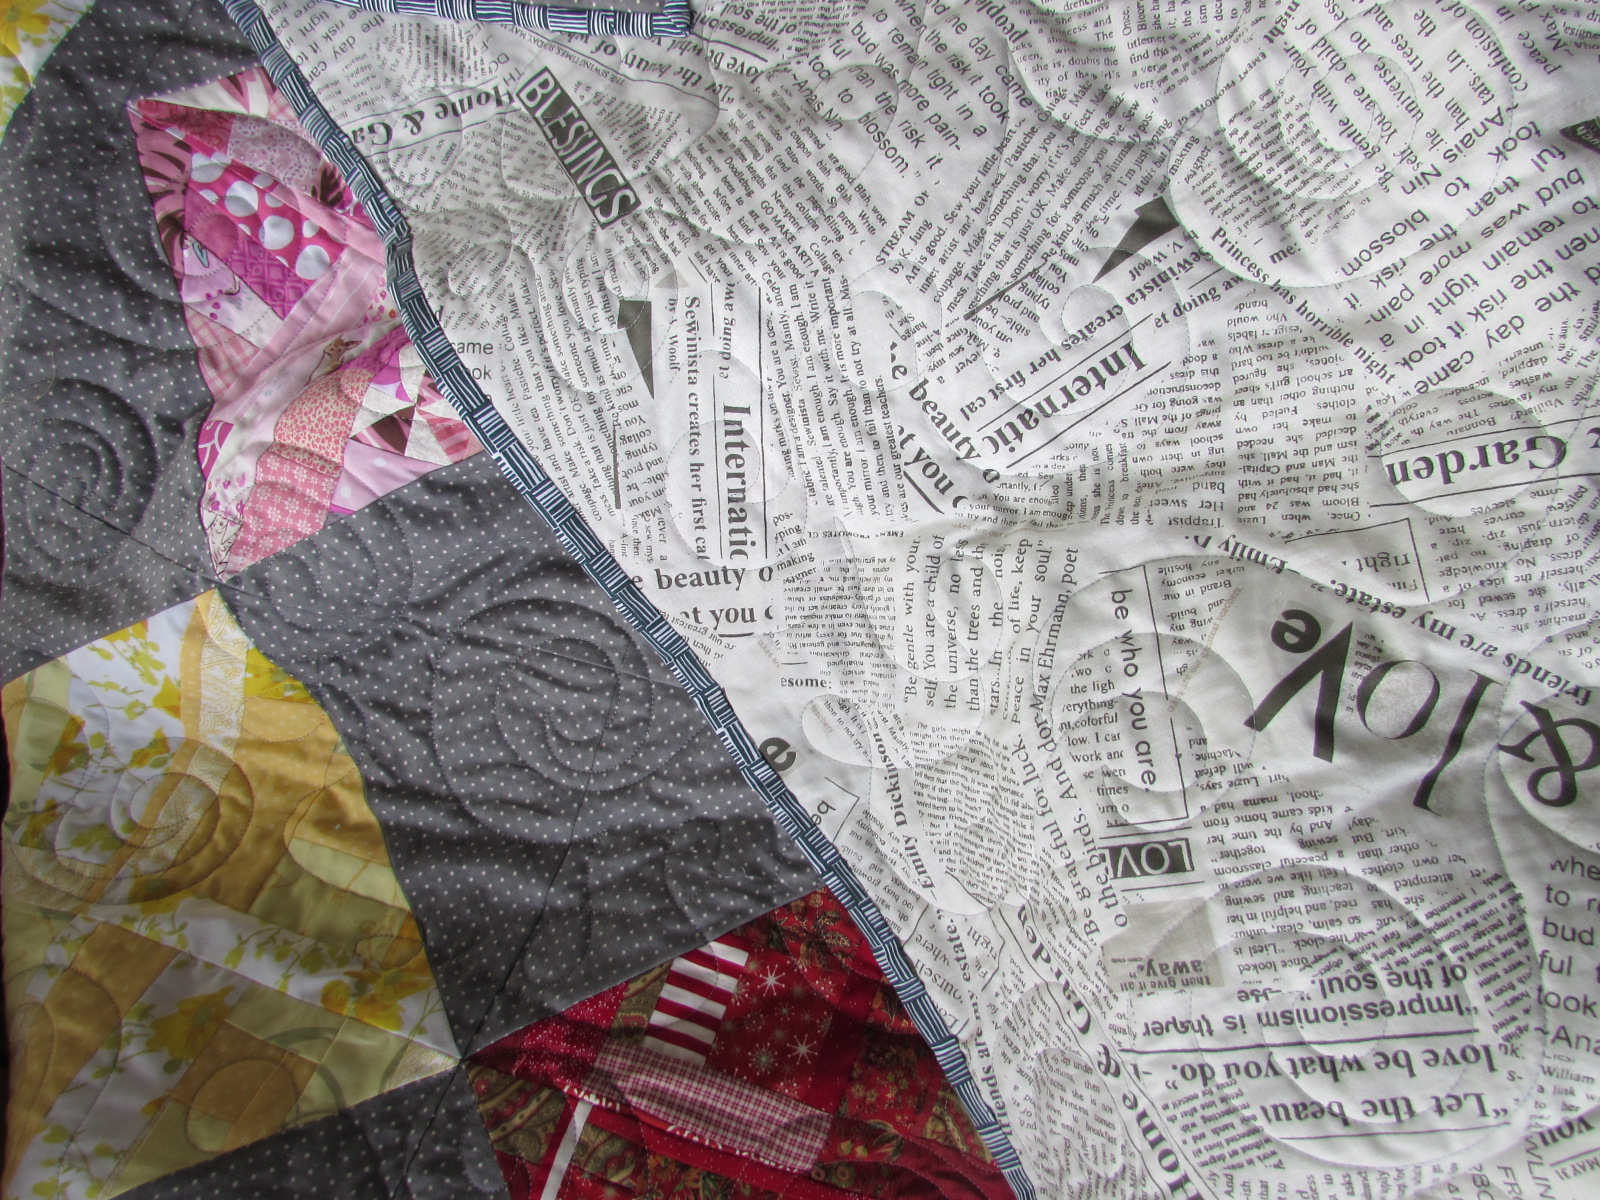
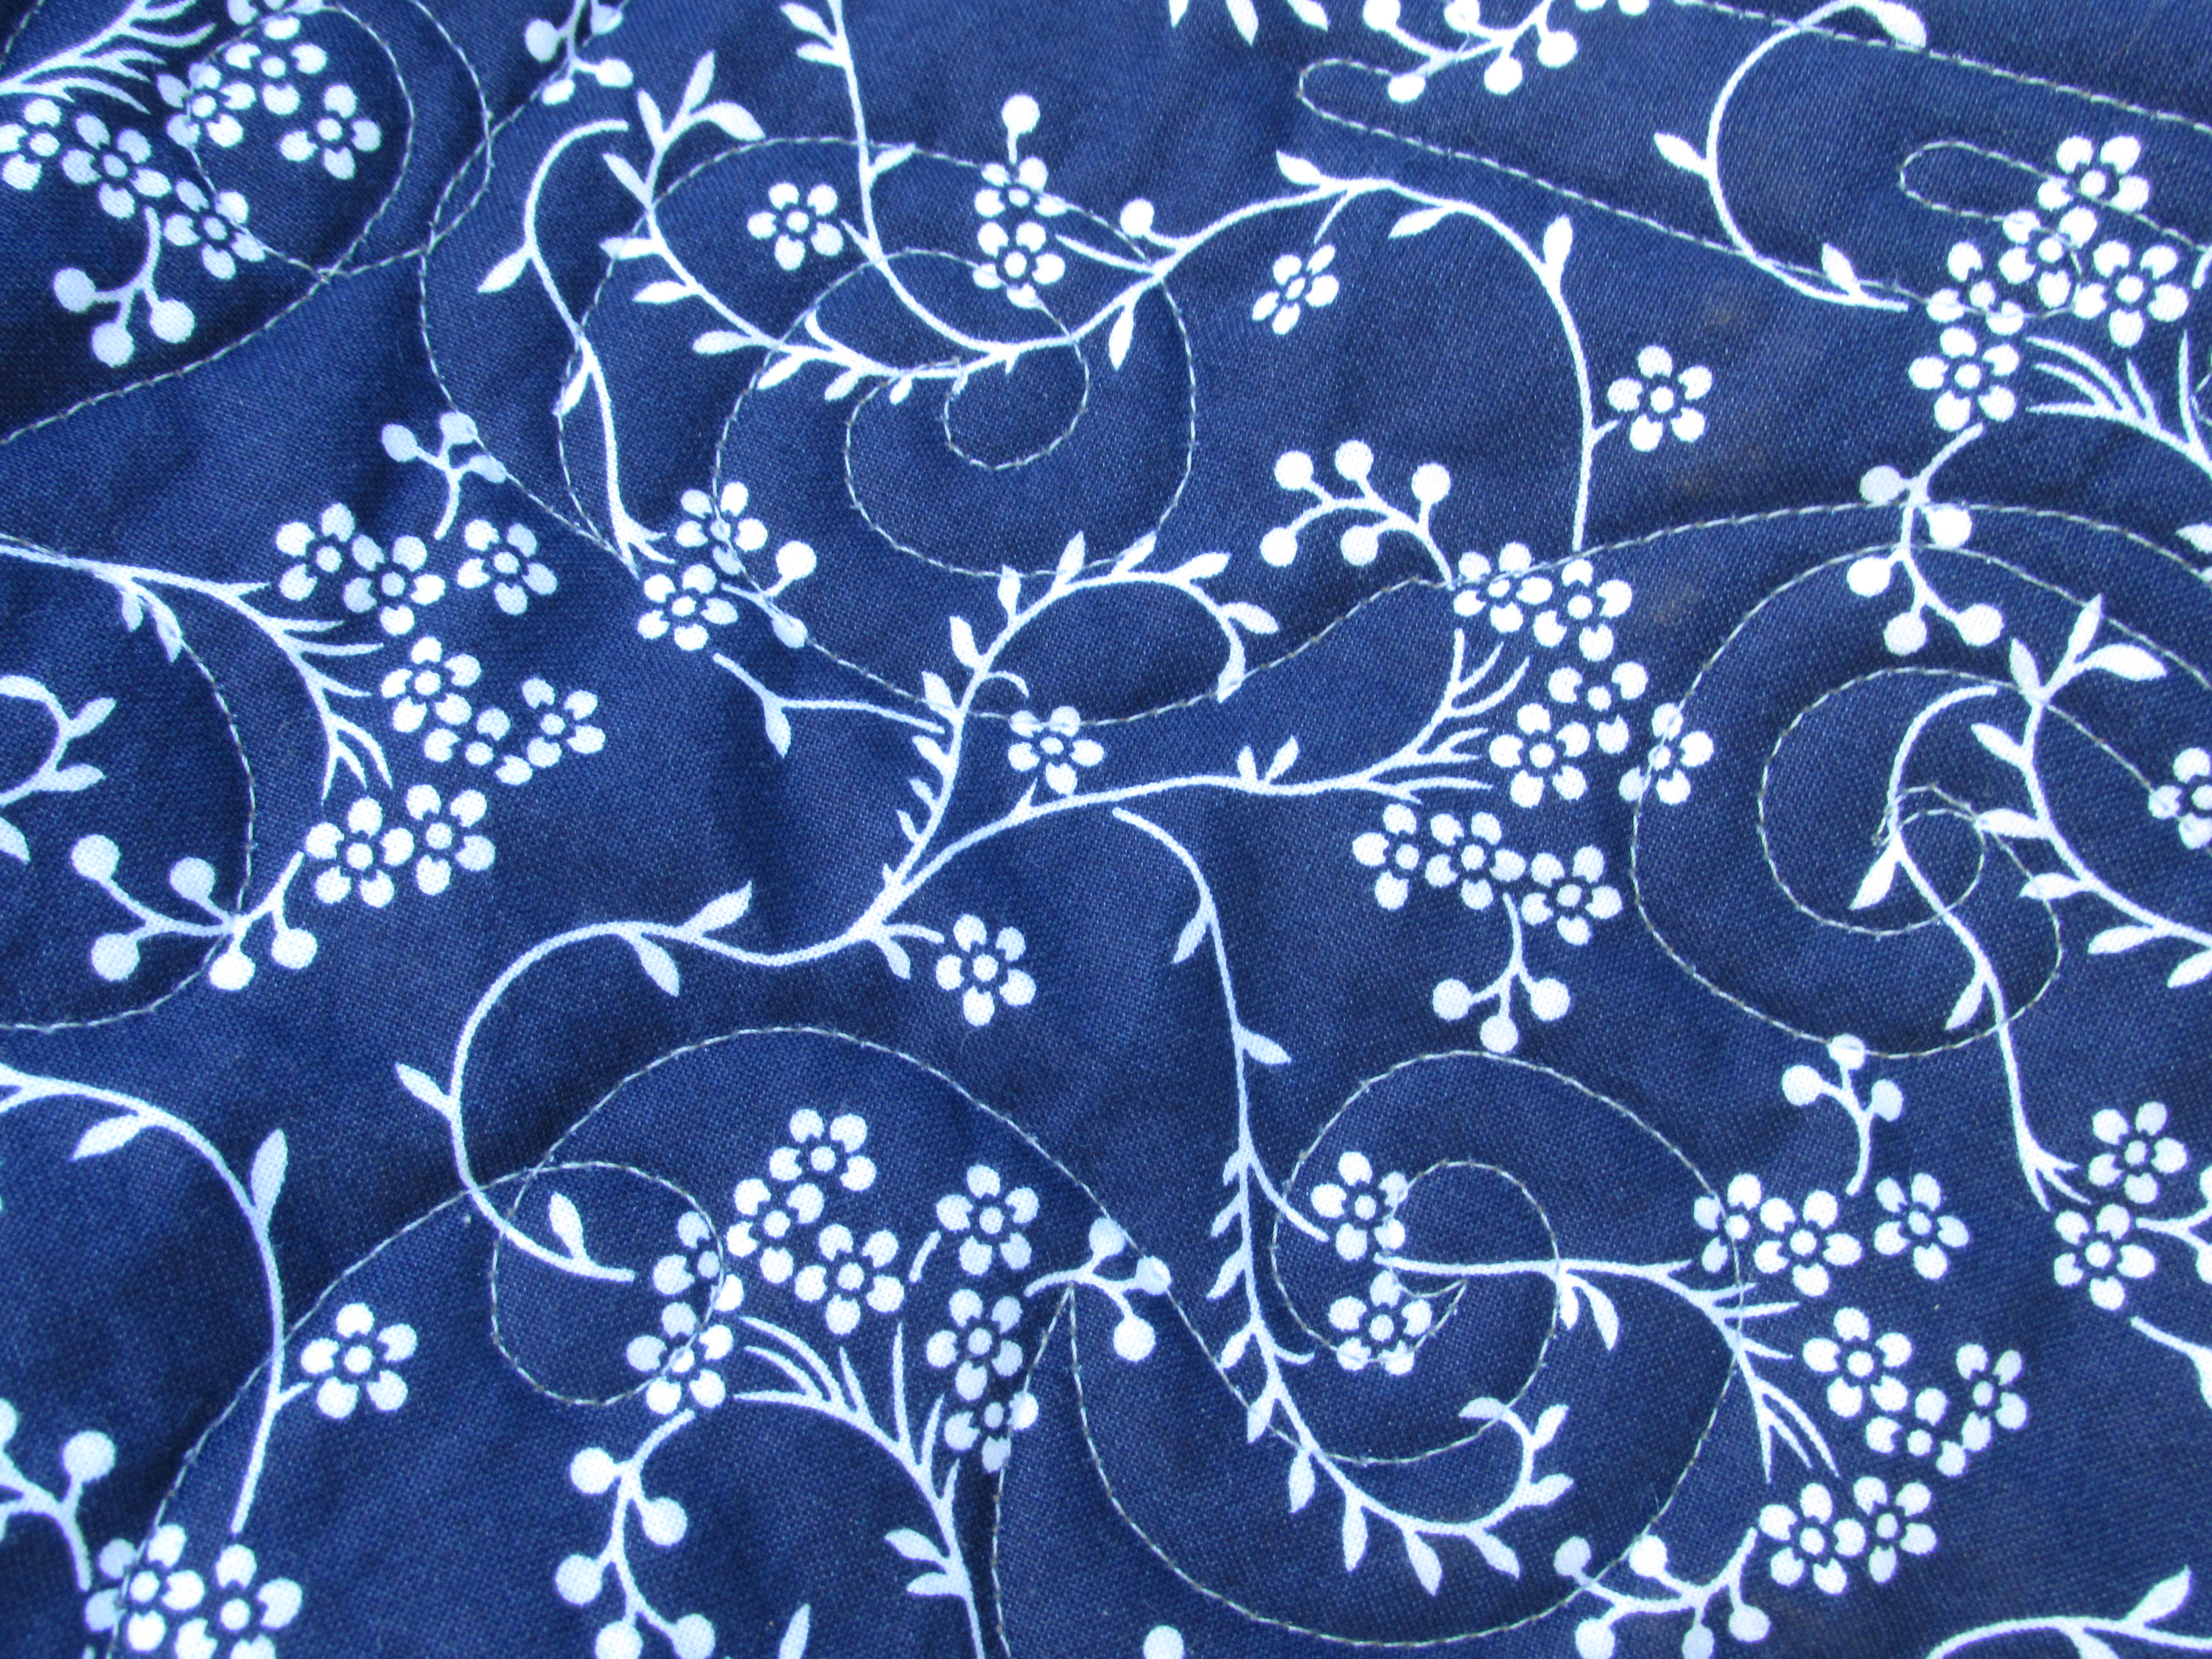
For the backing, I chose Newsprint in a wide back. This was designed by Carrie Bloomston and is probably my favorite backing. When I ordered my first bolt of it, I was pleasantly surprised to sell the bolt within weeks.  I just received a second bolt so I have it in stock again.  Because it is such a fun print, I also take the wide back and cut fat quarters and 1/2 yard pieces. Each of these (wide back, fat quarter, and 1/2 yard cuts) are available in my shop.

scrappy hat quilt

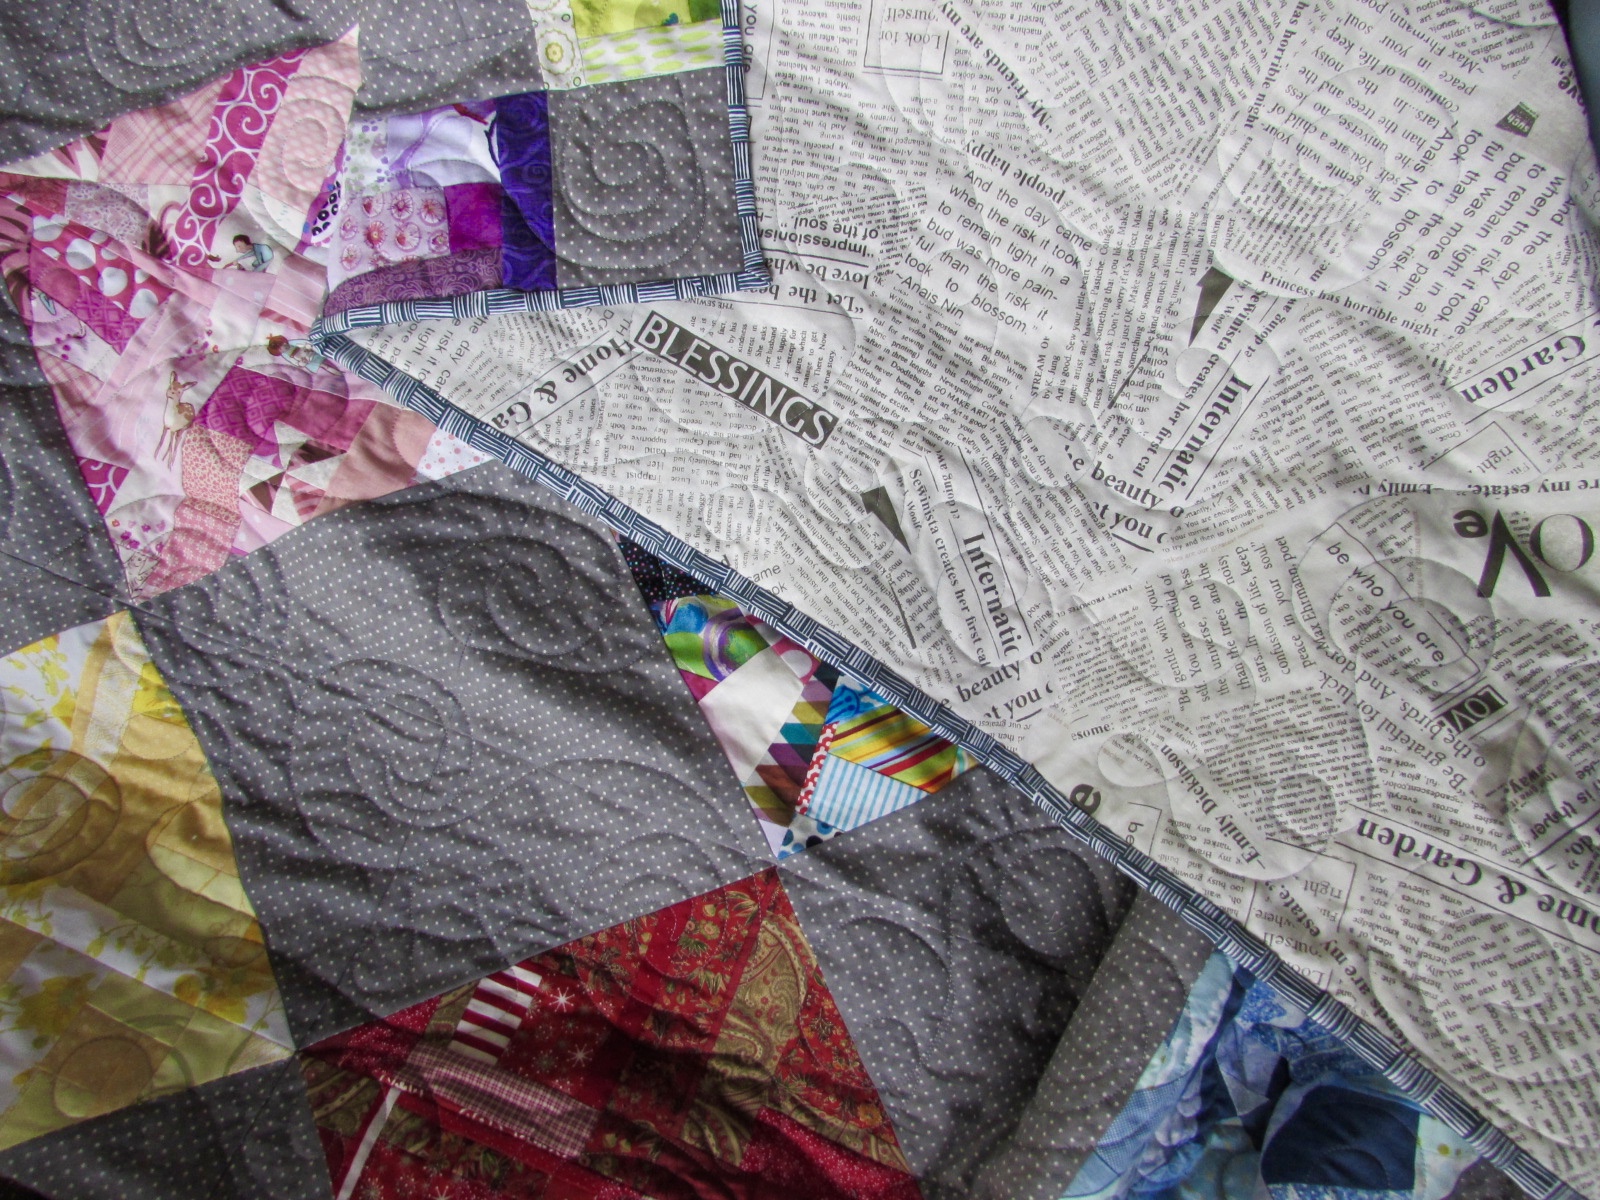
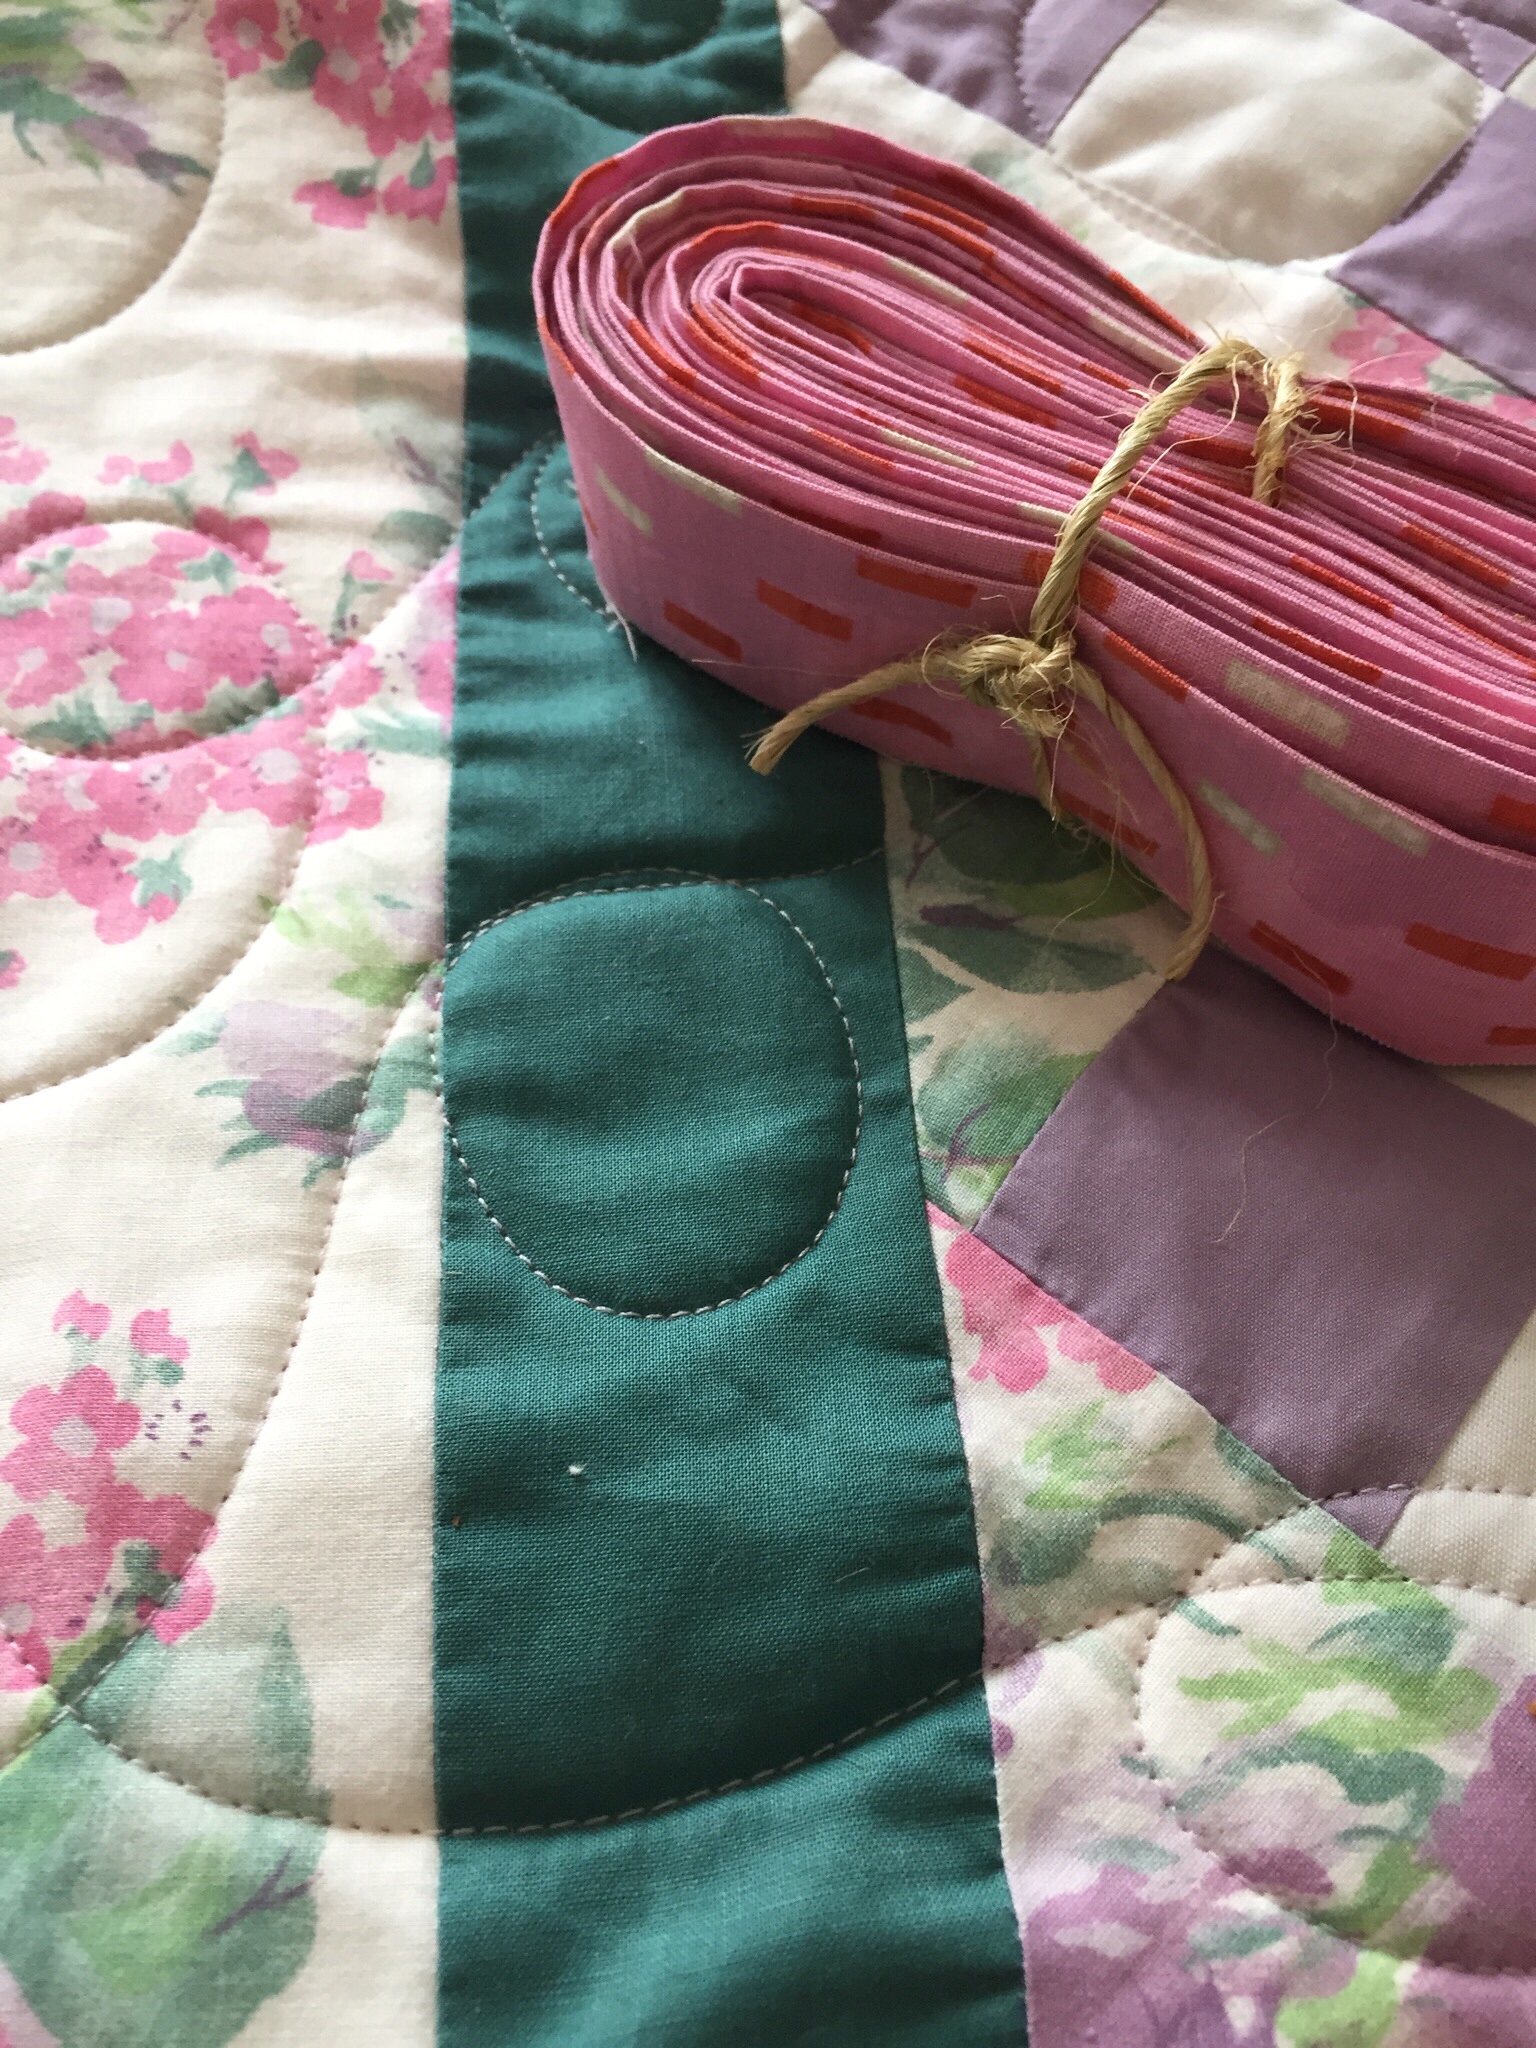
The binding is a print by Lotta Jansdotter called Aliisa from her Lemmikki line. I really like this fabric but looking back, I don’t know if it is the best match for the quilt.  The color is “slate” but when it is next to Newsprint and the gray dotted background, it has a very blue tone.  Because the quilt is so scrappy, I decided to go with it anyway. I like the angular pattern of the print. So, I think it is ‘good enough’.  I did go back to the listing though and update my description to explain about the blue hues this fabric has. If you are intrigued by this one, click here to see the shop listing.

I can happily check this one off the list and report I am down to three unfinished quilts in the closet.  Well, that is not including either of the RSC18 projects I am working on. Not too terrible!

Tomorrow I am off to see my kids in Vermont.  Probably no blog posts until I get back – unless I change my mind.  😉 I am so excited to see my grand daughter.  She started walking last week and it will be so fun to watch her toddling around.  Like I mentioned in my last post, any Etsy orders placed by 3:00 Friday (today) will ship.  If placed after that, they will ship on Monday, April 2nd.  The last time I was gone like this, I promised to refund half of the shipping charge for orders placed in my absence – sort of a thank you for being patient and waiting until the 2nd for shipment.  Same goes with this trip!  Place the order and just know I will pay half of your shipping cost.  Thanks so much for understanding!. It is a bit difficult to be a grammy to a little girl in Vermont when you live in California!


Linking to Finish It Up Friday and a few others.  All are listed at the top of the page, under Link Ups.

Long Arm Practice

A few weeks ago, I was visiting with friends in the office I retired from. One of the women follows my blog and Facebook page. She told me she had a quilt top she had made in the mid-1990’s. It was intended for her daughter (now in her early 30’s). Robin thought it would be fun to finish it up and asked if I would quilt it for her. I am the first to say I am not highly skilled with quilting. This quilt top was for a twin size bed which is bigger than I am able to quilt at home. After making sure she knew my skill level, I agreed to finish it up for her.

She brought me the quilt top the following week. As she said, it is definitely 90’s colors (mauve, pink and green) but she was hoping I would have a fabric in the shop that might work for the backing. I sent her several photos to choose from. She made a great choice with the Dash print from Carrie Bloomston’s Dreamer line. I love this print. It is very similar to Moda’s Grunge fabrics with the addition of a small scale print on it. The background is pink with smudges of lavender. The modern back is perfect for slightly updating the 1990’s quilt top.

I took it to the long arm shop where I am able to rent time. To me, this is such a great opportunity. I don’t have space for a long arm and don’t relish the idea of maintaining one either. Being able to rent one is the perfect compromise for me.

The gal that works there helped me load it on the frame. For the first time though, I didn’t really need a whole lot of help. (She was probably glad to see this!). The quilt top has been sitting for many years and was a bit distorted. Before I took it to the shop, I did clip threads from the back, iron it well and starched it. Even with all of the prep, it was a trick to get it to lay flat.

Because of this, I figured I should quilt it loosely and let it be a bit puffy. I think it would have been difficult to quilt it tightly without having lots of puckers.

It took little time to quilt. I used large loops and an occasional loose flower and just quilted edge to edge. I am pleased with how it looks. In previous projects on the long arm, I found it a challenge to quilt circles, they would look oblong and sometimes almost rectangular. These look like circles! I am making progress.

Never having quilted for someone else before, it feels a bit strange to just stop at this point and return it to her. When I trimmed the edges there was quite a bit of the backing fabric left over. I asked if she would like to use it as binding and she agreed. So, I cut the binding strips and sewed them together. The rest is up to Robin. She will bind it and wash it.

It was fun to use the long arm again. I think it has been since about October since I quilted there, so quite a few months. I do have a quilt top nearly finished though which means I will be back there next week. This was a win-win for Robin and I both; her long time UFO is nearly finished and I got more practice time on the machine. She did purchase the supplies and pay for my fees to use the long arm. Even though it still needs the binding, I am calling this a finish (at least for my portion of the project.). Linking up to Crazy Mom Quilts, TGIFF and a few others. Check the top of the page under Link Ups for lots of fun places to link to.

Sam’s Quilt

The sports jersey quilt is finished!  This is the second t-shirt quilt I have made, the first one being for my niece, Lil (Sam’s cousin.) The jersey quilt was a good learning experience, but what quilt isn’t? There is always something new to try or a skill to further practice.


The biggest challenge was definitely piecing those slick, polyester pieces of the jerseys.  Second to that would be working with the rubbery decals used for his number and the logos.  They were much thicker than one would think.  Other than those two issues, this was a breeze to make. You can read progress posts about putting it together here and here.

To quilt this rather heavy project, I rented time at the long arm shop.  It would have been difficult to feed it through the throat of my home machine because the decals are thick and stiff, making the quilt unwieldy. Once I had it loaded on the machine I quilted it with lots of interlocking squares.  It looks like a nice, masculine motif and works great with the blocky pattern of the quilt.

Sam’s football number was 50, just like his father’s was when he played.

I tried to avoid quilting through the rubbery decals and numbers.  Instead I went around and inbetween them wherever I could. It was really difficult to keep the quilt flat while quilting it. I cannot tell you why, the heft of it or maybe the slick jerseys? If I were quilting it at home, I would have guessed I didn’t baste it well enough. But when we loaded it on the long arm (the gal at the shop kindly helped me) it seemed very straight and flat.  At any rate, it is not tightly quilted. The quilt has a puffiness to it.  It doesn’t bother me though.  I plan to wash it today before I mail it off and it is likely to crinkle up a bit when the batting and cotton fabrics shrink up a little.


Remember I pieced the backing so I could use up a few more jerseys?  This is the first time I loaded a backing that really had to be straight on the long arm to line up well with the front.  It was mostly a success – the logos are straight but they aren’t centered across the back.  Side note, it has been quite rainy this week which is wonderful. I kept waiting for a clearing in the weather so I could take some photos.  Finally, Julia said we better just to take pictures Mom.  So off we went in the rain.  I put a beach towel under the quilt and she held it over the railing.  Such a dedicated quilt holder!!  You can see the towel shows under that edge on the left. 😉  Ok, back on topic – I love the way the back looks and it shows the quilting pattern off a bit.  I keep looking at the larger spaces near the decals and wonder if I should add some quilting there?  Do you have any input?  Are those unquilted spaces too large?

The binding is an older stripe with 1 1/2″ widths red and gray.  At first I was hesitant to use it because the red wasn’t exactly the shade I wanted but there are so many different reds in this quilt between jersey colors and the sashing I used that it worked well in the end. The bold, chunky look of the stripe fits with the blocky pattern of the quilt just fine.


So this one is finished and will be sent off to Sam early next week.  The long arm practice continues.  It is tons of fun but has a definite learning curve to it.  My skills are improving but I need so much more practice.  It motivates me to finish up some of my projects so I can go back and practice some more!

Now sewing time for me over the next couple of days. This weekend my sister and I are working the Pioneer Quilt Guild’s show in Roseville.  If you are local and planning to attend, please come say hello!  I am excited to see the quilts hanging and meet members of the Pioneer guild!

Sewcial Bee Sampler Quilt Finish

I am so happy with the finish of my Sewcial Bee Sampler quilt.  I loved making the blocks along with the billions of other quilters that followed along with this QAL hosted earlier this year by Sharon Holland and Maureen Cracknell. I posted progress shots along the way as I made the blocks, but just in case you didn’t know, the QAL included 25 blocks but I stopped after making 20.  This quilt is a comfortable size for a lap quilt and I felt like if I went for the full twenty-five blocks, this would just be set aside and not finished.  The colors of the quilt are so pretty and I was anxious to finish it and use it.

After sashing the blocks and rows with Mesh Joy, a gorgeous low volume print from Sharon’s Gossamer line, I took the quilt over to the long arm shop where I rent a machine.  For the backing, I used a piece of soft vintage gingham that I purchased at a thrift store over the summer. The light brown color is lovely and works well with the quilt top.

When I picked the binding, I was trying to choose between two fabrics, Terra Firma in deep yellow and Twinklestar Berry  from the Garden Dreamer line by Maureen Cracknell.  I couldn’t make up my mind so I asked Julia to choose between  them and she immediately went to the Twinklestar fabric.  It works well with the front and back.

I took it to the long arm shop a few weeks back and quilted it with a loose meander pattern. Because each block is different and the quilt is fairly busy, it made sense to keep the quilting simple.  More importantly, I wanted to use this quilting time to practice my control on the long arm and by using such a basic quilt motif, I could focus on the speed and evenness of the stitches on the long arm.  It was really helpful to practice like that.  It amazed me how little time it took to quilt it!

I really like the loft the quilt has with the loose quilting.  This quilt is so cozy.

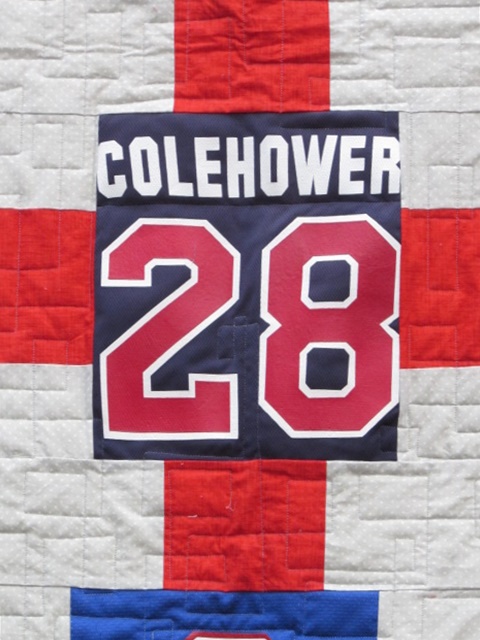
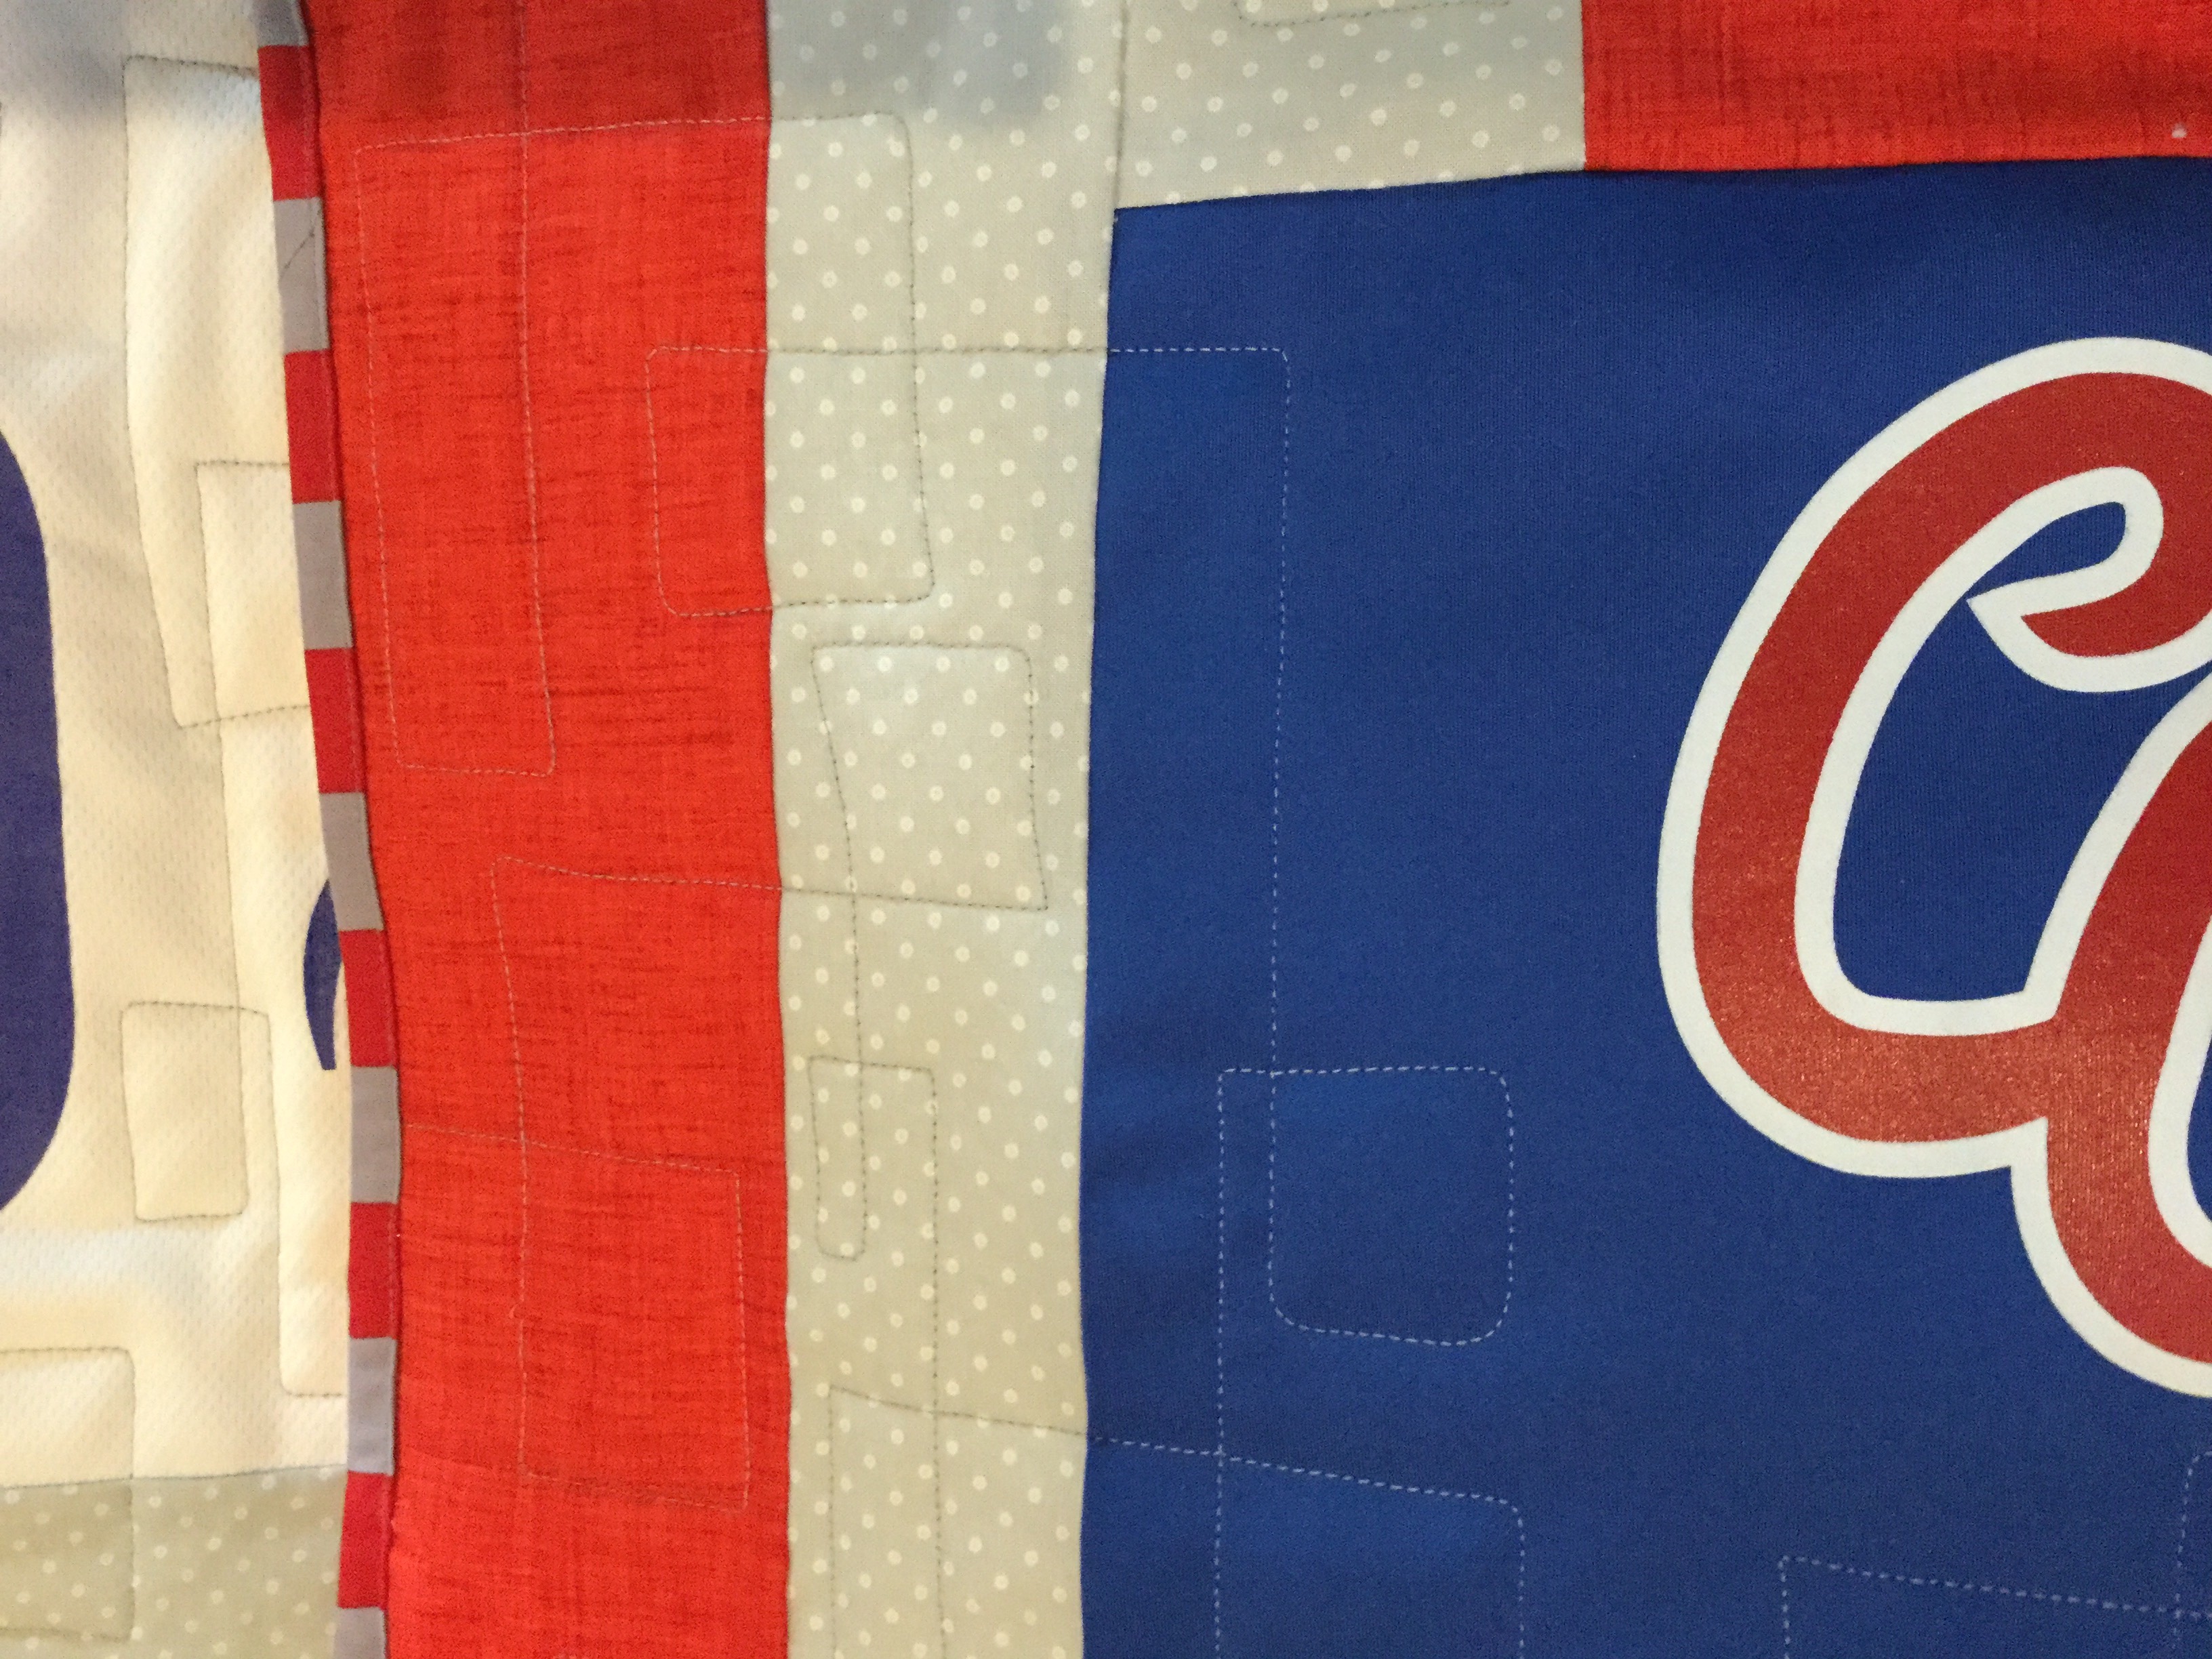
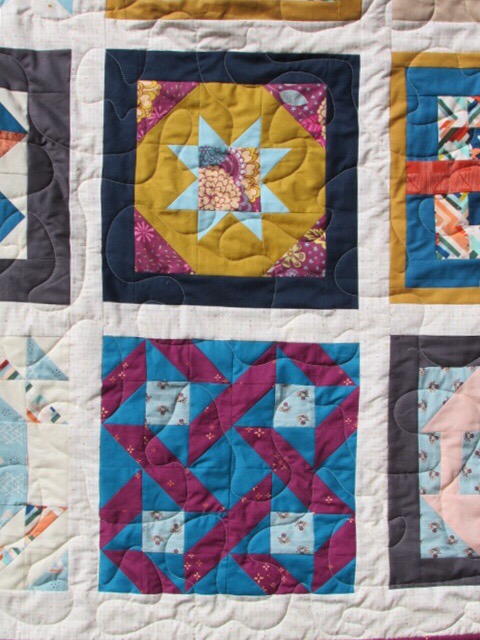
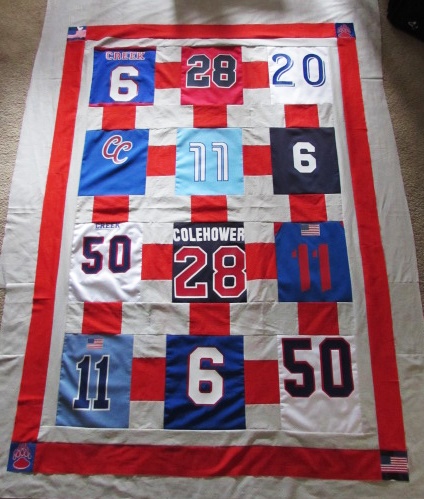
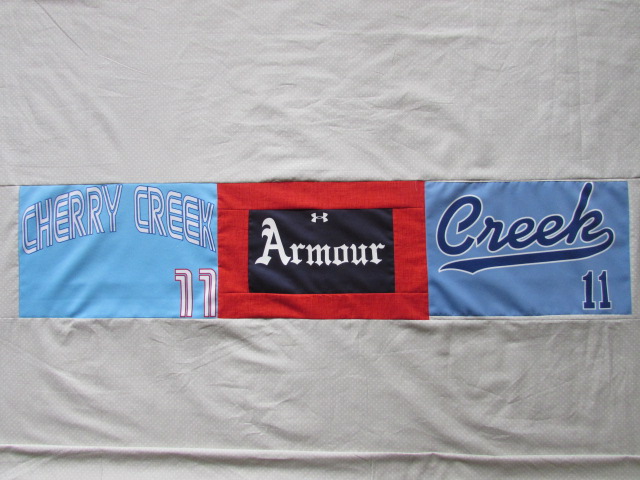
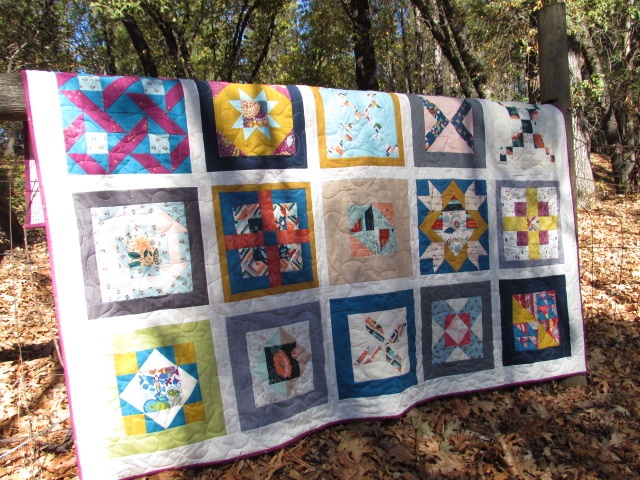
The rich colors – cheddar yellow, the deep blues and the raspberry colors are my favorites.  This was such a fun quilt to make.  I know there are a lot of QAL’s popping up for the new year.  I think I will look through them and choose one. I have two more quilts in process and I hope I can finish those up before starting another one.  Tomorrow I plan to take my nephew’s jersey quilt to the long arm shop and quilt it.  Hurray for finishing up some projects!!

Have a wonderful weekend all!  Linking to some of my favorites. Please feel free to check them out at the top of the page, under Link Ups.

No Finish This Friday

Well, I guess not every week is going to include a finished project, right? That is unreasonable.  But I did come close! It wasn’t a terribly productive week. Monday morning I had my second round of Botox injections. I have been receiving them as a way to lessen the frequency of migraines as well as the severity of them. My first round was in July and I will receive them every ninety days.  Both times, the series of injections set me off and triggered a cycle of migraines.  So, it wasn’t unexpected that I was down for the count for much of the week.

While I was in migraine mode, I wisely stayed away from the sewing machine as I tend to make so many mistakes if I sew while dealing with headaches. My brain just doesn’t fire on all pistons and I make silly errors.  Instead, I sorted my scrap pile which hasn’t been done in months. I also watched too much TV but Netflix has the most recent season of the PBS show, Call The Midwife, and I love that series so I couldn’t help myself.

As is often the case for me, the blue scrap pile and the green were huge. I managed to stuff the greens into their tub but no way would the blues fit. I posted this on Instagram and found someone who could use blue scraps. Those are packed up and ready to be sent off to a happy quilter. It is nice to share them, better than tossing the fabric and really, how on earth will I use all of it?!

Yesterday I felt much better and was able to keep my appointment at the long arm shop. I had planned to take the jersey quilt and finish that up but I chickened out. I decided to take one more of my own quilts to gain a bit more practice time before I tackle the jersey quilt.  I was nervous about thread or needle issues with that thicker quilt.  When I got there and talked to the gal at the shop, she assured me it wouldn’t be a big deal to quilt Sam’s project so it will definitely be the next one I take to the shop.

I loaded my Sewcial Bee Sampler quilt top and was excited that I was able to load it (almost) without help. I am getting the hang of this process which feels good.  The quilt top lay nice and flat – also exciting to me – it doesn’t always happen that way. I decided to just do a simple meander so I could focus on controlling the needle’s speed and direction.

Because I didn’t place any focus on a more challenging quilting motif, this was very relaxing and I really enjoyed it. I had almost no hiccups – the thread snapped once but the shop gal was able to adjust the bobbin tension and I was back in the game in no time.  I have to say, I am loving using the shop’s machine because there is a source of support right there – It is the best of both worlds.

It took no time to get the top quilted up. Another perk of renting time at the shop is their huge cutting table in the back.  I was invited to use it to trim and square up the quilt once I had finished. This process is so difficult at home because I don’t have a surface larger than the dining room table and I have to lay both my cutting mats under the quilt and keep shifting everything around. It is not easy, for sure.  But having this huge table available to me makes the task a breeze.I loved everything about finishing up this quilt. Today I will prepare my binding strips so I can do the hand stitching this weekend.  Hopefully I will have a finished quilt to share with you soon.

 I have also decided to pull my “Ring Me” quilt out of the closet and work on it. I started this one as a part of the blog hop celebrating Amanda Jean Nyberg’s recent book, No Scrap Left Behind.  I want to make it queen size instead of lap size (as I originally planned) so I have some cutting to do to enlarge it.  Previously I have been hesitant to make larger quilts because I dreaded quilting them on my home machine. I feel like I have options now so I am going to take advantage of that and make some larger projects. I would love to put this one on the guest bed in my sewing room.

Ok – enough for now.  I have a custom Etsy order to finish up and several fabric orders to pack. The shop has been really busy this week which makes me happy. It has been so nice to have this part time job that I can work into my time schedule, depending on whether I am dealing with a migraine or not.  Have a wonderful weekend everyone.

Remember today is the last day to enter the giveaway celebrating the Grand Opening of Ferrari Handmade.  Check that out here.

Jersey Quilt Progress

Happy first day of Autumn! I love this time of year and the change of season that is happening these days.

This week I took a look at the jersey quilt I am making for my nephew and decided the quilt top wasn’t quite large enough for this very tall guy.  I added 3 1/2 inch borders to all sides to enlarge it.

There were some smaller emblems that had been on the sleeves of a few jerseys and it seemed like a good place to use them.

I put the American flag on two corners.  (Number 50 was his father’s number when he played football for Stanford. I wonder if Sam requested the number, not too likely it was a coincidence, right?)

On the other two corners I used these bear paw prints. His high school mascot was the Bruins. This one is a funny coincidence because the high school mascot for my boys here in California, several  states away, was also the Bruins.

Now the quilt top measures about 56″ by 76″ which will be a bit better for this guy.

Besides adding to the quilt top, I also pieced the backing.  Wanting to use up a few more jersey logos, I made a strip with the last three.

The strip was the inserted into a piece of the light gray polka-dotted wide back that I used for piecing the front. I am hoping to reserve some time on a long arm machine next week so I can quilt this.  It will present a few challenges. One is the difference between the jersey blocks and the cotton pieces. There is some wave to it. Also, this is the first time I will have a pieced back on the frame. I need to make sure it is loaded nice and straight so it doesn’t come out slanted when it is quilted together. I am sure Kendra, the assistant at the shop, will help me with this. Finally, I need to better understand the order of things when quilting a project on a long arm. Once loaded on the frame, I want to do a simple all over pattern on the body of the quilt and then quilt something different on the borders. Do I do the center first and then roll it back to the top and do the borders? That seems cumbersome but I am not sure how else to do this without tons of stops and starts on the borders? I would love to hear hear how you handle this. Actually, I could easily quilt the main part and then do the borders at home on my machine. Options, options. Leave a comment if you have input on this–there is always something to learn.

I also spent time in the kitchen using up the bounty of tomatoes we are picking in the garden right now. I posted on Instagram that I have been making tomato jam.  I thought I would publish a link to the recipe I use from the Use Real Butter website. (Don’t you love that blog name?)  I have been making this for several years now.   It is a great mix of sweet and tangy that is great on burgers as well as spread with Brie on slices of baguette.  The combination of tomatoes, sugar, tart green apple, onion, and vinegar is really yummy.

When I made this batch I reduced the sugar by 1/4 cup and didn’t notice any difference. It is always good to be conservative with sugar if possible. Once it is all mixed up, I just let it simmer without a lid on the pot for a couple of hours. The pot needs to be watched and stirred often or the bottom will scorch. (n one batch I got sucked into blog reading and burnt the bottom. It wasn’t a total loss because I could just skim the top off and keep that. Luckily it didn’t taste scorched. But the yield was certainly smaller.

Once it cooks down, it can be canned in jars and processed in a water bath. Or, do as I did, and put it is small containers, label them, and freeze it. Much simpler!

Today is the last day to enter the giveaway for a 26 piece bundle of Island Batik.  Click here to enter.  Hope you all have something fun planned for the weekend.  My cousin is out here visiting (from Louisiana) and I am looking forward to spending time with her. Happy Friday!!

Positively Floating – a Finish

Earlier this summer I made a plus quilt using the Art Gallery Dare fabric line, designed by Pat Bravo. I set it aside for a while, as most of us tend to do. After taking the long arm class, I decided to quilt this one for my second round of practice. Thursday last week found me at the Sew-So Shop ready to load the project on the machine.

When I arrived, I was told that the owners would be running a bit late due to a family emergency. There was another woman, a very experienced long arm quilter (Diane), who was there to pick something up and she offered to help me get everything set up. I felt so fortunate to have run into her because she taught me a great deal in the 15 minutes that we worked together. It was so helpful!  We got the backing, batting and quilt top loaded and straight.

I talked with Diane about my plan to quilt this. I wanted to do simple spirals in the negative space and something linear within the pluses so they would be differentiated from the background. She and I scribbled on paper for a bit and decided on a flow of linear lines that look like water flowing. This would allow me to leave the machine free (as opposed to setting the channel locks for straight lines) and would give me a relaxed pattern to stitch. It worked perfectly (well, nothing is perfect but overall, it was very successful!)

img_7524

I love the flow of these soft linear curves. At first I tried to treat each plus as a separate entity but it didn’t seem to make a difference so I relaxed on that and let the lines flow over the edge of one fabric and on to the next.

img_7523

I love this motif – I don’t think I have used it prior to this but I will definitely use it again. It was really relaxing to stitch.

img_7521

For the negative space, or the background, I did large, loose spirals and loops. My goal was to work on my speed control and precision so I picked a simple motif. Looking back, I wish I would have selected a darker gray thread because the quilting hardly shows up.  I was not feeling very confident about my abilities so I picked a light thread, in case the stitching wasn’t the best.

img_7528

The stitching shows up better on the back.  For the first time, I bought a wide back cotton for the backing. This was so convenient! I had begun to piece a backing using the leftover Dare fabrics but when I decided to do this on the long arm, I nixed a pieced backing. I have enough going on loading the long arm without having to worry about a potentially wavy or ‘un-square’ backing (is that a word?).  Using a wide back fabric eliminated all of those possible issues.

img_7530

Since I had already pieced strips of the scraps, I decided to use that as the binding. I sliced the strips into 2 1/4″ strips for the binding. You know how much I love a scrappy binding.

As with each long arm experience before, I do have a question. The finished quilt has a bit of a wave to the center of it. (Look at the photo at the top and you’ll see it.) I feel it was flat and square when I started to quilt it. My question is, do you think this is because I quilted the Plus section more tightly than the negative space? It definitely has a stiffness to the Plus area. When I did the surrounding area, I kept it loose so the whole quilt wouldn’t be stiff but maybe I should have been consistent all the way through? Looking for some advice here. Yvonne….. Help please! 🙂

Oh how I have enjoyed learning about and using the long arm. I have one more finished quilt top to do so I will set up some time for that project soon! It has really helped me to get some projects finished up that were languishing a bit.

Couple of reminders –

  1. The voting begins for the Quilt Bloggers Festival on Sunday! Go take a look and choose your favorites — so many gorgeous projects have been entered.
  2. Handmade Halloween is coming soon! I hope you are checking your blog history for fun posts to link up that will inspire readers to make something for Halloween! If you don’t want to link an older post, you are welcome to write a new one. Lots of fun prizes have been provided by Craftsy, C&T Publishing, as well as Lorna from Sew Fresh Quilts. Come back and join the party October 4th!! Be sure to let me know if you have any questions!
  3. Craftsy has a sale going on this weekend. All classes are less than $20 (except for those in the Great Courses line.) Take advantage and learn something new!! There is always something new to learn.  (Note, I am a Craftsy affiliate.)

unnamed

Linking up to my favorites. See the tab at the top of the page, Link Ups, for more info.

Day Two at the Long Arm Shop

Last week I spent several hours practicing on a long arm machine. I decided to work on a quilt top that I made last fall. Using Kaffe Fassett stripes and solids, I made a strip quilt last fall. As often happens, it was put aside and left untouched for almost a year. By the time I finished this quilt top, it was distorted and nowhere near flats. Not sure if you remember this one, but here is the first post if you want the back story. In that post I mentioned that I had put some of the strips together incorrectly and had to do a bit of seam ripping to fix it. I think I handled the strips too much and they really stretched. If you haven’t handled Kaffe Fassett shot cottons, they are very soft. This makes for a cozy quilt but using a jelly roll of this was harder than I expected. Of all my quilts, I am sure this one has the most technical flaws. But it is also one of the prettiest because of all the color.

image

Fast forward eleven months, I decided to finally finish it. The colors are gorgeous and it deserves to be used. I knew it would never be a quilt to brag on but oh, it is so soft. Quilting it on my machine or the long arm was going to be problematic either way. I figured if I took it to the shop, they might be able to help me to make it as good as possible. When I showed it to the owner, he said I could choose to make it flat and out of square (by a long ways) or I could square it and there would be some big folds that I would just have to quilt down. Without much deliberation, I chose to smooth it and deal with squaring it up later. The larger goal was to practice with the long arm. He helped me load it and played with it to get it as flat as he could.

img_7420

I didn’t have much of a quilting ‘plan’ in my head with this. More important was learning to use the machine and get the feel of it. The speed picks up on the machine and it is difficult to get into a rhythm that isn’t too fast and allows me to have good control over moving the needle. I did a random stipple with a few loops here and there. It was so much fun. I loved the freedom of movement since I wasn’t dealing with the weight of the quilt. When I think back on how it felt when I was guiding the needle, I am certain I was going to fast. My concern was if I slowed down, my stitch length would shorten and be inconsistent. Plus I would just forget and my speed would increase!

img_7419

Speed was my primary problem. Second to that was judging how close I could quilt near the top and bottom bars. I found myself going too close and getting trapped in places. There is no reason to go that close; it is cleaner to stay a couple of inches away from the top bar and bottom. But I would get my speed going too fast and dang it, I would find myself trapped again!

Even laying it as flat as possible, there are a few significant puckers. It couldn’t be helped. I think using the long arm to quilt it was much more successful than my home machine would have been. I could look ahead and as I moved the quilt over the bars I gently finessed it as flat as possible.  Now, remember he said if I went for smooth and flat, it would be warped and out of square? Oh my, he was right. 🙂

When I got it home I trimmed the excess batting and backing away with scissors, just to see what I was dealing with. Then I did a few dramatic, heavy sighs and asked Ray for help. I knew he would have a solution. The issue was that if I cut it square, it would be so obvious due to the linear pattern of the stripes. Both the top and bottom green stripes would have been sliced at strange angles. Ray suggested taking some of the striped fabric and enlarging the width at the bottom of the stripes. This would give a bit of an illusion of a straight line and I would be able to keep the full width of both green stripes. (I am married to a genius.) I never even thought of it. I have quite a bit of the striped fabric left over. There was no problem cutting a piece and matching the stripe up completely.

image

imageMost of the extra width is covered by the binding. It was a simple solution and I am so pleased with the result. As I said earlier, this quilt is filled with flaws. But when I look at it I am quite happy with it. The colors are lovely and the feel is so soft. Learning to use the long arm feels a bit like going backward. I am just getting some confidence with my free motion skills on my domestic machine and now I am back at square one, learning to quilt all over again!

On Thursday this week, I will be back in the shop. I am going to quilt my plus quilt.  Hopefully I will be able to control my speed a bit. I am going to try to be diligent about leaving myself space at the top and bottom bars. My plan is to do loose spirals in the negative space and straight line quilting within the pluses. I think (I hope?) that is a reasonable goal for me at this point. Any hints or tips on my long arm practice sessions are more than welcome!  Also, while I am thinking of it, do I do all of the straightline quilting and then go back and do the spirals or do I just do whatever shows up within the space of the bars and keep moving it in the one direction? Inquiring minds need to know!

Linking to all of the awesomeness that is listed at the top of the page, under Link Ups.

unnamed

This is a good weekend to shop Craftsy! They have some great discounts on kits and supplies for their End of Summer Clearance. Take a look. This sale begins Friday, 9/16/16 and runs through Sunday night, 9/18/16.

(I am a Craftsy affiliate.)