Monthly Archives: November 2017

Giveaway Winner, Sneak Peaks and Other Exciting Stuff

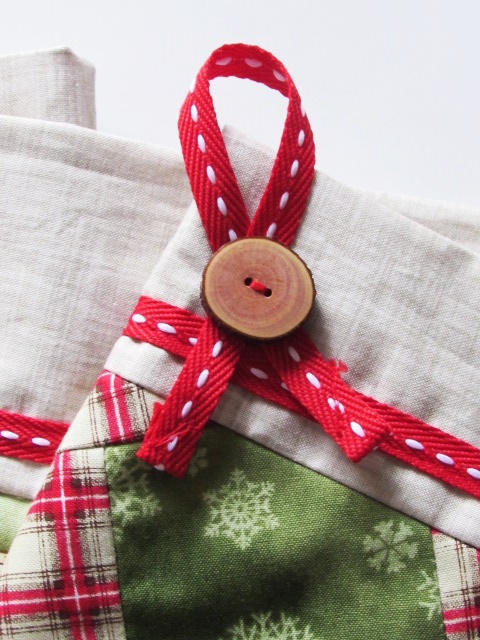
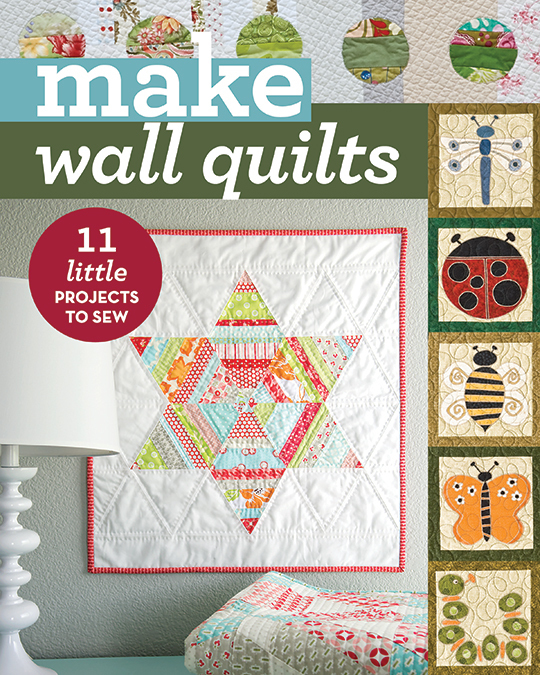
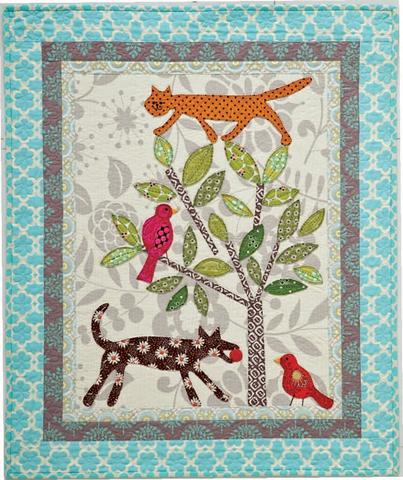
In the excitement of the holiday weekend, Black Friday sales activities and other distractions, I forgot to draw the winner of the Make Wall Quilts e-book.  This morning, using my scientifically random system of drawing names ( Hey Julia, what is a number between 1 and 42?), Nancy was selected as the winner of the book.  Nancy, I hope you enjoy it and make some fun projects with it!  Remember, if you want a copy of the book – it is a bargain on Amazon. Truly – only $2.56 for the hard copy of the book.  Great gift for yourself or your quilty friends!

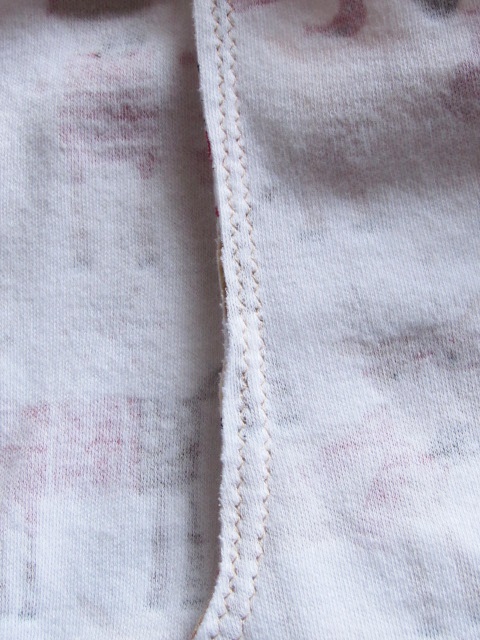
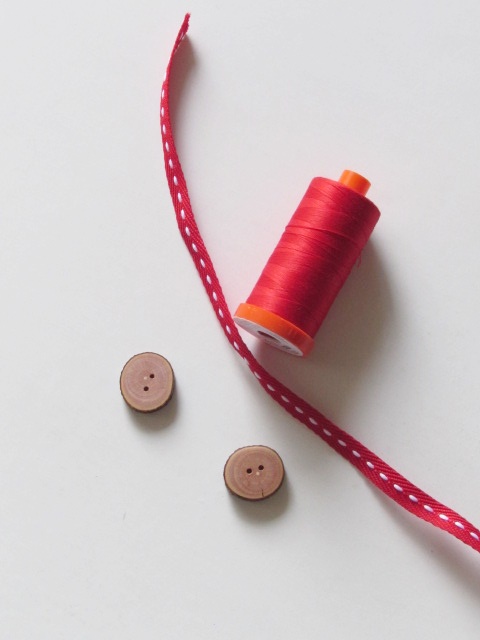
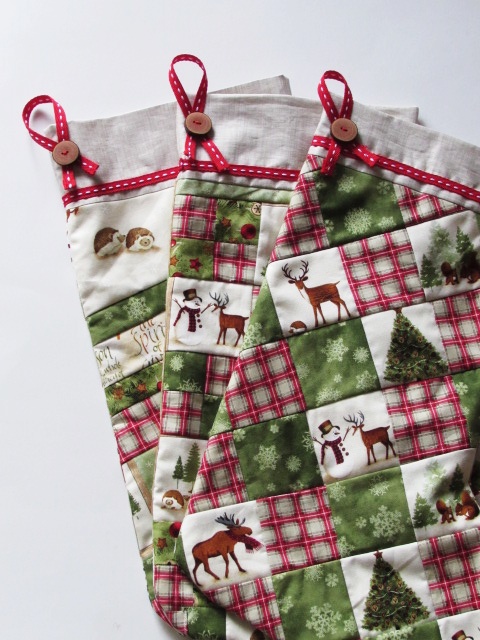
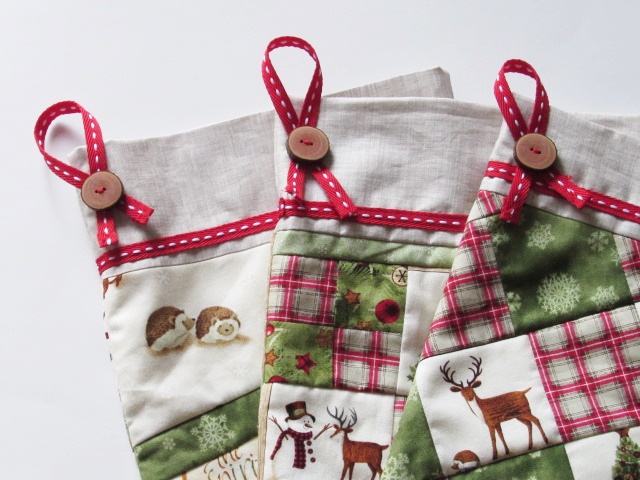
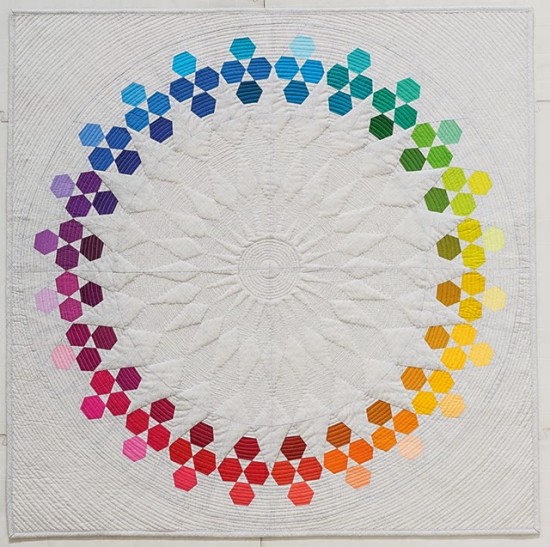
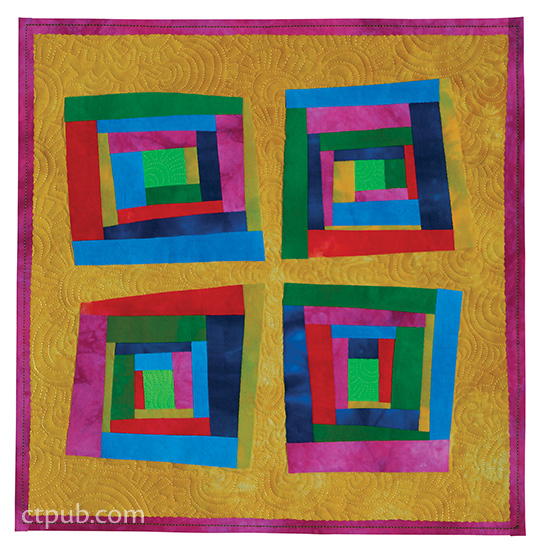
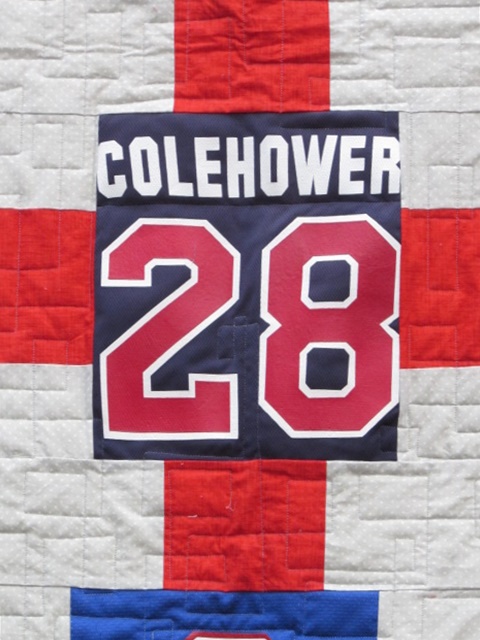
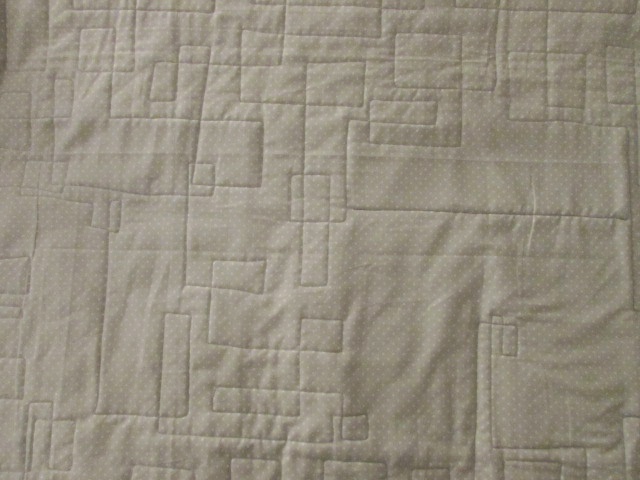
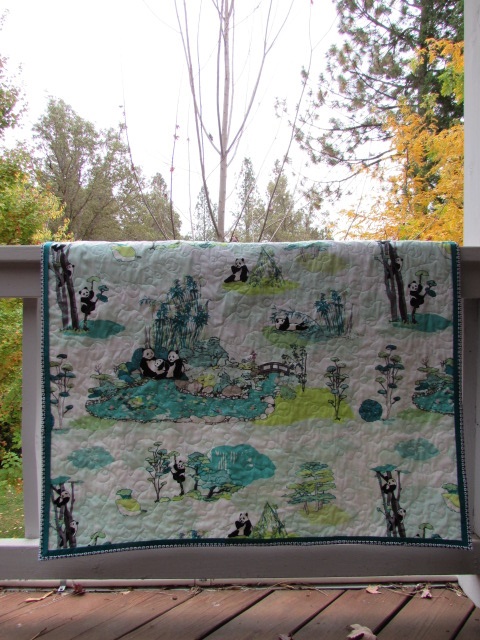
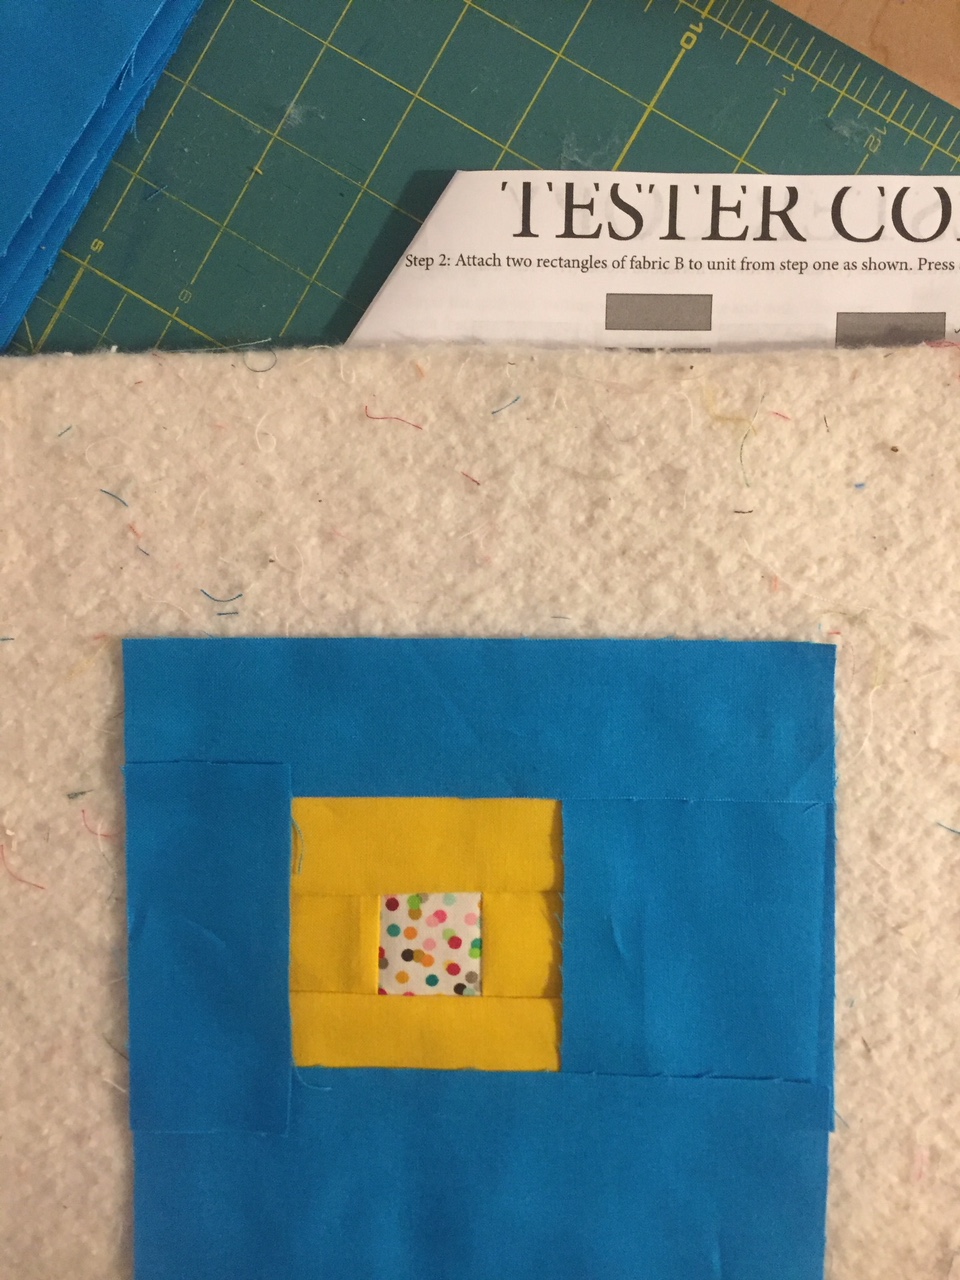
Now that business has been taken care of, want a peak at the quilt I am making?  Sarah Goer is a talented quilter, pattern designer, and blogger. We both started our blogs at roughly the same time and became friends at that time.  This is the second time I have pattern tested for her and I really enjoy it.  Before having children she was a math teacher at the junior high school level.  I think this gives her a great background for pattern writing.  An affinity for math and puzzles gives her the skills to write a clean, well understood pattern.   For now though, this is all I am going to say!  Here is a look at what I am working on.

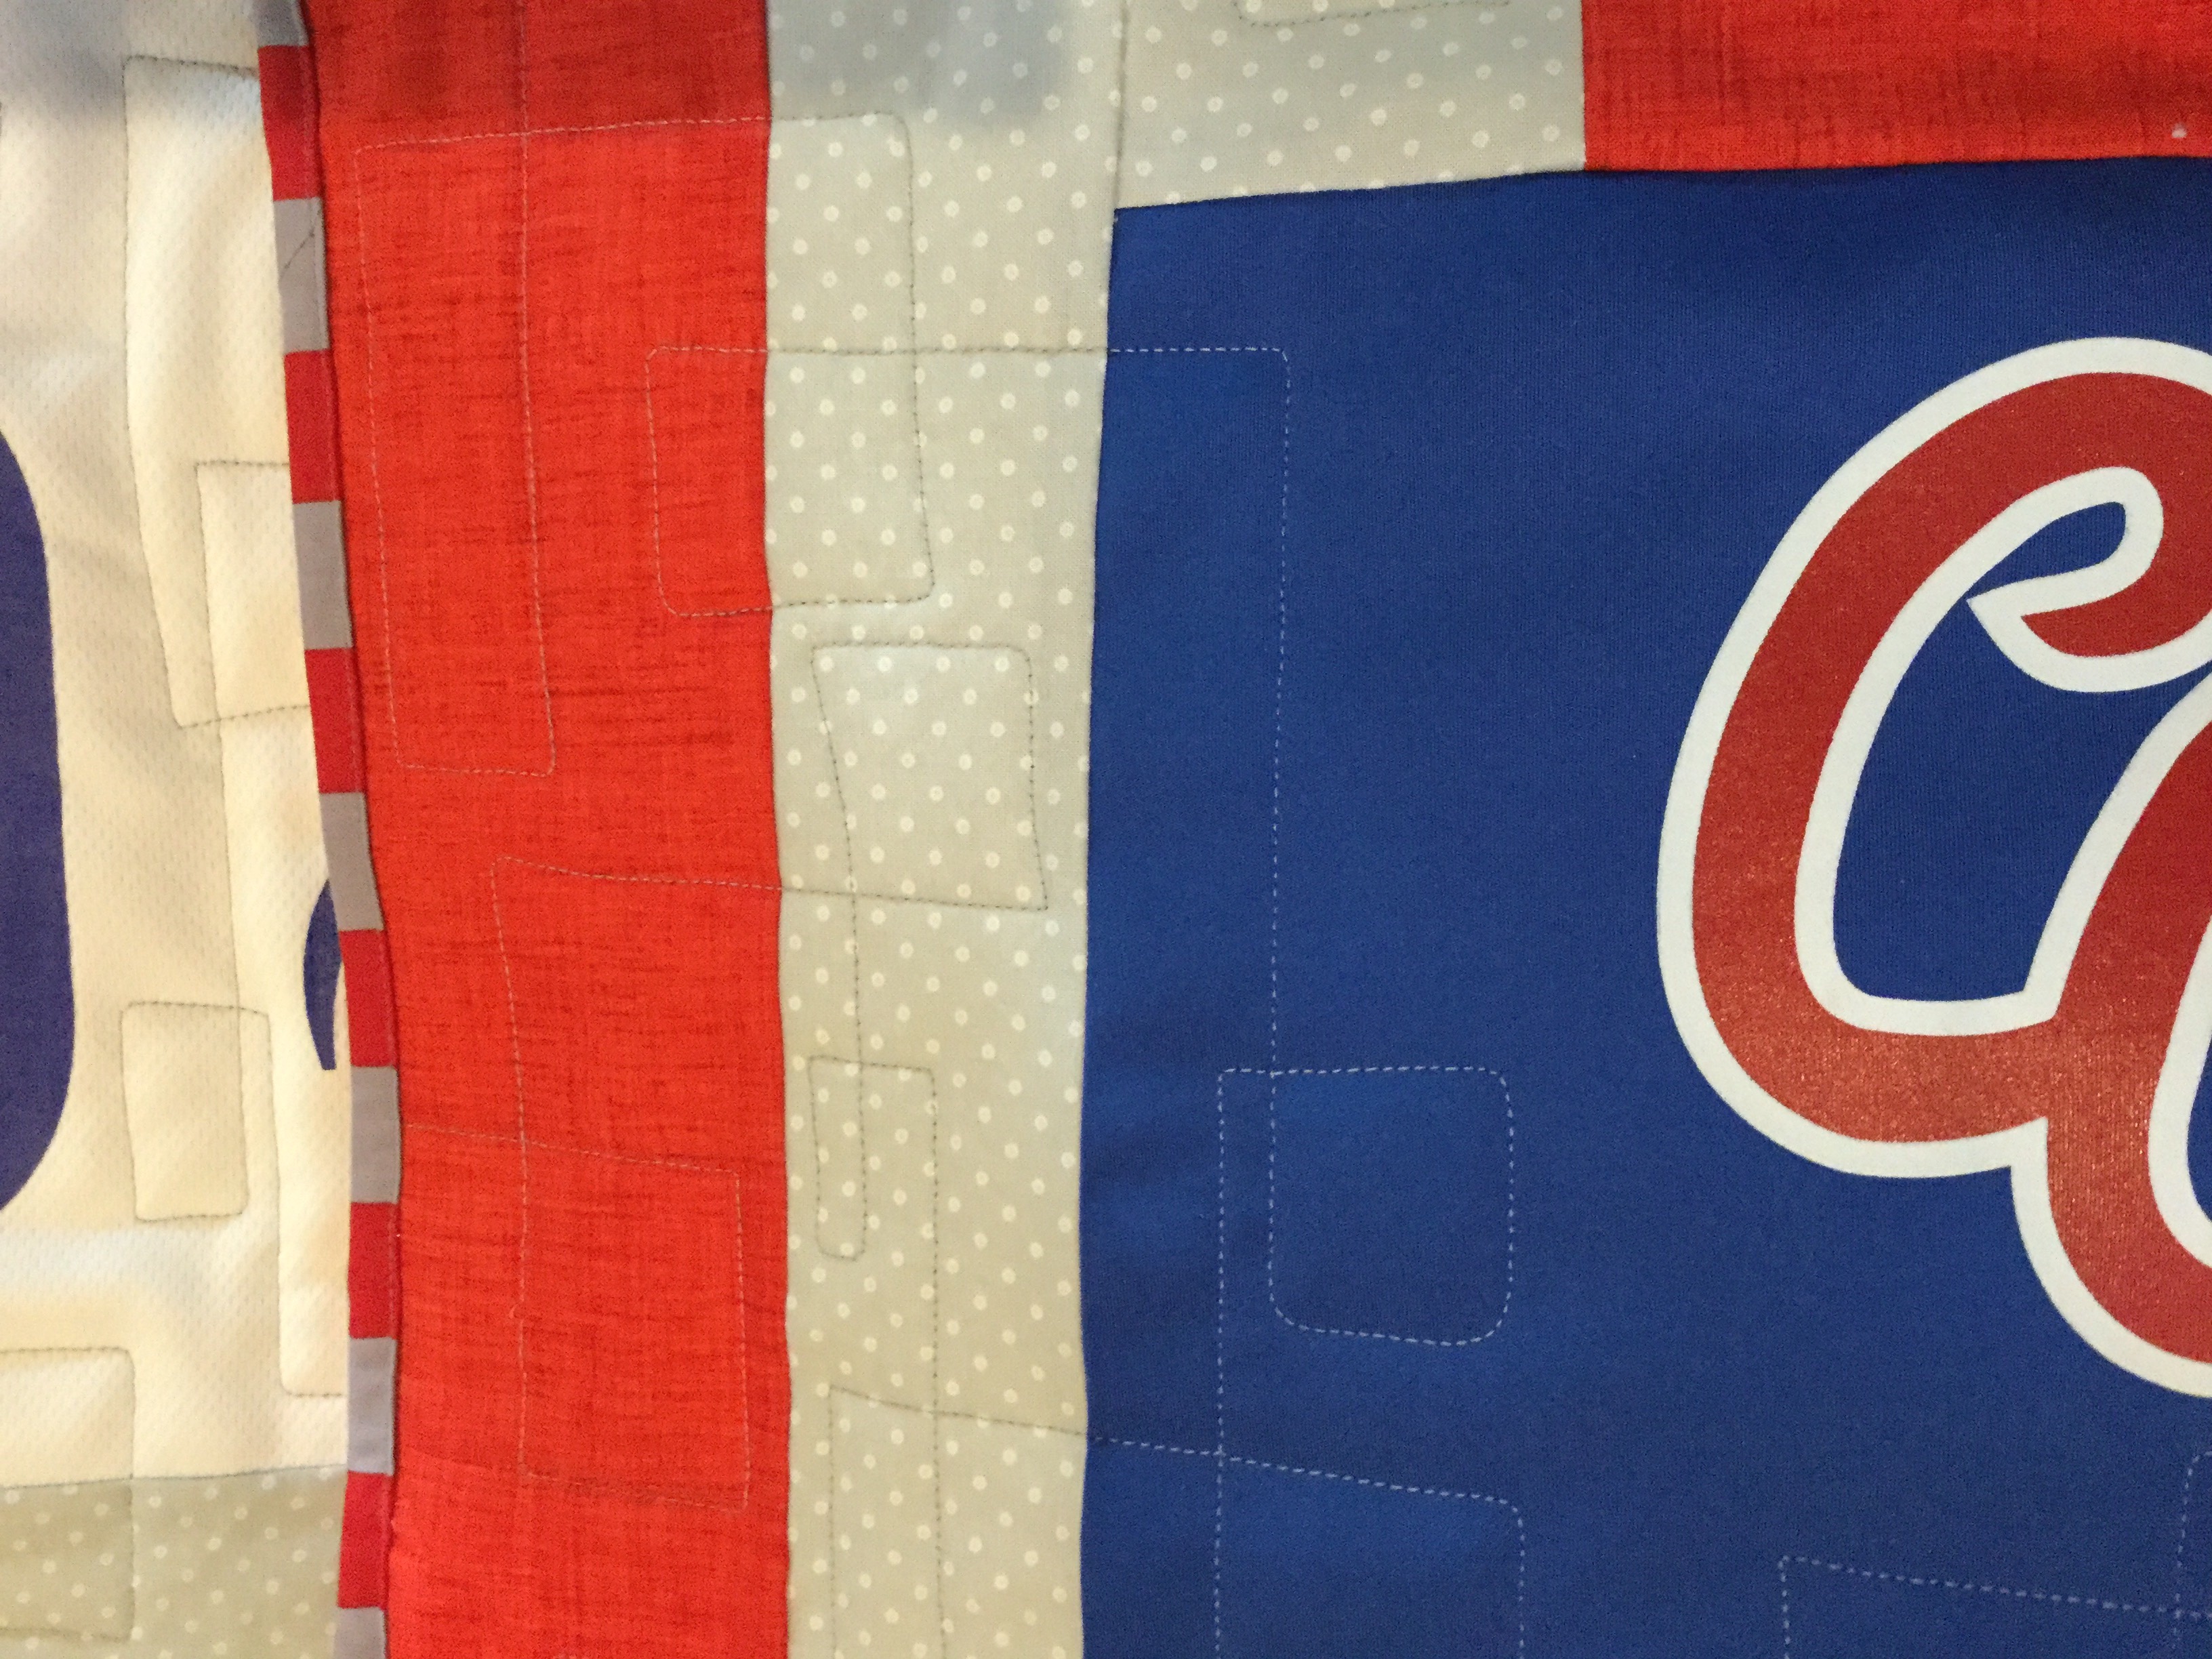
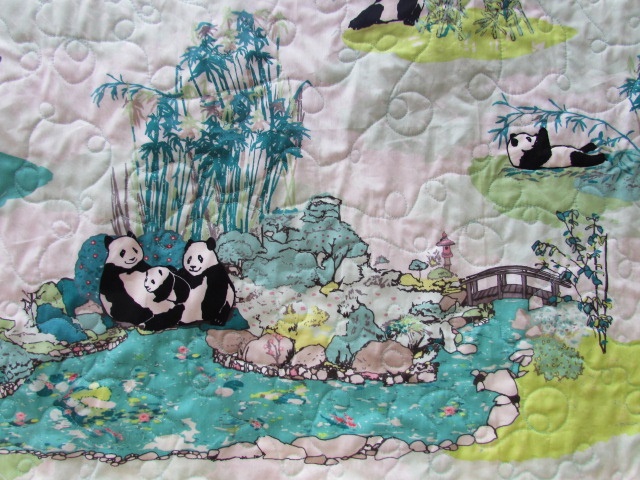
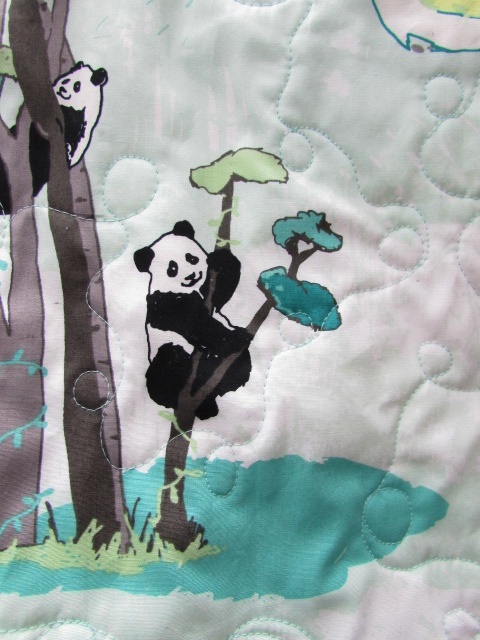
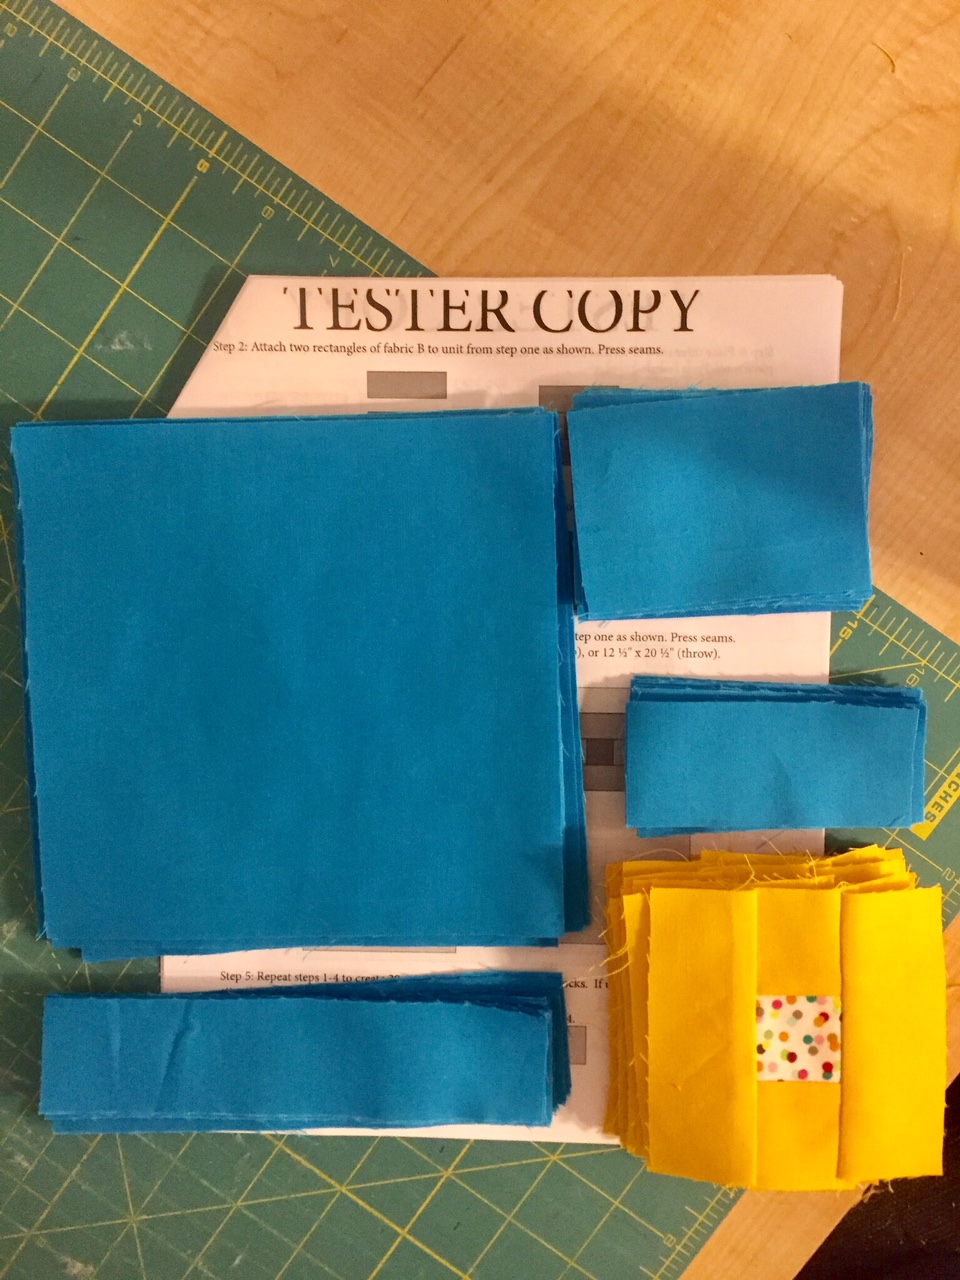
I asked for opinions on color choices on Facebook and Instagram about a week ago and got lots of feedback.  This blue and yellow combo was quite popular and I am very happy with the look so far!

Finally, I was reading the news this morning and saw an article about Facebook that caught my eye.  Facebook gets a bad reputation from the way fake news is often generated, hysteria builds based on ridiculous, irresponsible posting, the cyber-bullying that occurs etc.  Much of this is due to poor decision making on the part of the Facebook user community as well as lack of parental monitoring of the youth that use social media.  When Facebook introduced live video options last year some really disturbing videos were posted. In response to this, Facebook hired a large team (3,000+ employees) to monitor the videos for harmful content or intent.  For quite a while now, they have monitored text for any disturbing conversation that may indicate children and potentially abusive adults (sexual predators)  They will notify authorities when suspicious text is found.

Now Facebook has expanded their use of Artificial Intelligence to scan posts for text that indicates possible suicidal tendencies.  When such information is picked up, there is a team of interventionists ready to contact the person posting as well as persons who may have responded to the posts with supportive information such as suicide hot line phone numbers and other resources which may be able to assist.  Realizing that this sort of intervention has to happen quickly, Facebook has trained employees available at any hour to speak with authorities in the language of their country if something suspect is found.

Facebook is a powerful social media platform with over two billion users.  Many would say Facebook noses around where they shouldn’t.  That they push annoying ads targeted at users and monitor conversations to be able to do so.  However, it is my belief that people using Facebook are making a decision to be posting on a highly monitored platform and thus making their lives somewhat public.  I think it is a good thing to know that the company uses the tools they have to try to protect the safety of the users. I am curious to hear your thoughts on this. To me it shows a very responsible use of the incredibly powerful technology developed by Facebook.

Off to the sewing room!  I want to make some good progress on the baby quilt I am making with Sarah’s pattern.  Hope everyone is carving out a little creative time in their day.

Note: This post contains affiliate links meaning if a reader clicks a link on my page and makes a purchase, I will be paid a small amount.  This payment does not increase the price of the sale to the customer.

Heartwarming Holiday Project

Ok – this post has nothing to do with quilting or sewing and everything to do with service to one’s community, helping those who need it, and bragging about one of my kids. Sorry, I can’t help it – but I am so dang proud of her so I decided to write about this. Plus, it may inspire another family to do a similar project once they see how easy this came together.

Our family has always felt the importance of volunteer work. My parents instilled it in me and my sisters from a long ways back. I have tried to instill it into my children as they grew up. Because of this, Julia is already an active volunteer in our community. She has been helping at the local food ministry since she was about five years old. For the past four years she has volunteered at the thrift store benefiting the animal shelter off and on as her school schedule allows.

Julia and I were recently talking about other ways she could actively volunteer in the community. She wanted a project that was ‘all hers’. She wanted to think of it, organize it and carry it out on her own. After some discussion, she decided to hold a Toiletries Drive for the shelter. To do this she first got permission from her principal to hold the event at school. Then she approached the shelter and asked for a ‘wish list’ of what they needed in this regard. They were thrilled to give her a list of items such as toothpaste, tooth brushes, hand sanitizer, antibiotic creams, antacids, deodorant, lip balm, band aids, and many other items along these lines.


Julia’s next step was to create a little brochure which she posted at school and gave to the principal and school secretary. They both posted it on various avenues of communication with the students and parents. I posted her project on my personal Facebook account so my local friends and neighbors would know what she was trying to do. Oh. My. Gosh. The response to Julia’s project was just awesome.


She specifically suggested people donate all of those free little shampoos and lotions that one collects from hotel visits which often seem to linger on in the bathroom cabinet. She also proposed cash donations and promised to use them wisely to purchase what was needed. People from everywhere donated. Kids, moms and teachers at her school brought items in. Neighbors, friends and family members donated money. She ended up with bags and bags of items plus $245 in cash donations.

Yesterday she and I went to the local dollar store. She carefully counted and selected items from the list. It took quite a while to fill the cart but she heaped it with all sorts of supplies.

Calculating what she had spent, keeping notes on how many of each item she had selected, and figuring out what the tax would be was quite the process. She wanted to spend all of the money but not exceed the $245.00. She did great and has about $10 left over which we will take to the dollar store once more to buy a few more things. We didn’t dare go get more items on that trip. It took the cashier forever to ring up more than 200 items as I boxed them up and Julia tracked the costs. The other customers in line were so patient and kind. They could see she was doing a project and if they asked, she would explain it. One older gentleman chuckled and said ‘oh phew, I thought that was all for you.’ It was so nice to see everyone being supportive and sort of cheering her on rather than grumbling about having to wait behind her for a bit.

This picture makes me smile – she has a receipt that is about three feet long!

In addition to collecting from friends and kids at school, Julia also asked two of our family dentists for donations. One dentist donated a carton of toothpaste tubes and the other dentist gave her a box of toothbrushes. This is one generous community we live in!

There is so much value in a project like this! For one, she learned to define the steps needed to get this going. She approached adults – at school, at the homeless shelter and the local dentists – on her own – to ask for permission and support of her project. She lugged supplies home, posted signs at school, promoted the project on her social media account and will finish up by bringing the donations to the shelter next week. She also plans to write thank you notes for many of the donations. If I think about how projects are done in the professional realm, many of these steps are the same. I feel like this was a hugely valuable experience for Julia.

This is such a cute shot so I am including it, even though it is a bit blurry.

Honestly, it wasn’t all that difficult. I would strongly recommend something like this if your family is looking for a way to give back to the community. If your kiddos are younger, you might want to be more hands-on and supportive. As a teenager, Julia required only a little coaching here and there but truly she did 90% of the work herself.


I am really proud of this girl and she is (rightfully) proud of herself. She likes the fact that she started this, kept to a timeline that she developed, and was very successful. If you have any questions about implementing a project like this, feel free to ask. These are the times when parenting is so gratifying; when we see one of our kids giving time and energy in a selfless manner.

And now just a quick Thanksgiving recap:  We had a great holiday!  Very quiet with only three of us celebrating together but so much fun.  I also held my first big sale in the shop.  Orders kept me busy and I truly appreciate each of the orders I received, some from blog friends and others from new customers – thank you so much for supporting my business!

Black Friday Fabric Sale!

Happy Holidays everyone!

I want to thank you all for your support of my shop over the past ten months, it is definitely at the top of my list of blessings counted this holiday season.  The year has gone by so quickly and I have truly enjoyed selecting fabrics you love to sew withI look forward to the continued growth of my shop and the pleasure of serving you during the new year.

This weekend all fabric in my shop is on sale for 25% off.  No coupon code needed, you will see the discount at check-out.

In addition, orders for $50 or more will receive a free fat quarter tucked into the order. I will be sure to pick one that works well with the fabric in the order.  Plus, customers with orders for $50 or more will be automatically entered in a drawing for a $20 gift certificate to the shop!  Feeling lucky??

Take advantage of these sale prices and stock up, get ready for those projects you have lined up in the new year, purchase fabric gifts for those quilters on your list.  Sale runs through the end of Sunday, November 26, 2017.  Click here to shop!

Again, thank you so much for your loyal readership on the blog and wonderful support of my shop over the past year.  I greatly appreciate it.

Christmas Project Finish

Last weekend I made the cutest leggings for my Vermont grand baby.  This morning I took a few pictures to share with you. They will go off in the mail this afternoon so she can wear them for the holiday season.

I was in Jo-Ann’s about a month ago and picked up this adorable reindeer fabric.  I love the expressions on the face of these deer.  At the time, I was hoping to make one-piece pajamas or a little dress with the fabric but I didn’t buy enough.  Drat .  I had enough for leggings though.

As usual, I perused Pinterest and found this free pattern. It was just perfect, very simple and it went up to size 2T. My sweet grand daughter is a chunk and I didn’t want the pants to be too tight. The pattern is from Toddah.net and prints out on four pieces of 8 1/2 x 11 paper. The instructions are simple and if you are just learning to sew, I recommend this project. It is beginner friendly.

It took all of 45 minutes to cut and sew the legging.  I used a tiny zig zag stich while sewing so there is some give with the knit fabric.

Each seam was finished with an extra zig zag stitch. I wasn’t exactly sure about the length. I had an inseam measurement of ten inches from her mama but it seemed long. I put elastic at the ankles. That way if they are long, they can bunch up at the ankles.

Last finishing touch was to stitch an X at the back of the waist so it is easier to tell front from back. I can’t wait to see how these fit.

While I was working on these, I kept thinking about the kids’ Christmas stockings. I felt like they needed an embellishment at the top. I took a run to Ben Franklin and found this red twill tape with a white stripe. It has a rustic look that I thought worked great with the Winter Friends fabric. When I got home, I asked my husband to make some rustic buttons for me.  He found a maple branch and sliced some rounds from it.  Then he drilled two needle-size holes for stitching, sanded and put some finish on them.  They are SOOOOO cool.  I was thrilled with the finish of the buttons. (You can bet I will ask him for more of these in the future. He whipped them out in no time. What a talented guy!)

The twill tape would surely fray over the years so I stitched a teensy hem at each end and painted a bit of white glue over the ends.  I think that will help the tape remain intact.

What do you think?  I feel like this is the icing on the cake. The stockings feel finished now.

Do you want to see a button up close?  Yes, I thought so.

OK – This is it. No more blogging until after Thanksgiving Day.  This afternoon Julia and I have a date to make pumpkin pie, fudge and the dough for tomorrow’s rolls.  Happy holidays to you and your family!

Linking up with my favorites.  You’ll find the URL’s at the top of the page, under Link Ups.

Finally, if you haven’t yet signed up for my newsletter, now is a good time.  I have a fun Black Friday event planned.  Sign up here.

Make Wall Quilts – Book Review & Giveaway

Today I would like to share a book review with you.  C & T Publishing asked me to review one of their new books, Make Wall Quilts: 11 Little Projects to Sew (Make Series). In a nutshell, I would say I love everything about the book except for the title.  The title didn’t grab me and as I clicked on the link to the book, I was going in with a negative attitude.  Luckily the actual book is wonderful.  I suppose this means one shouldn’t judge a book by its title!

This book is a compilation of eleven different wall, or mini, quilts.  Each is from a different, well known quilt designer.  There are projects from Camille Roskelly, Kim Schaefer, Rebecca Bryan and Heidi Staples in the book as well as several others.  Taking projects from books previously published by the designers is a genius idea as it provides a variety of styles in one book.  You probably know just from reading the names above that the book contains modern and traditional projects made with a variety off techniques.  I am a fan of reading quilt books (no surprise there!) but each one usually has a particular theme or style to it.  With this book, the quilter can try a variety of styles and techniques. The projects are not large which means they are easily accomplished.

Well, all except one!  For me the Huckleberry Quilt designed by Rebecca  Bryan looks challenging and maybe out of my skill range.  But this is a good thing – it further affirms the book has something for everyone from the beginner to the more experienced quilter.  The fact that this riff on a color wheel requires 72 different color fabrics is enough to intimidate me.  I have enough difficulty choosing color and if I had to choose 72 different solids I might go right over the edge. But while you are here, take a look at the quilting on this piece.  Stunning!

The reader might choose to make a modern applique project or a traditional one. I really like the look of this quilt designed by Jennifer Dick, appropriately called Mod. Again just take a look at the quilting here. Gorgeous!

Quilters who favor traditional applique might enjoy this one.  Called Outside In, this project was designed by Becky Goldsmith. It is a larger piece, finishing at 30″ x 36″ but very doable.  I love the cat at the top.  She has attitude.

Quilters without improv piecing experience might like to learn from the Lazy Log Cabin project designed by Laura Wasilowski. The blocks in the piece are six inches with the total quilt finishing at 17″ square.  It is Laura’s use of bold color which makes this project stand out to me.

Most of the projects in this book could easily be expanded to a larger size quilt if the reader wanted to make a baby or lap size quilt with the project.  This further exemplifies the flexibility of the book.  I really give high praise to C & T for curating this great selection of projects and publishing them in one book.

C&T has generously offered a copy of the e-book to give away to one lucky reader. But if you are not the winner, I do recommend purchasing this book, either for your library or as a gift.  It is a lovely collection of a variety of projects, truly a something-for-everyone kind of book.

To enter to win a copy, please leave a comment on this post.   Tell me what your favorite quilting technique is at the moment.  Is it EPP, paper piecing, improv piecing, traditional block piecing, applique? What do you enjoy most?  Giveaway will be open until Friday and I will pick a winner on Saturday.

If you would like to purchase the hard copy of the book, it is on sale at Amazon for a steal of a price! (Affiliate Link)

I doubt I will post again this week so let me wish you a Happy Thanksgiving. I do love this time of year. Celebrating gratitude for all we are blessed with feels good and reminds us that even if we are enduring difficulty, we still have much to be thankful for.

Note:  Needle & Foot is an Amazon Affiliate meaning if you were to click through and purchase the book, I will receive a small stipend for the purchase.

Winter Friends Christmas Stockings

While visiting my son, daughter in law, and grand baby in Vermont last month we talked about the holidays.  This is the first Christmas we will be apart.  My daughter in law is working her second year of her residency as a radiologist.  Apparently the second year residents don’t have the best work schedule.  She is working over Thanksgiving and Christmas both.  So the three of them will be celebrating holidays in between her shifts at the hospital.  Such is the life of a new doctor.

Always ones to look at the bright side, my son and DIL are kind of excited about Christmas though.  Because they have always traveled to California for Christmas since they married in 2010, they have never had their own Christmas tree or stockings.  They have an 8 month old daughter and it is time to begin their own family Christmas traditions.  When my DIL asked me to make them stockings I was so pleased.  What a fun project to tackle.  I showed her pictures of the fabrics I have in my shop and she chose the Winter Friends line by PB Textiles.  This is so perfect since they are a very outdoorsy family living in Vermont. What better theme than woodland creatures, Christmas trees and snowmen?

I was looking around on Pinterest for inspiration when I asked the kids what they had in mind.  They said to make them coordinate with the set of fabrics but to make each stocking with a different design.  So this is exactly what I set out to do!

First I wanted a template for the size of the stocking.  I remembered I had an old pattern from Simplicity that was designed by Eleanor Burns (of Quilt In a Day fame.) The size of the stocking wasn’t exactly right but it was enough to get me going.  I cut stocking shapes from batting and that is what I quilted my piece work to. From there I looked for ideas on line.  I found this tutorial by Amy Smart (Diary of a Quilter) and liked the idea of doing a ‘quilt as you go’ strip pieced design for one of the stockings.  Beyond that, I thought I would do a basic patchwork design and just go from there.

The strip pieced QAYG stocking was a breeze.  It came together easily.  This was the first stocking and I did use a few strips from other Christmas fabric scraps.  I kind of wish I had not done that because for the next two stockings I stuck with just the five Winter Friends prints.  Not a huge deal though. For the QAYG process, I cut random width strips and sewed one on top of the other beginning in the middle and working out to both the top and bottom.  Once the strips were sewn to the batting I trimmed to the stocking shape.

What originally got me wanting to add other pieces was this bit of text saying “the stockings were hung” which I thought cute to include. It looks cute and the colors match well enough so I left it as is.

For the next two stockings I made rows of patchwork which I then used for the stocking front in the same QAYG fashion.  I fussy cut the blocks featuring the larger snowmen, deer, woodland animals, and Christmas trees. These were alternated with 2 1/2″ squares of the other prints. I love the way the patchwork looks when set on point. This is my favorite of the stockings.

The second patchwork stocking is also really sweet.  I made little four patch blocks, fussy cutting the squirrels and hedge hogs to be used with the green snowflake print and the plaid print.  The four-patch squares are a little wonky but I am calling that a charming design feature.  😉

I sewed a curved piece of a cross hatch neutral fabric over the toe of each stocking to make it look sock-like.  I also embroidered a line of stitching to decorate it a bit more.  The toe pieces were hand cut so each one is different from the next.

The back side of each stocking is made with the larger print.  This decision was made purely out of laziness.  I had enough of this fabric in the sewing room at the time and would have had to walk all the way downstairs to grab more fabric if I chose a different one. How lazy can a quilter get???

I don’t know what the kids plan as far as family size but for now they have three stockings made.  I set aside enough fabric to be able to make two more stockings should the family grow!  I might not have exactly enough but they will still match the original stockings well enough. I am really happy with the stockings and hope the kids use them for many years to come.

In celebration of the upcoming holiday season, I have put all of the holiday fabric in my shop on sale for the weekend.  Use code HOLIDAYFABRIC25 to receive 25% off any of the Christmas fabrics listed.  I hope you will take advantage of this great sale which will run through end of day on Sunday, November 19th. Orders will ship out first thing Monday morning so you will have your fabric in plenty of time to do some holiday sewing!

I am linking up with my favorite linky parties. For more information, click on Link Ups at the top of the page.

Fourth Show All Wrapped Up

Last weekend my sister and I worked as vendors at the quilt show for the Pioneer Quilt Guild of Rocklin, CA.  The show was held in Roseville which is about a 40 minute drive from my home.  Set up was Friday night which was slightly unusual. Since my generous sister had accumulated a zillion points with Holiday Inn, she treated us to a hotel rather than driving back and forth. It was a treat to stay in town rather than drive home after we finished setting up. Also, we were able to get there early on Saturday to put finishing touches on the booth before the show opened.

The show was great.  The guild is rather small but quite talented. You’ll be surprised to find out I didn’t take even one picture of the quilts on display.  So strange for me.  I think it was just too busy.  The show was not juried but I did go and vote for my favorite in each category.  I liked their system for displaying the quilts.  Each category was displayed together and there was a painted clothespin with the color of the pin denoting the category of quilts.  So if you saw a purple clothespin for example, that meant you were in the medium size, pieced quilts.

Saturday was busy until about 2pm and then it just dragged.  I think there were some Veteran’s Day activities in the afternoon that pulled customers/viewers away from the show. It made me nervous because usually the first day of the show has been the busiest and the second day much quieter.  Patti and I were nervously anticipating a very quiet day on Sunday.

We were pleasantly surprised because Sunday was very busy and we had so many customers.


Also, Julia spent the day with us on Sunday. She had fun talking with customers and putting bolts away after I cut fabric.


Patti, owner of Etsy shop Ferrari Handmade, had a very successful weekend. She brought only her holiday dresses and the coordinating doll dresses.  This is the perfect time of year for her shop and there were many grandmas at the show who liked and purchased the dresses for their grand daughters.  She also had a number of custom orders which she is busily sewing away on this week. The incredible technology we have these days enabled her to sell a custom dress for a grand daughter in Florida. It was really fun to watch the grandmas FaceTime with her daughter in Florida so she could show the fabric choices for the dresses.  Patti was able to get details right then by talking with the mom as she took the necessary measurements on the little girl. Gotta love technology!


Patti constructed this super cute fireplace to decorate our booth and give it a festive feel.  Julia was so funny as she tried to emulate an excited child sitting by the fire (a string of battery operated lights.)


As always we learned a few things with this show.

#1 – If you put the candy jar behind yourself because the work table is too small, one goes through candy much faster!  I suppose people are more ‘comfortable’ taking candy when it is less visible?  How funny.  So we ran out on Saturday afternoon and had to restock for Sunday’s customers!

#2.  We wrapped little holiday fat quarters with ribbon and hung them from our Christmas tree like ornaments.  However we didn’t post a sign with pricing and we didn’t sell even one!  We sold tons of fat quarters from the basket where the sign hung but not even one from the tree.  So, while it looked cute, it wasn’t an effective display.

#3.  As I had hoped, having samples made with fabric available for sale really boosts sales.  I had the small quilt made with the Shine panel as well as the Panda Garden whole cloth quilt on display.  Numerous sales resulted from this as they drew interest from the shoppers.

This is the last show I am doing for 2017.  I am looking at the shows for 2017 and deciding which to do.  My sister has a busy month booked for December.  She will be doing a weekly outdoor event up here called Victorian Christmas. Hopefully I will be able to help by working in her booth (if my head cooperates and I am not dealing with a migraine.) Whether I work in the booth or not, she will certainly be successful – especially after seeing the success of her efforts over the weekend!

The holiday season is going strong for me and i am sewing lots of cozies for both French Press coffee pots as well as Chemex pots. I have several Christmas projects I want to make/finish so I need to stay organized if I am going to get it all done.  I am sure you are feeling the same way as November marches on and the holidays begin.  Enjoy the sewing time and don’t stress over it!

Sam’s Quilt

The sports jersey quilt is finished!  This is the second t-shirt quilt I have made, the first one being for my niece, Lil (Sam’s cousin.) The jersey quilt was a good learning experience, but what quilt isn’t? There is always something new to try or a skill to further practice.


The biggest challenge was definitely piecing those slick, polyester pieces of the jerseys.  Second to that would be working with the rubbery decals used for his number and the logos.  They were much thicker than one would think.  Other than those two issues, this was a breeze to make. You can read progress posts about putting it together here and here.

To quilt this rather heavy project, I rented time at the long arm shop.  It would have been difficult to feed it through the throat of my home machine because the decals are thick and stiff, making the quilt unwieldy. Once I had it loaded on the machine I quilted it with lots of interlocking squares.  It looks like a nice, masculine motif and works great with the blocky pattern of the quilt.

Sam’s football number was 50, just like his father’s was when he played.

I tried to avoid quilting through the rubbery decals and numbers.  Instead I went around and inbetween them wherever I could. It was really difficult to keep the quilt flat while quilting it. I cannot tell you why, the heft of it or maybe the slick jerseys? If I were quilting it at home, I would have guessed I didn’t baste it well enough. But when we loaded it on the long arm (the gal at the shop kindly helped me) it seemed very straight and flat.  At any rate, it is not tightly quilted. The quilt has a puffiness to it.  It doesn’t bother me though.  I plan to wash it today before I mail it off and it is likely to crinkle up a bit when the batting and cotton fabrics shrink up a little.


Remember I pieced the backing so I could use up a few more jerseys?  This is the first time I loaded a backing that really had to be straight on the long arm to line up well with the front.  It was mostly a success – the logos are straight but they aren’t centered across the back.  Side note, it has been quite rainy this week which is wonderful. I kept waiting for a clearing in the weather so I could take some photos.  Finally, Julia said we better just to take pictures Mom.  So off we went in the rain.  I put a beach towel under the quilt and she held it over the railing.  Such a dedicated quilt holder!!  You can see the towel shows under that edge on the left. 😉  Ok, back on topic – I love the way the back looks and it shows the quilting pattern off a bit.  I keep looking at the larger spaces near the decals and wonder if I should add some quilting there?  Do you have any input?  Are those unquilted spaces too large?

The binding is an older stripe with 1 1/2″ widths red and gray.  At first I was hesitant to use it because the red wasn’t exactly the shade I wanted but there are so many different reds in this quilt between jersey colors and the sashing I used that it worked well in the end. The bold, chunky look of the stripe fits with the blocky pattern of the quilt just fine.


So this one is finished and will be sent off to Sam early next week.  The long arm practice continues.  It is tons of fun but has a definite learning curve to it.  My skills are improving but I need so much more practice.  It motivates me to finish up some of my projects so I can go back and practice some more!

Now sewing time for me over the next couple of days. This weekend my sister and I are working the Pioneer Quilt Guild’s show in Roseville.  If you are local and planning to attend, please come say hello!  I am excited to see the quilts hanging and meet members of the Pioneer guild!

Sewing Room News

The season has definitely shifted to full blown fall around here.  We had a great rainy weekend and the colors are gorgeous.  The shot above was taken a few days ago up at the pond on the edge of our property.

I have a few fun things to share with you.  You may have noticed that Craftsy has been evolving and changing over the past year or so.  They started to carry their own brand of fabric (Boundless) as well as yarn (Cloudborn).  Now they are offering a subscription plan to the videos offered for sale on their site.  This is an interesting proposal for those crafters that regularly purchase and view Craftsy videos.

The subscription is similar to that offered on Creative Bug but the Craftsy site offers many, many more classes in all sorts of subjects than Creative Bug does.  Of course, you get what you pay for, right?  The Craftsy subscription comes at a higher price.  For $14.99 per month, or $120.00 per year, the subscriber has full access to all of the classes in the Craftsy library.  There is no contract tying the subscriber to the plan for a certain number of months to enjoy full access.  (Of course if you pay for a year up front, you are subscribing for the twelve months.)

The interactive qualities, class notes, and discussions, are all available with the subscription. But you do not own the class, meaning when you decide to cancel the subscription you will no longer have access to the classes.  I think there is merit to their plan. Right now, Craftsy is offering a two week free trial of their subscription service.  Certainly worth taking advantage of, especially if you were considering purchasing a class in particular.  You now have the chance to watch the class and decide if it covers what you need before purchasing it.  There are lots of options how to utilize this new service.

As for sewing and fabric news, I am working on finishing up the binding on my nephew’s jersey quilt.  I decided to machine stitch it to both the front and back.  I am somewhat sure my nephew will not look at the binding and wonder why his Aunt Bernie didn’t hand stitch the back of the binding.  😉  Also, the quilt is made of jersey knits that have been stabilized.  It is pretty heavy and I don’t want the binding to come apart when the quilt is laundered.  I found one spot where the quilting stitches look a bit funky on the back side and I will take those stitches out and repair it on my machine.  I think I have thread that is close enough so it won’t be noticeable. Hopefully I will finish that up and then have a fun finish to share with you.

Last week I got lucky on my thrift store prowl.  I was having lunch with my mother in law who lives about an hour or so from me.  I saw a local thrift store that looked interesting and stopped in.  They had three rolls of knit fabric, each one 60″ wide.  I really love the color of one roll, a dusty purple and I grabbed it.  It was taped tightly so I couldn’t unroll it and check to see if it was in good shape. But I decided to take the chance on it.  If it didn’t turn out to be clean and in good shape, my $12.00 was going to a good cause (Hospice). But guess what?? It turned out to be really nice fabric and there is probably at least five yards on the roll. It will be fun to sew something up with this. I am not sure exactly what yet.  Nightgown? T-Shirt? There is plenty on the roll so maybe both?? As always, I look at a piece of fabric and it is so fun to think of the potential in it.

Hoping your week is going well and you are fitting in a bit of sewing time here and there!

Linking to Main Crush Monday at Cooking Up Quilts and a few others. Take a peek at the tab at the top of the page, Link Ups, for more linky parties.

(This post contains affiliate links meaning if you were to click through and make a purchase, I would receive a small compensation for that purchase.)


Playful Pandas Whole Cloth Quilt

I don’t know about you but I am really lazy about getting my sewing machines serviced.  I procrastinate, put it off longer and longer with my usual excuse being ‘I clean out the bobbin housing all the time so it must be fine’. But oh my gosh, think about how often I use these machines of mine.  The poor things need to be taken care of!

When my smaller Janome refused to stitch more than two inches without giving me grief, I realized it was time.  I took it to a woman in town who is a whiz with machine repair and maintenance.  She kept it for a few days and worked her magic. Some $80 later, my machine is purring along. What a huge difference!!  When I picked the machine up, Debbie had a sandwich size Zip Lok bag filled with lint and gunk. I can’t imagine how she got it all out of there but she did. The machine is like new!

I decided to take advantage of this amazing transformation and practice some free motion quilting. I have not been doing too much quilting at home because the machines were not cooperating (now I know why!)  To have a nice big canvas to play with, I chose to do a simple whole cloth quilt.  Have you seen Art Gallery’s line of fabric called Pandalicious? Of course it  features adorable panda bears. Designed by the very talented Katarina Roccella, these prints are really sweet and just filled with the personality of spunky pandas. I have a few pieces of the line in my shop and decided to play with the feature fabric.

Panda Garden Recess is a large scale print which tells the story of panda families frolicking in a garden of pastel blues and greens. I cut  a 40″ piece of this fabric and a 44″ piece of Hidden Panda for the backing. After trimming the top to a 40″ square and quickly pin basting the layers together, I started quilting loops. My machine was entirely cooperative and the tension was perfect. It is much more fun to quilt when my equipment is properly taken care of.  🙂


The quilting took no time at all.  After squaring it up, I decided it needed something more than just the binding.  I had a large scrap of a jade green solid in my stash and cut some 1 1/2″ strips to make a flange.  I am always, always a fan of a flanged binding!

As I mentioned earlier, the adorable backing is called Hidden Panda.  It is another of my favorite prints. The loopy quilting I did (which doesn’t really show up in the pictures) works well with the curve of the print.  Looking back, it would also have worked to quilt the piece from the back, by quilting along or tracing the curves. Another project for another day!

There you have it.  My machine is back to its amazing self and I have a sweet quilt as a result.  Next weekend is the quilt show for the Pioneer Quilter’s Guild where I will be a vendor.  It is going to be held in Roseville so if you are a local, come out, say hi, and enjoy the show!  I will use the quilt to show off this fun fabric in the booth.  After that, maybe it is destined for Project Linus or a spot in my Etsy shop.  I haven’t yet decided.

We are supposed to have a wet, rainy weekend and I am prepared!!  I have two projects currently vying for my time so I am very much looking forward to a quiet weekend in the sewing room.  There is also a tiny quilt show scheduled for the weekend and I may hop over there to take a look at the quilts.  We shall see!  Hope you have something fun planned as well!  Enjoy the weekend.

Linking to my usual favorites as well as one new to me;  Finished or Not Friday over at Busy Hands Quilts.  Check them out at the top of the page, under Link Ups.