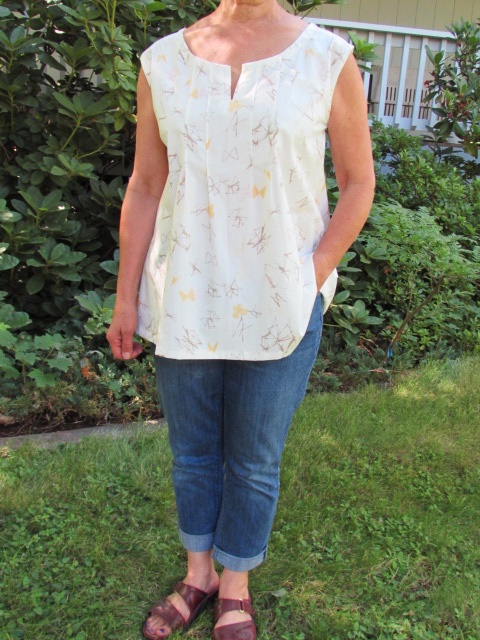
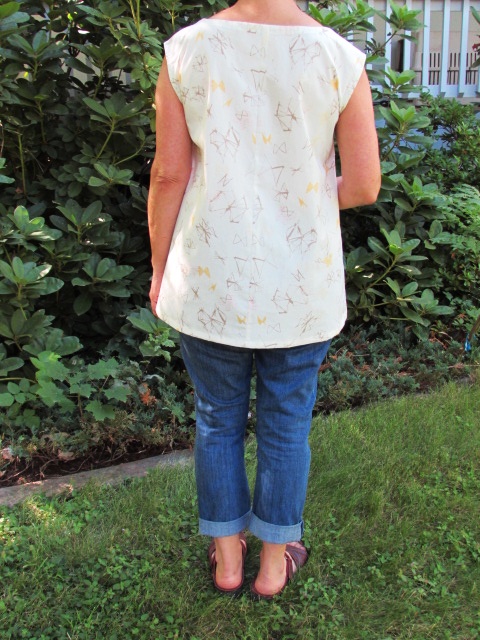
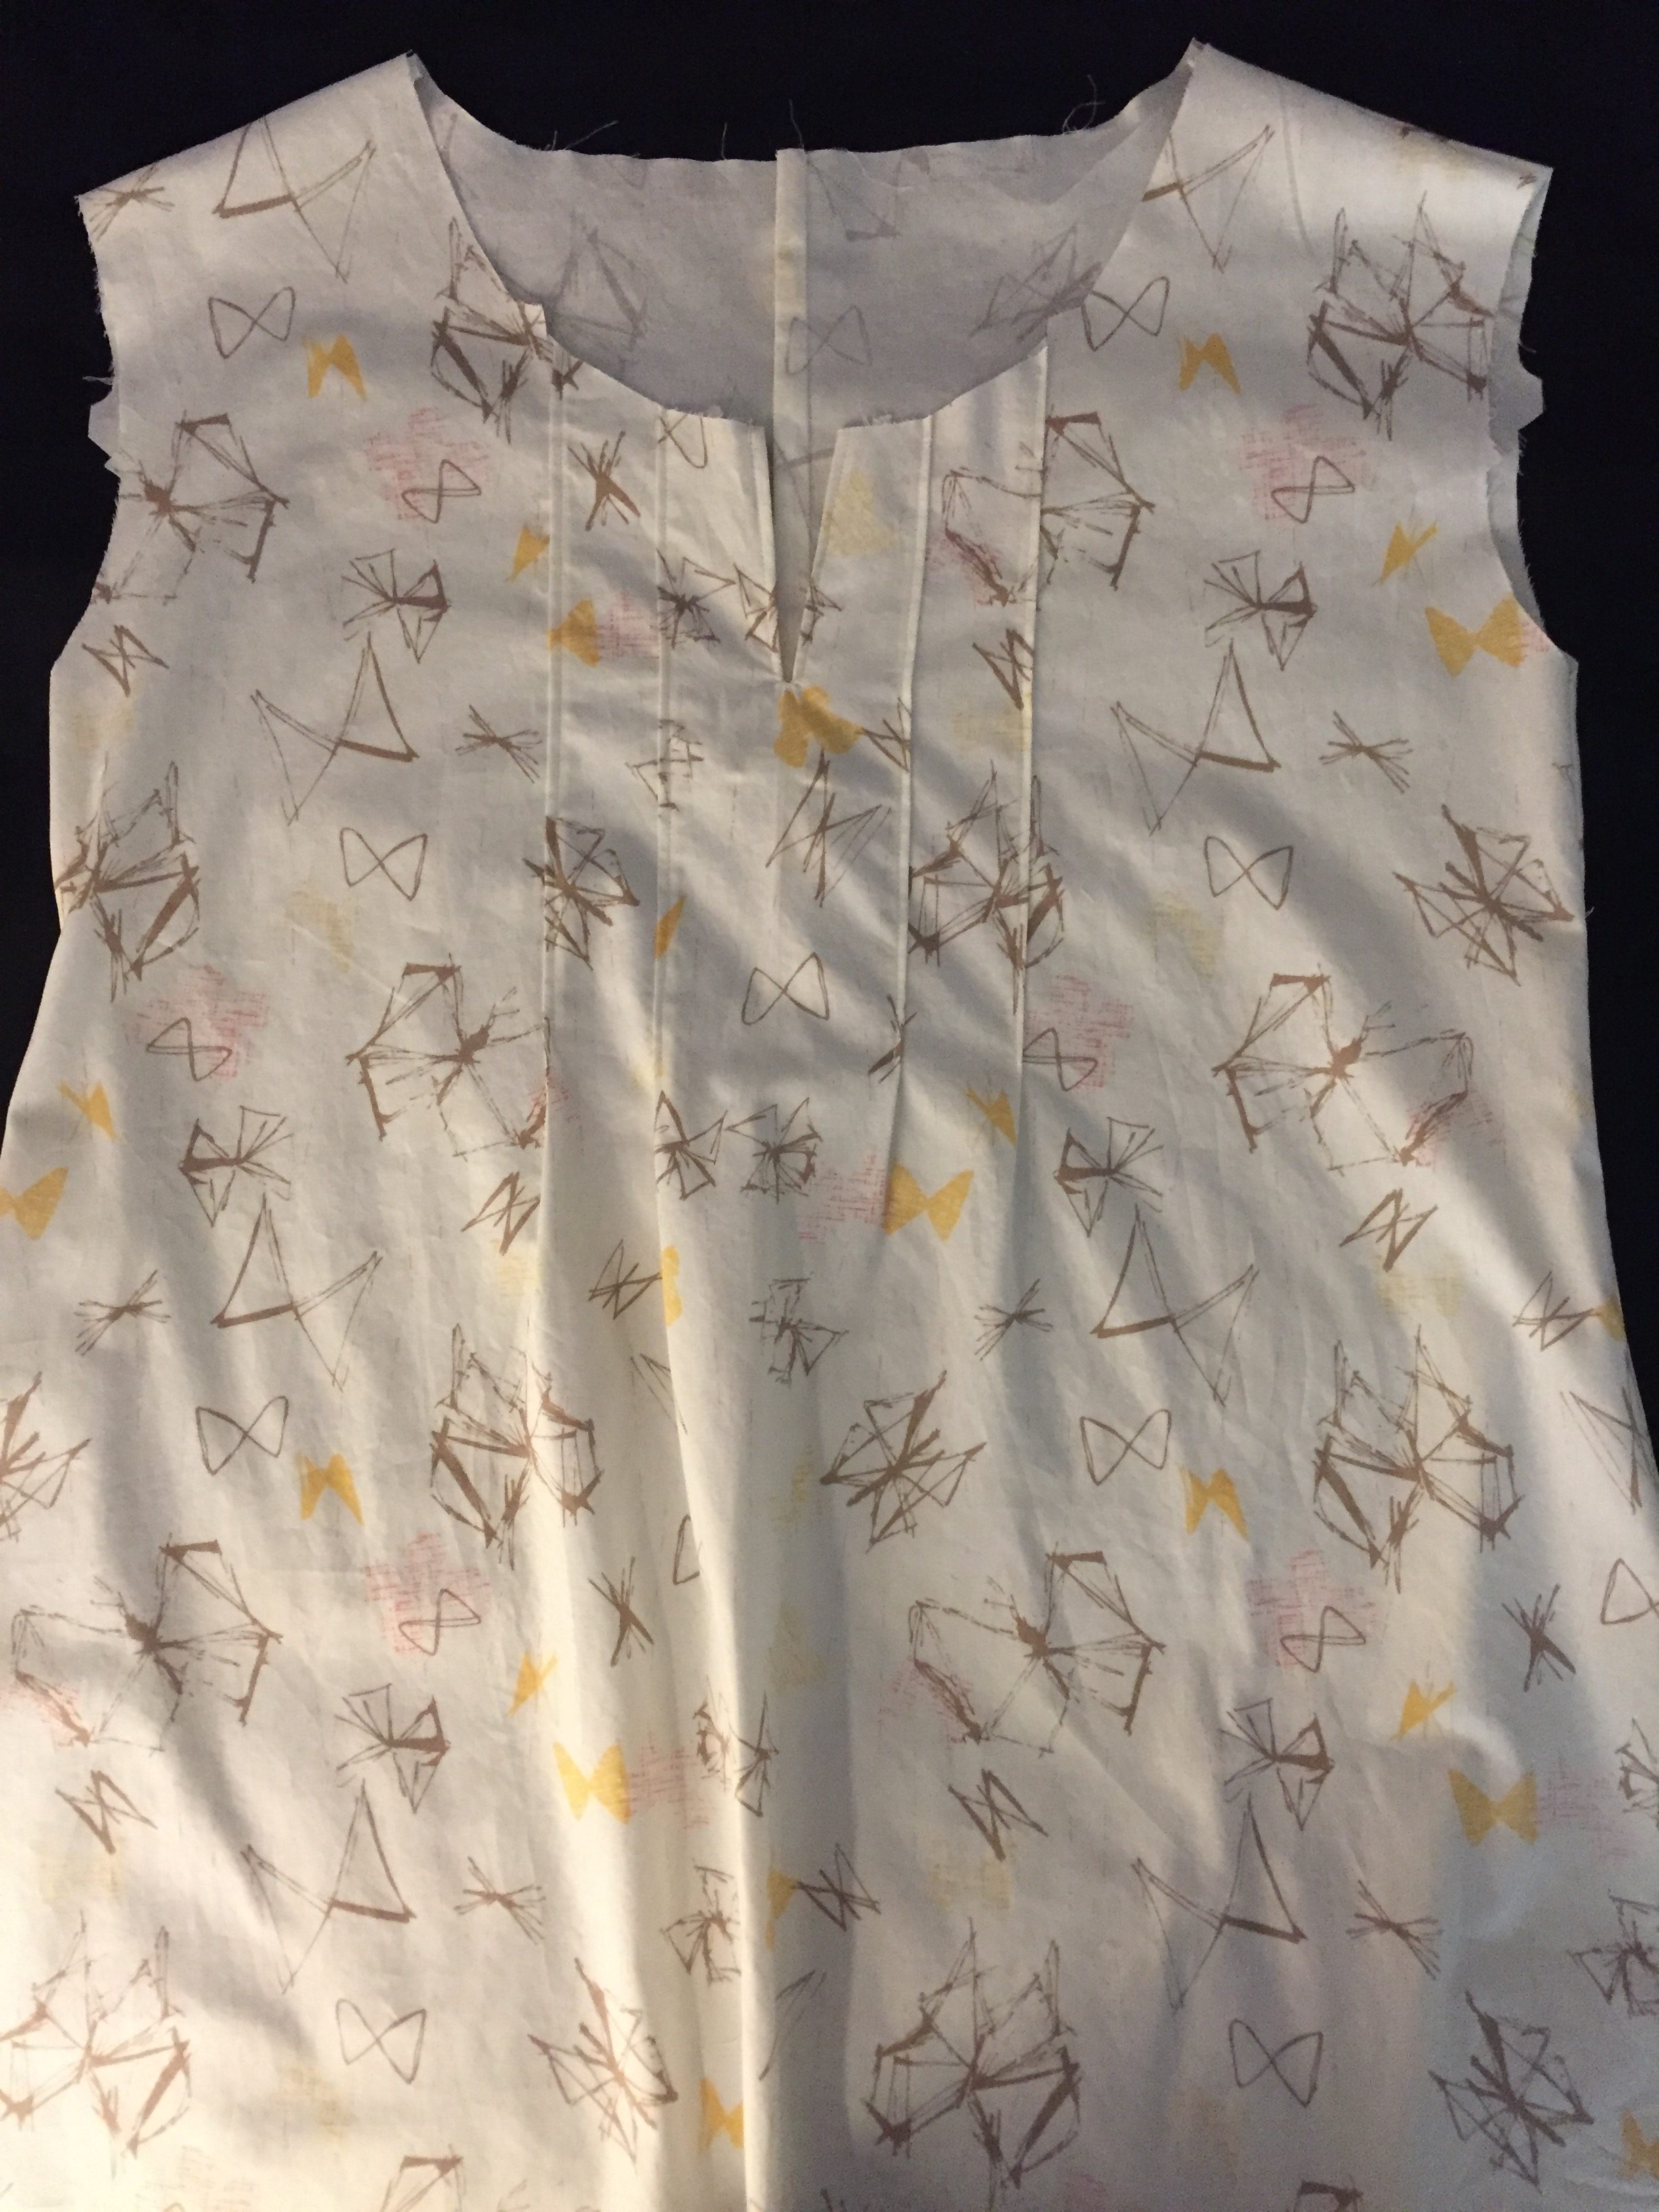
Today we are celebrating the finish of the Summer Sew Along. Together there were about twenty sewists that made a shirt using Butterick pattern number B6024. If you are just seeing this and want to check out the sew along from the beginning, click here. This is the first time I have hosted a Sew Along. I truly enjoyed every bit of it. I had a few frustrations as I finished up the shirt and I am anxious to see and hear how everyone else fared with the finishing touches on their shirt. So, let’s take a look at my finished shirt!
The fabric I selected is called Filaments Ethereal from Art Gallery Fabric’s collection called Gossamer. Actually of the group of us sewing, there will be at least five people with this shirt in a fabric from the Gossamer line. It was a popular choice for summer.
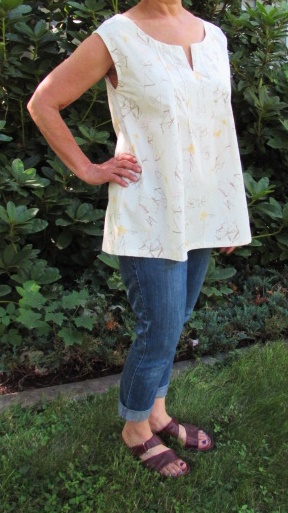
For the most part, I am satisfied with the fit. The first time I made it, I decided it was a teensy bit tight across the back and shoulders. So with this one, I made it a little bit larger. I may have gone too far the other way and it is a little bigger than I wanted. I know, I know, I am being too picky. The fit is always the biggest challenge with sewing clothes.
The shirt hangs well and it is super comfortable. The Art Gallery fabric, as always, is so light, making it perfect for summer.
I think, were I to make it again, I would make the version with sleeves. I like it just a bit better. But really, what a fun project this was. I would definitely host something like this again. Sewing with friends, whether in real life or virtual life, is always a fun time.
Here is one of the member’s of the sew along. Rosemary joined in and she chose to make the version with pin tucks across the front. She did such a great job and I think it looks beautiful on her. That fabric is wonderful! It looks like her puppy approves too!
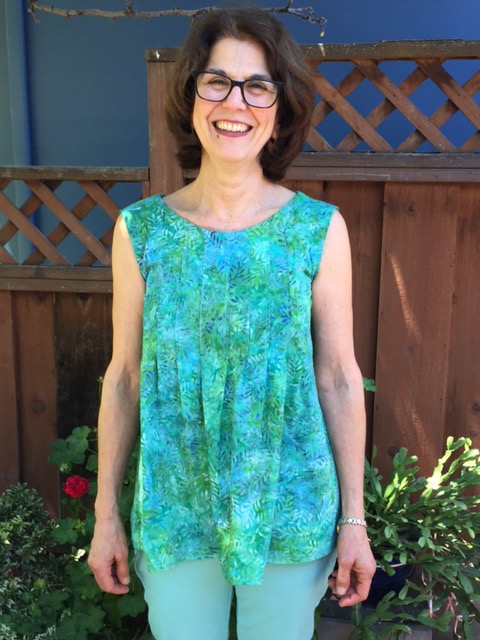
Here is my sister Tina. She joined in and sewed with us. She has been sewing for a long while but hadn’t made any garments for a while and wanted a refresher. She did a great job on the shirt!
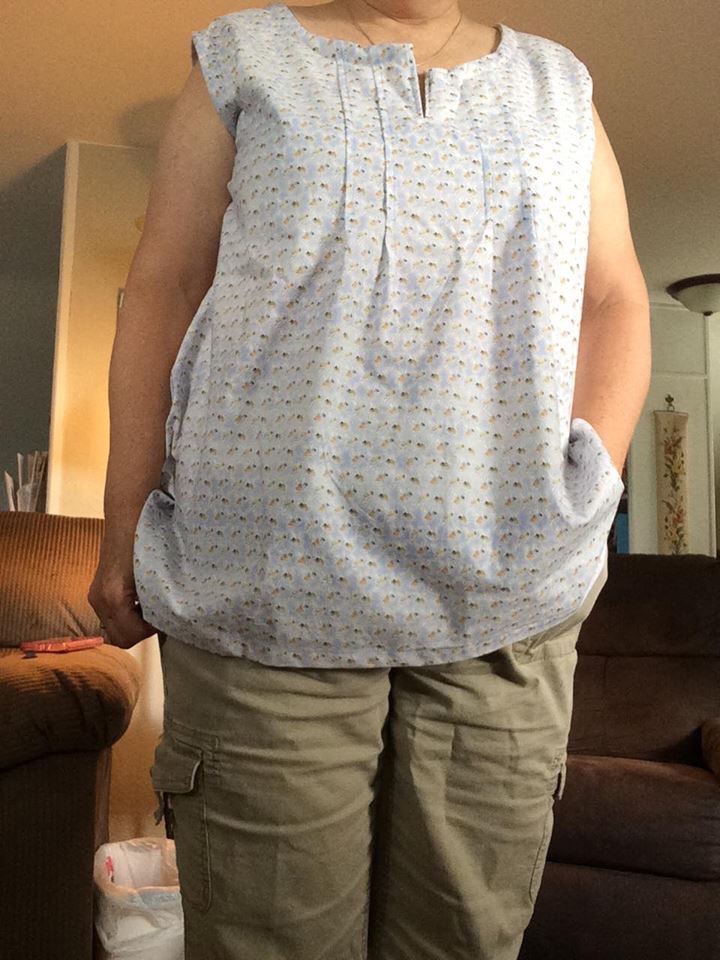
The picture above is from Cate. She chose a lightweight blue fabric for her blouse. It is just perfect for summer. It looks so pretty!
I have a link up below so people can share their finishes with everyone. I hope you will scroll through and take a look. The link up will remain open for about ten days. Not everyone has finished their shirt yet so I want them to have the chance to link up when they are done.
Finally here is a heads up on a great promotion over at Craftsy during this long holiday weekend. Might be the perfect time to select a new class for less than $20.00! So many excellent classes are available and once your purchase it you have it forever. What a great way to build your library. (Affiliate post)
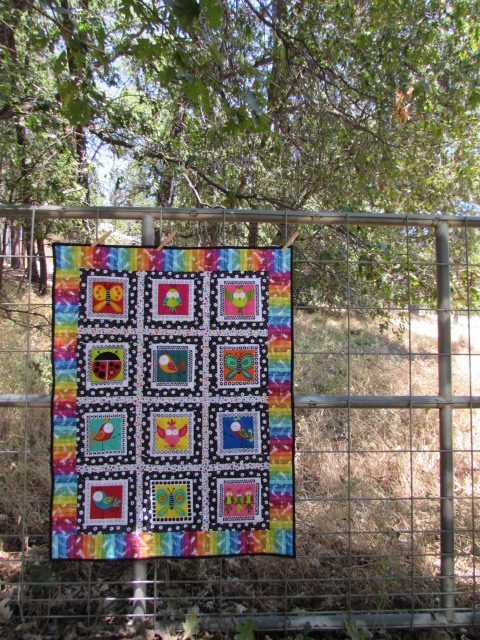
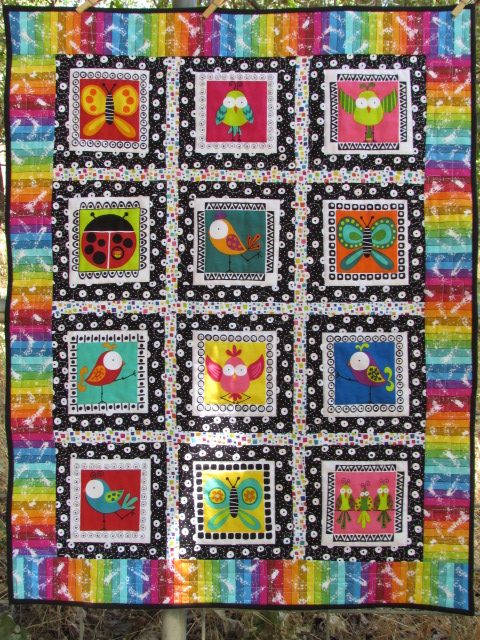
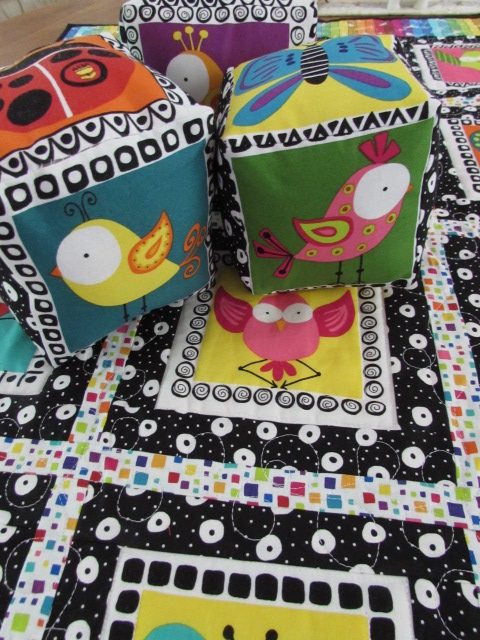
I have a finish to share with you this morning! I began this little quilt a couple of months ago when I had the Sweet Tweets fabric (by Kim Schaefer for Andover) in stock. There was a panel fabric with these fun critters and I made both a quilt top and three stuffed blocks out of it (with a few pieces to spare!) I wanted to wait a bit before finishing the quilt though. I sold out of the rainbow stripe that I wanted to use as a border. I knew Kim Schaefer was coming out with a new line that had a similar rainbow stripe and I had it on order for my shop. (Note: I am sold out of the Sweet Tweets panel now and Andover has told me they will not be reprinting any of this line. It is kind of unfortunate because it is such a cute one.)
The new rainbow fabric is from an Andover line called And Z (from the alphabet song… W, X, Y And Z!) It also has a sweet alphabet panel and lots of fun coordinating fabrics, including a new rainbow stripe, which I used as the border on this project. I greatly appreciate when a designer works to make sure successive lines work with the one prior. It makes it much easier to use your stash. Anyway, this rainbow stripe was perfect for the Sweet Tweets quilt border.
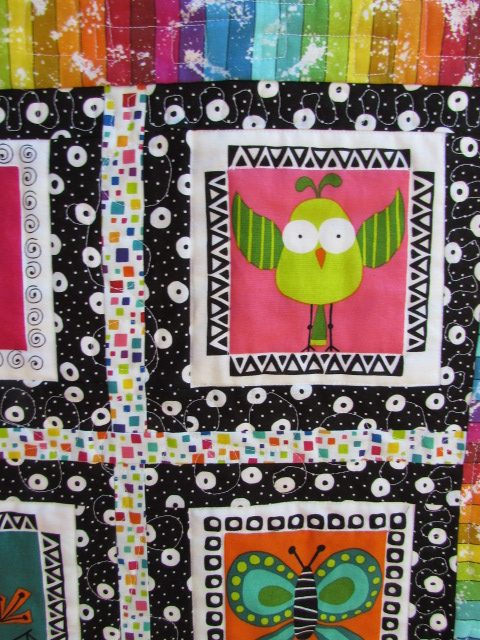
Once I had the borders on, it was time to quilt it. There is a whole lot going on with this quilt, cute focal fabric, stripes and dots, and all sorts of color. I thought it best to keep things simple. I outlined the critters with my walking foot which anchored everything down.
Next I free motion quilted large and small loops between the critters. I was using Glide thread in basic white and it was wonderful. I am really impressed with this thread and I need to get a few more colors to have on hand.
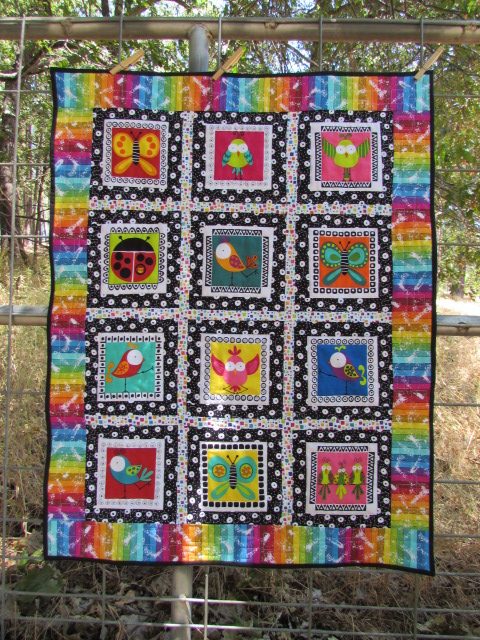
For the small row of sashing between the critters and the rainbow stripe border, I quilted a little wavy pattern. Finally when I got to the border, it was time to switch from curves to a boxy motif. (Side note – look how dry the pasture next door to us is…. We have had such a heat wave and the grasses are really dry now. )
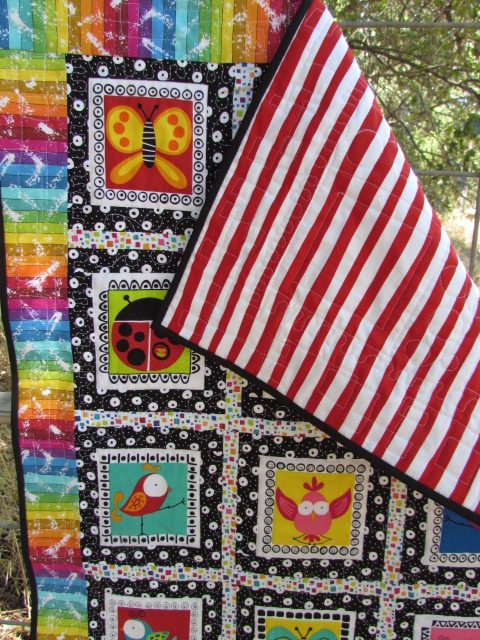
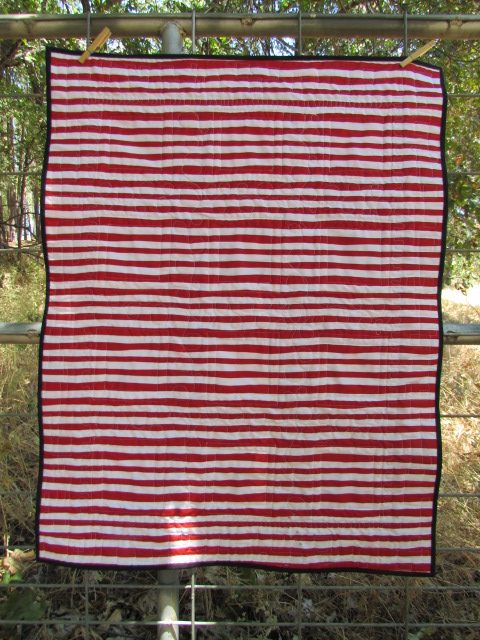
For the backing, I used a red stripe given to me by my sister last fall when she was purging her closets. It is perfectly bright and cheerful. The binding was a bit of a decision for me. I posted a photo on Instagram, asking people for input or suggestions. When someone said solid black to frame it off, I agreed. I think this quilt needed a simple binding for the finish.
The back side actually displays the quilting better than the front (as is often the case.
Look at the combination of the blocks and the quilt. This was such a fun way to use this panel fabric.
This quilt finished at 30″ by 38″ which is a nice size for baby. The quilt makes me happy and I am sure it will look cute in a nursery with a baby playing on it. There are so many colors, patterns, and critters to look at!
Linking to my favorite places. Find them at the top of the page under Link Ups.
Also, remember to sign up for the Needle & Foot newsletter to hear the latest on new fabric arrivals and fun promotions offered to my subscribers. Sign up form is on the right side of this page.
Finally here is a heads up on a great promotion over at Craftsy during this long holiday weekend. Might be the perfect time to select a new class for less than $20.00! So many excellent classes are available and once your purchase it you have it forever. What a great way to build your library. (Affiliate post)
Hi Everyone! I have been enjoying seeing pictures of your shirts on Instagram and Facebook. There is lots of sewing going on and they all look wonderful. Today is really the final ‘how-to’ post for this sew along. We will put the bias binding on the neckline and arm holes and finally, hem the shirt! Easy Peasy, right? Well, I thought so but honestly, the armholes gave me so much grief!! I think the problem, for me anyway, was the width of the bias binding piece. I will explain as we go.
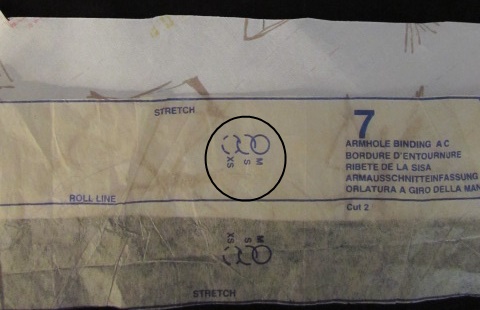
To begin, you need to mark the center dots that are printed on the paper pattern pieces, both the neck binding and the armhole binding. Those dots notate the center of the back side of the neckline as well as the top of the shoulder for the armhole.
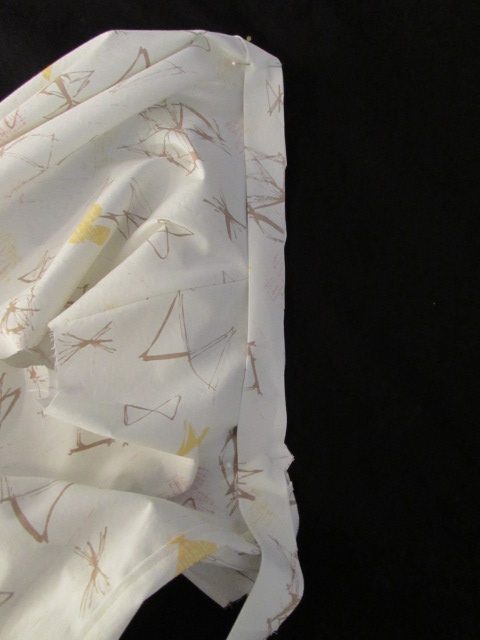
Let’s attach the neck binding first. After marking it, fold the binding in half, lengthwise – wrong sides together – and press (just like when binding a quilt). Next you will pin that folded binding to the neckline. When I pin something like this, I first pin the center back point. Then I match up those notches, there is one on either end of the binding. After those three points are pinned, ease the rest in and pin it well.
When I got to the end of side of the binding strip, I folded it back, then pinned and pressed it. This will tuck the raw edge of the binding strip in so when you stitch it down to the inside, you have a neatly finished edge.
The directions call for a 3/8″ seam allowance when stitching the neckline. I only point this out because it veers from the 5/8″ allowance we have been using up to now.
Stitch the binding to the shirt, making sure the fabric below the binding stays flat and smooth. Just take it slow and you will be fine. Remember the strip is cut on the bias which allows some stretch. You shouldn’t need to stretch it but you will be able to ease it around the curves nicely. Then clip the neckline a few times from the inside. Do not cut through your stitches though. I like to do this because I think it allows the binding to fold in over the curved edge nicely. Go ahead and press your seam and then fold the binding to the inside and press it down. Slip stitch the binding to the inside of the the shirt, including both ends.
The process is mostly the same for the armholes. However you will stitch the ends of each binding piece together (with a 5/8″ allowance) so that you have a circular piece, pressing that seam after stitching. Then, again, fold wrong sides together and press. Match that center marking with the shoulder seam and the stitched seam with the side seam at the bottom of the armhole. Then match your notches. Following that, ease the rest in and pin well. Stitch with a 5/8″ seam allowance.
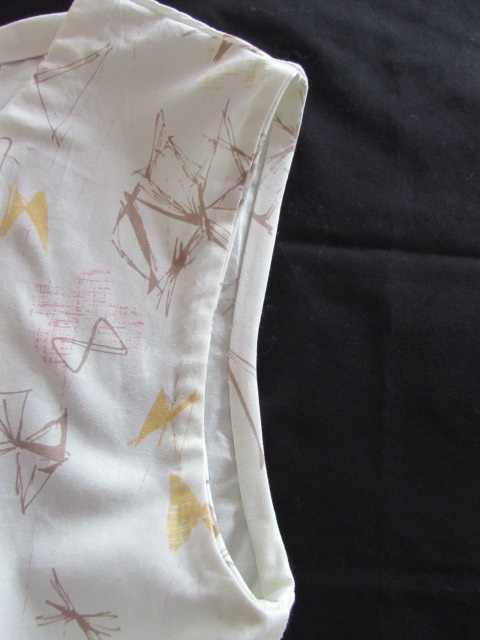
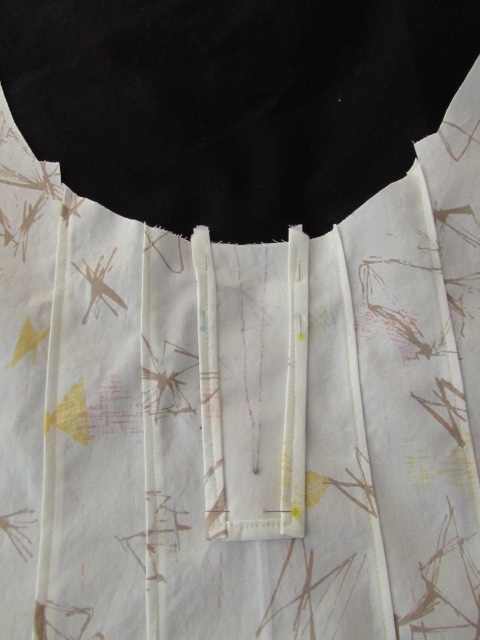
Before going any further, press the seam and turn the binding in toward the inside of the shirt. Press it and see if the binding lays flat. This is where I ran into difficulties. For me, the binding was too tight. I kept taking it off and fiddling around with it. Finally, the only way I could get a finish I was happy with, was to fold the binding in after stitching it. I stitched it at 5/8″ and then folded it in half to make it narrower and pressed it. Then I folded it to the inside and slip stitched it down. If you look at the picture, you will see it is rather narrow, compared to the neck binding. Honestly, I cannot really say what went wrong for me here but it sure made me crazy for a little while there.
But it lays flat and looks ‘good enough’. The first time I made this pattern, I put short sleeves on it and that was simpler! Hoping this isn’t a problem for you. I can’t figure out if I cut something to the wrong size or what?? I hope you don’t have this issue. If you do though, be patient and work with that binding piece. Message me via Facebook or Instagram and I will try to help.
That very last step is to hem the shirt. I am assuming you know how to do this but really it is so simple. Fold up 1/2″ to the inside and press. Then fold it again, to the inside, and press again. Pin along the edge and machine stitch the hemline. Ta Da!!! A finished shirt! I can’t wait to see all of your blouses. Let’s meet up here next week and share the finish. You can link up a blog post if you like as well as post pictures on Facebook and Instagram. Rather than figure out how to link an Instagram post here, please email me a picture of your finished shirt (on you or on the hanger!) and I will share them in the last post.
As always, please let me know if you need help. Have fun finishing your shirt up and I look forward to seeing them next week!
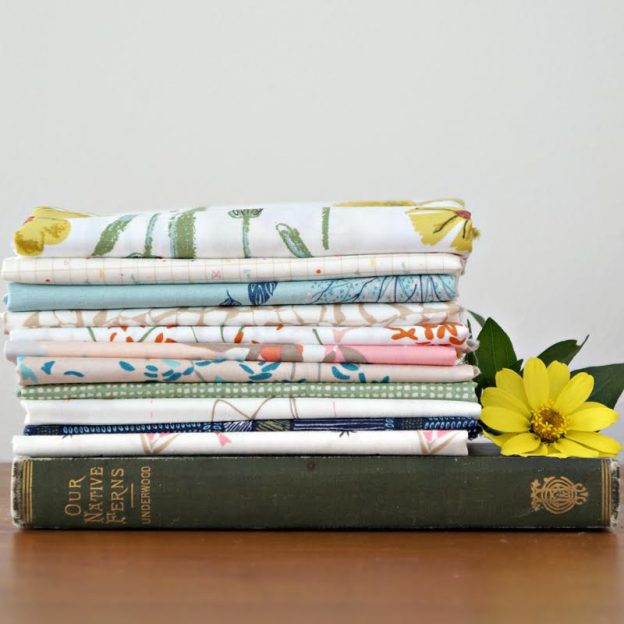
Are you participating in the Sewcial Bee Sampler Sew Along, sponsored by the wonderful Maureen Cracknell and the talented Sharon Holland? It has been on-going for the past twenty-one weeks with one block released each week. There will be 25 blocks total. I am making blocks, though I must admit to being behind by about three or four blocks at this point. But I love the quilt I am making. I have been using fabrics from the Fleet & Flourish collection and the Garden Dreamer collection, both of which are designed by Maureen Cracknell. I have mixed in solids as needed. It will be sashed with one of my all-time favorite, low volume fabrics, Mesh Joy – designed by Sharon Holland. Click here to see it in my shop!
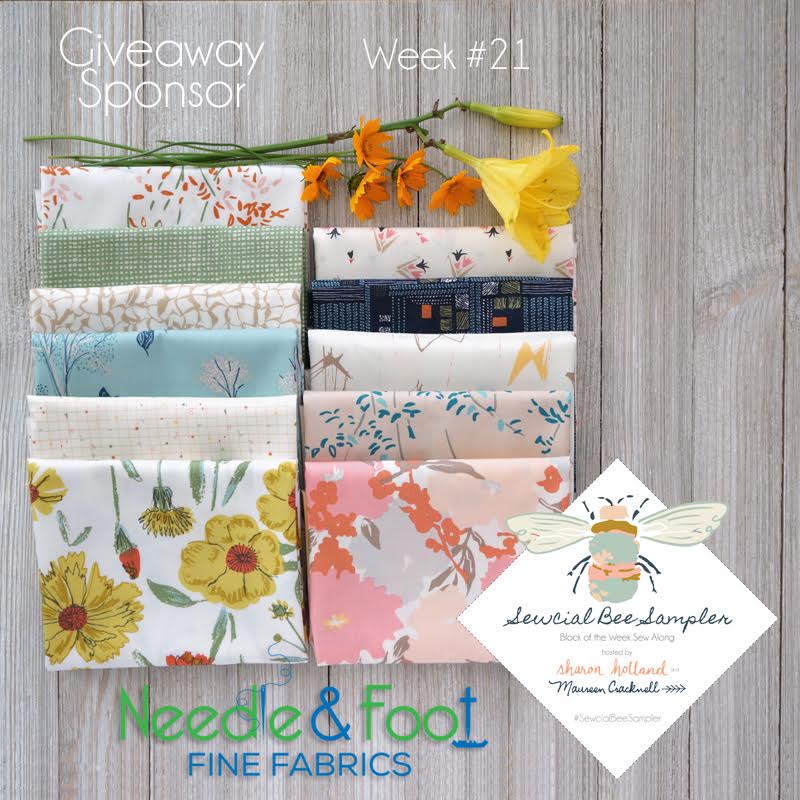
If you are participating in the sew along, you are aware of the giveaway that happens each Friday. Wonderful prizes have been offered up by the event sponsors each week. This week I am hosting the giveaway. If you are eligible, hop over to Maureen’s site to find out how to enter to win this bundle of fat quarters! A combination of eleven fabrics from two of Sharon’s lines, you could win pieces of both Gossamer and Bountiful. These muted, peaceful prints are gorgeous as a bundle. They are available now in my shop, both as fat quarters and yardage.
Essentially each participant is a winner this week. You may use coupon code SEWCIALBEE15 to receive a 15% discount off of your purchase from my shop all weekend long. The code will be active through Sunday night, June 25th. If you purchase one of the special SBS bundles and then are lucky enough to be drawn as the winner, I will refund the amount of purchase. No worry there. Take advantage of the coupon code to do some shopping — there are all sorts of wonderful fabrics to choose from! Happy Sewing. 🙂
Good morning all. I hope your shirts are progressing and that none of you are experiencing any frustrations. From what I have heard and seen, it looks like there are some really pretty shirts coming together. Yay! If you have made it to this point, then it is time to check the fit and start stitching the main seams together. If you are not quite there yet, no problem. You will catch up! If you are new to this event, click here to start at the beginning.
In this post we are going to talk about methods to use for finishing the seams. I think a nicely finished seam makes so much difference. The seams won’t fray and it won’t look ‘homemade’ with clean, finished seams. There are a several choices but for this project, we will talk about two finishing methods.
French Seams, my favorite
Seams finished with a zig zag stitch
I am going to mainly focus on French seams for our project. This will work in most cases. Where it might not work is if, after you try on your shirt, you decide to sew narrow seams to help with the fit (if it is a bit tight.) If this is the case, you may not have enough seam allowance to create the French seams. In this case, I would suggest you sew your seam, press it and then run a zig zag stitch to keep the seam from fraying. The finished seam would look like fine and and fraying would be greatly reduced. Each of our machines are different so I will not provide settings for the size of the zig zag stitch. I would suggest you play with a scrap, running a straight seam and then zig zag next to it to see what size works for the amount of seam allowance you have to work with. As always, I am happy to help if you have trouble with this.
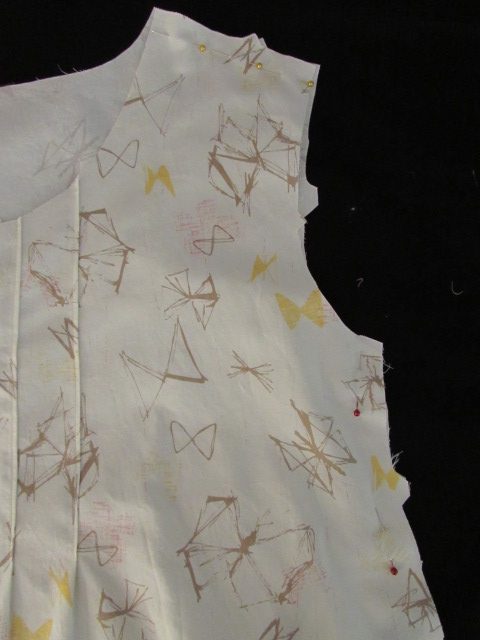
Before we talk about French seams, let’s make sure the fit of your shirt is good. Pin both shoulder seams and one side seam together on the 5/8″ seam line. Pin it wrong sides together.
Slip the shirt over your head and put one arm through that side that is pinned.
I have finished the back seam. The shoulder and one side seam are pinned.
If you have someone around to help you, have them pin the other side together for you once you have the shirt on.
Back seam is finished, one side and both shoulders are pinned.
Check to see if the shirt is comfortable across the bust line. Really, with this shirt, that is the only area that might give you trouble. Check if the armholes are fitting well. Does the shoulder seam need to be taken in or let out at all? If the shirt is tight across the bust line, try opening up that seam a bit. Take the shirt off and pin instead at the 3/8″ seam line. This reduces the seams on each side by 1/4″ which gives you 1/2″ more room. Hopefully this will open it up enough. You can also open up the seam on the back of the shirt to give more room. If this is not enough we can talk about putting a triangular gusset in at the top of the side seams but let’s do this together as needed. Leave a comment if we need to tackle this. 🙂
If the shirt feels baggy, you can increase your seam allowance. Like above, take the shirt off and pin it tighter, maybe at 7/8″ on each side seam. This would reduce the fit by 1/4″ on each side for a total of 1/2″ decrease. Increasing the seam allowance at the side may mean you need to play with the shoulder seams. You also have that back seam to play with to add or reduce the size of the shirt. You will need to play with it. But by doing this with pins and a mirror (and a friend if possible) you should be able to find the sweet spot where you are pleased with the fit.
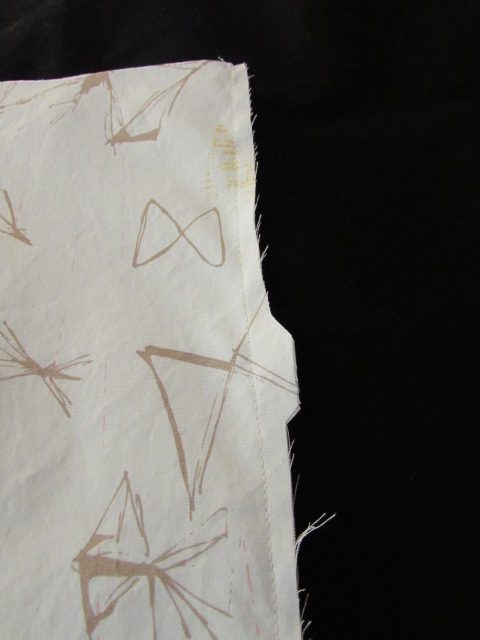
French seams begin by stitching wrong sides together. Kind of feels strange but you will pin your seam and take a 1/4″ seam with the wrong sides of the fabric together. It will look like you are sewing it inside out. Remember though, if you have increased your seam allowance to make the shirt tighter, you will need to trim your seam allowance appropriately, before sewing this 1/4″ seam.
In the photo above, the fabric is wrong sides together and the seam is stitched at 1/4″ seam allowance. You need to trim any notches or frayed threads at this point so the line is clean. Then turn the shirt inside out, so it is right sides together. Press the seam lines, massaging the seam so it is tight and well pressed.
In the photo above, the first seam is stitched, the shirt is turned so fabric is right sides together. Pin if needed and stitch a 3/8″ seam line. Press again. Turn it right side out and check for any fray that may be caught in the seam and showing. Likely it is nice and clean but if there is any fray, carefully trim the bits of thread.
Back,shoulder and side seams are finished.
Regarding the order of things, it is best to sew the back seam first. Second you will finish the shoulder seams, sewing the back to the front. Slip it on again and check your fit. Finally, sew the two side seams.
We are almost there!! I’ll be back on Monday with a post on finishing the neck line and arm holes. Then you just hem the bottom and it is a finish!!
I hope you are enjoying this project. Do not even hesitate to ask if you need my help. You can leave messages via Facebook comment, Messenger, or a comment on the blog and I will be right back with you.
Just a reminder, you may sign up for my newsletter while visiting the blog. The sign up form is at the top of the page on the right. You will receive a monthly newsletter telling you what is new with my shop and about any promotions or events that might be coming up.
You’re back! I hope that means you were able to lay out and cut your fabric pieces. If you had any trouble, don’t hesitate to email me at[email protected]. Or, you can always leave a comment on the blog or the Facebook page. I am happy to help.
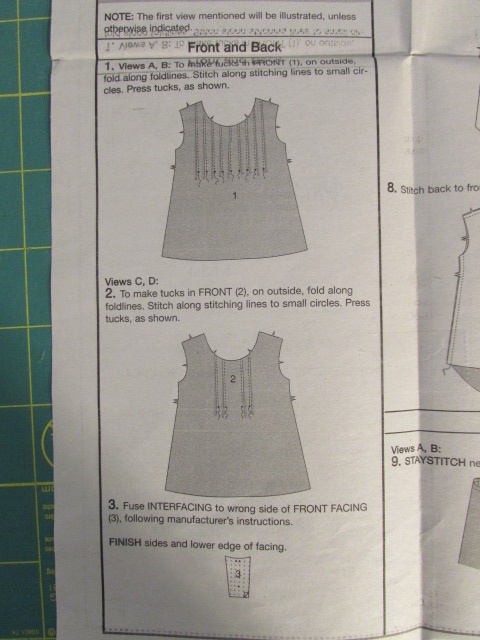
Today we are going to take our time and work on the details that make the front of the shirt unique. I think these details are both challenging and fun. If you take it slow, you will have good results. We are going to mark the lines for the pin tucks and also the stitching and cutting line for the slit at the center of the neckline. The portions of the instruction sheet we will be working on are numbers 1 through 6.
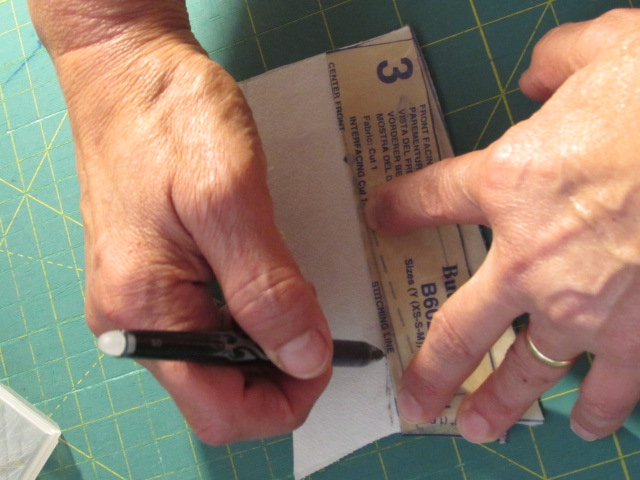
NOTE: For marking, I used a Frixion pen (the one that erases with the heat of the iron.) You should use whatever is comfortable for you. For the pin tucks we are marking on the front of the shirt so make sure it will come out easily. A piece of chalk would be good. Because my fabric is light in color, chalk wasn’t an option for me. Plus I want my markings to show in a photo for the blog so I needed a darker color.
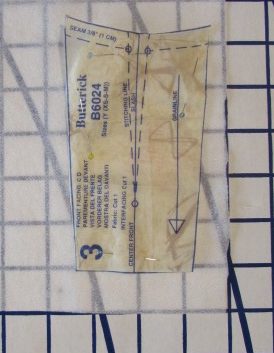
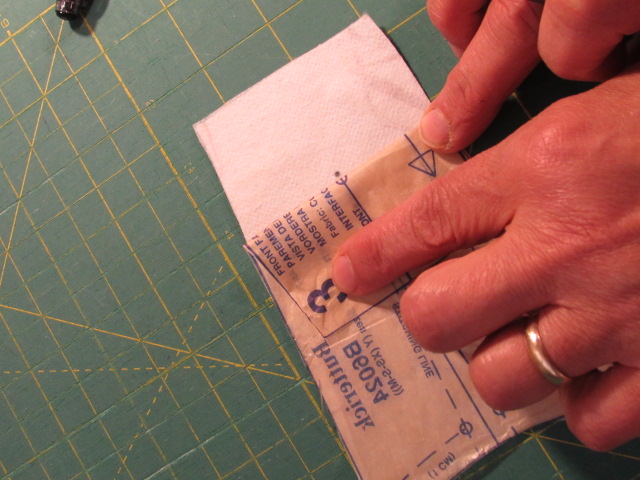
We will mark the center stitching line first. It is easiest to mark this on the facing piece, rather than directly on to the front of the shirt. You need to fuse the interfacing to the wrong side of piece number 3 first. When the interfacing is fused, lay the paper pattern piece back over the interfacing side. Fold back the bottom of the paper and make a mark the bottom of the slit.
Fold back the paper lengthwise on the dotted line and trace your stitching line. Then fold back the other side along that broken line and trace the opposite stitching line.
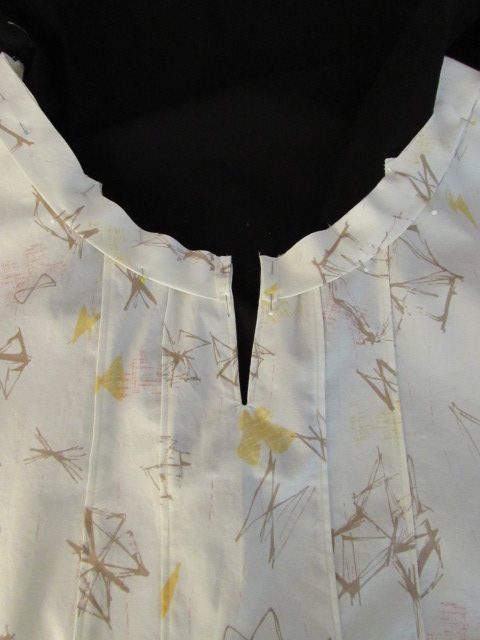
I noticed that the drawing of the slit comes to a deep point. I did not sew that far down because there would not be any seam allowance alongside the stitching line at the deepest point of the V. Instead, I traced and stitched a shorter, wider V on my piece.
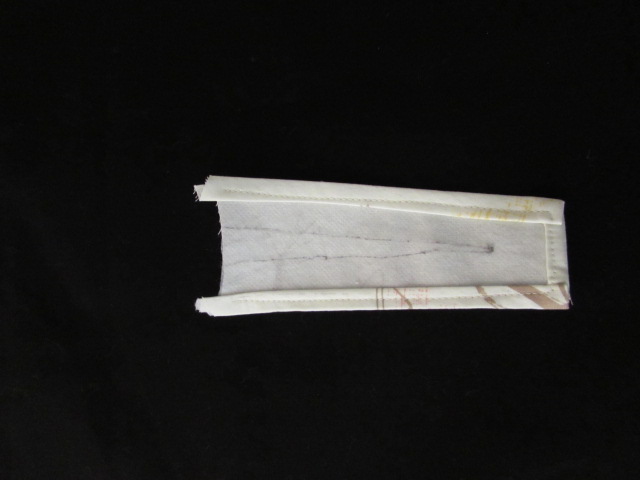
Once you have your facing piece marked, you need to finish the edge of the facing so it doesn’t unravel or fray when it is washed. I always fold a very narrow 1/4″ to the wrong side around the three outer edges (both long sides and the bottom). Press that first fold. Then fold it again and press that second fold. Pin to keep it in place as you stitch.
NOTE: Just like with free motion quilting, it is always best to draw your bobbin thread up to the top before you begin stitching. This will prevent that little rat’s nest of messy stitches that occur now and then. Also, with any stitching on a garment, stitch forward about two stitches, reverse for two stitches and then begin to sew. You need to reverse so that your stitches are locked down and don’t unravel.
Press after stitching. If you are using a Frixion pen, remember not to iron over your markings or you will have to trace a second time. (Ummm….don’t ask me how I know this.) Once your facing edges are finished, set it aside for now.
I feel like explaining the pin tucks with the written word is a bit of a challenge so, with the help of my daughter, I made my first ever YouTube clip. I think this will give you a good idea of how to fold the pin tucks. If the video doesn’t work in your browser, click here.
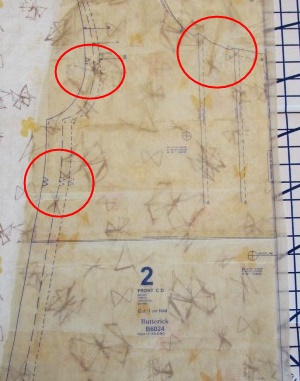
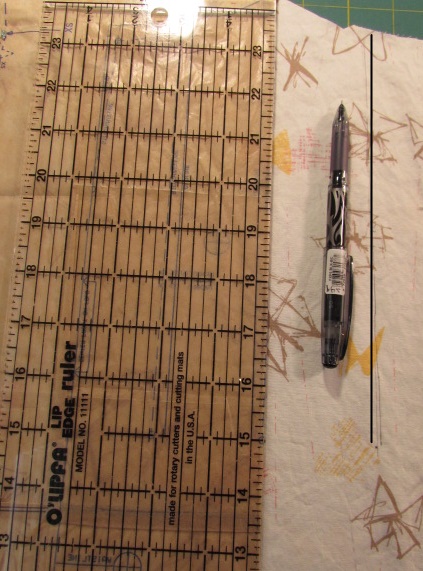
Now let’s mark the pin tuck lines. This will be much like marking the line on the facing piece. This time, fold the paper pattern back on the broken line (your stitching line). Use a clear ruler or straight edge to draw a line on the fabric from the top to the dot at the end of the stitching line. You will mark these twice on each side of the front piece. After you do the first side, remove the pins from the piece and turn the fabric over. Lay the piece down (should be upside down this time) and mark the two lines on the other side of the front piece. It is hard to see my lines so I drew over one to give you the idea of what I mean. Ignore the fact that I couldn’t line my hand drawn line with the computer drawn line! I definitely need some lessons on using graphic art tools!
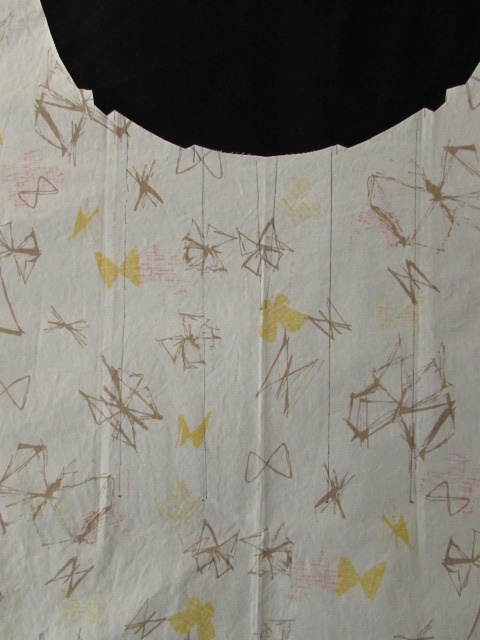
When you have all four lines drawn, it will look something like this. Again, my hand drawn lines are faint.
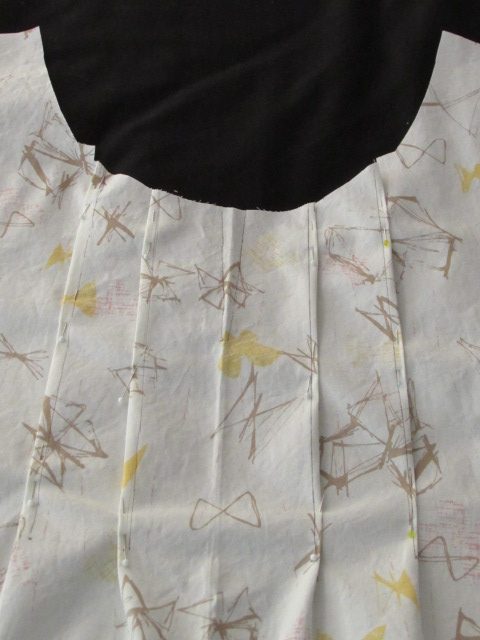
Next we will make the folds and pin the tucks in place. You want to pick up the fold at the notch and take it to the side. Finger press and pin in place. Remember, if it is folded in the correct direction, the notch will make a nice smooth curve for the neckline. Pin down to that dot we marked for the end of the tuck.
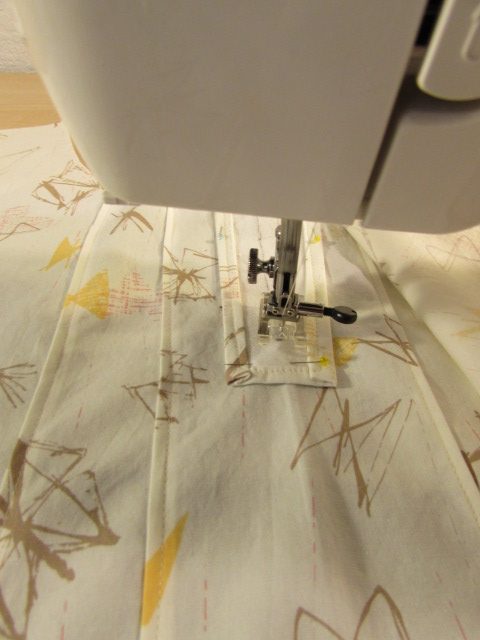
Top stitch each of the pin tucks, drawing your bobbin thread to the top before beginning the seam. Also, be sure to reverse for two stitches and then proceed to the end of the tuck. How does it look?
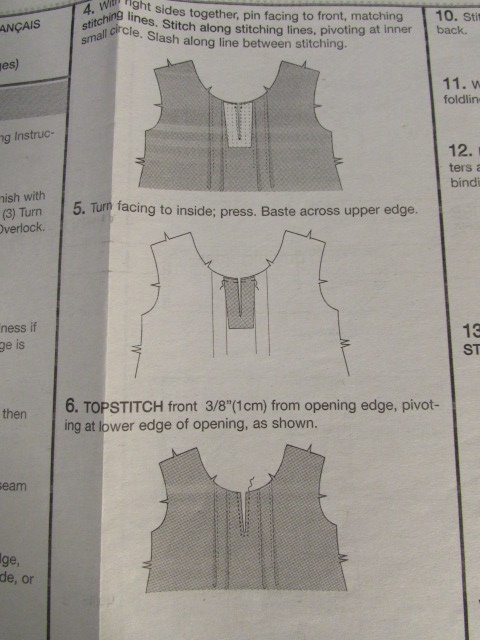
The next step is to attach the facing. Take the piece and lay it right sides together on the front piece. It will be centered between the tucks.
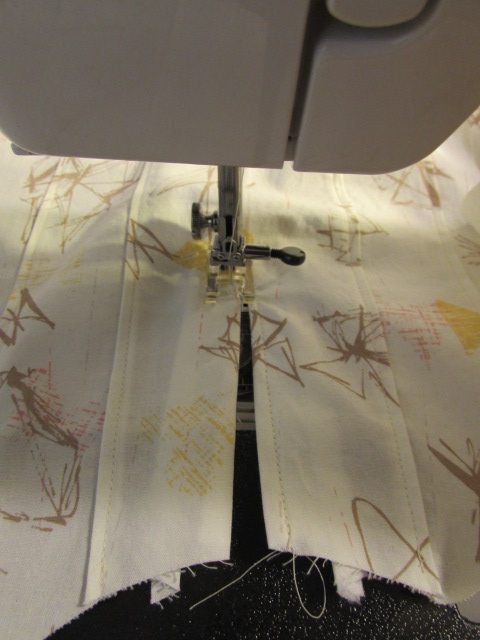
Pin in place. (I know… my markings are a bit wiggly.) Sew just a hair to the right of the stitching line. Take it slow here. This is probably the fussiest part of this project. Stitch down to the point and put your needle down to hold your spot.
Pivot, by turning the fabric, and stitch 2 or 3 stitches. You will need to have this bit of room when you clip this seam. Then with your needle down, pivot the fabric again and stitch back up to the top of the neckline.
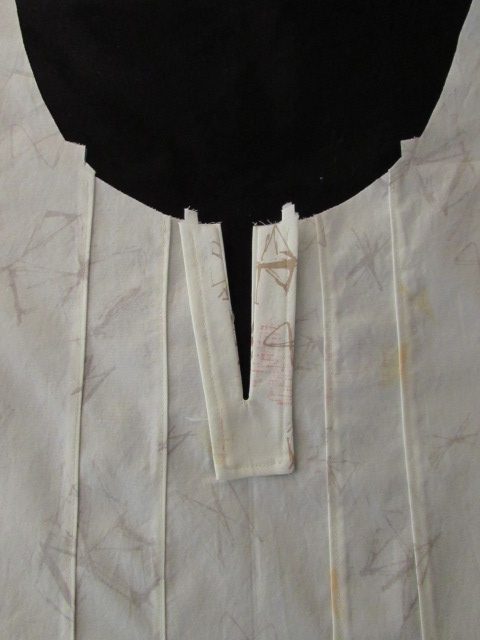
Press your seam. Just press the facing as it lays on the front of the shirt to smooth your seam. Next you will carefully cut the slit between the two long rows of stitching down to the point (where you made those two stitches and pivoted).
Make sure not to cut through the stitches. Now turn the facing to the inside of the shirt. You will likely have to massage the facing a bit to get it to lay flat. Use some steam and iron the front of the shirt with the facing on the inside.
The last step for today is to top stitch the opening in the neckline. Pull your bobbin thread to the top and stitch a uniform line no more than 1/4″ from the seam. I stitched mine at 1/8″ because I wanted to reinforce the facing seam. There is so little seam allowance here and I think a tight top stitching will prevent any problems.
Now that the front of this shirt is complete, you can breathe a sigh of relief. This was the toughest part. Hurray for you!
The next post will be on Friday, June 23rd. On Friday we will check the fit, learn about finishing seams, and sew the back, shoulder and side seams. Easy Peasy! See you then.
Please do not hesitate to ask questions. If you are wondering something, it is likely there is another reader wanting to know the very same thing. Leave a question and I will get back to you!!
Hi Everyone! Today we are going to begin working on our shirt. I am writing with the assumption that at this point in time, you have received your pattern (Butterick B6024) and have purchased your fabric. (Many thanks to the readers who purchased fabric at my shop!) Your fabric should have been washed (in cool water) and dried in the drier to be sure any potential shrinkage has already happened. Ok – if you are still with me, let’s begin. (If you haven’t gotten your supplies yet, don’t worry. You can still catch up. )
NOTE: before doing anything else, I strongly suggest reading through the instruction sheet that comes with the pattern. I am going to explain my process as we go through this but they are the professionals and it will help if you sit and read the instructions beginning to end. Then as we work through the pattern, it will likely make more sense to you. Be sure to read all the way through this post and then take your time. Be sure all of your pieces fit BEFORE you cut anything. I have to tell you this has bit me several times…..taking a quick glance and assuming the pieces will all fit properly does not work. Take the time to lay everything out completely before cutting fabric. Once you begin cutting, it is pretty darn hard to change the layout of the pieces.
In the first post, I mentioned you need to take your measurements and buy the correct size pattern, according to the measurements described on the pattern. Hopefully, you have done this and have the correct pattern in hand. Next I want you to cut out the paper pieces that will be needed for this shirt. For View C we will use pieces 2, 3, 4, 6, and 7.
NOTE: Some readers have mentioned that they are making a variation such as using the front from version A or adding a sleeve. I am not going to go into detail on variations as I think it will get confusing. If you are veering off the path, so to speak, that is fine. If you get stuck or need some help, please email me or leave a message on our Facebook page. I am happy to help if needed!
As you cut the the paper pieces out, note the various sizes printed on the pattern. Make sure to cut them out with the largest size intact (cutting around that size) so you have the choice each of the sizes when you actually pin and cut your pieces.
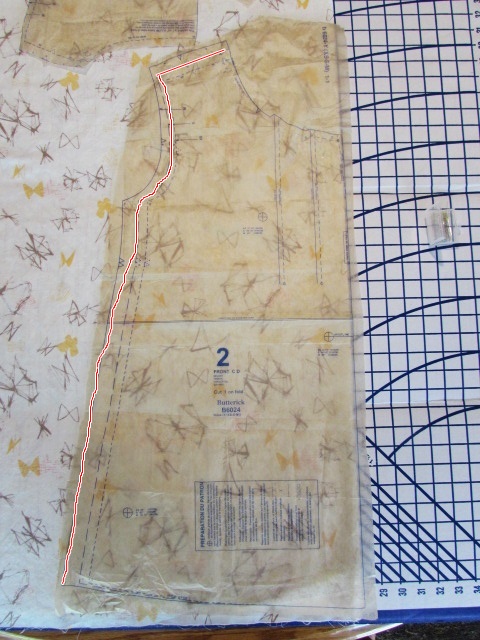
Once you have your paper pieces cut out, take the front piece and stand in front of a mirror. Hold the piece up to your torso with the shoulder seam line laying on top of your shoulder where it would be if sewn. Press the tissue paper so the armhole goes across the front of your arm and the side seam tucks under and lays down your side. The front of the top will look wide because we are going to make the pin tucks which will reduce it. But the shoulder seam and side seam should fall comfortably. Check to see if it looks like it fits. Check the length. If it is too short or too long, we can adjust the pattern piece accordingly. At the bottom, does it seem like the width is going to be comfortable? The nice thing about patterns with multiple sizes printed on them is that you can cut part of the piece at one size and gradually work to another size, thus altering the shape as you need to. For example, if your body is pear shaped, you might cut the top parts, the shoulder and armholes at a size small and then as you cut the side seam, you could gradually increase the cut as you go, until you reach the medium size line toward the bottom. I am by no means a graphic artist but I tried to illustrate what I am saying. (Hopefully your stitching line will be much straighter than my wiggly line!!) Does this make sense?
When I make a shirt or dress, I often have to adjust the length. I am just shy of 5′ 4″ tall and usually the pattern is a touch long for me. The length is a very easy adjustment. There is a line at the midpoint of both the front and back pieces. If the pattern is too long for you, you just make a little fold at the line to shorten the piece. It is much more effective to shorten at the middle of the piece than to just cut it shorter at the bottom. If you cut off the bottom, you might alter the way the piece drapes around the hip. Conversely, if you are tall and want the shirt to be longer, you would cut the piece at the mid-line and add length to the piece. This shirt is a fairly long one so it is not likely you’ll need to lengthen it. However, if you do, please message me and we can work through that together.
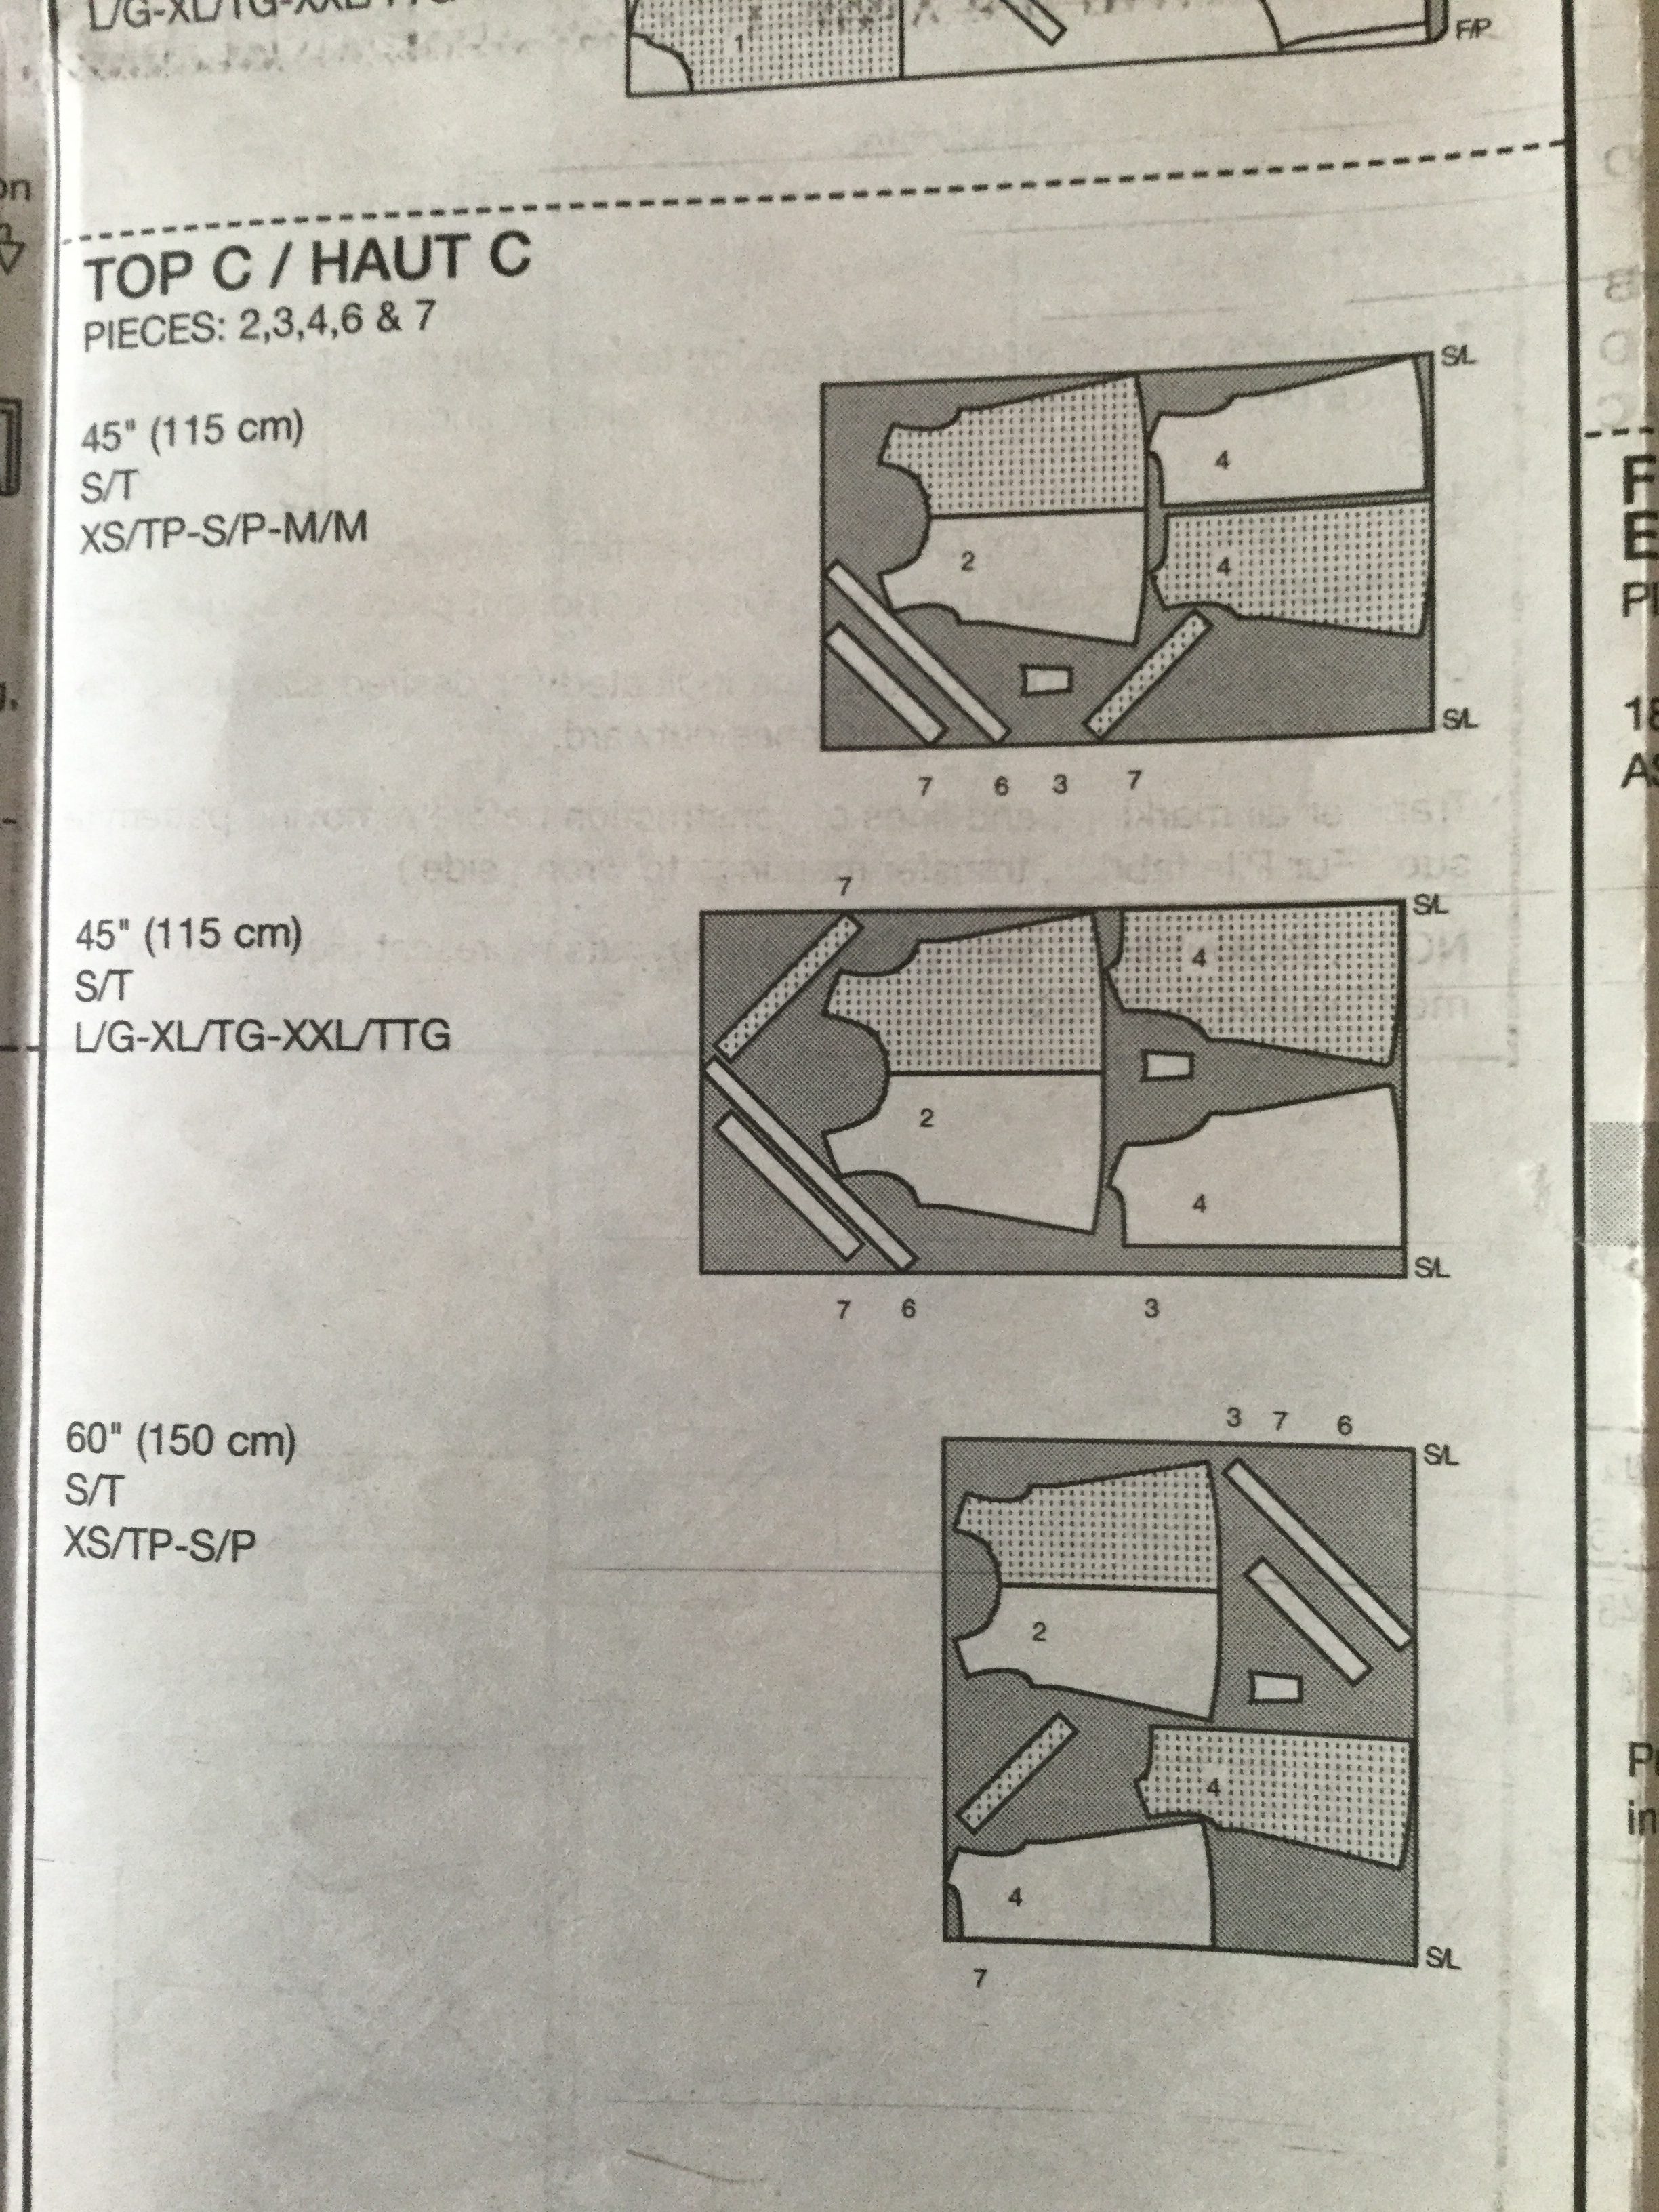
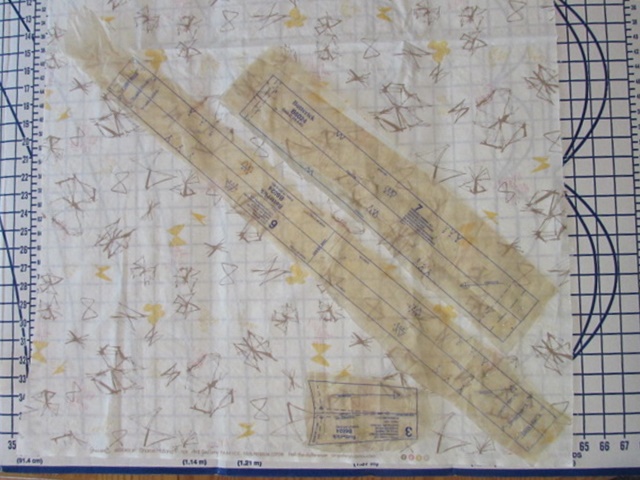
Each pattern always contains a suggested cutting layout. They are showing you how to fit all of the pattern pieces on the piece of fabric. In the photo below, you will see the layout instructions for view C, the shirt we are making. You will see it shows how to lay the pieces out on standard 44″ wide fabric and again for 60″ wide fabric. Also, they show the layouts in each of the sizes too. Note the pieces are running parallel to the selvage edge. Pattern pieces always have an arrow on them and that arrow must run in the same direction as the selvage of the fabric. This ensures the grain of the fabric is going the right way. If you don’t adhere to this, the fabric will not hang nicely.
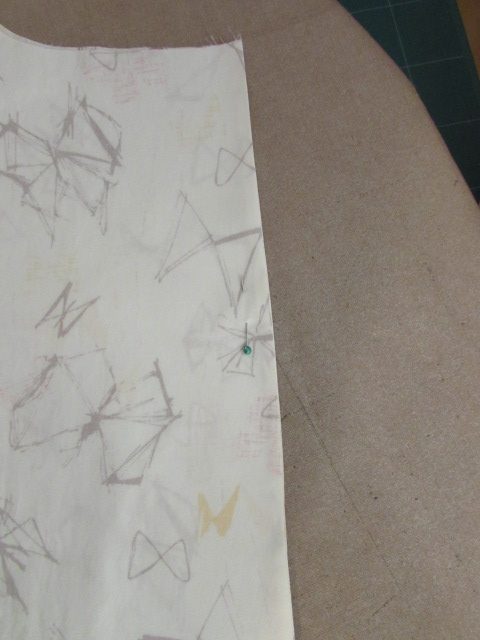
The suggested layout in the picture shows the fabric being unfolded and the pieces being cut from a single thickness of the fabric. They are instructing the reader to lay the main pieces (number 2 and 4) down and then to flip it over and cut the second one. Piece number 2 is the front of the shirt and must be cut as a single piece. So you would cut the one half, unpin the piece, flip it over, pin it and cut the other half. This all works and you are welcome to lay your pieces exactly as the instructions show them. I found this process a bit laborious. Instead, I kept my fabric folded and simply laid piece 2 on the fold.
I pinned it with the center line running along the fold, because that keeps that helpful arrow running parallel to the selvage edge.
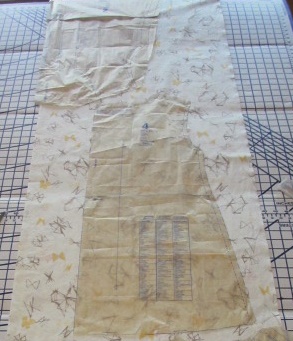
Piece number four is the back of the shirt. There is a seam running down the center of the back. If possible, it is a good idea to take a look at both layers of your fabric. If you can fold the top and bottom so that the pattern matches, then when you stitch the center back seam, the pattern will match. This isn’t absolutely necessary and if you have a print like mine, it is not very easily done. I chose not to worry about it. If you have a very bold print and, if you don’t mind fussing with the fabric, you could try to lay the piece so that the print of the fabric will match. Piece number 4 is not laid on the fold but that long arrow must be parallel to the selvage. Lay the piece just below the front piece, placing it as close as you can allowing room to cut each one out. I placed it closer to the selvage edge than the fold edge. I wanted that folded section to remain whole to keep as a bigger scrap. (We are quilters, aren’t we?)
The above photo shows the basic layout I used.
NOTE: From the pictures you have shared, I do not think anyone is using a directional print. However, if you are – be sure to lay your front and back pieces so that they run in the correct direction. They should both lay in the same direction so the print runs correctly on both front and back. Similar to when we are quilting, make sure the pieces are cut such that the direction goes the same way on both the front and back!
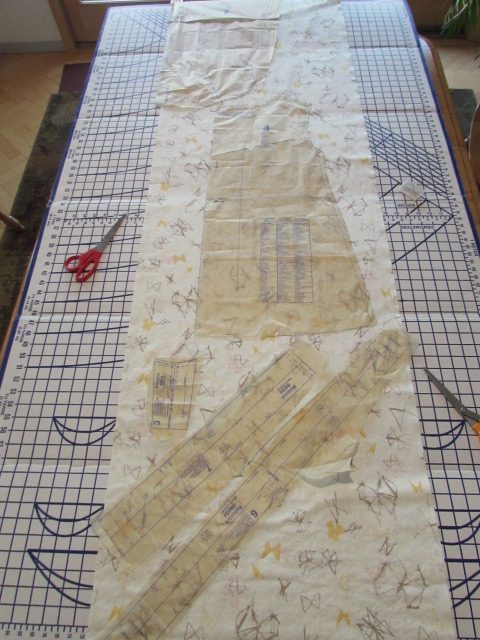
Once I verified all of my pieces fit and figured out what size and length I would be cutting, I pinned the front and back pieces (2 & 4) and cut them out. After they were cut, I opened the remaining piece and pinned the last three pieces. The final three pieces are simple. Piece 6 is the neck binding and piece 7 is the armhole binding. Since they will be used on curves, they must be cut on the bias. Look at the arrows and keep that arrow parallel to the selvage. Because we only need one neck binding piece, cut it on a single thickness of fabric.
In the picture above, you can see the selvage runs along the bottom of the photo. Pieces 6 and 7 are placed on the bias. You will need to cut a second sleeve binding piece. After you cut the first one, take that piece and flip it over (upside down) and cut the second one. You need to cut one with the pattern piece right side up and the other with the pattern piece right side down. The last piece you see is number three. This is the little piece we will use to finish the little slit at the center of the neck line. We only need one of these so cut it on the single thickness with our trusty arrow aligned with the selvage.
If this is your first time cutting out a pattern, you might wonder what the little notches are that are placed on the edges of the pieces in various places. You will cut the notches out and use them when you place your pieces together and pin them before sewing. The notches will be matched up and it helps you with the placement of the pieces.
I always cut the notches pointing outward so they are not within the seam allowance. These notches can be cut into the seam allowance – the same way they are pointing on the piece, however I don’t suggest this. There are times when you want the seam allowance intact in case you need to alter the size (by sewing a smaller seam to make that area larger). If you cut into the seam allowance you will not have the option to enlarge the seam if needed.
The last step in cutting out the pieces is to cut a piece of interfacing to back piece number three. It is silly that the pattern says to buy a 1/4 yard of interfacing when really you need about a 6 x 6 inch square. I guess 1/4 yard is the minimum that many shops will cut? Anyway, now you have extra for the next project!
Look at the stack of leftover fabric! Hmmm…. what could I possibly do with all these scraps?!
Whew — That was a whole lot of reading for what is actually a simple process. I hope I didn’t confuse you!! Because this is my first time hosting a sew along, I would love feedback on these posts. Too much detail? Too little detail? Is any part of this confusing? Please leave your thoughts in the comments so I can adjust things as we go. It will really help me to learn how these steps should be written.
If you need any help with this, please don’t be shy. I want to help you be successful with this and it is a bit different from quilting so there are no silly questions. Have you joined the Facebook group yet? If so, please remember to post pictures of your progress there, offer suggestions or tips to others, or answer any questions that may come up – let’s help each other out. If you are not a Facebook participant, you can also post progress photos on Instagram. Tag me @needleandfoot and use the hashtag #NFsummersewalong. Be sure to come back on June 19th for the next post. We will be working on the detailing of the front of the shirt (the pintucks and the slit at the neckline).
**If you haven’t yet signed up, I would love to have you sign up for my newsletter. Sent monthly, it contains updates about new fabrics I have in the shop and promotions that will run that month for newsletter readers. Sign up form is on the right side of your screen, toward the top.
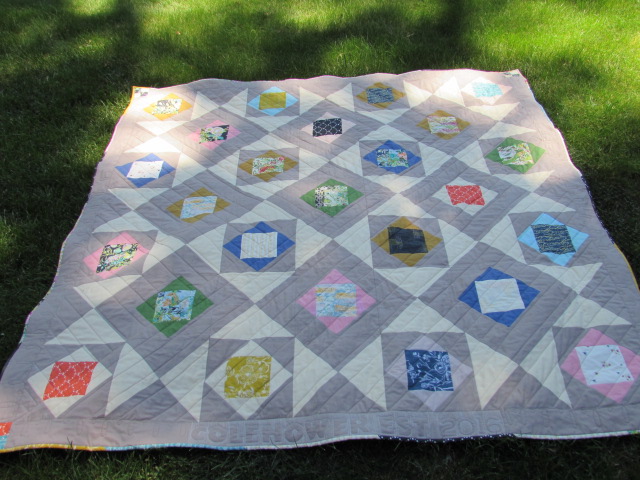
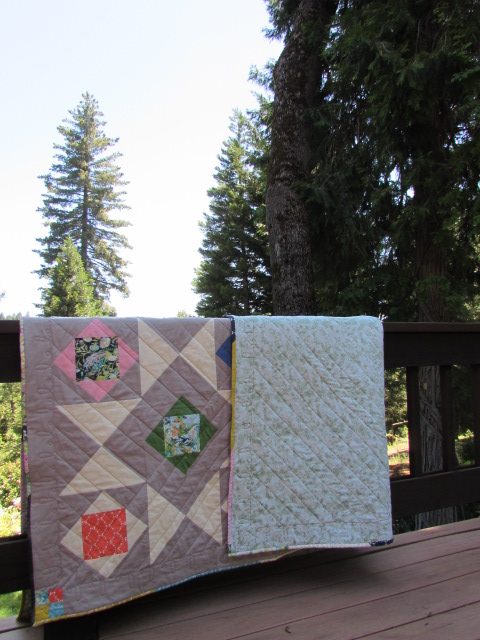
This week I finished my Harmony quilt. I will finally be able to send it off to my nephew and his wife as their wedding gift. Doesn’t some rule of etiquette say you can give a wedding present within the first year and it is still ‘proper’? According to this post on Manners Monday of the Huffington Post, I am still within the time frame. Though really, who would refuse a wedding gift because it was late? At least I am finally giving it to them!!
You might remember I made the quilt top a long time ago. I used a fat eighth set of Millie Fleur by BariJ for the centers and Moda solids, Fig Tree Cream and Stone. The pattern is one that alternates hourglass blocks and economy blocks, each of which finished at 9 1/2″. I love the look of this pattern and feel proud to have drawn it myself and figured it out without a pattern (I don’t do that too often.)
I wanted to quilt it on a long arm because there is lots of cool negative space and it would have been fun to play with it. However, that just never worked out and in the interest of time and wanting to complete this quilt, I opted to quilt it at home. It is fairly large at 74″ square so I decided against free motion quilting and settled for straight line with my walking foot. I did a diagonal line across the middle. For one side I did vertical lines all the way out and on the other side I quilted horizontal lines. I like the effect.
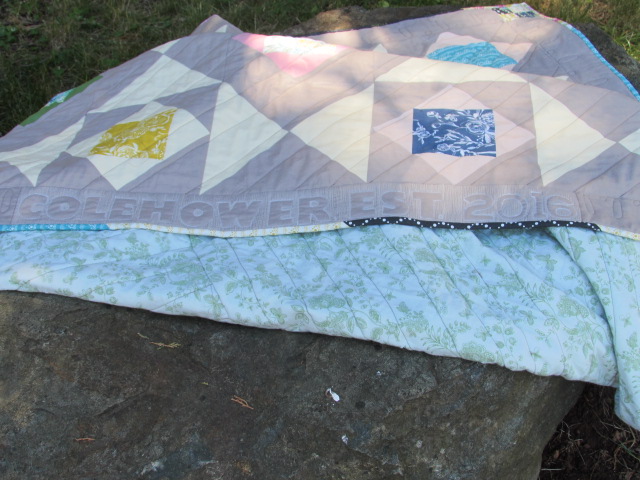
My favorite part of the quilt is the bottom border where I relief quilted their last name and the words EST. 2016. It is a sweet reminder of when they married and established their family of two (plus a couple of dogs!!) As with my other relief quilting projects, I fused stabilizer to the back of the border strip (before it was attached to the quilt) Once the letters were traced on to the border, I used my darning foot and created the design by free motion quilting around the shapes of the letters and numbers. After attaching the border strip and quilting the body of the quilt, I took the darning foot and FMQ’d the outline of each letter and number to quilt that section of the border and make the letters stand out and puff up a bit.
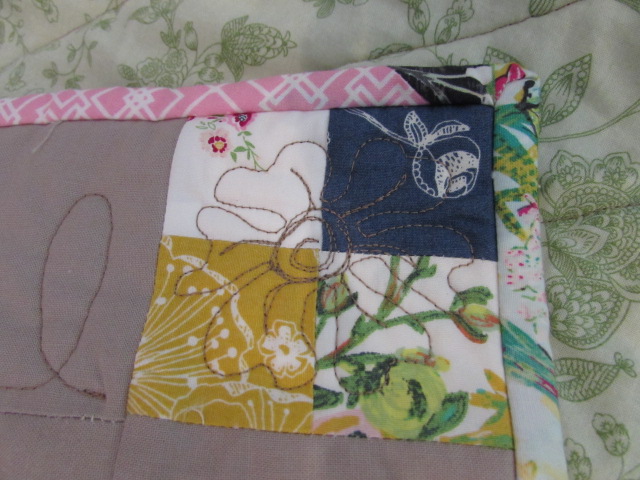
On the corners I used a four patch block as a cornerstone. On each of these I quilted a little flower. The borders were free motion quilted with a pattern of loops, alternating small and large ones.
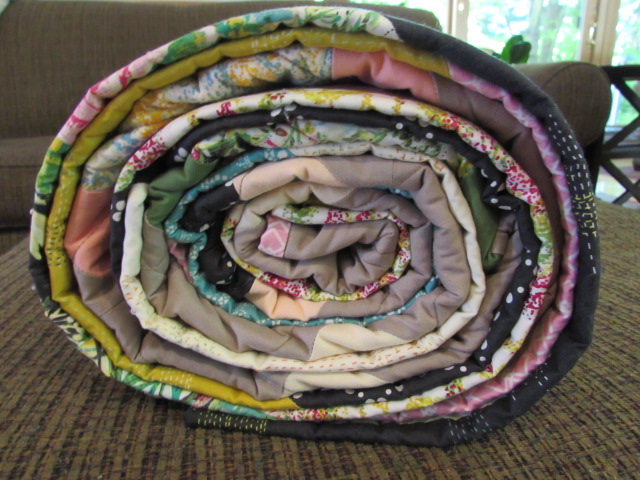
To finish it off, I made a scrappy binding! I am such a fan of scrappy bindings. Luckily, I had just enough of the Millie Fleur fabric left to make the binding.
The backing is a green, floral wide back I purchased long ago and I couldn’t honestly say what it is. I can say I love the ease of a wide back for backing. Pieced backs are very cool and give you sort of a double sided quilt but wide backs (108″ wide) provide ease of use and a speedy finish. (Plus I have a large piece of it leftover which is kind of nice!) In fact, I recently bought the first bolt of wide back, a small gray polka dot by Red Rooster and it is listed in my shop. Just in case you need some. 🙂
I can’t wait for the kids to receive their quilt. I was really sad to have missed this wedding last year. From the pictures they shared, it was just a gorgeous day for my nephew and his new wife. I am sharing a picture of them dancing at their wedding. Breathtaking, aren’t they? I hope they love the quilt and use it happily for years to come.
If you haven’t yet signed up, I would love to have you sign up for my newsletter. Sent monthly, it contains updates about new fabrics I have in the shop and promotions that will run that month for newsletter readers. Sign up form is on the right side of your screen, toward the top.
Linking to my favorites, each of which can be found at the top of the page, under Link Ups.
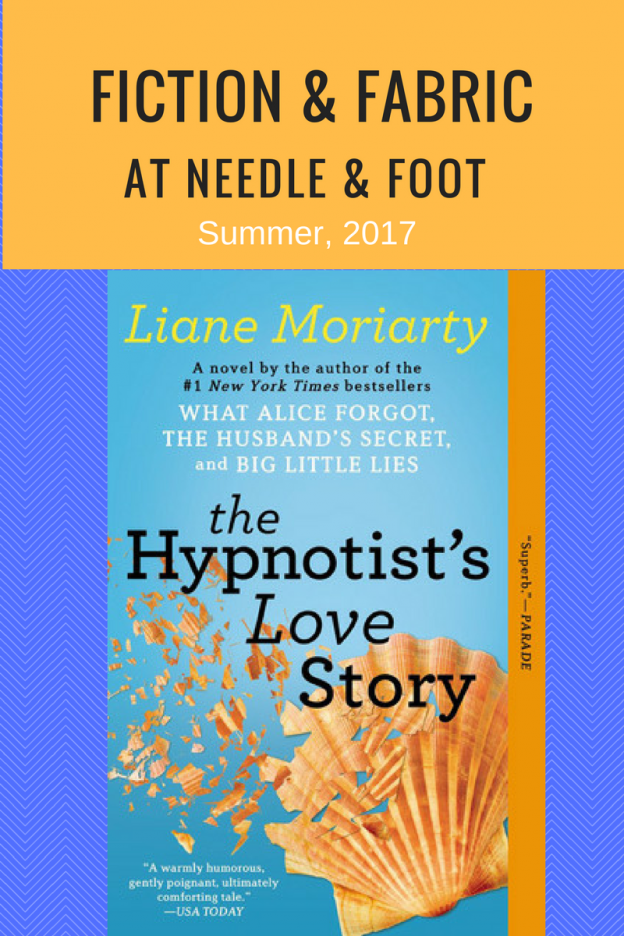
Time just buzzes by. It is one year since I began hosting the Fabric & Fiction book group. Last June, while on vacation in Maine, I thought it would be fun to share a book and see what others thought of it. About five or six readers joined in and we mailed the book from one member to the next, including three fat quarters of fabric that were somehow relevant to the book. Since then we have read Vinegar Girl, Double Bind, and Open House. Currently The Book of Bright Ideas is in route to various readers. It has really been a fun way to build community, enjoy a fun book, and give and receive fabric. As the book is received and read by the members of the group, each person writes a short note about their opinion of the book and then sends it to the next person along with three new fat quarters.
Today marks the beginning of the next book share. This summer we will share The Hypnotist’s Love Story, by Liane Moriarty. Ms. Moriarty is a prolific auther who has written a number of really good books. Last summer I read What Alice Forgot and it was excellent. Liane also wrote Big Little Lies which I haven’t read yet. I am on the waiting list for it at the library though.
The Hypnotist’s Love Story is about a woman who is a professional hypnotherapist who, until now, has not had many successful relationships with men. She meets Patrick, a widower with a young son, and feels like this might be ‘the one’ until she learns of a woman who stalks him constantly. I won’t tell you anymore but to say this is a really good book. I loved the characters, the setting, and the bits of information about hypnotherapy the author tucks into the story. The plot has a suspenseful element to it, making it quite hard to put down. It is a fun summer read and I hope you will enjoy it!
The first six readers to sign up via the comments are in. As much as I hate to do this, I am limiting this round to readers in the US. We have been sharing within Canada and the UK but it is expensive and shipping out of the country really slows the book down. I hope this doesn’t offend anyone.
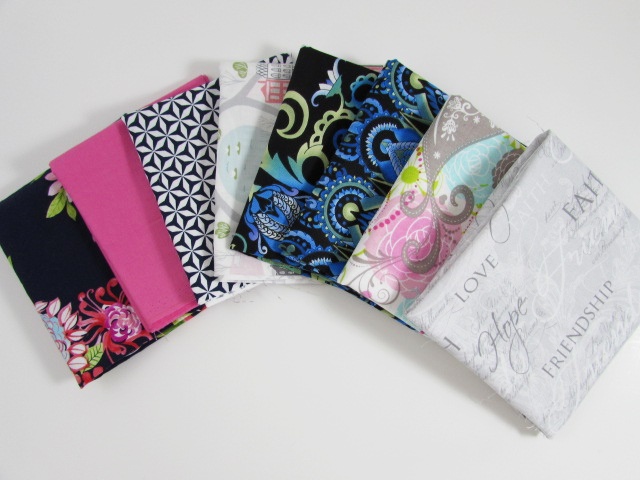
Before I close, I want to share the fat quarters I have received through the Fabric and Fiction groups. I think this photo shows the fabric received from the first two books. The second two books have not completed the rotation completely so I don’t have the books back yet. I love this mix and I hope to add to it as we go. When I have enough I will make a quilt just for me and it will contain fabric from all sorts of quilty friends!!
This group of fabric, sent to me by Rhonda of Rhonda’s Ramblings was a total surprise. She sent it as a thank you for organizing these reading circles. What a sweet gesture and a wonderful treat to open!!
I added the two gray and pink fat quarters to the collection for my quilt. The other two, the ducks and the vintage kitchen piece, will be used for other projects. I love all of them!
If you are interested in joining the summer group, please let me know in the comments! Also, there is still plenty of time to join in the Summer Sewalong. We will be making a cute shirt with a very simple pattern. Click here to read the details.
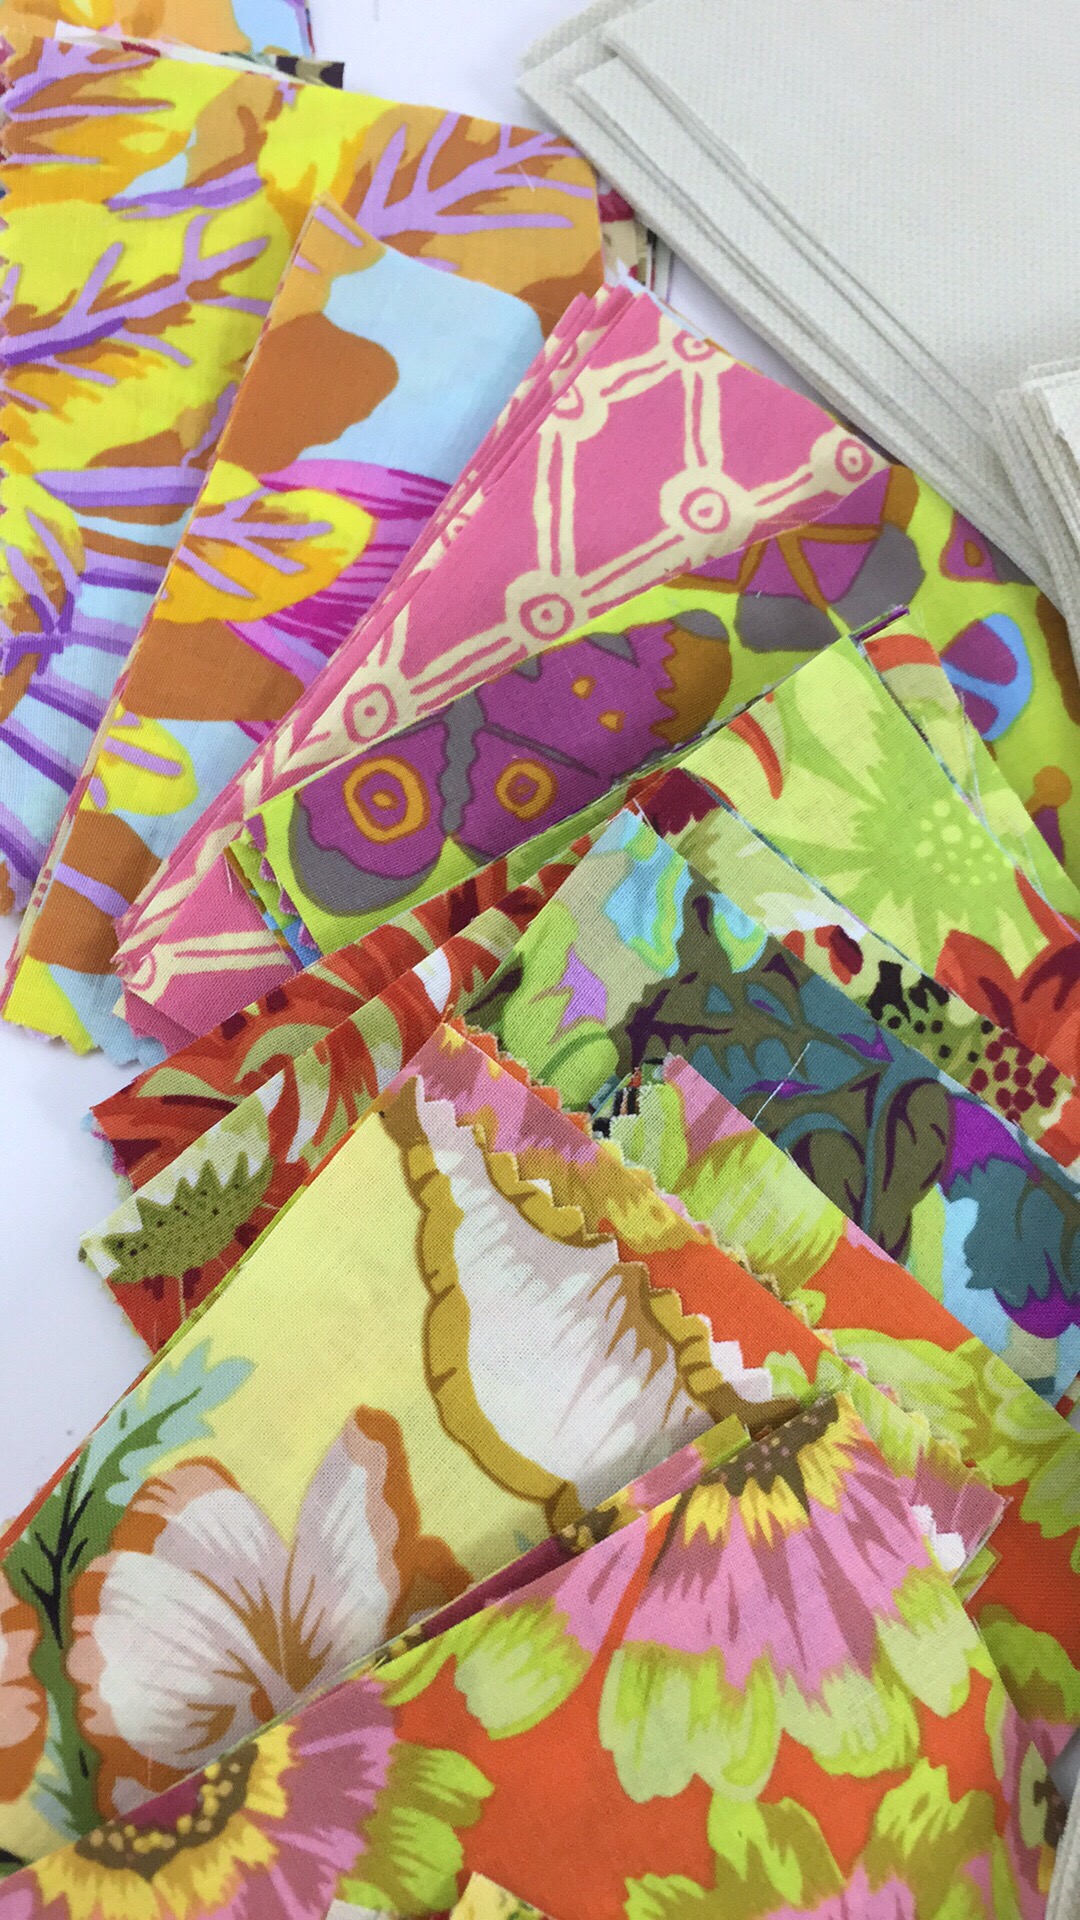
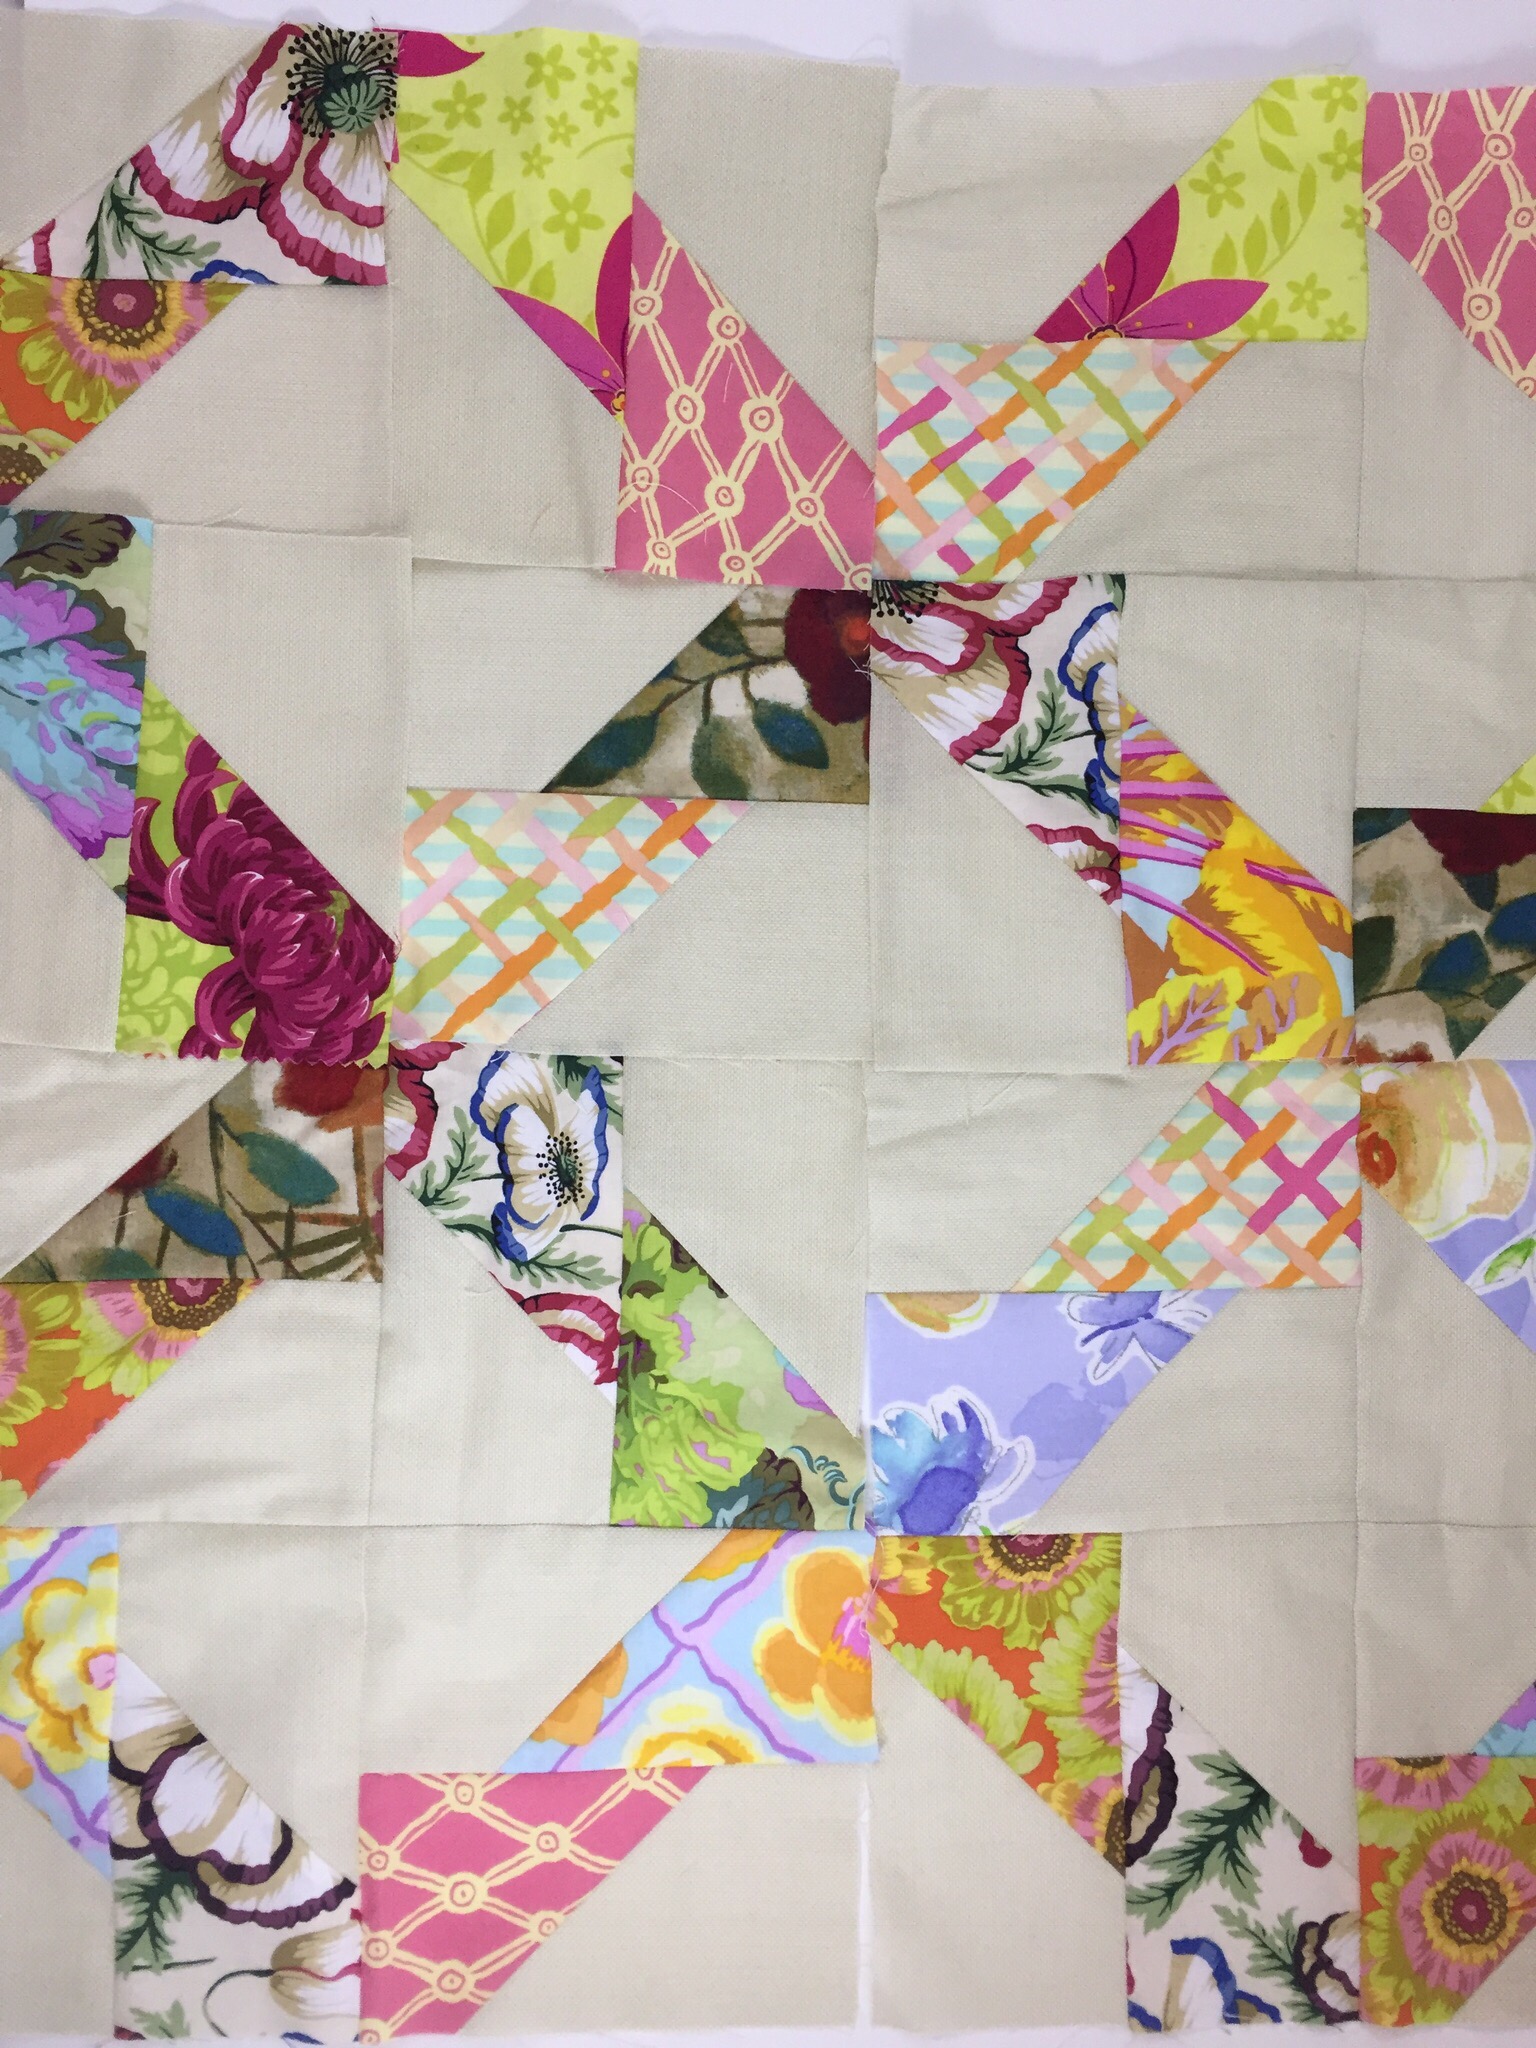
I started a new project! Over a year ago I received a stack of Kaffe Fassett florals from somebody. It was during the first round of #getyourquiltywishesgranted on Instagram. I wish I could give proper credit but I just can’t remember which kind quilter sent them. She had offered them up if anyone wanted to use them and I was the lucky recipient. Then, as often happens, they sat on the top shelf in the closet for about 18 months!
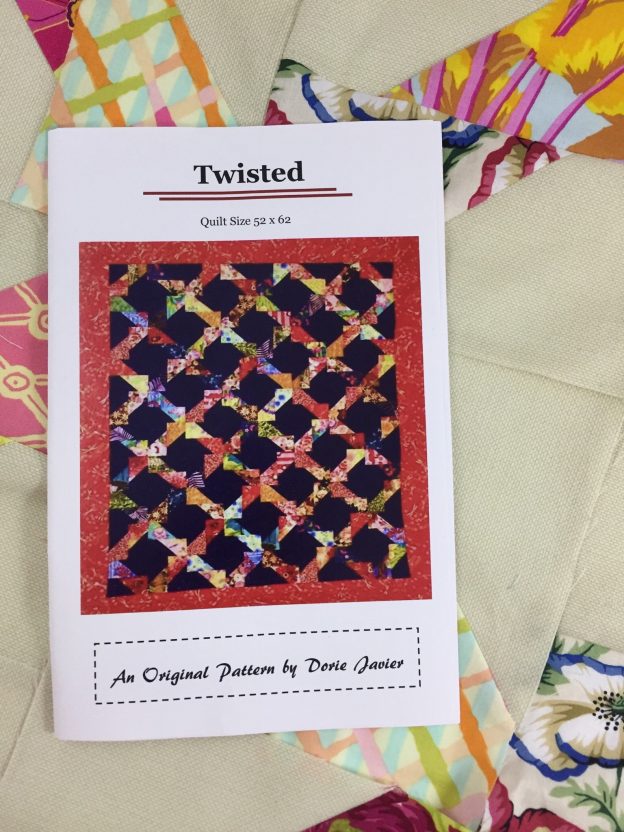
At the April guild meeting, they announced a class to be held for using up scraps. I have no shortage of possible ways to use scraps but this pattern looked cute and what is better than a day sewing with friends? I signed up. Yesterday was our sew day. A woman, Doris Javier, from a neighboring guild, had designed the pattern and she was there to teach. The pattern itself is extremely simple to construct; basically cut lots of rectangles and sew together in pairs. Then arrange in one of a number of designs and stitch into blocks. When I first started joining the rectangles, I was not consistent about the direction In which I placed the floral fabric and the background. Of course, it needs to be consistent so that the angles run the correct way. Luckily, I was eager to see how the block would come together and tried to lay some out right after I pieced the first couple. So I have a few that are slanting the wrong way and will have to be used in something else. Maybe I will piece the backing and use them for that. Because the rectangles are sewn together on the bias, much like binding strips, I now have a large stack of triangles to use up. They are all stacked in pairs and I will chain stitch them into HST’s to be used at some point down the road. Love those little bonus HST’s!
It has been a long time since I have sewn with a group and I had forgotten how much fun it is. Even with people you aren’t well acquainted with, there is already a common bond with our shared love of stitching. One of the best things about making a particular pattern with a group of people is seeing all of the different fabric combinations created by each of us. Each unique combination gives the quilt a whole new look. When I gathered my fabric together, I based the pull on the Kaffe Fassett scraps but didn’t have quite enough of them to make the whole top. It was very easy to add other brightly colored floral scraps to round things out. For the background, I selected a textured solid made by Red Rooster – it was the last bit I had in my shop and works perfectly with the florals. The look is so summery.
I made significant progress yesterday. I have a large stack of rectangles made and paired into blocks. It takes four of these to make a full block. I didn’t sew too many complete blocks together because I want to lay them out and check the distribution of color. At this point though, it shouldn’t take too long to complete the quilt top. I would estimate I have half of the rectangles pieced. With one more session in the sewing room, I should be able to chain piece the rest of them.
The group in class yesterday agreed to try and get at least the quilt top finished before the guild meeting in September. I am sure I can complete the top but would be even more pleased to get the quilt itself completed. We shall see how my projects go this summer!
Quick side note: I am thrilled with the number of readers joining in with the sew along that is just beginning. If you haven’t read the post yet, click here. We will be making a simple shirt to wear and I will break it down into a few simple steps. We are just getting started so I t isn’t too late to join in. Read the post, order your pattern and select your fabric. The next post will be up on June 15th! Let me know if you have any questions.

 I think, were I to make it again, I would make the version with sleeves. I like it just a bit better. But really, what a fun project this was. I would definitely host something like this again. Sewing with friends, whether in real life or virtual life, is always a fun time.
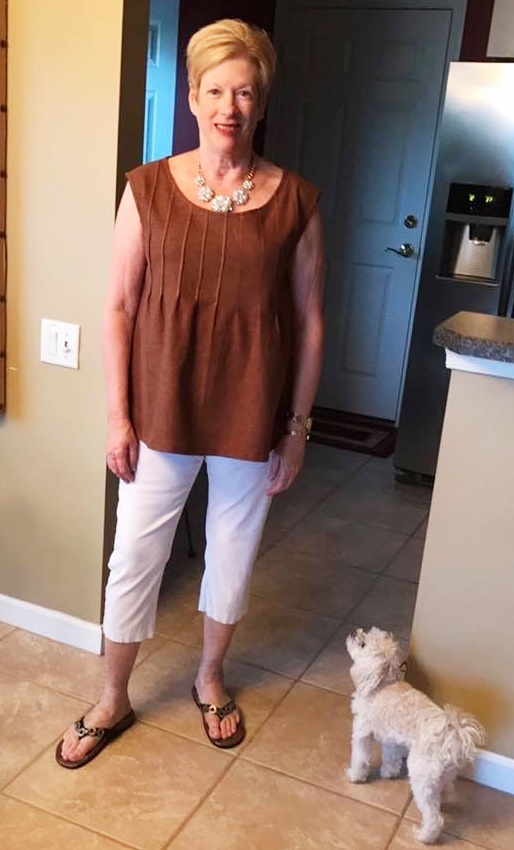

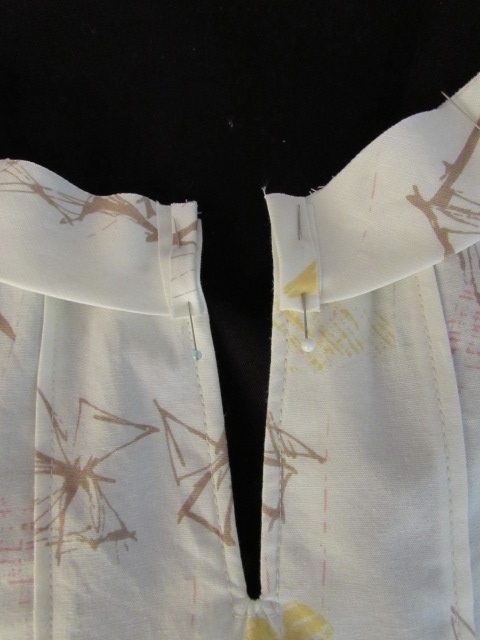
 Stitch the binding to the shirt, making sure the fabric below the binding stays flat and smooth. Just take it slow and you will be fine. Remember the strip is cut on the bias which allows some stretch. You shouldn’t need to stretch it but you will be able to ease it around the curves nicely. Then clip the neckline a few times from the inside. Do not cut through your stitches though. I like to do this because I think it allows the binding to fold in over the curved edge nicely. Go ahead and press your seam and then fold the binding to the inside and press it down. Slip stitch the binding to the inside of the the shirt, including both ends.


 Pin in place. (I know… my markings are a bit wiggly.) Sew just a hair to the right of the stitching line. Take it slow here. This is probably the fussiest part of this project. Stitch down to the point and put your needle down to hold your spot.