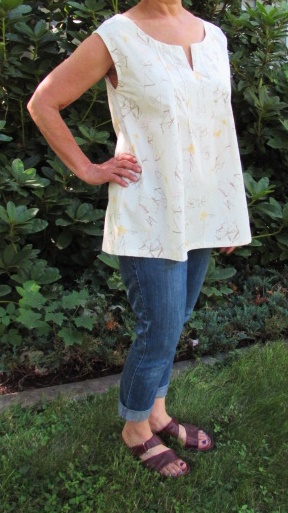
Today we are celebrating the finish of the Summer Sew Along. Together there were about twenty sewists that made a shirt using Butterick pattern number B6024. If you are just seeing this and want to check out the sew along from the beginning, click here. This is the first time I have hosted a Sew Along. I truly enjoyed every bit of it. I had a few frustrations as I finished up the shirt and I am anxious to see and hear how everyone else fared with the finishing touches on their shirt. So, let’s take a look at my finished shirt!
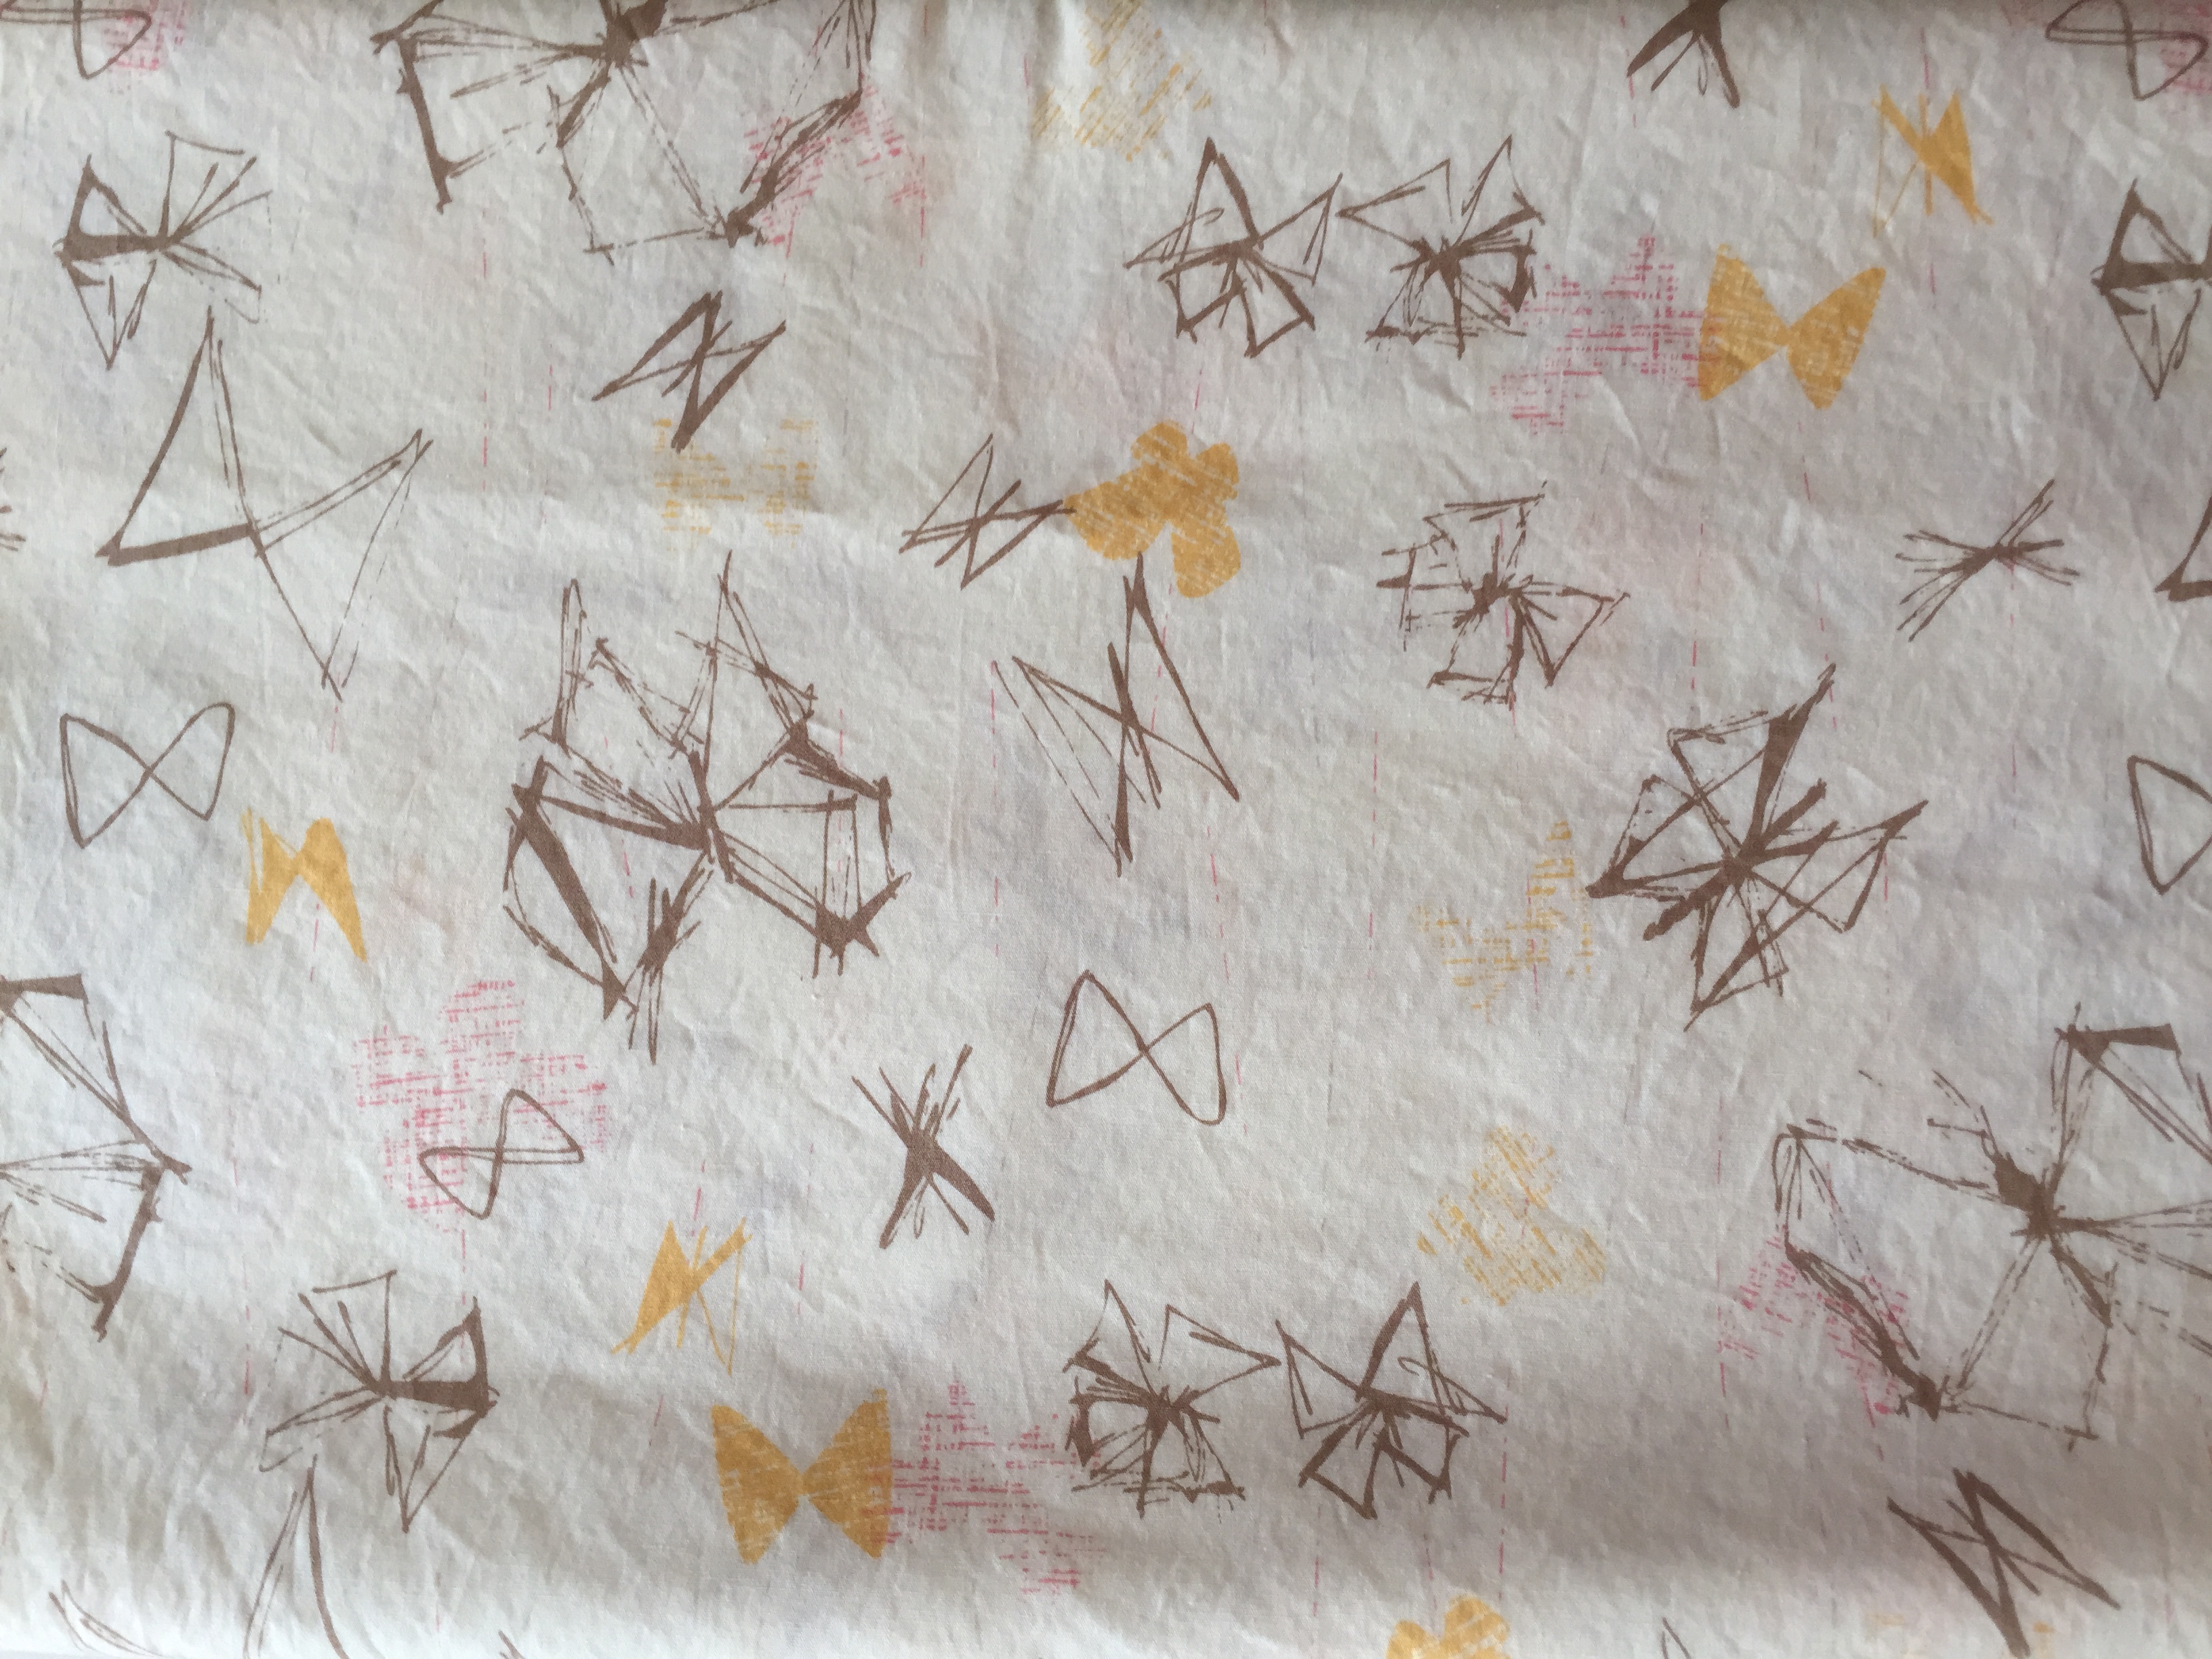
The fabric I selected is called Filaments Ethereal from Art Gallery Fabric’s collection called Gossamer. Actually of the group of us sewing, there will be at least five people with this shirt in a fabric from the Gossamer line. It was a popular choice for summer.
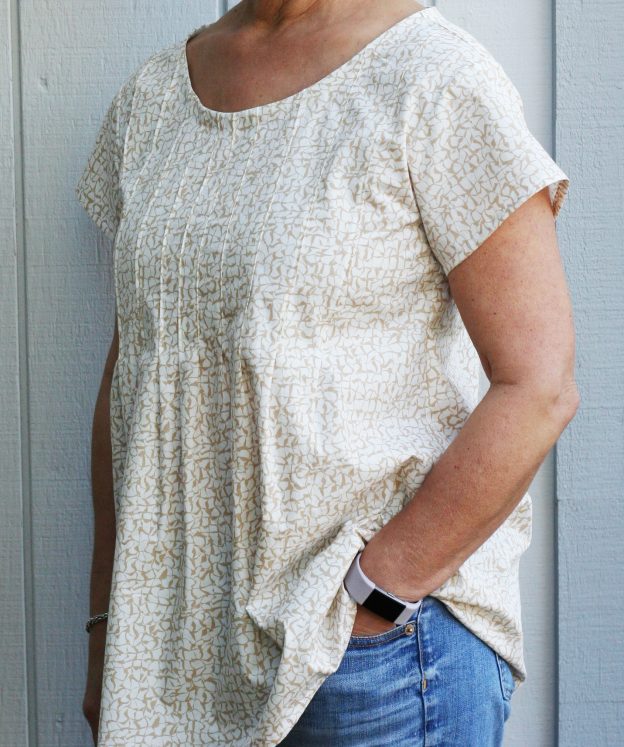
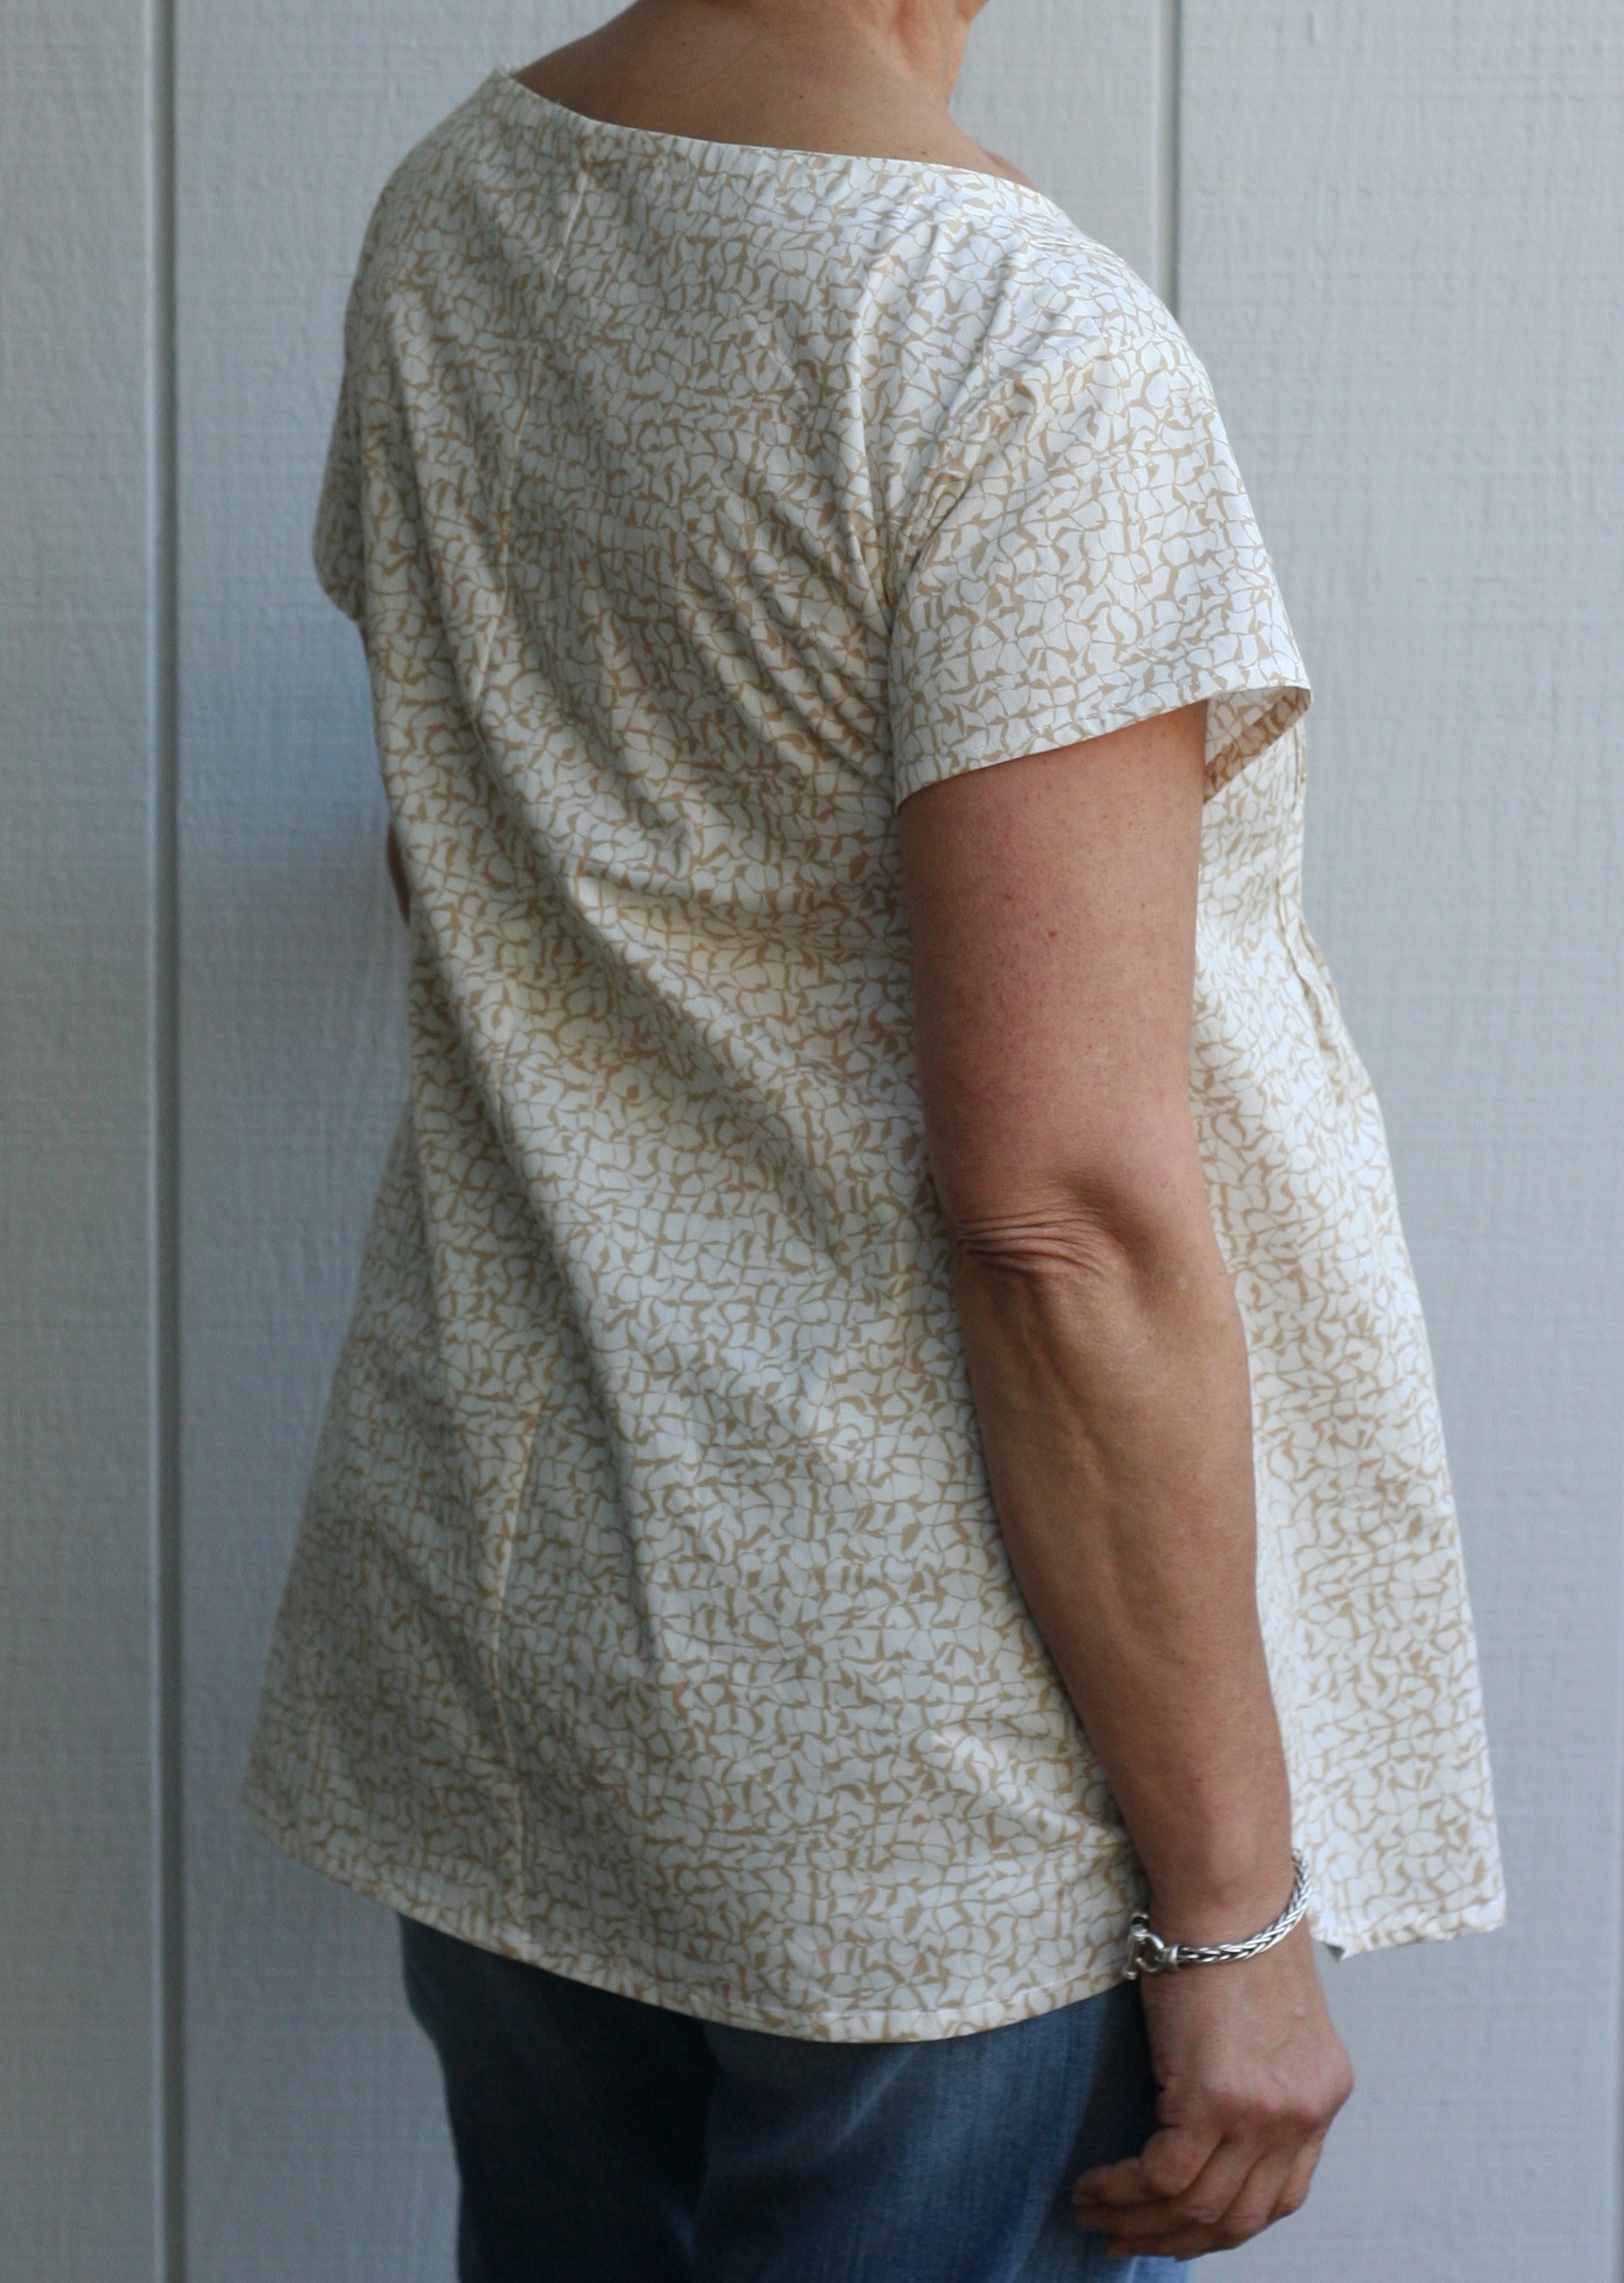
For the most part, I am satisfied with the fit. The first time I made it, I decided it was a teensy bit tight across the back and shoulders. So with this one, I made it a little bit larger. I may have gone too far the other way and it is a little bigger than I wanted. I know, I know, I am being too picky. The fit is always the biggest challenge with sewing clothes.
The shirt hangs well and it is super comfortable. The Art Gallery fabric, as always, is so light, making it perfect for summer.
I think, were I to make it again, I would make the version with sleeves. I like it just a bit better. But really, what a fun project this was. I would definitely host something like this again. Sewing with friends, whether in real life or virtual life, is always a fun time.
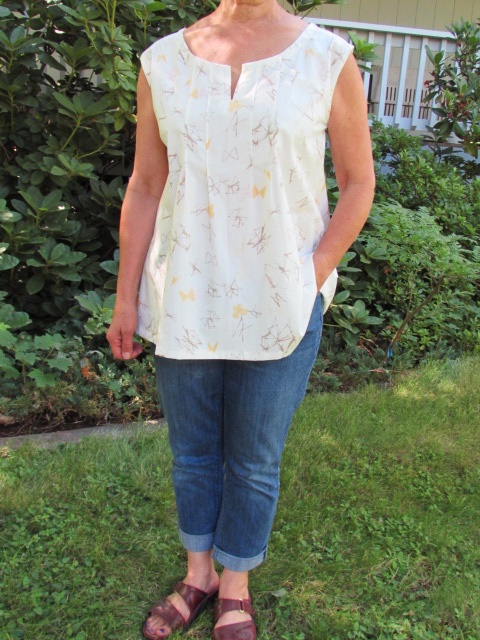
Here is one of the member’s of the sew along. Rosemary joined in and she chose to make the version with pin tucks across the front. She did such a great job and I think it looks beautiful on her. That fabric is wonderful! It looks like her puppy approves too!
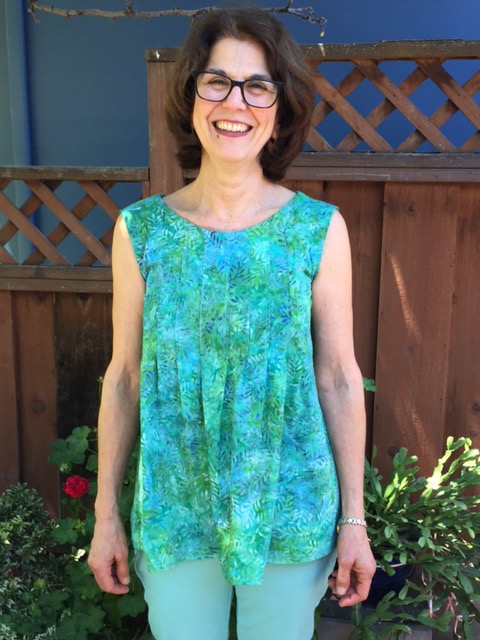
Here is my sister Tina. She joined in and sewed with us. She has been sewing for a long while but hadn’t made any garments for a while and wanted a refresher. She did a great job on the shirt!
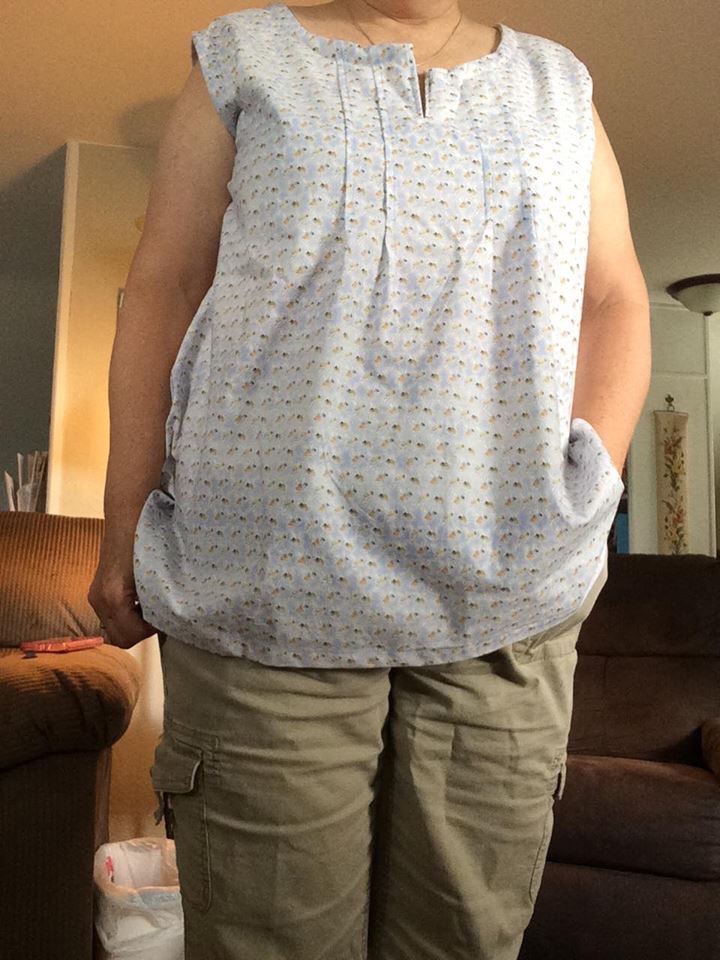
The picture above is from Cate. She chose a lightweight blue fabric for her blouse. It is just perfect for summer. It looks so pretty!
I have a link up below so people can share their finishes with everyone. I hope you will scroll through and take a look. The link up will remain open for about ten days. Not everyone has finished their shirt yet so I want them to have the chance to link up when they are done.
Finally here is a heads up on a great promotion over at Craftsy during this long holiday weekend. Might be the perfect time to select a new class for less than $20.00! So many excellent classes are available and once your purchase it you have it forever. What a great way to build your library. (Affiliate post)
Hi Everyone! I have been enjoying seeing pictures of your shirts on Instagram and Facebook. There is lots of sewing going on and they all look wonderful. Today is really the final ‘how-to’ post for this sew along. We will put the bias binding on the neckline and arm holes and finally, hem the shirt! Easy Peasy, right? Well, I thought so but honestly, the armholes gave me so much grief!! I think the problem, for me anyway, was the width of the bias binding piece. I will explain as we go.
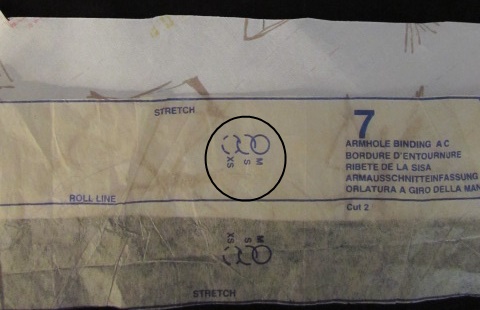
To begin, you need to mark the center dots that are printed on the paper pattern pieces, both the neck binding and the armhole binding. Those dots notate the center of the back side of the neckline as well as the top of the shoulder for the armhole.
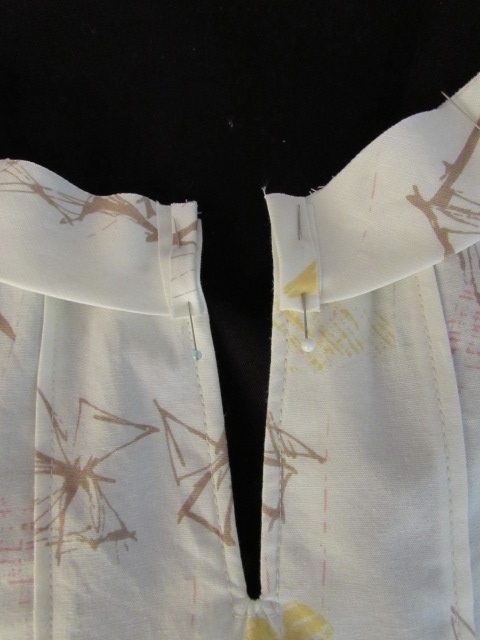
Let’s attach the neck binding first. After marking it, fold the binding in half, lengthwise – wrong sides together – and press (just like when binding a quilt). Next you will pin that folded binding to the neckline. When I pin something like this, I first pin the center back point. Then I match up those notches, there is one on either end of the binding. After those three points are pinned, ease the rest in and pin it well.
When I got to the end of side of the binding strip, I folded it back, then pinned and pressed it. This will tuck the raw edge of the binding strip in so when you stitch it down to the inside, you have a neatly finished edge.
The directions call for a 3/8″ seam allowance when stitching the neckline. I only point this out because it veers from the 5/8″ allowance we have been using up to now.
Stitch the binding to the shirt, making sure the fabric below the binding stays flat and smooth. Just take it slow and you will be fine. Remember the strip is cut on the bias which allows some stretch. You shouldn’t need to stretch it but you will be able to ease it around the curves nicely. Then clip the neckline a few times from the inside. Do not cut through your stitches though. I like to do this because I think it allows the binding to fold in over the curved edge nicely. Go ahead and press your seam and then fold the binding to the inside and press it down. Slip stitch the binding to the inside of the the shirt, including both ends.
The process is mostly the same for the armholes. However you will stitch the ends of each binding piece together (with a 5/8″ allowance) so that you have a circular piece, pressing that seam after stitching. Then, again, fold wrong sides together and press. Match that center marking with the shoulder seam and the stitched seam with the side seam at the bottom of the armhole. Then match your notches. Following that, ease the rest in and pin well. Stitch with a 5/8″ seam allowance.
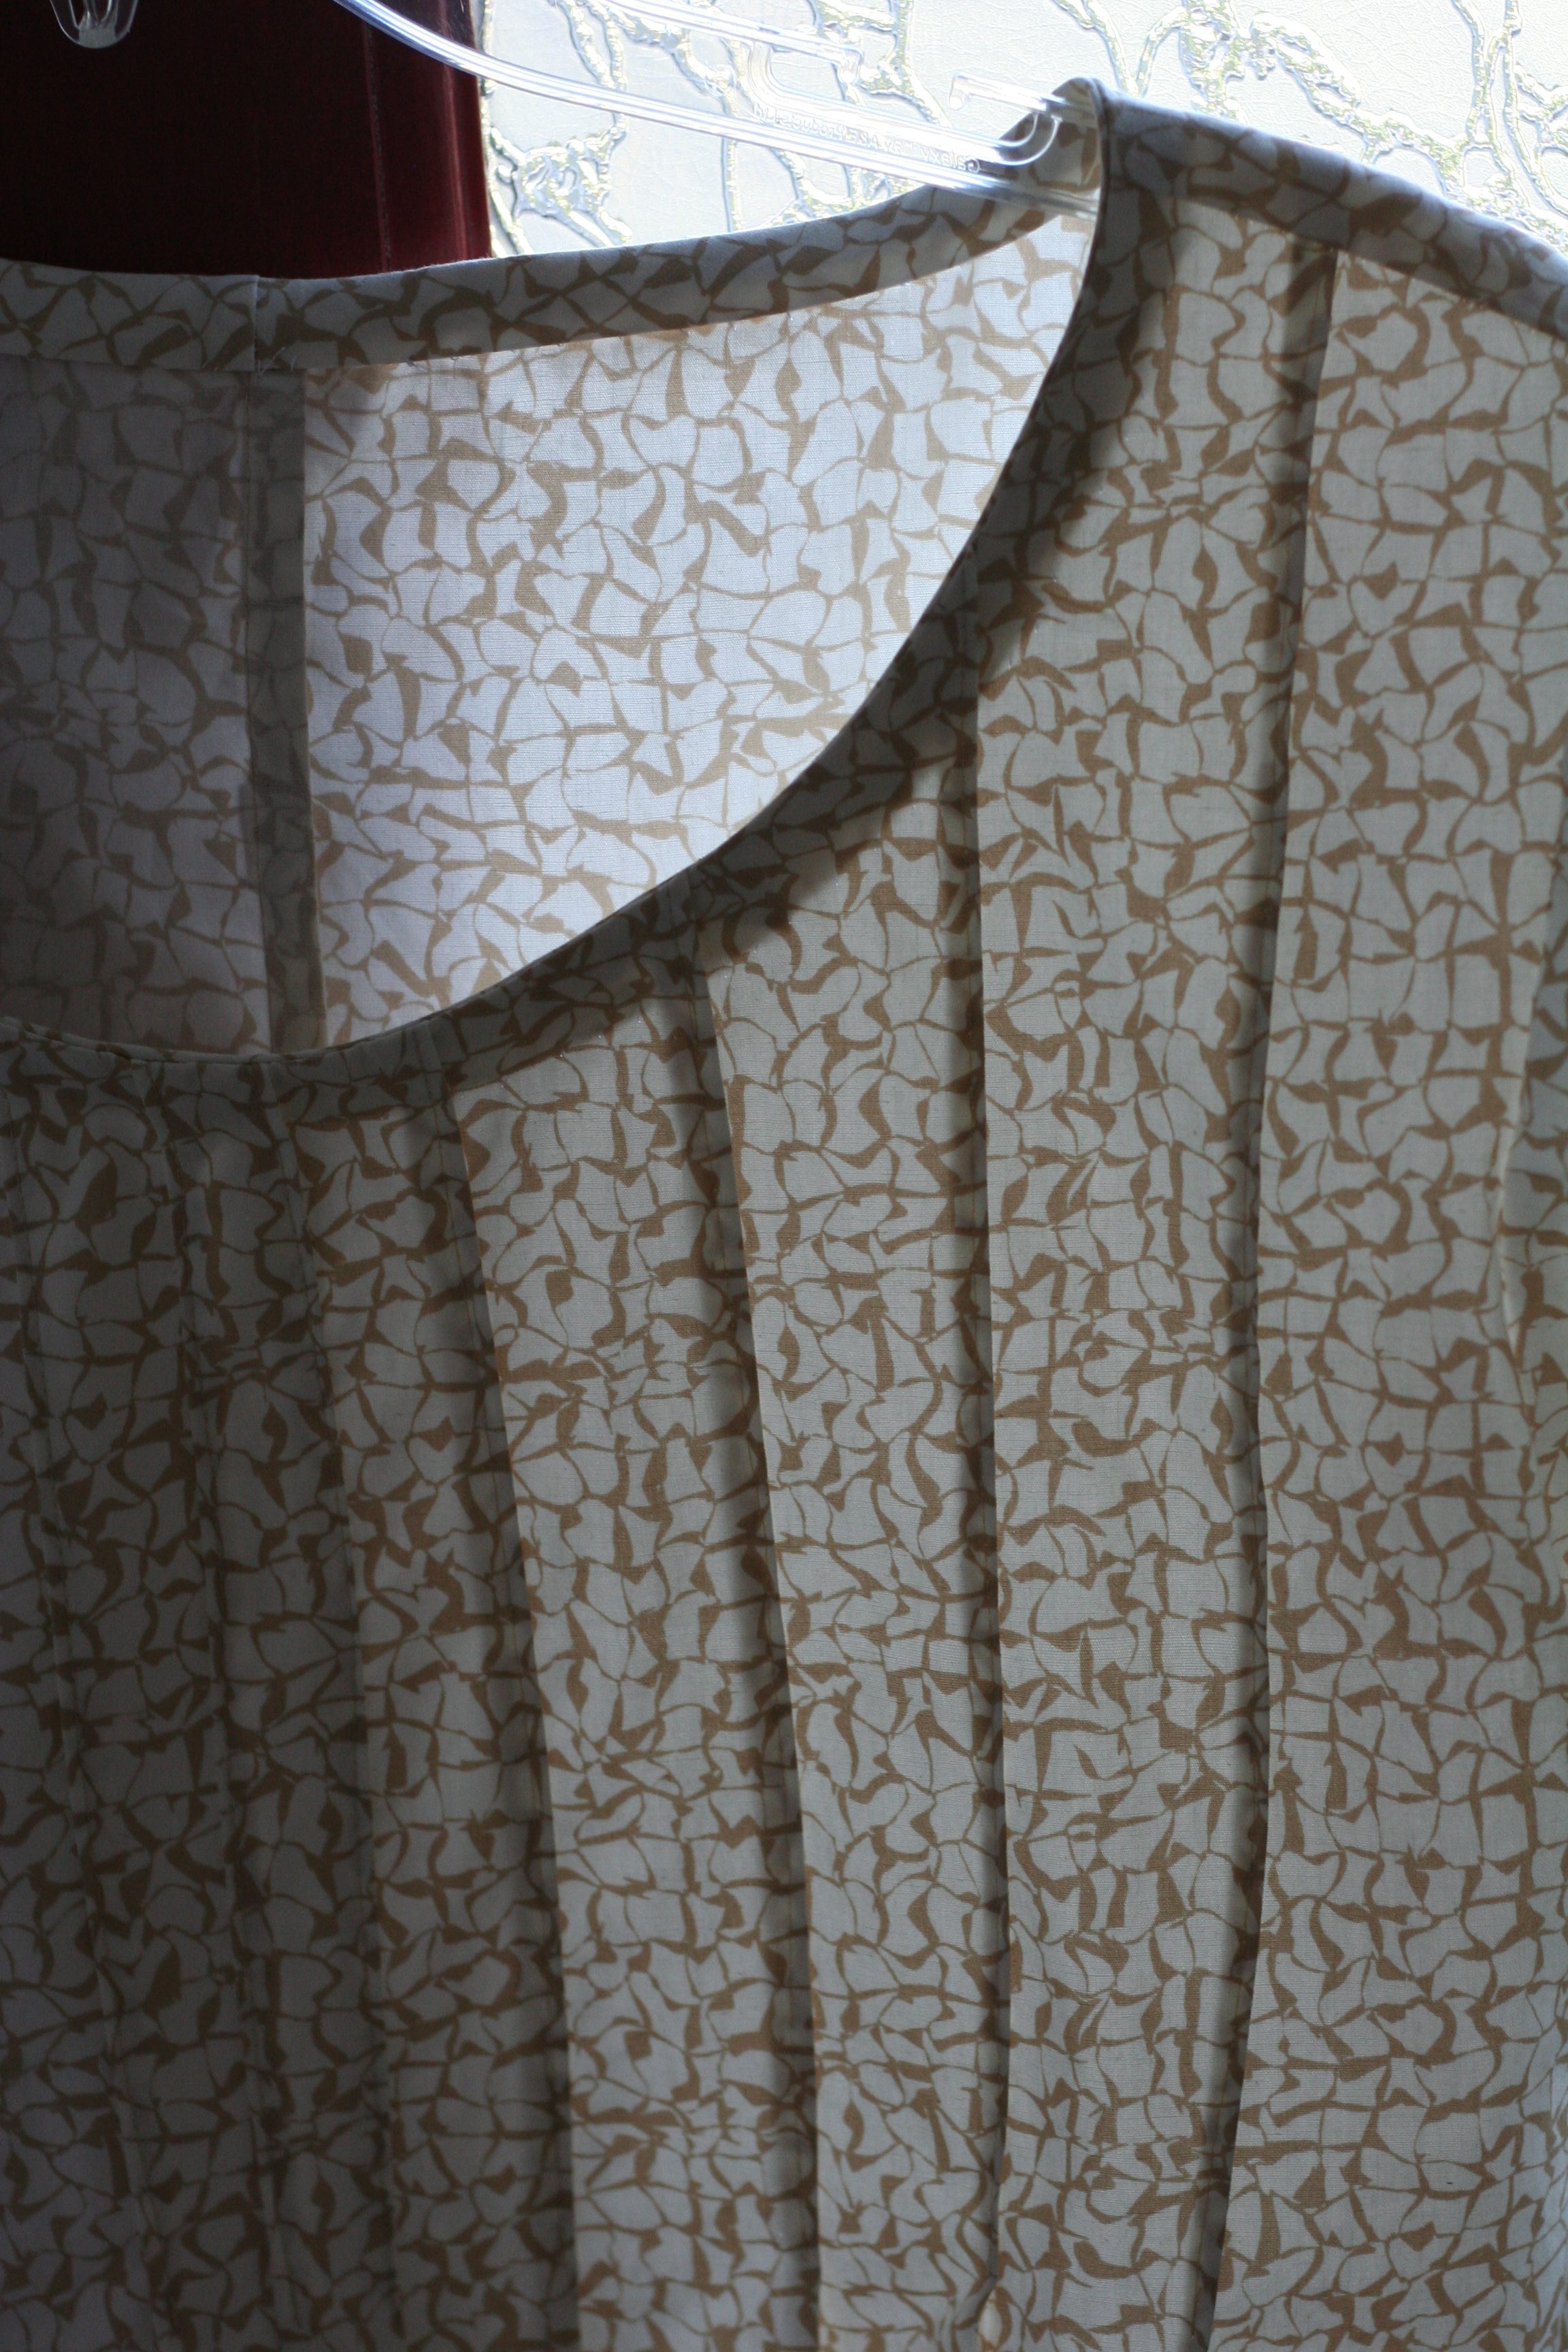
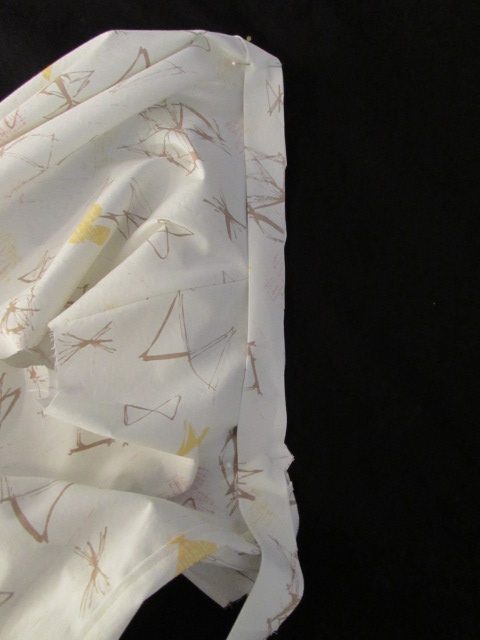
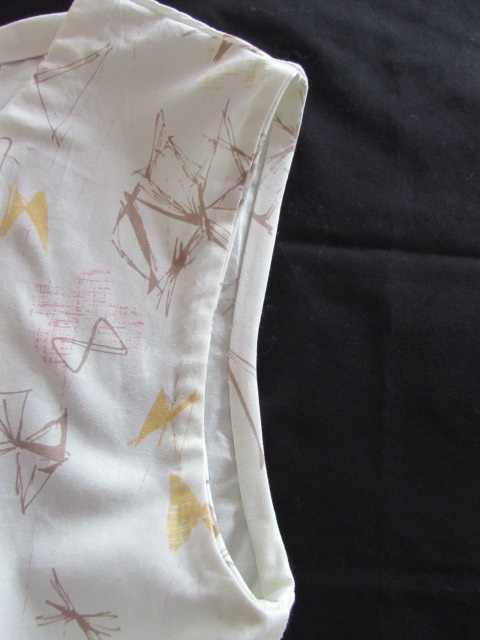
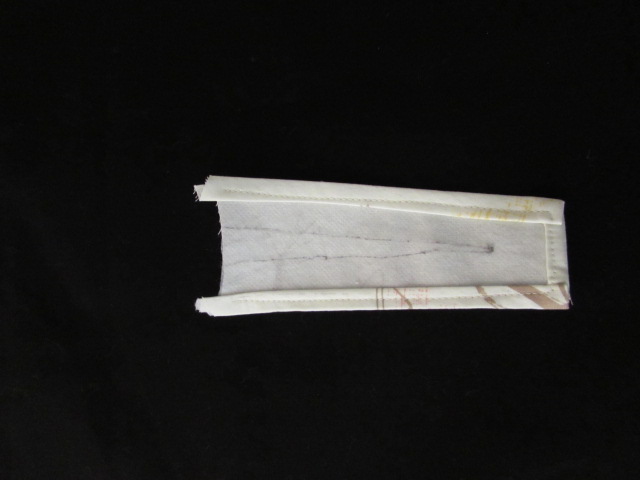
Before going any further, press the seam and turn the binding in toward the inside of the shirt. Press it and see if the binding lays flat. This is where I ran into difficulties. For me, the binding was too tight. I kept taking it off and fiddling around with it. Finally, the only way I could get a finish I was happy with, was to fold the binding in after stitching it. I stitched it at 5/8″ and then folded it in half to make it narrower and pressed it. Then I folded it to the inside and slip stitched it down. If you look at the picture, you will see it is rather narrow, compared to the neck binding. Honestly, I cannot really say what went wrong for me here but it sure made me crazy for a little while there.
But it lays flat and looks ‘good enough’. The first time I made this pattern, I put short sleeves on it and that was simpler! Hoping this isn’t a problem for you. I can’t figure out if I cut something to the wrong size or what?? I hope you don’t have this issue. If you do though, be patient and work with that binding piece. Message me via Facebook or Instagram and I will try to help.
That very last step is to hem the shirt. I am assuming you know how to do this but really it is so simple. Fold up 1/2″ to the inside and press. Then fold it again, to the inside, and press again. Pin along the edge and machine stitch the hemline. Ta Da!!! A finished shirt! I can’t wait to see all of your blouses. Let’s meet up here next week and share the finish. You can link up a blog post if you like as well as post pictures on Facebook and Instagram. Rather than figure out how to link an Instagram post here, please email me a picture of your finished shirt (on you or on the hanger!) and I will share them in the last post.
As always, please let me know if you need help. Have fun finishing your shirt up and I look forward to seeing them next week!
Good morning all. I hope your shirts are progressing and that none of you are experiencing any frustrations. From what I have heard and seen, it looks like there are some really pretty shirts coming together. Yay! If you have made it to this point, then it is time to check the fit and start stitching the main seams together. If you are not quite there yet, no problem. You will catch up! If you are new to this event, click here to start at the beginning.
In this post we are going to talk about methods to use for finishing the seams. I think a nicely finished seam makes so much difference. The seams won’t fray and it won’t look ‘homemade’ with clean, finished seams. There are a several choices but for this project, we will talk about two finishing methods.
French Seams, my favorite
Seams finished with a zig zag stitch
I am going to mainly focus on French seams for our project. This will work in most cases. Where it might not work is if, after you try on your shirt, you decide to sew narrow seams to help with the fit (if it is a bit tight.) If this is the case, you may not have enough seam allowance to create the French seams. In this case, I would suggest you sew your seam, press it and then run a zig zag stitch to keep the seam from fraying. The finished seam would look like fine and and fraying would be greatly reduced. Each of our machines are different so I will not provide settings for the size of the zig zag stitch. I would suggest you play with a scrap, running a straight seam and then zig zag next to it to see what size works for the amount of seam allowance you have to work with. As always, I am happy to help if you have trouble with this.
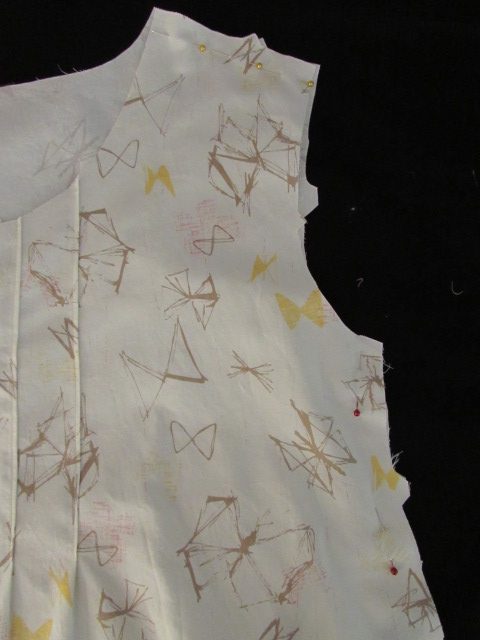
Before we talk about French seams, let’s make sure the fit of your shirt is good. Pin both shoulder seams and one side seam together on the 5/8″ seam line. Pin it wrong sides together.
Slip the shirt over your head and put one arm through that side that is pinned.
I have finished the back seam. The shoulder and one side seam are pinned.
If you have someone around to help you, have them pin the other side together for you once you have the shirt on.
Back seam is finished, one side and both shoulders are pinned.
Check to see if the shirt is comfortable across the bust line. Really, with this shirt, that is the only area that might give you trouble. Check if the armholes are fitting well. Does the shoulder seam need to be taken in or let out at all? If the shirt is tight across the bust line, try opening up that seam a bit. Take the shirt off and pin instead at the 3/8″ seam line. This reduces the seams on each side by 1/4″ which gives you 1/2″ more room. Hopefully this will open it up enough. You can also open up the seam on the back of the shirt to give more room. If this is not enough we can talk about putting a triangular gusset in at the top of the side seams but let’s do this together as needed. Leave a comment if we need to tackle this.
If the shirt feels baggy, you can increase your seam allowance. Like above, take the shirt off and pin it tighter, maybe at 7/8″ on each side seam. This would reduce the fit by 1/4″ on each side for a total of 1/2″ decrease. Increasing the seam allowance at the side may mean you need to play with the shoulder seams. You also have that back seam to play with to add or reduce the size of the shirt. You will need to play with it. But by doing this with pins and a mirror (and a friend if possible) you should be able to find the sweet spot where you are pleased with the fit.
French seams begin by stitching wrong sides together. Kind of feels strange but you will pin your seam and take a 1/4″ seam with the wrong sides of the fabric together. It will look like you are sewing it inside out. Remember though, if you have increased your seam allowance to make the shirt tighter, you will need to trim your seam allowance appropriately, before sewing this 1/4″ seam.
In the photo above, the fabric is wrong sides together and the seam is stitched at 1/4″ seam allowance. You need to trim any notches or frayed threads at this point so the line is clean. Then turn the shirt inside out, so it is right sides together. Press the seam lines, massaging the seam so it is tight and well pressed.
In the photo above, the first seam is stitched, the shirt is turned so fabric is right sides together. Pin if needed and stitch a 3/8″ seam line. Press again. Turn it right side out and check for any fray that may be caught in the seam and showing. Likely it is nice and clean but if there is any fray, carefully trim the bits of thread.
Back,shoulder and side seams are finished.
Regarding the order of things, it is best to sew the back seam first. Second you will finish the shoulder seams, sewing the back to the front. Slip it on again and check your fit. Finally, sew the two side seams.
We are almost there!! I’ll be back on Monday with a post on finishing the neck line and arm holes. Then you just hem the bottom and it is a finish!!
I hope you are enjoying this project. Do not even hesitate to ask if you need my help. You can leave messages via Facebook comment, Messenger, or a comment on the blog and I will be right back with you.
Just a reminder, you may sign up for my newsletter while visiting the blog. The sign up form is at the top of the page on the right. You will receive a monthly newsletter telling you what is new with my shop and about any promotions or events that might be coming up.
You’re back! I hope that means you were able to lay out and cut your fabric pieces. If you had any trouble, don’t hesitate to email me at needleandfoot@gmail.com. Or, you can always leave a comment on the blog or the Facebook page. I am happy to help.
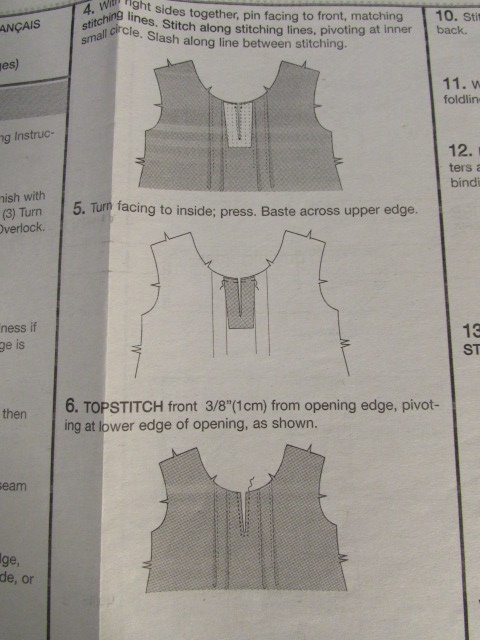
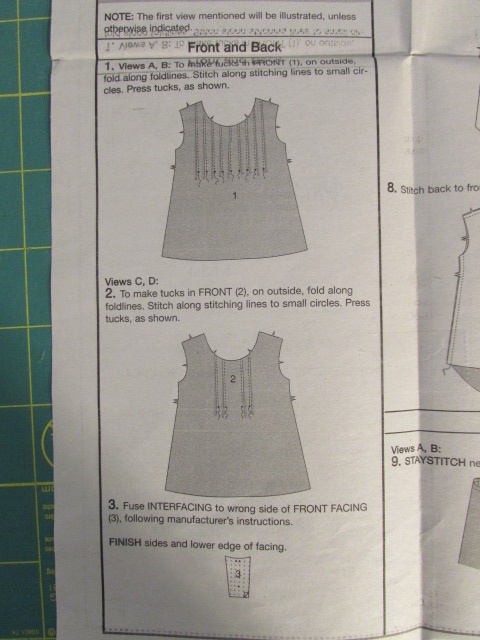
Today we are going to take our time and work on the details that make the front of the shirt unique. I think these details are both challenging and fun. If you take it slow, you will have good results. We are going to mark the lines for the pin tucks and also the stitching and cutting line for the slit at the center of the neckline. The portions of the instruction sheet we will be working on are numbers 1 through 6.
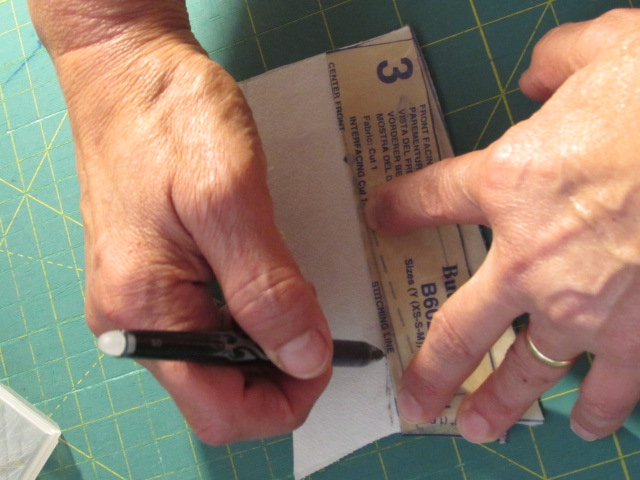
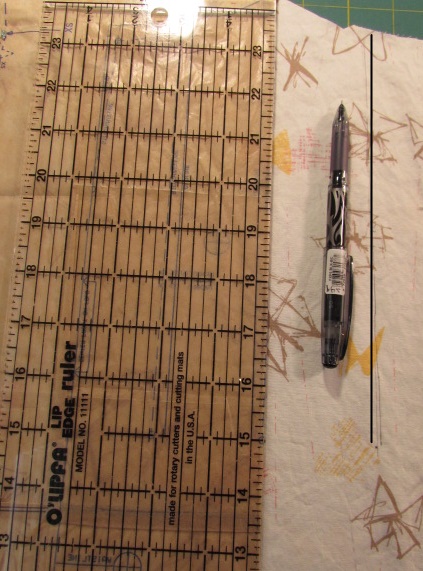
NOTE: For marking, I used a Frixion pen (the one that erases with the heat of the iron.) You should use whatever is comfortable for you. For the pin tucks we are marking on the front of the shirt so make sure it will come out easily. A piece of chalk would be good. Because my fabric is light in color, chalk wasn’t an option for me. Plus I want my markings to show in a photo for the blog so I needed a darker color.
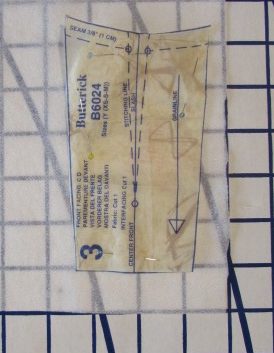
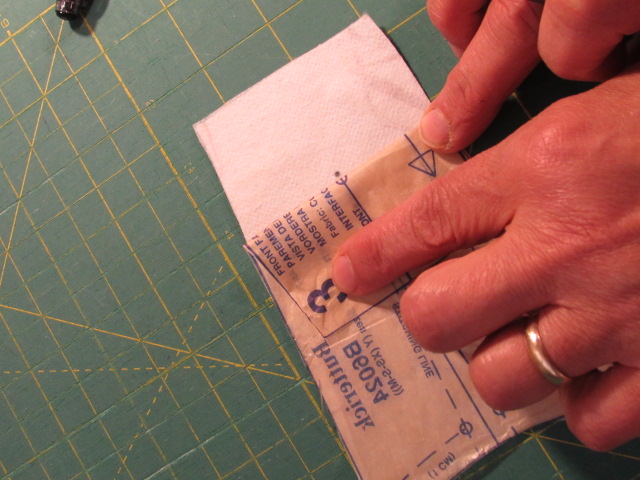
We will mark the center stitching line first. It is easiest to mark this on the facing piece, rather than directly on to the front of the shirt. You need to fuse the interfacing to the wrong side of piece number 3 first. When the interfacing is fused, lay the paper pattern piece back over the interfacing side. Fold back the bottom of the paper and make a mark the bottom of the slit.
Fold back the paper lengthwise on the dotted line and trace your stitching line. Then fold back the other side along that broken line and trace the opposite stitching line.
I noticed that the drawing of the slit comes to a deep point. I did not sew that far down because there would not be any seam allowance alongside the stitching line at the deepest point of the V. Instead, I traced and stitched a shorter, wider V on my piece.
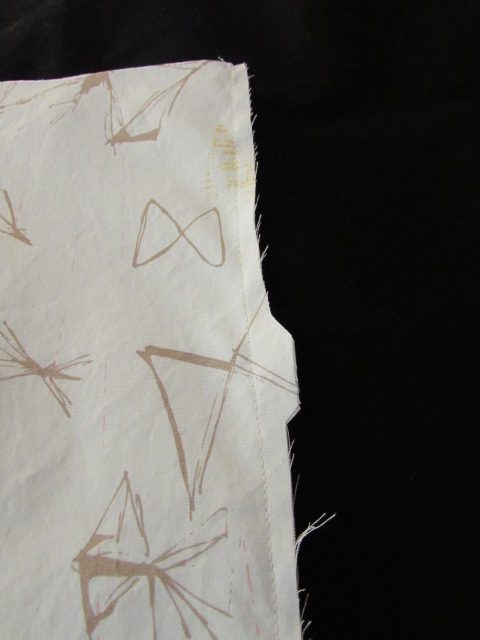
Once you have your facing piece marked, you need to finish the edge of the facing so it doesn’t unravel or fray when it is washed. I always fold a very narrow 1/4″ to the wrong side around the three outer edges (both long sides and the bottom). Press that first fold. Then fold it again and press that second fold. Pin to keep it in place as you stitch.
NOTE: Just like with free motion quilting, it is always best to draw your bobbin thread up to the top before you begin stitching. This will prevent that little rat’s nest of messy stitches that occur now and then. Also, with any stitching on a garment, stitch forward about two stitches, reverse for two stitches and then begin to sew. You need to reverse so that your stitches are locked down and don’t unravel.
Press after stitching. If you are using a Frixion pen, remember not to iron over your markings or you will have to trace a second time. (Ummm….don’t ask me how I know this.) Once your facing edges are finished, set it aside for now.
I feel like explaining the pin tucks with the written word is a bit of a challenge so, with the help of my daughter, I made my first ever YouTube clip. I think this will give you a good idea of how to fold the pin tucks. If the video doesn’t work in your browser, click here.
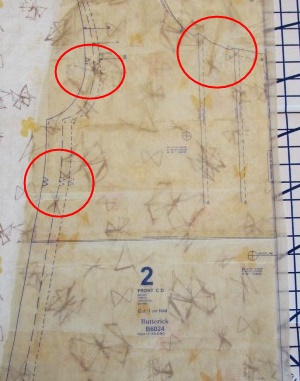
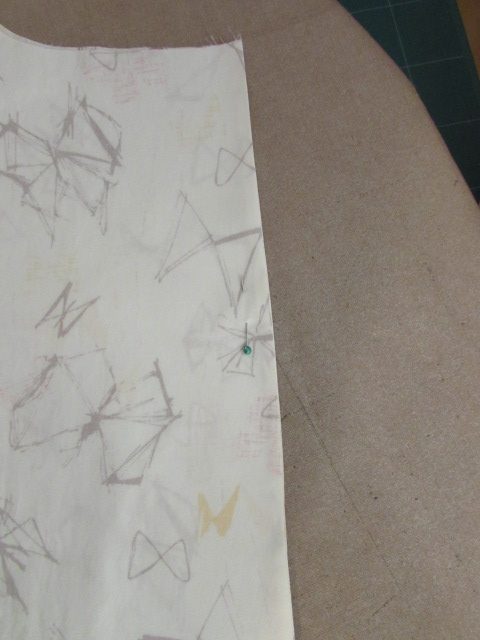
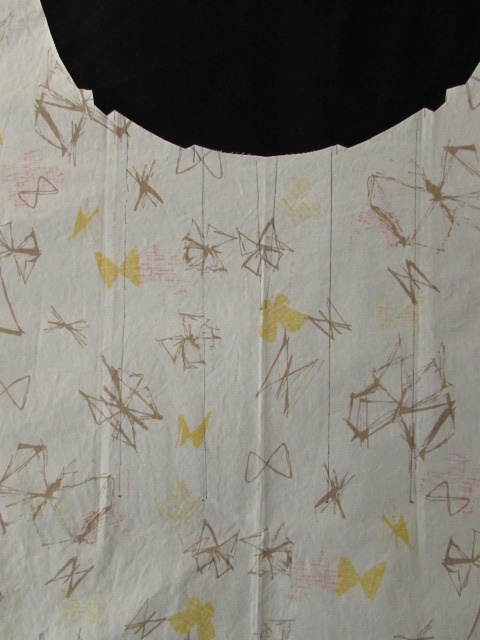
Now let’s mark the pin tuck lines. This will be much like marking the line on the facing piece. This time, fold the paper pattern back on the broken line (your stitching line). Use a clear ruler or straight edge to draw a line on the fabric from the top to the dot at the end of the stitching line. You will mark these twice on each side of the front piece. After you do the first side, remove the pins from the piece and turn the fabric over. Lay the piece down (should be upside down this time) and mark the two lines on the other side of the front piece. It is hard to see my lines so I drew over one to give you the idea of what I mean. Ignore the fact that I couldn’t line my hand drawn line with the computer drawn line! I definitely need some lessons on using graphic art tools!
When you have all four lines drawn, it will look something like this. Again, my hand drawn lines are faint.
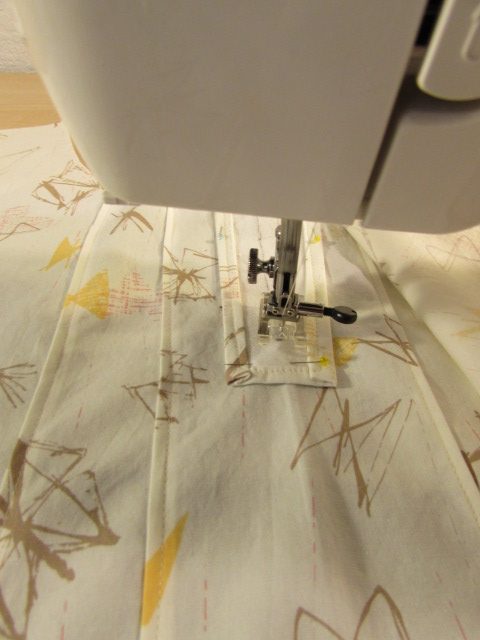
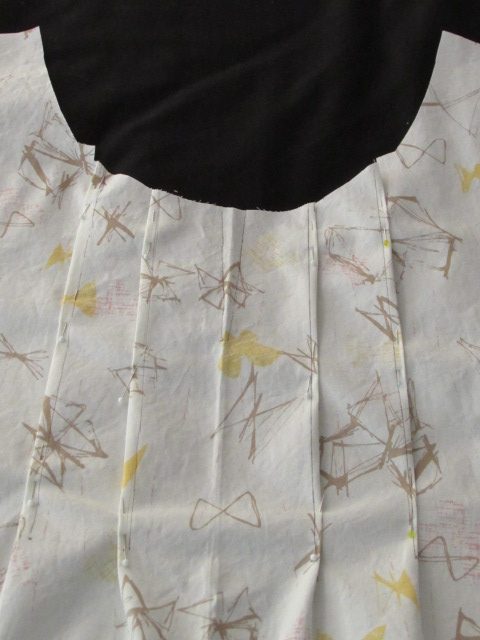
Next we will make the folds and pin the tucks in place. You want to pick up the fold at the notch and take it to the side. Finger press and pin in place. Remember, if it is folded in the correct direction, the notch will make a nice smooth curve for the neckline. Pin down to that dot we marked for the end of the tuck.
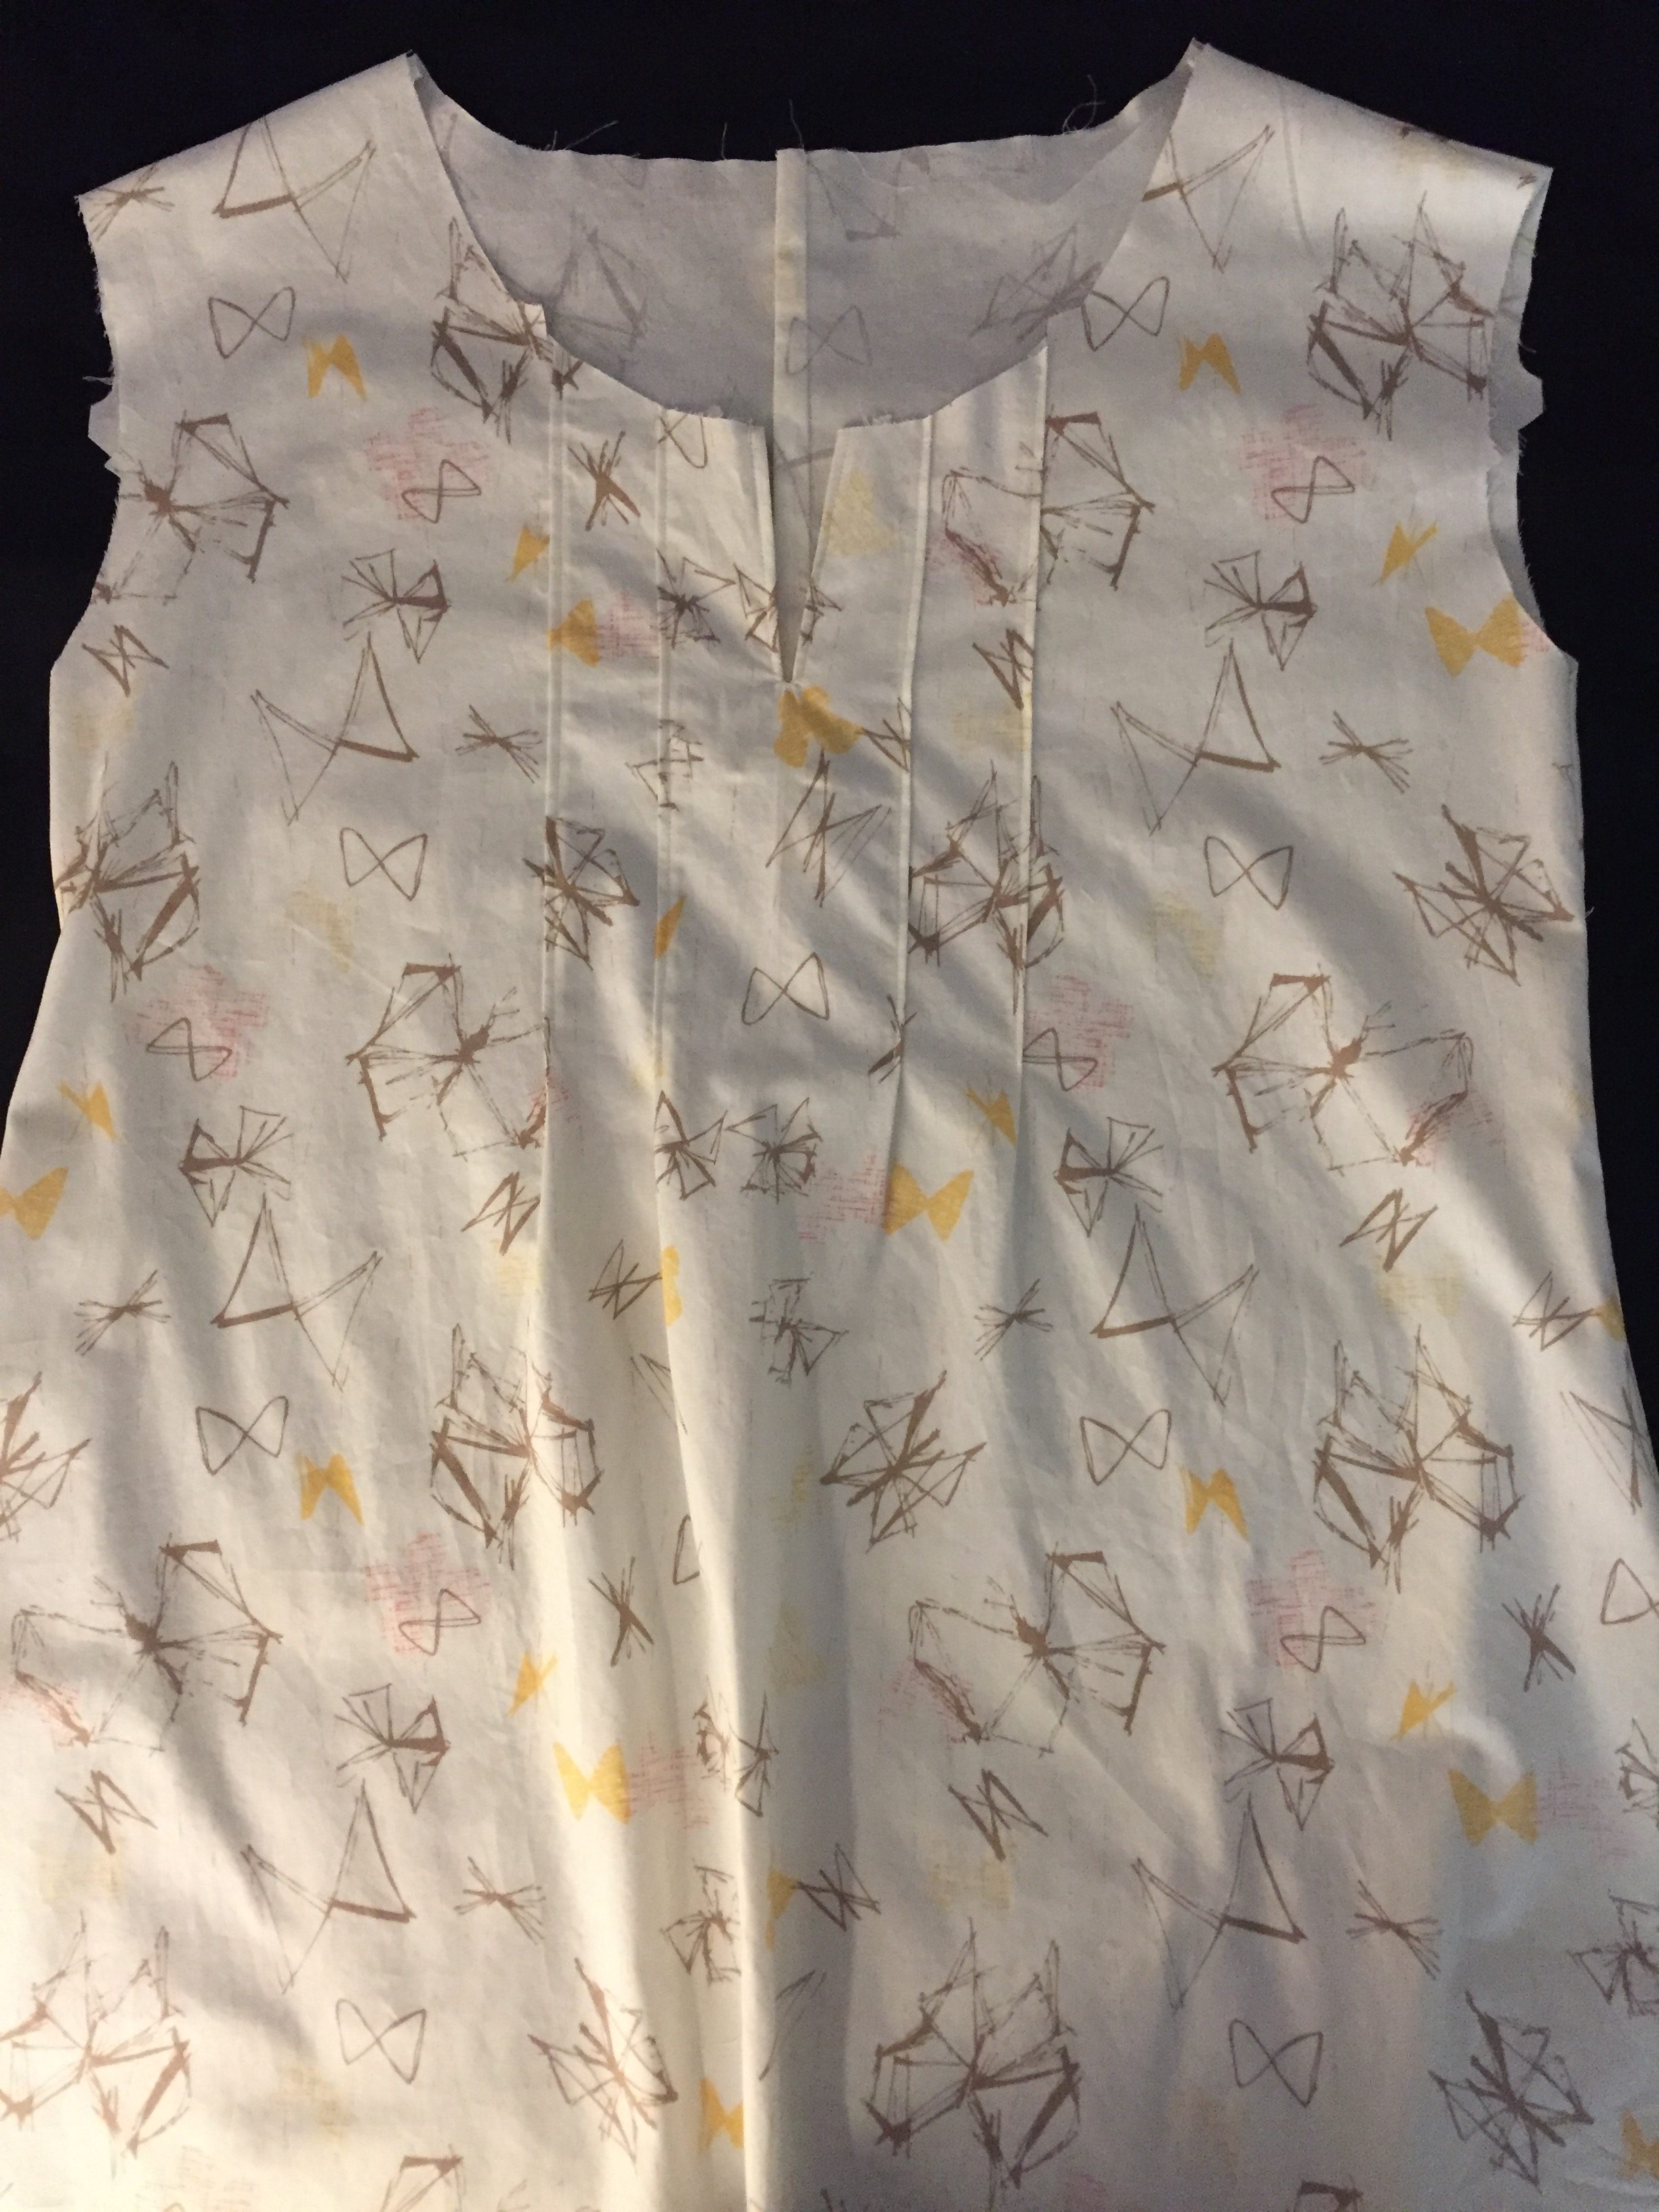
Top stitch each of the pin tucks, drawing your bobbin thread to the top before beginning the seam. Also, be sure to reverse for two stitches and then proceed to the end of the tuck. How does it look?
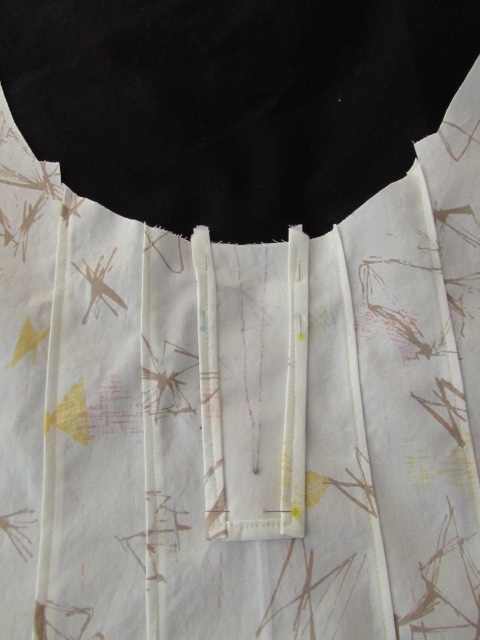
The next step is to attach the facing. Take the piece and lay it right sides together on the front piece. It will be centered between the tucks.
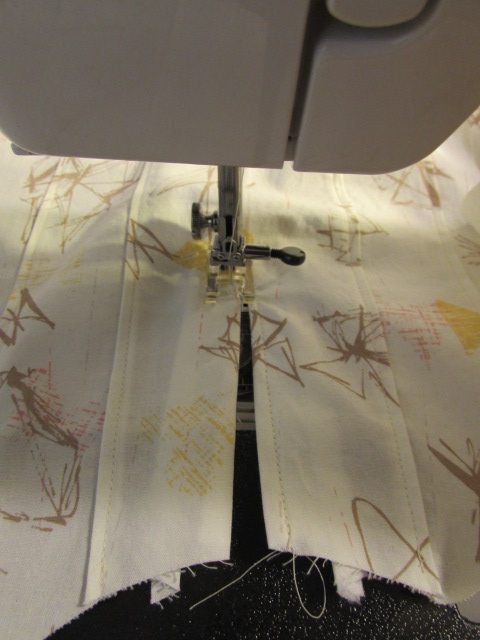
Pin in place. (I know… my markings are a bit wiggly.) Sew just a hair to the right of the stitching line. Take it slow here. This is probably the fussiest part of this project. Stitch down to the point and put your needle down to hold your spot.
Pivot, by turning the fabric, and stitch 2 or 3 stitches. You will need to have this bit of room when you clip this seam. Then with your needle down, pivot the fabric again and stitch back up to the top of the neckline.
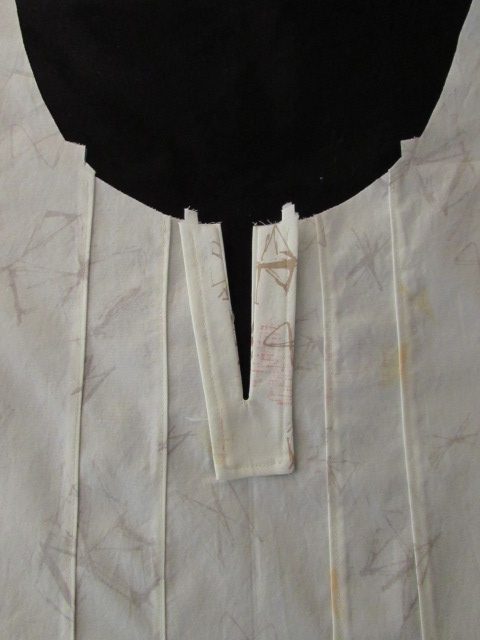
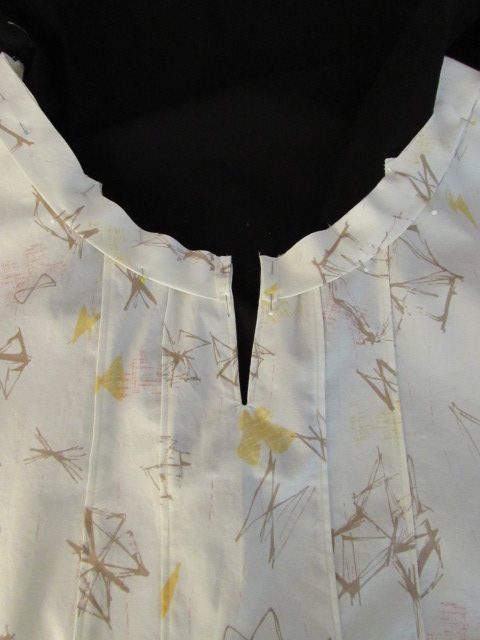
Press your seam. Just press the facing as it lays on the front of the shirt to smooth your seam. Next you will carefully cut the slit between the two long rows of stitching down to the point (where you made those two stitches and pivoted).
Make sure not to cut through the stitches. Now turn the facing to the inside of the shirt. You will likely have to massage the facing a bit to get it to lay flat. Use some steam and iron the front of the shirt with the facing on the inside.
The last step for today is to top stitch the opening in the neckline. Pull your bobbin thread to the top and stitch a uniform line no more than 1/4″ from the seam. I stitched mine at 1/8″ because I wanted to reinforce the facing seam. There is so little seam allowance here and I think a tight top stitching will prevent any problems.
Now that the front of this shirt is complete, you can breathe a sigh of relief. This was the toughest part. Hurray for you!
The next post will be on Friday, June 23rd. On Friday we will check the fit, learn about finishing seams, and sew the back, shoulder and side seams. Easy Peasy! See you then.
Please do not hesitate to ask questions. If you are wondering something, it is likely there is another reader wanting to know the very same thing. Leave a question and I will get back to you!!
Hi Everyone! Today we are going to begin working on our shirt. I am writing with the assumption that at this point in time, you have received your pattern (Butterick B6024) and have purchased your fabric. (Many thanks to the readers who purchased fabric at my shop!) Your fabric should have been washed (in cool water) and dried in the drier to be sure any potential shrinkage has already happened. Ok – if you are still with me, let’s begin. (If you haven’t gotten your supplies yet, don’t worry. You can still catch up. )
NOTE: before doing anything else, I strongly suggest reading through the instruction sheet that comes with the pattern. I am going to explain my process as we go through this but they are the professionals and it will help if you sit and read the instructions beginning to end. Then as we work through the pattern, it will likely make more sense to you. Be sure to read all the way through this post and then take your time. Be sure all of your pieces fit BEFORE you cut anything. I have to tell you this has bit me several times…..taking a quick glance and assuming the pieces will all fit properly does not work. Take the time to lay everything out completely before cutting fabric. Once you begin cutting, it is pretty darn hard to change the layout of the pieces.
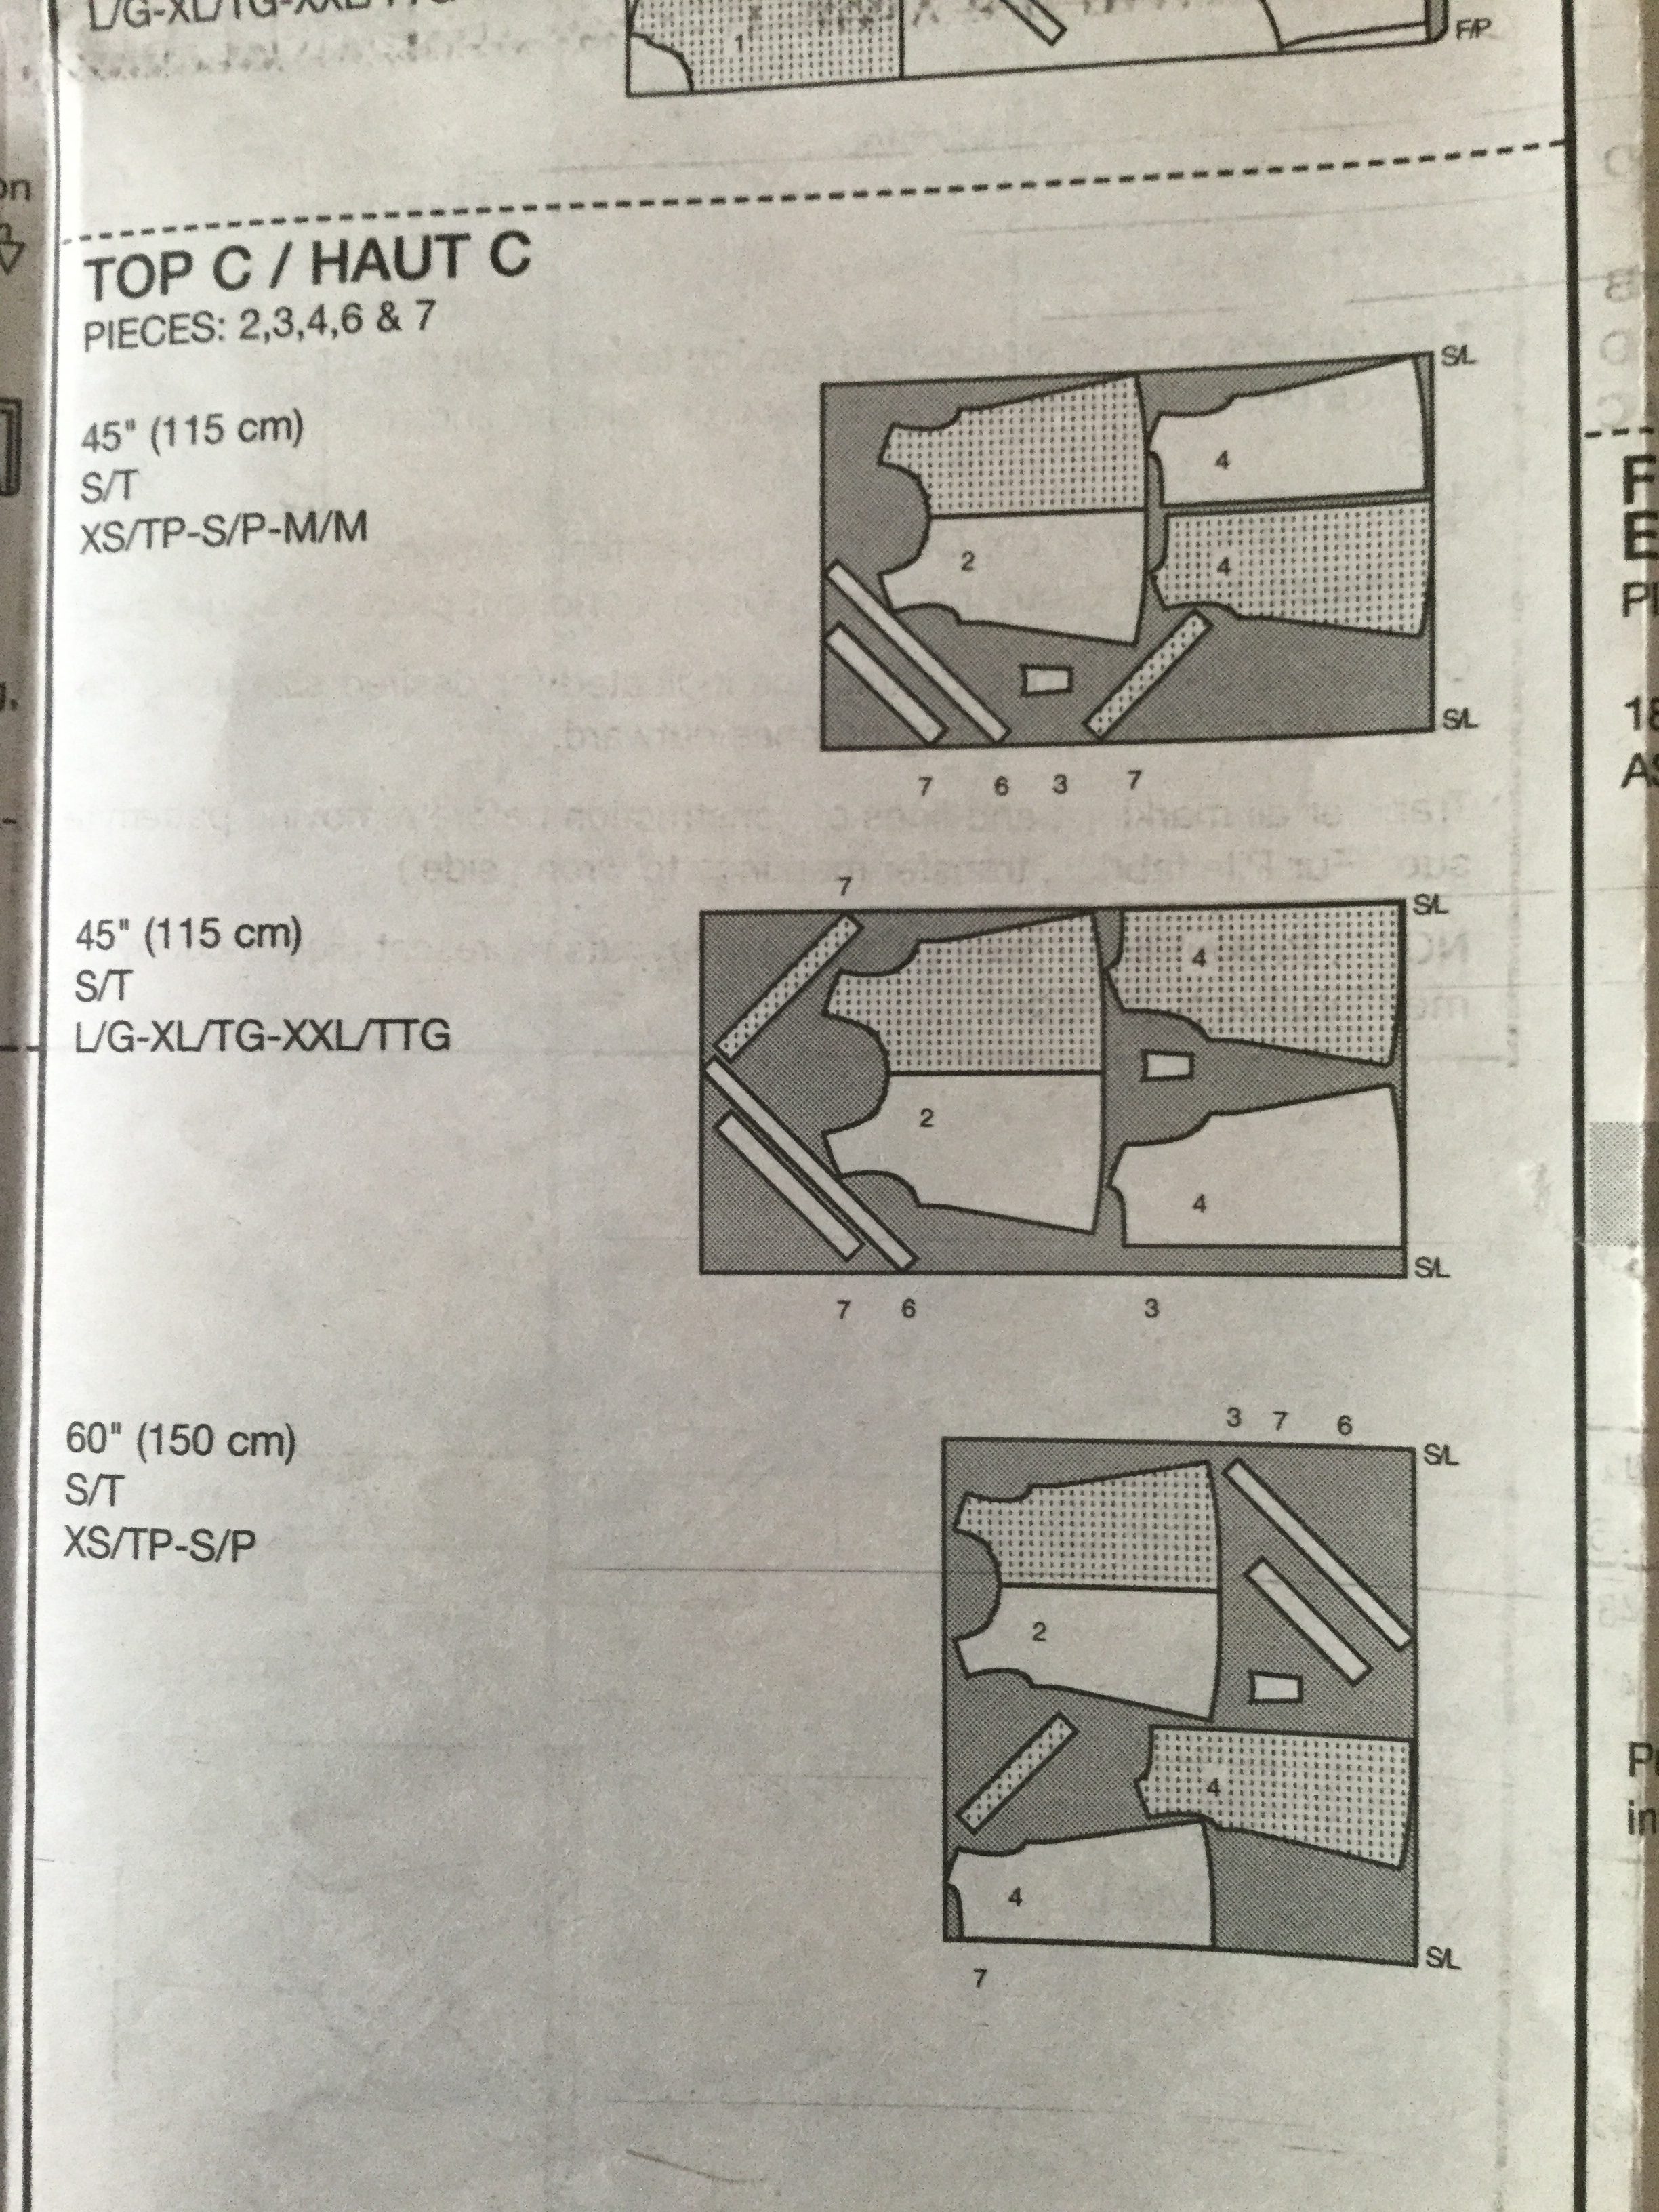
In the first post, I mentioned you need to take your measurements and buy the correct size pattern, according to the measurements described on the pattern. Hopefully, you have done this and have the correct pattern in hand. Next I want you to cut out the paper pieces that will be needed for this shirt. For View C we will use pieces 2, 3, 4, 6, and 7.
NOTE: Some readers have mentioned that they are making a variation such as using the front from version A or adding a sleeve. I am not going to go into detail on variations as I think it will get confusing. If you are veering off the path, so to speak, that is fine. If you get stuck or need some help, please email me or leave a message on our Facebook page. I am happy to help if needed!
As you cut the the paper pieces out, note the various sizes printed on the pattern. Make sure to cut them out with the largest size intact (cutting around that size) so you have the choice each of the sizes when you actually pin and cut your pieces.
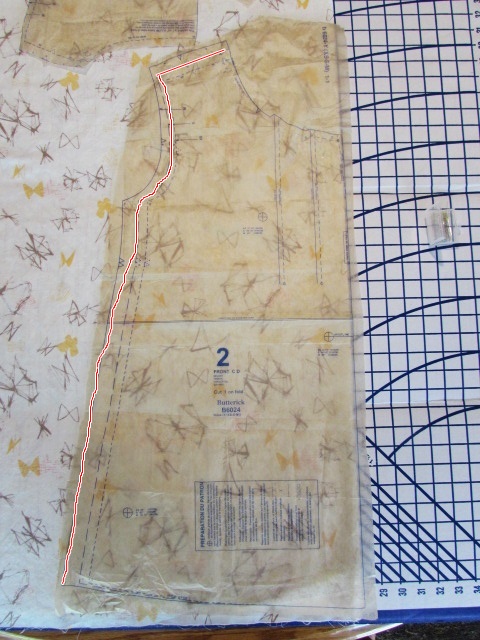
Once you have your paper pieces cut out, take the front piece and stand in front of a mirror. Hold the piece up to your torso with the shoulder seam line laying on top of your shoulder where it would be if sewn. Press the tissue paper so the armhole goes across the front of your arm and the side seam tucks under and lays down your side. The front of the top will look wide because we are going to make the pin tucks which will reduce it. But the shoulder seam and side seam should fall comfortably. Check to see if it looks like it fits. Check the length. If it is too short or too long, we can adjust the pattern piece accordingly. At the bottom, does it seem like the width is going to be comfortable? The nice thing about patterns with multiple sizes printed on them is that you can cut part of the piece at one size and gradually work to another size, thus altering the shape as you need to. For example, if your body is pear shaped, you might cut the top parts, the shoulder and armholes at a size small and then as you cut the side seam, you could gradually increase the cut as you go, until you reach the medium size line toward the bottom. I am by no means a graphic artist but I tried to illustrate what I am saying. (Hopefully your stitching line will be much straighter than my wiggly line!!) Does this make sense?
When I make a shirt or dress, I often have to adjust the length. I am just shy of 5′ 4″ tall and usually the pattern is a touch long for me. The length is a very easy adjustment. There is a line at the midpoint of both the front and back pieces. If the pattern is too long for you, you just make a little fold at the line to shorten the piece. It is much more effective to shorten at the middle of the piece than to just cut it shorter at the bottom. If you cut off the bottom, you might alter the way the piece drapes around the hip. Conversely, if you are tall and want the shirt to be longer, you would cut the piece at the mid-line and add length to the piece. This shirt is a fairly long one so it is not likely you’ll need to lengthen it. However, if you do, please message me and we can work through that together.
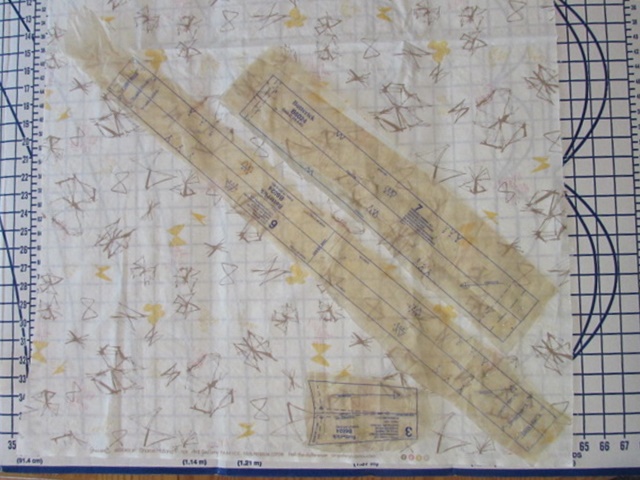
Each pattern always contains a suggested cutting layout. They are showing you how to fit all of the pattern pieces on the piece of fabric. In the photo below, you will see the layout instructions for view C, the shirt we are making. You will see it shows how to lay the pieces out on standard 44″ wide fabric and again for 60″ wide fabric. Also, they show the layouts in each of the sizes too. Note the pieces are running parallel to the selvage edge. Pattern pieces always have an arrow on them and that arrow must run in the same direction as the selvage of the fabric. This ensures the grain of the fabric is going the right way. If you don’t adhere to this, the fabric will not hang nicely.
The suggested layout in the picture shows the fabric being unfolded and the pieces being cut from a single thickness of the fabric. They are instructing the reader to lay the main pieces (number 2 and 4) down and then to flip it over and cut the second one. Piece number 2 is the front of the shirt and must be cut as a single piece. So you would cut the one half, unpin the piece, flip it over, pin it and cut the other half. This all works and you are welcome to lay your pieces exactly as the instructions show them. I found this process a bit laborious. Instead, I kept my fabric folded and simply laid piece 2 on the fold.
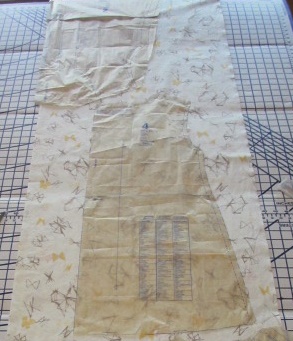
I pinned it with the center line running along the fold, because that keeps that helpful arrow running parallel to the selvage edge.
Piece number four is the back of the shirt. There is a seam running down the center of the back. If possible, it is a good idea to take a look at both layers of your fabric. If you can fold the top and bottom so that the pattern matches, then when you stitch the center back seam, the pattern will match. This isn’t absolutely necessary and if you have a print like mine, it is not very easily done. I chose not to worry about it. If you have a very bold print and, if you don’t mind fussing with the fabric, you could try to lay the piece so that the print of the fabric will match. Piece number 4 is not laid on the fold but that long arrow must be parallel to the selvage. Lay the piece just below the front piece, placing it as close as you can allowing room to cut each one out. I placed it closer to the selvage edge than the fold edge. I wanted that folded section to remain whole to keep as a bigger scrap. (We are quilters, aren’t we?)
The above photo shows the basic layout I used.
NOTE: From the pictures you have shared, I do not think anyone is using a directional print. However, if you are – be sure to lay your front and back pieces so that they run in the correct direction. They should both lay in the same direction so the print runs correctly on both front and back. Similar to when we are quilting, make sure the pieces are cut such that the direction goes the same way on both the front and back!
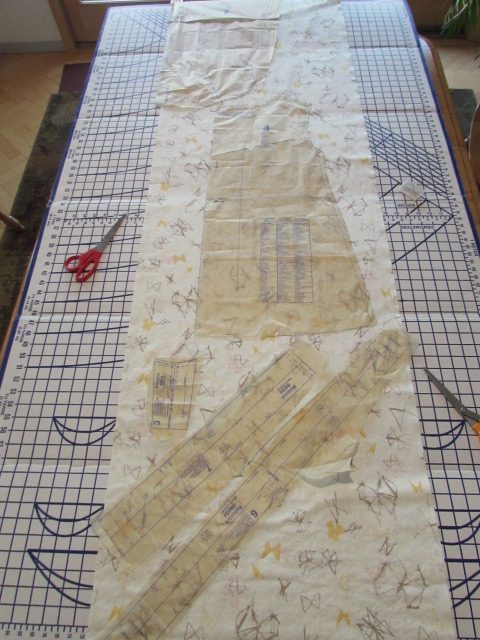
Once I verified all of my pieces fit and figured out what size and length I would be cutting, I pinned the front and back pieces (2 & 4) and cut them out. After they were cut, I opened the remaining piece and pinned the last three pieces. The final three pieces are simple. Piece 6 is the neck binding and piece 7 is the armhole binding. Since they will be used on curves, they must be cut on the bias. Look at the arrows and keep that arrow parallel to the selvage. Because we only need one neck binding piece, cut it on a single thickness of fabric.
In the picture above, you can see the selvage runs along the bottom of the photo. Pieces 6 and 7 are placed on the bias. You will need to cut a second sleeve binding piece. After you cut the first one, take that piece and flip it over (upside down) and cut the second one. You need to cut one with the pattern piece right side up and the other with the pattern piece right side down. The last piece you see is number three. This is the little piece we will use to finish the little slit at the center of the neck line. We only need one of these so cut it on the single thickness with our trusty arrow aligned with the selvage.
If this is your first time cutting out a pattern, you might wonder what the little notches are that are placed on the edges of the pieces in various places. You will cut the notches out and use them when you place your pieces together and pin them before sewing. The notches will be matched up and it helps you with the placement of the pieces.
I always cut the notches pointing outward so they are not within the seam allowance. These notches can be cut into the seam allowance – the same way they are pointing on the piece, however I don’t suggest this. There are times when you want the seam allowance intact in case you need to alter the size (by sewing a smaller seam to make that area larger). If you cut into the seam allowance you will not have the option to enlarge the seam if needed.
The last step in cutting out the pieces is to cut a piece of interfacing to back piece number three. It is silly that the pattern says to buy a 1/4 yard of interfacing when really you need about a 6 x 6 inch square. I guess 1/4 yard is the minimum that many shops will cut? Anyway, now you have extra for the next project!
Look at the stack of leftover fabric! Hmmm…. what could I possibly do with all these scraps?!
Whew — That was a whole lot of reading for what is actually a simple process. I hope I didn’t confuse you!! Because this is my first time hosting a sew along, I would love feedback on these posts. Too much detail? Too little detail? Is any part of this confusing? Please leave your thoughts in the comments so I can adjust things as we go. It will really help me to learn how these steps should be written.
If you need any help with this, please don’t be shy. I want to help you be successful with this and it is a bit different from quilting so there are no silly questions. Have you joined the Facebook group yet? If so, please remember to post pictures of your progress there, offer suggestions or tips to others, or answer any questions that may come up – let’s help each other out. If you are not a Facebook participant, you can also post progress photos on Instagram. Tag me @needleandfoot and use the hashtag #NFsummersewalong. Be sure to come back on June 19th for the next post. We will be working on the detailing of the front of the shirt (the pintucks and the slit at the neckline).
**If you haven’t yet signed up, I would love to have you sign up for my newsletter. Sent monthly, it contains updates about new fabrics I have in the shop and promotions that will run that month for newsletter readers. Sign up form is on the right side of your screen, toward the top.
I am both excited and somewhat anxious to begin our summer sew along!! It was the beginning of April when I posted a finish where I made a blouse using a Butterick pattern, B6024. It was a very simple pattern and several readers commented they would like to be able to sew a blouse. I thought about it and decided I would host a sew along where we could make a blouse together. This is the first time I have attempted a sew along, hence the bit of anxiousness. I have been sewing for a very long time, more than 40 years. However, I haven’t taught classes either in person or on-line. So it is with that bit of a disclaimer, I welcome you to sew along with me.
And sew it begins! Today we will talk about pattern and fabric selection as well as necessary supplies or notions.
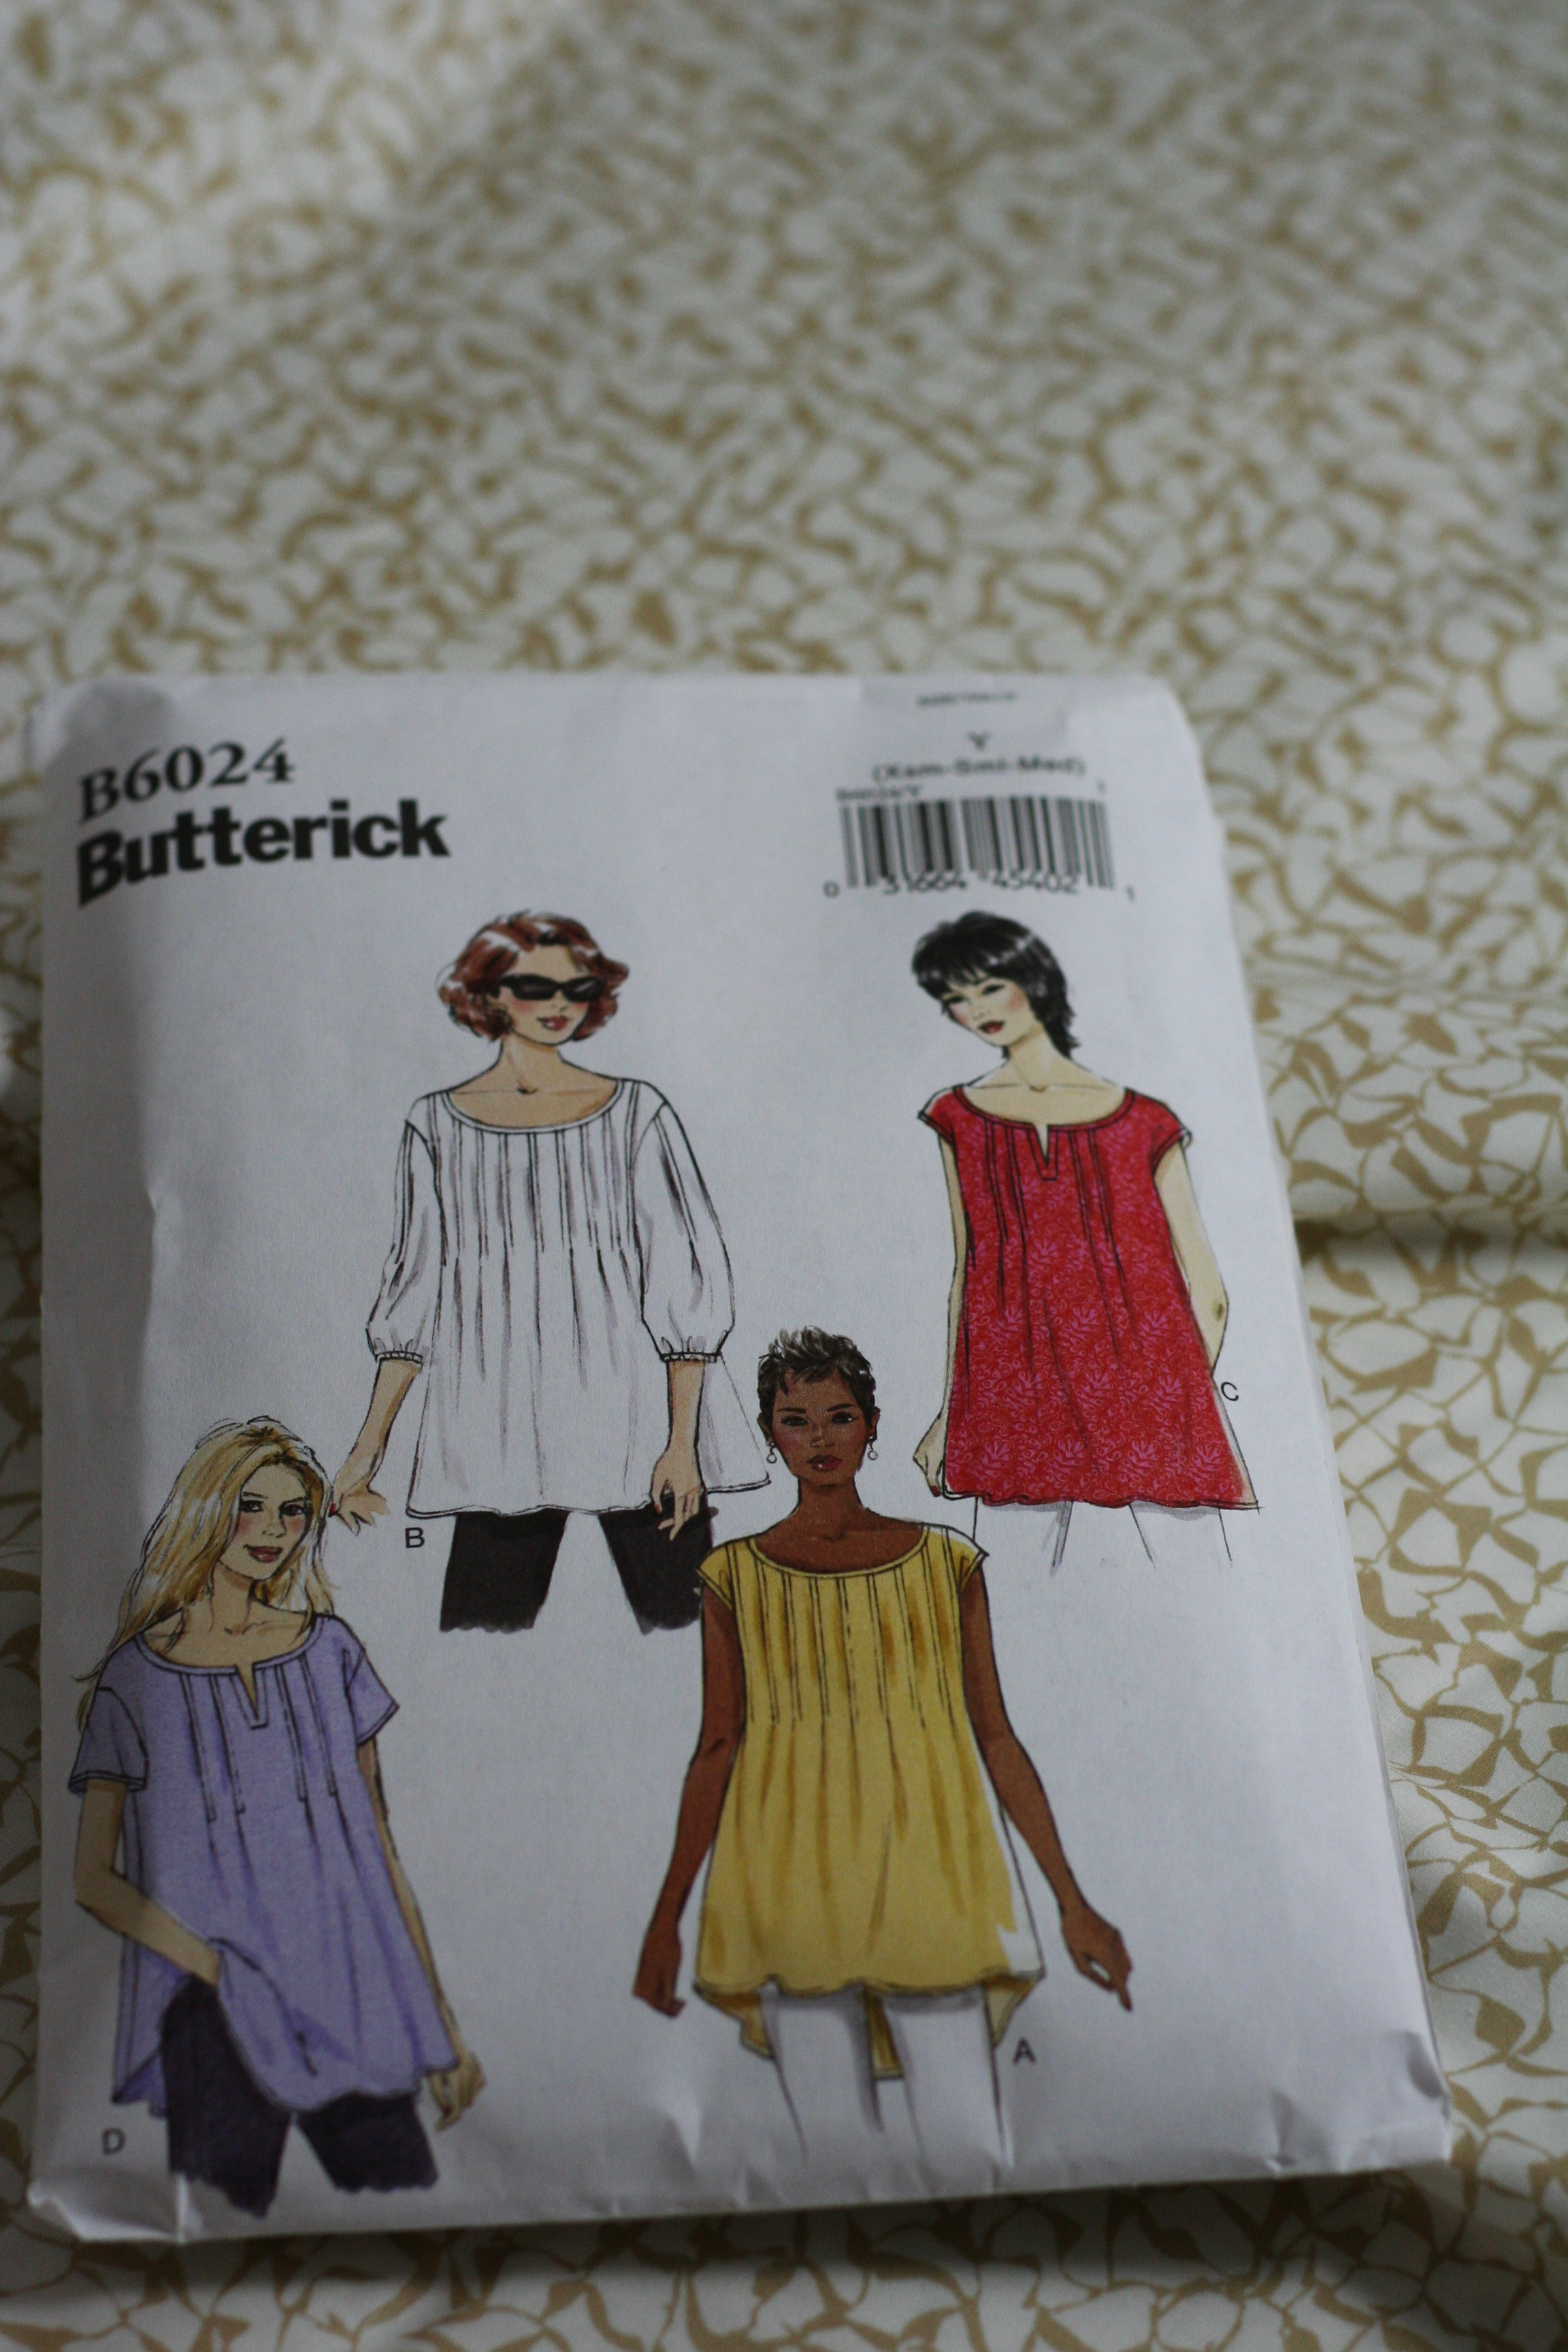
When I began to plan the sew along, I looked at so many different, simple blouse patterns. A few readers sent me ideas of blouses that would be fun to make. But the more I looked, the more I came back to this pattern. Some of the suggested patterns were indie designer patterns that were really cute. However most of them were pdf patterns which means we would have a an additional learning curve. Downloading, printing and assembling pdf patterns can be a bit confusing. The patterns print on A4 (regular size) printer paper and then must be taped together and cut into the pieces. It isn’t terribly difficult but I thought for the first time it would be simpler to go with a pattern that is available and printed on regular tissue pattern paper. Thus I selected Butterick pattern, B6024.
This pattern is widely available. I found it in several Etsy shops for a great price as well as on Ebay. If you shop at Jo-Ann Fabric, they carry it as well. Lastly, it is also available directly from Butterick but it is a bit more expensive there.
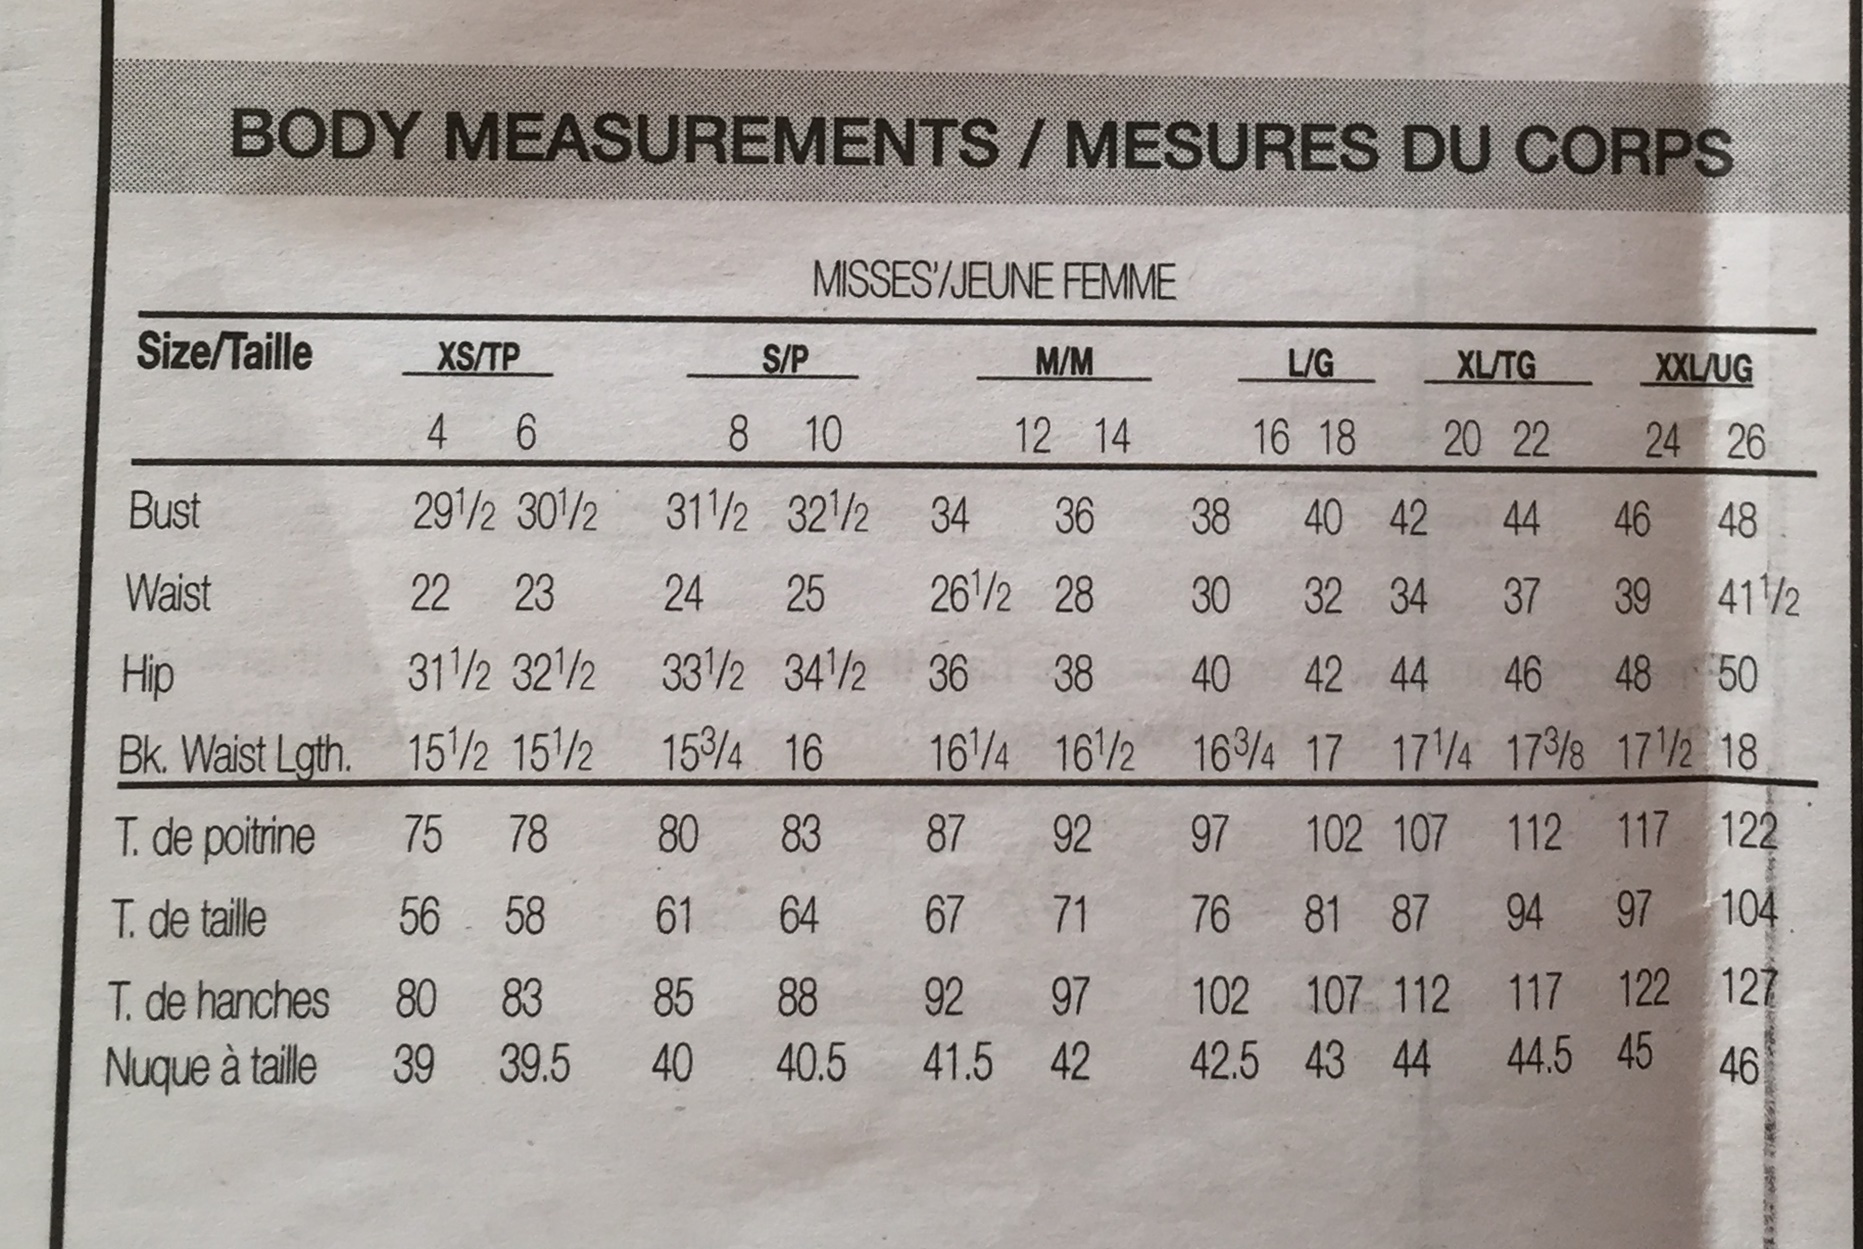
Measurements for pattern B6024
Before ordering your pattern, you must determine the correct size. Pattern sizes correlate only somewhat to ready to wear clothing sizes. It is really important you take your measurements and order the size based on your measurements. If you normally wear a size 10, don’t just automatically assume that is your size when sewing clothing. Luckily, this pattern (like most patterns) comes to you with multiple sizes available in the one envelope. You will buy it with either XS, Small and Medium combined or with Large, XL and XXL combined and printed on the one pattern. For this particular pattern, you need only be concerned with the bust measurement and hip measurement. It is not a fitted blouse so the waist measurement doesn’t come into play. I will say this patterns runs a teensy bit on the large side. I think that is because of the loose fitting design.
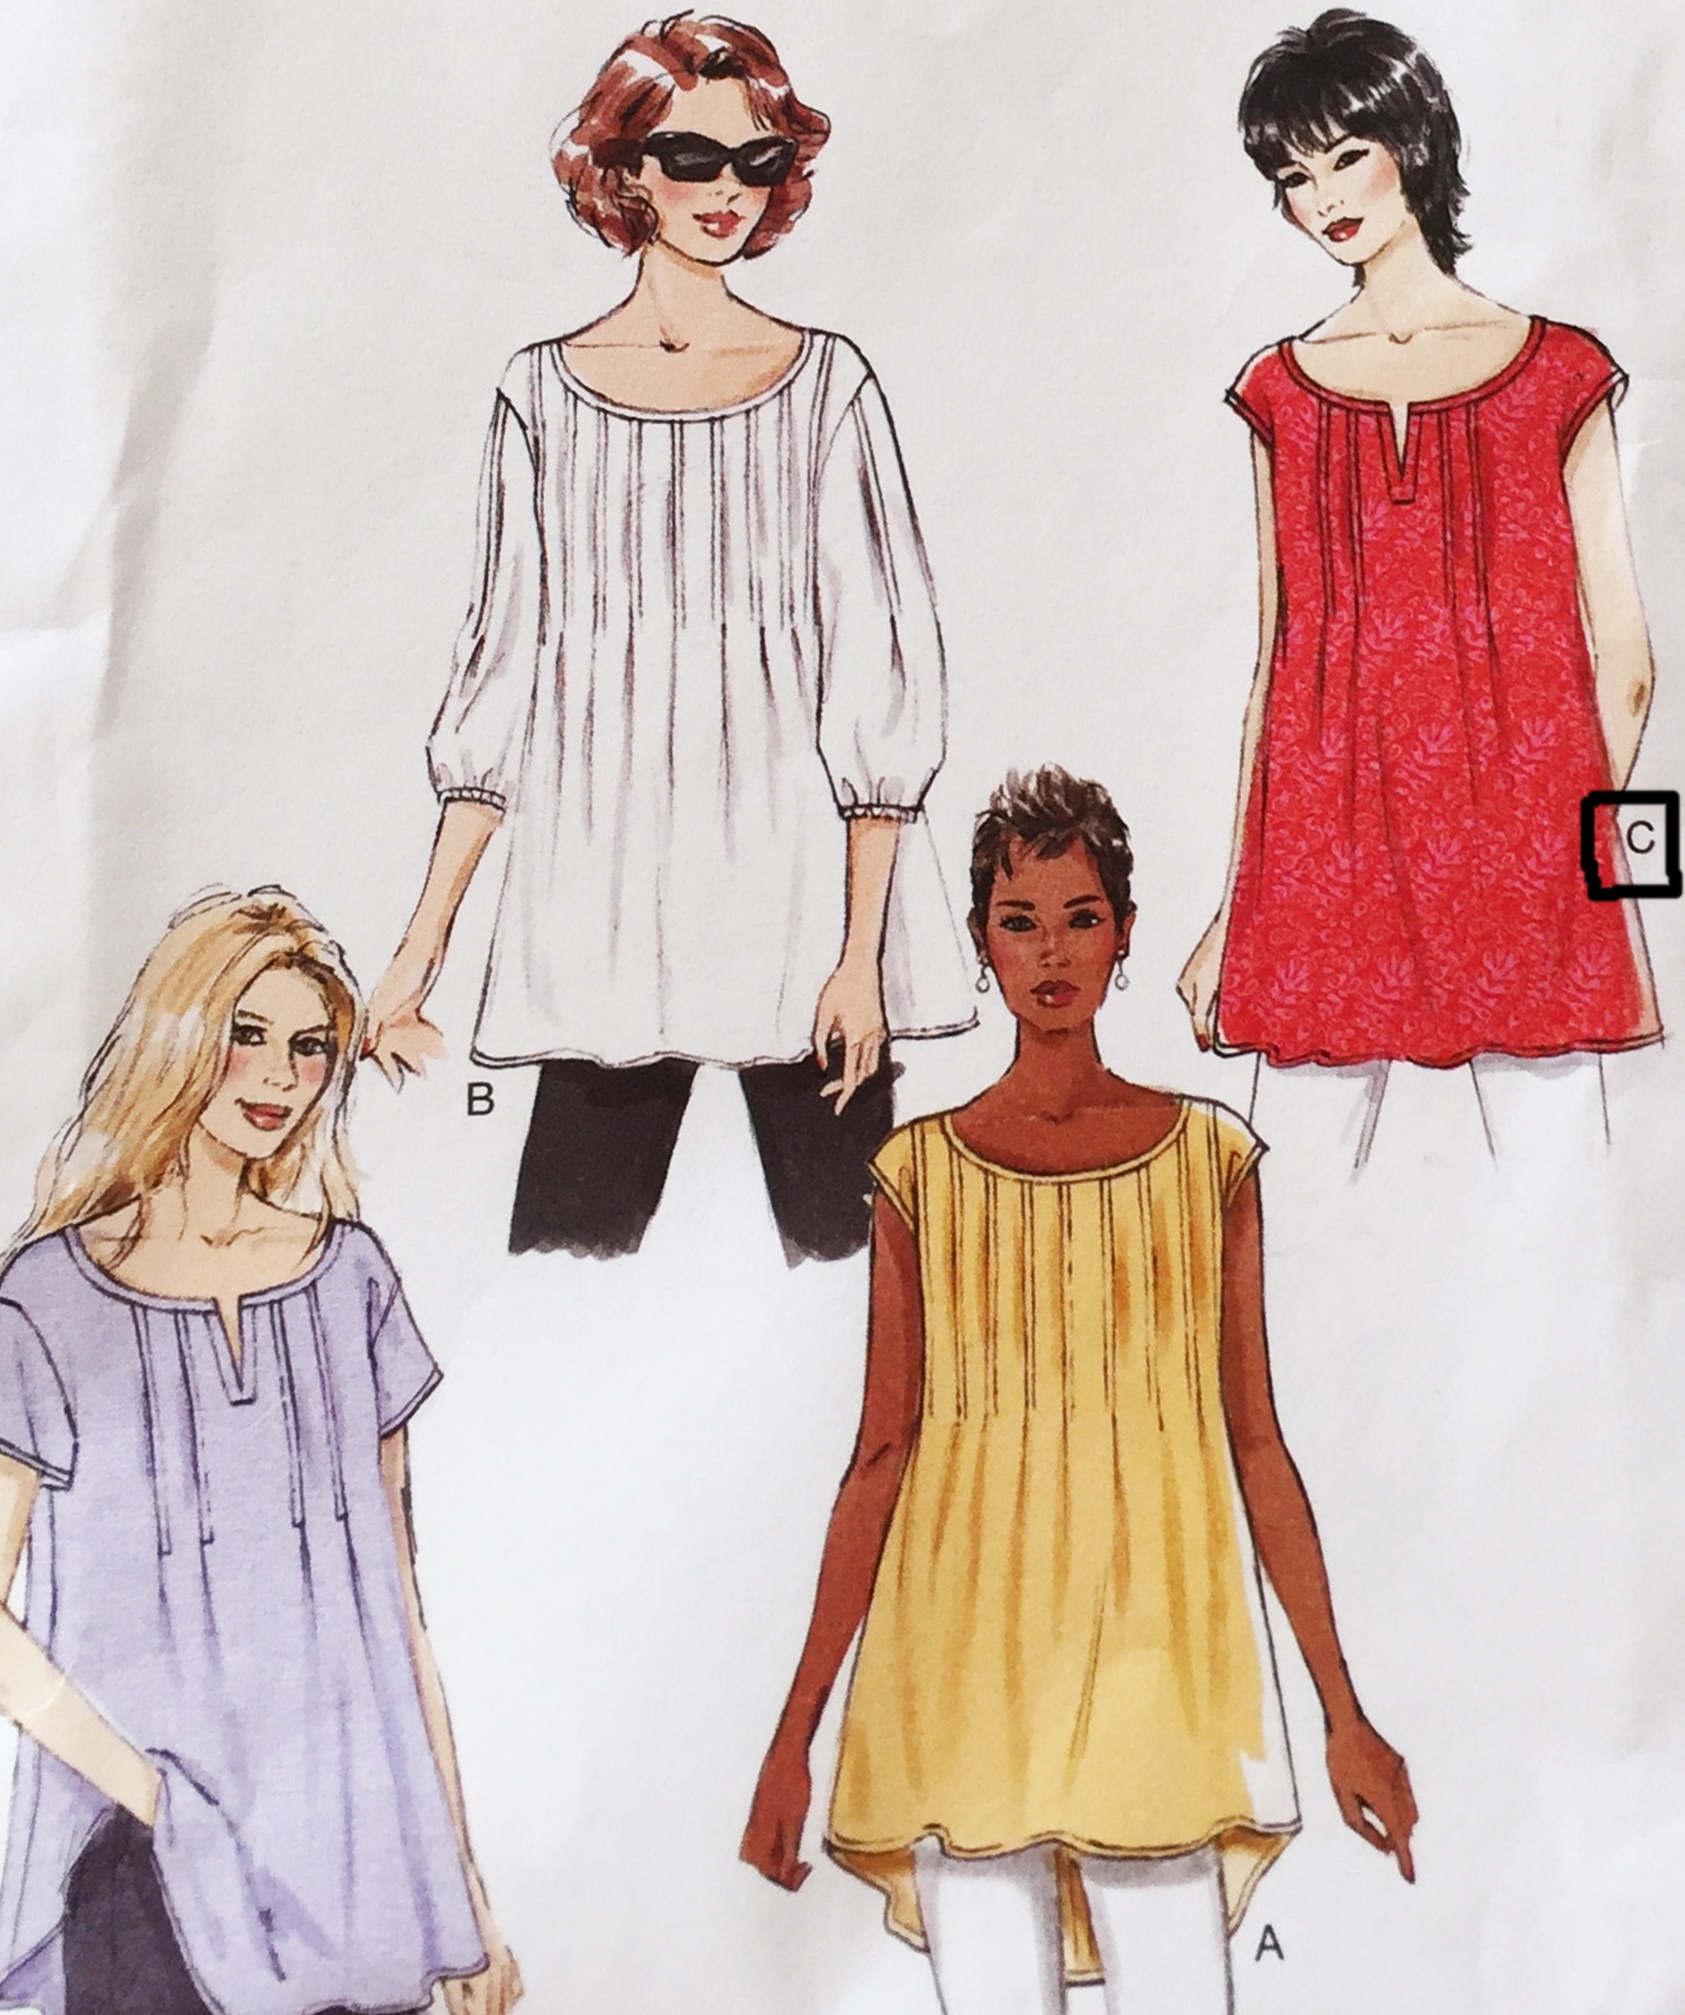
The forgiving fit of this blouse is another reason I selected it. We will be making view C which has a bit of a cap sleeve (really just an extended shoulder) and two pin tucks on either side of the neckline opening. I also chose view C because the hemline is straight. We won’t have to deal with hemming a curved hem. This loose fitting blouse pattern should make for a good beginner sewing experience.
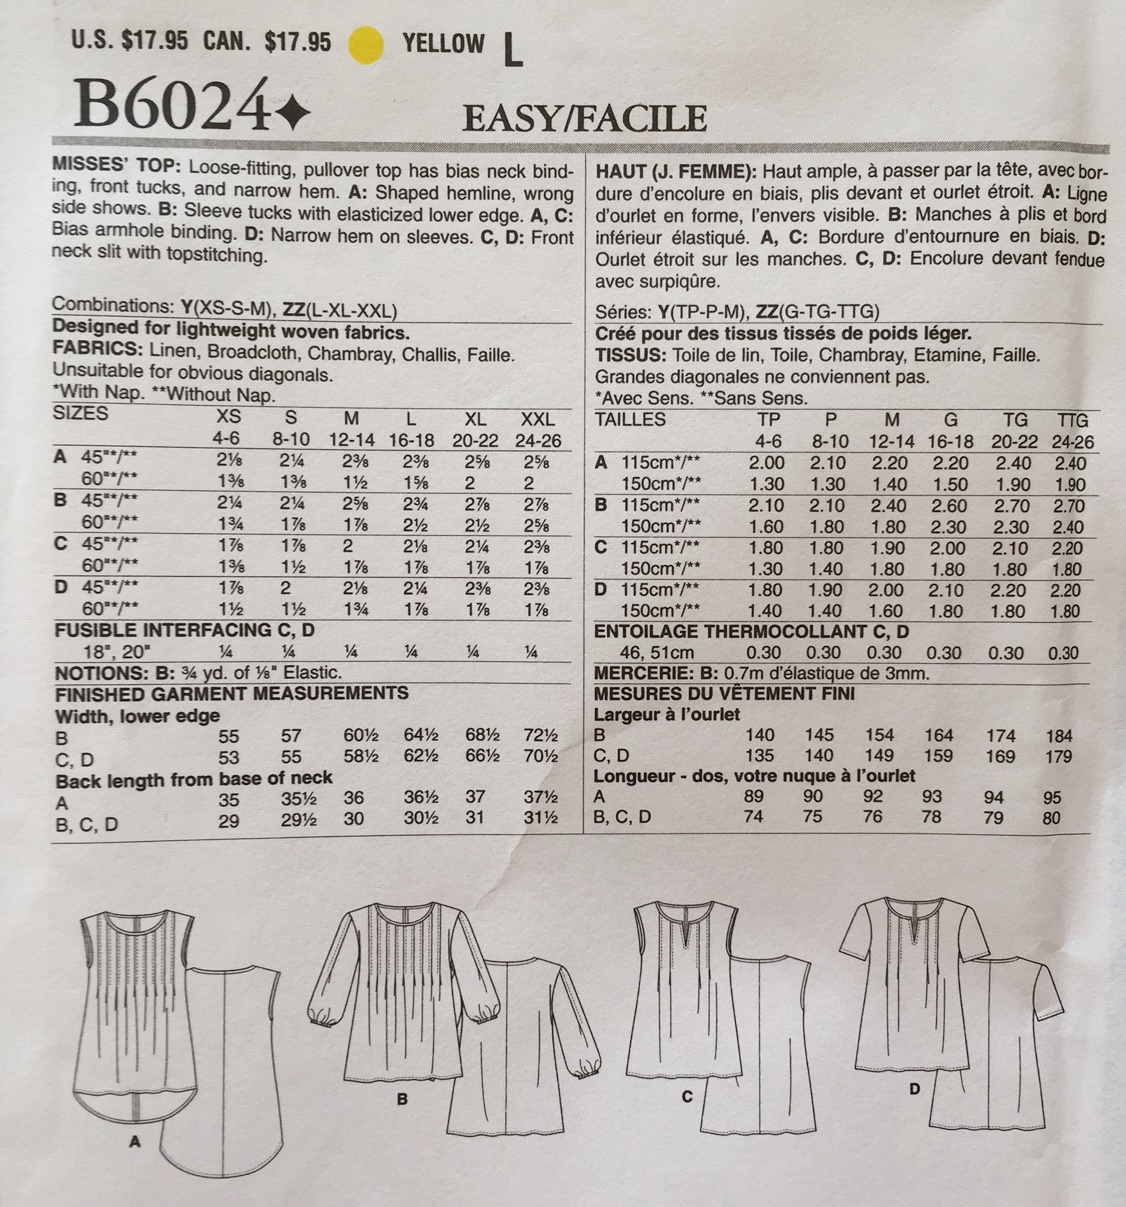
Now that we have selected the pattern, let’s look at fabric choices. You will see the yardage requirements on the back of the pattern envelope. This pattern suggests using lightweight cotton fabrics. These are fabrics such as chambrays, voiles, or rayon. Most quilting cottons are not considered to be light weight. The exception here would be Art Gallery Fabric. Art Gallery has a much silkier feel to it than other quilting cottons which allows for more drape. I have already made this blouse once with Art Gallery Fabric (the Diaphanous Sand fabric from the Gossamer line.) It is comfortable and hangs nicely. I do usually touch it up with the iron when I wash it though. There are so many fabrics available, both on-line and in the big box stores. While I am not going to go into detail on each of the types of lightweight cottons, I will say that sometimes the voiles and rayons can be a bit slippery to sew with. Just keep that in mind and use lots of pins. Chambrays and Art Gallery cottons are a bit easier to use.
To determine how much fabric you need, just look at the chart above. You will purchase the amount for View C listed under the size pattern you are using. The fabric you choose will either be 45″ or 60″ wide (some of the chambrays and voiles are wider fabrics than regular cottons). For example, if you are making view C in a size Large, you need either 2 and 7/8 yards of 45″ wide fabric or 2 and 1/2 yards of 60″ fabric.
Once you have your fabric be sure to prewash it according to the manufacturer’s instructions. Most likely you will wash on a gentle cycle with cold water and dry it on low heat. It is a fairly certain bet that a cotton fabric will have some slight shrinkage. You want to have the shrinking occur BEFORE you cut out your pieces. Otherwise, once you sew the blouse and wash it, it may shrink and then not fit as well afterward.
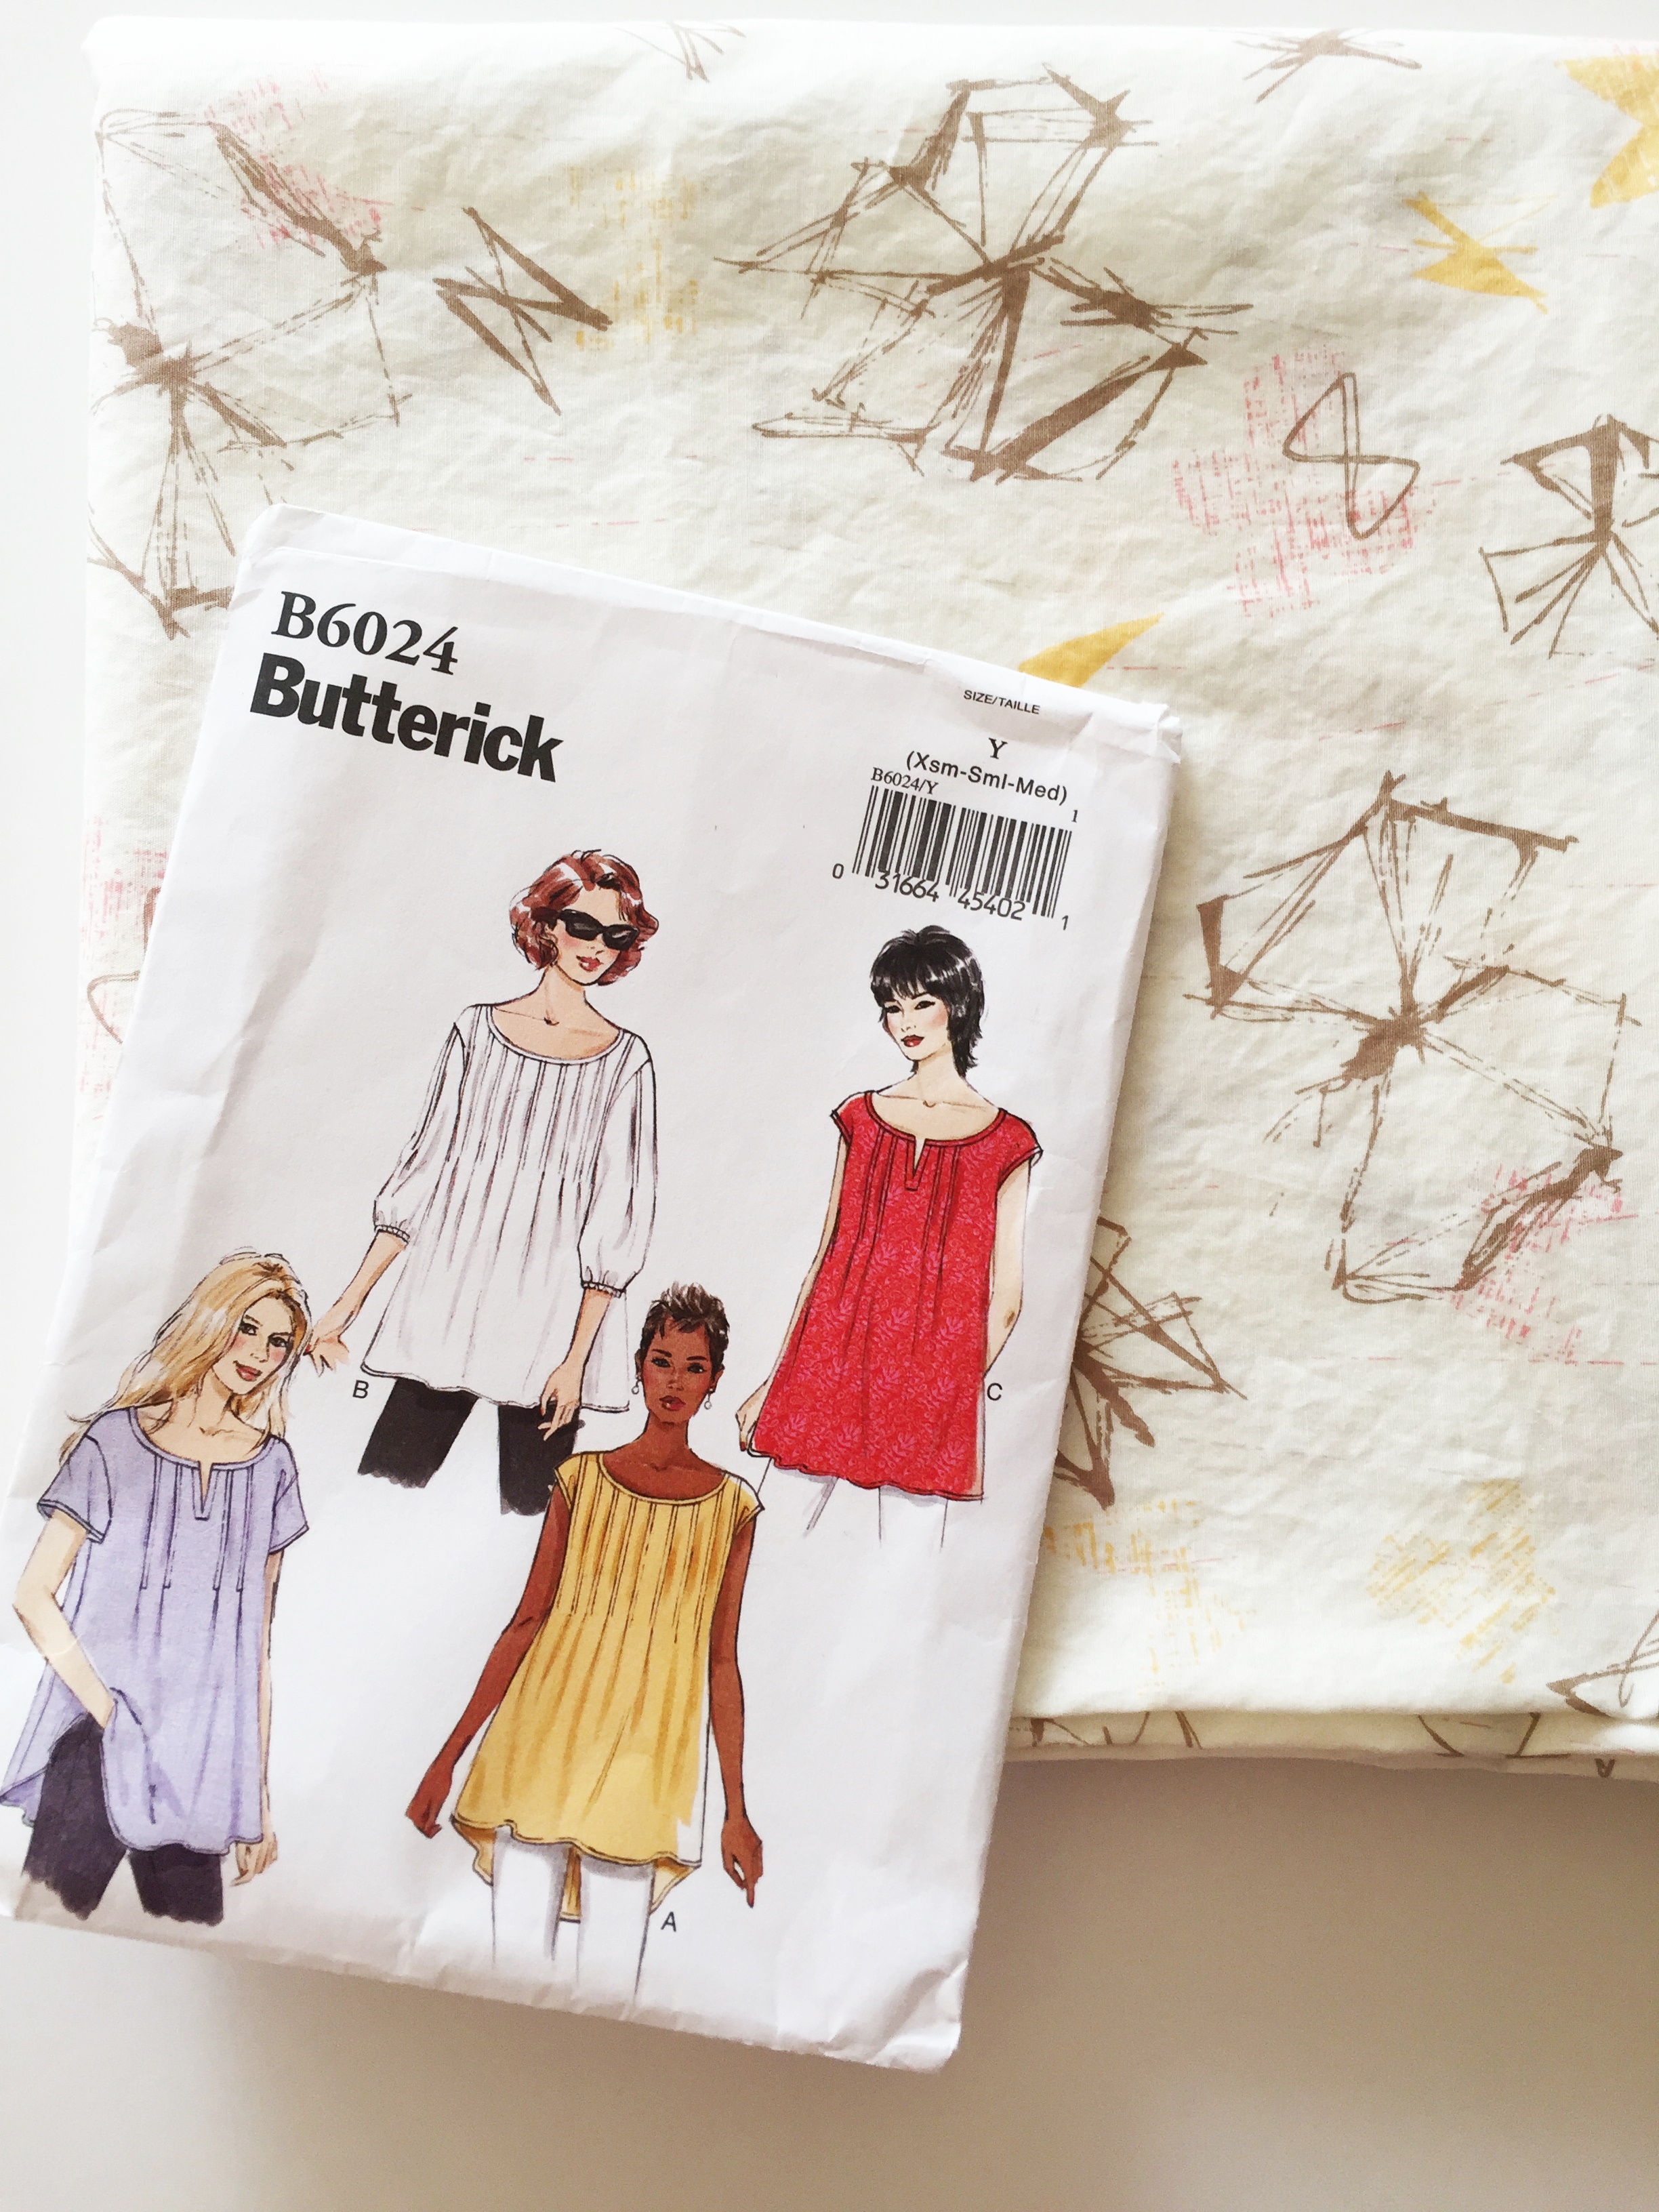
I plan to use this pretty fabric from the Gossamer line. It is called Filaments Ethereal. I measured the piece and then prewashed it. It had about 3/8″ shrinkage. The pictures show the fabric as it came out of the dryer. Wrinkled but not terribly so.
As I said earlier, this blouse is a simple one. Therefore, not a lot of supplies are required. Here is the list of supplies needed for our sew along:
Lightweight cotton fabric
Butterick pattern B6024
1/4 yard of 18″-20″ wide light weight fusible interfacing
Basic sewing machine with straight stitch and zig-zag capability
Soft measuring tape (to take your physical measurements
Smaller clear ruler (the smallest of your quilting rulers will be fine)
Scissors, thread and hand sewing needle
The project will be broken down as follows.
June 6: Fabric and Pattern selection (you are here!)
All of the posts will live here on the blog. If this isn’t a good time for you to join in, you can always work through the blouse on your own timeline. Comments and questions along the way are encouraged. There is no question too simple. I plan to write the posts assuming the reader has very little sewing experience. This way I will cover the details. If you have sewn garments before, it may seem simplistic but I want to be sure a reader new to sewing will be successful.
I set up a closed group on Facebook called Needle & Foot Sew Along. I would love it if you joined in. Let’s all post progress pictures and any questions we might have. Also, please help each other. If you have a suggestion or an answer to someone’s question, feel free to post them. The group is a closed group so you will need to click on join and I will approve you. Others will not be able to see our posts. I want to respect your privacy.
If you have a blog and want to grab the button for your sidebar, it is available! Let me know and I will send you the HTML code.
Finally, for participants of this sew along, I would love to offer you a discount on the Art Gallery Fabrics I carry in my shop. Use coupon code SEWALONG15 for a 15% discount. The coupon code will expire on Sunday, June 11th. I want to be sure you get your fabric ordered (whether from me or someone else) so that everyone has fabric and pattern ready to go by Friday, June 16th.
Here is the homework that needs to be completed before the next post on June 16th.
Order your pattern
Purchase your fabric and interfacing
Prewash your fabric
Leave any questions or concerns in the comments. Have fun selecting your fabric!! See you back here on Friday, June 16th!
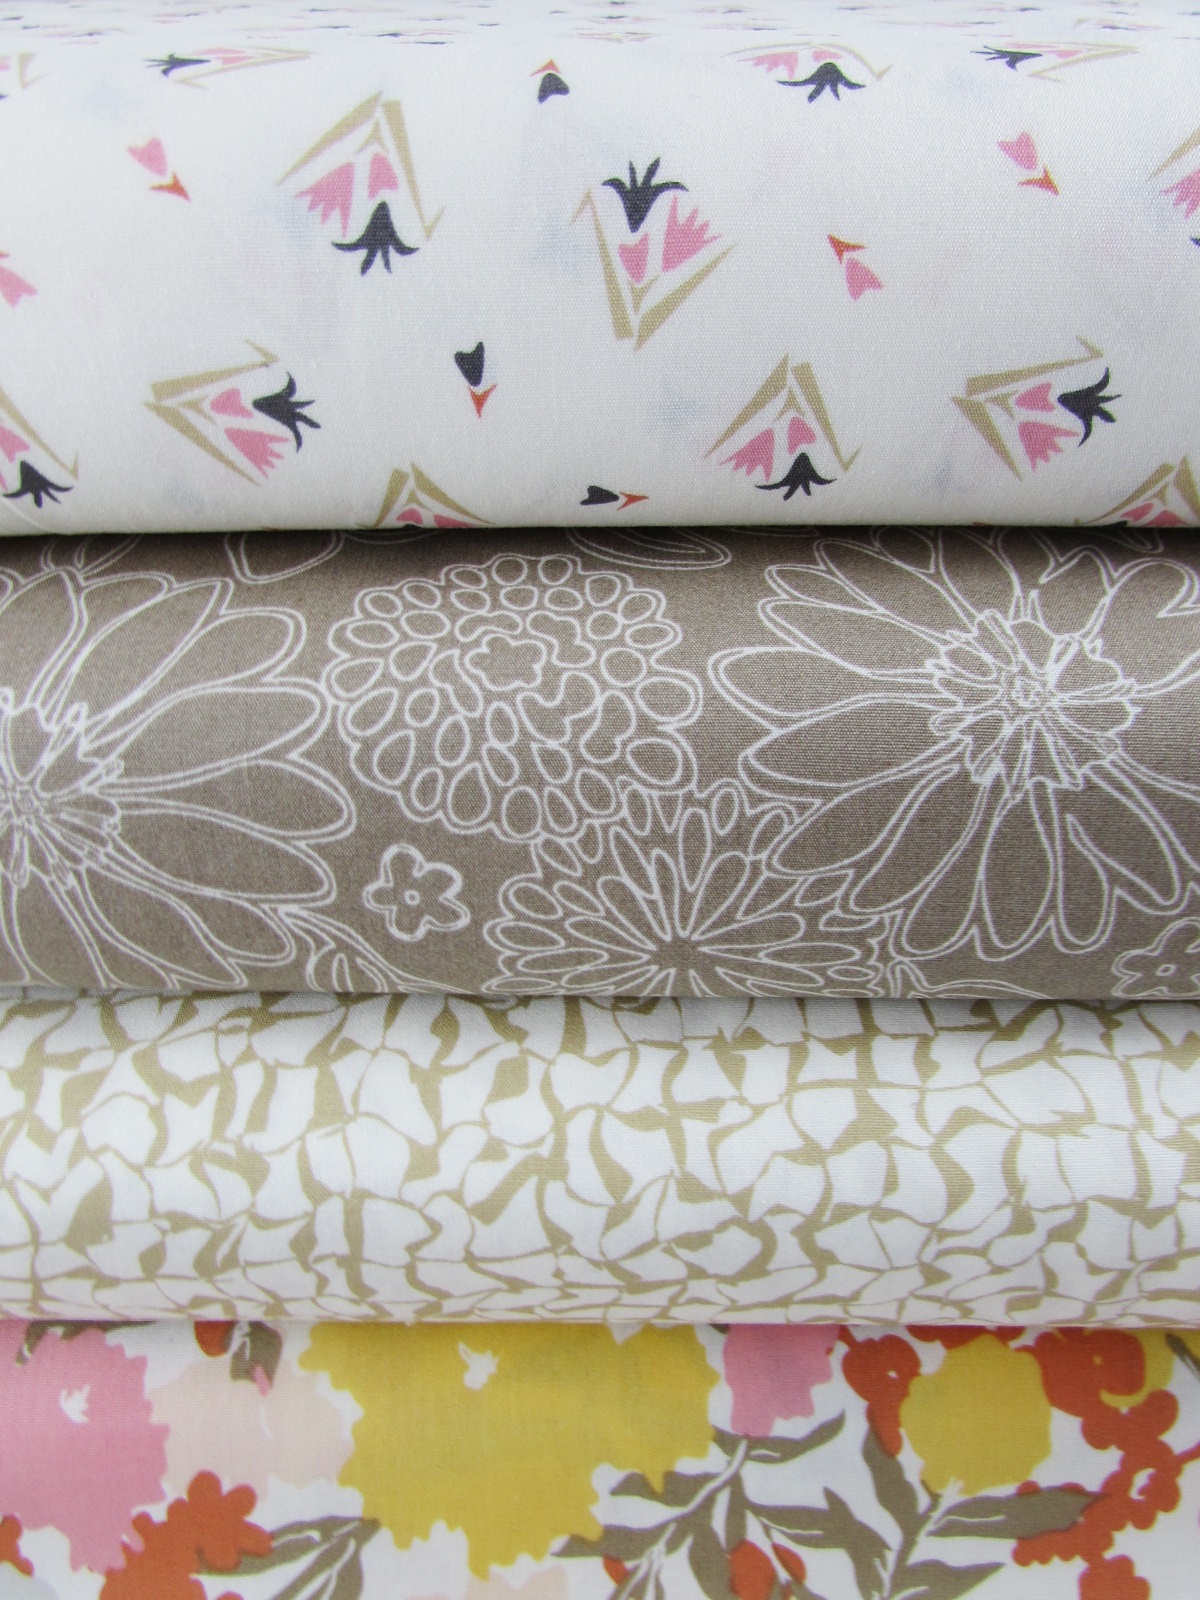
Ever since I received these bolts of fabric designed by Sharon Holland, I have wanted to make a shirt with one of them. They have such soft colors and the fabric feels silky smooth which just seemed perfect for a blouse. The line is called Gossamer and I love the pallette Sharon used for them. If you want to take a peek, I do have them listed in my shop. Click here.
Gossamer Fabrics by Sharon Holland
I chose to use Diaphonous Sand which is second from the bottom. It is very neutral and should work with any of my pants (especially since most of them are denim jeans!!) I poked around looking for a pattern thinking surely one of the 200 or more listed in my shop should work. Oh no… I had to order one instead! Kind of silly I suppose, but I really liked Butterick B6024.
I mixed up the versions just a bit and used the front from Version A, the sleeves from Version D and the back from versions B/C. I wanted the straight hemline in the back, short sleeves and the series of pin tucks detailing the front. Luckily it is quite simple to switch out the pieces of each version to get just what you want.
I posted this project over on Instagram just as I got started. I was a bit worried the pin tucks would make the front of the shirt too full and give it a maternity top look. Definitely not a good look to wear at the wise age of 56. But it worked out well. I did taper the sides just a tiny bit.
It hangs straight enough which takes care of the is-she-pregnant look I was trying to avoid. I did decrease the length about an inch but I don’t know that it was really necessary.
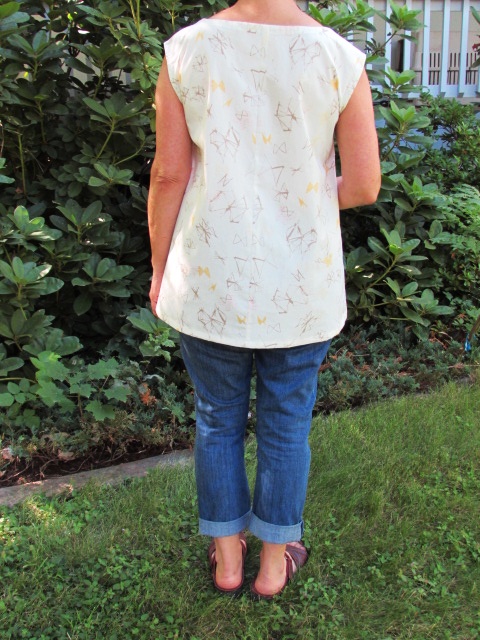
The back is simple – no detailing to speak of.
I finished most of the seams using french seams. I love the polished look french seams provide. The pin tucks are not terribly difficult. The require a bit of fiddling to get them folded and pinned just so but then it is just a matter of top stitching them down. It has been really satisfying to make a few shirts. Just in time for Spring too!

 I think, were I to make it again, I would make the version with sleeves. I like it just a bit better. But really, what a fun project this was. I would definitely host something like this again. Sewing with friends, whether in real life or virtual life, is always a fun time.
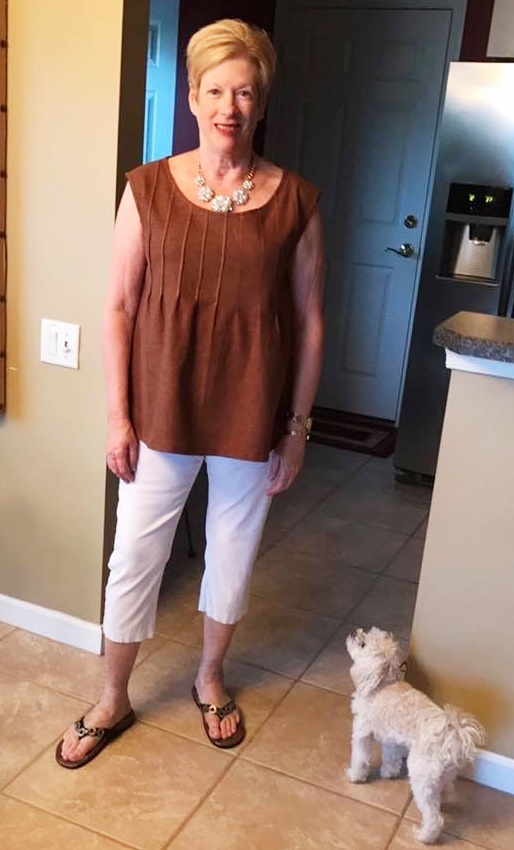


 Stitch the binding to the shirt, making sure the fabric below the binding stays flat and smooth. Just take it slow and you will be fine. Remember the strip is cut on the bias which allows some stretch. You shouldn’t need to stretch it but you will be able to ease it around the curves nicely. Then clip the neckline a few times from the inside. Do not cut through your stitches though. I like to do this because I think it allows the binding to fold in over the curved edge nicely. Go ahead and press your seam and then fold the binding to the inside and press it down. Slip stitch the binding to the inside of the the shirt, including both ends.


 Pin in place. (I know… my markings are a bit wiggly.) Sew just a hair to the right of the stitching line. Take it slow here. This is probably the fussiest part of this project. Stitch down to the point and put your needle down to hold your spot.