Category Archives: Applique

An Unexpected Hiatus

It has been so long since I have written a post, I hardly know where to begin! From mid-November to now, I have been sick with one thing after another. This has been incredibly annoying! There are so many respiratory viruses going around and I believe I have sampled all of them. Our area has been hit so hard that my primary care physician’s office is unable to see any respiratory/flu cases in person because the staff has come down with it and now they are very short handed. It is just wild. The kids have it the worst and the children’s Tylenol and Motrin is flying off the shelves. Anyway, in case you’ve wondered, that is what caused me to go missing. I have been reading and watching TV and doing bits and pieces of sewing as I could.

I think I need to do a general post to catch up with what has happened around here. This blog is somewhat a journal and I can’t just ignore a whole six weeks!

In mid-November my amazing sister hosted an early Thanksgiving for our family. There were about 50 people attending and another 15 couldn’t make it. We haven’t had the group together in a very long while and this was great fun. My parents have six children (my sisters and I) who then in total had 21 children and those grandchildren have had 16 children. If you add in all of the spouses and partners, we have one big family! When I think of the numbers that make up our group, I always come back around to my parents. I am so grateful they had a big family and started this whole ball rolling!

When we all got together it seemed like every single one of the kids attending was coughing like crazy. The following week, the adults started to catch the bug. It was nuts – but also worth it to be able to see everyone in one place.

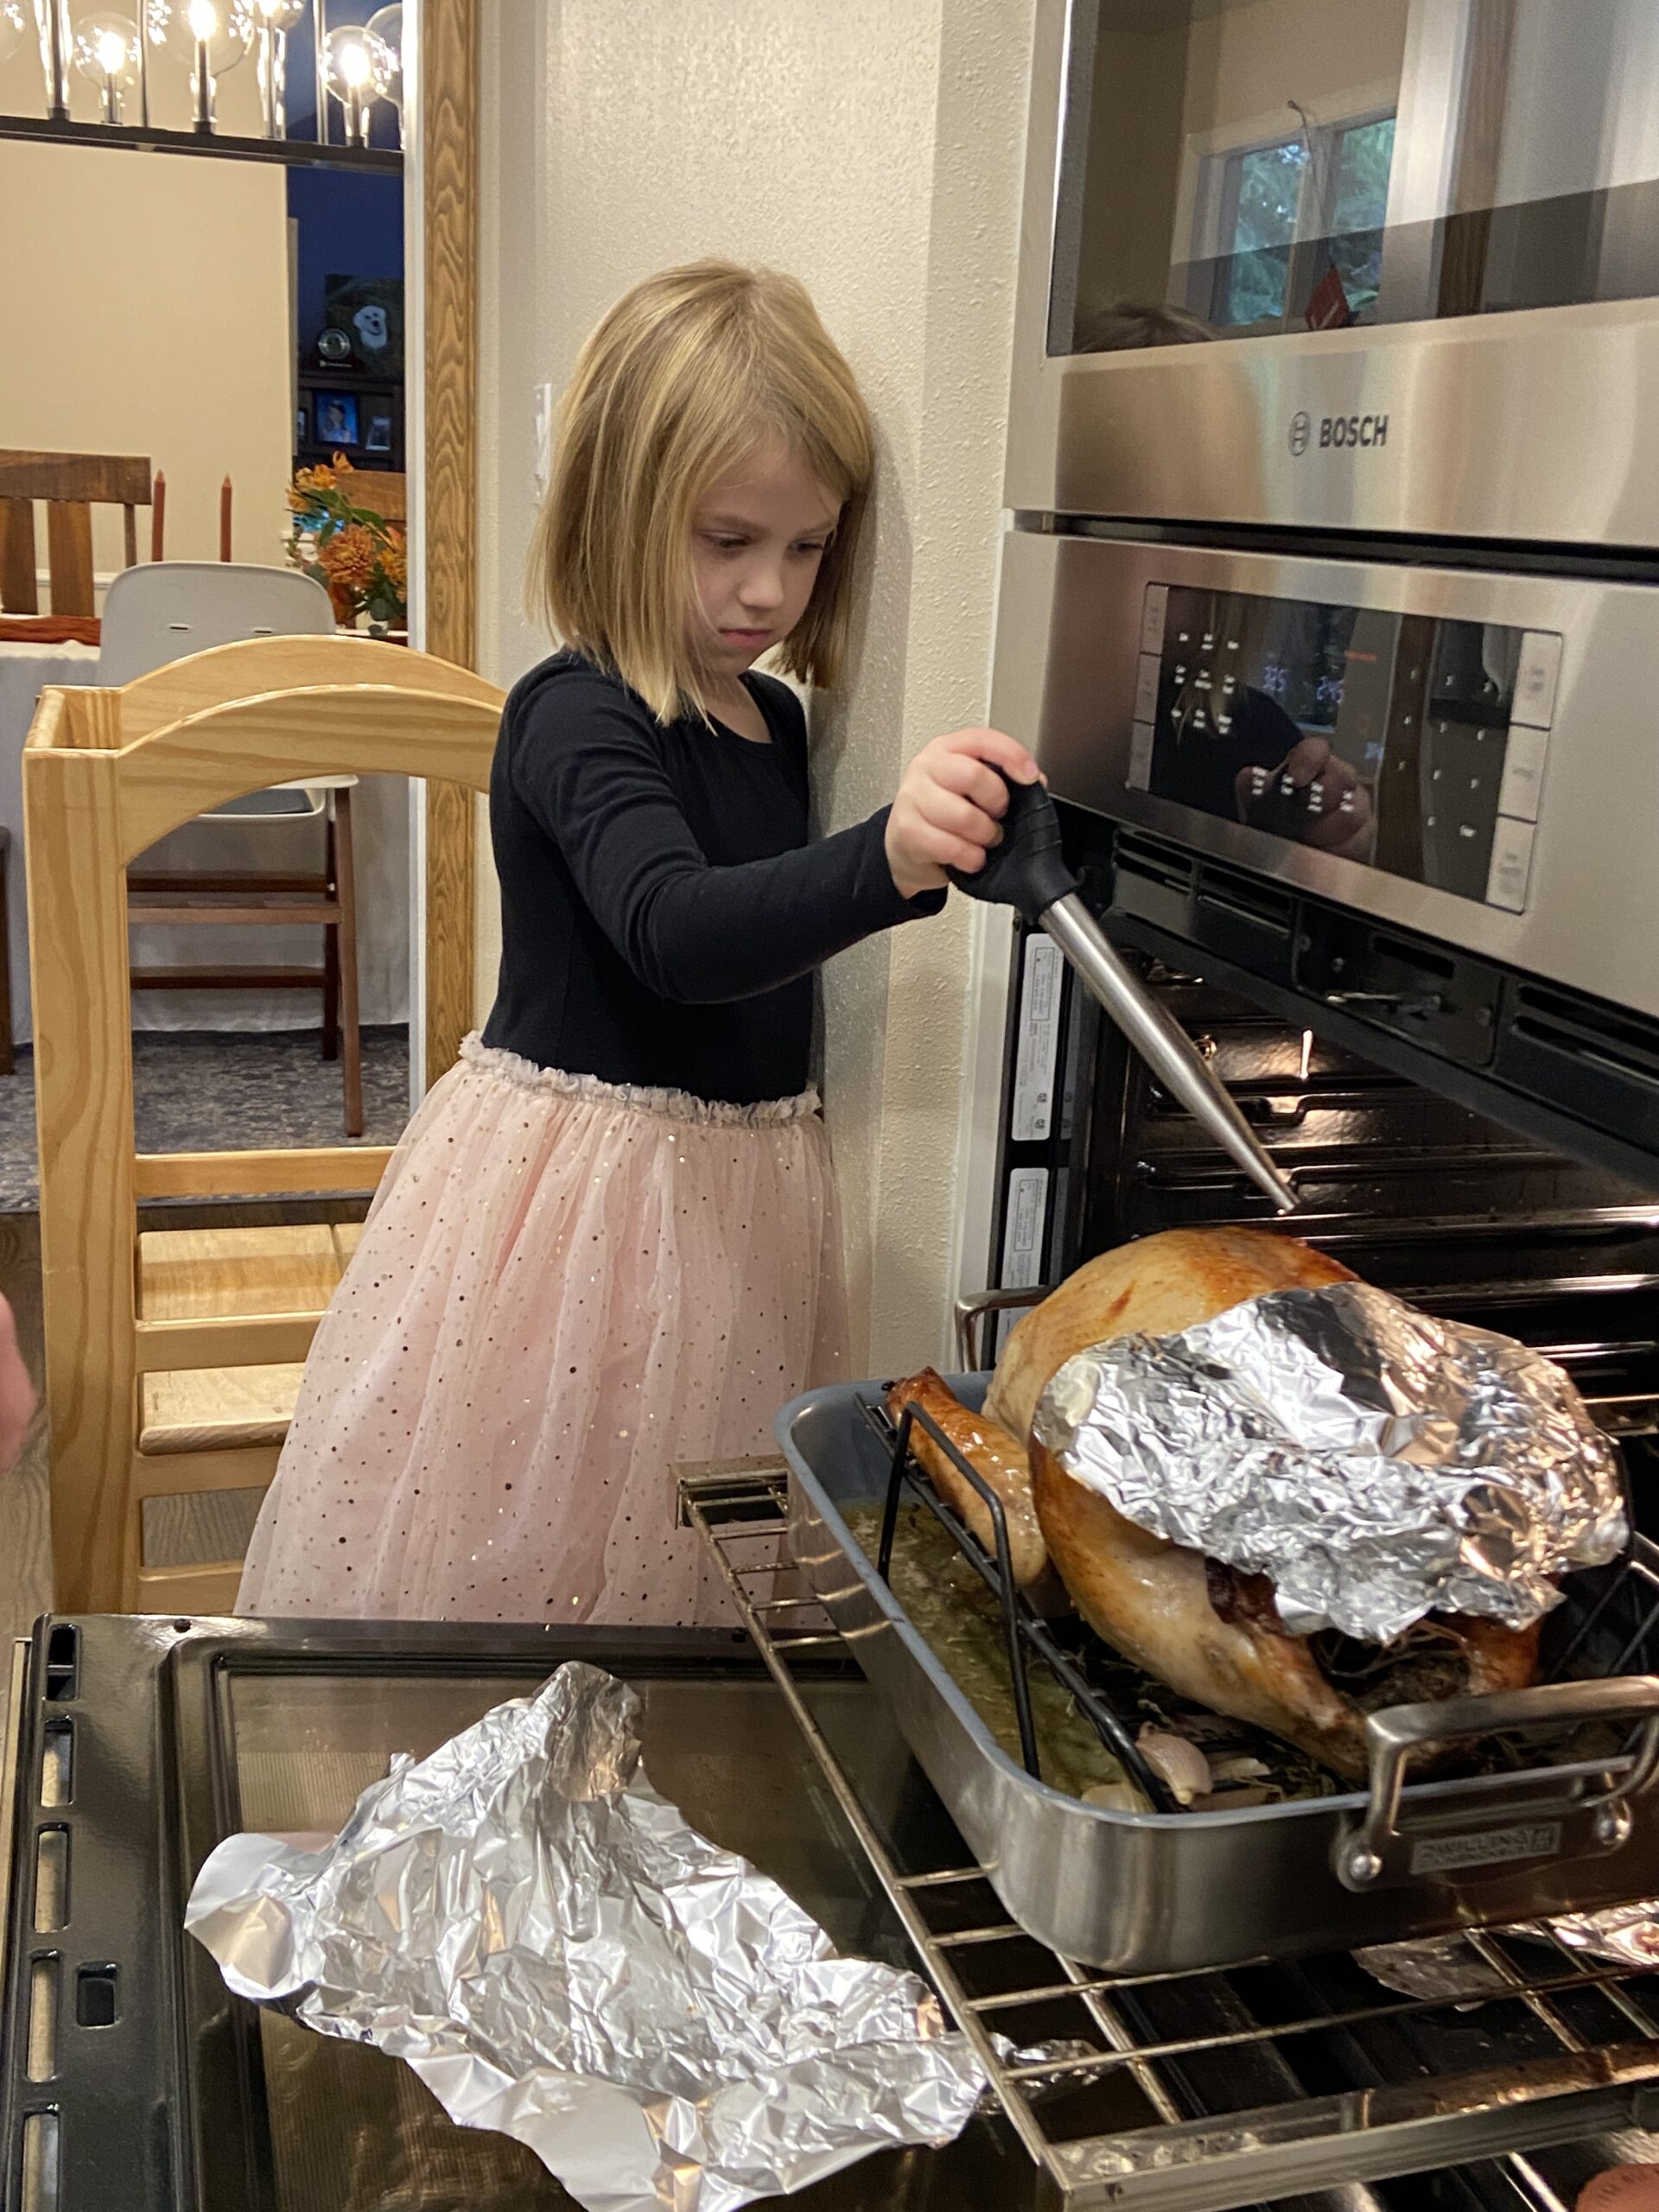
Two weeks later was Thanksgiving. We had dinner at my son’s house. Look at this big girl learning to baste the turkey! We enjoyed a smaller group this time. It was pure luck that most people felt decent for the holiday. (The girls have also been sick constantly for the past 6 or 8 weeks).

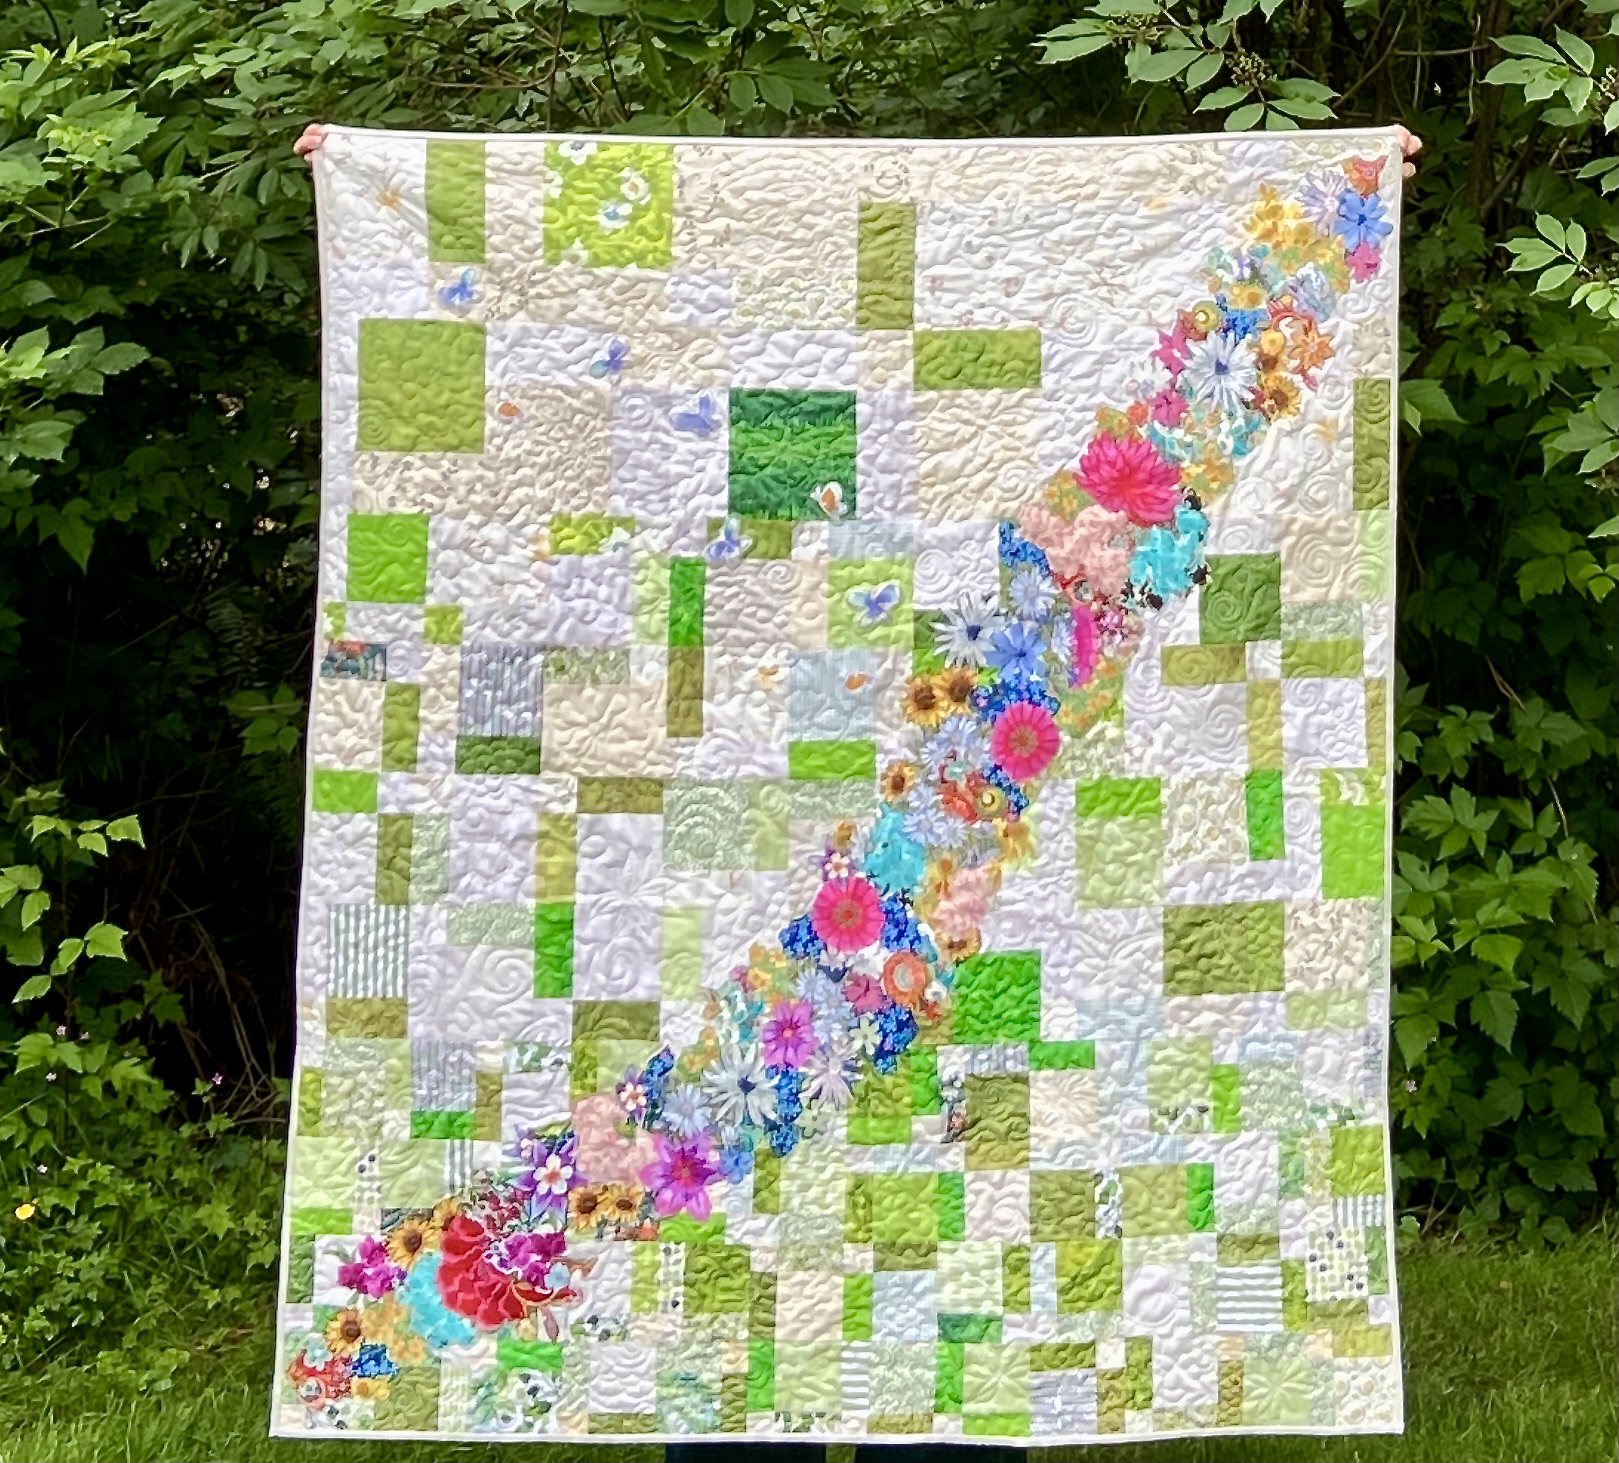
Being home so much did allow me to work on a holiday quilt. I saw a free pattern by Cheryl at Meadow Mist Designs called Candy Circle. I have a very large bin of holiday fabrics. Many of them were already cut into five inch squares which made putting this together quite easy. I chose the gray and white background to give it a modern wintry look.

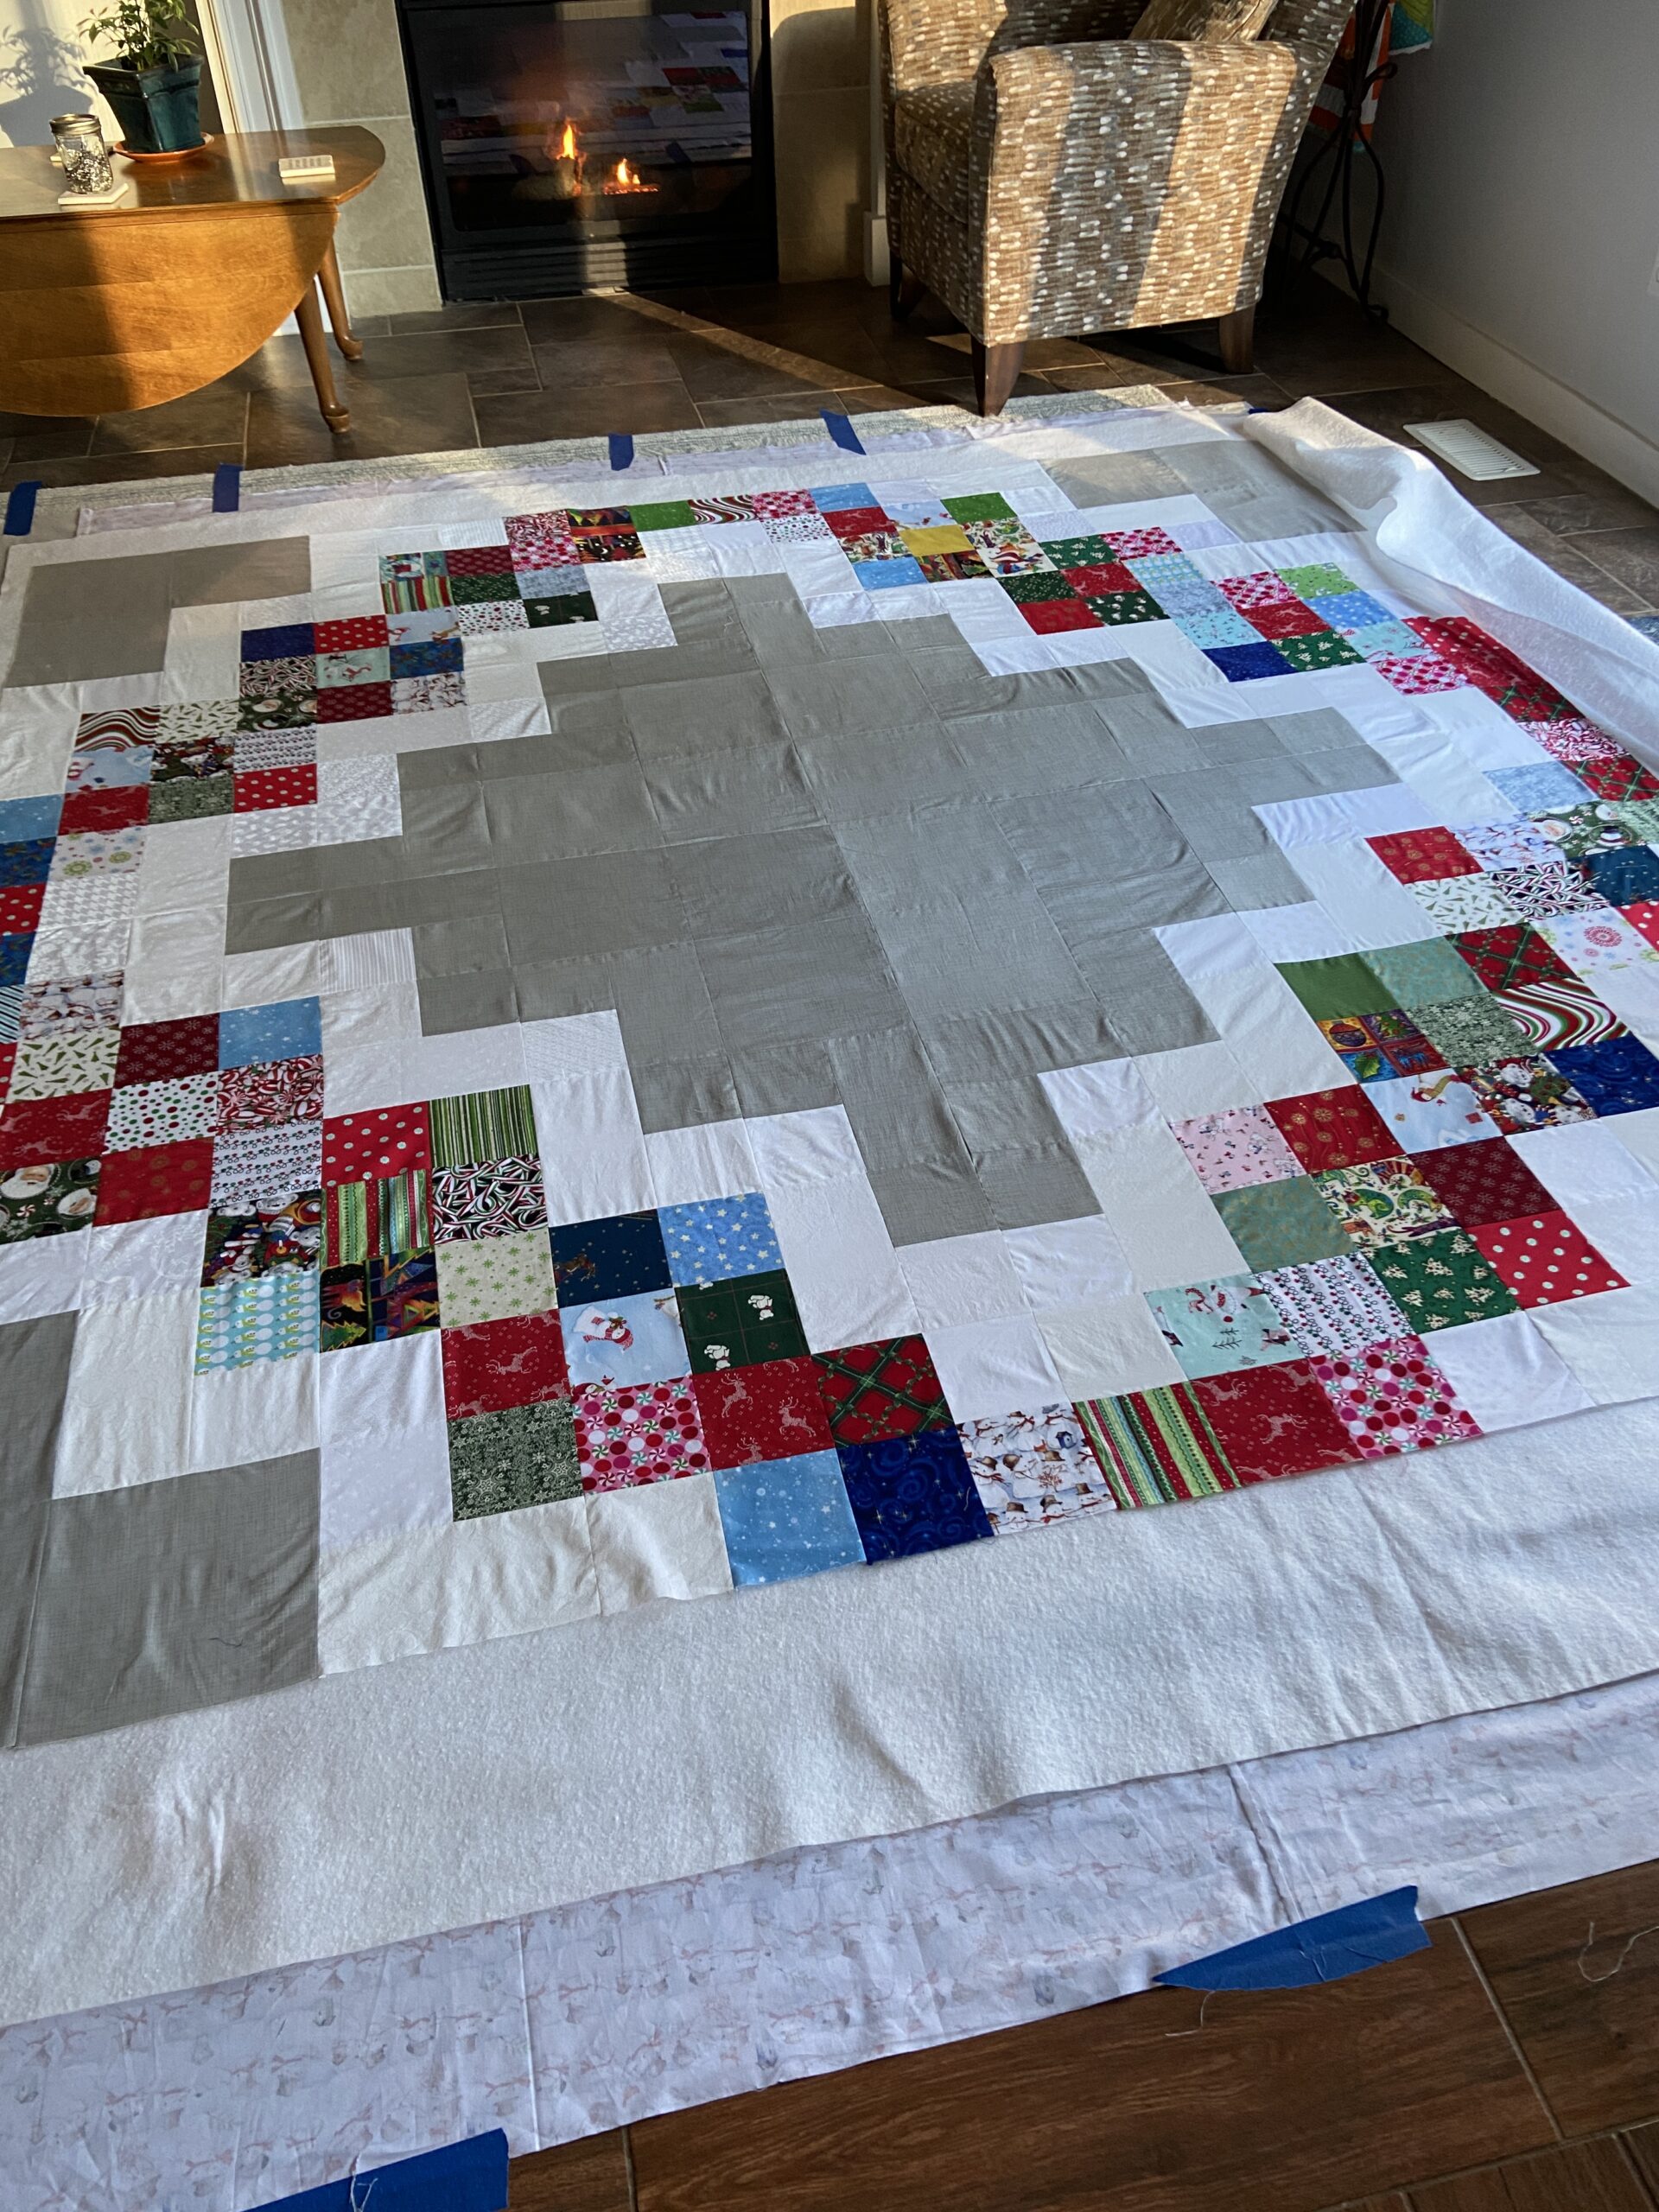
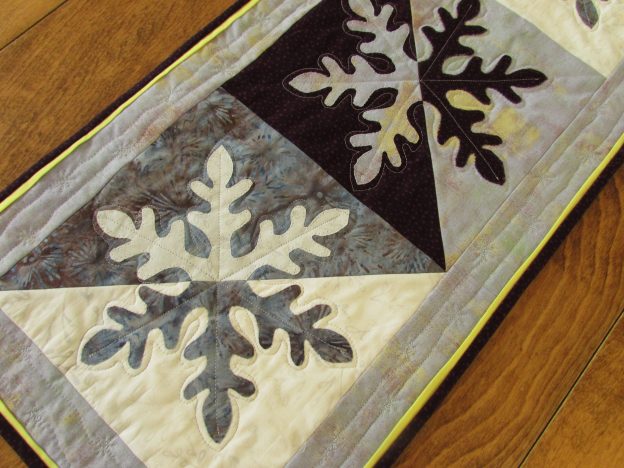
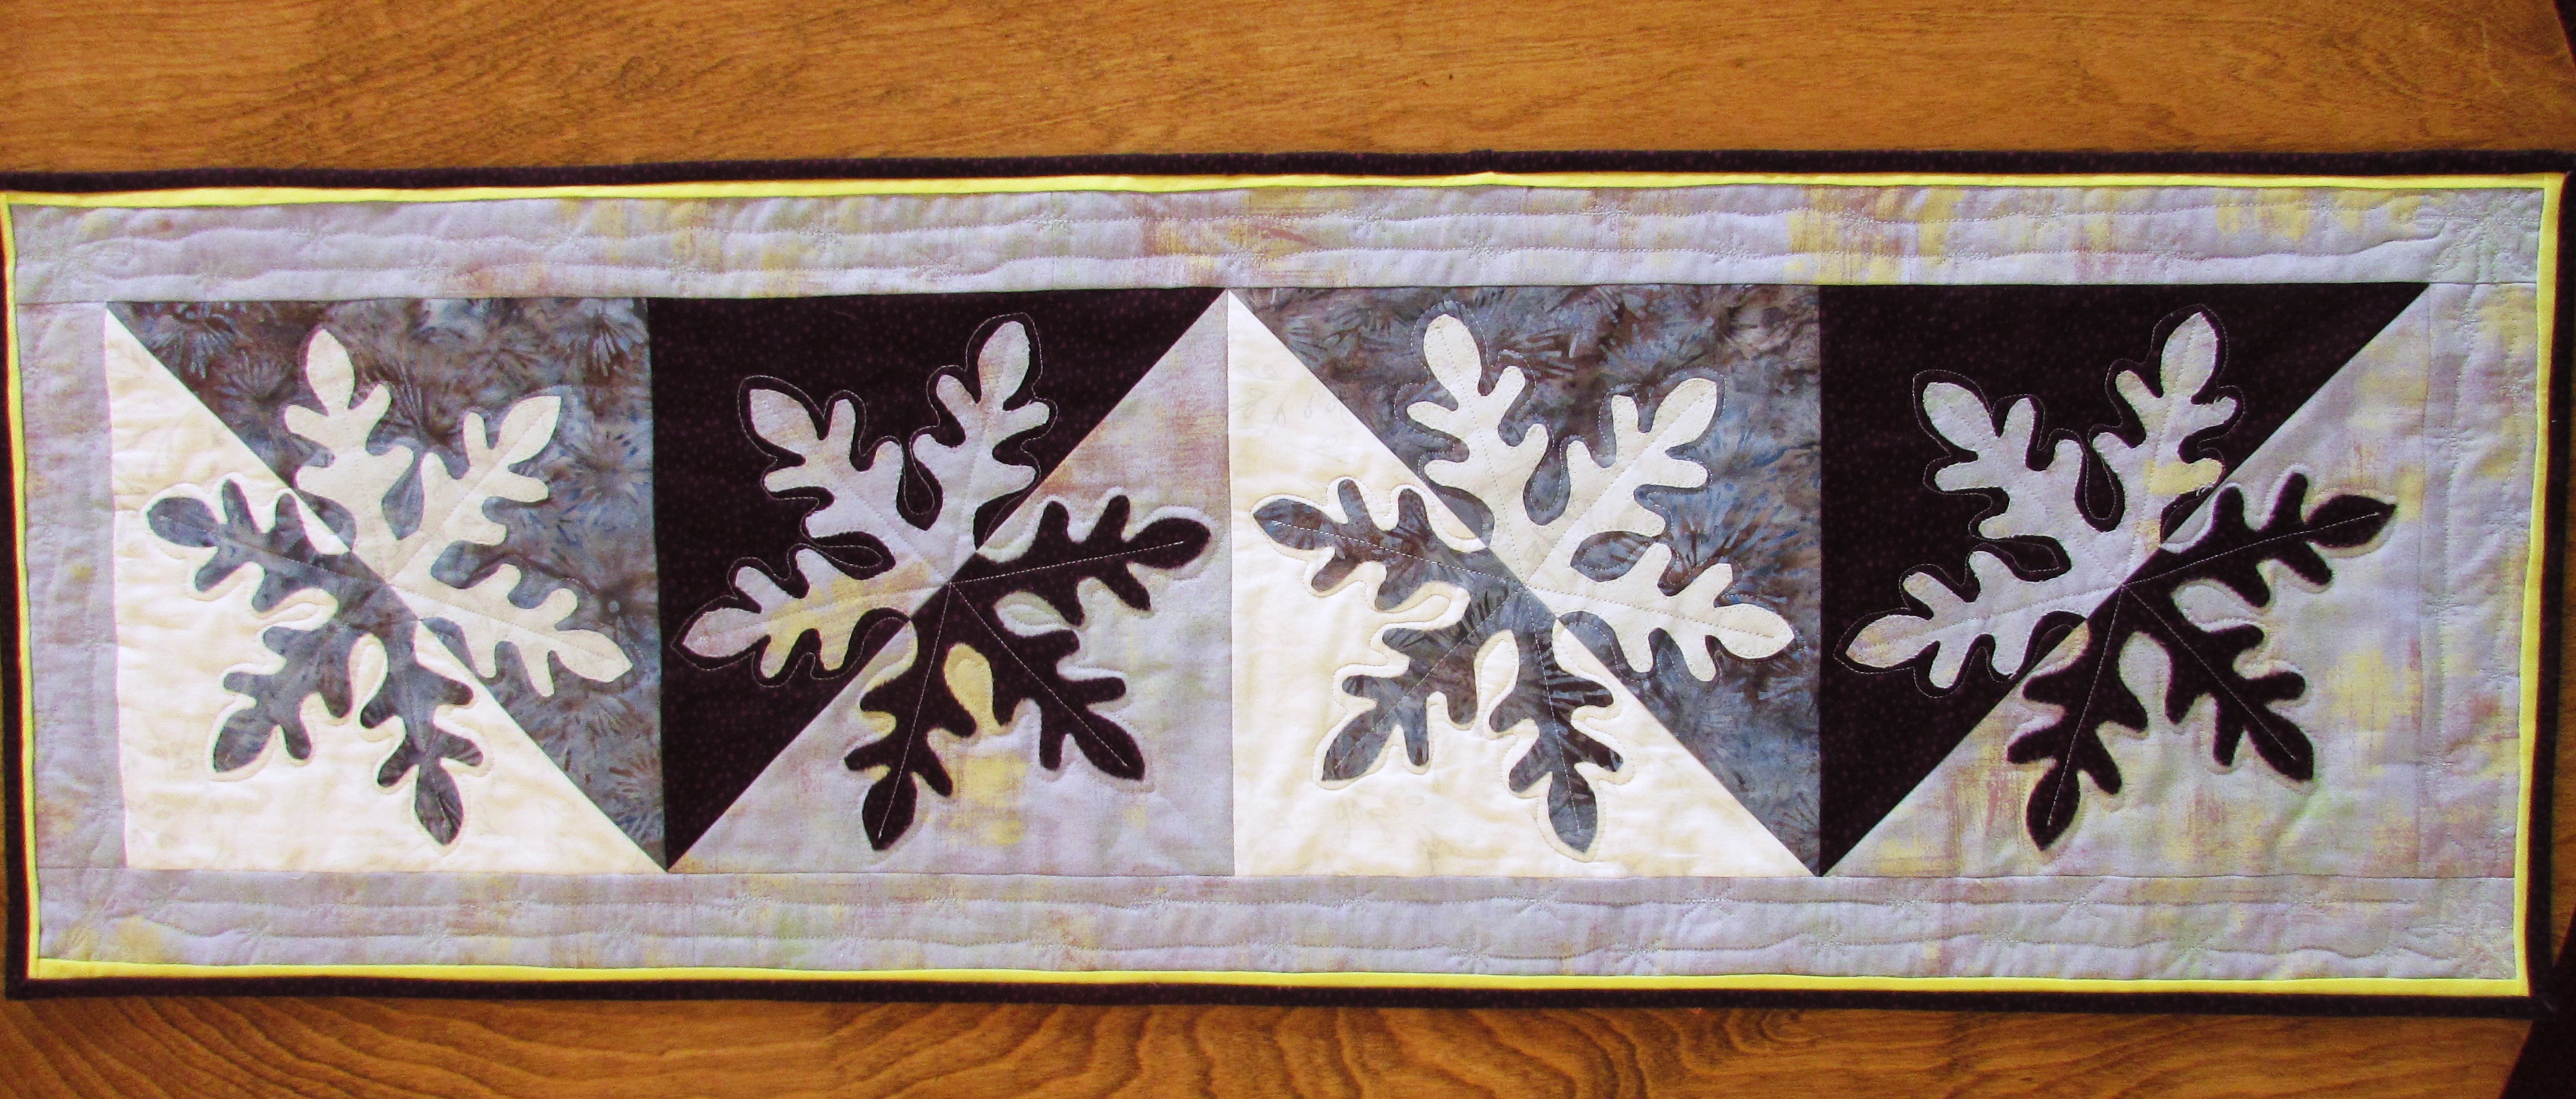
When I had the quilt top on the floor for basting, I decided I wasn’t happy with the large expanse of gray in the center. Not sure how it popped into mind, but I thought adding a big snowflake would be fun. My husband created the template for the snowflake and I found some white, tone on tone fabric with a very slight shimmer to it. Perfect!

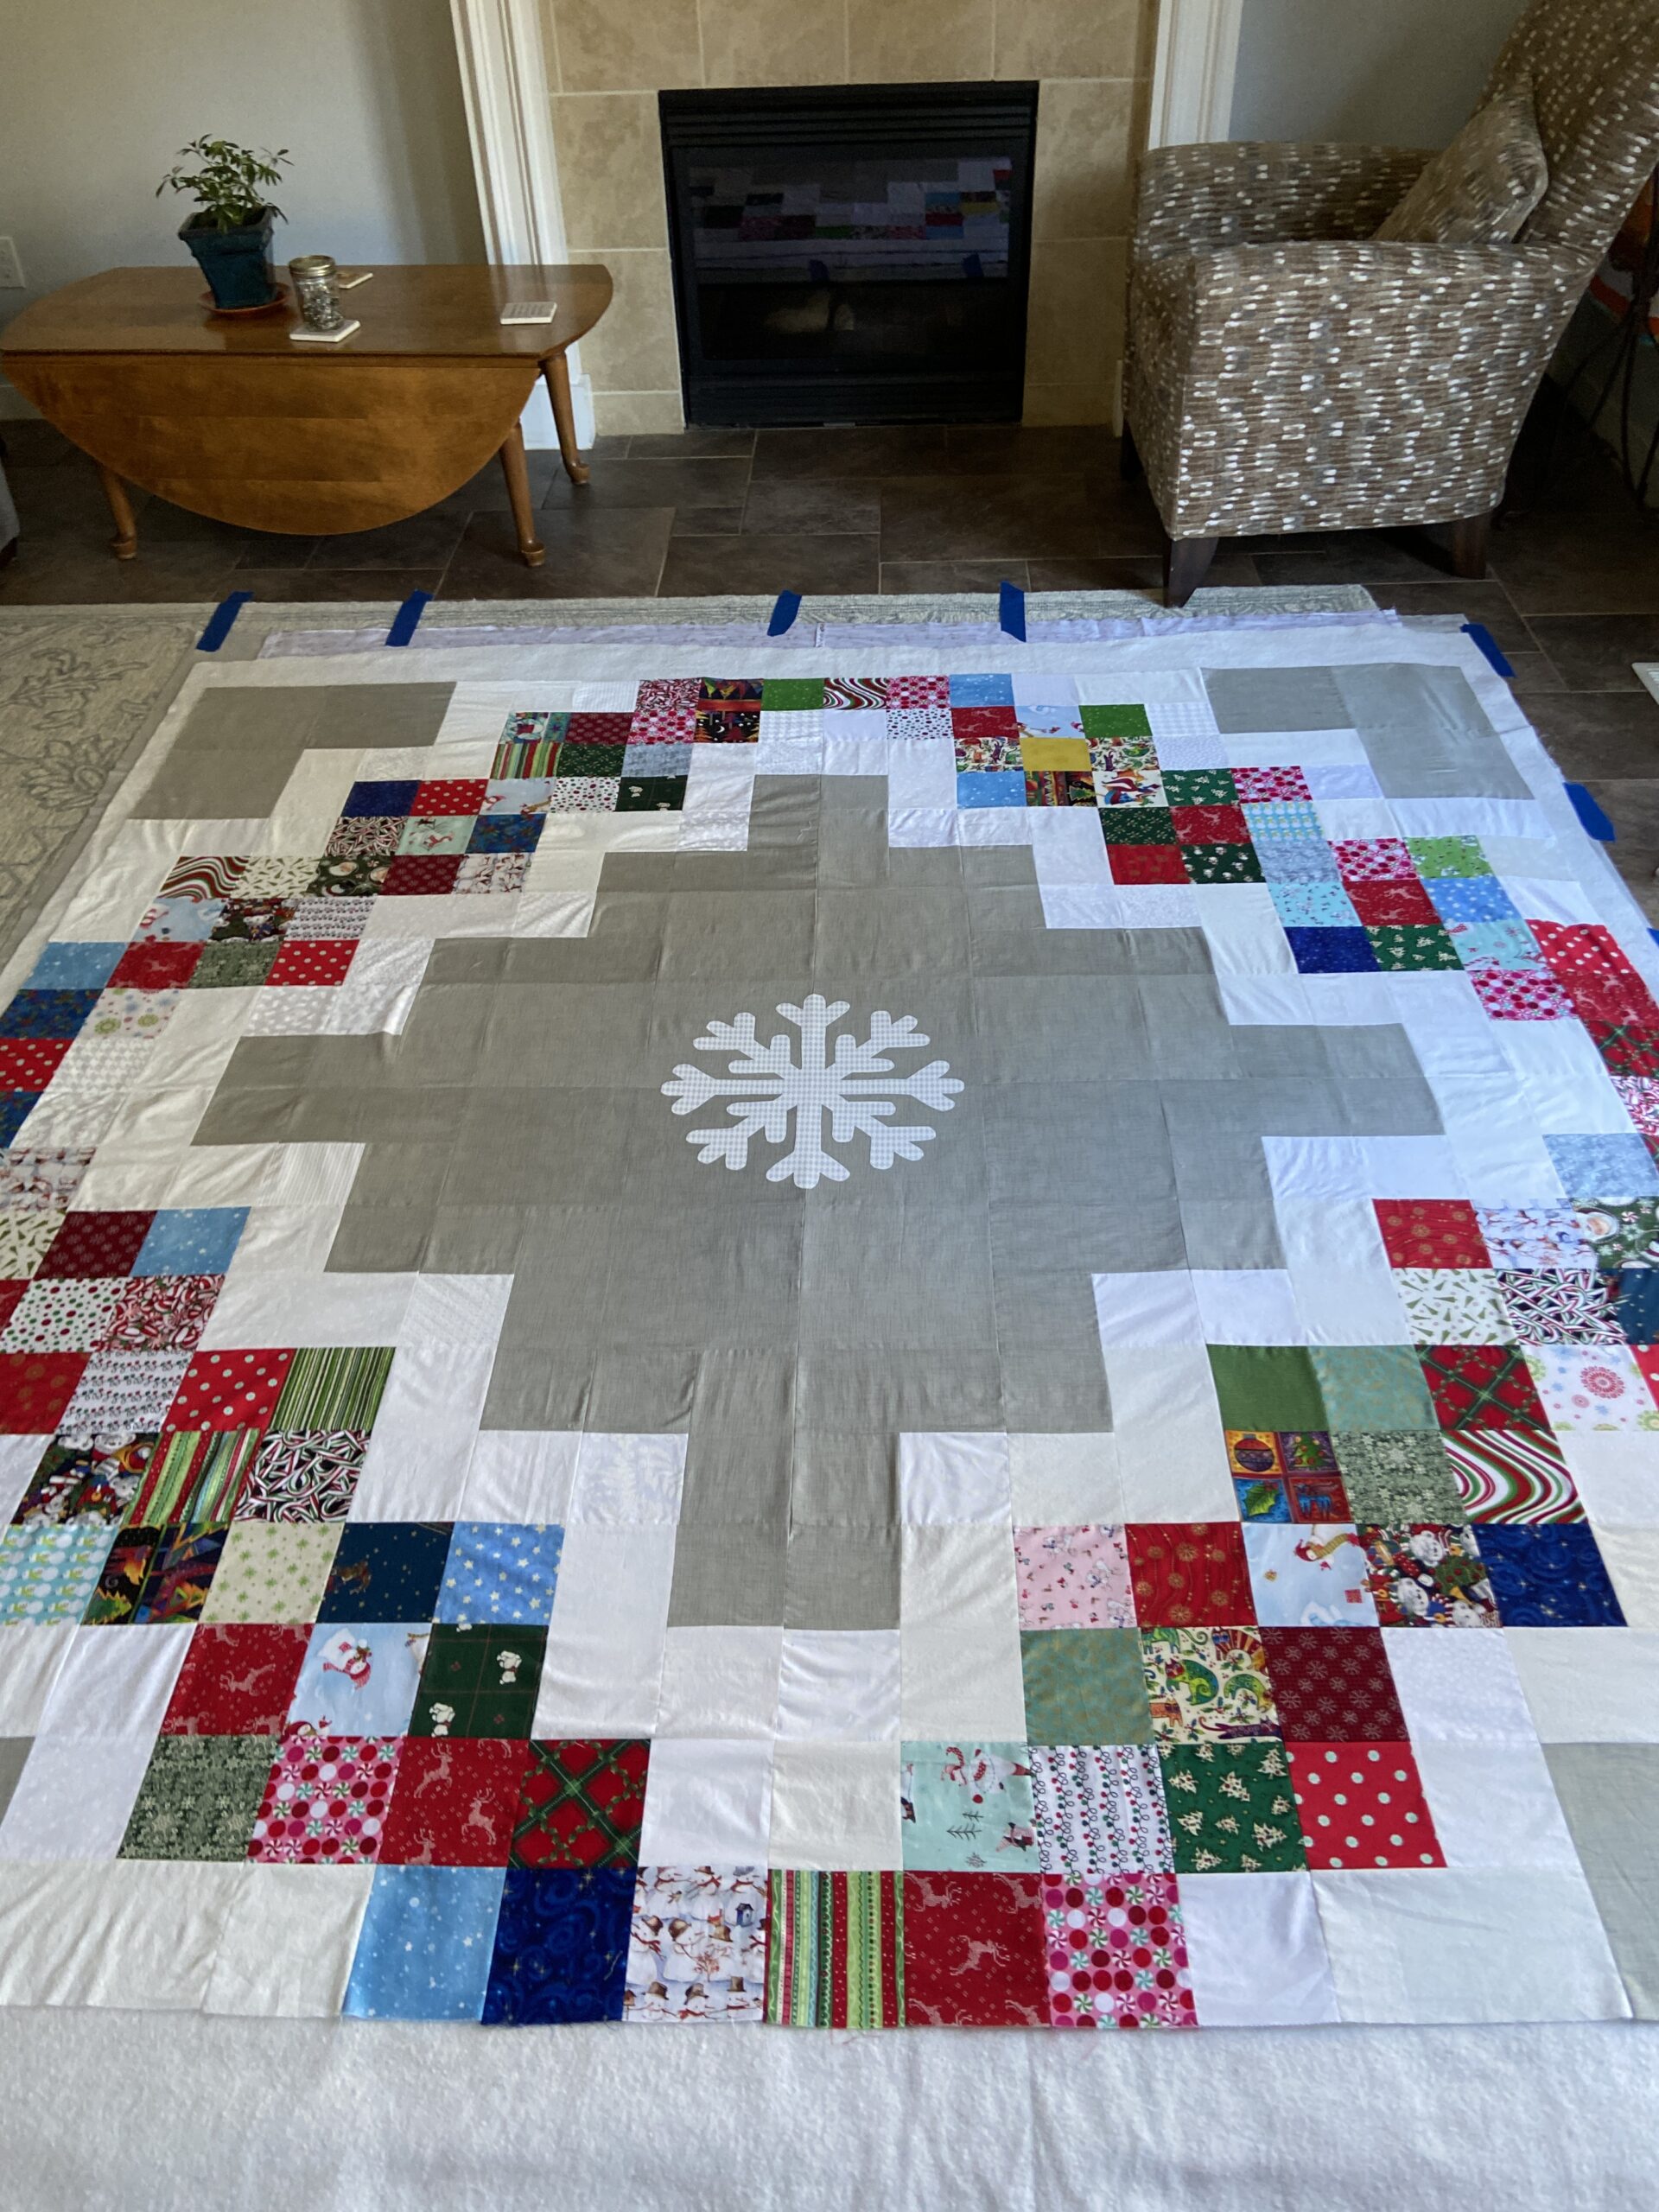
I fused it to the center while the quilt top was on the floor and then stitched the raw edges of the snowflake first, before I started to quilt it.

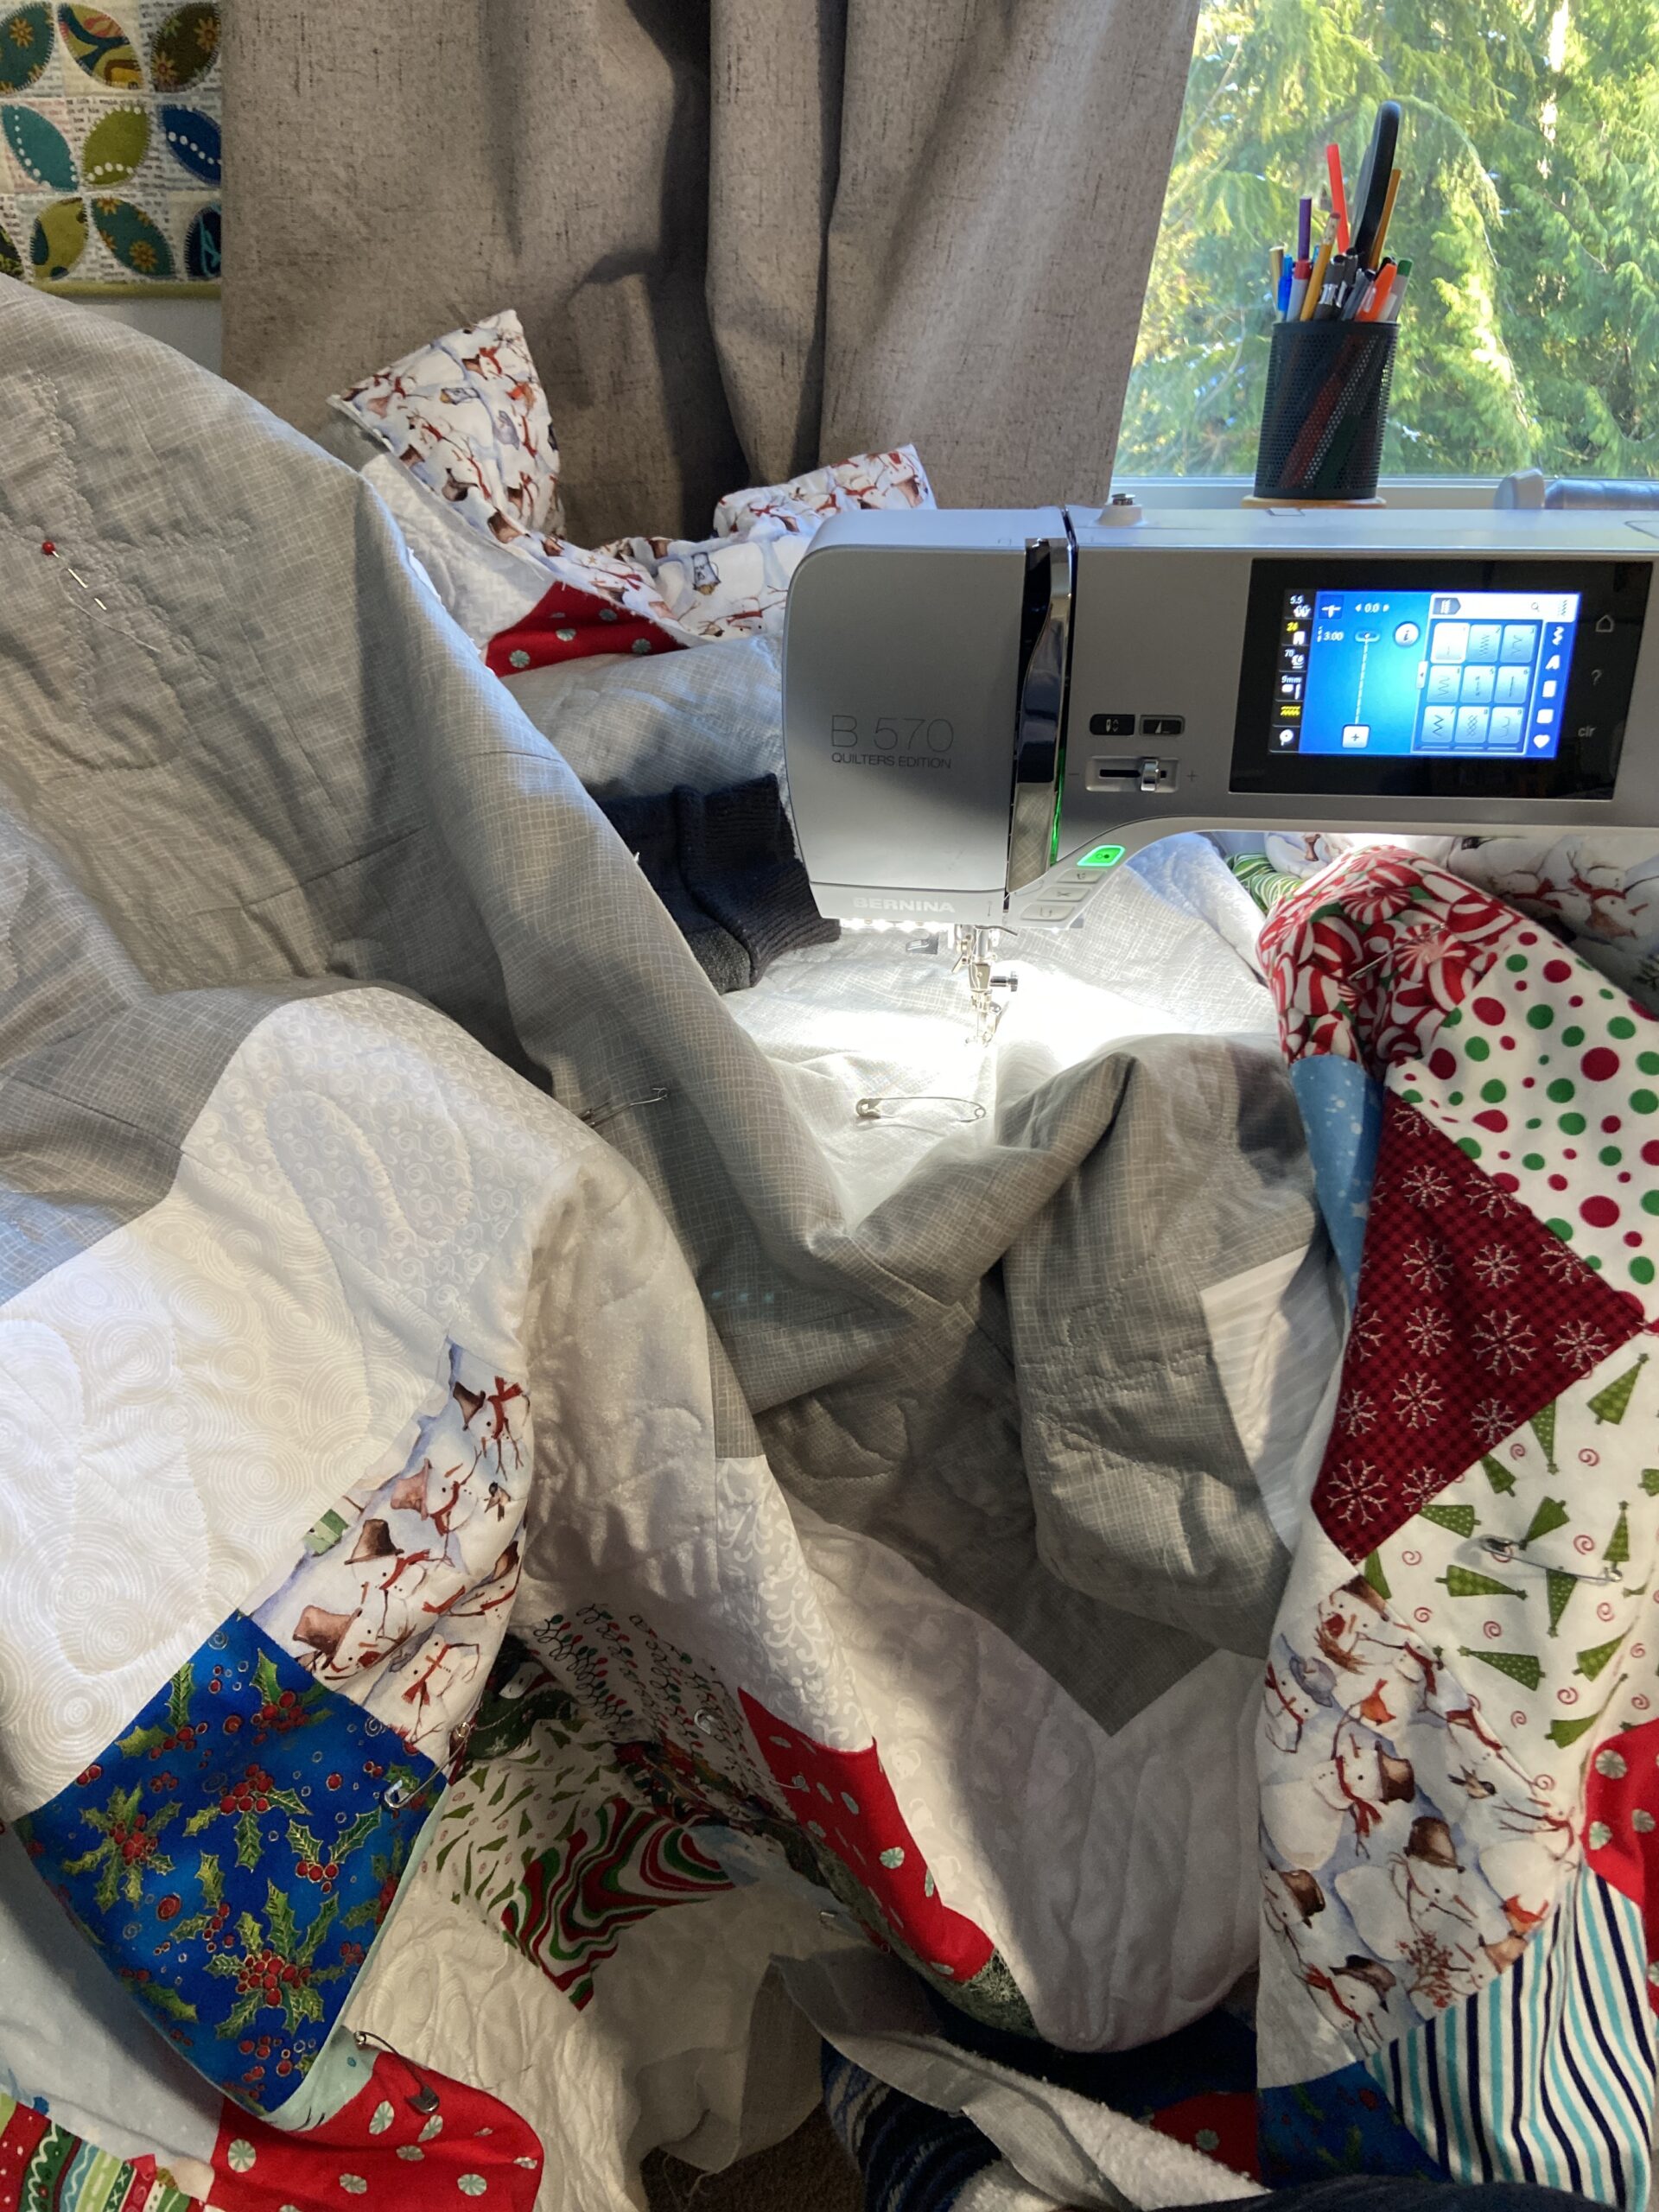
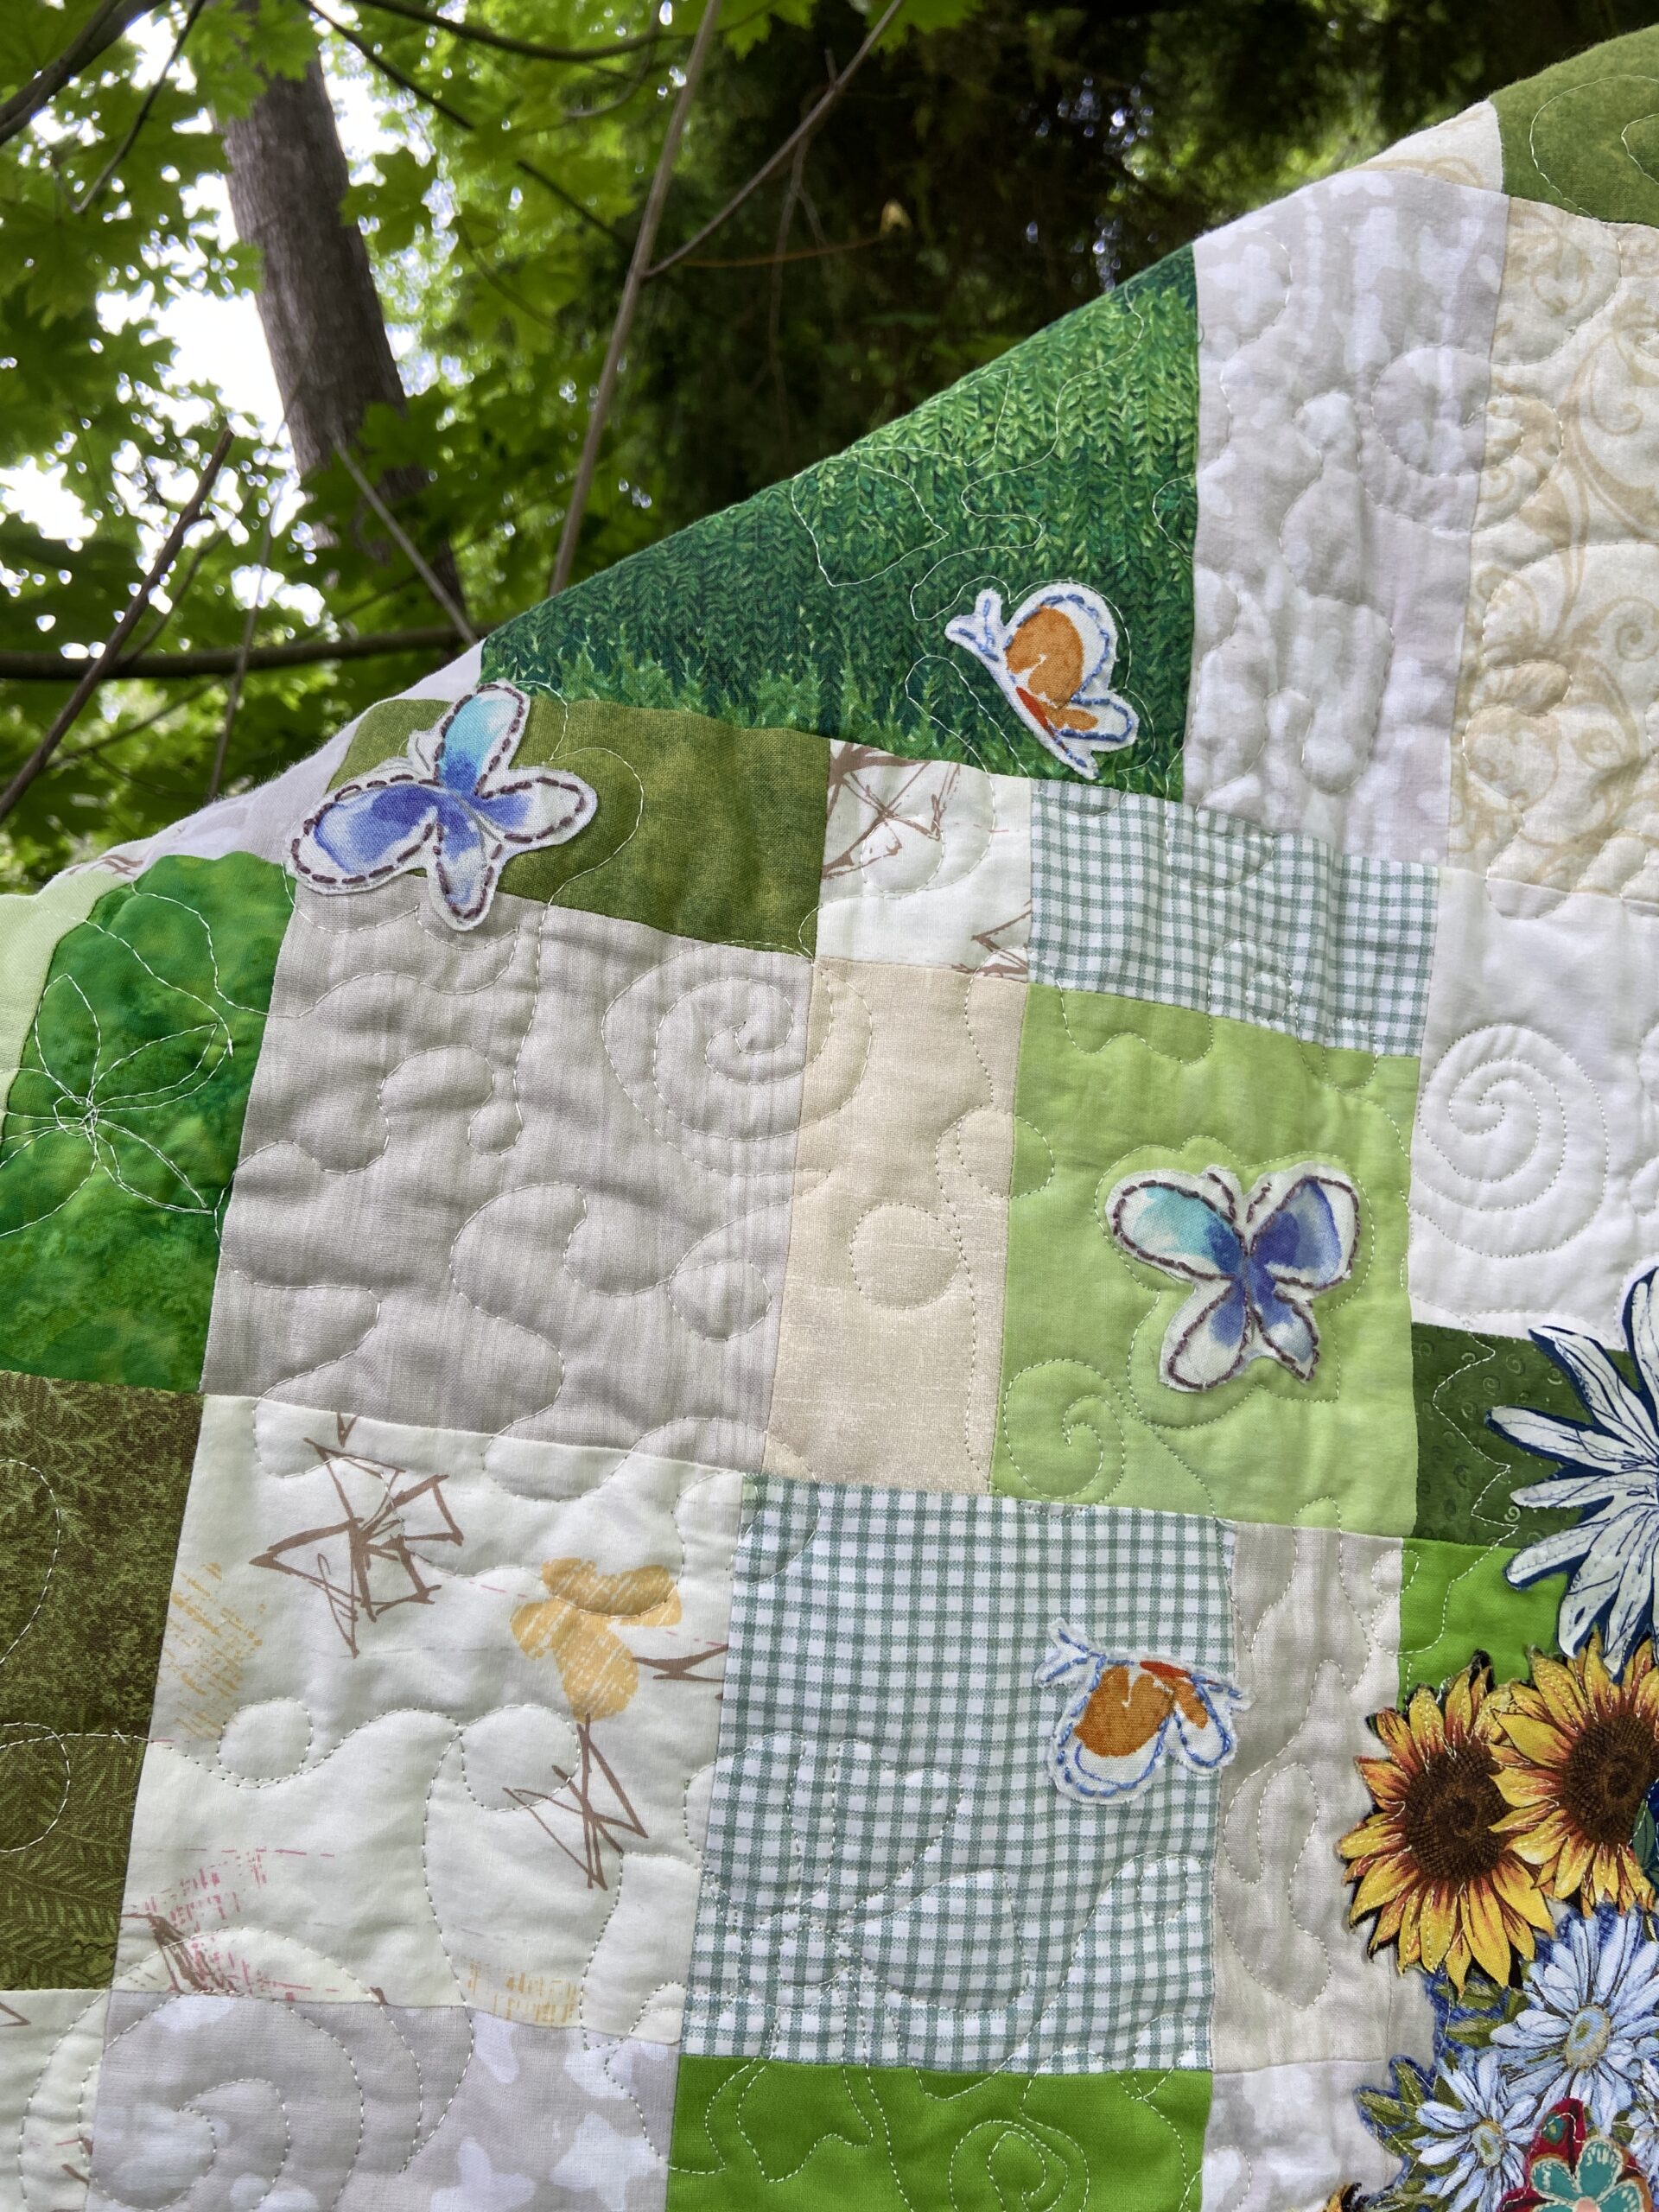
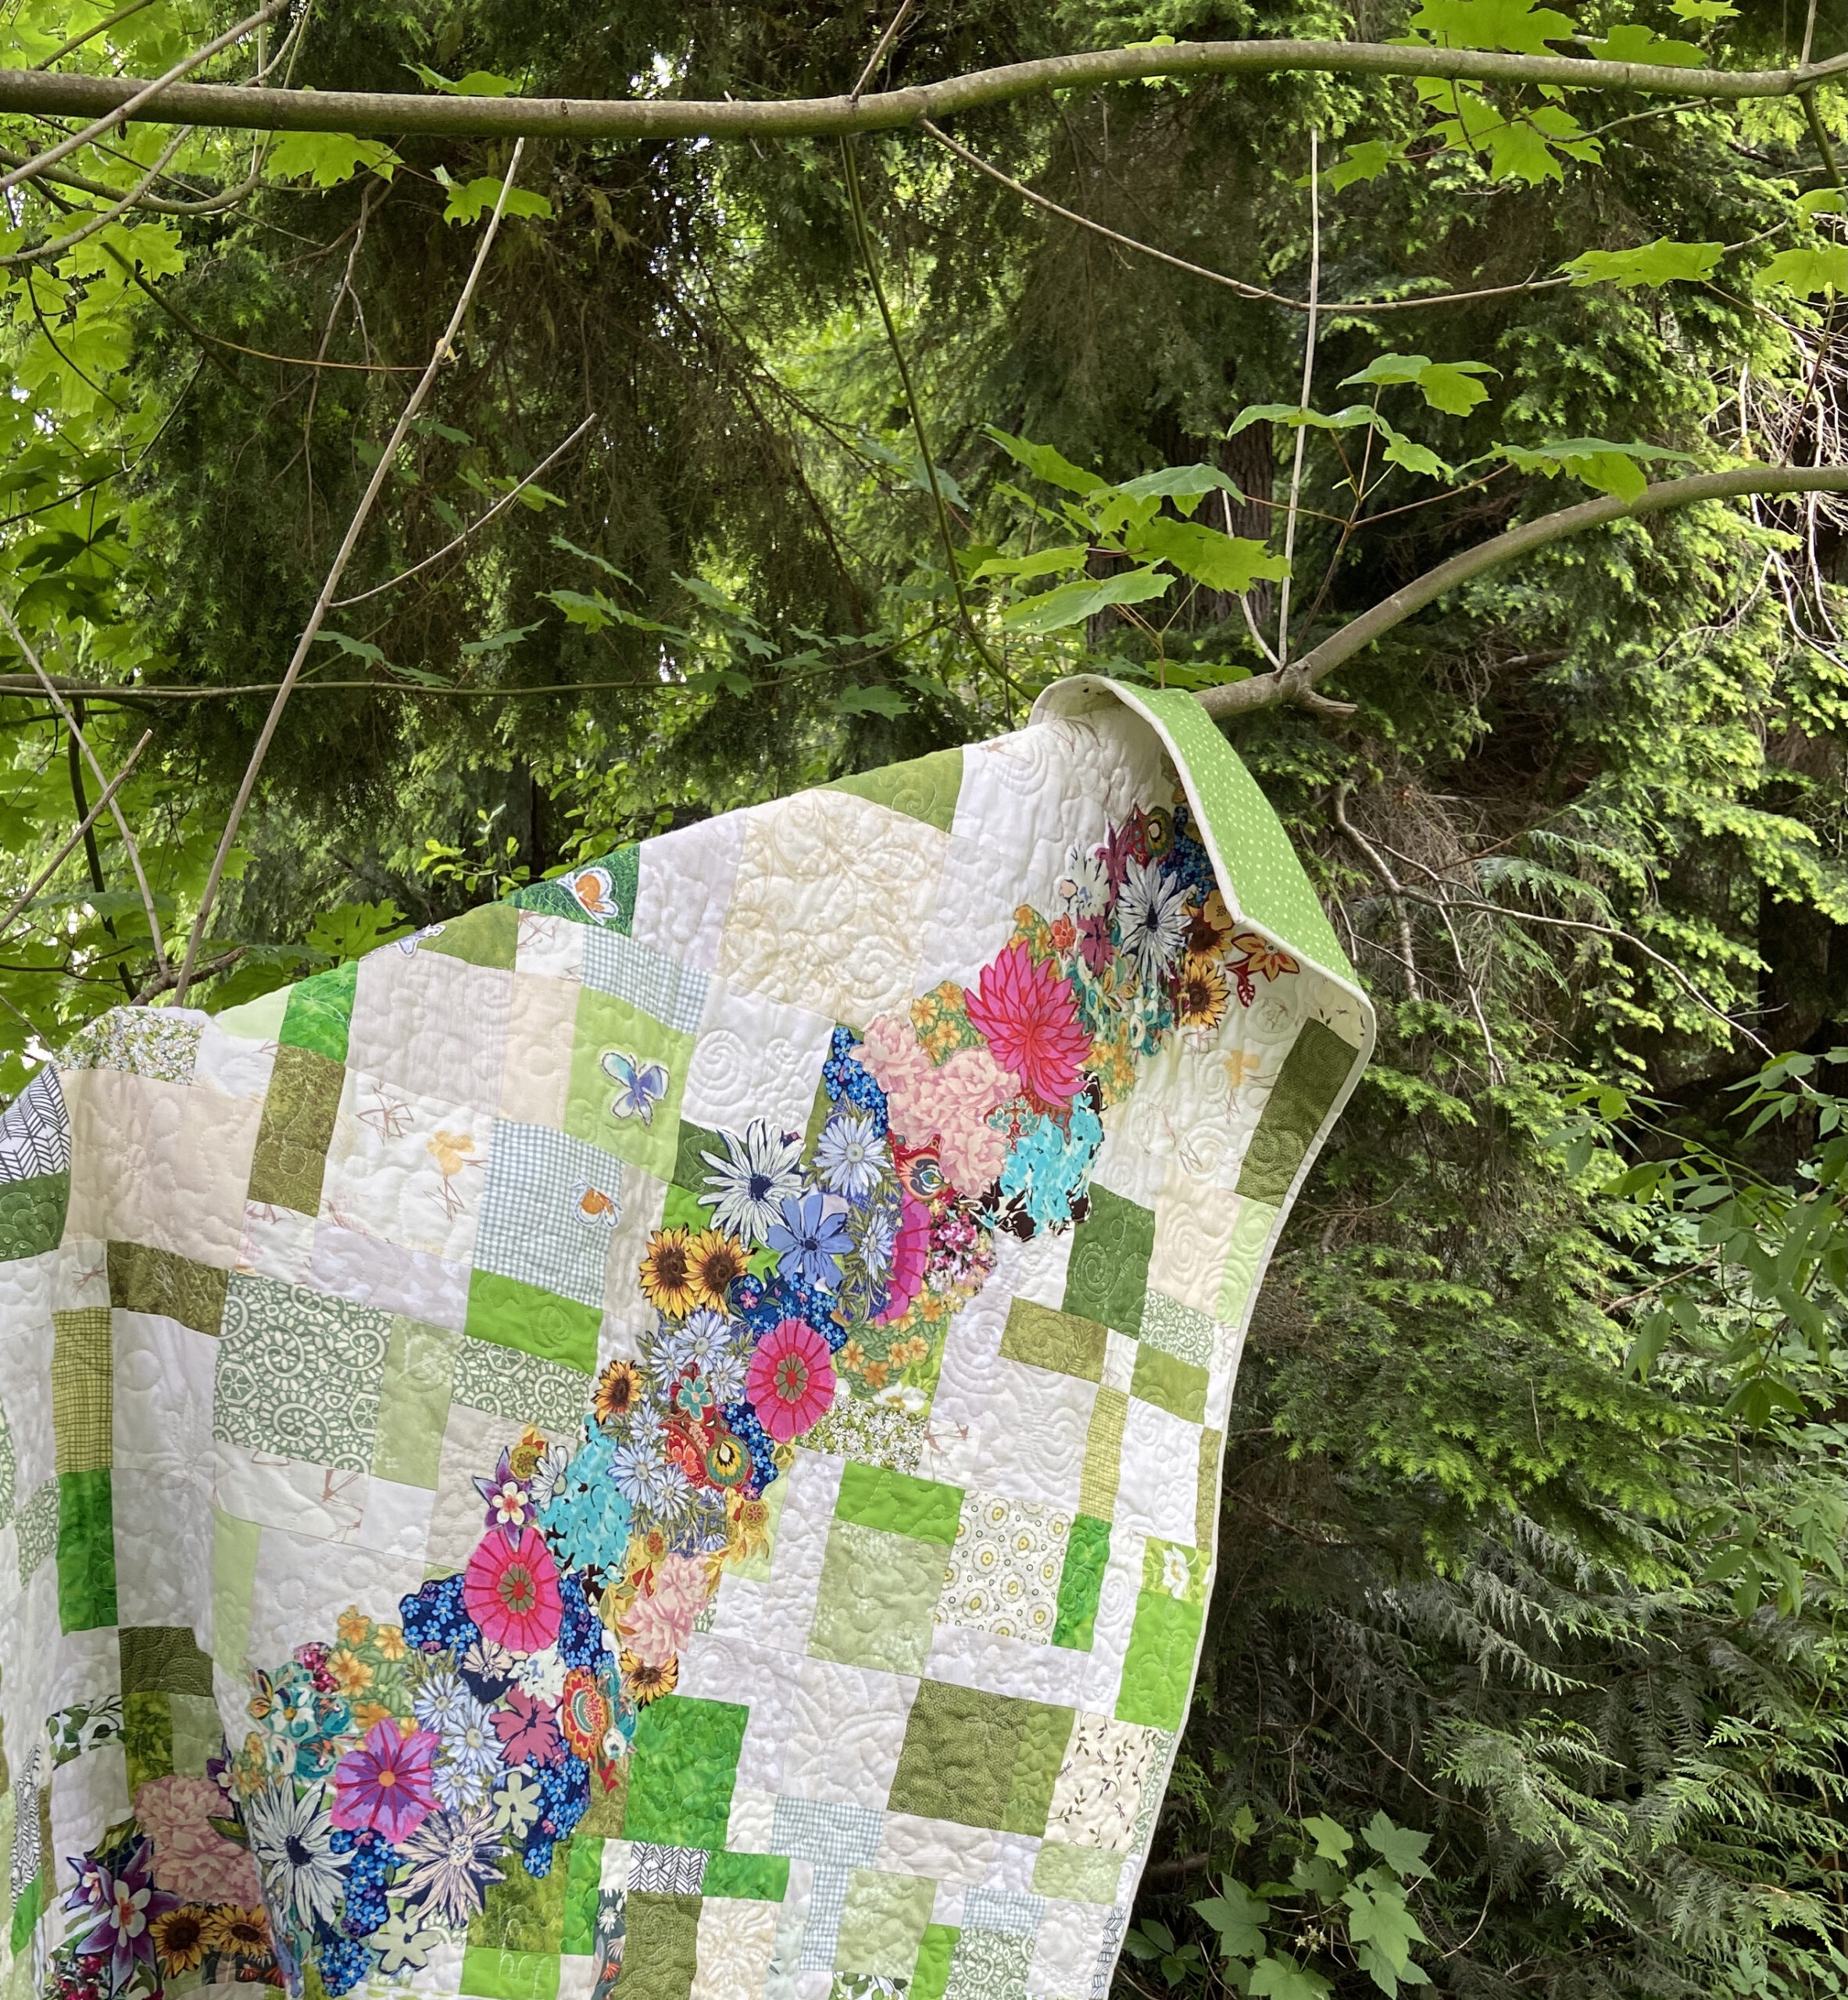
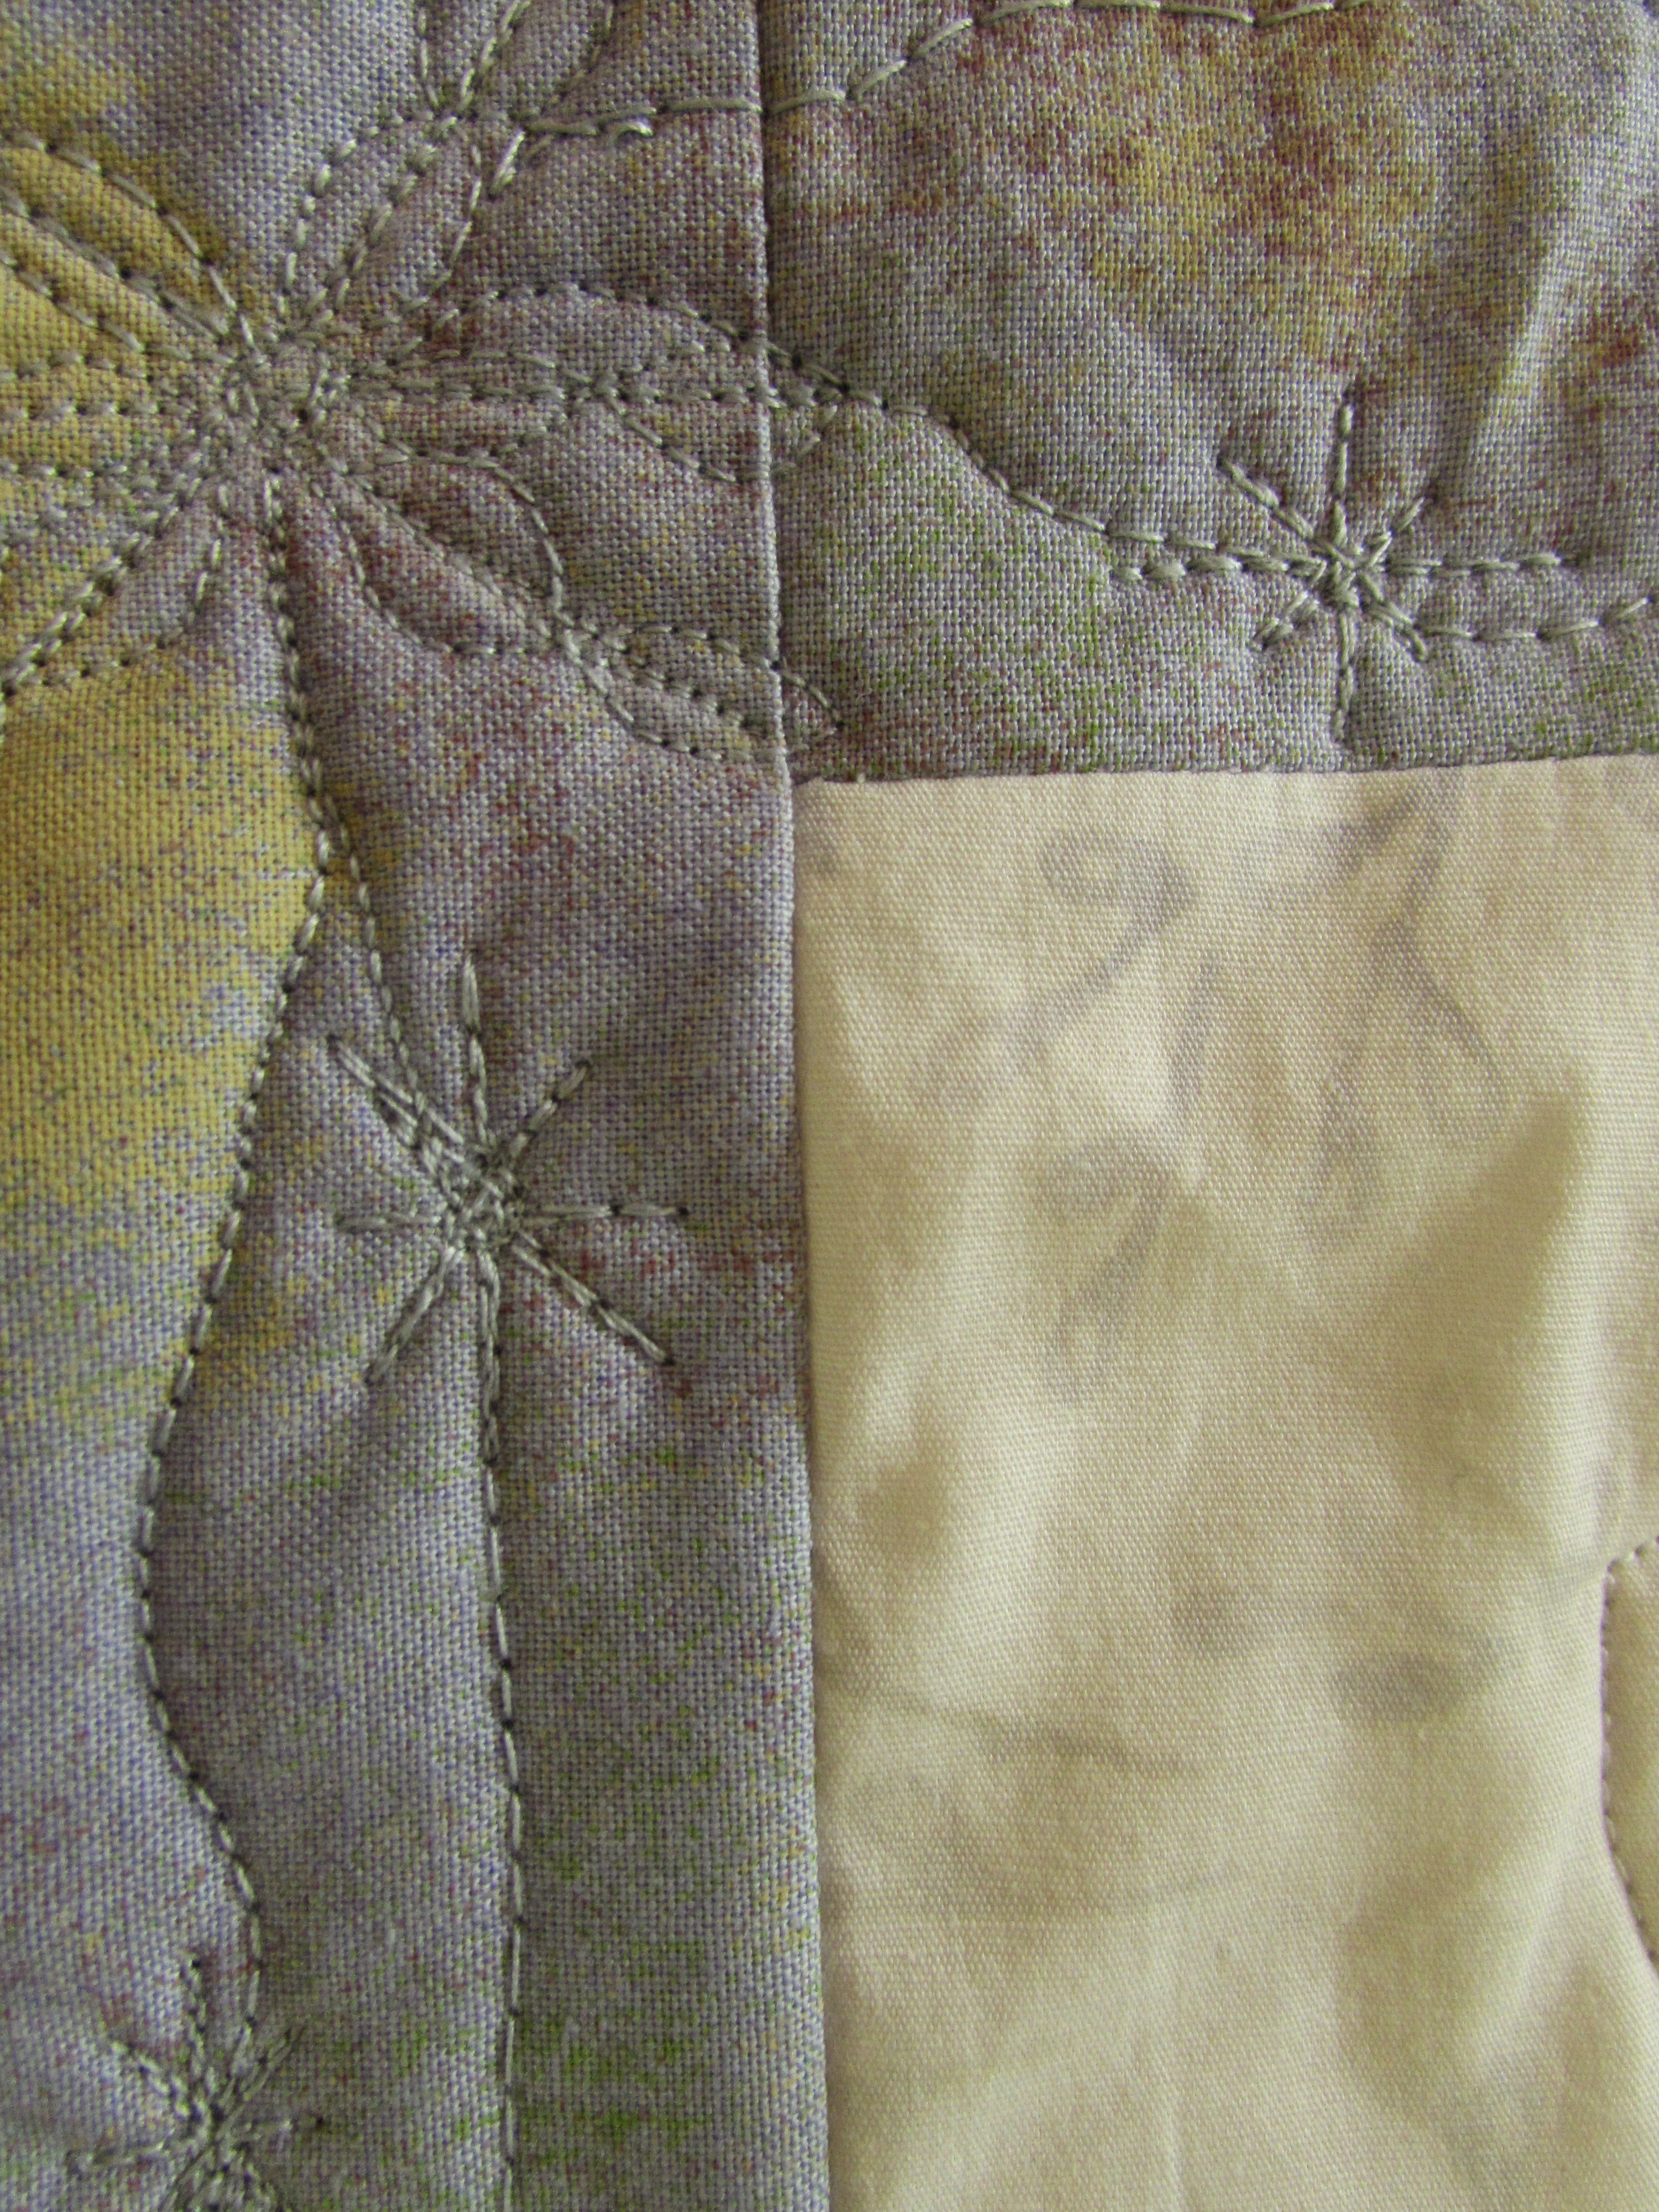
Quilting this piece was a bit unwieldy but overall, it went really well. On each section, white, gray, and colorful, I did a different motif. This kept me interested – honestly, quilting something this big becomes a bit mind-numbing for me after a bit.

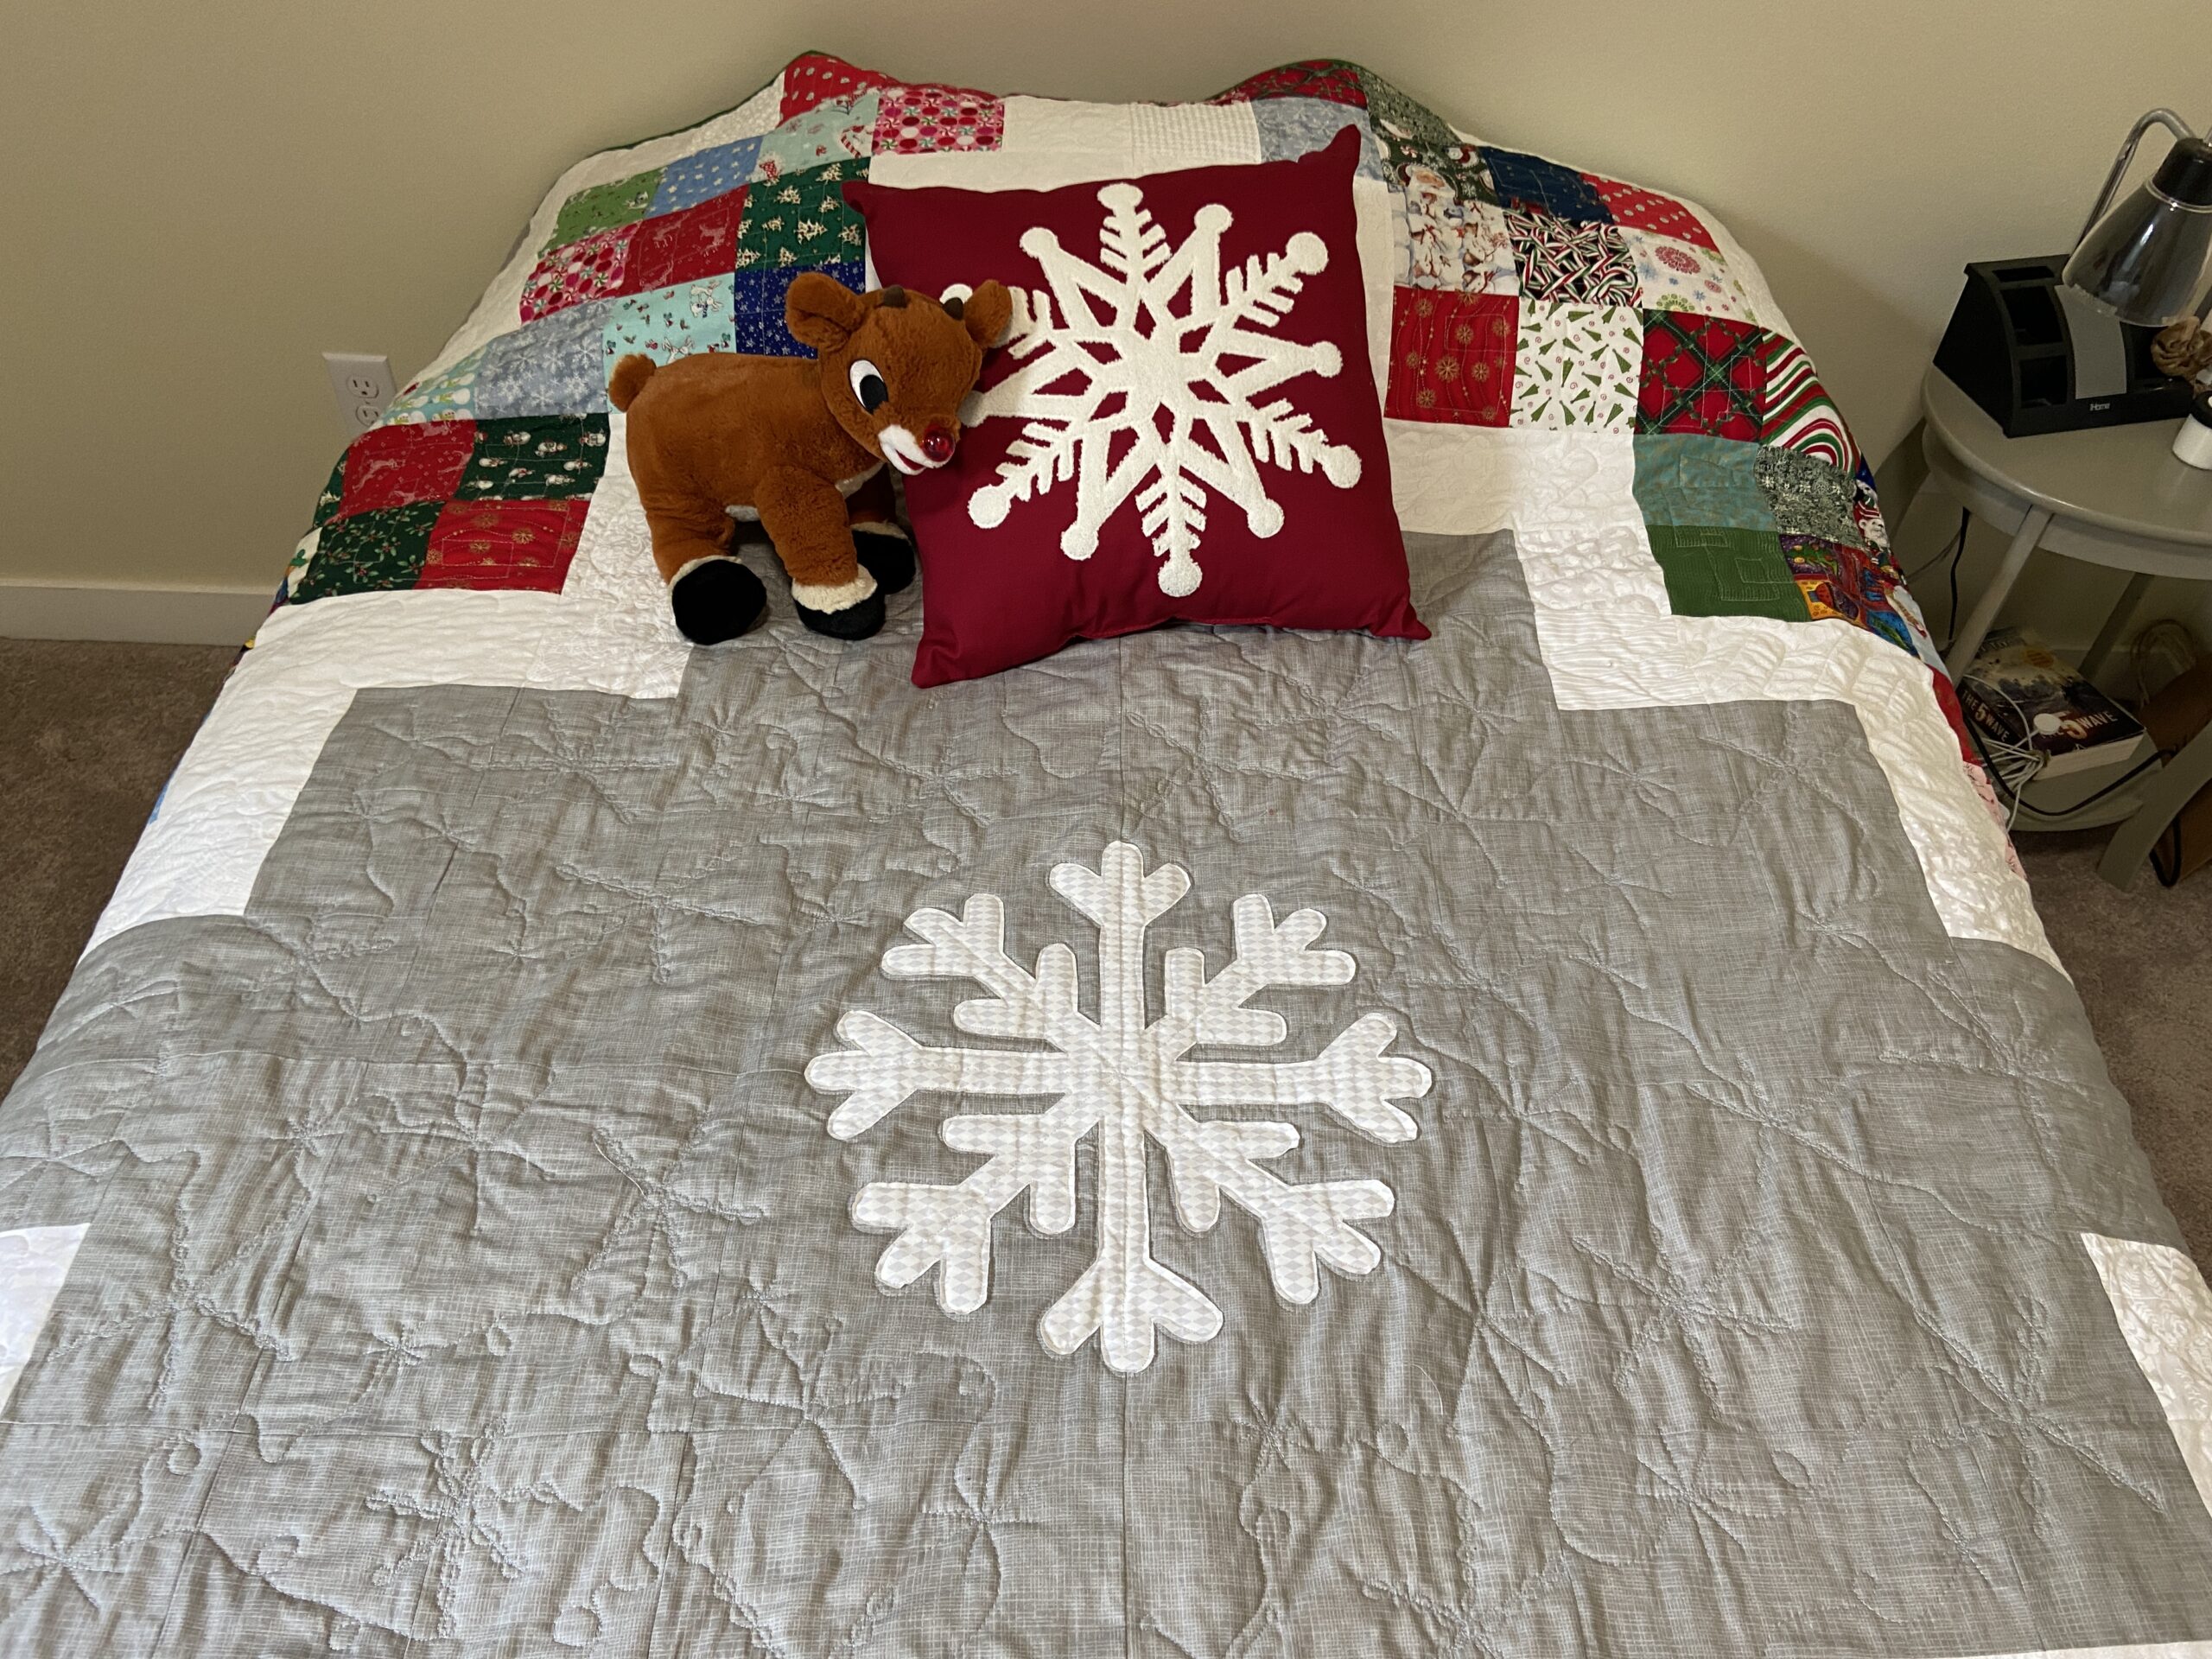
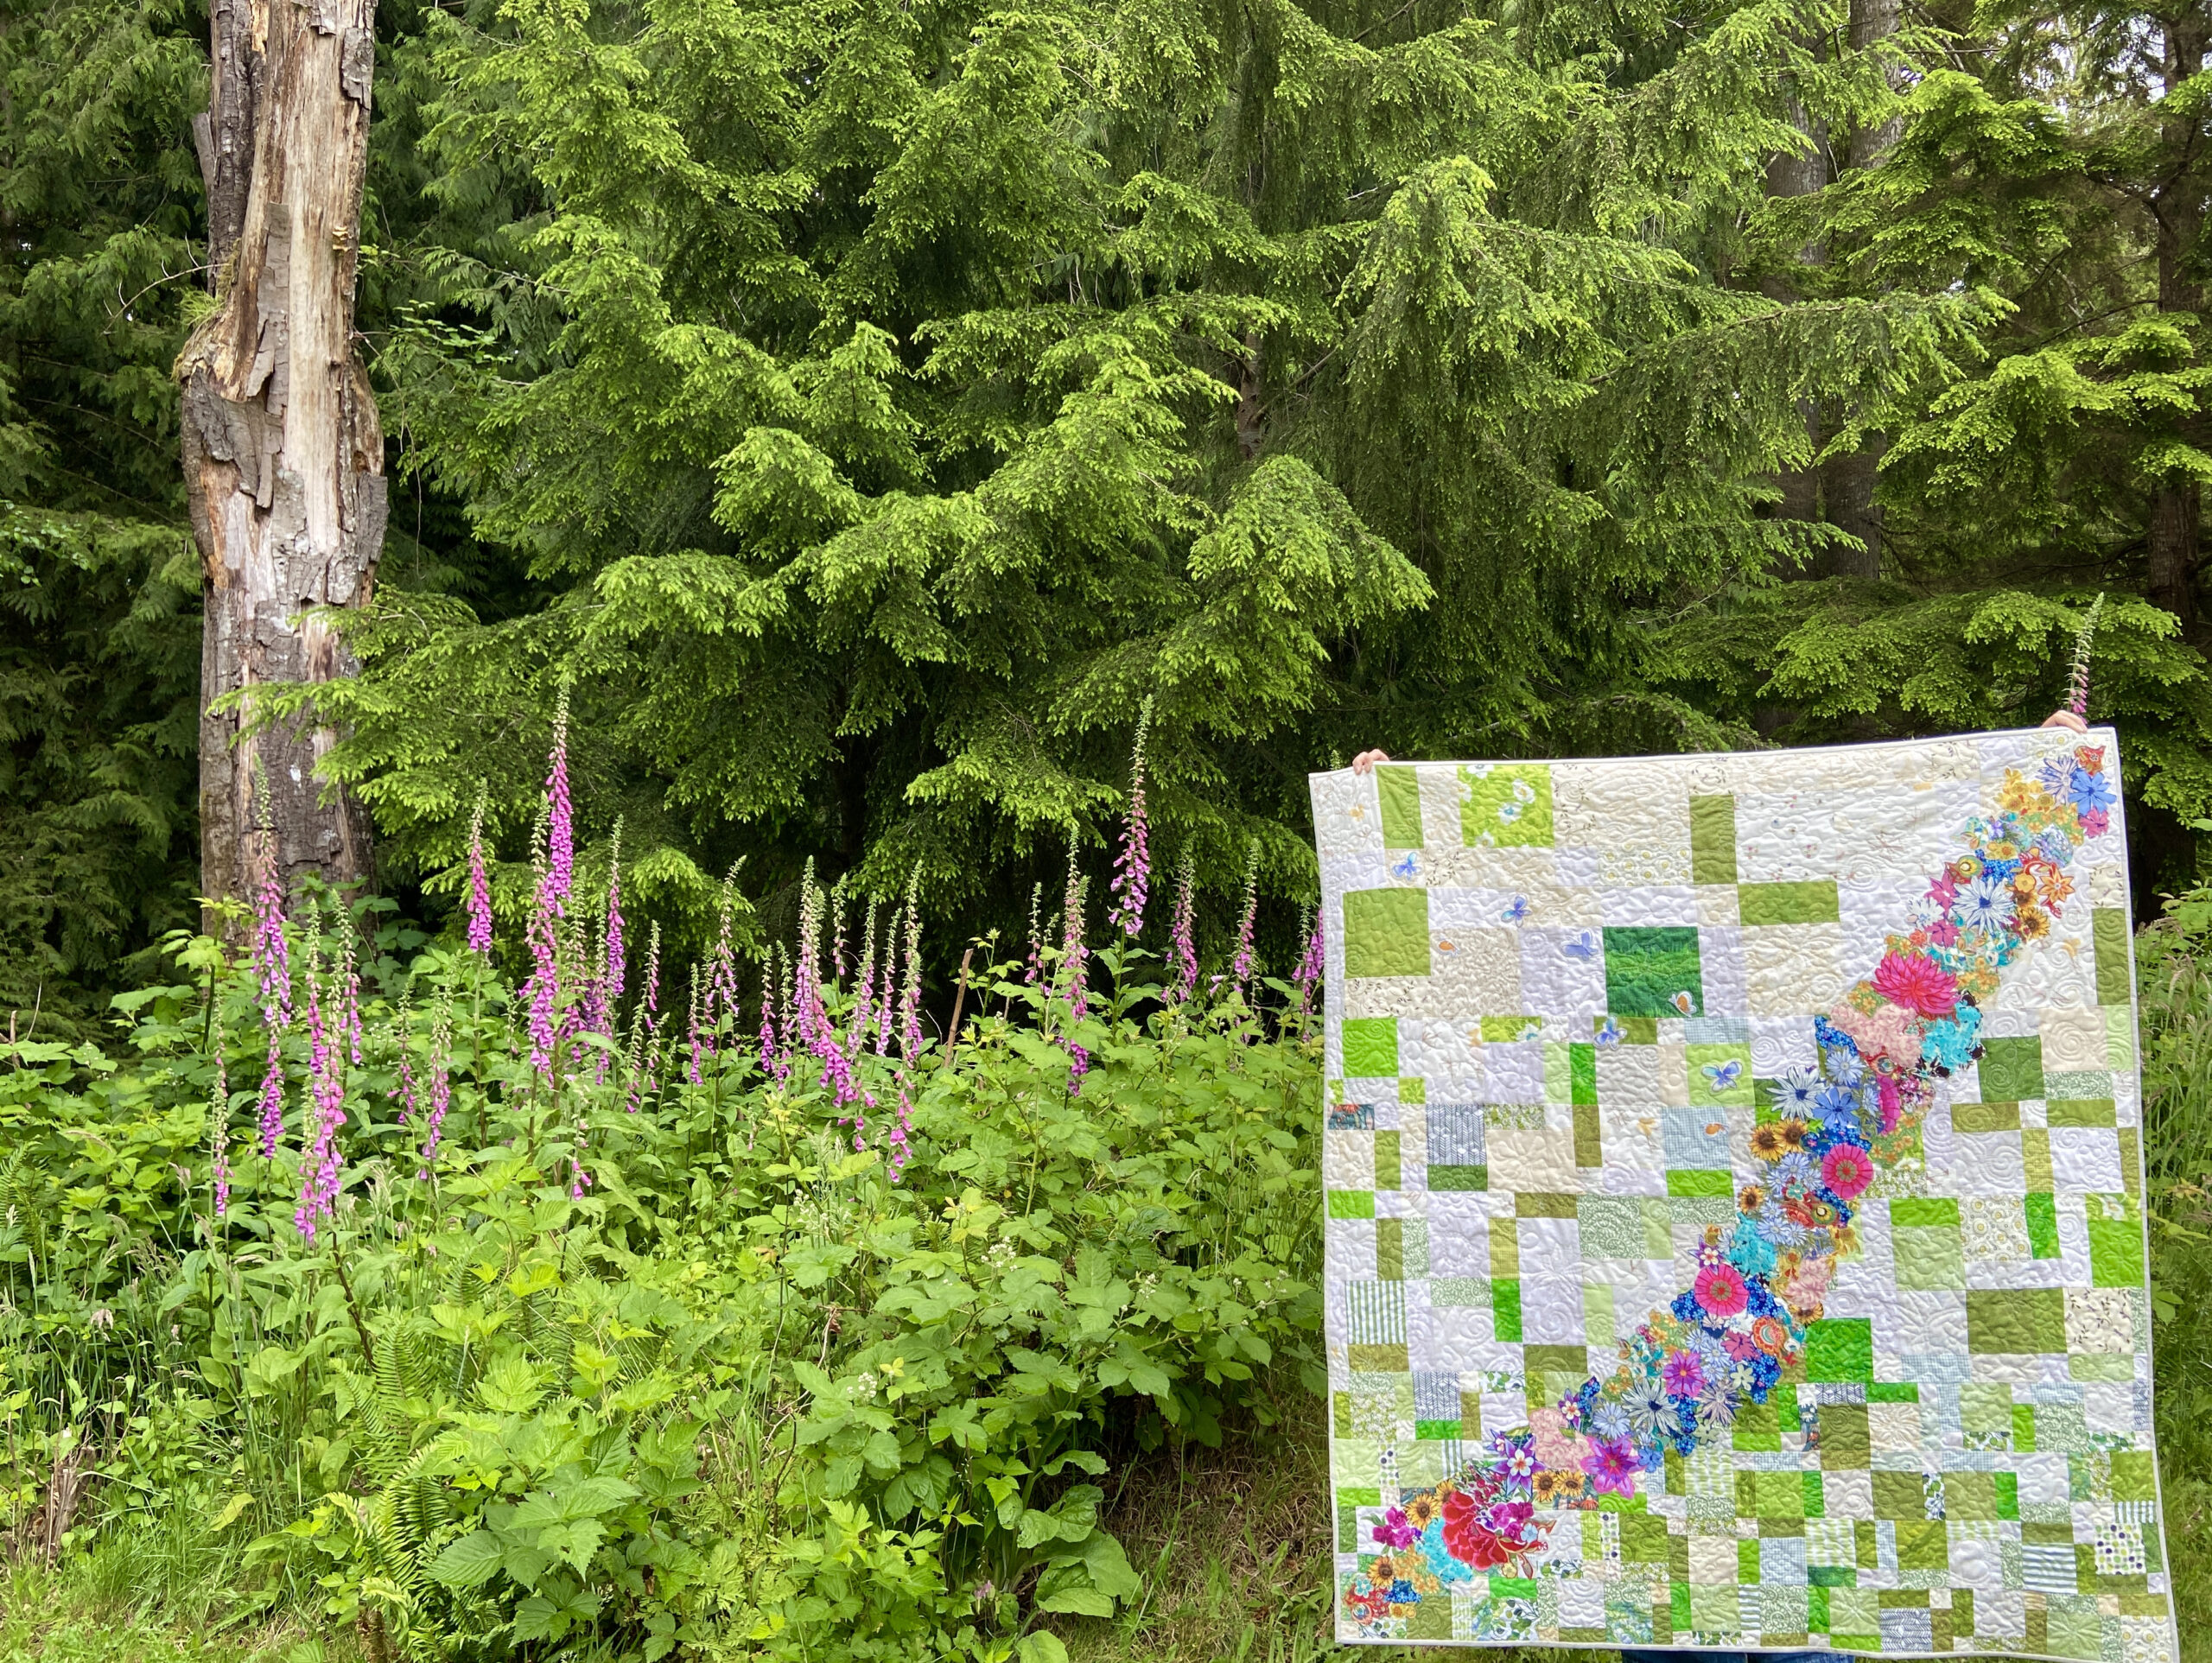
It is now on Julia’s bed and I think she really likes it. (I couldn’t resist the snowflake pillow when I saw it in the store. It looks like it was made for the quilt!) Most impressive to me was the fact that I made the quilt top completely from stash. I had to buy the backing fabric but otherwise, this was all made using fabric and batting I had on hand!

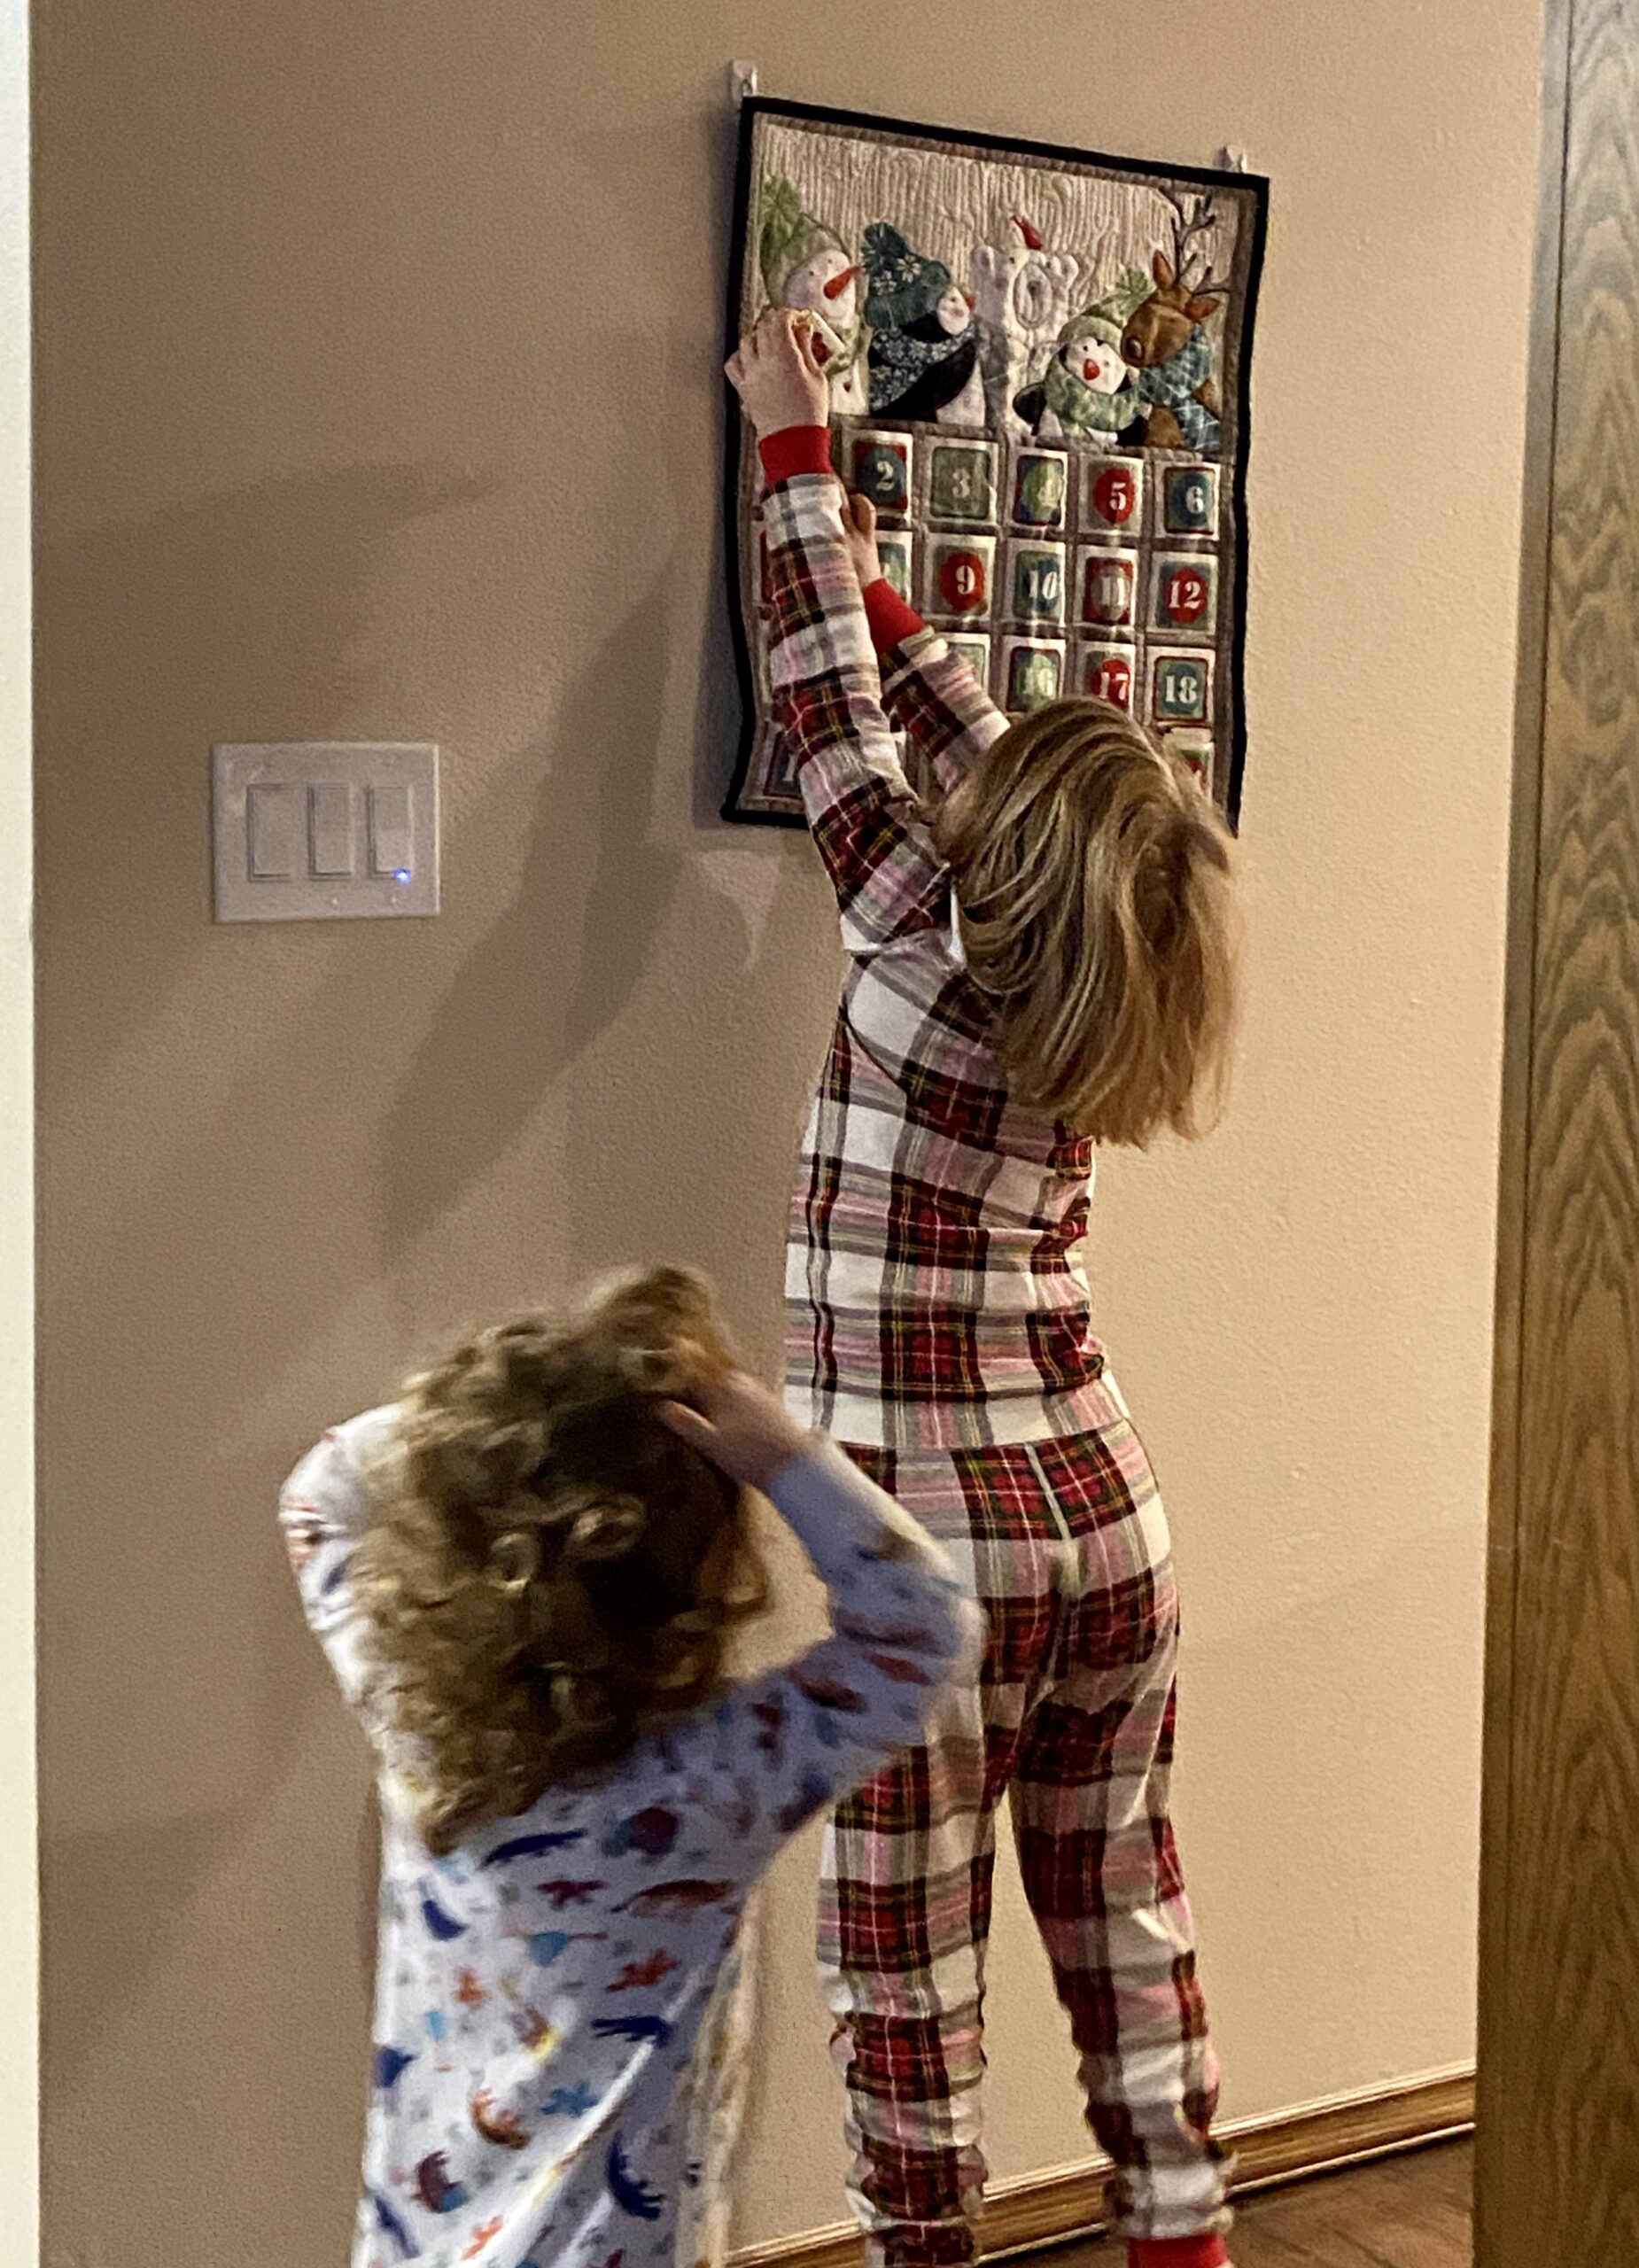
In the early fall, I went to a quilt show and as I wandered the vendors, I saw this advent calendar. I know I could easily make this but it was all finished and so cute. Supporting the vendors is important – I know I was very appreciative when quilters shopped my booth at shows in the past. I picked it up for the girls and later on headed over to the Dollar Store. Each pocket has two items in it, one for each girls. Some candy, some hair ties, stickers, and holiday stamps. This picture is from the first December 1st. I think they have enjoyed their daily treats. (It is hung somewhat high because of their Labrador – A calls him a Wabrador– puppy who would surely sniff out the forbidden chocolate).

Moving on! I have also been sewing gifts for the girls for Christmas. I am excited to be able to spend Christmas with them. We haven’t ever been there to watch them on Christmas morning so this year will be extra special.

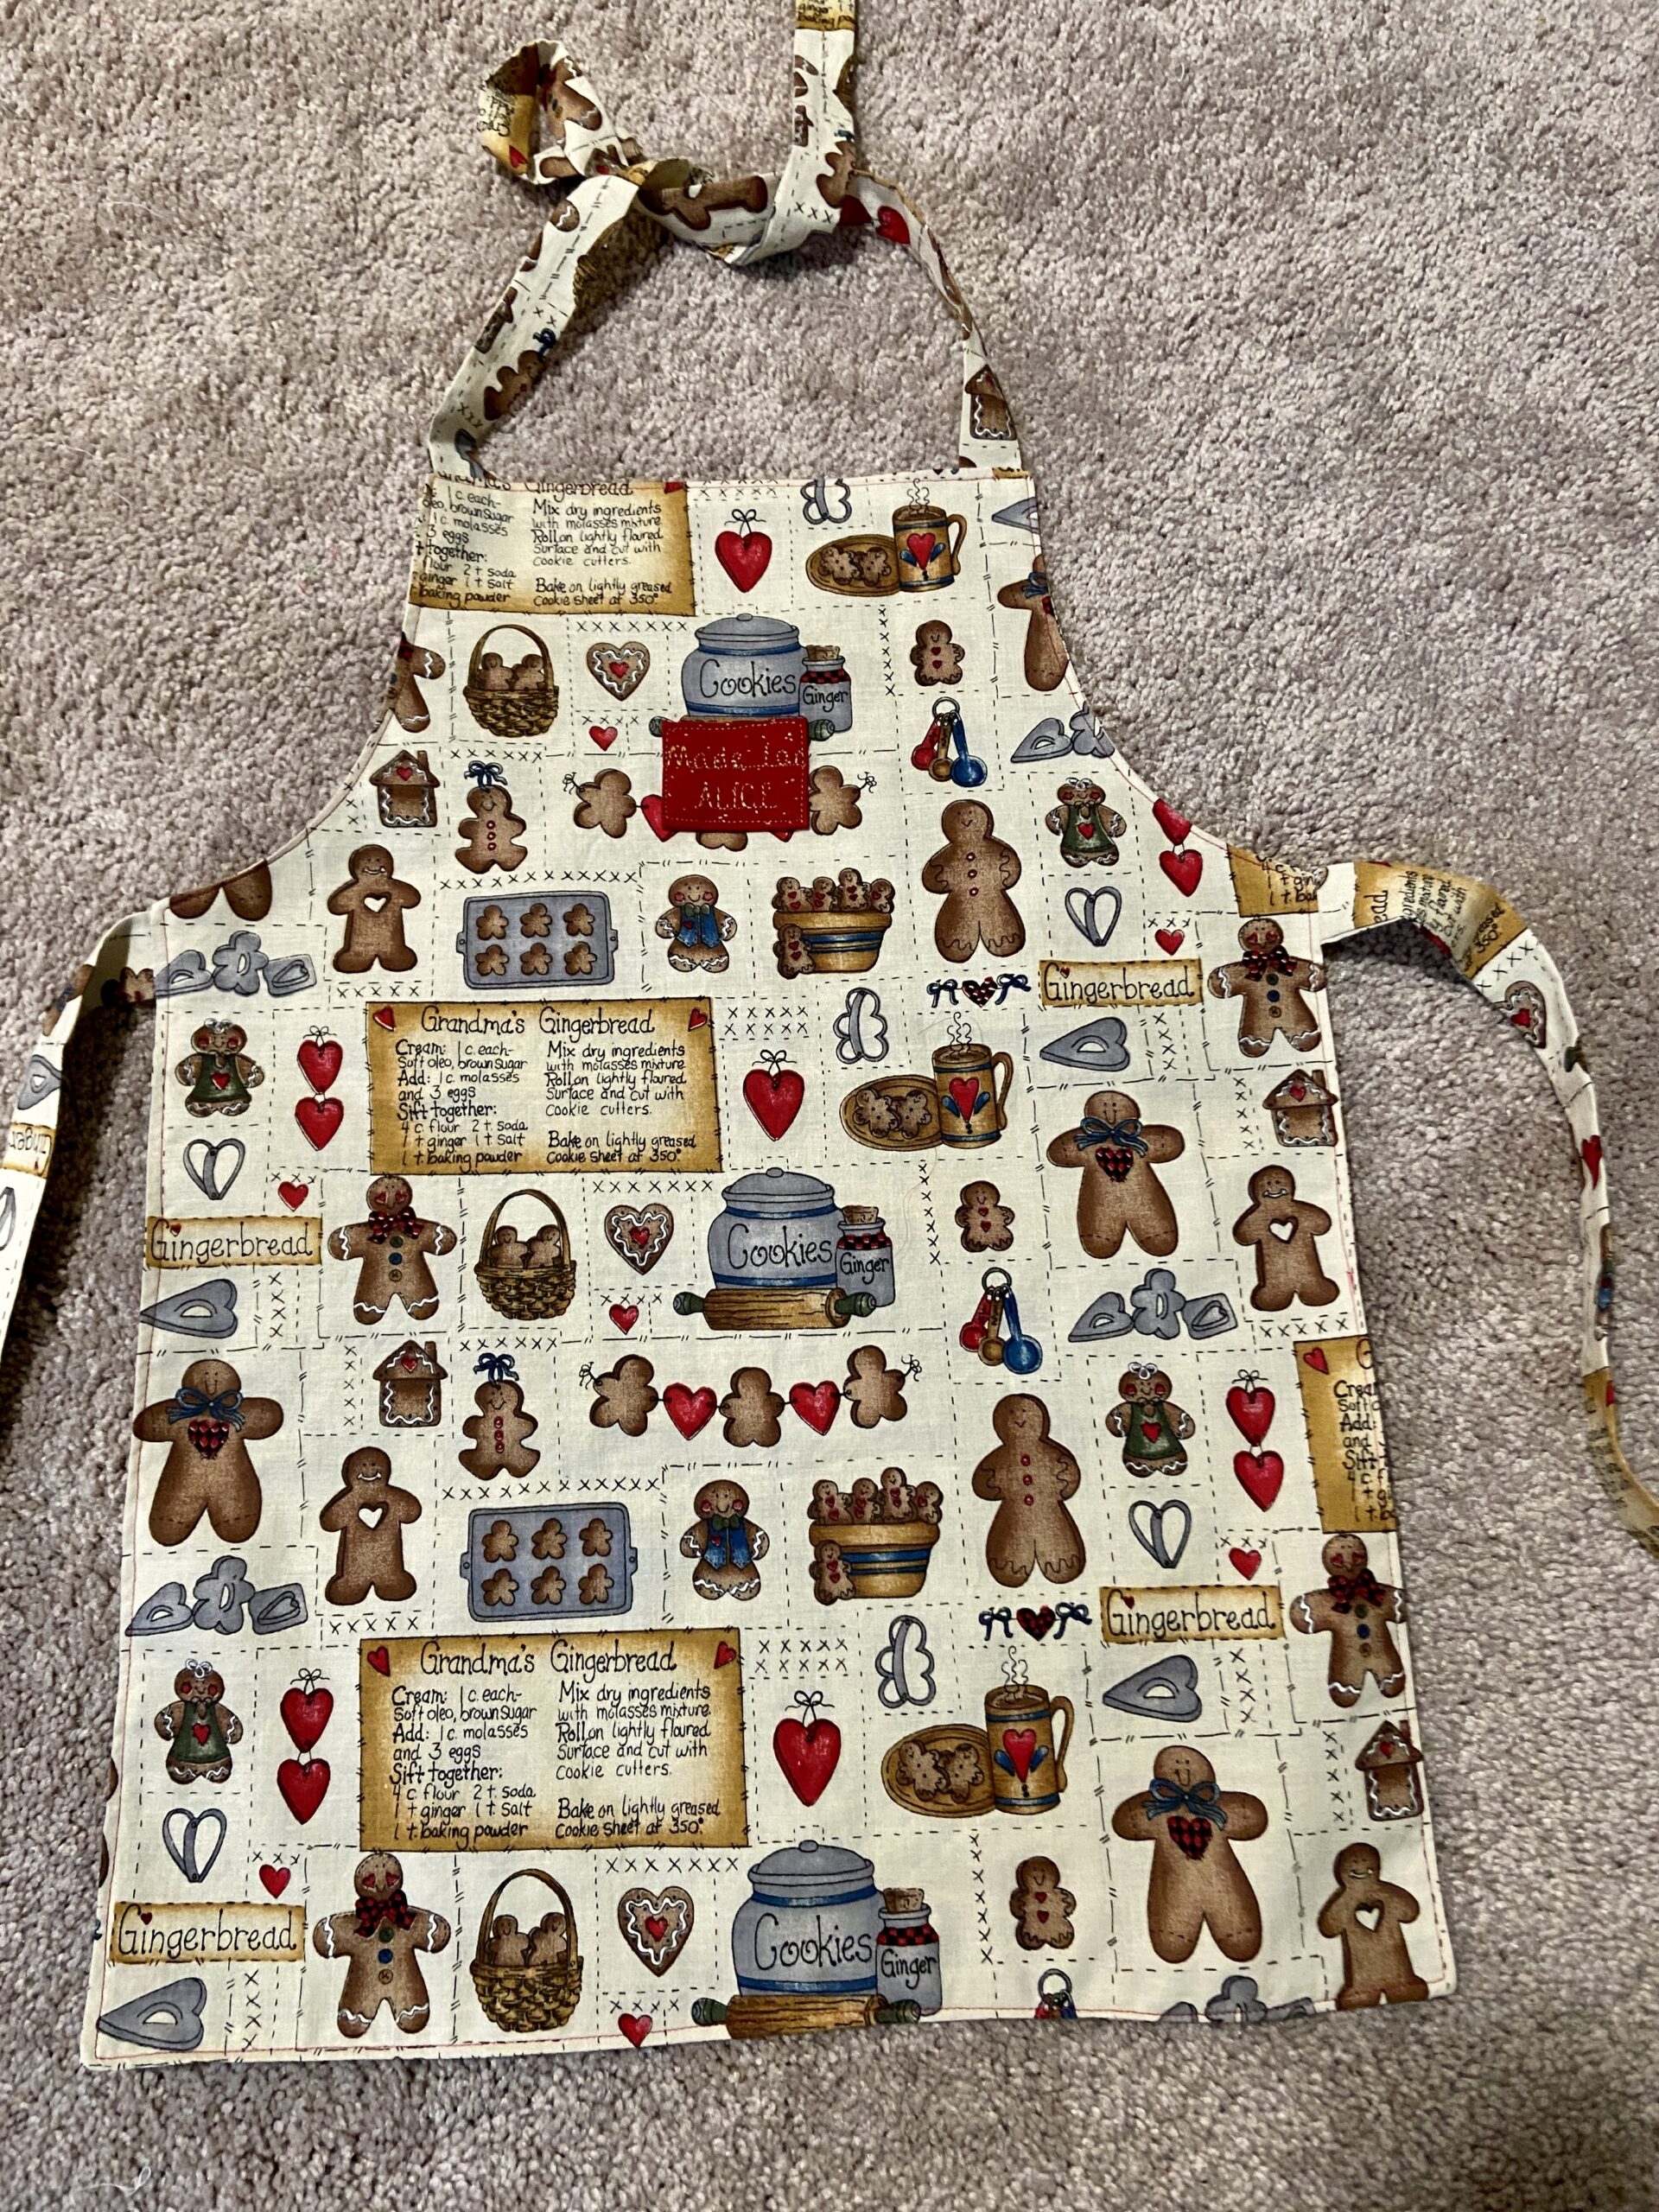
This apron is for little sister. It is lined so she can wear it either way. This fabric is an older print that has been in the holiday fabric bin for a while now. I think she will love the cookie print. For big sister I made one with princesses and castles. It is already wrapped and somehow I forgot to take a picture of it.

I also made each child a teddy bear. I have never made a stuffed animal and have to say, this was really easy. For me, the most challenging part was stitching the mouth. I had to take it out a couple of times to get a decent result. The teddy bear pattern is from TieDye Diva. Here is a link for you. The pattern comes with some clothes and I did use them for the pants. For the hoody, I went over to Best Dressed Bears. She has lots of simple and super cute teddy bear clothing patterns. Here is the link to the hoody. The patterns over at Best Dressed Bears are made for a slightly bigger stuffed bear so I just made the pieces a smidge shorter in length which did the trick.

OK – I think that sums up the last six weeks. After soooo many boxes of tissues, cups of tea and honey, inhalers, antibiotics, humidifiers, and more naps than I can even count, I think life is back on track. I hope you are healthy and happy. Julia is home and has been patiently waiting around for me to feel better. We love going to some of the cute towns around here for window shopping and just enjoying the Christmasy vibe. Hopefully we will do that tomorrow. Fingers crossed!

Linking up with lots of fun blogs. Check it out at the top of the page, under Link Ups.

Meadow Quilt is a Finish!

Making a quilt is not a quick endeavor. At least for me it isn’t. Back in 2016 I read a tutorial by Bonjour Quilts and left a comment about how much I loved the quilt. Then in 2020, in a newsletter by Bonjour Quilts (side note – if you don’t receive her newsletter, check it out. Kirsty writes a great newsletter and I very much enjoy reading it) I was reminded of the quilt. At that time, I started cutting pieces for the background. I believe this was at the beginning of the pandemic. Fast forward to 2021, I decided to finish the quilt so I could give it to my nephew and his bride when they married in July 2021. Well, then we decided to list the house and move so all sewing came to an abrupt halt.

With my sewing room (almost) set up and my time freed up, I am sewing and quilting again! I had the Meadow quilt top finished and basted before we moved, so I started to quilt it. Before basting it, I did some FMQ over the flowers in the center. I knew I wanted to secure them tightly, even though they are fused to the base. However I didn’t want all of that to show on the back. I did a preliminary set of stitches before basting and then finished securing the flowers after it was basted.

The background is free motion quilted with whatever came to mind. There are swirls, basic stippling, some flowers, hearts, sunshines and a few words here and there. On the top I used an off-white Glide thread and the bottom is a pale green Glide thread. (I am a big fan of Glide for free motion quilting).

Every meadow has a few butterflies fluttering about, right? I fussy cut these and fused them to the top. Using Perle cotton, I did some basic stitching around the edges to help them stand out a bit.

I forgot to take a shot with the backing showing but in this one you can see a bit of the corner. It is a 60″ wide voile by Frou Frou. Grassy green with tiny white stars on it, the fabric is so soft. I think it gives a cuddly feel to the quilt. (I have had this on the shelf for a long time so don’t know that it would be available anymore?)

The pictures were all taken in our yard. Right now everything is so green. Foxglove are standing tall in the backyard, giving a meadow like feel to it.

I am so happy with this finish. It is unusual but not difficult. I actually think this is the case with many of Kirsty’s (Bonjour Quilts) patterns and tutorials. It is on the way to the bride and groom, just in time for their first anniversary!! I hope they love it.

Sharing at my favorite link ups – see the list at the top of the page for the details!

REMINDER: The first link up for 2022 Positivity QAL opens this Sunday, June 26th. Please come back (here) then to link up and show us your progress with your blocks. I am looking forward to seeing the different color combos!!

Falling for You Autumn Table Runner

A couple of months ago I read about some fun table runners over at Pieceful Thoughts of My Quilting Life.  Wendy had been pattern testing for a friend and actually made two versions of the runner.  I really liked the simplicity of the pattern and immediately hopped over to Craftsy to purchase the pattern. Designed by Vicki of Vicki’s Crafts & Quilting, it is a fun pattern and a quick project.  My kind of sewing!!

So, I had the pattern and I pulled some fun autumn fabrics from my (currently very messy and unorganized) stash for the runner. I cut out the pieces and got ready to start. Then I had to set it aside because this happened!

Isn’t this an adorable picture??

Once the wedding was over, life returned to it’s regular routine and I was able to make the table runner.

When I did the appliqué, I used Steam a Seam for the first time.  I loved it!  Prior to this, I usually used any fusible product such as Wonder Under.  But Steam a Seam works so well and it can be repositioned if needed. Really good product ( no affiliate here – just a recommendation). I didn’t do any appliqué stitching until I put the front and back together. I chose not to use the usual batting and binding process that the pattern called for. Instead, after piecing the top, I sewed it right sides together, to the backing, leaving an opening to turn it right side out.  After trimming the four corners to get nice, crisp corners, I turned it right side out.

Once I had it pressed, I top stitched the outside perimeter at 1/8″ to close the opening and define the edge.  Then I top stitched the other edge of the border and also along the sashing between the leaves.  Finally I did a raw edge appliqué stitch around the edge of each leaf.

The backing is a fall leaf print I picked up at a thrift store a long while back.  I have used it in a number of projects as I really like the color (and I think the piece I bought was several yards in length.)

I am very pleased with the finished project.  It is fun to have a few seasonal decorations to put out each holiday and this works perfectly for this time of year. I highly recommend Vicki’s pattern, especially if you are in the mood for a pretty autumn addition to your table. I noticed she has several other holiday patterns in her Craftsy shop that are super cute too.

Have you seen the October Blogger Bundle?

Remember the October Blogger Bundle is on sale in the shop, 20% off through the end of today. Have you hopped over the Persimon Dreams to enter the giveaway for the October bundle?  If not, please do – it is such a pretty collection of fabric.  Giveaway is open until Monday, October 15th.  Good luck!!

Newsletter!

Have you signed up for my newsletter?  It is published every month or so and is full of information about my shop, new arrivals, sales, and events.  Click here to sign up!


Linking to all of my favorites – check out the list of linky parties at the top of the page, under Link Ups!


Collecting Florals

Have you seen the gorgeous floral collage quilts popping up lately?  I have seen a number of them at the last couple of quilt shows I have attended.  One was a dressmaker’s form made of flowers and at the last quilt show, there was a really pretty rooster wall hanging made of floral fabrics collaged together.

The patterns are the work of Laura Heine.  The more I see these, the more smitten I become.   She has designed all sorts of patterns that utilize this collage method.

Potpourri Collage Pattern; Giraffe on Newsprint Fabric Background

I love this one. The giraffe was created against a background of Carrie Bloomston’s Story Newsprint fabric.  This is one of my very favorite Bloomston fabrics. (If you want a better look at it, click here because I carry it in the shop.). It makes a fantastic background for this design.

Laura doesn’t just use animals (though she has many) but also cars, campers, birthday cakes, pin cushions and even Santa.

She uses the collage technique across all sorts of fun themes.

Last week, while I was shopping at Ben Franklin, I picked up three floral pieces, just 1/4 yard each. I’ve decided to start collecting florals and to attempt one of these patterns. I think smaller floral pieces are adequate and in fact, I could have even bought an 1/8 yard cut. These three are really pretty florals and the colors vary greatly.  I did that intentionally as I don’t have any plan yet so I am unsure if I will only use certain colors or the whole rainbow.

This particular Timeless Treasures fabric is so pretty. It looks like a water color to me.  Cutting it up for the floral bits will be perfect for this sort of project.

When I got home and went to put these away, I decided to do a quick scan and pull any florals I already had.  To no one’s surprise, I had plenty!  Isn’t it amazing what we have tucked away, here and there!

Florals, florals, and more florals.

Reds, purples, teals, blues, pinks and greens.  All kinds of flowers!

Before I go any further with this, I need to pick which pattern I want to attempt.  Then I need to do some research and see whether anyone has any tips on these patterns.  In fact, have any of you tried one of these?   If so, I would love to hear your thoughts on the pattern and the collage process.  I don’t think I should purchase anymore florals until I have a plan. Also, I have a few things in the works that I need to finish up before starting this.  It is fun to look forward though and add this project to the list (the long, never-ending list!)

Linking to Molly Sparkles Sunday Stash link up as well as Main Crush Monday!

Snowflake Finish

I surprised myself by finishing up the Snowflake piece that I started last weekend while at the Mountain Star Quilters retreat. I had really done the bulk of the work over the weekend. All that remained was to square up the blocks and add borders. Then it was ready to sandwich, quilt and bind.

I am pleased with the project – the fabric choices worked well.  I had help selecting the fabrics for this one. I was at my LQS and it was a Thursday which meant that Sandra was working. Sandra Bruce is a gifted quilter/artist/long-armer in Grass Valley. I have mentioned her before – here and here.  She does amazing quilts from photographs that she then pixelates by placing a grid over to piece the photo together. If you have a minute, pop over here to see some of her work – it is well worth your time.

img_7833

Back to my Snowflake project. Sandra was working and I asked for her help gathering fabrics.  I knew I wanted and icy blue and a deep burgundy to play off of each other. The suggestions that I appreciated most from Sandra was to use a Grunge fabric (first time I have done that) and a solid, bright yellow for the outer flange. I wasn’t sure about the yellow but I like it – it picks up the yellow in the Grunge fabric nicely.

img_7835

I mentioned that the applique process was tedious, moving along each curve of the snowflakes. However the clear thread was forgiving and the little misses that happened along the way don’t really show up.

Quilting this one was very simple. I stitched straight lines through the star of the snowflake and then echoed around each one.

img_7834

For the borders I stitched slightly wavy lines with little star/snowflake shapes along the way. Also, I did a snowflake on each corner. (I am not thrilled with how they turned out but that’s the way it goes sometimes.)

img_7837

The backing is a piece of white with tiny silver polka dots that I found at a thrift store over the summer. I like the snowflake motif on this white shimmery backing. I even have a sleeve made for this but it still needs to be sewn to the back. Talk about a complete finish. 🙂

img_7839

I don’t want to use this as a table runner because I don’t want to wash it. I feel uncertain about the strength of my applique. Instead, this quilt will hang in the living room up in Downieville – at least during winter. I should make another long piece to switch out during the other seasons.

Linking to my favorites – find them at the top of the page, under Link Ups.

A Beginner’s Wool Applique Project

Remember my trip to Maine? The one where I found all sorts of awesome quilt shops? When I was at Attic Heirlooms in Damariscotta I took a long look at some traditional wool applique projects. Having never made anything like this, I decided to give it a try. When I saw the Row by Row project for Attic Heirlooms it looked like a row that could stand alone and be used as a wall hanging or table runner. (I wrote more about that shop here.)

Making this project was fun in that it was slightly unfamiliar to me. I have only done a bit of applique and haven’t hand stitched applique at all. I dug into the kit enthusiastically. Cutting the little pieces didn’t take long at all. I fused the pieces as far as I could go (without stacking pieces in areas that needed to be stitched first.) Then I took the kit and my assorted Perle cotton skeins over to the coast last week. We spent a long weekend over at Bodega Bay (about three hours drive from home) with lots of family to celebrate my husband’s birthday. What a perfect weekend for hand stitching.


While I was working on it there were a couple of mishaps. At one point I was stitching and not really paying attention and somehow I sewed the project to my pants. Ha. I felt so silly. Ian and Julia found it most amusing.  Fortunately it didn’t take too long to pull the stitches out and free myself from the project. 😉

After that, the little windows started popping off of the house. I am not sure what I did but the fusing clearly wasn’t working! The more I handled the piece, the more bits fell off. I didn’t have an iron and of course, wasn’t patient enough to wait and fix it when I got home. Instead I just held the windows in place and stitched. It worked out and I was able to continue stitching. The windows aren’t as precise as they might have been but that’s ok.

IMG_6996

The center block is surrounded by a log cabin block on each side. Once I got the three blocks assembled, I wasn’t sure how to quilt it. Wanting to stick with tradition, I really didn’t know how to treat the area around the wool house and trees. It seemed like it should be quilted. I wanted to leave the wool pieces alone because I think the fabric is just gorgeous and I like the blanket stitch that I used to attach the pieces. (Except the tiny star and the tree trunks; I wasn’t sure what to do with those so I just stitched around the edges.) After consulting with one of my trusted quilting advisers, Janine, I decided on some wavy lines on the background. The color of the sky (background) fabric looks like a heavy sky to me. The wavy lines make it look just a bit stormy.


IMG_6998

I used an older calico fabric that I had for the backing and binding. I haven’t put a sleeve on it yet but I think I will. It would be fun to pull this out in the fall and hang it somewhere. I don’t really want to put it on the table because of spills. The wool isn’t really washable.

IMG_6999

This is my first try at wool applique and I absolutely enjoyed it. It is a sweet reminder of our vacation. I think I will give it another try. First I want to look at the process and learn more about it. Anyone have any recommendations for a book or a quilter who is into this sort of work? Please let me know. 🙂

As always, I am linking this sweet finish with my favorite linky parties. Find the links at the top of the page, under Link Ups.

craftsy august sale

Want to know what is happening at Craftsy this weekend? A sale, that’s what! Craftsy has marked down their newest classes for the weekend. If you have had your eye on a class, now is the time! You can escape the brutal heat that August can bring and learn something new in the cool of your house.

As an affiliate, I will earn a bit of a commission for any sales made by clicking through links on my blog.