Tag Archives: sandra bruce

Designs by Heidi – Guest Post

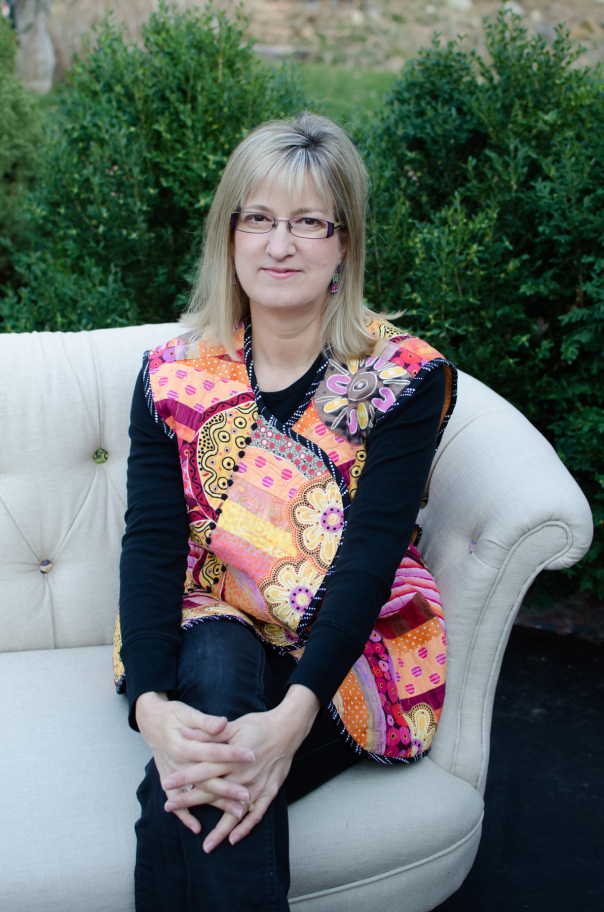
Hi Everyone – I am back from our back-to-back vacations! Both trips were awesome but as always, home sweet home!  After a relaxing time away, I am ready to jump back into my blogging/sewing/shop routine.  Today I have a really special post to share with you.  I would like to introduce you to Heidi Emmett.  Heidi is a really talented pattern designer and I am proud to carry a number of her patterns in my pattern shop. To do justice to this introduction, I need to tell you a bit more!  Heidi lives in Grass Valley and we are both in the same quilt guild.  Heidi makes both quilts and garments, designs clothing patterns, teaches sewing classes at an annual retreat up at Lake Tahoe and is generally a creative maker at heart.  She also owned a brick and mortar fabric shop in Grass Valley for quite a few years.  She is a person with what seems like unlimited energy and is constantly making or designing something.  About a month ago, she and I chatted at a guild meeting and we were brainstorming ways we could work together since we both have so many common interests.  As a result, I have begun to carry her patterns in my pattern shop.  She had purchased some of the Sarah Golden linen blends from me at the quilt show last May with the intent to make one of her Terrific Tabard vests. Today she will share the vest she made and explain the process she used to make it. I hope you enjoy the post.   If you have any questions for Heidi, be sure to leave them in the comments and she will post a reply to you there. I hope you all will enjoy getting to know Heidi as she is a creative force to be reckoned with!

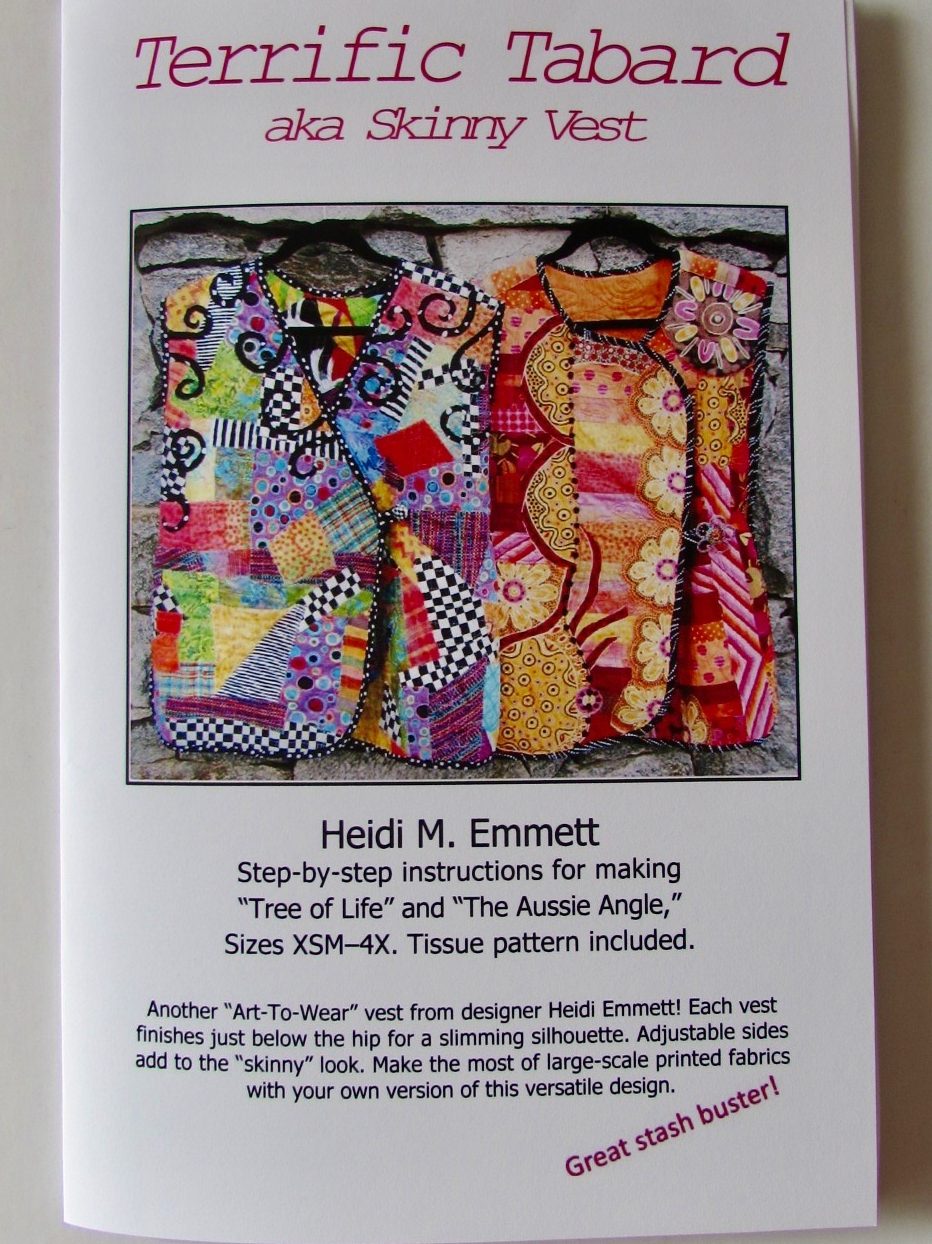
Hello! Designs by Heidi is who and what I am. I have a line of “Art to Wear” patterns. You can find some of my patterns for sale at Needle and Foot. A BIG thank you to Bernie, for inviting me show off some of the fabric she sells using one of my patterns, Terrific Tabard.

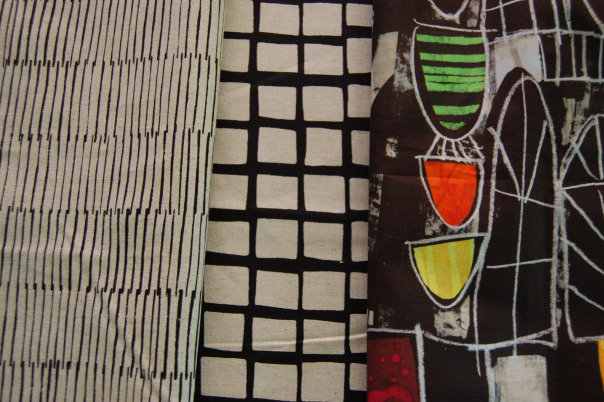
I’m going for a whole new look (than the cover shot above) with the linen blends I got from Bernie’s Etsy shop. Let me show you what I did to create a sophisticated and smooth Terrific Tabard. I started with two linen blends from Bernie. I absolutely LOVE linen! And these two linens by Andover Fabric are neutrals that will work with ANY  other palette of colors. The piece with the columns of lines is called Lines (appropriate enough!) and the piece with the checked pattern is called Squares on Tailored Cloth.  Both were designed by Sarah Golden and are available in Bernie’s shop.

tabard

I went to Quilt Market in Portland, OR this past May and was able to buy a modern black and brightly colored panel by Marcia Derse. This panel won’t be available in stores until October. I immediately thought to use it as a part of my Tabard vest!

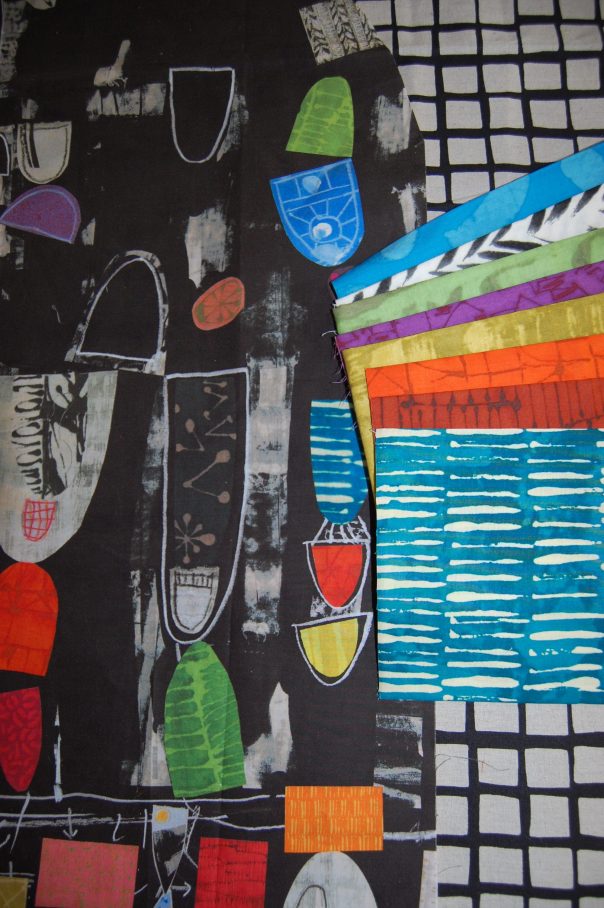
Fortunately, I also snagged some very small pieces from Marcia’s newest collection, again available in October.  The linen fabric is just perfect with these prints.

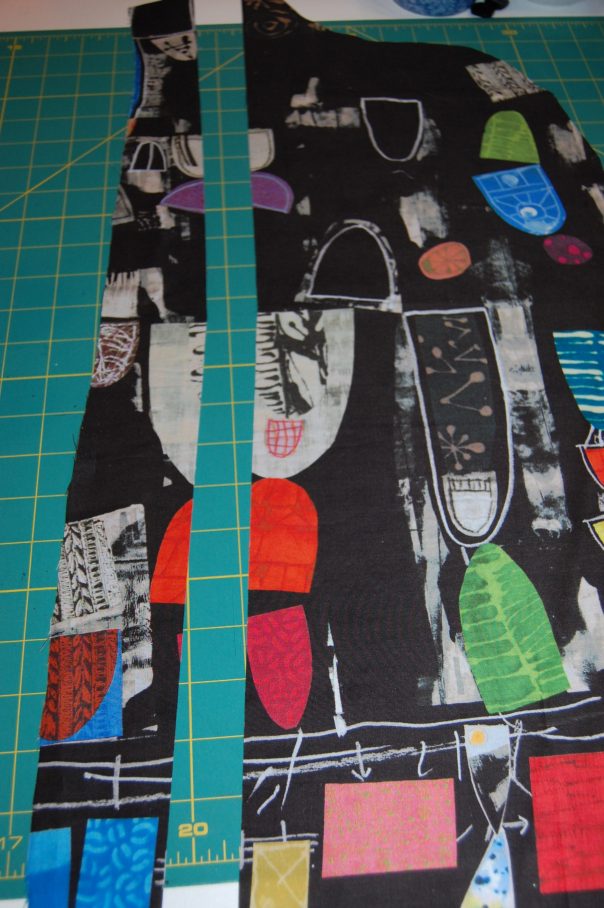
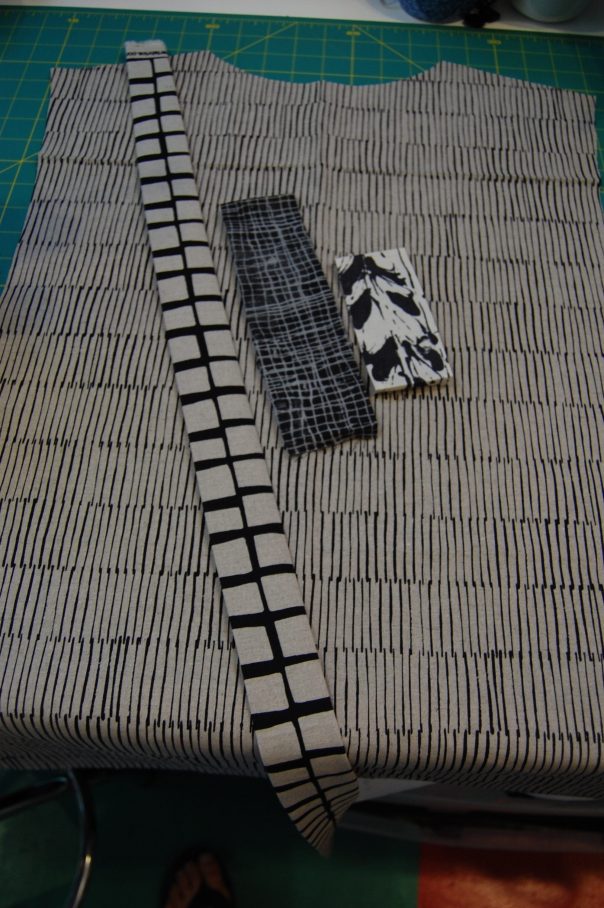
Most of my patterns have tissue pattern pieces included (I always include a range of sizes in one pattern). Notice I have taken a lengthwise fold in some of the tissue (closest to the side, not the center). I did this because I want to insert some improv strips to add color and visual interest to the vest.

I love lots of bold color and plan to use bits of the smaller Marcia Derse pieces to create a long strip of fabric.  Remember when I cut out this piece I pinched out some, so now I have to fill it back in with something.

I first cut the panel apart near the pinched out area all the way up through the shoulder area. Tip: Always cut wherever you pinch it out, then you can replace that space with your accent fabric and bring it back to size again. It is a fun and creative trick.

I cut up a few of those colorful pieces and sewed them together and then stitched them to either side of what I cut apart.

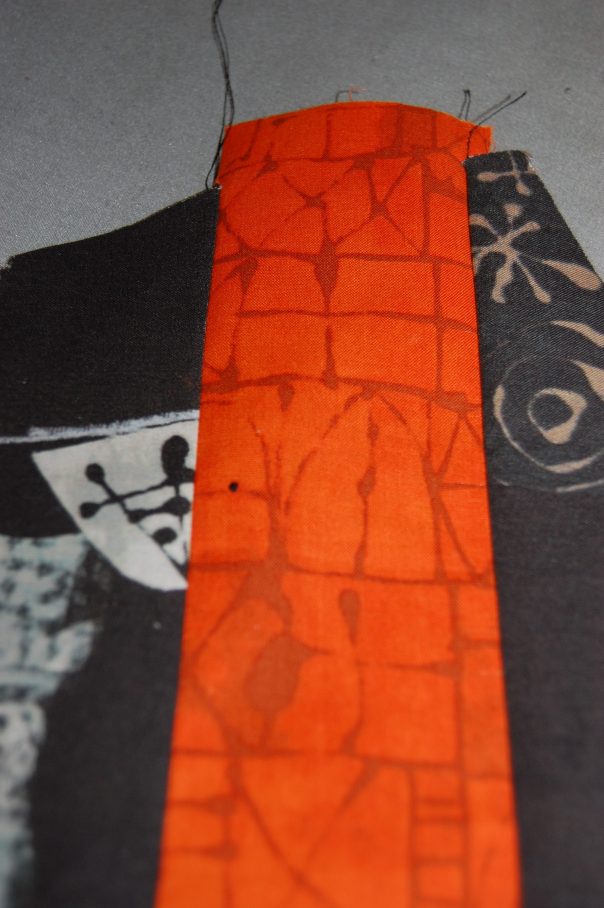
Always line up other seams and plan to have extra on either end to trim off. I do not like to run short. I will just snip, snip, the orange fabric in line with the shoulder seam.

While I let the fashion layer dictate what each section will look like, I always, ALWAYS, strive for a long and lean look. I want your eyes to see the whole design in an up and down fashion as this tends to be much more flattering than looking side to side.

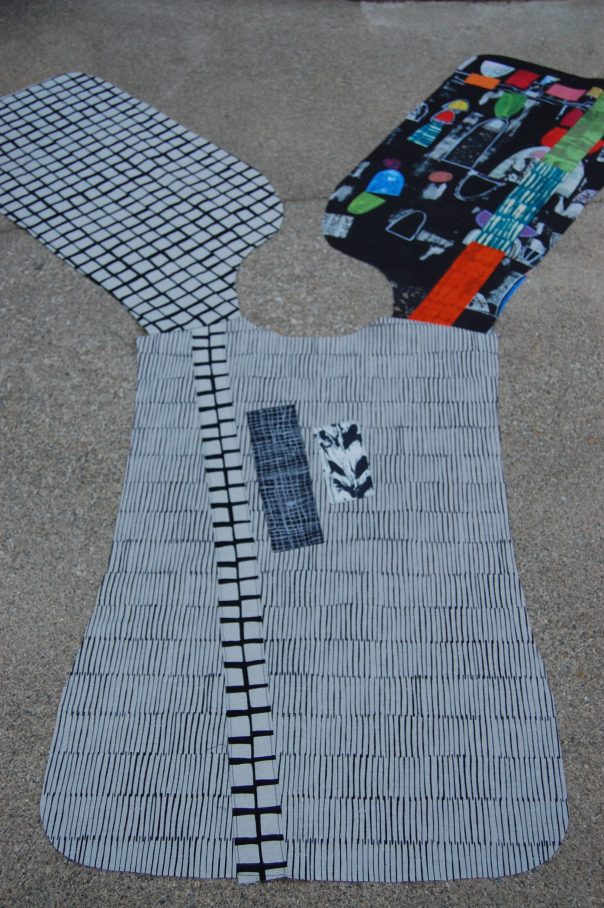
Preparing the embellishments for the back of the vest

When I created the back piece, I wanted to add some embellishment to it as well.  For this, I used an applique process rather than slicing and inserting a strip.  I cut the pieces I wanted and folded the raw edges under and pressed them. Next I pinned them in place and top-stitched around the edges to attach them to the back as well as finish those raw edges.  I didn’t fuse them first though you certainly could if you preferred that method.

After stitching the front pieces to the back, in most other “quilted” version of Terrific Tabard, I would be layering the vest with batting right now (sometimes even before the shoulder seams are stitched together) and quilting all three pieces. Then the vest would be finished off with quilt style binding (albeit much narrower than a quilt binding). These instructions are included in the pattern. But THIS vest will have no batting. I chose to line it traditionally which means no binding necessary! This version really goes together quickly.

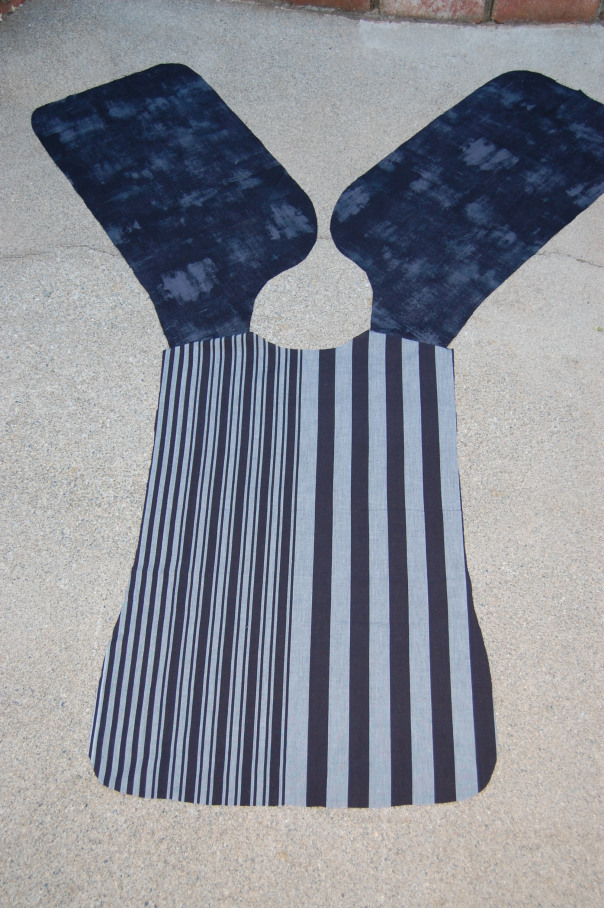
Front and back lining pieces stitched at the shoulders

The two front lining pieces are “Grunge” in black. The back piece lining is a very old (no longer being made) Kaffe Fassett stripe. To line this I pinned it, right sides together, and stitched all the way around using a 1/4″ seam allowance. I made sure to leave about a 6-8″ opening on one side so I could turn it right side out.

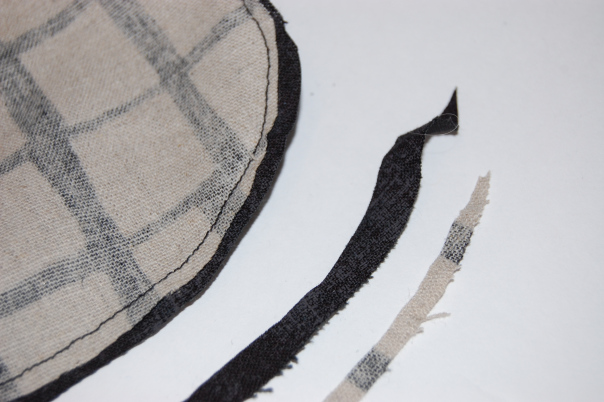
Grading a curved seam.

Very carefully grade the seams on the curved portions. Grading just means trimming one piece smaller than the other. When you turn the whole piece inside out and begin to press, press, press (that’s the secret to a beautifully lined piece), all the rounded edges will fall into place as you press. Tip: On dark fabrics use a press cloth (a piece of muslin works) on top of the fabric before you press. Sometimes you get a shine, even on linen.

Handmade buttons by Sandra Bruce

I have a rather large collection of buttons. Here is a group of handmade polymer buttons by the talented Sandra Bruce. I love to buy the buttons I like, knowing that someday, I’ll have the perfect button for a project. Forget buttonholes. I use strips of fabric that have been folded and pressed and stitched into place.


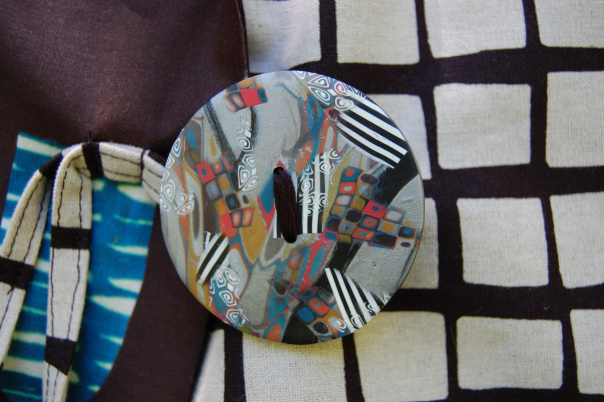
The polymer button I chose for the front is very intricate and it’s really BIG, but I think it blends in nicely.

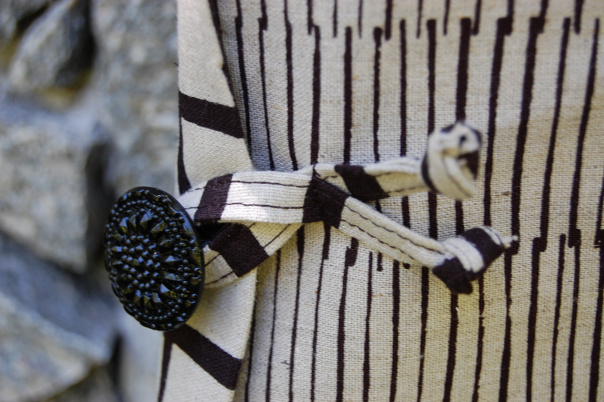
The two side buttons are from my glass button stash. I know, I know, it’s a sickness, but one I don’t want to get over. Ha, ha.

It’s finished!!

I love my new vest. I can’t wait to wear it (not sure when since it is still summer!), but I’ll be ready when cooler weather comes.

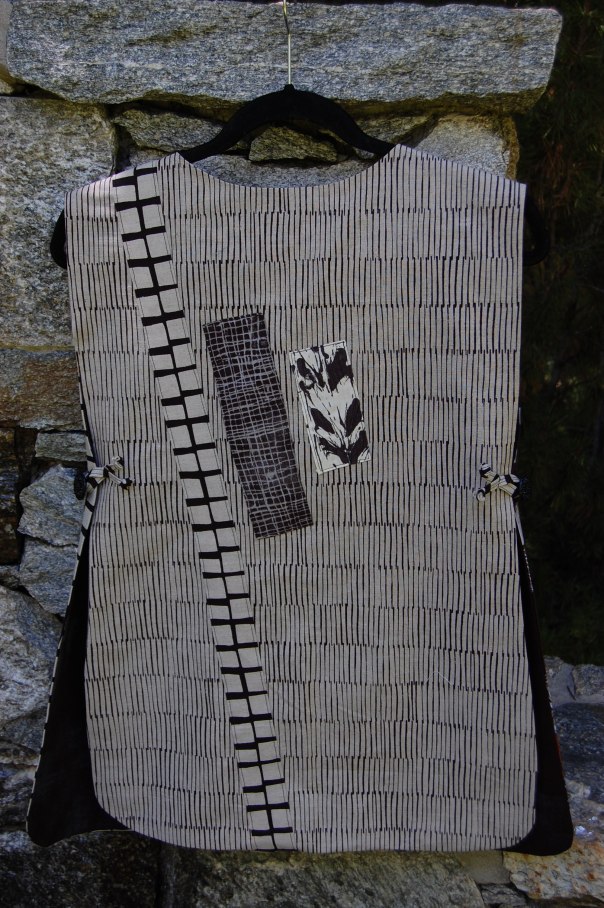
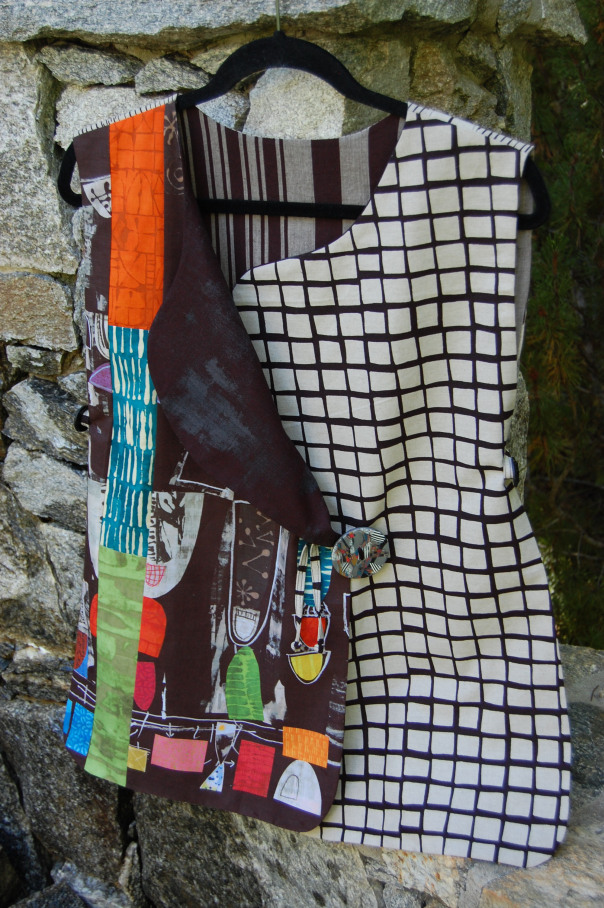
Here is the finished back side of the vest.  I love the look of the larger scale linen print slicing through the narrower lines.

Worn with just one lapel folded out.

One last way to style this Terrific Tabard, fold back the lapel on just one side.

If you like what you have seen, please join me at Designs by Heidi for more fun and creative happenings. I love sewing “Art to Wear.”  You can also follow me on Instagram to see the latest patterns and classes I offer. Thank you again Bernie for letting me join in with you all at Needle & Foot.

Hugs, Heidi Emmett

Snowflake Finish

I surprised myself by finishing up the Snowflake piece that I started last weekend while at the Mountain Star Quilters retreat. I had really done the bulk of the work over the weekend. All that remained was to square up the blocks and add borders. Then it was ready to sandwich, quilt and bind.

I am pleased with the project – the fabric choices worked well.  I had help selecting the fabrics for this one. I was at my LQS and it was a Thursday which meant that Sandra was working. Sandra Bruce is a gifted quilter/artist/long-armer in Grass Valley. I have mentioned her before – here and here.  She does amazing quilts from photographs that she then pixelates by placing a grid over to piece the photo together. If you have a minute, pop over here to see some of her work – it is well worth your time.

img_7833

Back to my Snowflake project. Sandra was working and I asked for her help gathering fabrics.  I knew I wanted and icy blue and a deep burgundy to play off of each other. The suggestions that I appreciated most from Sandra was to use a Grunge fabric (first time I have done that) and a solid, bright yellow for the outer flange. I wasn’t sure about the yellow but I like it – it picks up the yellow in the Grunge fabric nicely.

img_7835

I mentioned that the applique process was tedious, moving along each curve of the snowflakes. However the clear thread was forgiving and the little misses that happened along the way don’t really show up.

Quilting this one was very simple. I stitched straight lines through the star of the snowflake and then echoed around each one.

img_7834

For the borders I stitched slightly wavy lines with little star/snowflake shapes along the way. Also, I did a snowflake on each corner. (I am not thrilled with how they turned out but that’s the way it goes sometimes.)

img_7837

The backing is a piece of white with tiny silver polka dots that I found at a thrift store over the summer. I like the snowflake motif on this white shimmery backing. I even have a sleeve made for this but it still needs to be sewn to the back. Talk about a complete finish. 🙂

img_7839

I don’t want to use this as a table runner because I don’t want to wash it. I feel uncertain about the strength of my applique. Instead, this quilt will hang in the living room up in Downieville – at least during winter. I should make another long piece to switch out during the other seasons.

Linking to my favorites – find them at the top of the page, under Link Ups.

The Plan for May

OK, May is going to be busy. We have my daughter’s 14th birthday (yikes!). I have a family trip planned that lasts nearly one week and we have my daughter-in-law’s graduation from medical school (double yikes!!)  Lots of activity going on so I am trying to be reasonable.

My main goal for the month  (which will by my ALYOF goal for May) has to be the completion of my Allison Glass Mini Quilt. The swap has to be mailed out in the first part of June so this needs to be at the top of the list. It shouldn’t be a problem as the top of the mini is done. I need to make the back and quilt it up. I want to make the quilting shine and as I still consider myself a newbie, I need to spend some time with this. I also want to make an “extra” giftie to include with the mini using some of the Allison Glass scrap.  Here is what I have left to make the backing with as well as an extra. I should have plenty of fabric.

IMG_20150504_3260 Second to the Allison Glass Mini is a custom order I am doing for a friend. She frequently has her granddaughters for the night and they sleep in bunkbeds. She asked me to make two hanging bags so they can have books and stuffies up on the bunk with them. The bags will hang from the rails of the beds. These are already cut and 1/2 way done so I shouldn’t have any trouble finishing them up. Hoping to do that this week. I am using a polka dot twill by Riley Blake and lining the bags with the lovely “Wander Woods” print from Wee Wander.

Third on the list is to make this month’s row for my Classic Stitches Row Quilt that I am doing with Mari over at Academic Quilter as my RSC15 project.  Tomorrow she will post the block that is to be made for this month. Luckily May’s color is green – I love green and have a bundle of scraps for it.

That is it for goals. Anything that is accomplished beyond that is a bonus.

This weekend was our local quilt show. It was great fun and so inspiring. I want to share the quilt that won Best of Show. This local artist, Sandra Bruce, is amazing. I posted about a class that I took with her last spring to learn her process called “Material Matrix”. It is a great process that takes a photo and divides it into patchwork squares by overlaying a grid on it. Sandra is an excellent teacher and a brilliant artist. Her portrait of Clair is approximately 4′ x 5′. Really striking, it is a perfect portrait of this sweet girl. When I was oohing and ahhing over the portrait, Sandra pointed out Clair to me. I asked her to pose for a picture and, while she probably thinks I am some sort of stalker, she did it for me.

IMG_20150503_3257Below is a closer look at the quilt. Sandra’s ability to create the human expression with bits of fabric never ceases to amaze me. If I remember correctly, she used 2 1/2″ squares to create this. Click on the link above if you want to check out her gallery. She does travel and teach so you never know, maybe she’ll be in your area some time. If she is, it’s totally worth your time to work with her for a day or two!

IMG_20150503_3258Finally, have you seen the list for some of the instructors at 2016 Quilt Con??? This was in today’s issue of the Modern Quilt Guild  Newsletter. Absolutely. Amazing. I am so excited and am considering whether this might be my first time attending. It is in Southern CA in February of 2016 so it would be fairly easy for me to attend.

quilt con teachers

Big question is, how would a person even choose which one(s) to take a class with??? Most of my quilty heros are in this line up. It’s too good to be true!!  Are you going?  C’mon, you have a nearly a year to figure it out!

Linking to Sew Cute Tuesday, FreeMotion by the River and ALYOF at Sew Bittersweet Designs.


Material Matrix Project

Over the past two days I have been working to complete a project that I started a few months back. I was fortunate enough to take a class from the talented Sandra Bruce. She teaches a method that she calls “Material Matrix”. She takes a photograph, enlarges it and overlays a grid on it. When you have the grid, it breaks down the photo into squares which you then replicate with fabric. She is an amazing artist and you can see her work here. This project was really difficult for me. In some ways I am proud of it – mainly that I finished it!  It was so frustrating. I have difficulty with spatial relationships/spatial perception. So when I was trying to make a square, it often came out as the mirror image of what I needed.  The curves made me crazy and you can see from the picture, I was not hugely successful. It is a bit uncomfortable to post work that you feel is less than awesome but this is a part of the progress. I am working on quilting it which defines the shapes a bit. Here is the work, created by Sandra, that we were striving to replicate in class. sew readyfinished copy-filtered .After lots of work, here is what I have completed thus far. pincushion 1   Thinking about what a process this has been I realize it was a great learning experience. Some of the 2.5″ squares are made up of four or five smaller pieces. I have never worked with such tiny piecing and it was clumsy for me.  I think it (like everything) is just something that requires practice. I look forward to finishing the quilting. I will use a facing to bind it and will hang it proudly (and with more than a little relief!) in my sewing room. If you want to see something amazing, check out the self-portrait that Sandra did.  It is huge (80×80″) and very detailed. It required 1600 pieced squares. Best yet, it looks just like her!!

Post Update: I wanted to show the piece now that it is quilted, bound and hanging in my sewing room. I was supposed to embroider the pins but never got around to it so I stuck real ones into the piece!  🙂     Such a learning experience!!

my finished matrix

Linking up with ihavetosay.com for Show and Tell Tuesday; Sew Cute Tuesday at BlossomHeartQuilts; Fabric Tuesday at QuiltStory, and at Linky Tuesday FreeMotionByTheRIver.