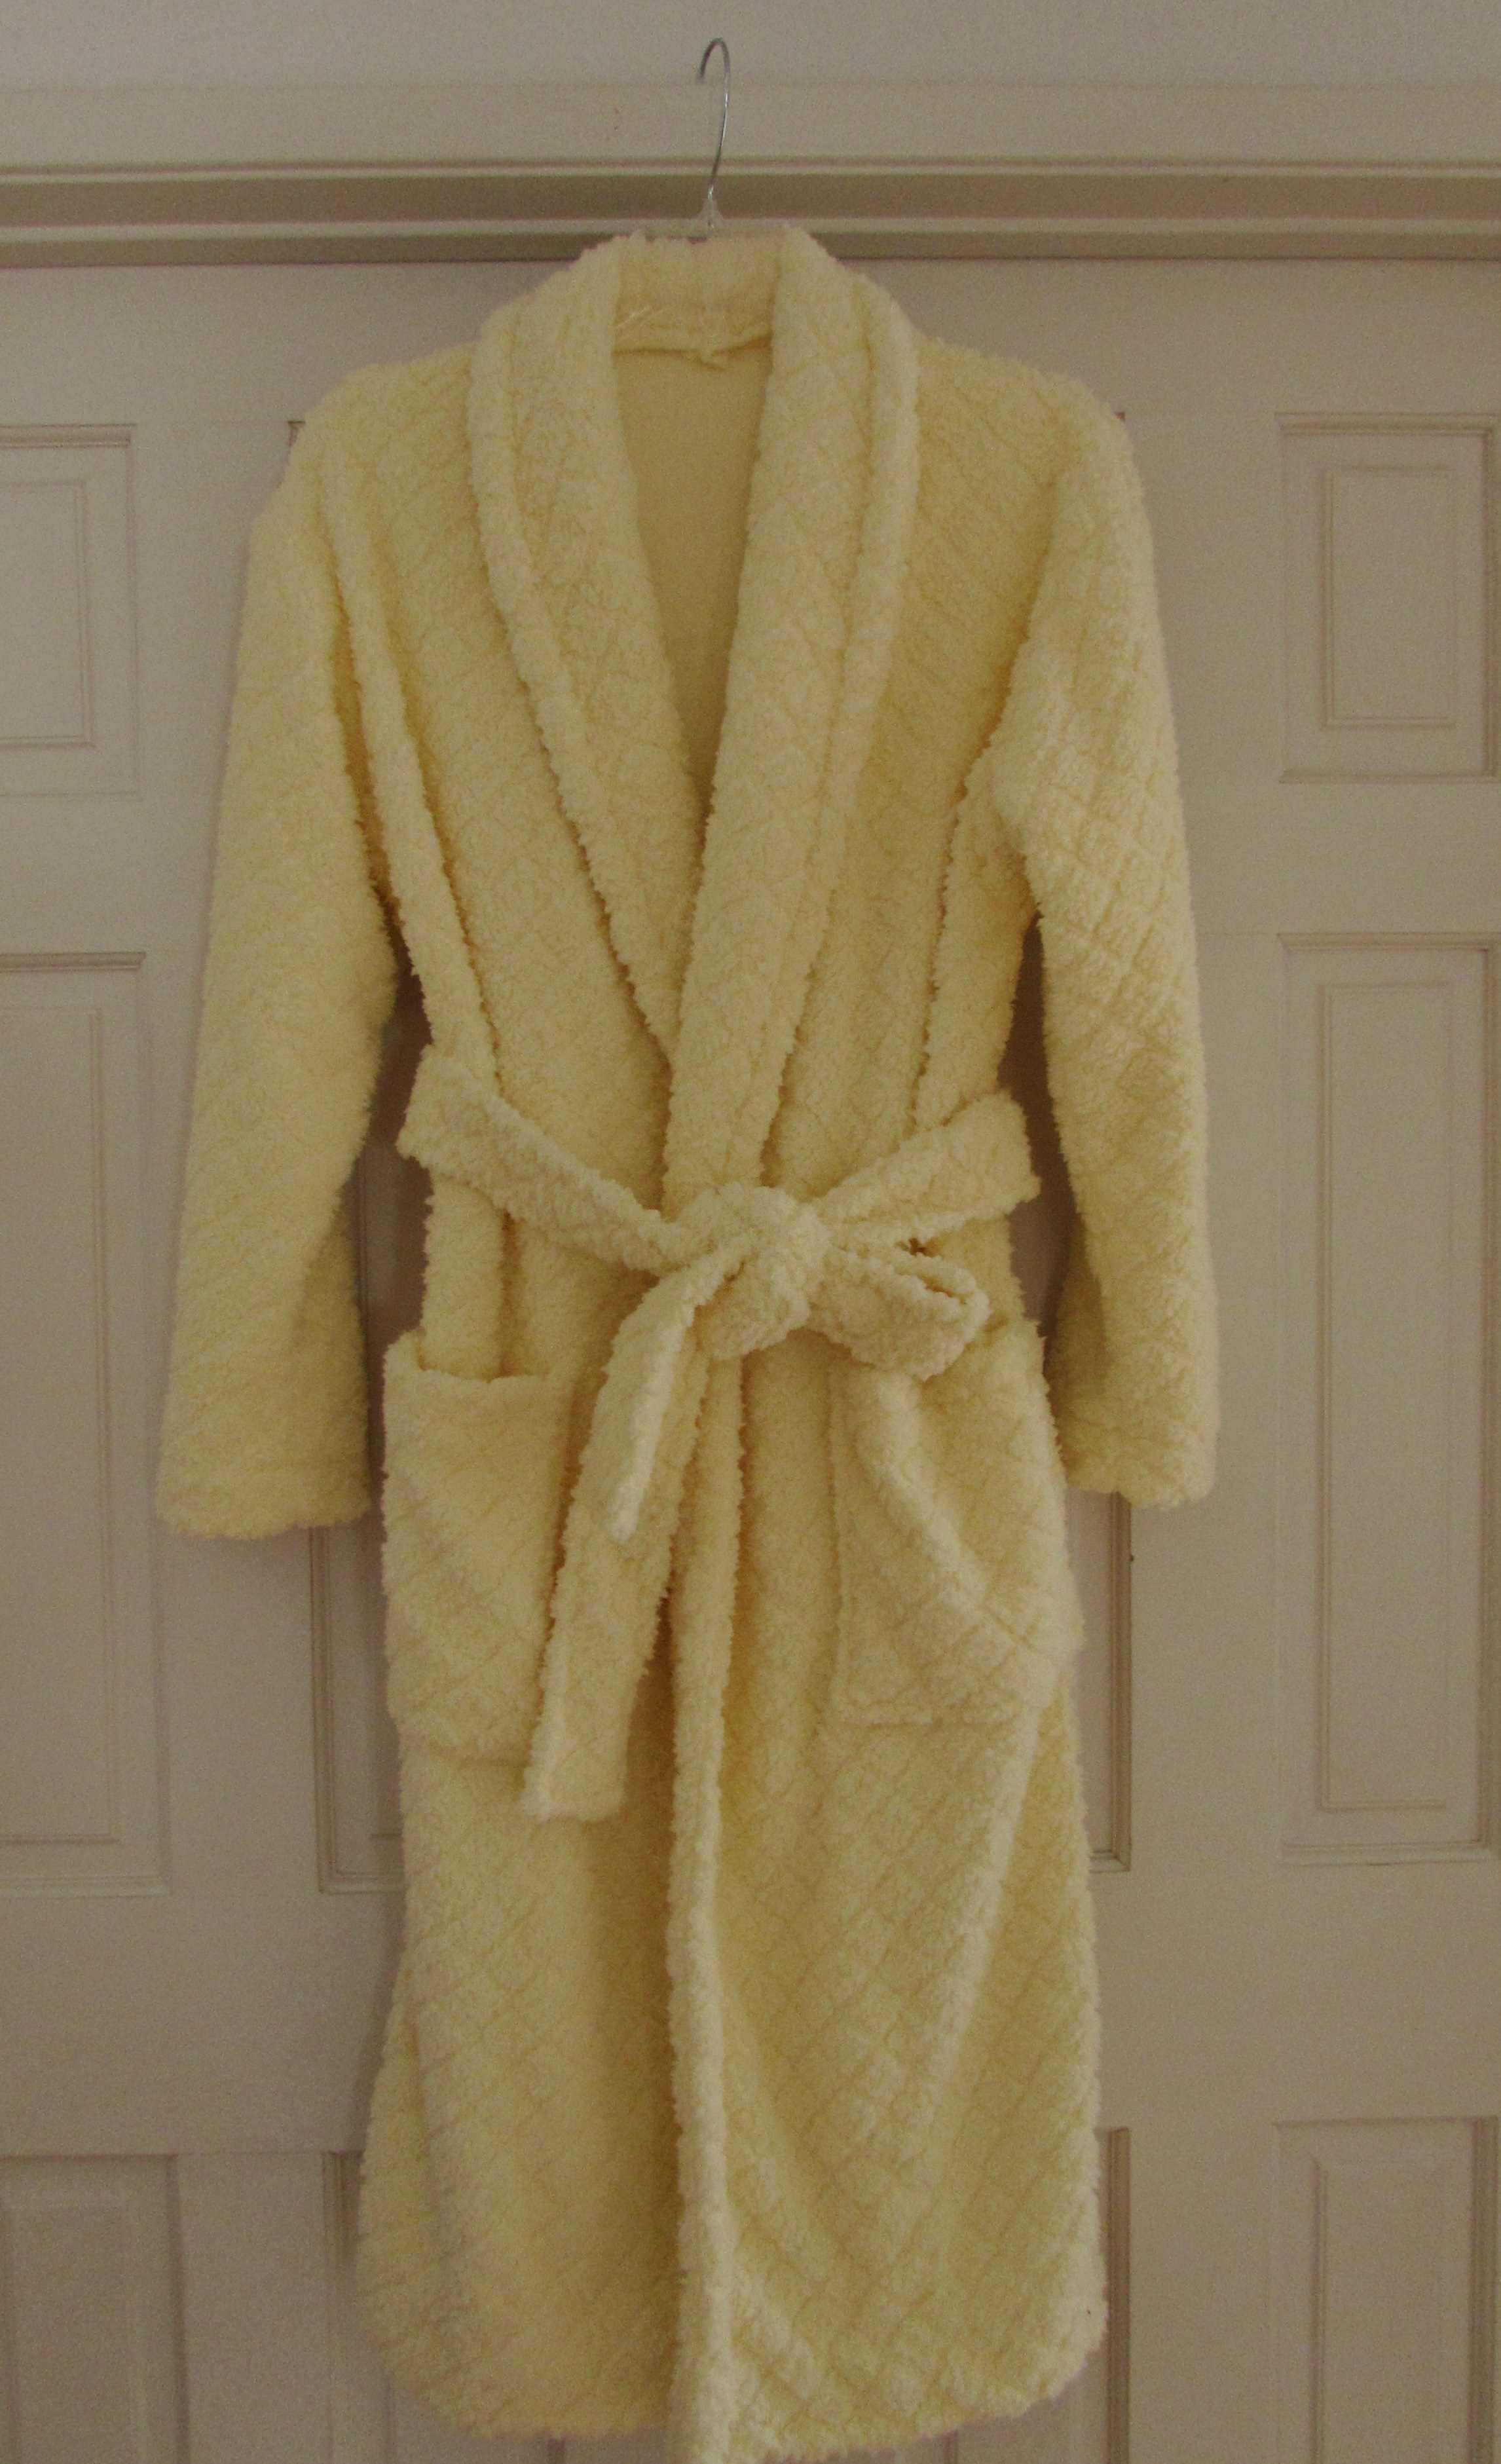
The beast has been tamed. The pile of oversized yellow fluff has been transformed into a cozy bathrobe at last. I received so much encouragement after that last post that I decided to dive back in and take control of that yellow monster.
It was easy!
First I took a bit of time with the seam ripper and picked out the hem on both sleeves. Turning it inside out, I laid it on the floor and carefully smoothed it out. I pinned two inches or so along the inside of the length of the side seams and the seam of the sleeve. Then I just cut – cut off the two inches along each side.
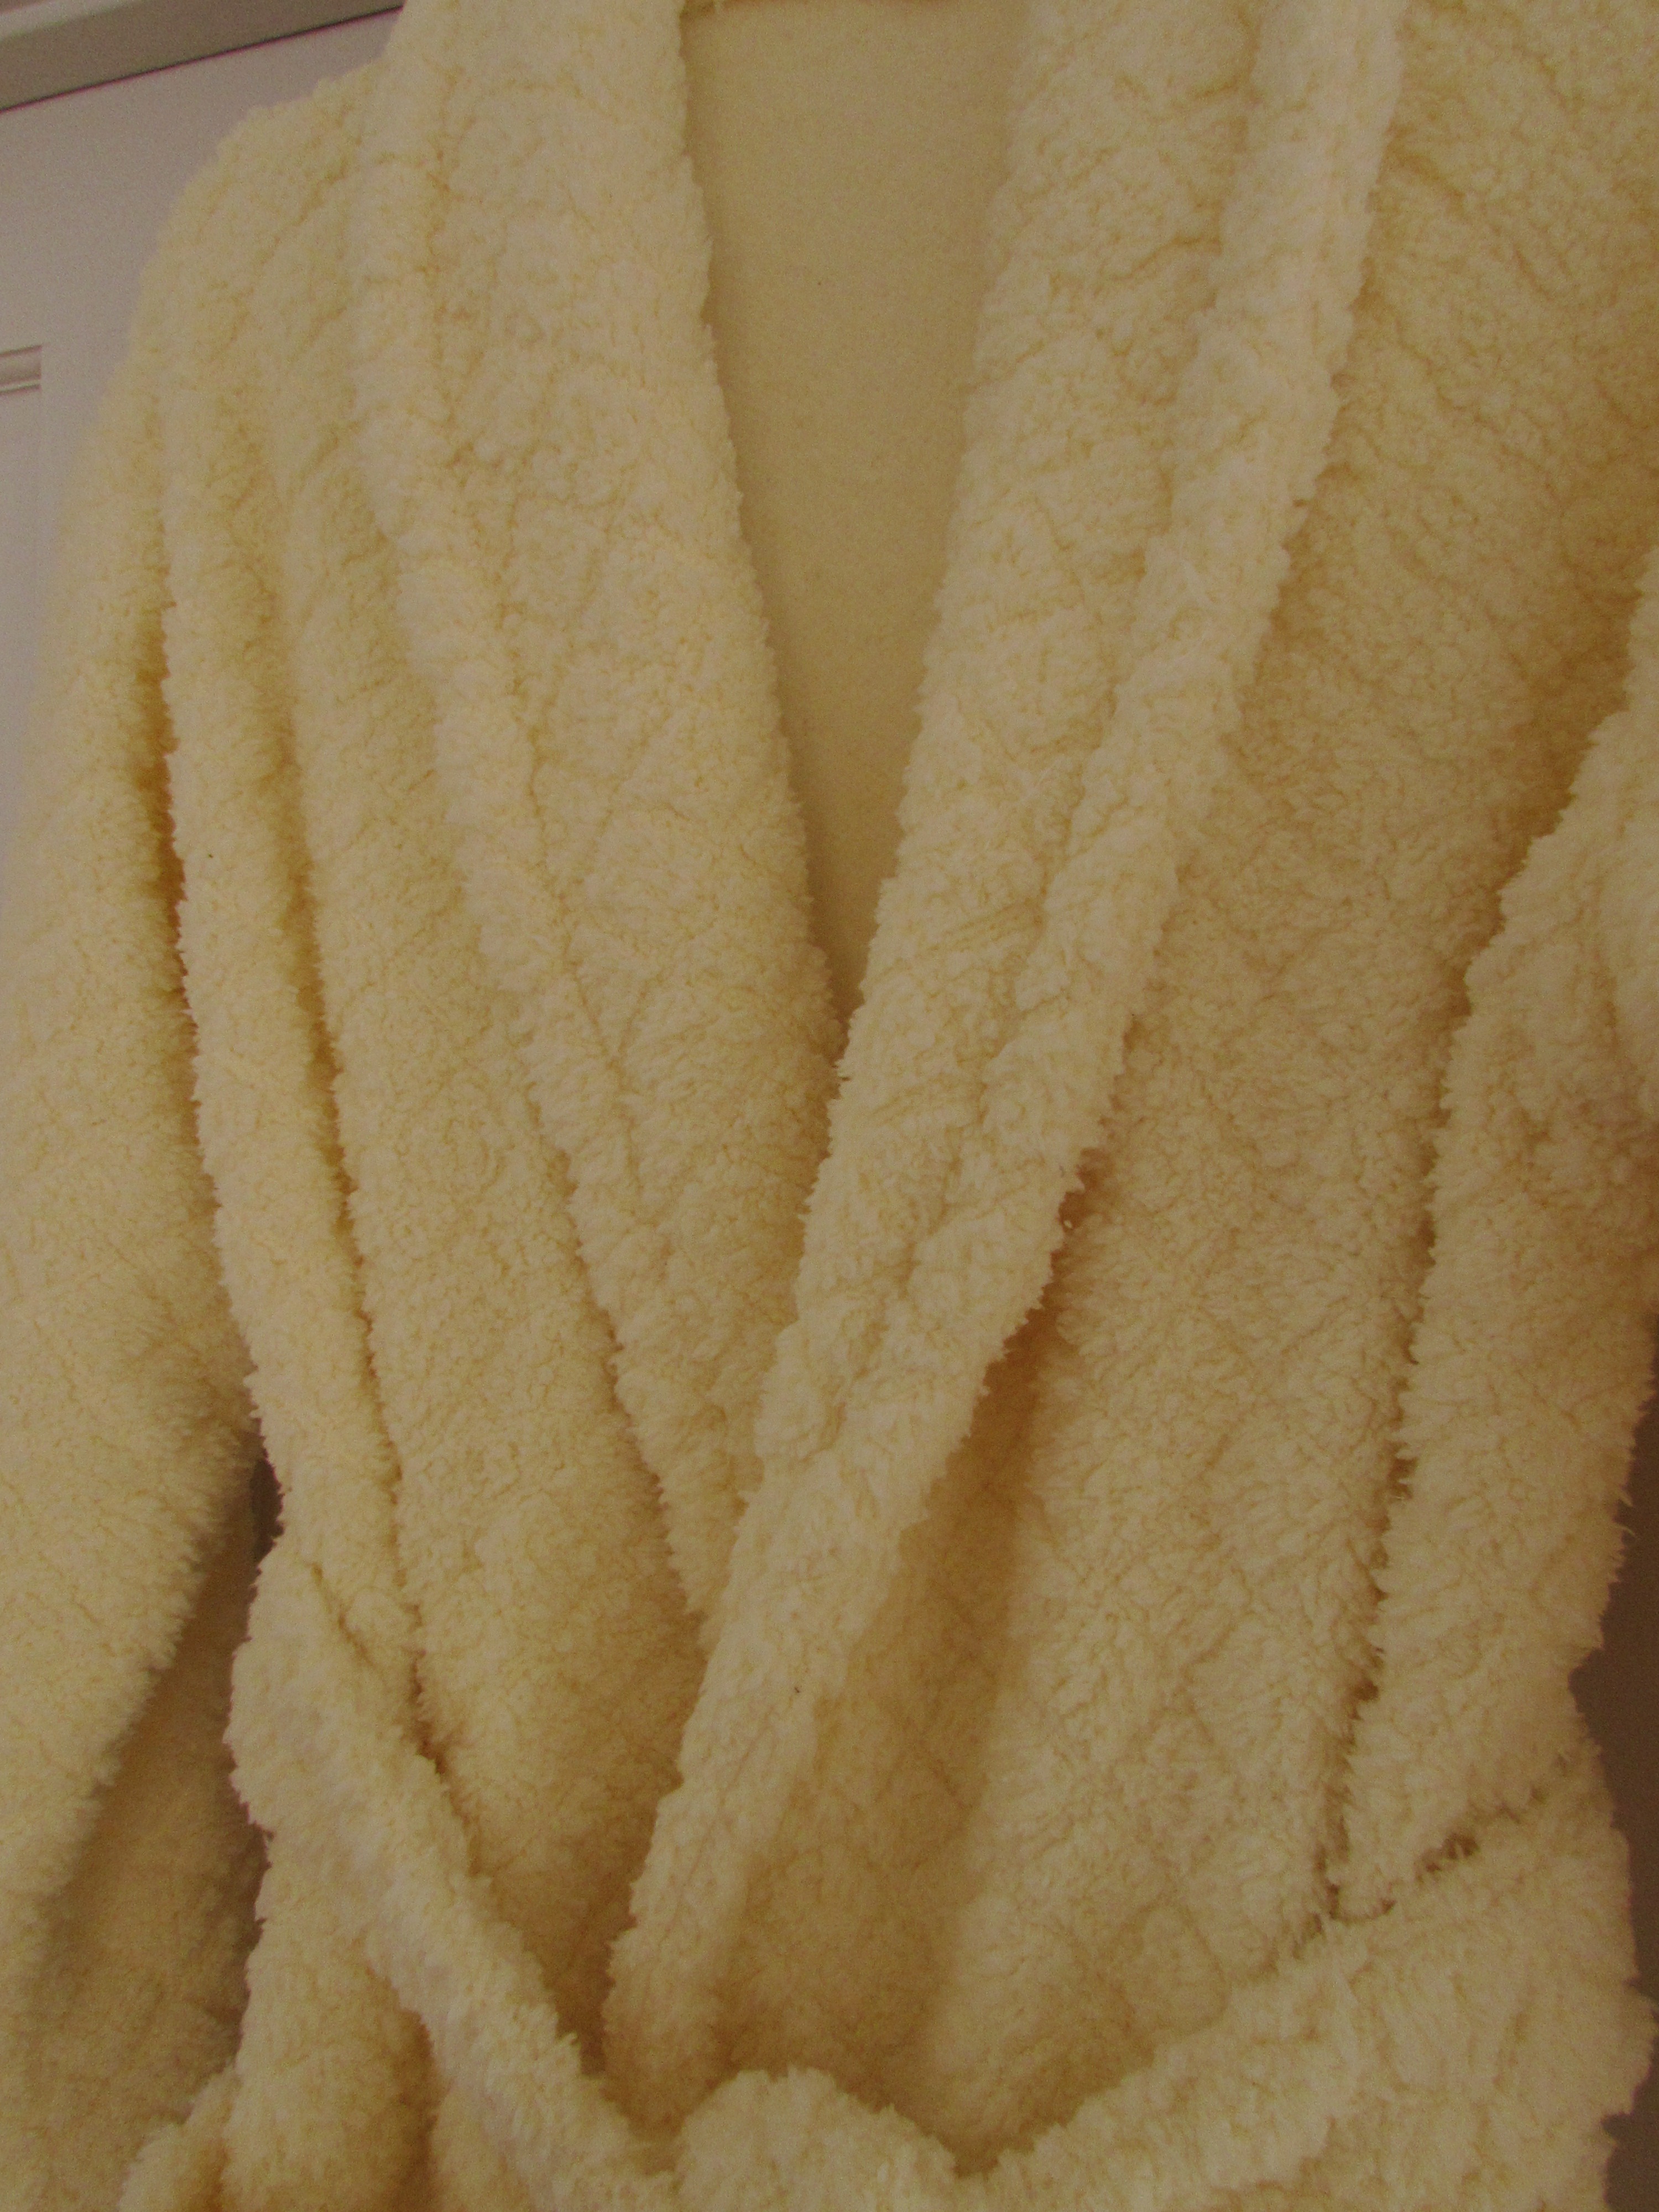
The nice thing about this robe is the fluff. Conversely, the worst thing about this robe is the fluff! Once everything was stitched back together I tried it on. Amazing how this helped! ( If only I would have thought to do this the first time around!) It fit much better but was still too puffy. Topstitching around the entire collar and all the way down the front of the robe, on both sides, really helped to tame it. Because of the fluff, it was hard to sew accurate straight seams. When I was sewing on the “wrong” side of the fabric, there was no issue. However sewing on top of the fabric was really tough. My presser foot would get lost in all that fluff! There was a lot of drag on the fabric and my top thread shredded over and over. (I tried my walking foot but that seemed to make it even worse.)
Like I was saying before, the fluff was also a positive attribute in that it didn’t truly matter how straight my seams were. The depth of the fabric made it difficult to see the actual seam, you only see the impression the seam leaves.
Here is my first attempt at modeling the robe (in my sweats and socks!)
Photo credits to my kind husband for these modeling shots. I may send them into a bathrobe modeling agency. I feel a new career beginning.
Looking at these amazing photos, I noticed that the pattern on the fabric almost matches where I put the patch pockets on. I cannot take credit for this – it certainly was not planned! I found that hand stitching was much faster than top stitching so I sewed the hem by hand while watching some TV last night.
At this point my only remaining concern is that this is one very warm robe. Maybe too much so for this post menopausal model.
Linking to Crazy Mom Quilts and Confessions of a Fabric Addict. Also with Sew Bittersweet Designs, once the December ALYOF link up is posted. Because, with 13 days to spare, I just completed my December goal! Woot woot!
Both links are found at the top of the page under Link Ups.
I hope all of you that celebrated Thanksgiving had a wonderful holiday. We had a small group for dinner and it was a very nice day. The Wednesday prior was a snow day for the local schools so Julia’s weekend was even longer than expected. We didn’t get as much snow as was forecast but what a treat it was.
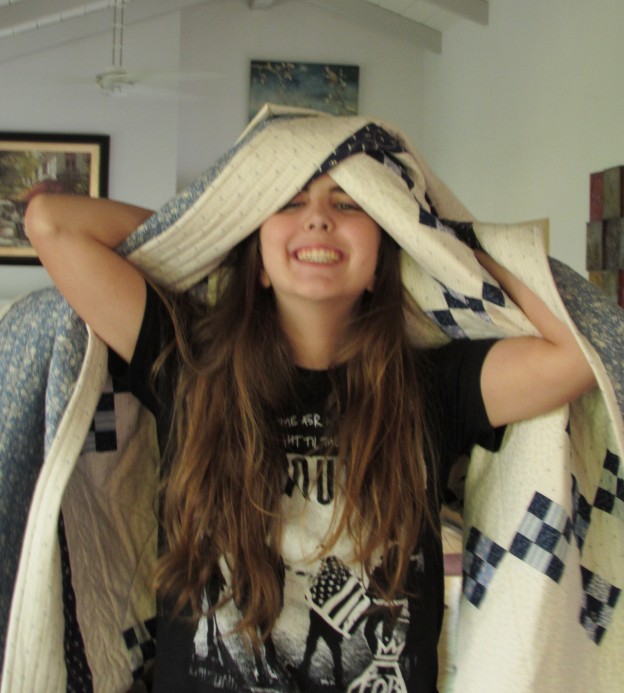
Ray, Julia, and I went up to Downieville for the rest of the long weekend. Julia brought a friend up too. On that Saturday we got a text from my middle son, Kyle. Big news! He proposed to his girfriend of five years and she accepted. They are perfect for each other and we couldn’t be happier to have Marisa join our family. The gorgeous picture at the top of the page was taken by Ian (my youngest son) on a recent vacation he had with Kyle and Marisa. In this picture they were at Niagra Falls.
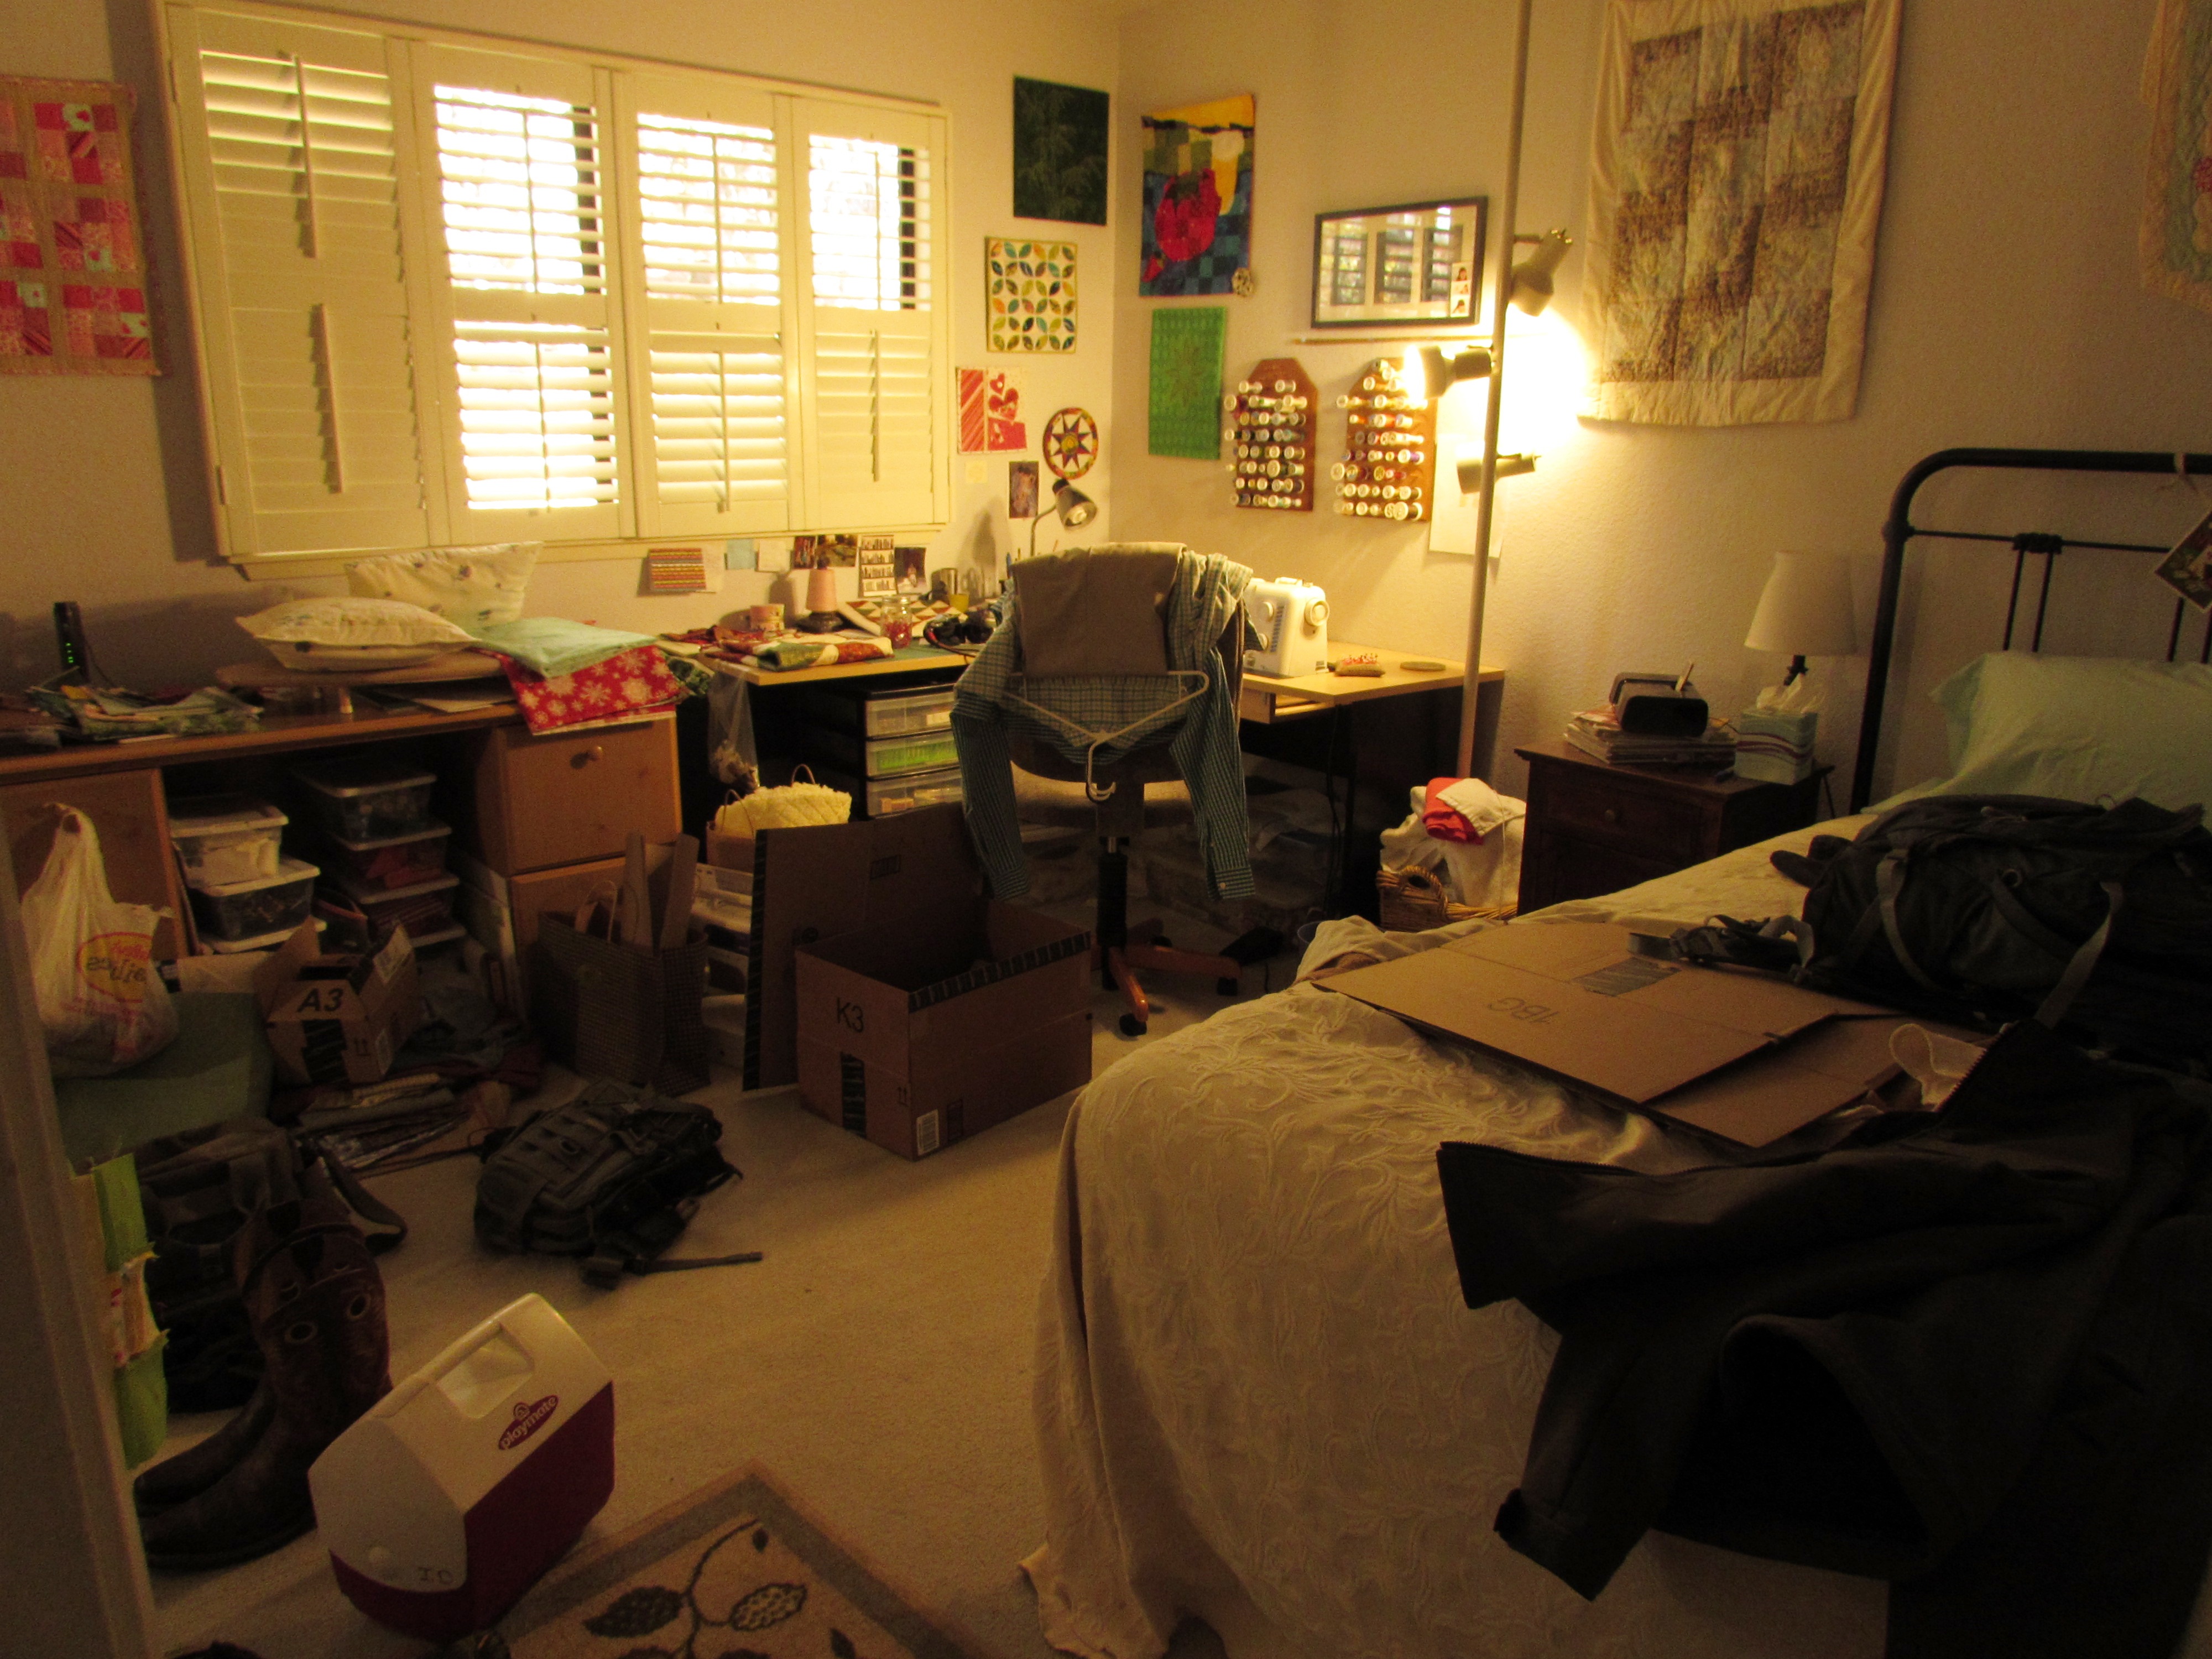
With all that was going on, I didn’t have a whole lot of time to sew. Also, it was a physical impossibility. When Ian is home, he uses the sewing room as his bedroom and this happens:
To his credit, he did ask me on multiple occasions if I wanted him to clear a path to the sewing machine. There wasn’t time for it anyway so it was not a big deal.
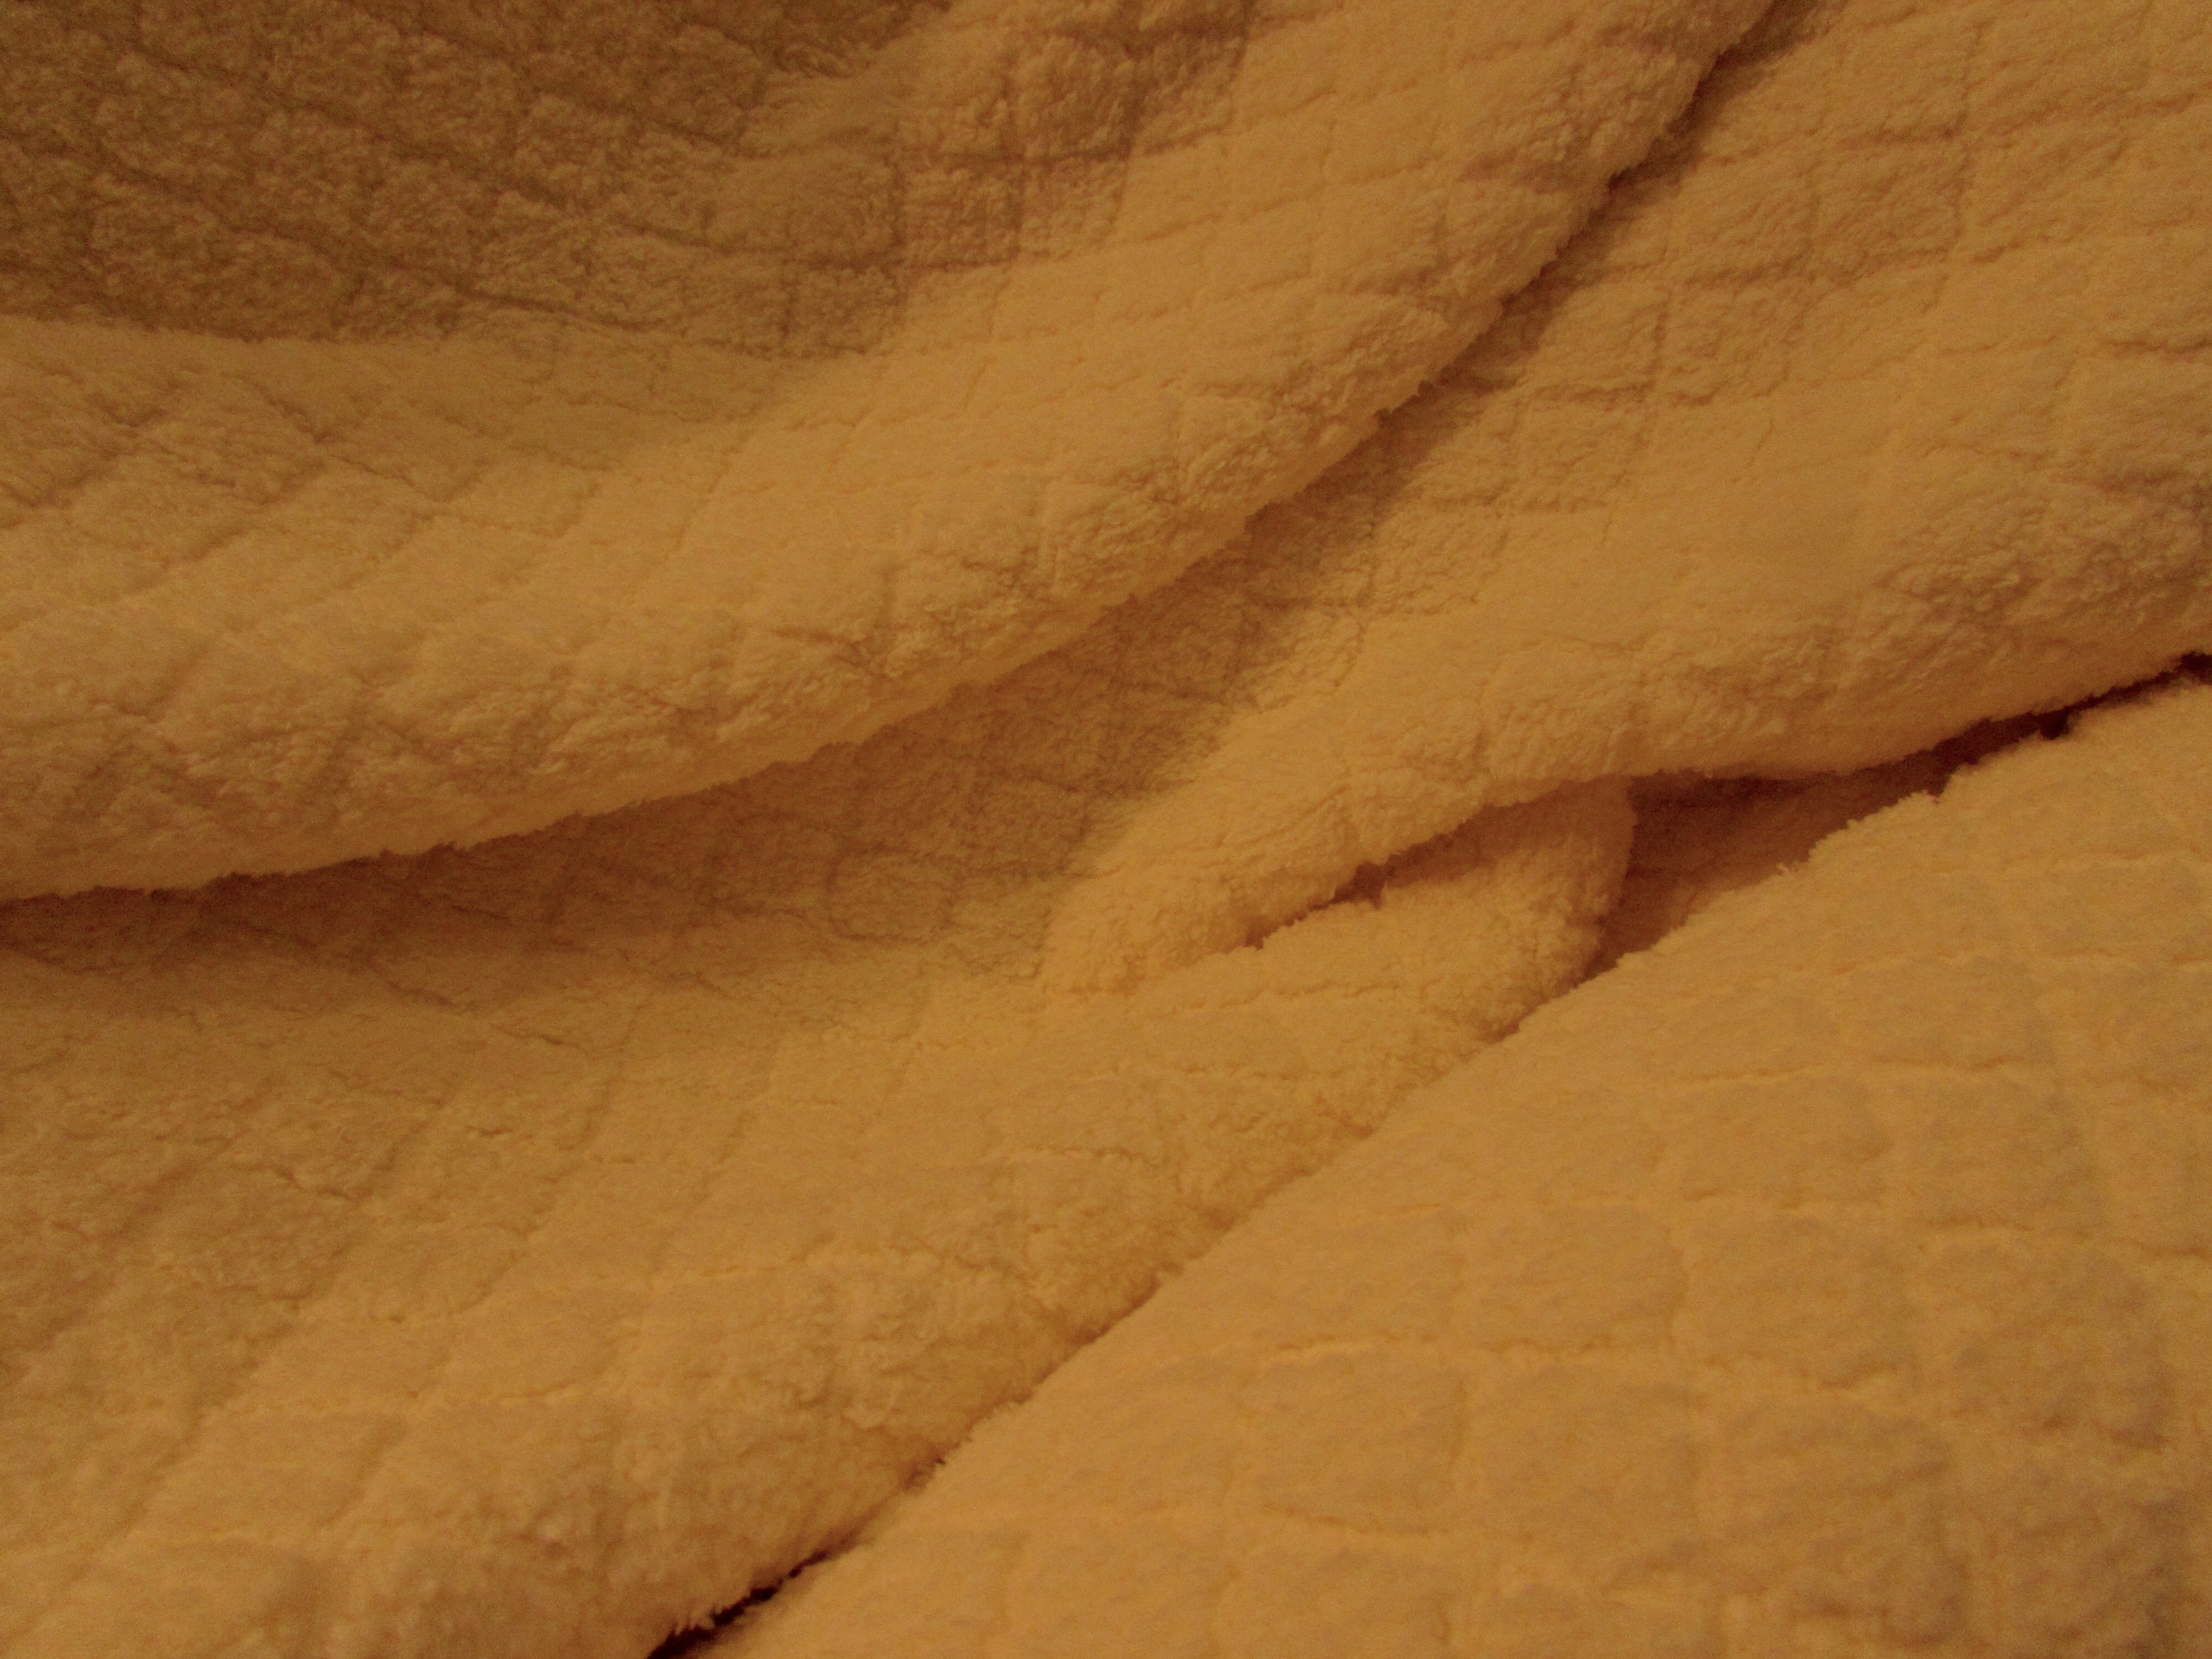
Last night when we got home from Downieville I decided to cut into a piece of fabric I bought last week. I was at Jo-Ann Fabric and had one of their always-welcome “20% off entire purchase” coupons. Those make me a little crazy. I bought some practical items that I needed for my Etsy shop and then decided I wanted to make a new bathrobe. Prior to my current quilting obssession, I used to sew clothing fairly often. A long while back, I wrote a post about this. Like quilting, garment sewing is a fairly expensive hobby. More often than not, I can buy the ready-made garment for less than I can sew it. But again like quilting, it is more fun to make it. I found this wonderful, soft buttery yellow fabric. With my coveted coupon and the fact that it was already on sale, the expense for the fabric went from $55 to $33. Not too shabby.
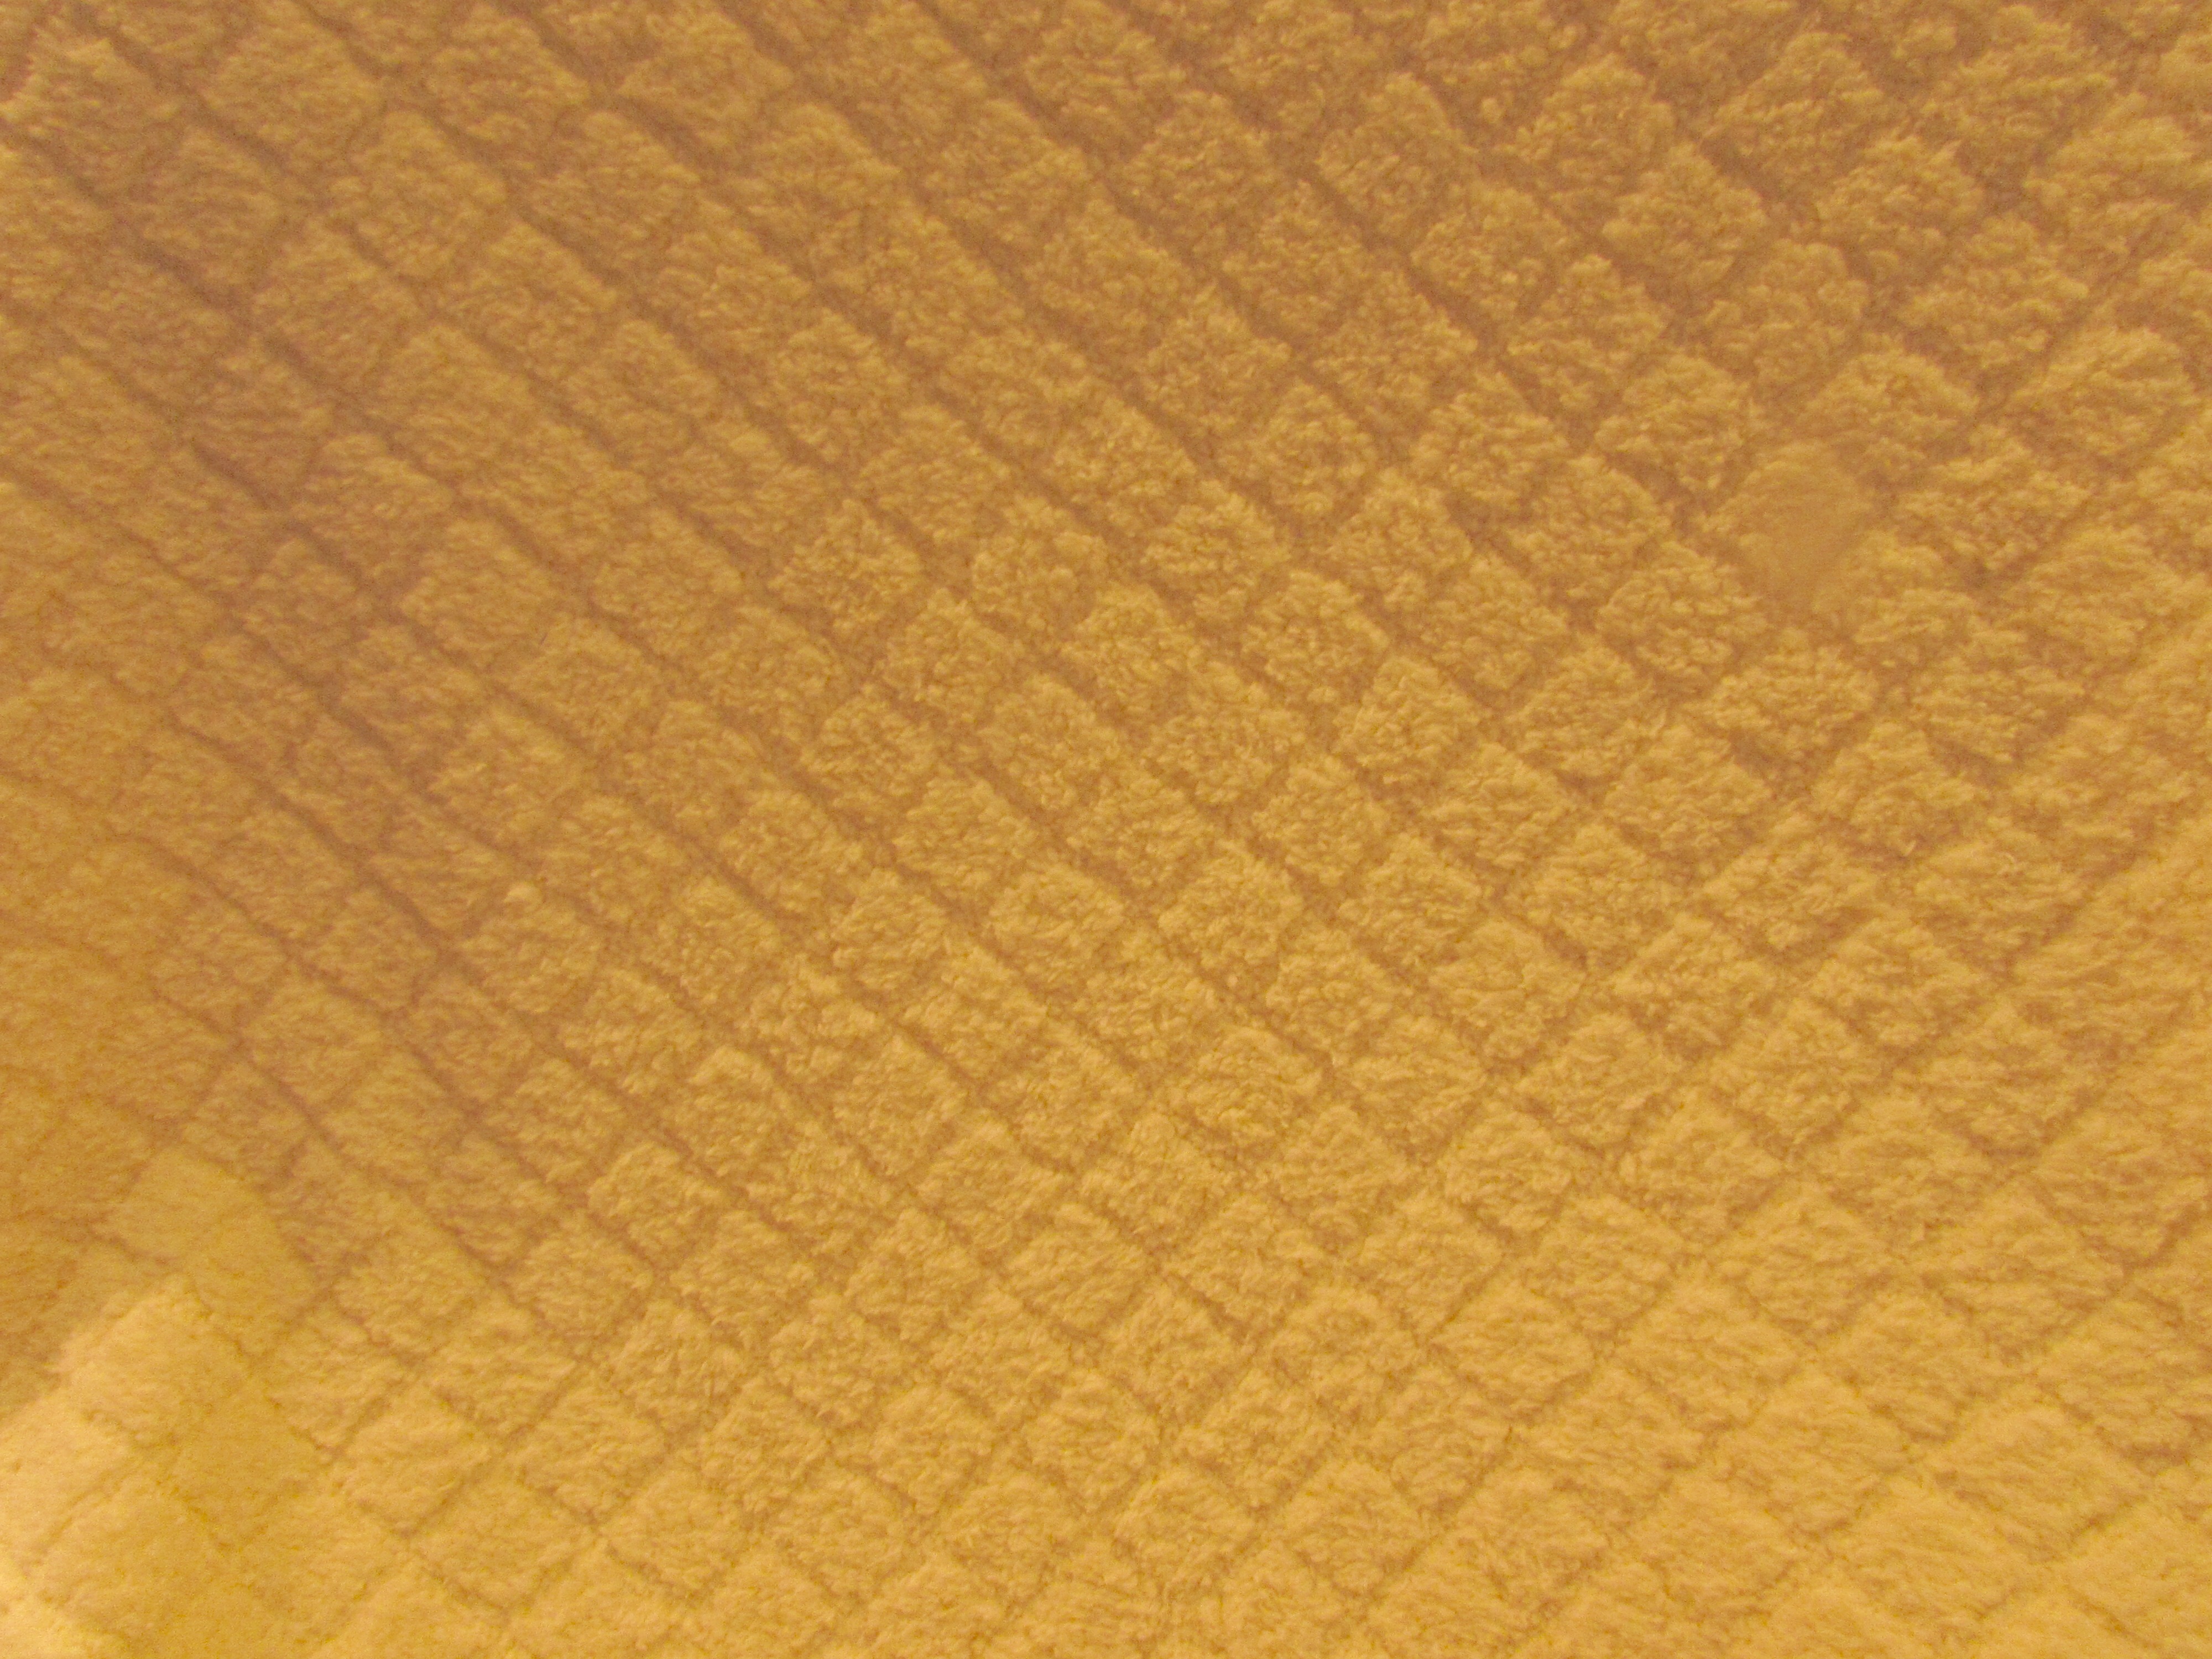
It is a very pale yellow and so snuggly. The texture is perfect and there isn’t a nap to worry about when cutting the pieces
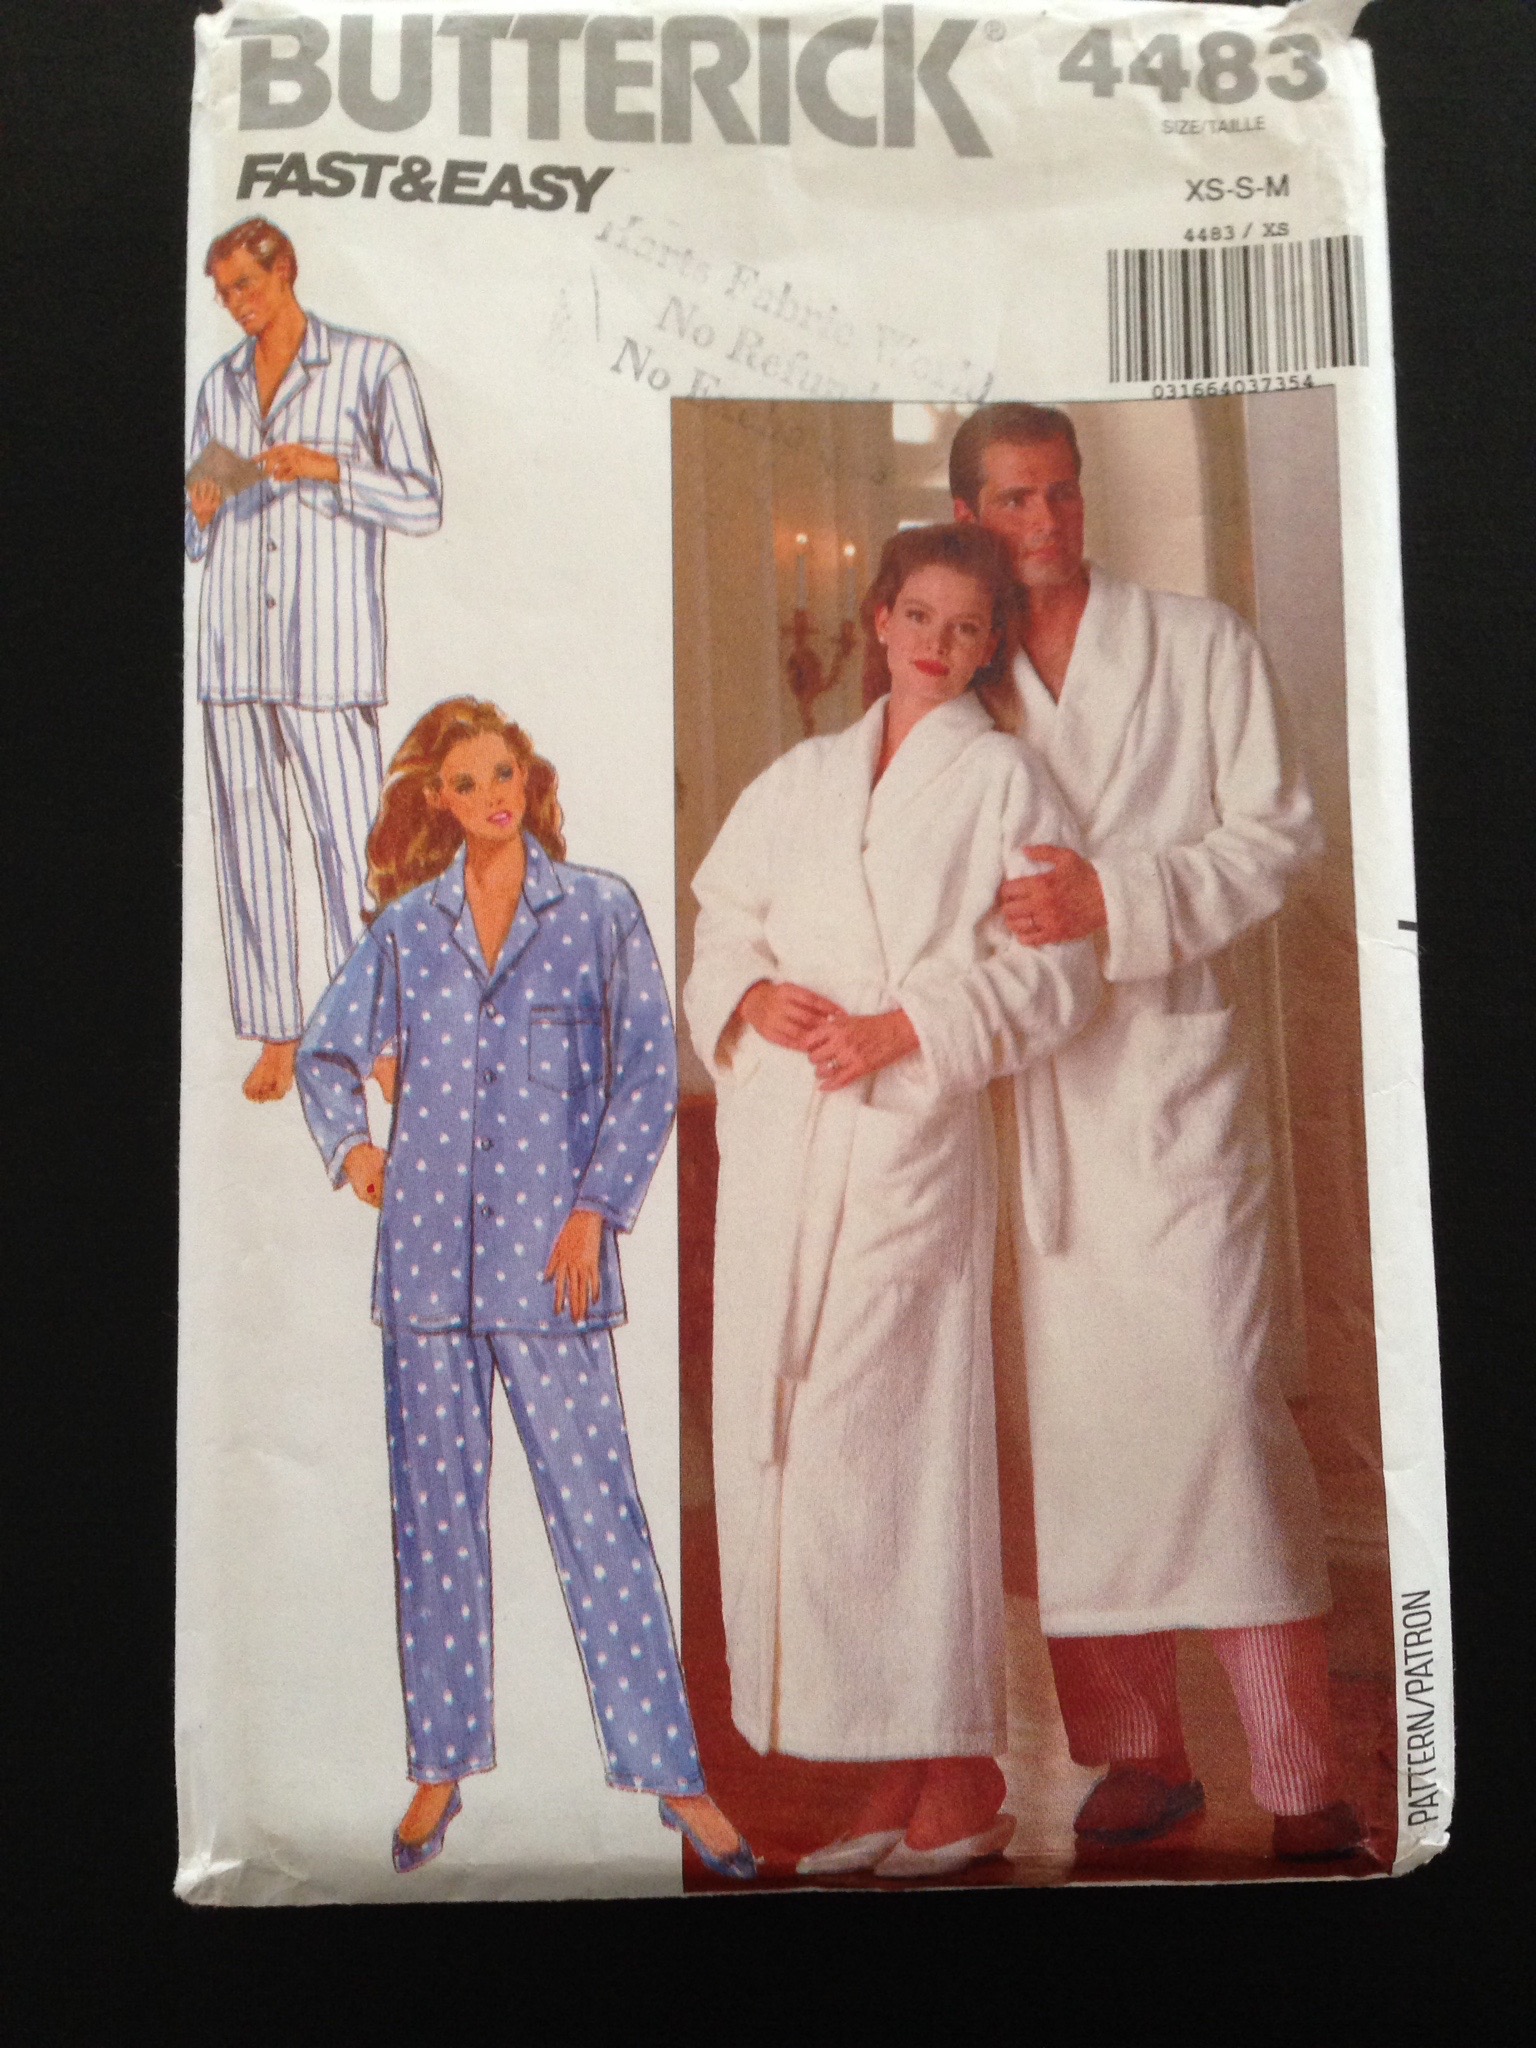
I knew I would be able to find a pattern to use in my pile of old patterns. This one was missing the pieces to the PJ pants but still had all of the pieces to the robe. It is date stamped 1989 so yep, I have had it around for a while!
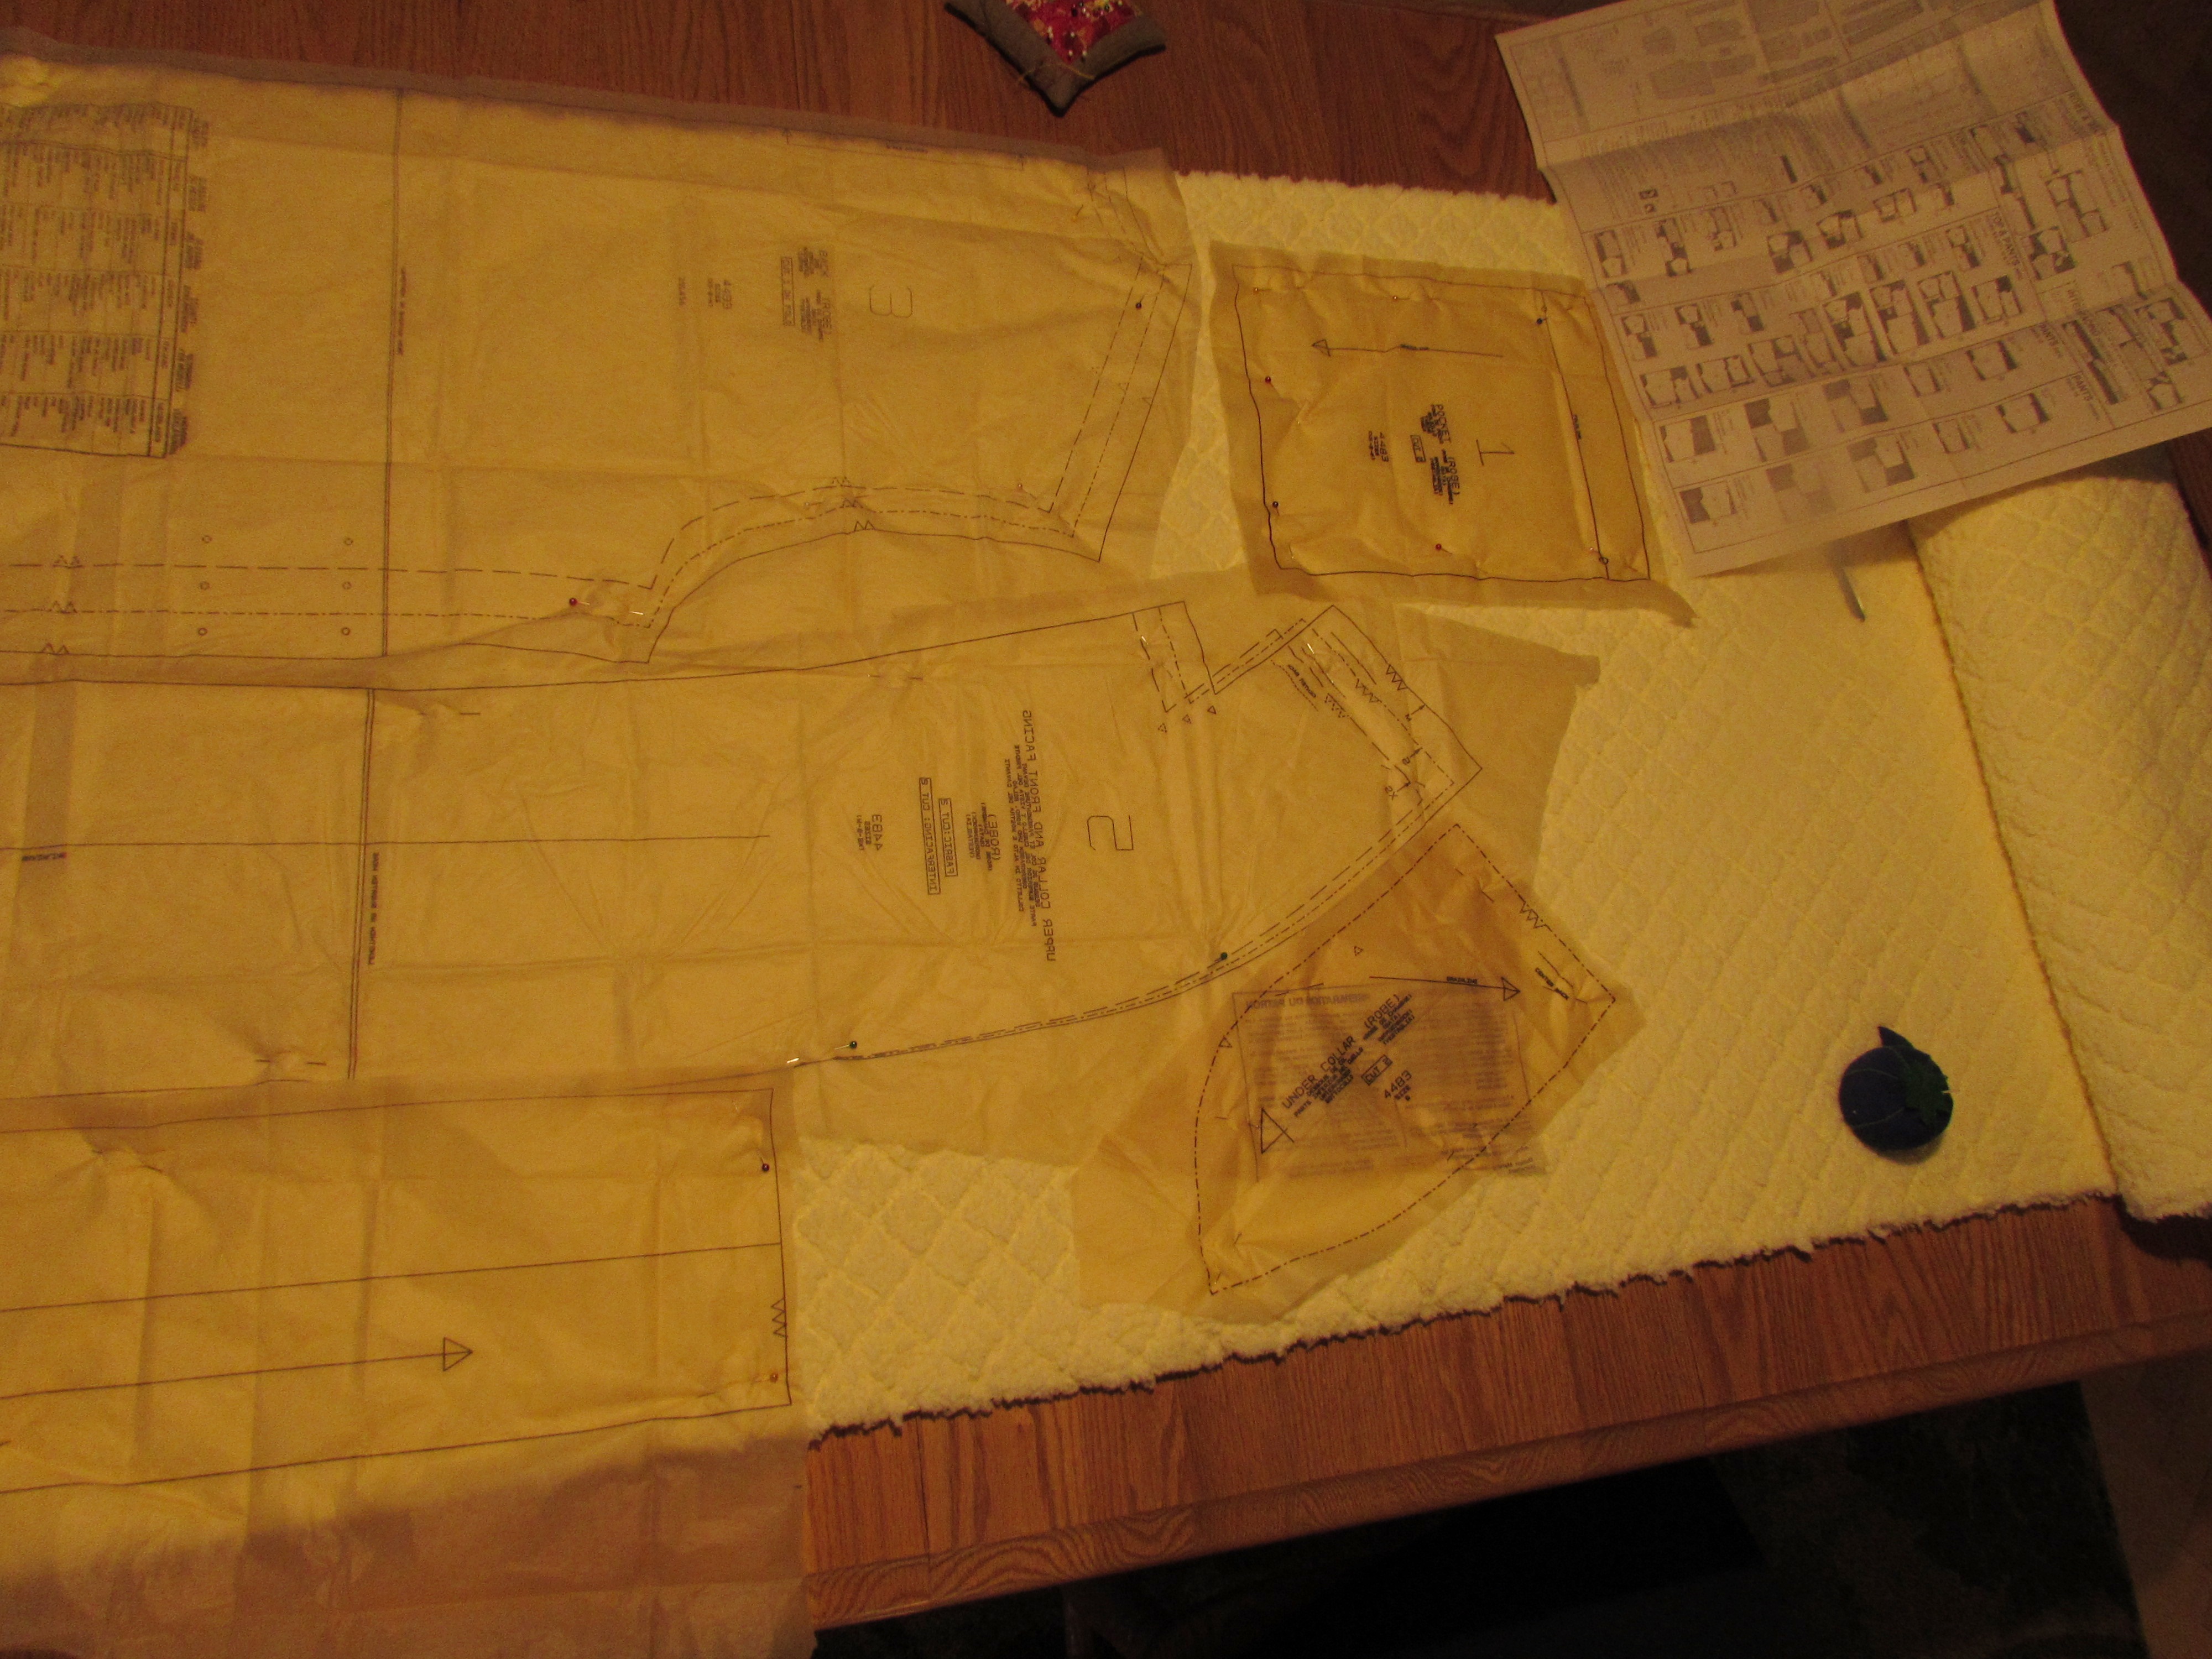
Isn’t that couple just dreamy in their matching robes? Too bad I didn’t think to buy enough of the yellow fabric to make Ray a matching robe…… 😉 I got the pieces laid out and cut last night so I am ready to go. (Well, maybe I should vacuum first. I cut the pieces in my dining room because I was working with a four yard length of fabric. There is yellow fuzz floating around throughout the house now.) This bathrobe consists of a few long seams and putting two pockets on the front so it will come together quickly. I’m looking forward to working on it. Sewing from a pattern is something that I have done for so long that I don’t really have to think about it. It is mindless sewing – as compared to quilting where I have to watch myself all along the way. In fact, this will come together fast enough that I will call it my December goal for ALYOF. I didn’t set a goal at all in November and didn’t meet my goal for October so it is time to get back on track!
I want to give a couple of updates on past posts. They are both heartwarming to say the least! Here goes:
Remember the post about the yellow and gray elephant quilt that I made for a friend several months ago? To recap, my daughter-in-law’s brother and his wife had been trying to have a baby for a very long while. After many miscarriages, they finally decided to take an alternate route and use a surrogacy firm. This firm is located in India and it was a huge undertaking but it speaks to their determination to have a child. You might want to read more about it on my blog, here, or on Margot’s blog, Find Your Spark. (I have given you the link to her home page, rather than a specific post. There are many posts on the process as she went through it and it is a wonderful read.)
Here is the latest! Margot and TJ’s daughter, Emmerson Kate, was born in September! It is hard to believe that she is already one month old. This baby is such a miracle. Margot and TJ traveled to India about a week before Emmerson was born so they were there for the birth of their baby. That was such an exciting day. Pictures were being texted from India to the East Coast and then to the West Coast. The first pictures of Margot holding Emmerson brought tears to my eyes. It took a few weeks to process the paperwork and get Emmerson’s passport but as soon as that was completed, they were able to fly back to the States and settle into their new life as a family of three. Margot sent me a few pictures of Emmerson with the quilt I sent her.
She is just adorable. Here she is on the back side of the quilt.
She is such a sweet girl. I wish this family joy and happiness. Margot continually says that she is blessed to have Emmerson. That is certainly true. It is also true that Emmerson is so blessed to have such wonderful parents in Margot and TJ.
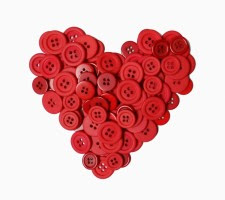
Update number two is about the Ashes to Beauty project. At the end of September I wrote a post about a project to help the quilters in Northern California who had lost their homes and belongings in the Butte Fire. I put out a call for quilters to make pastel colored, 10″ blocks with a heart appliqued on each one. It was wonderful to see the number of readers who made blocks and/or put the word out to others. One reader posted it on a Facebook page for a quilt guild in Ohio and they responded with blocks. A few days ago I received an email update on the project. Here is what Kerri (the project coordinator)had to say:
THANK YOU to everyone who made Ashes To Beauty heart blocks. We stopped counting at 500 and there are still many more. We have more than enough to make 9 quilts for ladies who lost everything in the fire.
We received blocks from all over the country and as far away as New York, Ontario, Canada, and Hawaii. Needless to say I am overwhelmed at your generosity, kind words for me and the ladies who will receive the quilts and the obvious love and care that went into your blocks. Also for generous cash donations for battings and backings and supplies, etc. One gal who was evacuated but her home did not burn made lovely labels for each quilt.
Again- THANK YOU so much. God does truly console the hurting and turns ashes into beauty and many times uses us to accomplish it. We have begun sewing the blocks together and they are wonderful.
I’ll take some photos and send them along later.
I think it is just awesome that they received so many blocks! Thank you to all that participated and sent in blocks or told others about the project! If I receive pictures of the quilts, I will post them later on.
Finally, last but certainly not least, thank you all for the prayers and good wishes you offered up for my mom. She is really doing well. It seems like she gets a bit stronger each day. We are all so happy to see her up and walking (still with the support of a walker). She is now doing the work of healing and resting and going to myriad post-op doctor visits. My sisters and I are taking turns staying up at Mom and Dad’s to help with errands, cooking, etc. In a strange way, this is sort of the silver lining for me. We don’t all get together very often, but with everyone coming and going to help out at mom’s, I get to see one, if not two, of my sisters each week. (Mom and I live about 15 miles apart.) I think I need to convince my mom to keep this visiting daughter/nurse thing going on as long as possible! 😉
Well, it is the end of October and I have done little to no quilting. Clearly I didn’t complete my ALYOF goal for this month! I had hoped to sandwich and quilt the Kaffe Fassett jelly roll quilt I made. But it is still hanging in the closet, untouched. I had also planned to complete the brown row of blocks for my Classic Stitches BOM quilt. I have completed only two of those little blocks so far. But it feels like life is calming down now and I think I will be getting back into the routine soon. So what have you accomplished this month?? I would love to hear.
This week I have a finish to share – I made a quilt top using a jelly roll of Kaffe Fassett solids and a coordinating striped piece of yardage. Several months ago, I saw the jelly roll on Cratsy.com and was crazy about the colors. Really rich, earthy tones that were just calling out to me. I didn’t have a specific plan for it so it sat on the shelf for a while.
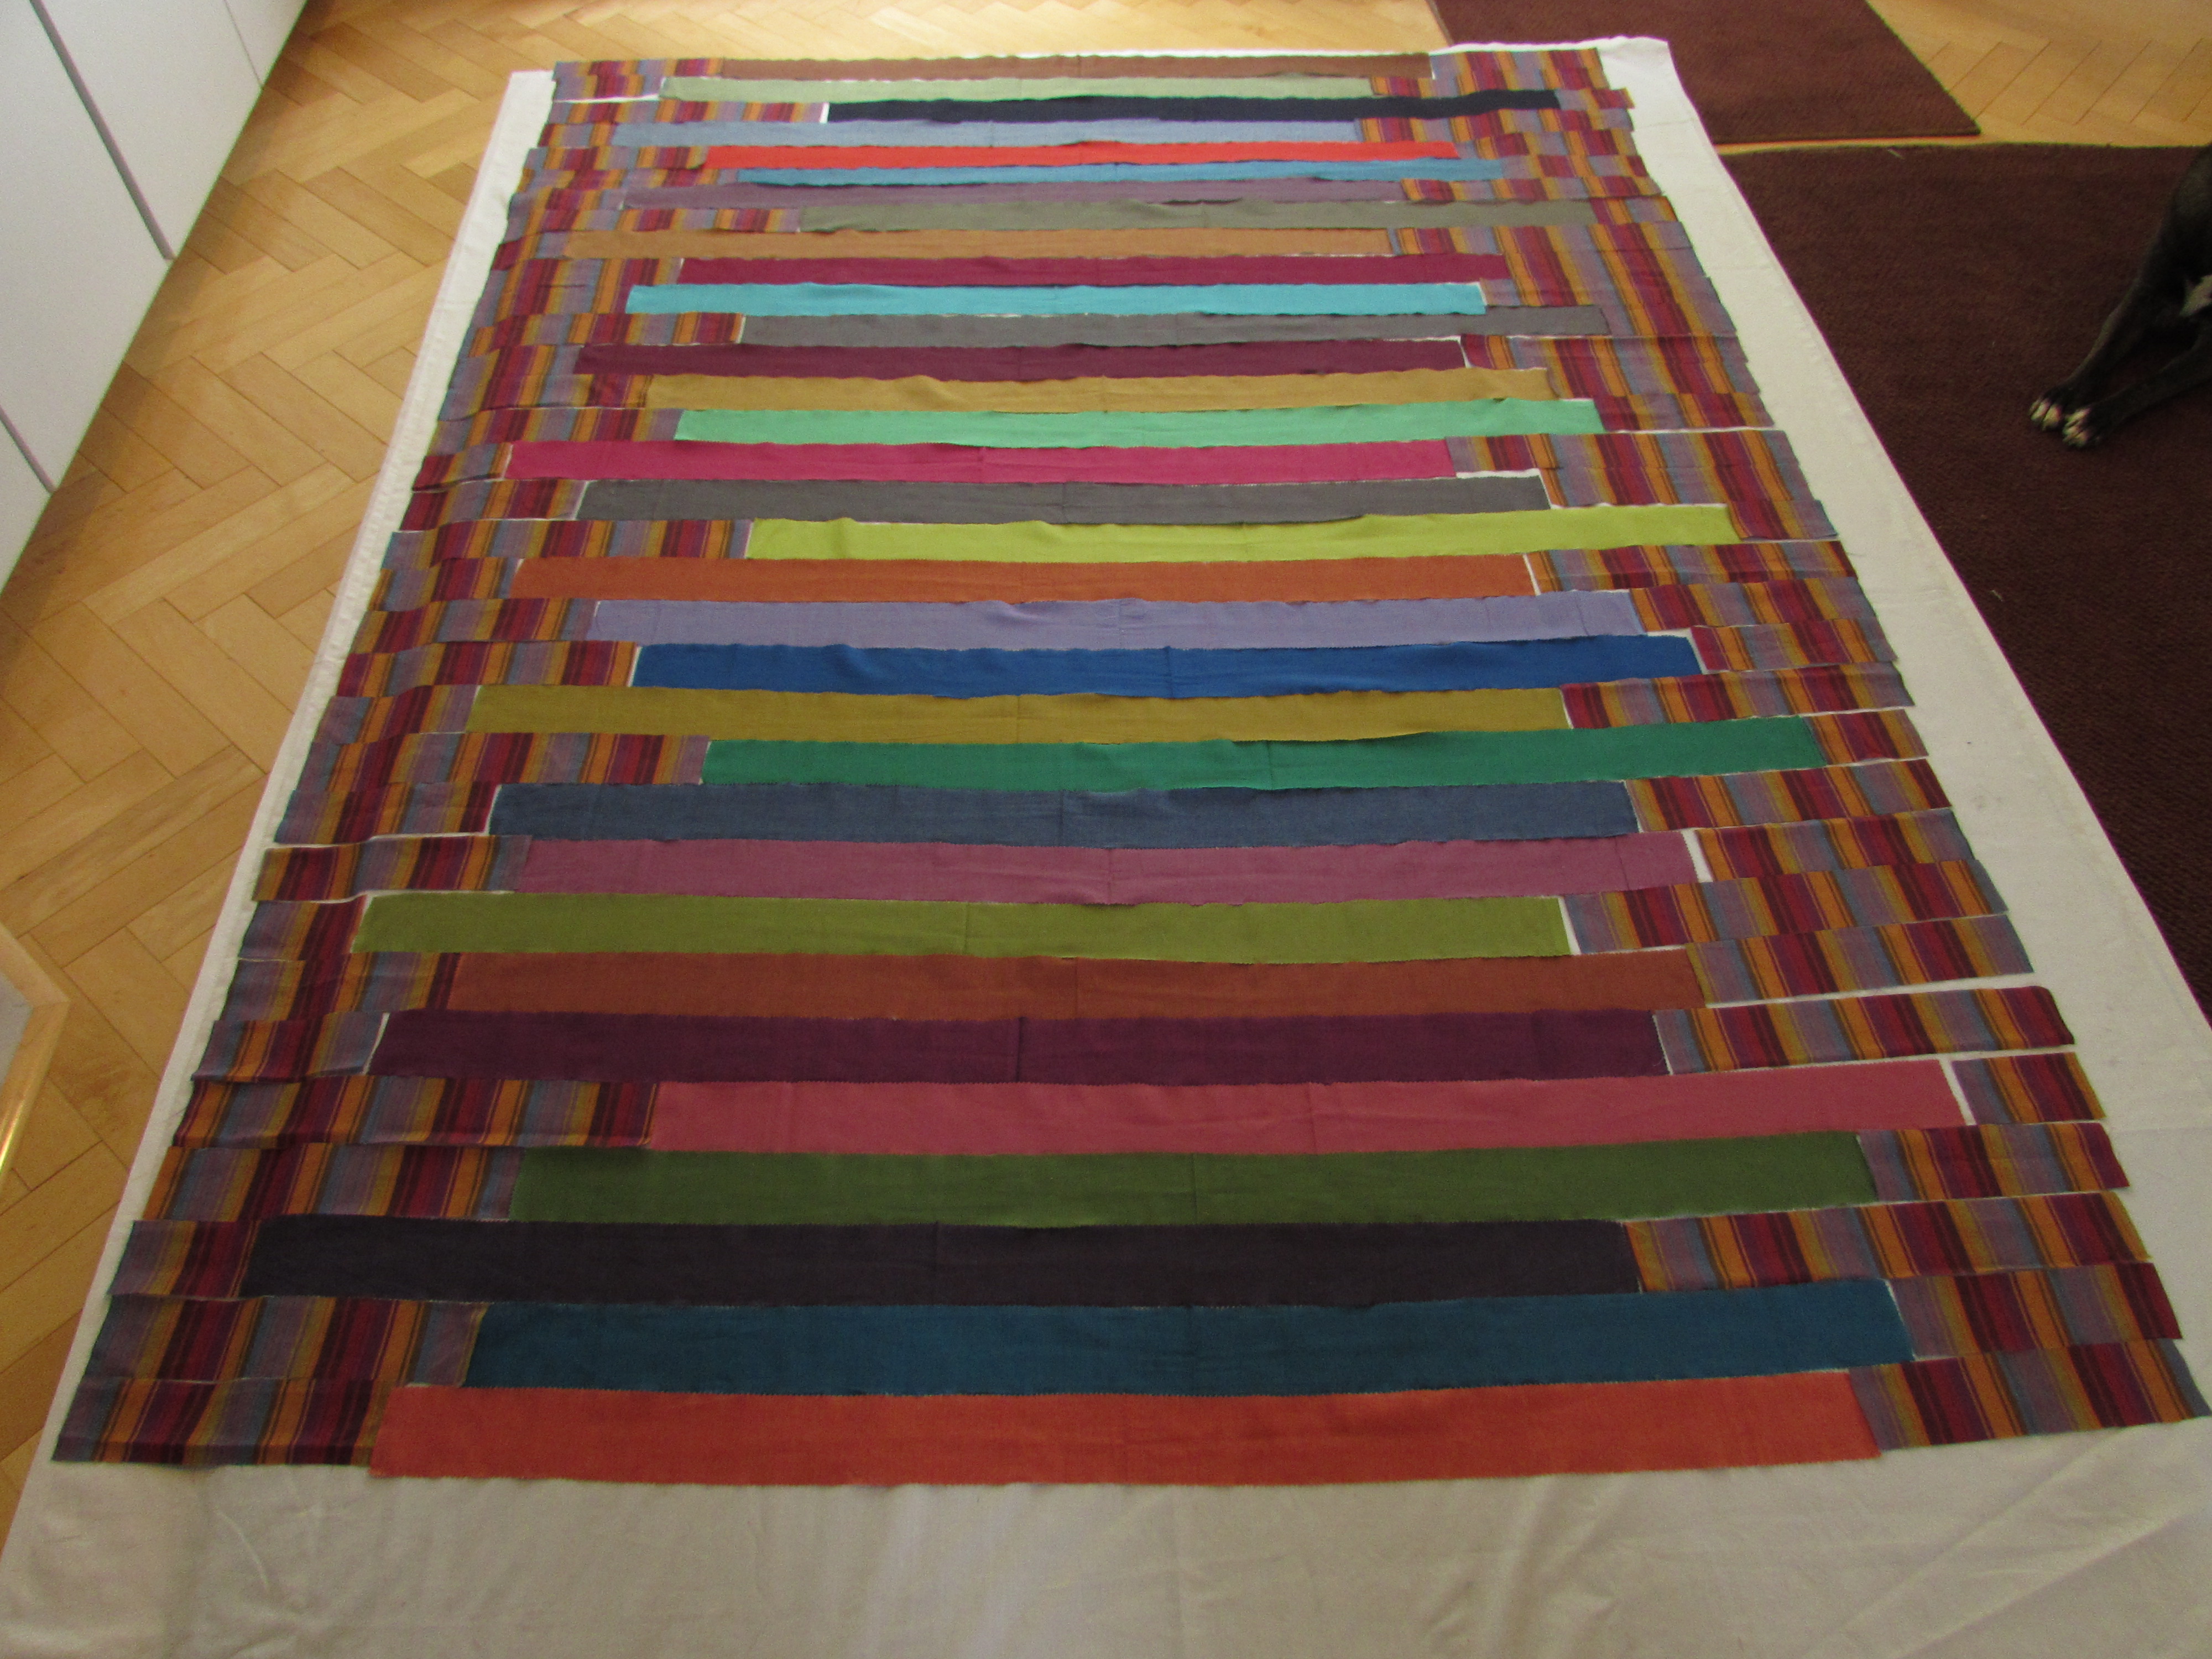
Meanwhile, I have been practicing my FMQ and am always in search of something to stitch. I decided to make a very simple quilt top with the jelly roll as that would allow me a really clean slate for quilting. I went to my LQS and found the coordinating yardage (she has a great selection of Kaffe Fassett in her shop.) Then I started to play with ideas. I cut strips from the yaradage and laid them out in a few patterns with the jelly roll (actually I drew everything first on graph paper but then still had to play around with it for a while, crawling all over the living room floor.)
First try:
In this version, I was putting the striped pieces in a random pattern. (You can see that Lady was supervising me all the while – those are her paws in the upper right corner.)
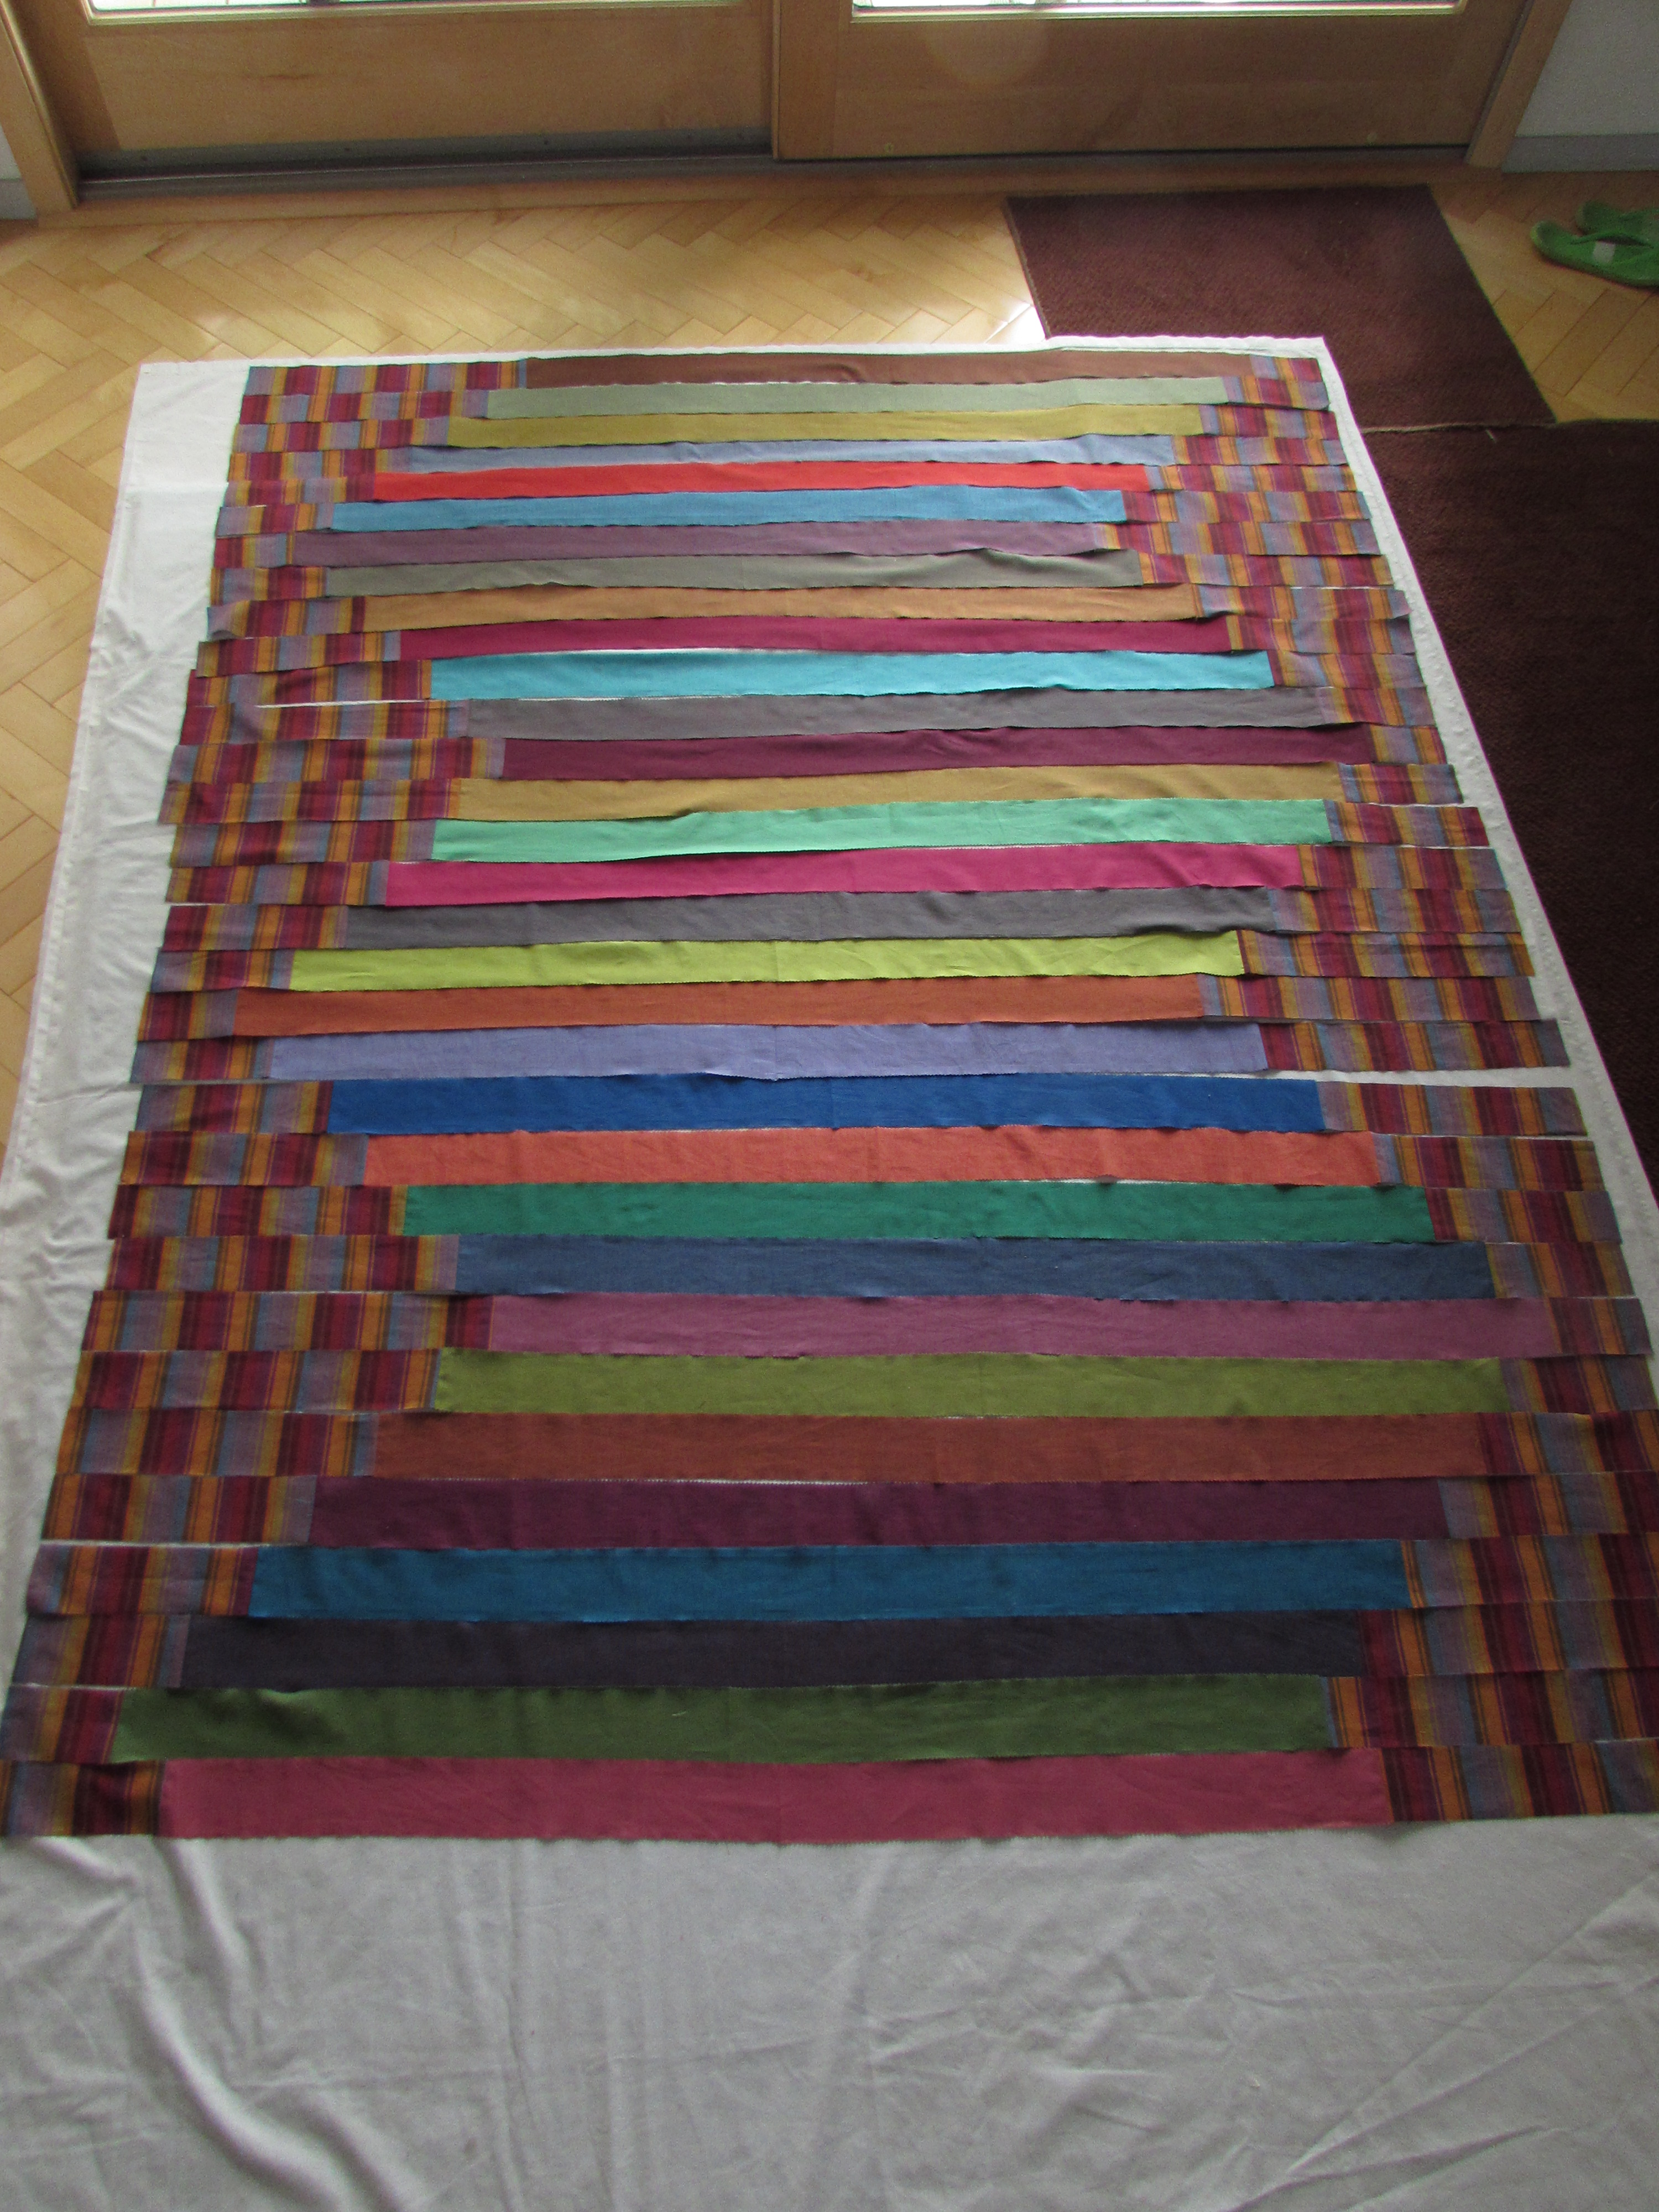
Next I tried something with a bit more order to it, increasing and decreasing the length of the striped pieces by size.
I decided I liked this pattern best. The stitching not a big deal. Well, it shouldn’t have been. I had all of the striped pieces sewn to the solid strips and then I spend a day or two dealing with a migraine. I thought that I was through the worst of it and started to sew the stripes together. As luck would have it, I was not thinking clearly enough and in several places, I sewed them together incorrectly, creating havoc with my simple pattern. It took a bit of time with my seam ripper to get it all fixed up.
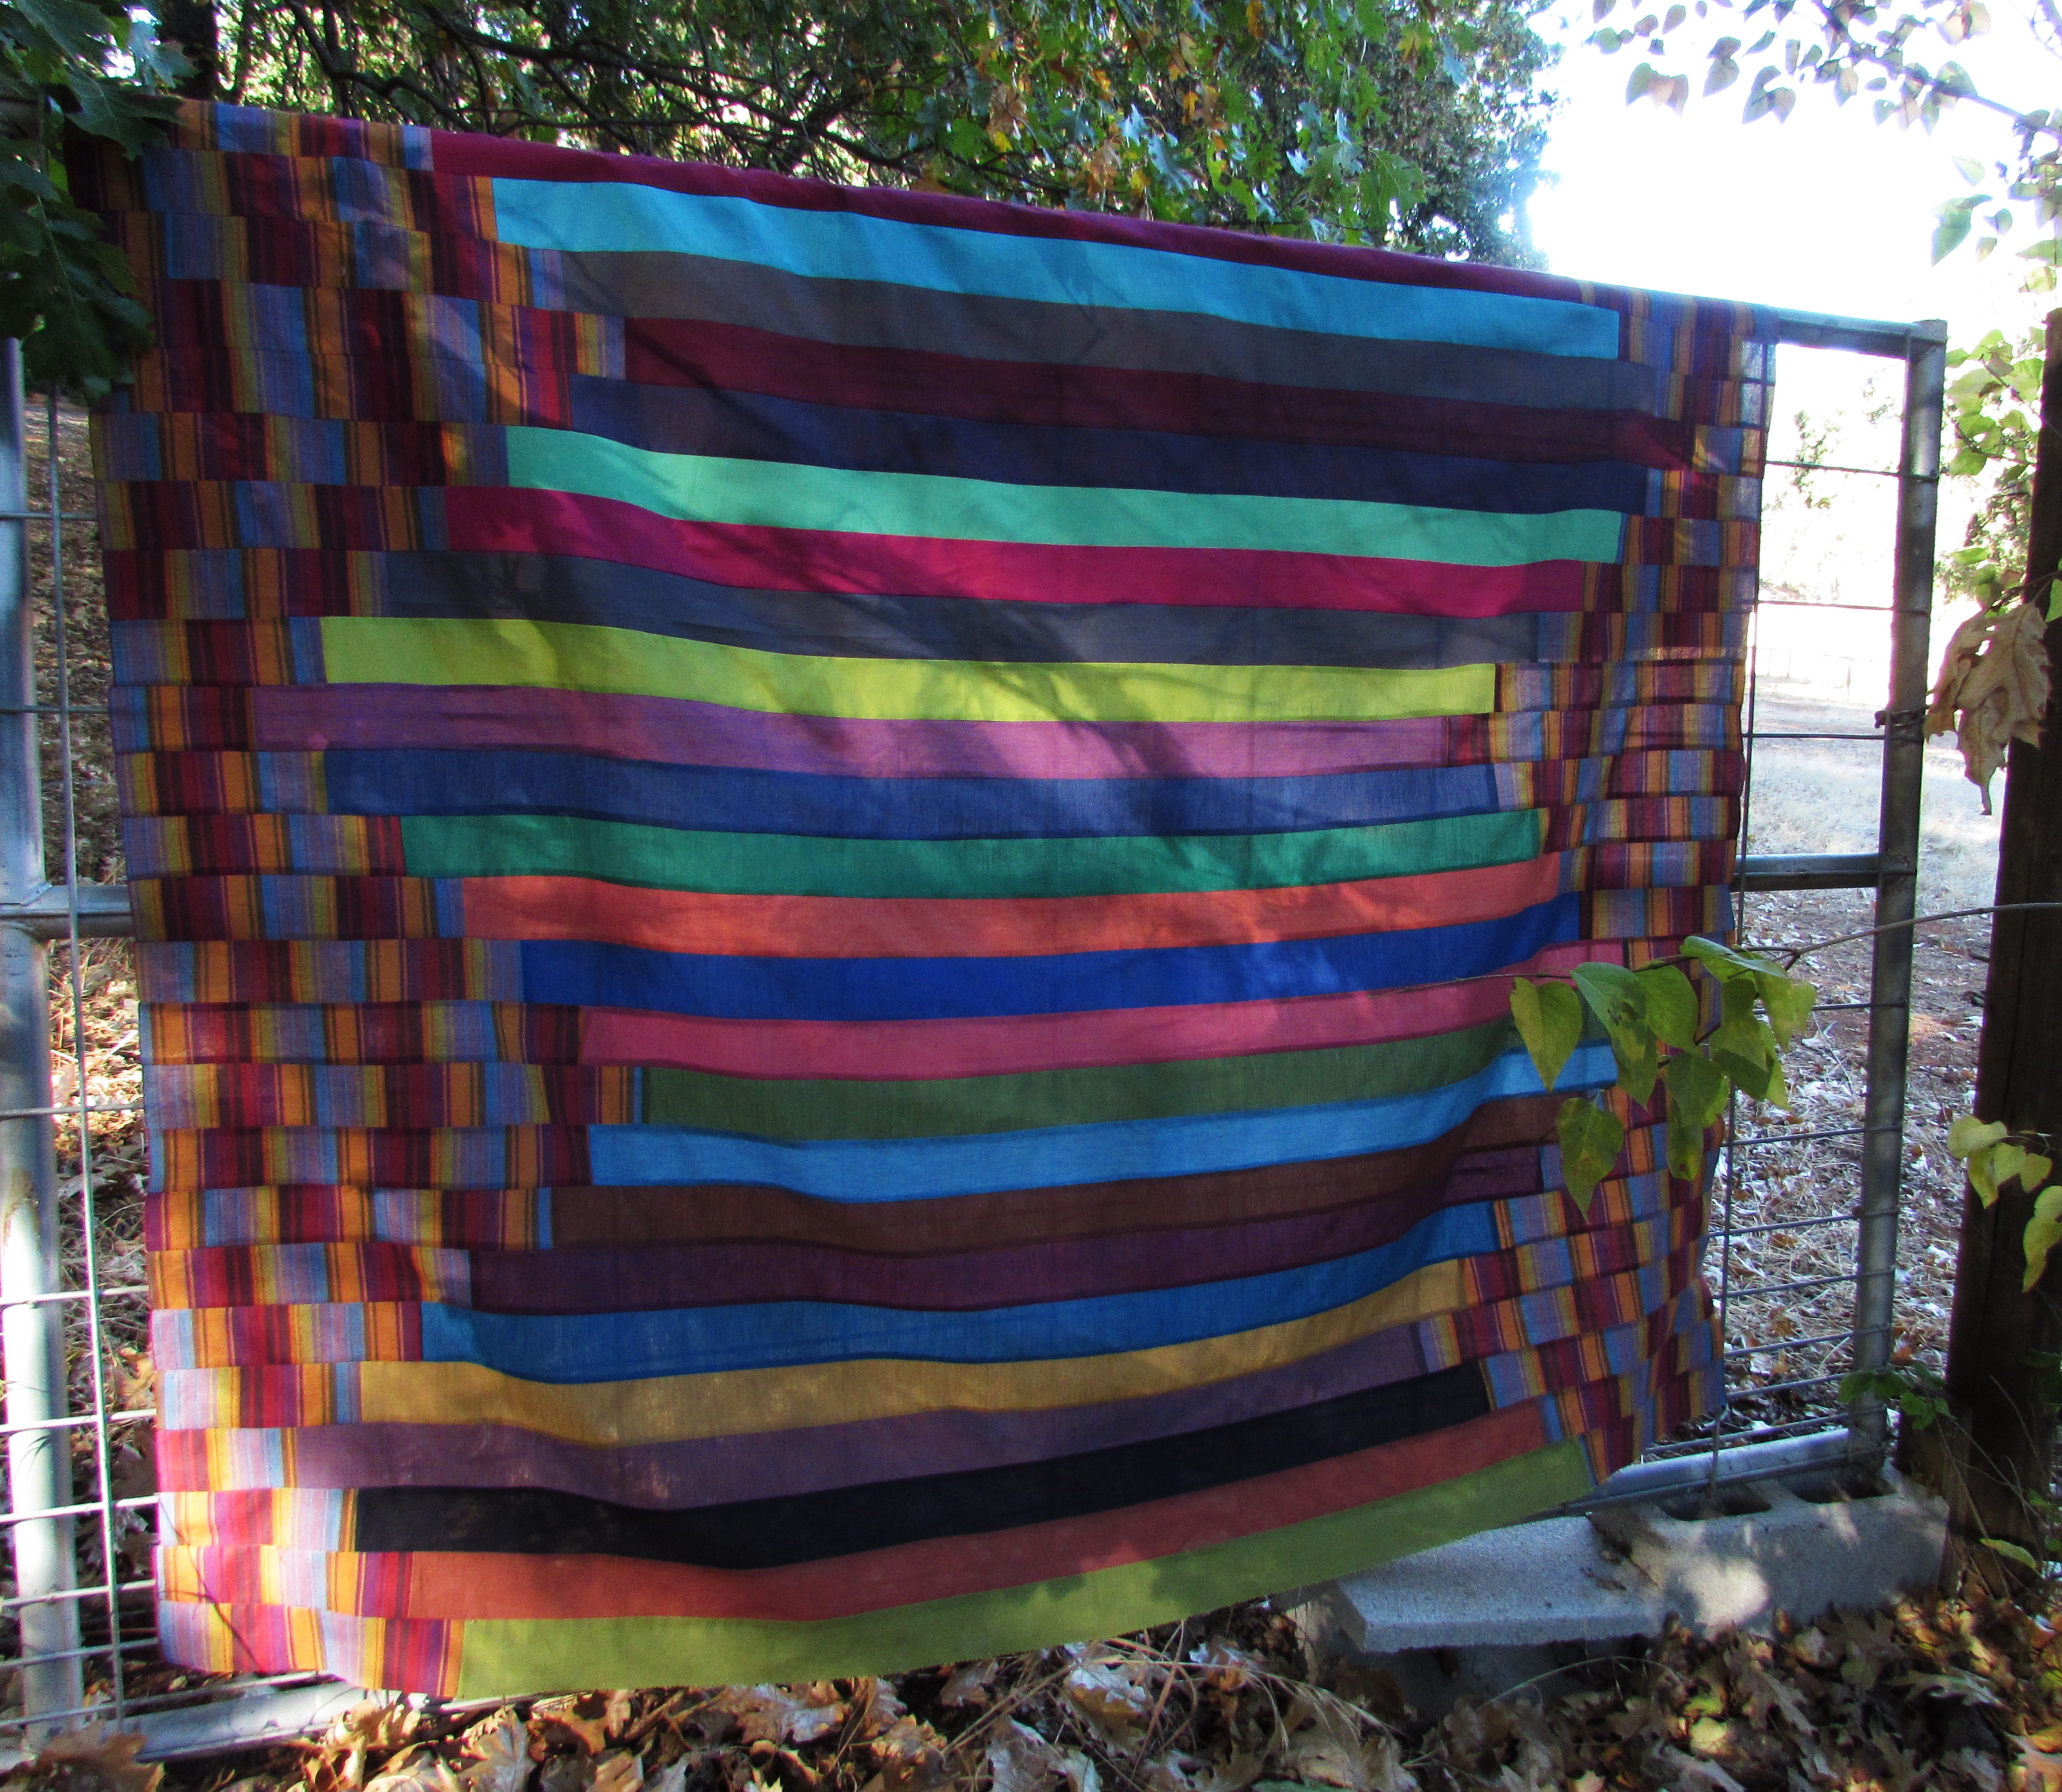
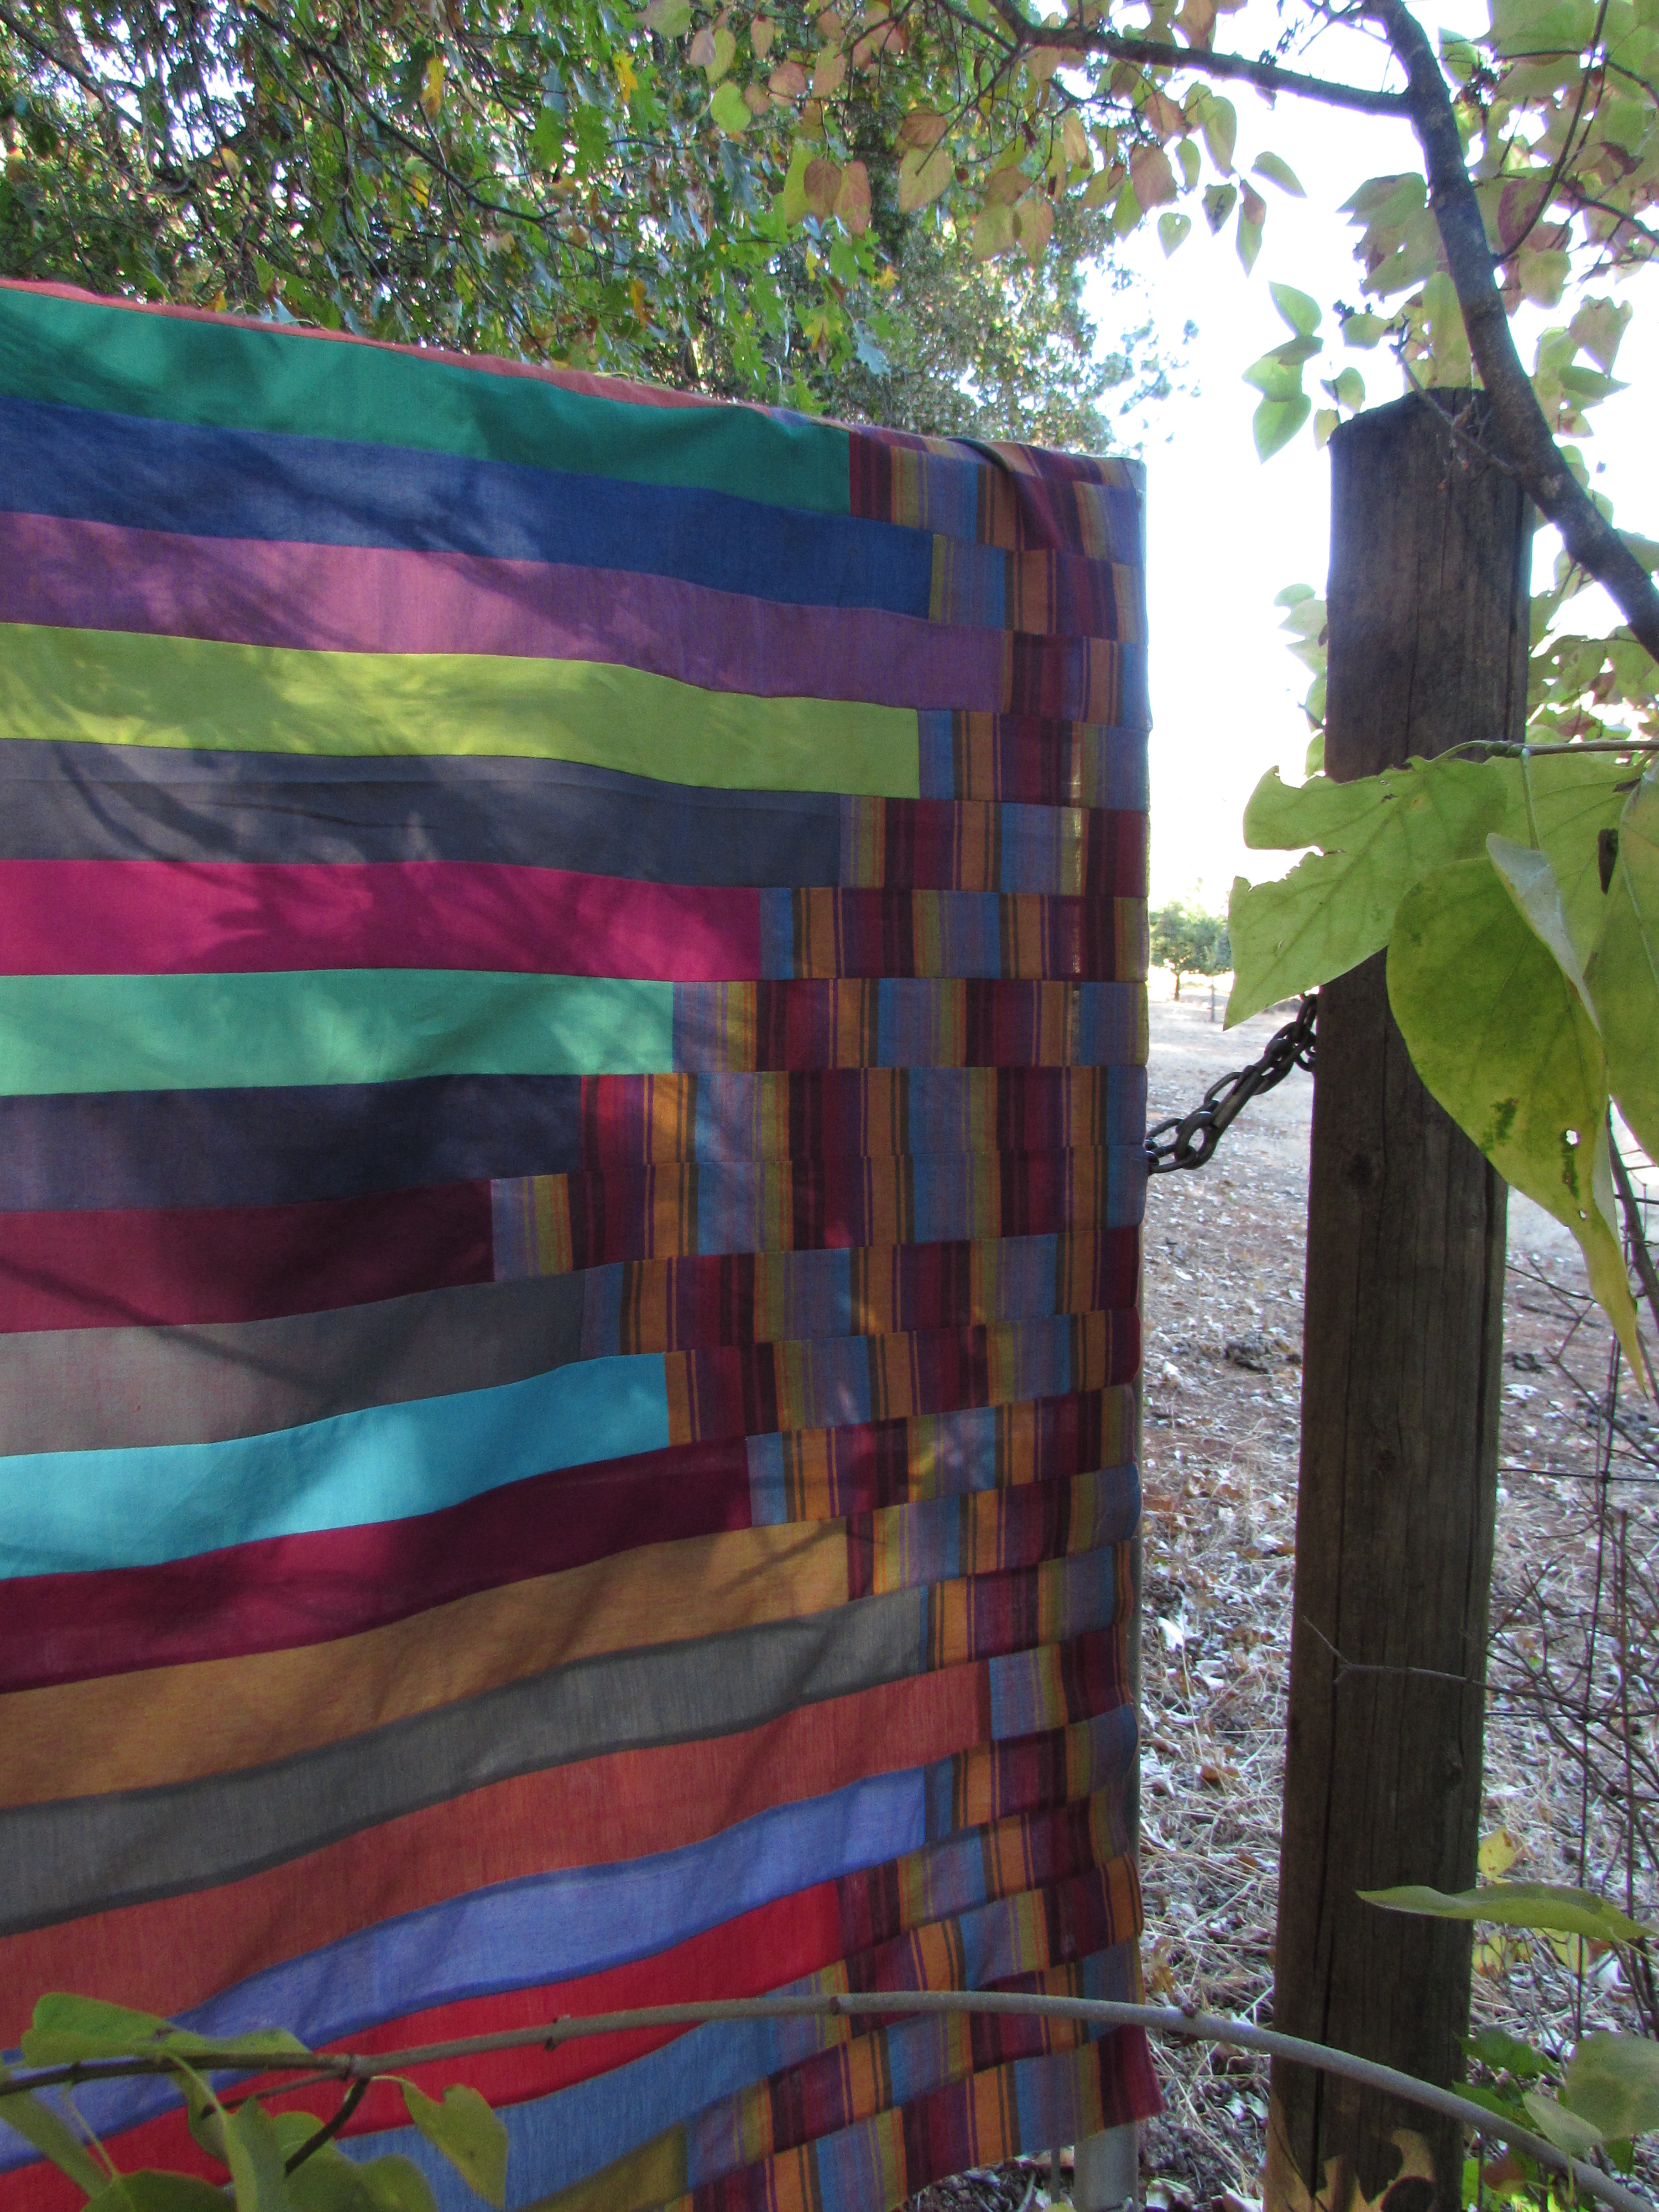
Now that it is done, I am really happy with the curved look of the solid color stripes. Kind of like an over-sized chevron.
I haven’t figured out what I will use as backing. I know I don’t have anything in my stash that will work so I will do some shopping for that. Most likely I will use a solid that is used on the front. I don’t plan to put any borders on it. I do plan to finish this up soon so I am going to use it as my October goal for ALYOF. I will have it quilted and bound by end of October!
Later today my five sisters are coming to my house for the weekend. I am beyond excited. My mom and dad live about 15 miles from me so the whole family will be together for the weekend. My husband and daughter went up to the Downieville house which means it will be just the original eight of us for the weekend!
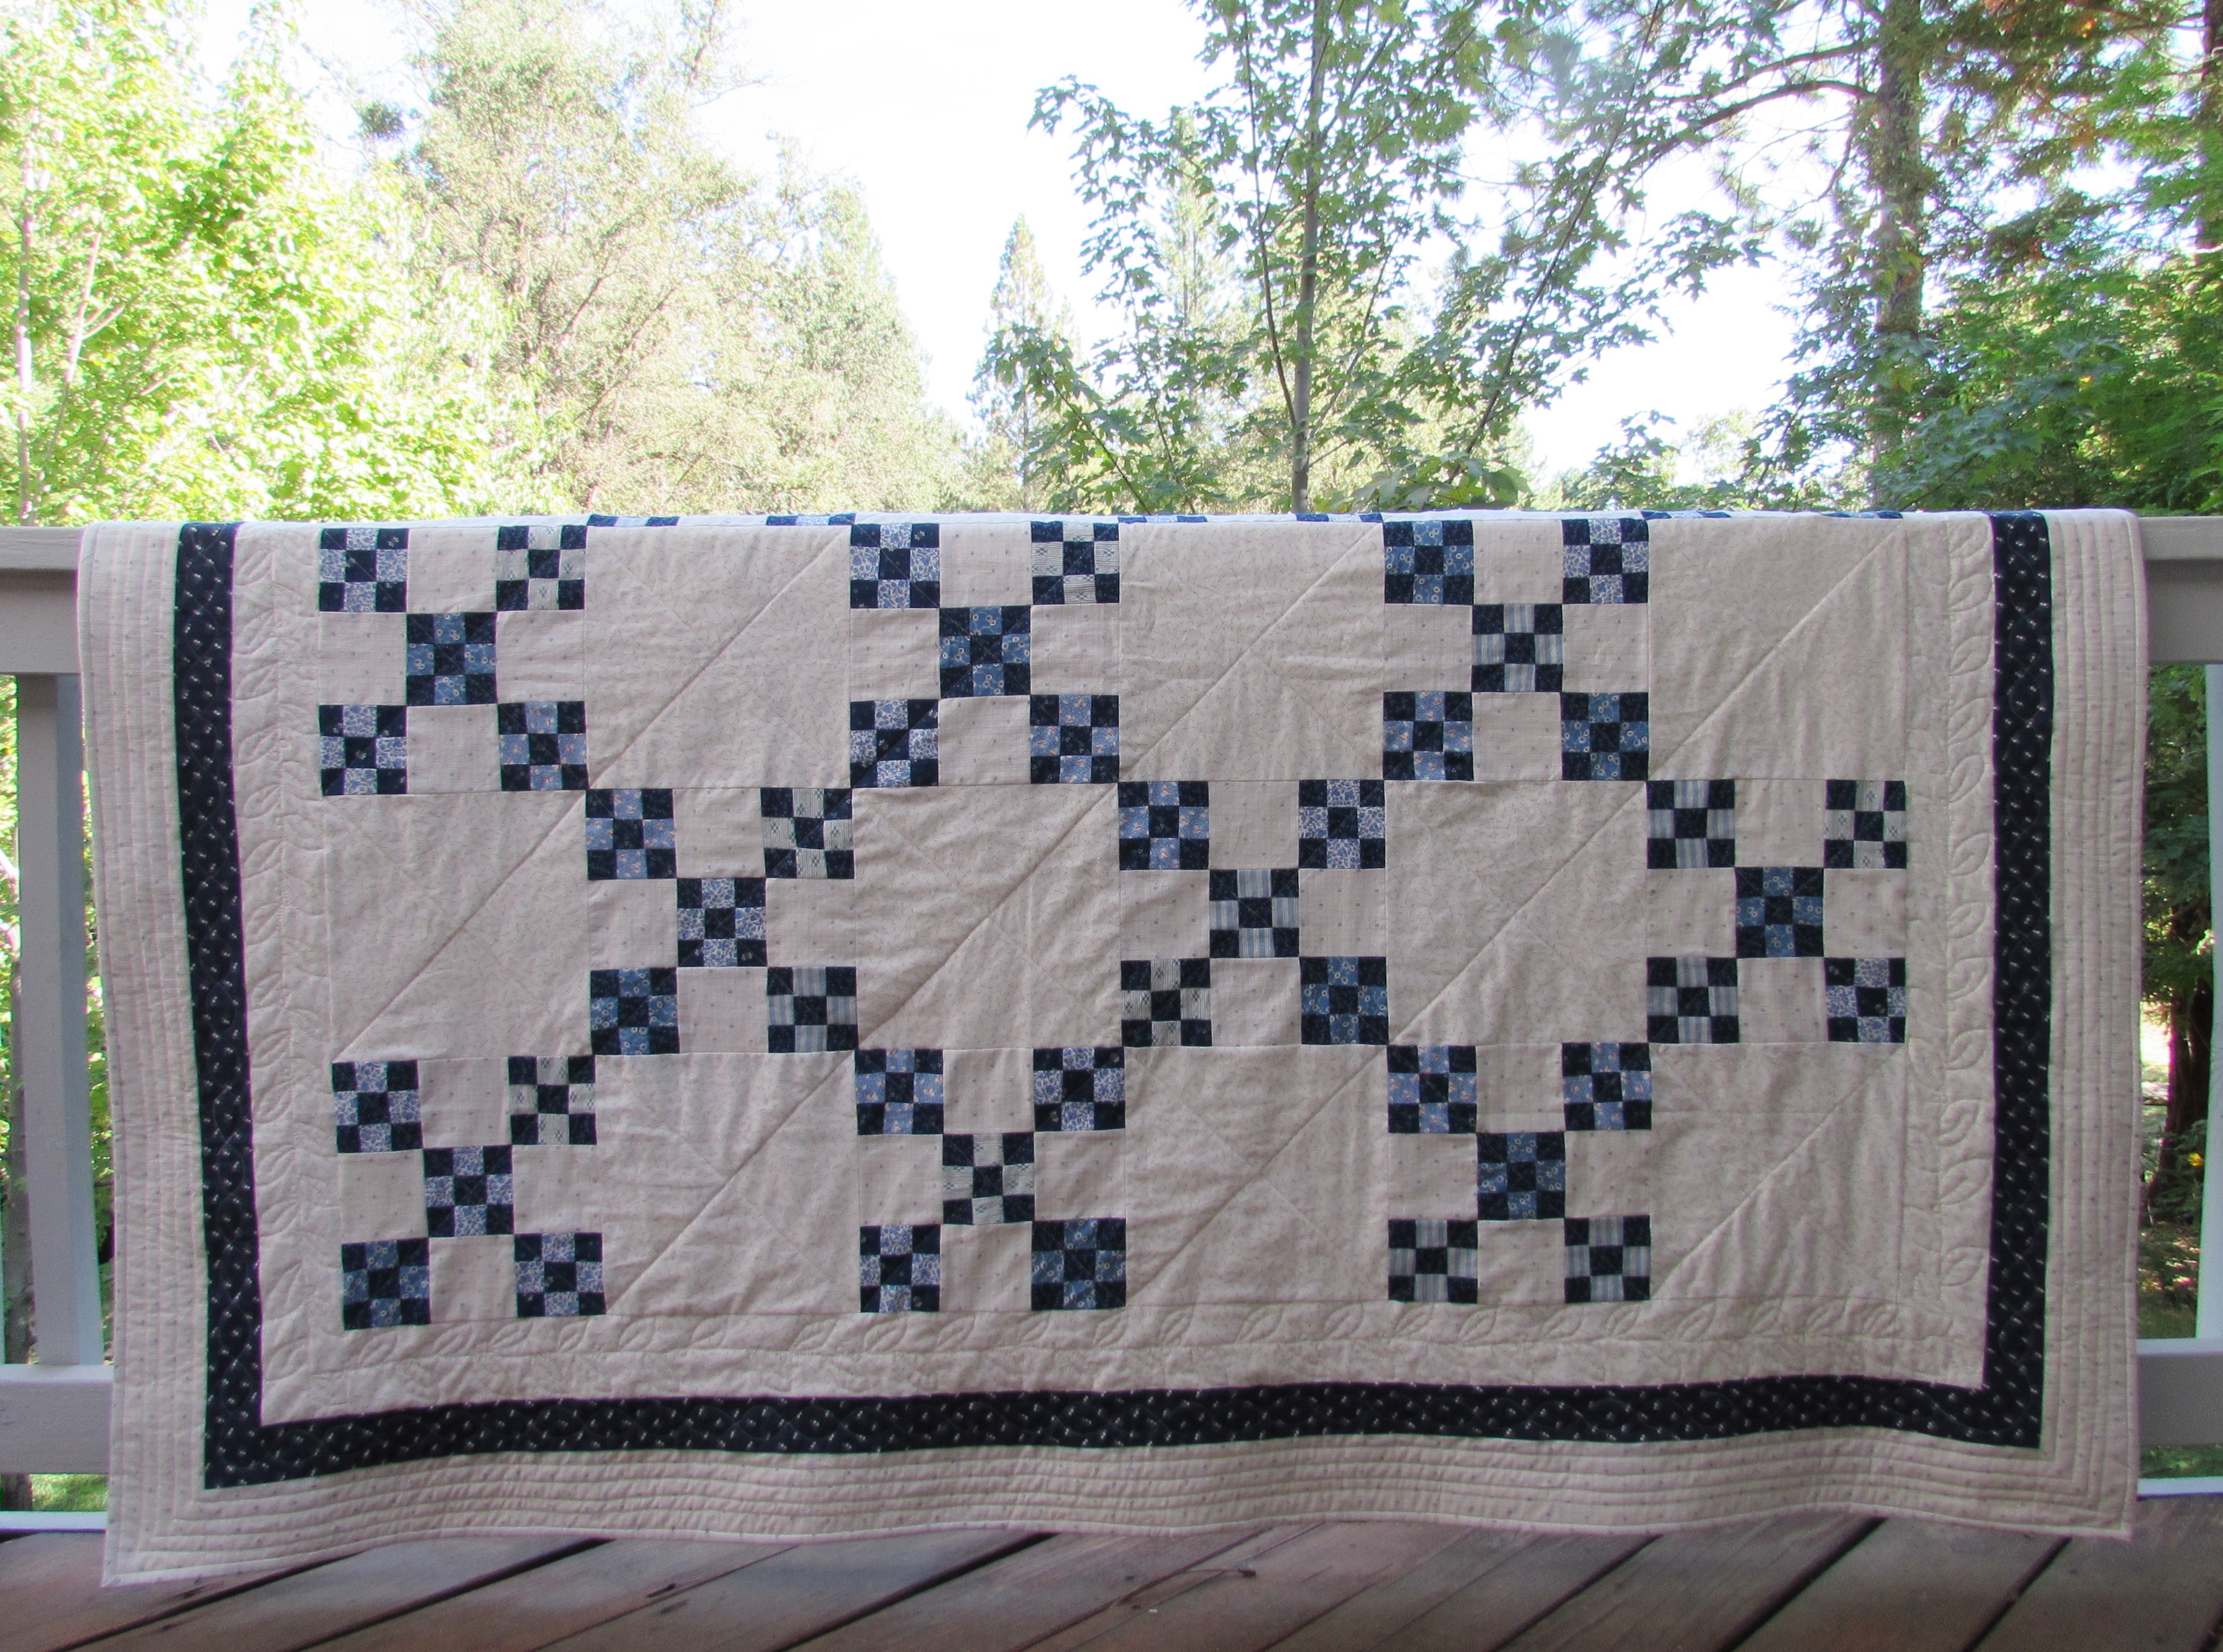
Looks like I made it, and with a few days to spare! My ALYOF goal for August was to quilt and bind my vintage double nine patch quilt. Yahoo for setting goals.
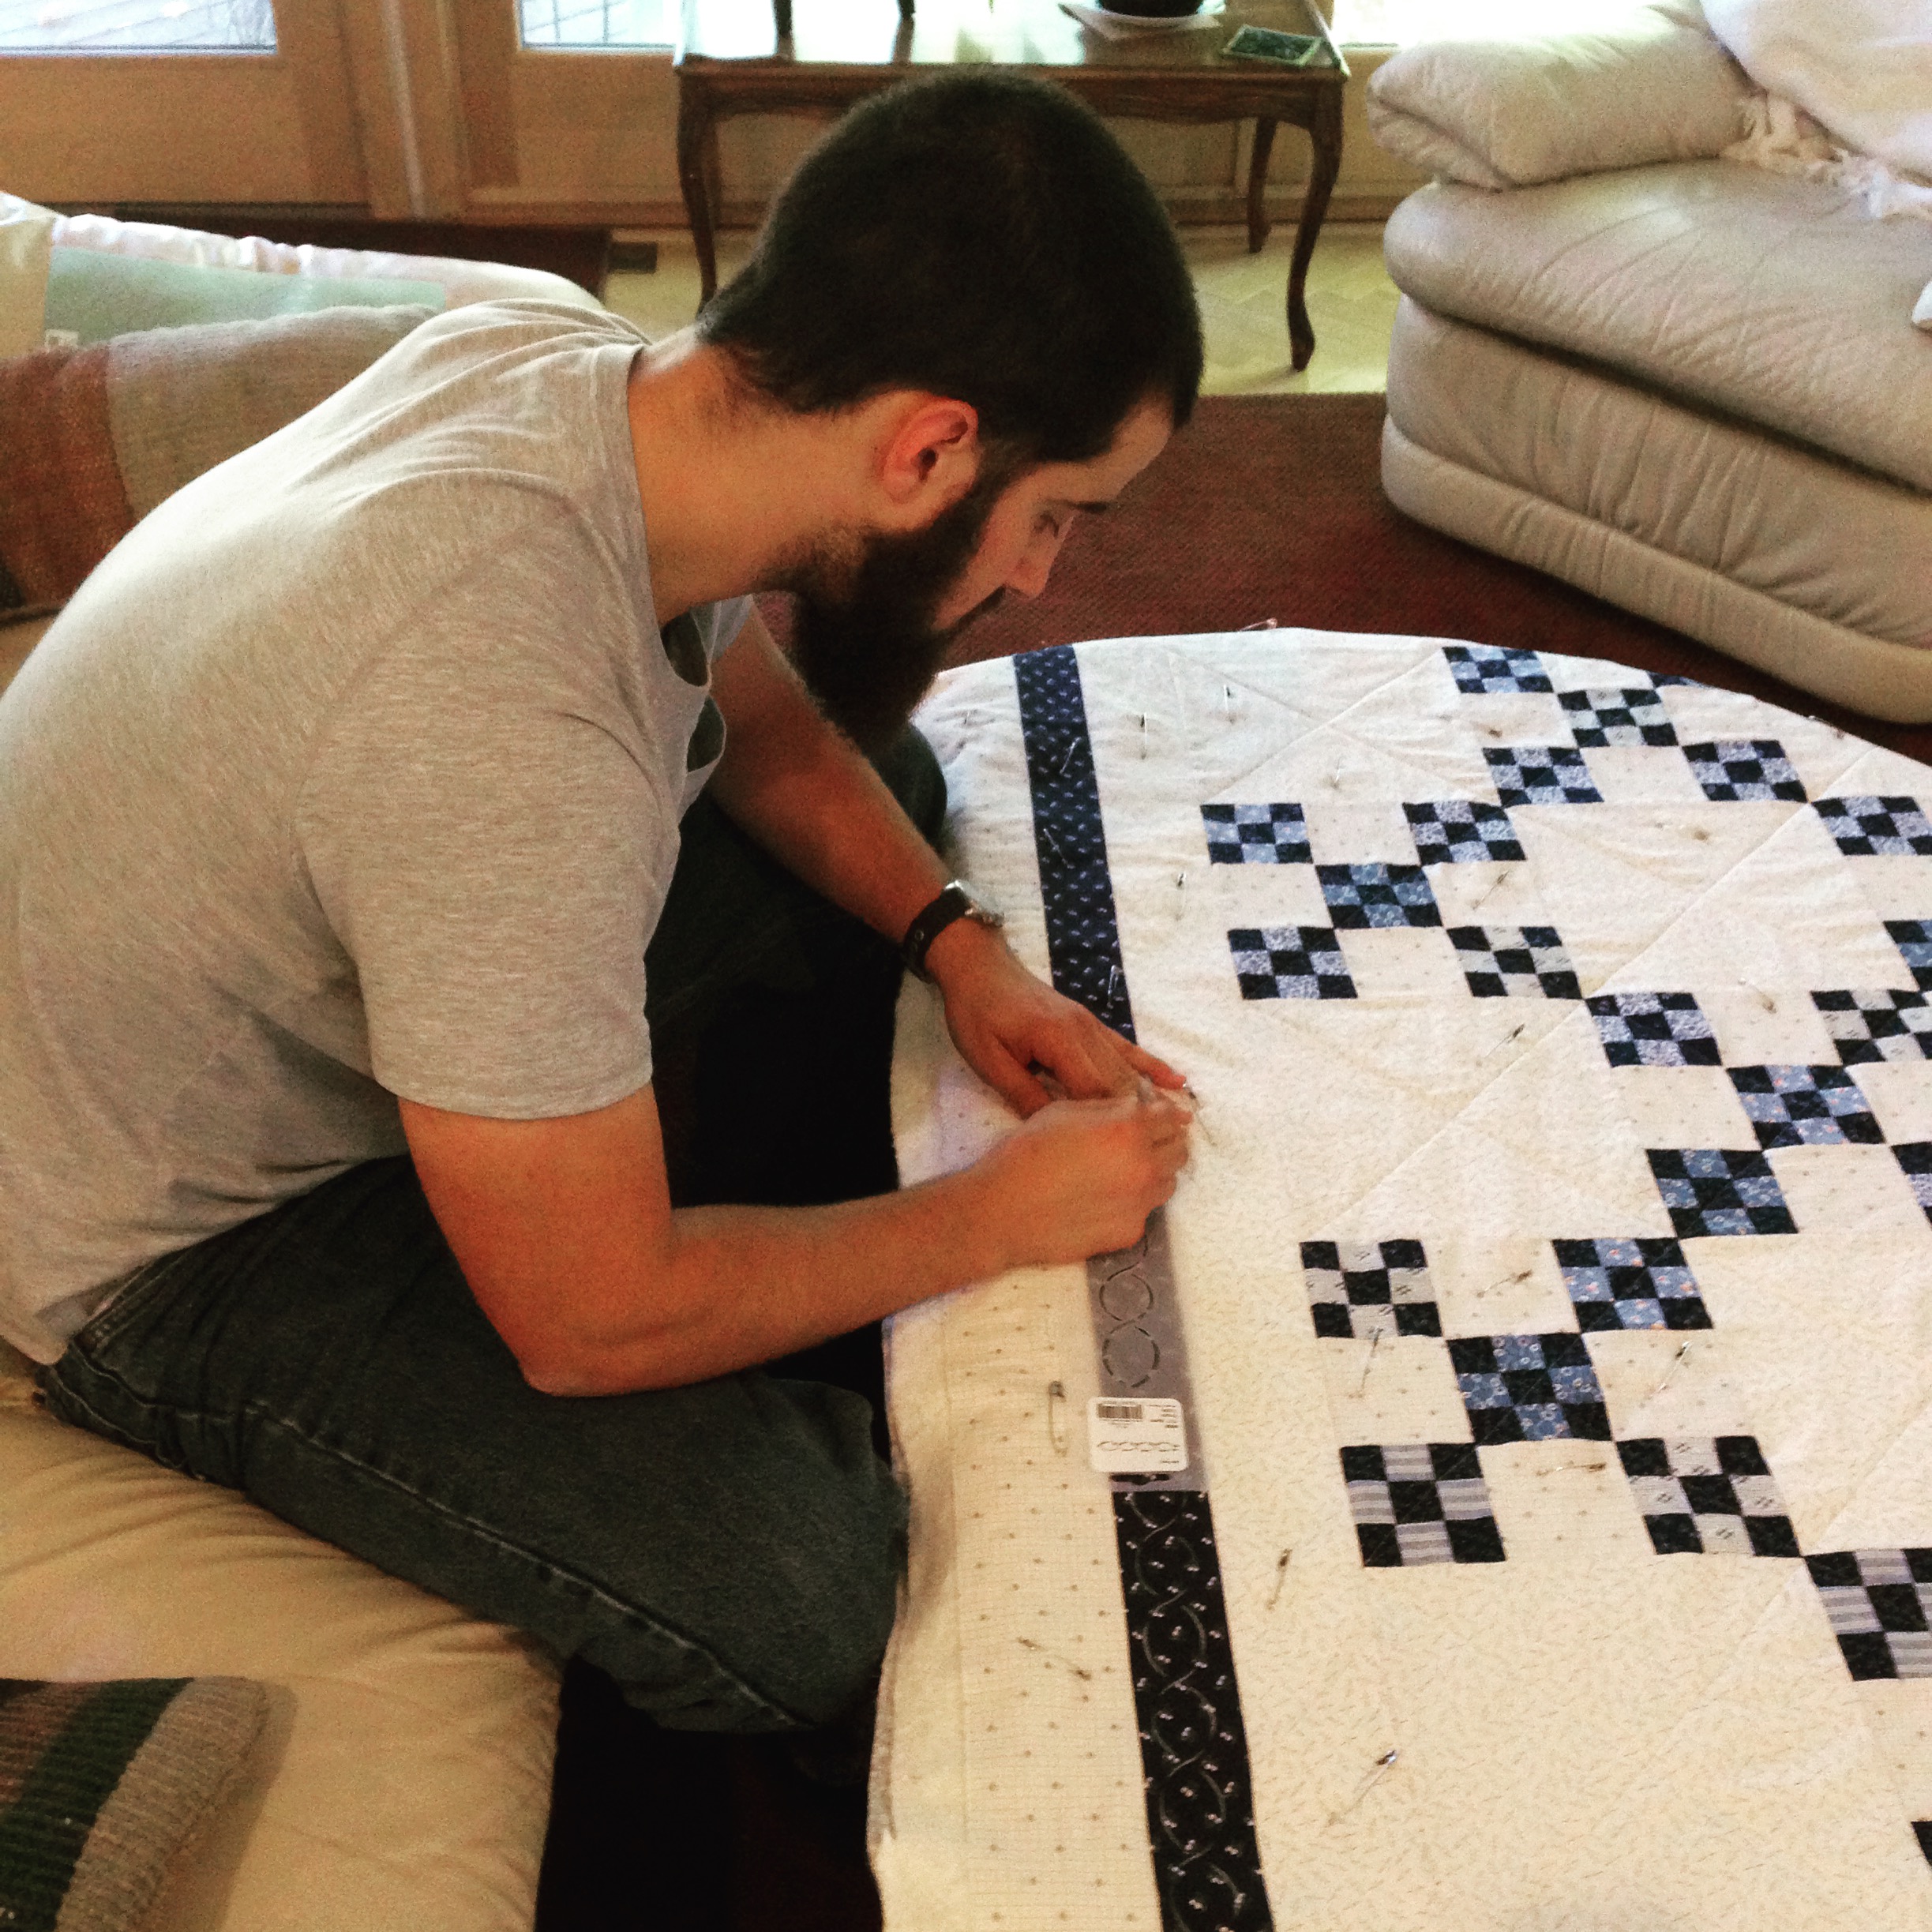
I had asked readers to suggest ideas for quilting the vintage quilt and was happy to receive tons of suggestions. Thanks so much for the ideas. I decided to quilt a basic cross-hatch over the main nine-patch blocks. Then I wanted to do something different with each of the three borders. My original thought was to do different cable patterns so I bought a couple of cable stencils.
Alas, it wasn’t entirely successful. I started by doing a basic, single cable on the middle (narrowest) border. I had great help with tracing the stencil. Ian was home for the weekend and kindly traced for me.
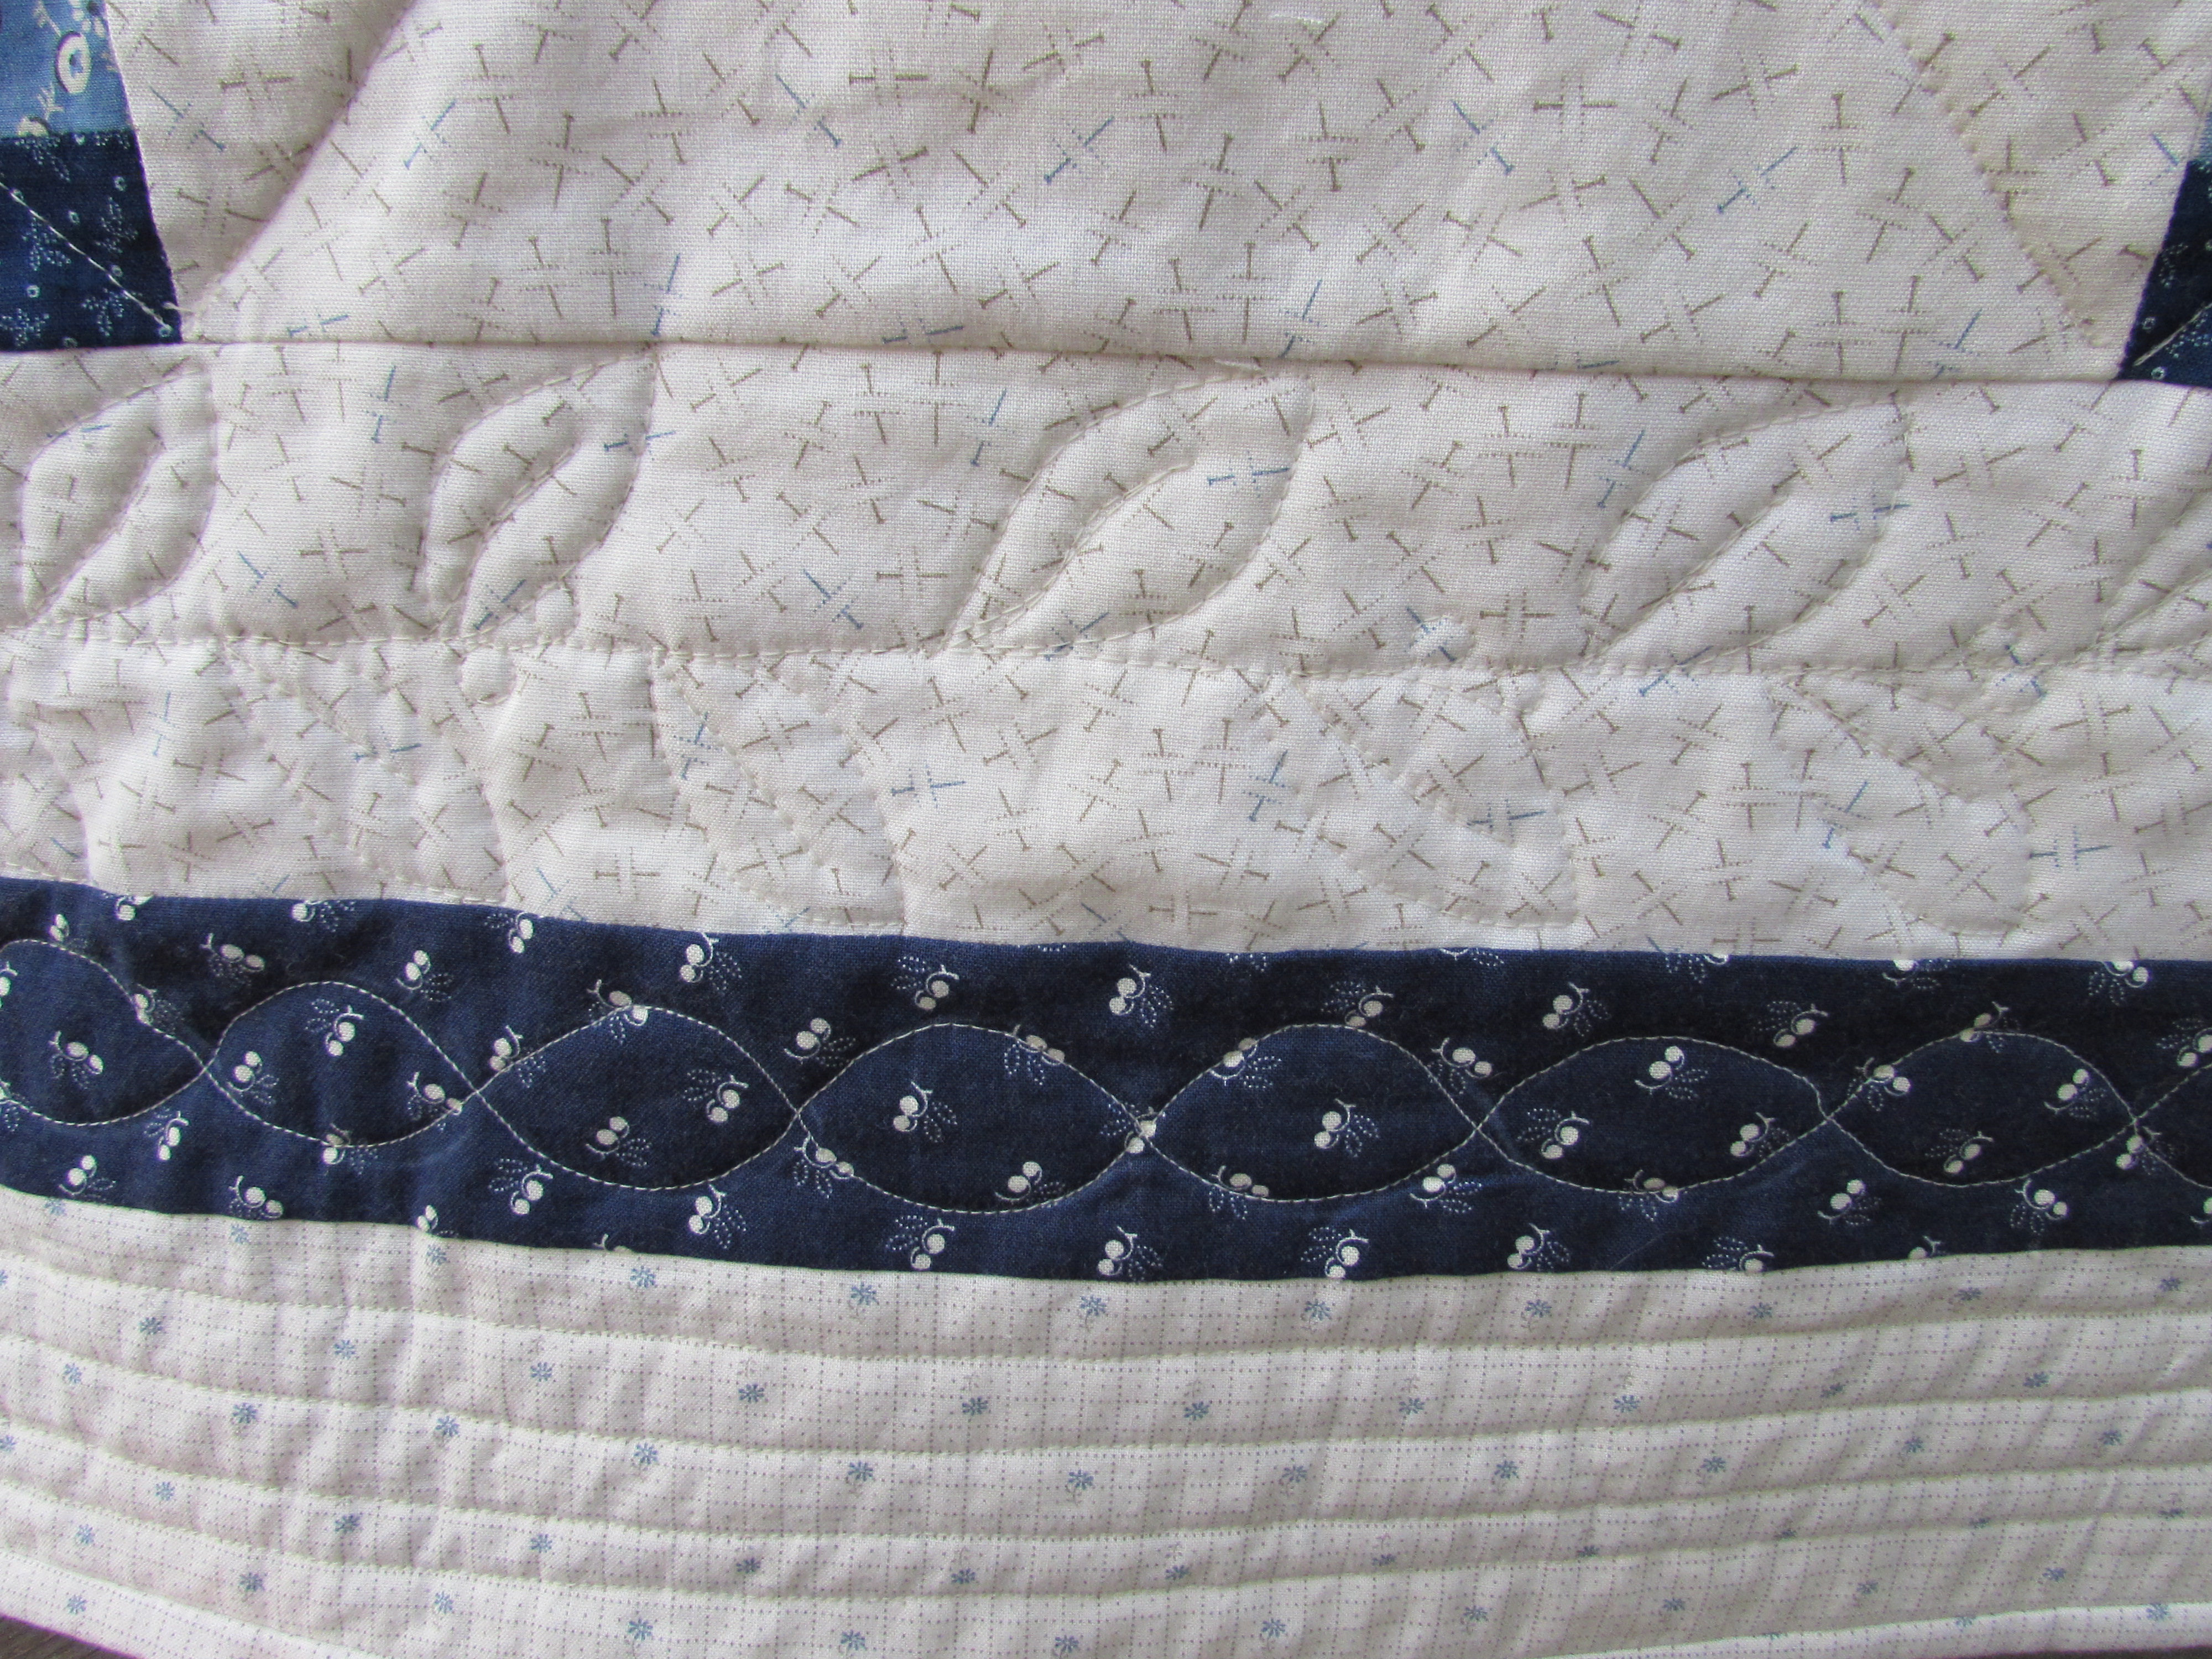
Try as I might, I couldn’t relax and just stitch. I wanted to use my walking foot, maybe that was the mistake? The stitching isn’t fluid and I am less than pleased with it. Hoping that a run through the wash (in my NEW washing machine) will make the jitters a bit less obvious.
Because of the issues with the single cable, I lost interest in doing a more complex cable pattern so I put the stencils away in the deepest recesses of my desk drawer. I don’t plan on looking at them for quite some time. Instead, I played with some motifs that Lori Kennedy has posted over at The Inbox Jaunt. I chose her Modern Leaf pattern (which I posted about earlier this week.) Because I am susceptible to this sort of nonsense, I wondered if I should use a motif with the word “Modern” in it when I was really trying to go for a vintage look. Jeez… I need to get over myself already. It worked out fine and was very fun to quilt. Because I did the quilting with cream colored Mettler thread, it is hard to see in the pictures. But I am much happier with it than the single cable. (I love the fabric with those little pins. Really cute.)
For the final, outside border I did basic straight-line quilting which I just eyeballed using the side of the walking foot. Simple and clean. I backed it with a blue print and as you can see, I used one of the cream background fabrics as the binding.
One small concern that came to mind is that I have a six inch gap between stitching lines on the cross-hatch. The batting said I could space the quilting with as much as an eight inch gap. However this is likely the widest I have gone and it seems sketchy to me. Any input on that? I could still add lines to the body of the quilt if need be. If I split the difference between the existing lines, I would have a three inch gap. Thanks for any ideas you might have.
Overall, I am happy with the finish. This is a more traditional quilt than I normally make but I enjoyed it. My next project is more modern and uses Kaffe Fassett yardage and jelly roll. I am chomping at the bit to get started on it so stay tuned.
August is here. That’s crazy. Summer is buzzing by and we are trying to cram as much as possible into these last few weeks.
With the new month, I am looking at what I want to create and complete for August. The list is long, maybe too long?
The main goal is to finish the vintage nine patch quilt. I have the quilt top and backing ready to go. I ordered batting on-line because I don’t feel like the 75 miles (round trip) to Jo-Anns. I won’t buy batting at the local store, it’s too expensive. Anyway, it should be here this week and then I can get the quilt pin basted and start quilting it. That is the goal I am submitting for August for ALYOF.
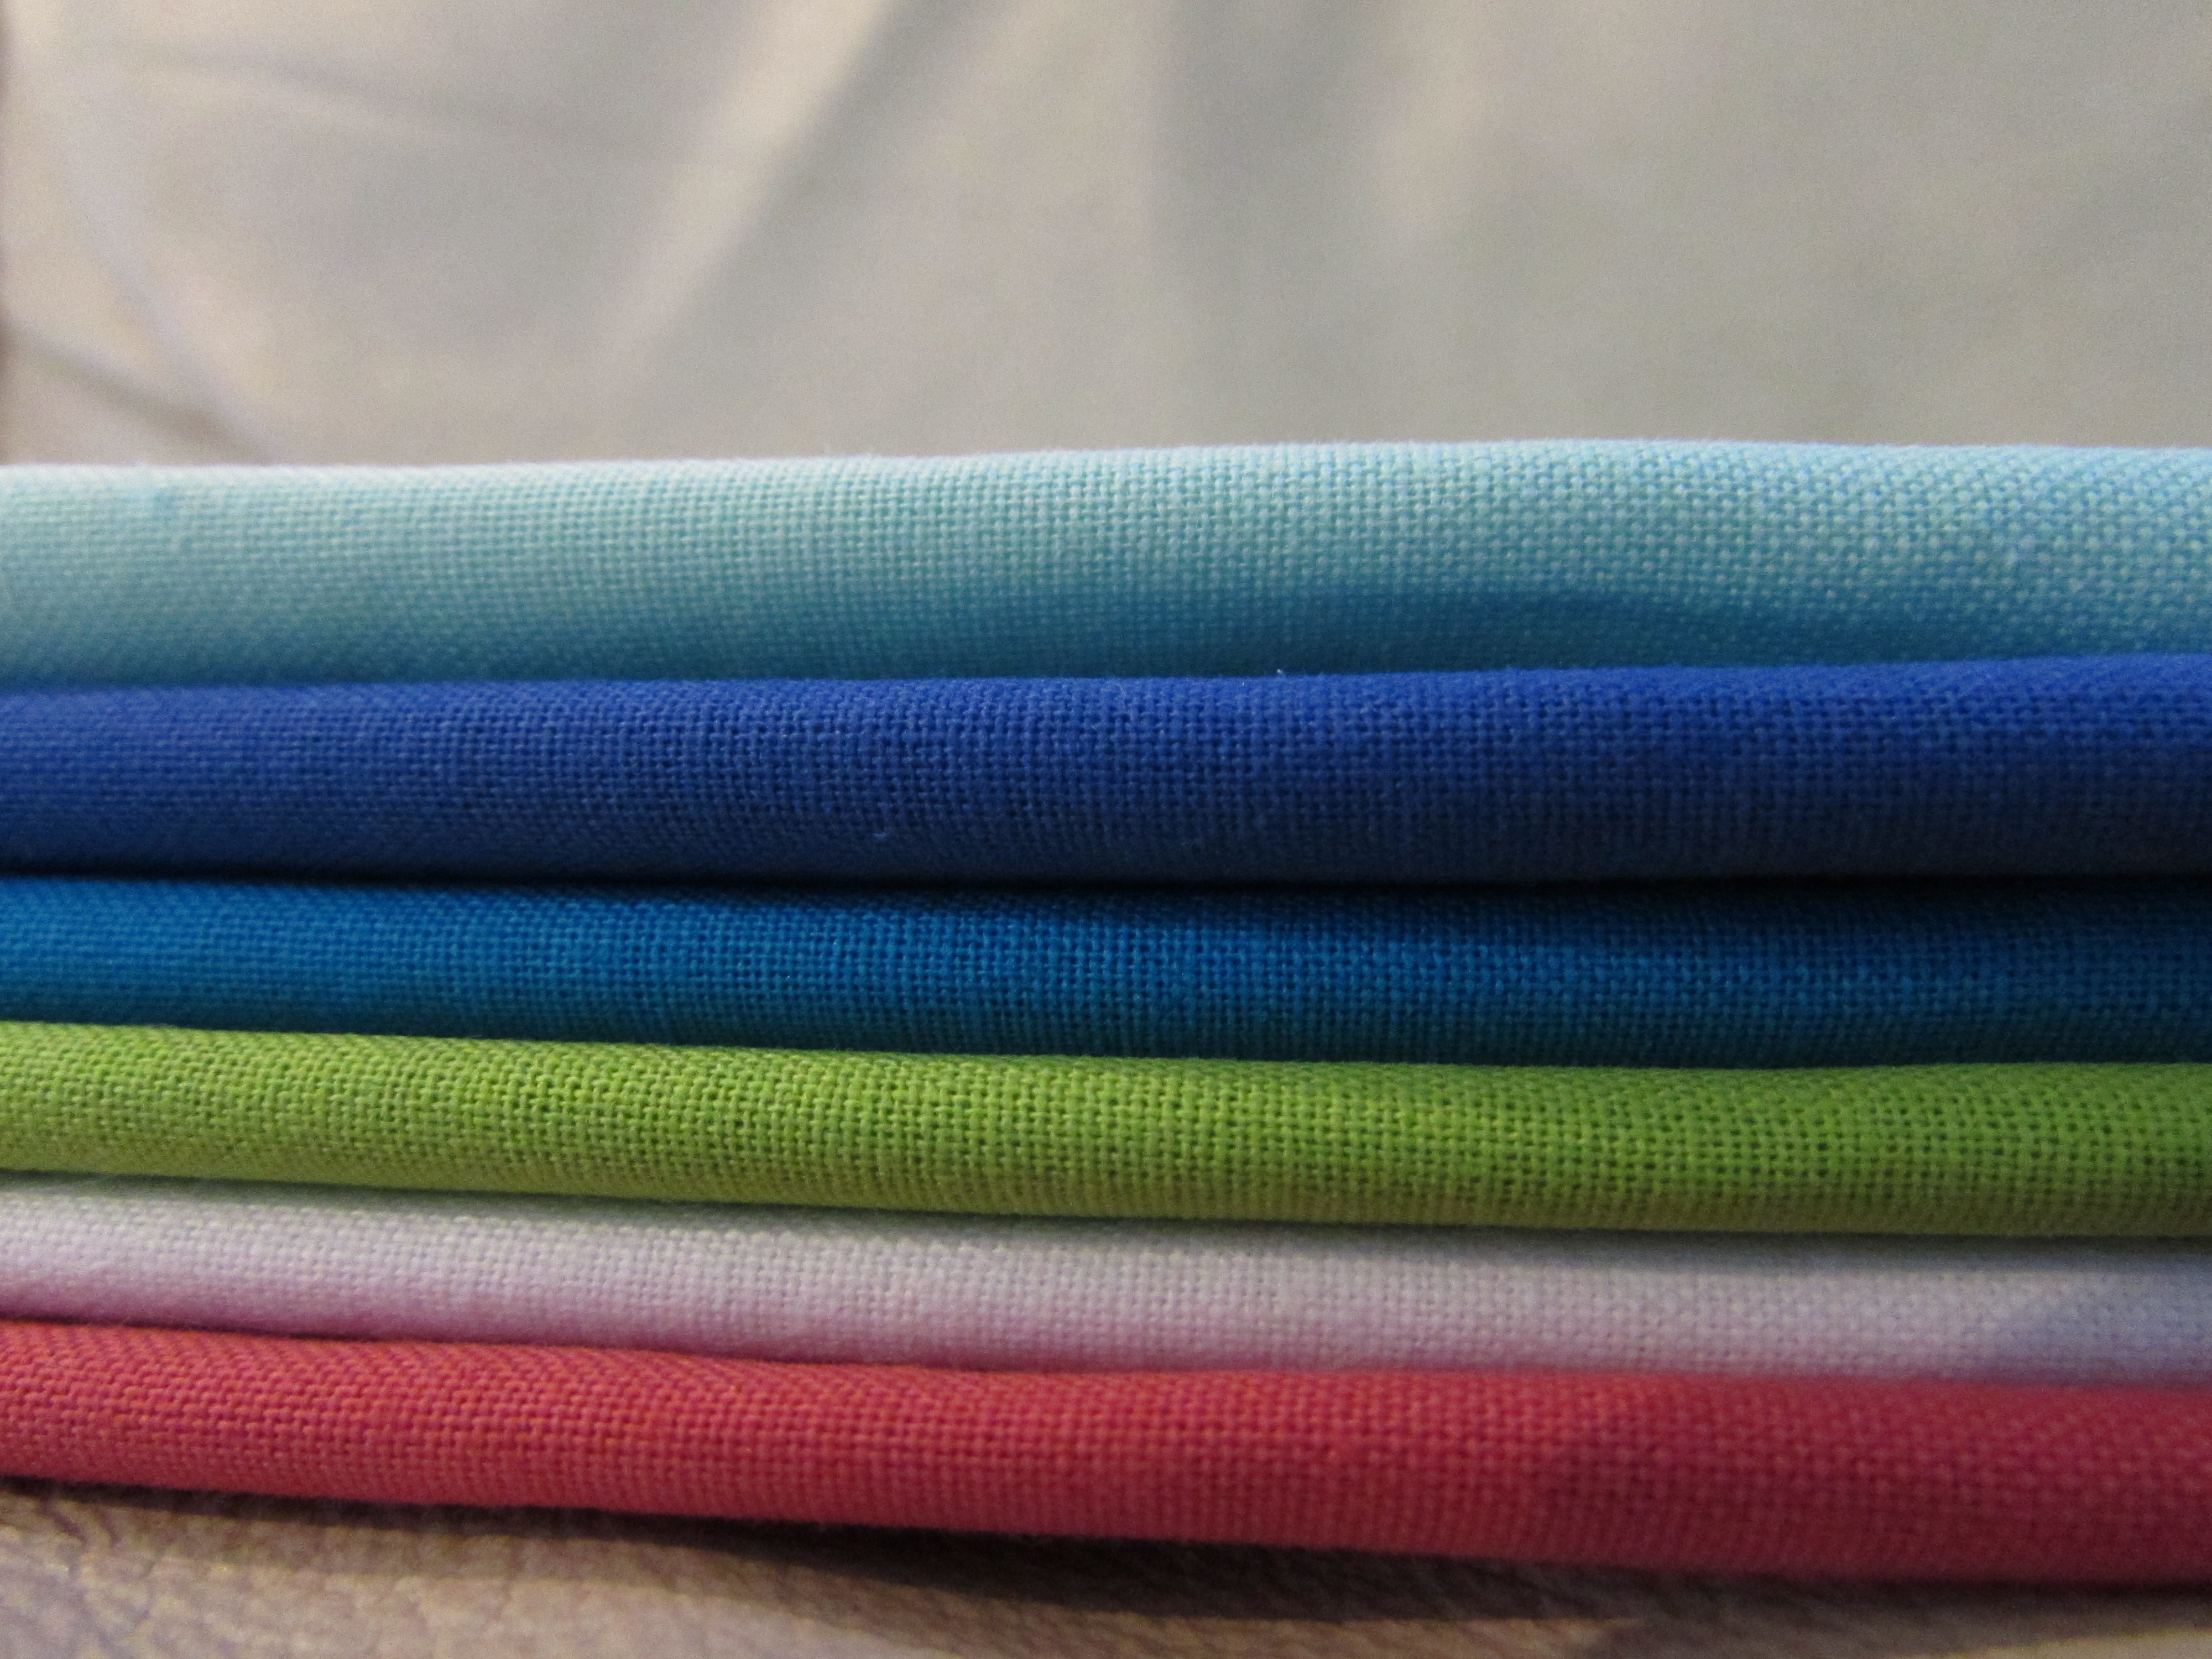
I also have a project that came my way via the New Quilt Bloggers Bloghop. Fabri-Quilt has sponsored an activity for the group. We are each to work with a set of solids and create a block that is of our own design.
These are the fat eighths that I received this week. I have been cutting and sewing mock ups and so far don’t have exactly what I want. It needs to be original. What exactly does that mean? I can’t really think of a block that hasn’t been used in some way by someone else. Truly, there are only so many ways I can visualize HST’s, squares, triangles and rectangles. So, I am trying to take a regular block and put my own spin on it. That is about as original as my brain gets. At any rate, this is certainly forcing me to work beyond my comfort zone. In addition to making the block, we will all be writing tutorials for the blocks. That part will be fun and I am really curious to see everyone’s block tutorials. Could be a fun project to make a selection of the blocks and come up with a sampler quilt or wall hanging. Stay tuned for more on this.
Next on the list, as always, is my RSC15 row quilt. Last month I veered from the Classic Stitches block but this month I plan to go back to Mari’s monthly block. She wrote up an easy block for this month and the color is indigo, black or gray. I need to look at the quilt so far and choose either indigo or gray, either of which I have plenty of scraps to choose from.
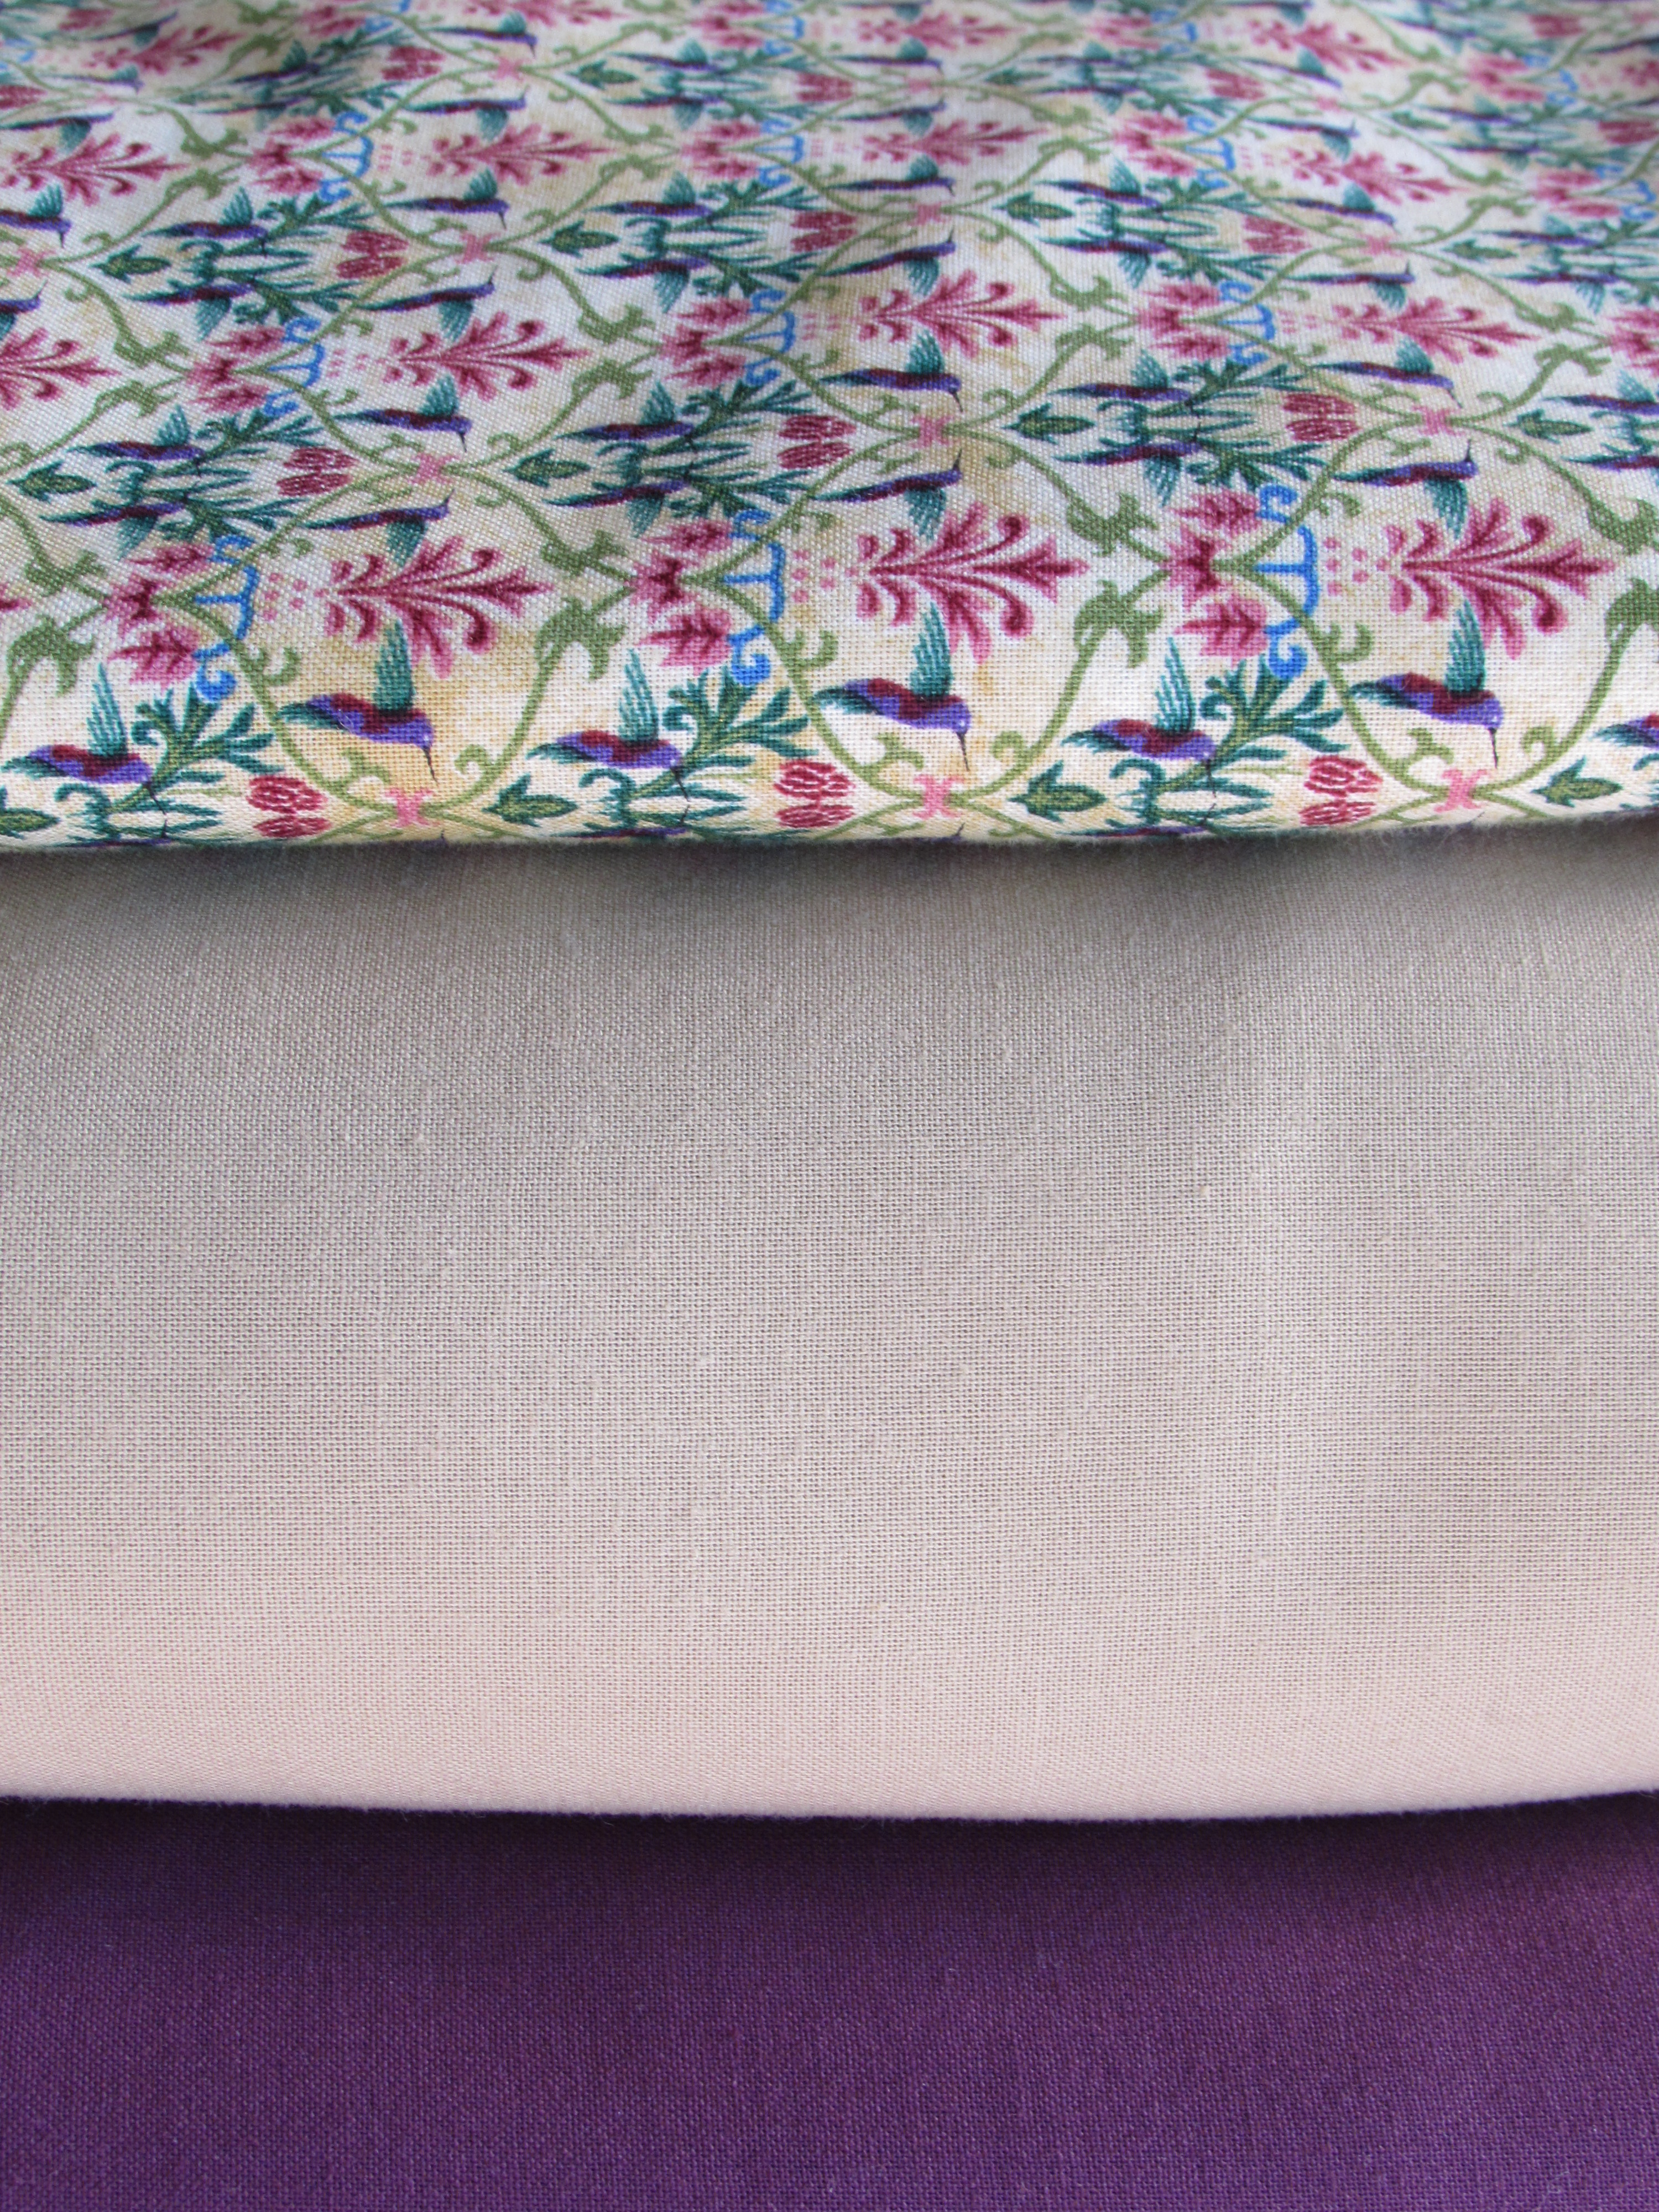
Lastly, if I get around to it, I am going to start making two twin quilts for the beds up at Downieville. Ray saw me looking at comforters on-line and raised those eyebrows of his – like, really? You are always looking for a reason to sew and you want to buy two comforters? I shook my head and came back to reality. I painted the room a pale sage green. There are cute curtains (that I thrifted) with a floral pattern of green and violet on a tan background. (Sorry, I don’t have a picture for some reason.) I was at the store last week and they had a deal where if you bought the end of the bolt, it was 40% off. The tan bolt (I think it was a Bella Solid) was perfect so I bought the remaining six yards. Then I bought a piece of violet and a print.
It is a good starting point. I don’t know exactly the design yet, but I do know I want it to be big, oversized blocks. I started a board on Pinterest for inspiration. I think with big chunky blocks, both quilts will come together reasonably fast. My hope for this month is to settle on a design and get the pieces cut.
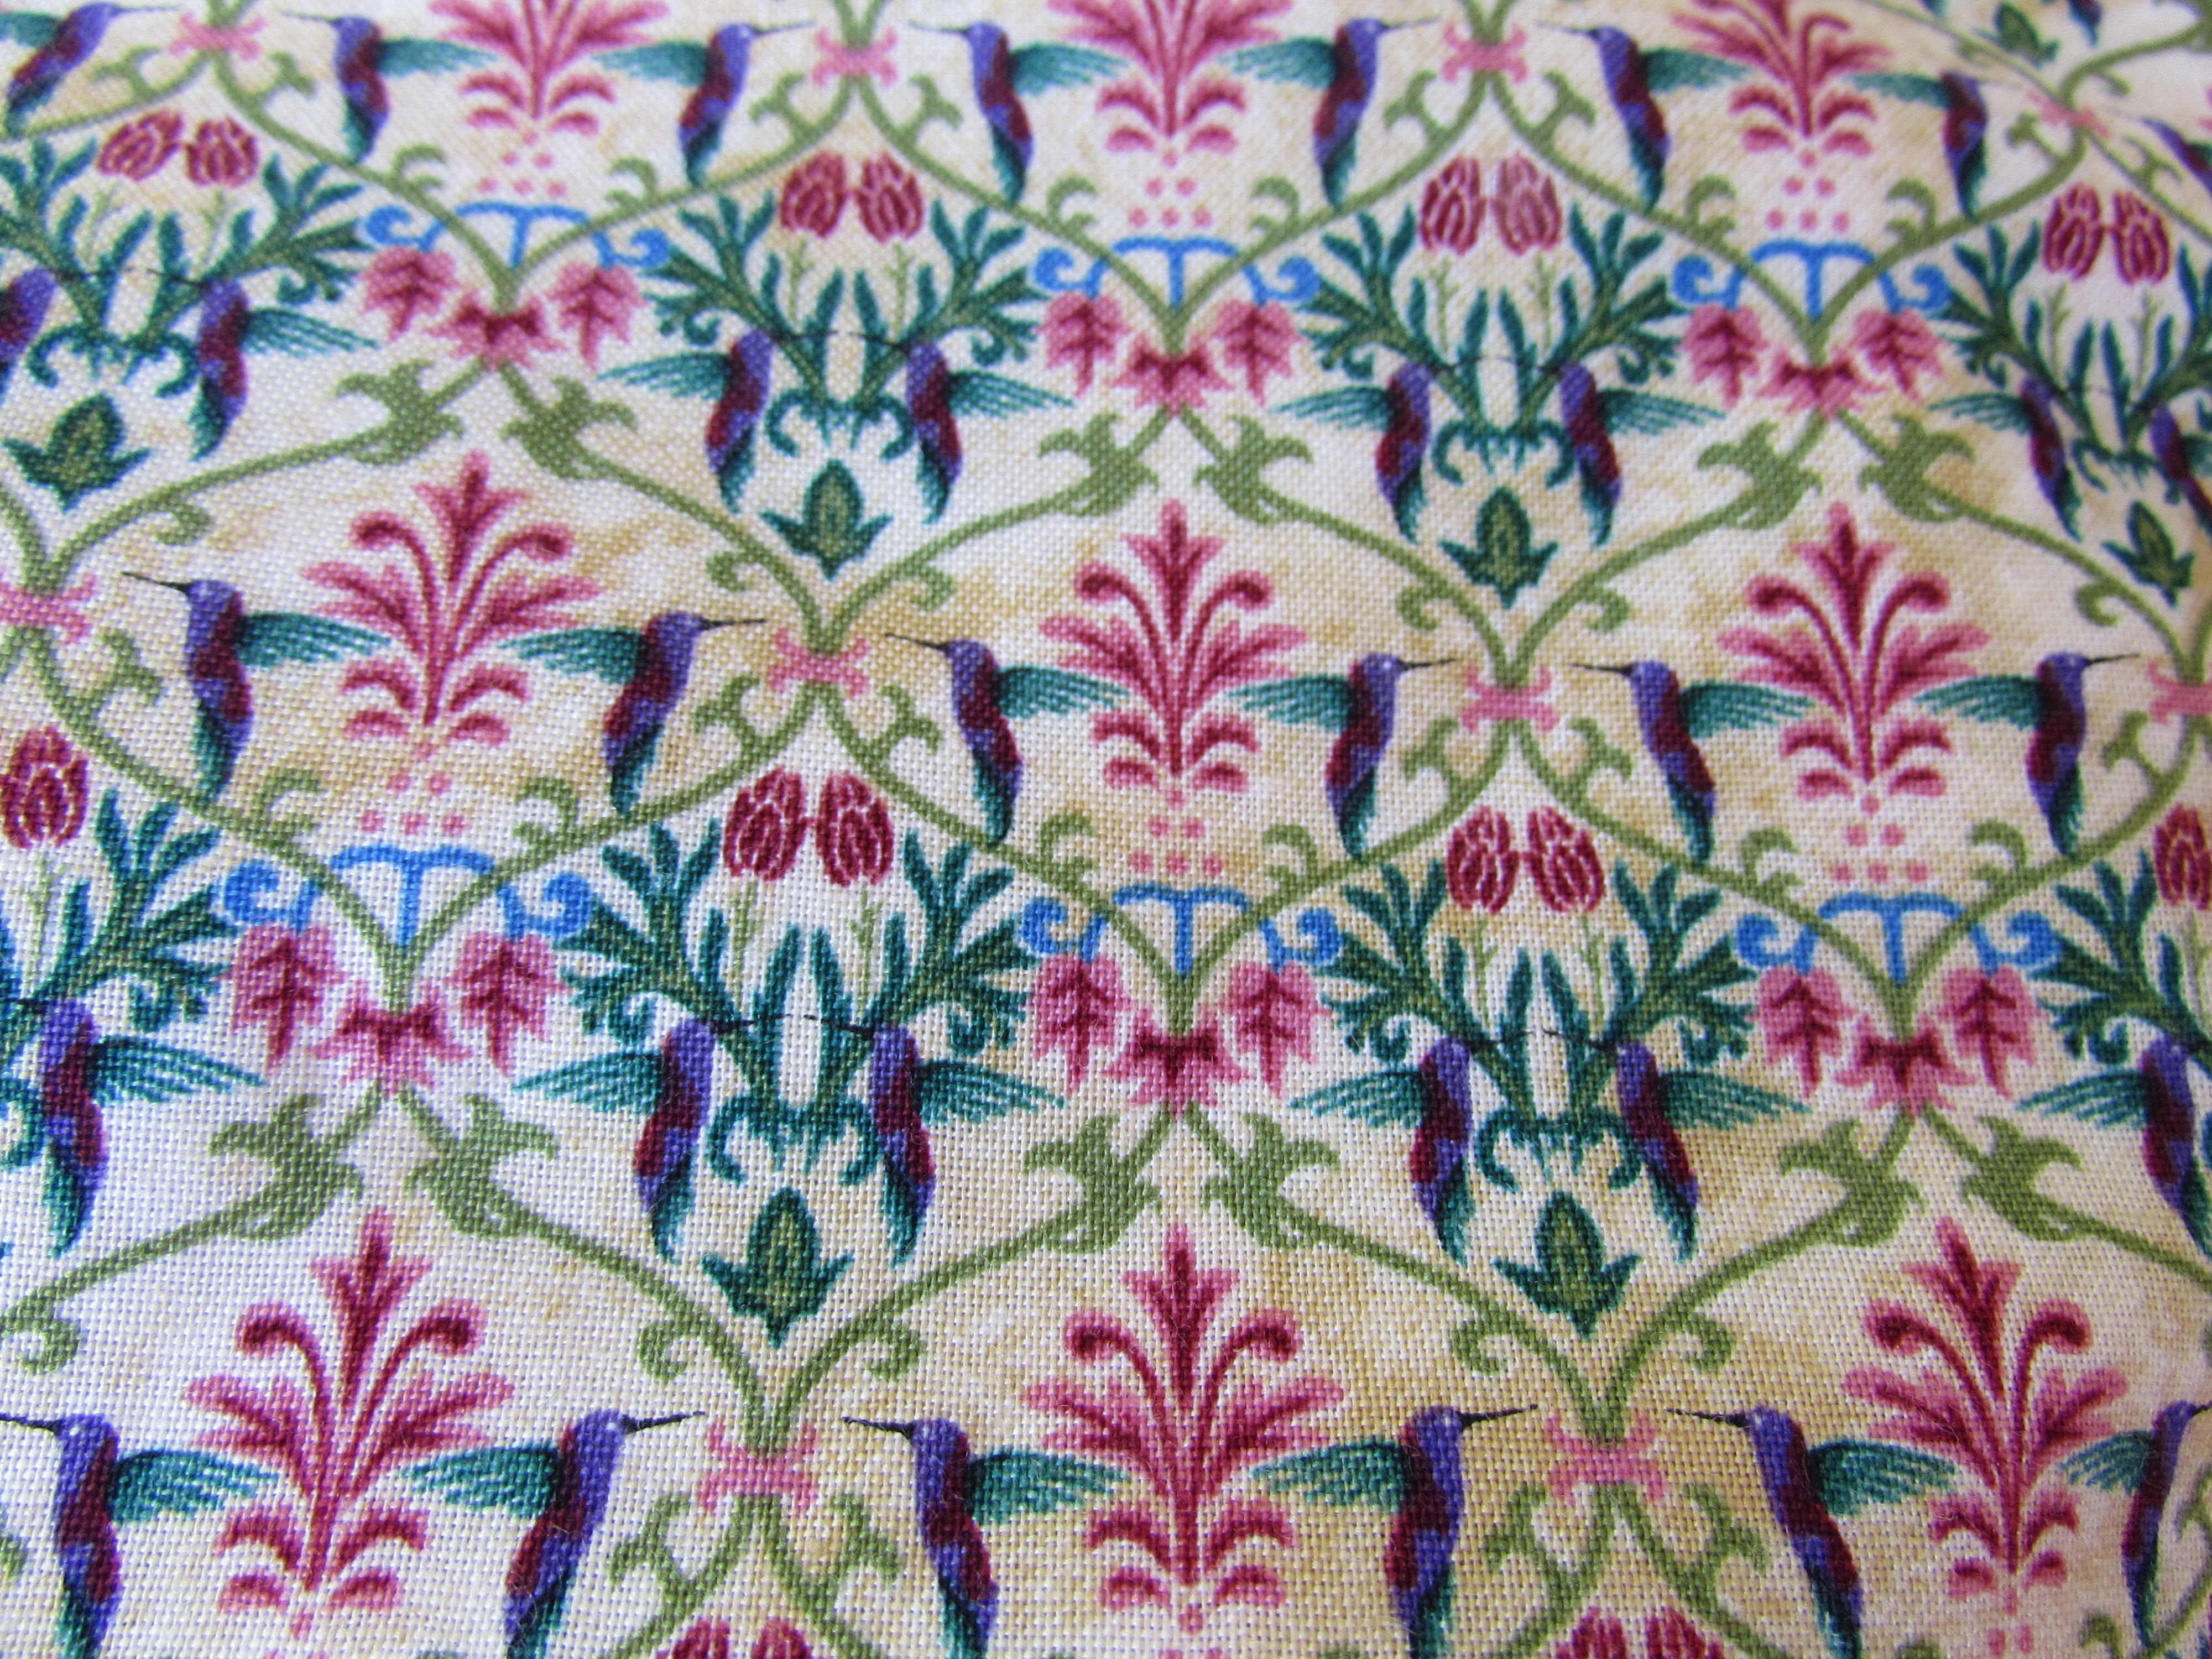
The bedroom will look much better with normal bedding. Right now there is a hodge-podge of linens that I had stashed away. Not exactly pretty. I really love this little hummingbird print. It is called “Windsor Woods”.
Somewhere in all of this, I need to start working on Etsy items. The holiday season will be here soon. I hope to have plenty of items posted by fall. Last year I was new to the game (actually, I still am!) I didn’t have enough items listed and sold out quickly. Hope to boost the quantity this year.
Lots of the list. I better get to work!
Linking to Sew Cute Tuesday, Freemotion by the River and Let’s Bee Social. Links to all of these sites are available at the top of the page, under Link Ups.
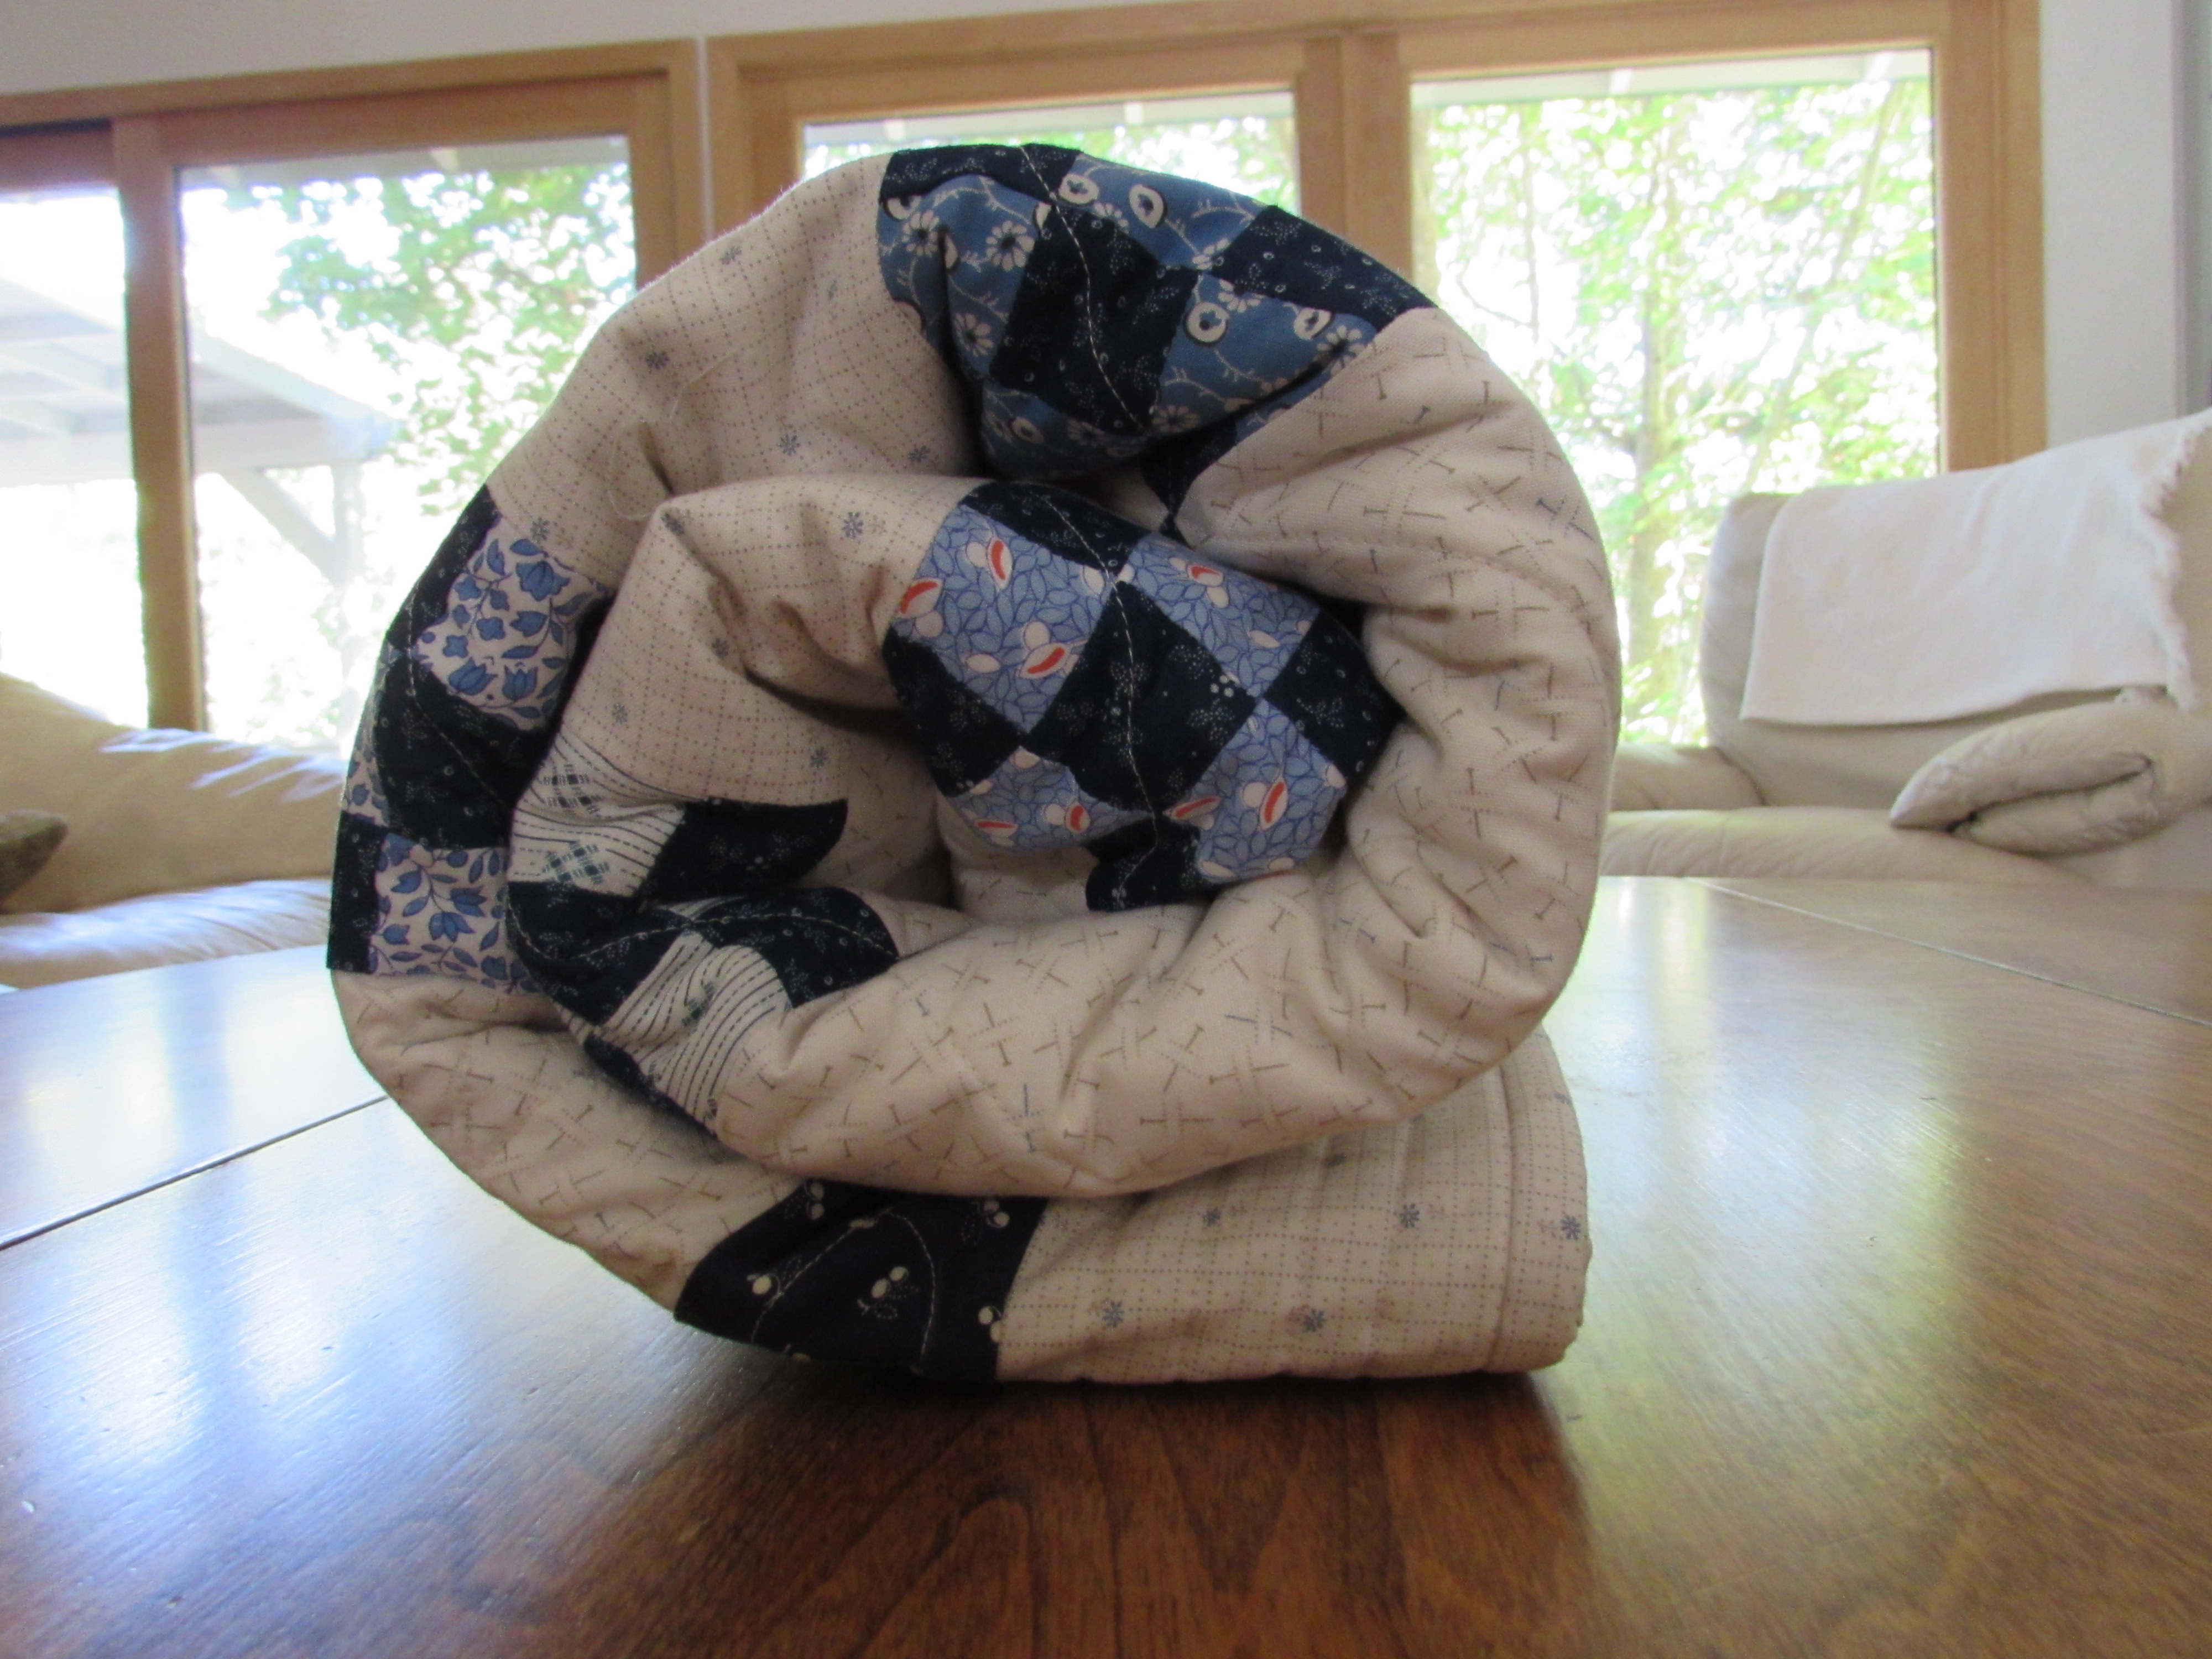
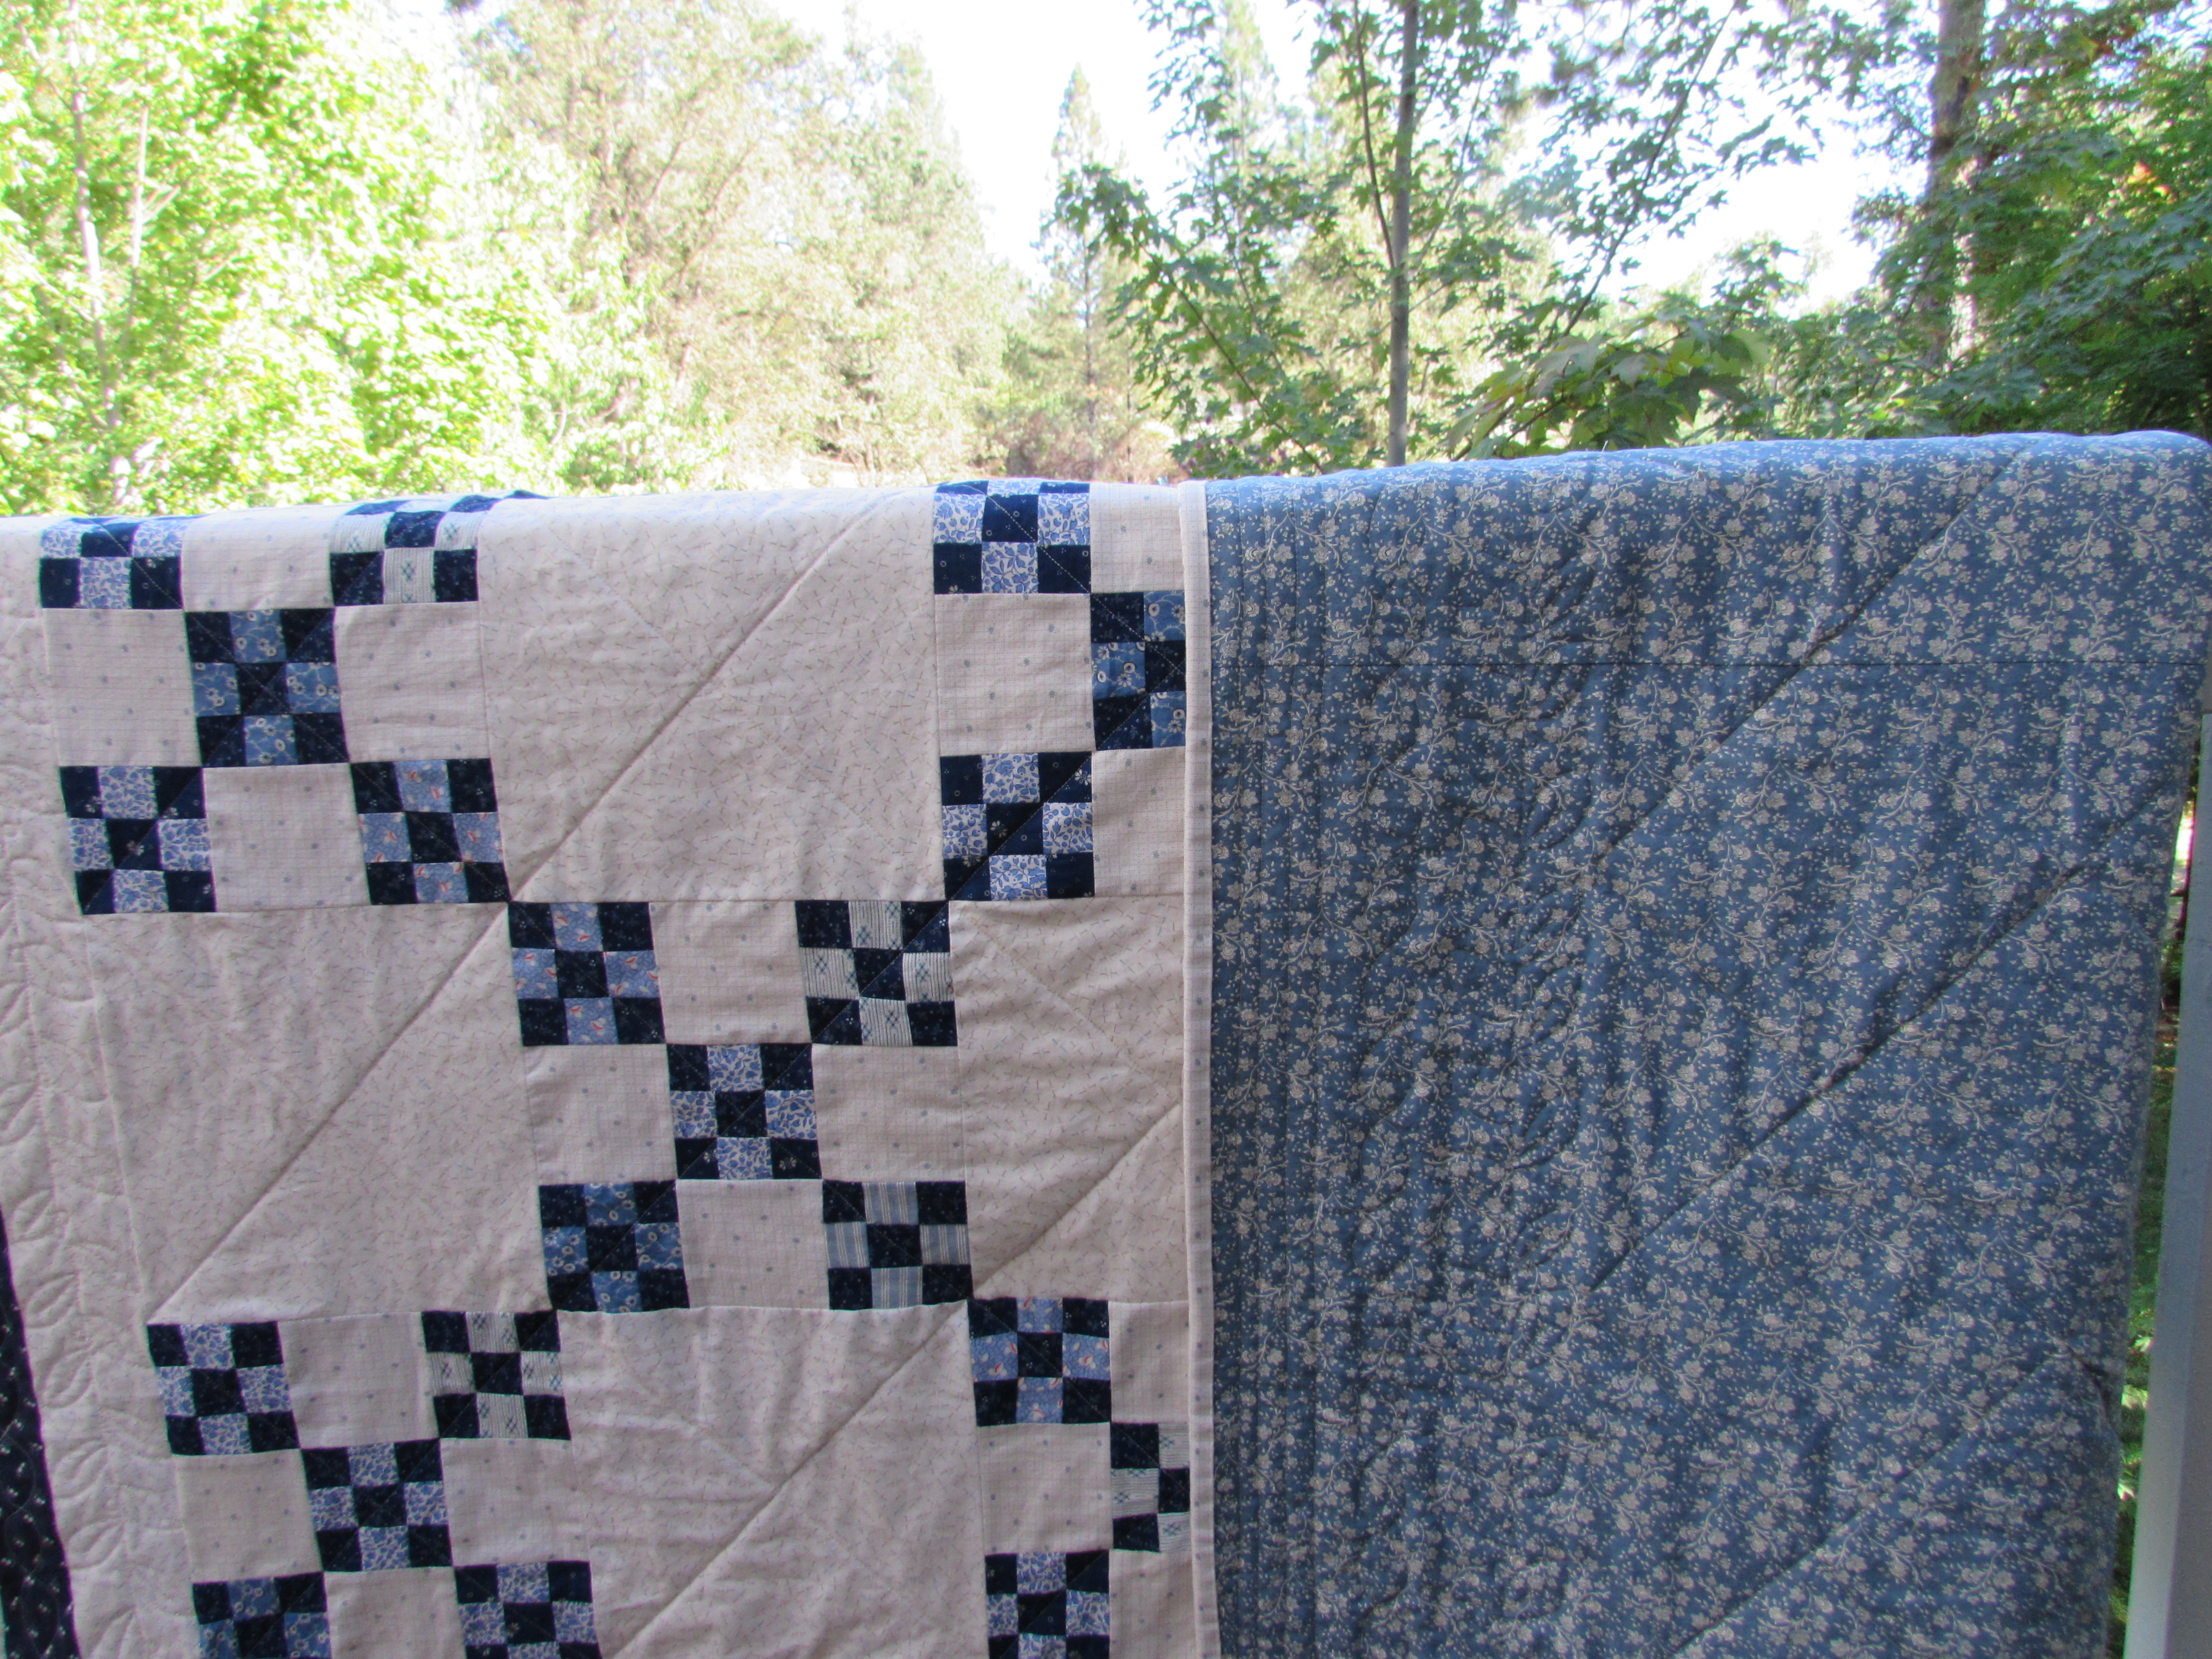
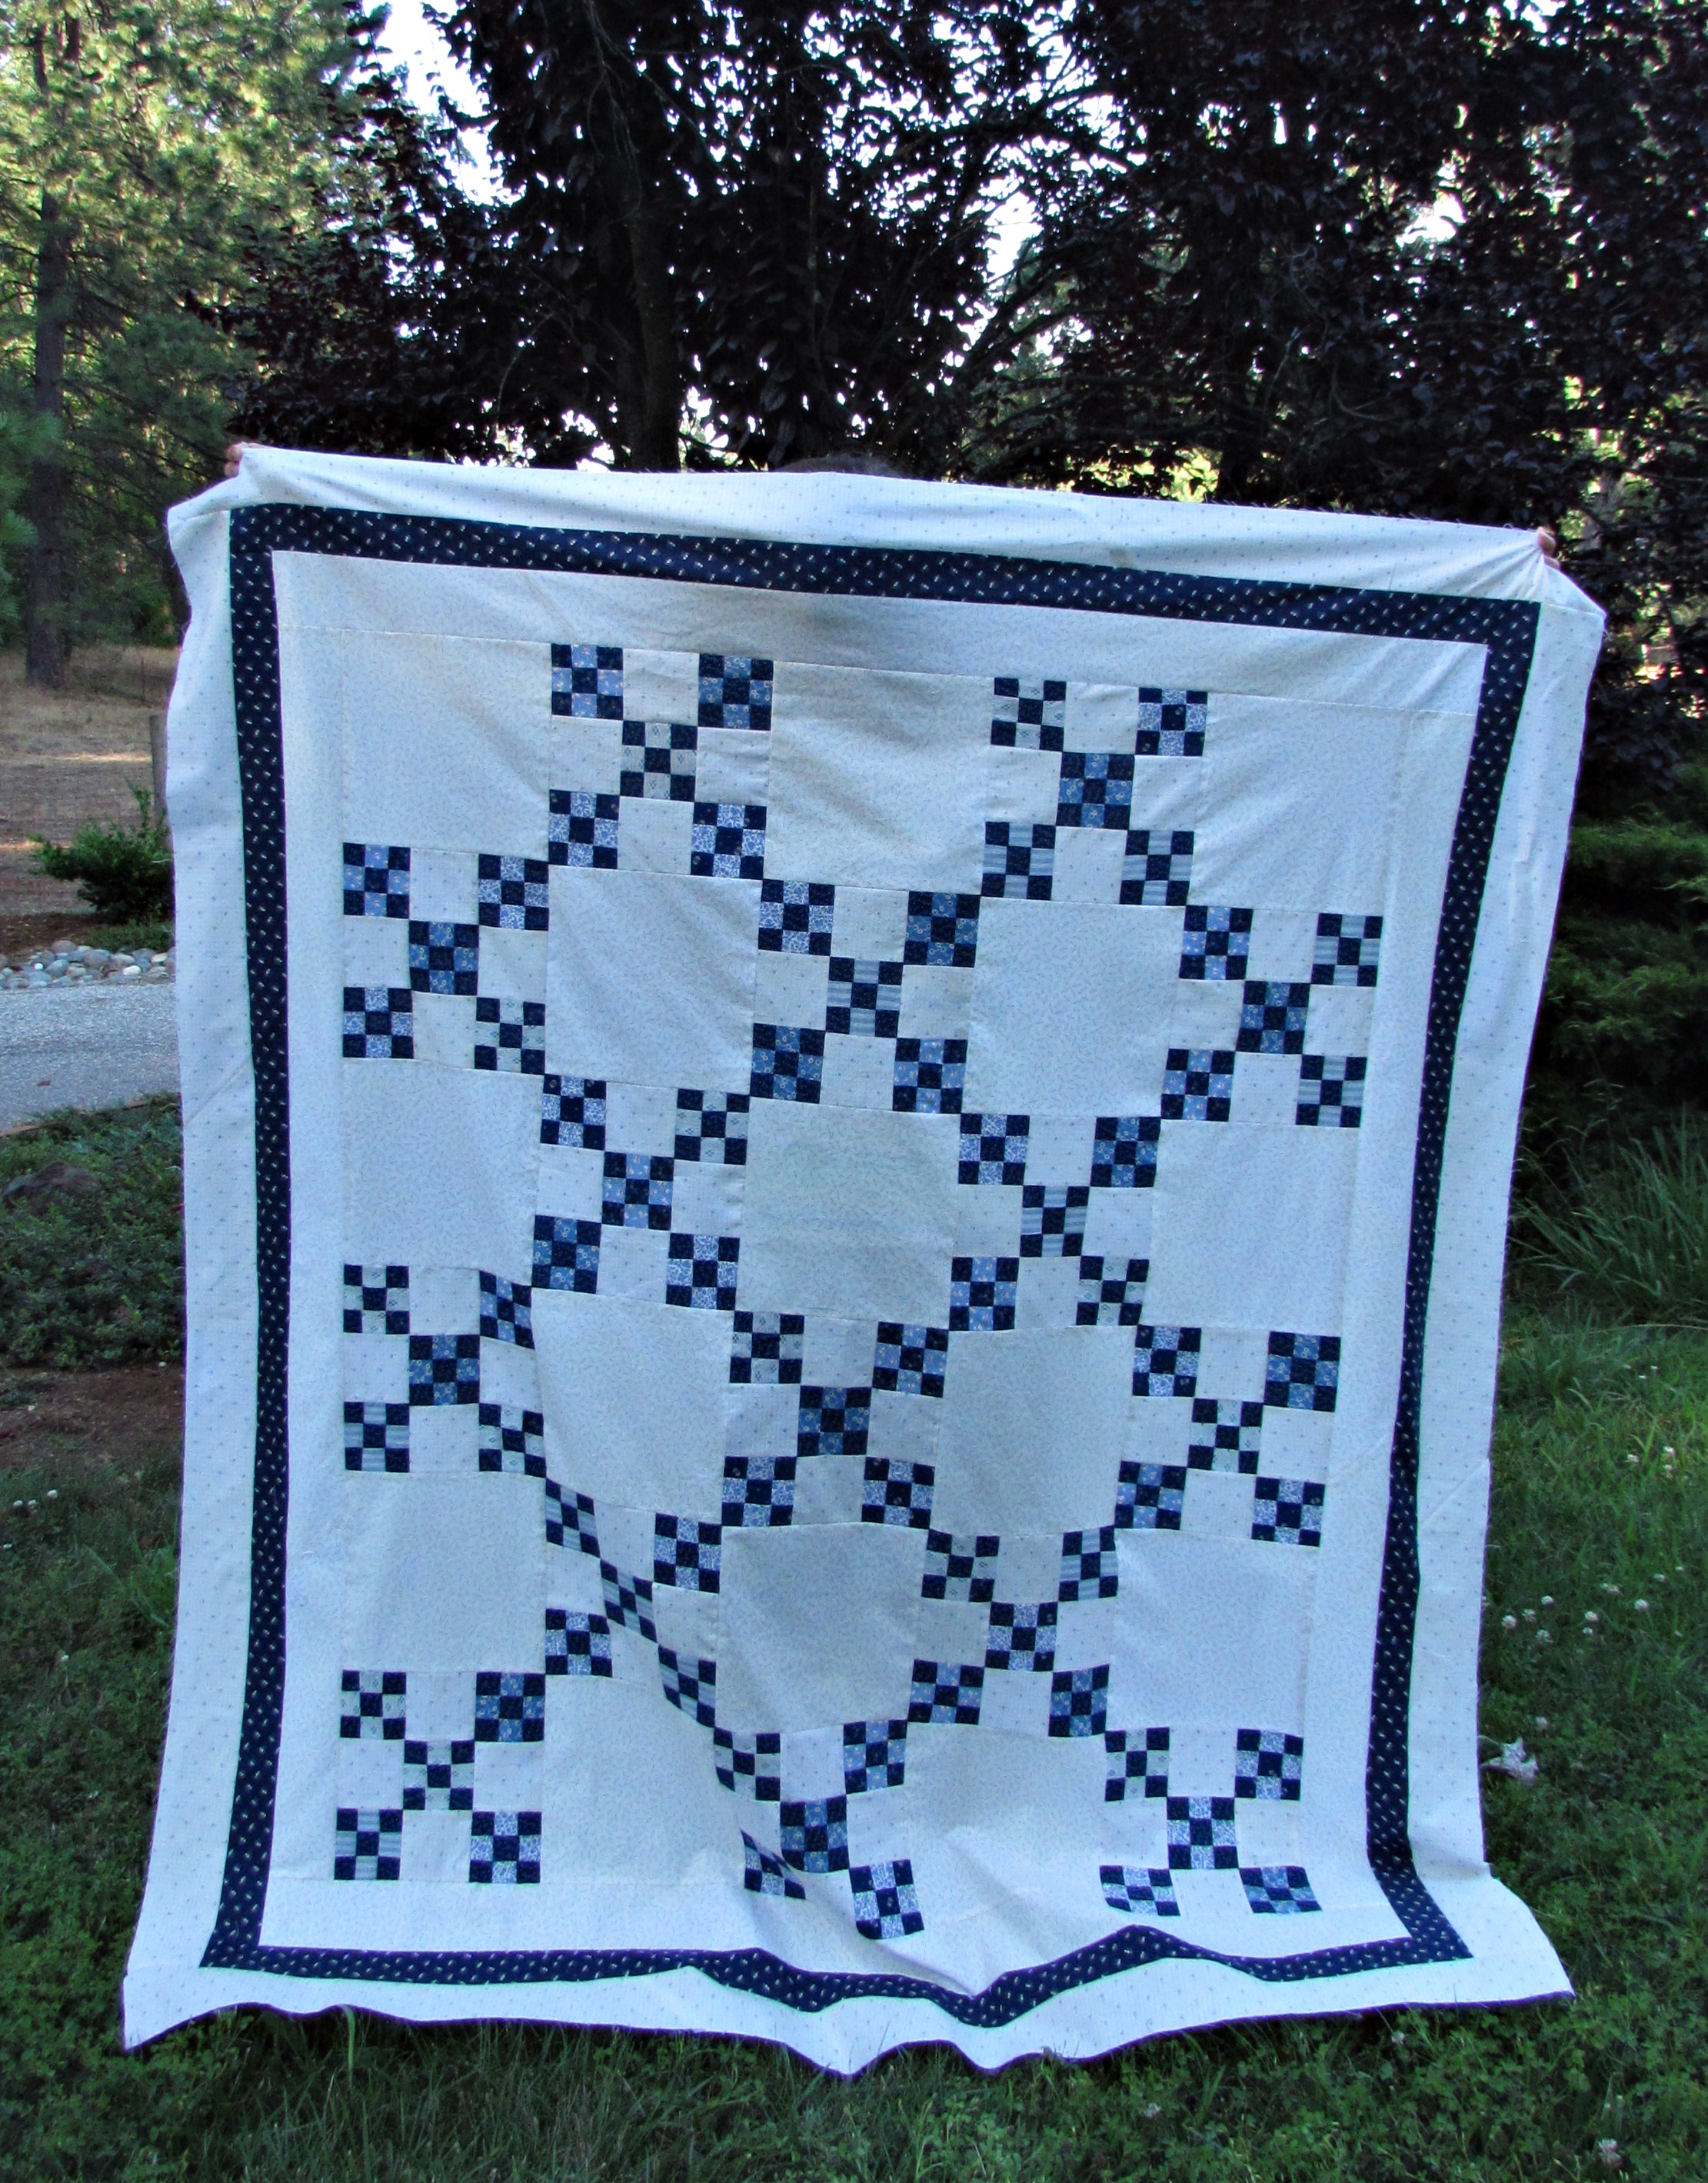
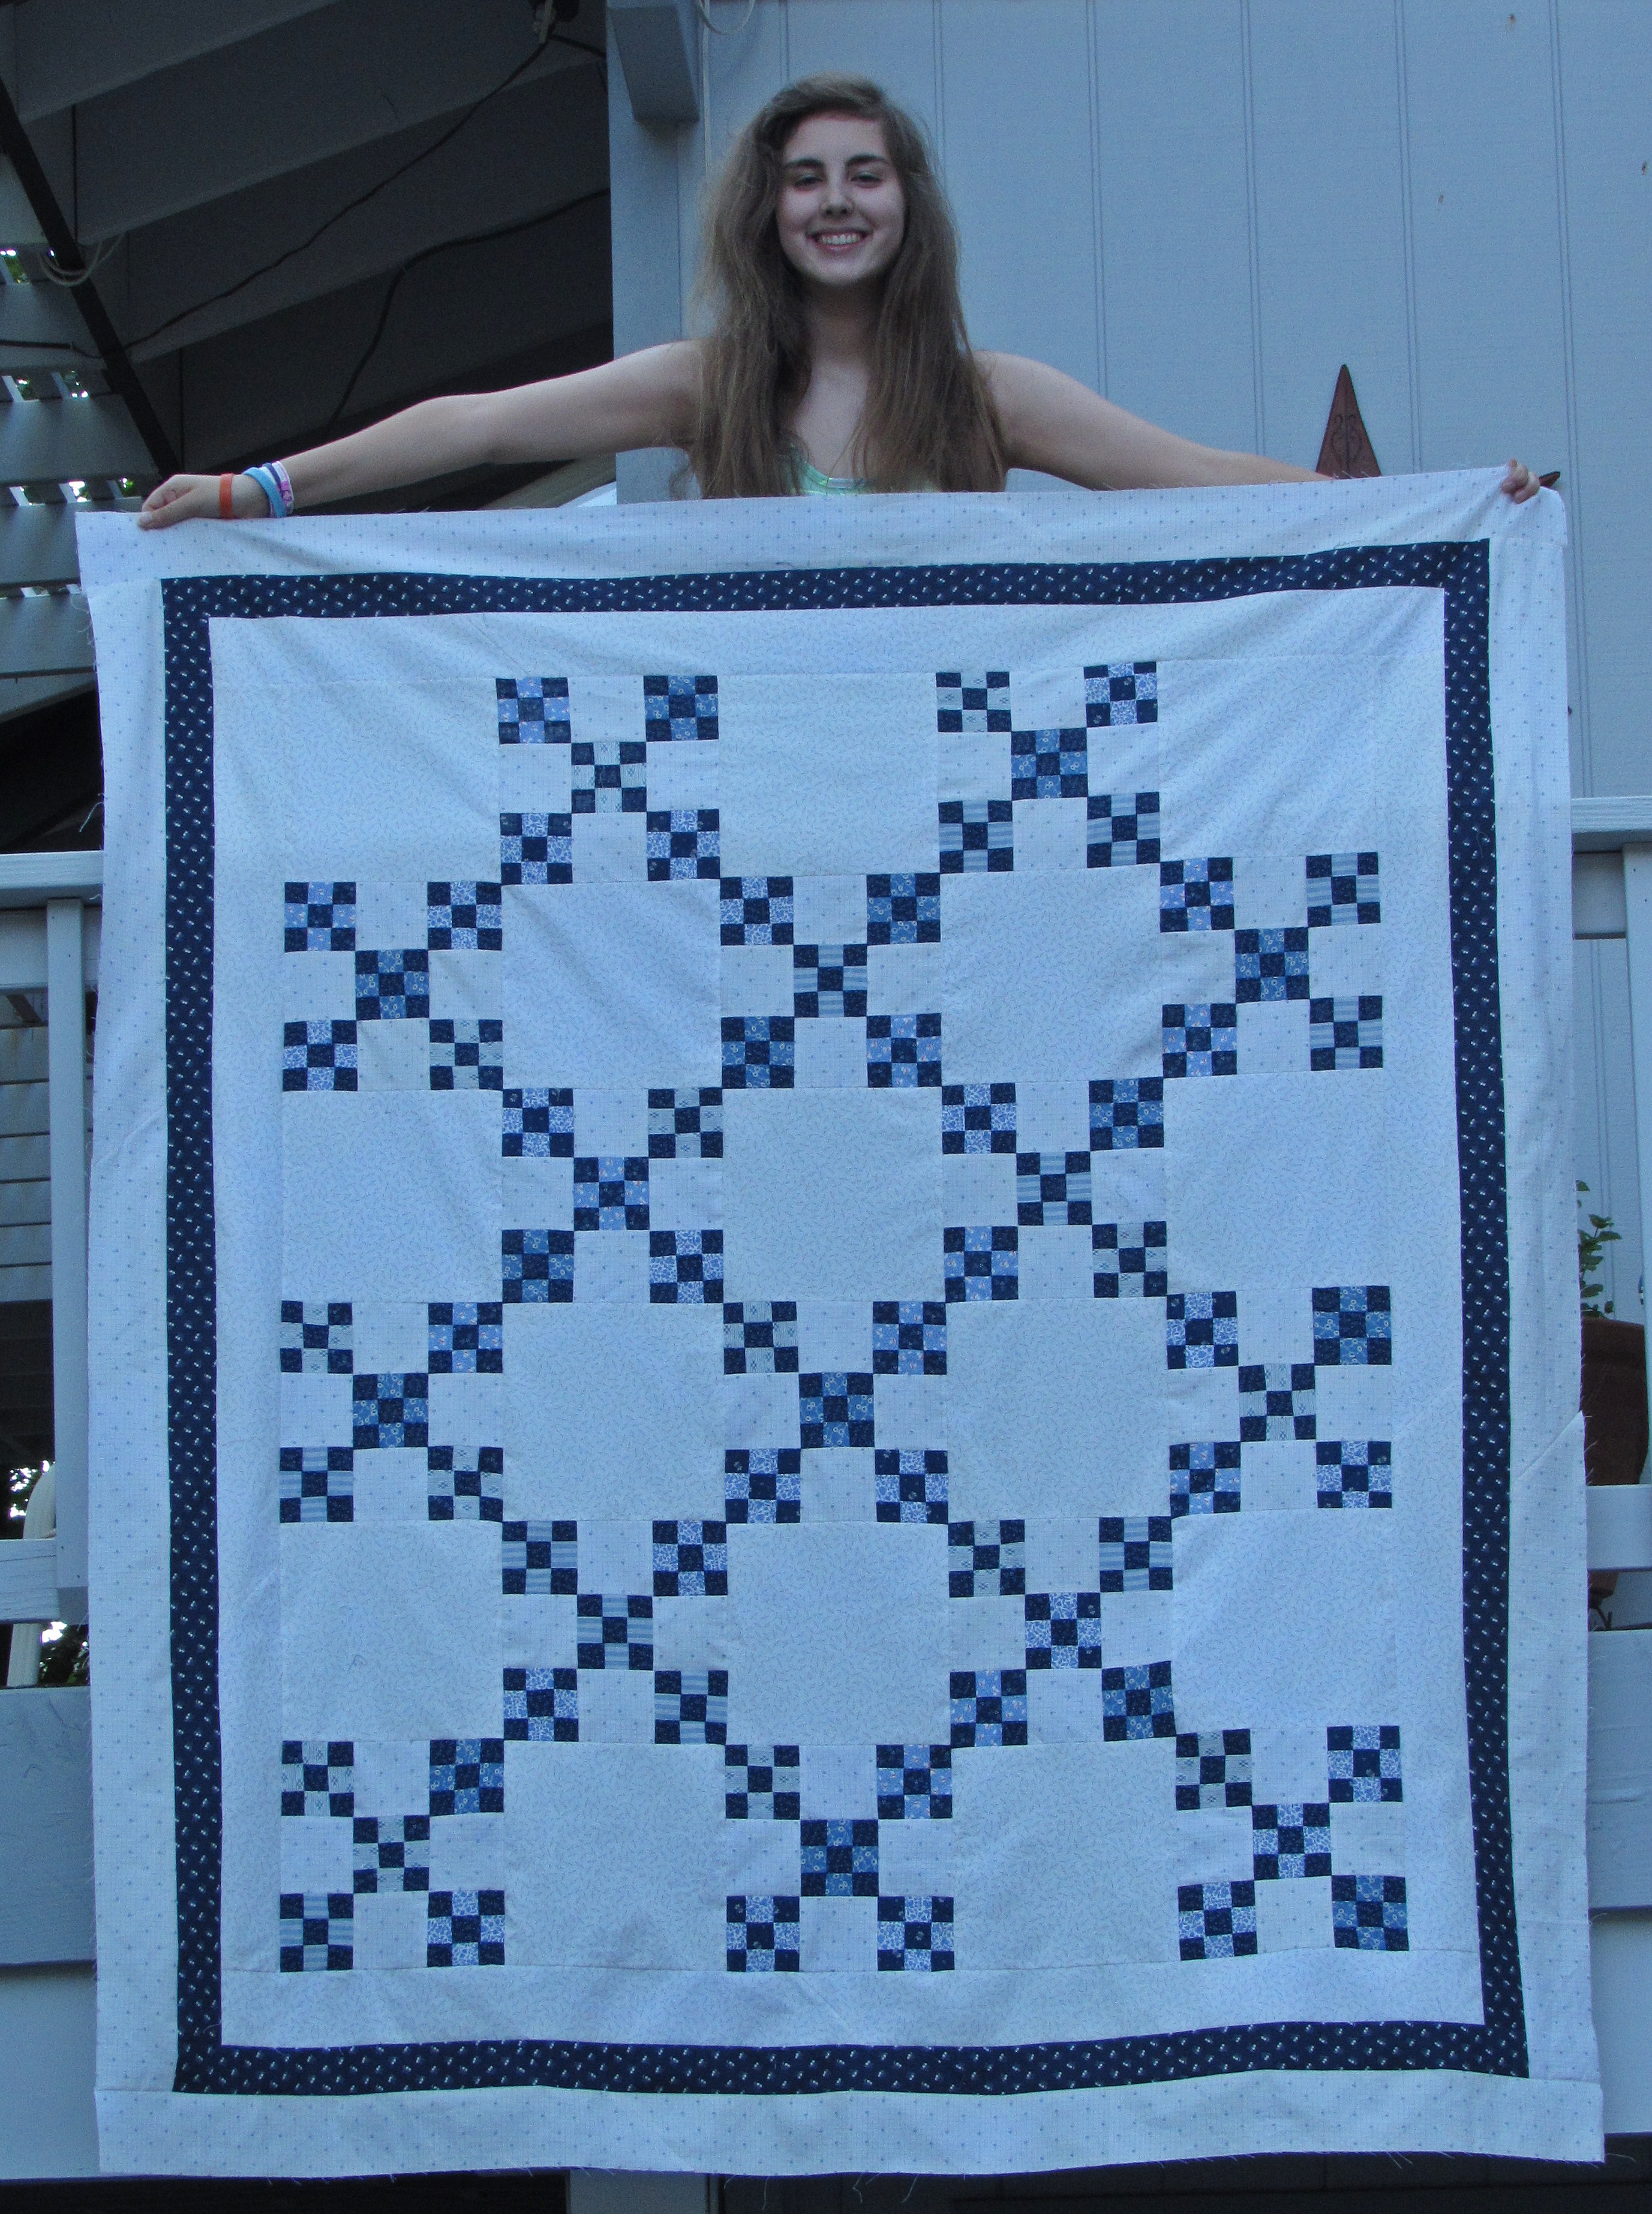
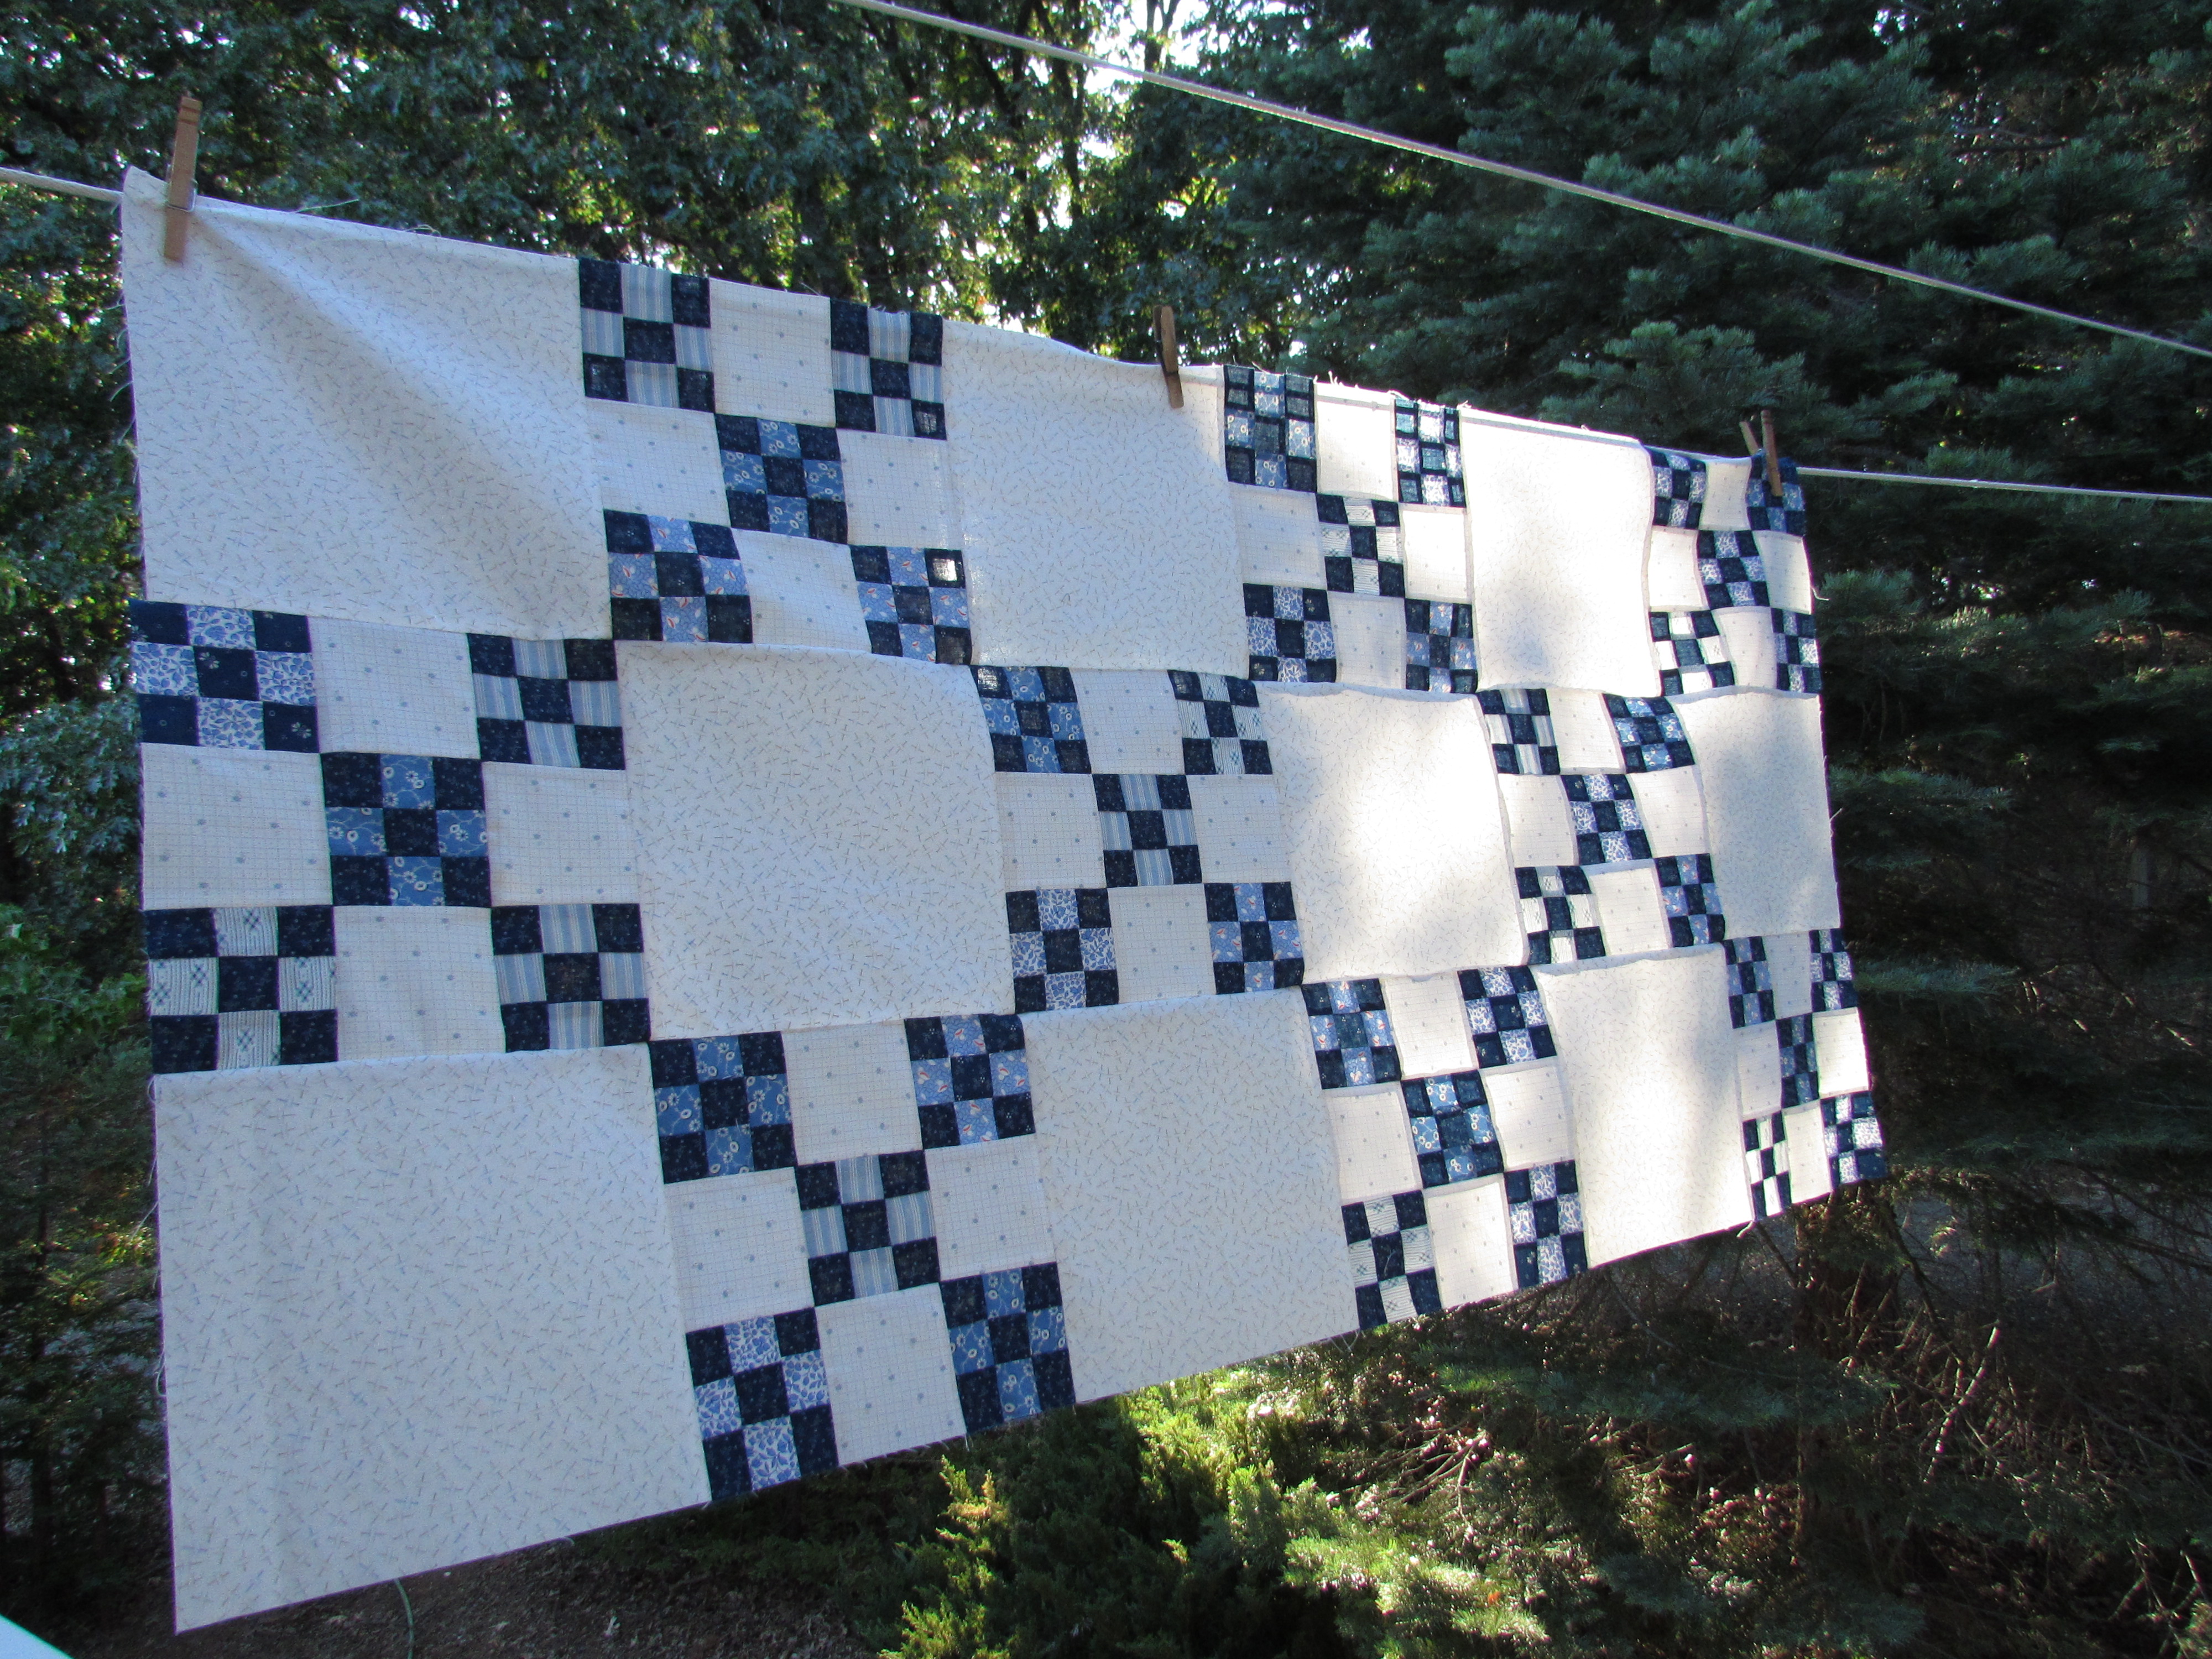
Hey everyone! I finished the vintage double nine patch quilt top. Yay for staying with it and getting it done. It is a good size for a lap quilt. Finished, it should measure out to about 60″ x 70″. I am really happy with it and look forward to getting it basted and ready to quilt.
The quilting decision is an important one due to all of the negative space that this quilt has. My FMQ skills are improving but aren’t stellar. What to do?? My thinking is that this sort of traditional quilt calls for FMQ over straight line quilting (I usually associate straight line quilting with a more modern project). Because this will be auctioned off at a 1940’s themed fundraiser in October, I feel like I need to do some decent quilting on it. I need a foolproof idea! Please help me out here and send ideas my way! Do I do an easy all over stipple? If so, do I stipple the main portion and do something different on the borders or just cruise right over the borders too? I have plenty of time to decide. I don’t have any batting just now (well, other than the piles and piles of batting scrap – I could probably stitch those scraps together and make a piece large enough for a king size quilt). I need to spend some time on Pinterest and hop over to a few sites (The Inbox Jaunt and The Freemotion Quilting Project come to mind) for inspiration.
One more thing…. Totally off topic here, but yesterday my quilt model and I went to the movies and saw “Inside Out”. I had high expectations for this new Pixar film since the reviews are glowing. Yikes, I was disappointed. Both of us kind of shook our head on the way out, wondering what the hype is all about. I found it really preachy – sort of like they were forcing a lesson down my throat. Neither my daughter nor I could figure out what age group this was aimed at. The plot doesn’t seem suitable for early elementary school ages and it seemed very trite for older kiddos. Did I miss something? Maybe I wasn’t in the mood for it? Just curious what others are thinking about this movie.
Linking up with Crazy Mom Quilts and Needle and Thread Thursday. Links to these sites are available at the top of the page, under link ups.
Well, I am happy to say It have made great progress on my vintage double nine patch quilt. I have all of the blocks done and have been sewing the rows together. It worried me to set this as my goal for June but it appears I’ll be able to finish it this week and we are only at the middle of July! Just never know.
Here are a few rows – they are not yet pressed though.
This quilt has been fairly mindless to create. Lots of repetition in making the smaller nine patches and then sewing those into the 9″ blocks. For the most part I have been happily listening to music and stitching away. I usually have either music or a podcast on when I am sewing, unless I really have to focus on the pattern. This week I indulged in lots of oldies. I had my playlist set to include music from the early 1970’s (which would have been junior high and high school for me). Carole King, Van Morrison, Cat Stevens and The Lovin Spoonfuls, to name just a few.
Music doesn’t seem to distract me when I am sewing but TV is not such a great idea. When I was cutting the smaller background squares for this quilt there was an episode of “The Office” playing. (Julia recently discovered this show.) It was so distracting – I think that show is so funny. I ended up cutting 3″ squares instead of 3 1/2″ squares. Dang it. I have tons of the fabric so that wasn’t a problem but now I have a pile of 3″ squares ready for another project and I had to spend the time to cut a new stack in the correct size. Clearly watching tv doesn’t work for me when I am sewing or cutting.
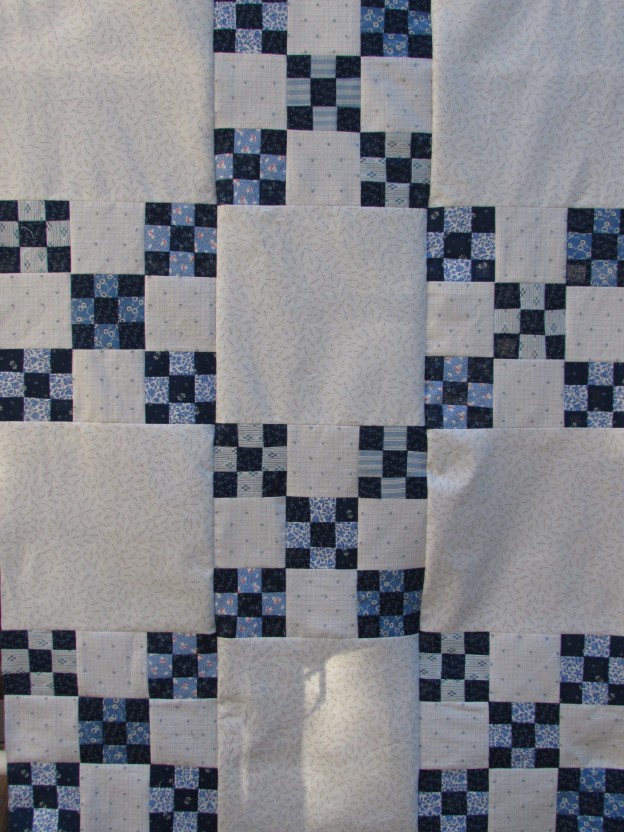
The quilt will have two borders of the cream fabric with a narrow border of navy blue in between them. If you remember, the small nine patch blocks are made with the vintage fabric that I received last spring. I need to look through the vintage stash to see if I have a big enough piece to make the navy border. I think I need about 1/2 yard and doubt I have a piece that big, especially since the vintage fabrics are 24-36″ wide. Looks like a trip to my LQS is on the agenda for tomorrow, darn it. I am really excited to sew the rows together and put the borders on. Hoping to have a quilt top finish for you by end of the week.
So, what’s on your playlist when you are sewing??? Do tell.
Linking to Lorna at Let’s Bee Social and Connie at Freemotion by the River. Links to both of these parties are at the top of the page, under Link Ups.
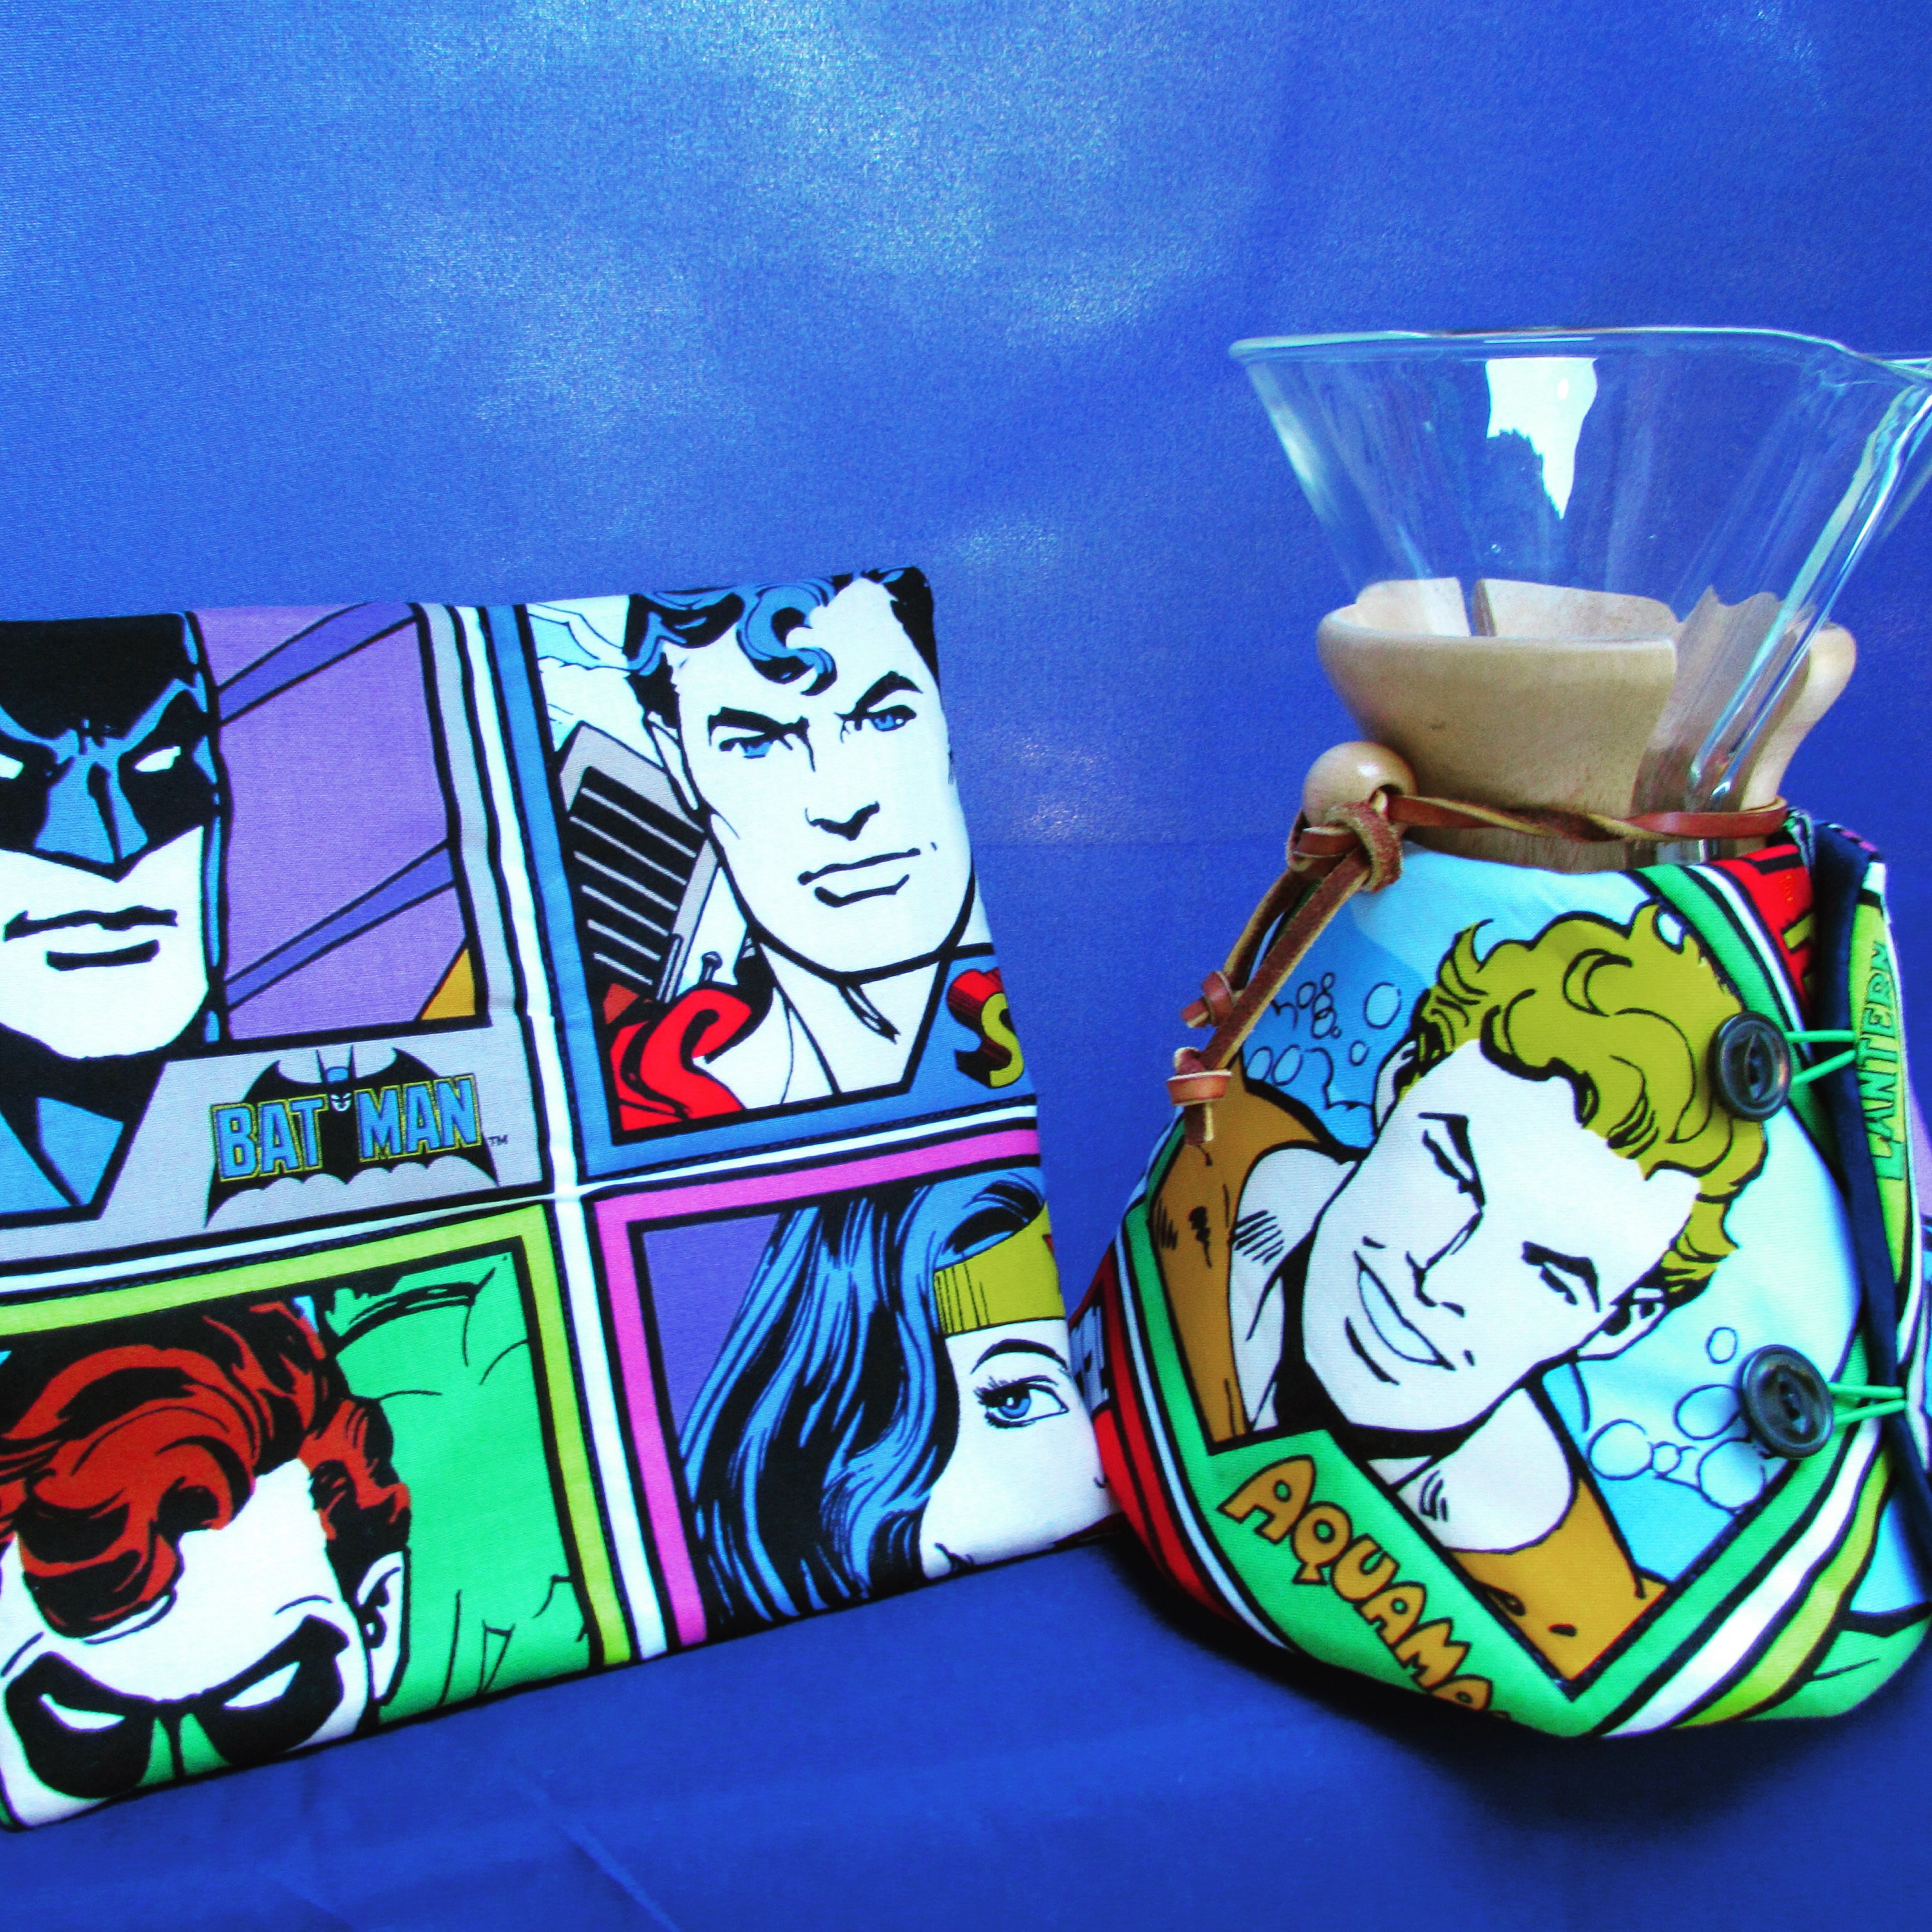
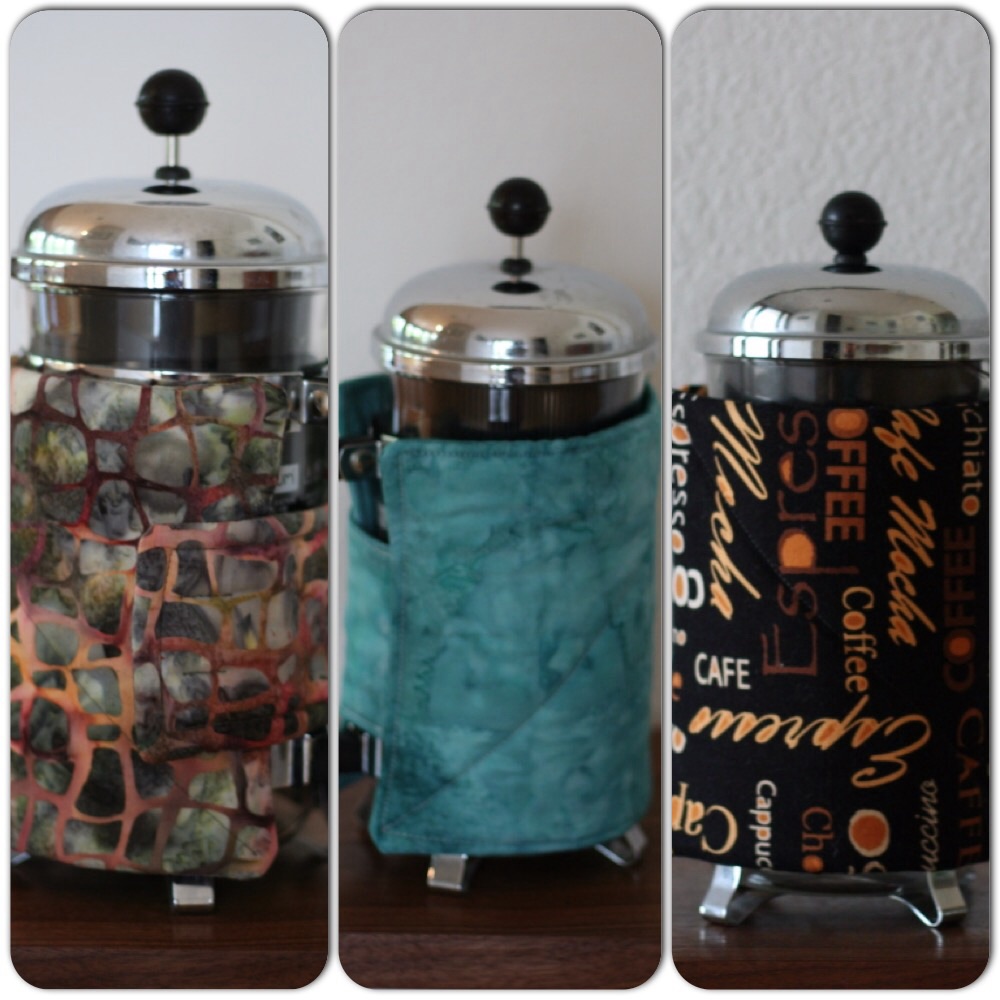
My Etsy stock was looking meager so this week I focused on making product to list. My biggest sellers are the Chemex cozies. I have also recently sold a couple of French Press cozies. I took a look through my fabric, pulled a few pieces, and began cutting. It is amazing how quickly things go if I have a stack of pieces all cut and organized. One night of prep time pays off well.
In all, I completed four Chemex cozies and three French Press cozies. Not too shabby. This is my favorite of the Chemex cozies.
I received this piece of fabric from my boys as part of a birthday gift. (Read about this amazing present here.) I have a 1/2 yard cut of it and thought this would be a fun way to use some of it. Kind of makes that first pot of coffee in the morning a bit more powerful, right?
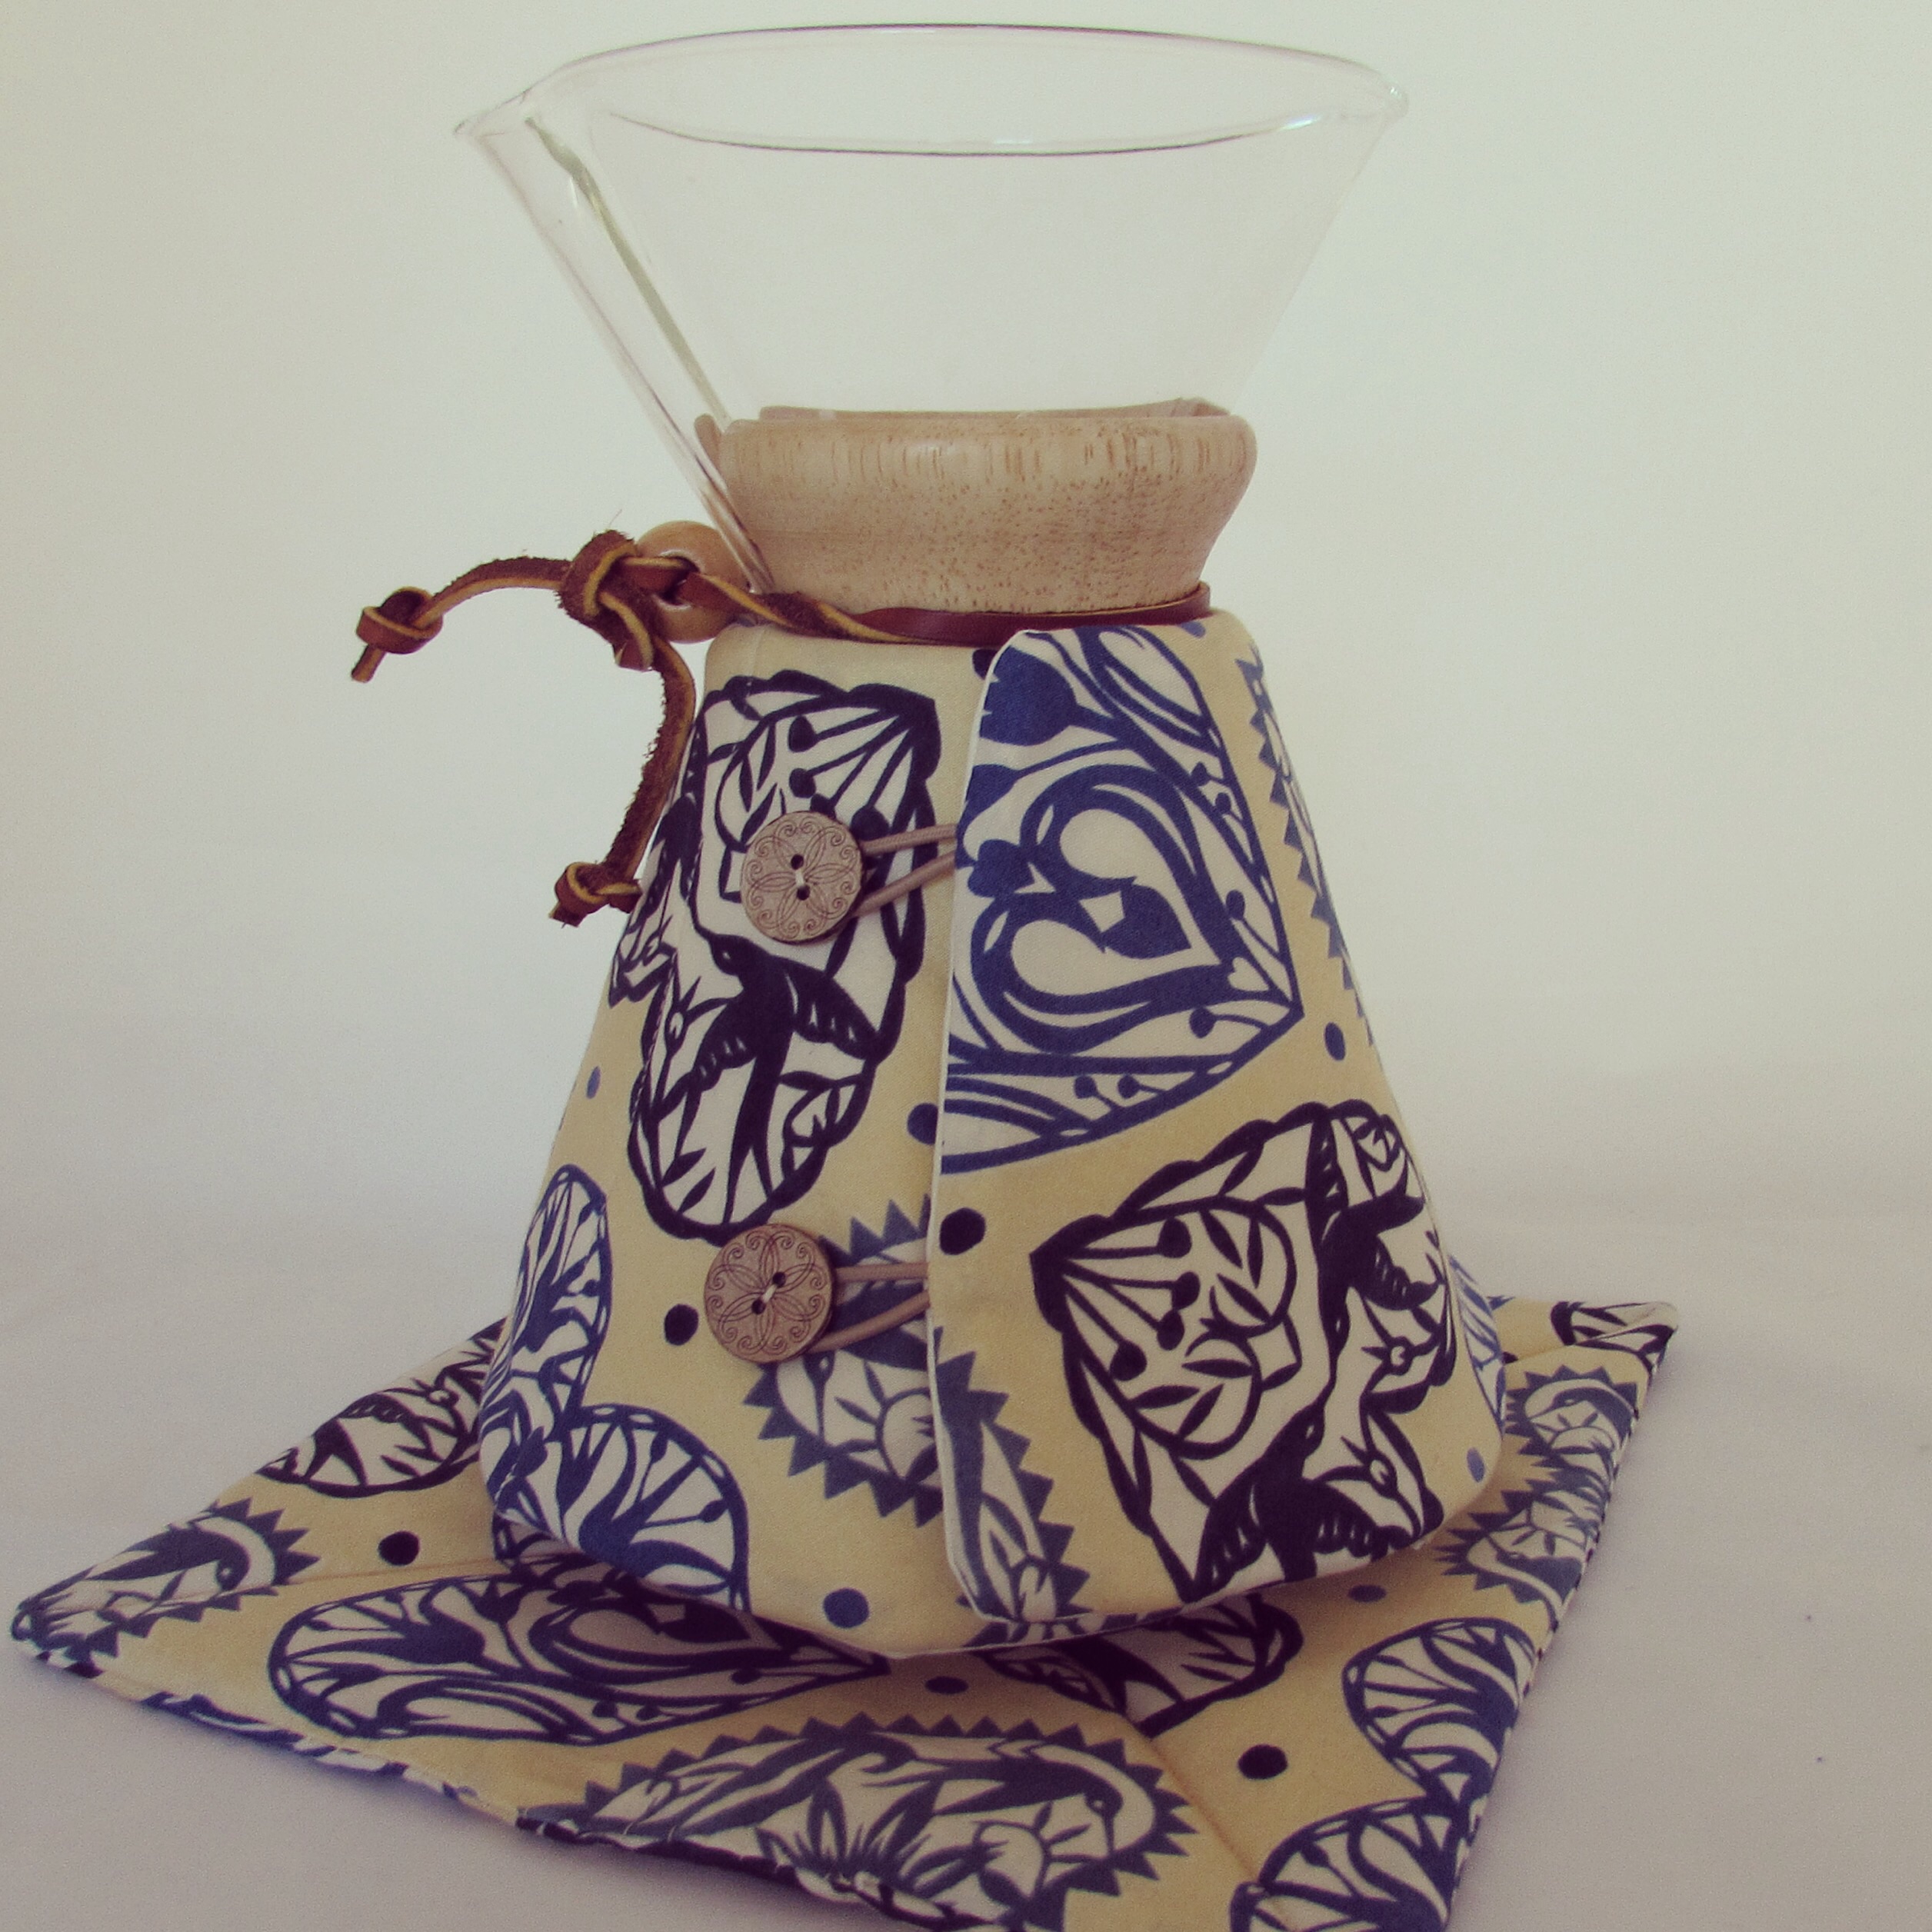
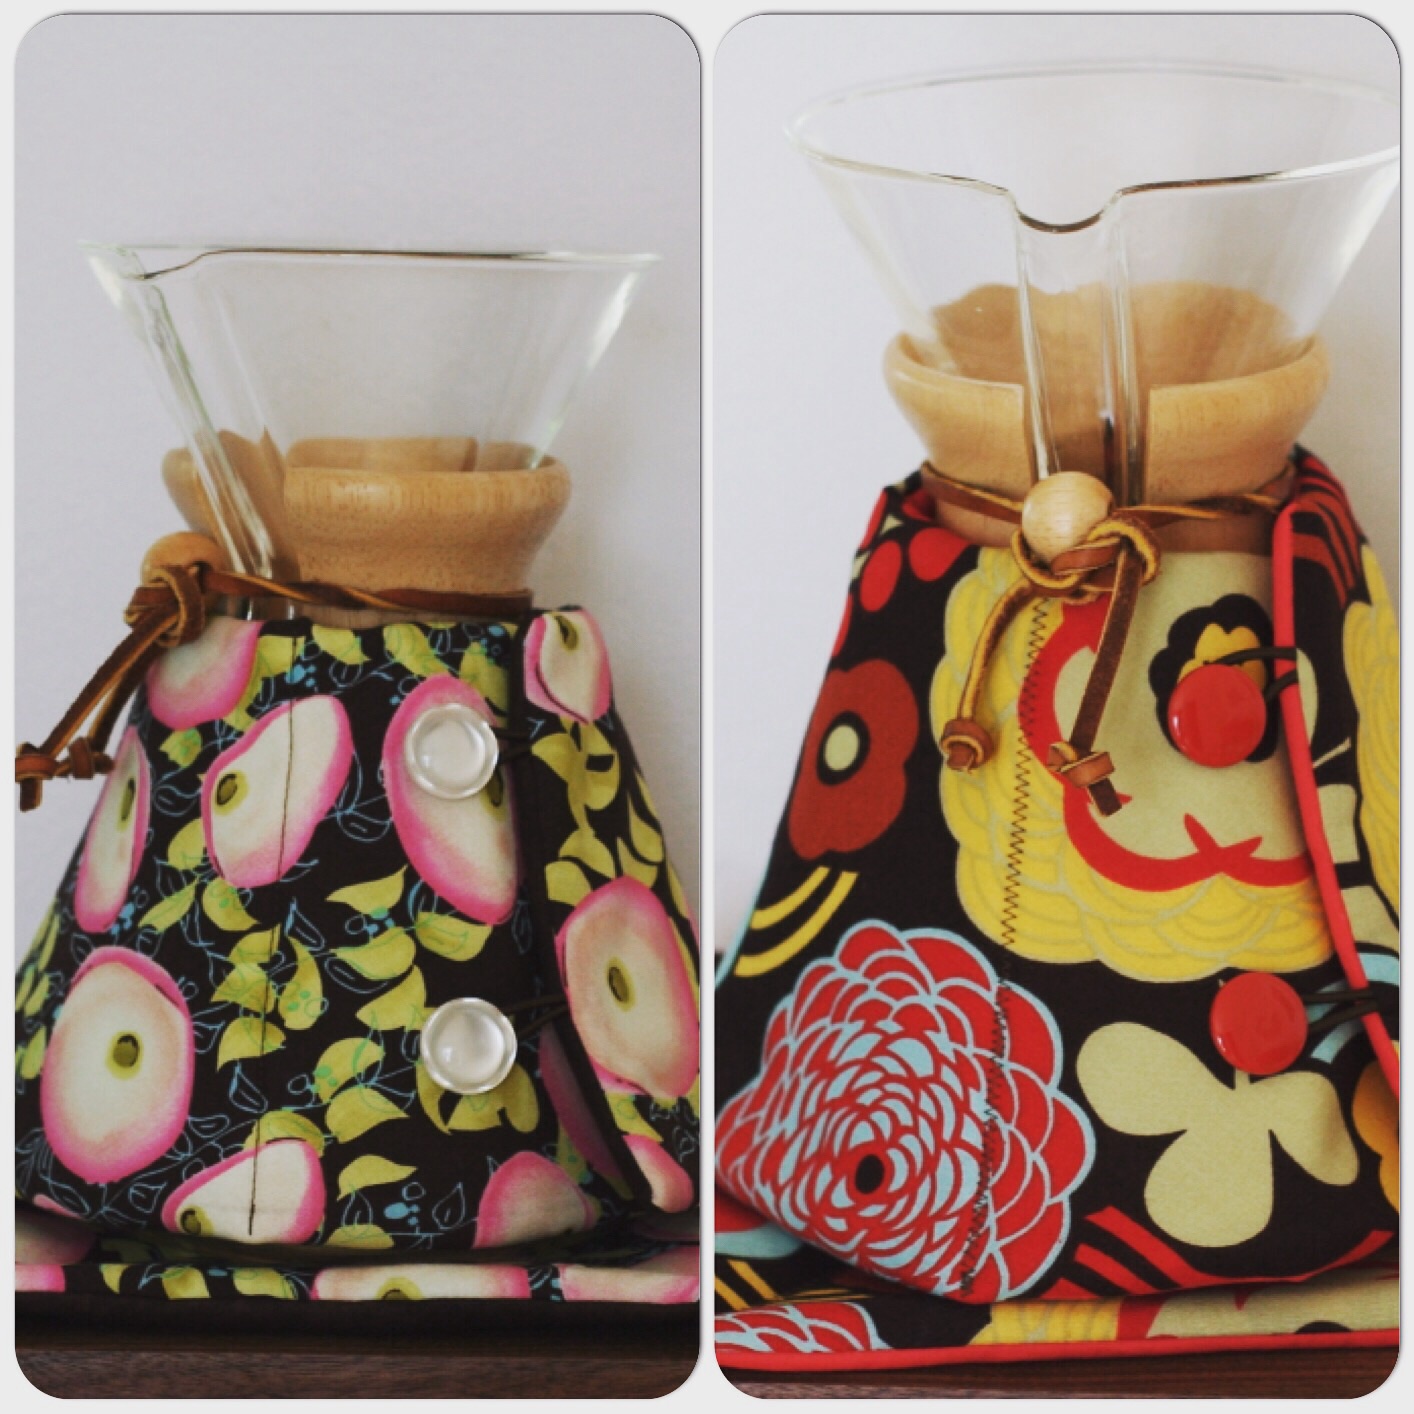
Here are the others that I finished up.
The French Press cozies are super easy to make. I cut out fabric for five of them but at this point, only three are finished.
The blue one in the middle is gorgeous – the fabric reminds me of beach glass. All of these items are listed in my shop. Check them out here if you’d like.
Being the beginning of July, it is time to make a plan for the month. My main goal (and the one I will link to ALYOF with) is to complete my vintage double nine-patch quilt top. This is the one that I started working on last week. I haven’t made a whole lot of progress but I am hoping to get the quilt top done this month and then next month I can sandwich, quilt and bind it. I want to show it in a little quilt show in Downieville the first weekend of October and then it will be donated at an event two weeks later. This sounds doable to me but I better get going and finish up more of those baby nine-patch blocks. Hopefully I will also have time to finish the July row for my RSC15 project. I have been following Mari’s Classic Stitches BOM but I think for the month of July, I will veer off and use a different block. Hers looks fairly labor intensive and I don’t think I will get it done with the other project. If I choose a simpler block it will be more likely to get finished. Gotta know our limitations, right?
Hope all of you in the US have a fun, safe holiday on the 4th of July and a happy weekend to everyone else!
Linking to Sew Bittersweet Designs, Crazy Mom Quilts and TGIFF. Links are located at the top of the page under Link Ups.
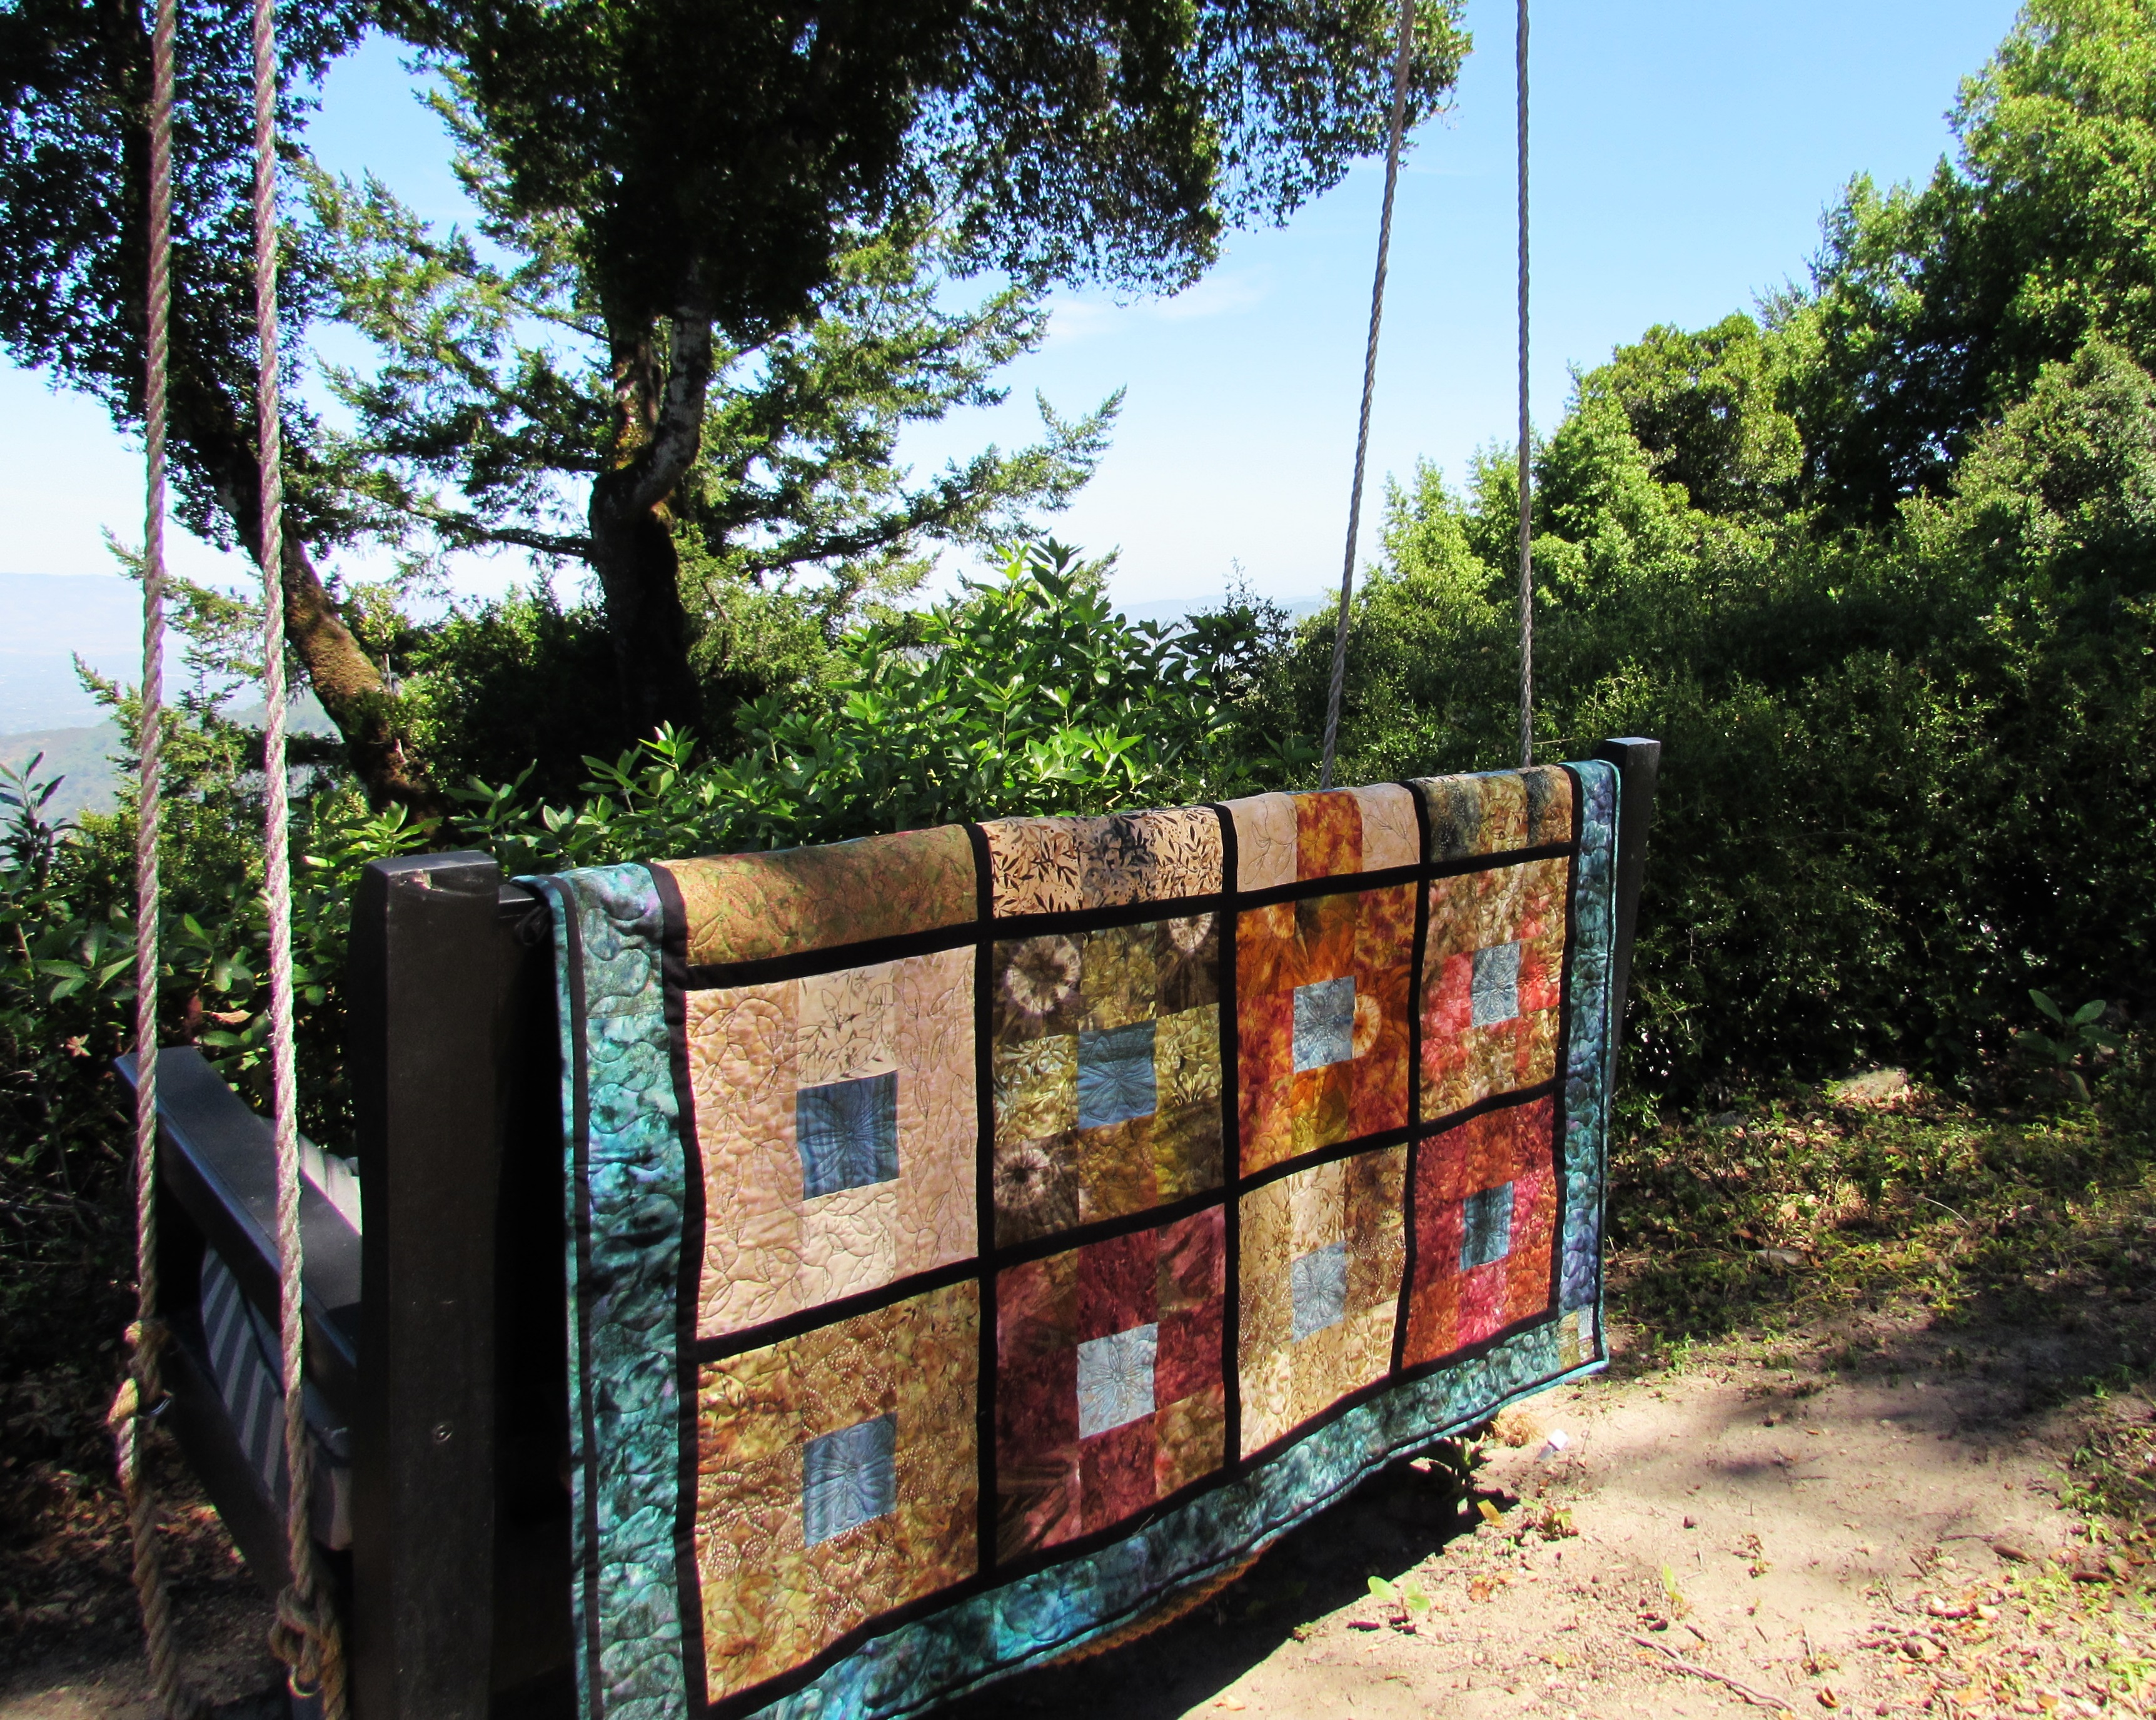
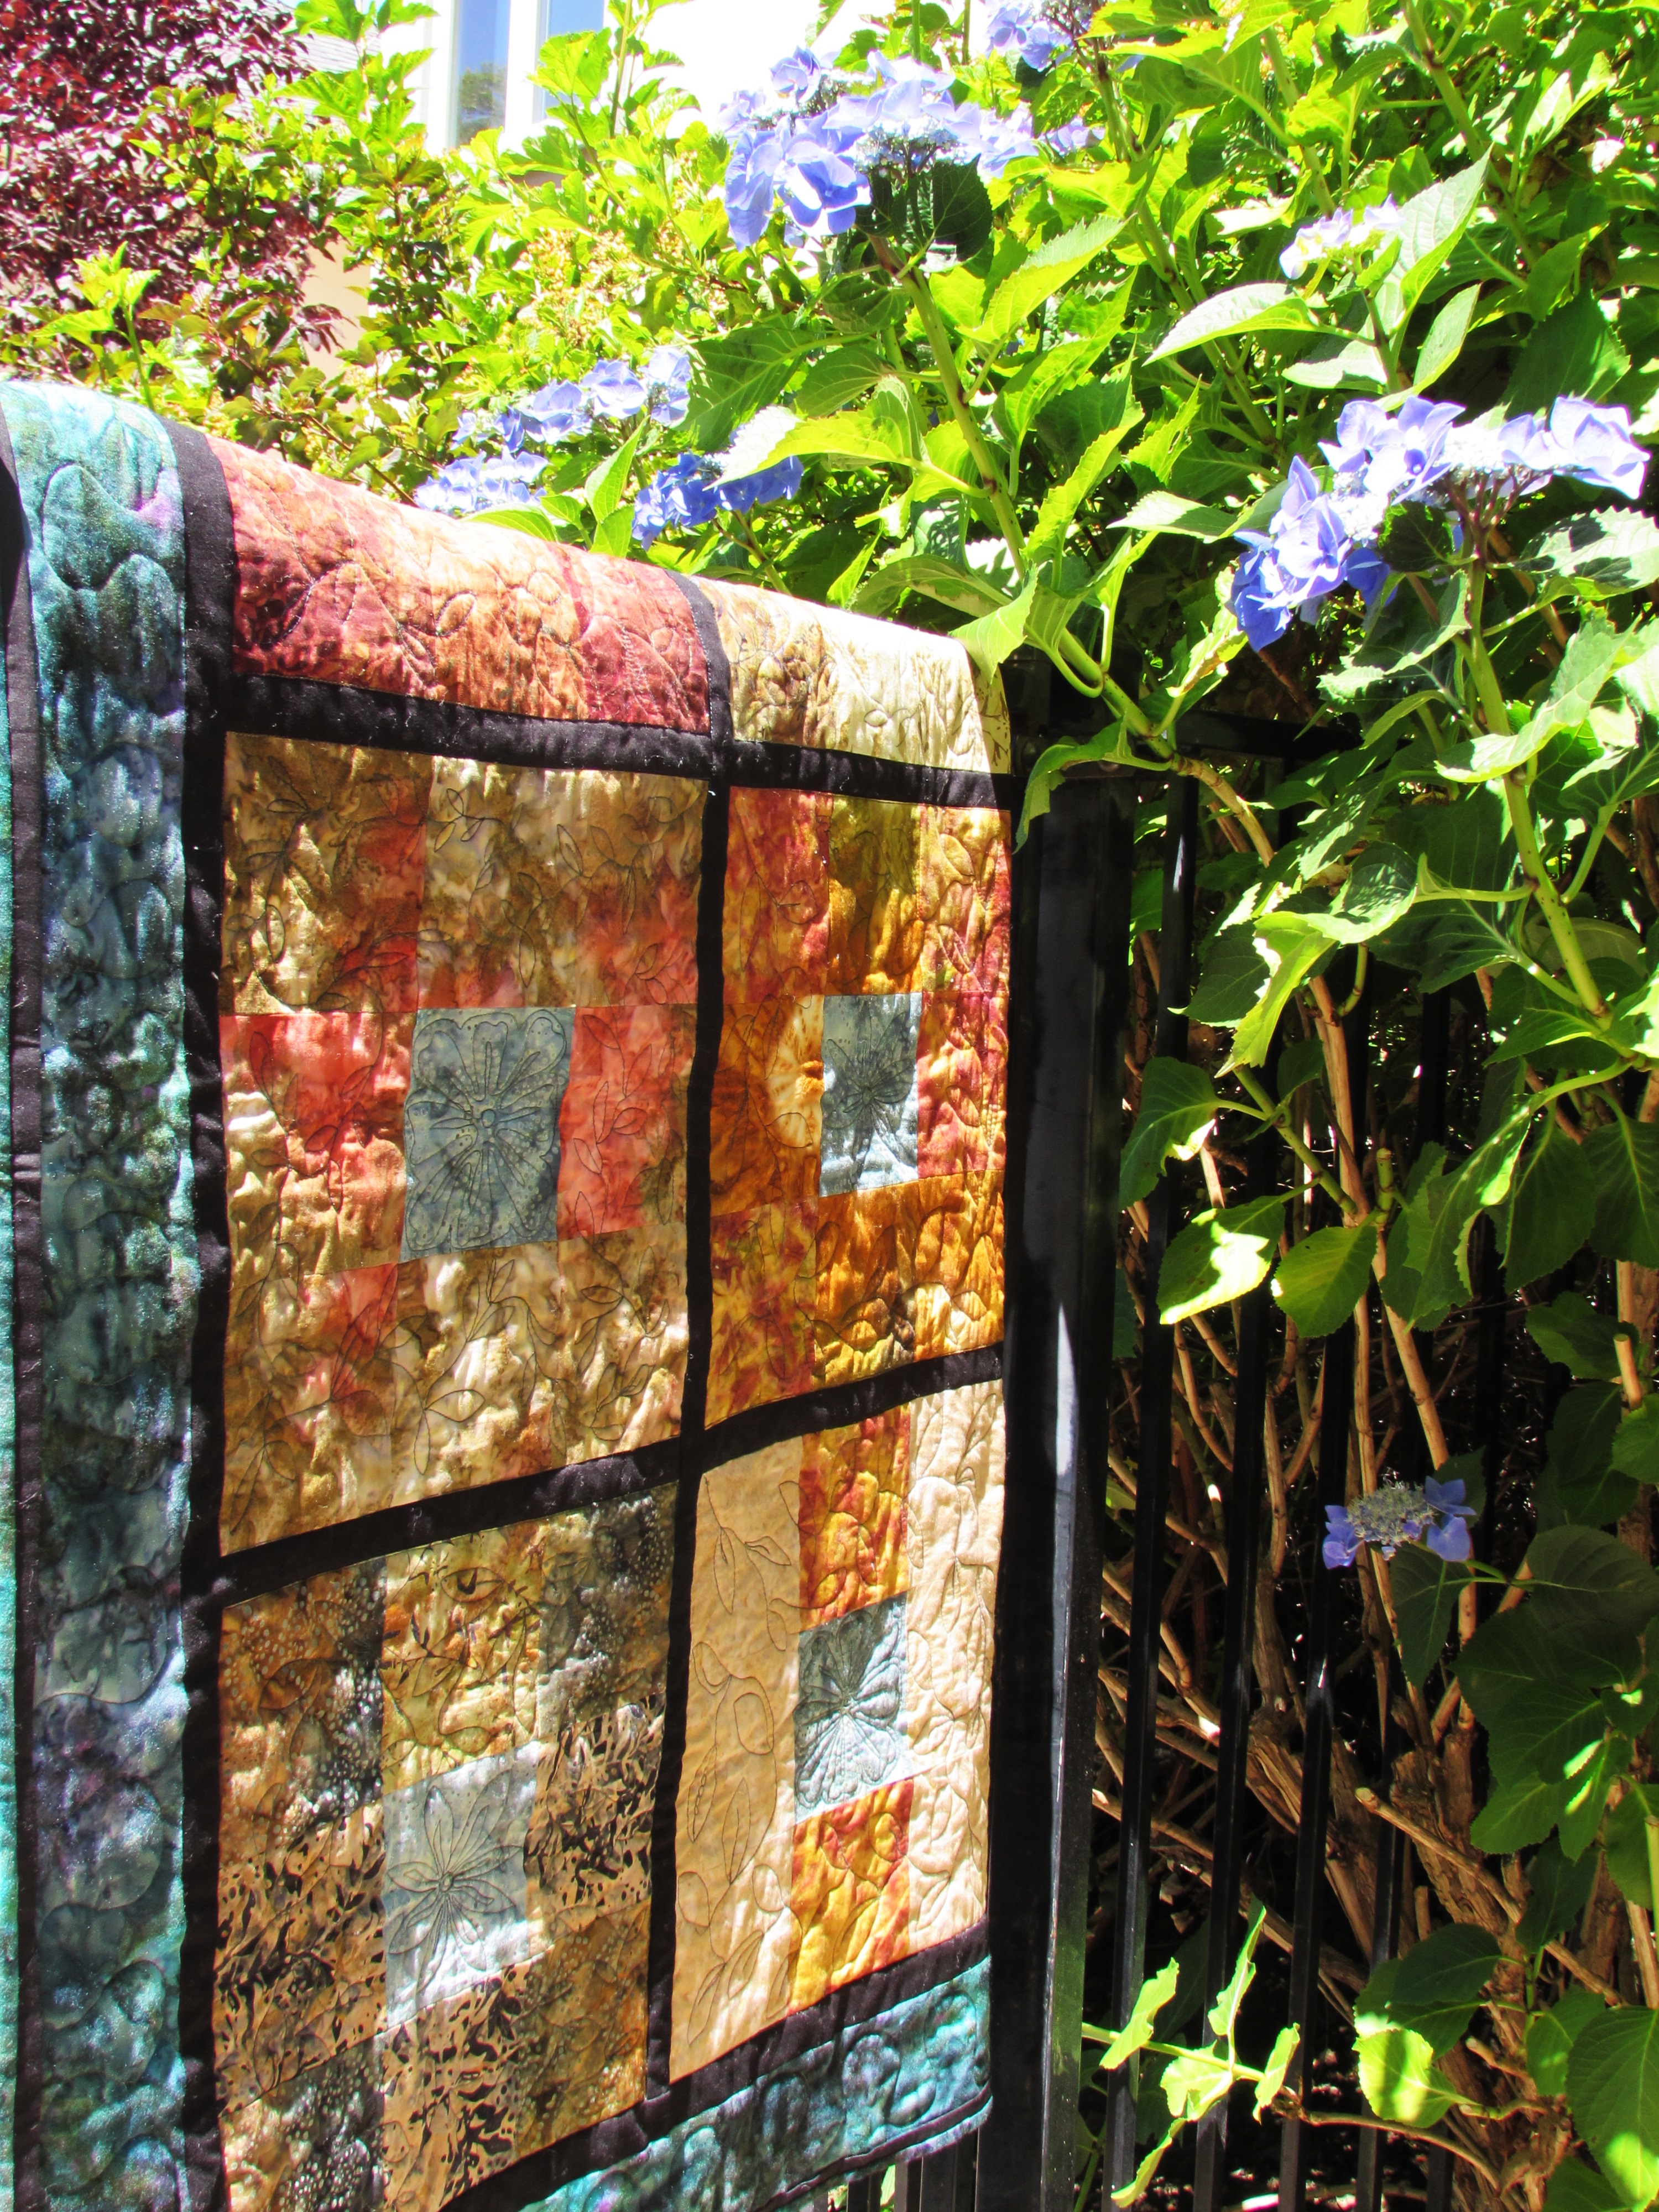
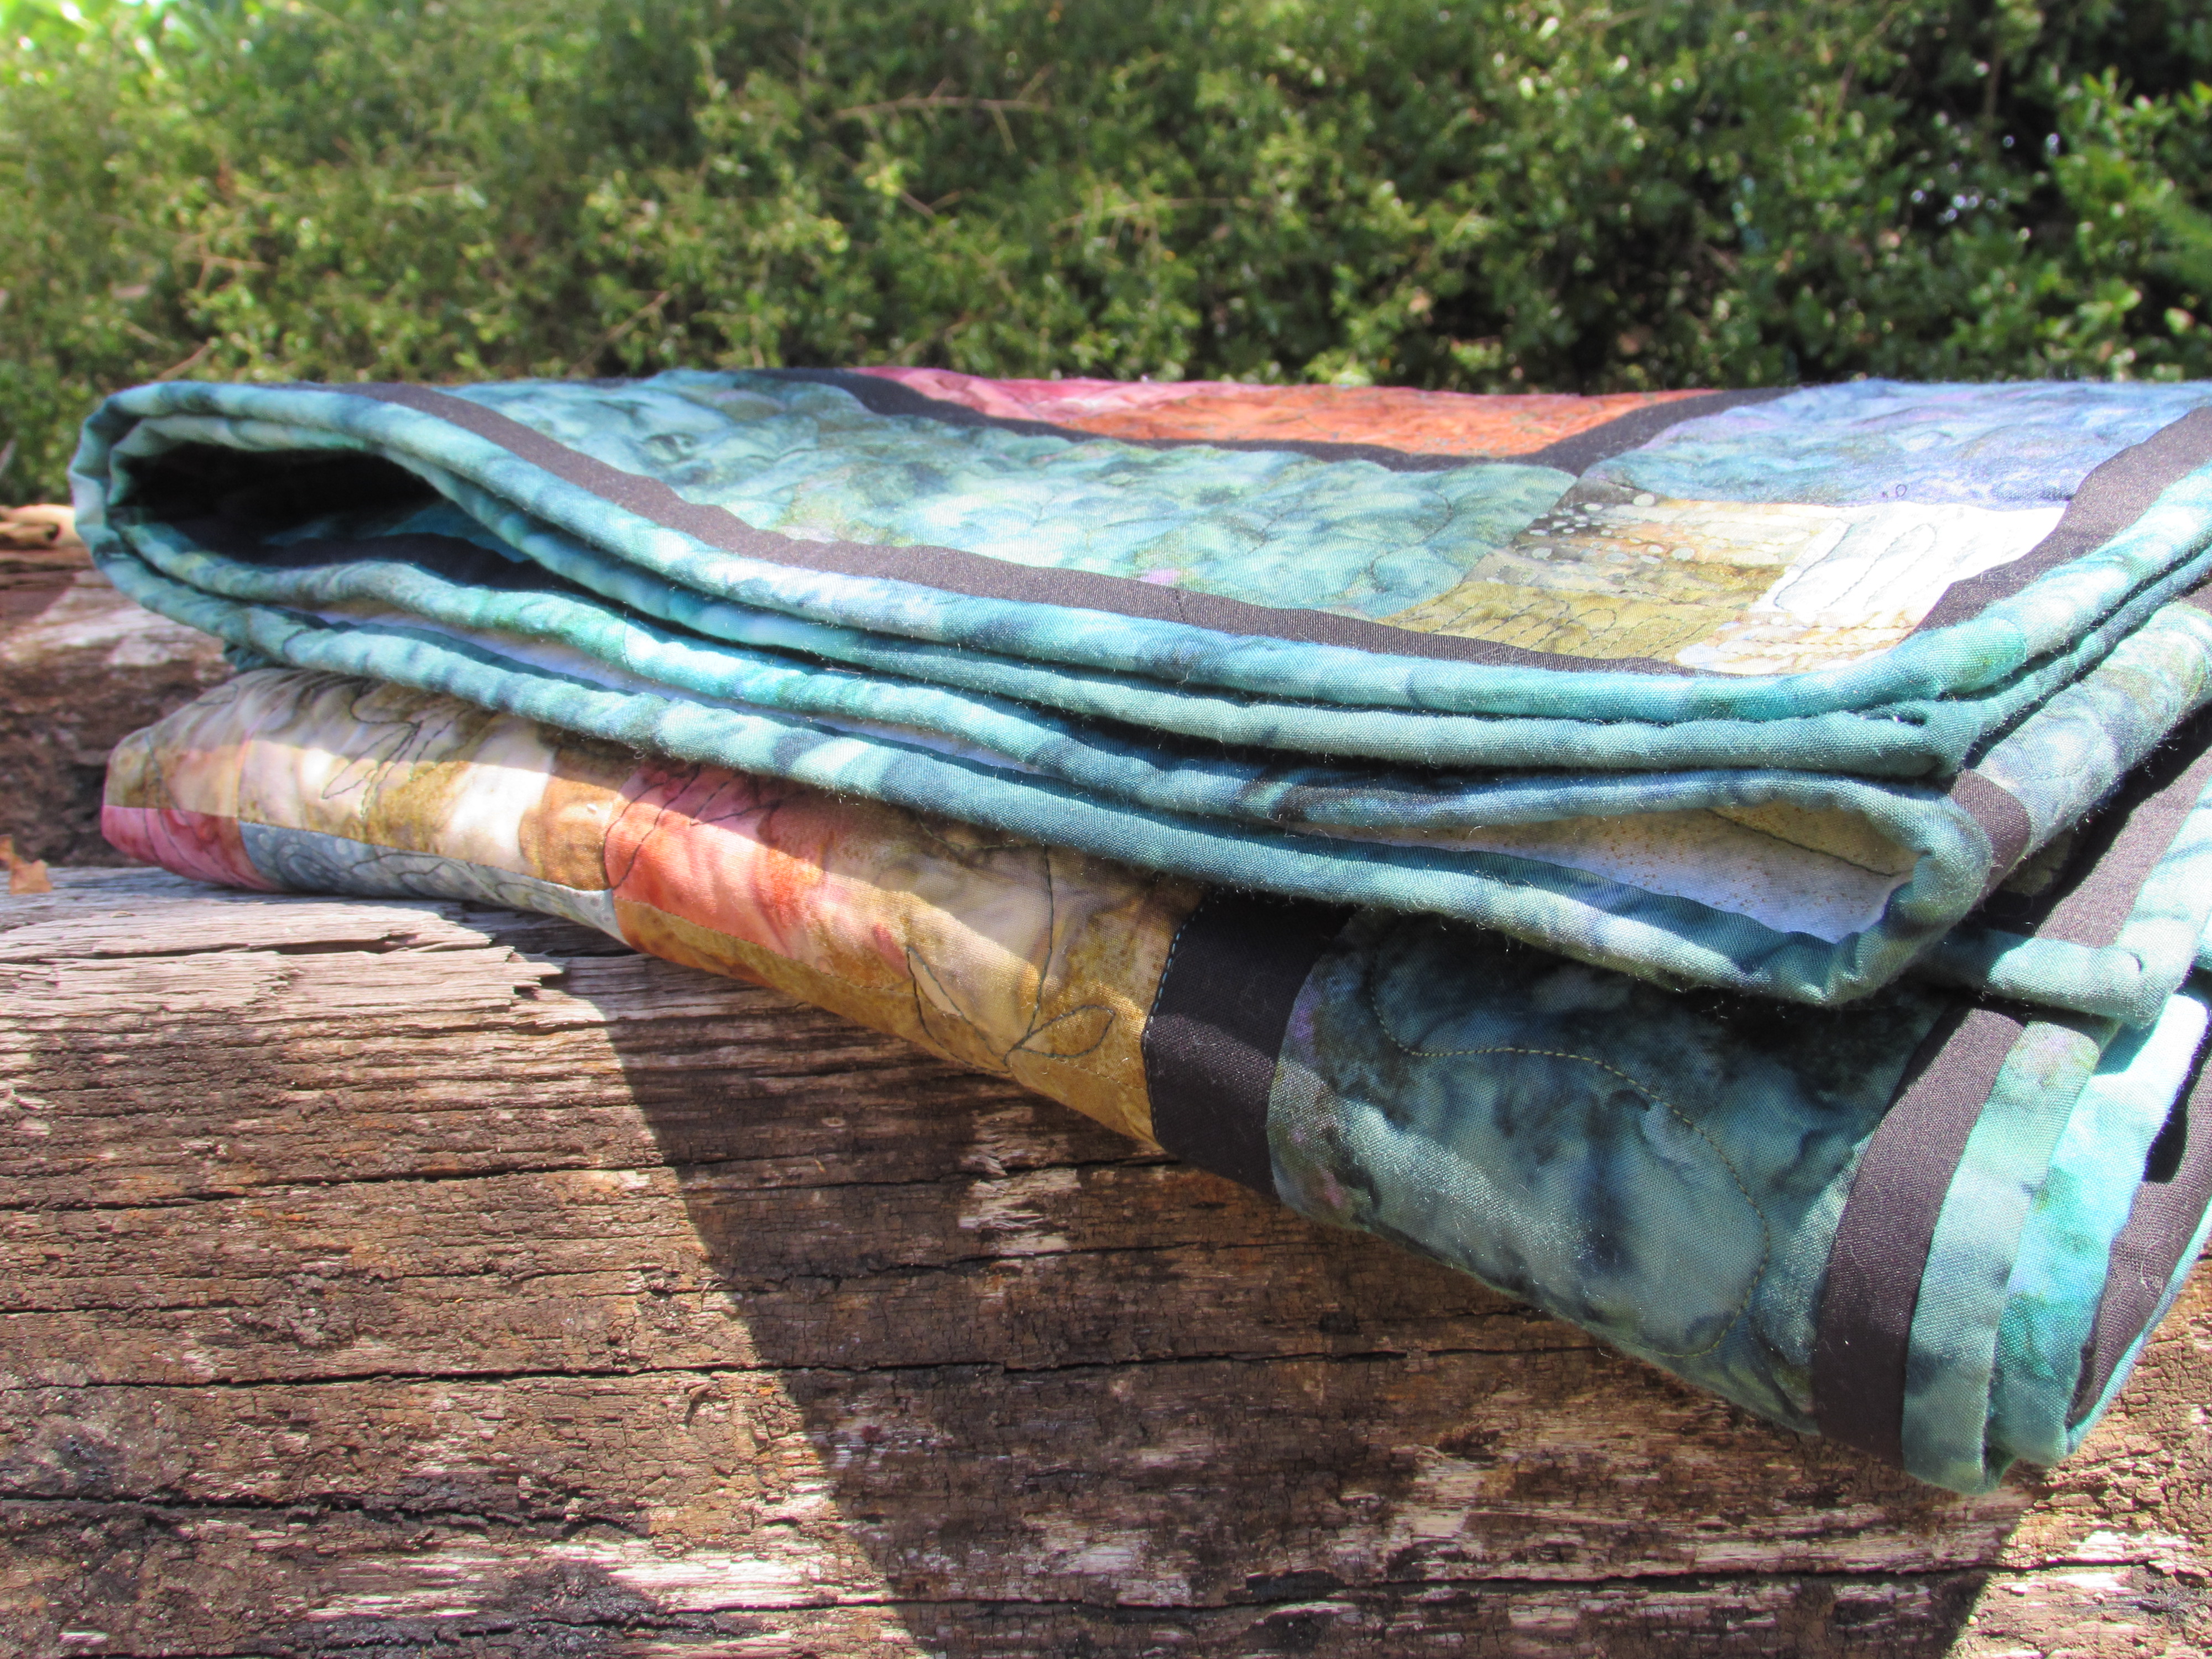
A couple of months ago my husband and I celebrated our 17th anniversary. This week I finished a quilt made with fabric purchased on our honeymoon on the island of St. John. It may have taken me 16 years to think of how I wanted to use the fabric but once I got going, it didn’t take too long to finish it up. I posted earlier about making the quilt top in August of last year. Because I wasn’t sure how I wanted to quilt it, I set it aside (for nearly a year!) Come January of 2015, I set a goal to finish this quilt up and I did it. This finish means that I do not have any unquilted tops lying around. Yahoo!
This project was fun to plan. I have been reading about whether to stitch in the ditch before starting to FMQ. Honestly, this sounded like a whole lot of extra work. I decided to compromise and I stitched the perimeter of each nine patch. I thought this would stabilize the quilt and hopefully, reduce and puckers on the backing. It is so irritating when you flip the quilt over to check on it and there is a fold. Between pin basting and ditch stitching I was hoping for a better back. Some quilters think it holds the quilt square and prevents distortion. Others say it makes the FMQ work look better. I do think it helped. My quilt stayed square and often, it doesn’t. I didn’t have a single pucker on the back. The only thing is that on the back of the quilt, the ditch stitching is very visible so one has to take that into account when planning the quilting. It doesn’t show much at all on the front. As for any benefit to the look of the quilting on each nine patch, I didn’t notice a huge difference. In fact, after I had quilted about 65% of the project, I noticed that I had skipped ditch stitching one block. That block really didn’t look noticeable different from the others. So, I think it is good forquilt stabilization and keeping square but doesn’t noticeably enhance the FMQ.
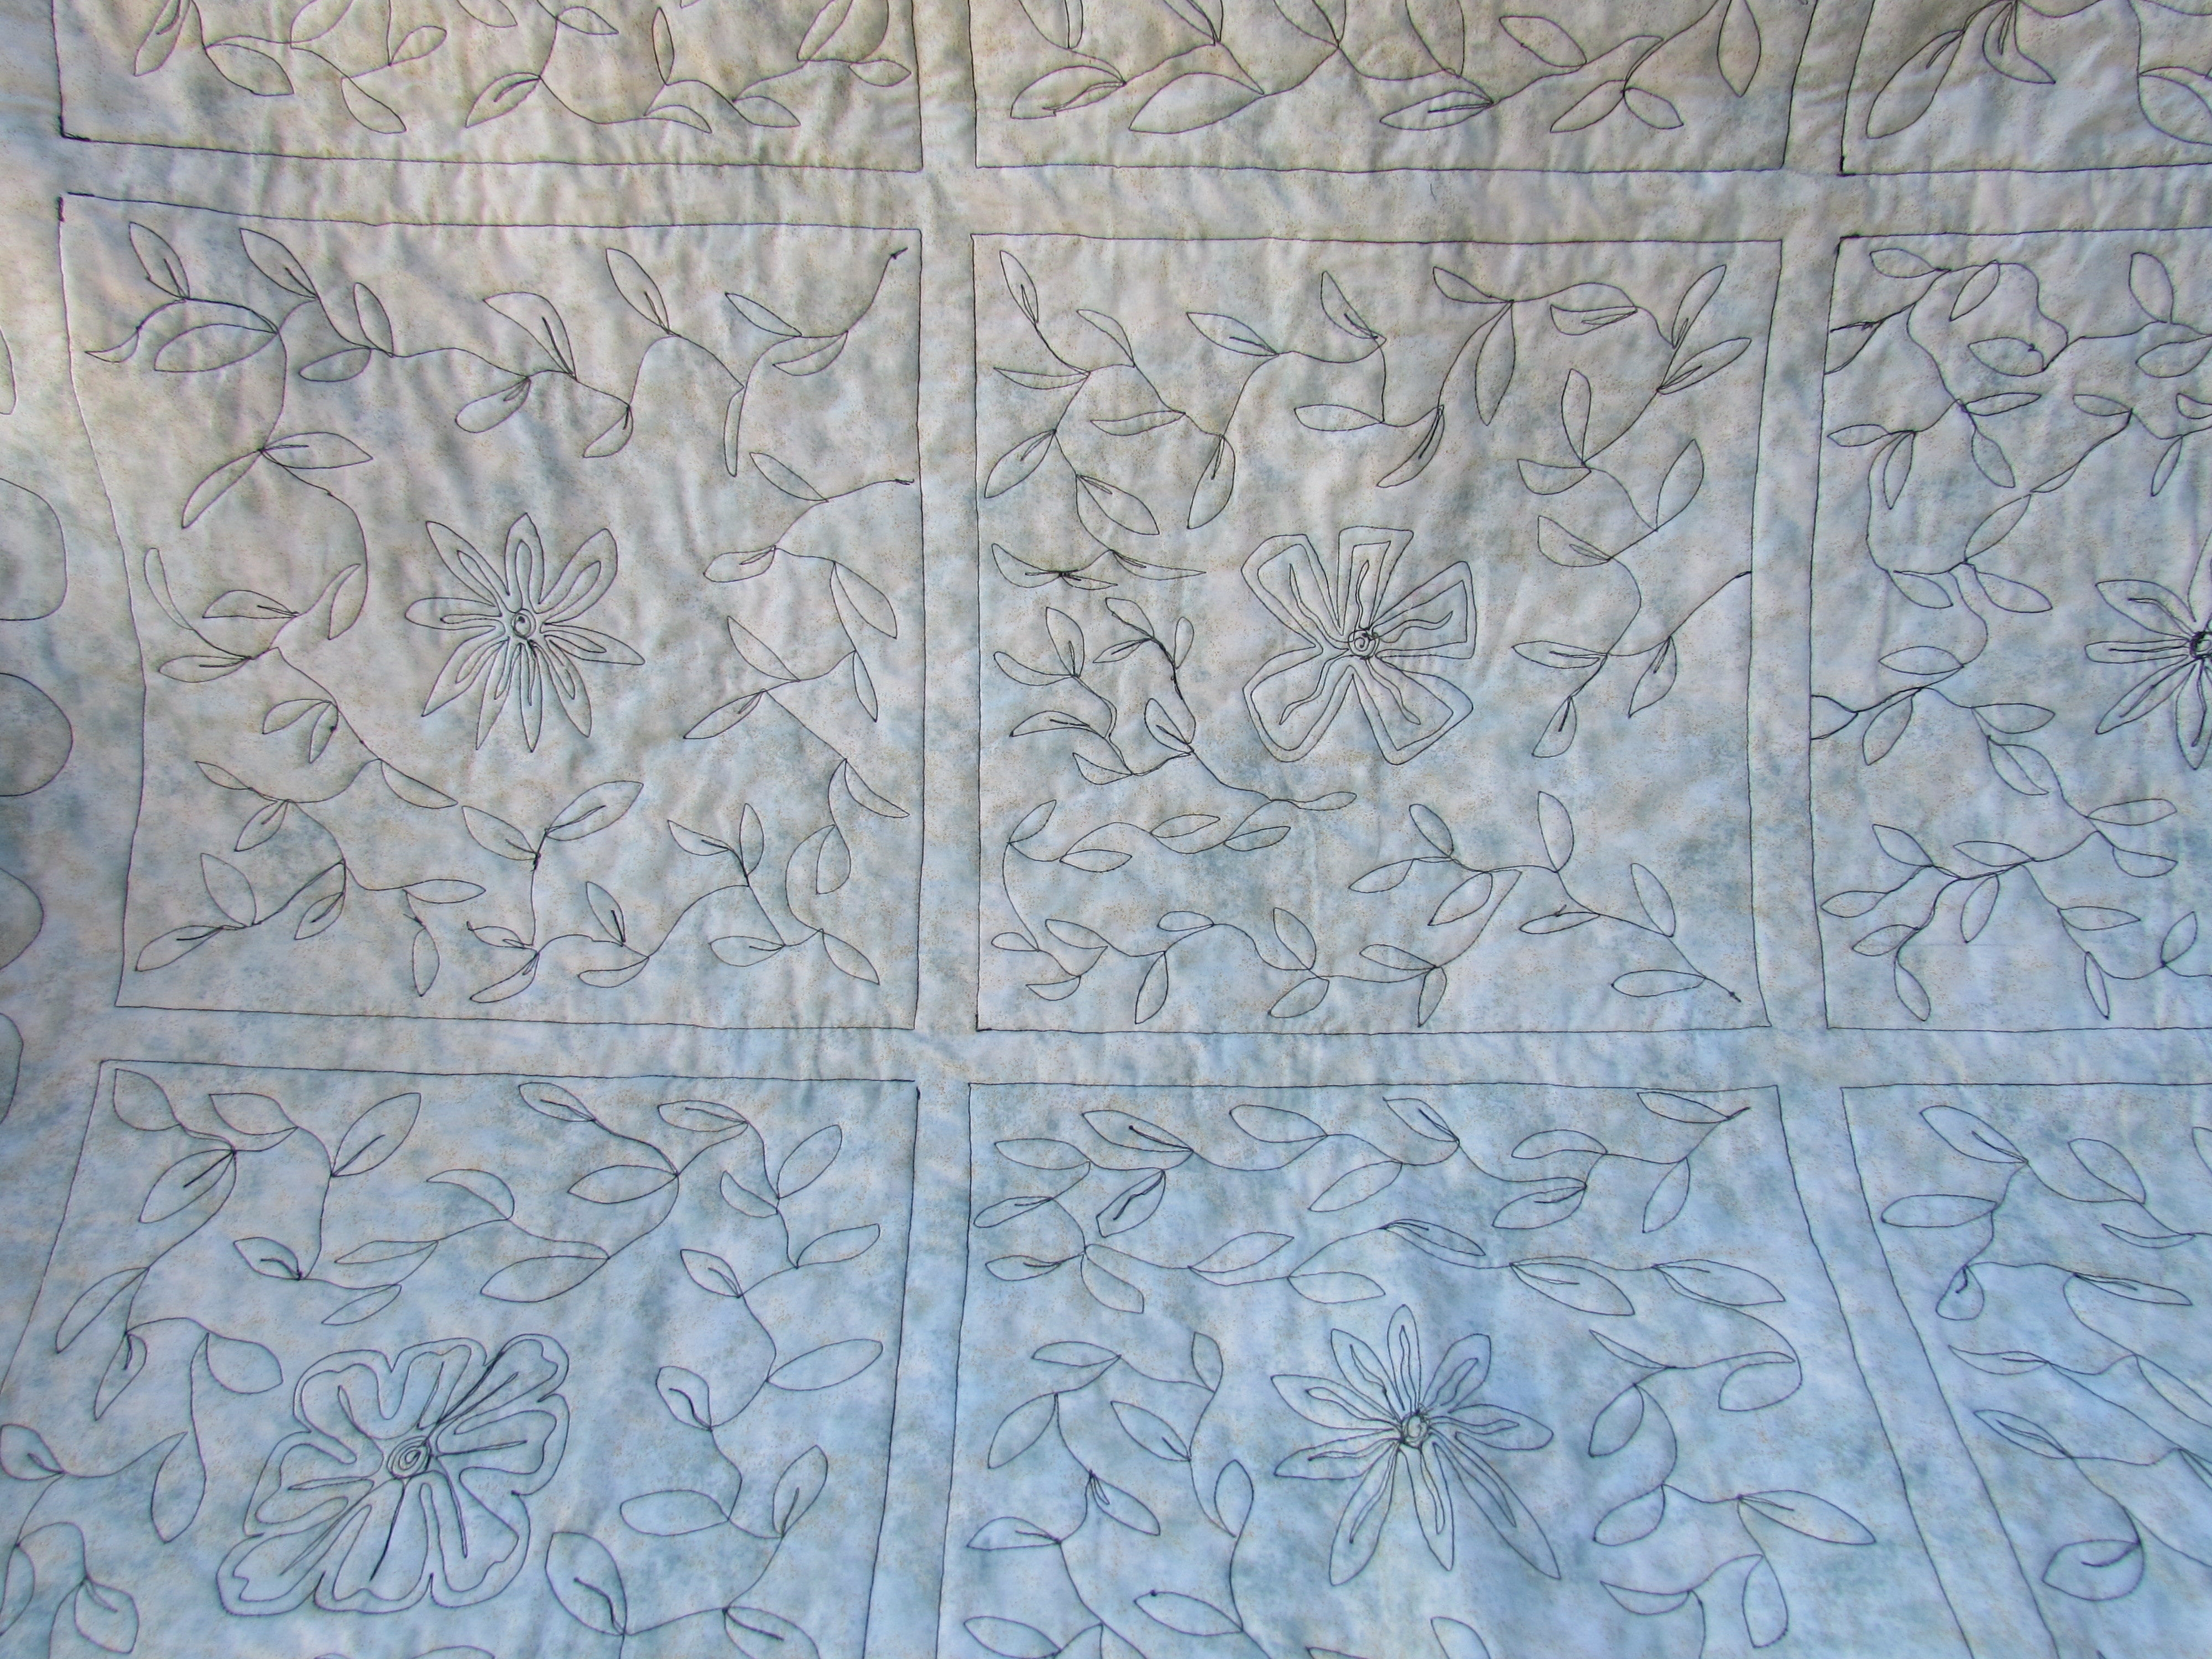
I took a look at some quilting sites (mainly Lori Kennedy’s site, The Inbox Jaunt) to get inspiration. I knew that I would do an all over FMQ pattern but wanted just a bit more detail than that. Each of the nine patch blocks have a blue center. Starting with that, I quilted a large flower in the center of each blue square.
I decided that leafy fines would complement the flowers. Using a variegated green YLI quilting thread, I FMQ’d leaves of various sizes on each block. I left the black sashing plain. Because the backing is a light green batik, the FMQ stitching really shows up on the back. Not sure if this is good or bad! For the most part, I am happy with the stitching. Why is it that my eye goes to the little tension blips and the occasional jittery stitching instead of the overall look? For those of you that quilt on your domestic machine, how to you handle the starts and stops? Look closely at the squares that I ditch stitched, see the dark spots at one corner where I stopped and started? I chose to reverse a few stitches rather than knot and bury tons of threads. Not sure I like how this looks. What is the consensus? Do you back tack stitches or knot and bury threads? I know which is cleaner but yikes, burying all of those threads is time-consuming.
The binding is, as usual, one of my favorite parts. I used the honeymoon batik for the border and also for the binding. To add some depth, I attached a black flange to the perimeter of the quilt before binding the quilt. I love the ‘something extra’ that this flange adds to the quilt.
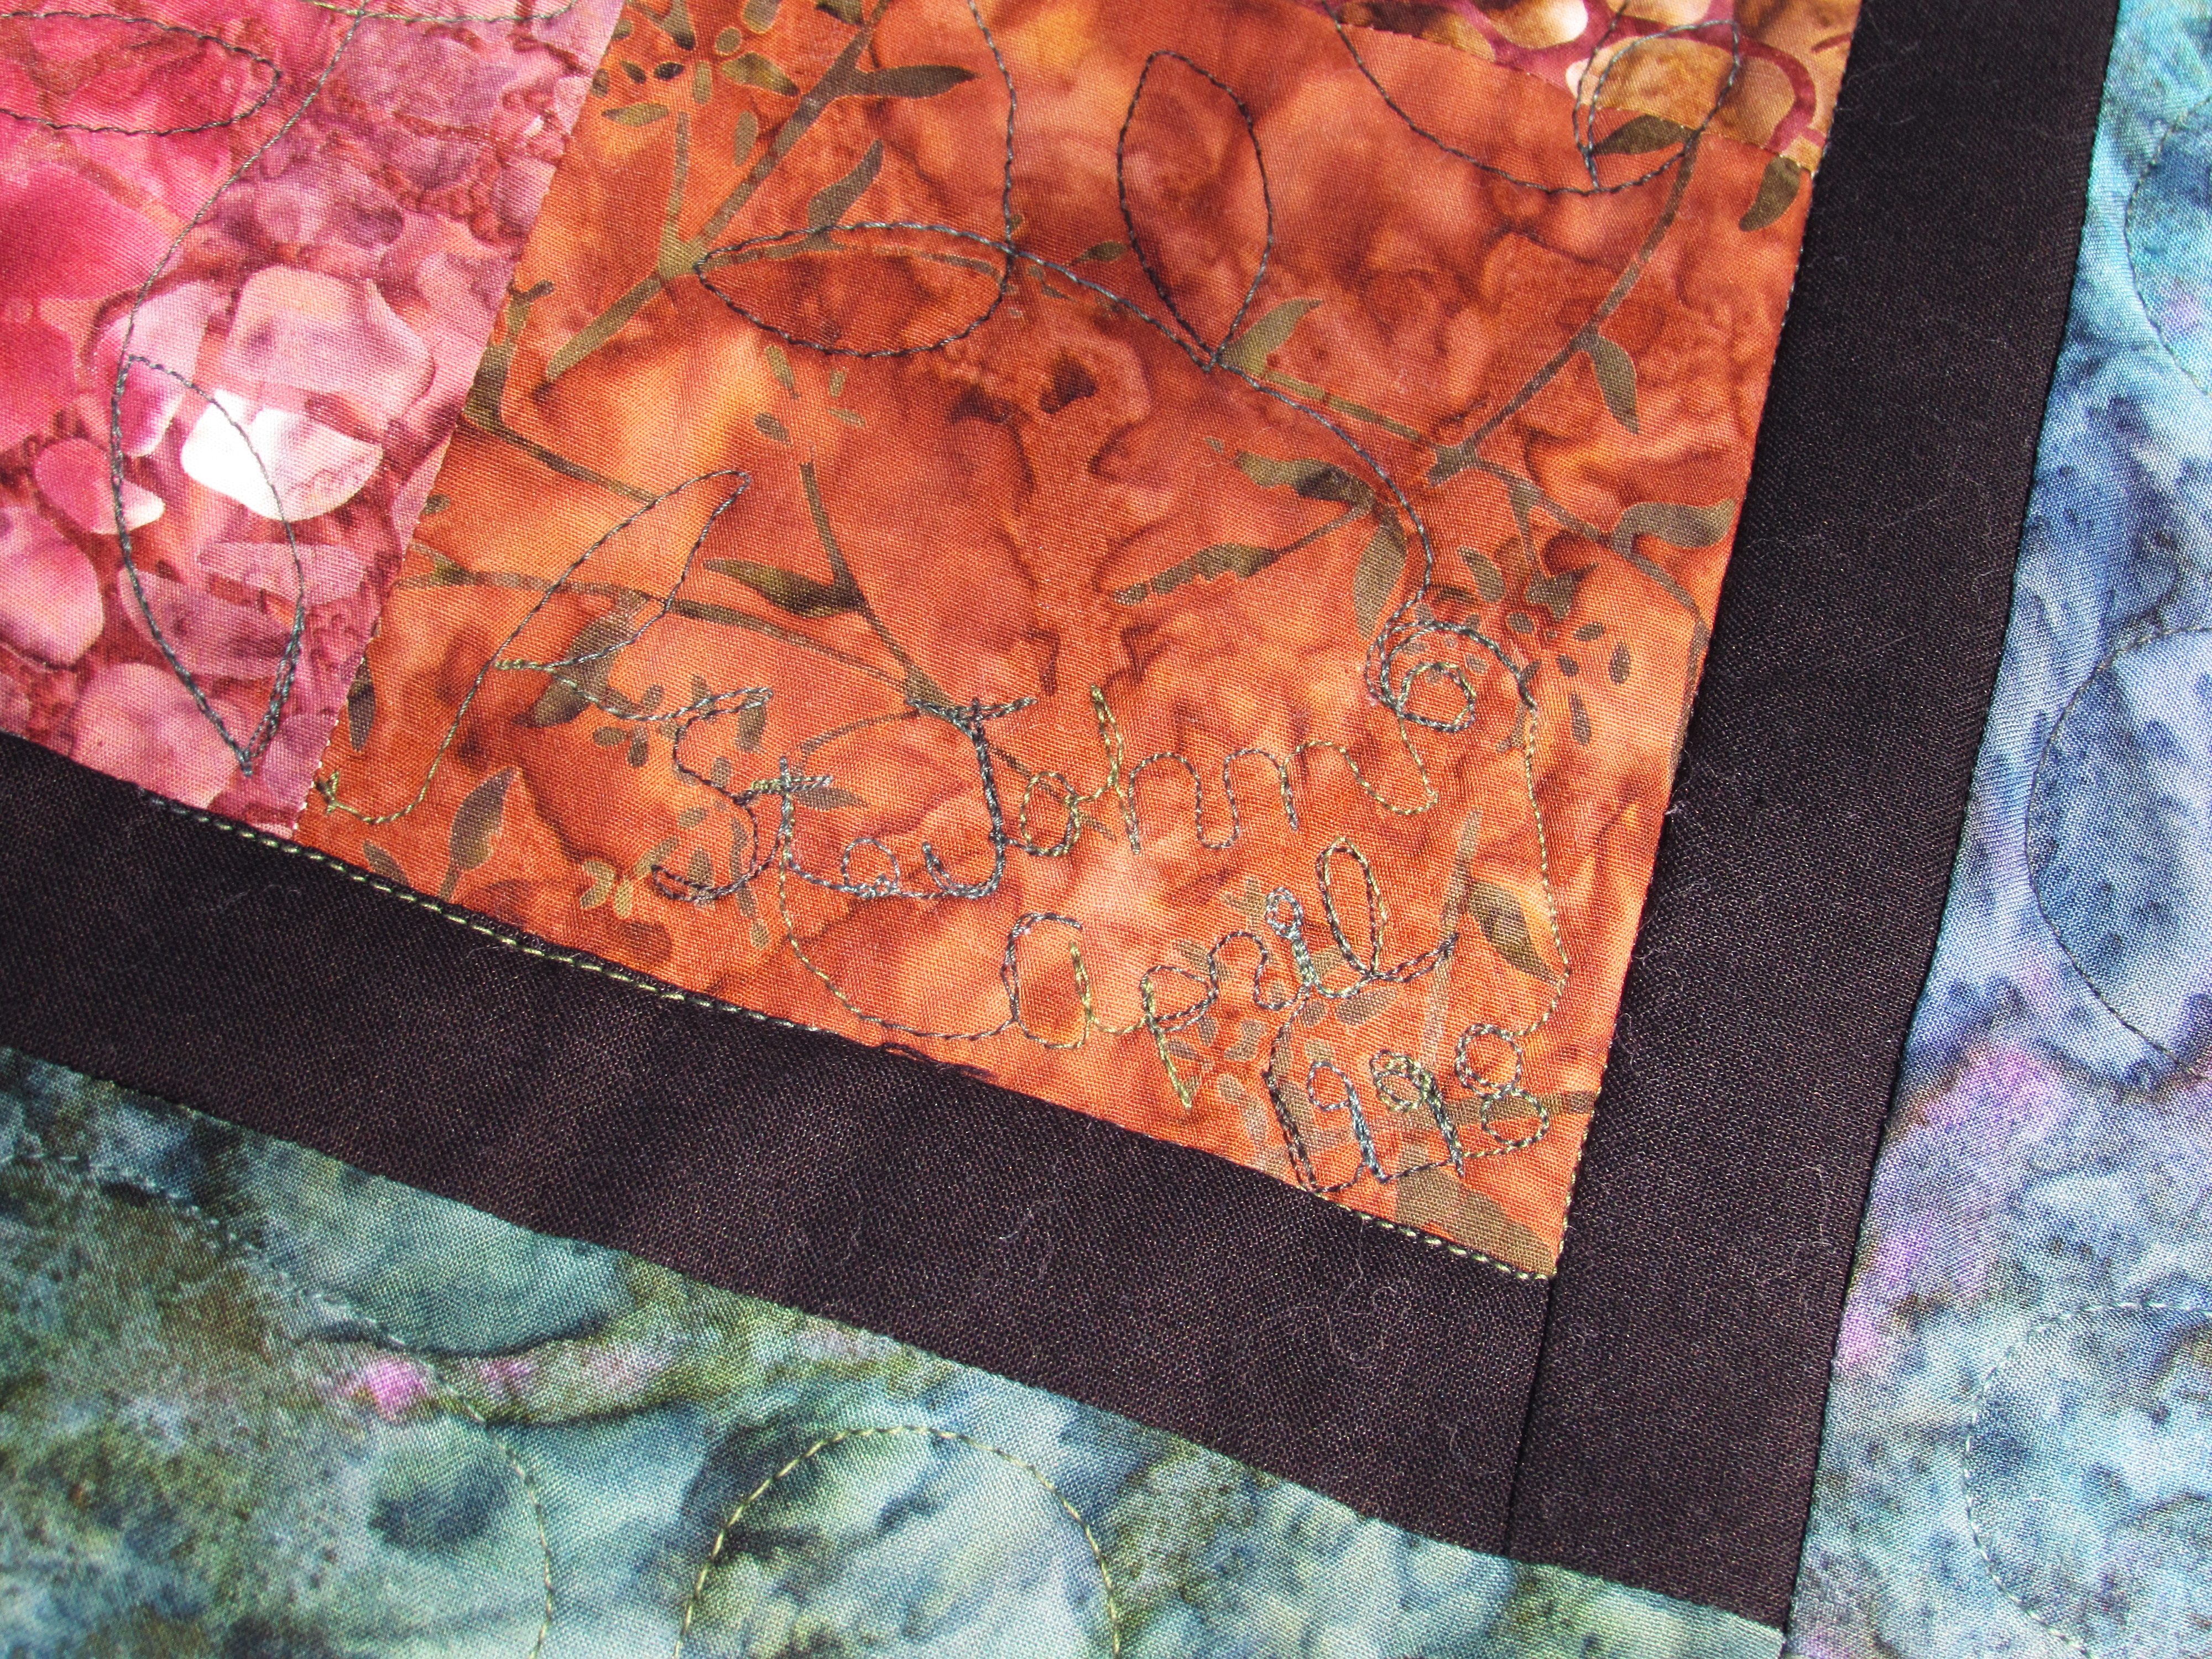
To honor our honeymoon, I tried stitching St. John as well as April, 1998 on a corner of the quilt. Kind of difficult to see but it was a good addition.
When I was binding it, I came upon my two ends that needed to be joined and sighed my heavy, here-we-go sigh. I hate attaching the tails of the binding. This time I looked to Rita over at Red Pepper Quilts. On the off chance that there is someone who hasn’t heard of Rita, she is an amazing quilter who has the most amazing sense of color. Her quilts are bright, happy and so vivid. Truly amazing. If you haven’t looked at her work, now is the time. She has numerous tutorials, several of which talk about binding. This is the one that I used. The result was good so I will refer back to her measurements next time.
I can check this goal off of my 2015 list and move on to another one! I think the next goal I need to work on is some quilt restoration. I have two quilts to restore and I want to get one of them going soon.
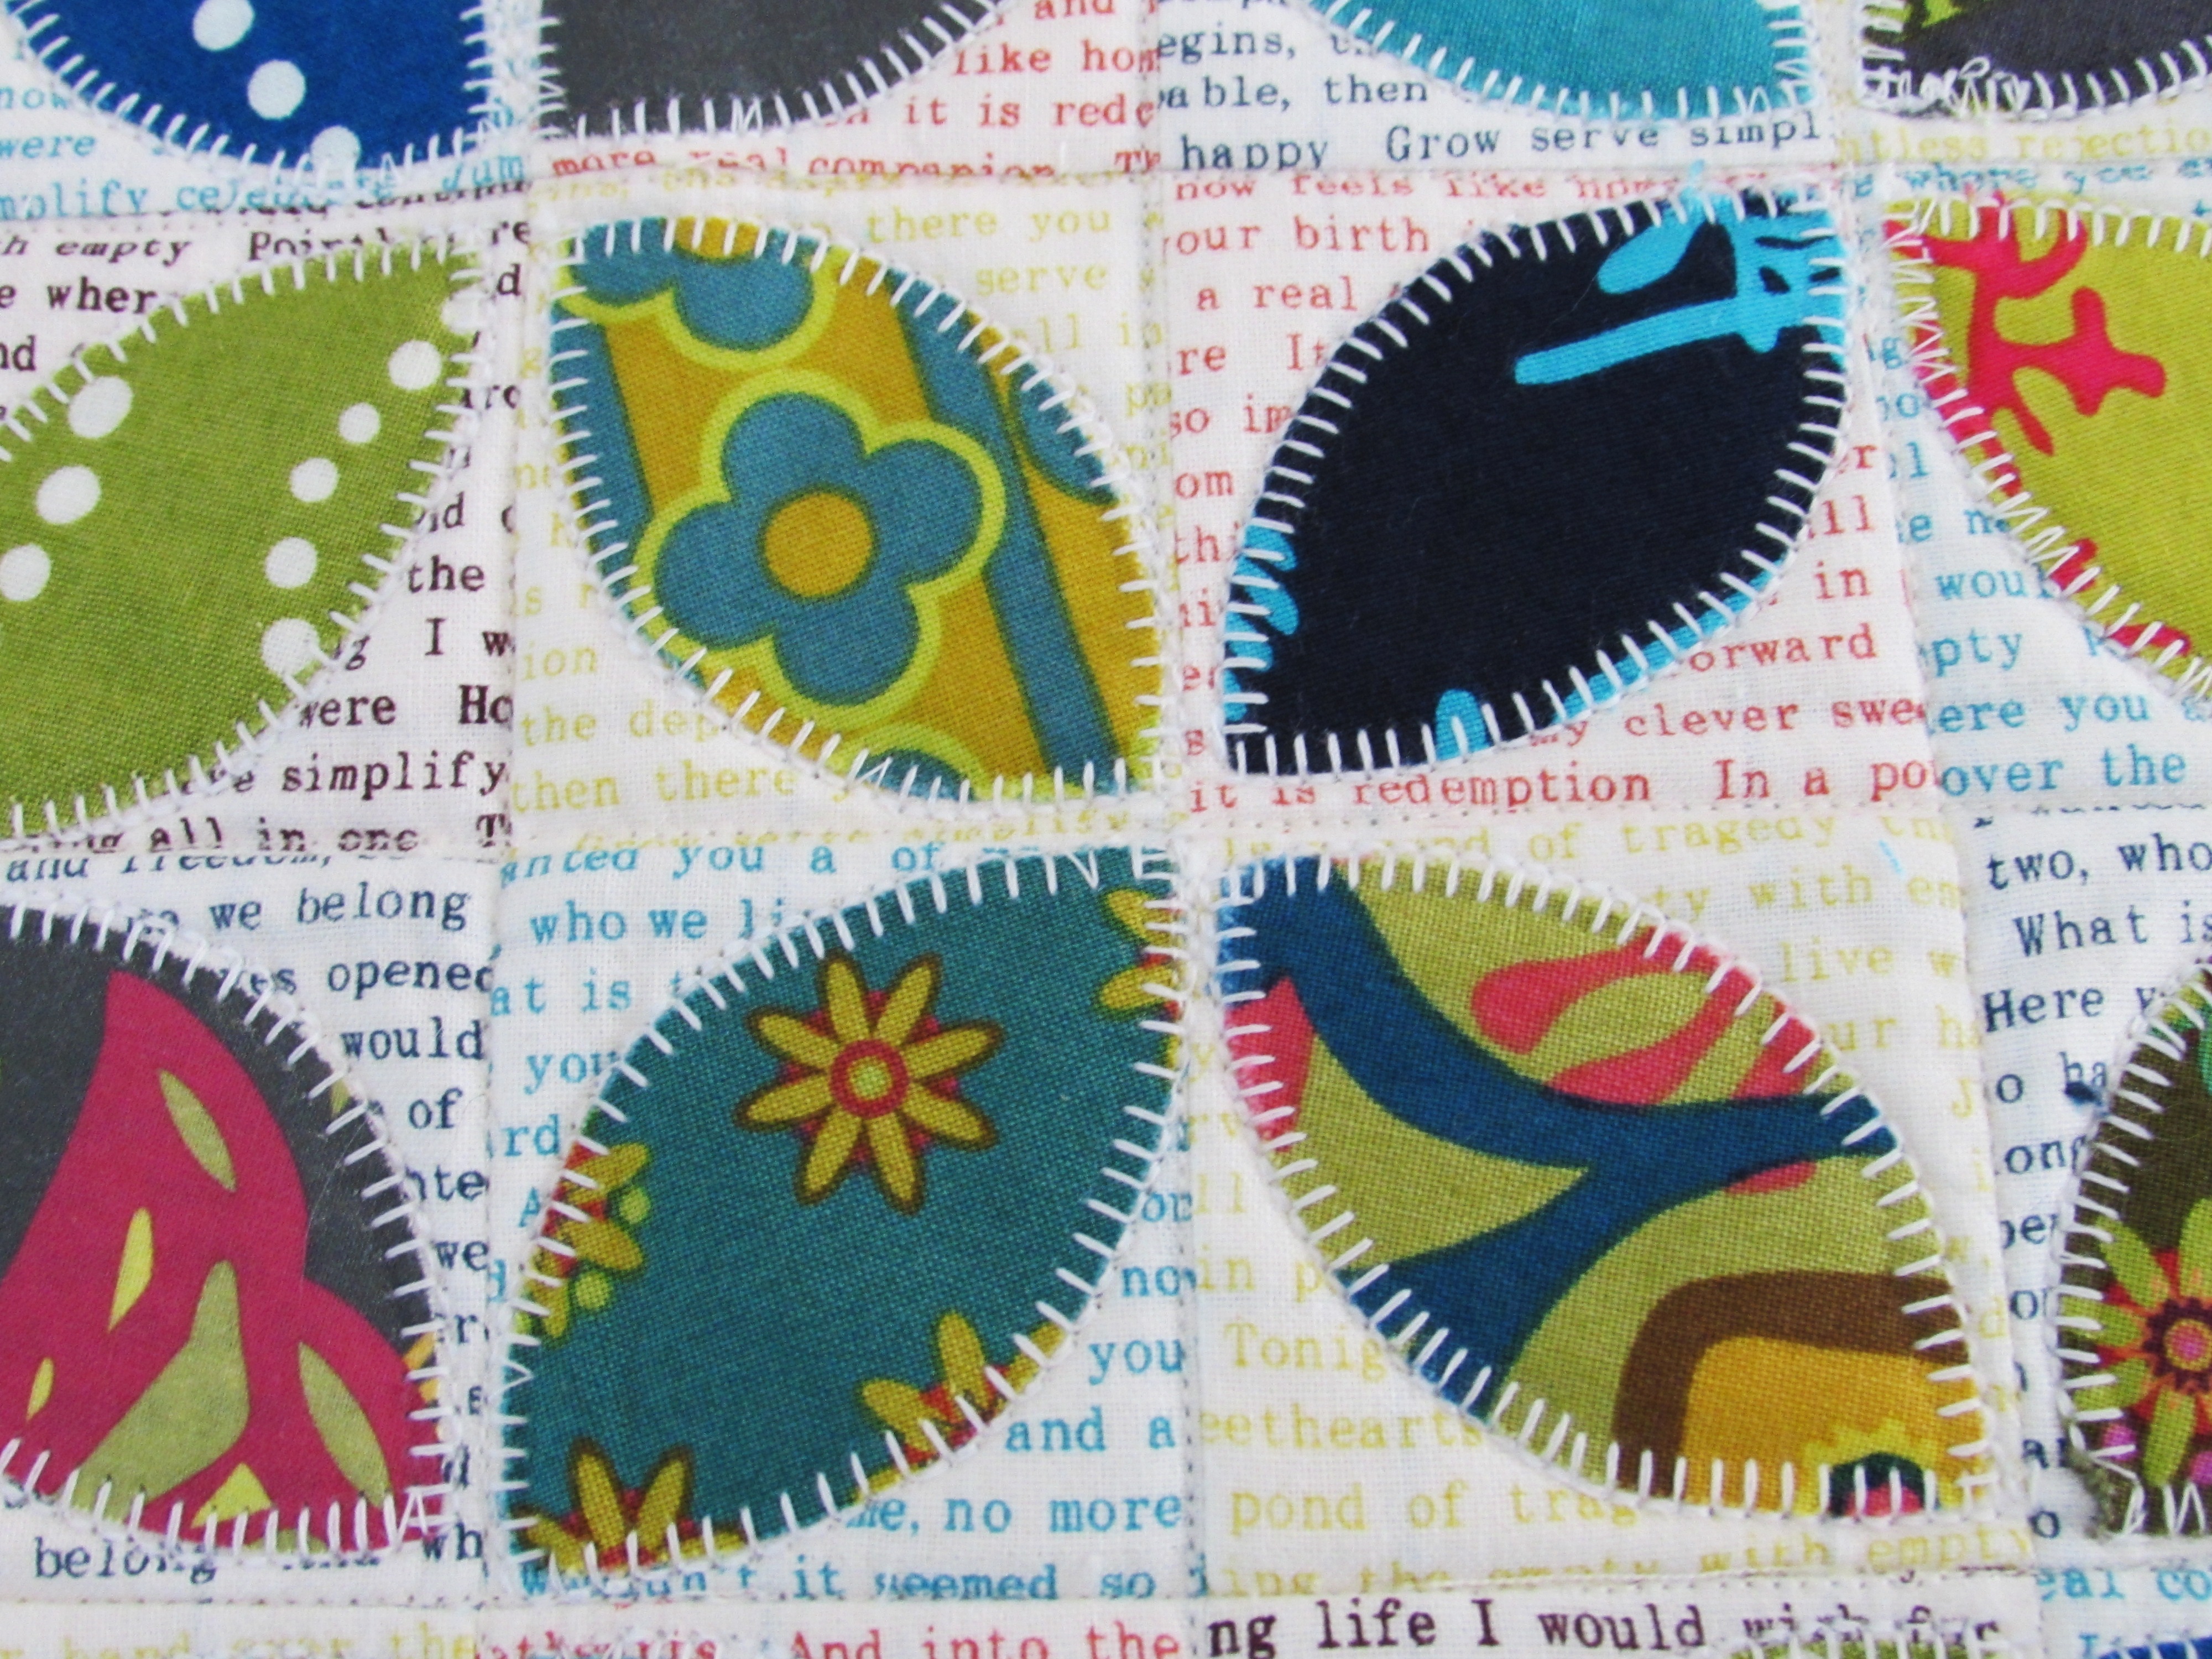
Finally, remember the Allison Glass mini swap that I participated in? I blogged about the mini that I made here. There were a few comments asking me to post the mini that I received. Wow, I can’t wait to share it. It is gorgeous. I am so grateful to my partner for putting so much effort into this project!
My partner outdid herself with this. I love the text print that was used as the background on each 2″ square. She appliqued the orange peels with a blanket stitch which was brilliant.
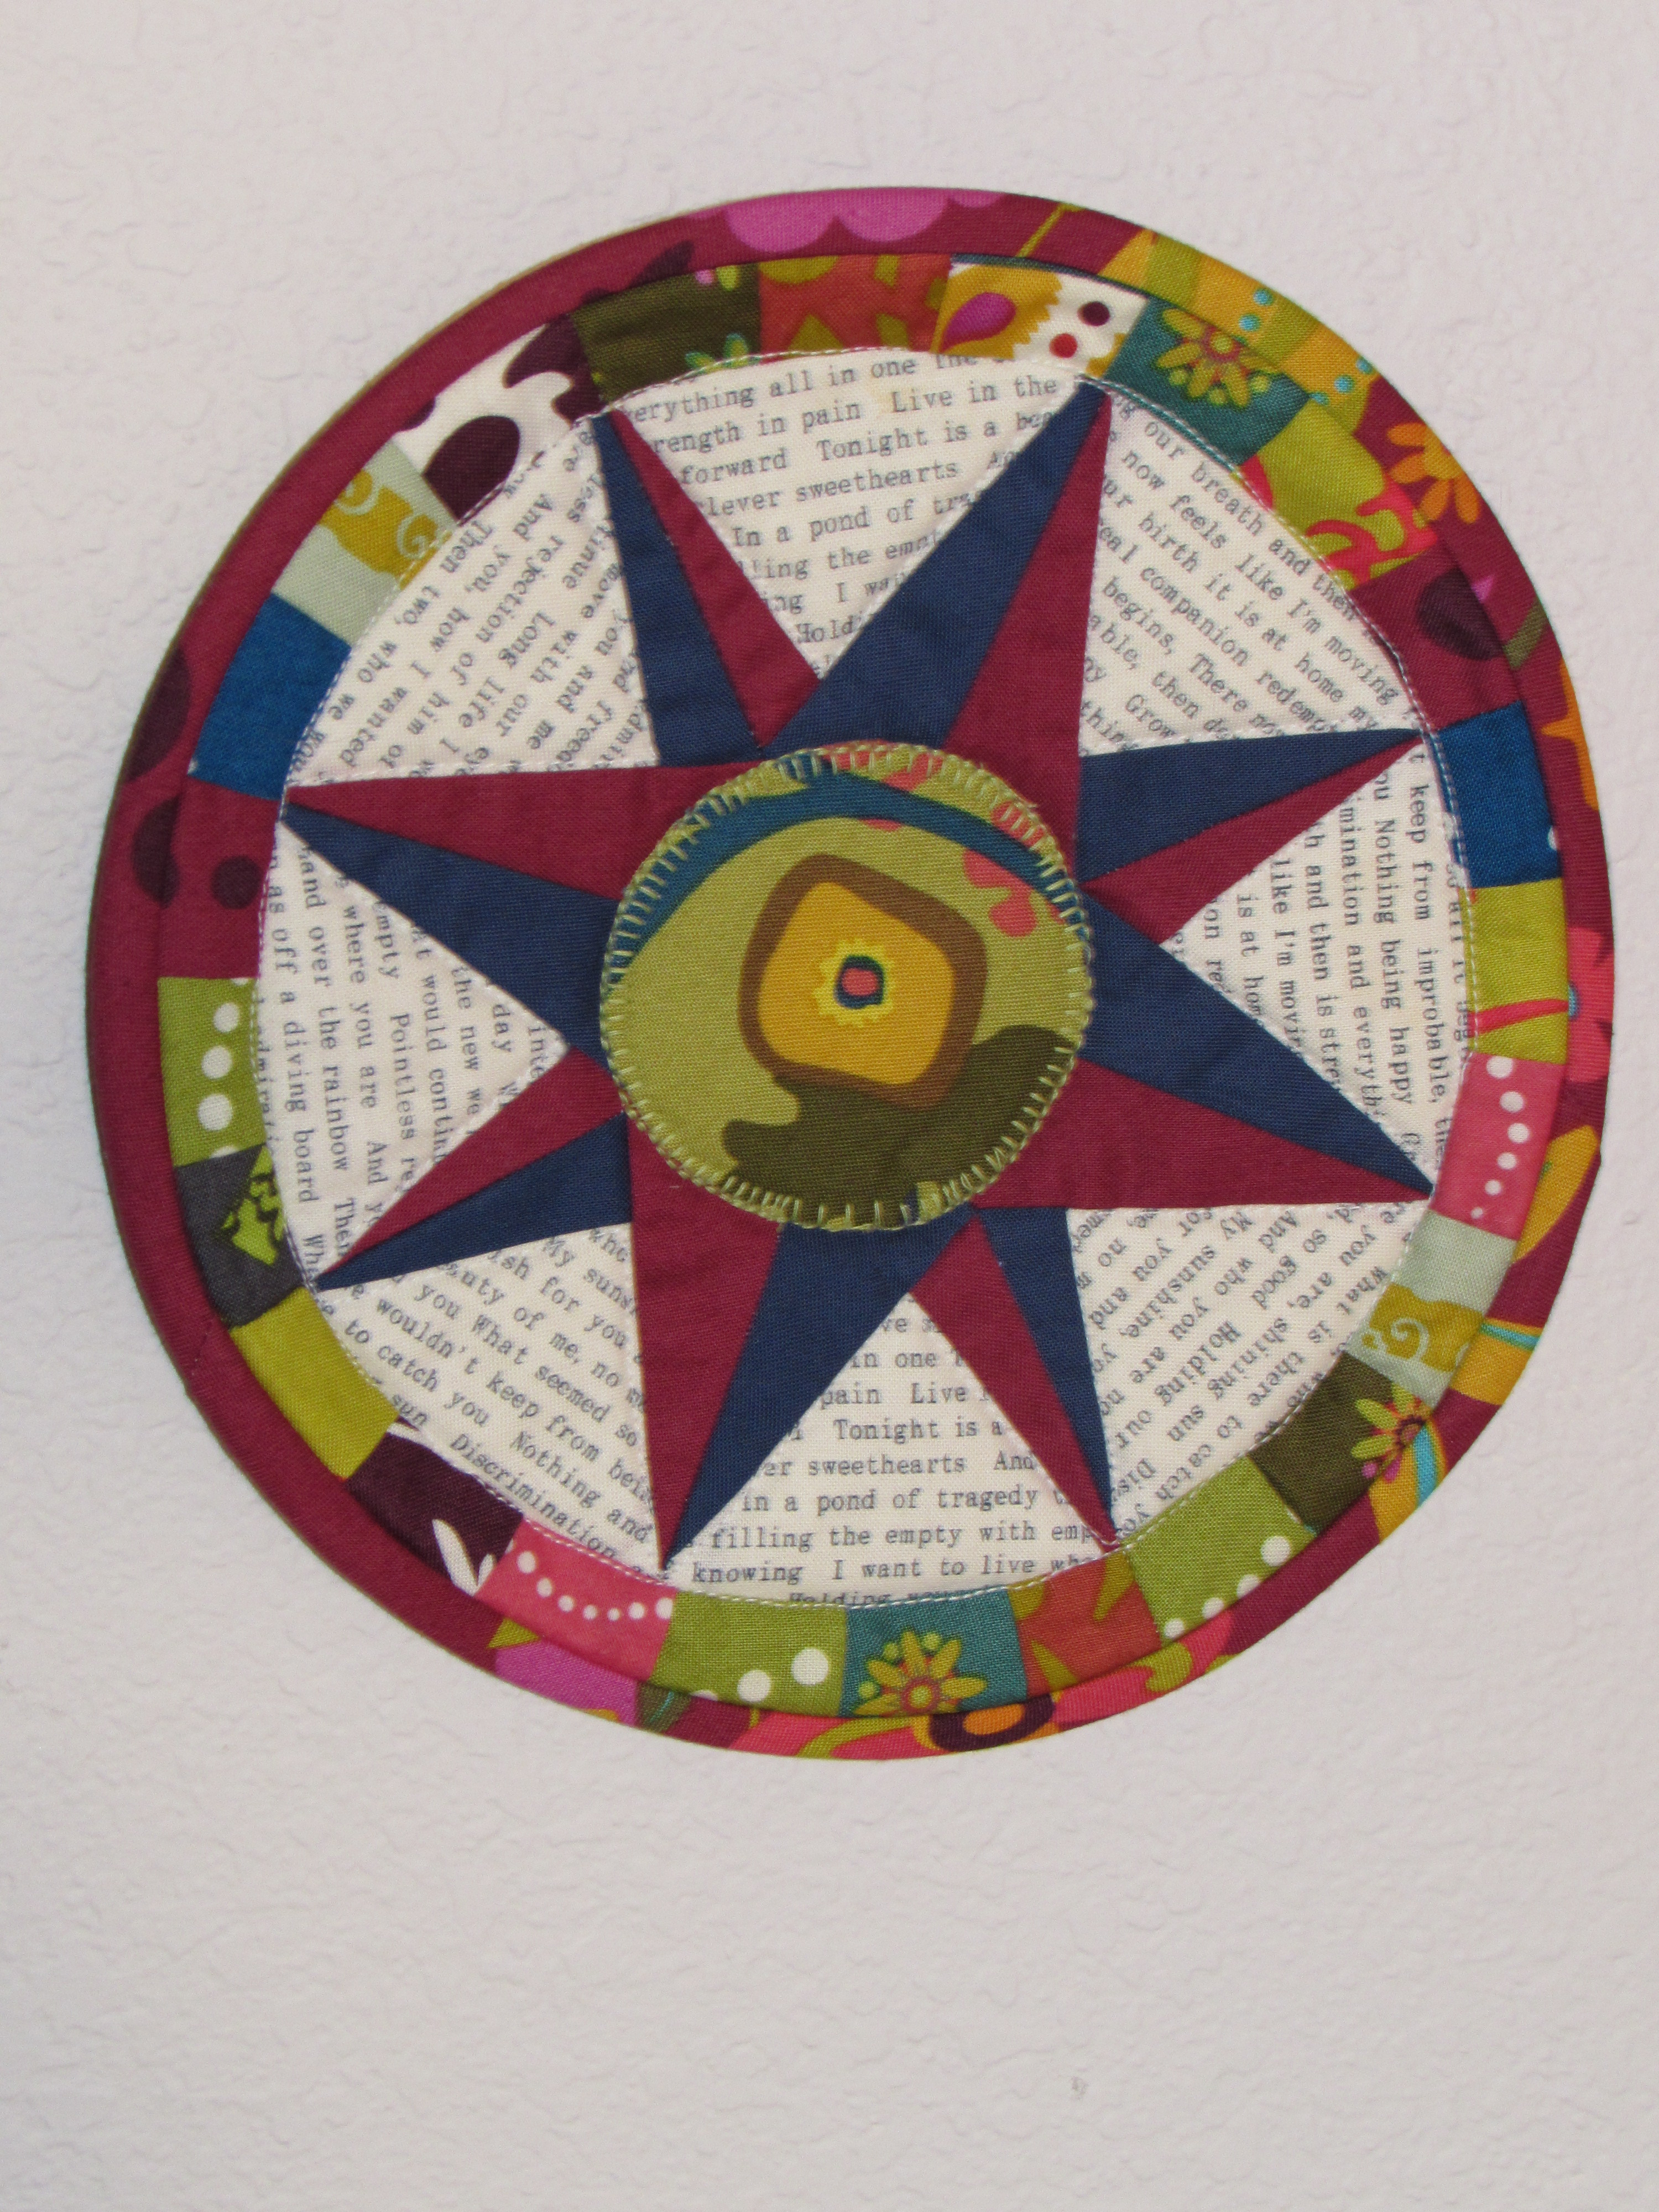
She also made this smaller mini. I think it is intended as a pot holder but I am hanging it on the wall. I don’t want it soaked with food splatter, which we all know would happen.
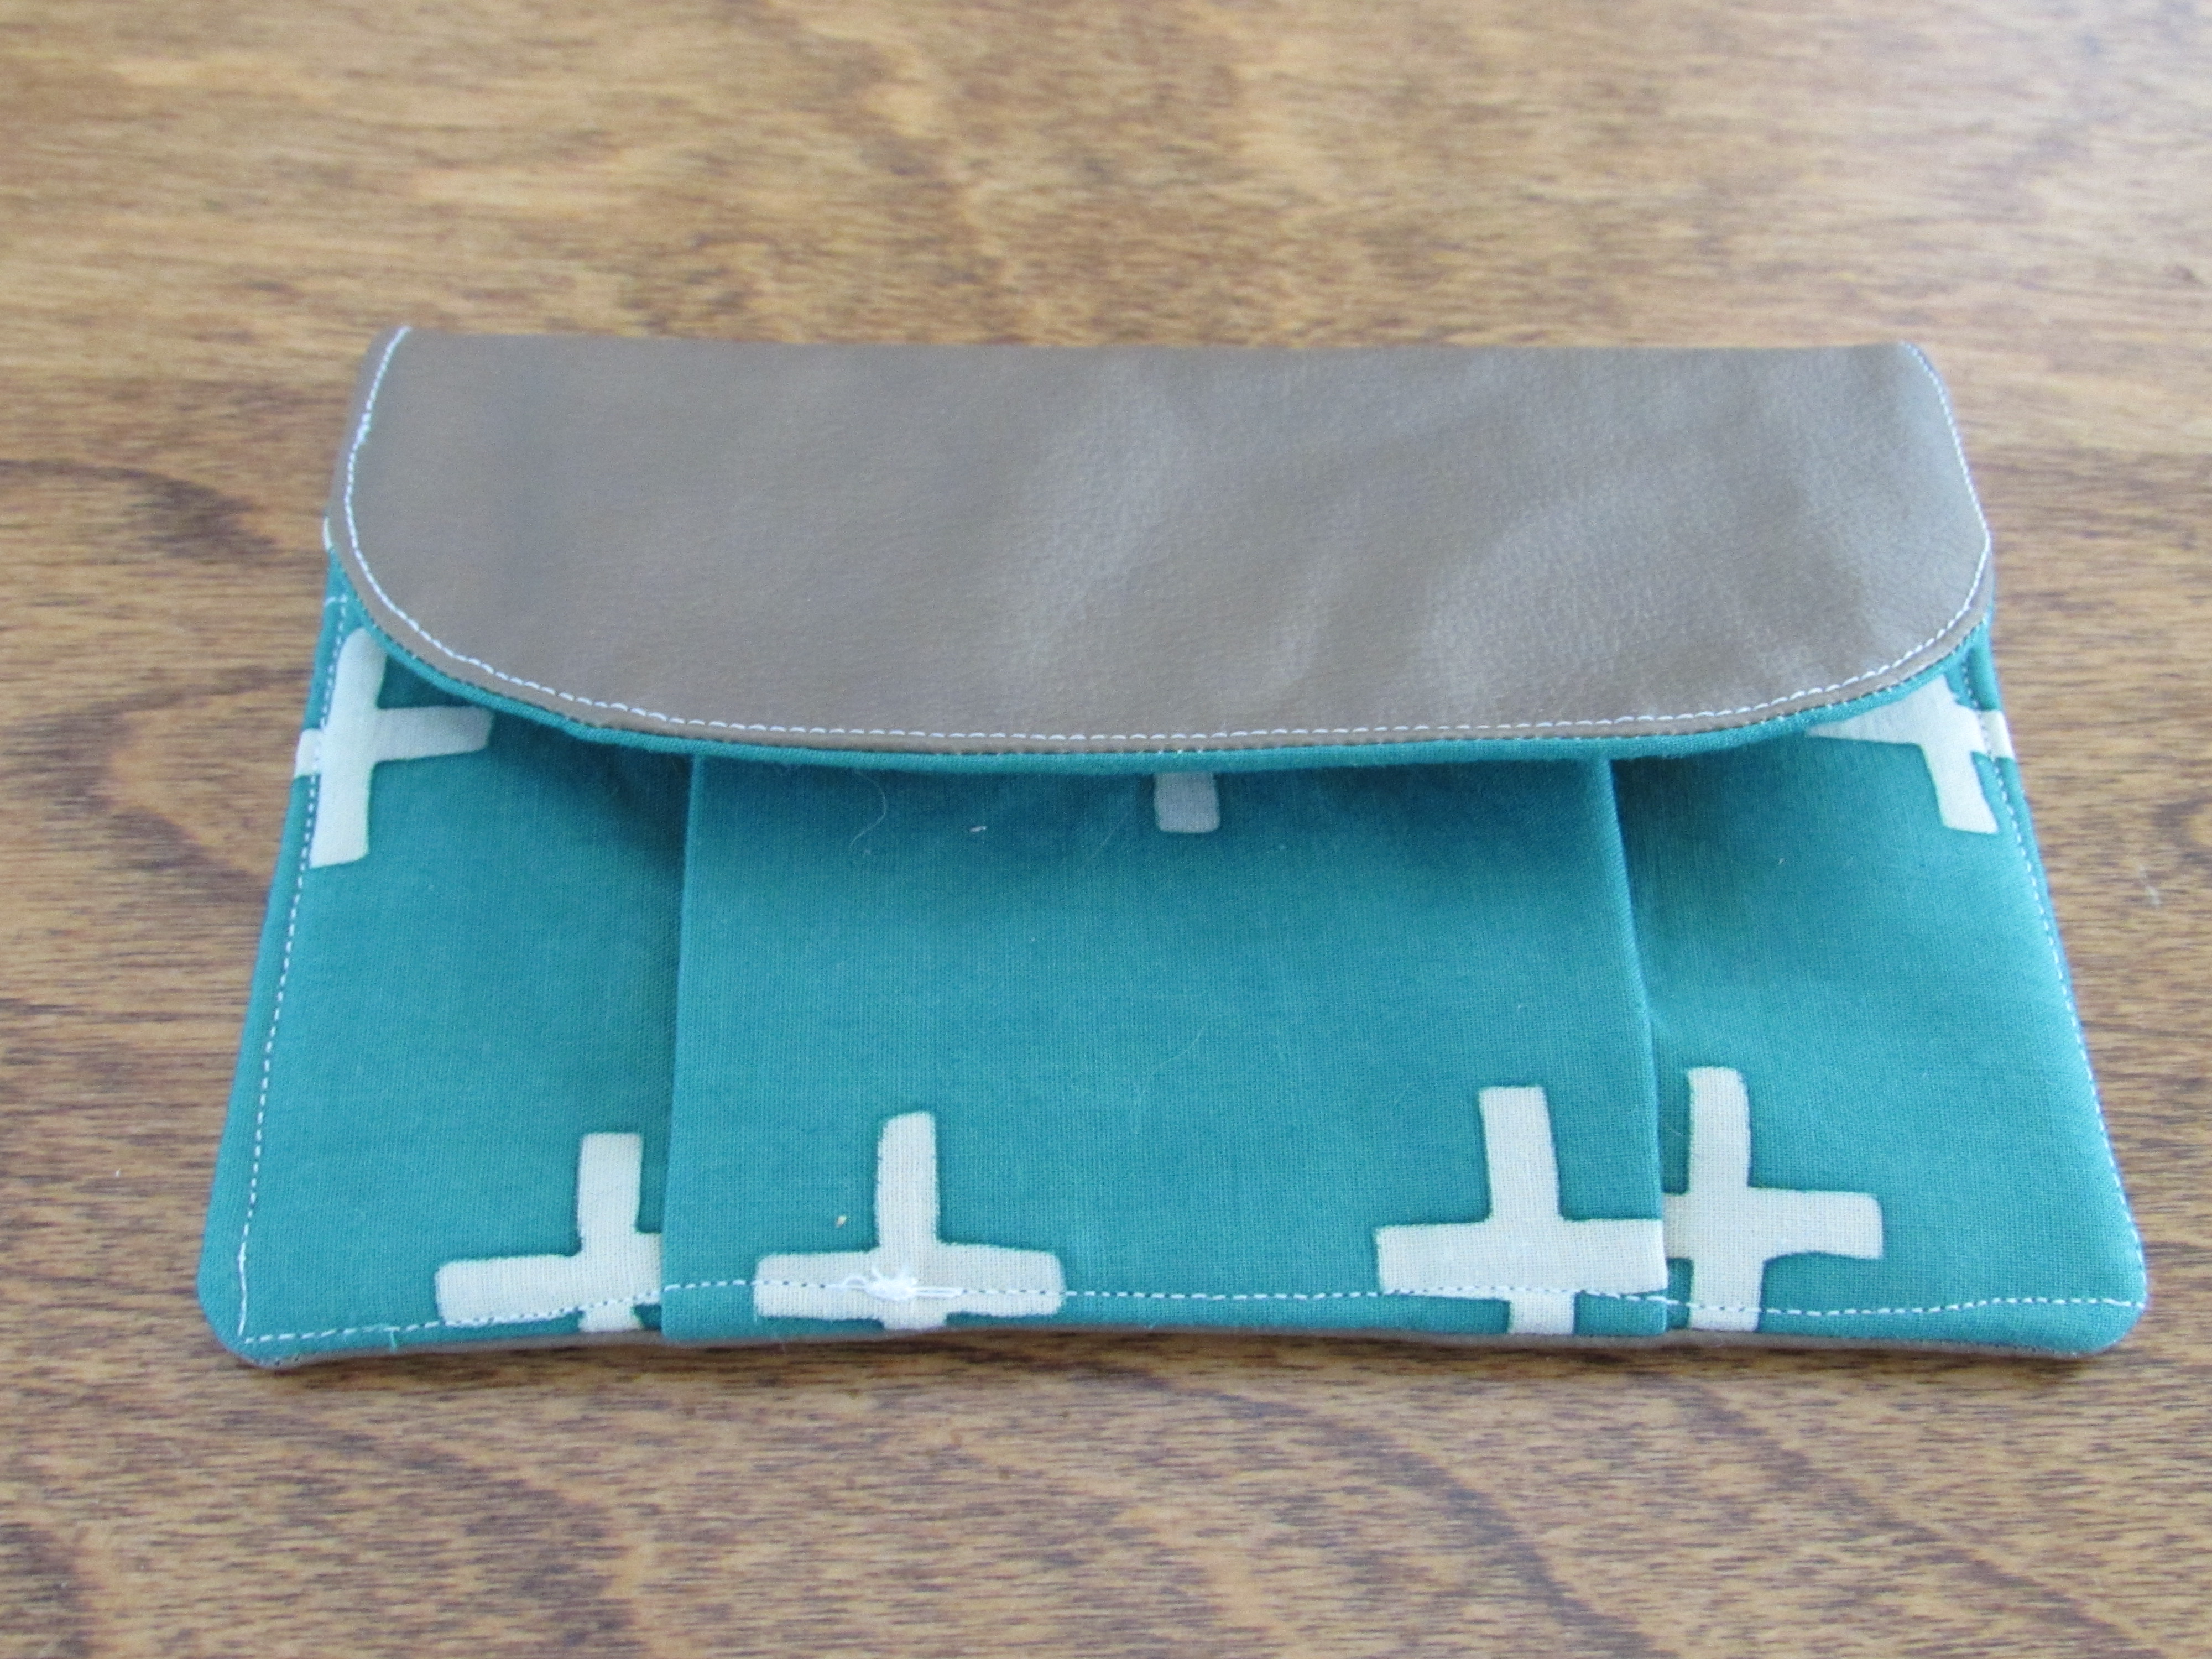
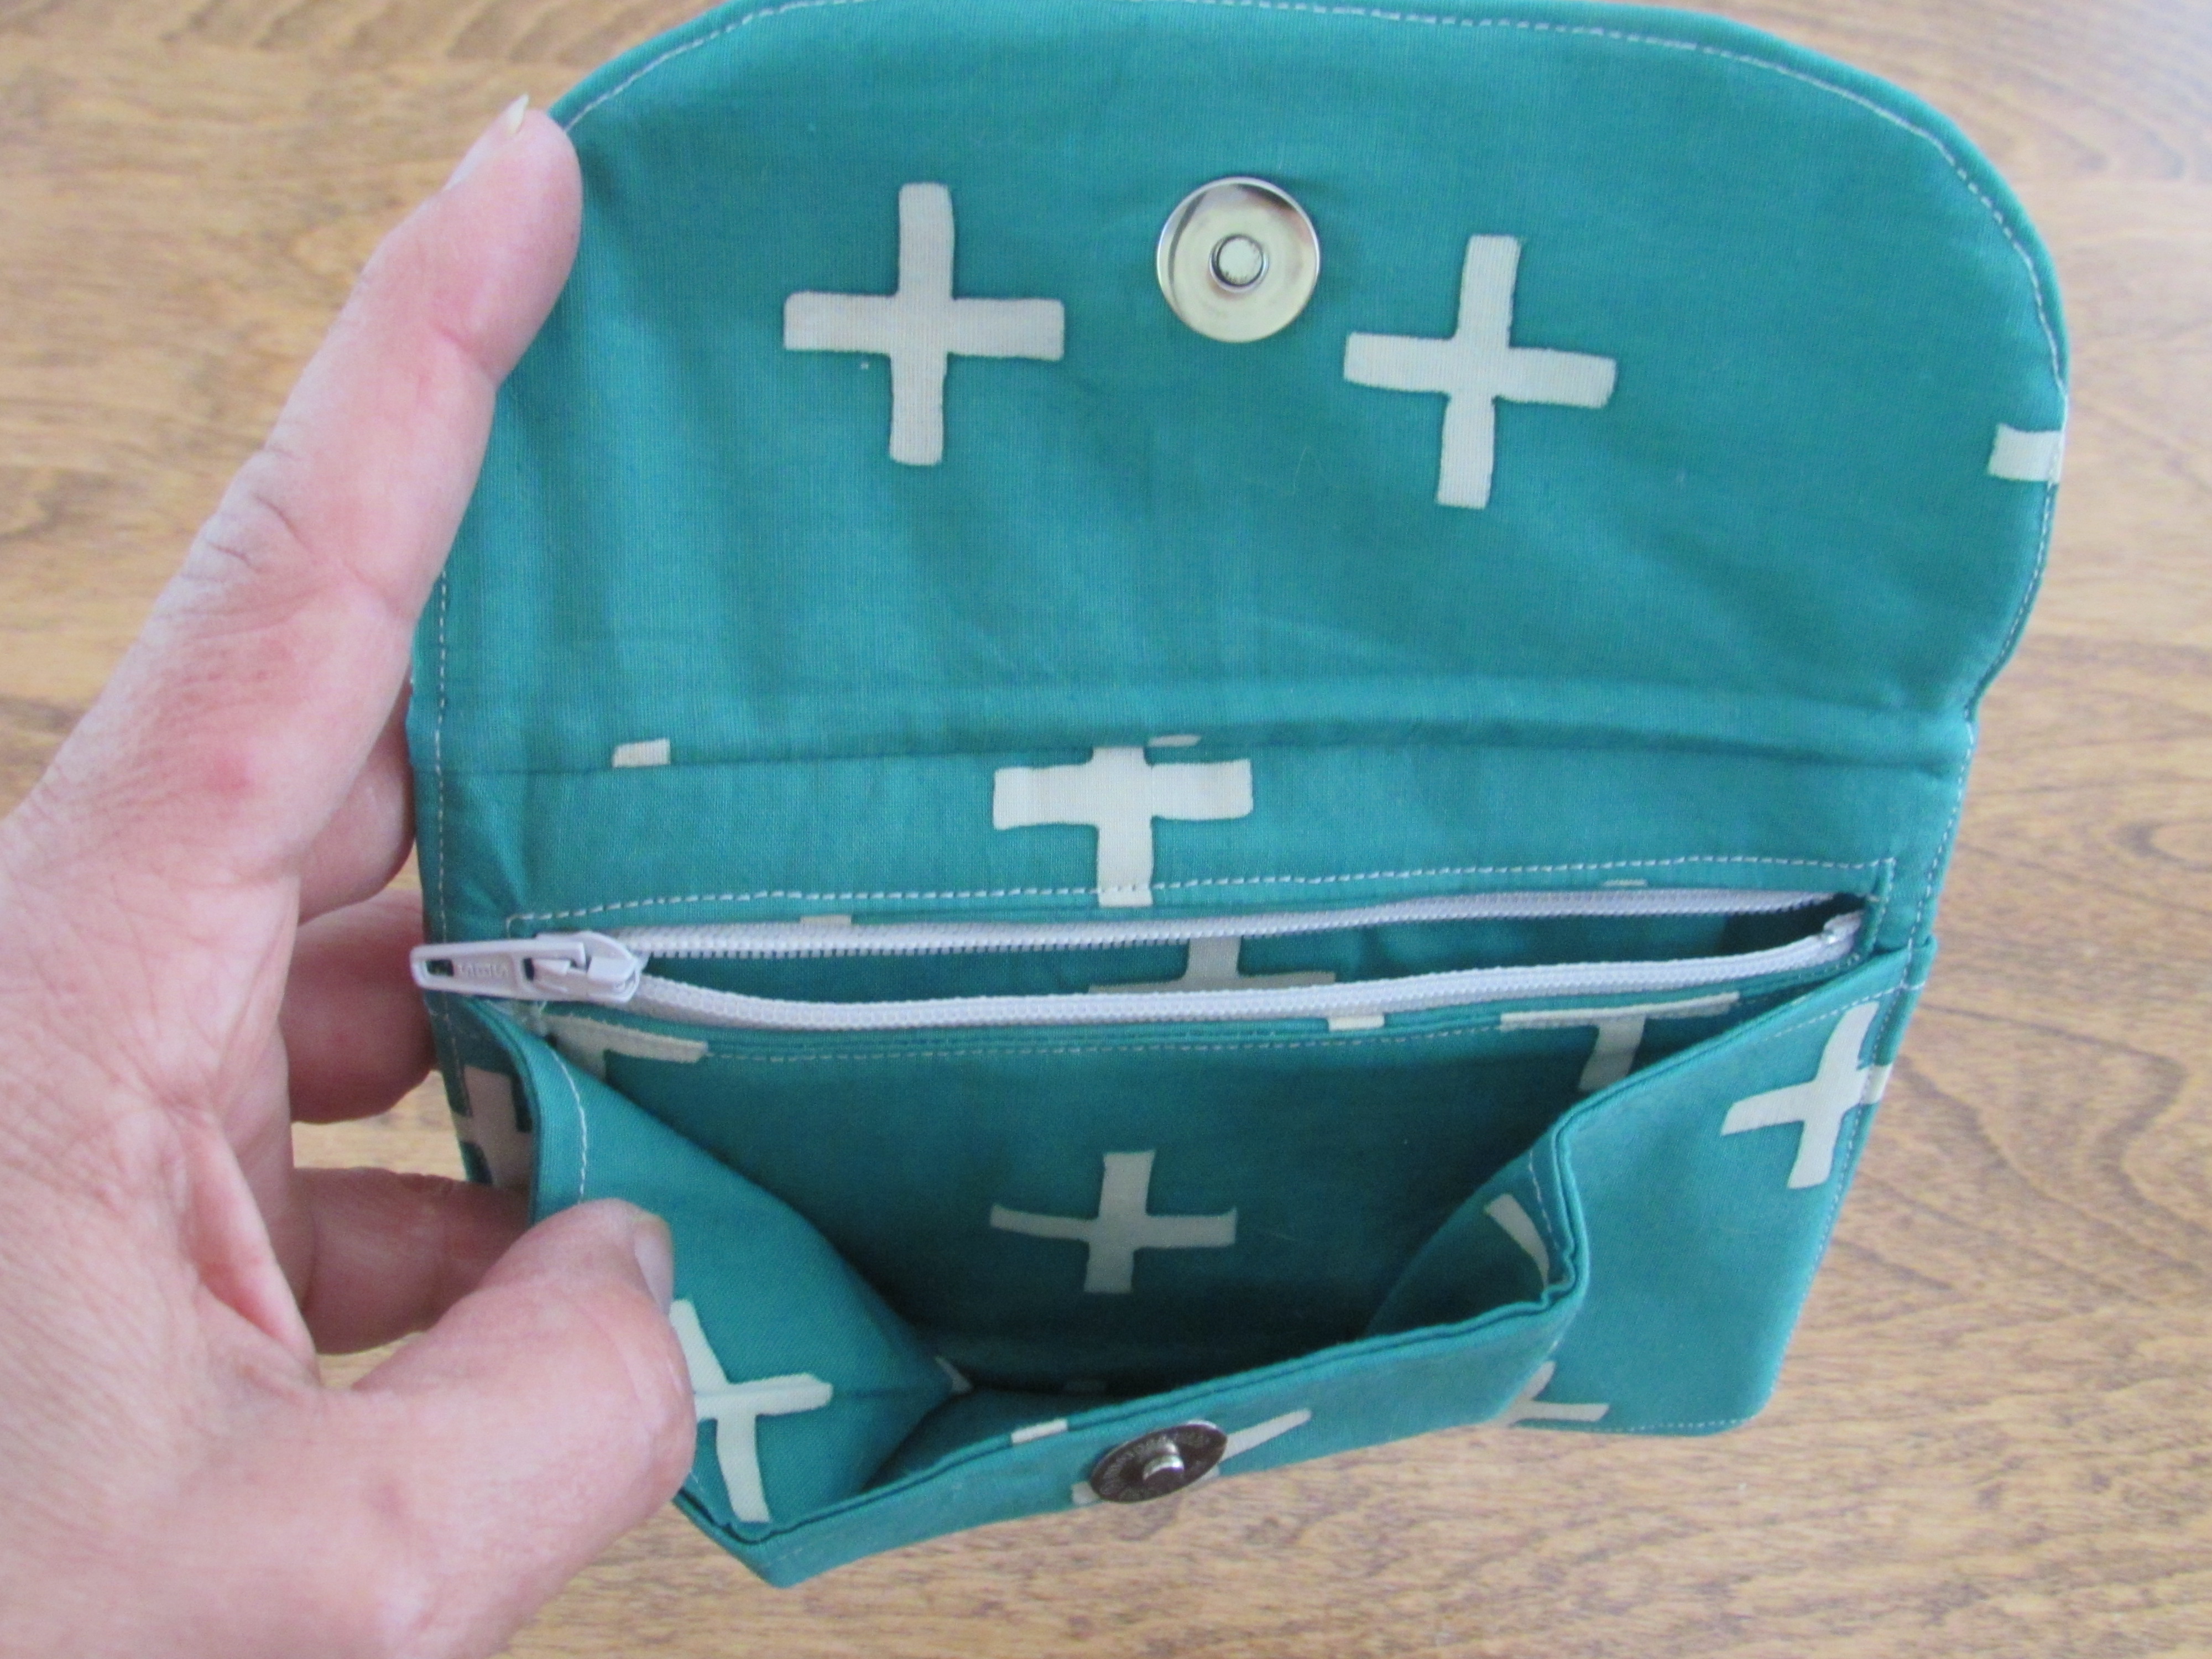
I also received this sweet wallet. Hand-made and so well done, it is lovely.
The swap was fun and I am thankful that I gave it a try as it pushed me quite far out of my comfort zone. Also, I am truly grateful for the work my partner put into the items I received. That being said, I am not sure I will do another one for a while. I could see participating in one each year. They are quite time-consuming and it set my nerves on edge trying to think of what my partner would want, based on the few hints we are given. The process is a good way to get to know other makers though. It is really a big deal on Instagram and there is a swap for just about anything crafty.
Hope you all have something fun planned for the upcoming weektend.


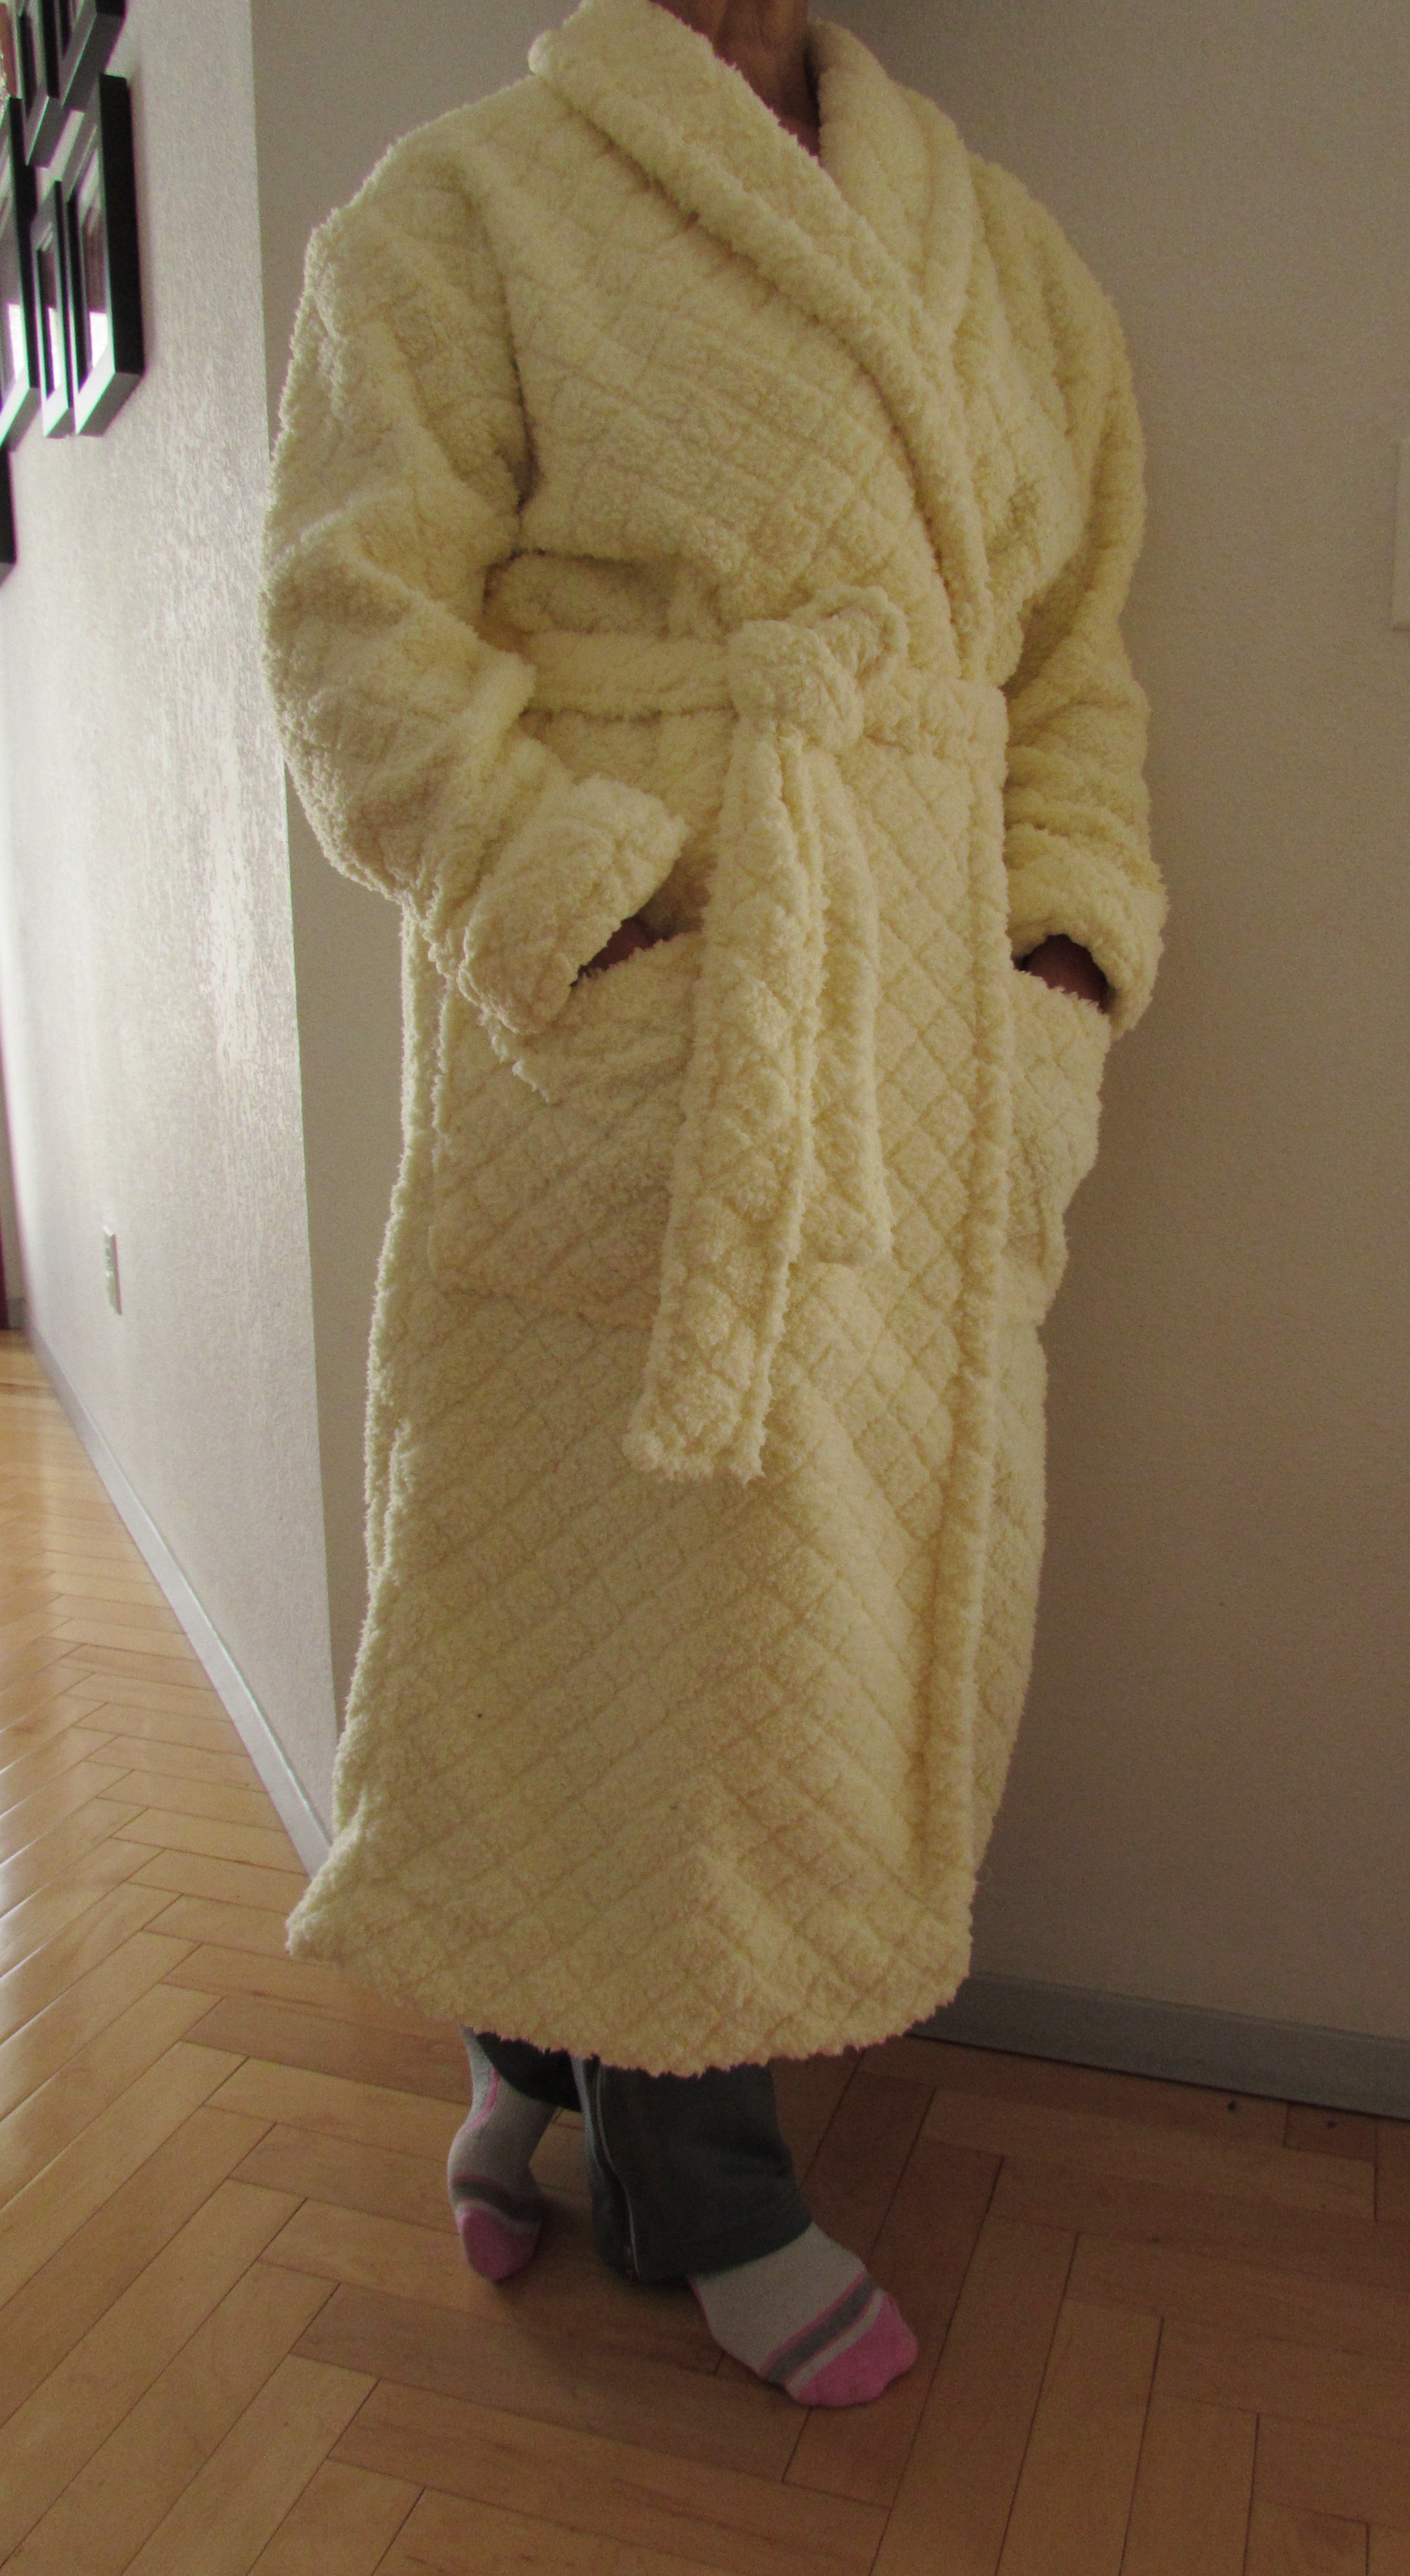 Photo credits to my kind husband for these modeling shots. I may send them into a bathrobe modeling agency. I feel a new career beginning.
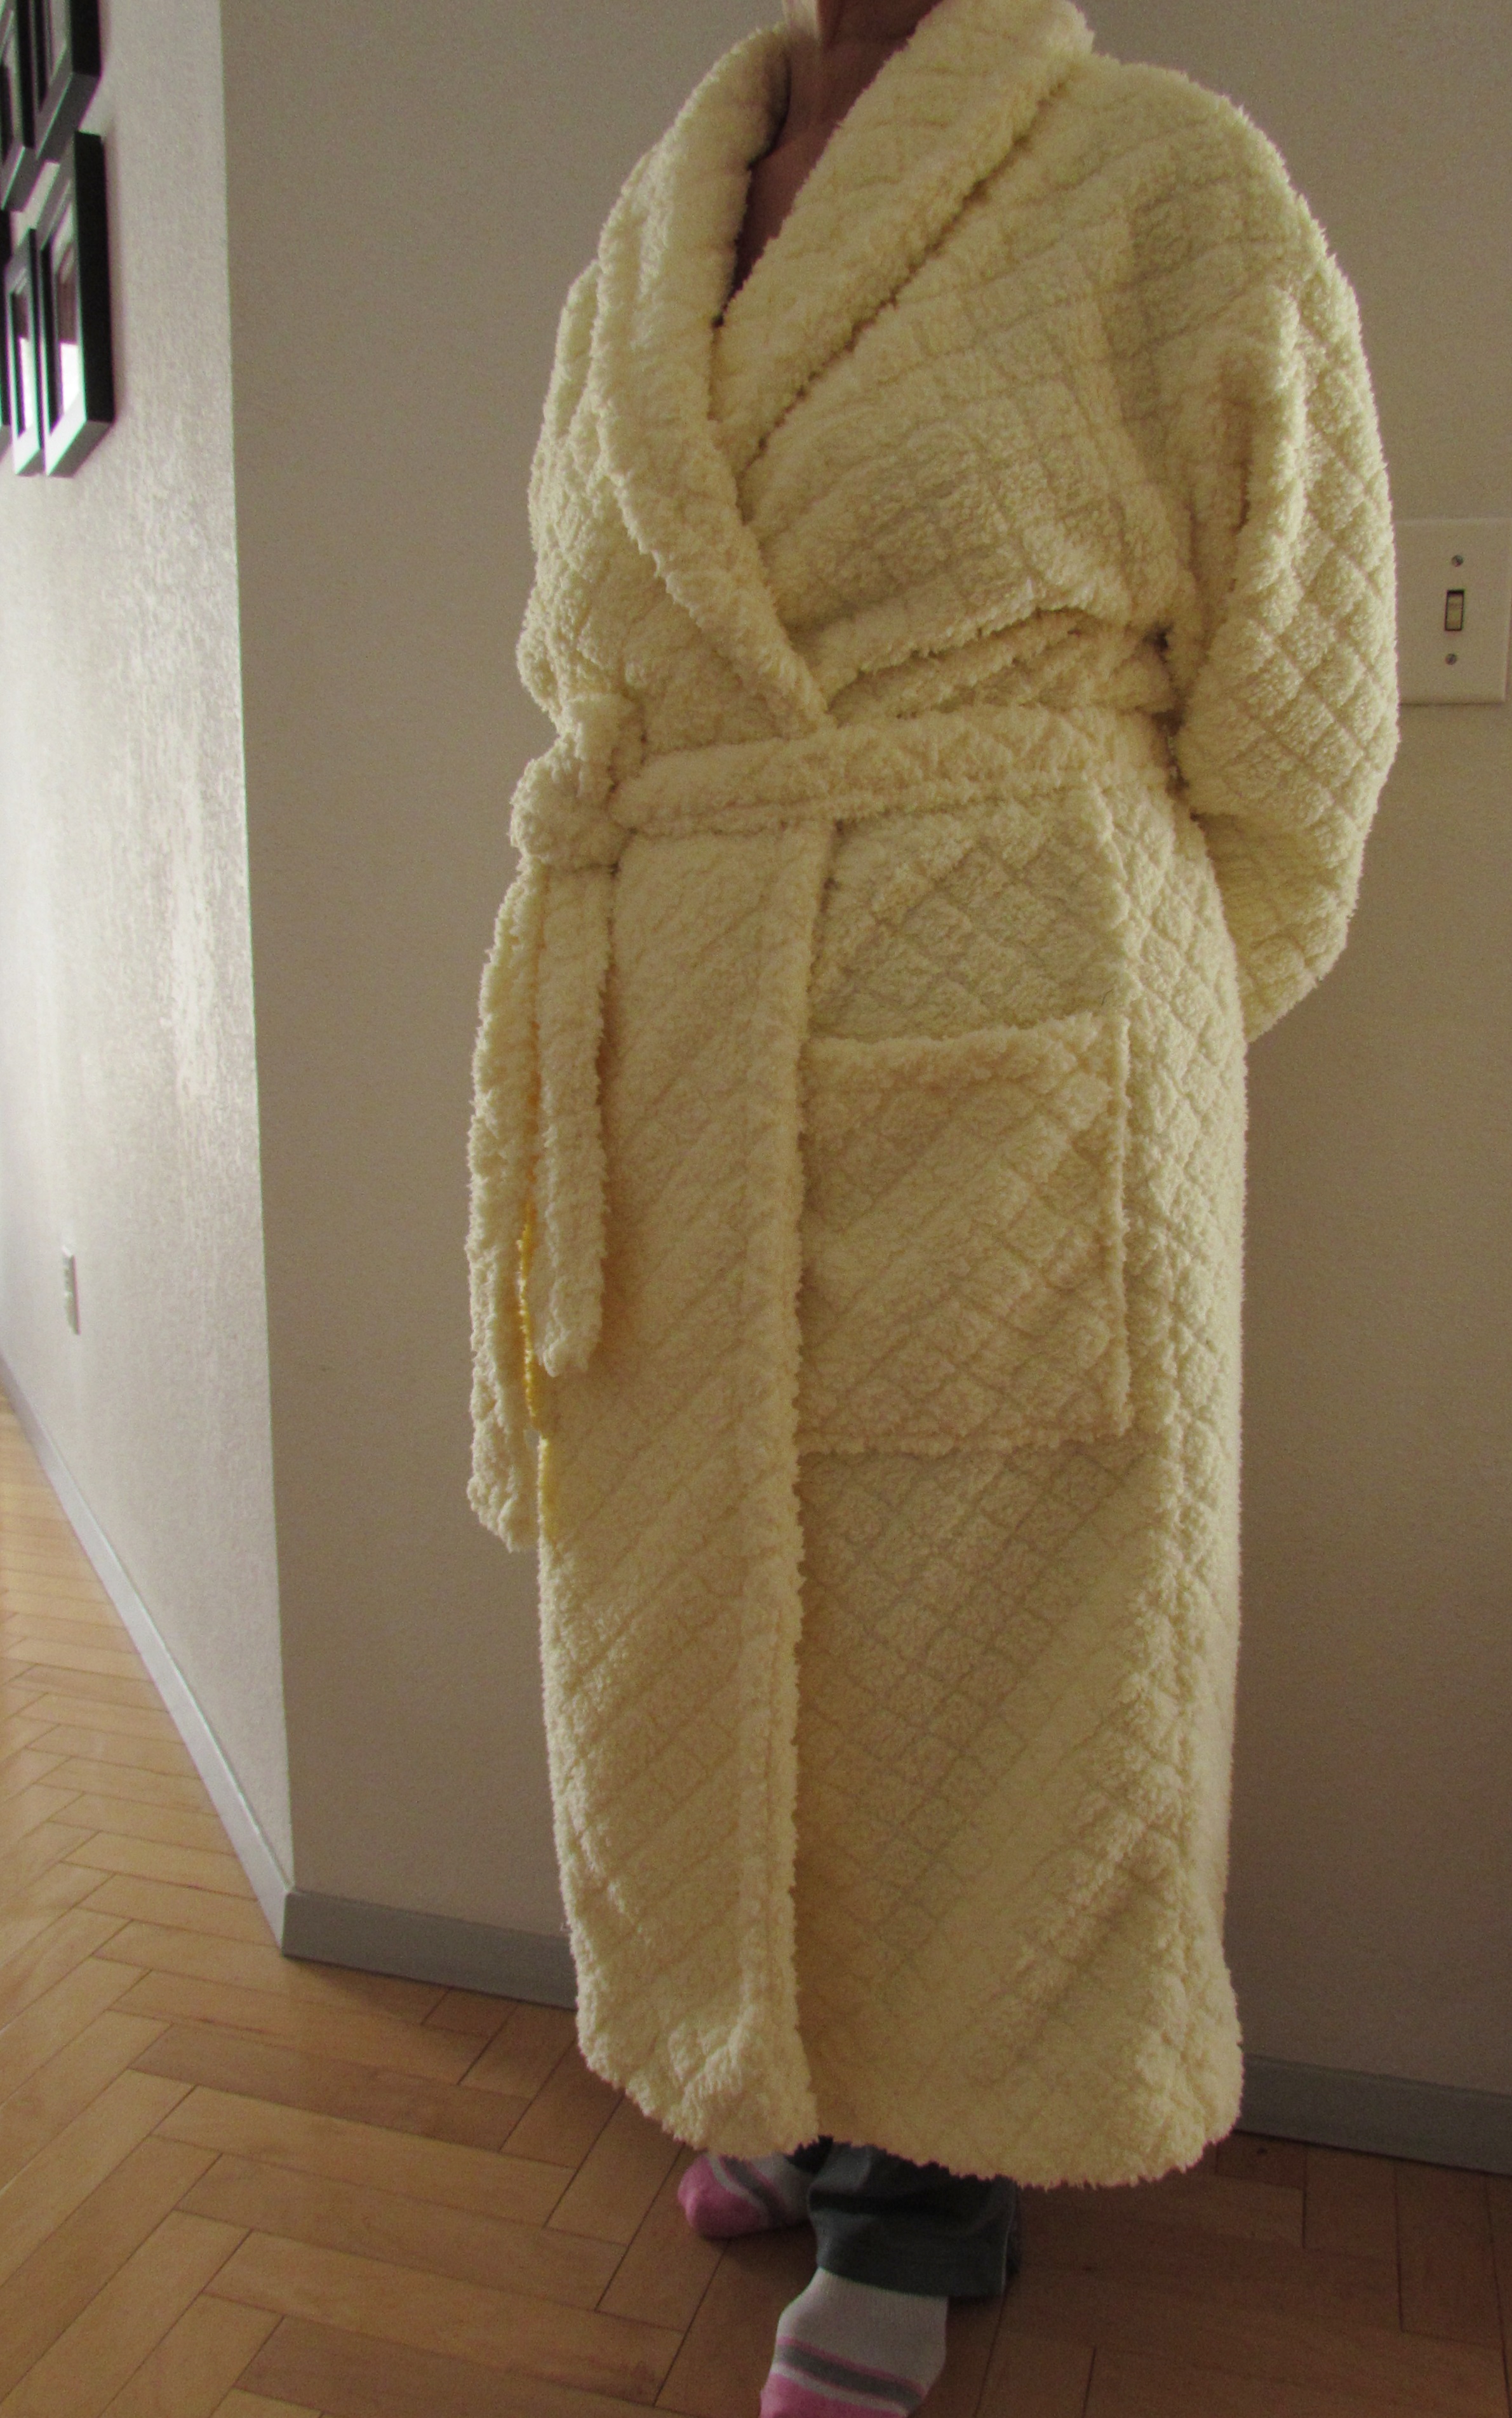 Looking at these amazing photos, I noticed that the pattern on the fabric almost matches where I put the patch pockets on. I cannot take credit for this – it certainly was not planned! I found that hand stitching was much faster than top stitching so I sewed the hem by hand while watching some TV last night.