Tag Archives: vintage fabric

Thrifting Fabric

About a week ago, our local guild sent out an email to members stating a seamstress in town was retiring and having a sale. She wanted to clear out her fabric and supplies as she planned to downsize to a smaller home. I am sure you knew I would be sure to go check it out. The woman was both a garment maker as well as a quilter. Her shop was large and there was tons and tons of fabric.

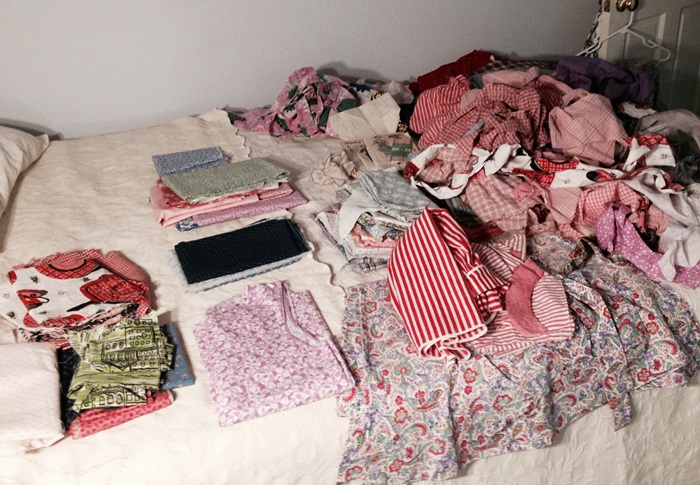
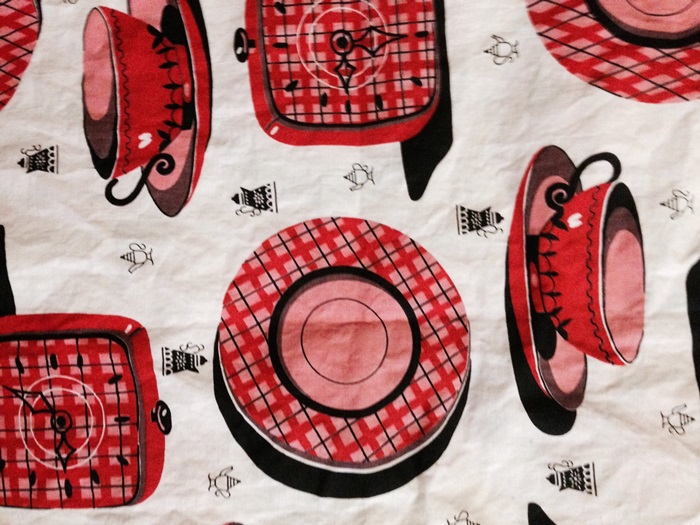
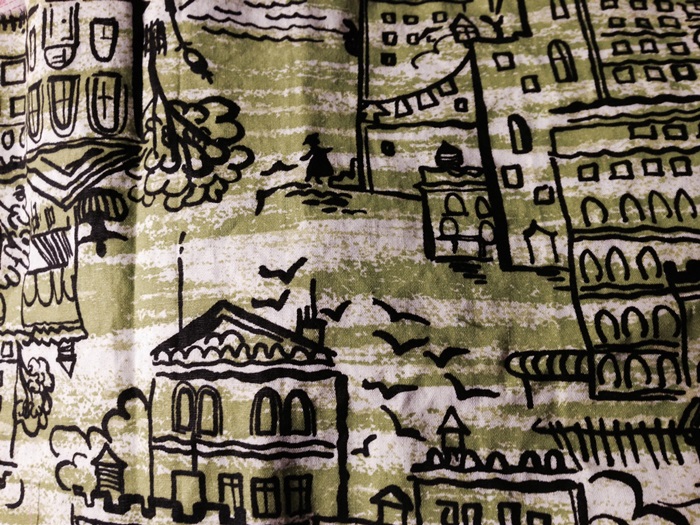
By the time I got there much of the quilt fabric had been sold. But I was not really interested in quilt fabric considering the shop I have downstairs! My interest was actually in garment fabric. I found a few gems. Instead of setting a price on each piece of fabric (which would have taken days and days) the woman had a stack of plastic laundry baskets. The deal was $10 for whatever fit in the basket. Oh my. Let me show you what I picked up.

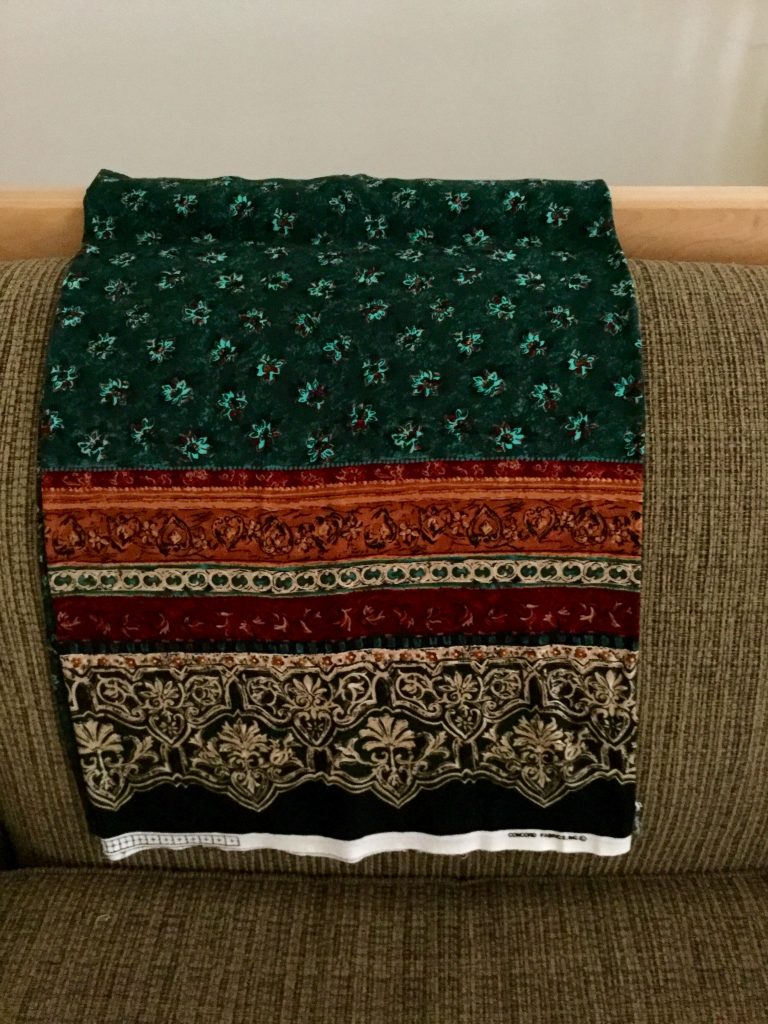
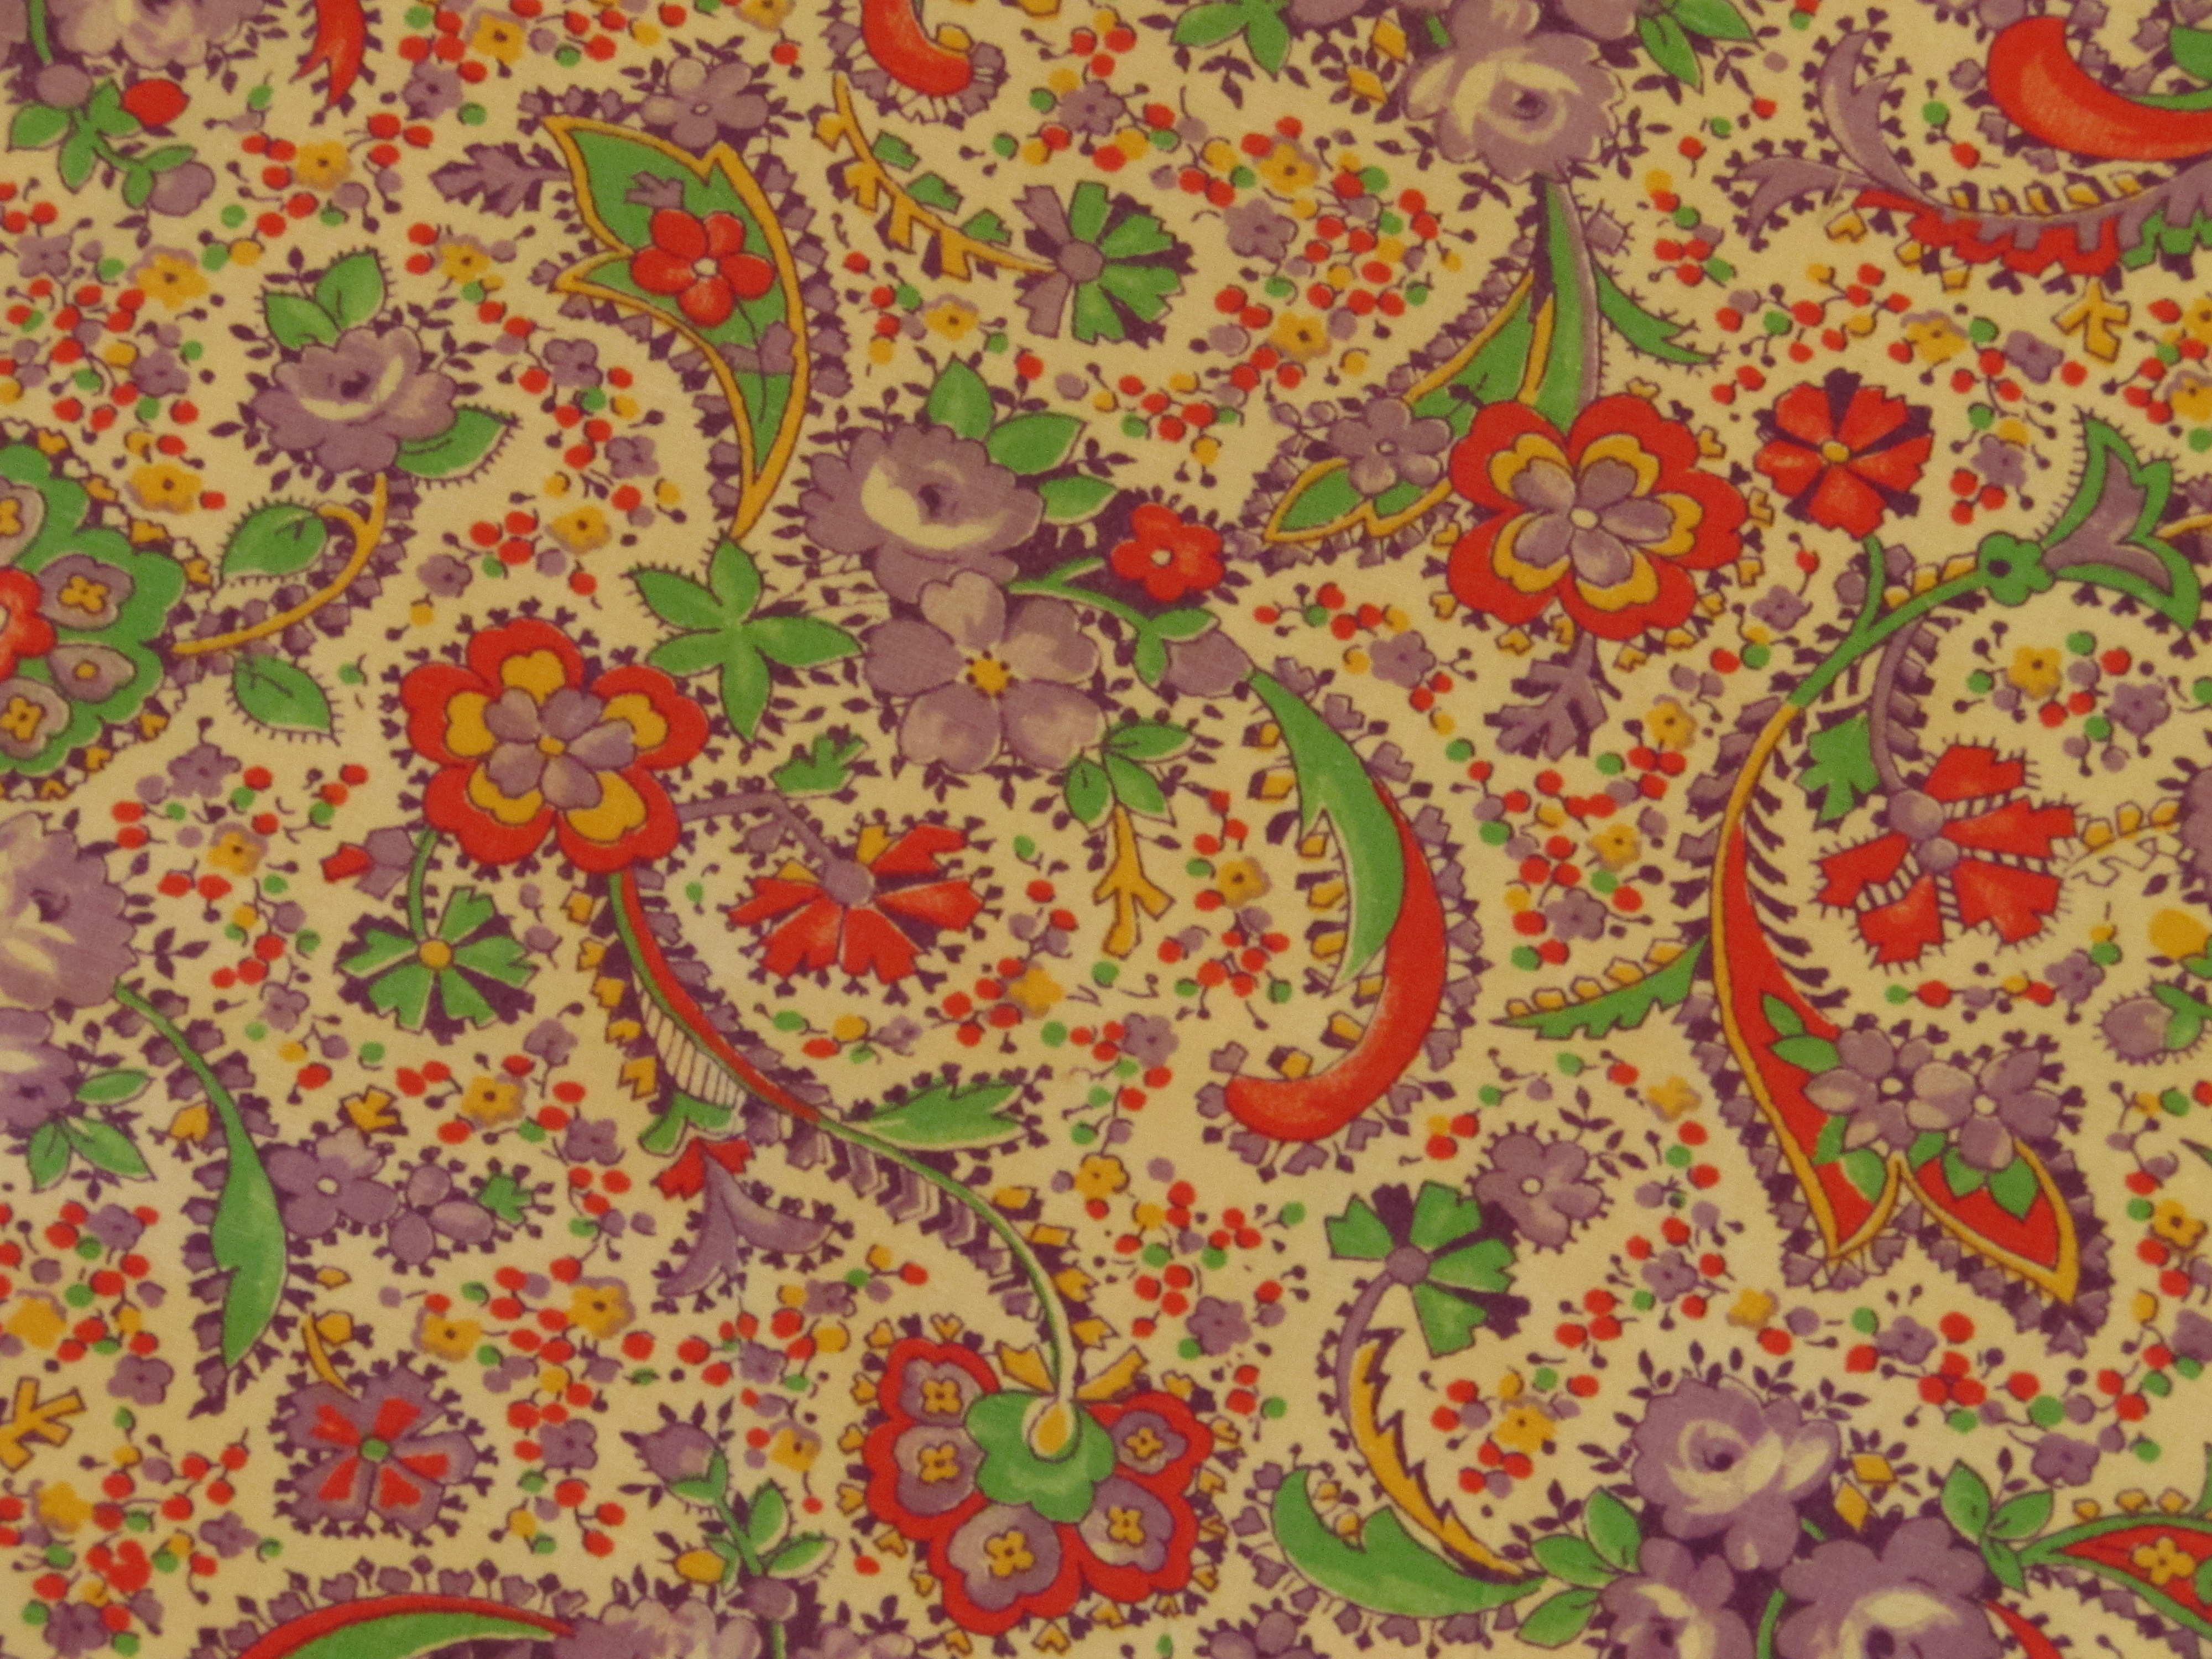
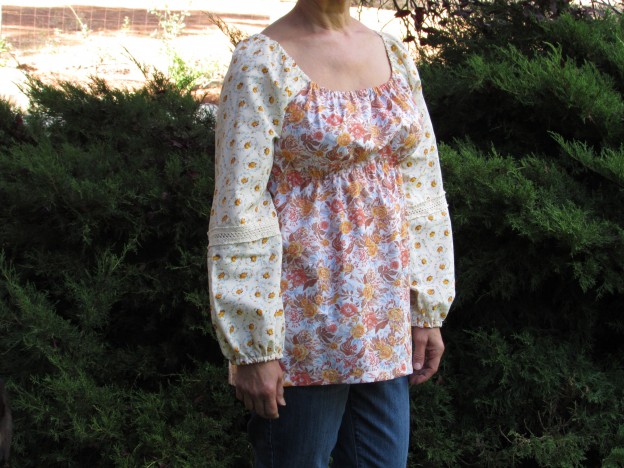
This is two yards (58″ wide) of a stunning border print. It is a cotton/rayon blend and has the nicest feel to it. I washed it and had no issues. I think Julia has claimed this piece for a pair of wide legged pants. That border will be so nice at the bottom of each leg. Sort of a boho look.

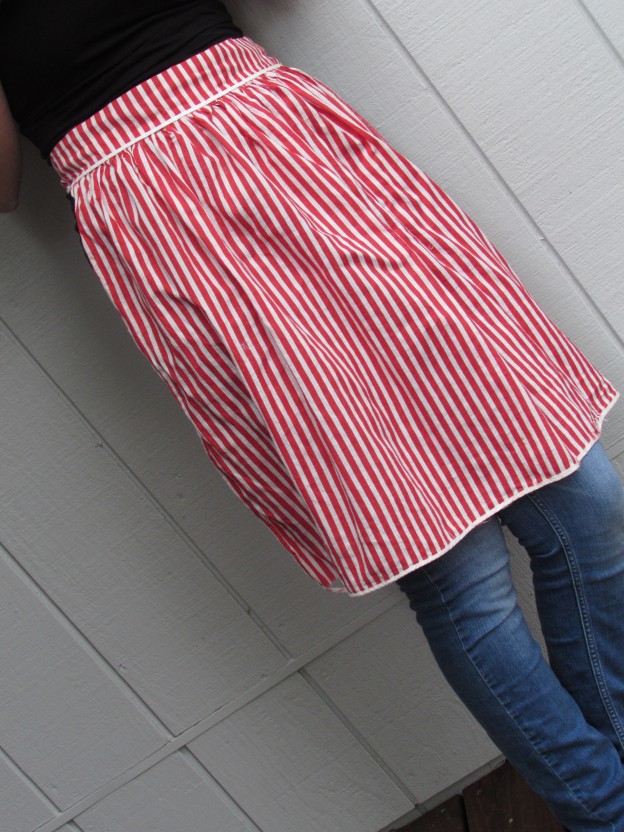
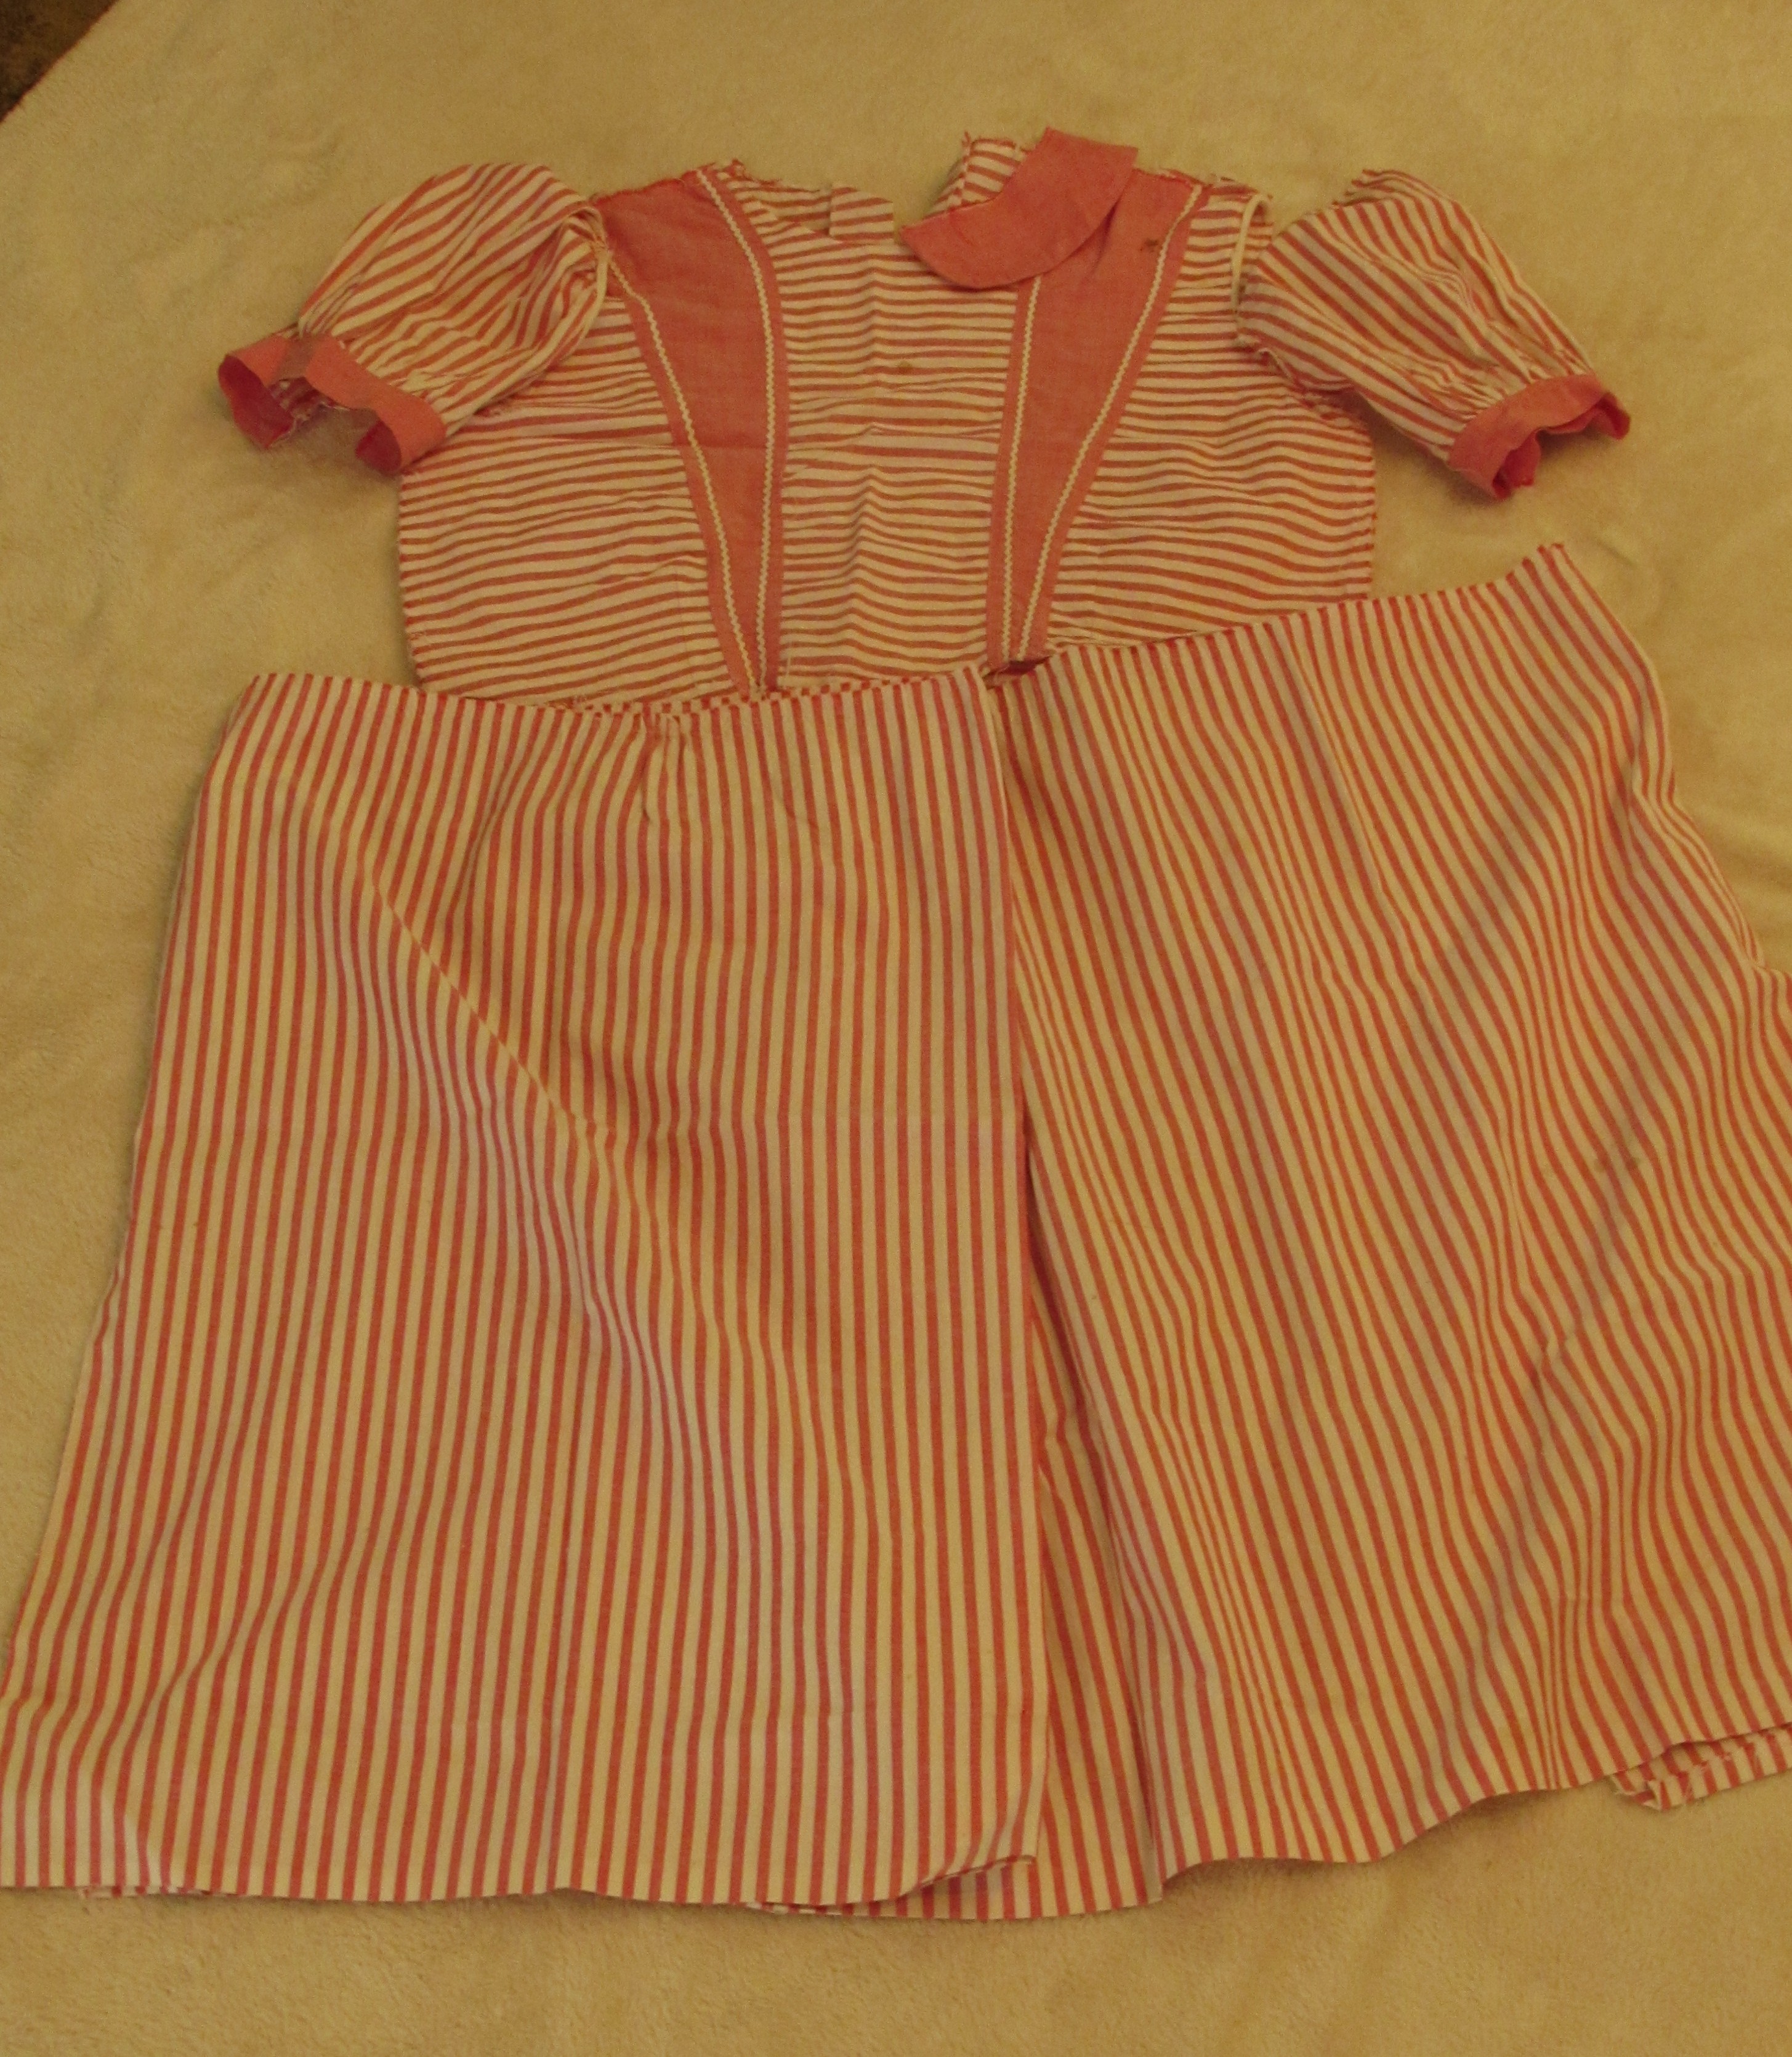
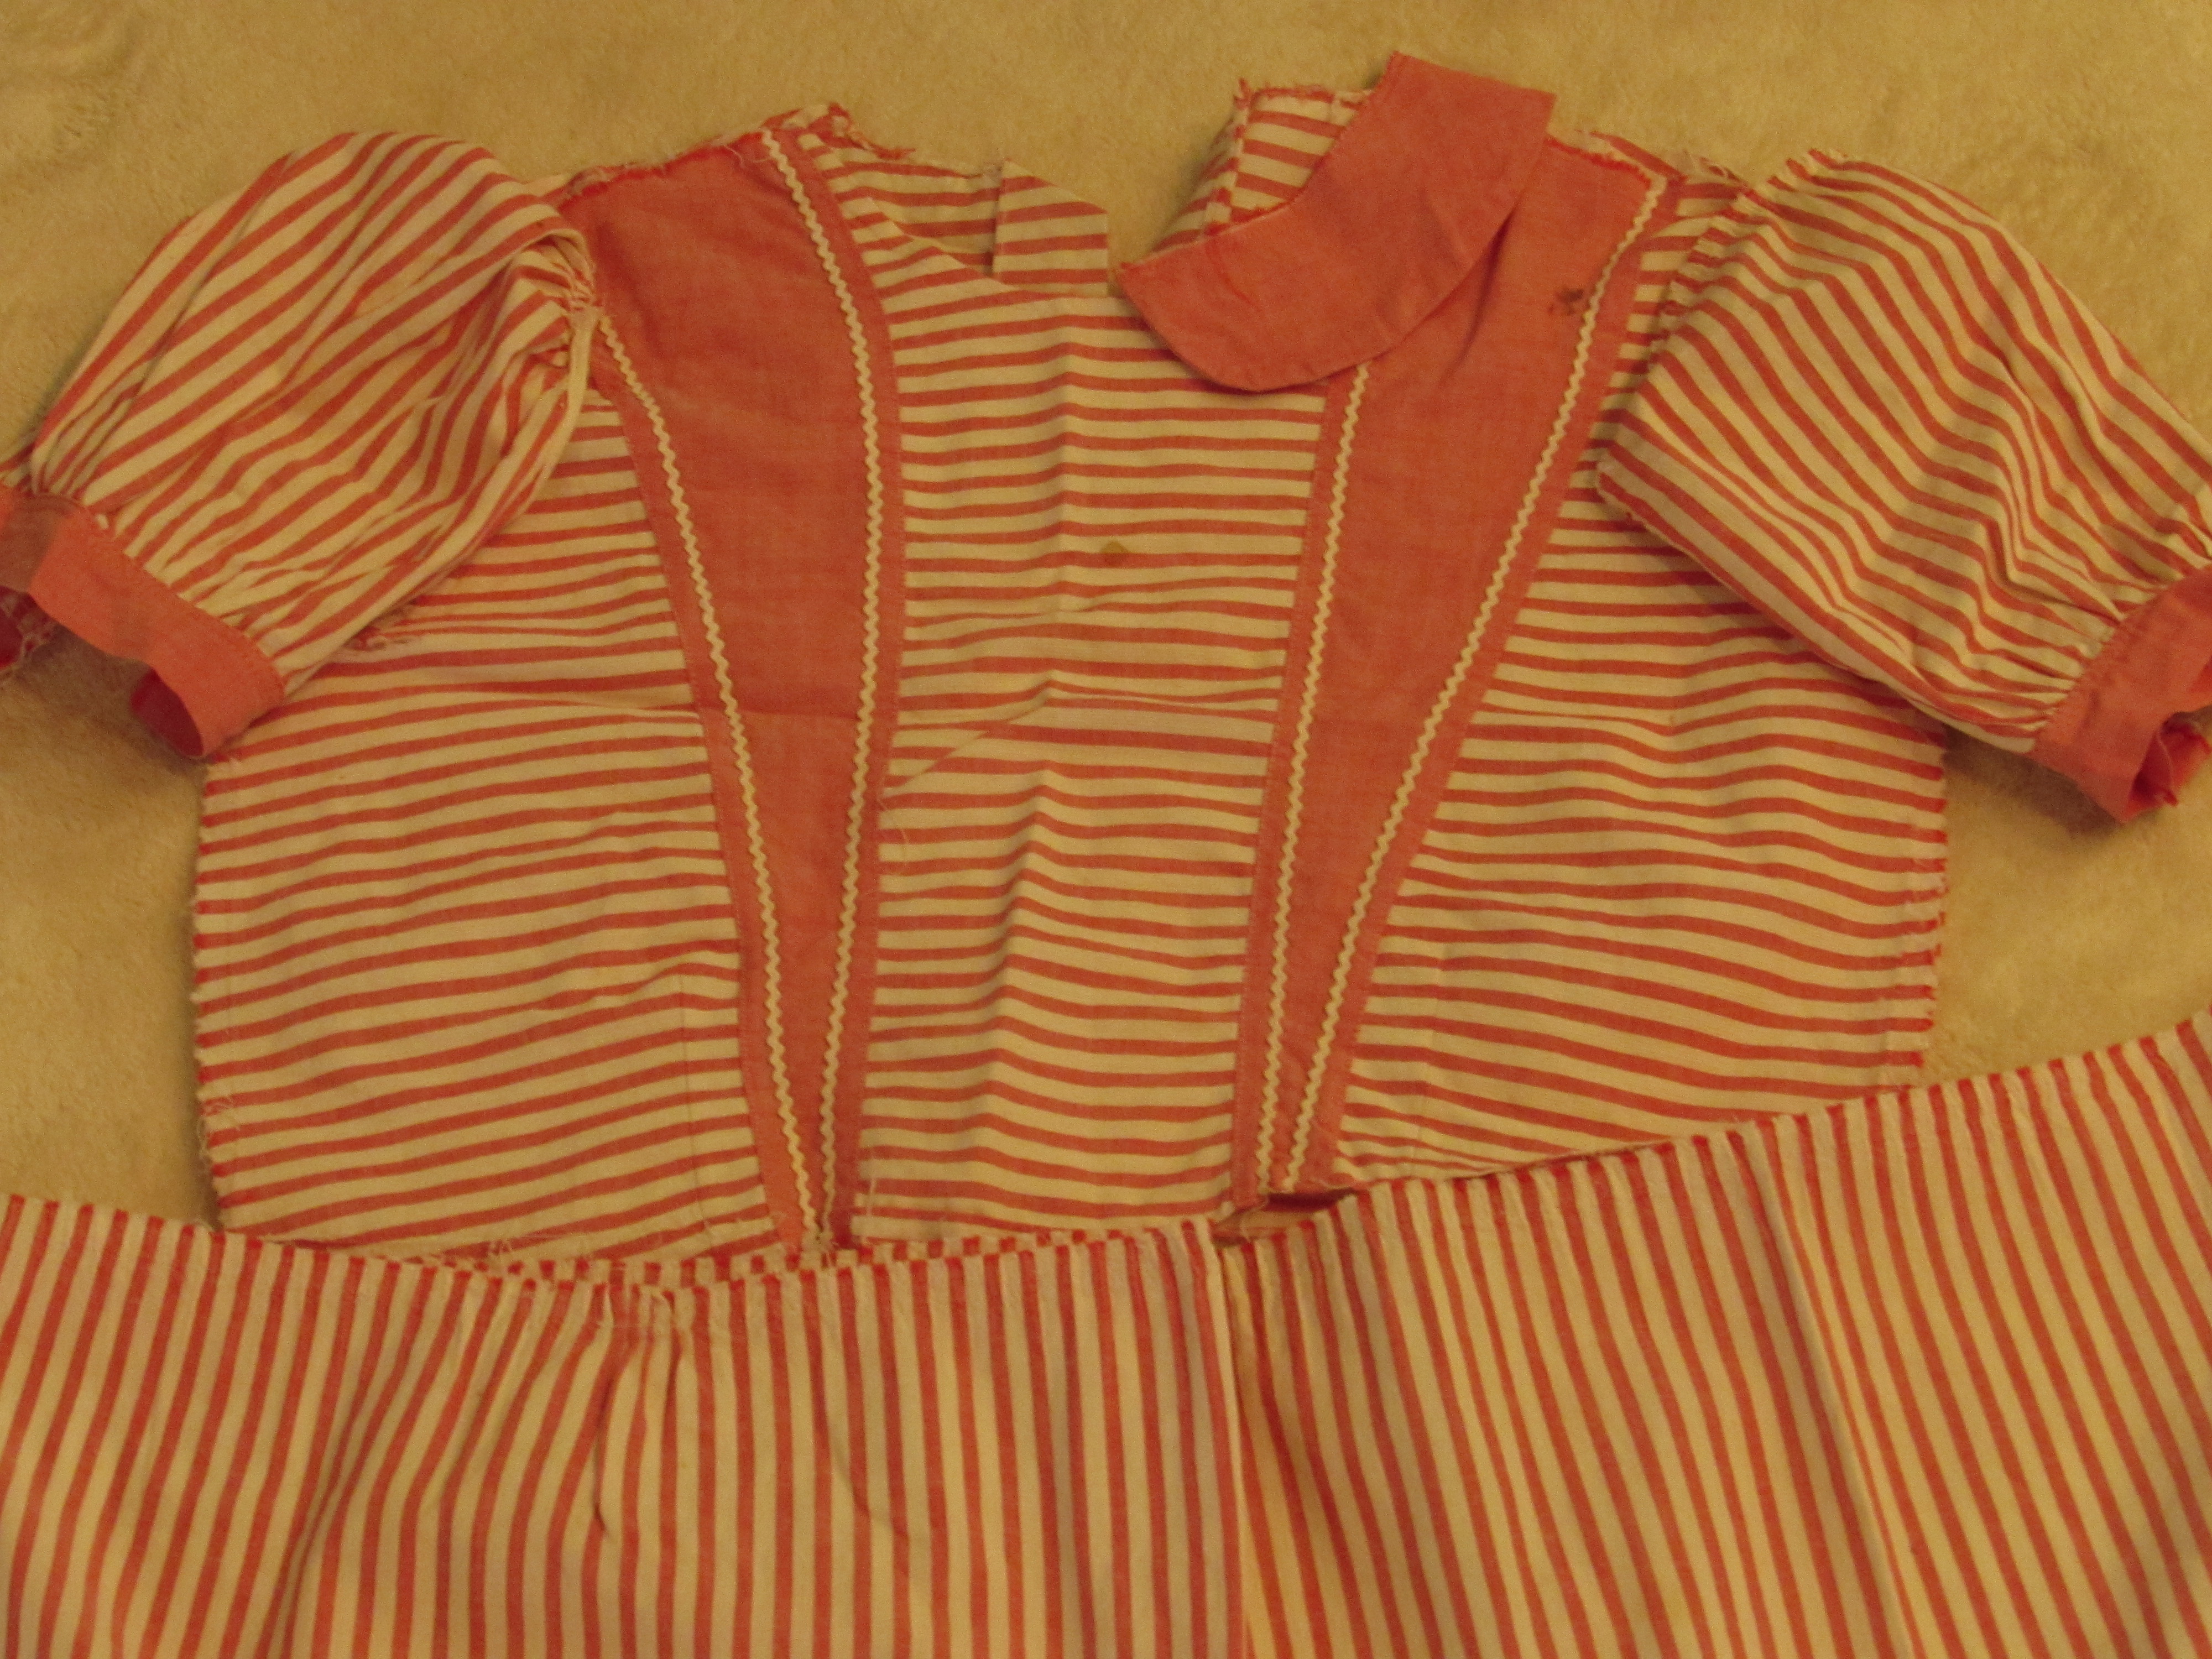
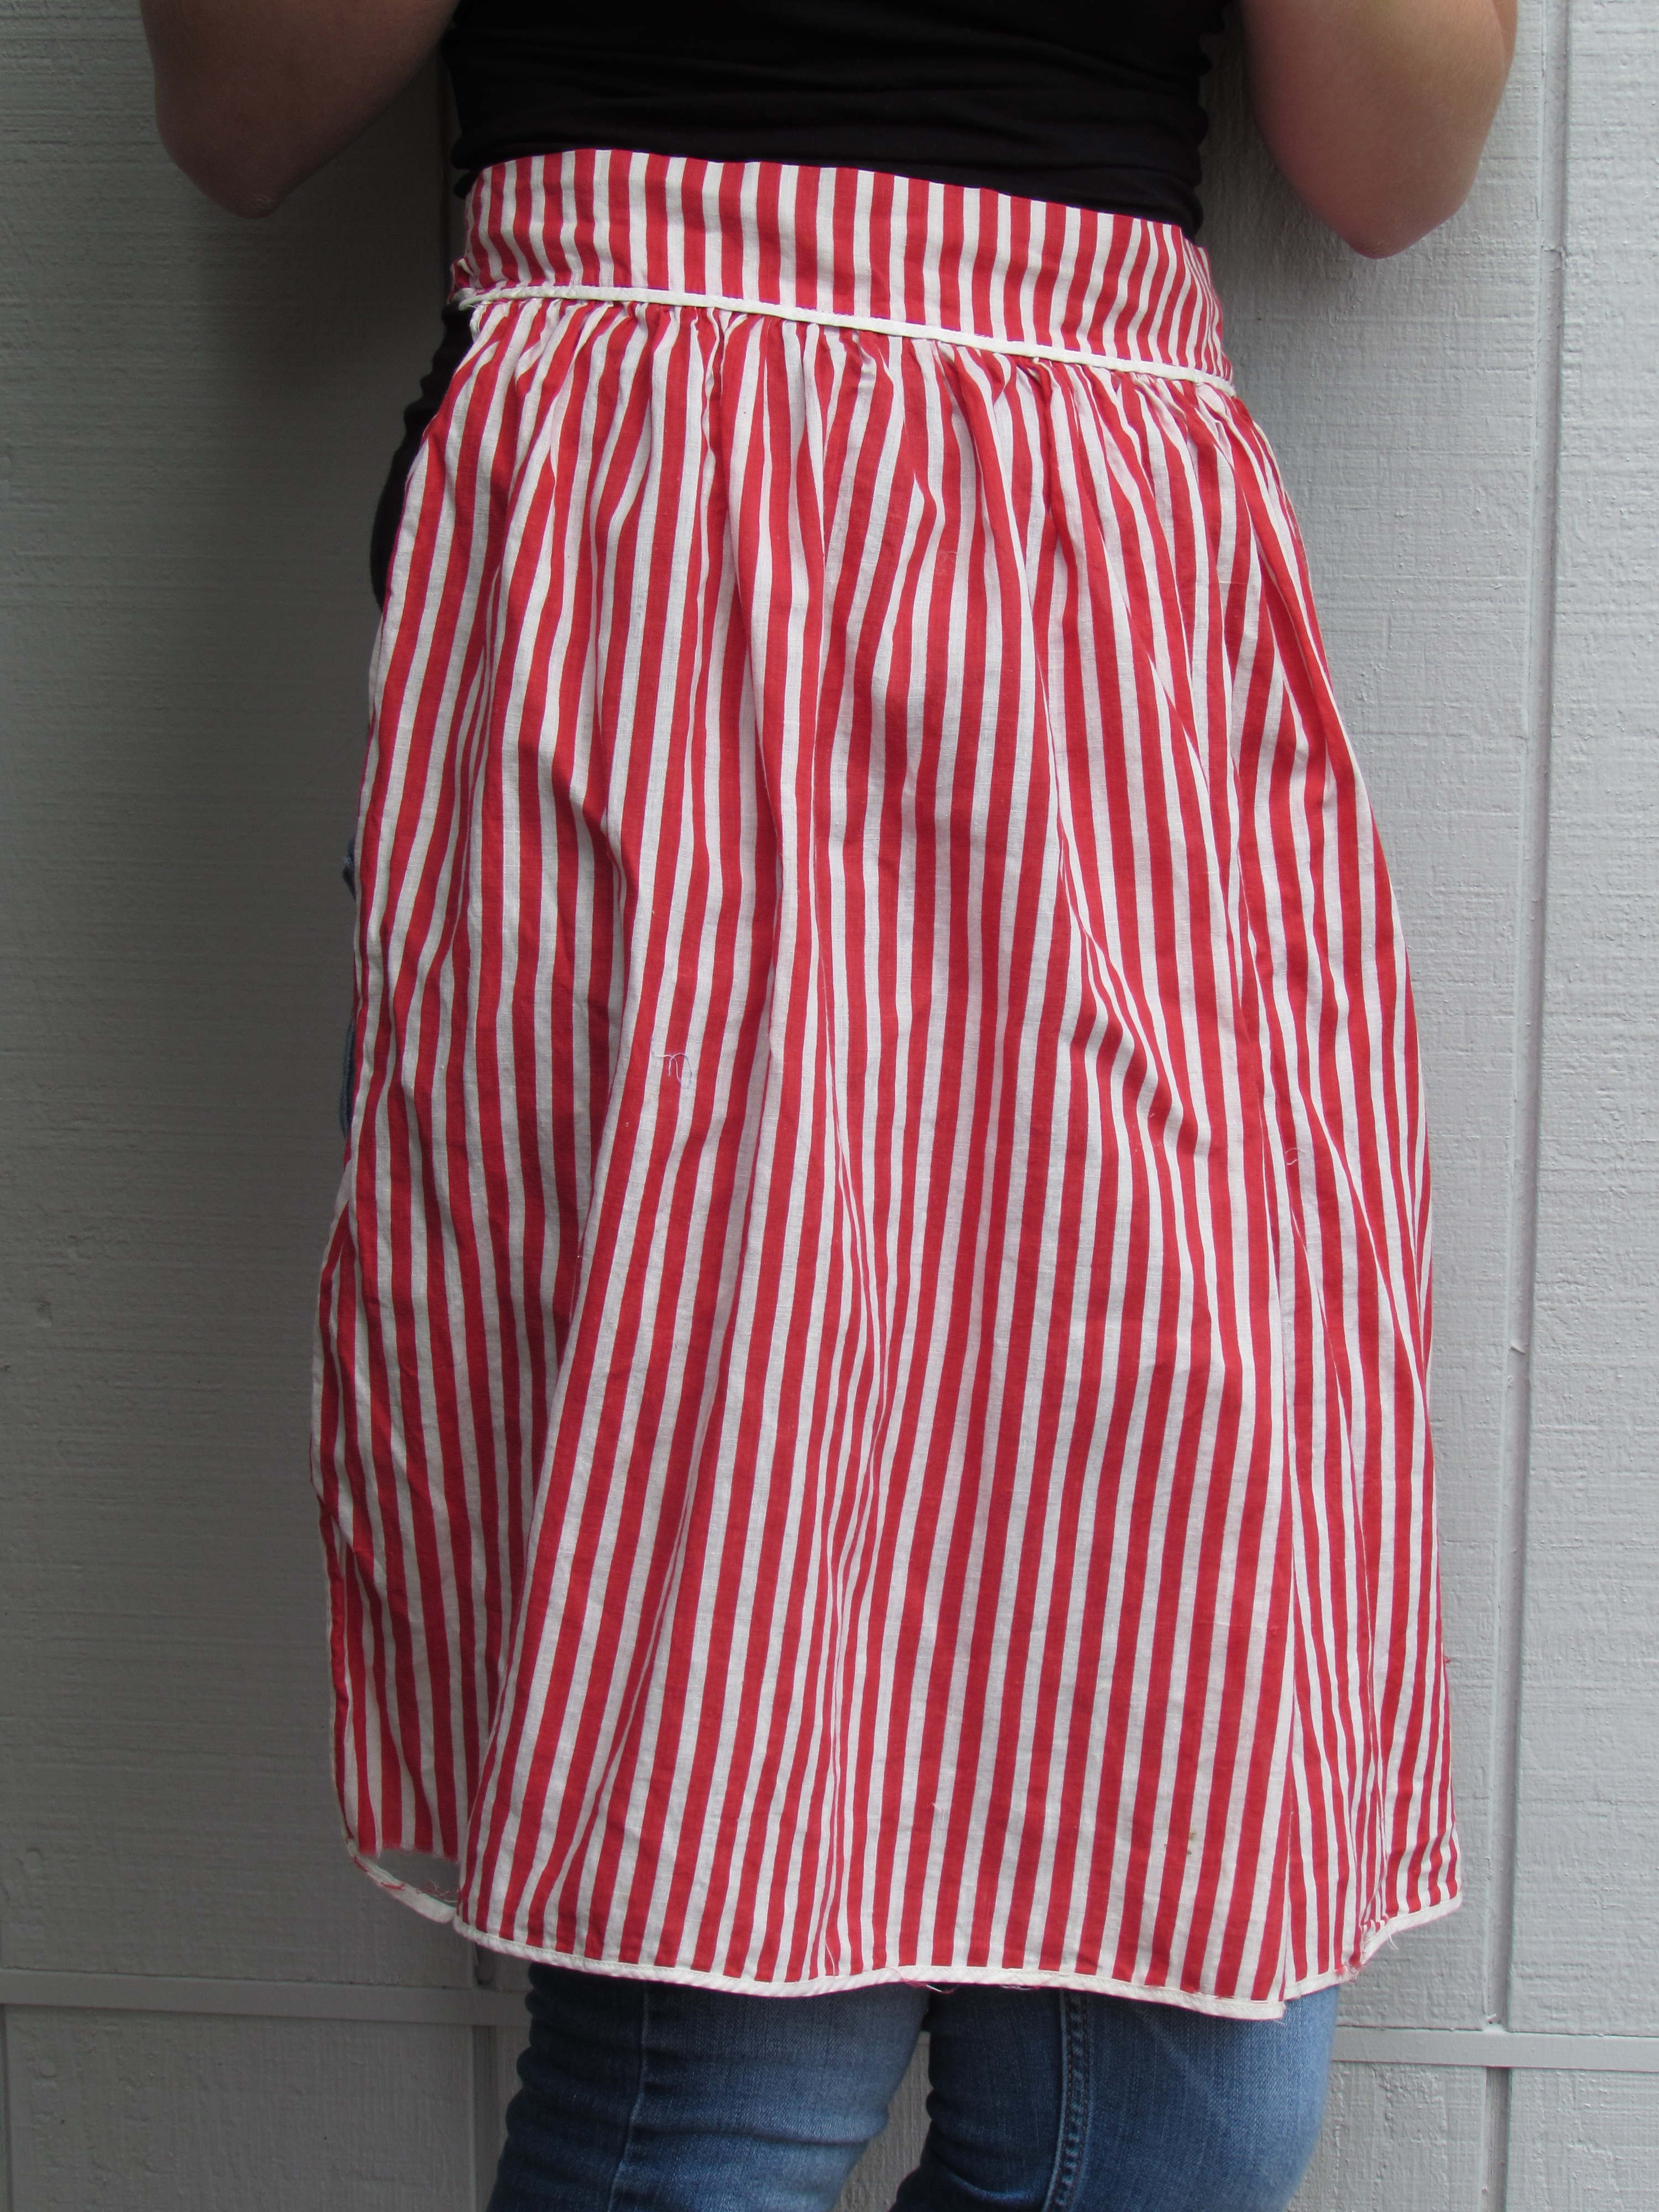
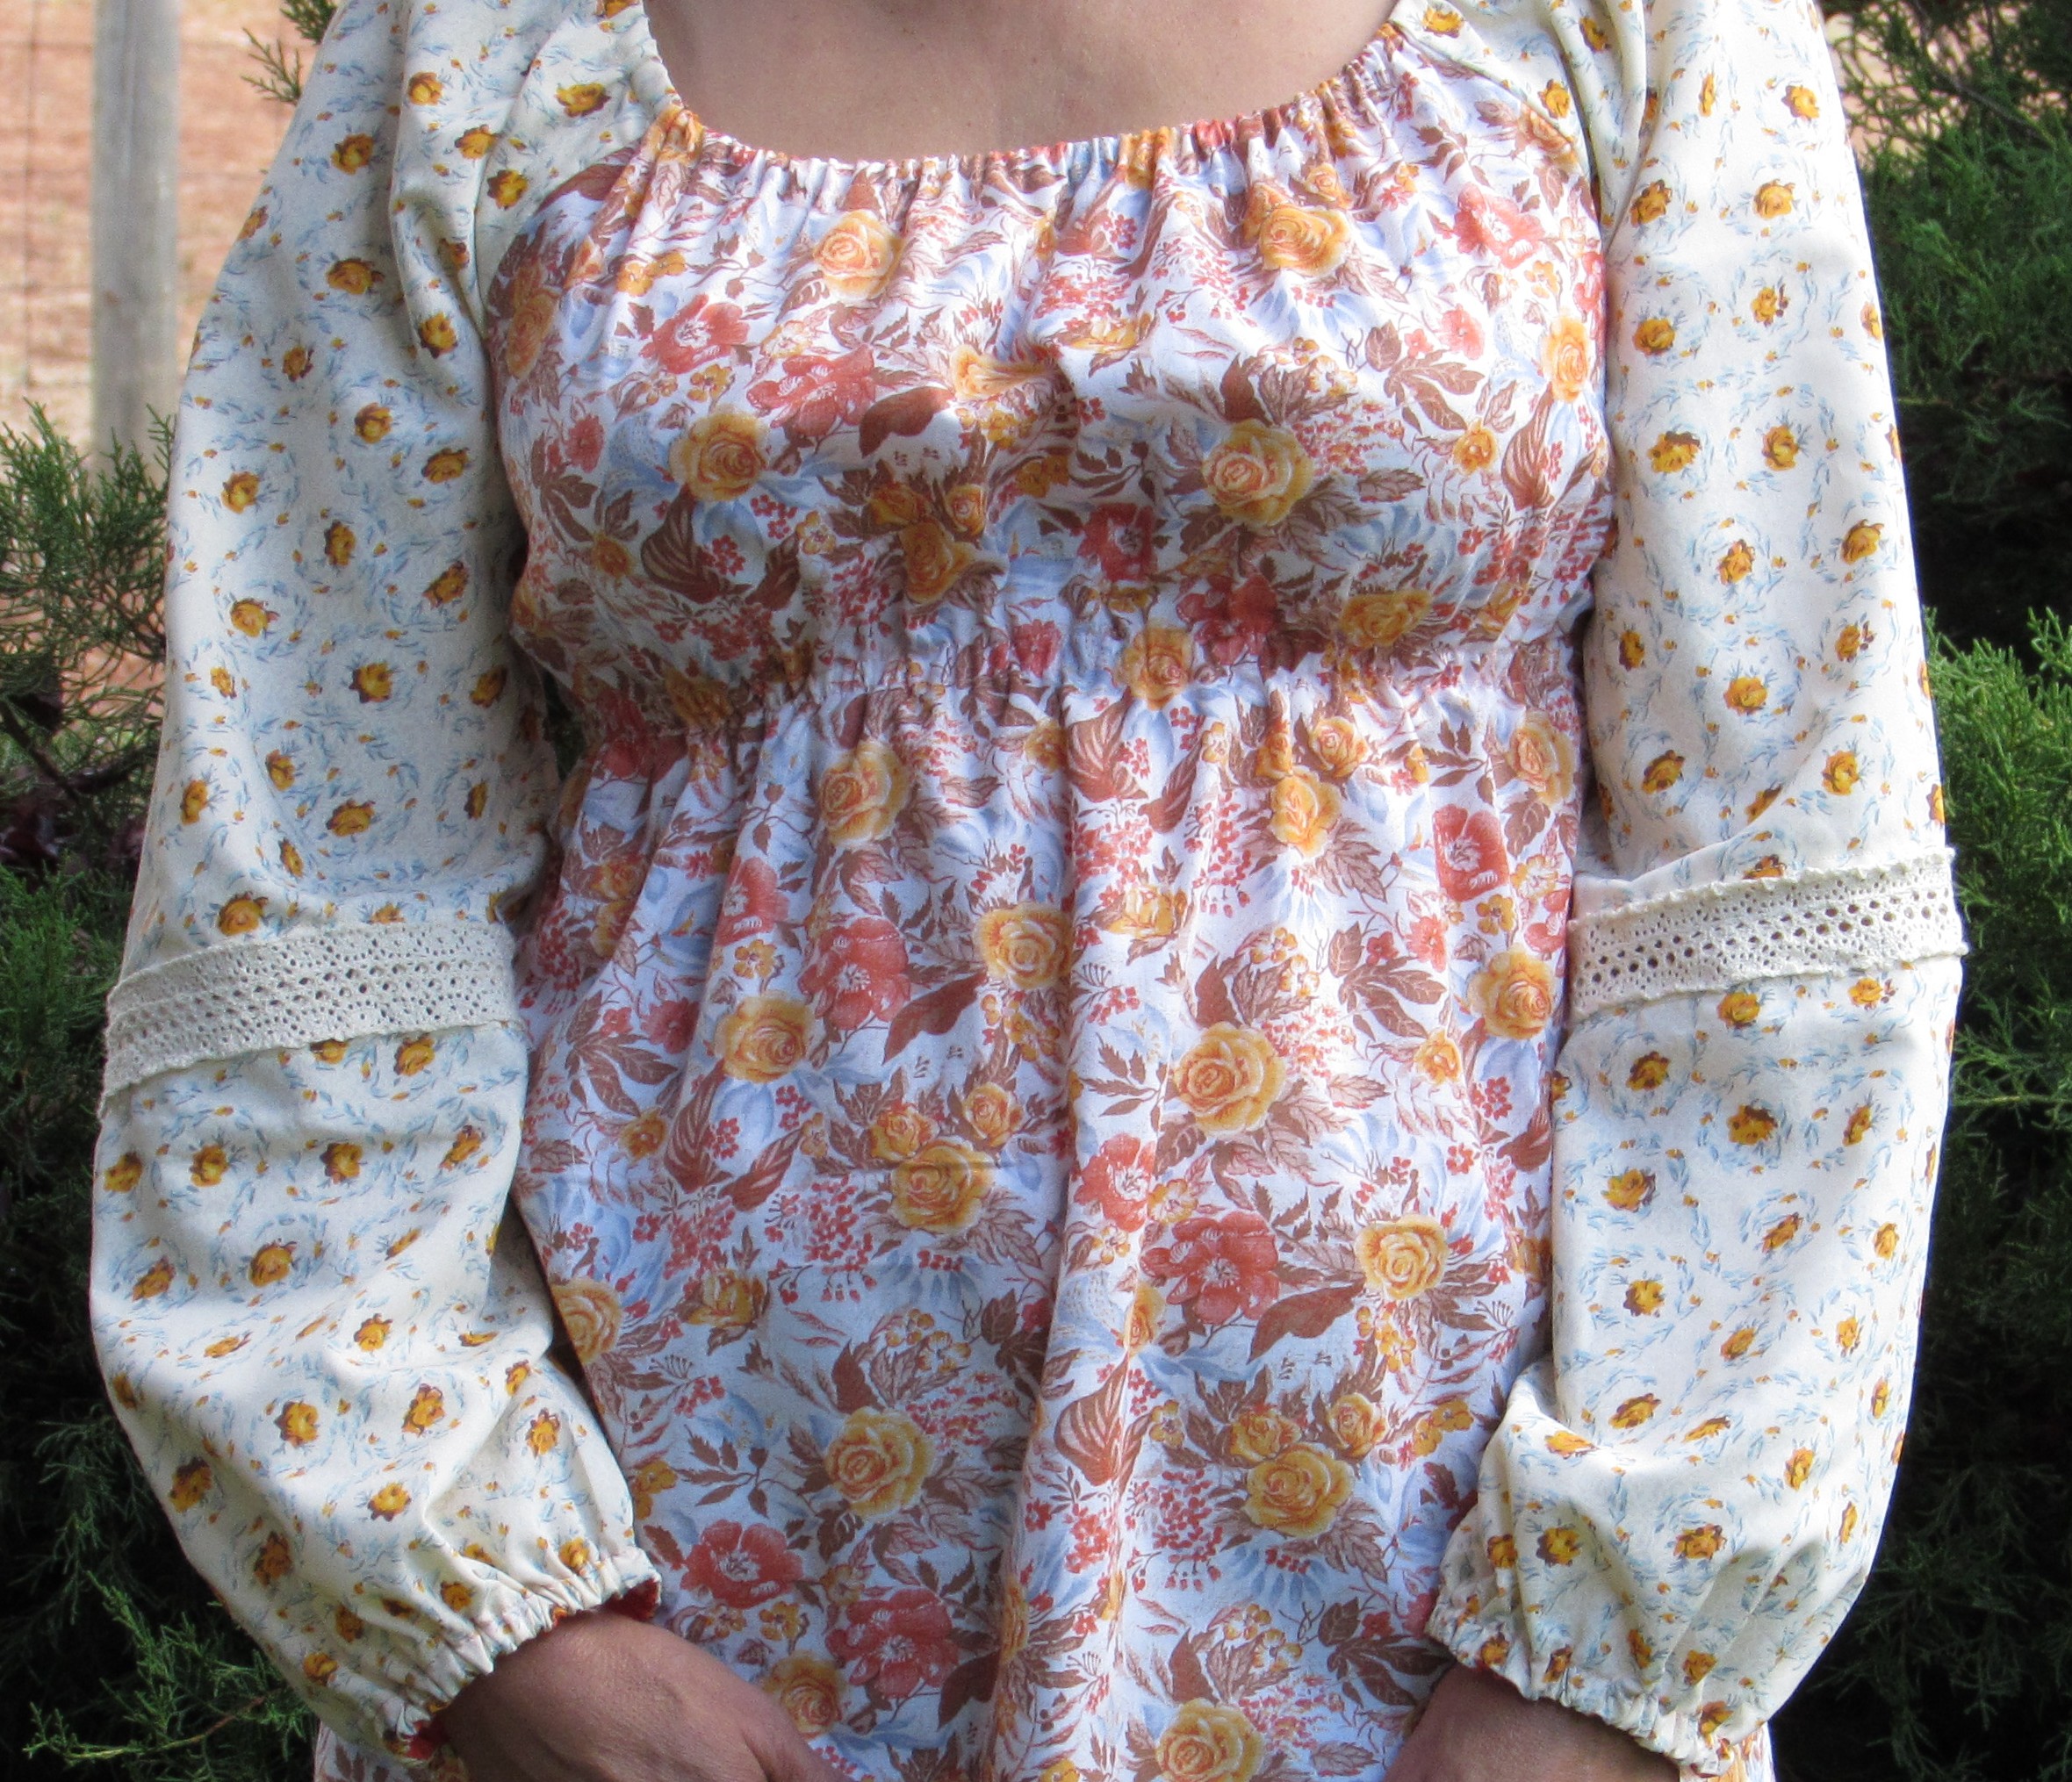
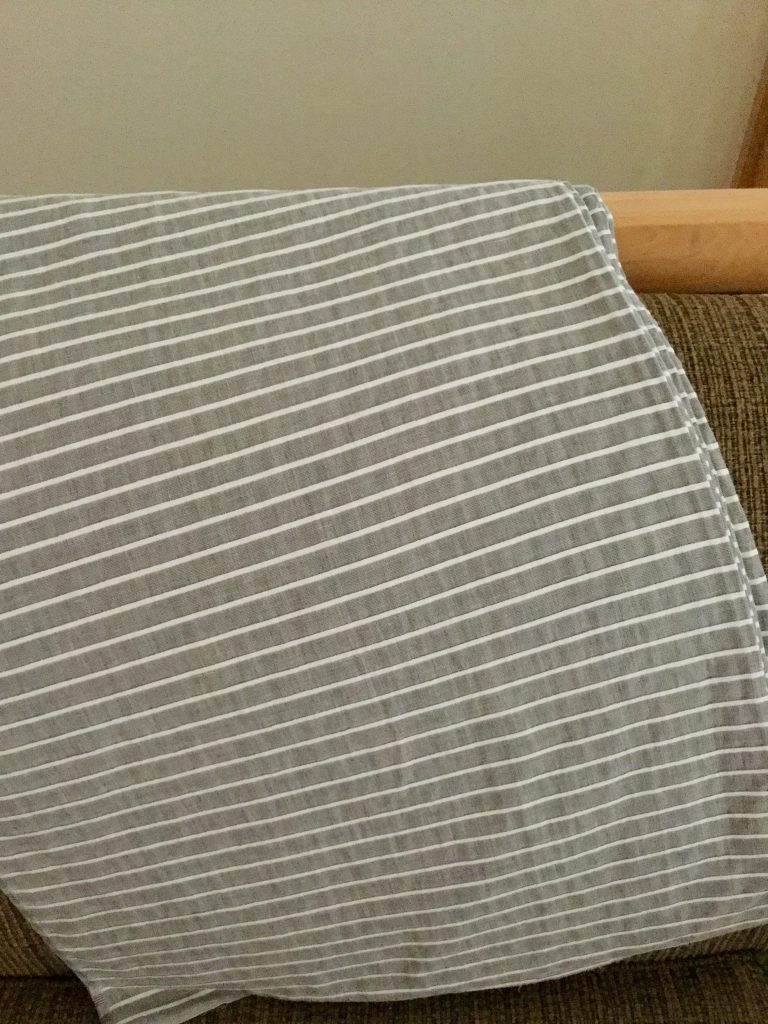
I picked up six yards of this fabric. Not a seersucker but it feels like one? I am not sure what it is but it washed well. Julia and I both want pants out of it and I am sure there will be leftover fabric.

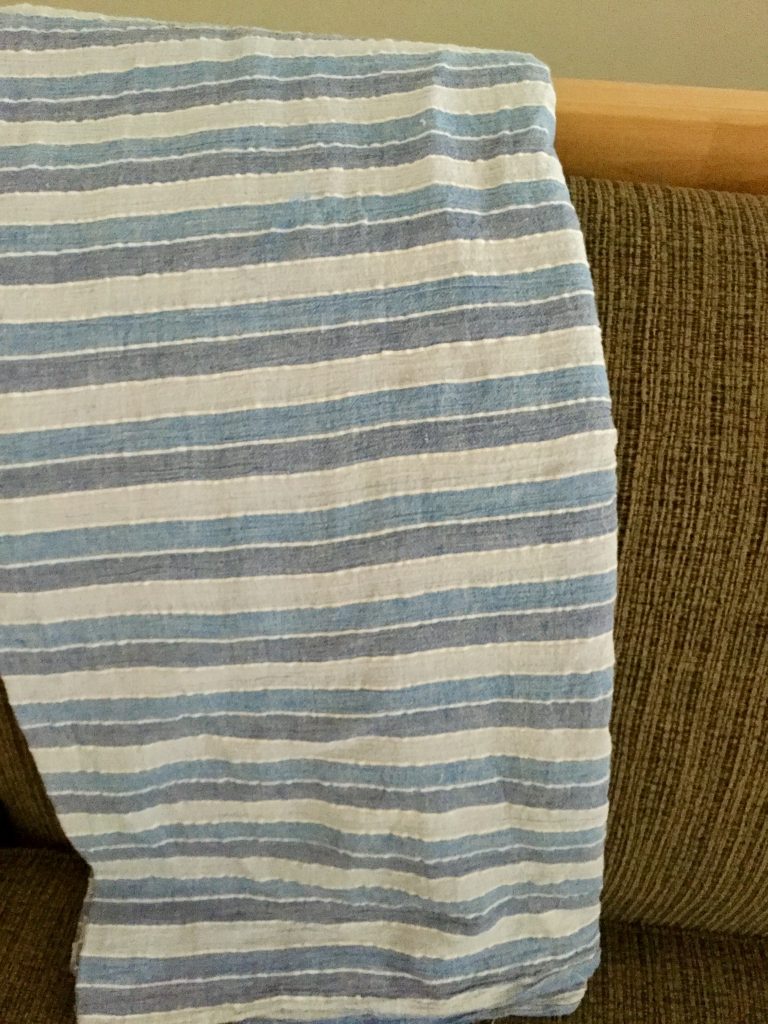
Four yards of this gray and white chambray. It is really pretty and a great quality fabric. I am not sure what I will make with it. It is heavy enough to back a quilt but I think I want to make some sort of wearable with it. Hmmm…. decisions, decisions.

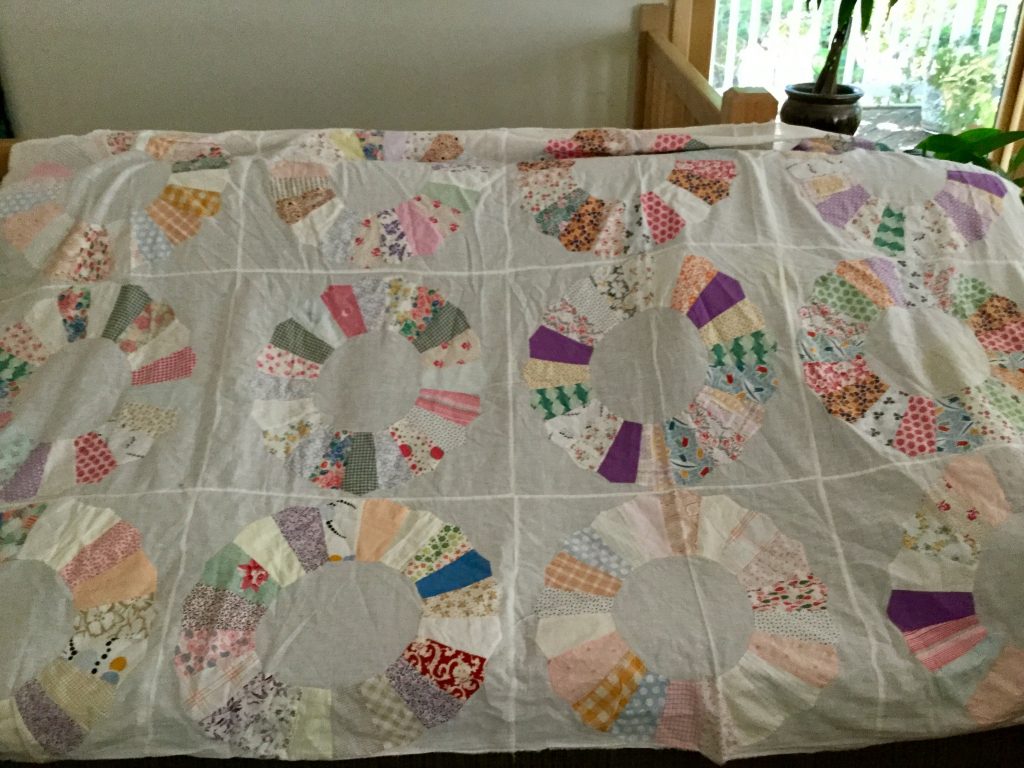
As I brought these up in the basket, along with a few oddball pieces, Carol (the seamstress) smiled and remarked my basket wasn’t yet full. I looked around and saw an antique unfinished Dresden quilt top stuffed into a corner. All hand stitched to a very thin muslin (as was often the case with this sort of quilt).

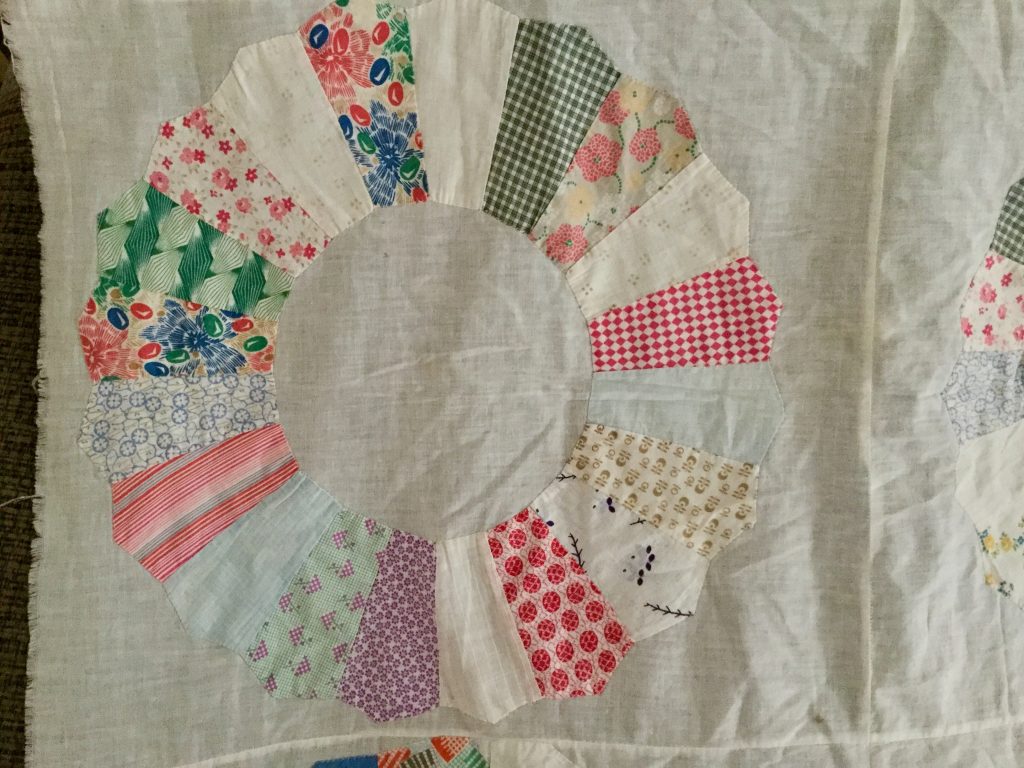
The blocks are huge at 18″ across. The fabrics look like the 1940’s – 1950’s. I picked it up and she said to add it to the basket. My plan is to pick the blocks apart – there are twelve blocks in good enough condition to use. Then I will fuse a very thin stabilizer to them since that muslin is so thin. Add some sashing from my vintage fabric collection and it will be a quilt top again. I am really looking forward to finishing this one and it shouldn’t be a huge project.

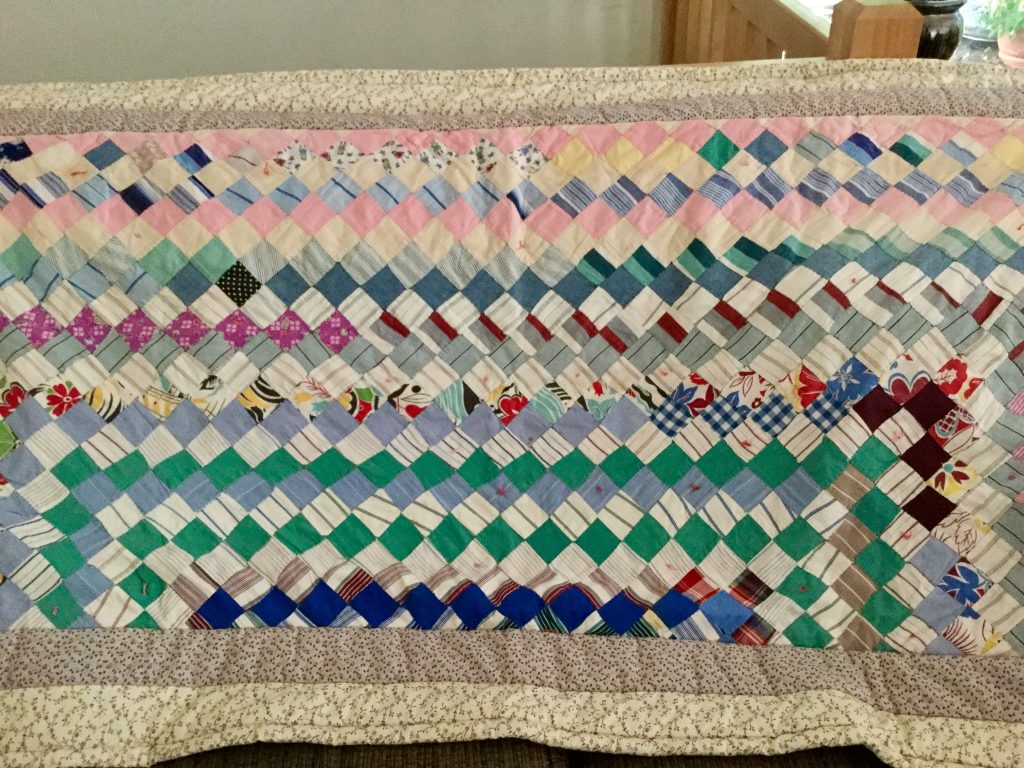
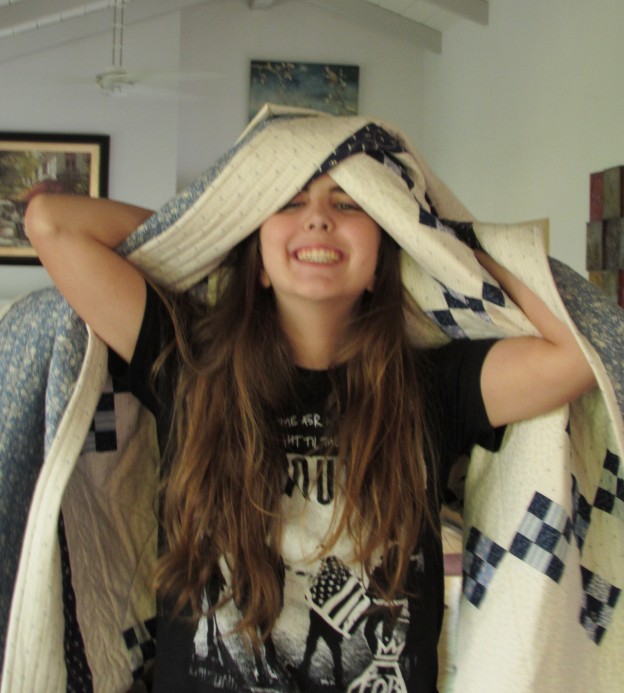
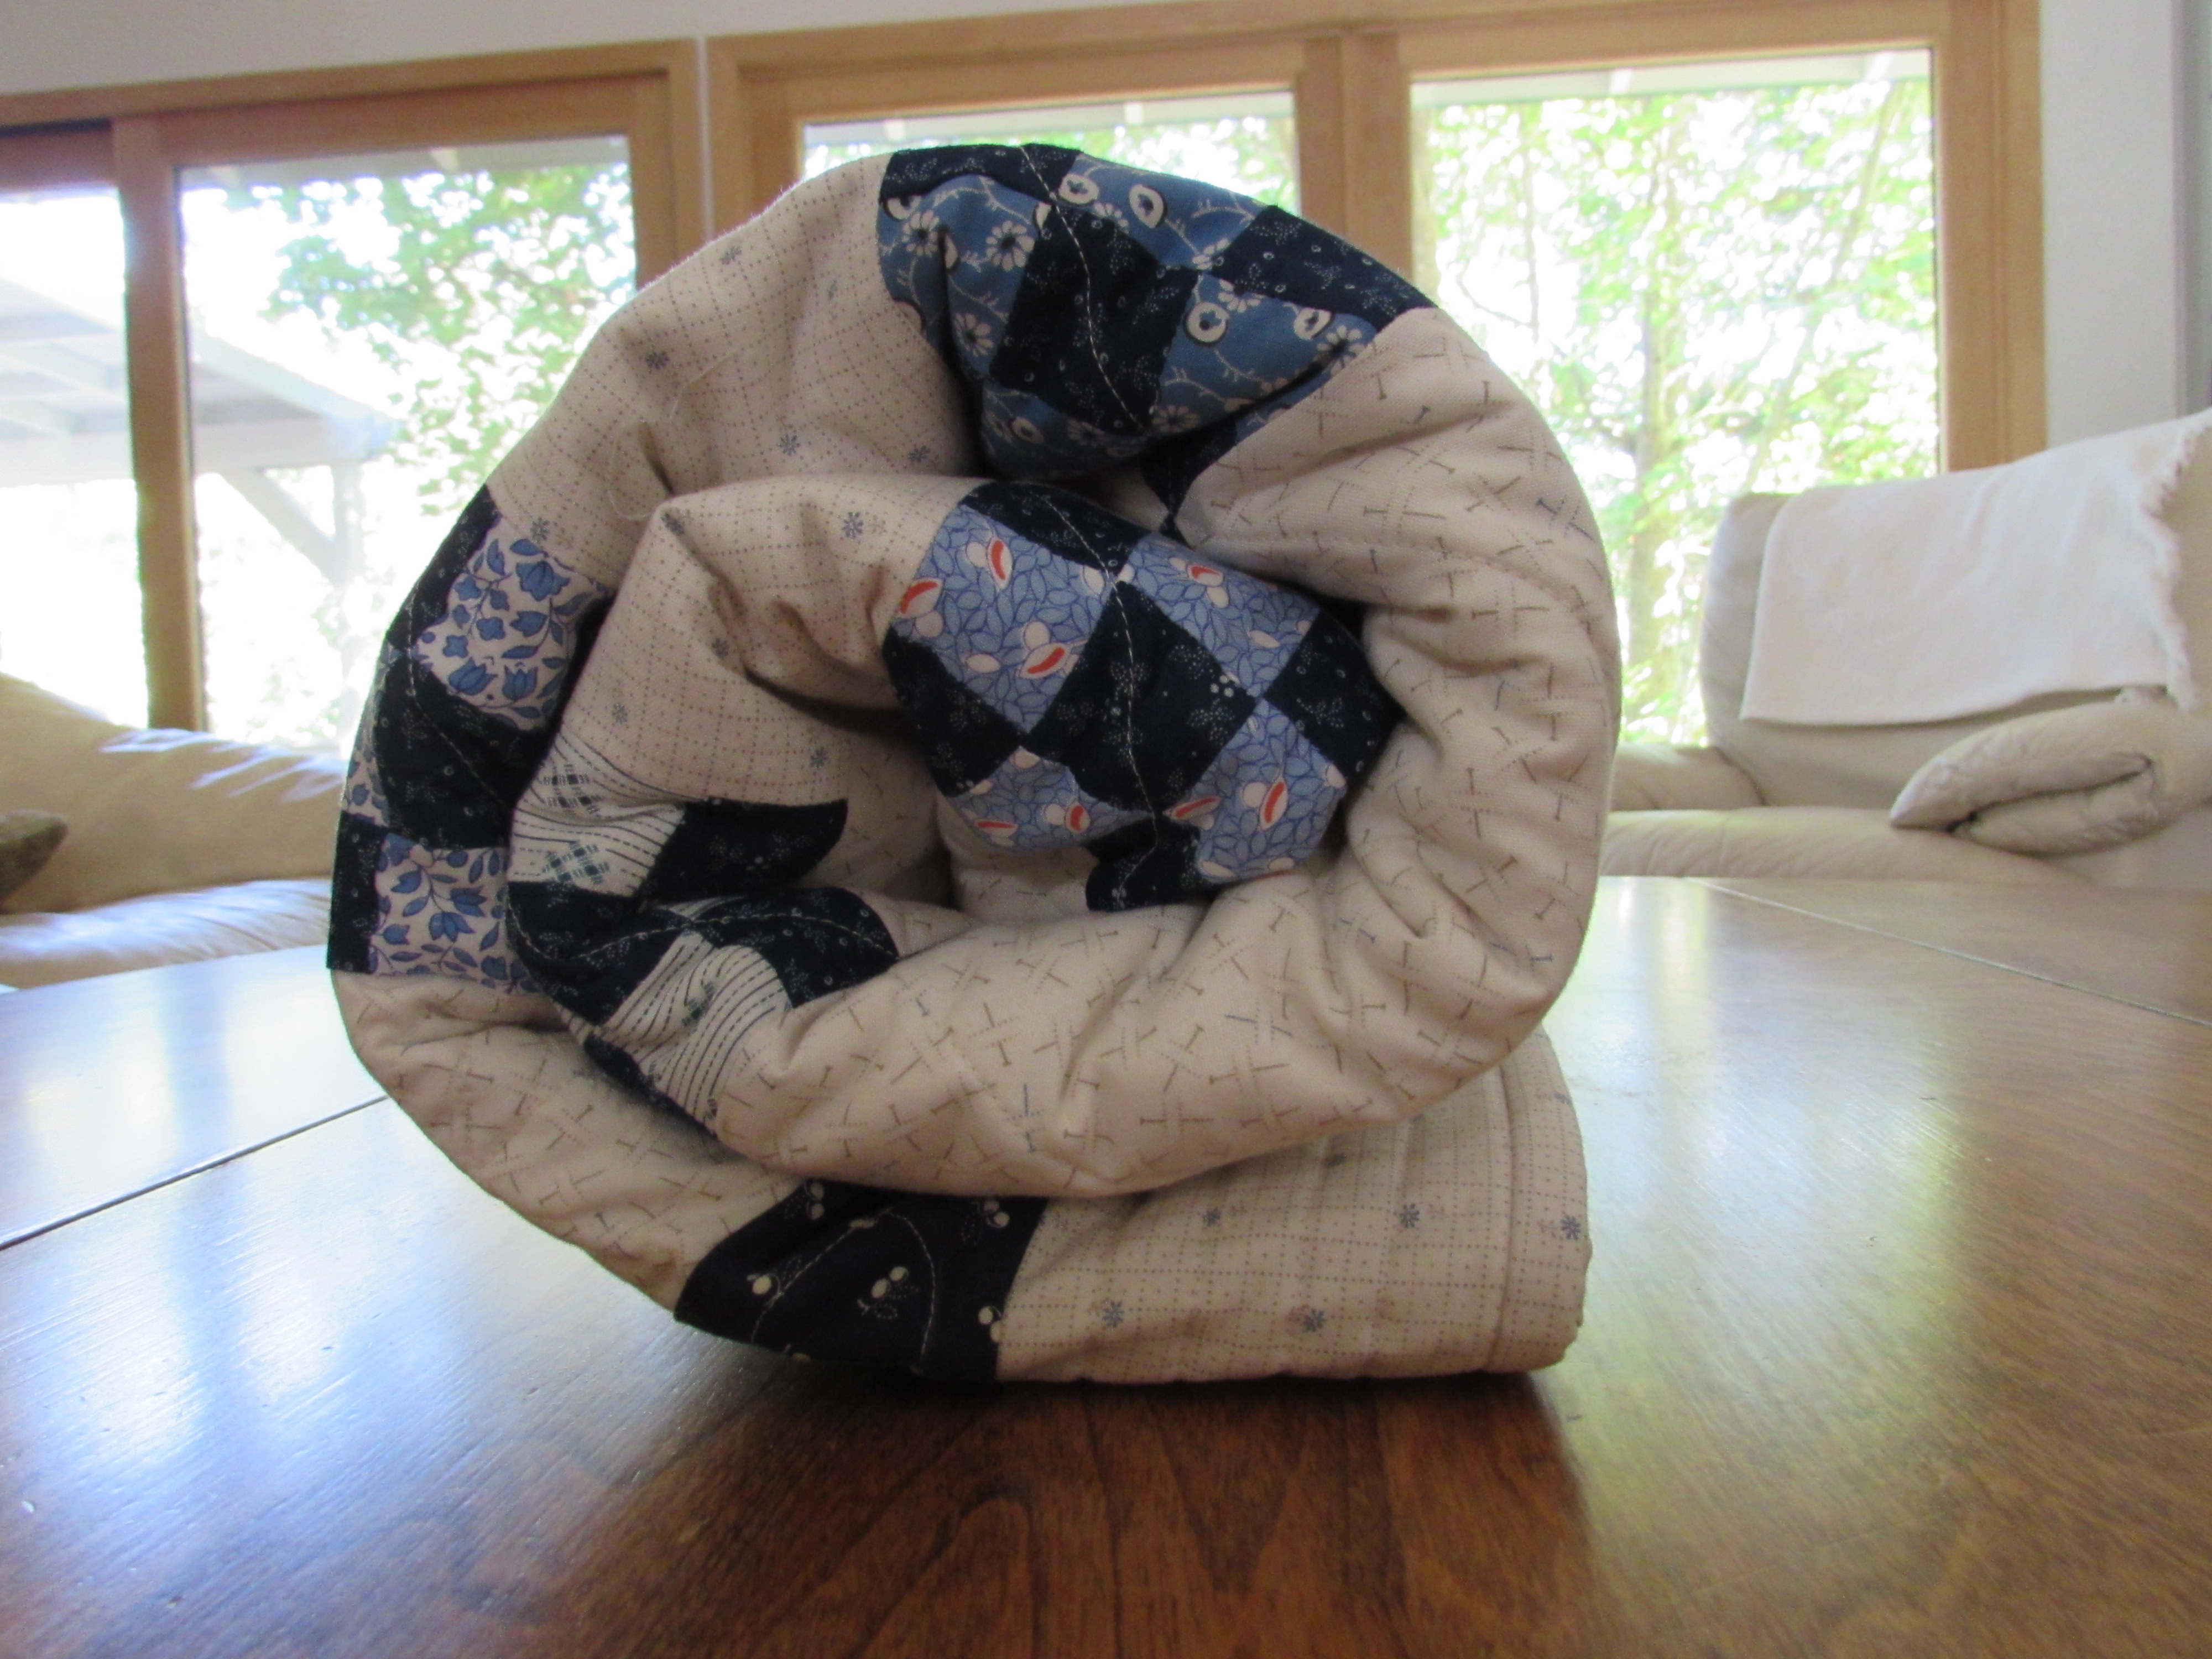
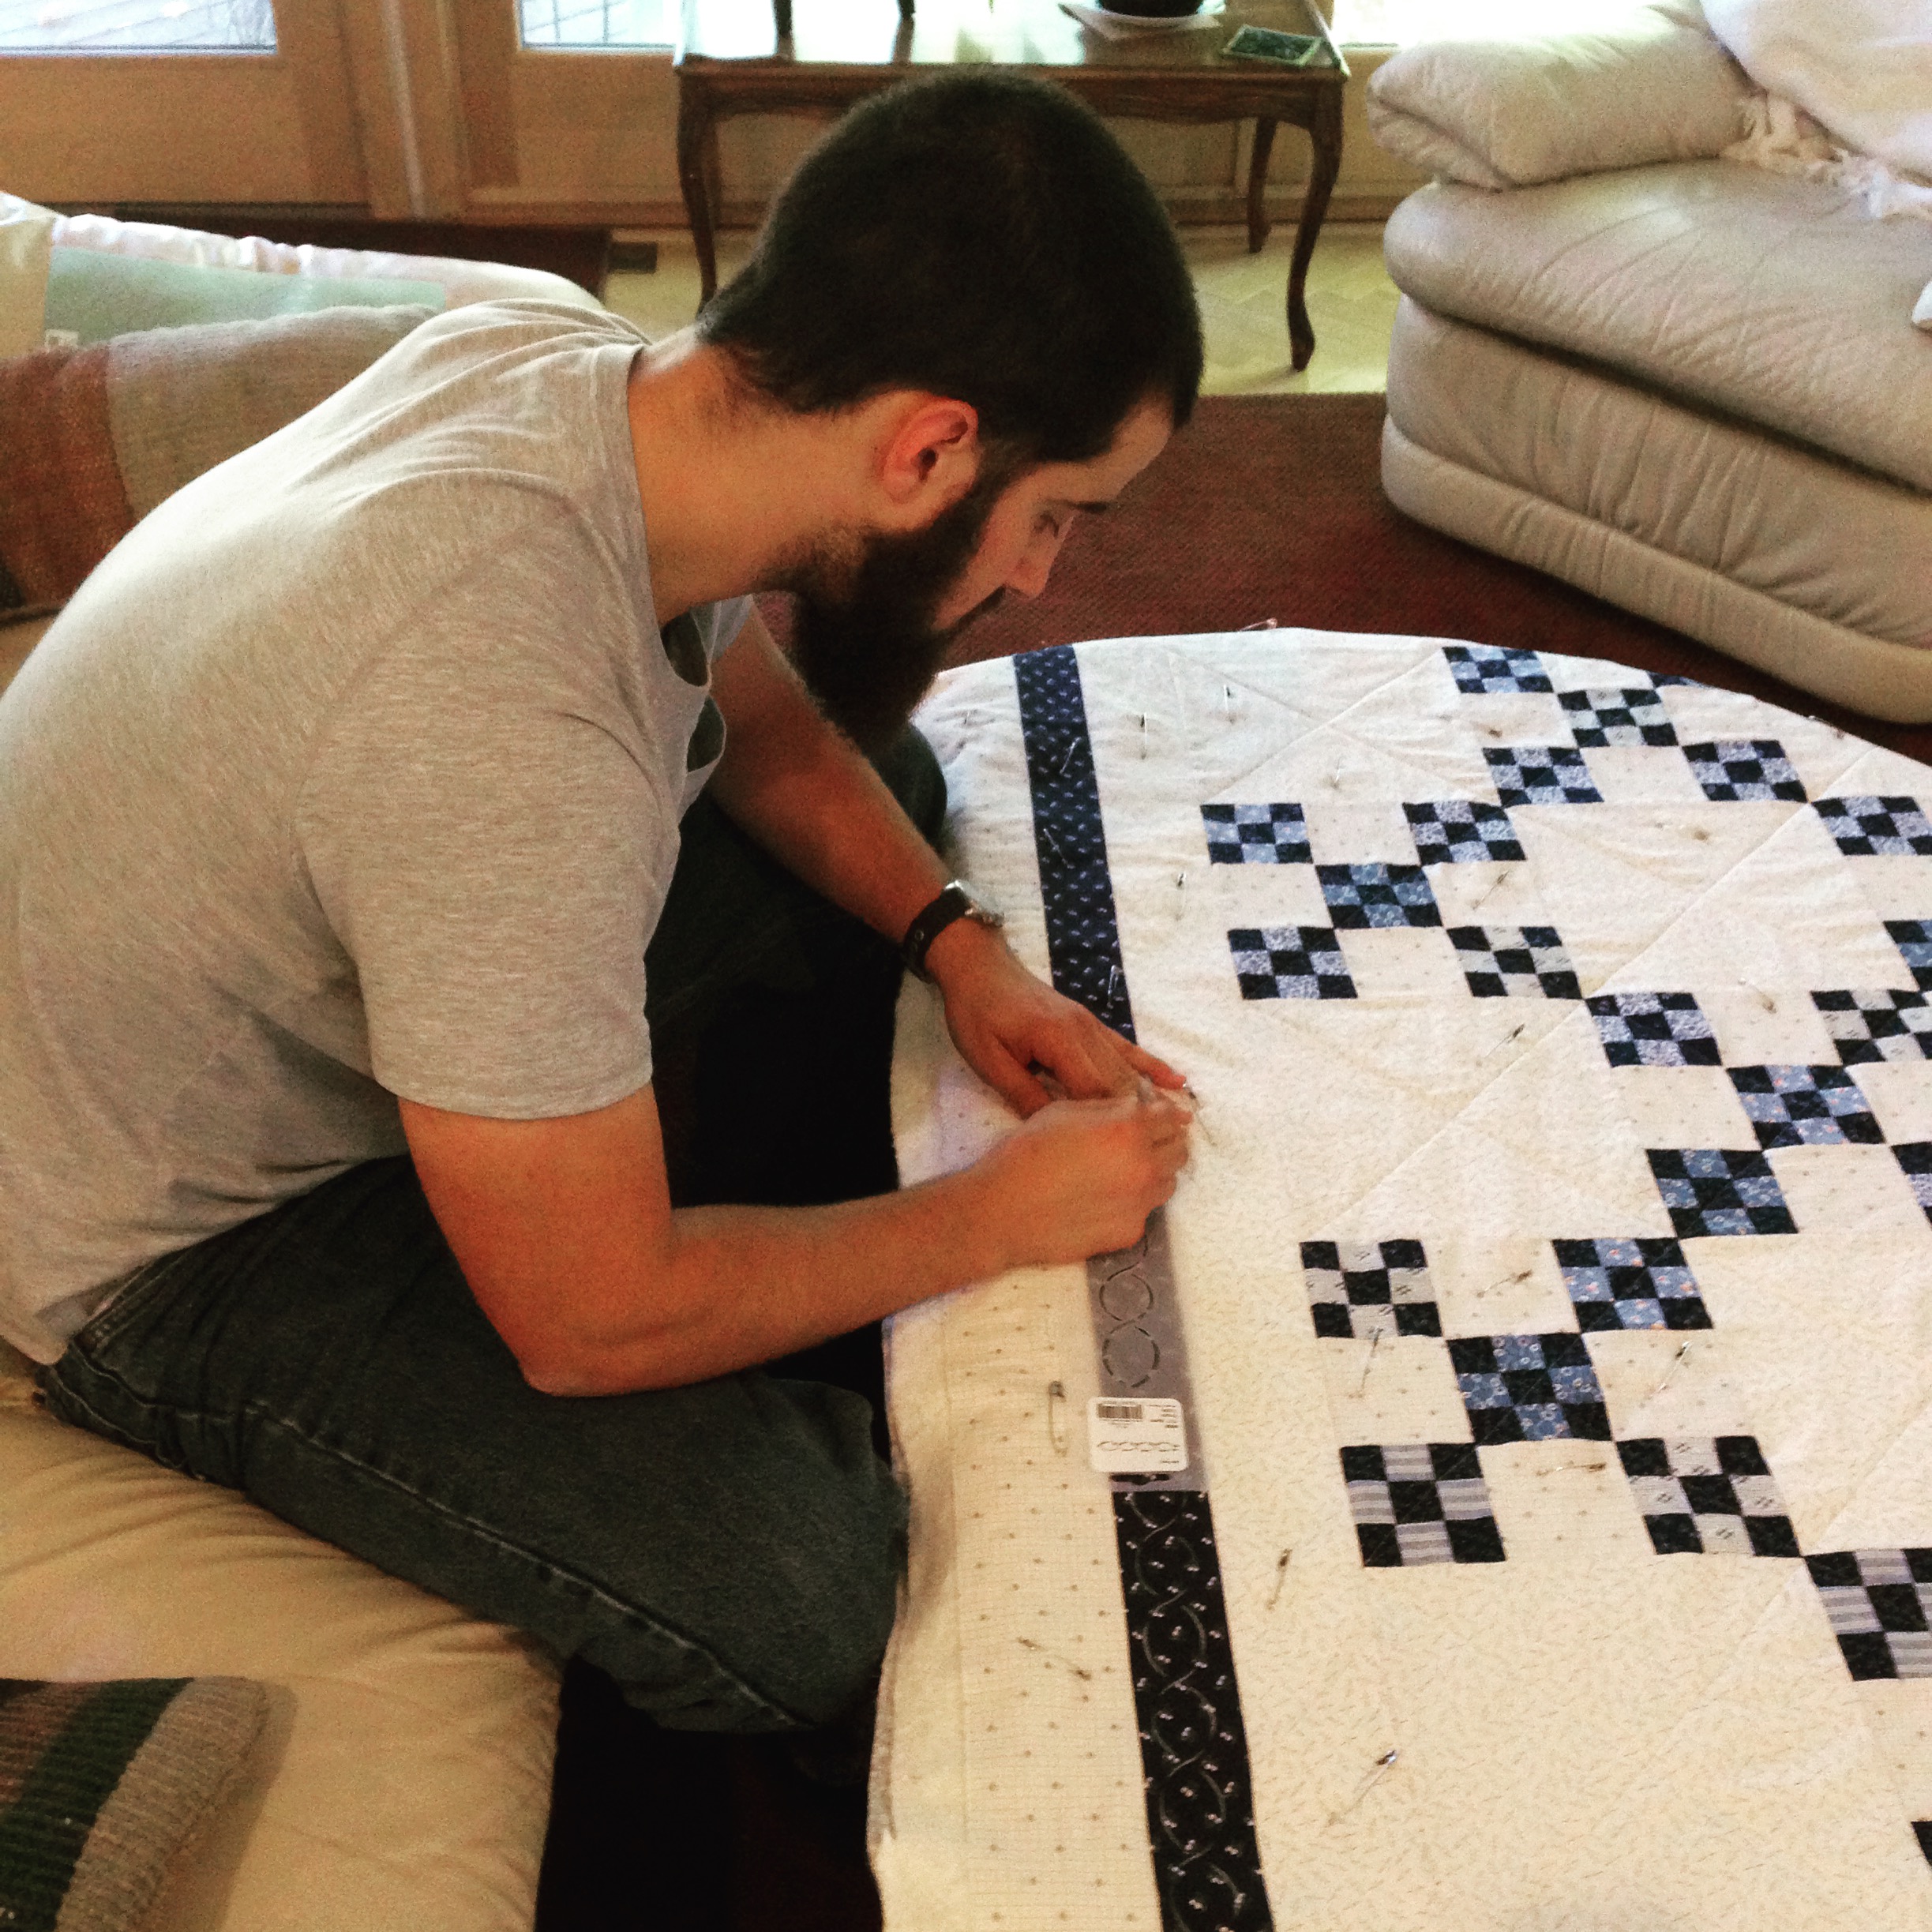
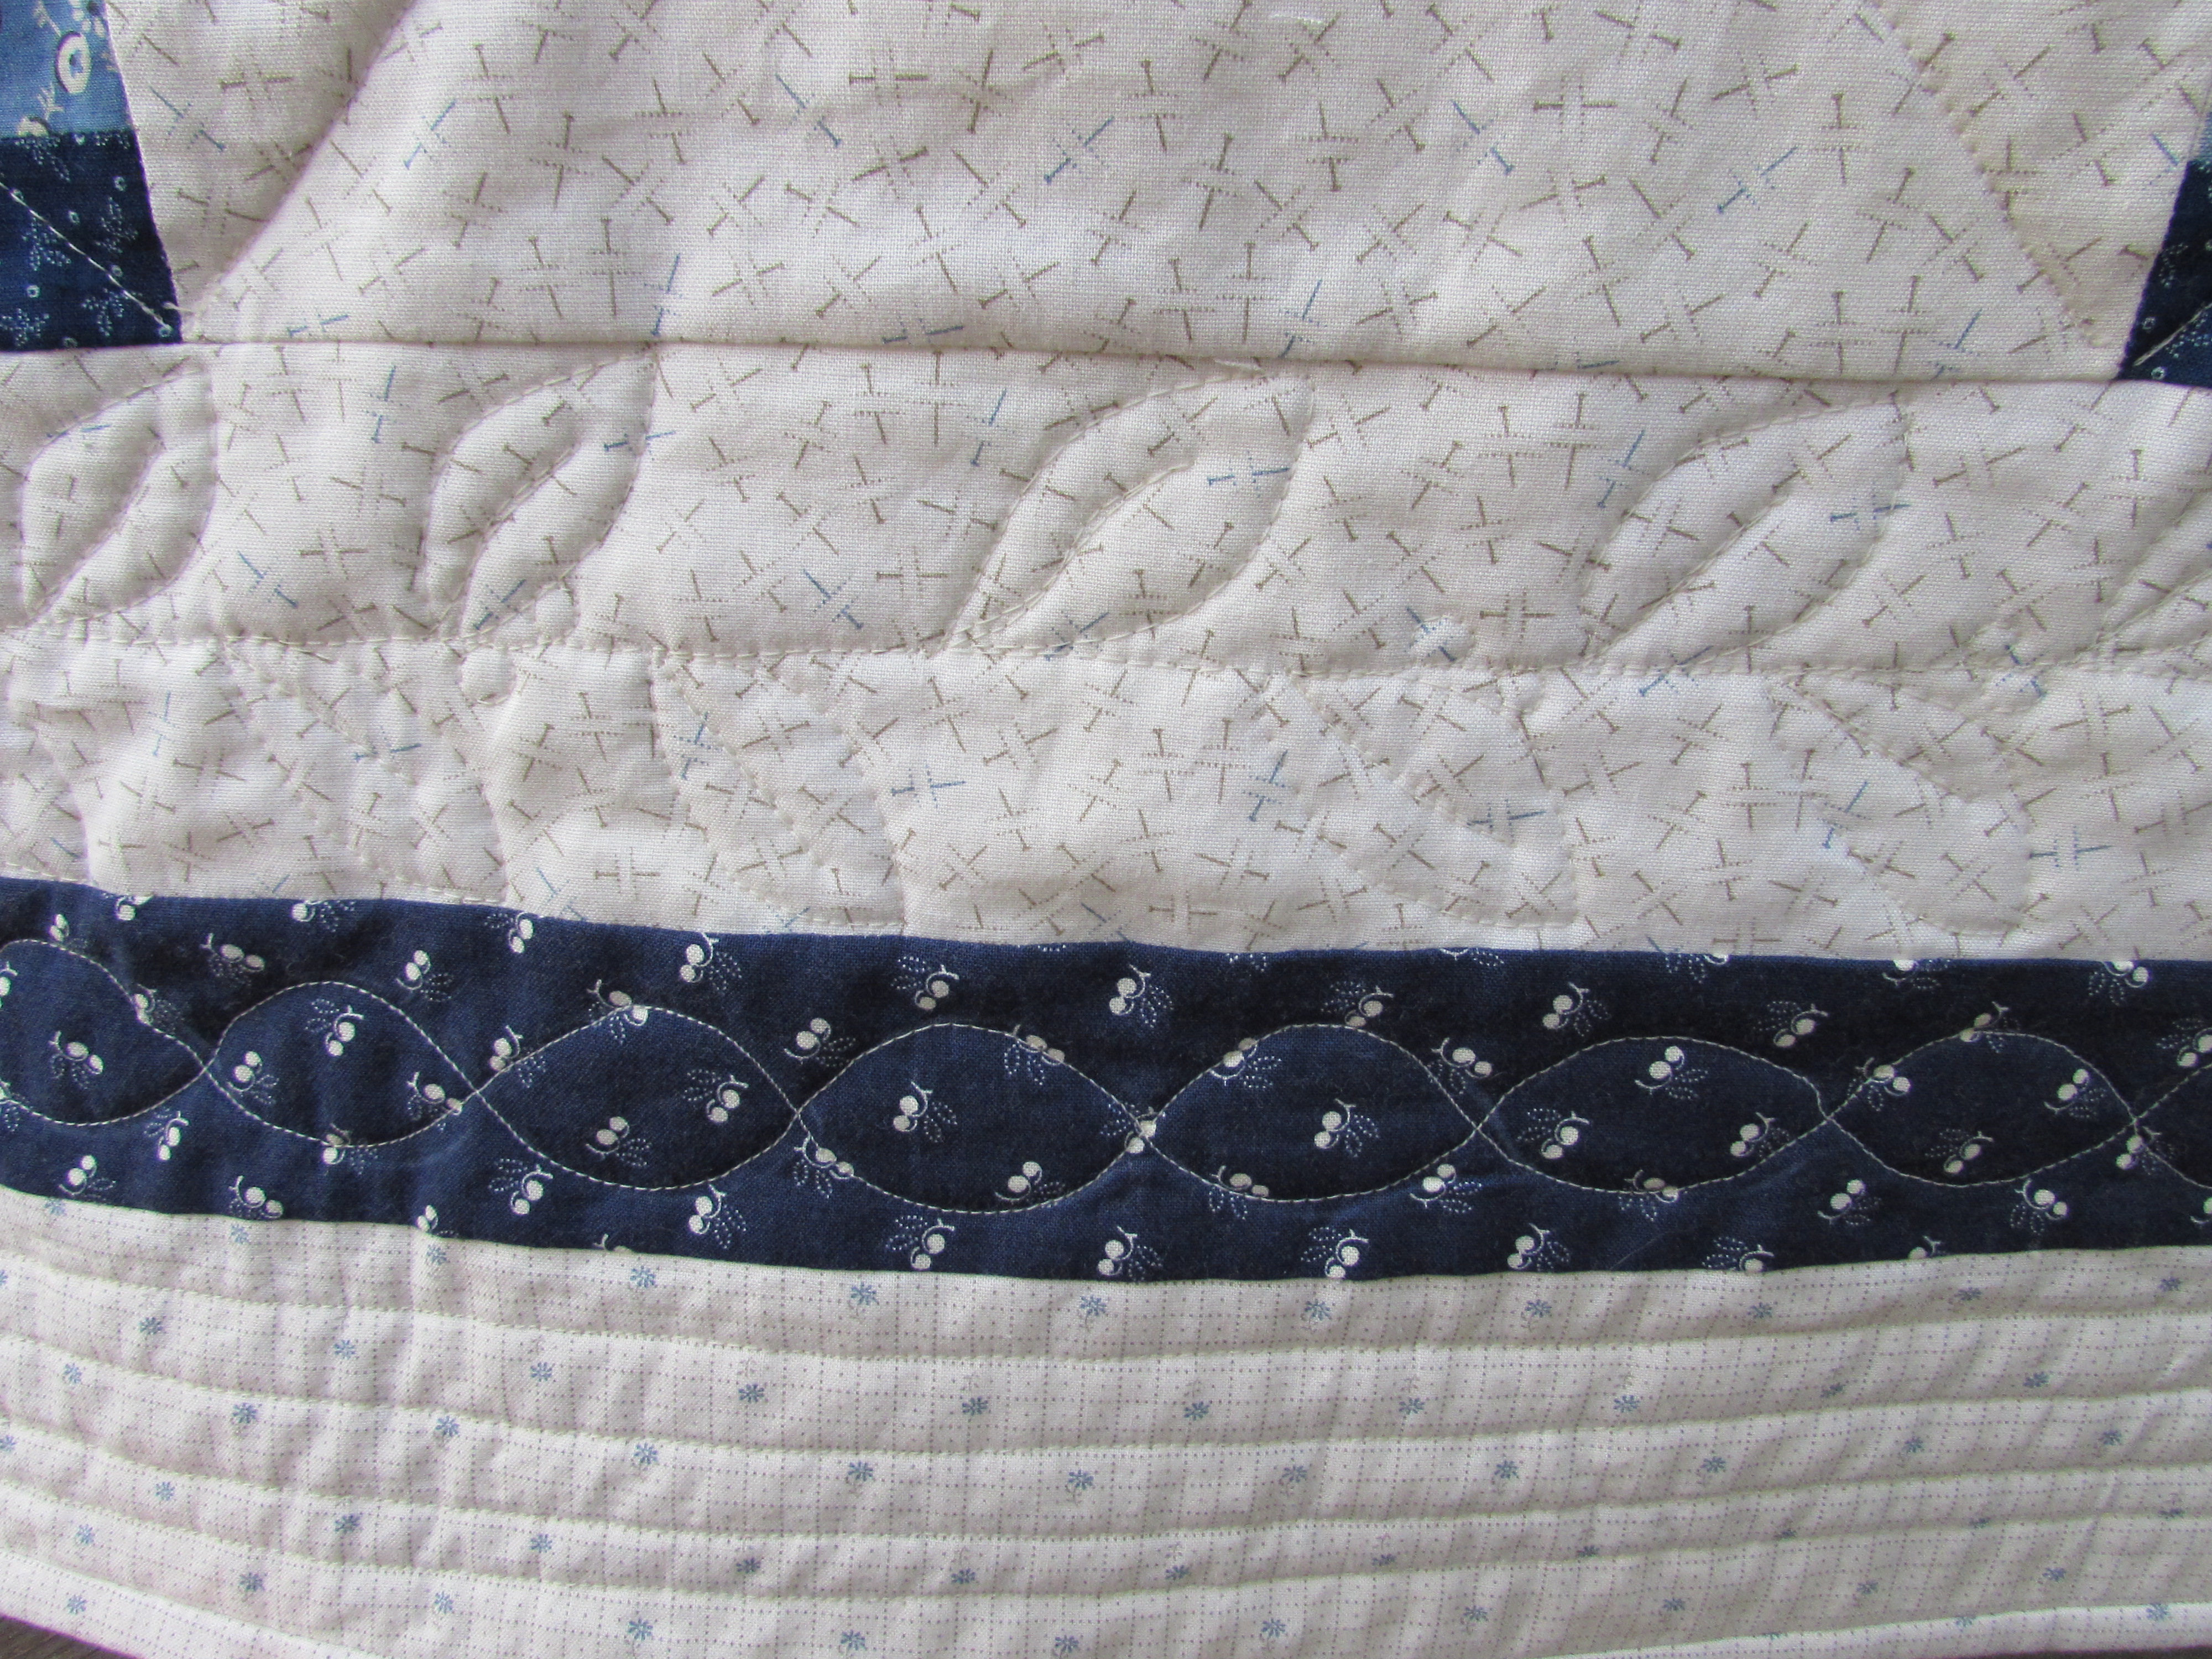
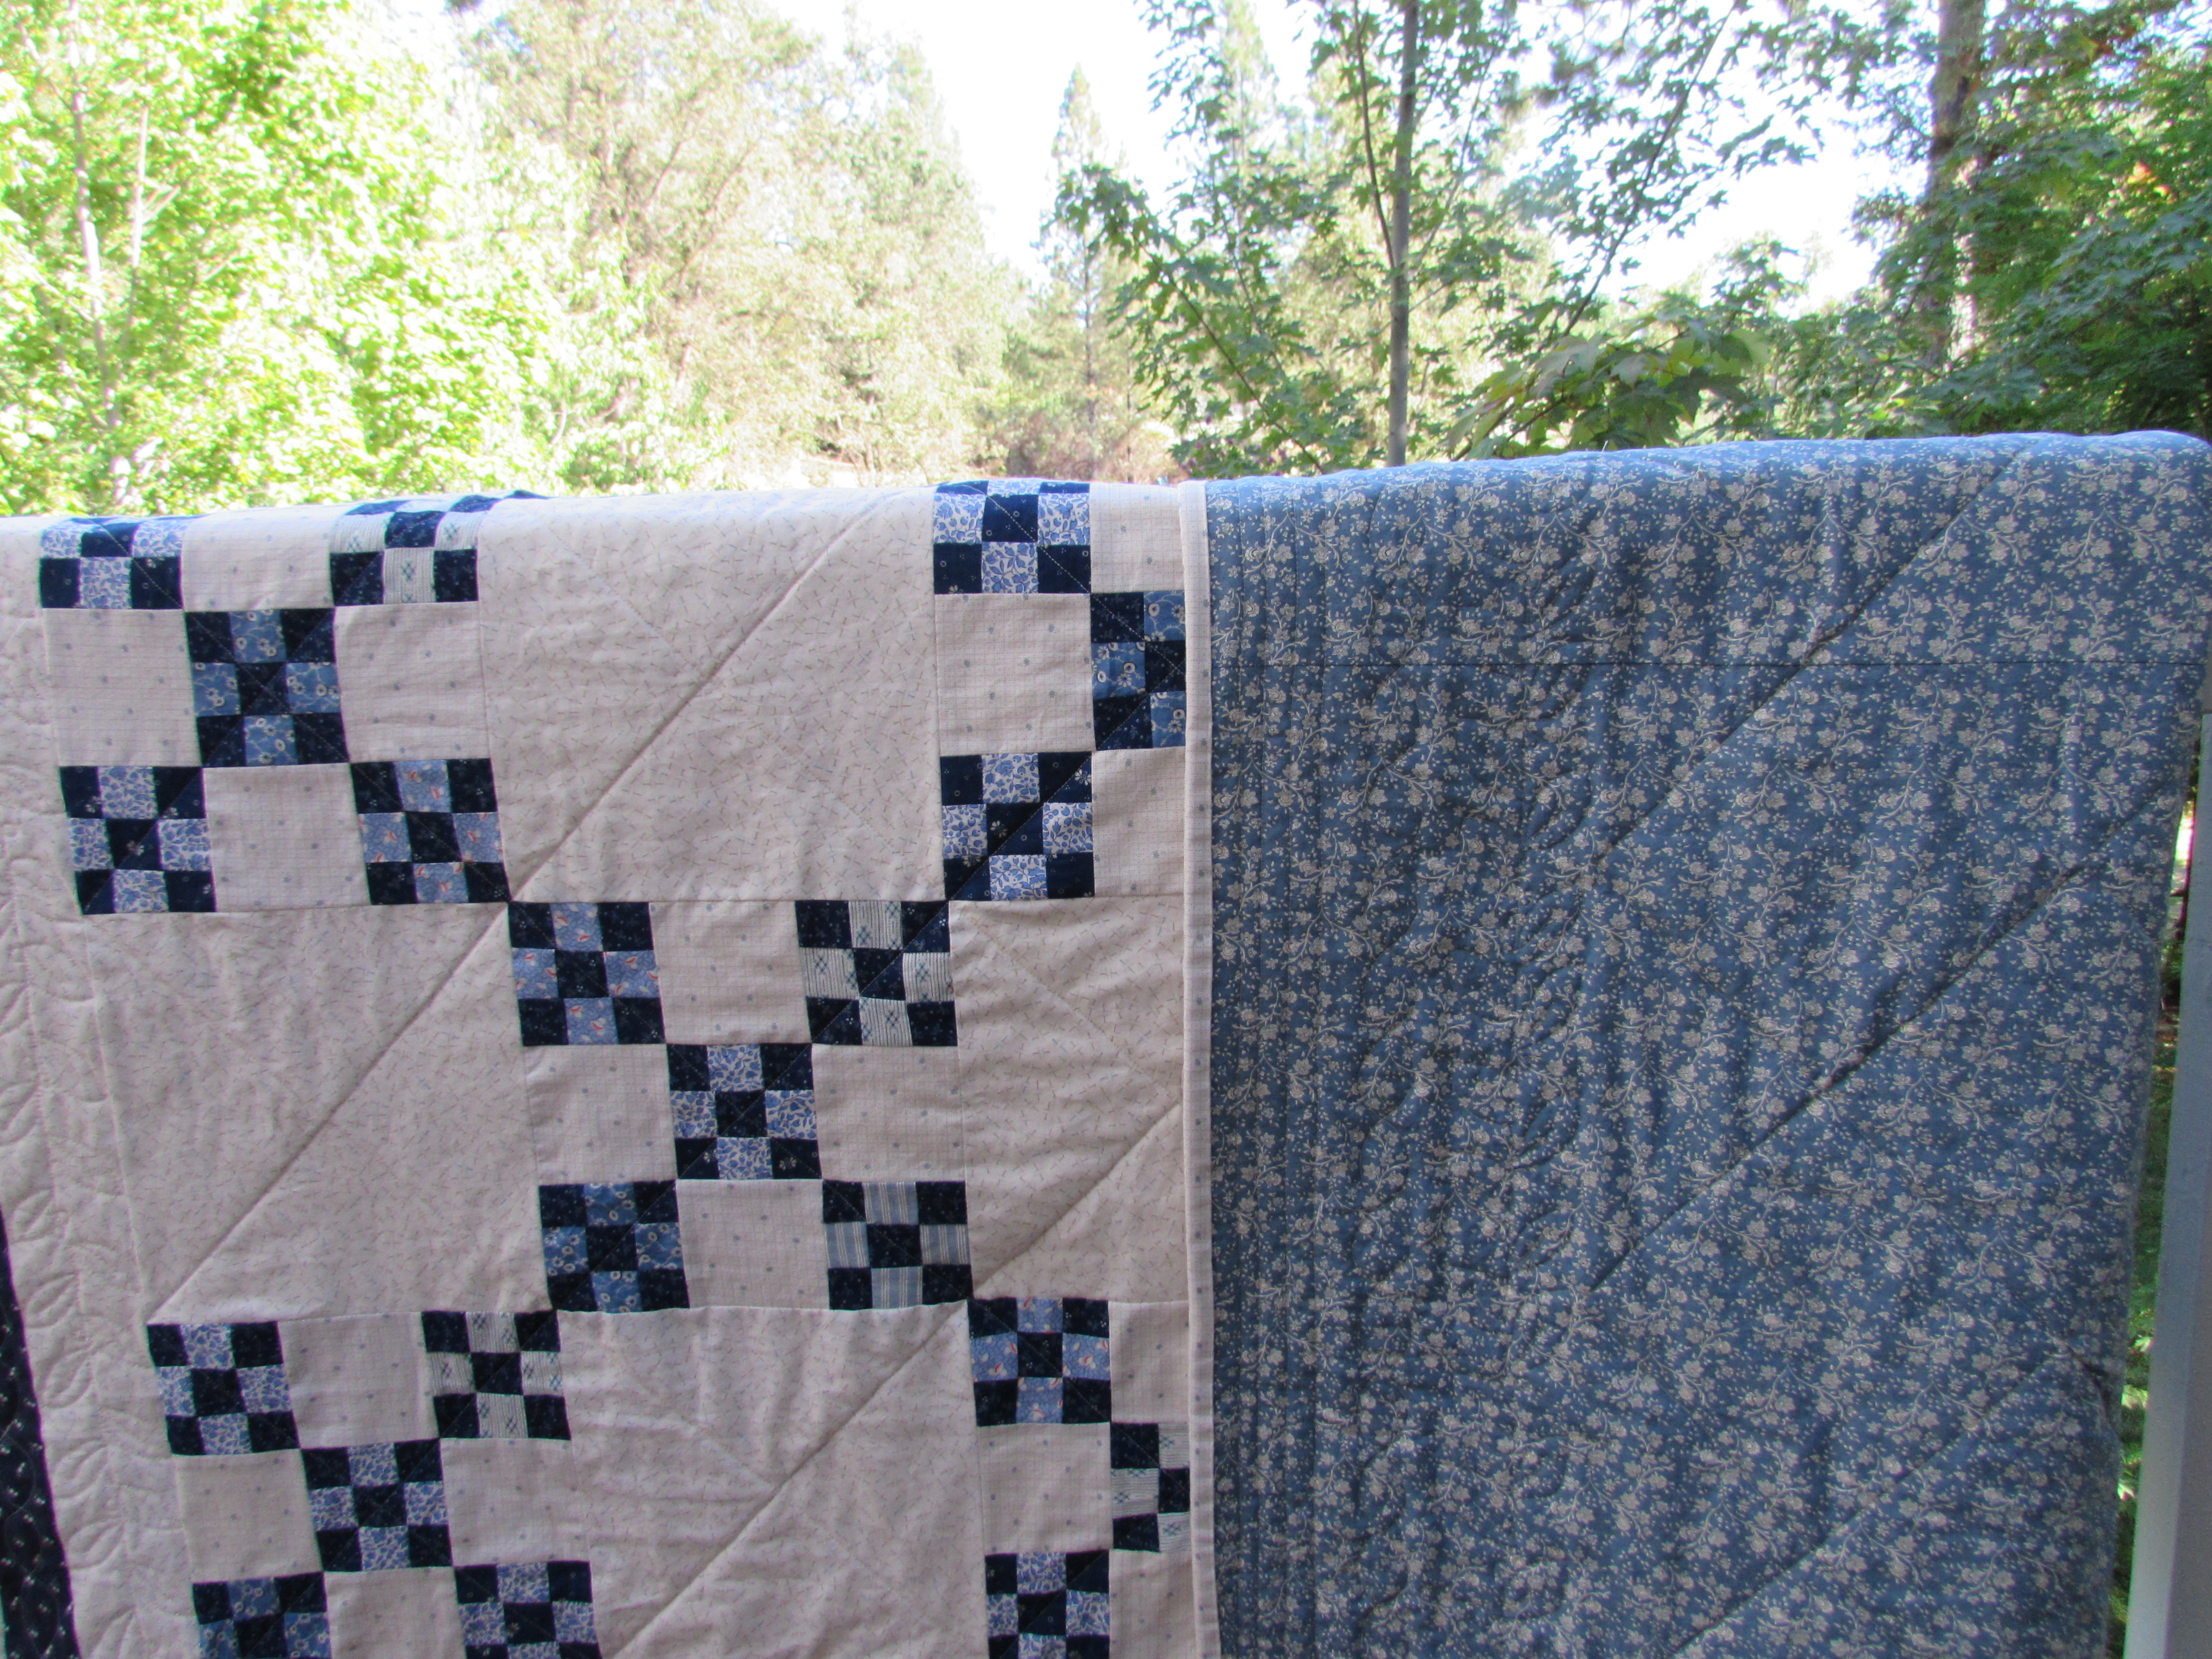
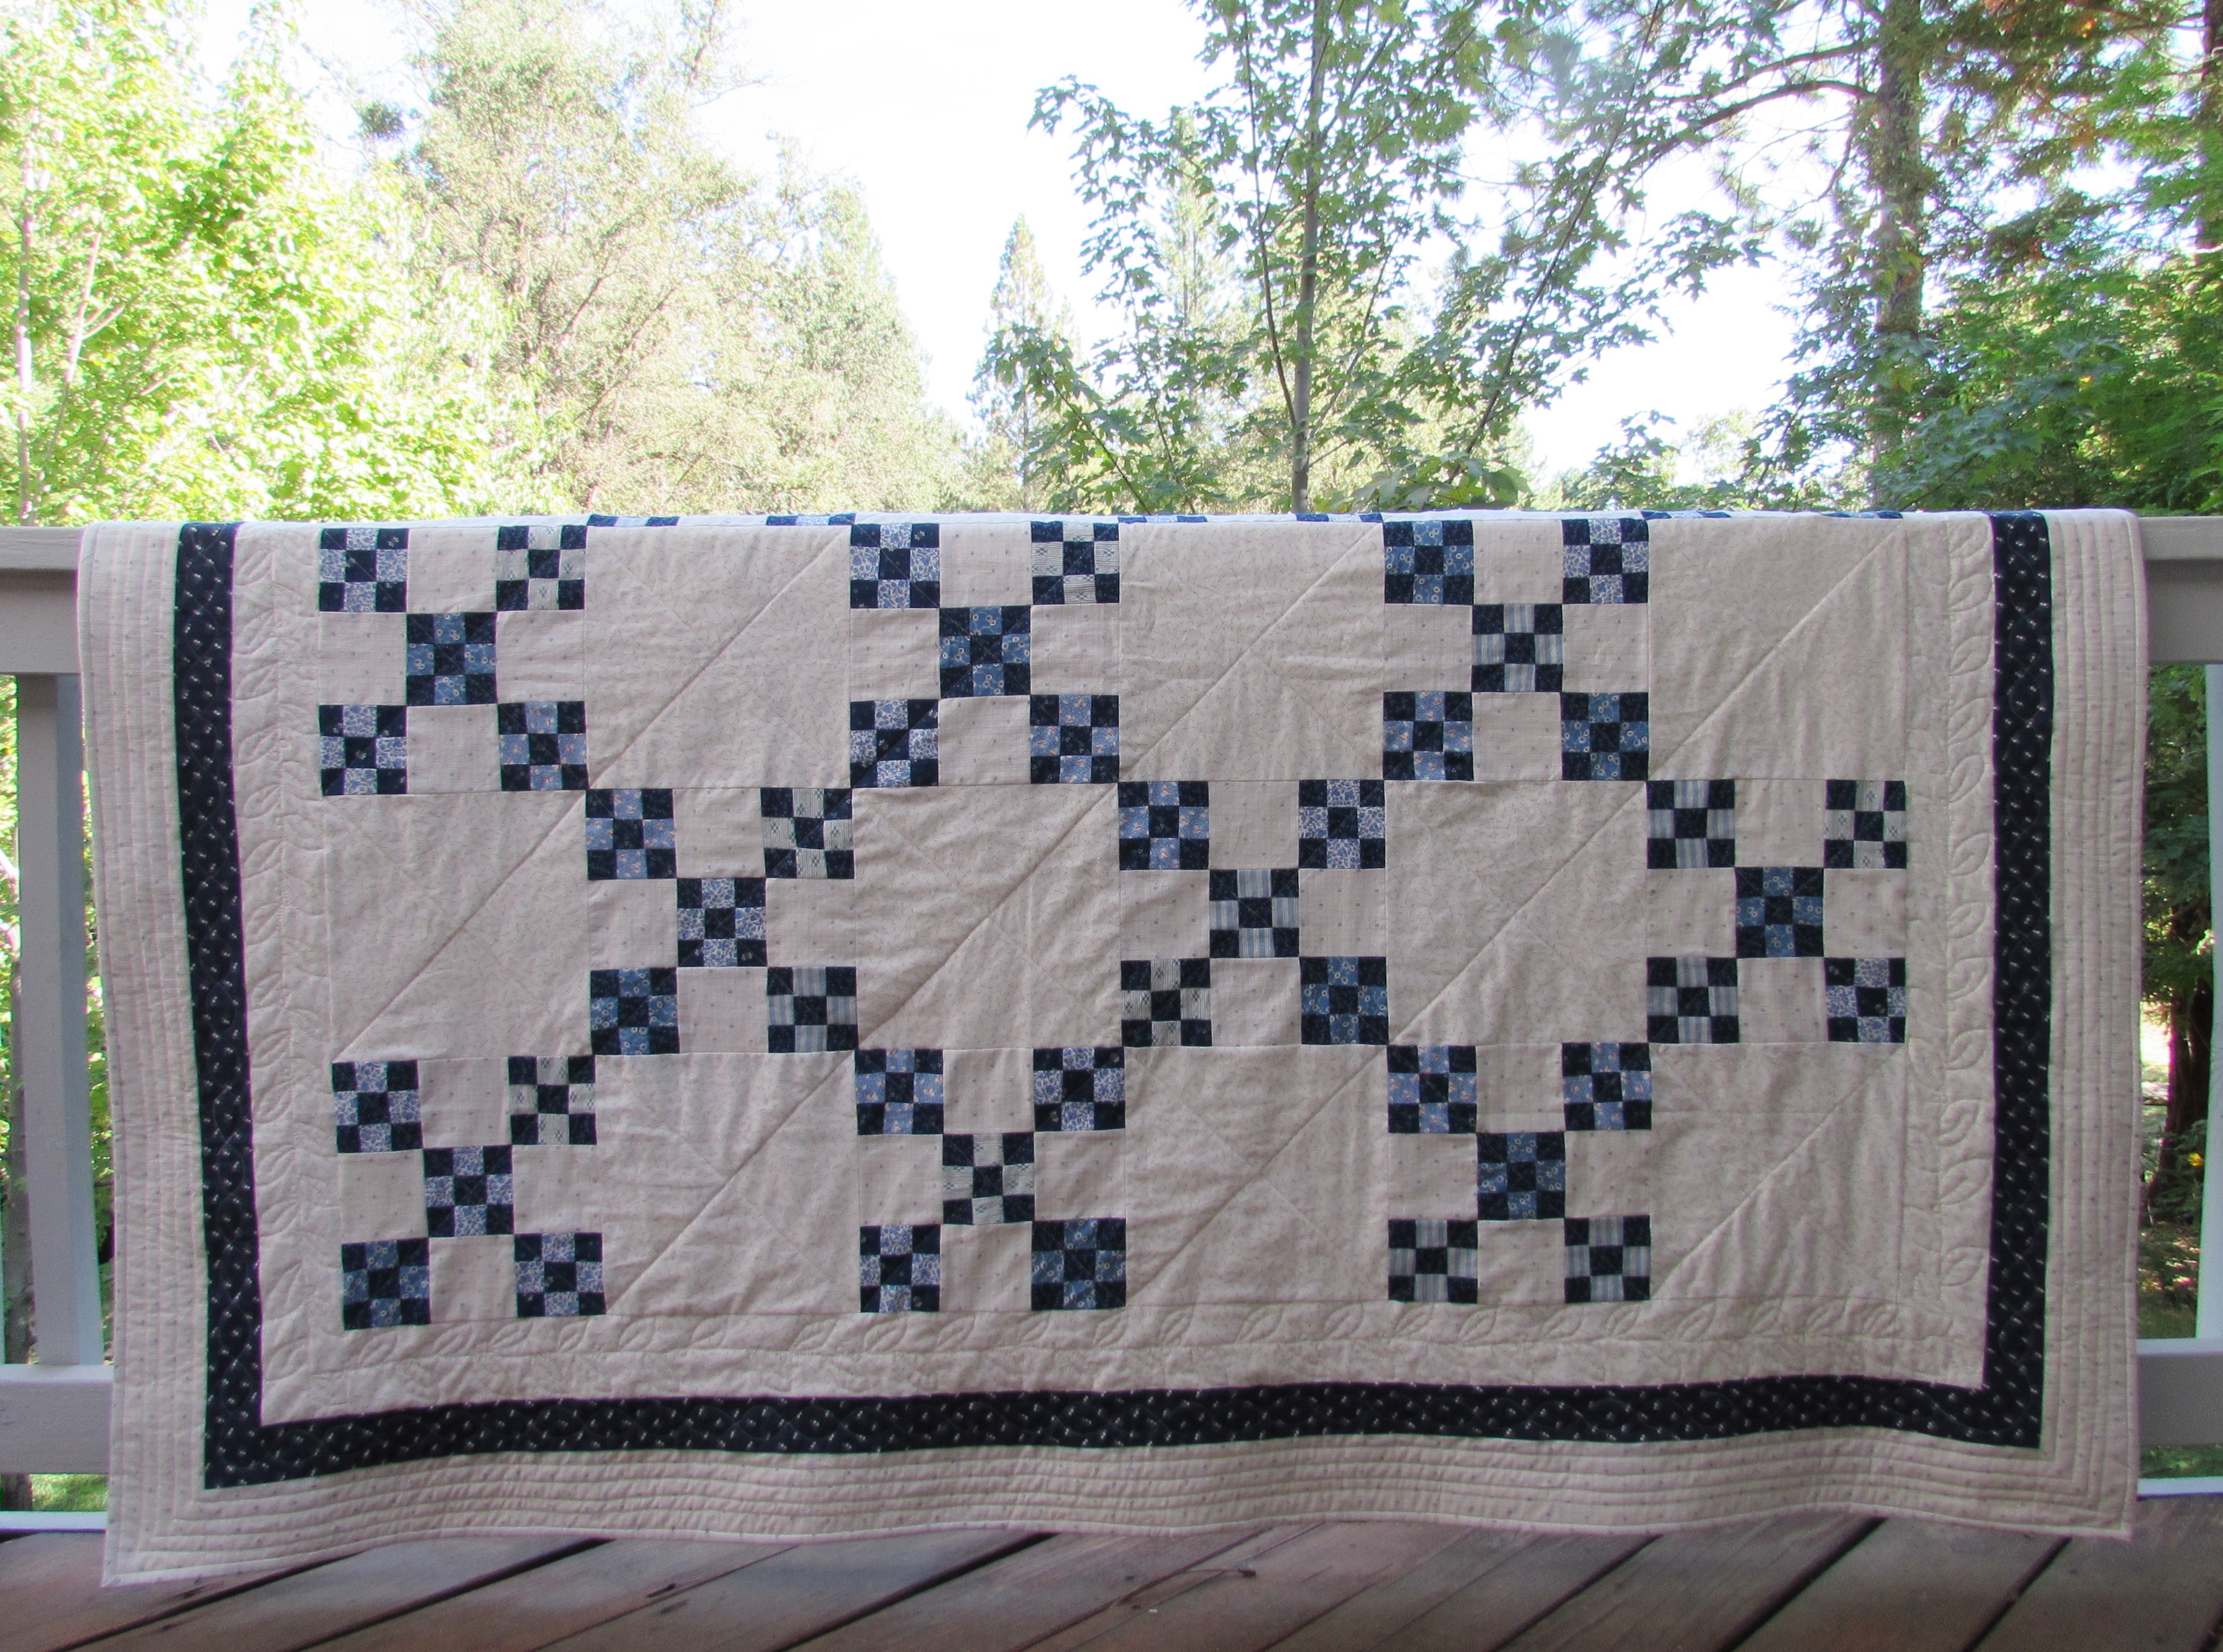
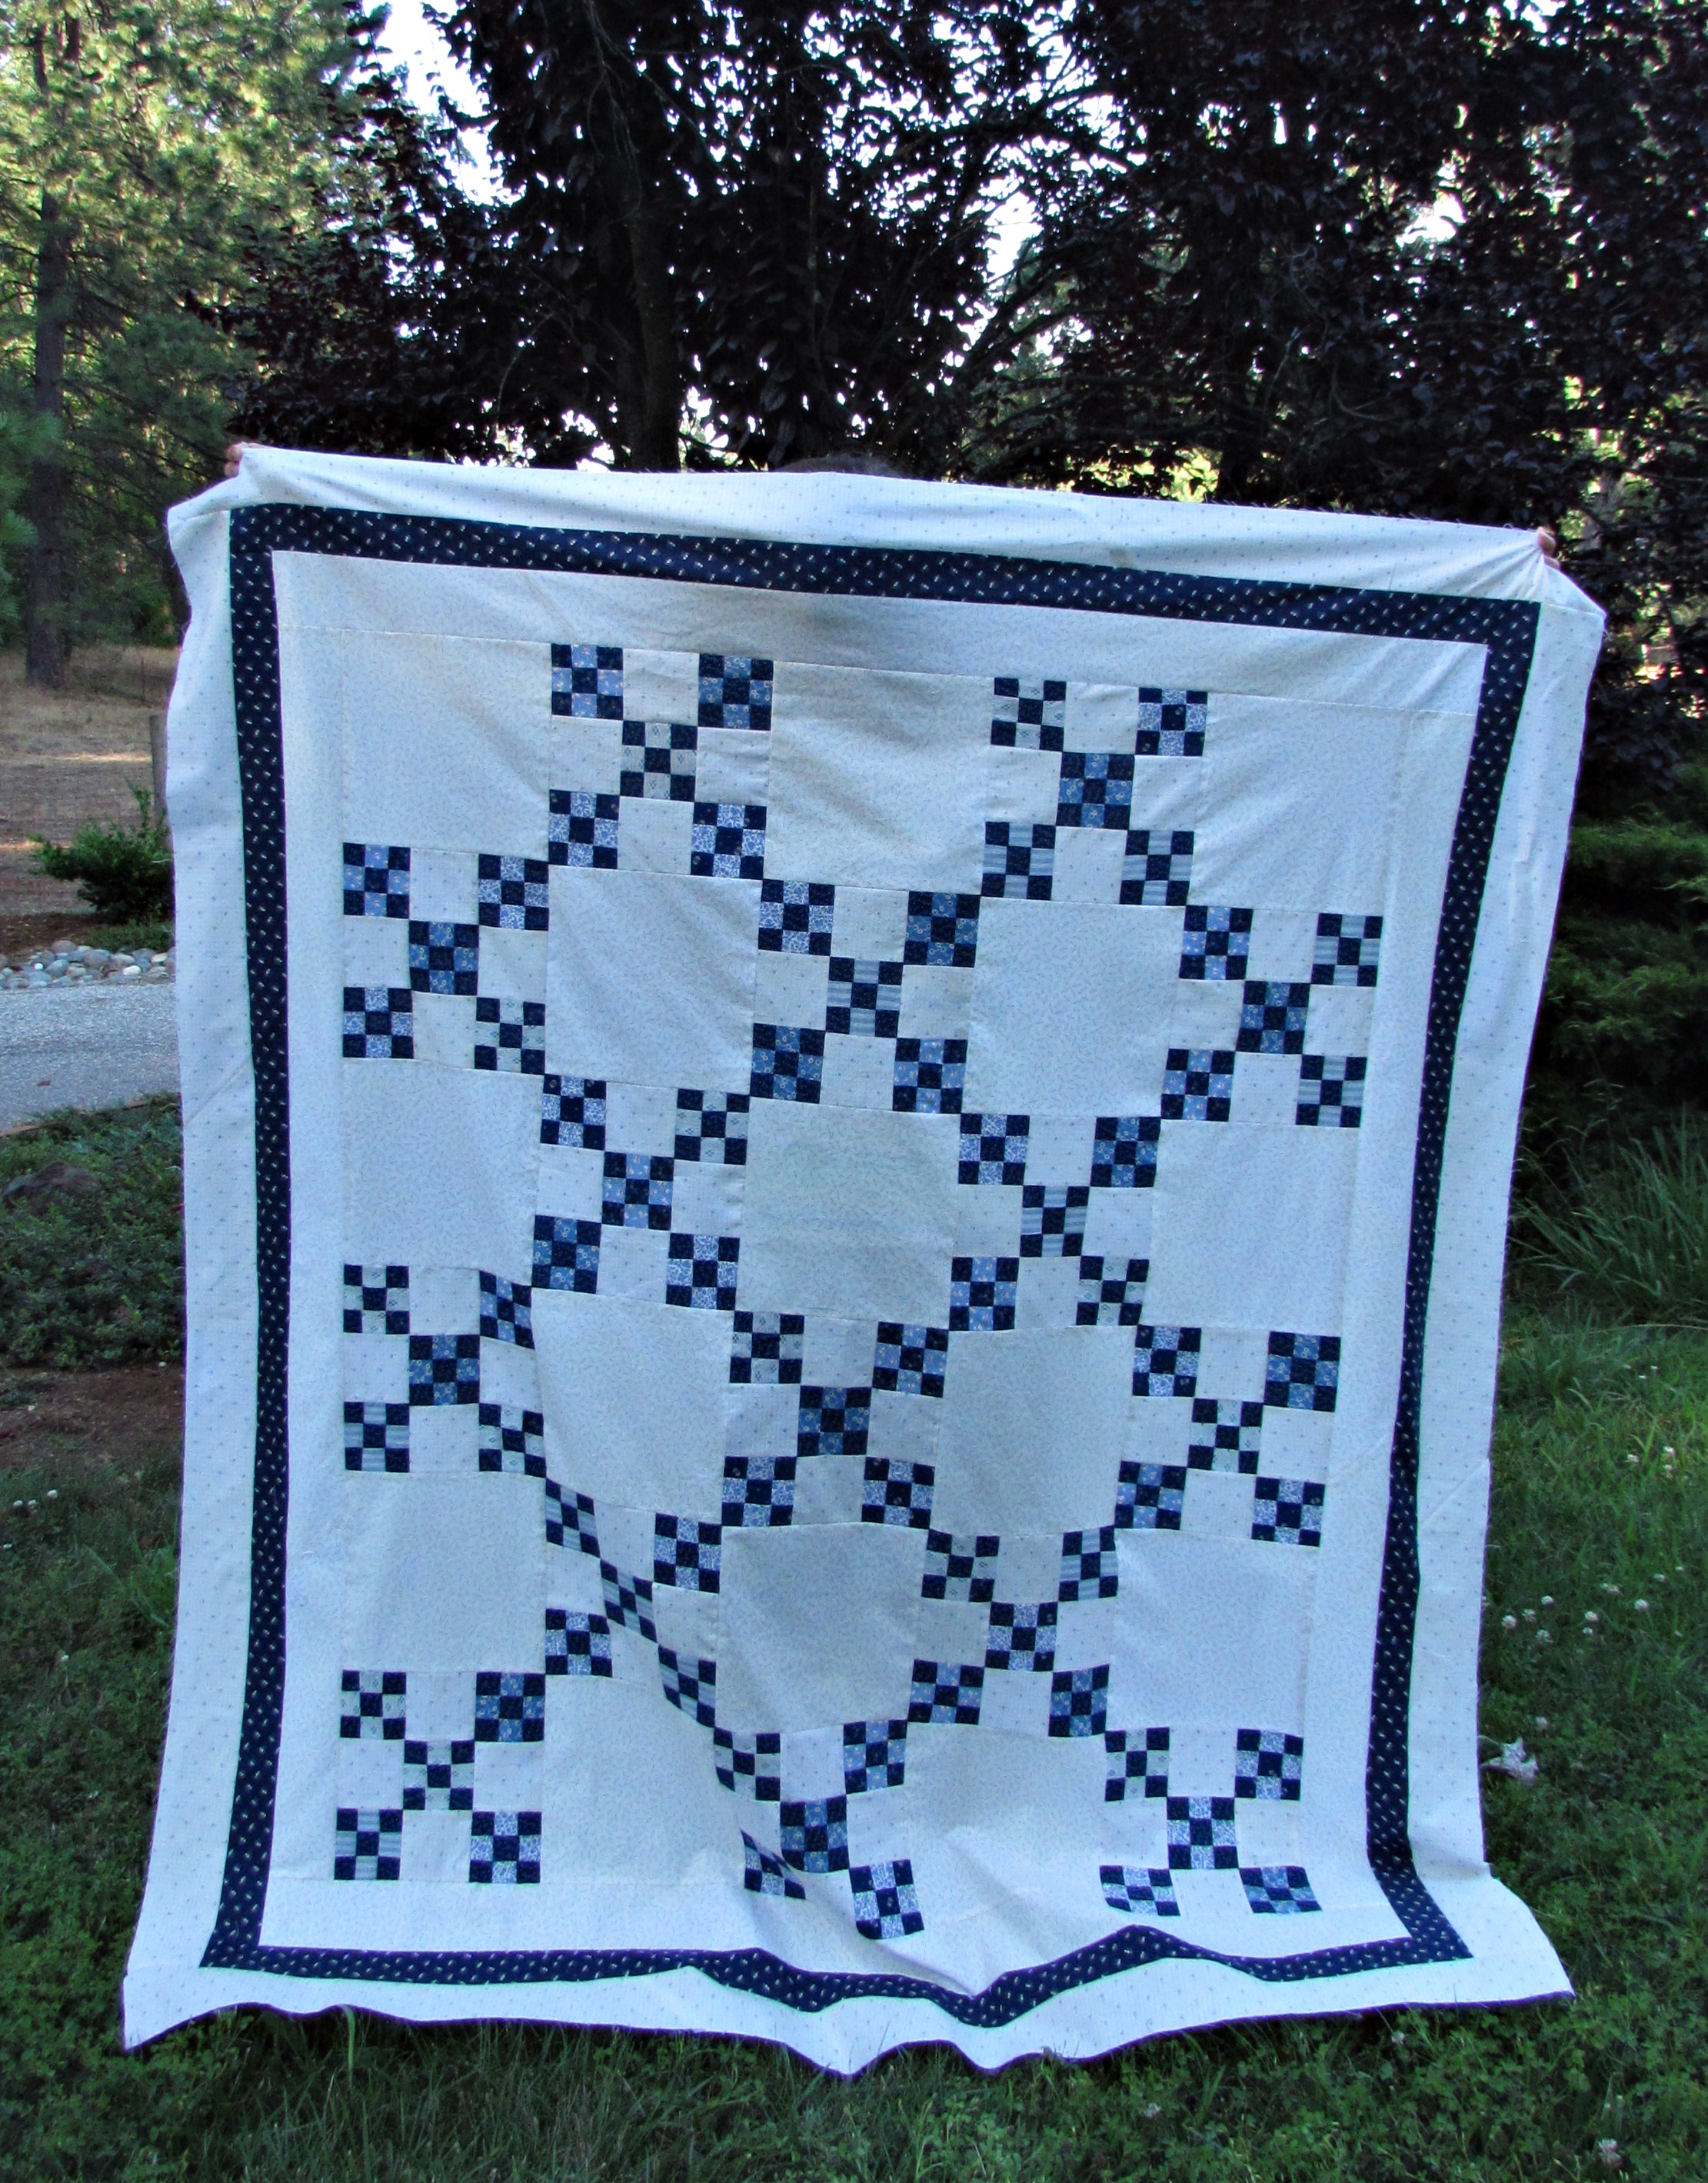
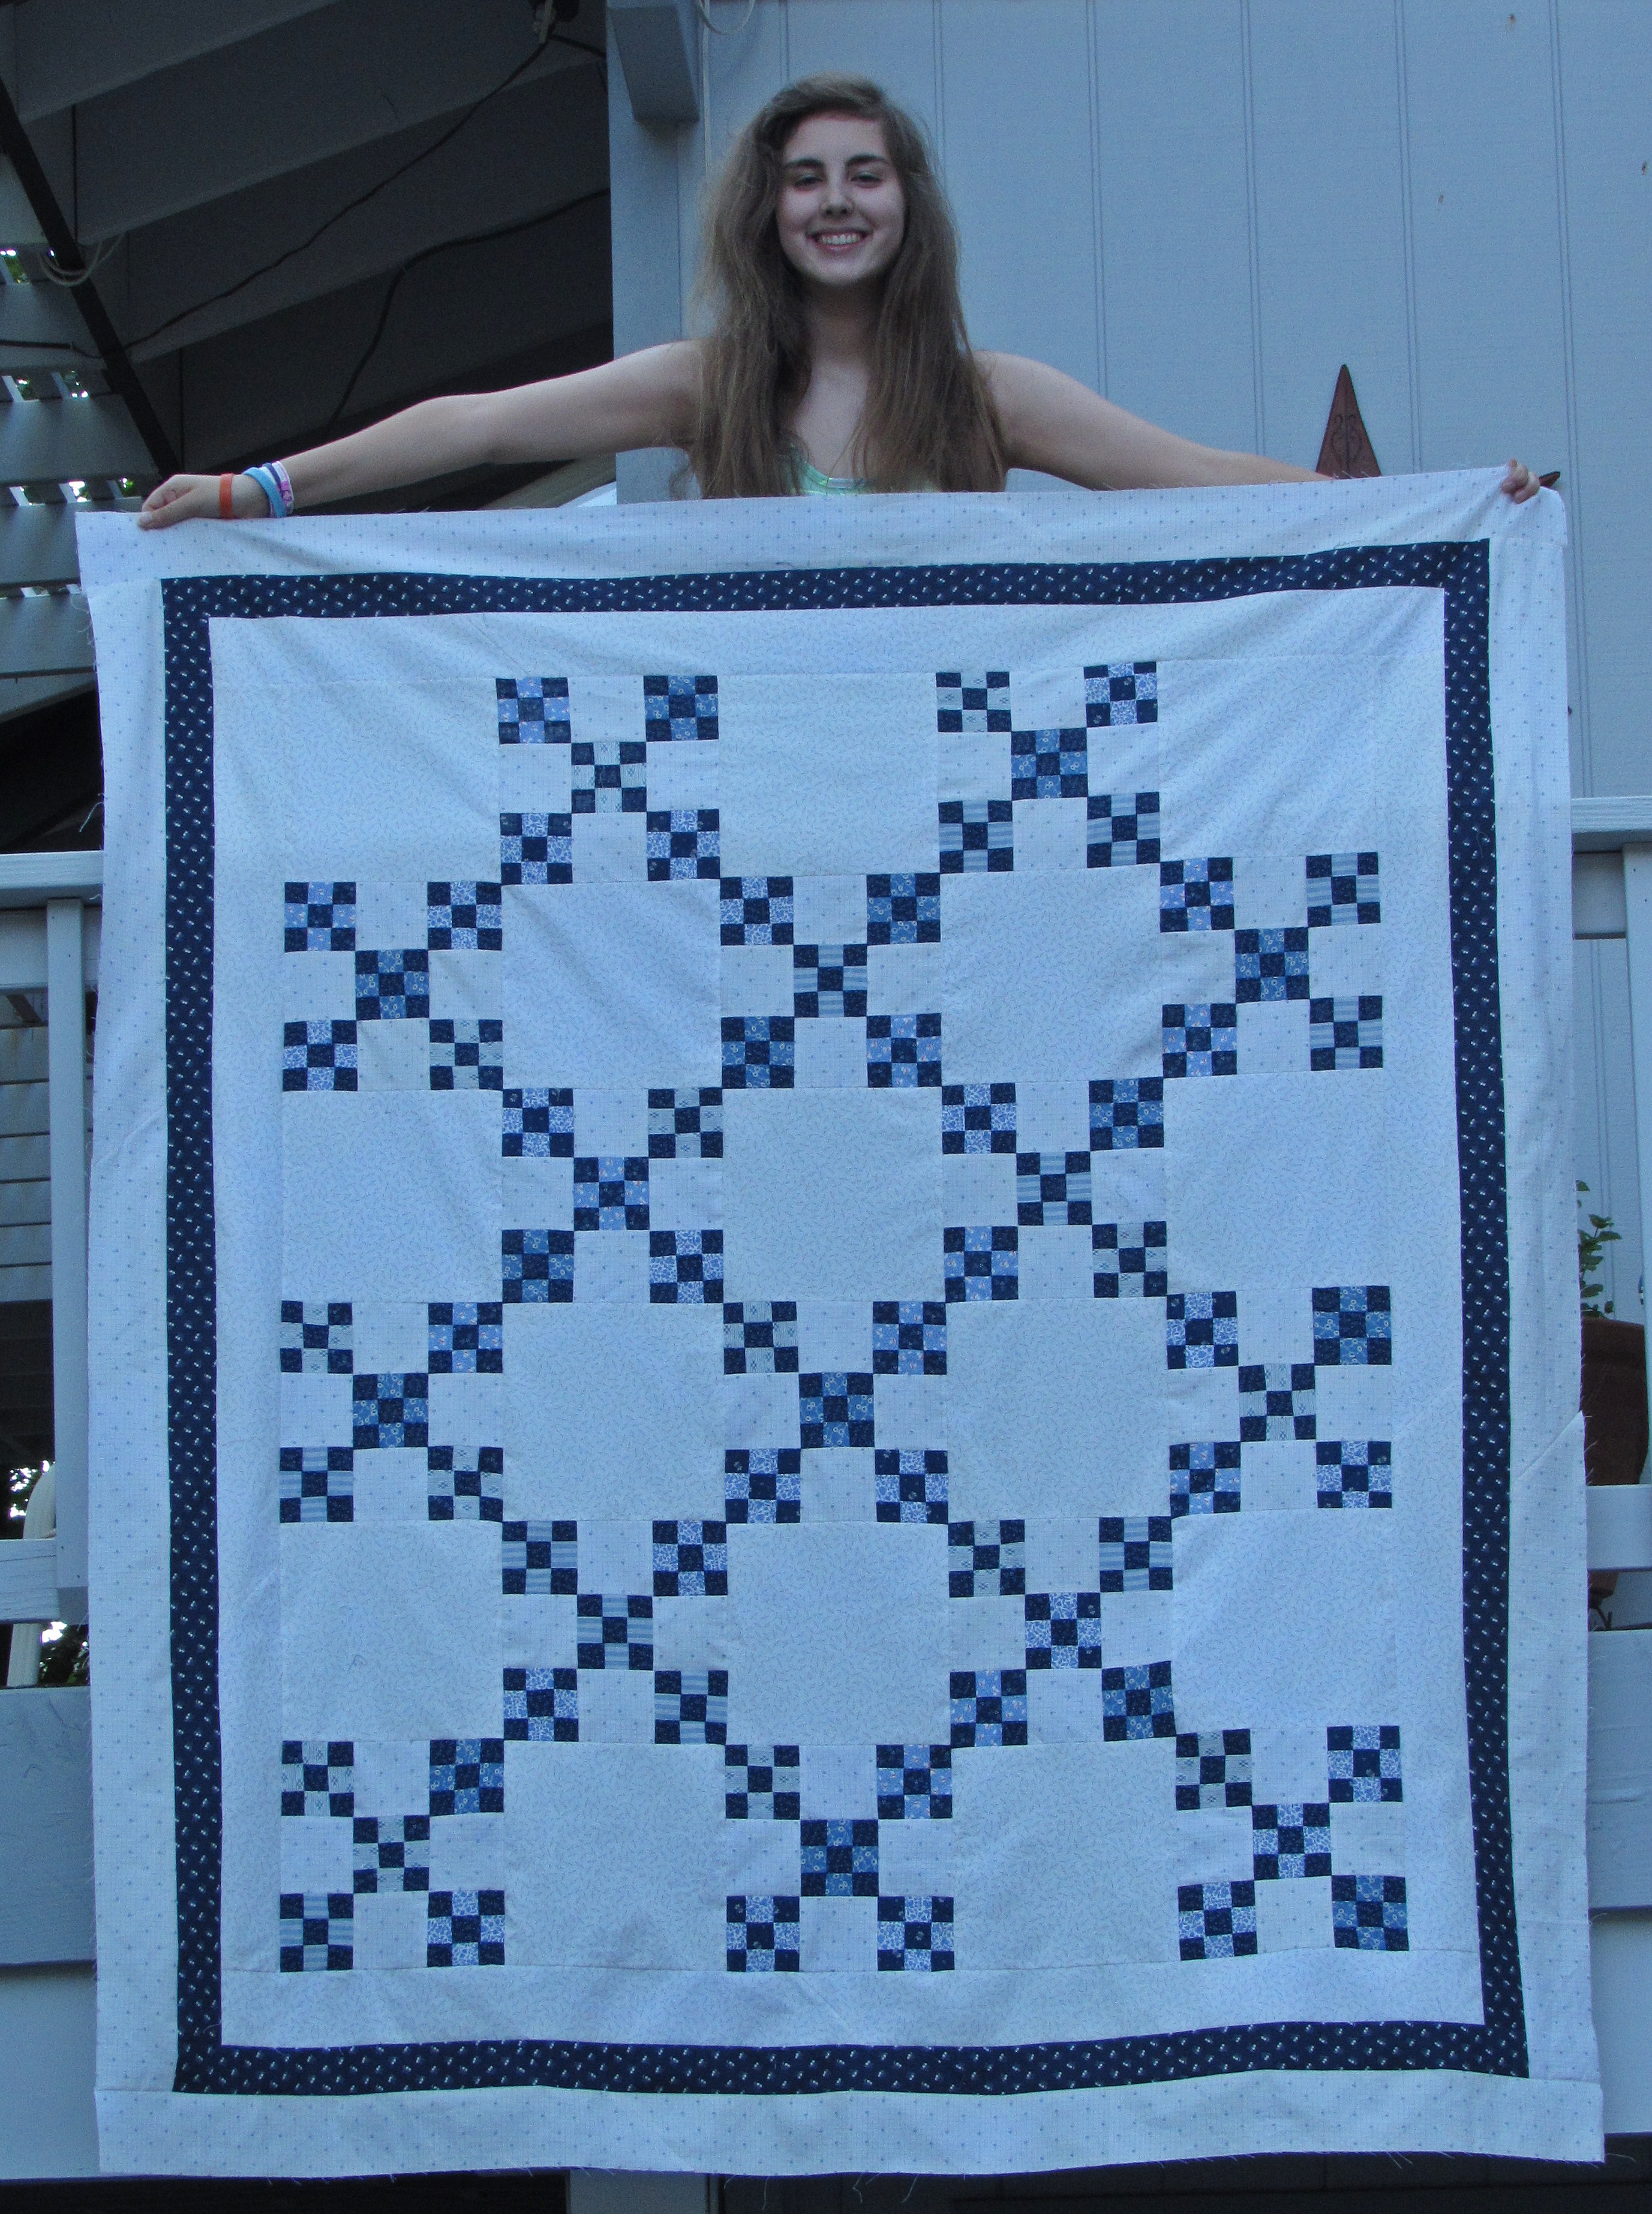
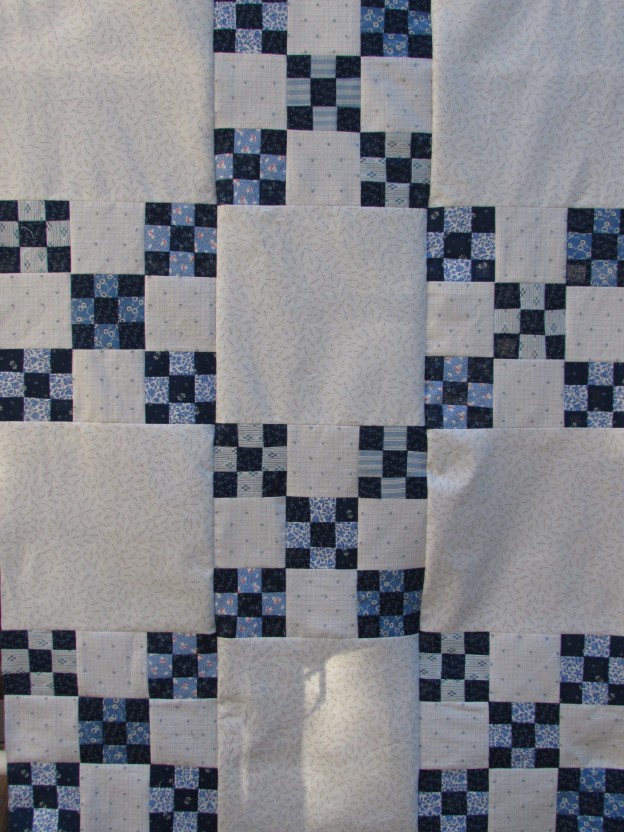
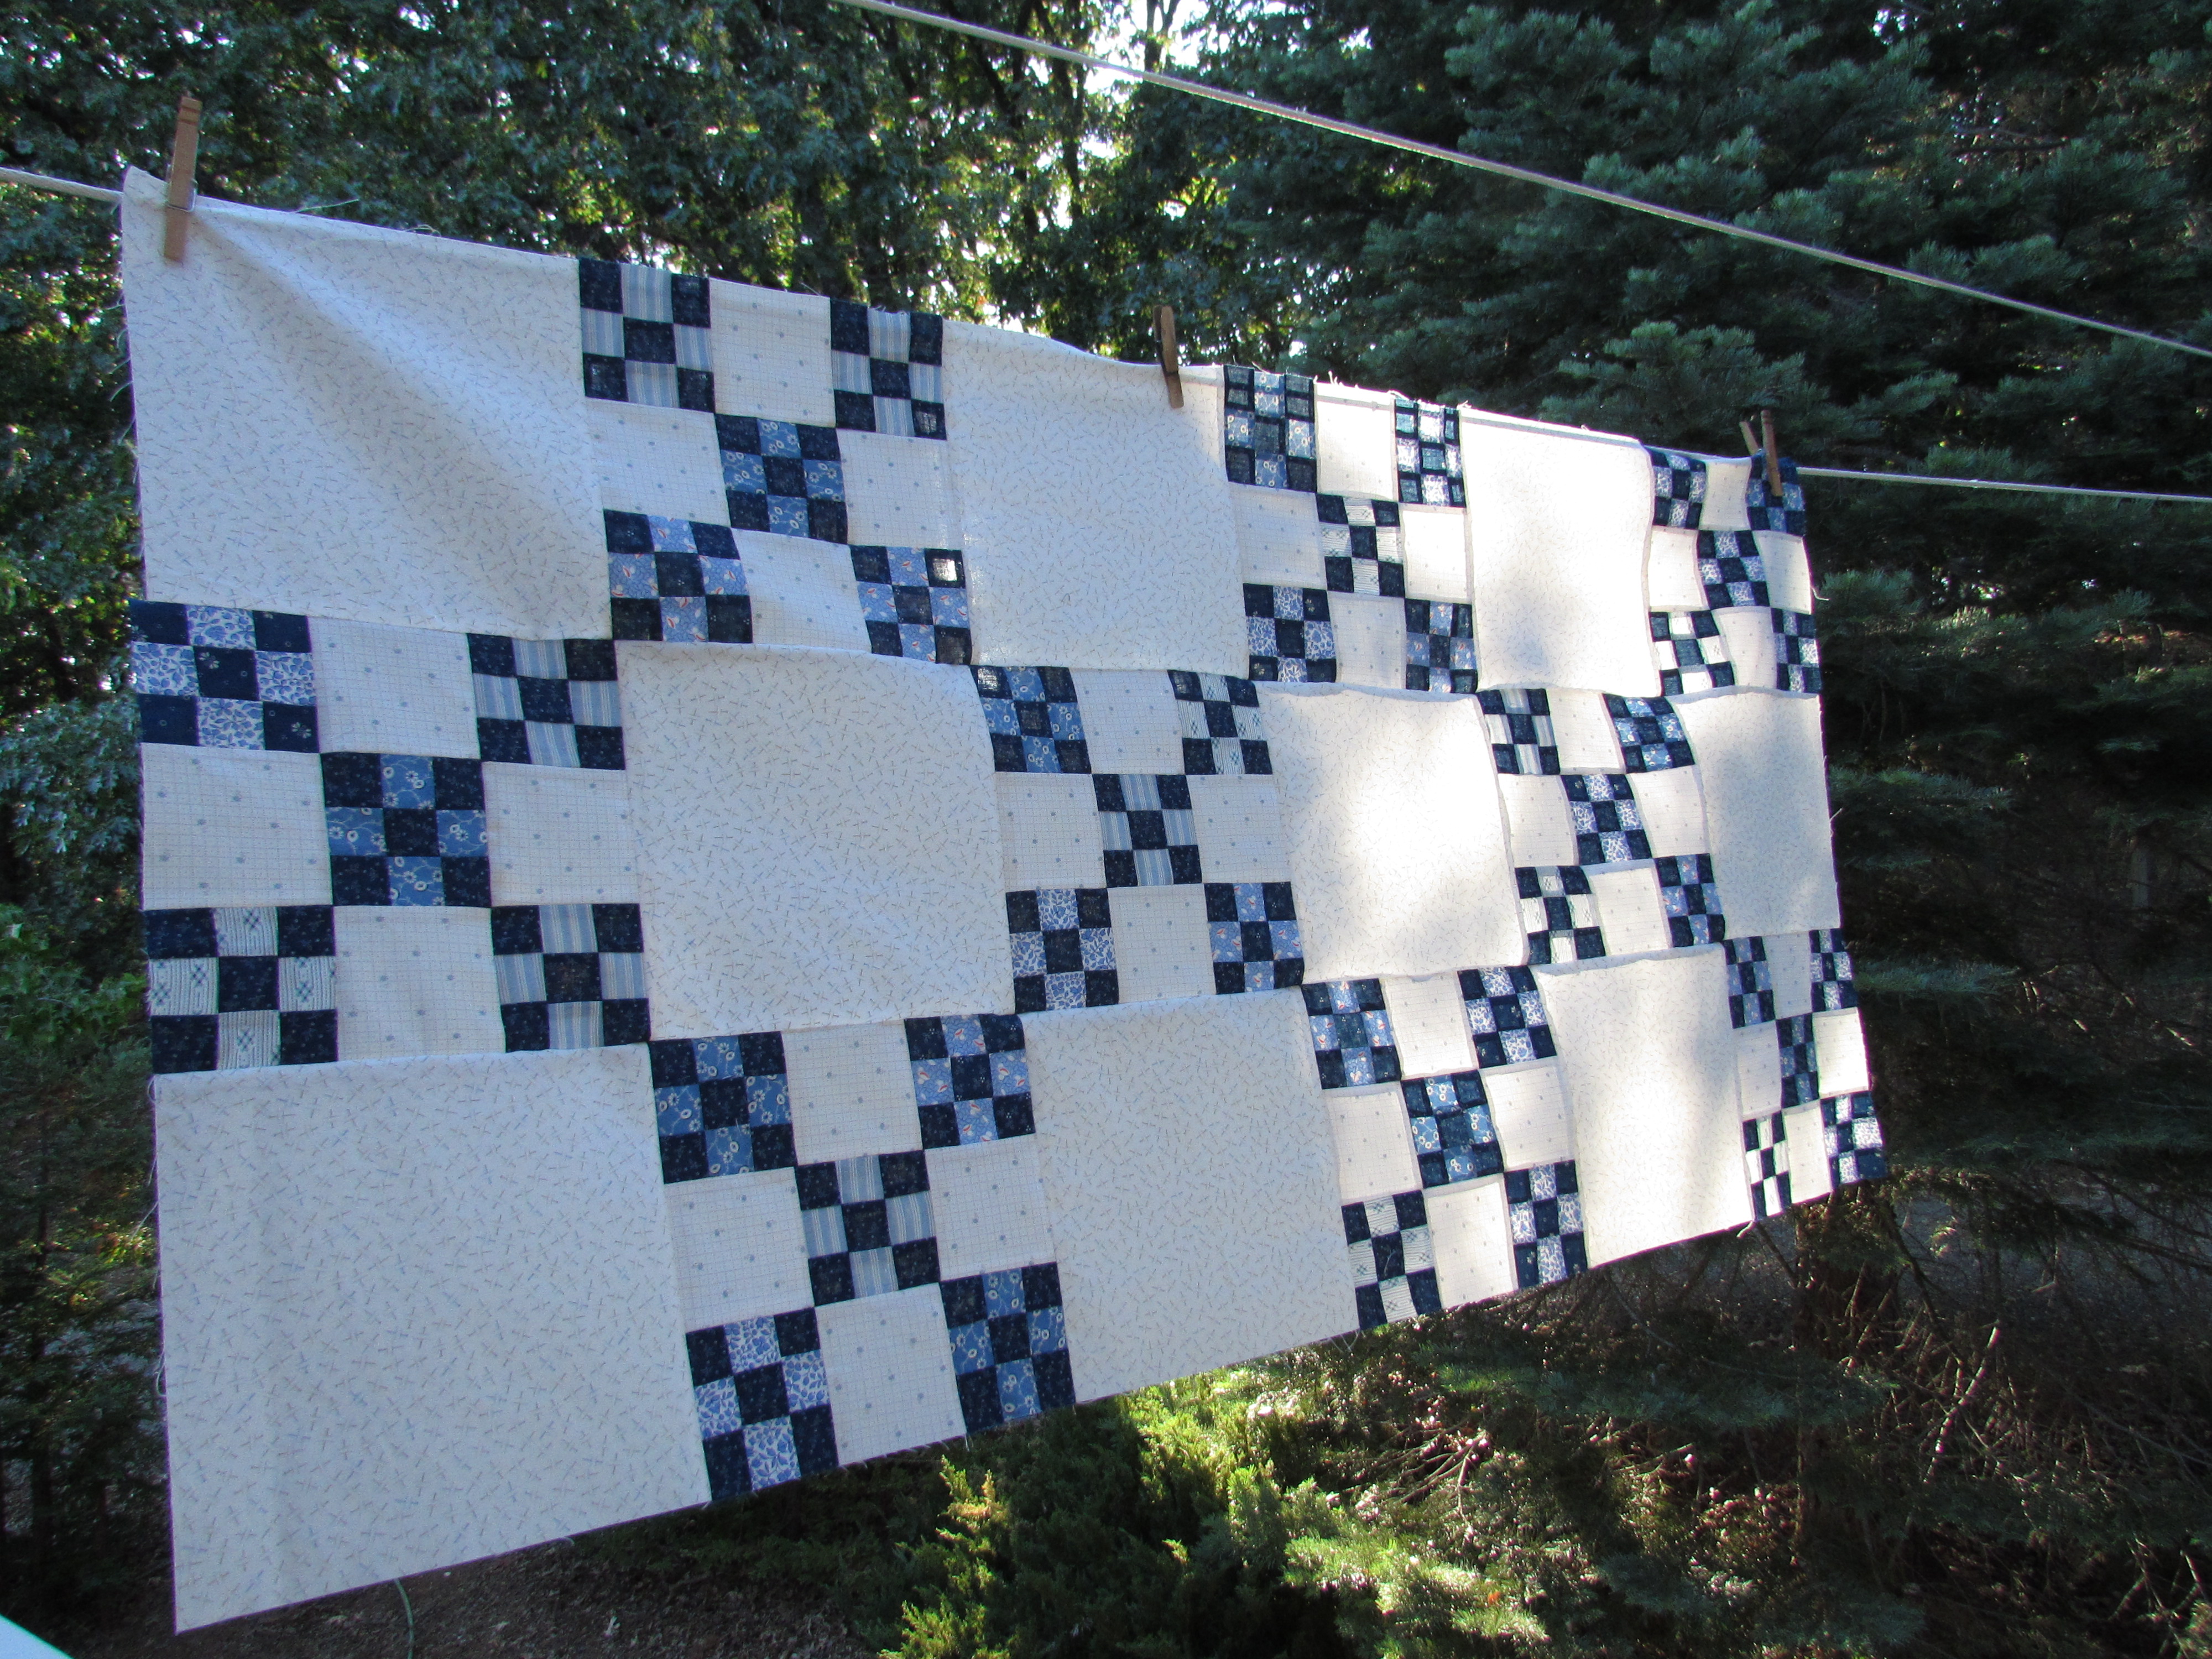
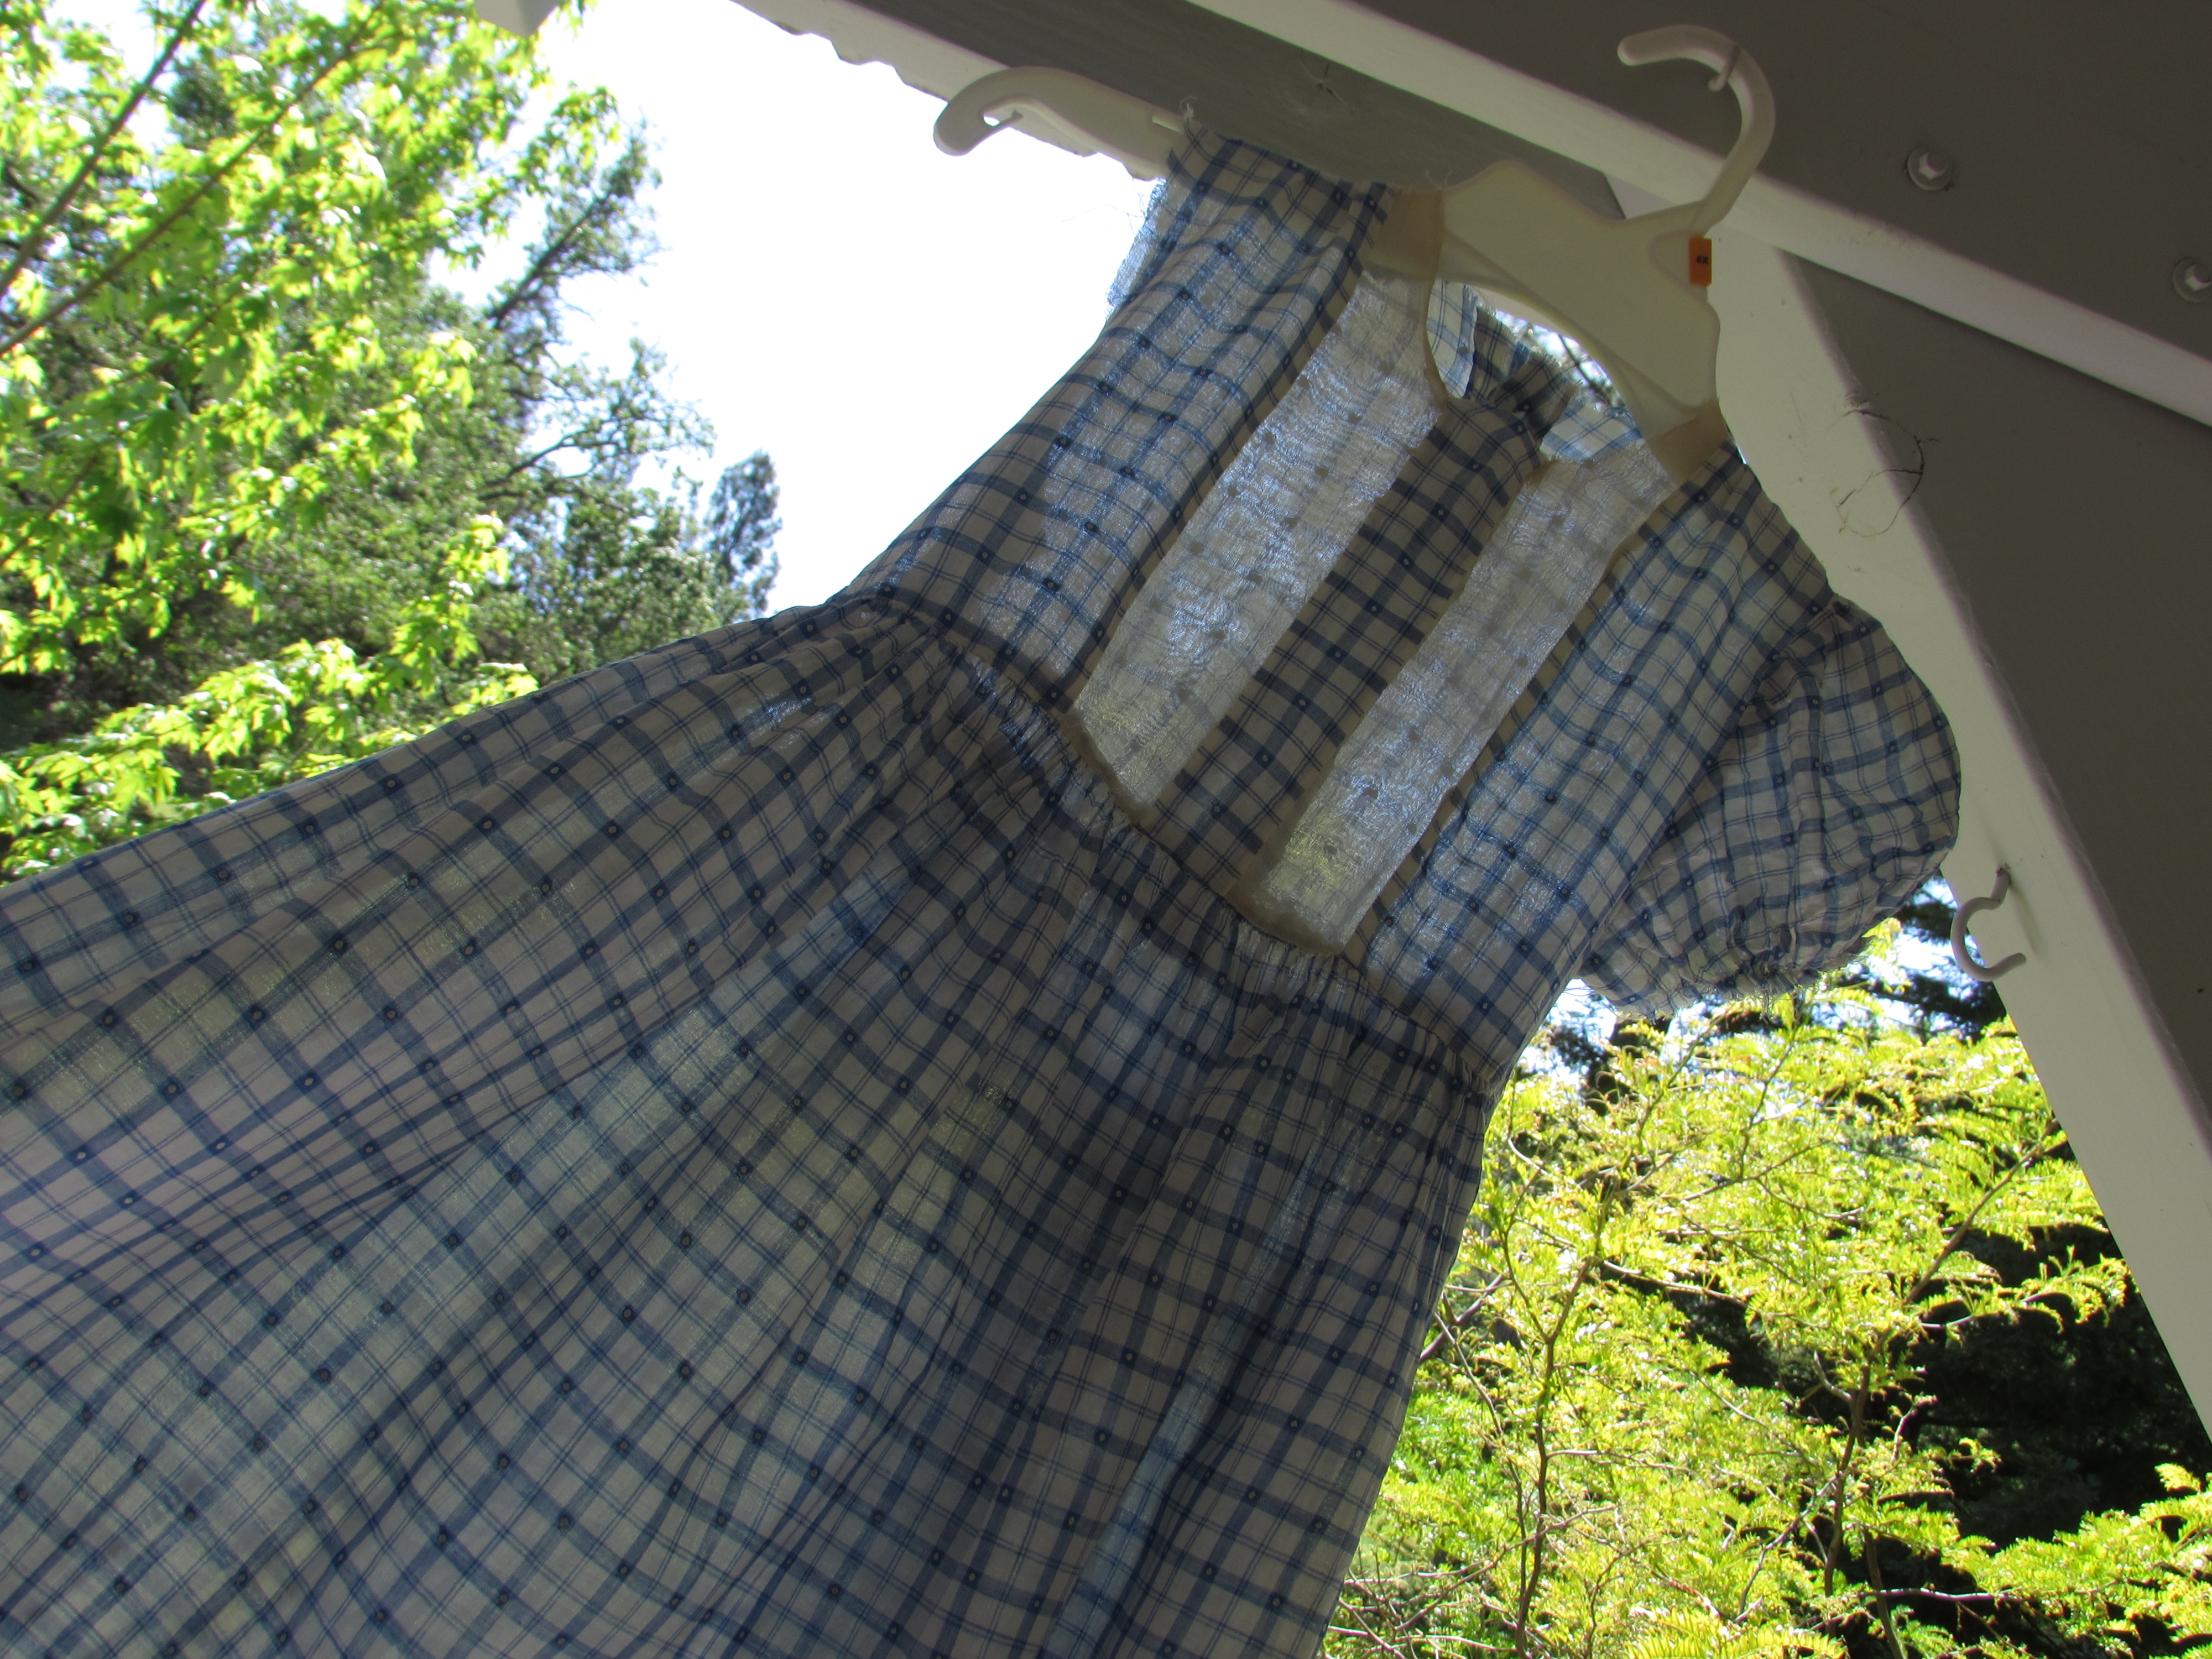
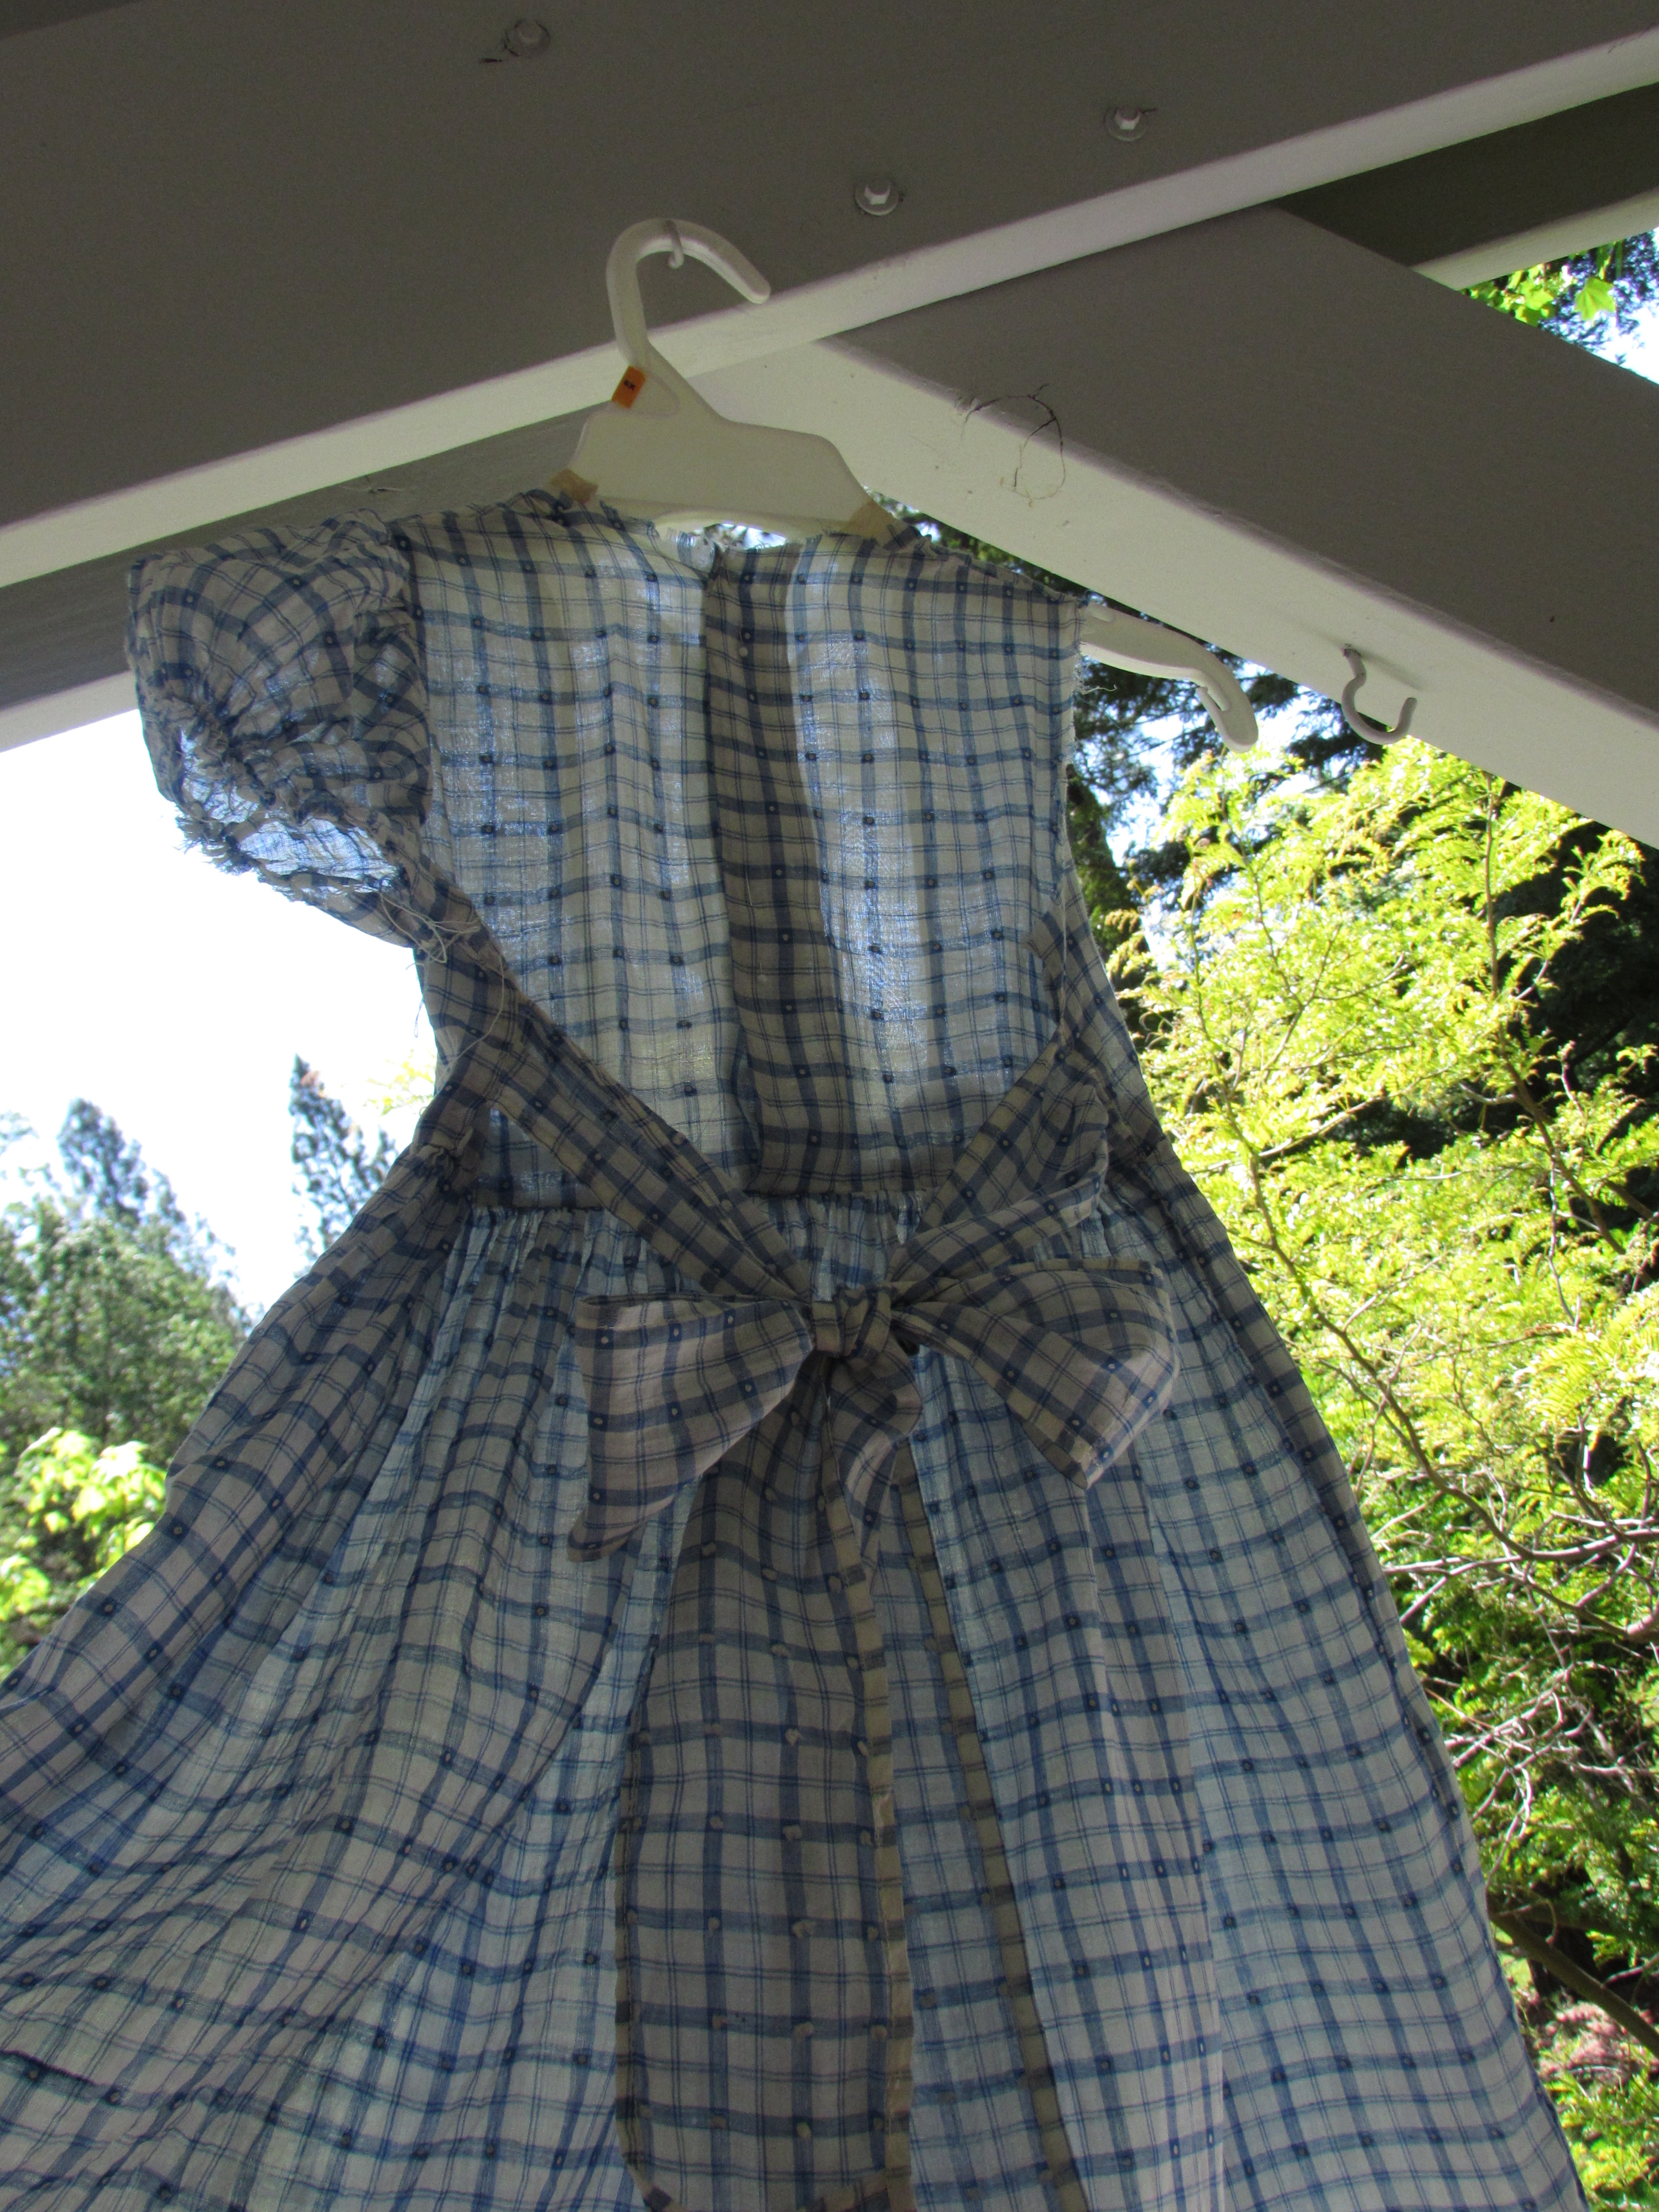
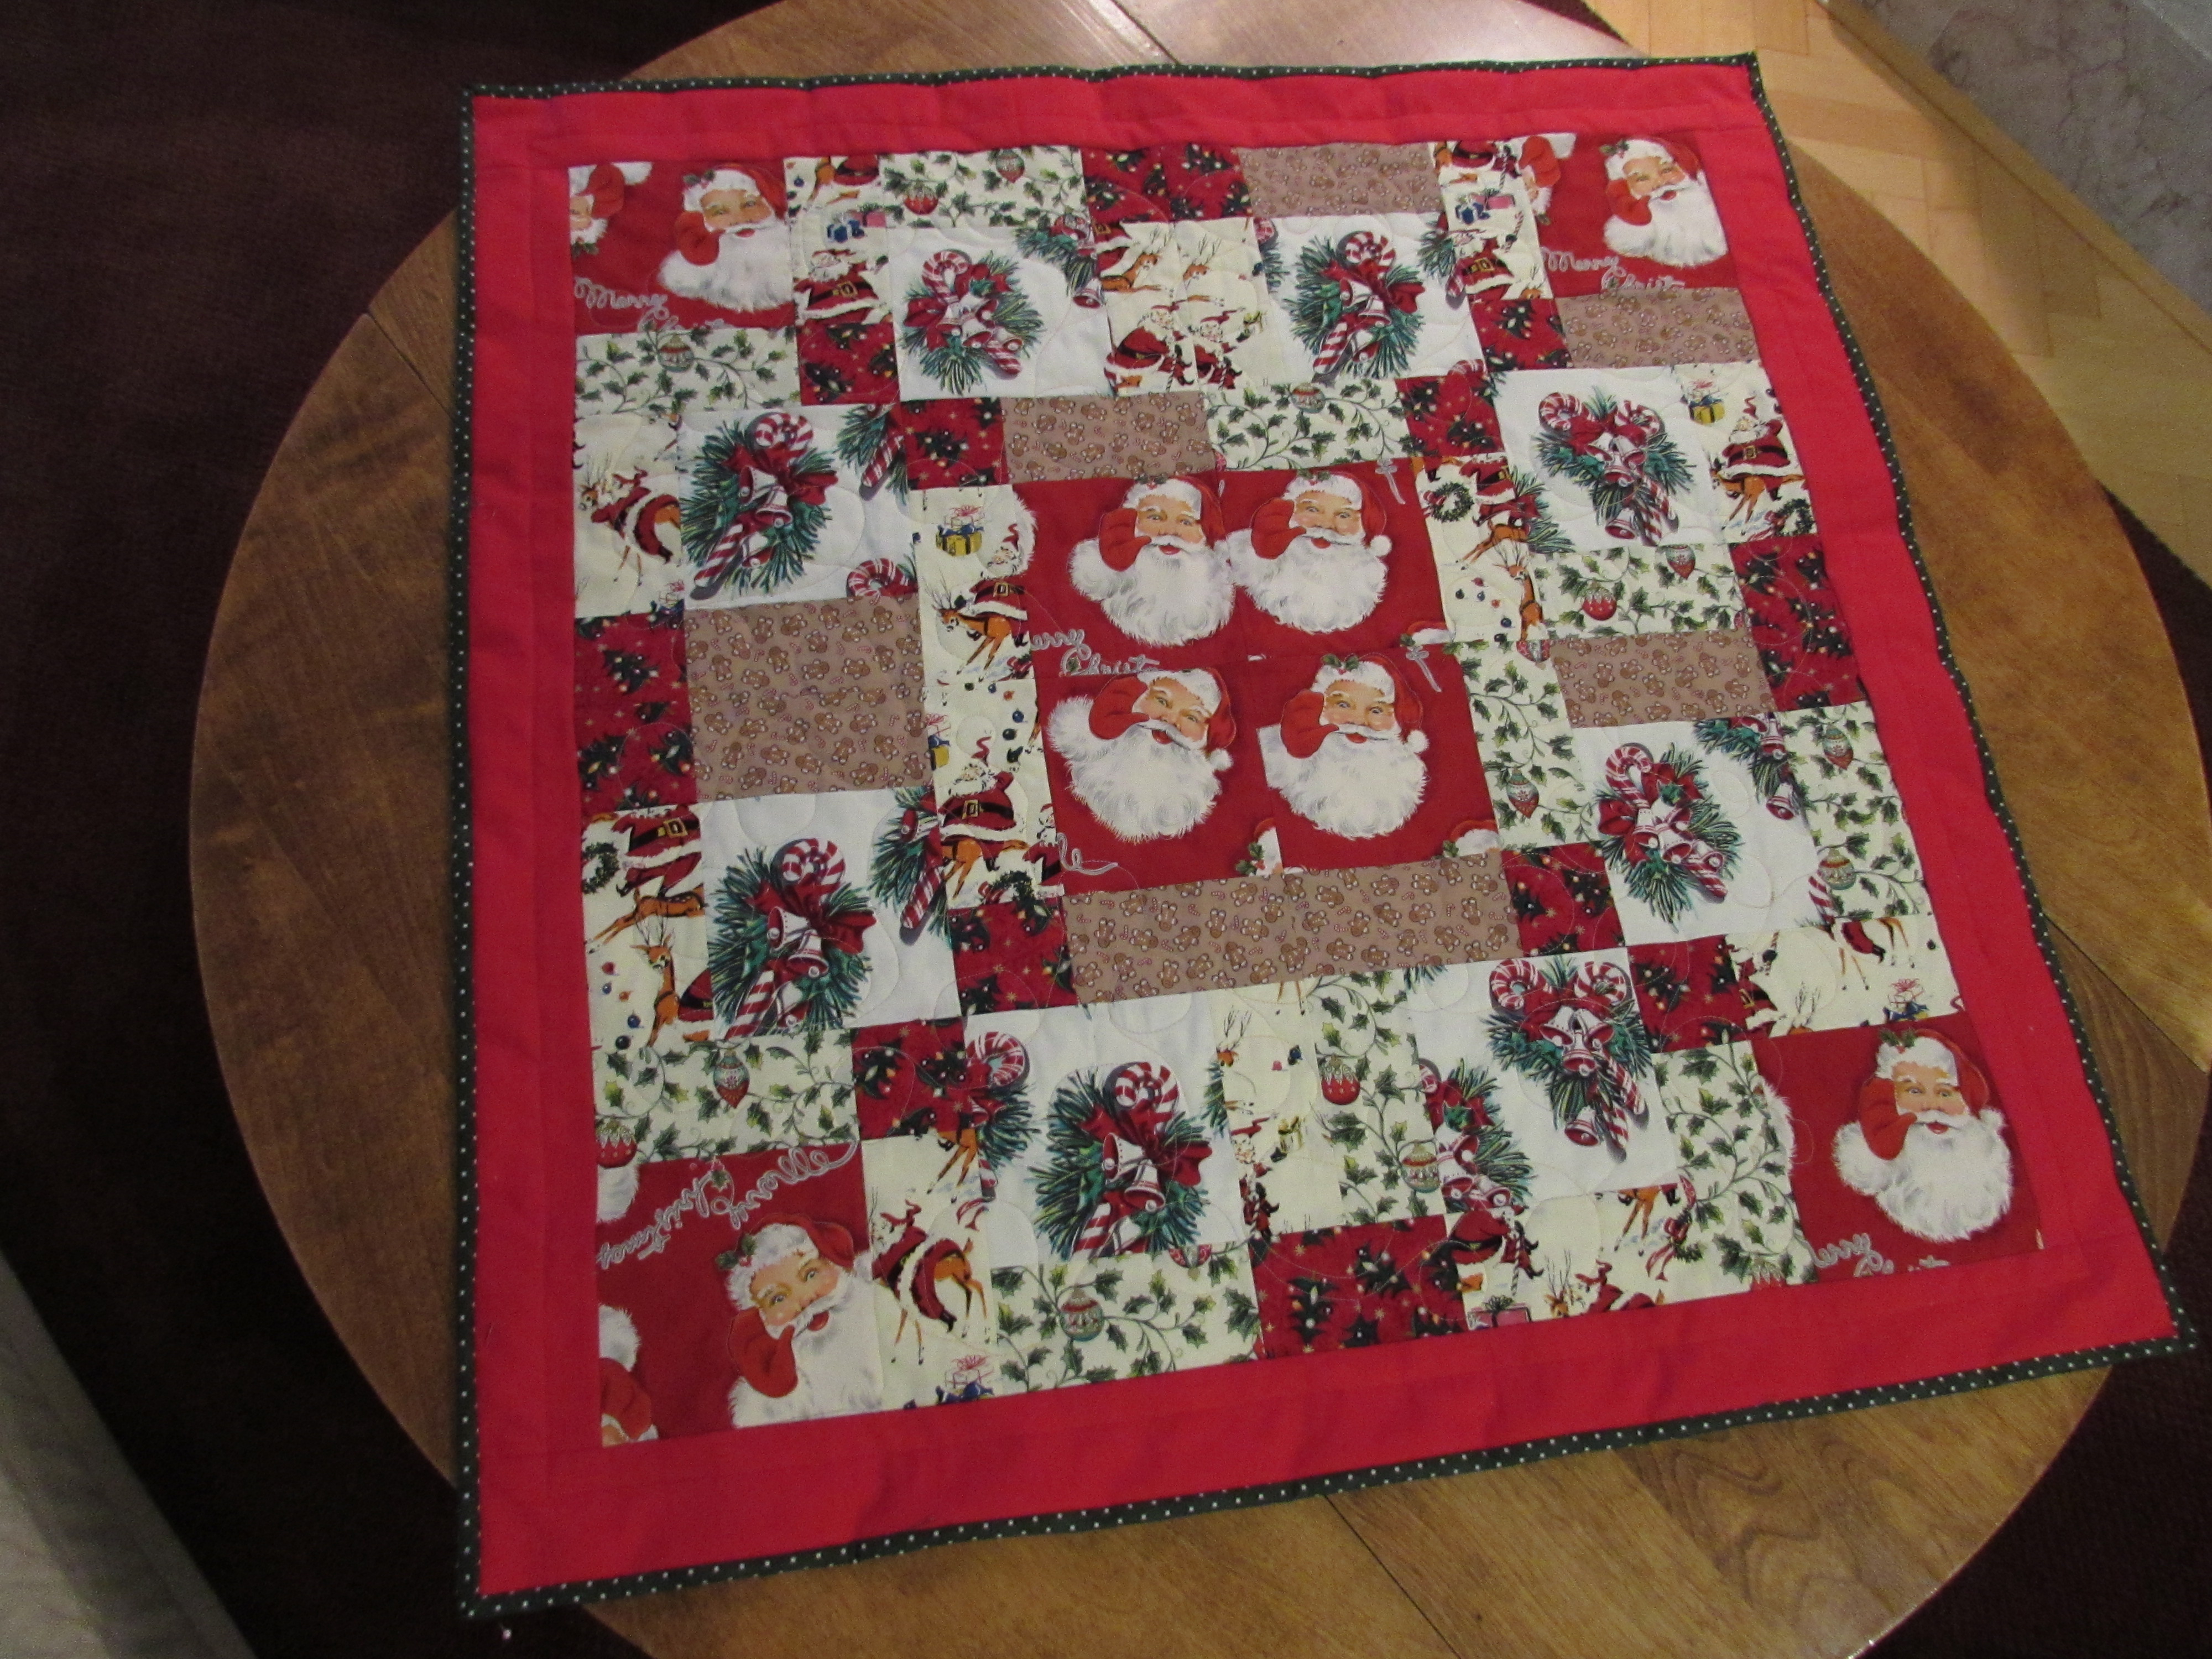
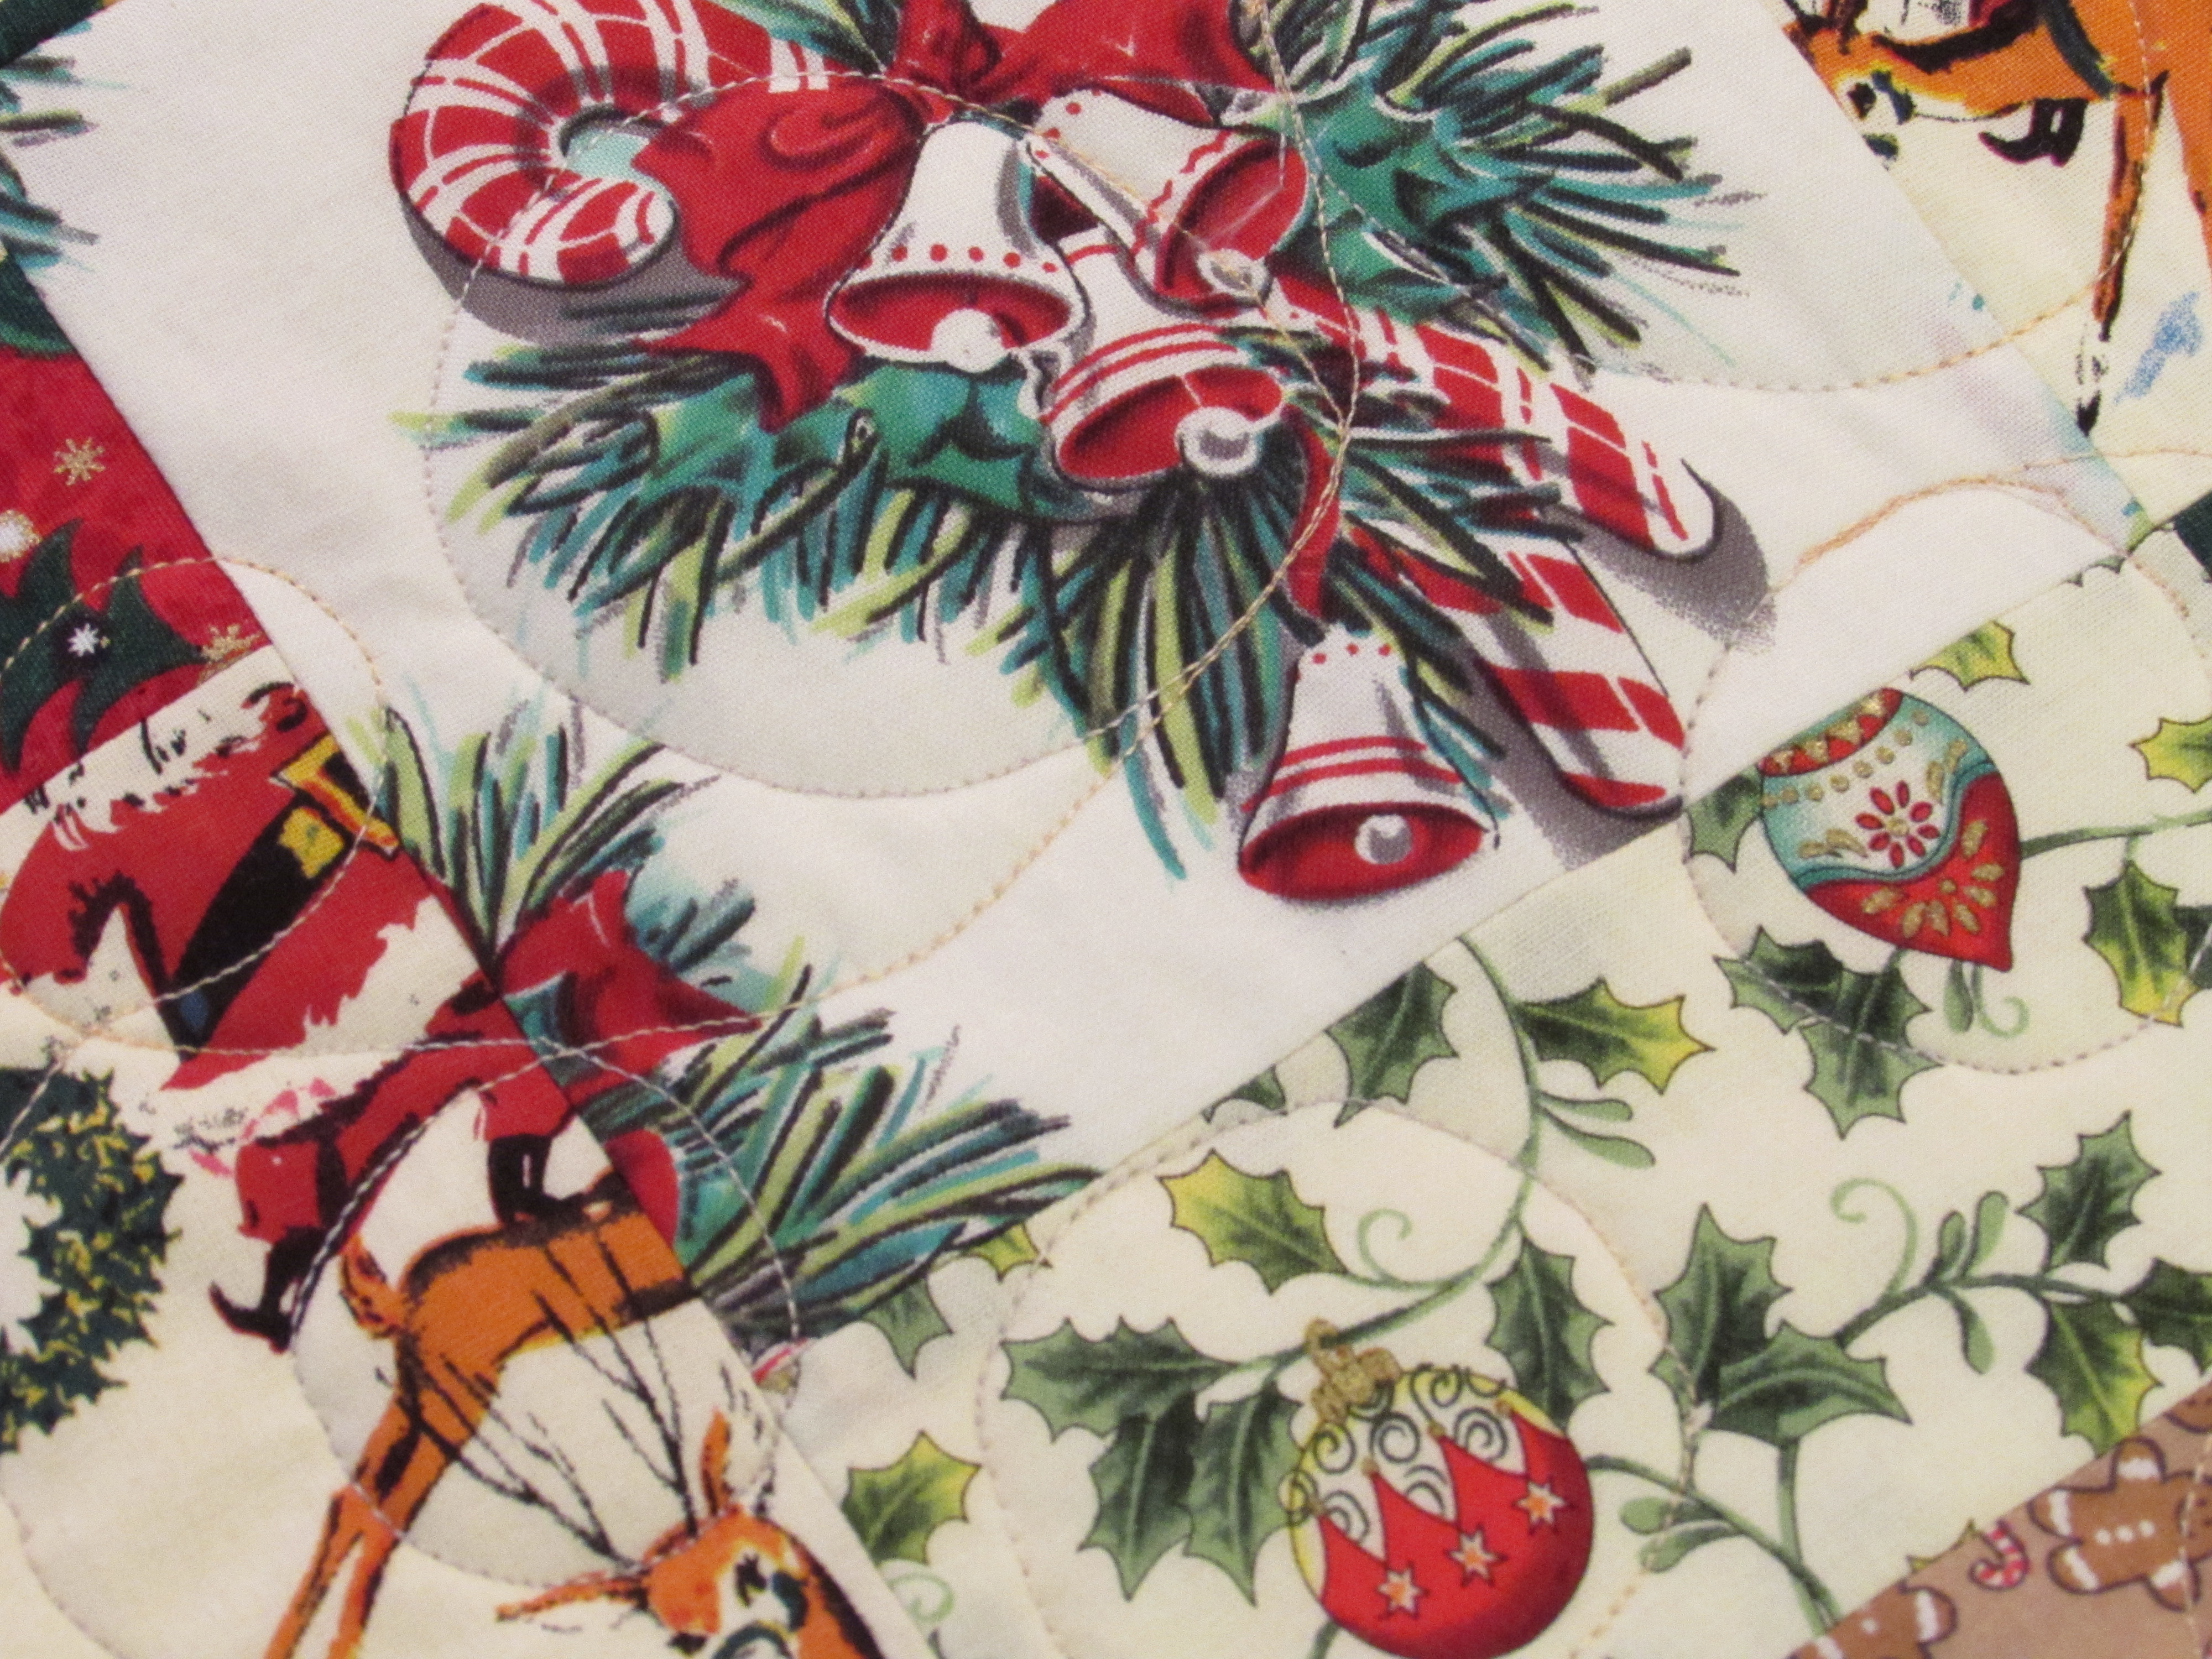
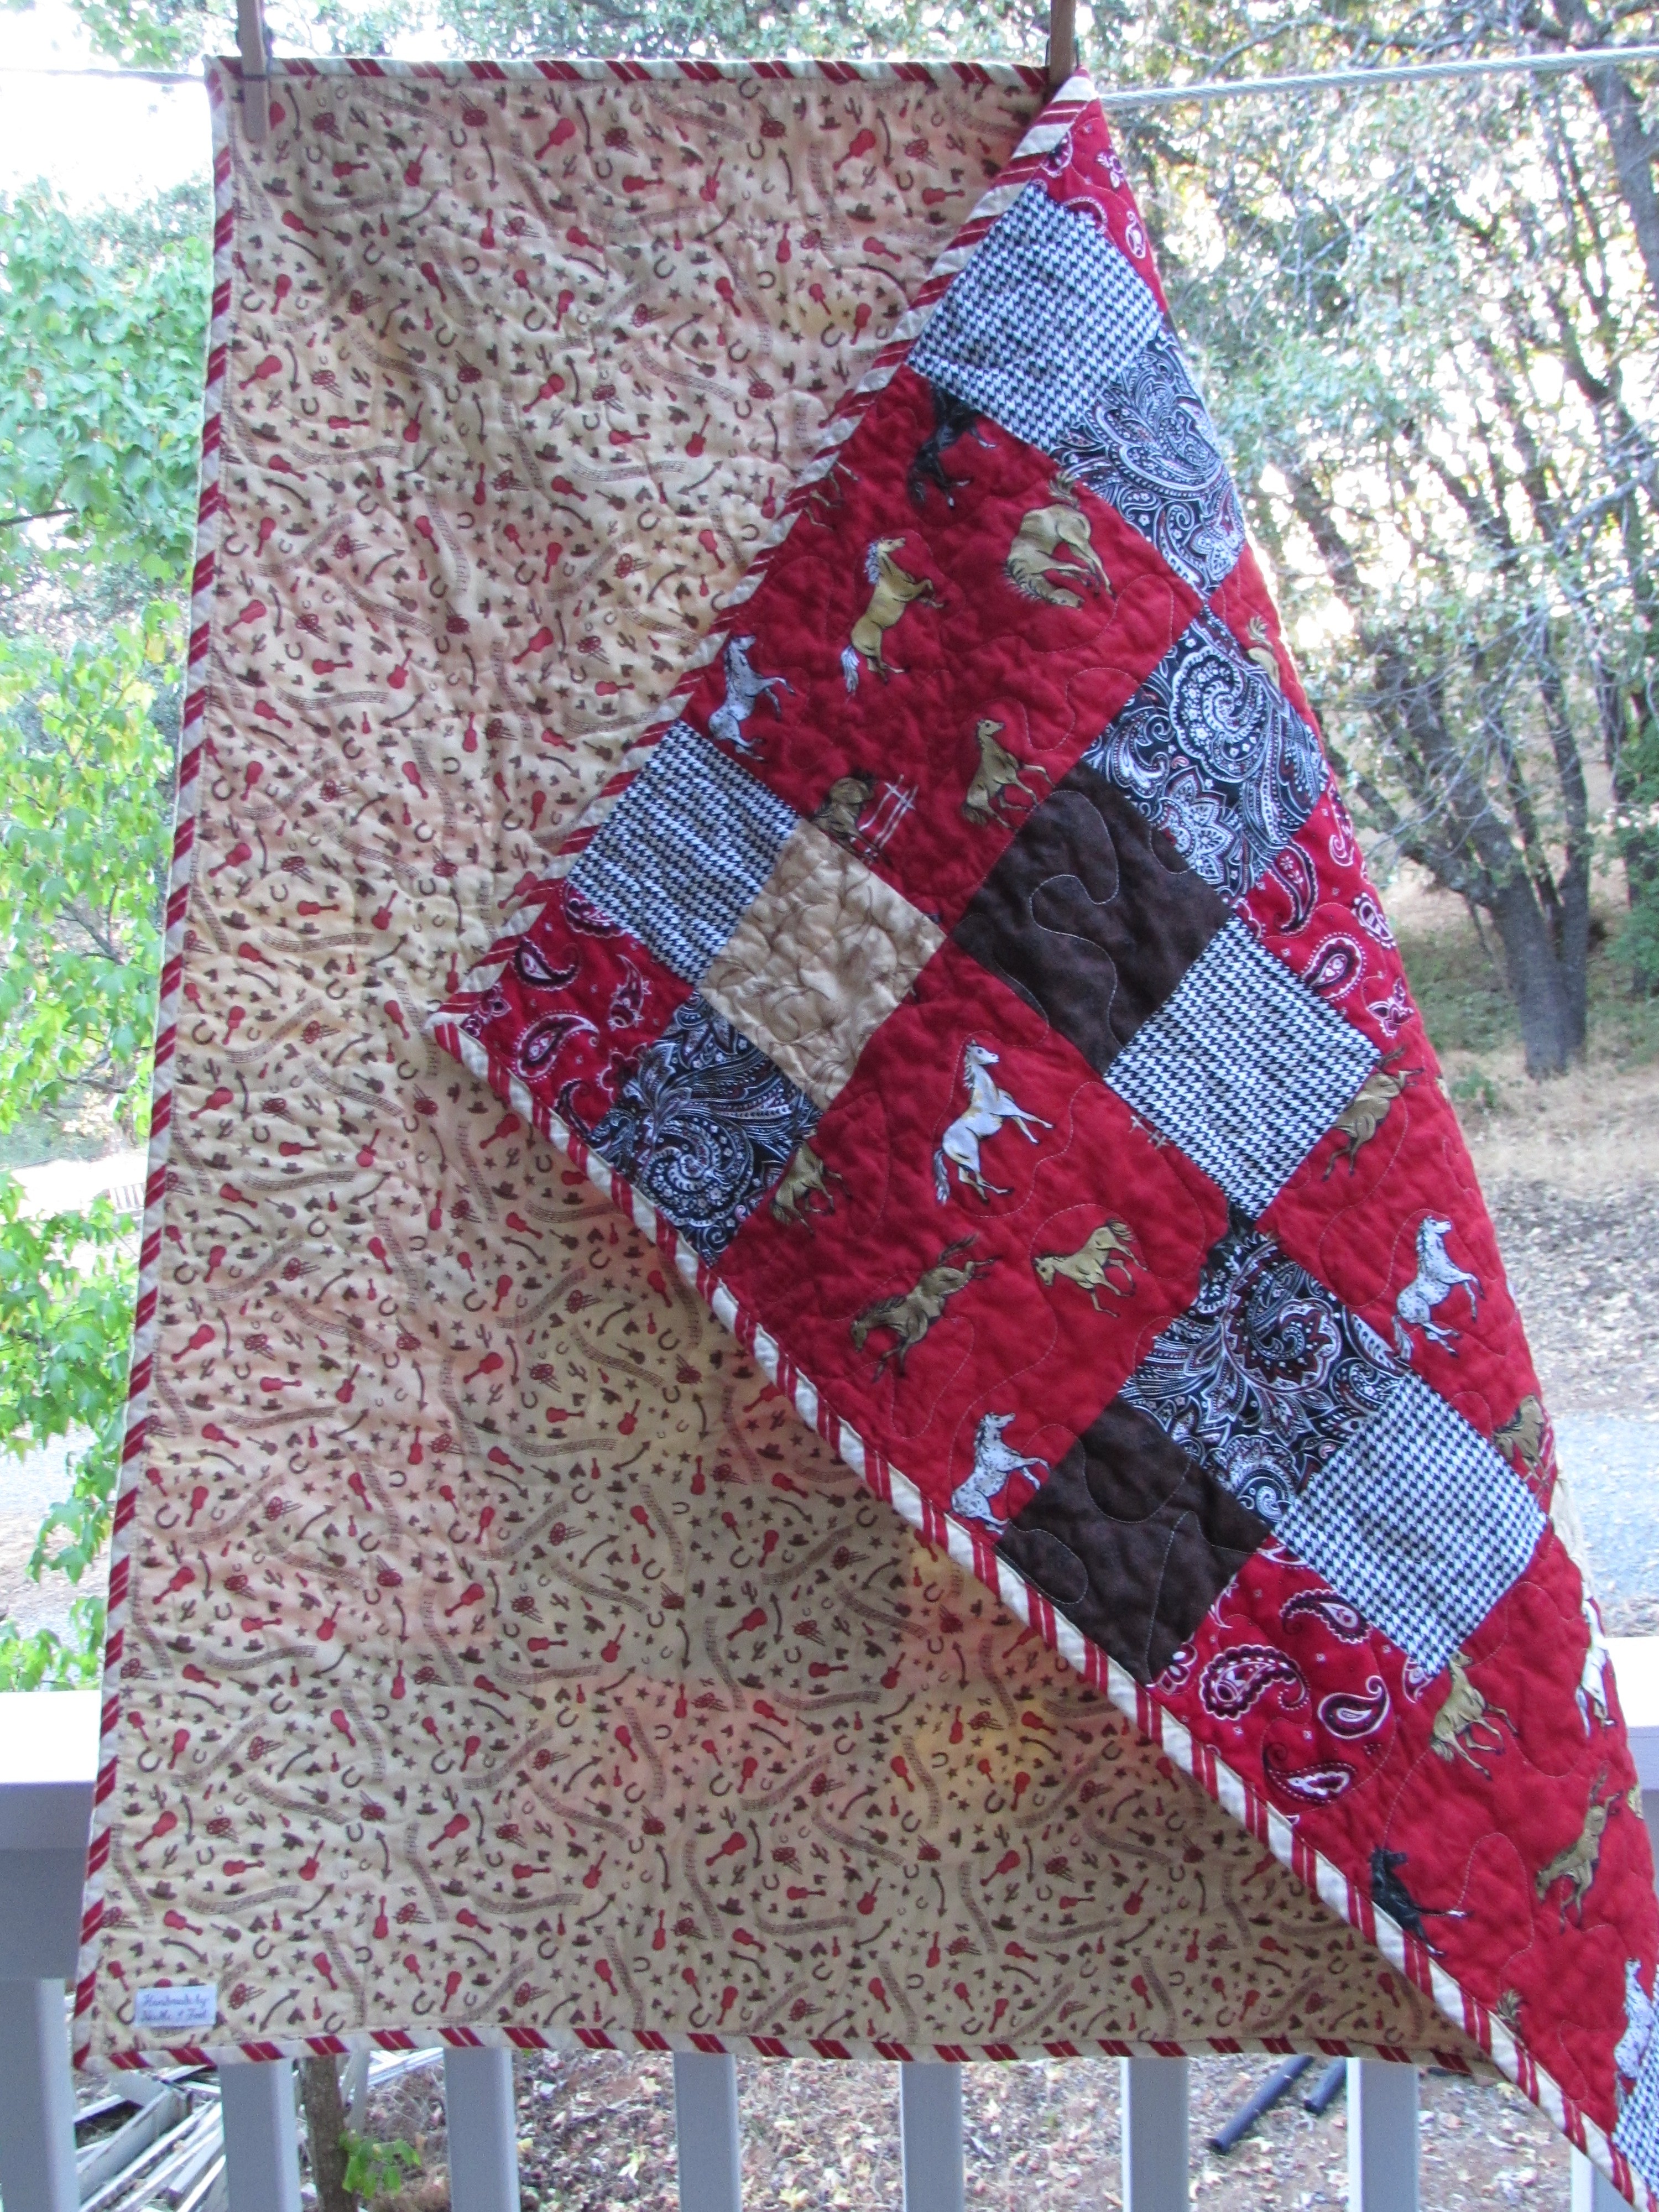
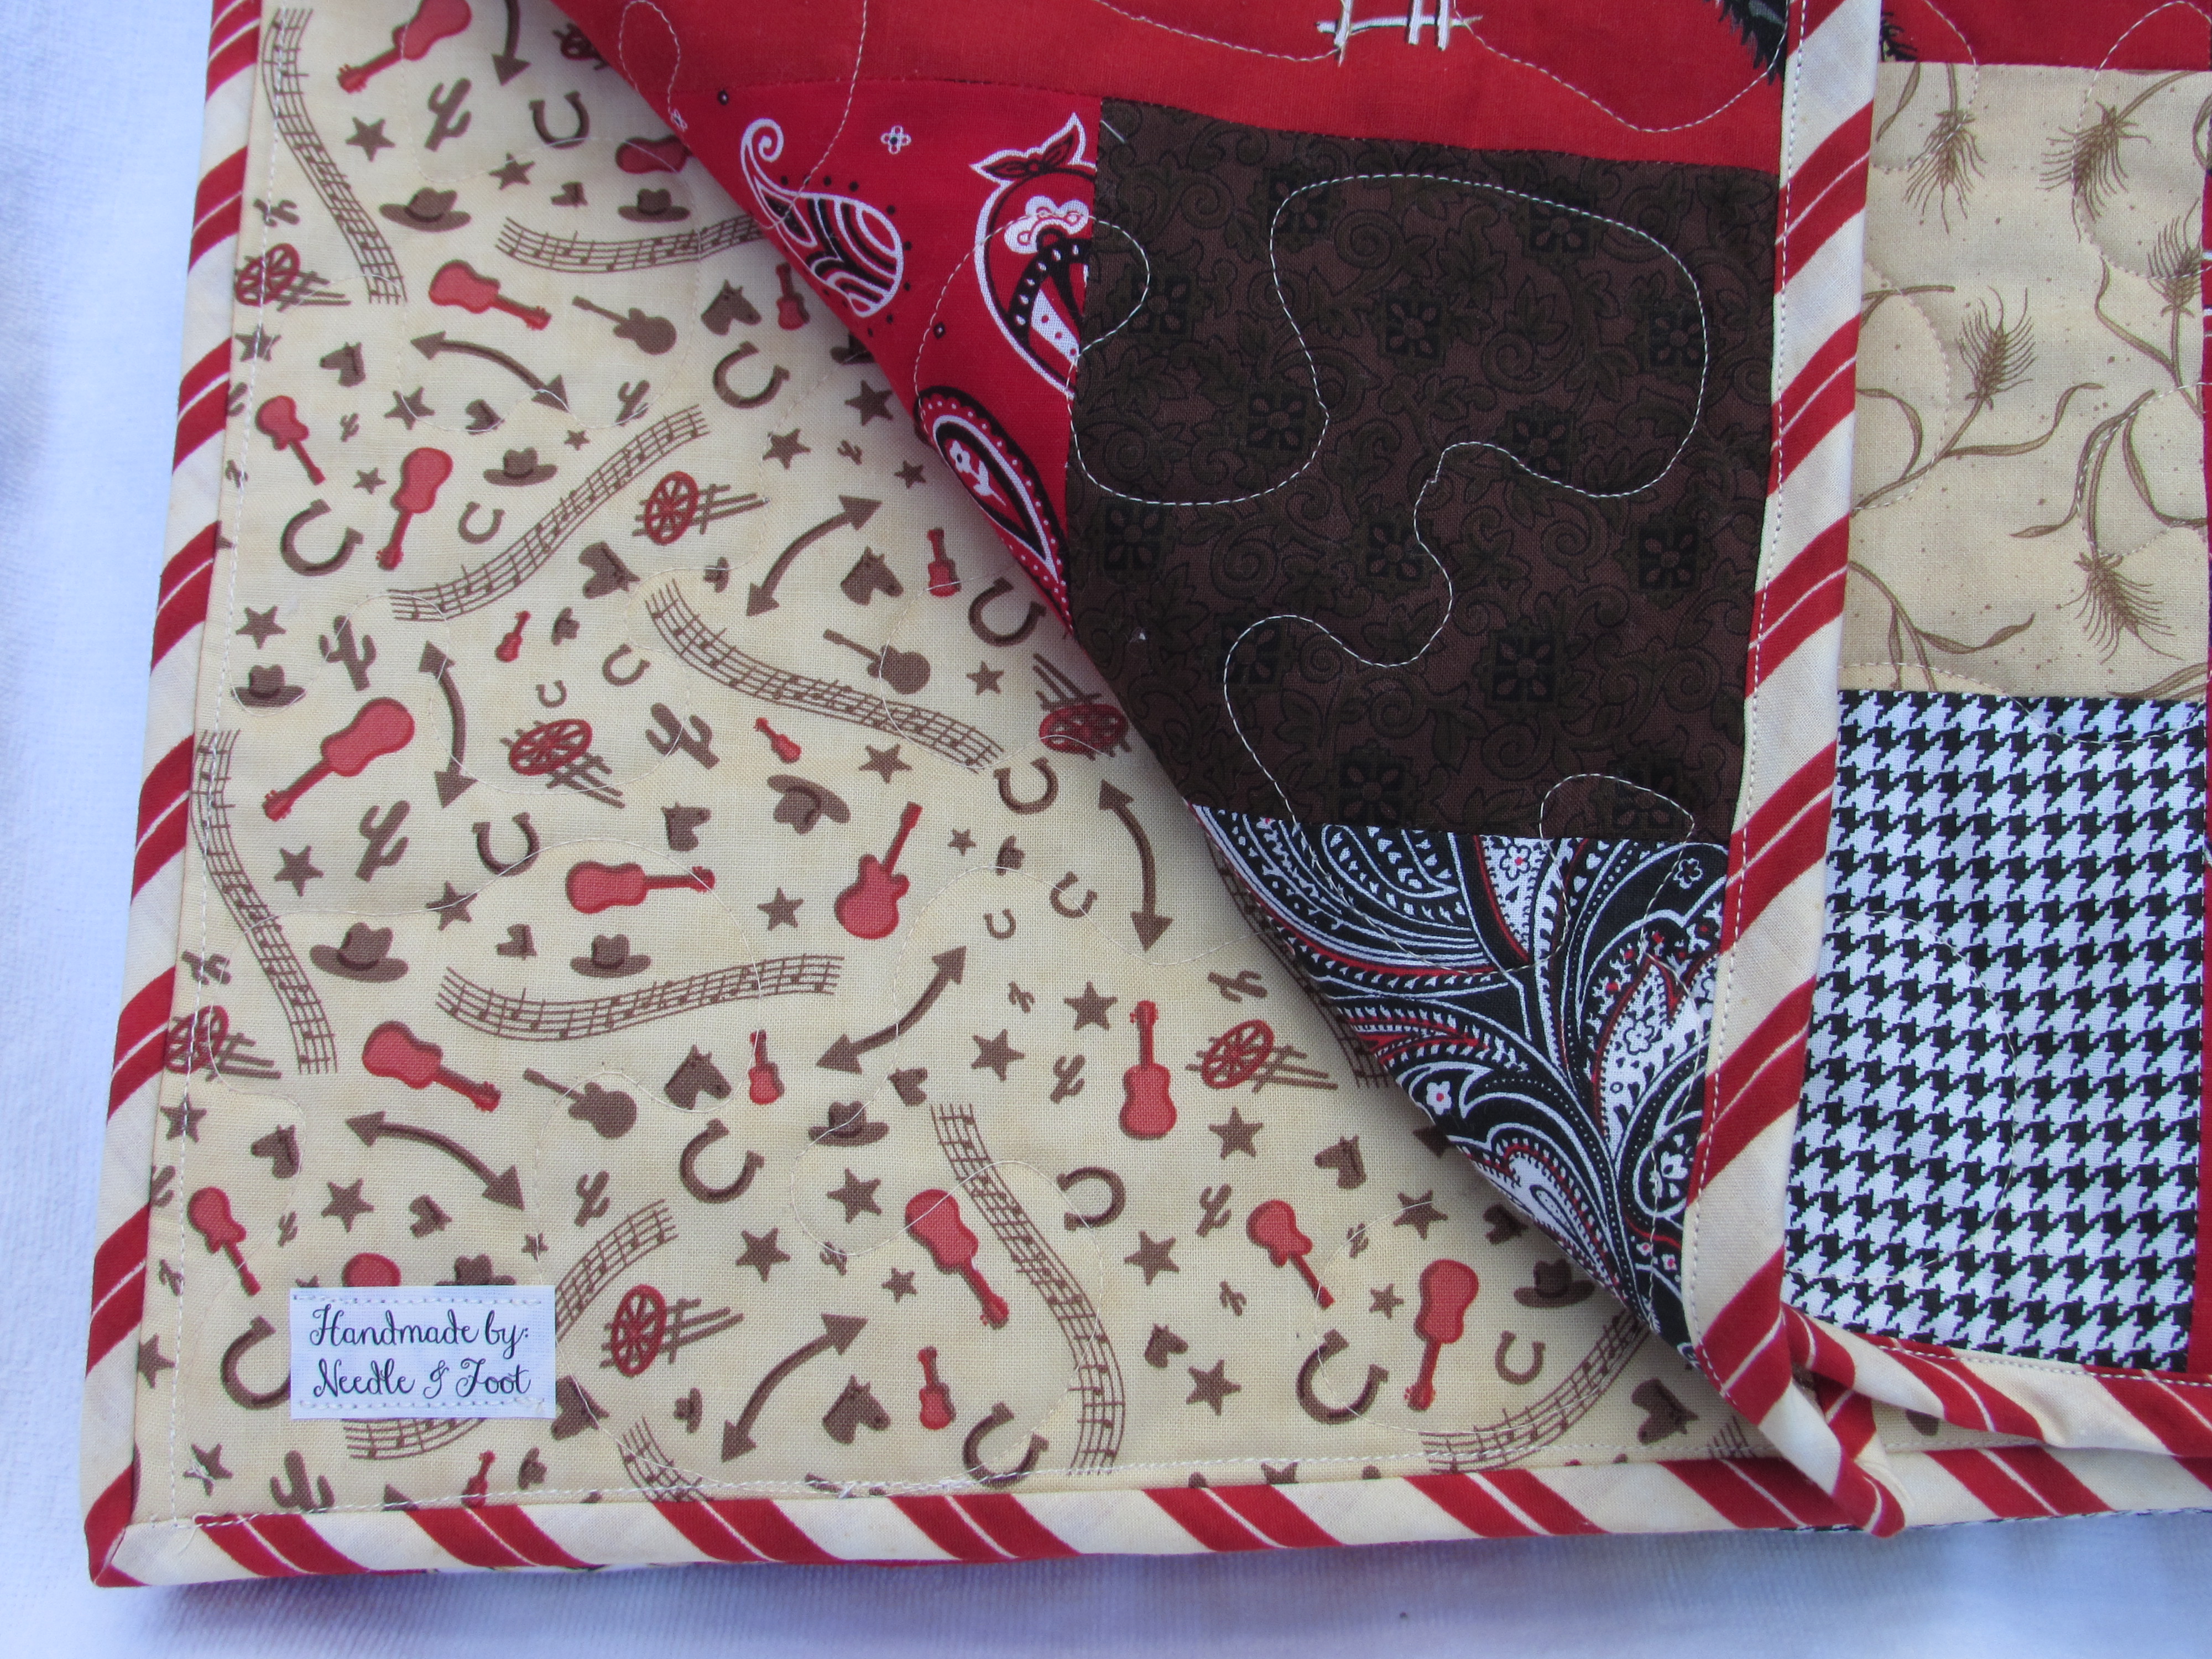
As I was waiting to pay, I saw this little quilt folded up on the counter. Apparently Carol had picked up the center patchwork piece and added borders to it. The little squares are 1 1/2″ and all hand stitched. It had been tied intermittently. I believe it looks like the remaining 1/2 of a quilt – if you look at the pattern, I think it continued into full square with that navy blue having been at the center. I am not terribly fond of the borders that were added. They are filled with puffy batting, probably a polyester. But it was calling to me. I could leave it as is and just give it a wash or I can consider taking those borders off and reworking it. Looking at the fabrics, the patchwork portion was also made in the 1940’s or so.

Julia will be busy this week with the county fair. Hard to believe her time with Leo has come to a close. Why is it that time goes by faster and faster?? Since we share a car, I will likely be home quite a bit which means lots of time to sew. I started a purse for myself a couple of days ago and want to finish that up. The quilting on my friend’s memory quilt is very close to being finished. Those two projects will be the focus for this week. How about you?

A Vintage Finish

Looks like I made it, and with a few days to spare! My ALYOF goal for August was to quilt and bind my vintage double nine patch quilt. Yahoo for setting goals.

IMG_20150827_3699

I had asked readers to suggest ideas for quilting the vintage quilt and was happy to receive tons of suggestions. Thanks so much for the ideas. I decided to quilt a basic cross-hatch over the main nine-patch blocks. Then I wanted to do something different with each of the three borders. My original thought was to do different cable patterns so I bought a couple of cable stencils.

Alas, it wasn’t entirely successful. I started by doing a basic, single cable on the middle (narrowest) border. I had great help with tracing the stencil. Ian was home for the weekend and kindly traced for me.

IMG_2409

Try as I might, I couldn’t relax and just stitch. I wanted to use my walking foot, maybe that was the mistake? The stitching isn’t fluid and I am less than pleased with it. Hoping that a run through the wash (in my NEW washing machine) will make the jitters a bit less obvious.

IMG_20150827_3703

Because of the issues with the single cable, I lost interest in doing a more complex cable pattern so I put the stencils away in the deepest recesses of my desk drawer. I don’t plan on looking at them for quite some time. Instead, I played with some motifs that Lori Kennedy has posted over at The Inbox Jaunt. I chose her Modern Leaf pattern (which I posted about earlier this week.) Because I am susceptible to this sort of nonsense, I wondered if I should use a motif with the word “Modern” in it when I was really trying to go for a vintage look. Jeez… I need to get over myself already. It worked out fine and was very fun to quilt. Because I did the quilting with cream colored Mettler thread, it is hard to see in the pictures. But I am much happier with it than the single cable. (I love the fabric with those little pins. Really cute.)

IMG_20150827_3702

For the final, outside border I did basic straight-line quilting which I just eyeballed using the side of the walking foot. Simple and clean. I backed it with a blue print and as you can see, I used one of the cream background fabrics as the binding.

IMG_20150827_3704

One small concern that came to mind is that I have a six inch gap between stitching lines on the cross-hatch. The batting said I could space the quilting with as much as an eight inch gap. However this is likely the widest I have gone and it seems sketchy to me.  Any input on that? I could still add lines to the body of the quilt if need be. If I split the difference between the existing lines, I would have a three inch gap. Thanks for any ideas you might have.

IMG_20150827_3701

Overall, I am happy with the finish. This is a more traditional quilt than I normally make but I enjoyed it. My next project is more modern and uses Kaffe Fassett yardage and jelly roll. I am chomping at the bit to get started on it so stay tuned.

Linking to my favorites:  Let’s Bee Social, Finish it up Friday, and Sew Bittersweet Designs.  Take a peek at these sites – there is a lot of great work out there!

Double Nine Patch Update

Hey everyone! I finished the vintage double nine patch quilt top. Yay for staying with it and getting it done. It is a good size for a lap quilt. Finished, it should measure out to about 60″ x 70″. I am really happy with it and look forward to getting it basted and ready to quilt.

IMG_20150716_3530The quilting decision is an important one due to all of the negative space that this quilt has. My FMQ skills are improving but aren’t stellar. What to do?? My thinking is that this sort of traditional quilt calls for FMQ over straight line quilting (I usually associate straight line quilting with a more modern project). Because this will be auctioned off at a 1940’s themed fundraiser in October, I feel like I need to do some decent quilting on it. I need a foolproof idea! Please help me out here and send ideas my way! Do I do an easy all over stipple? If so, do I stipple the main portion and do something different on the borders or just cruise right over the borders too? I have plenty of time to decide. I don’t have any batting just now (well, other than the piles and piles of batting scrap – I could probably stitch those scraps together and make a piece large enough for a king size quilt). I need to spend some time on Pinterest and hop over to a few sites (The Inbox Jaunt and The Freemotion Quilting Project come to mind) for inspiration.

IMG_20150716_3532

One more thing…. Totally off topic here, but yesterday my quilt model and I went to the movies and saw “Inside Out”. I had high expectations for this new Pixar film since the reviews are glowing. Yikes, I was disappointed. Both of us kind of shook our head on the way out, wondering what the hype is all about. I found it really preachy – sort of like they were forcing a lesson down my throat. Neither my daughter nor I could figure out what age group this was aimed at. The plot doesn’t seem suitable for early elementary school ages and it seemed very trite for older kiddos.  Did I miss something? Maybe I wasn’t in the mood for it? Just curious what others are thinking about this movie.

Linking up with Crazy Mom Quilts and Needle and Thread Thursday. Links to these sites are available at the top of the page, under link ups.

Double Nine Patch Progress Report

Well, I am happy to say It have made great progress on my vintage double nine patch quilt. I have all of the blocks done and have been sewing the rows together. It worried me to set this as my goal for June but it appears I’ll be able to finish it this week and we are only at the middle of July!  Just never know.

Here are a few rows – they are not yet pressed though.

IMG_20150715_3522This quilt has been fairly mindless to create. Lots of repetition in making the smaller nine patches and then sewing those into the 9″ blocks.  For the most part I have been happily listening to music and stitching away. I usually have either music or a podcast on when I am sewing, unless I really have to focus on the pattern. This week I indulged in lots of oldies. I had my playlist set to include music from the early 1970’s (which would have been junior high and high school for me). Carole King, Van Morrison, Cat Stevens and The Lovin Spoonfuls, to name just a few.

Music doesn’t seem to distract me when I am sewing but TV is not such a great idea. When I was cutting the smaller background squares for this quilt there was an episode of “The Office” playing. (Julia recently discovered this show.) It was so distracting – I think that show is so funny. I ended up cutting 3″ squares instead of 3 1/2″ squares. Dang it. I have tons of the fabric so that wasn’t a problem but now I have a pile of 3″ squares ready for another project and I had to spend the time to cut a new stack in the correct size. Clearly watching tv doesn’t work for me when I am sewing or cutting.

The quilt will have two borders of the cream fabric with a narrow border of navy blue in between them. If you remember, the small nine patch blocks are made with the vintage fabric that I received last spring. I need to look through the vintage stash to see if I have a big enough piece to make the navy border. I think I need about 1/2 yard and doubt I have a piece that big, especially since the vintage fabrics are 24-36″ wide. Looks like a trip to my LQS is on the agenda for tomorrow, darn it. I am really excited to sew the rows together and put the borders on.  Hoping to have a quilt top finish for you by end of the week.

So, what’s on your playlist when you are sewing??? Do tell.

Linking to Lorna at Let’s Bee Social and Connie at Freemotion by the River.  Links to both of these parties are at the top of the page, under Link Ups.


Vintage Collection, Part 2

Last week I wrote a post about the amazing gift of vintage fabrics I was given by a woman I met up in Downieville. There is so much to the collection that I decided I would divide it into a couple of posts. Here we go with part two! Again, this is post is a bit longer than usual.

I was up at the house in Downieville one day last week. While I was there, I visited with a few of the women in the quilt guild. When I told them about this gift, they were all smiles. Knowing my love of vintage pieces, this fabric had found a good home. I asked about the history of the woman the fabric originally belonged to. They gave me a bit of information. Her name was Cornelia but everyone called her Nela. She had two daughters (one of which was the person that gave me the fabric.) Her husband, Dewey, was the sherrif of Downieville from sometime in the 1940’s to the 1960’s. I like having this bit of history. Kind of nice to be able to imagine where all of these little lovelies came from.

As I mentioned last week, included in the bags of fabric were these little bundles. Nela took all the pieces of a particular fabric and rolled them up, tying them with a strand of that same fabric. I have been unrolling the bundles and have been surprised to find she had taken apart “ready-made” dresses, probably to use the fabric. The first dress could almost be reassembled. I am missing the back of the bodice but all of the other pieces are here. The gores of the skirt, the top bodice, two sleeves and the sash.  It is really tiny.  Take a look.

IMG_20150425_3159

I held the bodice up and quickly realized that this would have been made for a very slender woman. The fabric is adorable, though faded in parts. Clearly, this dress was worn a great deal.

IMG_20150425_3161

Here is another dress that had been taken apart. The fabric is in much better shape. I am thinking it was made for a young girl. The sleeves are small and didn’t wrap around my arm or Julia’s.

IMG_20150425_3169Again, the most of the parts to dress are here, less one piece of the collar. The dress reminds me of the uniform I wore when I was a volunteer “candy-striper” at the local hospital during high school. I love the bodice with the trim pieces.

IMG_20150425_3170

In addition to these two dresses, there were a few items that had not been taken apart. There were also pieces that were cut and bundled but never sewn. She had a lot of projects going on here!  I love this little apron that was in the bag. Julia was modeling for me here. She looks good in an apron!

IMG_20150425_3151

Here is a skirt that I found. The waist is about 23″ so it’s certainly not fitting me!!  Very tiny.

IMG_20150425_3155The waistband buttons in the back and then there is a sash that wraps and ties in the front. The flowers are huge and bright. I would guess this is from the 1950’s?

Finally, my favorite. This sweet little dress looks like it would fit a girl of about five years or so.

IMG_20150501_3241

The sheer fabric that is inserted into the bodice is a mystery to me. It is very, very thin and the fabric is definitely compromised just from age. It seems an odd choice for a child’s dress. I suppose she would have expected the child to wear something underneath the dress.

IMG_20150501_3243

I love the sash that ties on the back side. I haven’t found the rest of the pieces, though I still have a large pile of scrap to sort through. It looks like Nela was making this dress. The neckline is still unfinished and while she put the placket in for the buttons on the back, there are no button holes. Only one sleeve is in place and the bottom of the sleeve is not in place.

I have accumulated quite a bin of vintage fabrics as a result of this awesome gift. It is going to be so much fun to make something with it. Now how to decide what pattern to use and which fabrics to put together. I need to sort them into colorways which will help me to get a plan together.

Linking to Linda at Coastal Charms and Molli Sparkle’s Sunday Stash.


Vintage Heaven!

Remember the post I recently wrote about the estate sale that I went to in Downieville?  I had scored some quilting supplies and was/am so excited about the purchase. Well, there’s more to tell. I know, I know…. how much can a person handle! Bear with me. This will be a longer post than usual. Lots to say, ok?

While I was at the estate sale, I struck a conversation (as I am wont to do) with the nicest woman. She is probably in her 70’s and lives in Downieville. We started talking about things that we like to find at estate sales. I told her that I usually keep an eye out for unusual fabrics. She became interested and told me her mother enjoyed sewing. She asked me if i would like to have her mother’s fabrics. I almost fell over. Keeping my composure (not really, my smile probably spread happily across my face!) I said indeed, I would. She was almost apologetic, saying that while there were nice pieces in there, it might not be what I am interested in. Oh my, the thought of having a bag of vintage fabrics to poke through was so exciting. We exchanged addresses (me – “I bought Viola’s old house” & her – “oh, I live behind the forest service housing”  Love this small town!!) I told her I would walk over later that afternoon, but an hour later she was at my door with two large plastic bags of fabric.  I thanked her over and over and happily took them home with me that night.

I have spent hours sorting through these bags of joy. The fabric is very old and very dusty. I have been washing and ironing it all week. This seamstress would take the pieces of matching fabric and roll them up, tying them with another scrap of fabric, into bundles. The pieces are gorgeous. This picture shows less than half of what she gave me. Most are cottons but there are also several garments and some satins.

vint fab sorting

I have been trying to figure out how old these pieces truly are. There are a few clues.  One is that the width of the pieces of yardage (those where the selvedges are intact on both sides) varies from 22″ to 36″; only one piece so far measures at 44″ wide. According to an article on Fabric.net, fabrics were made in 22-24″ widths into the early 1930’s. After that, 36″ fabrics were introduced. I know that when I worked in my father’s fabric store in the mid-1970’s we sold mostly 44″ wide cottons but had a few 36″ pieces now and then. For the most part though, 44″ had become the standard. There are no markings at all on any of the selvedges. I don’t know when that became industry practice.

Another clue to the era of this collection is the bundle of patterns that I discovered in one of the bags. The copyrights on these patterns run in the 1950’s. The styles are just wonderful.

vint patterns (2)

In addition to those patterns, there was a promo for JC Penney’s in the bag. It was an apron pattern and the promotion had a Cinderella theme. “It’s magic how much you can do when you sew!”  (Which happens to be true, by the way.) On this ad, they talk about JC Penney’s being ‘almost 50 years old’ and JC Penney’s was started in 1902, so that places the ad in 1951 or so.  The promotion included ads for Percale cotton fabric priced at 39 cents per yard and also for Broadcloth cotton at 49 cents per yard. This pattern is so cute and I hope to find a way to hang part of it in the Downieville sewing room someday.

IMG_20150425_3174


IMG_20150425_3175

The history of textiles is really interesting to me. It is hard to explain my love of all things vintage but these fabrics make me so very happy! I have been hunting around for someone who has some expertise in this area. (If you have a resource for me, please leave me a comment. I would be ever grateful.)

Here are a few of the pieces that I have washed so far. I picked out some of my favorites.
vint fab 3


vint fab 5

I think this next piece with the teacups looks to be from the 1950’s or so. The size of this kitschy print is larger and very bold.

vint fab 3 (2)

This piece is a mystery to me. There are several scraps but no uncut piece to measure the width. I love the print. Anyone have any clues on this one?

vint fab 1

I think this is enough vintage fabric joy for now. Just know that this gift has enhanced my stash immeasurably. I don’t think I can even store it with my other fabric. It deserves its own tub!  Next week I will show you the garments that were in the bags.  More vintage treasures!

Linking to Molly Sparkles and Coastal Charms’ Show and Share.

Christmas Finishes

Loved waking up to rain this morning.  It is still going and that is making for a great start to the day. Today is my birthday…..  my husband asked what I wanted to do today.  Did he really need to ask? I haven’t had much sewing time this week so today I am going to spend the afternoon in the sewing room.  My daughter is down with a bug so it is a good day for just hanging out. Before I get to the machine tho, there is a sale at Roxann’s Humble Fabrics in town. I love her shop.  She has a great selection of new and “pre-owned” fabrics with a lot of cool vintage pieces if you look hard enough.  I figure a fabric sale on my actual birthday is a must.

I have several holiday items that I have been working on. Three of which are finished or, almost finished. I posted about this disappearing nine patch that I pieced a few weeks ago.  It is done.  The binding needs to be hand sewn on the back side but that will wait until tonight.  It is a good “tv watching” task.

20141025_1971

It finished out as a 38″ square.  My mother-in-law called dibs on this one and wants to hang it on the wall.  I will put a sleeve on the back after I sew the binding. To quilt it I outlined the Santas and then used a large circular pattern all over the rest of it. Kind of reminds me of Christmas ornaments. For some reason the thread shredded constantly and this drove me batty. I don’t know what the issue was. I cleaned the machine and re-threaded everything but it kept happening.  For the first time I was using Superior’s Bottom Line thread in the bobbin which felt soooo thin. I don’t know if this had anything to do with it. Though it was my top thread that was shredding? I switched to Aurifil in the bobbin and that actually seemed to help. Maybe it was just coincidence.  I am not sure.

20141025_1973I like the dark green polka dots that I used for the binding.  All in all, it turned out pretty cute.

I also finished up a few table runners over the past week or two.  These are both destined for my Etsy Shop. Here is the first one.

20141008_1788Very pleased with the look of the fabric and the green and gold striped binding.

20141008_1786And another runner:

20140925_1733A different look altogether.  The tan and red borders are so pretty. Kind of a linen look to these fabrics.

20140925_1735Not so sure if I like the idea of putting labels on items that are in the shop. It means that the runner isn’t really reversible.  I may not put them on in the future.

Hope you are all enjoying some lovely fall weather. My maple trees are turning and I am loving the colors!!

Linking to Confessions of a Fabric Addict and Crazy Mom Quilts.  As always, the links are available up at the top of the page, under Link Ups.


Paying Homage to High School Home Ec

Growing up, I used to sew a lot of my clothes.  Even as an adult I made clothes for myself as well as my kids.  Since I have been spending so much time quilting over the past several years, I haven’t done any garment sewing for a long while.

I mentioned in an earlier post that I started sewing when I was in 7th grade. My mom taught me to use the sewing machine and cut a pattern out. Because I went to a small parochial school through 8th grade I didn’t have any home economics classes during junior high school.  Once I got to high school we had all sorts of Home Ec options. I took them all. Let’s face it.  Home Ec was an easy elective. I loved to sew and this class beat Spanish, History, Math and English any day. My sewing teacher was fussy, really fussy (or at least she seemed like it to 15 year old me). She was forever making me rip seams out and fix my errors. The nerve!  I suppose she had to be tough on me. I was a lazy seamstress. I can remember, on multiple occasions, sewing the sleeves in the armholes backward.  The pattern companies try very, very hard to help the seamstress avoid doing this by clearly marking the sleeves with those small and large arrows.  Match the arrows and you are golden.  Sloppy cutting leads to a vague arrow and, hmmmm, which one matches to which?  More than once (probably more than five times!) I got it wrong,  resulting in my shirts having the cuffs on upside down so that the buttons were on top of my wrist.  This didn’t honestly bother me.  My go-to solution was to wear the shirt with the cuffs rolled up. I was going for kind of a casual, sporty look. My teacher, Mrs. H, was not ok with my sporty fashion.  It is really a pain to take the sleeves out.  Not a lot of fun. The lazy 15 year old that I was could usually circumvent this task by finishing the project without letting her see it in progress.  My grade was lowered but at least I didn’t have to rip the sleeves out. We usually had to turn in our projects along the way and it was so irritating to get something back with a veritable list of errors that needed to be fixed. Looking back, I will admit if it wasn’t for Mrs. H and her pickiness, I wouldn’t have learned to sew; or at the very least I would have been wearing lots of shirts with the sleeves rolled up. I found her picture in my yearbook from my sophmore year of high school.

mrs HI haven’t looked at a high school yearbook in many years – at least 20. I remembered Mrs. H as being old. When I was in high school I am sure I thought of her as old. Now that I look at her  picture, she doesn’t look all that old. She was probably in her 40’s? My perspective has changed some 38 years later. I bet anything she made her plaid blazer!

OK – moving on. I had a hankering to make something that was not-a-quilt.  Anything really.  I poked around the fabric in my sewing room and decided to use these two vintage pieces that I bought a while back. I played around with them and decided to make a blouse – my vision was something kind of bohemian or like a peasant blouse. The vintage prints made me think of peasant blouses, the 1970’s, high school and Mrs. H.  One thing led to another and the whole time I sewed this blouse I kept thinking of what Mrs. H would have changed, commented on or corrected.  Lots of nostalgia going on in my sewing room over the past couple of days! First, let’s  take a look at the blouse. It turned out pretty but definitely would not have earned me an “A”.

Here are a couple of things that would have brought the grade down.  First of all, the sleeves. I did a french seam on the first sleeve but then got distracted and did a regular seam on the other sleeve.  The 15 year old me decided this was just fine.  At least one sleeve has a nicely finished seam. Two french seams? Overkill.

20140925_1752Another definite mark-down is the hem.  I didn’t use any sort of hem tape or blind stitch for a nicely finished hem. I am so sorry Mrs. H but I just didn’t feel like it.  I did a quick roll of the fabric and machine stitched the hem.  I know, I know, it should have been hand sewn and she would have knocked my grade for that but I am ok with a machine stitched hem.  Honest, it is fine with me.

20140925_1759Then there is the sleeve length.  I had this idea to cut the sleeves and put a cotton lace trim on them. That worked out nicely except that I didn’t measure the sleeve length correctly and they ended up almost-too-short.  The 15 year old me was not at all concerned about this.  She found some bright orange, single fold bias tape (that was probably purchased back in the 1970’s) and made a casing for the elastic so as not o lose any length on the sleeves by making a casing for the elastic.  If you look closely you can see the orange peeking out of the bottom of the sleeves. I feel this was probably a wash – Mrs. H would have been impressed with the inset cotton lace and irritated with the bright orange bias tape.

This was a really fun, sweetly nostalgic project.  Just for kicks, here is 15 year old me.  I cannot explain the hair except to say that my hair was never my best feature!  Also cannot explain the halter top on picture day. Remember, this was 1975. We got to wear halter tops to school. Times have changed!

hs pic

Linking to TGIFF, Finish It Up Friday, Link a Finish Friday and Confessions of a Fabric Addict. All of these wonderful sites are listed at the top of my page, under Link Ups.  Take a minute and check out these blogs. I love them all!  Have a good weekend everyone!


Cowboy Small

Big news! I sold my first baby quilt on Etsy! I was so excited to see that order come across. My  quilt, Snips and Snails, featuring the ‘Here Boy’ fabric ,was purchased. I wrote a post about it earlier. After recovering from the excitement of selling a quilt, I decided I needed to make another baby boy quilt to list in my Etsy shop.

So… What to make??  I love reading and/or hearing about the process that an individual quilter uses to develop the design, choose the right fabrics, auditioning different prints and then coming up with the quilt they want to create. It is interesting to hear about those that choose and buy fabric first and then go forward from there  vs those that develop the design and then purchase fabric. I fall into the camp of buying the fabric first.  I love to pick up pieces that strike me for whatever reason.  Once I have a few that go together or even one that will be a good focus fabric, I start to think about what I want to make with it.

This week I made a darling baby quilt for a boy.  I developed the project around a piece of fabric with a vintage design featuring horses. About two weeks ago I found a great deal on some fabric at a garage sale.  I don’t tend to pay much attention to garage sales but my husband happened to notice an ad for a garage sale that listed fabric for sale. My interest was piqued and I went to it.  I scored an assortment of awesome fabric!

Back to the retro fabric that I found.  It is adorable.  I became sort of nostalgic as it reminded me of a book I read to my boys when they were little. This book, Cowboy Small, was written in 1949 by Lois Lenski. We read this book constantly and it was especially favored by my eIdest, Andrew (now 29 years). At some point in the story the cowboys are shown sitting around their campfire (eating beans out of a can) singing “Home on the Range.” At this point, Andrew would belt out his rendition of Home, Home on the Range. Look at the picture below from the book.

cowboy quilt 2

On the fabric there is a bucking horse that is so similar to this. Look to the left side.

horse quilt

Such a good memory for me. Needless to say, I was pretty excited to use the horse print for a baby quilt for a little guy. I selected a simple pattern alternating whole 8″ blocks with 8″ four-patch blocks.  The pattern was inspired by a quilt made by Amy Smart on Diary of a Quilter. Making the quilt five blocks wide and five blocks tall would give me a baby quilt that measured 40″ x 40″.   Ok, focal fabric selected and pattern decided upon, I just needed the scrappy fabrics for the four patch blocks. I pulled a stack of fat quarters and played around with those. Fortunately my sister was visiting for the weekend so I had her take a look.  As only a sister is allowed, she looked at a number of them and scratched them from the list right away.  She vetoed them saying they were too modern, wrong color, or too contemporary. Looking through my shelves, she pulled a black and white houndstooth pattern and the black, white and red paisley. Perfect additions! She has such good taste. Cutting and piecing such a simple design took no time at all.

Cowboy Small Baby Quilt; September 2014

20140911_1672

I backed it with this sweet Moda fabric called Honky Tonk. This was the perfect piece to use as backing.  It features cactus, guitars and musical notes – just like Cowboy Small!

20140911_1667

I quilted it with a large meandering pattern.  I really enjoyed quilting this project.  The stippling is a little herky-jerky in spots but overall it looks good (especially after washing and drying the quilt.) The binding is a bias stripe of light tan and red. Adorable! I machine stitched the binding on both the front and back of the quilt. (If you need a good tutorial on quilt binding, check out this one at Crazy Mom Quilts.)

Overall, this project was a blast.  It was a trip down memory lane which is always a fun thing! I will list this quilt in my Etsy shop for some lucky little cowboy.

Linking to: Freemotion by the River, Needle and Thread Thursday, Finish it Up Friday, and TGIFF. Links to each of these sites are available at the top of my page under Link Ups. There are some great projects featured at these linky sites. Take a minute and check them out!