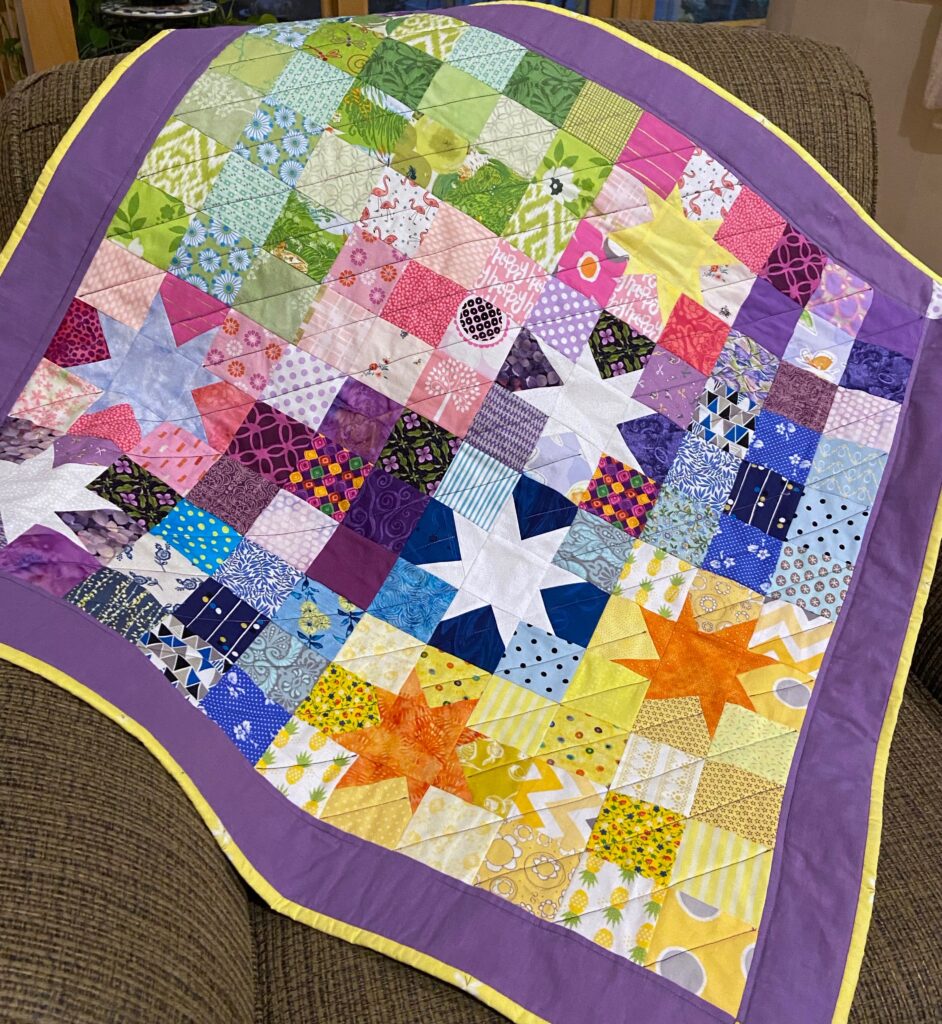
Look another little quilt headed to Jack’s Basket! As a result of my cleaning efforts in the sewing room, I put some scrappy nine patch blocks together that had been sitting in a pile for quite some time. It felt so nice to use up the blocks and make this sweet little quilt.
It is so bright and cheerful. I quilted straight lines on the diagonal. At first I was stitching across the wonky stars but it looked funny so I took that out. I think the stars look best without any quilting. The lines were just freehand with the corners of each square guiding me. Because the quilting is very light, the quilt has a cozy drape to it.
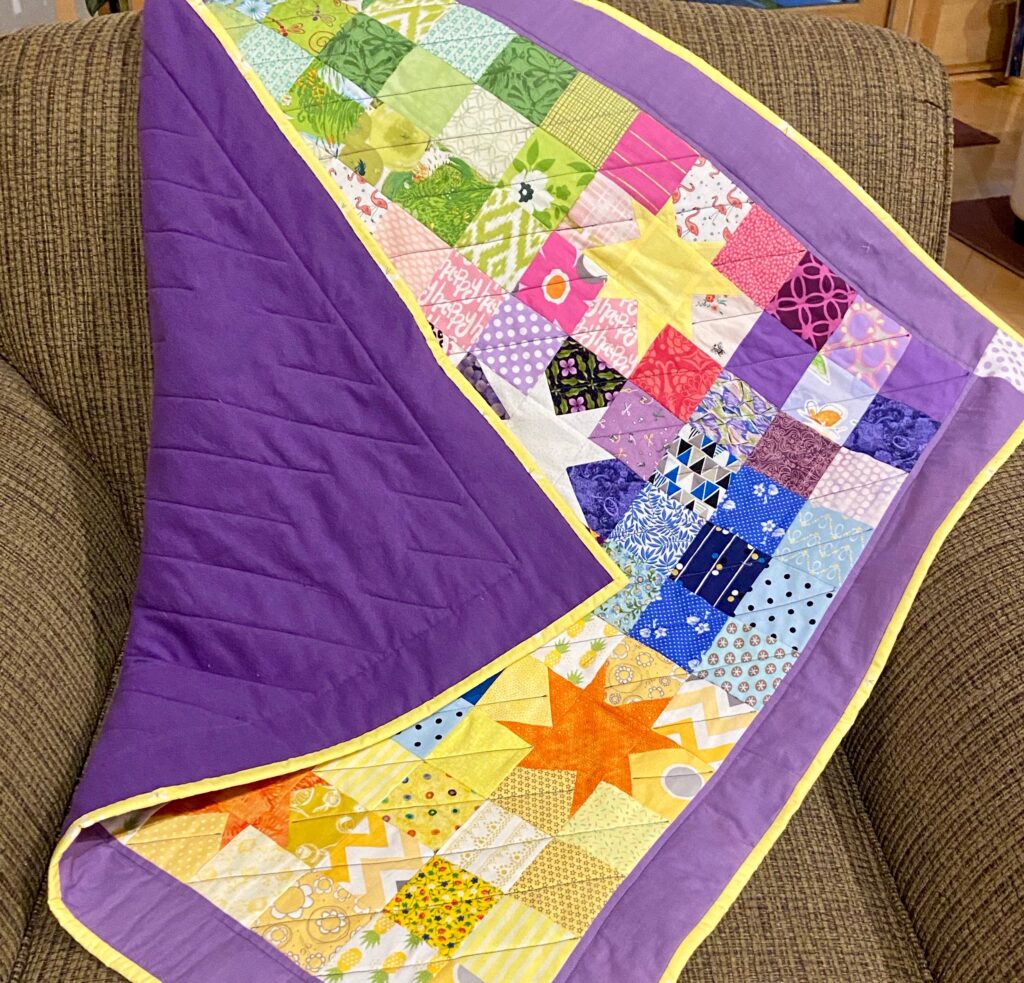
Purple flannel on the back makes for a soft, cuddly quilt. For the binding, I used a bit of a yellow print from an older line by Jeni Baker, back when she was designing for Art Gallery Fabric. I even had the right size scrap of batting for this. Isn’t it great to use up some fabric that has been sitting for a while?
I had not yet mailed the You Are My Sunshine whole cloth quilt yet so both of these will go out together next week. I am not positive, but I think this is either the seventh or eighth quilt I have finished this year. Most of these were were made with flimsies that have been sitting which is super satisfying! Still another month to go this year. Will I have time to finish another quilt? Time will tell!
Know what I mean? I keep pulling bins and zip lok bags out to sort and organize. Then I find something fun and ditch the cleaning process and start sewing. I suppose I am kind of cleaning up but if you look at my sewing room, you wouldn’t really know it. Hahaha. Surely this is not unique to me. Cleaning up a mess usually means making a bigger mess temporarily. However, the inability to overcome the temptation to play with little bits here and there is certainly slowing down the process!
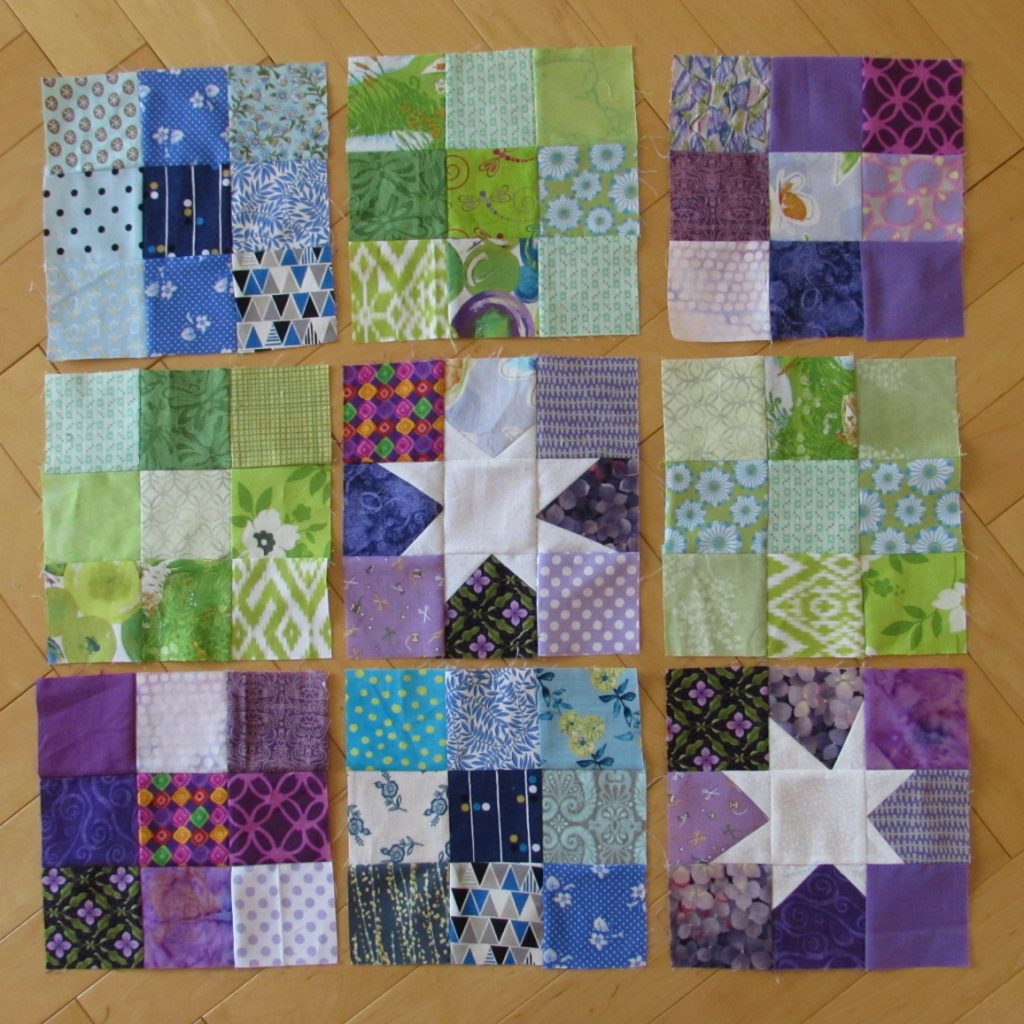
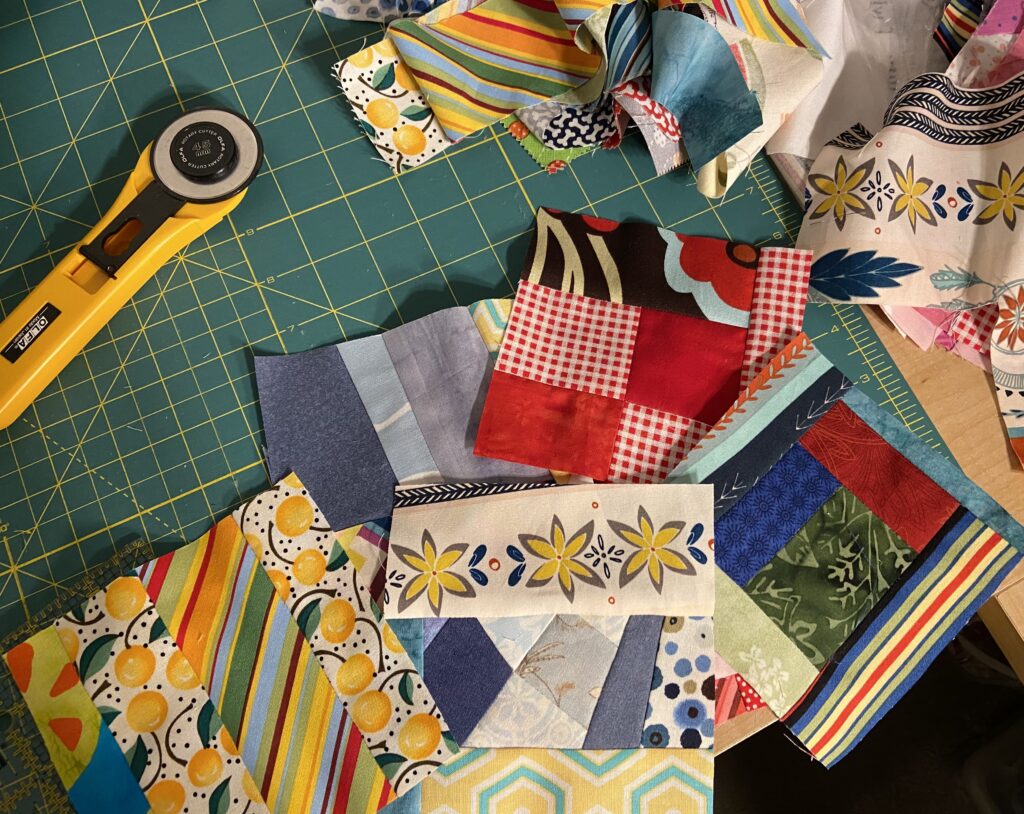
Just a sampling of the blocks I found.
When I was pulling out a stack of zip lok bags I found a stack of 17 nine patch blocks. I made these during the first half of 2018 and then got tired of them. This is a habit of mine! Anyway, when I found the stack I decided I should use them up rather than put them away again.
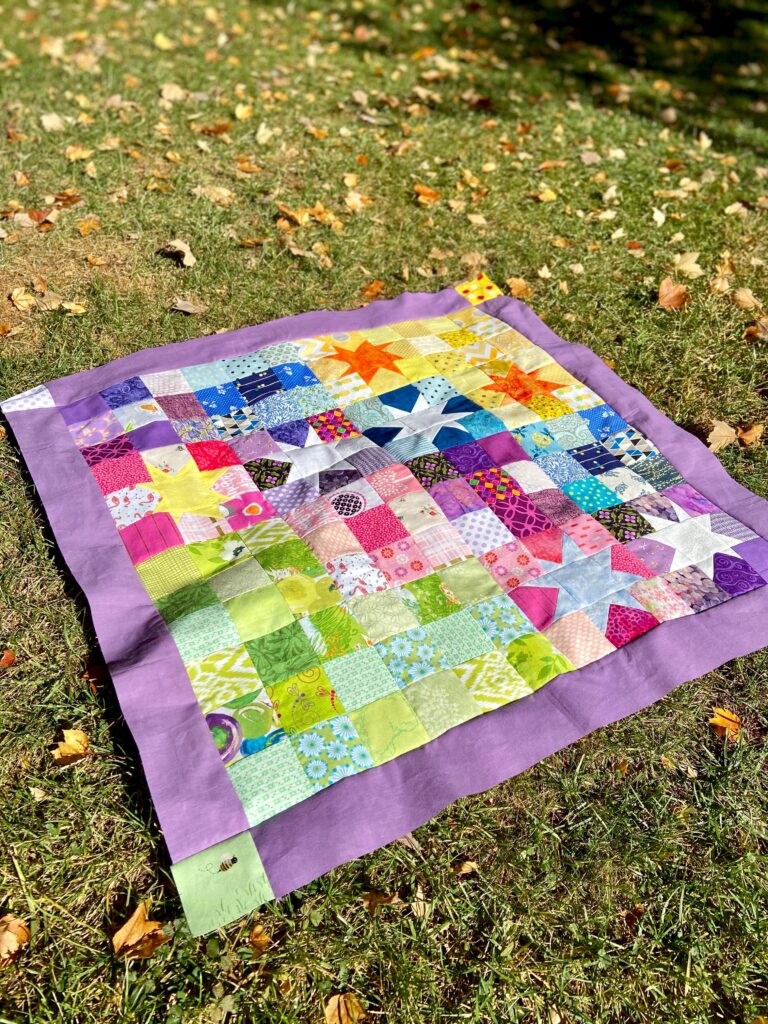
It took very little time to stitch them together and put a border around the whole top. It will be just the right size for donating to Jack’s Basket. I wish I had made a few more with the wonky stars but I knew if I set it aside, telling myself I would do that, it would be months before I picked it up again. Better that it is going to be finished and sent off. I found some purple flannel for the backing and will get it basted and quilted up asap.
What the heck?
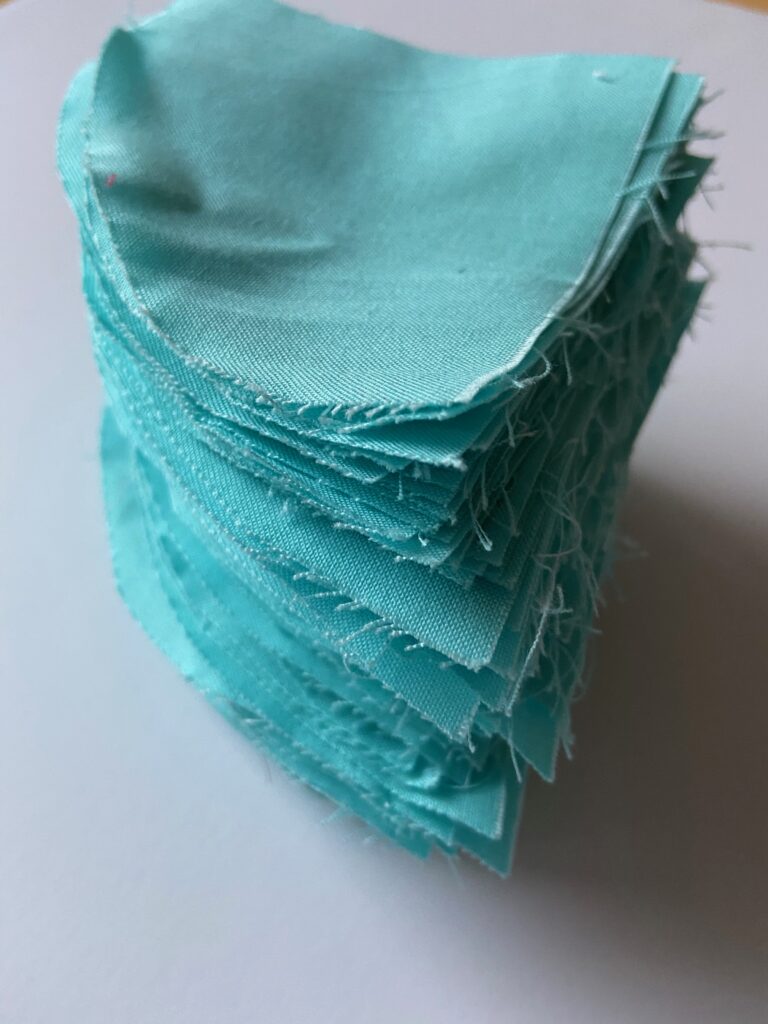
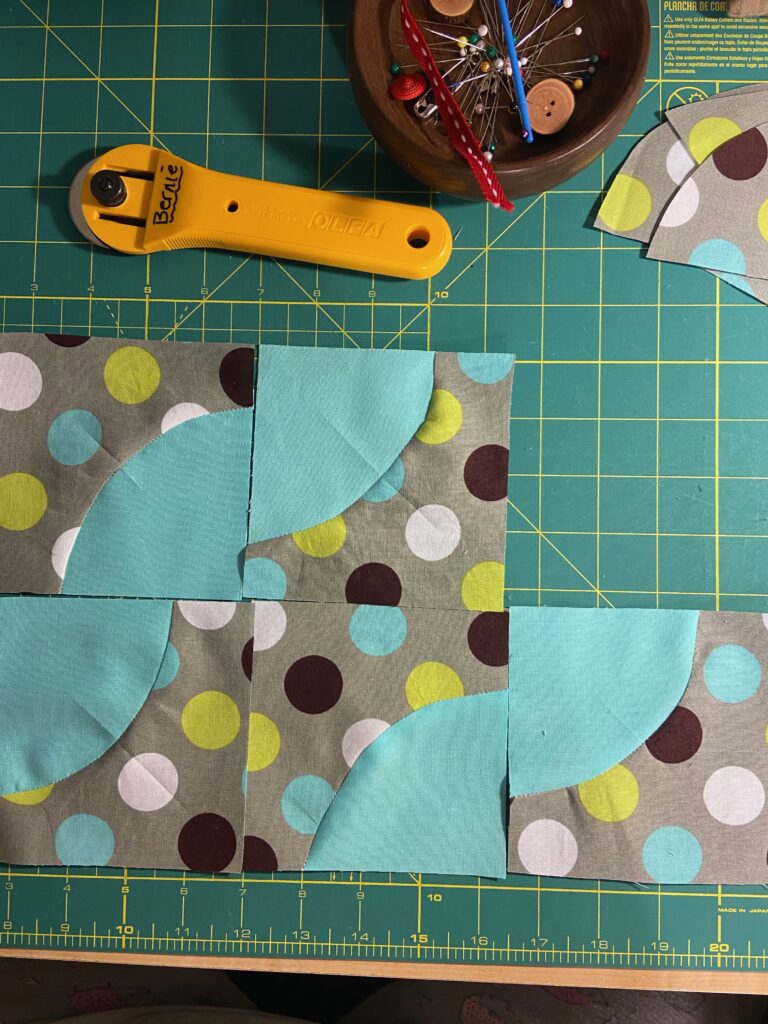
I have a bin marked solids. All colors are in there, all sizes and shapes. When I was picking through it, I found all of these light blue 1/4 circles. They are from the quilt I made for Julia’s bed back in 2013. I don’t know how many there are in the stack so we will just say a million. I was contemplating what I might do with these and in the blink of an eye, I was at the sewing machine playing with curves. Sigh. Maybe I am just not meant to have a clean sewing room?
But look at this. I think it is really cute and could be a fun quilt or mini. I pulled some chocolate brown and chartreuse and bagged all of it up as a project to work on soon. I love making the curves without having to measure. I am just tracing around the blue curve on the polka dot fabric and sewing them together. Then I square each block to 4.5″. I know I will use them in some fashion.
I put the blue 1/4 circles and related fabric away and – I kid you not – I found another zip lok bag. Jeez, it is endless. But this one had a lot of brightly colored strings in it PLUS about ten little improv crumb blocks. This was a huge distraction and I spent the evening yesterday making more of the blocks. I am up to about 18 or 19 now. The crumb blocks finish at five inches. My plan for these is to make economy blocks using the crumb blocks at the center. I believe the blocks will finish at nine inches which is a nice size. I need to make more of the crumb blocks to have enough for a lap size quilt. This project is now in the “make for Mercy Hospital” pile.
In between all of this, I have been using the AccuQuilt Go to trim scraps into usable squares. I now have a bin that is really stocked up with 2.5, 3, 3.5 and 4.5″ squares. Plus a huge stack of 5 inch squares. This is quite satisfying!
OK – now I am off to cut out a pair of flannel pajama pants for Julia. Hers are looking a little ratty so she is in need of a new pair.
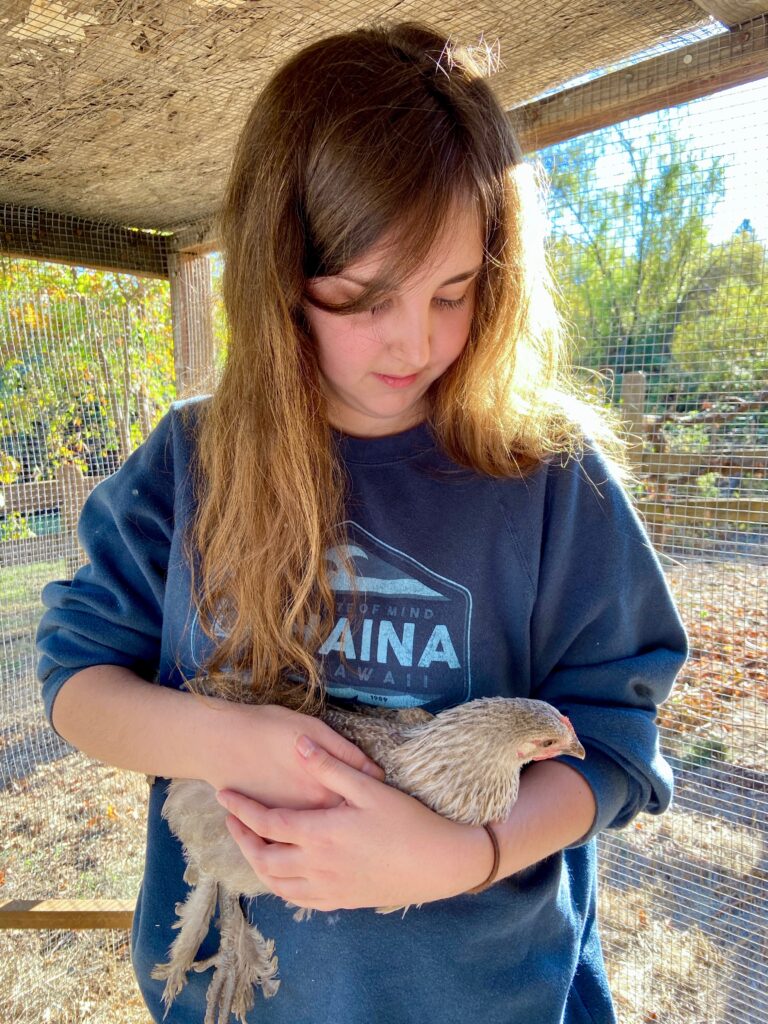
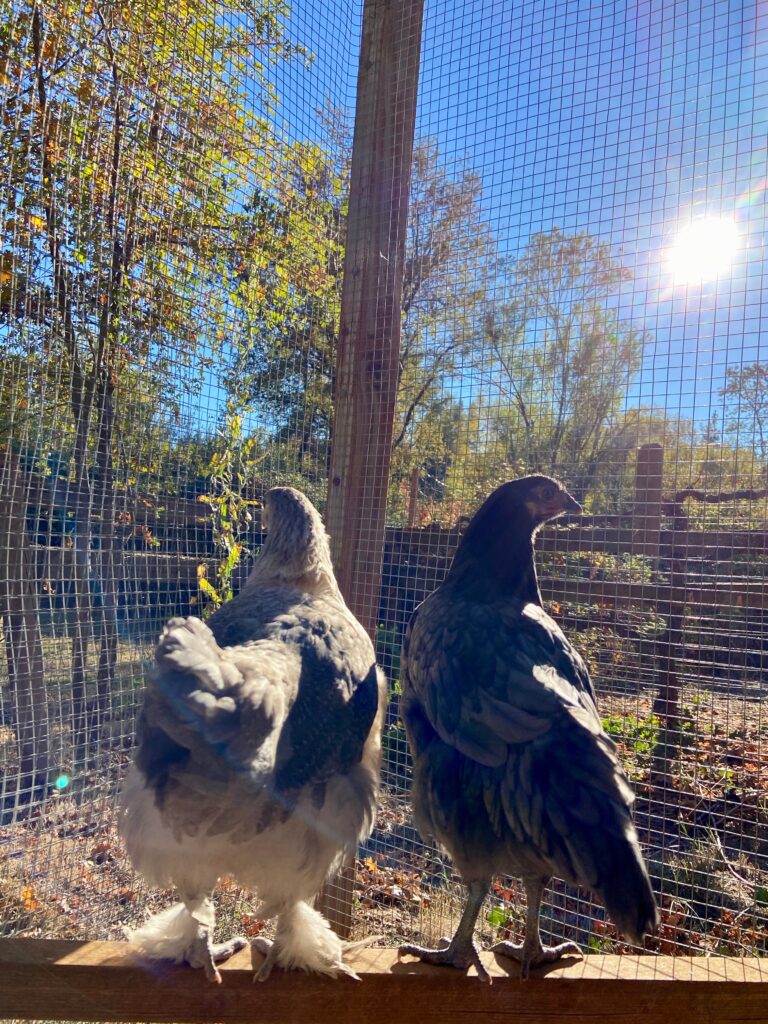
Here is a picture of her with one of her older chickens. She has two out in the coop and is trying to socialize them a bit. I think she is working her magic because they are calmer now when we hold them.
Flora and Fauna, enjoying a little sunshine.
Enough for now. Hoping all of you are well and happy. 🙂
First of all, thanks to everyone for the get well wishes. I am feeling better and have spent the last day or two getting caught up on things. Whenever I spend time down due to some illness or other, it is always so satisfying to get back to normal and have a regular day. Do you know what I mean? It makes me appreciate normal.
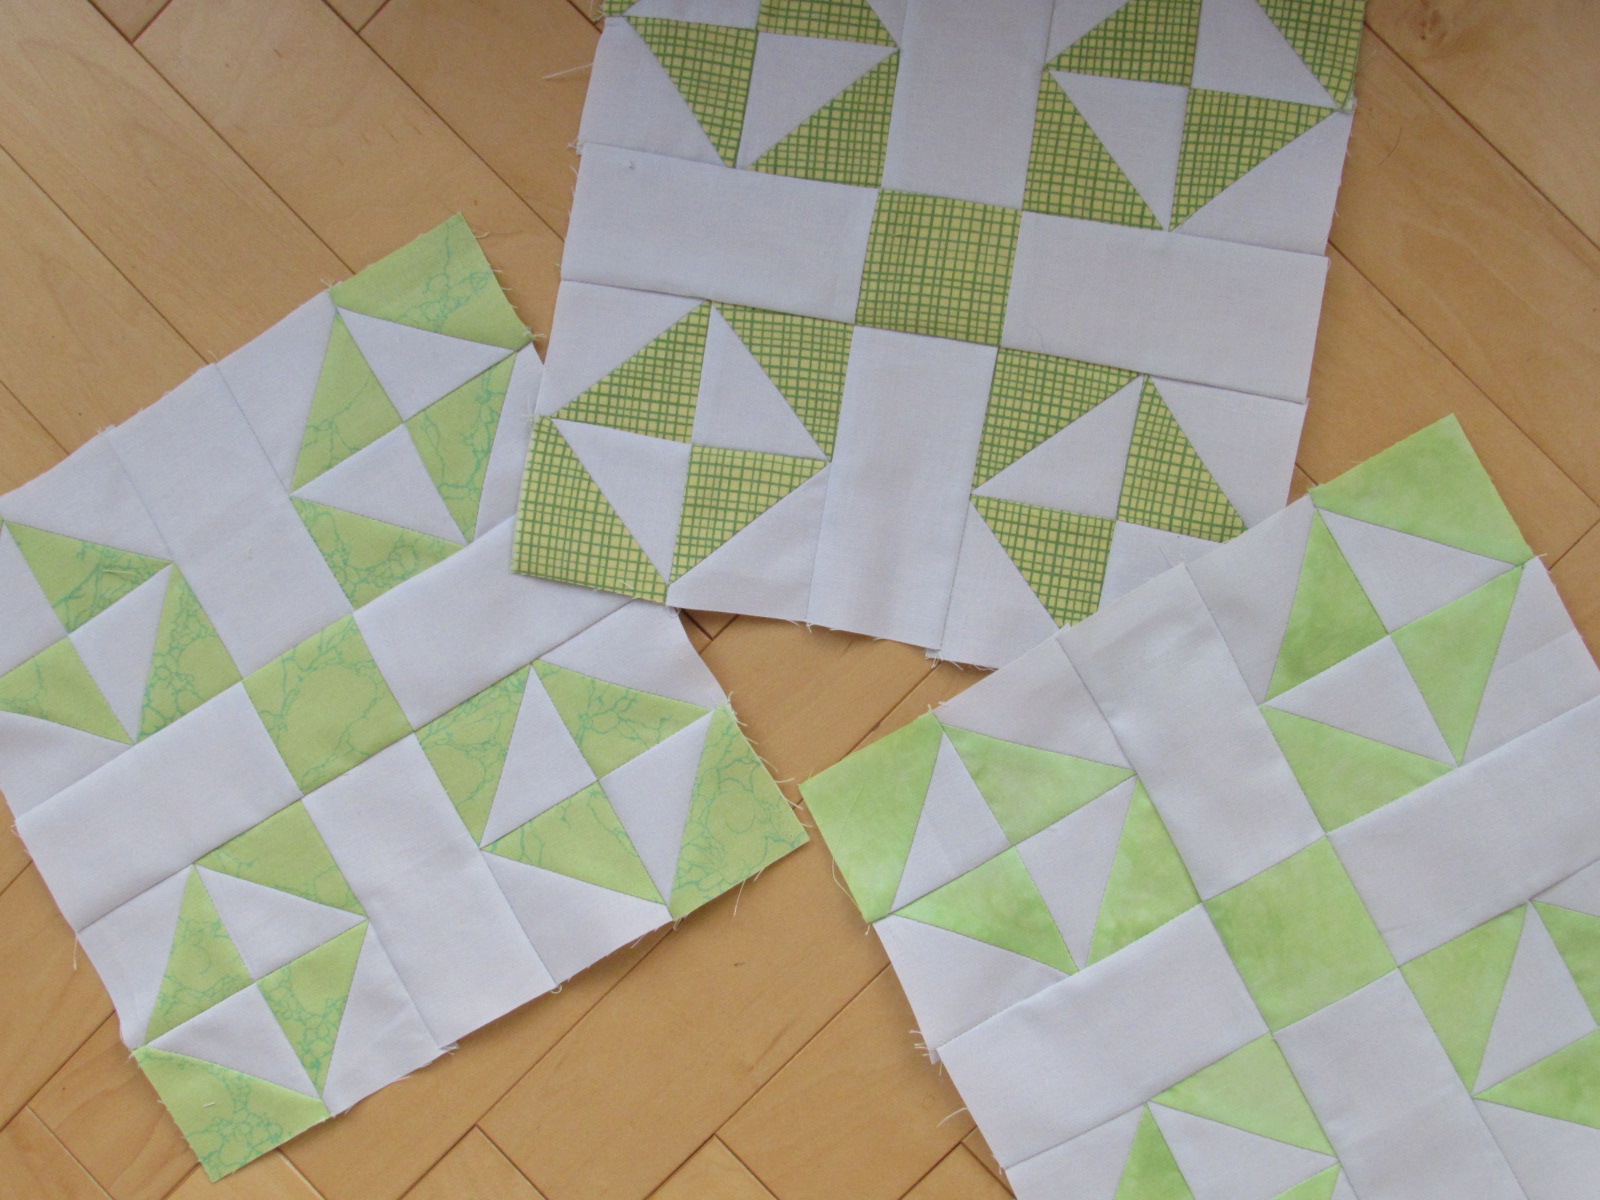
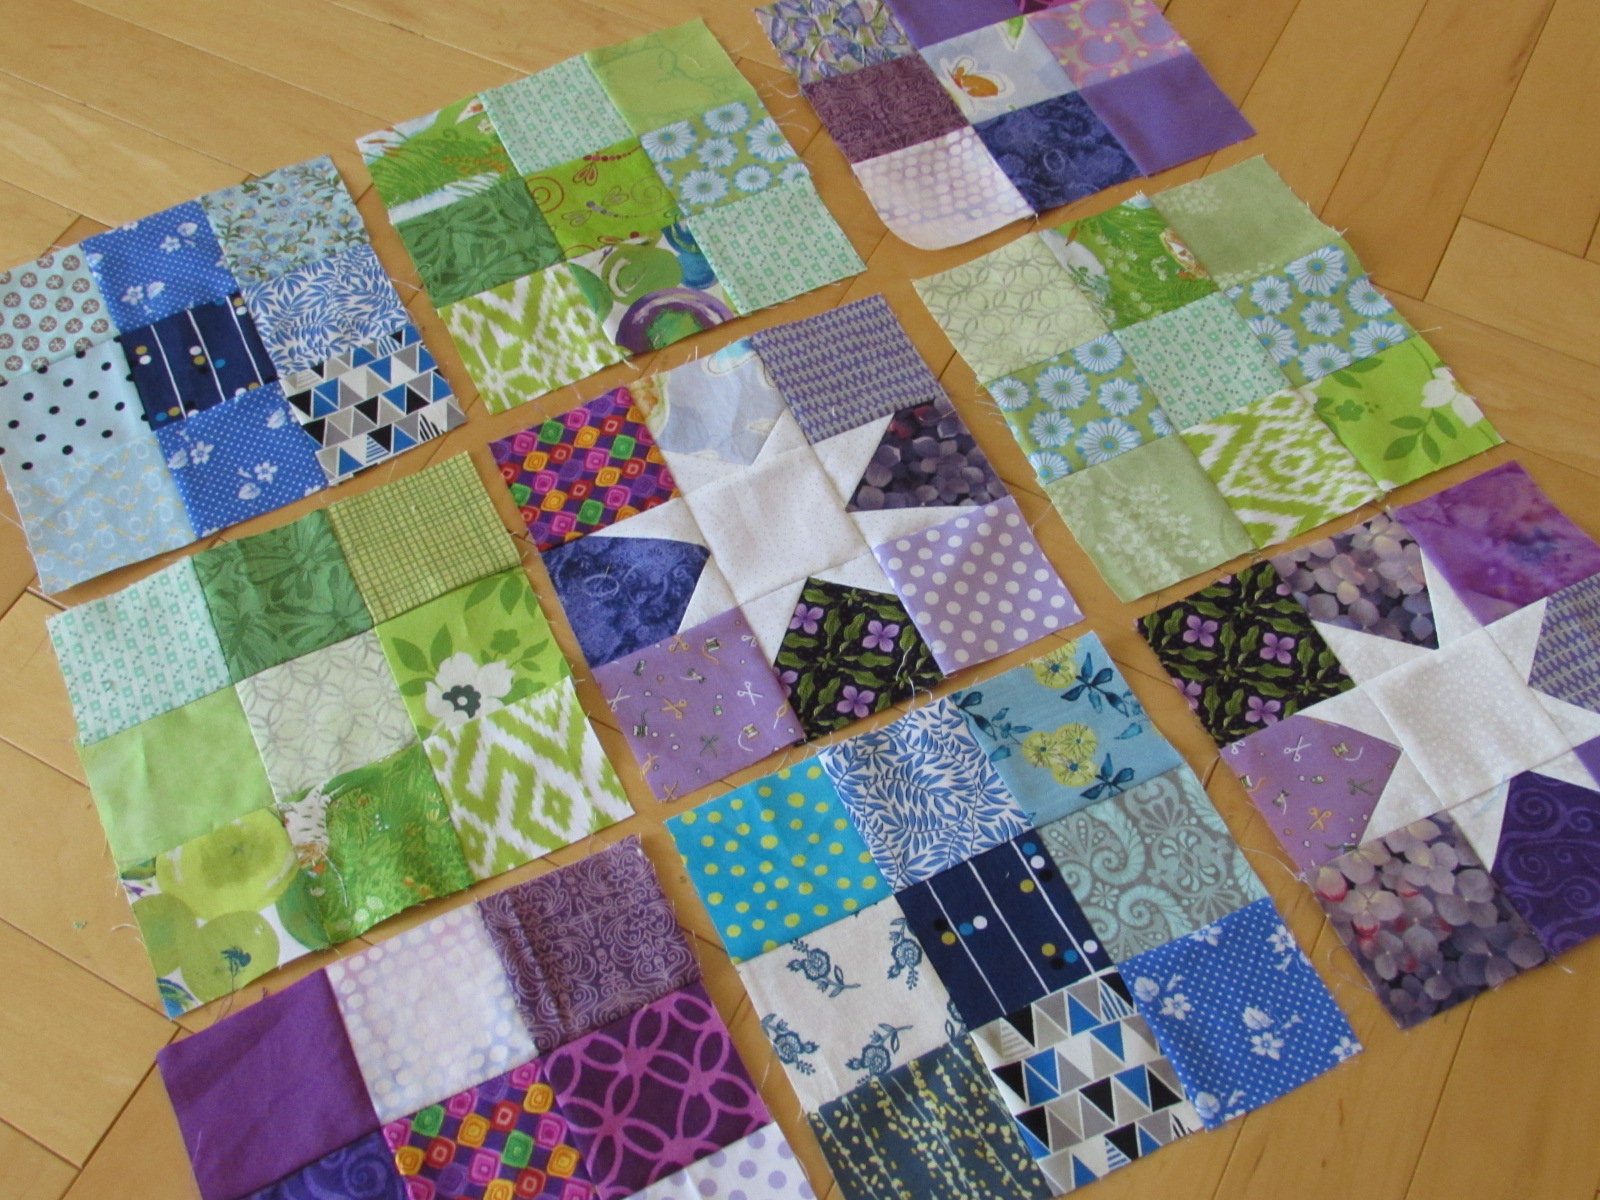
Today I am sharing my RSC18 projects to date. I finished the green blocks on the last day of March but never took pictures or posted them. The block for March is called Red Cross and dates to 1897. I don’t get the name but it is a fun block to make. Luckily I didn’t sew any bits together with the green HST’s pointing the wrong way (unusual for me, I know!) The color was to be light or bright green and this was easy as my green tub is truly overflowing. Like January and February, I tried to keep to the same scrap for each of the Squared Away blocks. Two of the greens look very similar (the lower two) but I am fine with this.
This green and yellow fabric is striking -somehow I have no idea where it came from. Usually I can remember but not this time! I love sampler quilts but sometimes they have a very busy look to them. I think using the gray background and keeping the fabric the same within each block is going to add order to the quilt.
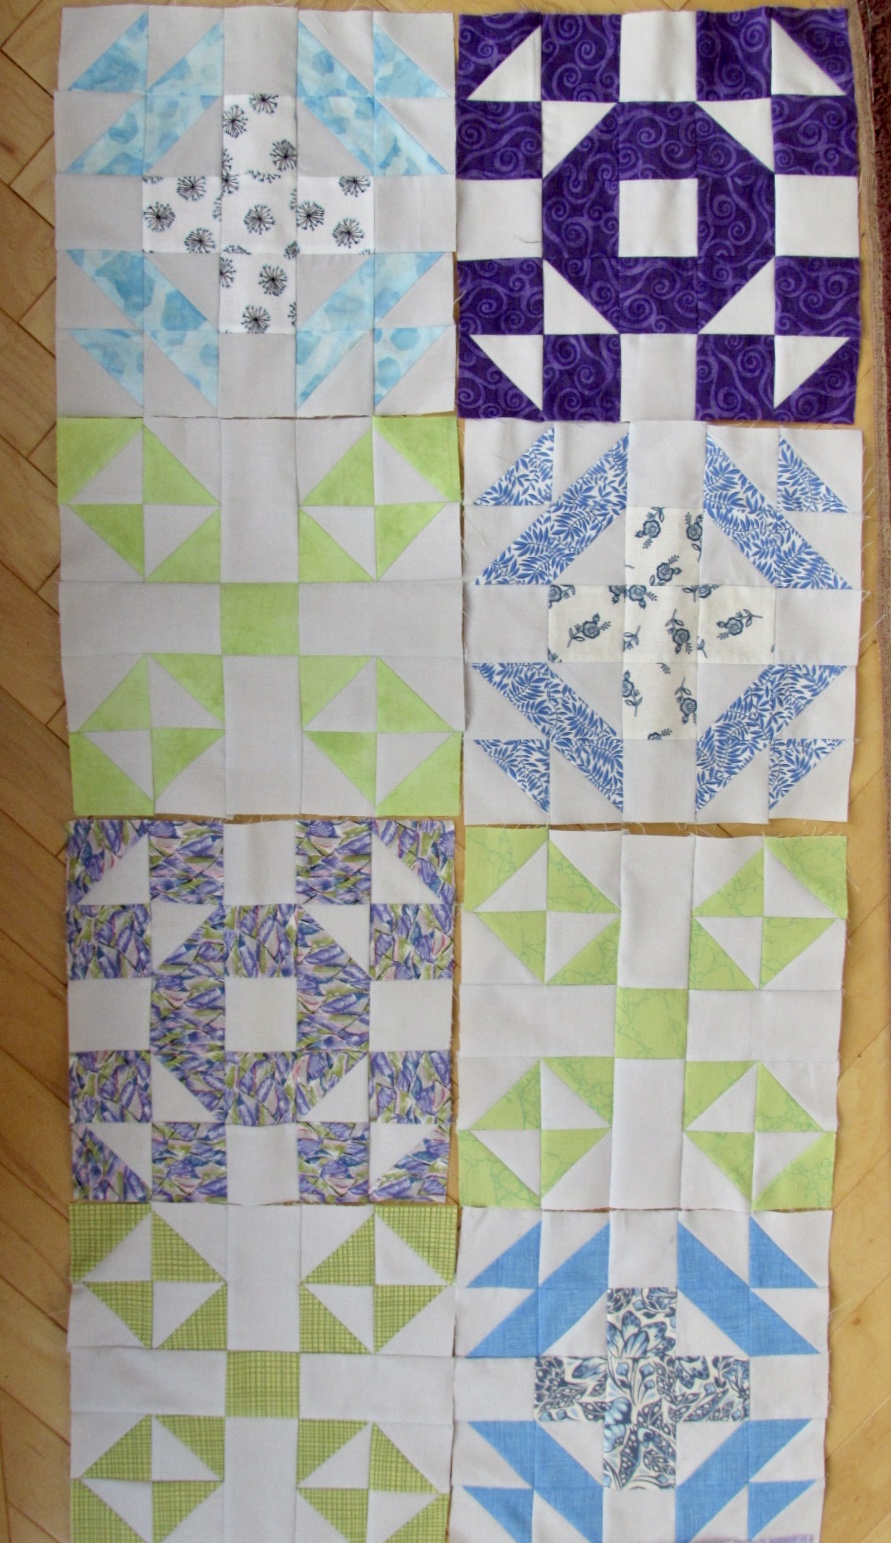
Here are the blocks together, though none have been squared yet. There is a third purple block but my OCD self couldn’t take the picture with an extra block hanging out in space. Oh dear, what is wrong with me anyway??
I have said this before but it bears repeating. Mari, designer of the quilt for Squared Away, does an excellent tutorial and I appreciate the bit of information she provides about each block. If you haven’t sewn along with her before, I highly recommend her block of the month projects. Organizing, writing, preparing for this sort of event has to be incredibly time consuming. Thank you Mari!
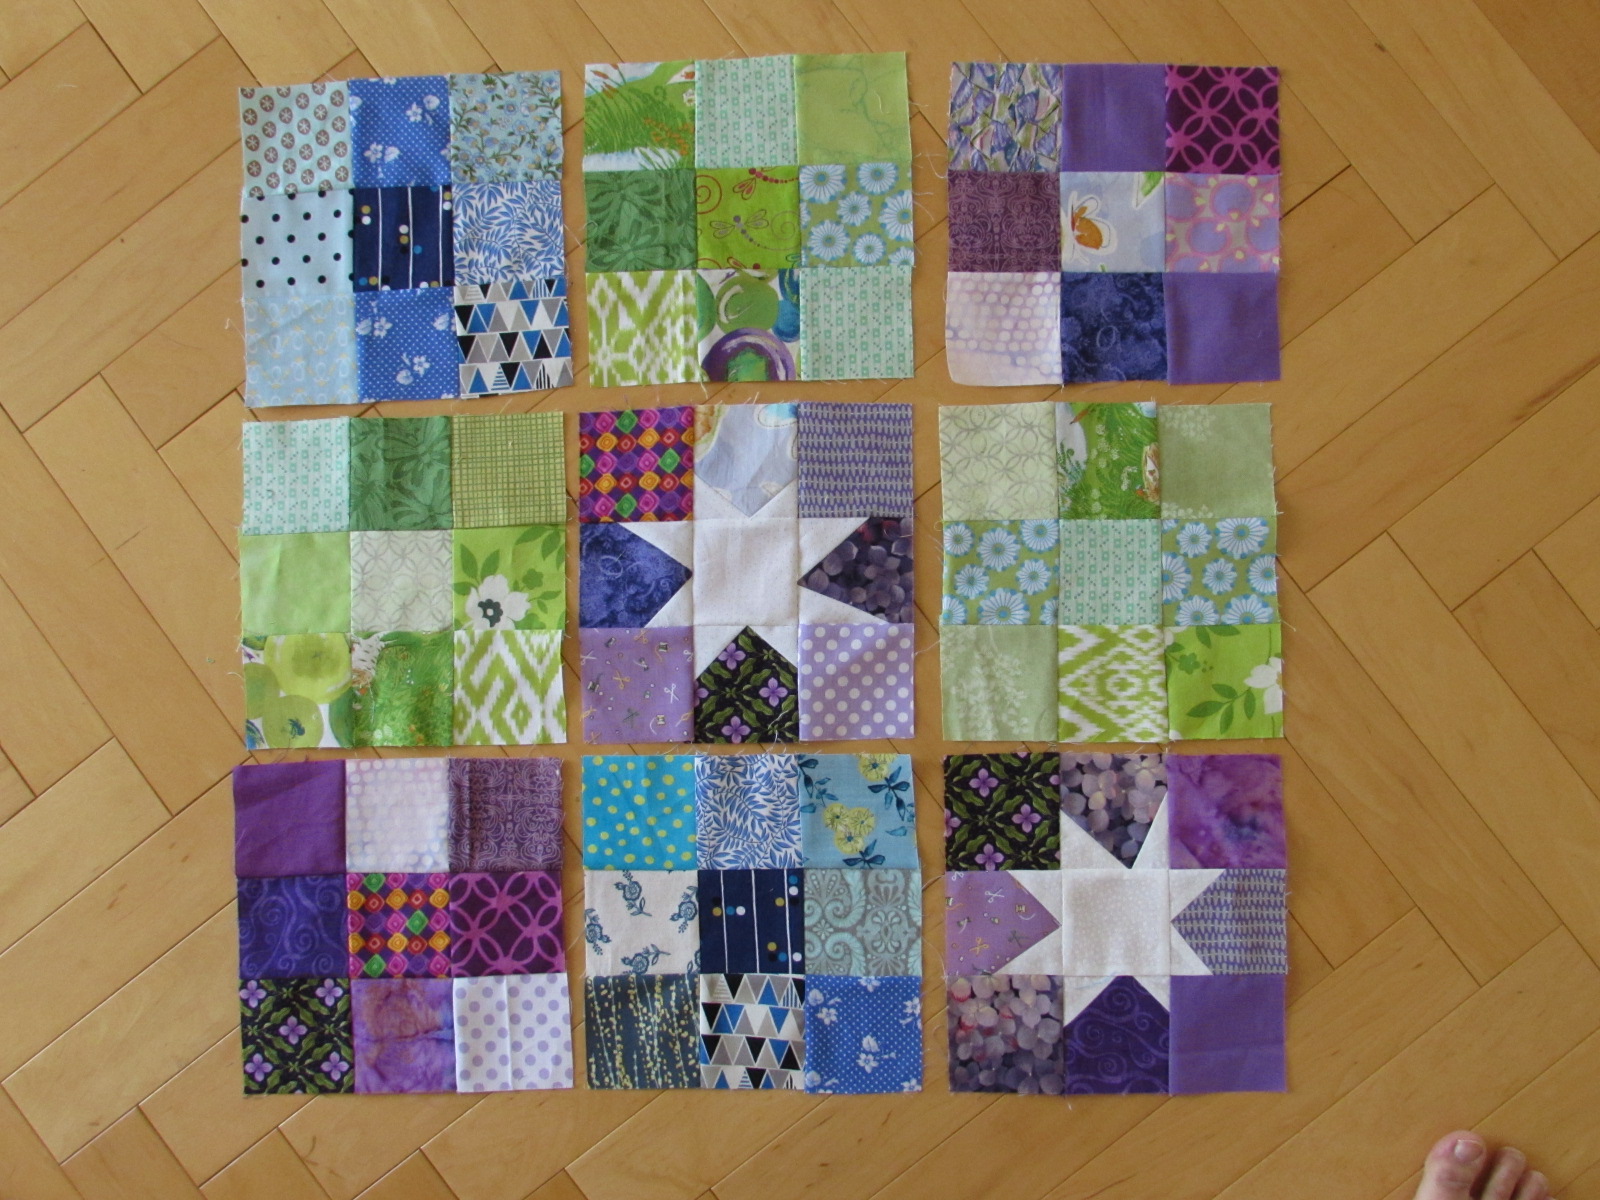
As I make the Squared Away blocks, I have also been pulling smaller scraps from the bins and making nine patch blocks. These finish at nine inches each. In February I did a few wonky stars to go with the purple set. I really like these and will make more as I go along. I am unsure what I will do with these. Maybe just sash them in black and use it as a donation quilt. The nine patch blocks are a breeze and this uses up more of the small scraps in each bin.
The wonky star blocks add interest to this project.
I need to pull yellow scraps for April. This could be a challenge because I have so few yellow scraps. There are some charm squares I might be able to utilize, depending on the cutting instructions for the April block.
Another project I worked on this week was cleaning up my shop. I have deliveries tomorrow and next week. Hurray for new fabric!! There was a stack of 1/2 and one yard cuts that were end of the bolt so I did some measuring and pricing. Each of these is listed in the Bargain section of the shop. Come take a look, maybe you will find something you like!
Enough for now. I have lots to do. Hope you are all enjoying a ‘normal’ day too.
Linking up with a number of blogs, including Finished or Not Friday. See the list up at the top of the page, under Link Ups.
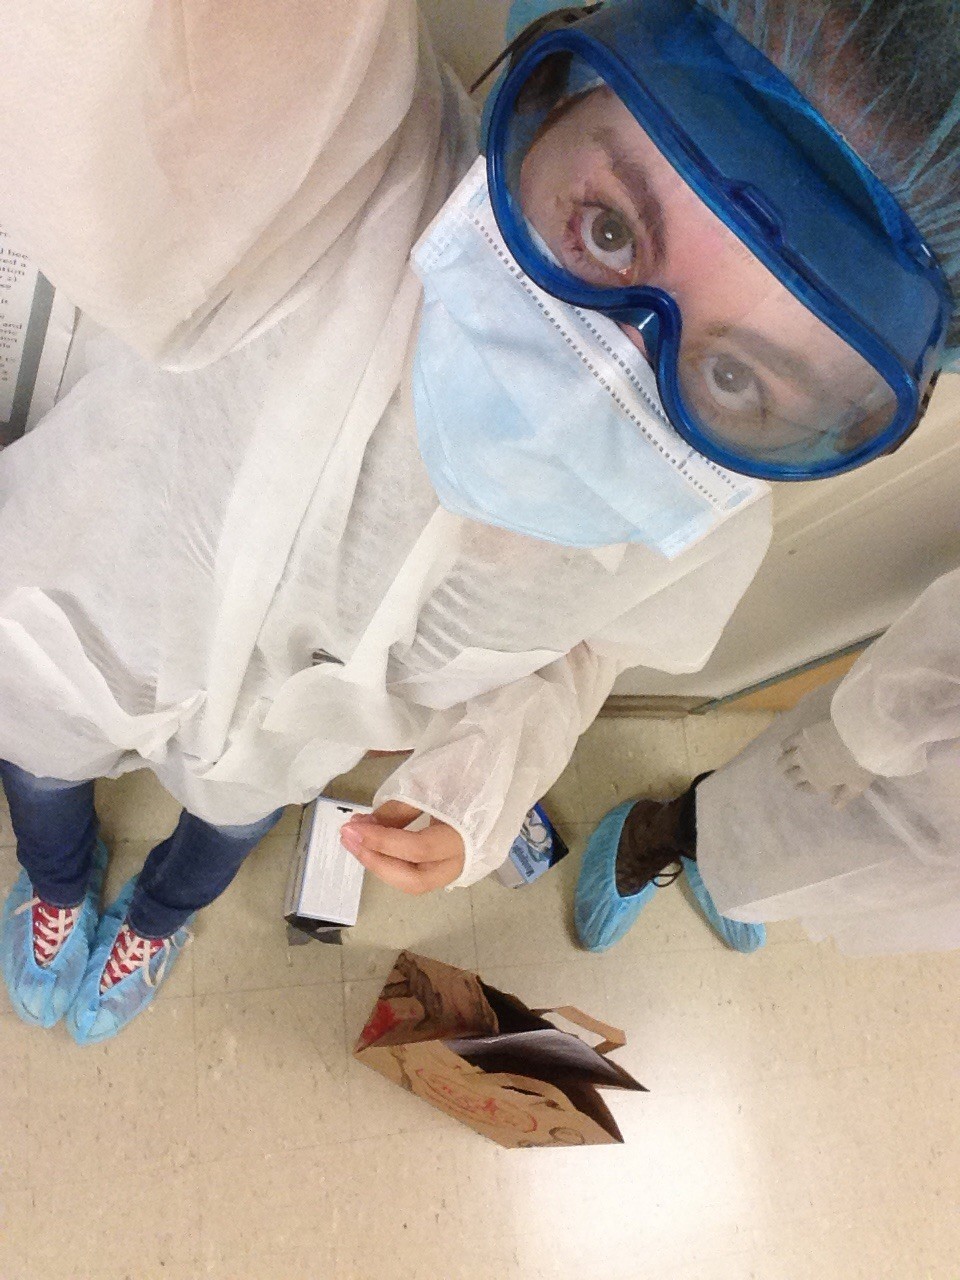
This has been a week spent in the car rather than my sewing room. Some months ago, I enrolled Julia in a class at our ‘local’ state university. They hold summer academy classes in a range of subjects for high school age kids. She wanted to take the Forensic Science class. This academy is very well done. She has a professor from the college and only 16 students are in each class. She has been working on extracting DNA from samples of blood and learning about how things are done at a crime scene. She loves the class. This girl loves her science.The university is about 1 and 1/4 hours from our house. Her class lets out at 5:00 which is, naturally, prime traffic time so the commute home is long and tedious. It has been worth it though to hear the stories of what she is working on. Choosing to live in the rural area that we do means driving your kiddos all over kingdom come in order to expose them to all the experiences a child needs.
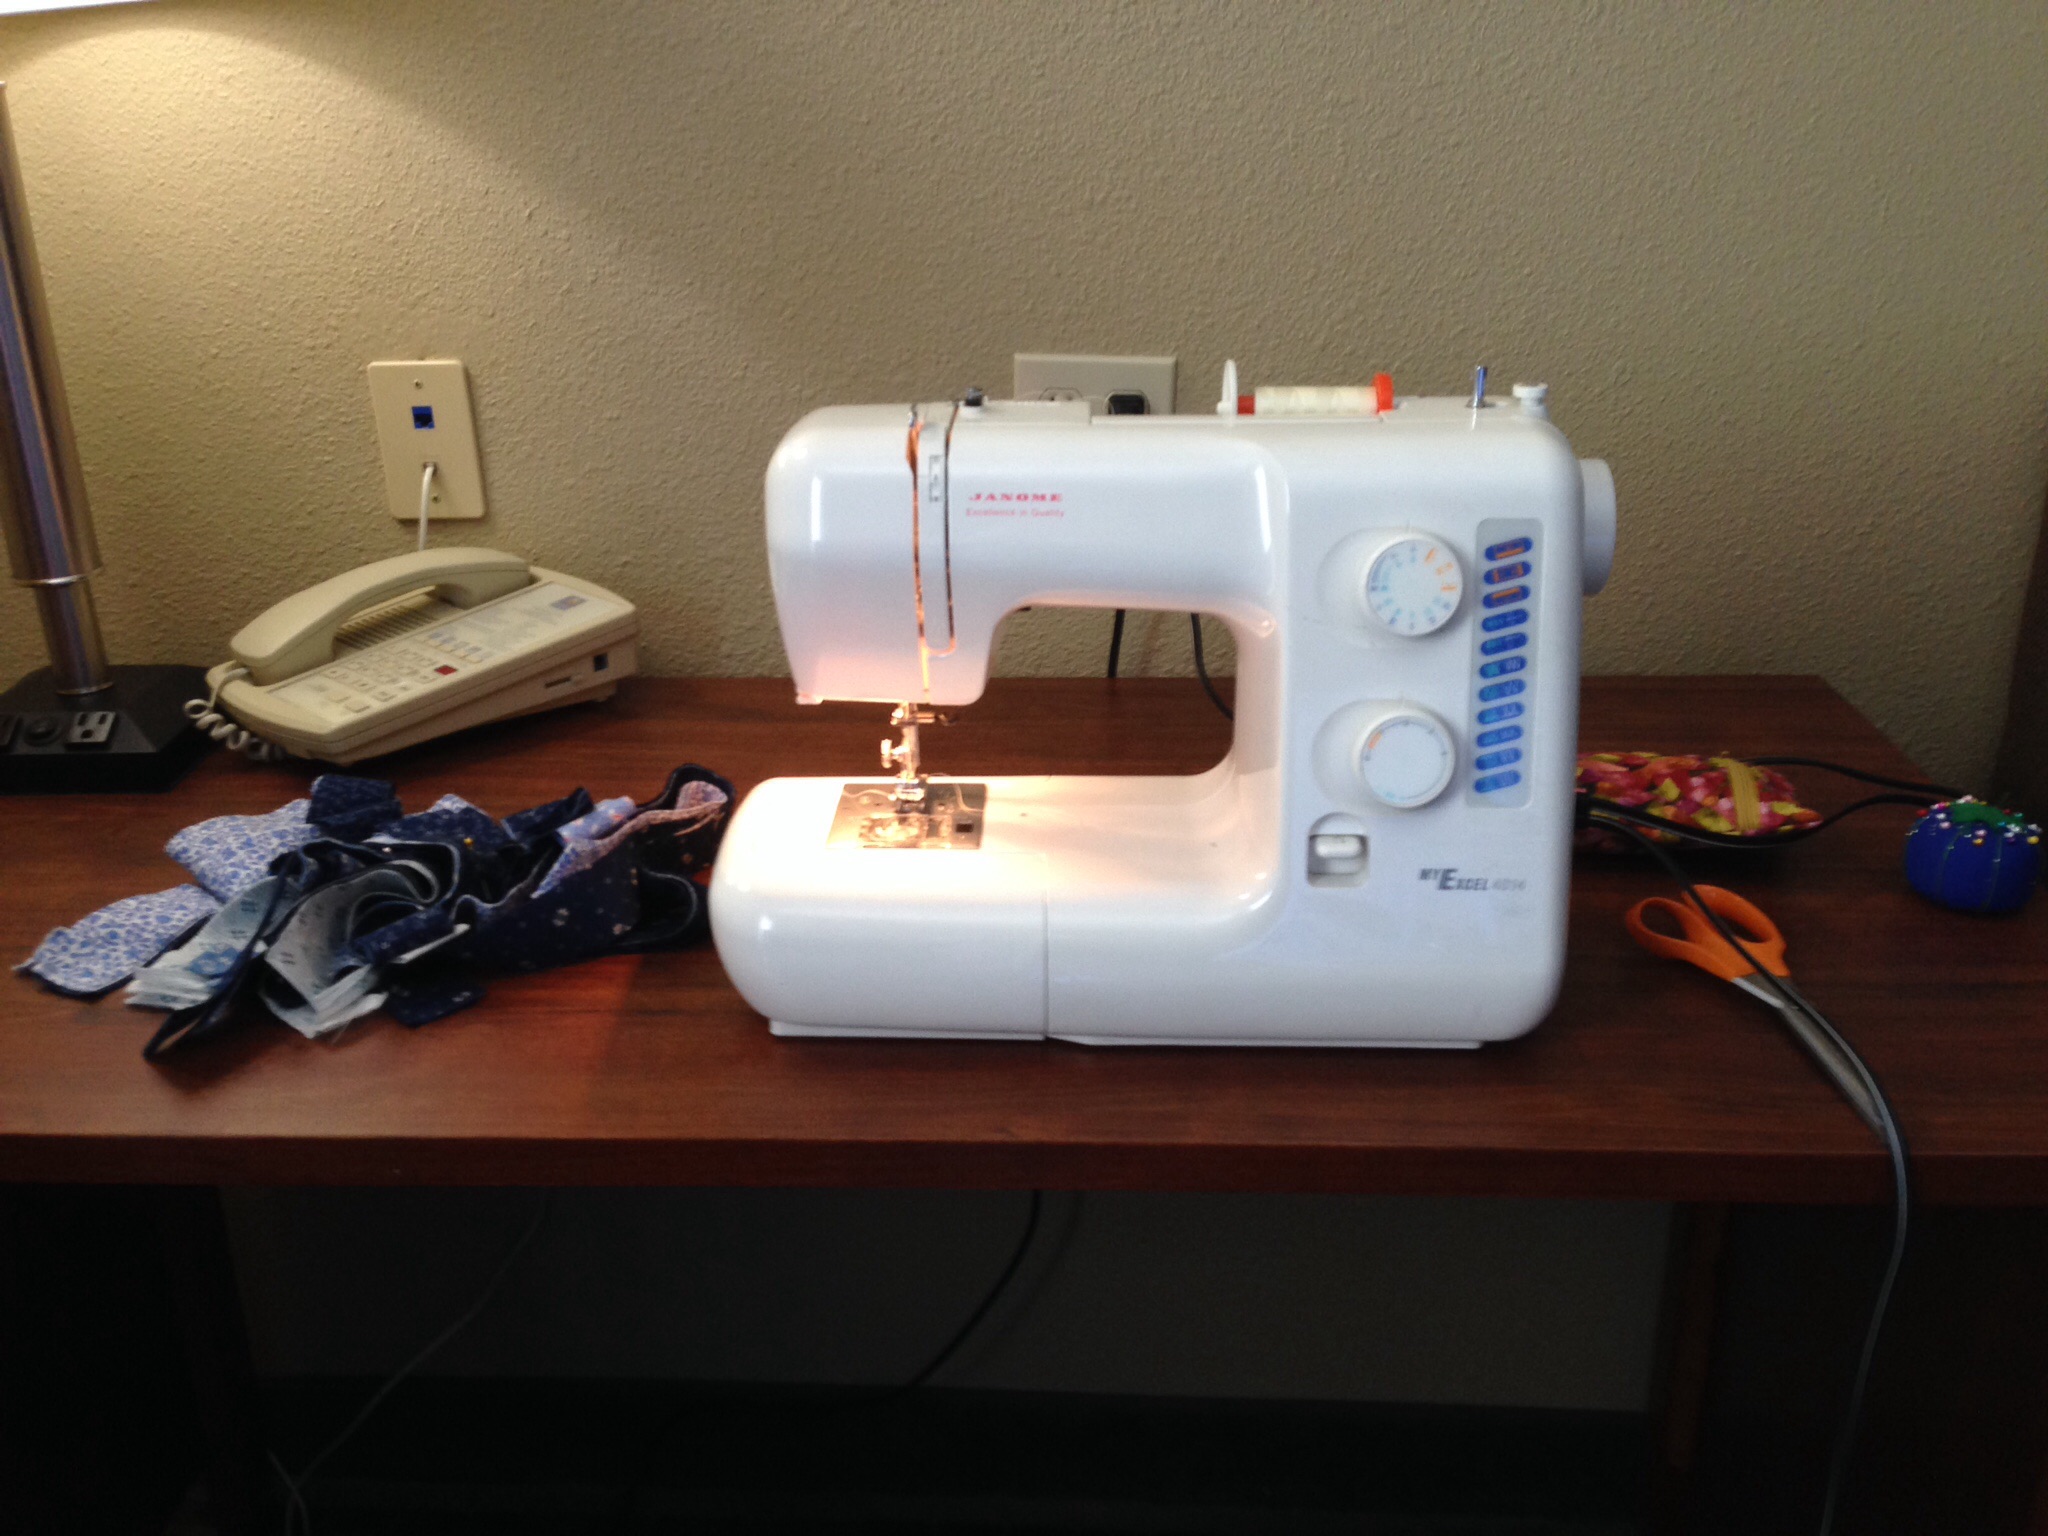
We spent one night in a hotel near the university to avoid a couple of the drives. I brought my small sewing machine and set up shop for a day and an evening.
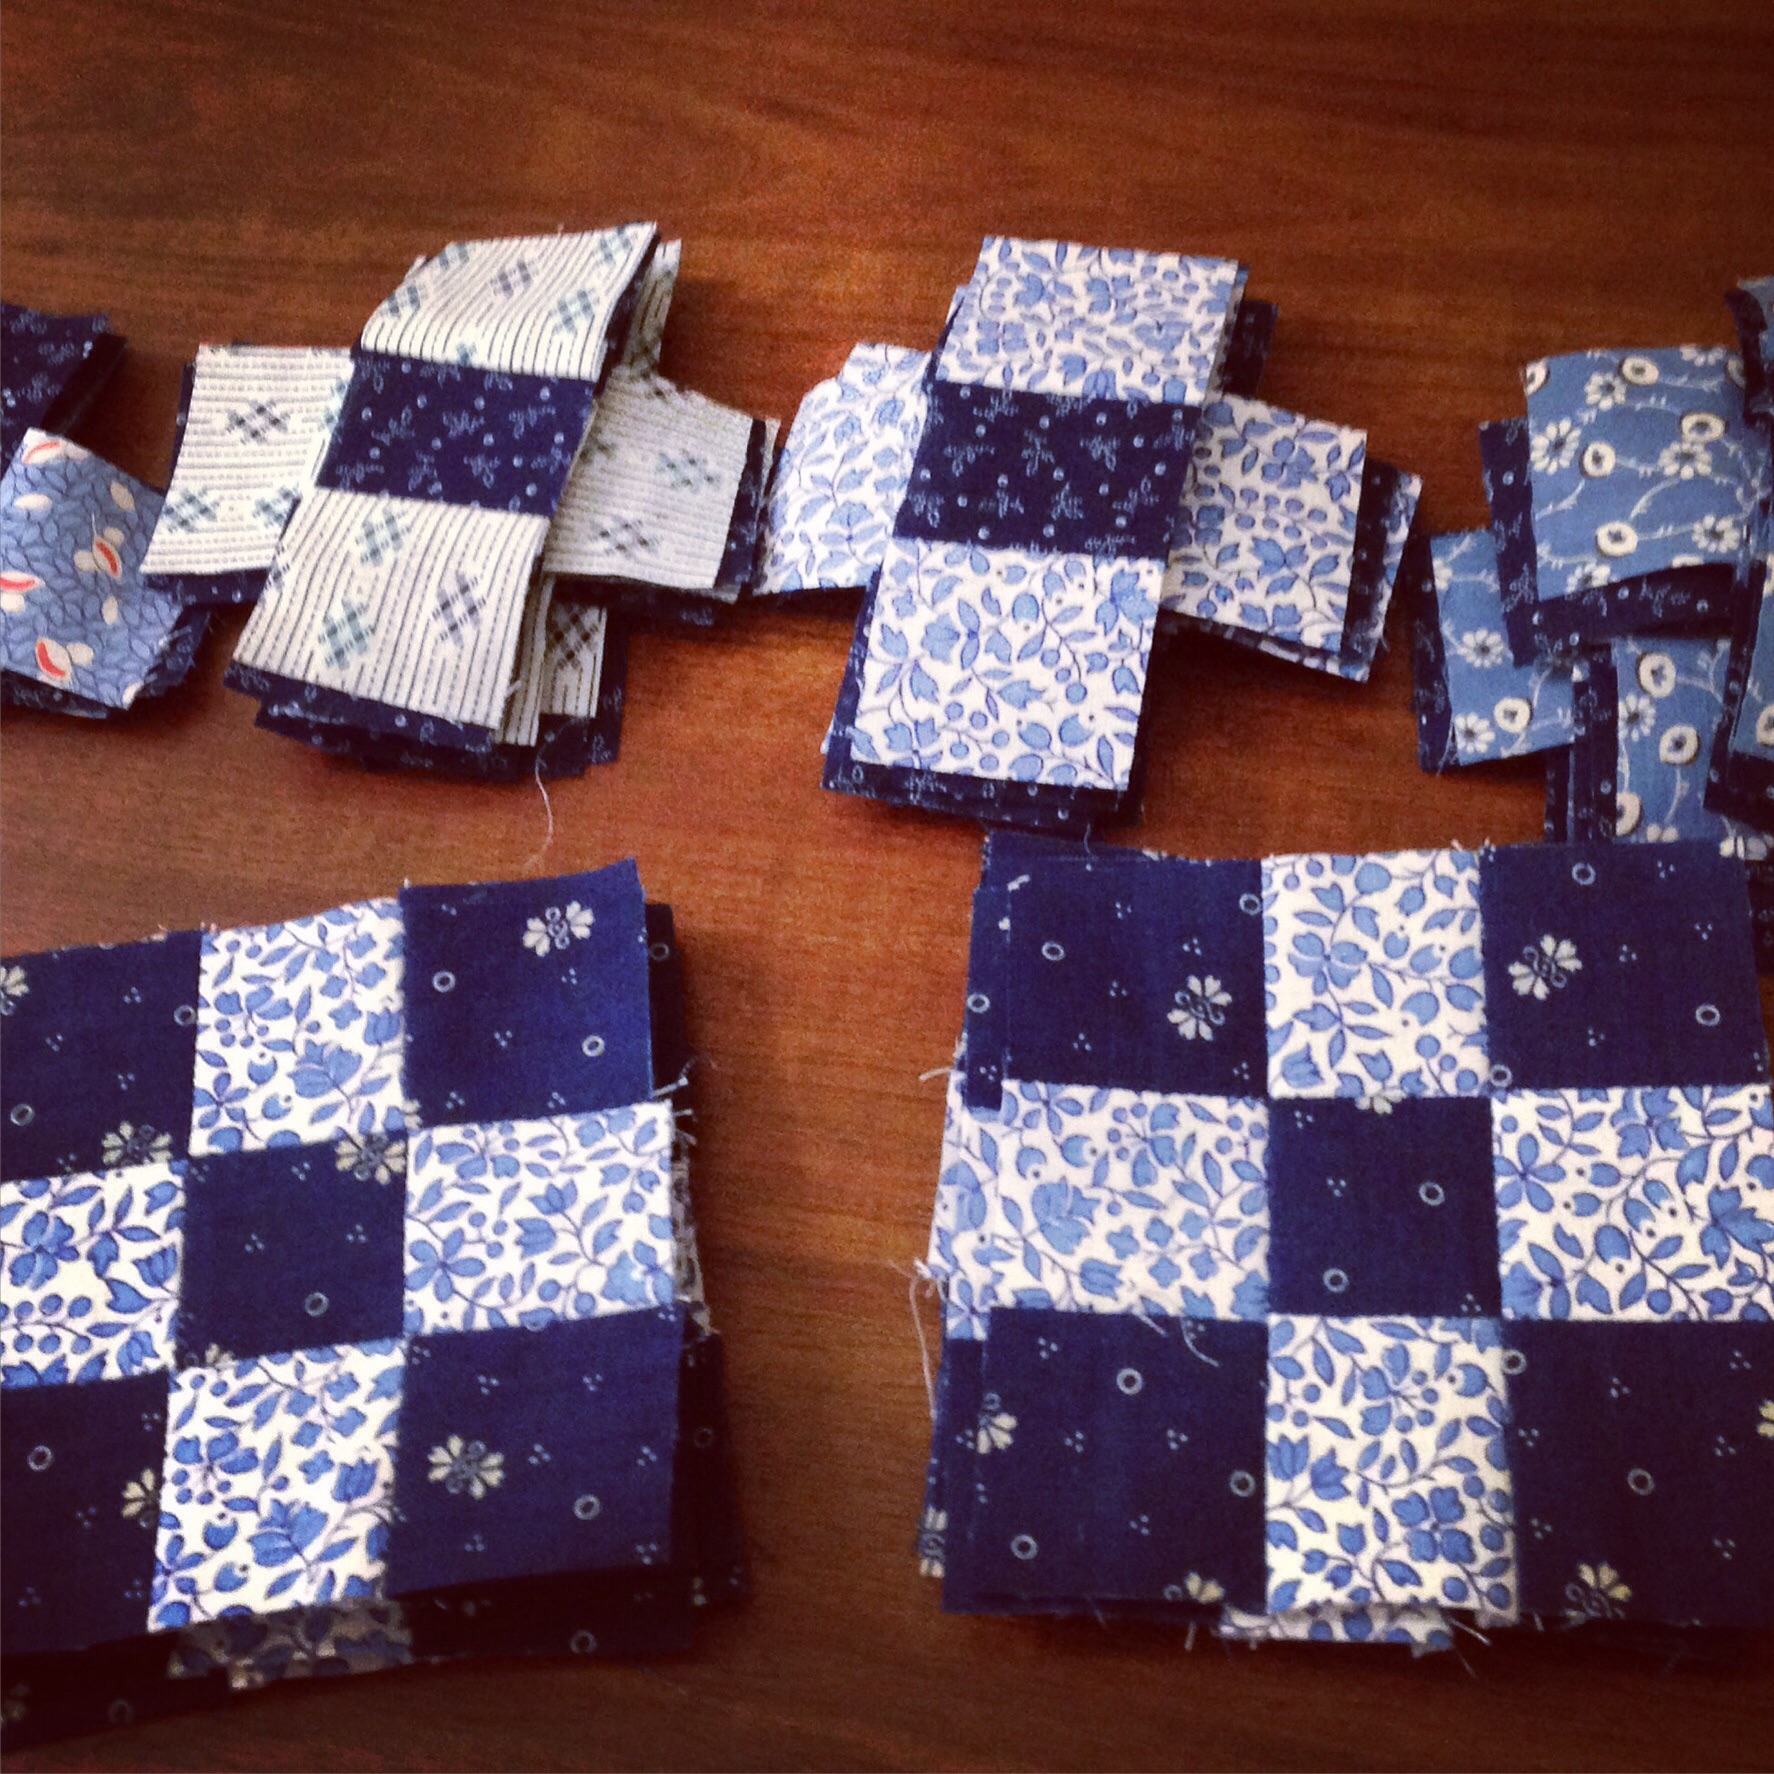
I made a bit of progress on a new project I am just starting. I am using some of the blue fabrics from the vintage collection that I posted about here. I cut strips from the blue scraps and joined those in sets of three strips. Each stripset was then sub-cut into strips that are 1 and 3/4″ wide. Those strips were then joined to make tiny 3″ nine patch blocks. The little nine patch blocks are the cutest. I will be combining those blocks with solid 3″ blocks into a larger, double nine patch to end up with a 9″ block. I have made about 25 of the baby blocks and need 100 so I am just getting started.
Hopefully I will get caught up this weekend. It is supposed to be fairly warm so I don’t see that I will be outside very much. Spending the week in Sacramento with my daughter really made me appreciate living in the Sierra Foothills. Sacramento is so darn hot – it was 107 degrees today! In addition, the traffic is lousy. We are so lucky to have nice cool nights and no traffic. I am thankful for our little town in the mountains.
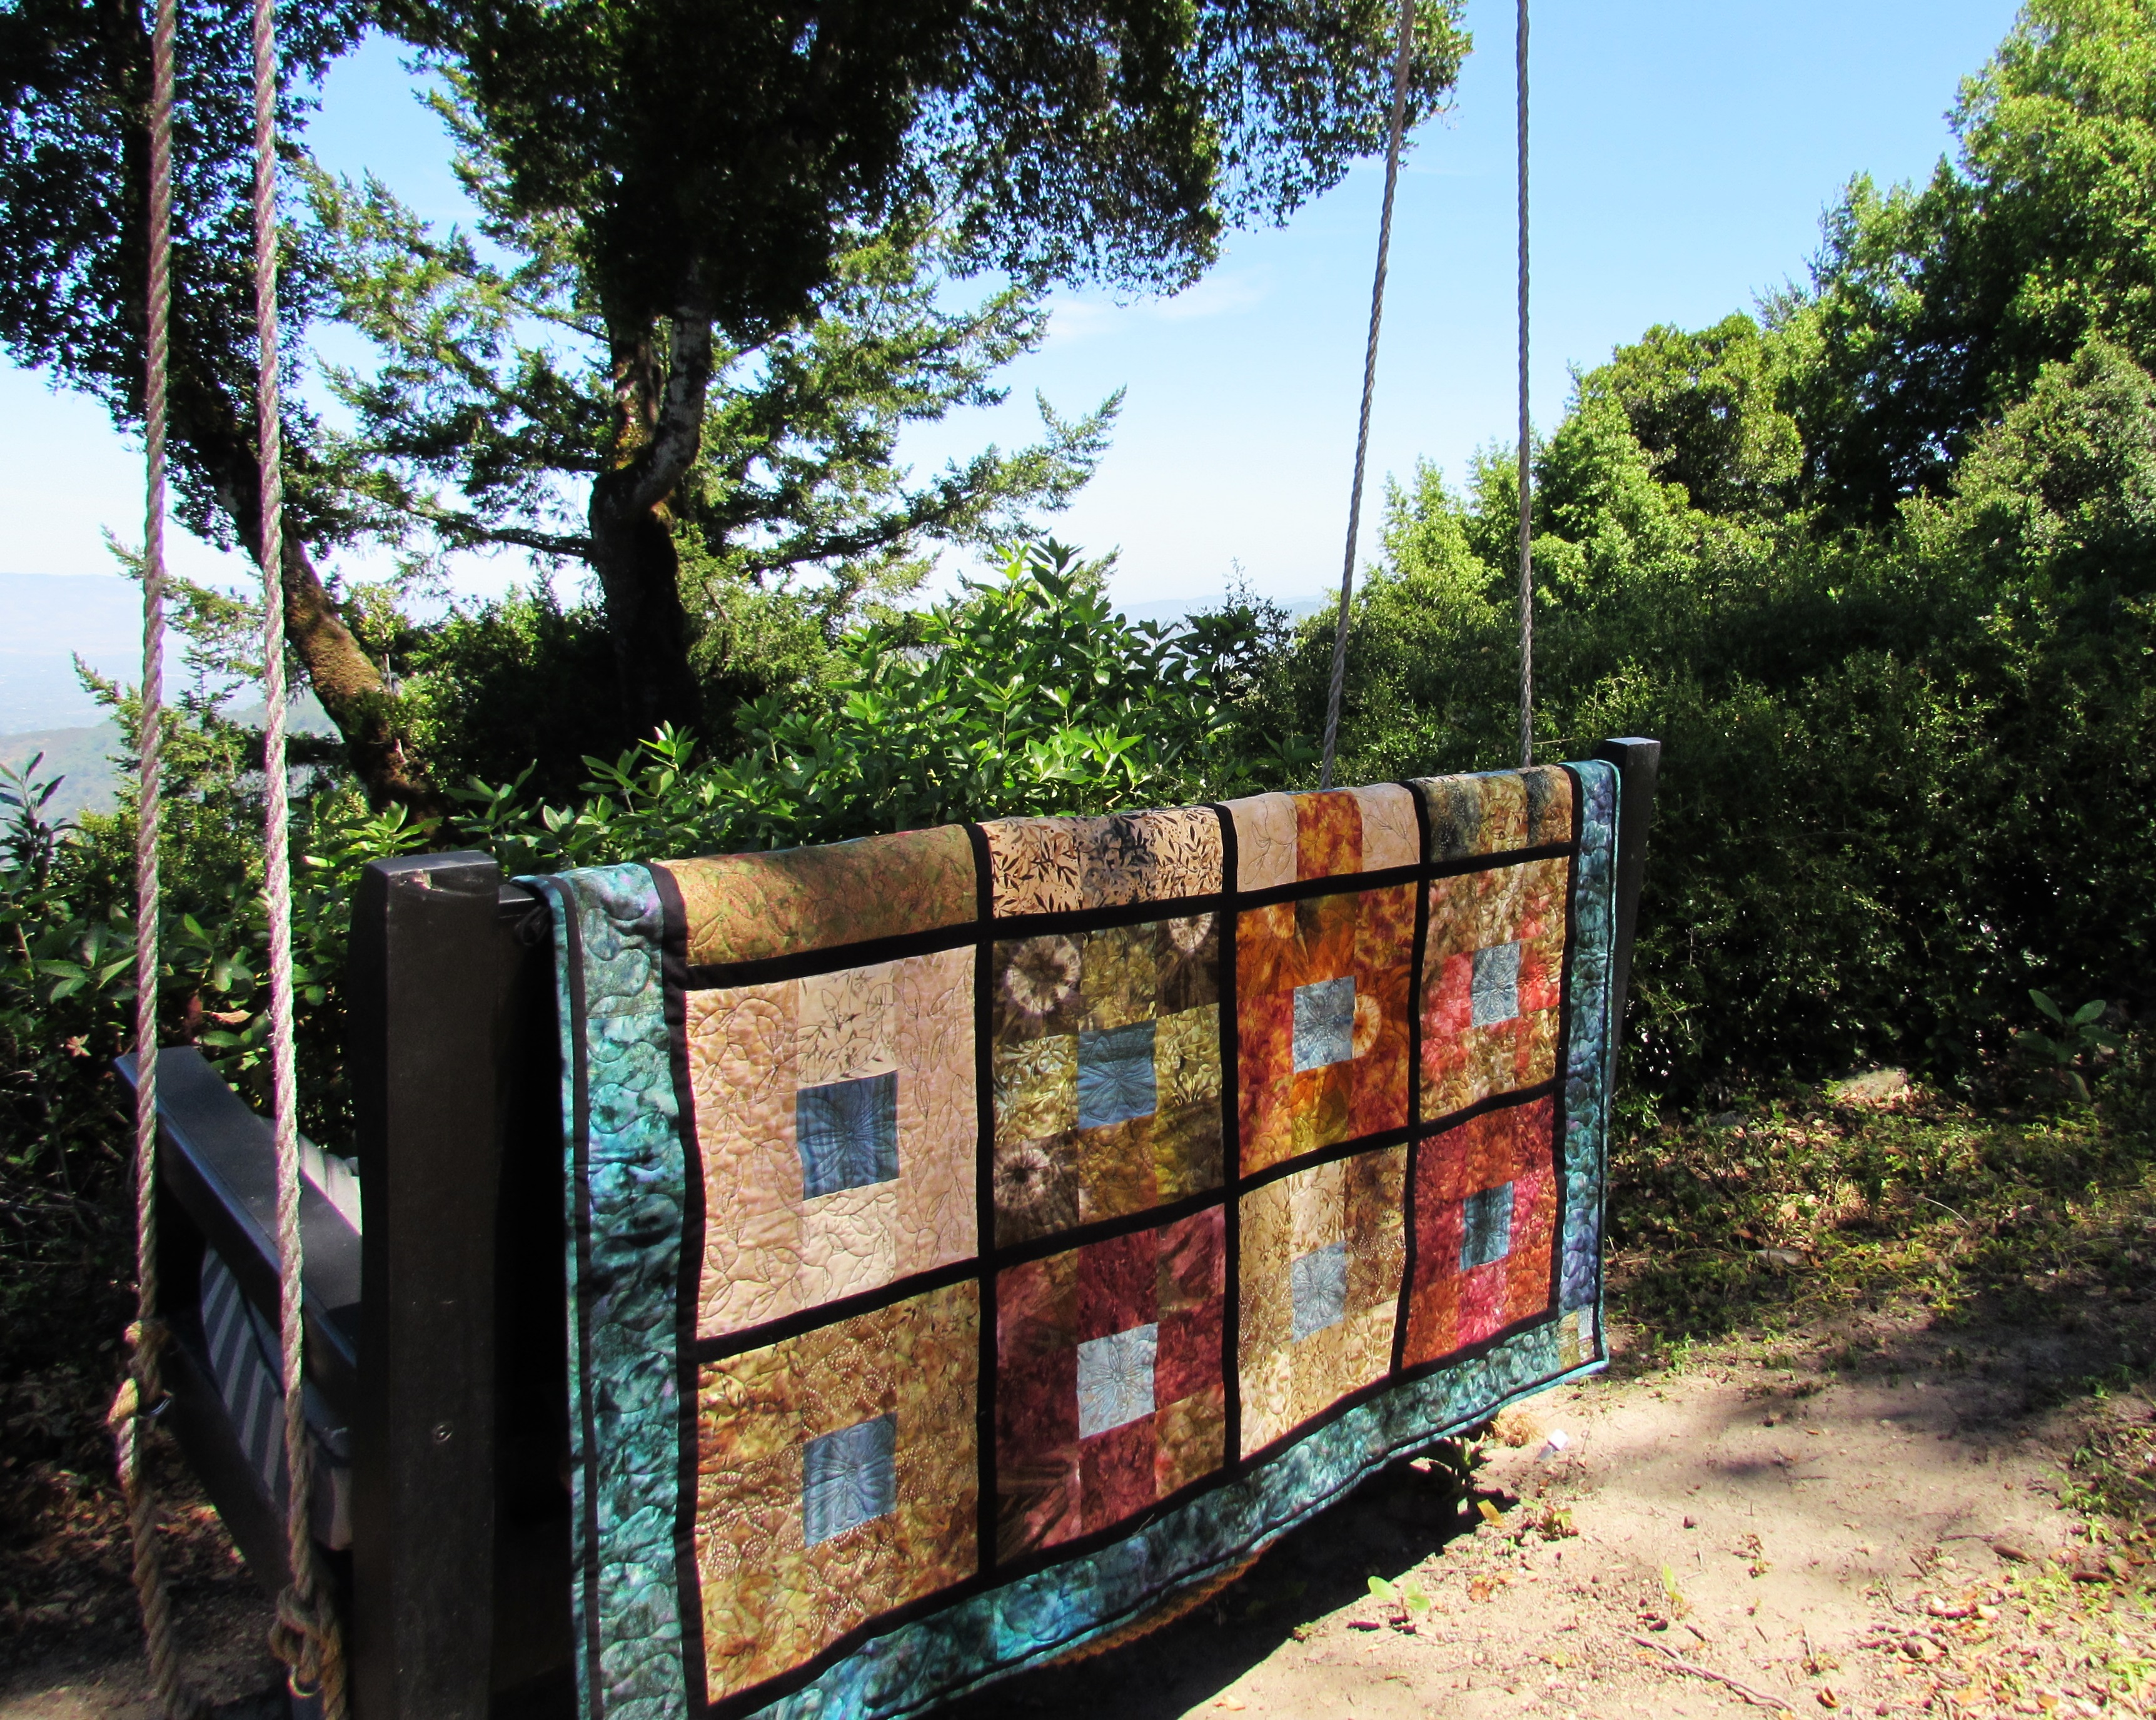
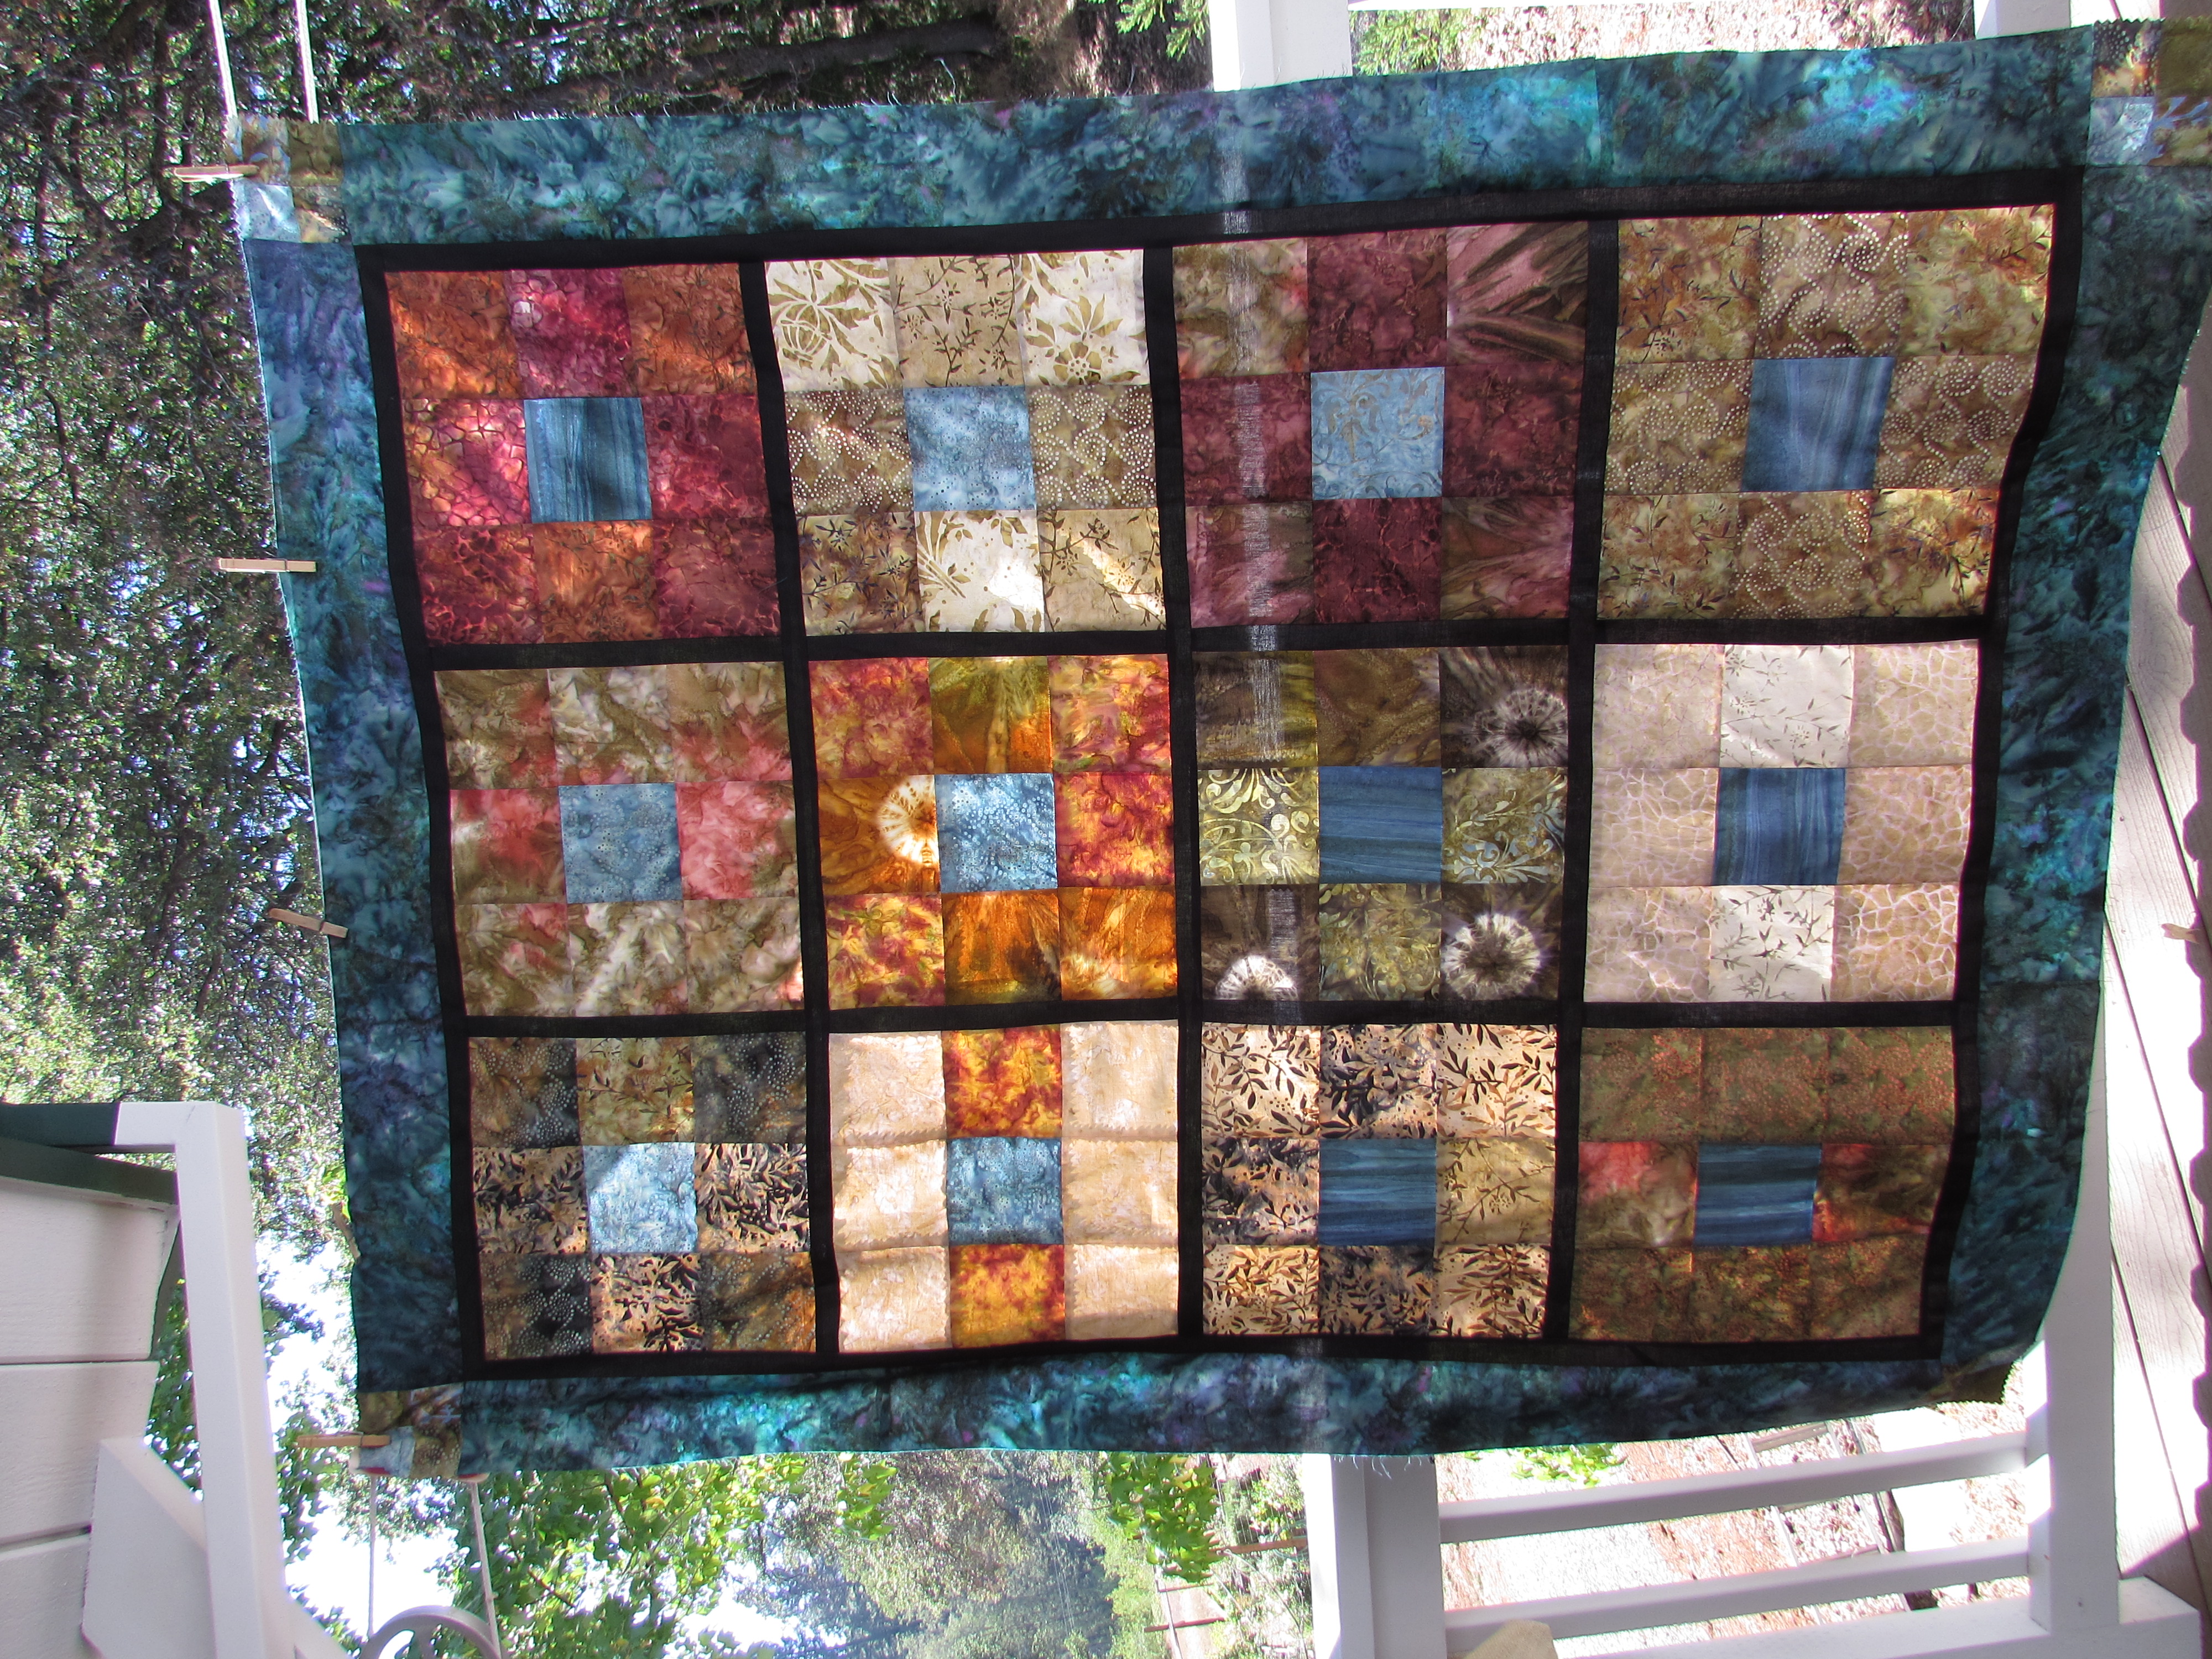
A couple of months ago my husband and I celebrated our 17th anniversary. This week I finished a quilt made with fabric purchased on our honeymoon on the island of St. John. It may have taken me 16 years to think of how I wanted to use the fabric but once I got going, it didn’t take too long to finish it up. I posted earlier about making the quilt top in August of last year. Because I wasn’t sure how I wanted to quilt it, I set it aside (for nearly a year!) Come January of 2015, I set a goal to finish this quilt up and I did it. This finish means that I do not have any unquilted tops lying around. Yahoo!
This project was fun to plan. I have been reading about whether to stitch in the ditch before starting to FMQ. Honestly, this sounded like a whole lot of extra work. I decided to compromise and I stitched the perimeter of each nine patch. I thought this would stabilize the quilt and hopefully, reduce and puckers on the backing. It is so irritating when you flip the quilt over to check on it and there is a fold. Between pin basting and ditch stitching I was hoping for a better back. Some quilters think it holds the quilt square and prevents distortion. Others say it makes the FMQ work look better. I do think it helped. My quilt stayed square and often, it doesn’t. I didn’t have a single pucker on the back. The only thing is that on the back of the quilt, the ditch stitching is very visible so one has to take that into account when planning the quilting. It doesn’t show much at all on the front. As for any benefit to the look of the quilting on each nine patch, I didn’t notice a huge difference. In fact, after I had quilted about 65% of the project, I noticed that I had skipped ditch stitching one block. That block really didn’t look noticeable different from the others. So, I think it is good forquilt stabilization and keeping square but doesn’t noticeably enhance the FMQ.
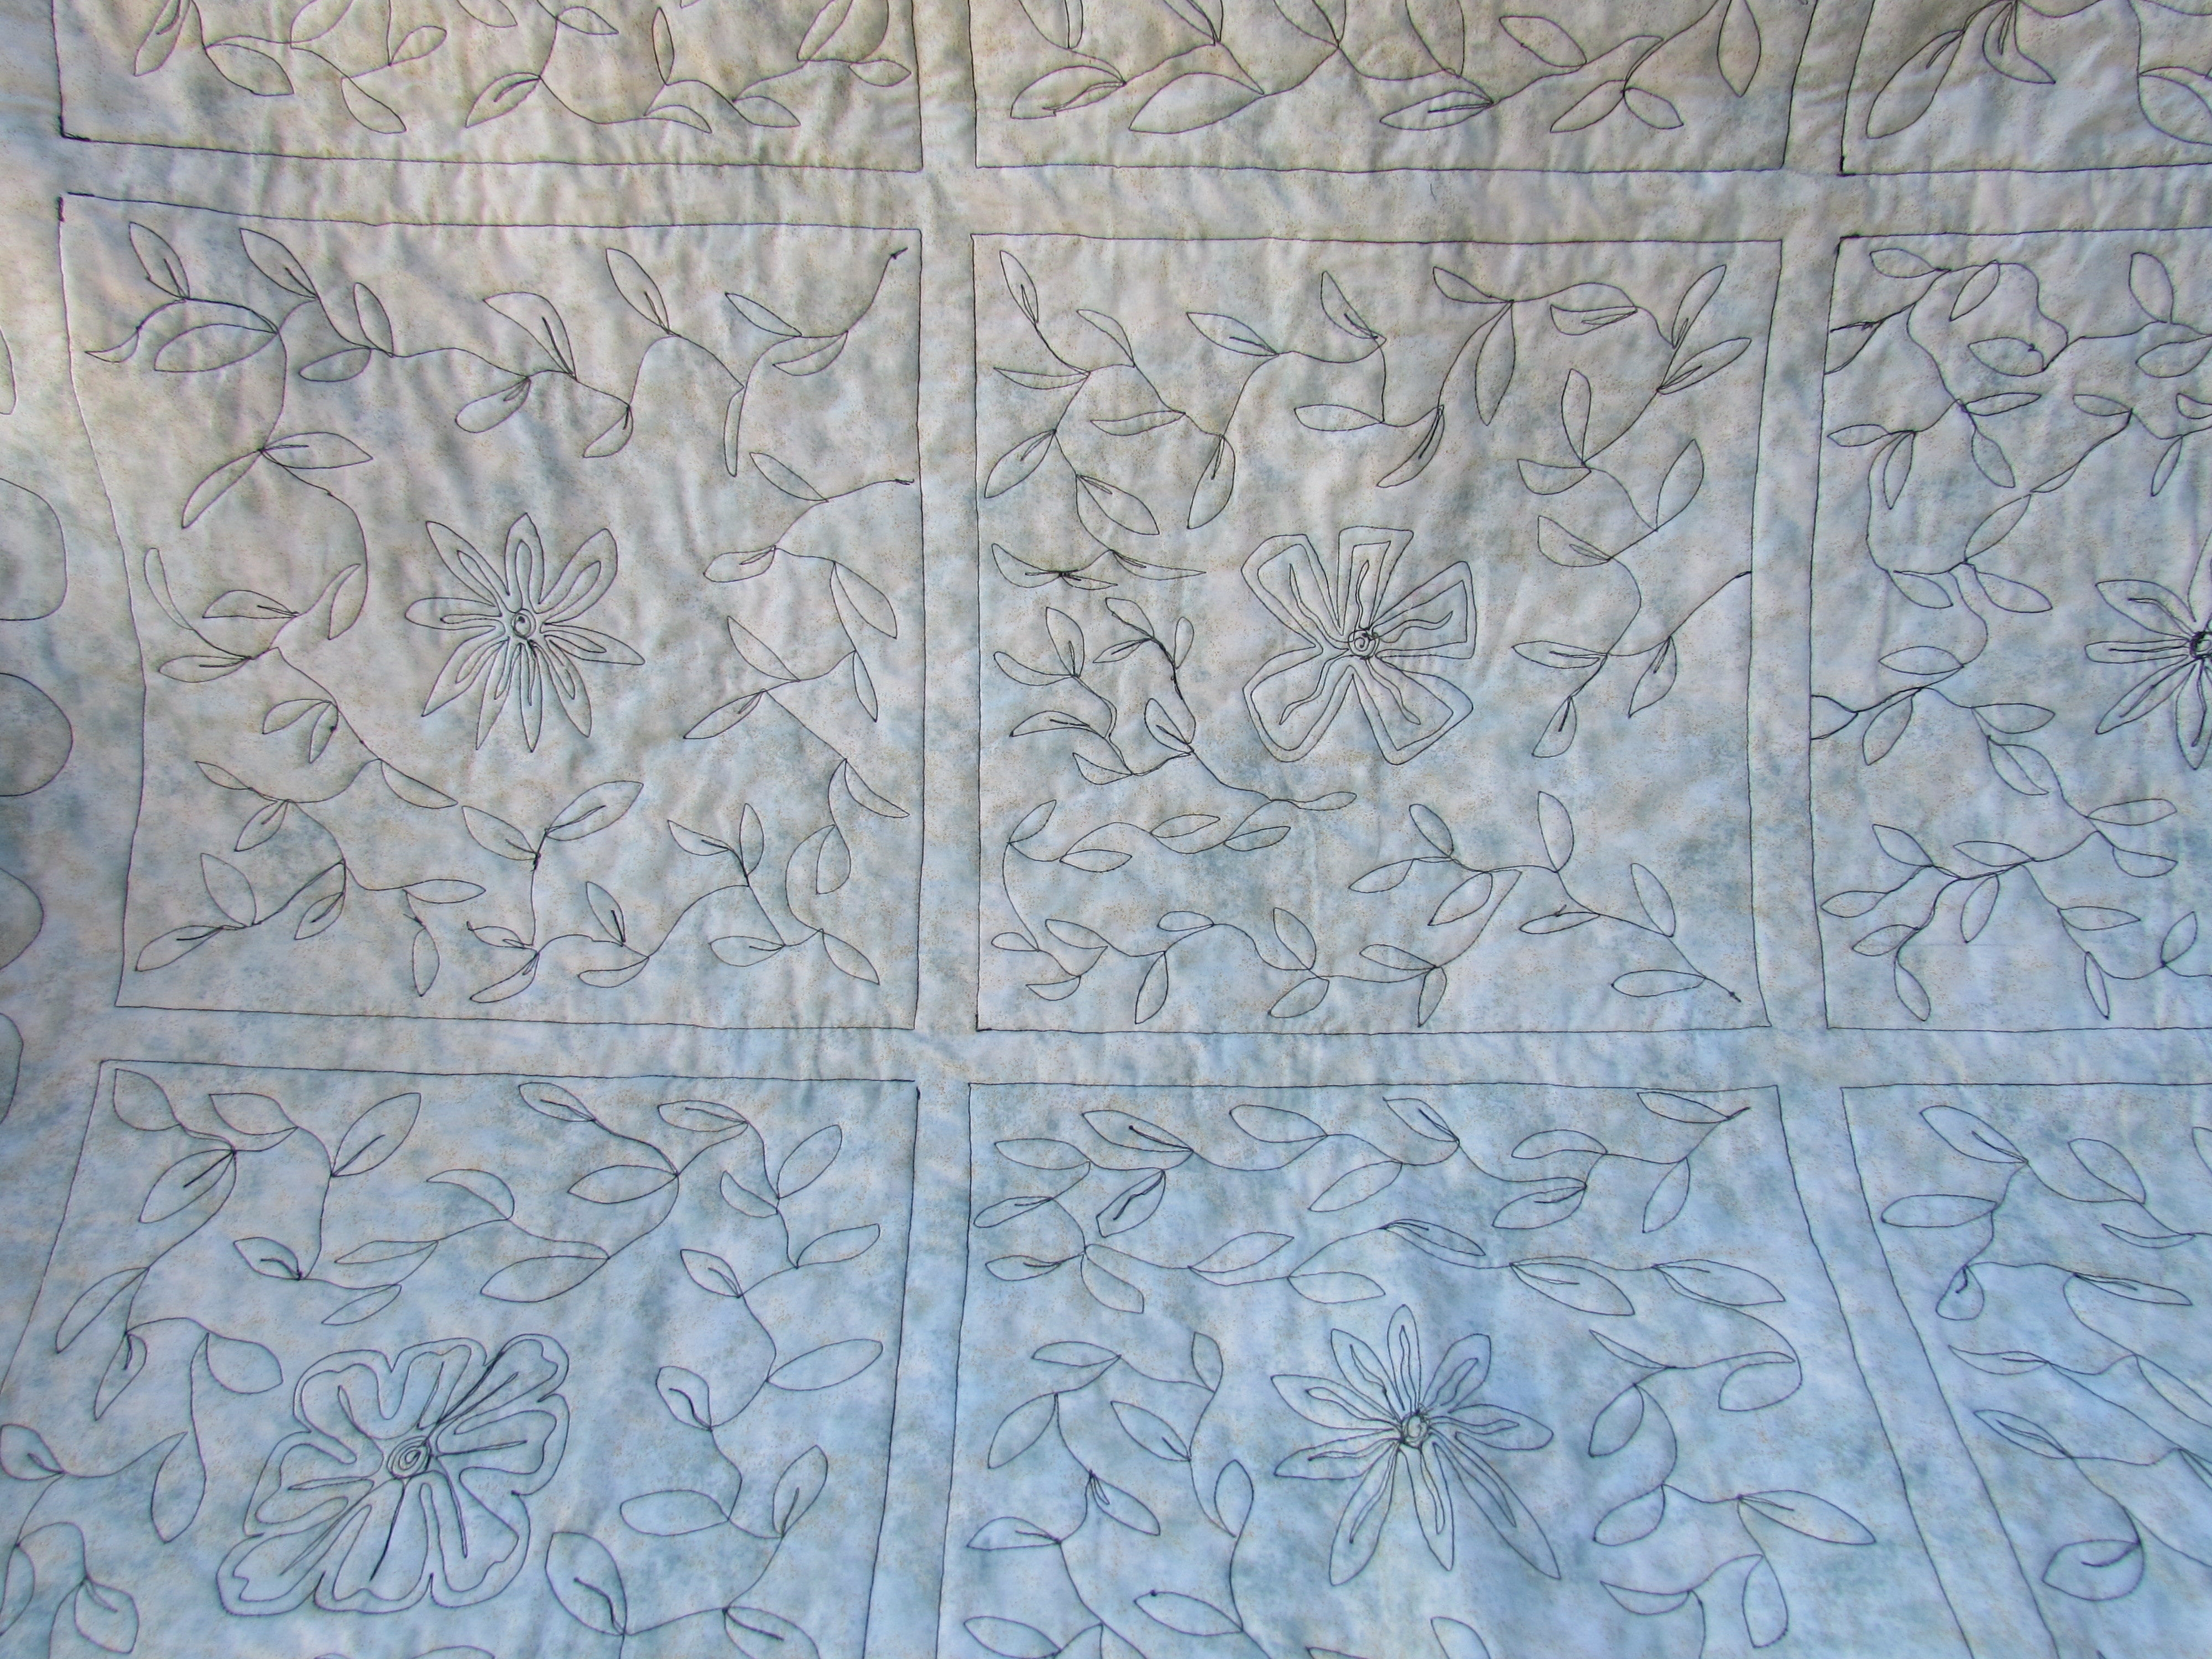
I took a look at some quilting sites (mainly Lori Kennedy’s site, The Inbox Jaunt) to get inspiration. I knew that I would do an all over FMQ pattern but wanted just a bit more detail than that. Each of the nine patch blocks have a blue center. Starting with that, I quilted a large flower in the center of each blue square.
I decided that leafy fines would complement the flowers. Using a variegated green YLI quilting thread, I FMQ’d leaves of various sizes on each block. I left the black sashing plain. Because the backing is a light green batik, the FMQ stitching really shows up on the back. Not sure if this is good or bad! For the most part, I am happy with the stitching. Why is it that my eye goes to the little tension blips and the occasional jittery stitching instead of the overall look? For those of you that quilt on your domestic machine, how to you handle the starts and stops? Look closely at the squares that I ditch stitched, see the dark spots at one corner where I stopped and started? I chose to reverse a few stitches rather than knot and bury tons of threads. Not sure I like how this looks. What is the consensus? Do you back tack stitches or knot and bury threads? I know which is cleaner but yikes, burying all of those threads is time-consuming.
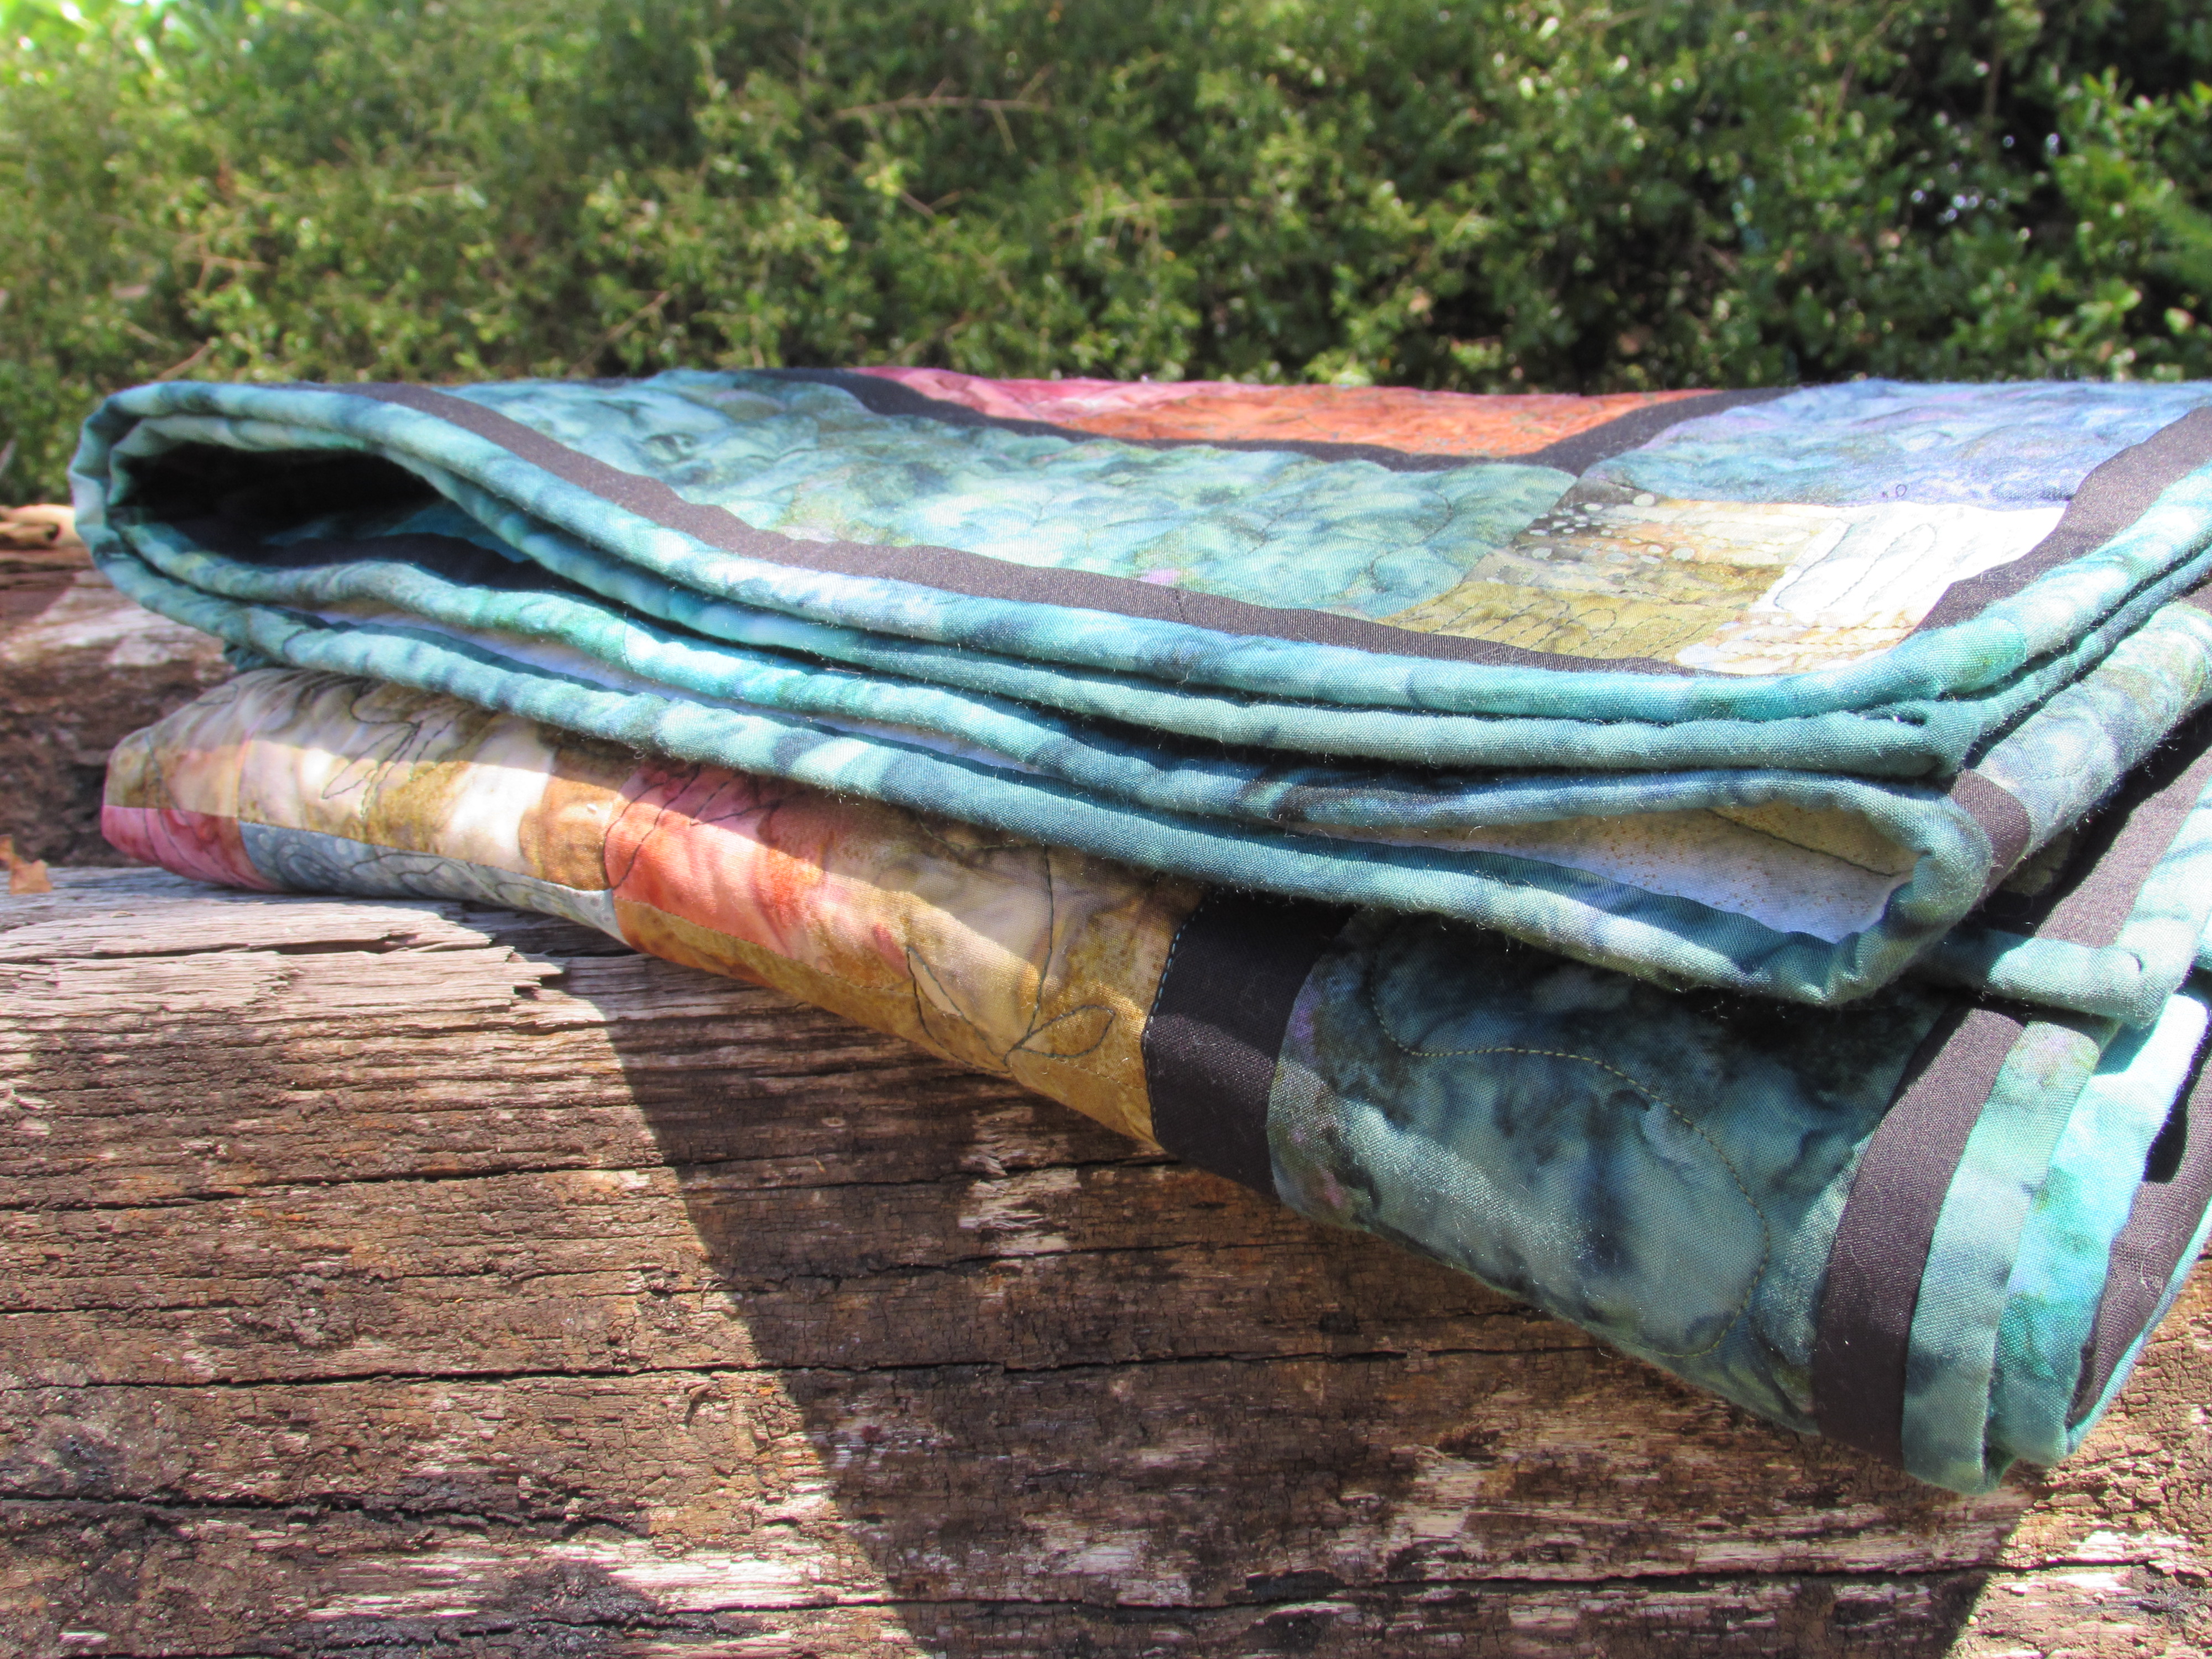
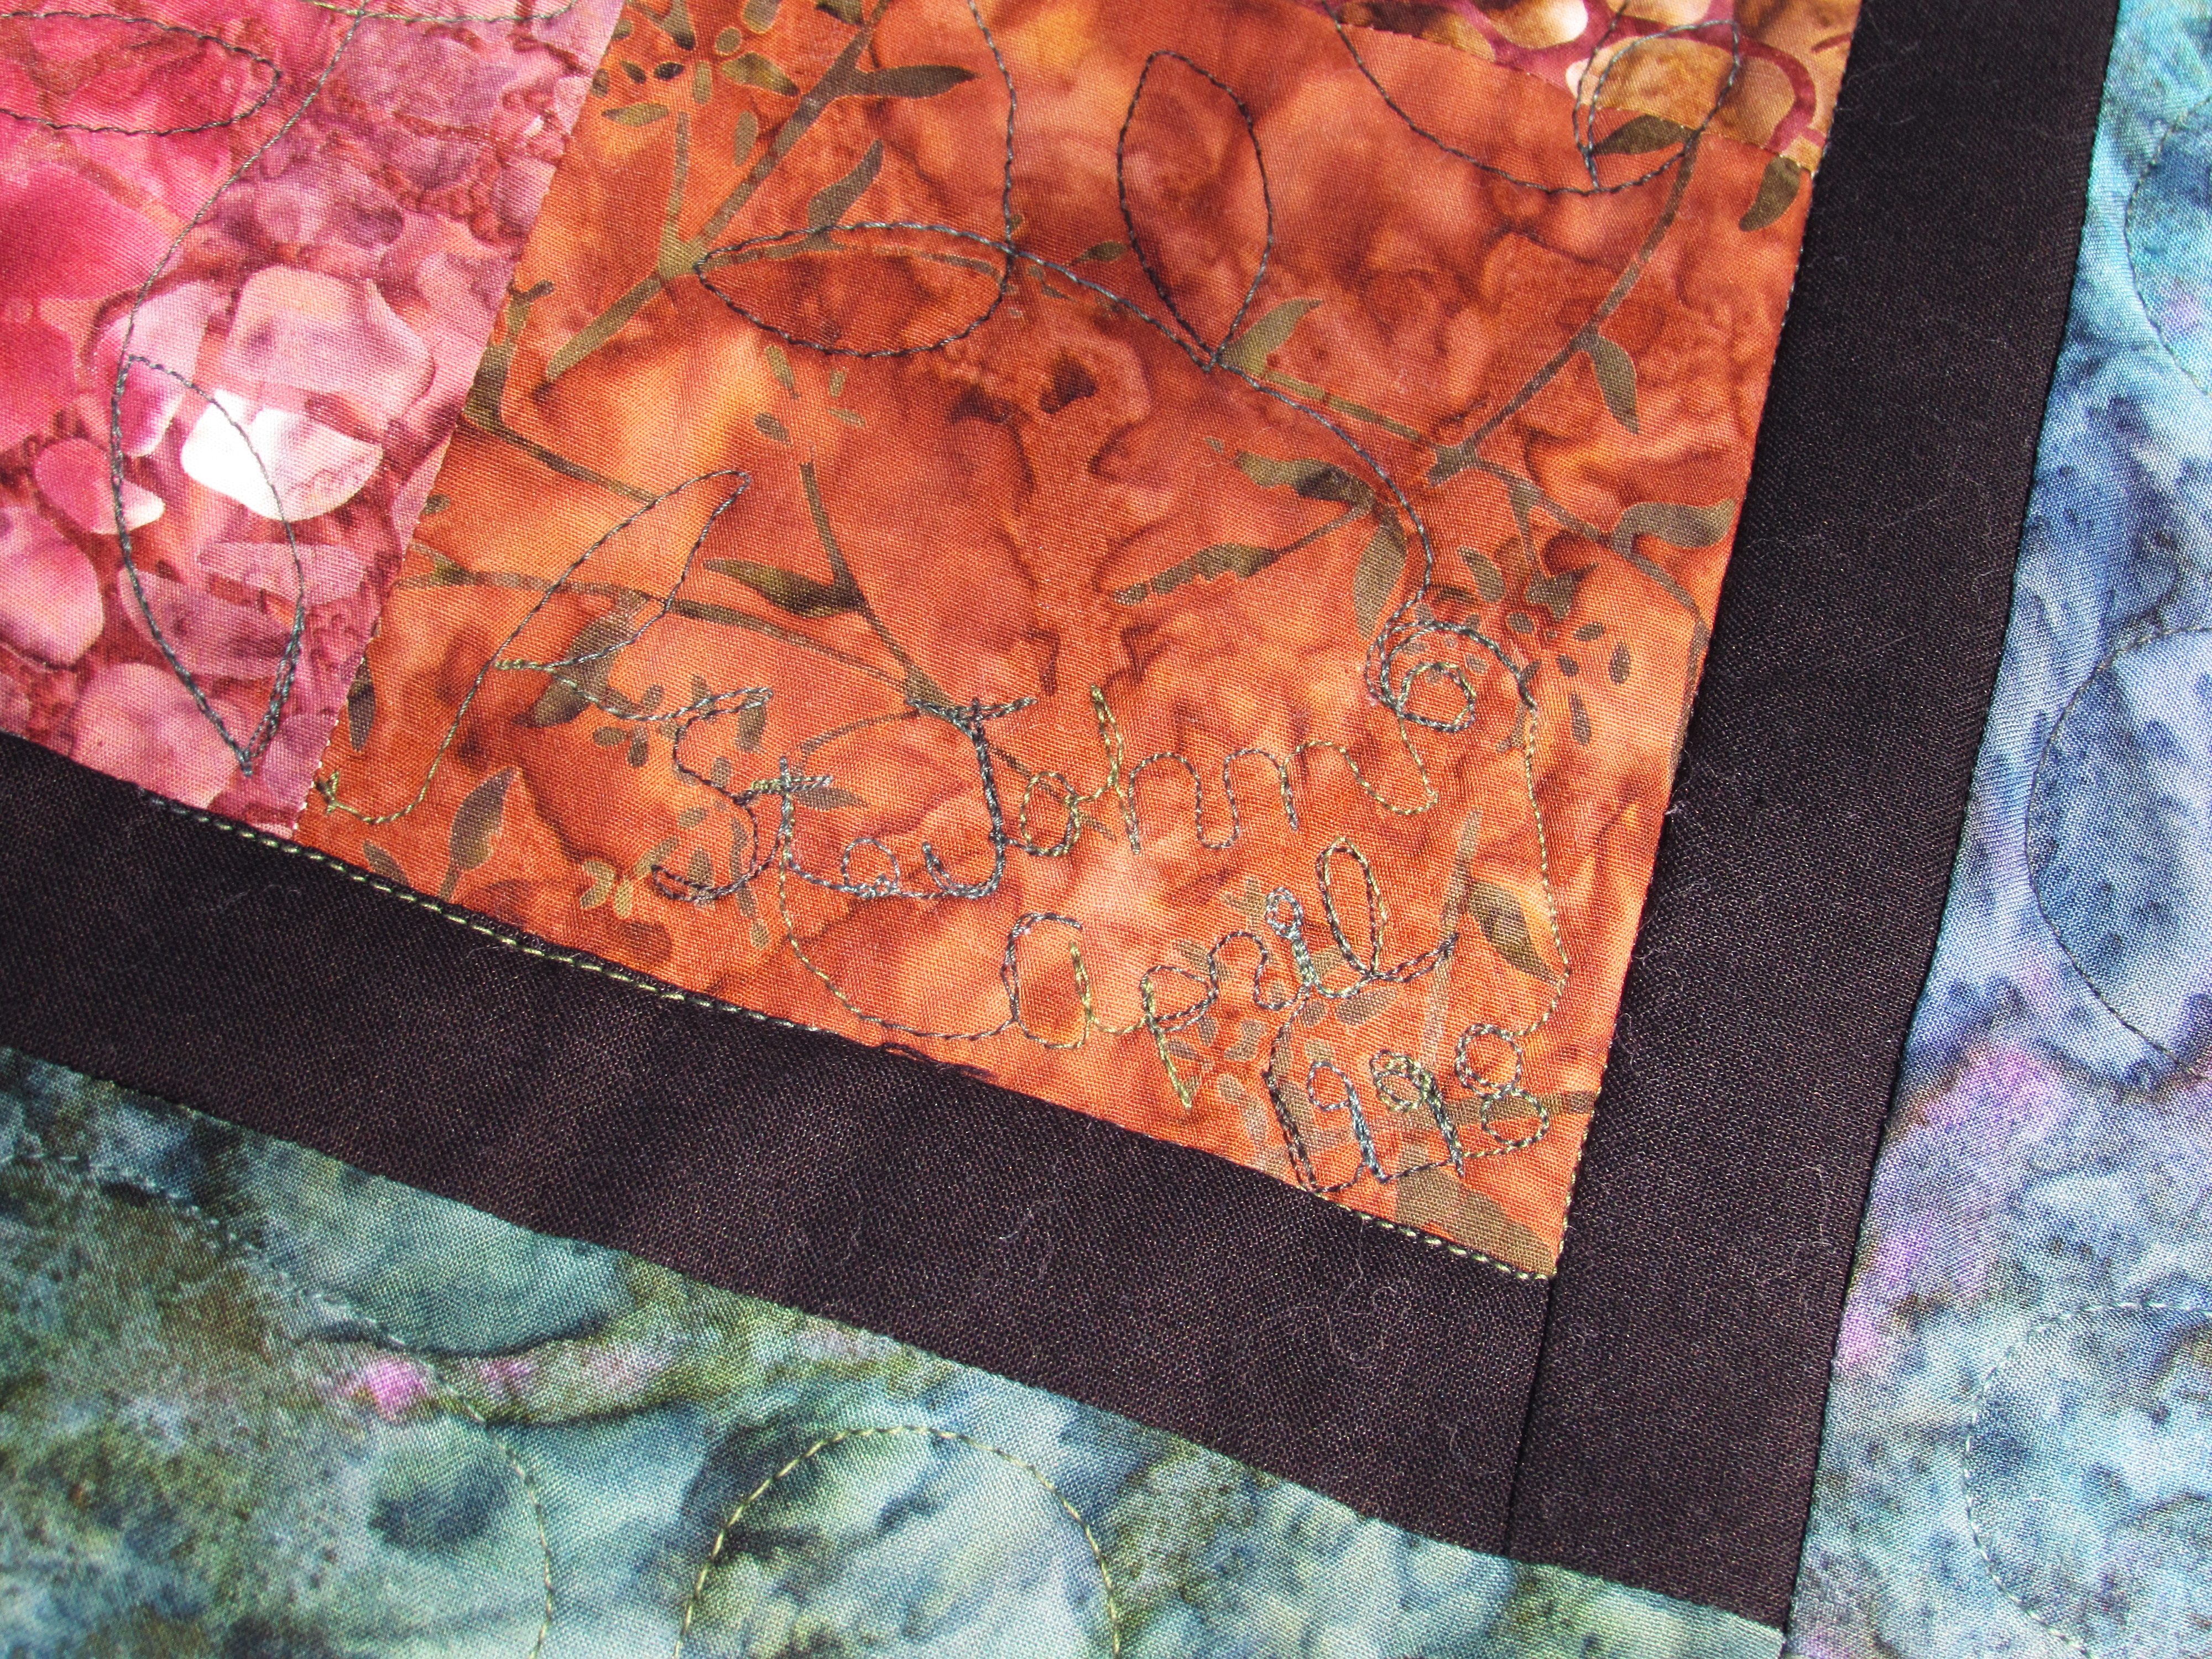
The binding is, as usual, one of my favorite parts. I used the honeymoon batik for the border and also for the binding. To add some depth, I attached a black flange to the perimeter of the quilt before binding the quilt. I love the ‘something extra’ that this flange adds to the quilt.
To honor our honeymoon, I tried stitching St. John as well as April, 1998 on a corner of the quilt. Kind of difficult to see but it was a good addition.
When I was binding it, I came upon my two ends that needed to be joined and sighed my heavy, here-we-go sigh. I hate attaching the tails of the binding. This time I looked to Rita over at Red Pepper Quilts. On the off chance that there is someone who hasn’t heard of Rita, she is an amazing quilter who has the most amazing sense of color. Her quilts are bright, happy and so vivid. Truly amazing. If you haven’t looked at her work, now is the time. She has numerous tutorials, several of which talk about binding. This is the one that I used. The result was good so I will refer back to her measurements next time.
I can check this goal off of my 2015 list and move on to another one! I think the next goal I need to work on is some quilt restoration. I have two quilts to restore and I want to get one of them going soon.
Finally, remember the Allison Glass mini swap that I participated in? I blogged about the mini that I made here. There were a few comments asking me to post the mini that I received. Wow, I can’t wait to share it. It is gorgeous. I am so grateful to my partner for putting so much effort into this project!
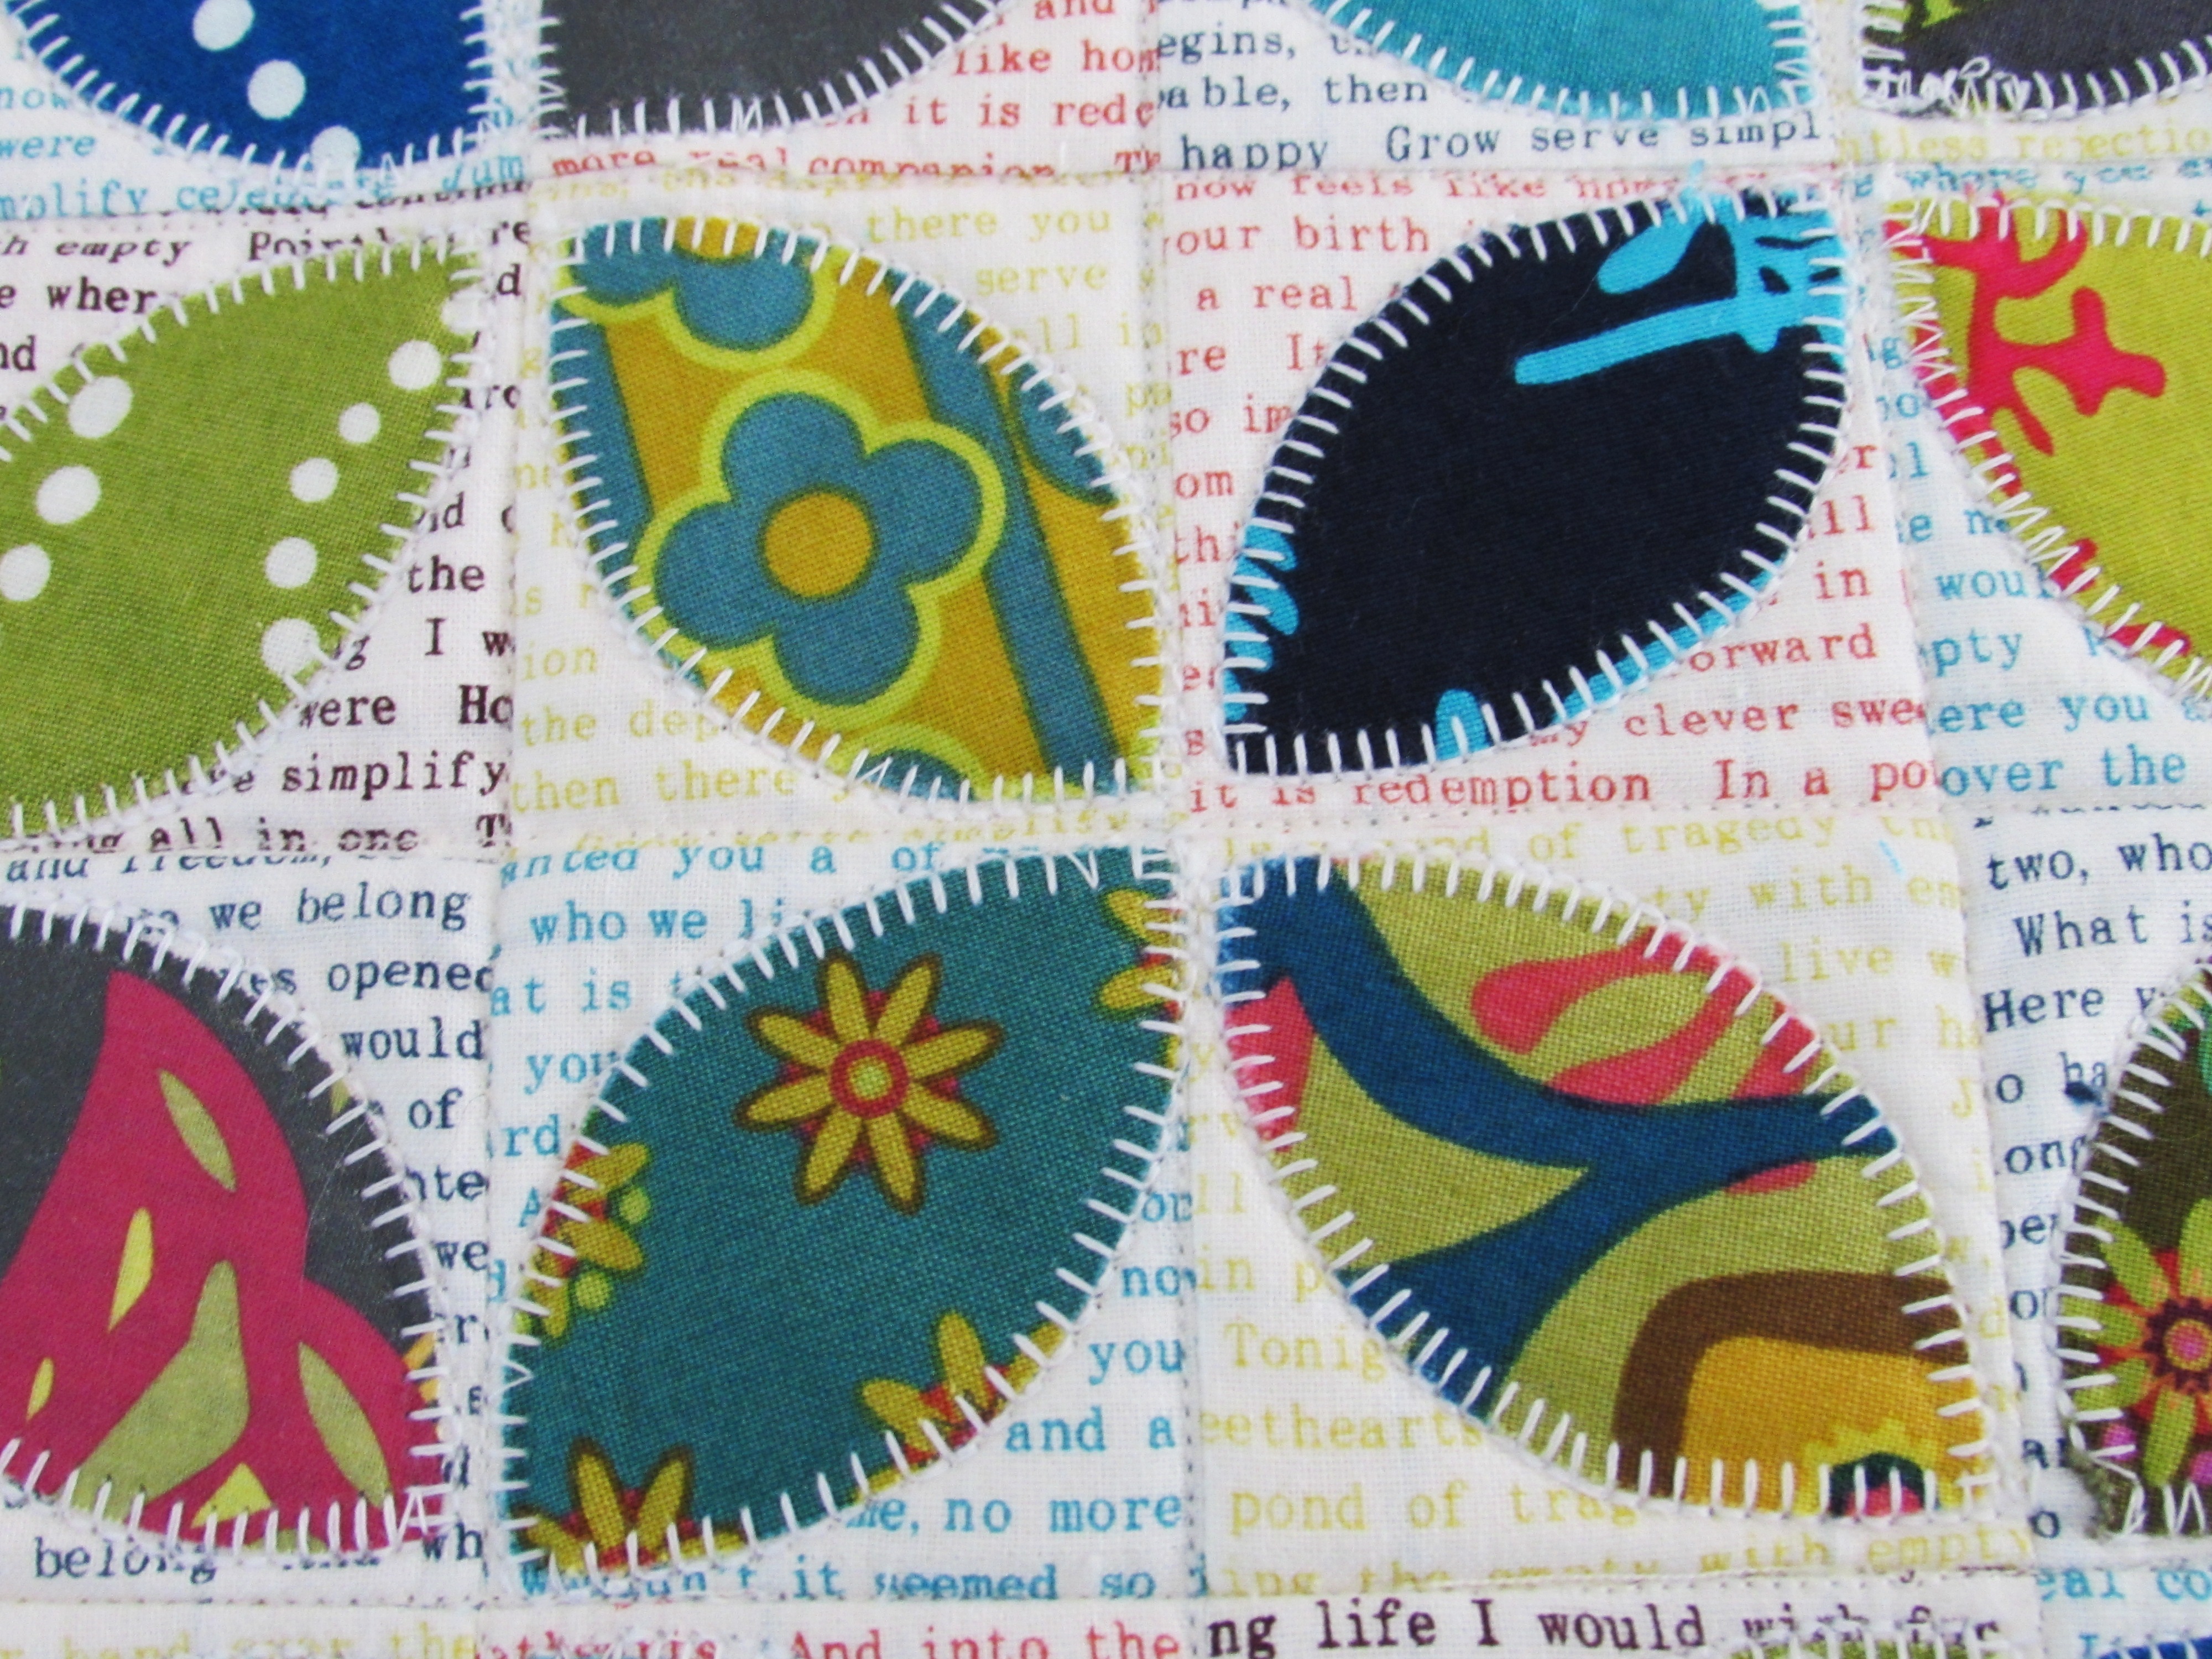
My partner outdid herself with this. I love the text print that was used as the background on each 2″ square. She appliqued the orange peels with a blanket stitch which was brilliant.
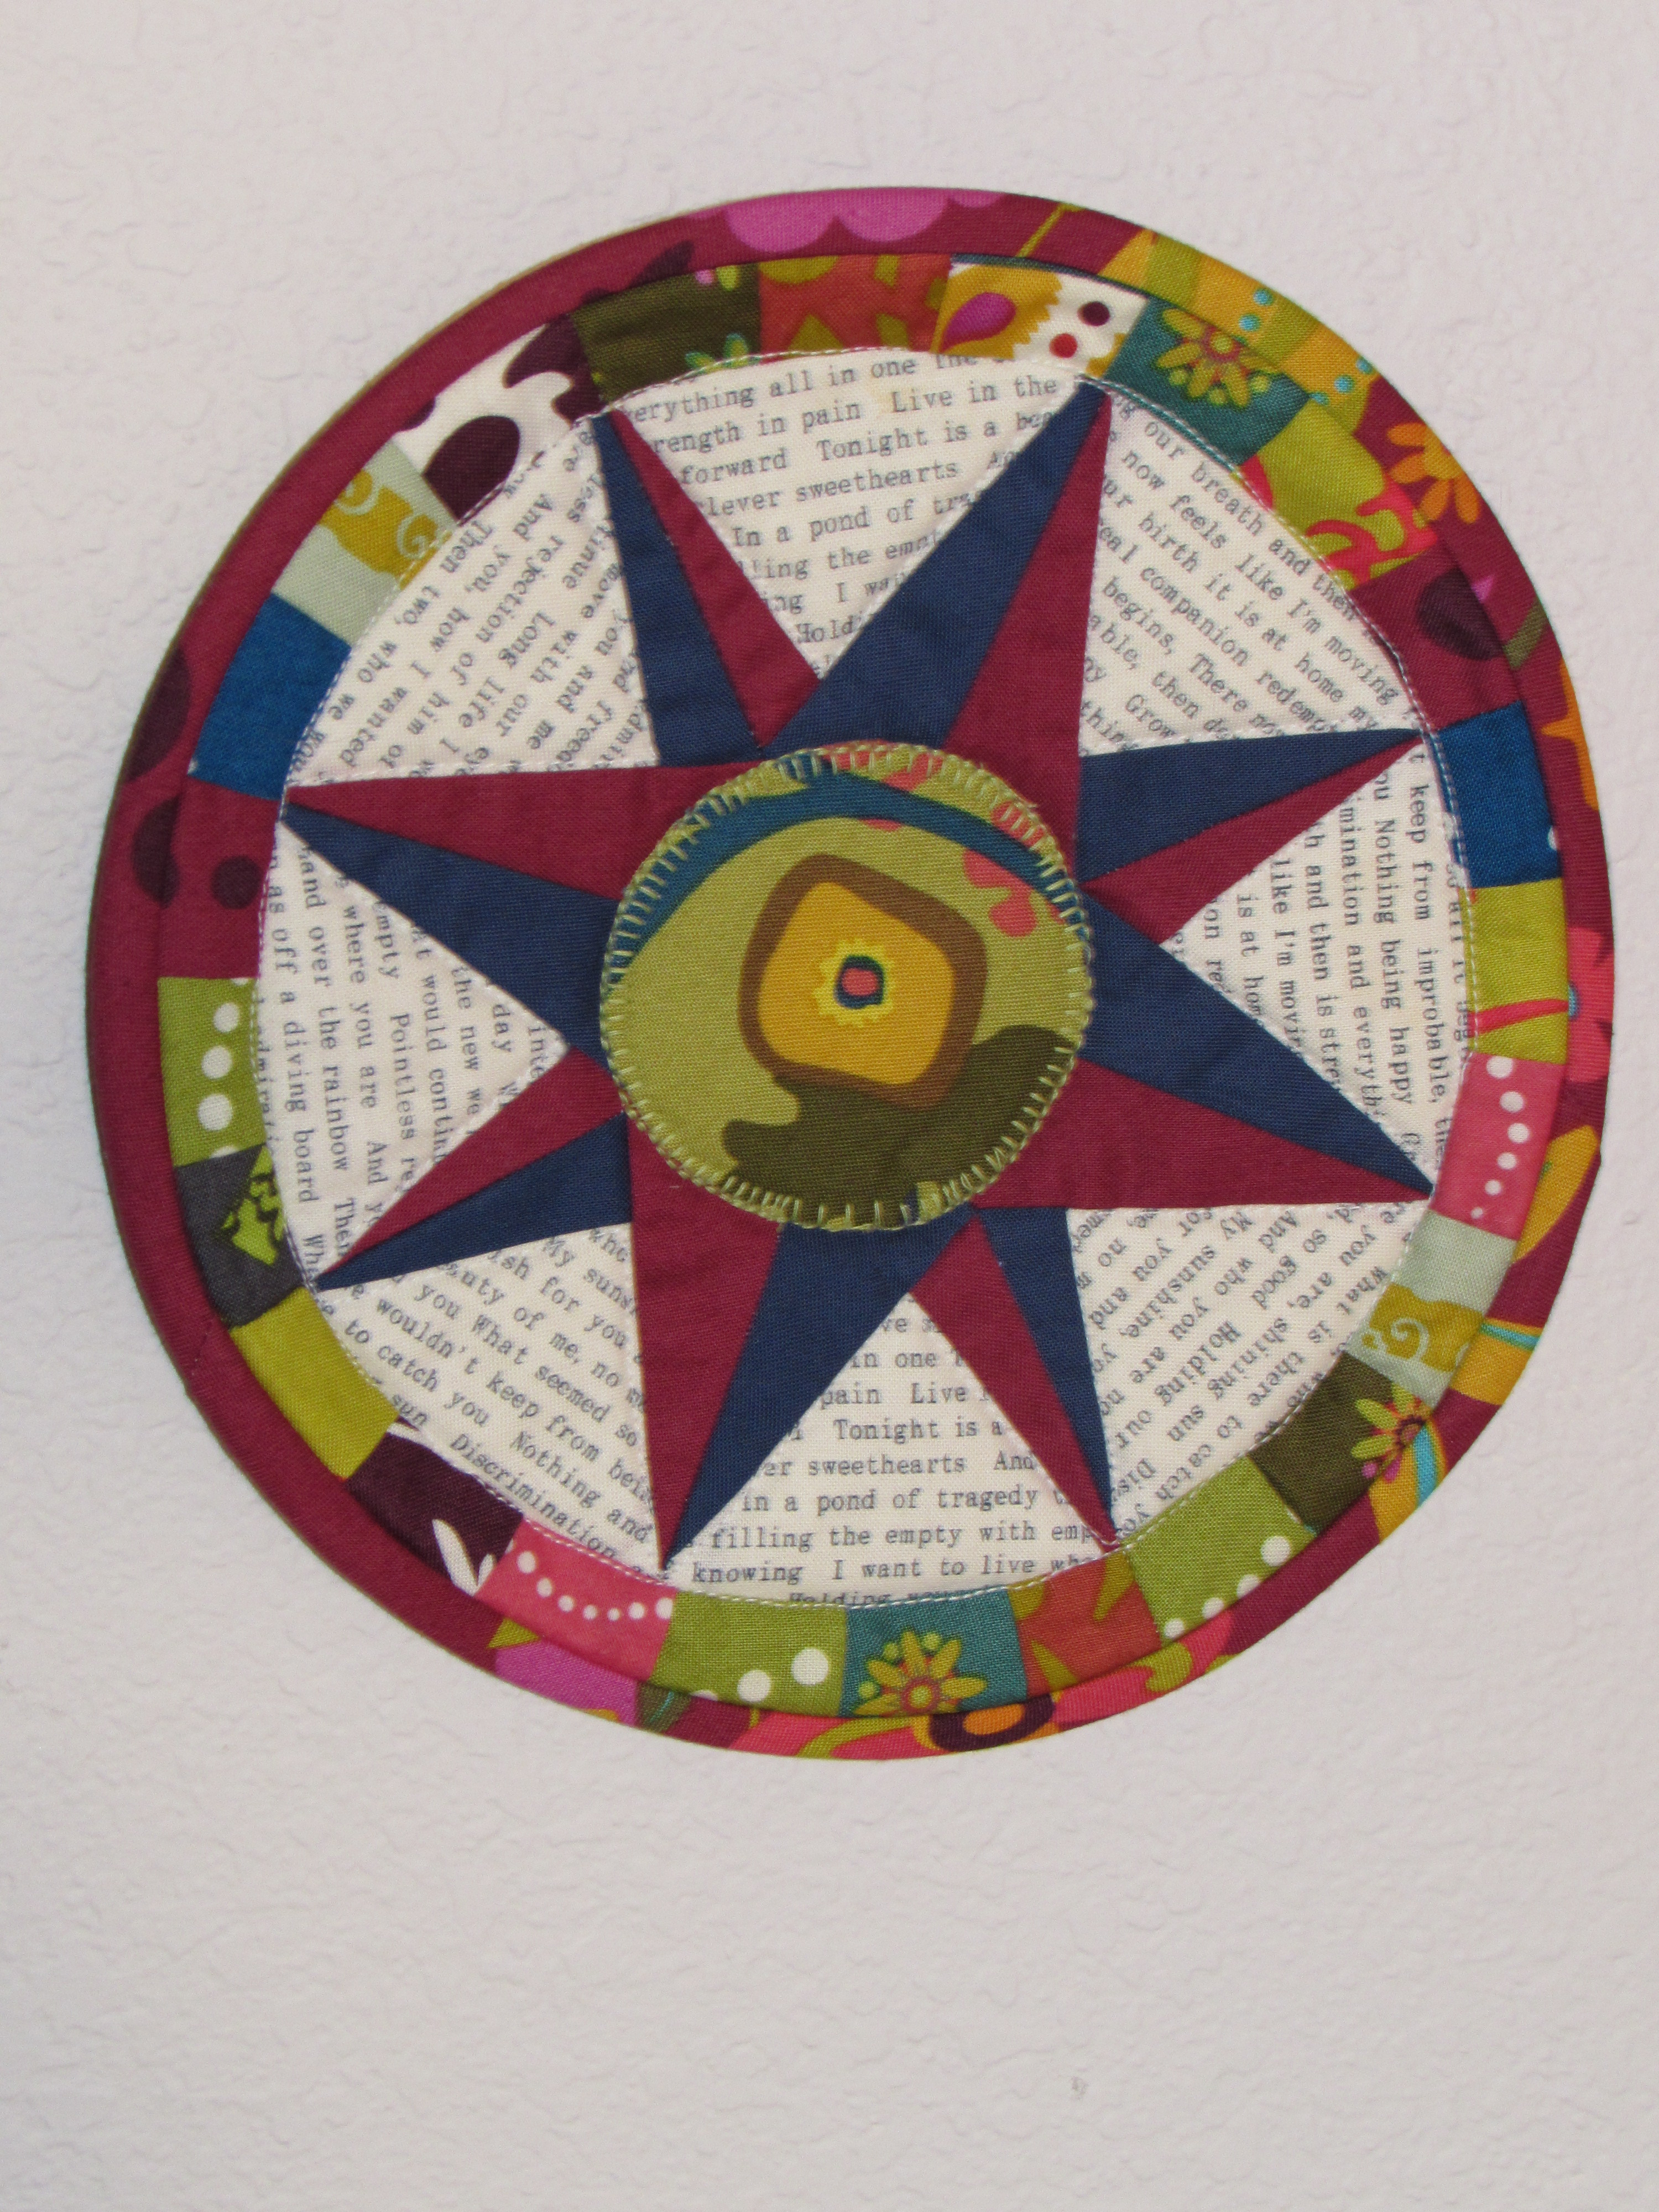
She also made this smaller mini. I think it is intended as a pot holder but I am hanging it on the wall. I don’t want it soaked with food splatter, which we all know would happen.
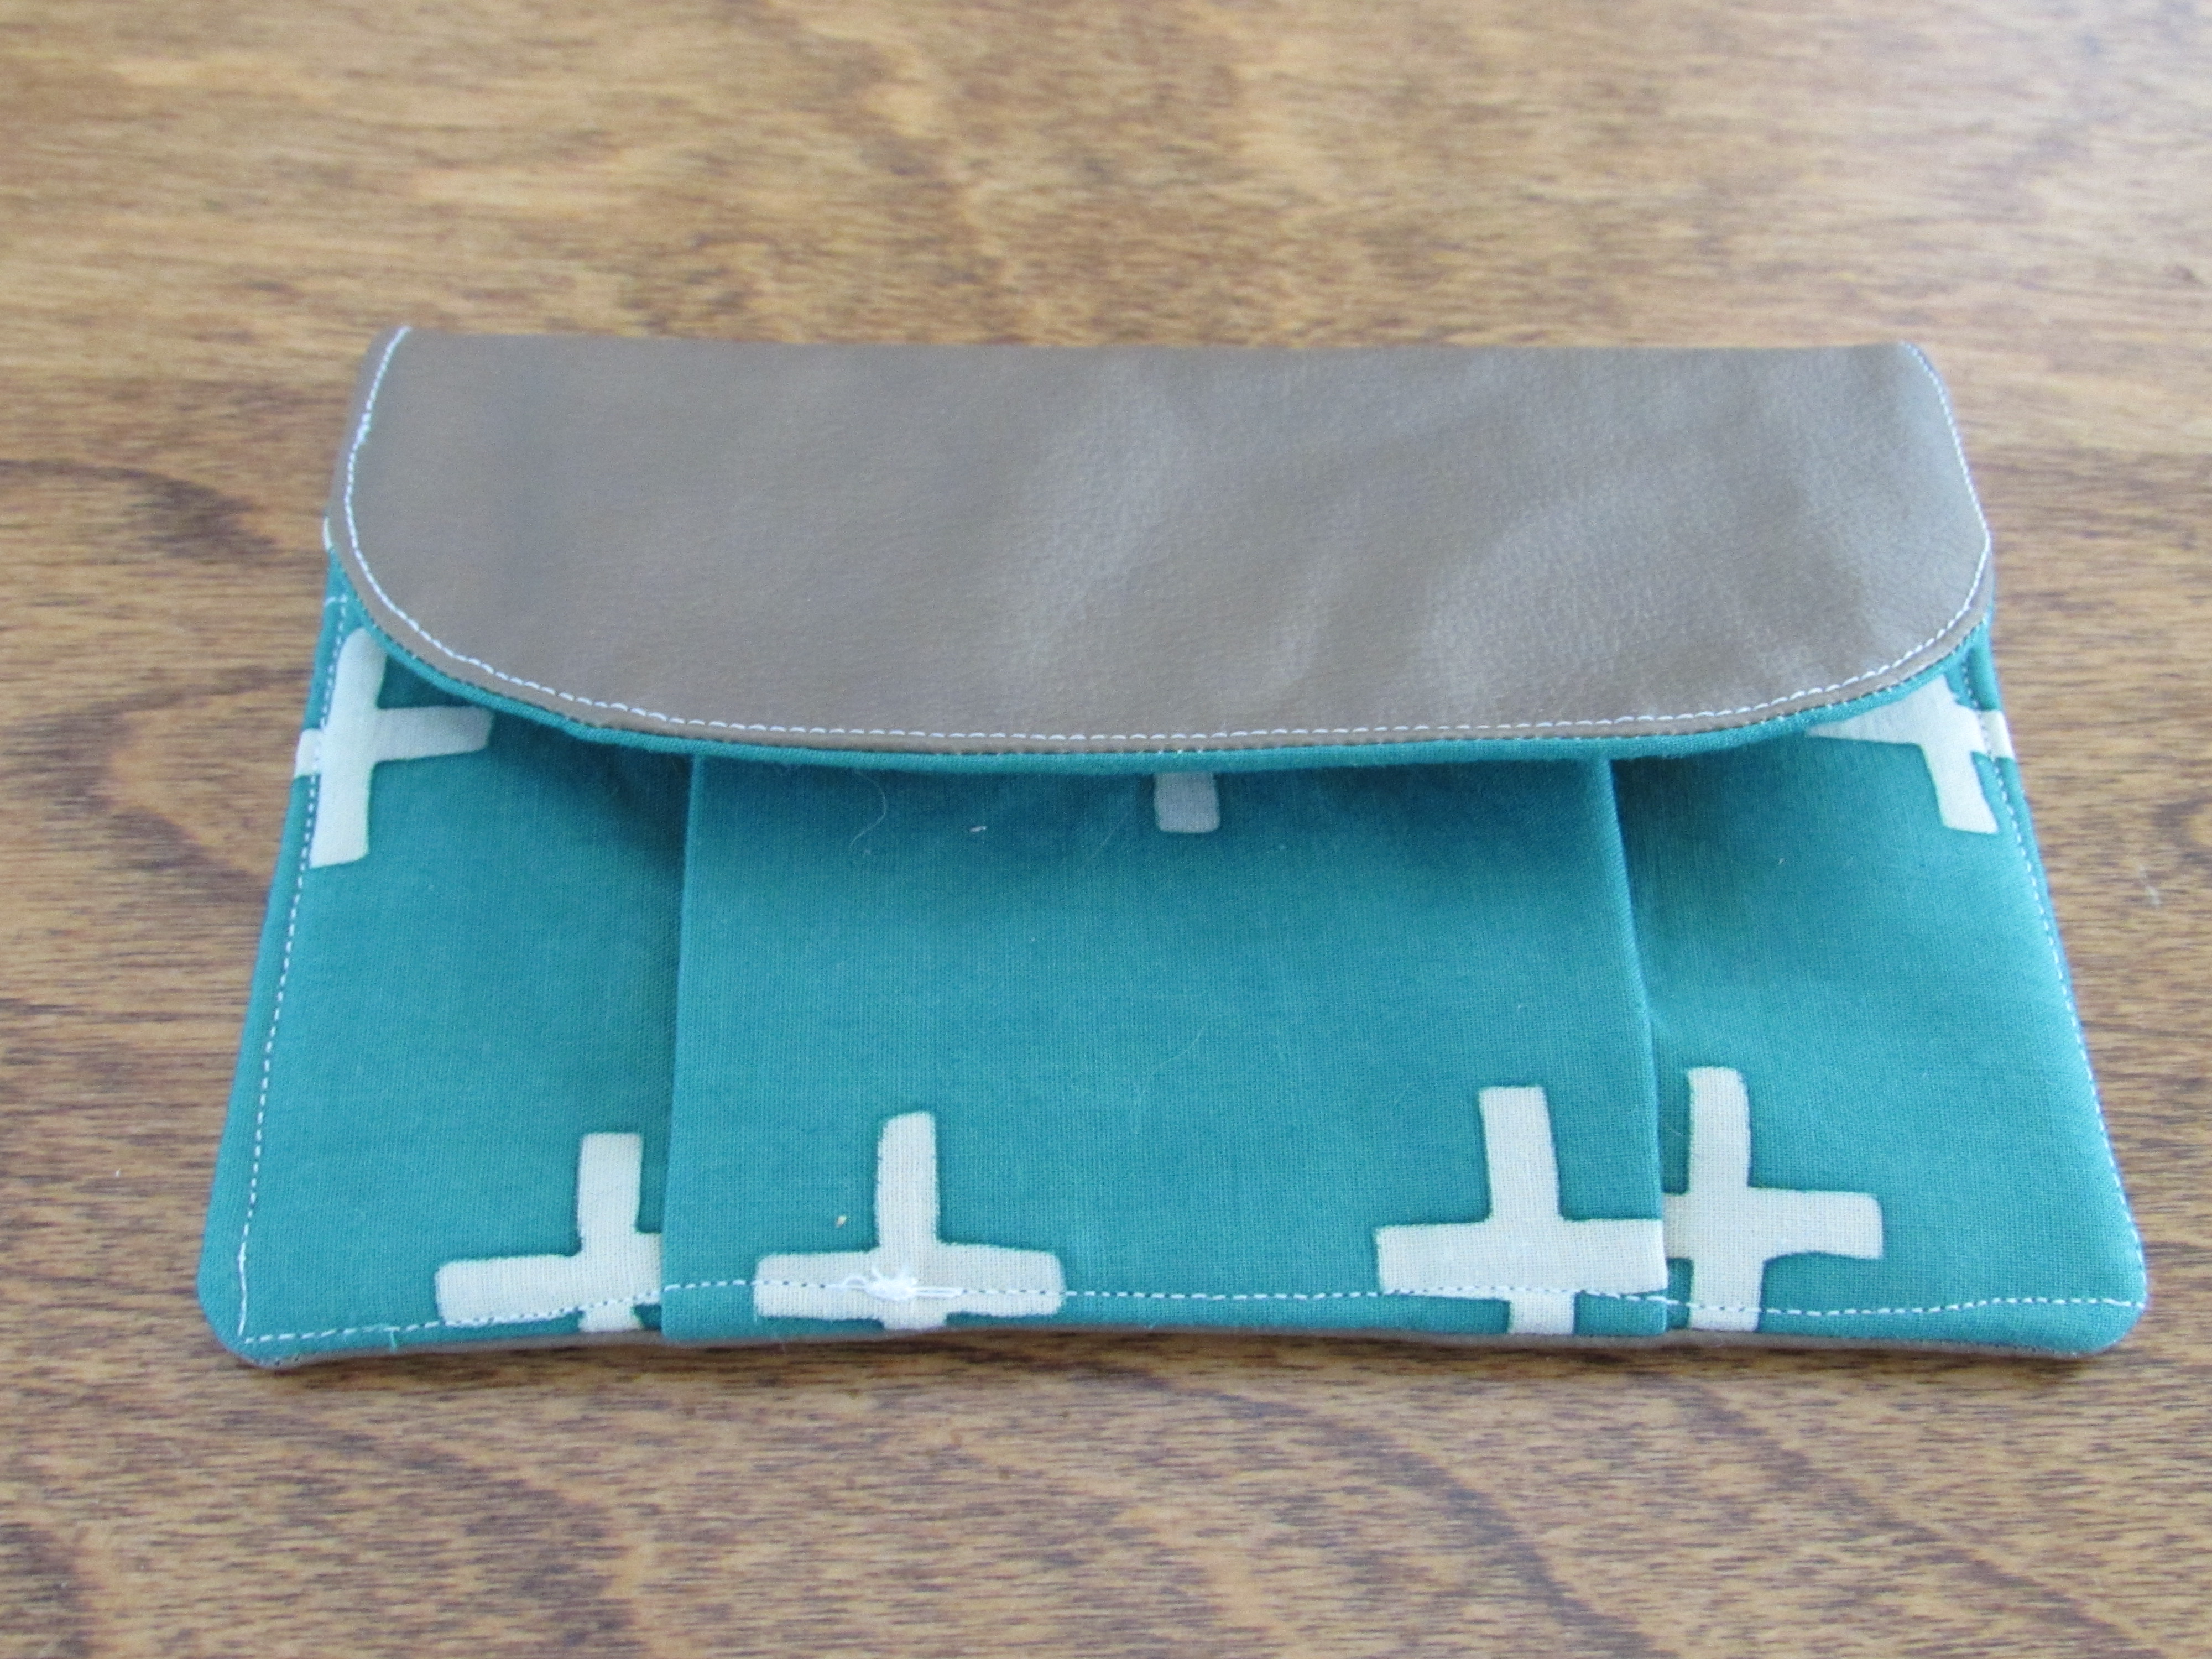
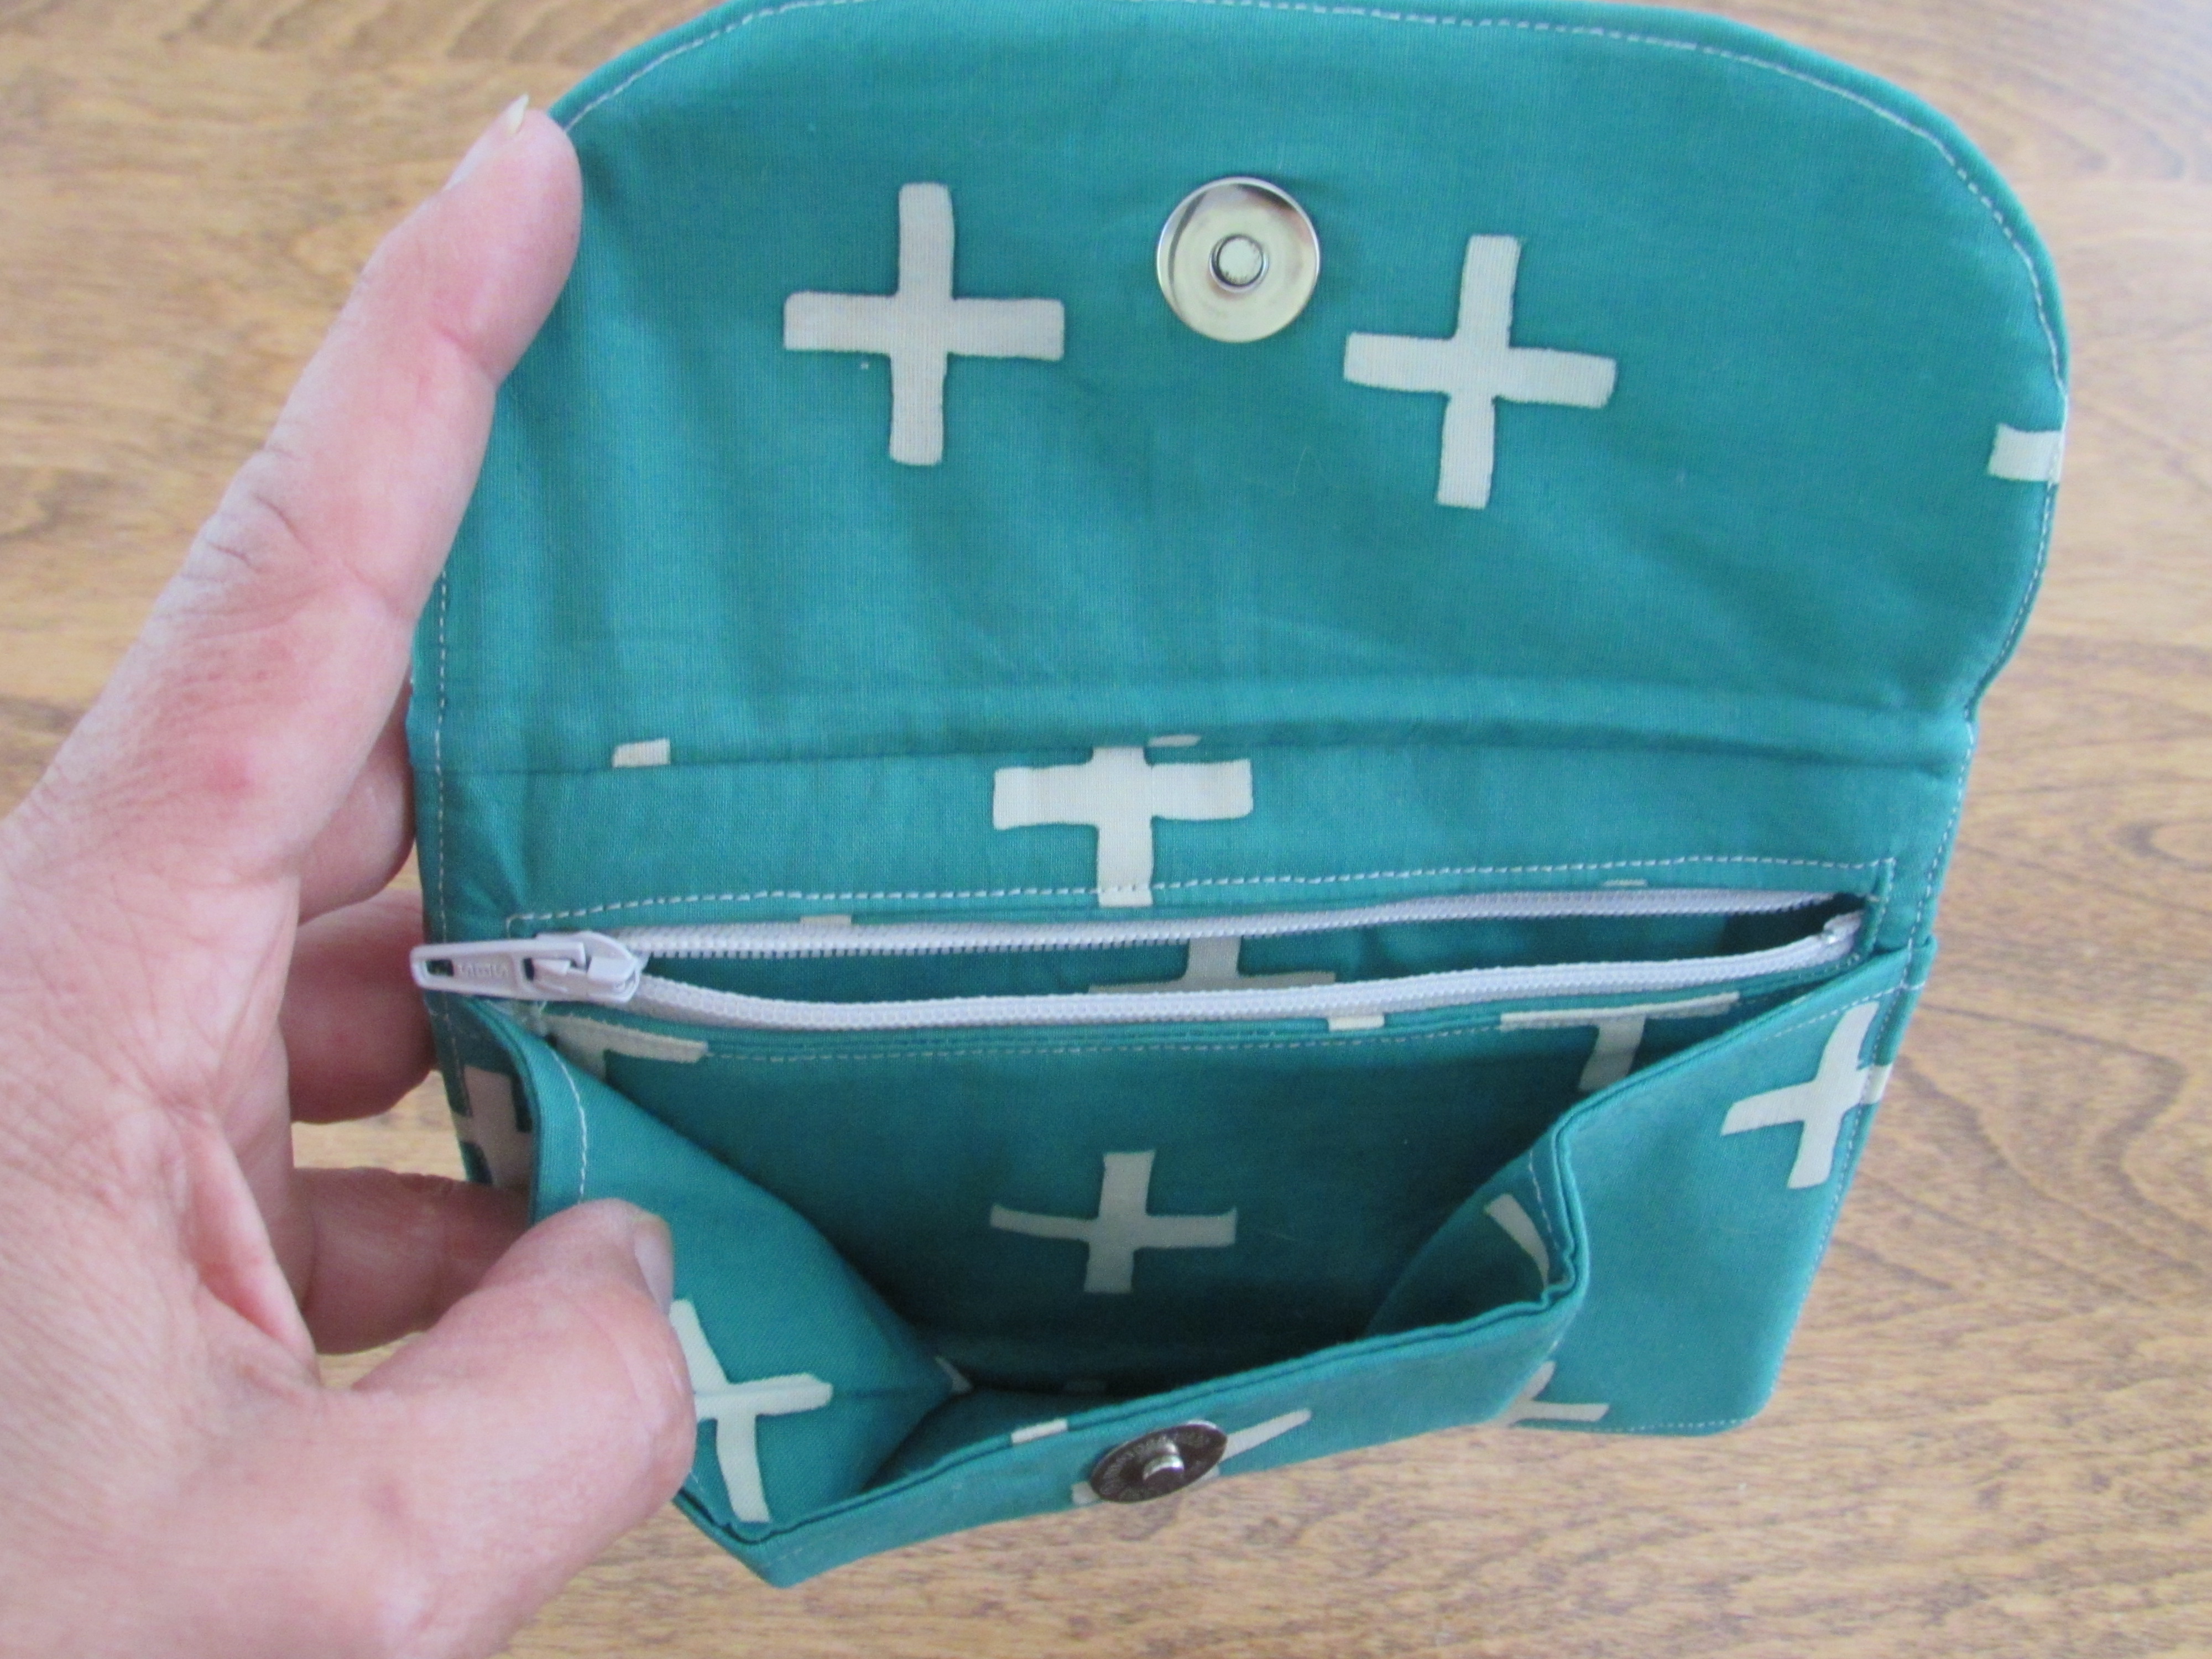
I also received this sweet wallet. Hand-made and so well done, it is lovely.
The swap was fun and I am thankful that I gave it a try as it pushed me quite far out of my comfort zone. Also, I am truly grateful for the work my partner put into the items I received. That being said, I am not sure I will do another one for a while. I could see participating in one each year. They are quite time-consuming and it set my nerves on edge trying to think of what my partner would want, based on the few hints we are given. The process is a good way to get to know other makers though. It is really a big deal on Instagram and there is a swap for just about anything crafty.
Hope you all have something fun planned for the upcoming weektend.
I was fortunate enough to meet my husband back in 1997. We were set up on a blind date by a good friend that we both worked with at the time. It was just a lunch and as blind dates go, it wasn’t bad! I was a single mom with three small children under the age of 11 years and it was a busy time. My blind date called me a couple of times and I didn’t return the calls. Mostly because dating as a single mom was just a pain. Somehow we did go out again about a month later. And that was it. We were engaged six weeks after that, married six months after becoming engaged. A whirlwind romance, to be sure.
I can’t say that I heartily recommend becoming engaged after six weeks of dating but it worked well for us. Both of us joke about it often. We have decided that the universe somehow knew that if we spent any length of time dating and/or deliberating marriage, we would both chicken out. It was his first marriage and he hadn’t any children. He was inheriting my three boys with no kid experience at all (he did however have a huge dog, which was a big score for my dog-less children.) It was my second marriage, after having been widowed four years earlier. Things were still rough as the boys and I continued to grieve the loss of their dad. Step-parenting is an absolute challenge, as I am sure many of you know. Both for the step-parent and for the natural parent overly-possessive-mama of the kids being step-parented. However, we worked through all of it and life is grand.
On to the quilty part of the story. After the wedding we honeymooned on the island of St. John in the Virgin Islands. It was blissful. Heavenly! One of the many things I learned about my new husband on that trip is that he takes millions of sunset pictures and they are really good. This just looks heavenly, doesn’t it? (This was before digital was available so scanning this photo doesn’t really do it justice.)
While we were on our trip I picked up a piece of batik fabric, maybe 1 and 1/2 yards. It was so pretty. It sat on the shelf with my other fabrics and waited patiently for me to figure out what to do with it. Sat there for sixteen years! I looked at it now and then but didn’t want to cut into it. I couldn’t figure out the best way to use it.
Last week I finally decided what to do with it! About a year ago I purchased three charm packs of Moda’s Dancing In the Rain batiks. I bought them for a great price from Judy Madsen’s on-line shop, Green Fairy Quilts. Quick, unsponsored, plug here – This shop is awesome. She has good prices and often has great sales. There is no shop (that I have used) that ships as fast as Green Fairy Quilts. I swear they must ship the order the day it is received. She ships out of Utah and it hits my California address within a matter of a couple of days. Wonderful! Anyway, I purchased these charm packs and added them to the proverbial shelf. When I was looking for a project last week, I pulled these out. I chose to make a nine patch quilt. Something simple, mainly for the satisfaction of sewing and finishing something without any fuss. As I was laying out the charm squares and deciding how to use them, I remembered that batik from St. John. Perfect for the border!! I was so excited. I knew it was the right place for that fabric.
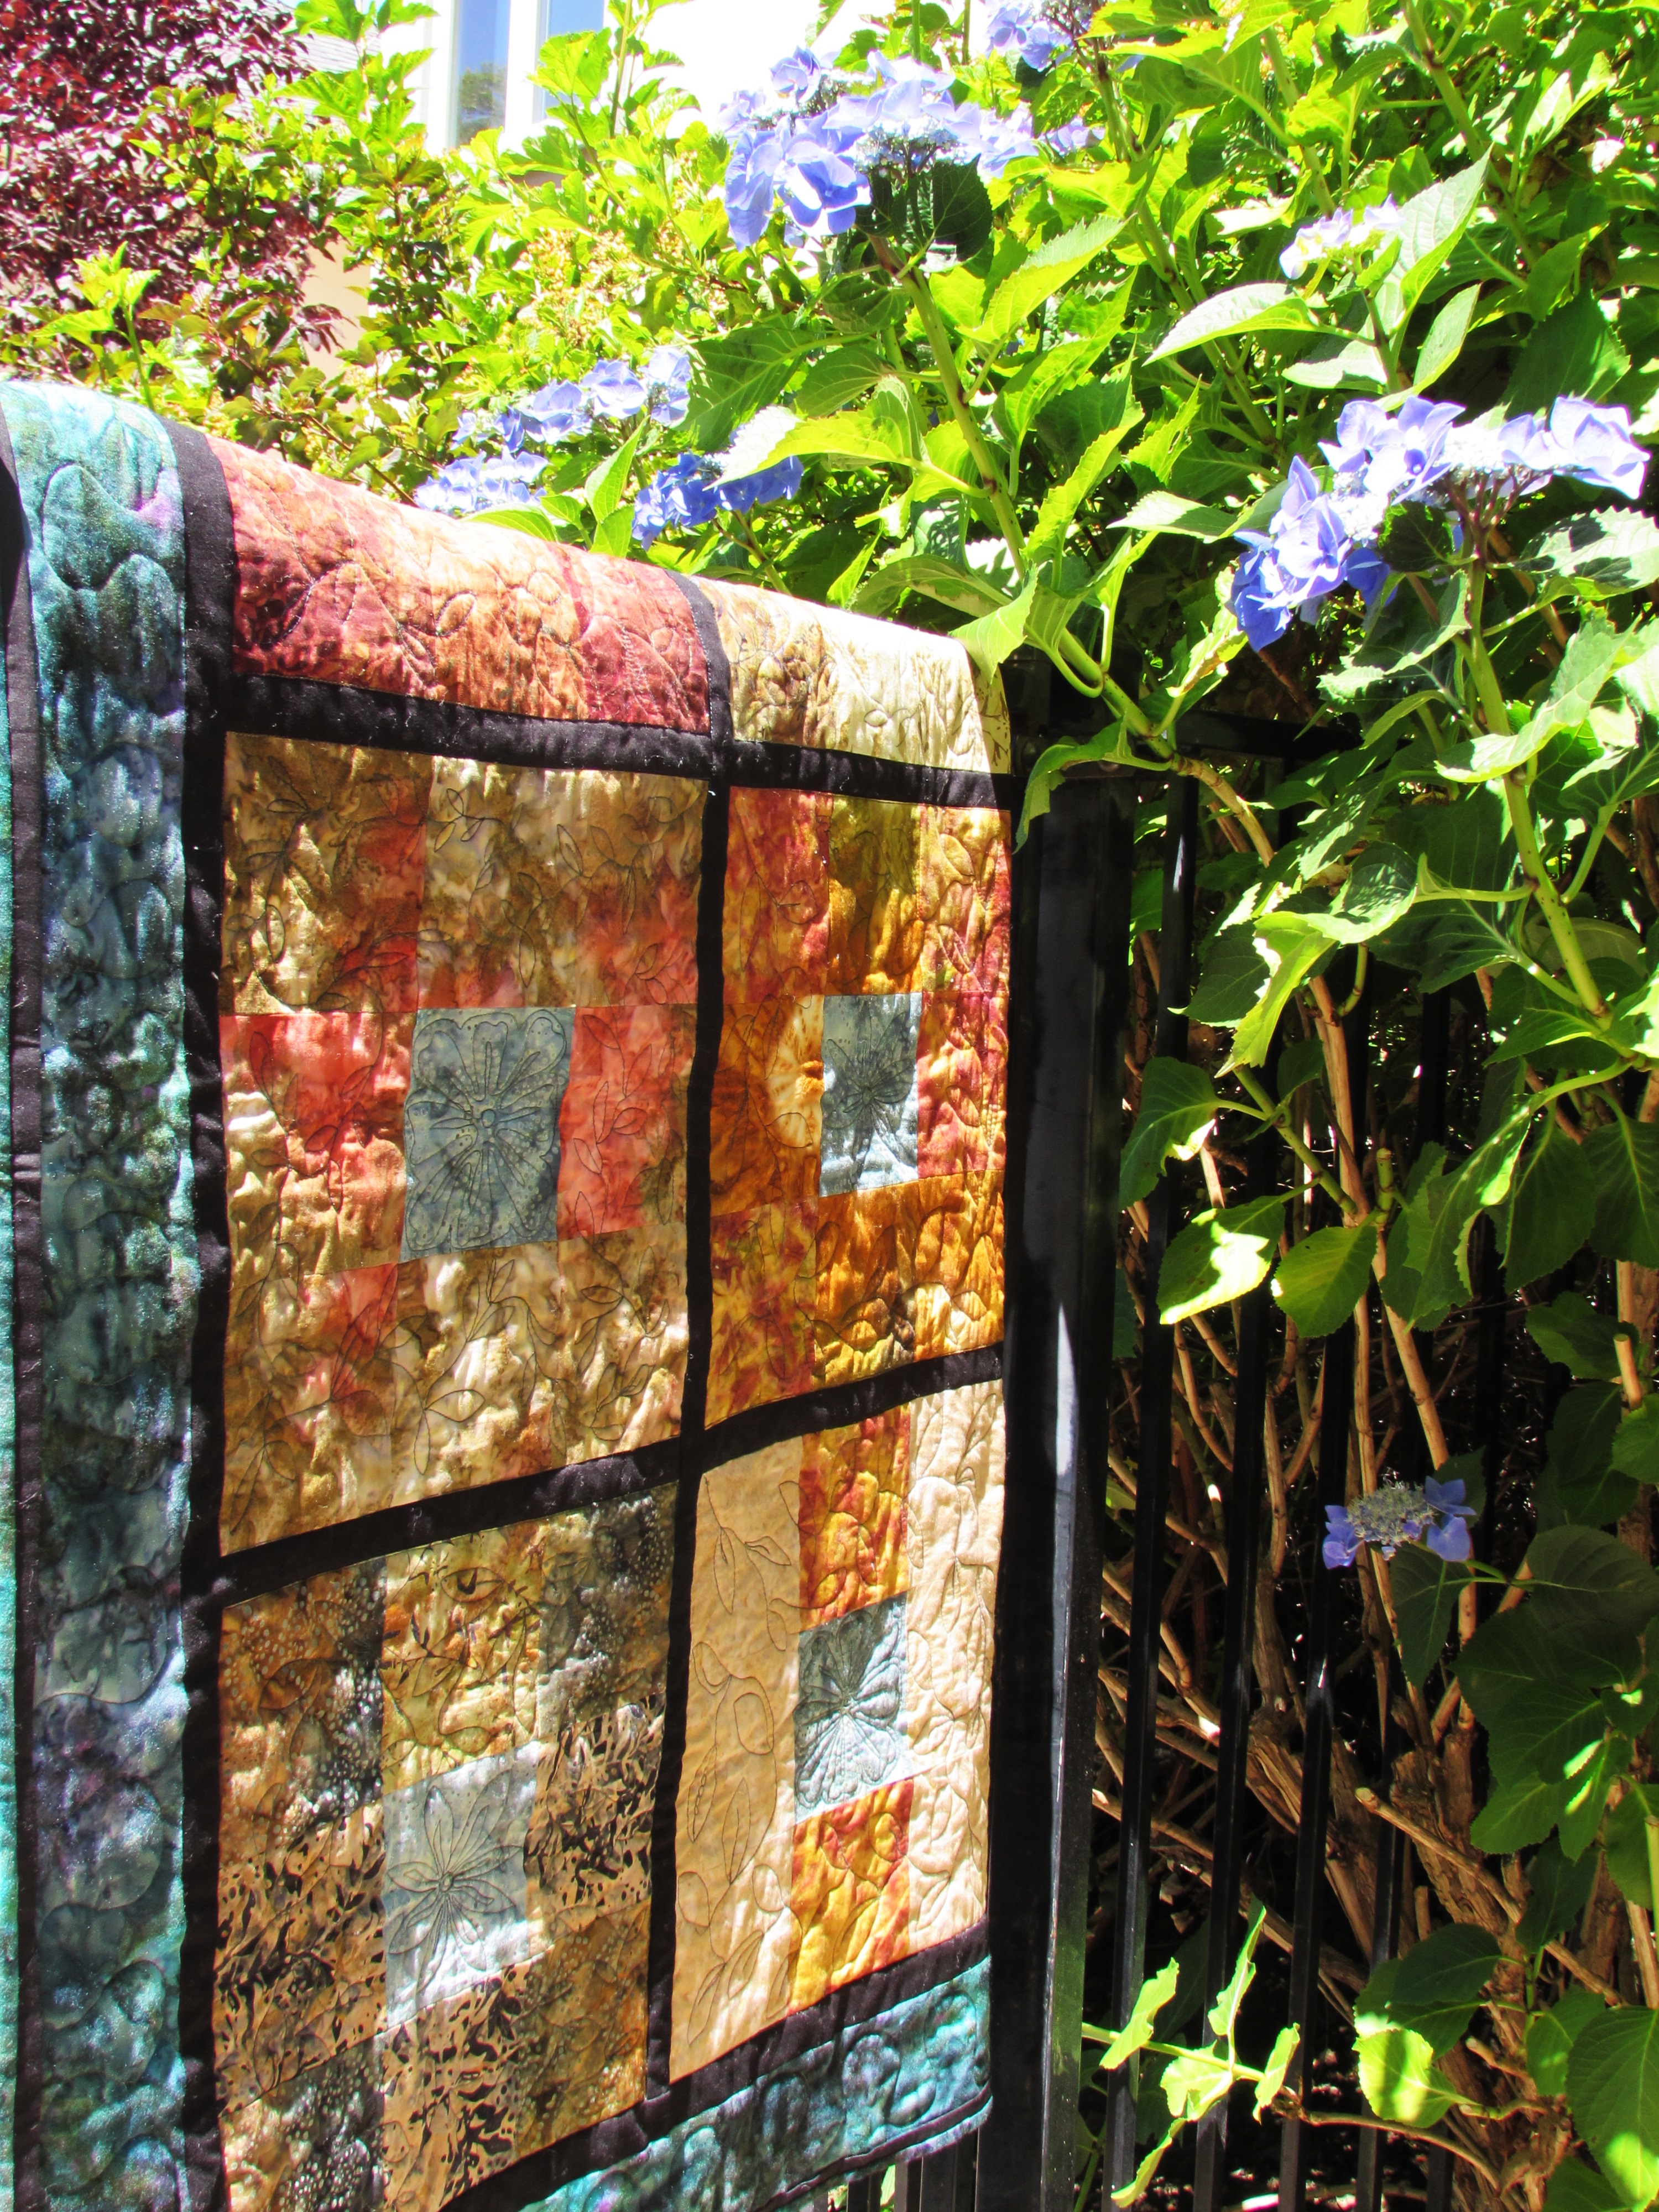
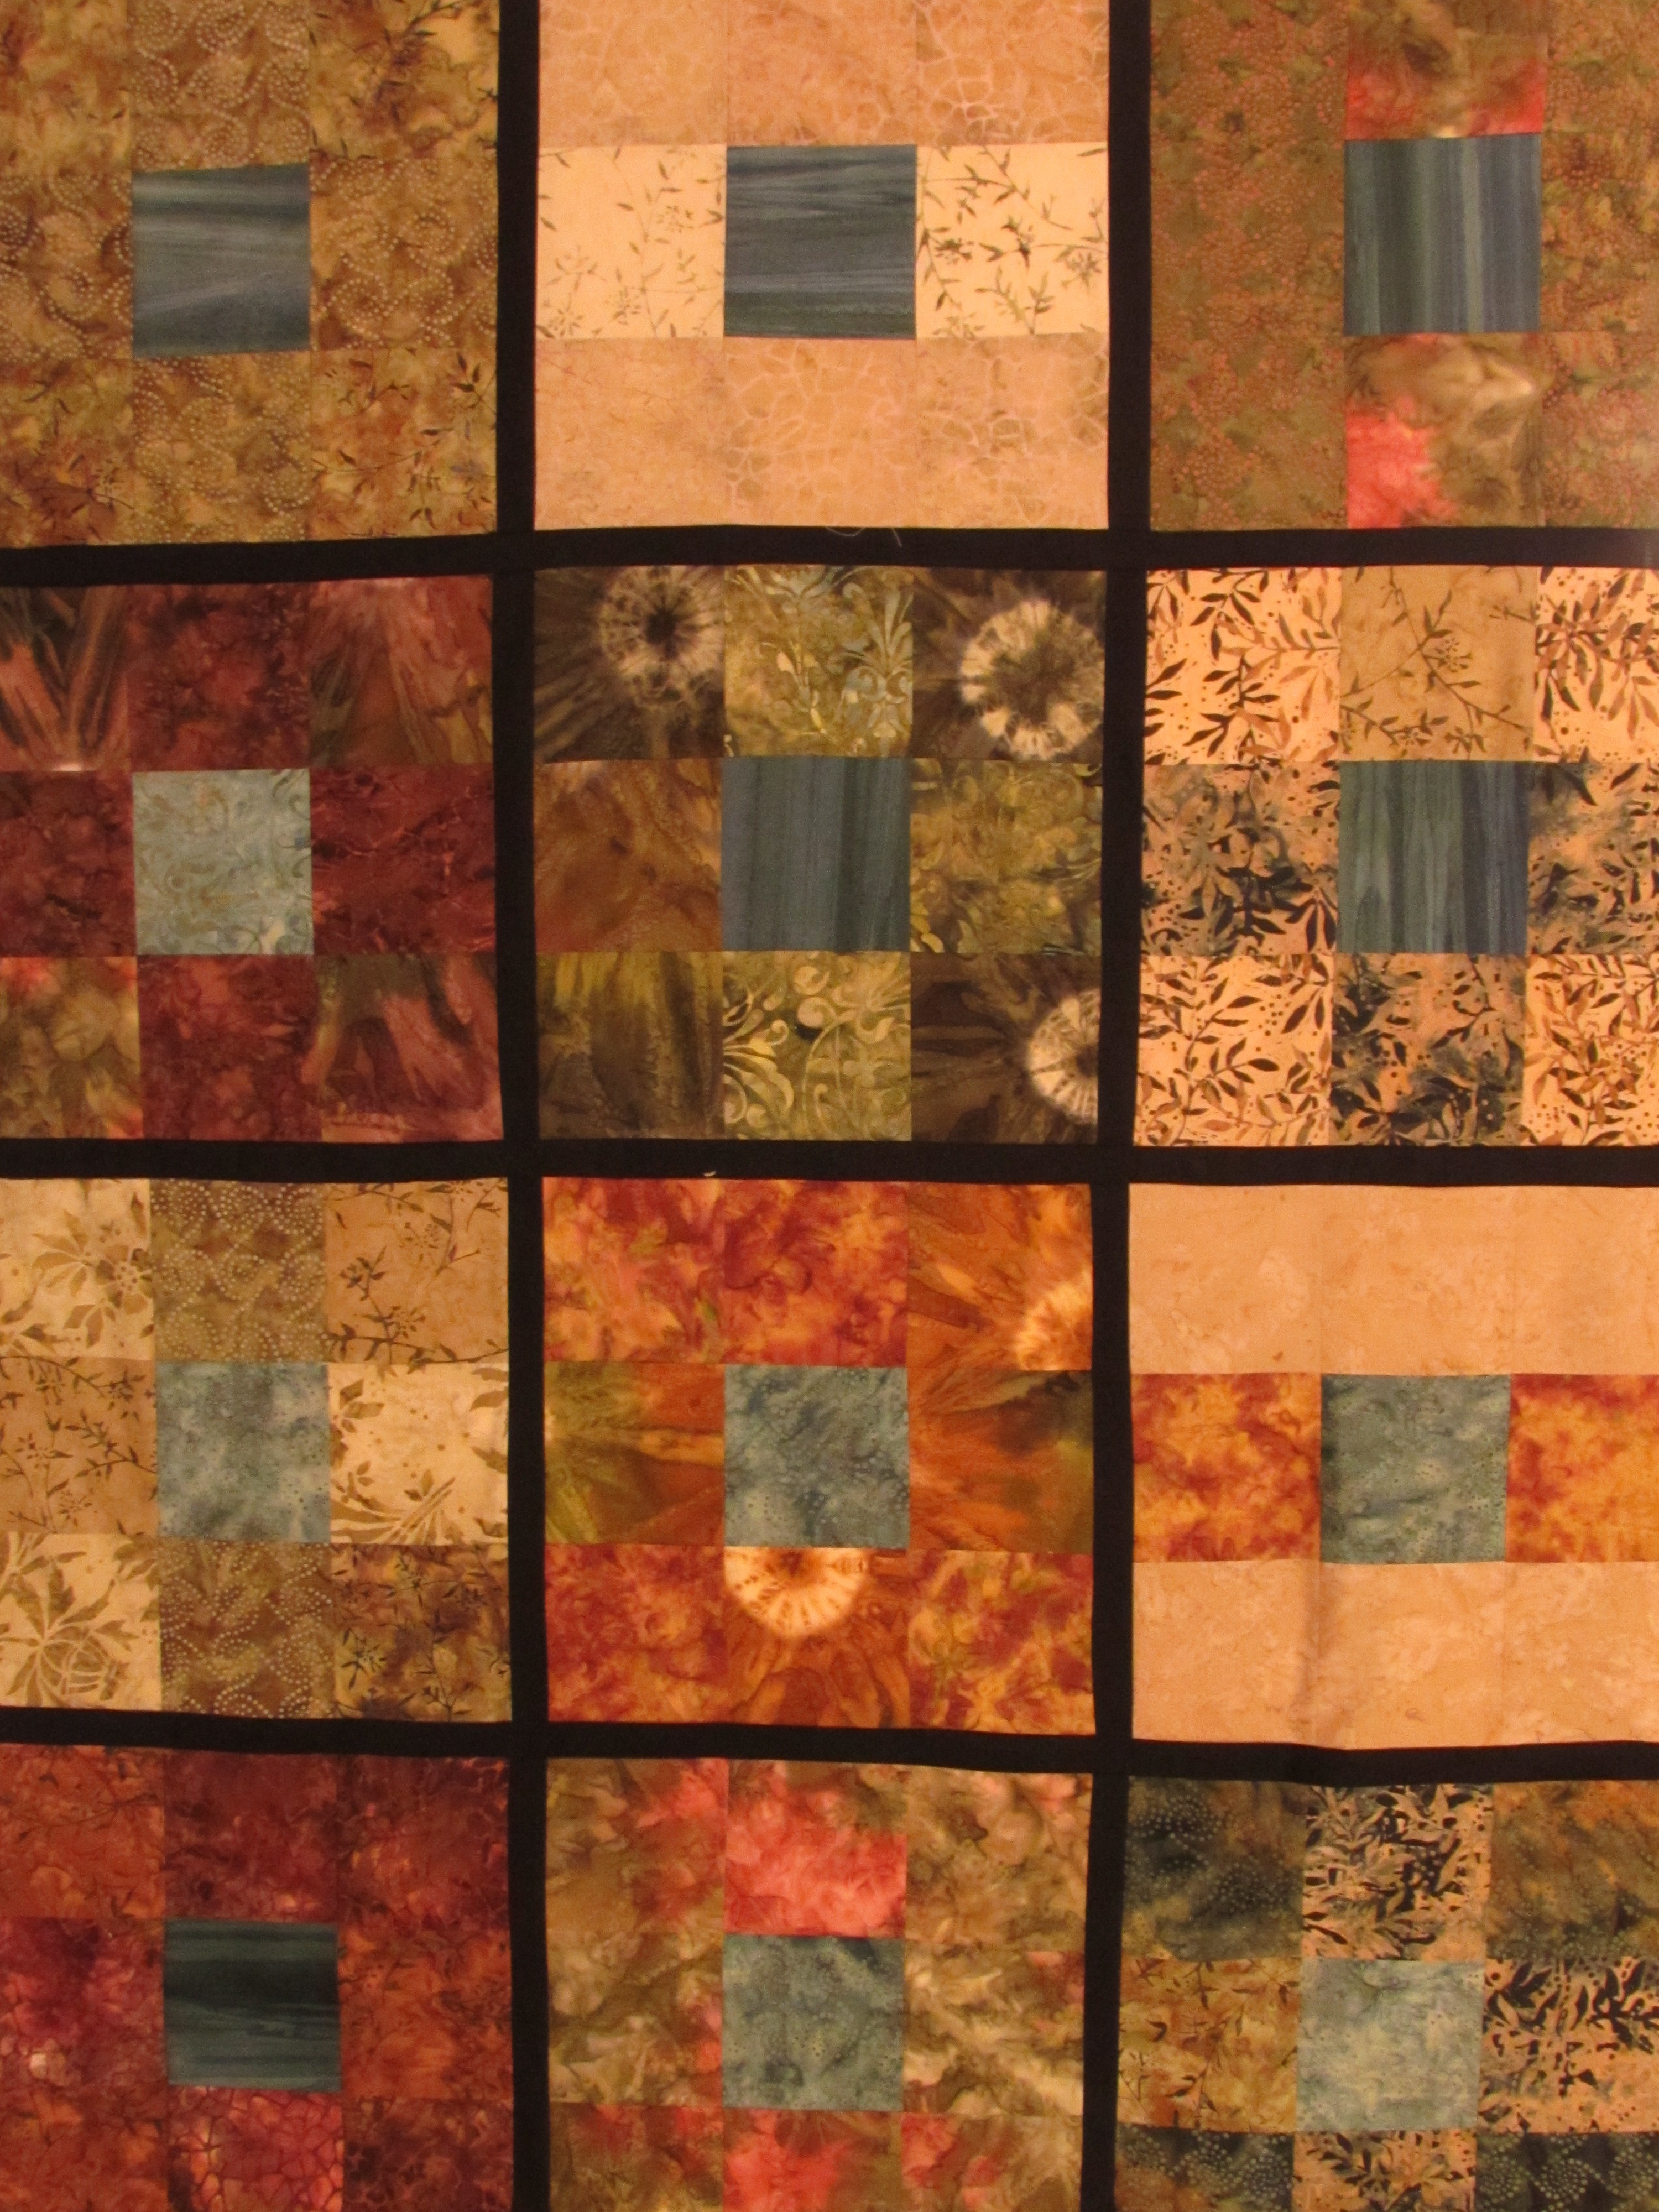
I sashed the nine patch blocks with a bit of black to set off the colors. I think it lends a look of stained glass to the quilt.
I decided to use the blue batik charm squares as the center of each block. It lends continuity to the colors. After I sashed the blocks, I made four cornerstone blocks. I just diced four extra charm squares into four squares and made small patchwork blocks with them. I cut my precious honeymoon fabric into strips for the border and added the cornerstone blocks. Hurray, my quilt top is finished!!
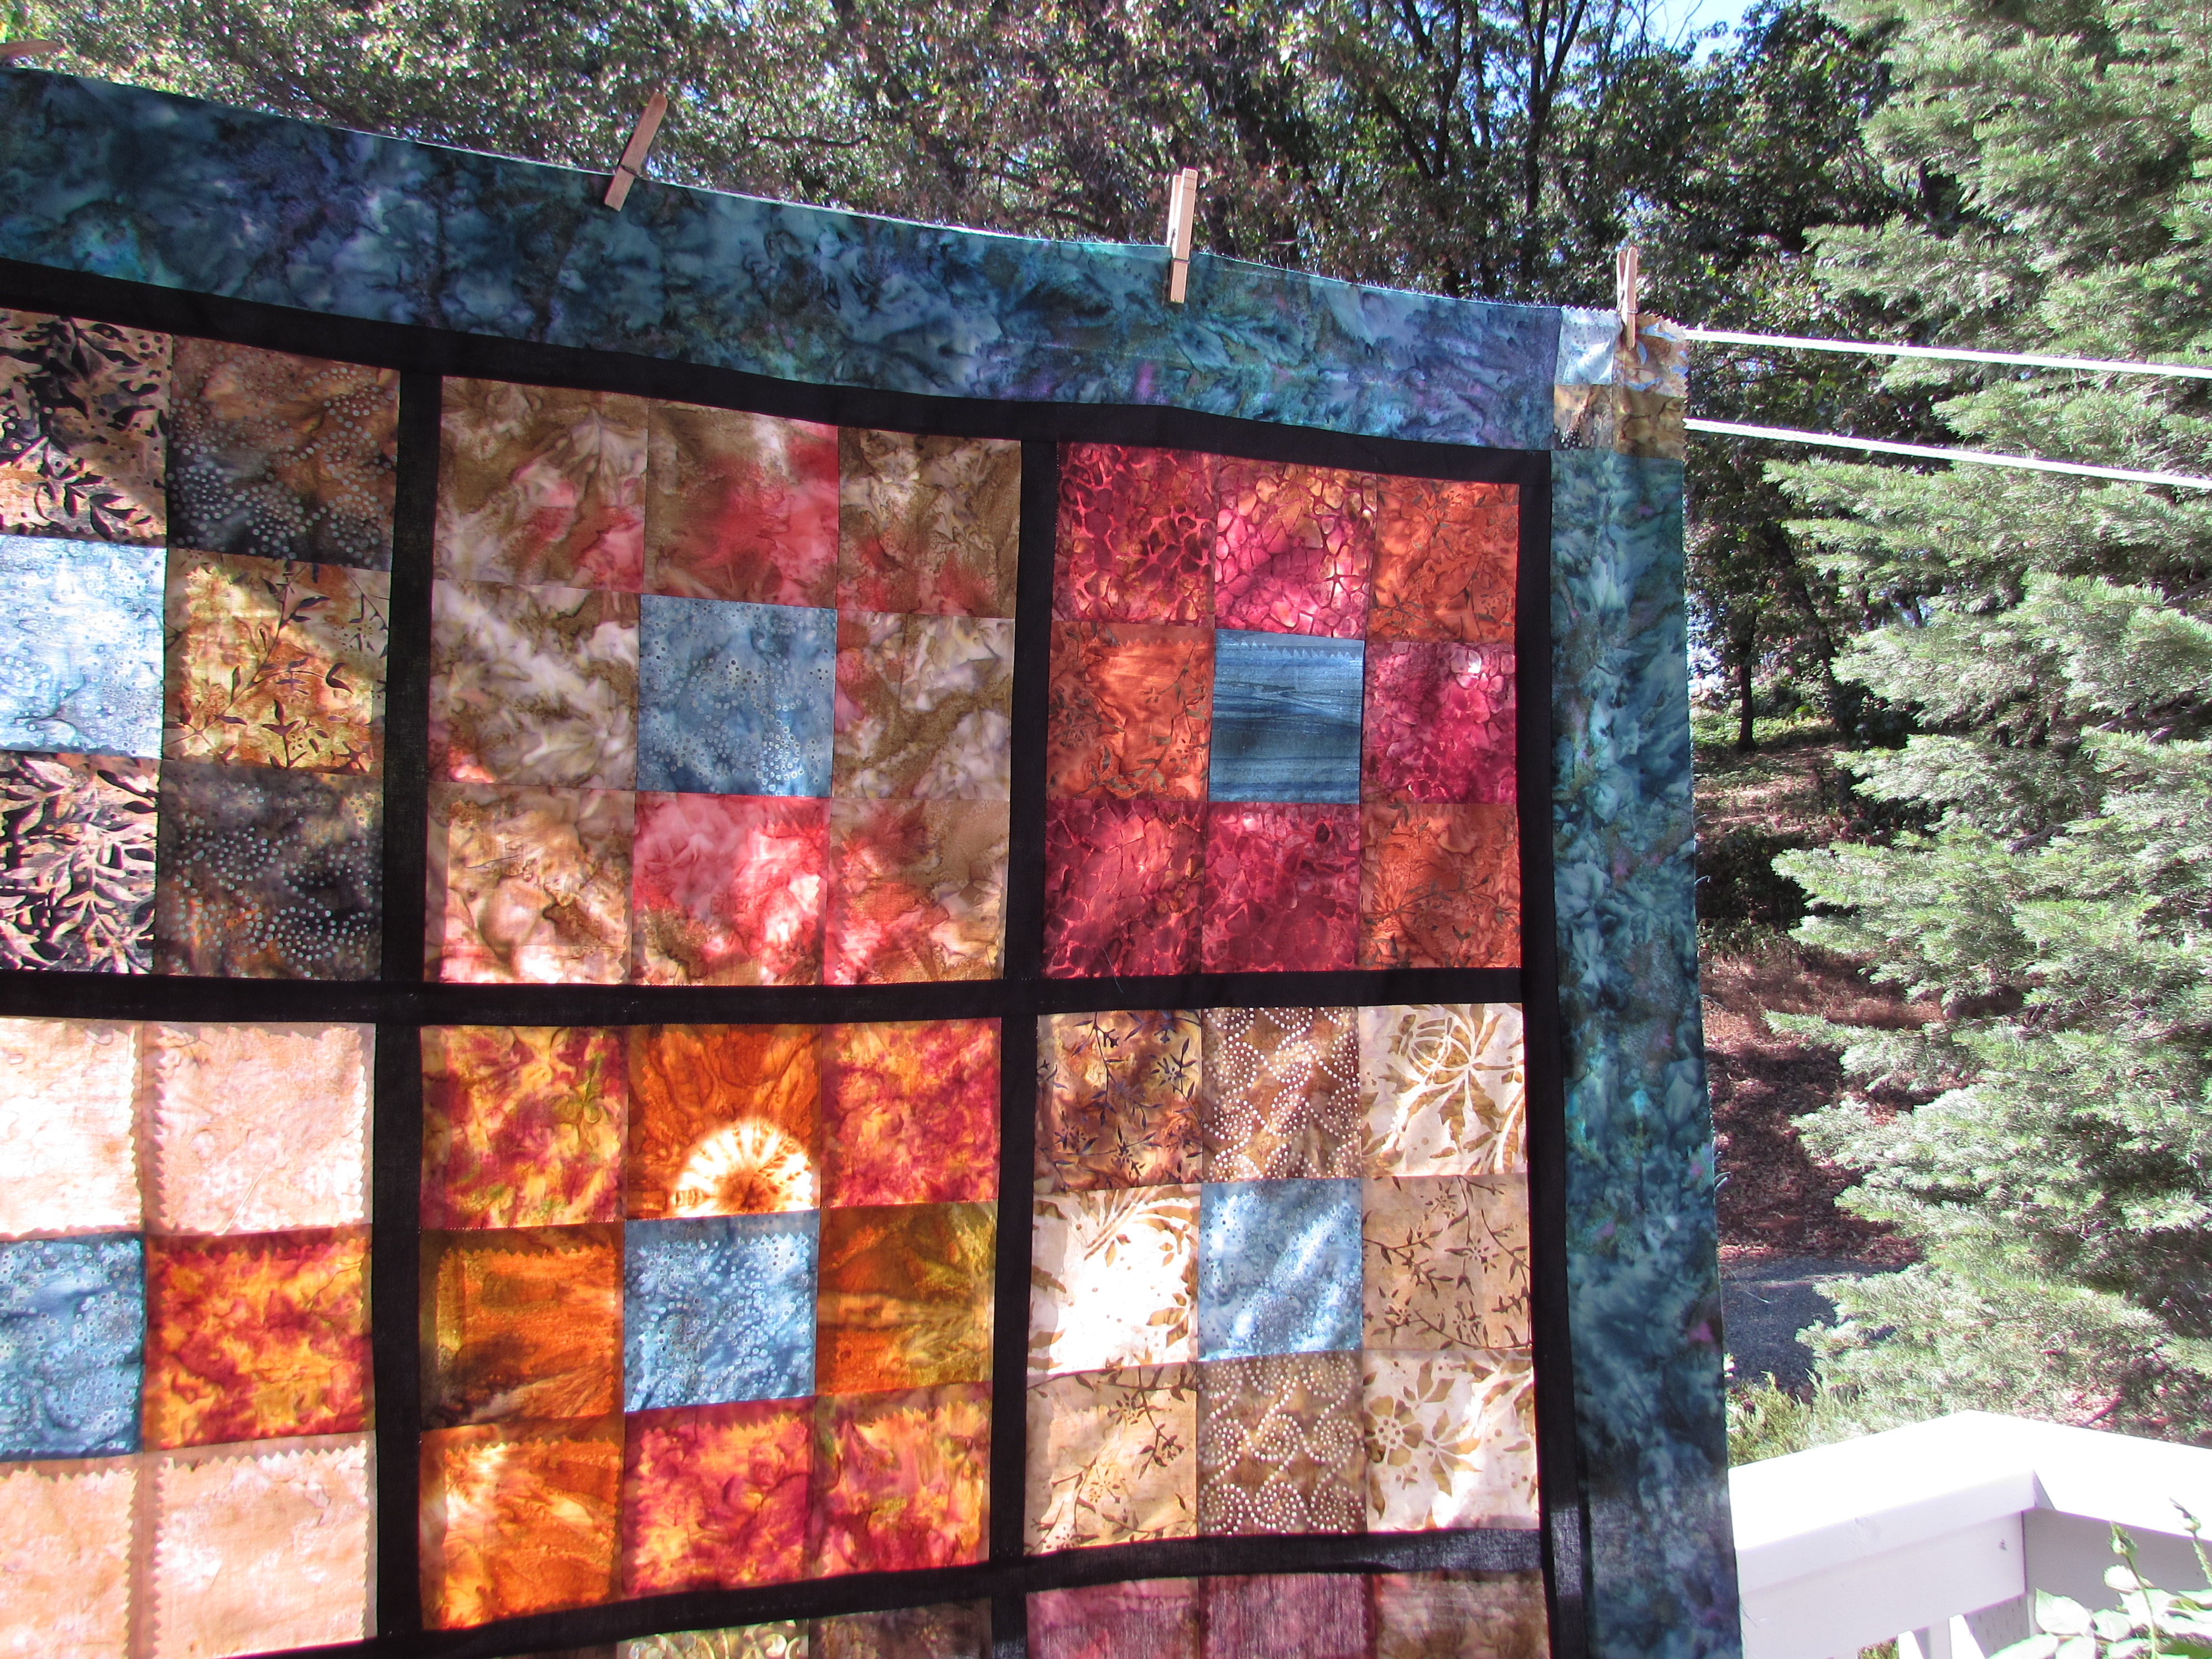
The sun was shining hard through the quilt top which makes it even more reminiscent of stained glass. Love the pink square at the upper right corner.
I keep looking through my fabric trying to come up with something that works for the back. Alas, I have not found anything I like which necessitates a trip to my LQS. How unfortunate for me. 😉
I am so happy with this quilt top. I love the batiks. I haven’t ever made anything with batik before and it is really pretty. I plan to add a black piping or flange to the top and then bind it with the honeymoon batik against that black flange. I will post a picture of the finished quilt when it is actually that, finished!
Happy weekend all!
Linking to: Freemotion by the River, Sew Cute Tuesday, Let’s Bee Social, NeedleandThread Thursday, TGIFF, Finish It Up Friday. All of these wonderful sites have a link listed in the Link-Up tab at the top of my page.