Someone said ‘every finish line is the start of a new race’ but for me it is the start of a new quilt. I am now allowed to work on 2022’s Positivity Quilt! As well as all of the other little distractions that pop up along the way.
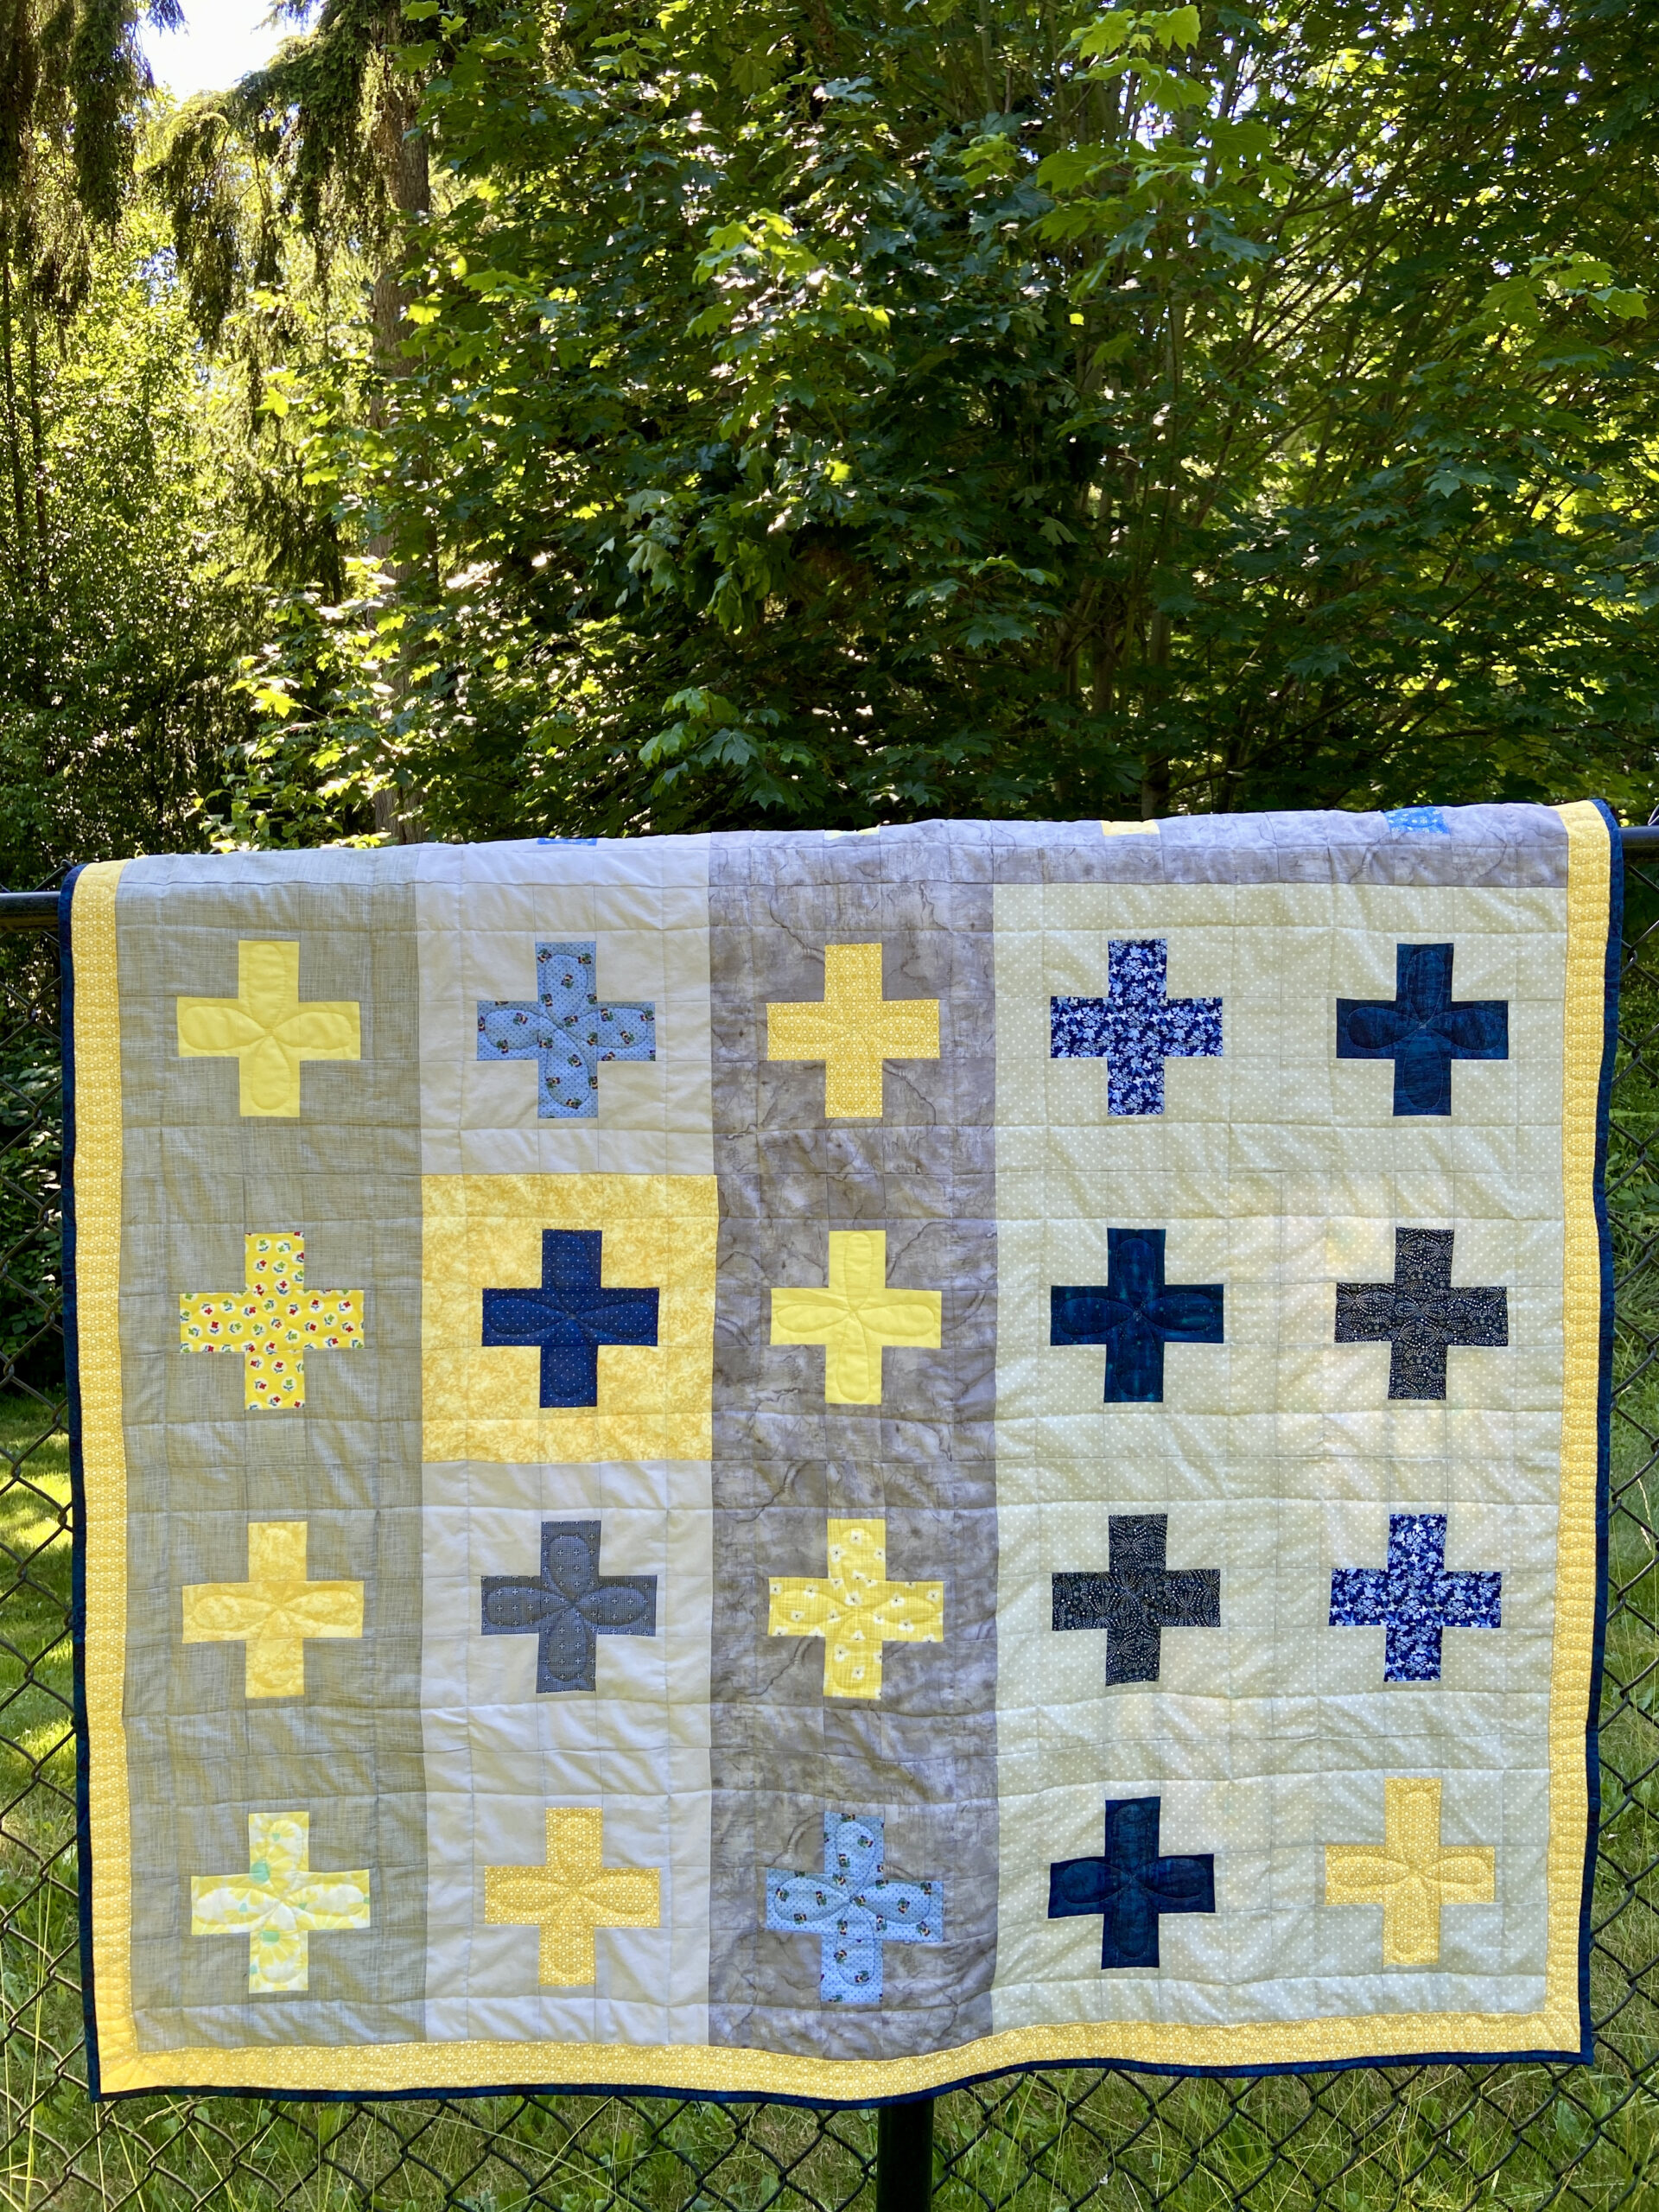
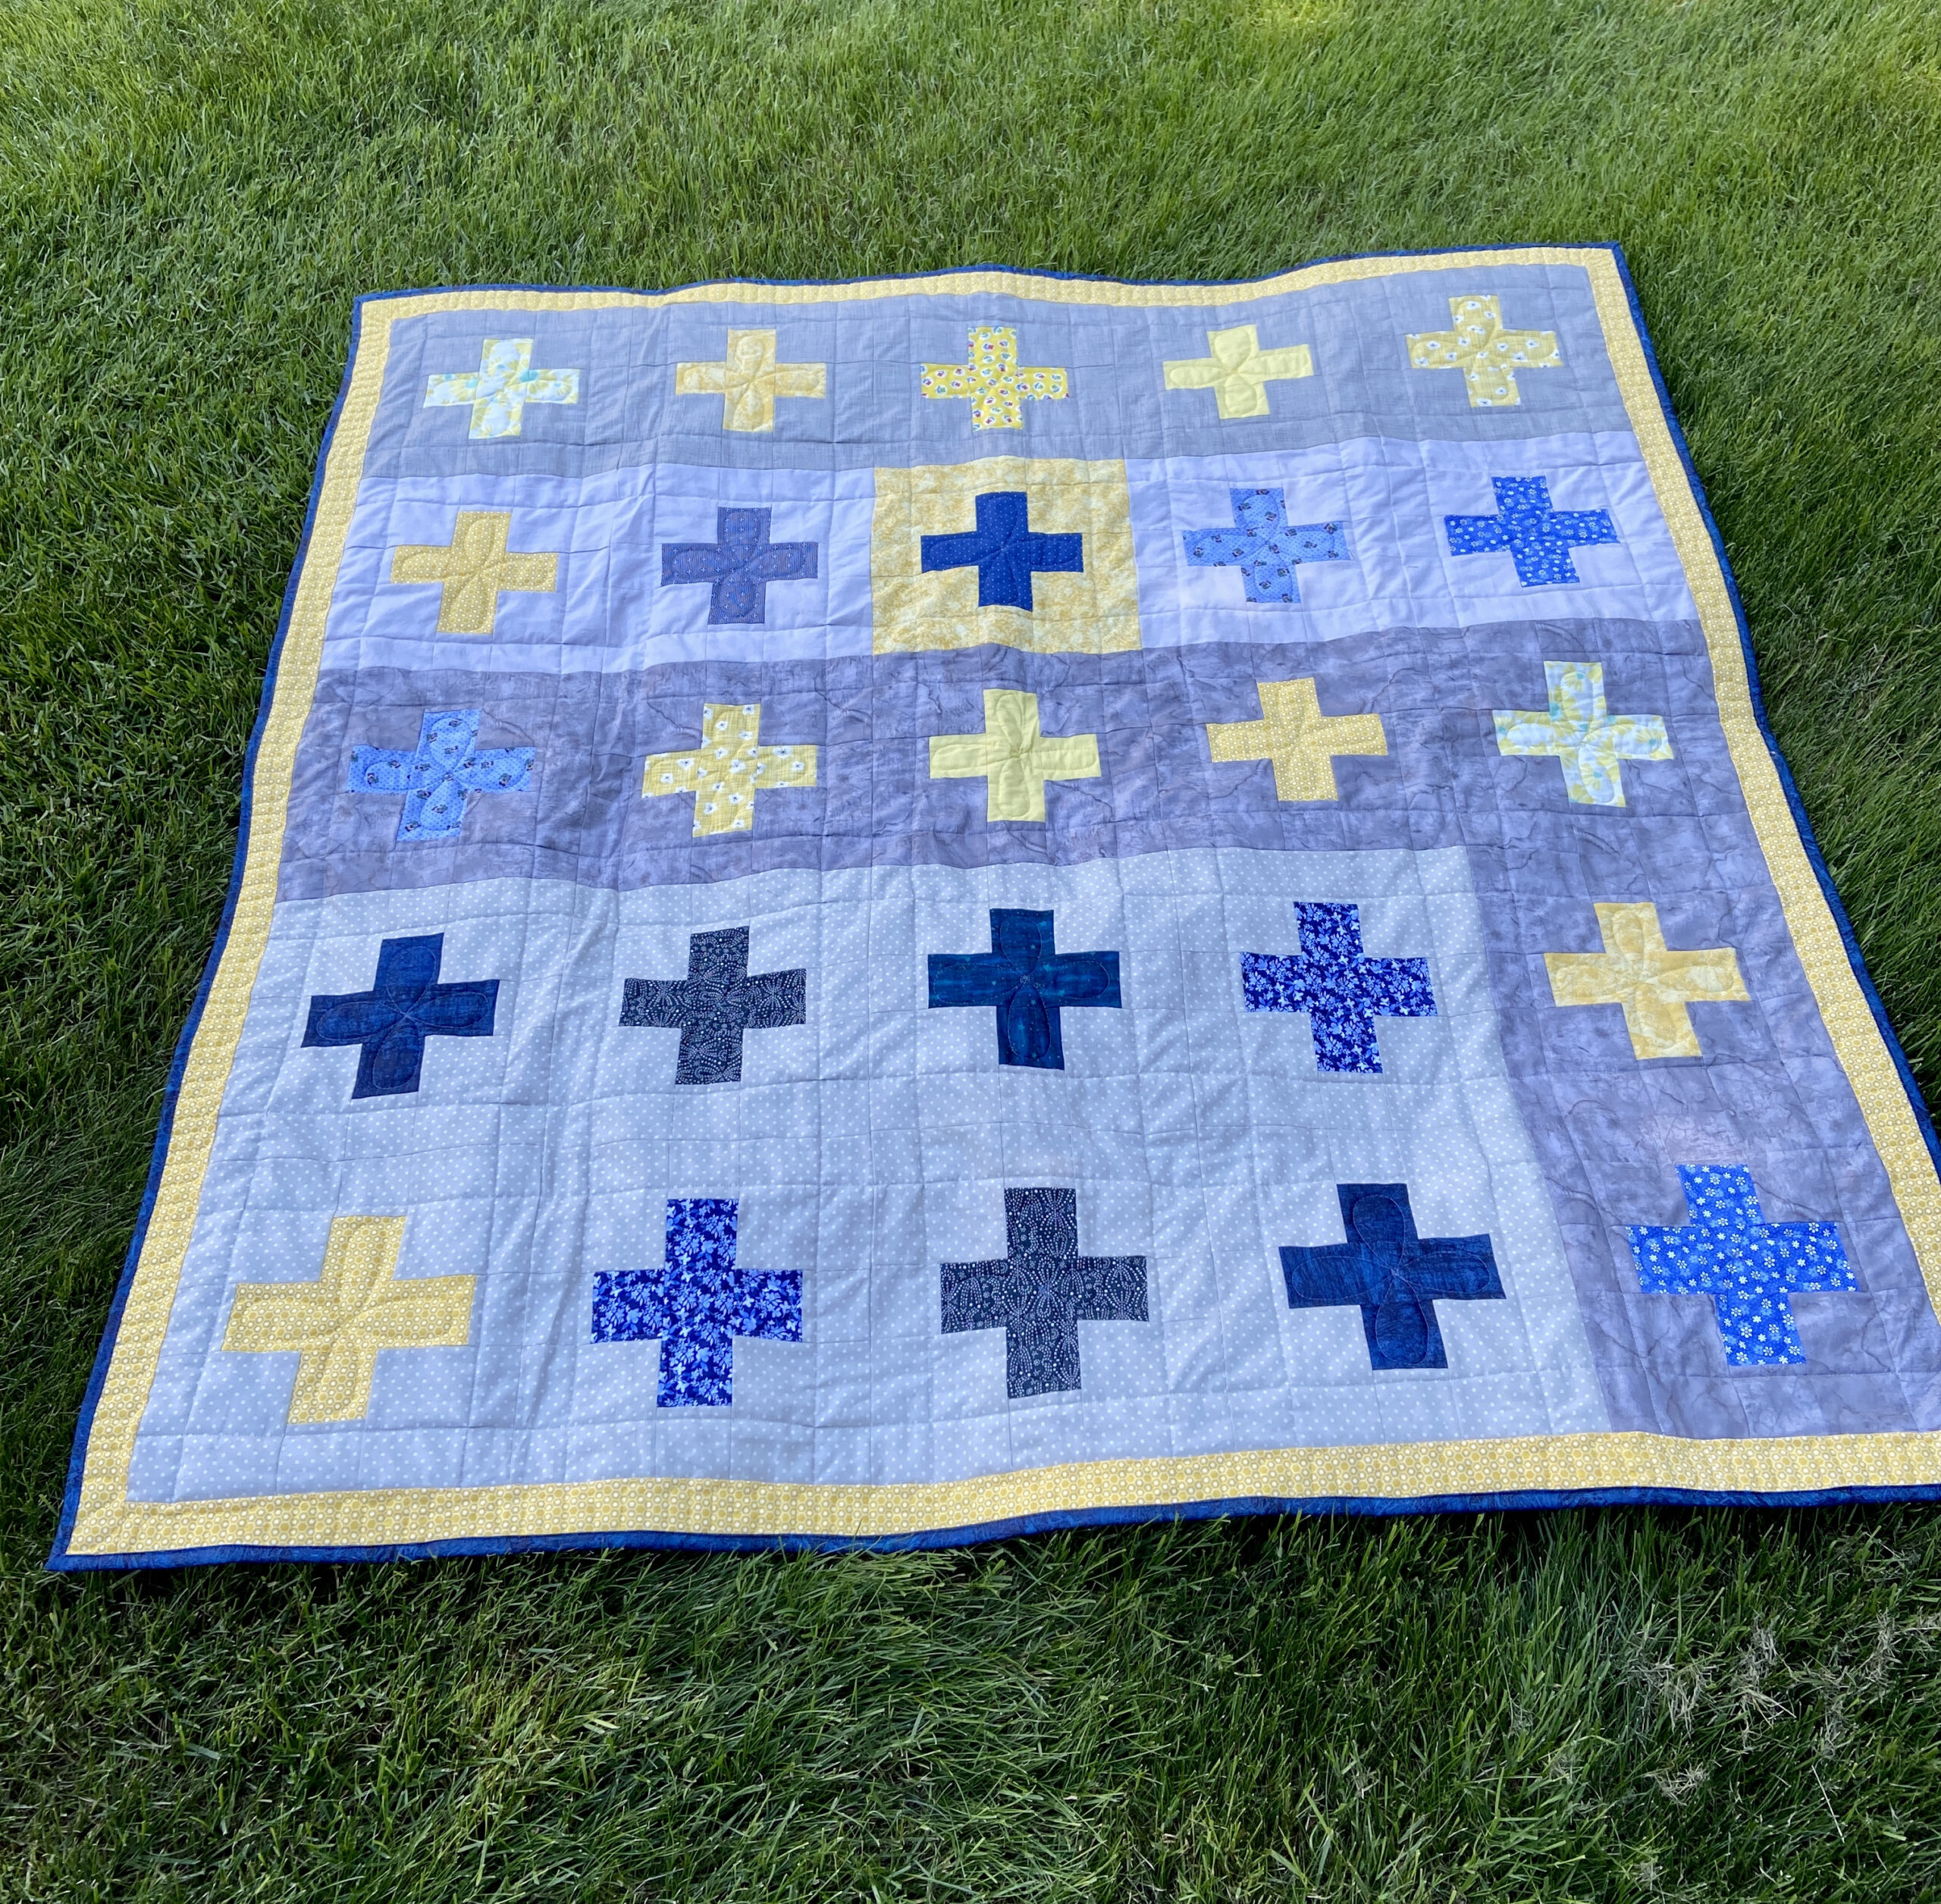
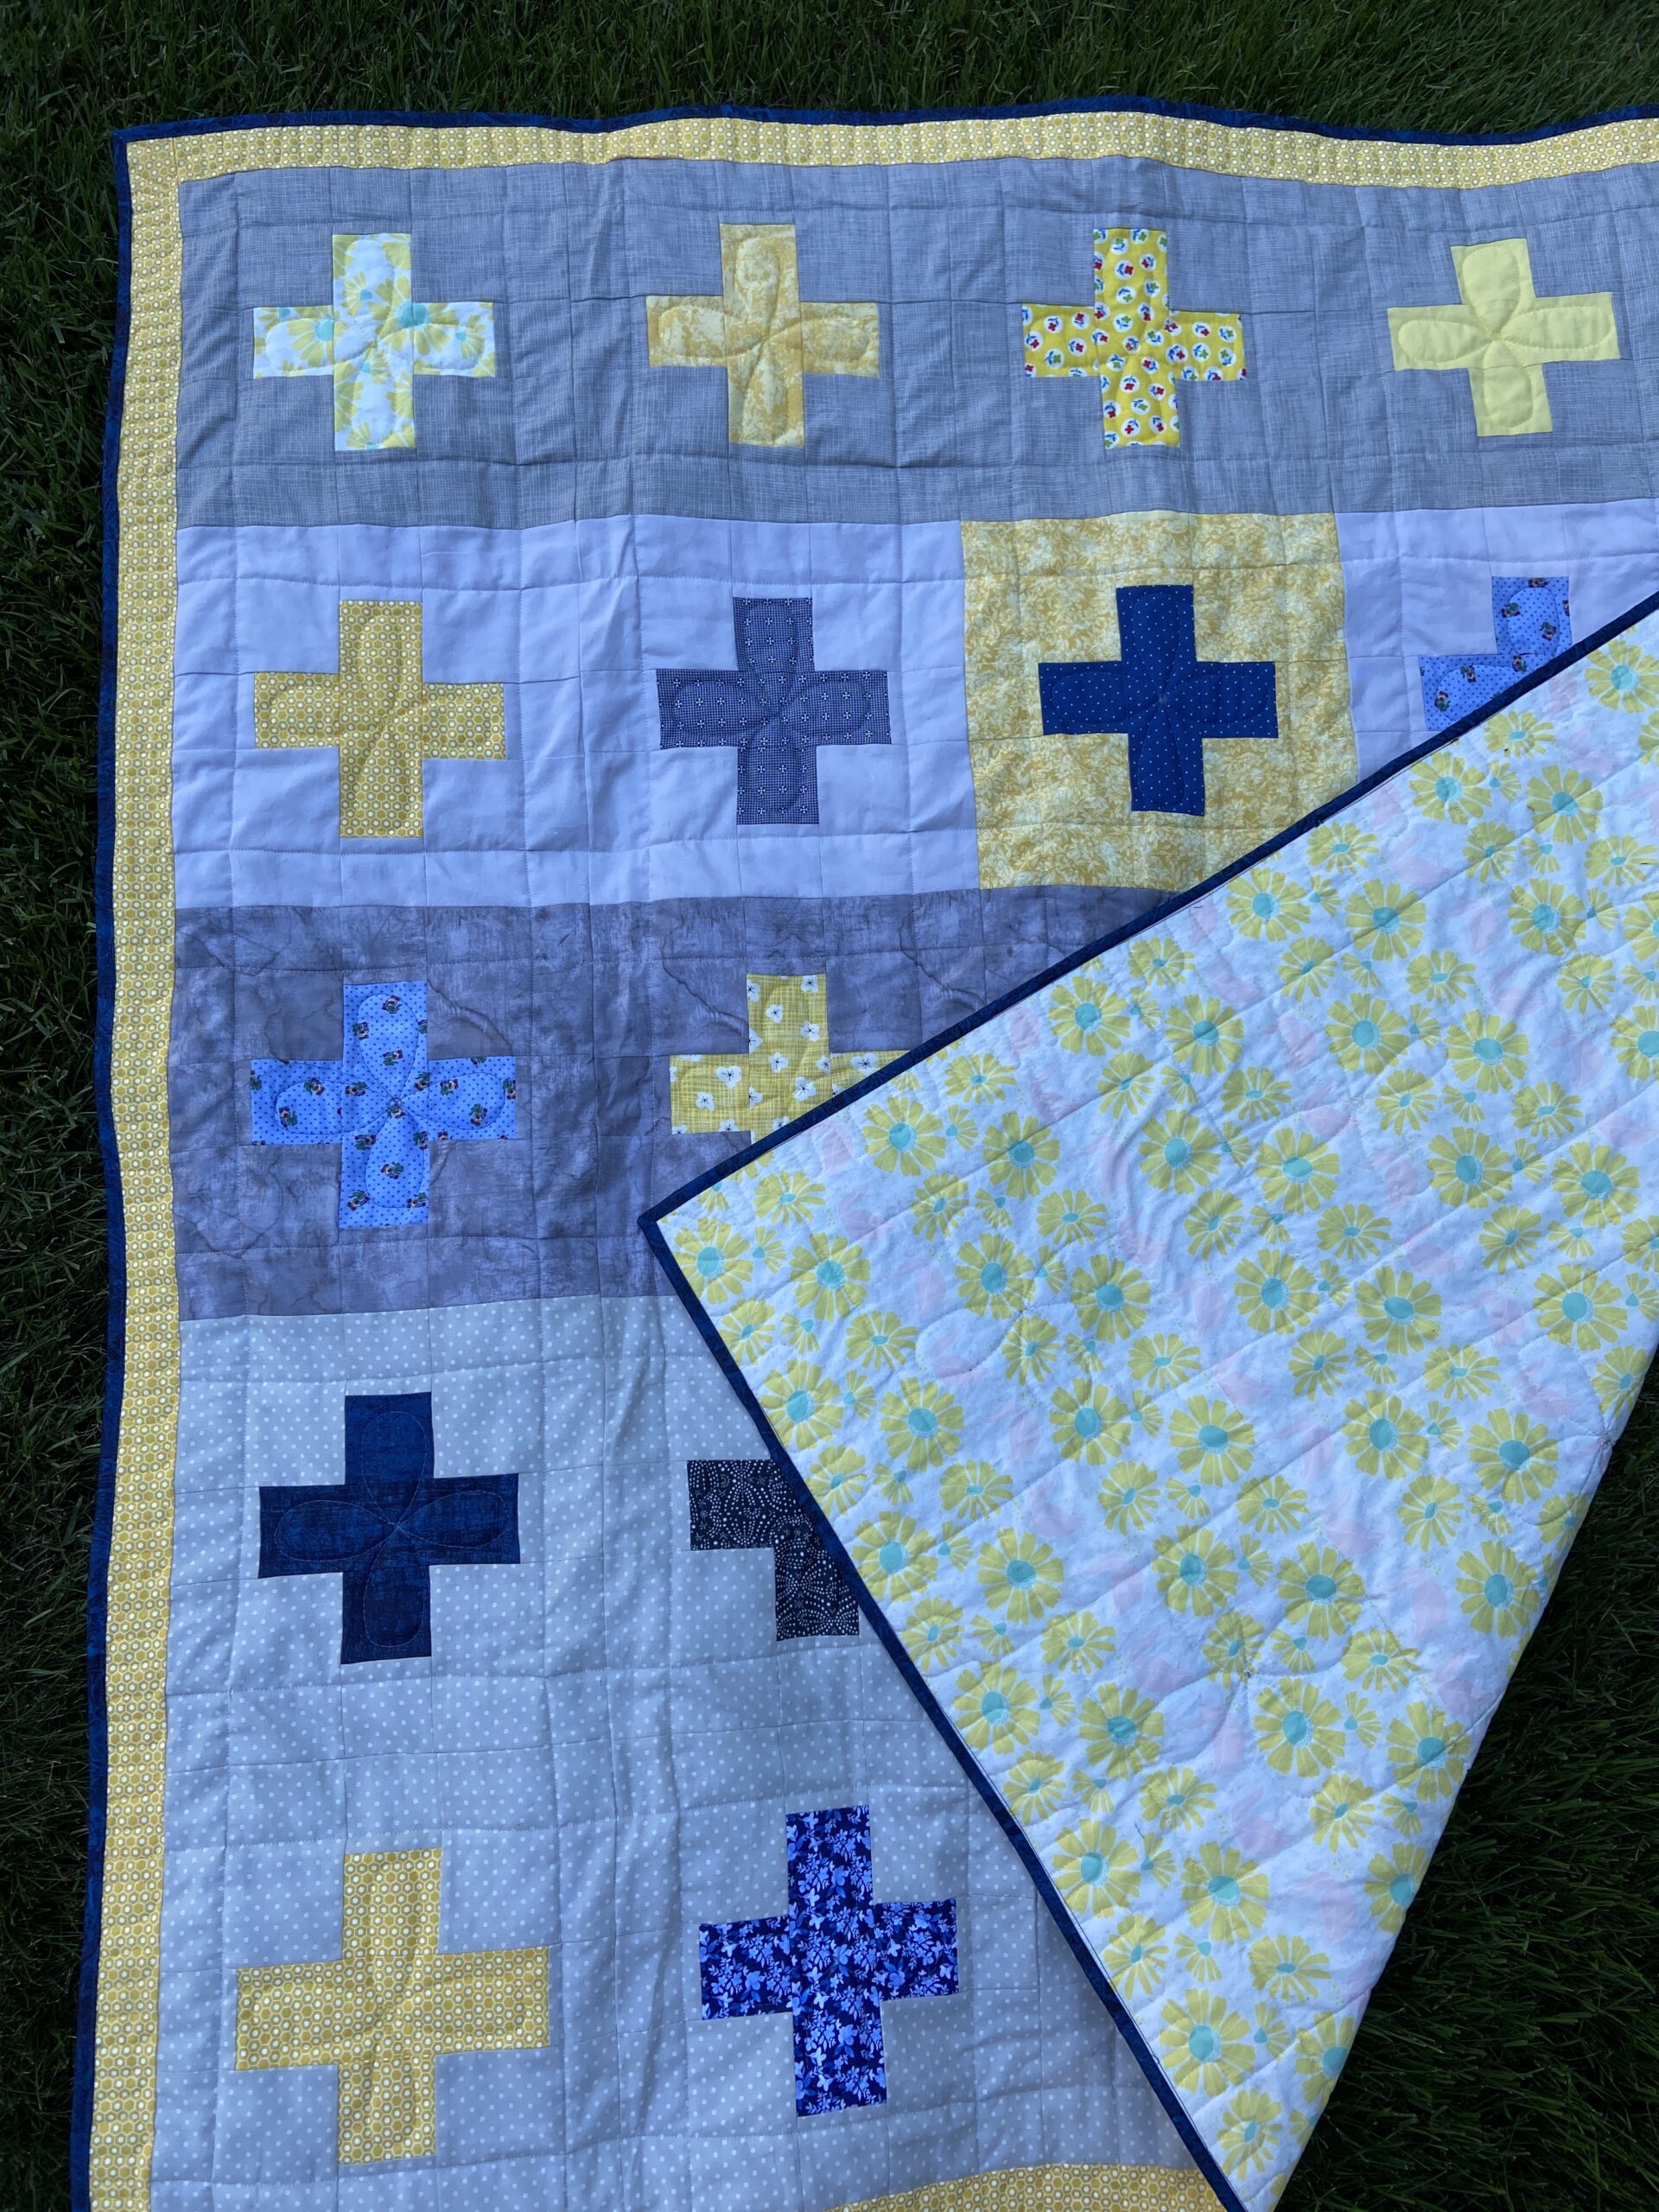
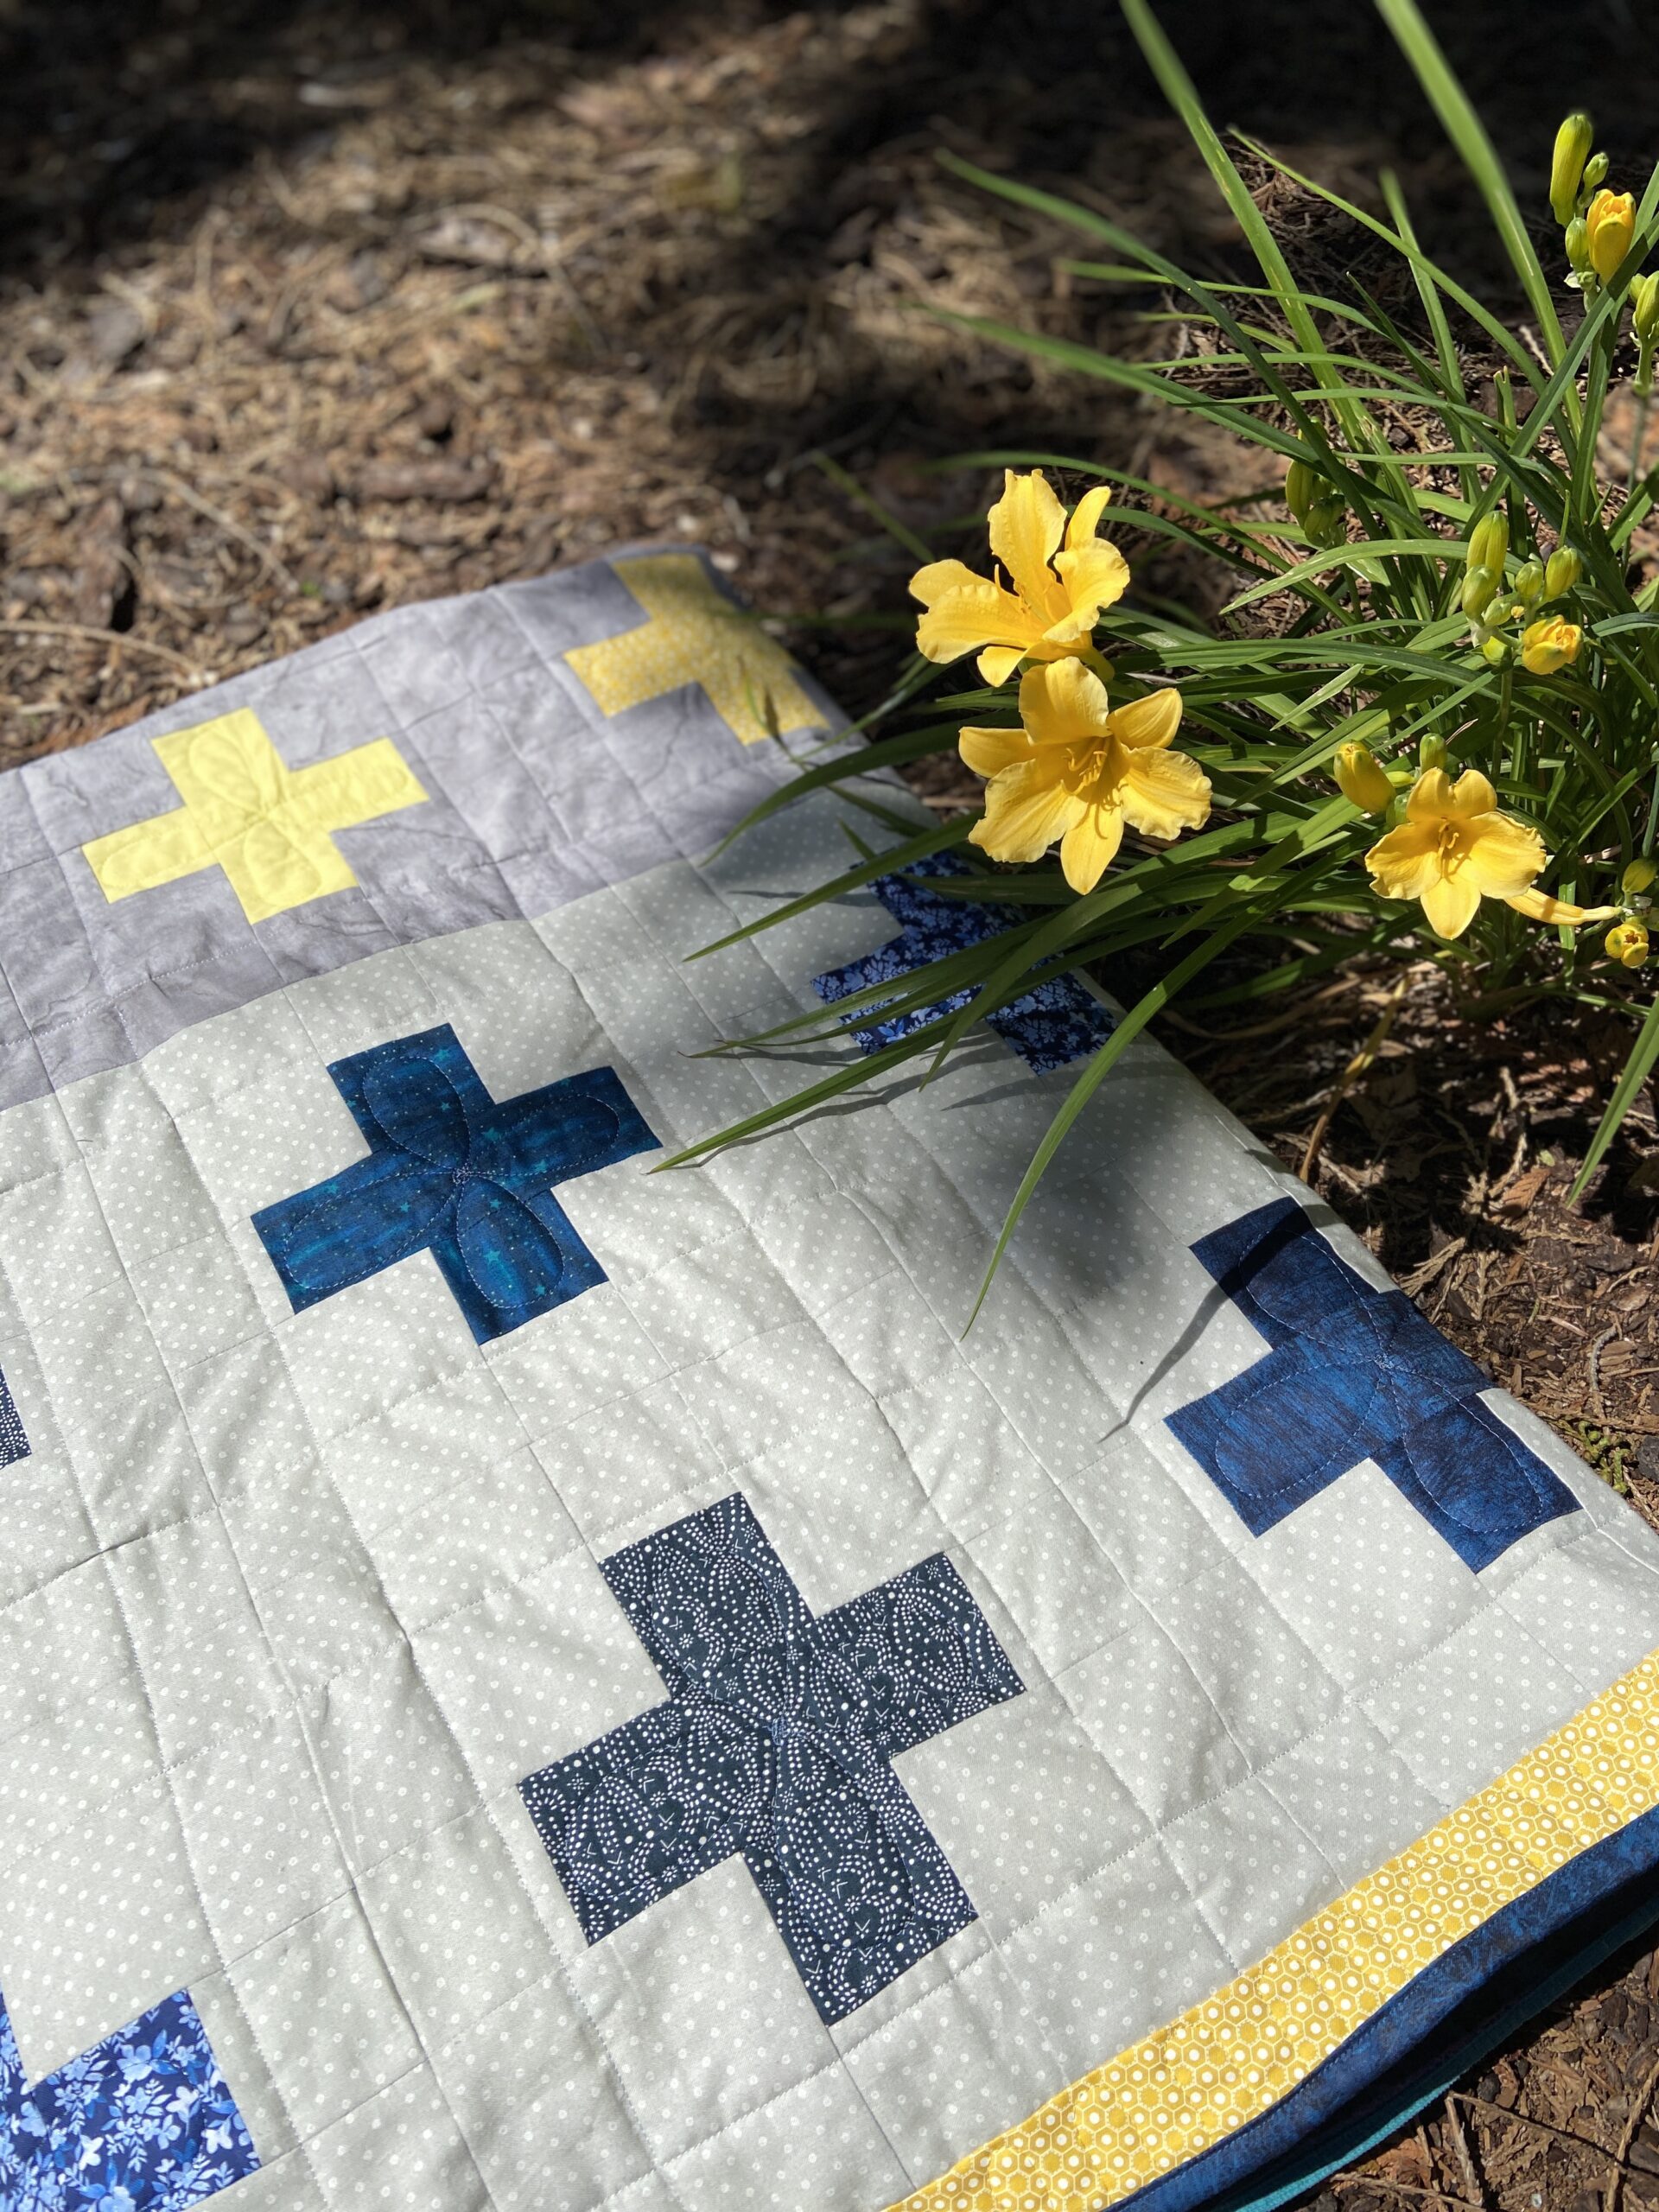
This quilt doesn’t have nearly as many blocks as Preeti (Sew Preeti Quilts) called for but I decided it was a large enough quilt at this point. All of the pluses are either a shade of blue or yellow and with one exception, all backgrounds are various grays. The blue cross with yellow background came from Alycia (Alycia Quilts). She included this with her quilt when she donated it – you know, a year ago, when we were supposed to have finished these! I thought it was a perfect pop for this quilt so my quilt was technically made by me and Alycia!
There is a border of deep yellow framing the blocks and a dark blue binding. The binding was selected by my sisters. I texted them when I just couldn’t decide and they chose blue. Smart call on their part, as this looks great!
The backing is a piece called Abiding Reverie from Art Gallery Fabric. I had it in my shop because it reminded me of vintage sheets (which you all know I have a strong affinity for). It is such a cheerful fabric. There is still some left which makes me happy.
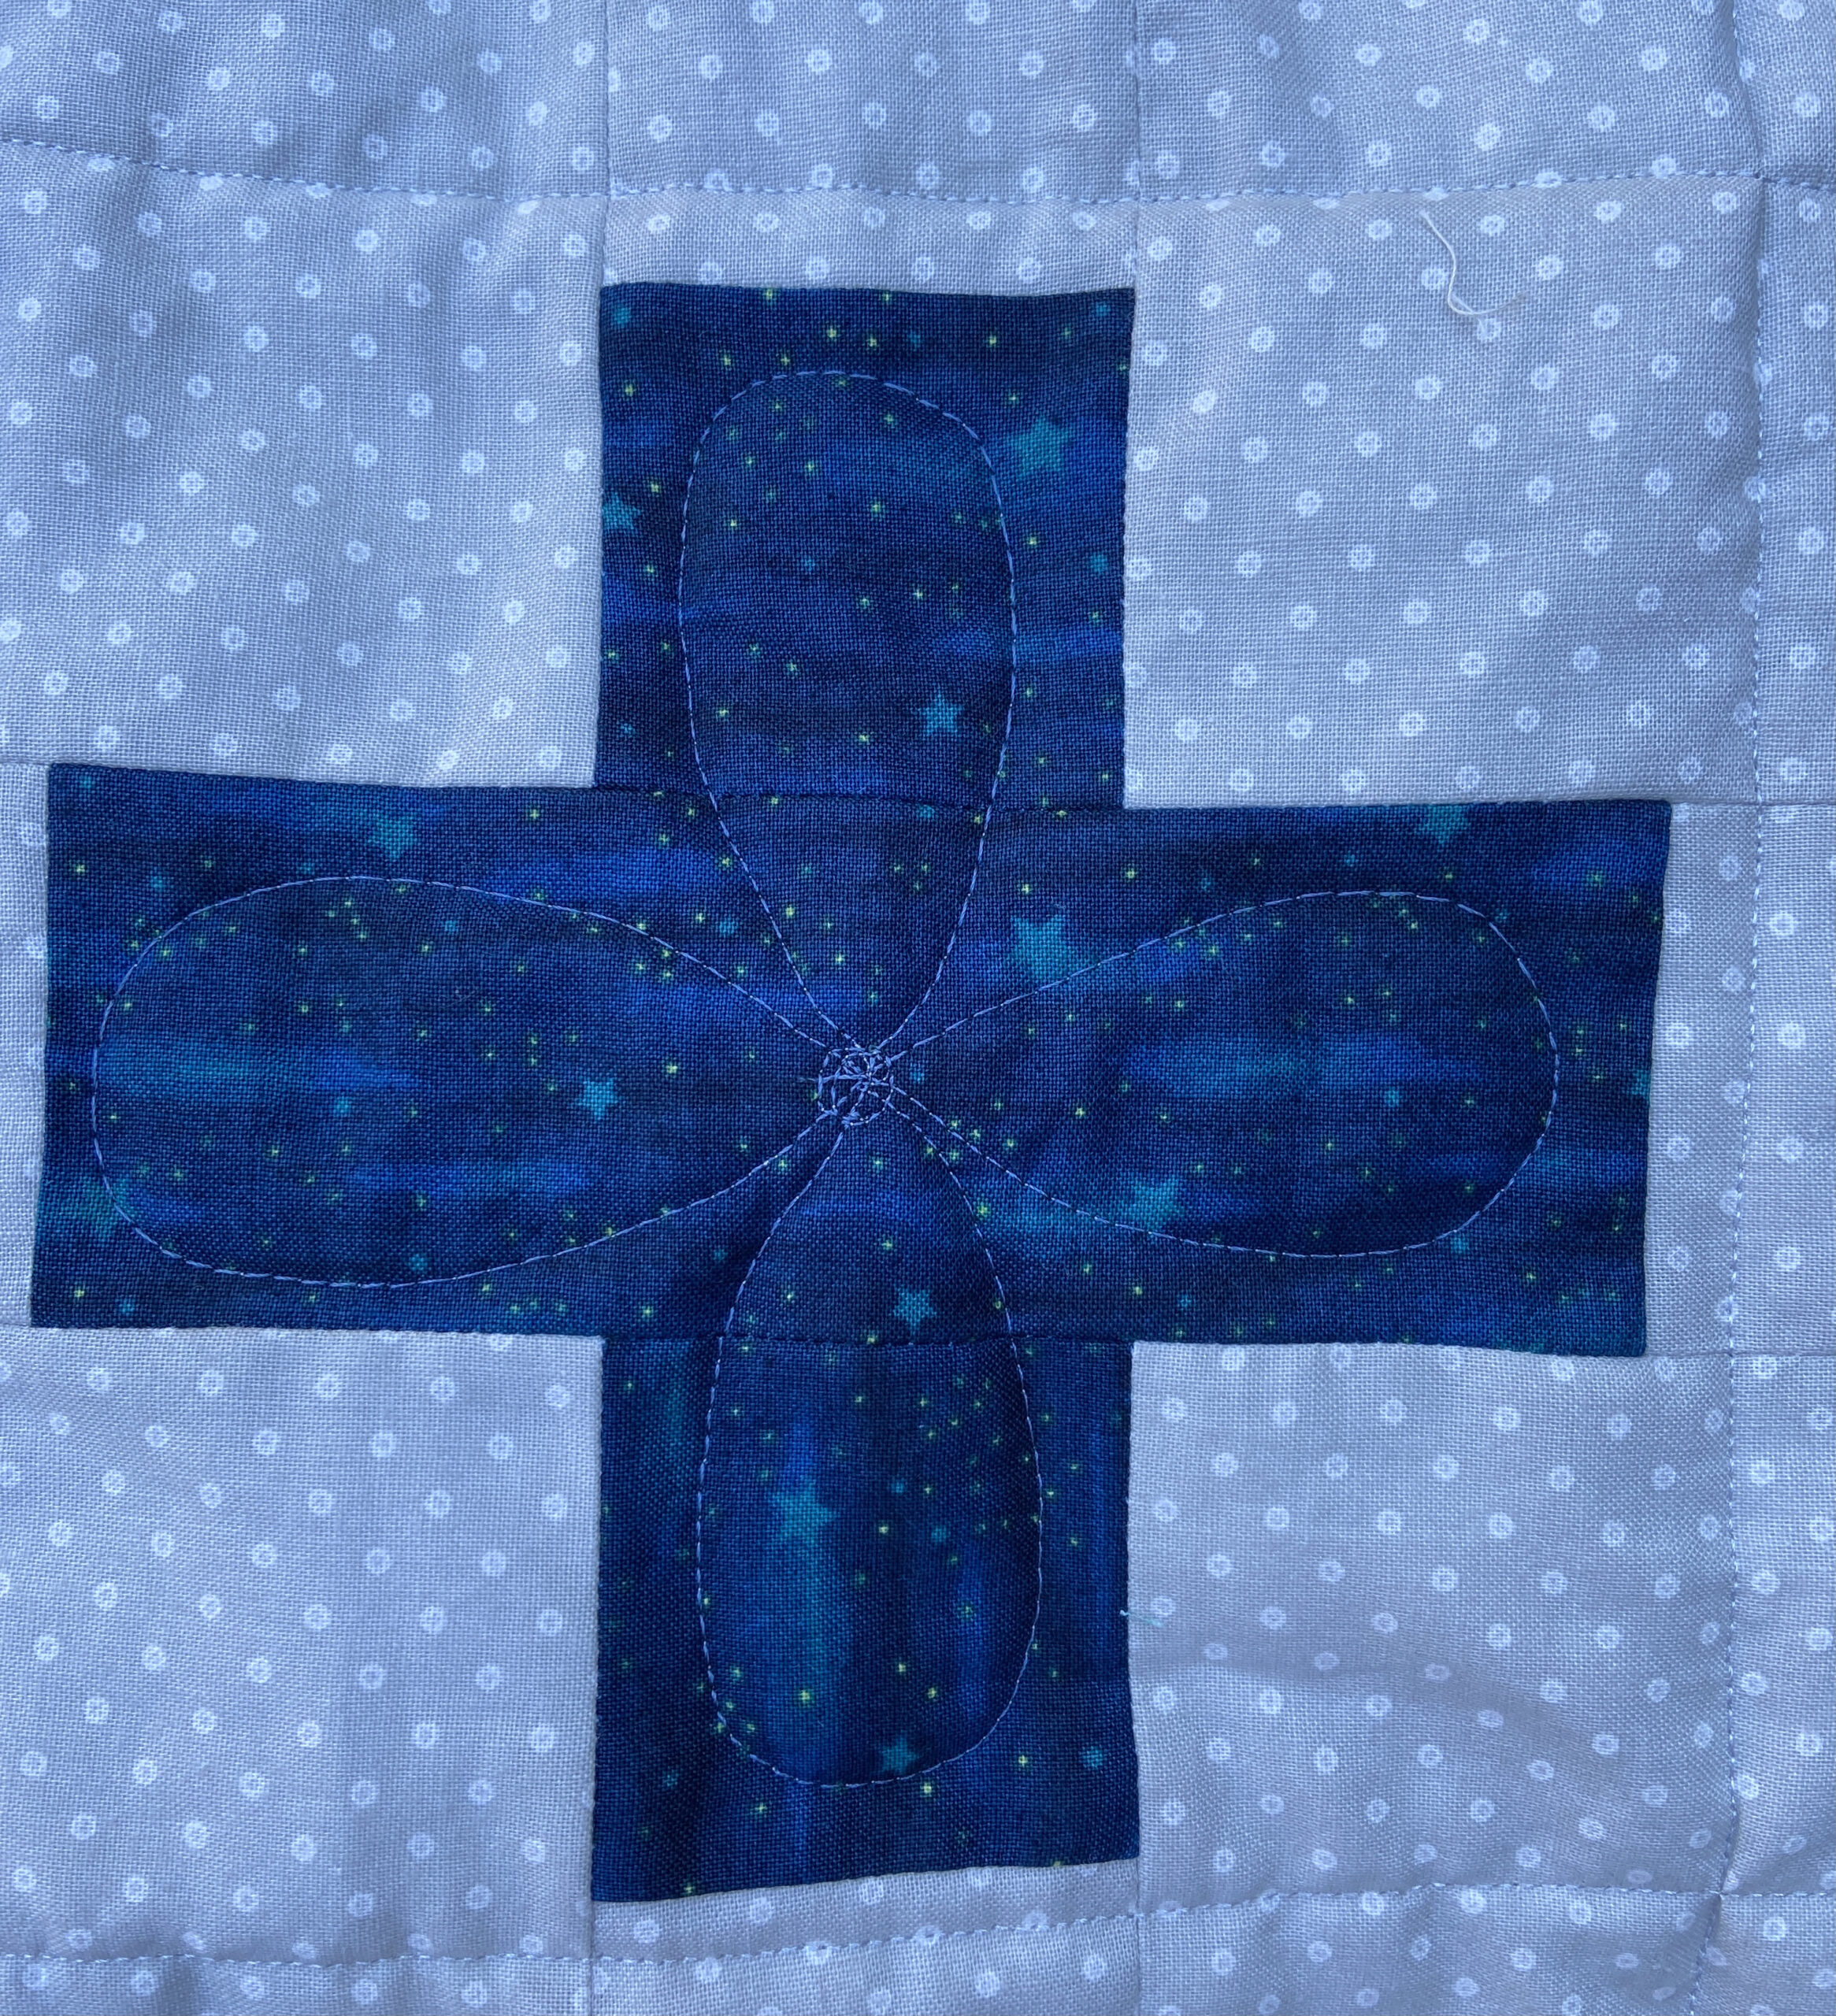
After doing straight line quilting both horizontally and vertically, I did this little design on each plus. I am so happy with the new machine my sister gave me. It is so easy to quilt on compared the the older machine I was using. I still don’t have a walking foot yet and the straight line quilting was actually more of a challenge than the FMQ. I had a few puckers since the fabric wasn’t being moved from top and bottom.
This is a finish and I am thrilled with it. I think I will wait and mail it to Mercy with the second quilt. Having this beauty sitting in my sewing room will motivate me to finish the 2022 project! Thank you Preeti for hosting this event, both last year and this!
Linking to my usual favorites. Check them out at the top of the page, under Link Ups.
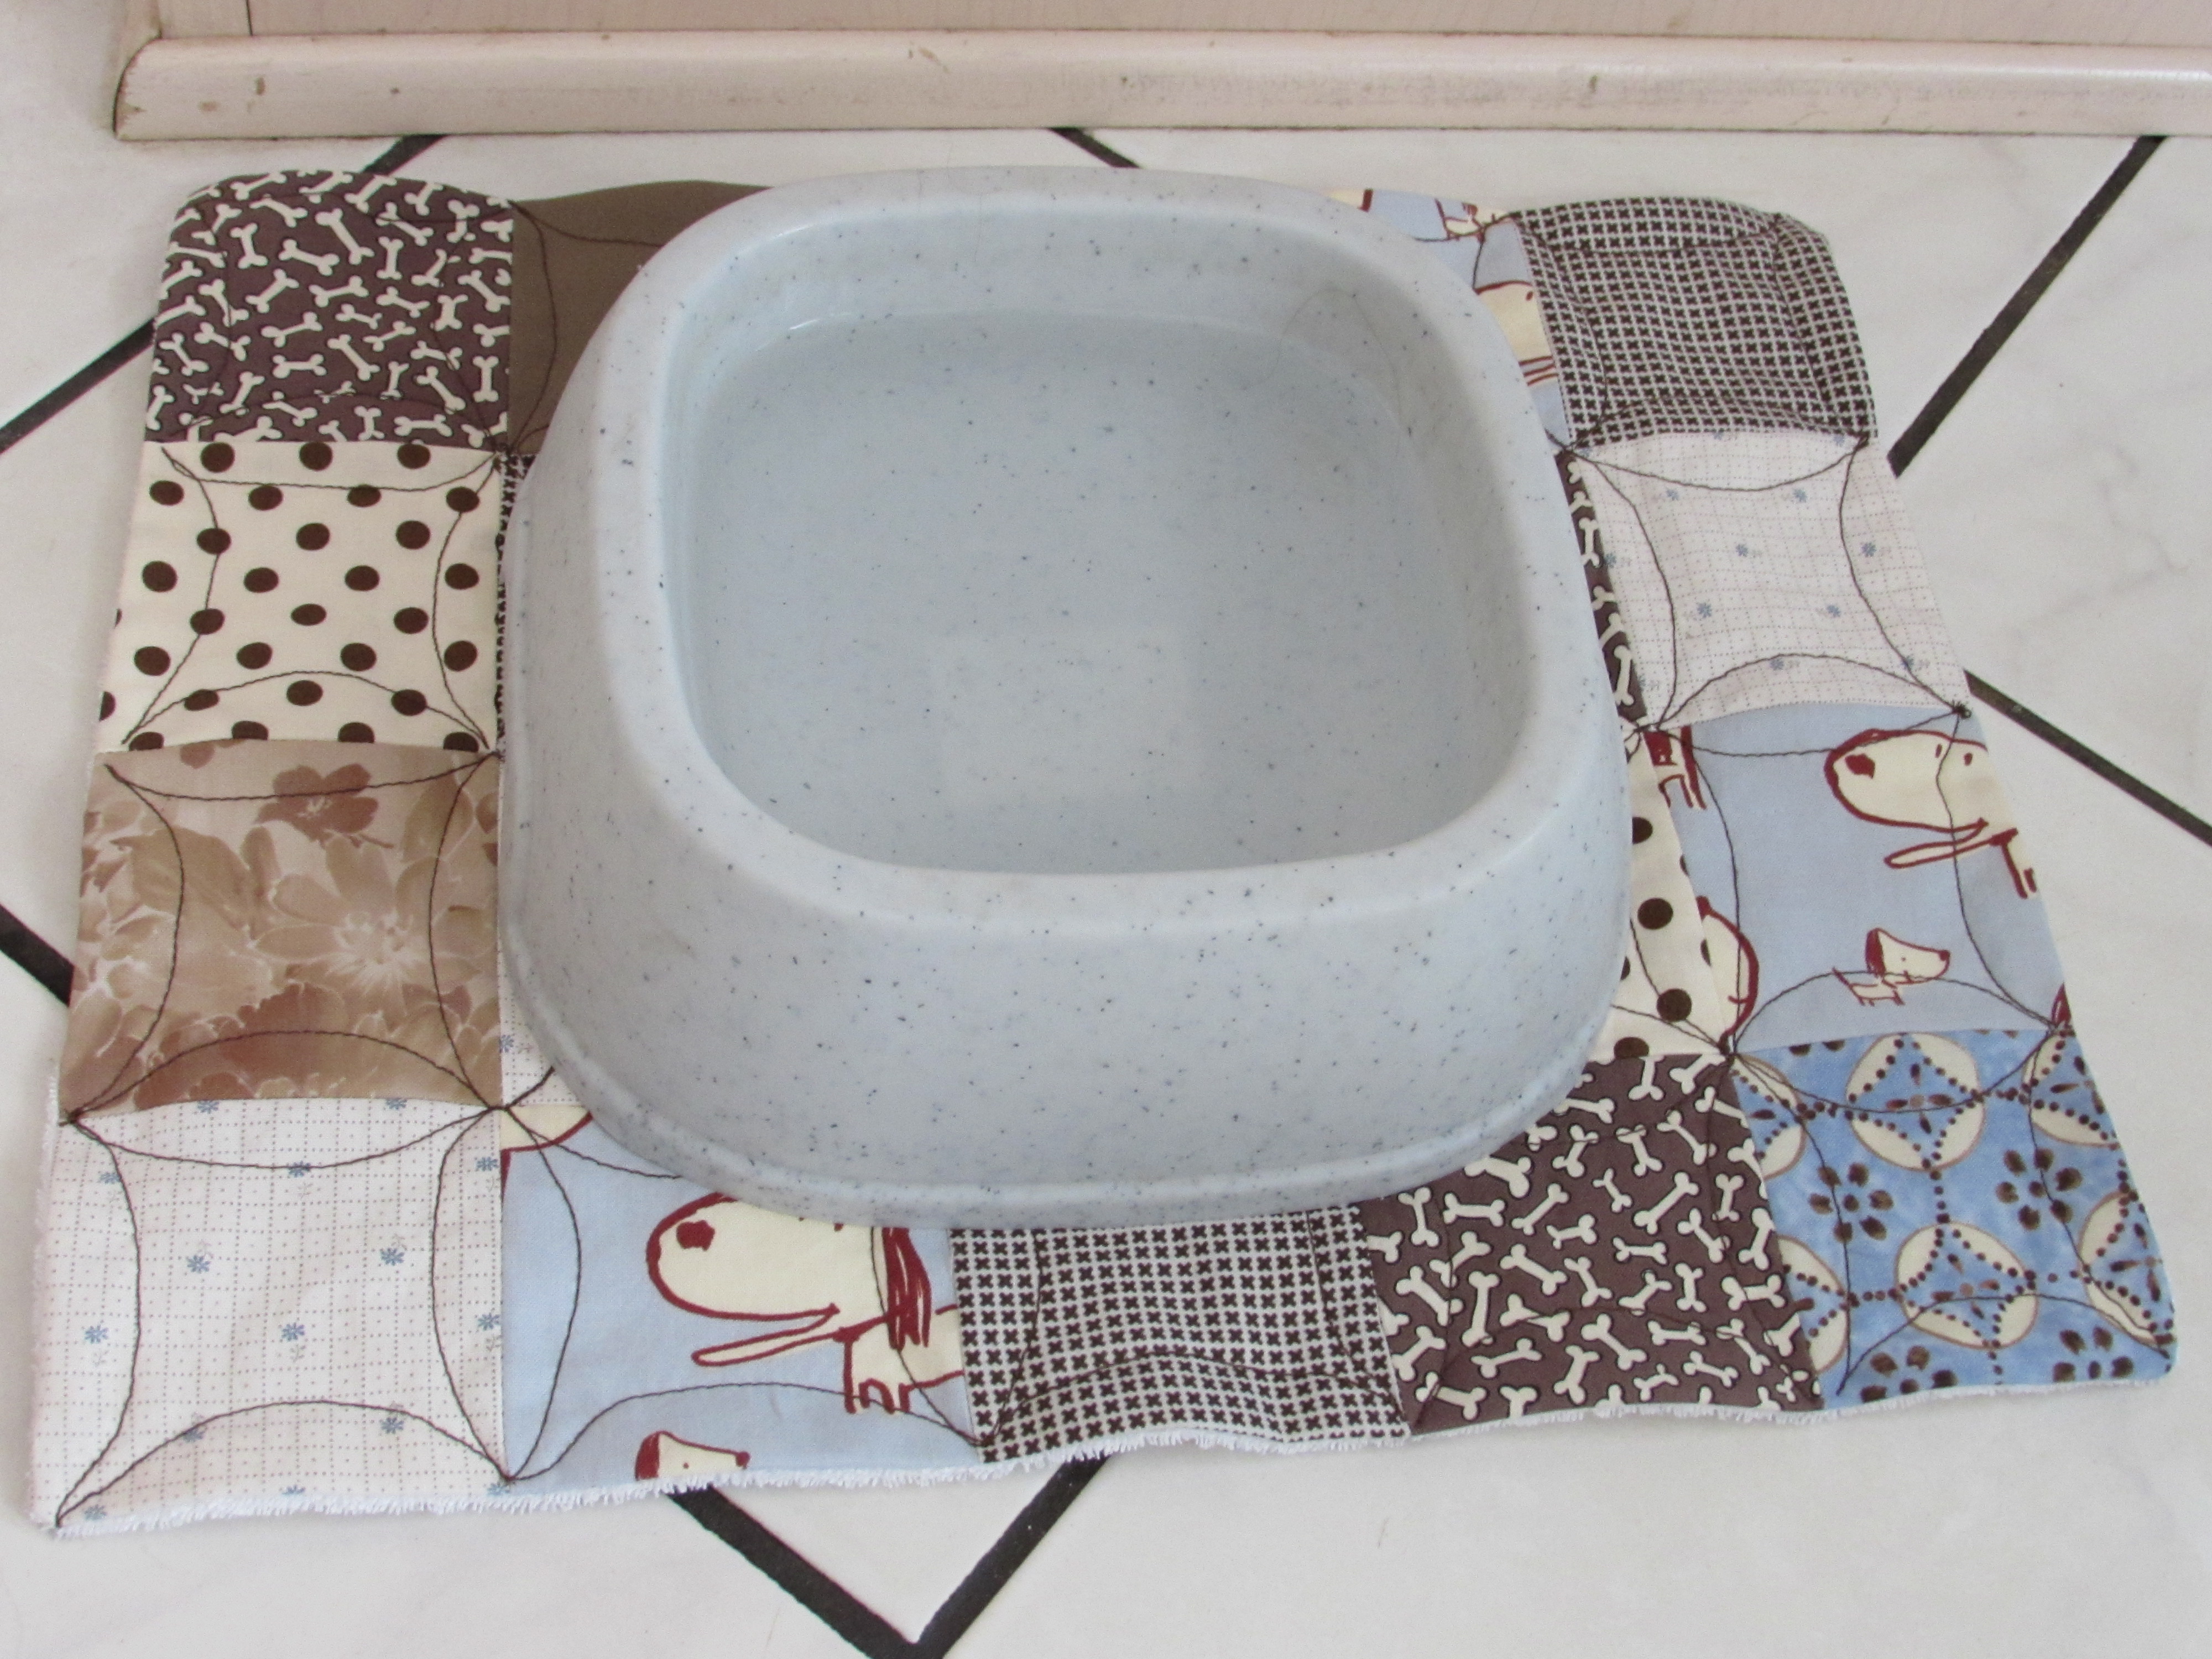
Here is a post about one of the least exciting things I have made thus far. Today I made a little mat to place under my dog’s water dish. I hate the puddles that happen when she drinks (and more often than that, when I kick the dish as I walk by it – like every. single. day.) It wasn’t that I didn’t try to control the issue. Look at this gorgeous set up I had going on.
Classy, right? (Please avert your eyes from the dirty floor. Thank you.)
My true goal was to learn to quilt a basic “orange peel” motif. It is one that I had not yet tried and seemed like a good one to add to my limited repetoire. I didn’t look for a tutorial and didn’t sketch any first. It just seemed so easy. Silly, silly me. Drawing first has huge benefits as will become clear in a sec.
First I found a pile of 3 and 1/2″ squares that were left over from various projects. I added a few extra squares cut from puppy themed novelty fabric that was in my stash. I made a patchwork of five squares across and four down. I found a scrap of french terry to back it with so it would have the absorbency to handle my constant kicking and splashing of the water. (One would think moving the bowl to another location would be much simpler!) I sewed the two pieces, right sides together, leaving a small opening to turn it right side out. After stitching the opening shut, I pressed it and pinned it. Then I just dove in with the quilting process.
The problem was I didn’t really think about how to travel along with the orange peels. Mostly I was listening to music and not focusing on the exciting task at hand. I began by moving around the inside of each square. This doesn’t work and I was almost immediately stuck in the corner. Ahh… of course. The pattern is supposed to be stitched along the length of each row of squares and then again along the opposite edges of the squares (e.g. along the vertical rows and then the horizontal rows – or vice versa.) Very basic and had I sketched for just a few minutes first, this would have been apparent right away. No big loss though. This was easily remedied and I finished up by stitching along the edges. Once I figured it out my curves looked (somewhat) better.
The quilting on this is mediocre at best. Fortunately I have a rather undiscerning dog when it comes to quality of the FMQ on her water mat. It does look better from the back (because there isn’t the point of reference of the squares to look at next to my stitching.) Quilting along the perimeter was really tough because there was no edge to hold on to (since I had just made this “envelope style”.)
I really love how the orange peel motif looks (when done well!) and plan to practice it further. It would be very easy to quilt a larger project with this pattern. I would want to have a better handle on it first though. This little mat certainly improves the look of the water station in the kitchen though! Very classy. I am sure the dog is grateful.
Have you been enjoying the Fabri-Quilt New Bloggers Block Hop so far this week? I have seen some amazing creativity out there. The hop continues through Thursday. The Tuesday group can be found over at Meadow Mist Designs with Cheryl leading the crew.
I am sitting here waiting for the delivery of my new washing machine.If you could have heard the noise made during the final spin cycle, you would have no trouble imagining my anticipation for this wonderful event. It sounded like jets were leaving the runway. The floor shook as the machine rumbled. The sound grew louder with each load of wash. I called to see about having this fixed, assuming that they could just replace the bad bearing or whatever was failing. But the service technician asked how old the washing machine was (ten years old) and told me that it wasn’t worth fixing it. The average lifespan of a washer is about ten years these days. Planned obsolescence – don’t even get me started. Remembering back, I am fairly certain my mom had one washer for the duration of my childhood.
While shopping for a new machine, I asked the salesperson if there was a washer that would hold up for longer than the estimated ten years. He said, sure – this one over here will last 15 or so. Of course it was expensive enough that I could just buy another one in ten years and still spend the same amount. Irritating. So, I am just waiting for the delivery guys to show up and heave that beast up the two flights of stairs on my deck and install it. I have a pile of laundry waiting right here with me. Exciting times, right?
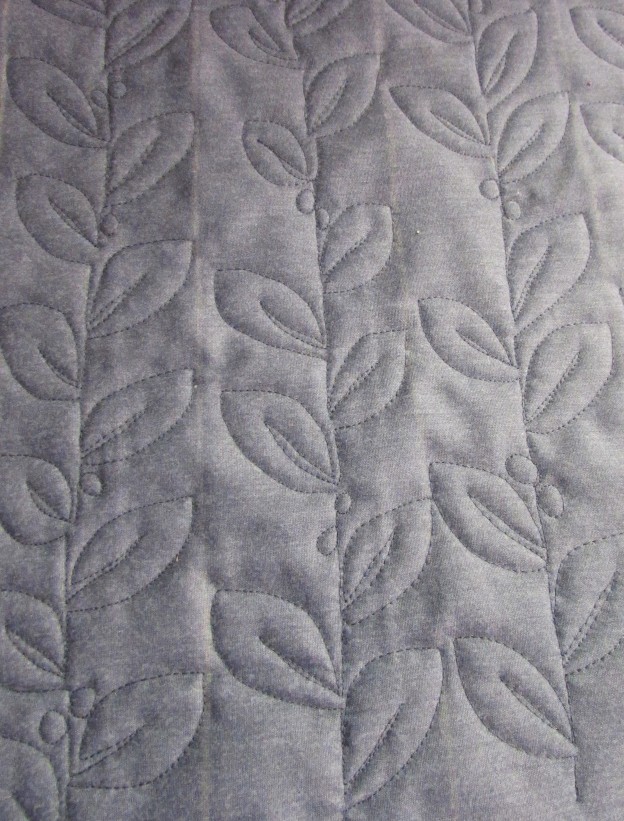
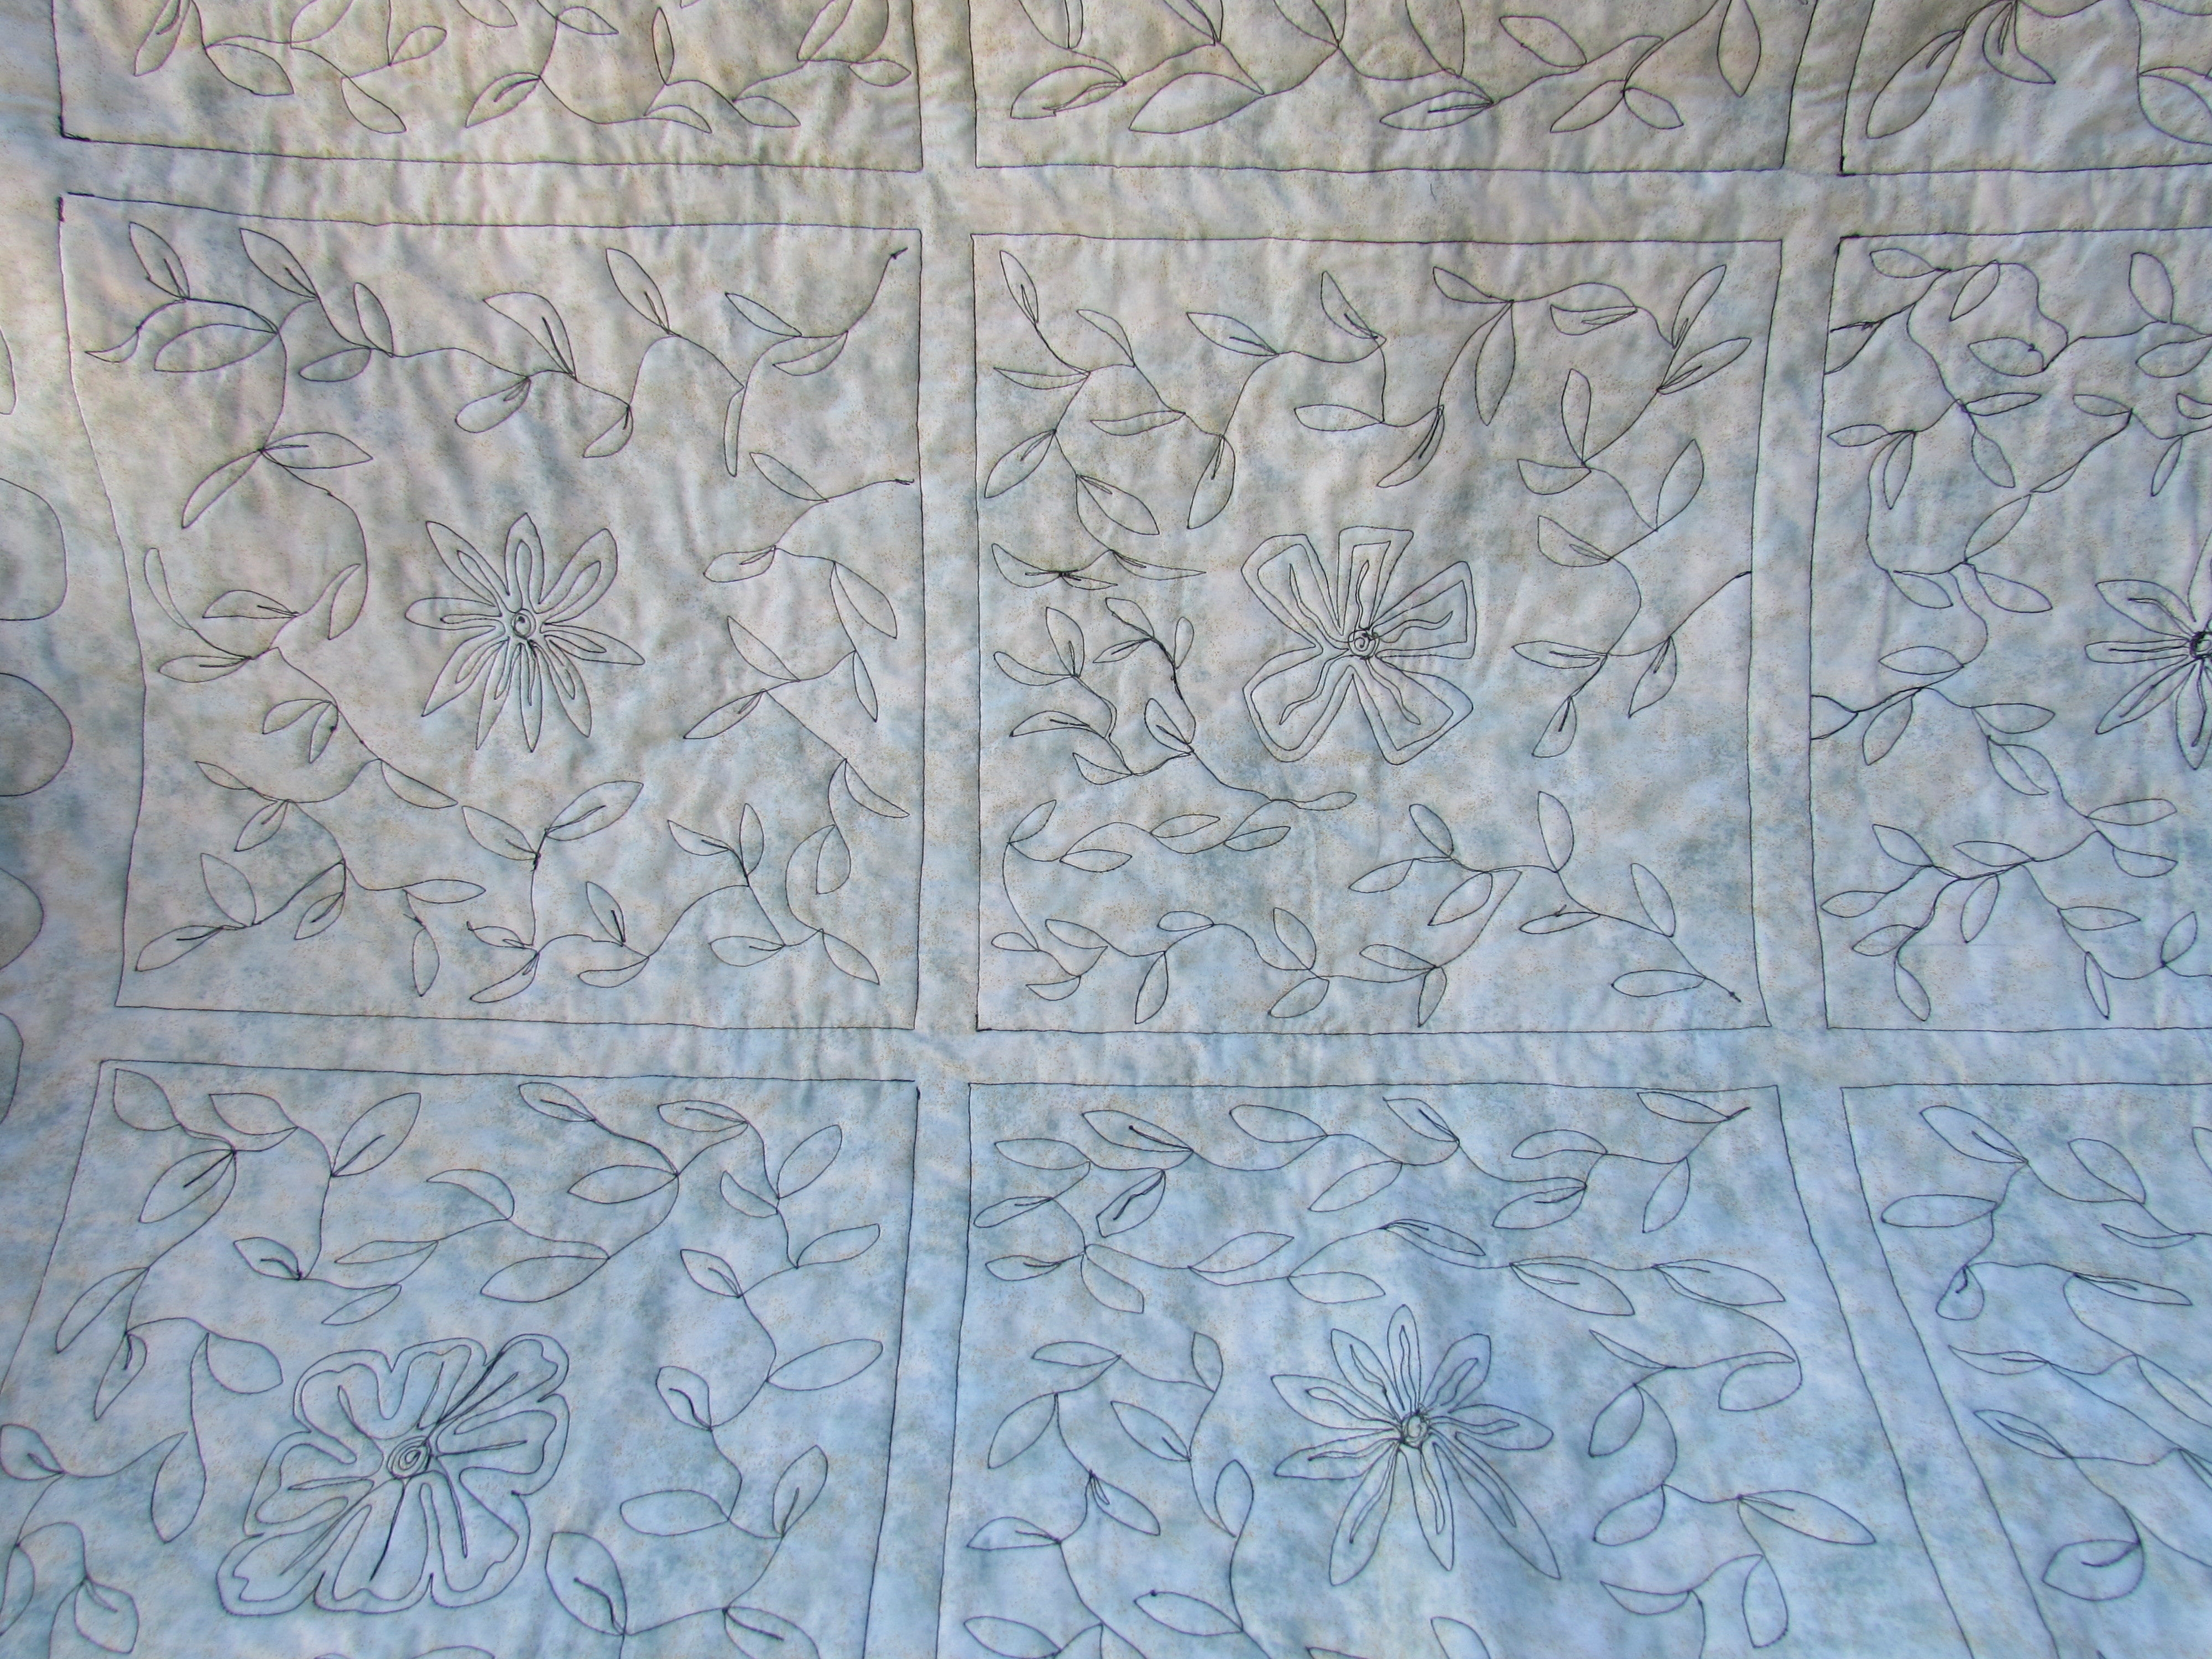
Over the weekend (since I wasn’t doing laundry) I practiced my FMQ. I wanted a larger fabric sandwich to practice on as I was doing a leafy border motif and wanted to figure out how to turn the corner. For me, it is really a challenge to plan the motif and be at the right point in the design to make that turn. I cannot visualize things like that in my head, yet I prefer to quilt without tracing a design. When I stitch over a tracing of a design, my stitches wobble. Don’t ask me why. If I had to make a supposition, it would be that my mind becomes focused on that dang traced line. Without the line, my stitches flow much better. This corner isn’t great. I don’t like that harsh right angle on the vine. But the leaves worked out ok.
I do like the motif. I found this Modern Leaf tutorial via Lori Kennedy’s incredible website, The Inbox Jaunt. I have mentioned her before, but really, if you are working on your FMQ skills, I cannot recommend her enough. Her site offers tons of tutorials and many, many different motifs. It is definitely worth taking a peek at all she has to offer.
Lori is a huge proponent of doodling and drawing the motif before actually stitching it. I did several pages of practice drawings. (Drawing is not my forte, not in the slightest.) However, the practice of making those hand motions using pencil and paper definitely transfers to an increased muscle memory of that pattern. It helps!
When I was putting the fabric sandwich together, I didn’t want to waste a large scrap of batting. I have a whole drawer full of many straggly lengths (often from trimming the edges off of a project after quilting it). I have taken to stitching these pieces together (frankenbatting style). Have you tried this? I have never had any issue with it. Mainly I do it for smaller projects, but I have read posts from many quilters who have done it to gain larger sizes as well.
I use a fairly wide zig zag stitch with only a hint of overlap of the two lengths of batting. To avoid a lump along that line of stitching, it is best to just hold the two lengths as close together as possible without much of an overlap. This is a great way to use up those piles of batting scraps.
Today I plan to finish up the quilting on the vintage double nine patch. I have one border left and I will use this leaf motif. My binding strips are ready to go. Looks like I will have a finish this week!!
How about you? Working on anything fun this week?? Ever pieced your batting scraps? Do tell. 🙂
Linking to Freemotion by the River, Sew Cute Tuesday, Freemotion Mavericks, and Confessions of a Fabric Addict (who by the way is having a giveaway to celebrate her 1,000,000 VIEW!! That is worthy of celebrating!! The giveaway is open until Thursday of this week.)
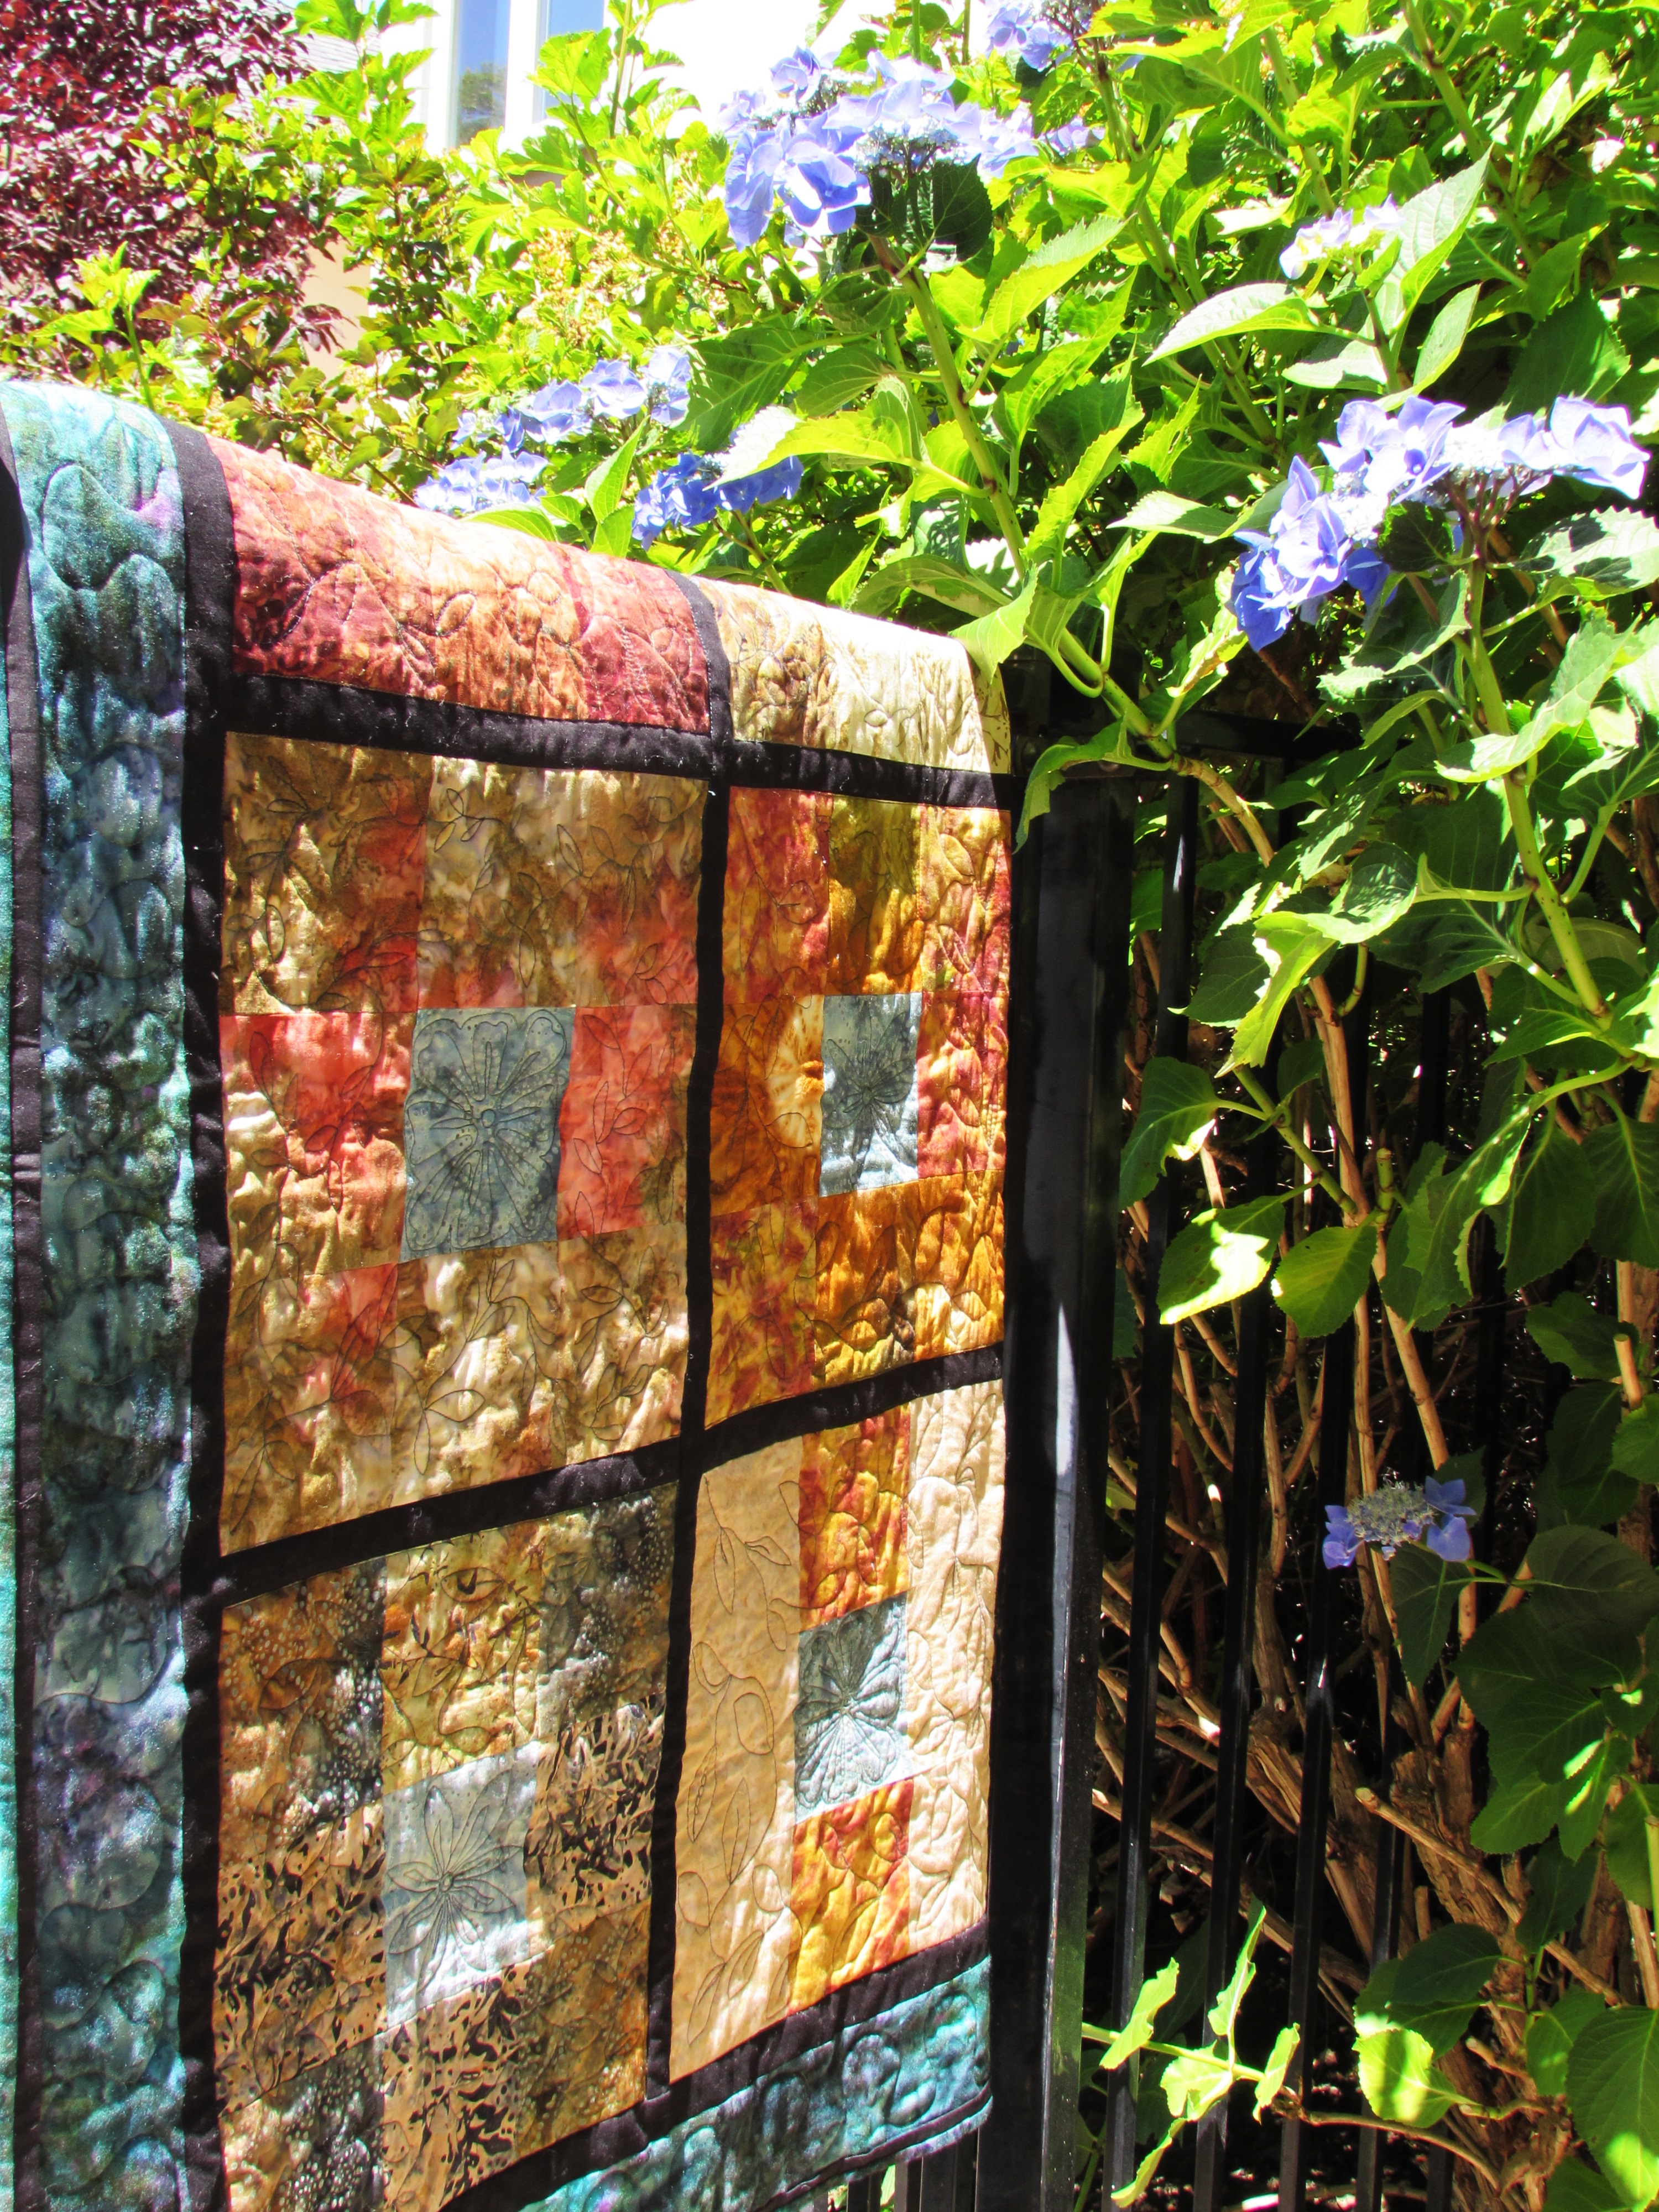
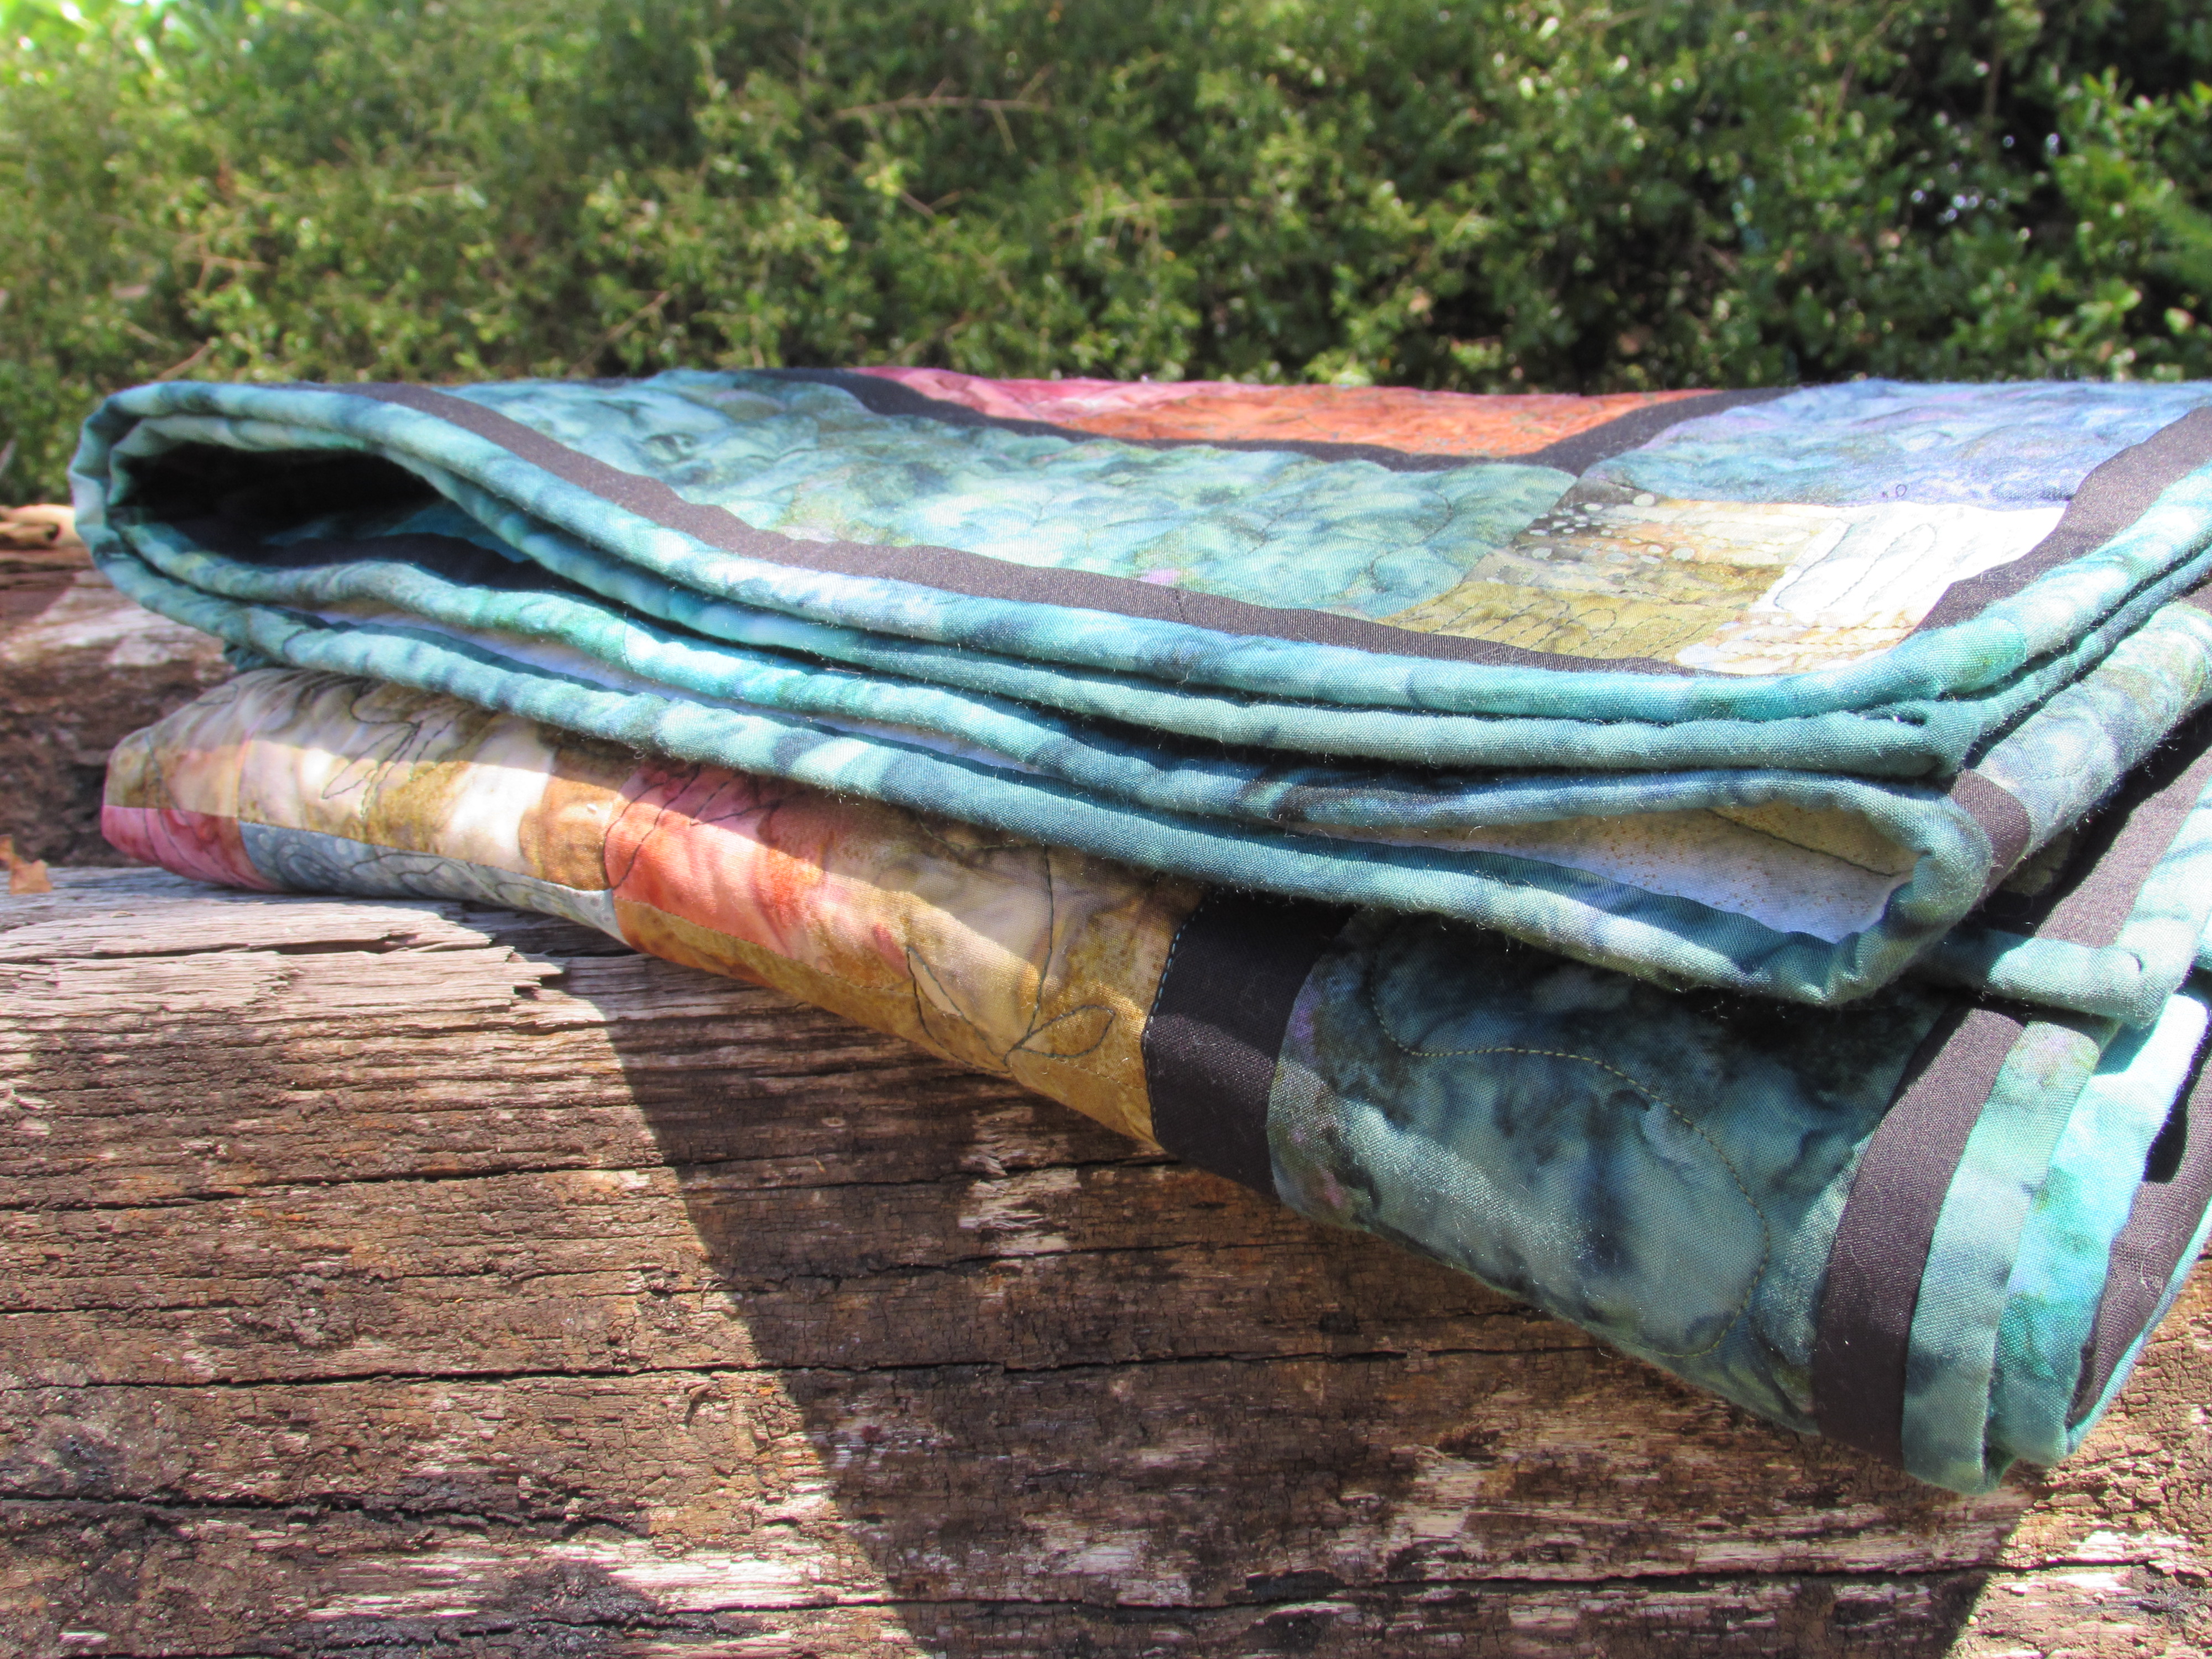
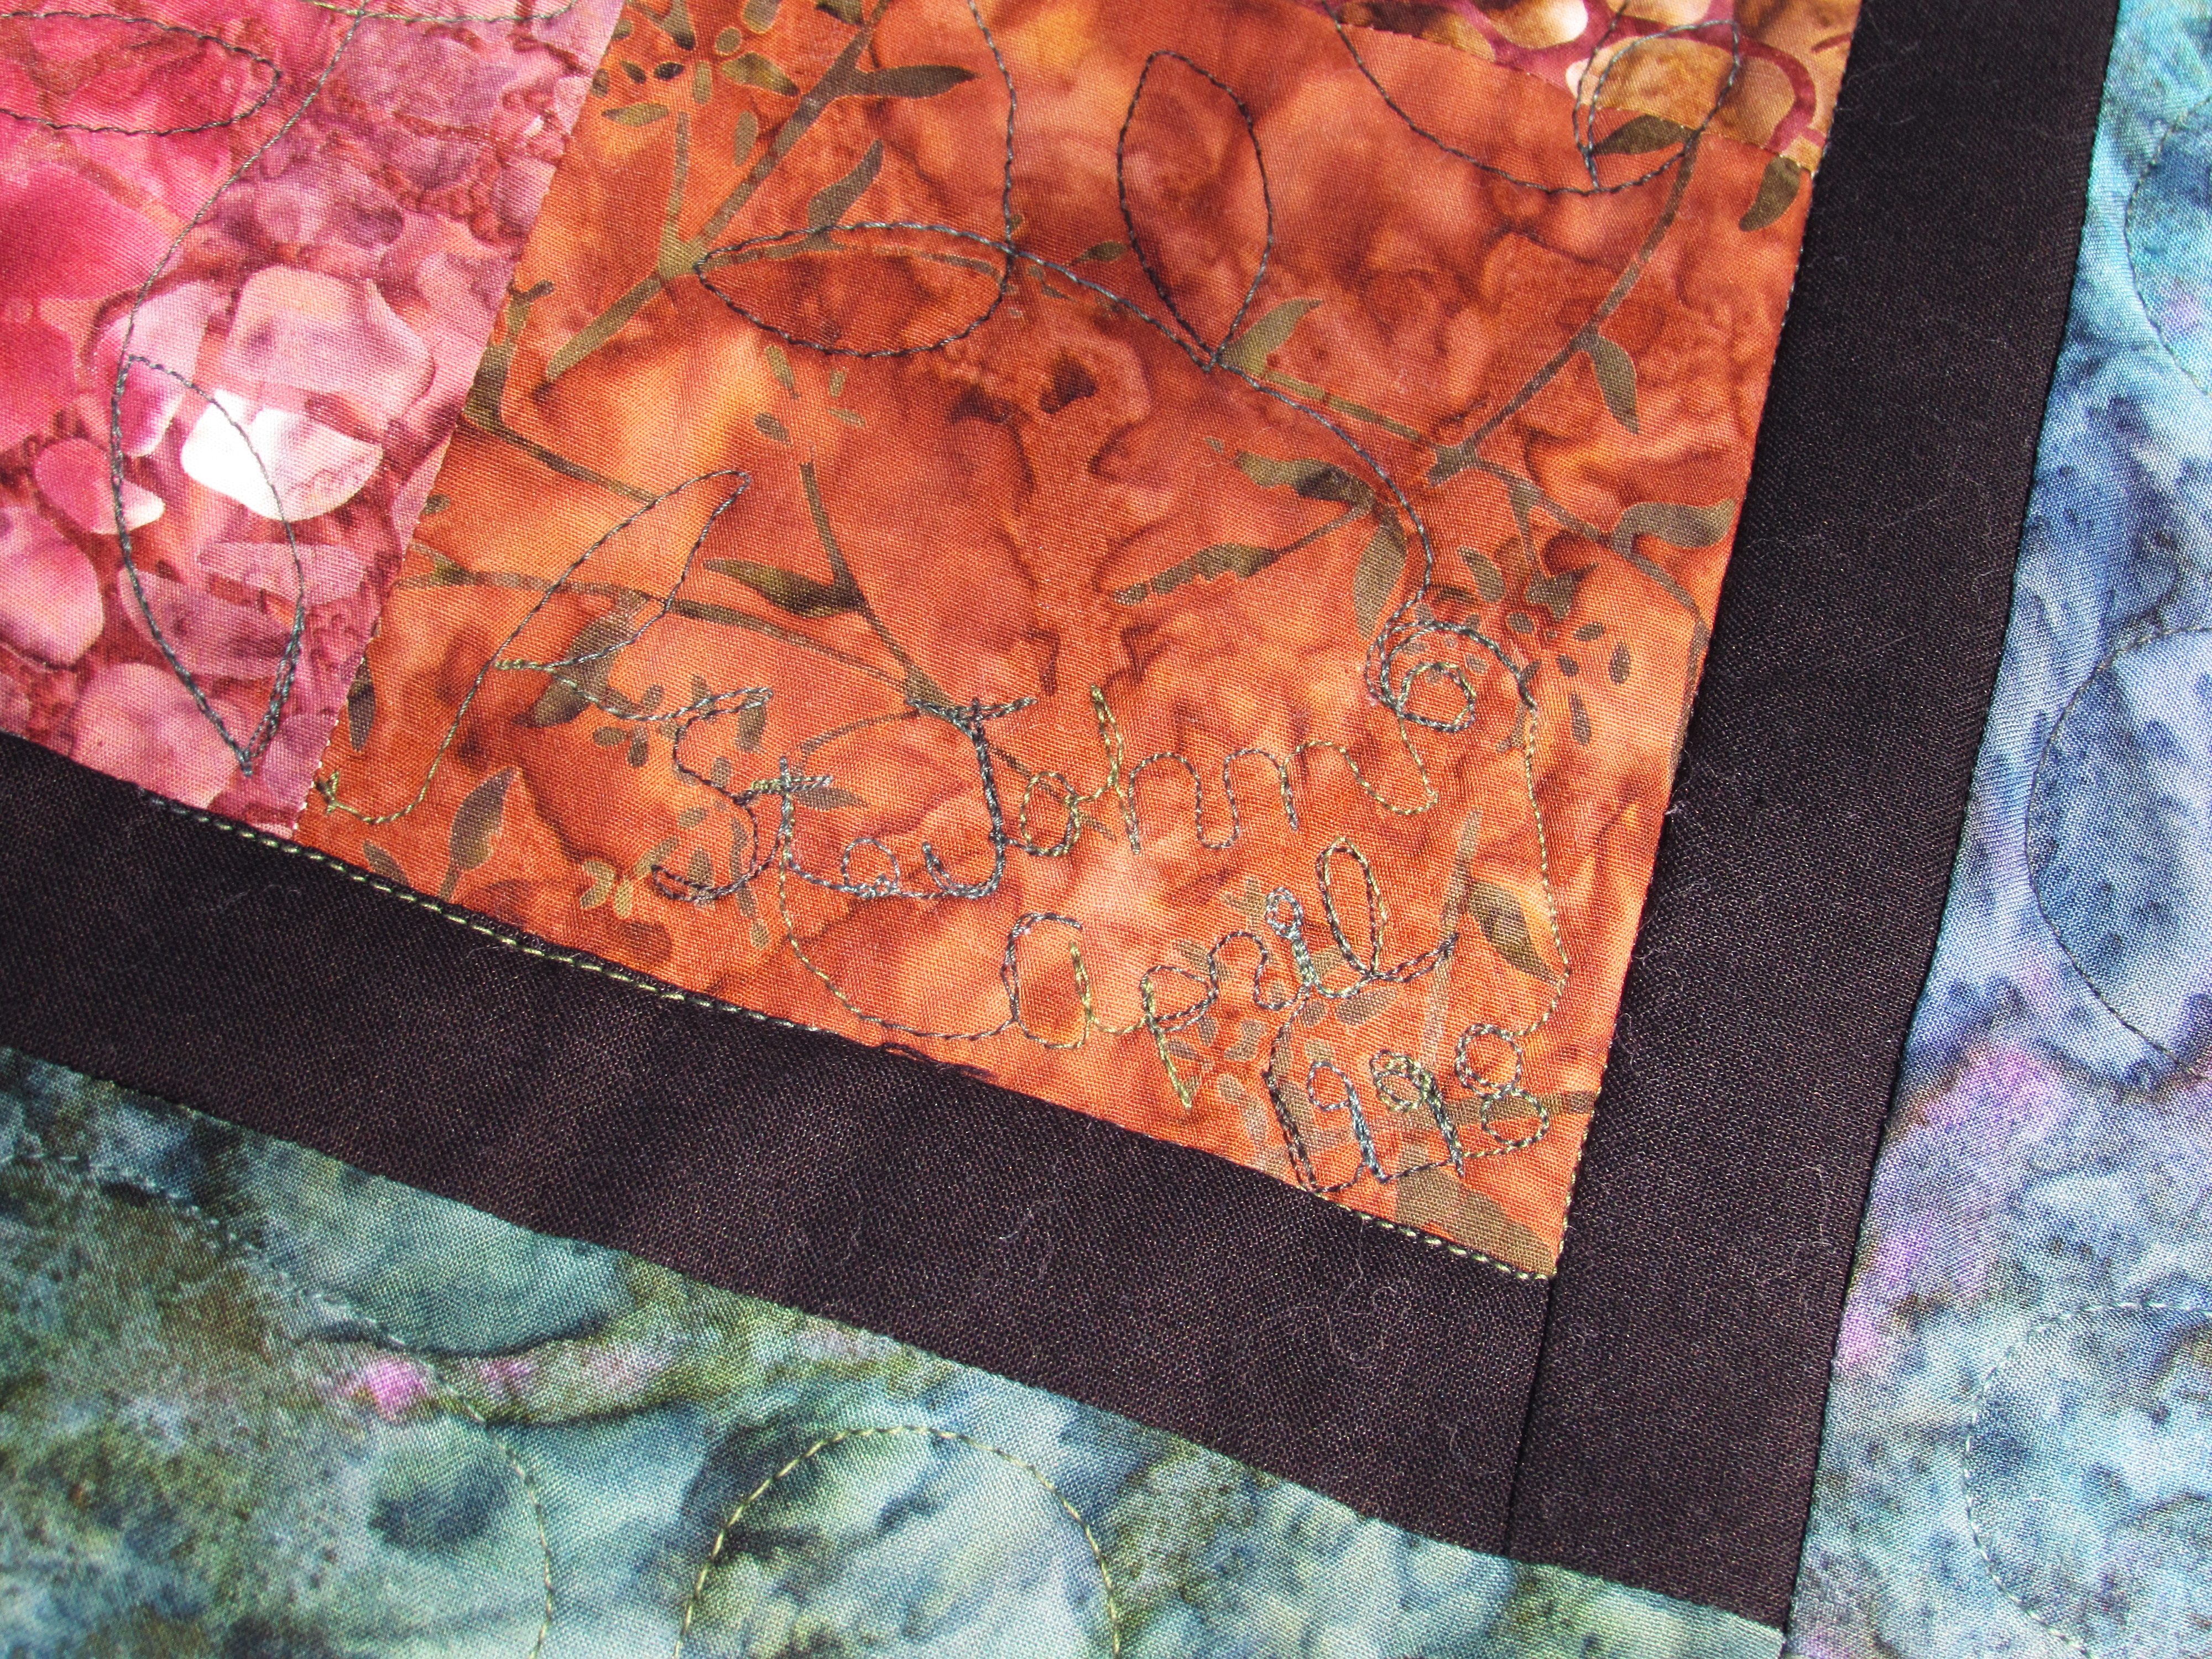
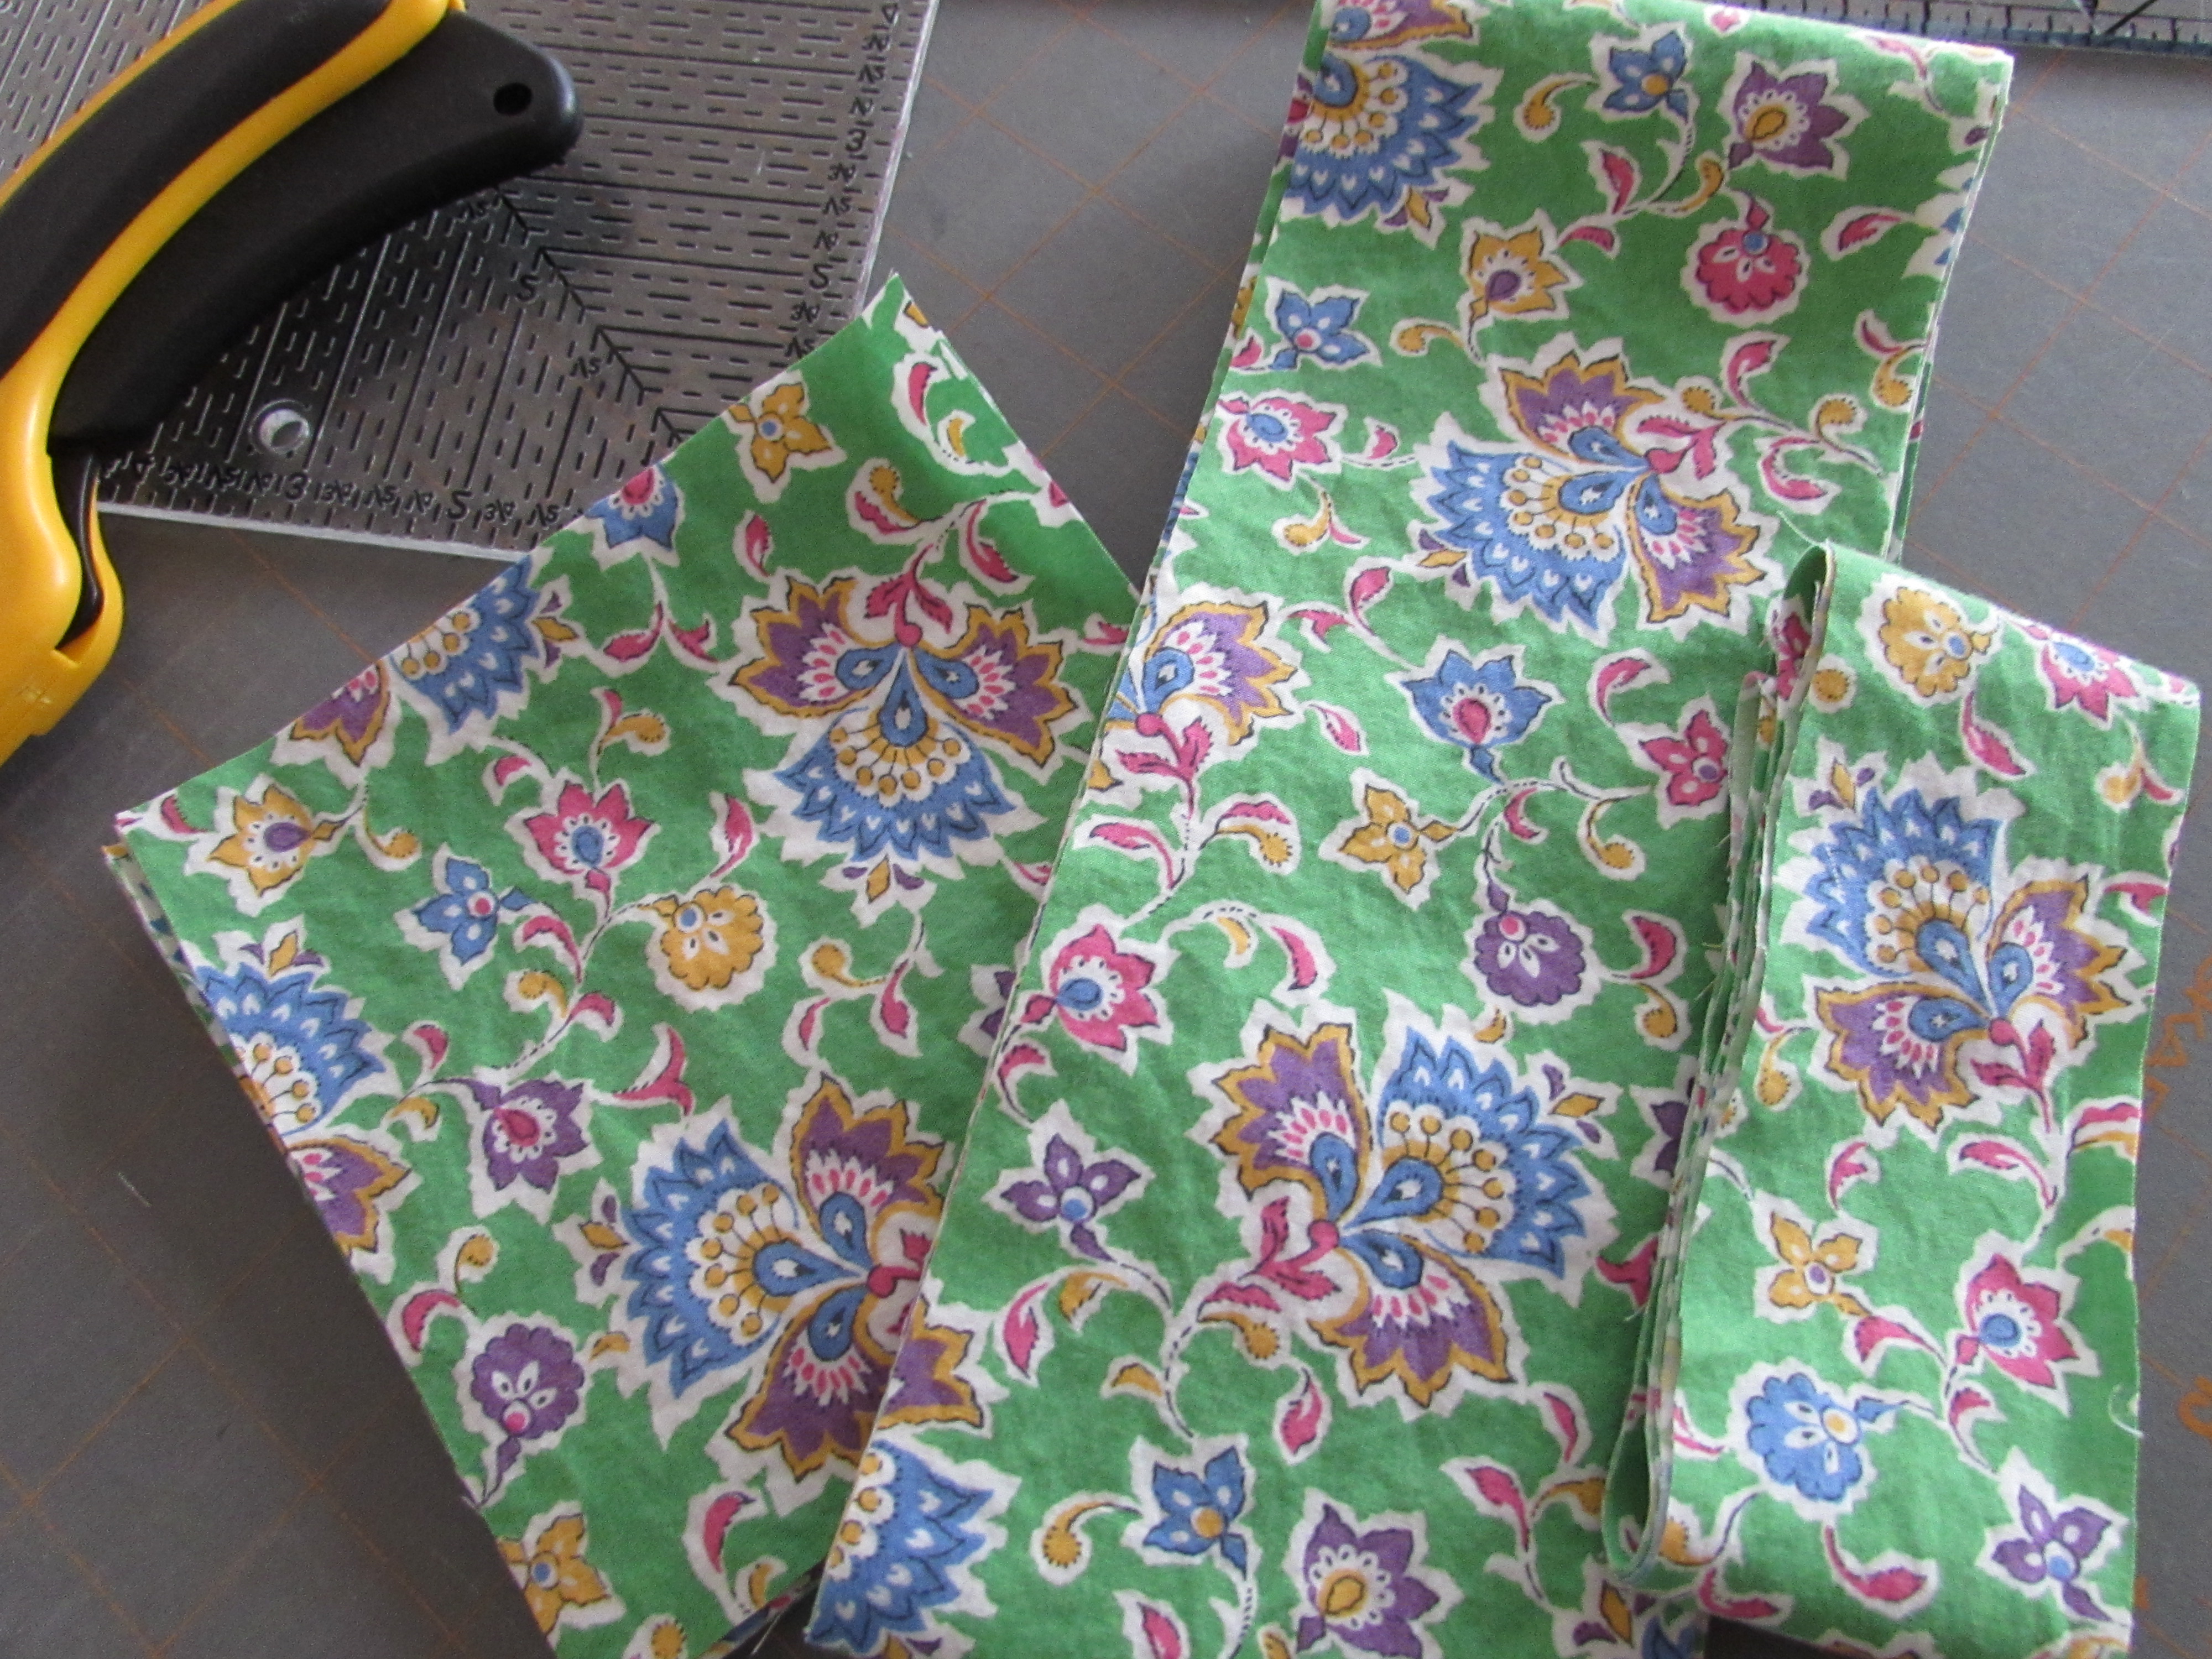
A couple of months ago my husband and I celebrated our 17th anniversary. This week I finished a quilt made with fabric purchased on our honeymoon on the island of St. John. It may have taken me 16 years to think of how I wanted to use the fabric but once I got going, it didn’t take too long to finish it up. I posted earlier about making the quilt top in August of last year. Because I wasn’t sure how I wanted to quilt it, I set it aside (for nearly a year!) Come January of 2015, I set a goal to finish this quilt up and I did it. This finish means that I do not have any unquilted tops lying around. Yahoo!
This project was fun to plan. I have been reading about whether to stitch in the ditch before starting to FMQ. Honestly, this sounded like a whole lot of extra work. I decided to compromise and I stitched the perimeter of each nine patch. I thought this would stabilize the quilt and hopefully, reduce and puckers on the backing. It is so irritating when you flip the quilt over to check on it and there is a fold. Between pin basting and ditch stitching I was hoping for a better back. Some quilters think it holds the quilt square and prevents distortion. Others say it makes the FMQ work look better. I do think it helped. My quilt stayed square and often, it doesn’t. I didn’t have a single pucker on the back. The only thing is that on the back of the quilt, the ditch stitching is very visible so one has to take that into account when planning the quilting. It doesn’t show much at all on the front. As for any benefit to the look of the quilting on each nine patch, I didn’t notice a huge difference. In fact, after I had quilted about 65% of the project, I noticed that I had skipped ditch stitching one block. That block really didn’t look noticeable different from the others. So, I think it is good forquilt stabilization and keeping square but doesn’t noticeably enhance the FMQ.
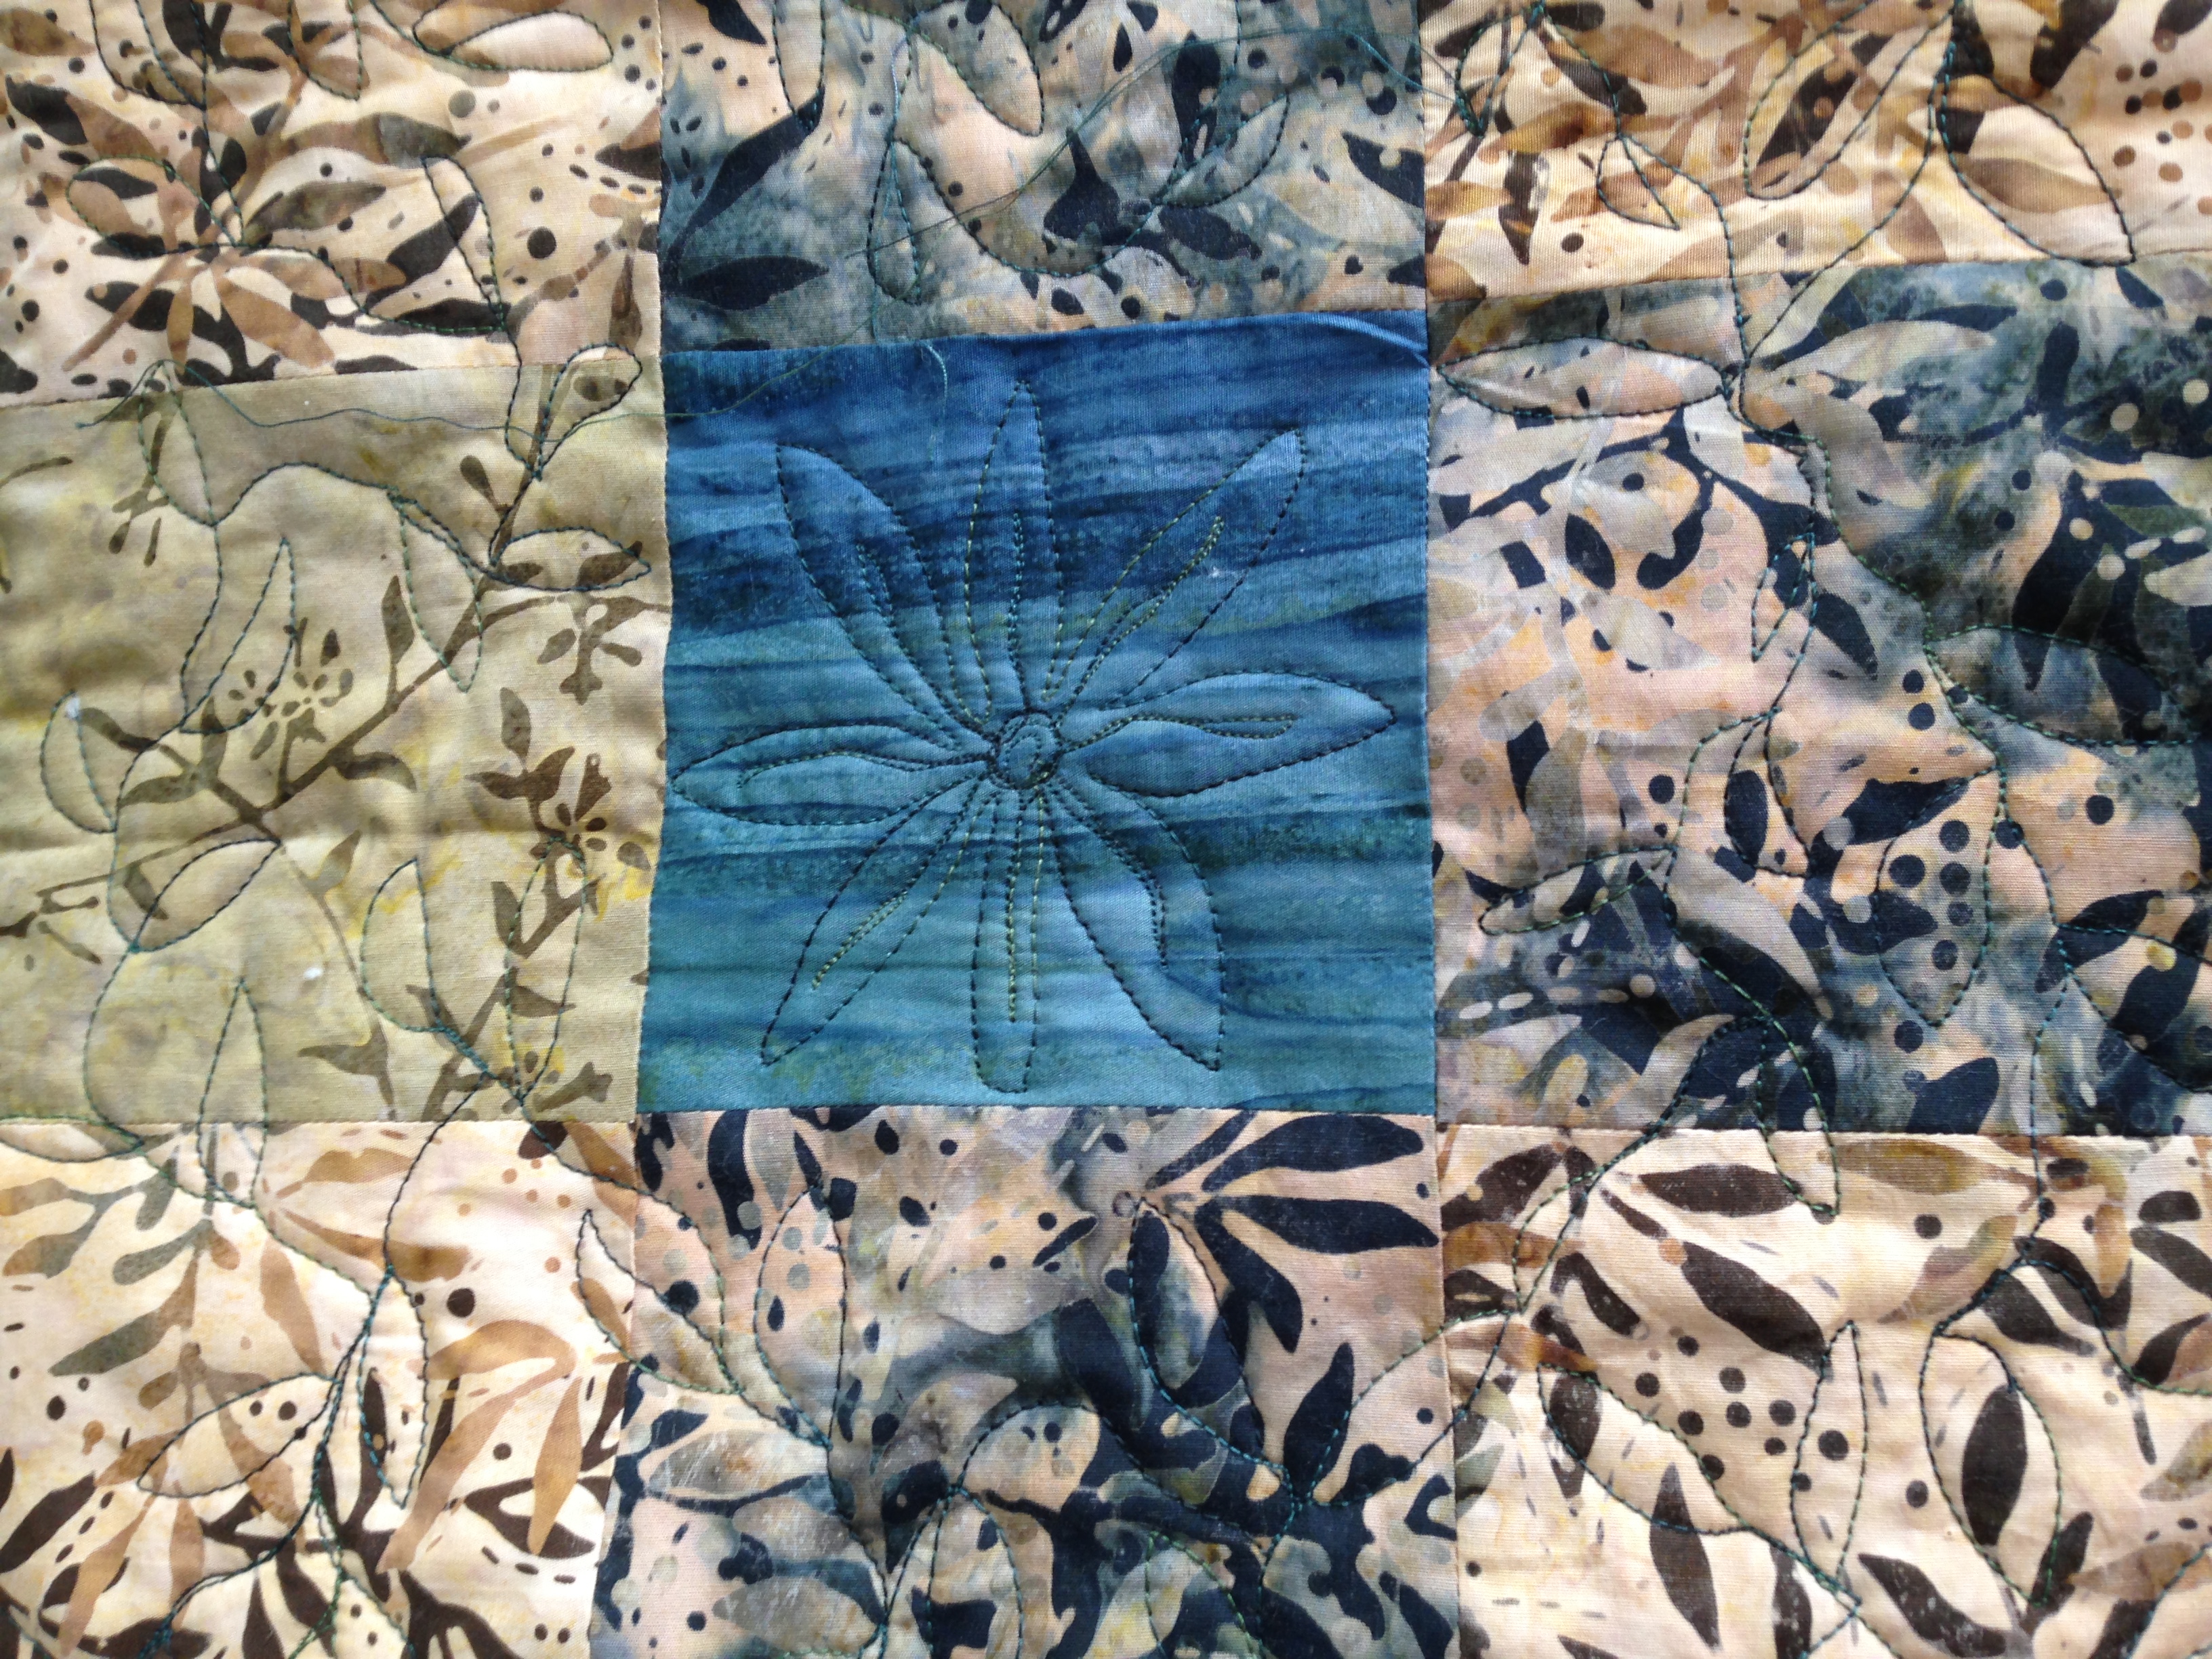
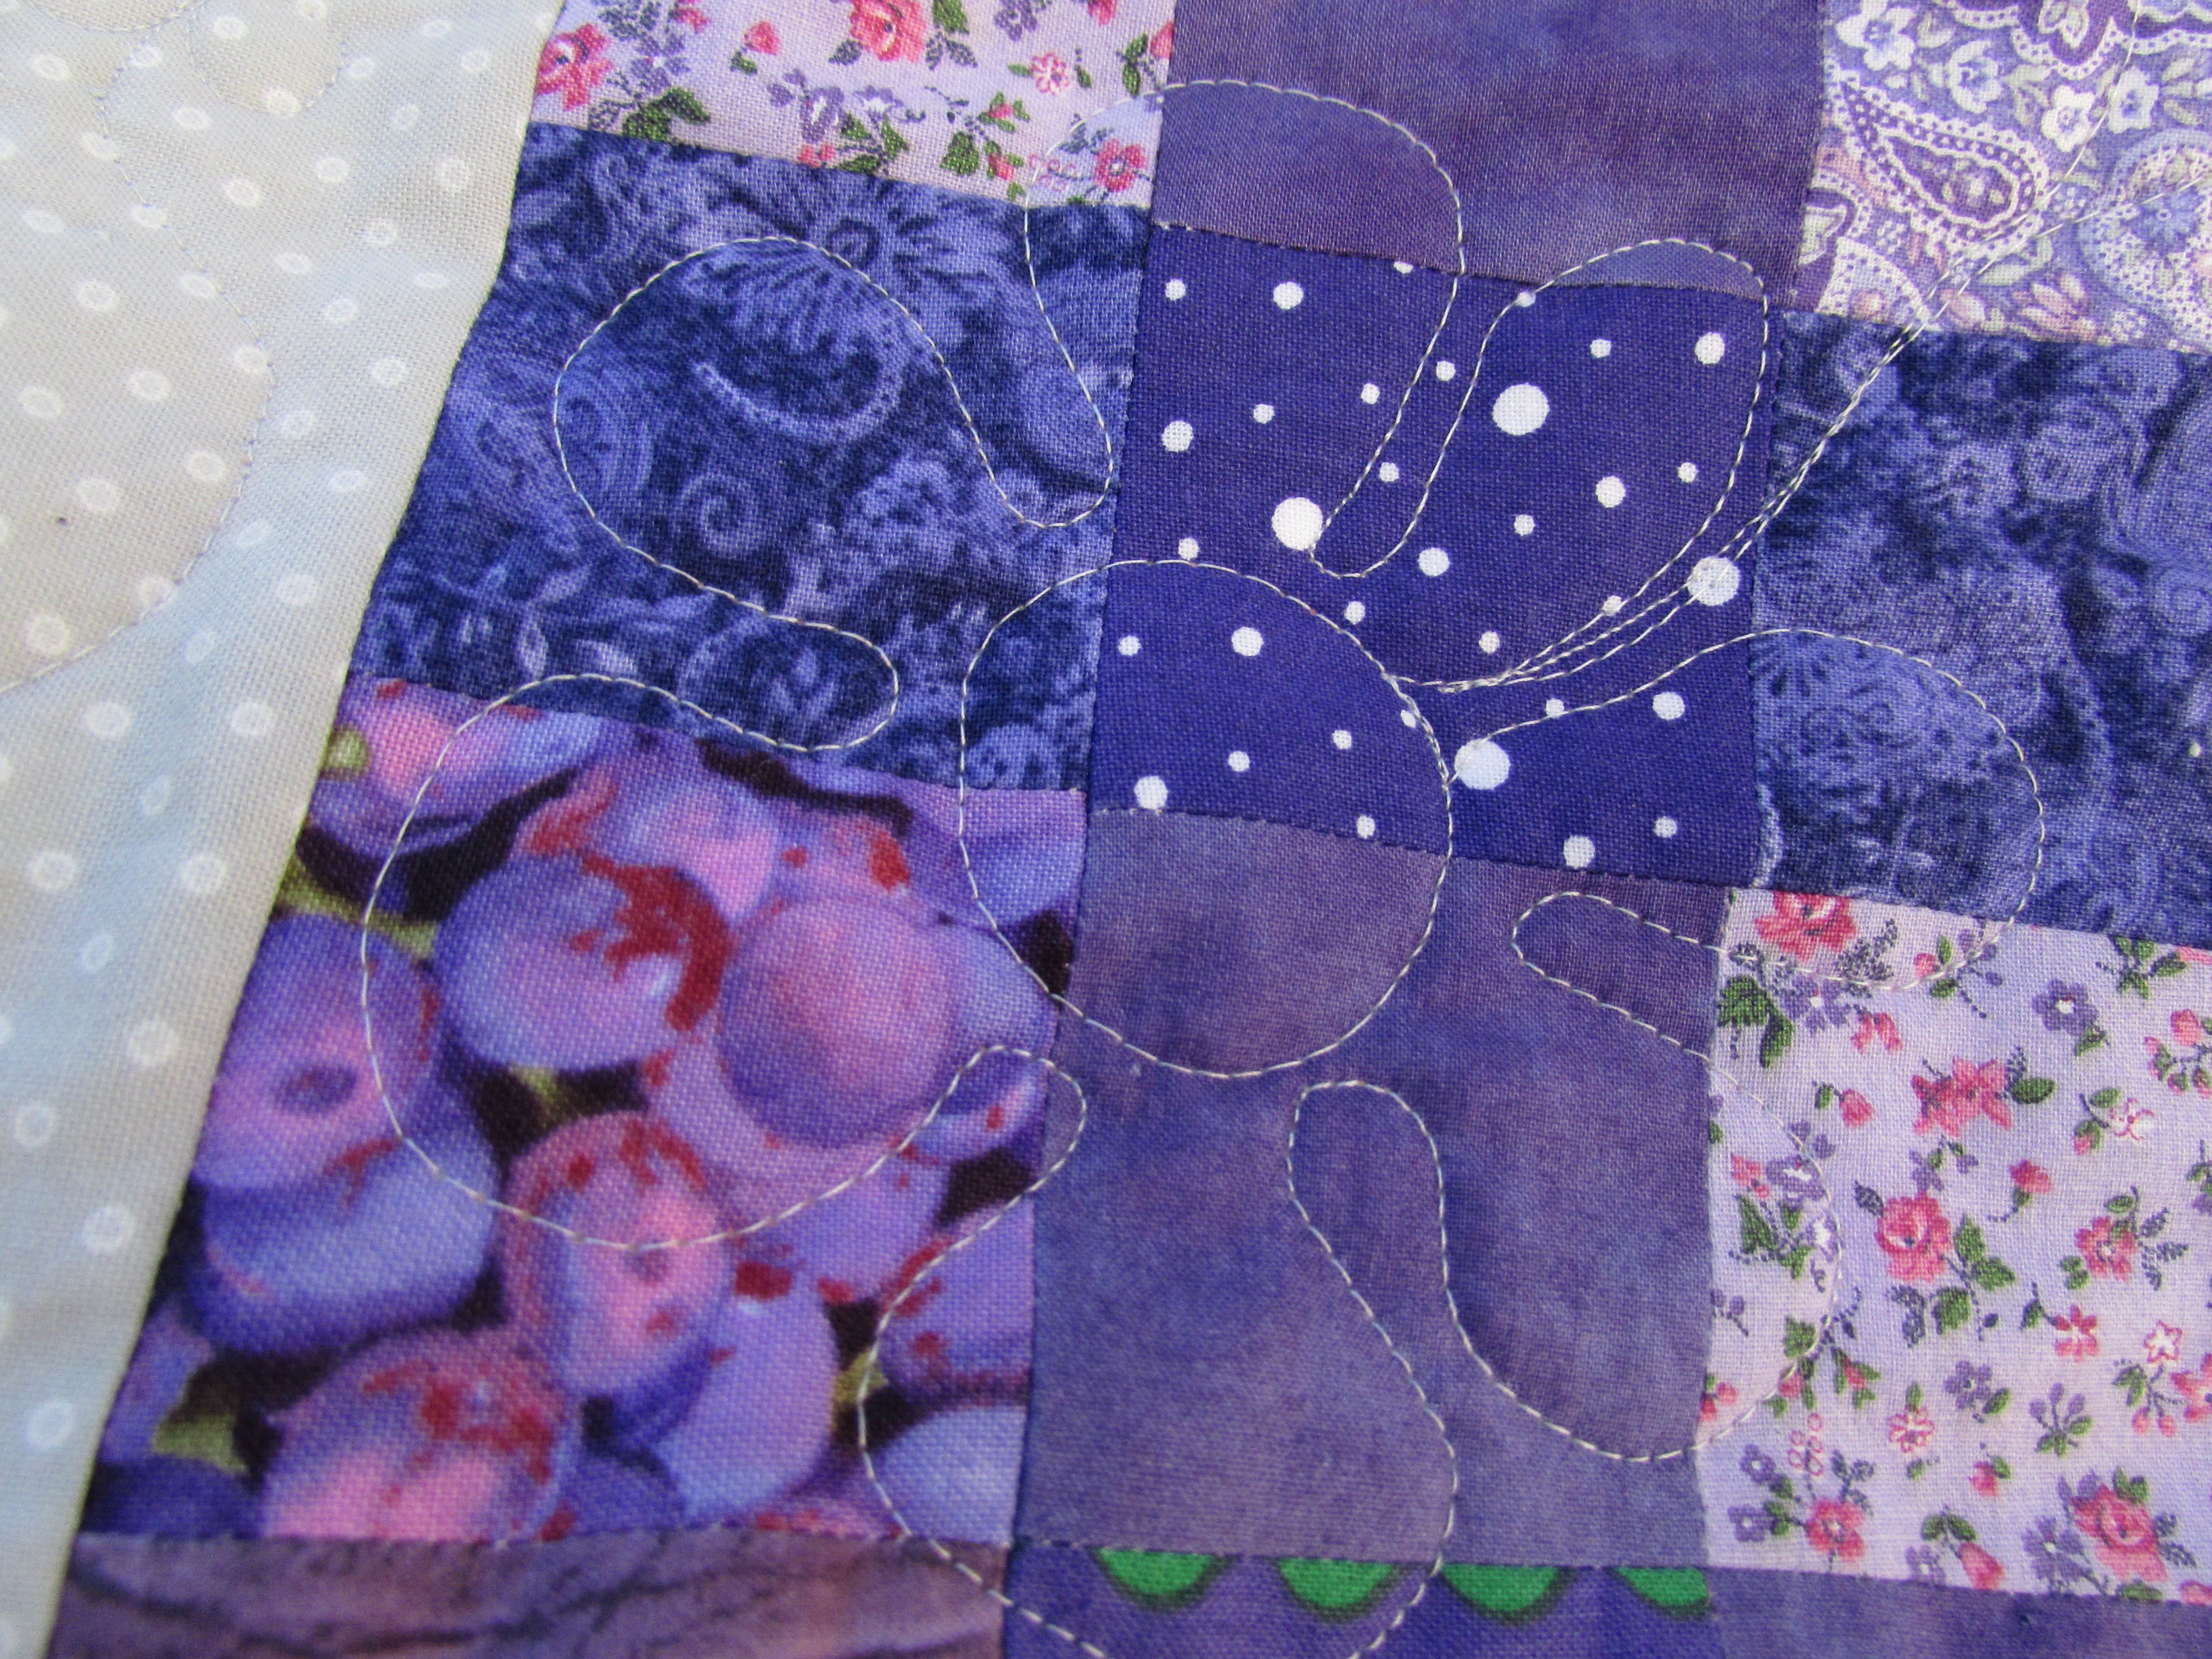
I took a look at some quilting sites (mainly Lori Kennedy’s site, The Inbox Jaunt) to get inspiration. I knew that I would do an all over FMQ pattern but wanted just a bit more detail than that. Each of the nine patch blocks have a blue center. Starting with that, I quilted a large flower in the center of each blue square.
I decided that leafy fines would complement the flowers. Using a variegated green YLI quilting thread, I FMQ’d leaves of various sizes on each block. I left the black sashing plain. Because the backing is a light green batik, the FMQ stitching really shows up on the back. Not sure if this is good or bad! For the most part, I am happy with the stitching. Why is it that my eye goes to the little tension blips and the occasional jittery stitching instead of the overall look? For those of you that quilt on your domestic machine, how to you handle the starts and stops? Look closely at the squares that I ditch stitched, see the dark spots at one corner where I stopped and started? I chose to reverse a few stitches rather than knot and bury tons of threads. Not sure I like how this looks. What is the consensus? Do you back tack stitches or knot and bury threads? I know which is cleaner but yikes, burying all of those threads is time-consuming.
The binding is, as usual, one of my favorite parts. I used the honeymoon batik for the border and also for the binding. To add some depth, I attached a black flange to the perimeter of the quilt before binding the quilt. I love the ‘something extra’ that this flange adds to the quilt.
To honor our honeymoon, I tried stitching St. John as well as April, 1998 on a corner of the quilt. Kind of difficult to see but it was a good addition.
When I was binding it, I came upon my two ends that needed to be joined and sighed my heavy, here-we-go sigh. I hate attaching the tails of the binding. This time I looked to Rita over at Red Pepper Quilts. On the off chance that there is someone who hasn’t heard of Rita, she is an amazing quilter who has the most amazing sense of color. Her quilts are bright, happy and so vivid. Truly amazing. If you haven’t looked at her work, now is the time. She has numerous tutorials, several of which talk about binding. This is the one that I used. The result was good so I will refer back to her measurements next time.
I can check this goal off of my 2015 list and move on to another one! I think the next goal I need to work on is some quilt restoration. I have two quilts to restore and I want to get one of them going soon.
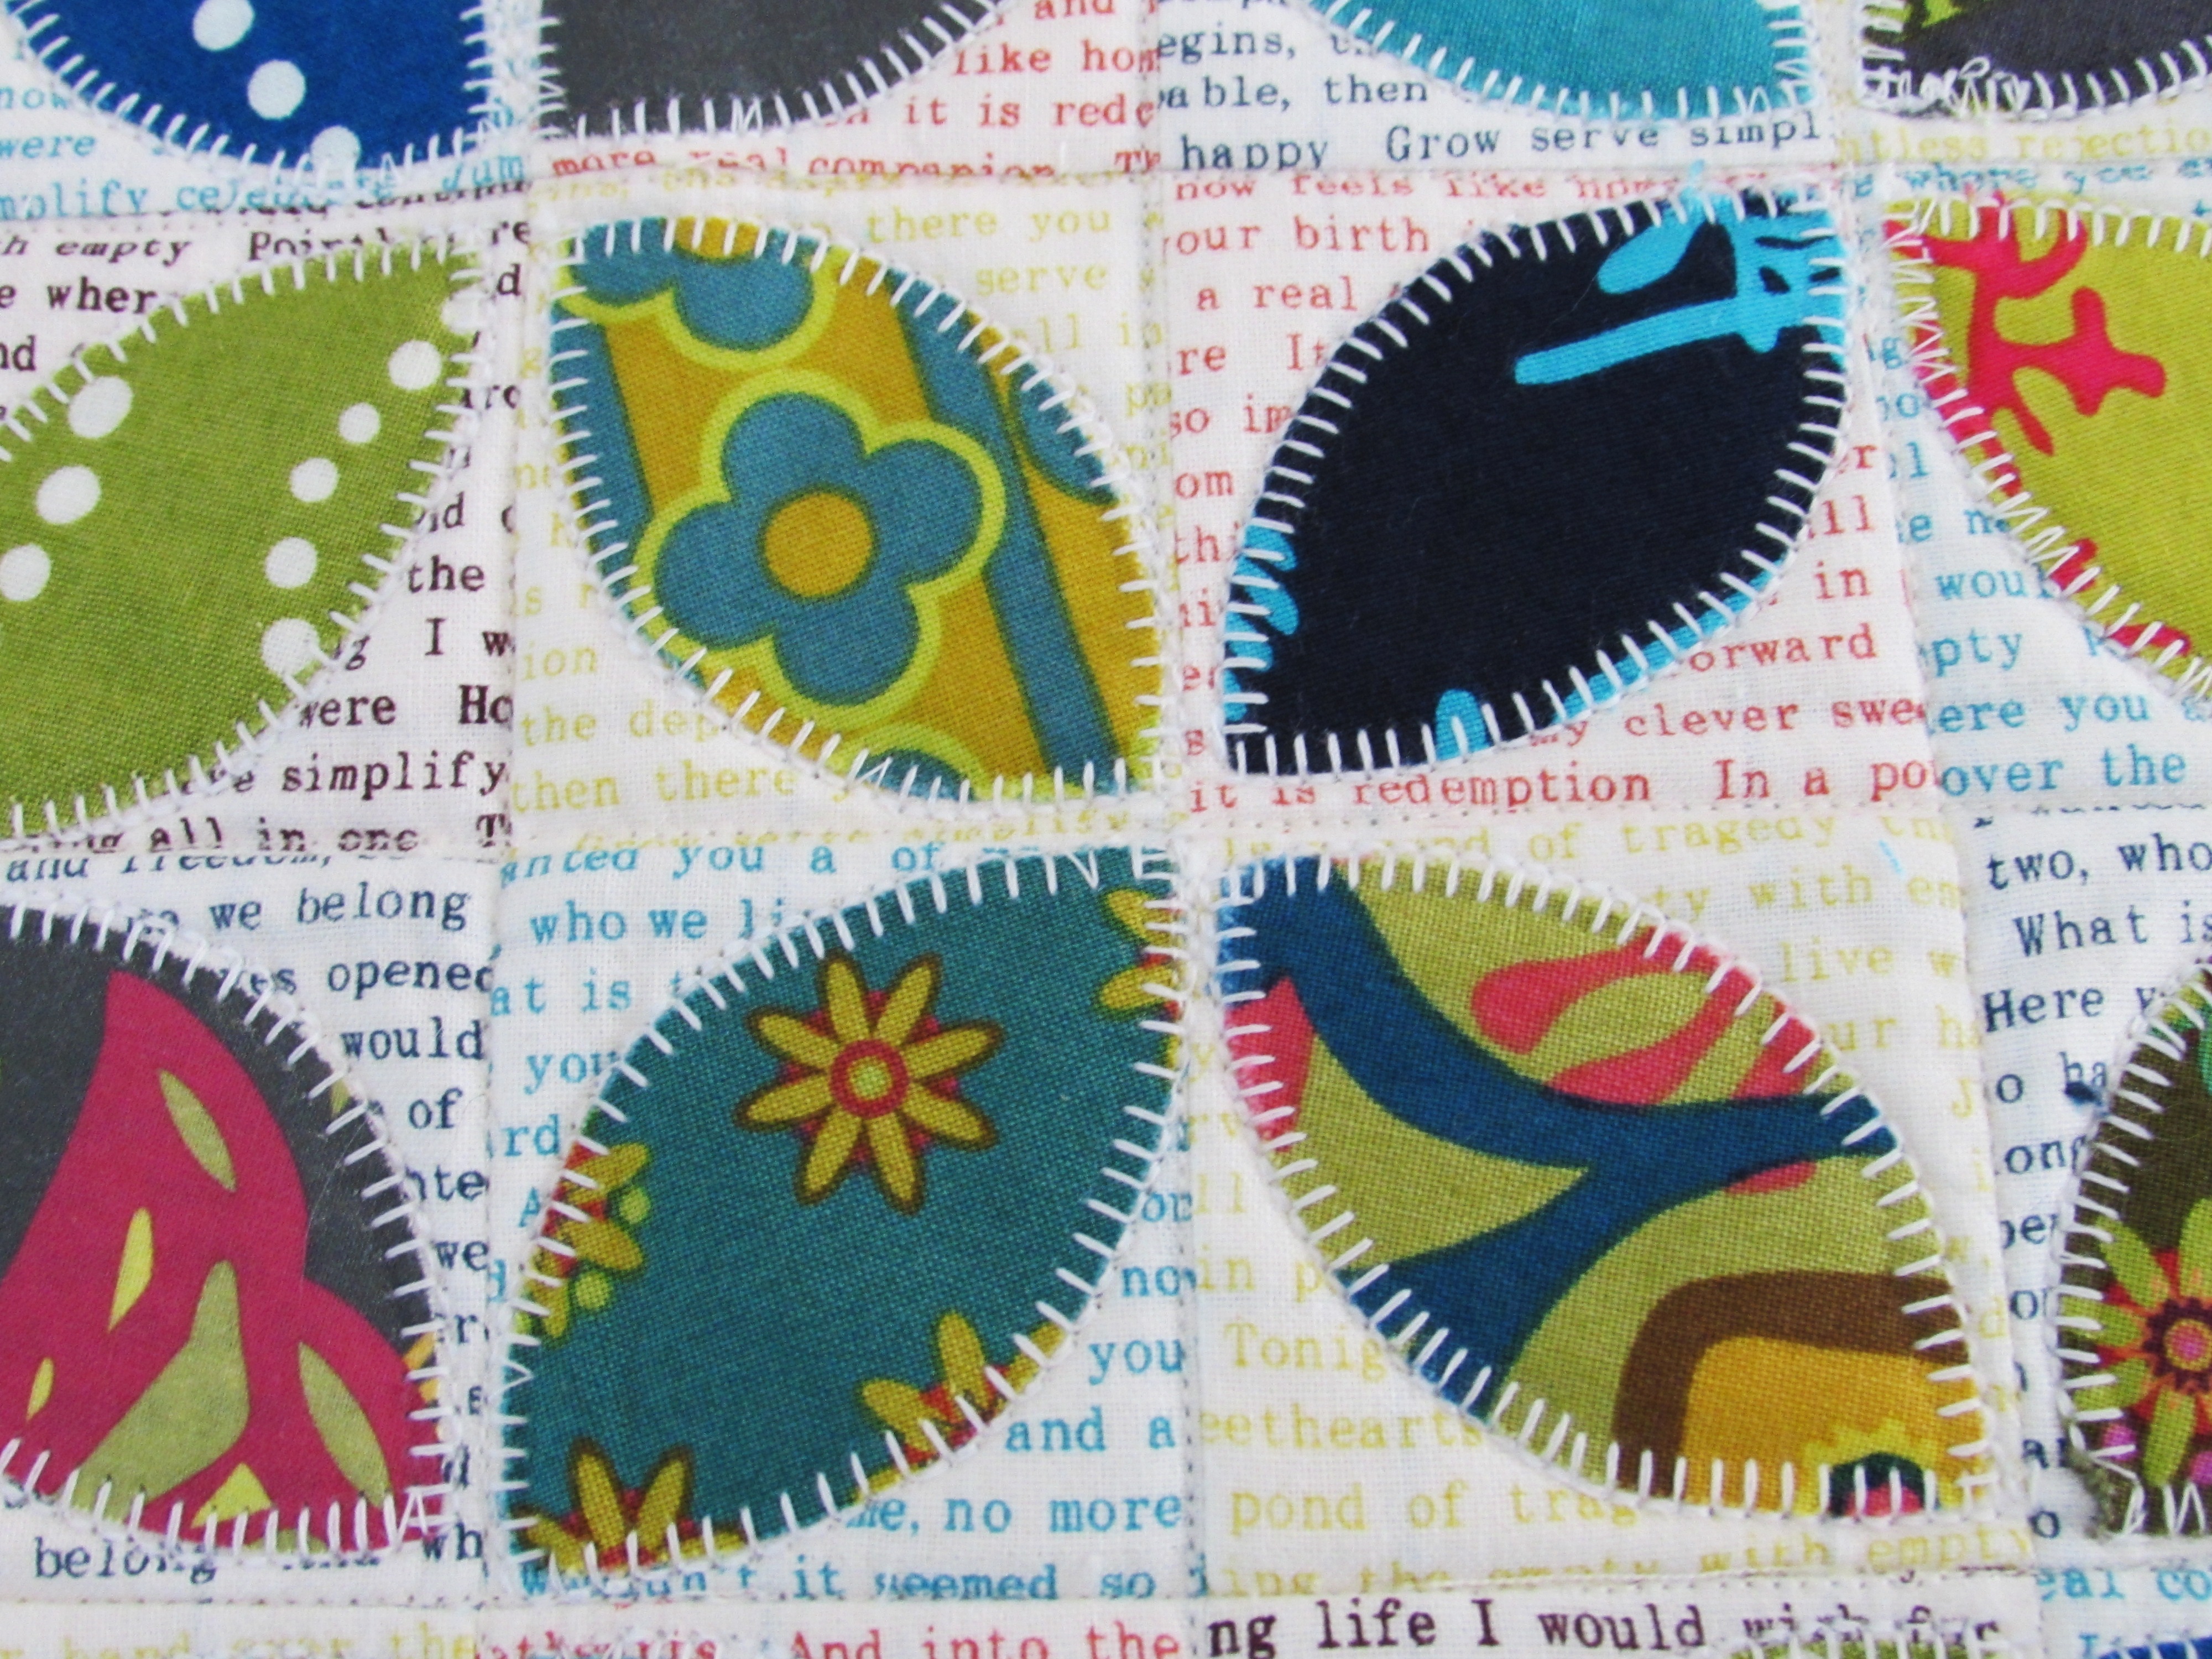
Finally, remember the Allison Glass mini swap that I participated in? I blogged about the mini that I made here. There were a few comments asking me to post the mini that I received. Wow, I can’t wait to share it. It is gorgeous. I am so grateful to my partner for putting so much effort into this project!
My partner outdid herself with this. I love the text print that was used as the background on each 2″ square. She appliqued the orange peels with a blanket stitch which was brilliant.
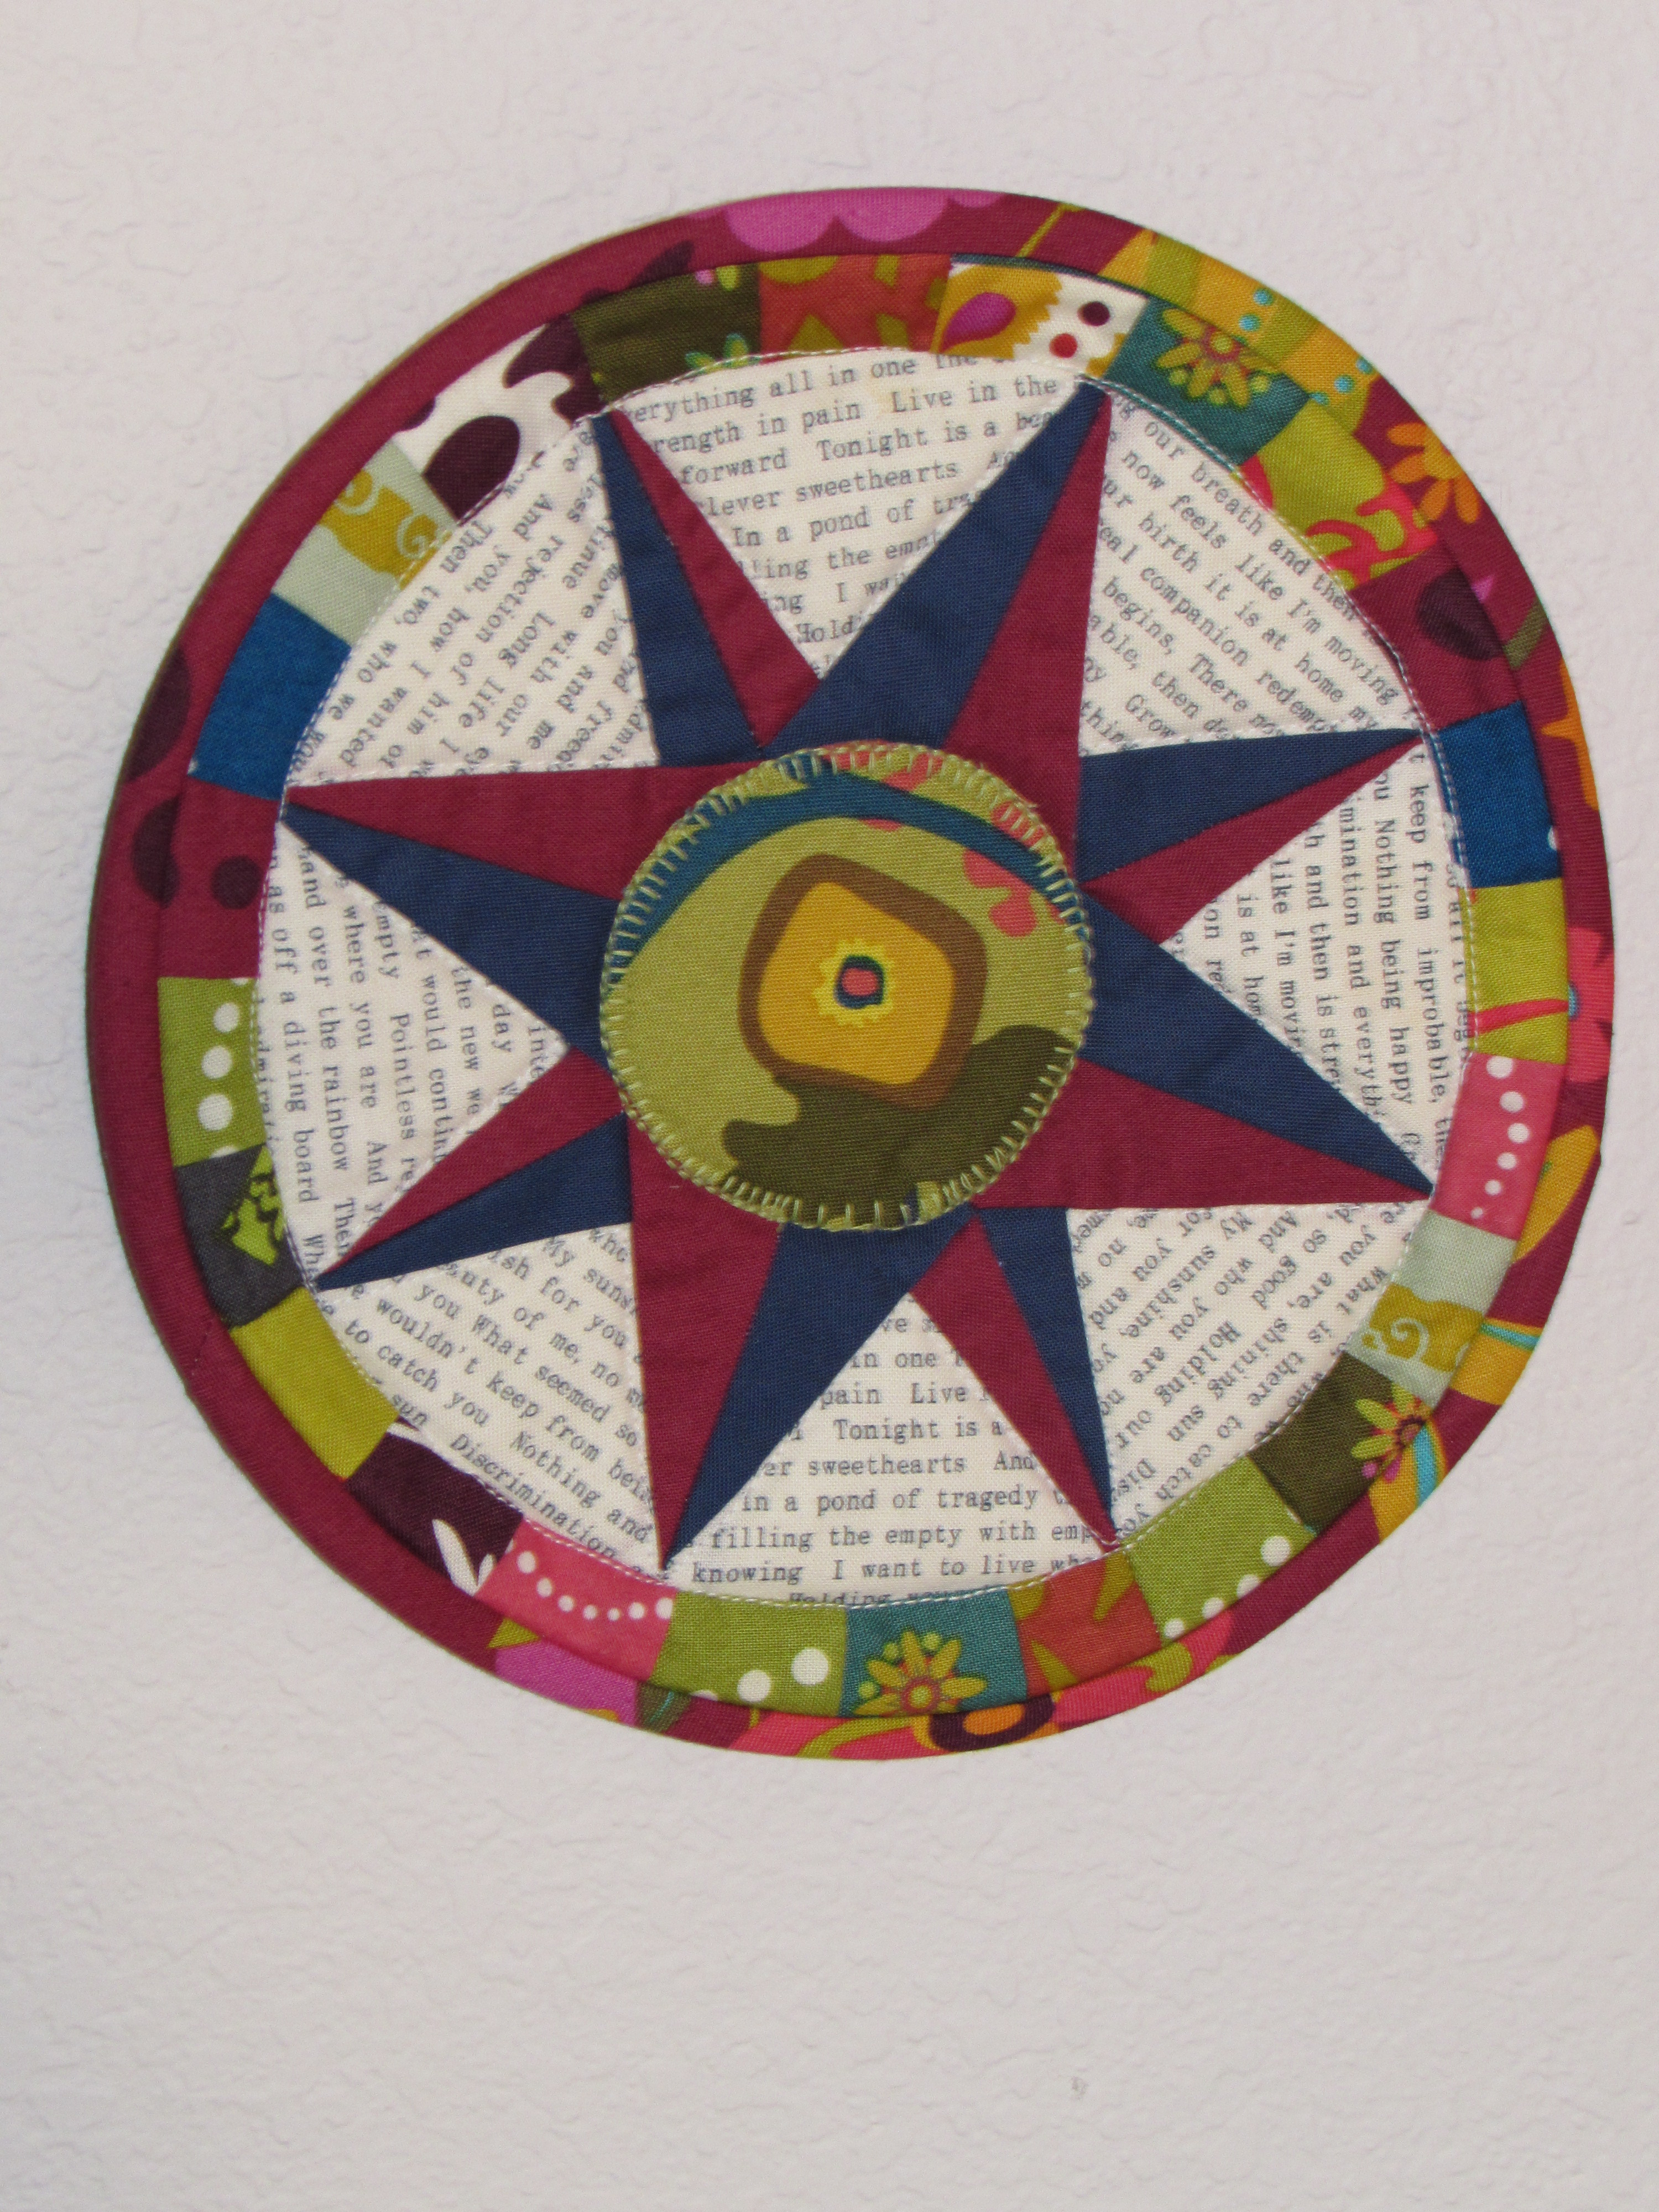
She also made this smaller mini. I think it is intended as a pot holder but I am hanging it on the wall. I don’t want it soaked with food splatter, which we all know would happen.
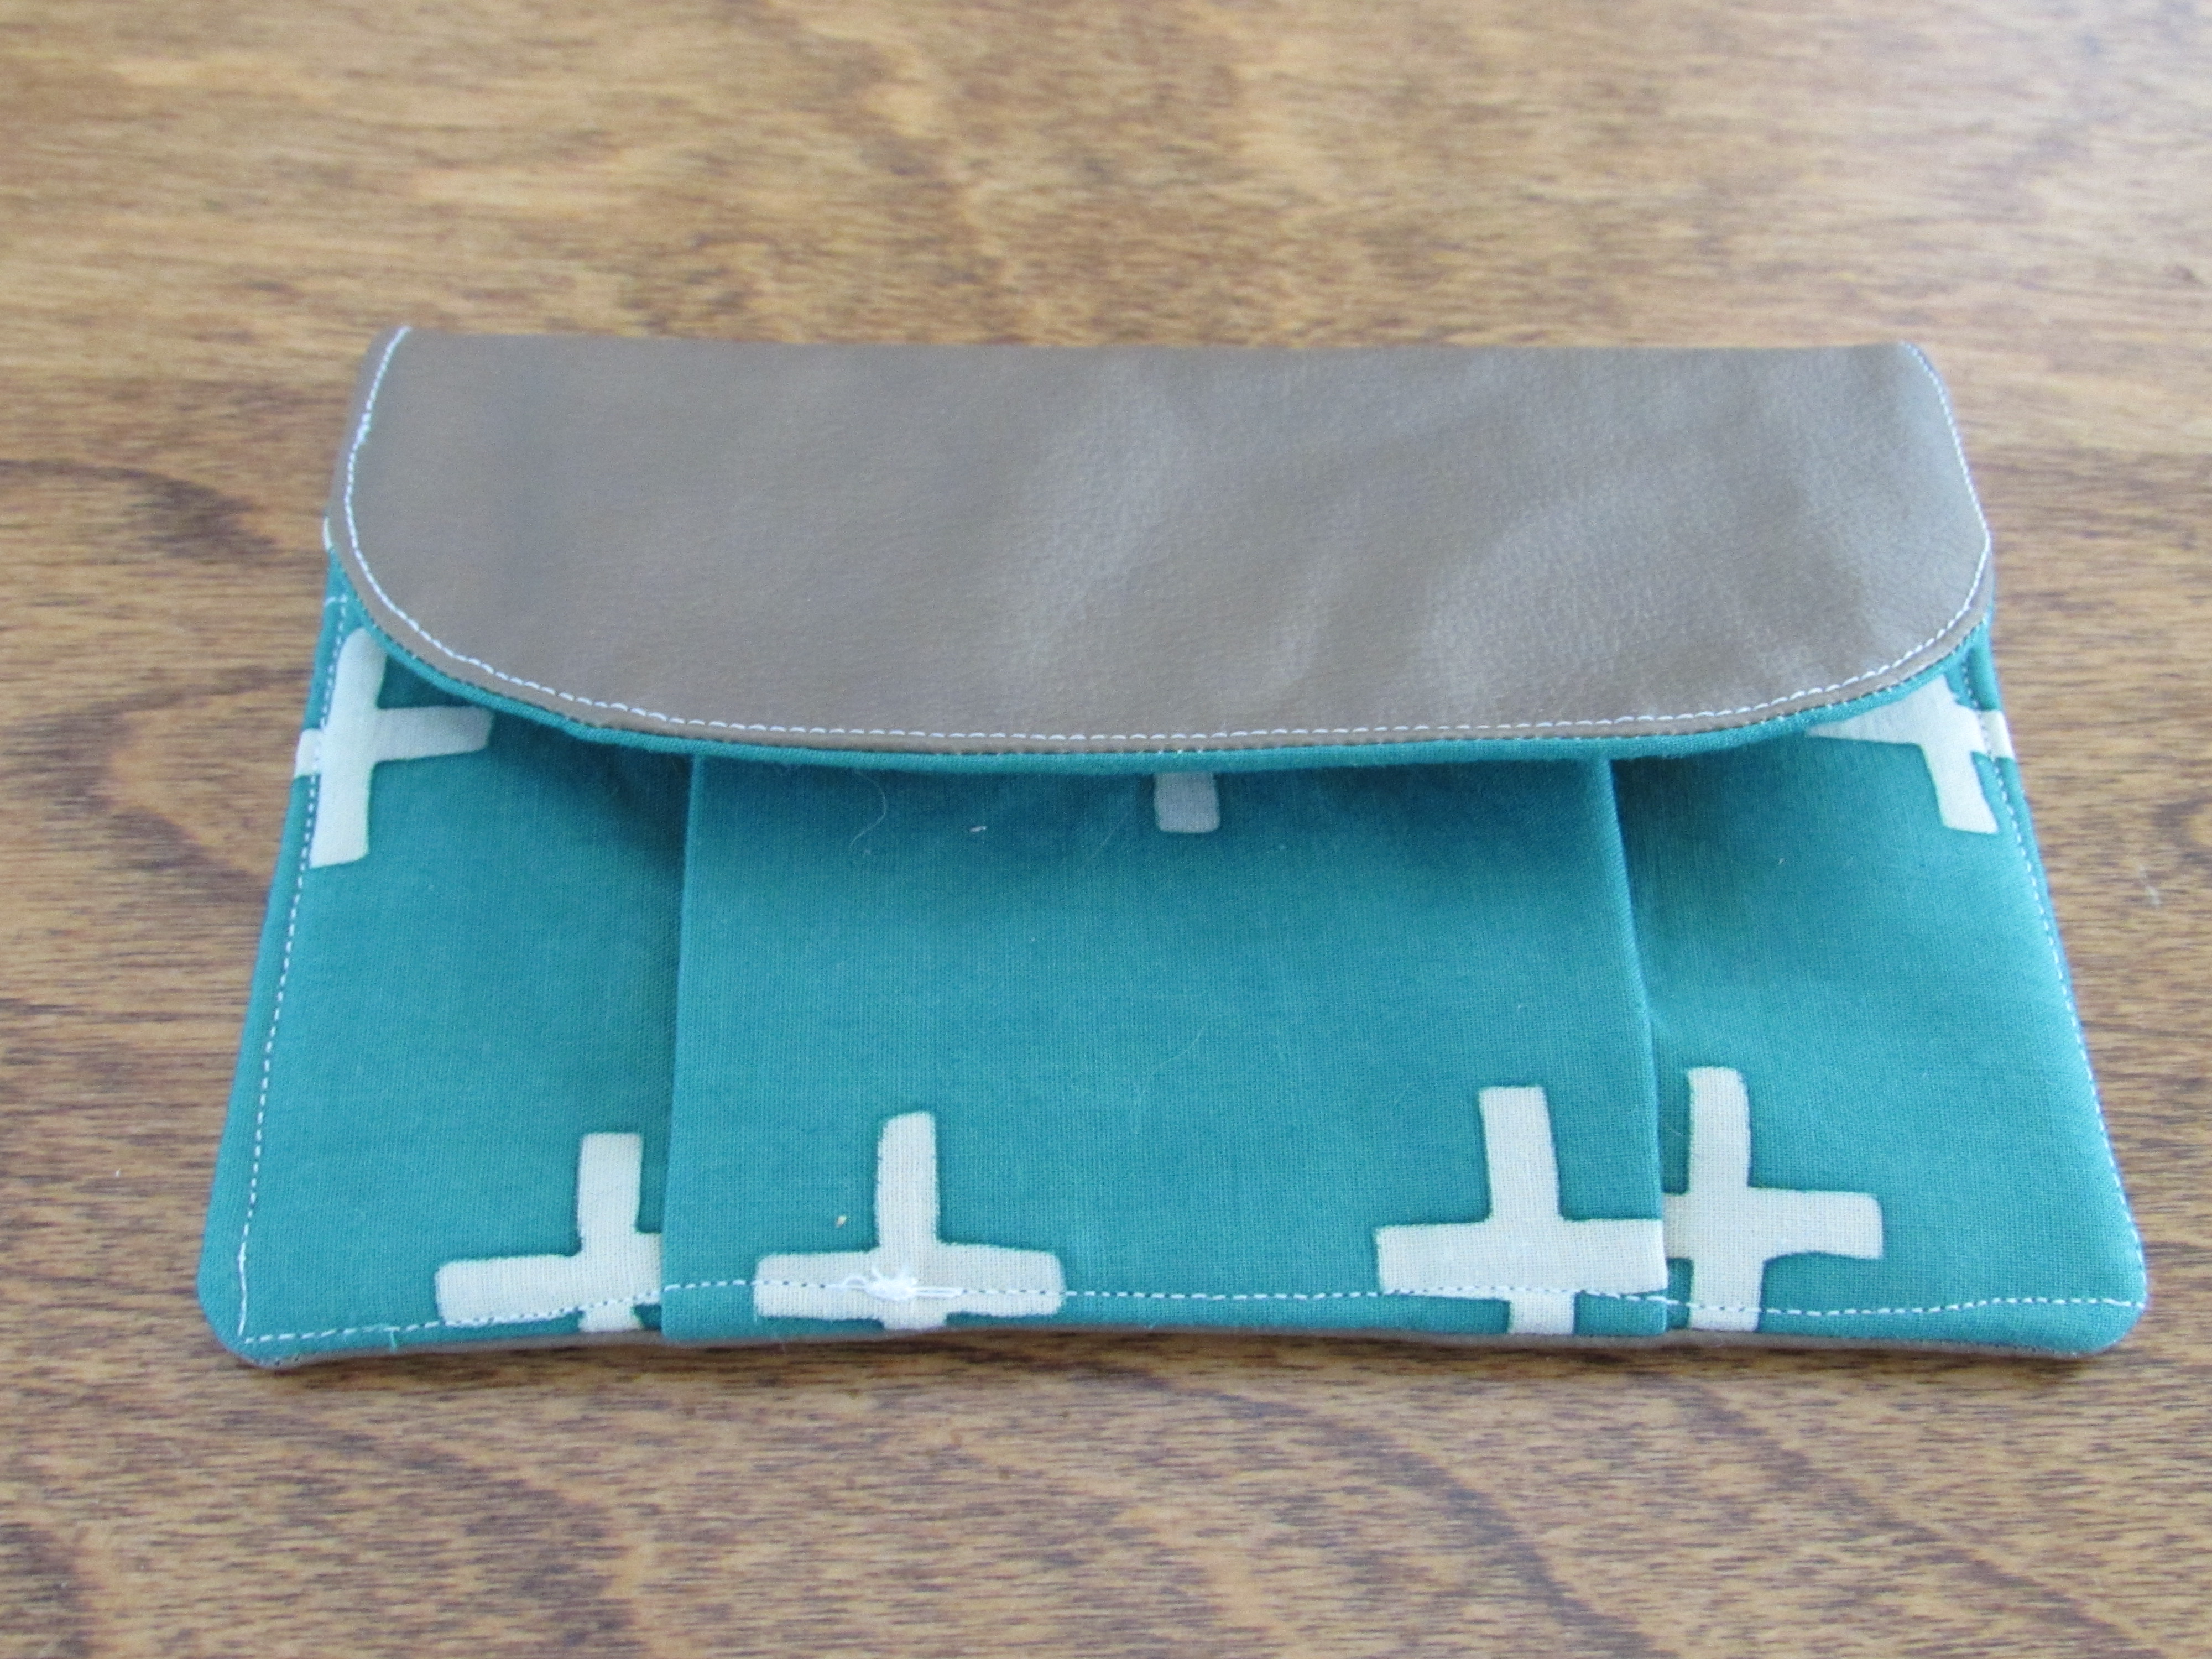
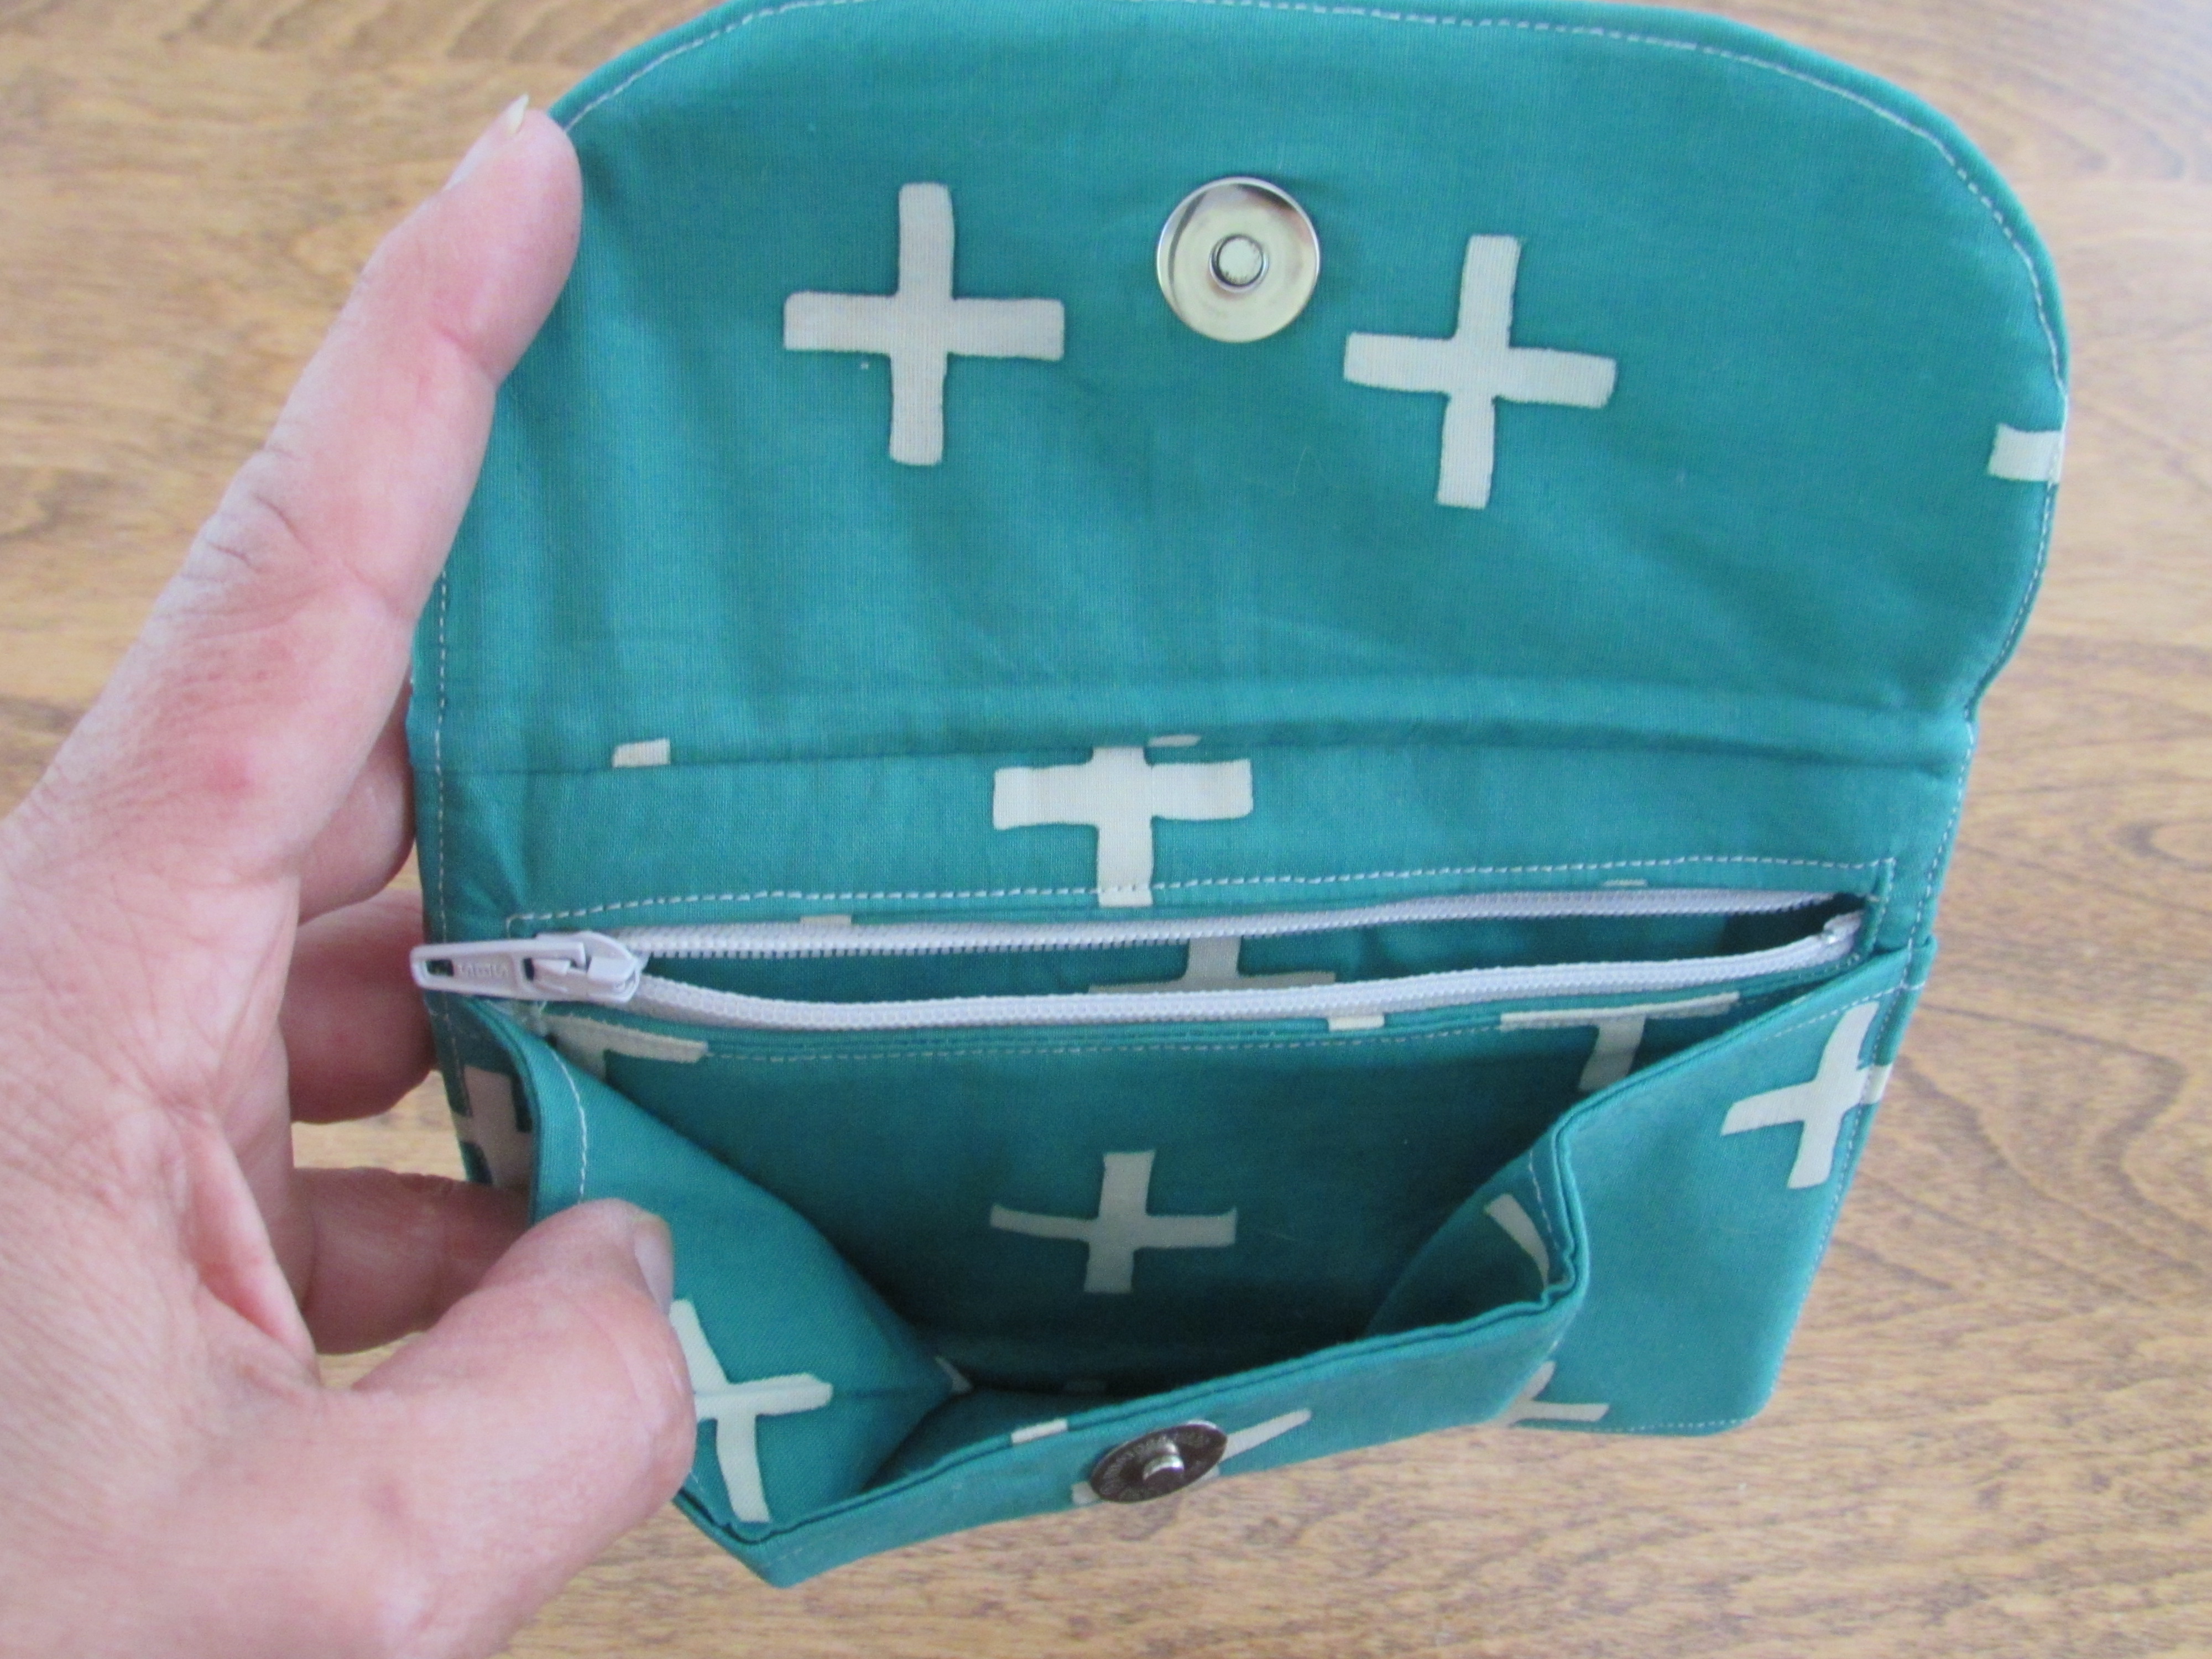
I also received this sweet wallet. Hand-made and so well done, it is lovely.
The swap was fun and I am thankful that I gave it a try as it pushed me quite far out of my comfort zone. Also, I am truly grateful for the work my partner put into the items I received. That being said, I am not sure I will do another one for a while. I could see participating in one each year. They are quite time-consuming and it set my nerves on edge trying to think of what my partner would want, based on the few hints we are given. The process is a good way to get to know other makers though. It is really a big deal on Instagram and there is a swap for just about anything crafty.
Hope you all have something fun planned for the upcoming weektend.
Hi Everyone! Happy Tuesday. Wow, as always, summer came quick. Never fails that the temp jumps from mild to crazy hot in a matter of days around here. We were floating along with lovely 78 degree temps and it is in the high 90’s this week. I am not a fan of hot weather. Makes me ever so grateful for the A/C unit. The older I get, the more I dislike hot weather (thank you menopause.)
One positive side to the heat is that my husband’s berry patch is going crazy. We have blueberries and boysenberries that are ripening and they are so yummy. Right now we are picking about 5 pints daily of the two combined (more boysen’s than blue’s). Ray is all about making jam so I suspect that he will take over the kitchen on Sunday and put up jam. When he does this, I happily become chief bottle washer and he does the rest.
Thanks to everyone who entered my blogiversary celebration giveaway by leaving me a comment about their favorite non-profit. I truly enjoyed reading through each comment and found it interesting to see what everyone holds near and dear to their heart. If you haven’t read the post, I offered to donate $25 to the winner’s favorite charity. My sister, Patti, then piped up with an offer to match my donation, bringing it up to $50. Because, you know, she’s awesome like that. 🙂
And the winner is……….. Number 9, Sarah Goer!! Sarah was one of the first virtual quilty friends I made when I began this blog last summer. A talented quilter and writer, Sarah is also a stay at home mom to two little ones. I enjoy her blog and especially love reading about the projects she does with (and for) her kiddos. Her son (about 5-ish years old) is on his second quilting project already! Do yourself a favor and take a peek at her blog, Things I Make. Sarah left a wonderful comment as an entry to my giveaway. See what you think:
“Happy blogiversary! What a special and unique giveaway. And thank you Patti for contributing as well! The Cystic Fibrosis Foundation has a special place in my heart as my friend’s 18-year-old daughter (who I’ve known since she was 2 or 3) is living with CF. She just graduated from high school and is on her way to college. I admire how hard she has worked while also having daily treatments and regular hospital stays to deal with her CF.”
In honor of Sarah’s friend, $50 has been donated to the Cystic Fibrosis Foundation!
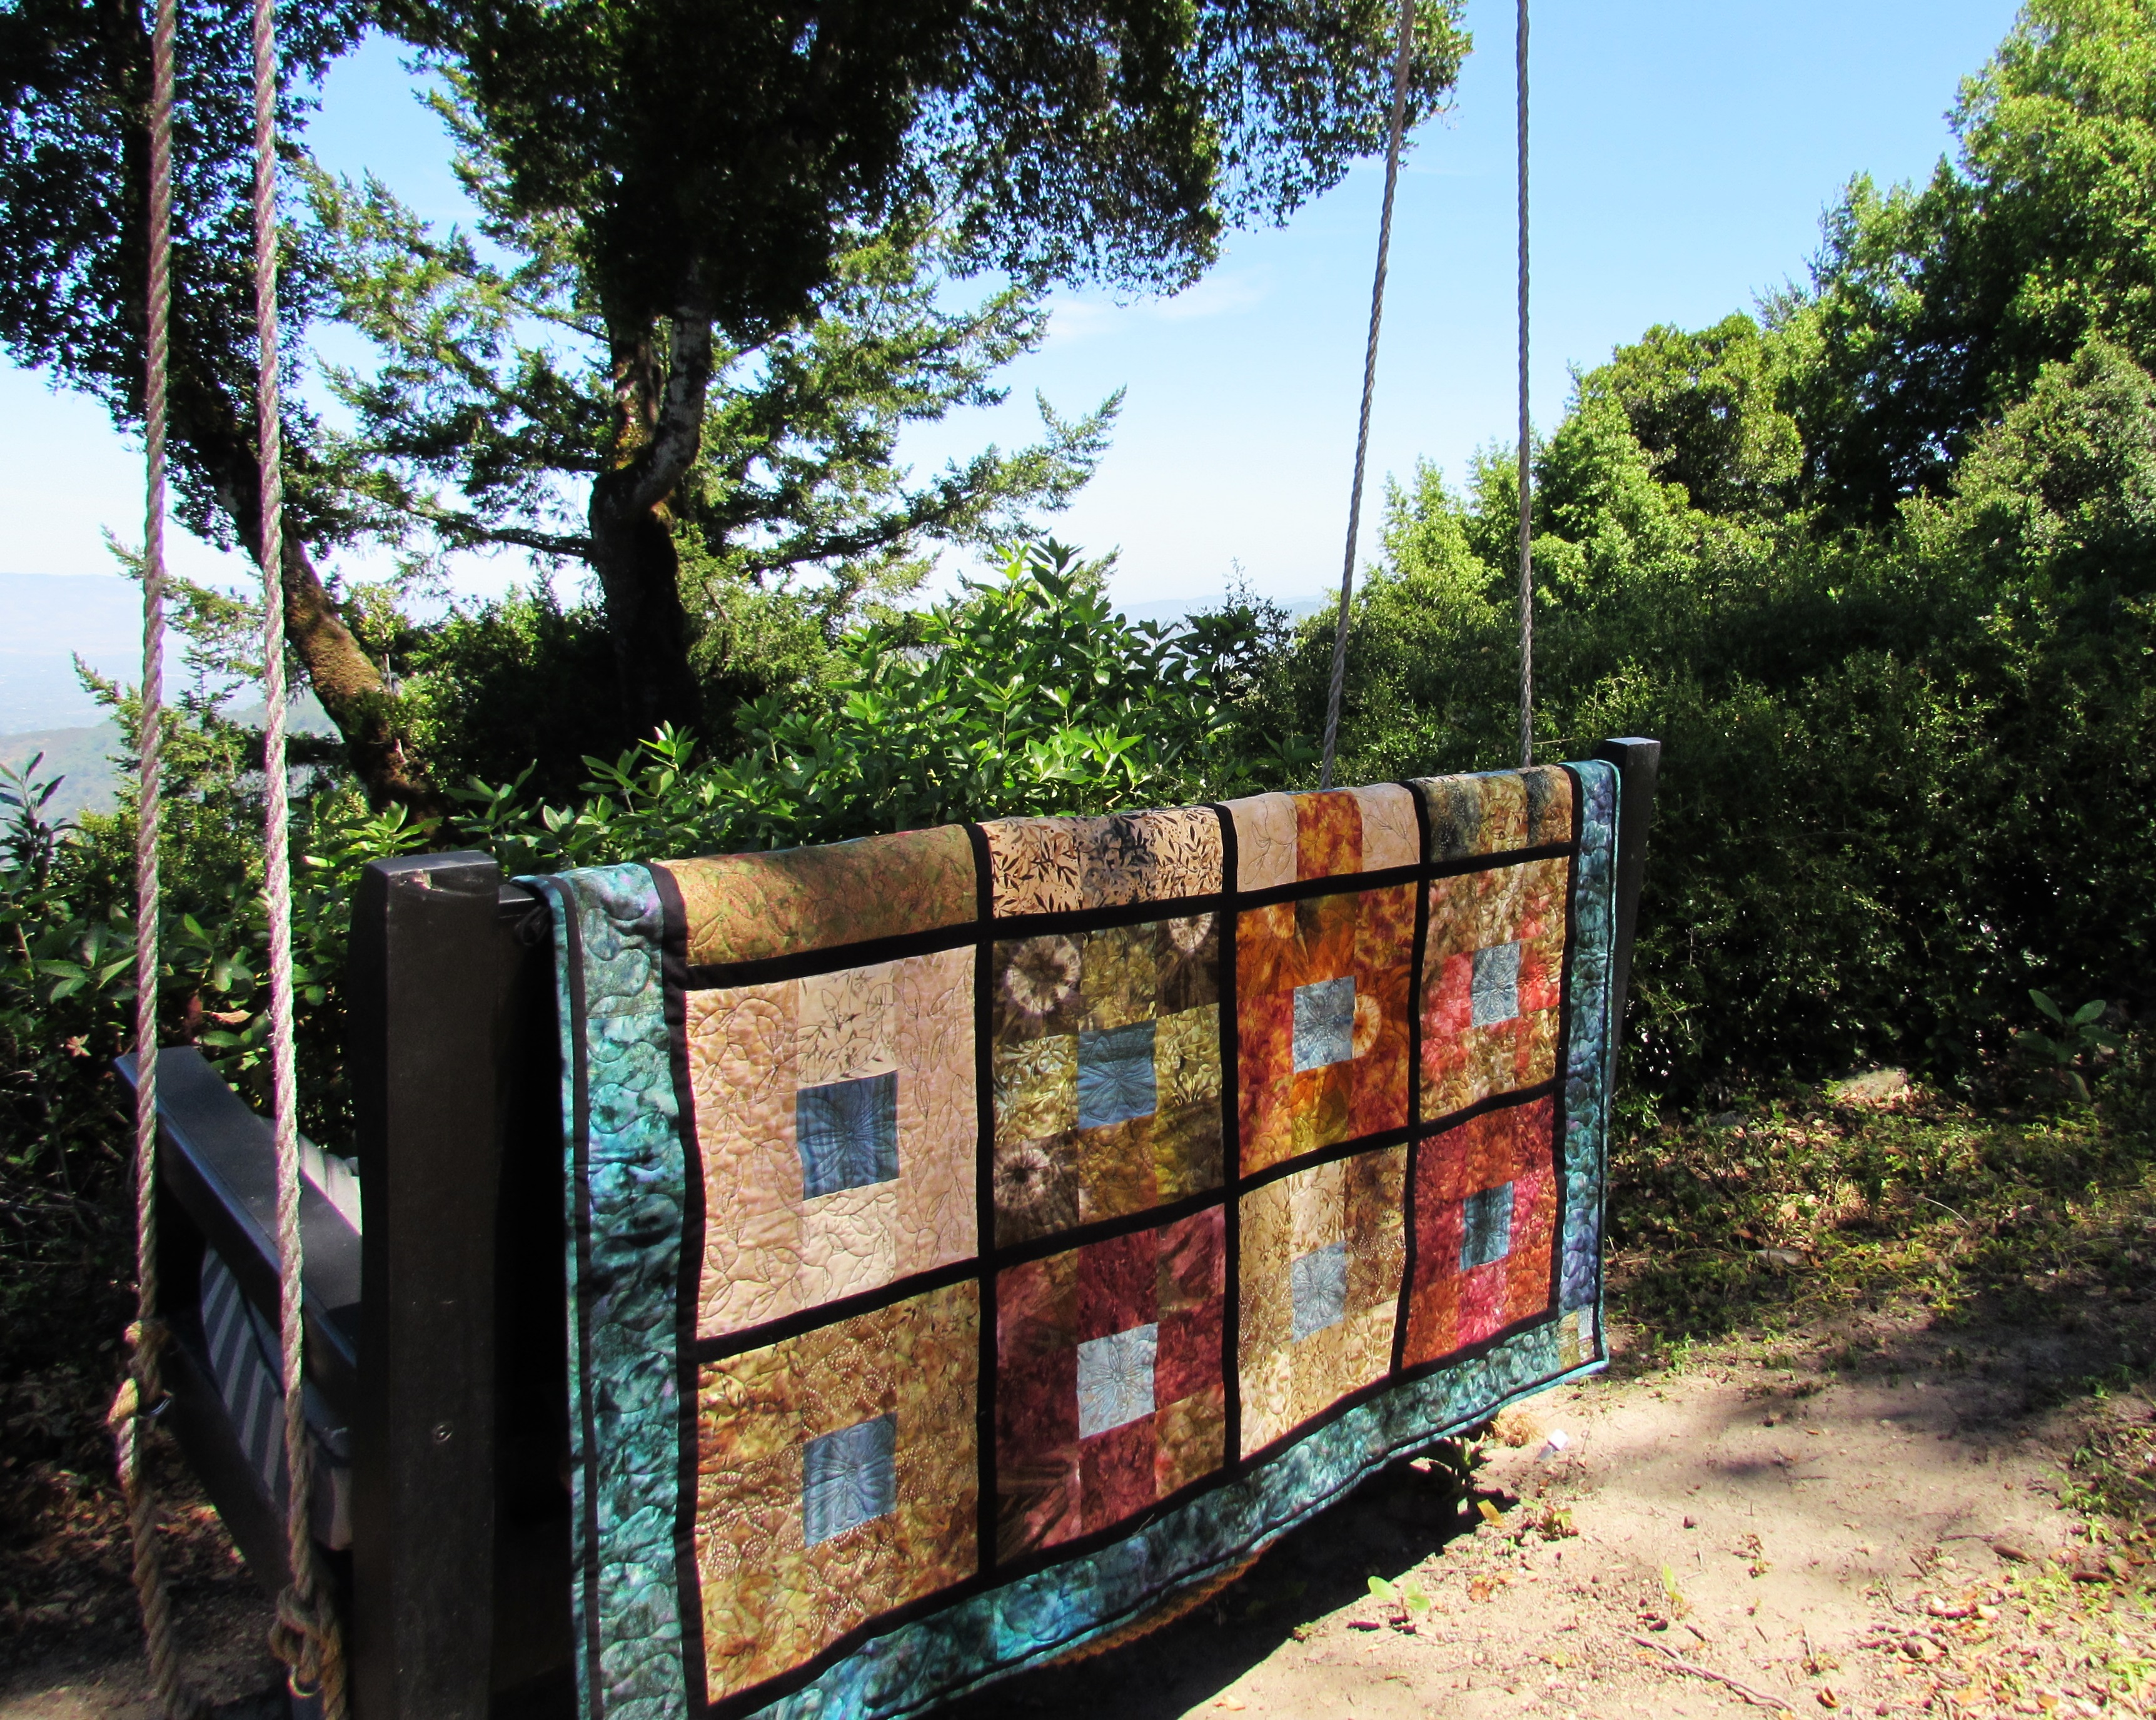
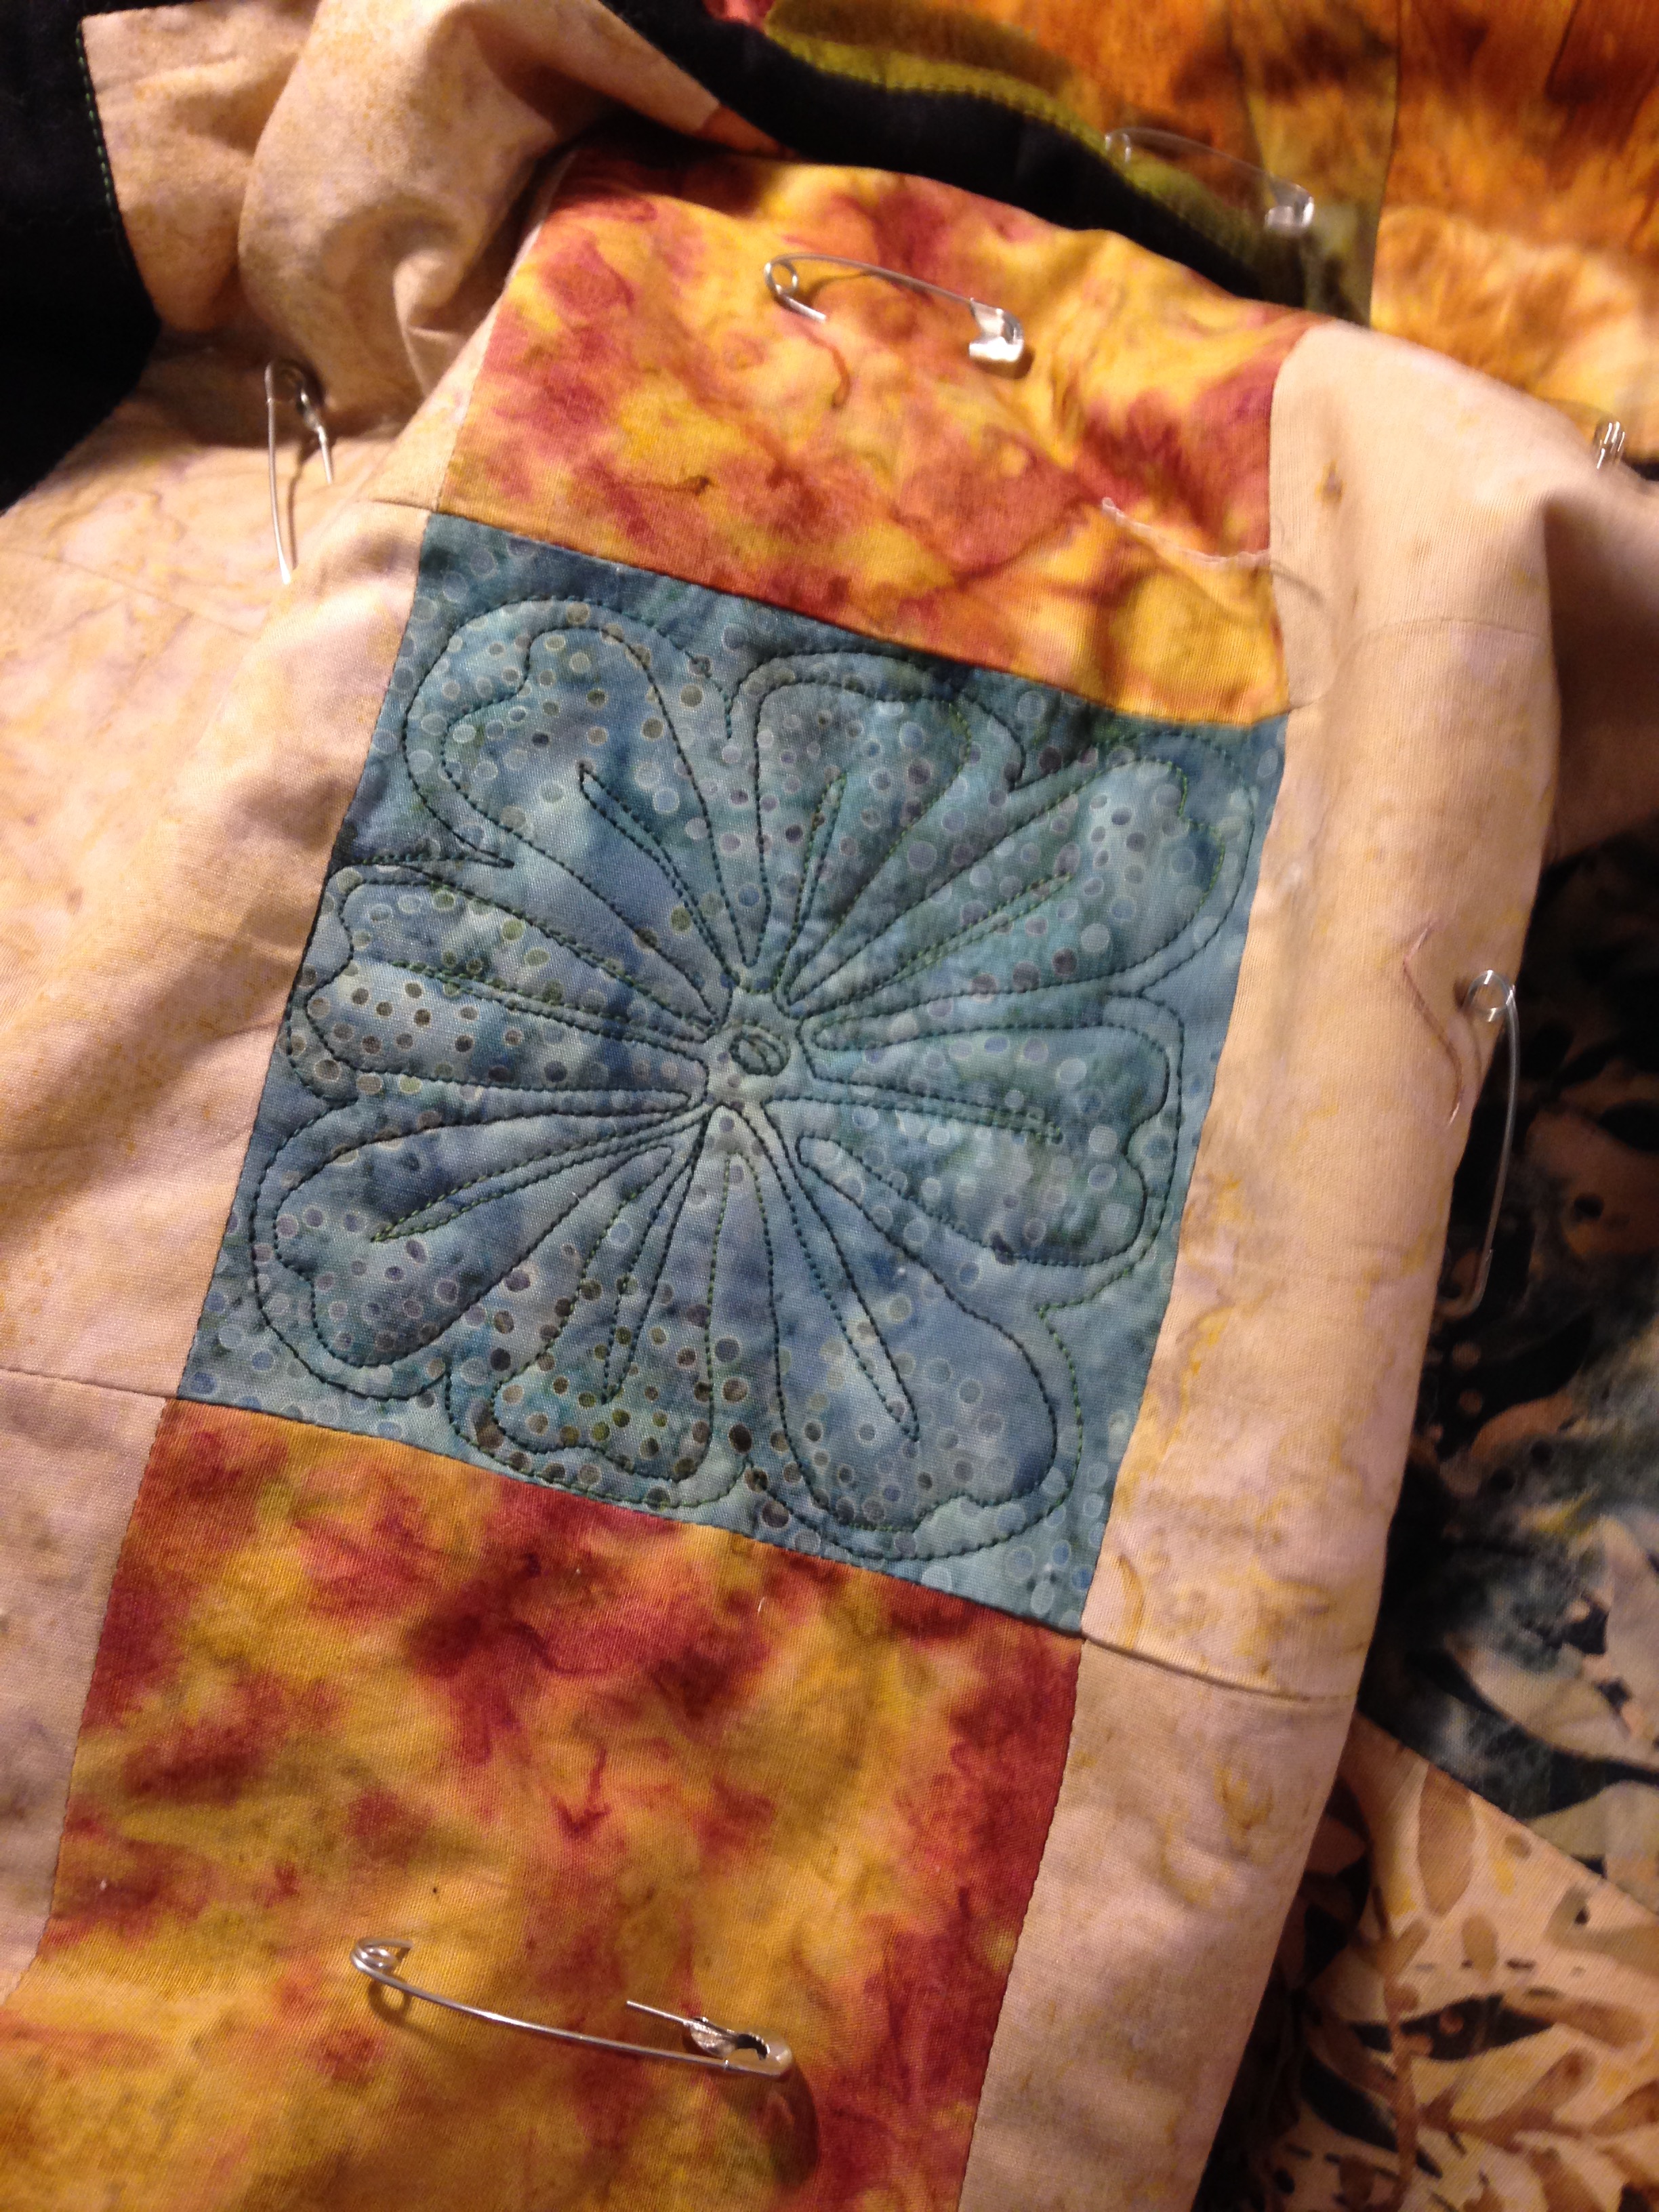
Finally, here is a peak at the quilting I am doing on the batik Honeymoon quilt. It is a traditional nine patch pattern with each block being made up of nine 5″ charm squares. The center of each nine patch is a blue square which I quilted with a large flower of one sort or another.
I have all twelve of the flowers done and just started the filler pattern to go around the flowers. I am doing a leafy vine.
It is kind of difficult to see the pattern against this particular batik because is it so busy and leafy. This is the only square I have done so far though. I think I should be able to get this finished up fairly soon. Seems like it is going quickly.
That’s it for now. Wishing each of you a wonderful summery week! The season for iced coffee, iced tea, iced water… get the idea? Stay cool and enjoy.
Linking to Freemotion Mavericks, Sew Cute Tuesday and Freemotion by the River. Links to all of these sites are available at the top of this page, under Link Ups.
OK – while it doesn’t really seem possible, June is here. School is on its last legs and summer is around the corner. So crazy. Julia graduates from 8th grade (though this year the administration has quite vehmently changed the terminology from ‘graduation’ to ‘promotion’). Whatever it is called, it is a big change and she will move on to high school in August!
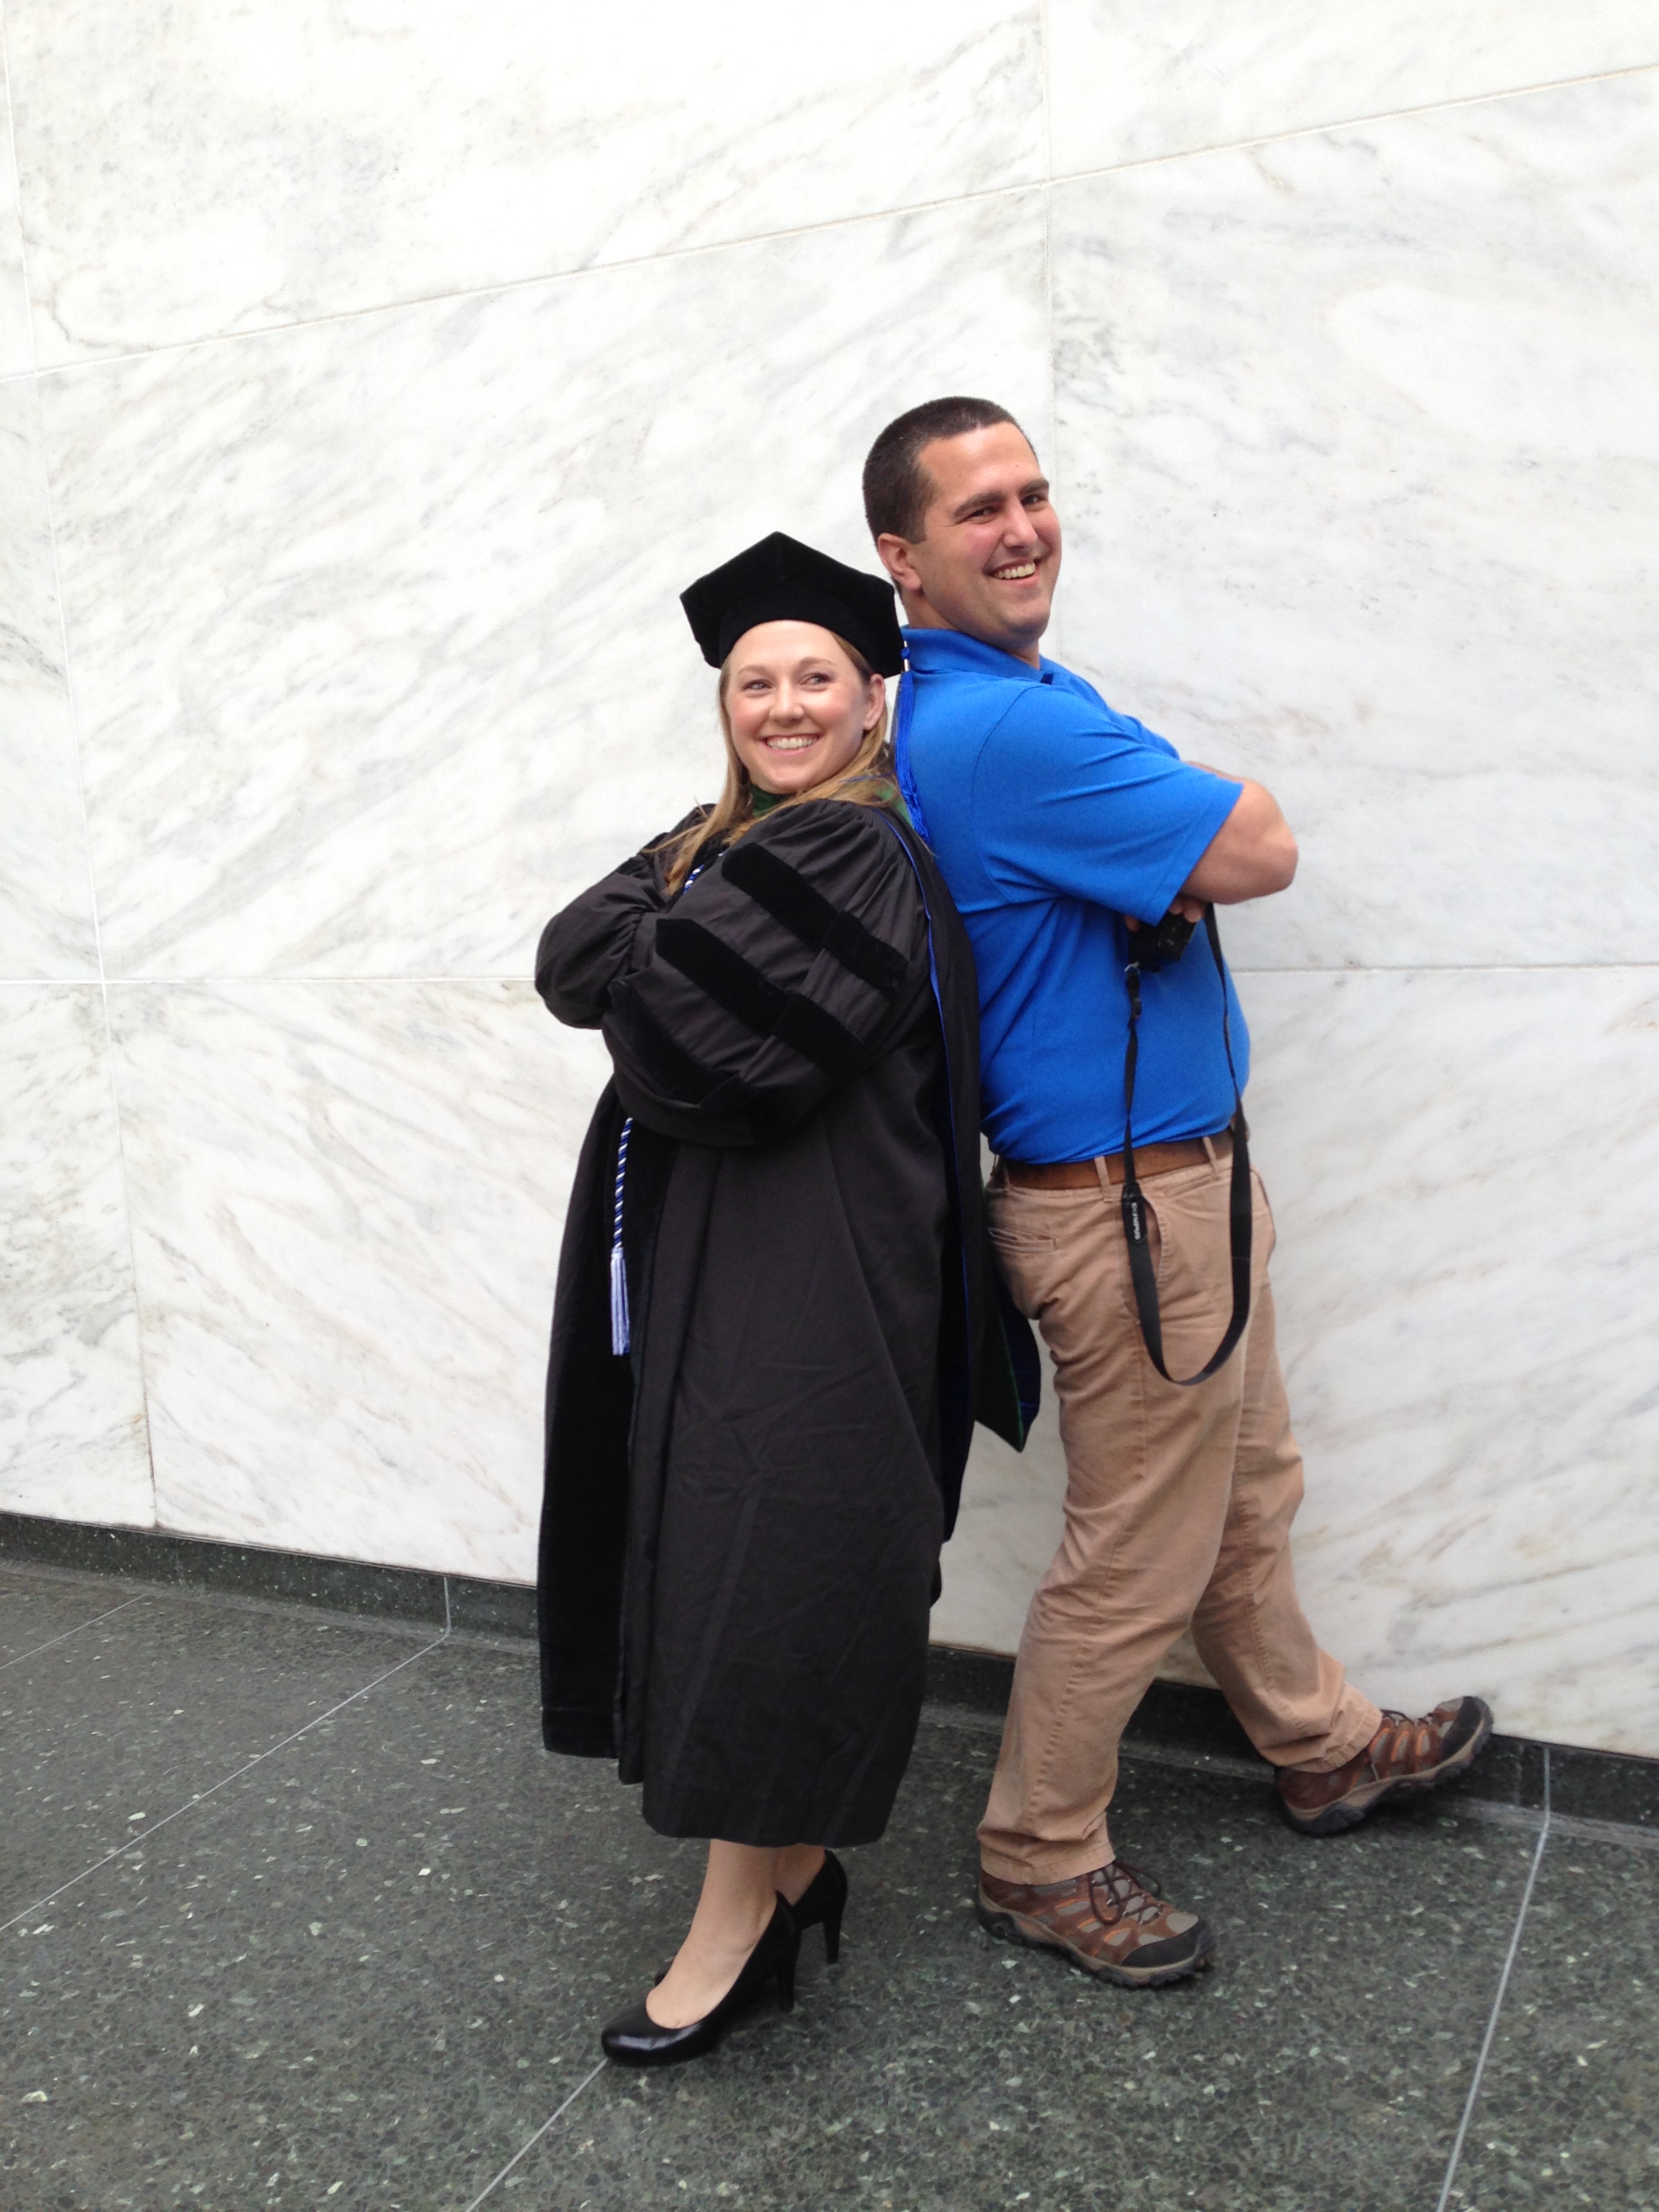
We spent Saturday and Sunday in San Francisco. Even though it is a quick 140 miles from home, we rarely go. This weekend was my daughter-in-law, Naomi’s, graduation from medical school. She is officially a doctor and we couldn’t possibly be more proud of her. She has worked so very hard over the past four years.
The ceremony was touching and, with about 100+ graduates, small enough that we could reallyt enjoy and see everything. Naomi will be starting her residency in Diagnostic Radiology in a few weeks. This will take them to Burlington, Vermont for a good four or five years. I haven’t been to Vermont so this will be a good excuse to visit.
I didn’t accomplish a whole lot in the sewing room last week. I made sure to do a bit of FMQ practice. I am trying hard to fit at least a little practice session in each week. This round was just a quick rectangle (7″x 8″) with a loopy figure eight running side to side. I used a tutorial by Rachel over at Stitched in Color.
This side looks reasonable. I purposely quilted with a light gray thread against the blue so i could see my results clearly. A bit uneven but not too terrible. The other side shows a bit of pulling or uneven speed, whatever it is that gives that “eyelash” effect on the curves. I put an Insul Bright scrap in the middle and bound it off to be used as a hot pad. I even machine stitched both sides of the binding, very quick.
Being the first of June, it is time to link up to Sew Bittersweet Designs for ALYOF. I have one last quilt top to finish up so that is the goal for the month. I made a batik nine patch back in August of last year. (Posted about it here.) I love this top and was sort of waiting until my quilting abilities improved before I put it together. Enough waiting. I am going to finish it this month!! The plan is to free motion it with some sort of all-over pattern.
While that is the main goal, I have others. (Of course I do!) I will make the row for June for my Classic Stitches row quilt. The color is light to medium blue for RSC15 which should be fine. I have quite a lot of blue scrap. Hopefully, I can continue to do a bit of FMQ each week, though quilting the batik quilt will probably make up a few of my practice sessions. Finally, I have a quilt idea that will use some of the 1940’s vintage fabrics that I recently received. I want to use this as a donation quilt for an event in mid-October. At minimum, I need to get the cutting done for that (hopefully I will get some of it pieced though.)
OK, that’s it for me – what’s on your list for June???
I have been spending more time practicing my free motion quilting skills. I really want to be more competent with the FMQ part of the quilting process and the only way to get there is what? Practice, practice, practice. It is tough because the time I can spend quilting, like most people, is limited by regular life. When I spend time practicing my FMQ, I am not making!! It doesn’t feel as productive as piecing, binding, FINISHING something. Possibly I am a bit too goal oriented at times, you think? At the beginning of the year, I set a goal to focus more on the process, rather than rushing to the finish. This is a great exercise in being more process focused.
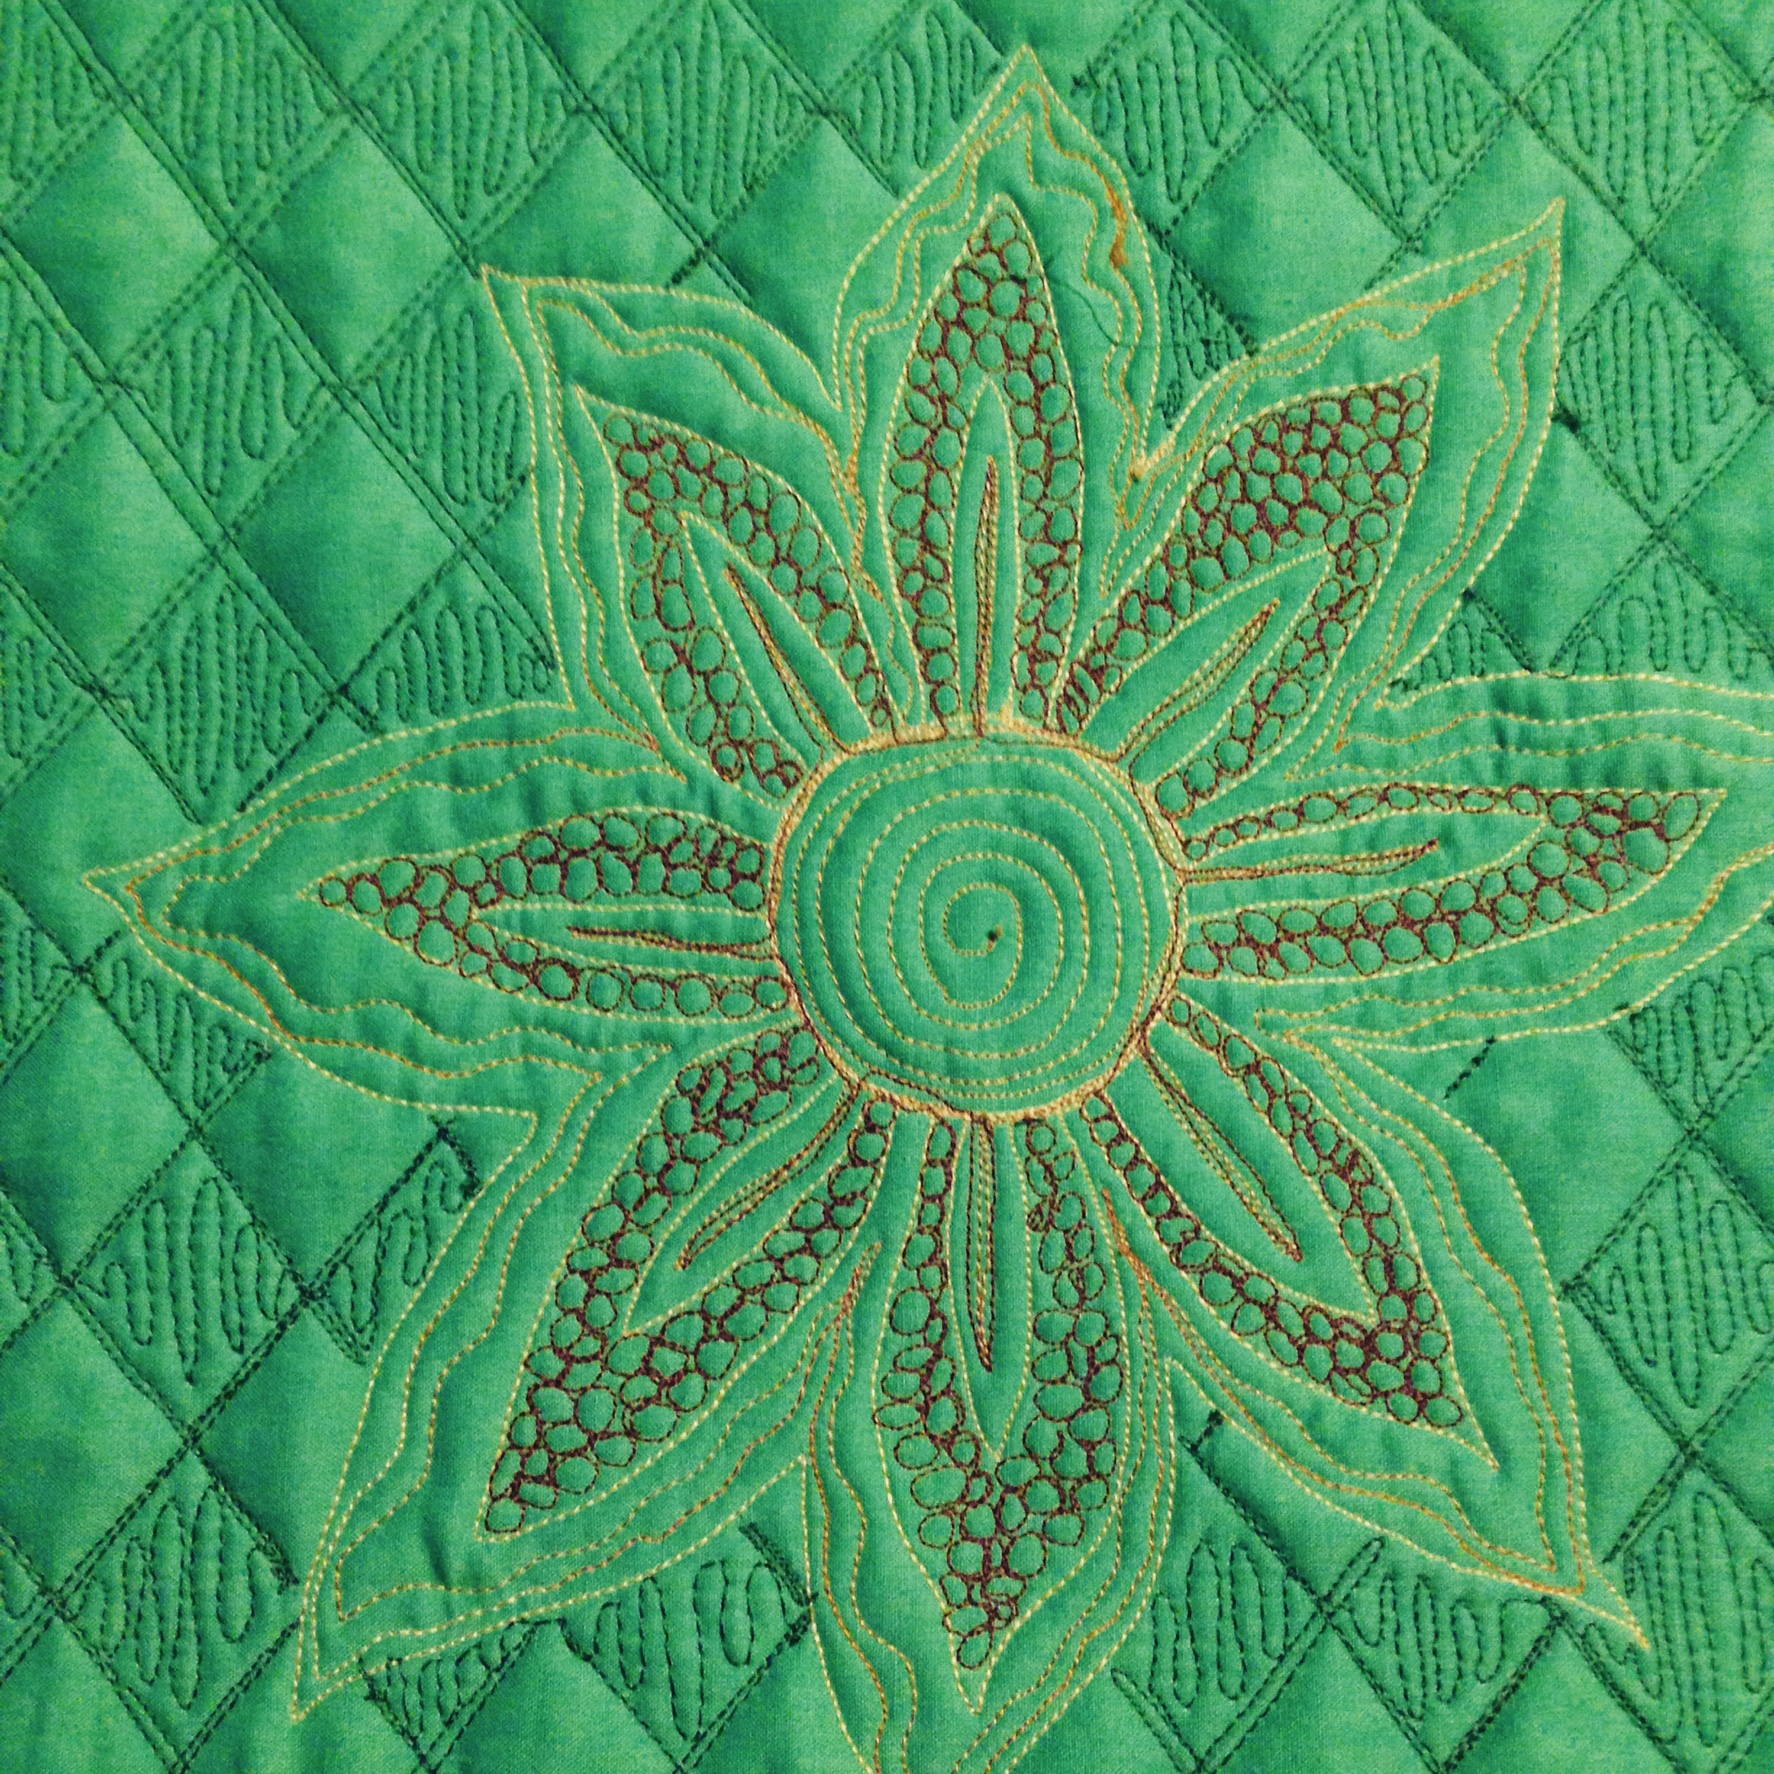
Last week I was working from Christina Cameli’s book and practicing filler patterns. This week I decided to find a larger motif and then use filler around it. I grabbed some solid green fabric that I had thrifted a while back, some batting and plain muslin for the backing. Making a sandwich and pinning it together, I tried to think of what I wanted to quilt on it. I turned to Pinterest, the source of so many ideas. I came across a sunflower that looked pretty, and more importantly, like something I could accomplish. The inspiration came from Amy at Freemotion Quilting Adventures. This site is a wonderful collection of all sorts of helpful information for those learning to FMQ, as well as those that are just expanding their skills.
I did the flower first and then started looking for a background filler. A great source for ideas is Lori Kennedy’s site, The Inbox Jaunt. She is an amazingly prolific quilter and is very generous in sharing tutorials and patterns for different fillers as well as motifs. I saw her tutorial on the grid pop motif and decided that would be a fun one to try. I drew diagonal lines and double stitched each line. To gain the pop effect, every other line of diamonds is filled in. The effect is great!
For this project, I made a conscious decision not to worry about perfection. My tension was making me crazy and after doing the usual, re-threading, cleaning out the bobbin space, rewinding the bobbin, I let it go. This isn’t a gift, it isn’t for sale, it is practice. I want more time quilting and it doesn’t have to be perfect. It is more about gaining that muscle memory to make it that much easier the next time.
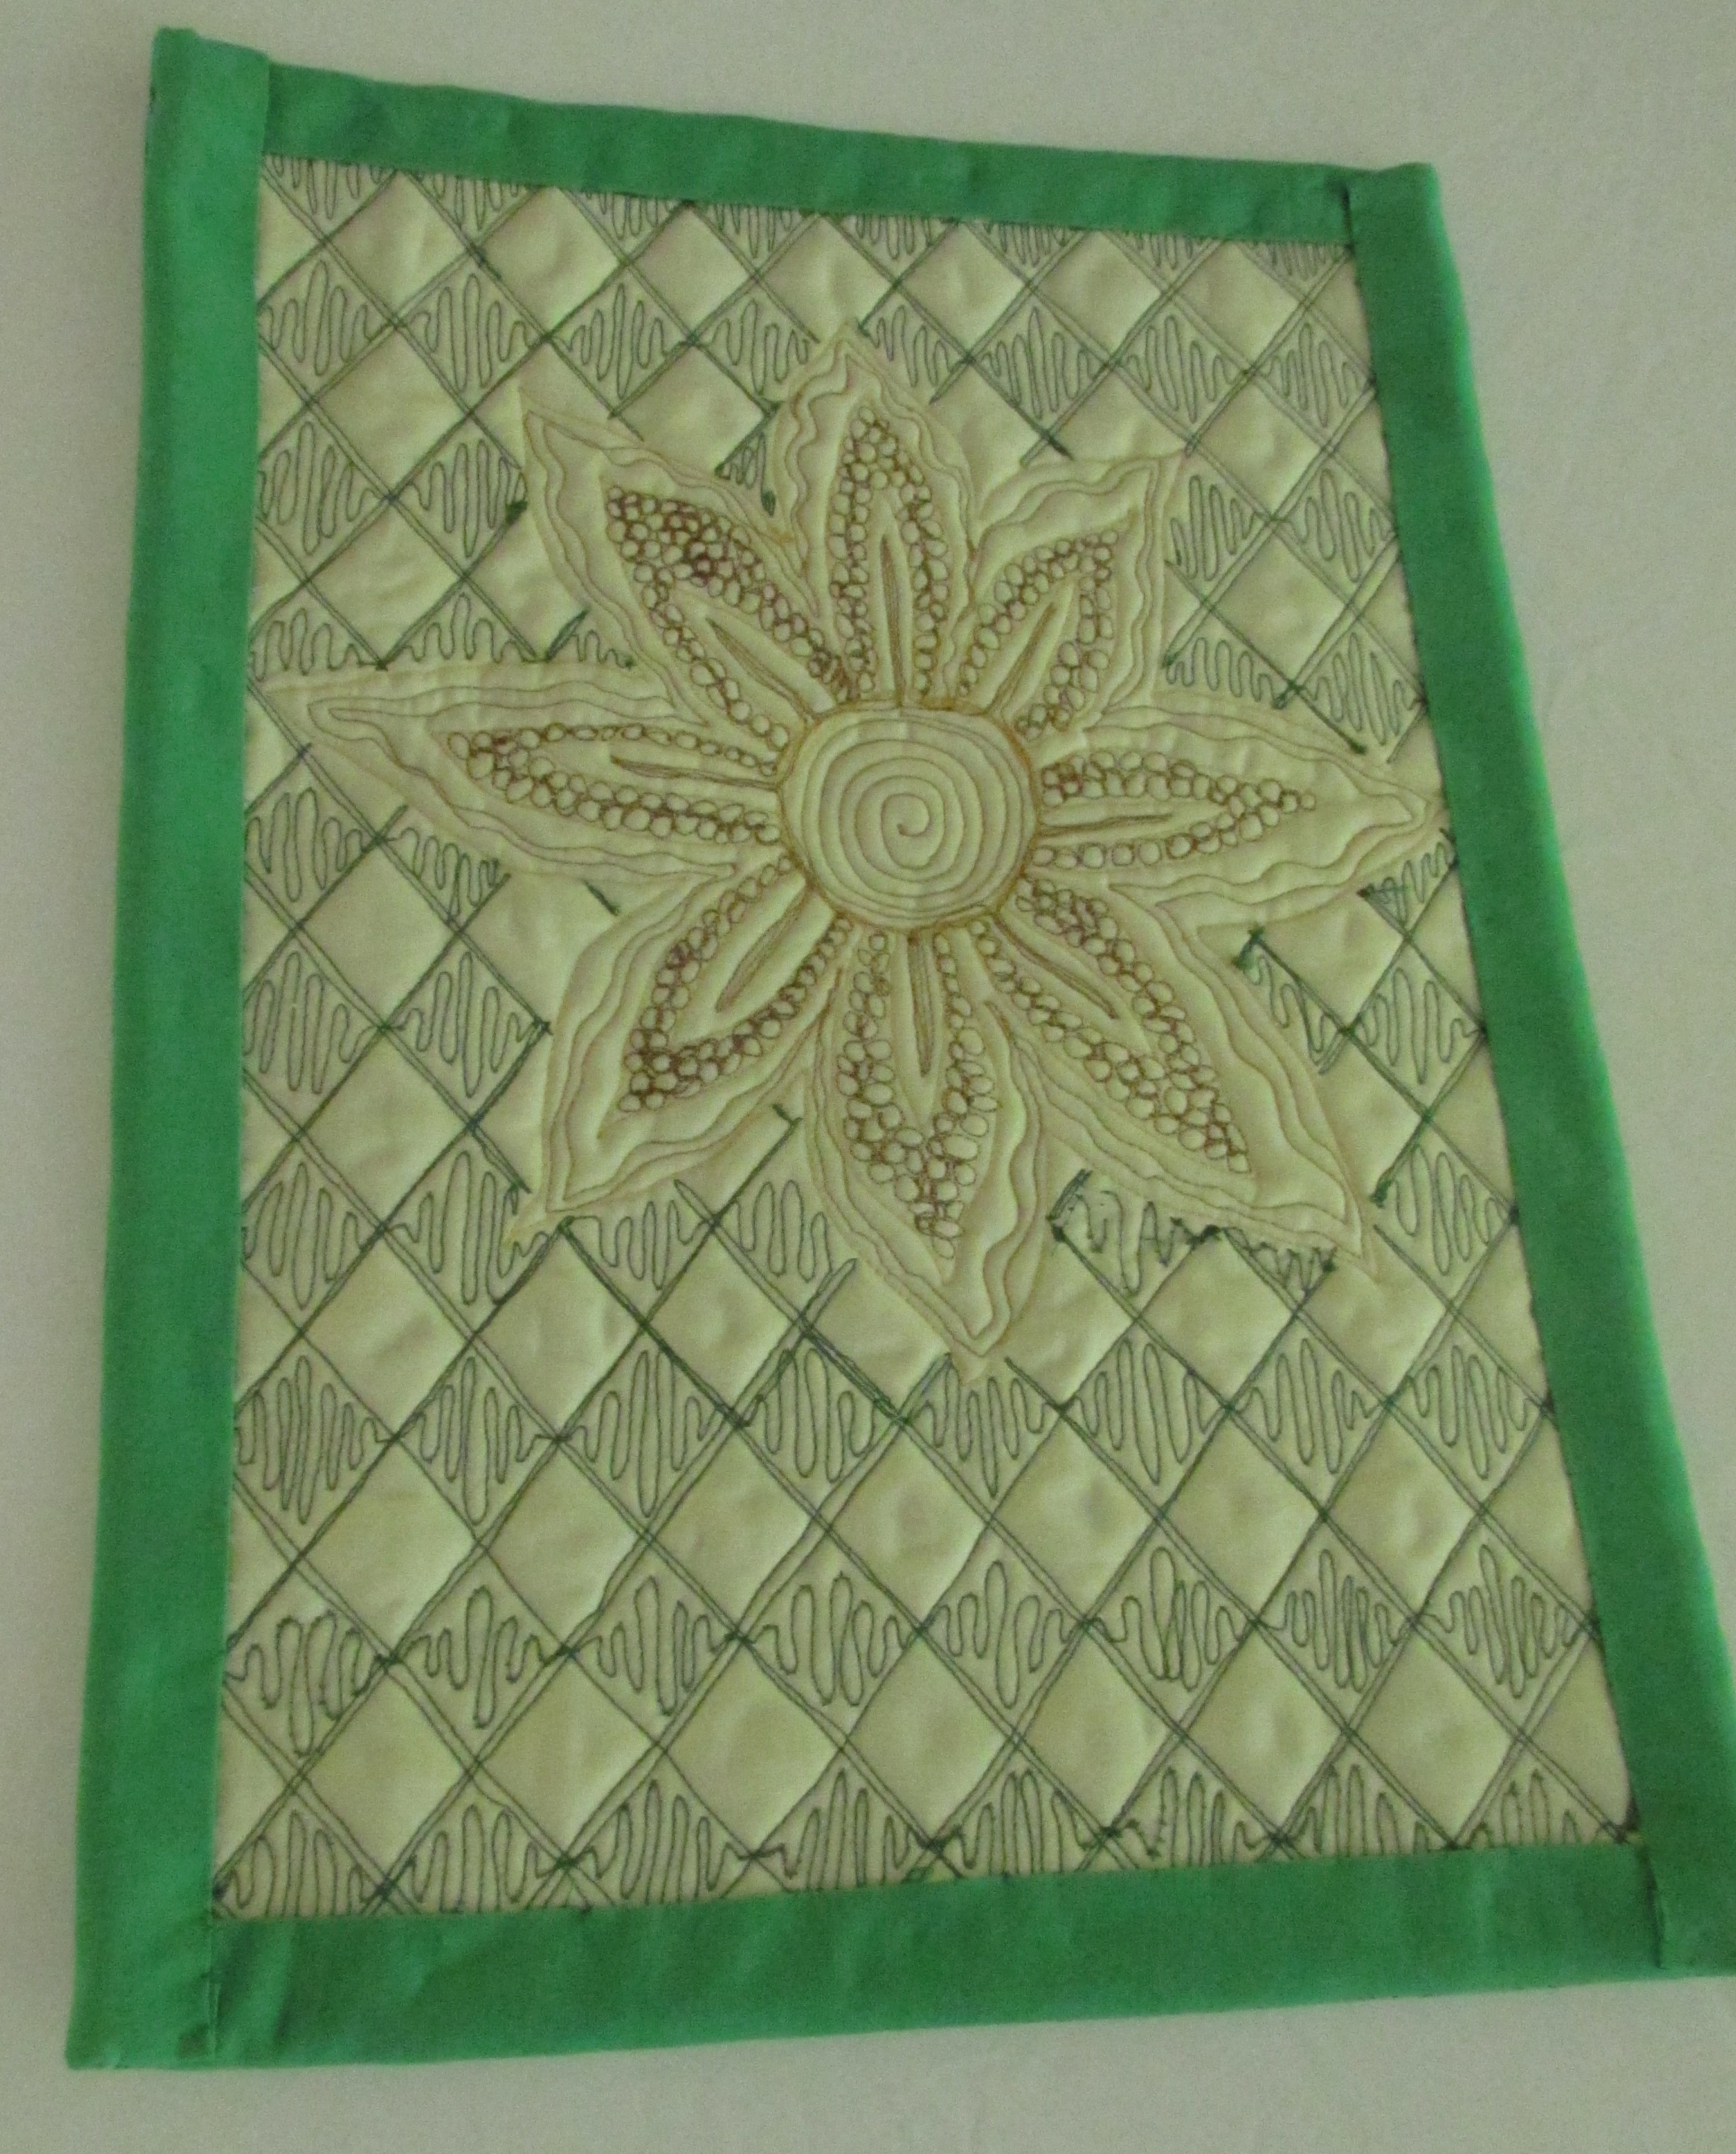
Looking at the back of the piece, you can see the tension issues.
Overall, I love the end result. I even faced it so that I can use it. Currently I have it sitting on my hutch and the sunflower and popping grid make me smile. It is a good sense of accomplishment. I am already looking at ideas for this week’s practice session! Hope everyone has a wonderful week.
I treated myself to a new book last week. I love it. Written by Christina Cameli, it is full of simple ideas for free motion quilting patterns. Christina blogs over at A Few Scraps and I have been following her for quite some time. She creates such lovely quilts and her blog is filled with great information. The patterns in this book are based on common shapes like circles and wavy lines. She then expands on those shapes, creating many different free motion shapes.
When I first got the book, I started to doodle and draw shapes on paper. Some were really easy, others weren’t. Once I got the hang of doodling the designs, I wanted to practice with actual thread! I made a simple nine patch block, using 6.5″ squares. I thought I would quilt each square with a different pattern.
The quilting is far from perfect but I really enjoyed playing with this. The stitches are fun.
Both of these flower patterns were fun to stitch.
My favorite stitch so far is the one below. I will definitely use it in a project. It is a bit time consuming but I like the effect.
My only disappointment with the book is a minor one. I had hoped there would be some discussion of how to integrate some of the patterns together. She doesn’t touch on that. I know that is a strength of hers as she is great at using all sorts of patterns together. I was looking for some information on that but it isn’t included in the book. Overall, the book makes it so fun to practice because the patterns are broken down into easy steps. I highly recommend it if you are in the market for a little FMQ practicing!!
Linking to Crazy Mom Quilts, Confessions of a Fabric Addict, and Freemotion Mavericks. Links to these sites are always available at the top of this page, under Link Ups.
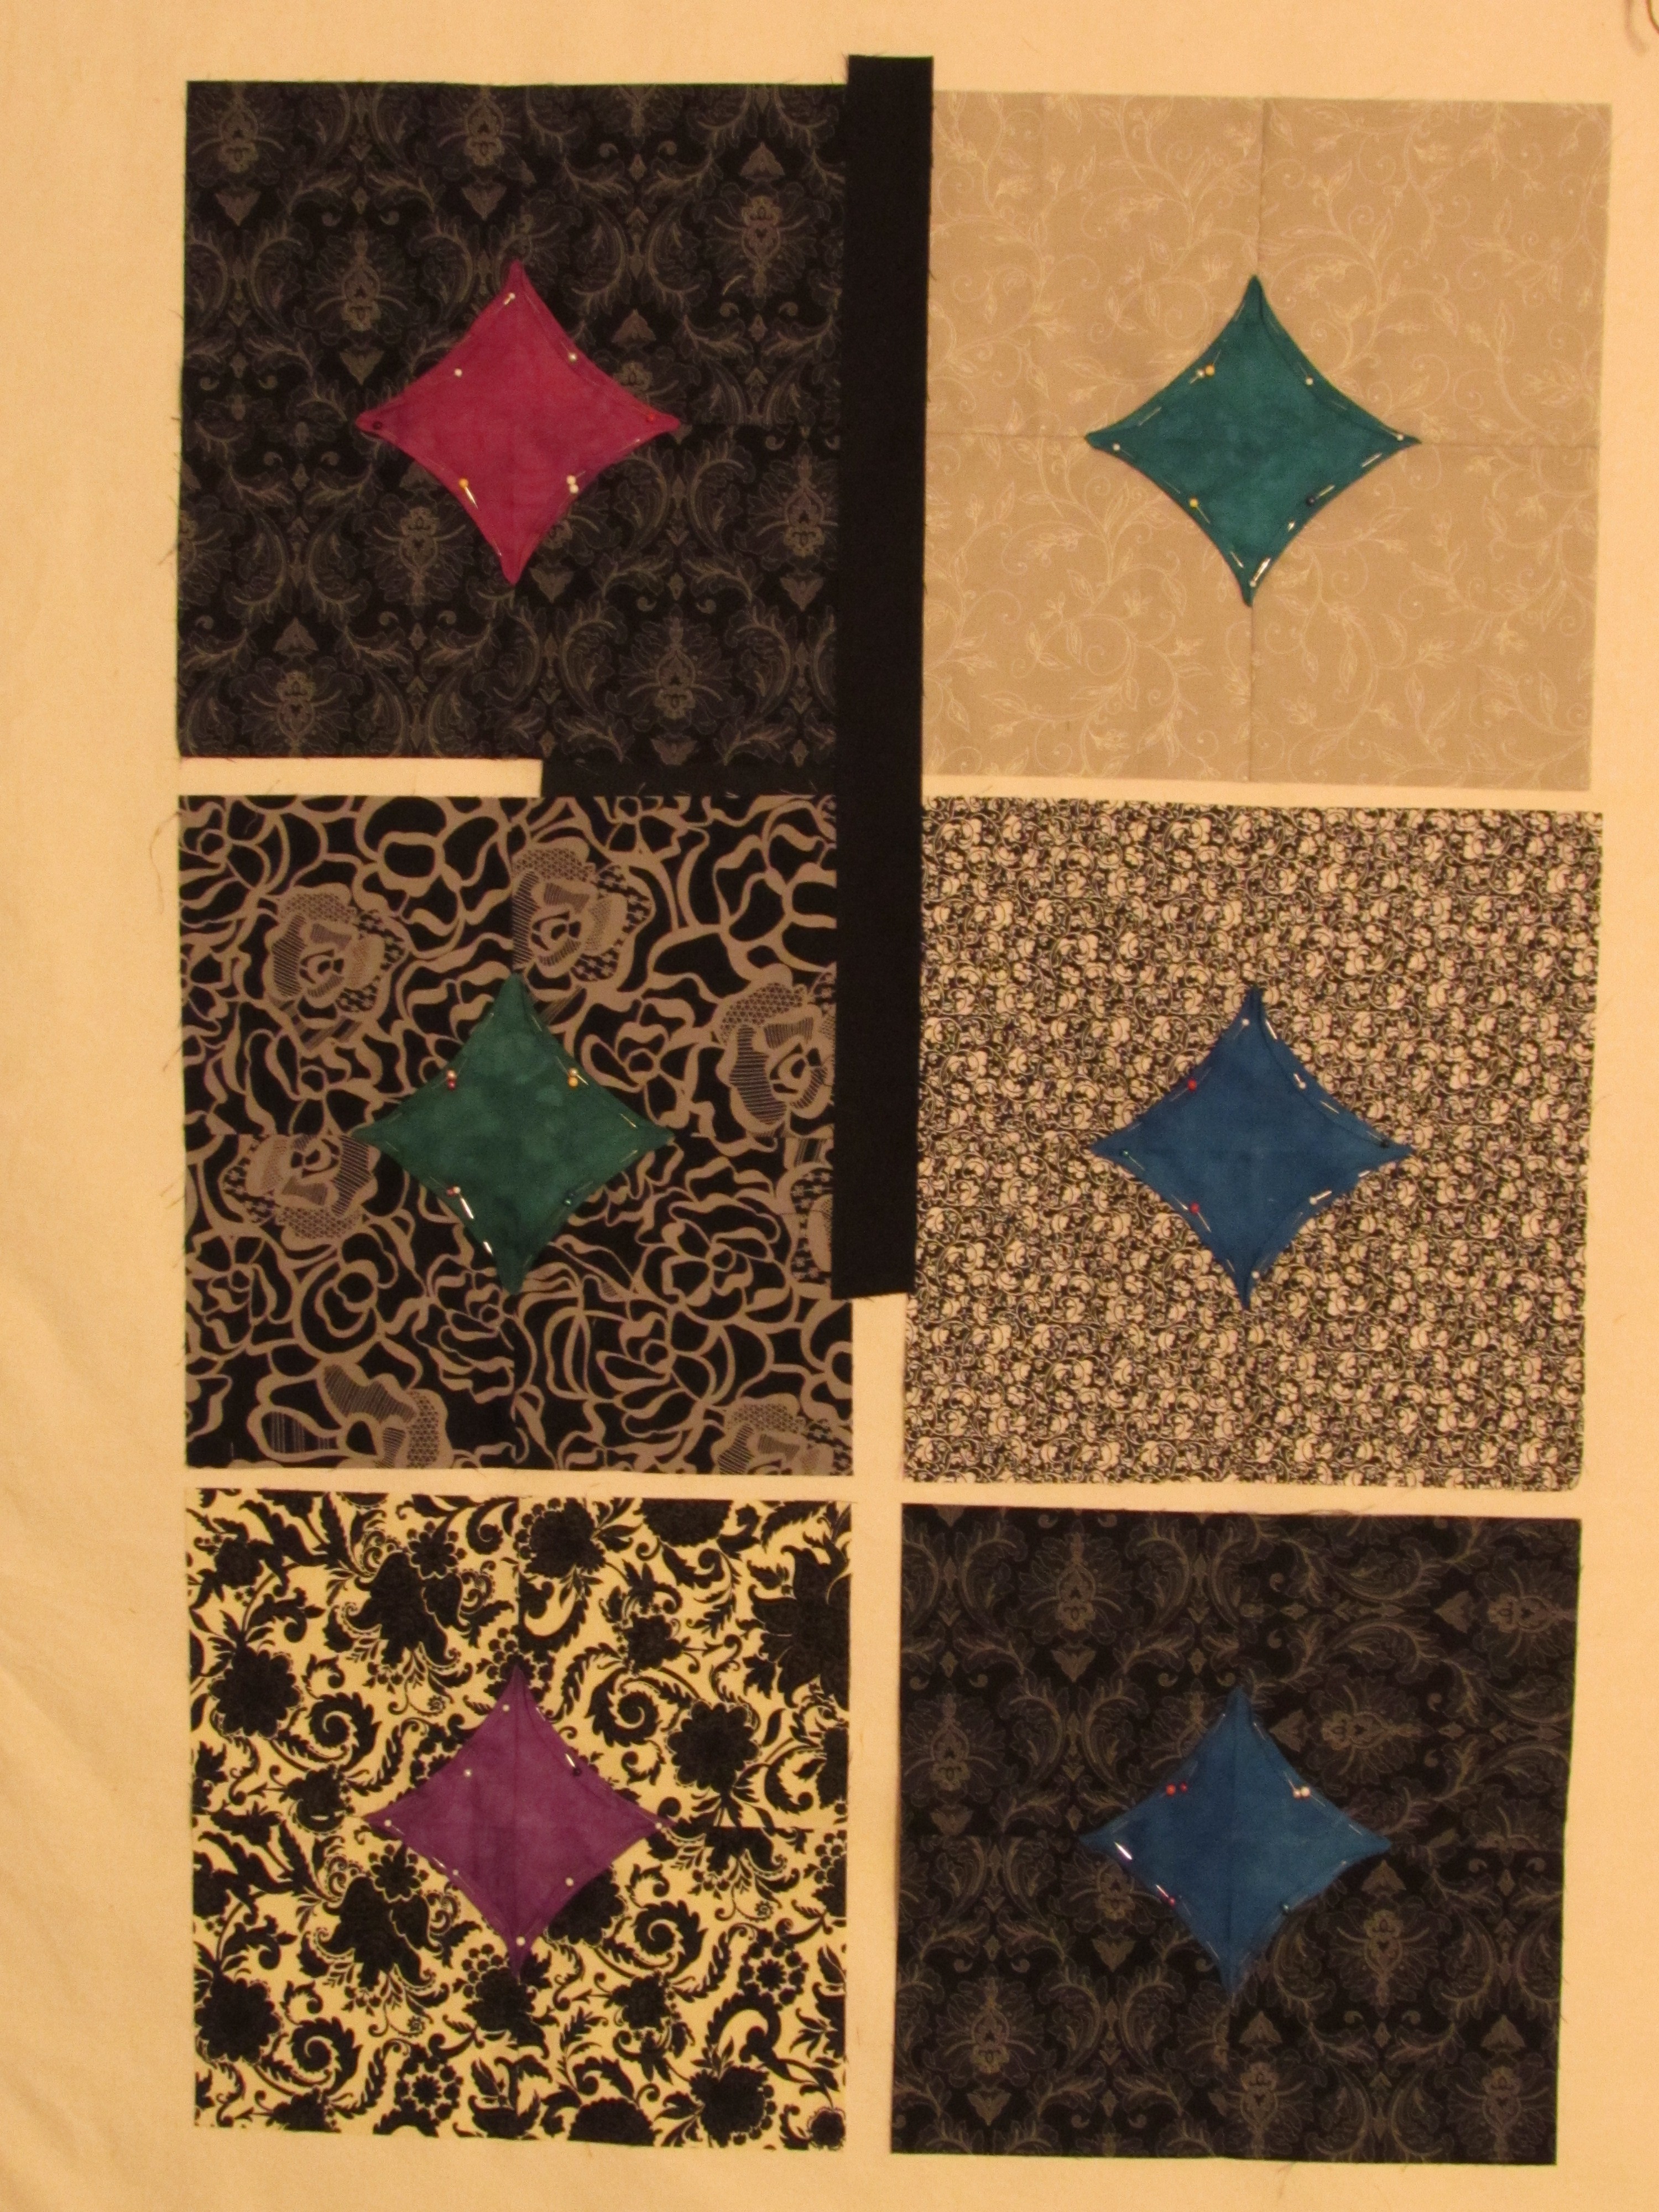
If you are unsure what ALYOF means, it stands for A Lovely Year of Finishes (a fun link up at Sew Bittersweet Designs where you set goals and see what everyone finishes up during the month). Let’s just says some are lovlier than others! I finished my quilt with the black and gray ten minute blocks which was my February goal for AYOLF. Finishing it feels good because I met my goal, but I am not thrilled with the finish. I didn’t like the blocks a whole lot from the get go. I set them on point, sashed them with black and used black for both the corner and setting triangles. Then I remembered that I hate quilting on black…. Ooops.
I have been really working on improving my FMQ skills. Want to know how to highlight the fact that you are not yet highly skilled at FMQ? Quilt with lighter colored thread on black – that will do it. I used a varigated YLI thread which matched the colors of the quilt very nicely. YLI has some heft and it is nice to sew with. It looked ok on the print fabrics. On the black, not so much. Oh well, live and learn!
The saving grace for this quilt, in my opinion, is the scrappy binding. I love a scrappy binding. I had actually gone to the LQS for fabric to bind it and couldn’t find anything so I decided to just bind it in black. Alas, I didn’t have enough black when I got home so I dug through all the scrap left from the project and made a lovely binding. To me a scrappy binding adds charm to a quilt.
Like I was saying, lessons learned…. if I were to be granted a “do-over” on this one, I would quilt it in charcoal gray (dark but a color I could see against the black). The stitching would look reasonable if it wasn’t so darn light. I am not at a skill level (yet) to highlight the stitching by using light colors on a dark fabric. Hard to post pics of your work when you aren’t really happy with it but this is the real deal. It doesn’t all turn out perfect. I am definitely done with black for a while. Luckily, my daughter loves the colors and she doesn’t give a hoot about the quilting. I had planned to use it as a donation quilt but I think this one will stay with us. 🙂
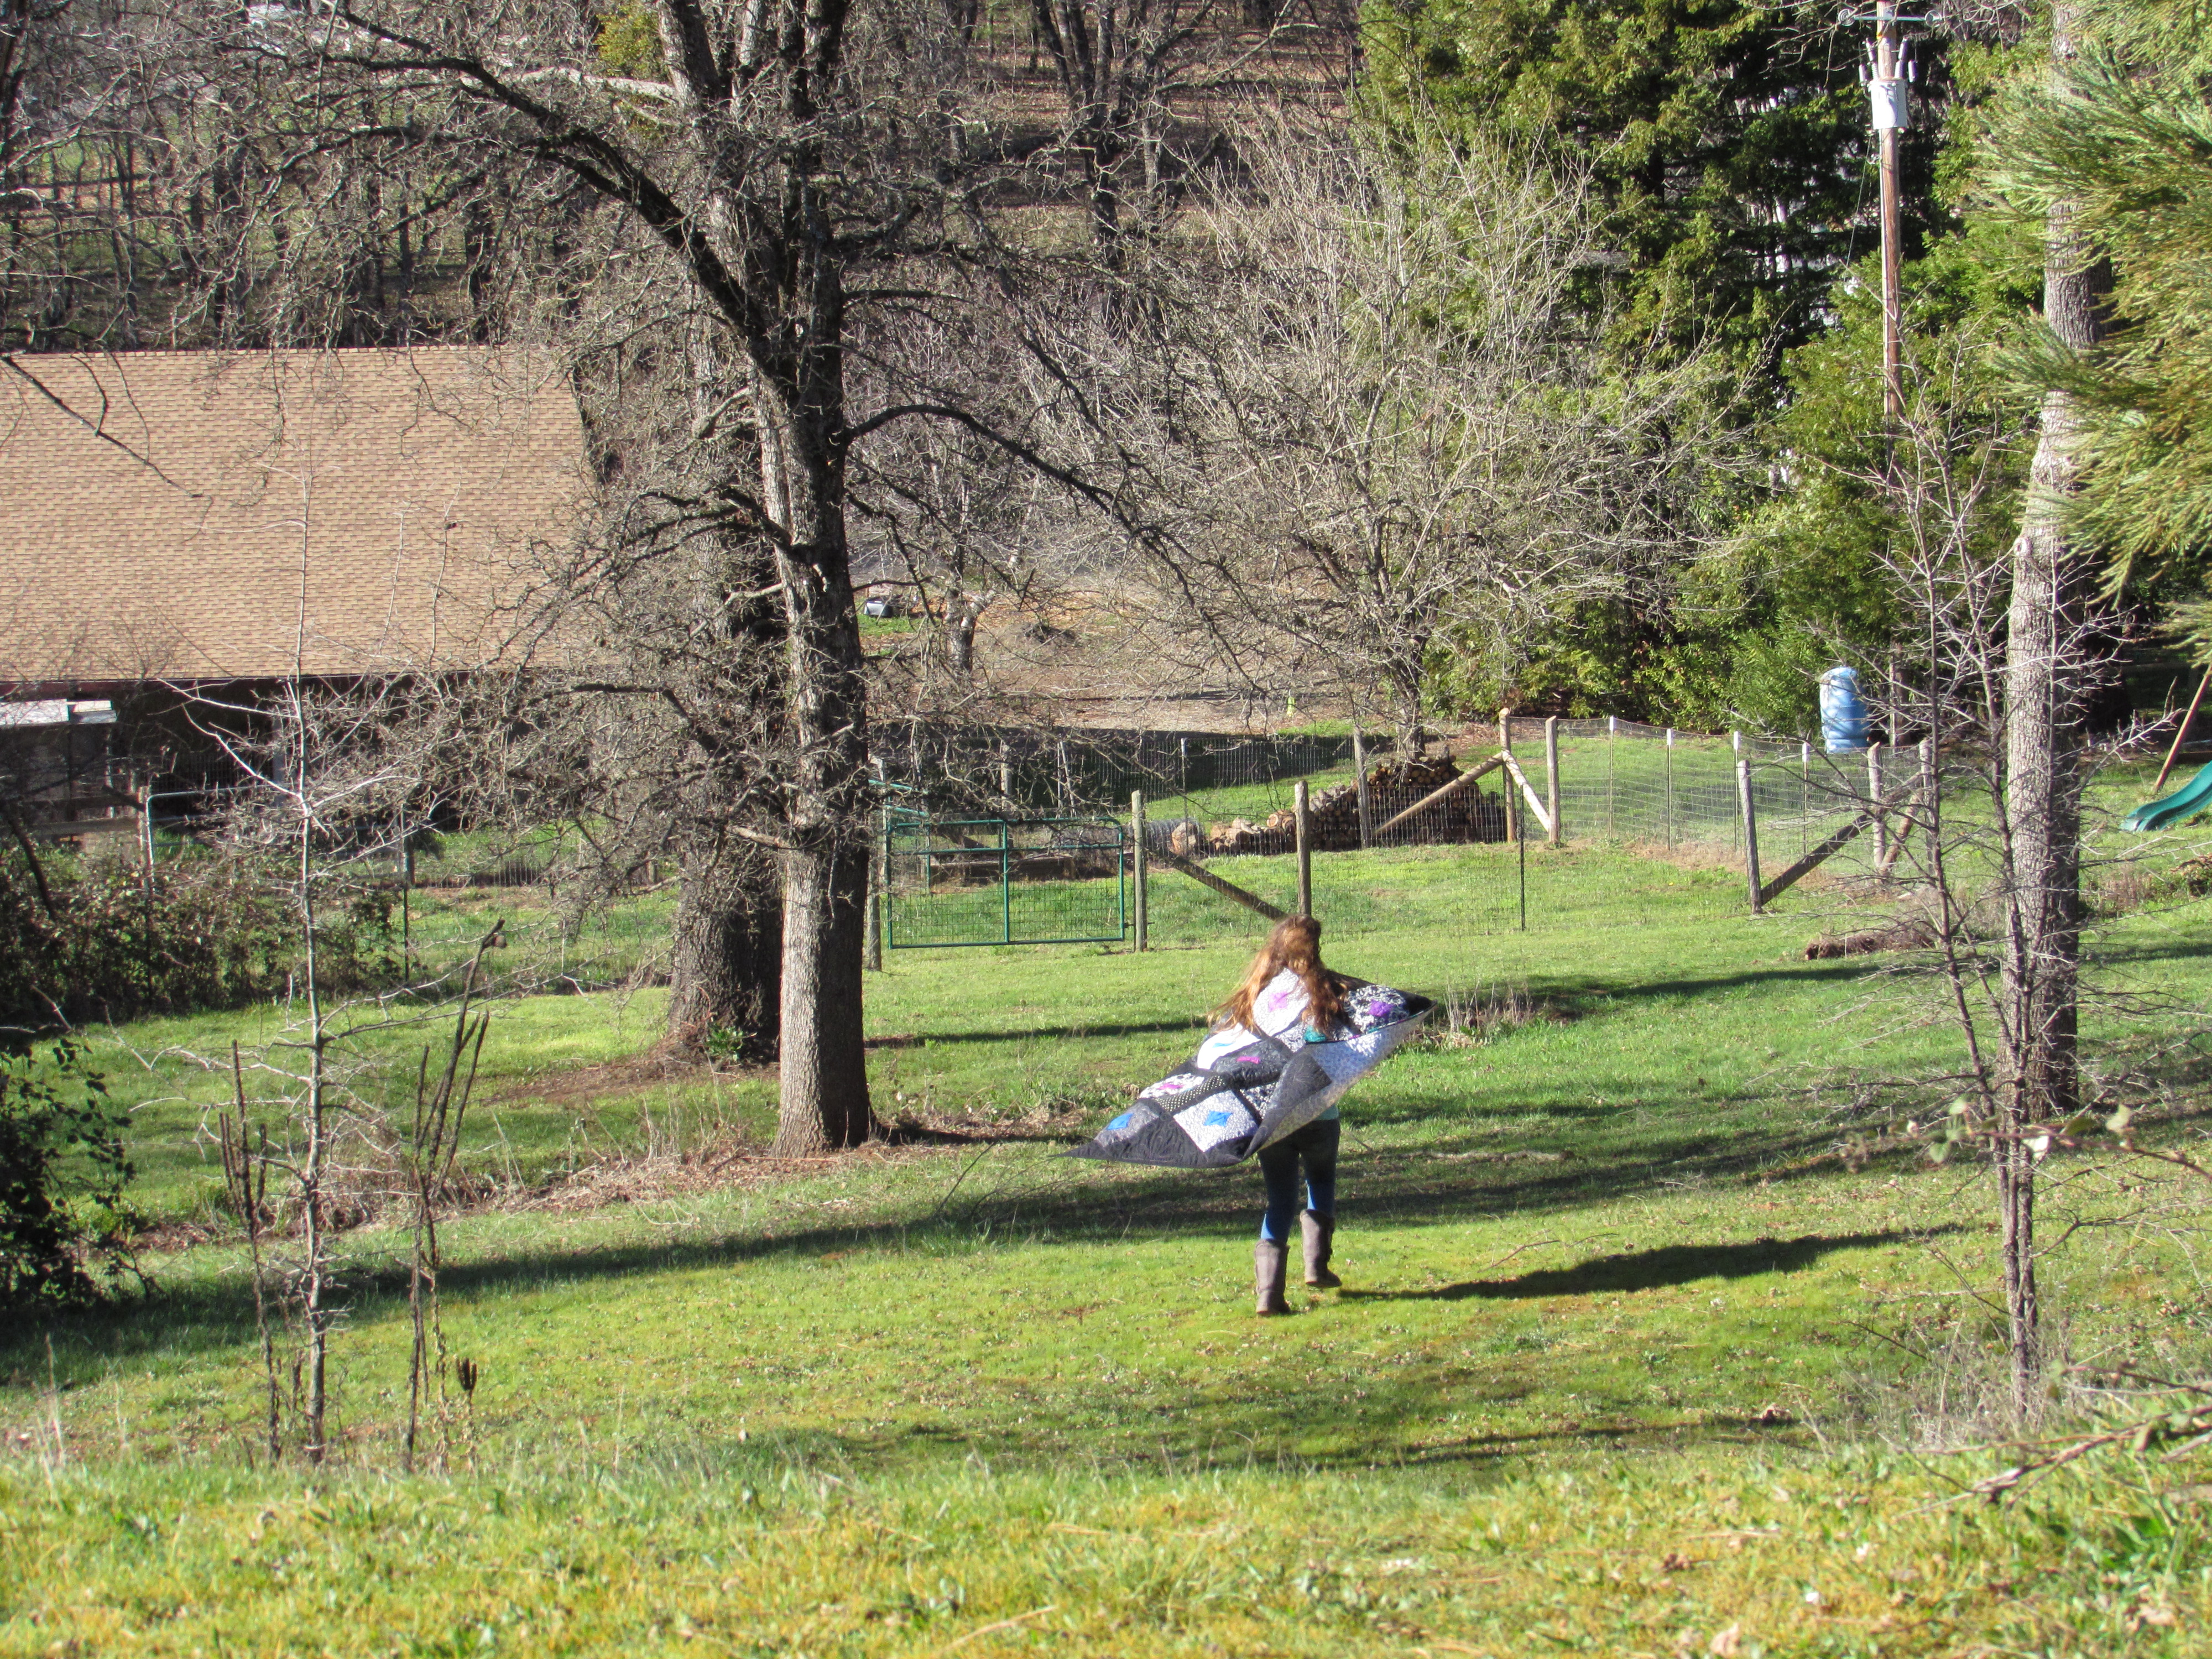
My daughter was my quilt model yesterday. My favorite pictures were of her running down the hill from our pond, back to our house. Put a cape on a kid, no matter the age, and they will run.
Hope everyone is having a good week. As usual, we are crossing fingers for a bit of rain at the end of this week. California has virtually NO snowpack which should make for a horrendous fire season this summer. I am hearing hints that there might be a tiny bit of snow coming our way this weekend. Please, please, please……
Linking to Sew Cute Tuesday, Freemotion by the River and Let’s Bee Social as well as AYOLF at Sew Bittersweet Designs. Links for most of these are at the top of the page under link-ups.
Yay!! Got my second UFO of three finished up this week. Completing these three quilts is on my list of 2015 goals. Going well so far. I’m very glad to be done quilting this one. It didn’t take long either. I don’t know what the deal is. I think I get bored about 1/2 way through the quilting process. It looks great though. It was a bit narrow so I added a green border to each long side for width.
To quilt it I free motioned large, loopy flowers all over the top. They reminded me of the flowers girls would draw in the margins of the notebook when you are supposed to be taking notes in junior high but your mind is wandering. Anyway, I mean I’m pretty sure I saw the other girls doing this…..
Oddly enough, the flowers also brought to mind a weird memory of this PE teacher I had when I was probably 8 or 9 years old (so we are talking 1968 or 1969 here – hippy days). I went to a parochial school through 8th grade. Mostly we had nuns for teachers and usually the classroom teacher/nun was also your PE teacher. But for a while, we had a young woman that as our PE teacher. I bet she wasn’t more than 21 or 22 and I thought she was SOOO cool. For one thing, she wasn’t a nun and she was young. (To me, the nuns seemed old no matter their age since I couldn’t see their hair.) For another, her name was, get this…. Flower!! Looking back, I’m guessing that wasn’t her legal name but that was what we called her. Shocking, right? It sure was to me. Ahh… the 1960’s.
I also quilted flowers along the gray borders. Once I got to the green, I switched to a medium sized leaf. Kind of wish I had switched to green thread when I quilted that portion. Oh well. I also attached the binding by machine on both front and back sides. Not sure I like that as well but I gave it a try.
In my on-going resolve to upcycle, I used a duvet cover for the backing. I found it at a thrift store for $7.00 and it is huge. I will easily back a couple a quilts with it. One side of the duvet cover is a green stripe and the other is a green floral print. I had the green binding sitting in my stash so this quilt is all scrappy and used a good portion of my stash. The only piece I purchased directly for this project is the gray print that I sashed the blocks with. Not too shabby.
Trying to start the new year out right with better scrap management habits. (Wow, “scrap management” sounds so quilty-dorky!) But really. When I trimmed the excess off around the perimeter of the quilt I actually trimmed the scrap into usable pieces. This is definitely a first for me. Three inch and 2 inch strips plus a stack charm squares!! It hardly took any extra time and it’s done.
Not exactly sure what I will work on next. I want to do some piecing. I need a break from quilting for a while. I have some blocks that have been sitting around for a while. I don’t love them, know what I mean? I think I am going to create a quilt to donate to a fundraiser at my daughter’s middle school.
The lighting on this picture is horrible. (I took it at night with my phone.) I think I will set the blocks on point and sash them with black. I have a cute black and white print for the backing and maybe I can find a jewel toned batik to use for a border and binding. Hopefully that will jazz this up a bit.
Linking to Freemotion at the River, Lorna at Sew Fresh Quilts and Amanda Jean at Crazy Mom Quilts. Links to these amazing ladies are found at the top of the page under Link Ups.
Will also be linking this post to A Lovely Year of Finishes as this completes my January goal. Hurray for that – three days before month end.