Tag Archives: sewmystash2015

The Week’s Progress

This has been a good week for sewing. I made progress toward my April goals for ALYOF. Which is a good thing, considering April will be over before you know it. The speed with which time passes seems to increase frighteningly each month.  Anyway, it is April 23rd and I am over 3/4 of the way there. My goal was to make two table runners and either a wall hanging or runner. I wanted to complete three smaller projects this month. I finished the chevron table runner which I posted about last week.

This week I completed the second table runner. The process I used was new for me and was inspired by the way that Victoria Gertenbach at The Silly BooDilly works. I started reading her blog and looking at her style over the past couple of months. She is a modern quilter with a gorgeous sense of line and color. She quilts and does a lot of other work in fiber and paper art. I strongly suggest you take a look at her site as her work is lovely.  One of the tutorials she wrote was about pattern-less design.  She has developed a way of cutting a piece of fabric and then adding sections to it, thus creating her piece. I love the idea. While I didn’t actually follow her tutorial with this project (because it didn’t work with the fabric I had on-hand) I was surely inspired by her process .

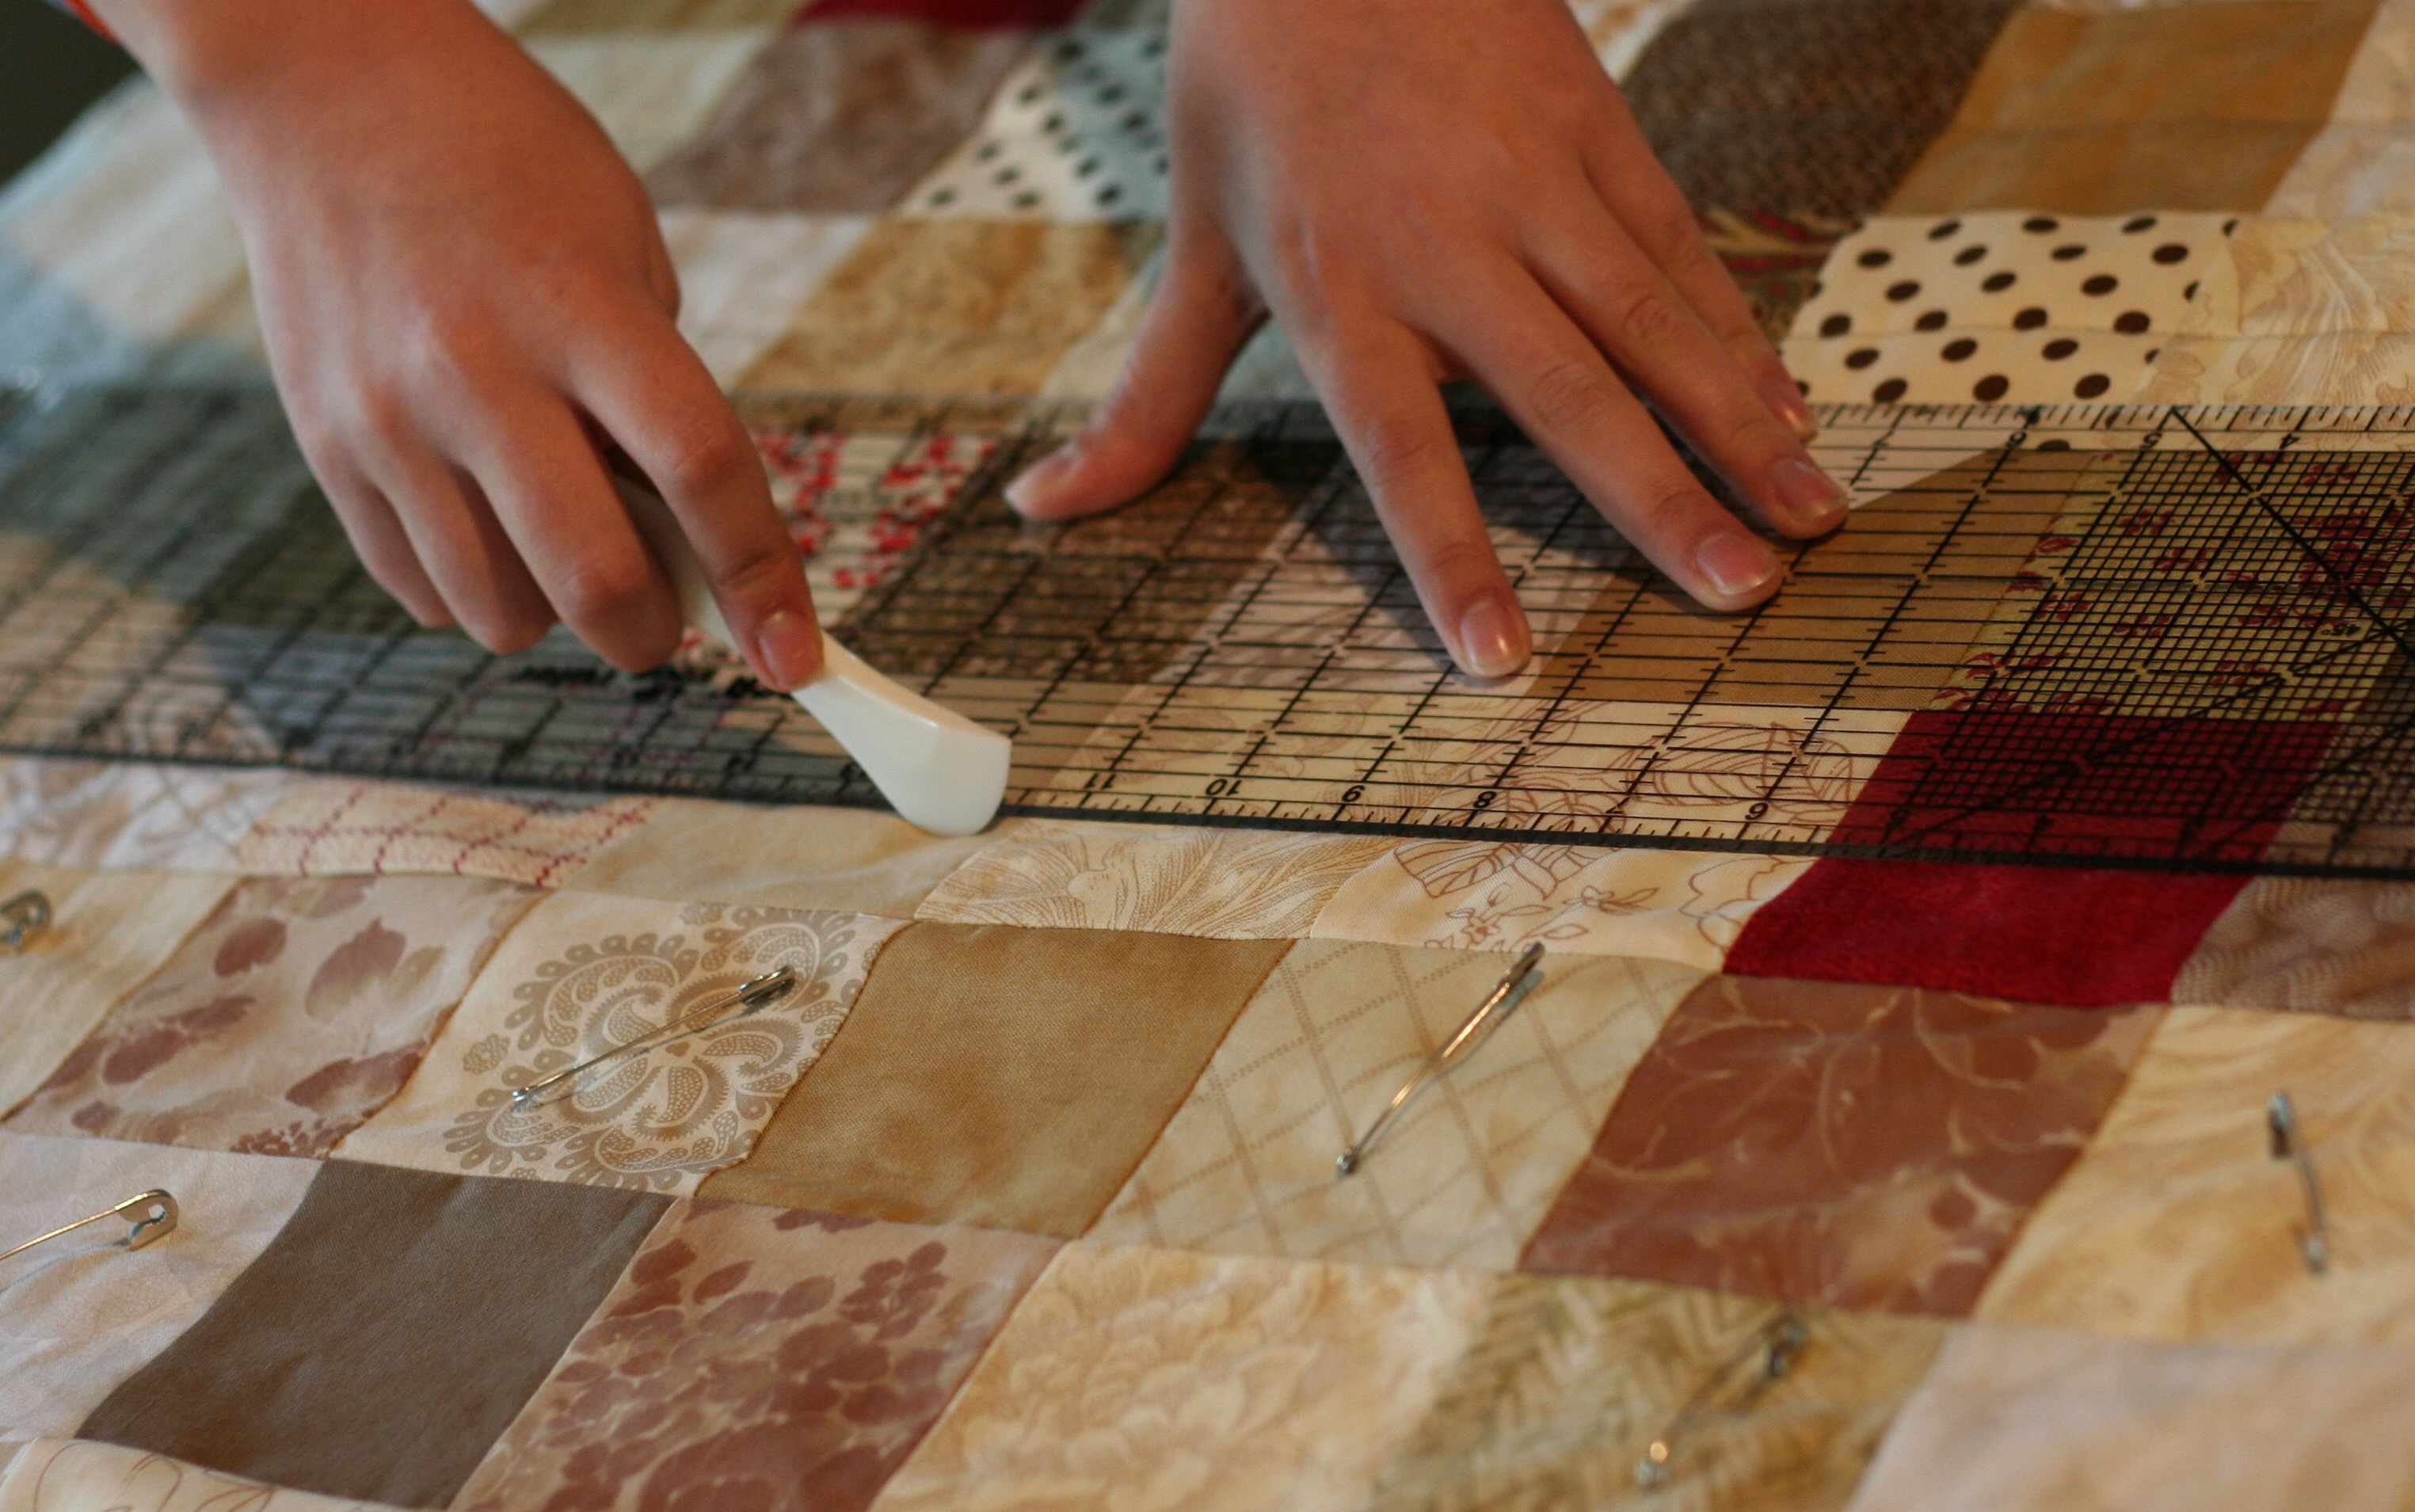
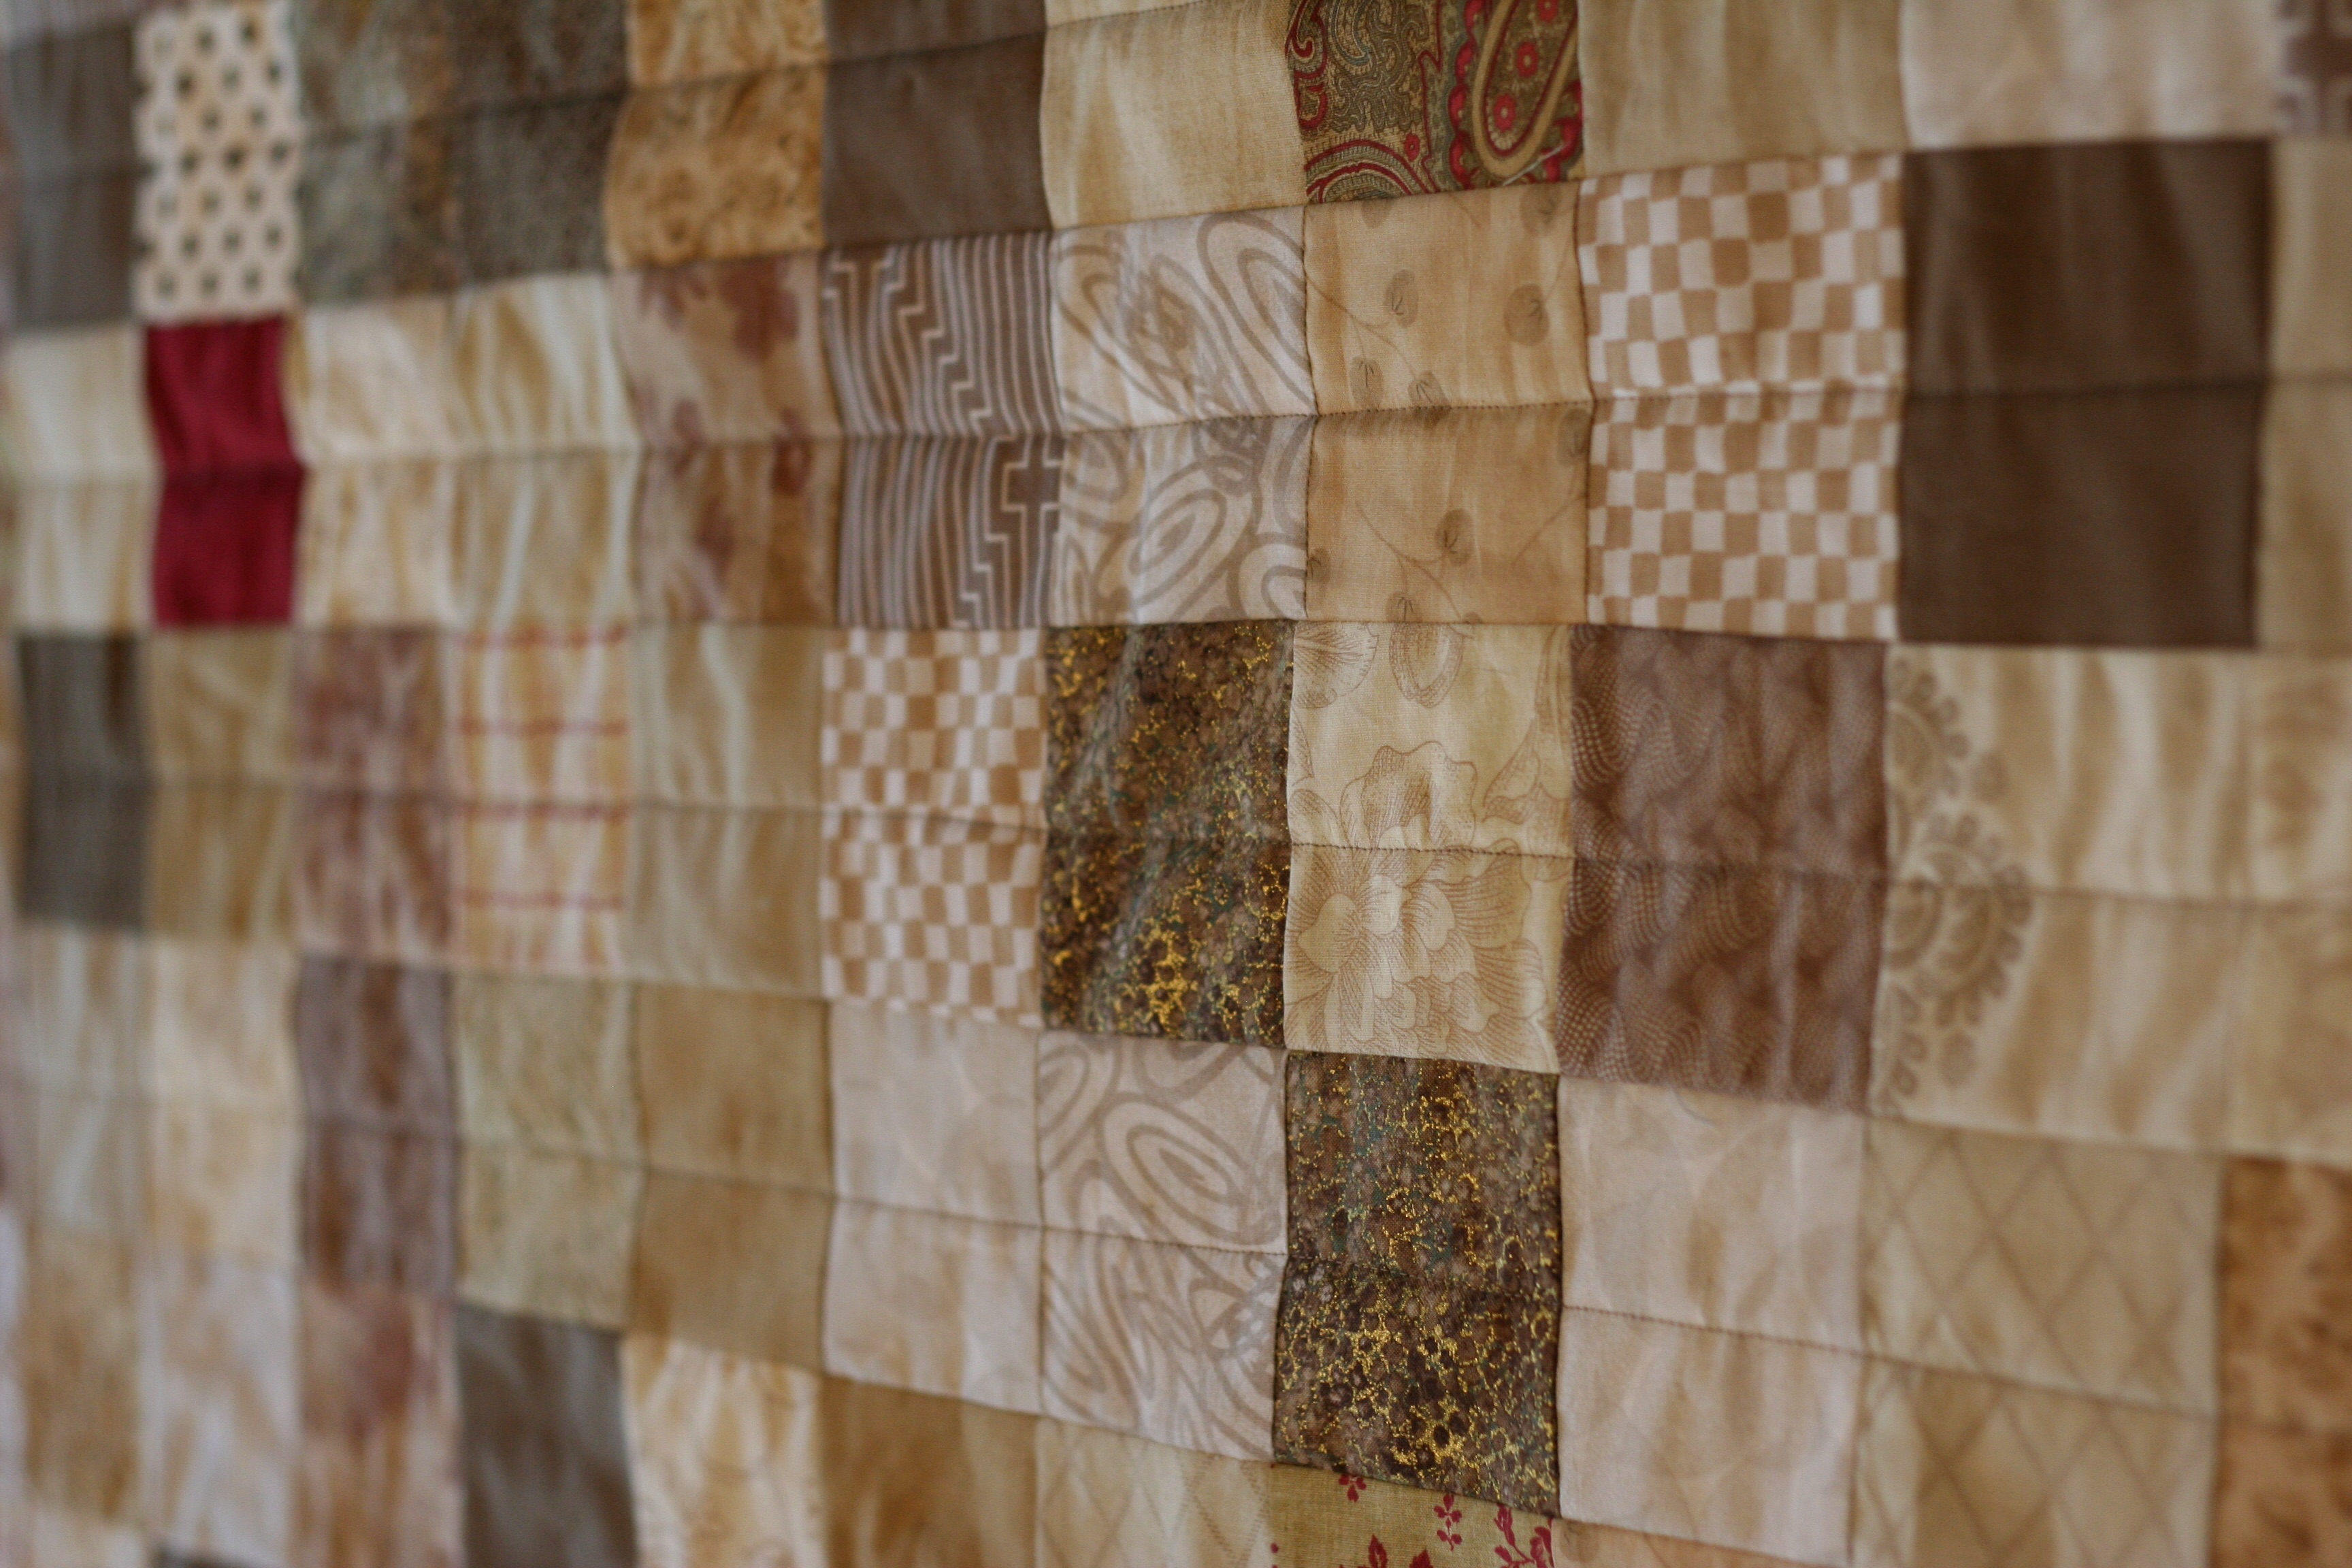
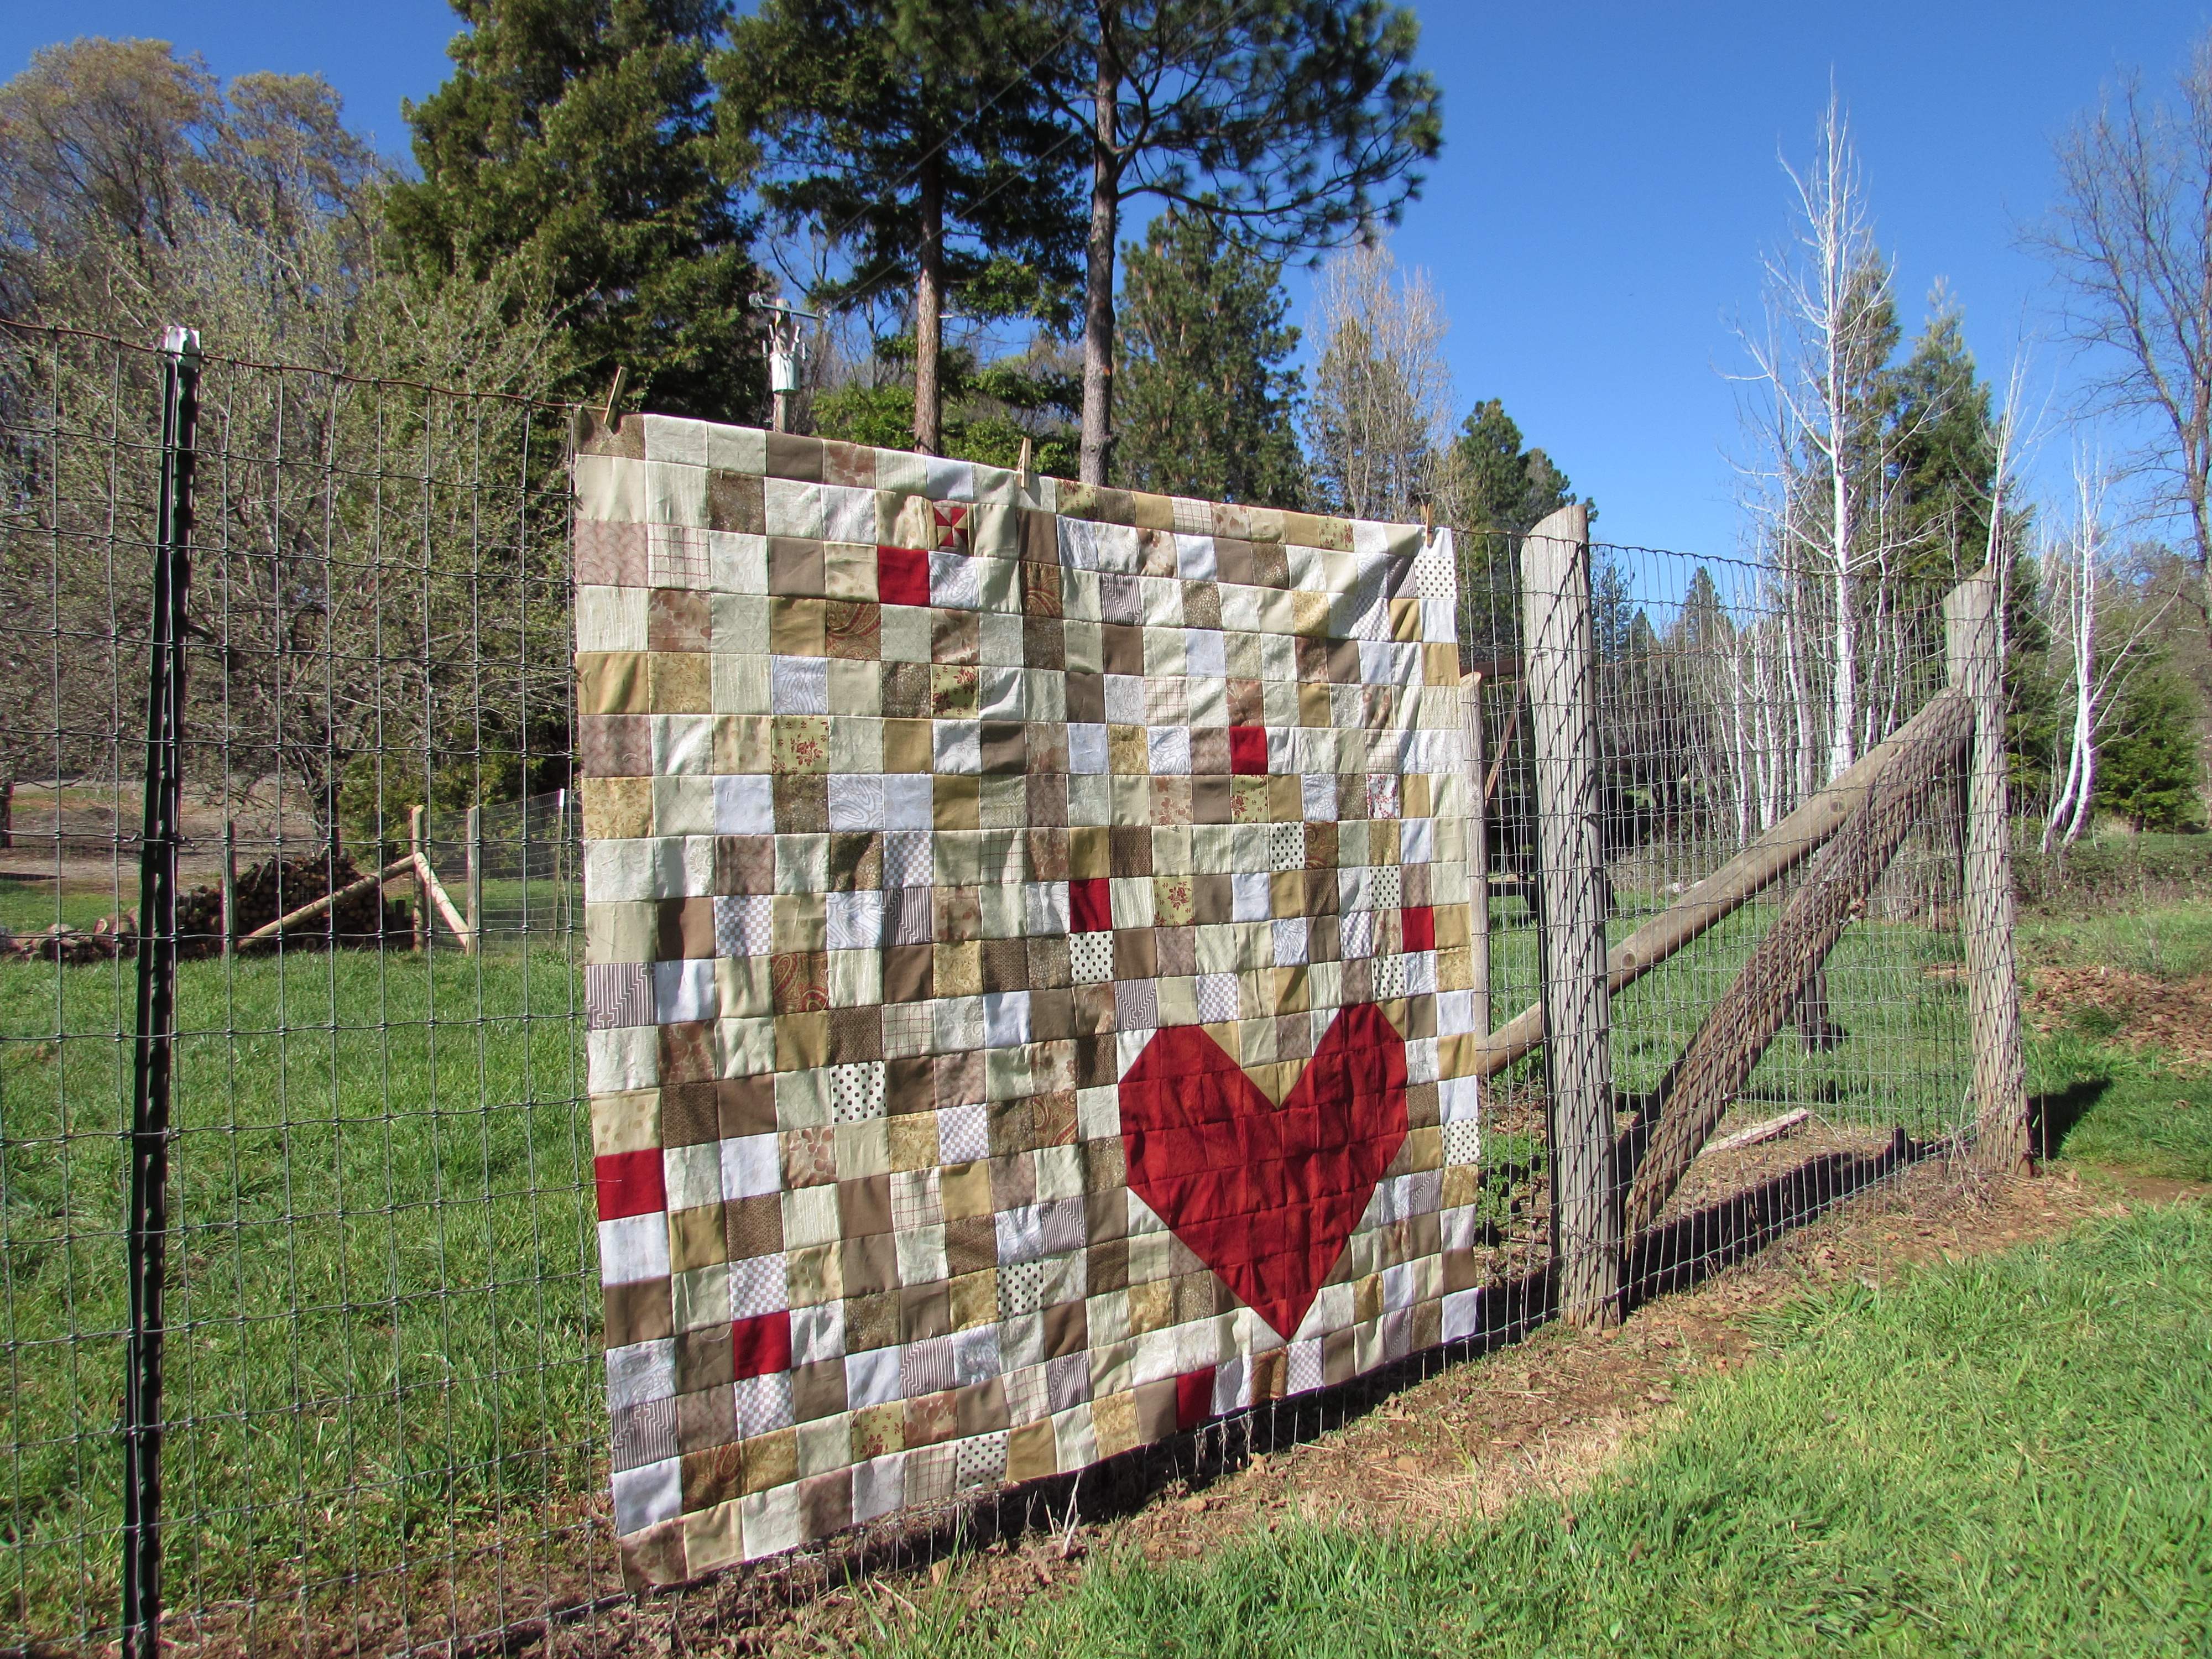
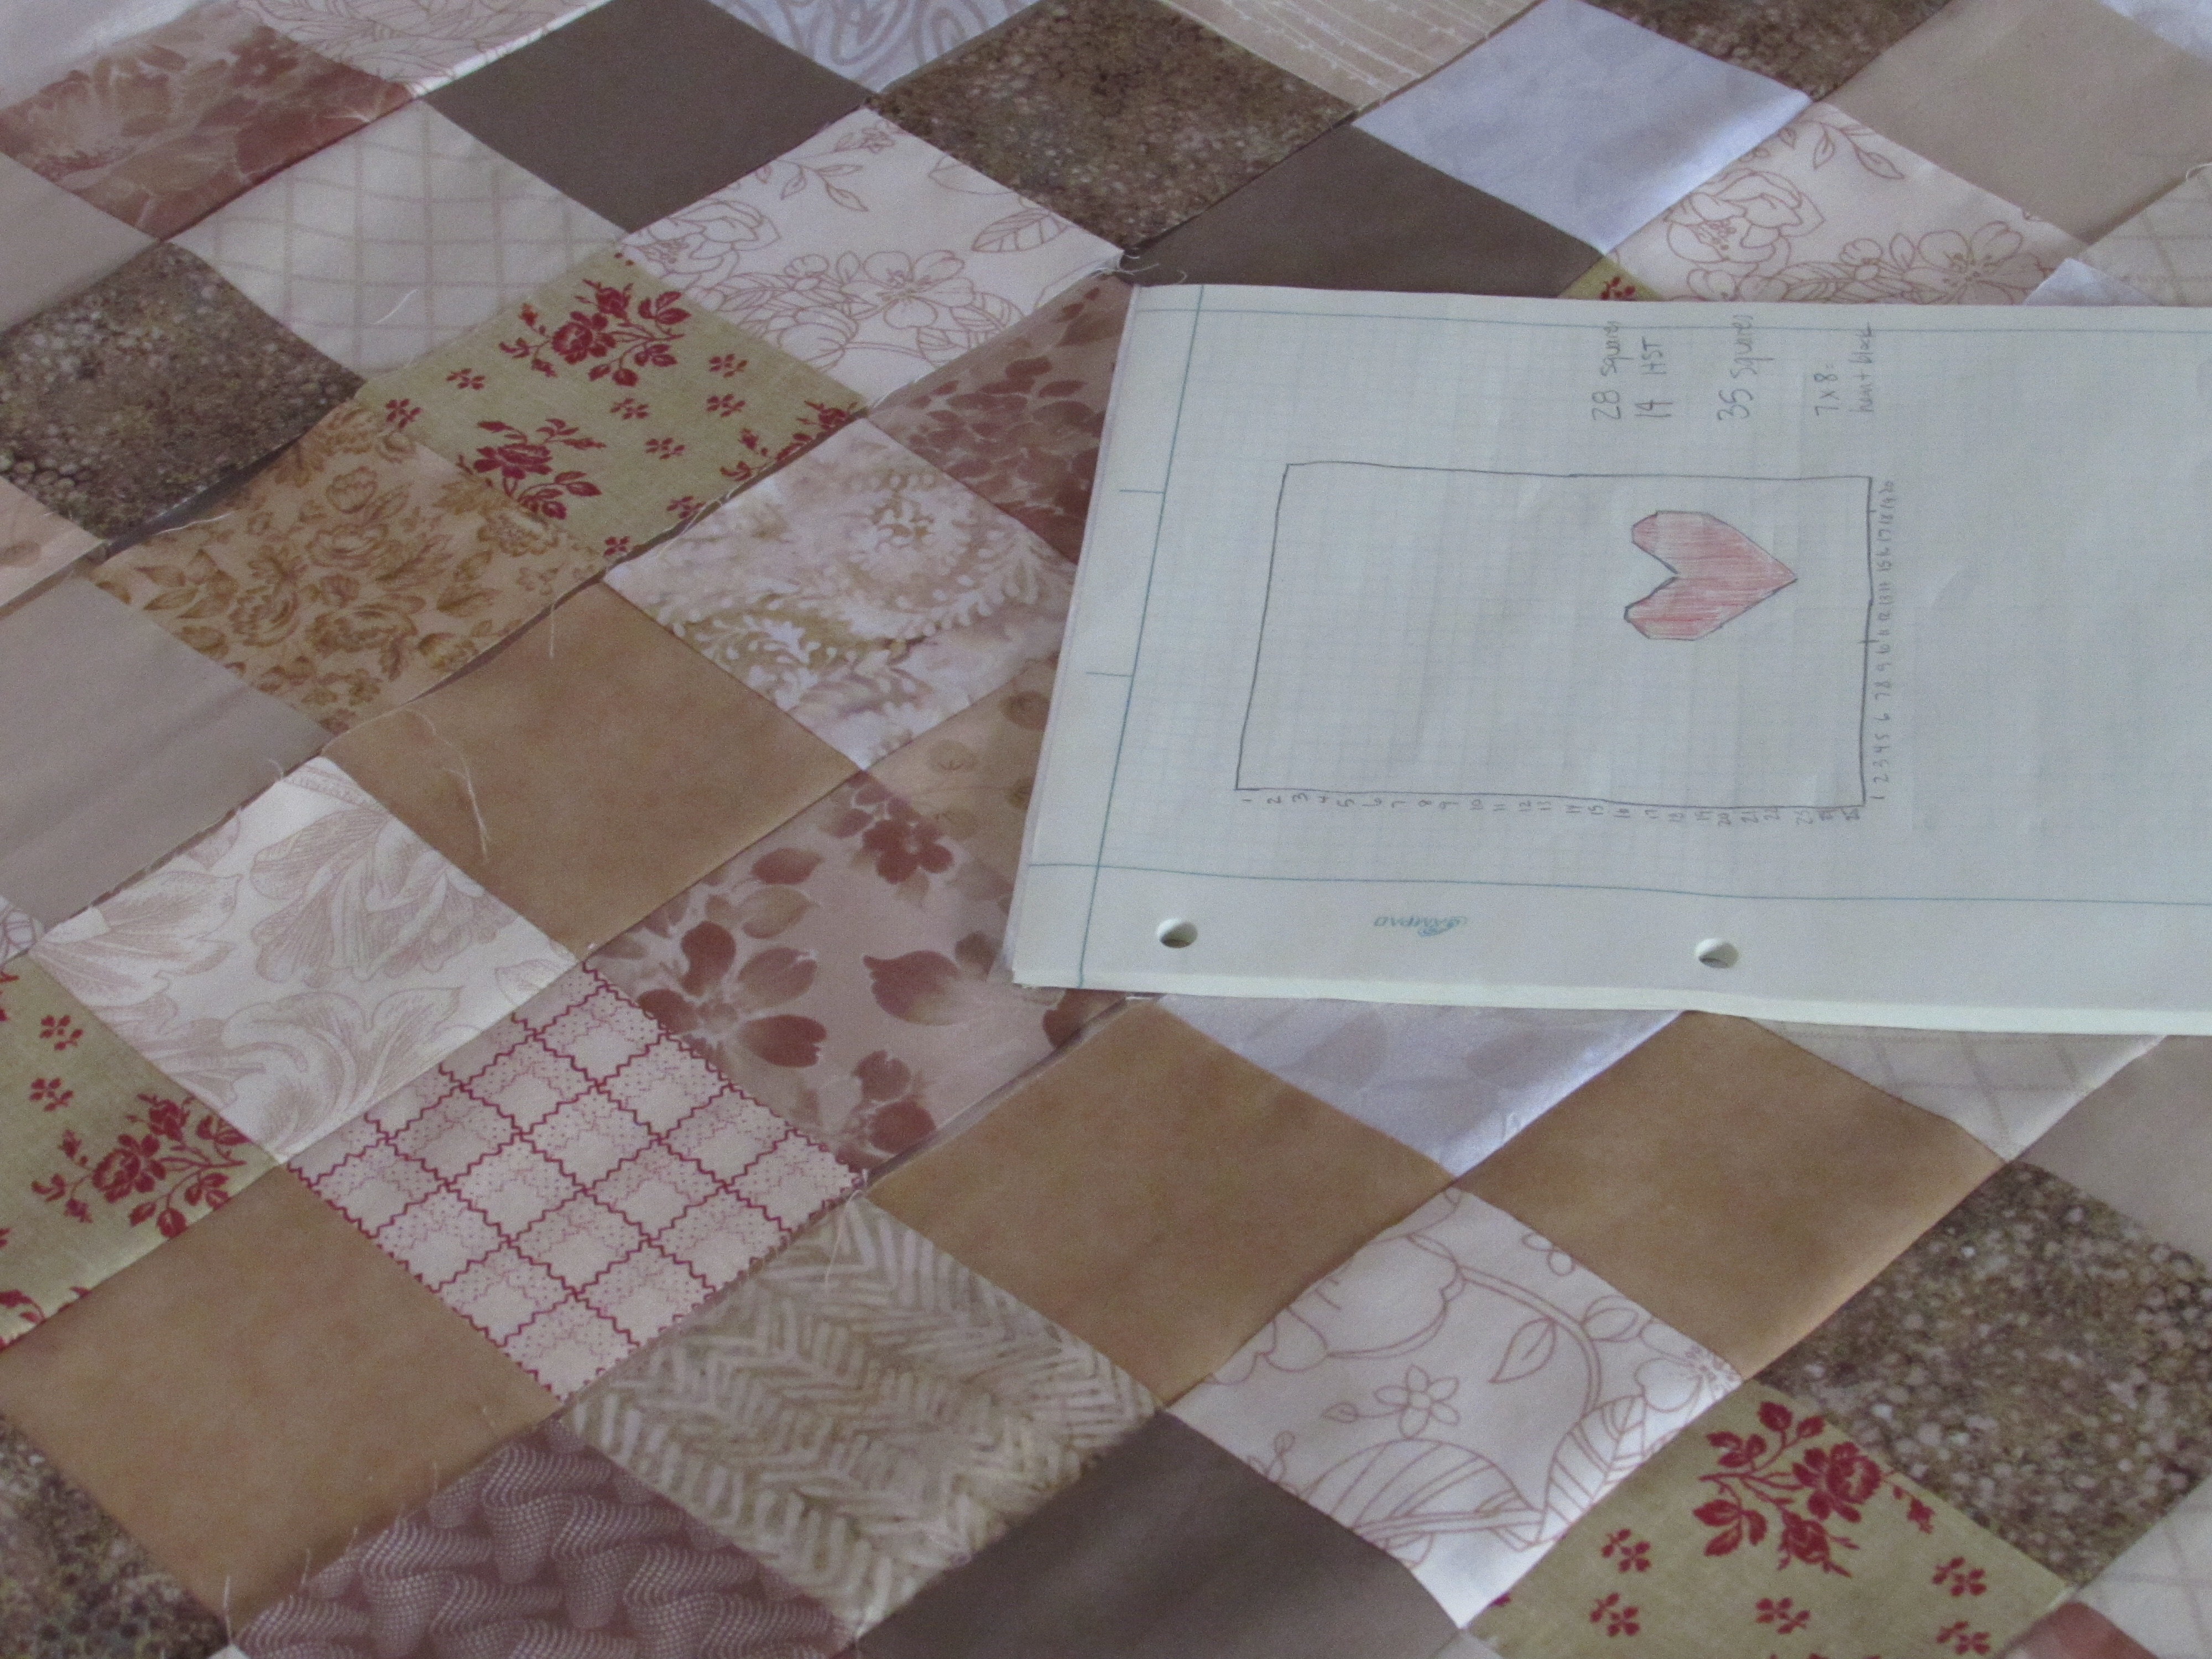
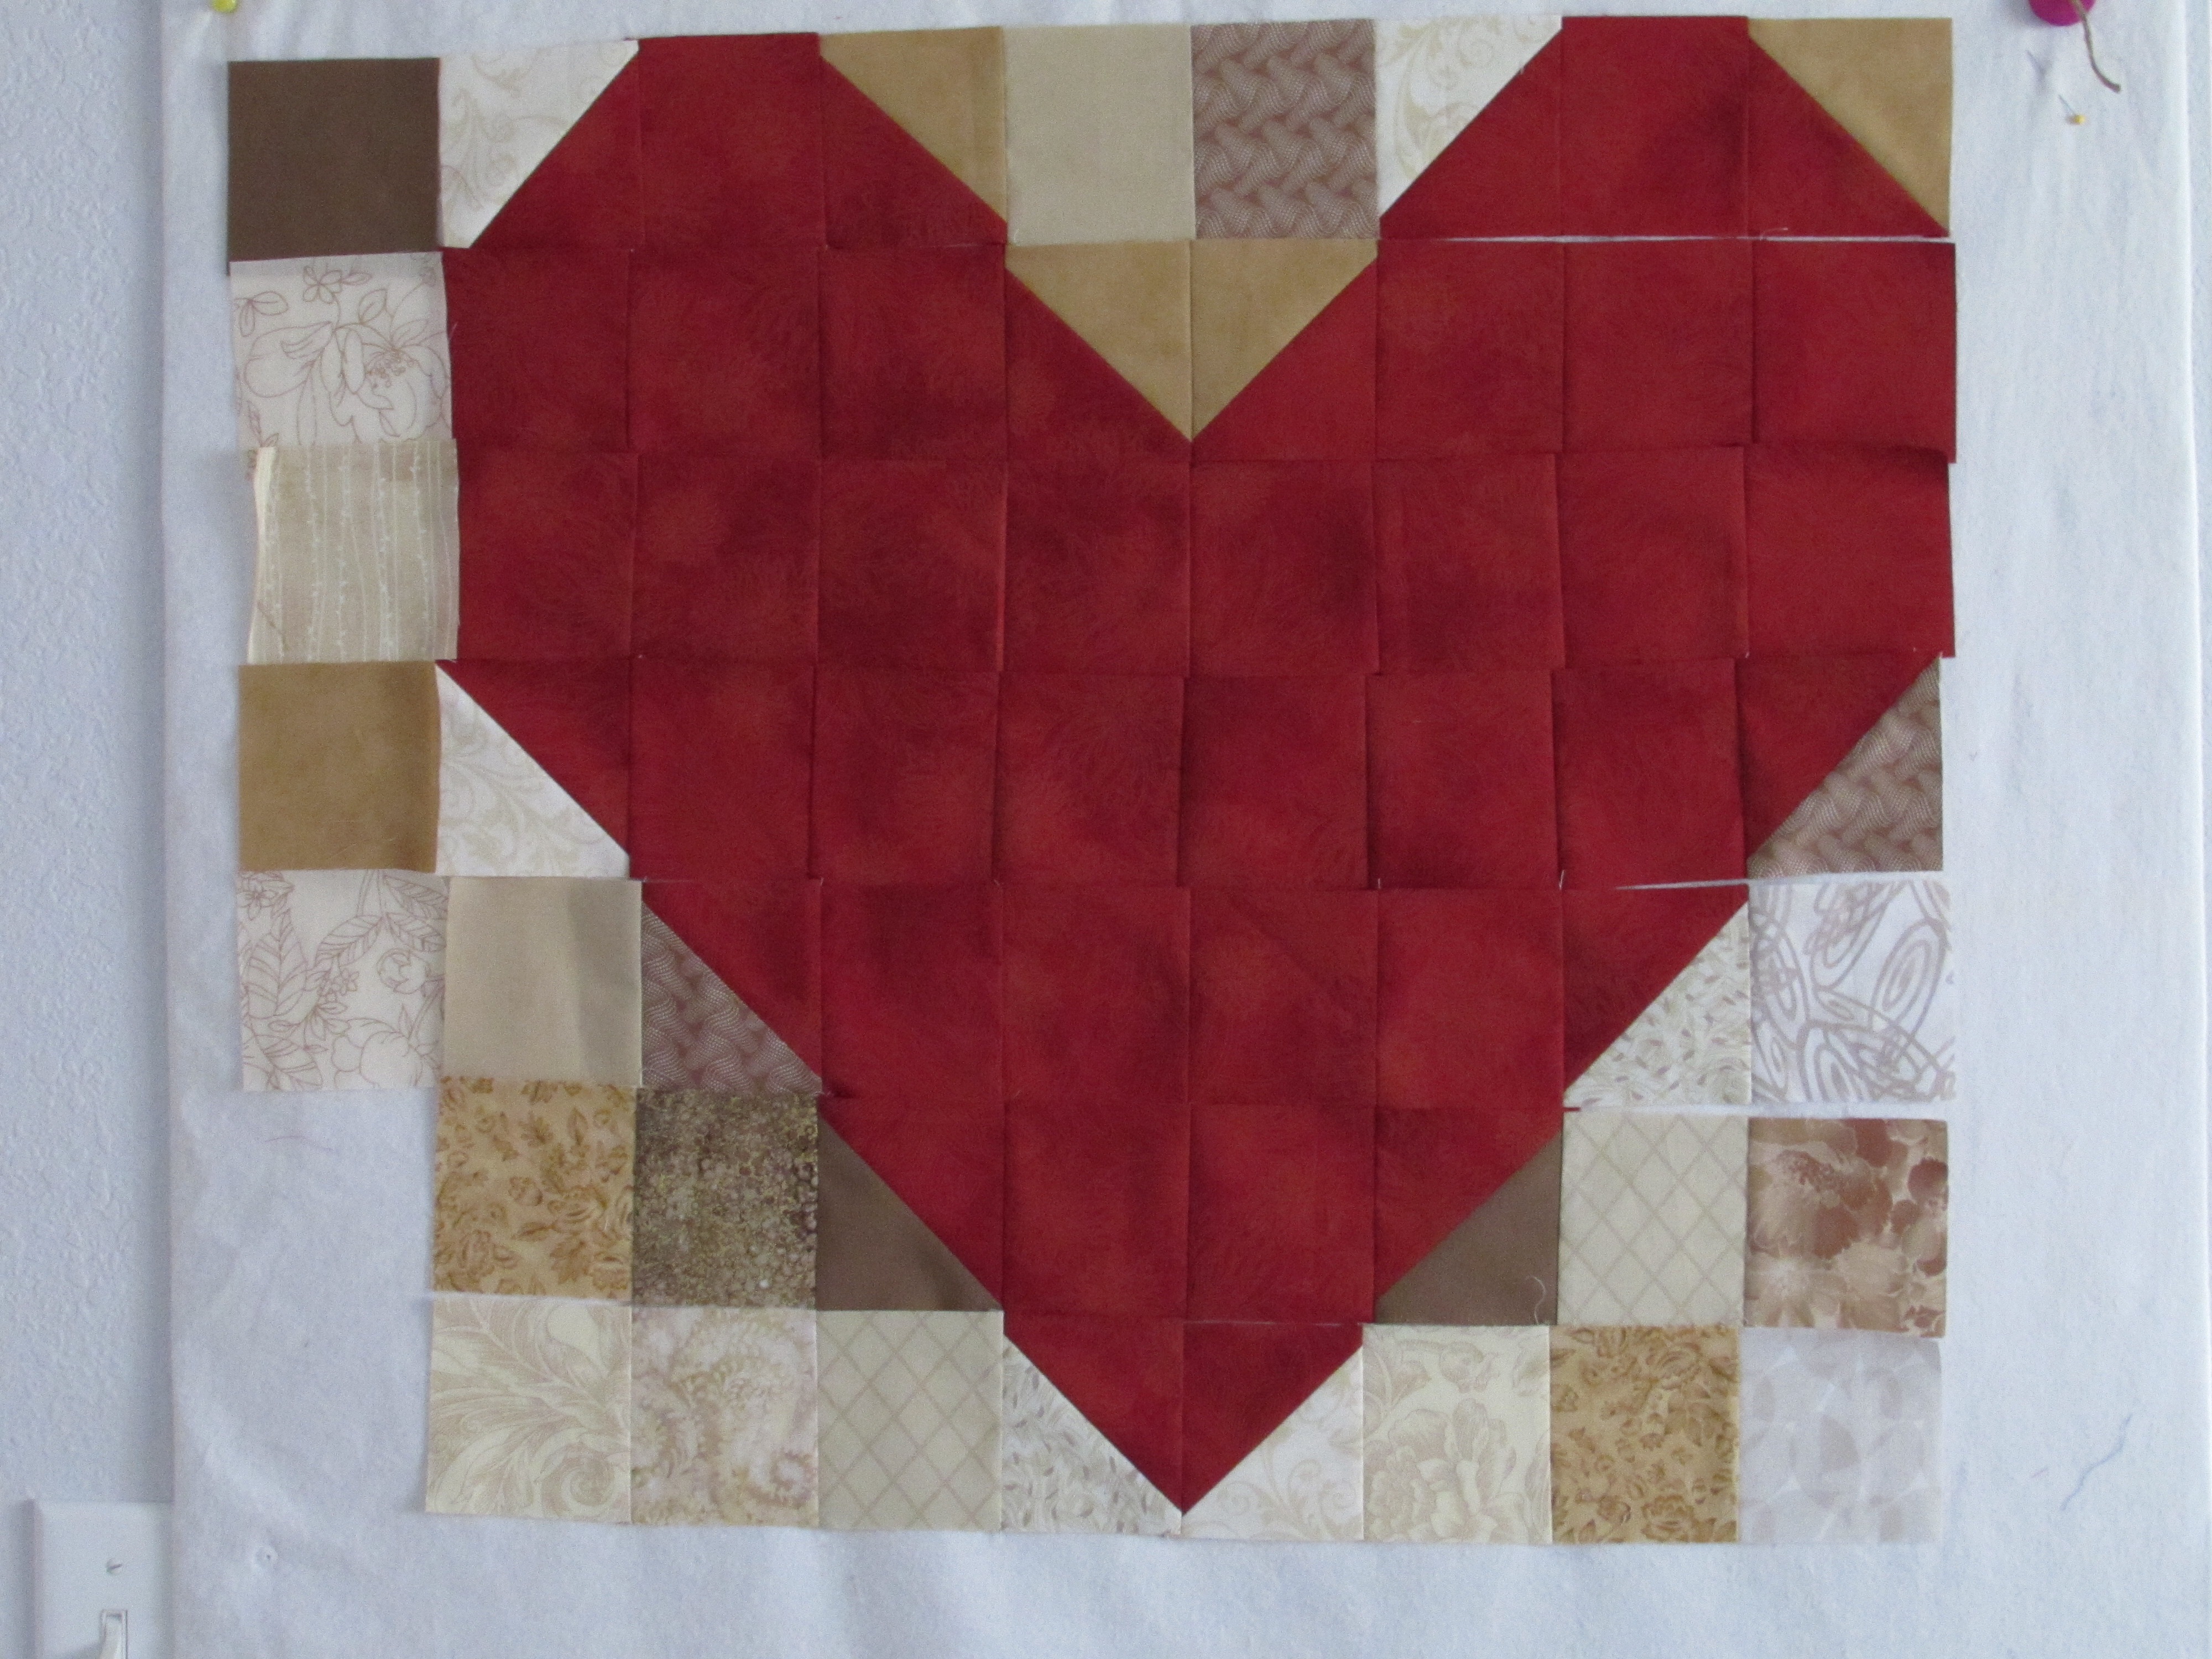
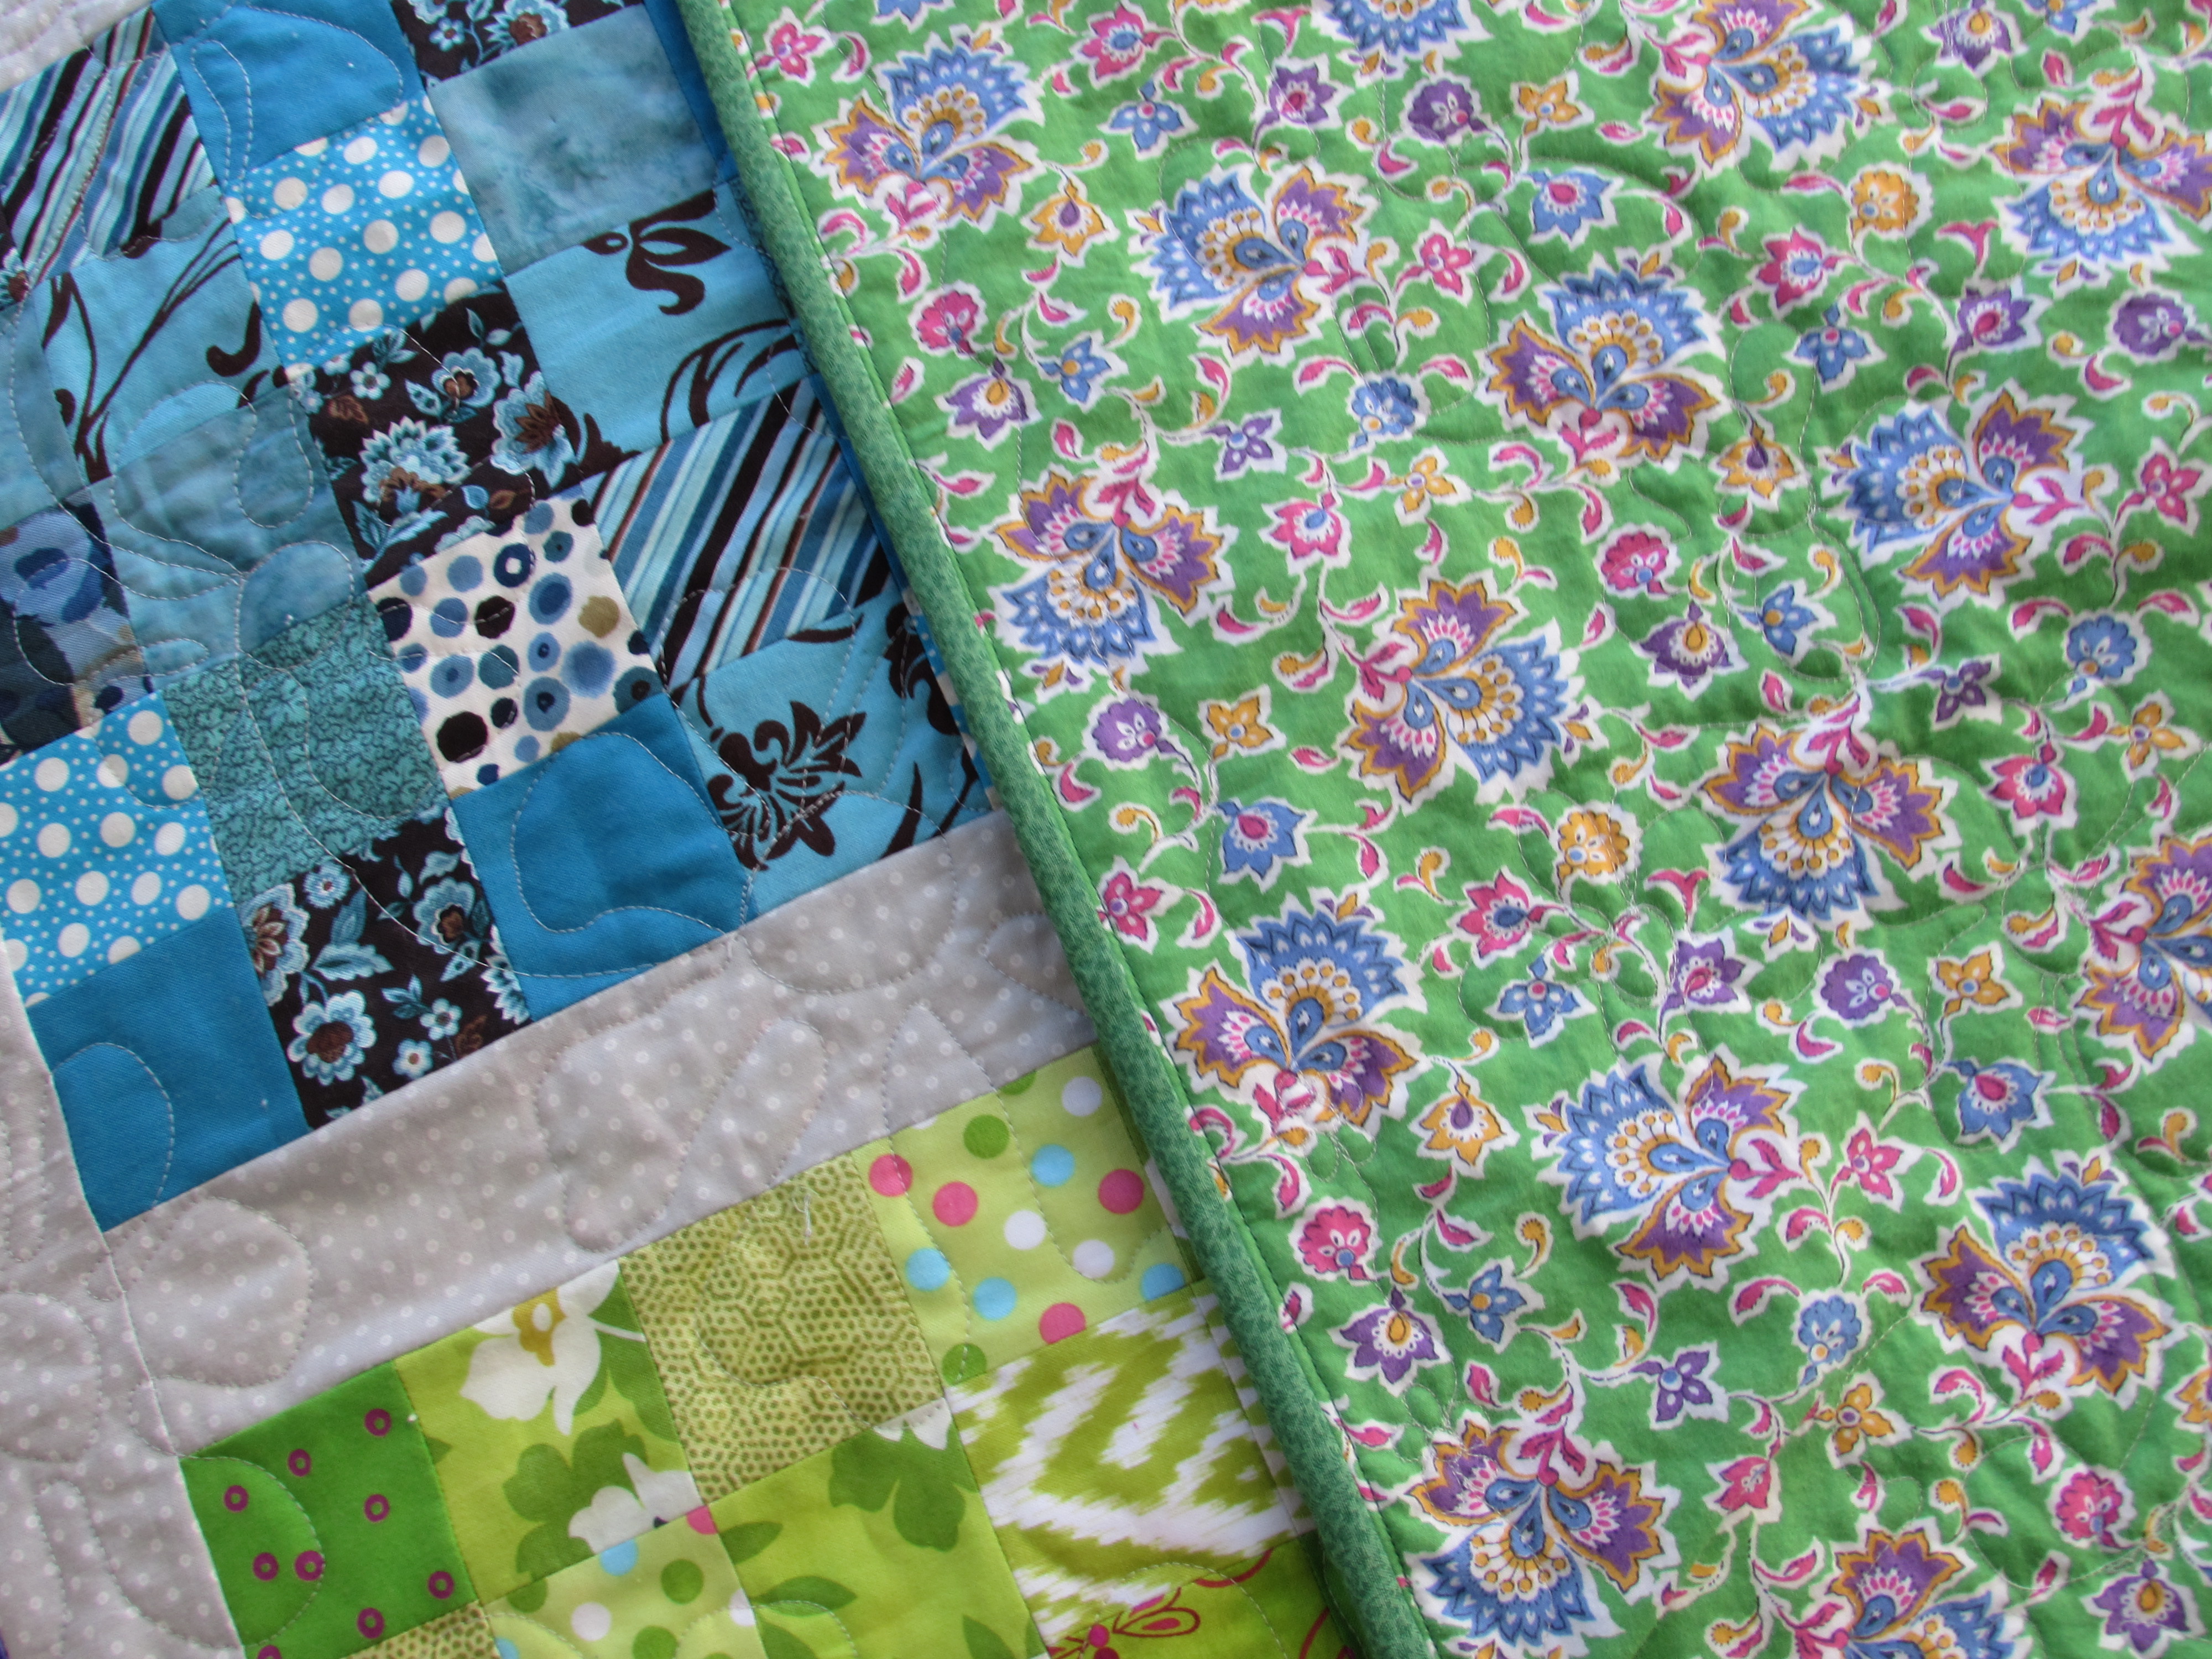
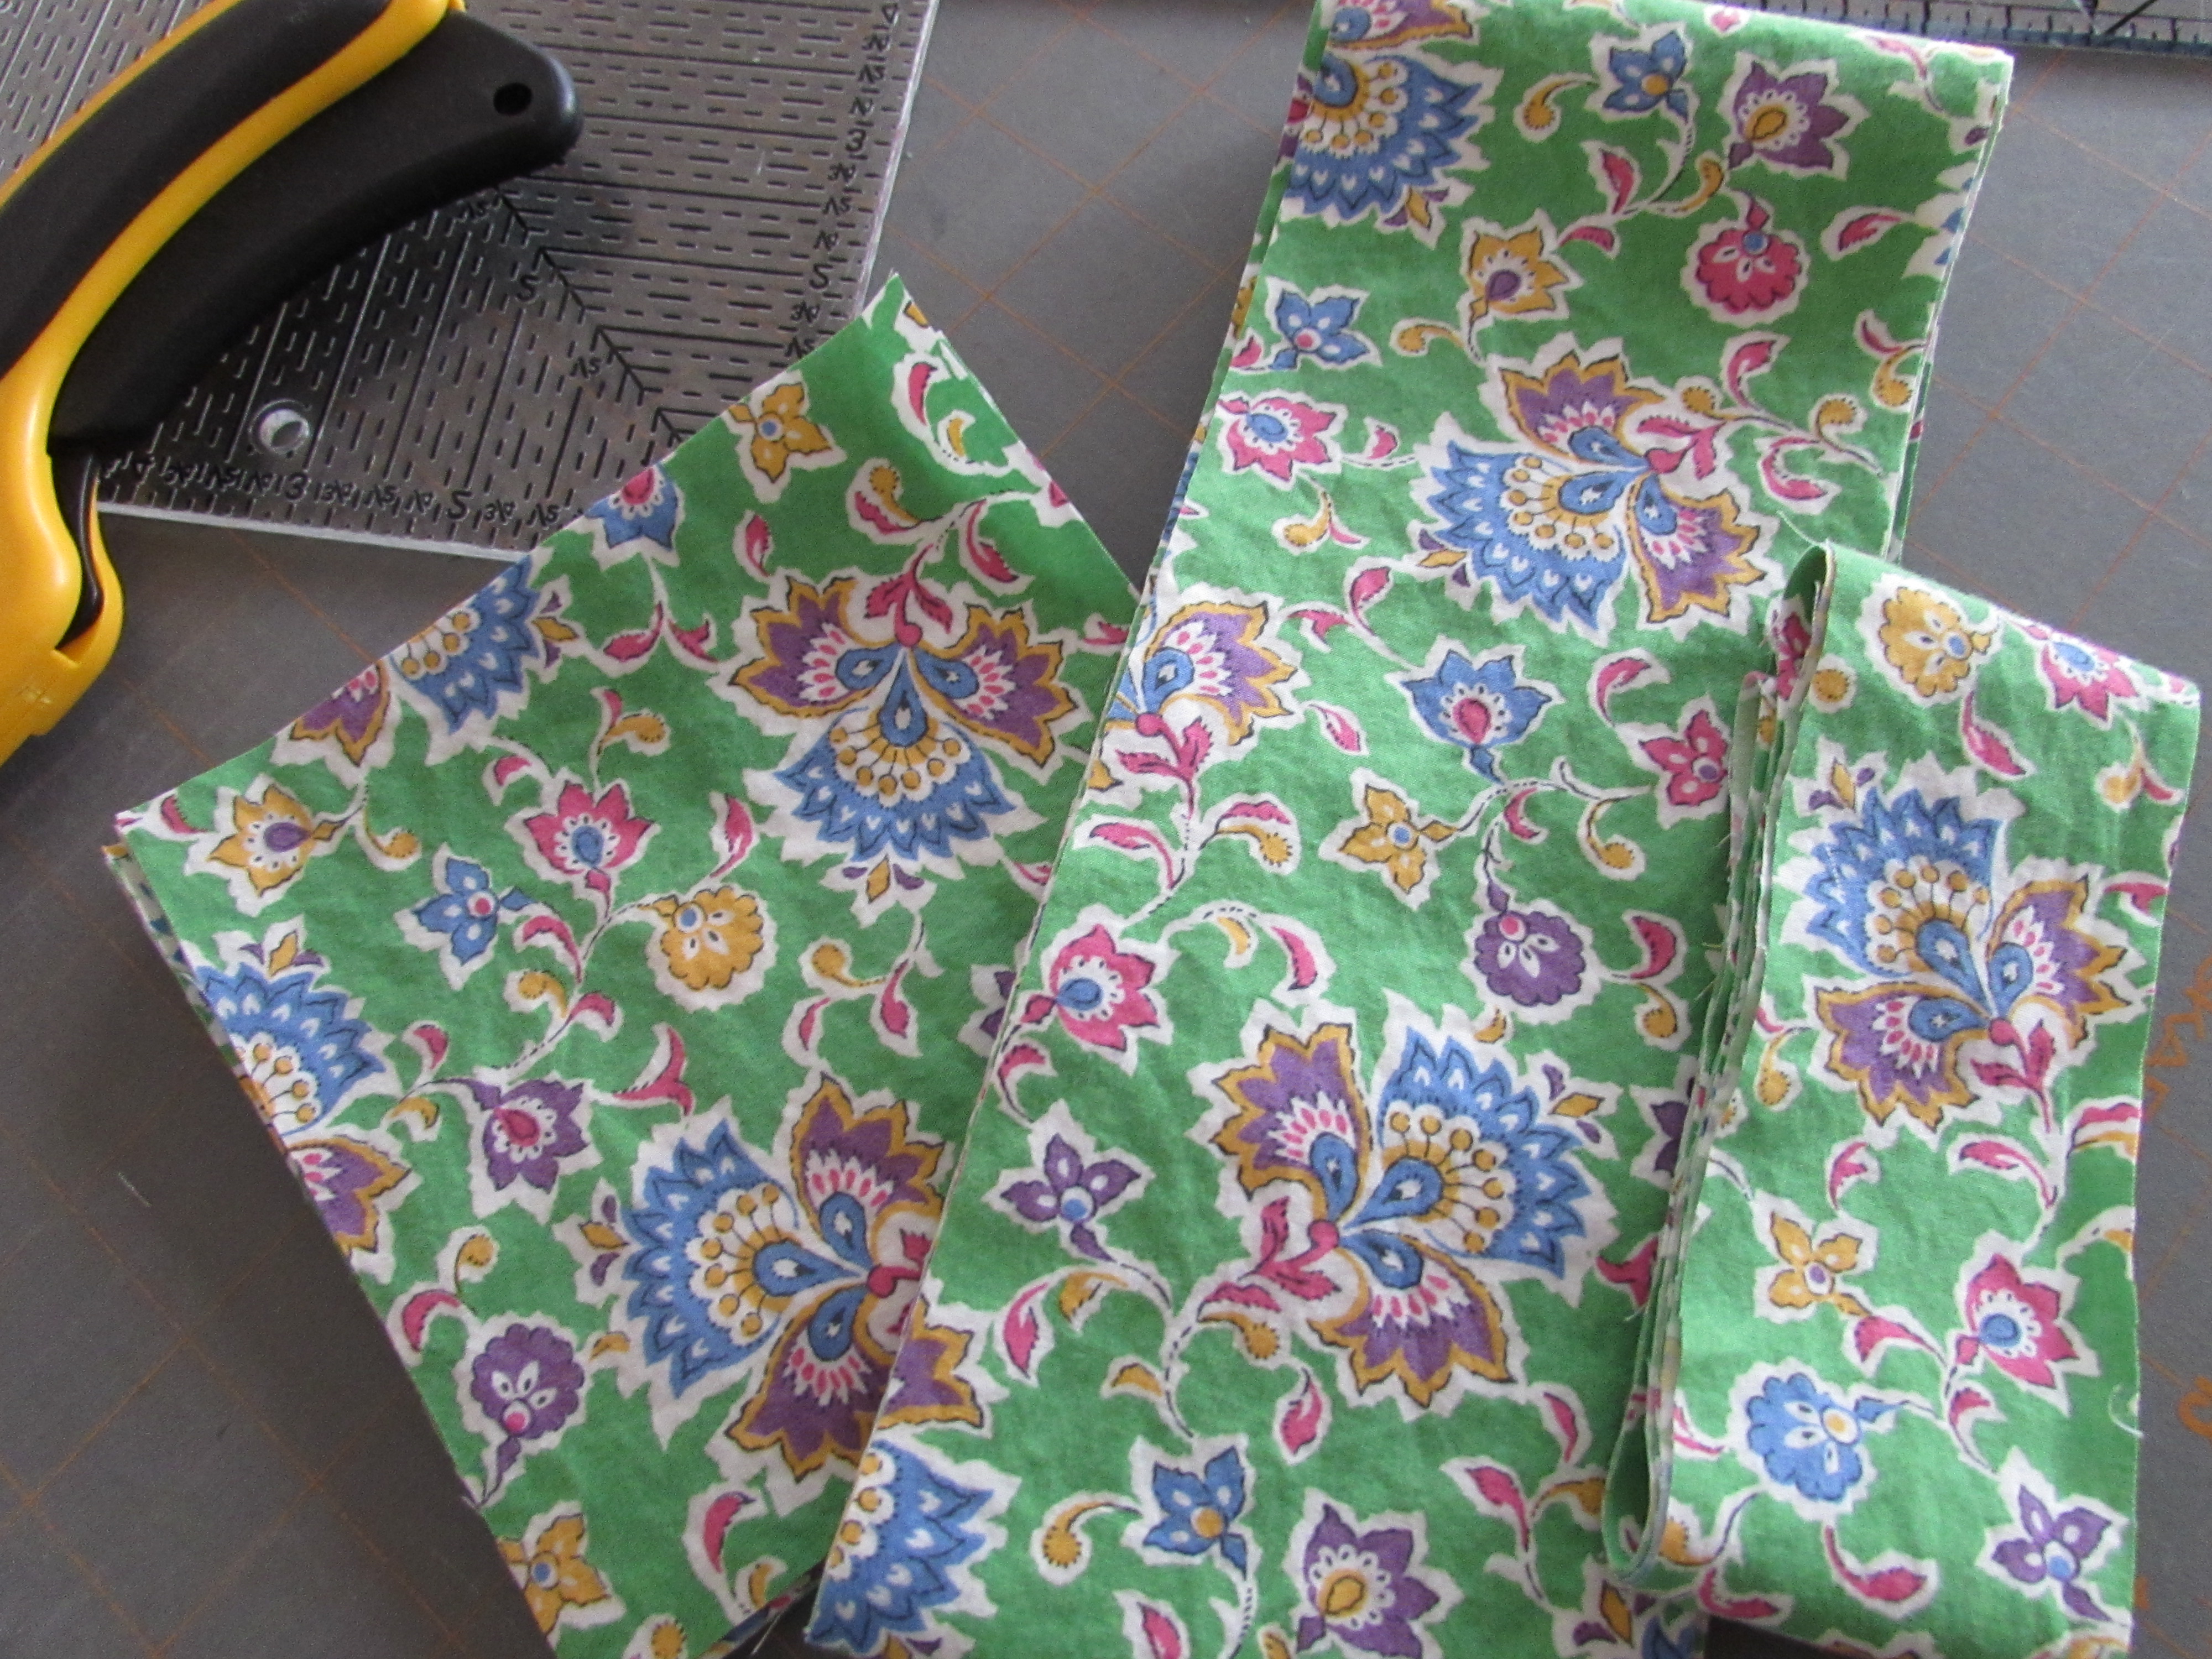
About a year ago, I purchased a scrap bag from an on-line fabric shop. Sorry, I am not positive but I belive it was Alaska Quilting Adventures.  I ended up with loads of strips, probably end cuts from the bolts as she was creating bundles of precuts.  First I cleaned up the strips so they were (relatively) straight, though I did not cut them exactly the same width. Next, I sewed a set of them together to make a long rectangle of fabric. I cut that into three sections. I then played with more of the strips, creating blocks to add between the sections. Kind of hard to describe, but it was a very simple process. As I have mentioned before, I usually sew from a pattern or tend to copy other’s ideas for inspiration. This was very freeing. I want to try this again with a Kaffe Fassett jelly roll of shot cottons that I have. Here is the resulting table runner.

runner
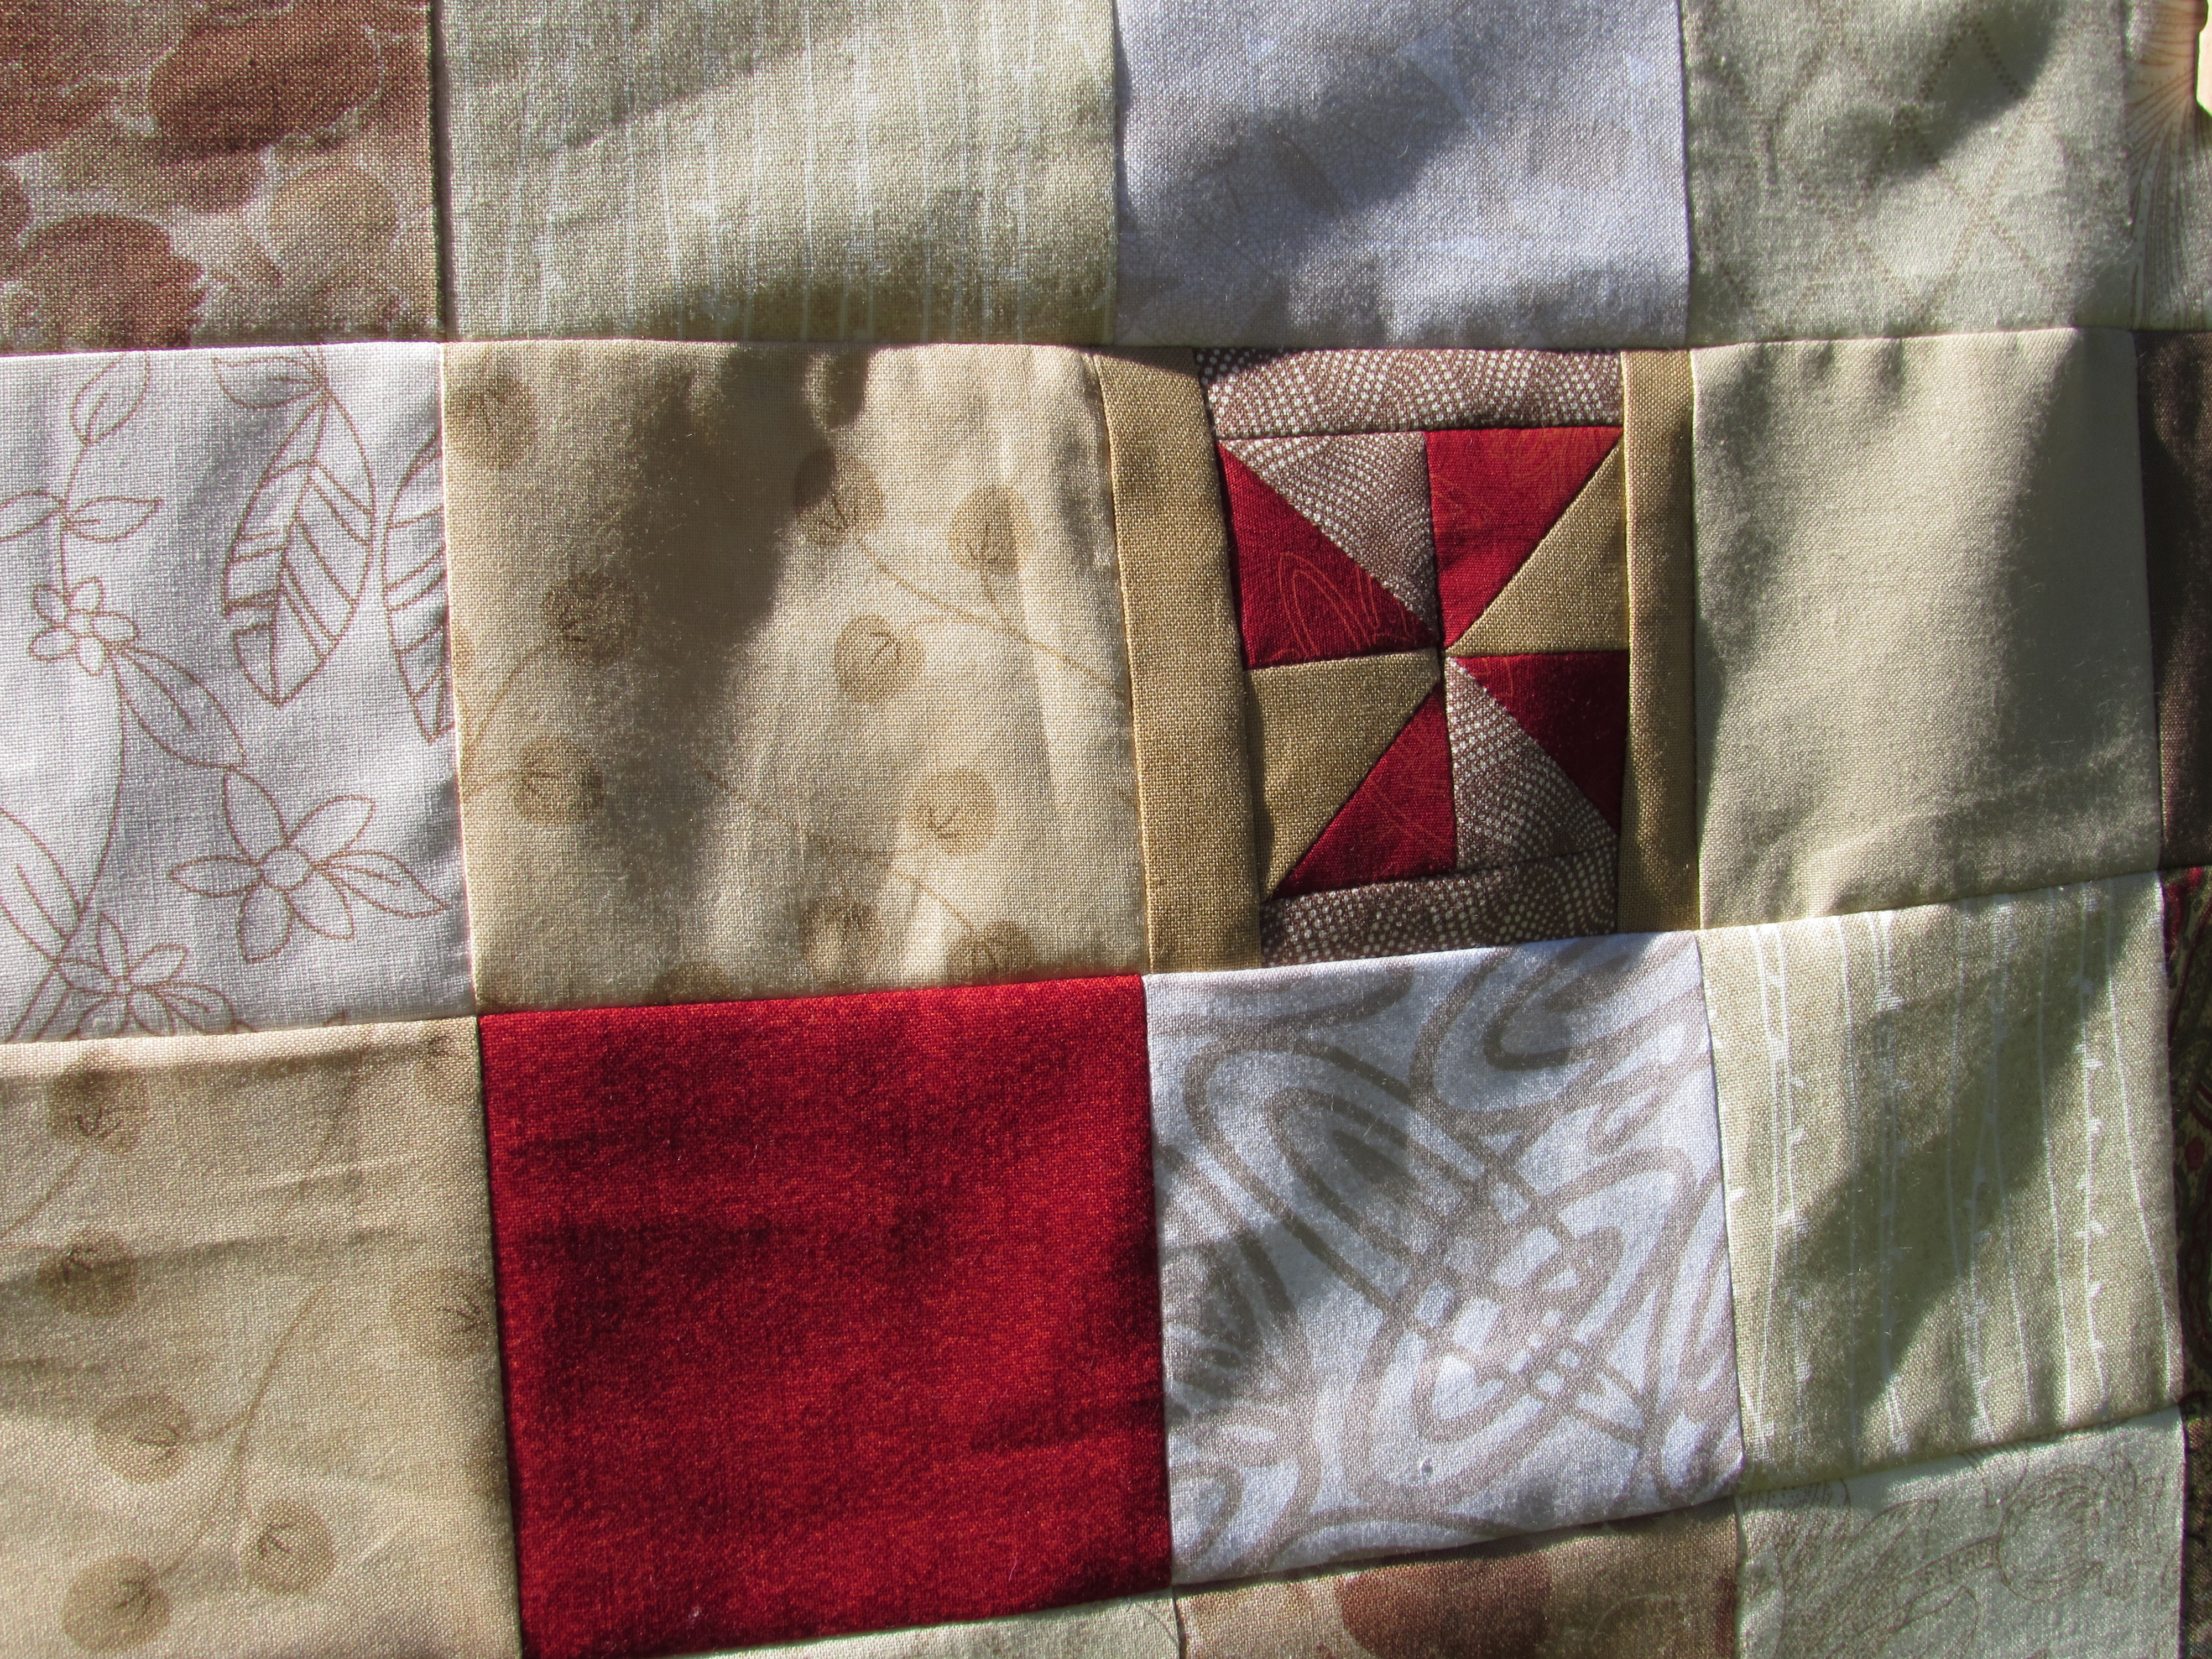
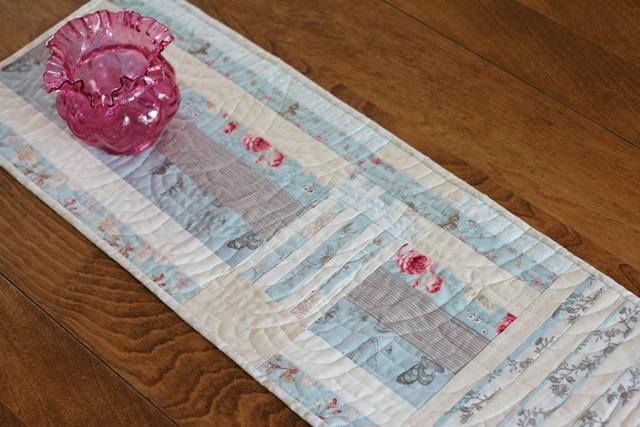
The colors are soft and soothing.  I had fun creating the block in the center which has a bit of extra detail in the piecing.

table runner detail
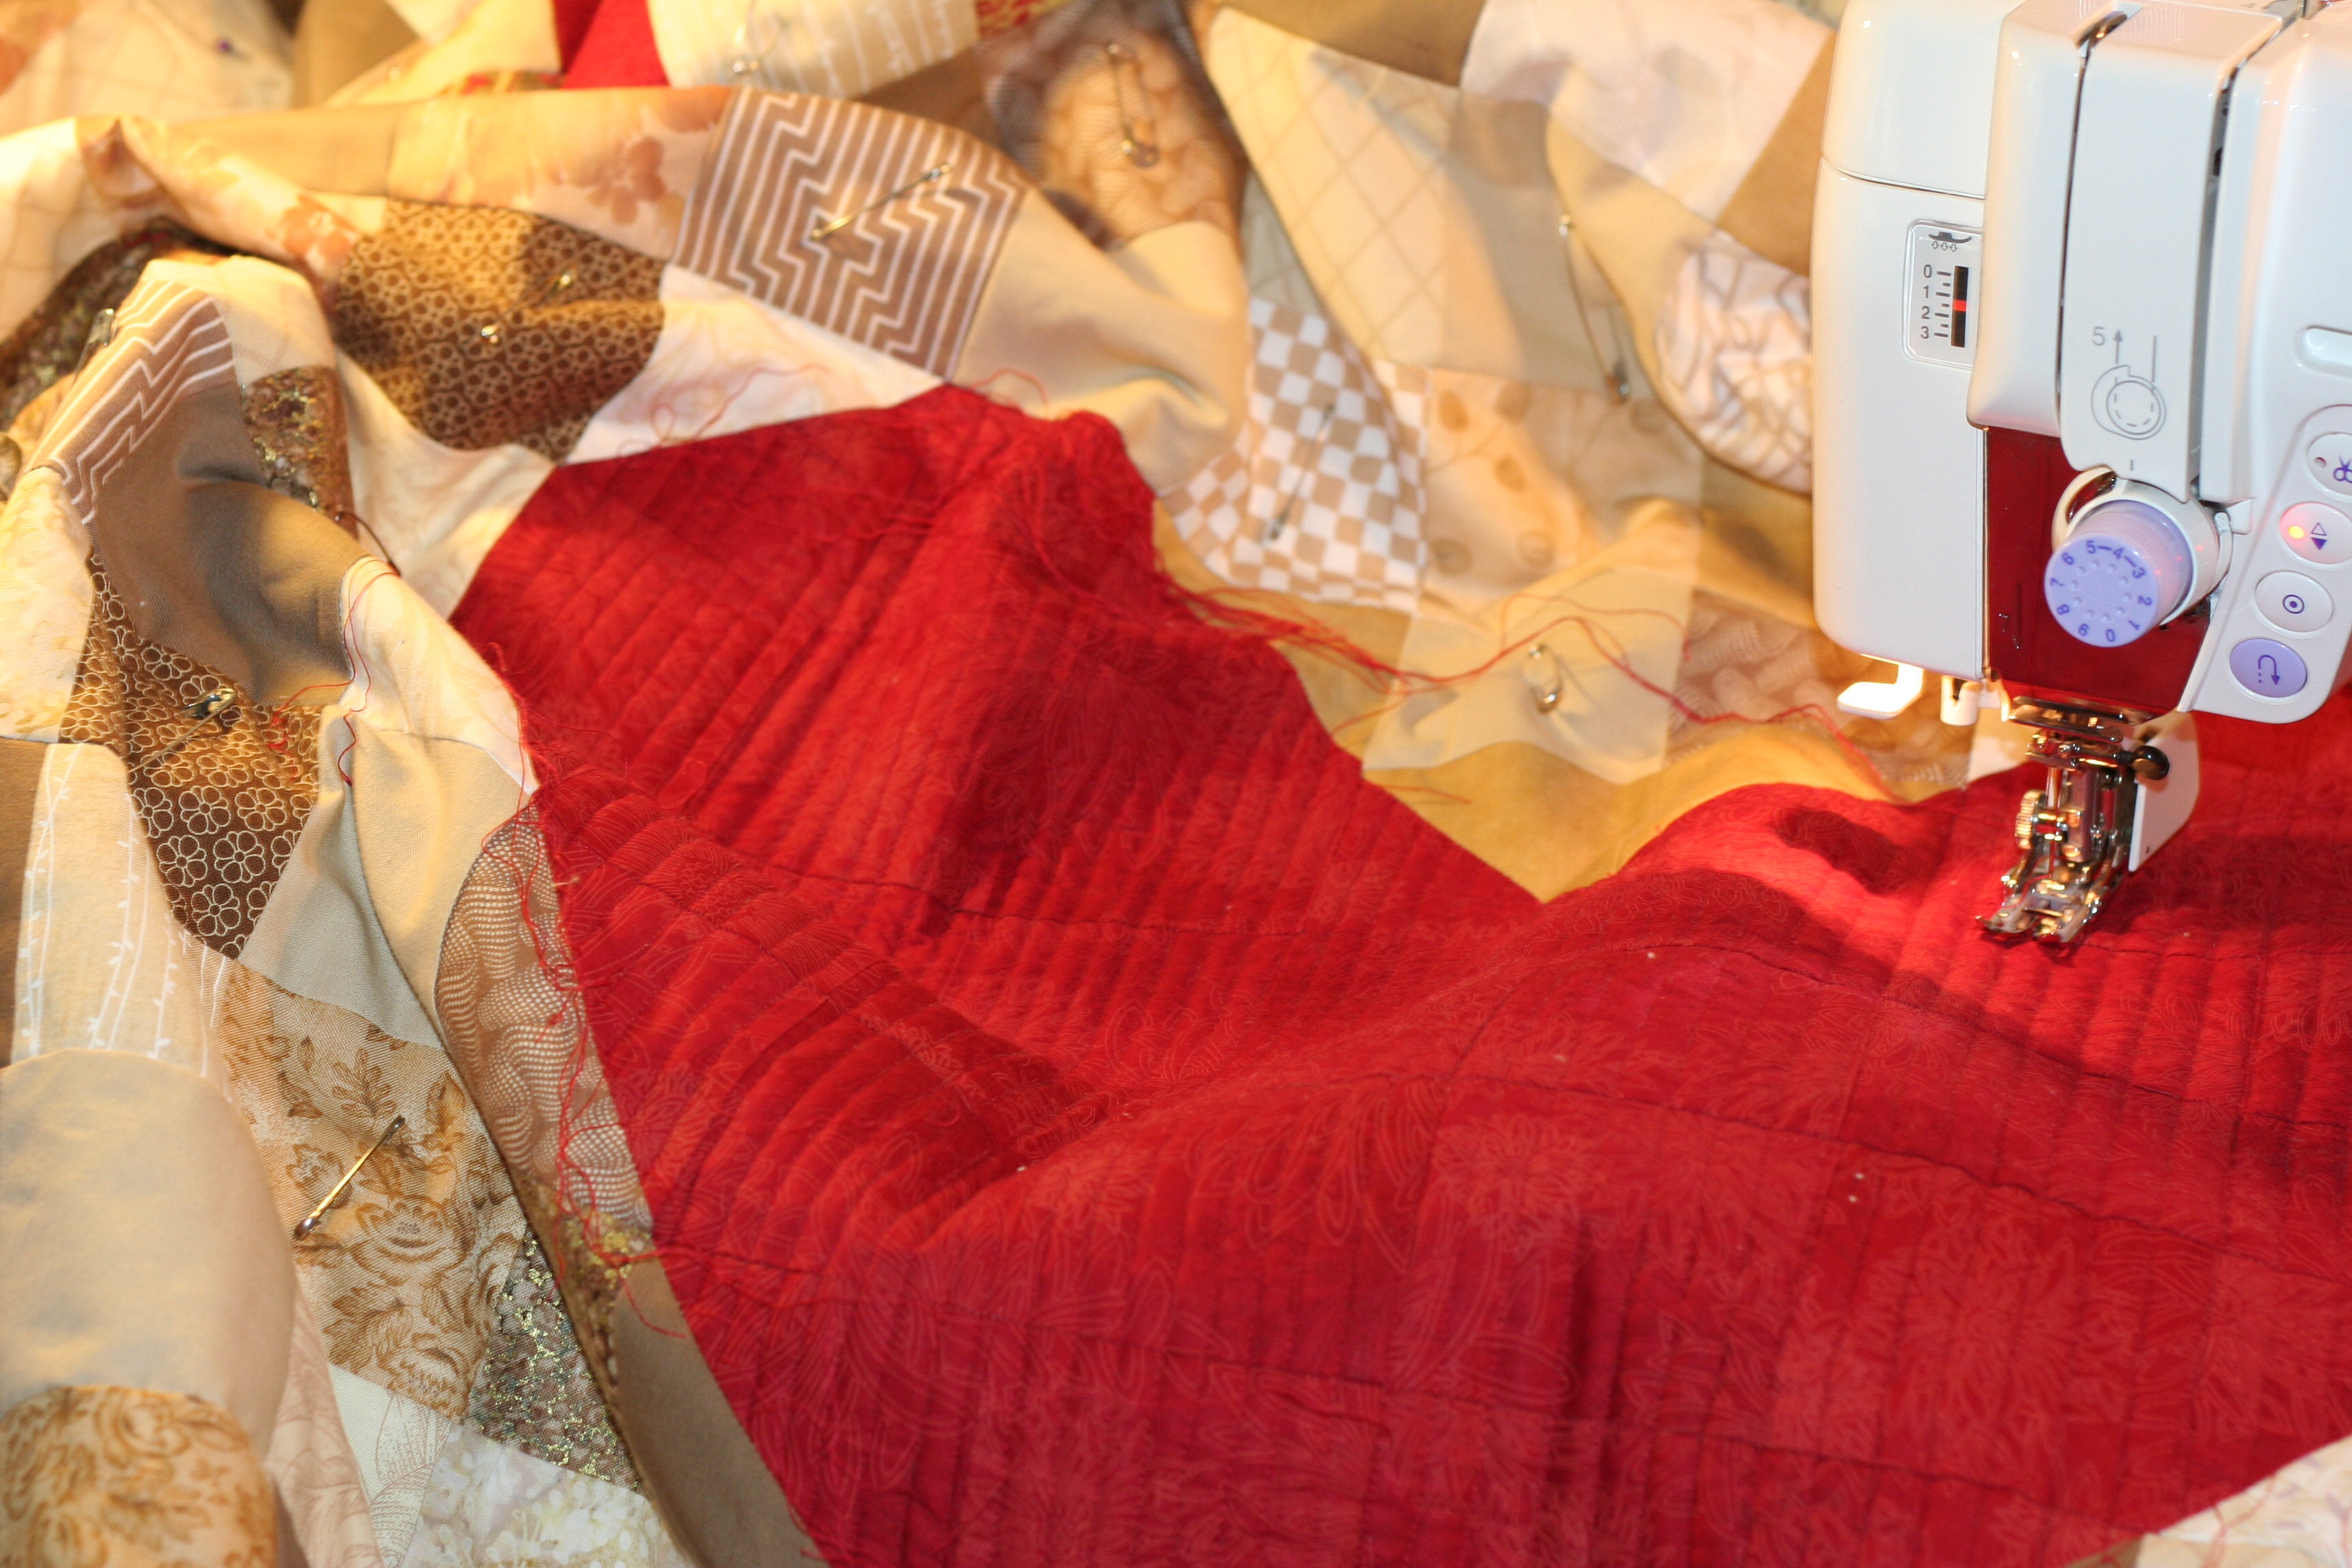
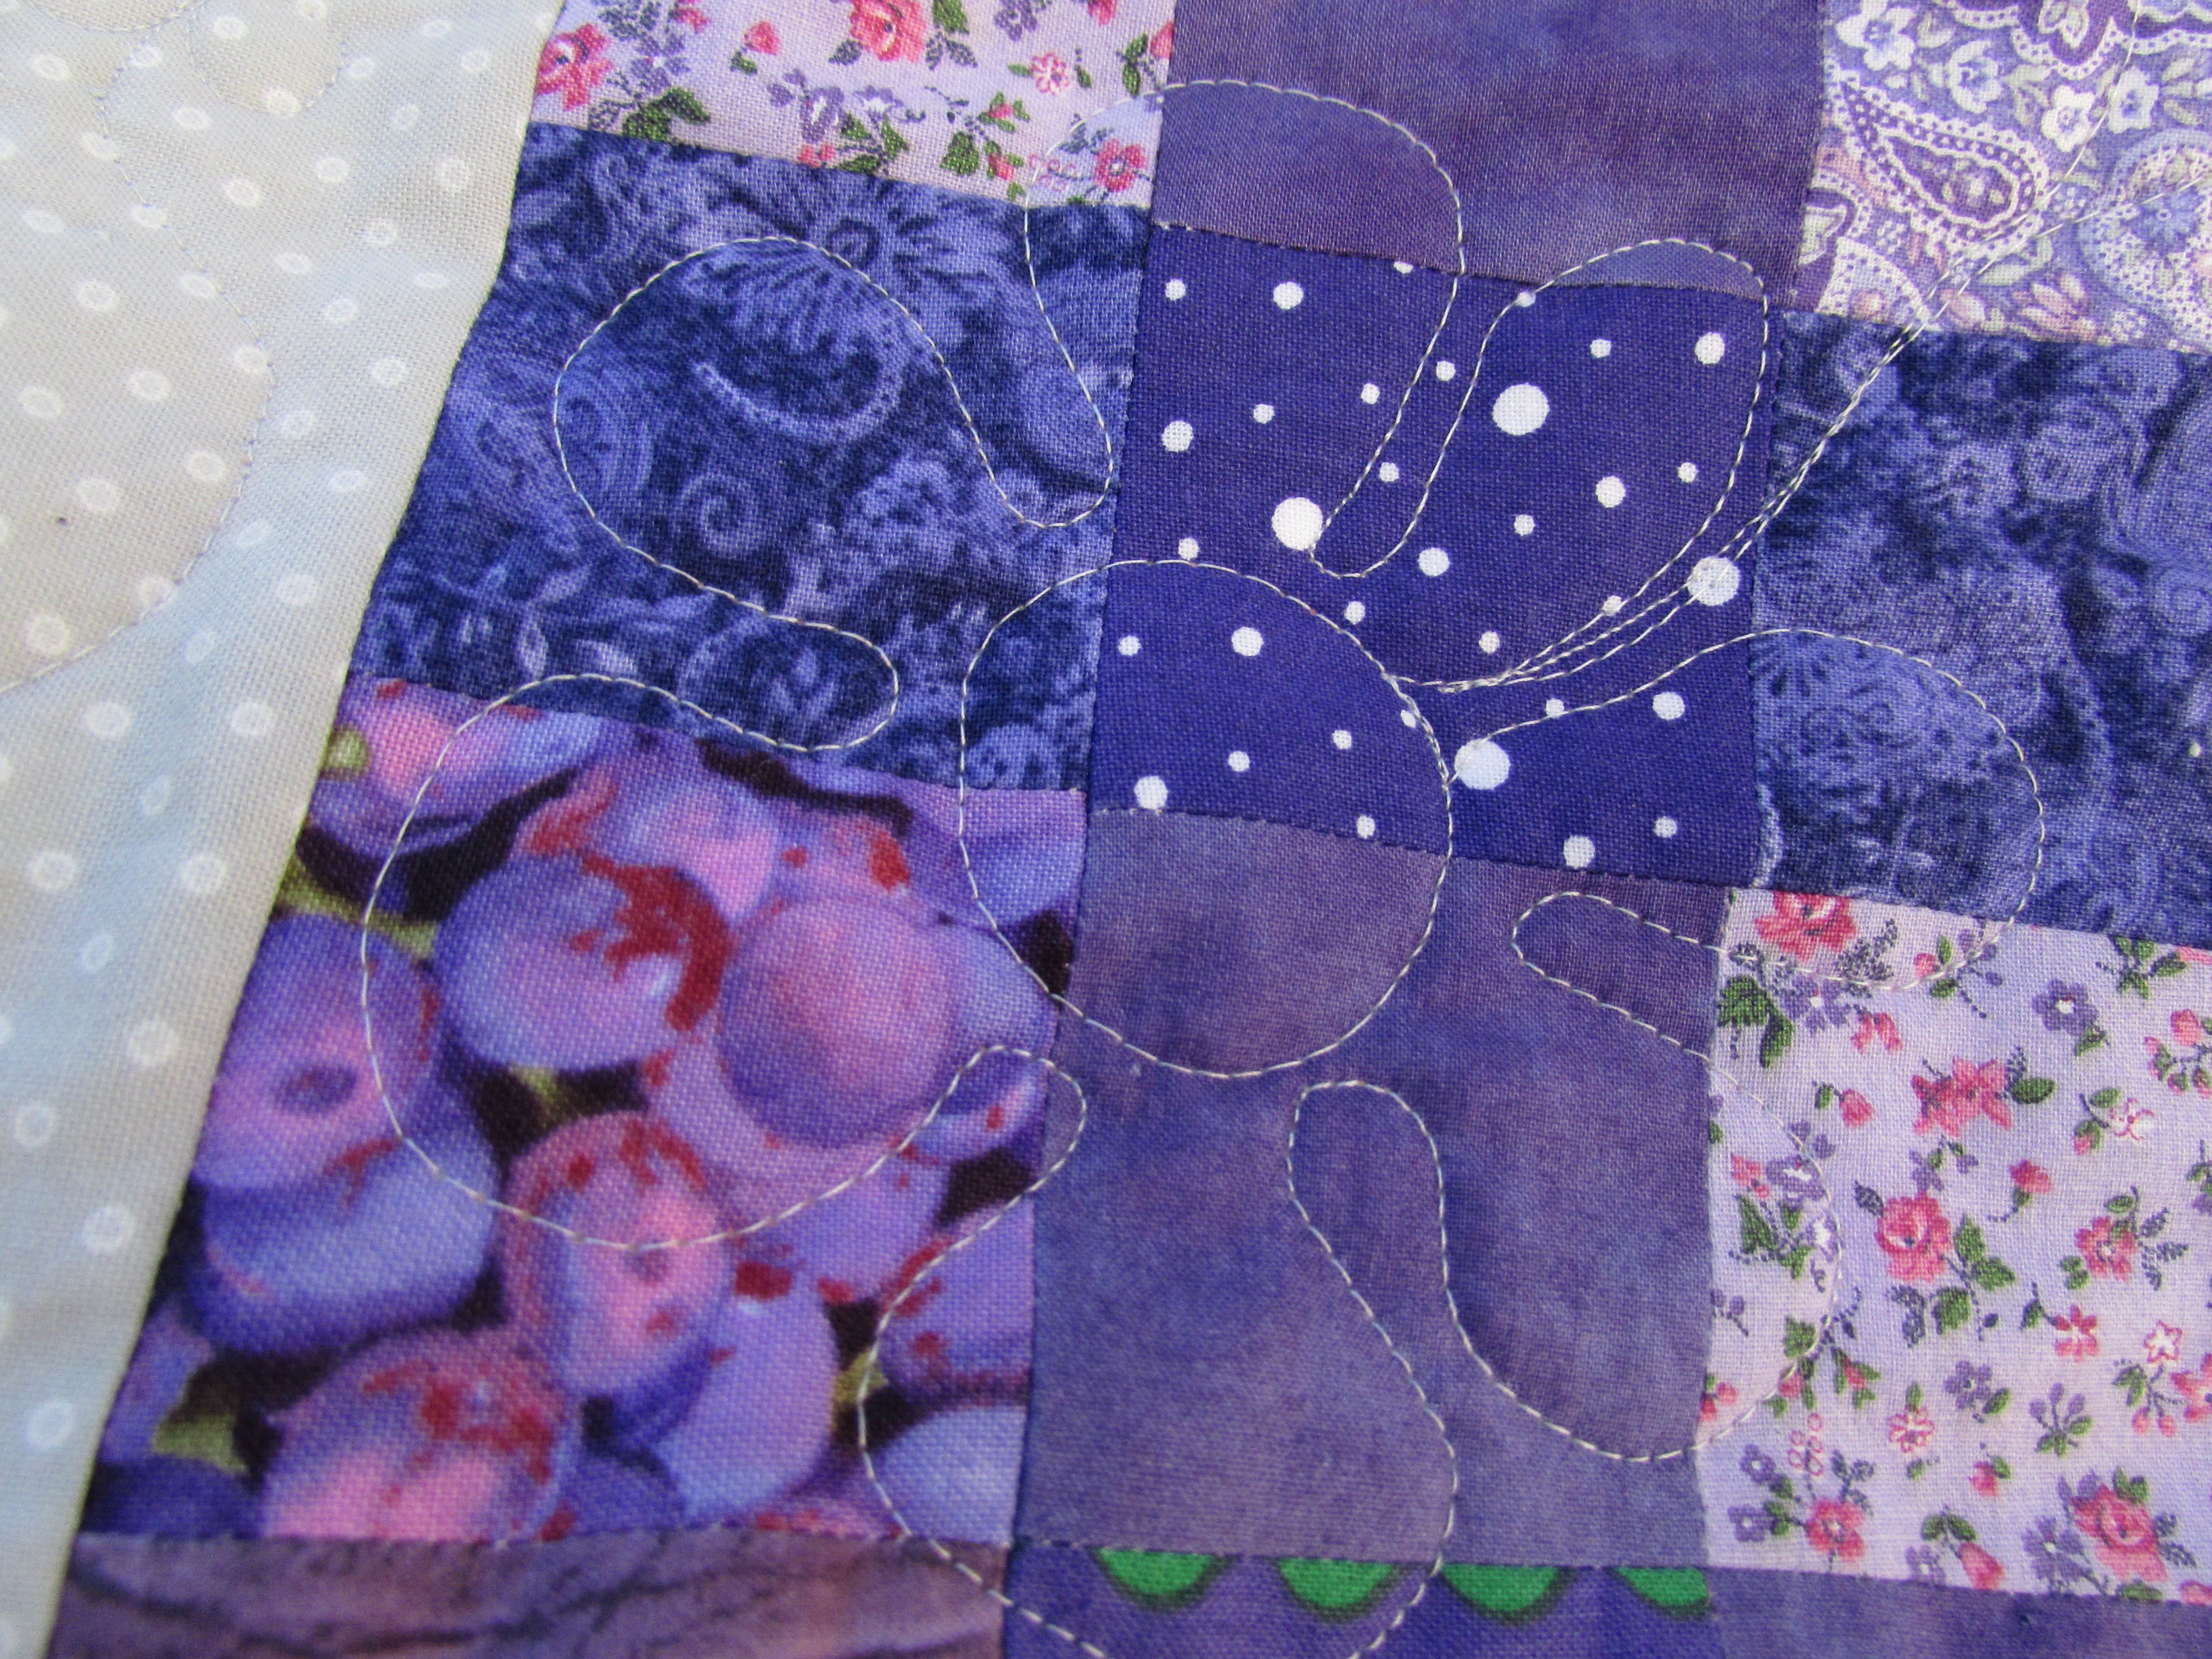
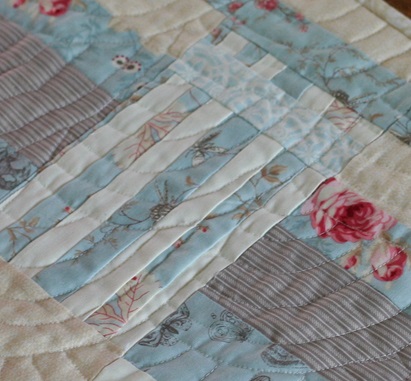
When I was ready to quilt it I decided to use something with curved lines to offset the straight lines of the piecing. I chose the Baptist Fan pattern. I had not done this before so I drew it on newspaper with a sharpie until it was comfortable and then sewed a few fans on a practice piece. It is really a simple shape to FMQ. I didn’t trace it on the runner before quilting. If I had, I am sure my lines would have less wobble.

image3 (3)

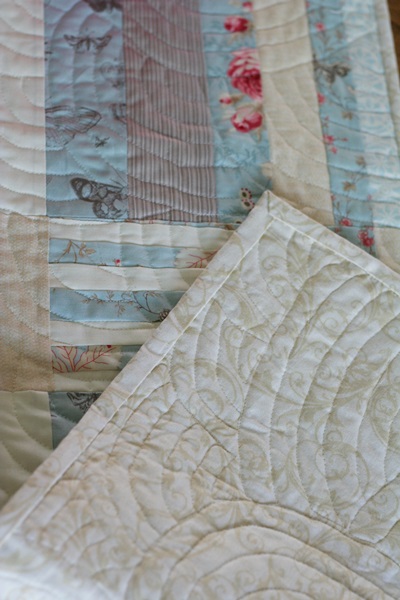
It is backed and bound with the same fabric. Not sure what it was but it used up some of my stash which is always a good thing. Overall, I am happy with the result and it was a huge learning experience, both in piecing and quilting. Yay!

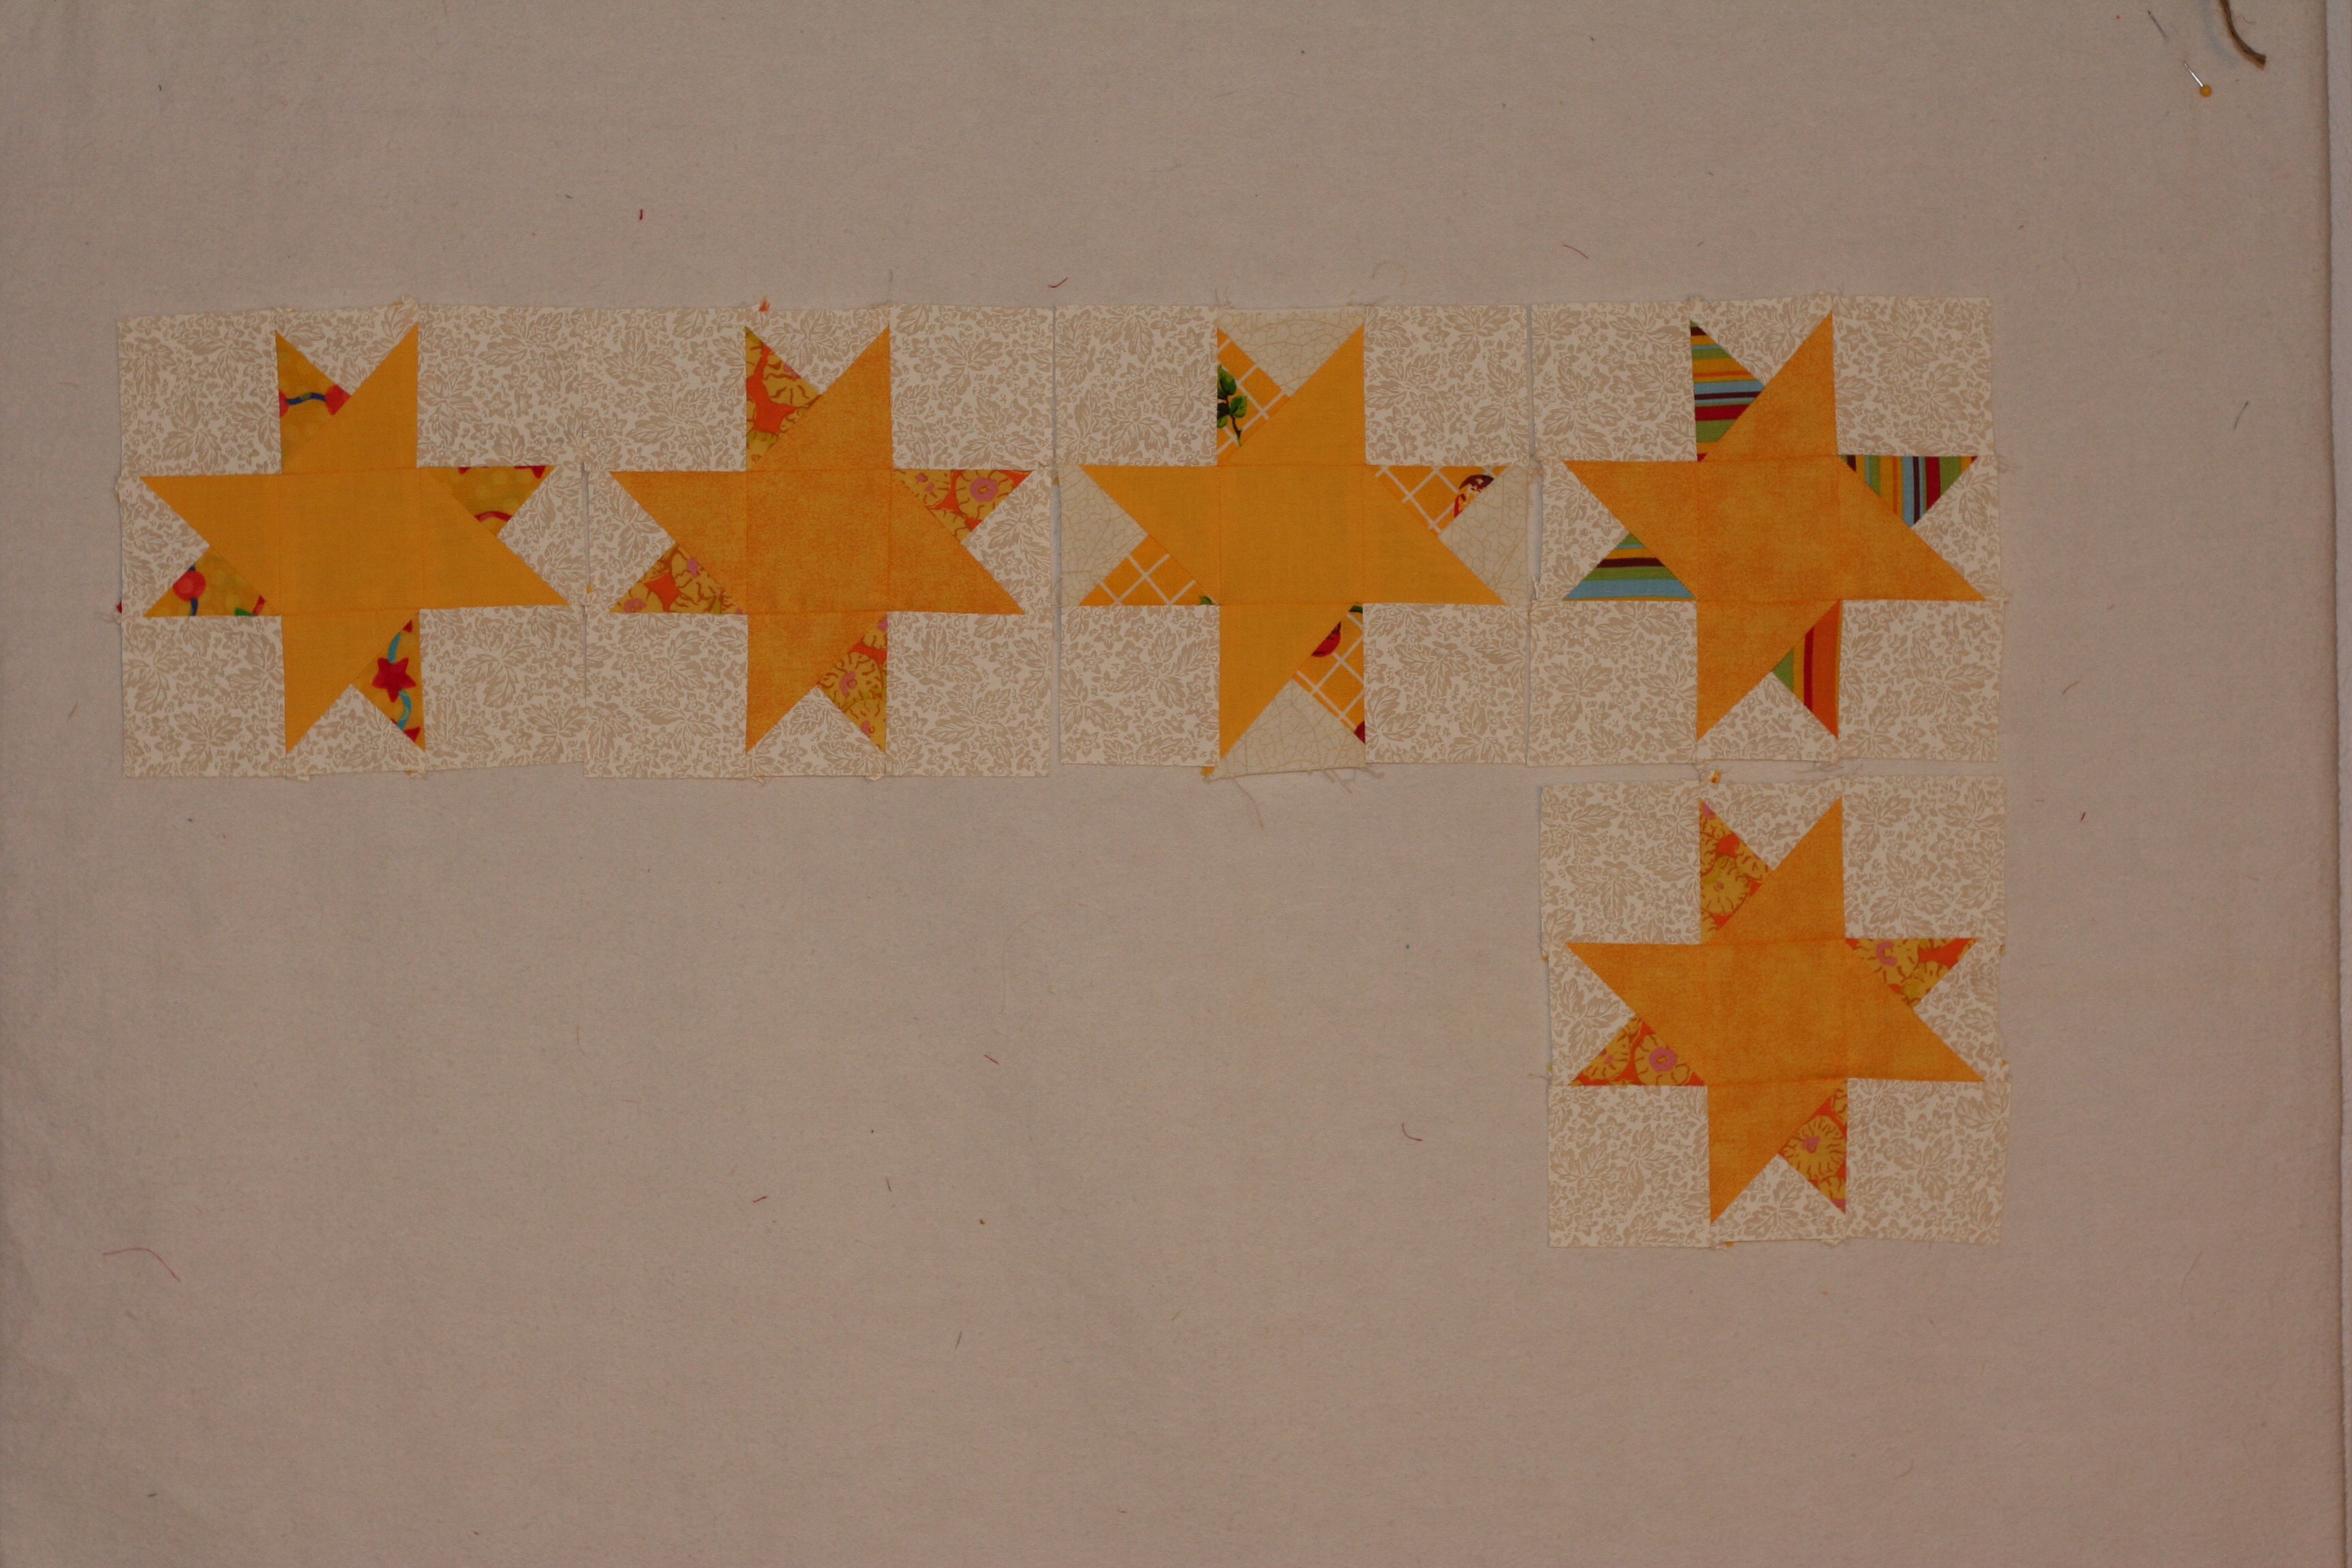
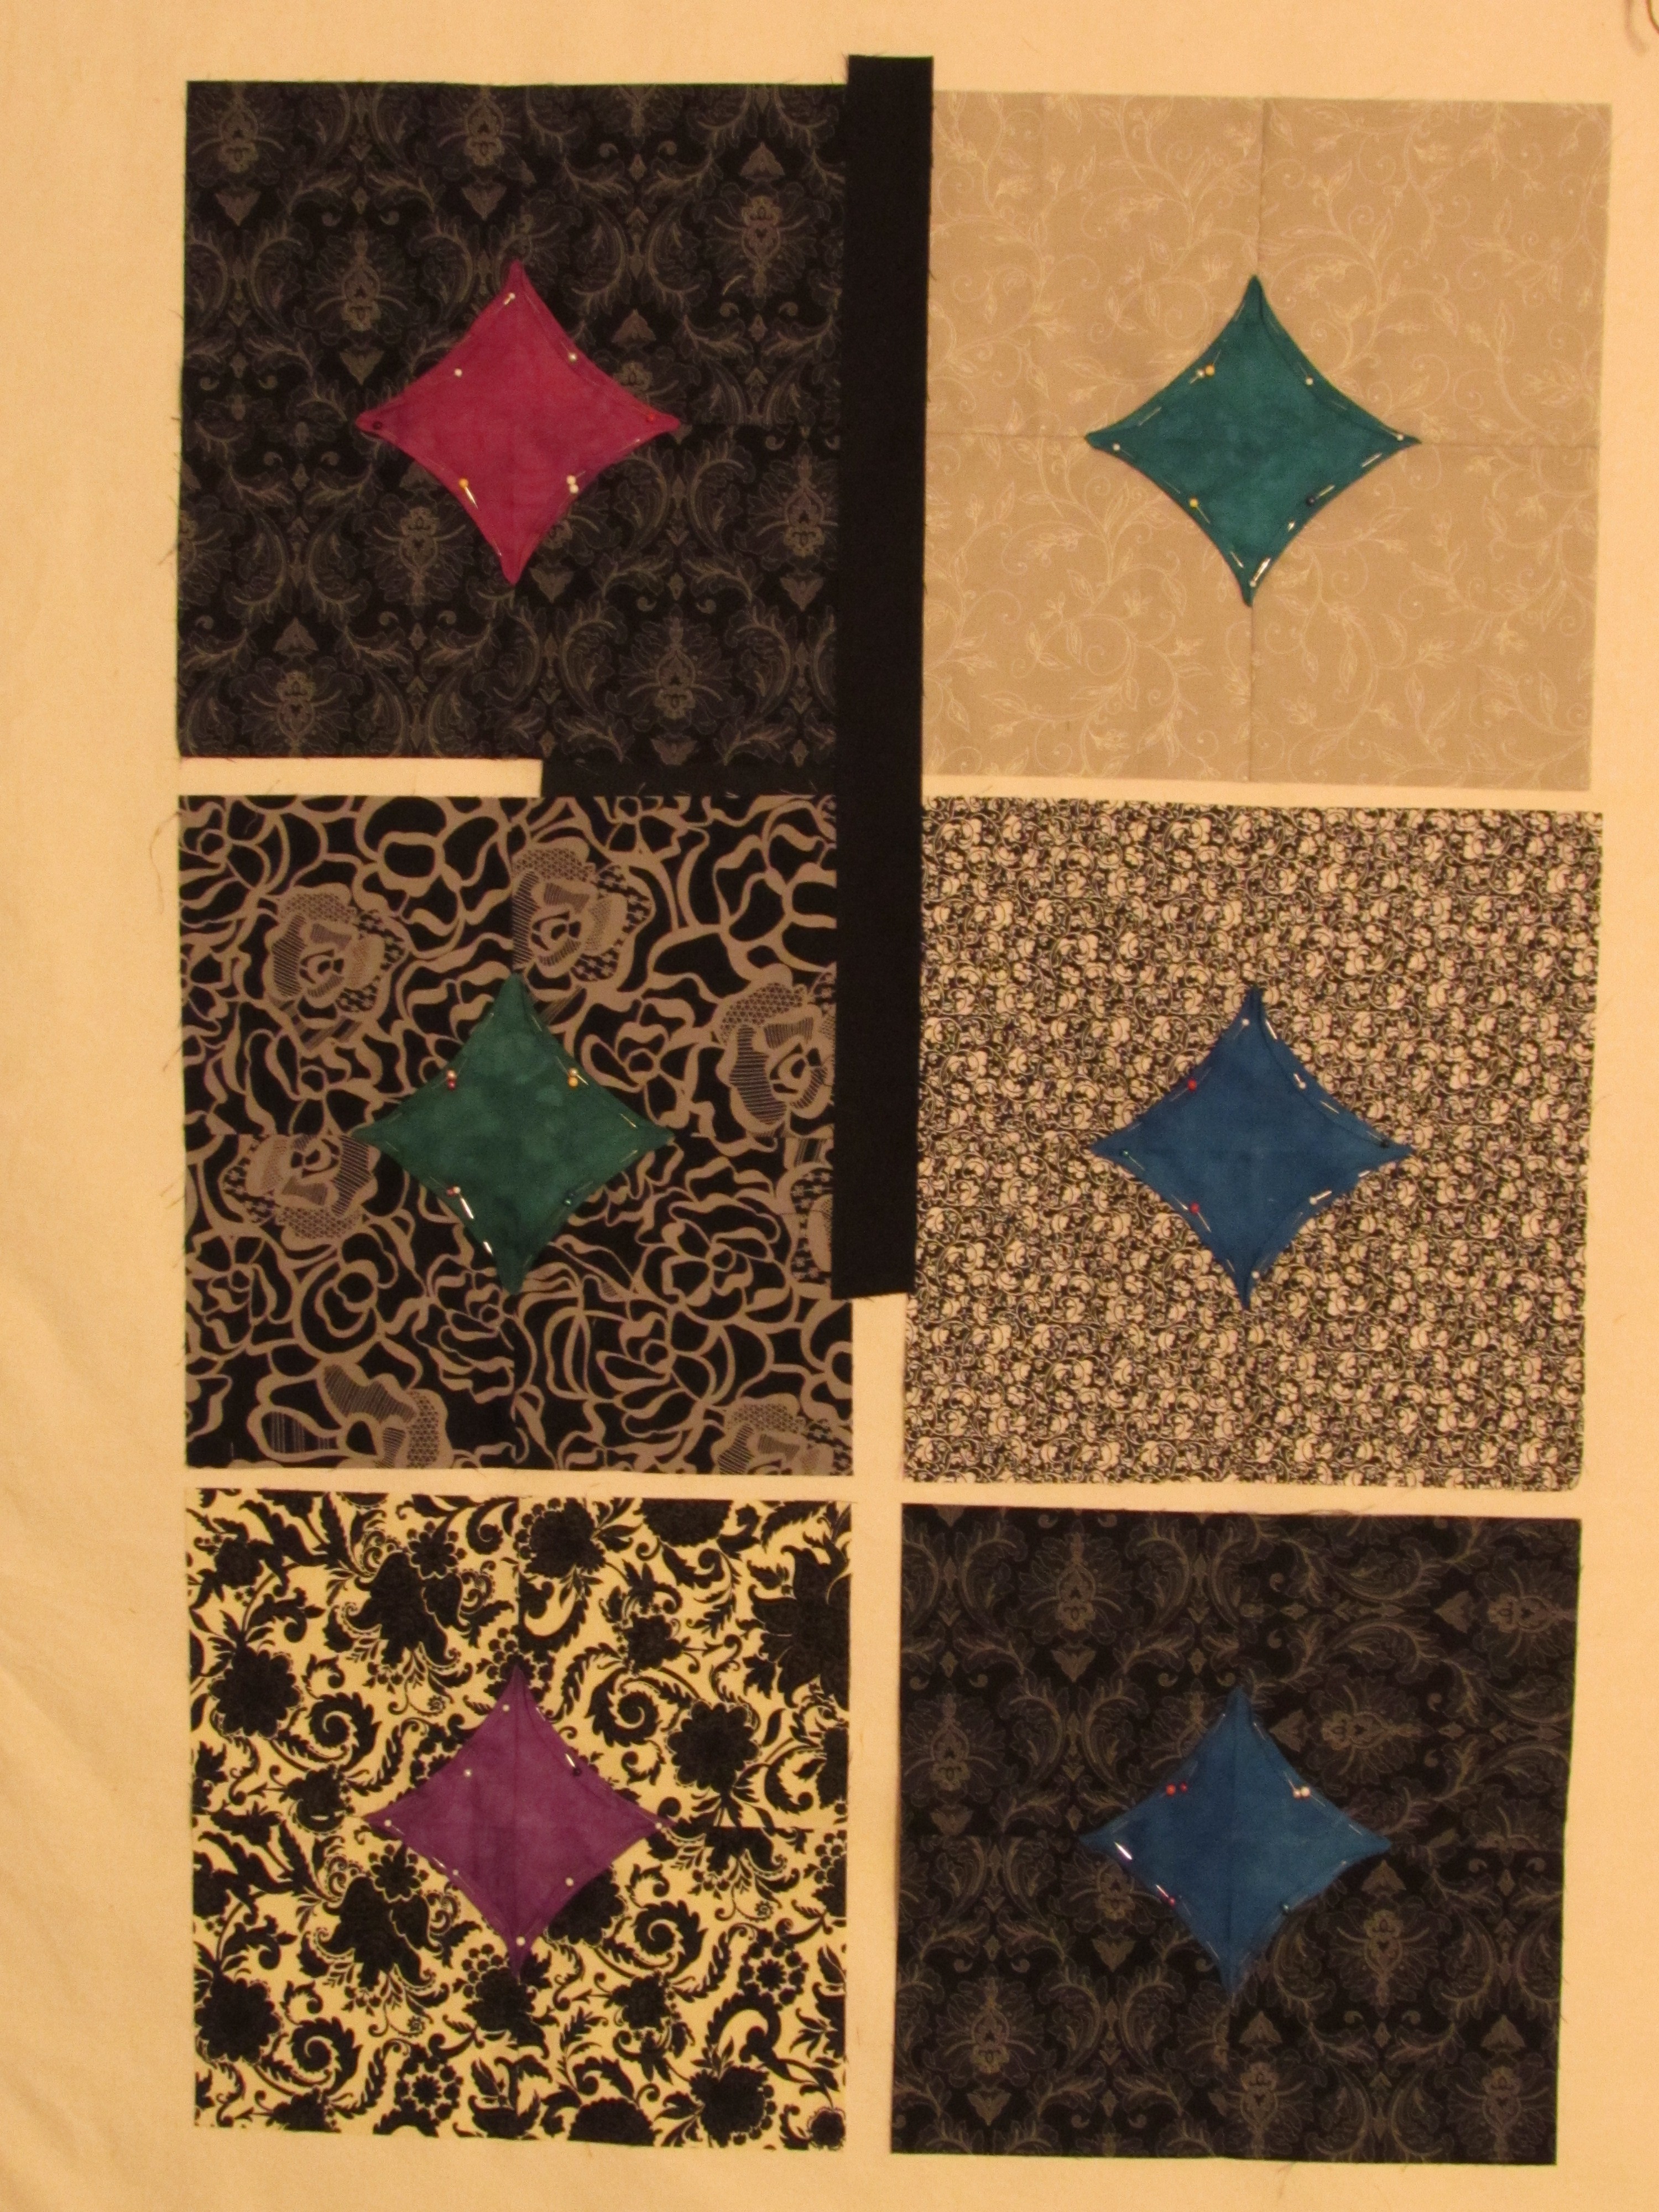
The third April project I worked on is for my first mini-swap. This swap features fabrics by Allison Glass. I was really getting nervous about this project, doubting my abilities till I was just about stuck. I decided to start cutting fabric last weekend and just dive in. I chose the Fireworks pattern by Canoe Ridge Creations. She does a lot of mini quilt pattern design and I have several of her patterns. They are easy to use and her instructions are great. I have the blocks done and need to stitch them together. It should finish out at 24″ x 24″. The swap isn’t due to be mailed out until early June so I am way ahead of schedule. May is going to be a busy month so I’m glad to check this one off. (By the way, for those of you who have done swaps, do you usually put anything on the back for hanging, or is that up to the recipient to do that?  Please leave a comment if you have experience here! I appreciate it. )

agmini

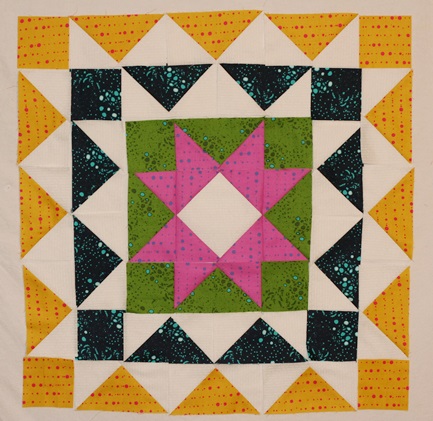
The colors aren’t showing correctly due to the poor lighting but I am happy with it. The blue in the third section out is much more vibrant than shows here. I really need better light in my sewing room. When this is finished I will take a picture outside. I am hoping to sew the blocks together later today and get it quilted next week. Of course, that leads to the perpetual questions, how do I want to quilt this? Most likely I will straight line quilt it with a narrow spacing.

First though I have a garden swap to go to this afternoon. I joined a gardening group and we are exchanging plants from our gardens. About six weeks ago, I potted starts from my Shasta Daisies, Oregano, and Chives.

IMG_20150423_3148

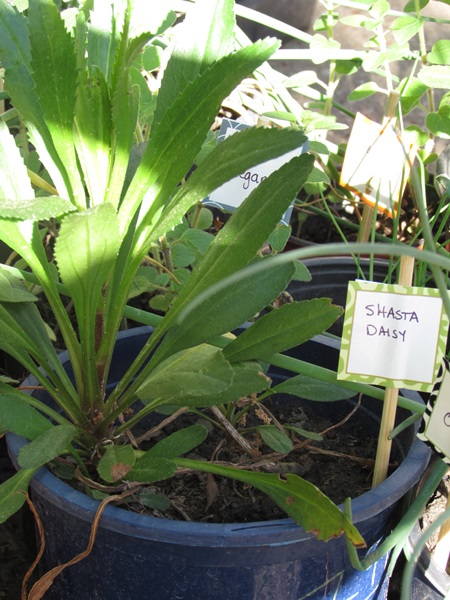
It will be fun to give these to the group and bring home something different. Hoping for plants that don’t require much in the way of water!

Linking to Let’s Bee Social, Needle and Thread Thursday and  Crazy Mom Quilts. Links to these wonderful sites are at the top of the page, under Link Ups.


Not a lot of sewing going on

I haven’t spent a whole lot of time at the sewing machine this week. Lots of regular life going on and my neck was being sort of cranky. But that’s ok. I did get a few odds and ends done.

For RSC15 I am working on the March blocks from the Classic Stitches BOM over at Academic Quilter. I only finished five of the ten blocks but they are really fun.

image

For the kitchen in our Downieville house we decided to put in pleated shades. In keeping with the vintage look of the kitchen, I ordered a Waverly plaid that was printed in yellow, blue and green to make valances. We have green and yellow on the walls and I just put a 1950’s formica table in the eating area. It is gray with turquoise trim and the chairs have turquoise vinyl on the seats. I love pulling all of the colors together with these valances. I made a valance for each of the four kitchen windows. Hopefully we will be up there working on the house over spring break so I can hang these soon.

image

I’ve also worked a bit on the quilting for the neutrals quilt. I have a newfound appreciation with my Hera marker (which is made by Clover). I bought this (inexpensive) little tool months ago and each time I use it, I am so impressed by it. If you don’t have one, this tool is used to mark lines for quilting. No worry about removing ink or chalk after you sew. It is so cool. I have been marking the lines on the neutrals quilt with it.

image

The lines aren’t always easy to see. But the indentation left by the Hera marker is enough to guide me along. I don’t mark more than two lines at a time because the indentation doesn’t last very long. If you mark a line and don’t like what it looks like, a simple spritz of water (lightly sprayed) will remove the mark, as will smoothing the fabric with your hands. I don’t know that I would rely on this for intricate marking, but for straight lines it works great. If you want a quick tutorial on using a Hera marker here is a brief video – though it is so simple, not much instruction is needed.

image

I am quilting down the center of each three inch square and when I finish this direction, I will quilt down the center, going the other way.

image

For the heart I used lines that were much closer together. I didn’t mark these, just used the edge of the walking foot to judge the distance. It seems to solidify the heart, almost removing the lines of the patchwork. Looking good so far. Should make my (ALYOF) goal of completing this quit in March. Yahoo!

I was lucky enough to have one of my sisters here for a couple of days to visit this week. What a treat. Even better, her son was also here briefly. My nephew and his wife live in Japan which means I don’t see him very often. We used to live next door to each other when the kids were growing up and I miss having them around all the time. Family visits are the best. That’s the update for the past week or so. Hope everyone is doing well and spending some time with at the sewing machine and some time hanging with family. Best of both worlds!

Linking to Freemotion by the River and Let’s Bee Social. As always, links to these sites are available at the top of the page, under Link Ups. This post is also linked to Stephanie and Michelle at Late Night Quilter for Tips and Tutorials Tuesday.

Progress Report

This week has started out with a productive bang. Yesterday I completed my neutrals/red heart quilt top. Today I finished up our taxes (never a fun task). Wow. If I don’t do anything else this week, I’m ok with that!

I got on a roll with the neutrals quilt and it all came together so quickly.

IMG_20150309_2952The fence wasn’t quite tall enough to photograph the whole thing but this is most of it. Pretend I ironed it – the wrinkles are really showing in these pictures!

IMG_20150309_2954I pieced one little random block. When I was trimming the HST’s to be used in making the big heart, I had little bits and pieces leftover. I used a few of them to make this little guy.

IMG_20150309_2953Tomorrow I will get the backing assembled and pin baste the layers together. I haven’t quite  decided how to quilt it. I know I want to use straight line quilting but not positive of the pattern.  Also thinking about quilting the heart separately or different somehow so it stands out more.

Making good progress on my March goal! Also got started on the yellow scrappy blocks for RSC15 and they are going to be adorable. They are a double star block – finished the first of ten blocks today . At least all of the pieces are cut though so they will go together quickly.

Linking to Sew Cute Tuesday, Linky Tuesday and Let’s Bee Social. Links to all of these great sites are located at the top of this page under Link Ups.


March Goal

The start of the new month means time to set a quilting goal for March. I am enjoying participating in Sew Bittersweet Designs link up, A Year of Lovely Finishes.  It encourages me to make a plan and have one overall goal to work toward. Something about writing it down helps it to happen.

I am working on a basic patchwork quilt right now. I love the simplicity of a traditional patchwork design. I have been collecting an assortment of neutral fabrics – all shades of cream, taupe and tan, both prints and solids. A few weeks ago I started cutting 3 1/2 inch squares. Luckily my son was home and he cut tons of them for me. I decided to go with 25 rows of 20 squares across so I needed 500 pieces. Ian was a champ – cutting 500 pieces would be major neck pain for me. Yay for having kids – see how it pays off.  (Just kidding Ian – love you!)

IMG_3353

In addition to the neutrals, I added a small number of squares that have some red in the print as well as a few red solid squares. I love the neutrals but the addition of the red adds a nice contrast.

image

As I was piecing squares I started liking the red even more. The evolution of a project, right? I started sketching ideas and decided to piece a heart and include it on the lower half of the quilt. This is turning out quite different than my original plan but that’s ok. I am loving it.

image

I am usually one to follow patterns and directions. For a long while, I have envied people who can just play with fabric and be ok with that. This quilt is one of the first that I have made without a pattern or a strictly defined plan. Makes for a fun project because I have enjoyed the process of letting things evolve. It has also been a great use of stash I have on hand. I bought the red for the heart but had the rest.

The goal is to have this project finished by the end of March. Piecing the top is almost 1/2 way done so a March finish is more than reasonable. Hoping March brings some decent weather to my northeastern friends!

Linking to ALYOF, Freemotion by the River and Let’s Bee Social.

Two Down and One to Go

Yay!! Got my second UFO of three finished up this week. Completing these three quilts is on my list of 2015 goals. Going well so far. I’m very glad to be done quilting this one. It didn’t take long either. I don’t know what the deal is. I think I get bored about 1/2 way through the quilting process. It looks great though. It was a bit narrow so I added a green border to each long side for width.

IMG_20150128_2830To quilt it I free motioned large, loopy flowers all over the top. They reminded me of the flowers girls would draw in the margins of the notebook when you are supposed to be taking notes in junior high but your mind is wandering. Anyway, I mean I’m pretty sure I saw the other girls doing this…..

IMG_20150128_2832

Oddly enough, the flowers also brought to mind a weird memory of this PE teacher I had when I was probably 8 or 9 years old (so we are talking 1968 or 1969 here – hippy days). I went to a parochial school through 8th grade. Mostly we had nuns for teachers and usually the classroom teacher/nun was also your PE teacher. But for a while, we had a young woman that as our PE teacher.  I bet she wasn’t more than 21 or 22 and I thought she was SOOO cool. For one thing, she wasn’t a nun and she was young. (To me, the nuns seemed old no matter their age since I couldn’t see their hair.) For another, her name was, get this…. Flower!! Looking back, I’m guessing that wasn’t her legal name but that was what we called her.  Shocking, right? It sure was to me. Ahh… the 1960’s.

IMG_20150128_2833I also quilted flowers along the gray borders. Once I got to the green, I switched to a medium sized leaf. Kind of wish I had switched to green thread when I quilted that portion. Oh well. I also attached the binding by machine on both front and back sides. Not sure I like that as well but I gave it a try.

In my on-going resolve to upcycle, I used a duvet cover for the backing. I found it at a thrift store for $7.00 and it is huge. I will easily back a couple a quilts with it. One side of the duvet cover is a green stripe and the other is a green floral print. I had the green binding sitting in my stash so this quilt is all scrappy and used a good portion of my stash. The only piece I purchased directly for this project is the gray print that I sashed the blocks with. Not too shabby.

IMG_20150128_2836

Trying to start the new year out right with better scrap management habits. (Wow, “scrap management” sounds so quilty-dorky!) But really. When I trimmed the excess off around the perimeter of the quilt I actually trimmed the scrap into usable pieces. This is definitely a first for me. Three inch and 2 inch strips plus a stack charm squares!! It hardly took any extra time and it’s done.

IMG_20150126_2824Not exactly sure what I will work on next. I want to do some piecing. I need a break from quilting for a while.  I have some blocks that have been sitting around for a while. I don’t love them, know what I mean? I think I am going to create a quilt to donate to a fundraiser at my daughter’s middle school.

20141006_1774The lighting on this picture is horrible. (I took it at night with my phone.) I think I will set the blocks on point and sash them with black. I have a cute black and white print for the backing and maybe I can find a jewel toned batik to use for a border and binding. Hopefully that will jazz this up a bit.

Linking to Freemotion at the River, Lorna at Sew Fresh Quilts and Amanda Jean at Crazy Mom Quilts. Links to these amazing ladies are found at the top of the page under Link Ups.

Will also be linking this post to A Lovely Year of Finishes as this completes my January goal.  Hurray for that – three days before month end.