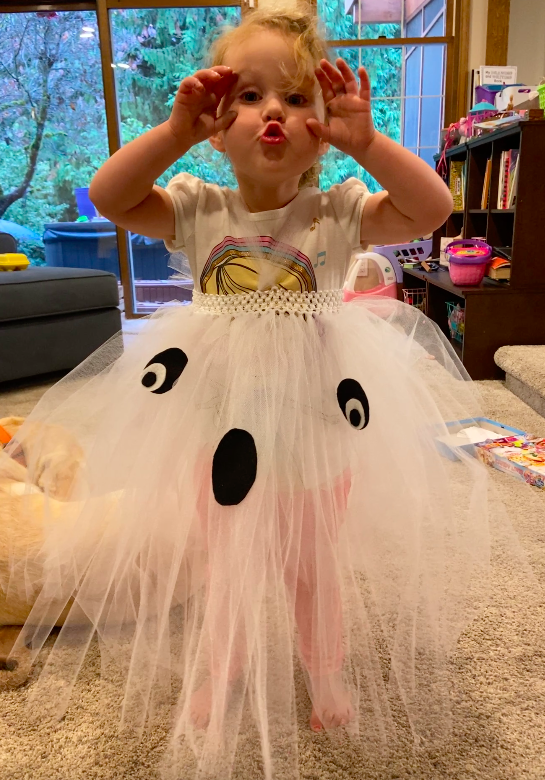
This year I was tasked with making a very, very spooky costume for my grand daughter’s Halloween. A wanted to be a ghost, a spooky, spooky ghost. She was quite specific about this. When asked what a spooky ghost does, she pursed her lips into a tiny ‘O’ and said oooohhhh. That was the extent of it. She is so dang funny.
‘Ooooh’ says the spooky, spooky ghost.
I asked my daughter in law what she thought would be a good spooky ghost outfit and she sent me a link from The Frugal Navy Wife. It looked adorable and super easy. I agreed to make it and promptly forgot about it! Two weeks ago my son asked me how the costume was coming along. Yikes! I quickly ordered a few things from Amazon and got going on it.
Assembling the costume
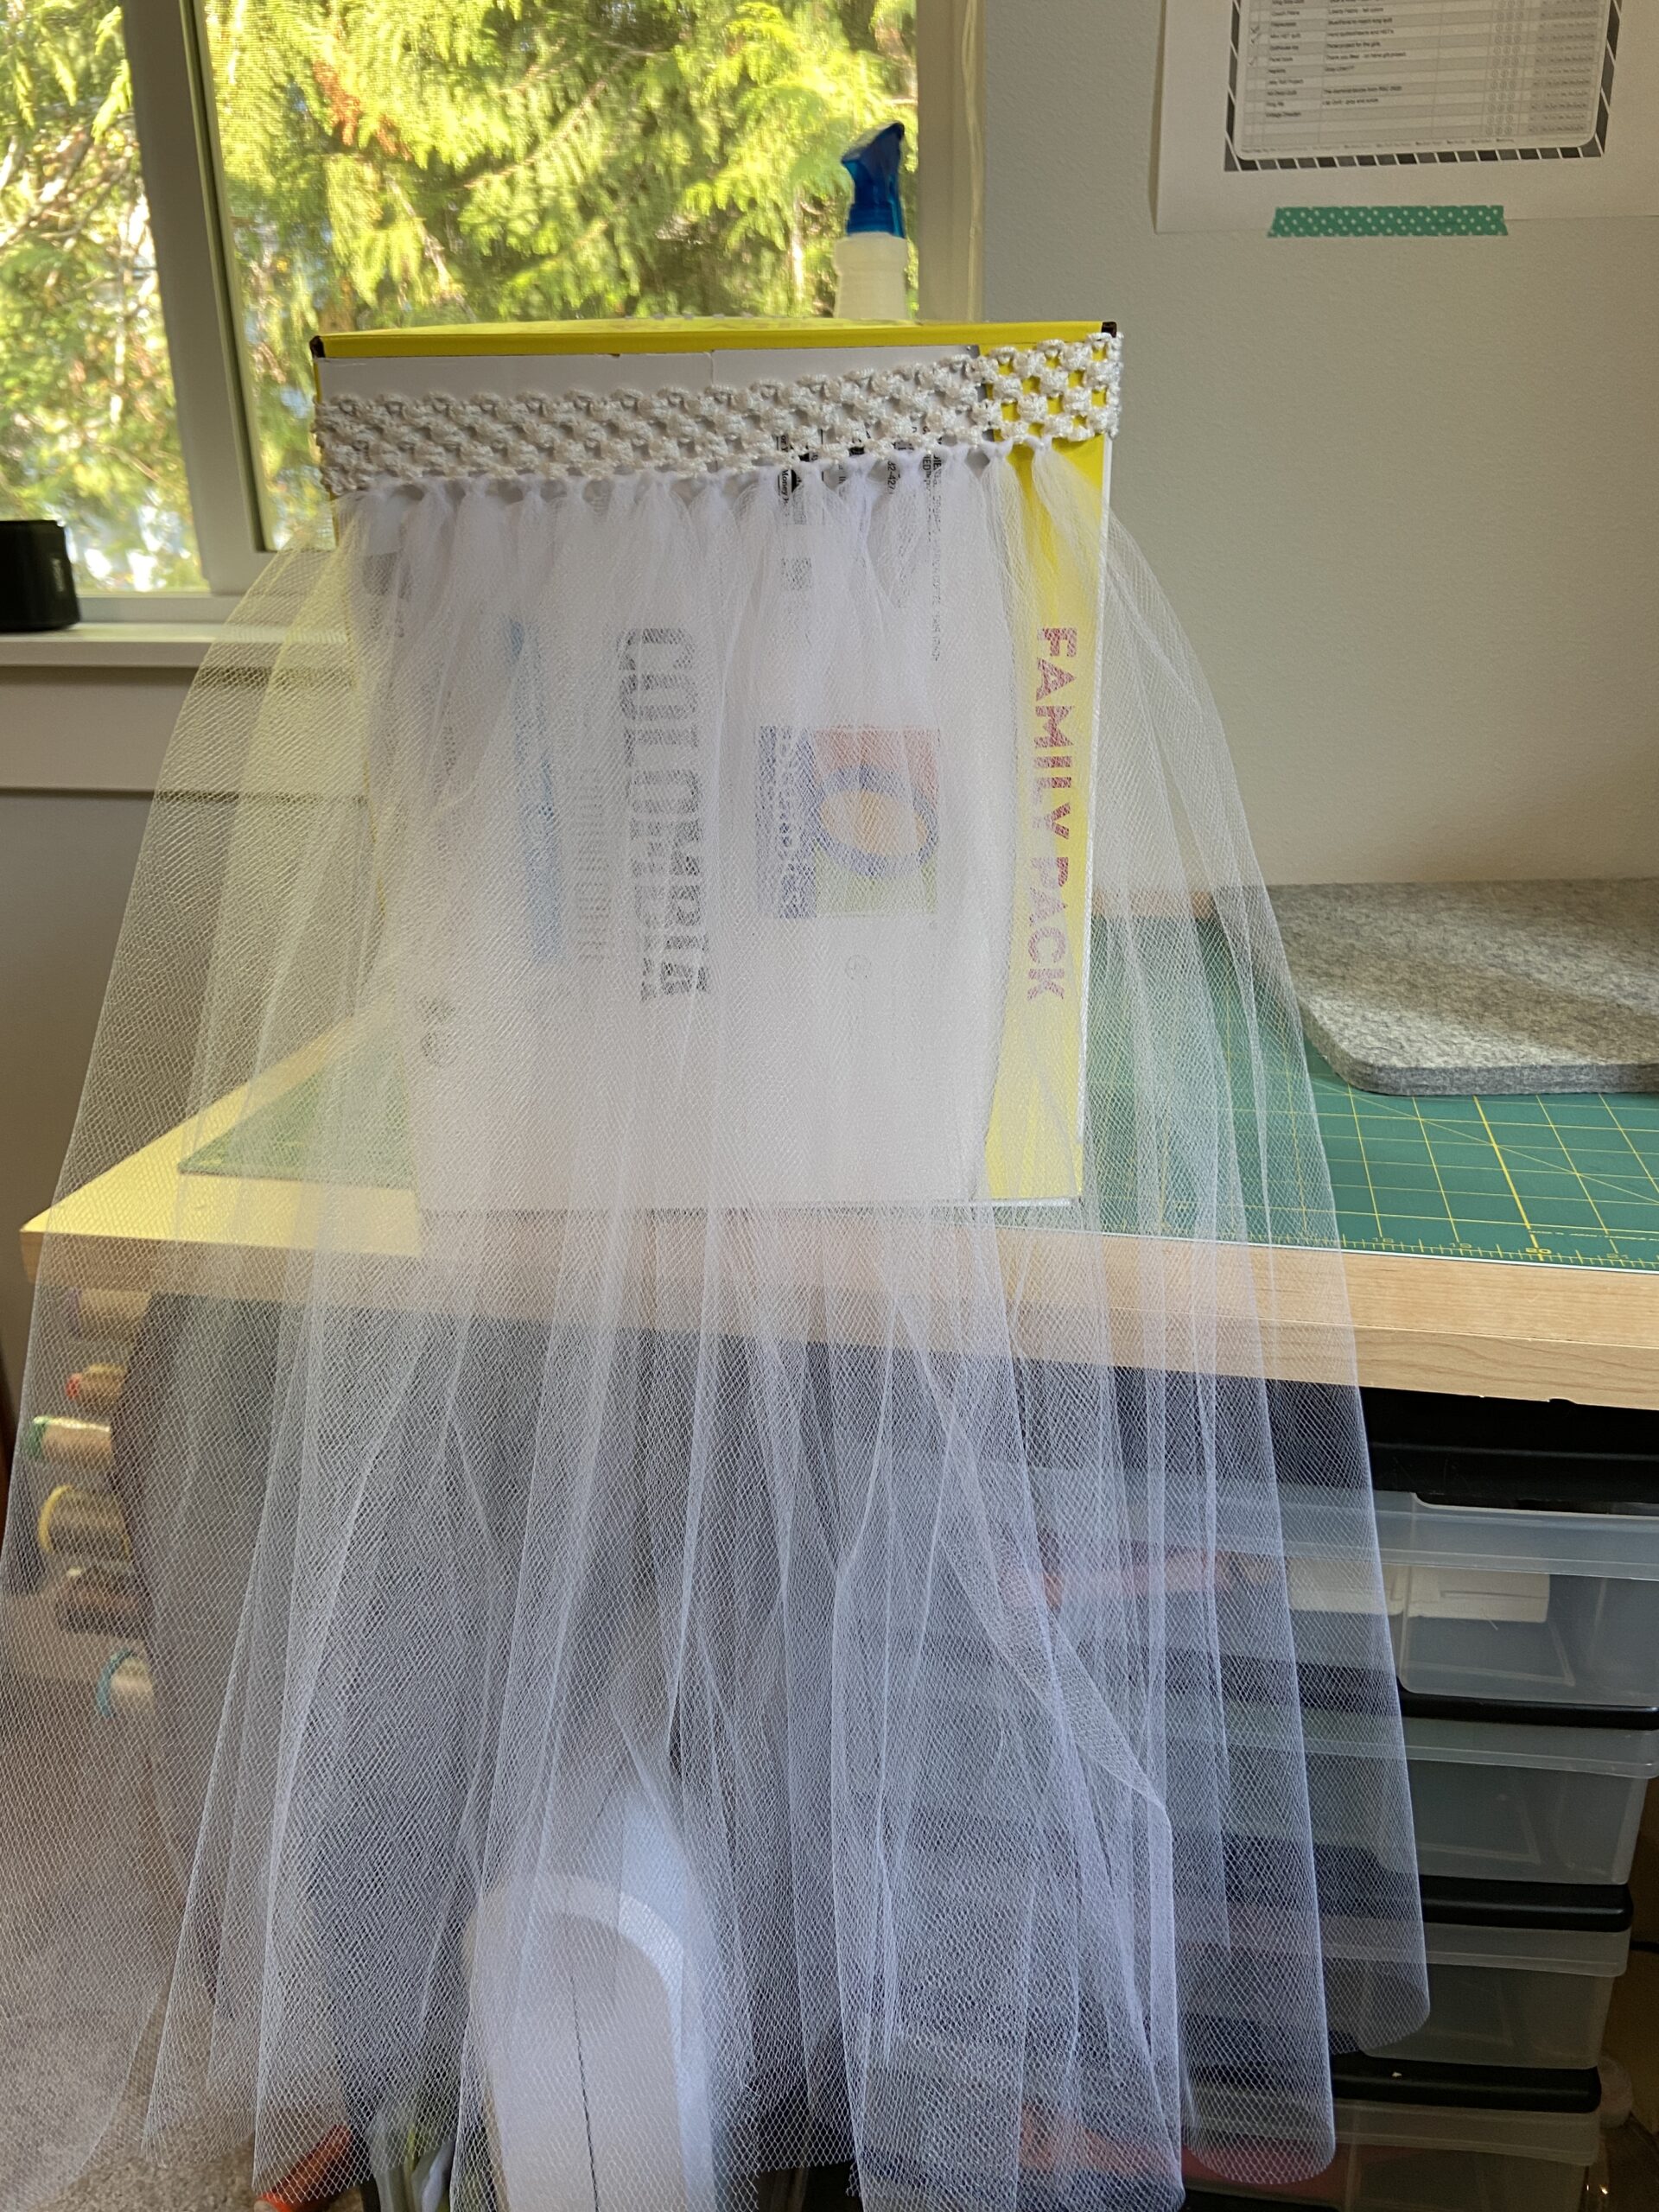
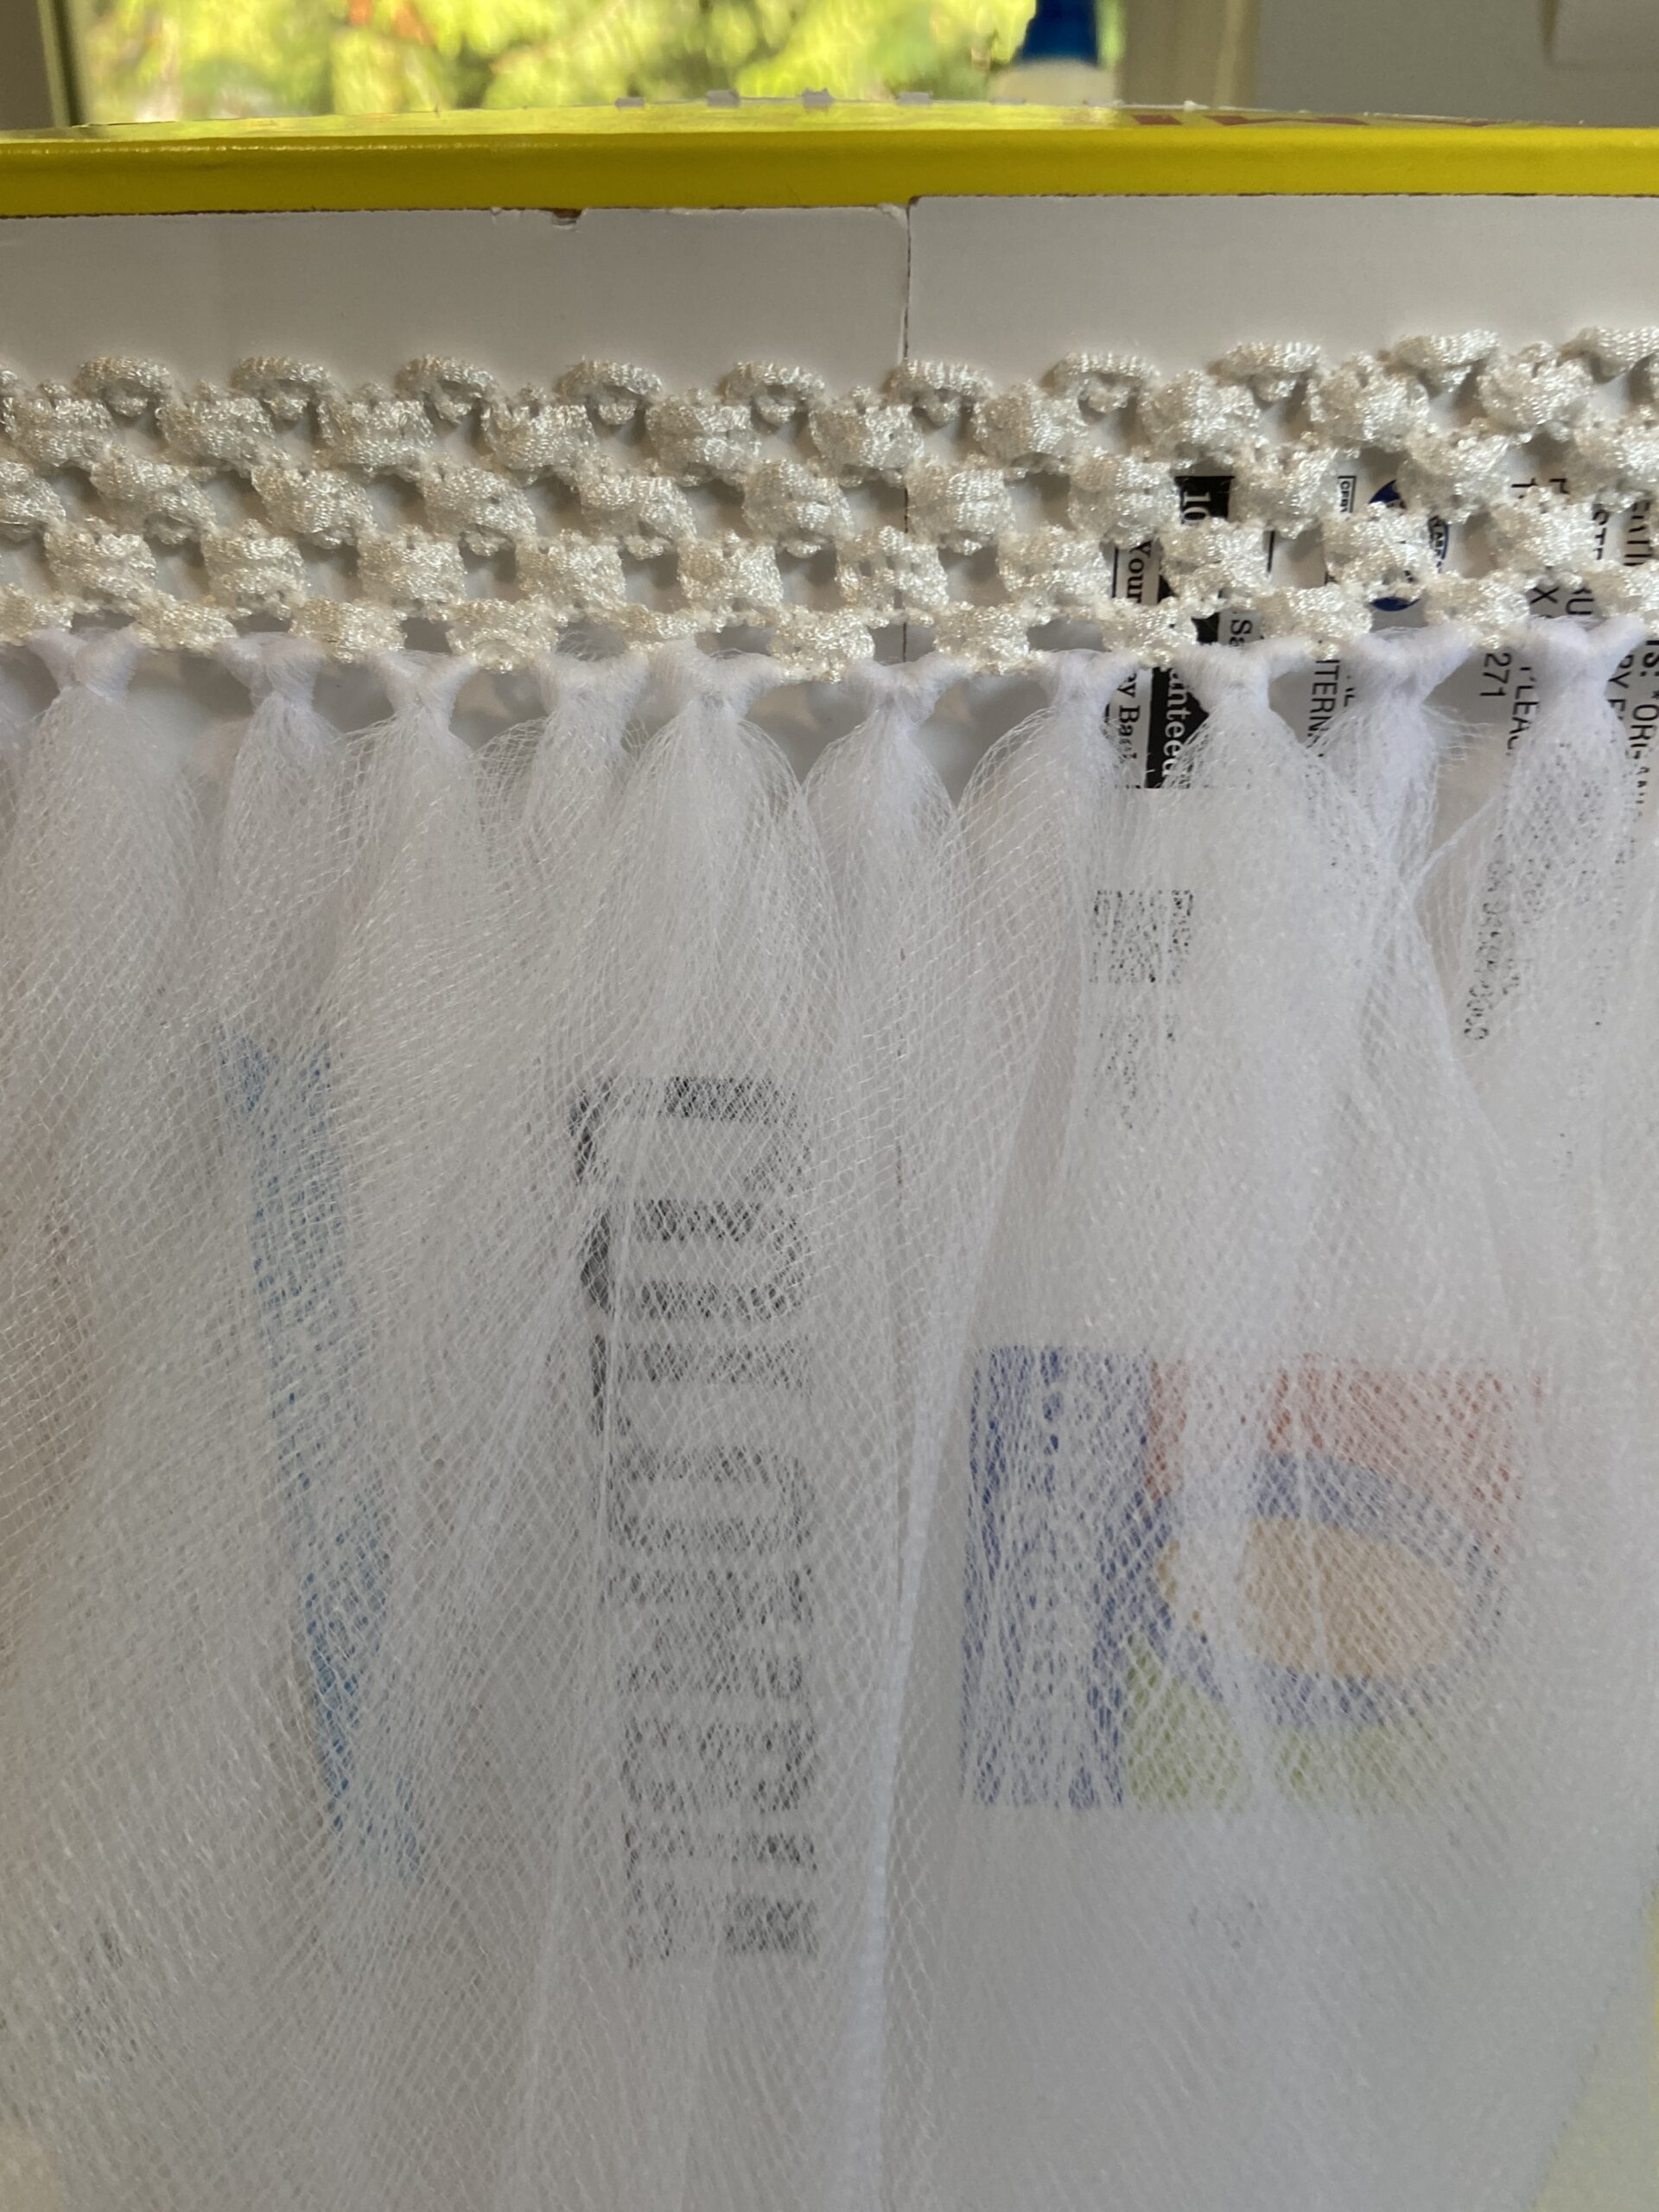
This couldn’t have been any easier. One piece of stretch lace was seamed into a loop sized to fit around A’s chest. A spool of six inch tulle was cut into 40″ lengths, or double the length I wanted the skirt to finish at. (Of course the spool I ordered from Amazon is enough to make about a hundred of these, but that’s ok. It will be used up at some point). I stretched the lace around a box so I would have something to work from.
Each piece of tulle was poked through the opening in the lace and the strip then pulled through the loop that formed. (Does this make sense?) I pulled down on the strips of netting to tighten the knot and made my way around the piece of stretch lace. I also looped a long piece of tulle from front to back so it could be tied as needed in back. It was sort of like the straps to a sundress.
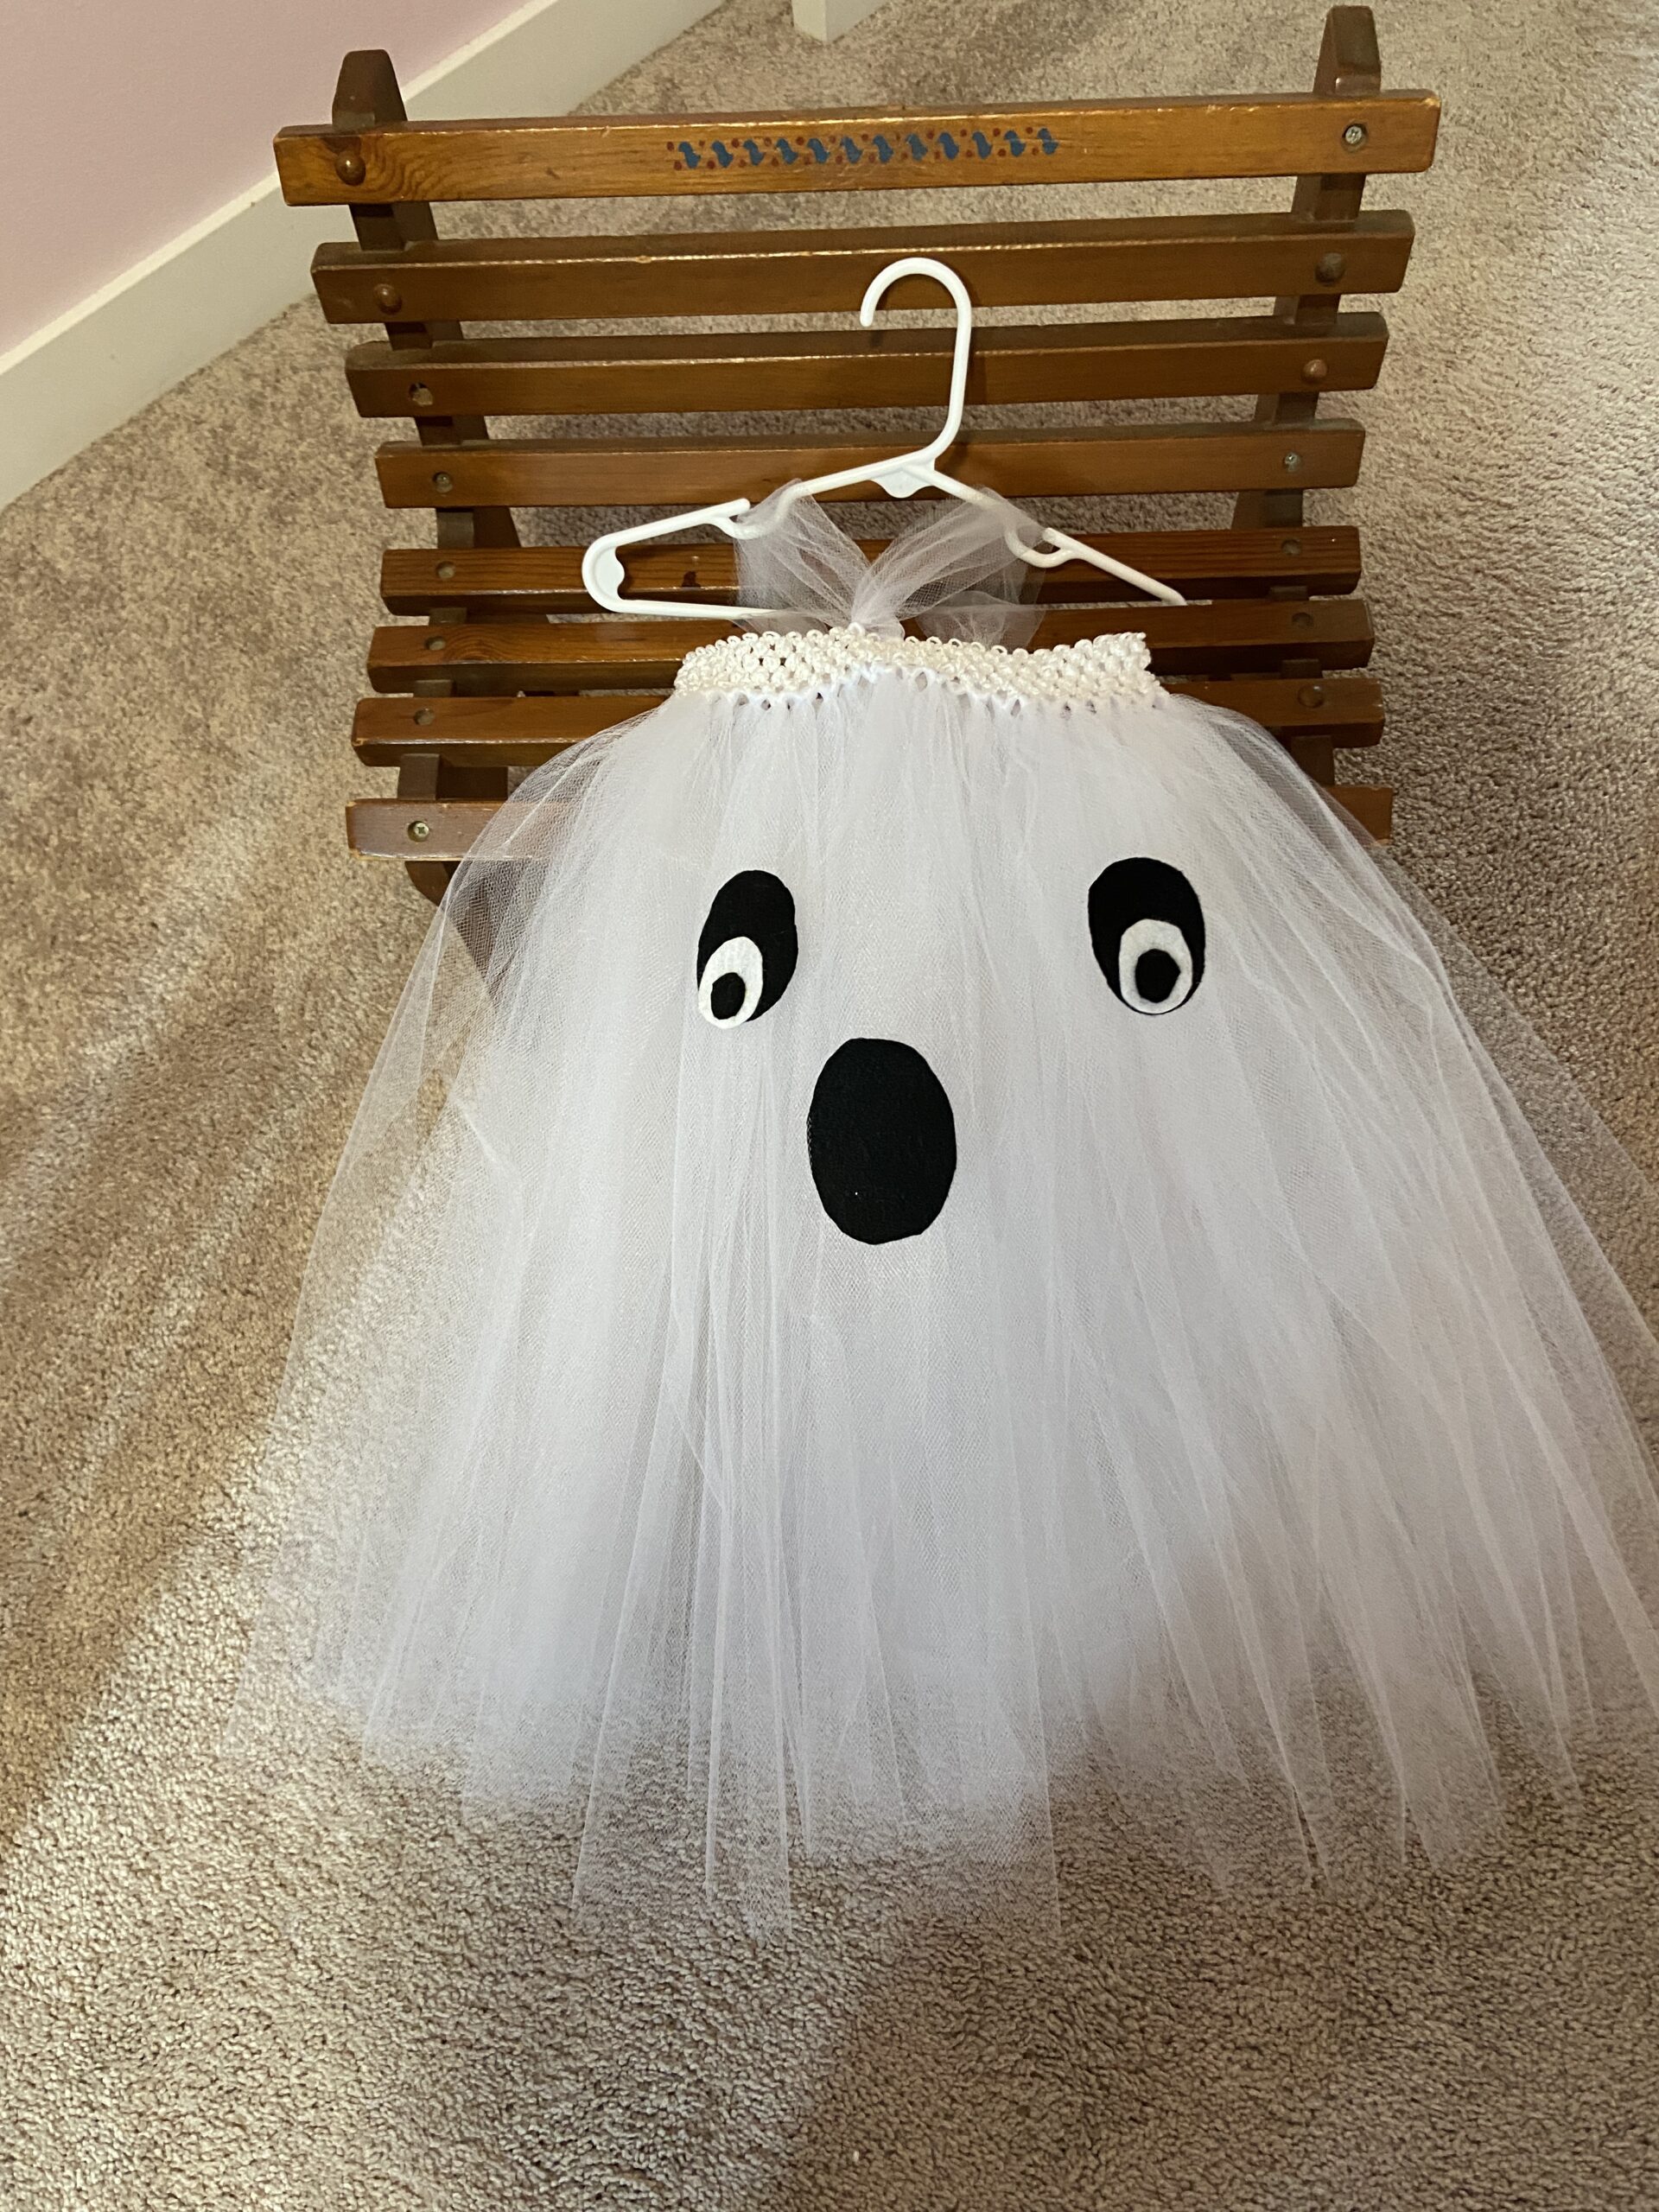
Finally, I cut ovals from black and white felt for the eyes and the spooky, spooky mouth. These were hand stitched to the front.
The finished costume
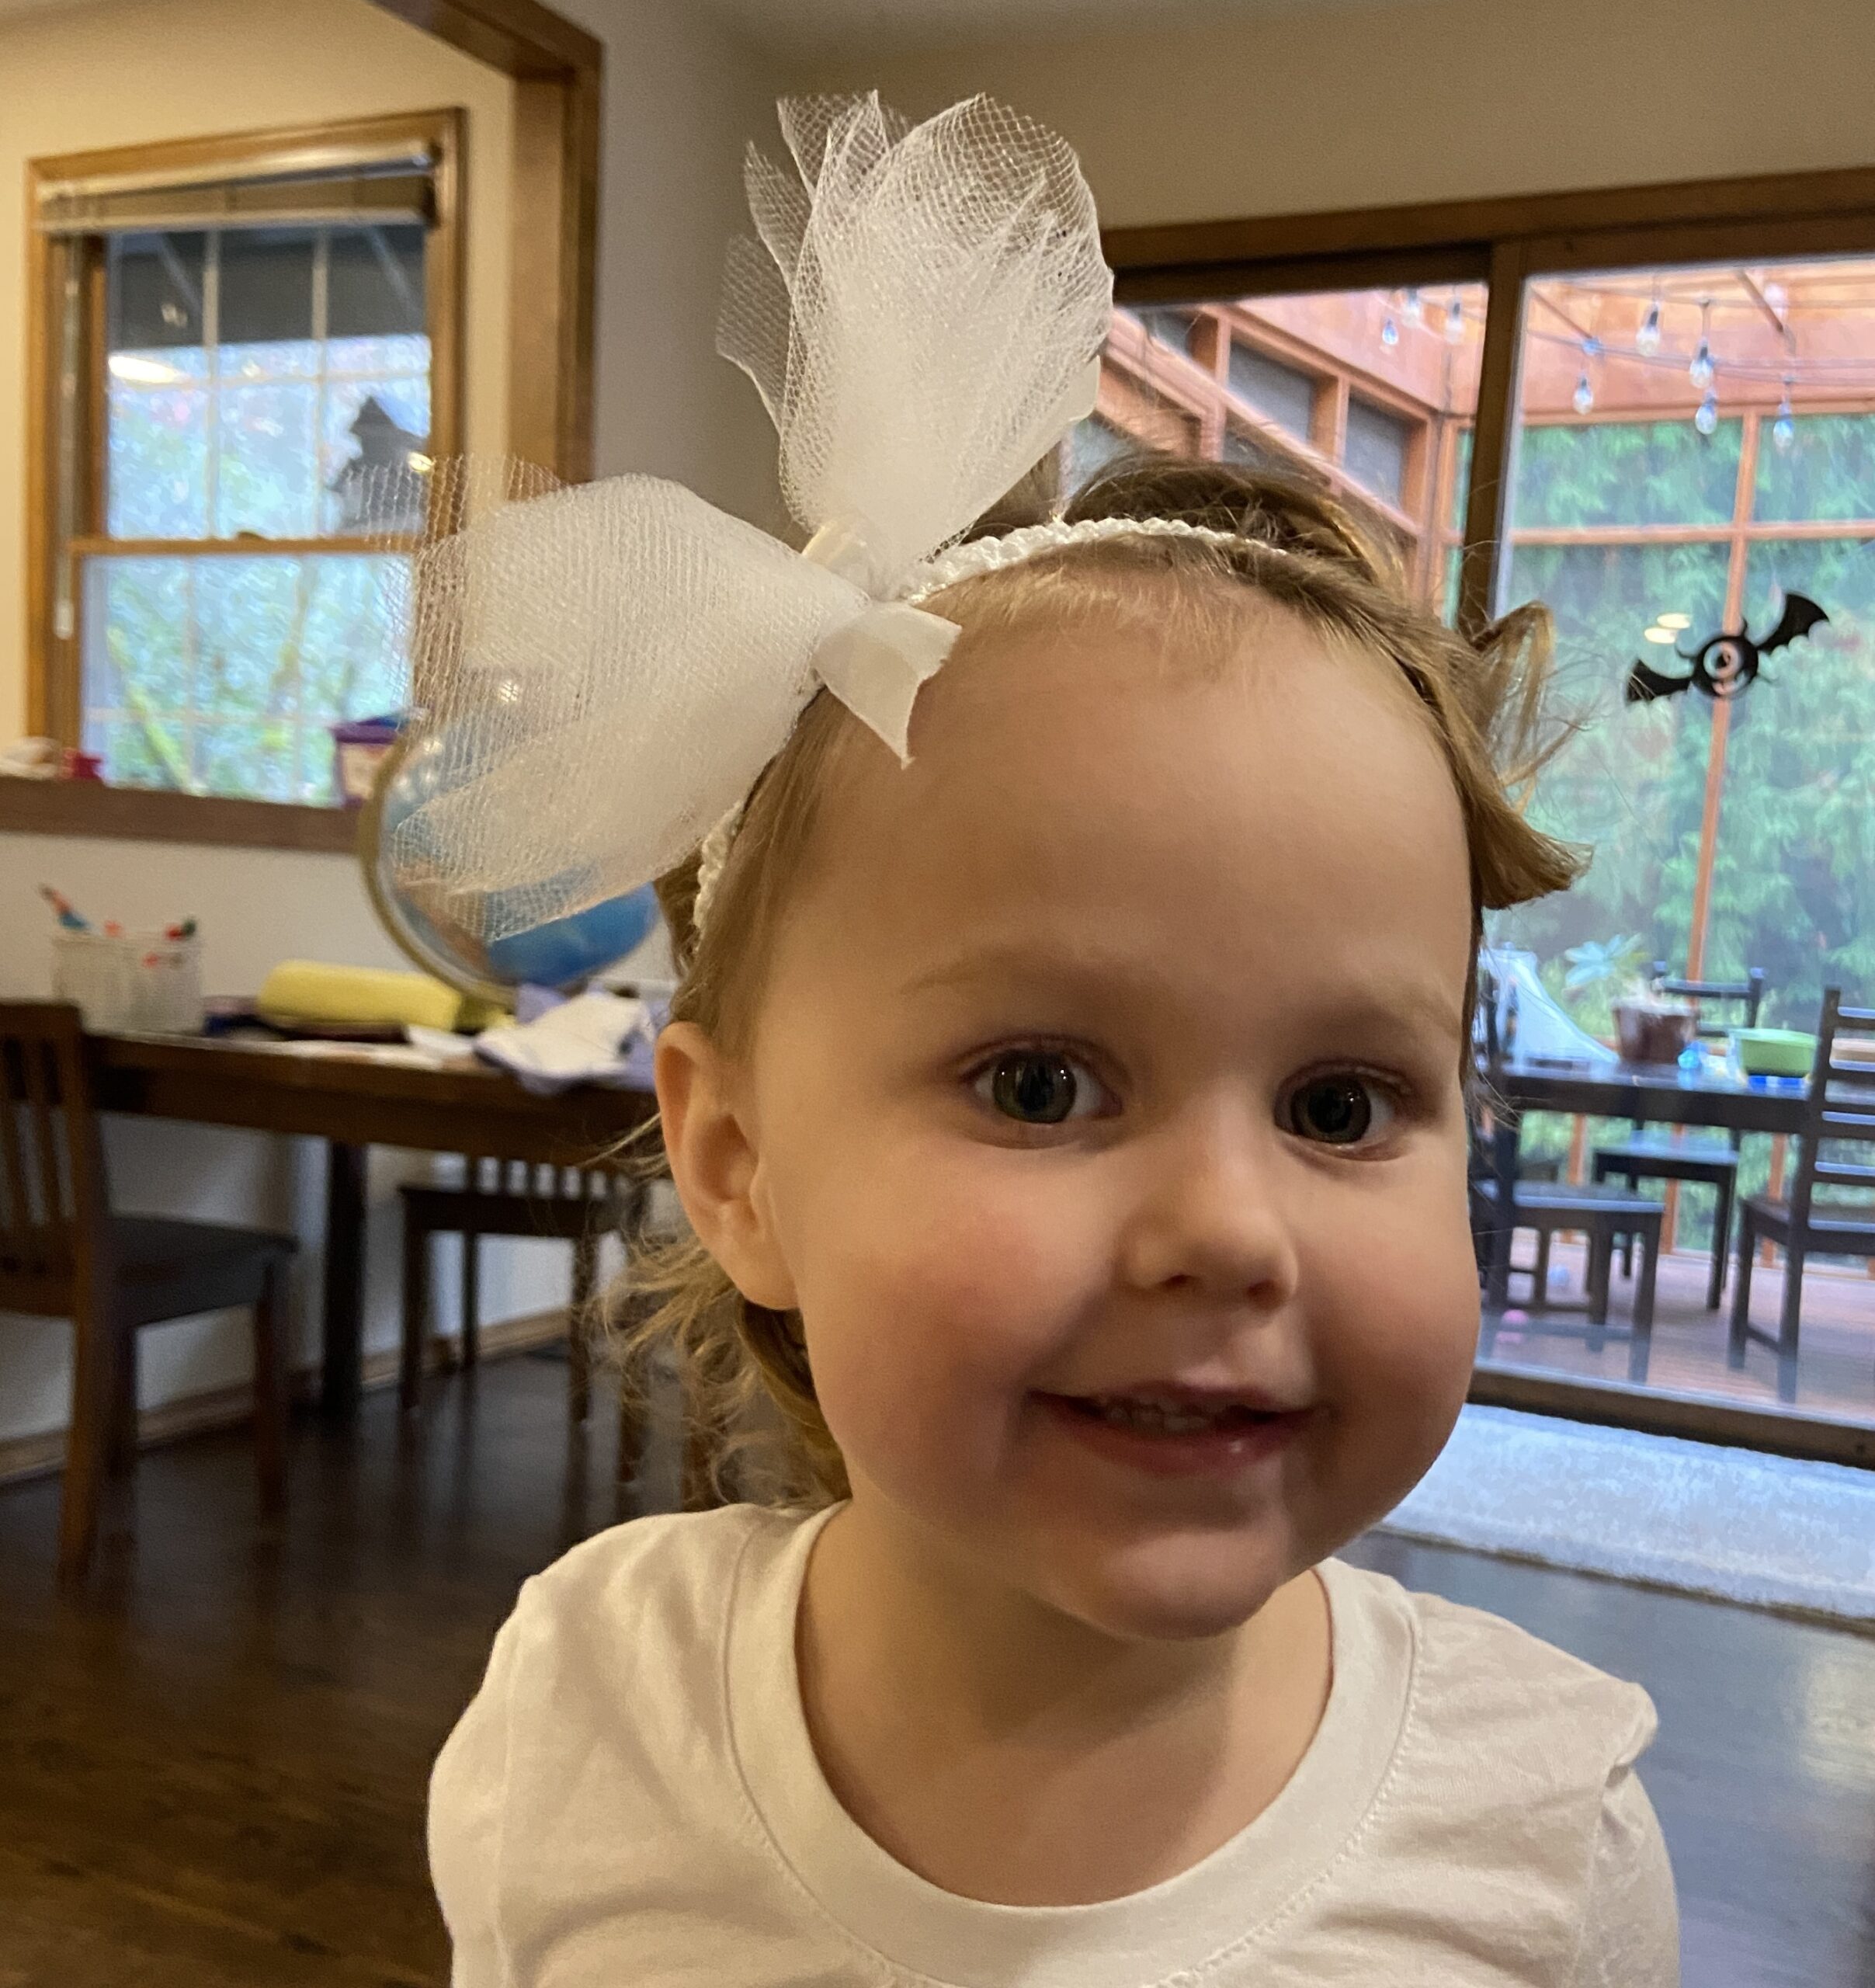
Once it was finished I decided to make a matching headband with the stretch lace and a bit of tulle.
So cute, not so spooky!
Our sweet girl was quite pleased with the costume and headband. She wore them to the Halloween party at her little toddler program.
This spooky ghost went to a party!
Halloween finally rolled around. A was cranky and not in the mood for much. It turned out she was coming down with a virus and by the middle of the night (of course!) she had spiked a fever and was feeling miserable. I am really glad she got to go to the party at her school and enjoy a bit of Halloween there since she wasn’t able to enjoy it on the actual day.
I highly recommend this costume for anyone. It is simple and super cute! It would also be a great way to make a tutu. All different colors of tulle could be used to make it just how the ballerina wants it.
I am working on a quilt but it is going to be gifted to someone at the holidays. So no pictures of it until after Christmas. I am super happy with my progress so far! Take care everyone.
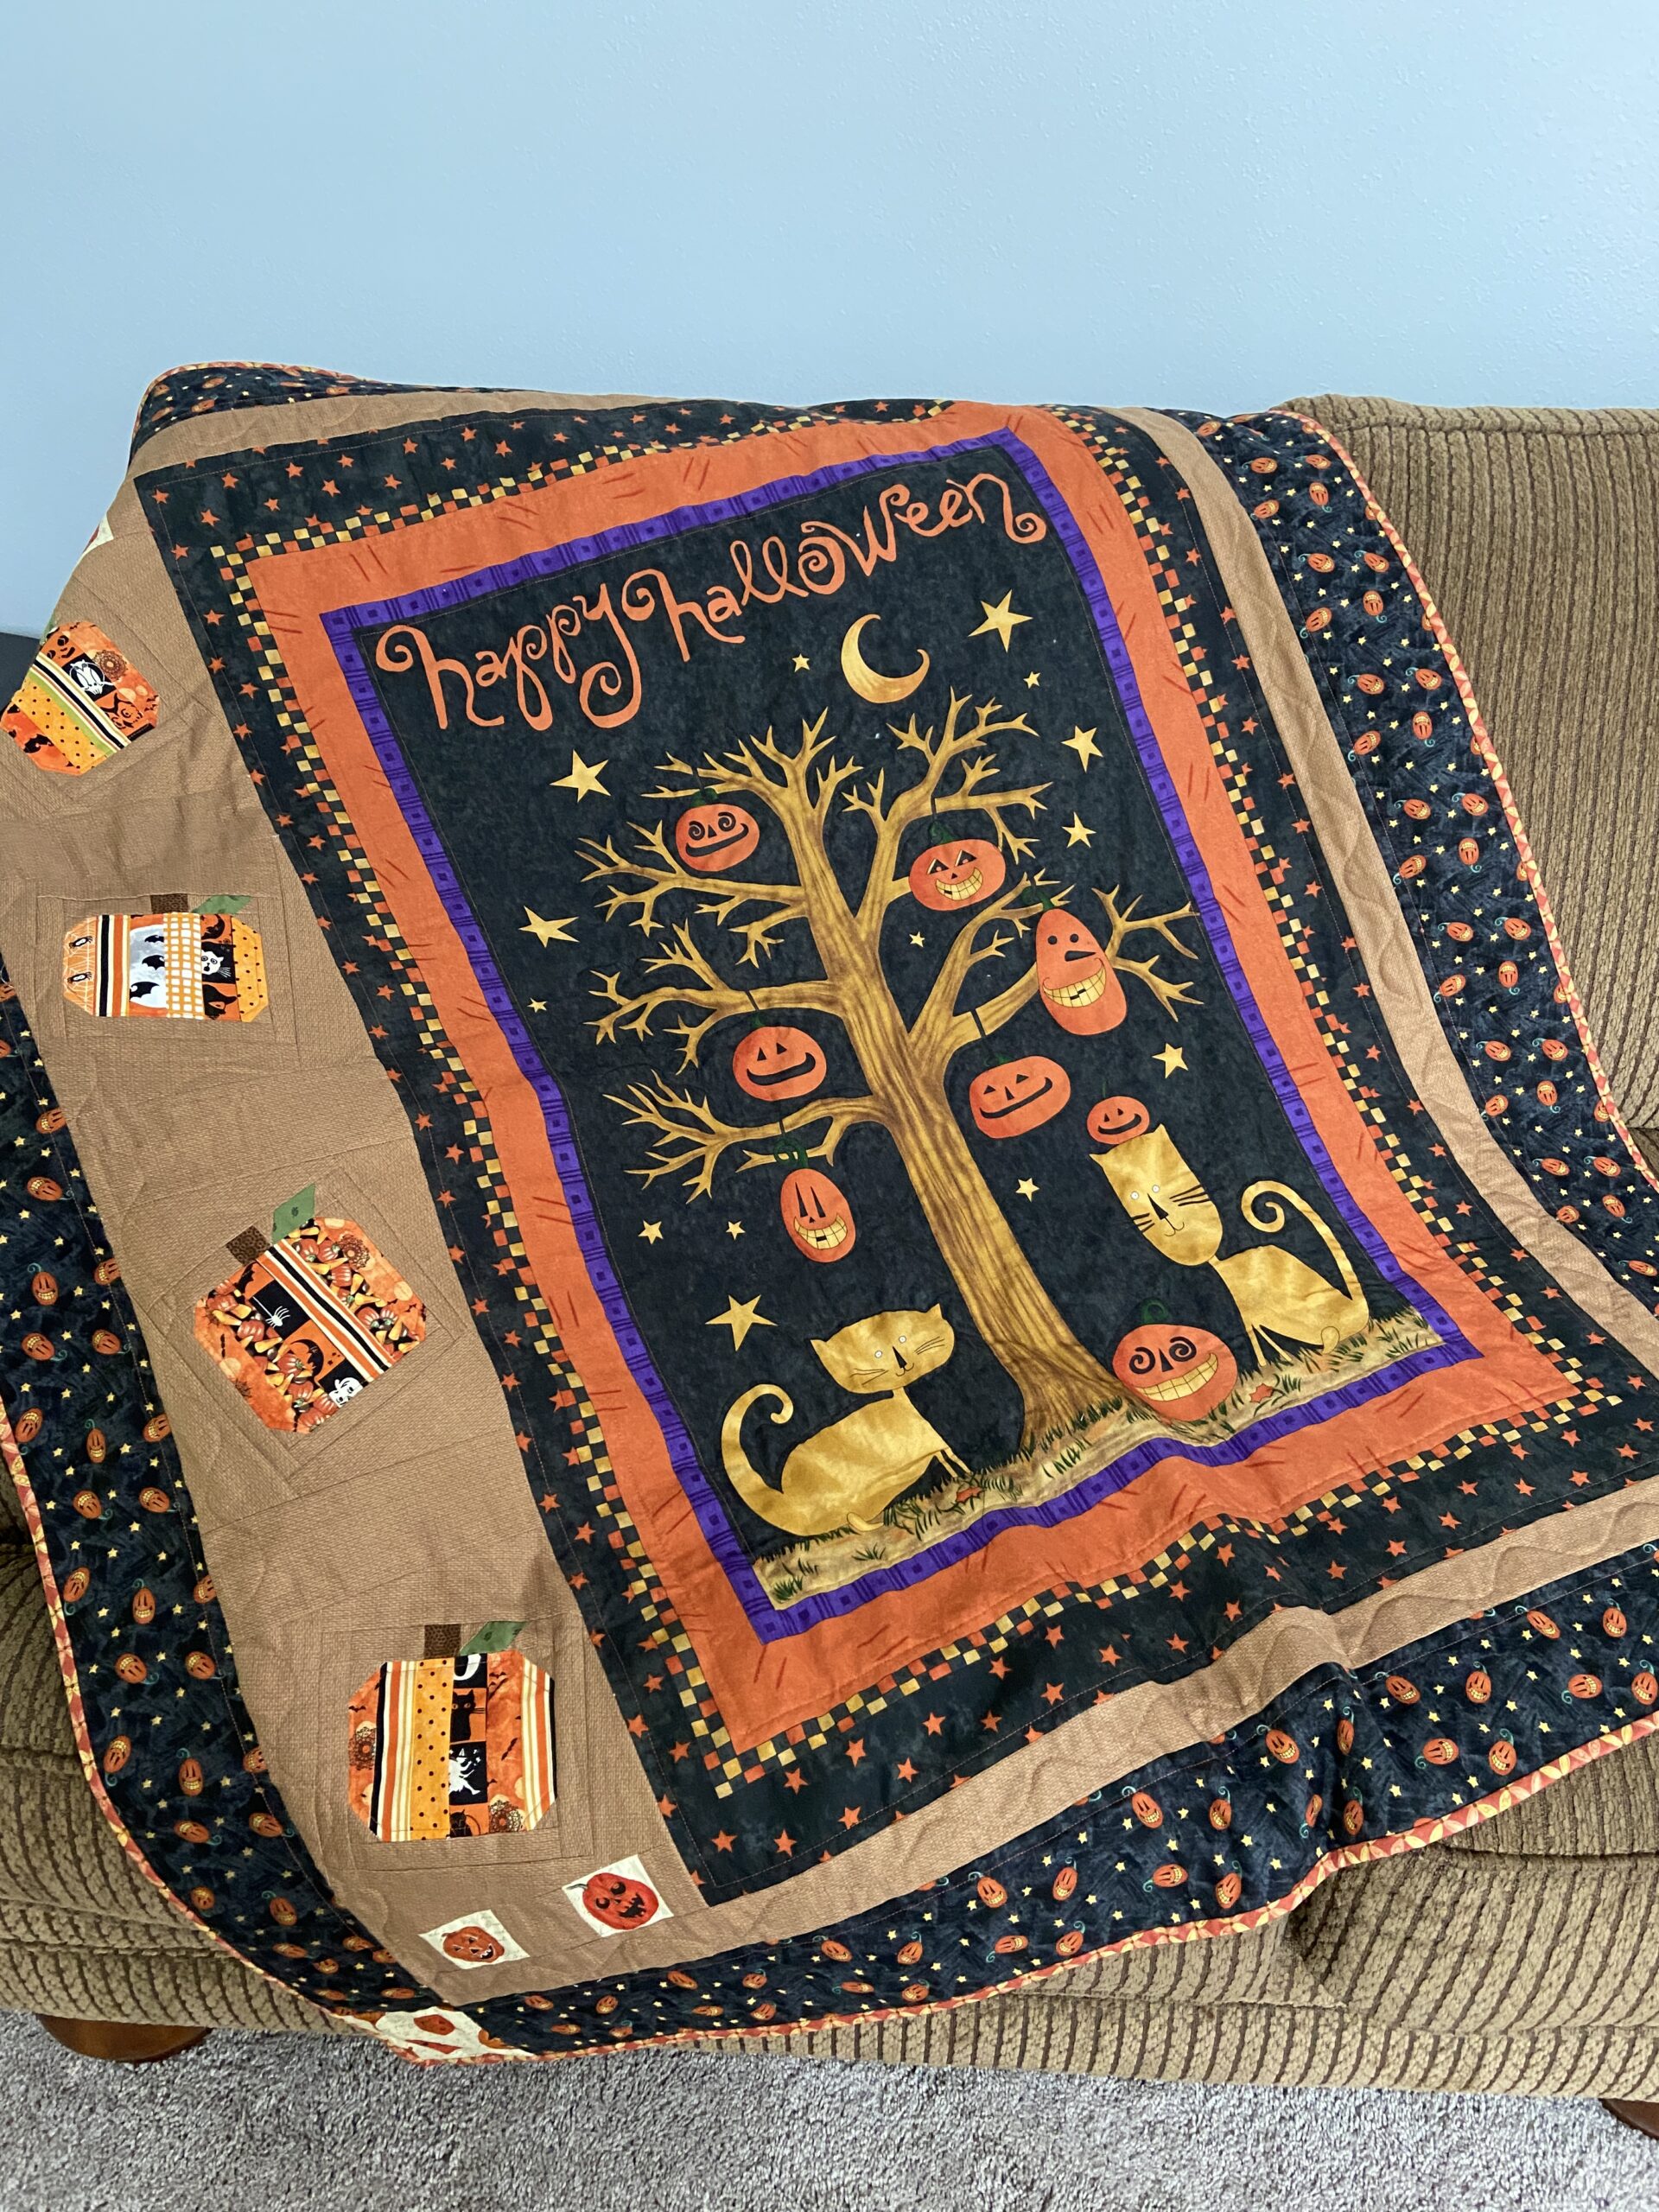
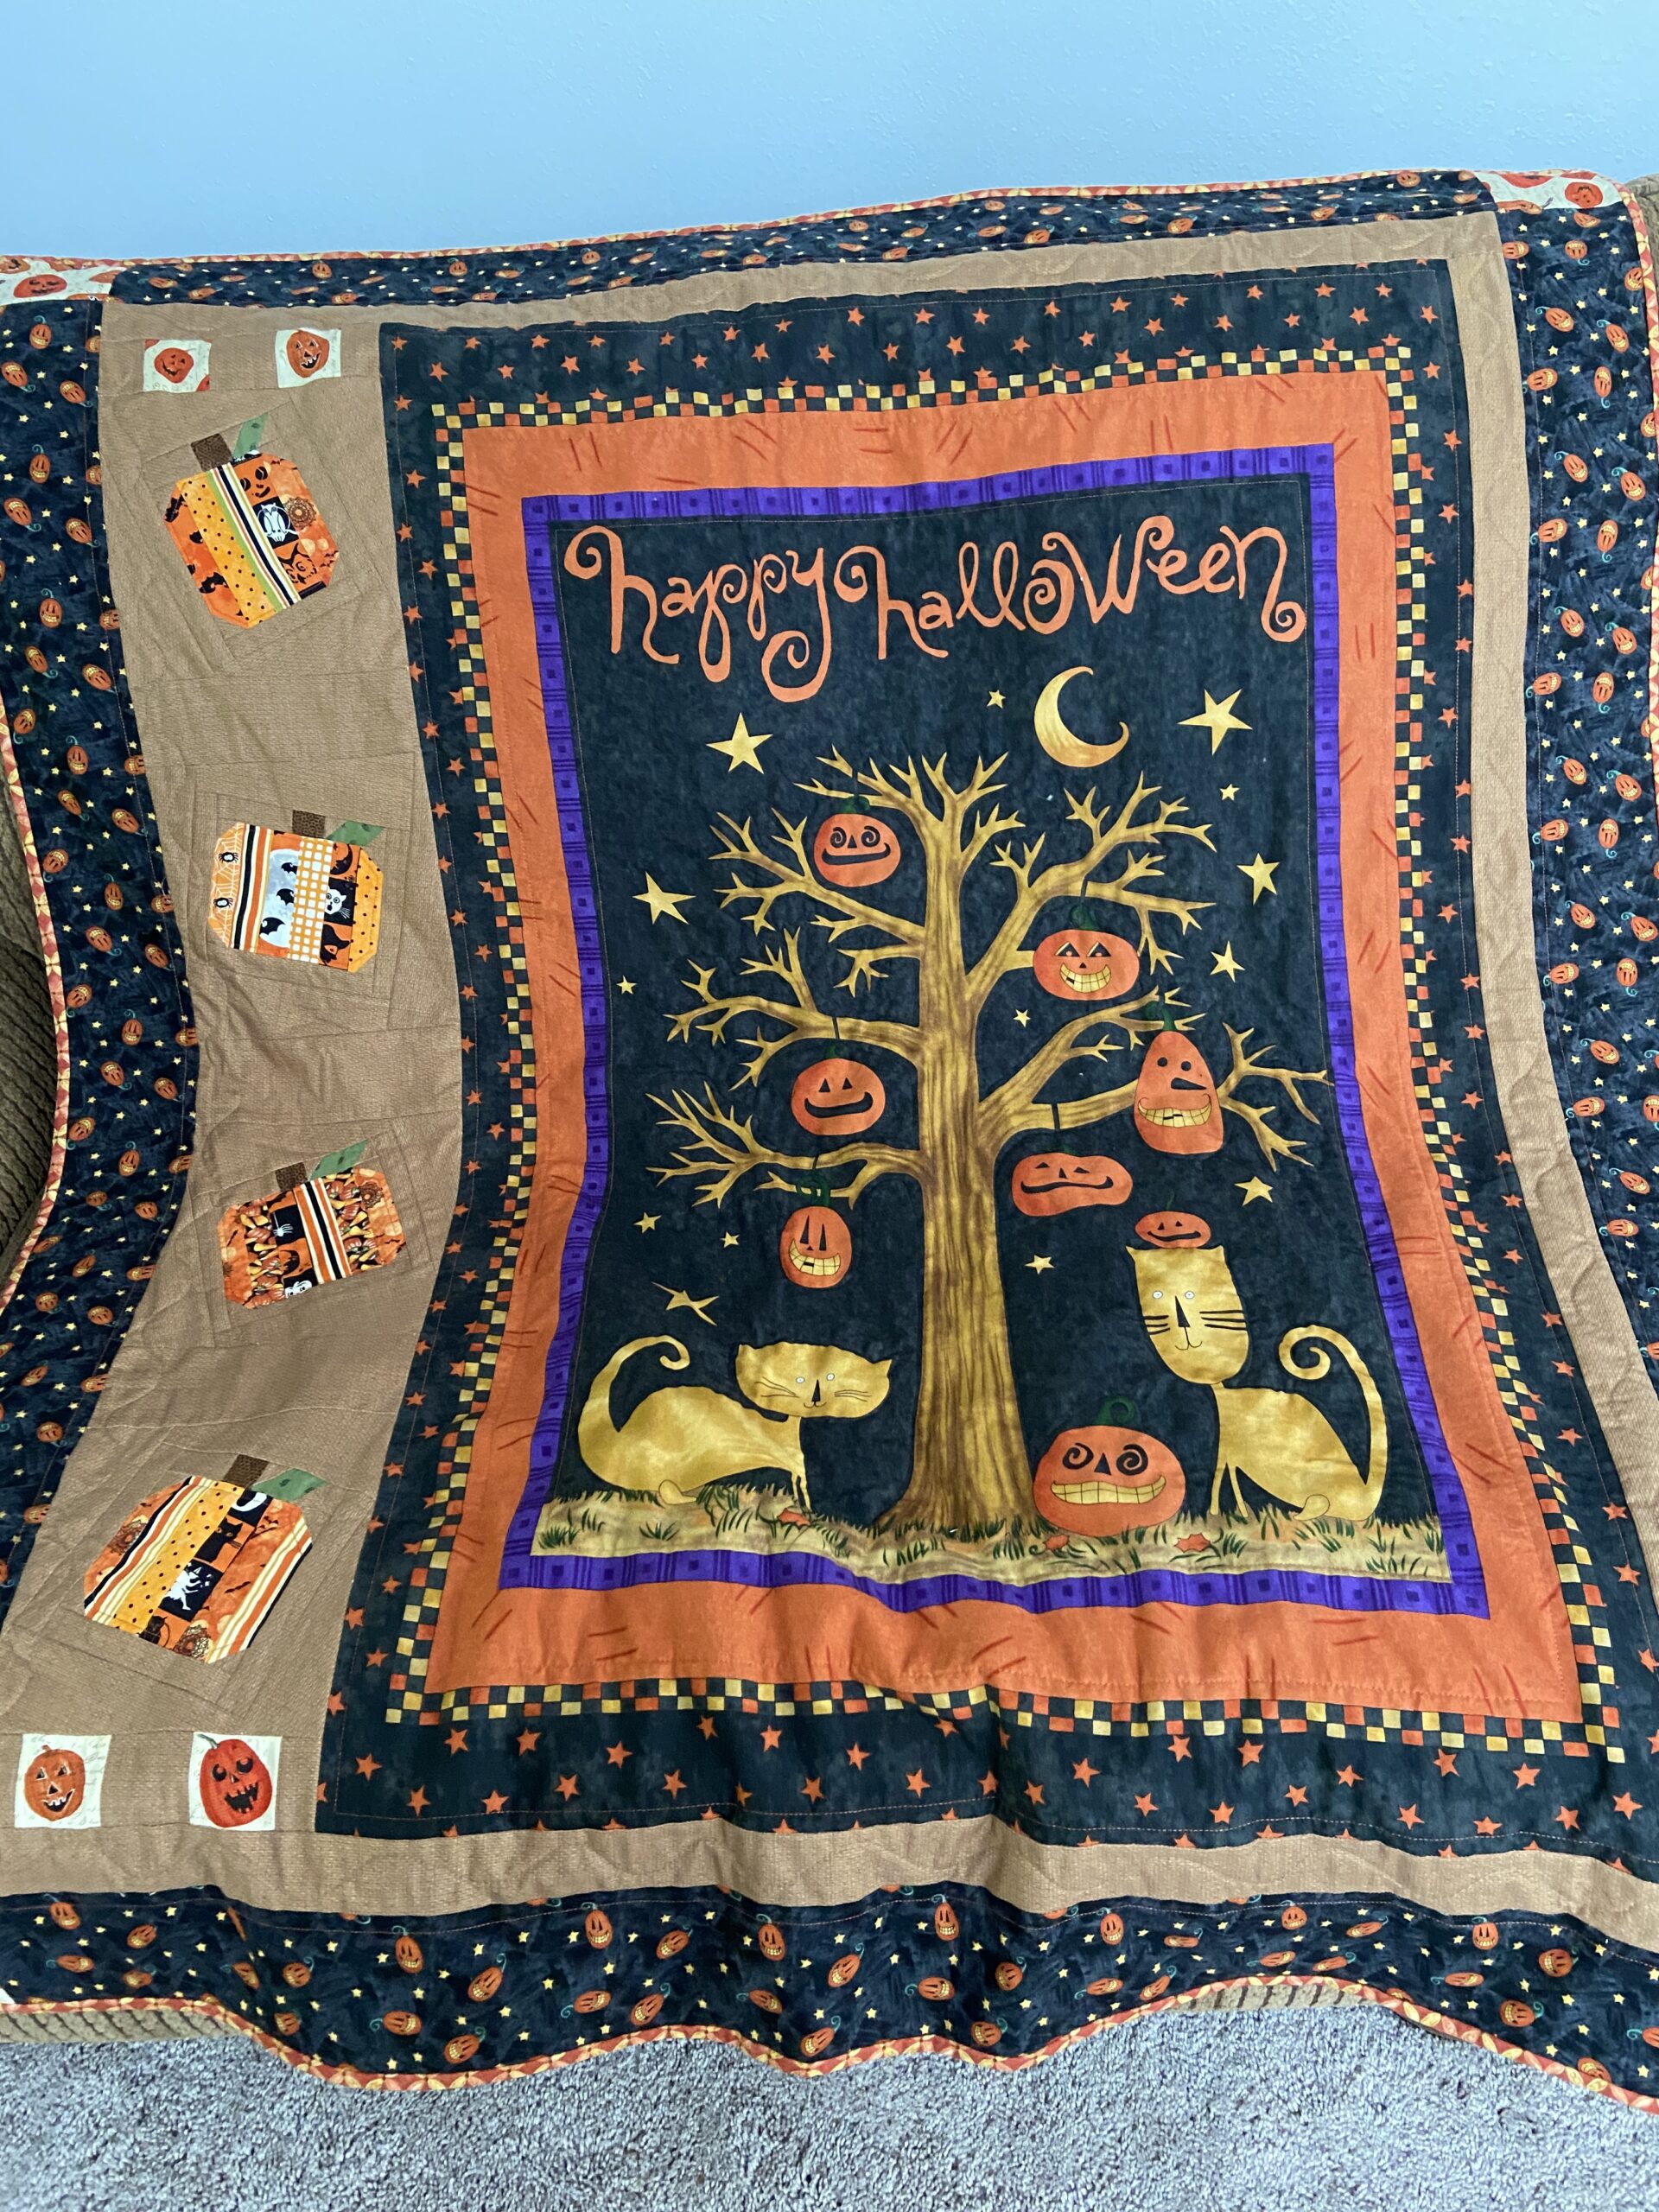
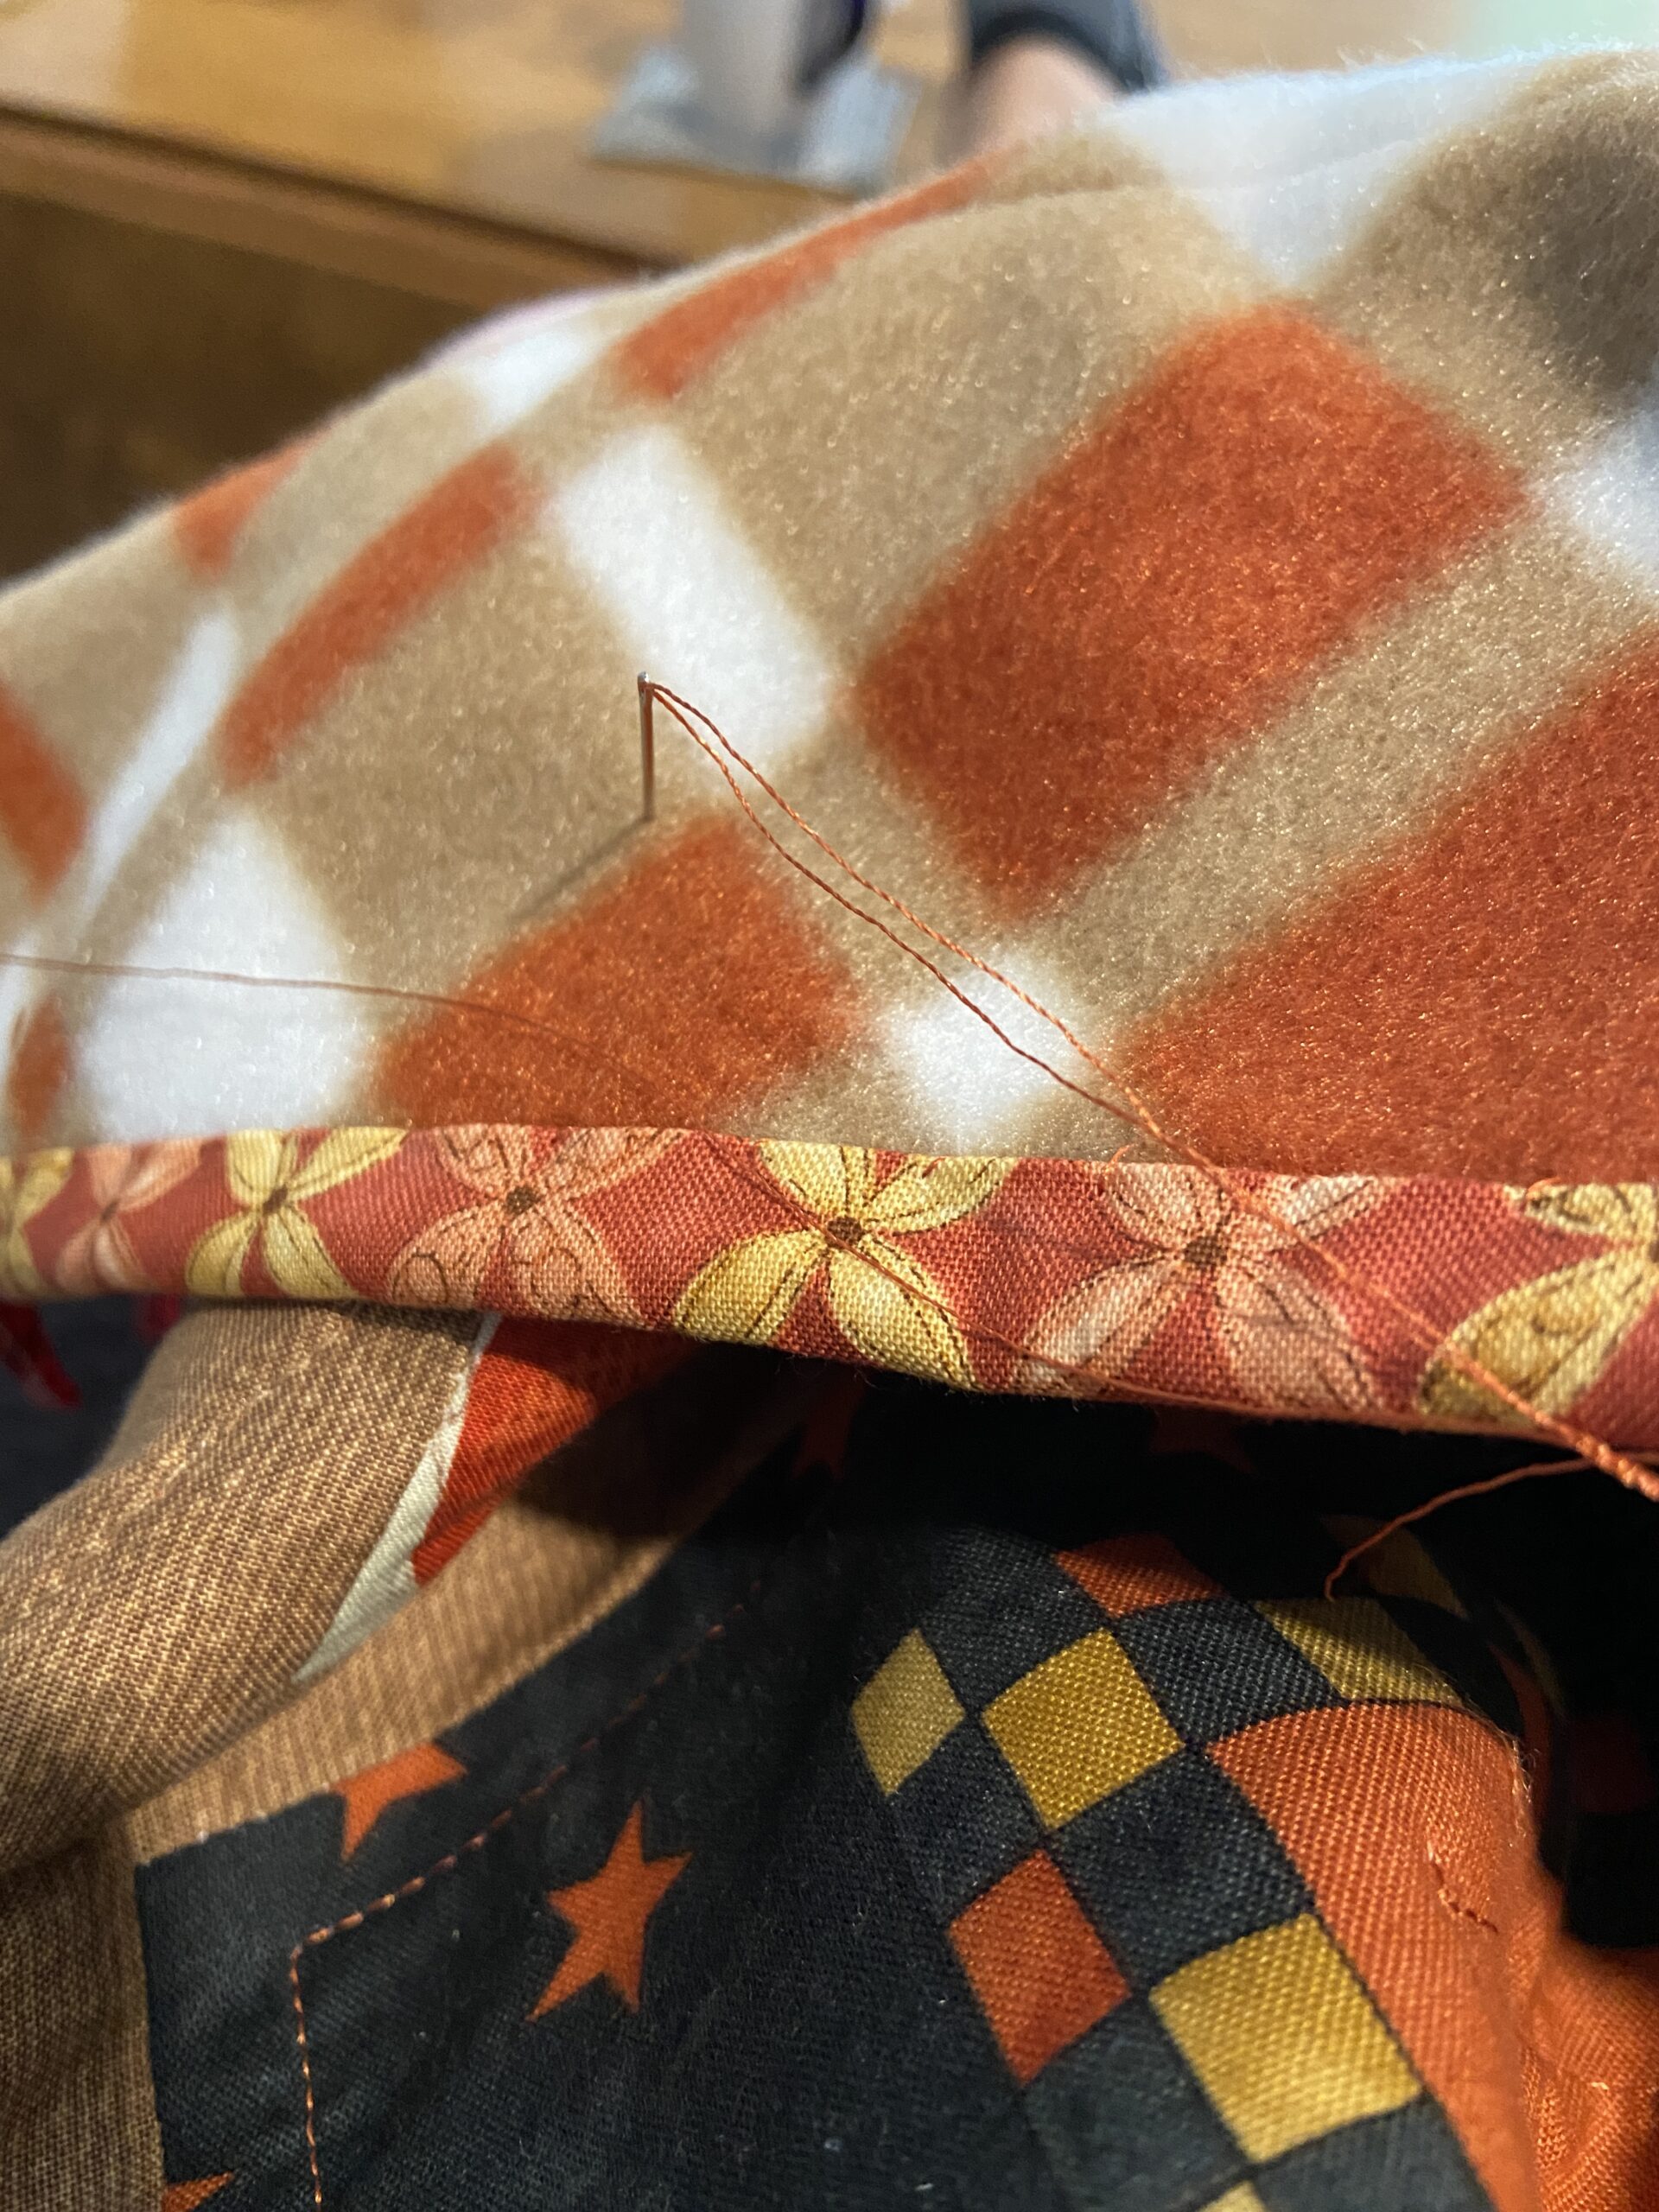
This quilt is a first for me. I have never backed a quilt with fleece. As I was making this little Halloween quilt, it seemed like a fun thing to try. I was hoping for a soft, cuddly quilt and wow – backing it with fleece did the trick. Early in the summer, I browsed an estate sale of a quilter. I restrained myself and bought only some Halloween fabric plus a few books. The fabric was from an older line designed by Debbie Mumm.
Using fleece made the quilt feel substantial enough that I decided not to put batting between the quilt top and the fleece. I had read of some issues with quilting fleece backed projects so I pinned the heck out of it before quilting. It was interesting – for some reason, the straight line quilting was more difficult than the free motion. (I tried both out.) I suspect this is because I still haven’t bought a walking foot for my new machine.
Isn’t this a fun quilt?
A few posts back, I shared the pumpkins I made with strips of fabric. Using a tutorial by Jayne over at Twiggy and Opal, I framed the pumpkins and then cut them so they would be a little bit wonky. I like the whimsical effect of having them slant to the right and left.
To make things a bit more interesting, I placed the panel off to the side so that the quilt isn’t symmetrical. When I quilted it, I did straight lines for most of the borders and then echoed around the tree and the cats on the panel. Very simple quilting was the ticket.
The binding was made with fabric I had on the shelf; machine stitched to the front and hand stitched to the back.
It isn’t feeling like fall outside just yet but while out walking, I have seen some leaves that are turning color already. It won’t be too long before autumn is here. We are spending Saturday afternoon with my son and his family. We haven’t seen them for a couple of weeks so we are looking forward to it.
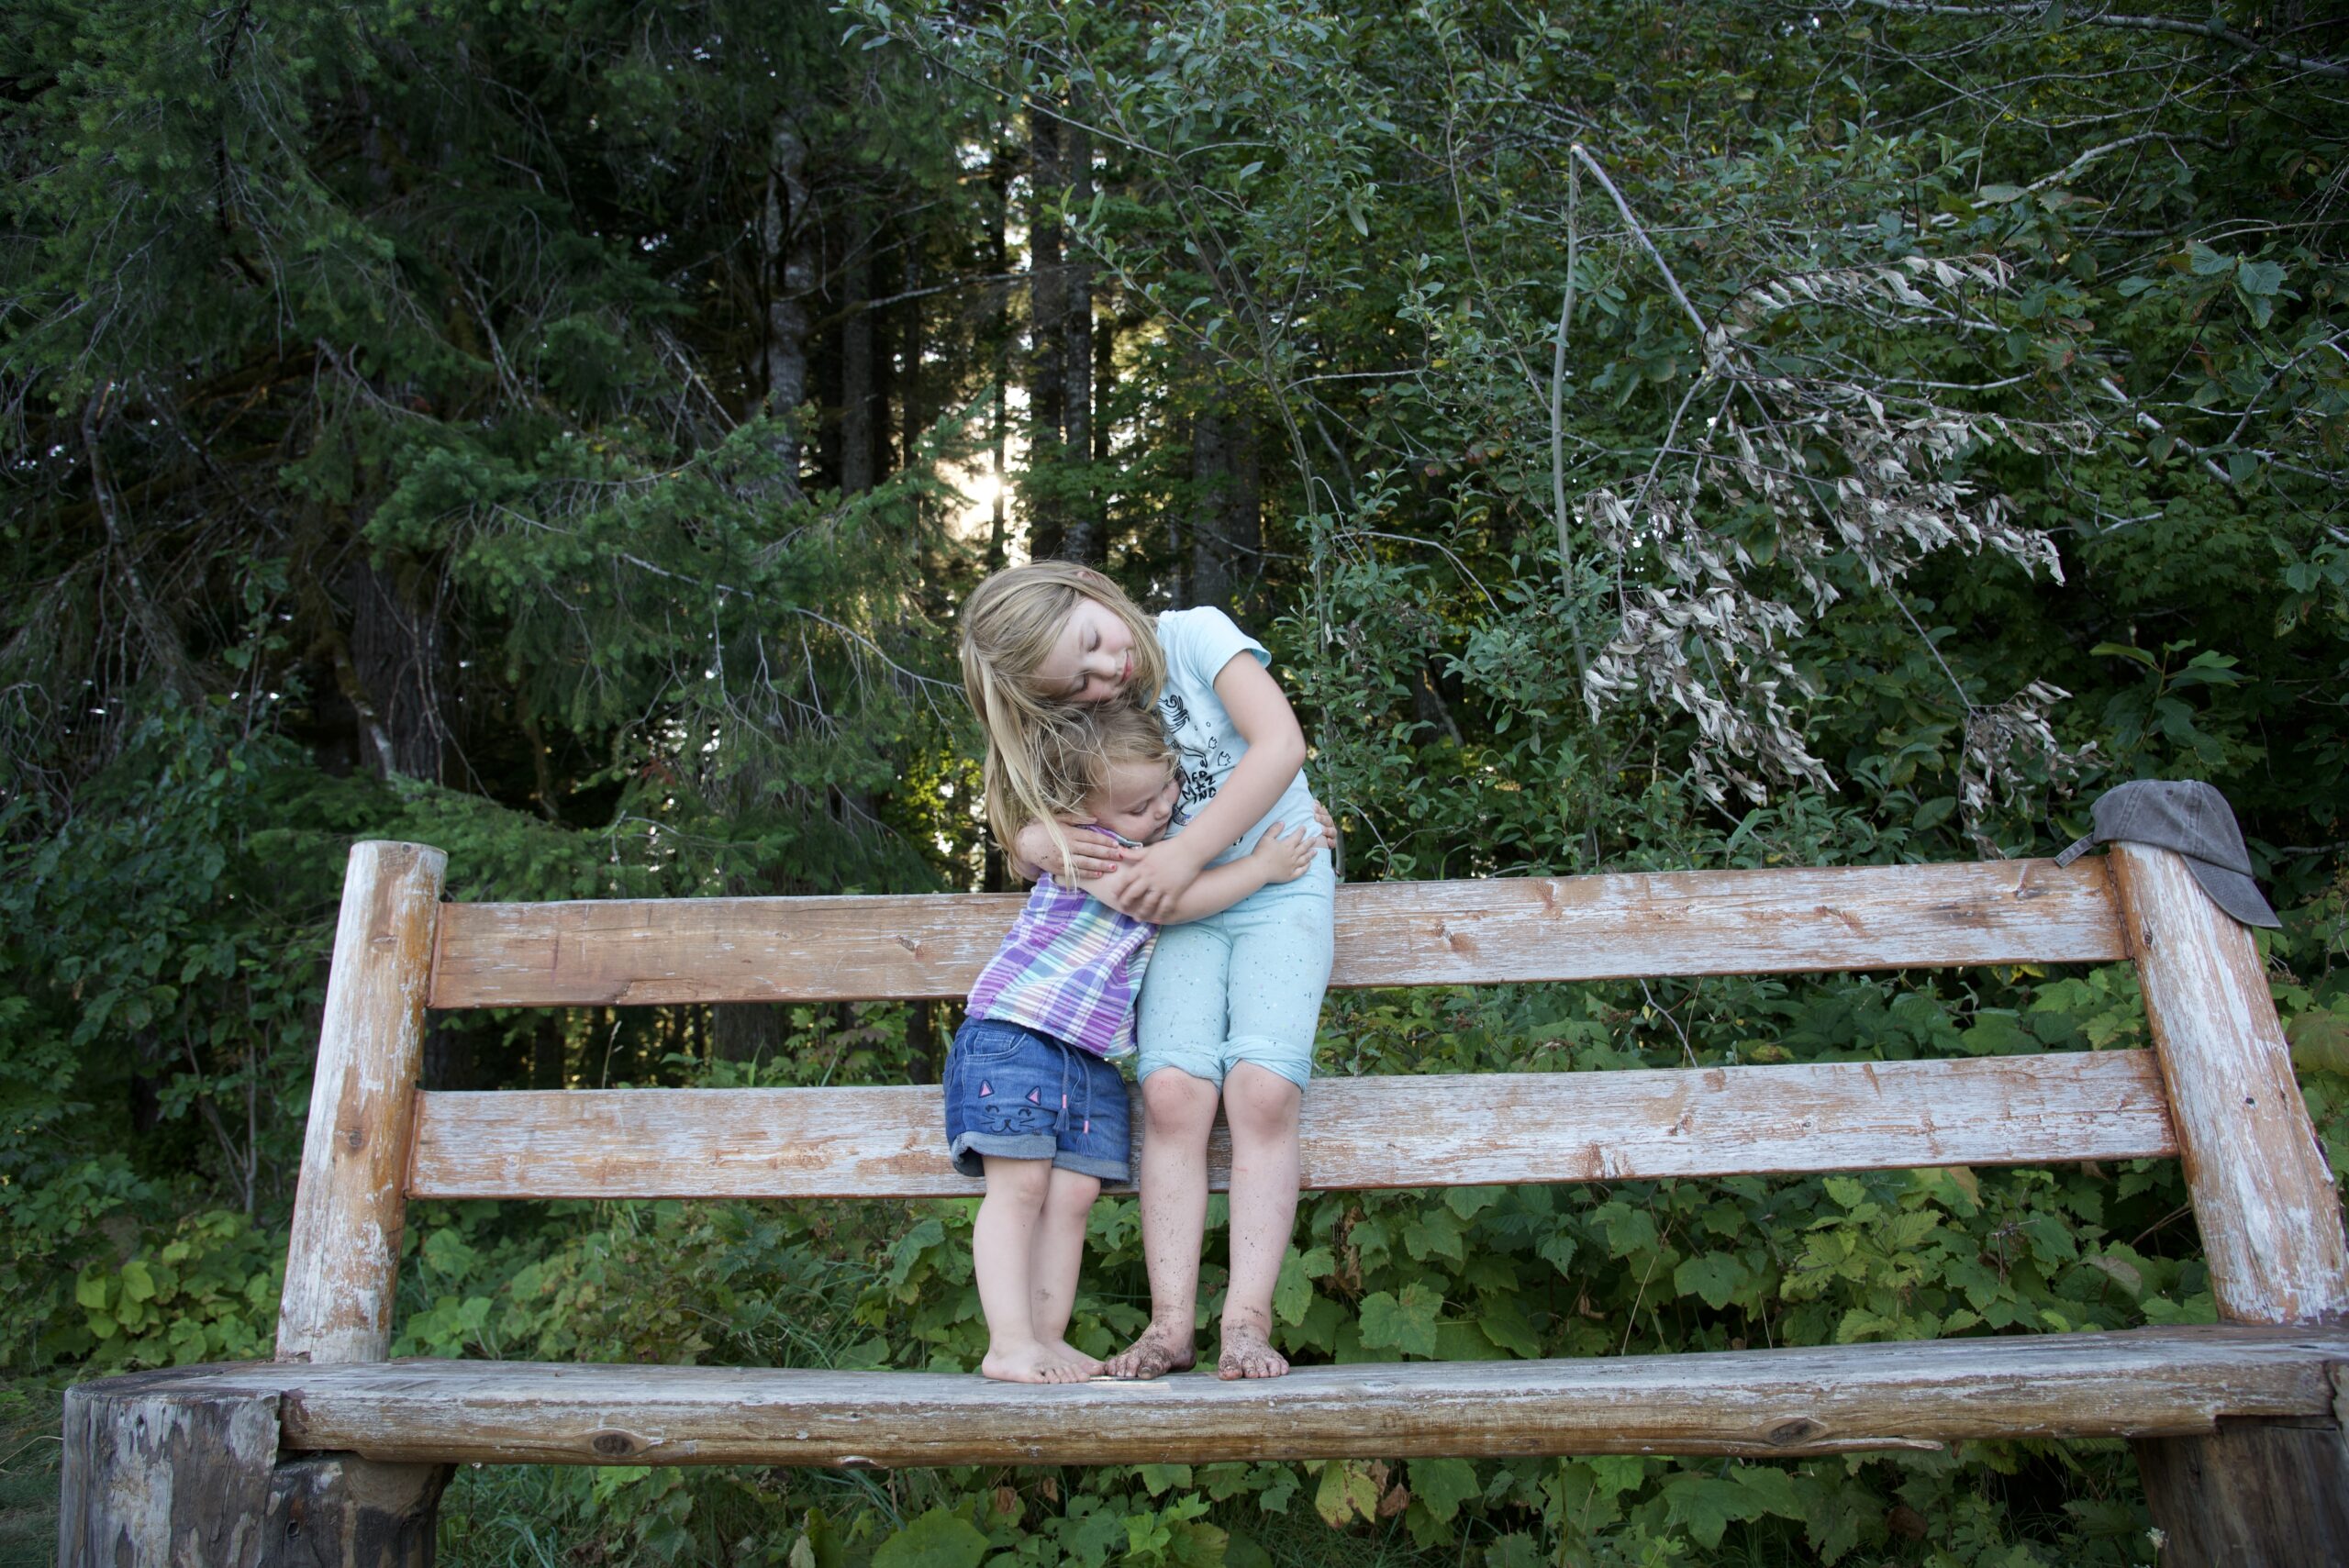
My son and his wife took the girls on a long camping trip last week. They shared so many great pictures of their adventures. But this was my favorite. These two sisters have an awesome bond.
Hope you are finding ways to celebrate the end of summer! Kids are going back to school and fall is on the way. Enjoy!
Linking up with the Peacock Party as well as other favorites. Find the links at the top of the page, under Link Ups.
Between the Covid safety measures and the wildfires out here, our family is basically stuck inside and at home. The smoke continues to pollute the air and our Air Quality Index has ranged from 175 to 352 (the highest I have seen it) over the last month. (As a point of reference, 0-50 is considered healthy, clean air). In our area, the fire that started this mess began on August 14th. Fortunately, that fire has been dealt with but there are myriad other fires up and down the whole west coast, keeping the air very unhealthy.
Having to stay inside so much gets boring and the three of us get antsy. We have been trying to do projects, read a lot, watch tv and play an occasional card game to pass the time. Over the weekend we got crafty! Want to see what we made?
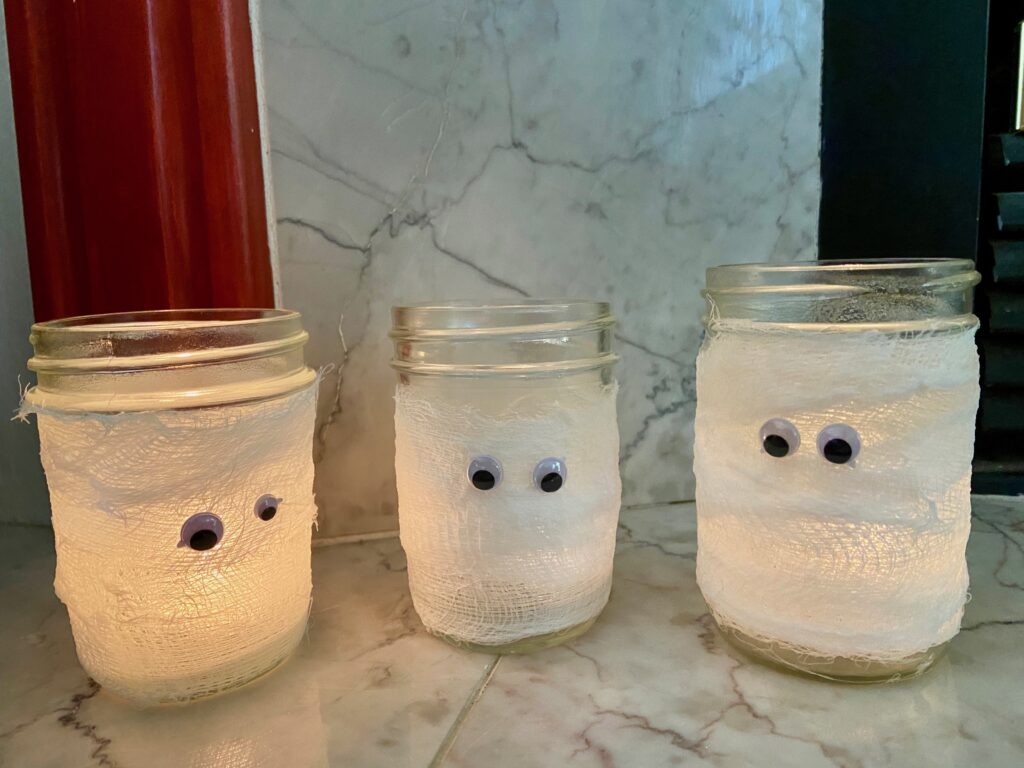
The first project were these silly mummy jars. Julia and I thought they would be fun to have out for Halloween. The project is so simple and if you have small children, it is perfect for them. You only need a few clean jars, some Mod Podge, cheesecloth, and wiggly eyes.
Cut the cheesecloth into strips approximately 1 1/2″ wide. Maybe two strips per jar? Paint the outside of the jar with a coat of Mod Podge. Wrap the strips around the jar as you might wrap a mummy. Haha – like I would know how to wrap a mummy. Then paint another coat of Mod Podge over the wrapped jar. Let dry. The next day we used a hot glue gun and attached the wiggly eyes. Julia’s boyfriend decided one of our mummies needed to have crazy eyes so he used two different size wiggly eyes.
They are quite cute when lit up.
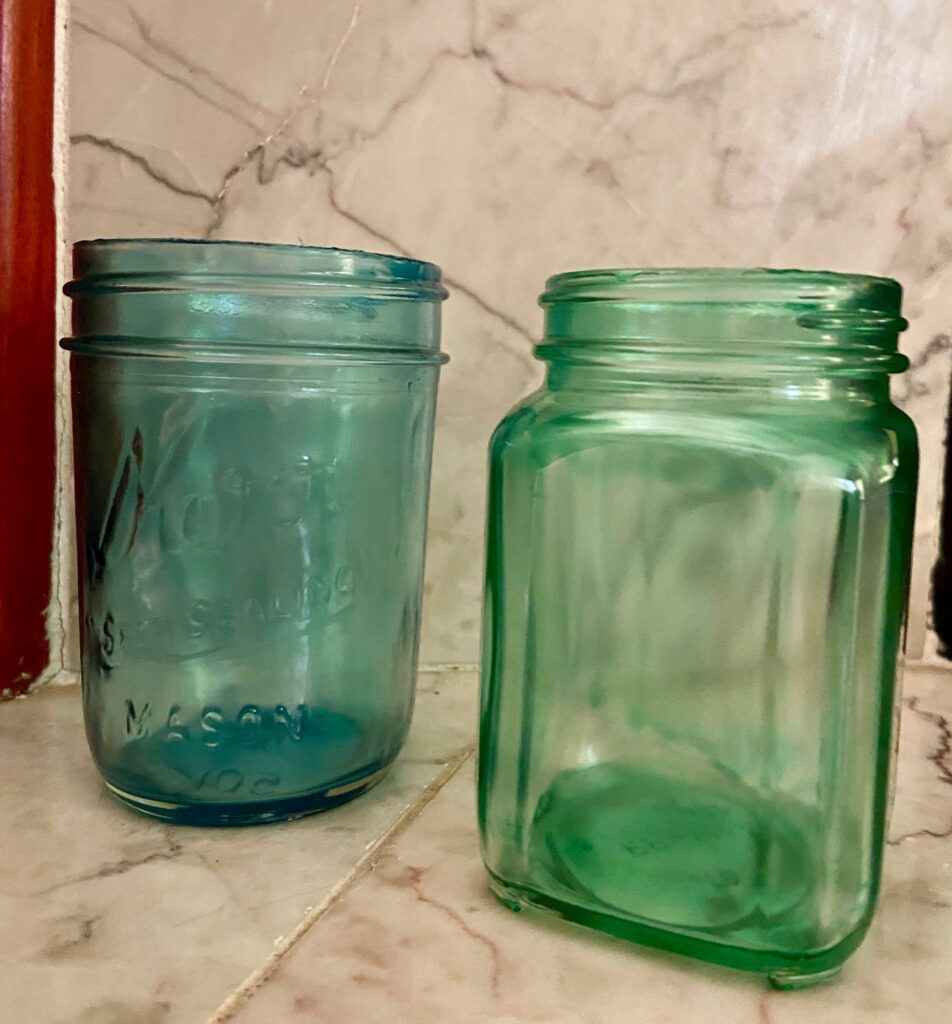
Moving on, and in keeping with the Mod Podge crafting, Julia and I colored two jars. I really love these!
Another simple project, you only need two clean jars, Mod Podge, and some food coloring. For these jars, pour about 2 tablespoons of Mod Podge into a little bowl. Add the color you want (remembering not to add too much!) and about a teaspoon of water. Mix until the color is distributed – we used a toothpick to mix ours. Pour the colored glue into the jar and start to rotate your jar slowly, letting the glue run over all sides of the jar. Once the inside of the jar is well coated, drain the Mod Podge out. If you are going to make more jars, drain back into your bowl. Since we didn’t want to make more than one each, we drained the jars over the kitchen trash. Hold it upside down for a minute or so to let it drain. Then invert it on to a tray with waxed paper on it. Let the jars stand upside down for an hour. After that hour passes, bake the jars – standing right side up – for an hour at 225 degrees. They dried clear and hard.
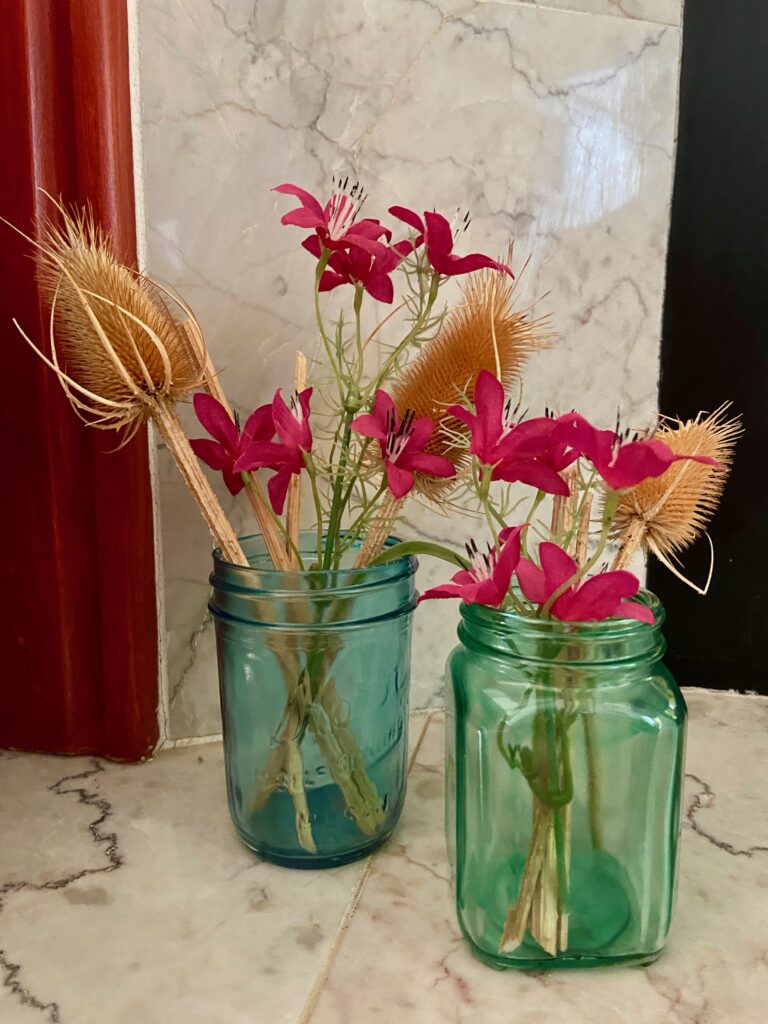
I don’t know that I would put water in them as I am uncertain if that would eventually wash out the finish we made. But they look cute with dried flowers.
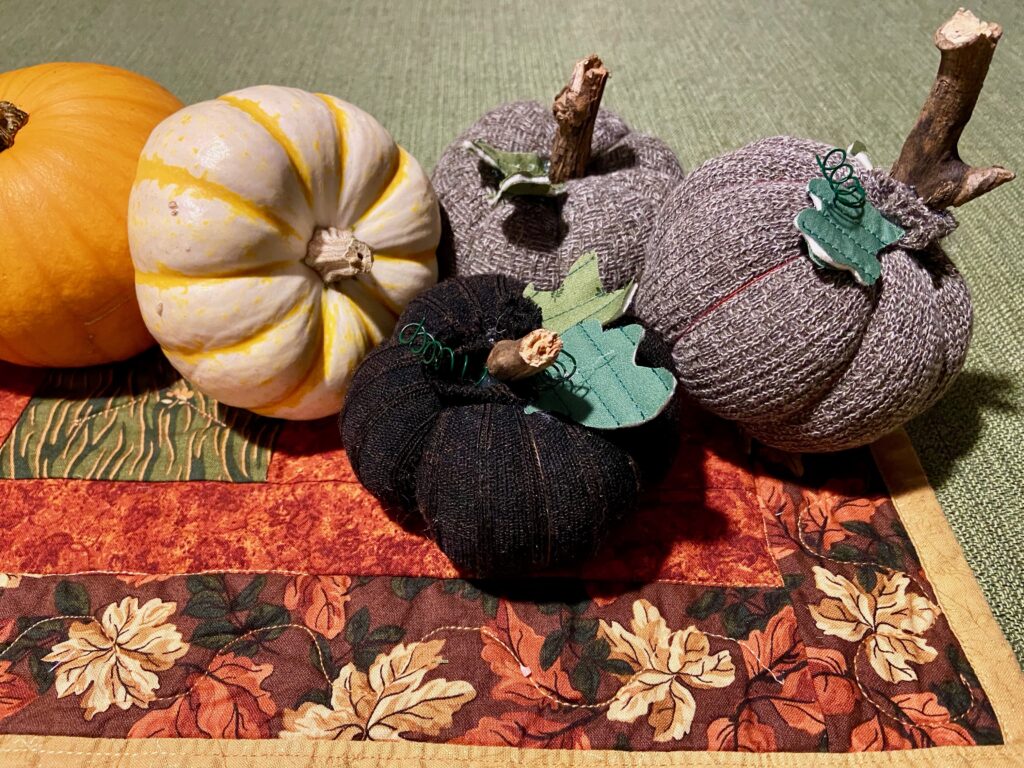
Moving on Julia wanted to make some soft pumpkins. We had everything we needed though the only appropriate socks we found were from Ray’s drawer. I am not a fan of the darker colored pumpkin. I do like the lighter colors though.
To make these we used a tutorial found at A Well Purposed Woman. I won’t go into the details since we really followed her instructions completely. This was a lot of fun to do together. Julia had the great idea to wrap floral wire around a pencil to make the little curlicue ‘vines’ we glued at the top near the stems. I like the fact that the instructions told us to put 1/4 cup of dry rice in first and then the polyfil stuffing. This weight at the bottom really makes the pumpkins sit nicely. If I were to do this again, and thrift stores were a feasible option, I would look for some socks with better colors or a knit sweater that could be upcycled. However, considering we were only using what we had at home, I call this a success.
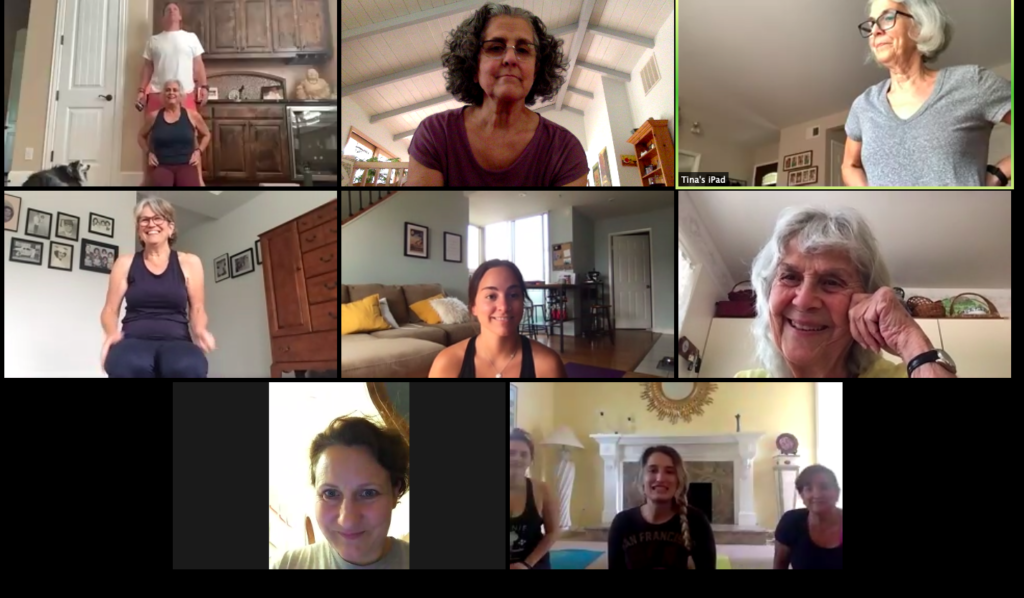
One more fun thing to share – my sister, Juanita, is a yoga instructor who lives in Texas. With all of the travel restrictions in place, my family (like yours I am sure) is unable to be together. To allow family members to be able to spend time together, my sister has been teaching a yoga class via Zoom on Sunday afternoons. The link goes out to everyone in the family and whomever is available joins in. I took a screen shot over the weekend to share with you.
This doesn’t even show all of the family that participated. I couldn’t fit everyone on my screen. But it is such a great way to spend an hour together. Do a little yoga and then we all visit for a few minutes. It is just real life connected virtually. During family yoga this past Sunday, my sister in the upper right corner had her 16 month old grand daughter in and out of the room and my niece, bottom row, far left had to stop to help her three year old put her pants back on. It all makes us laugh and we (sort of) get to be together.
It takes some effort and a bit of creativity but I am glad we can find ways to stay connected. I hope you are able to as well!
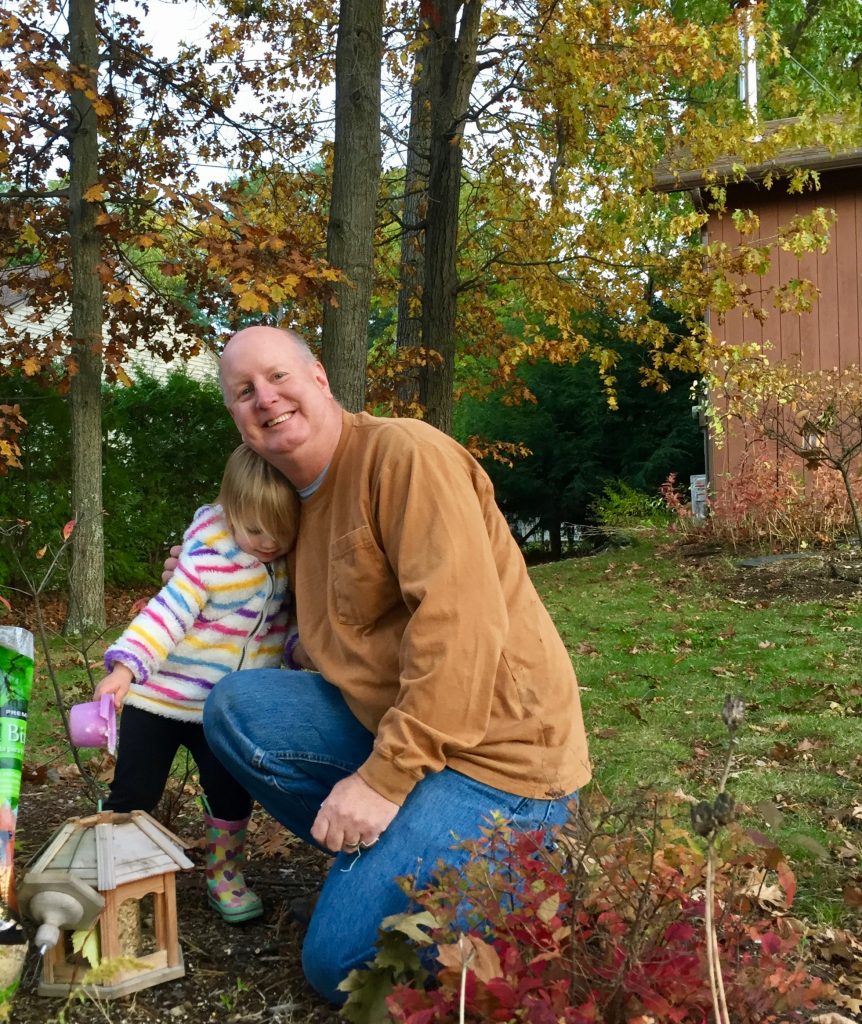
Happy Halloween!! Your recent two weeks of family time in Vermont were wonderful. The goal was to hang out with our son and his wife and spend as much time as possible with our grand daughter.
Grandpa was her favorite during our visit!
While there my grand daughter came down with a miserable virus and had terrible croup. Poor little girl was sick for a long stretch and toward the end of it, my husband came down with it. Not a fun bug at all! The two days before we left, my son and his wife were starting to come down with it but it didn’t look like they were going to be quite as sick.
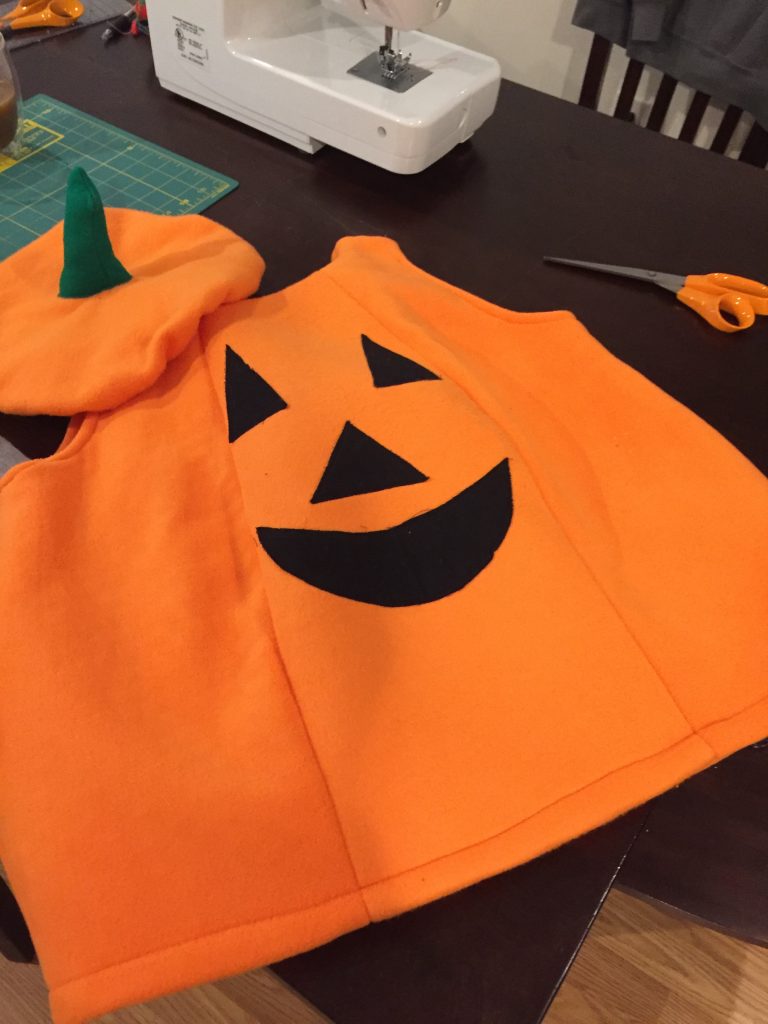
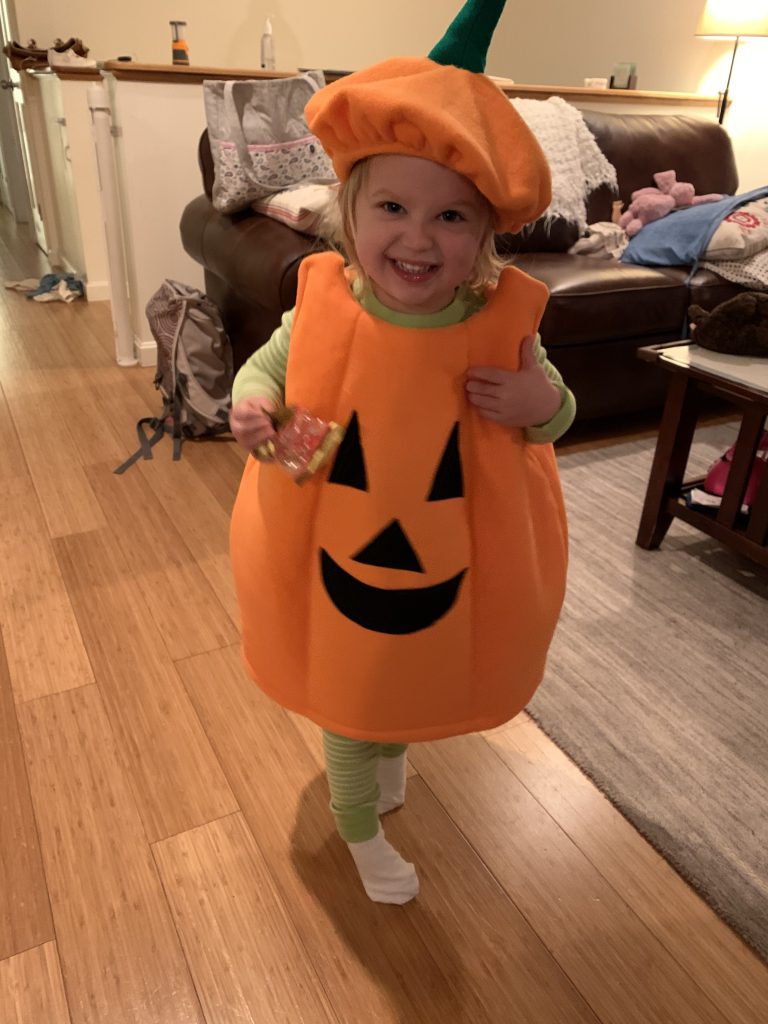
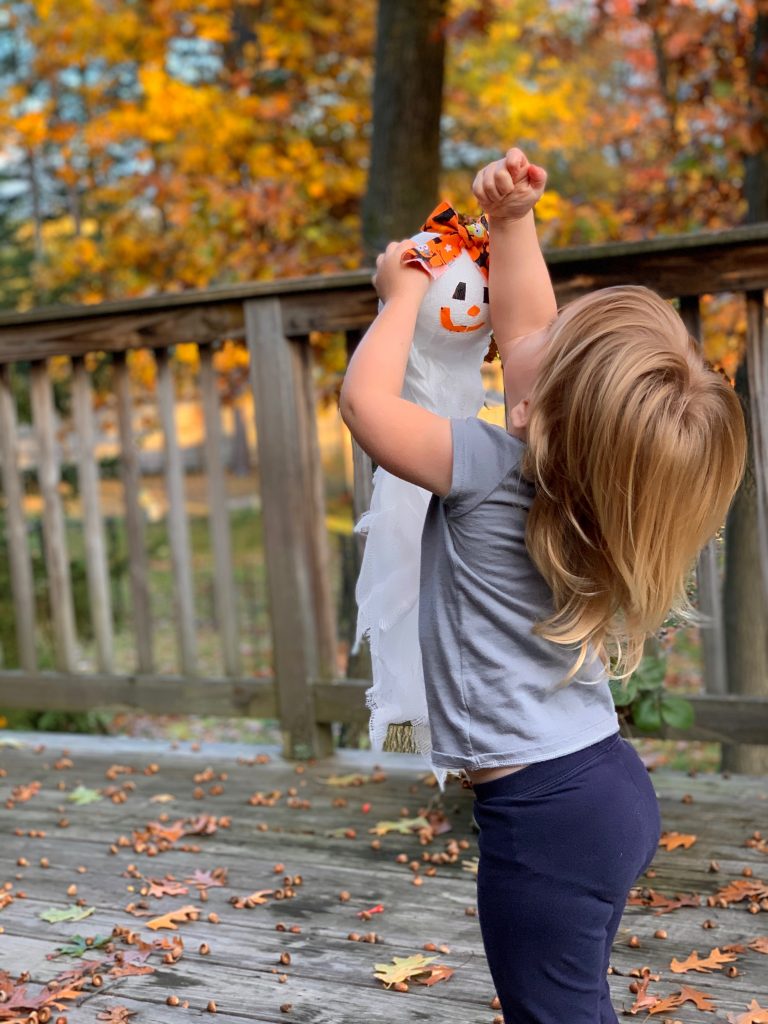
Since we were having some quiet time at home and H was taking long naps due to being sick, i did have time to do some sewing. I pulled out my DIL’s sewing machine to make a Halloween costume for H. She and her mom found a cute picture of a little girl dressed up as a pumpkin with green leggings and t-shirt on underneath.
I used a Simplicity pattern for the costume. There is a Jo-Ann’s in the next town over so off I went in search of orange fabric. At first I planned to use a wool felt but it was so stiff. I knew H wouldn’t have fun running around in that at her Halloween party (at her daycare). I was with my son Kyle (he and his wife drove over from New York for a weekend) and he spotted a bolt of orange fleece way up on a top shelf, not yet unwrapped. Lucky for me he is 6’ 2” and was happy to hop up and down to grab it. This was perfect.
The pumpkin is lined with fleece and filled with batting. Even trick or treating in Vermont, this girl is going to be quite warm. Her outfit is so heavy!! There was a stencil for the face but i felt like it was too big so I ended up cutting the pieces out free hand. Using a few bits of ‘Wonder-Under’, I fused the face to the front and appliquéd them with a simple zig zag stitch. The pattern called for a casing to be made at the hemline with elastic inserted to make it puffy. However with the fleece, there was already a nice shape to the pumpkin. Instead, I trimmed the fleece lining to be about two inches shorter than the outer layer. Turning one inch of the outer layer to the inside, I machine stitched the hemline.
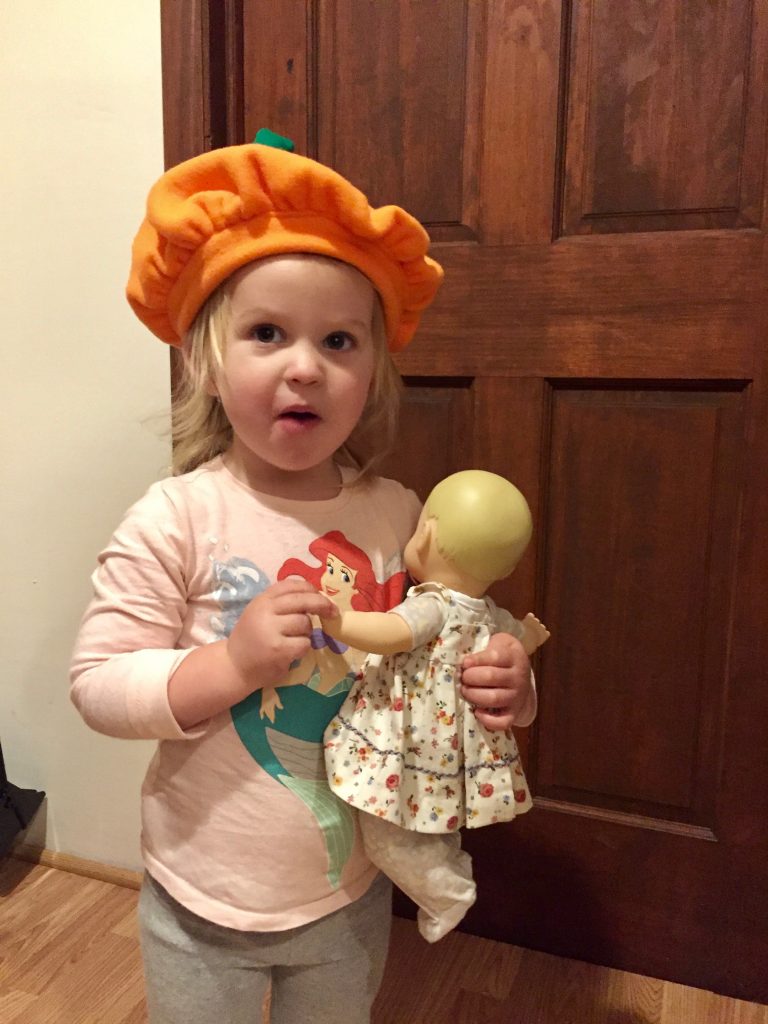
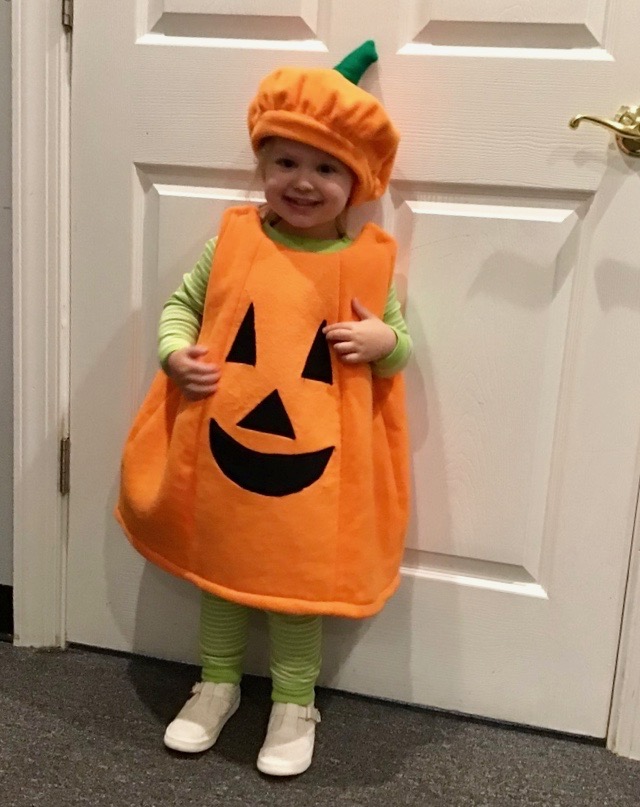
She was trying on the hat when I first finished it. But it was a bit too big.
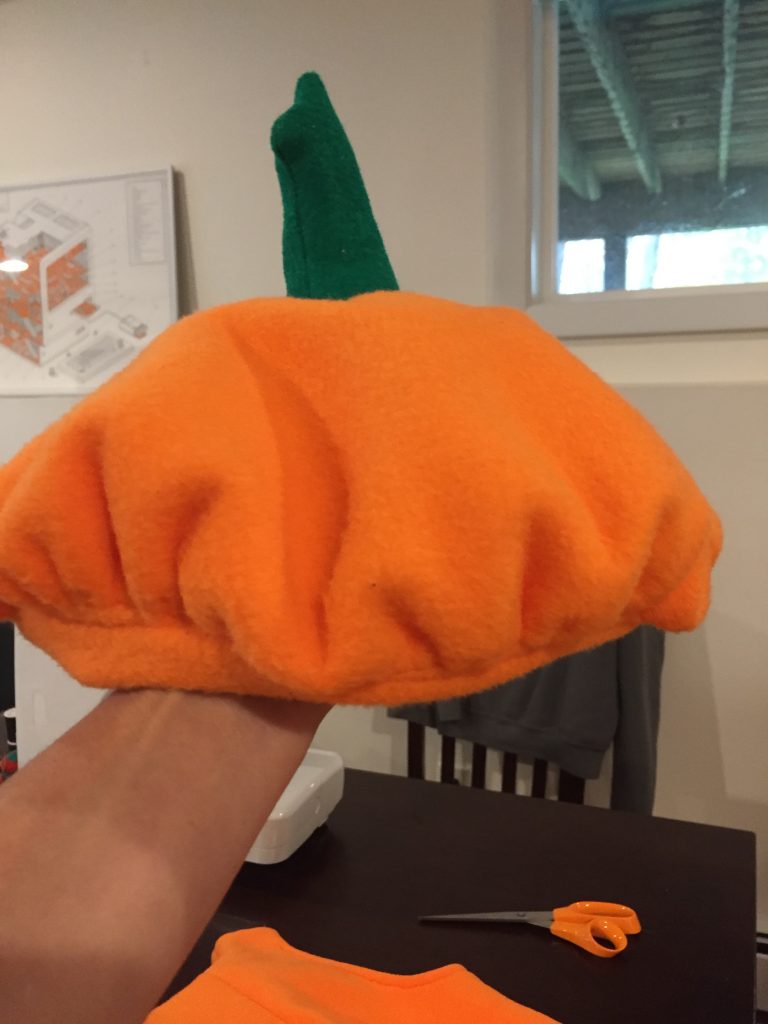
Ok- my favorite part of the whole costume is definitely the hat. When I made it, H was quite happy to wear it about the house for an afternoon so I really hope she wears it on Halloween. It looks so darn cute on her. I made it during a nap time, guessing at the sizes and it was too big for her. There wasn’t a clean way to fix this without doing a lot of seam ripping. I had to rip one seam on the pumpkin and it was difficult to manage with that puffy fleece fabric. So I cheated and took a little tuck and just stitched it up. The hat is still a bit large but better than before.
So darn cute!
When I left I had not had time to run out and buy some velcro which was needed for the shoulder straps. So I left it unfinished and my daughter-in-law took care of it. I received some really cute pictures of H having fun with her costume today.
Getting ready for daycare earlier this morning. So much excitement!
I am glad they had a little party at her daycare. I hear they are supposed to have a lot of rain tonight so that may put the kibosh on any trick or treating.
I love the green and white striped leggings and t-shirt under her pumpkin costume.
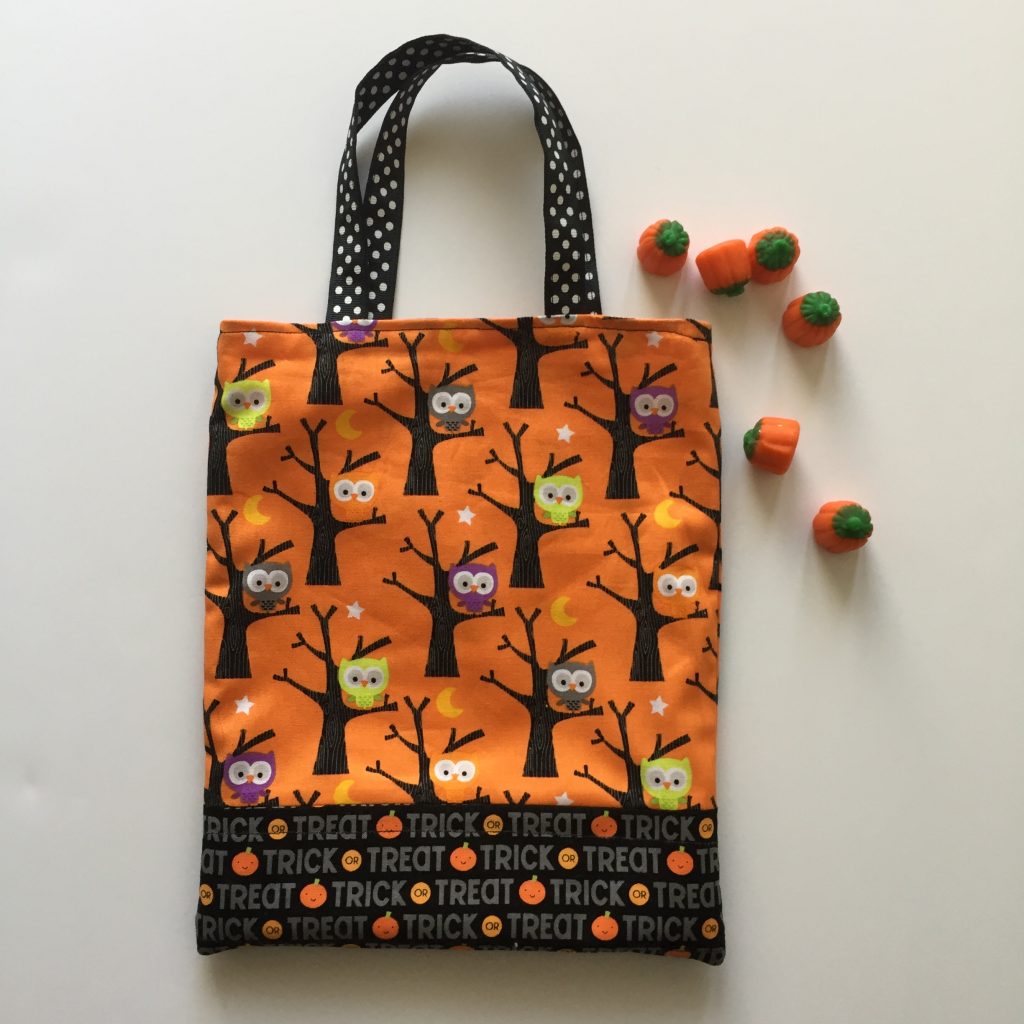
Just in case there was a chance for trick or treating, I also made her a tiny treat bag to carry.
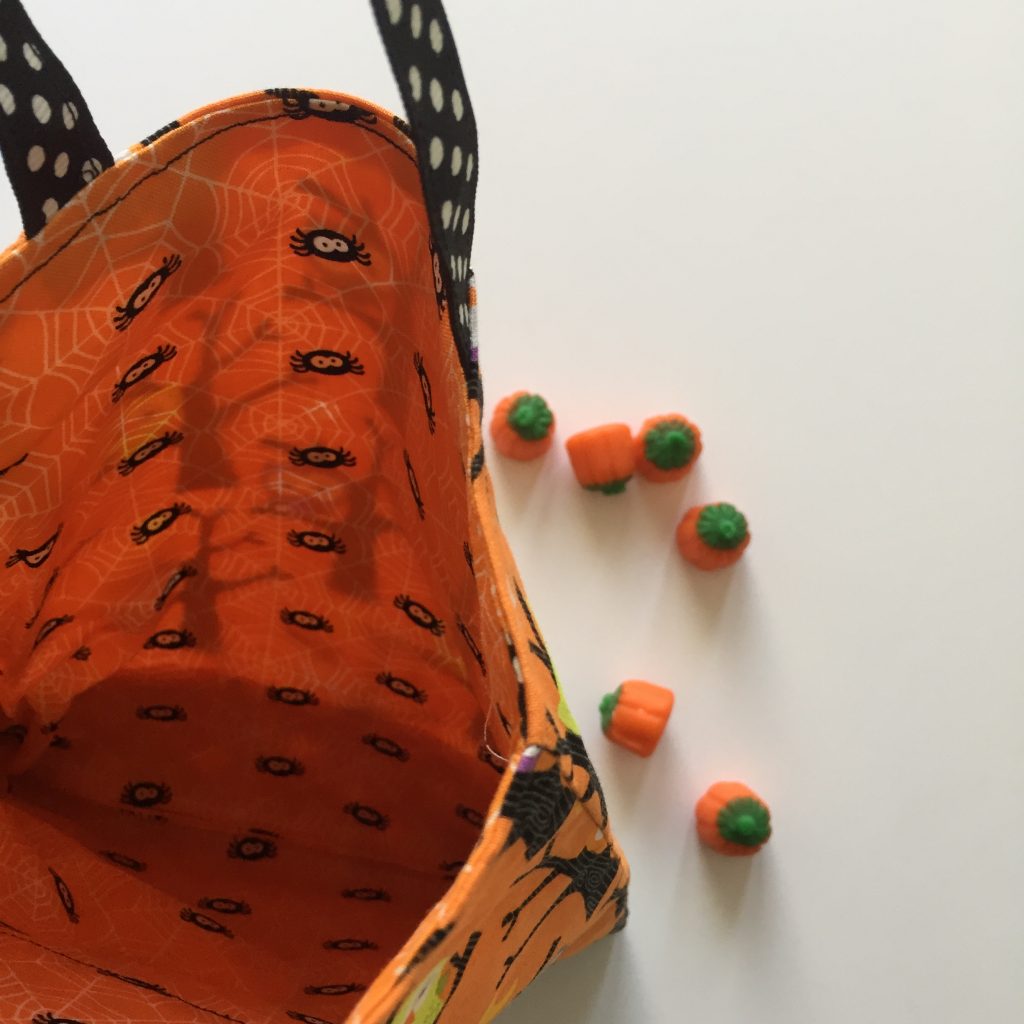
This was designed off the cuff and I didn’t write down any measurements. If I had to guess, I would say it finished at about 8″ x 11″ or so. Maybe even a bit smaller. I had that polka dot ribbon on hand (actually had all of the supplies on hand) and I took two pieces and sewed them together (wrong sides together) just to make it a bit heftier.
The bag is lined, which makes it a bit stronger. Since she does not yet know what trick or treating really is, she won’t be disappointed this year if they skip it due to weather. She can play with this bag or use it next year.
While I was there H and I made a festive bandana for their dog Wusha. I think Wusha looks a bit embarrassed to wear it but this dog will do anything my grand daughter asks of her. I had the triangular pieces cut and pinned and then had H sit on my lap and help me feed the fabric through the machine. I tried to take a selfie because it was so sweet but I am really, really not good at those and didn’t get much of a picture! But we had fun and she was thrilled to help Gram-gram sew for a few minutes.
Introducing Georgie Ghost
One last project while we were there was to make a little ghost to hang in the dining room. We had been taking walks around the neighborhood and she really liked looking at the neighbors decorations. She loved the ghosts and a few little scarecrows we saw. I asked her if she would like to make a ghost and she was so excited.
This was super easy. One styrofoam ball from Wal-Mart and a packet of cheesecloth from the grocery store. I cut the cheesecloth in two strips and with the help of one happy two year old, layered the ball with the cheesecloth. Then we worked together to cut the eyes, nose and mouth. I had gotten her a glue stick that starts out purple and dries clear. This way she could see where she was putting the glue to put the pieces on. The addition of the bow on her head turned this little ghost into a girl. H and I had so much fun with this project and it was the perfect amount of work for a two year old.
Checking to see if Georgie Ghost can fly.
My son took the photos of H and her ghost – they are so sweet! We really enjoyed our time with the kids and can’t wait for our next visit. Grand parenting is the best and it would be even better if we all lived on the same side of the country!! Someday…
Linking up with a few fun places, including the monthly Favorite Finish party at Meadow Mist Designs. Be sure to check the top of the page under Link Ups!
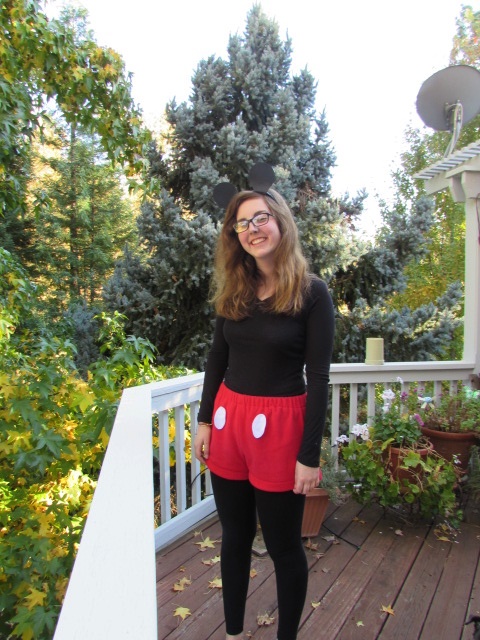
Julia has always come up with fun ideas for what she wants to be for Halloween. Over the years, she has dressed up as Wednesday Addams, a devil, a ladybug, and a bat to name a few. This year she decided to dress up as Mickey Mouse. She is long past the age of trick-or-treating but her high school has an annual Halloween Dance and they all dress up for that.
Did you know that Mickey Mouse was developed by Walt Disney and the very talented Ub Iwerks in 1928? He is the official mascot of the Walt Disney Company and has been making people smile for years.
“I only hope that we never lose sight of one thing – that it was all started by a mouse.”
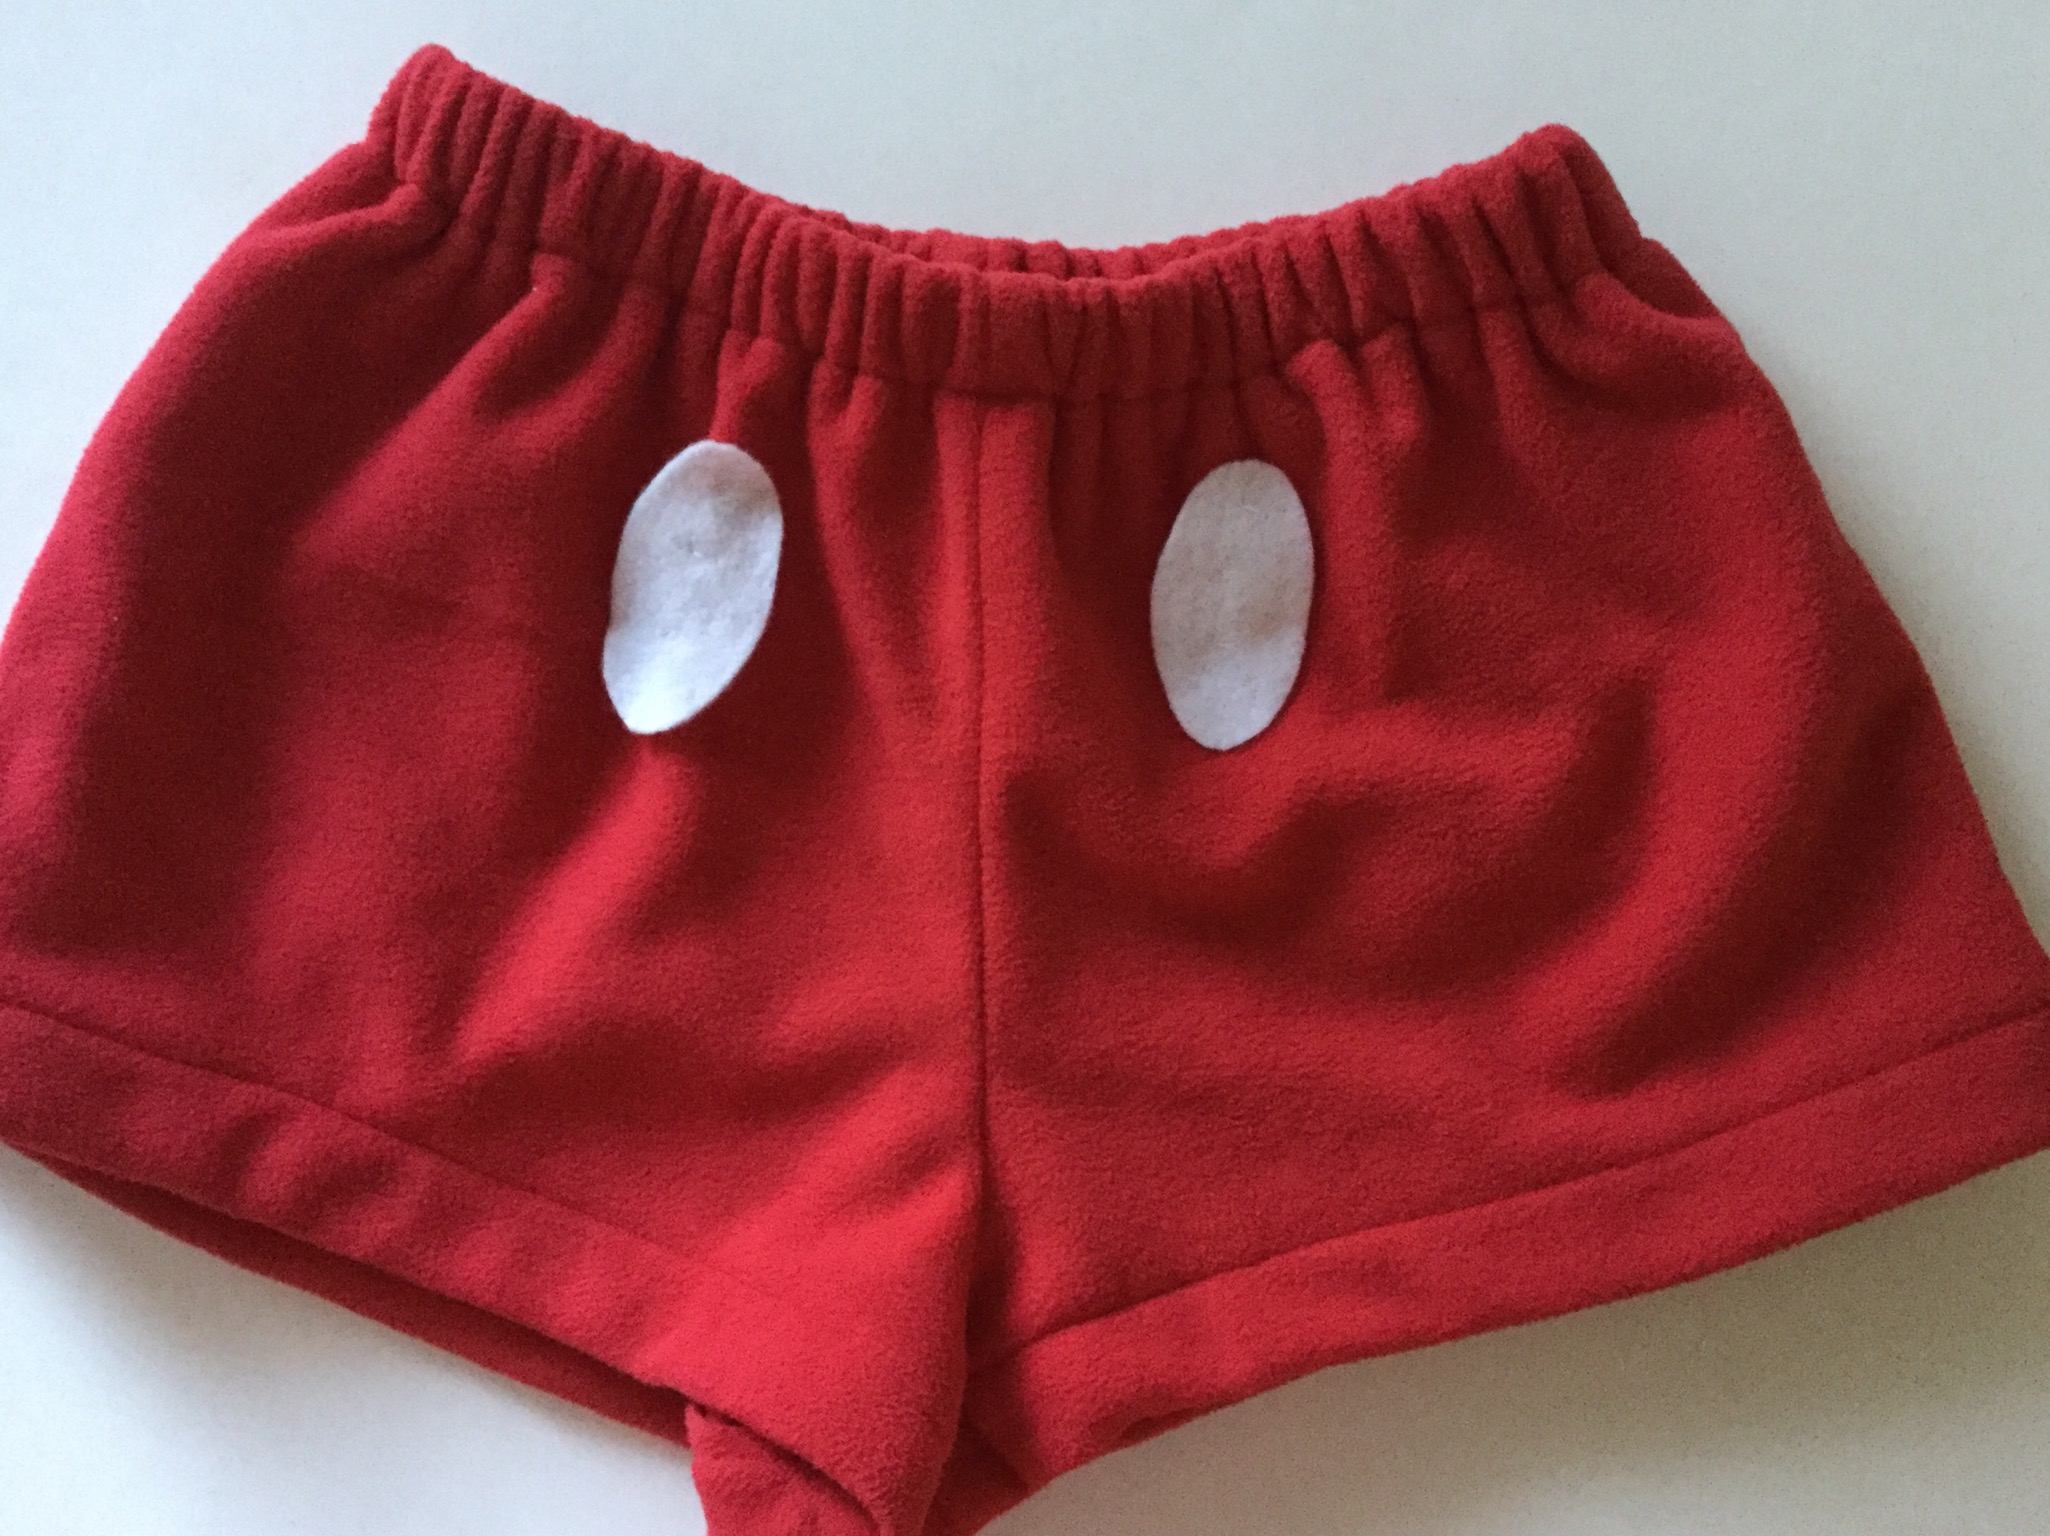
Let me tell you, Mickey Mouse was such an easy costume to put together. Julia had black leggings and a black t-shirt to use so the main task was to make the red shorts and the Mickey ears. For the shorts, we dashed out to Ben Franklin and bought a 1/2 yard of red fleece. I used a pattern I had for pajama pants and did a few alterations to the pattern pieces before cutting them out. I had to make the waist sit a bit lower, shorten the inseam quite a bit and add a pocket to the right side. (Pockets are a must-have on all clothing so she can keep her phone nearby!) Between cutting, fitting, adjusting, and sewing them — the shorts took about an hour or so to make. Julia cut two white ovals out of felt and I lightly tacked them to the shorts. She plans to use them as pj shorts so it will be easy to take the buttons off when she is through being Mickey.
The only challenge (and it wasn’t a huge deal) was making the Mickey Mouse ears. I had a remnant of black vinyl on hand and we cut circles out of that. But the vinyl proved to heavy and the ears constantly flopped over. Browsing ideas on Pinterest, we found a great alternative using black poster board and a head band. This called for another trip to Ben Franklin! I was extremely proud of my self control when I was able to go into the shop, grab the head band and poster board and not even wander through the fabric department. Didn’t even go near it! This is probably the first time I have achieved this feat and may well be the last! While I did go get the supplies, I didn’t actually make the ears. Julia and Ray took care of that. Here is a link to the site they used if you need inspiration.
It would appear Mickey is tiring of this photo shoot!
We couldn’t think of an easy way to achieve yellow shoes so she skipped it. But really, she looked so cute – Seemed like they all had fun at the dance too. Living out in the country, we don’t really get trick-or-treaters so Halloween night is usually quiet for us. I hope you all have more treats than tricks tonight!
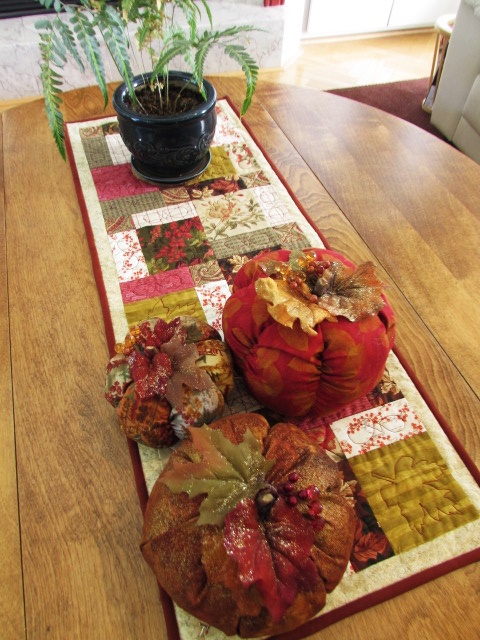
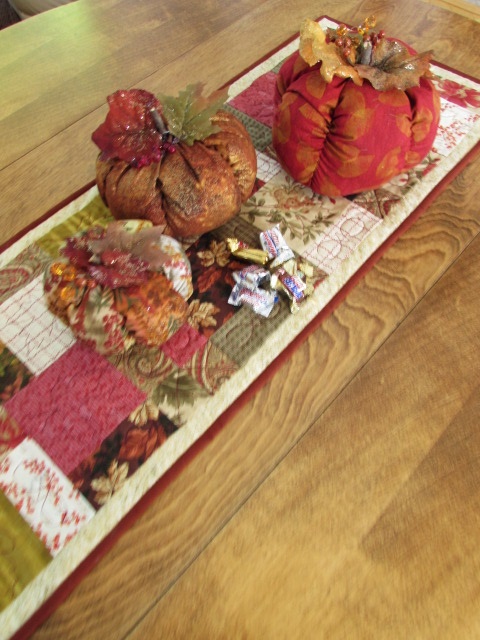
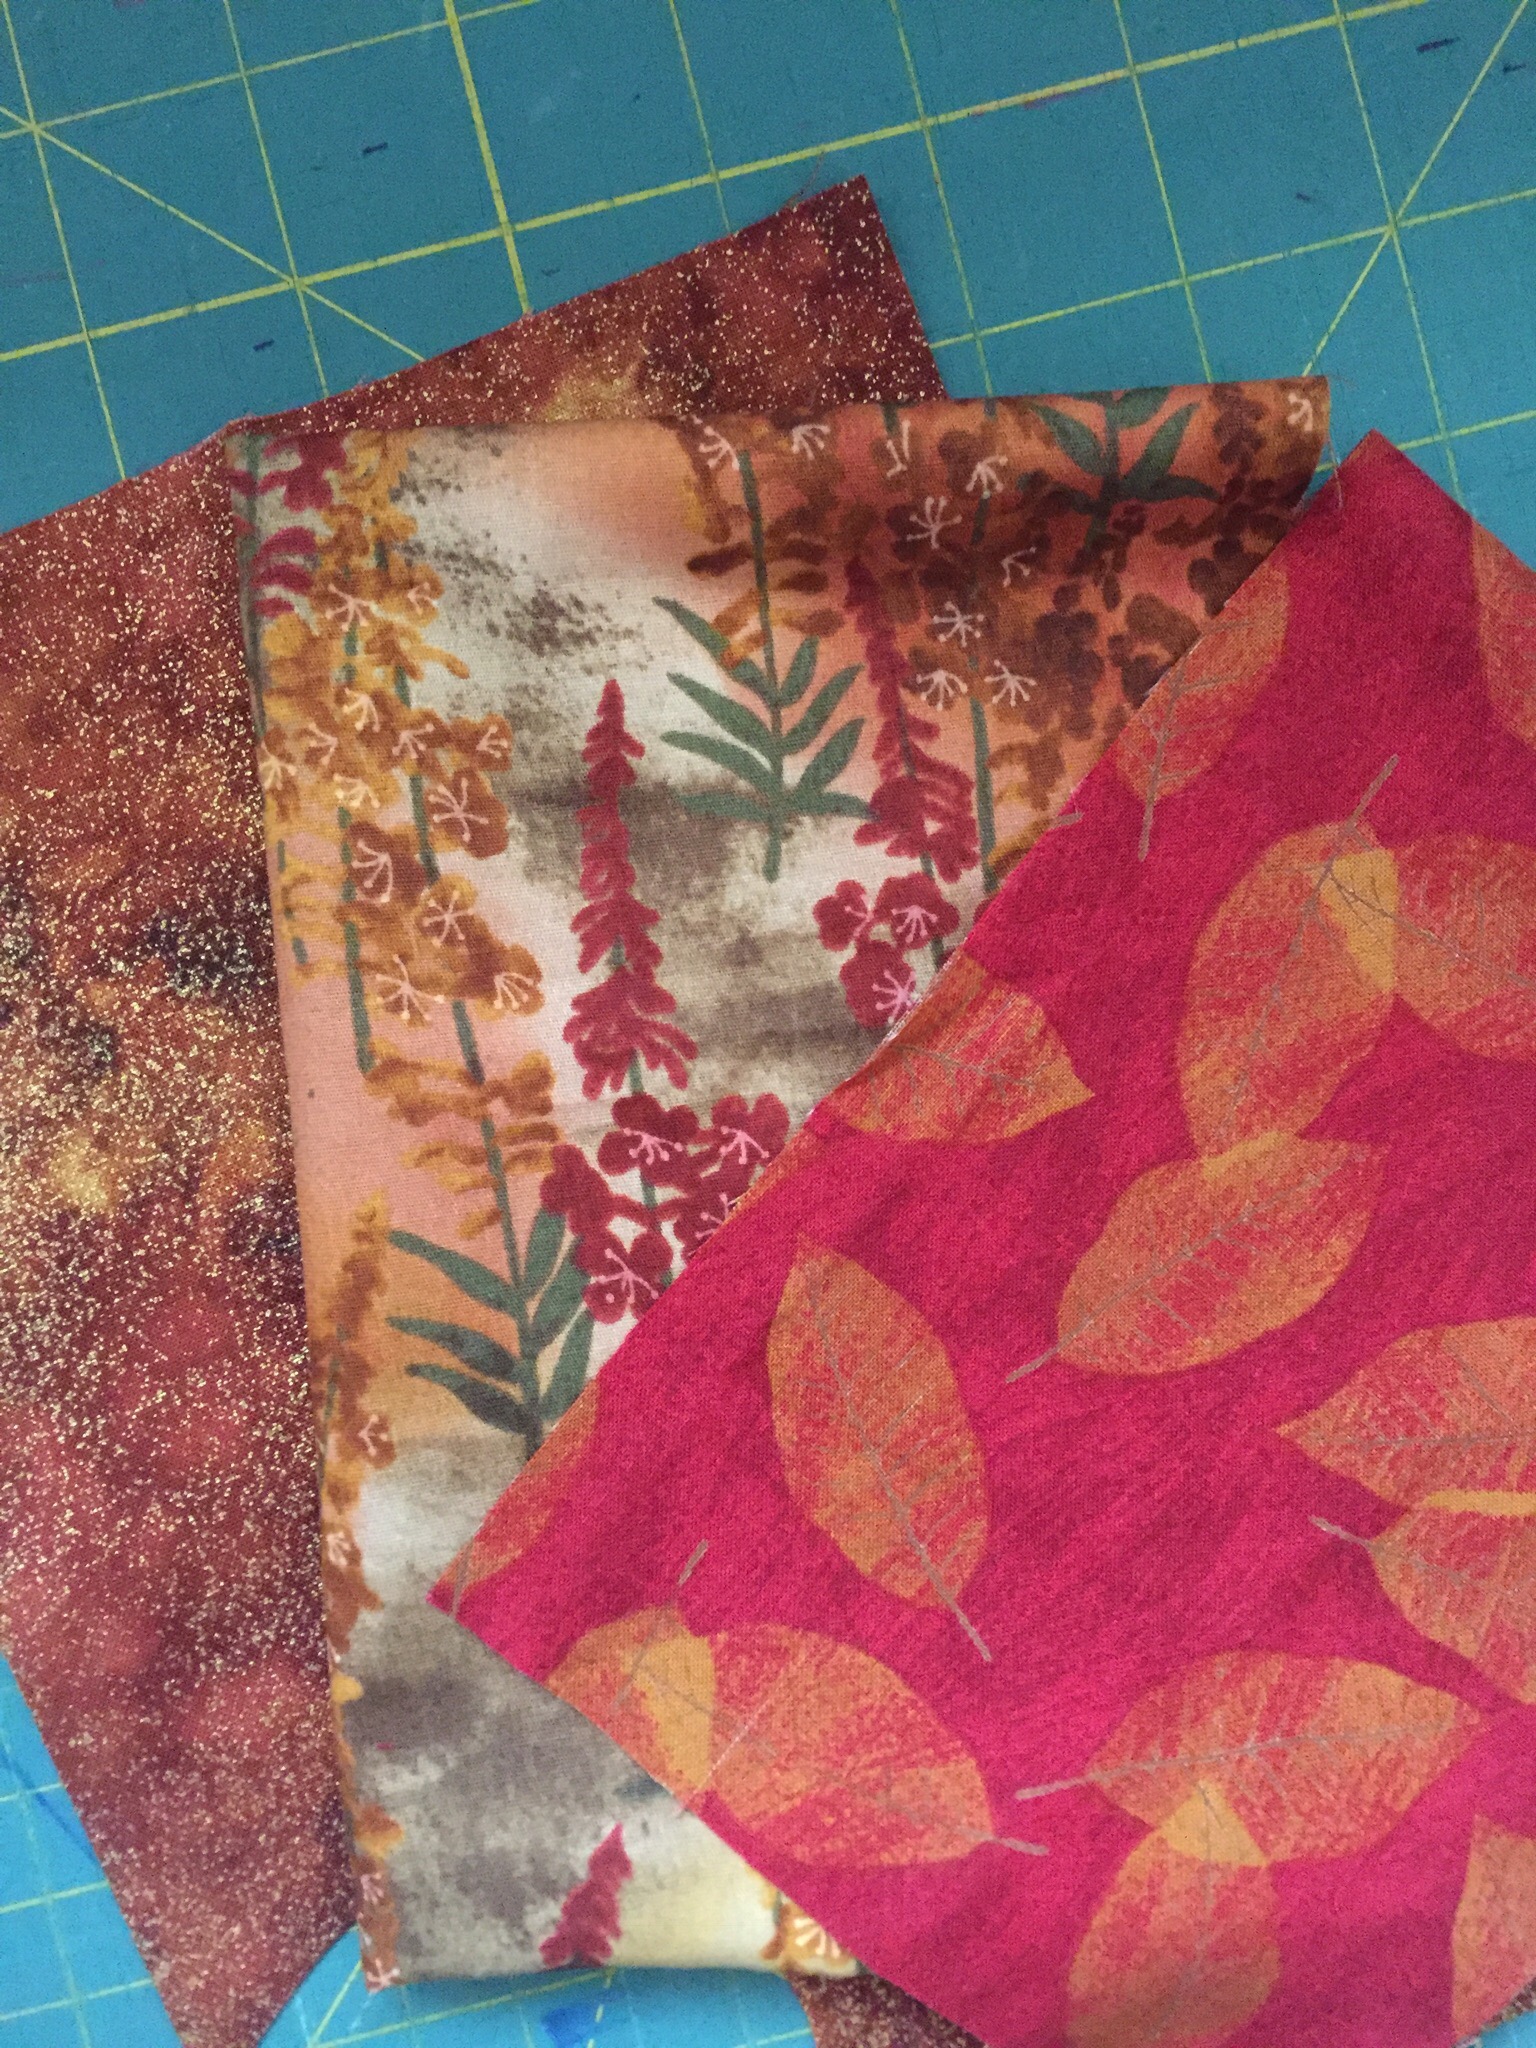
Hi Everyone! As part of the Sew Much Fun Halloween Blog Hop hosted by Jen at Faith and Fabrics, I decided to make some autumnal fabric pumpkins. I wanted to make something new for the house but decided to forgo the Halloween novelty fabric and use fall fabric so I could leave them out through Thanksgiving.
These pumpkins are such a breeze to make. I poked around Pinterest for a while and found this easy tutorial from HGTV. Mainly I was looking for suggestions on the size of the individual rectangles that make up each puff on the pumpkin. This tutorial had three sizes worked out which was just perfect.
To make the sections of one pumpkin, I cut six rectangles of equal size. I stacked the rectangles and trimmed off each corner, making a slightly curved shape. Next I sewed the long side of the rectangles together from top curve to bottom, using a large, basting stitch. (My Janome machine stitch length was set to four.) Use the threads on either end of the seams to gather the pumpkin sides to your liking.
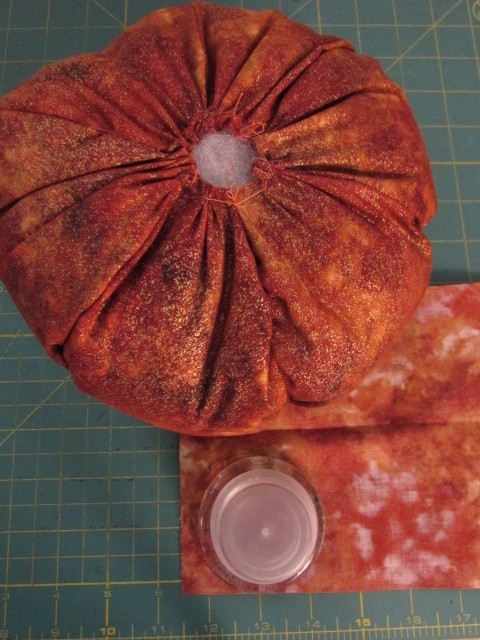
Then you hand sew a loose, running stitch around the bottom opening and draw the opening to a close. Stuff with pillow stuffing (you might be able to use batting scraps?) and then sew a loose running stitch around the top to close the opening. When closing the top and bottom openings, it doesn’t have to look perfect because both areas are covered.
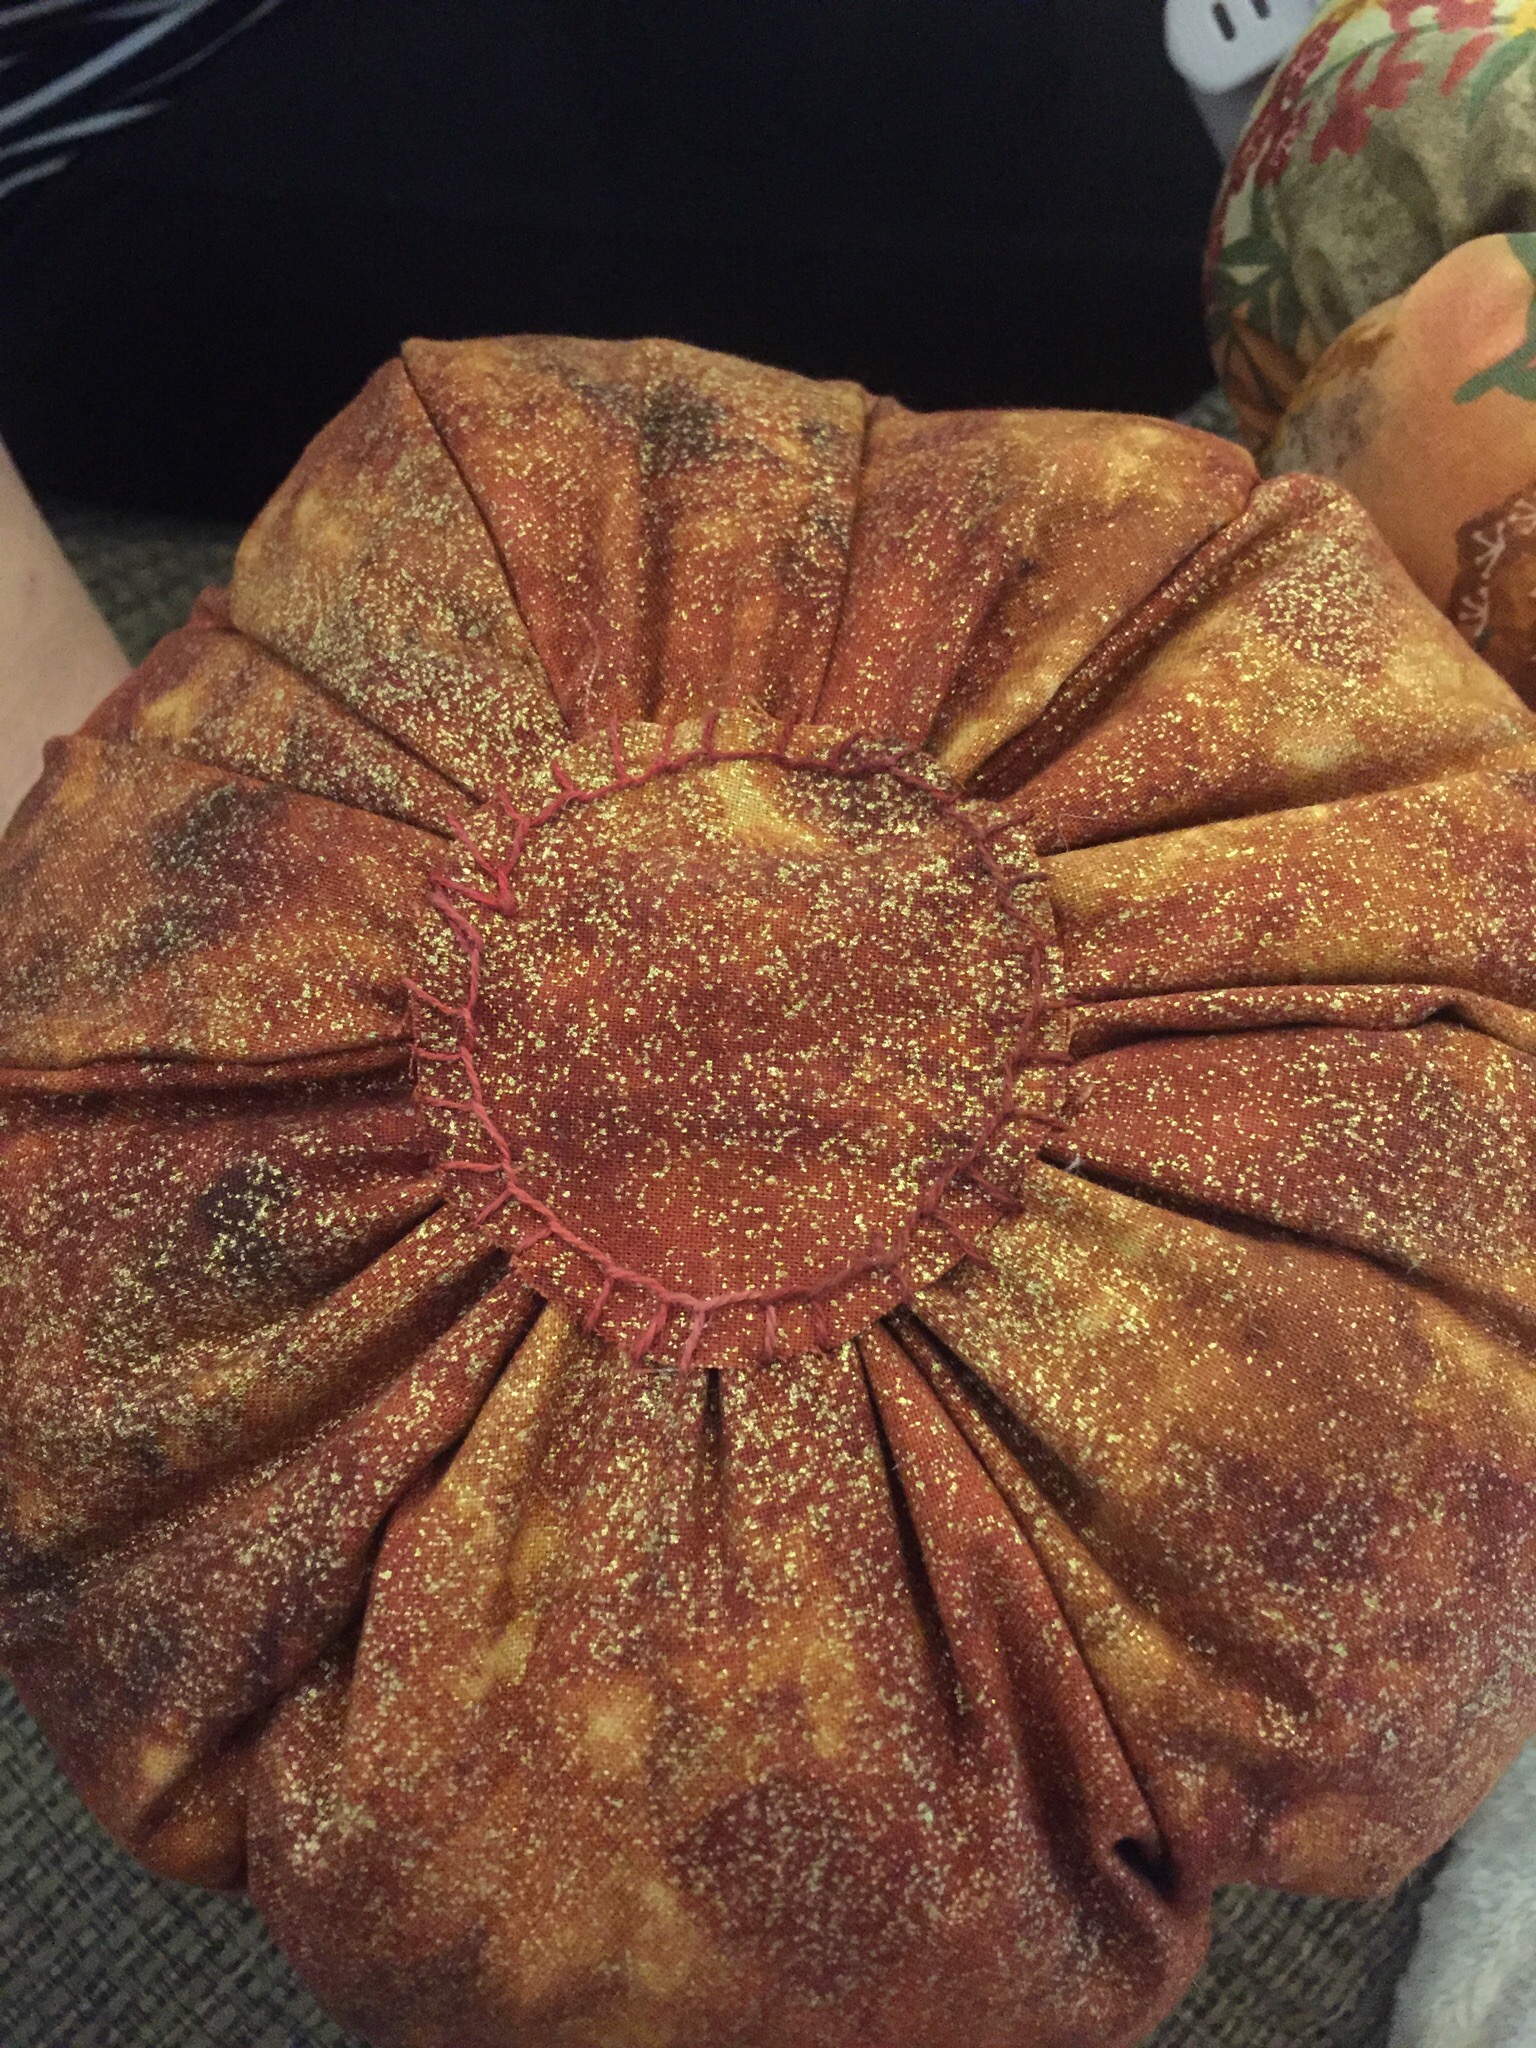
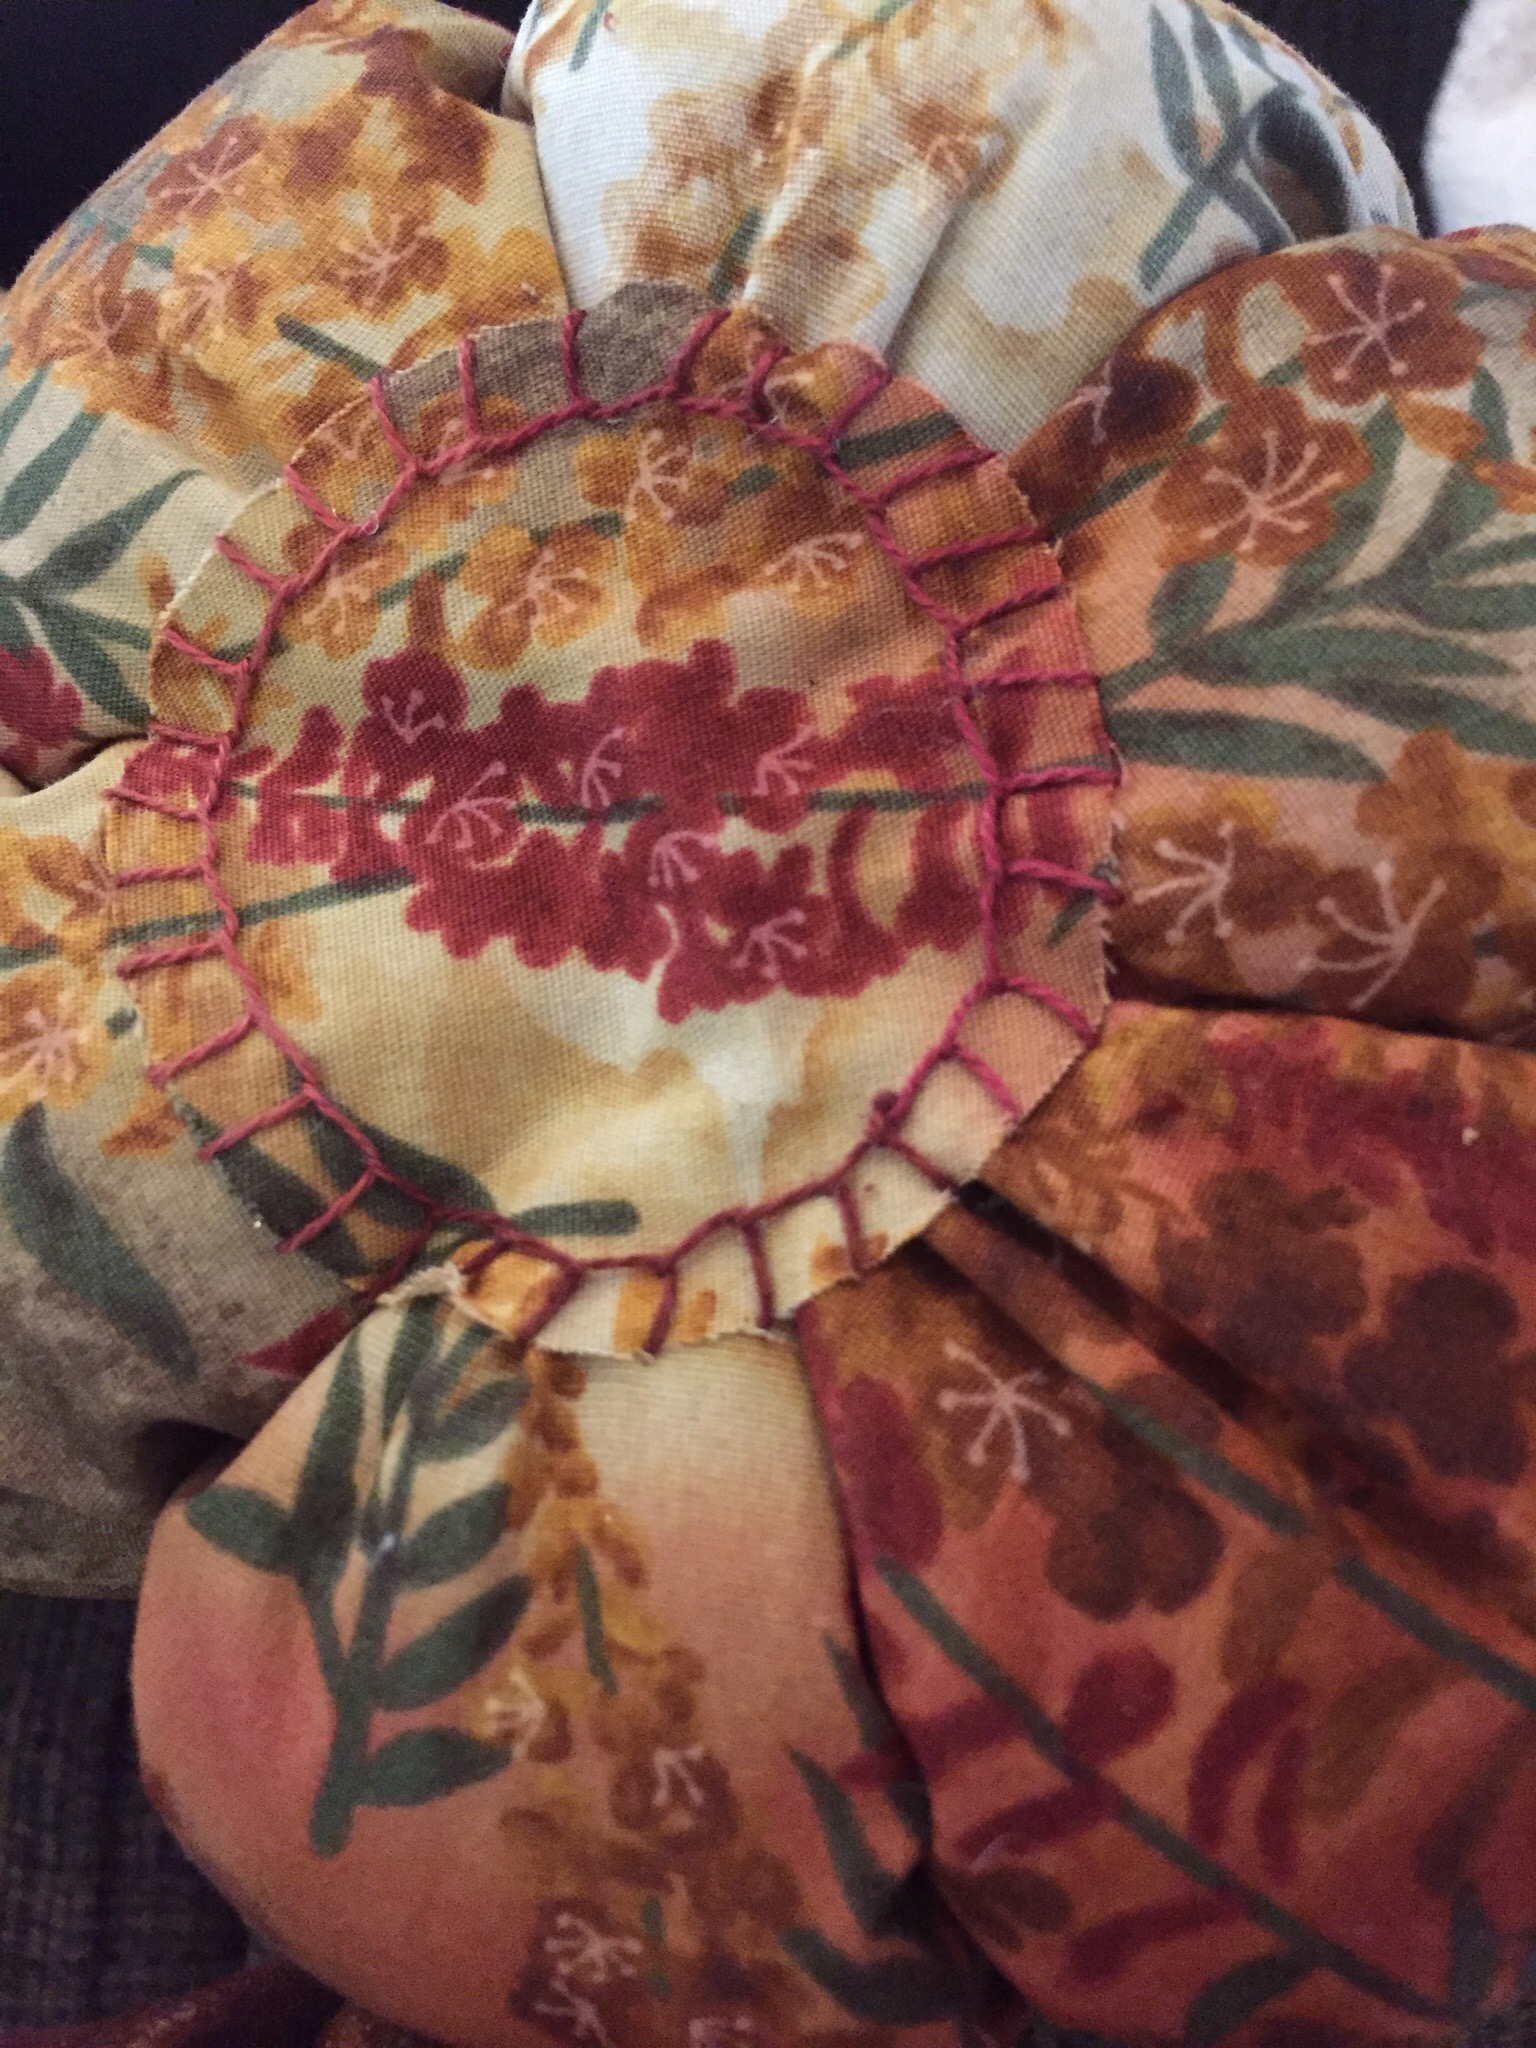
To cover the bottom, I traced a round object (the top to my little button jar) and cut a circle of matching fabric. I used raw edge applique to attach it, hiding the bottom stitches. I thought the blanket stitching looked really nice for this.
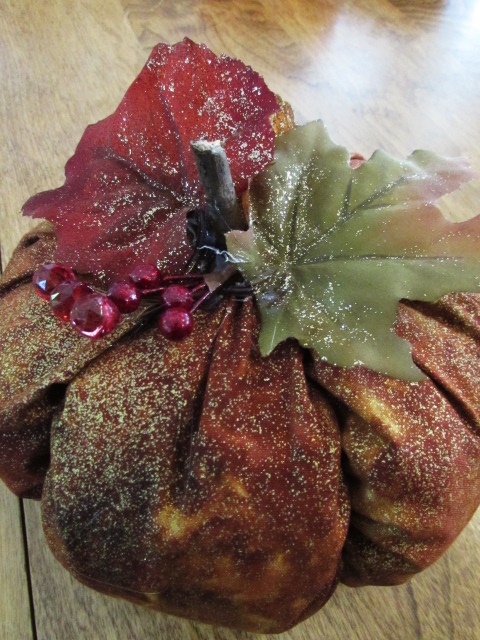
Here is another one.
I found a sprig of fall leaves at Ben Franklin and decided to cut it apart, using the leaves to decorate the tops of the pumpkins. I also took apart two beaded napkin rings I had to use the little vines with red and gold beads on them. They look really cute.
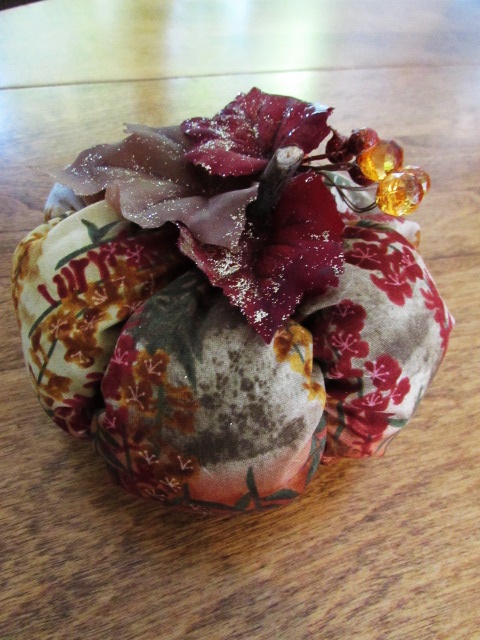
The smallest one, below, is my favorite. Probably because I really like the fabric used for this one.
Nothing here that can’t be accomplished with a bit of hot glue and some leftover bits found around the house! I was glad to have a bag of stuffing that was nearly full (leftover from making these stuffed blocks for my grand baby). It took the remainder of that bag to stuff the three pumpkins. I found twigs in the yard for the main pumpkin stem. The only thing I purchased specifically for this project was the fall leaf sprig for a whopping $2.99!
I hope you will give these a try. If you get stuck or have questions, don’t hesitate to comment or shoot me an email. I am happy to help.
For more Halloween inspiration, be sure to check these posts out too. Have fun!!


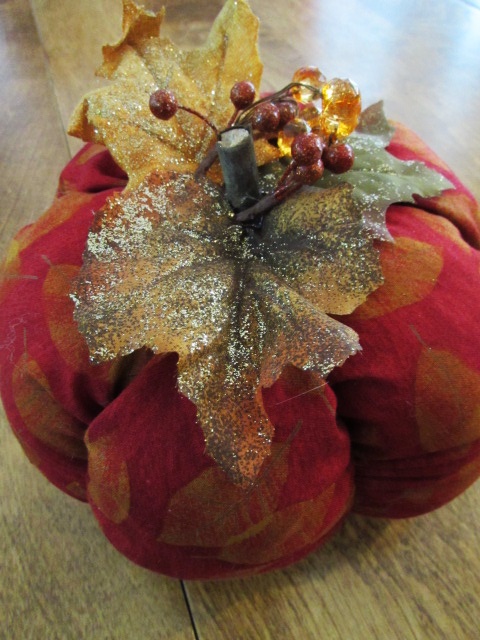
 Here is another one.