Happy Halloween!! Your recent two weeks of family time in Vermont were wonderful. The goal was to hang out with our son and his wife and spend as much time as possible with our grand daughter.
While there my grand daughter came down with a miserable virus and had terrible croup. Poor little girl was sick for a long stretch and toward the end of it, my husband came down with it. Not a fun bug at all! The two days before we left, my son and his wife were starting to come down with it but it didn’t look like they were going to be quite as sick.
Since we were having some quiet time at home and H was taking long naps due to being sick, i did have time to do some sewing. I pulled out my DIL’s sewing machine to make a Halloween costume for H. She and her mom found a cute picture of a little girl dressed up as a pumpkin with green leggings and t-shirt on underneath.

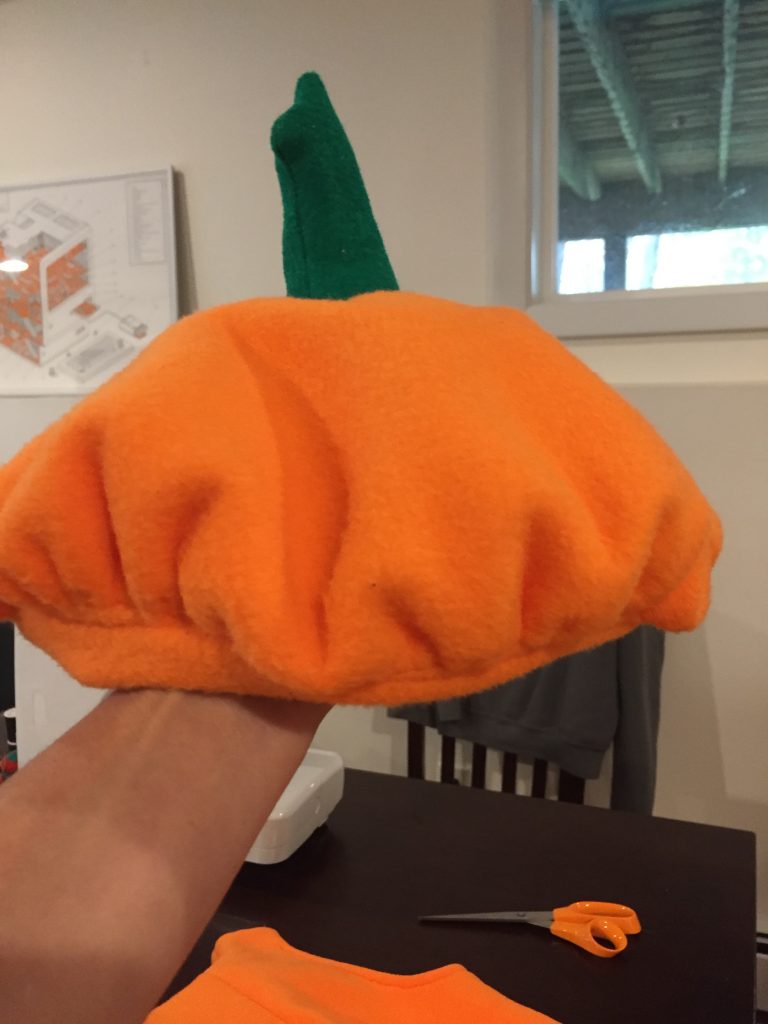
I used a Simplicity pattern for the costume. There is a Jo-Ann’s in the next town over so off I went in search of orange fabric. At first I planned to use a wool felt but it was so stiff. I knew H wouldn’t have fun running around in that at her Halloween party (at her daycare). I was with my son Kyle (he and his wife drove over from New York for a weekend) and he spotted a bolt of orange fleece way up on a top shelf, not yet unwrapped. Lucky for me he is 6’ 2” and was happy to hop up and down to grab it. This was perfect.
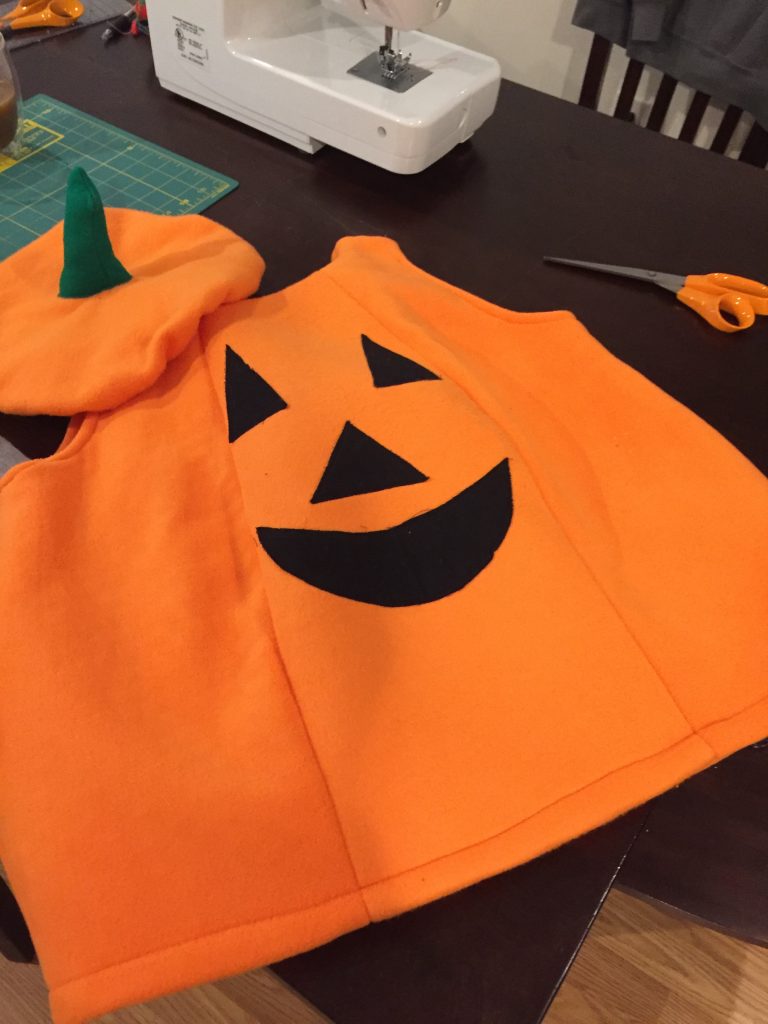
The pumpkin is lined with fleece and filled with batting. Even trick or treating in Vermont, this girl is going to be quite warm. Her outfit is so heavy!! There was a stencil for the face but i felt like it was too big so I ended up cutting the pieces out free hand. Using a few bits of ‘Wonder-Under’, I fused the face to the front and appliquéd them with a simple zig zag stitch.
The pattern called for a casing to be made at the hemline with elastic inserted to make it puffy. However with the fleece, there was already a nice shape to the pumpkin. Instead, I trimmed the fleece lining to be about two inches shorter than the outer layer. Turning one inch of the outer layer to the inside, I machine stitched the hemline.
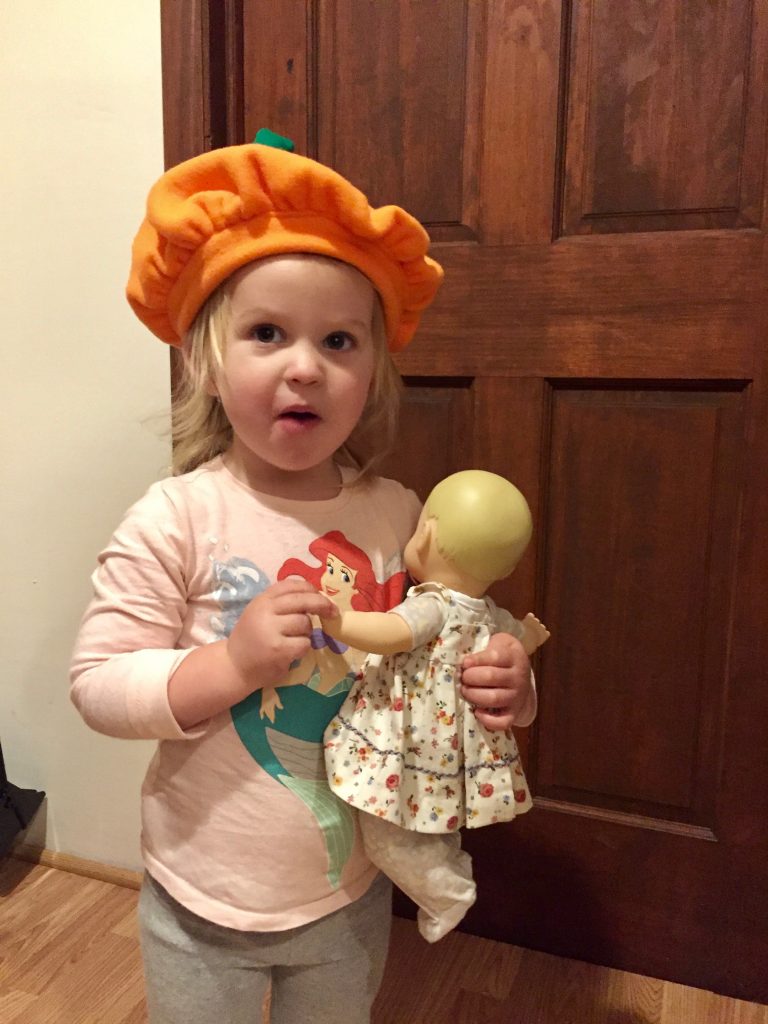
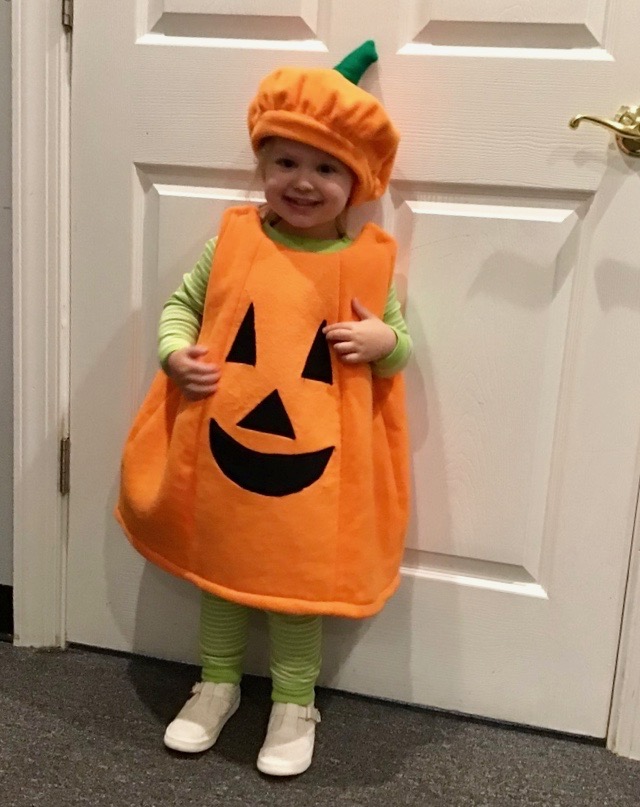
Ok- my favorite part of the whole costume is definitely the hat. When I made it, H was quite happy to wear it about the house for an afternoon so I really hope she wears it on Halloween. It looks so darn cute on her. I made it during a nap time, guessing at the sizes and it was too big for her. There wasn’t a clean way to fix this without doing a lot of seam ripping. I had to rip one seam on the pumpkin and it was difficult to manage with that puffy fleece fabric. So I cheated and took a little tuck and just stitched it up. The hat is still a bit large but better than before.
When I left I had not had time to run out and buy some velcro which was needed for the shoulder straps. So I left it unfinished and my daughter-in-law took care of it. I received some really cute pictures of H having fun with her costume today.
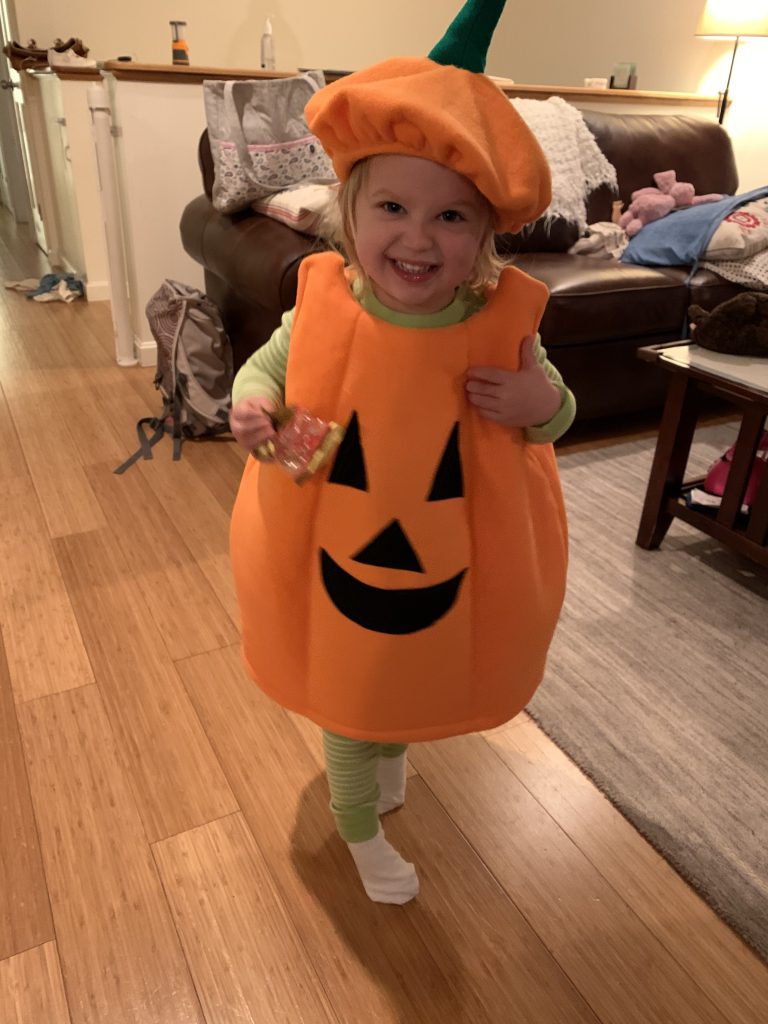
I am glad they had a little party at her daycare. I hear they are supposed to have a lot of rain tonight so that may put the kibosh on any trick or treating.
Just in case there was a chance for trick or treating, I also made her a tiny treat bag to carry.
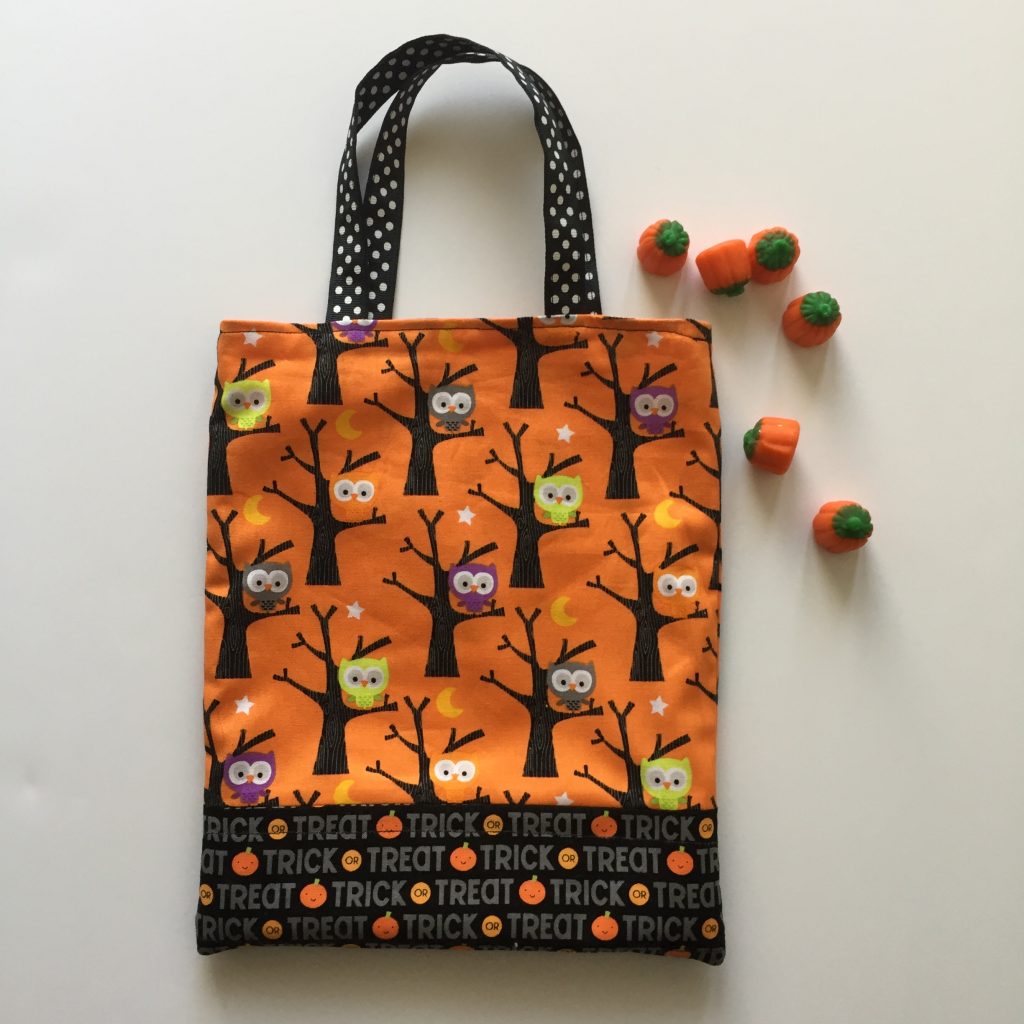
This was designed off the cuff and I didn’t write down any measurements. If I had to guess, I would say it finished at about 8″ x 11″ or so. Maybe even a bit smaller. I had that polka dot ribbon on hand (actually had all of the supplies on hand) and I took two pieces and sewed them together (wrong sides together) just to make it a bit heftier.
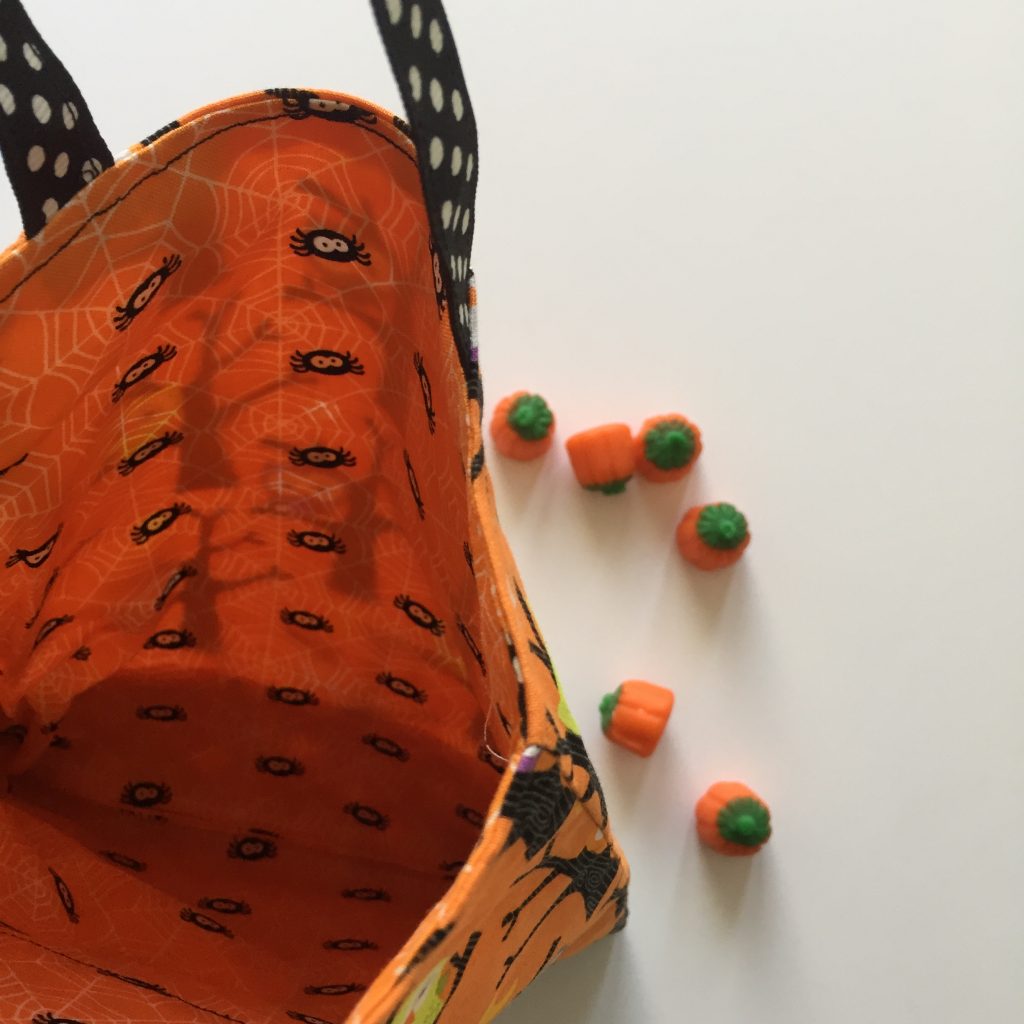
The bag is lined, which makes it a bit stronger. Since she does not yet know what trick or treating really is, she won’t be disappointed this year if they skip it due to weather. She can play with this bag or use it next year.

While I was there H and I made a festive bandana for their dog Wusha. I think Wusha looks a bit embarrassed to wear it but this dog will do anything my grand daughter asks of her. I had the triangular pieces cut and pinned and then had H sit on my lap and help me feed the fabric through the machine. I tried to take a selfie because it was so sweet but I am really, really not good at those and didn’t get much of a picture! But we had fun and she was thrilled to help Gram-gram sew for a few minutes.

One last project while we were there was to make a little ghost to hang in the dining room. We had been taking walks around the neighborhood and she really liked looking at the neighbors decorations. She loved the ghosts and a few little scarecrows we saw. I asked her if she would like to make a ghost and she was so excited.
This was super easy. One styrofoam ball from Wal-Mart and a packet of cheesecloth from the grocery store. I cut the cheesecloth in two strips and with the help of one happy two year old, layered the ball with the cheesecloth. Then we worked together to cut the eyes, nose and mouth. I had gotten her a glue stick that starts out purple and dries clear. This way she could see where she was putting the glue to put the pieces on. The addition of the bow on her head turned this little ghost into a girl. H and I had so much fun with this project and it was the perfect amount of work for a two year old.
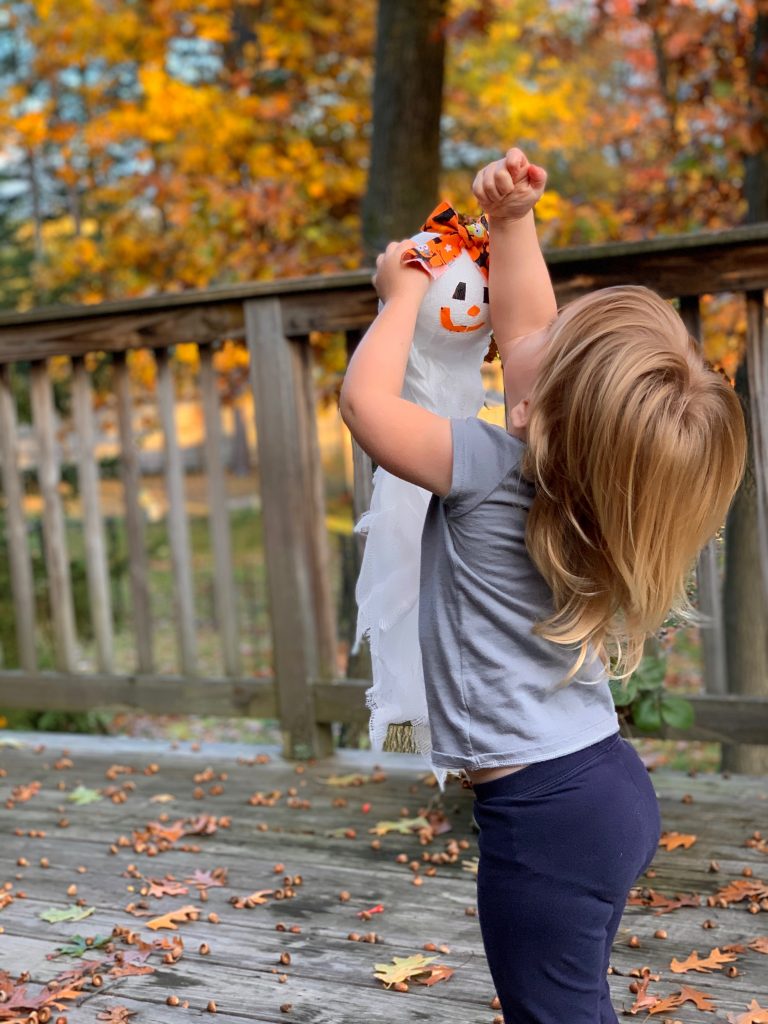
My son took the photos of H and her ghost – they are so sweet! We really enjoyed our time with the kids and can’t wait for our next visit. Grand parenting is the best and it would be even better if we all lived on the same side of the country!! Someday…
Linking up with a few fun places, including the monthly Favorite Finish party at Meadow Mist Designs. Be sure to check the top of the page under Link Ups!