Category Archives: Tips

Odds & Ends

I am supposed to be at a class today. I have been really looking forward to it – Mel Beach came up from the South Bay to teach a workshop for our guild. But, as you can probably guess, the past two days were migraine days and I am wiped out today. It seemed ‘too difficult’ to cart the sewing machine and supplies and be in class, listening and comprehending a technique today. The day or two after a migraine are just weary for me. So, I am home.

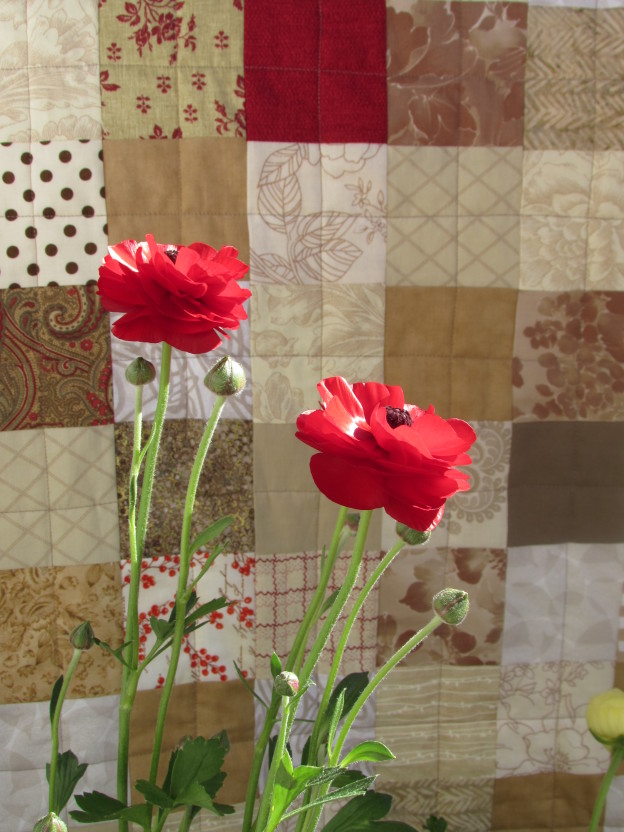
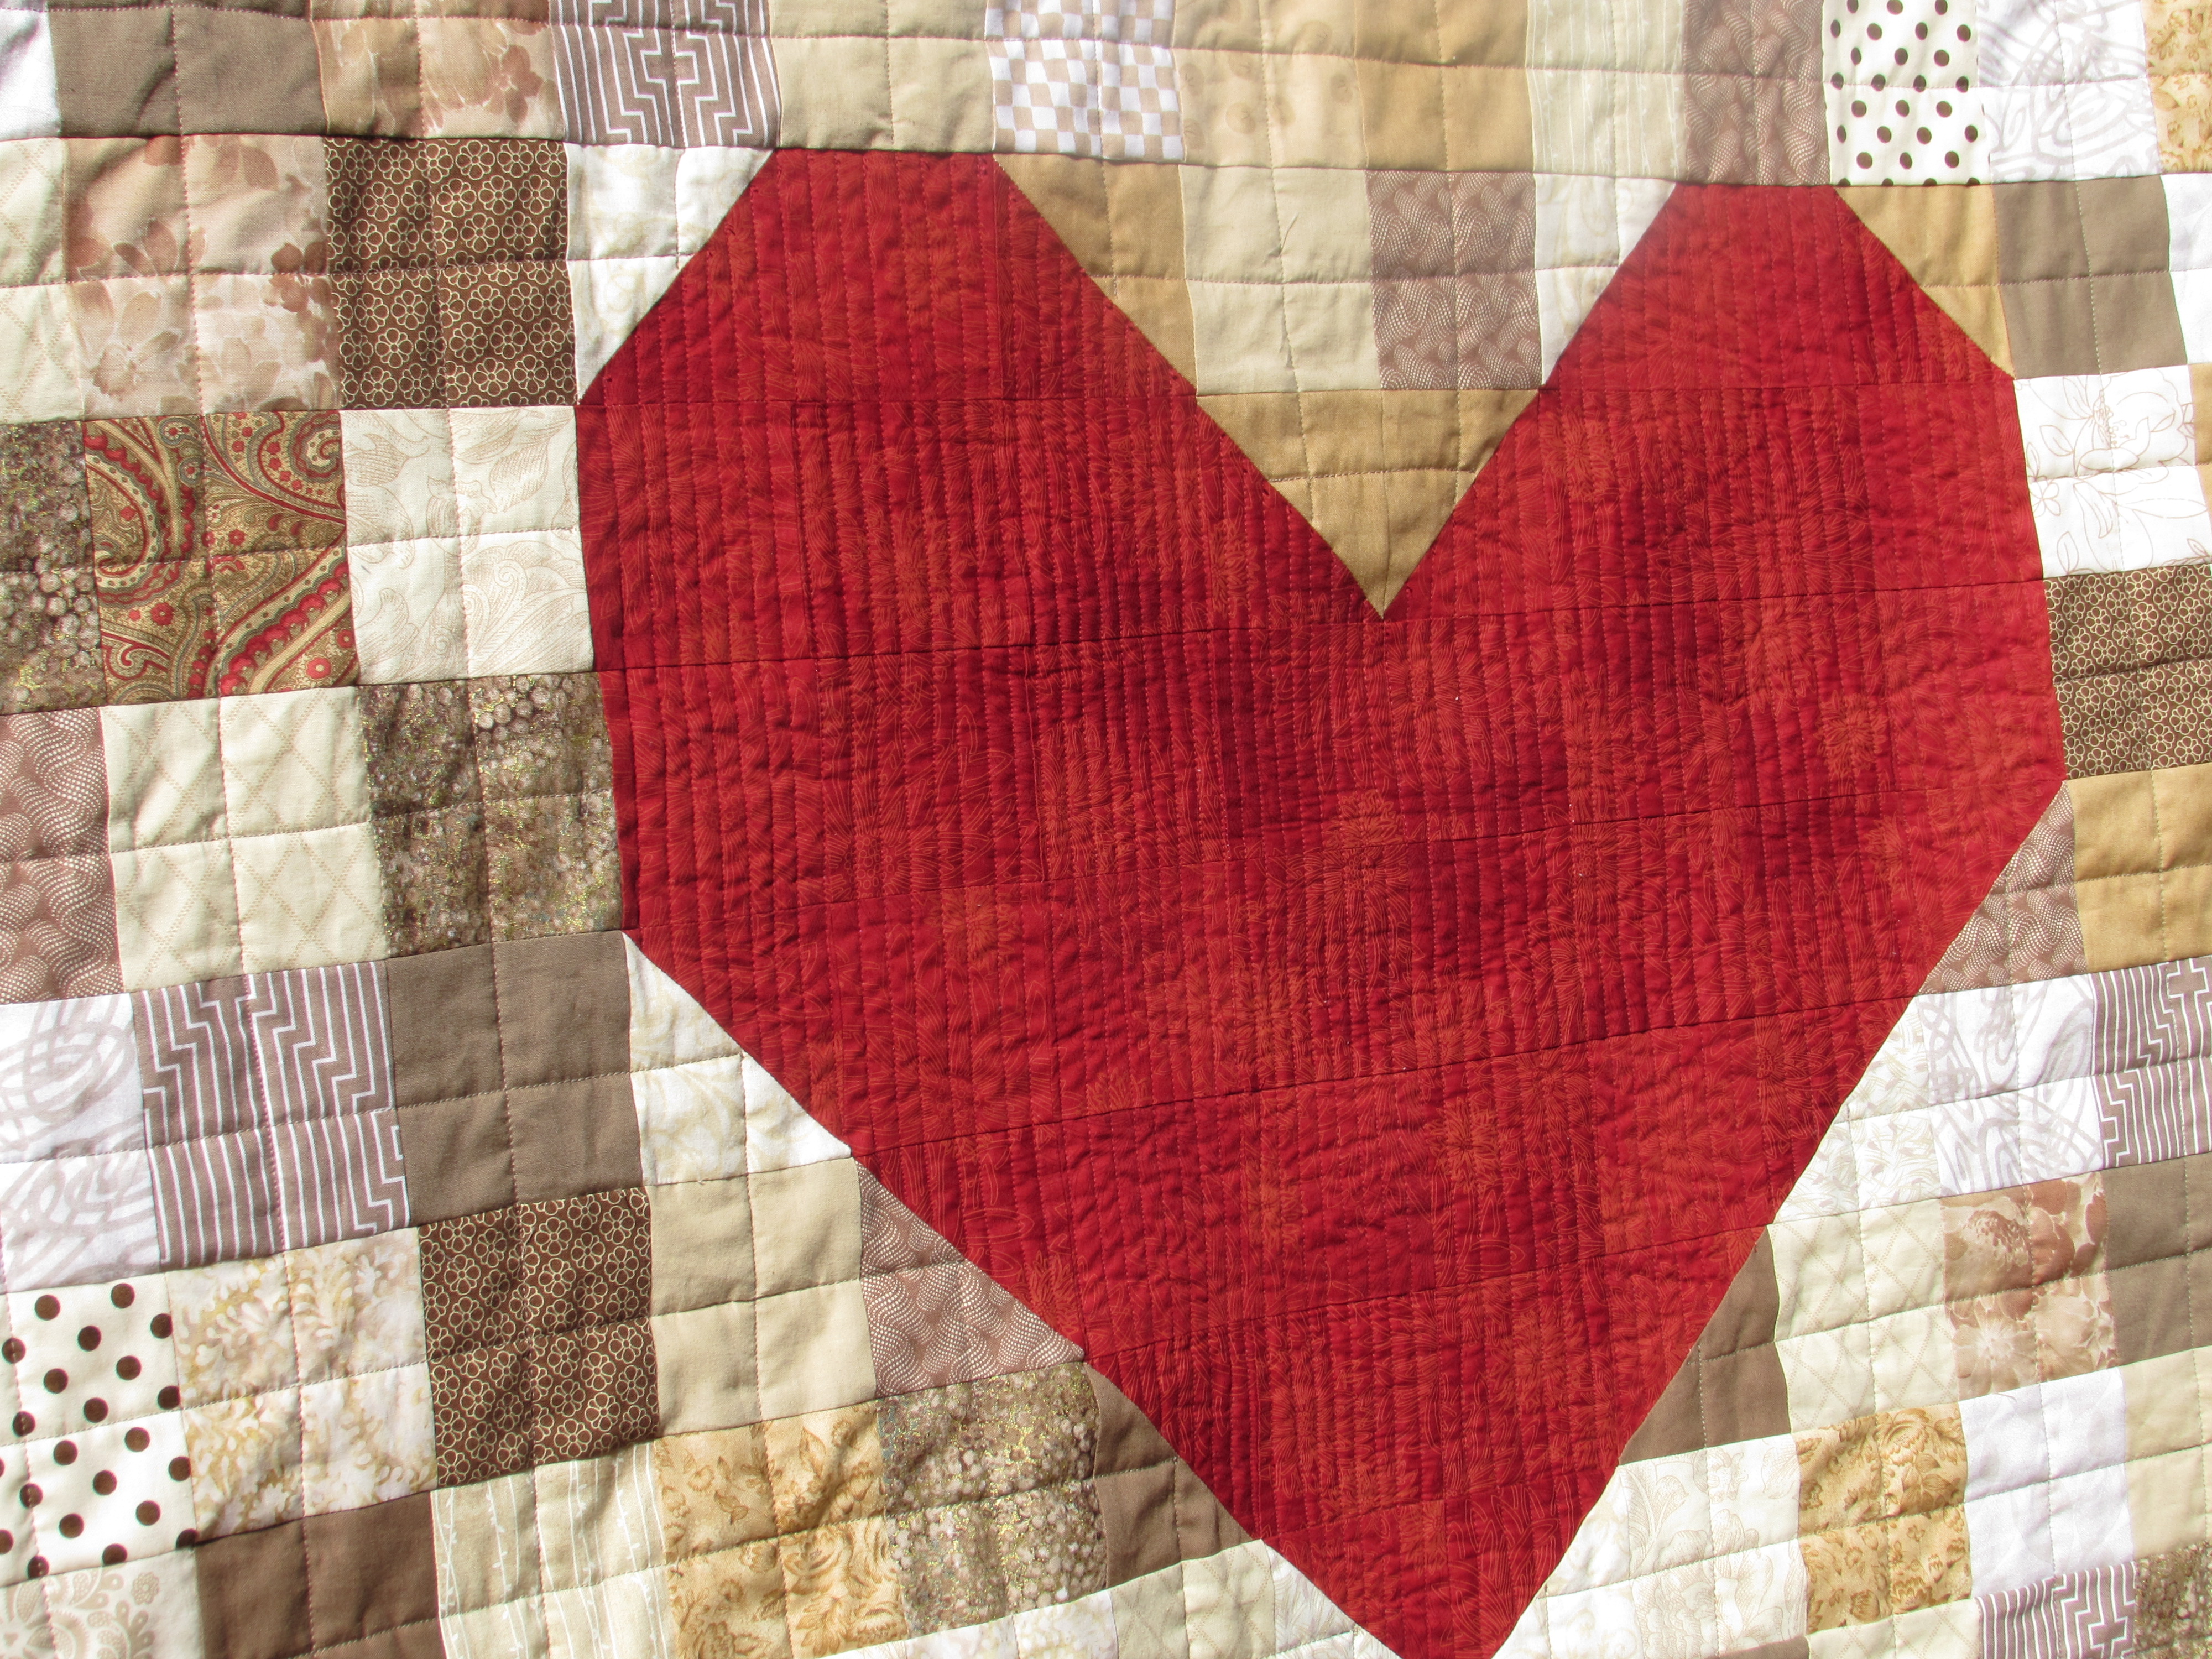
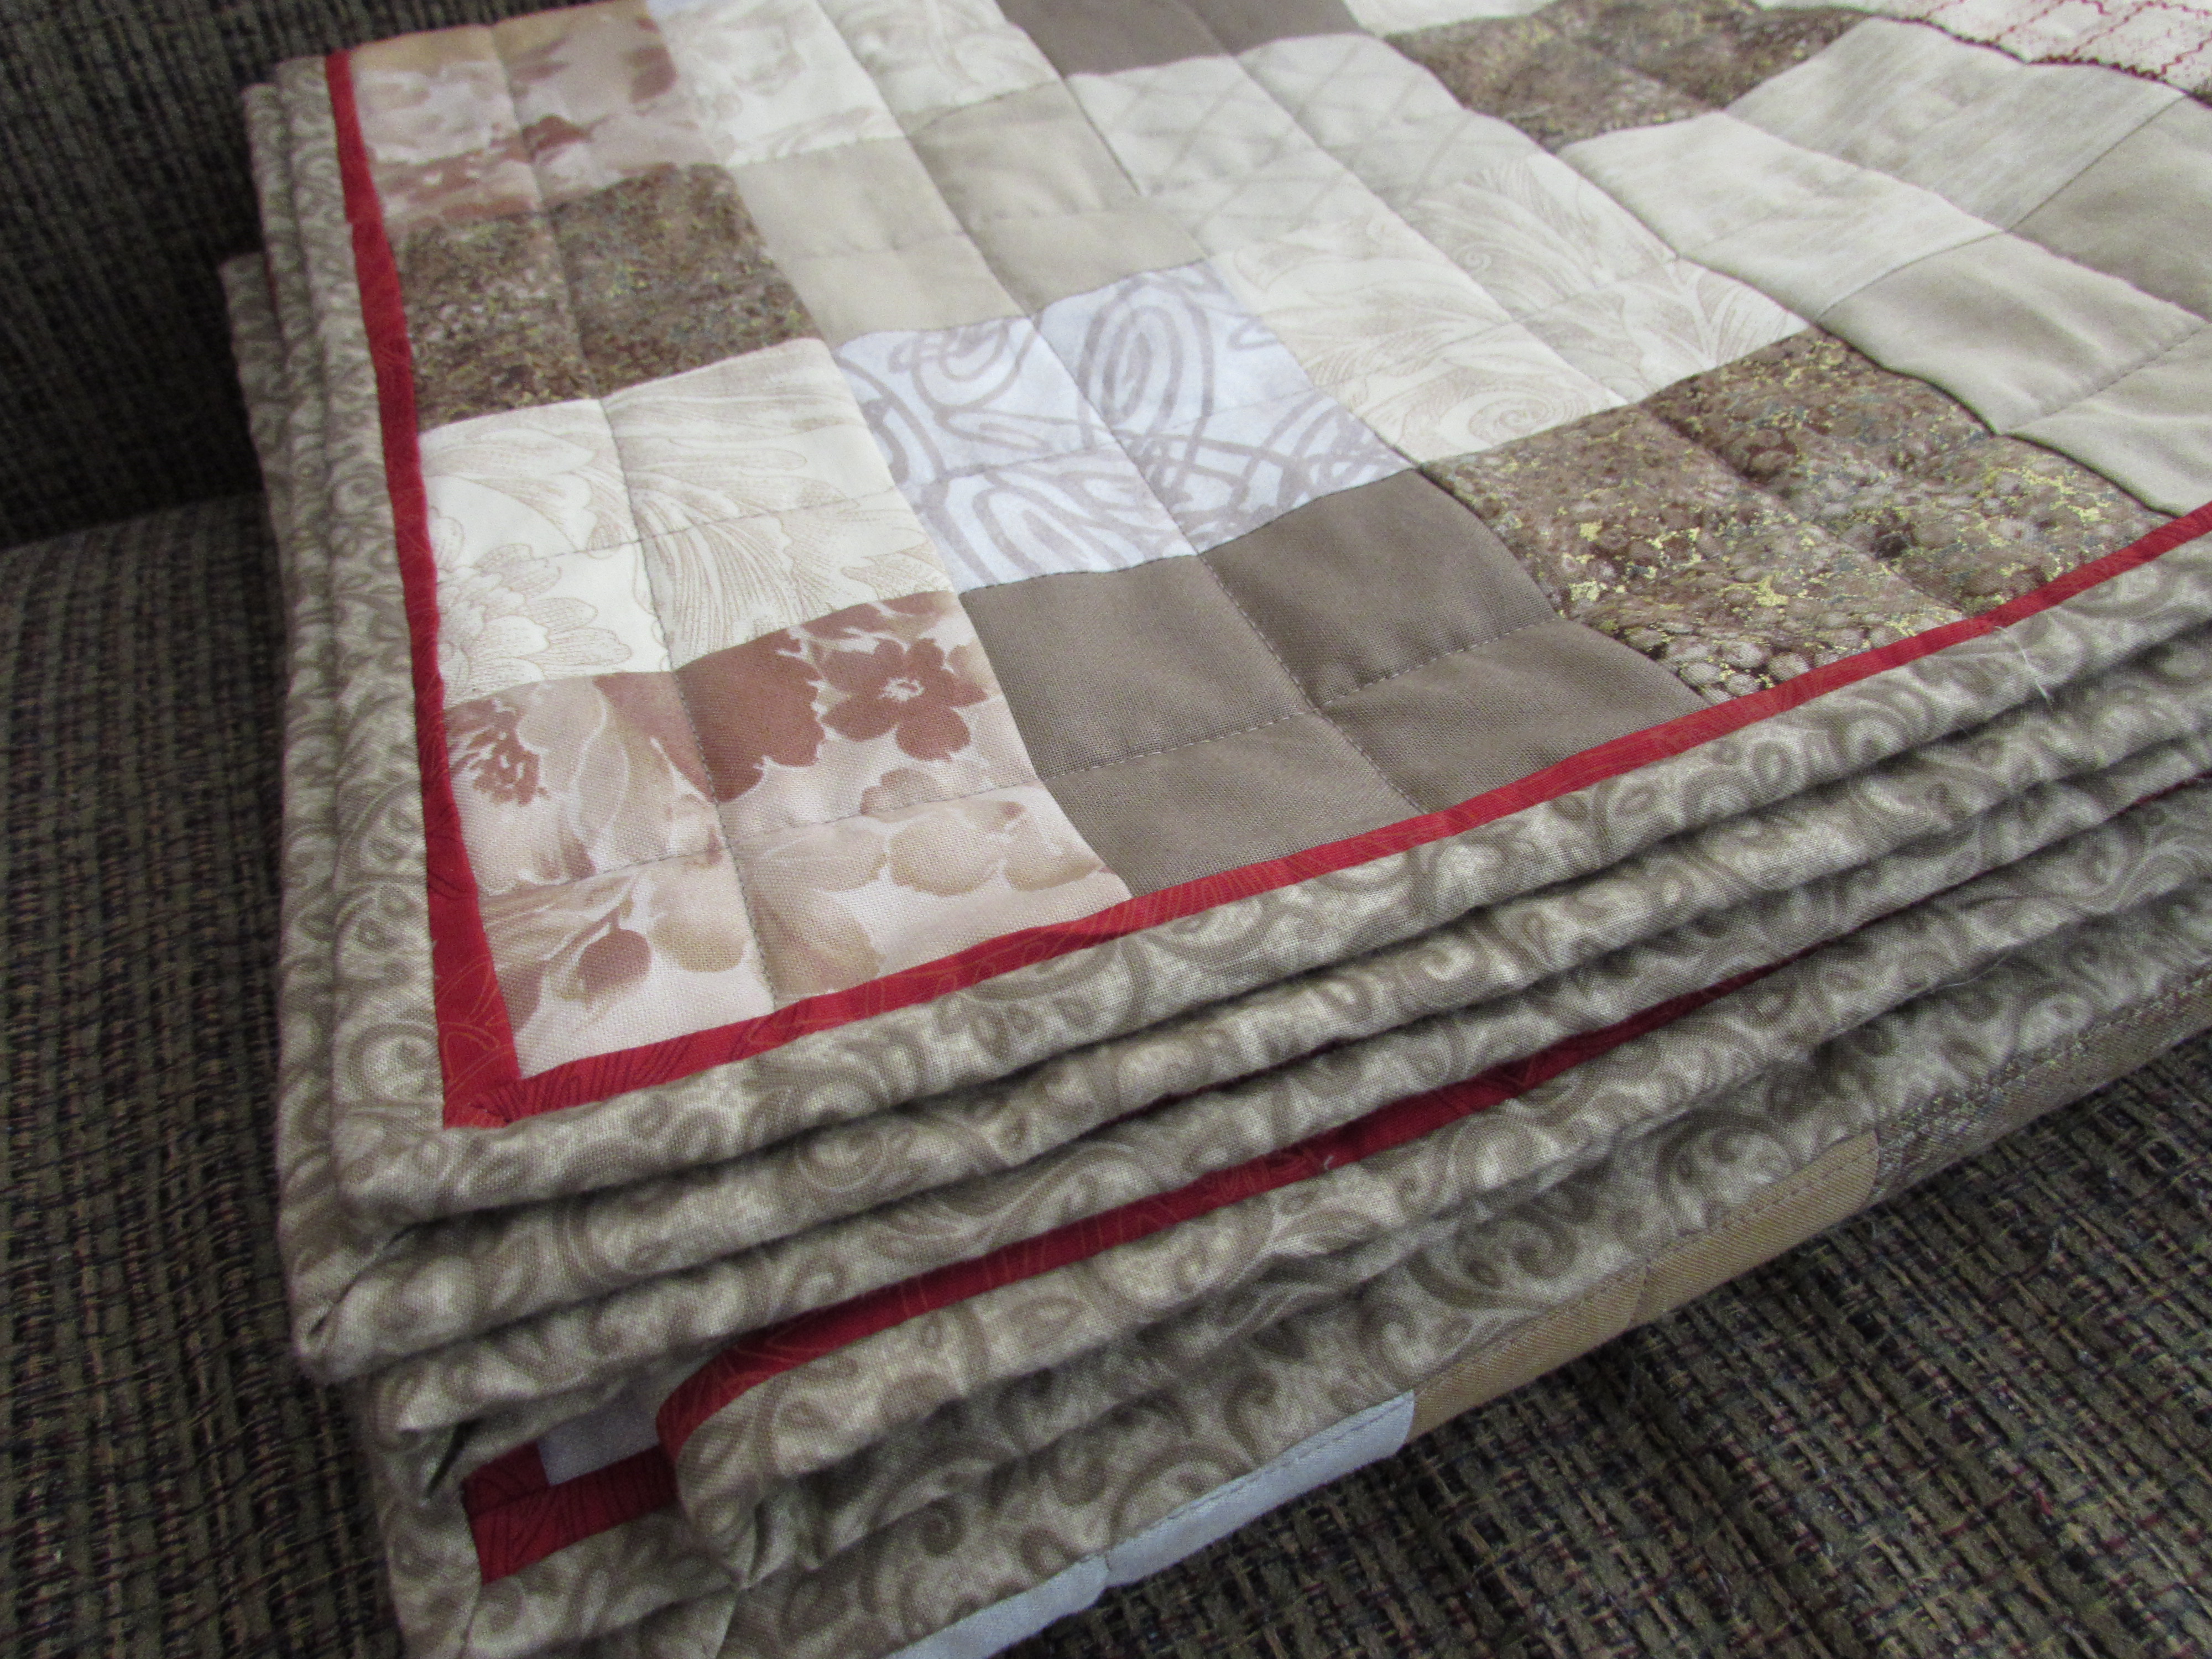
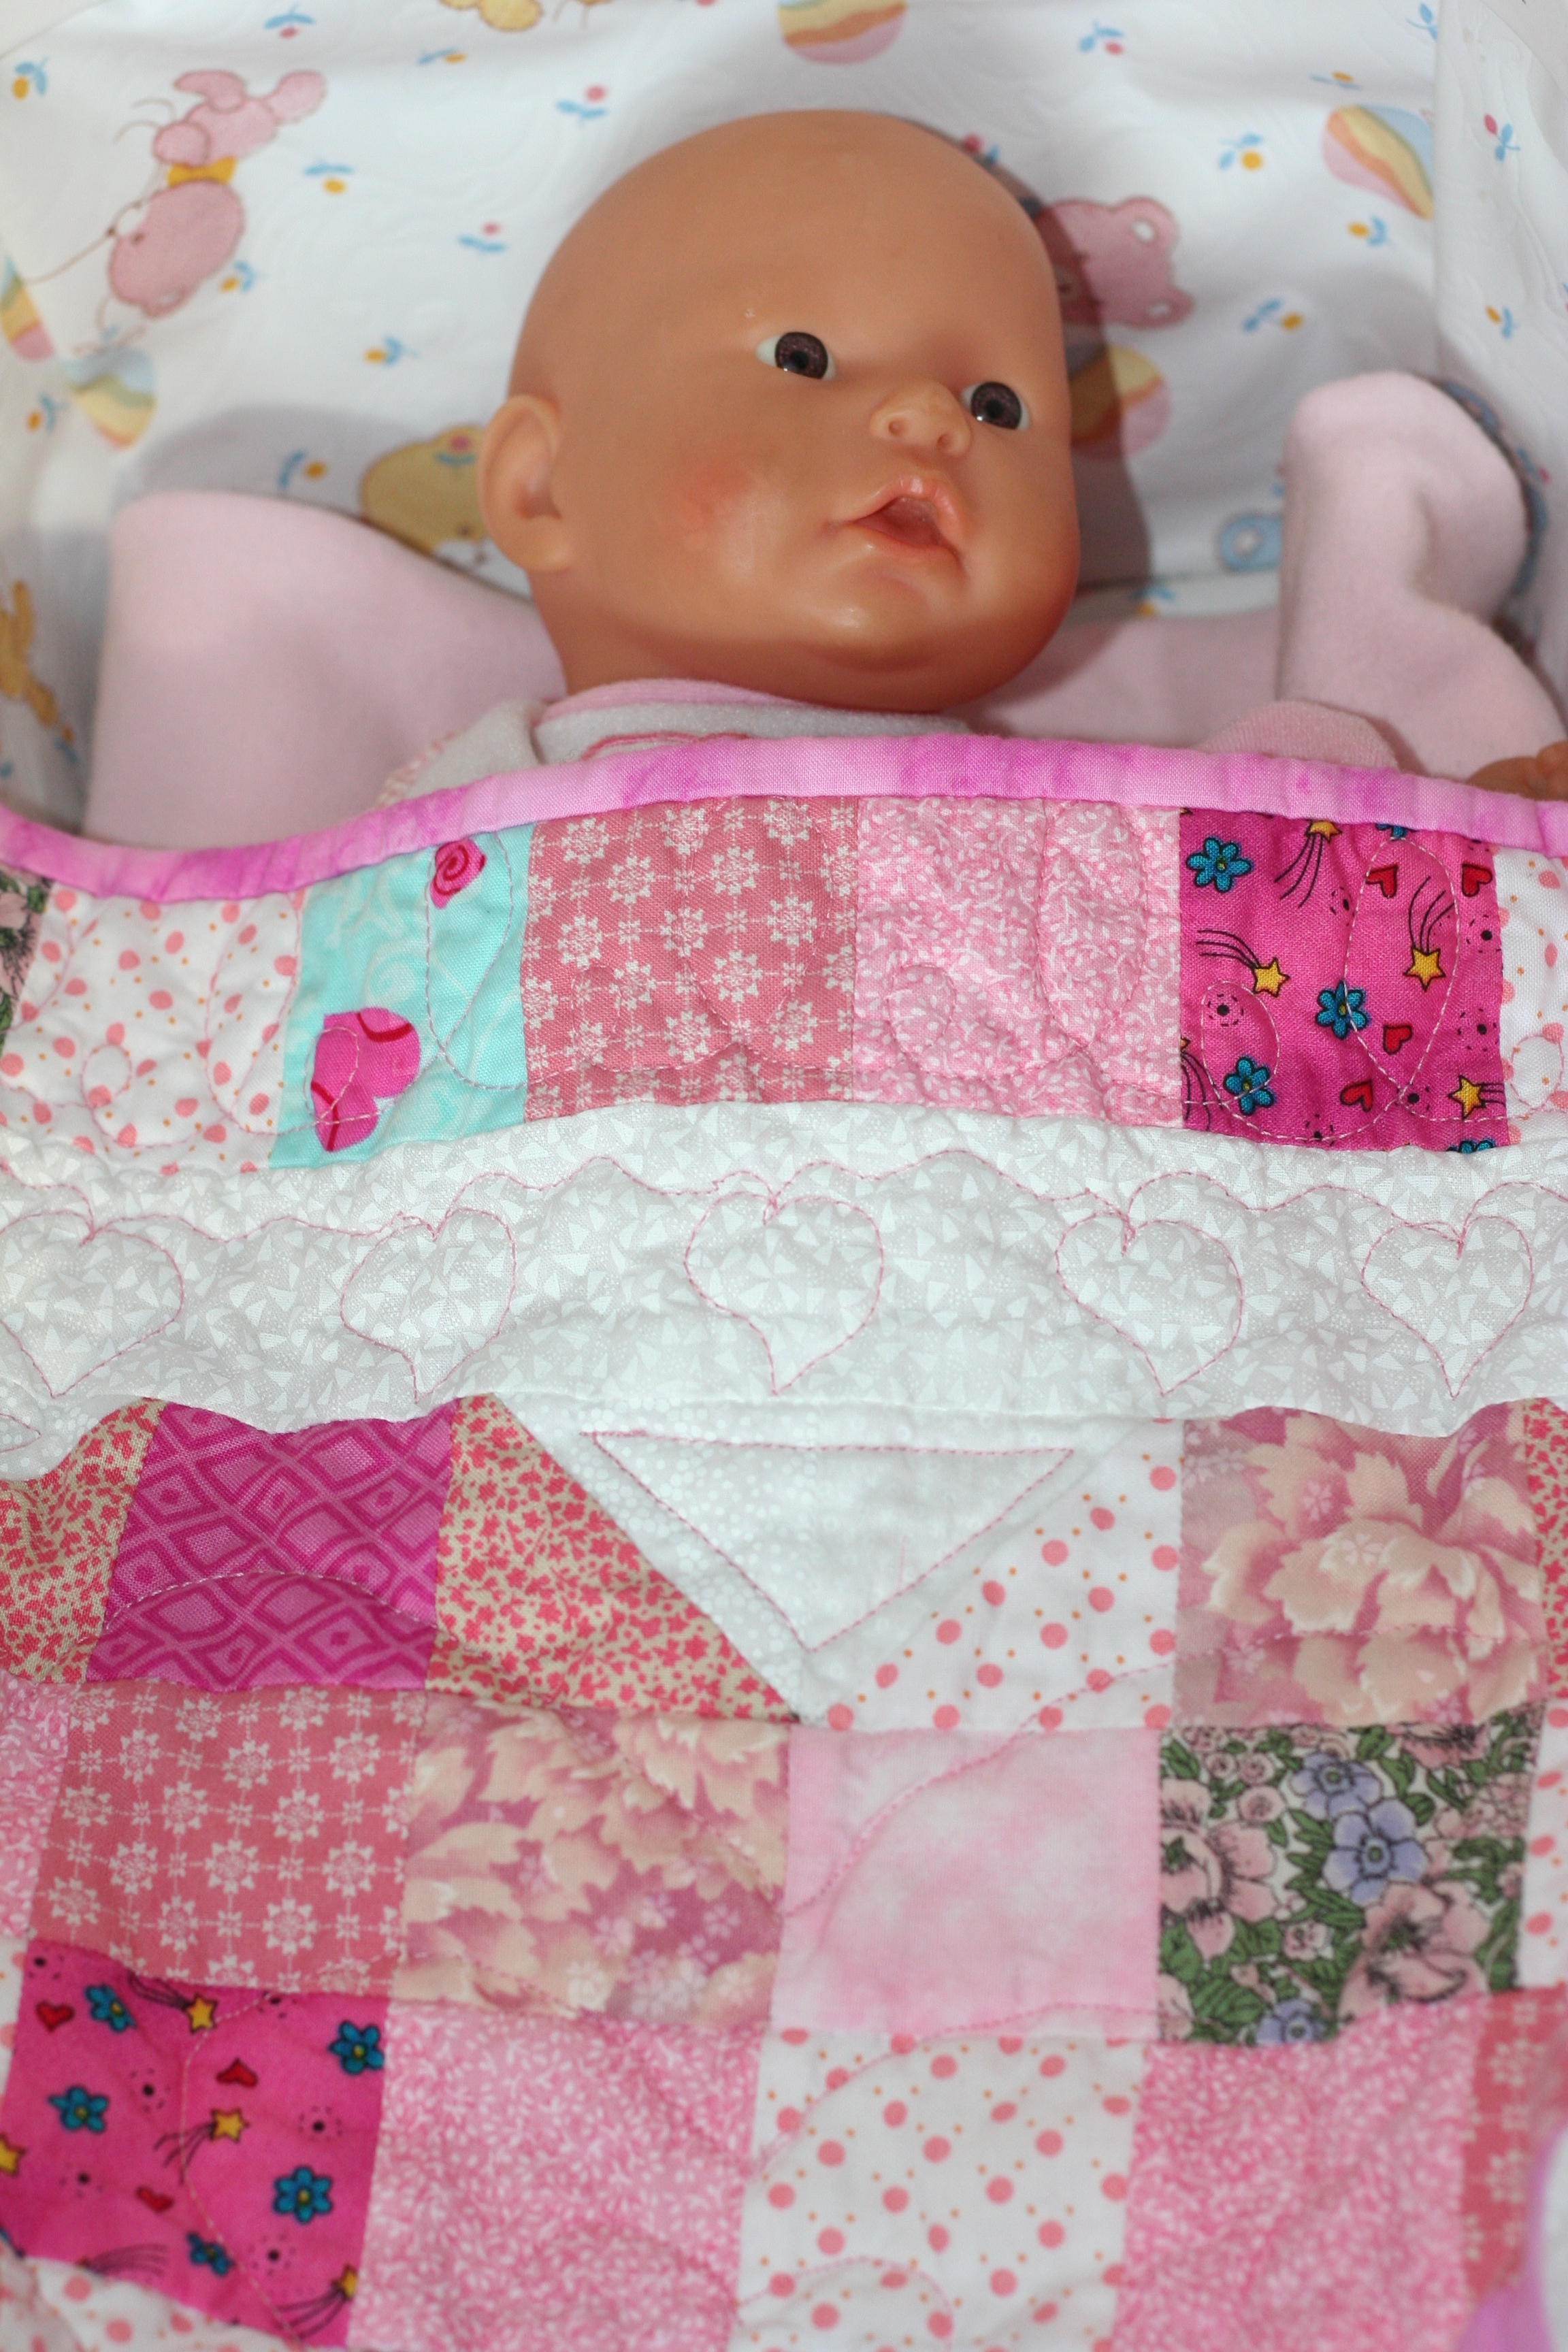
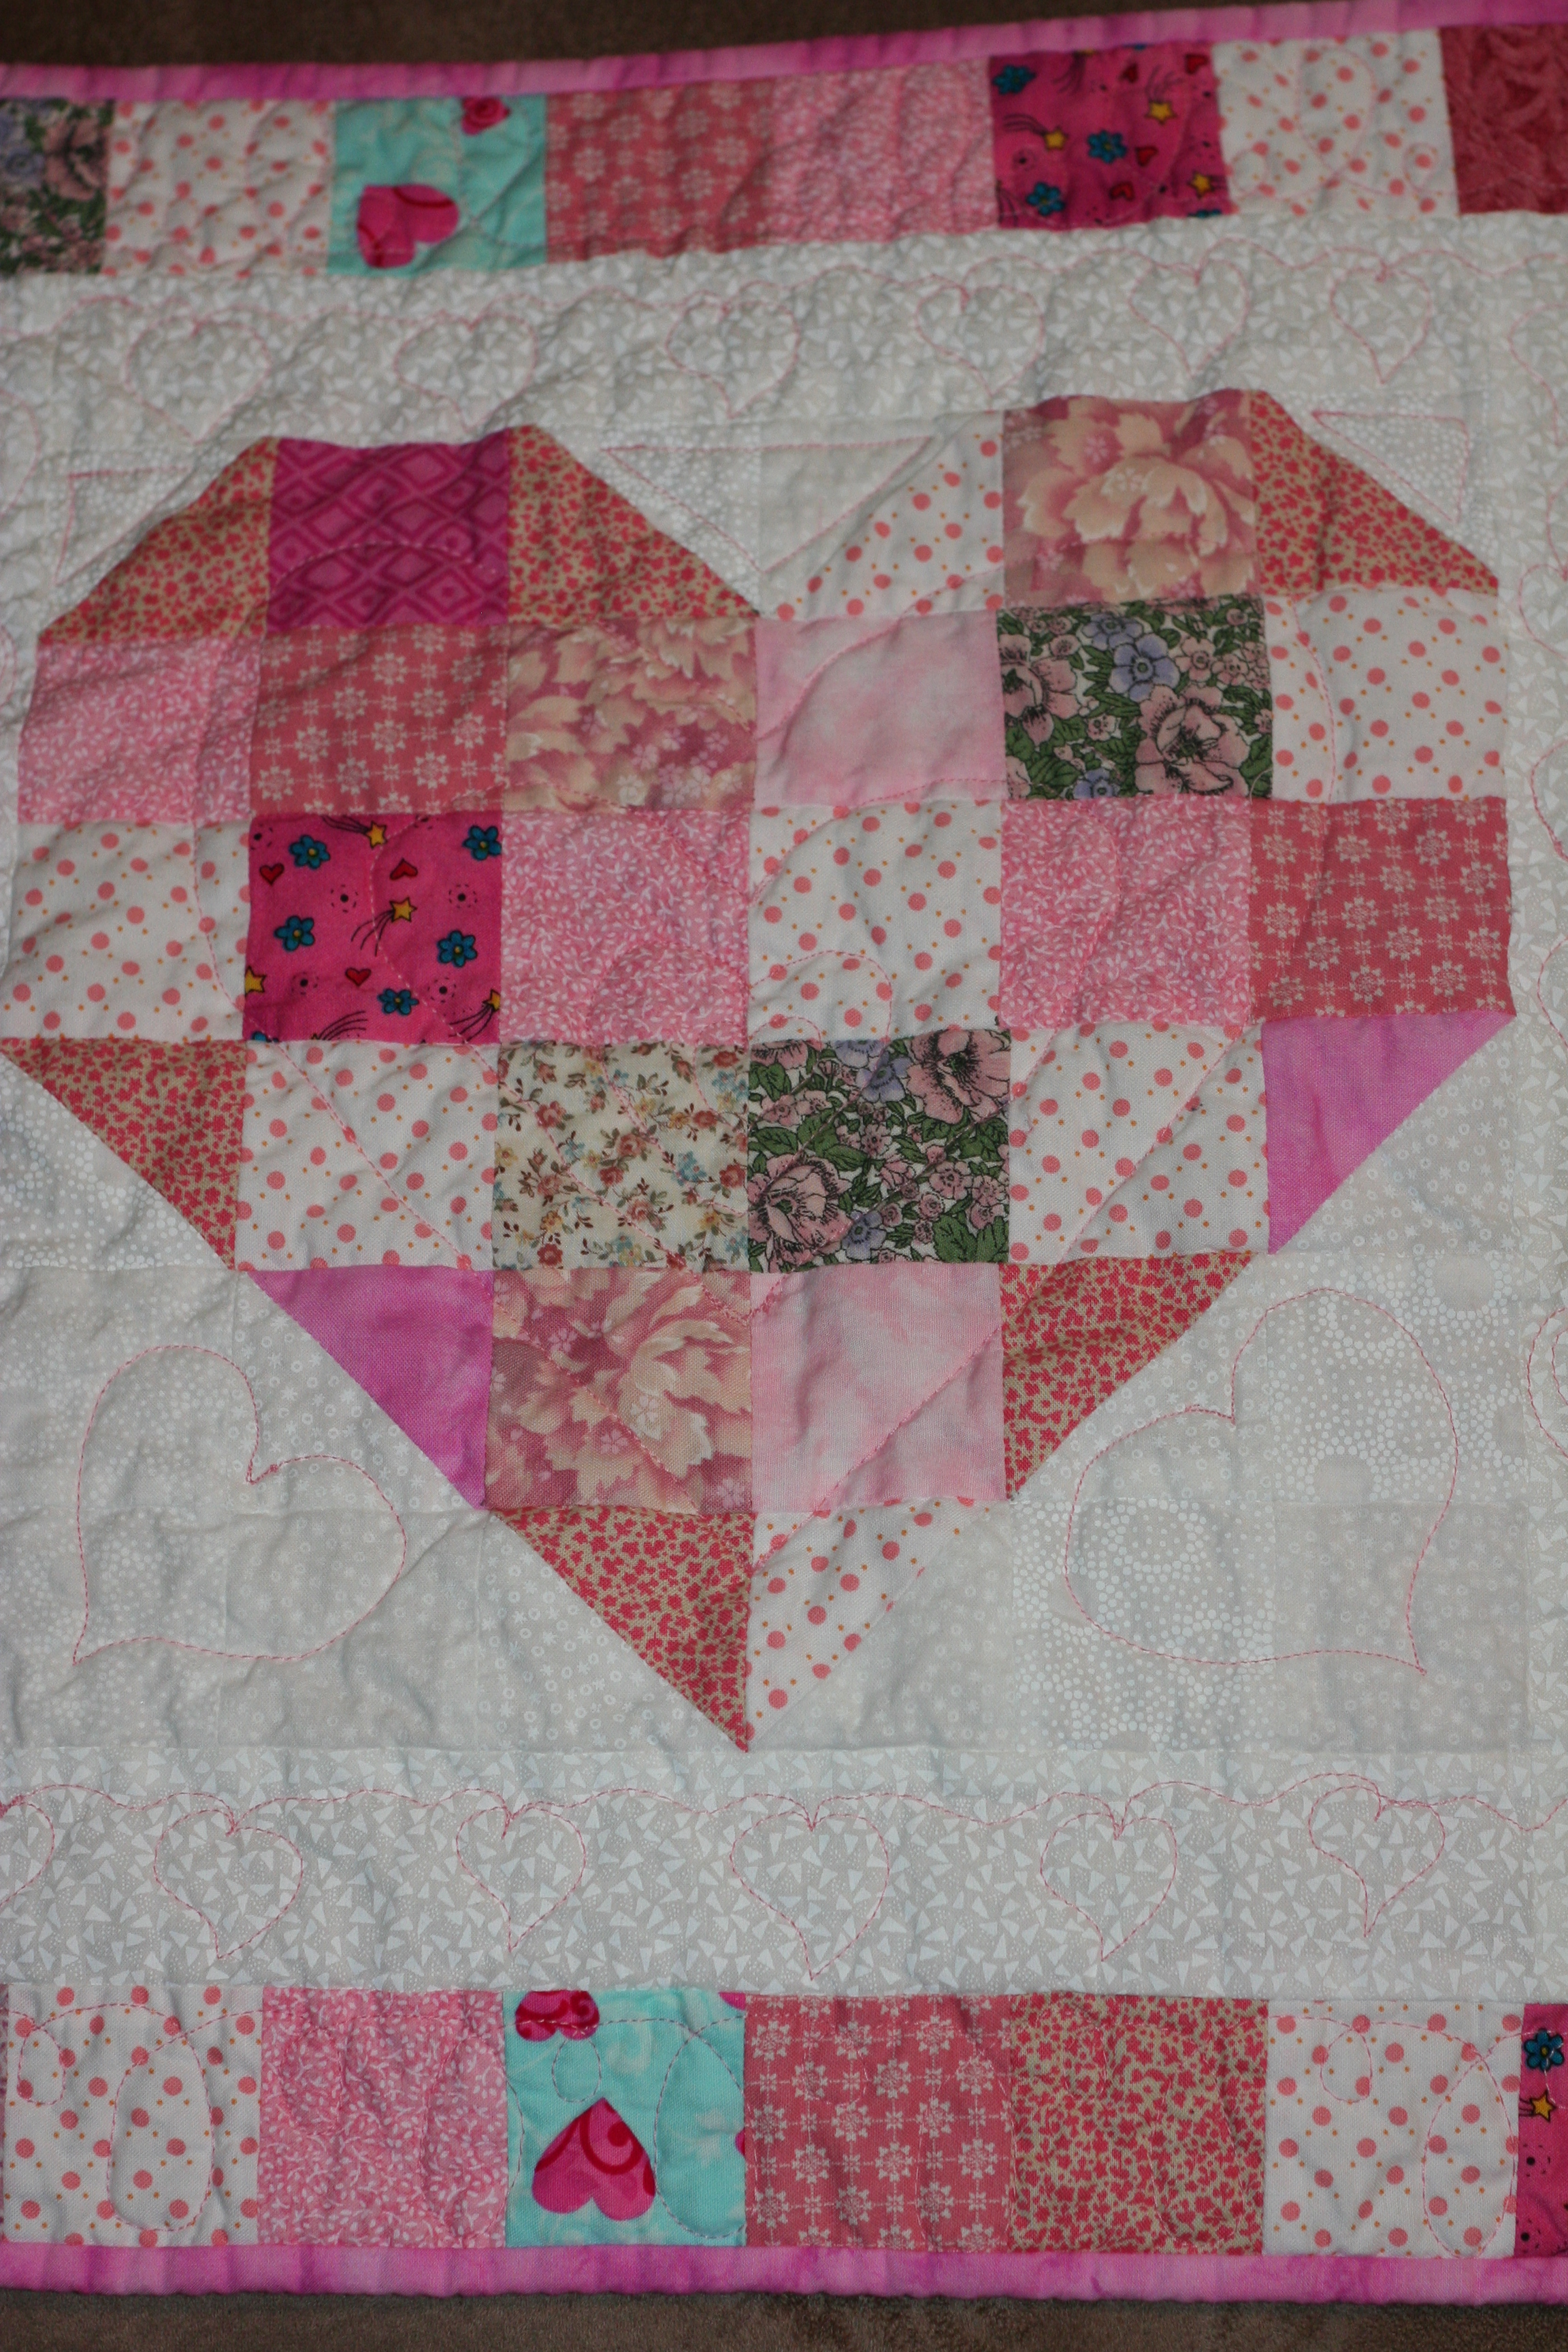
I thought I would catch up with you. It has been a while since I have shared the Mercyful Quilts I’ve received. They are just gorgeous, I am sure you will agree!

Six new beautiful quilts for Mercy Hospital!

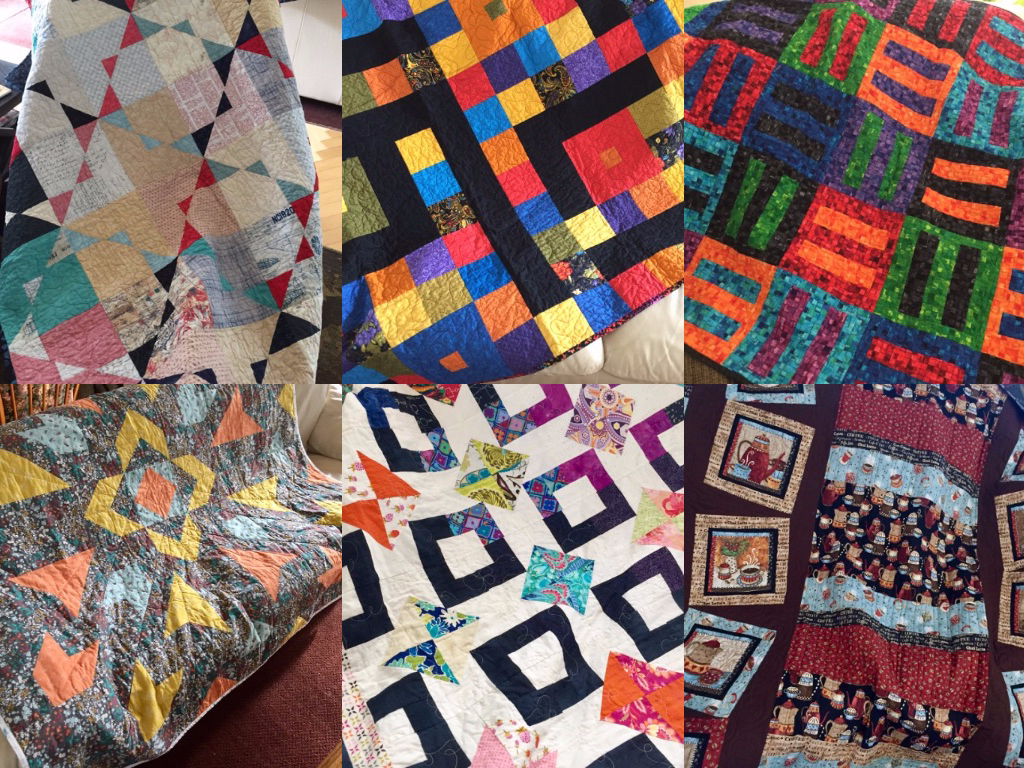
As always, the quilts are stunning. Each one is so unique and more beautiful than the last. Mercy Hospital’s Palliative Care team is so grateful for these. I hope you know how much your work and generosity are appreciated by staff and the families who are given these comforting, loving quilts. If this program is new to you, read this post and this one to see what it is all about!

I could drool over these Art Gallery bolts all day long.

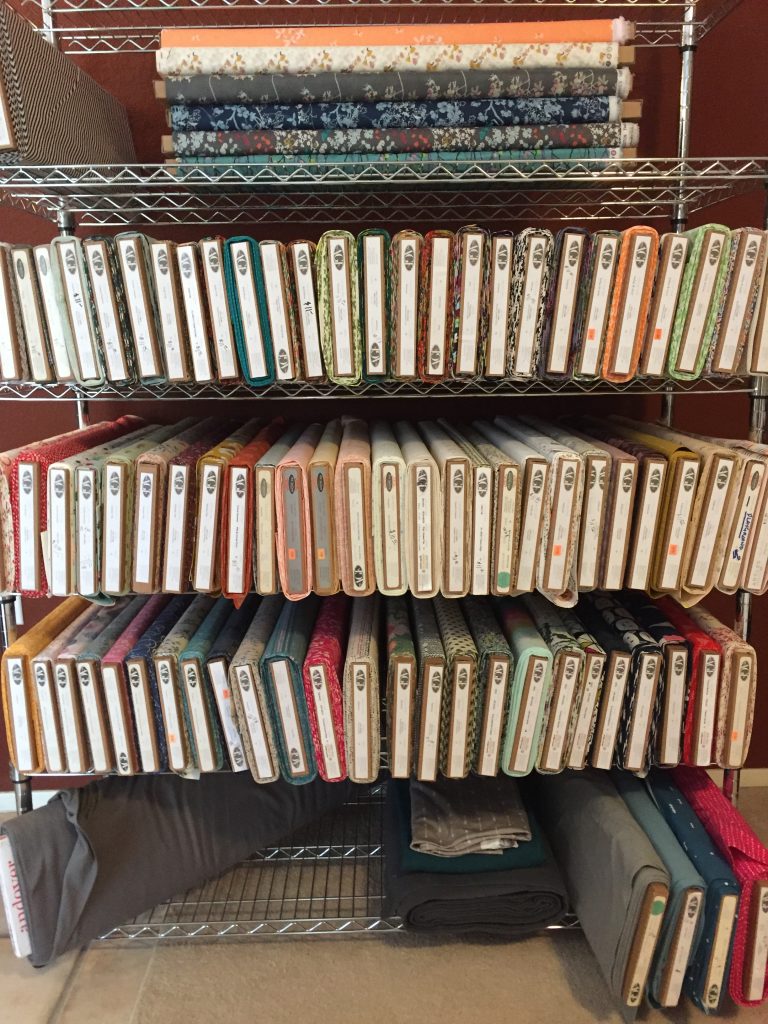
I have been running out of space in the shop so I ordered a wire shelving rack. It is now filled with Art Gallery Fabric, my favorite of all fabric. Isn’t it a pleasure to look at this and just think of the projects one could make??? I have a box of AGF arriving today and I can’t wait. There will be a couple of new colors from the Pure Elements solid line as well as a few more from Maureen Cracknell’s Sun Kissed line. It’s like Christmas morning every time a box shows up!!

Did you have any idea of all the choices??

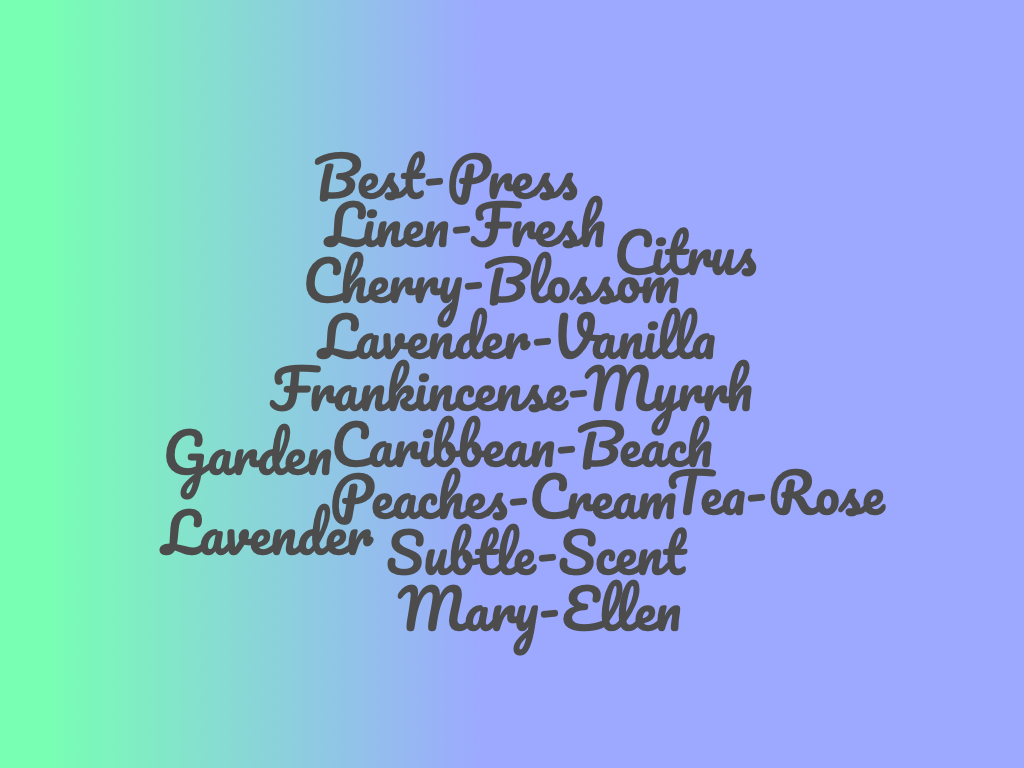
I am out of Mary Ellen’s Best Press and went to order a bottle on-line. Did you have any idea of the number of scents it is made with? I thought there was just the regular Mary Ellen’s – this caught me by surprise. Just what do you suppose “Caribbean Beach” smells like?? Of course I ordered unscented. I am not a fan of fragrance – not in lotion, creams – none of it. This was news to me. (I lead such an exciting life.)

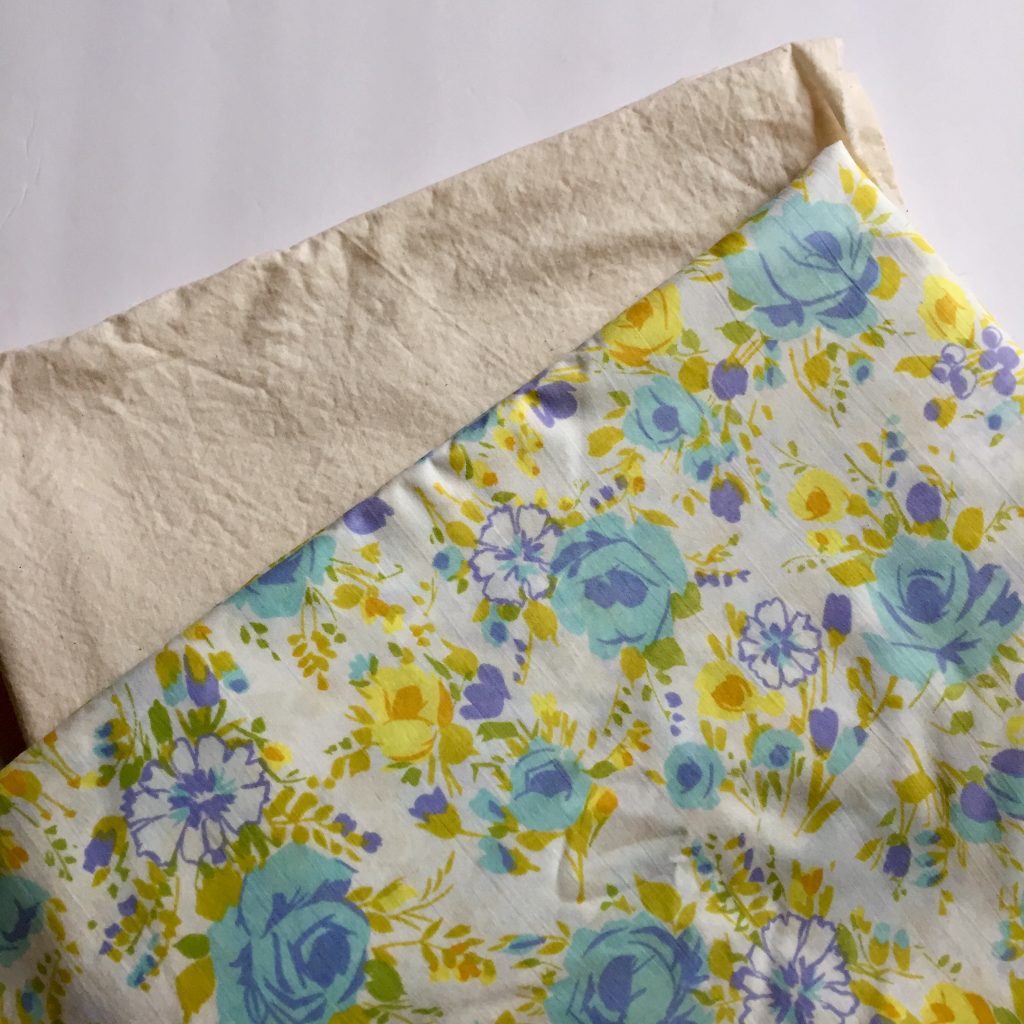
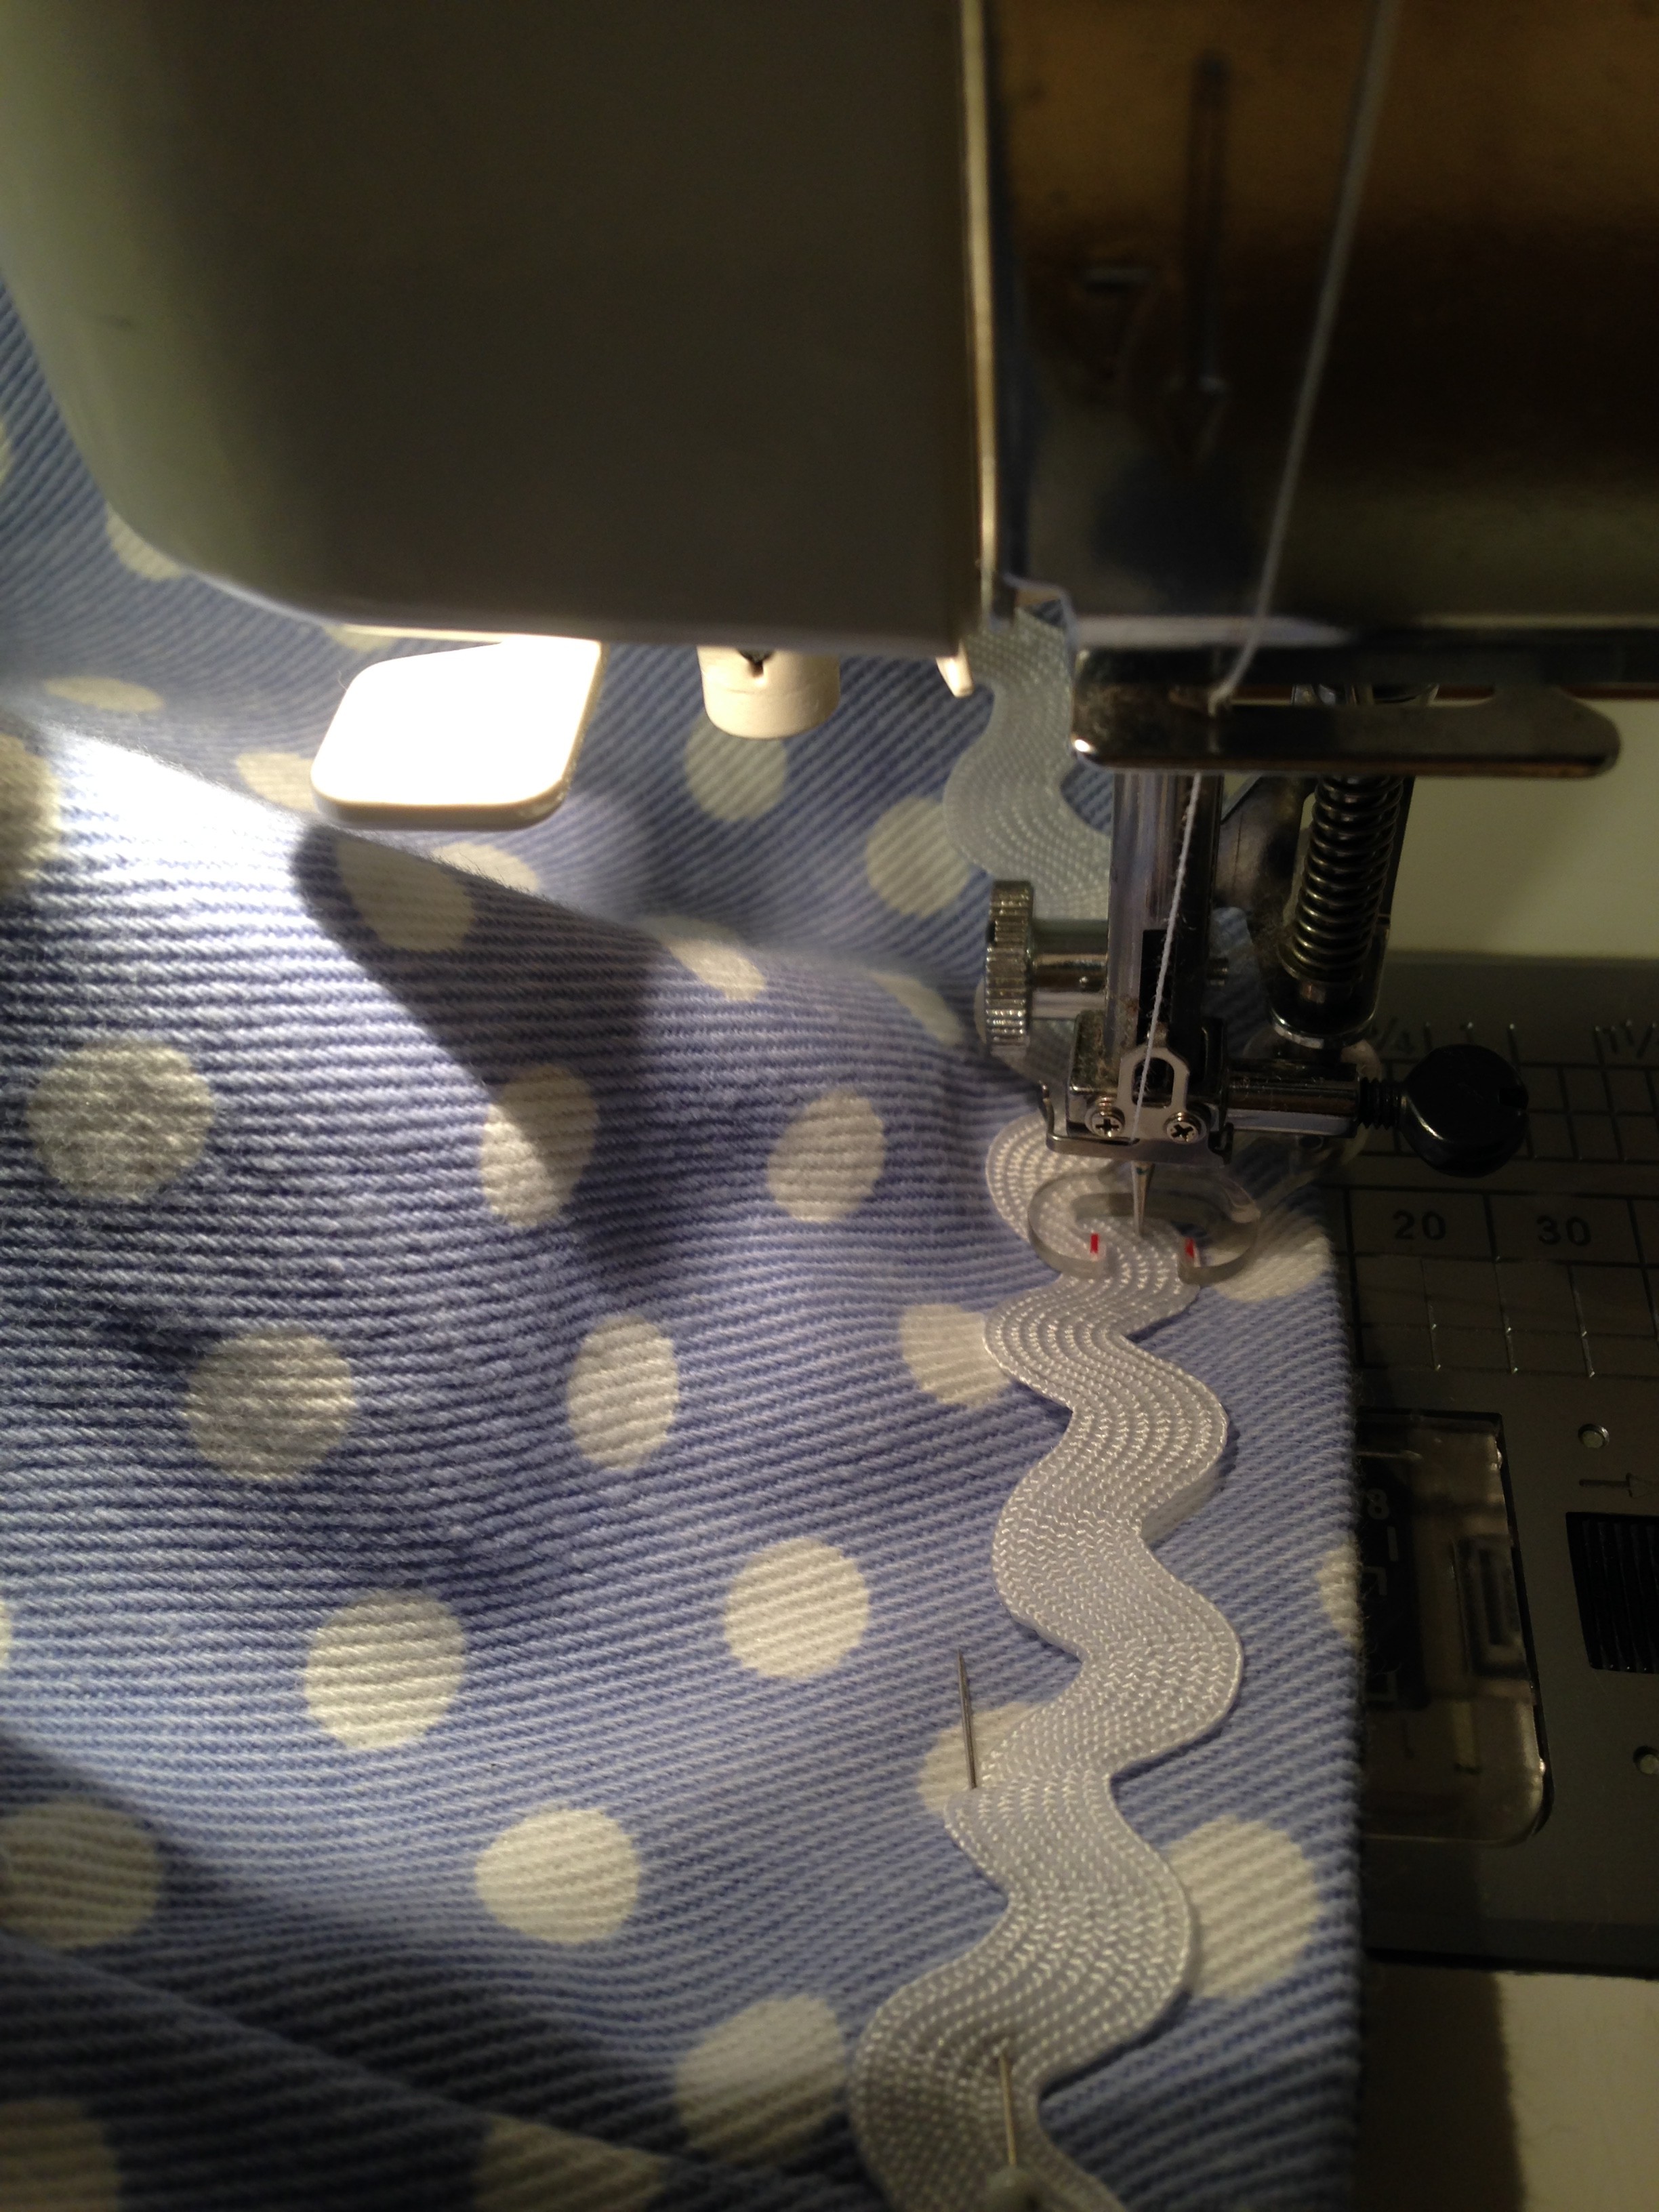
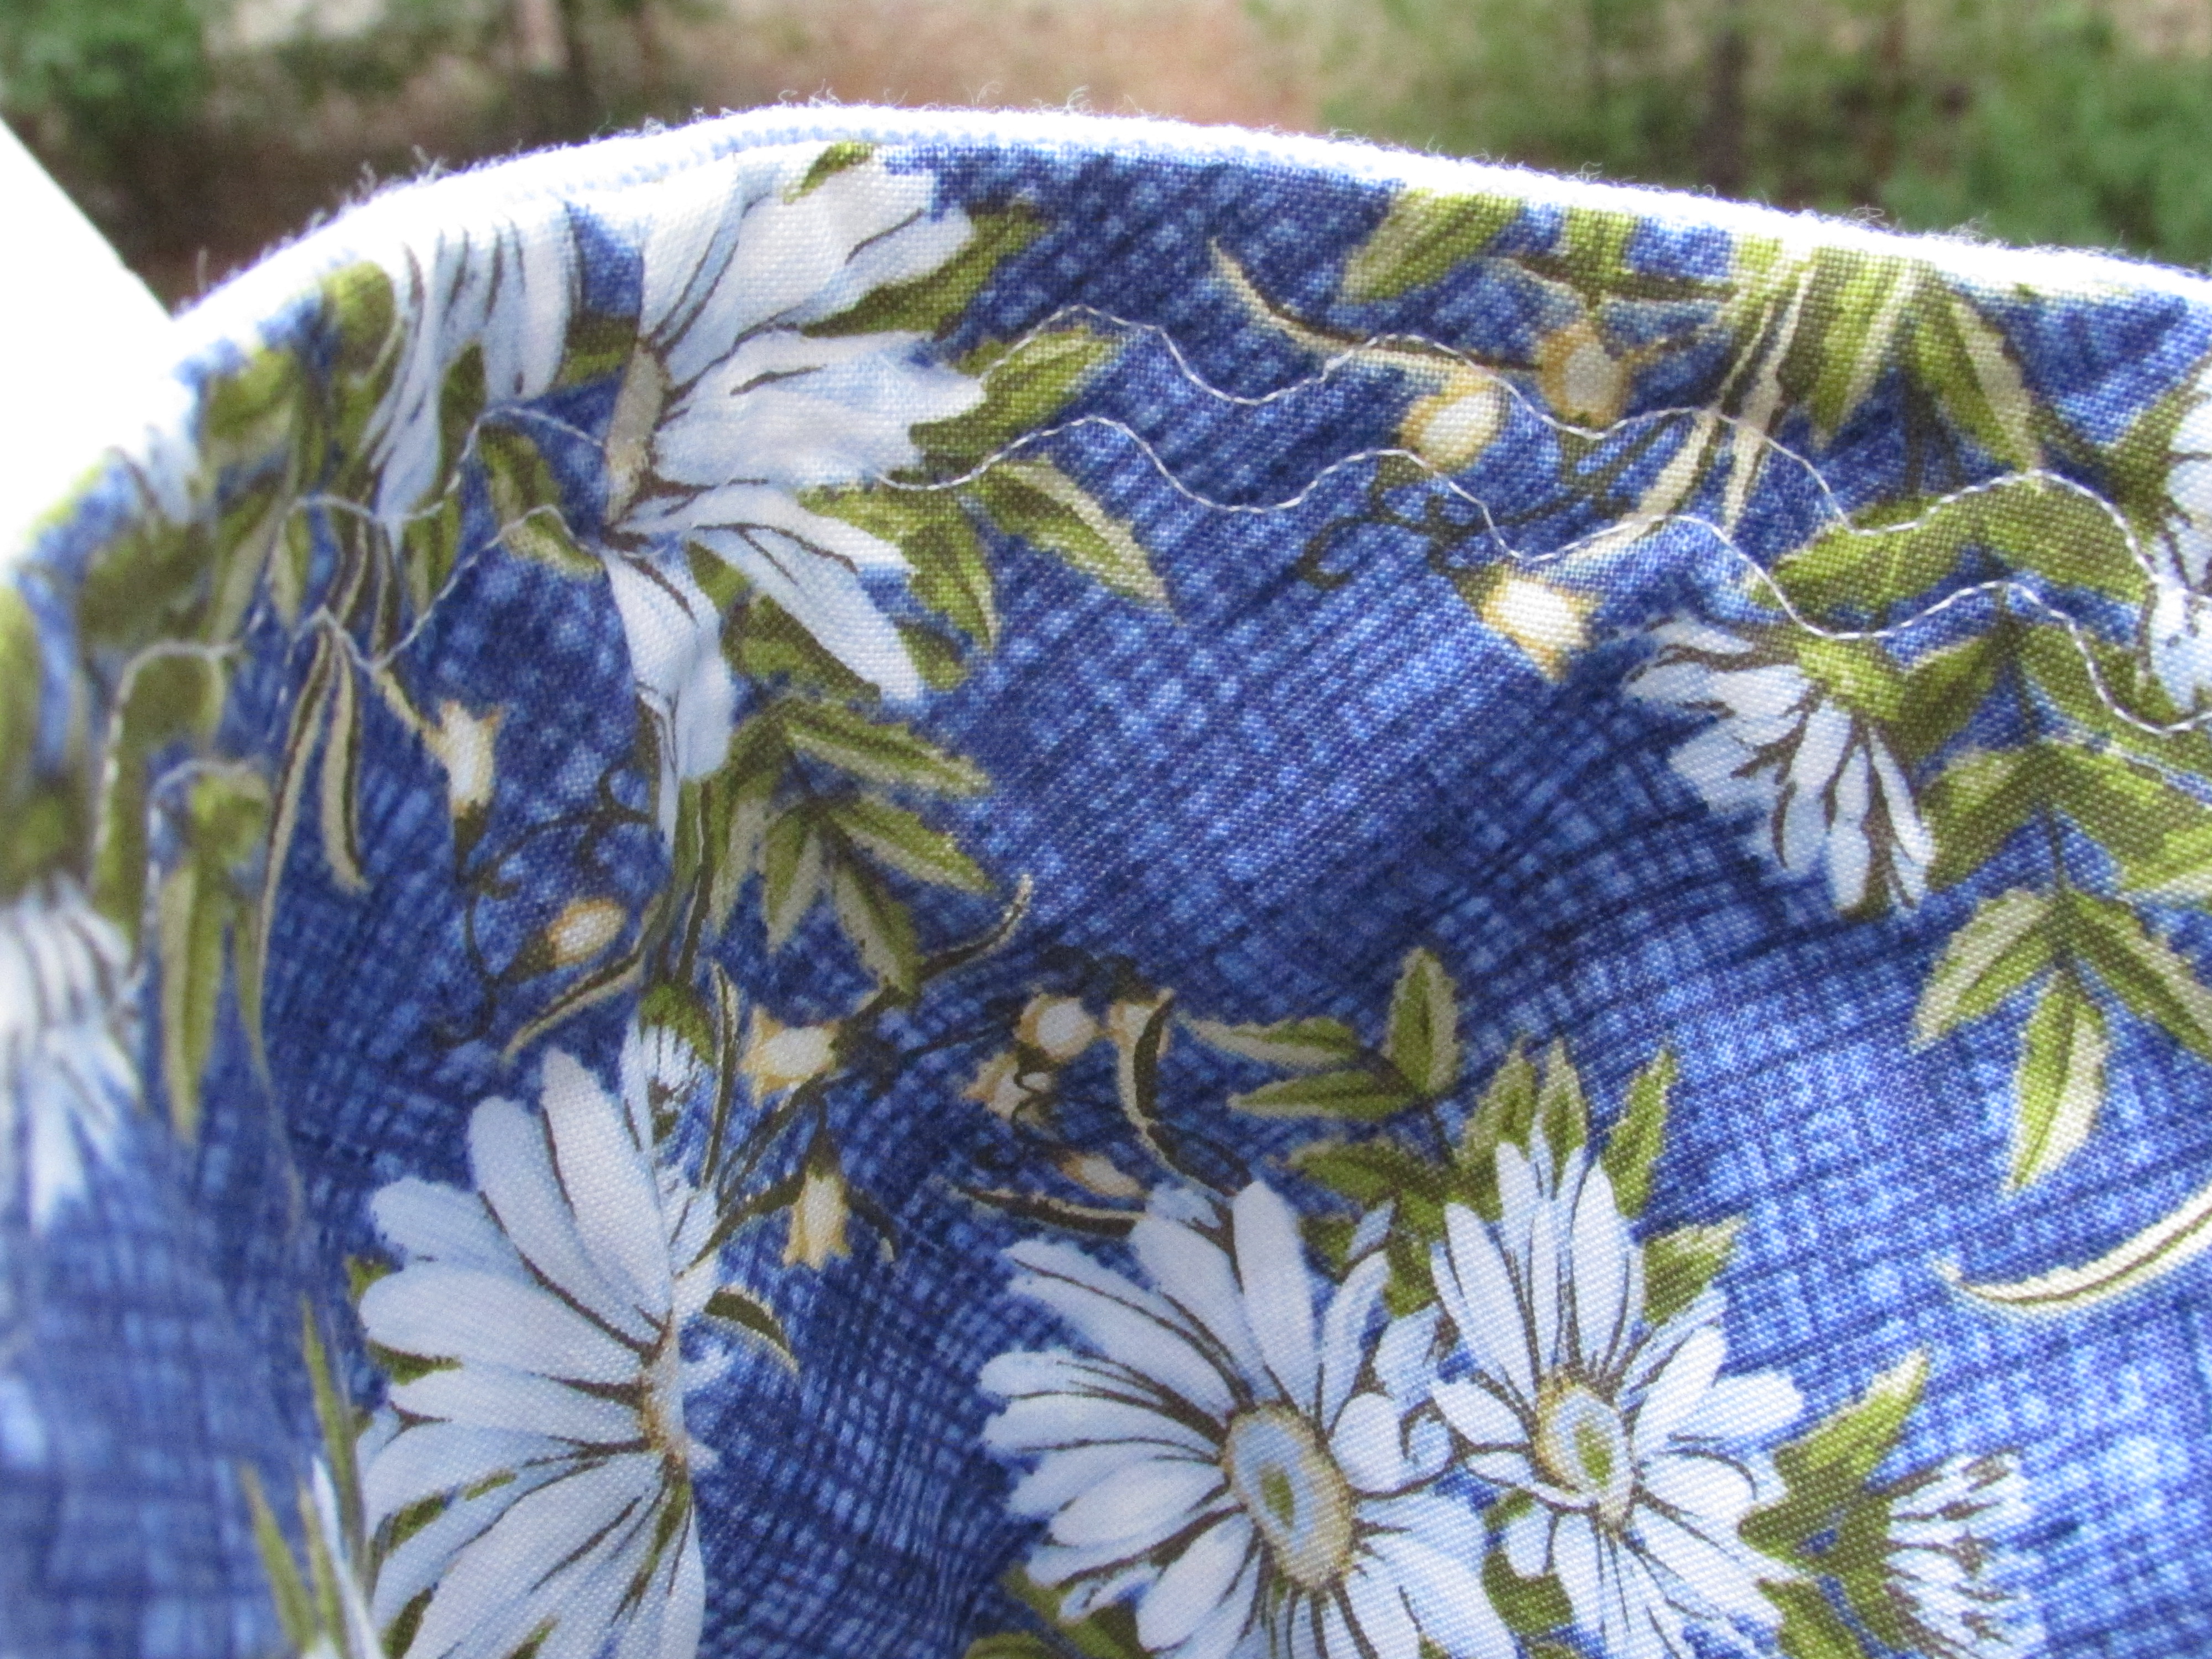
OK – Better get busy. My project for today is to make a couple of simple curtains for the Downieville house. There is a stairwell off the kitchen, leading to the basement and it has a couple of windows. Those windows are single pane and can be quite warm in summer and chilly in winter. I am going to use this vintage sheet and line them with a heavy muslin. I think that will help and they will look cute. The old fashioned floral is perfect for the house. I have an old curtain from the window to use for measurements so this should be a quick project. (if my post-migraine brain cooperates.) Wish me luck!

If you haven’t yet read the fantastic comments and discussion on this post, please do! So many quilters are sharing their mistakes and quilting blunders. So funny to read these and very validating!! There is time to enter a comment sharing your experience as well. ( I am definitely reading all of them and trying to comment on most – it has been a challenge because of my head.) Prizes are offered!! Winners drawn Saturday morning. Go check it out.

My New Look

Well, what do you think? I have been torn between wanting to update my blog’s appearance and feeling too attached to the vintage photo of the presser foot that was in the blog’s banner. I kept going back and forth on it.

Over the Christmas holidays, when my son was here from Vermont, I was talking about it with him. He is my source of help for all things technical for the blog as well as the guy that took that original photo for me some years back. He knows I like a “minimalist” look to the blog, clean lines and no clutter. As we talked, we both agreed that neither of us was the right person to create a new look. We needed something to work from. He told me about a website, Fiverr.com. It is an interesting place where independent designers, most from other countries, put up a quick bio and explain their style. You than contract with one and they design logos to work with a set of criteria that the buyer predefined. For instance, I asked for something with a sans-serif font (no curlicues on the letters), blues and greens in color, not fancy or intricate, and somehow related to my theme of Needle and (presser) Foot.

Within 48 hours he sent three designs (the number that I paid for). Two of them looked very industrial, the third one is what you see here. It took several iterations to get the presser foot to my liking. But this wasn’t an issue as I paid for, and was given, unlimited revisions. The designer was quick and tried to match my expectations. Overall, it was a great experience and gave me a logo from which to base some changes. I ordered new business cards, which was great as I only had about five left. Also updated my Etsy shop and the small enclosures that I send with my customer’s purchases. It has been so much fun to work on these updates.

Yesterday I Facetimed with my son and he walked me through changing some of the colors and details on my blog. Usually he does this for me but you know the saying, ‘Give a man a fish, you feed him for a day. Teach a man  to fish, you feed him for a lifetime’? Let’s just say this easily converts to ‘teach your mom to do her own blog maintenance….’!!  😉

I would love to hear what you think. I am quite pleased. If you check out the site, let me know what you think. There are all sorts of services offered there, not just logo design.

How to Create a Simple Pattern from a Garment

I want to share a quick project that I did last week. It isn’t a full-fledged tutorial, but I did take some pictures to give you an idea of how I went about making a new nightgown by tracing my old one.

I have a favorite nightgown that I bought some time ago at a very, very expensive store. You might have heard of it, Target?? I have worn it for at least four or five summers and it is worse than ragged. It is the kind of nightgown that I would be afraid to wear in a hotel because if there was a fire in the middle of the night and I had to run to the parking lot in my pajamas, it would be a very embarrassing experience.  See…. it is awful.

IMG_6266

If you look carefully, you can see that I had to tie little knots in the straps because they were so stretched out that it became a bit indecent. (I kind of can’t believe I am showing my worn out pj’s but it’s all for the greater good, right?) Anyway, I really liked this nightgown because it was so comfy.

Several weeks ago, I found a piece of lightweight knit at the fabric/thrift store in our town. It was a bargain. Maybe 2.5 yards long and 60″ wide so I knew I could get a nightgown out of it and, if I screwed up the pattern, I would probably have enough to try again.

What I did was basically fold the existing nightgown and trace the front and back sections on to the new fabric. The hardest part of this was that the new fabric is basically the same as the original and it was kind of hard to see (and worse to photograph) what I was doing. Also, the old nightgown was worn and the fabric stretched, making it difficult to work with.

IMG_6267

For the front piece, I folded the front of the nightgown, wrong sides together, exactly in half (as close to exact as one can fold an old, stretched out piece of knit fabric.)

IMG_6268Then I laid out the new fabric. (See how close the colors are?) A quick aside to explain something; when I cut lengths fabric, I use the dining room table. I put my largest cutting mats down end to end first, so I don’t scratch anything. It also gives me the choice of using scissors or a rotary cutter.  Ok – next, I placed the folded nightgown along the folded edge of the fabric and I traced it with a Clover Chaco-Liner pen. It was tricky because I only have white chalk markers and it was very hard to see on the pale pink. Once I traced it, I used scissors to cut it out.

IMG_6269I repeated the same steps for the back of the nightgown. Once it was cut out, I opened the pieces and placed them on top of the existing nightgown to see if they were cut to the right shape and size.

IMG_6270

I know it is hard to see but if you look, you’ll notice that the new piece (underneath the old nightgown) is too wide. So I had to do some trimming. After that it was so quick. I pinned front to back, right sides together, and matching the stripes as best I could.

IMG_6274

If you aren’t experienced with knit fabrics, you need to know that sewing on knits requires a ballpoint needle. They work best with knits and you won’t experience those annoying skipped stitches that often happen if you sew knits with sharps.

IMG_6275Once the front and back were sewn together, I cut some strips to use to finish the neckline and armhole edges and create straps. Knit fabrics when cut, curl at the edges but a quick spray with some spray starch and a little pressing took care of that. I cut two inch strips. Then I folded one long edge over 1/2″ and pressed it.

IMG_6276

Stitching the facing strips (right sides together) to the neckline was quick. I started at the outer edge on the front, continued along the underarm edge, across the back and along the other underarm, stopping at the other edge of the front of the neckline. (This means I finished both armholes and the back of the neckline.) After pressing the seam, I folded it over, to the inside, and pressed under the raw edge. Finally, I top-stitched the whole length. For whatever reason, I failed to take any pictures of this part of the process. The straps were formed by taking a long piece and pressing it like I did the first piece. It was used to face the front neckline and it continued beyond the neckline to make straps.

IMG_6295

Once that was all top-stitched, I stitched the straps to the outer edges of the neckline on the back. Does that even make sense?? It would if I had taken pictures, darn it.

Here is the final result alongside the original. Not bad, right?

IMG_6285

I think it is kind of funny that the fabrics are so similar. That wasn’t intended but the fabric was a great price and the knit felt really nice.
This is the first time I have attempted to use an existing garment as a pattern. It worked well but as always, I learned a few things. The next time I do this I will:

  1. Trace the garment on paper for use as a pattern. That way, I will be able to check the size and proportion before I have cut any fabric. As an added bonus, if the results are good, I have the paper pattern to use again and again.
  2. For this garment, I would have made the bias strips for facing it a bit narrower. The resulting  neckline finish is a bit wider than I like.

Update:  Once I had the nightgown finished, I decided to add a bit of trim to the neckline to give it some shape. The cotton lace  trim is not a knit so it acts to prevent any stretch at the neck. I like the look of it but of course, if I had added it before facing the neck, it would have a more finished look.

IMG_6293

Another source of instruction on cutting a pattern from a garment is this video produced by Muv at Lizzielenard-vintagesewing.com.  It is really helpful and gave me a good start. I look forward to giving this another try!


Linking to lots of fun places. Check them out at the top of the page, under Link Ups.

Using Incognito Mode

I learned something new this weekend and wanted to share it with you. When I am writing a blog post and using various links, I test them before I publish the post. In an effort to publish a usable bit of information for the reader, it seems best that the links work as intended, right?

When I was working on my review of Lori Kennedy’s “From Doodle to Design” class on Craftsy the other day, I was trying to test my links to her class on the Craftsy website. As an affiliate of Craftsy, I receive a small payment if anyone purchases something through my blog. Naturally, I wanted the links to work properly. 😉  The problem was that when I clicked through the link, it took me to my personal Craftsy account, not the main page that I intended to link to. This was because my Chrome browser was keeping track (as it is designed to) of my browser history and taking me to the last Craftsy place I had been.

I asked Ian (my youngest son) to test the link from his laptop. He was sitting at the table with me editing photos on his laptop while I was fussing with this. He suggested I open an “incognito” window and test it myself. I never knew this was even a “thing”.  Using Chrome, if you press Ctrl-Shift-N (all at the same time) it will open a new tab on your browser. This tab will be working privately, meaning it will not see your history, or cookies, that are generally available.  When I tested my link while “incognito”, it worked exactly as intended because I was testing from a clean slate, so to speak. Another way to use incognito browsing on a Windows computer is to click on the 3 thin lines at the top of the screen, in the upper right corner. The drop down menu will offer ‘New Incognito Window’ as a choice. That will take you to the same thing. Again, this window will not access your history so you have the clean slate I was talking about. Browsing the web using an incognito window also means that your history isn’t saved when working with this screen.

After learning about this ability to browse Incognito, I took advantage of it and tried to search for my Facebook page. I have the privacy on my Facebook page locked down fairly tightly. I wasn’t able to access it at all. That was good to see.

Could be that this is old news to you and I am late to the party here, but I am happy to add this to my process when I am proofing a post before hitting the publish button. Hopefully it will help you too if you hadn’t already heard of this.  If you have questions, leave them in the comments and I will find an answer (probably by calling Ian but still….)  🙂

Linking up with Stephanie today over at Late Night Quilter. Come take a look at her Tips & Tutorials Tuesday. There is always something to learn each week at this link up!

Giveaway Winner & a Tip From a Genie

Good morning! I want to announce the winner of the giveaway sponsored by Brewstitched! Drawn by Random Number Generator, the winner is 24, Tami from Sew Much for Free Time! Thanks to all who entered! If you didn’t win today, remember that you can still have 10% off of your order through the end of tomorrow by using coupon code NANDFMARCLUB10!

bobbin genie

Here is my tip! I have been working on quilting my Square Dance quilt for the past week or so. My machine has been giving me all sorts of grief, not the least of which is eyelashing on the back side. It has been really frustrating. Consulting the wizard of all things, Google, I have read a fair amount on technique and the speed of one’s hand movements related to the speed of the needle. I also came across quilters who touted these Magic Bobbin Genies. These are small washers made of teflon that are dropped into the bobbin holder, underneath the bobbin. I gave them a try and they are very helpful. It didn’t solve the problem 100% but certainly improved the stitching by quite a bit.

I am not totally sure why these work. My best guess is the washer provides a slick surface on which the bobbin can spin. This is not an affiliate post, I am just spreading the word in case it might be helpful to you. They come in packs of 12 which seems to be a lifetime supply! I am not sure how long they last but it seems like there isn’t much wear and tear on the little discs. I didn’t pay close attention when I ordered and ended up with Size L. The package says they are for machines with snap-in bobbin cases. I have a Janome and my bobbin drops in. At any rate, the washer fits perfectly and definitely improves the quality of my stitching.

step stones begins

Now that I am nearly done qulting my Square Dance quilt, it seems a good time to begin something new. Seems like I haven’t started a new quilt for a while now. Several weeks ago I was perusing blogs and came across a quilt along that was sorting soon. I have never followed along with a QAL and it sounded like fun. I liked the pattern (called Stepping Stones) and thought it might be fun to meet more of the online quilty community. Jennifer, over at The Inquiring Quilter, is hosting the QAL.  It is definitely not too late to join if you are interested. Other than the social aspect of making the quilt with a group of quilters that are working from the same pattern, there is the benefit of having a schedule to work to each week. I am really enjoying seeing the fabric choices that the others are using for their quilt. As for mine, I have had a collection of black and white charms in my stash for a while now. I didn’t have quite enough for the project so I found more on Etsy. The charms will be bordered with 1 1/2″ strips. If ever there was a time for pre-cuts, it is this quilt. I found a honey bun in royal blue at Missouri Star Quilt Co. This was my first order from Missouri Star and I smiled when I read their shipping notice. Someone over there is a very creative writer! I also smiled when I was ordering my blue strips and I saw their Daily Deal with a package of Kaffe Fassett charms for $2.00. Score. And so my stash continues to grow, bit by 5″ bit.

Time to sew. I have been neglecting my Etsy shop and need to make a few new Chemex cozies today. I also need to work on about a billion little HST’s for the quilt along. Hope you will carve out a few minutes to sew as well.

Linking up all over the place. Check the tab, Link Ups, at the top of the page for details!


Quilting Hack

Here is a tip for you. I have been wanting to try those little rubber tips that you can put on the end of your straight pin while basting a quilt sandwich together. Until now, I have used the curved safety pins when I baste my quilts. It takes time to fasten the pins when basting and even more time to remove the pins while quilting. That is actually the part that annoys me most, removing the pins when I am quilting. The little stubs that I have seen on other quilters blogs were intriguing. Until I looked at the price. They are kind of spendy, for my budget at least. Quilting is an expensive hobby obsession. If I can minimize some of the cost, I will. Sometimes this means buying fabric or notions at estate sales and thrift shops or choosing not to buy some of the many gadgets that are available (and oh-so-tempting.)

I was mentioning my surprise at the price of these little stubs to my husband and asked him what else I might use. He immediately suggested the little ear protection plugs he uses when working with power tools or using the chain saw. Isn’t he brilliant? I looked around online and saw that there was already some discussion of using the earplugs in this way on an old forum.

A quick search on Amazon showed myriad choices of ear protection. I purchased a jar of Sound Blocker ear plugs which was priced at $17.95 for 30 pair.  Thirty pair provides 60 individual pieces. Cutting each one in half nets out 120 stubs. The originals are priced at .35 each and this method sets the cost at .15 each. In all honesty, I didn’t do a great job of pricing these plugs when I purchased them. There are others listed on Amazon that look to be the same and are priced even lower. While the price difference that I ended up with was good, it could have been even lower. When they arrived, I unwrapped about 15 of the little packets and quickly cut each plug in half using my regular craft scissors

IMG_20160102_4424

I gave these a try for the first time when I was basting the baby quilt that I made with the orphan blocks. It was a bit awkward at first. The ear plugs squish down with the least bit of pressure and I thought they wouldn’t work bec ause of this. Not so. I think they are supposed to be squishy like that if  you are using them in your ears, as they are intended. I found that when I put them on the ends of the pins, the natural shape was restored after a bit. Kind of like they deflated when I put one on a pin and then it puffed back up. They held to the end of the pin quite well. I think I had only one fall off the whole time I was quilting.

When I was experimenting with these, I cut a few of them into three pieces, rather than in half. (I suppose one can be too frugal though.) They were not long enough and the tip of the pin would poke through the other end of the plug. One of the purposes of using these is to protect your fingers and hands from being poked so this wasn’t exactly helpful. 😉

IMG_20160102_4427

I am happy with the results so far. It will be interesting to see how long these last. I love taking regular pins, instead of safety pins, out of the quilt while quilting. In addition, I can use a thinner pin since I am not using the safety pins. The safety pins leave a larger hole than my sharp pins, especially with batiks.

Hope this is helpful to you. If you have tried this already, let me know your thoughts.

Linking to Freemotion by the River and Let’s Bee Social. You’ll find their links at the top of the page, under Link Ups.

Sharing Ideas

OK- I feel like I made the greatest discovery. Not earth shattering or life changing (well, maybe a bit life changing for me) but so cool!

I have been making clothespin bags which I sell in my Etsy shop. They are fun to make and I have sold a number of them. Today I wanted to trim one out and decided to use rick rack. I love the cheerful look that rick rack gives to anything! It is such a classic trim. However, I don’t like the way it is usually attached. Often you will see it attached with a seam straight down the middle. However, this means that once it is washed, the edges of the trim will curl up around the seam. I debated sewing two straight seams down each edge to catch the edges but then you have stitching between each angle. This didn’t make me happy. I did what any self-respecting seamstress would do and turned to Pinterest. As one would expect, there are lots of ideas to be had. Many people are embroidering the trim down. This looks really cute but is too laborious. I can’t charge enough for these little bags to spend that kind of time stitching.  I came across a pin that linked back to Craft Nectar (which is the blog for Weeks and Bill over at Modern Quilt Studio). Weeks posted an idea about attaching rick rack by dropping the feed dogs and using your FMQ foot (aka darning foot).  Ah ha!!  Perfect. I never thought of that. It was so simple.

IMG_2159

I did reduce the stitch speed on my machine – it takes a bit of effort to keep the trim straight and stitch along the edges. Next time I think I will pull out the glue stick and use that to attach the trim first. That should make it even easier. The inside looks pretty good!

IMG_20150518_3333Here is the finished bag hanging from my clothesline.

IMG_20150518_3330On an unrelated note, I am so excited about the New Quilt Blogger bloghop event that is getting started. Hosted by Yvonne at Quilting Jetgirl, Stephanie at Late Night Quilter, Cheryl @ Meadow Mist Designs and Terri Ann at Childlike Fascination, this is a great opportunity to learn more about blogging and to interact with others in the community. I signed up this morning and thought I would put this out there in case any of you are interested.

2015 New Quilt Bloggers Button (300px)

The parameters they have set for joining are that you currently have a blog:

  1. mainly about modern quilting*,
  2. for less than 2 years,
  3. writing at least 4 posts a month,
  4. are willing to agree to be actively involved in the blog hop through visiting and commenting on the other blogger’s hop posts,
  5. and have or are willing to open a Facebook account to participate in the group discussions,

If you are interested, please visit and fill out the 2015 New Quilt Bloggers Blog Hop Sign Up Form.

(*Modern quilting to you is modern quilting to us.)

Note: They plan to accept 100 participants for the blog hop this year. The sign up form will be available until May 31, 2015, or until they reach 100 participants.

This looks like an amazing opportunity and I am really looking forward to learning from everyone involved. If you feel like it would be right for you, I encourage you to check it out.

That’s it for now! Hope you are all having a great week!

Linking to Connie at Freemotion by the River, and  Tips and Tutorials Tuesday.


A Finish with a Flange

So pleased to show this week’s finish!!  I love this quilt for a variety of reasons. The colors are just what I wanted for one.  I have always loved a basic pallette using neutral colors. As I mentioned earlier, I then decided I wanted to put a pop of red it. The more I played with this, the more I liked that red. Thus the addition of the large red heart!

IMG_20150325_2982

The biggest reason though is that it is my own.  The design is simple but it came from me; I didn’t use anyone’s pattern and that is absolutely a first. I used straight line quilting going in several directions. The hearted was densely quilted with lines about 1/2″ apart. I used the edge of the walking foot as my guide for that. The body of the quilt has straight lines going through each square, both horizonally and vertically. I started out marking each line with my Hera Marker but after a while, I got used to the patterns in the fabric and used those to guide me along and just freehanded it. Much simpler and very freeing!

IMG_20150325_2986

I took my time with this and didn’t rush to finish it. I did get antsy when I was quilting it and again when I was burying the threads around the red heart. I reminded myself to relax and enjoy the process and it was so nice. I loved every bit of it – even the annoying tasks like cleaning up the myriad little threads all over the back before sandwiching it. Even (and especially) sewing the binding to the back. I do love the process. I think part of the issue is that I feel like I should crank something out so I have “something” to write a post about. This was in the back of my mind but really, even though this blog is something I truly enjoy, I don’t want to be cranking out finishes just so I have a post. That doesn’t make any sense to me.

IMG_20150325_2988

After I got the quilting finished up, I was looking at it trying to decide how I wanted to bind it. I had enough of the fabric from the backing to use as binding but I was torn between using that and using the red fabric from the heart. Finally I remembered a post I had read a long while back over at Persimon Dreams. She had placed a very narrow flange on the quilt before binding it to add a pop of color. Yay-it was the perfect solution. I commented on that particular post and Kim was so kind to send me a quick email explaining how she did it. (So, actually part of this quilt was inspired by another but that’s ok. I want to give credit where credit is due.) Adding the flange took very little time and I think the effect it provides is wonderful.

IMG_20150325_2996


If you haven’t ever done a flange, it is very easy. I cut strips that were one inch wide of the contrasting red fabric. Then I sewed them together, just as one would with a binding strip. Fold it in half and press so you are left with a 1/2″ wide folded strip. (Kim used a 3/4″ strip ending up with a 3/8″ folded piece but I wanted something a little bit wider.) Once you have the flange prepared, attach it to the quilt’s raw edge on the top side. Sew it to the quilt using a VERY scant 1/4″ seam. I used a longer stitch (my Janome was set to 3.5 stitch length) which made attaching it a breeze. Then attach your binding as usual. Be sure to hand stitch the binding to the back. If you machine stitch it, those stitches will show on the flange. Easy peasy!  If you have any questions, let me know in the comments.

IMG_20150325_2989

Yep, this was a great finish and I will be gifting it to someone soon. That is the best part – giving it away and giving someone the joy of a cozy quilt. Hope the recipient loves it.

Linking to Sew Bittersweet Designs as this is my March finish for ALYOF. Yahoo for setting a goal (I had better plan my projects for April soon.) Also linking to Freemotion by the River and Let’s Bee Social.

Quilting is a pain in the neck

My obsession with quilting wreaks havoc with my neck. I have two discs that slip (they extend farther than they should when I bend my neck forward or backward). It doesn’t take much activity to make my neck tighten up and go into these really fun muscle spasms. Most quilters get that tired neck and sore shoulder thing going on when doing a lot of piece work or, expecially, when quilting a piece. The other day Megan Jorrick of Sew Stitching Cute was mentioning issues with her neck and I could completely relate. This week my neck was giving me fits and I was really careful not to aggravate it too much. There are a few things that I do to protect it and I thought sharing what I have learned might help others that deal with the same issue. The main goal is to limit the amount of looking down that I do. The head is really heavy and to look downward is a big strain on your neck. Googling for information, I found that the average human head weighs approximately 10 pounds. Imagine supporting the weight of two 5 pound bags of sugar on your neck. When you extend your head to bend forward to look down that is a lot of stress on your neck.

First off, whenever possible, I look at something straight on rather than bending my neck to see it. This means that if I am ironing seams or bits of fabric, I don’t use my ironing board. I made a little pressing pad which I keep on the desk near my sewing machine. I actually kneel down at the desk and press away – that way I really don’t have to bend my neck. It probably looks odd, like I am worshipping the iron, but it is helpful.

003

Second trick is when I am piecing a long stretch involving matching many little seams (e.g. one row of blocks to the next row of blocks) I, again, get at eye level with it. I happen to have a queen size bed in the sewing room. I lay one row on the bed, kneel down and place the other row on top of it. Then I can match seams and do all of that fussing while looking (almost) straight on to the piece.  Same goes for pin-basting a quilt sandwich. I have a long table that is fairly low in the basement and I use that. Kneeling down at that table is a challenge because of the cement floor but I found an old pillow to kneel on and I can push that along as I scoot around and pin while looking straight on the quilt. Pin basting a quilt on the floor involves crawling around and reaching to the center of the quilt which is horrible for my neck. As you know, it takes a while to pin a quilt sandwich together. Better to use a table for this task.

This is one of my favorite tricks though. My husband was watching me sew and he kept telling me that if I could change the angle of the actual sewing machine I might be able to lift my head a bit. It works. Not perfectly but it makes a difference. My machine sets down into a table so I took an old piece of flannel and rolled it tightly. I lifted the front end of my machine and put the flannel under it, tipping the front of the machine up. It hasn’t posed any problems with stitching or quilting unless I am appliqueing. For some reason, my machine has to be flat for that. Here is a picture to show you. Not gorgeous but it is worth it.

001

My last tip, and the most obvious one, is to sew in short increments. My neck has very little tolerance for sewing which means that I have to limit myself to 15 minute increments which makes it tough to accomplish what I really want to. This is probably the hardest part for me. I get sucked into the process and then I look up and see that 40 minutes have passed. I’m working on it though.

I only did a few quick projects this week. I got a few French Press cozies made for my Etsy shop. More fun though is the baby doll quilt I made.

020

Julia and I are going to see my sisters this weekend. One sister is having a “Heart’s Party” for Valentine’s Day at the request of her three year old grand-daughter. I made a “heart” baby quilt to bring for the kids to use with their baby dolls.

009

I had a pile of 2 1/2 inch squares leftover from the scrappy rainbow quilt I made for RSC2014 so this came together very quickly.  It finished at 15″ x 18″.  The quilting is a mix of heart shapes and loops quilted in pink which I am sure will be totally appreciated by the toddlers that will be playing with it!

011

Can’t wait to see my sisters, their kids and their grandbabies!! Hurray for long weekends!

Linking to Lorna at Sew Fresh Quilts and Amanda Jean at Crazy Mom Quilts.  Also linking to Tips and Tutorials Tuesday and So Scrappy (since pink is the February color.)