
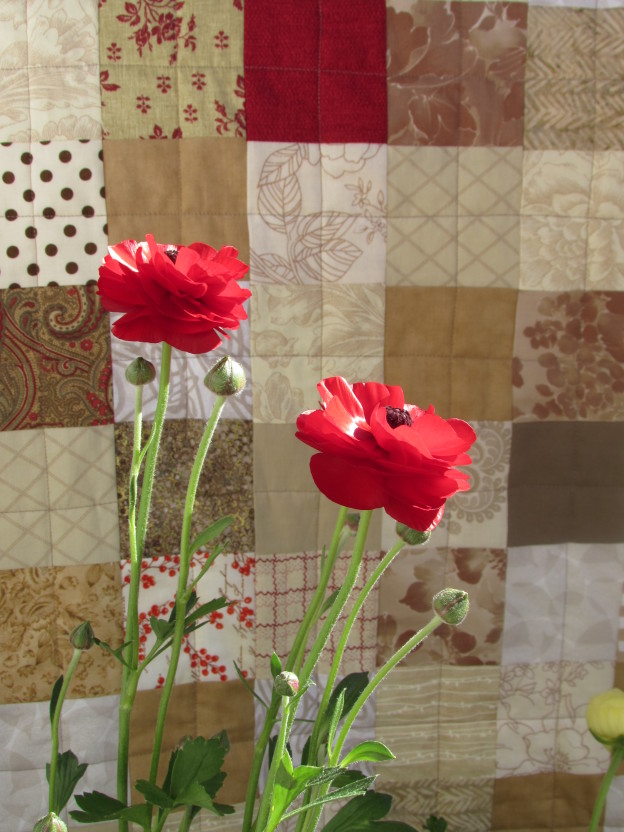
So pleased to show this week’s finish!! I love this quilt for a variety of reasons. The colors are just what I wanted for one. I have always loved a basic pallette using neutral colors. As I mentioned earlier, I then decided I wanted to put a pop of red it. The more I played with this, the more I liked that red. Thus the addition of the large red heart!
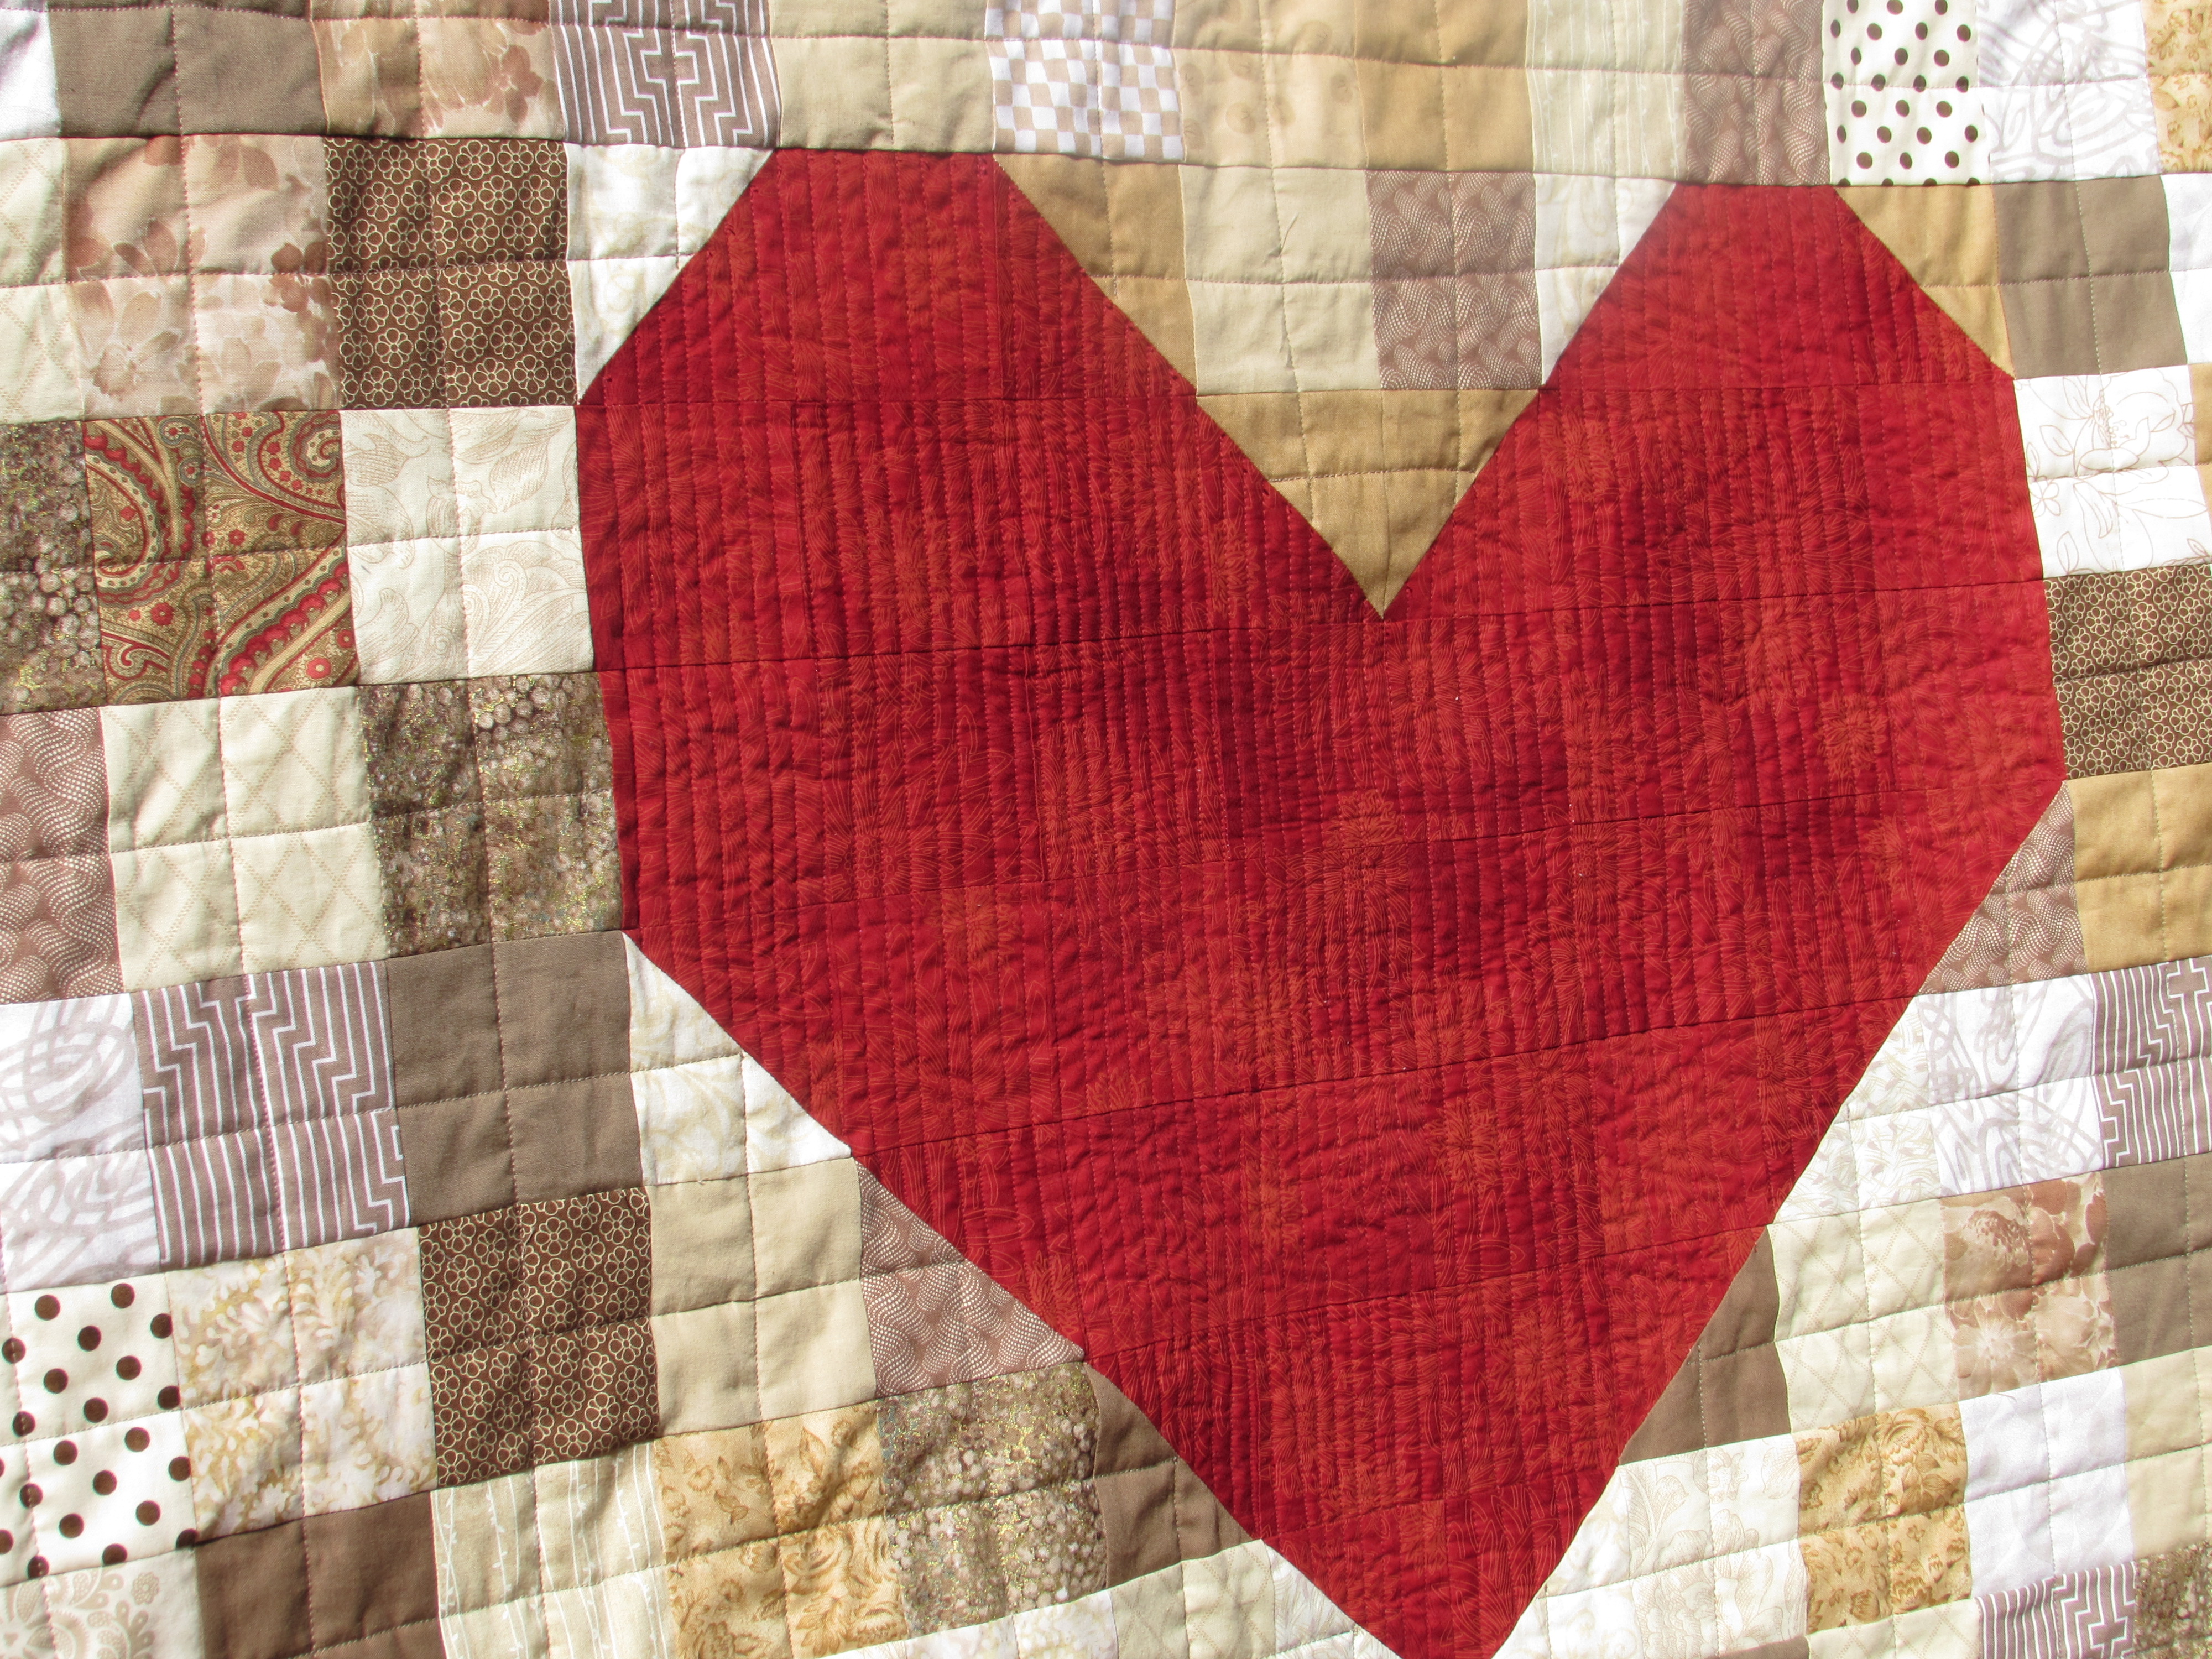
The biggest reason though is that it is my own. The design is simple but it came from me; I didn’t use anyone’s pattern and that is absolutely a first. I used straight line quilting going in several directions. The hearted was densely quilted with lines about 1/2″ apart. I used the edge of the walking foot as my guide for that. The body of the quilt has straight lines going through each square, both horizonally and vertically. I started out marking each line with my Hera Marker but after a while, I got used to the patterns in the fabric and used those to guide me along and just freehanded it. Much simpler and very freeing!

I took my time with this and didn’t rush to finish it. I did get antsy when I was quilting it and again when I was burying the threads around the red heart. I reminded myself to relax and enjoy the process and it was so nice. I loved every bit of it – even the annoying tasks like cleaning up the myriad little threads all over the back before sandwiching it. Even (and especially) sewing the binding to the back. I do love the process. I think part of the issue is that I feel like I should crank something out so I have “something” to write a post about. This was in the back of my mind but really, even though this blog is something I truly enjoy, I don’t want to be cranking out finishes just so I have a post. That doesn’t make any sense to me.

After I got the quilting finished up, I was looking at it trying to decide how I wanted to bind it. I had enough of the fabric from the backing to use as binding but I was torn between using that and using the red fabric from the heart. Finally I remembered a post I had read a long while back over at Persimon Dreams. She had placed a very narrow flange on the quilt before binding it to add a pop of color. Yay-it was the perfect solution. I commented on that particular post and Kim was so kind to send me a quick email explaining how she did it. (So, actually part of this quilt was inspired by another but that’s ok. I want to give credit where credit is due.) Adding the flange took very little time and I think the effect it provides is wonderful.
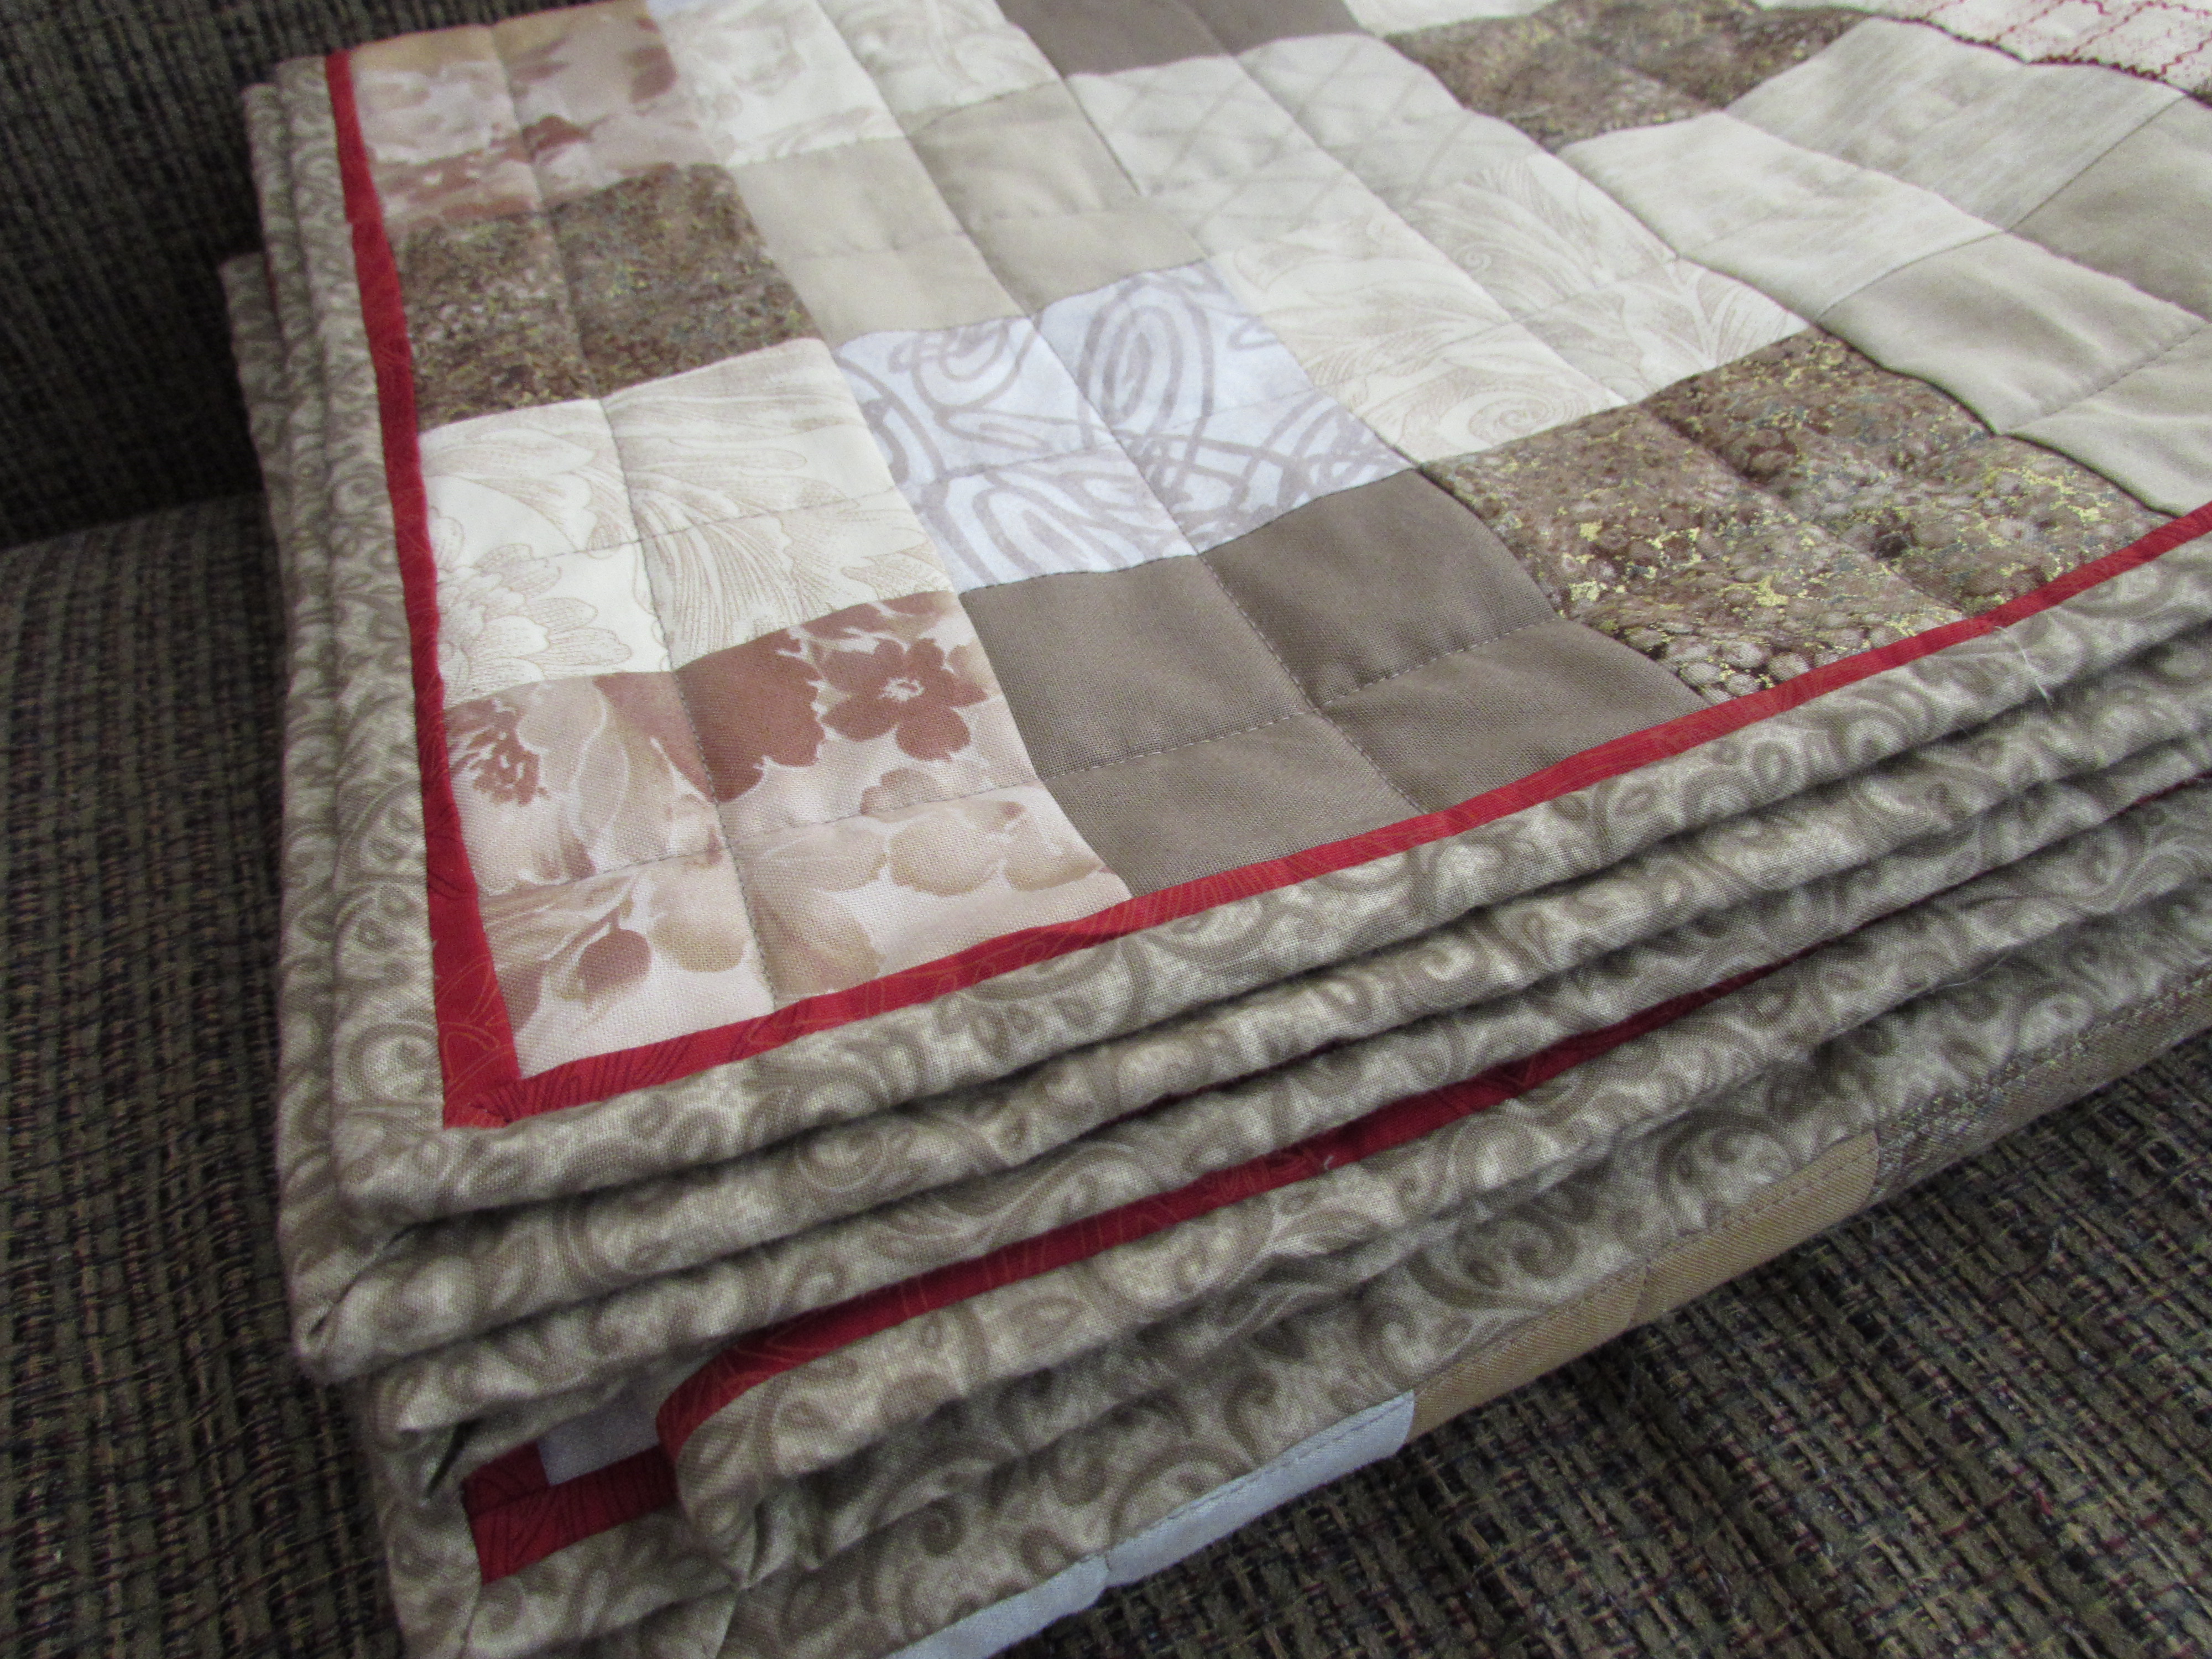
If you haven’t ever done a flange, it is very easy. I cut strips that were one inch wide of the contrasting red fabric. Then I sewed them together, just as one would with a binding strip. Fold it in half and press so you are left with a 1/2″ wide folded strip. (Kim used a 3/4″ strip ending up with a 3/8″ folded piece but I wanted something a little bit wider.) Once you have the flange prepared, attach it to the quilt’s raw edge on the top side. Sew it to the quilt using a VERY scant 1/4″ seam. I used a longer stitch (my Janome was set to 3.5 stitch length) which made attaching it a breeze. Then attach your binding as usual. Be sure to hand stitch the binding to the back. If you machine stitch it, those stitches will show on the flange. Easy peasy! If you have any questions, let me know in the comments.

Yep, this was a great finish and I will be gifting it to someone soon. That is the best part – giving it away and giving someone the joy of a cozy quilt. Hope the recipient loves it.
Linking to Sew Bittersweet Designs as this is my March finish for ALYOF. Yahoo for setting a goal (I had better plan my projects for April soon.) Also linking to Freemotion by the River and Let’s Bee Social.