Tag Archives: washi dress

Five Reasons to Repeat a Pattern

I don’t know that I have ever made the same quilt twice. Wait, maybe that isn’t entirely true. I have definitely made the same quilty gifts in multiples. Like the Christmas table runners I made for my family one year. Or the zip pouches I made for gifts last year.  But not full quilts. Those have always been different. There are so many amazing quilt designs out there and I haven’t yet repeated one.

Clothing patterns? Those I will repeat. Time after time after time. When my kiddos were tiny I would make flannel pj’s for them, using the same pattern until the pieces were so pin marked I would have to tape them together. My Washi dress? Just repeated that one and I am so glad I did. Here are my thoughts on why.

  1. The first time I use a pattern I have to learn the pattern. Even though I have been sewing for so many years (44-ish years?) it takes a minute to just look at the pieces, read the directions and figure out the process.  Using the pattern a second (or third, or fourth) time that process is complete and doesn’t need to happen again.
  2. Of course, the cost of the pattern. I think I paid about $12 for the Washi pattern, I am not sure. So why not distribute that across a few garments? Kind of like dollar cost averaging in the stock market. 😉 Make it once and you have spent $12 plus the cost of fabric and notions for the one garment. Make it three times and you are at $4 plus fabric and notions for each garment. Might as well get as much bang for your buck as possible.
  3. My confidence level increases with each garment. Going in the second time, I knew where the problem areas might be and already had solutions for those. For instance, in the first Washi dress, I found that the elastic bobbin used while shirring the back would need to be reloaded with each stripe of shirring. I still don’t understand why but at least, this time, I didn’t have to fool around to figure out a solution. It makes for a more peaceful sewing experience.
  4.  With the extra confidence in the pattern, I can challenge myself in other ways. For this dress, I chose a knit fabric. I wasn’t sure what it would mean to make a pattern designed for woven fabrics with a knit but I felt good about trying it because I was already familiar with the pattern and how it fit me. I would not have done this the first time using the pattern because I wouldn’t have felt confident in the result.
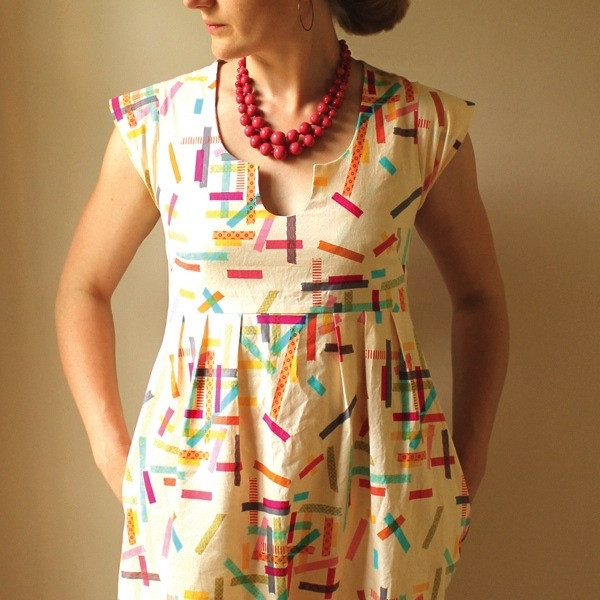
  5. There are so many variations to be had. For the second dress, I chose not to cut the dip in the neckline. I was concerned that with a heavier fabric (knit vs cotton) the neckline would not lie flat with that cut out. I used the scoop neck version instead. Also, I tried it without the sleeve cap, didn’t like it and put the little sleeve on in the end.

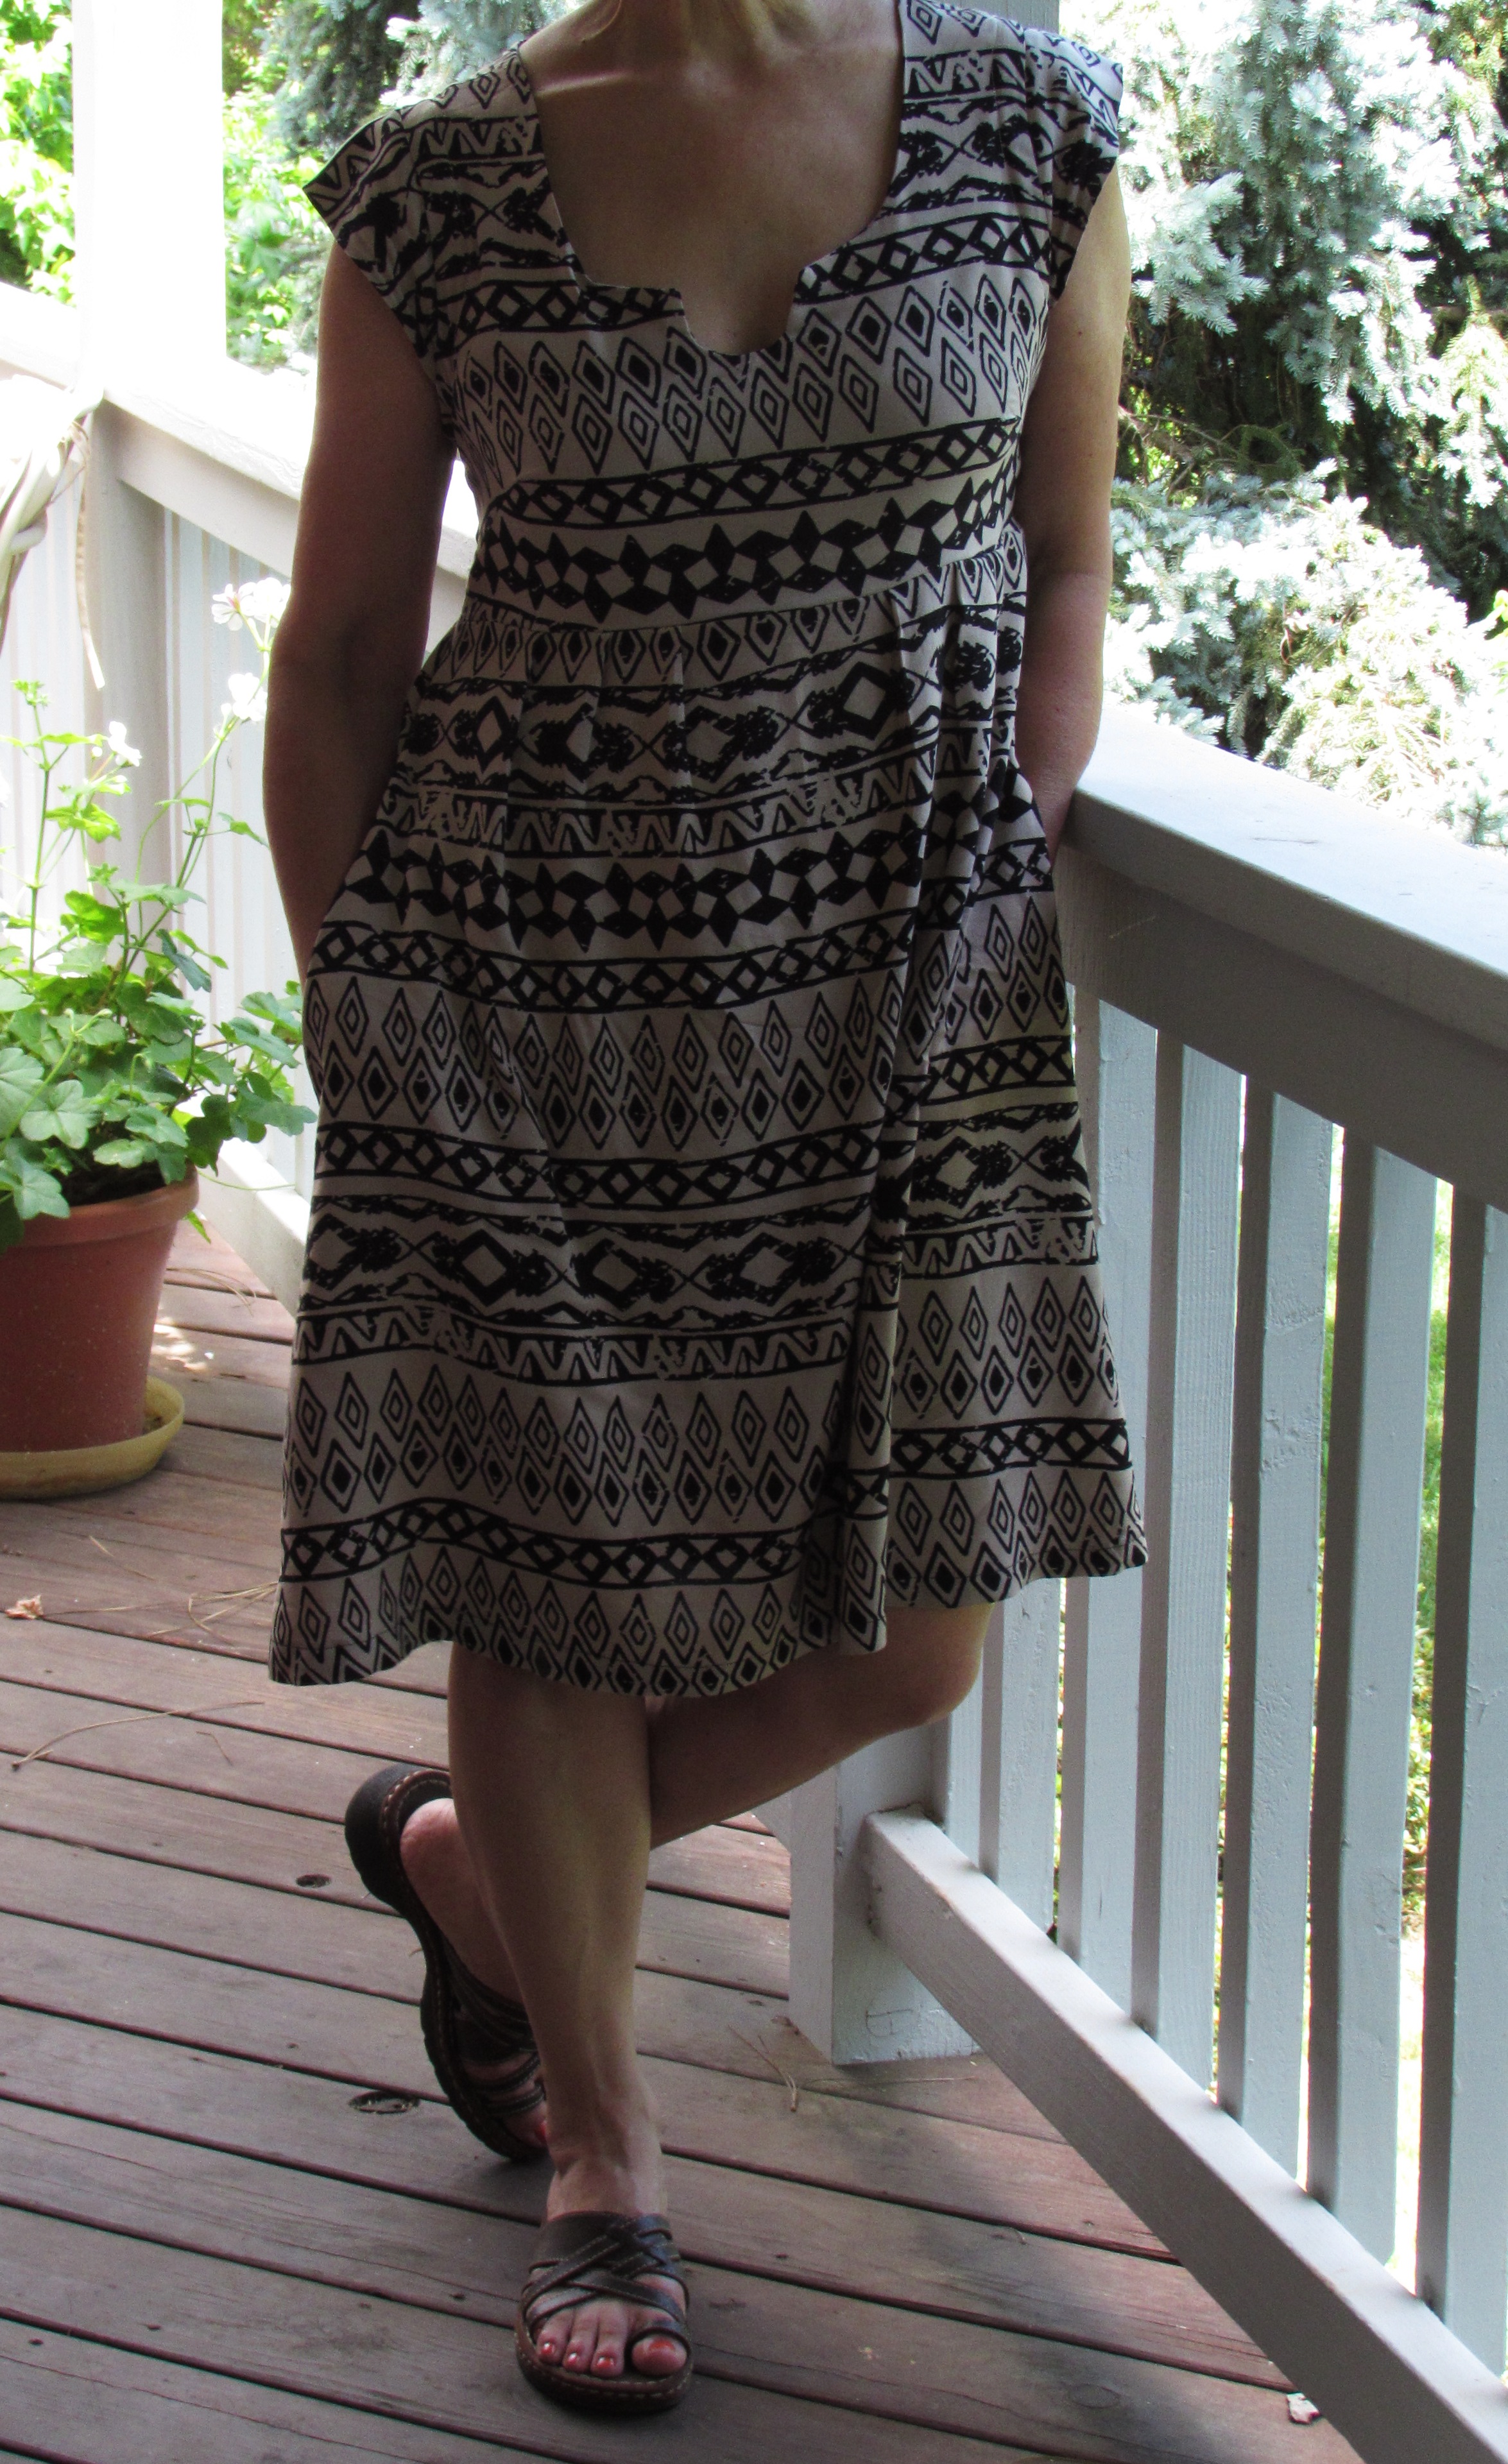
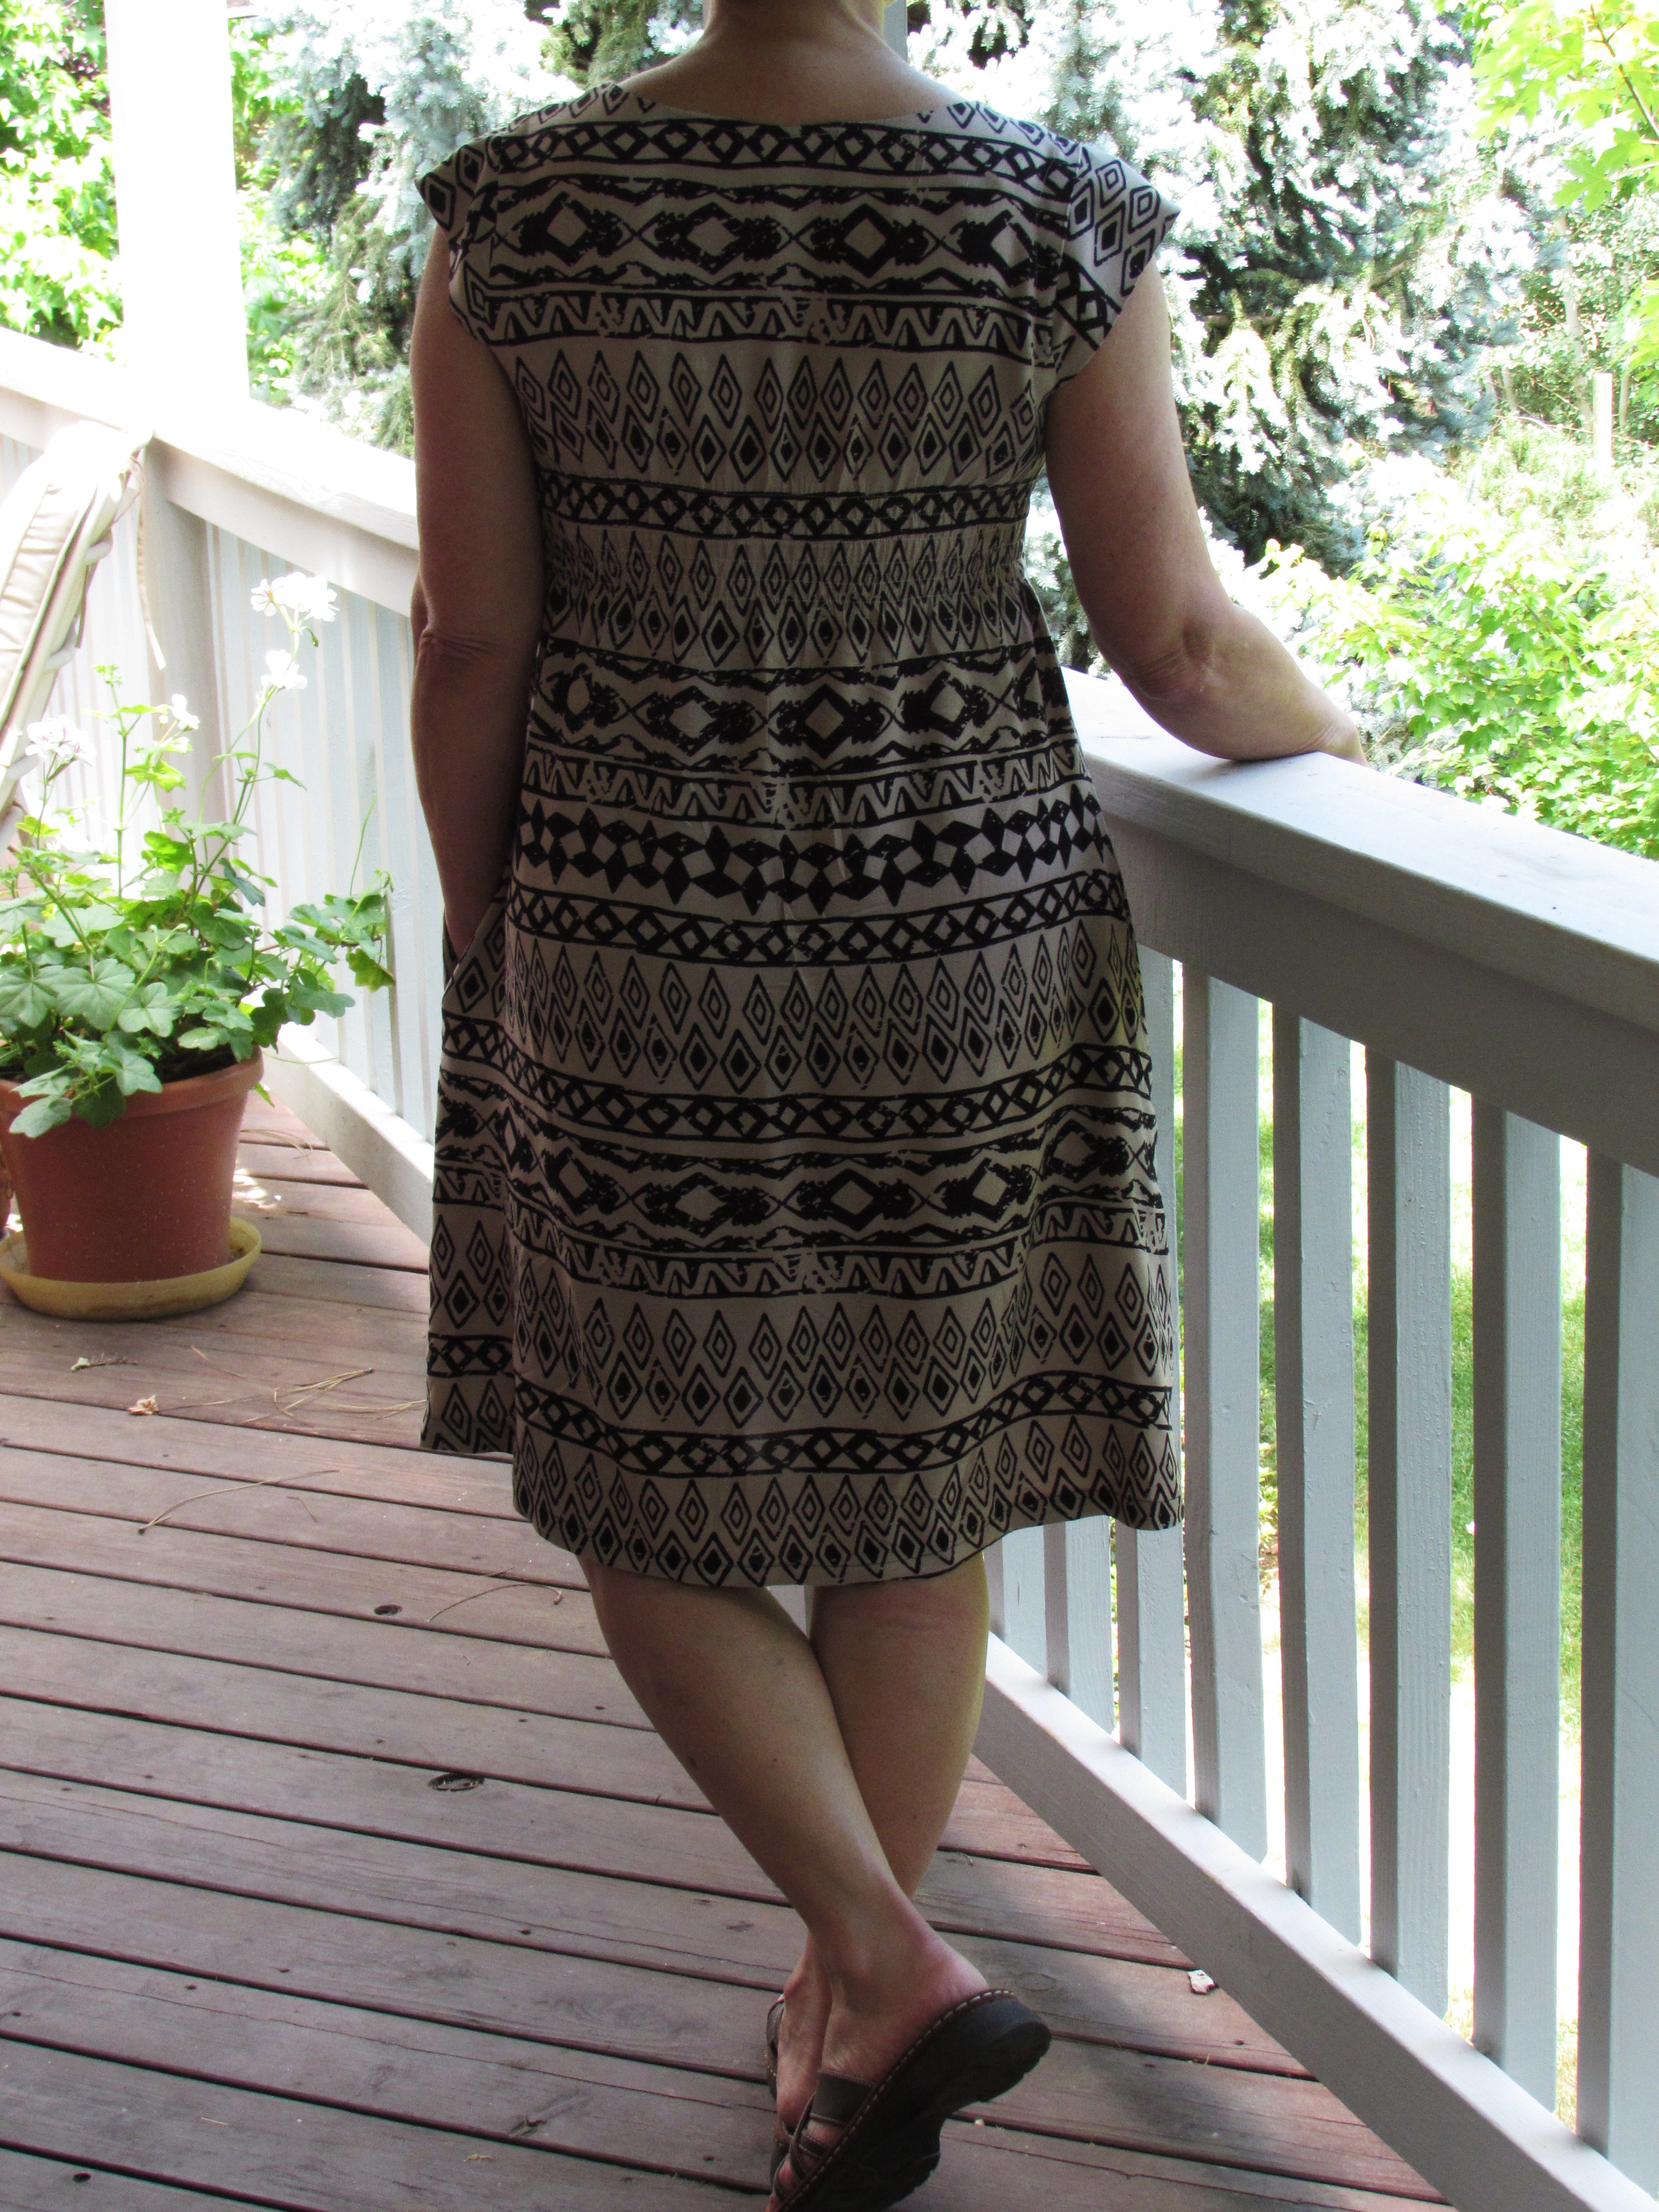
Here is the finished Washi, version two!

IMG_6823

Just as I hoped, it is very comfortable. (For me the goal is almost always comfort.) The knit washes well. (I did prewash it as knits have a strong tendency to shrink.)

IMG_6834

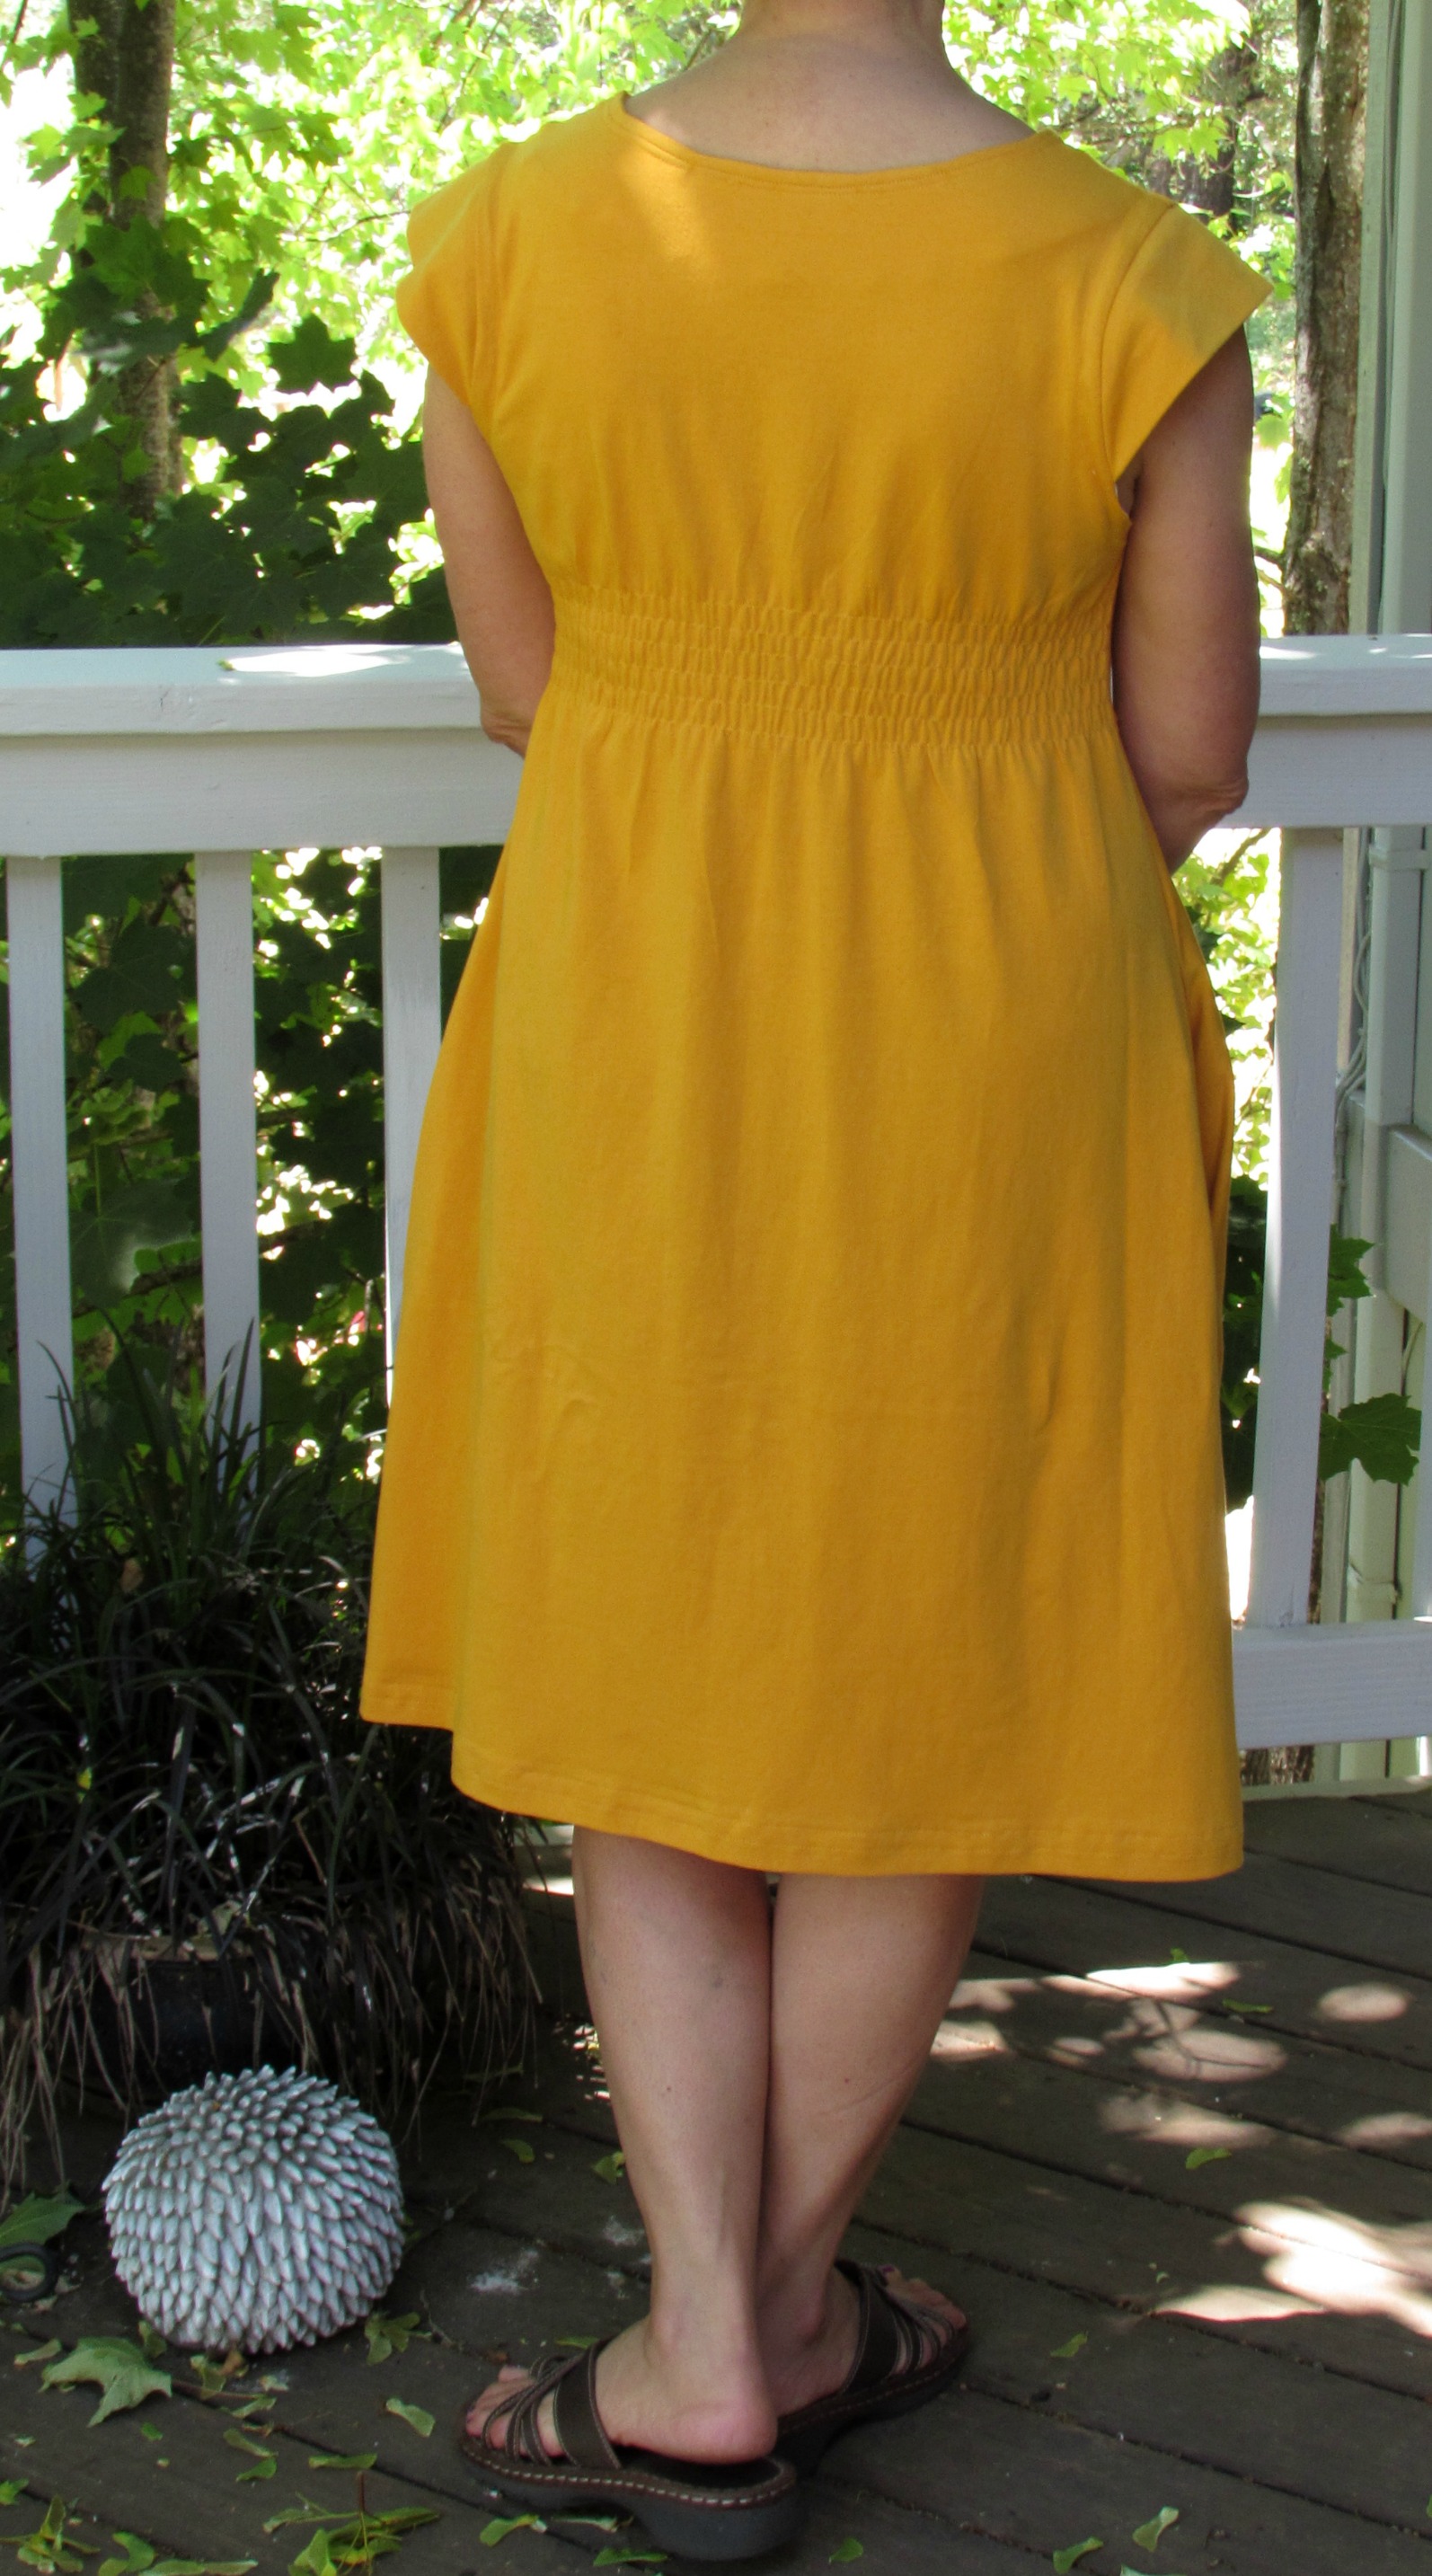
The drape is very soft. After washing and drying it, there was no issue with wrinkling.

IMG_6834.2

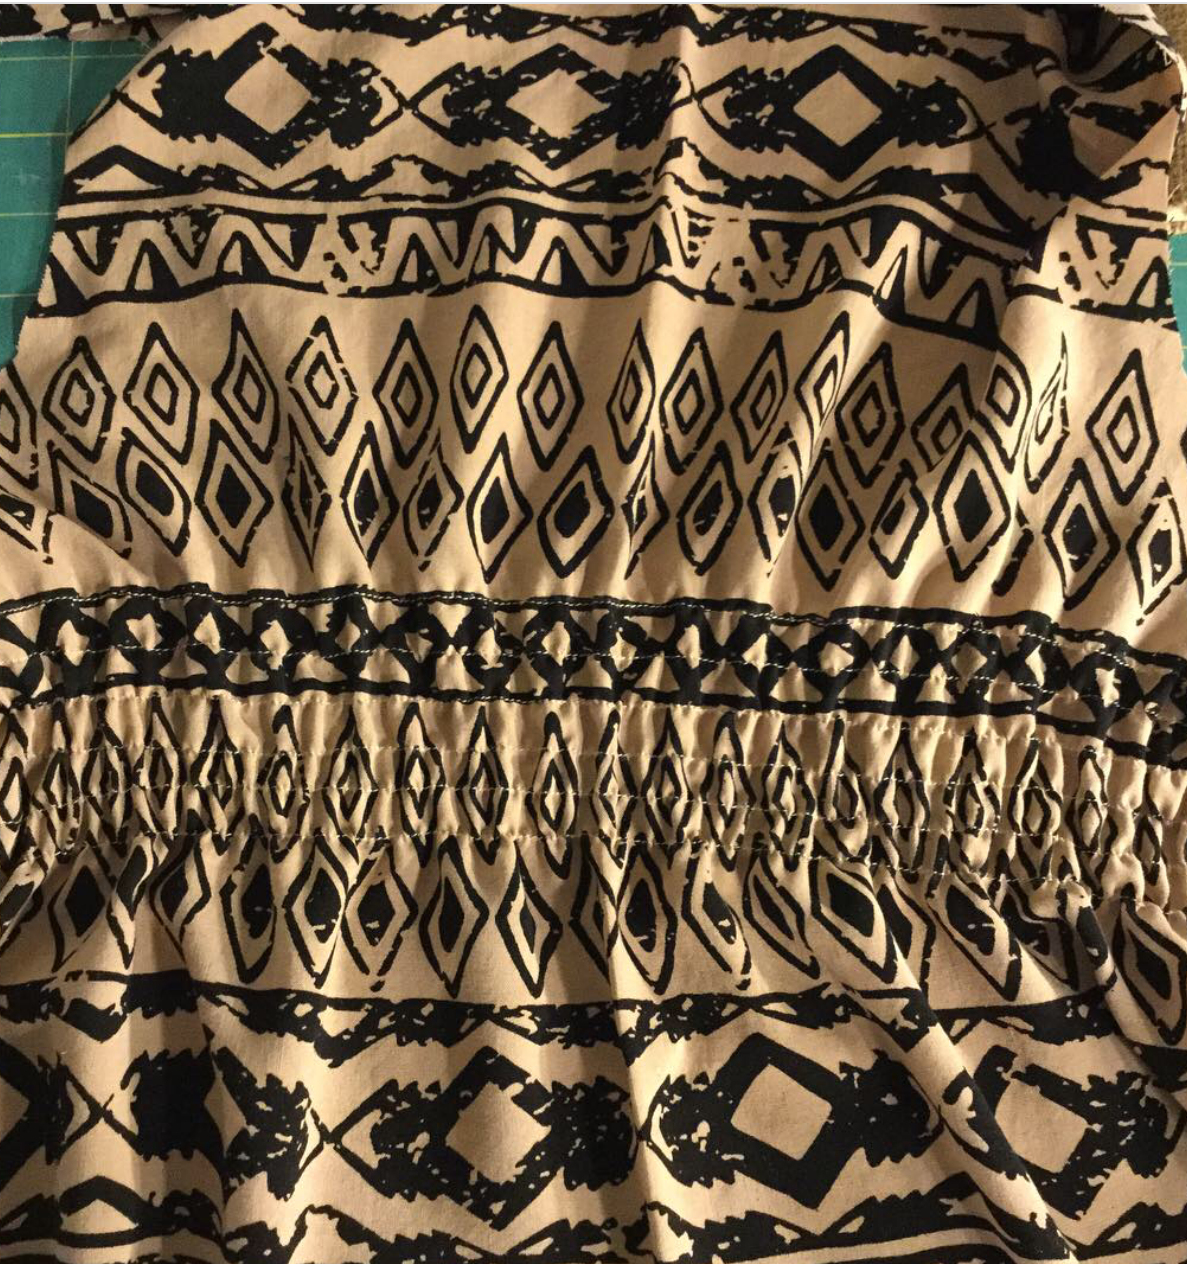
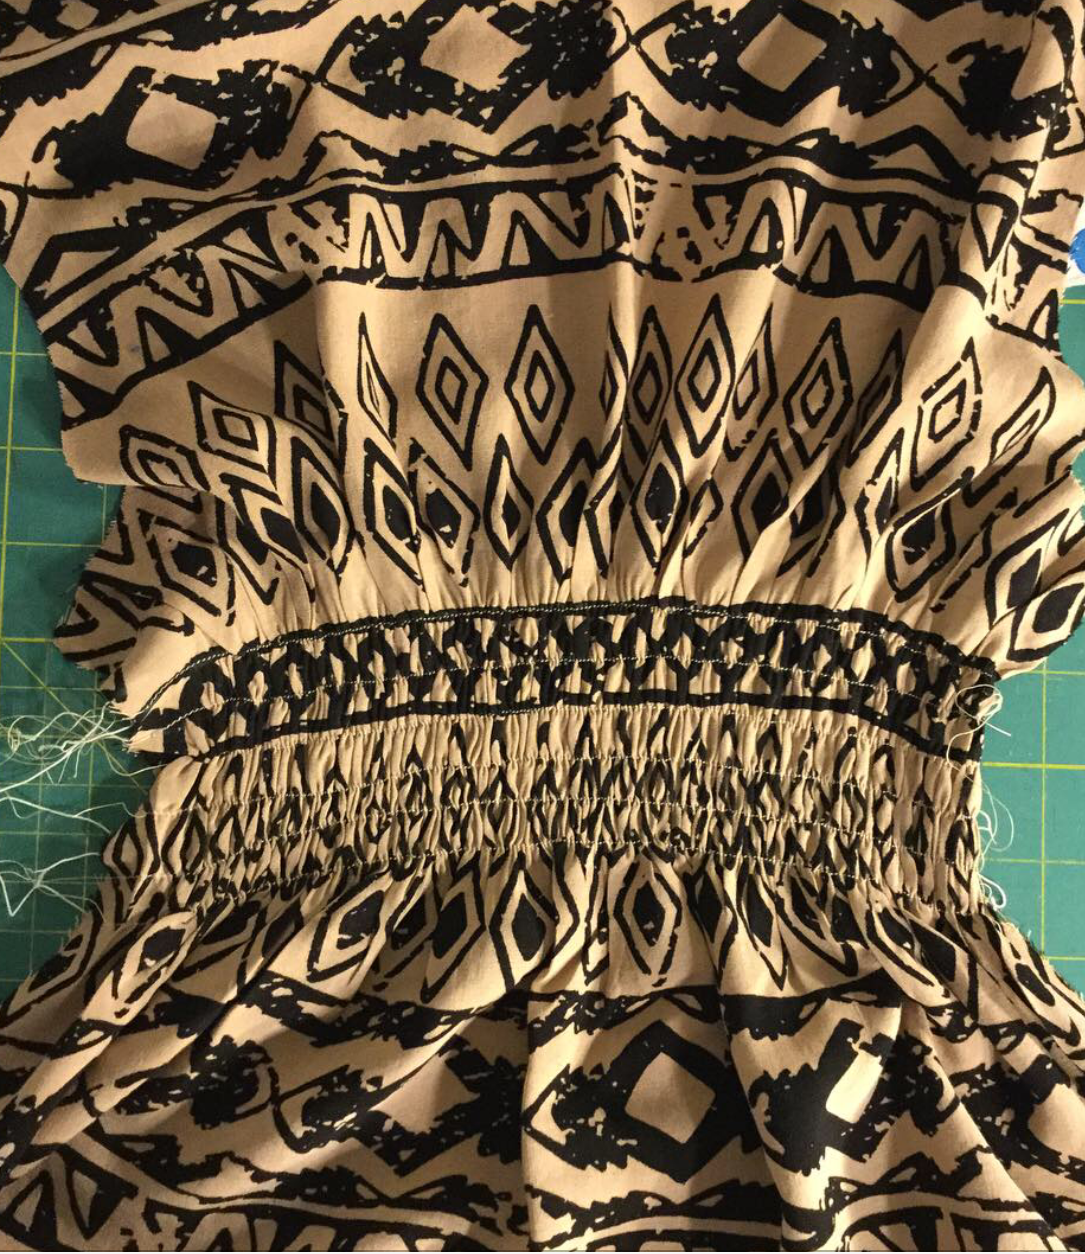
The shirring wasn’t as tight with this version. I suppose that has to do with the knit vs cotton issue but I am not sure? If I make it again with a knit, I would play with the stitch size a bit while shirring it. Also, with the stretchiness of the knit it feels a bit too big. So if I do a repeat, I will cut it down a bit, especially in the bodice.

I also learned a bit more about sewing with knits. I wasn’t sure how to finish the seams since I don’t have a serger machine. Looking through some great garment sewing websites, I found one that instructed me to use a tiny zigzag stitch on all of the straight seams (like the side seams.) This sort of intimidated me but it worked out wonderfully.

IMG_6800

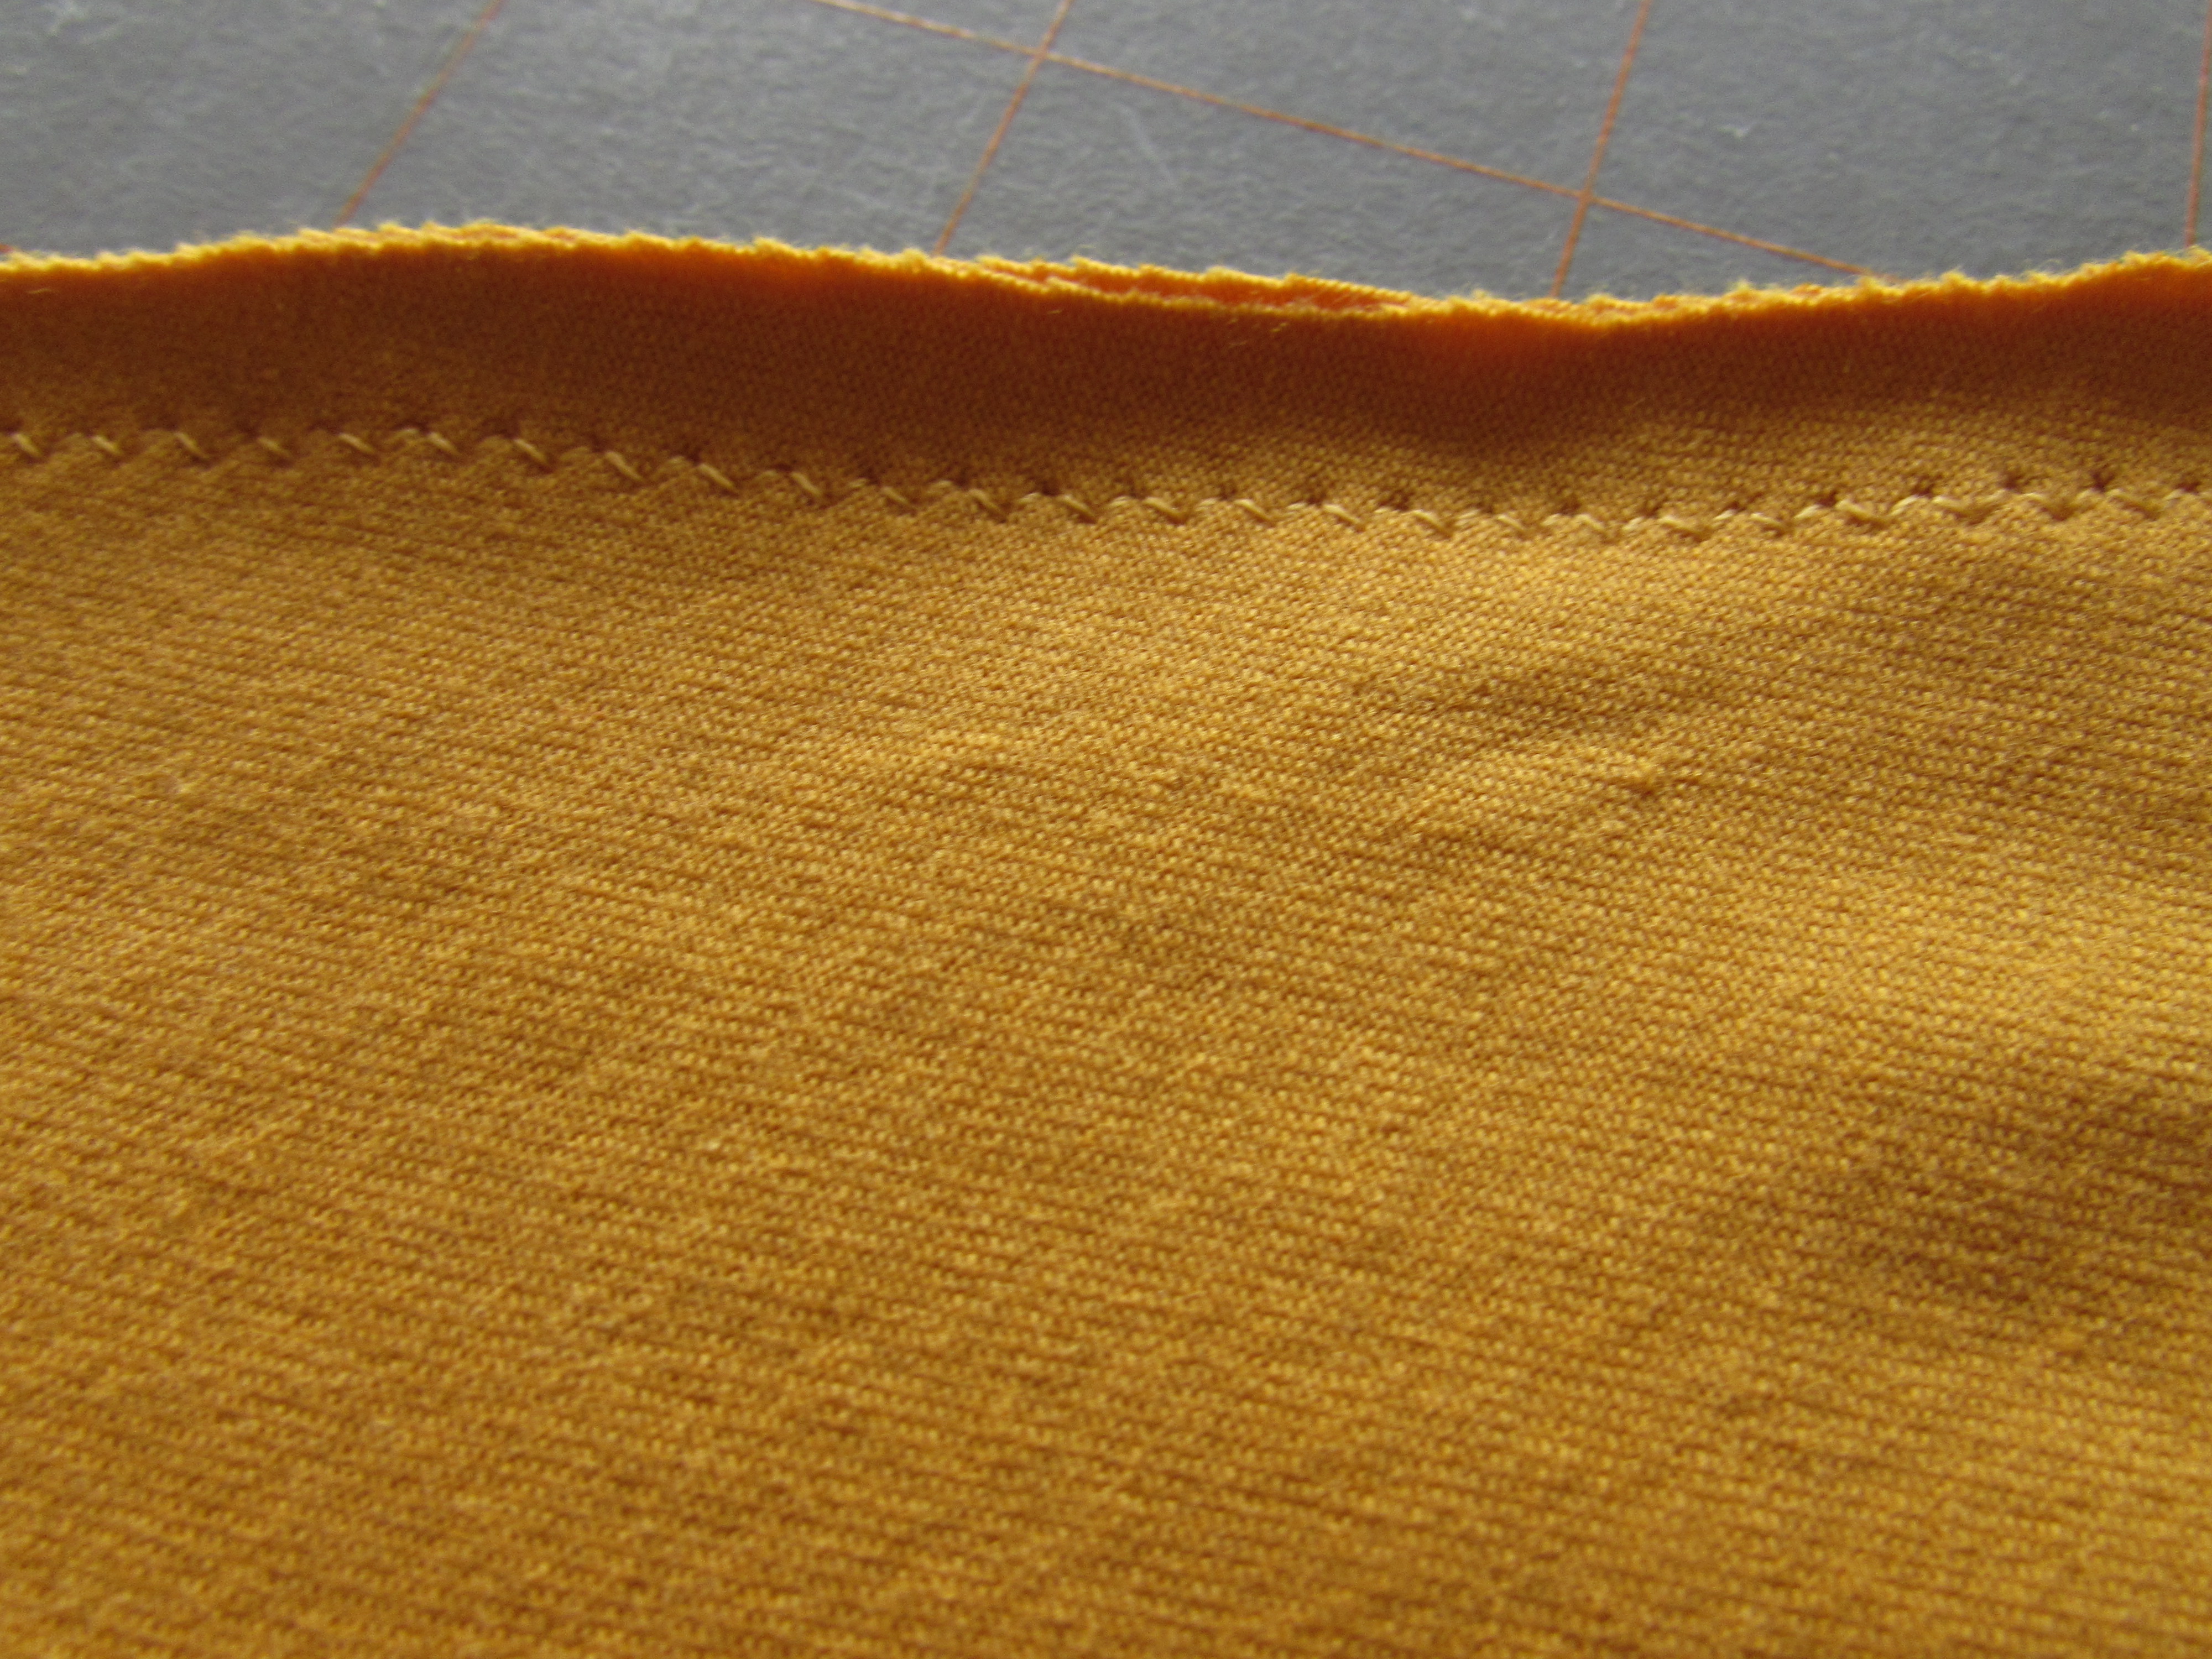
This tiny zigzag stitch made a big difference in how the dress hung. The seams didn’t get wavy because the zigzag stitch allows for some movement with the stretch of the knit. Also, I sprayed the hemline with starch before hemming it. Adding that extra structure made for a nice flat hem.

Besides finishing up the dress, I also finished painting the caps of the deck railings. I am so happy because it is supposed to really heat up over the next week or so.

IMG_6841

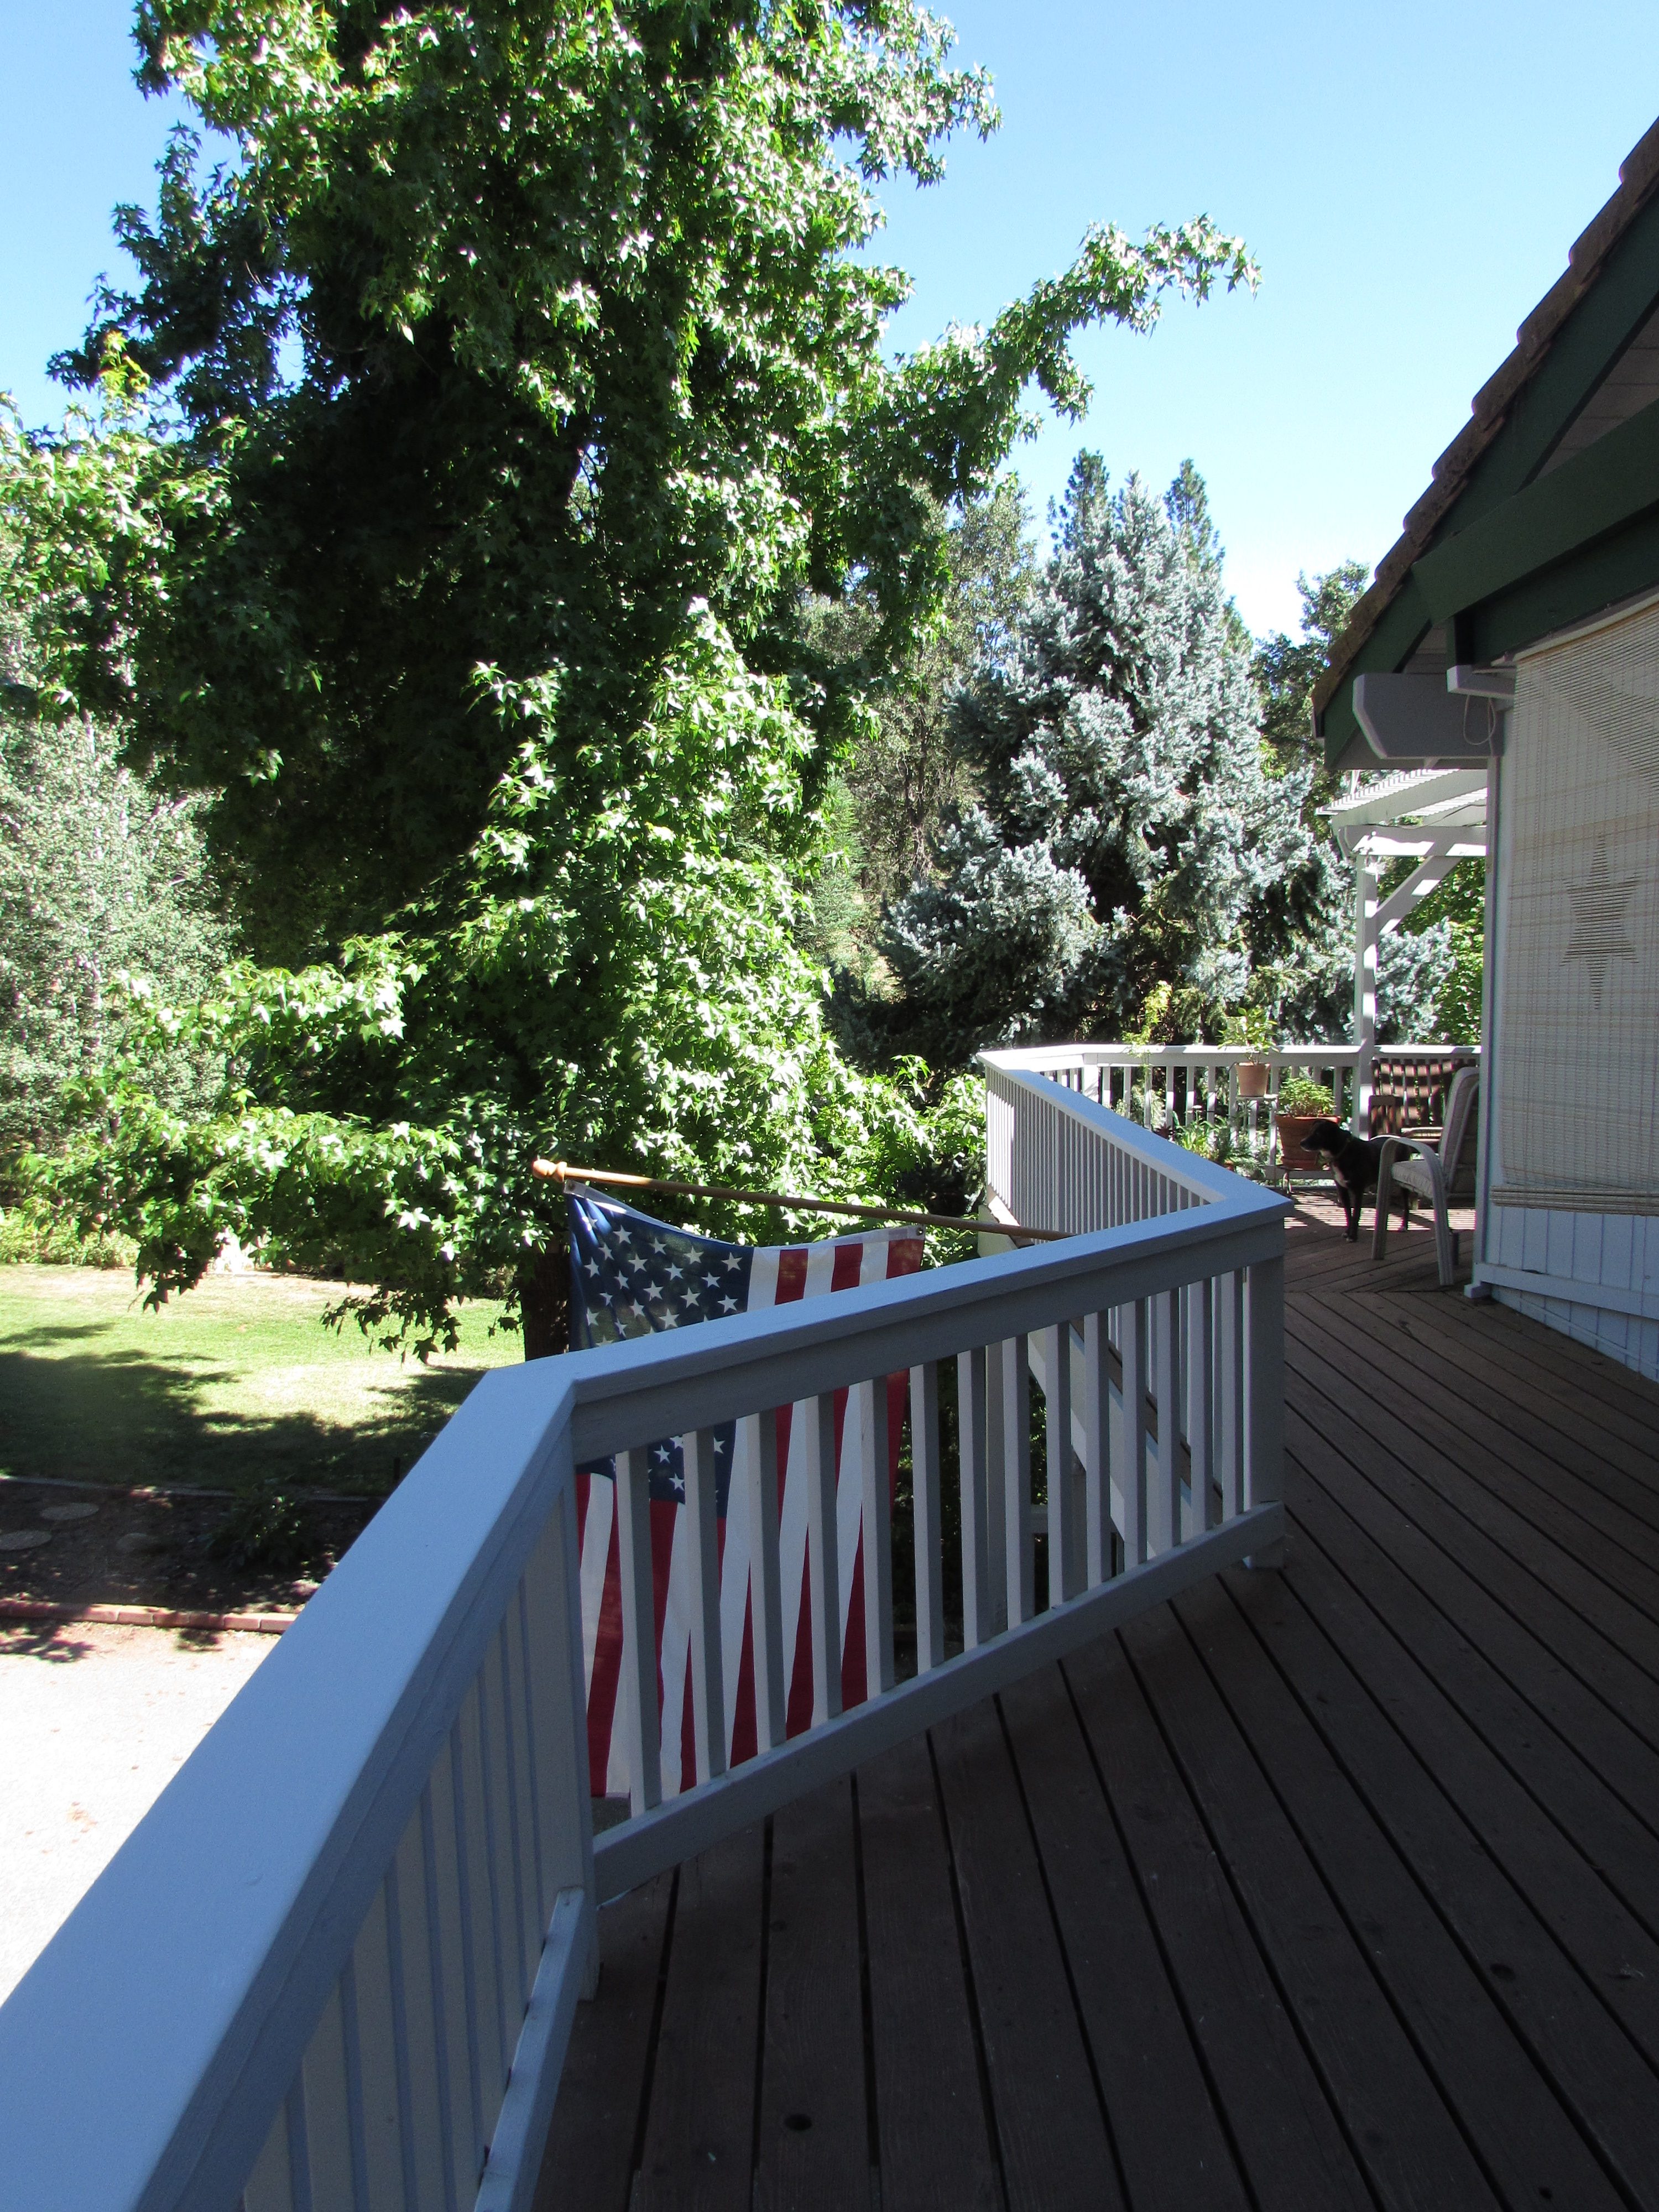
Lots and lots of painting!

IMG_6840

For now, the painting project is a finish and it looks so much better. Don’t you love checking something off the list? Especially something you really didn’t want to do in the first place?? Me too.

Have a good weekend everyone. Stay cool during this oh-so-hot part of July.

Linking up all over the place. See the links at the top of the page, under Link Ups.

christmas-in-july

In case you are wondering what is going on at Craftsy this weekend, here is the latest. It is Christmas in July at Craftsy and they are offering great deals (up to 60% off!) on kits and supplies so you are able to start working on holiday gift items ahead of schedule. You’ll be ready when the season rolls around. Sale begins today, 7/22/16 and runs through Sunday, July 24th. Check it out!

I am a Craftsy affiliate! Thank you for any purchases made via my blog as I will receive a small commission.


Weekly Planning

Last week I hosted To-Do Tuesday for Christine at Stitch All the Things. This was good for me as it gave me a reason to organize my thoughts and make a plan for what I would accomplish that week. List making tends to keep me on task and it worked well last week. I didn’t put very much on the list because my first priority was to finish up the vintage quilt for my guest bed. That took a bit of time but I did finish it. I also finished item two, cut out the second Washi dress I wanted to make and number three, select a book for the Fall Book Share (which I am loving and will tell you about soon). Done and done!

This week, I have ambitious plans.

  1. Finish painting the deck railings for the upper deck of our house. The caps on the railings are forever exposed to cold winters and very warm summers. The wood is constantly contracting and expanding so the paint doesn’t hold well.  I am currently scraping, priming and painting them. Just the caps though. Not each picket because that would take about 907 years and I don’t have the patience. This is an early morning job though because it gets really warm out there after about 10:00 am.
  2. Continue working on my Mighty Lucky Quilting Club challenge for July. This month the challenge was developed by Cheryl Arkinson who is a very talented quilter. I am enjoying this month’s challenge. To be honest, I have been really disappointed with most of the previous month’s challenges. But this one is fun. She talks about creating with only one fabric, using a directional print or large focus fabric. Here is where I am so far.IMG_6836If you follow me on Instagram, you might have seen a post about this. I love where it is headed. Putting all of these blocks together creates an effect that is almost dizzying. Remember the vintage pink striped pillow cases from two weeks ago? This is the same fabric and I will make a throw pillow with this. A modern project to put on my vintage bed. I think it will finish at 21″ square – I can’t remember for sure. My quandry is the same as usual, how do I quilt this? I am at a loss. I want to retain the effect of the stripes, but how? I would really appreciate ideas on this one.
  3. Finish and take photos of the second Washi dress – I’m almost there.
  4. Prep a project for hand stitching. We are going to spend a few days on the coast soon and I want to have something to bring along. I started last night. Remember the Row By Row project I bought in Maine? The two outer blocks are traditional log cabin and I have those about half way there. The center block is a wool applique and I want to work on it during our trip. All that I need to do is finish cutting the shapes and fusing them in place.
    IMG_6835

5. Finally, if there is time, and there might not be, I picked the fabrics for the quilt I am going to make for my nephew’s wedding gift. I didn’t have all of the solids that I need so I took advantage of a sale over at Green Fairy Quilts, Judi Madsen’s online shop, and ordered some Kona solids. But I definitely have enough here to start cutting. It is all set up on the dining room table so I can do a bit of cutting here and there. I am pretty excited about this project. This is the first one that I designed myself, using the Quiltography app. (If you are unfamiliar, see this post.)IMG_6839

That is more than enough for this week. Wish me luck and then tell me what is on your list. Also, if you have a second, take another look at my dizzy stripes and tell me how you would quilt it.

Linking to Let’s Bee Social and To-do Tuesday – find the links at the top of the page, under Link Ups.

Guest Host – To Do Tuesday Link Up

This week I am helping out by hosting the To Do Tuesday Link Up.  This is a weekly link up that many quilters use to organize their time and better accomplish projects (both quilty and otherwise) during the week. Sometimes it is a matter of organizing and planning all of the other things life requires in order to carve out a bit of time in the sewing room. This link up is usually hosted by Christine over at Stitch ALL the Things.  She is a bit overwhelmed as she works on one house in Oregon and plans her transition back to another house in Arizona. Somehow I don’t think time in the sewing room is in the cards for her right now. In fact, I don’t know that a sewing room exists yet in her Oregon house!

Let’s see. There is always plenty to be done each week but here is the short list.

  1. Work on quilting and binding the vintage sheet patchwork quilt that I showed you on Sunday. I really want to get this one on the bed in my sewing room. It has such a summery feel to it and I don’t want to set it aside, finish quilting it on October and then not use it until next season. So, this is numero uno.
  2. Cut out another Washi dress.  In June I finished my first Washi dress and I love it. It is such a comfortable dress. I want to try making it with a piece of deep goldenrod yellow knit fabric that I have. I am almost certain that when finished, it will be akin to wearing jammies all day. The pattern is that comfy and made in a knit, it will be even more so.  At the very least, I hope to get it cut out. If I spend any time sewing it, so much the better.
  3. Pick out the book for the Fall Book Share here at Needle & Foot.  I recently wrote a review of Vinegar Girl and invited any interested readers to sign up to share the book this summer. There are six of us sharing Vinegar Girl. This is how it works – I sent off the book to the first person after writing a tiny blurb on the inside front cover of the book. I included three fat quarters of fabrics chosen because they are somehow related to the story. The person that received it has four weeks to read and then send it on with their opinion written in the book and three more fat quarters that they feel are related to the story. On and on it goes until the last person has it and returns it back to me.  I am happy with the response to this idea and will host it again beginning in September. I haven’t yet picked out the book but I better get going so I can read it first and then gather a group of readers for the next round. If anyone has a suggestion for a good (fiction) book I would love to hear about it. Leave ideas in the comments.

OK – that is it for this week. The quilting is a big one (literally, queen size) which will take most of my sewing time. How about you? Are you feeling overwhelmed? Need to get organized? Let us know what you have on your plate this week.

To-Do-Tuesday-Button-200-x-200


Rules:

  1. Link up to this To-Do Tuesday blog post using the InLinkz linky below. Don’t forget: you can link up Instagram photos! The link up is open all week, and you can link any post for the week even if it’s written on the prior Sunday or Monday. It simply needs to be related to setting, working on, and/or completing your weekly goal(s).
  2. Try to visit at least one or two other blogs and leave a nice comment.


Wearing Washi

As part of May is for Makers, I bought the pattern for the Washi dress. Designed by Rae over at Made by Rae, this dress pattern has been around now for several years. For no particular reason, I haven’t made clothing for myself in a very long time. When Julia was younger, I made her lots of dresses, shorts, pj’s and halloween costumes. Same with the boys when they were younger (well, except for the dresses.) I decided it is time to refresh my memory on garment sewing.

IMG_6233

This dress was a breeze to make. The pattern is very simple (read no zippers or buttonholes to deal with.) There are a few design elements that add style to the dress. First of all, the scooped cut in the neckline (which is totally optional) is very cute. There were hints included with the pattern instructions that I found very helpful. An example of this was the suggestion to add some fusible interfacing behind the front of the neckline so the scooped cut would lie flat.  It worked like a charm.

Another feature that I really like is the shirred back on the dress. Never in my long (40 years or so) sewing career have I done any shirring. It was fun. First I practiced a bit on a scrap of the dress fabric to see how it would behave.  I used a rayon fabric which feels wonderful and has a very nice drape. But being somewhat slippery, it was a pain to sew with. If the print on the fabric had not been so linear, it would have been less of a problem but I had to work hard to keep the lines straight and the print matching at the seams. I’m off track here, let’s get back to the shirring. To gather the fabric, normal thread is used on the top and elastic thread is used in the bobbin. The thread must be wound by hand on the bobbin. After marking the lines on the fabric, you just stitch along the line. I tied off the threads by hand, rather than backtacking the stitches at the start and end of each row. The first row looks like it will be too loose but as more rows are stitched, it gathers up a bit tighter. My machine didn’t have a problem with the elastic thread except, for some odd reason, after the end of each row, I had to take the bobbin out and reseat it. I have no idea why but I couldn’t just start the next row. If I lifted the bobbin and reseated it, I had no problem. This was only a minor inconvenience. The fun part of shirring (and I didn’t know this would happen) was the magical shrinkage after pressing the shirred portion. Take a look. Here is the shirring just after I finished the six rows. It looked fine but was quite loose.

IMG_1104

The instructions said to press it so it would shrink up. Yikes, it was magical.

IMG_1103

Pretty interesting, right? Once the shirring was done, everything came together quickly. I think the dress was easily completed in an afternoon.

IMG_6236

I am going to buy a knit fabric and make a second dress. This one is so comfortable and I think it would be even more so in a knit. There are some pleats in the front and I don’t want them to be ‘poochy’ – no 55 year old tummy needs that – so I will look for a thin knit to minimize any potential issues! The sizing was spot on. I made a medium and it fits great. While I wouldn’t say this is a pattern for a someone just learning to sew, it is a fun one if you have a little sewing time under your belt.

Finally, tomorrow is the two year blogaversary for Needle and Foot! I want to celebrate with a giveaway. I hope you will come back and join in!

Linking to Can I Get a Whoop Whoop and Finish it Up Friday – you’ll find links to both of these at the top of the page, under Link Ups.

Thrifting Success & Another Pattern

We had one of those weekends where things didn’t go as planned. Julia had invited several girl’s for a sleepover on Saturday night to celebrate her 15th birthday. Friday afternoon she started looking a little peaked and by Friday night she was feeling lousy. Saturday morning she cancelled the sleepover and parked herself on the couch, where she has spent the vast majority of the weekend. Poor girl – feverish, headache and all congested. No fun.

So, instead of celebrating her birthday, I snuck out to get her some dvd’s and run a few errands.  I passed a thrift store that supports our local Hospice organization and saw that they had a bunch of office/desk chairs out front. I have been sitting on an older chair that is fairly uncomfortable. I ran in and bought one of their chairs – very comfy and it doesn’t have any arms so it can hug up close to the machine. Yay! While there, I had to at least take a quick peek at their little craft area. Sometime there is fabric there, sometimes not.  I happy to see a few bundles of fat quarters on the shelf which I promptly purchased, brought home, washed, dried and ironed them. I was on a roll!

Love these autumnal prints. Especially the gray/rust piece at the far right.

img_20160522_5231

Here is another bundle.

img_20160522_5229

The black batik and the Asian looking print on the far right are great – the piece in the middle is only so-so.

img_20160522_5230

These two are nice additions as well. Black is always quickly used and I love the geese on the right. Eight fat quarters for about 50 cents each. Score.

I also want to share my May is for Makers pattern for this week. It has been years since I have made a dress but the time has come. I chose the Washi pattern. You may have seen this floating around for a bit. The Washi dress was designed by Rae who blogs at Made by Rae.

washicoversquareI love the neckline and the side pockets on the dress and the fact that the back is shirred with elastic thread. It looks like it will be very comfy which is what I am all about. My list of projects is growing really fast so I’d better get busy!

I need to get to work on:

  • Washi Dress (though I don’t have the fabric for that yet)
  • Fleur Mini
  • 241 Tote for myself (I started pulling fabric for that today)
  • Finish sewing the binding on the Stepping Stones Quilt (almost done!)
  • Prewash fabric and start cutting out the Courtyard Tiles project with my Dear Stella fabric

Ok, get ready, get set, go! What is your list looking like these days?

Check out “Link Ups” at the top of the page to see my favorite places to link to.