Ever since I fell victim to my Pinterest addiction, I have wanted to make a plus quilt. Something about the simplicity of the design and the ability to use large scale fabrics effectively makes plus quilts very attractive to me. Honestly, I don’t think I have seen one that I didn’t like.
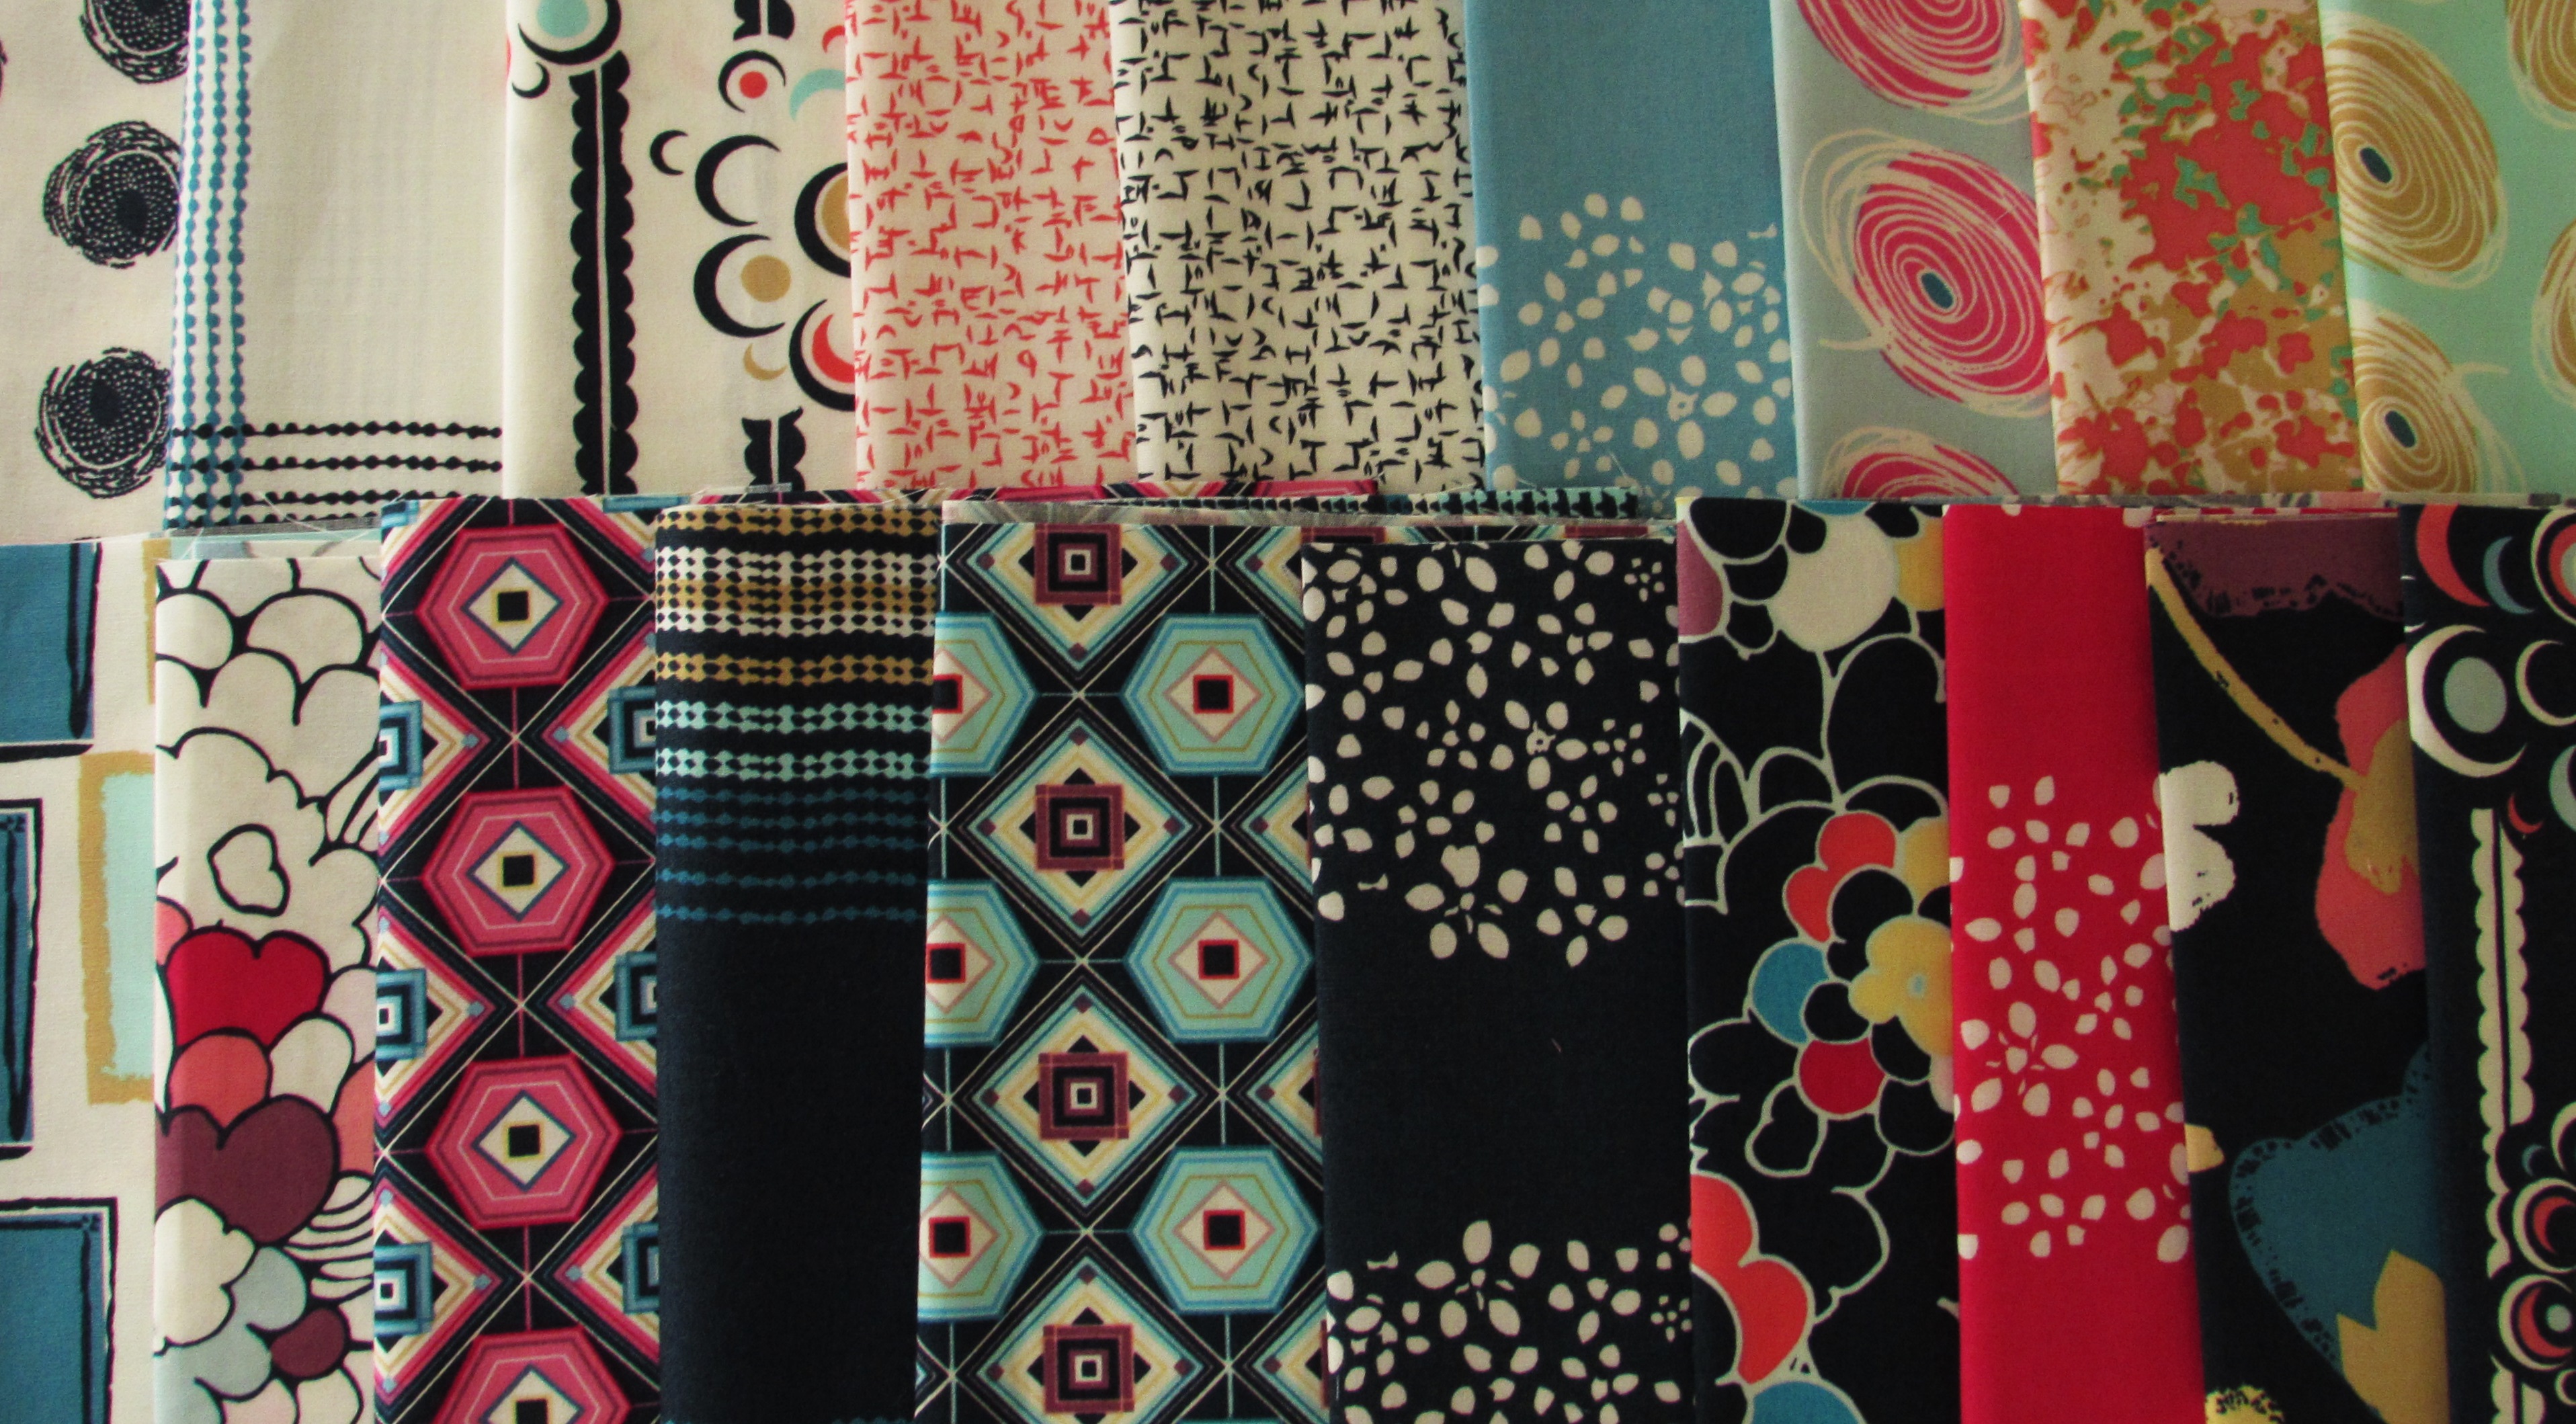
Last fall, when I received my first Art Gallery Club shipment from Pink Castle, I designated that bundle to be used for a plus quilt. (I posted about this here.) The line, Dare by Pat Bravo, has some wonderfully vivid large floral prints. I immediately ordered a couple of yards of Thread On to be used as the background fabric. When that arrived, the whole bundle sat in the sewing room until March.
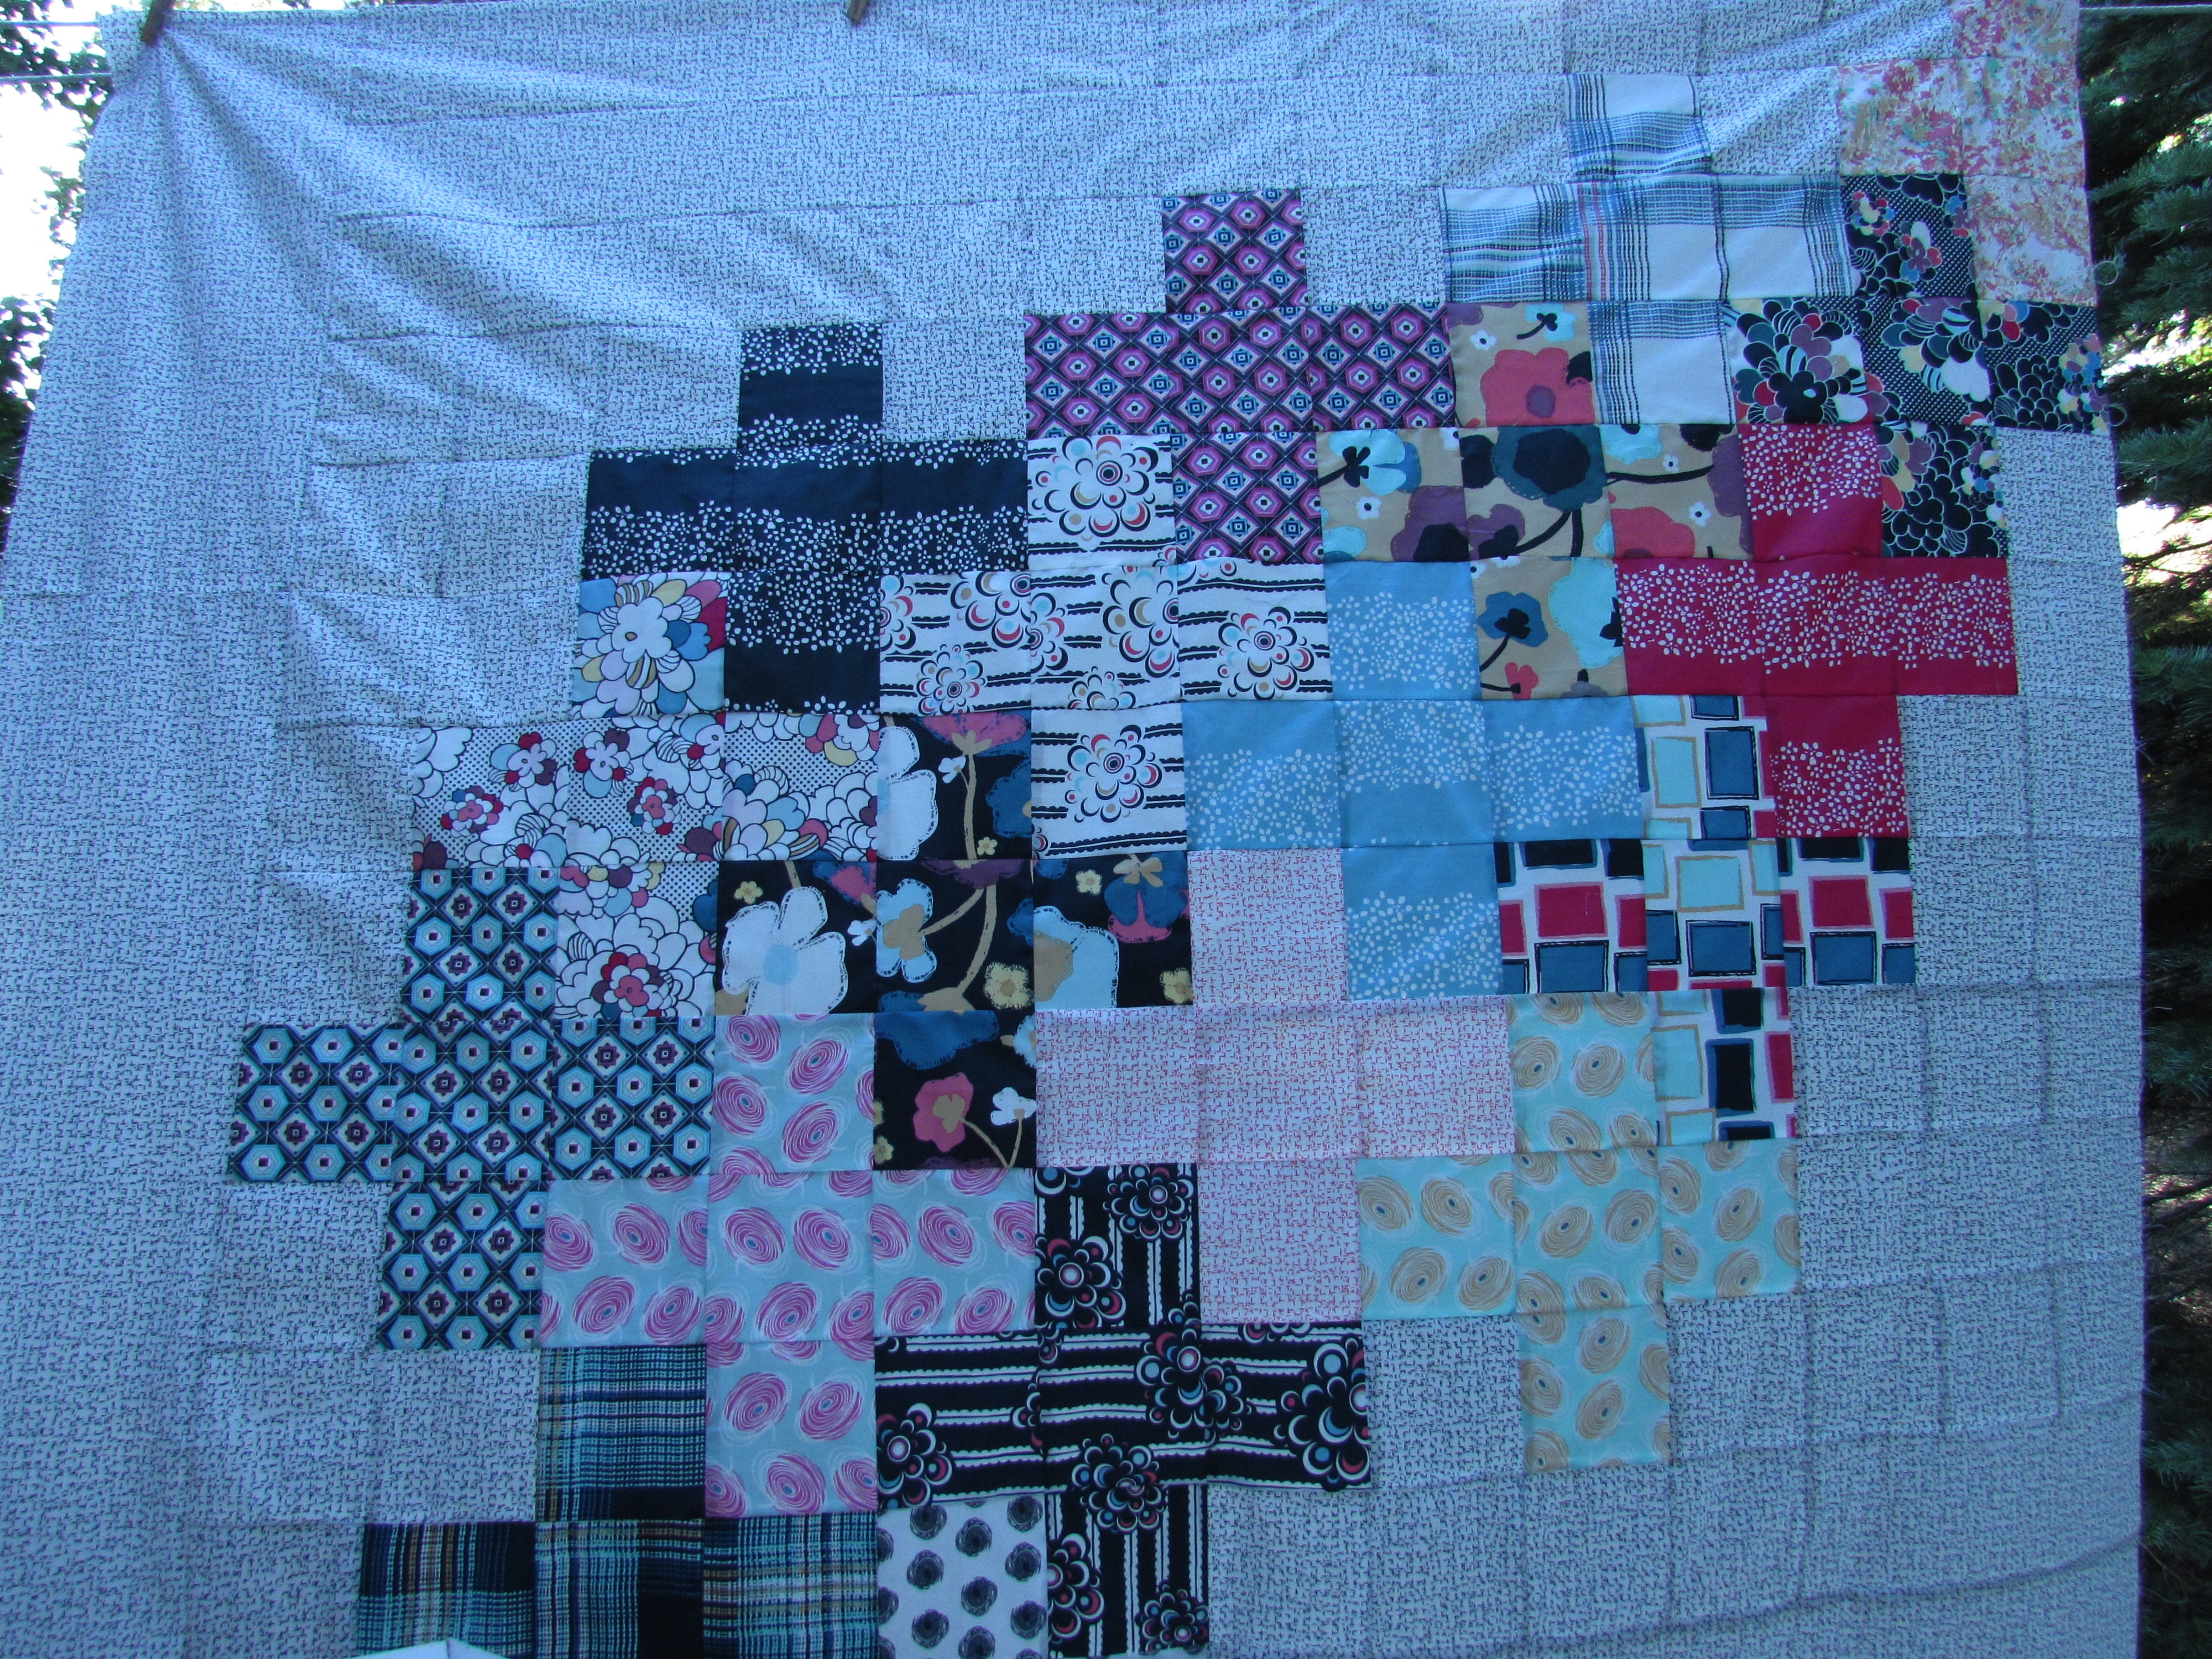
One rainy Saturday, I managed to cut all of the squares for the pluses. Then it sat some more. Finally I started to assemble the quilt top. Really, it doesn’t get much simpler than this. Once I going, it went together quickly.
This quilt top was not an easy one to photograph. It was really breezy this afternoon and I couldn’t get the winds to cooperate with me.
I had to resort to my ever faithful quilt model.
She is such a helpful girl.
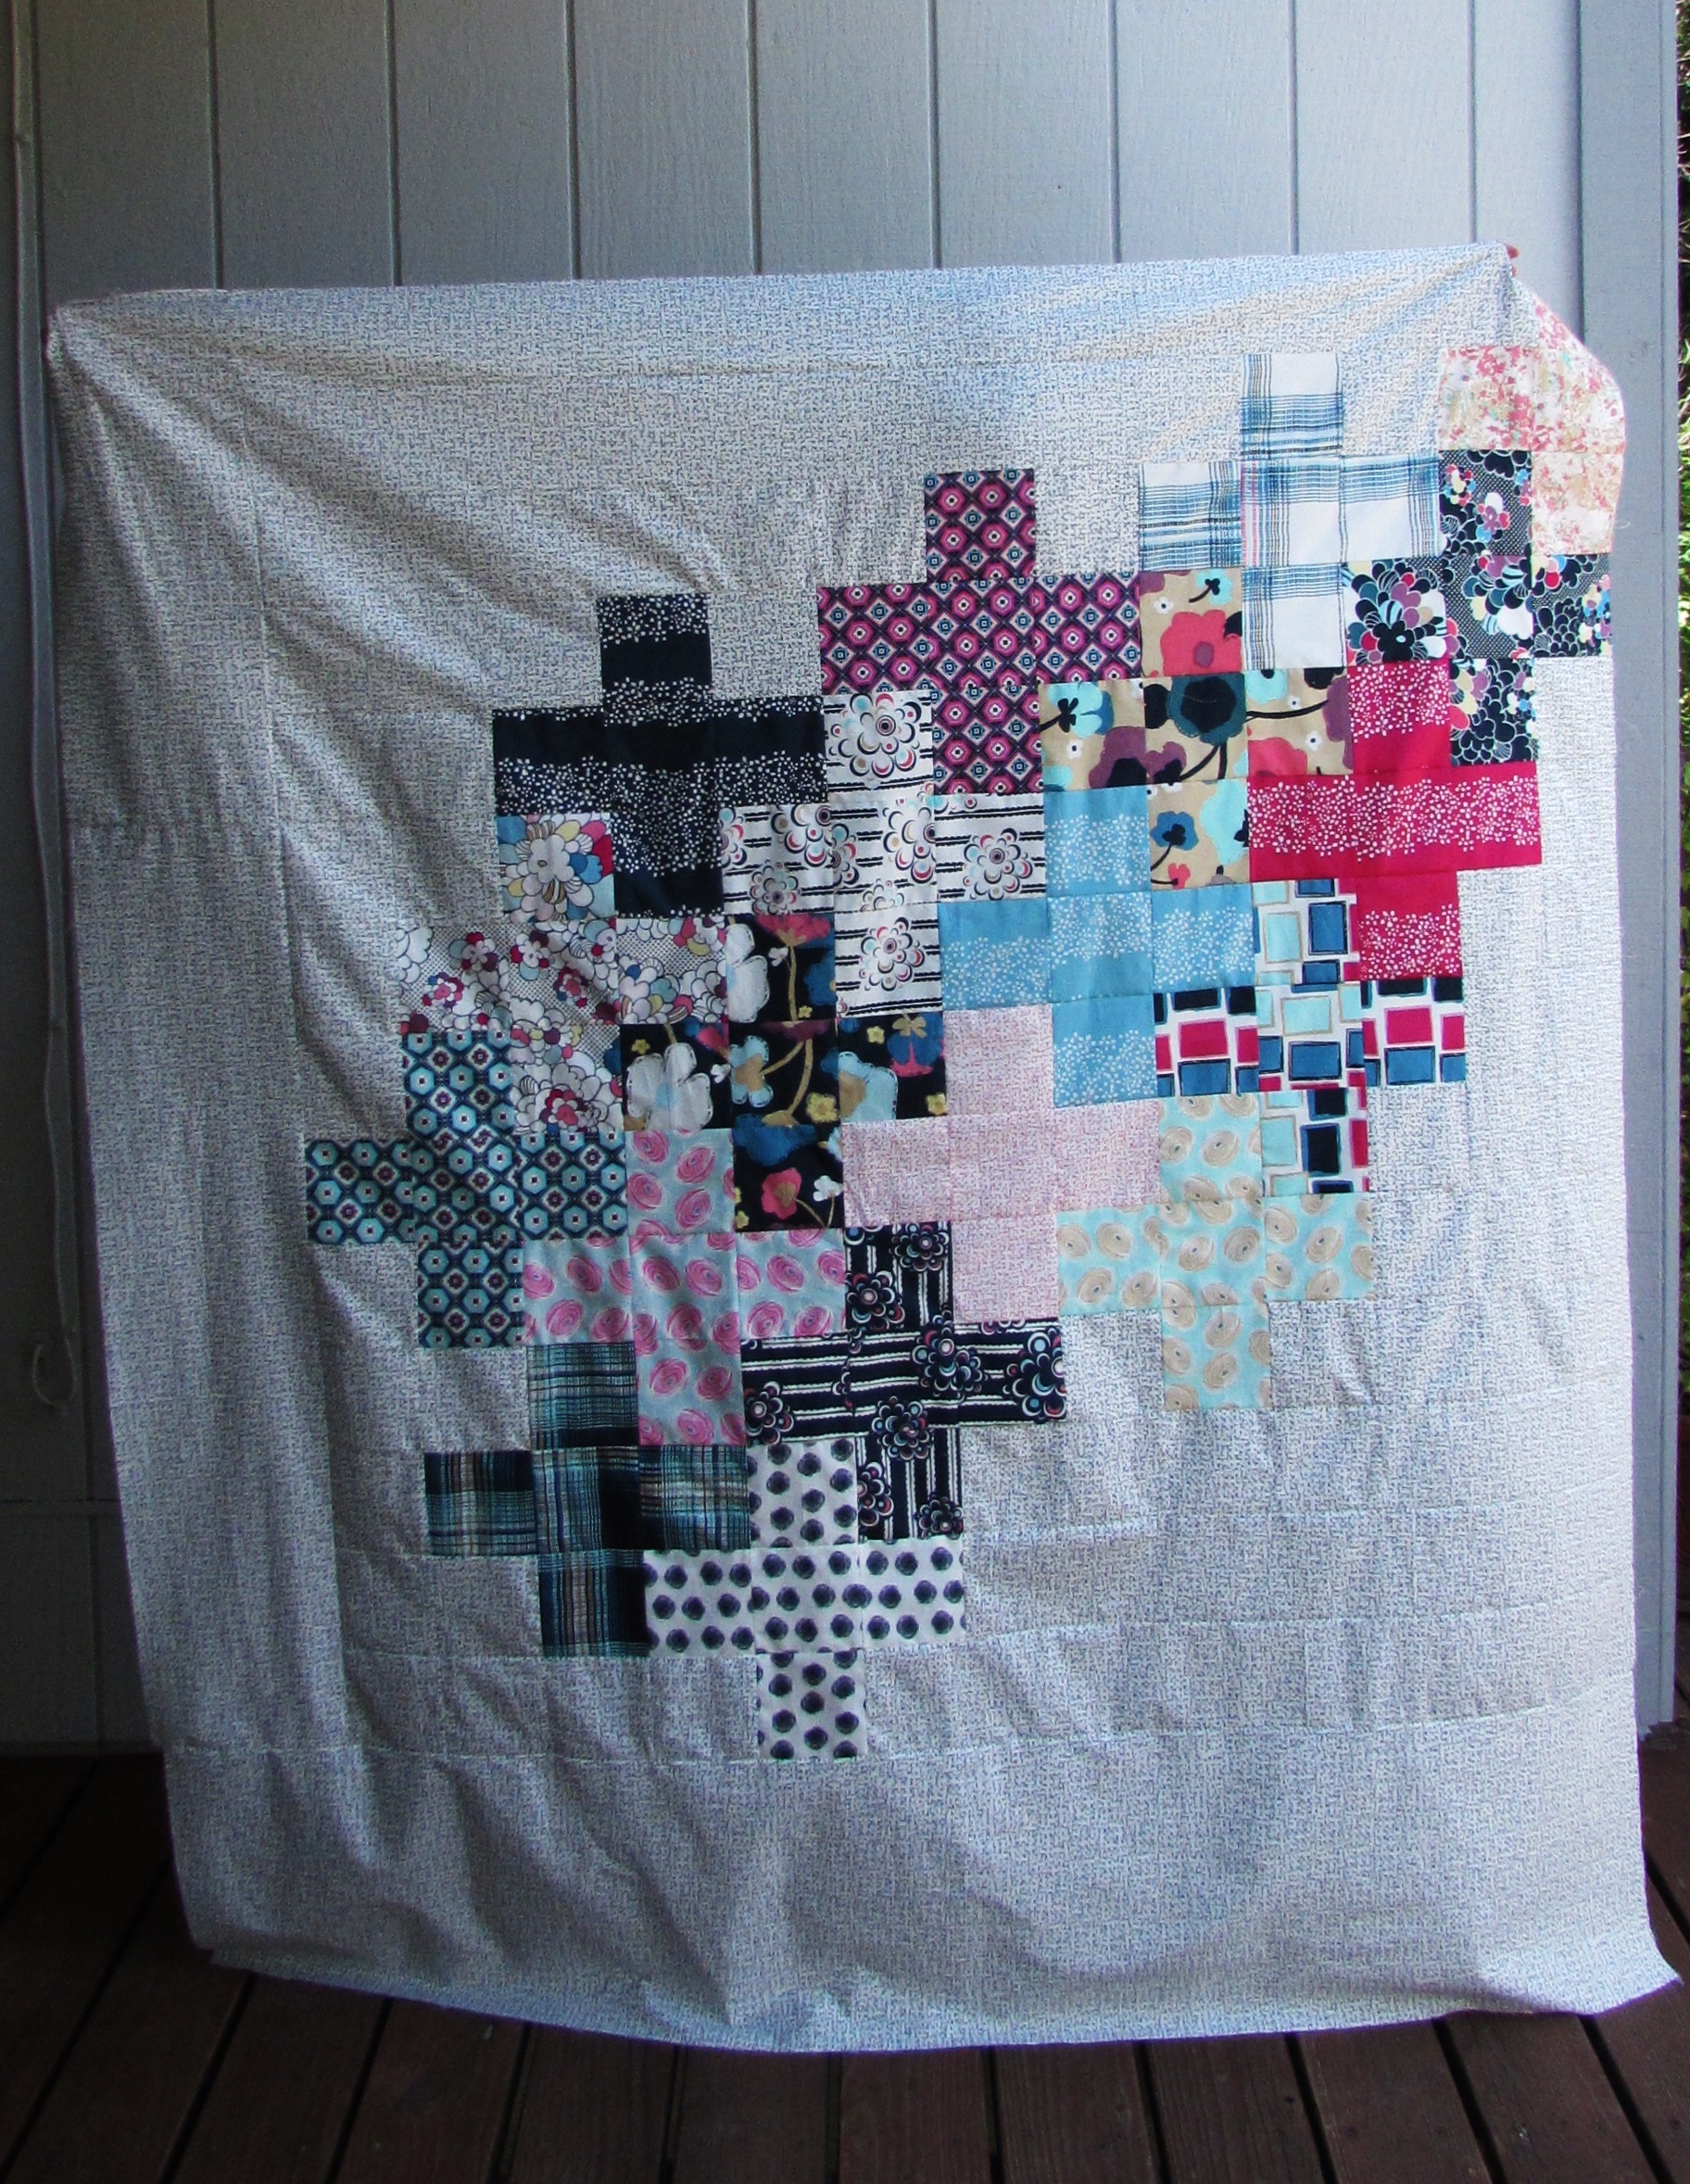
I am looking forward to quilting this. Lots and lots of negative space to work with. That is both fun and intimidating at the same time. For the backing, I have been piecing the scraps that were left from the front. I need a bit more fabric to complete it though. I had hoped I had enough leftover fabric but I am short. Darn it. I ordered a bit more of the background fabric and it won’t take any time to finish the backing once it arrives. For now though, the top is done and I am calling this one Positively Floating.
Linking this pretty flimsy finish with my usuals. Find them at the top of the page, under Link Ups.
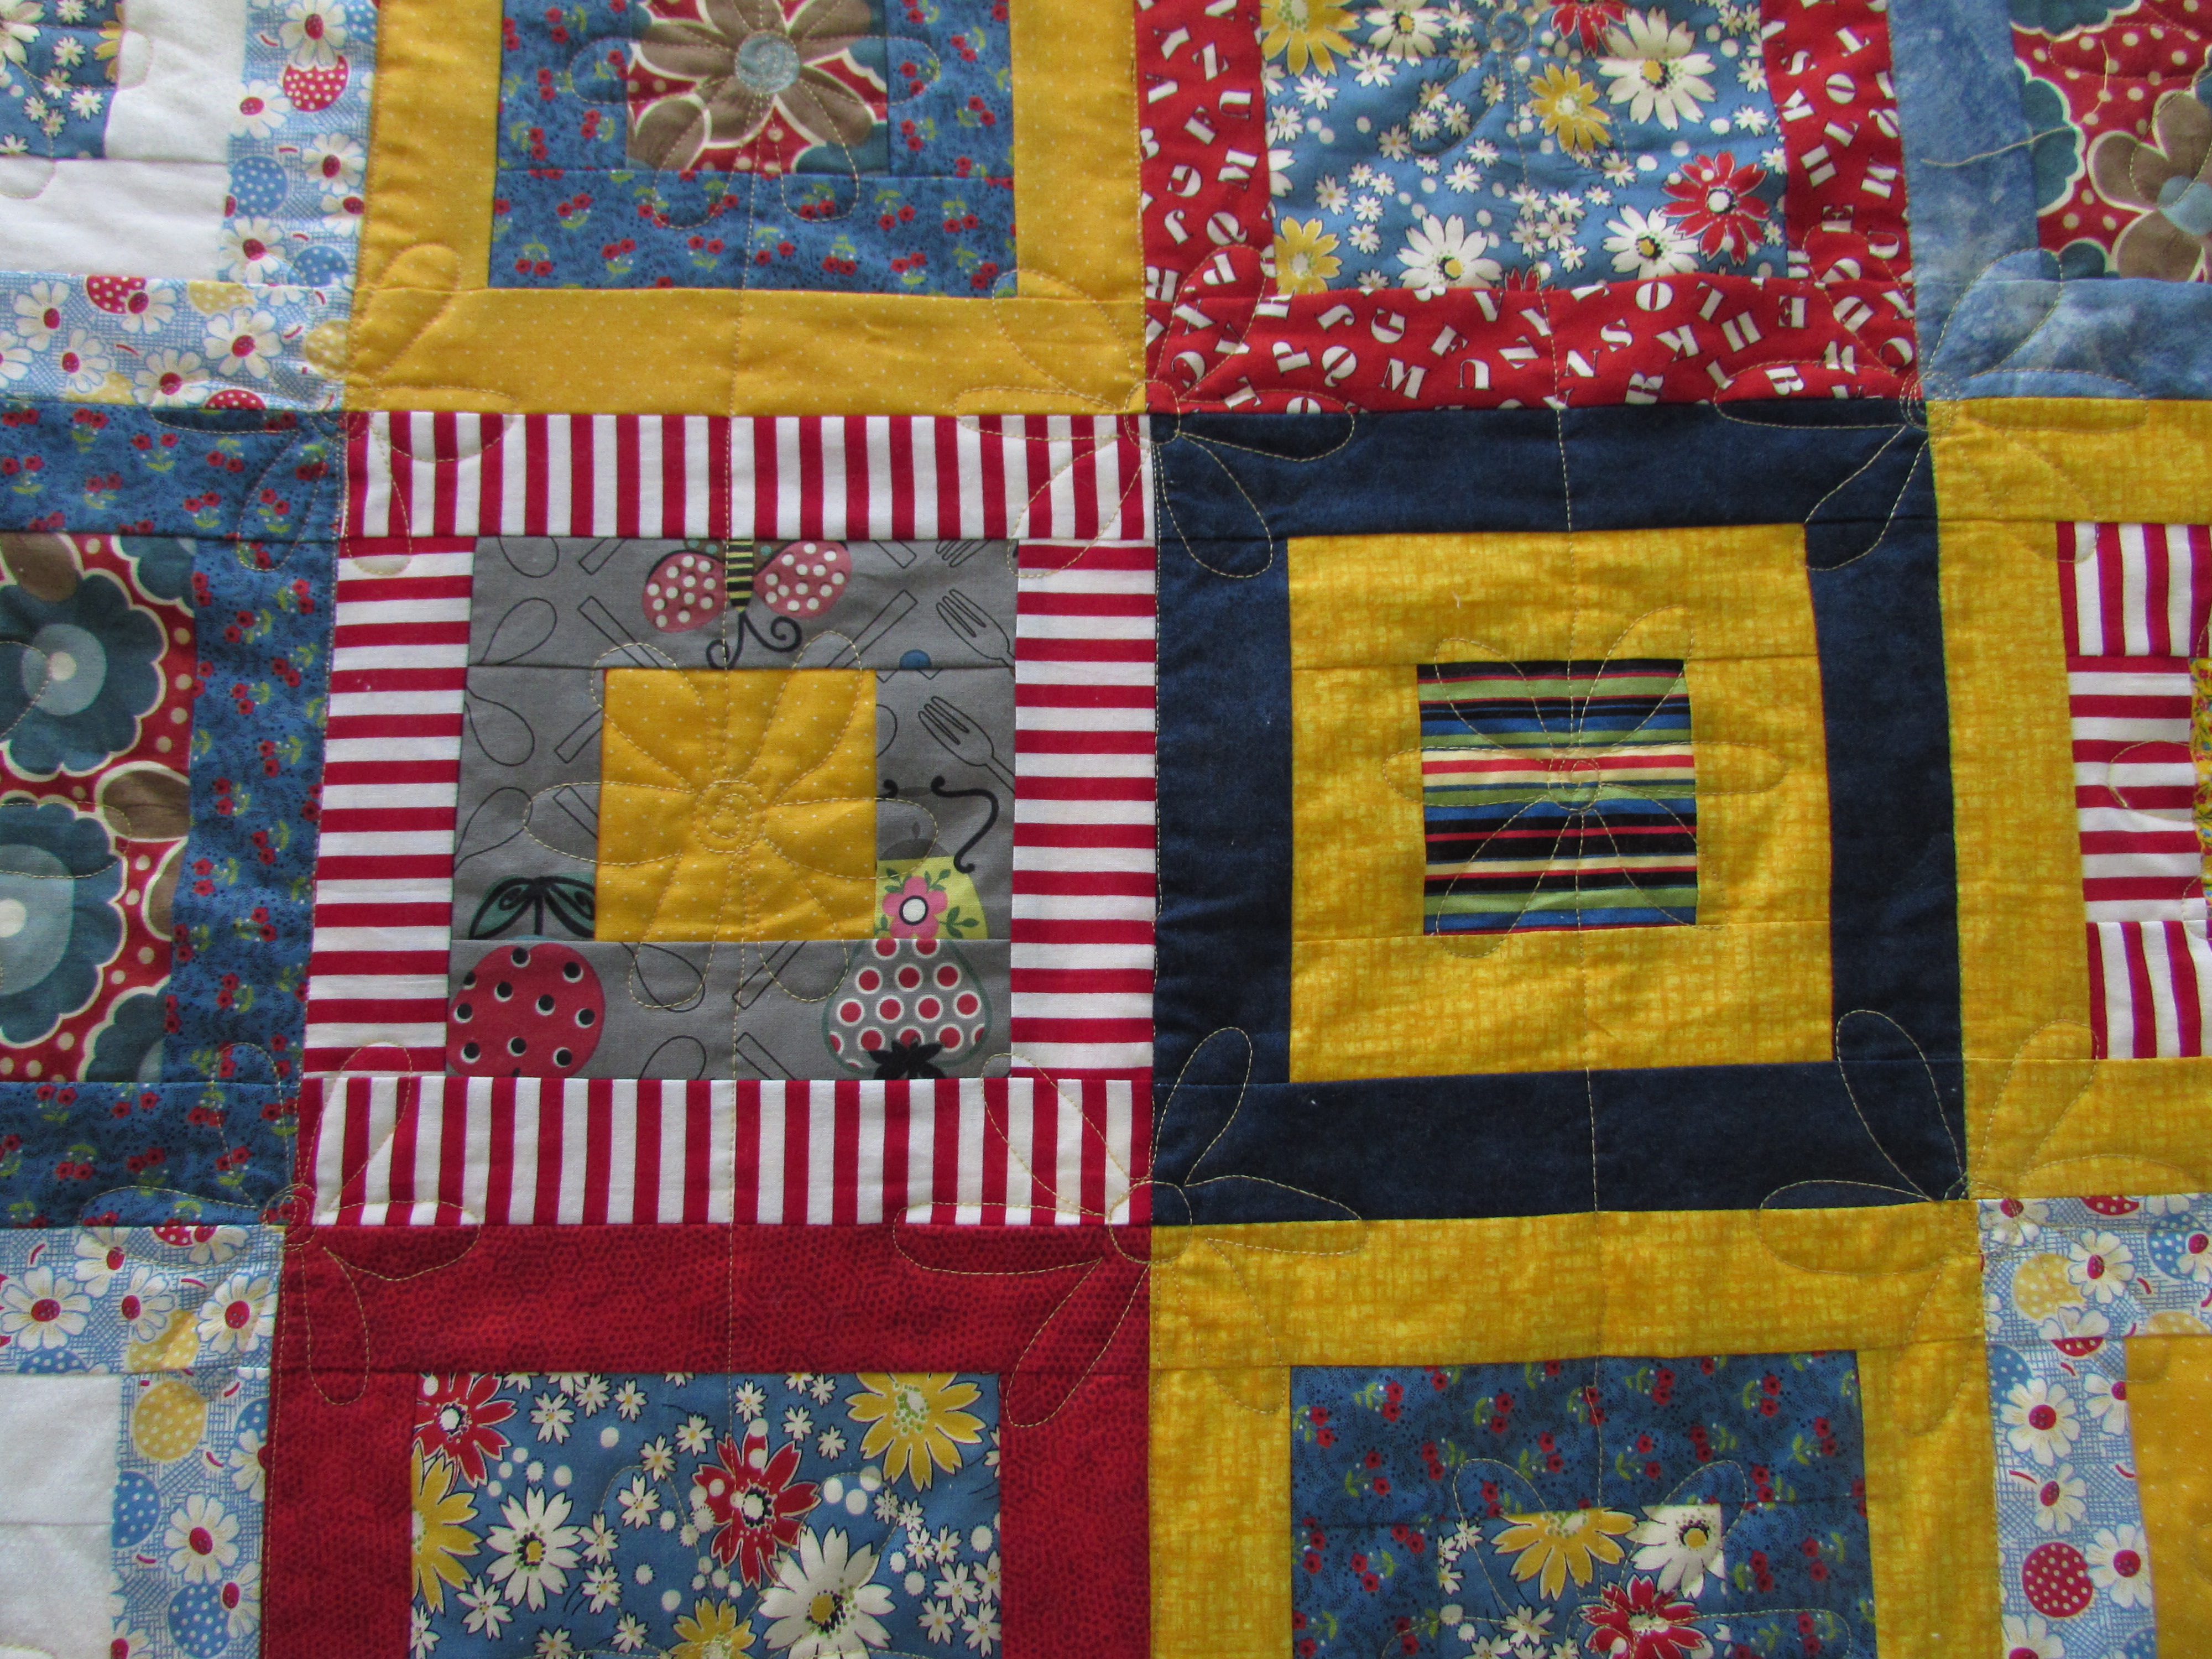
This week I finished up Square Dance. It was well over a year ago that I started this quilt. For some reason, it was put aside and ignored for a long while. Now that it is done, I am really pleased with the cheerful colors. The pattern is a simple one based on squares of two different sizes and simple borders on each, bringing the blocks to 9″ when finished.
Putting the quilt together was a breeze. Quilting it, on the other hand, was not. Back in March, I was reading Cynthia’s posts over at Quilting Is More Fun Than Housework. She showed some quilts that she had finished up using some oversized daisy flowers. I loved it and thought it would be great for this quilt. I planned to put a flower in the center of each block. Additionally, I placed one on the intersection of each set of blocks.
My machine was most uncooperative and I stitched about 1/4 of the quilt before I realized that my bobbin tension was way off and I had to unpick all of that quilting. Ugh. Not my favorite task. There really wasn’t a choice though. On the bright side, the tension was so far off that the stitches were totally loose on the back side and came out easily. These frustrations were resolved when I found the Magic Bobbin Genies that I recently posted about. The small washers helped a great deal. I have had these issues sporadically and I am hoping this resolution works out over the long haul.
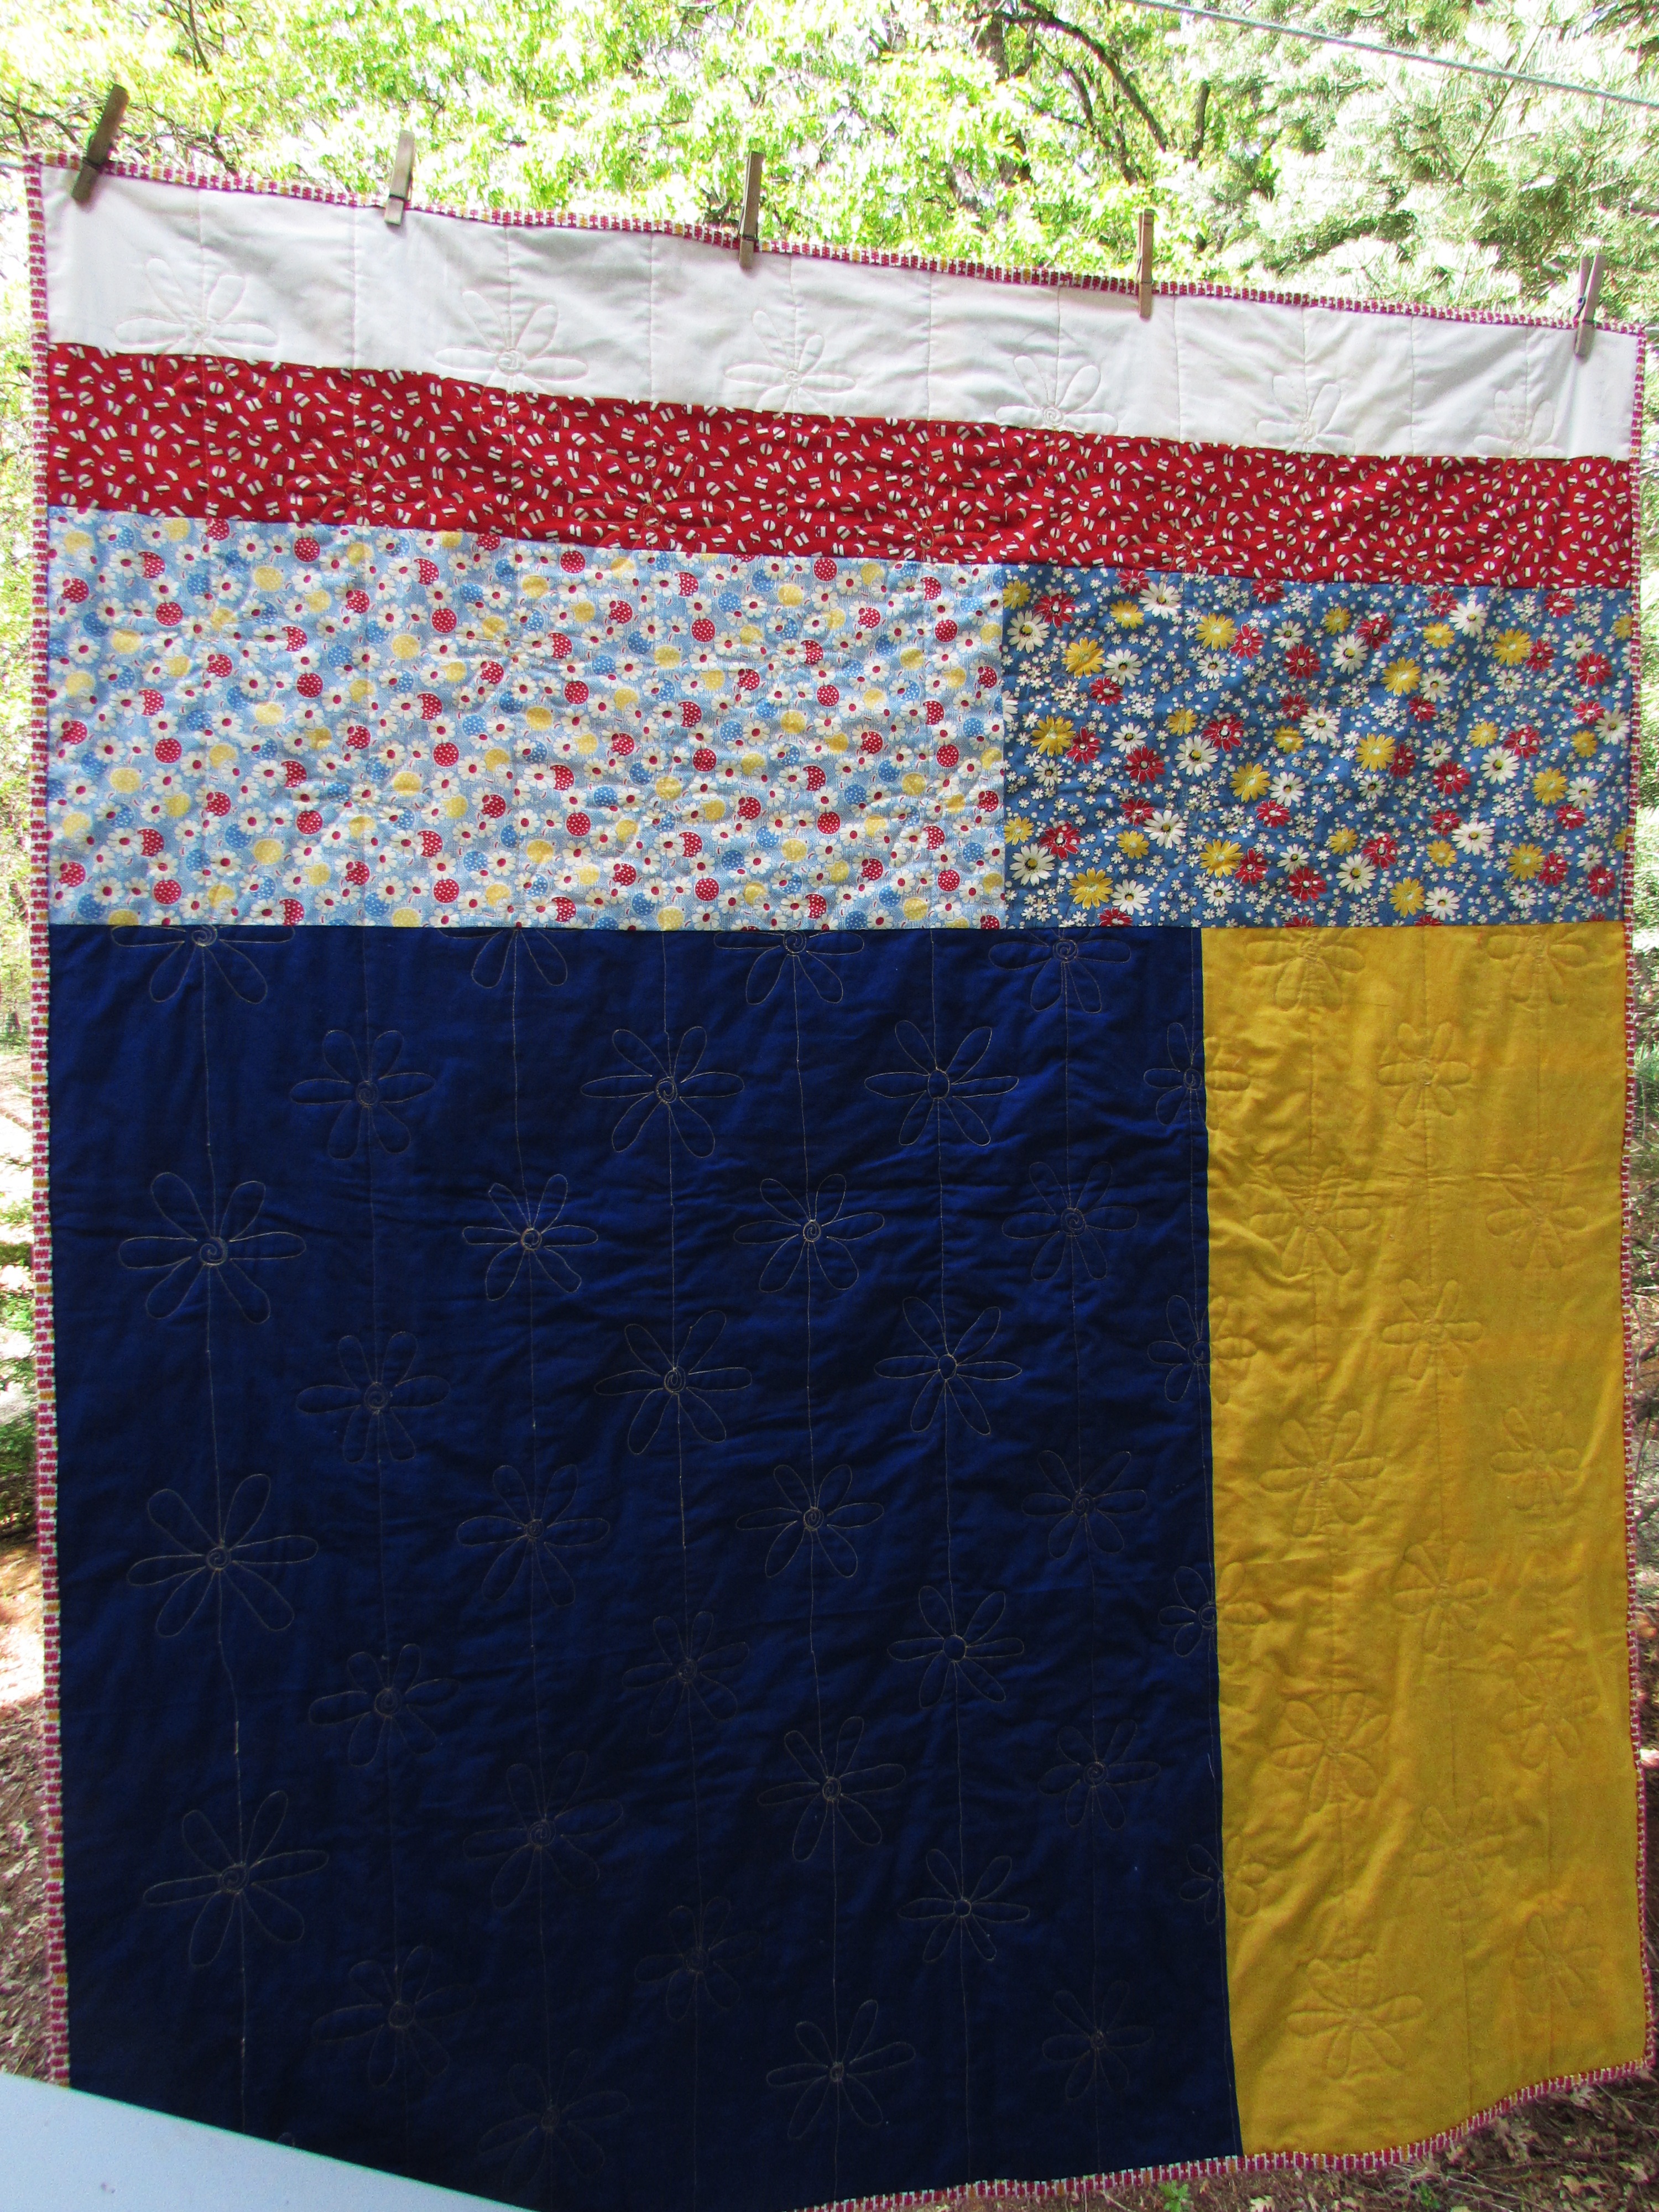
I requilted (is that a word?) the first section and finished up the rest. I think it is very cute – though it looks much better on the front than the back. I pieced the backing as I was determined to used some stash up. I love the way the backing came together but backing a quilt in solids means that every FMQ wiggle is accentuated. That’s ok. I am making progress with each project. For now, I am just going to look at the front side!
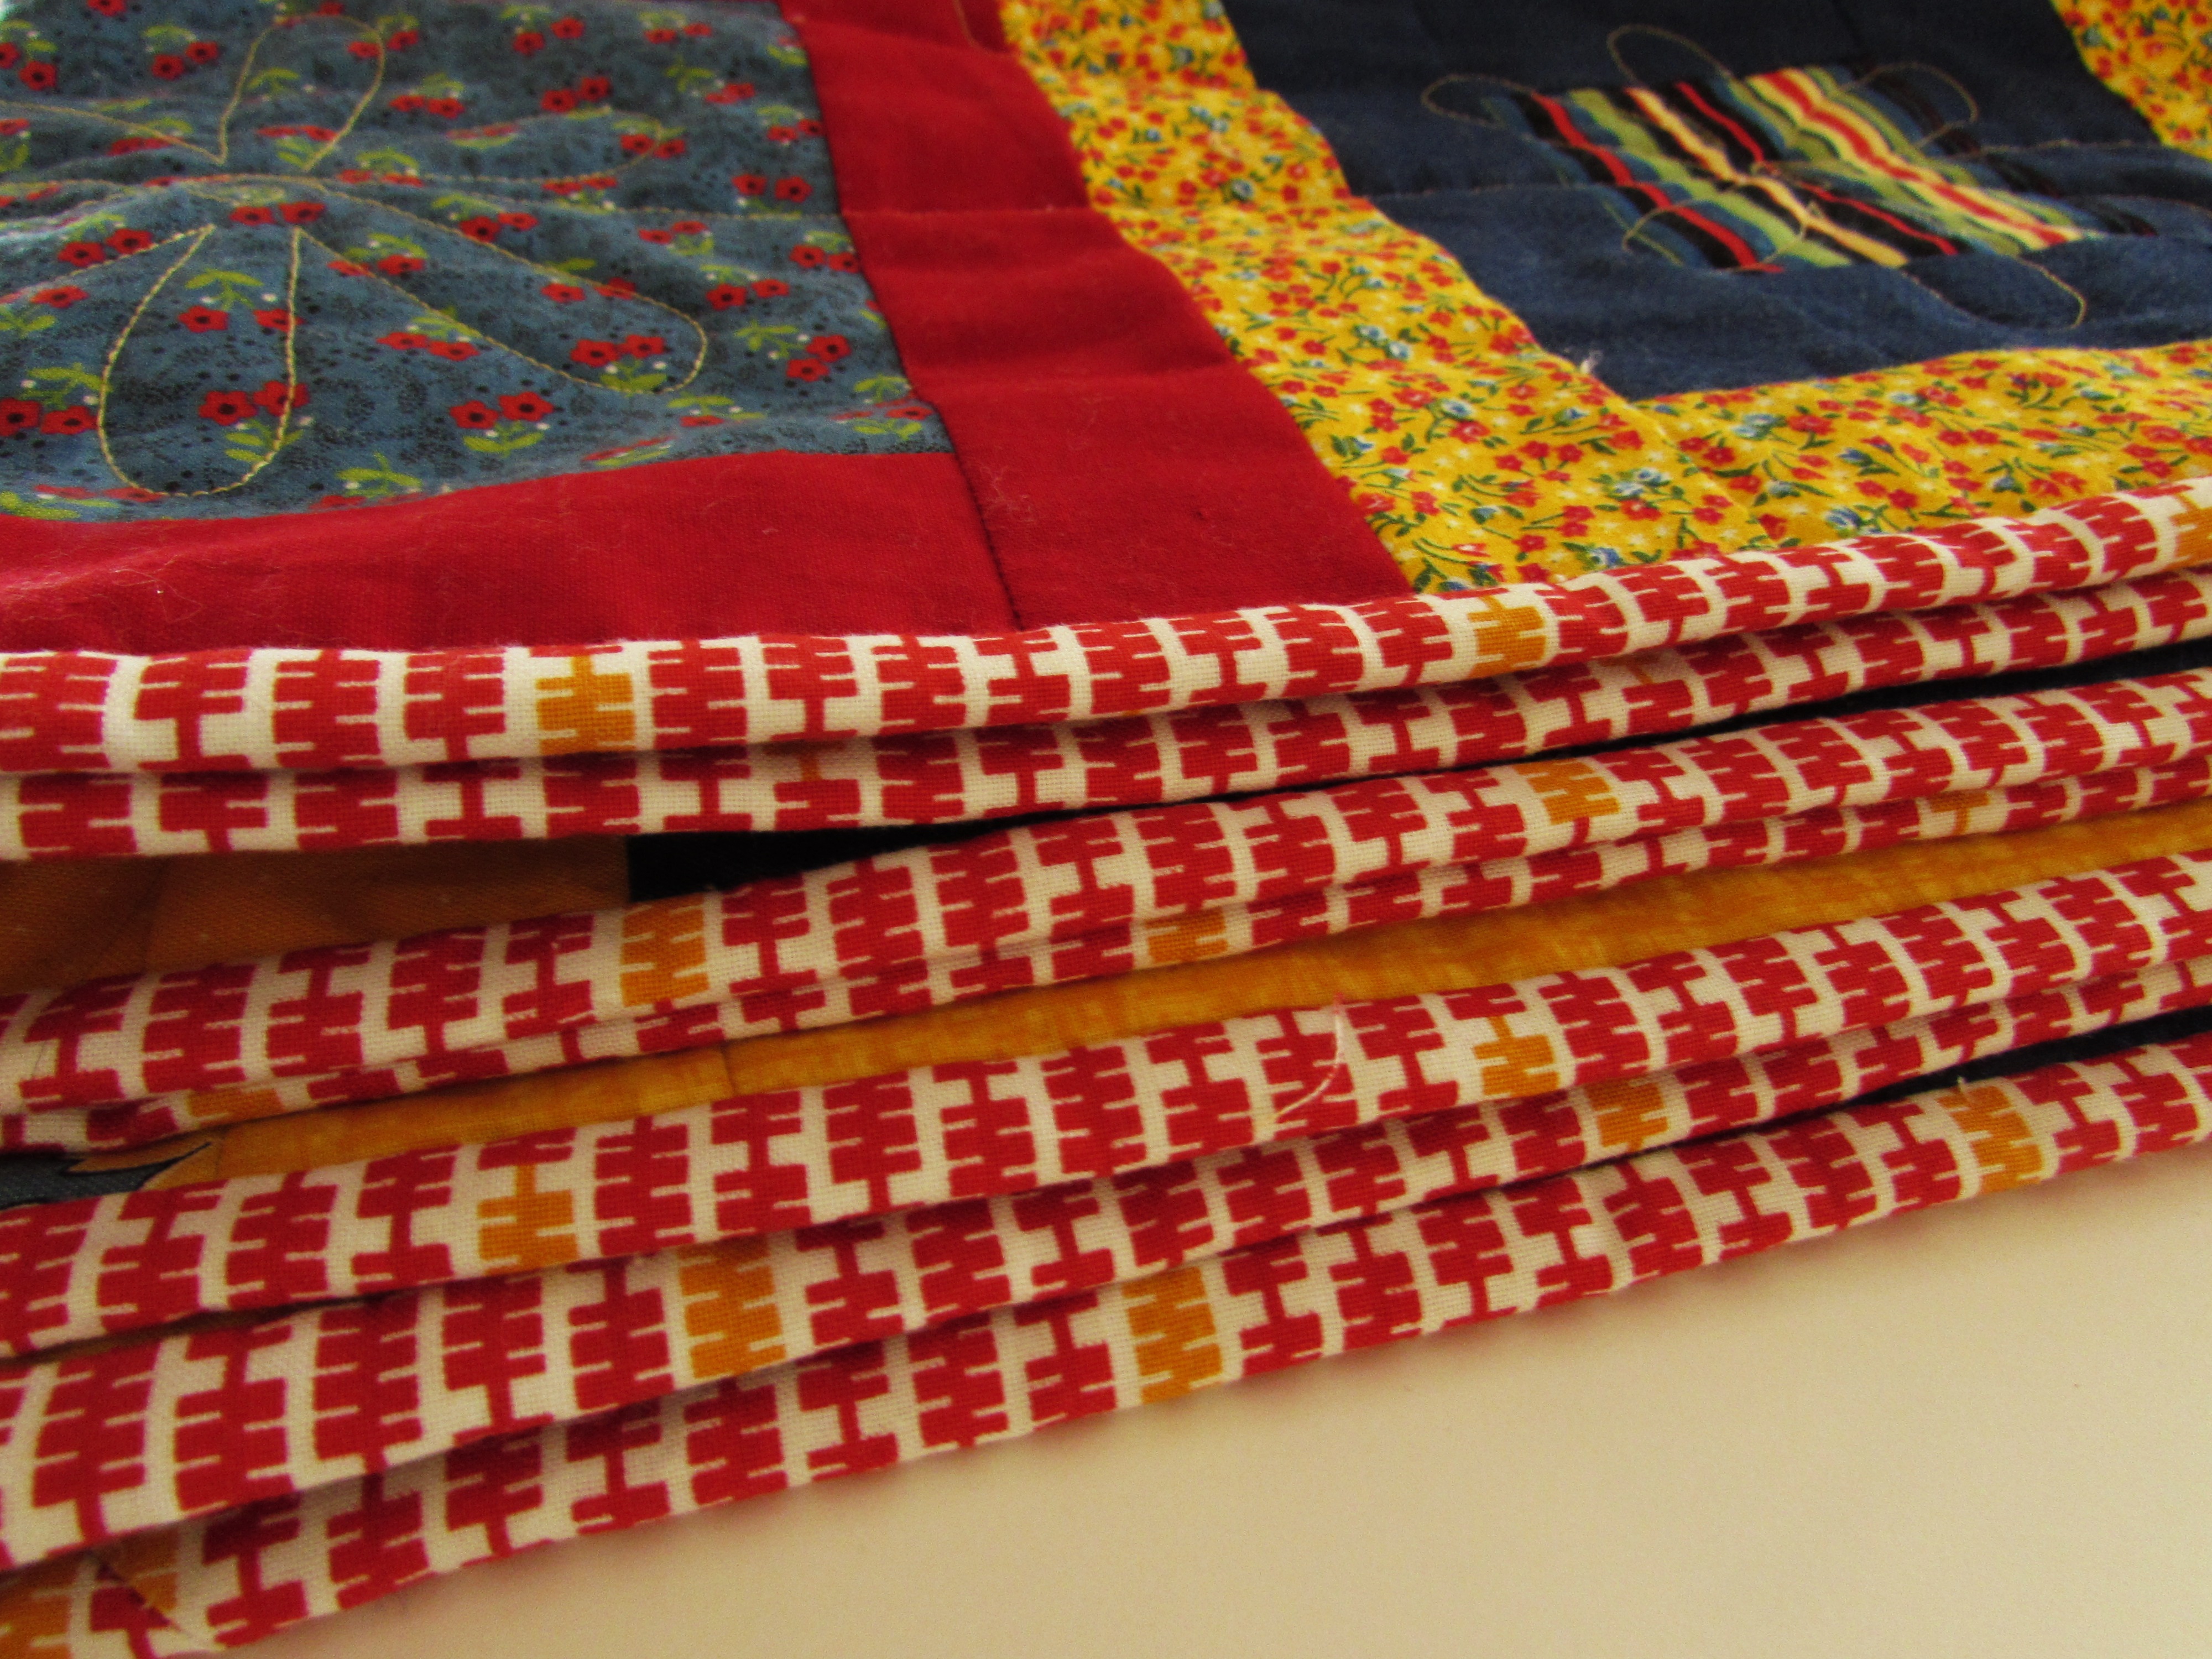
The colors are great, as is the motif I chose for quilting Square Dance. Finally, look at the binding. It is adorable. I found this red and yellow print on a sale table at Ben Franklin and it was a steal.
Tomorrow I will wash it and enjoy that cozy crinkle that the quilt will have once it is out of the dryer. Earlier this year, I signed up to participate in Hands 2 Help Charity Quilt Challenge organized by Sarah at Confessions of a Fabric Addict. When I signed up, I wasn’t entirely sure what I would donate but I think this quilt will bring comfort to it’s recipient.
Update: I shipped this quilt off to Kat for her Covered in Love program and she let me know it had arrived. I hope it will be used by someone in the near future.
The timing of this finish is good as I am now in the process of piecing my black and white Stepping Stones quilt. There is black and white flying all over in my sewing room these days. The blocks are looking really good though. I am pretty excited about this one!
Linking to all sorts of sites. Check them out at the top of the page, under Link Ups!
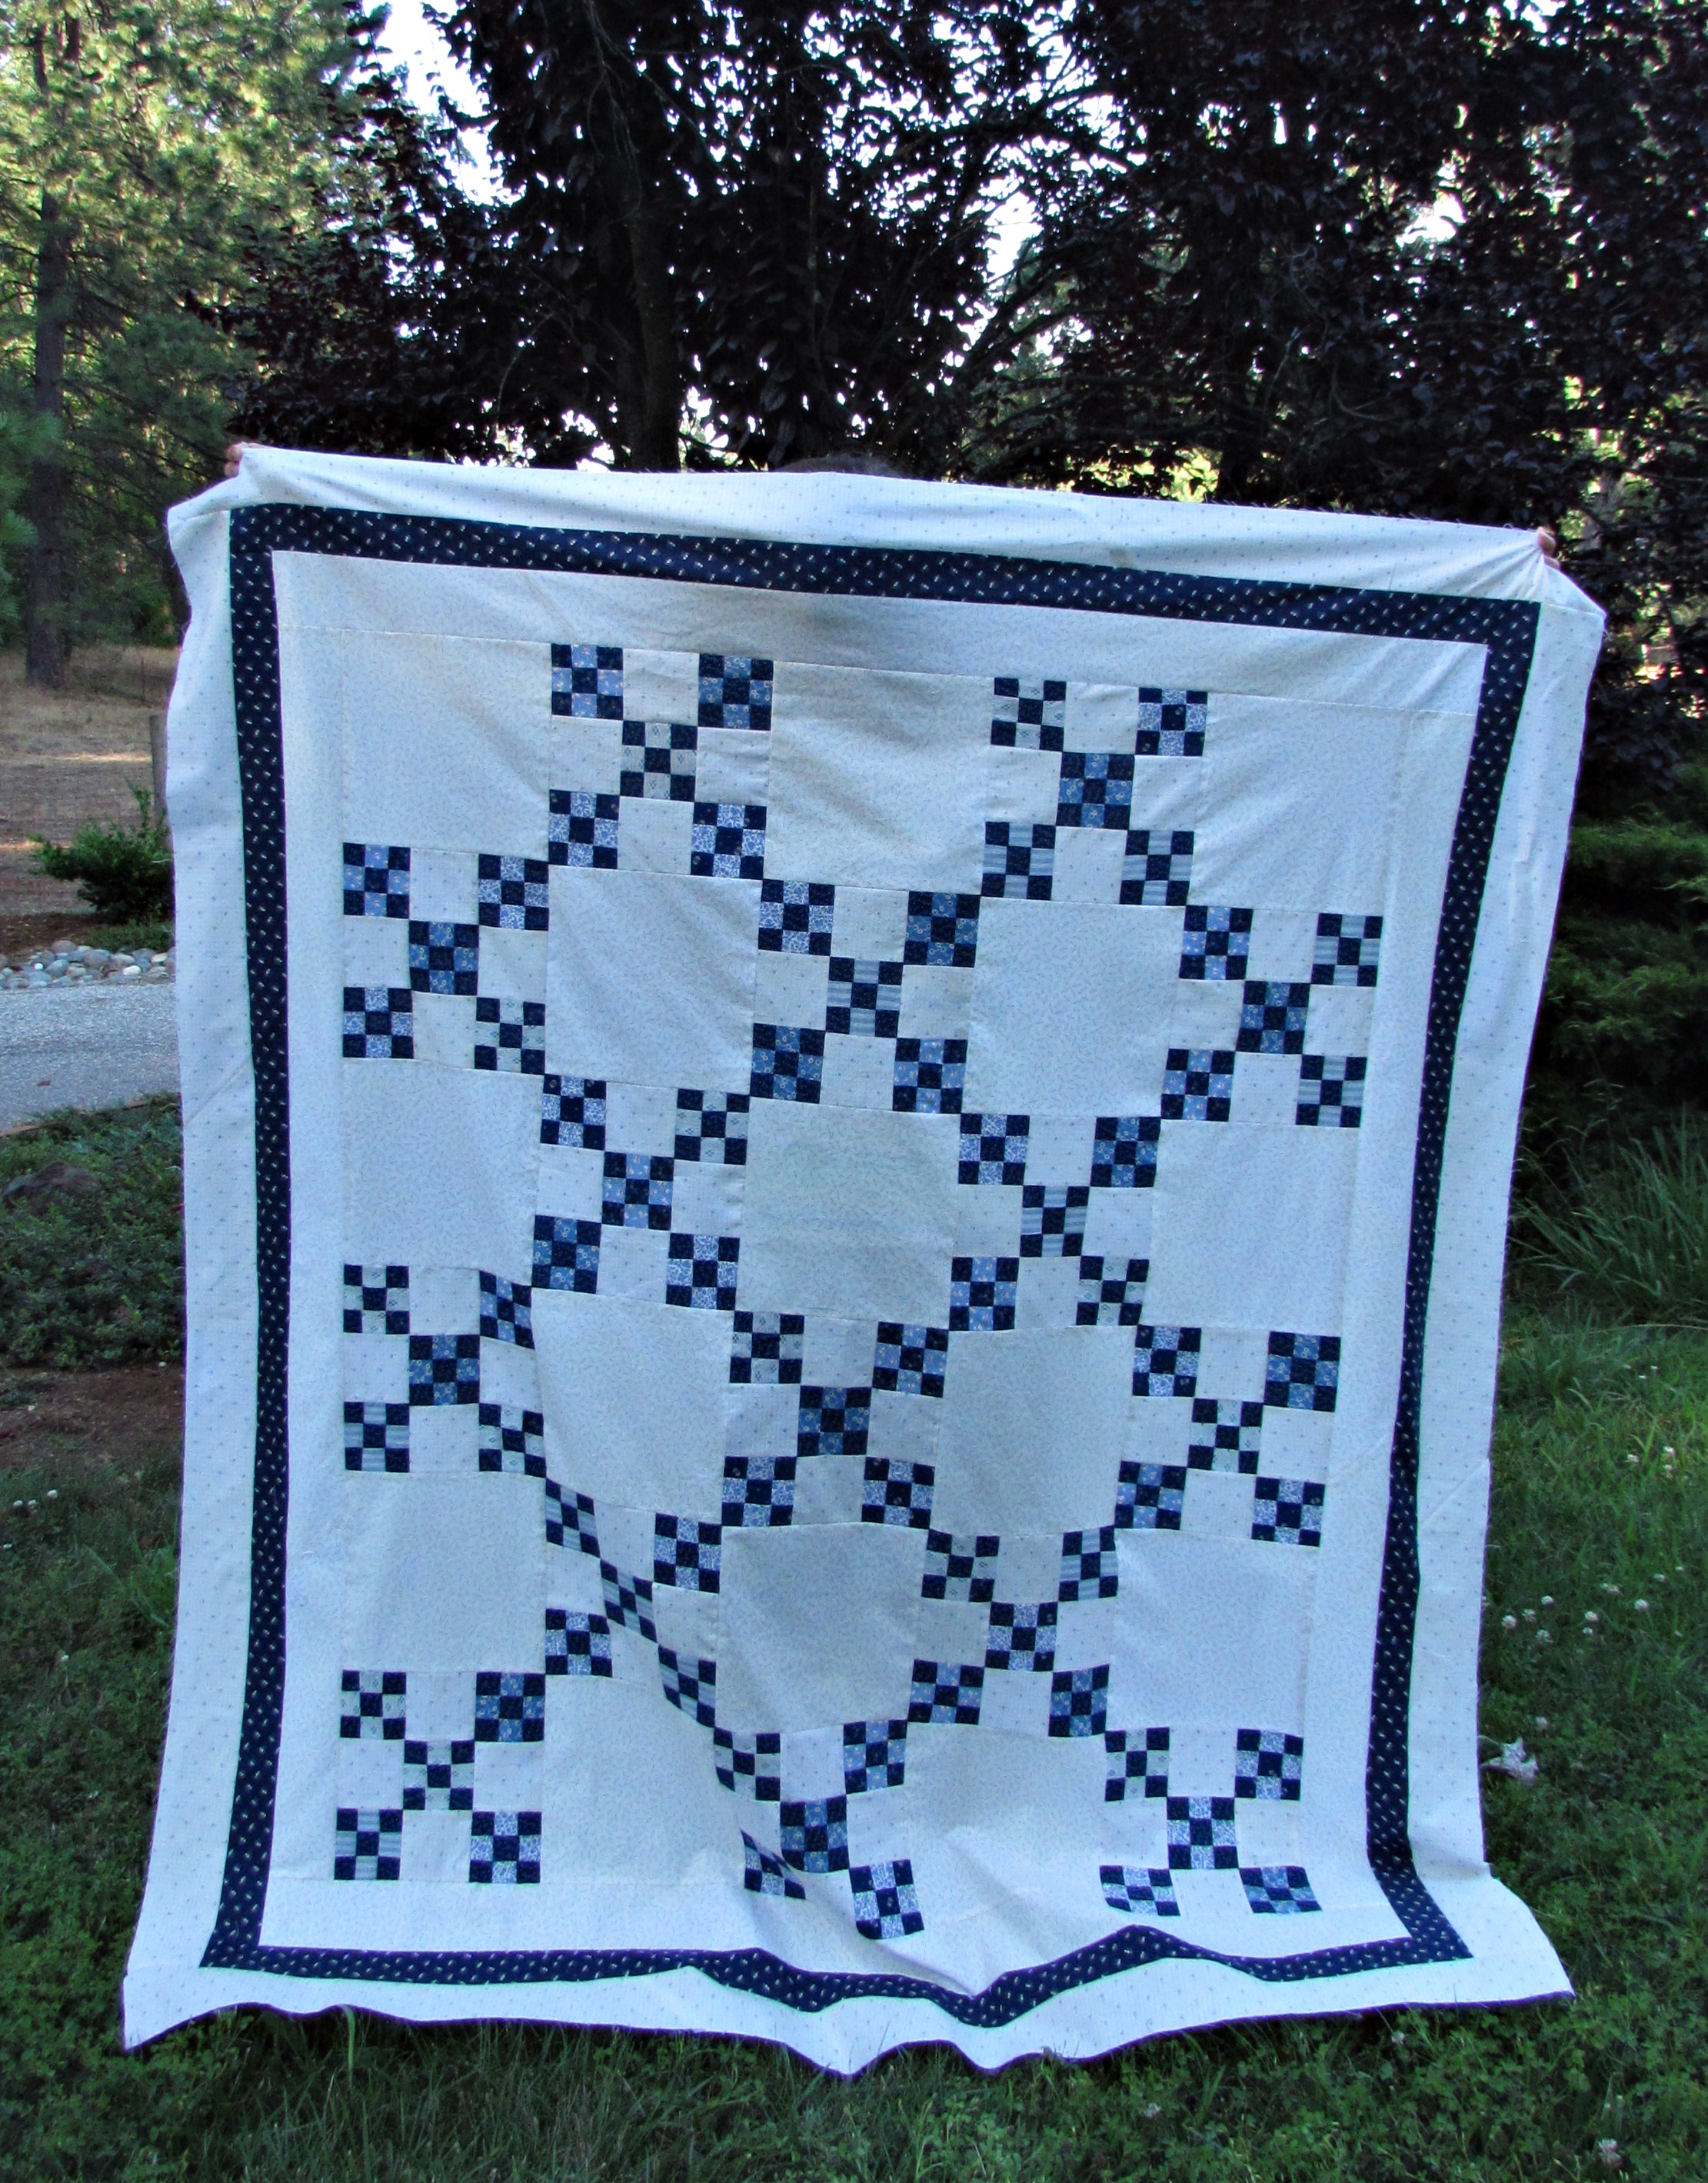
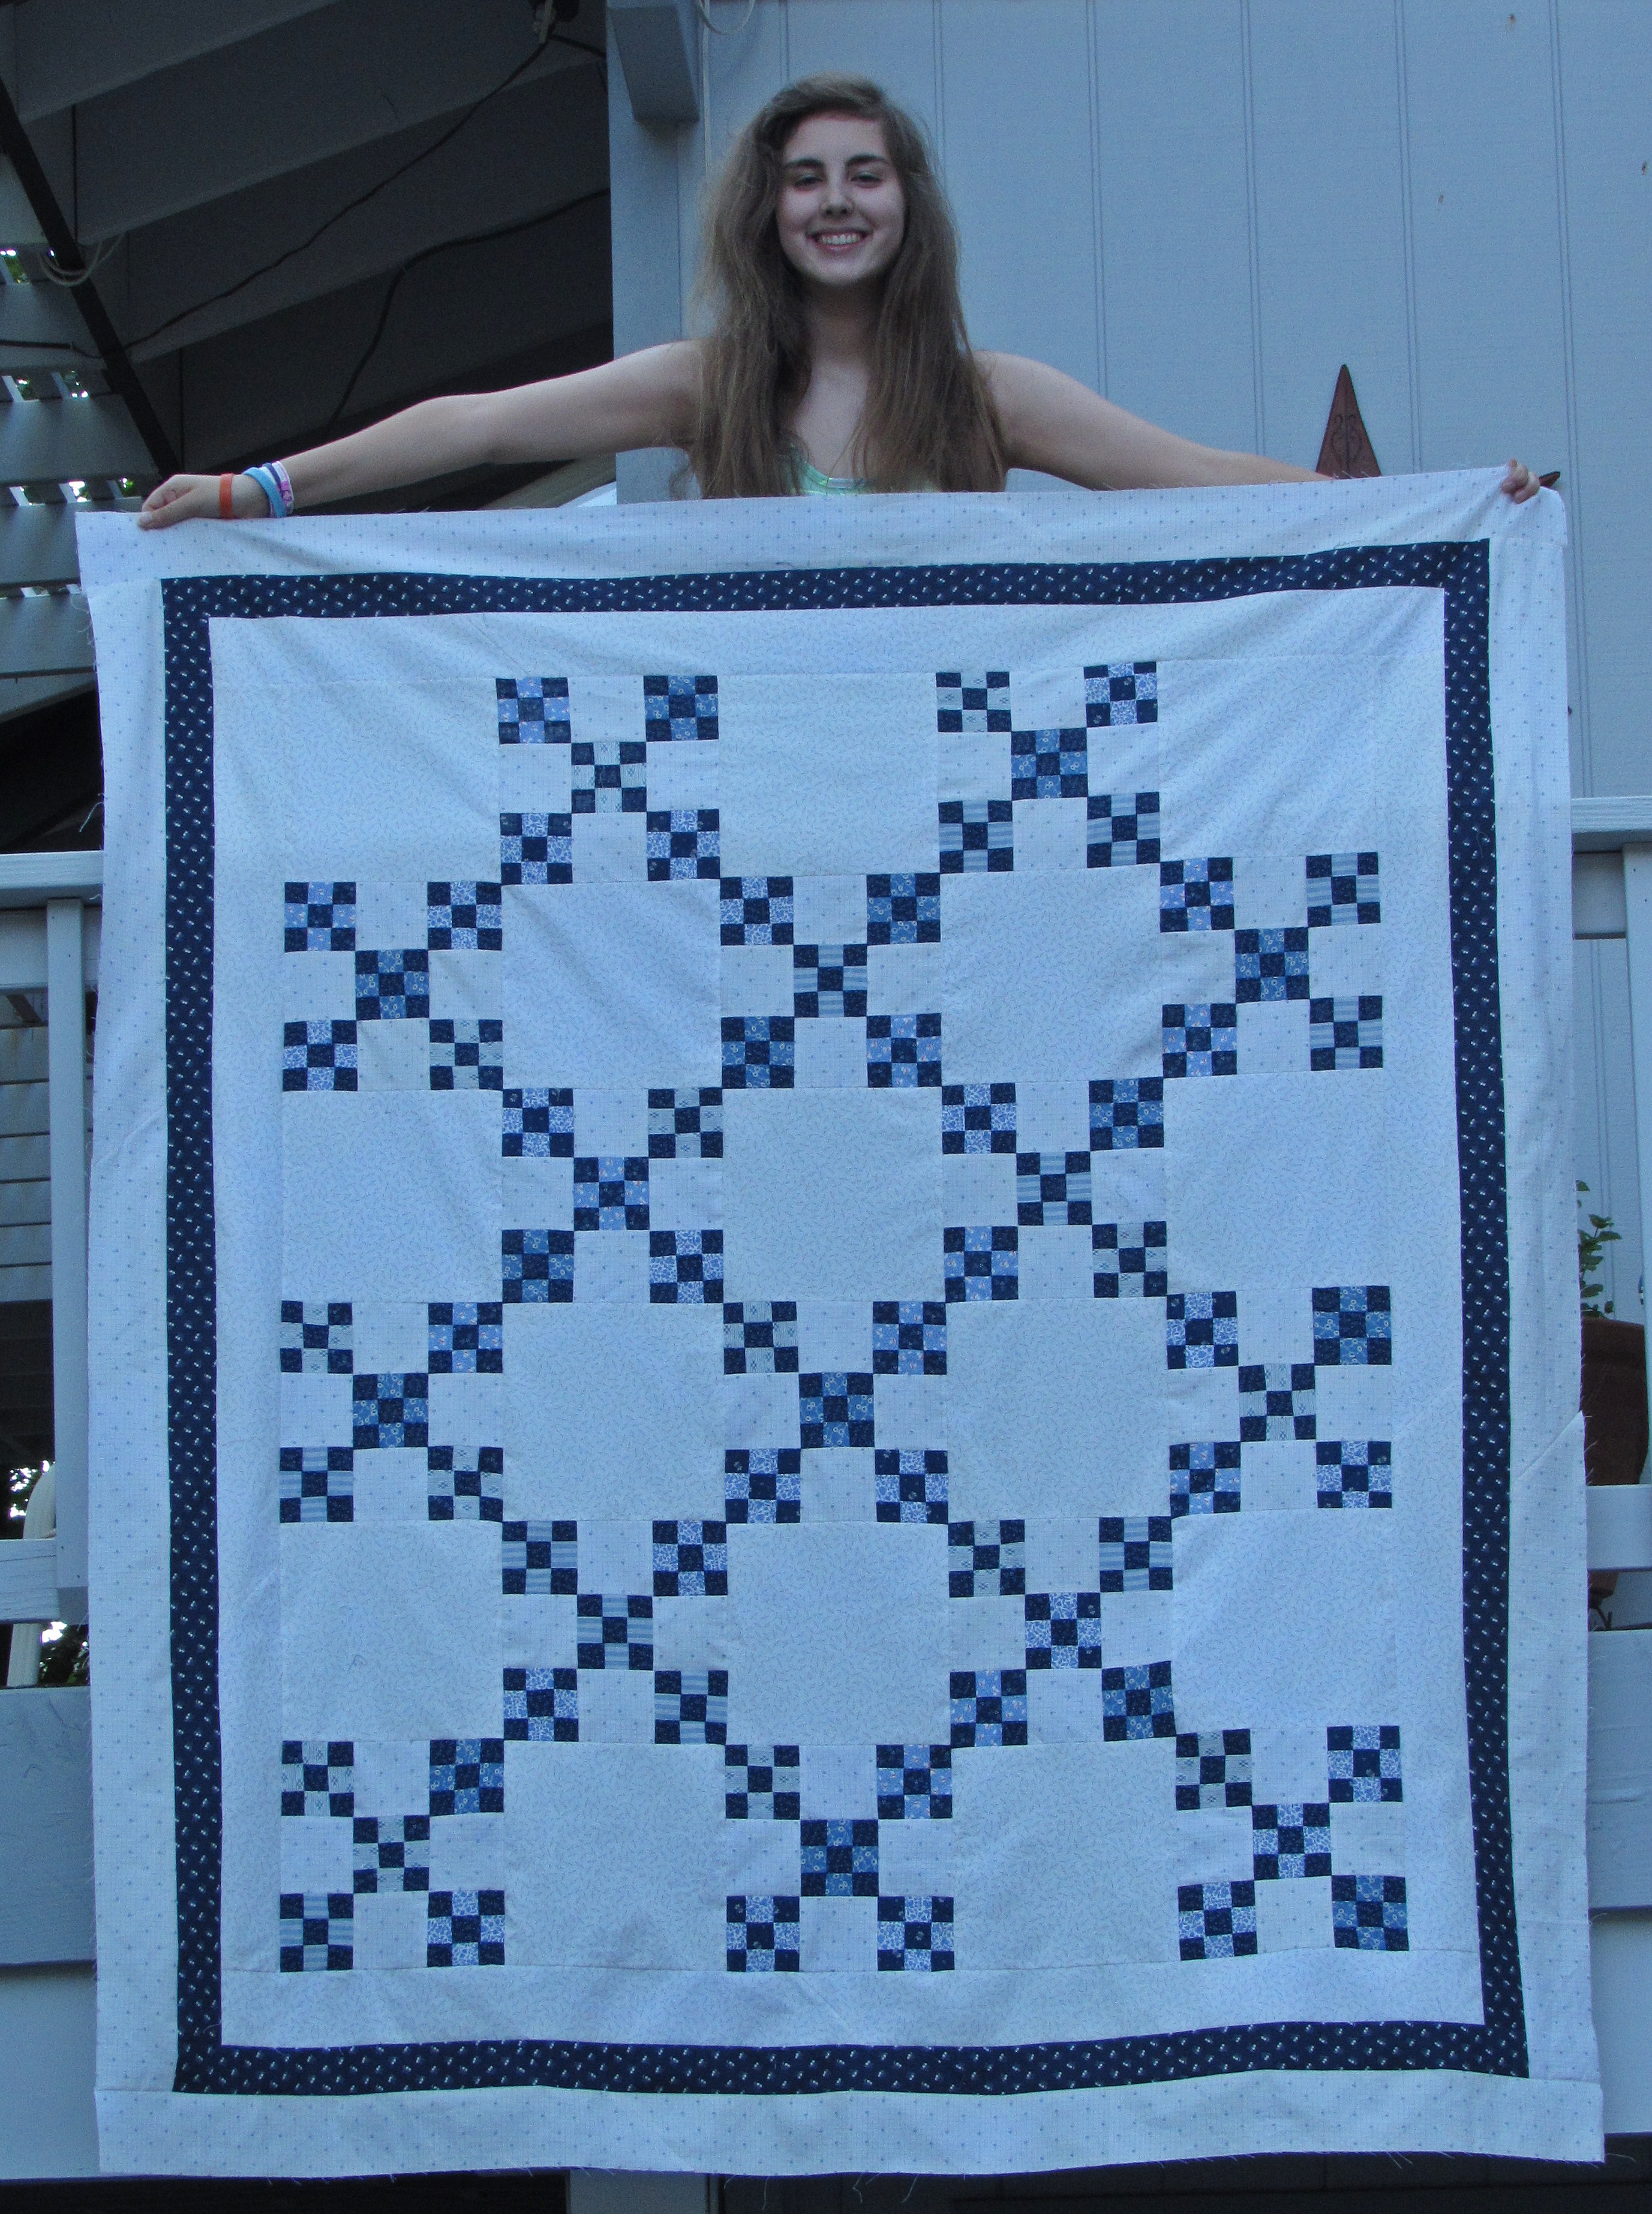
Hey everyone! I finished the vintage double nine patch quilt top. Yay for staying with it and getting it done. It is a good size for a lap quilt. Finished, it should measure out to about 60″ x 70″. I am really happy with it and look forward to getting it basted and ready to quilt.
The quilting decision is an important one due to all of the negative space that this quilt has. My FMQ skills are improving but aren’t stellar. What to do?? My thinking is that this sort of traditional quilt calls for FMQ over straight line quilting (I usually associate straight line quilting with a more modern project). Because this will be auctioned off at a 1940’s themed fundraiser in October, I feel like I need to do some decent quilting on it. I need a foolproof idea! Please help me out here and send ideas my way! Do I do an easy all over stipple? If so, do I stipple the main portion and do something different on the borders or just cruise right over the borders too? I have plenty of time to decide. I don’t have any batting just now (well, other than the piles and piles of batting scrap – I could probably stitch those scraps together and make a piece large enough for a king size quilt). I need to spend some time on Pinterest and hop over to a few sites (The Inbox Jaunt and The Freemotion Quilting Project come to mind) for inspiration.
One more thing…. Totally off topic here, but yesterday my quilt model and I went to the movies and saw “Inside Out”. I had high expectations for this new Pixar film since the reviews are glowing. Yikes, I was disappointed. Both of us kind of shook our head on the way out, wondering what the hype is all about. I found it really preachy – sort of like they were forcing a lesson down my throat. Neither my daughter nor I could figure out what age group this was aimed at. The plot doesn’t seem suitable for early elementary school ages and it seemed very trite for older kiddos. Did I miss something? Maybe I wasn’t in the mood for it? Just curious what others are thinking about this movie.
Linking up with Crazy Mom Quilts and Needle and Thread Thursday. Links to these sites are available at the top of the page, under link ups.
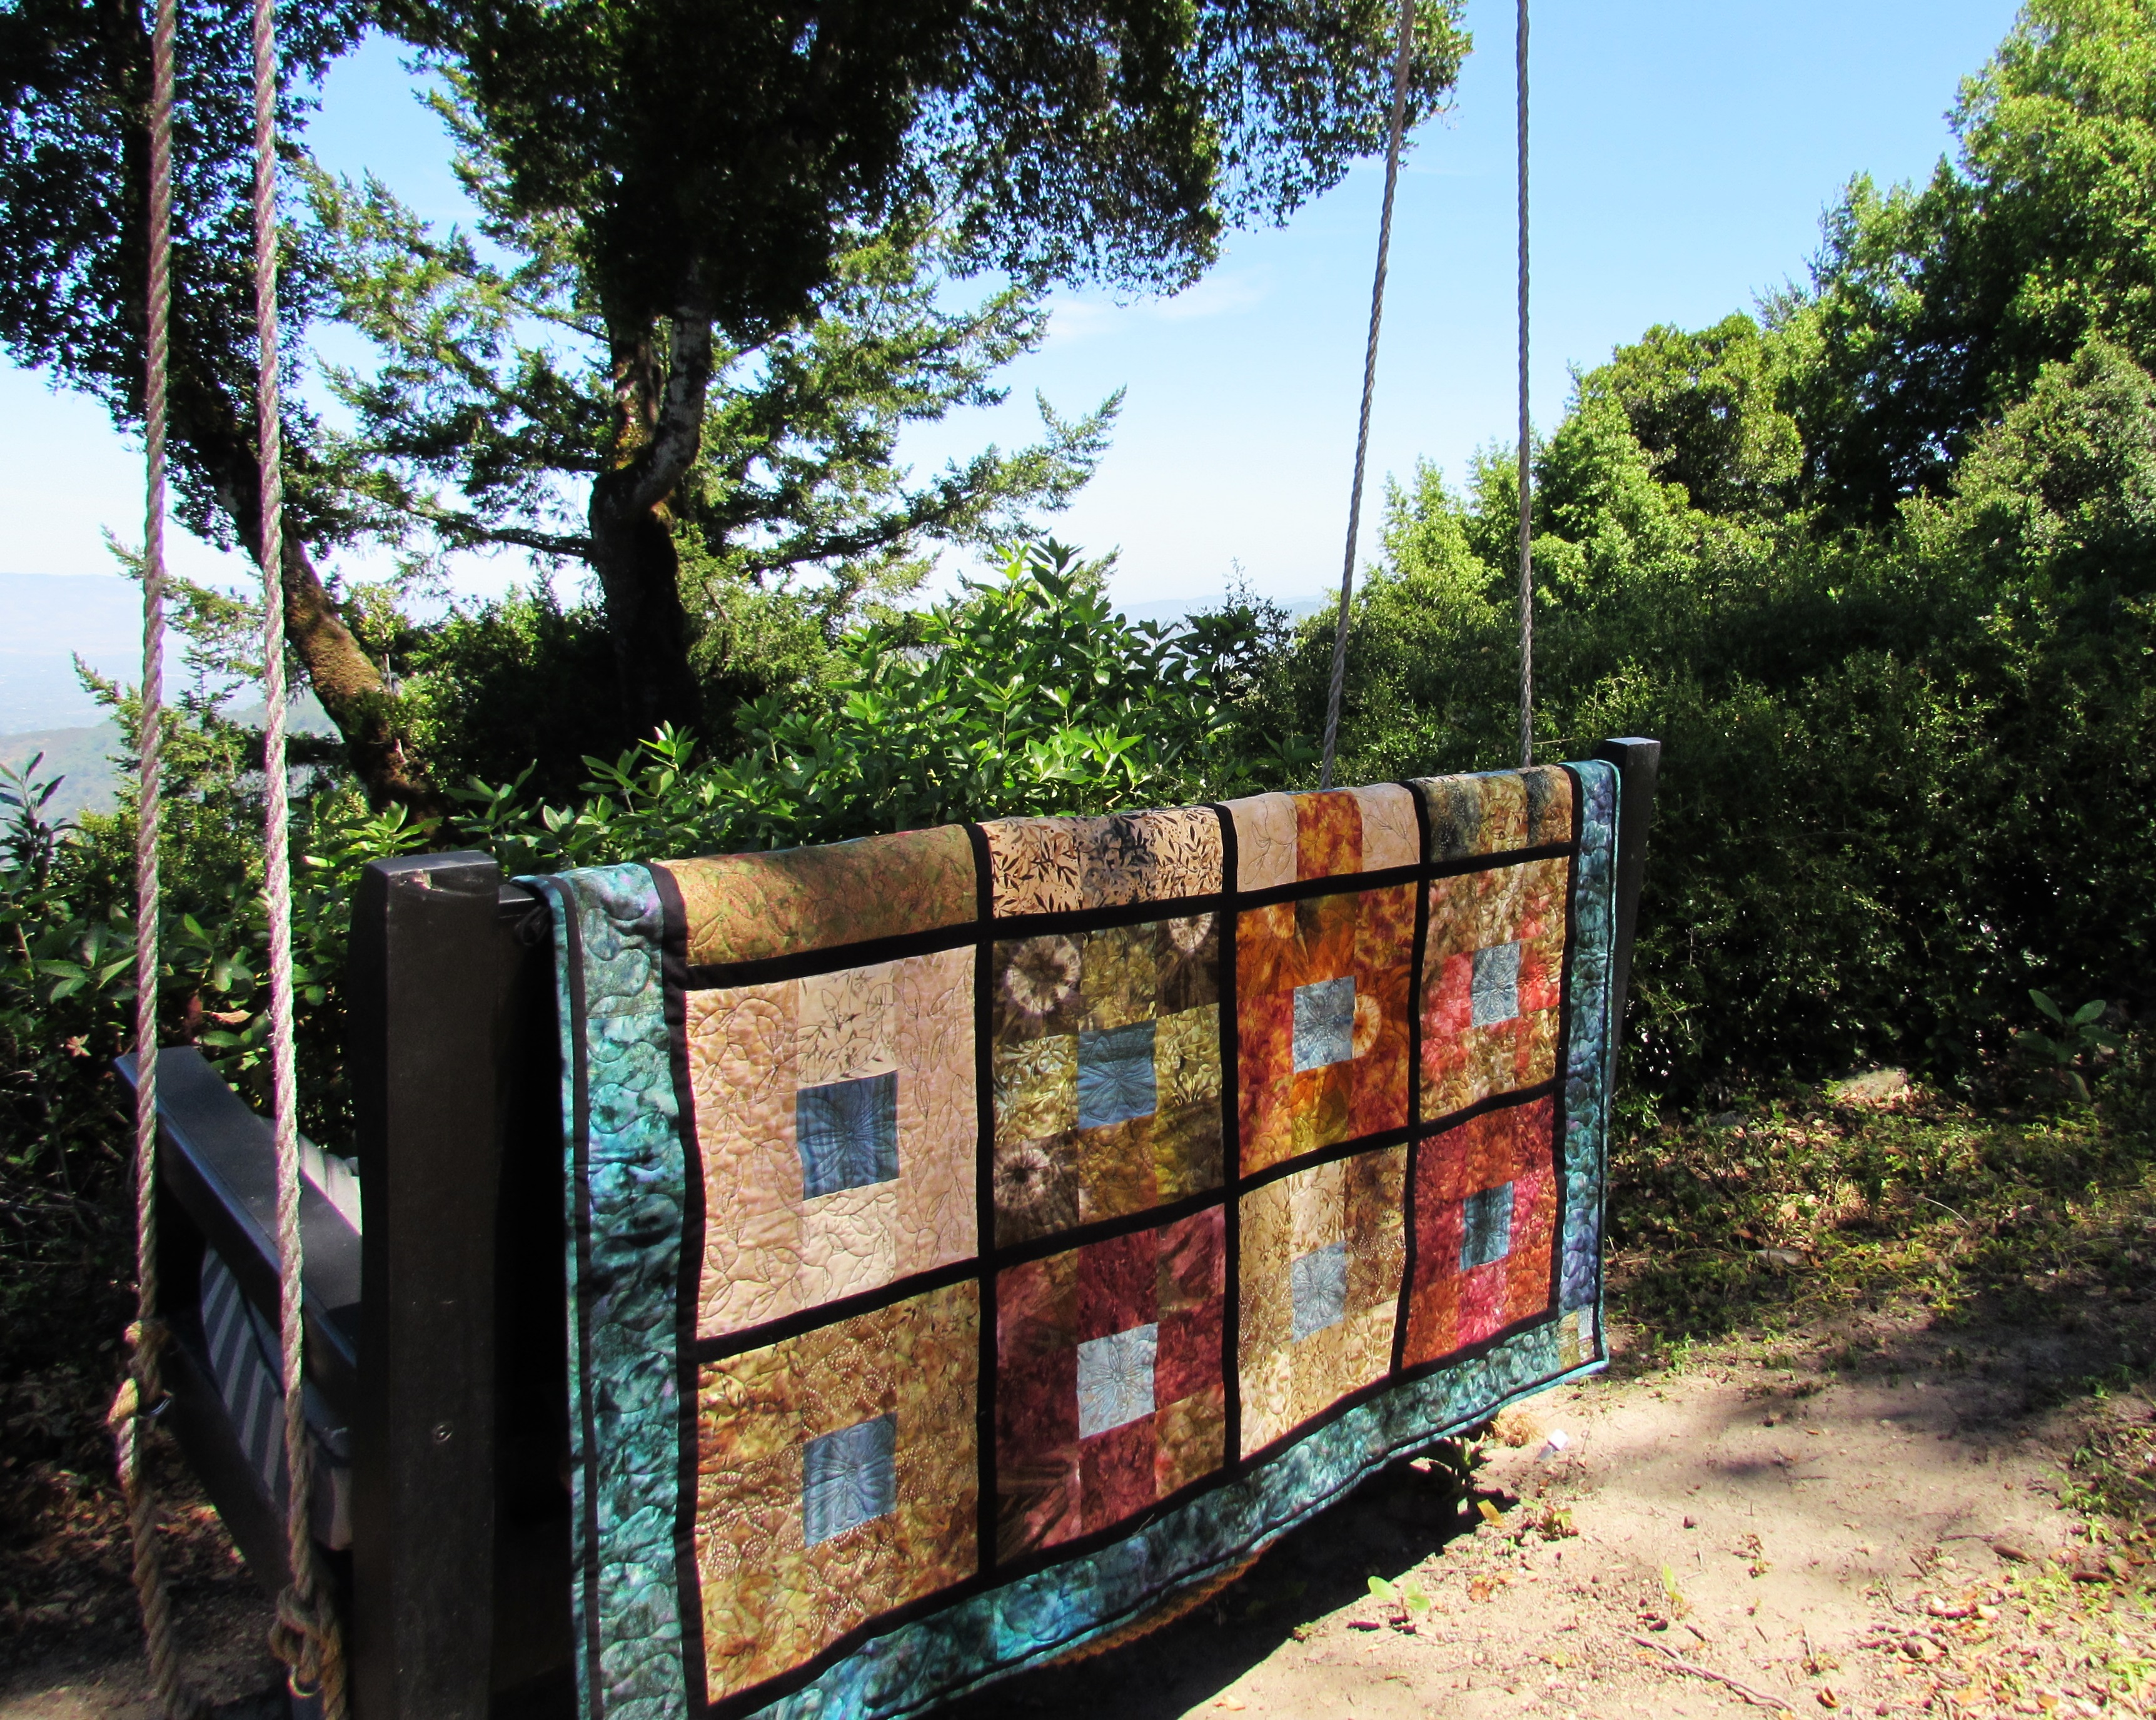
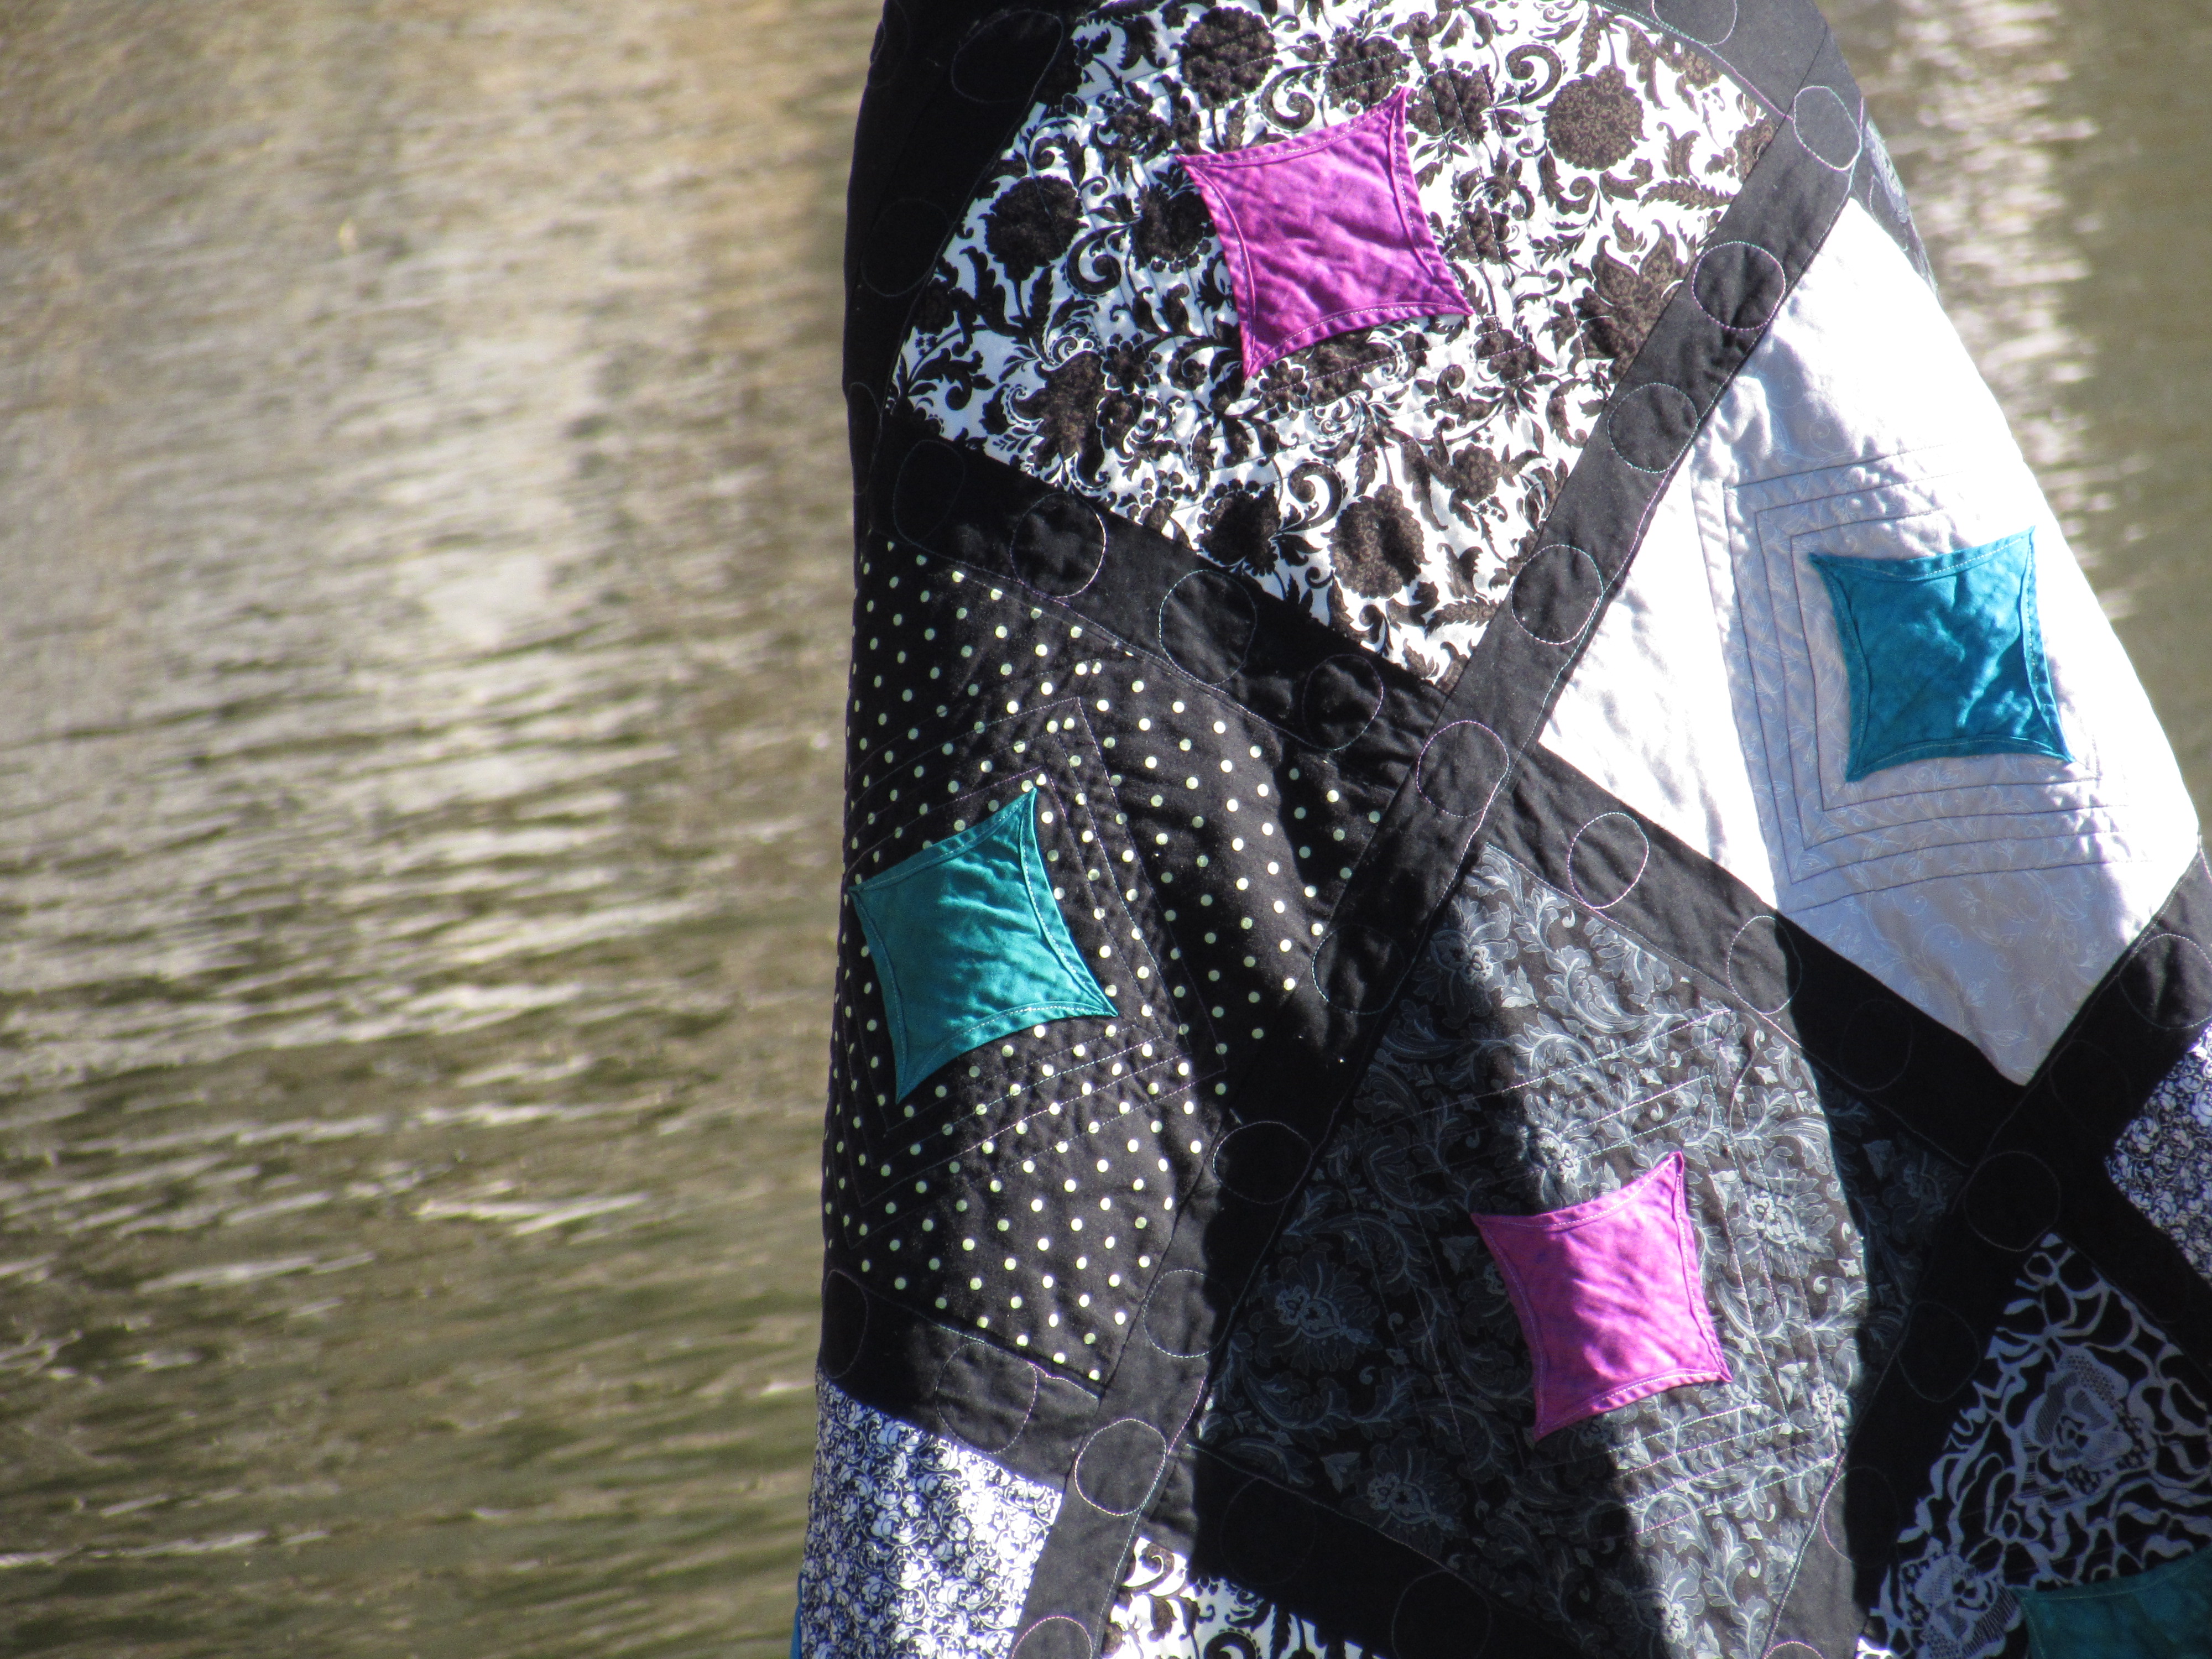
A couple of months ago my husband and I celebrated our 17th anniversary. This week I finished a quilt made with fabric purchased on our honeymoon on the island of St. John. It may have taken me 16 years to think of how I wanted to use the fabric but once I got going, it didn’t take too long to finish it up. I posted earlier about making the quilt top in August of last year. Because I wasn’t sure how I wanted to quilt it, I set it aside (for nearly a year!) Come January of 2015, I set a goal to finish this quilt up and I did it. This finish means that I do not have any unquilted tops lying around. Yahoo!
This project was fun to plan. I have been reading about whether to stitch in the ditch before starting to FMQ. Honestly, this sounded like a whole lot of extra work. I decided to compromise and I stitched the perimeter of each nine patch. I thought this would stabilize the quilt and hopefully, reduce and puckers on the backing. It is so irritating when you flip the quilt over to check on it and there is a fold. Between pin basting and ditch stitching I was hoping for a better back. Some quilters think it holds the quilt square and prevents distortion. Others say it makes the FMQ work look better. I do think it helped. My quilt stayed square and often, it doesn’t. I didn’t have a single pucker on the back. The only thing is that on the back of the quilt, the ditch stitching is very visible so one has to take that into account when planning the quilting. It doesn’t show much at all on the front. As for any benefit to the look of the quilting on each nine patch, I didn’t notice a huge difference. In fact, after I had quilted about 65% of the project, I noticed that I had skipped ditch stitching one block. That block really didn’t look noticeable different from the others. So, I think it is good forquilt stabilization and keeping square but doesn’t noticeably enhance the FMQ.
I took a look at some quilting sites (mainly Lori Kennedy’s site, The Inbox Jaunt) to get inspiration. I knew that I would do an all over FMQ pattern but wanted just a bit more detail than that. Each of the nine patch blocks have a blue center. Starting with that, I quilted a large flower in the center of each blue square.
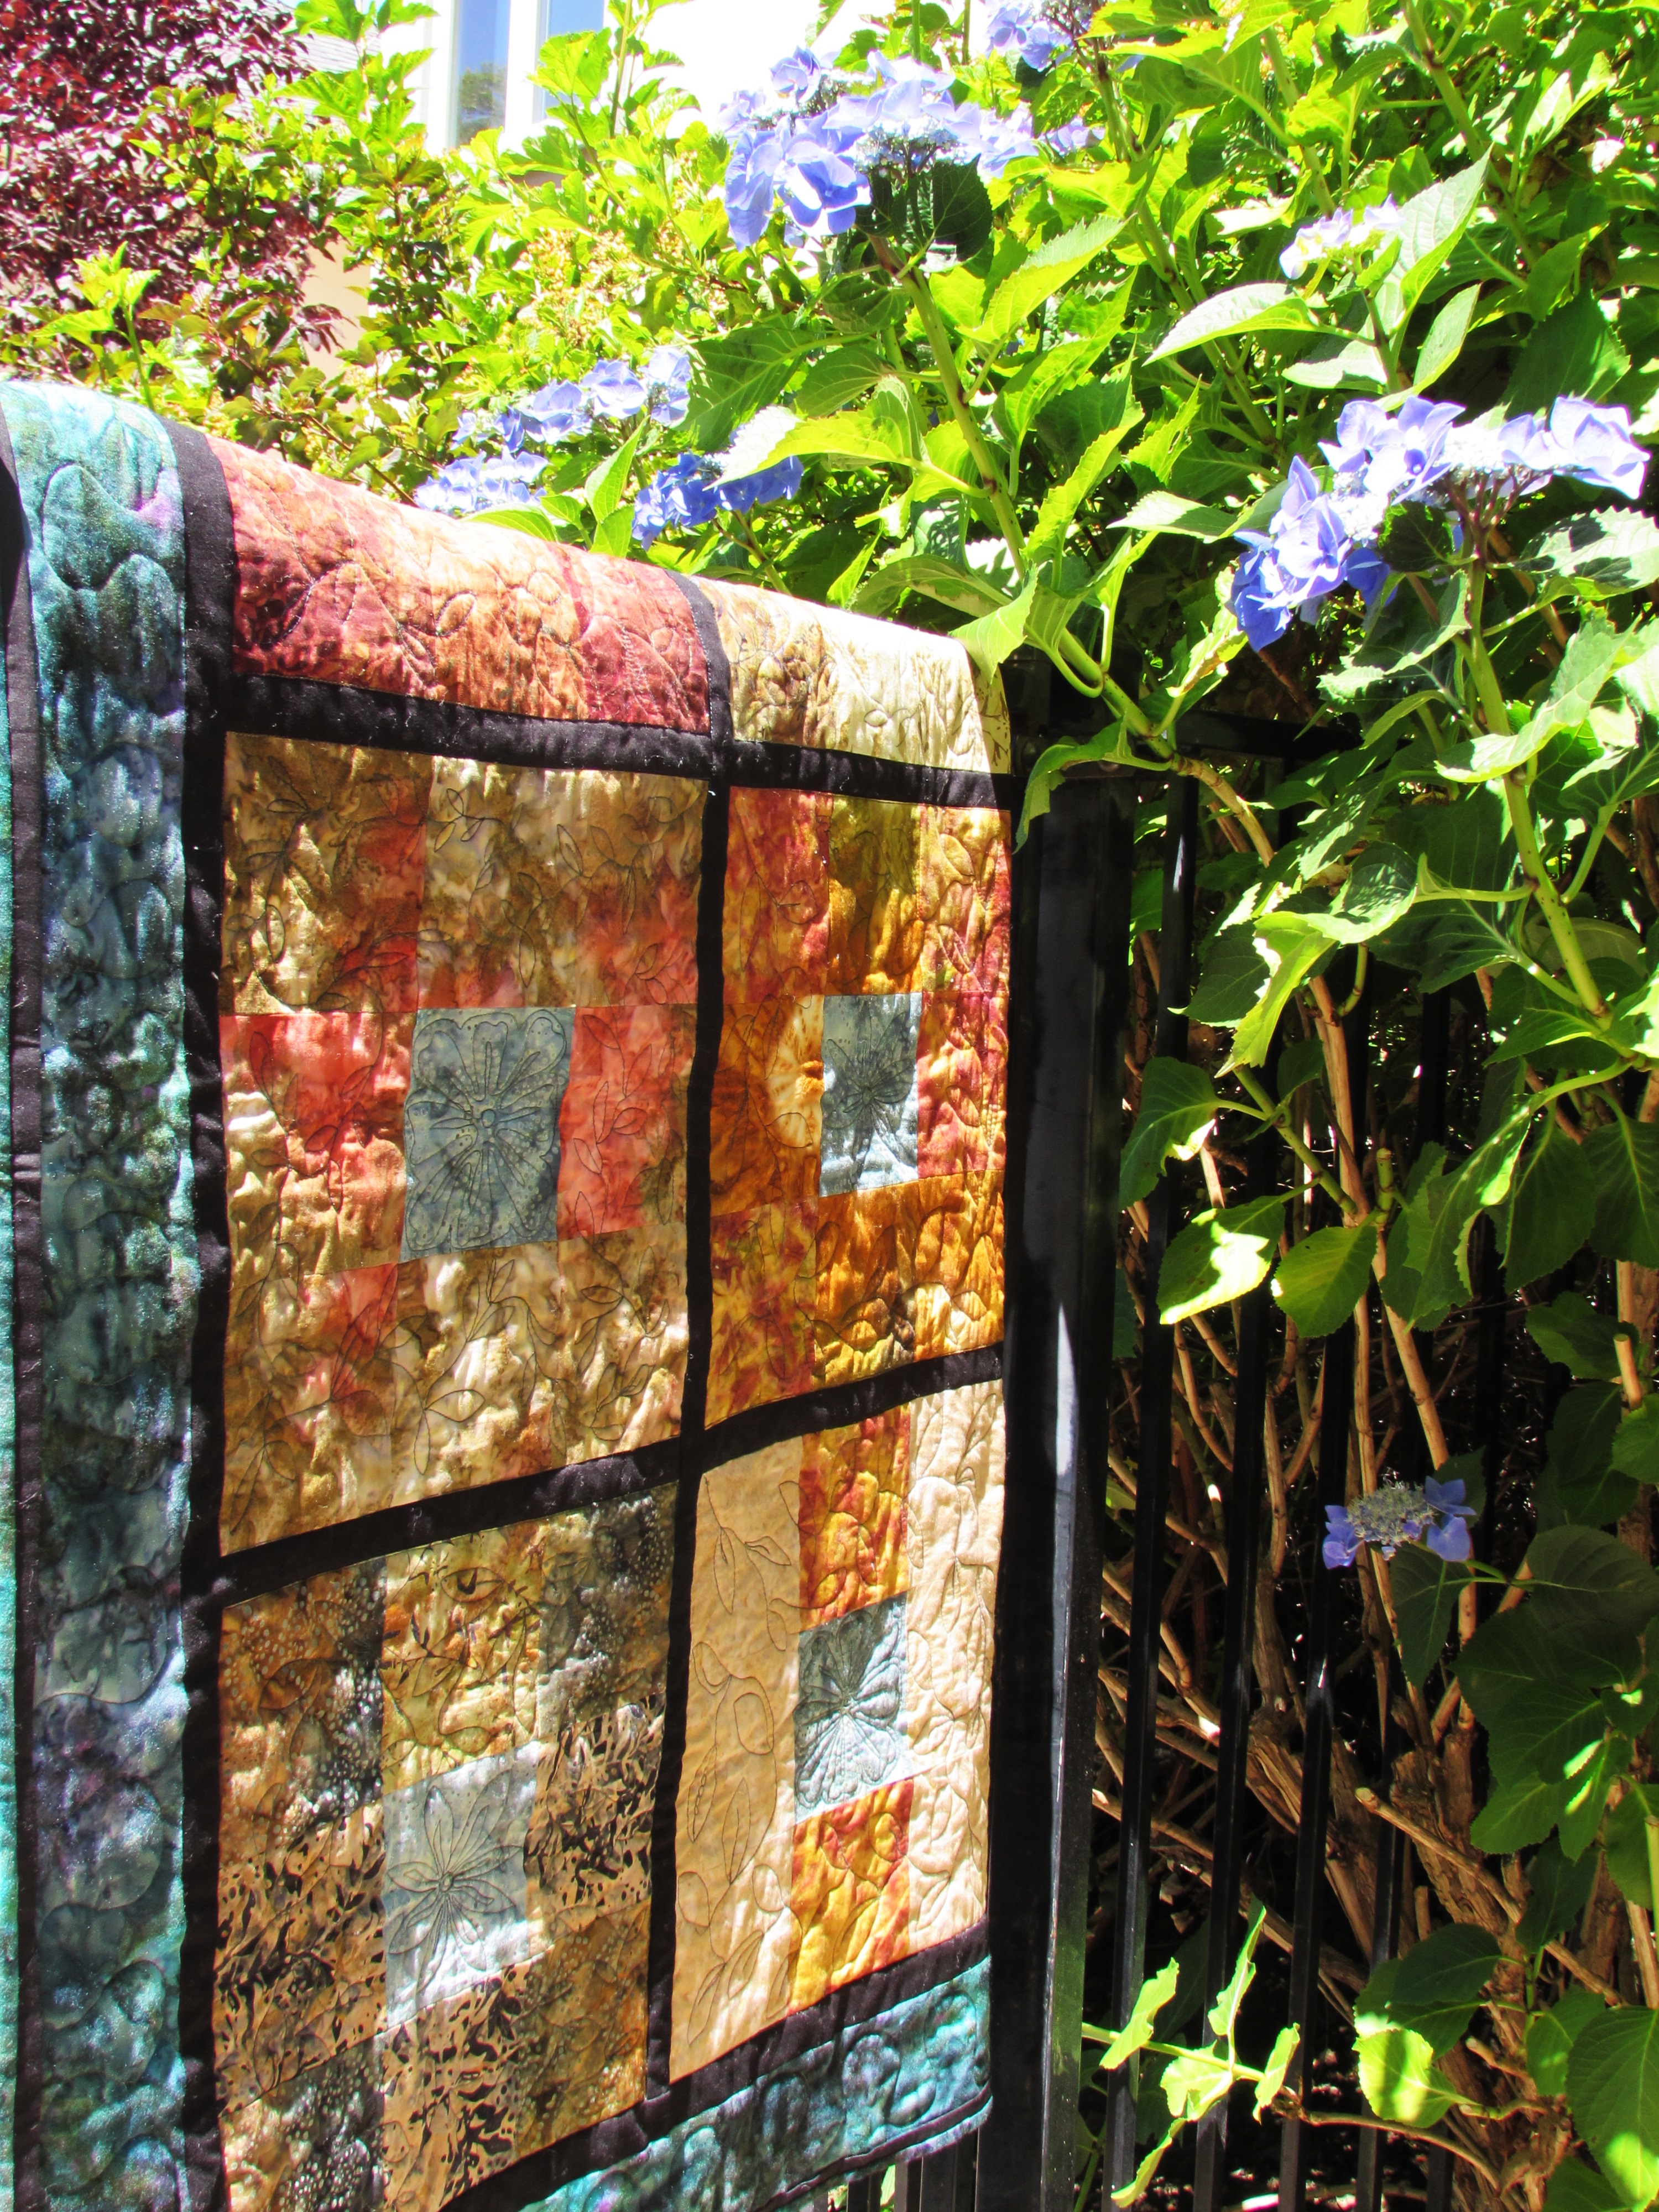
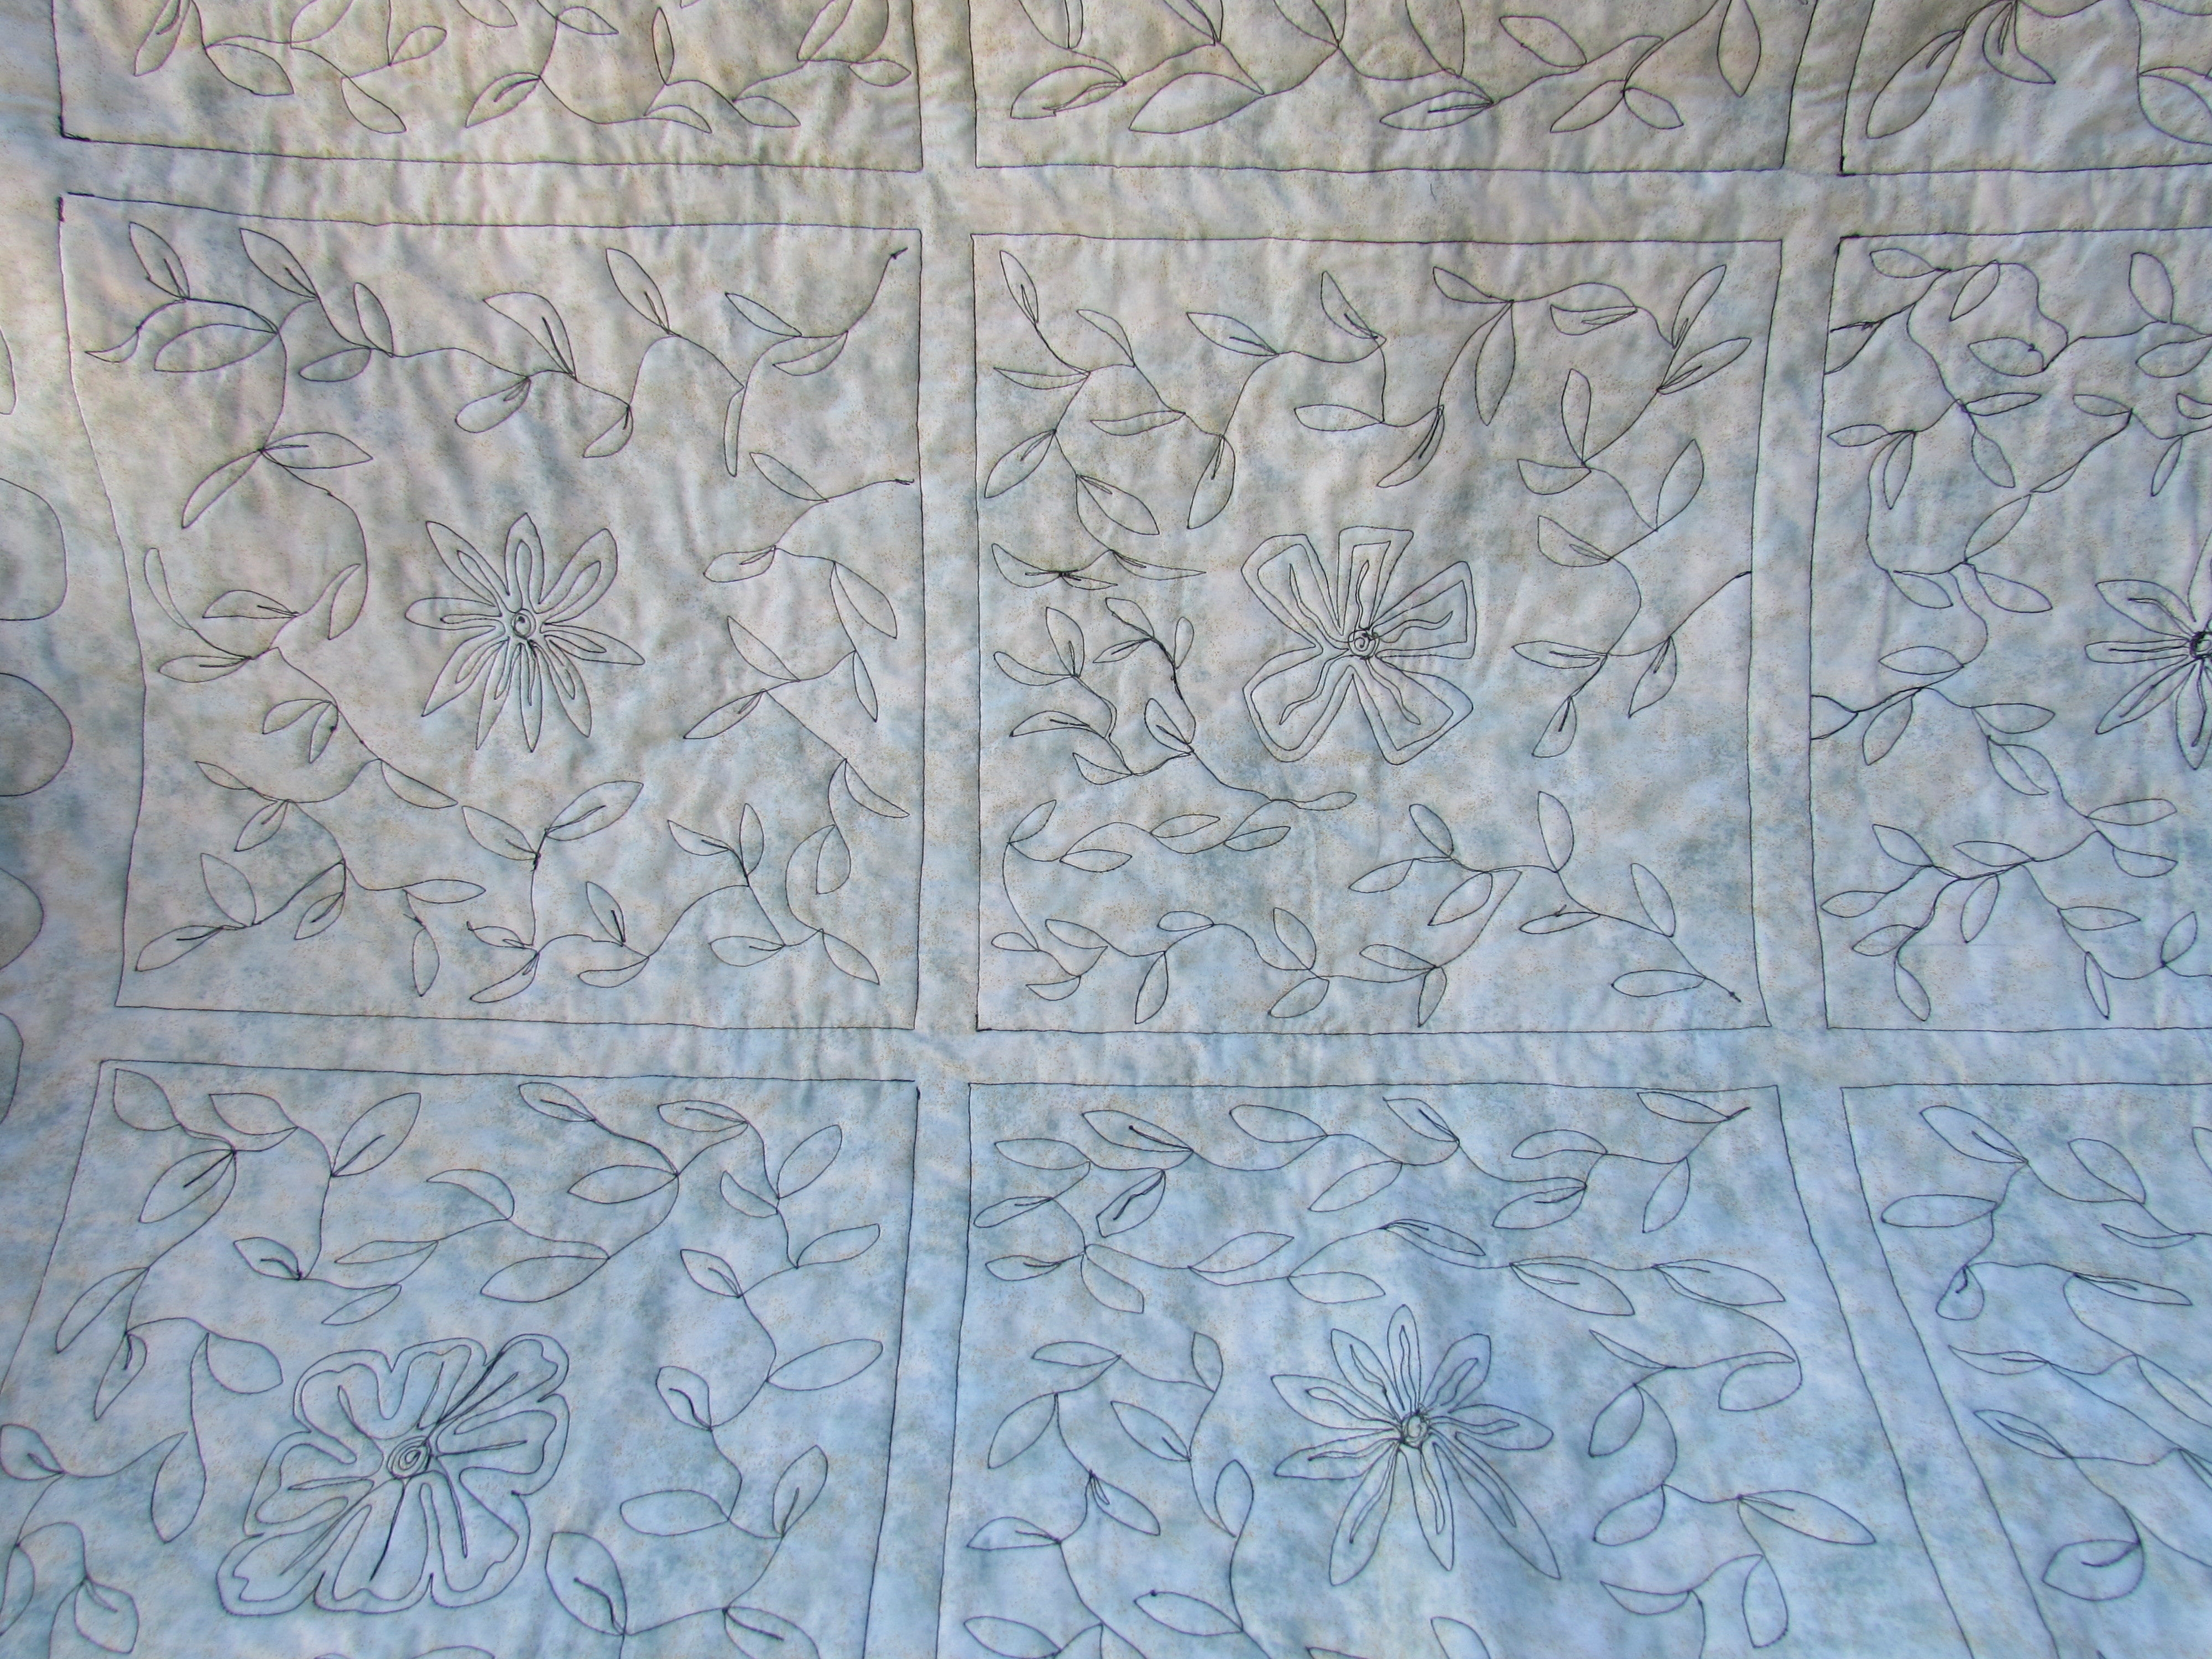
I decided that leafy fines would complement the flowers. Using a variegated green YLI quilting thread, I FMQ’d leaves of various sizes on each block. I left the black sashing plain. Because the backing is a light green batik, the FMQ stitching really shows up on the back. Not sure if this is good or bad! For the most part, I am happy with the stitching. Why is it that my eye goes to the little tension blips and the occasional jittery stitching instead of the overall look? For those of you that quilt on your domestic machine, how to you handle the starts and stops? Look closely at the squares that I ditch stitched, see the dark spots at one corner where I stopped and started? I chose to reverse a few stitches rather than knot and bury tons of threads. Not sure I like how this looks. What is the consensus? Do you back tack stitches or knot and bury threads? I know which is cleaner but yikes, burying all of those threads is time-consuming.
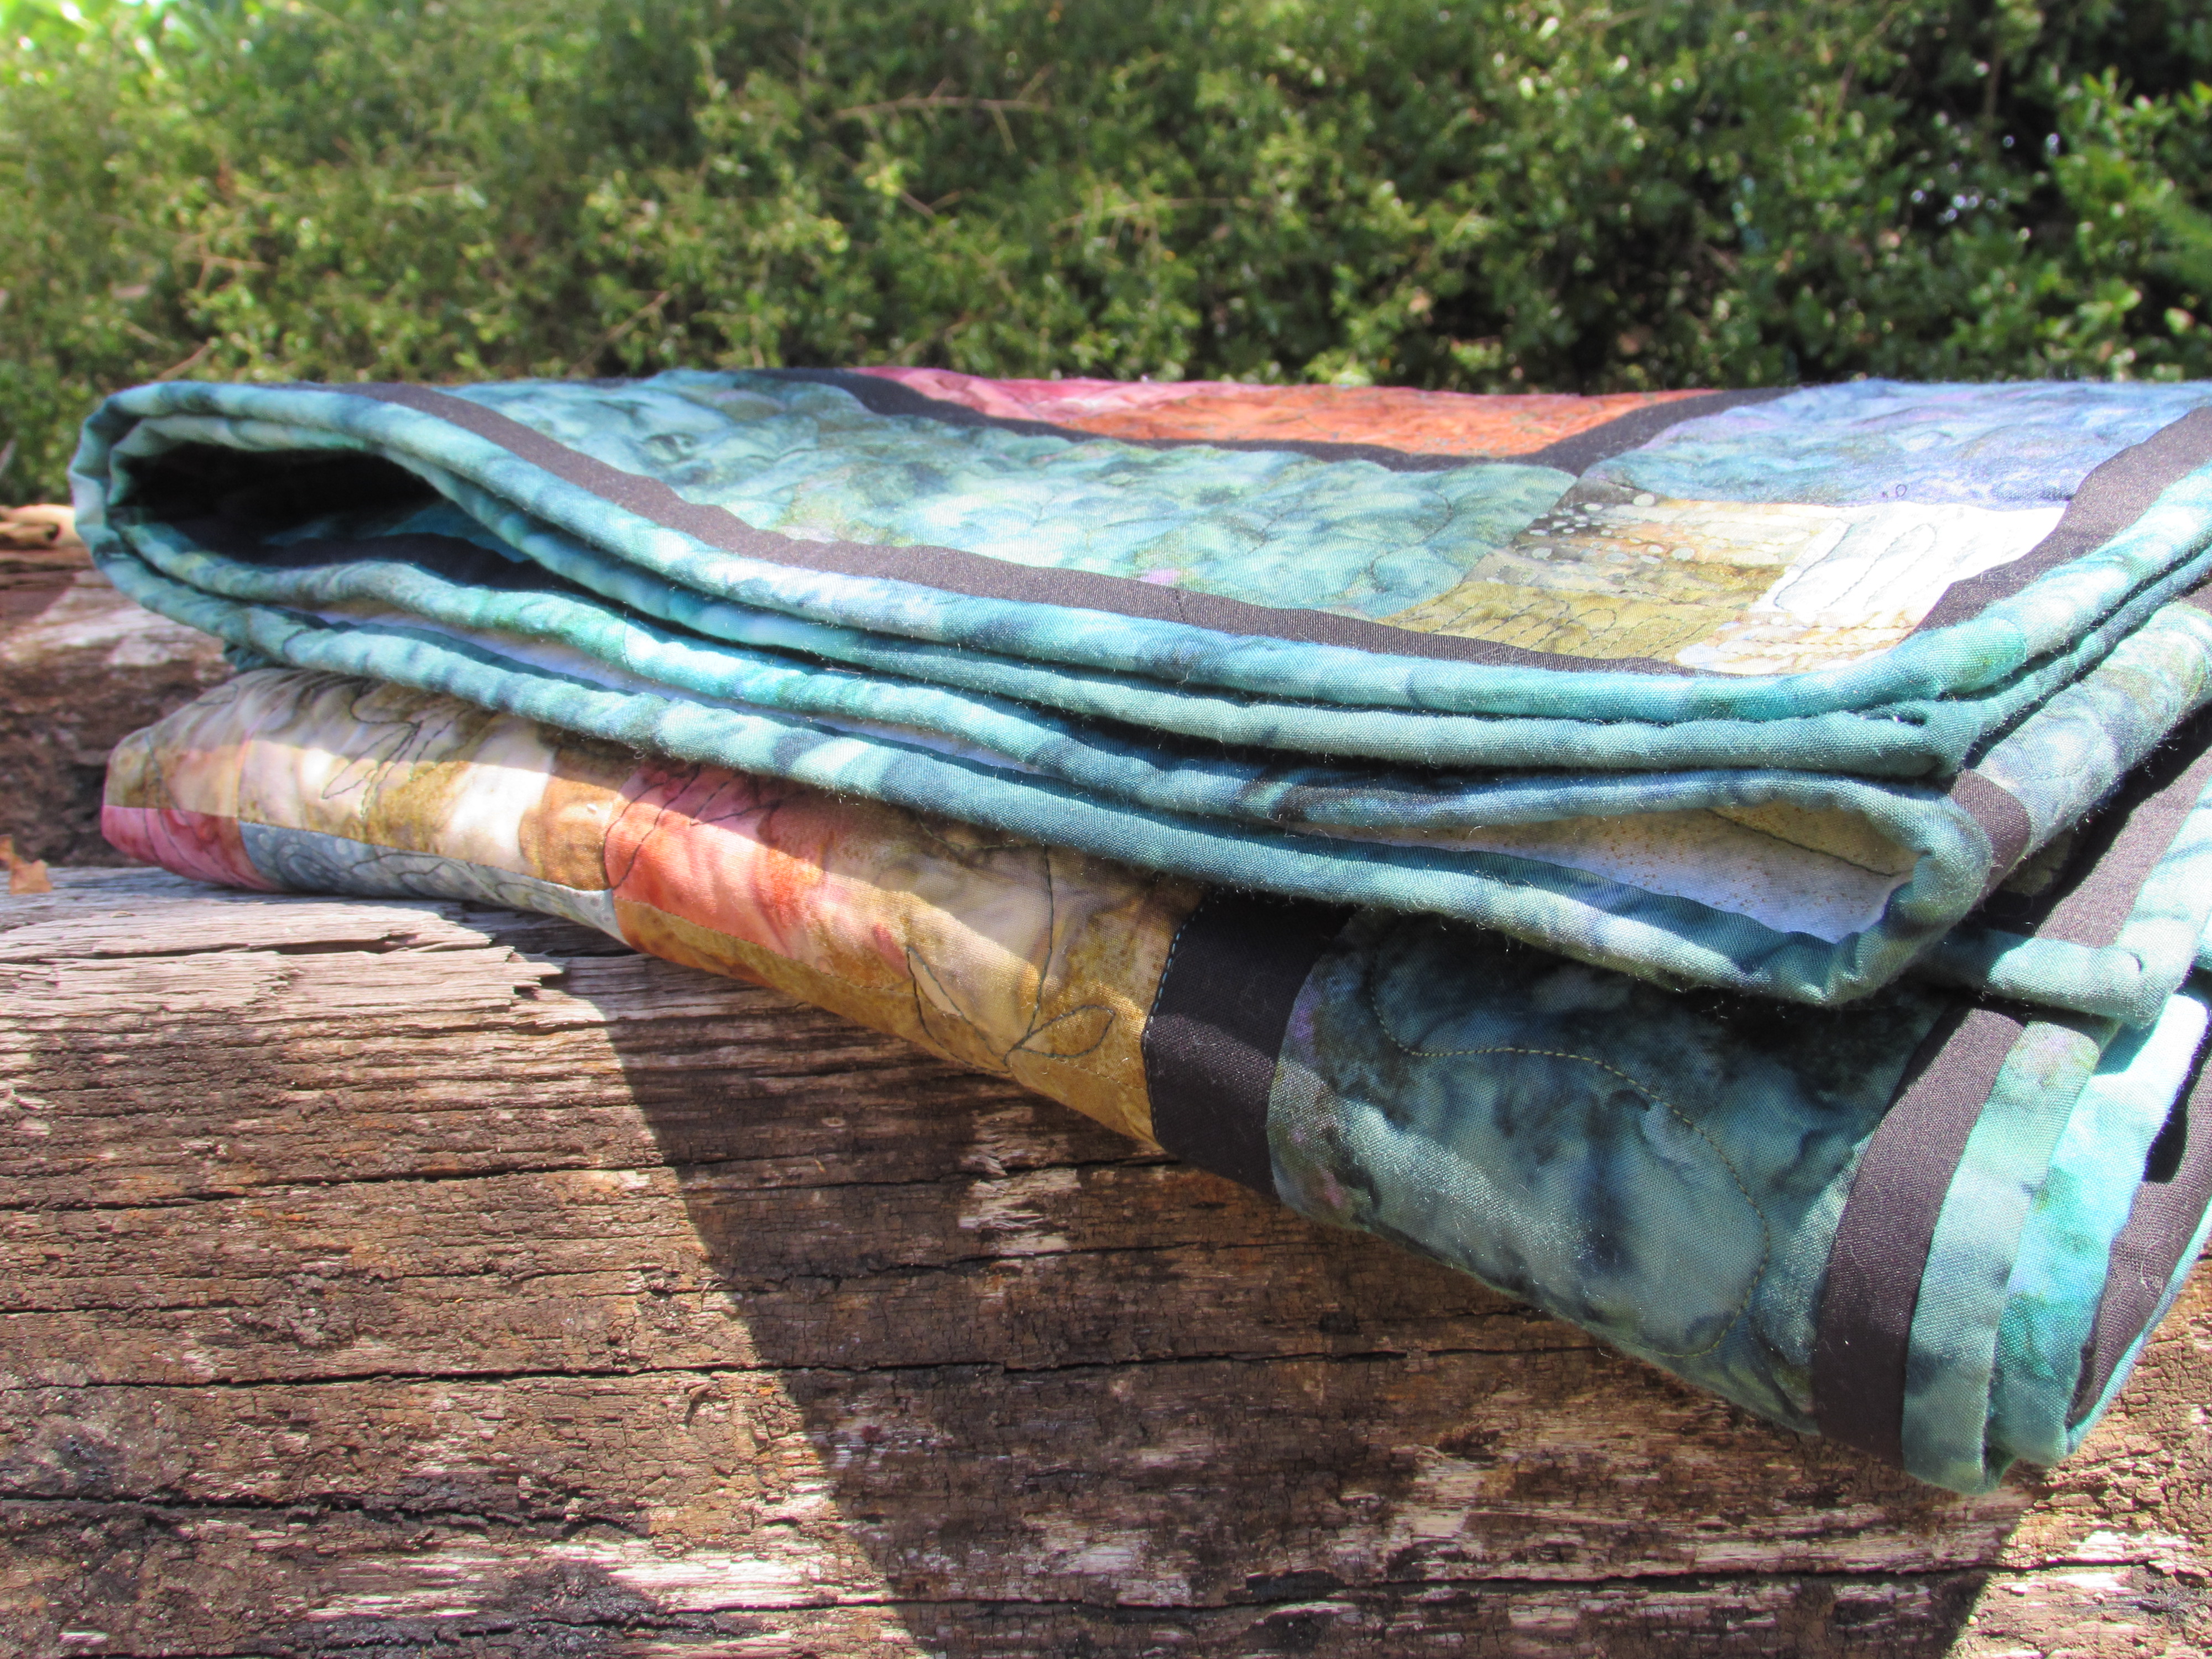
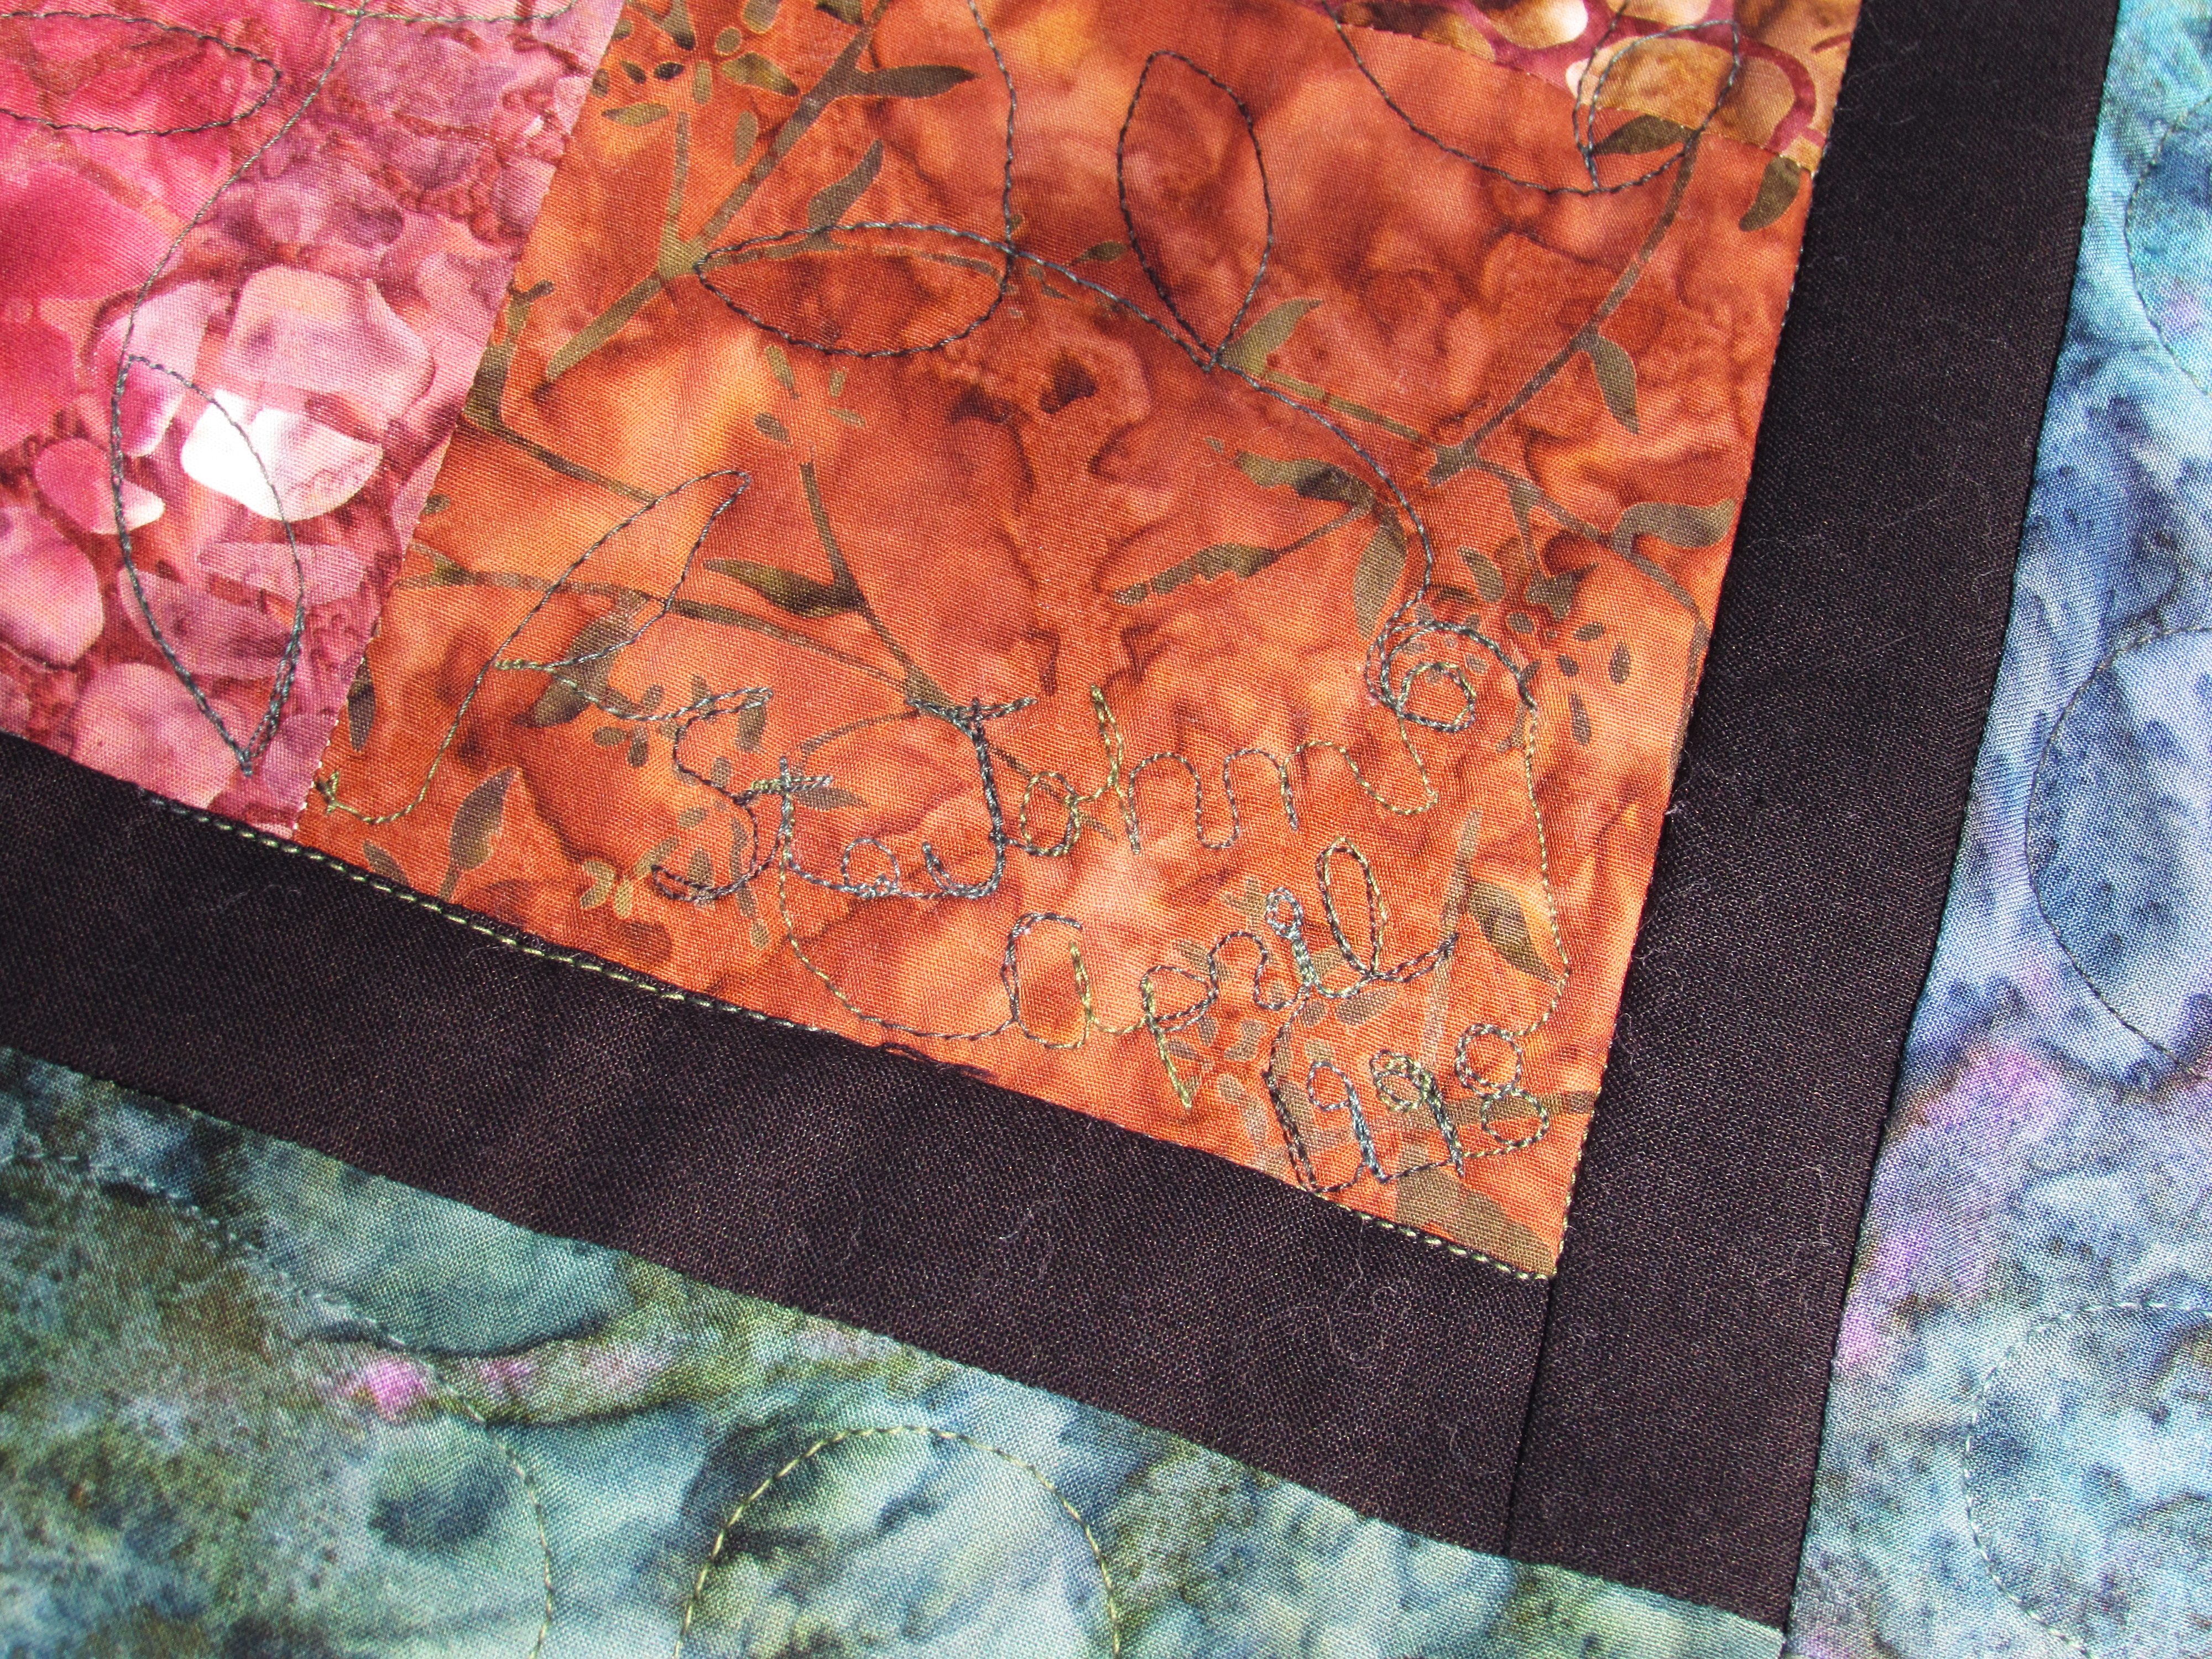
The binding is, as usual, one of my favorite parts. I used the honeymoon batik for the border and also for the binding. To add some depth, I attached a black flange to the perimeter of the quilt before binding the quilt. I love the ‘something extra’ that this flange adds to the quilt.
To honor our honeymoon, I tried stitching St. John as well as April, 1998 on a corner of the quilt. Kind of difficult to see but it was a good addition.
When I was binding it, I came upon my two ends that needed to be joined and sighed my heavy, here-we-go sigh. I hate attaching the tails of the binding. This time I looked to Rita over at Red Pepper Quilts. On the off chance that there is someone who hasn’t heard of Rita, she is an amazing quilter who has the most amazing sense of color. Her quilts are bright, happy and so vivid. Truly amazing. If you haven’t looked at her work, now is the time. She has numerous tutorials, several of which talk about binding. This is the one that I used. The result was good so I will refer back to her measurements next time.
I can check this goal off of my 2015 list and move on to another one! I think the next goal I need to work on is some quilt restoration. I have two quilts to restore and I want to get one of them going soon.
Finally, remember the Allison Glass mini swap that I participated in? I blogged about the mini that I made here. There were a few comments asking me to post the mini that I received. Wow, I can’t wait to share it. It is gorgeous. I am so grateful to my partner for putting so much effort into this project!
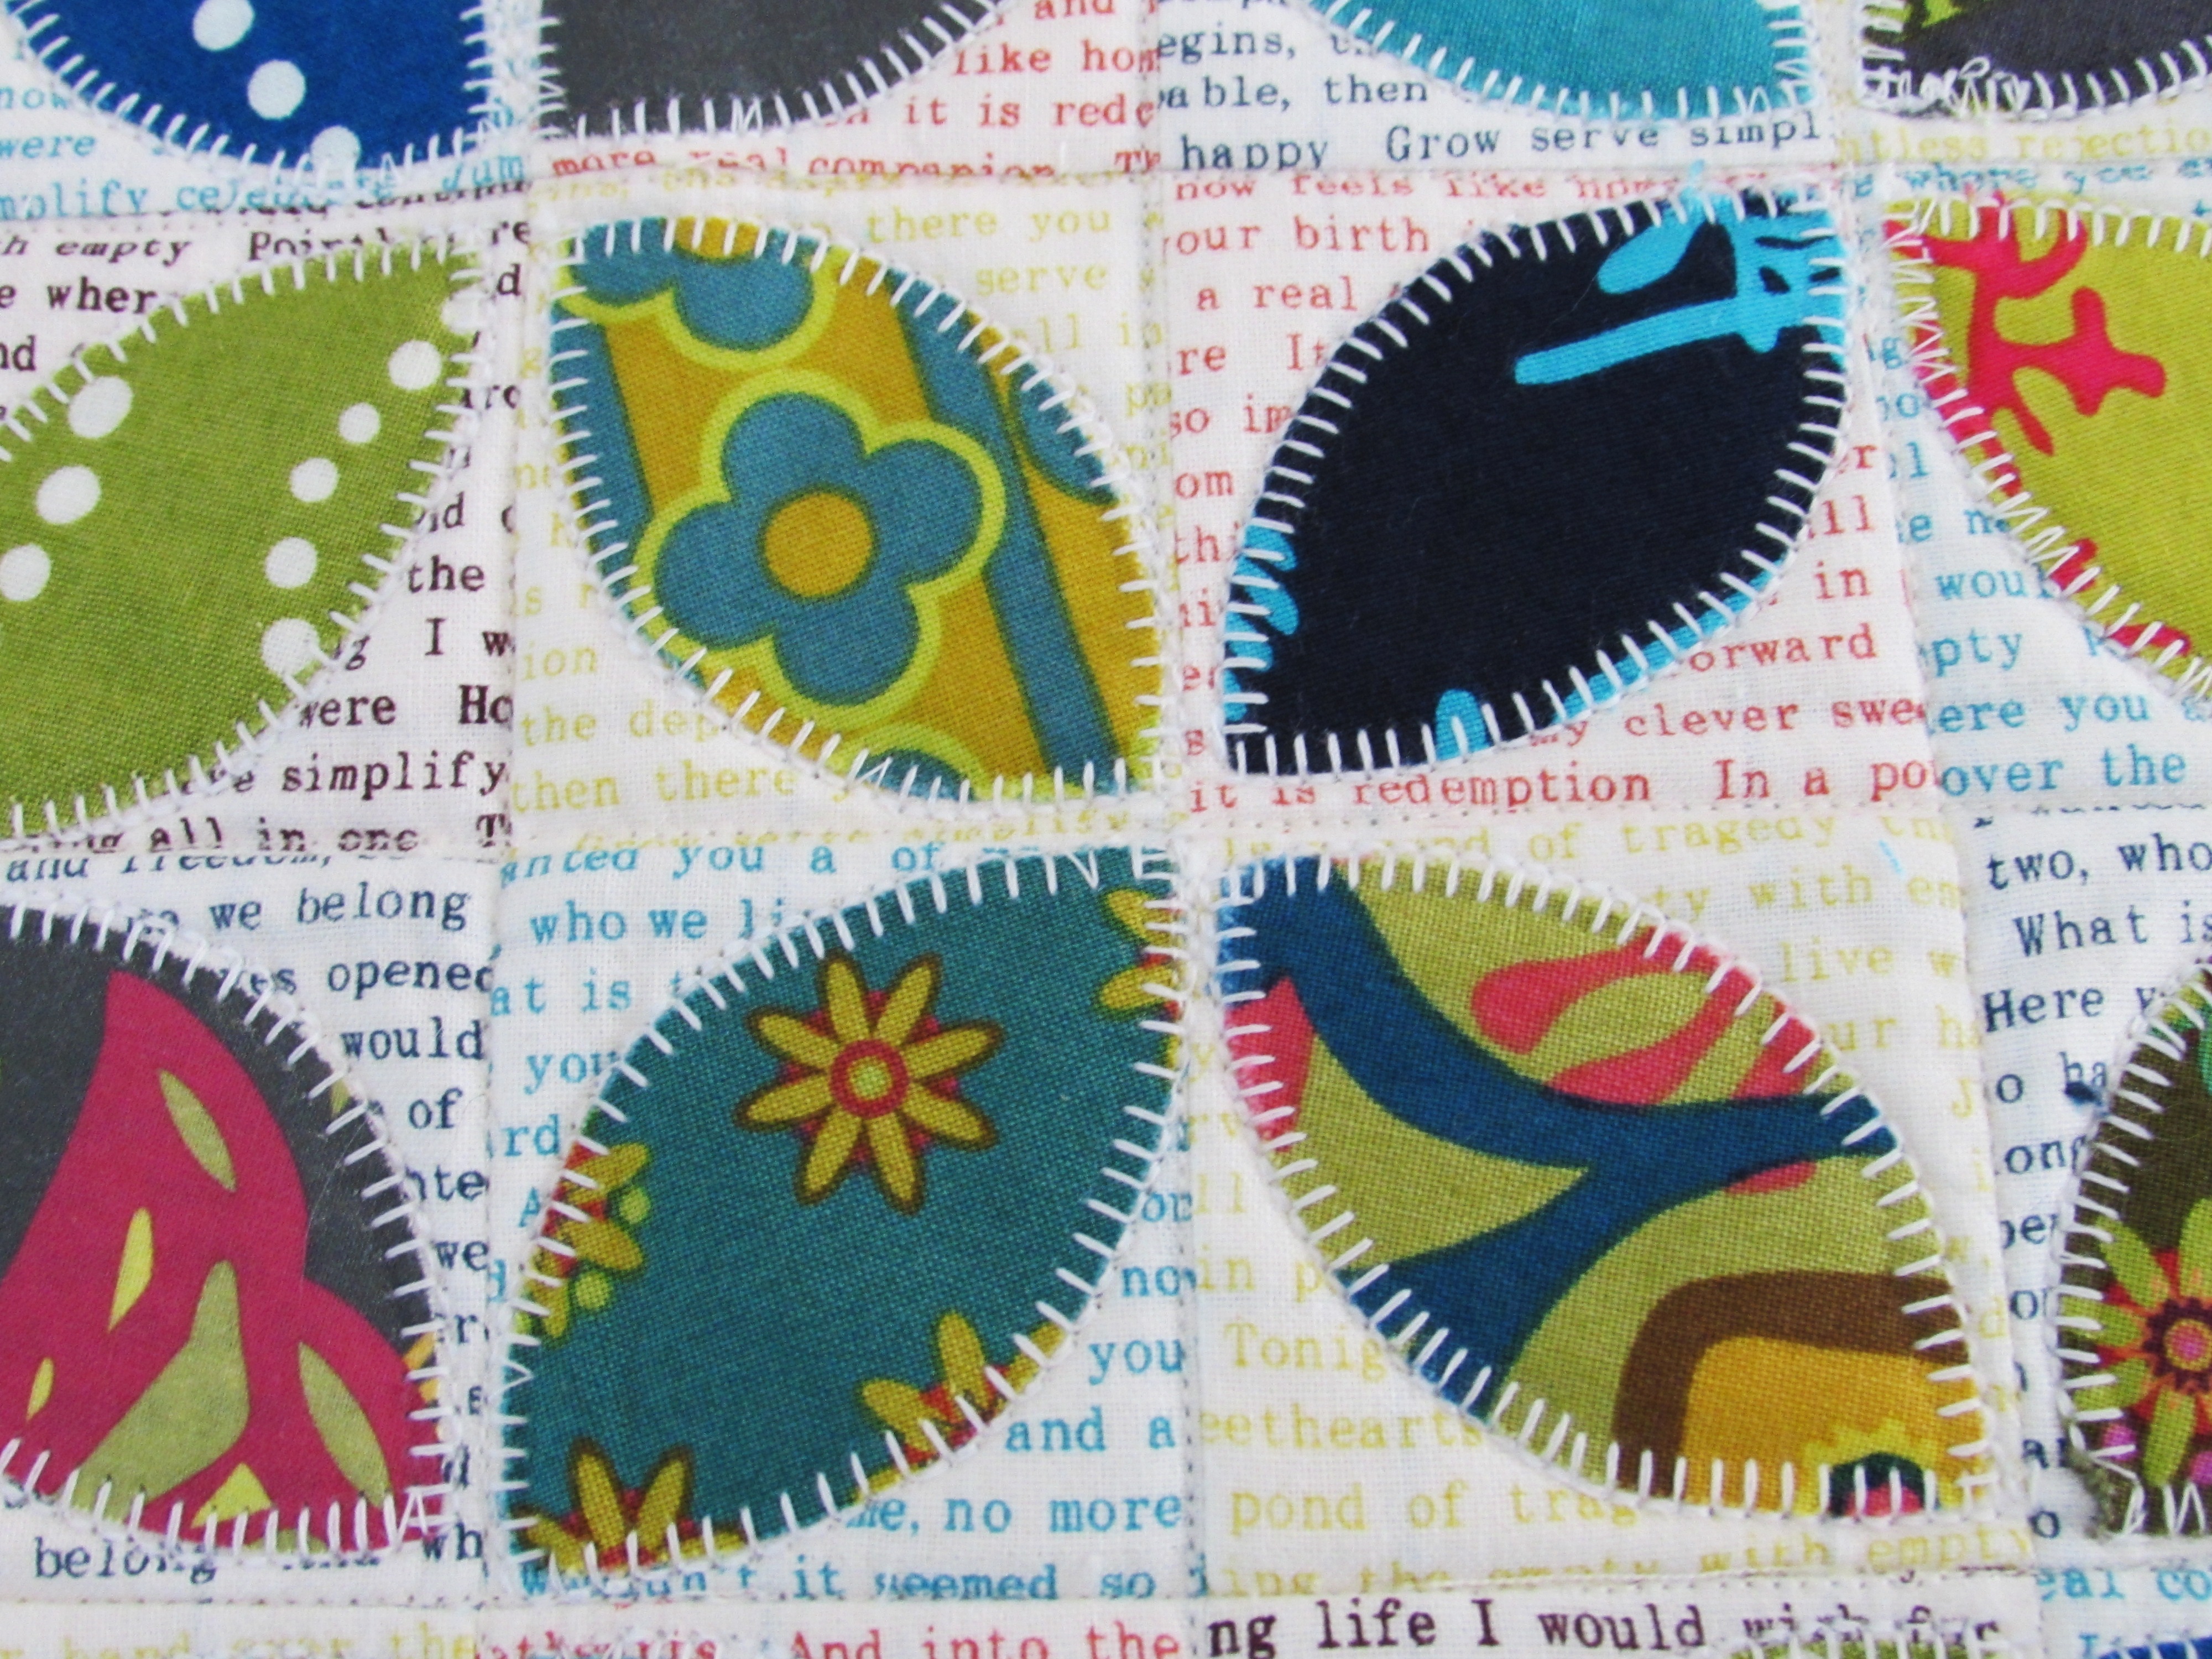
My partner outdid herself with this. I love the text print that was used as the background on each 2″ square. She appliqued the orange peels with a blanket stitch which was brilliant.
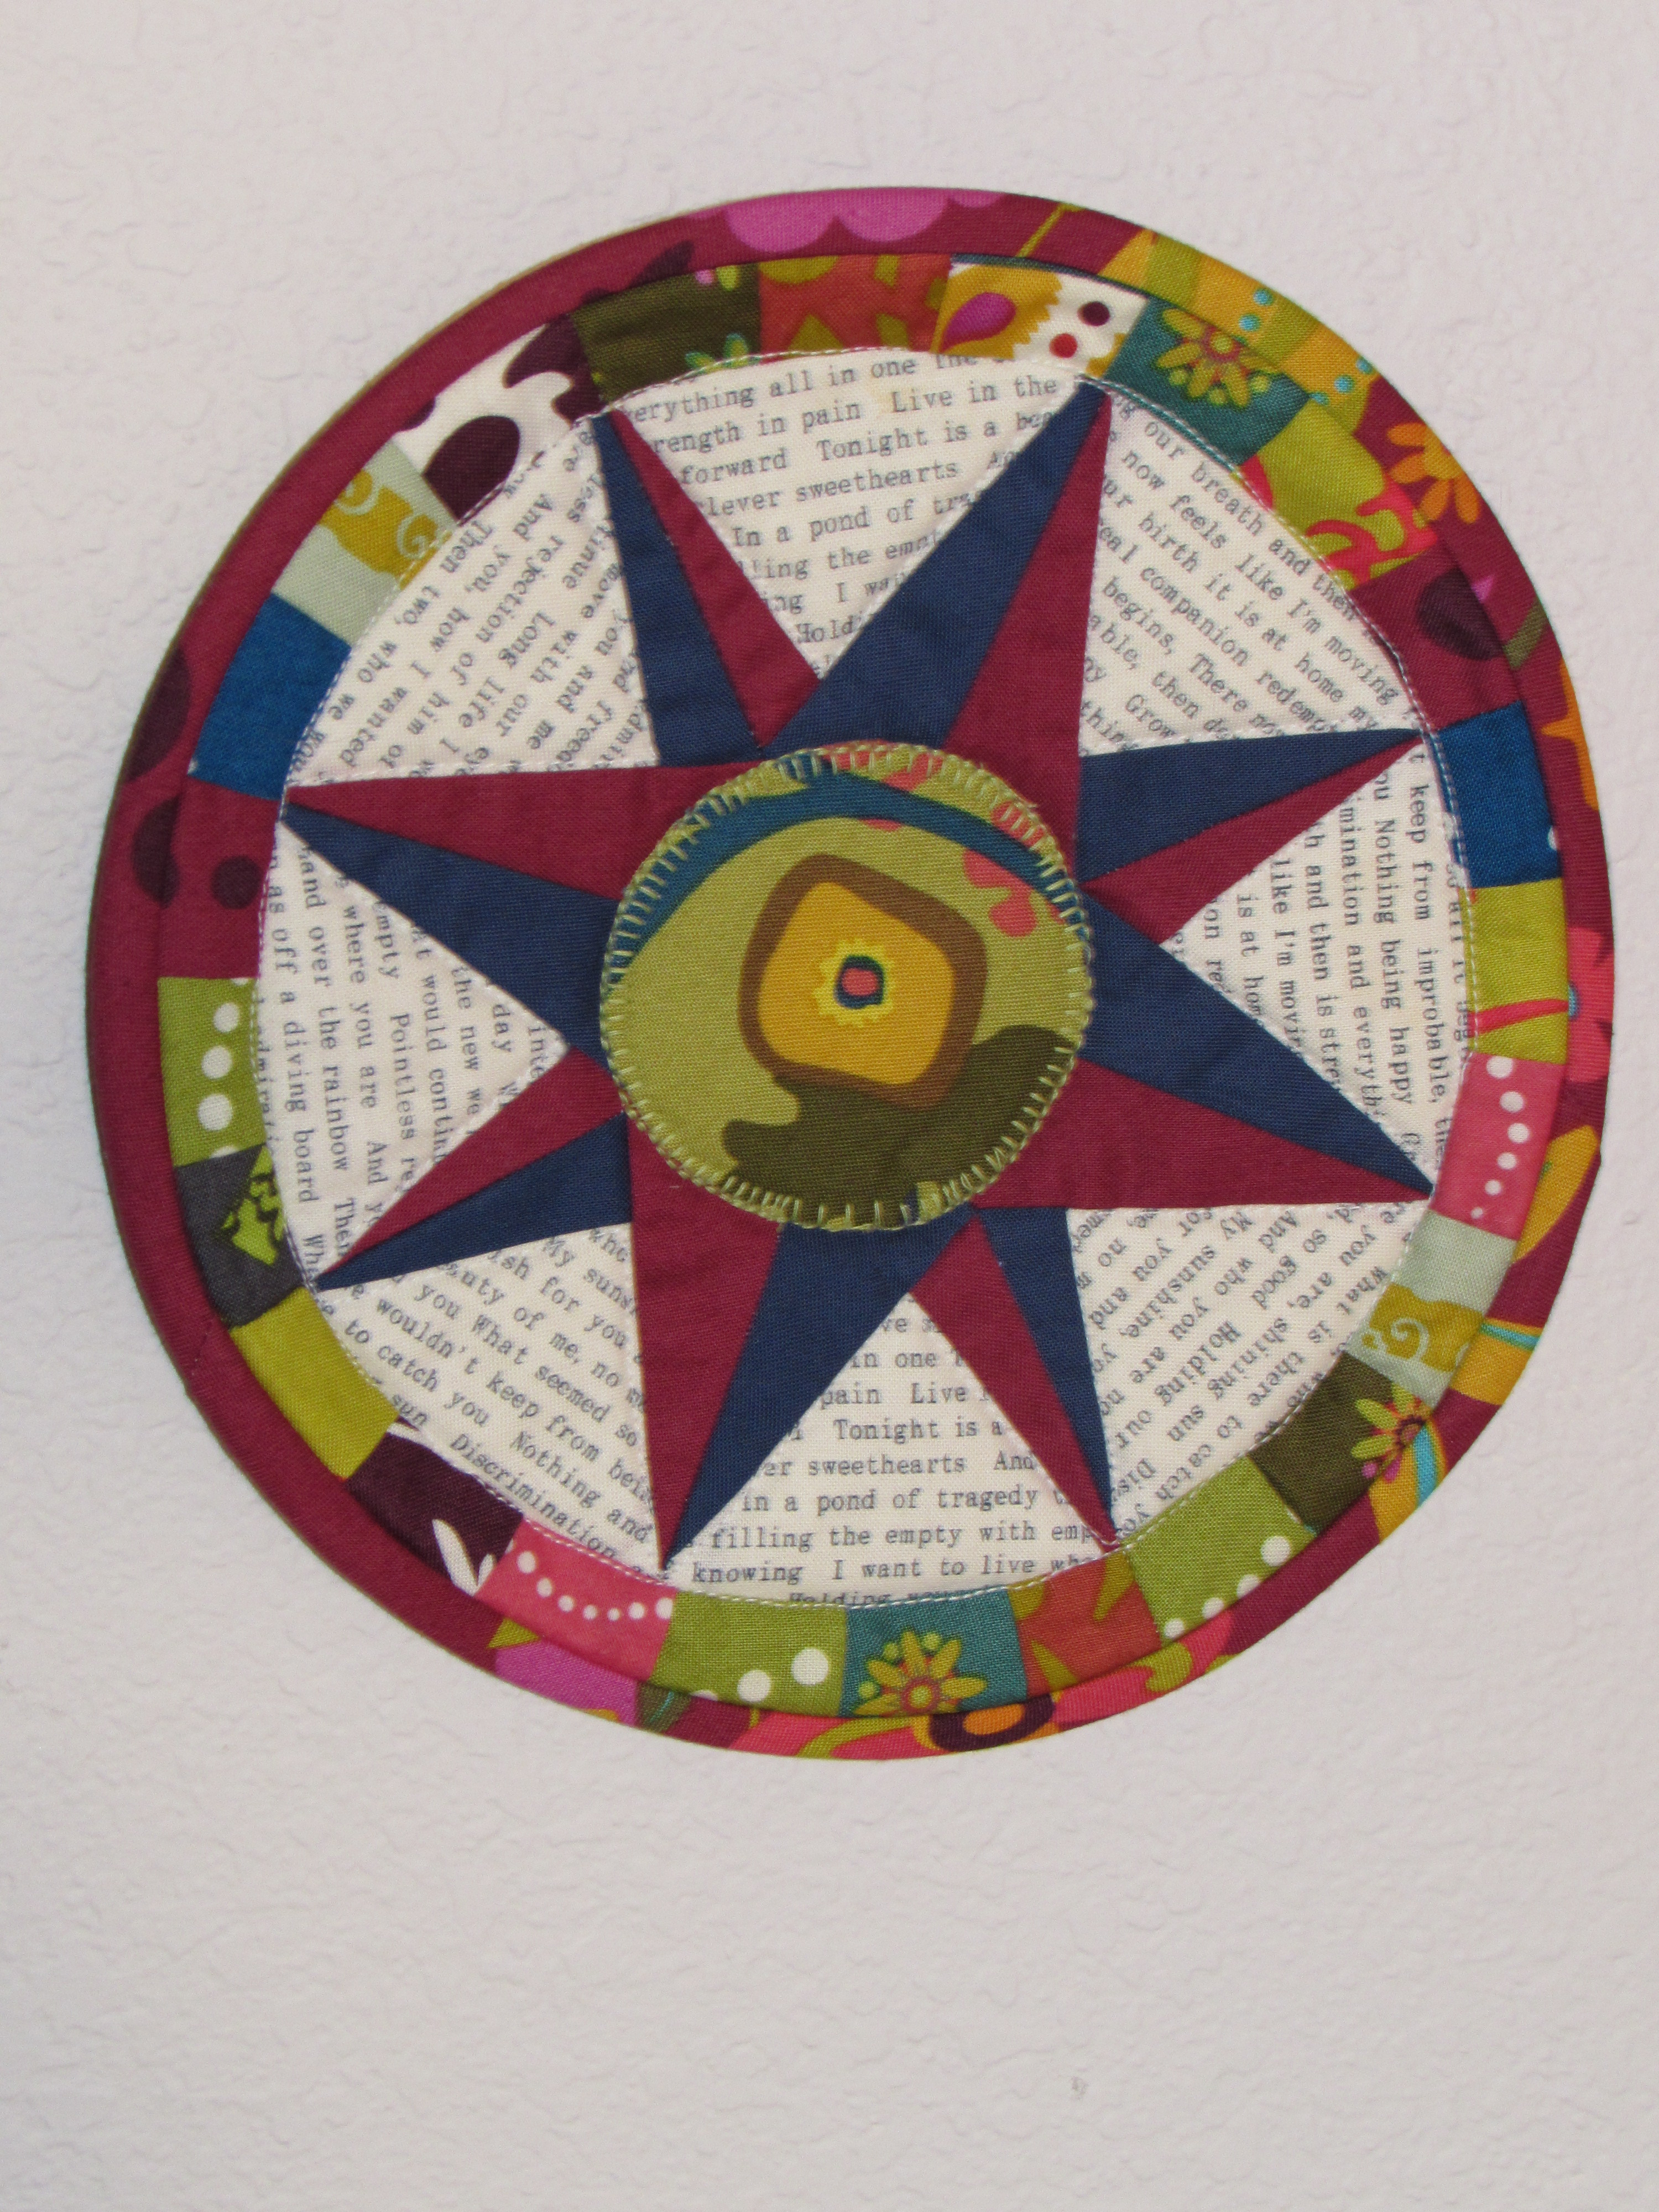
She also made this smaller mini. I think it is intended as a pot holder but I am hanging it on the wall. I don’t want it soaked with food splatter, which we all know would happen.
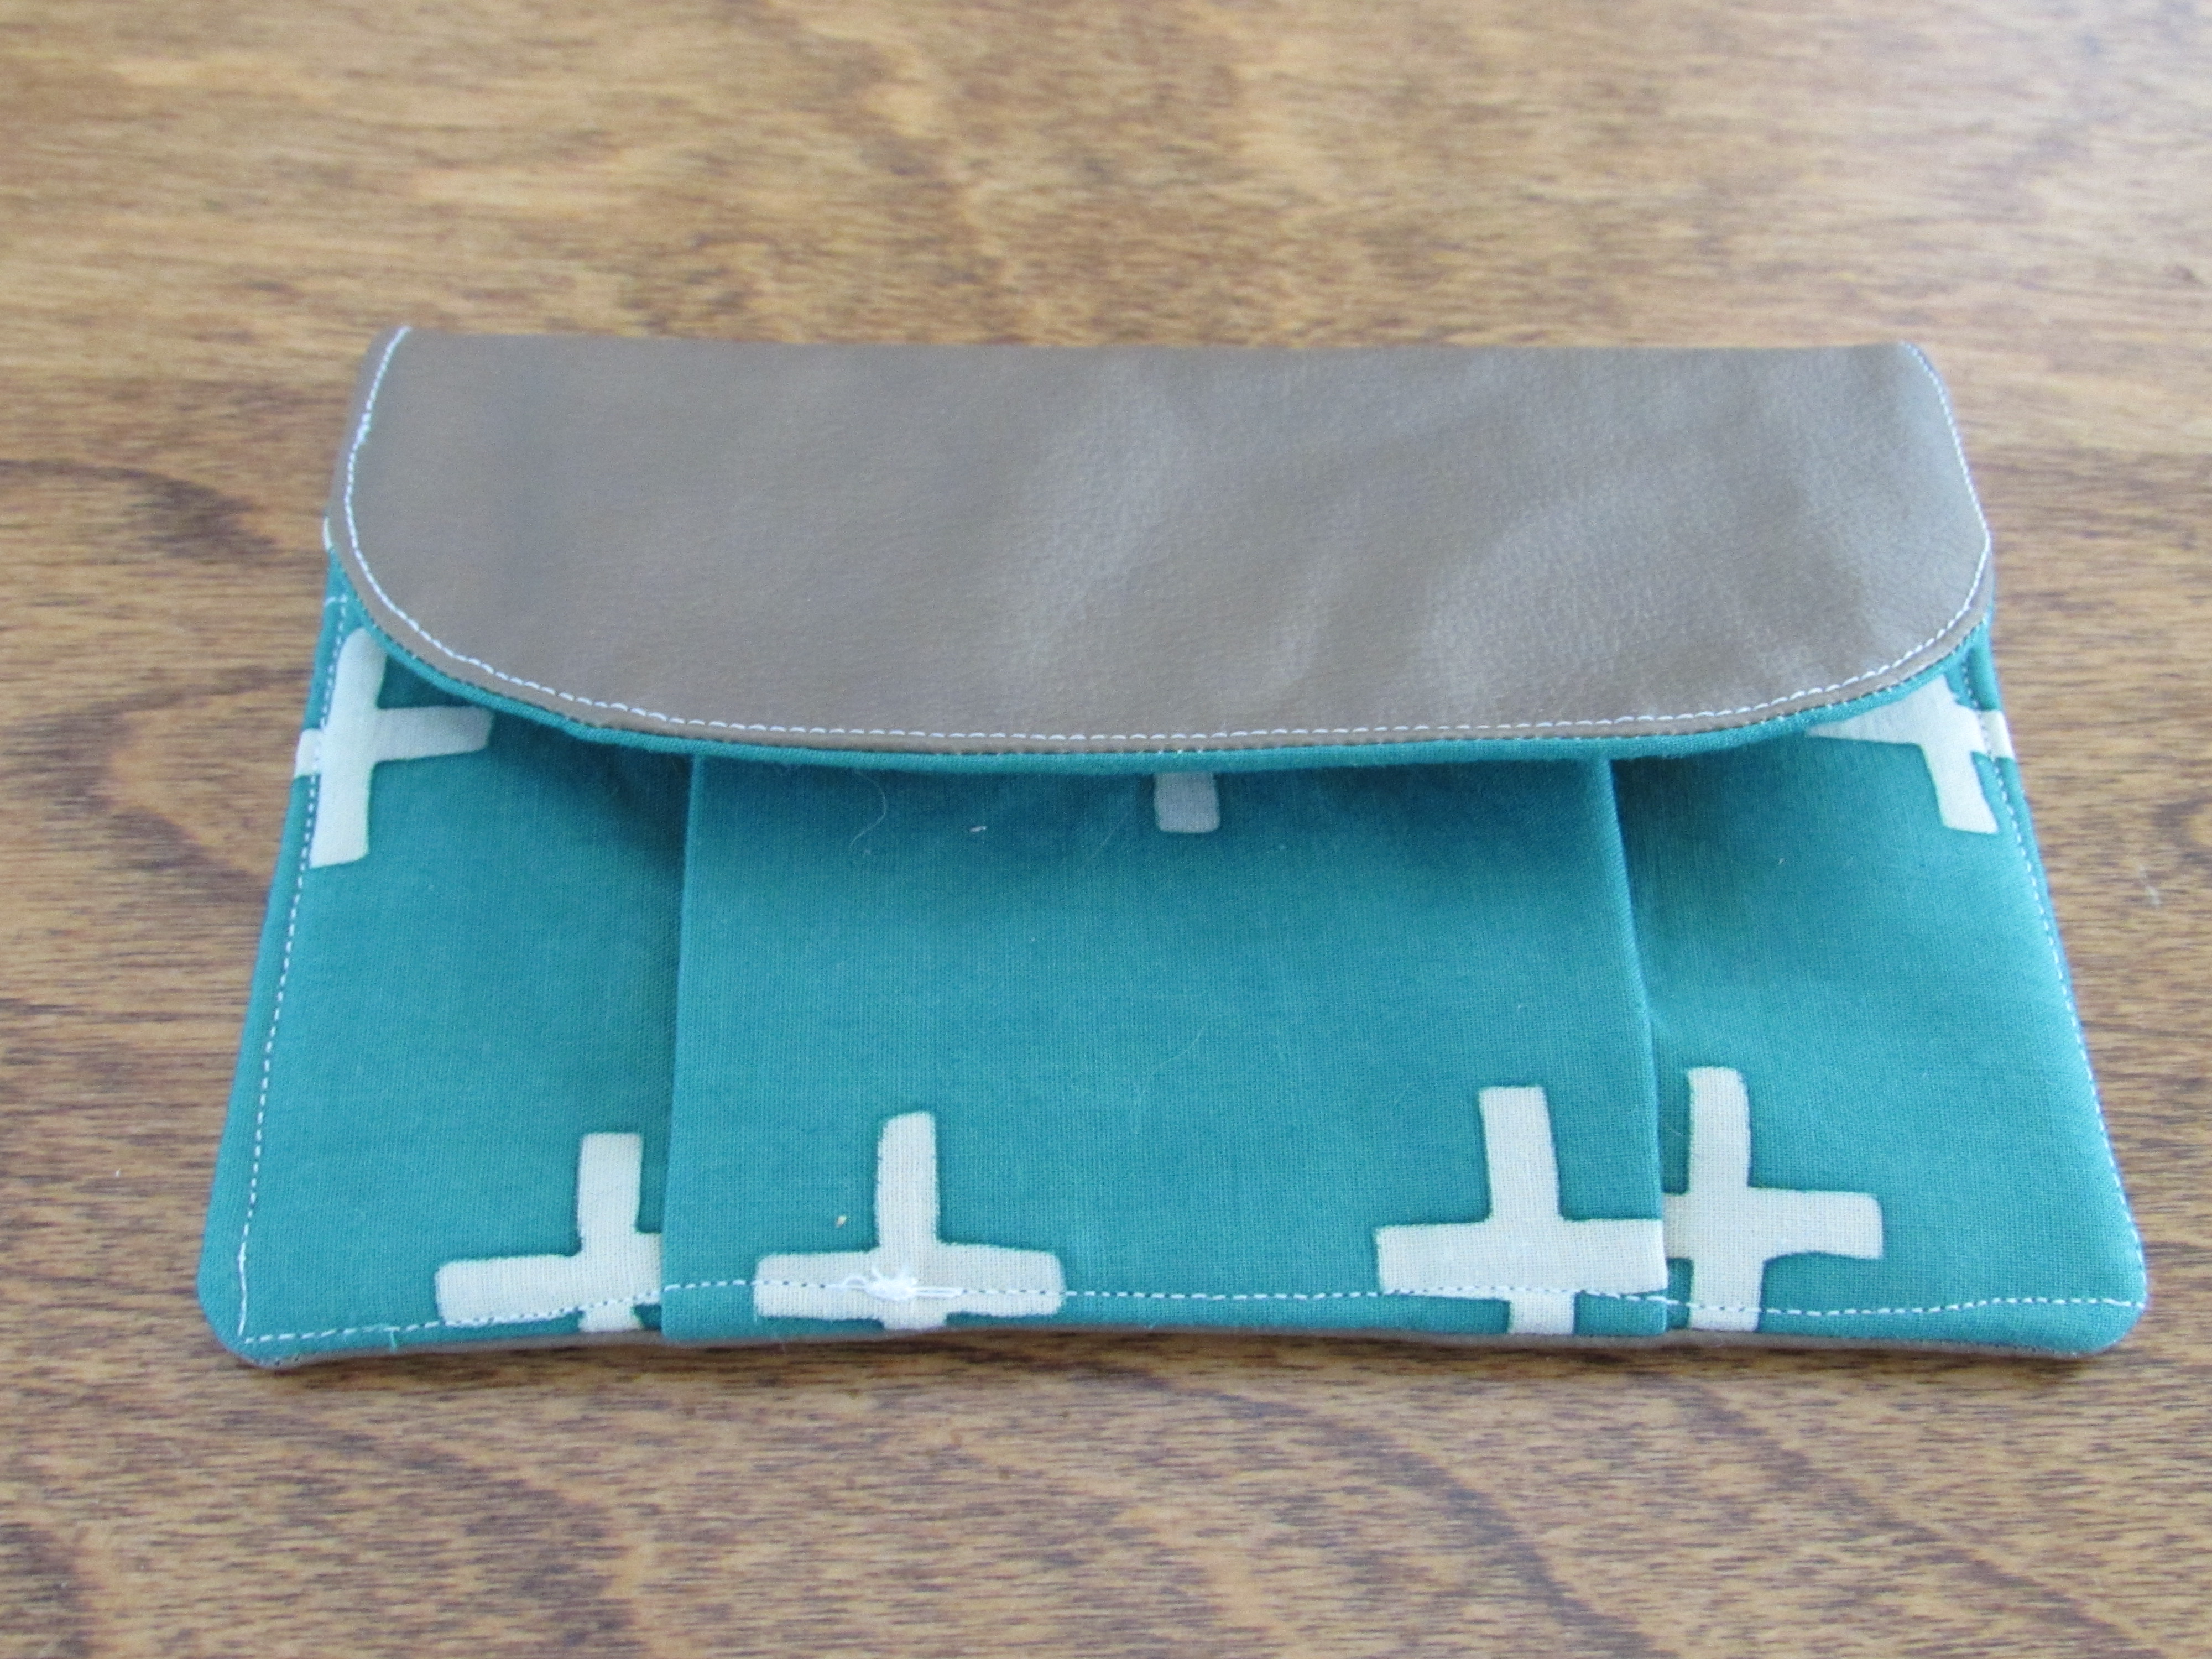
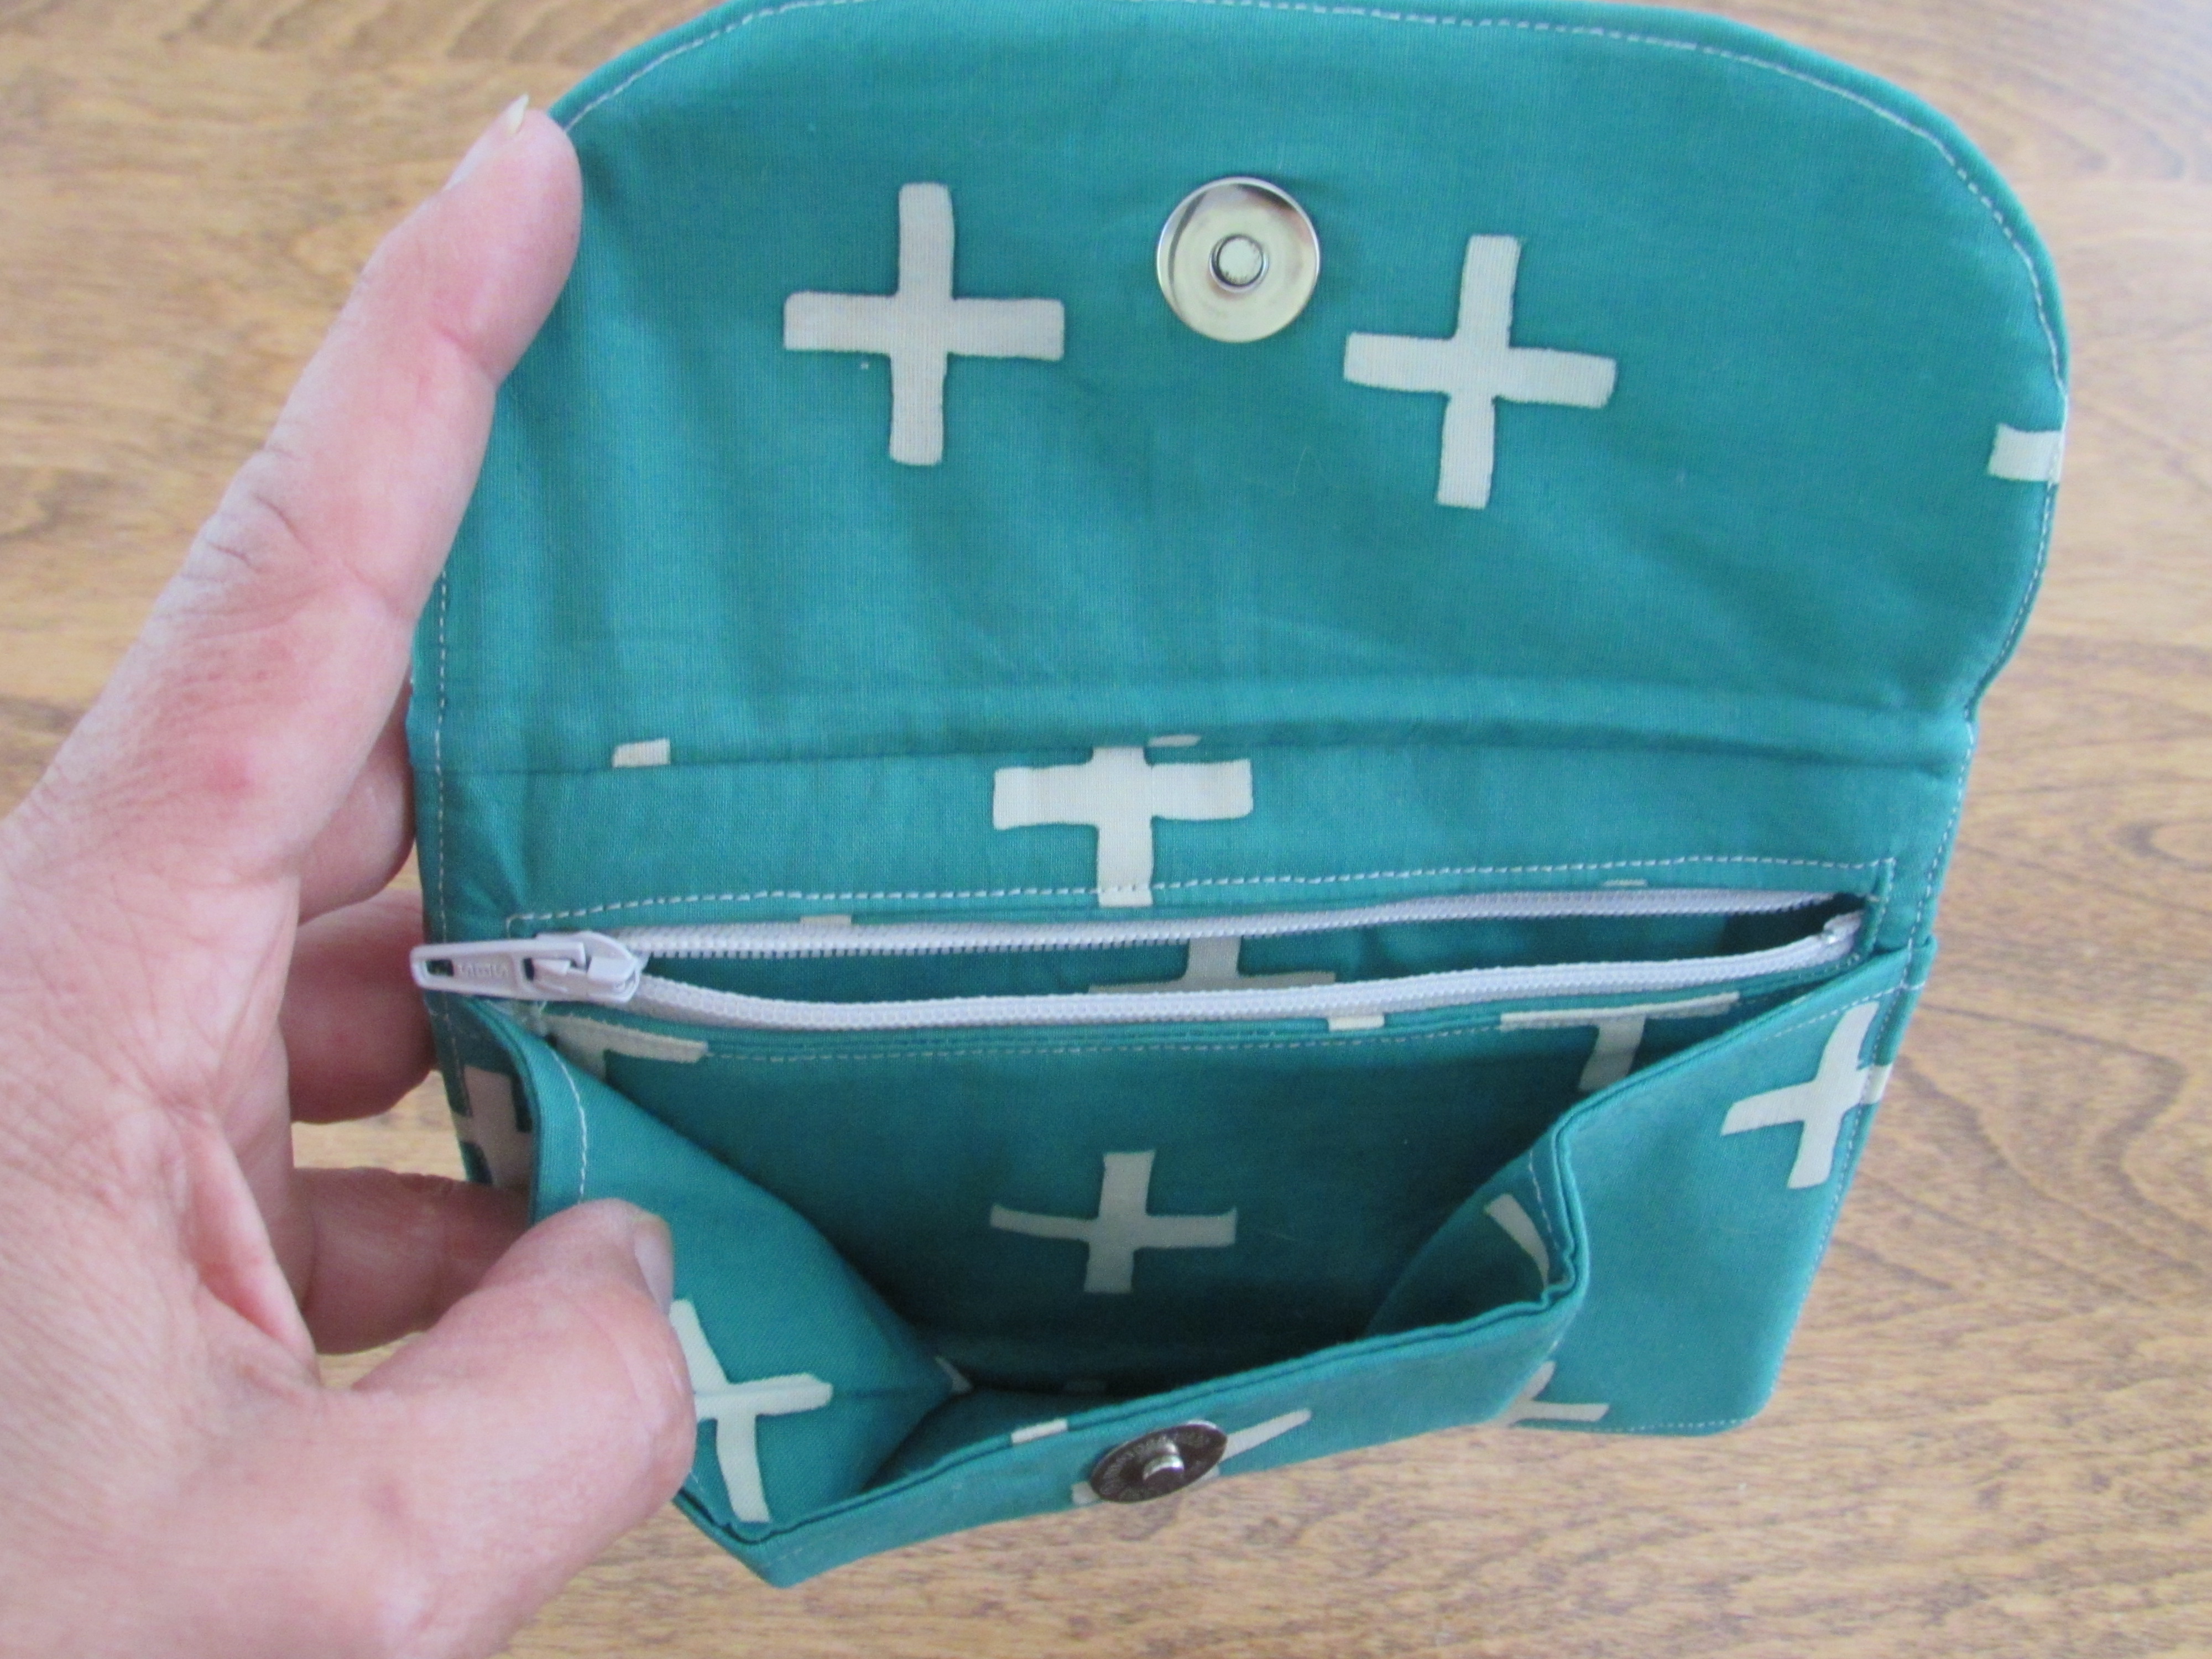
I also received this sweet wallet. Hand-made and so well done, it is lovely.
The swap was fun and I am thankful that I gave it a try as it pushed me quite far out of my comfort zone. Also, I am truly grateful for the work my partner put into the items I received. That being said, I am not sure I will do another one for a while. I could see participating in one each year. They are quite time-consuming and it set my nerves on edge trying to think of what my partner would want, based on the few hints we are given. The process is a good way to get to know other makers though. It is really a big deal on Instagram and there is a swap for just about anything crafty.
Hope you all have something fun planned for the upcoming weektend.
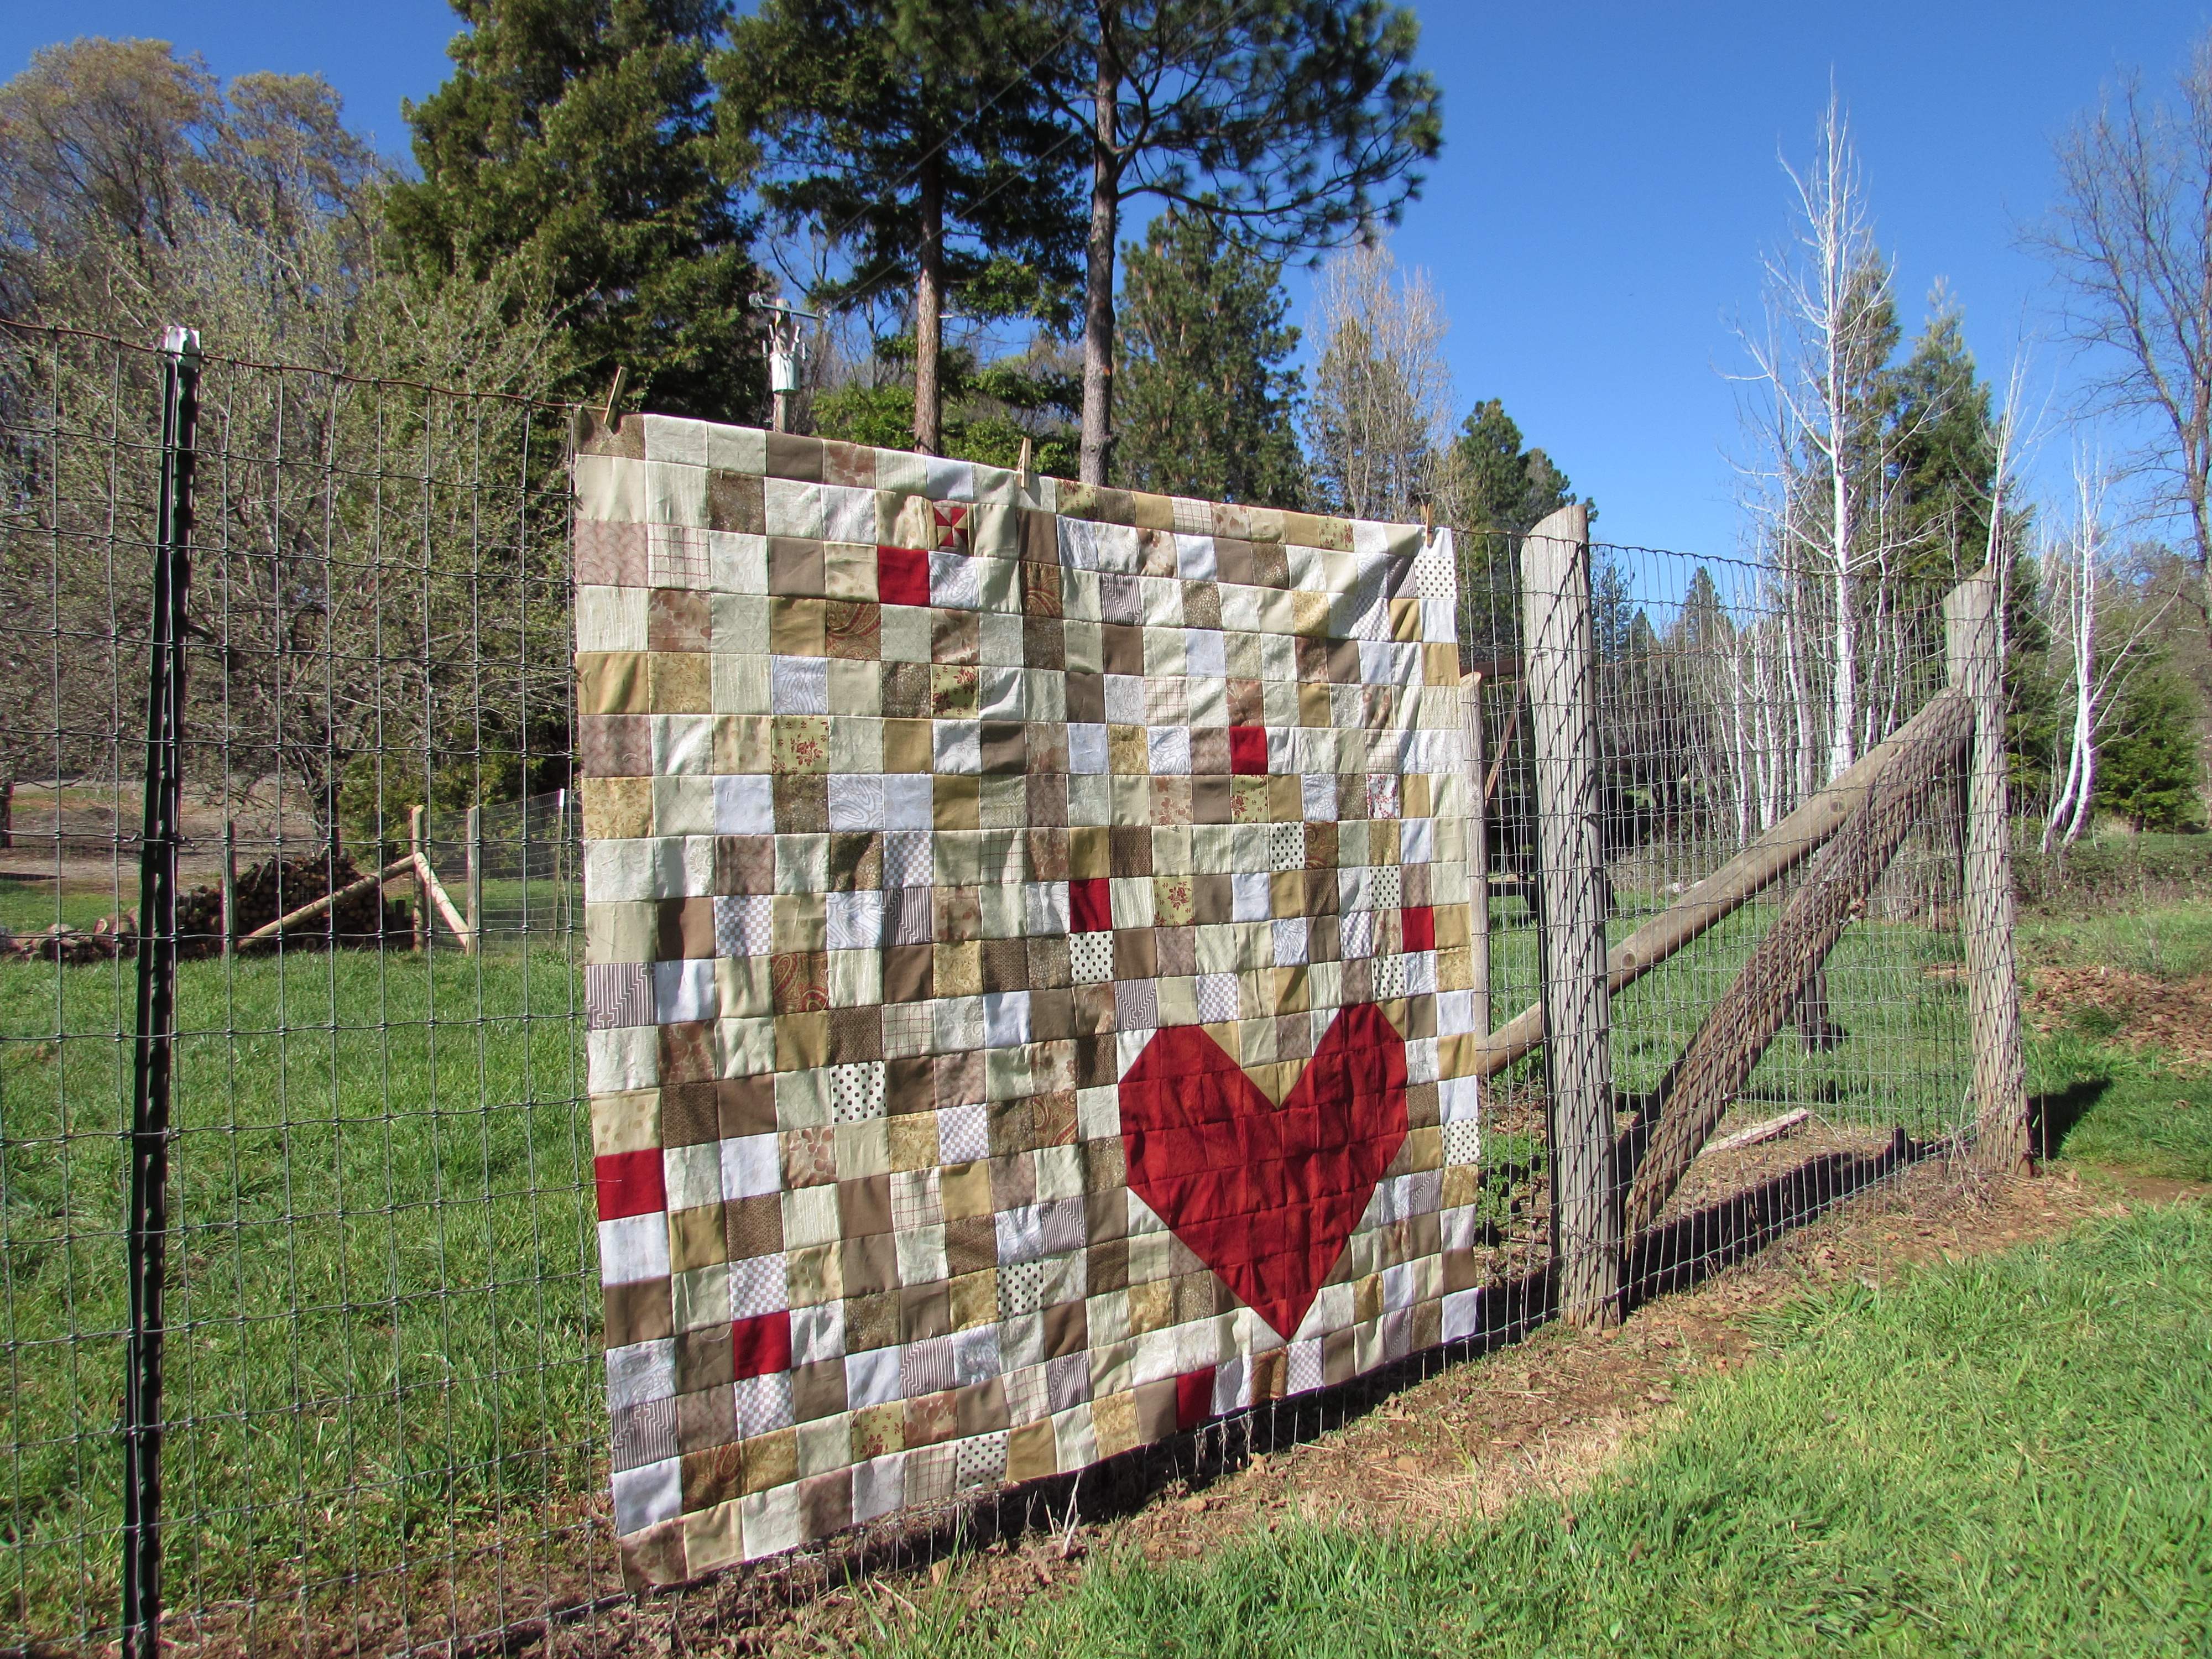
This week has started out with a productive bang. Yesterday I completed my neutrals/red heart quilt top. Today I finished up our taxes (never a fun task). Wow. If I don’t do anything else this week, I’m ok with that!
I got on a roll with the neutrals quilt and it all came together so quickly.
The fence wasn’t quite tall enough to photograph the whole thing but this is most of it. Pretend I ironed it – the wrinkles are really showing in these pictures!
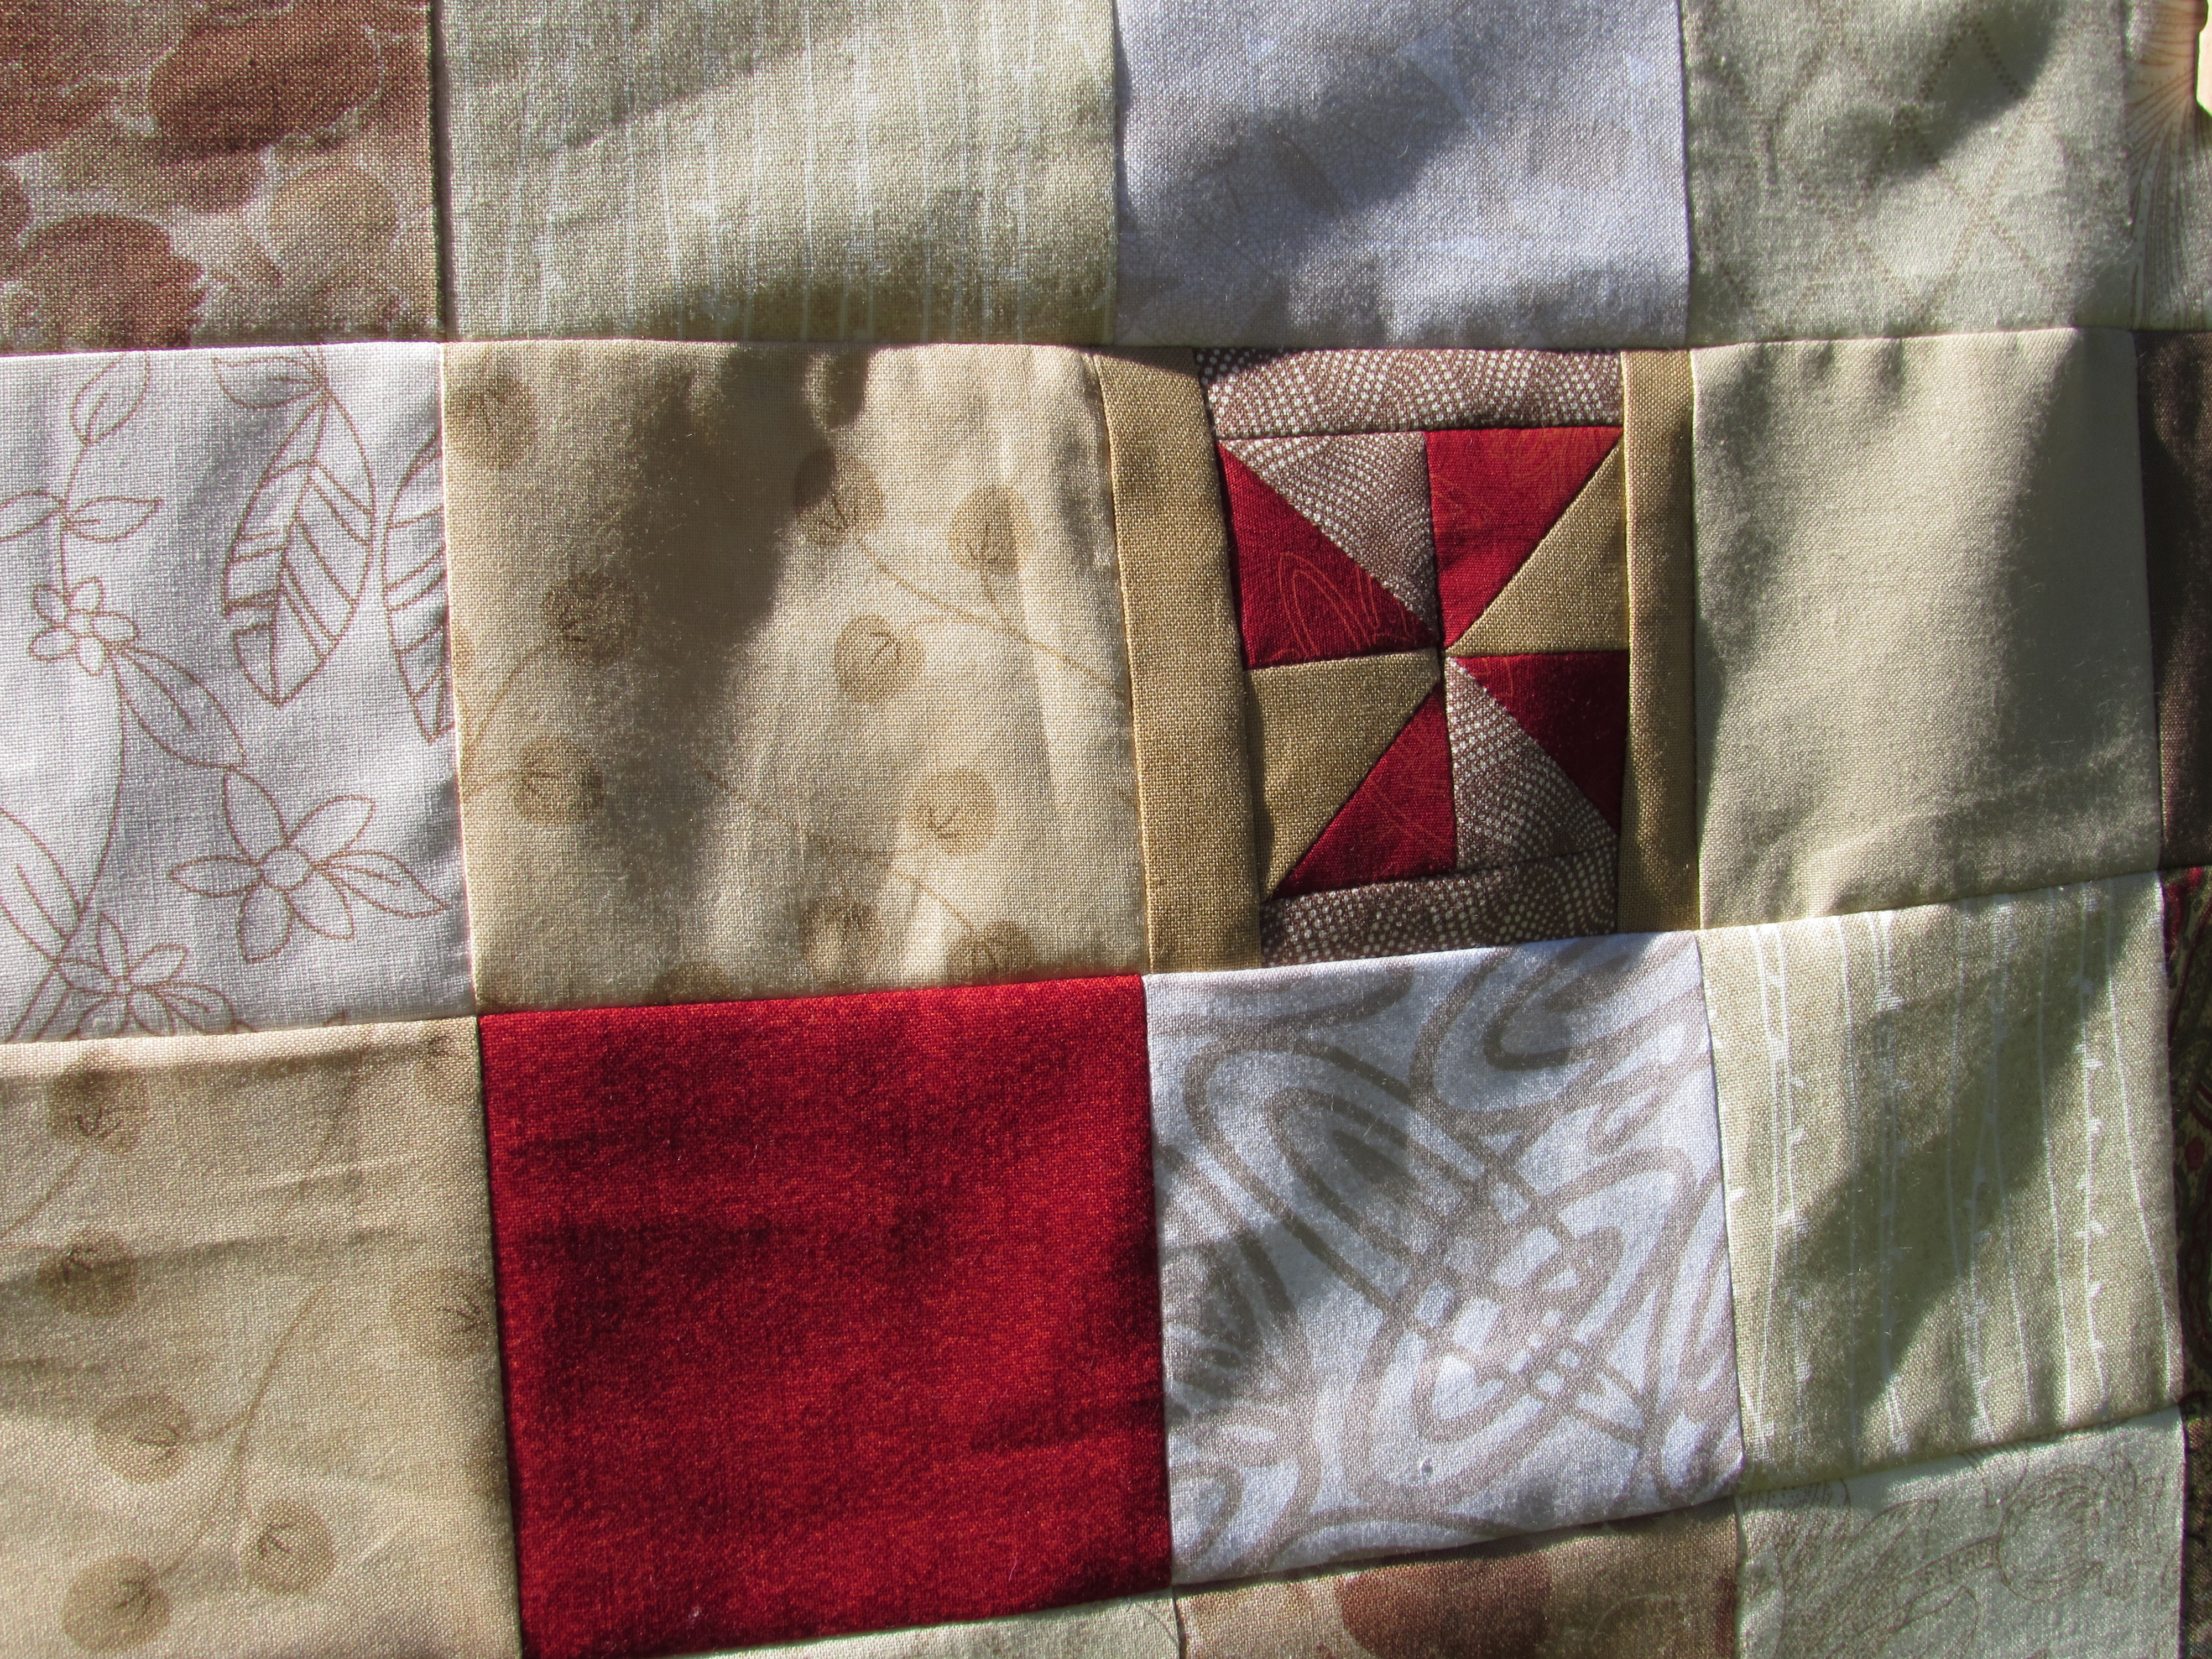
I pieced one little random block. When I was trimming the HST’s to be used in making the big heart, I had little bits and pieces leftover. I used a few of them to make this little guy.
Tomorrow I will get the backing assembled and pin baste the layers together. I haven’t quite decided how to quilt it. I know I want to use straight line quilting but not positive of the pattern. Also thinking about quilting the heart separately or different somehow so it stands out more.
Making good progress on my March goal! Also got started on the yellow scrappy blocks for RSC15 and they are going to be adorable. They are a double star block – finished the first of ten blocks today . At least all of the pieces are cut though so they will go together quickly.
Linking to Sew Cute Tuesday, Linky Tuesday and Let’s Bee Social. Links to all of these great sites are located at the top of this page under Link Ups.
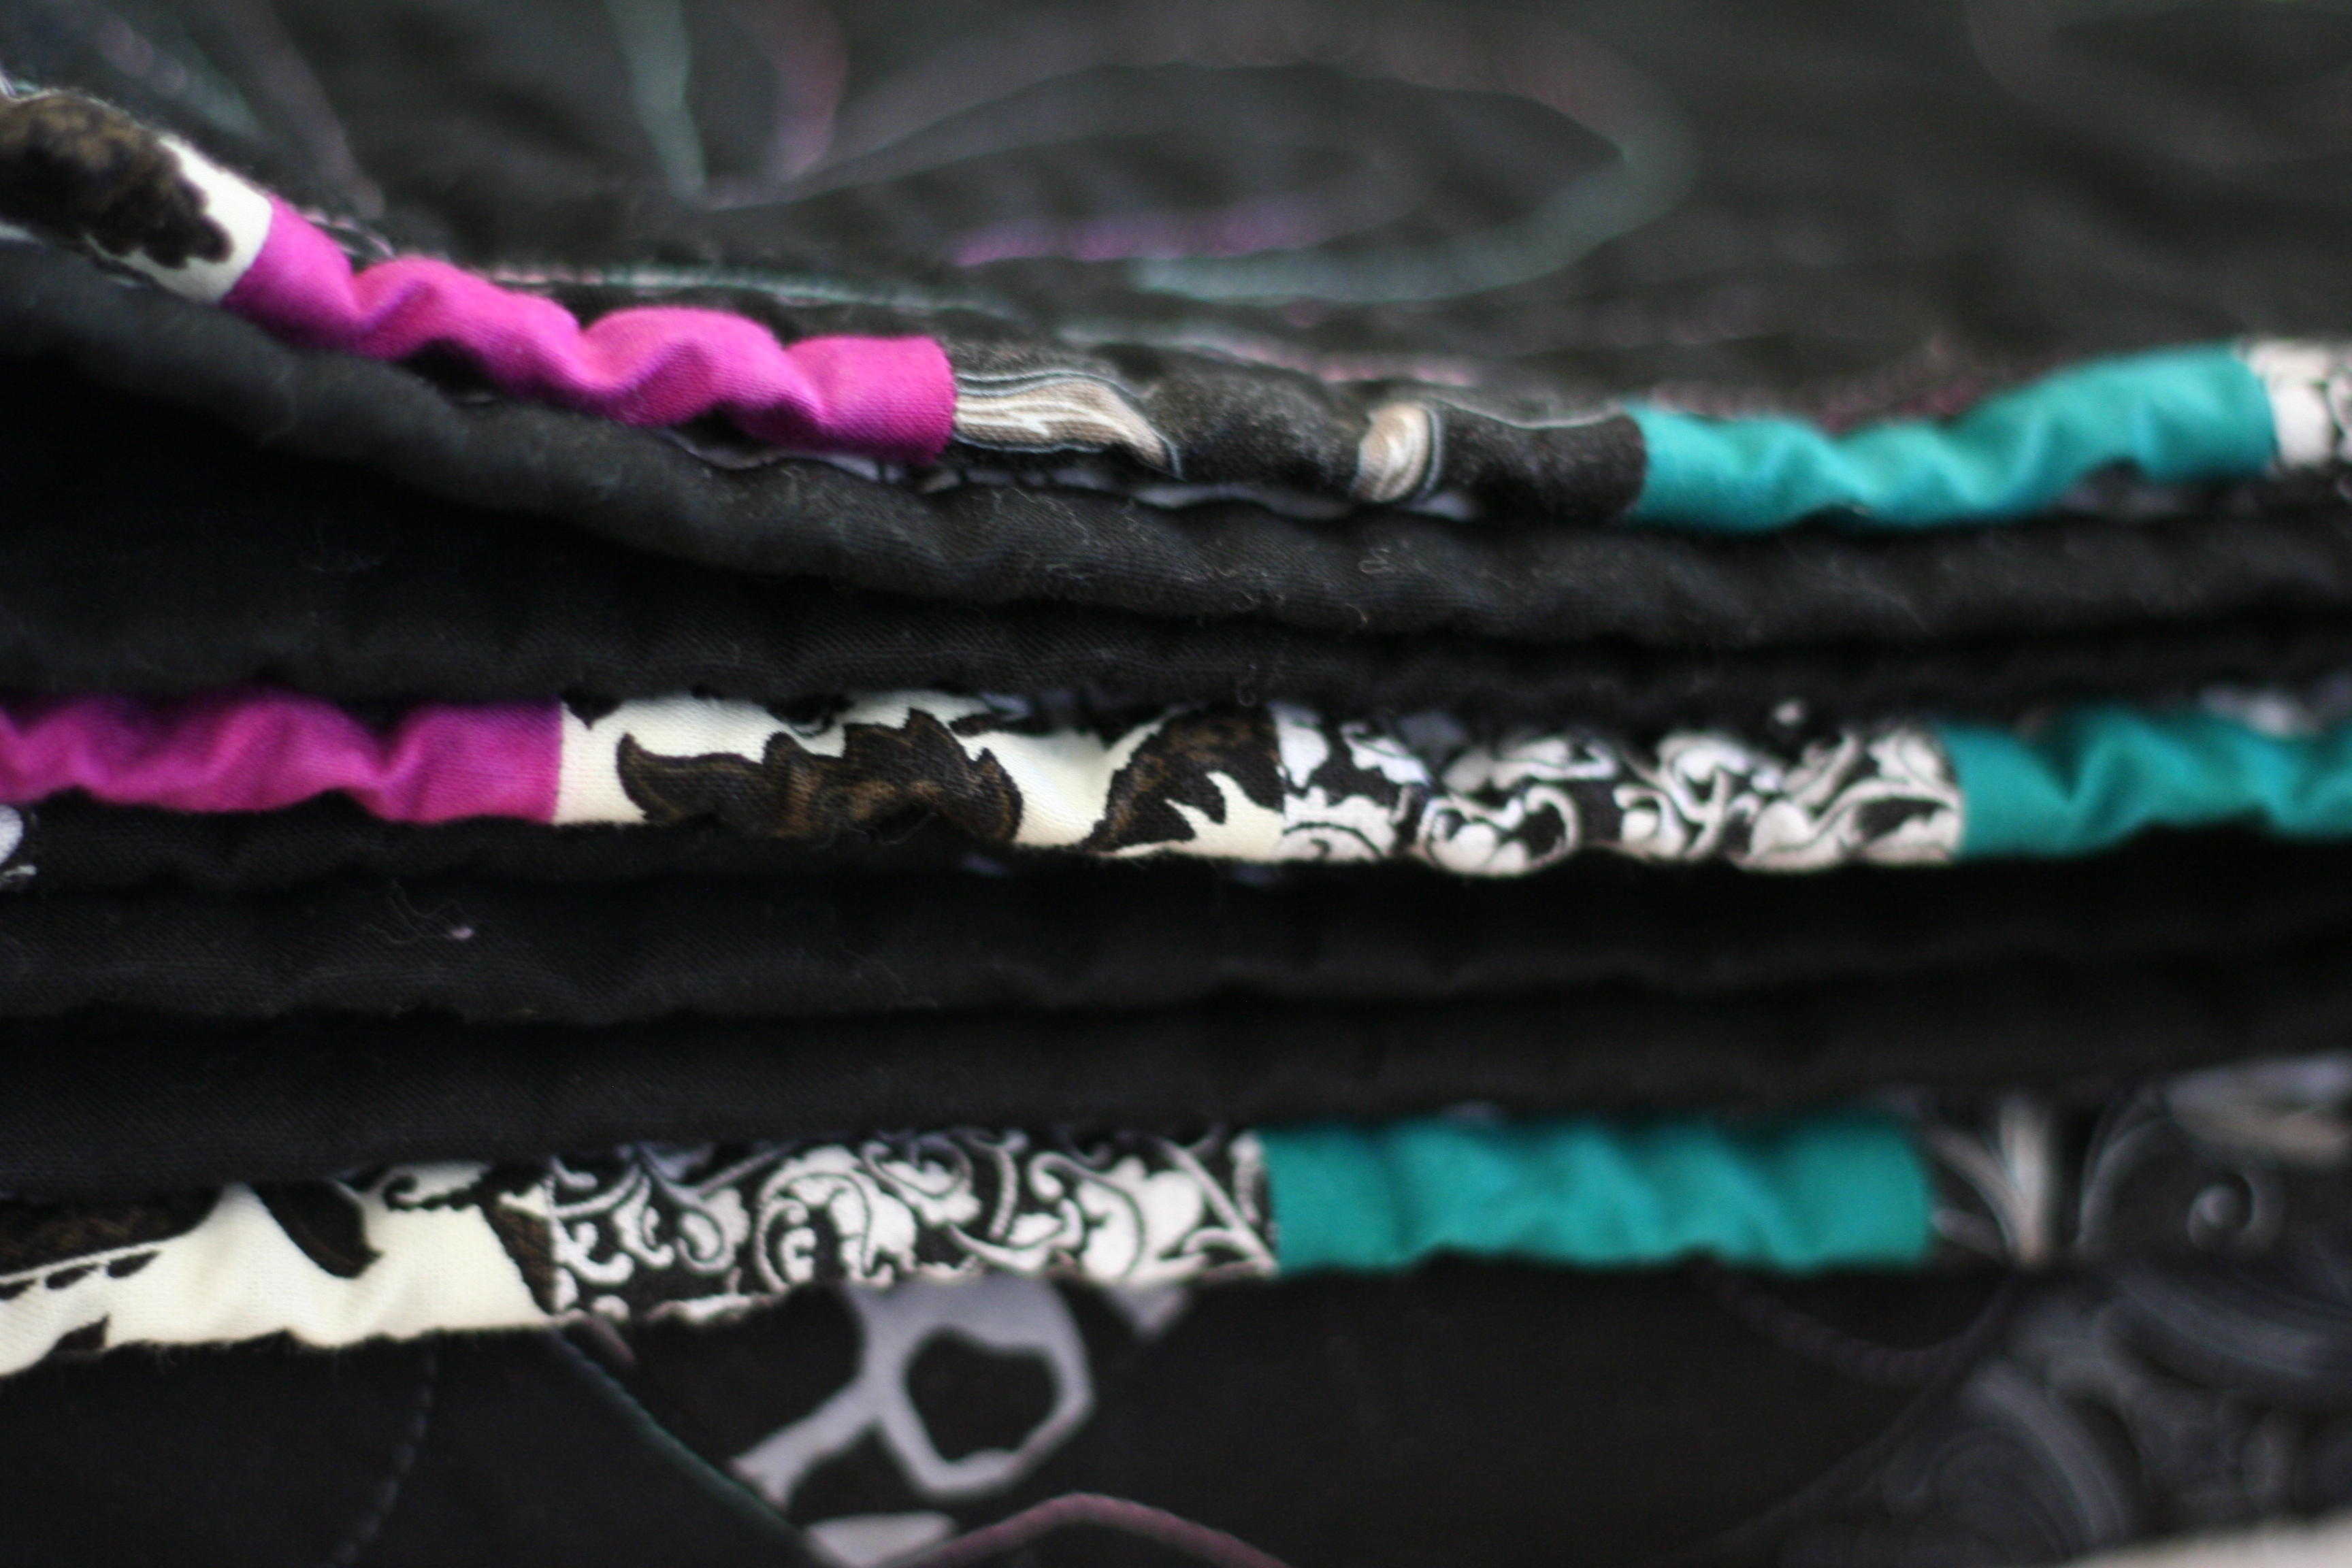
If you are unsure what ALYOF means, it stands for A Lovely Year of Finishes (a fun link up at Sew Bittersweet Designs where you set goals and see what everyone finishes up during the month). Let’s just says some are lovlier than others! I finished my quilt with the black and gray ten minute blocks which was my February goal for AYOLF. Finishing it feels good because I met my goal, but I am not thrilled with the finish. I didn’t like the blocks a whole lot from the get go. I set them on point, sashed them with black and used black for both the corner and setting triangles. Then I remembered that I hate quilting on black…. Ooops.
I have been really working on improving my FMQ skills. Want to know how to highlight the fact that you are not yet highly skilled at FMQ? Quilt with lighter colored thread on black – that will do it. I used a varigated YLI thread which matched the colors of the quilt very nicely. YLI has some heft and it is nice to sew with. It looked ok on the print fabrics. On the black, not so much. Oh well, live and learn!
The saving grace for this quilt, in my opinion, is the scrappy binding. I love a scrappy binding. I had actually gone to the LQS for fabric to bind it and couldn’t find anything so I decided to just bind it in black. Alas, I didn’t have enough black when I got home so I dug through all the scrap left from the project and made a lovely binding. To me a scrappy binding adds charm to a quilt.
Like I was saying, lessons learned…. if I were to be granted a “do-over” on this one, I would quilt it in charcoal gray (dark but a color I could see against the black). The stitching would look reasonable if it wasn’t so darn light. I am not at a skill level (yet) to highlight the stitching by using light colors on a dark fabric. Hard to post pics of your work when you aren’t really happy with it but this is the real deal. It doesn’t all turn out perfect. I am definitely done with black for a while. Luckily, my daughter loves the colors and she doesn’t give a hoot about the quilting. I had planned to use it as a donation quilt but I think this one will stay with us.
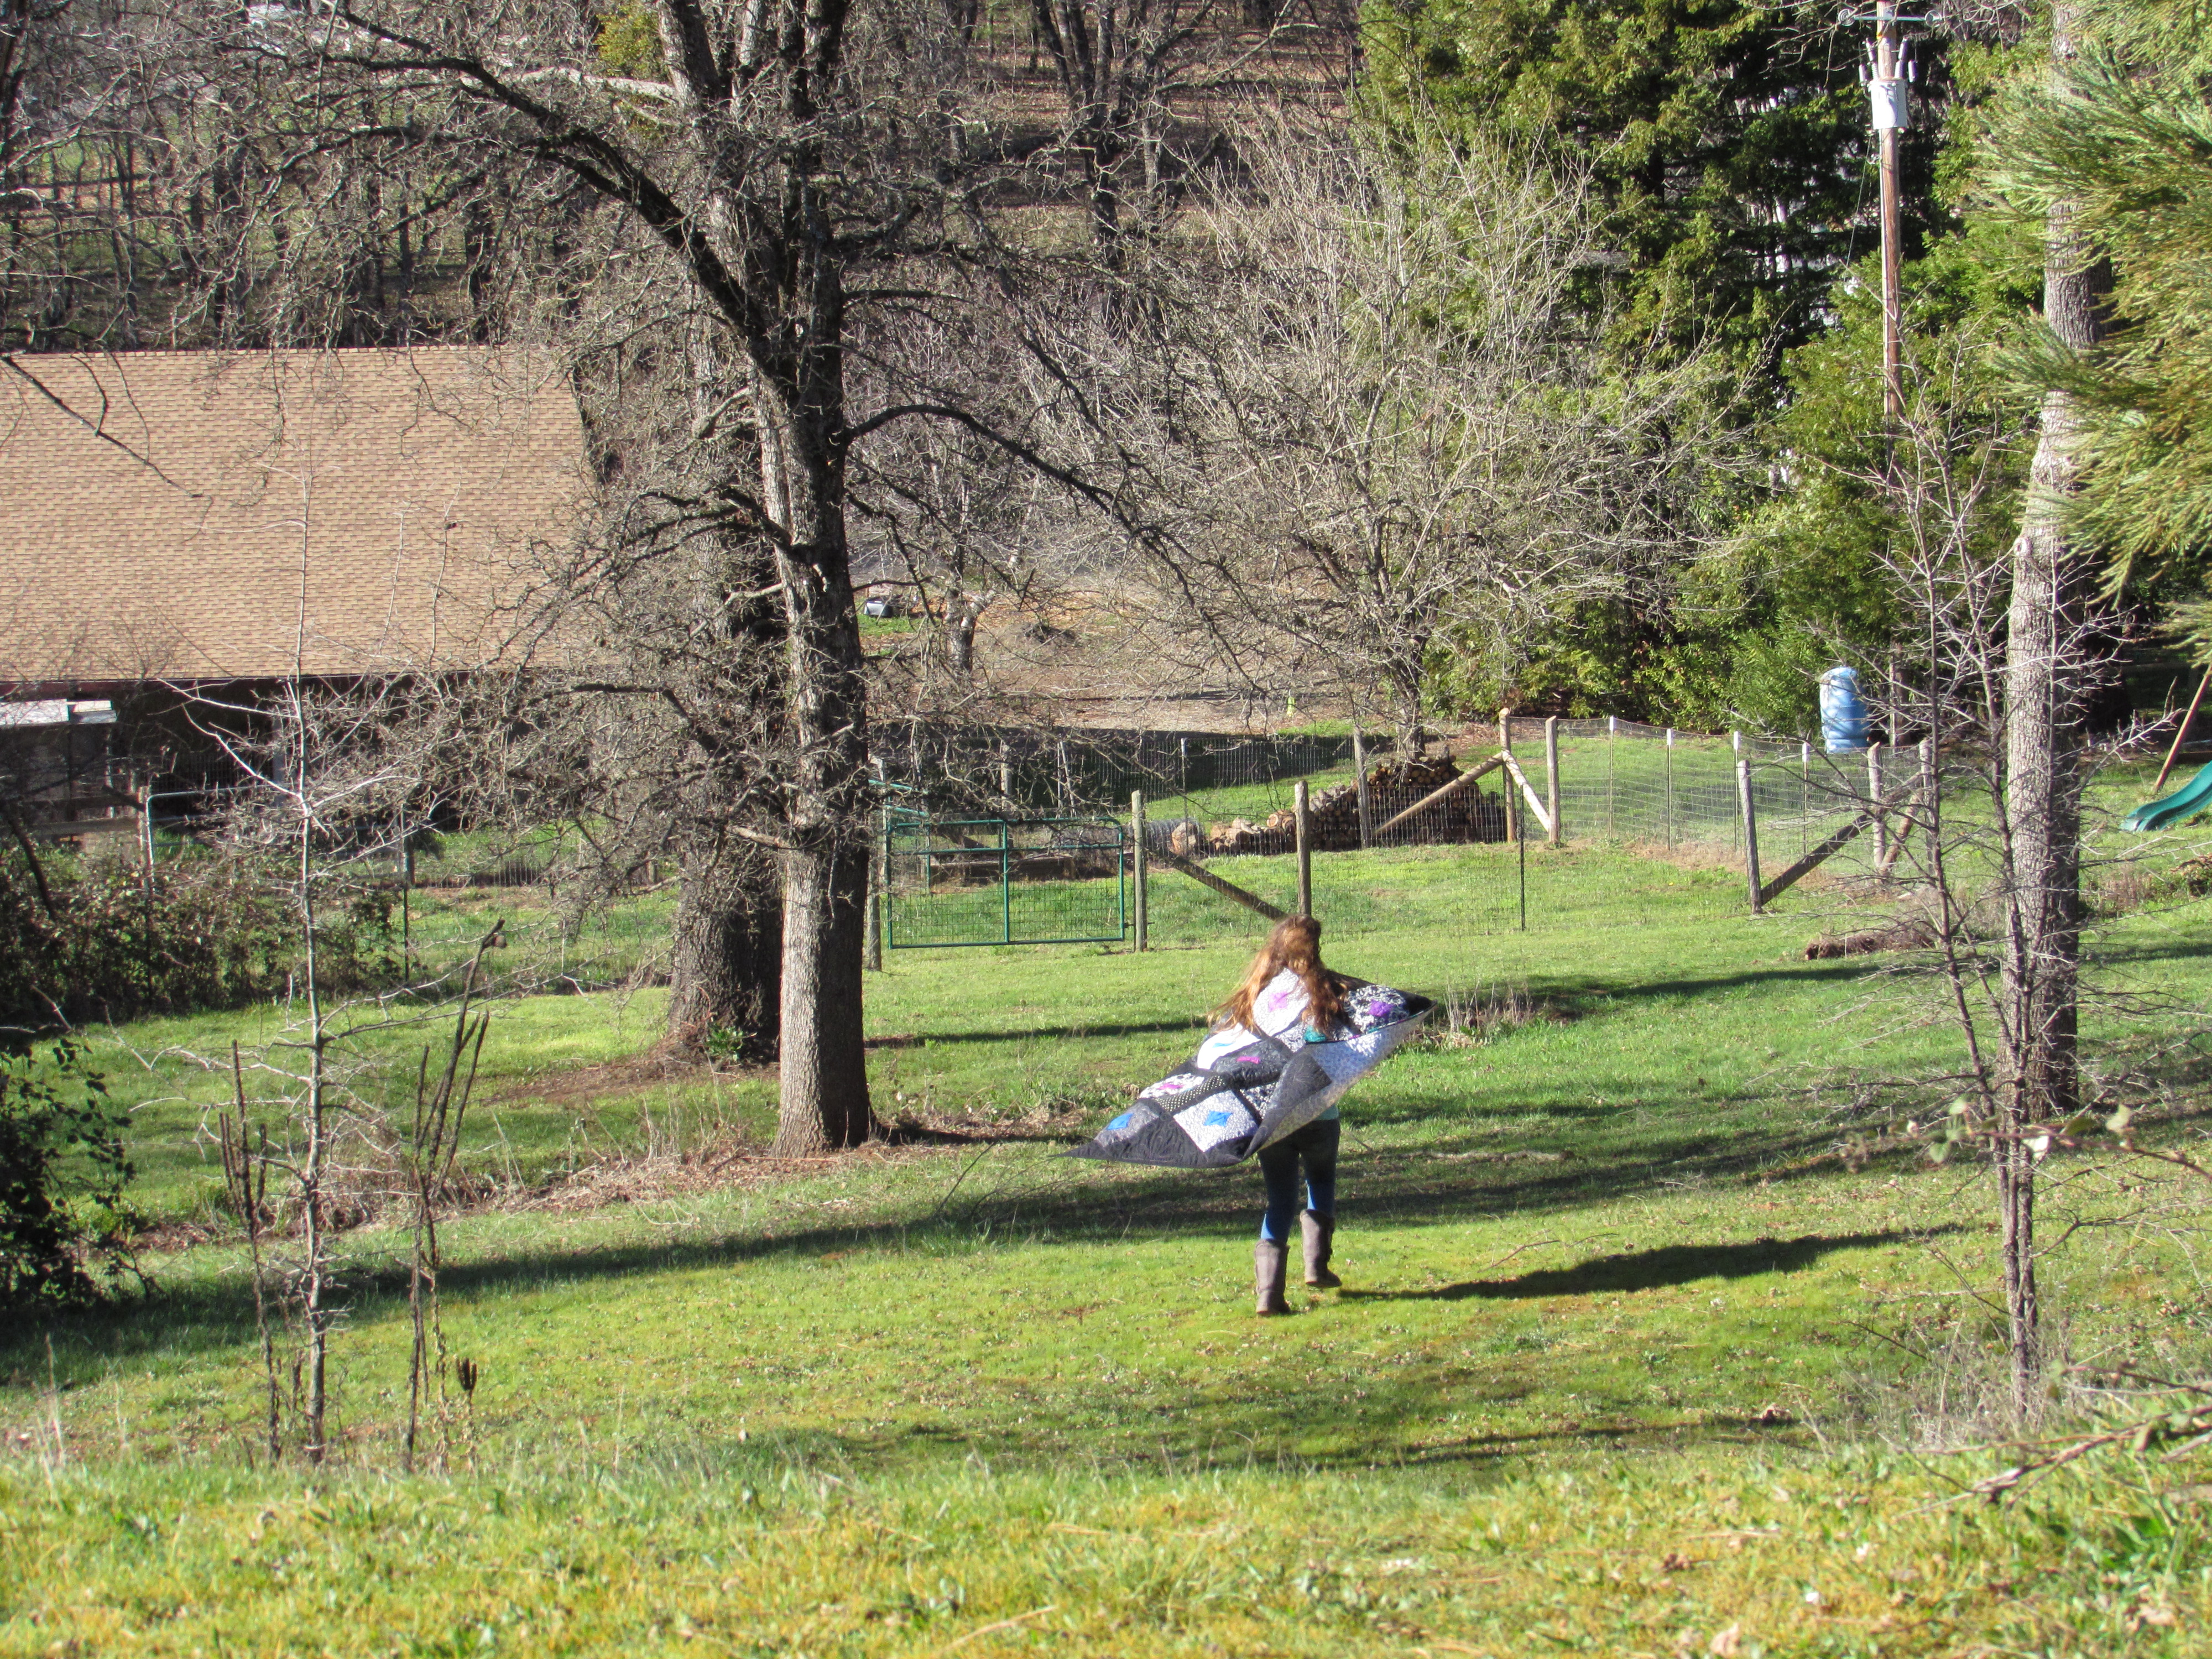
My daughter was my quilt model yesterday. My favorite pictures were of her running down the hill from our pond, back to our house. Put a cape on a kid, no matter the age, and they will run.
Hope everyone is having a good week. As usual, we are crossing fingers for a bit of rain at the end of this week. California has virtually NO snowpack which should make for a horrendous fire season this summer. I am hearing hints that there might be a tiny bit of snow coming our way this weekend. Please, please, please……
Linking to Sew Cute Tuesday, Freemotion by the River and Let’s Bee Social as well as AYOLF at Sew Bittersweet Designs. Links for most of these are at the top of the page under link-ups.
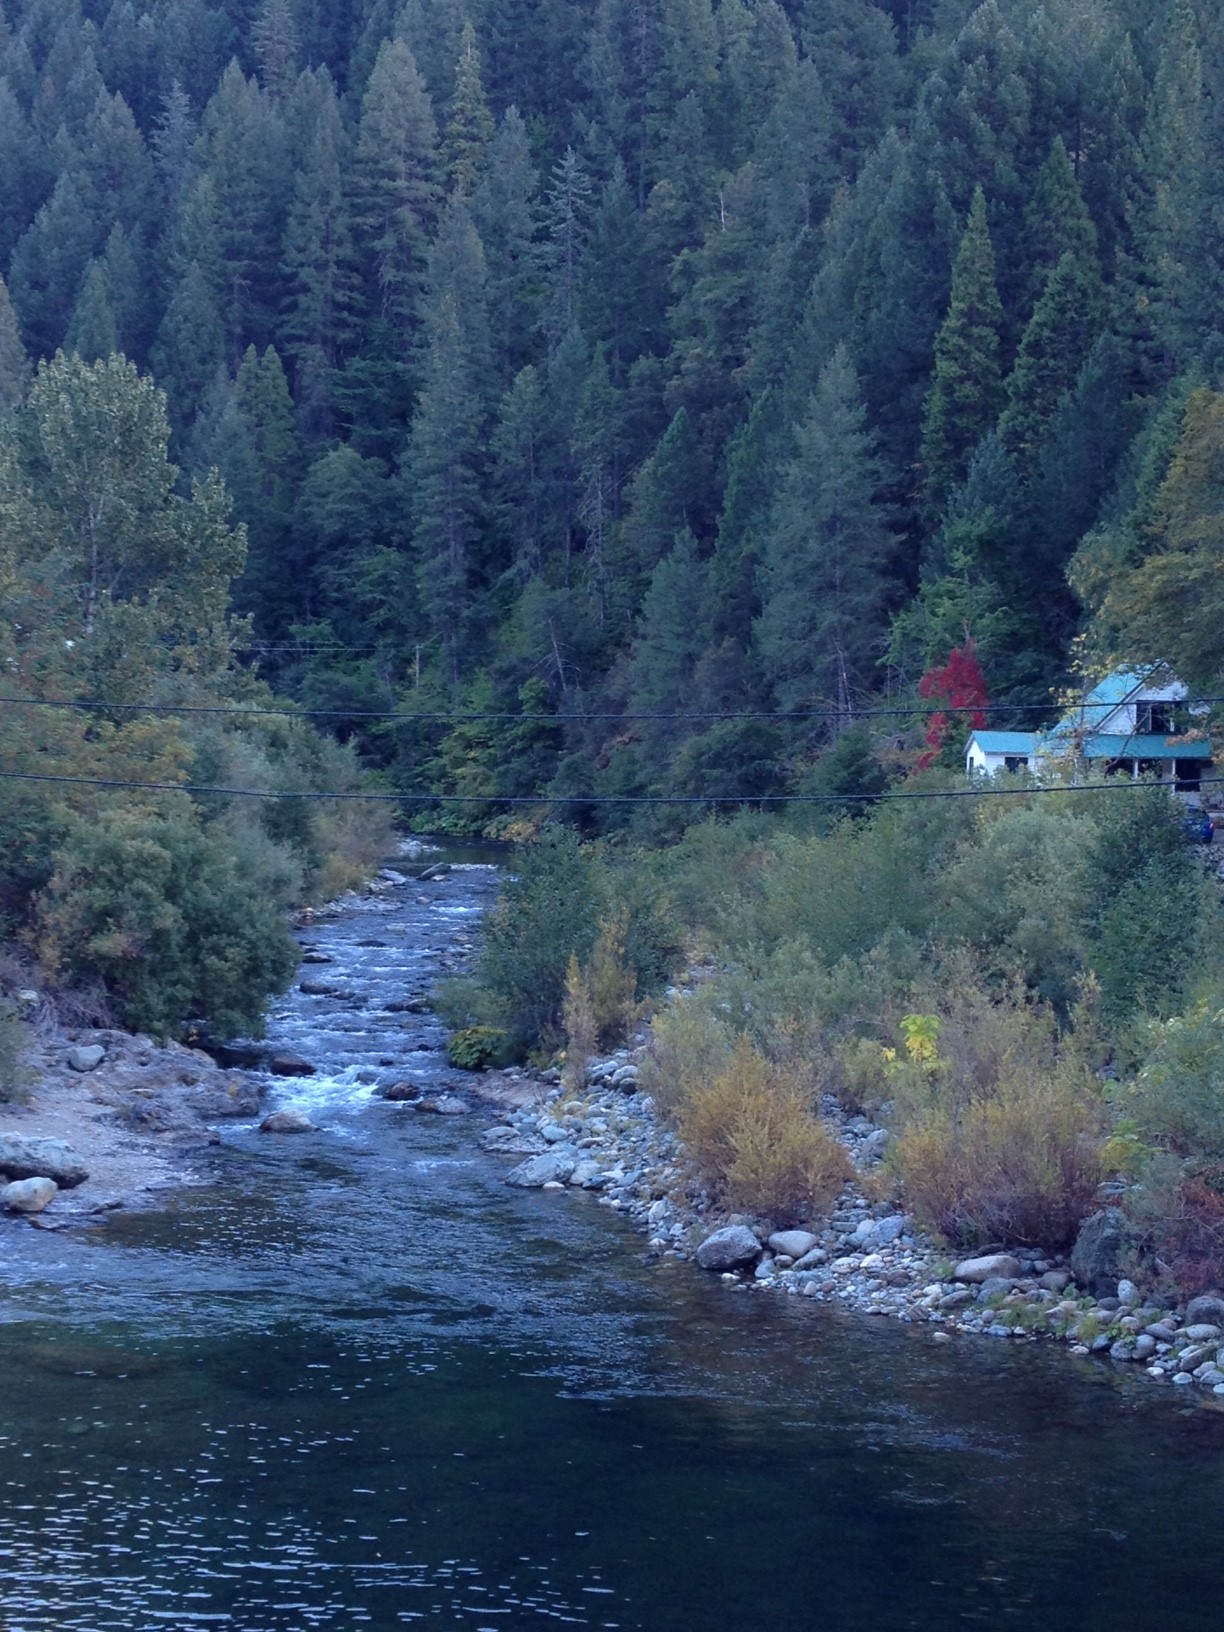
This weekend my friend Sophia and I went to a quilt retreat that was hosted by a quilt guild in the neighboring community of Downieville. Downieville is a gold rush town that is about 50 miles from my home. Unfortunately, 30 of those miles are cutting through the Sierras on a really, really winding road. (Yuk.) It is worth the nasty drive though. Downieville is a gorgeous, tiny town of about 500 people. It sits on the north fork of the Yuba River which flows through Downieville and winds its way through the Sierras to my hometown of Grass Valley. It is a popular place for fishing, mountain bike riding, and hiking. The main block of “town” consists of three restaurants, two shops, a tiny theatre, the community center, and a hardware store. Check out the North Yuba River. I love the one bright red tree that had already turned to its fall color.
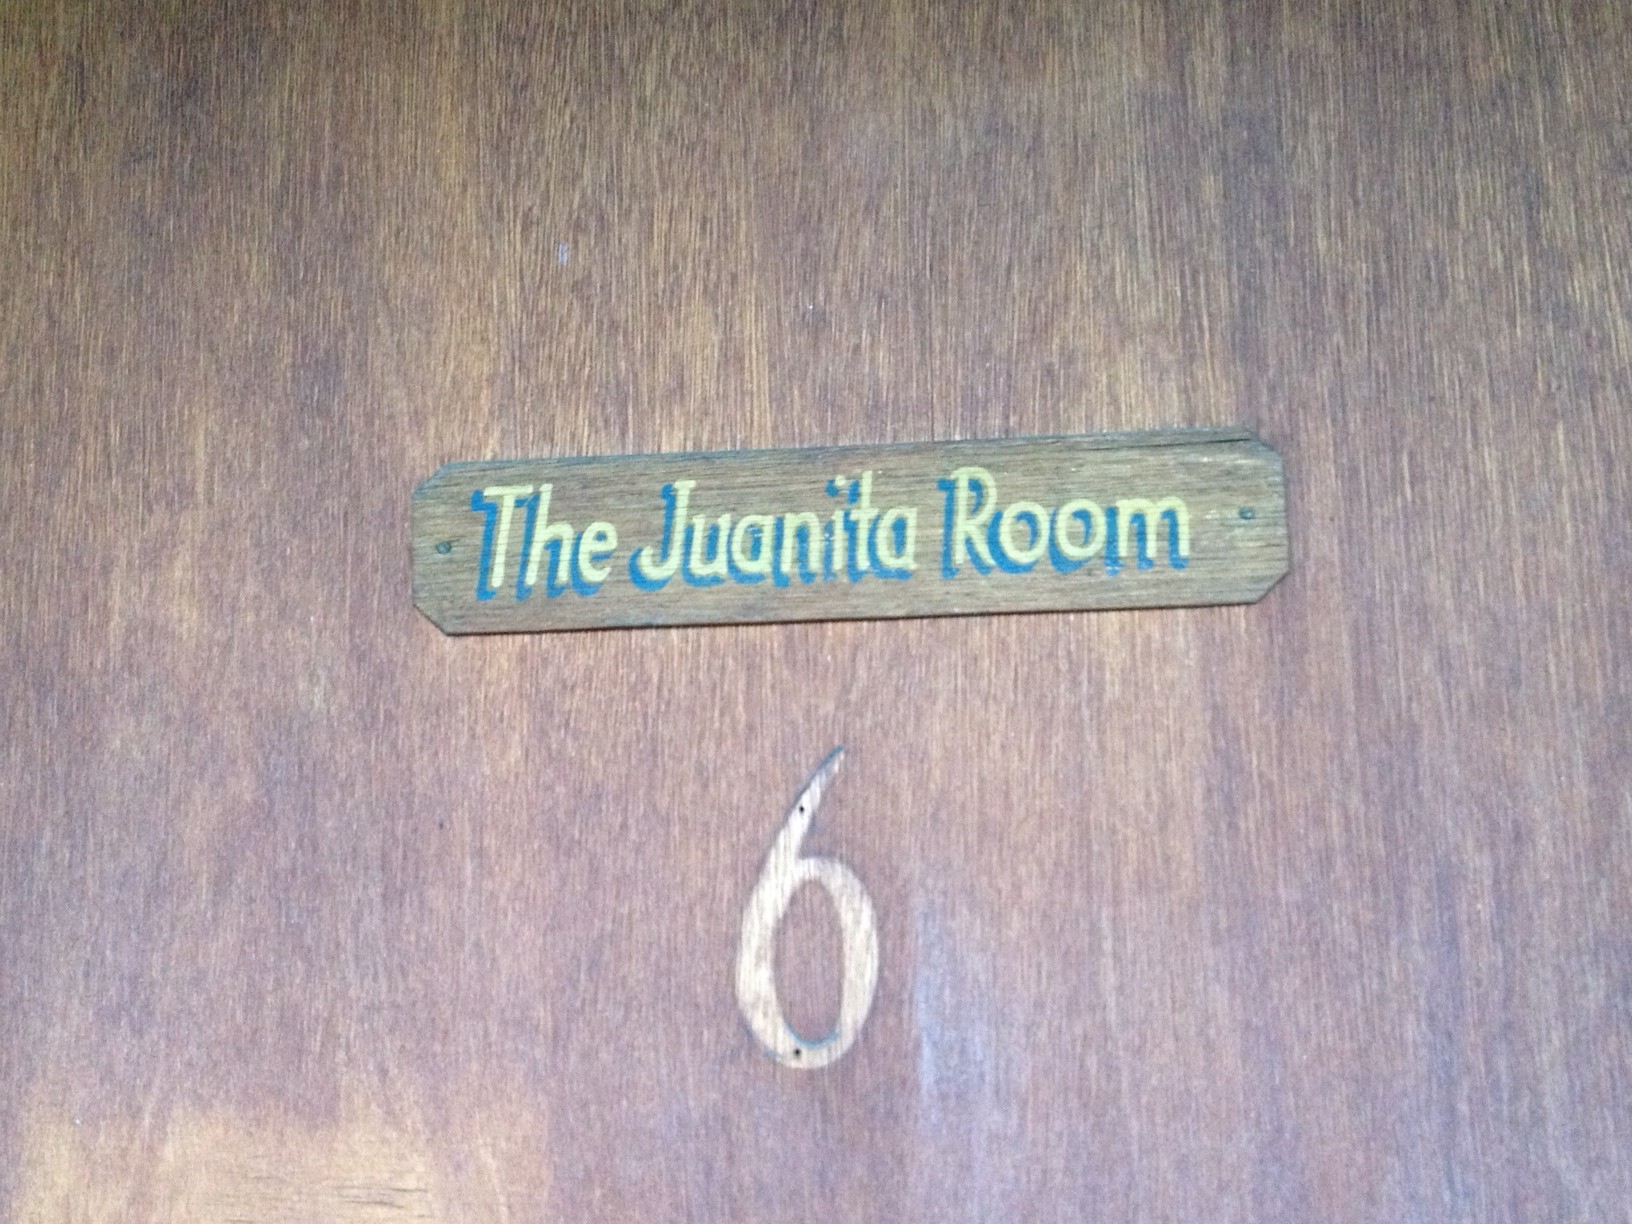
Downieville has a colorful history as a gold rush town. While we were there Sophia and I noticed that several buildings bore the name “Juanita”. This made me curious because my younger sister’s name is Juanita.
One of the “Juanita” sightings was a sign on the door between Sophia’s motel room and mine. Sophia was in room 5 and I was in room 7. On the door of room 6 was the name “Juanita”. We thought this odd since the other rooms didn’t have any names on the doors. We didn’t have any decent cell reception being in such a remote town so I figured I would google this when I got home. Clearly Juanita had some history in Downieville.
After doing the research, I am somewhat glad I didn’t check into this until I got home! Apparently, there was a Mexican woman living with her lover (Jose?) in Downieville in the early 1850’s, which was during the height of the Gold Rush in California. This woman, Josefa Segovia, was the only woman to be lynched in the history of California. Yikes! This story is a horrid tale of the treatment of the Mexican population living in the old gold rush towns during that time period. Apparently, a gang of drunk miners, led by a guy by the name of Frederick Cannon showed up at the home of Josefa and her lover during the night. They were angry with Josepha and Jose because of an incident at a saloon earlier in the evening. Some say they attempted to gang rape Josepha. Somehow she was able to get her hands on a large knife and stabbed and killed Frederick. This was impressive since history says that Josefa was a tiny woman in her early 20’s. She was declared guilty without any trial and lynched the following day, July 5, 1851. The historical records don’t often use this woman’s true name. They call her Juanita which began as a show of disrespect, using a more familiar name rather than her true name.
When I was doing this bit of research, I found out that the Inn I stayed at (with the name Juanita on the door) is listed as “certified to be haunted”. Of course, it is easy to guess who haunts the place…. Juanita. Supposedly there have been proven ghost experiences in rooms 1 and 3 (kind of glad we were in rooms 5 and 7!) For the most part, I do not believe in ghosts or supernatural activity. But it might have been uncomfortable to hear all of this and then to stay in this place for the night. The motel, one of two in town, was a bit on the sketchy side.
Here is Juanita’s home.
This whole story was such a wild bit of history to discover. It made my quilt retreat weekend that much more memorable.
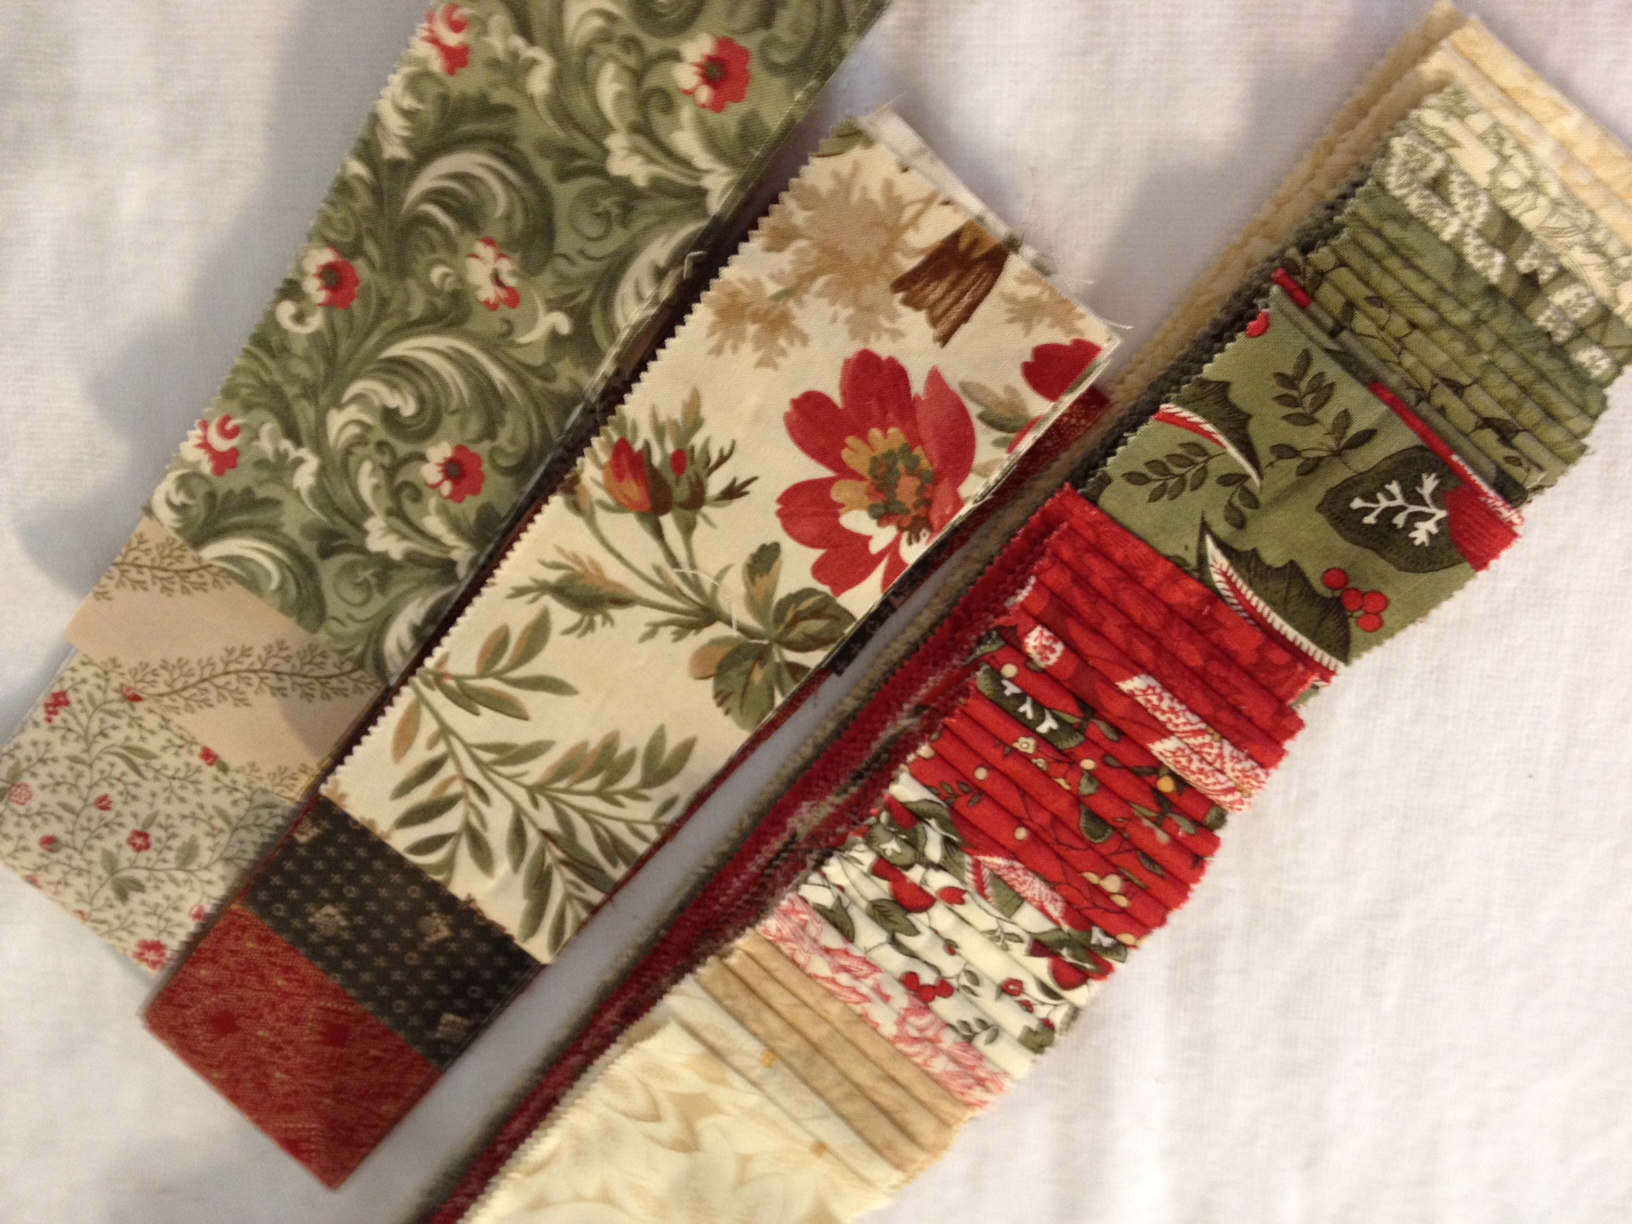
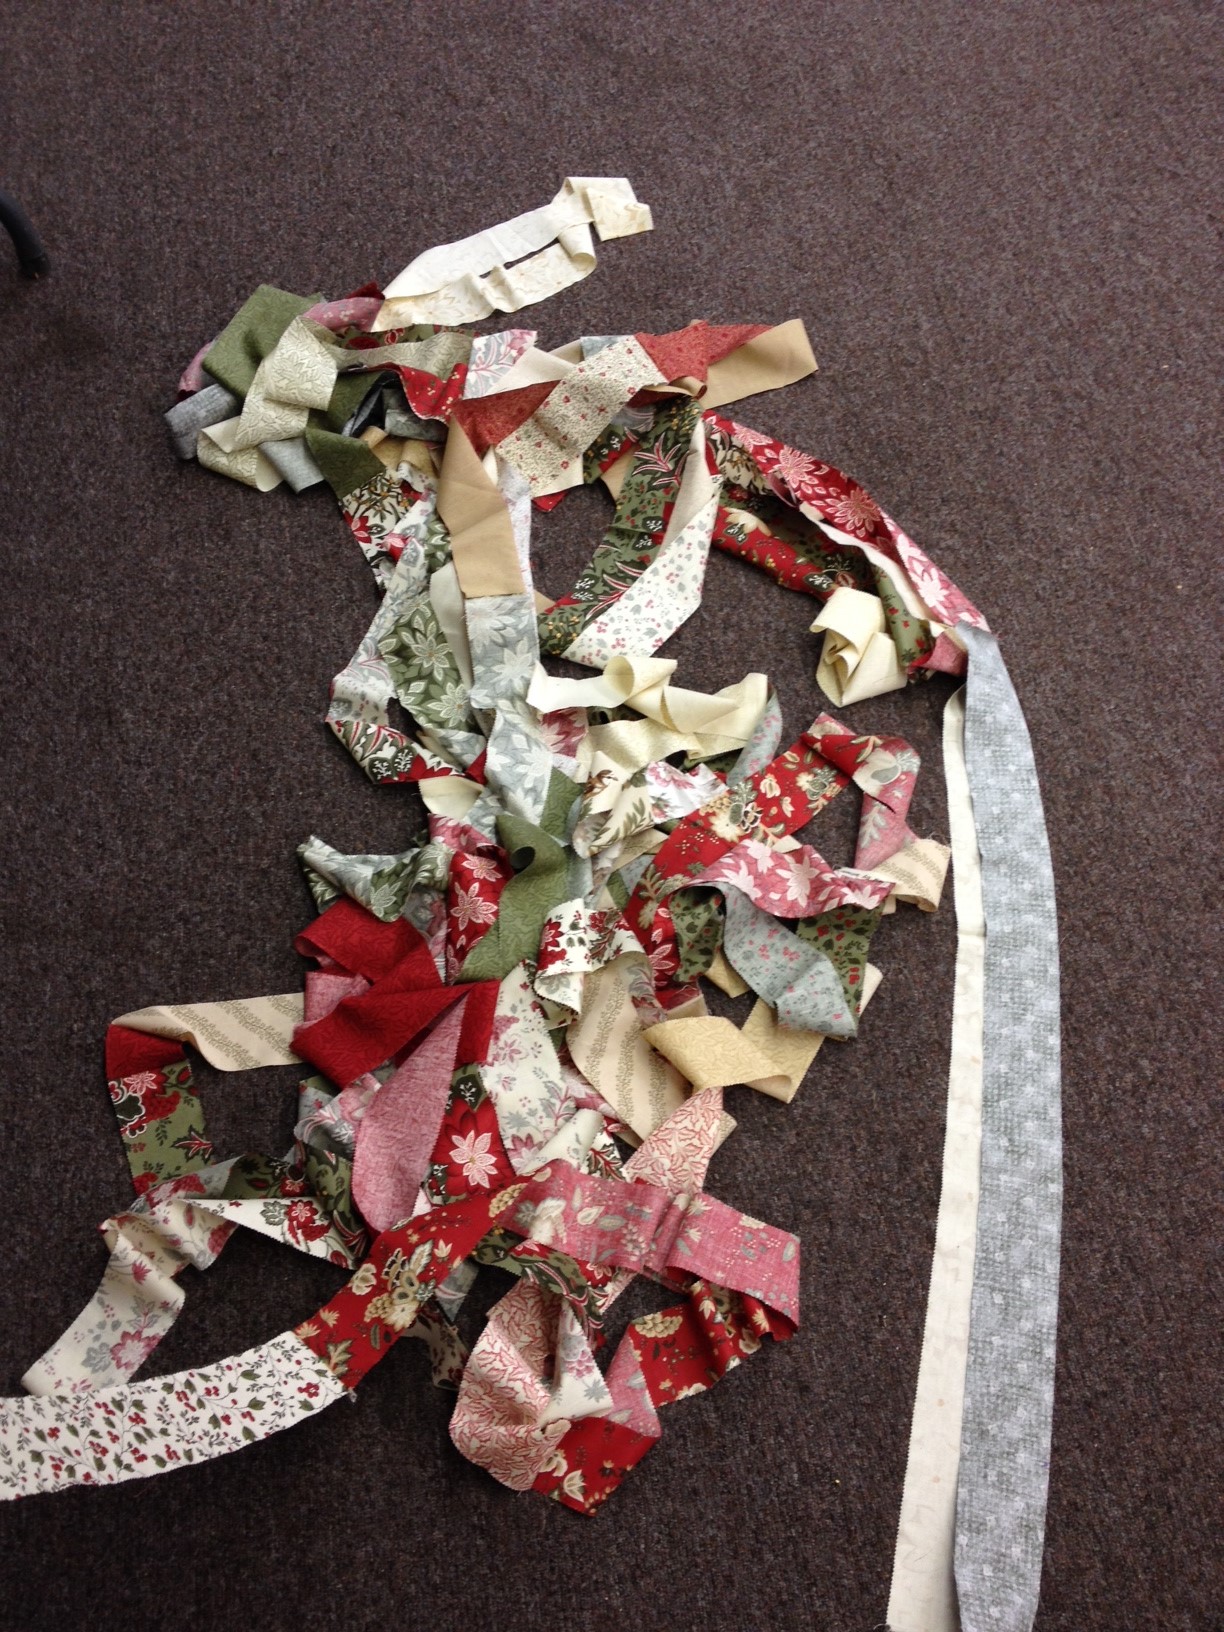
The weekend itself was great, even without all of the tales of ghosts and lynchings. Sophia and I were able to indulge ourselves with two long days of sewing, some good food and a nice hike. Wonderful! I completed about 85% of two different quilt tops. One of them was a strip quilt, or a 1600 quilt. If you haven’t made a 1600 quilt, it is incredibly simple. It requires a jelly roll or a set of 45-50 2 and 1/2″ strips. I used the line called “Merriment” by Moda. I also added in some strips to be able make a larger quilt.
These are sewn end to end until you have a length of fabric that runs about 1600 inches. Mine was closer to 2000 inches as I added the extra strips. Here is the first pile of strips when sewn end to end. I also cut some of my red strips into 2 and 1/2″ blocks and used them intermittently when sewing the very long strip together at the beginning. I was hoping that these little blocks would be more noticeable than they actually were. The effect would have been nicer had I used a different color, maybe a gold or a color with some shimmer to it.
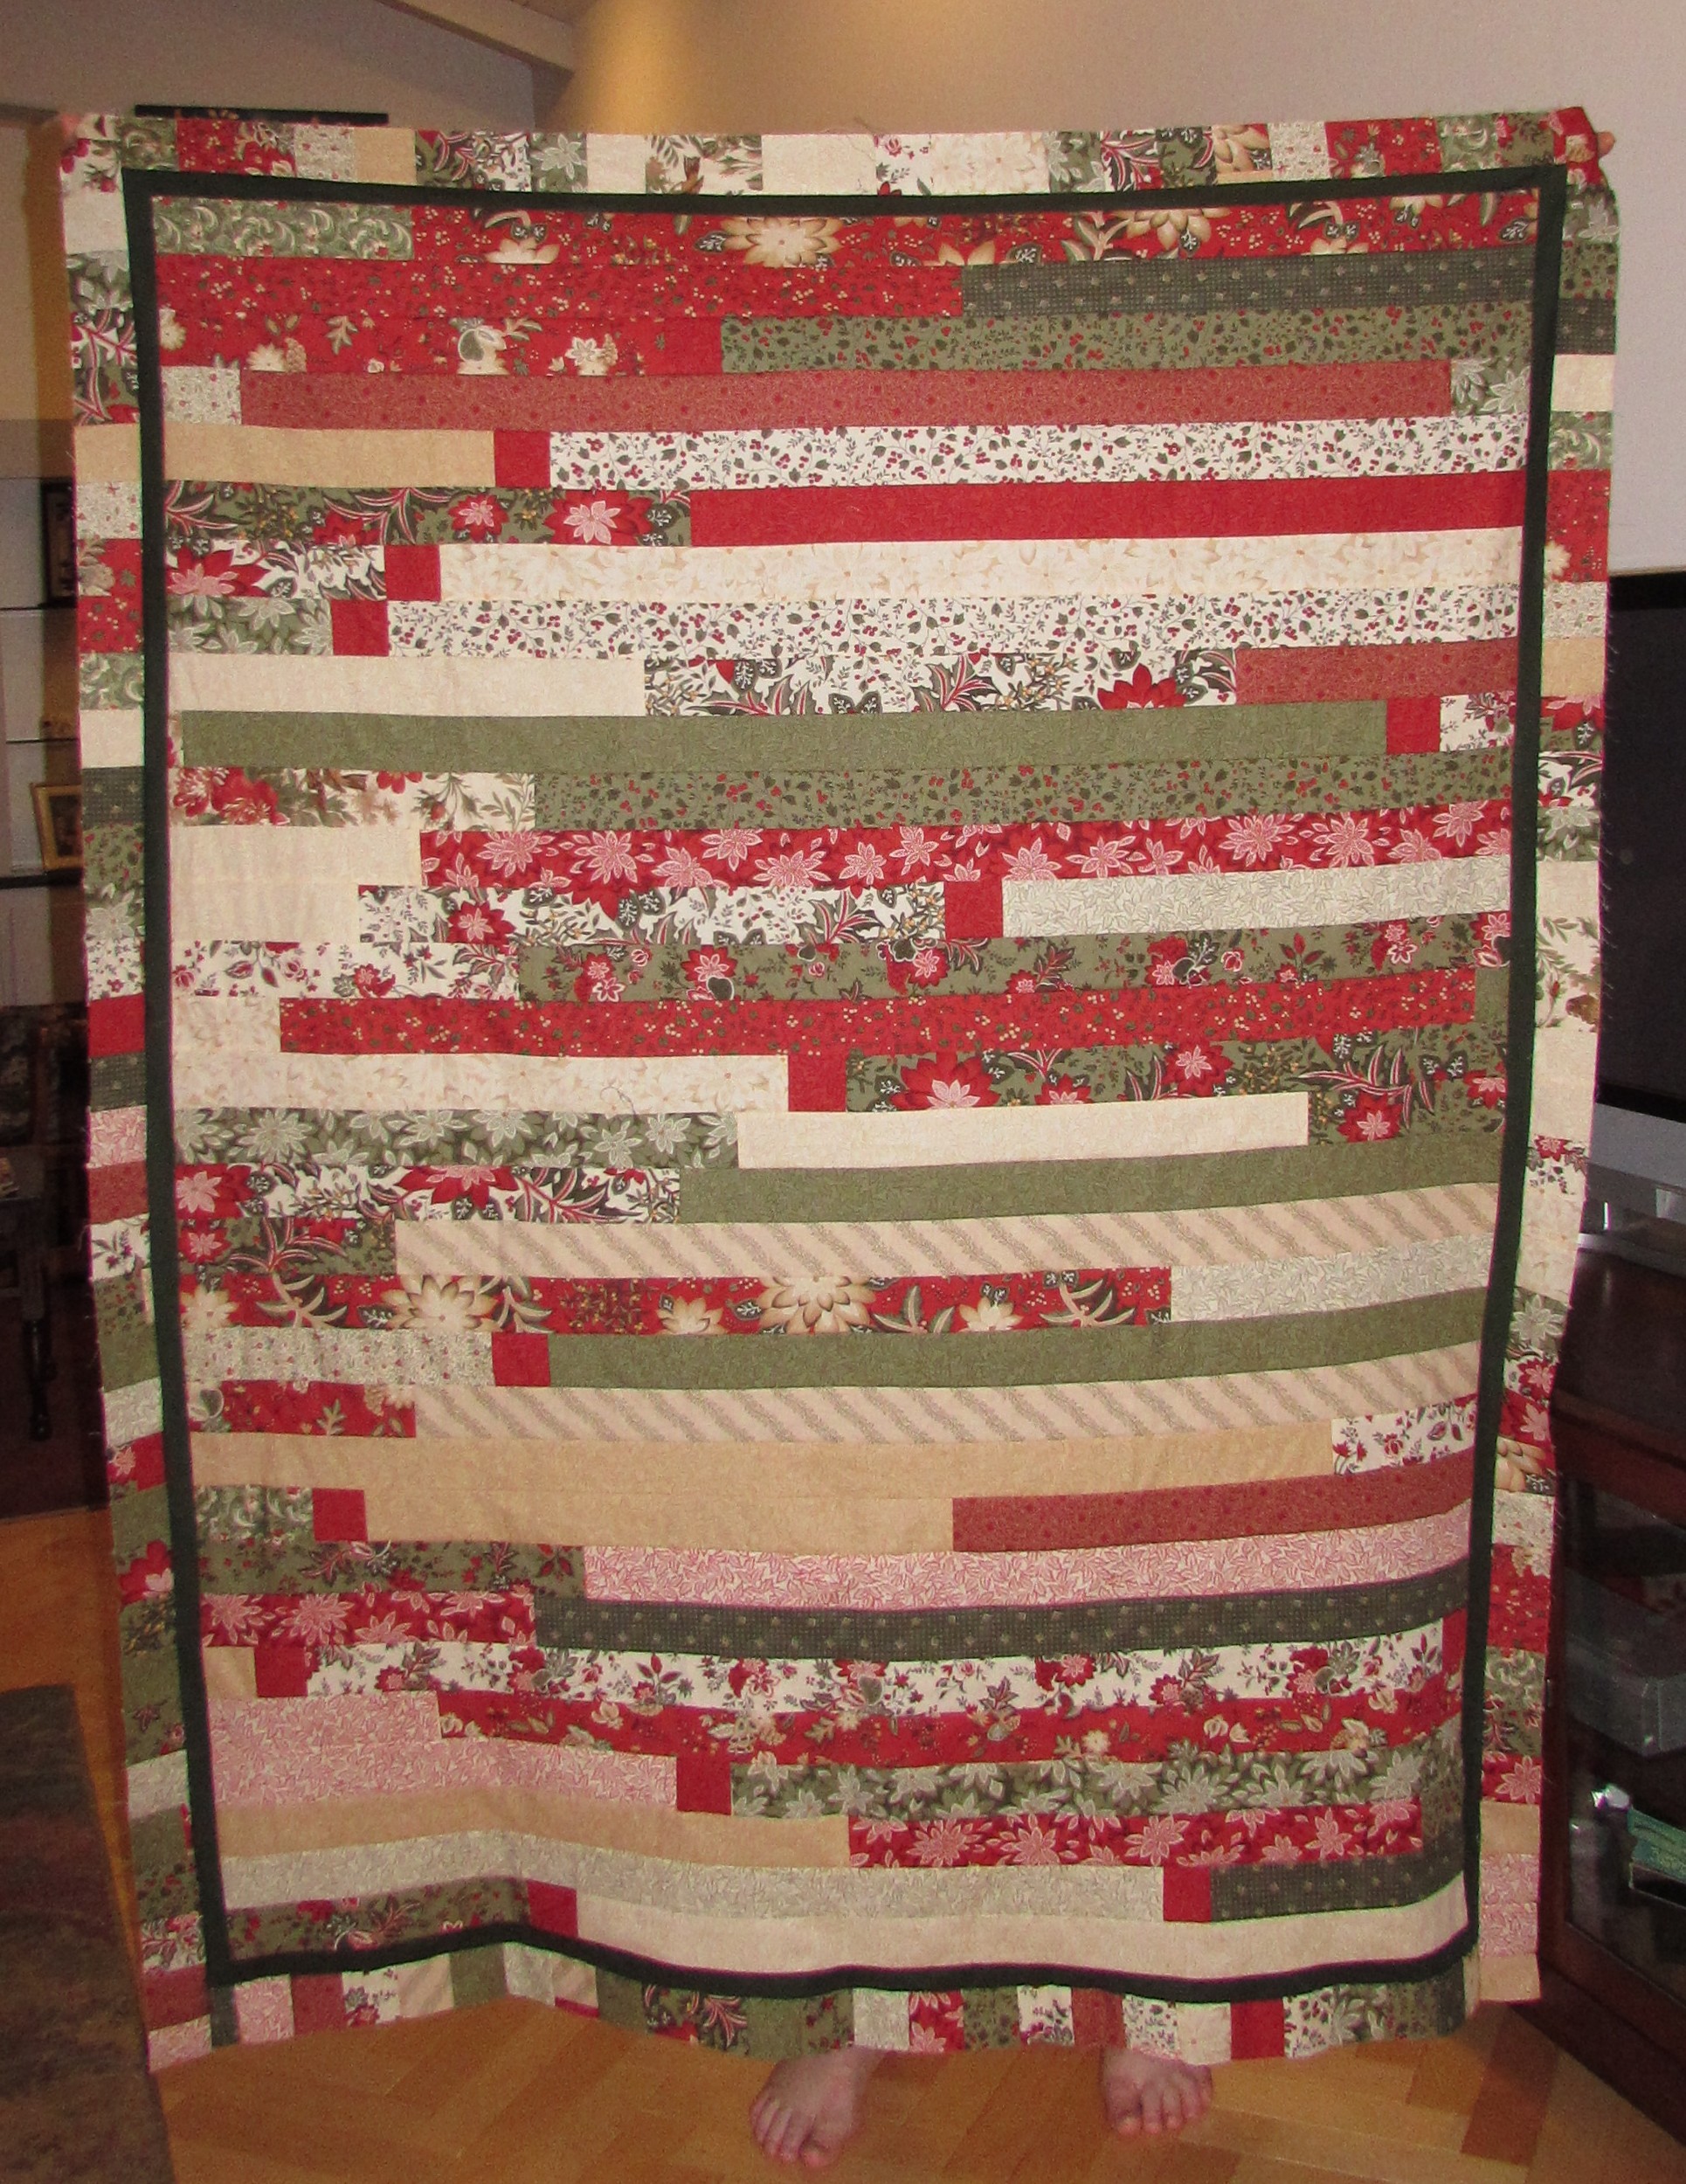
Once the strips are sewn into one length, they are folded in half and sewn together (lengthwise) so that you now have a long strip that is two rows deep. This is done again and again to create the quilt. I trimmed off five strips that were 2 and 1/2″ wide to use as an outer border. I added a 1 inch wide dark green border to the main quilt and then attached the striped border. The overall effect is lovely.
Thank you to my husband for assisting with the phot shoot, those are his toes peeking out at the bottom!
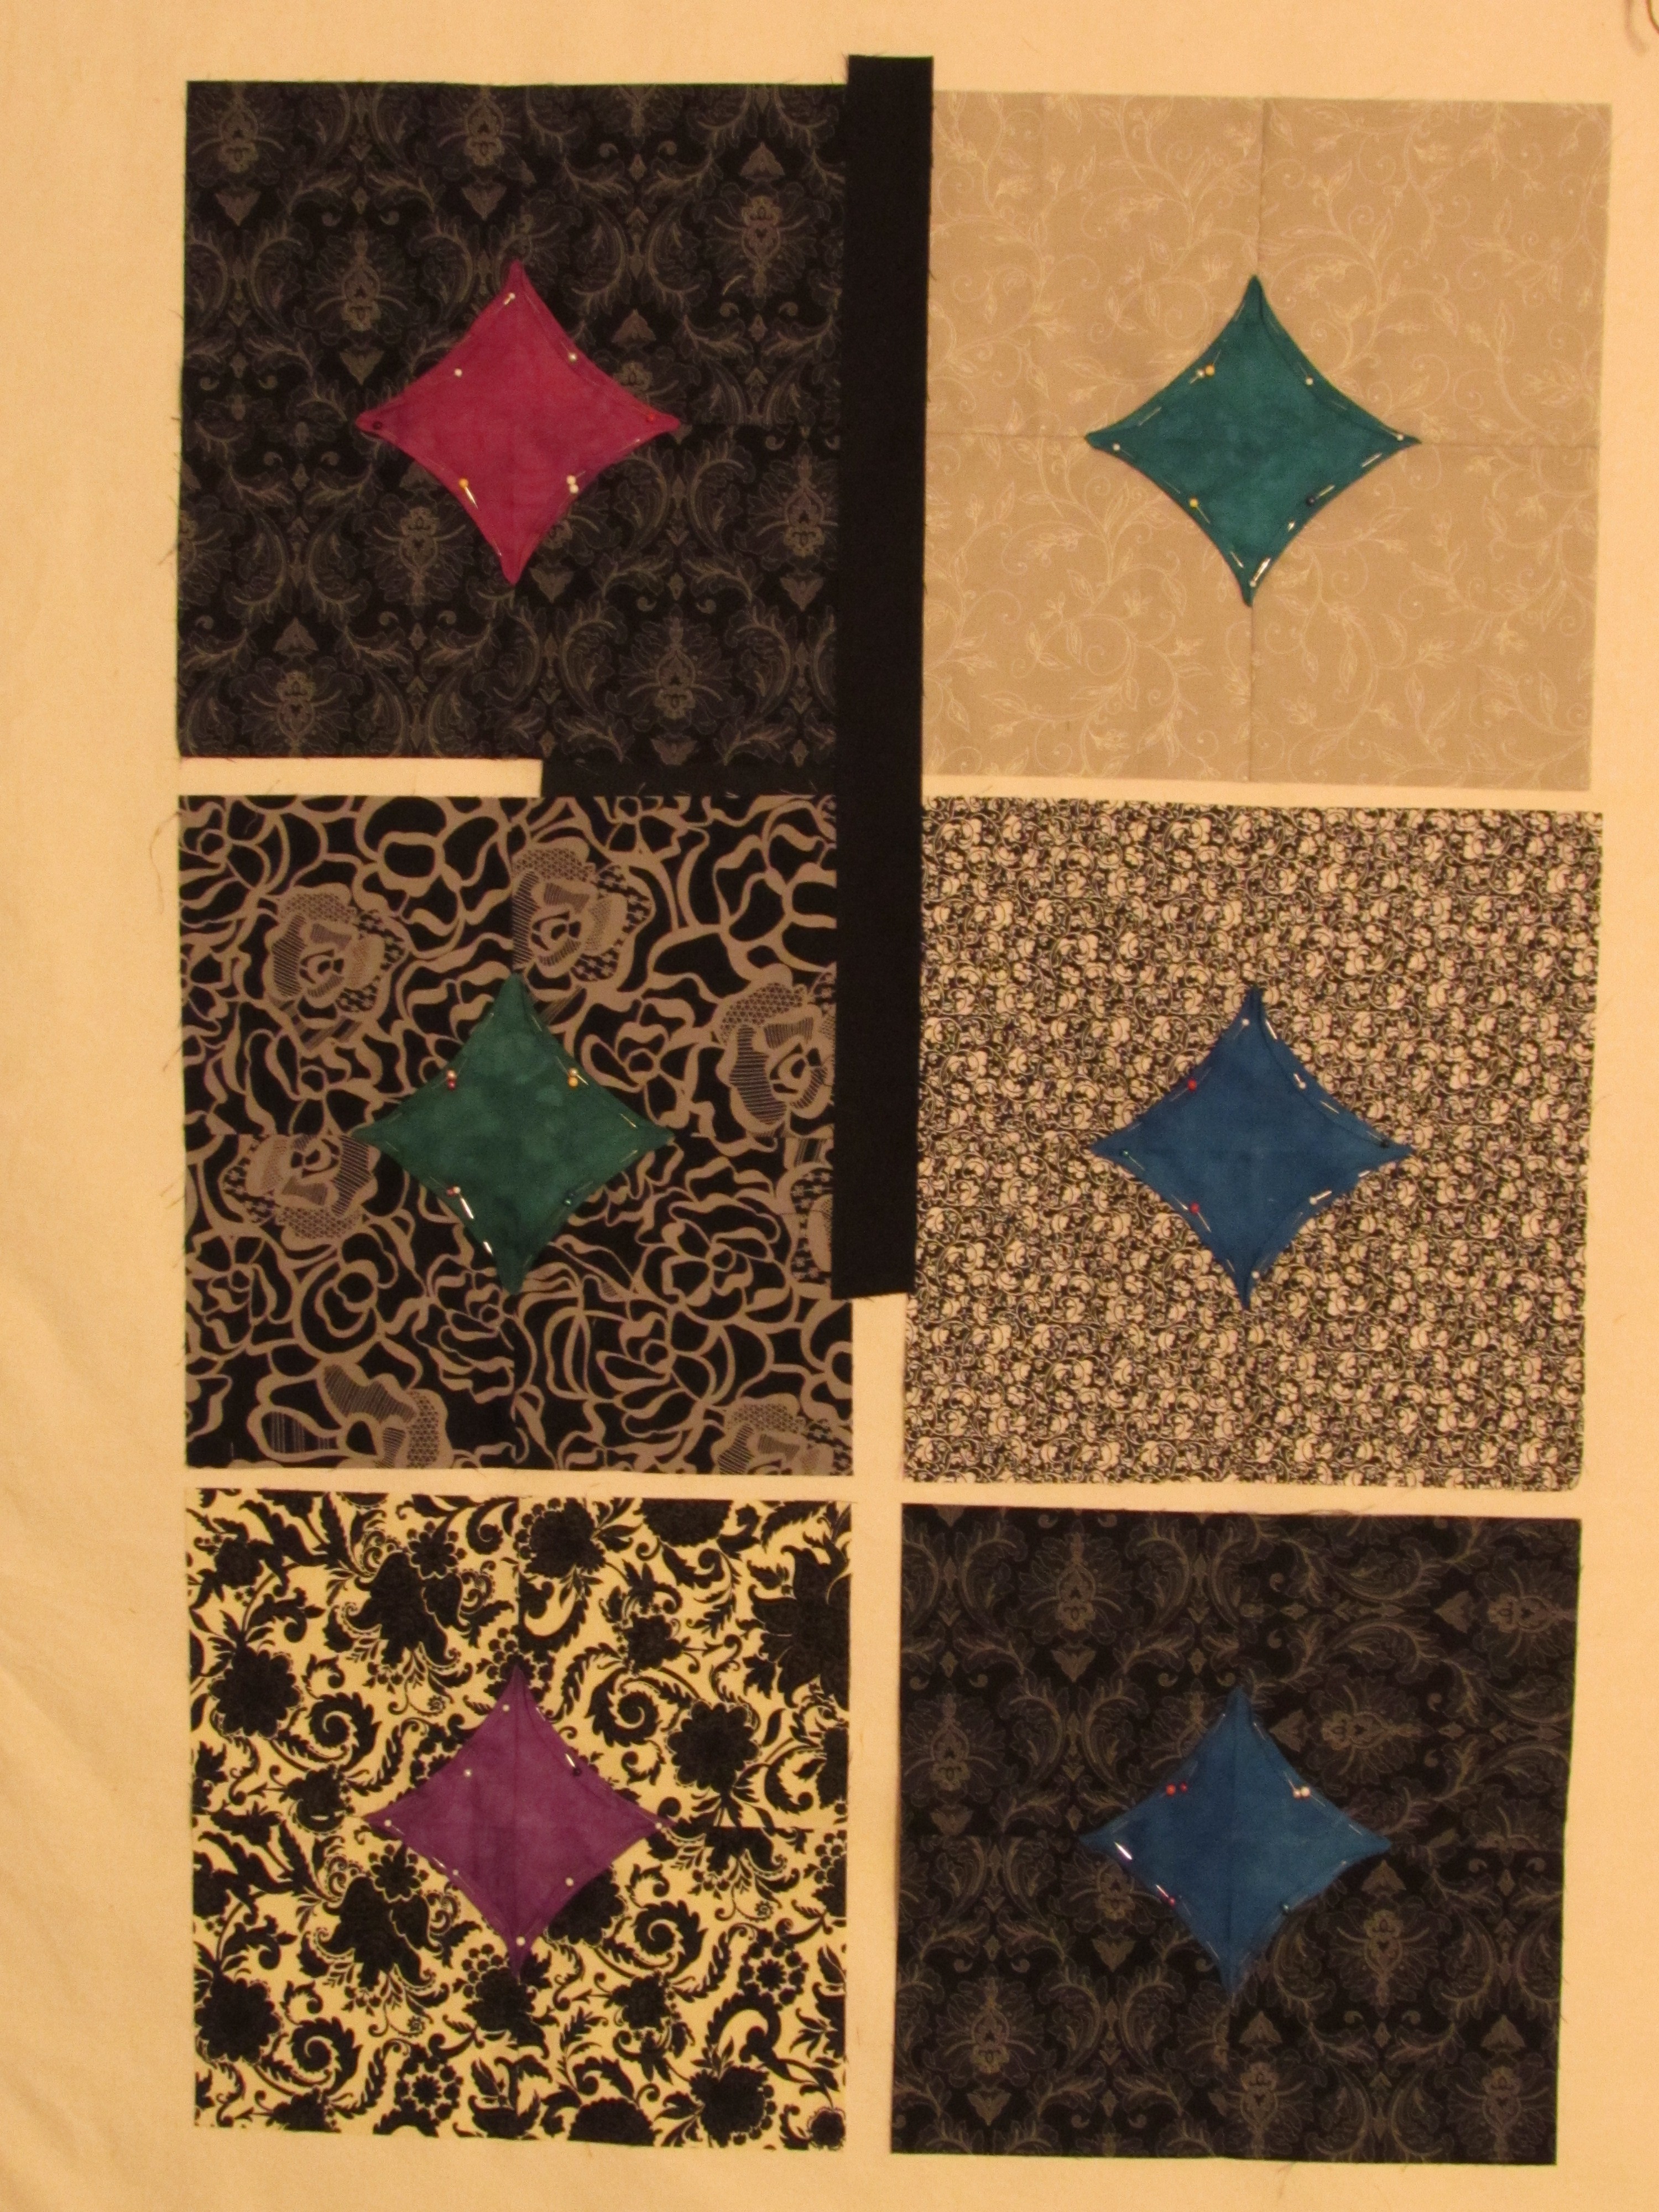
The other quilt that I worked on used “Ten Minute Blocks”. They were really fun to make – a lttle confusing for the first one and then they came together so fast. Being the sort to compete with myself constantly, I started timing myself after the first couple – to confirm whether these were indeed “10 Minute” blocks! (I know, I know….) Well, they are. I got them down to about 9 minutes to assemble each block.
I made all 13 blocks. I have some topstitching to do on the center accent blocks. You can see that I have turned the edges in and pinned them. I will stitch those before I put the blocks together. They are all in various shades of black, cream and gray with jewel toned centers. I will set the blocks on point with black sashing and setting triangles. I love the whole effect. These blocks are 12 inch blocks. Next time around I will make smaller blocks as I think the effect will be better on a smaller scale.
The retreat was great fun. The Mountain Star Quilt Guild hosts this weekend event on alternate years. I definitely plan to return. The town is fun with such gorgeous scenery. Hiking along the river is wonderful (though there were numerous spots where we saw bear scat – I was not at all unhappy that the two of us didn’t actually cross paths with a bear! Yes, I will go to the next retreat. I may stay in a different inn though!
Linking to:
Anything Goes Monday, Freemotion by the River, Sew Cute Tuesday, WIP Wednesday, and Lorna at Let’s Bee Social. Take a minute to check out some of these sites. I have links to all of them at the top of my page under Link Ups.
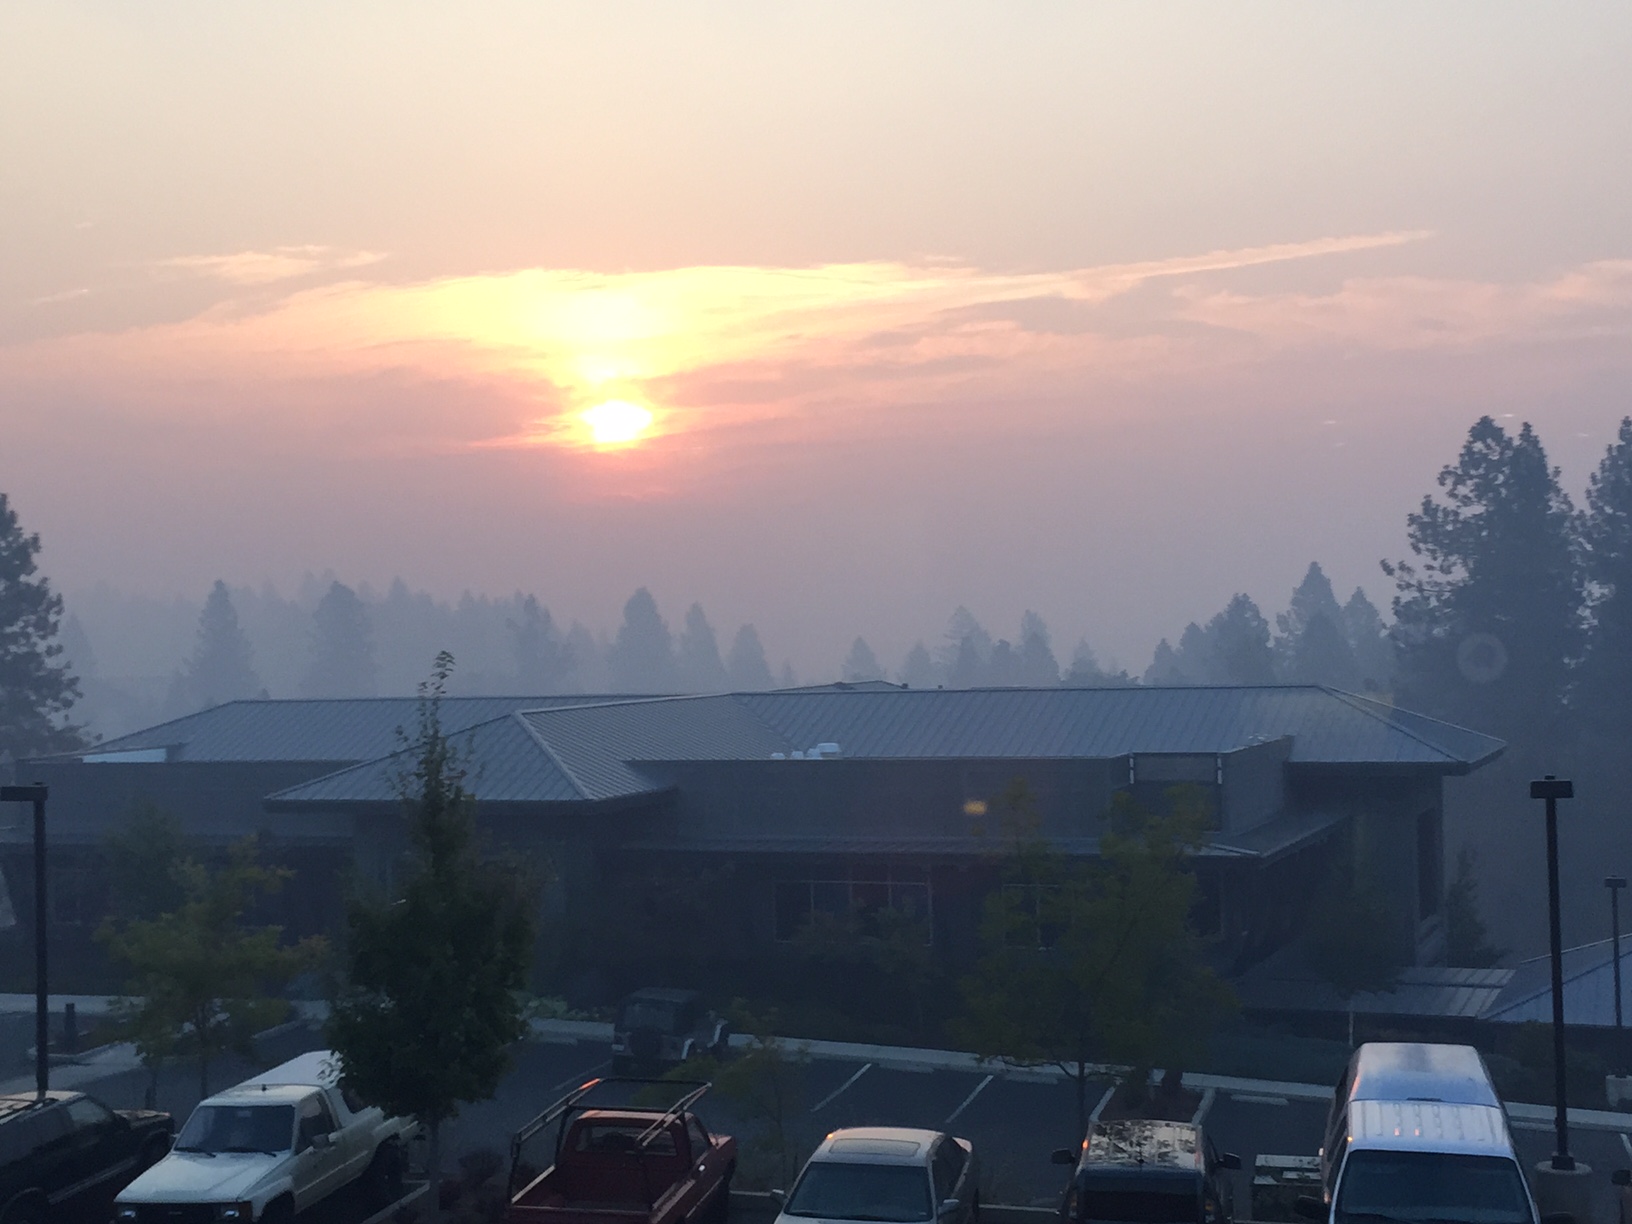
I don’t know how much this makes the news across the country but Northern California is basically on fire. It is horrendous. We had a local fire about a mile from my house two weeks ago. It burned 350 acres and caused a lot of local damage. Before this we had a fire up at Yosemite. It burned 4,700 acres and is just about contained. Along with this fire is the Happy Camp fire (the name is sort of ironic.) Burning still, it has consumed 132,000 acres. It is in a wilderness area so it hasn’t burned many structures. Closer to my home, we are dealing with the King Fire. It is burning near the town of Placerville which is about an hour from my house. But as the crow flies, it is much closer. This fire is now burning just over 92,000 acres. There are over 7,000 firefighters working it and it is only 35% contained as I write this. The fire started over a week ago and has consumed 65 structures so far. It is a horrific fire. The worst part? It was started by an arsonist. The suspect has been arrested. Just unimaginable. Crazy, smokey, frustrating times.
Here is a picture of the smoke we are dealing with. This was taken this morning by my hub.
Luckily this afternoon a breeze came through and cleared the smoke for a while. I am sure it will settle back in by morning. They closed a number of schools on Monday. For today and tomorrow they decided to keep the kids indoors and cancel after school activities. It is completely unhealthy to be outside. The good news is that we have a 60% chance for rain on Thursday. We are so excited! Doing a rain dance for sure. Keep your fingers crossed for us. We need to get the fires contained and we desperately need some (a lot, a lot, a lot!) of rain.
Since I was inside all weekend with the exception of one trip to the grocery store, I spent a great deal of time at the sewing machine. It was a good opportunity to work off my stash because there was no going to the fabric store. Here are a few things I worked on.
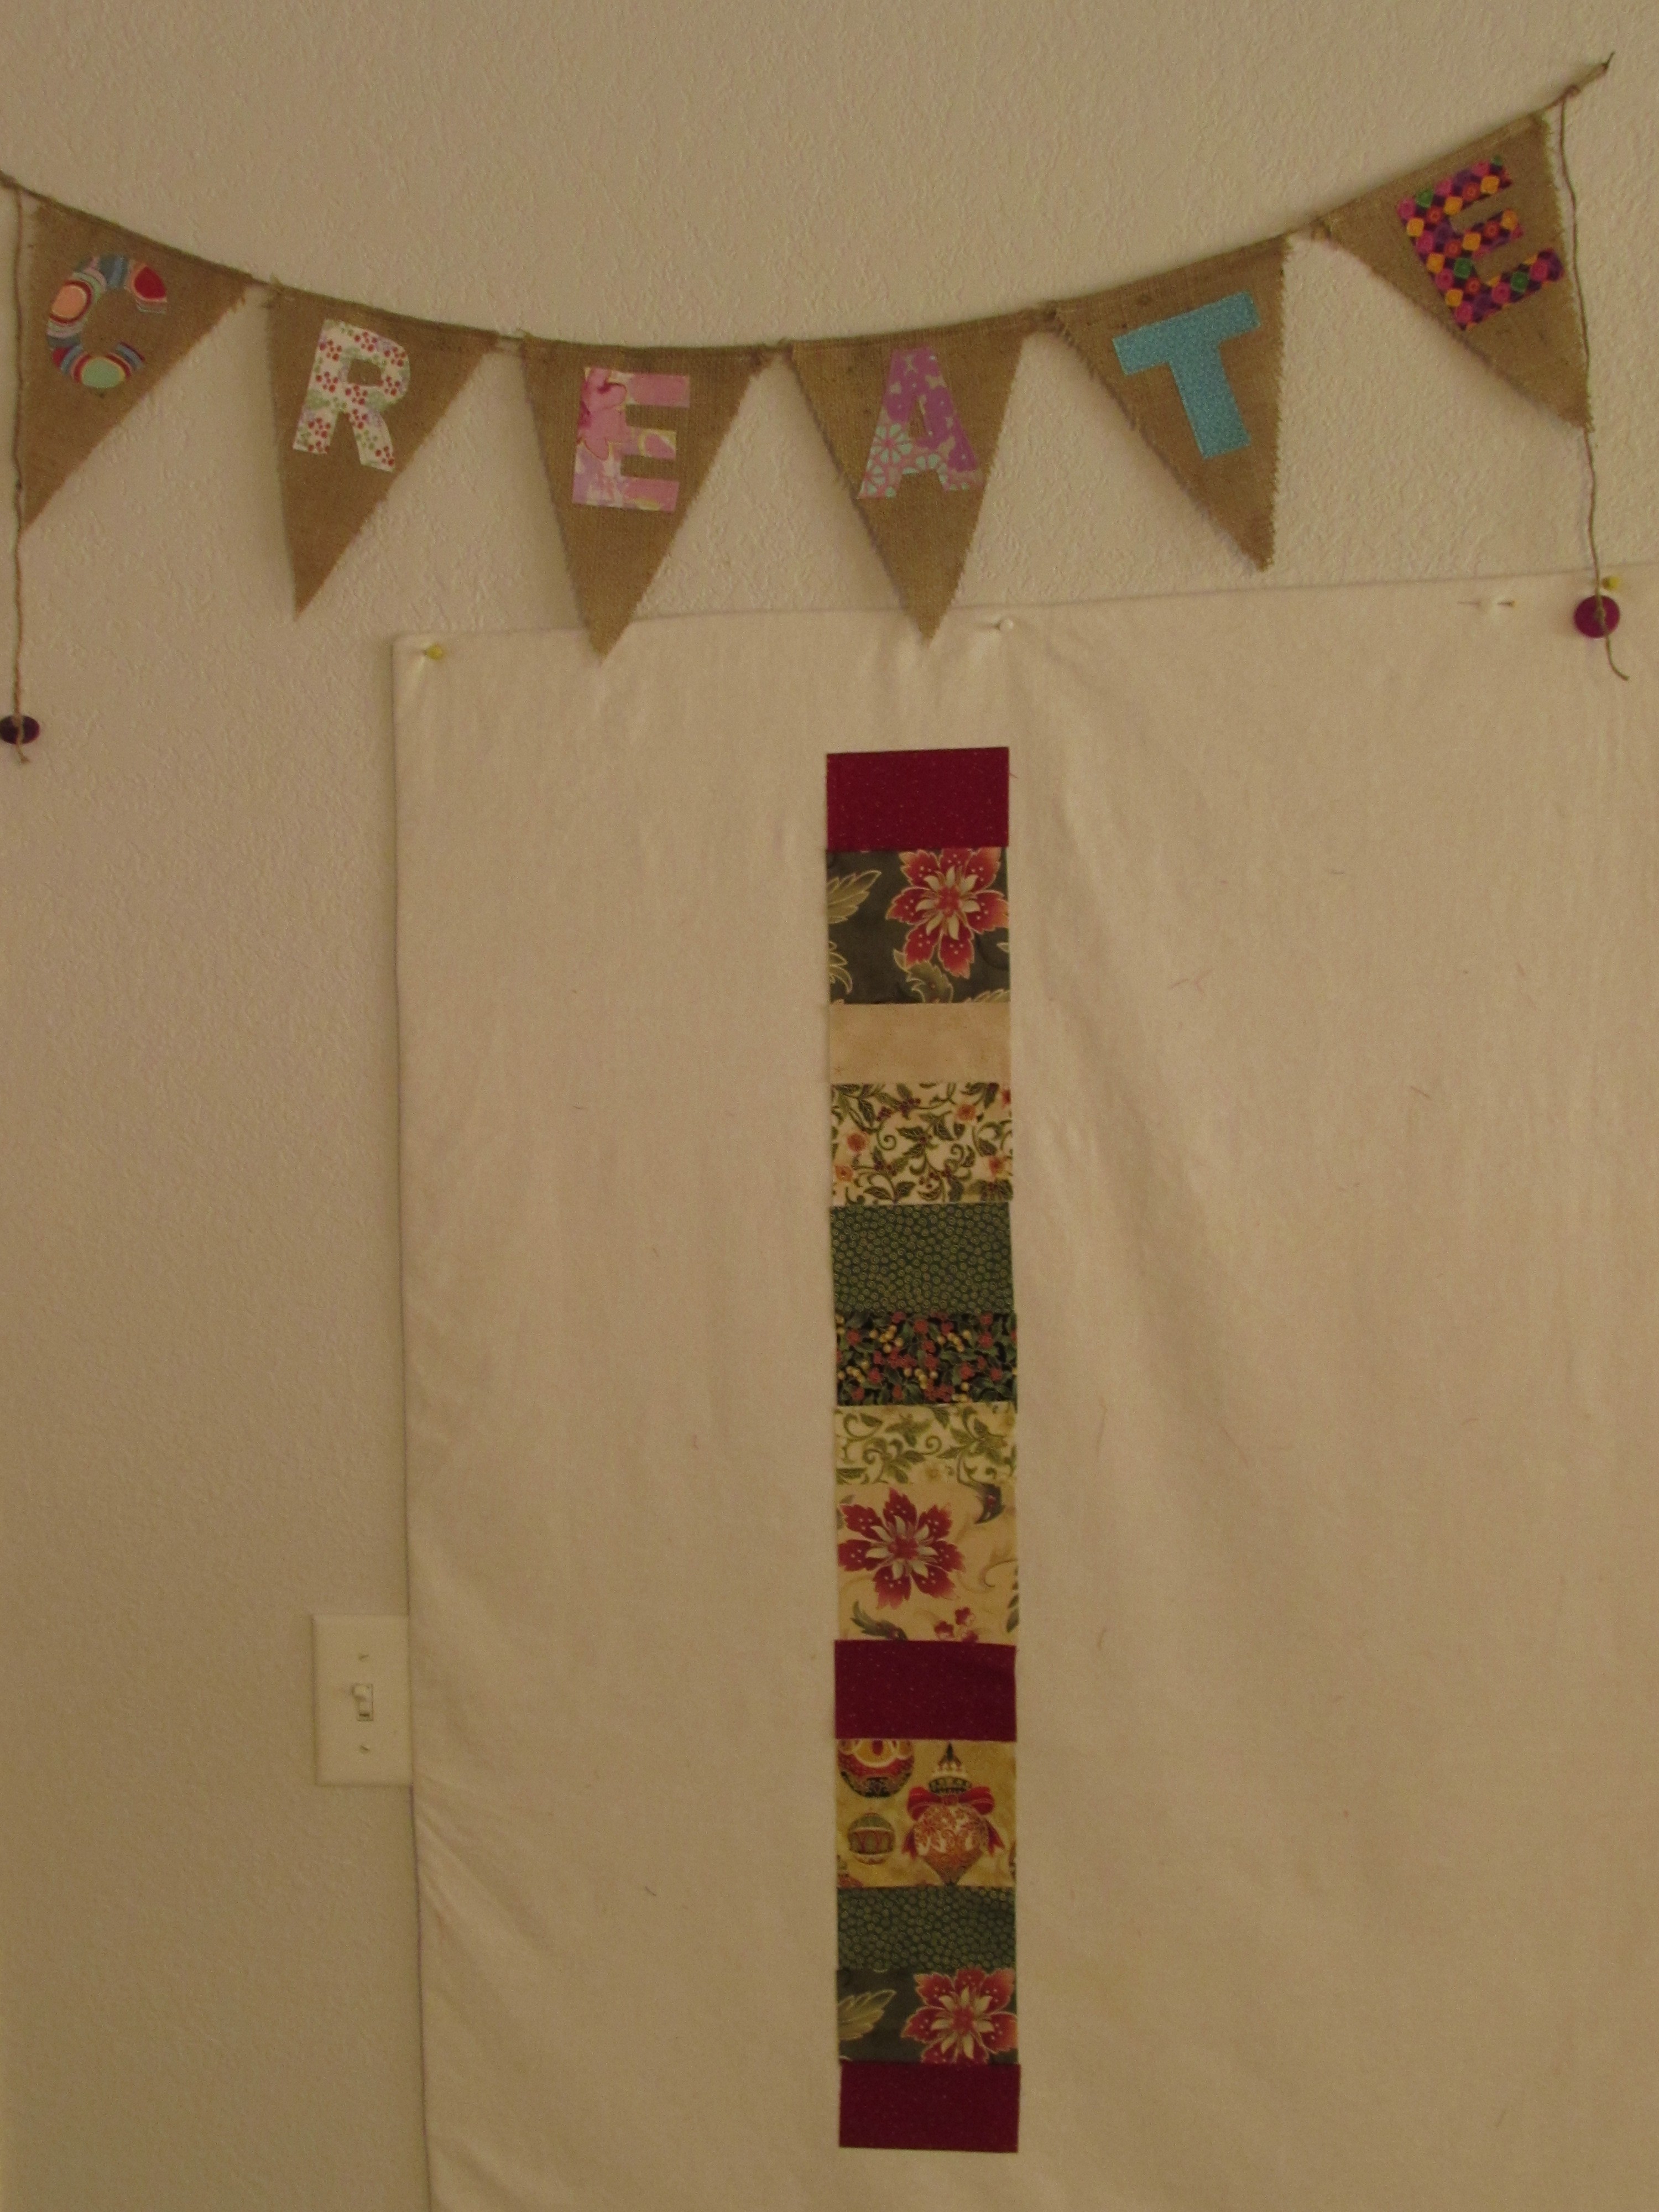
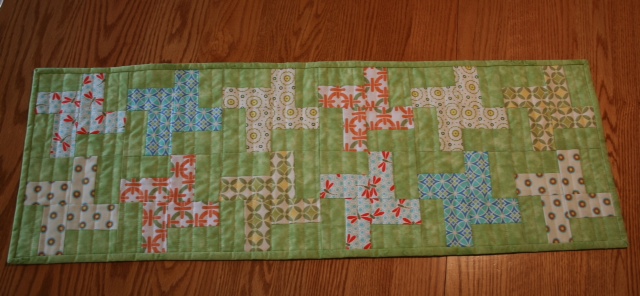
I used more of the upcycled burlap that I love creating with. This pennant is hanging up above my (very fancy!!) design wall, inspiring me. On the design wall is a strip that I created with some holiday fabric scraps. I will add some lengthwise strips to the long edges to create a Christmas table runner but I need to find something at the LQS because none of my fabric worked. Love the banner though.
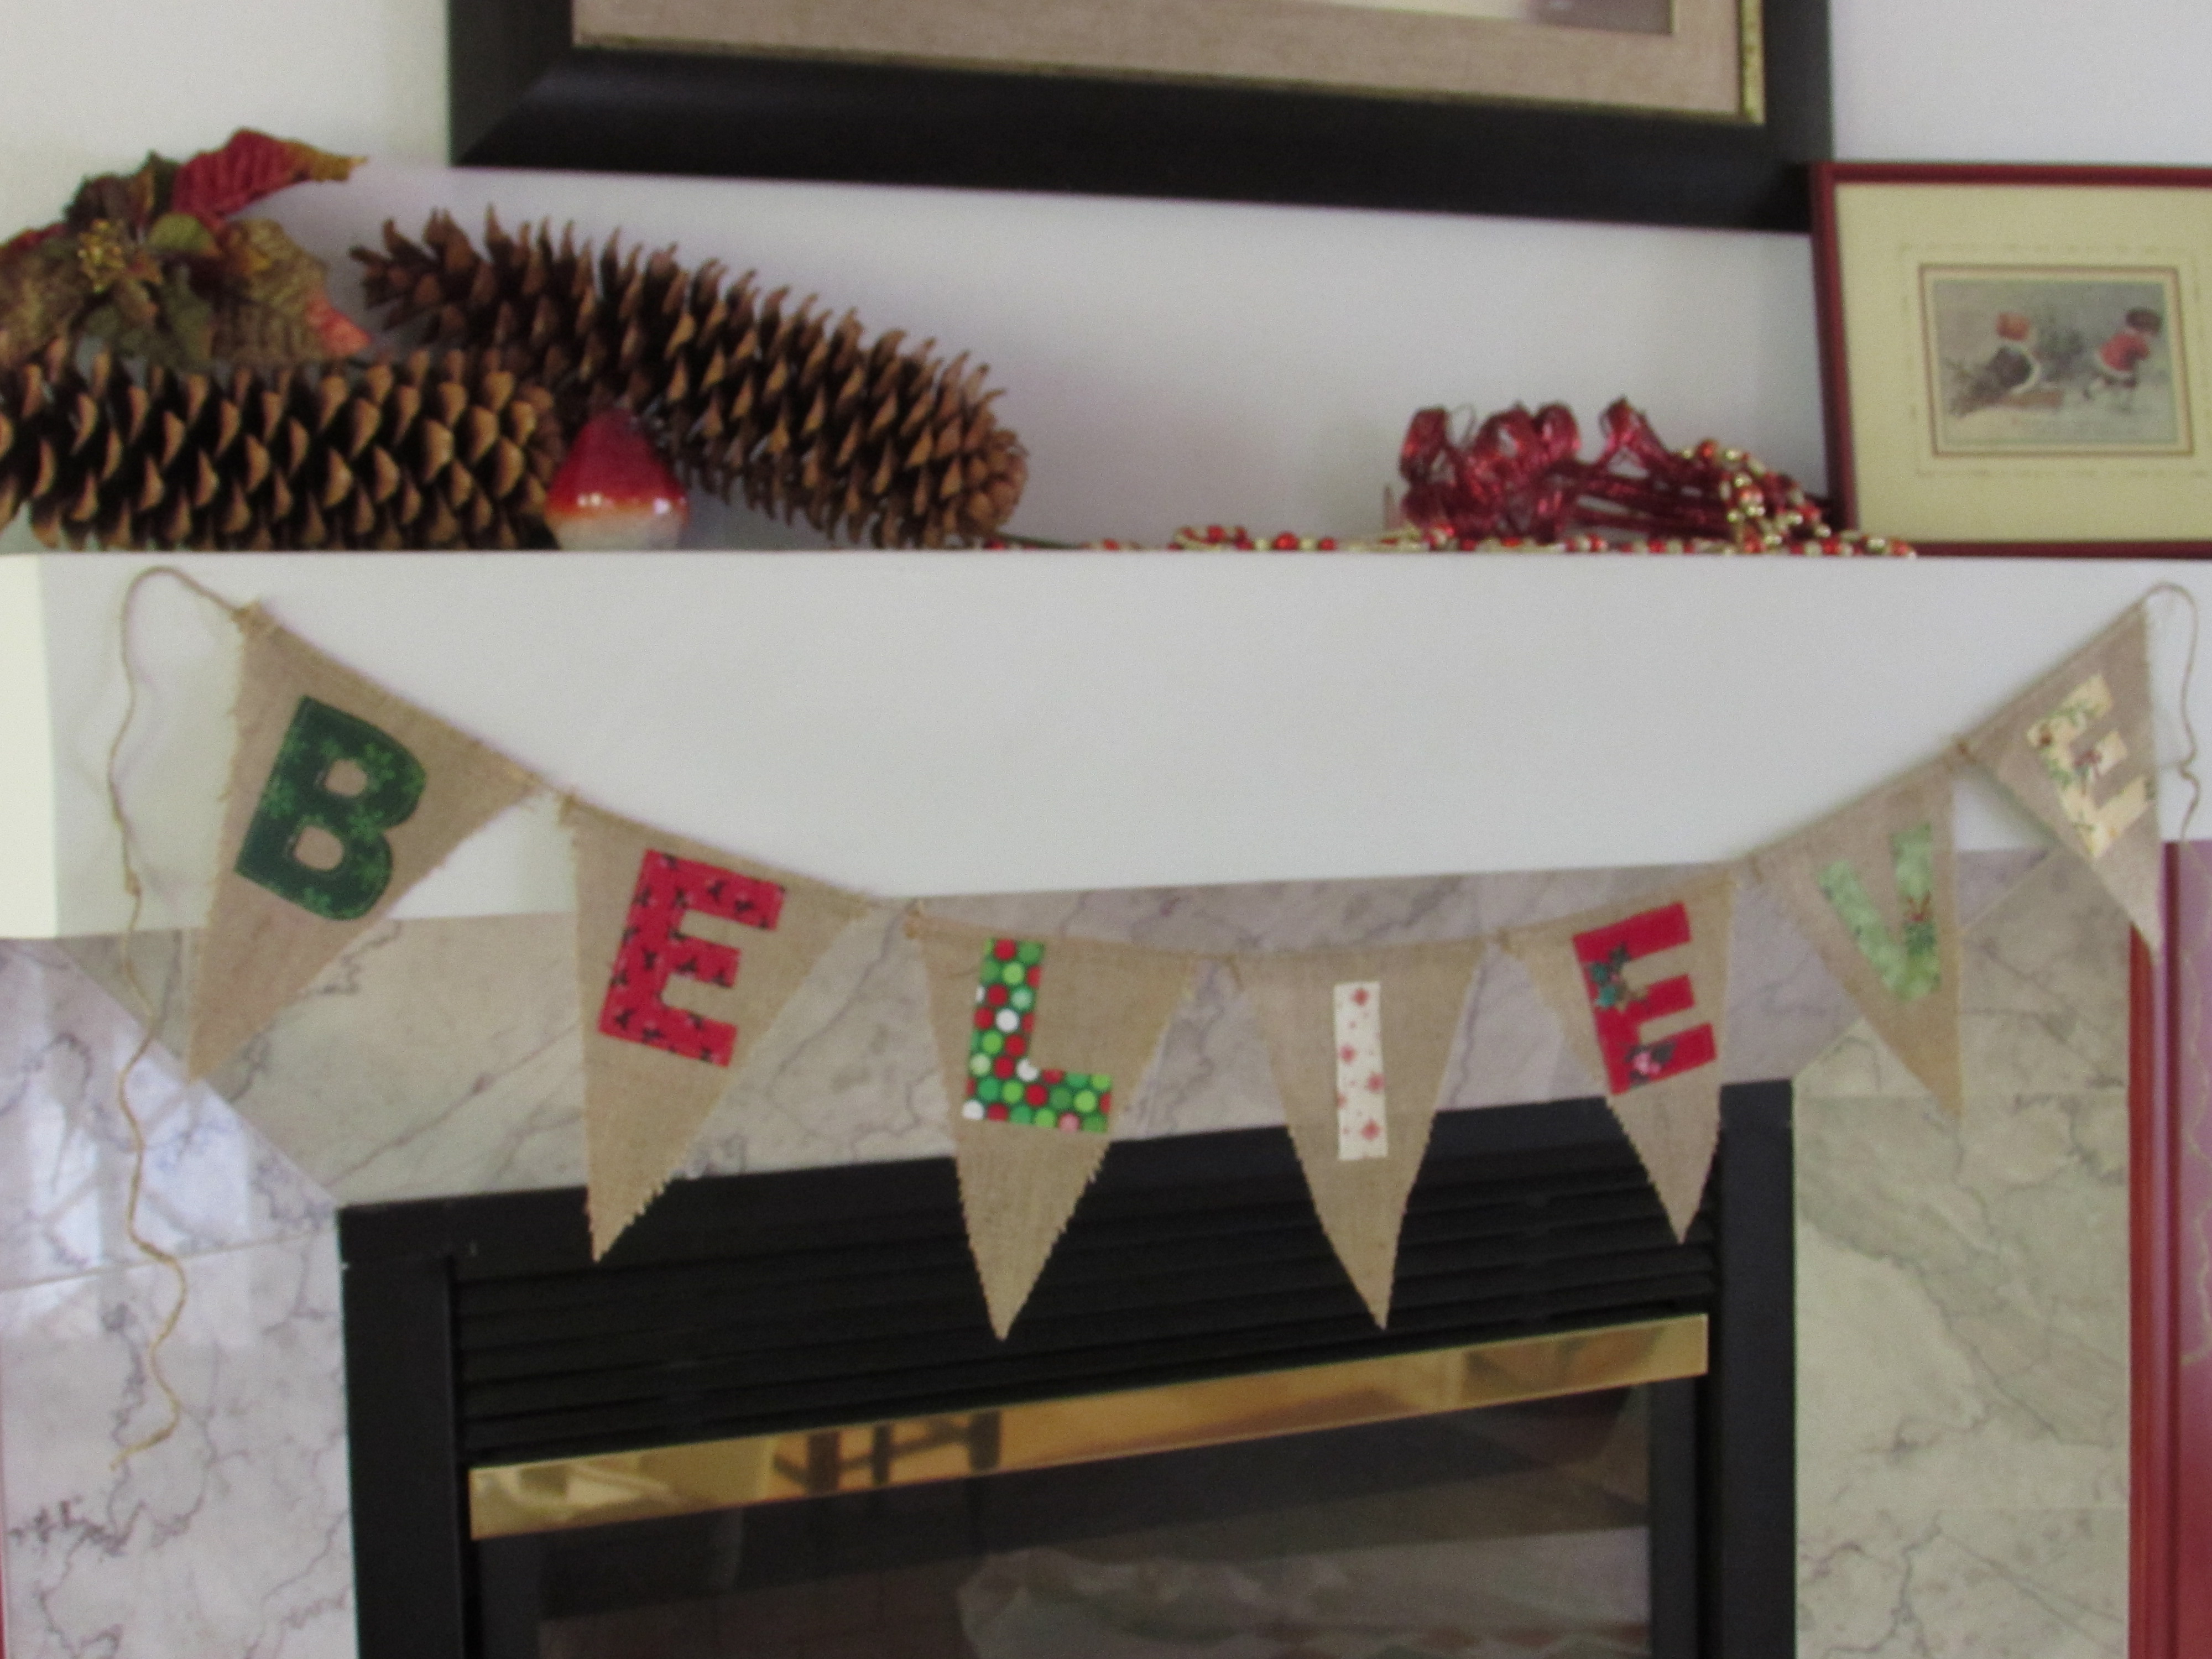
After making the “CREATE” banner I decided to make one for the holidays. First I made this one:
I put up a few odds and ends on the mantle to give it a holiday feel. I like the pennant with the exception of the E on the end. It needs to be a darker color so I will replace that flag.
This is the other one that I made.
I like this one but it needs some embellishment. I think I will add some buttons to the ends of the twine for weight and maybe that will dress it up a bit.
Finally, I made progress on a holiday lattice quilt that I am making. It will be set on point and needs sashing. I am thinking of using a fabric that is a deep cream color, tone on tone, for the sashing. Again, I didn’t have anything for this. I need to get the sashing as well as a fabric to use for the corner and setting triangles. But this is coming along nicely and will sew together quickly.
Not bad for a few days stuck inside! Hoping for clear skies tomorrow and a trip to the fabric store. Simple pleasures, right?
Linking to Stitch by Stitch, Freemotion by the River, Fabric Tuesday, WIP Wednesday and Let’s Bee Social as well as Needle and Thread Thursday. Links to these wonderful sites are found at the top of my page under Link Ups.
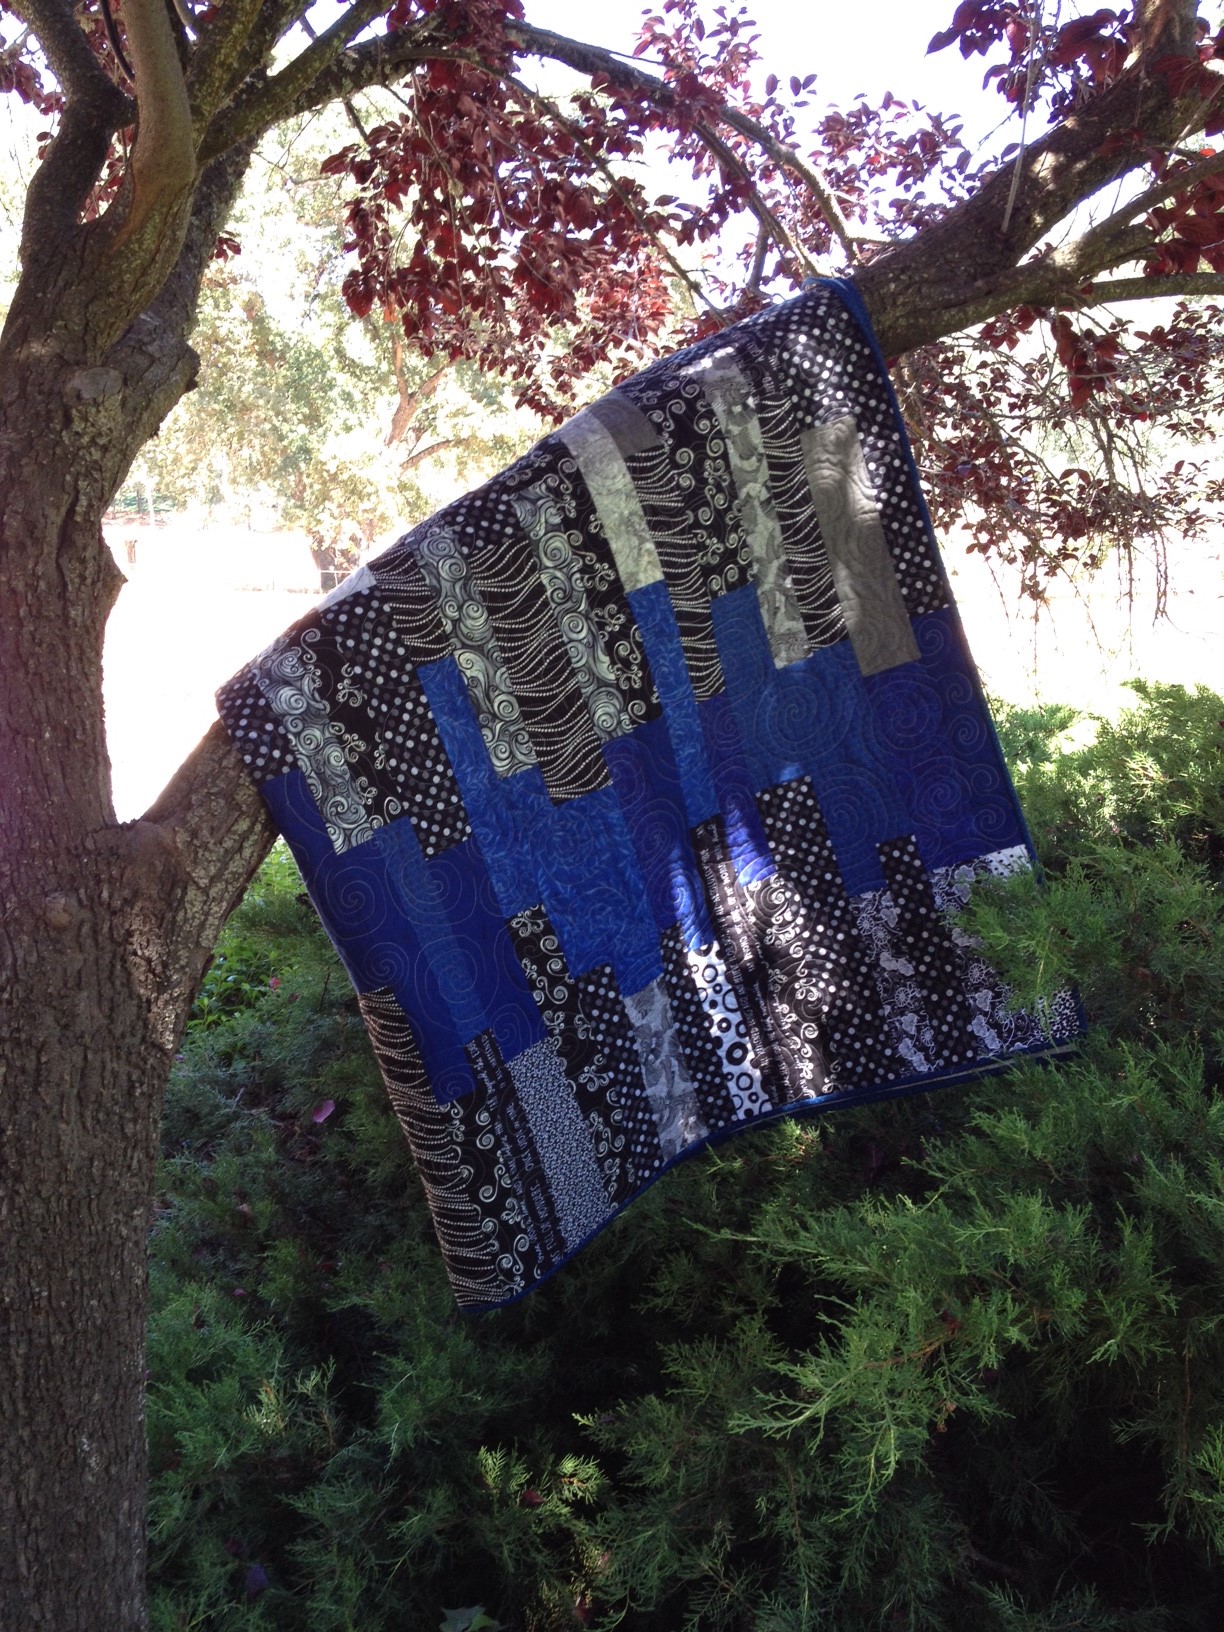
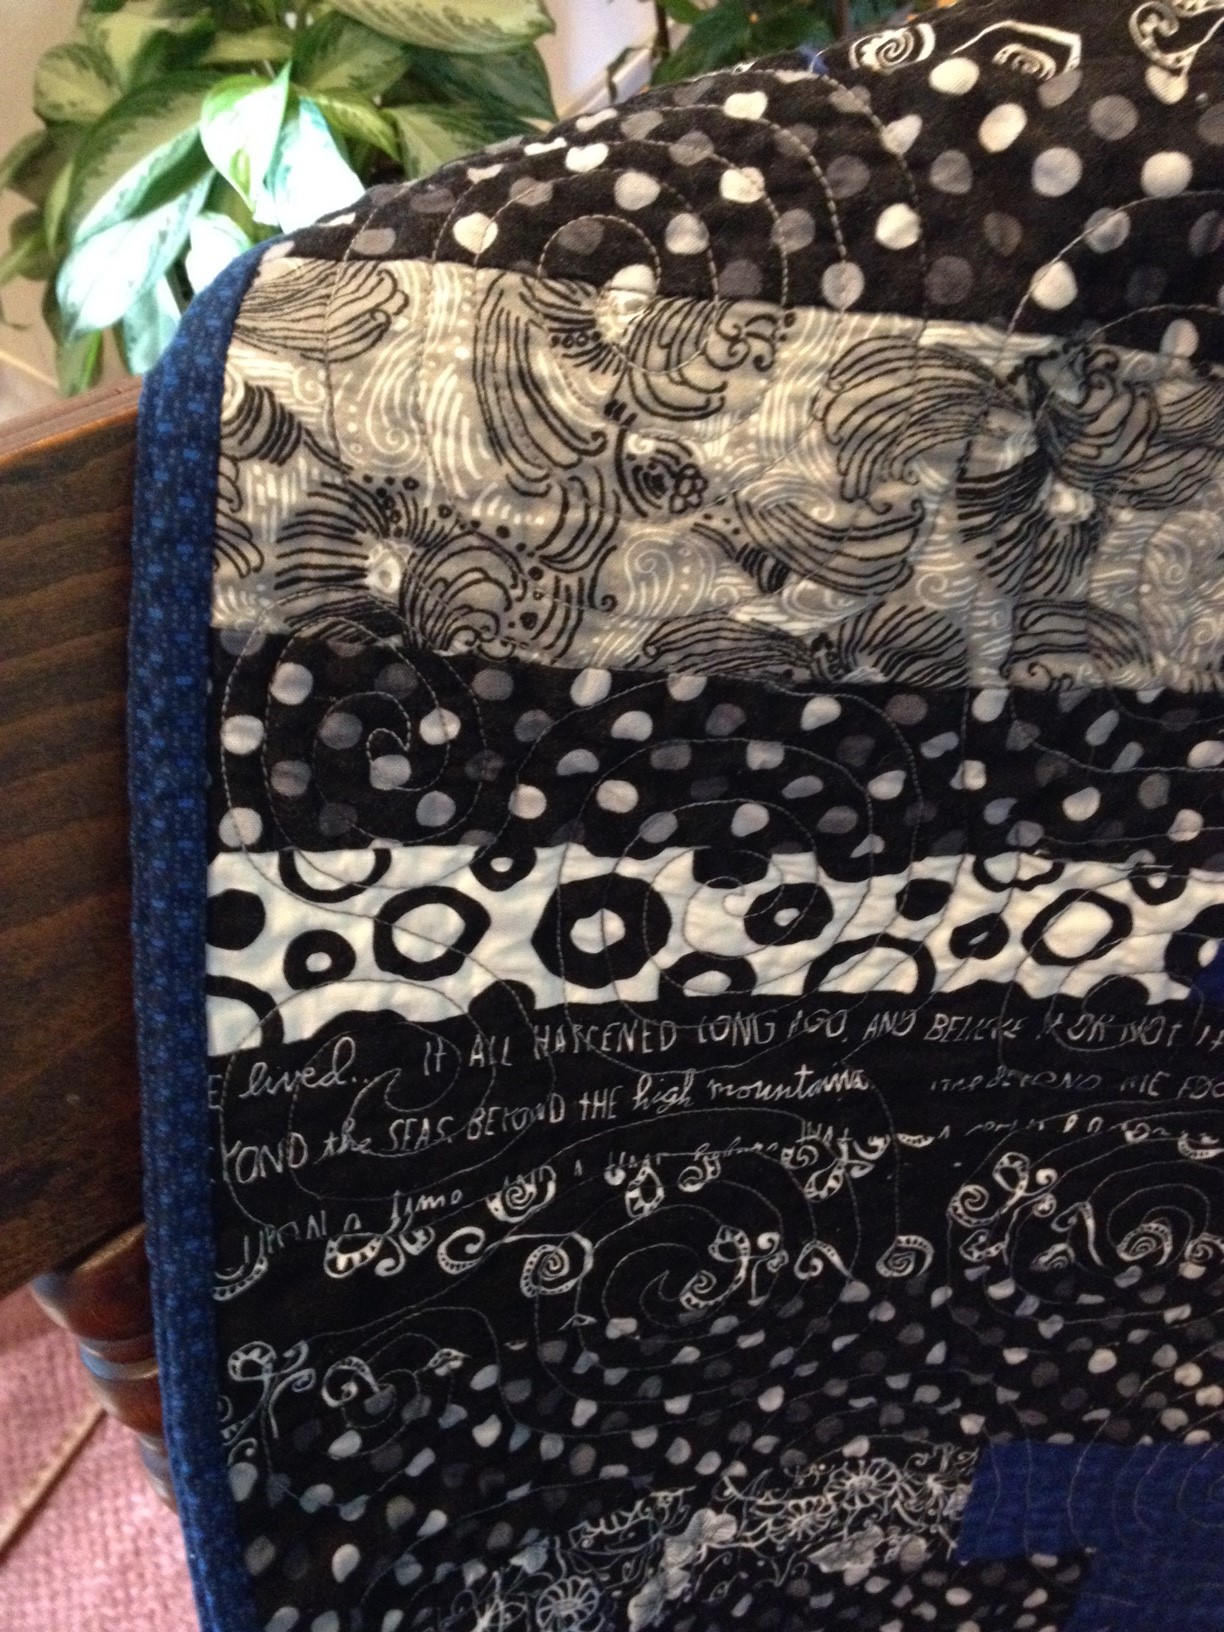
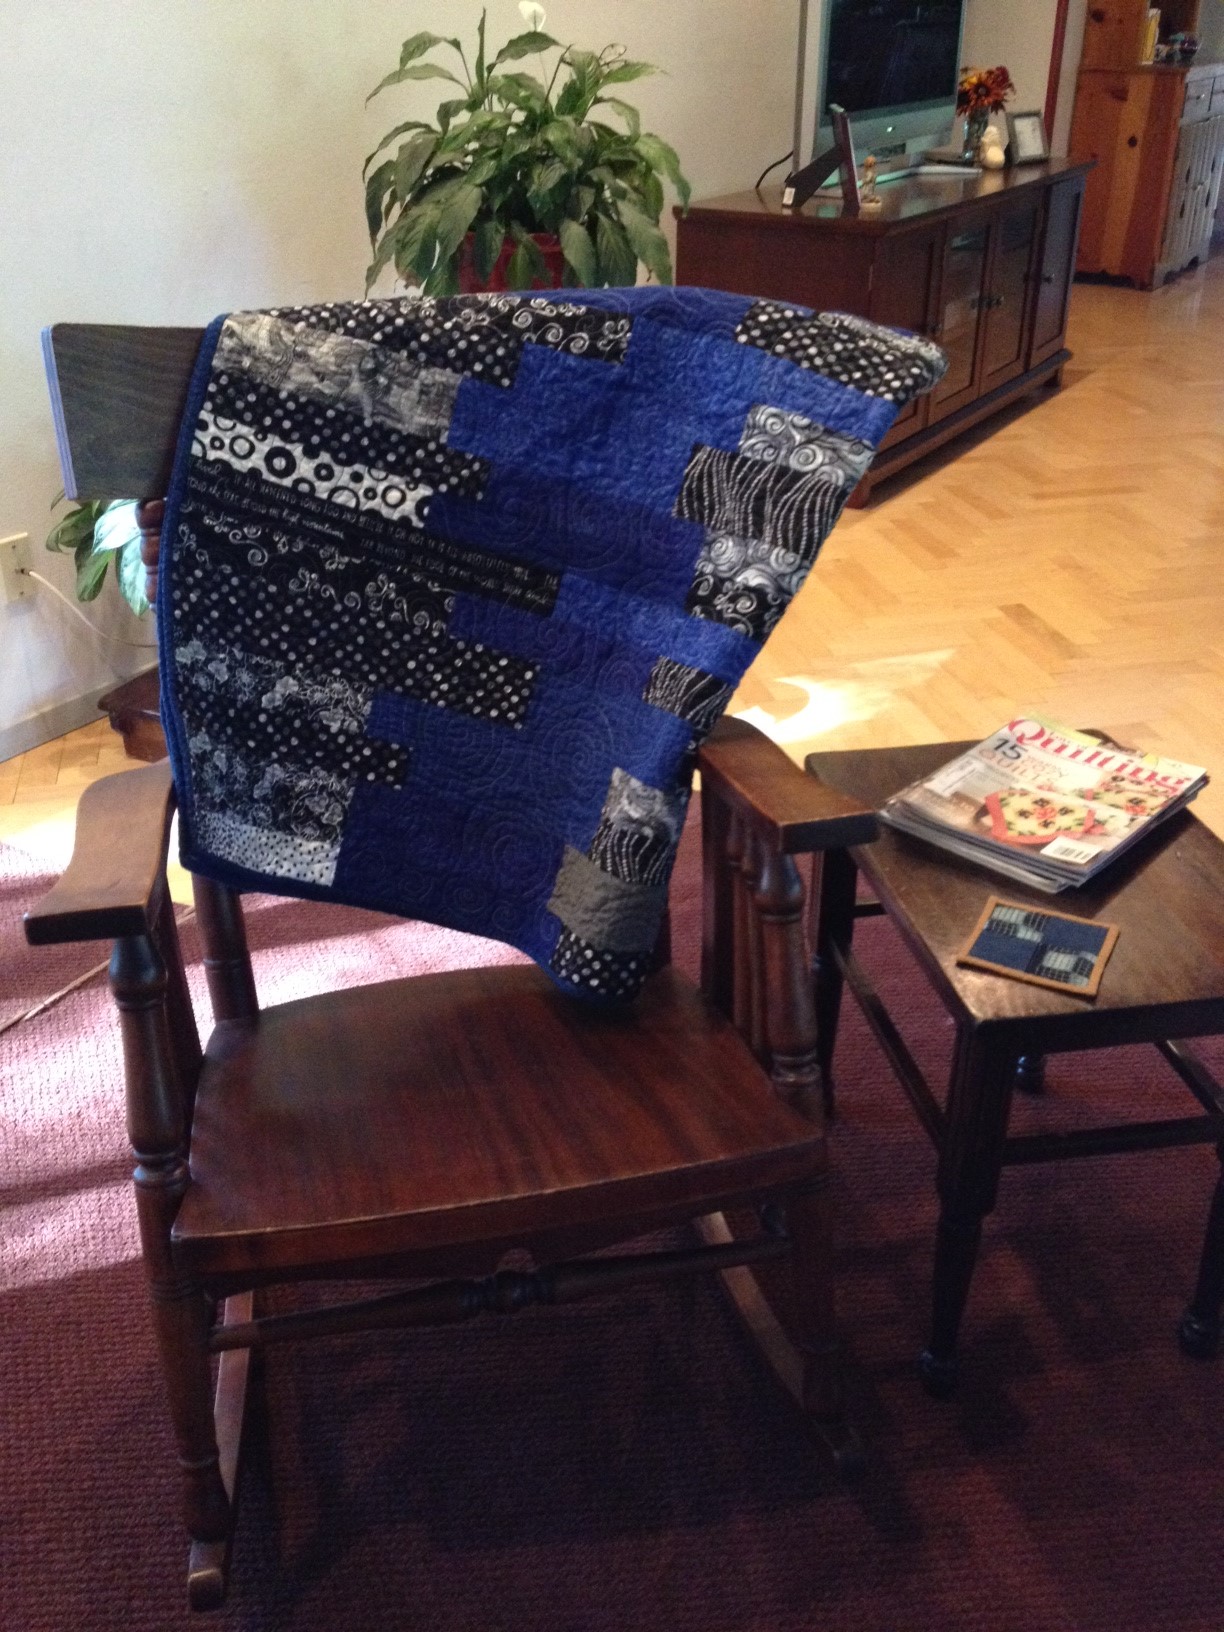
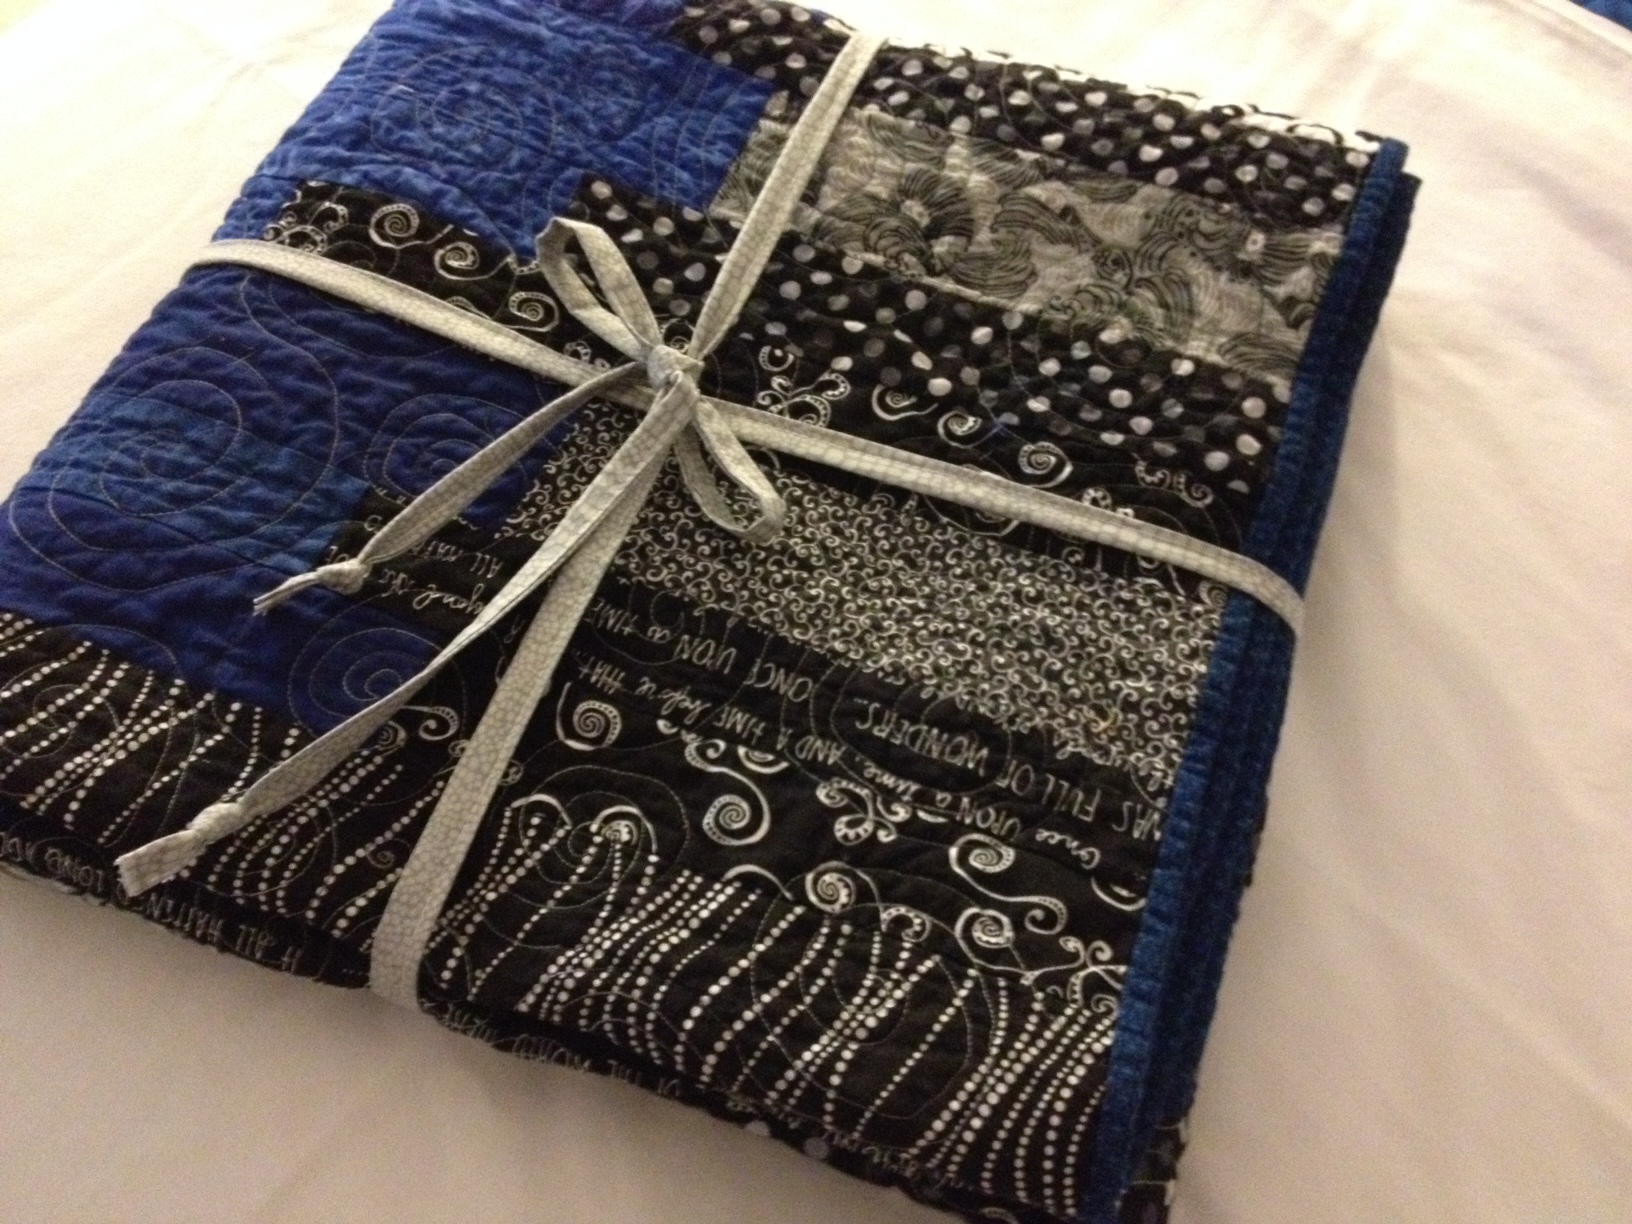
At the beginning of this year I set a goal to make three birthday quilts for three special women. You can read about the first two of these quilts here. Yesterday I finished the third of the birthday quilts!! Yay! I will ship it out today in honor of her birthday, which is today! Think it will make it from California to Chicago in time for her to open it tonight?? At least I am getting it in the mail – it will have to arrive a few days after the day. I am sure she won’t mind. I really love this quilt. I had pinned this design on Pinterest a long while back and was so happy to have an occasion to make it. I used the pattern called Sedimentary created by Debbie Grifka at Esch House Quilts. Before I got started I check with my son, partner of the birthday girl, Marisa. I knew I wanted to use black, gray and white as the basis but wanted him to select the accent color. He chose cobalt blue, which I thought was a great choice. Nice bold contrast but not too bright. This is a really easy quilt to make. Cutting pieces consisted of lots of strips in three different widths. The pattern directions are crystal clear and easy to follow. Once the strips are sewn together it is a matter of laying them out and moving them around until the layout is pleasing. I think if I ever make it again, I would reduce the widths of the strips overall and just create more of them. The strip widths are a bit “chunky” looking and narrowing the width would help that. Overall though, I am so happy with it and hope that Marisa loves it!! It was a lot of fun to choose all of the different black and white and gray fabrics. Some I had in my stash and others I purchased for the quilt. I used two text prints that I thought were perfect for Marisa. One was all about stories (fitting as she is absolutely a bibliophile) and the other is written in French (Marisa is multi-lingual and speaks French among other languages). I had not used text prints before and they look great. It is fun to personalize the quilt with just the right text prints. The quilting was easier than it has been. I suppose that it truly is all about practicing and it seems that each time gets a bit more comfortable and looks better over all. I used YLI thread in a varigated gray to quilt a random pattern of swirls. The pattern contrasts nicely with the linear direction of the pattern. The thread was heavier and showed off the quilting better. (Although on the swirls that were a bit herky jerky they showed up more than I wanted!!) The only real problem was when I was quilting on the darker black strips, it was hard to see where I was coming from and going to. The back – I love the back. Sometimes I get more excited about the back of a quilt than the front. I decided to make four modern blocks with leftover strips and insert them in a column. It looks great. It is bound with a tiny print of blue and black, setting off both the front and back nicely. Here is my favorite tale about this quilt. When I had the quilt lying on the floor and I was squaring it off and trimming the excess before binding it, my 13 year old daughter came in the room and took a look at it. She said, “Mom, this is so pretty. It is sophisticated. Just like Marisa.” I loved Julia’s interpretation and that is how the name of the quilt came to be. Sophisticated. Happy Birthday Marisa!! Linking up with Freemotion by the River, Fabric Tuesday and Sew Cute Tuesday and Show and Tell Tuesday. Also at the lovely Lorna’s, Let’s Bee Social and, finally with Freshly Pieced’s WIP Wednesday.
I have never taken part in an on-line bee or a block of the month quilt activity. Not for any real reason, it just hasn’t happened. Well, I decided to join up and do one. I follow Amy Smart’s blog, Diaryofaquilter, avidly. I love her style and her genuine speak. She has wonderful tutorials. When I first got started quilting I stumbled on to her website and I never left. My first few projects were items made from her tutorials.
If you are new to quilting or want info on the basics, I cannot recommend her enough!
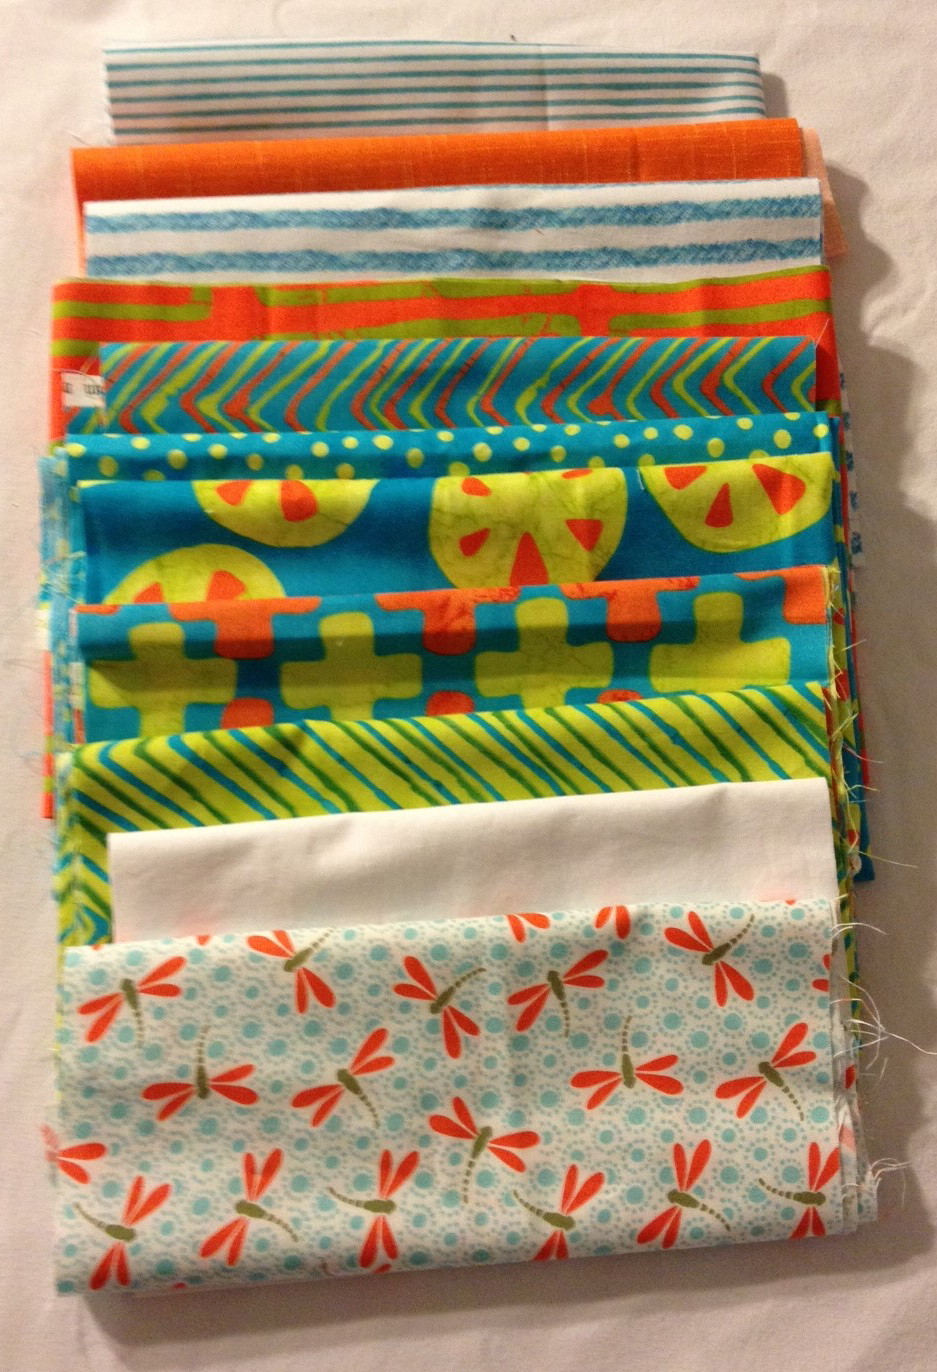
Anyway…. lately Amy has written some posts about the Block of the Month activity sponsored by Aurifil Thread. They are featuring various designers each month and along with an interview of that designer, they post the block that the designer created for this activity.Amy is one of the designers that was featured and interviewed by Pat Sloan. You can read about it here and here and here. The more I read about it, the more I saw the look of the different blocks, the more I wanted to do it. Really, by making one 12 1/2″ block per month, you’ll end up with a quilt at the end of the year. What’s better than that? It doesn’t really get in the way of other projects that are in progress. It all started back in January so I am a wee bit late to the party. But, better late than never! This week I got everything together and started. I chose to use a collection of fabric called Stitch in Color, designed by Malka Dubrawsky for Moda. I saw pieces of this on clearance (the line came out in 2012) during a shop hop I did earlier this year and snatched them up. I love the bright colors. Plus it is wayyy out of my norm for colors and value. Much bolder than what I usually choose. I supplemented the set with a solid white and solid orange, as well as the blue stripes and dragonfly fabric. I don’t think I have enough of Malka’s line to do all twelve blocks and really, I wanted some solids in there.
What do you think??
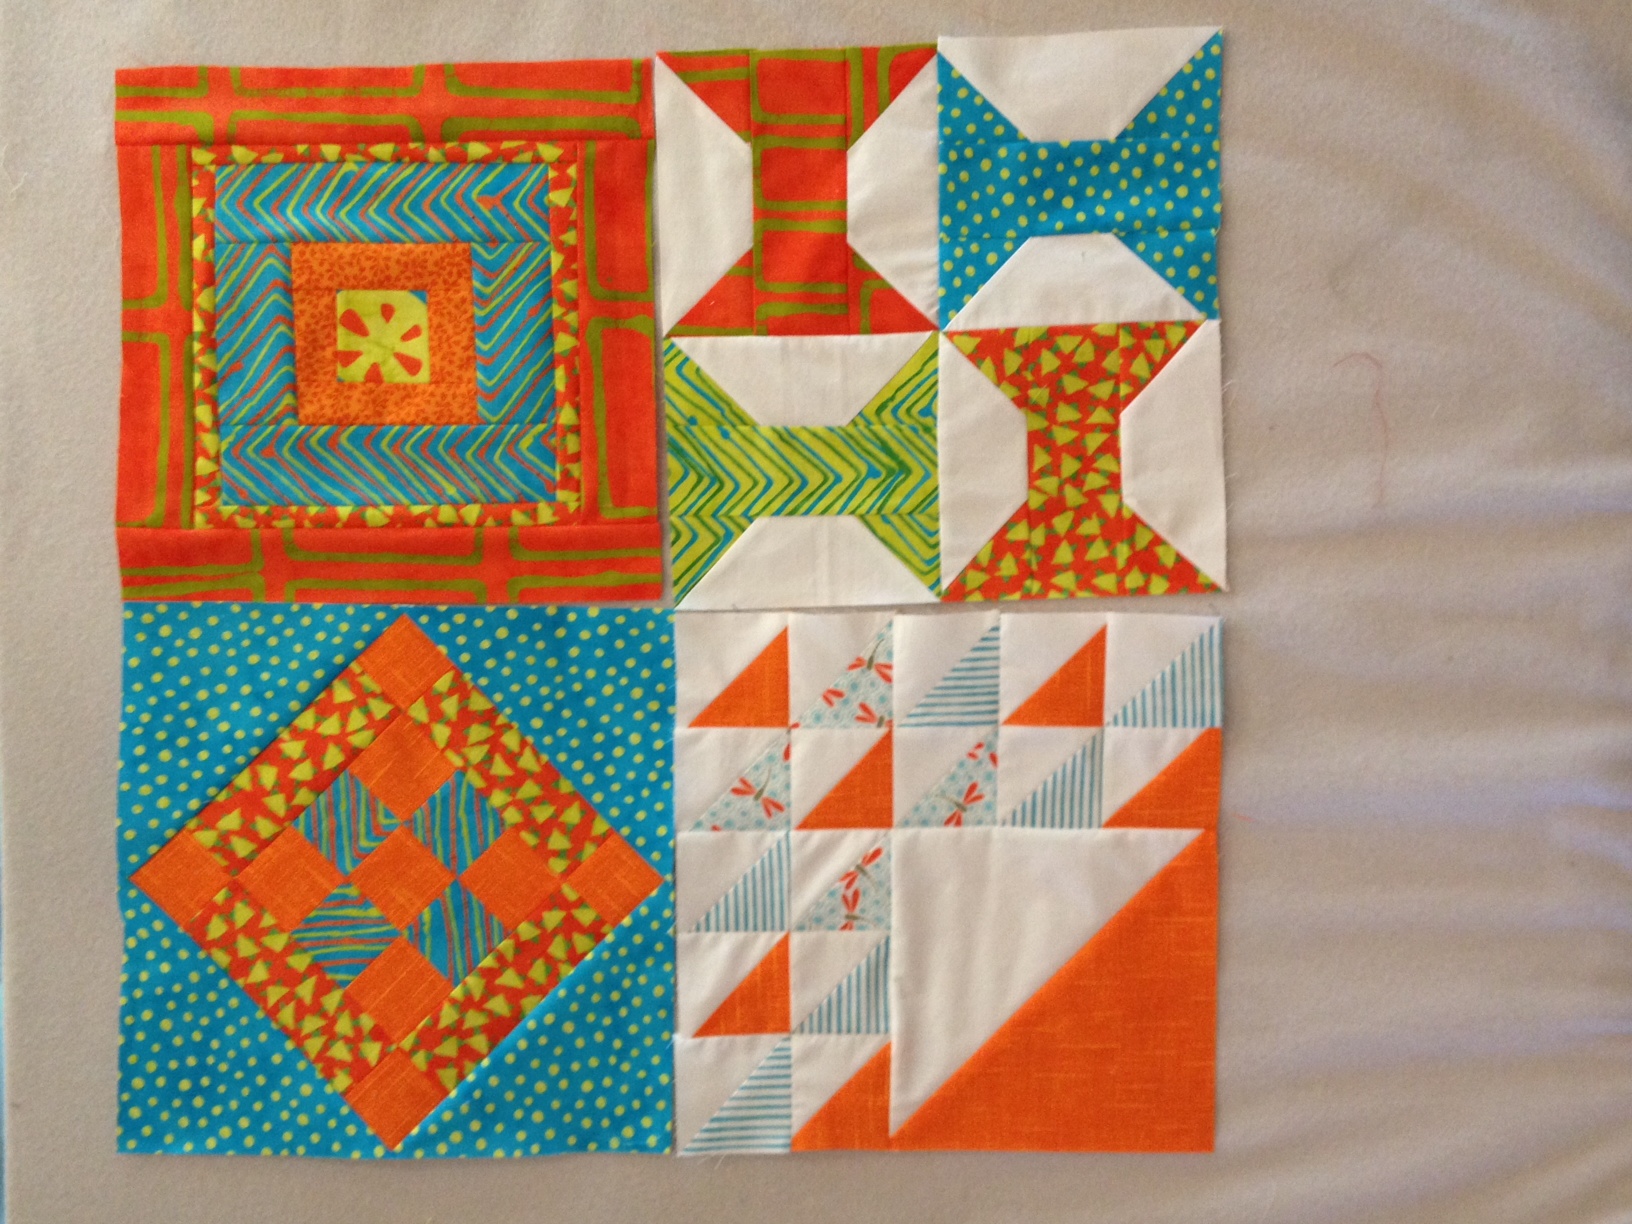
I have finished four of the blocks so far. The thing that pleases me most is that my triangles worked well and my points line up!! Yay – that is something I have been working on. These blocks were a great place to practice. It provides the opportunity to make blocks that are different and it is kind of fun to make something where you don’t know what the finished result will be (since you don’t see all of the blocks at once). I look forward to placing the blocks come December!
See??
I love how this is coming together. The colors match absolutely nothing in my house but I am keeping this one anyway. It is going to be so bright and spirited. Just in case anyone out there decides to join up, I will tell you that the March block, called Borders (upper left block) was designed to by 12 x 12. The rest of the blocks are 12 1/2″ square. So I will have to modify it and add a 1/2″ border to it so it fits with the rest. Luckily it is an easy one to fix! If you participate, post pictures of your blocks to the Aurifil Flickr site. They are randomly picking one participant per month and sending a box of Aurifil thread. Ahhh…. love that stuff and it is spendy. I can only hope – pick me, pick me!
If you are making blocks, leave me a comment and a link so I can see yours!!