Category Archives: string quilt

The Best Laid Plans

A few months ago my nephew and his wife bought flights to come up for a visit from Colorado. They were to stay at my parents’ house. We were all so excited because we don’t often see them. In the last 10 years, I may have seen him twice and met his wife only once. Anyway, I was pretty excited. Mom and Dad planned a brunch. My sisters and I planned to take them on the ferry over to Seattle to visit some of the touristy area around Pike’s Market.

Well, none of that was to happen for me. I got sick about 10 days ago and by the time the weekend rolled around, I felt awful. I missed every bit of the weekend. How disappointing! I am sure they had a lovely visit and the brunch seemed to go well. My kids were there and my husband too. I spent the afternoon dog-sitting my grand dog and binge-watching the Apple TV show, Trying. (By the way, if you haven’t seen this show and are an Apple TV subscriber, I think it is really cute).

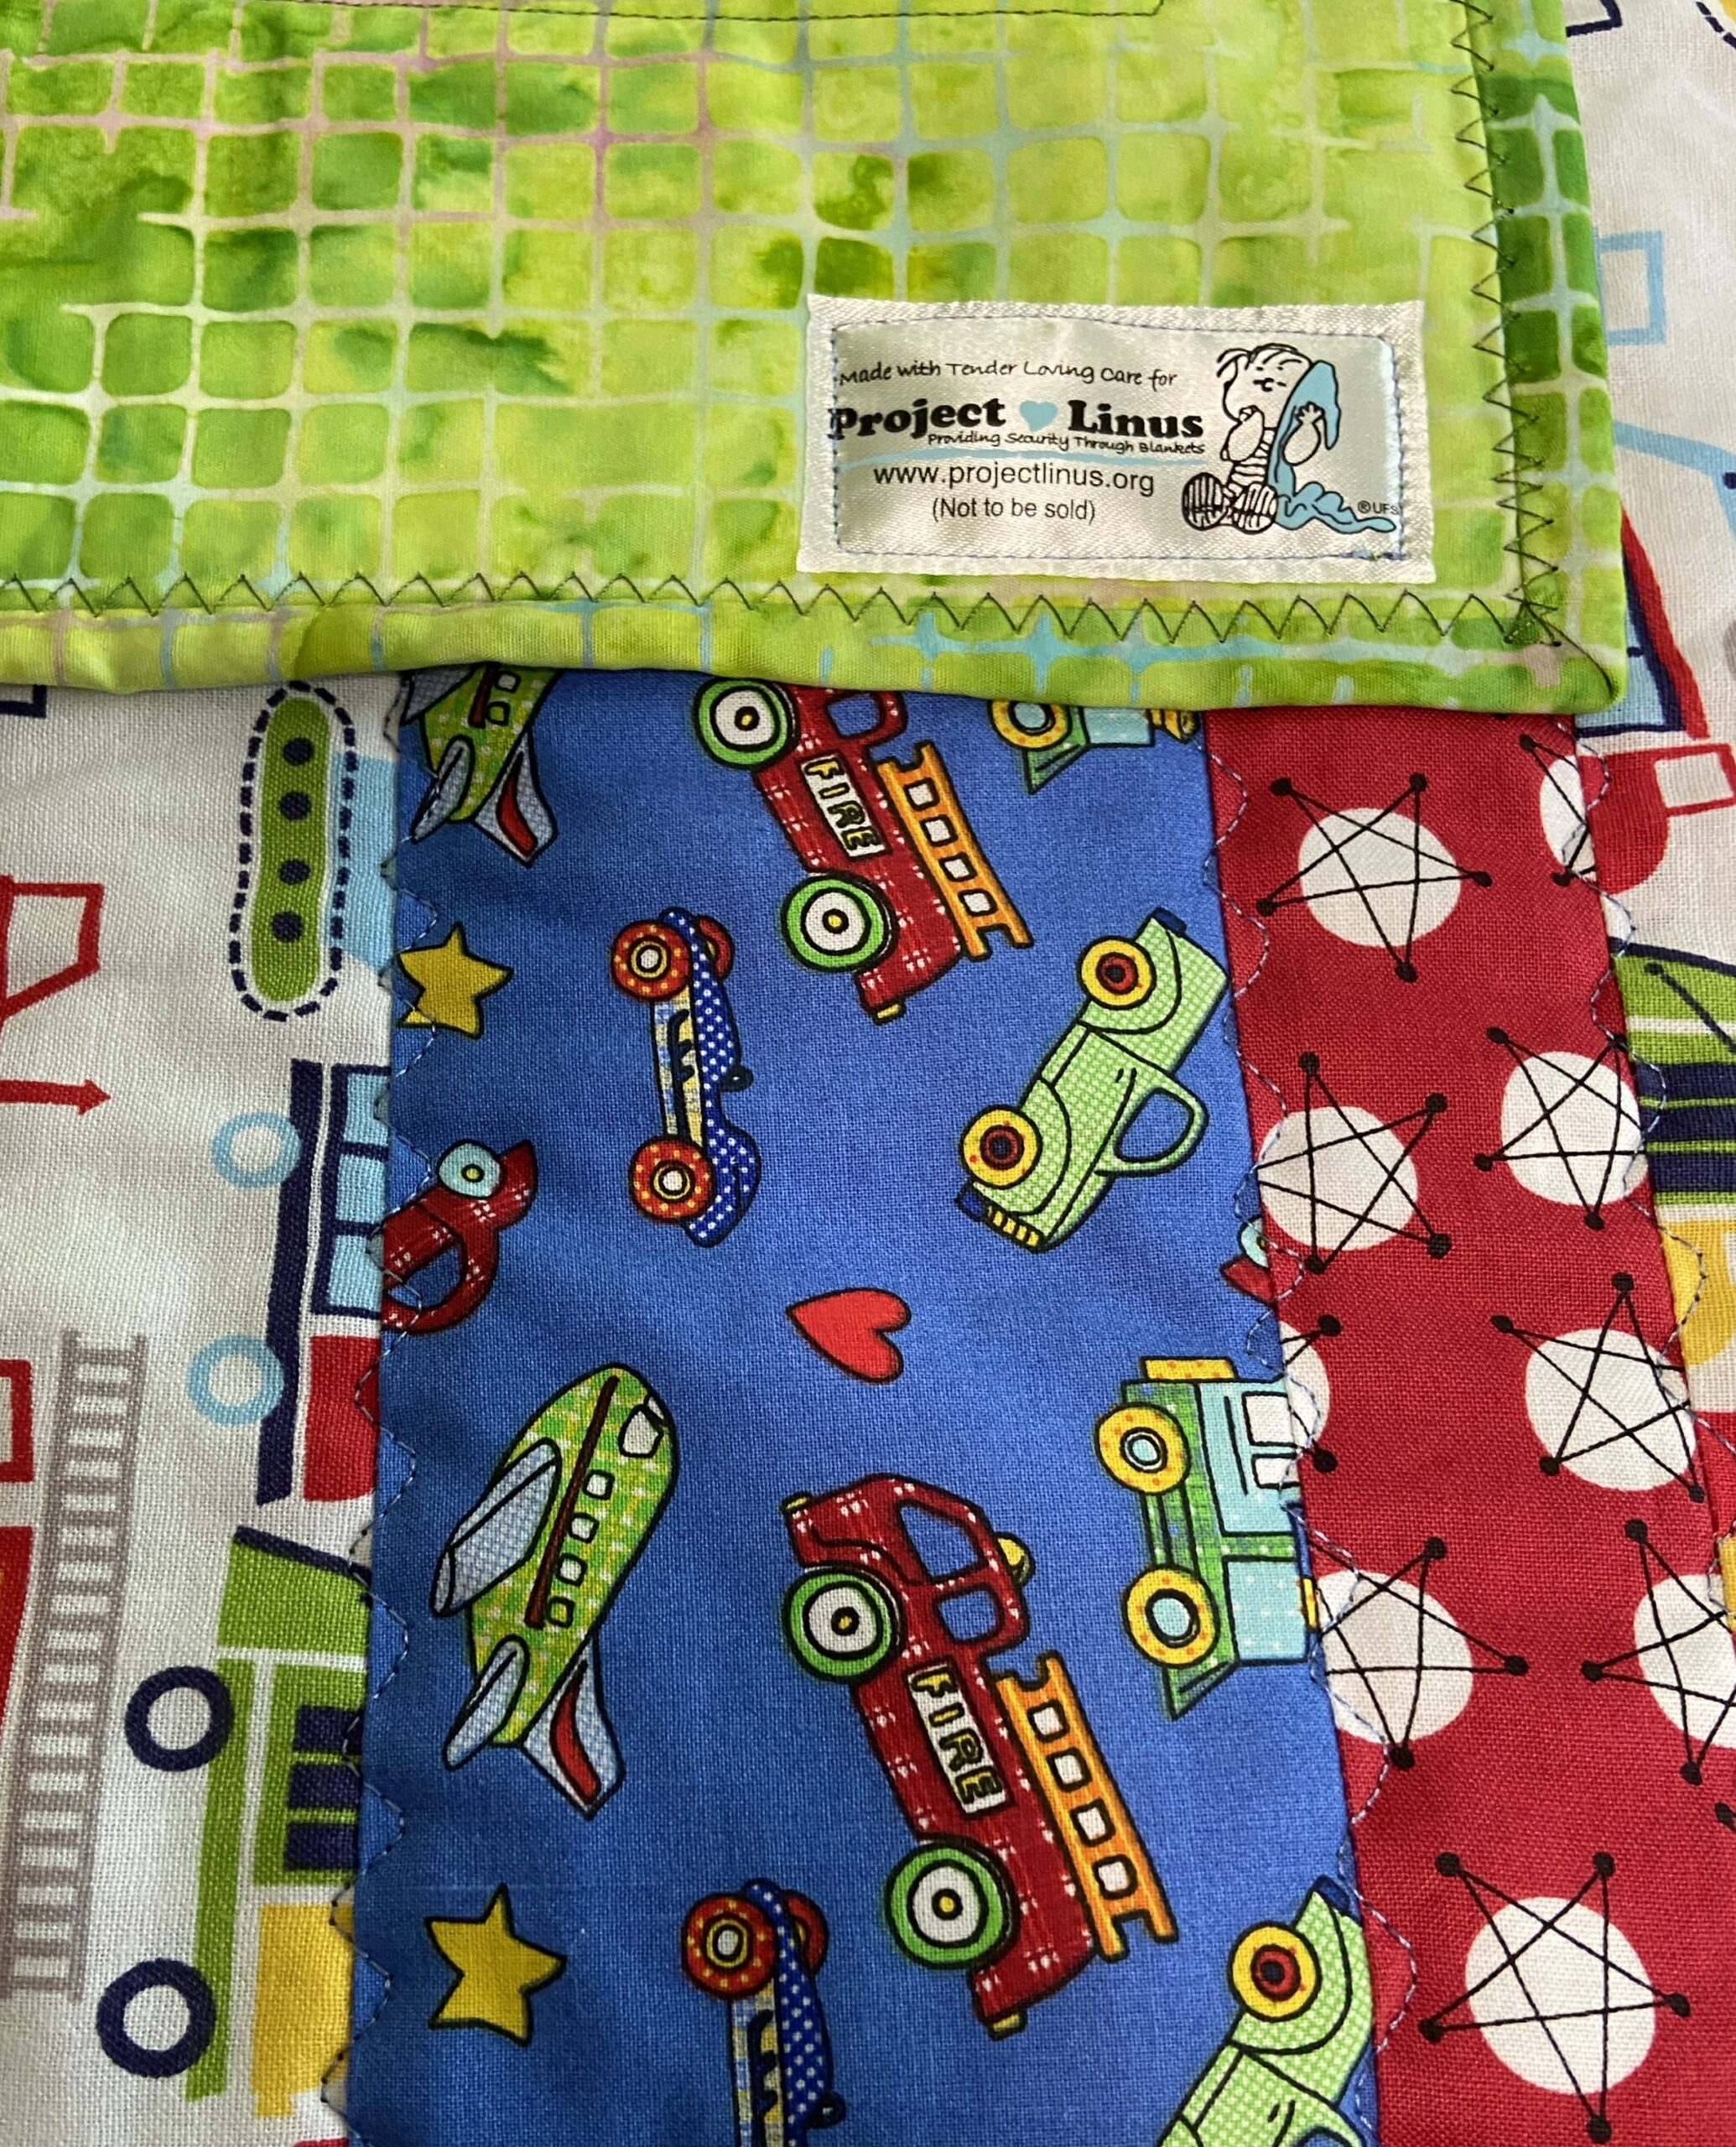
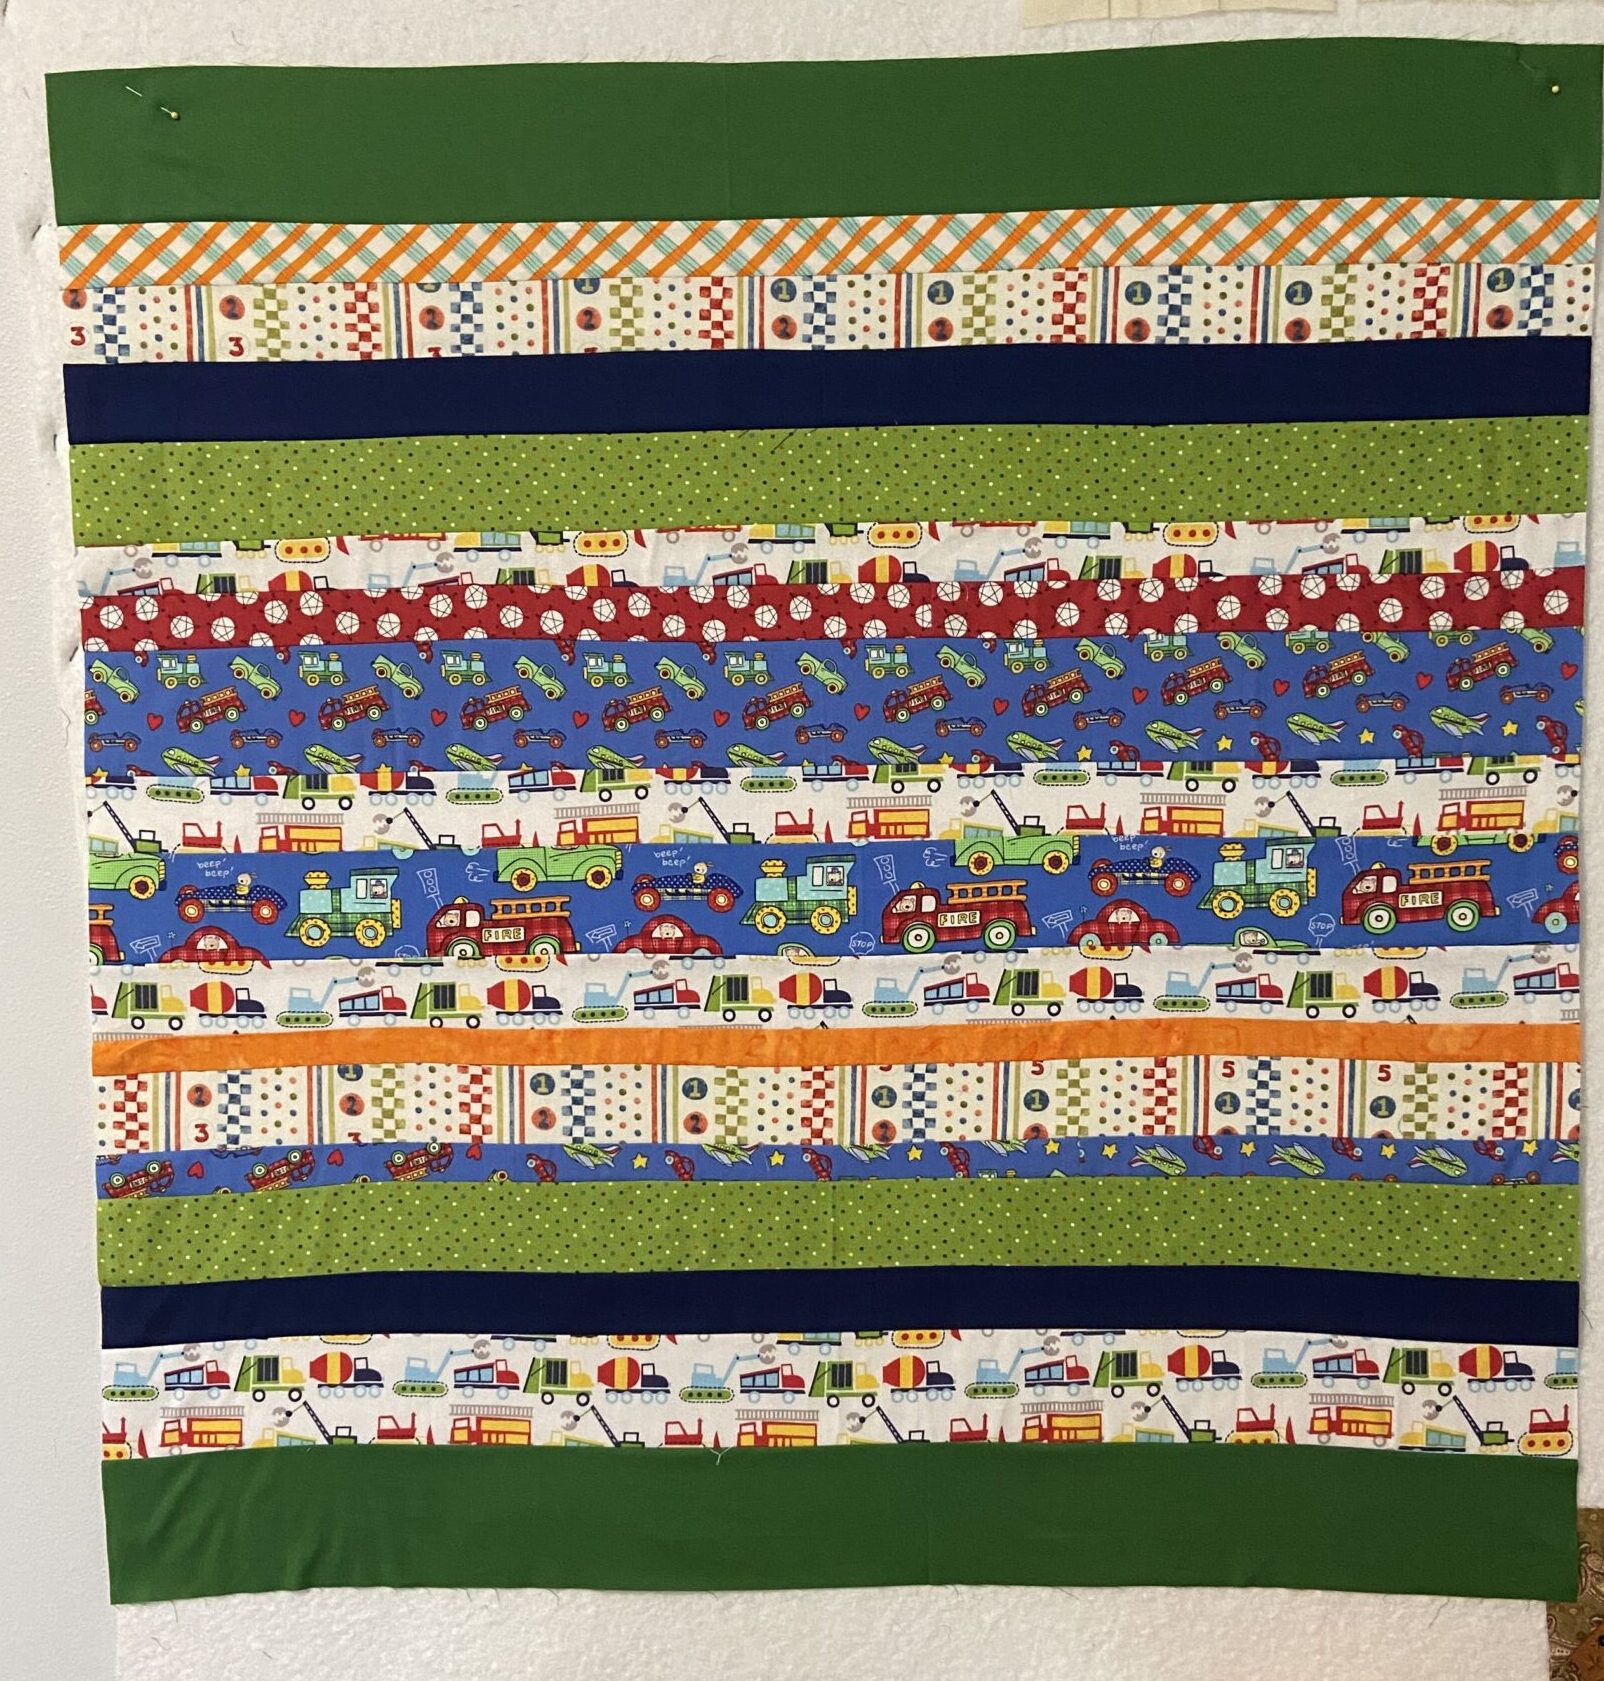
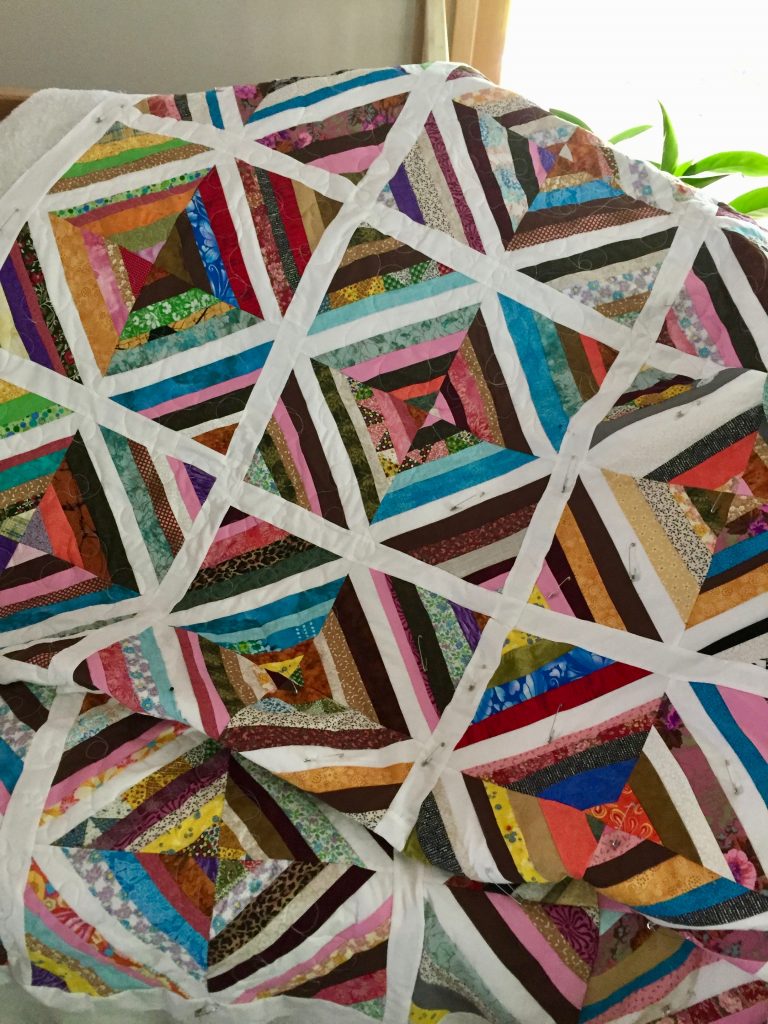
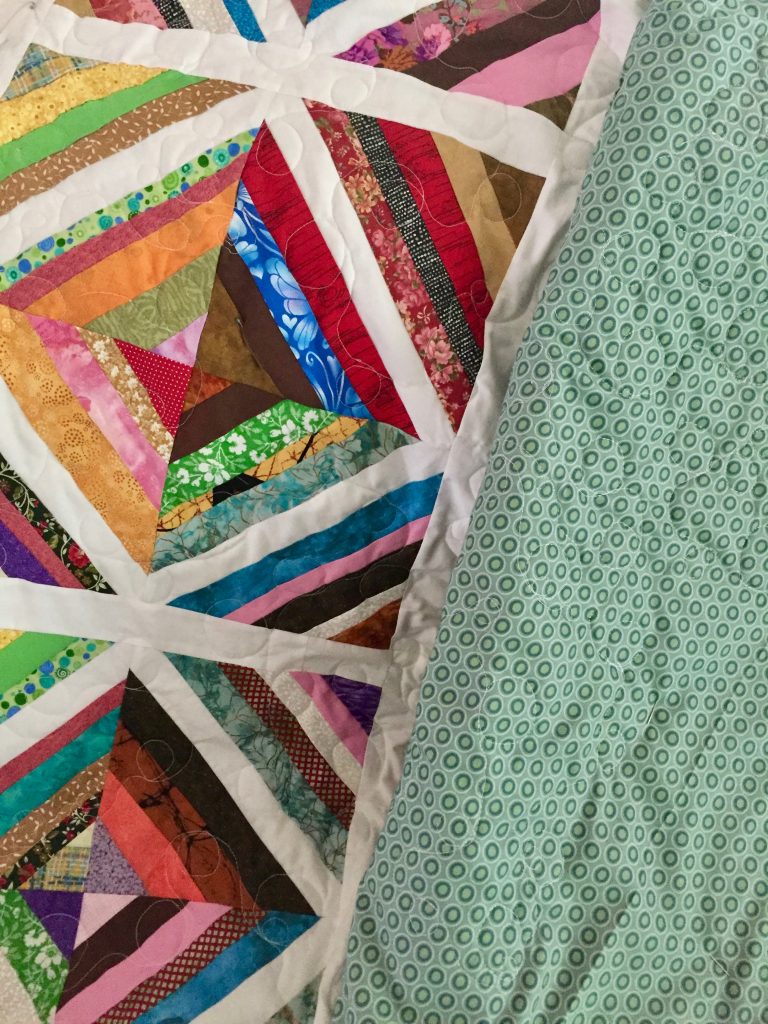
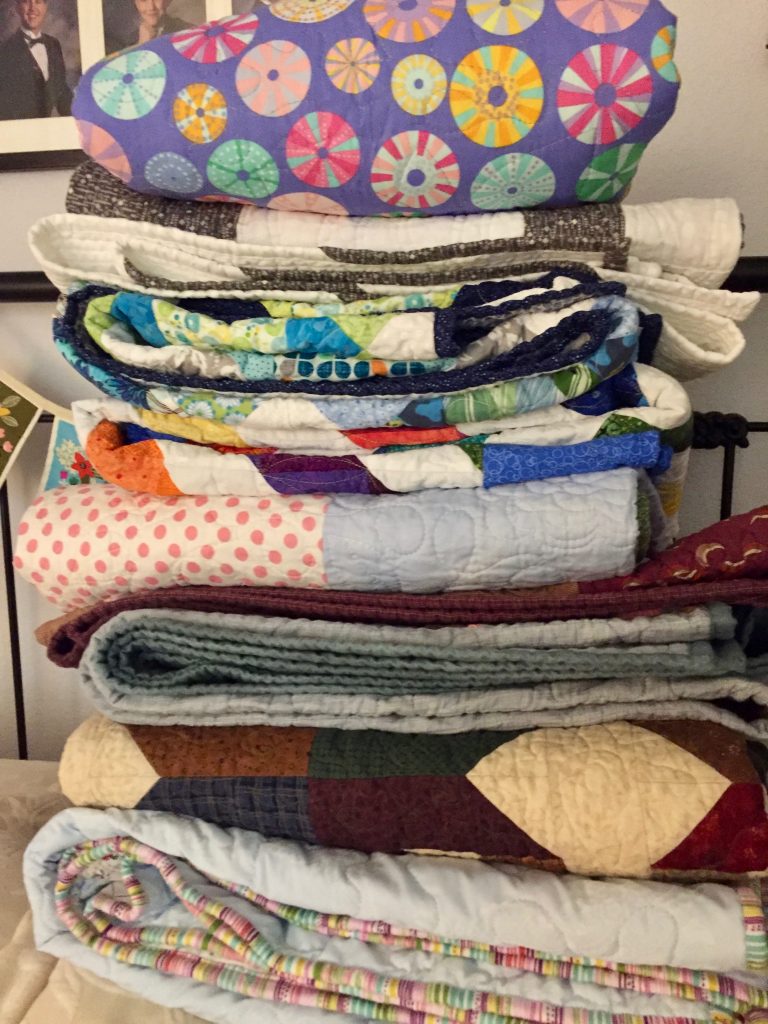
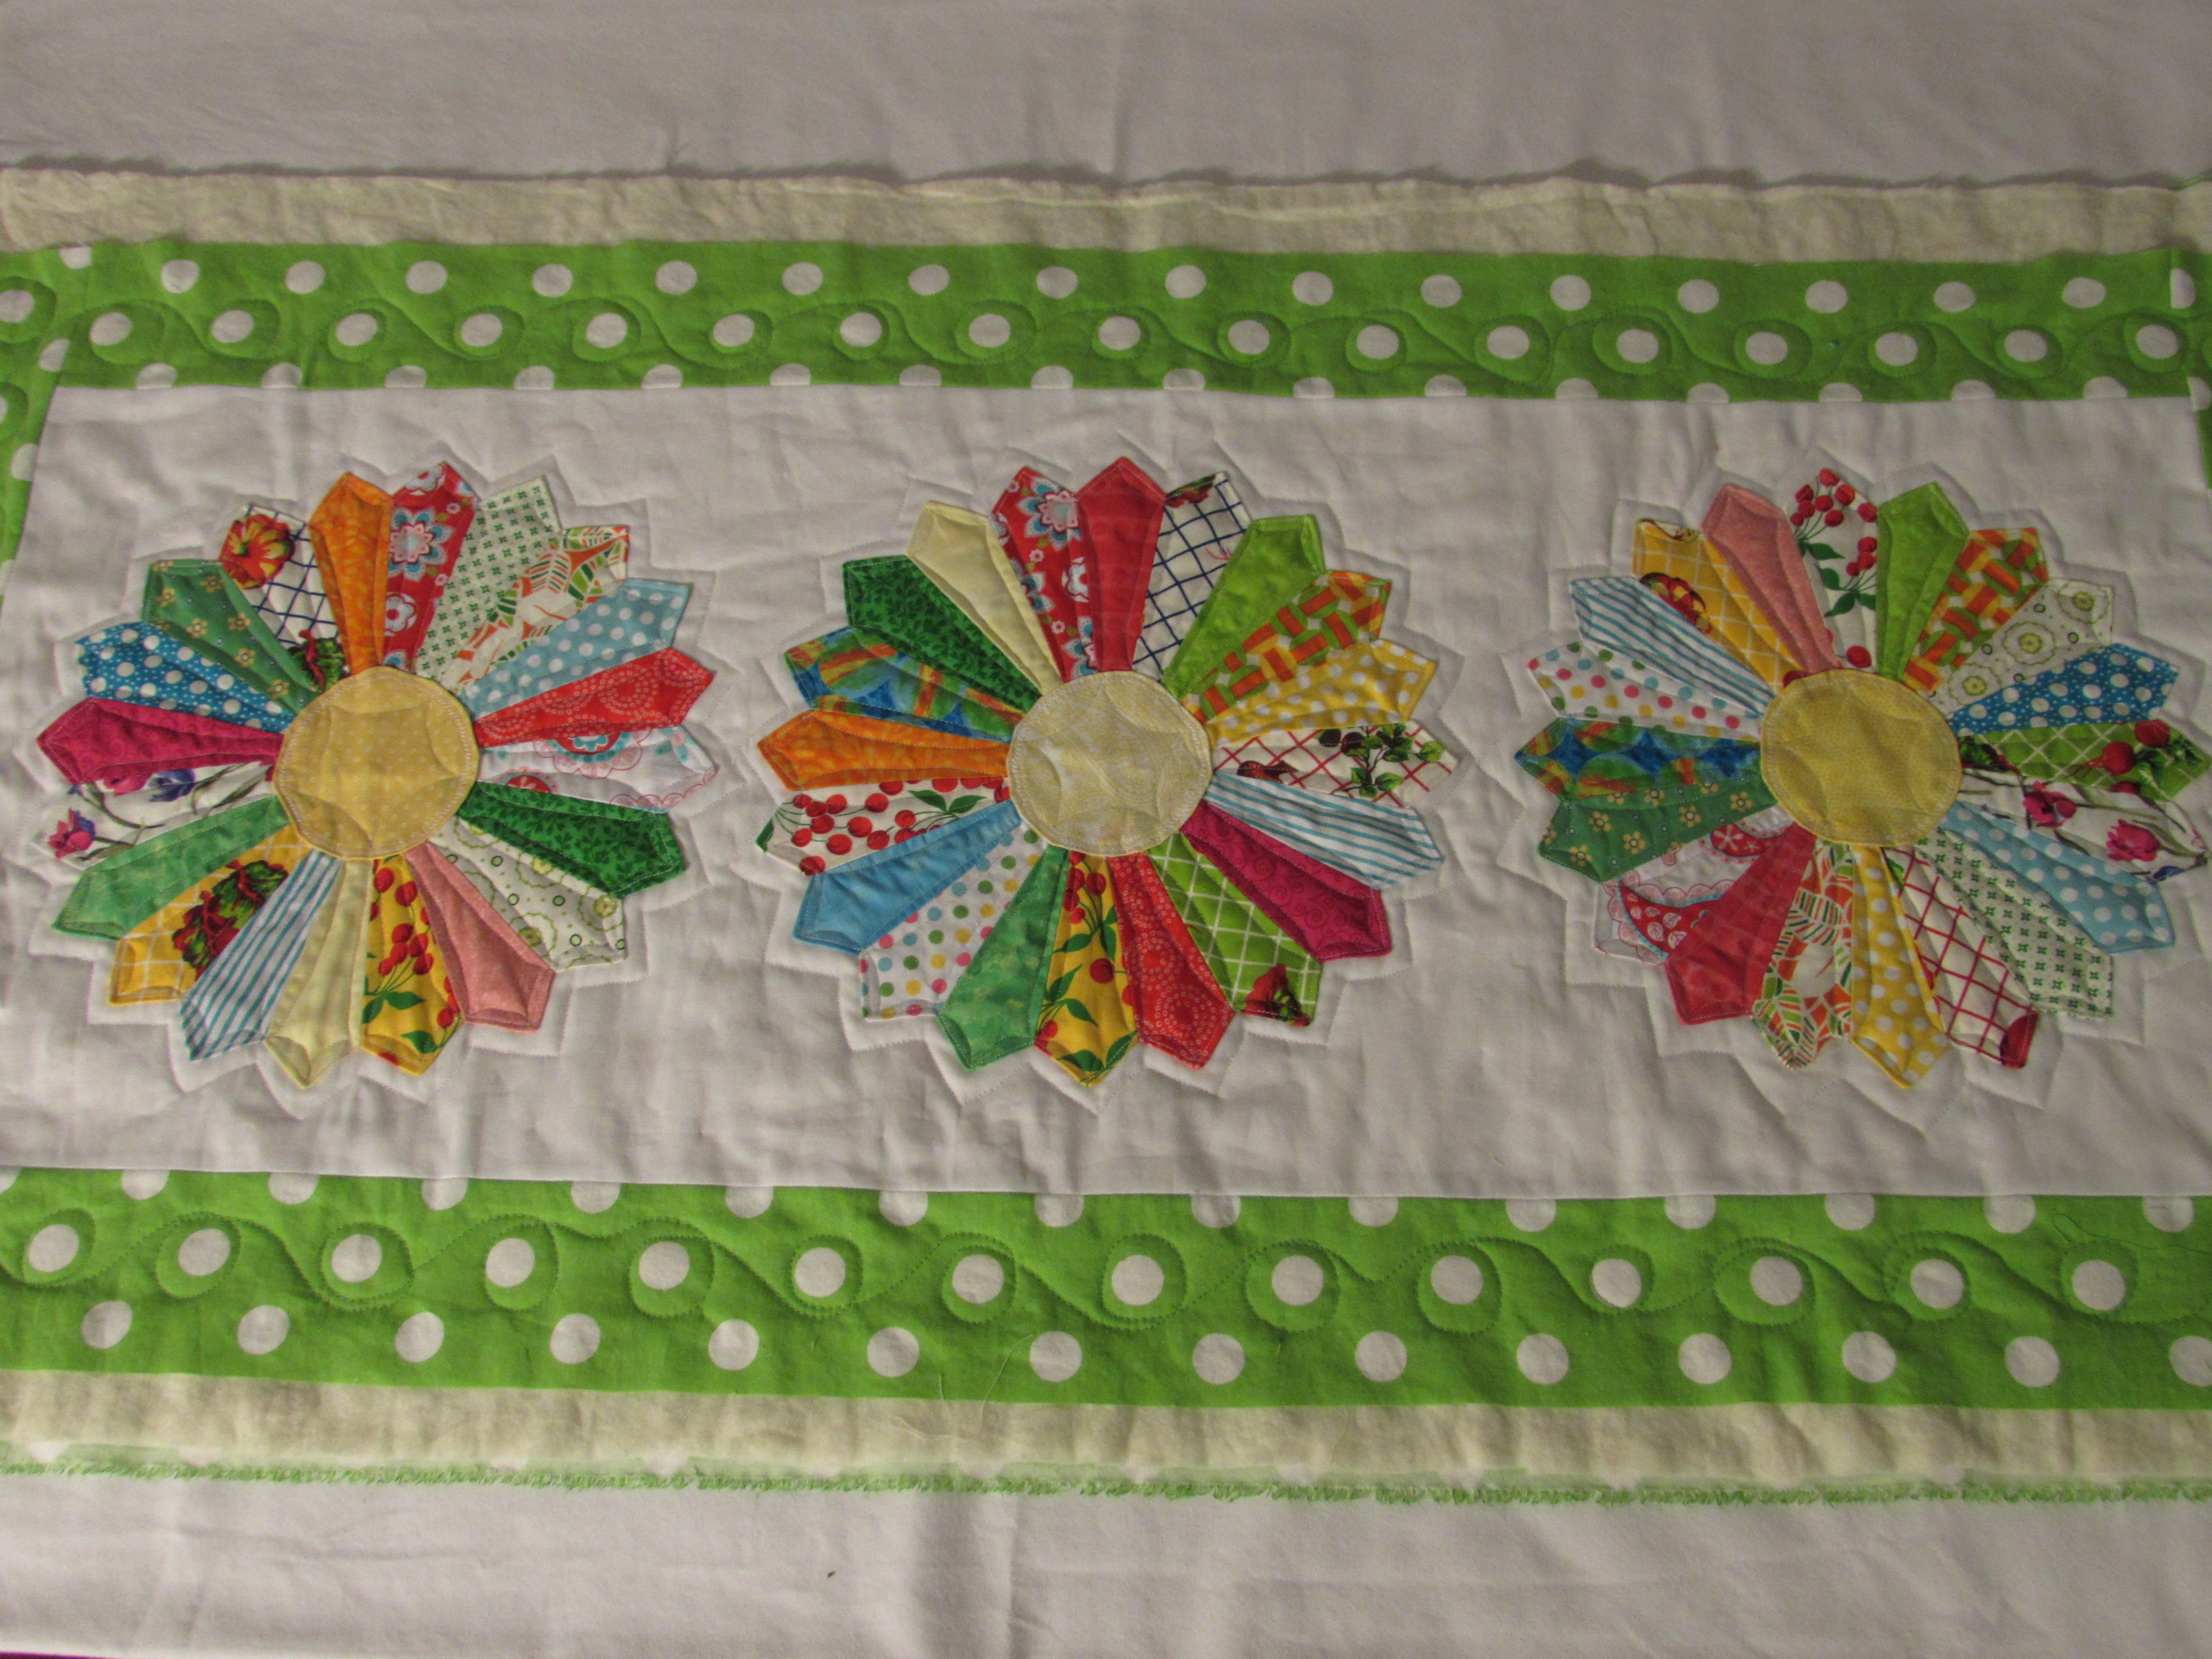
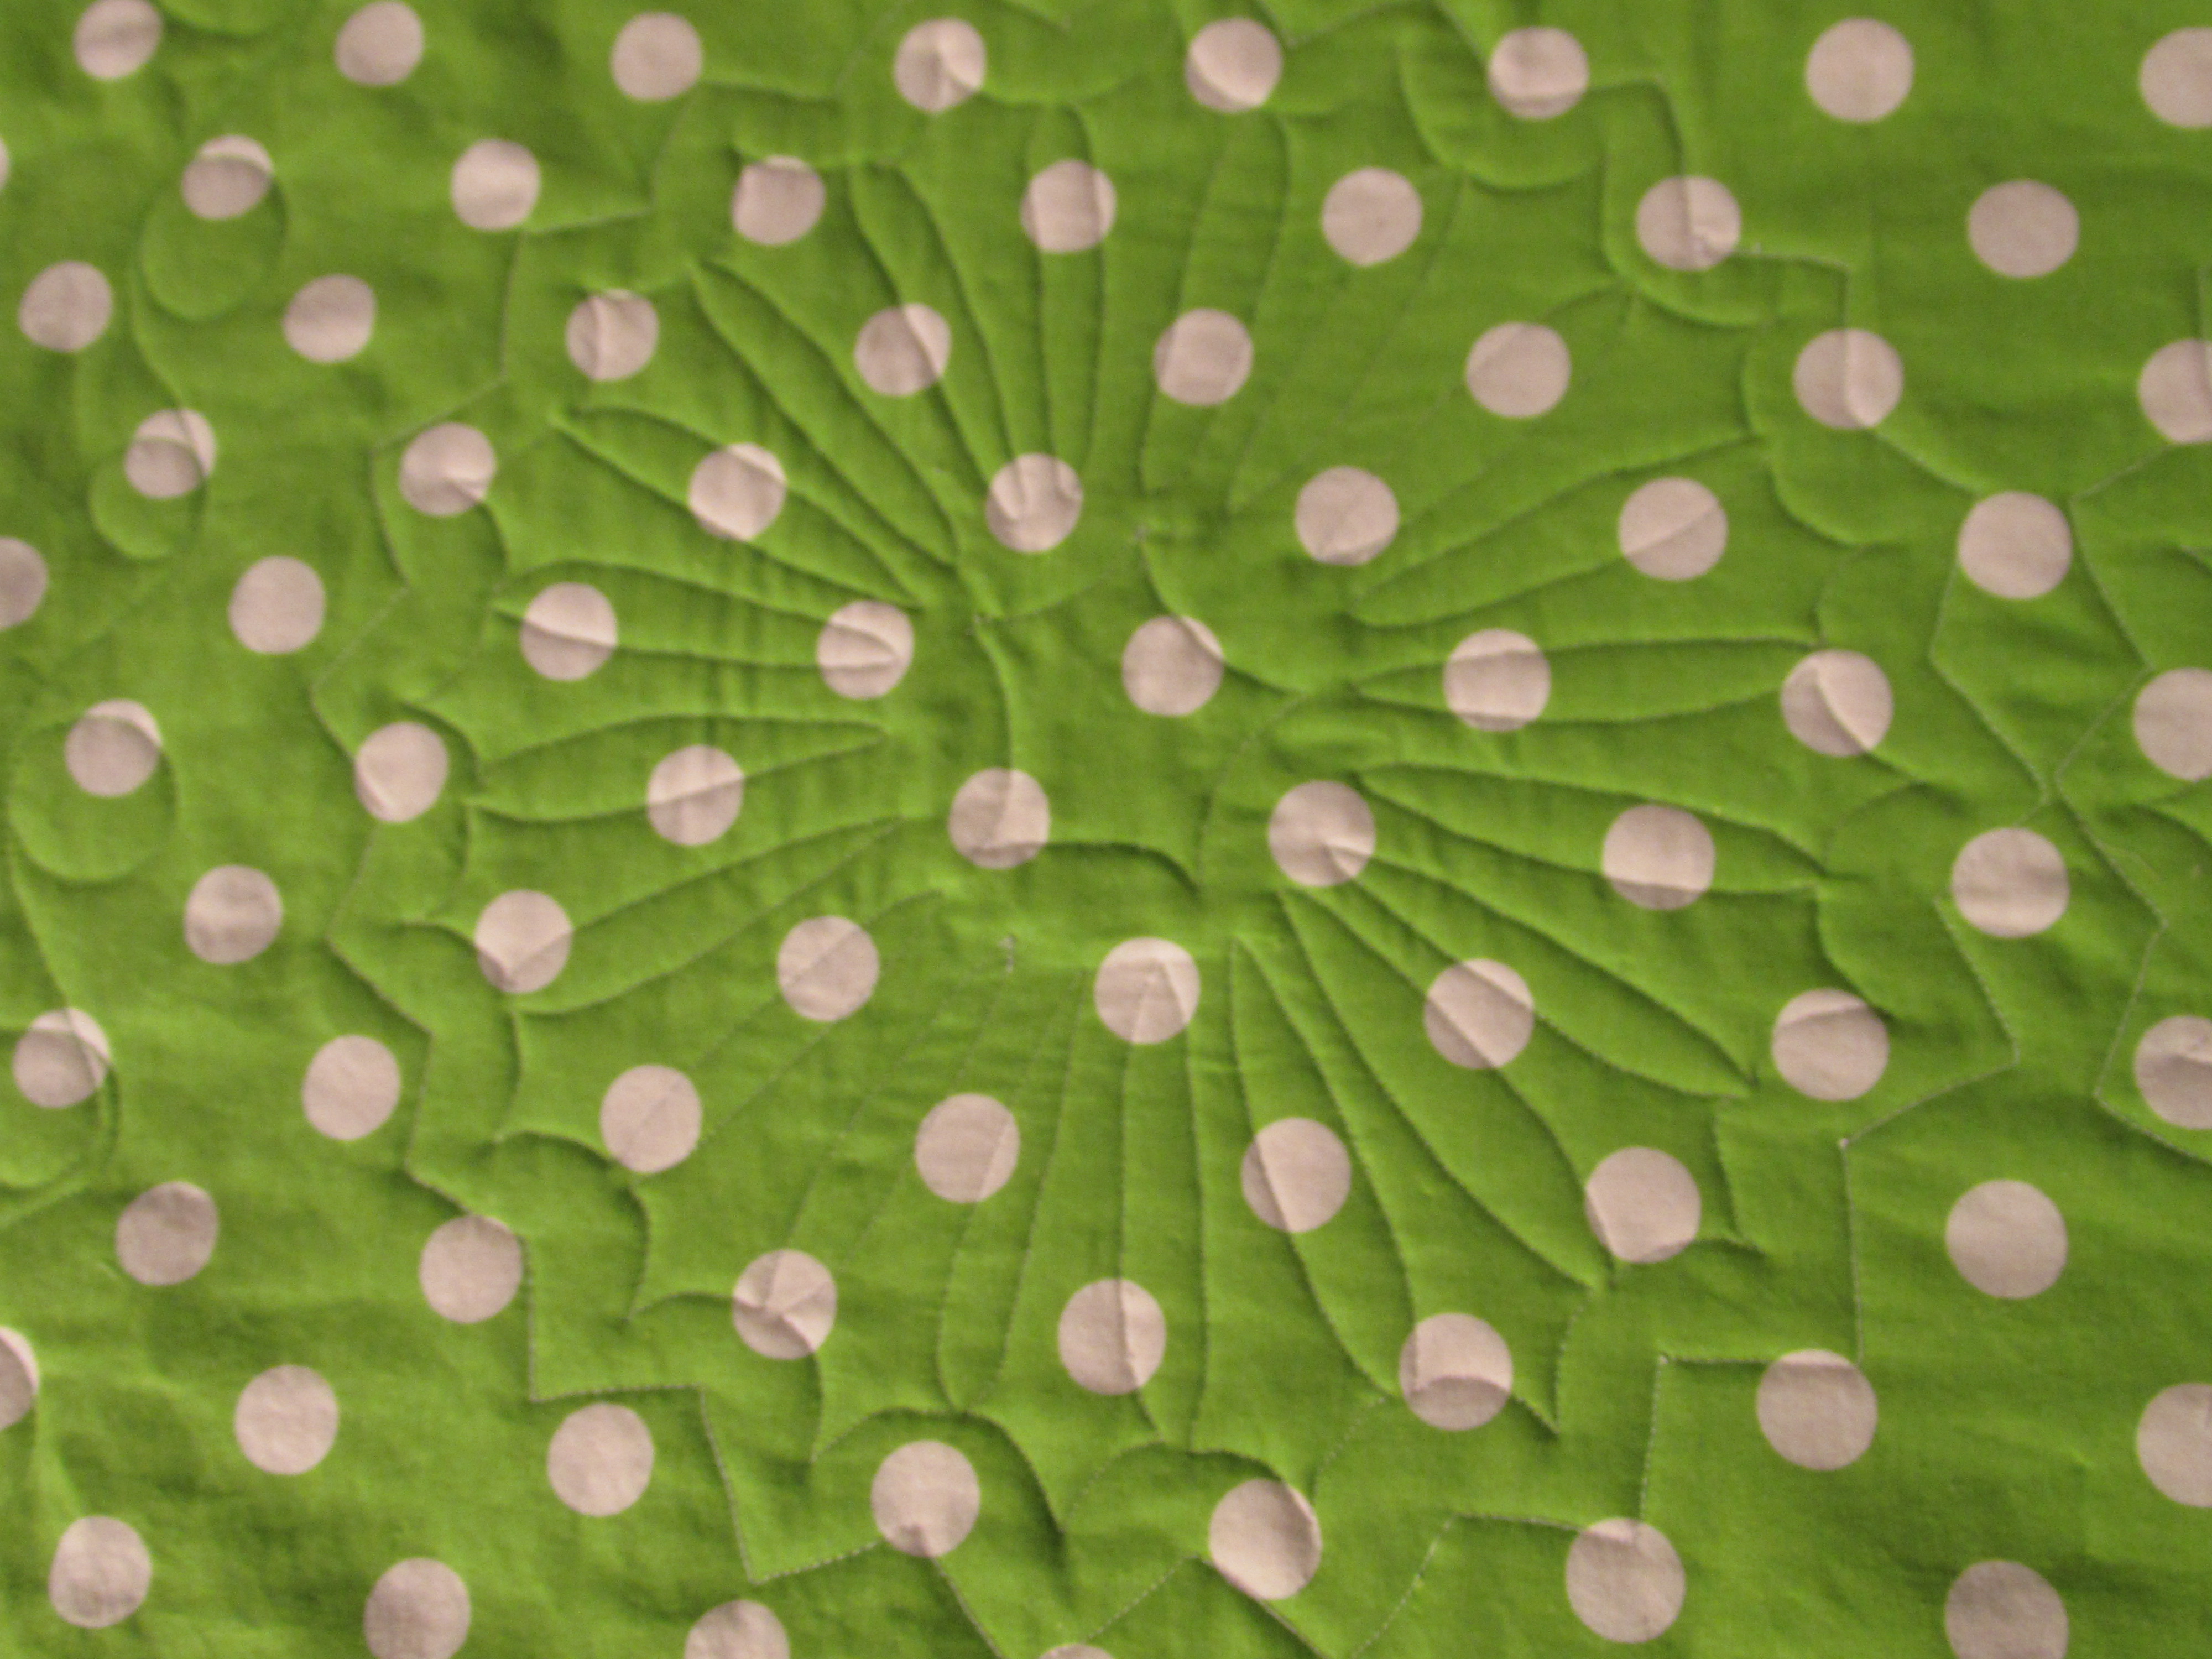
Just before getting sick, I did manage to finish this little strip quilt for Project Linus. Above you can see the backing which is a green batik my sister gave me. I machine stitched the binding with a zig-zag and it looks great.

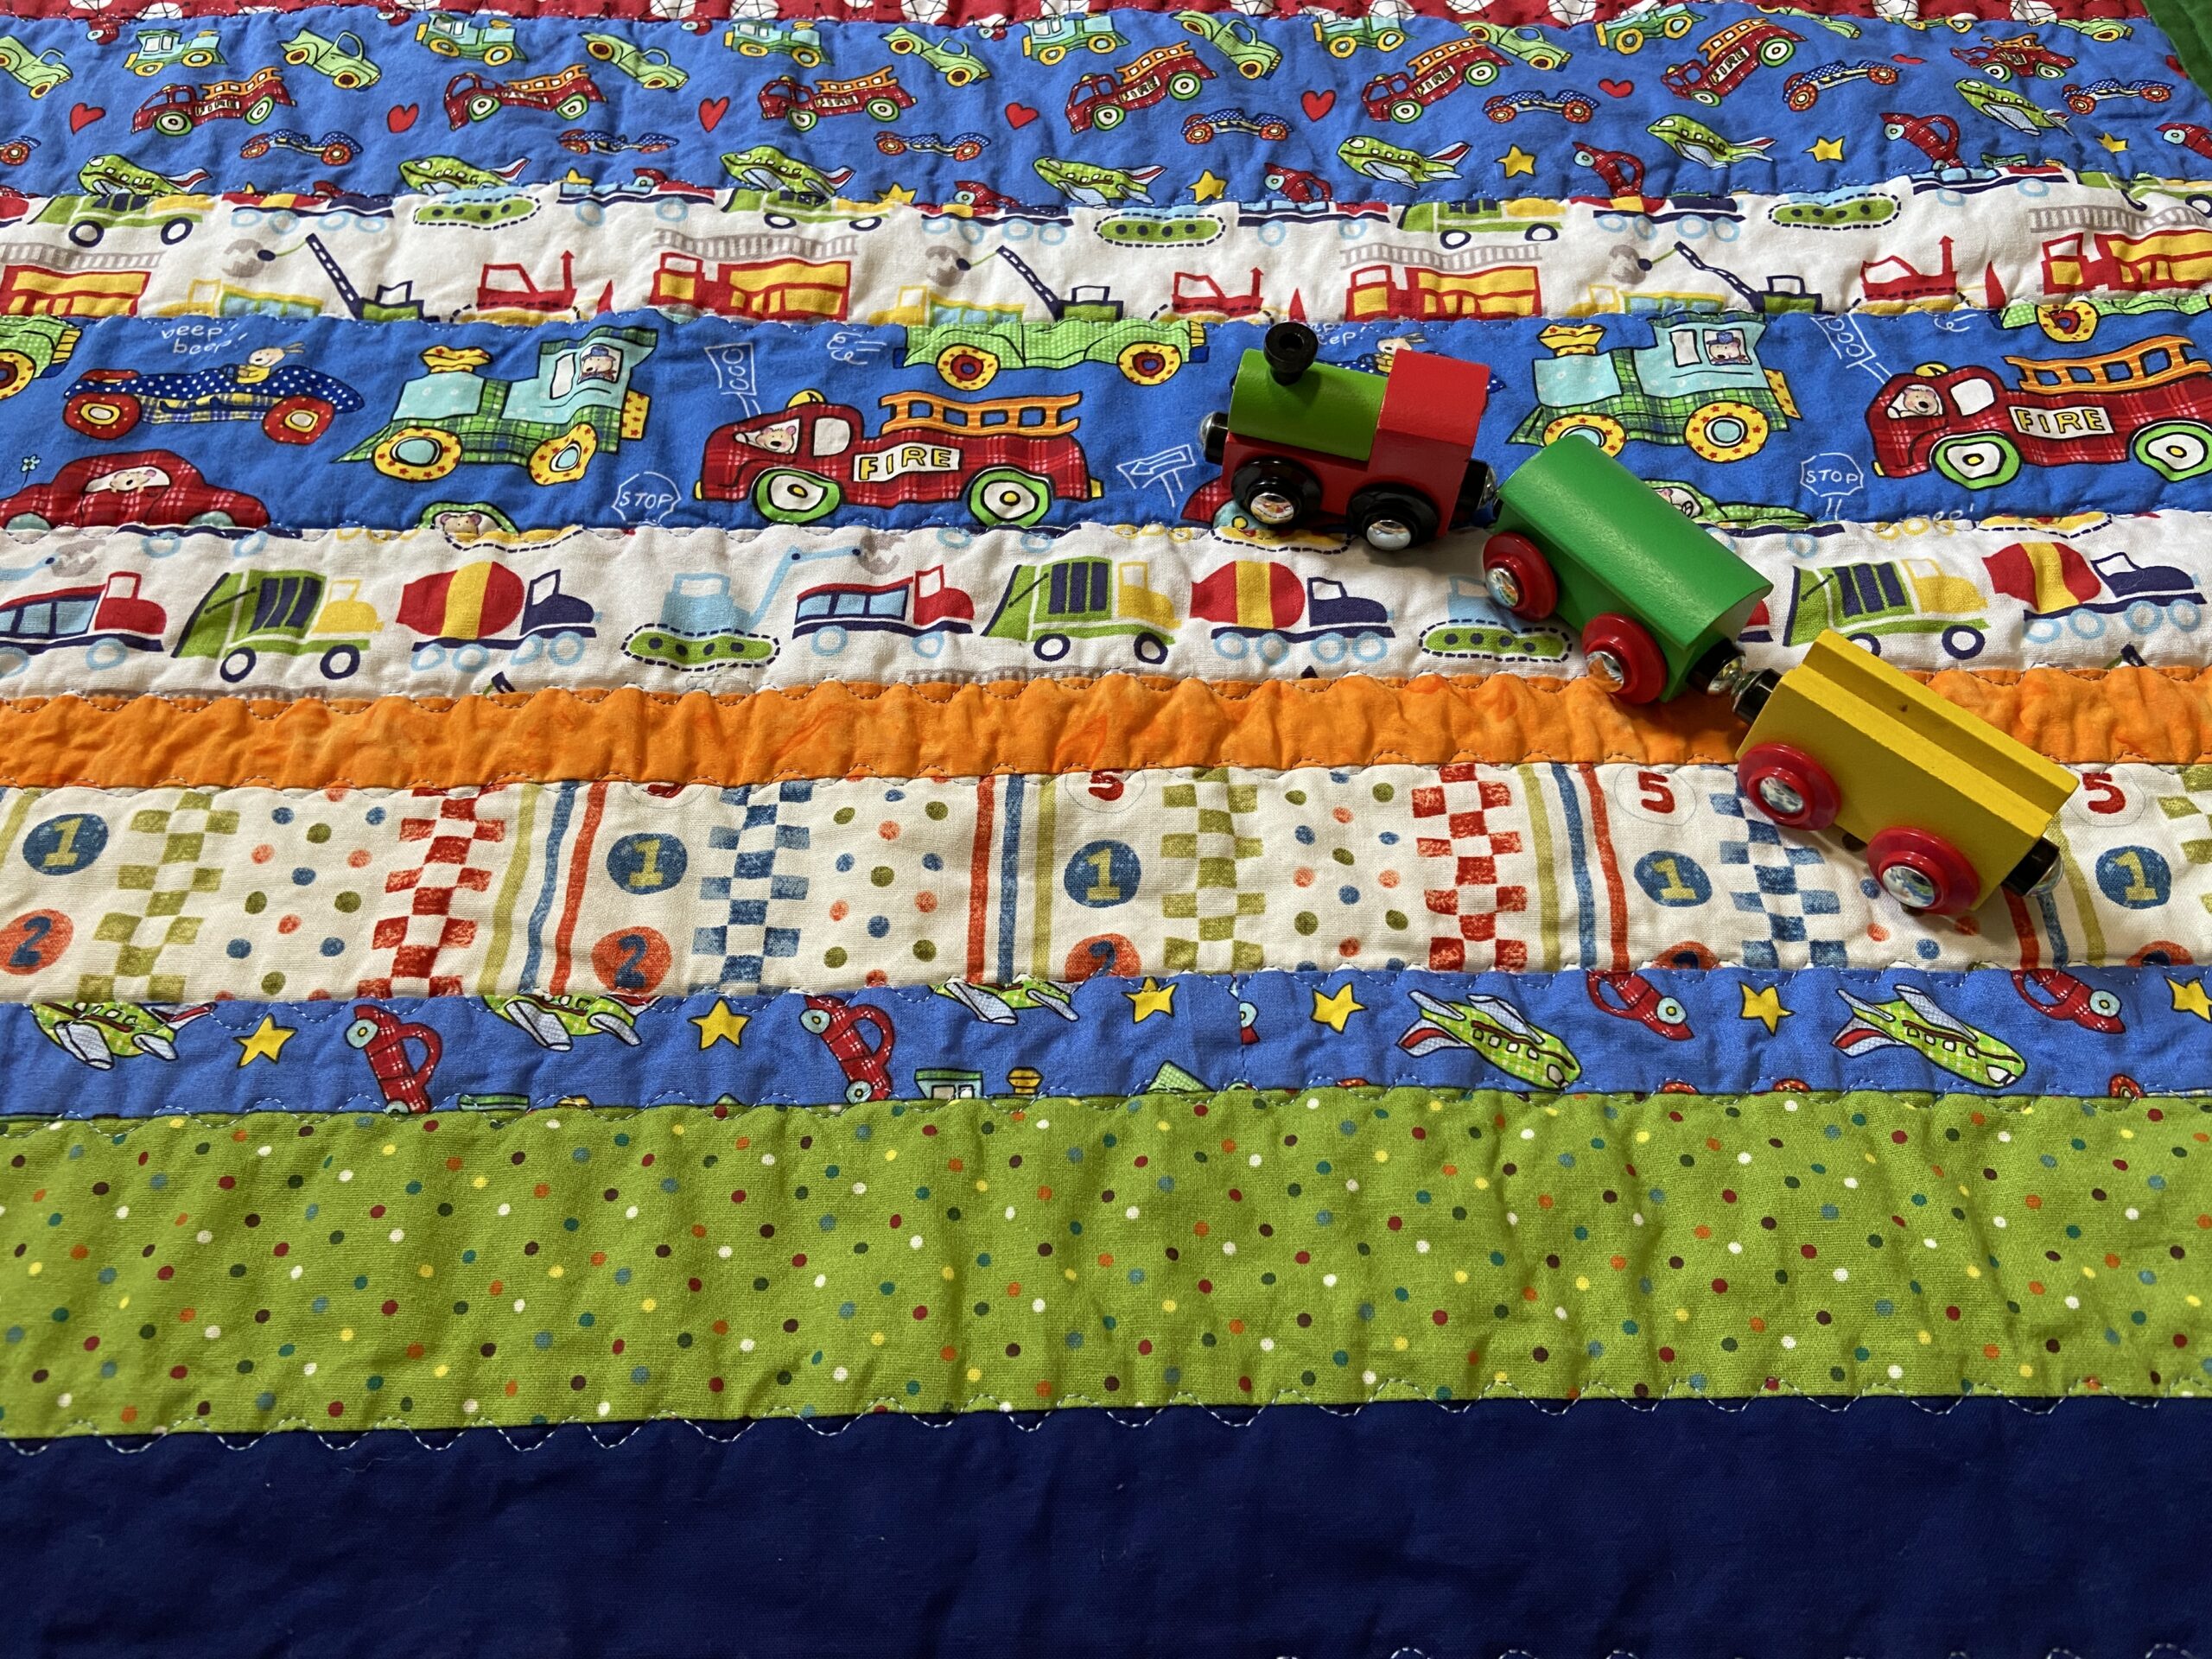
This quilt was such a good use of these random strips. Most from a scrap bag donated to Project Linus and some from my bin of strips. I tried to alternate the widths to keep things balanced. Other than straightening up some of the strips, this was a breeze. Unfortunately, the monthly Project Linus meeting was yesterday and I was not feeling up to going. So this quilt will sit and wait until the May meeting for donation.

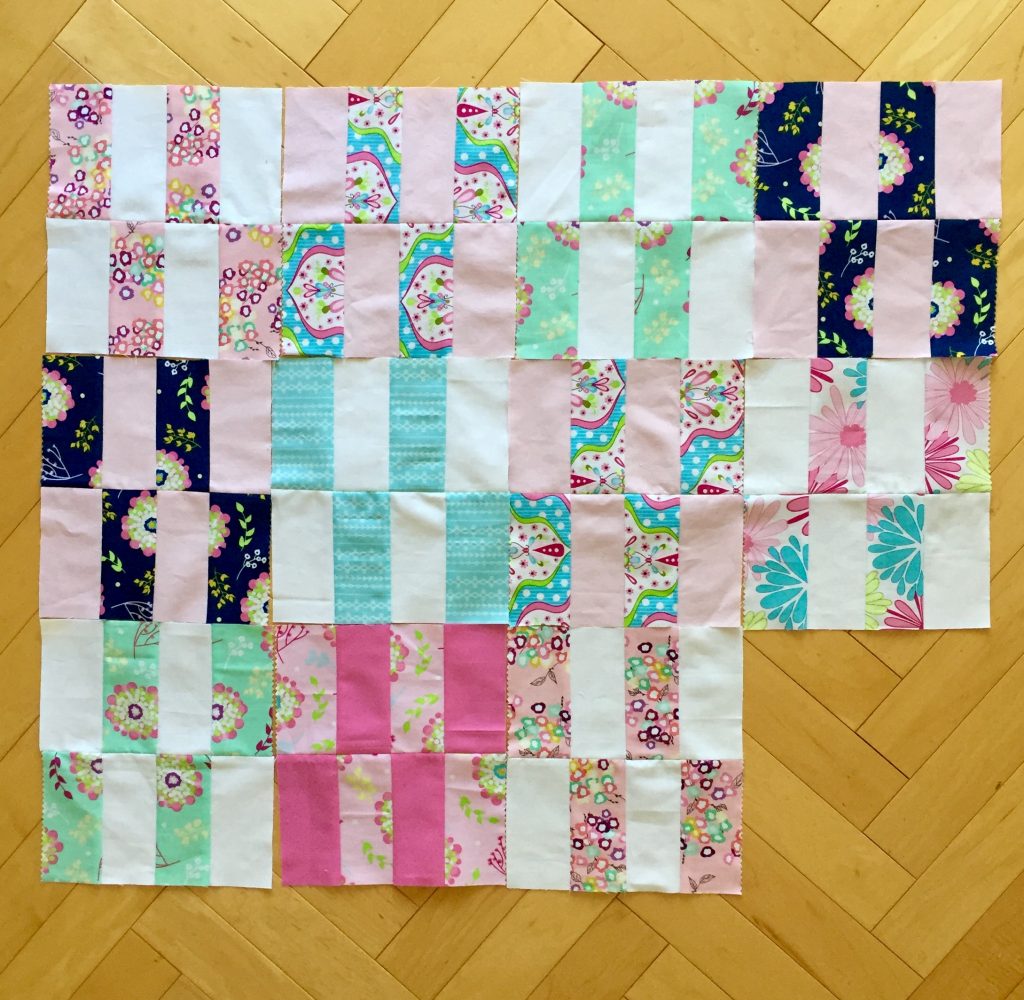
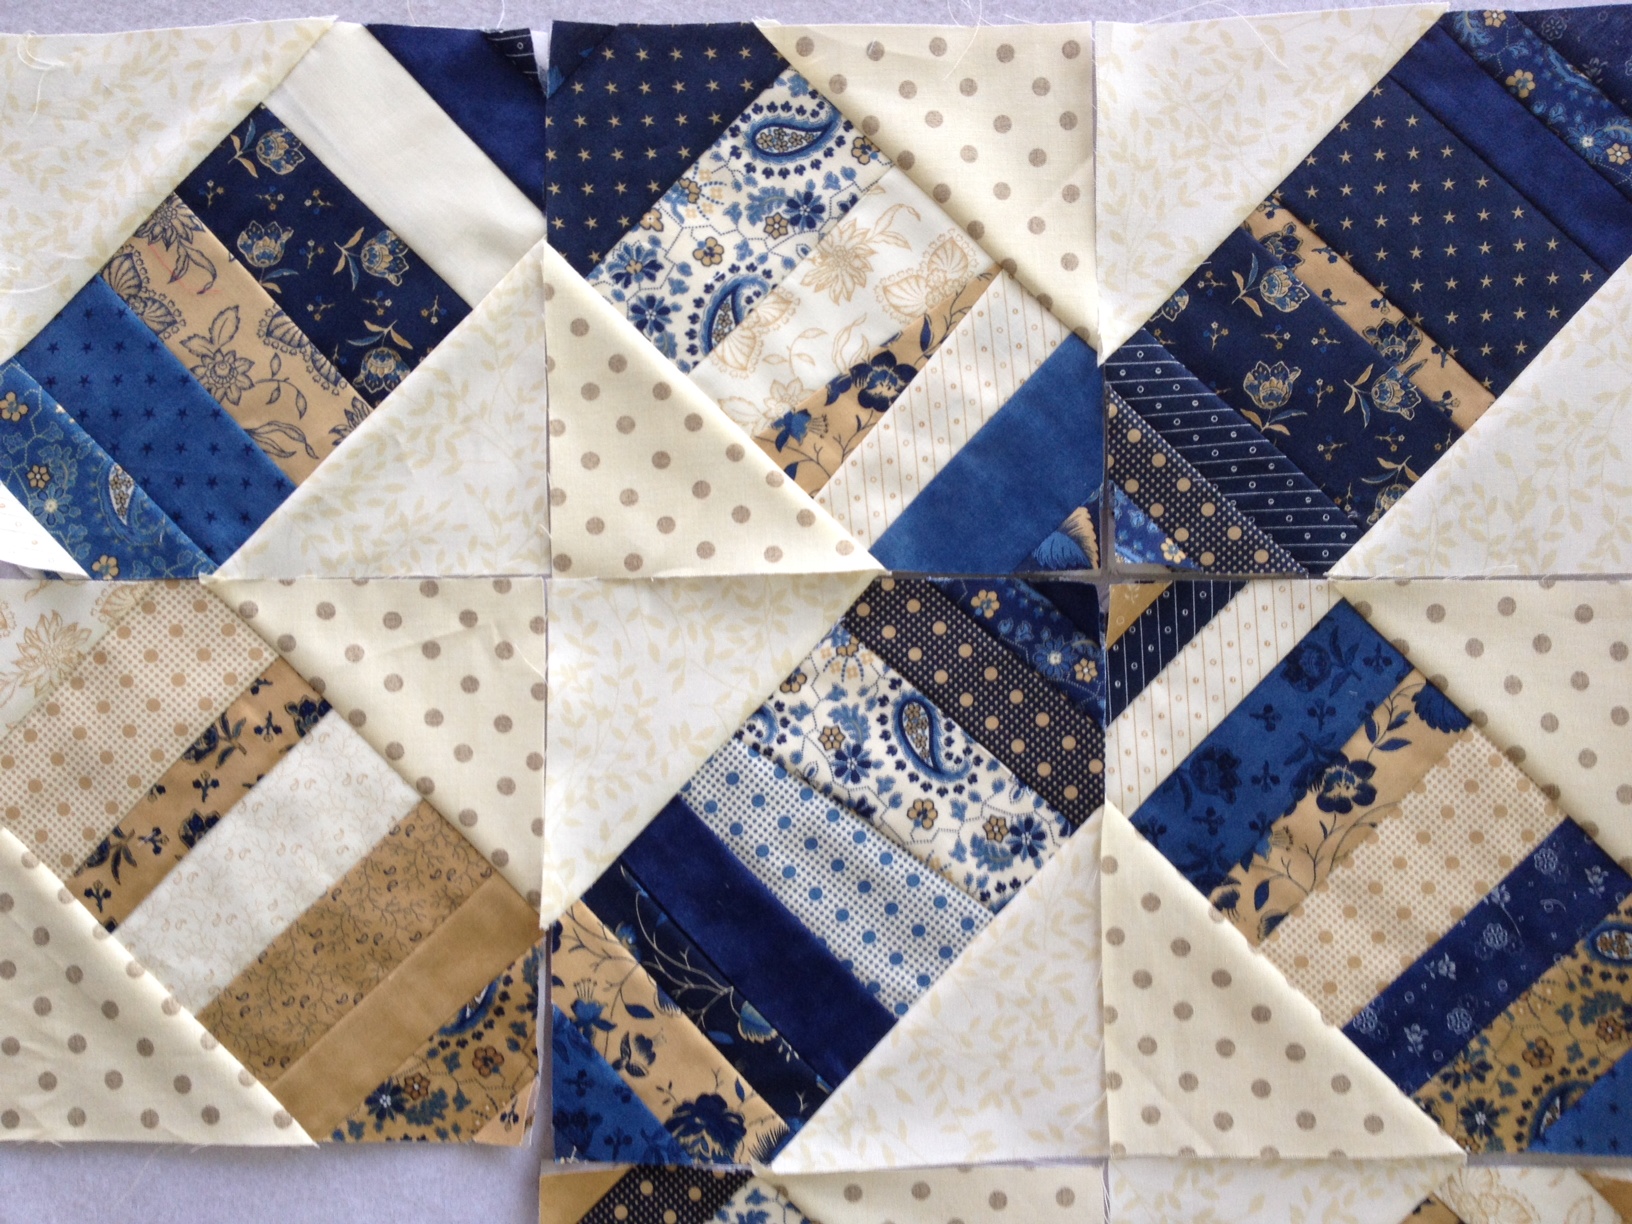
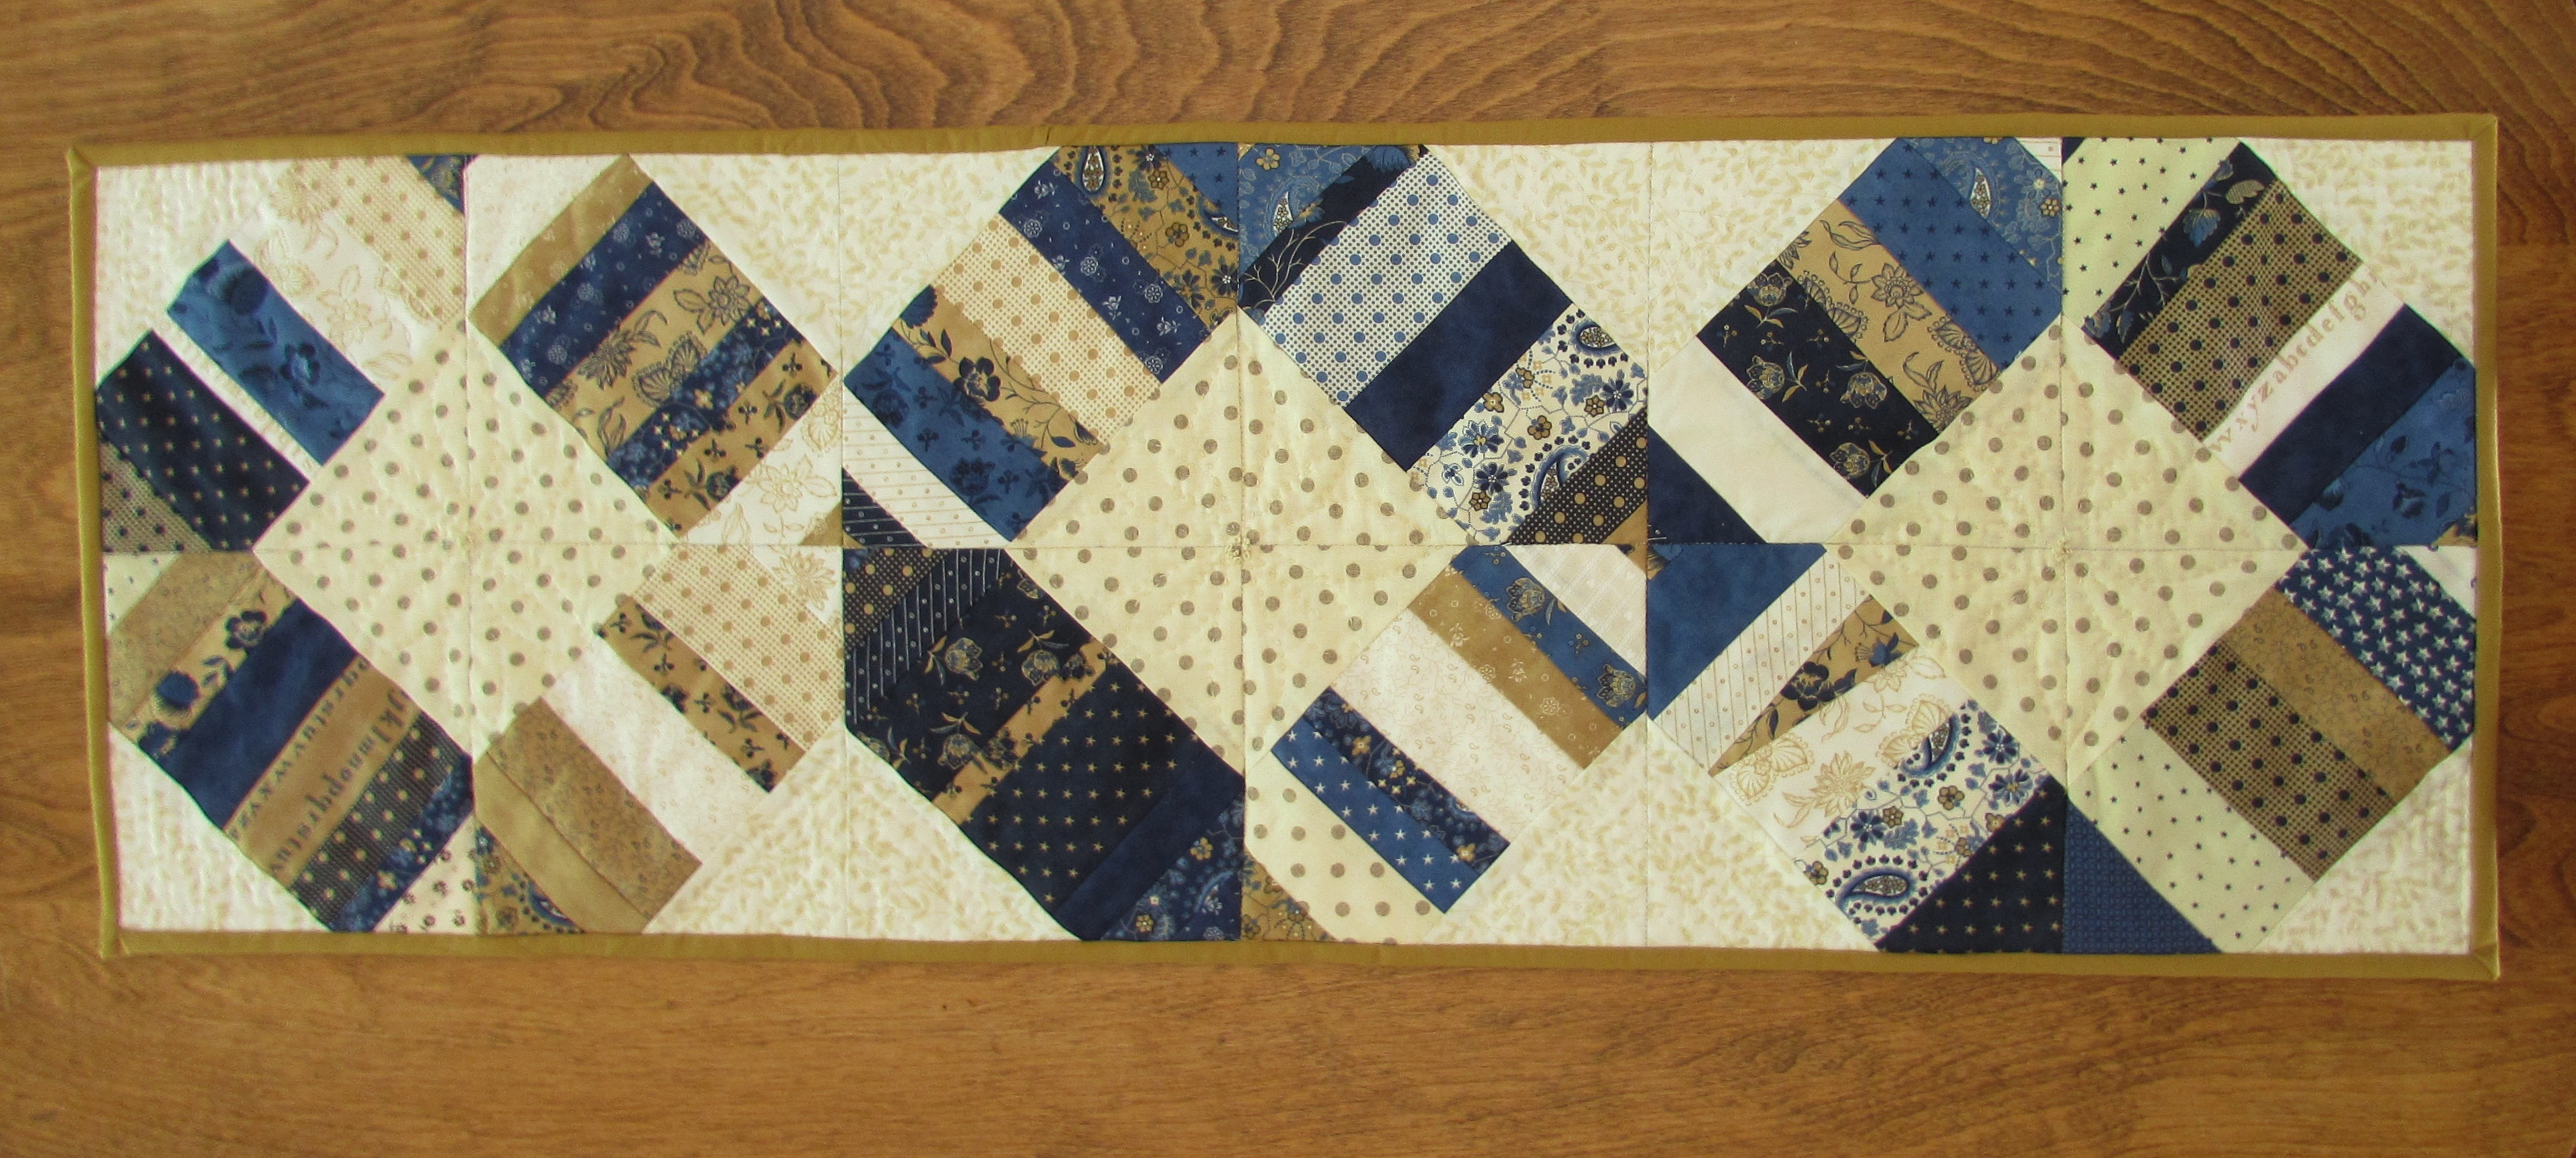
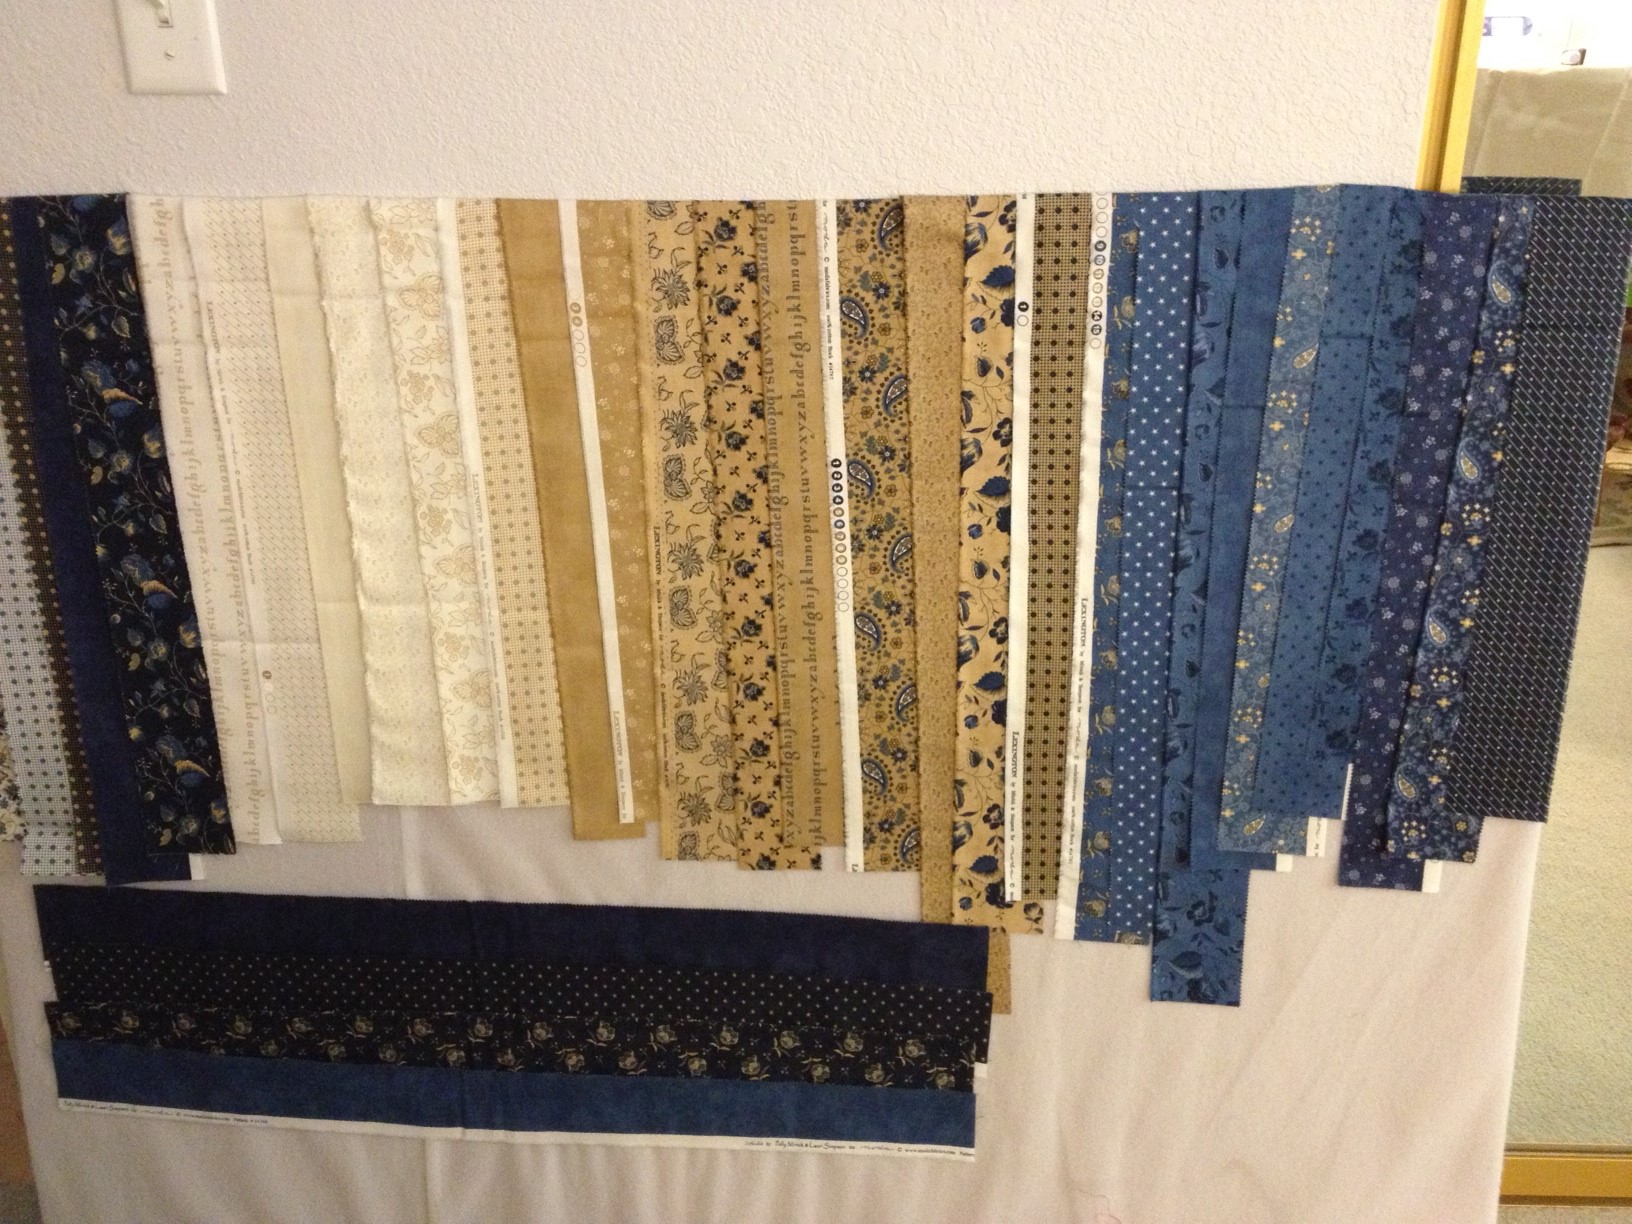
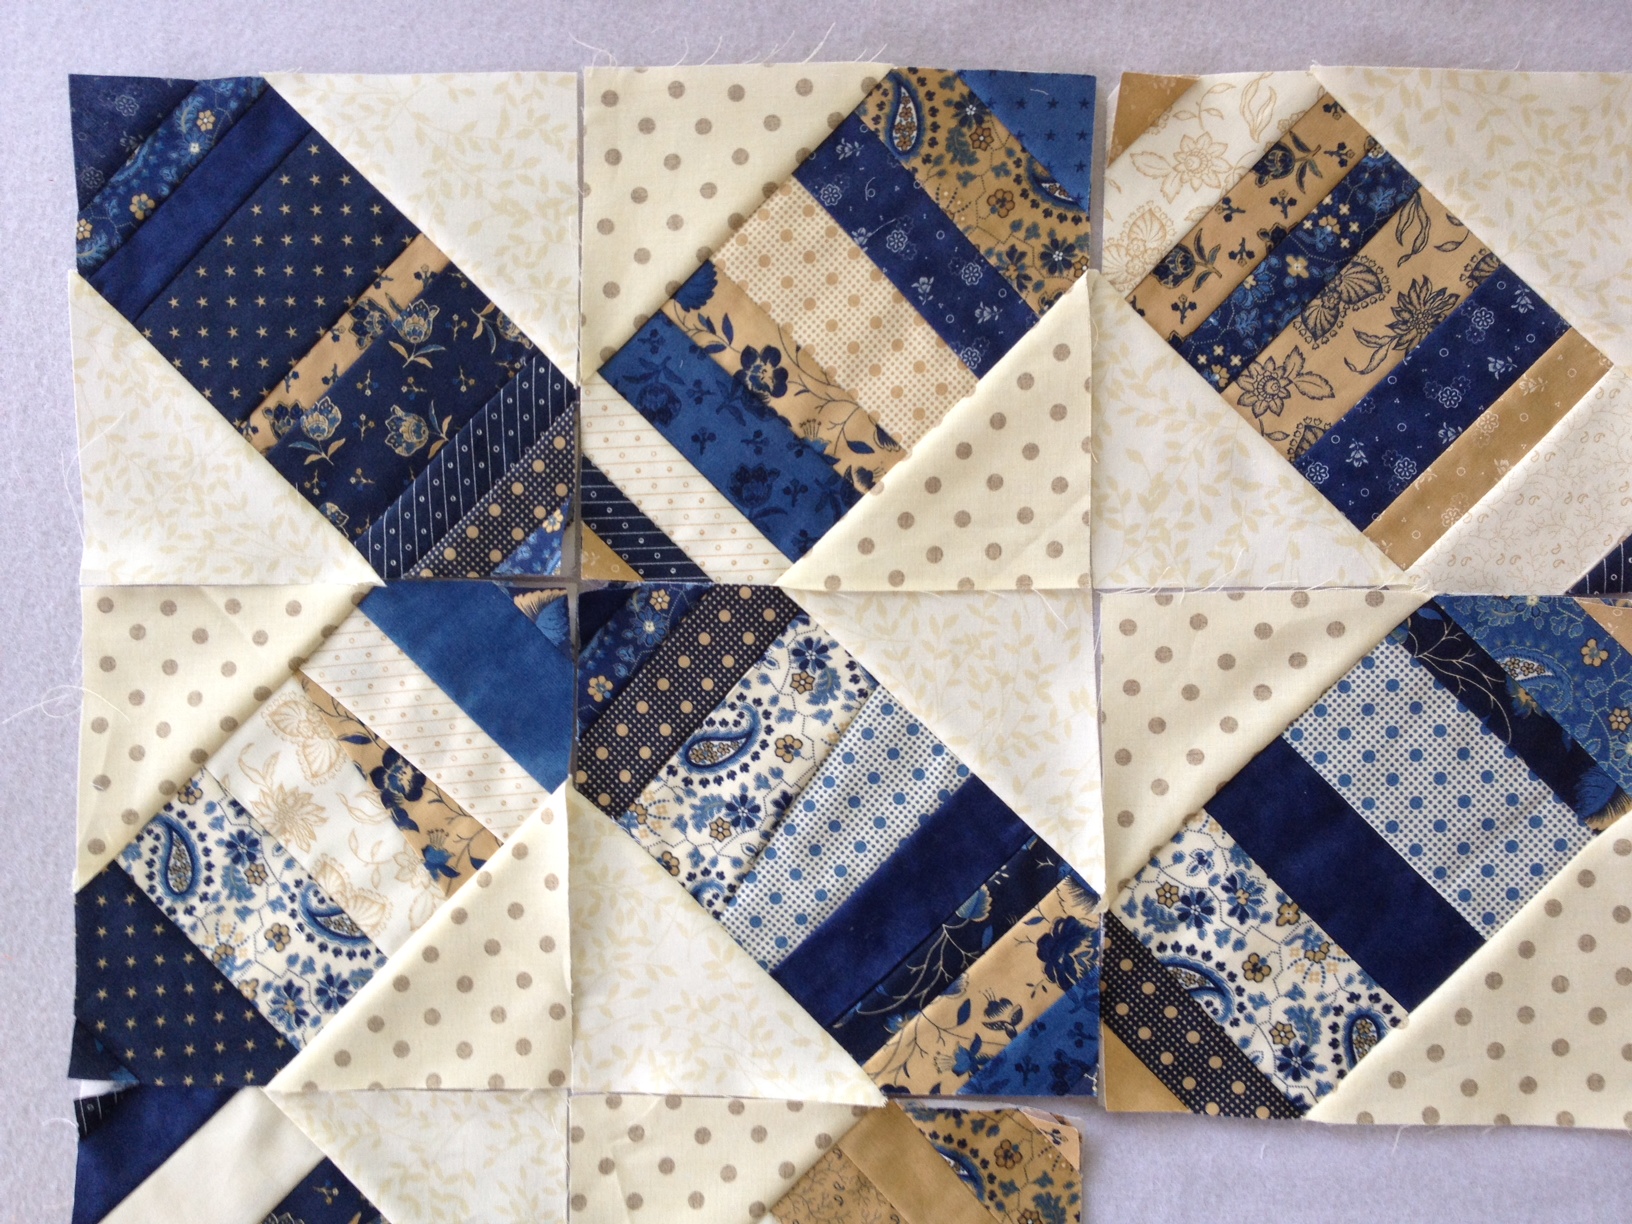
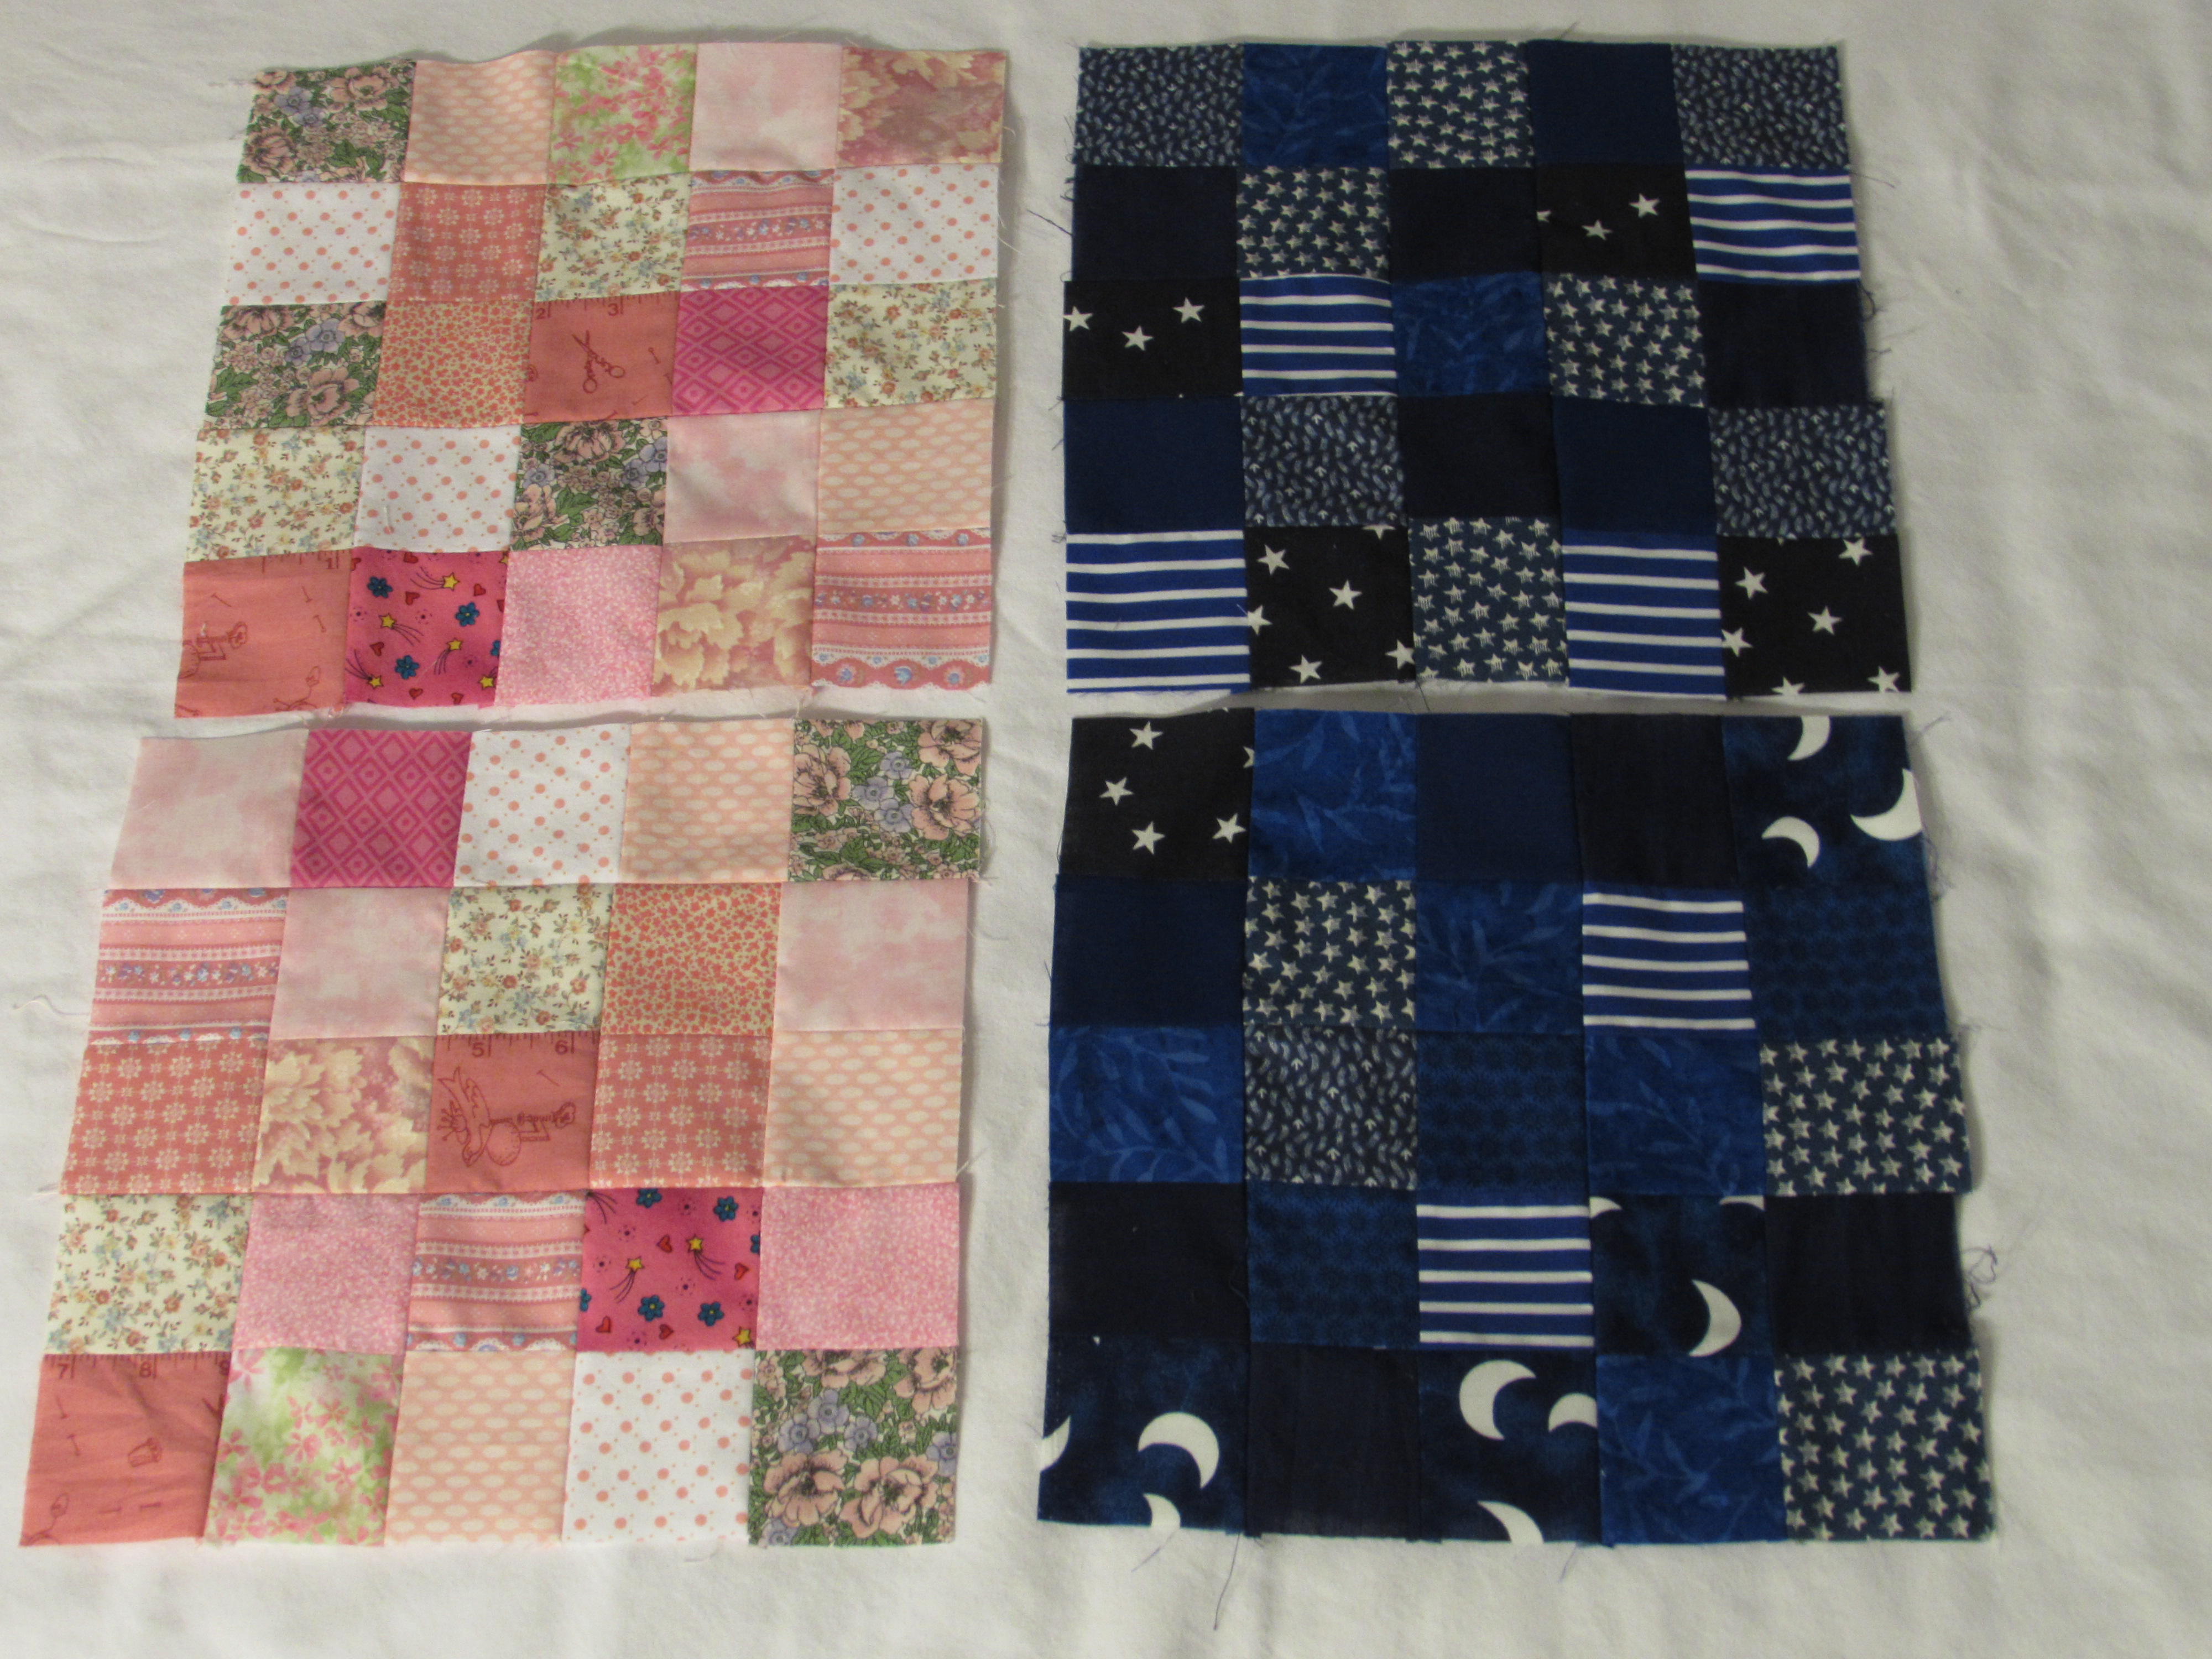
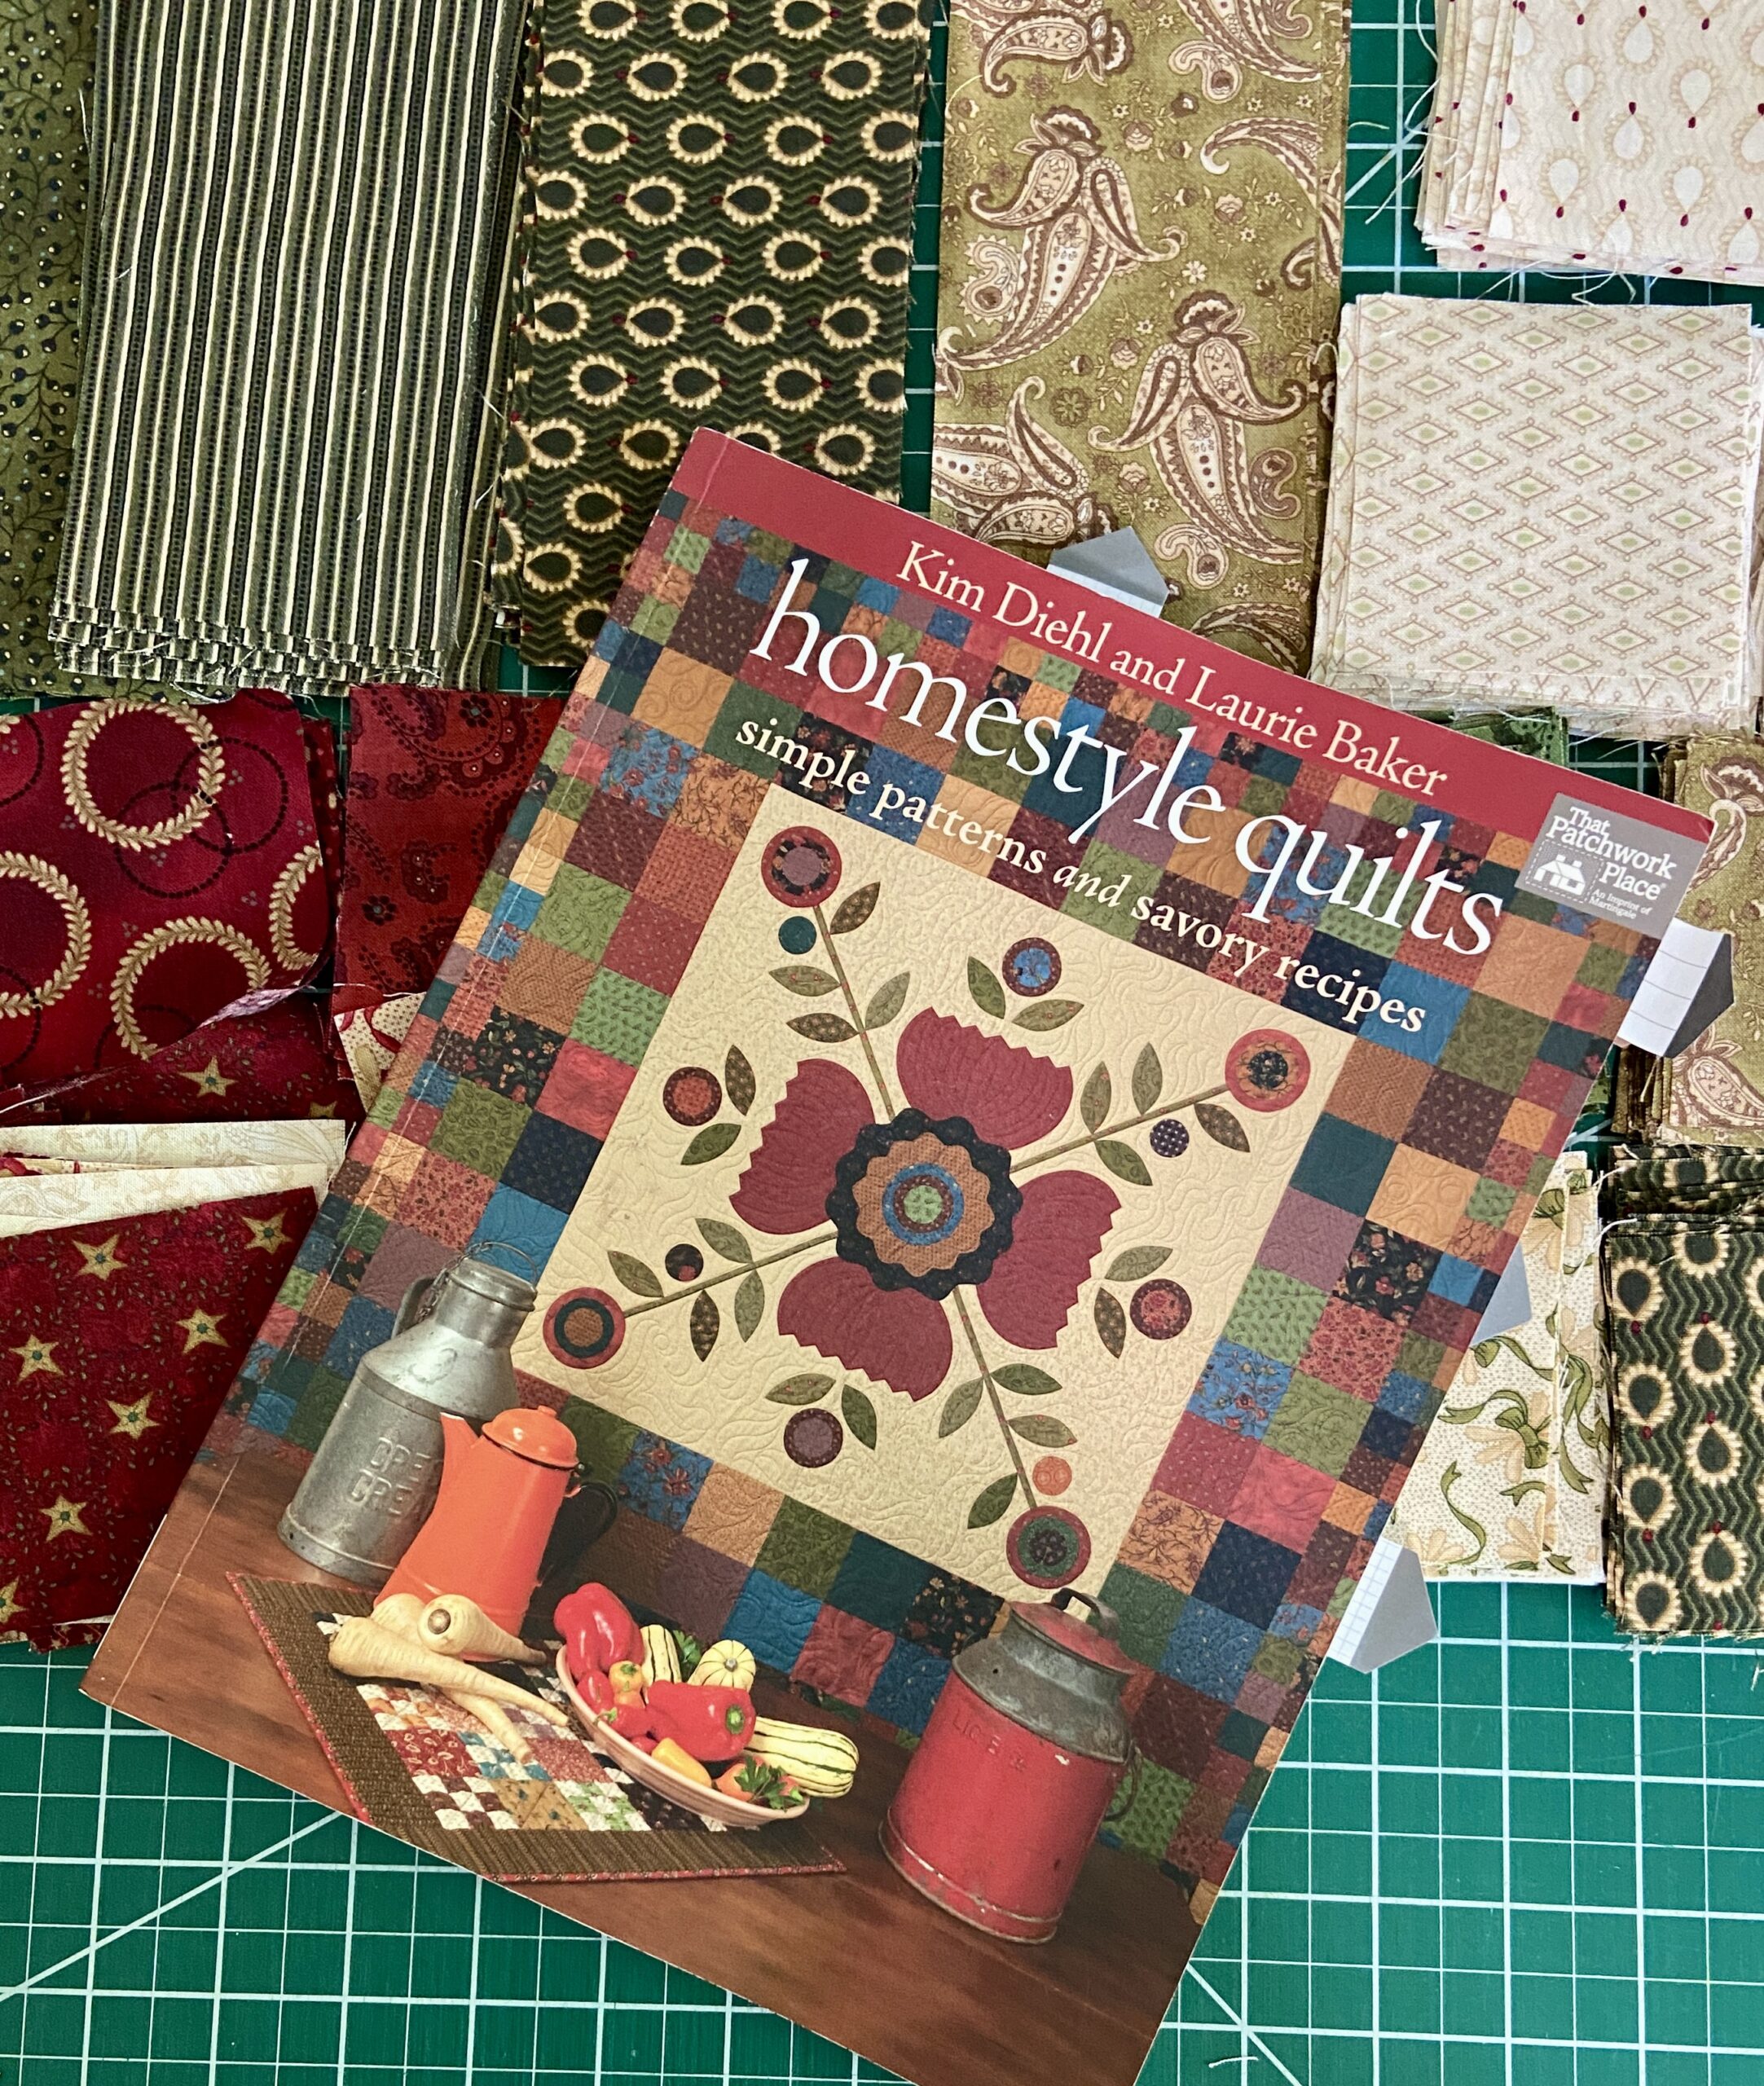
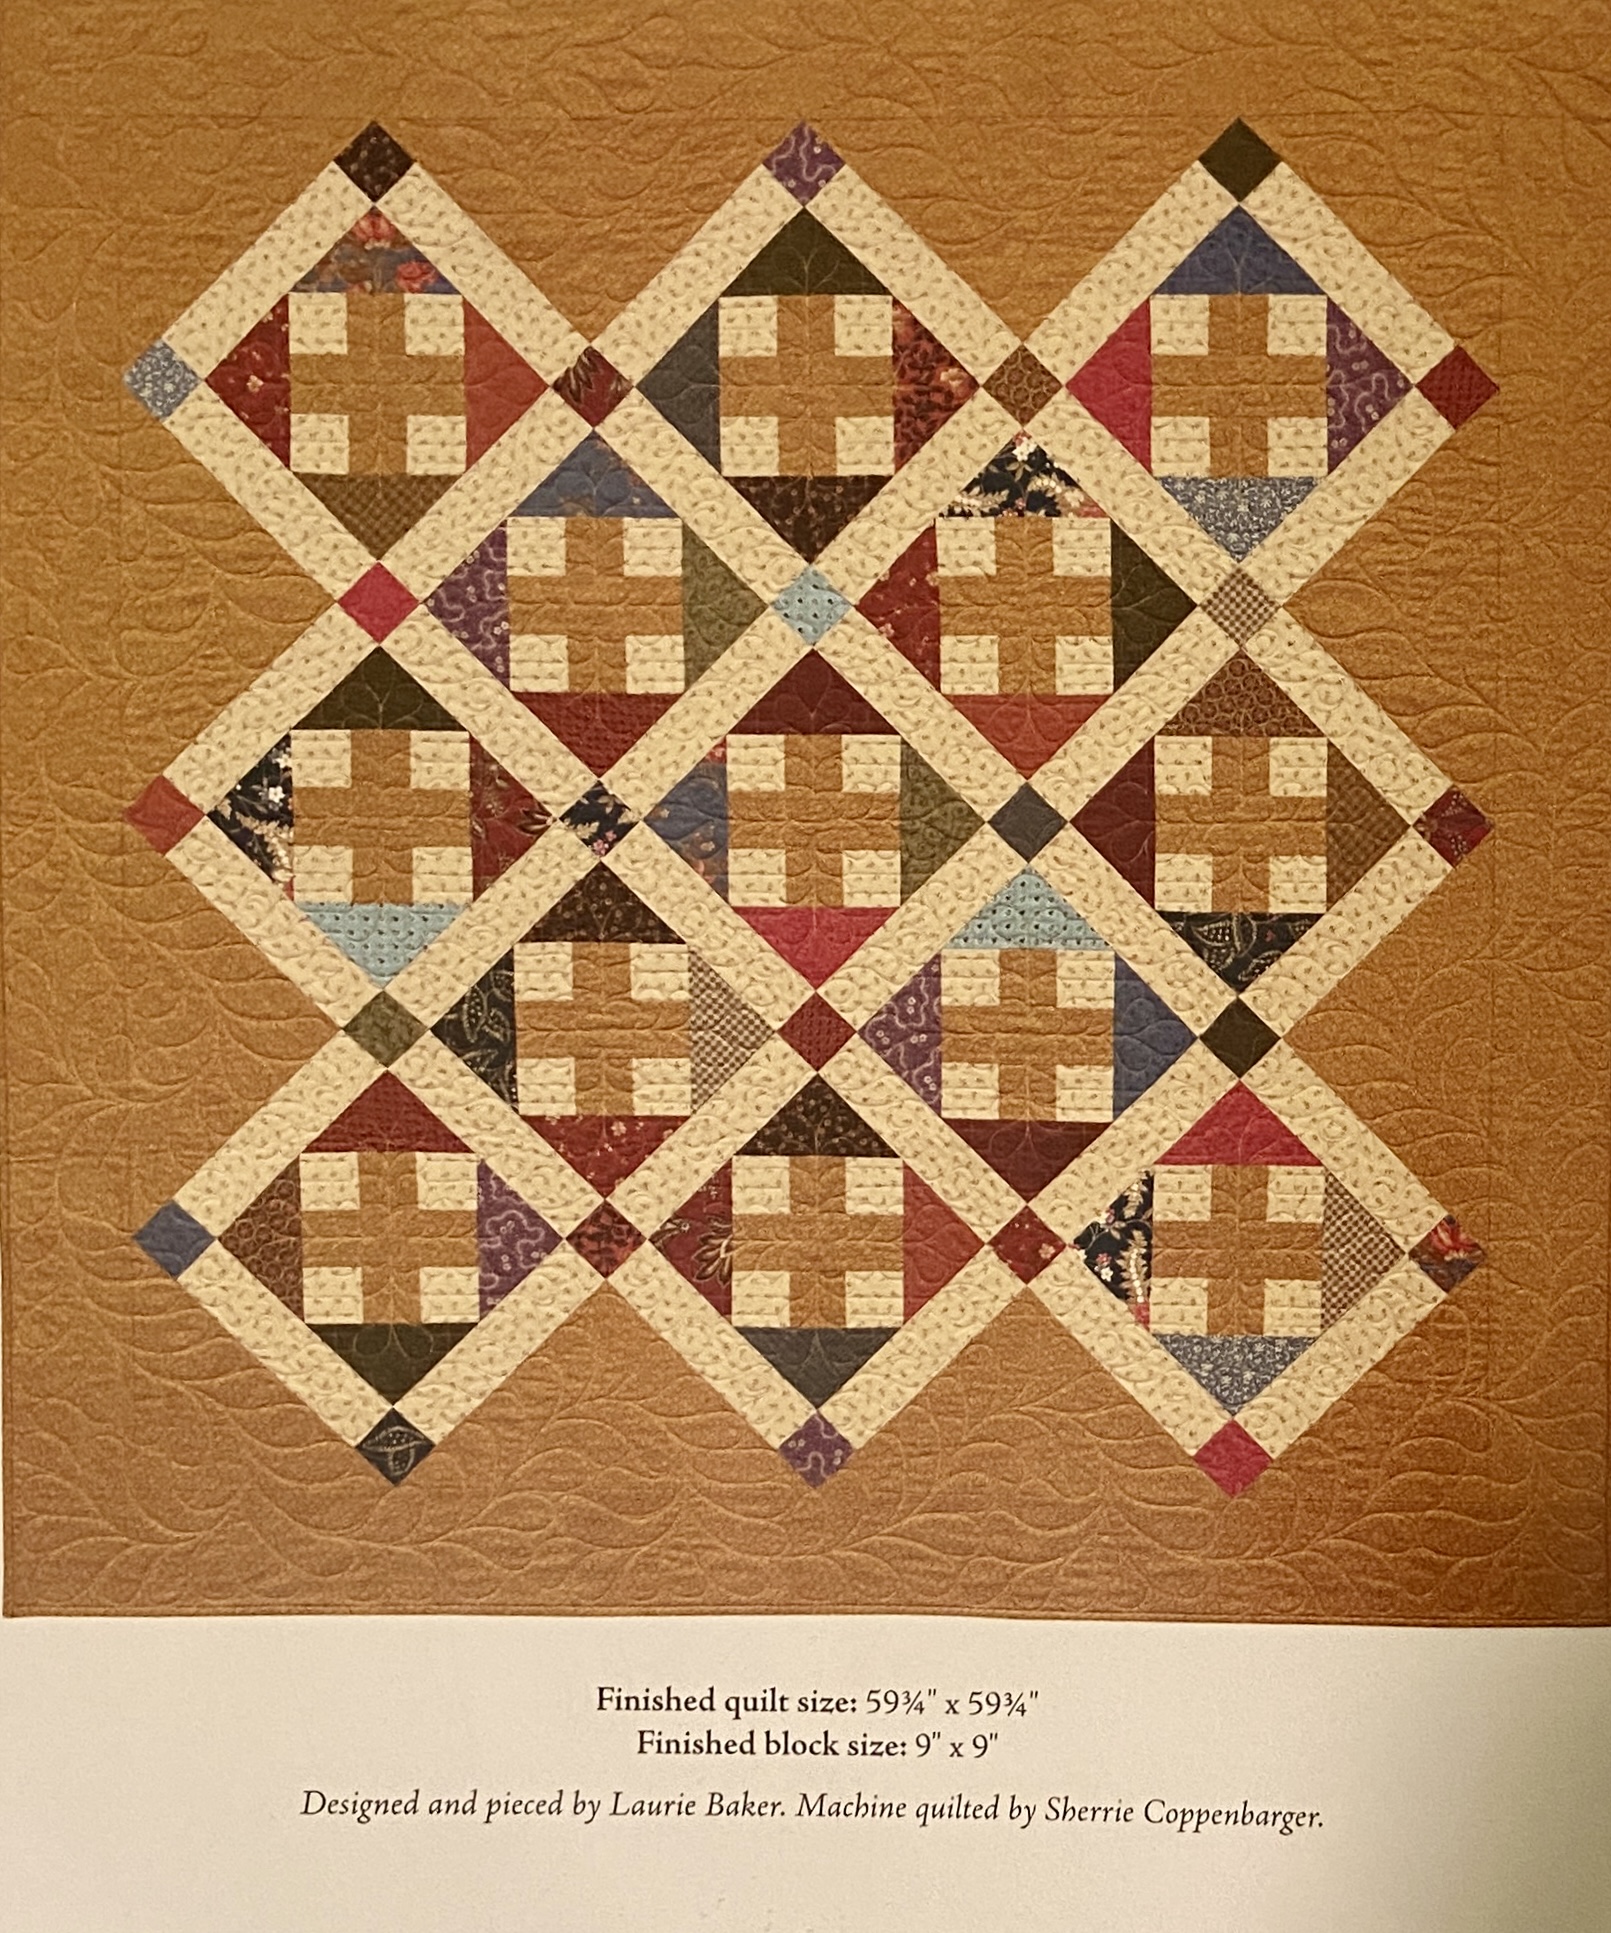
When I was feeling lousy, I went poking around in the sewing room. I wanted to make something and decided to use some fabric given to me by a friend of mine in California. It is an older line designed by Kim Diehl – so very traditional reproduction fabrics. The main reason I was drawn to these this particular week was included in the fabric Stephanie gave me were stacks of pieces already cut into squares and rectangles. I looked through a book, Homestyle Quilts, and chose a pattern that could be easily modified to use the squares that I had.

Even though I sewed just between naps; a little here and some more there, this sure did come together quickly. This was mainly because I had very little I had to cut. Cutting pieces can be very time consuming!!

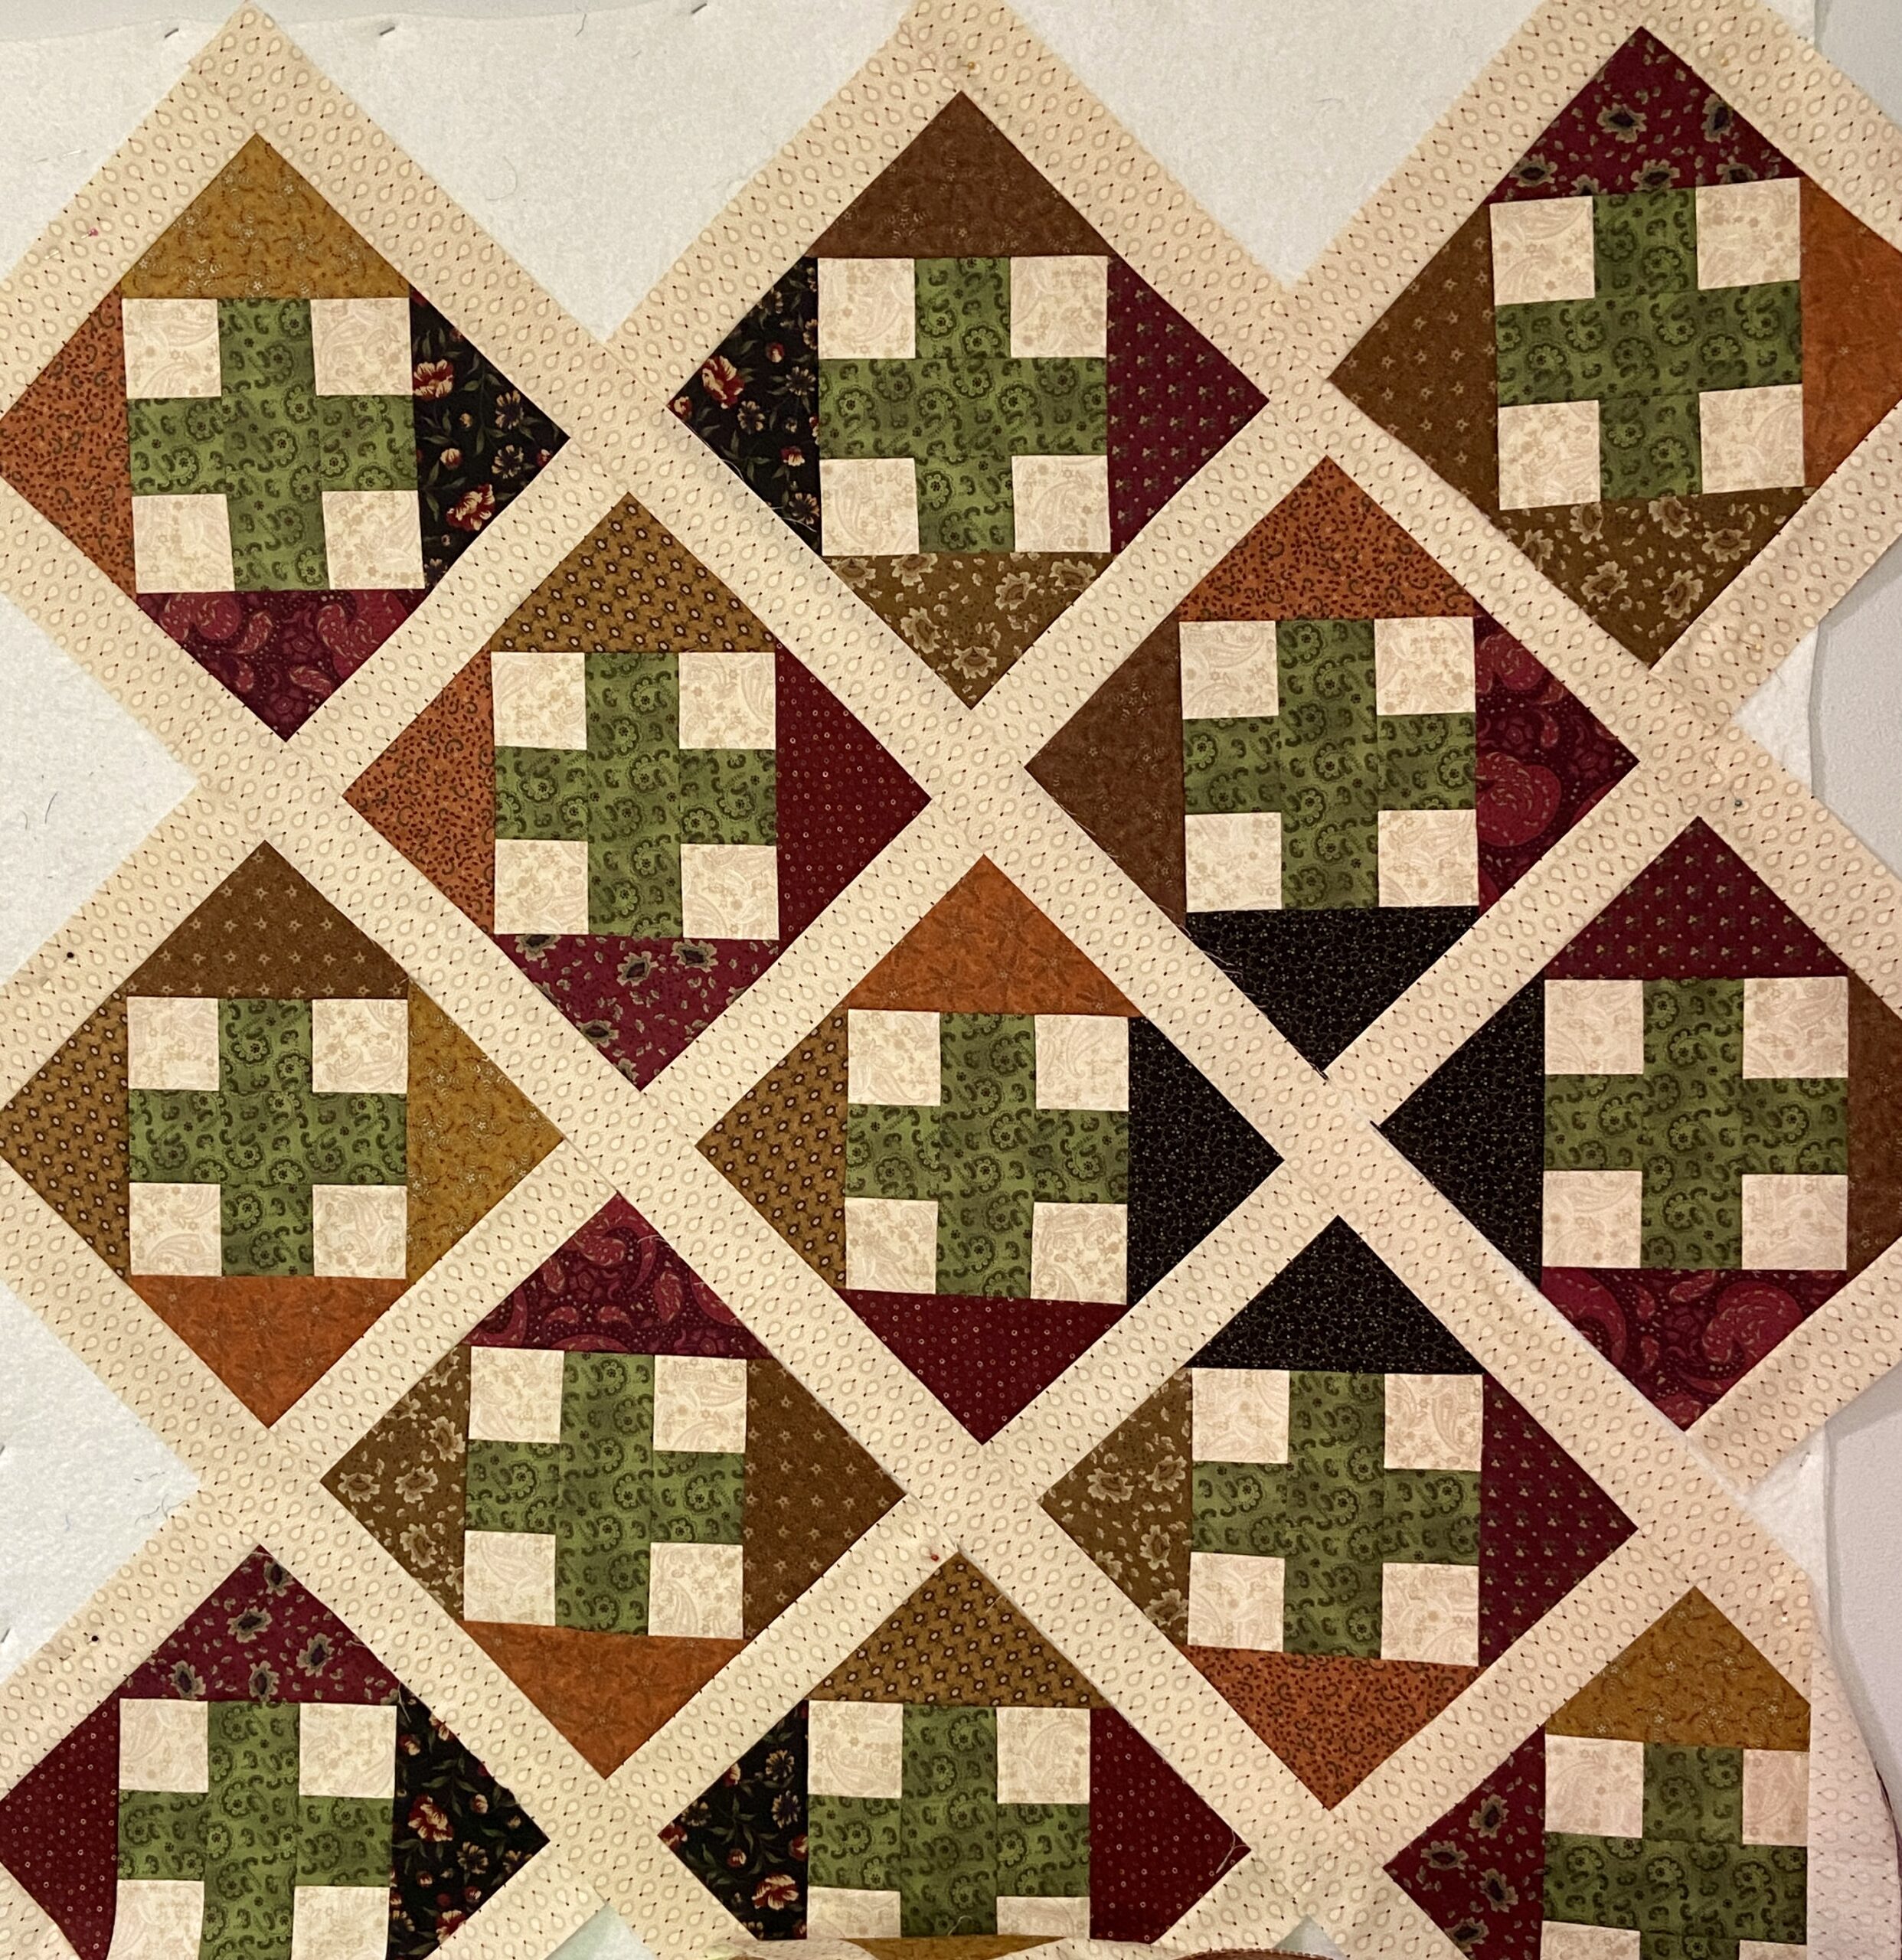
At this point, all sashing strips are done and I am on the hunt for some darker green yardage for the setting and corner triangles.

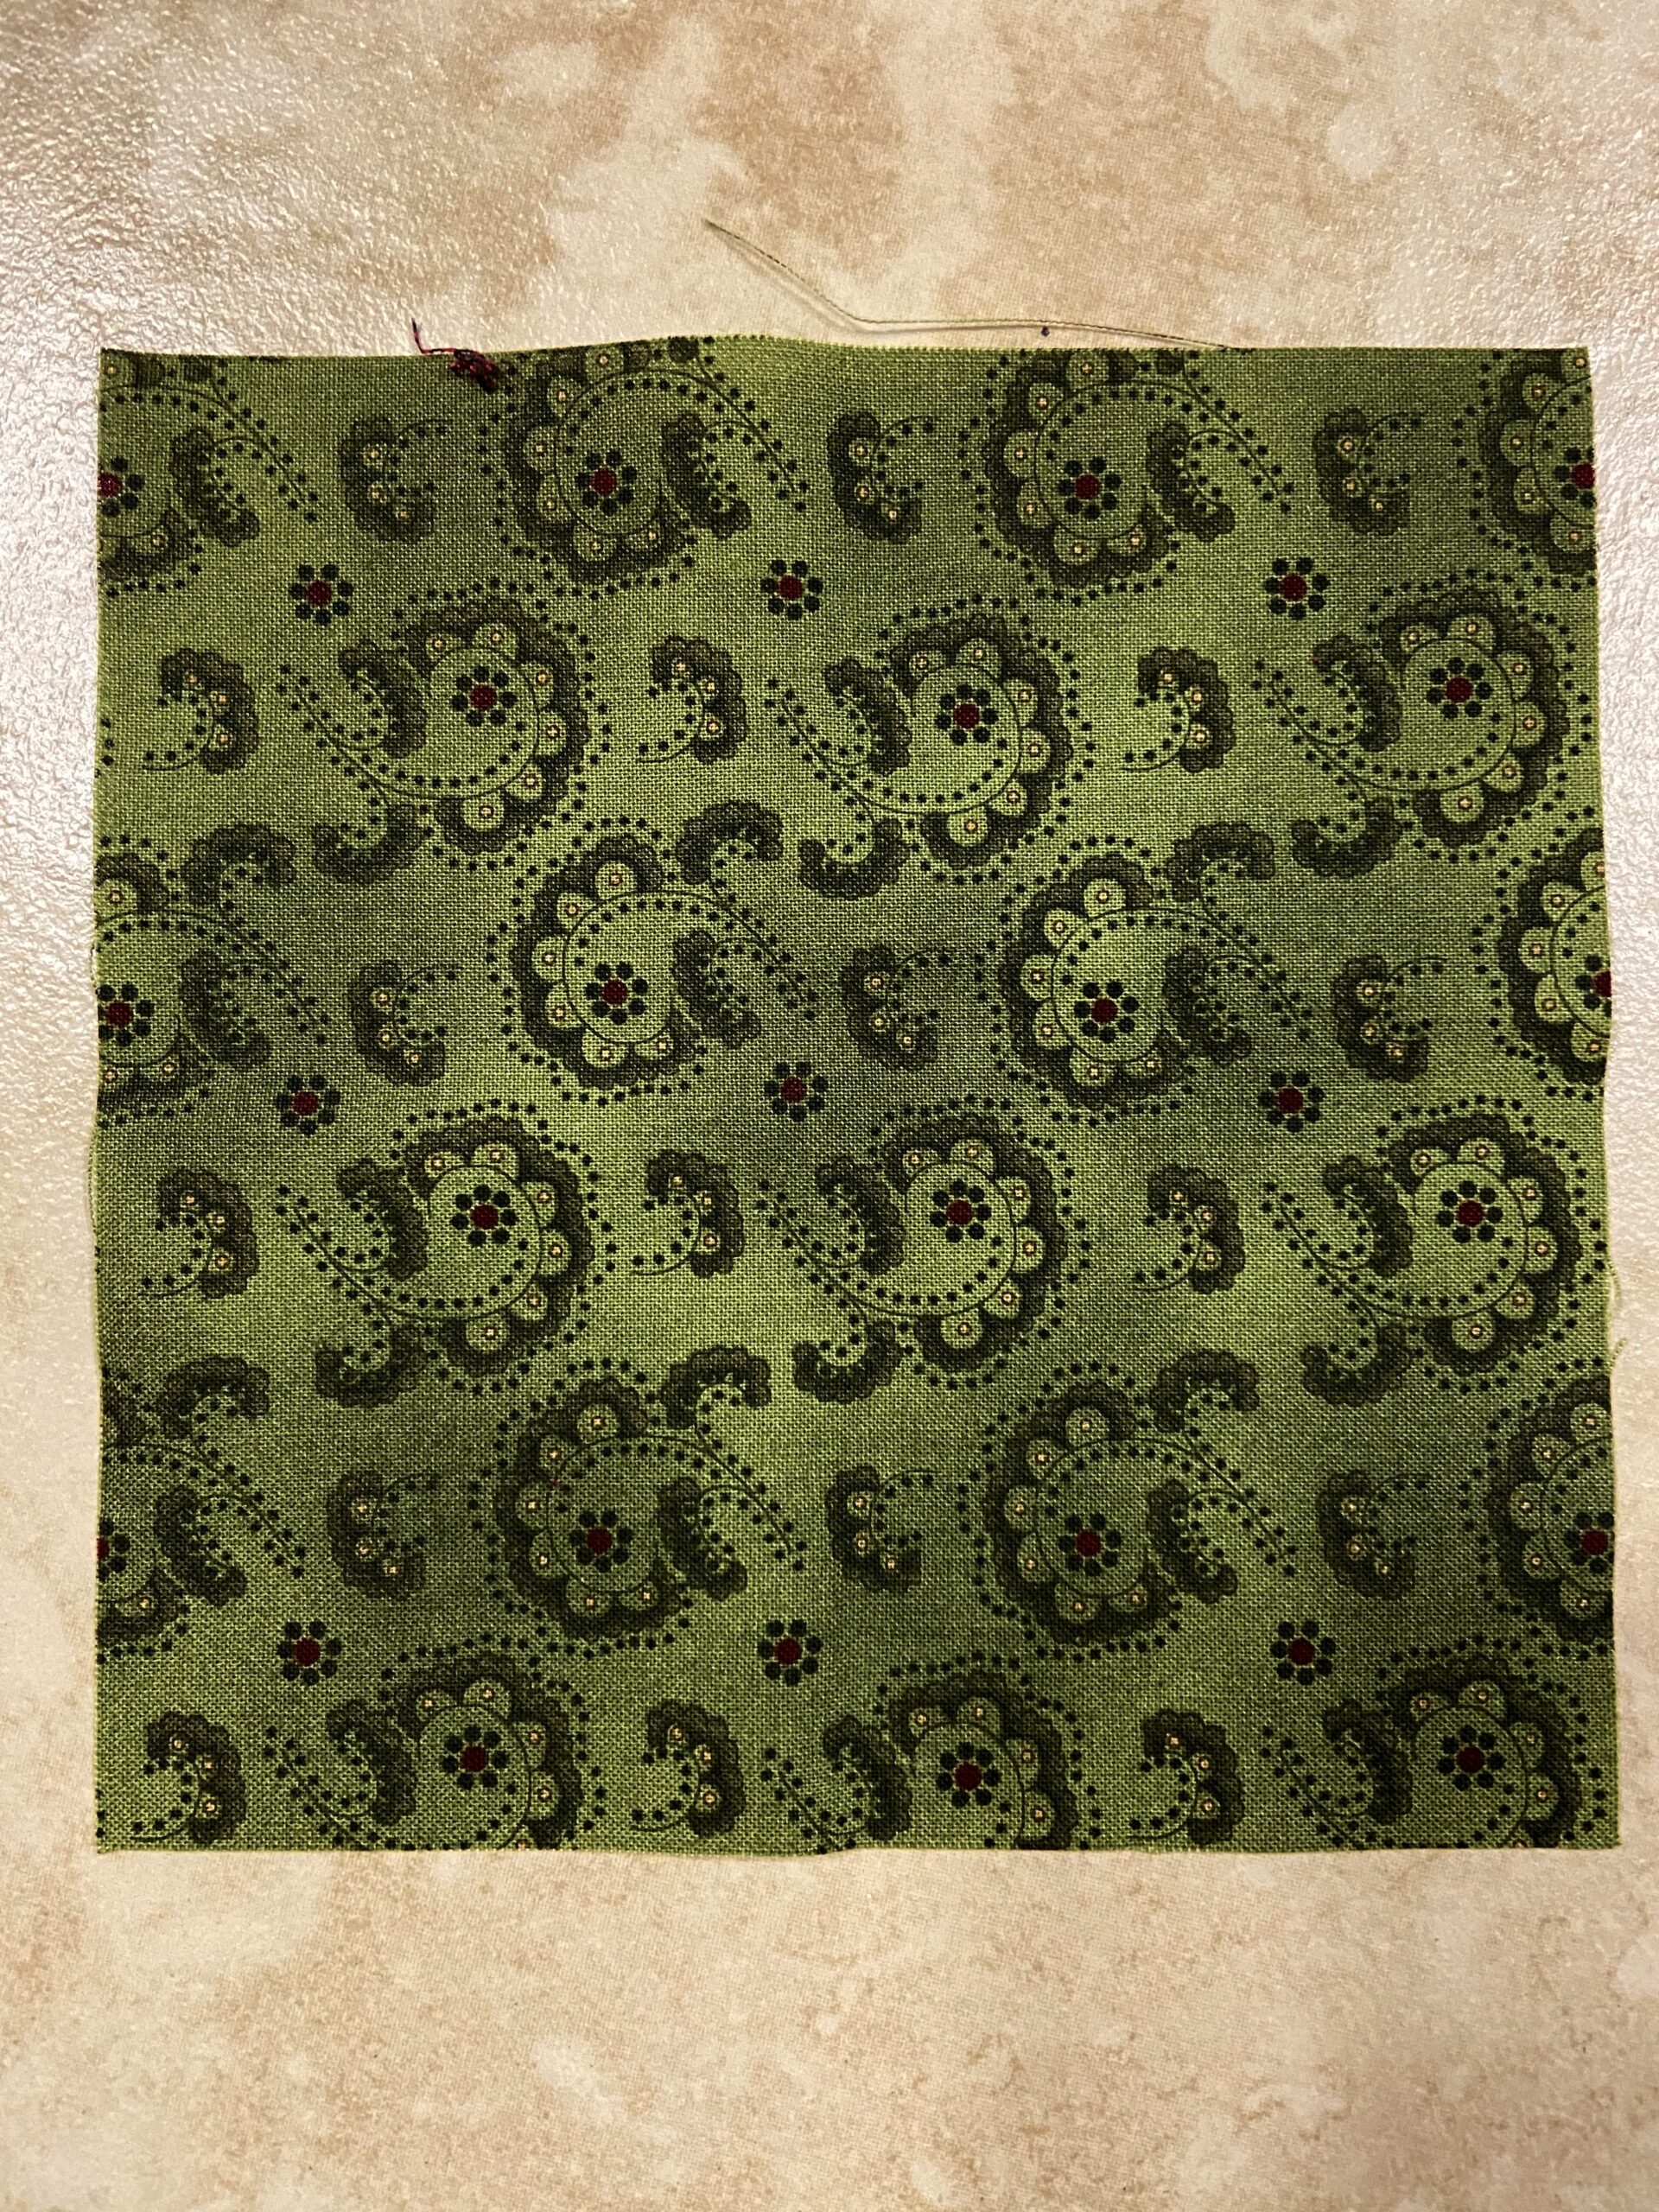
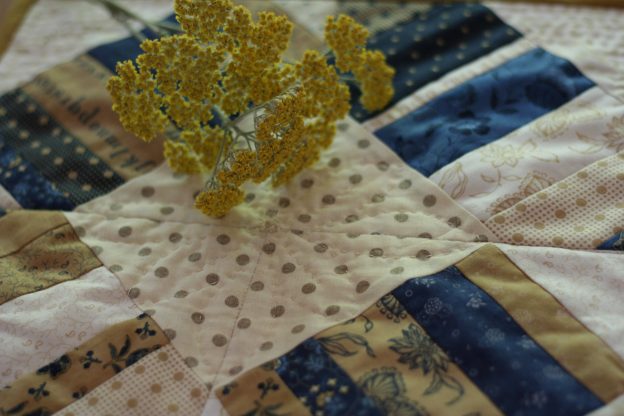
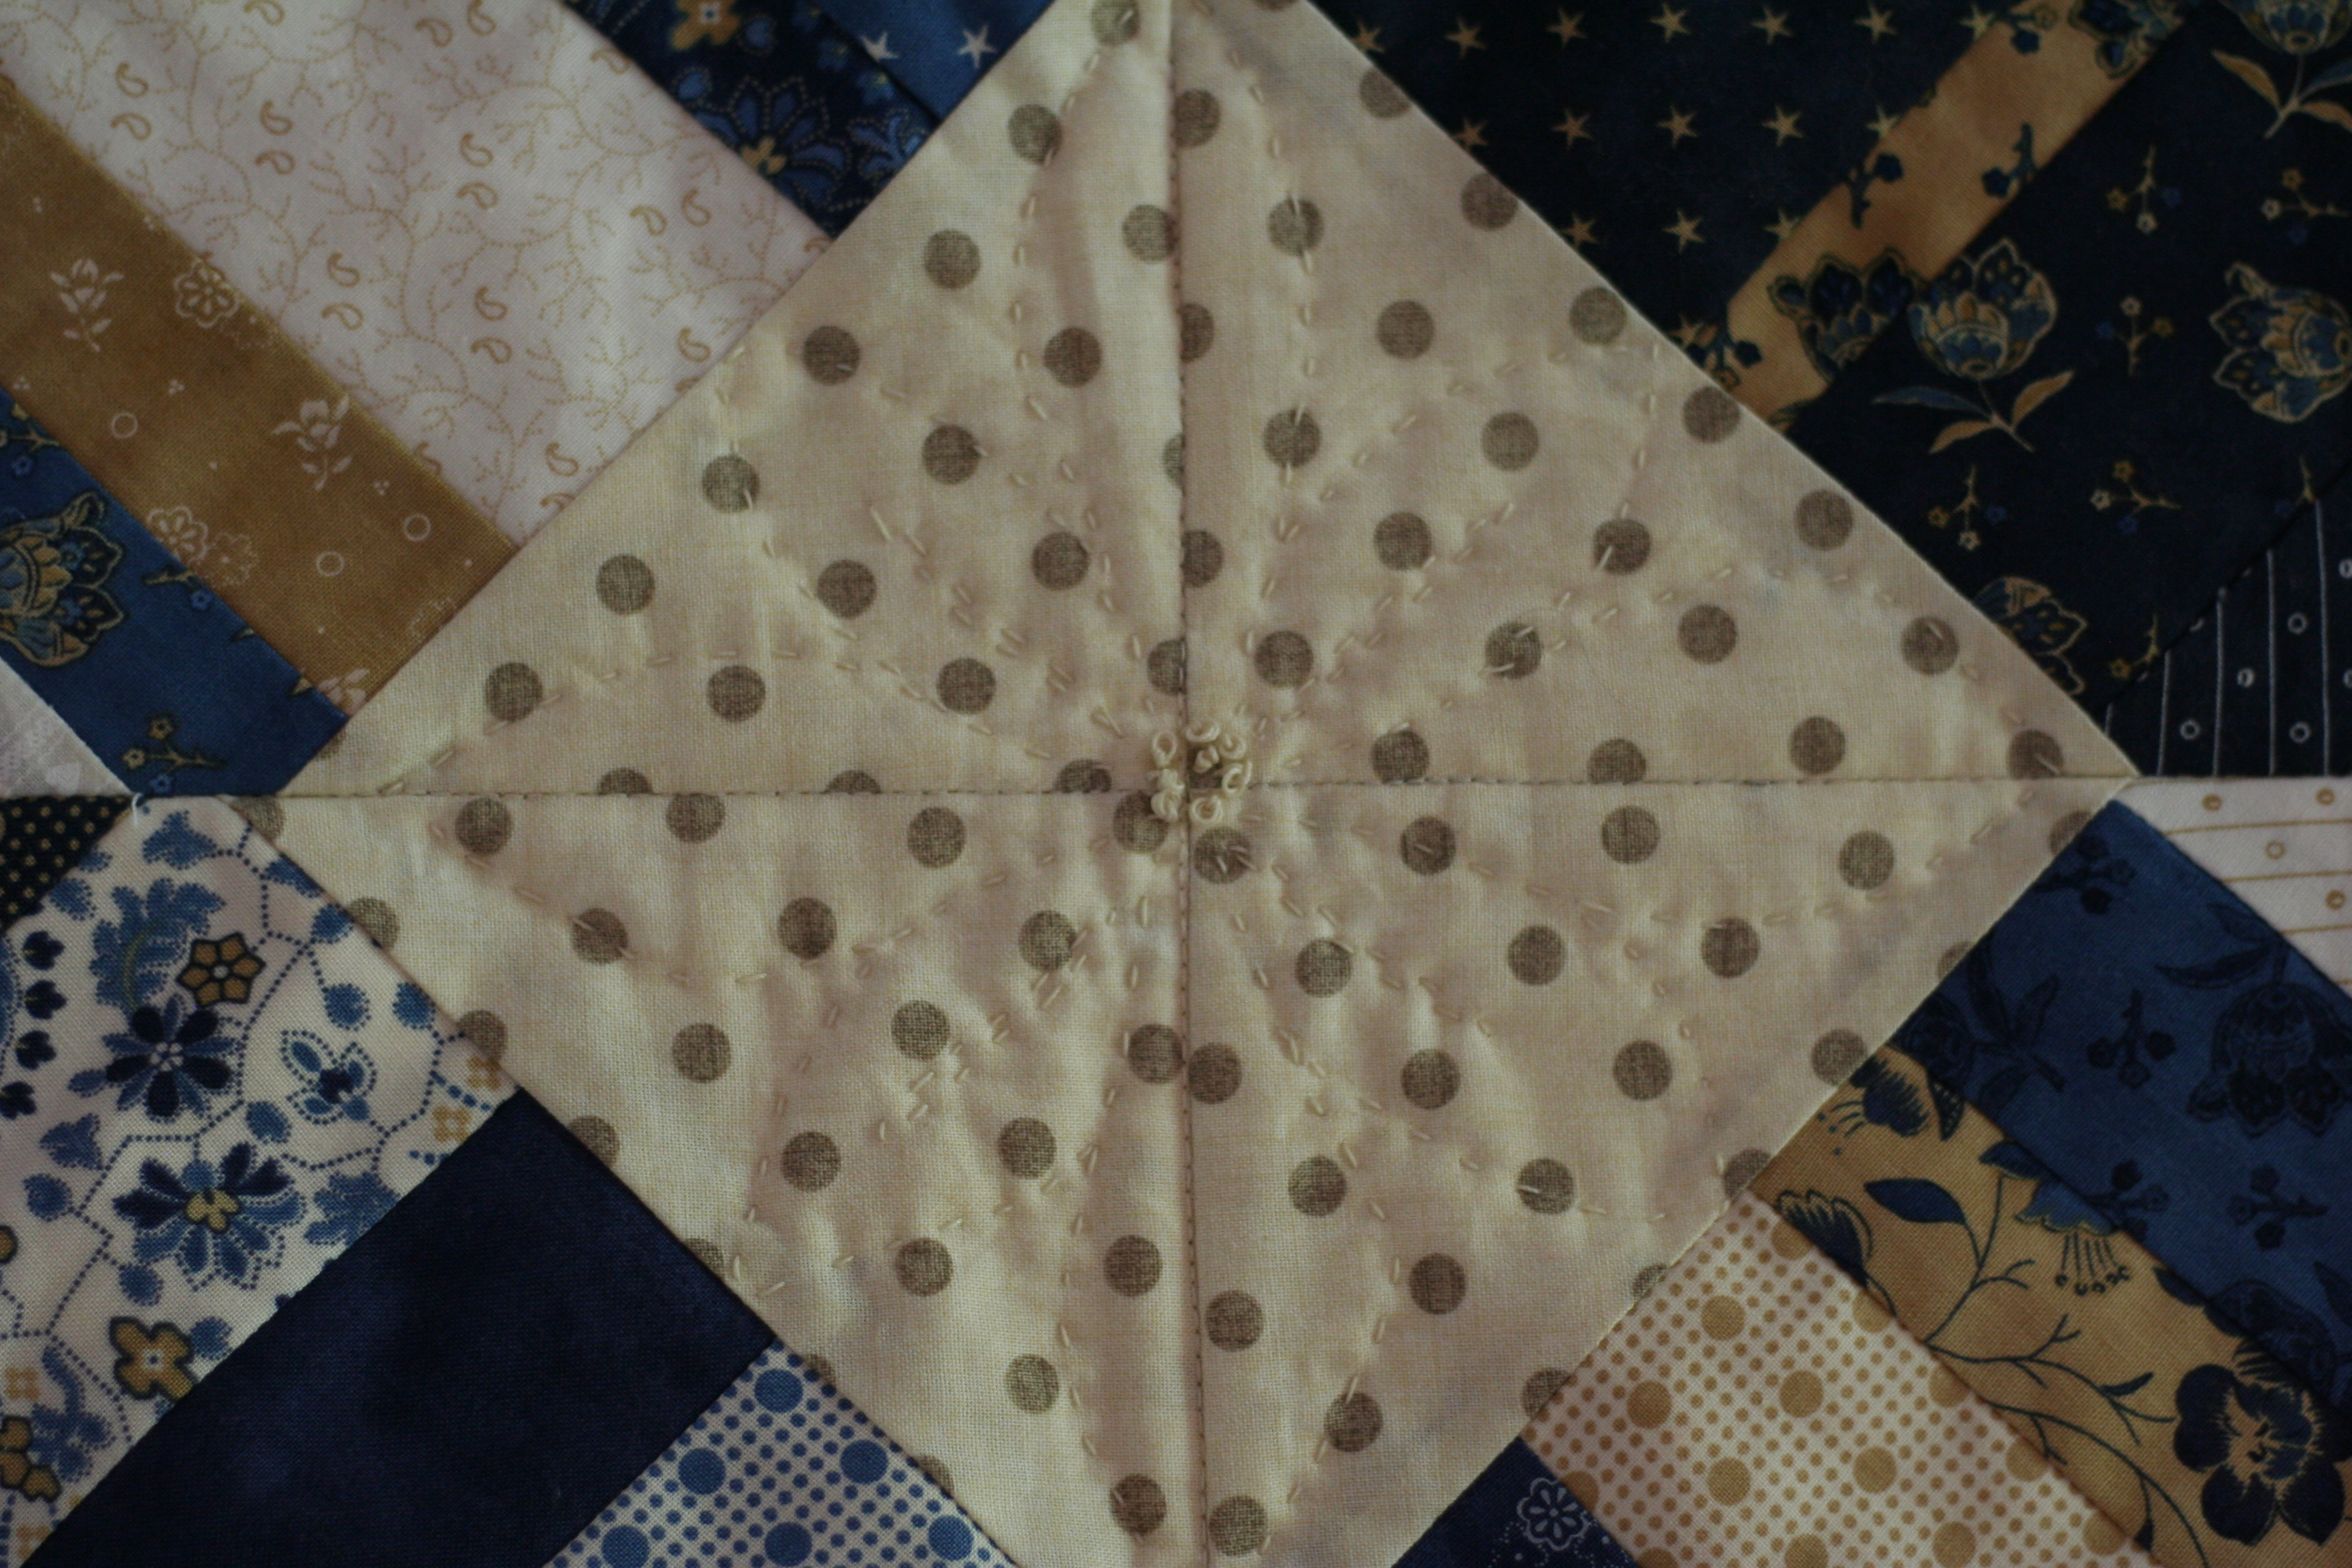
Just in case I get lucky here, the above picture is the fabric I would like to use for the setting triangles. It is the same as what I used for the block centers. I don’t suppose any of you have a piece of this sitting on a shelf, collecting dust? It is an older line so I am unable to find any on-line (though I have tried mightily)! If you do happen to have about a yard or maybe 1 1/2 yards, I would love to buy it from you. Leave a comment!! I’ll cross my fingers. 🙂

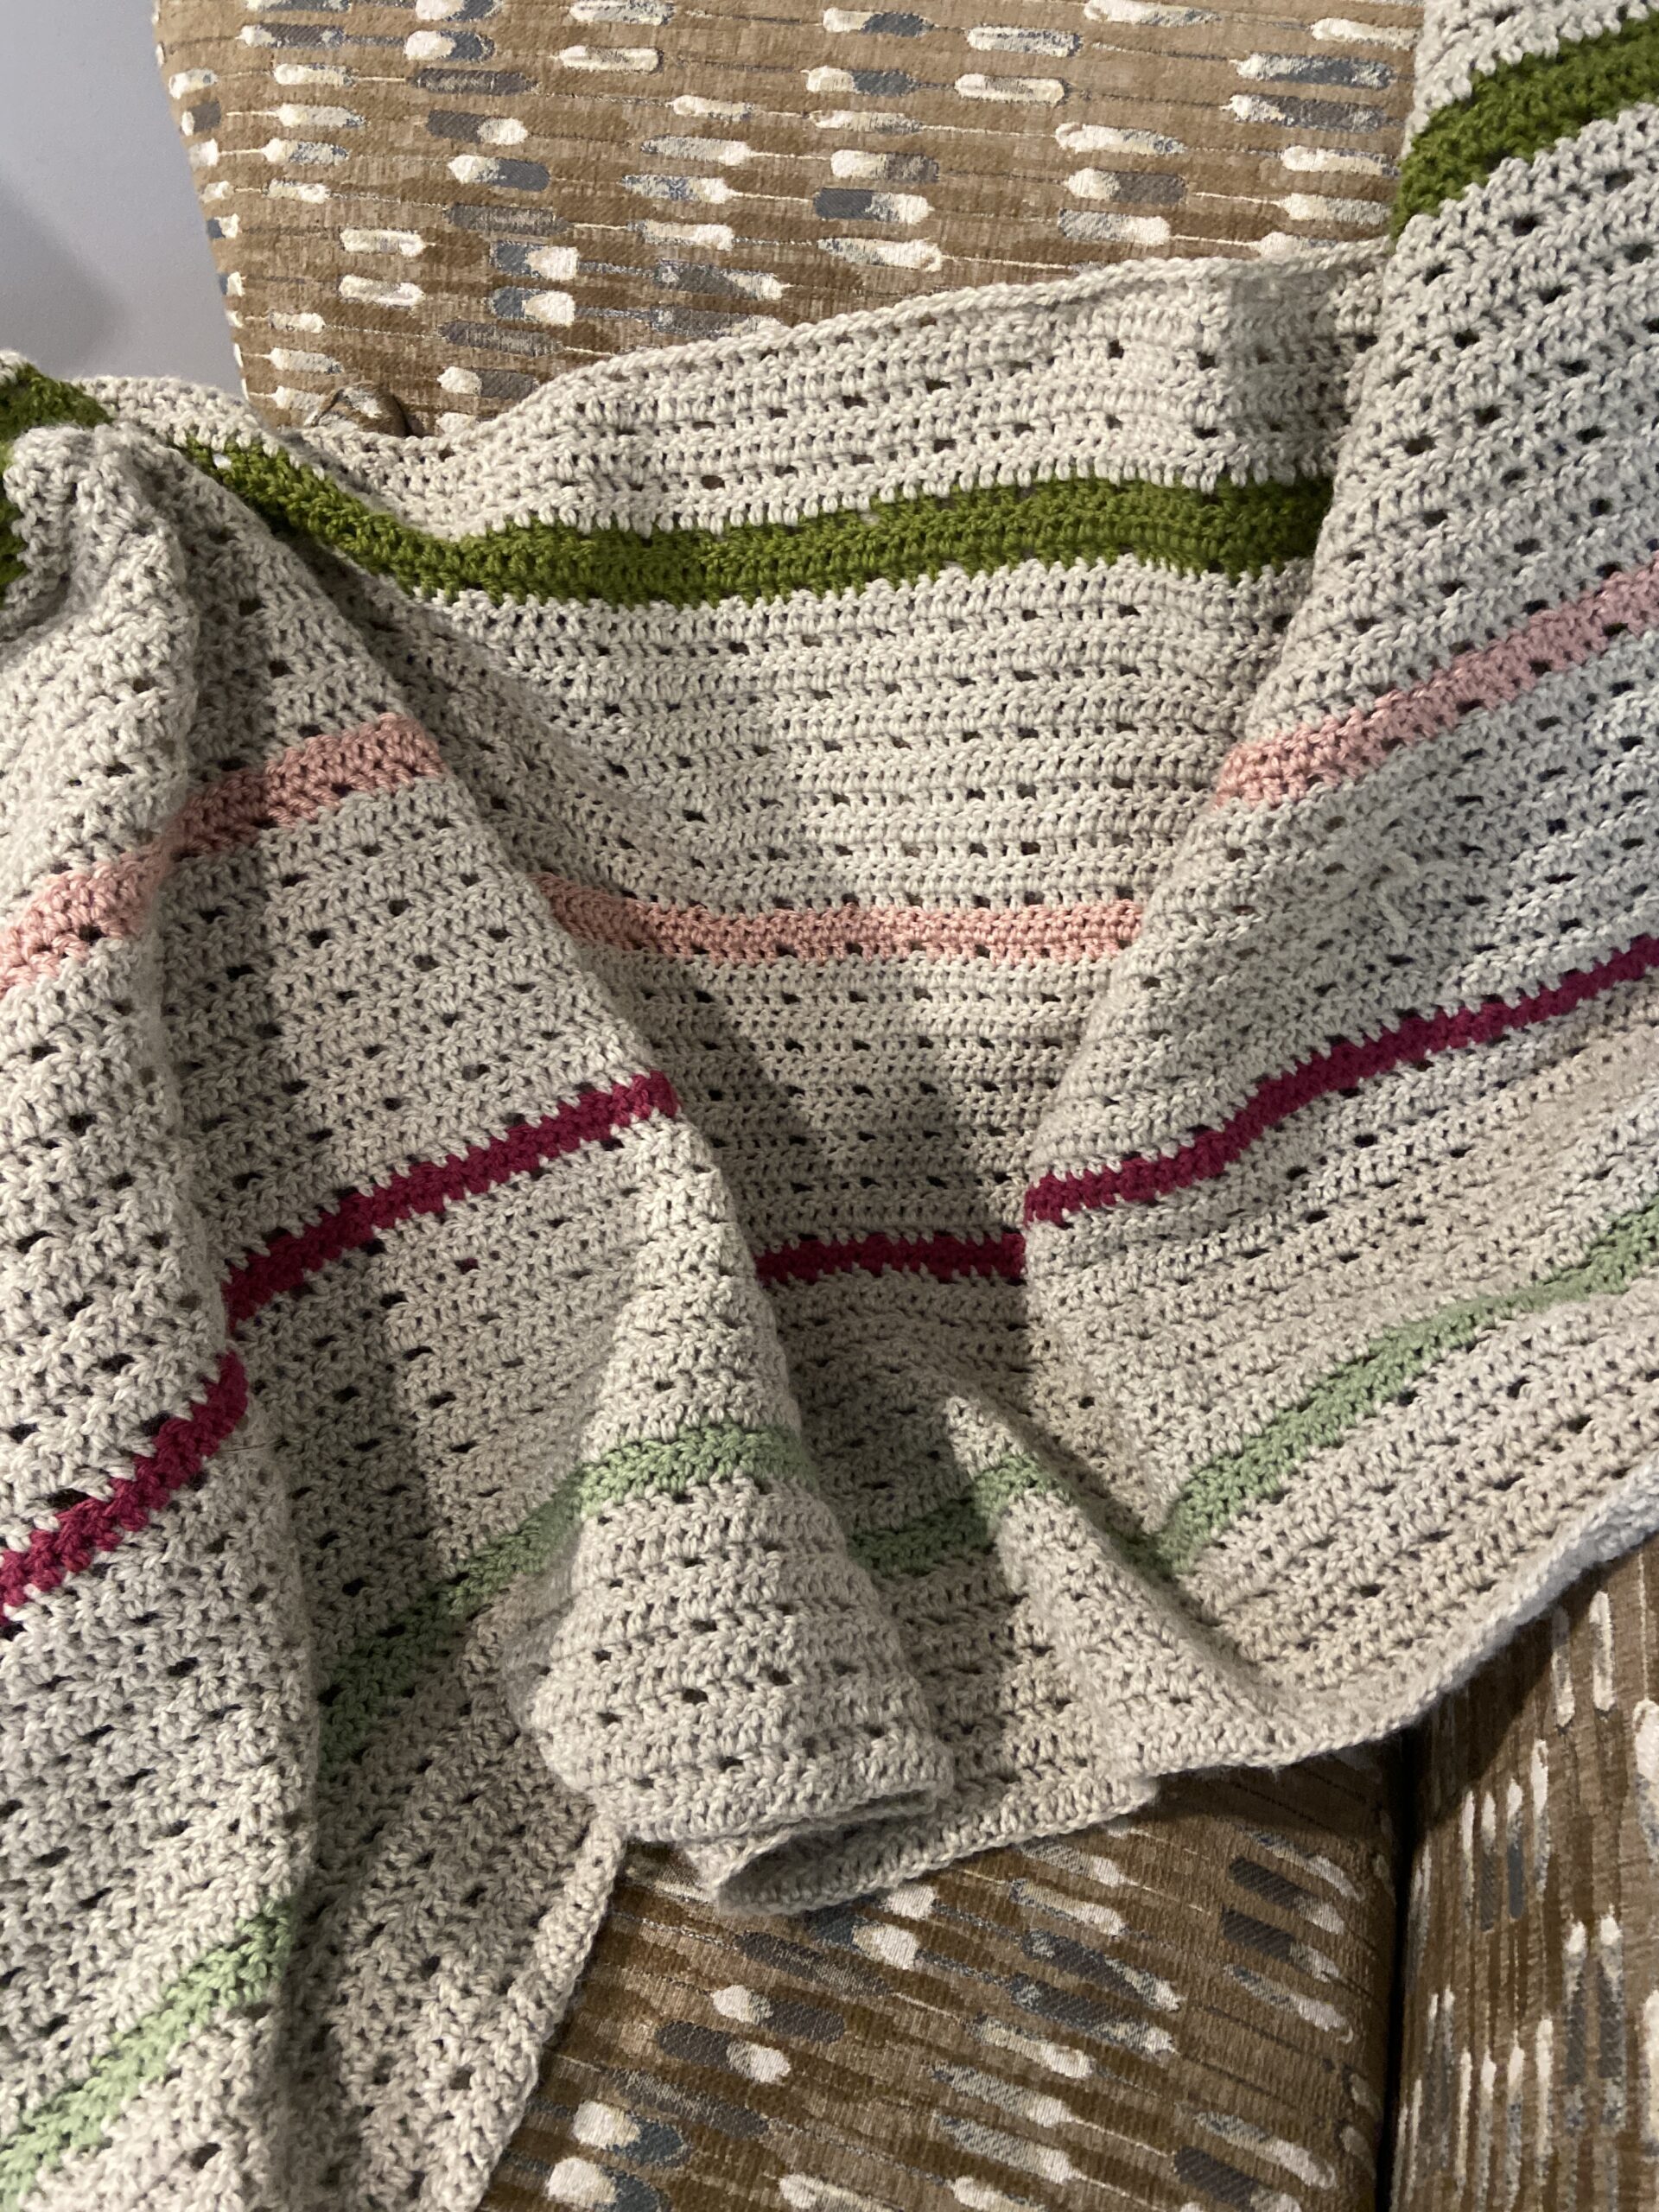
Recently finishing up the hand quilted mini I posted about earlier, I wanted another hand work project for the evenings. Changing things up, I have been working on a crochet project. This afghan is so soft – I can’t remember where I picked up the first few skeins of yarn. Having only three skeins, I somehow decided to start an afghan. What was I thinking??? Never having made one before I wasn’t clear as to how much yarn I really needed. Let’s just say it is a whole lot more than three skeins! Luckily I found some on Etsy and a bit more on Ebay. So, I will be able to make this a good size to snuggle under on the couch. But jeez – yarn adds up and a project that takes 10 or so skeins is expensive! Crocheting in the evening feels meditative. Especially now that I have the rhythm of this pattern solidly memorized and don’t have to pay too much attention to it. As with quilting, I am not precise when it comes to crochet. Sure, every now and then there might be four double crochets where there should be three but in this sort of pattern, I don’t think it matters a whole lot. Plus, it’s how I do things…..

Hopefully this virus will end sooner than later. I am bored and want my energy back. Plus, my husband is probably tiring of listening to me cough! Hope you are all healthy and enjoying the spring time. Our skies are blue today after a very rainy night. Hurray!

Big Stitches and Strip Quilts

Somehow a month passed by and I wasn’t struck with the urge to write. Not for lack of projects to share however. I have found quite a bit of time to be in the sewing room. Let’s take a look at a few projects.

Quite a number of weeks ago, I decided I wanted to make something that I could hand quilt with big stitches. I love the look of hand quilting and have not done a whole lot of it. I wish I could remember where I saw the inspiration for this but I didn’t write it down. It isn’t terribly unique but I did use someone else’s idea.

It took me no time to stitch these strips together. The most time was spent on choosing the fabrics. All came from the scrap bin though!

The first fabric I selected was the red print in the upper left corner (actually, this picture shows the project upside down). Not that anyone would know that but in my mind, this is upside down.

After assembling the top and basting it, I began to quilt it by hand. I didn’t use a hoop and maybe I should have. By the time I was done quilting it, it was somewhat distorted and this made it a challenge to square up for binding.

I love the stitching, even with all of the wobbles and wiggles.

Currently I have it hanging on a wall in my sewing room. I like this little hanger (made by my friend’s husband). I switch quilts here fairly often because it can be done easily. You can see this is crooked on the right side. Well, I should clarify, it is actually cut squarely but the strips are distorted. It is quirky but I like it. The colors are right up my alley. This little quilt provided many evenings of hand sewing which I enjoyed greatly.

In between times, I have been sorting and cutting a bag of fabric scraps for Project Linus. I was able to cut a large stack of charm squares and 3 1/2″ squares for future projects. In the scrap bag there were loads of strips. Rather than sort and cut them, I decided to just trim them up and make a quick quilt top.

I think I will add another strip or two to both the bottom and top to make it a bit larger. Then it will be finished up. The meetings are the last Sunday of each month so I have time to get this done by the next session. It is cute, kind of busy but it has a lot of fun things to look at. I’ll share it again when it is finished.

In between sewing, we have had lots of good family time. We had my son and his wife out from New York for about 5 days which was so nice. I miss them all the time and treasure when I do get to be with them. We also celebrated Easter with lots of family, including my sister and her husband who came up from Colorado.

I have been waiting for the rain to stop and it looks like it has. Time to get some time outdoors! Hope you will leave me a comment and tell me how you are doing. It has been a long time since we’ve chatted!

Spring Equals Birthdays & Proms

May has been such a busy month! School is winding down – senior year is coming to a close for Julia. Plus we have celebrated her 18th birthday and she went to her Senior Prom. Crazy to see this girl finishing up high school because it was only a few weeks ago that I felt like such an awful mother as I left her crying on the first day of Kindergarten. Such is life, right?

A few weeks ago, I posted this desperate plea on Instagram and Facebook. Julia’s prom dress didn’t really fit well and she asked if I could fix it. This was the week before prom. Being the confident sewist, I immediately suggested we return it and quickly find another dress. But she #1 – threw away the receipt and tags and #2 – said she loved this dress and wanted to wear it. OK, I promised to do what I could. The main issue was the lining was too snug around her waist. I looked at letting it out and adding some width to the side seams. But I suspected I would end up with something bulky that wouldn’t lay flat. My brilliant daughter, who doesn’t sew, asked if I couldn’t just lift the lining up, folding it right sides together, sewing all the way around, which would make it a little wider at her ribs. Does this make sense to you? It worked like a charm and was super easy. Sort of hard to explain though.

Photo credit to Natalie Webster.

The next issue was the hem. It was really long and she didn’t want to be tripping over it at the dance. I was a bit leary of this task because the outer fabric was a slippery chiffon. But with the help of YouTube, it was not hard at all. The video I watched instructed me to pin it about 1/4″ longer than I wanted it to be. Press it and stitch all the way around. Then trim the excess as close as possible to the seam line. Finally, roll that stitched line to the inside, pin and press and stitch again. I was amazed by how wonky the original hem was. There was no way to straighten it so Julia and I figured if we hadn’t noticed how wavy it was before, no one else would either and I just stitched it – crooked as can be.

Photo credit to Natalie Webster.

Hiding under that pretty dress are black sneakers because my daughter won’t wear much else!

Following the prom, we celebrated Julia’s 18th birthday. Not sure if you remember but last year I made a cake for her 17th birthday and was not entirely successful!

This was one ugly cake!

This year Julia asked for the same yellow cake with strawberry filling and chocolate frosting. I wanted to use a cake mix again but with better results. My trusty internet sources advised adding an extra egg yolk and replacing the required water with milk. I did both of these, though I used almond milk to keep it dairy free for my husband. Also, another site suggested adding a couple of tablespoons of any pudding mix that would match the flavor of the cake. I had an old box of butterscotch pudding that likely expired in 2010 or so. I opened it and added two tablespoons and tossed the rest. Guess what? It worked wonderfully.

Such an improved version!

Julia was happy and we are hoping her wishes come true for this year!

With all of this, plus two different awards nights at school, I haven’t done tons of sewing. One thing I am working on though is quilting a top given to me by a family friend. She actually donated three finished quilts to Mercyful Quilts. Then she sent me four tops she had, asking if I would finish them and donate those as well. I don’t normally do this because it takes a bit of time which I am sorely lacking, but she was so sweet to donate the other quilts and I agreed. I know they all won’t be finished terribly soon but I am working on the first one.

This string quilt was probably made a while back. There are many fabrics that look to be circa 1980’s and it is very pretty. Unfortunately, it doesn’t lie anywhere close to flat. I don’t think these string blocks were pieced with any sort of foundation paper or fabric, making them quite stretchy. I pressed it and starched it before pin basting. While pin basting, I took little tucks all over the place and hand stitched them which really helped. When I get to those bits, I quilt heavily over them so they won’t come apart. I am just using a loopy meander which is quite forgiving when I come to a section that is wavy. After binding and washing this it will, hopefully, crinkle up and be very cozy.

The backing is from the sale section in my shop. It is an Oval Elements piece from Art Gallery Fabric. Fabric for the binding has yet to be selected though. I am just about out of thread (which is silly since I am quilting it with white thread) so I won’t get too much farther on this today. I am counting this as my one project for Hands 2 Help and it should be finished early next week.

The quilts continue to arrive for Mercy Hospital and the Mercyful Quilts drive. The Hands 2 Help event at Confessions of a Fabric Addict has been amazing. I cannot even believe the number of quilts made for all of these deserving organizations . Just so inspiring. Some quilters have made 4 or 5 quilts – some even more than that. I have this stack and another box full ready for pick up. Judging by the emails I have received and blog posts I am reading, there are many more on the way. Thank you to all of you generous quilters!!

I hope everyone has a lovely long weekend. In the US, Monday is Memorial Day which many mark as the beginning of summer. We have had rainy, gloomy weather all week so it sure doesn’t feel summery here!

Little Updates

Hurray – It’s Friday!! When you work at home, it doesn’t really matter as much that Friday rolls around, does it? But I still love that feeing of heading into the weekend. It is probably just ingrained in me from the years of being in school, working, having kids in school – Fridays are a great day!

I am popping in with just a few things to tell you. Before we get started, you may have noticed the incredibly beautiful hatching chick in the picture above. Julia made it in first grade and it makes me smile to remember those days. Do you keep your kids Objet d’art from way back when?

Ok, the first point of discussion is about commenting on various blog posts. There has always been this glitch in commenting on certain blog posts since I use WordPress for my blog. I know about fixing the no-reply issue and I have done that a couple of times but things are always changing and once again, there are many blogs I cannot comment on directly.

Additionally, those blogs I can comment on (that are not on a WordPress platform) usually have a Captcha process to go through. I don’t mind this for the most part. Many of the blogs have it set so I usually have to click one round of objects (you know, the fire hydrant, traffic light, bus, car, cross walk or store front) but there are some blogs where I have to go through five and six rounds. To be completely honest, after the 3rd round or so, I just give up. It becomes a bother.

Instead of just reading posts and not commenting, I have started to comment directly by using a blog reader. I have used Bloglovin for years to organize the blogs I follow and to keep track of those following me via Bloglovin. A while back they added a feature where a reader can comment on a post right there. It is not heavily used but it is so convenient. It does mean the author of the post has to check Bloglovin to see those comments. I cannot figure out a setting where they will notify me if I have a post comment on Bloglovin. That would be a great feature, so maybe one day. I just wanted to let people know that they might want to check Bloglovin and see if there are comments from yours truly or others on their posts. Not the perfect solution but I am going to continue to do this and see how it goes. At least I am trying to interact and not just lurk behind the scenes.

Springtime blocks.

As for sewing, I have been working on these cute blocks. This line is called Floriography. I had purchased a stack of it at least three years ago. I began a Tula Pink quilt with it but hated the way the blocks looked. I clearly didn’t know what I was doing and it gives me a headache just to look at those blocks! So, I decided to throw in some solids from my wonderful closet of stash and make these blocks. I want to make more blocks with the darker blue and pink before I really work on the layout. I am using a pattern (tutorial really) by Cluck Cluck Sew. I had pinned it long ago and decided this is a great use for it. I am looking forward to making more of these and putting it together.

This weekend Julia selects her piggy for this year. She is pretty excited (actually, so am I!). My son and his wife are coming for a little family time and my parents are coming to dinner tomorrow night as well. I am thinking steak and shrimp for dinner with peach cobbler for dessert. This should make for a great weekend! Family time, baby pigs, and good food. What more does this girl need?

Check out my Forsythia blooms! So pretty this time of year!

I cut some to bring in the house. The blossoms always drop everywhere but it doesn’t bother me. I love the bright yellow indoors!

Through this weekend!

Remember – there is a great sale on Michael Miller Fabric over at my shop. Today and through the weekend, it is 50% off. There are some great stripes for quilt bindings and a few large scale prints that would make wonderful quilt backs. Come take a look! Have a great weekend everyone! Linking with Myra at Busy Hands Quilts for Finished or Not Friday.

Change of Plans

The day we were to leave for our vacation in Maine, I decided I really wanted to take a hand stitching project along with me as I was fairly certain Ray wouldn’t be too keen on my bringing along a sewing machine. He can be so darn unreasonable. Ha ha. We were to be gone for two weeks which is far too long to be without needle and thread. I was searching through the closet in my sewing room and decided to change my plan for a UFO that I had.

Here is the back story. In July, 2014, I posted about a packet of scraps I ordered online. It turned out to be strips from the Moda line called Lexington, designed by Minnick & Simpson. I planned to make a string quilt. Here is a picture of some of the blocks. Side note:  wow, that is a horrible picture. I am happy to see that my photography has improved over time. 😉blue tan quilt blocks 2

Each string block finished at seven inches. After making about 20 blocks I set it aside and have not touched it since. I am not sure why, but I lost interest in it. I really like the colors in the project though. I decided to repurpose the blocks that were made and quickly sewed twelve blocks together to use as a table runner. Using twelve blocks gave me a runner that was about 13.5″ x 40″ which is a nice size for my table.

I cut a piece of batting from a bag of batting scraps that I had and also a piece of backing. I love the backing – I purchased it a couple of years ago at a quilt shop in the bay area. My sister, Cathy, found it on a sale table for me.

image

It has been on the shelf for a bit and I was happy to find a project to use it in. After stitching up the blocks, I quickly sandwiched everything and ditch stitched it down the center and across the width at each seam. I didn’t want to pack a hoop to quilt it and if it was stitched already, I knew it would be stable to hand stitch.

This was such a nice way to practice hand quilting. I have not done a lot of handwork. I did quilt a pillow last spring but since then, not so much. I brought my Hera marker and a square ruler with me, hoping I could figure out some sort of design once I got going. I also brought some basic hand quilting thread as well as Perle cotton.

image

There are three centers and on each, I stitched a flower. In the center I placed a cluster of french knots. To create the flower petals I used my Hera marker and traced around the top of a coffee cup. Once I got going, I could just freehand them but I needed a guide to get me started.

In each triangle I echoed the lines of the triangles with straight lines. I like the simplicity of the quilting. While we are looking at this picture, let’s all ignore the fact that the point isn’t even close to matching properly. Thank you kindly.

IMG_6735

The  table runner is very pretty and I look forward to using it later this fall. It feels autumnal to me. I love the binding. This bit of fabric was in my stash and works perfectly. I definitely enjoyed the hand quilting and will continue to practice my stitching.

IMG_6714

I still have a few more of these string blocks which will likely sit in that lonely pile where orphan blocks go until I find a use for them.

Hope everyone has a lovely weekend which involves at least a little time in the sewing room. Linking to my usual favorites. Find them at the top of the page, under Link Ups.

day1_quilt craftsy

In case you are searching for that perfect class to take on Craftsy, there is a sale running this weekend on their most popular classes. It’s a good time to take advantage of a great deal and learn something new.

As a Craftsy affiliate, I will earn a small portion of any sale made by clicking through the links on my page. If you choose to make a purchase, thanks a bunch!

What’s Next?

This quilting obssesion is such that I am always, always, always thinking of what’s next?  I have two quilts in progress and two projects that I am in the process of finishing up the binding.  Isn’t that plenty?  No, not even close.  If you are reading this, you probably understand.  I don’t know what drives this.  Is it all the amazing fabrics out there?  Do they  create this continual desire to start the next thing? Maybe it is the satisfaction of creating something? The peacefulness that comes over me when I am piecing something?? Honestly, it is almost always in the back of my mind; the next project.

So, here is “what’s next”, for today anyway.  On a whim, I purchased a bag of scraps from Southern Fabric.  Have you taken a look at their on-line shop?  It is filled with a huge assortment of really nice fabric.  I follow them on Instagram and Facebook because they are always having a sale on something.  One day it was bags of strips.  They were half off (regular price is $12.00).  The only thing guaranteed was that the strips were from a coordinated line from Moda.  Good enough for me.  Really, is there any line that I really wouldn’t want to work with?  Doubtful. (By the way, this isn’t a sponsored post.  I just love their shop.) With rapid speed, I received my bag of surprises in the mail. (I love a good surprise too!) I was so thrilled.  Look what I got:

blue stripsThe strips are from the Lexington line designed by Minick & Simpson for Moda Fabrics.  I love it.  My favorite pieces are the text prints that just repeat the alphabet.  Really sweet.  I think I need to order some yardage in that text print.  Two strips just isn’t going to do it for me.

It was easy to come up with a project for these strips.  I decided to make a string quilt. The tutorial that I liked best was found on Quiltville.com. The blocks are strip quilted on a  rectangular piece of fabric and then triangles are added to the sides to create the block. First I trimmed the selvages off and cut my strips into various widths between 1 1/2 inches to 2 1/2 inches.  I used a sheet that I cut into rectangles for the foundation fabric. For the triangles, I have some low volume fabrics that work perfectly.  Check these out:

blue quilt low volThese are such pretty pieces and I love them with the blues and tans of the Lexington line.  Here are the blocks that I have thus far. As I have mentioned before, I lean toward the precise side (that actually is a bit of an understatement) so I’ve decided to sew some of the strips slightly wonky and try to enjoy the freedom that allows.  Not so bad to relax and accept a little intentionally crooked piecing! If nothing else, it is kind of freeing.

blue tan quilt blocks 2

The blocks are fun to make – they require almost no concentration.  The only (small) downside is pressing the strips each time one is flipped over.  Usually I will sew one from each end, starting at the center so I can press two at a time.  Kind of a hassle to do the pressing.  Other than that, easy peasy.

blue tan quilt blocksI am taking off this afternoon to go visit my son for a couple of days.  He just got his first job after graduating college so I am looking forward to hearing how things are going. I suspect I might be able to find a few local quilt shops during my travels! (a given, right?) Hope you are all enjoying your fabric craziness as much as I am.

Linking up with:

Marelize at Anything Goes Monday; Alyce at Blossom Heart Quilts, Connie at Freemotion by the River, Heather and Megan at Randi at Fabric Tuesday. How about with the lovely Lorna at Let’s Bee Social?

From one project to the next

Lots of progress has been made on a few projects this week.  I had some minor dental surgery done so I have been home taking it easy for most of the week.  Much of my time has been spent trying to figure out how many ways I can prepare a diet of oatmeal, smoothies, yogurt and scrambled eggs.  The ideas are running low though and it is lucky that I am able to chew things with a bit more substance today!

I posted last week about the Dresden plate table runner.  I got the quilting done on that and am so happy with it. I kept it simple and it works beautifully with the Dresdens.

20140722_1440

The back looks so pretty.

20140722_1441

In addition, I started (another) Block of the Month project.  Recently, I came across Mari’s blog, Academic Quilter .  As I was reading through some of her posts at Academic Quilter I saw that she is working on two rainbow block of the month quilts.  She has some gorgeous blocks pictured and I was intrigued.  As often happens, one thing led to another and there I was looking at (another) blog, So Scrappy.  (I swear I just get sucked in and lose all track of time when I start reading these quilty blogs.)  Angela, the writer at So Scrappy is hosting the Rainbow Scrap Challenge for 2014.  I decided to join in and start creating some rainbow blocks for myself.  Again, a little late to the party so I need to work to catch up.  My family was off and about on Saturday so I used the day to sew.  I got the January (blue) and February (pink) blocks done. I have the scraps collected and prepped for March which is teal blue. Because I am getting going on this a bit late, I decided to do simple patchwork blocks using 2 1/2″ squares, ending up with 10 1/2″ blocks.  I will sash them with white and put corner blocks in. Making two of each color will provide 24 blocks, enough for a quilt at the end of the year.  It has been fun using up all of the strips that I have been so faithfully sorting and saving. Also interesting to see what colors I have an abundance of and which I have very little (the dark blue for example…. not too much of that available).

20140722_1442

The other block of the month that I am working on is sponsored by Aurifil.  I posted about this earlier this summer.  I am just about caught up on this one.  Two more blocks done! The bear claw took some time…. When I finished it, the block was only about 10 inches square.  I stared at it for what seemed like forever, wondering why it was so tiny. I left out the interior border strips. So I had to spend a little time with my seam ripper and fix that up.

20140722_1434

Here are the six blocks:

20140722_1437

That is my quilting week in review! Summer is already more than half way through for us.  My daughter returns to school on August 14th!!  It’s going by way too fast. Hope you are all enjoying your summer!

Linking up with all of these lovely blogs:

FreeMotionbytheRiver, FabricTuesday, ShowandTellTuesday, and BlossomHeartQuilts. Also with NeedleandThreadThursday hosted by the lovely Kelly @ My Quilt Infatuation.