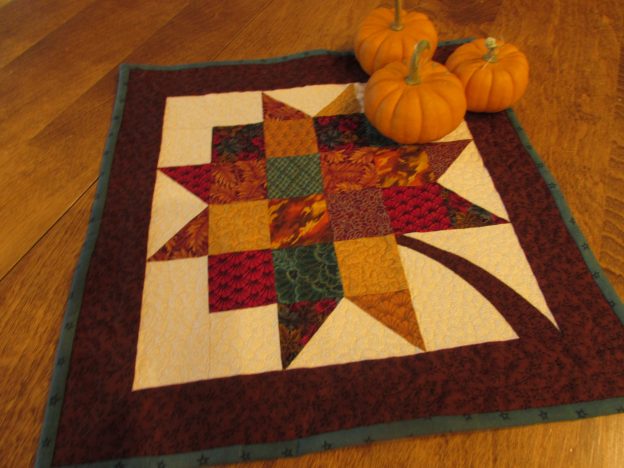
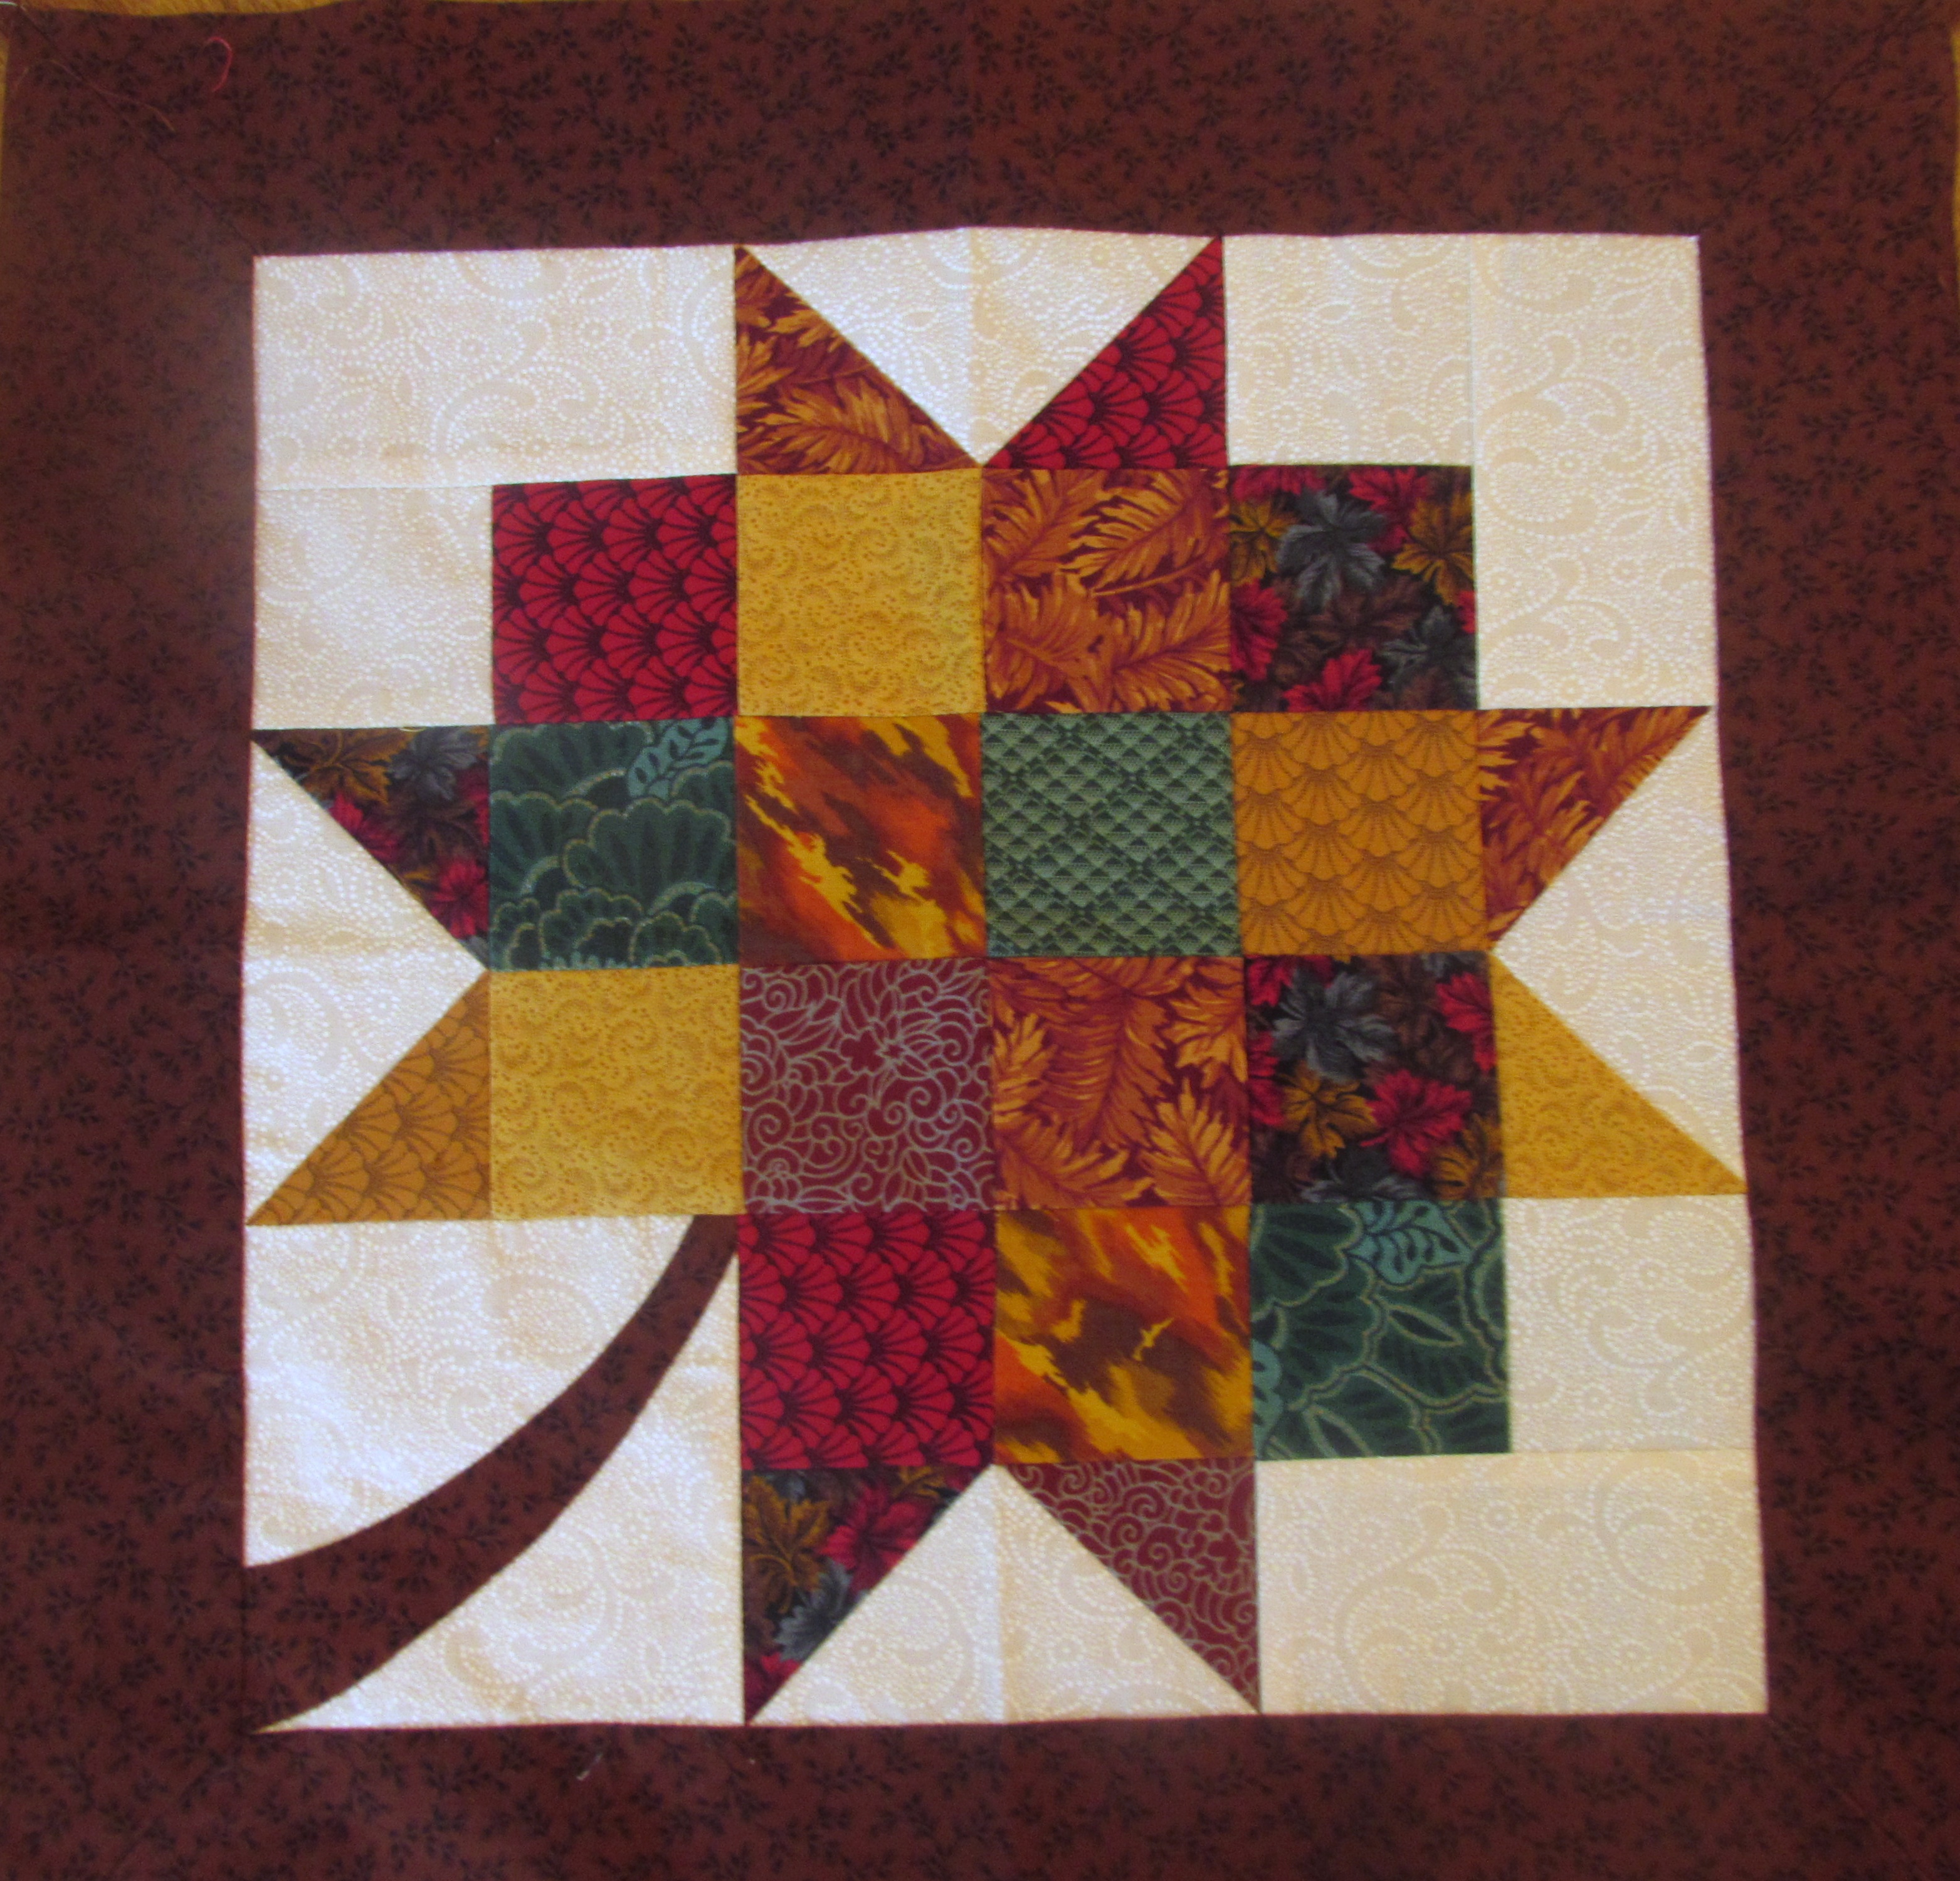
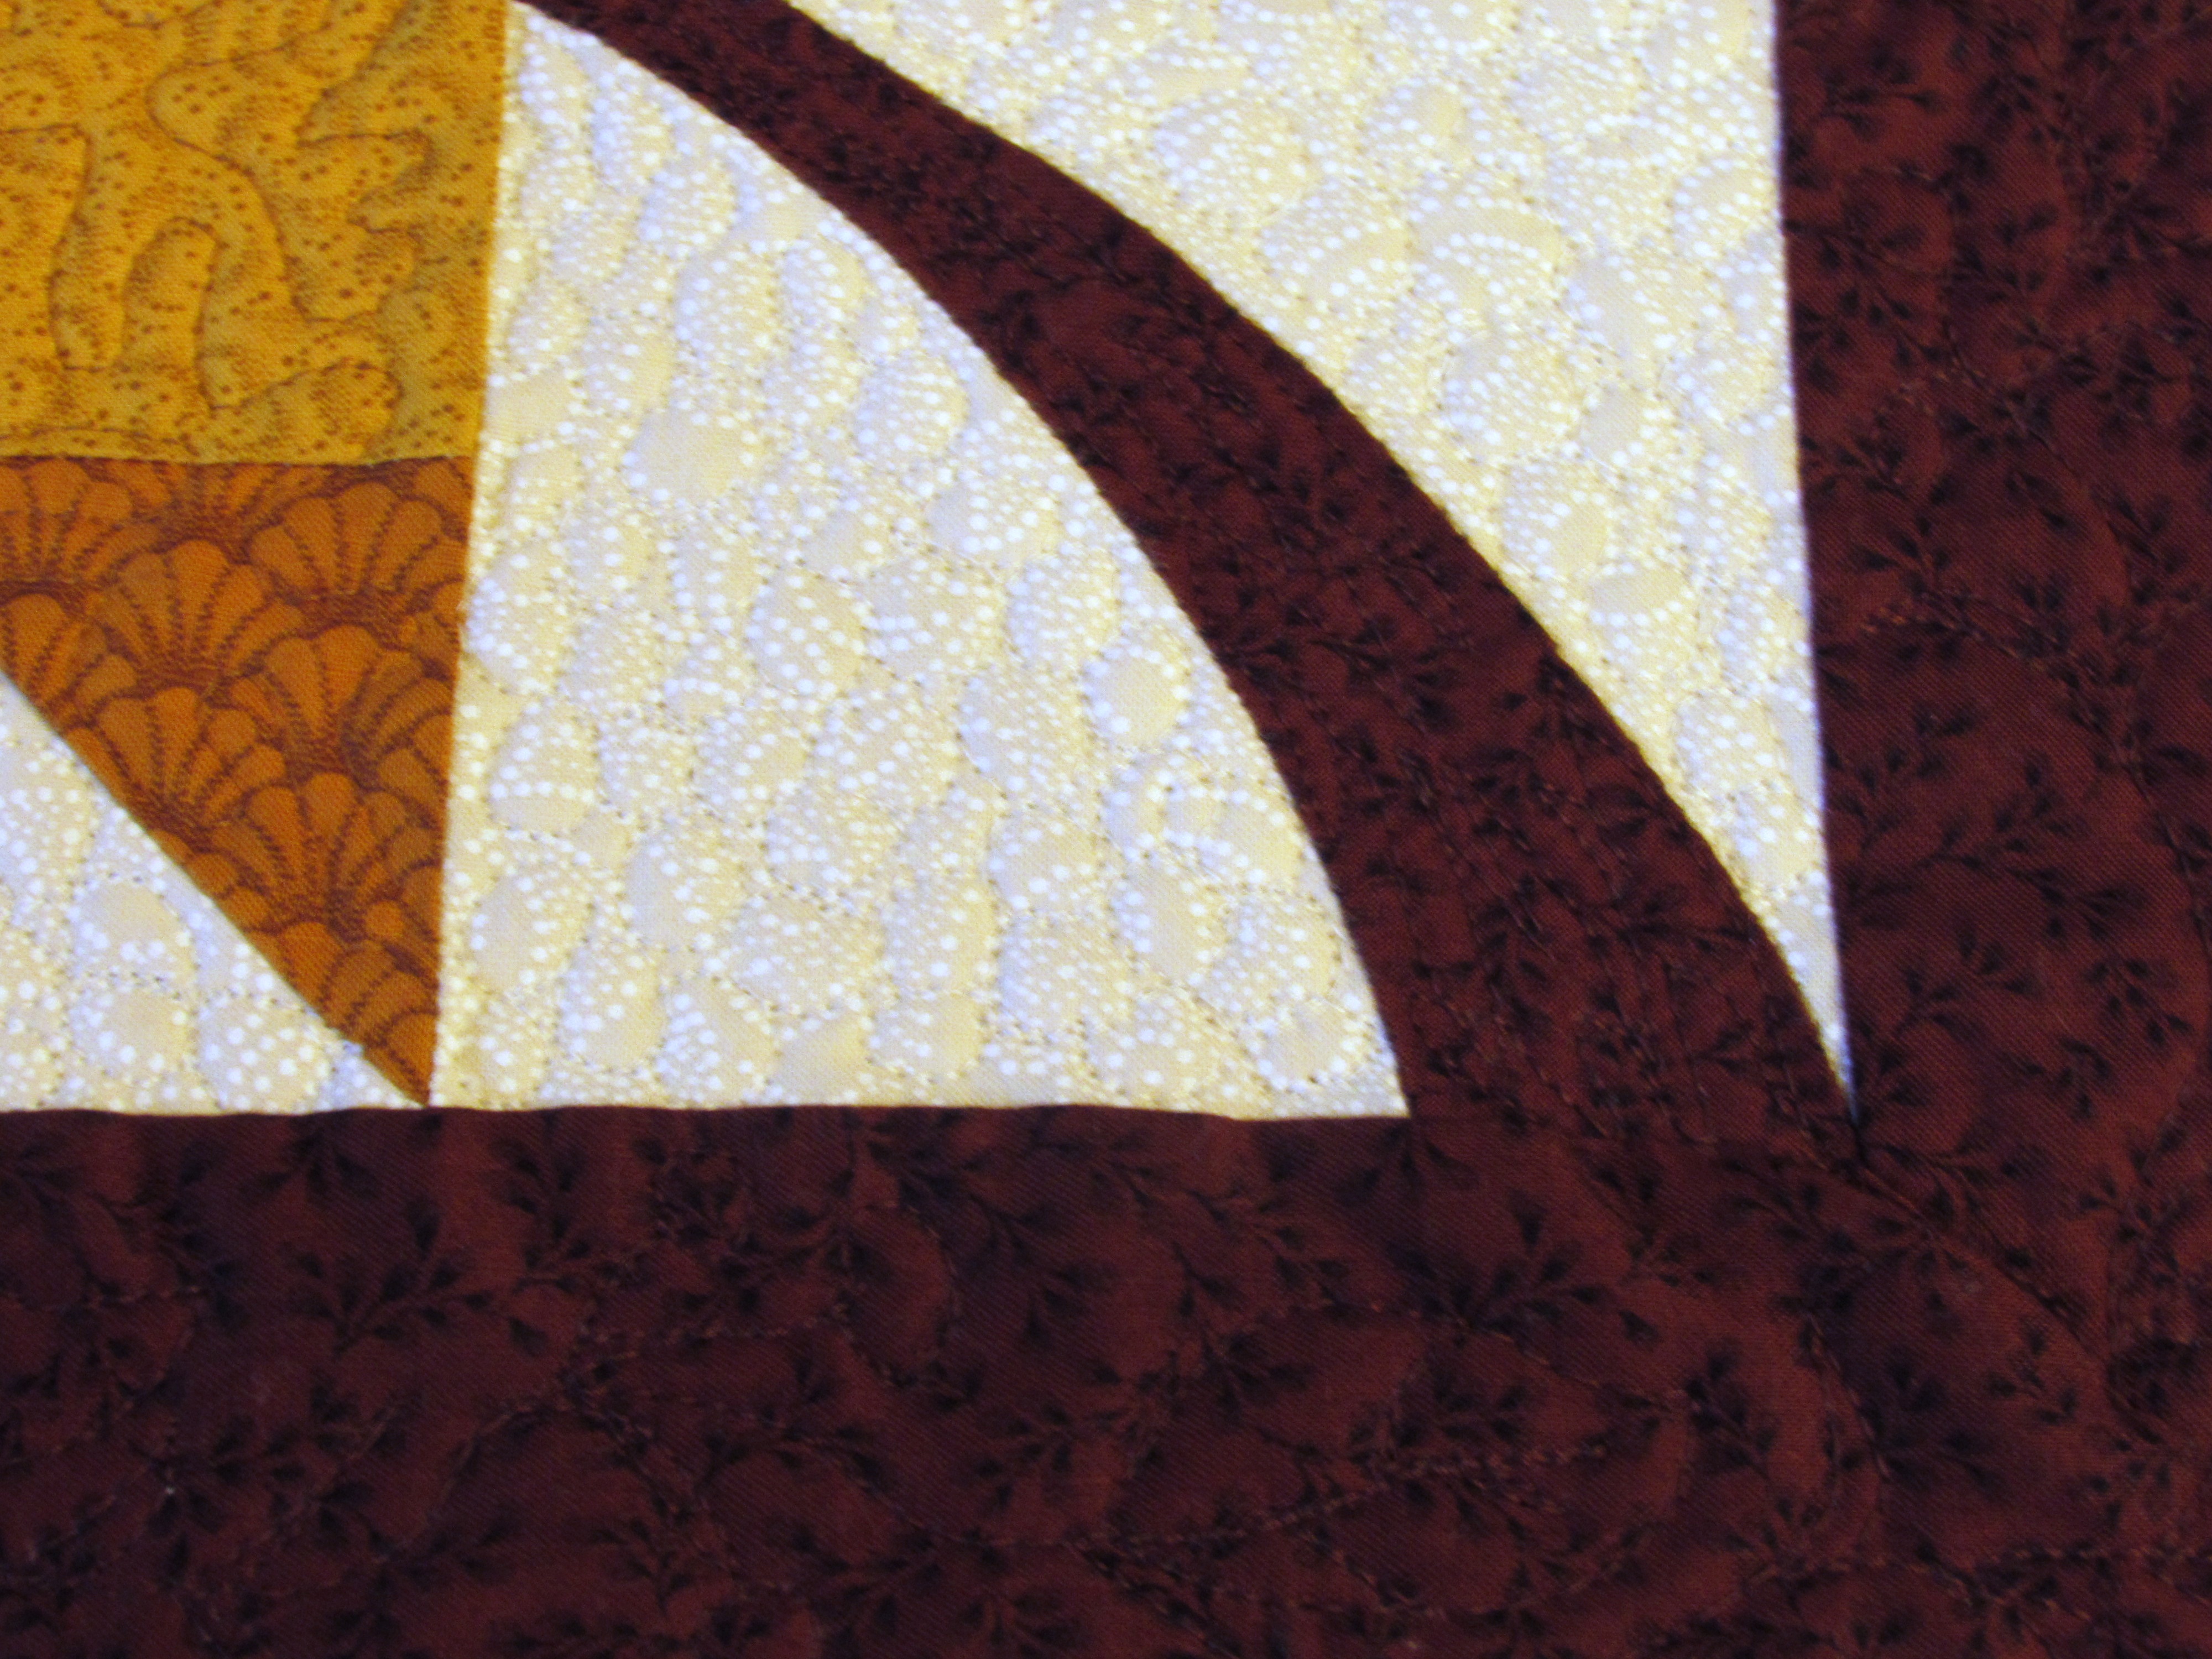
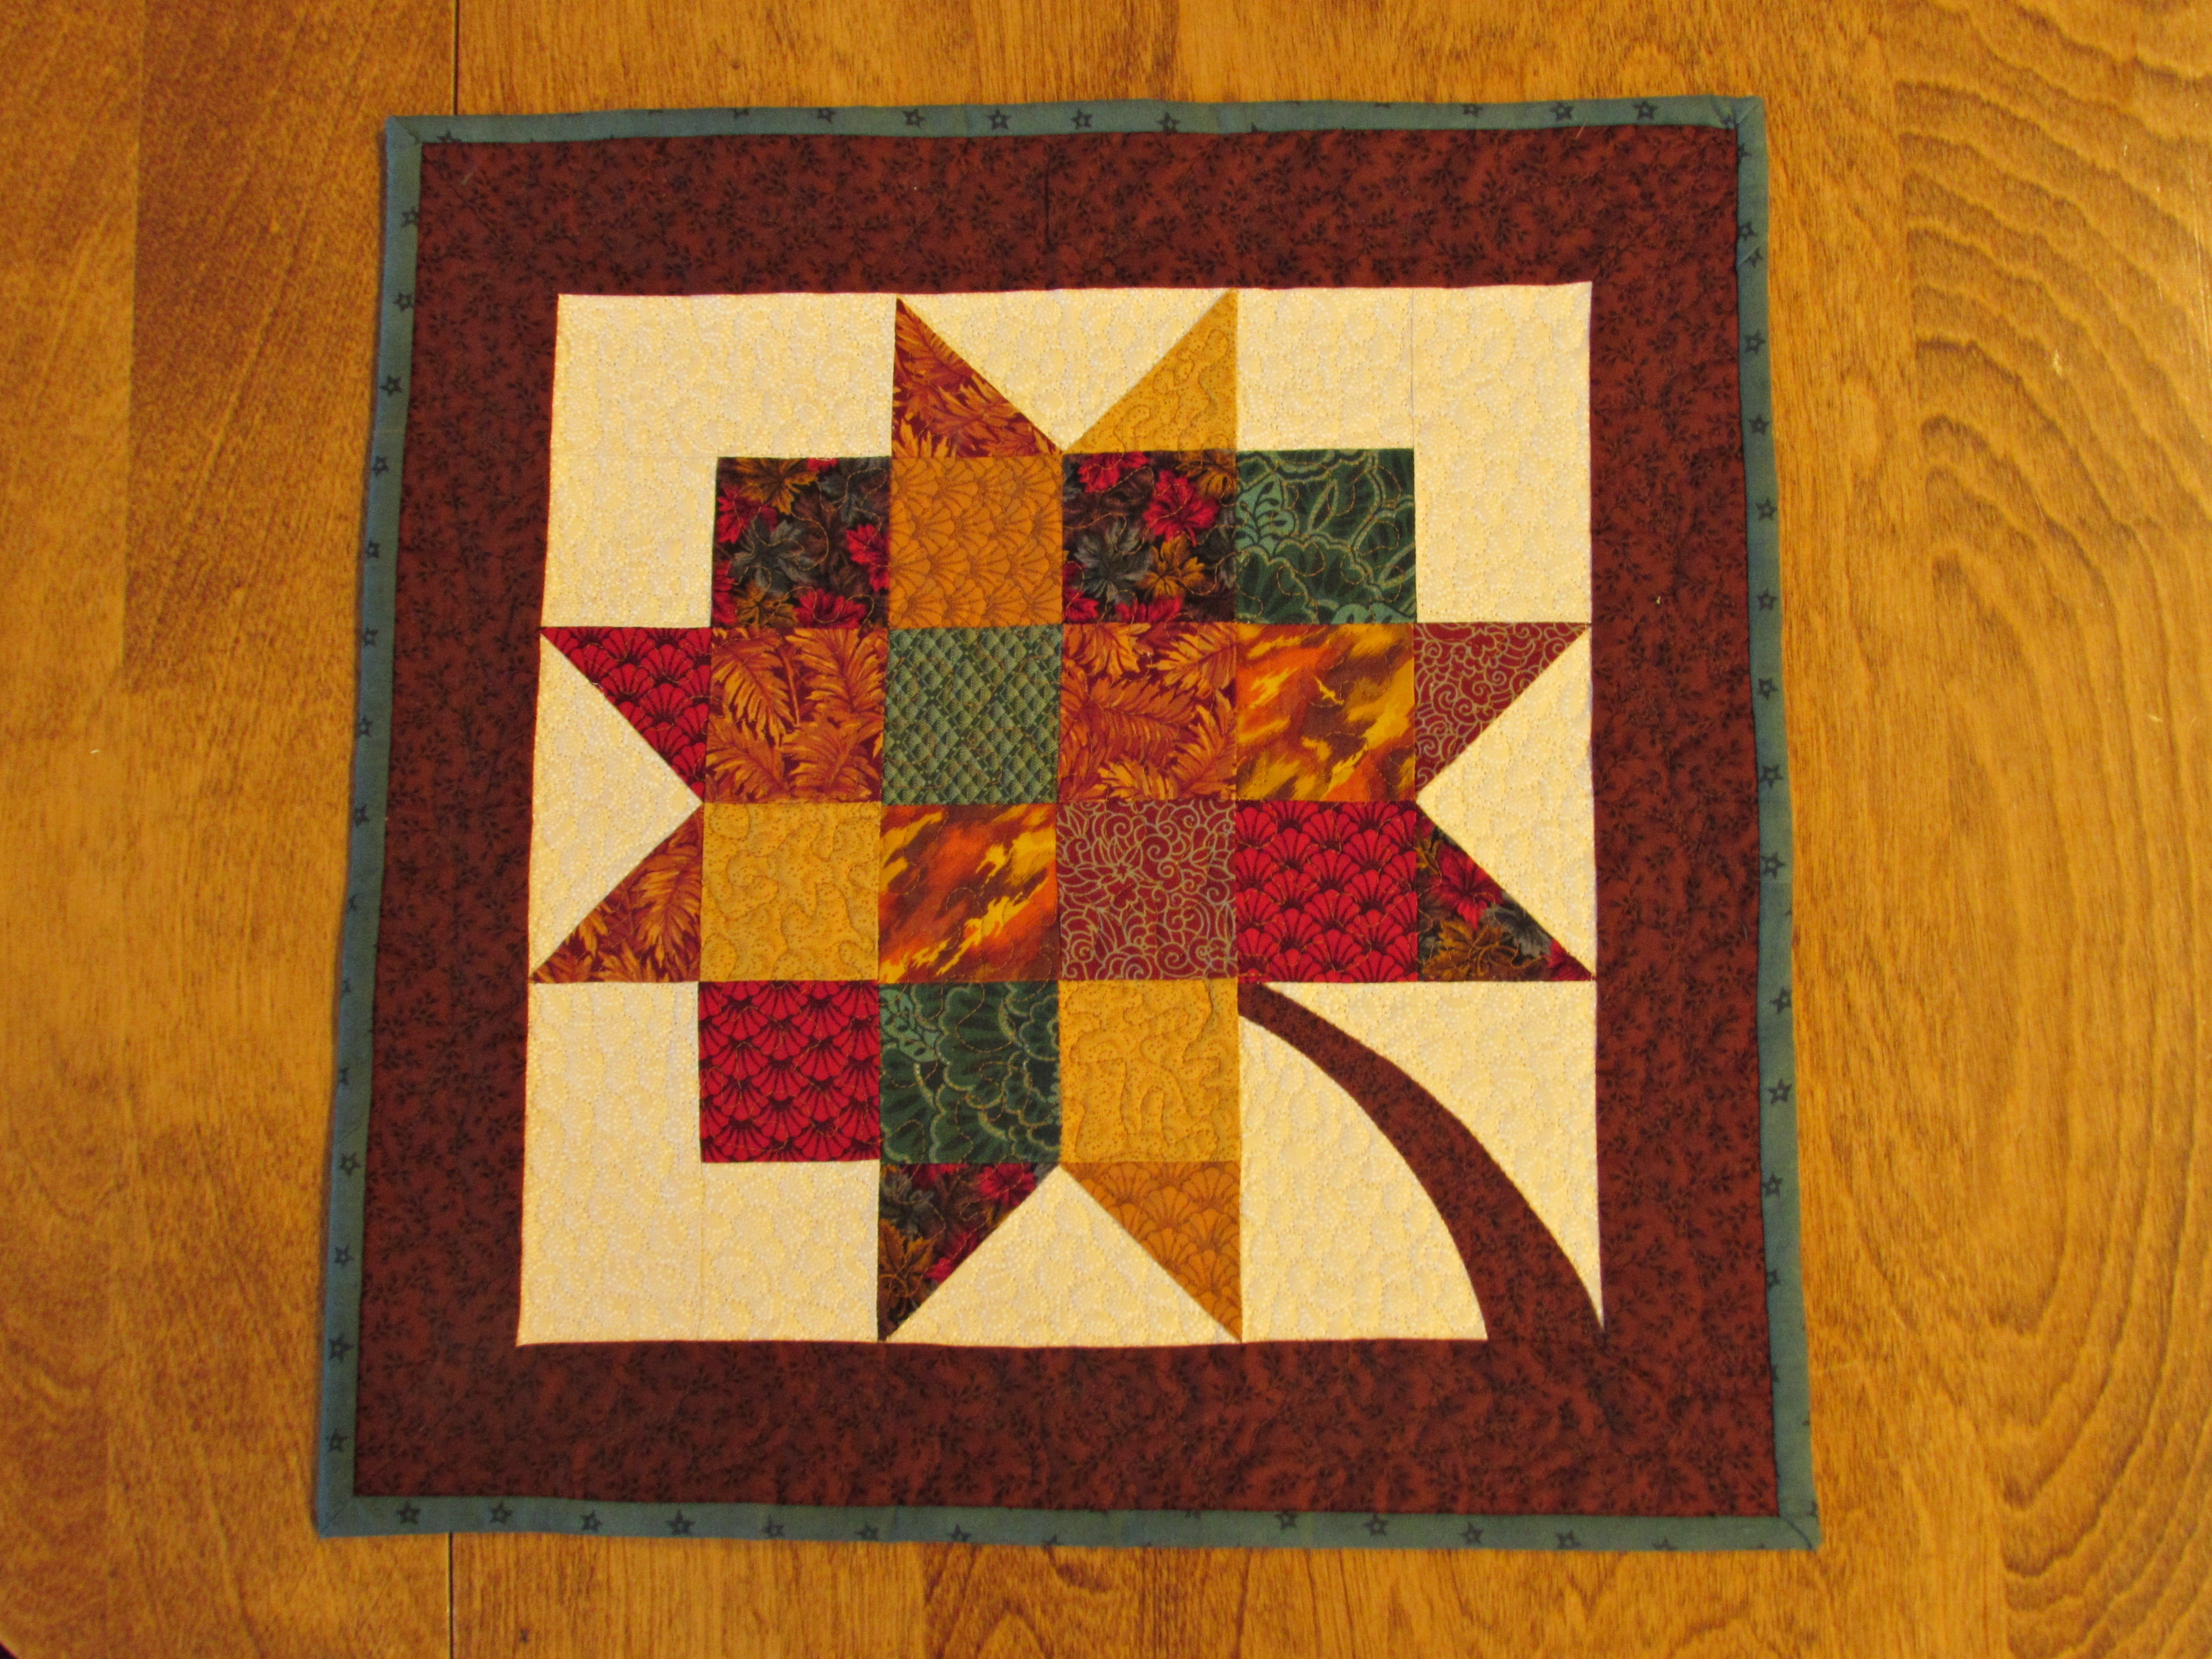
Remember this little orphan block that I scored at a thrift store a couple of weeks ago?
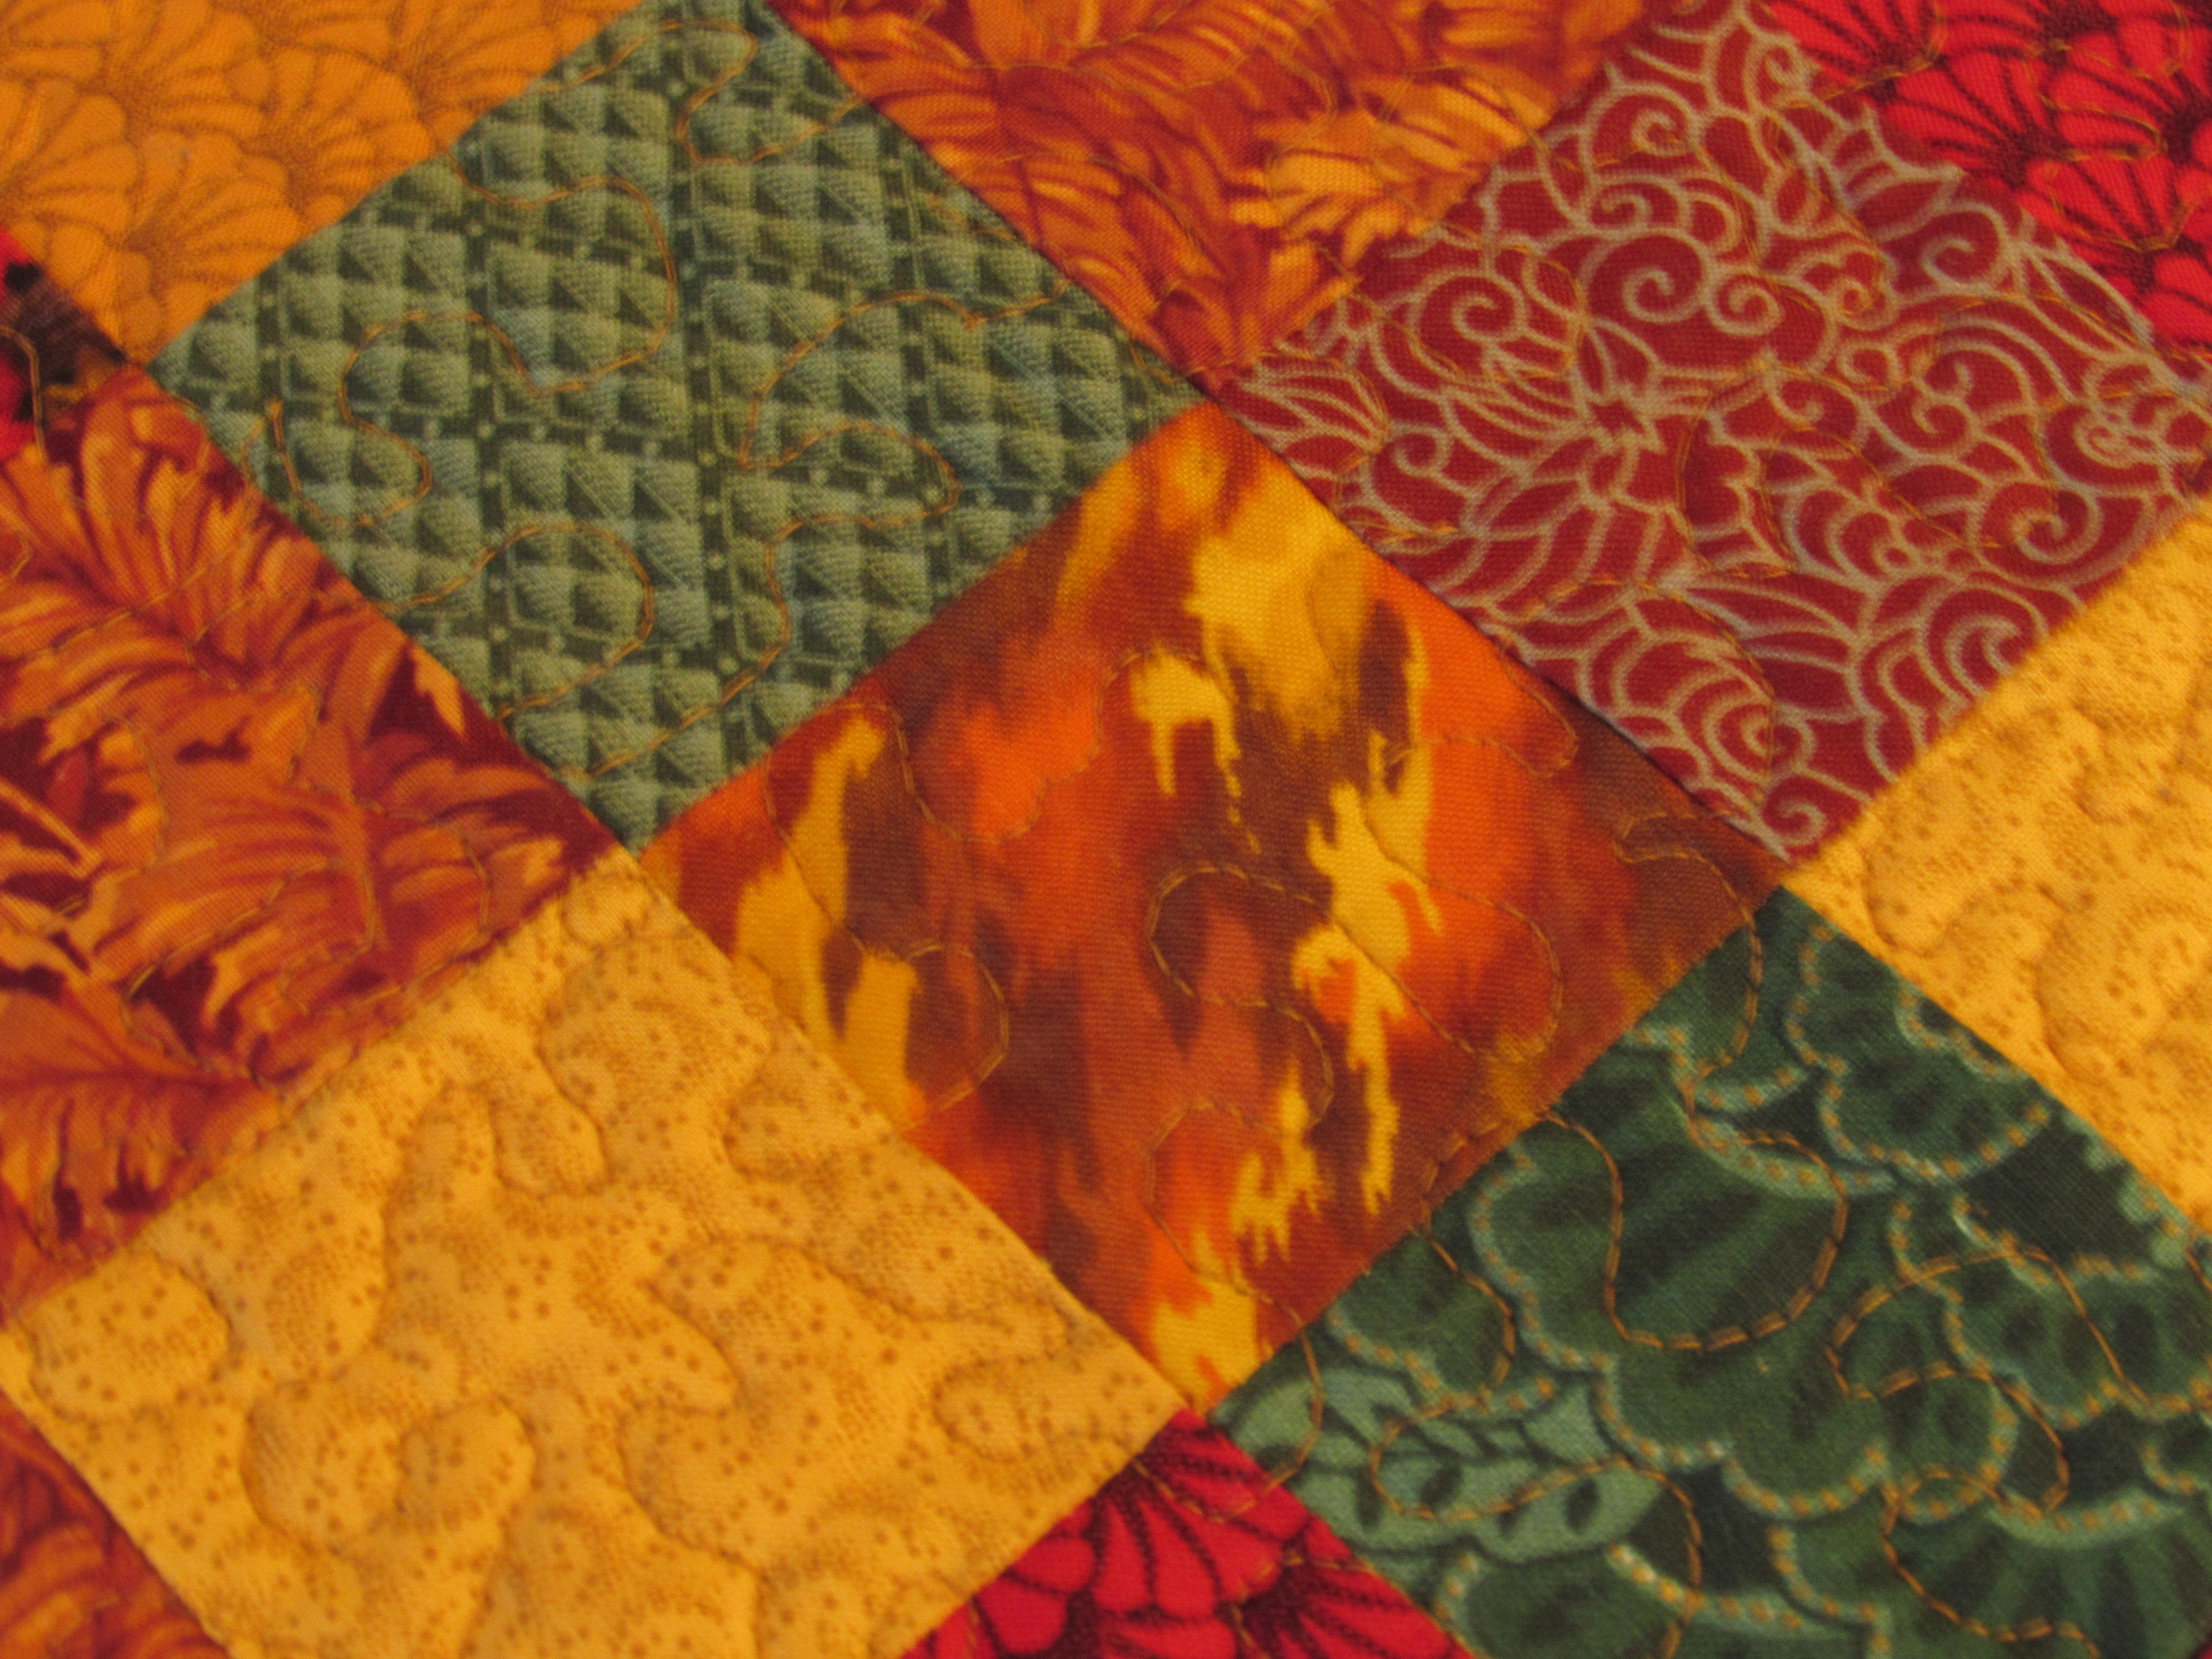
I spent a fun afternoon quilting it up. I used a rust colored thread for the main leaf portion and quilted it with a tiny stipple. These little stitches look so darn cute.
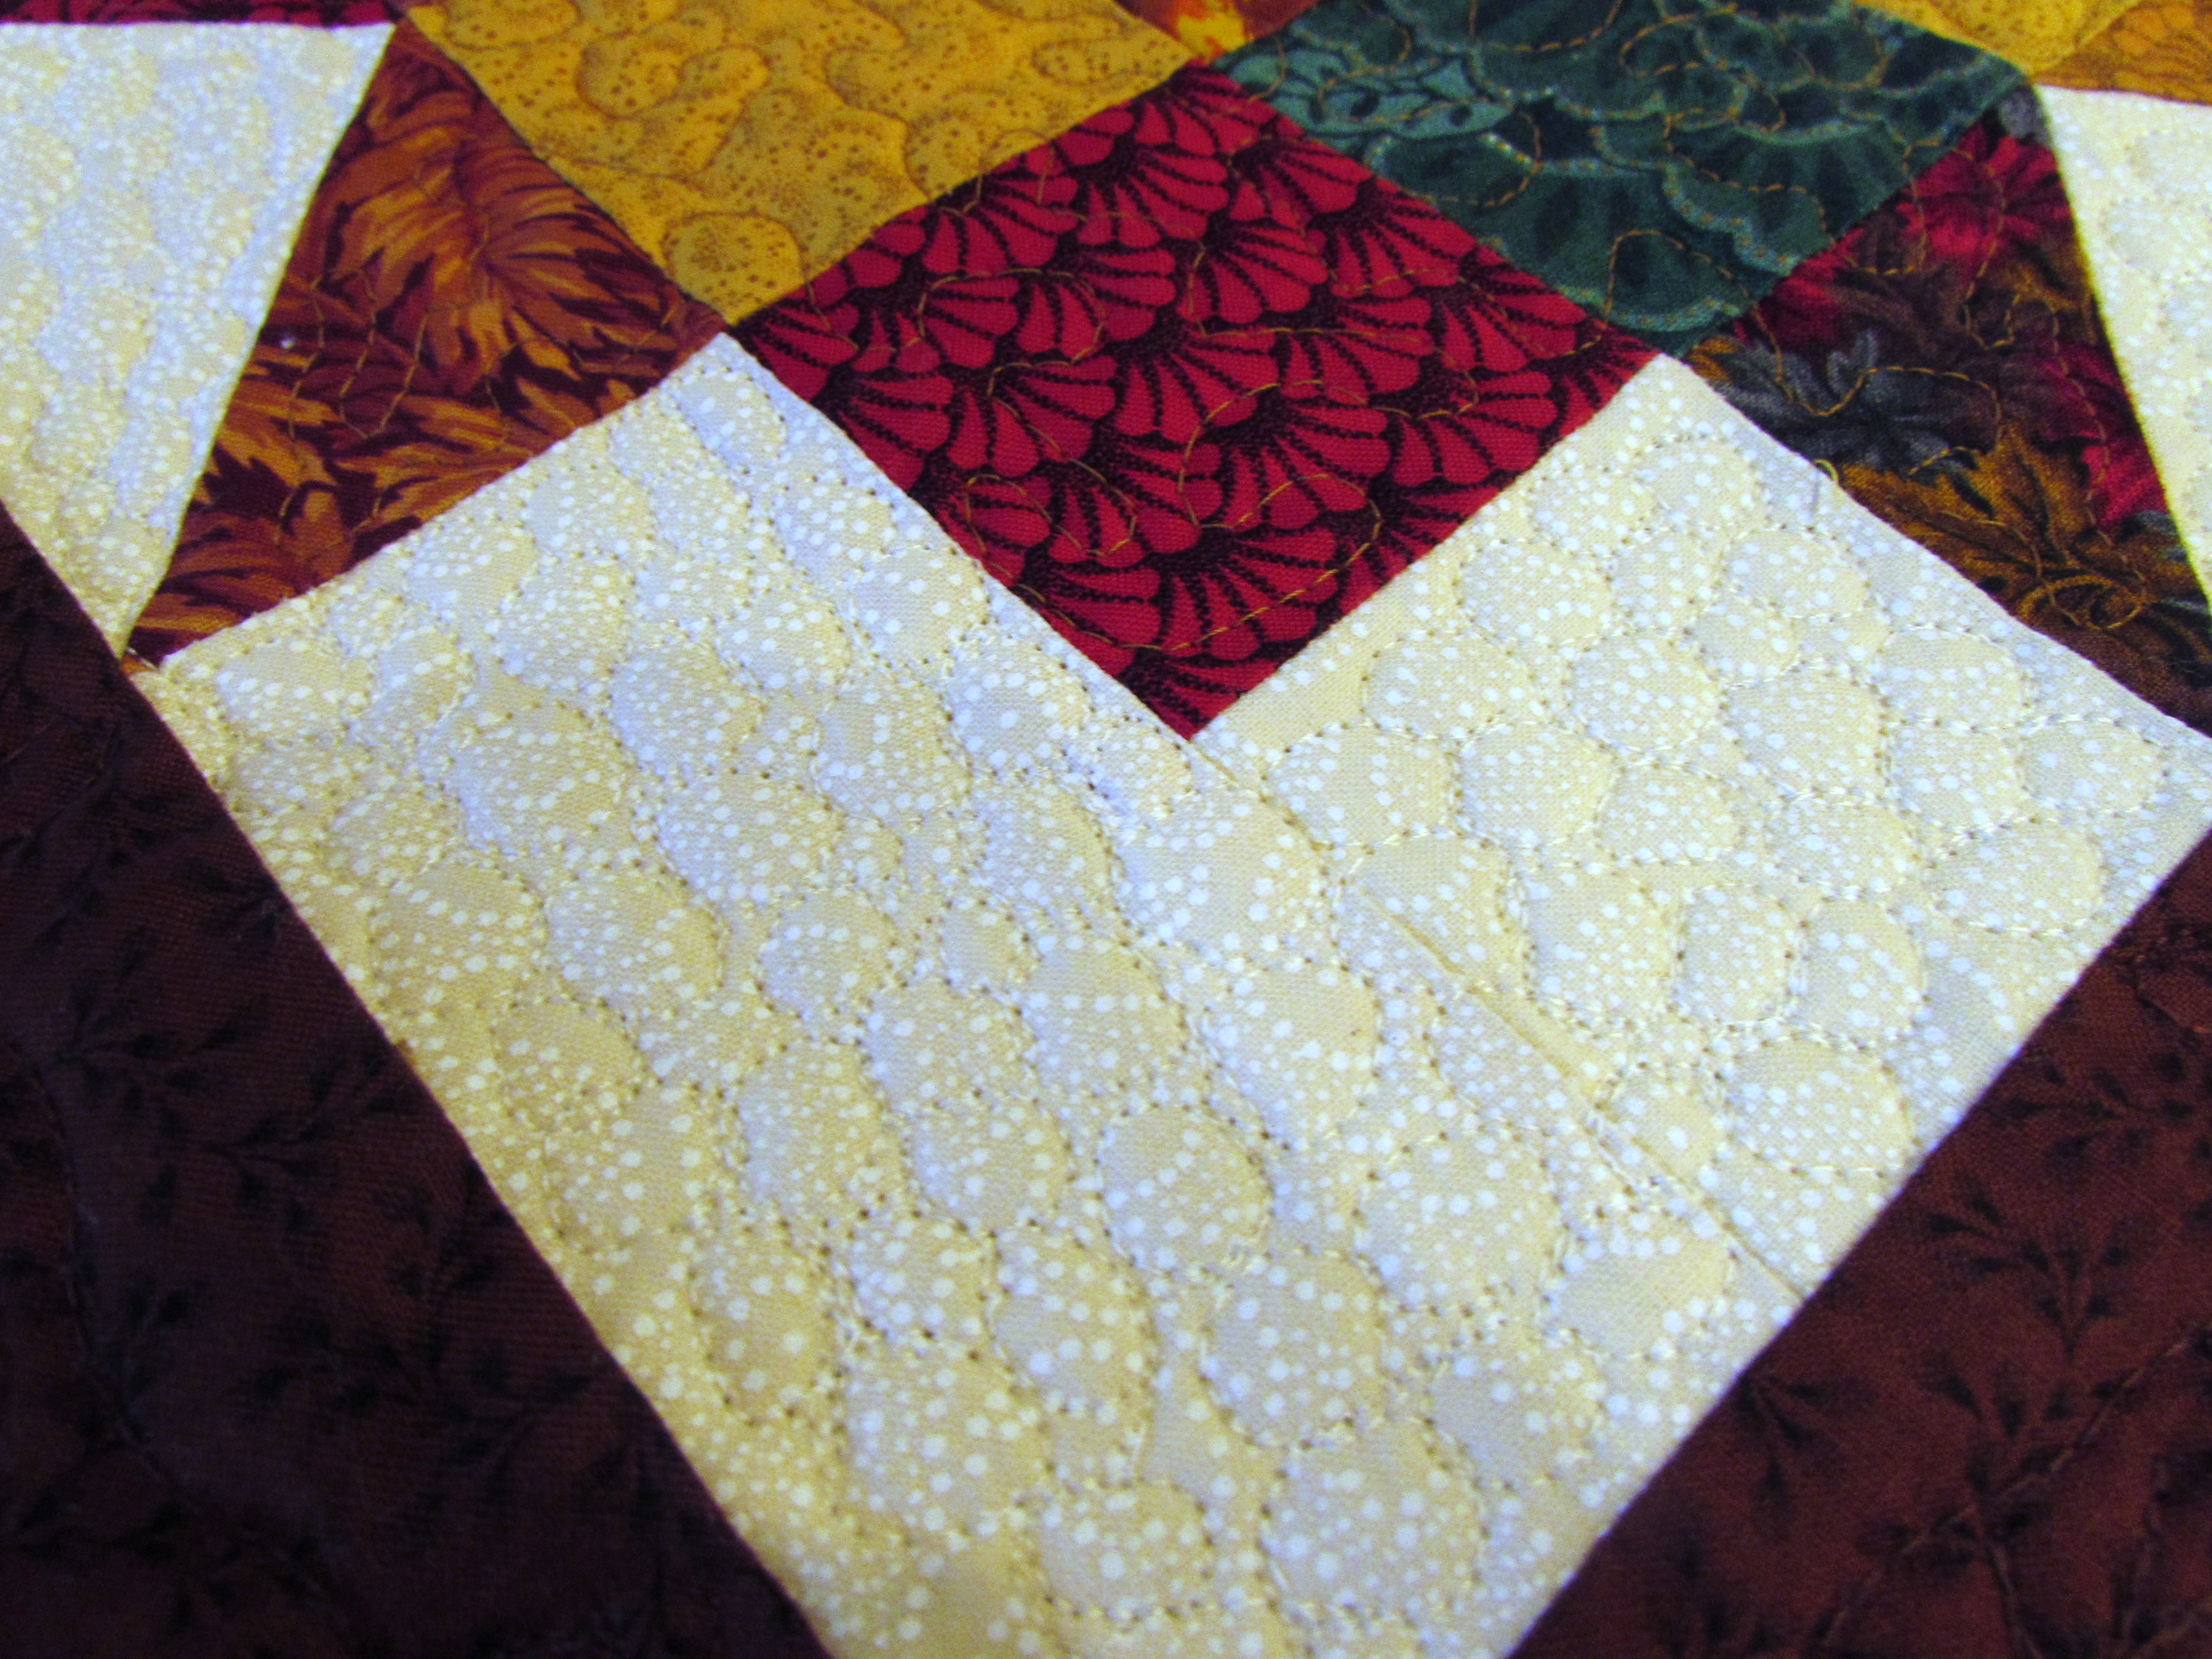
For the white background, I pebbled away for about one-half hour and filled it up. Sometimes it is so satisfying to work on a quick project. When I first started to pebble the white portion, I quickly remembered that I don’t really like to FMQ pebble patterns and thought I would regret it. But with such a tiny project it didn’t really matter. I was done before I could even get annoyed with the tedium.
For the border I quilted little leaves and berries but it is nearly impossible to see because the thread matches too well. It was good practice but really, I have to look very closely to see it. Kind of funny.
The dusty green binding wraps it all up into a sweet little mini. Perfect for fall.
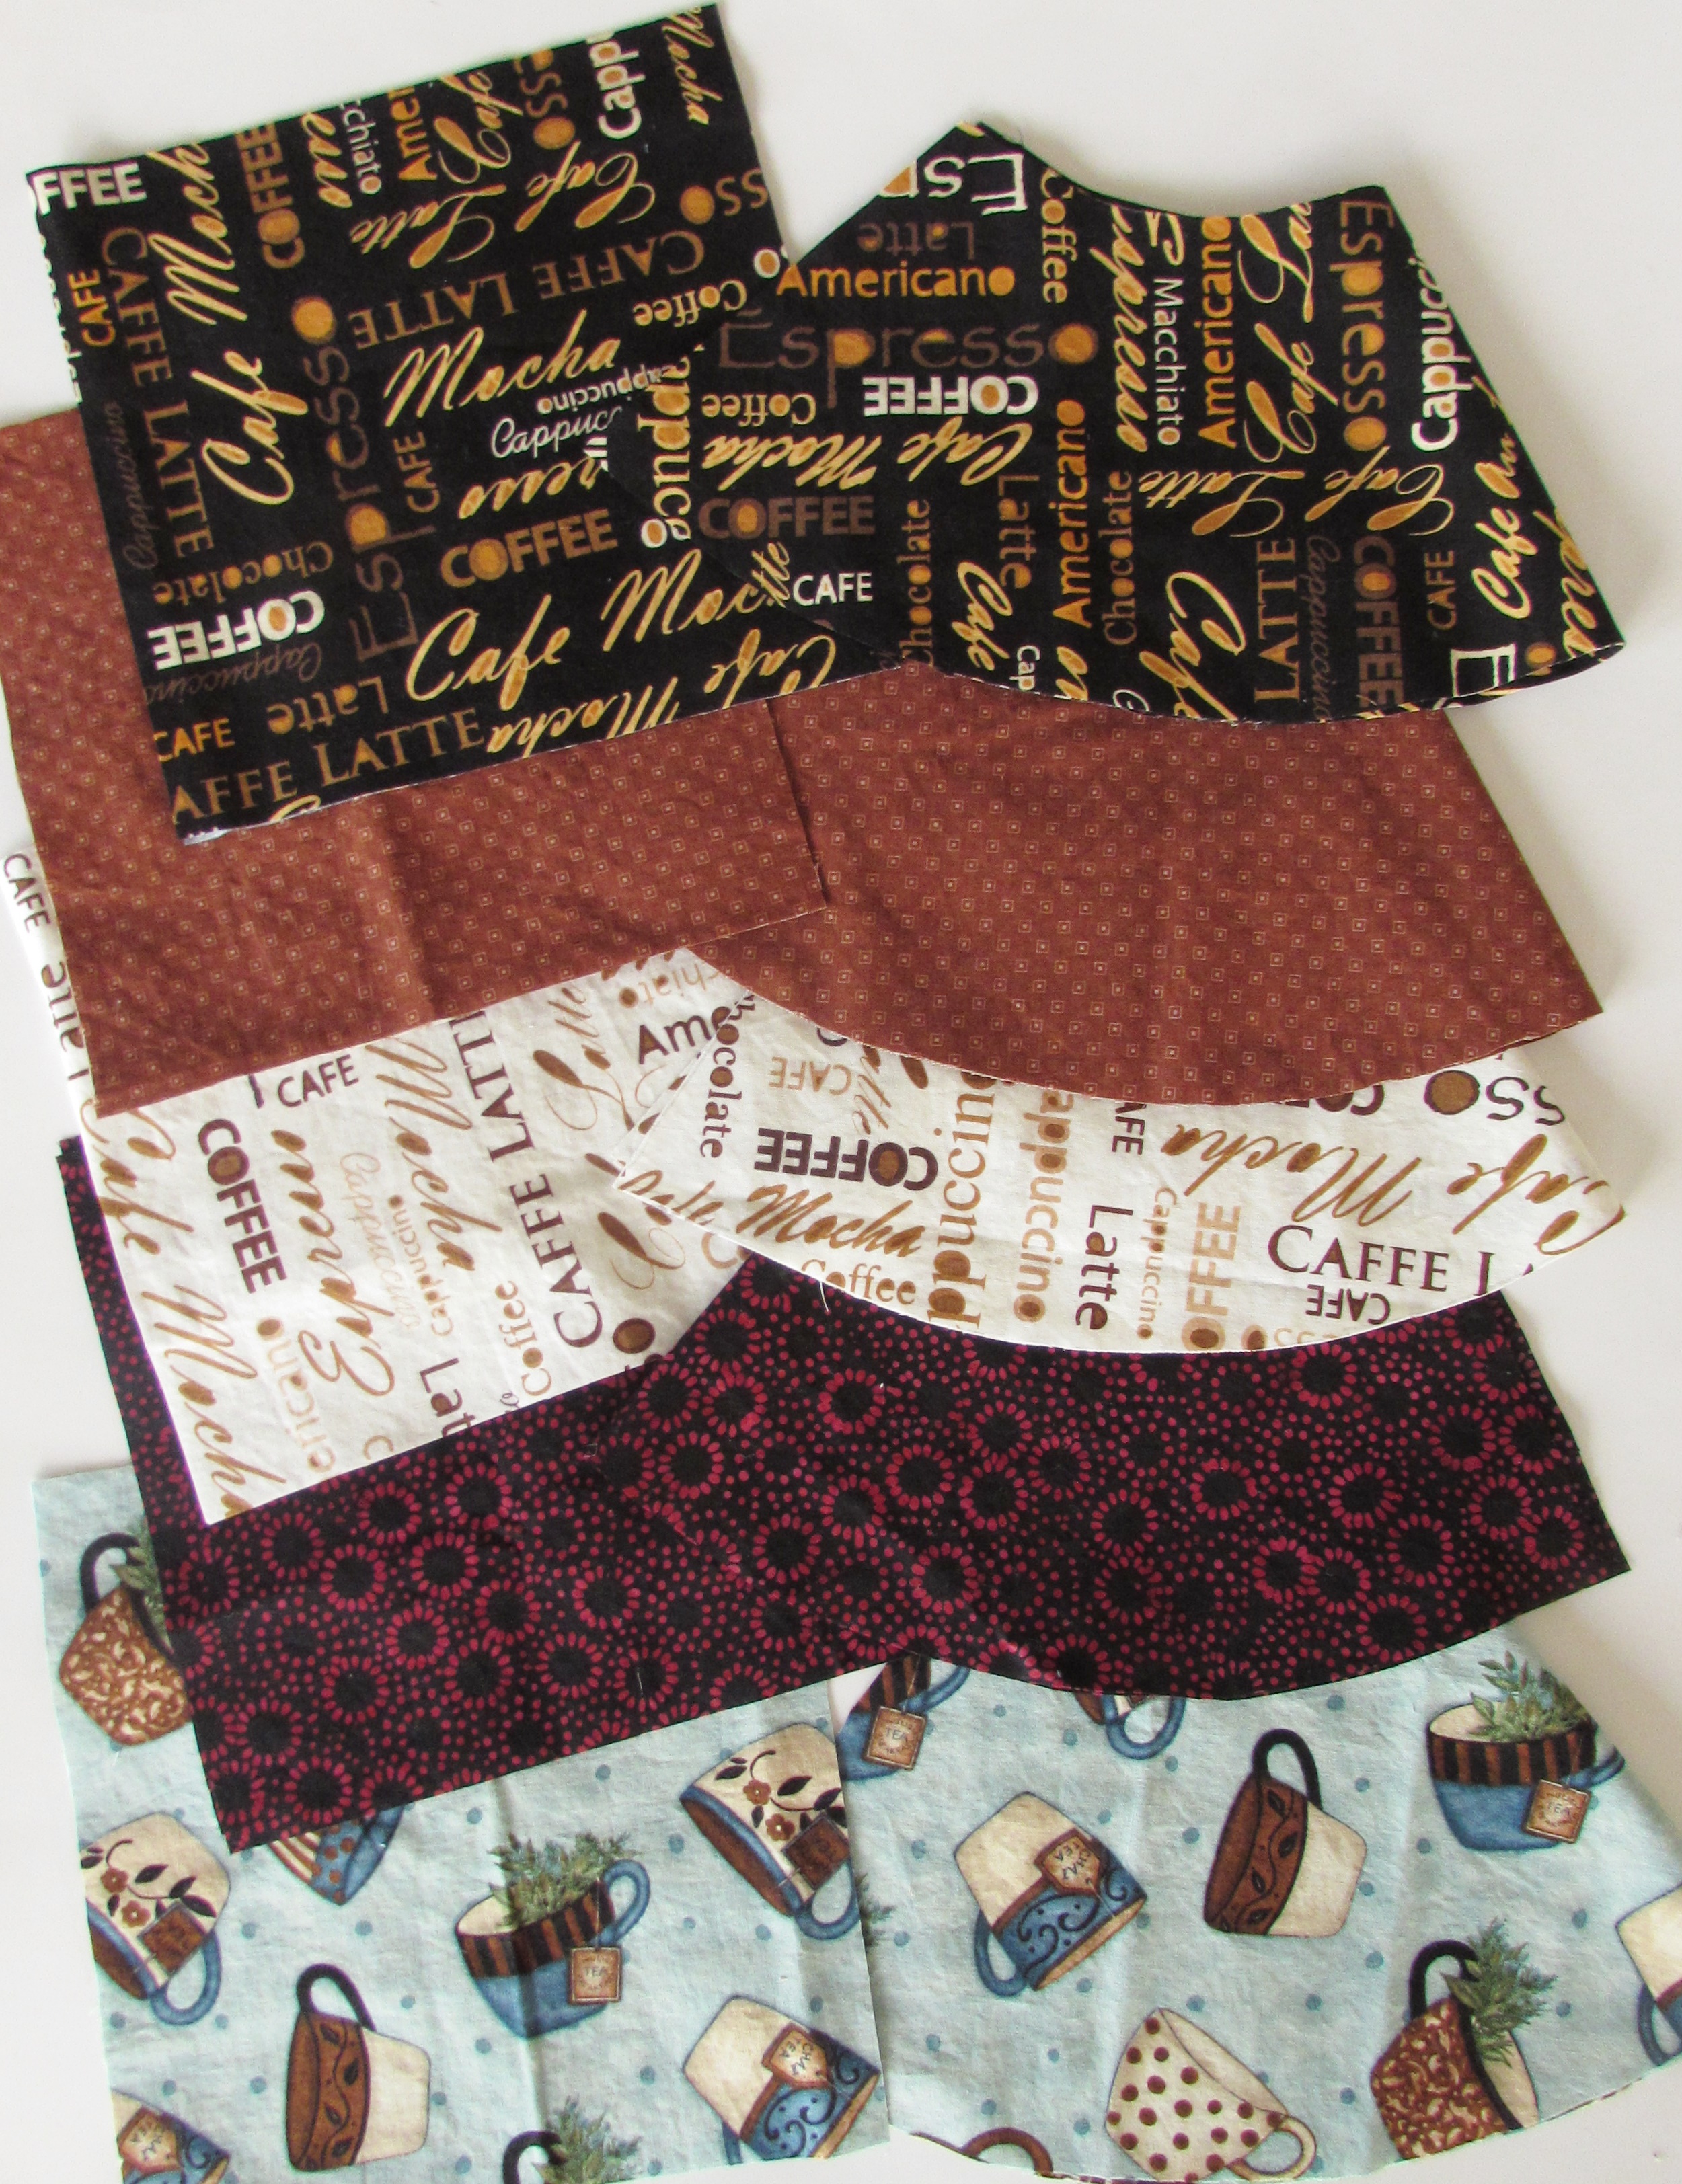
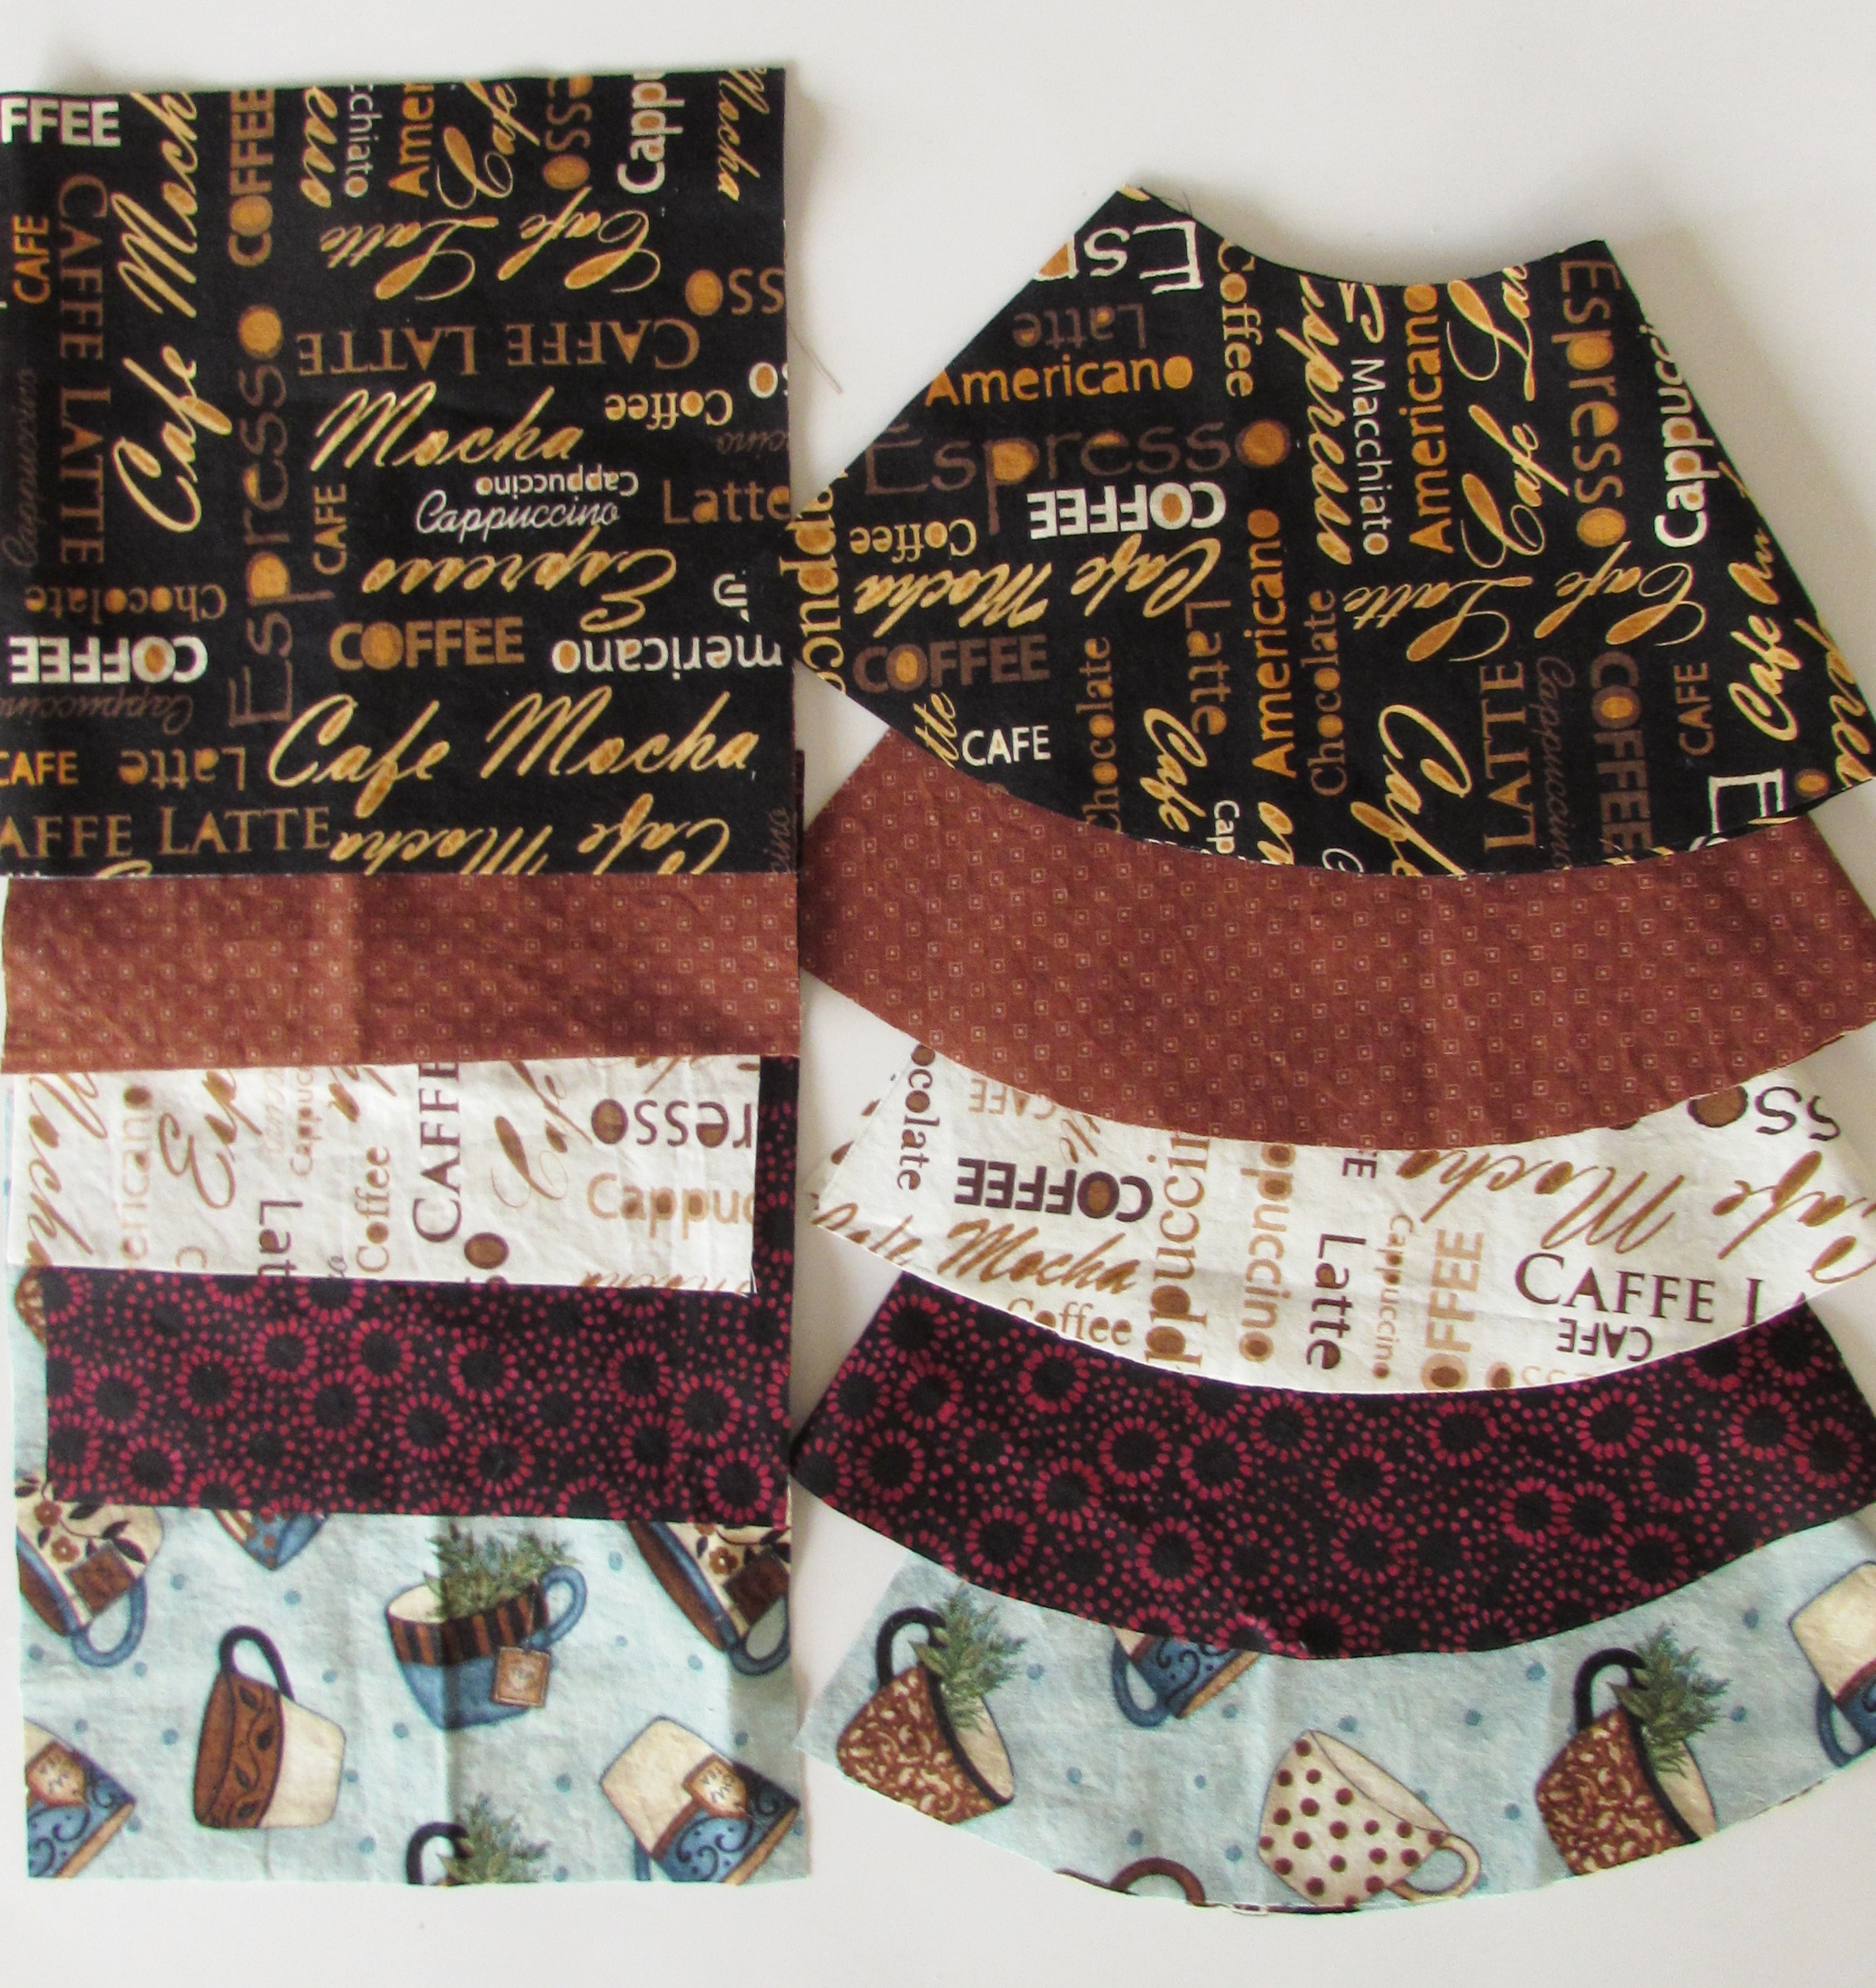
Now that we are approaching fall, I need to start getting my Etsy shop stocked for the holidays. The Chemex cozies that I make are definitely my best seller around Christmas which means I need to get busy. Yesterday I cut fabric for five covers.
Selecting the fabrics is fun but also a bit of a challenge. Looking back at what has sold well over the past two years, the favorites are definitely gray, blue, black, and red tones. Also, the two fabrics with the coffee theme text prints (in cream or black) are usually good sellers. These are the last two I could cut from that fabric so I need to purchase more of it.
I love to make a few with novelty fabric. I have done some with bicycles for coffee drinking cyclists and another one with Marvel comics on it which made someone very happy. Last Christmas I had a custom order for a cozy made with Star Wars fabric. I am debating making a few fun ones like this but choosing a theme is hard, kind of a guess as to what will sell – if you have any suggestions, please feel free. I truly love your input. For now, these will get me off to a good start.
Have a wonderful weekend everyone! Remember, I am hosting Handmade Halloween on October 4th!! Link up any blog posts, new or old, that are related to Halloween – costumes, decorations, quilts, even fun recipes. Let’s make it a fun round up of all things Halloween! I will tell you that I have had some really nice prizes offered in support of this party. Go write a post and come back and link it up. This will throw your name in the draw – maybe for a win! See you then.
Linking up today with the best of the best. See the top of the page, under Link Ups.
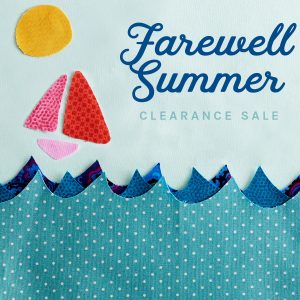
This is a good weekend to shop Craftsy! They have some great discounts on kits and supplies for their End of Summer Clearance. Take a look. This sale runs through Sunday night, 9/18/16.
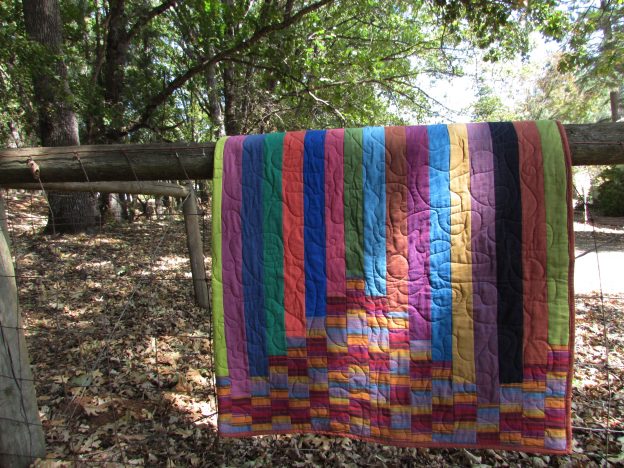
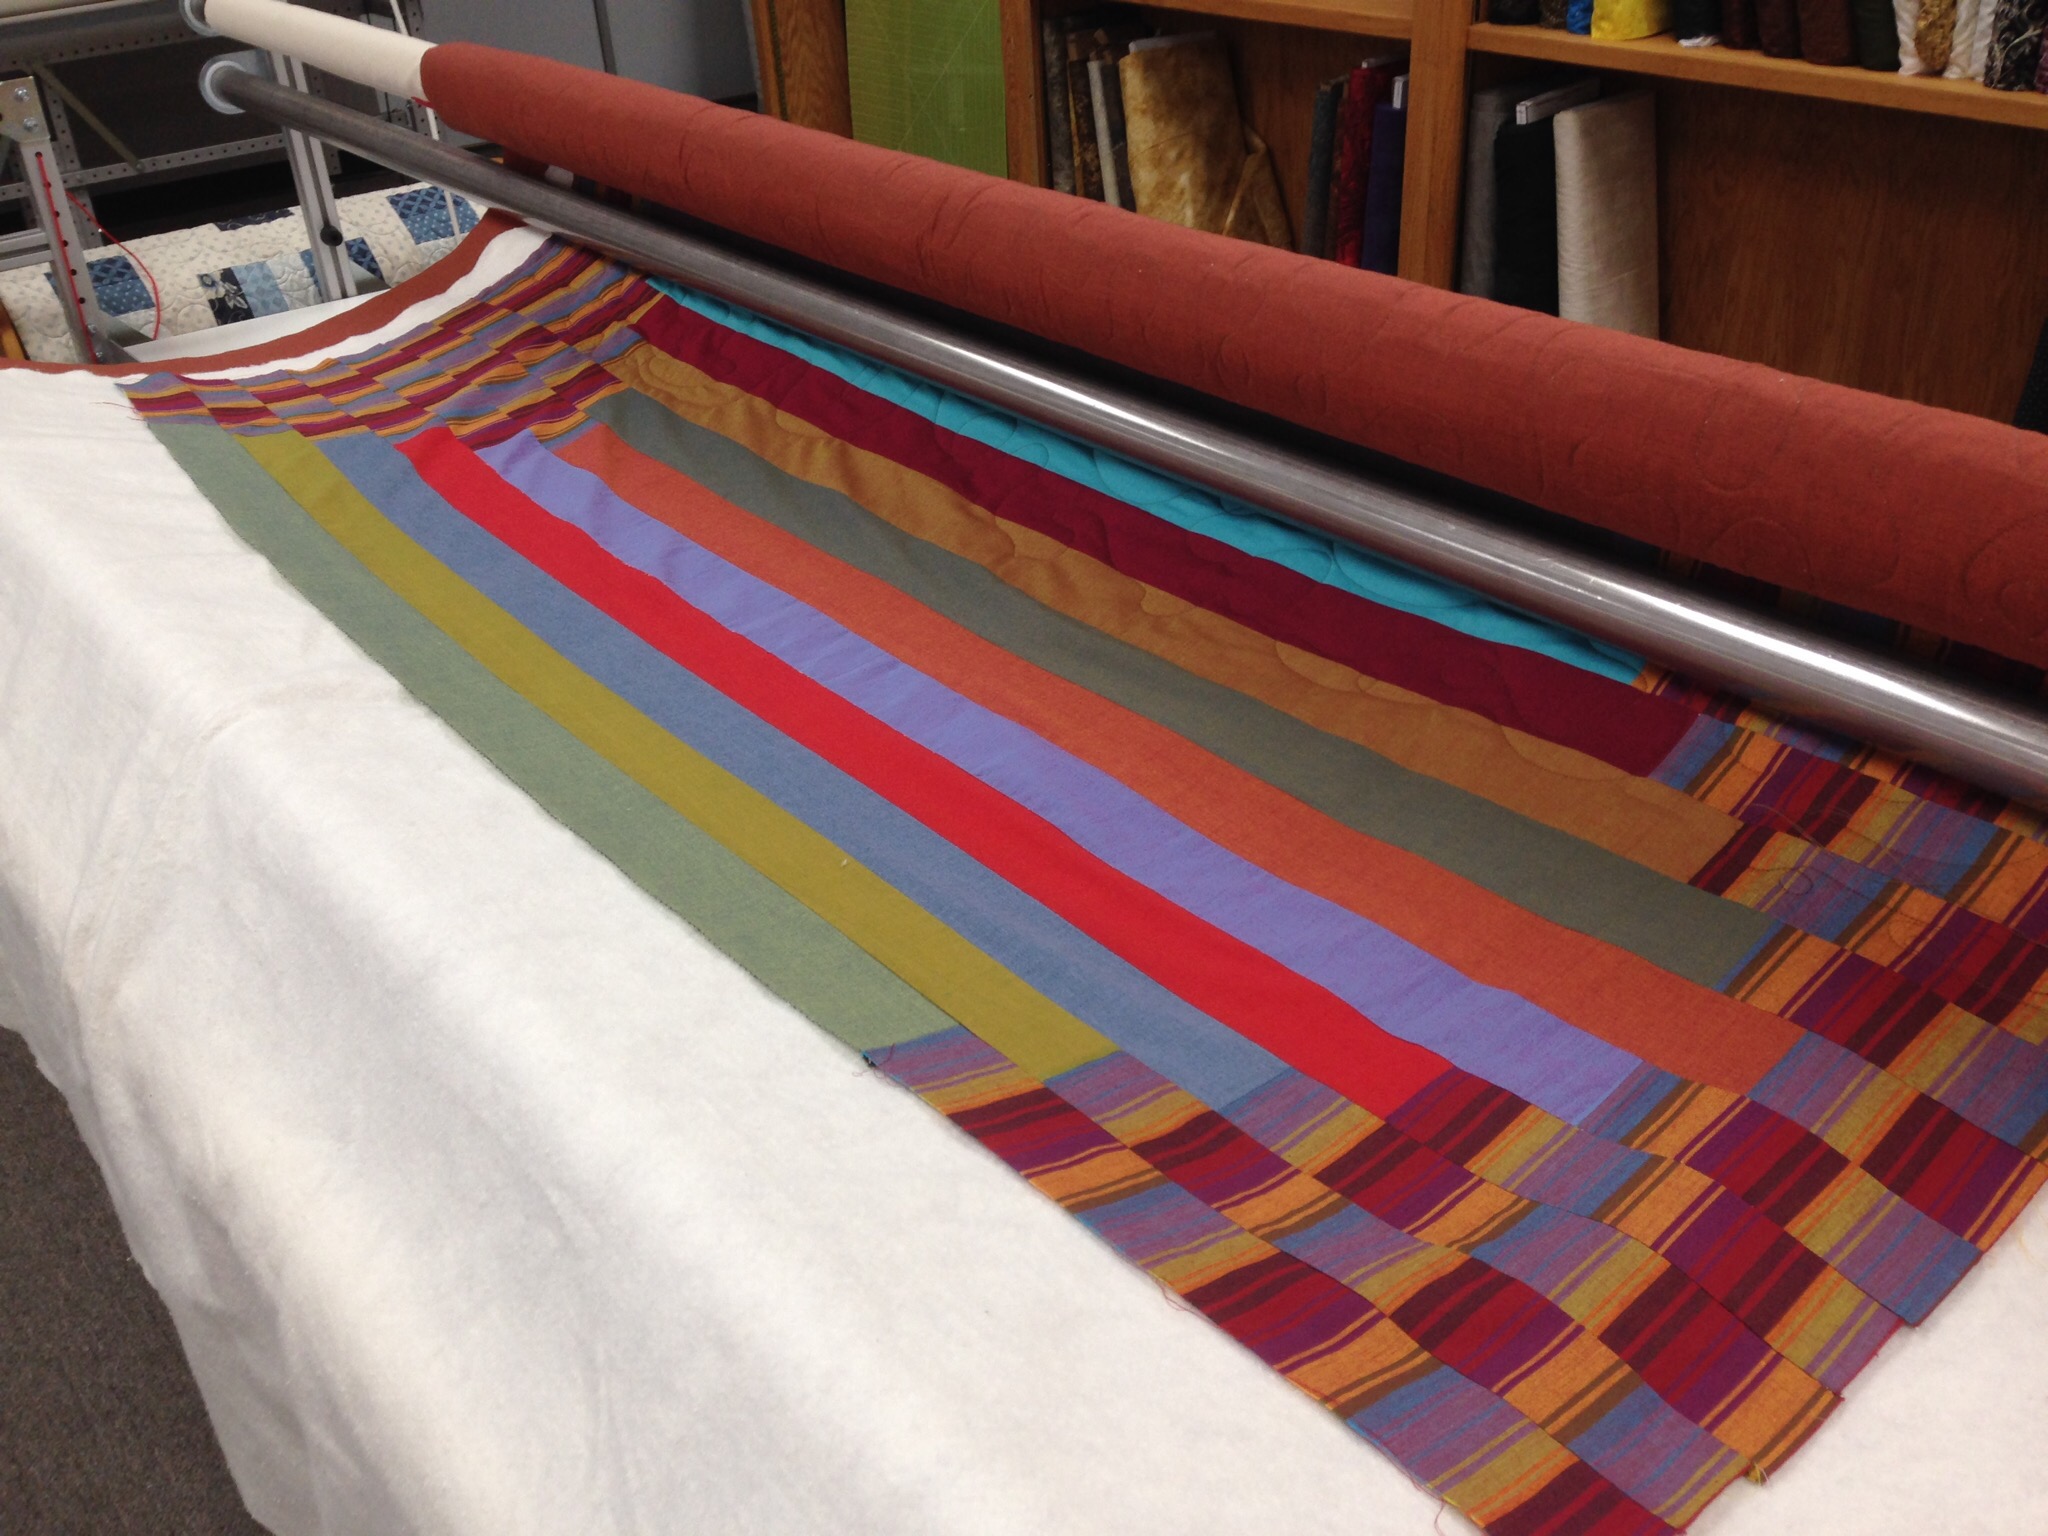
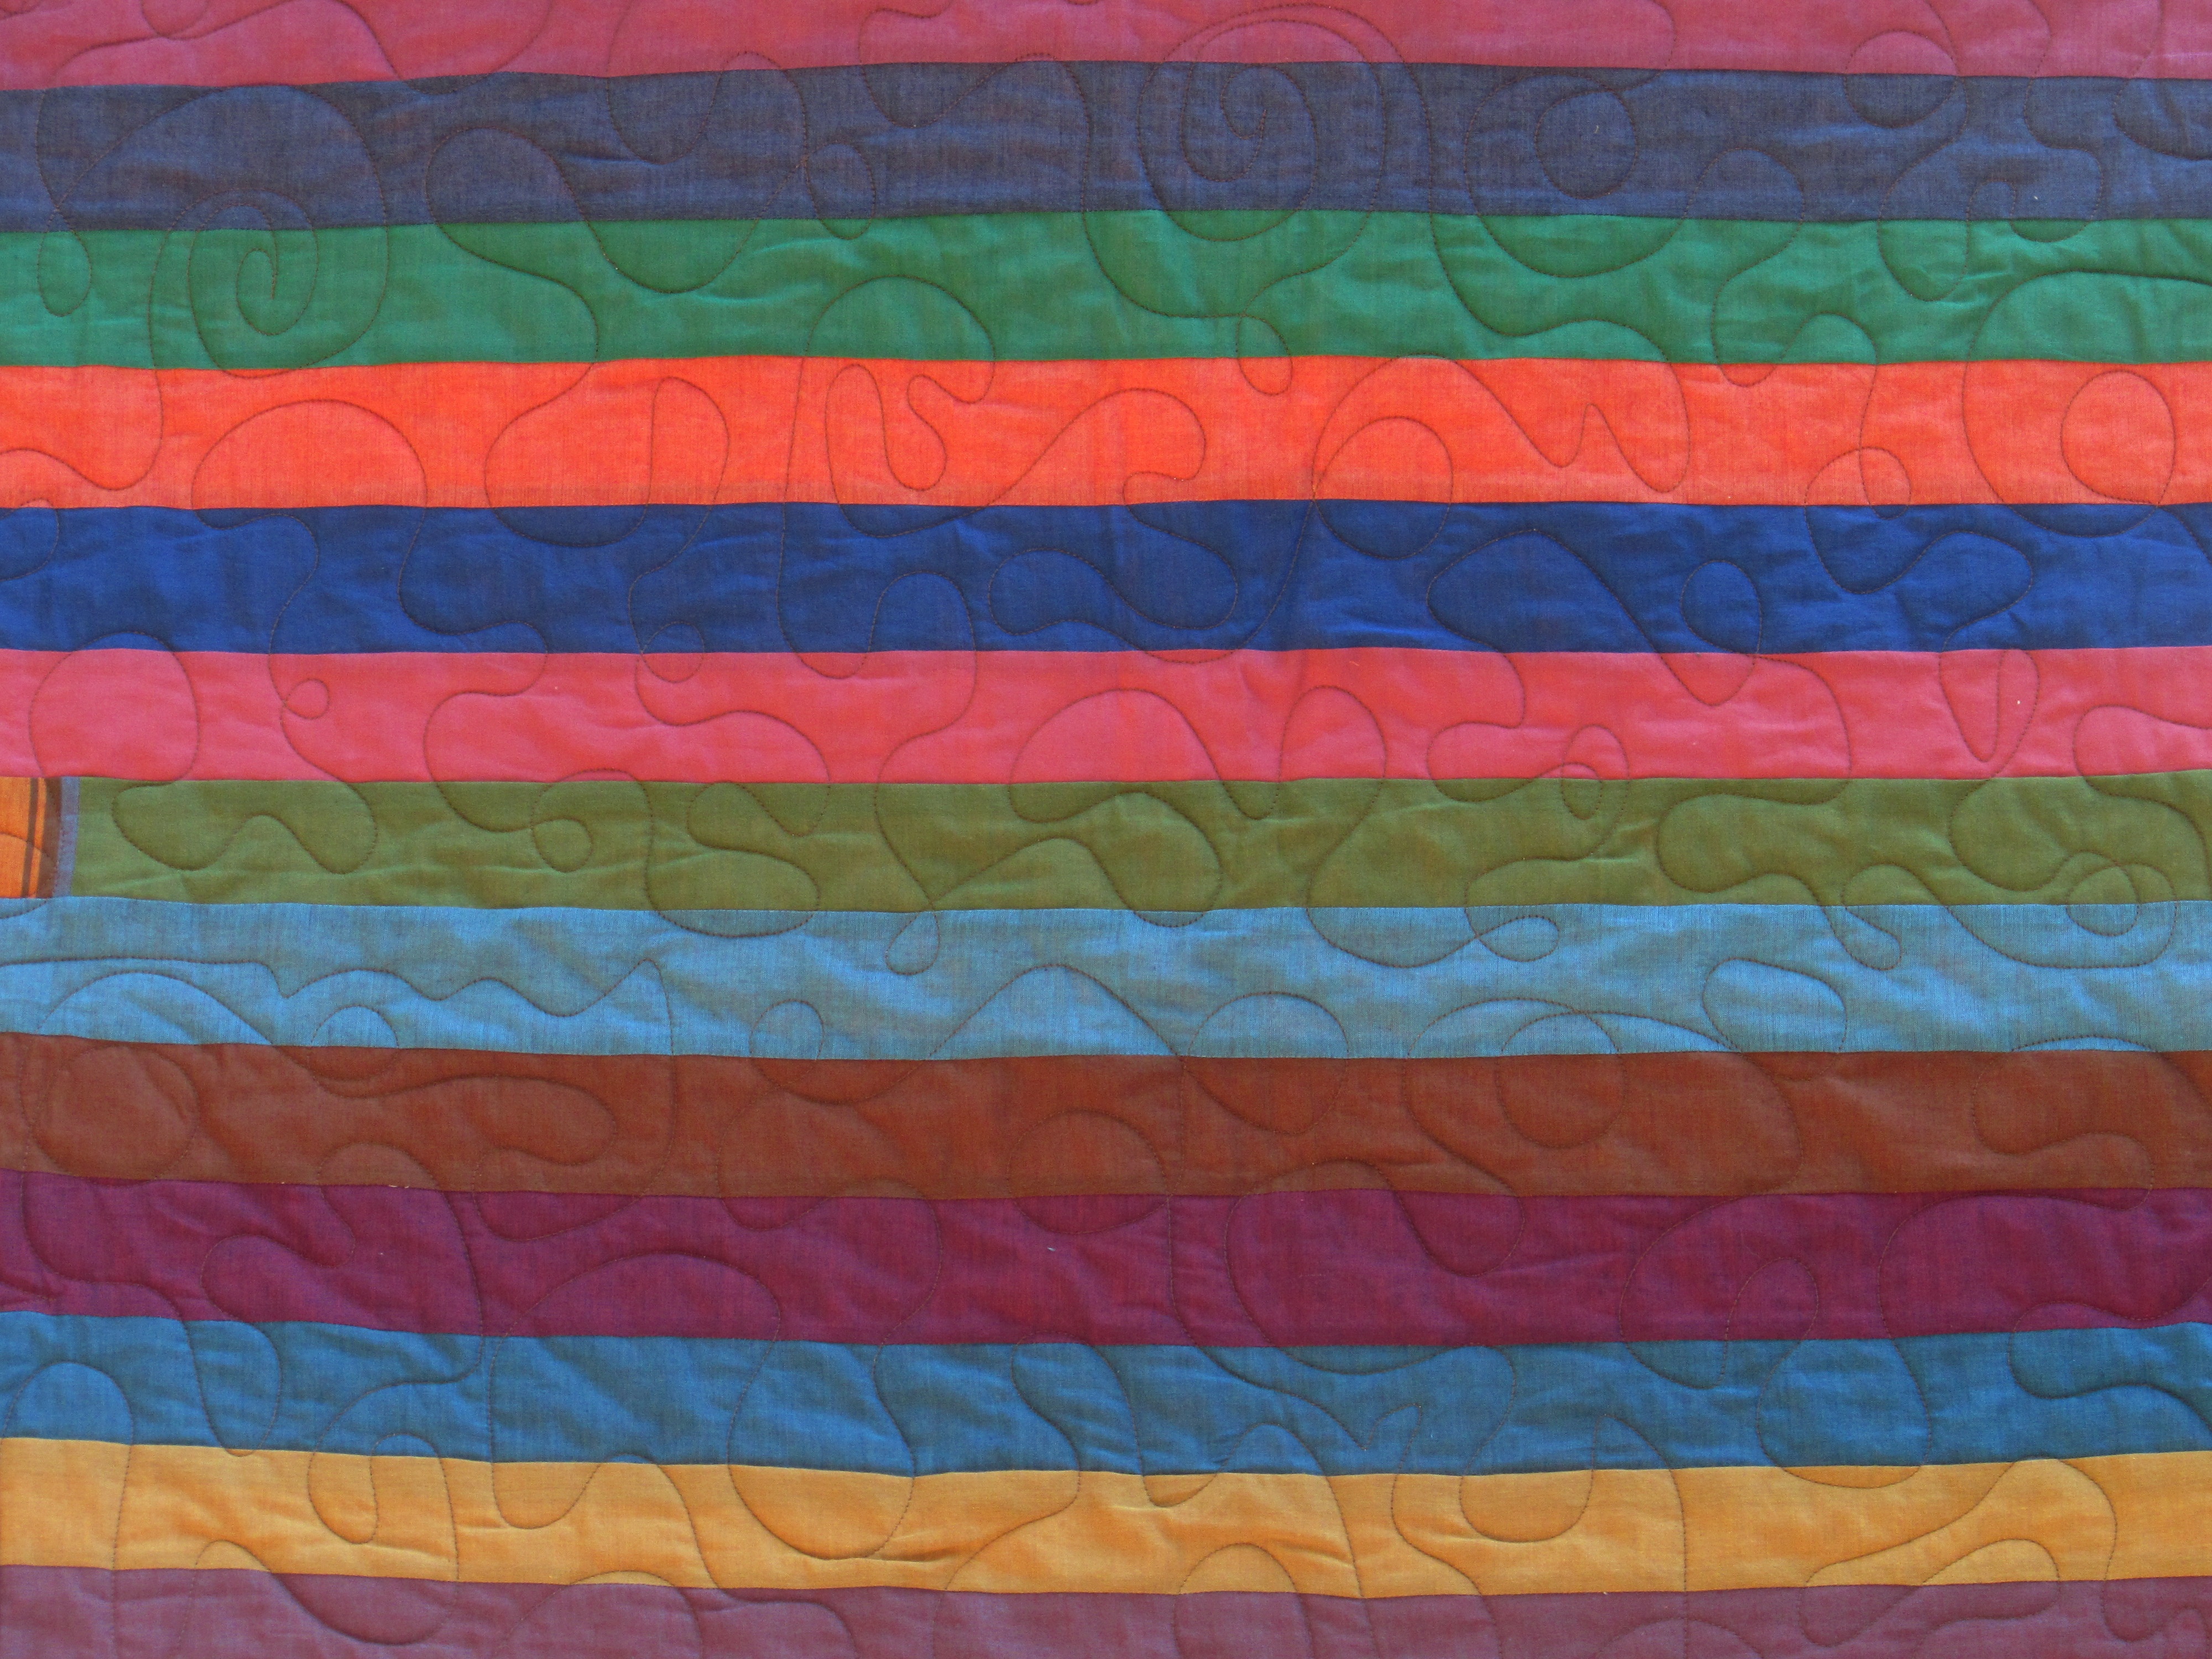
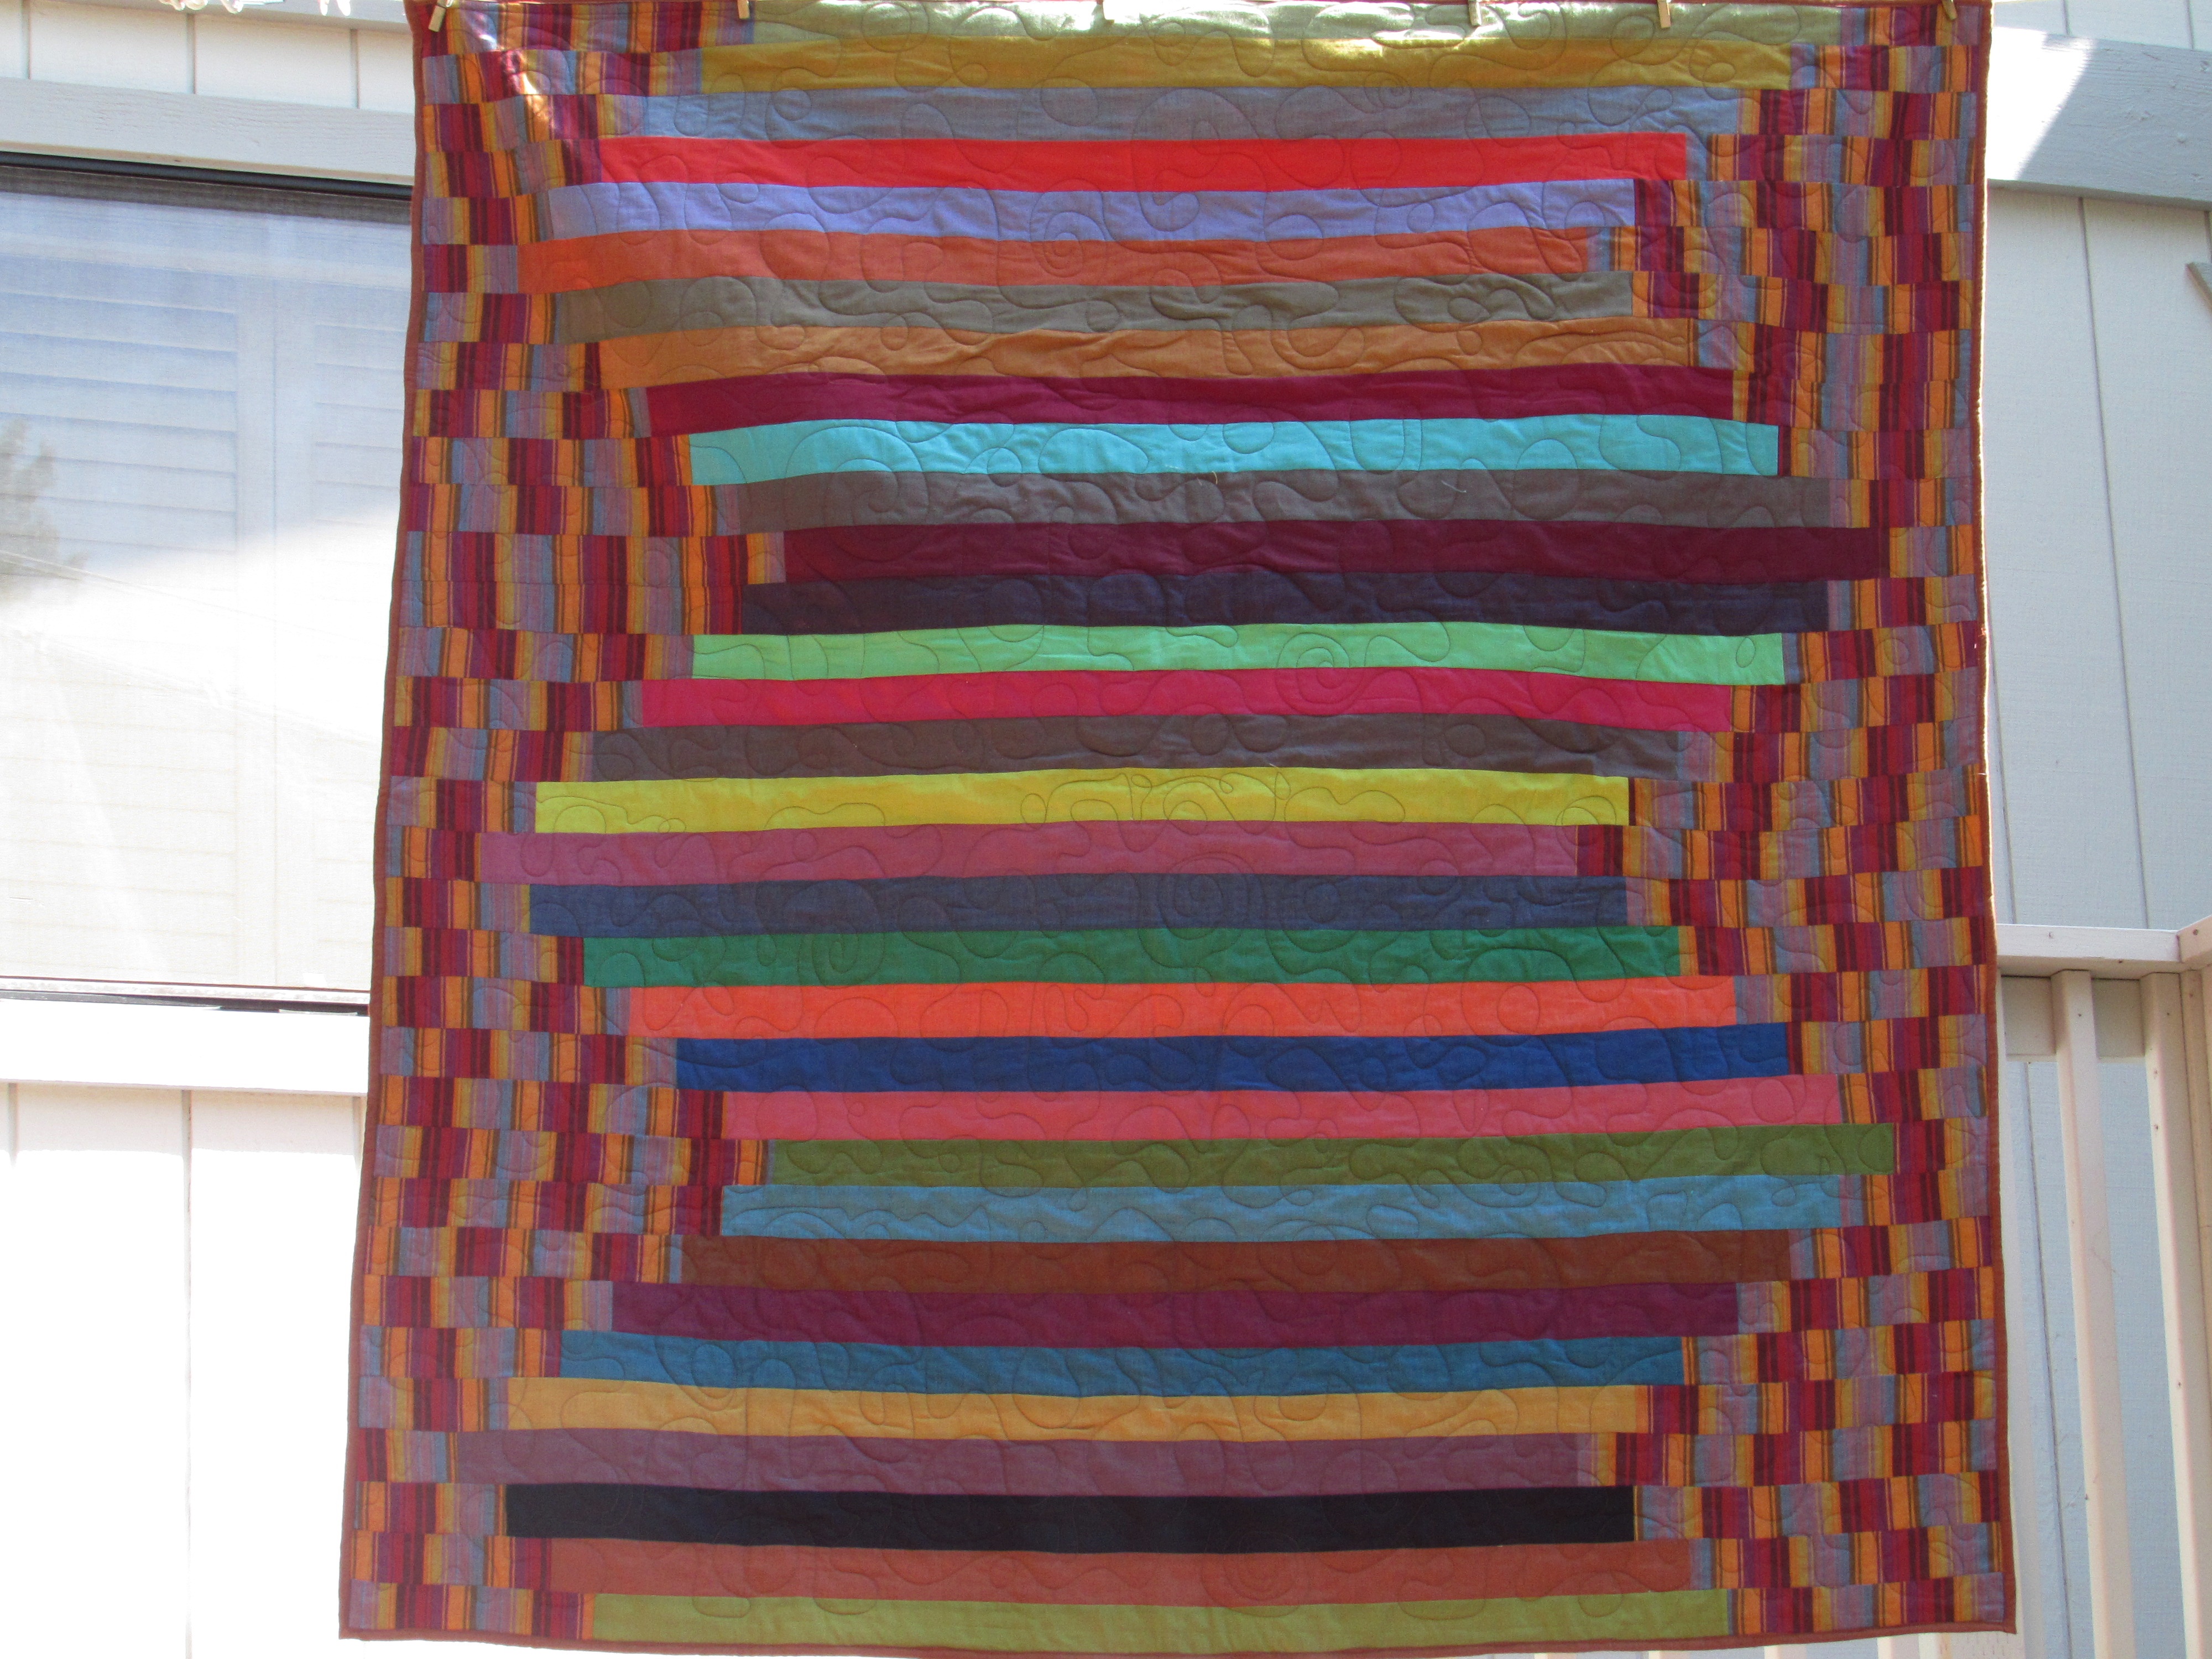
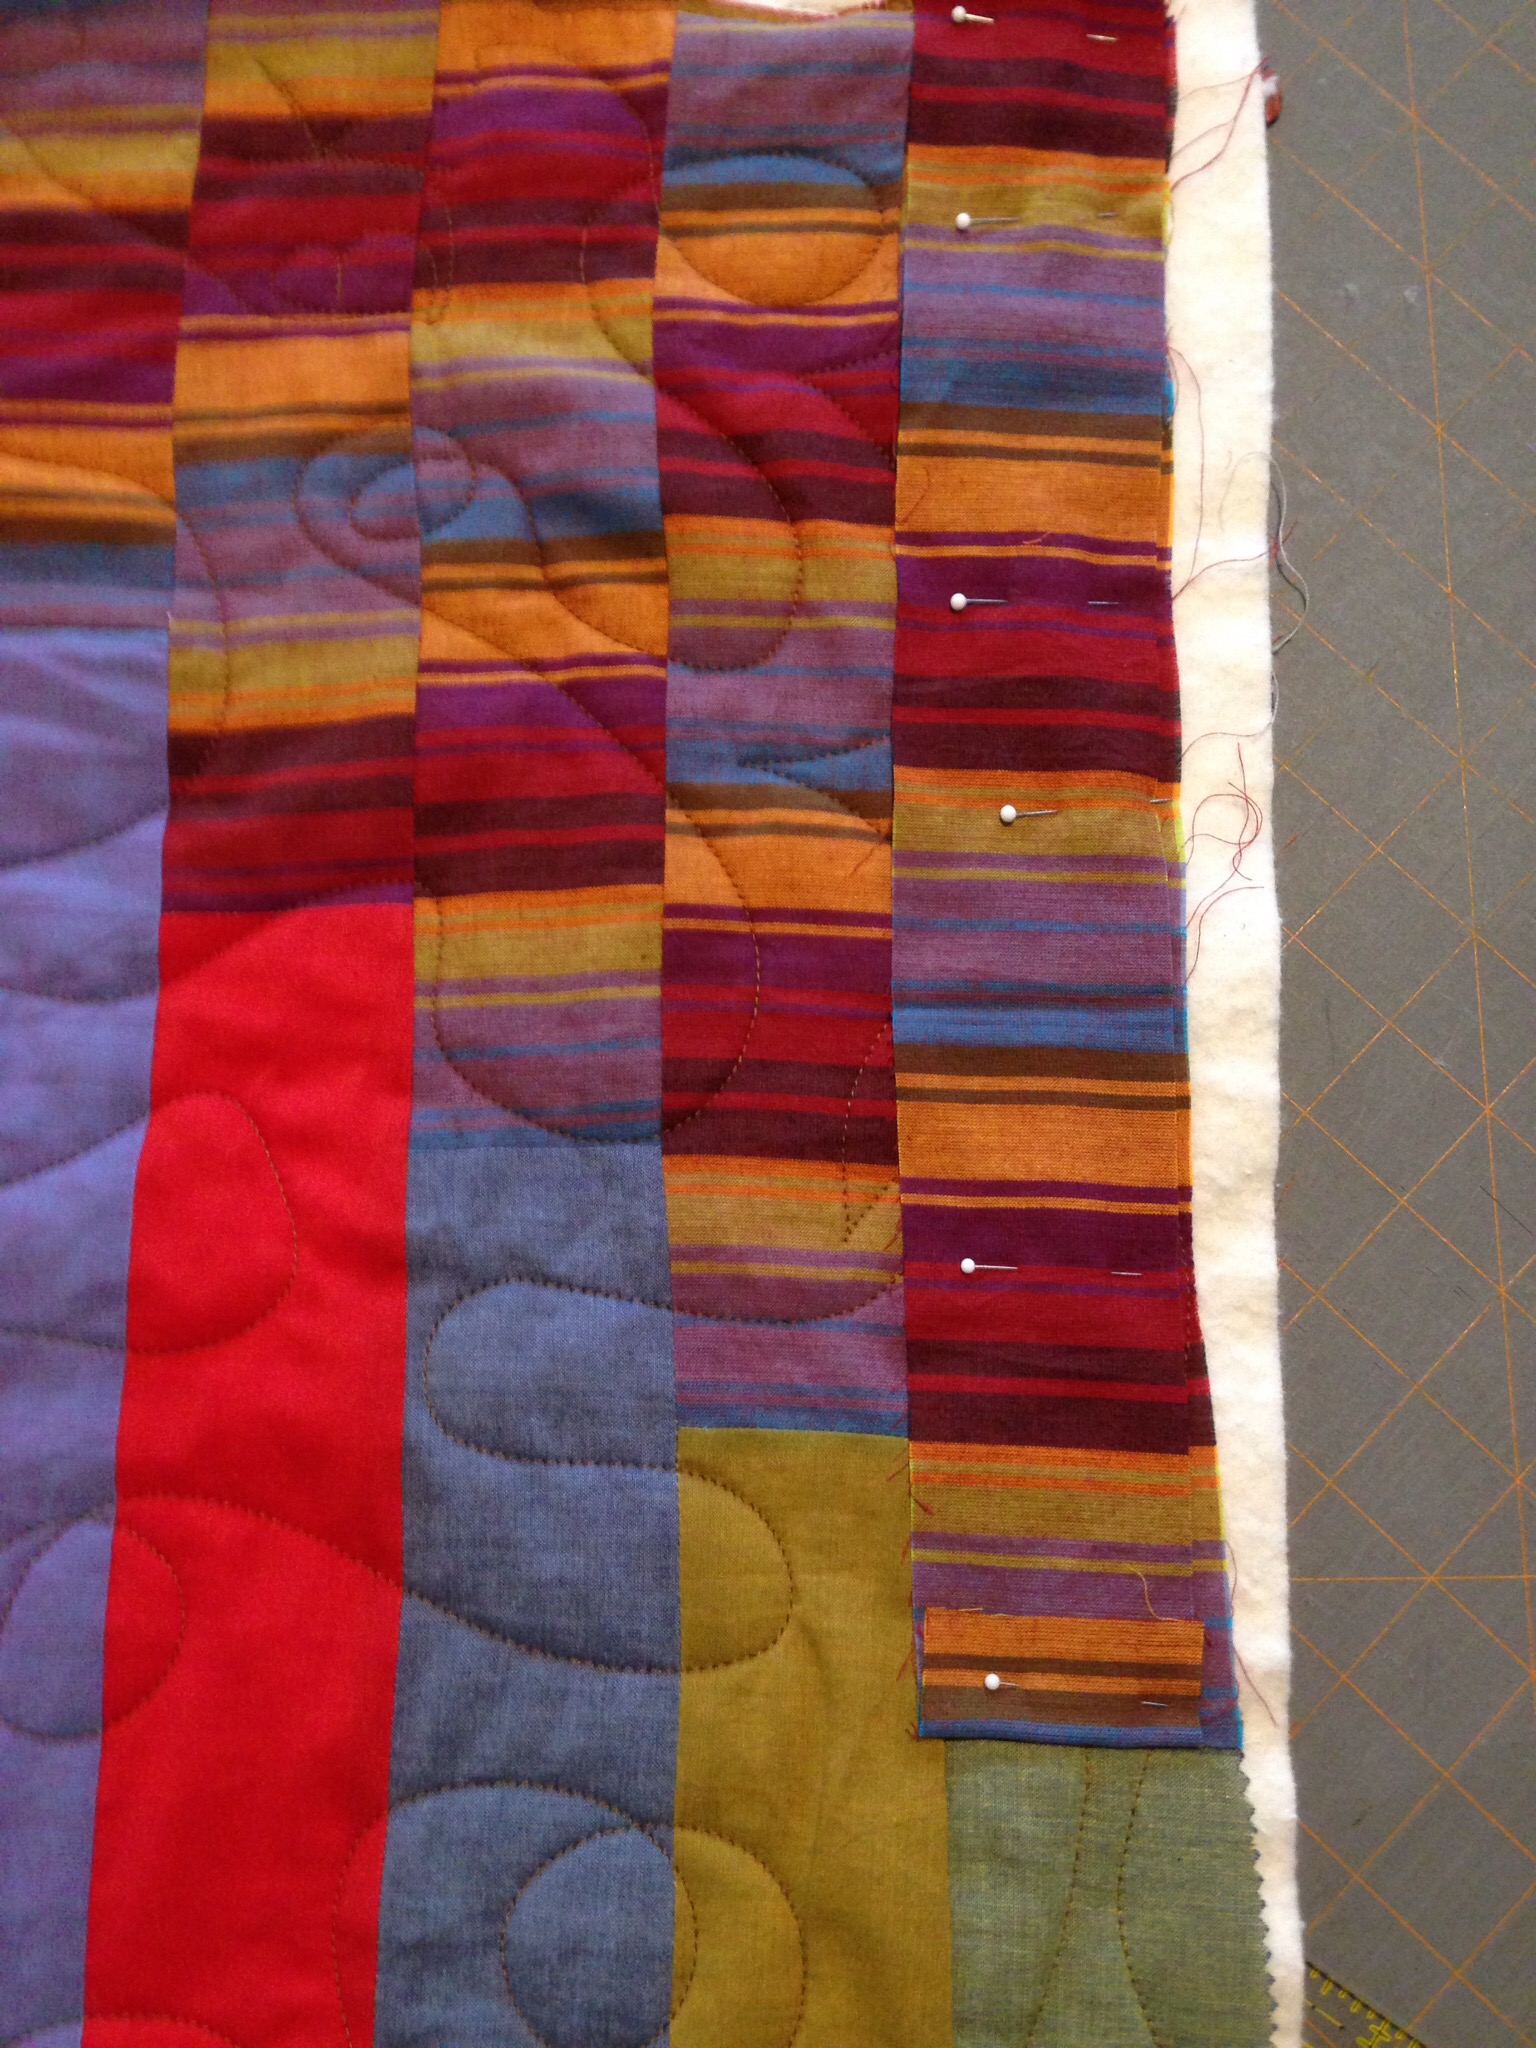
Last week I spent several hours practicing on a long arm machine. I decided to work on a quilt top that I made last fall. Using Kaffe Fassett stripes and solids, I made a strip quilt last fall. As often happens, it was put aside and left untouched for almost a year. By the time I finished this quilt top, it was distorted and nowhere near flats. Not sure if you remember this one, but here is the first post if you want the back story. In that post I mentioned that I had put some of the strips together incorrectly and had to do a bit of seam ripping to fix it. I think I handled the strips too much and they really stretched. If you haven’t handled Kaffe Fassett shot cottons, they are very soft. This makes for a cozy quilt but using a jelly roll of this was harder than I expected. Of all my quilts, I am sure this one has the most technical flaws. But it is also one of the prettiest because of all the color.
Fast forward eleven months, I decided to finally finish it. The colors are gorgeous and it deserves to be used. I knew it would never be a quilt to brag on but oh, it is so soft. Quilting it on my machine or the long arm was going to be problematic either way. I figured if I took it to the shop, they might be able to help me to make it as good as possible. When I showed it to the owner, he said I could choose to make it flat and out of square (by a long ways) or I could square it and there would be some big folds that I would just have to quilt down. Without much deliberation, I chose to smooth it and deal with squaring it up later. The larger goal was to practice with the long arm. He helped me load it and played with it to get it as flat as he could.
I didn’t have much of a quilting ‘plan’ in my head with this. More important was learning to use the machine and get the feel of it. The speed picks up on the machine and it is difficult to get into a rhythm that isn’t too fast and allows me to have good control over moving the needle. I did a random stipple with a few loops here and there. It was so much fun. I loved the freedom of movement since I wasn’t dealing with the weight of the quilt. When I think back on how it felt when I was guiding the needle, I am certain I was going to fast. My concern was if I slowed down, my stitch length would shorten and be inconsistent. Plus I would just forget and my speed would increase!
Speed was my primary problem. Second to that was judging how close I could quilt near the top and bottom bars. I found myself going too close and getting trapped in places. There is no reason to go that close; it is cleaner to stay a couple of inches away from the top bar and bottom. But I would get my speed going too fast and dang it, I would find myself trapped again!
Even laying it as flat as possible, there are a few significant puckers. It couldn’t be helped. I think using the long arm to quilt it was much more successful than my home machine would have been. I could look ahead and as I moved the quilt over the bars I gently finessed it as flat as possible. Now, remember he said if I went for smooth and flat, it would be warped and out of square? Oh my, he was right.
When I got it home I trimmed the excess batting and backing away with scissors, just to see what I was dealing with. Then I did a few dramatic, heavy sighs and asked Ray for help. I knew he would have a solution. The issue was that if I cut it square, it would be so obvious due to the linear pattern of the stripes. Both the top and bottom green stripes would have been sliced at strange angles. Ray suggested taking some of the striped fabric and enlarging the width at the bottom of the stripes. This would give a bit of an illusion of a straight line and I would be able to keep the full width of both green stripes. (I am married to a genius.) I never even thought of it. I have quite a bit of the striped fabric left over. There was no problem cutting a piece and matching the stripe up completely.
Most of the extra width is covered by the binding. It was a simple solution and I am so pleased with the result. As I said earlier, this quilt is filled with flaws. But when I look at it I am quite happy with it. The colors are lovely and the feel is so soft. Learning to use the long arm feels a bit like going backward. I am just getting some confidence with my free motion skills on my domestic machine and now I am back at square one, learning to quilt all over again!
On Thursday this week, I will be back in the shop. I am going to quilt my plus quilt. Hopefully I will be able to control my speed a bit. I am going to try to be diligent about leaving myself space at the top and bottom bars. My plan is to do loose spirals in the negative space and straight line quilting within the pluses. I think (I hope?) that is a reasonable goal for me at this point. Any hints or tips on my long arm practice sessions are more than welcome! Also, while I am thinking of it, do I do all of the straightline quilting and then go back and do the spirals or do I just do whatever shows up within the space of the bars and keep moving it in the one direction? Inquiring minds need to know!
Linking to all of the awesomeness that is listed at the top of the page, under Link Ups.
This is a good weekend to shop Craftsy! They have some great discounts on kits and supplies for their End of Summer Clearance. Take a look. This sale begins Friday, 9/16/16 and runs through Sunday night, 9/18/16.
My sewing room is basically made up of bits and pieces that eventually come together to form something pretty – I don’t mean this to sound all philosophical. I am not like that. I mean to say it is a mess and I spent some time organizing and realized there are all sorts of fun bits in there that I want to play with. I have picked up a few things thrifting, made a few fun things and finished some others.
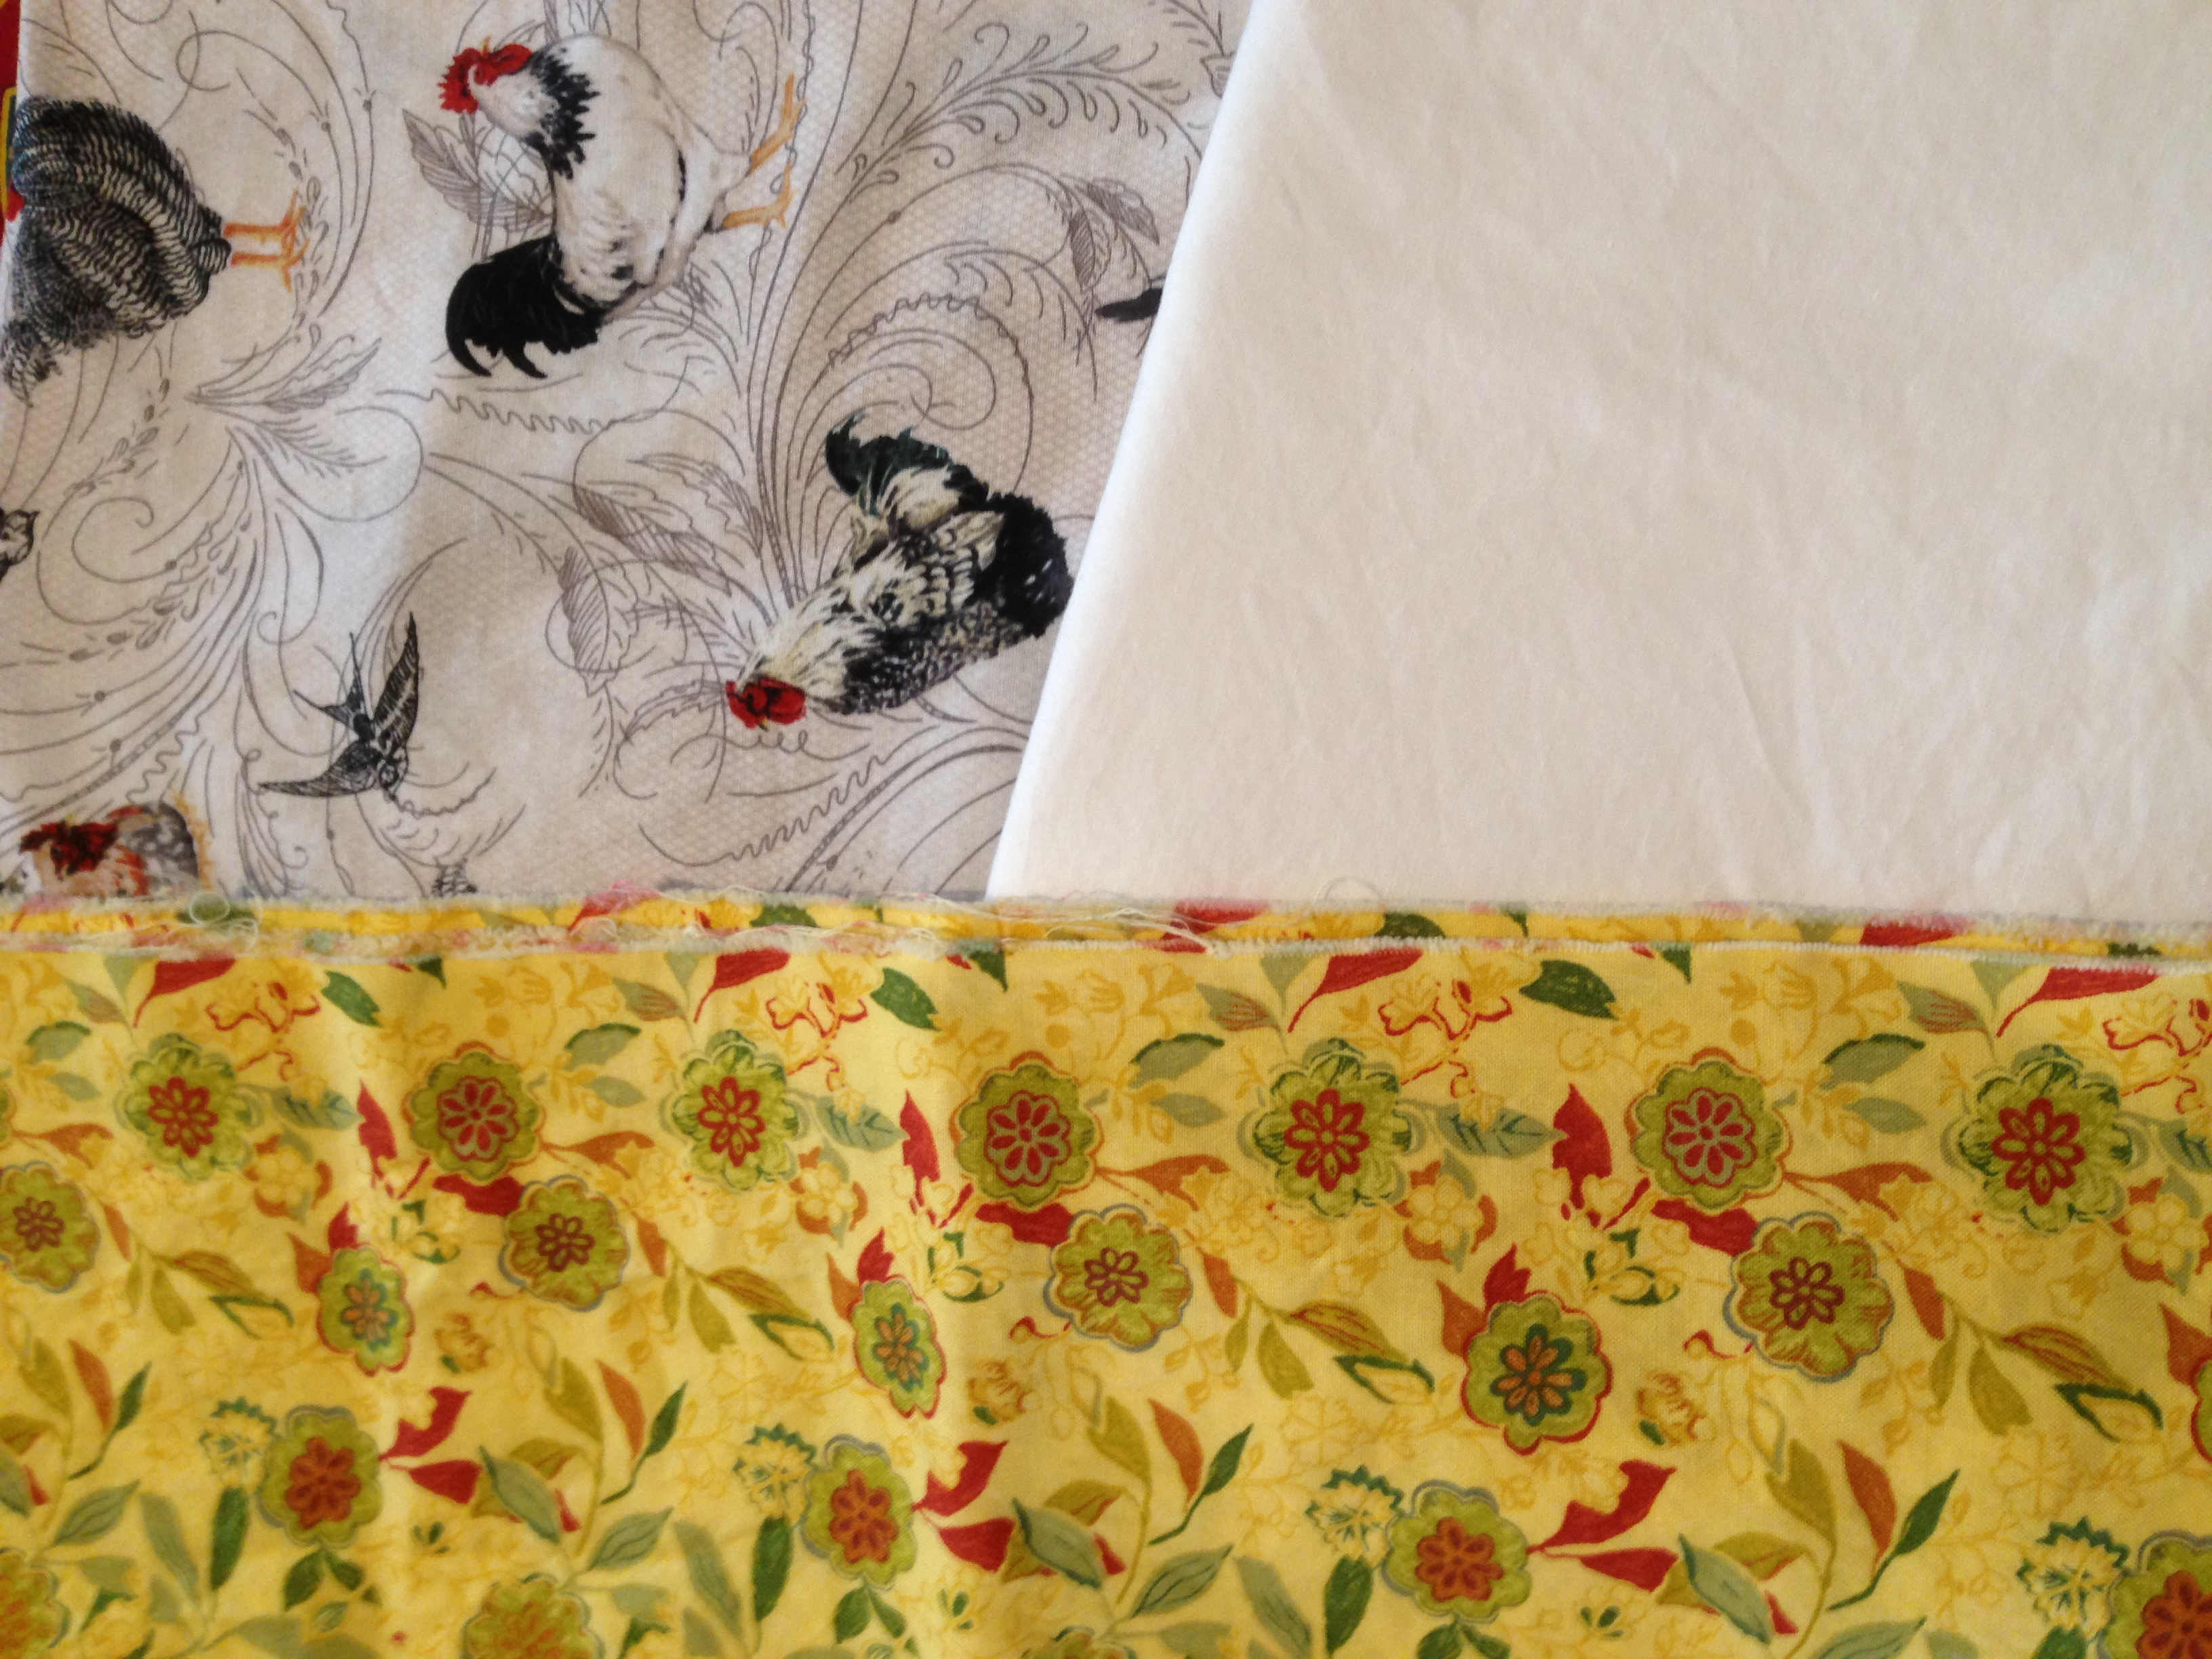
As far as thrifting goes, here are the most recent finds. This little stack of bits was a cute one. I love the roosters and the piece of white is totally clean and quite large; and really,- who doesn’t want extra white fabric on the shelf? The yellow bit is about 7″ by 42″ and my yellow scraps are next to nothing. These are washed and put away for now.
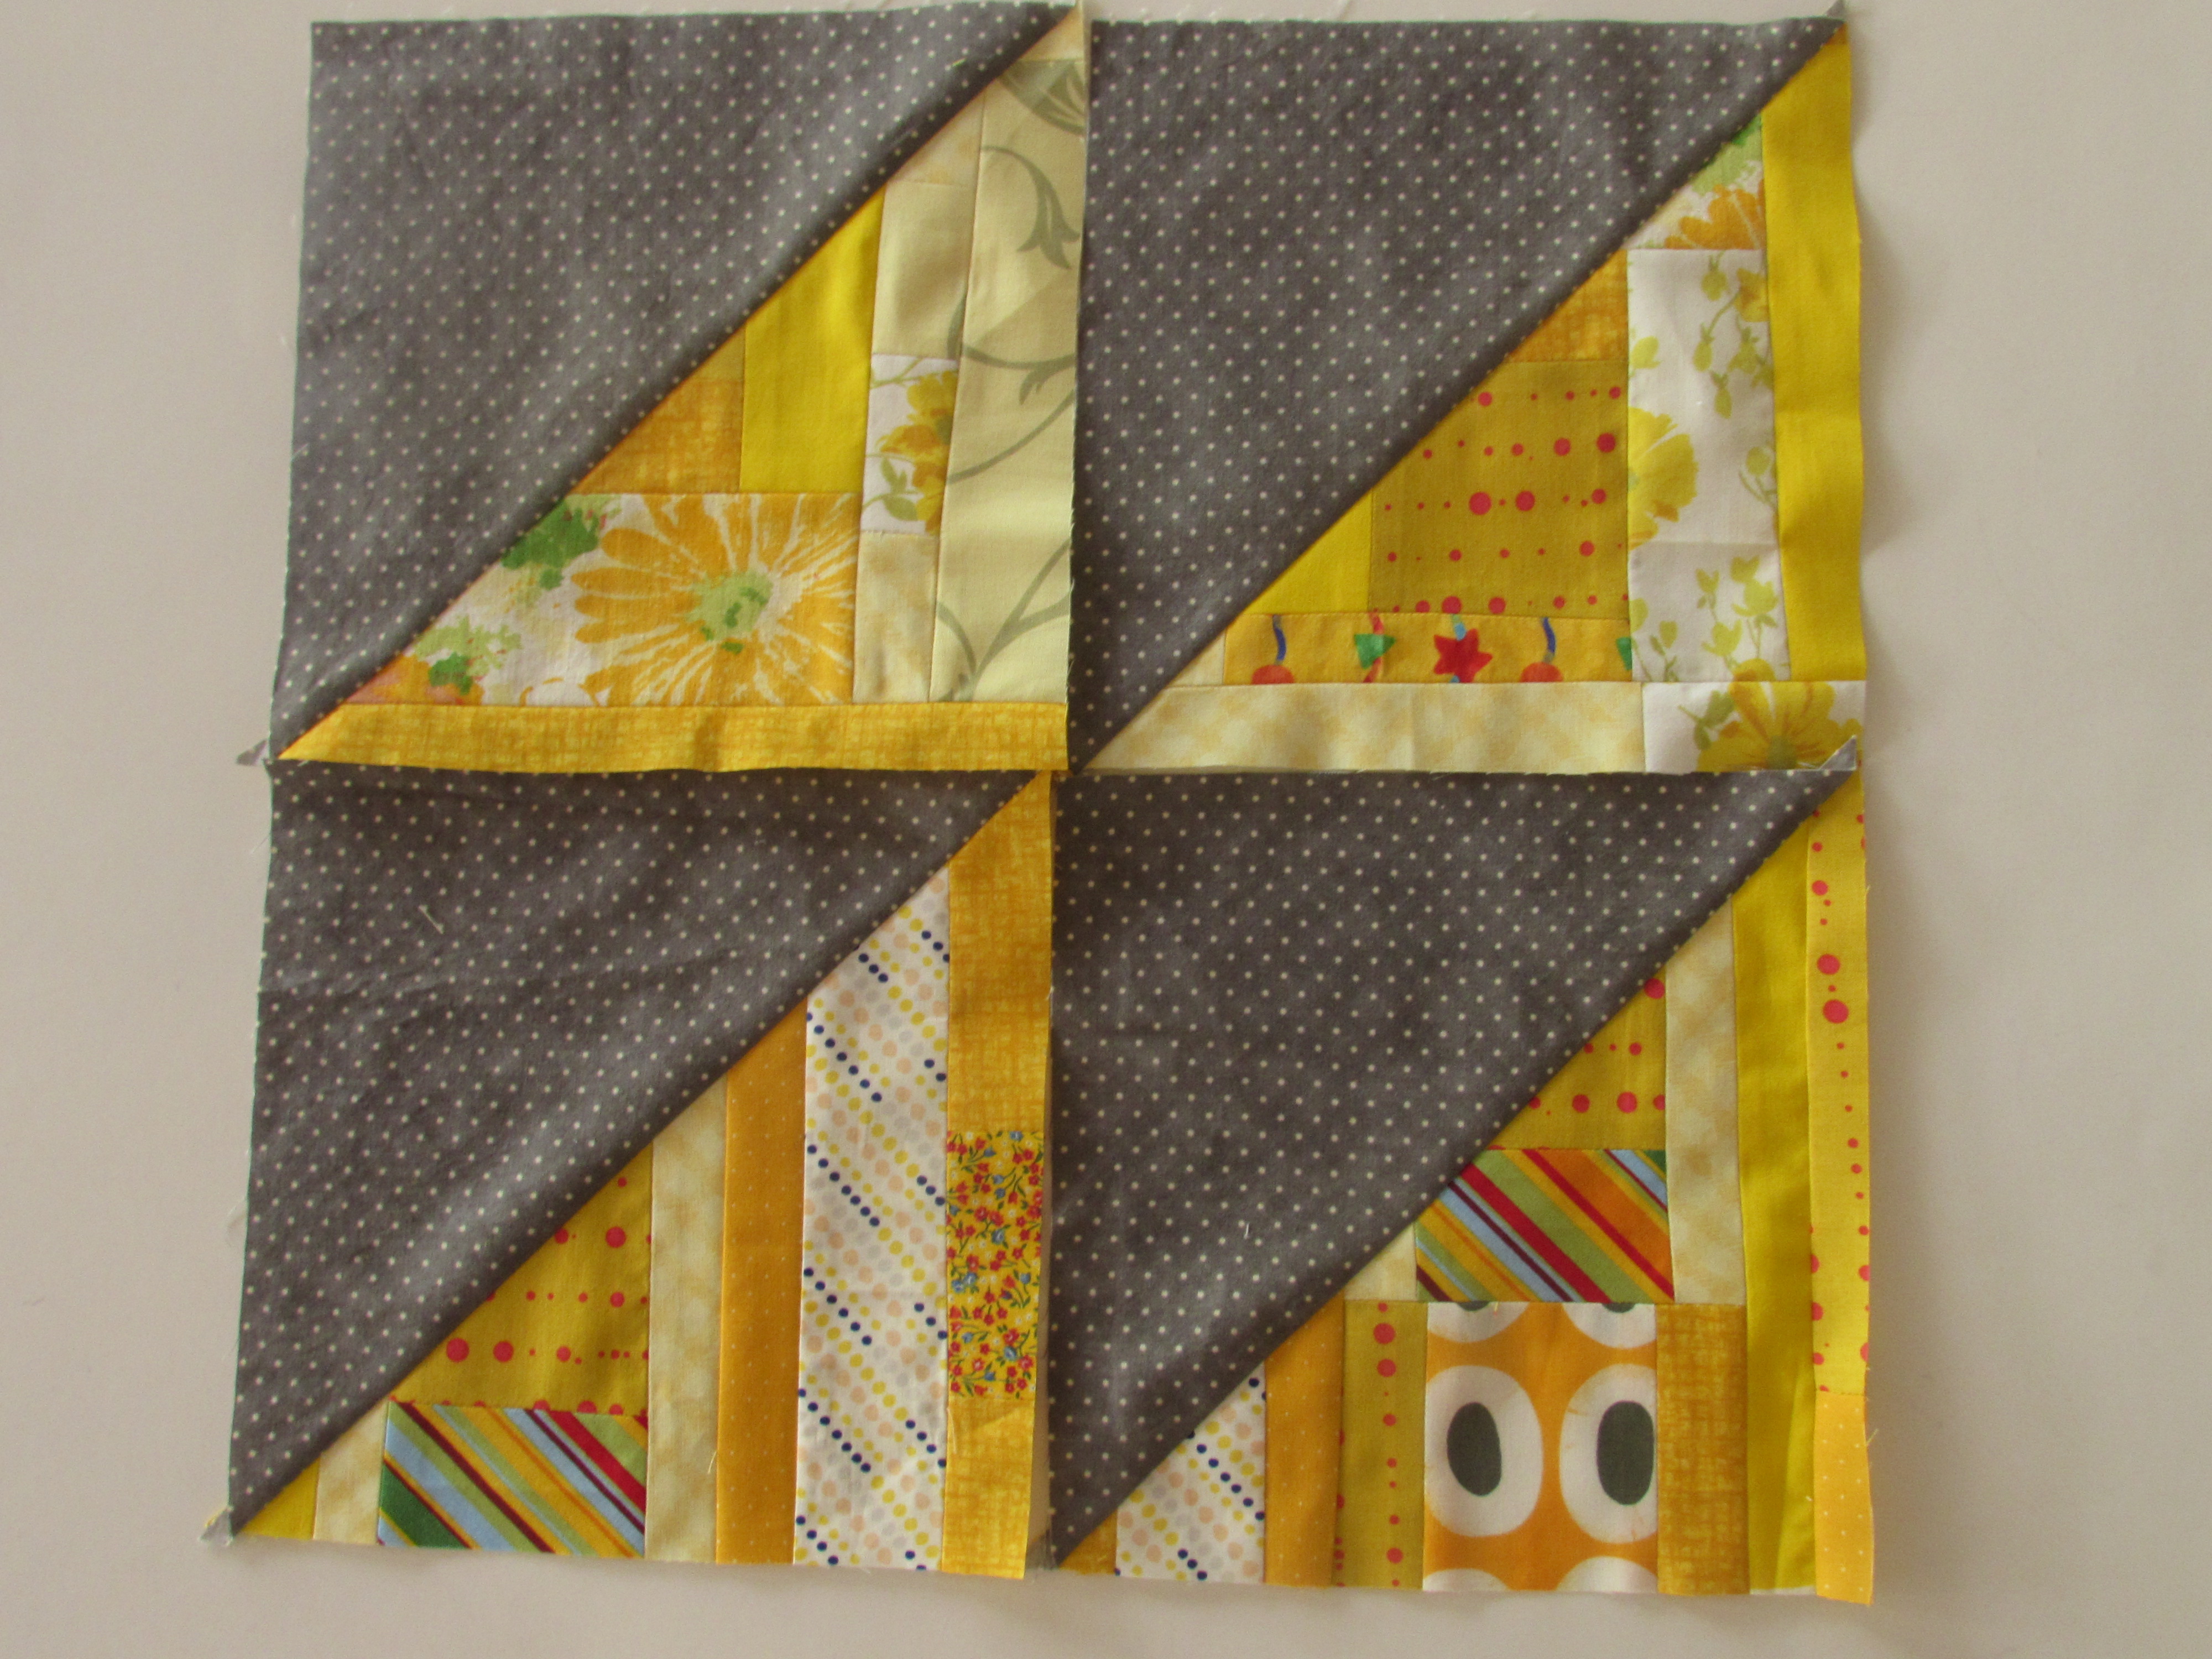
This block was in a bin and looked so forlorn. It was a dollar and I wondered who pieced this with such nice points and didn’t want to keep it. I usually imagine that these things come from a lovely woman’s quilty UFO pile and get donated when she can no longer sew. Take a look at the beautiful curve she did with the stem, it is lovely. I will make a little table topper with it because it is 14″ square and deserves to be finished.
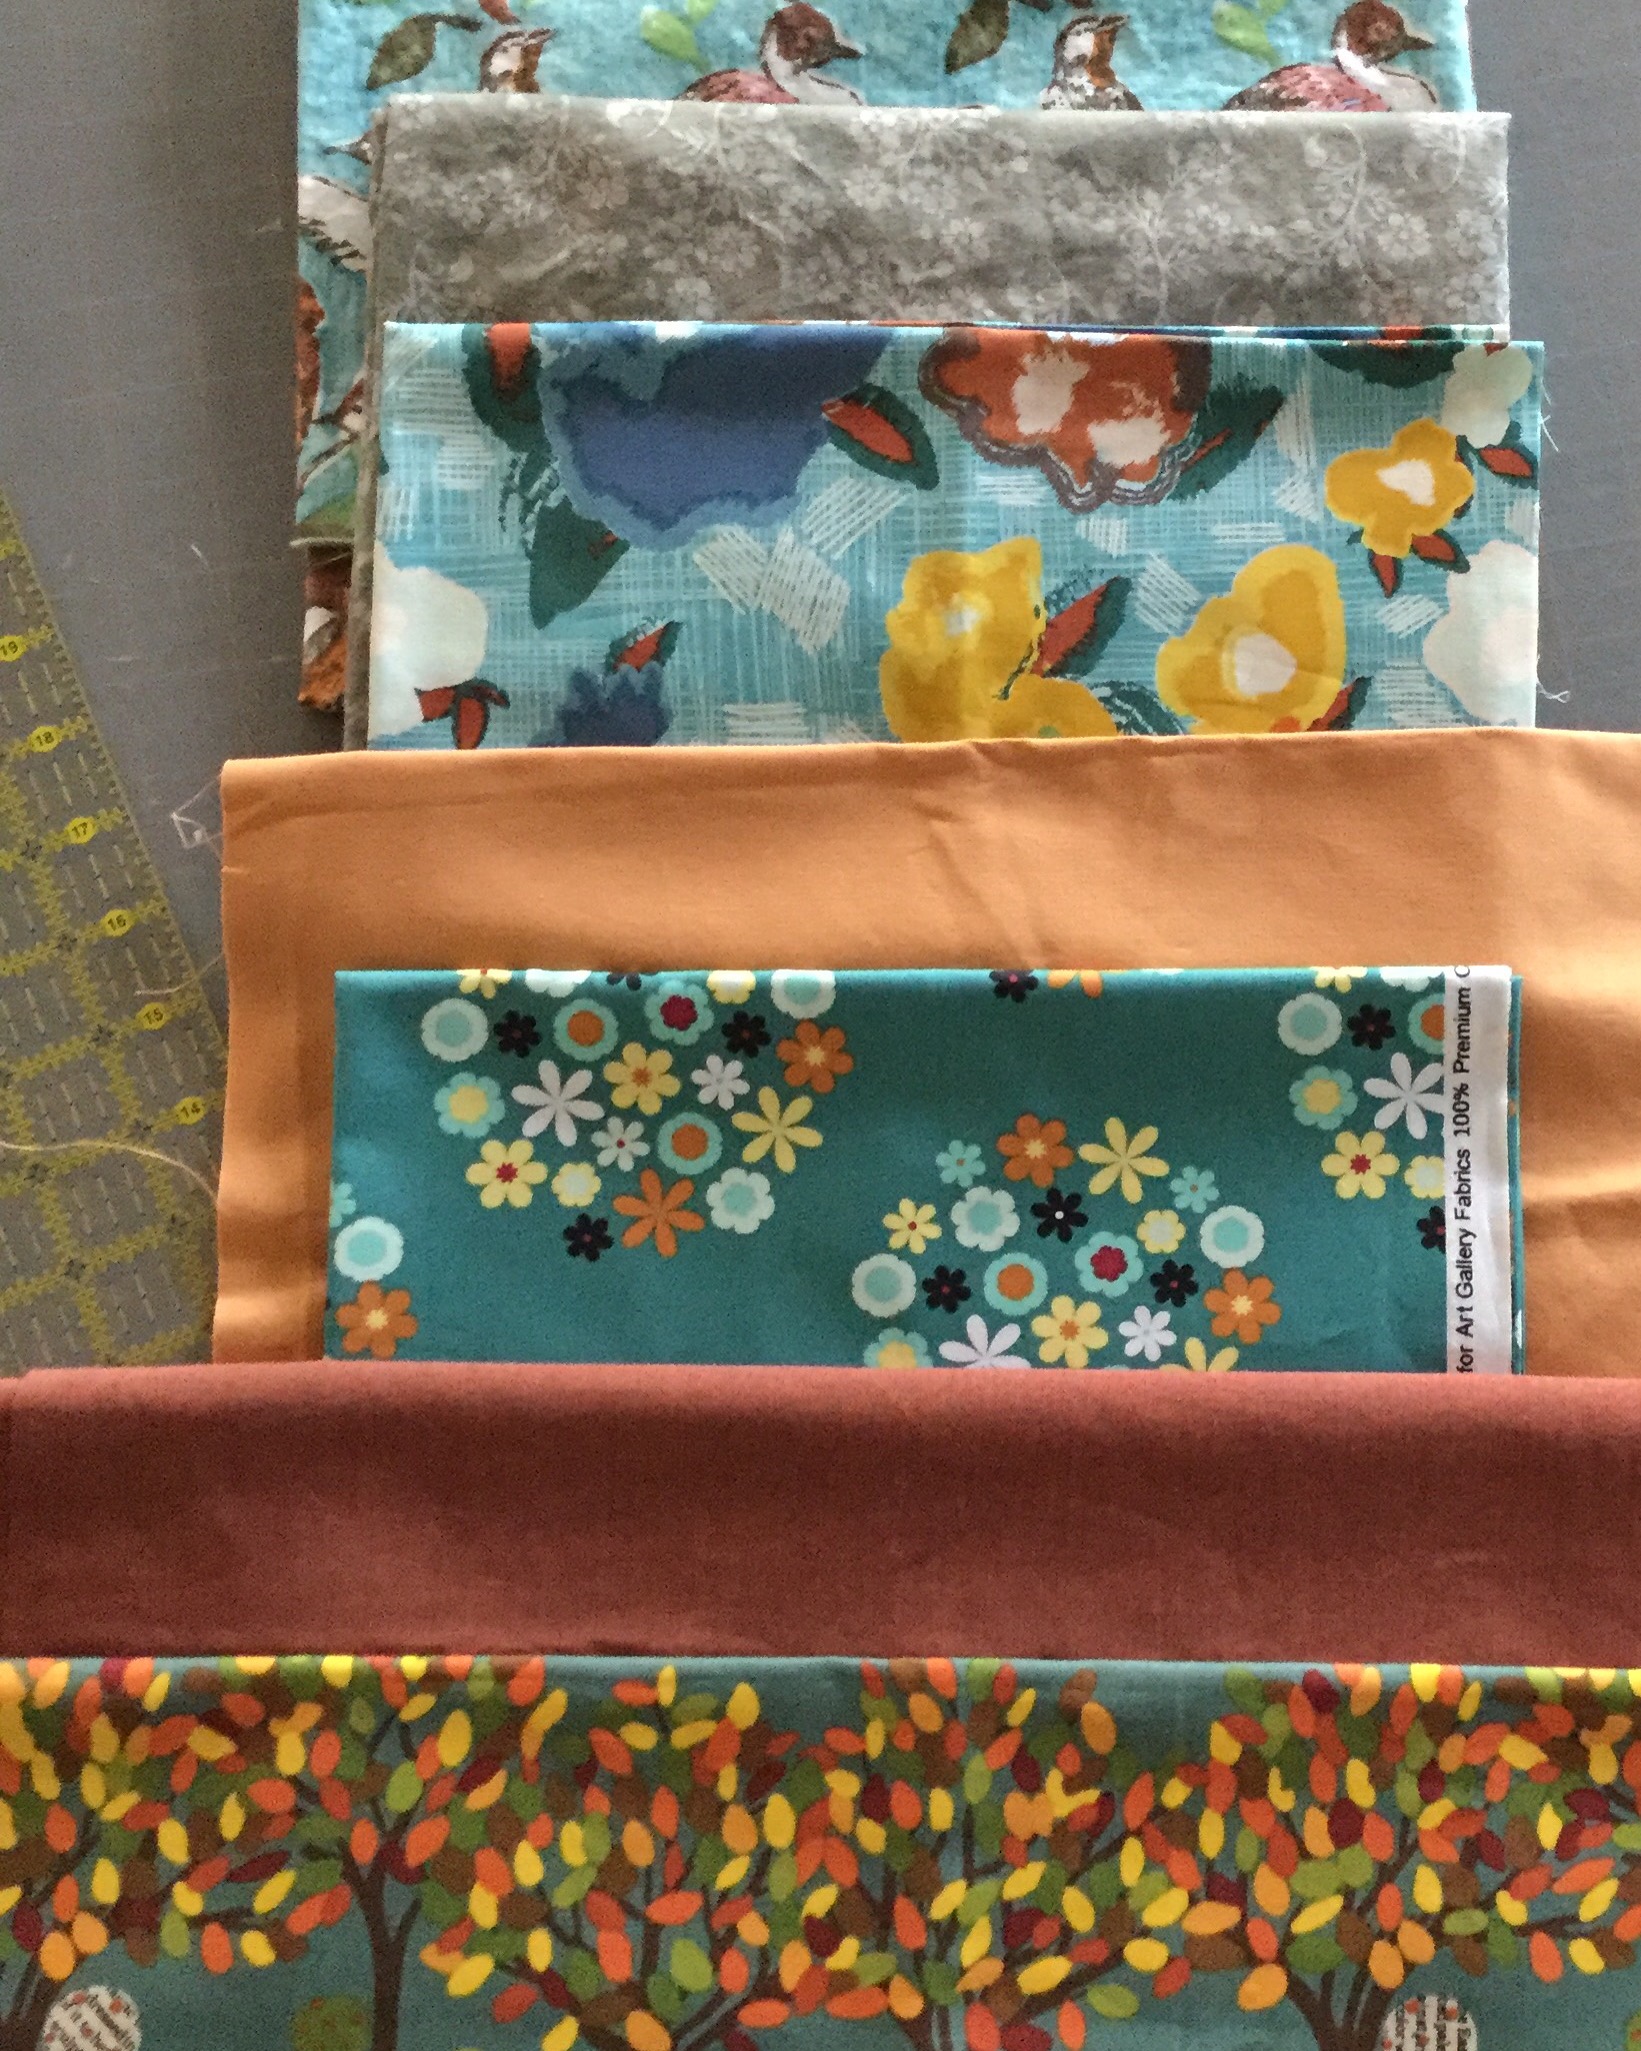
When I was cleaning up, I somehow ended up with this pull from my stash. I kept seeing pieces that needed to be together. I don’t have a project in mind for it but if I put them back in their color area, they wouldn’t become used together and they should, don’t you think? Pieces are anywhere from fat quarter to 1/2 yard in size. I just love this autumnal bundle. When I put the photo on Instagram last night I was asking what other colors might need to be added. My IG/blogging friend, Gloria, suggested deep brown and I agree. I have a nice dark brown in the solids stack and will pull it to see if it belongs with the others. Am I crazy to just pull it and let it sit there until I figure out what to make with it? Do others do this? I have projects lined up right now and don’t “need” another but still??
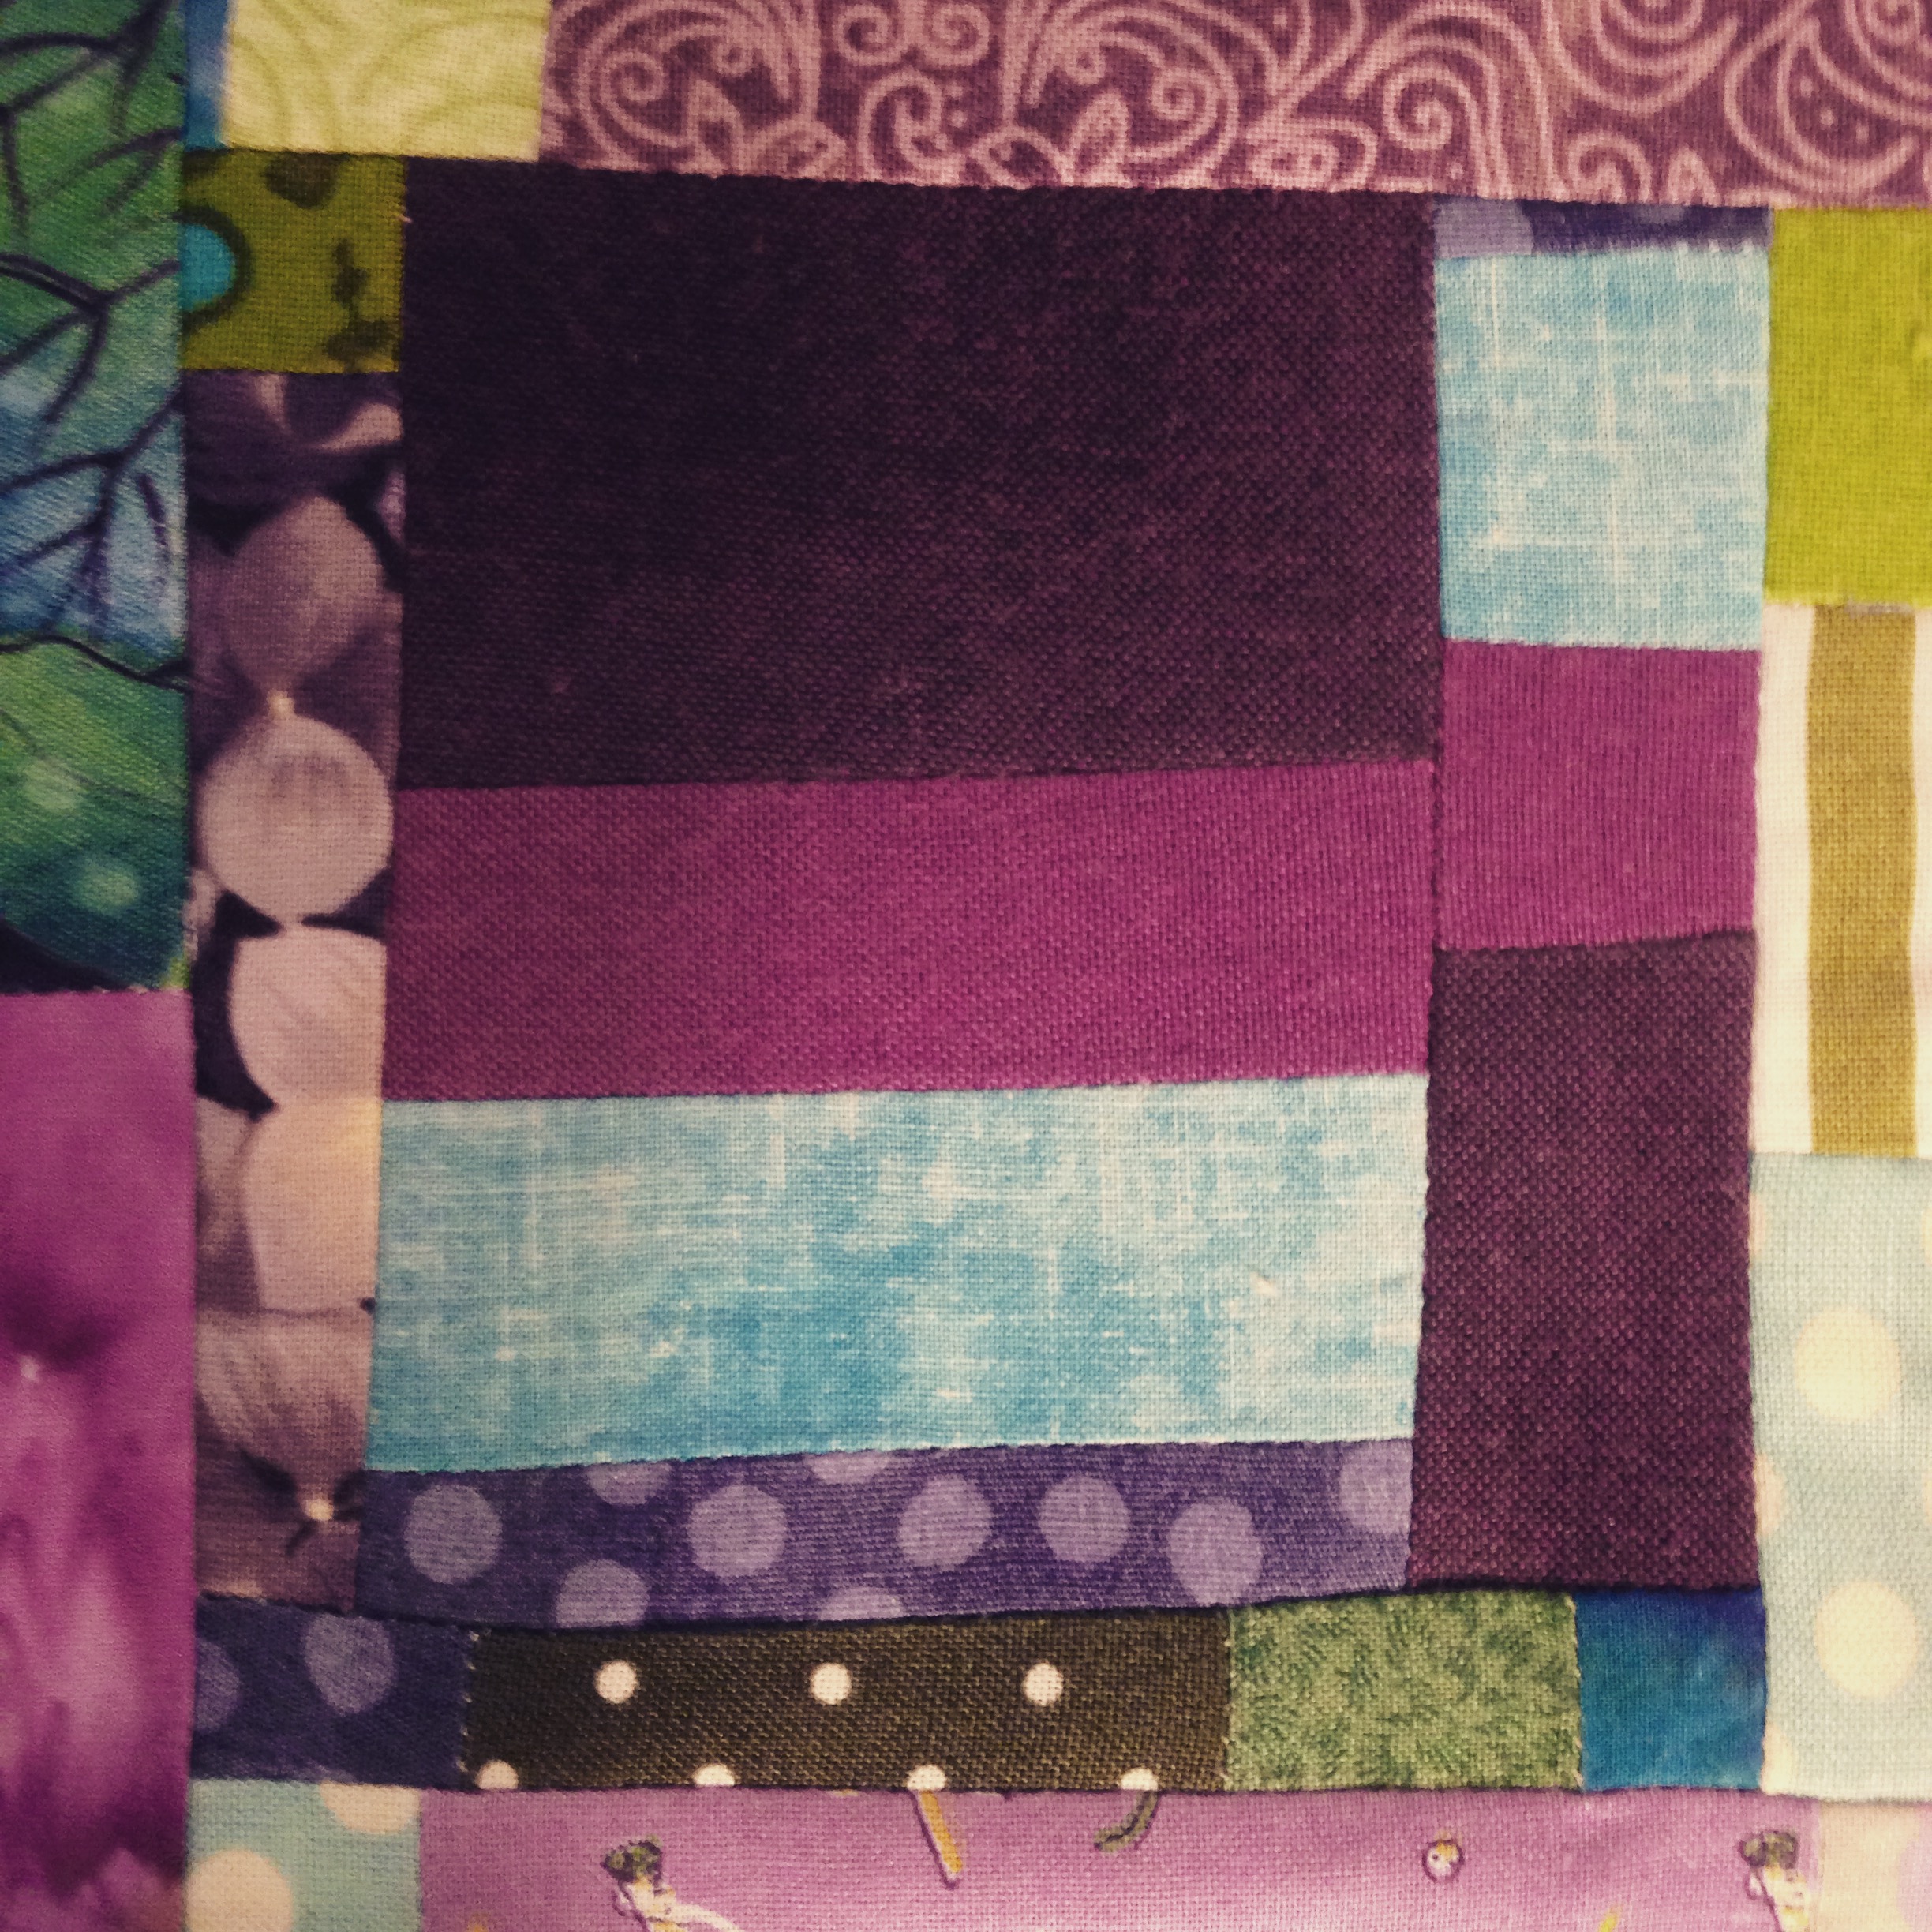
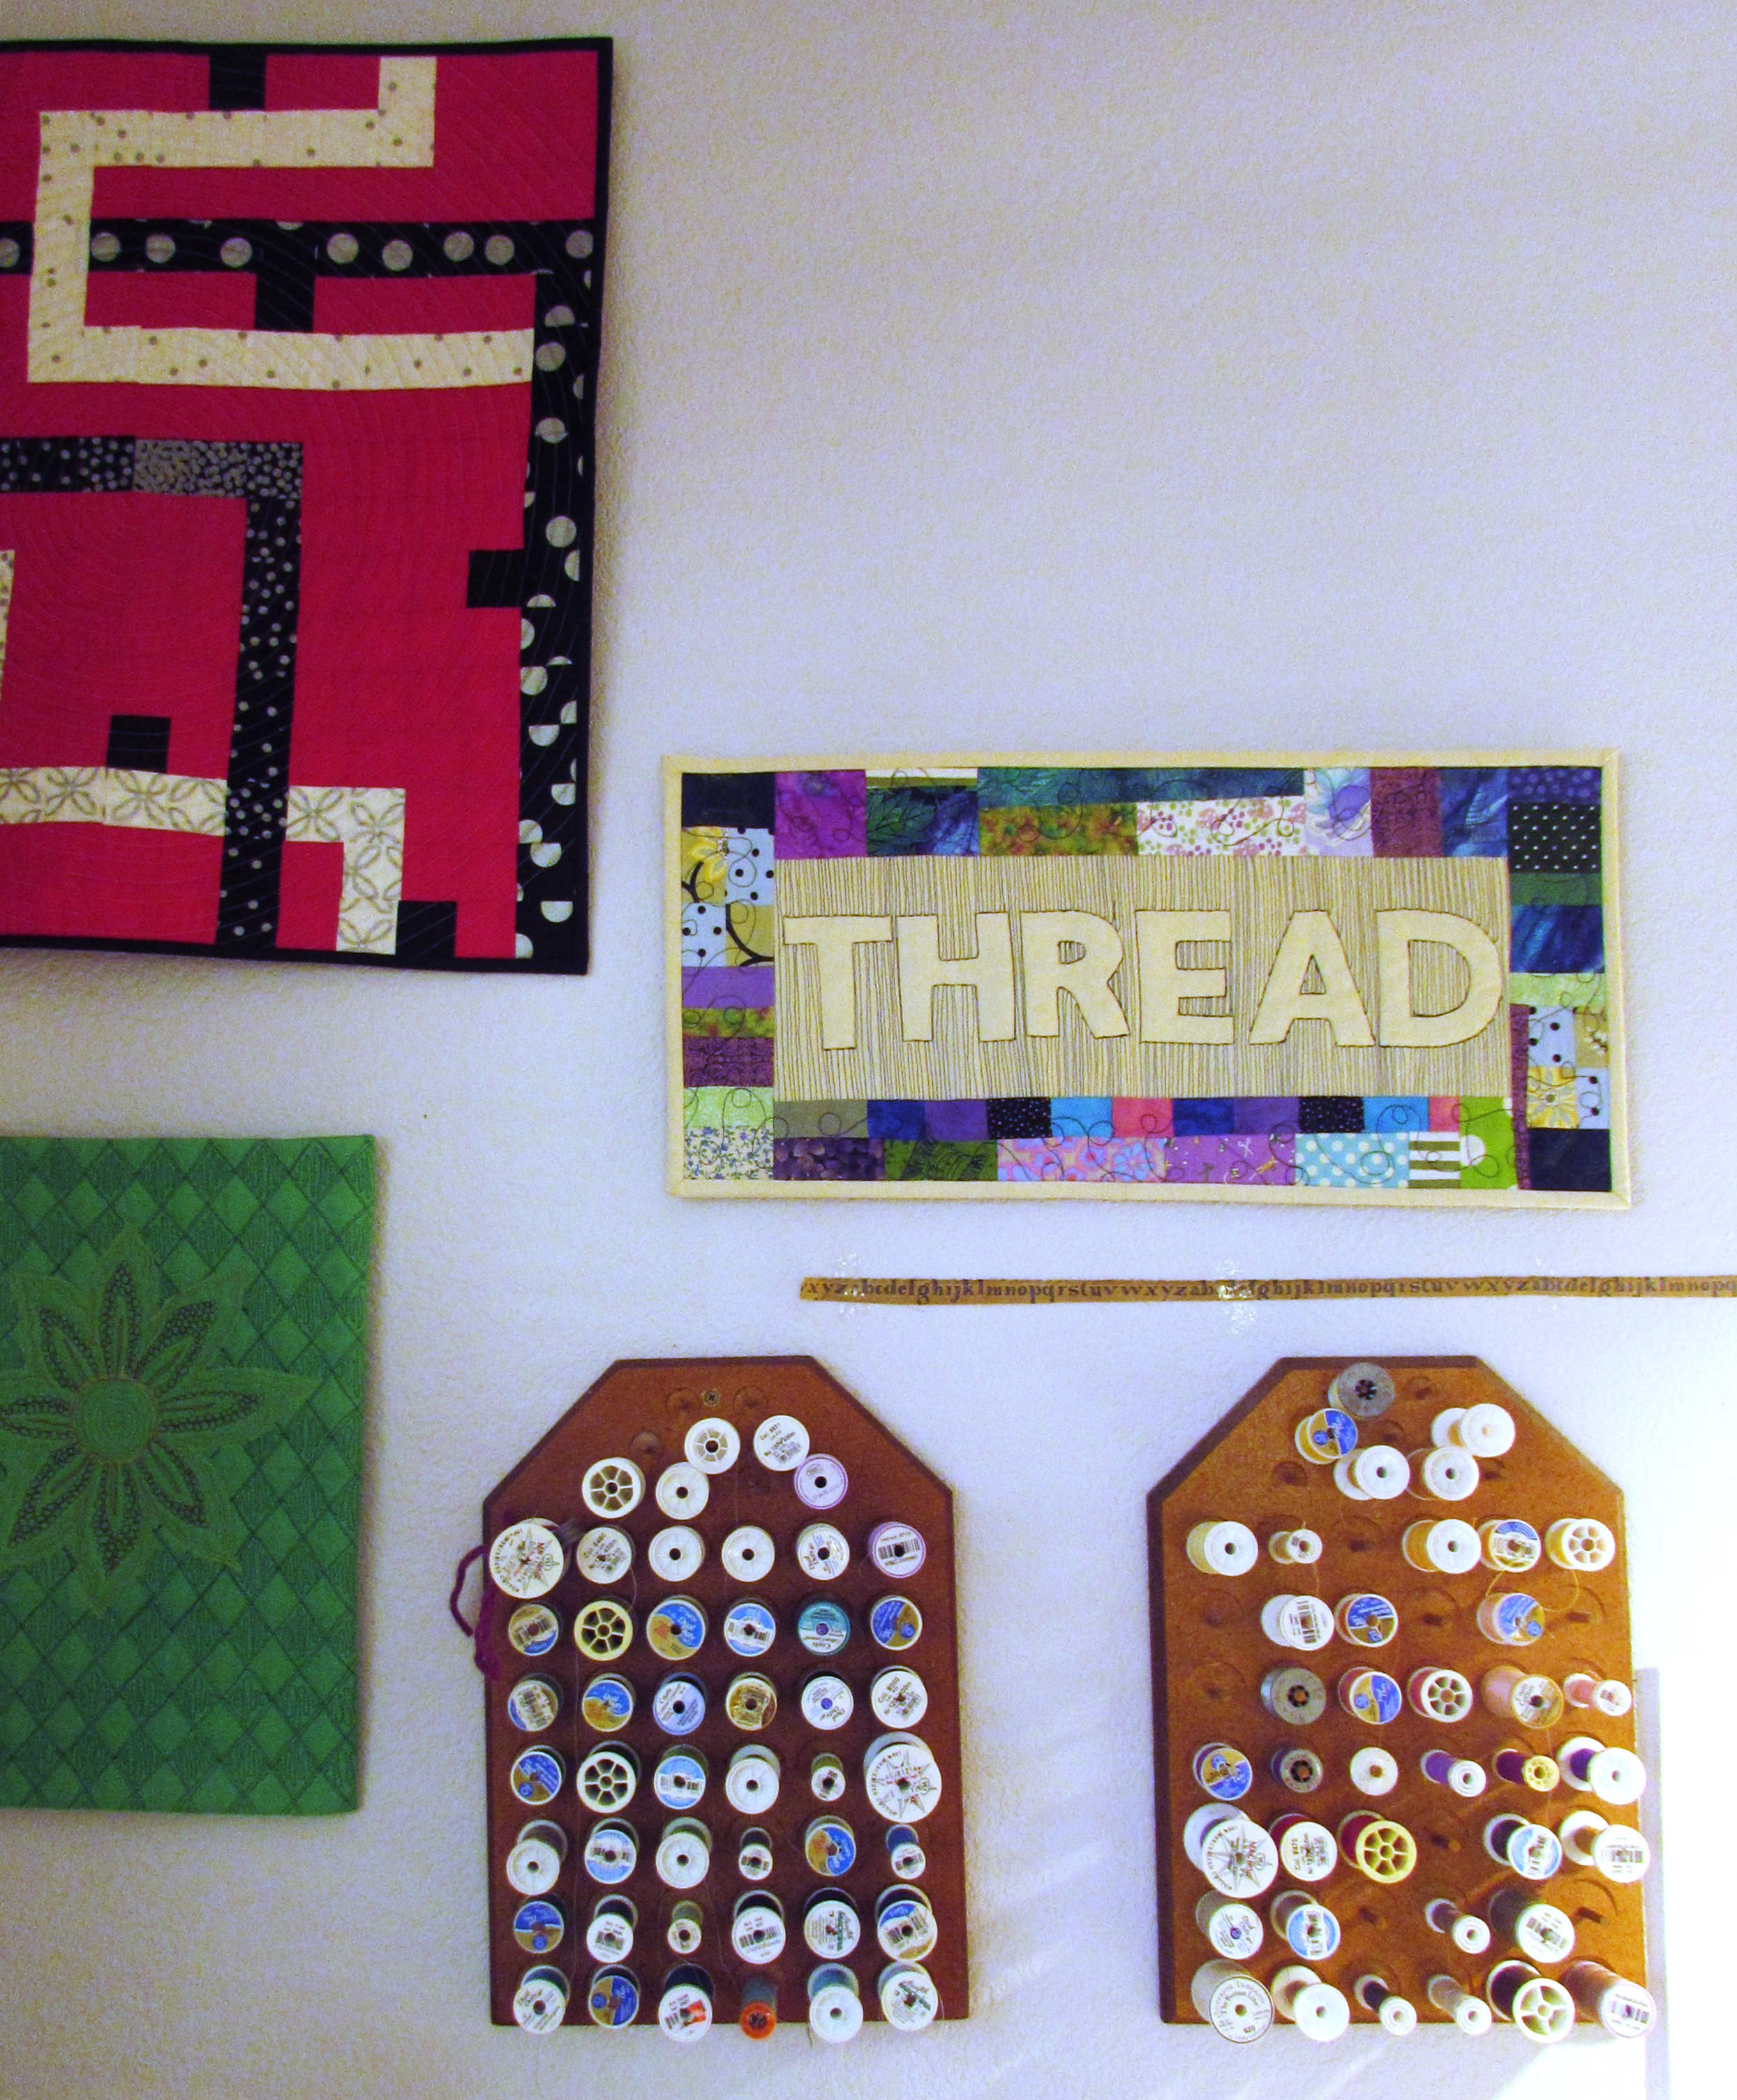
Here is another little bit. This is a six-inch square made up of leftover pieces when I was making the border to surround my THREAD mini quilt. I didn’t want to throw them away. It will adorn my design wall for now, waiting to become something else. It is so cute.
Speaking of the THREAD mini, I put sleeves on both minis and got them hung up. My thread collection is a mess. I have some on the wall, as you can see. The pegs on these two spool hangers are too short for my Aurifil and Connecting Threads collections. So I have bins of those two and another of gorgeous, shiny spools of Sulky. What is the solution here??
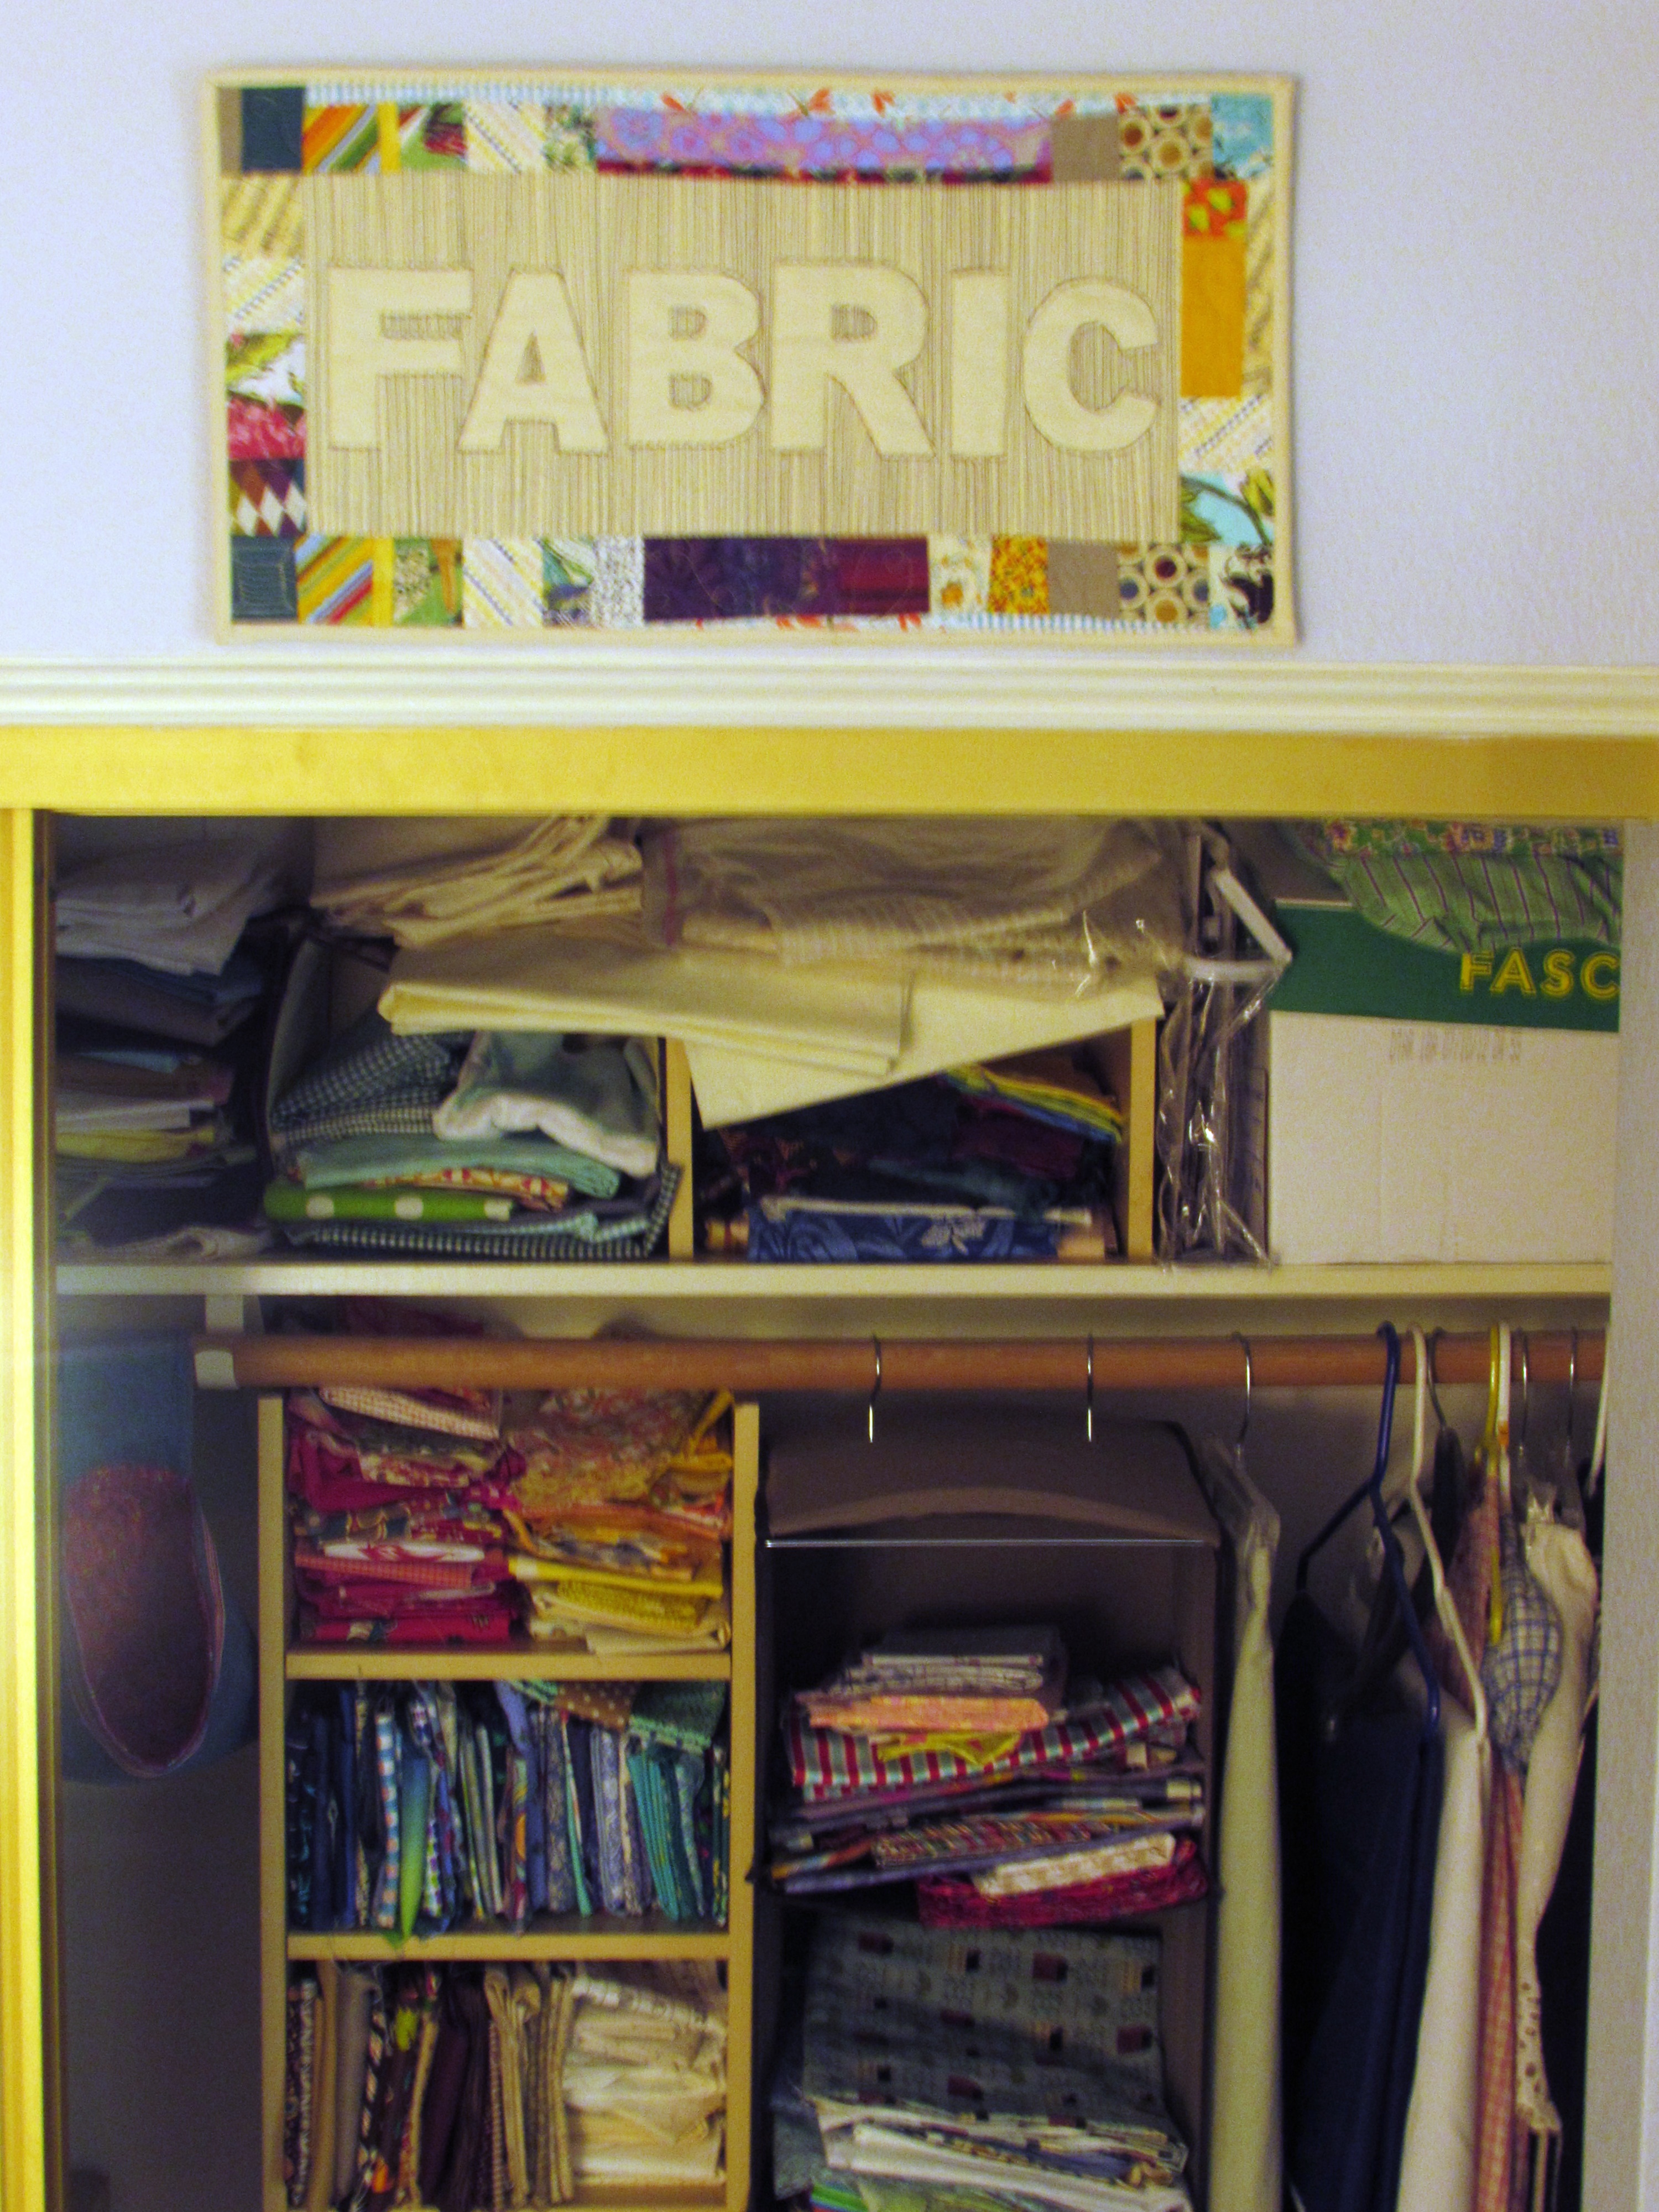
This picture shows the slightly ridiculous state of affairs in the closet that holds my fabric. It was either show you the truth or close the door which is a mirror and show you me taking a picture, standing on a chair, in my nightgown. The decision came quite easily.
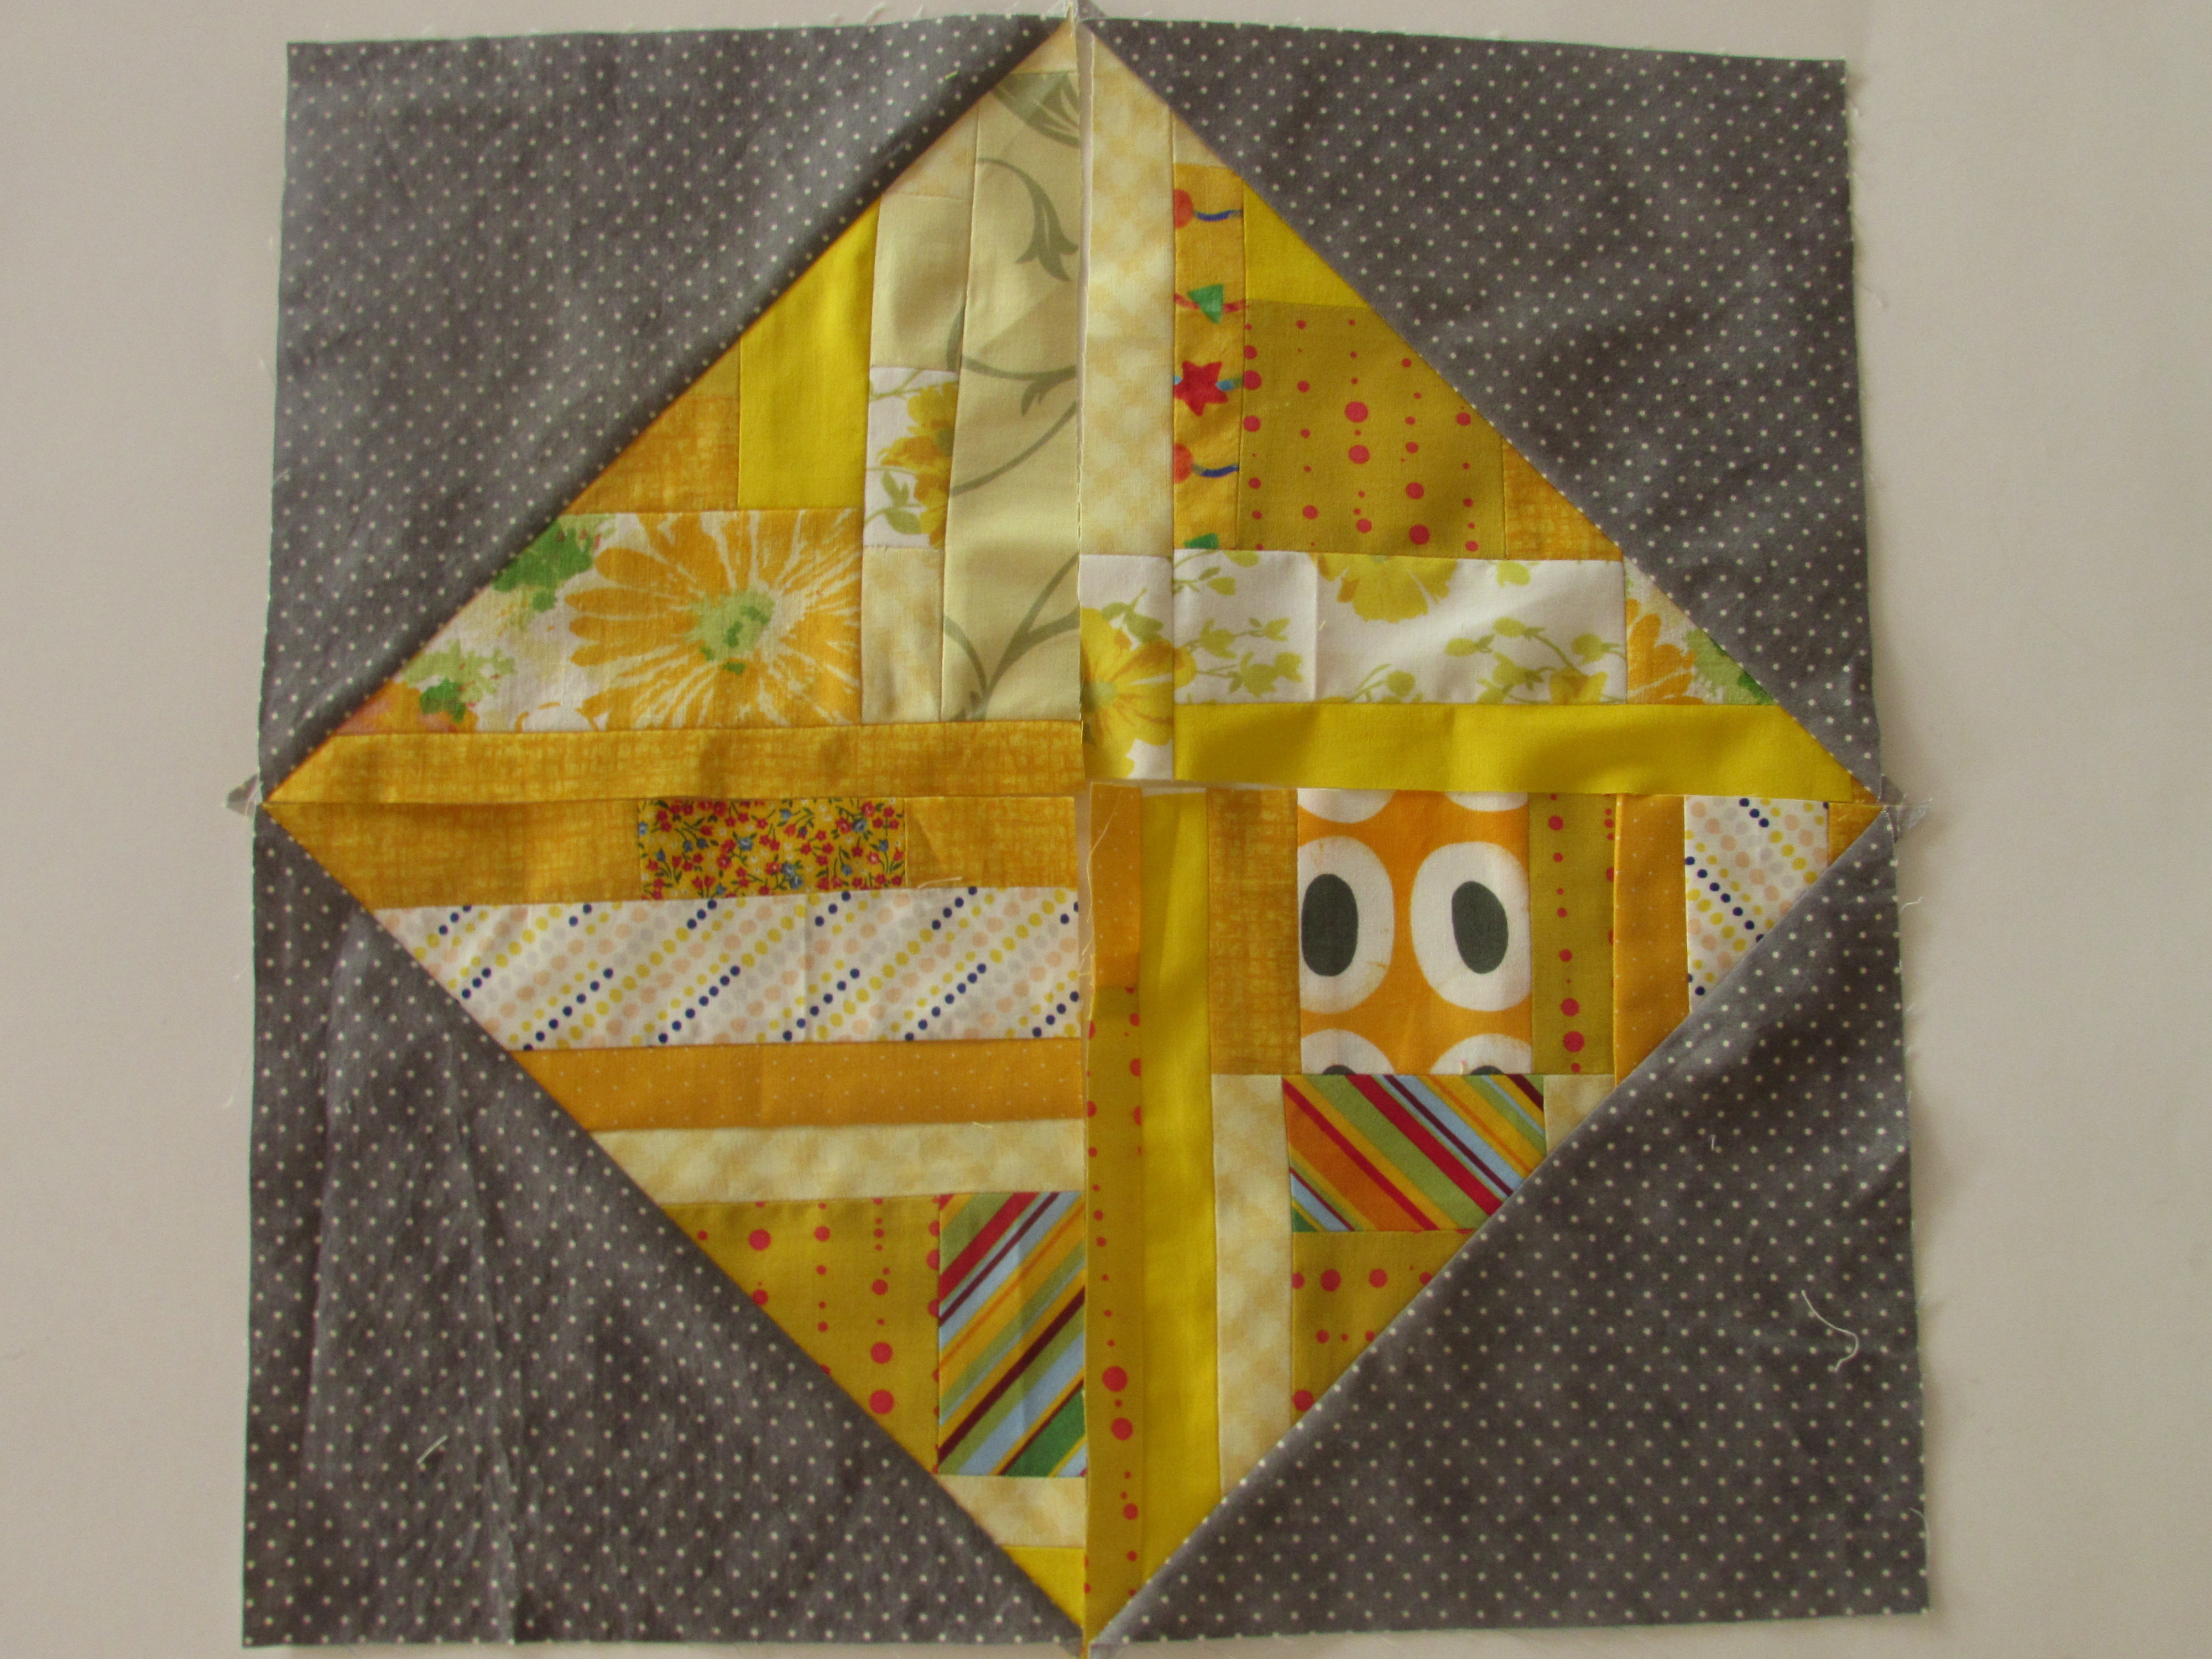
Lest you worry that I didn’t make any progress on my scrappy projects during August, let me assure you I did. But barely….hardly any….almost none. I made four scrappy HST blocks. Except, once again, I veered from the RSC16 color of the month and used yellow scraps instead of a second round of purple. I think I can no longer call this a RSC16 project. They are so cheerful – I was too pressed for time to lay them out with all the others though.
I will have to lay them out this month though and take stock to see what colors I need to finish it up. There are three months left and while it sounds like forever, we all know it will pass far too quickly! I also need to double up on the Pretty Gemstones project and do two colorways for that.
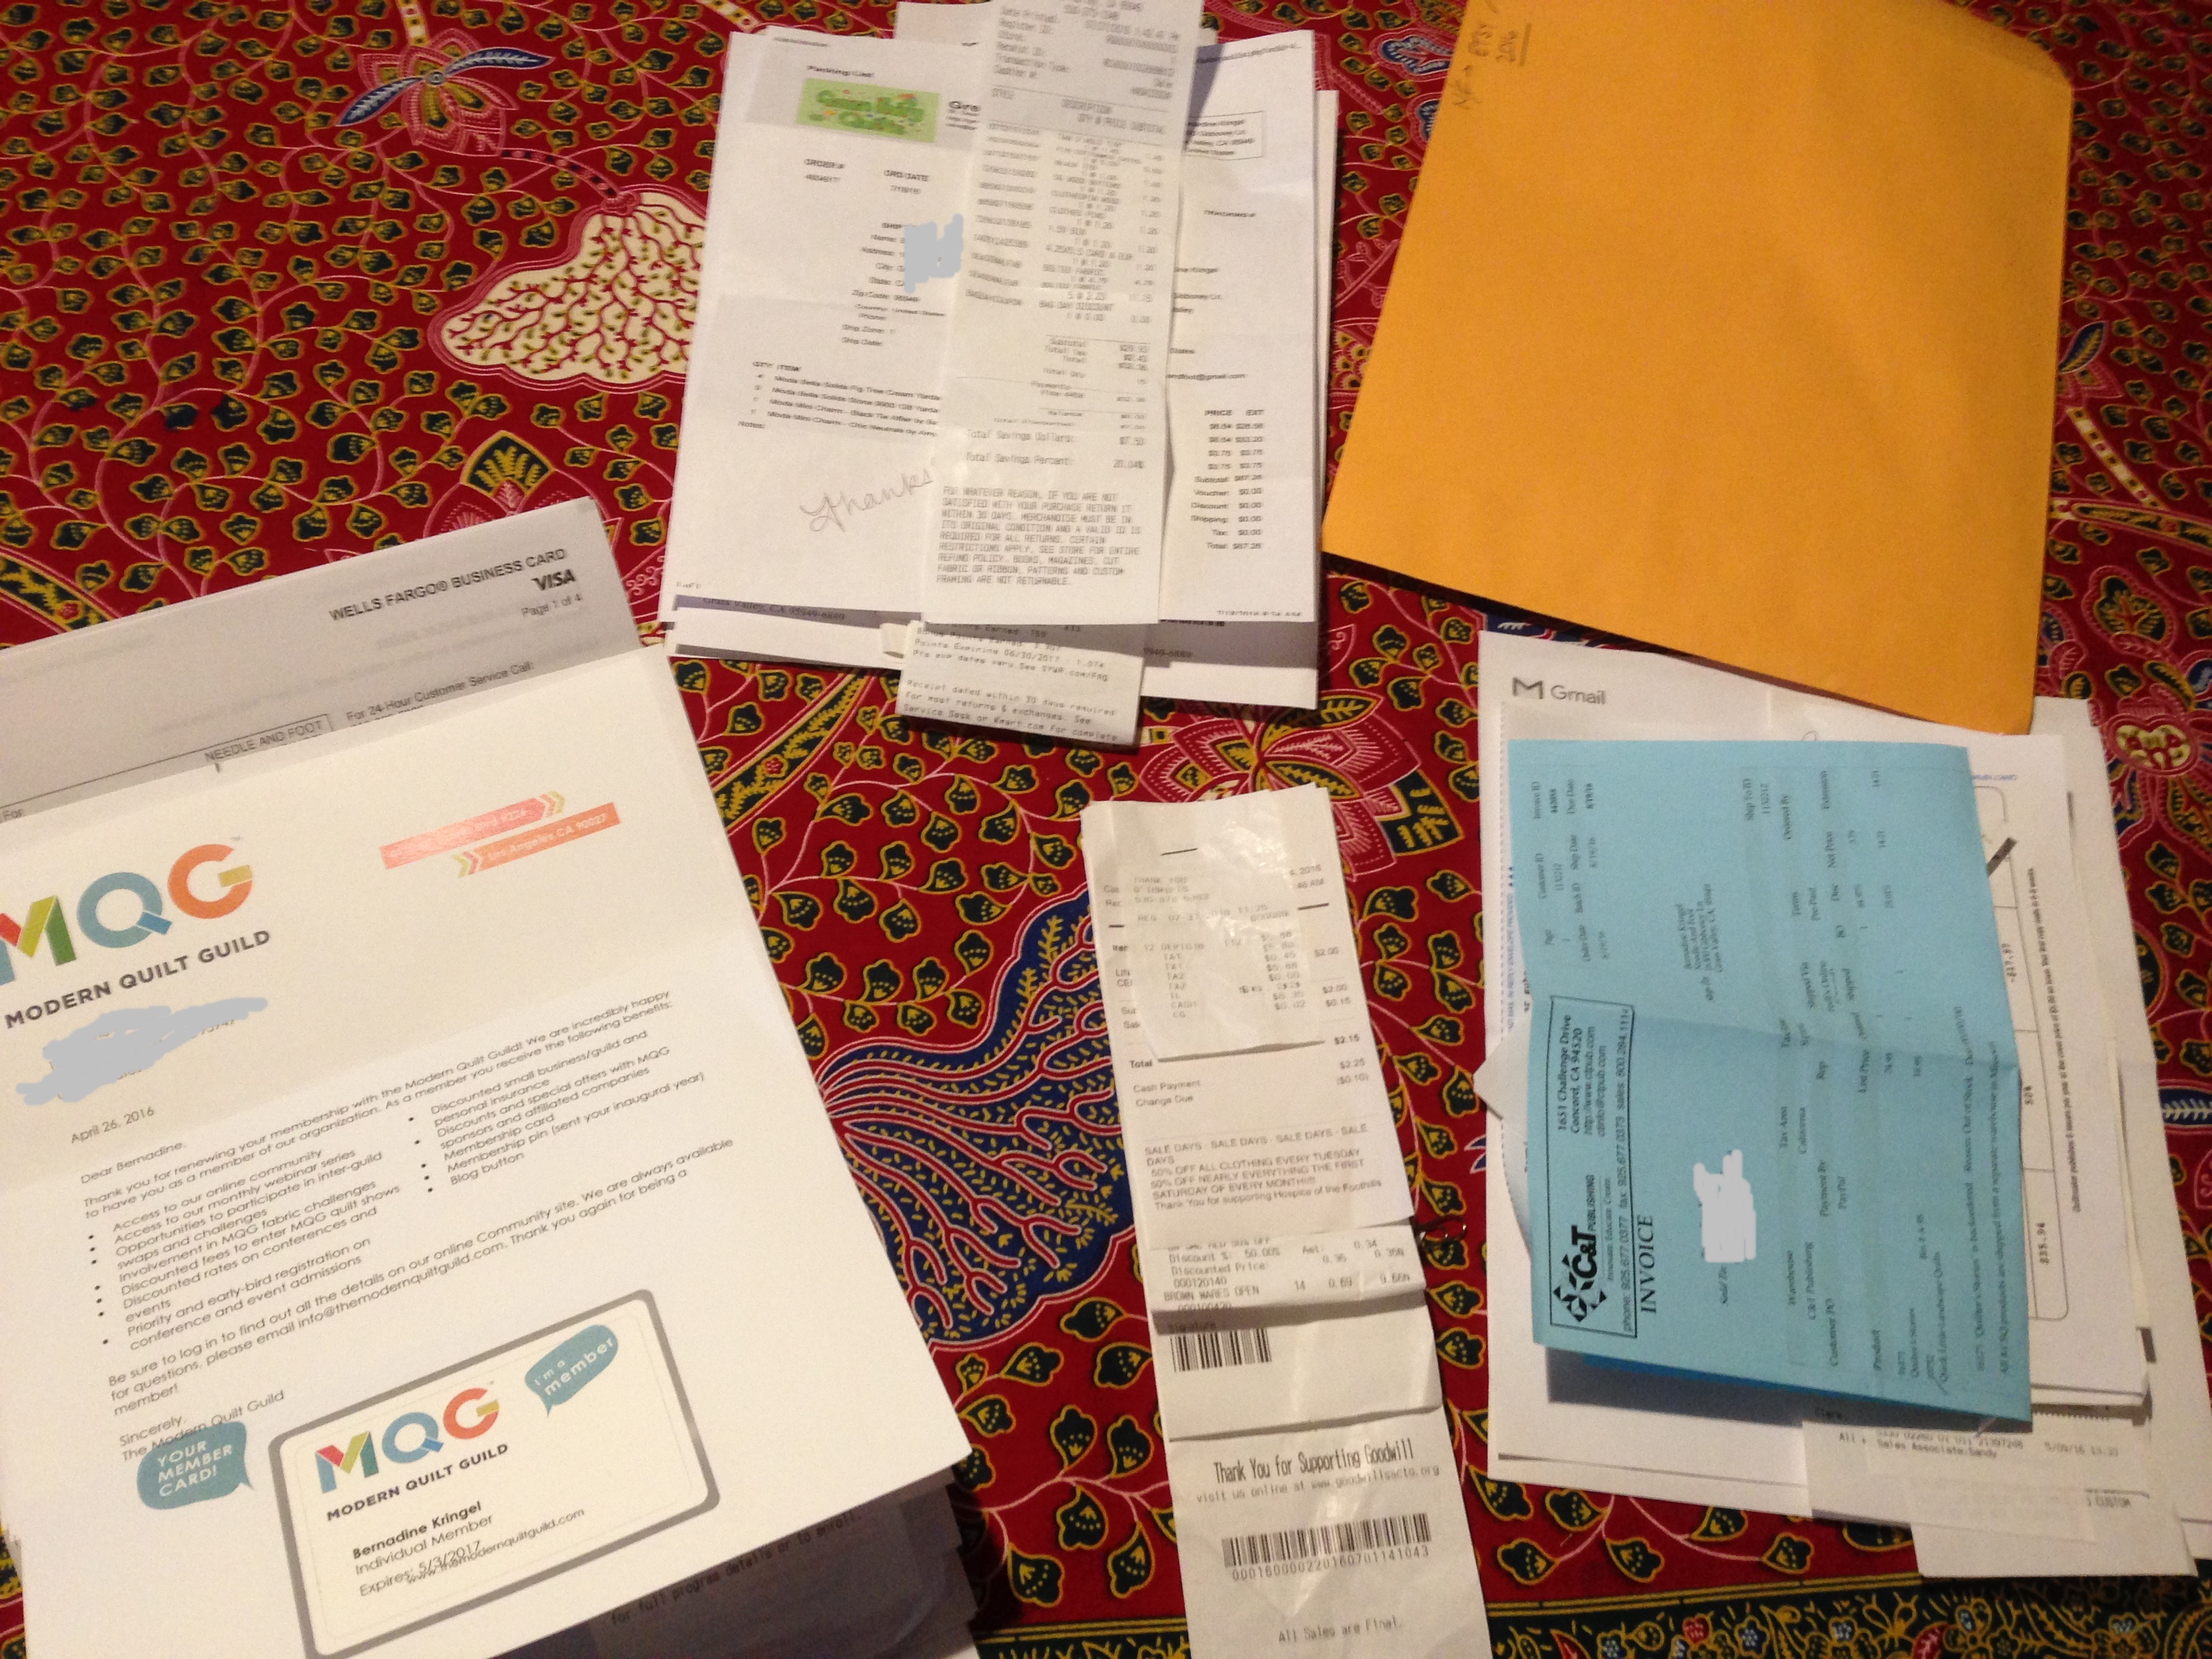
Finally – oh, you are going to be so proud of me for this one. I took a ton of bits and pieces – namely the receipts that support my Etsy shop – and got them organized into a spreadsheet for the 2016 tax year process. Oh my gosh, you don’t know how happy this makes me. To have eight months all organized – Paypal and Etsy reports downloaded, numbers entered in Excel. Amazing!! My usual process is to complete our personal taxes, and then become angry with myself because there are twelve months of nonsense to compile to figure out the numbers for my little business. Last year I was kicking myself over and over for having it in such a messy state. But, look! It is September and 3/4 of it is done. OK, I will stop bragging now.
There you have it. A whole lot of minutiae – somehow having written this up makes me feel like I took care of lots of loose ends. Simple pleasures, right?
Linking up to my favorites – please check out the tab at the top of the page, Link Ups, for all sorts of fun linky parties.
Also, if you haven’t popped over to check out the $5 Blowout Sale at C&T this weekend, please do. Lots of great sewing and crafting books to be had for only $5 each.
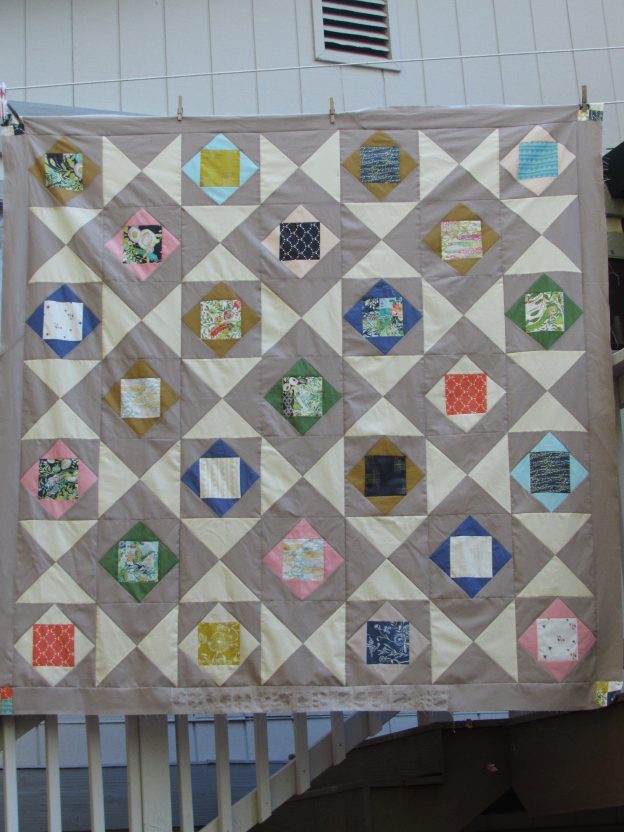
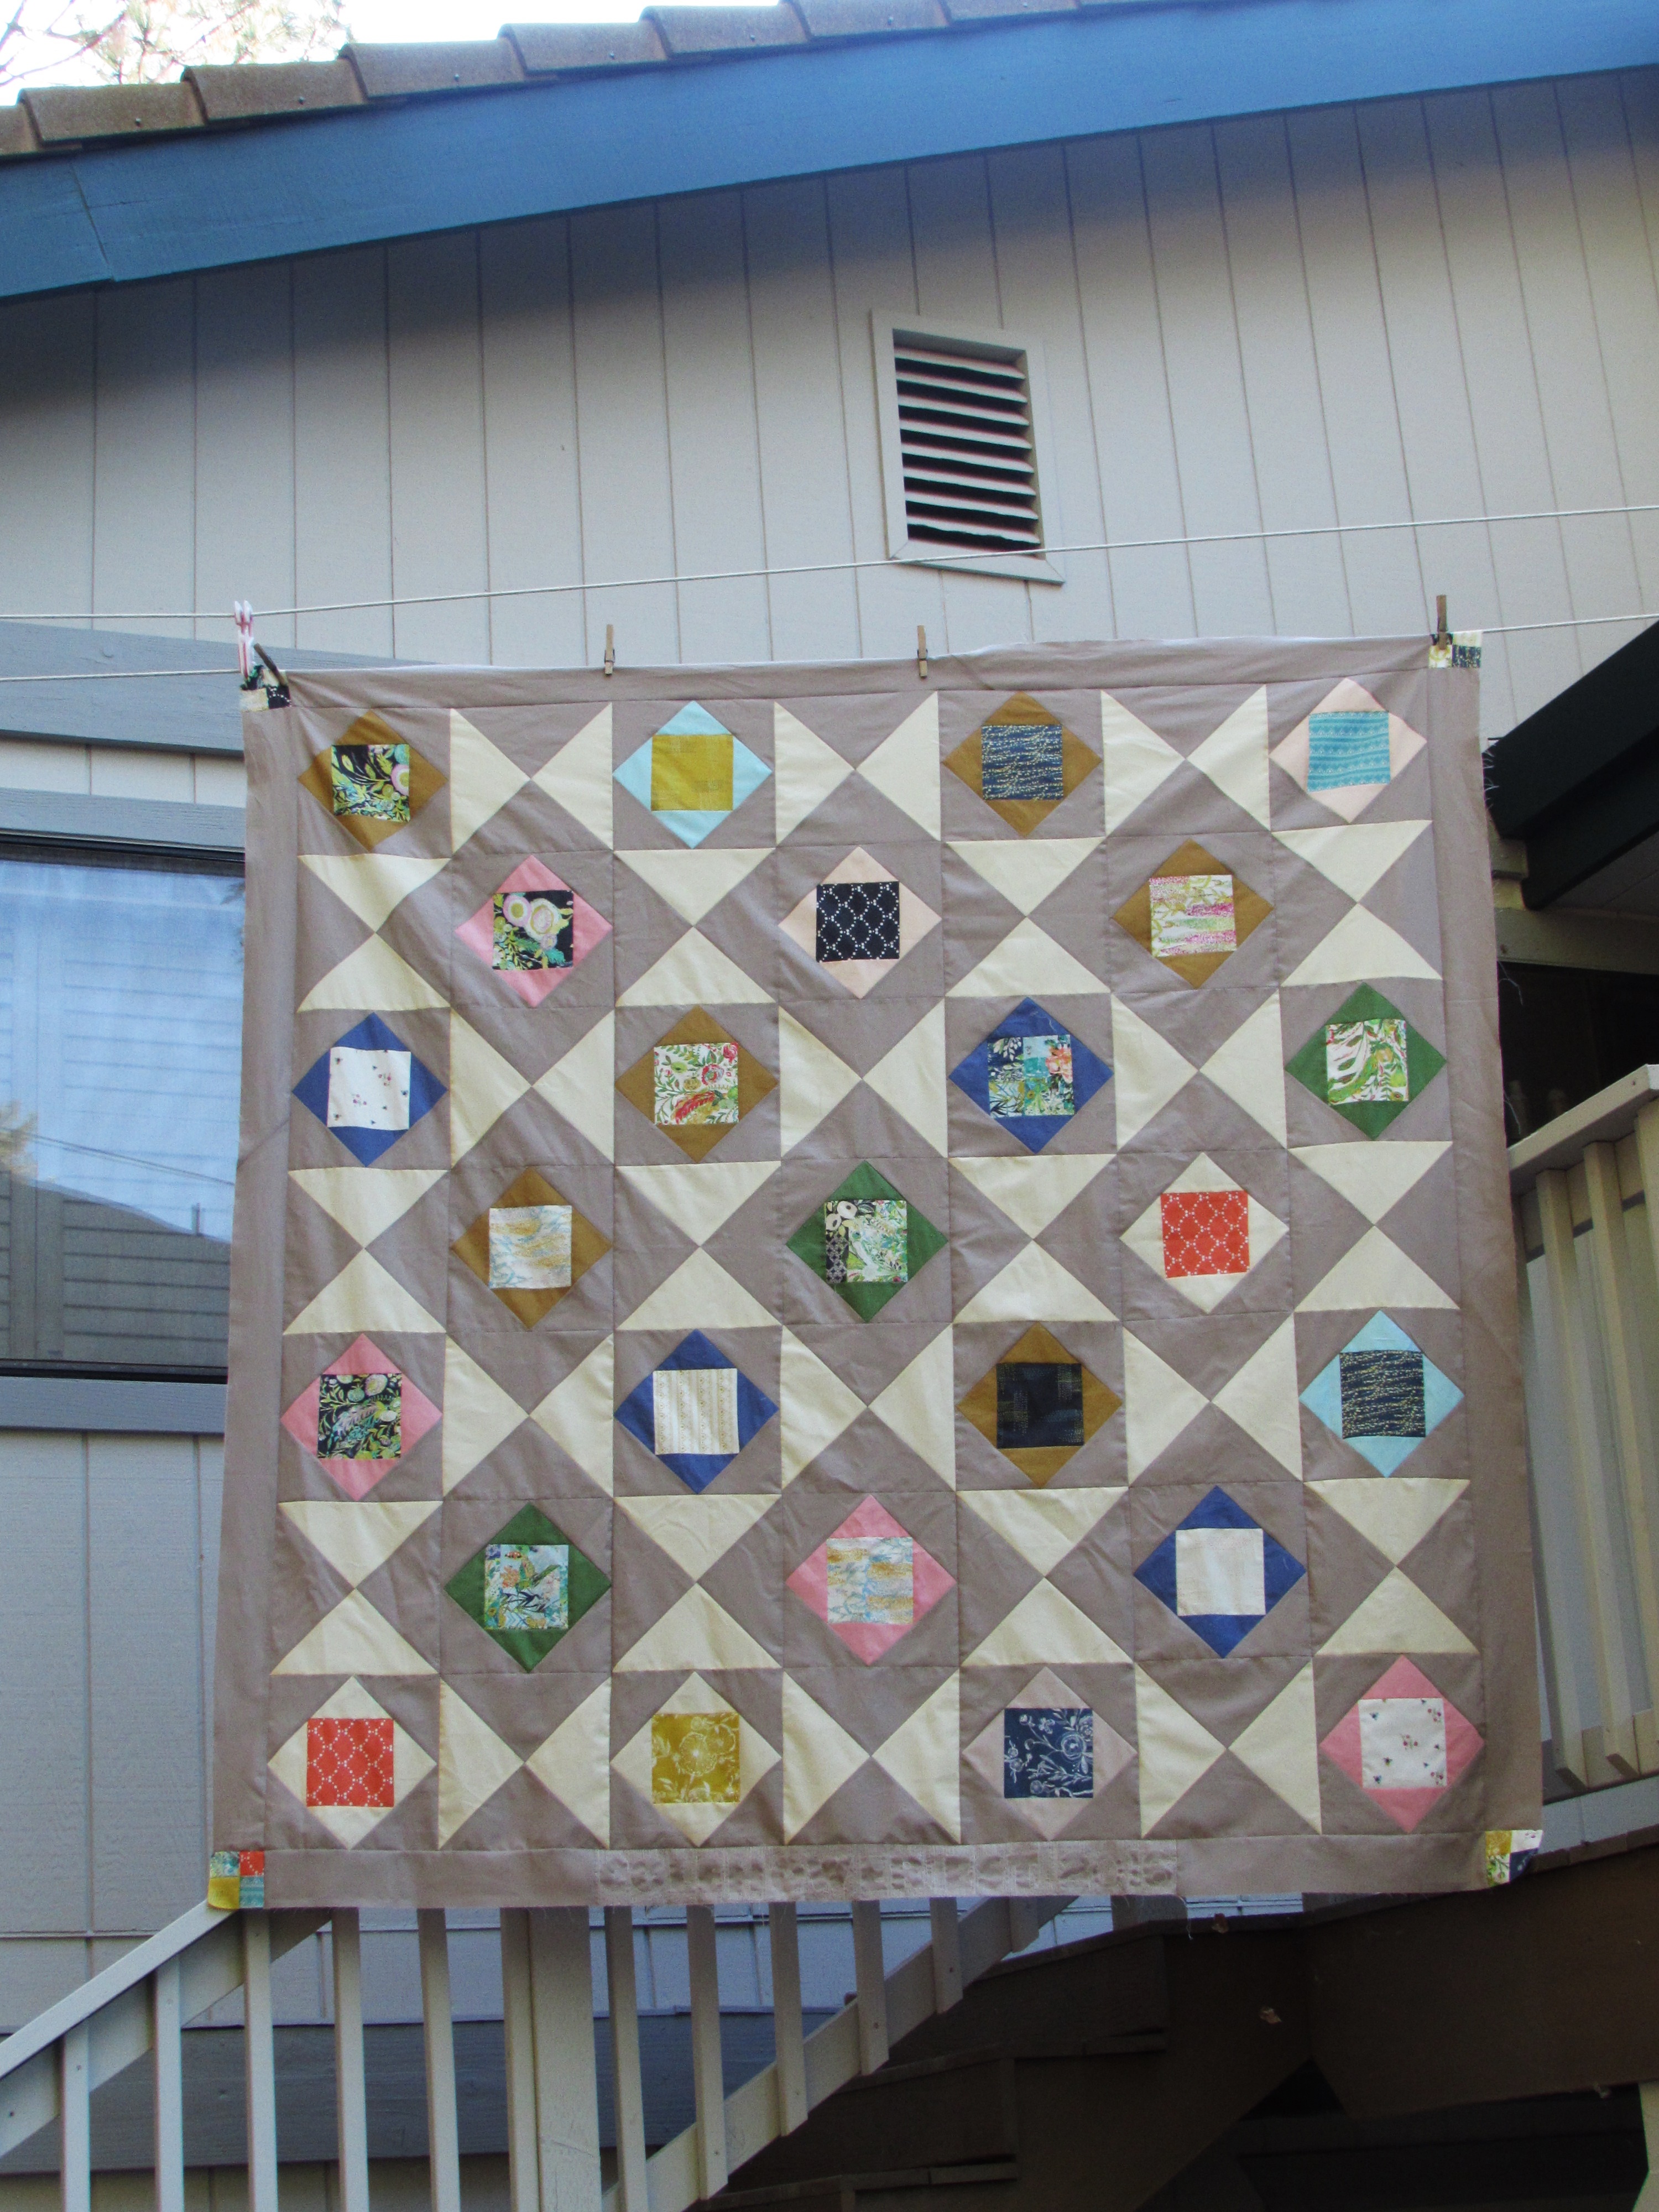
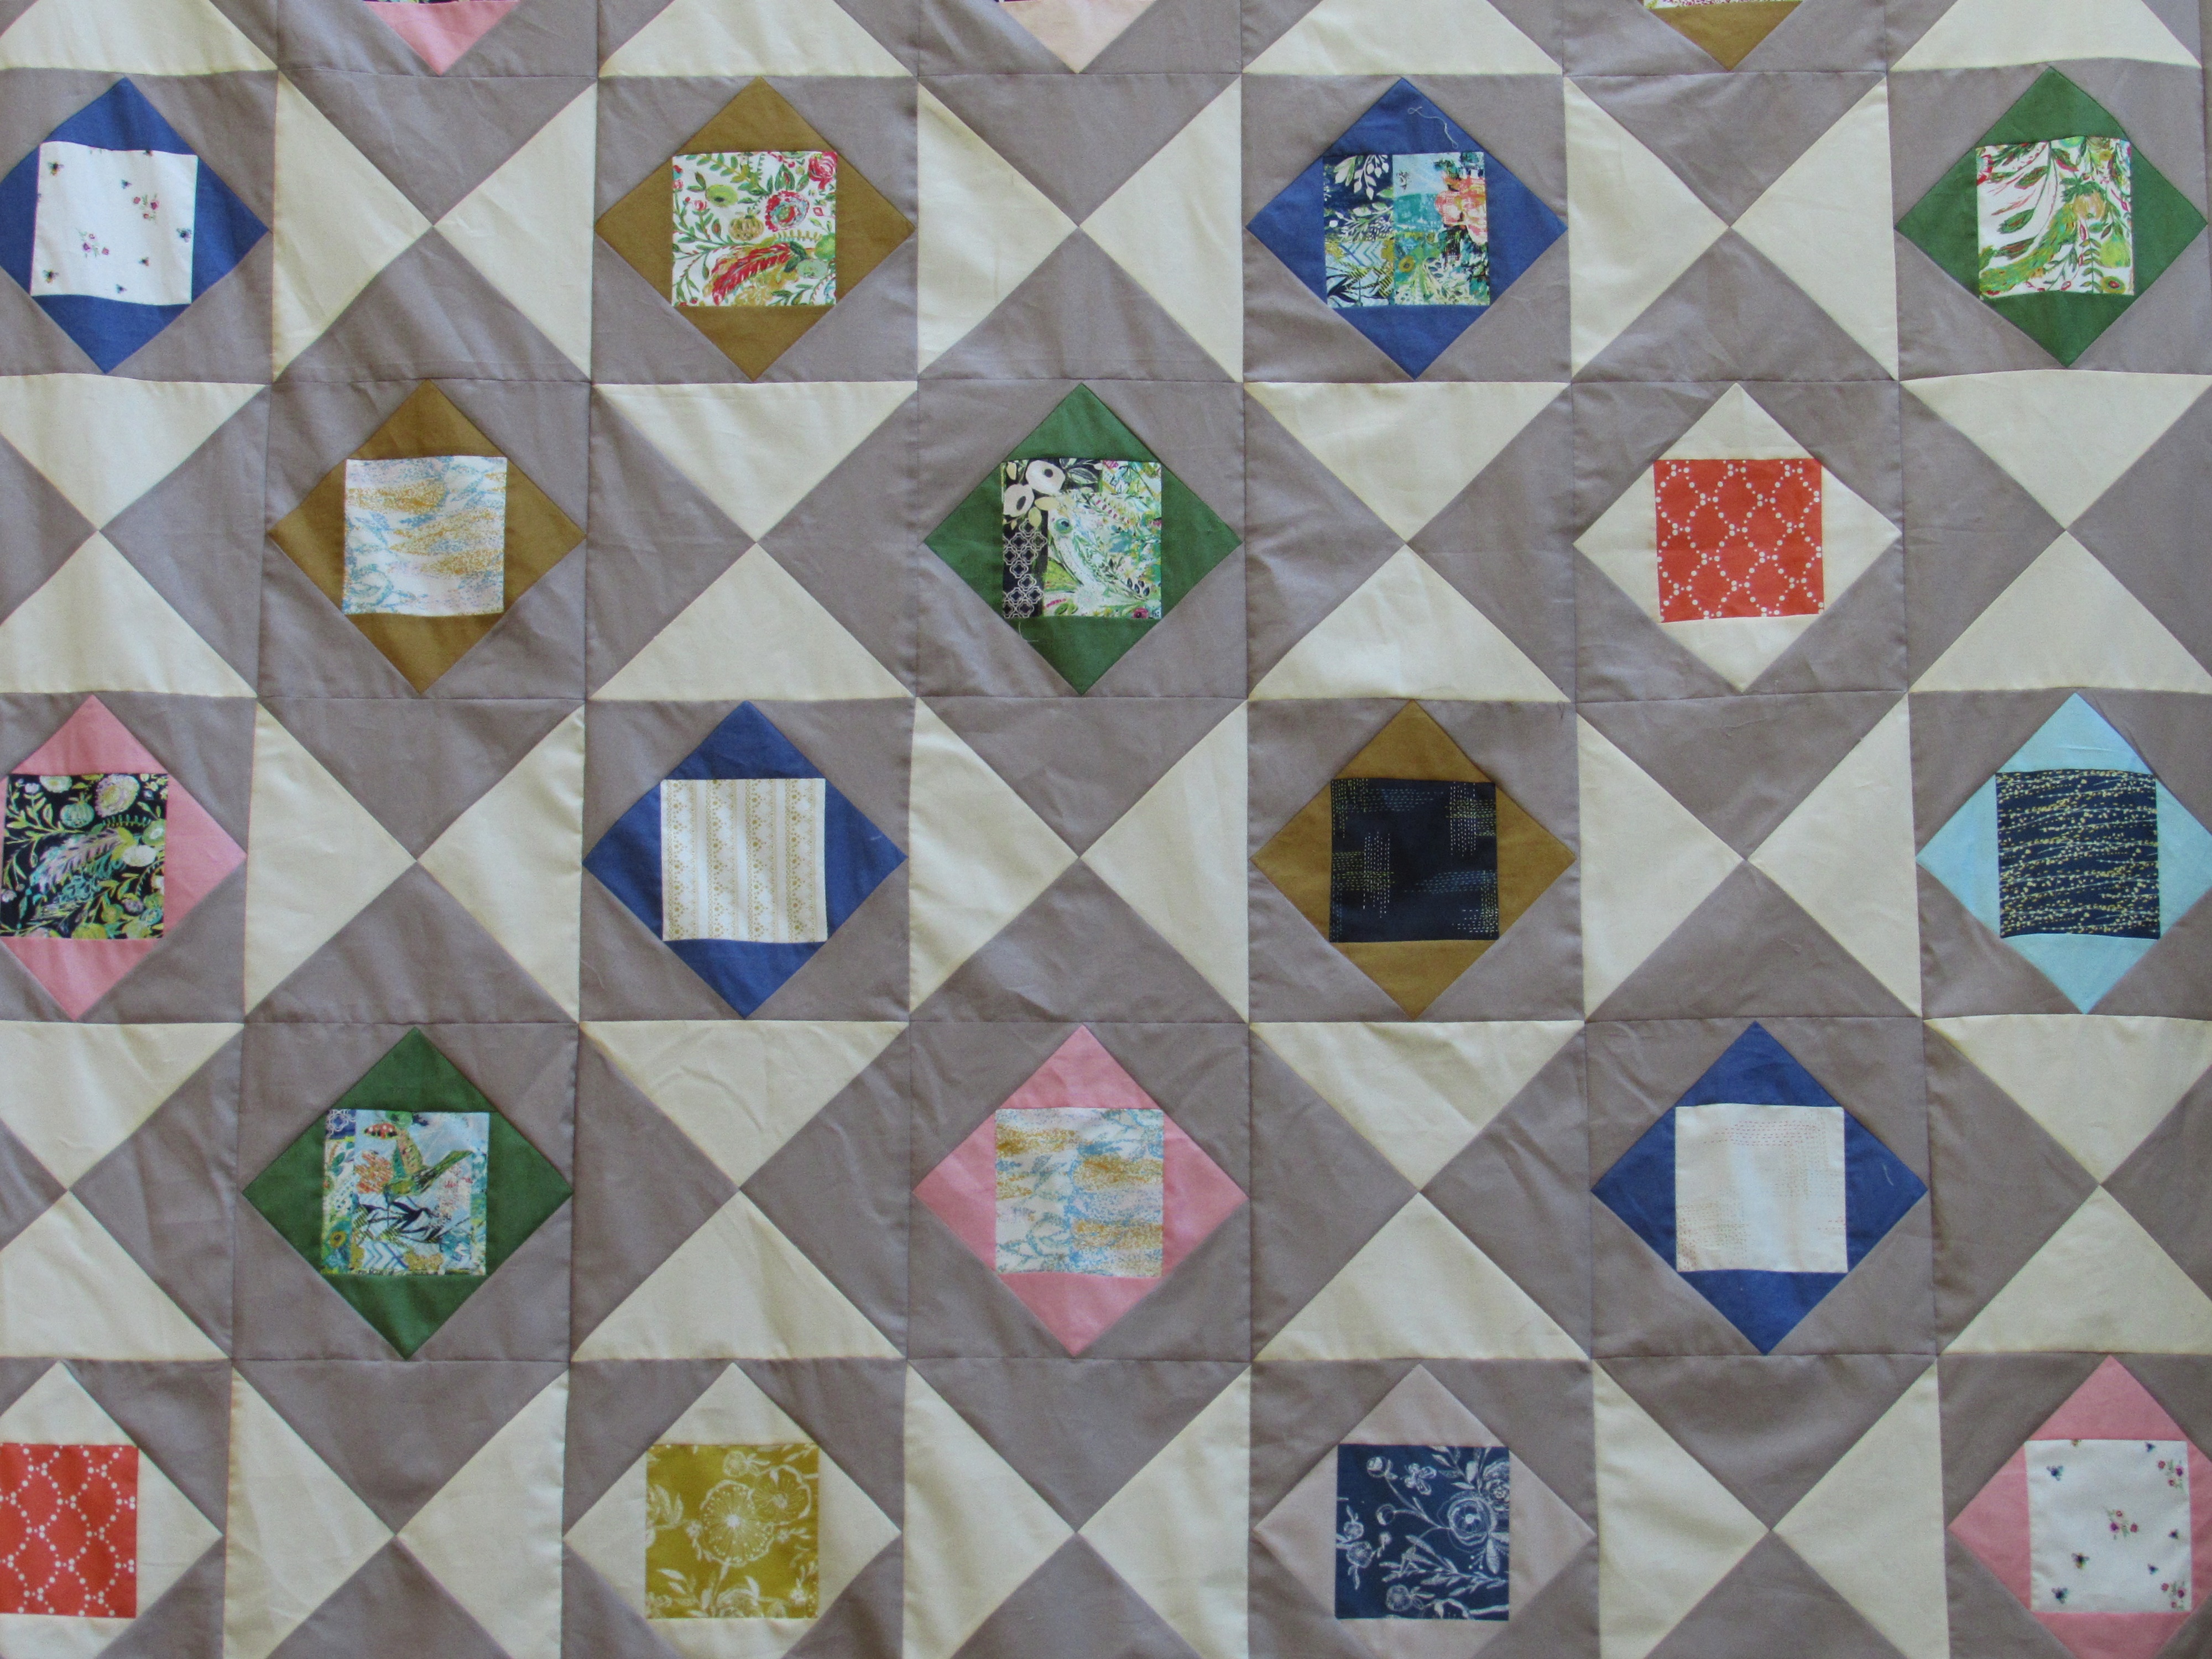
Yesterday I finished a quilt top. This hasn’t happened for a while! I am excited about this one because it is going to be a gift for someone that I am almost certain does not read my blog. I certainly hope so, otherwise, I have just blown the surprise.
The fabrics in this quilt worked wonderfully together. The background fabrics are Moda solids, Figtree Cream and Stone. I am not entirely sure how this rich and creamy, off white color relates to a fig tree but it is gorgeous. Maybe they were thinking of that creamy outer part of the fig’s flesh? Who knows. The centers of the economy blocks are from a fat eigth collection I received for my birthday. The Art Gallery collection, designed by Bari J, is Millie Fleur. This quilt didn’t consume too much of the collection so I think I will use the rest to create a scrappy binding. (I love a scrappy binding!) Along with the prints, I used a selection of solids from my stash to create the center of the economy blocks. The blocks are quite large at 10″ square.
Looking at the secondary pattern (the cream and stone diamonds that surround the smaller economy blocks) will help me determine how to quilt it. The quilt is 70 x 70, so a slightly large lap quilt. Since I just took the long arm class, I plan to quilt it at the shop. It will be fun to quilt over all of that space created by the solid fabrics. However, since it is a gift, I want to do one or two quilts as practice before I work on this one. I still have two tops waiting to be finished which will make for good practice sessions.
There is a three inch border surrounding the blocks with four patch blocks serving as cornerstones. The bottom border looks distorted in this picture. I did some relief quillting there which I will show in the next post after I quilt this up. For now, just know that is why that portion looks a bit odd.
This was a bit of a beast to photograph, especially since my trusted quilt holder is back in school. Alas, I had to rely on my clothesline instead.
Hopefully I will be able to reserve some time at the long arm shop next week to practice. I’m very much looking forward to that. Then when I am a bit more confident, I will finish this project.
The weekend is coming and we don’t have anything planned. If it is cool enough outside, there is plenty of yardwork to be done. Not terribly exciting but that’s ok with me.
Linking to my usuals. Find them at the top of the page, under link ups.
Have you heard about the $5.00 Blowout Sale over at C&T Publishing? It runs through Sunday, 9/11/16 and is a great opportunity to grow your sewing library for not a lot of money! Take a peek at the titles that are on sale this weekend. One of my favorites is Get Quilting with Angela & Cloe, a book about sewing with kids written by the wonderful Angela Walters.
I know, I know. It is only the beginning of September. But I am starting to get excited for fall. Autumn has always been my favorite time of year. So I am getting in the mood.
My kids are all beyond the age of trick or treating (I am pretty sure you aren’t supposed to trick or treat while in your twenties and thirties unless you have children to do so with. So, I am really hoping my kids are not going door to door this year!) However, when the kids were little it was fun to think up costumes for trick or treating each year. For the boys, I had it easy. My sister has two boys that are just a few years older than mine. We would inherit their Halloween costumes each year and they were great costumes! My sister is quite a seamstress and she made the most awesome costumes for her kids. With Julia, we had to come up with fresh costumes each year. I love looking at the pictures from each Halloween, remembering what she chose to be and how we came up with the costume.
To celebrate Halloween this year, I am hosting a Handmade Halloween Link Party!!! You are all invited. It is my hope that we all share posts of current and past Halloween decorations, quilts and costumes that we have made. If we all link to one place – HERE – just think of all the fun ideas that will be shared. Let’s make this the go-to link up for all sorts of Halloween inspiration. The posts don’t have to be new ones. If you have posts from your past Halloween projects, link those up too! You can bet there are readers who will enjoy them. I have some old posts that I will share as well as a new post about costume ideas. I don’t plan to create full tutorials, rather I will share ideas for some fun Halloween costumes that we have created.
You have plenty of time to gather photos and write your post(s)or decide on your older posts. Then come back to link up on Tuesday, October 4th! I want to have the party at the beginning of October so readers who are inspired by these ideas might have time to create before Halloween. Linking up will put your name in a drawing for some great giveaway prizes. Each time you link that is another entry to win! More on that as we get closer to October.
If you feel inclined, you are welcome to share the Handmade Halloween button and help spread the word.
Let me know if you have any questions. Otherwise, come back and link up any of your Halloween related posts on Tuesday the 4th of October! See you then.
Hi Everyone! I want to introduce the book that will be used for the book share this fall. If you are unfamiliar this is how it works. Last July I wrote a quick review of a book titled Vinegar Girl, by Anne Tyler. Several readers signed up to then share this book. I sent it to the first person along with three fat quarters that were somehow reminiscent of something in the plot. That person then reads the book, jots a note or some thoughts in the front cover of the book and sends it on to the next person with three fat quarters of their choice, again somehow tying the fabric to the plot. It has been a lot of fun. The book has traveled from California to Wisconsin to Idaho and is currently on its way to the UK.
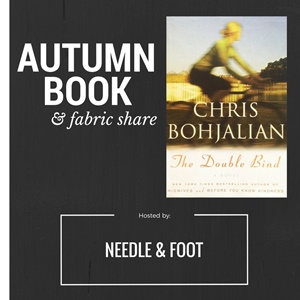
For the next book I am really excited to share The Double Bind, by Chris Bohjalian. I just finished the book and it was a gripping, suspenseful read. I have read a number of books by Bohjalian and loved each one of them. He really gets into the subject matter, becoming very knowledgable before spinning the story for us. This particular book is based on the true story of Bob (Soupy) Campbell, a talented photograper who became homeless late in life. He died, leaving behind a collection of amazing photographs and negatives, many of people quite famous. He lived out the end of his life in subsidized housing which was found for him by COTS, a homeless shelter in Vermont. Bohjalian is from Vermont, and wrote the story with a Vermont setting. He tells an excellent story of Laurel, a young woman who works at a shelter in Vermont called BEDS. Laurel was the victim of a horrid crime which has caused her to withdraw into herself and her work as a photographer and social worker at the shelter. The way that Bohjalian ties Laurel’s situation to Bobbie Crocker (the homeless man in the story) is genius. Laurel’s and Bobbie’s stories are also entwined with the story of the Buchanan’s and Jay Gatsby, from F. Scott Fitzgerald’s famous tale, The Great Gatsby. The author uses a number of the photographs taken by real life photographer, Bob Campbell, in the book. This story is an excellent illustration of how little it takes for a ‘regular’ person to end up on the streets as well as a compelling look at mental illness. I highly recommend the book which was first published in 2007 and then spent a considerable bit of time on the New York Times bestseller list.
This book is all set to go. If you want to join in, share some fabric and my copy of this book, leave a comment. The first five people to express their interest are in. When you comment, please leave me your email address and tell me if you are willing to ship internationally. That will help me create the route the book will take. When you receive the book, you have four weeks to finish it, jot down a little note and send it to the next reader with three fat quarters of your choice. I hope you will join in and share in this book and fabric adventure!
Are you wondering what is going on over at Craftsy this weekend? Sale on ALL classes – yep, all of them. $19.99 each. Check it out!
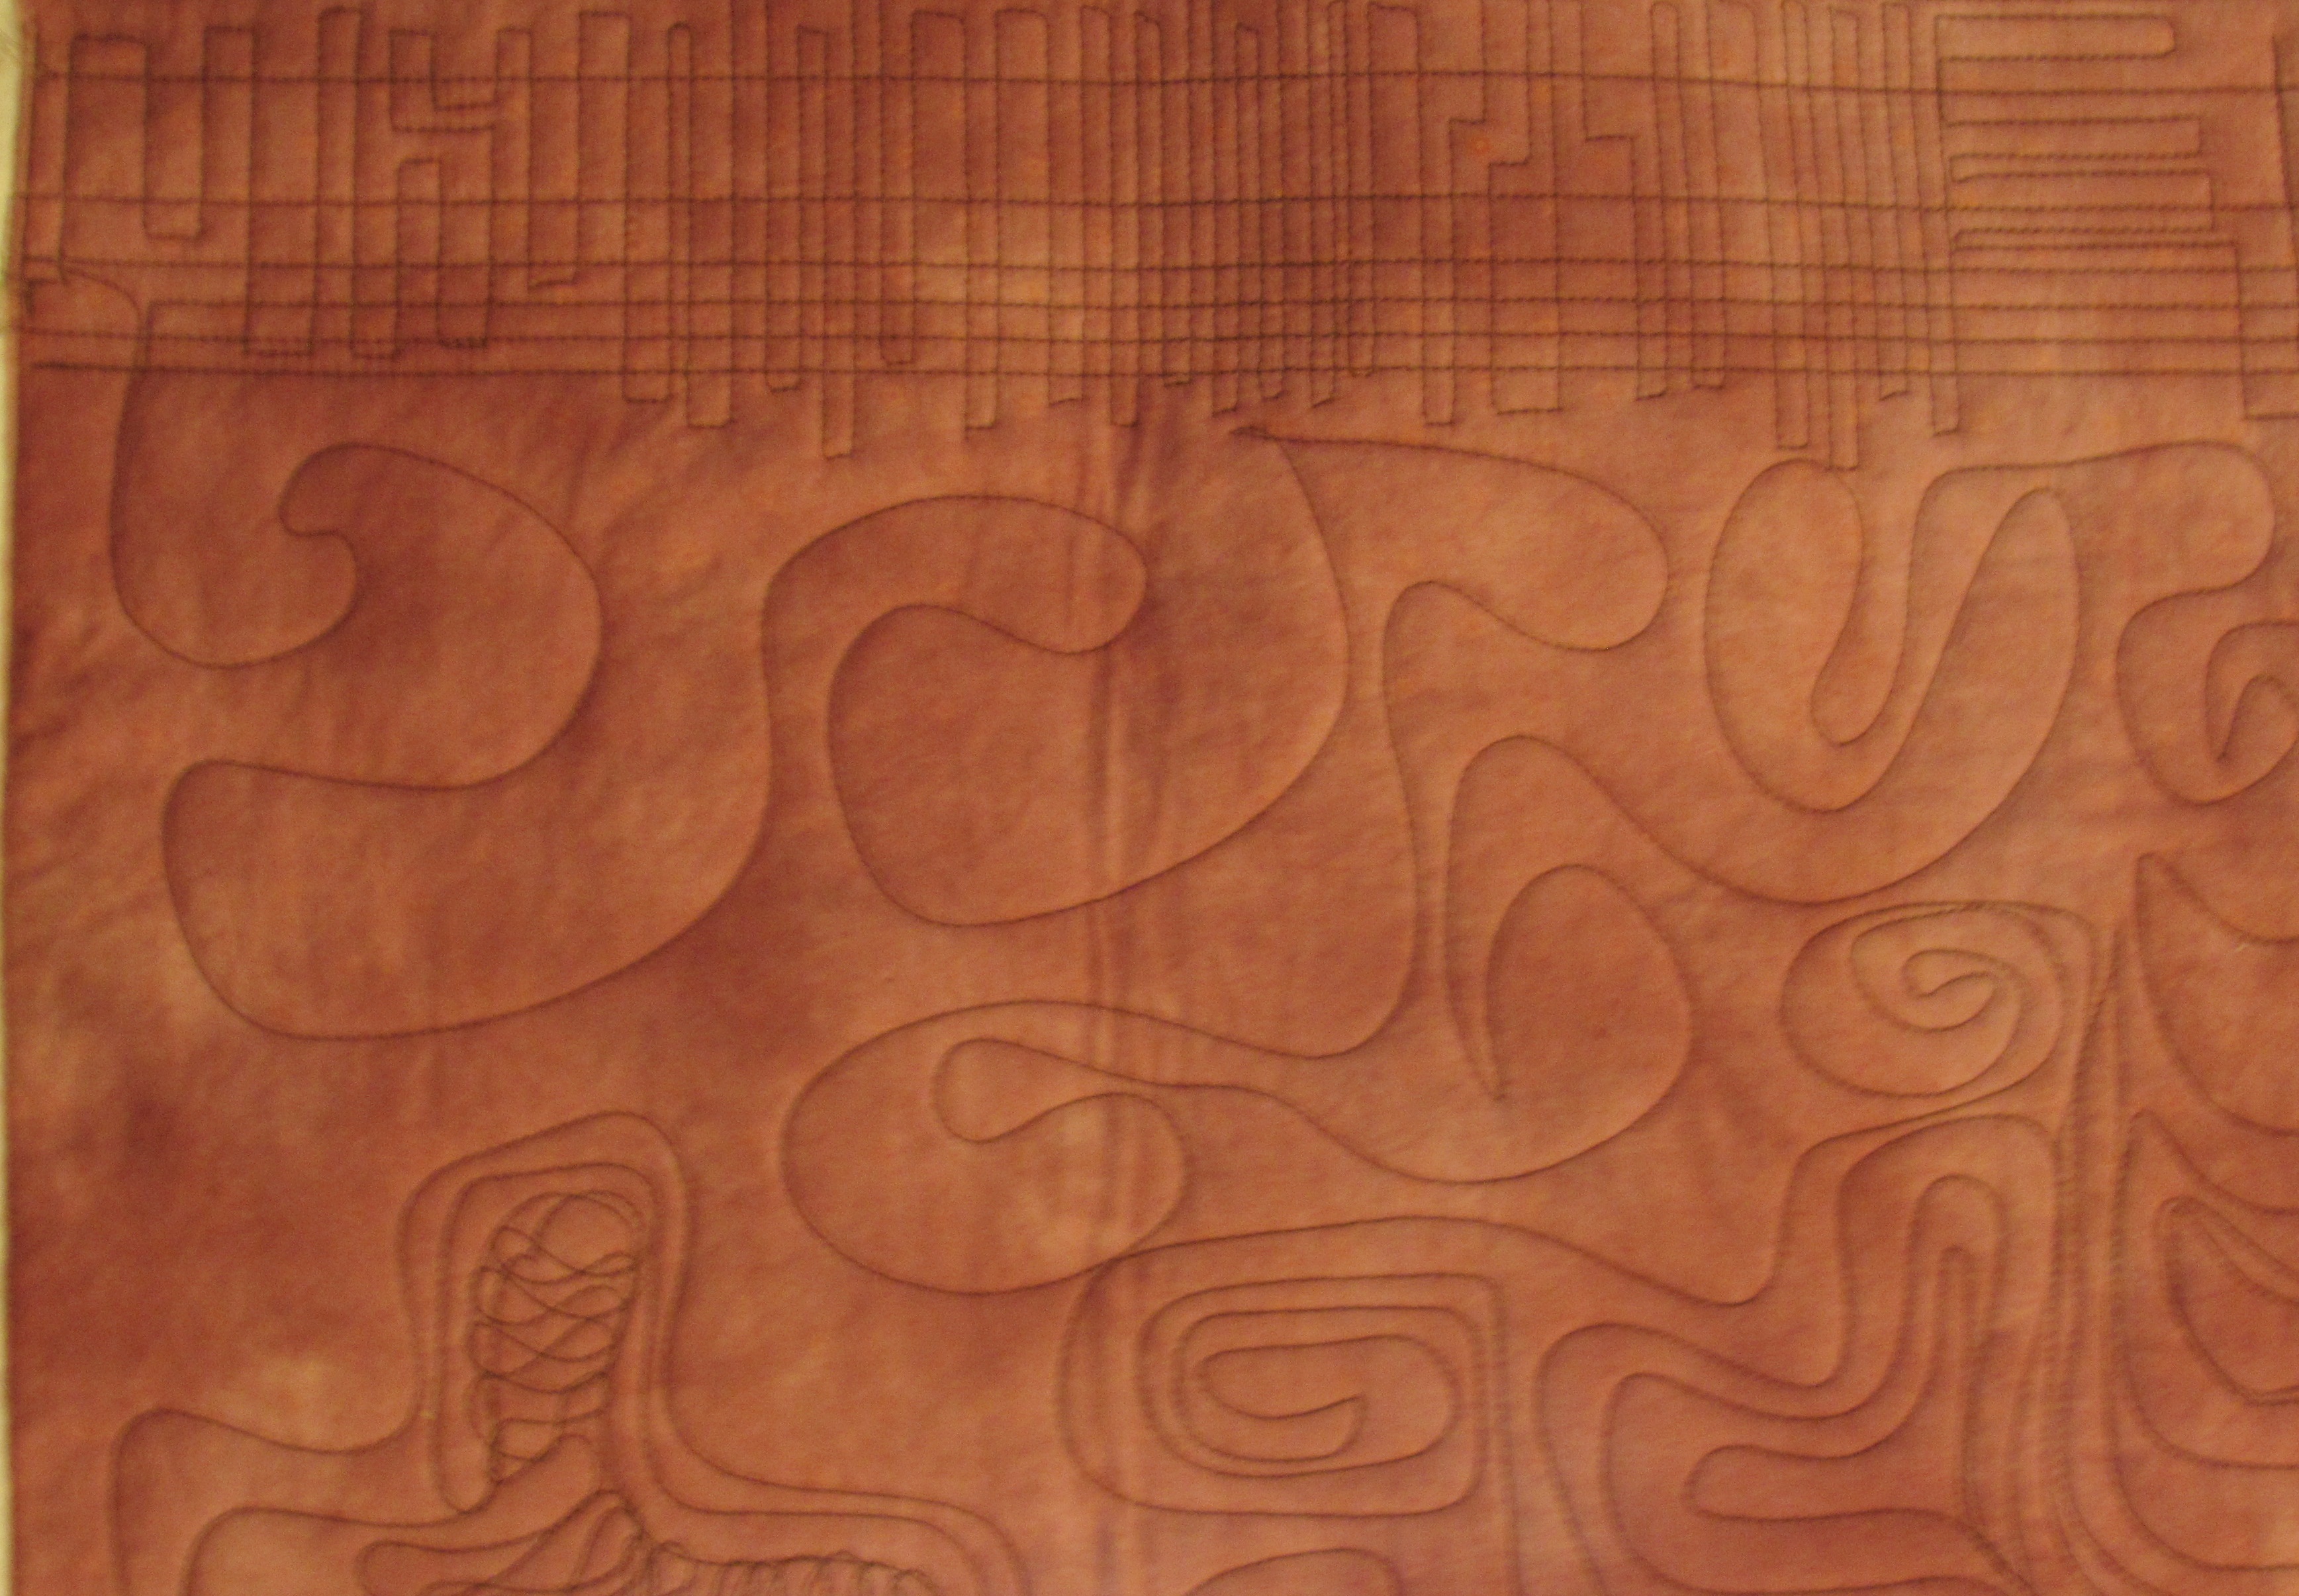
Earlier this week I mentioned I was taking a class on long arm quilting. Wow, it was so much fun. Not so much that I plan to shell out the kind of money required to buy a long arm machine but enough that I would definitely go and rent time on the machine. Probably on a regular basis.
I have wanted to take a class on long arm quilting for quite a while. The stars finally aligned and it happened this week! The shop that rents time on these amazing Innova machines is about an hours drive from my house. This is a good thing – if it was more convenient I would be in there all the time! This way, it takes a bit of thought and planning to get there, which might help me to control the spontaneous urge to go quilt something. The rate is $20 per hour which is high except when one considers how fast a project can be quilted on a long arm vs my domestic machine. Taking this class also enables me to quilt larger projects. As I mentioned before, I have only made two large quilts and this is because it is tough quilting them. I don’t really want to pay someone to quilt my projects because I like to do it from start to finish. Anyway, now I will be able to make larger quilts!
Here are some thoughts on my experience. First of all, as I expected, loading the machine is challenging. It does make the basting process less of a physical challenge in that I am not crawling all over the floor but it is quite a process to load the backing and then the batting and quilt top, making sure all is square and straight. Naturally, this process will be quicker after I do it a few times. There is much to learn about stitch length and tension but for my first time, I thought it was relatively easy. There were three of us in the class and each of us had our own machine to load. We brought two pieces of fabric that were each about 1.5 yards and this is what we practiced with.
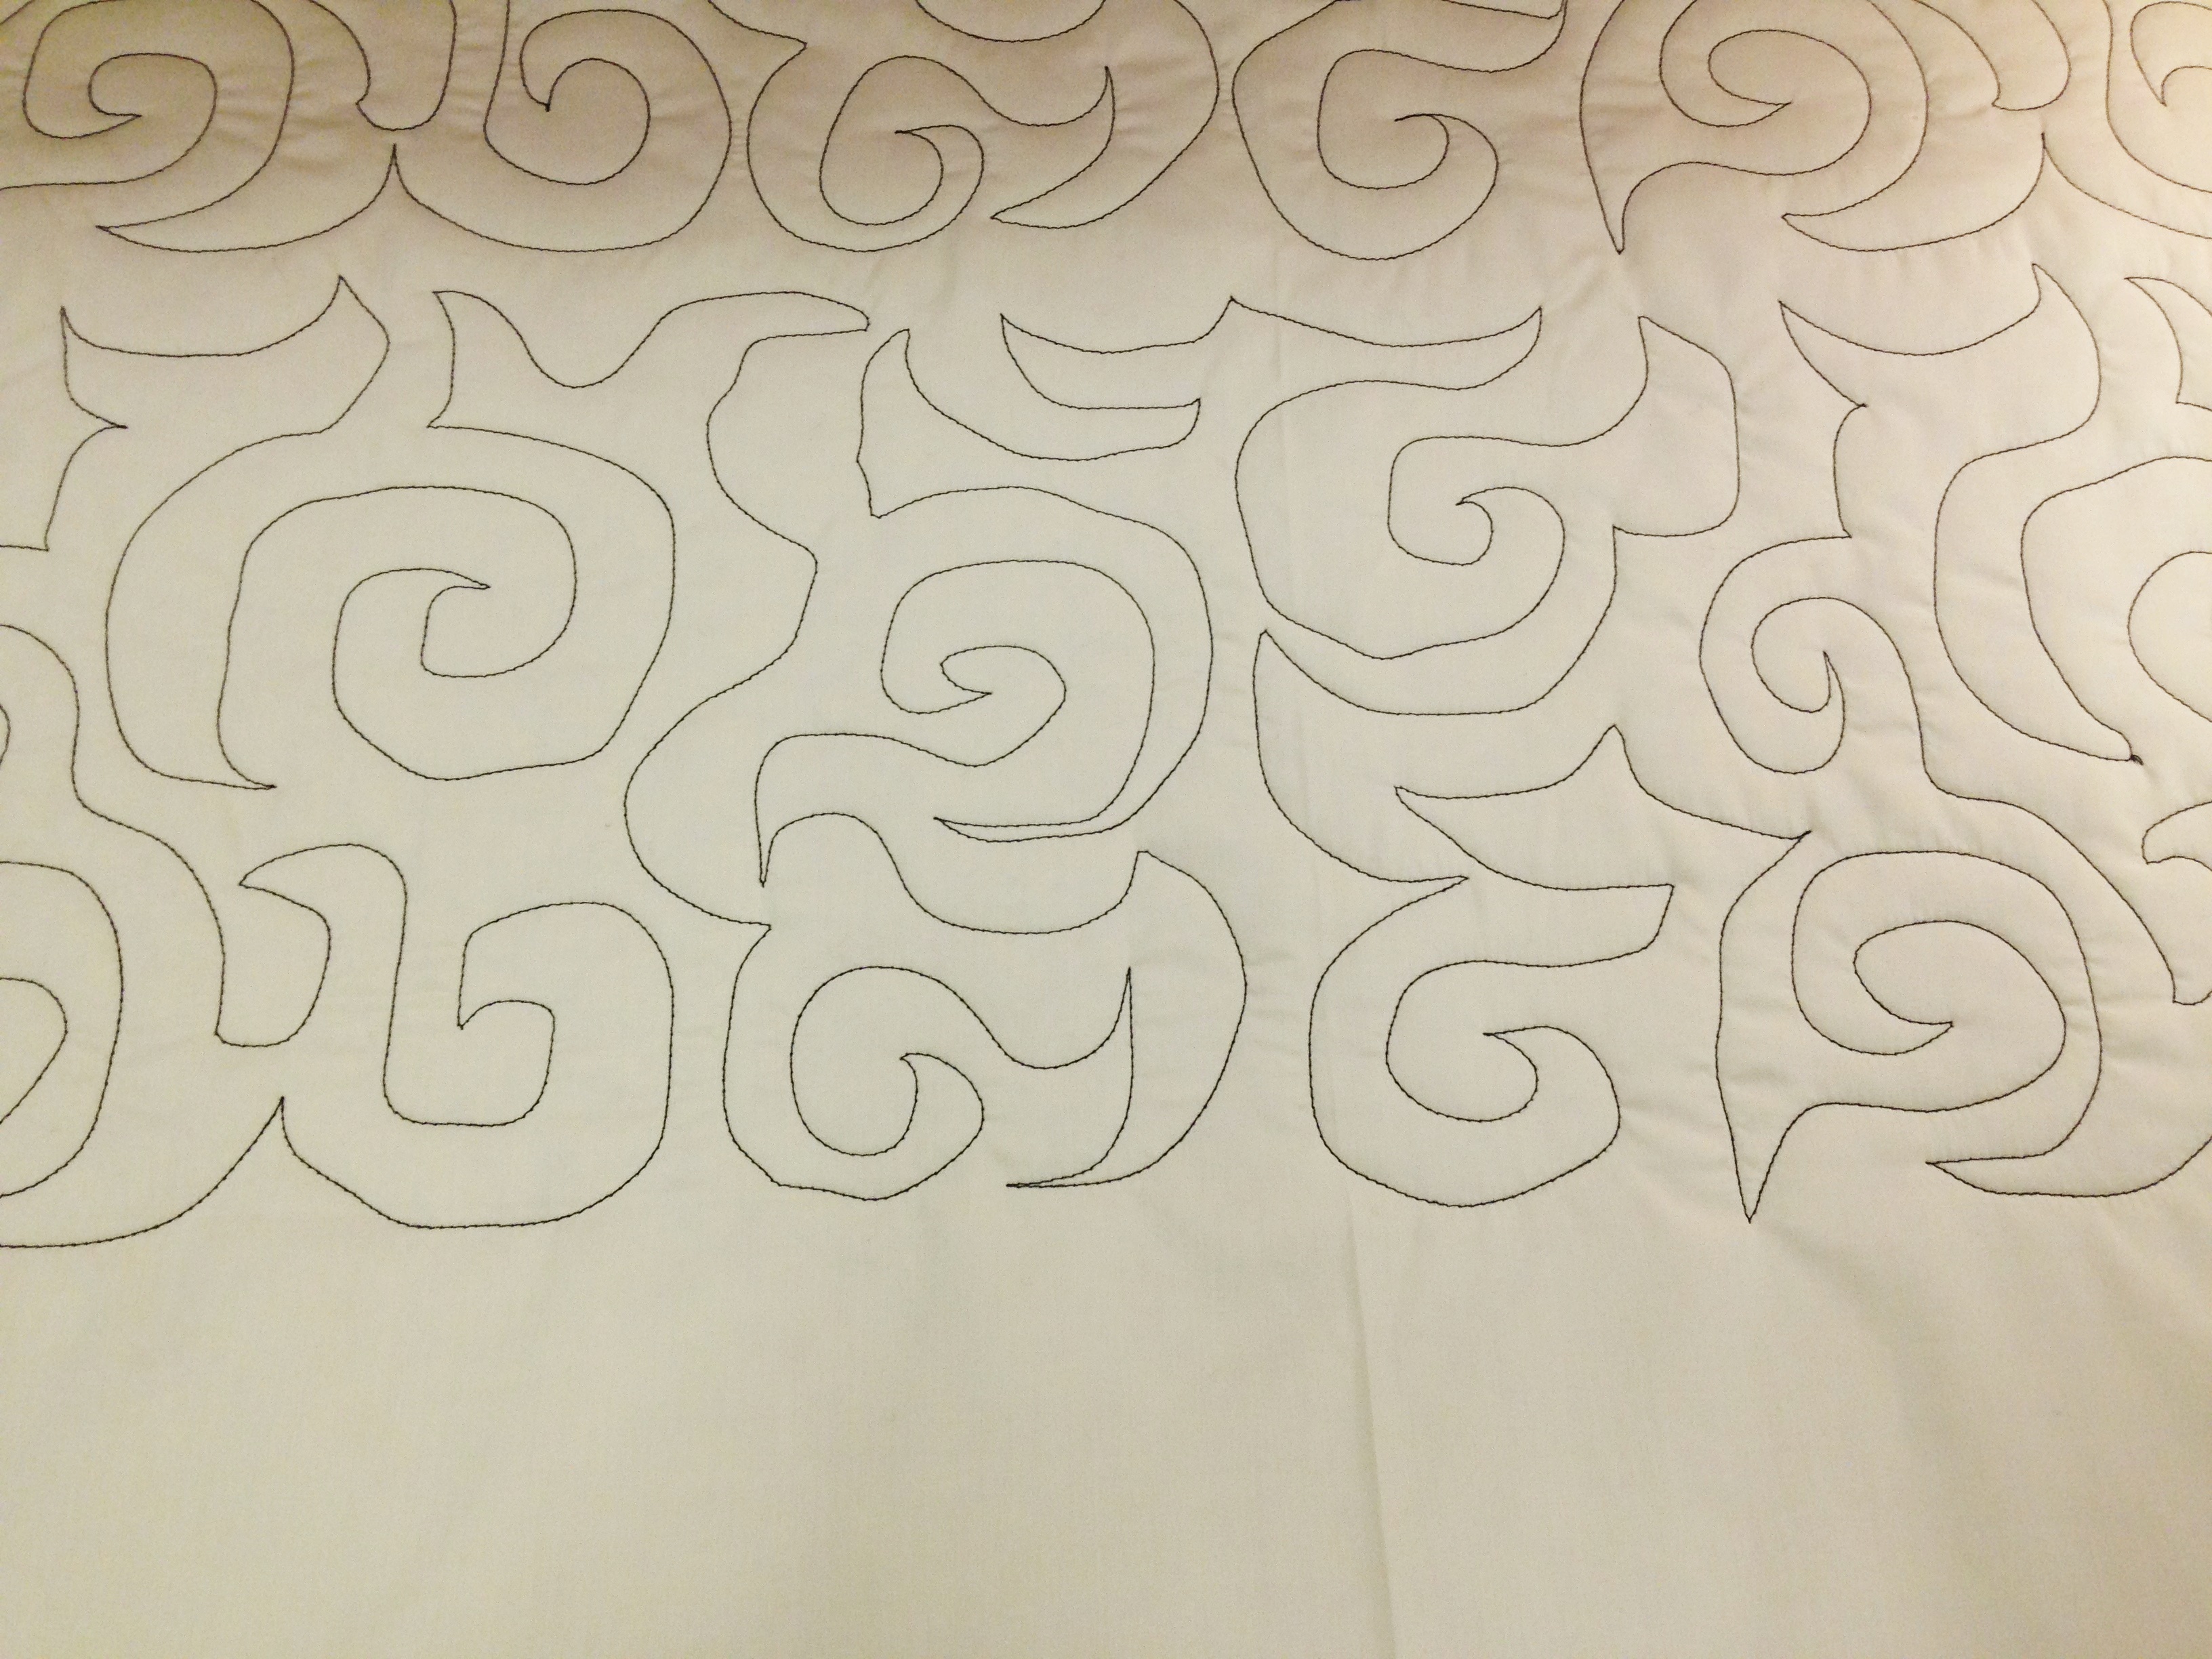
What wasn’t so easy was quiltiing a smooth circle. For whatever reason, when I tried to move in a circular pattern it was difficult and my curves had a distinctly rectangular look to them. It was surprisingly easy to get a nice straight line though. Looking at the bit of stitching at the top of the picture, the horizontal lines were stitched with channel locks on and this made those lines very straight because the machine could only stitch in that one direction (no free motion, just straight). But the vertical up and down lines that I did were done with everything open (no channel locks) and it was easy to create a nice, straight line. When I FMQ at home, I find straight lines to be very challenging if I FMQ so I normally use a walking foot and have to move the fabric with each line.
As would happen, the more I stitched, the softer the circular motion became. I tried to do a bit of pebbling and that was difficult.
But the circles got rounder as I went. To explain the mess you see above you, I first did a very large stipple or meandering stitch and I used up my practice piece of fabric too quickly. So I went back and started filling in the shapes. Messy yes, but so much fun to play with. Sort of like some very rough graffiti quilting.
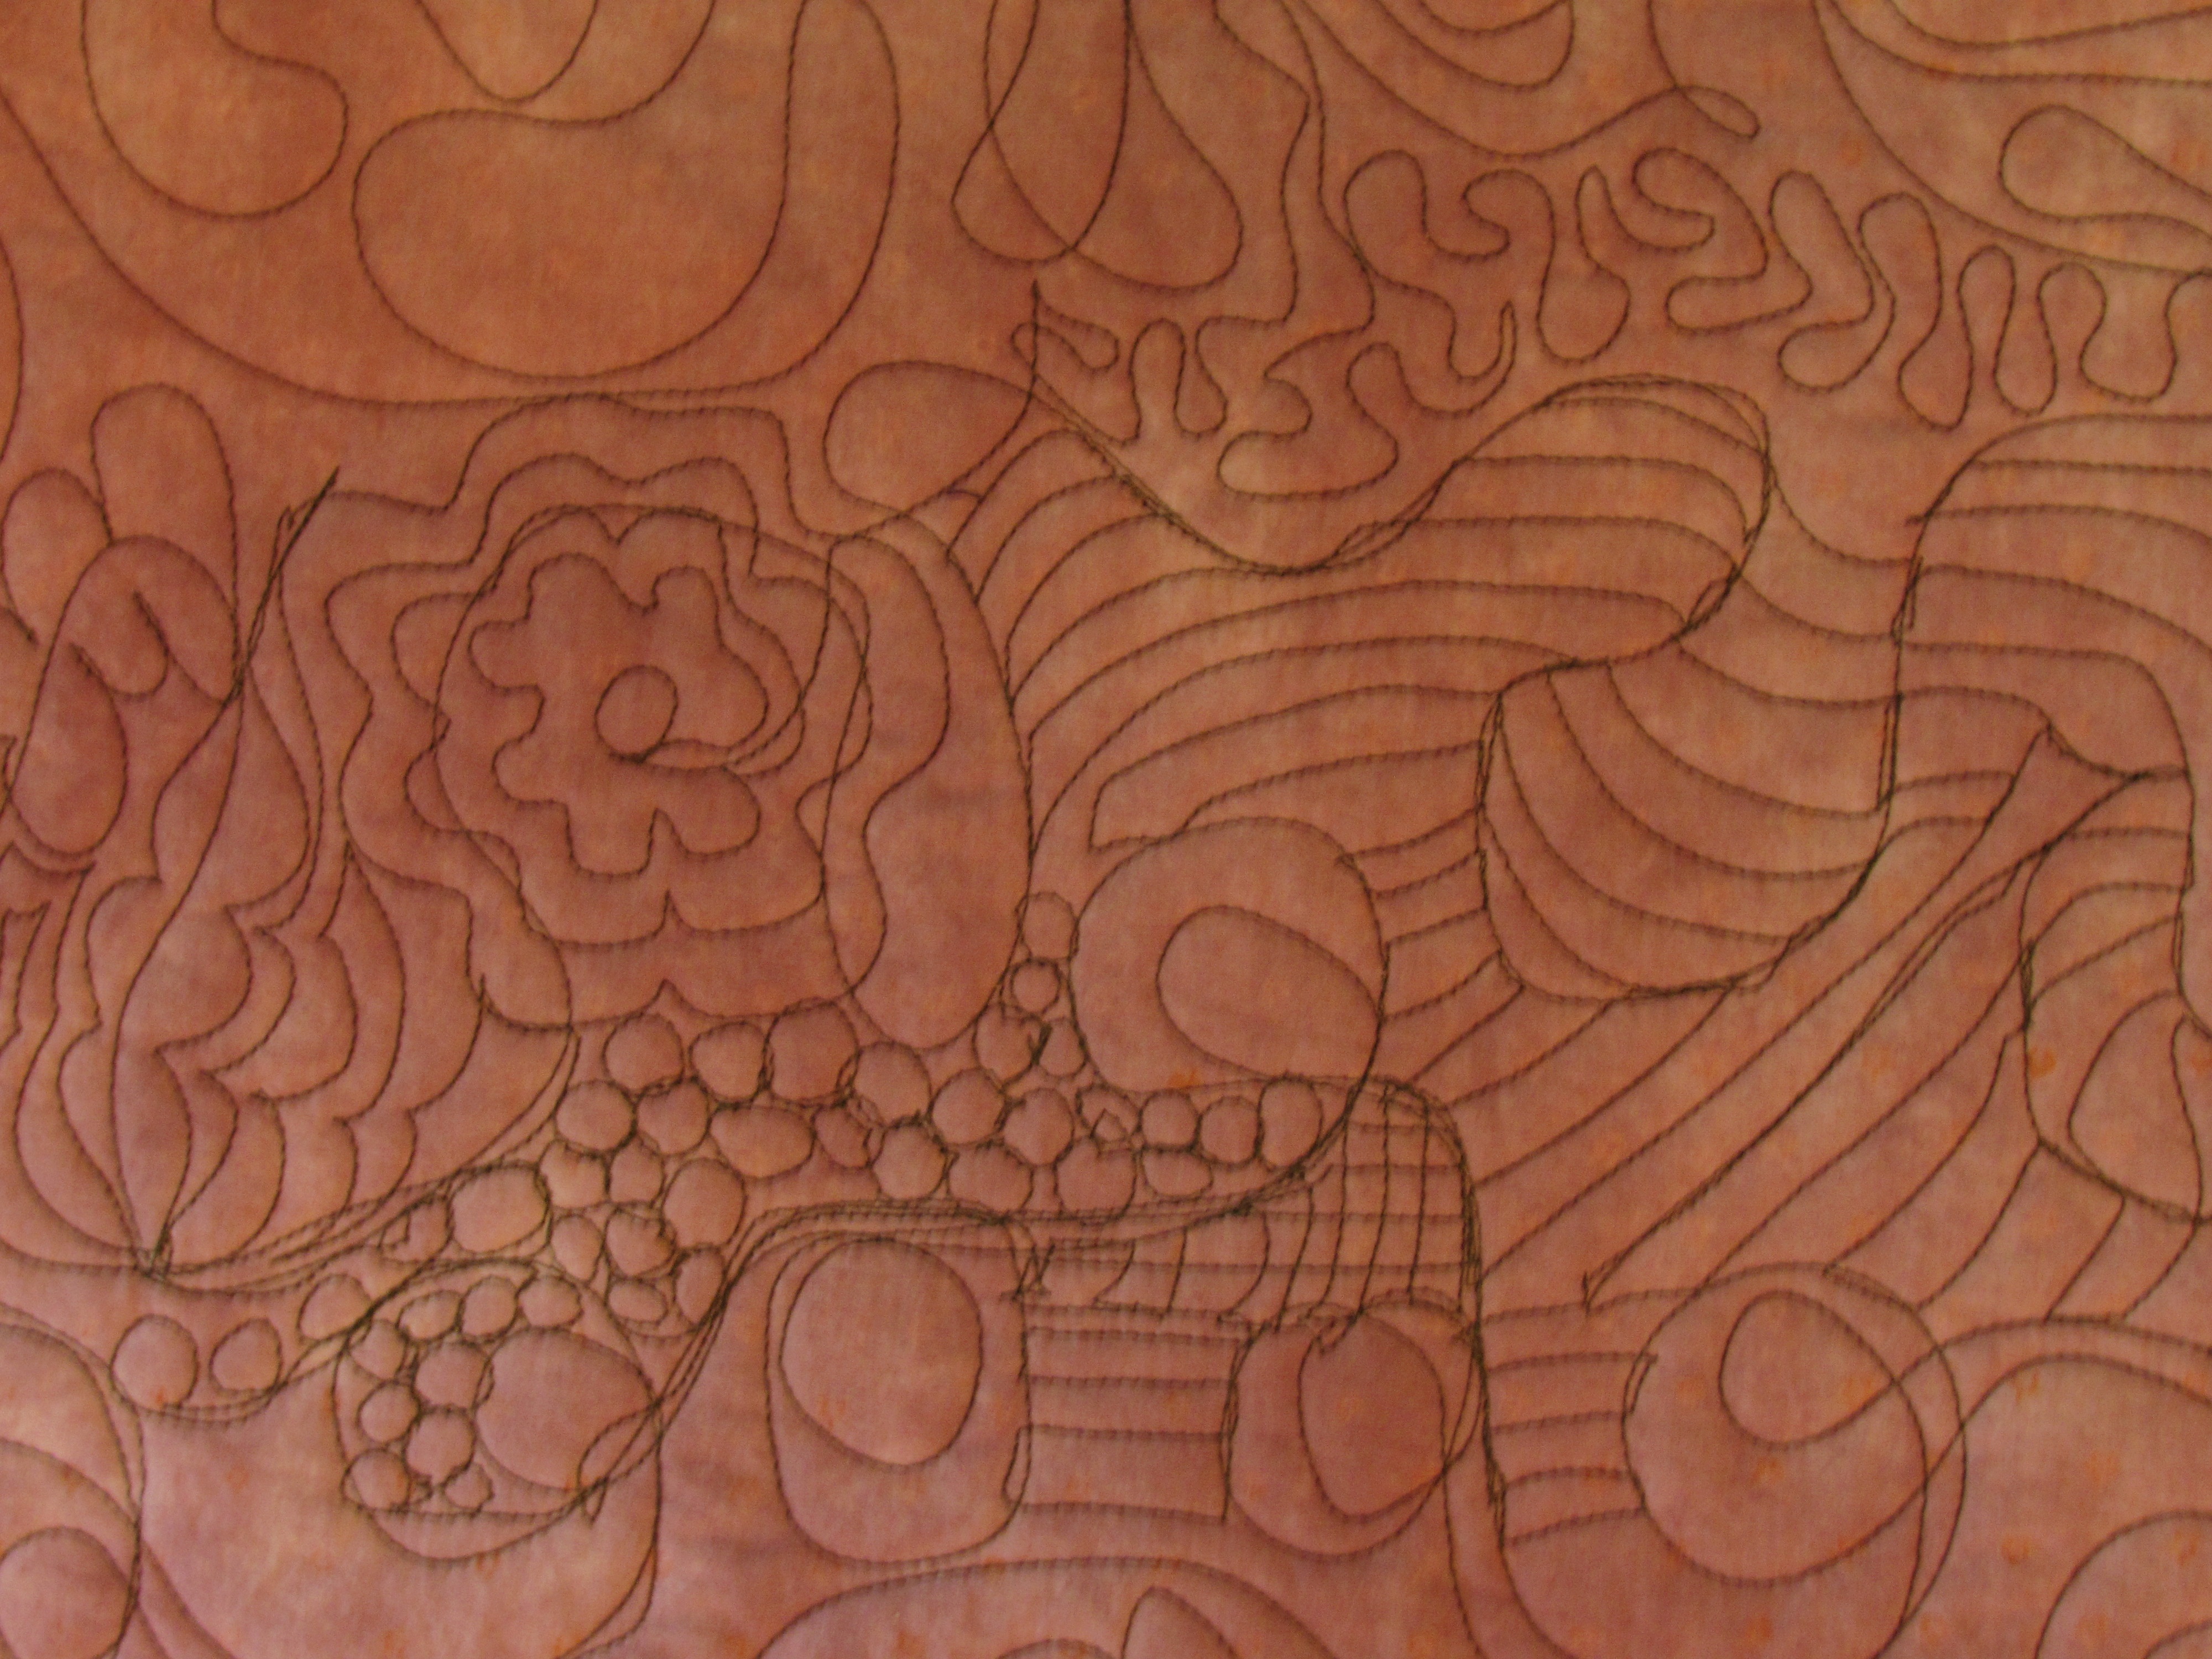
This photo shows stitching done toward the end of the afternoon. The shapes are looking better and the circles were easier. It doesn’t have the harsh flow of the quilting done earlier.
We also had a bit of time to practice using pantographs. This was far more difficult than I anticipated. Just in case you don’t know how they work, pantographs are designs that one can purchase. They are a length of design printed on a long strip of paper. Once the quilt is loaded, the long strip of paper with the design is placed on a table which is between you and the quilt. Then the design is basically traced, or followed, with a tiny laser beam that emits from the machine. As you trace the design, the machine is stitching the lines that you trace. It was very hard for me to relax and the stitching reflects that,. Also, because I was staring at the design and not looking at the quilt top, I didn’t get to plan where the design would hit the print of the fabric or shape of the block. I didn’t like this. With FMQ one looks at the quilt as it is stitched and there is the ability to plan where to go next. These all over designs done with a pantograph don’t really allow for this. I am sure I would get used to it but it wasn’t as easy as it looks!
You can see that the stitching is very awkward here. We did trace the panto without stitching a few times and that helped to get my brain to remember the flow of the movement. Practicing will certainly make this flow more easily. At this point though I think I prefer quilting without a panto so that I can look at the quilt and plan the stitching according to fabric and blocks. With simple quilt designs, a panto would certainly be fast and very attractive. Maybe the first time I actually use one, I will pick something with softer shapes? Or maybe a broader design? Mostly, it is going to require practicing which means I’ll need to make more quilt tops so I have something to practice on. A girl’s gotta do what a girl’s gotta do.
I am excited to go back and practice on something real. I have two quilt tops in the WIP pile and I plan to do both of them as practice on the long arm. Overall, the biggest benefit is this type of quilting didn’t strain my neck. Using my machine to quilt anything larger than a wall quilt creates a strain on my (often cranky) neck so I have to take lots of breaks, stopping every 15 minutes or so. I quilted for a couple of hours straight while practicing and my neck didn’t fatigue. Hurray!!! It was a blast to learn something new and to see what it felt to use a machine like this. I can’t wait to go back and try again.
Linking to several sites – take a look at the list at the top of the page, under Link Ups.
All summer there have been posts from bloggers who have nominated some of their favorite bloggers for the One Lovely Blog award. It is another symbol of the friendly, kind community that quilters enjoy. This is a sweet way to recognize some of the bloggers that inspire us and sort of introduce them to other readers. In the beginning of August I was nominated by Kate of Smiles From Kate. I had not had time to write a post in response to Kate and then today I was nominated by Jayne of Twiggy and Opal. So I am taking a minute to respond and play along.
I don’t honestly know where this started or who started it but it is a lot of fun. There are a couple of parameters and they are :
Thank the person who nominated you, and give a link to his/her blog.
List the rules.
Display the image of the award on your post.
List seven facts about yourself.
Nominate (up to) 15 bloggers for this award, and notify them to let them know you have nominated them.
Ok – Here we go. As I mentioned above, Jayne (from Twiggy and Opal) and Kate (from Smiles from Kate) both nominated me. These two bloggers are so much fun. I follow both of them closely and enjoy our friendships – via blogging and Instagram both. So much talent and inspiration is available via their blogs. If you are not familiar with them, I highly recommend you take a quick peek at their work and their words. You will not be disappointed.
Seven facts about myself…. Hm, I write about family and life as the subject fits when I am blogging but in case you are a new reader or haven’t been a follower for too long, here are a few things about me.
First, I live in a rural area in Northern California. We have three acres and along with that, comes a large vegetable garden and a chicken coop with six hens. I love our lifestyle. It is quiet and secluded which I really enjoy. We grow lots of veggies and have peaches, blueberries, boysenberries and blackberries each summer. There are drawbacks – such as it is a 70 mile round trip to get to Jo-Ann’s and a 40 mile round trip to find a Target. So it is not terribly convenient living here but one gets used to it.
Second, my five sisters are my dearest friends. As a mom I have come to hugely appreciate the sacrifices my parents made so they could have a large family of six girls. We see each other as often as possible and text in a group string all day, every day. My phone is constantly beeping and when this happens during dinner it takes all of my self-control to not check my phone (that is the rule – no devices during dinner.)
Number 3 – I LOVE my family – My husband and kids are my priority. I feel so blessed and grateful for all of them. I have four kids – three boys and one girl – but Julia is our only child at home at this point. Each of the boys has a wonderful partner (wife, fiance, girlfriend) and they have richly expanded our family. I grew up in a large family and it is wonderful to have a large family. (Justs for grins – you might find it interesting that my parents have six kids, 21 grandkids and so far, nine great grandkids with three more due to be born in 2017! One crazy, big family!) The photo above shows my kids plus my daughter-in-law and almost daughter-in-law!
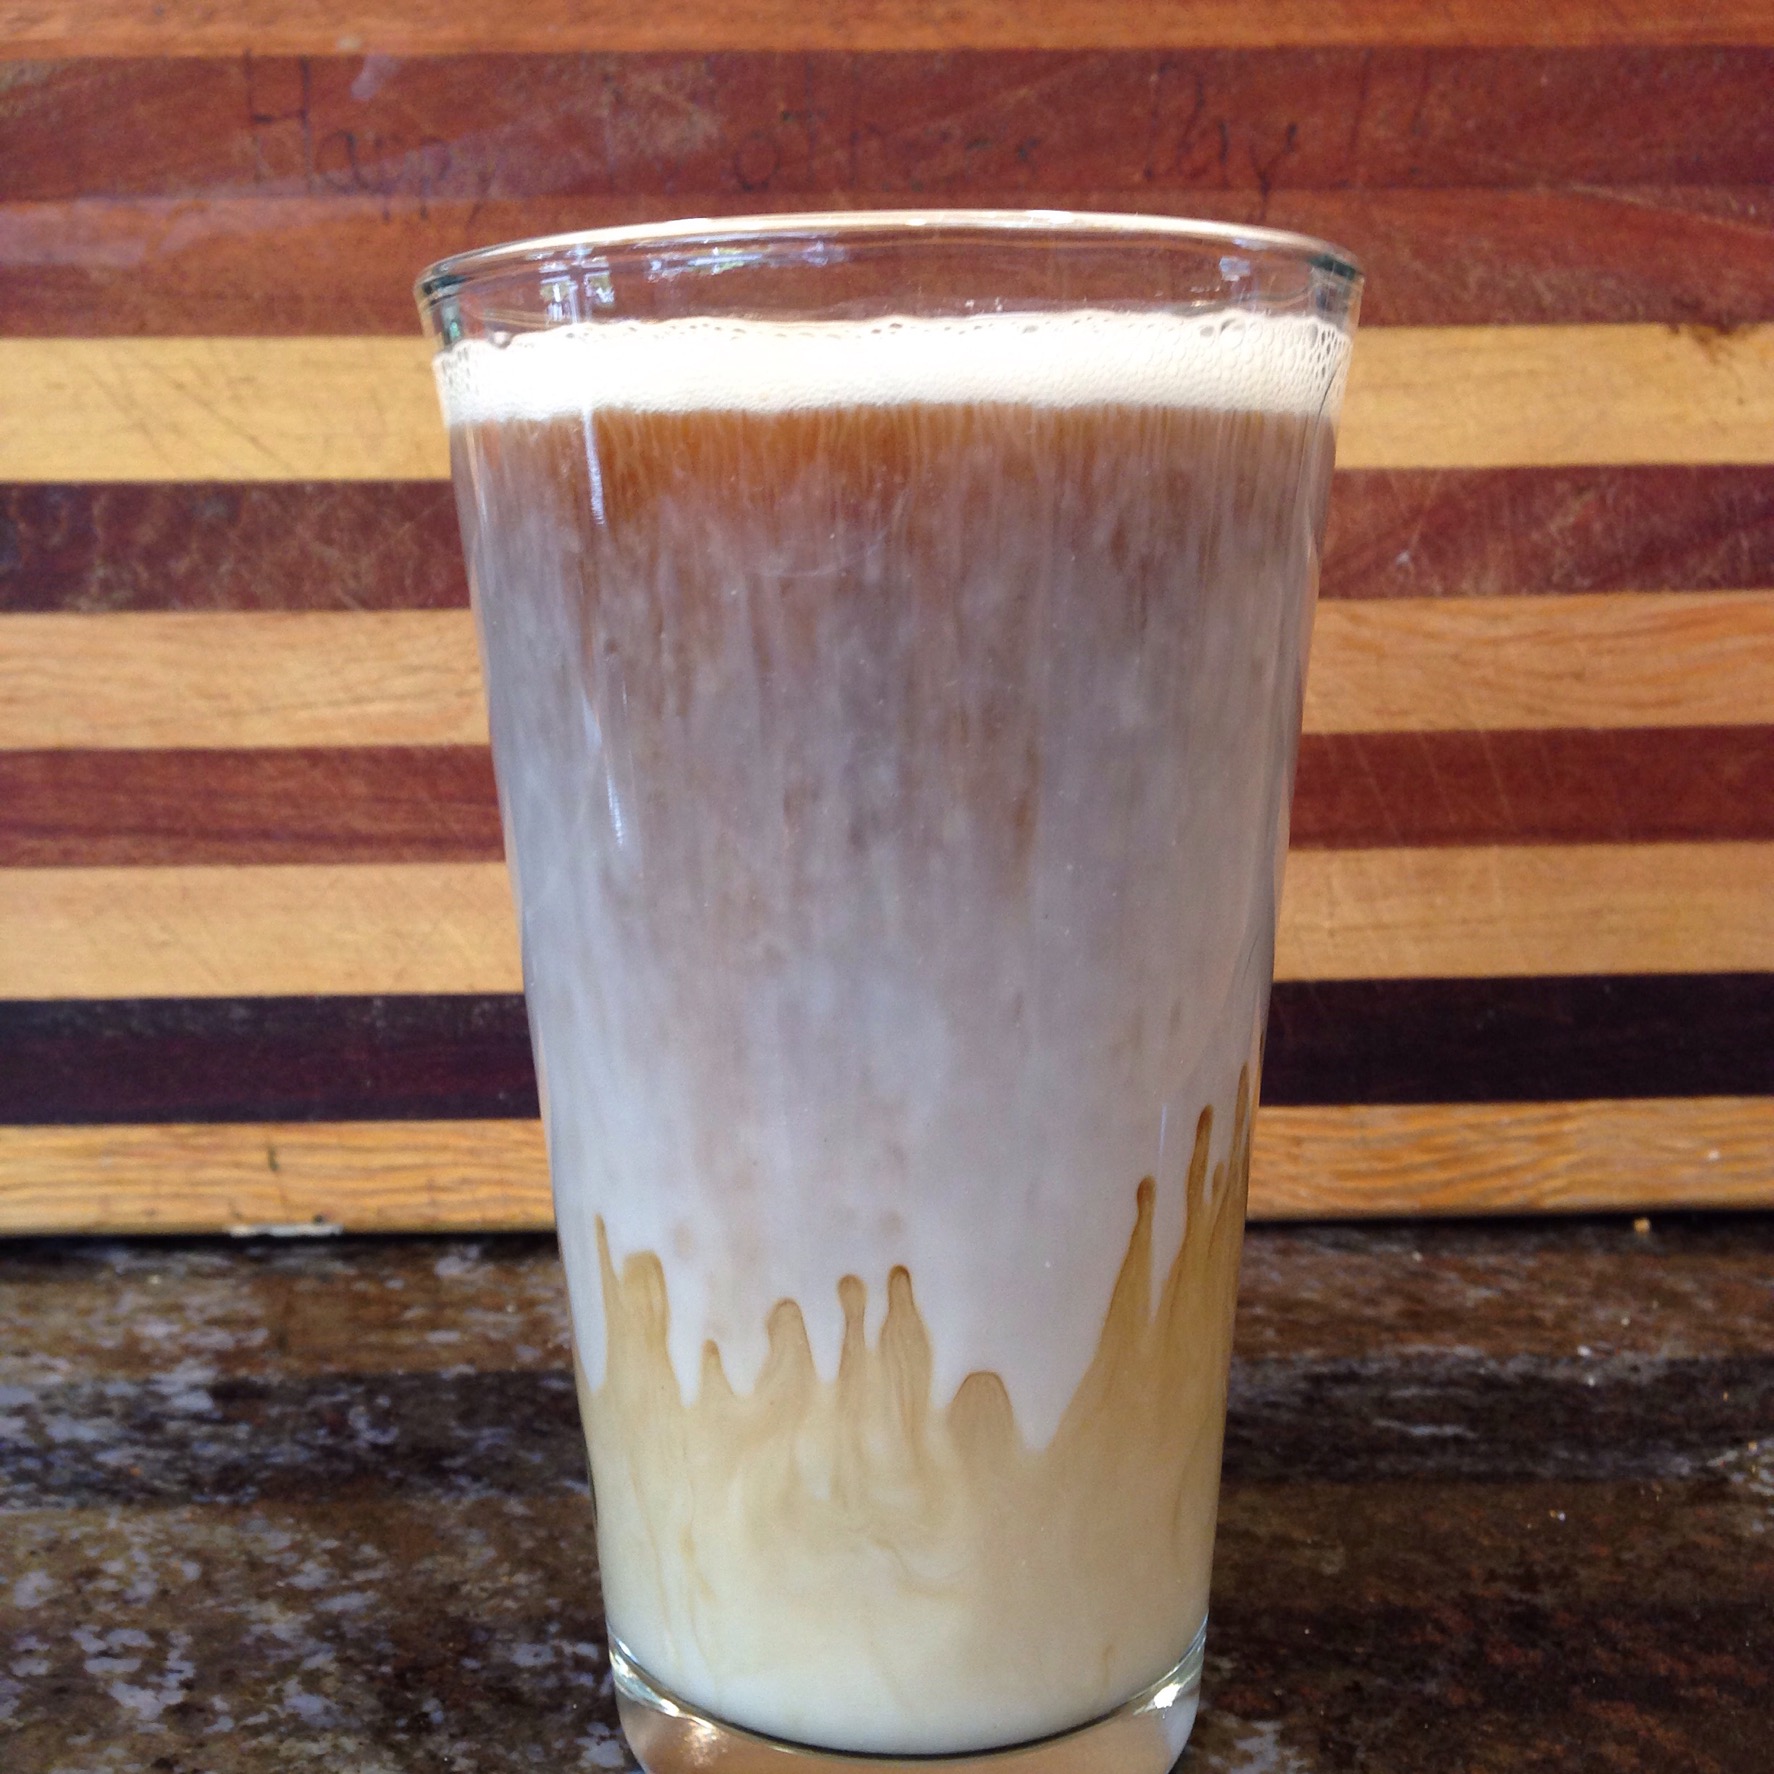
Fourth -I have only ever quilted my own quilts on my Janome sewing machine. But I have been wanting to learn how to use a long arm machine. I am finally taking a class at a shop about an hour away. Once I take the class I will be able to rent time on their long arm machines. So – I am giving this a try. I have made two queen size quilts; one I stitched in the ditch and the other I tied. It is difficult to fit a big project through the throat of my machine (and it is a rather large throat.) I am hoping this enables me to make larger projects. I’ll let you know how it goes!Number 5 – My very favorite snack is popcorn. I eat it often and never tire of it. Iced coffee with almond milk is my go-to drink. All decaf, all the time. Once when I was ordering an iced decaf with non-fat milk, the barrista said “I call that a ‘why bother'” (as in no caffeine, no fat, no sugar) I thought that was so funny. I don’t like caffeine but I love the flavor of coffee.
I love vintage everything. Cookbooks, fabrics, linens, kitchen ware – all of it. So I regularly spend time checking out our local thrift stores and usually come away with something fun. I list vintage sheets (fat quarters) in my Etsy shop. I have numerous vintage cookbooks which I love to look through. The other day I scored this little vintage Pyrex bowl, circa 1970. Isn’t it adorable? I have posted fairly often about my vintage finds – if you want to read more, check out this post, or this one. Or just put vintage in the search box above and it will show even more posts.
Finally, I love that I have found a community where sewing, quilting and working with fabric is considered to be an art. Growing up, I could not draw. Actually, I still cannot draw beyond a stick figure. I always equated my inability to draw to my being unartistic. However there are so many ways to be artistic that do not involve paper and pen or paints and paintbrush. I learned to sew when I was 11 years old and have been sewing consistently since then. But it was ‘just a hobby’ and I wouldn’t have described myself as artistic. Having spent so much time and energy quilting and blogging, making friends, learning from other blogs has taught me that sewing and quilting are very artistic. Oh my gosh – there is endless inspiration – so many gorgeous quilts, patterns and fabrics with each combination thereof creating something new and unique. Creative and artistic indeed.
Now for my nominations. There are just over 200 blogs in my feed on Bloglovin. I would say all of them are absolutely Lovely Blogs. But there are a few that especially speak to me. Here you go. You are probably familiar with most of these, if not all. But if by chance, you are not, be sure to go take a look at these Lovely blogs!
Mari at the Academic Quilter – I love Mari’s precision. She makes such intricate blocks and quilts. Really amazing stuff! Last year I sewed along with her Classic Stitches BOM. This year she is hosting Intricate Stitches and I look at these blocks with my jaw hanging open. So pretty!
Janine at Quilts from the Little House. Janine has many years of quilting experience. She is a wealth of knowledge. But you know what? I love the fact that she either hand quilts or machine quilts – on a treadle machine!! Honestly. I can’t even imagine.
Deb at Frugal Little Bungalow. Deb is a quilter who shares my love of gardening, vintage collections, and sewing. Her blog is a delight to read. She is a talented photographer who generously shares her photos of the critters and nature that surround her in Pennsylvania.
Rachel @ Stitched in Color. Rachel has been blogging in this community for quite a long while. Her blog is a great source of information and she has posted many excellent tutorials. Above all, Rachel writes from her heart and has a beautiful ability to express herself with the written word. I don’t have a lot of connection with Rachel but have followed her blog for a long time now and it is one of my favorites.
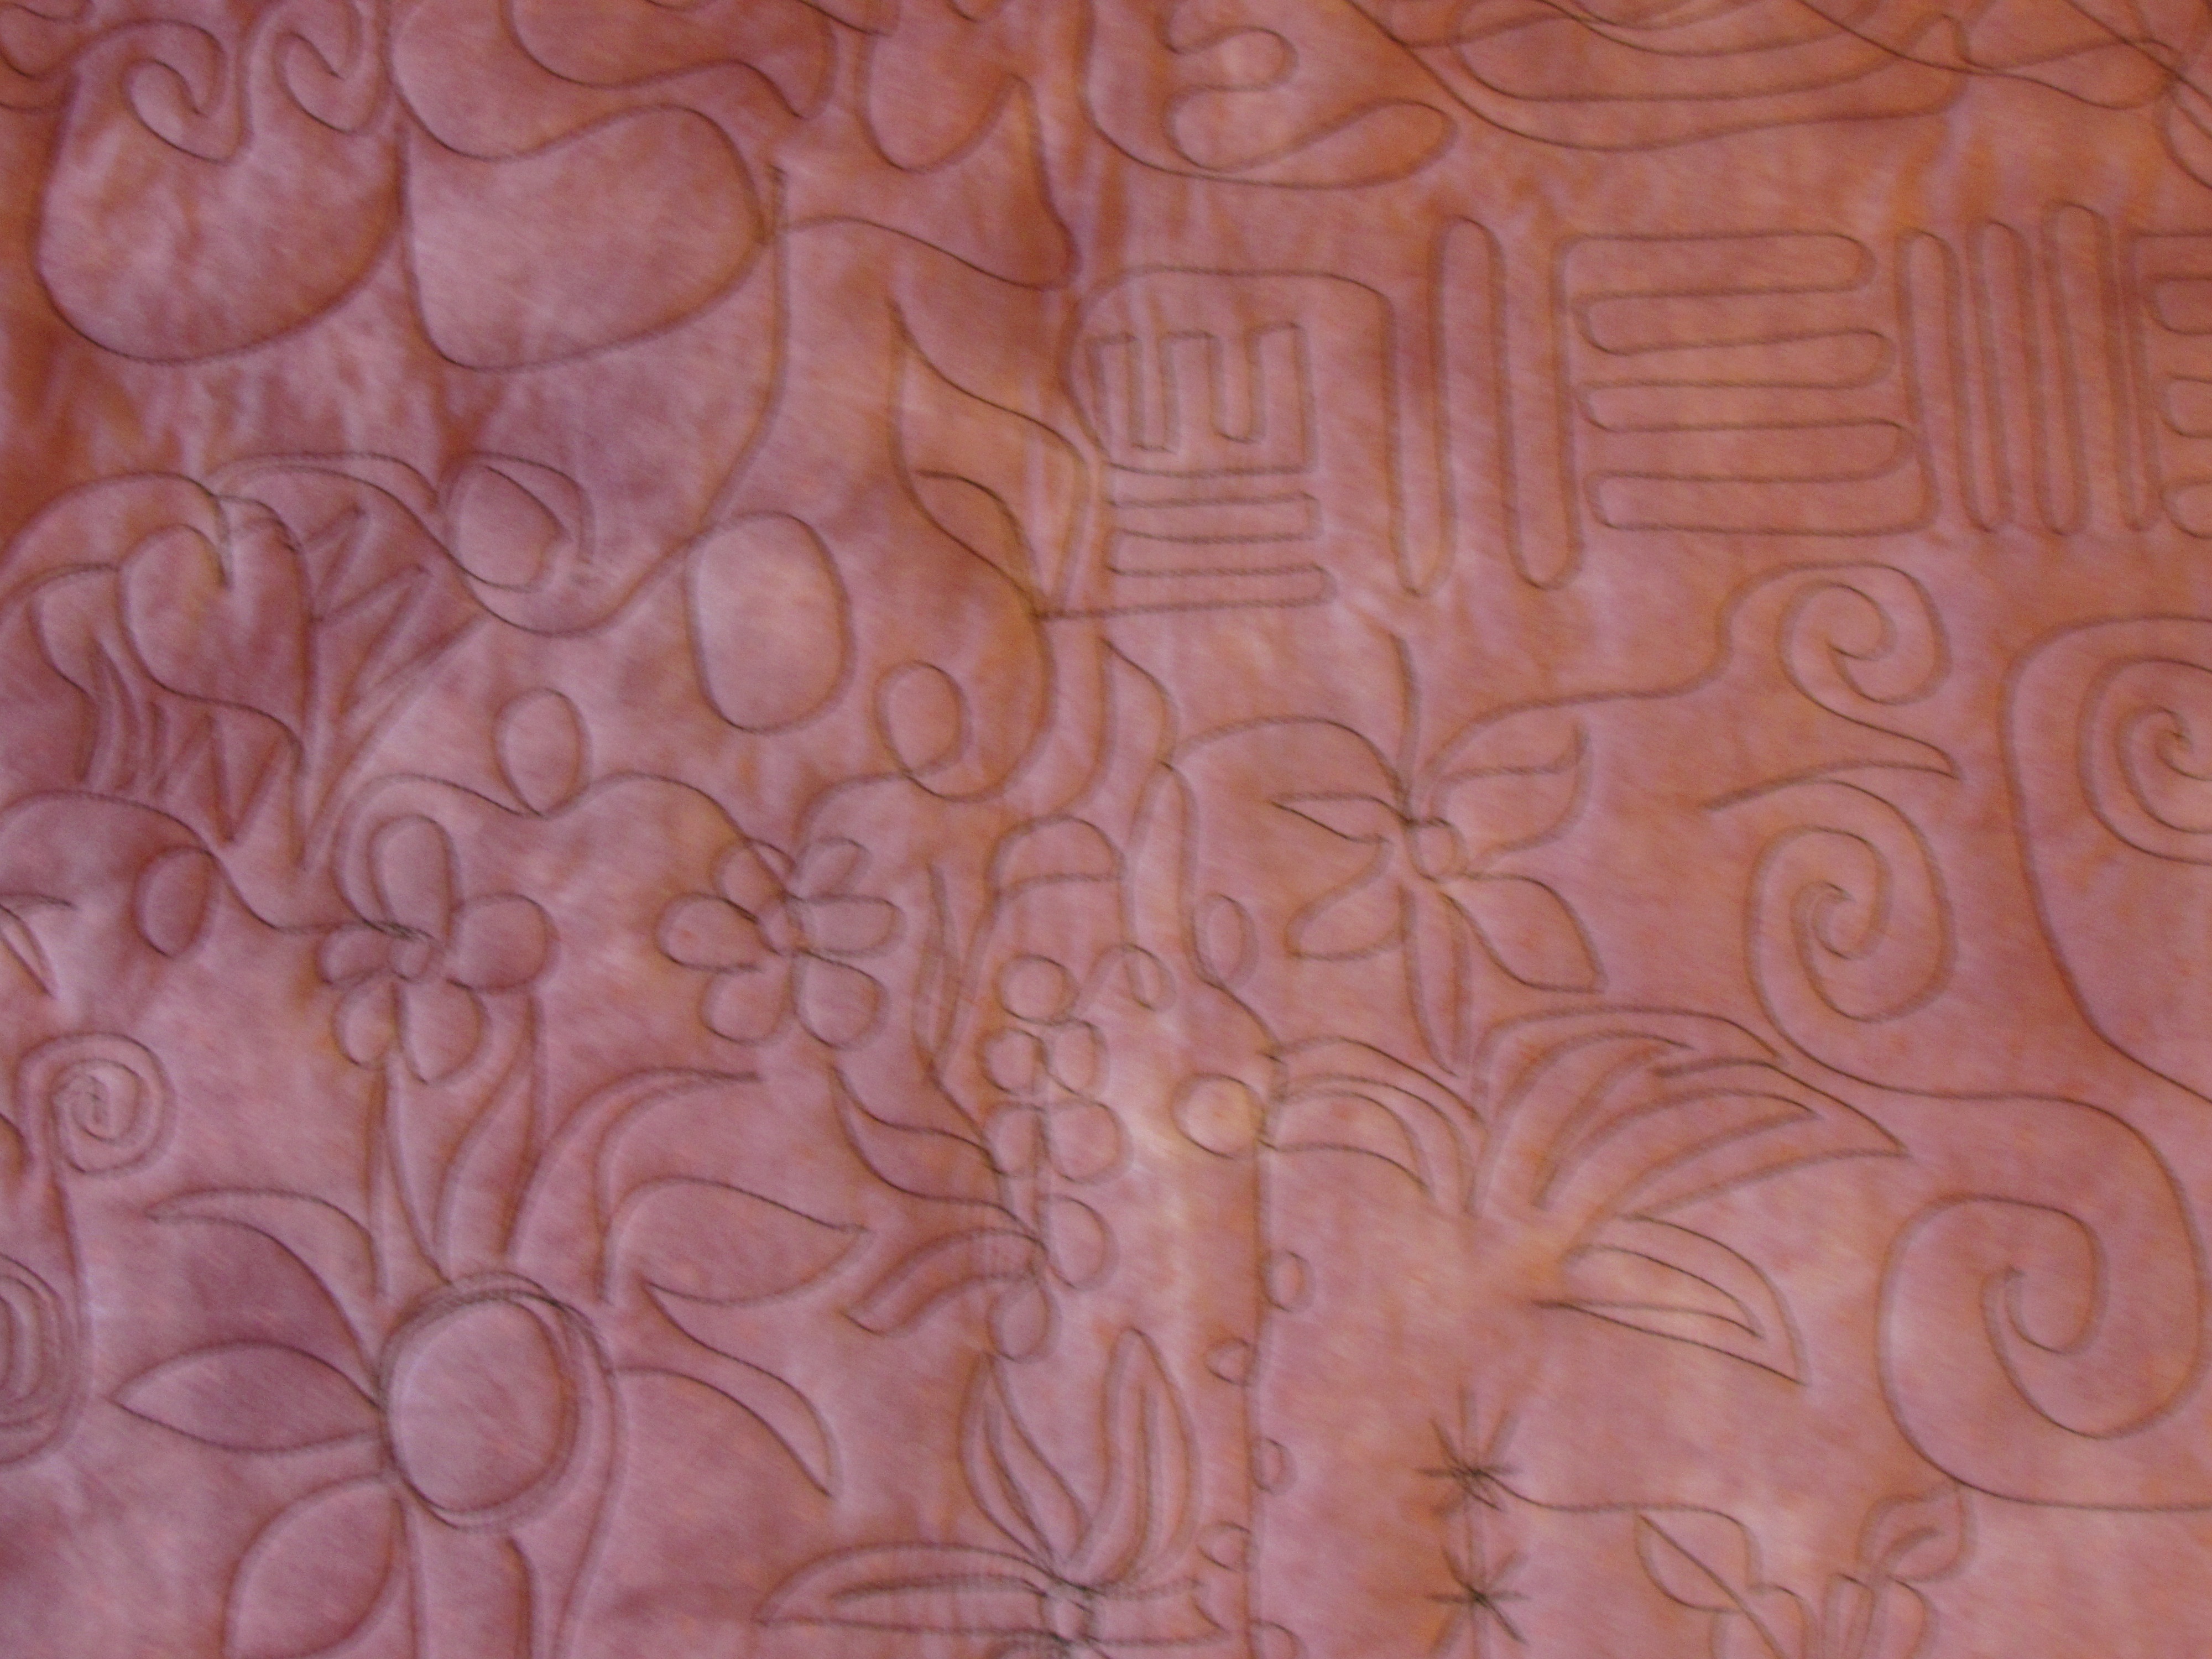
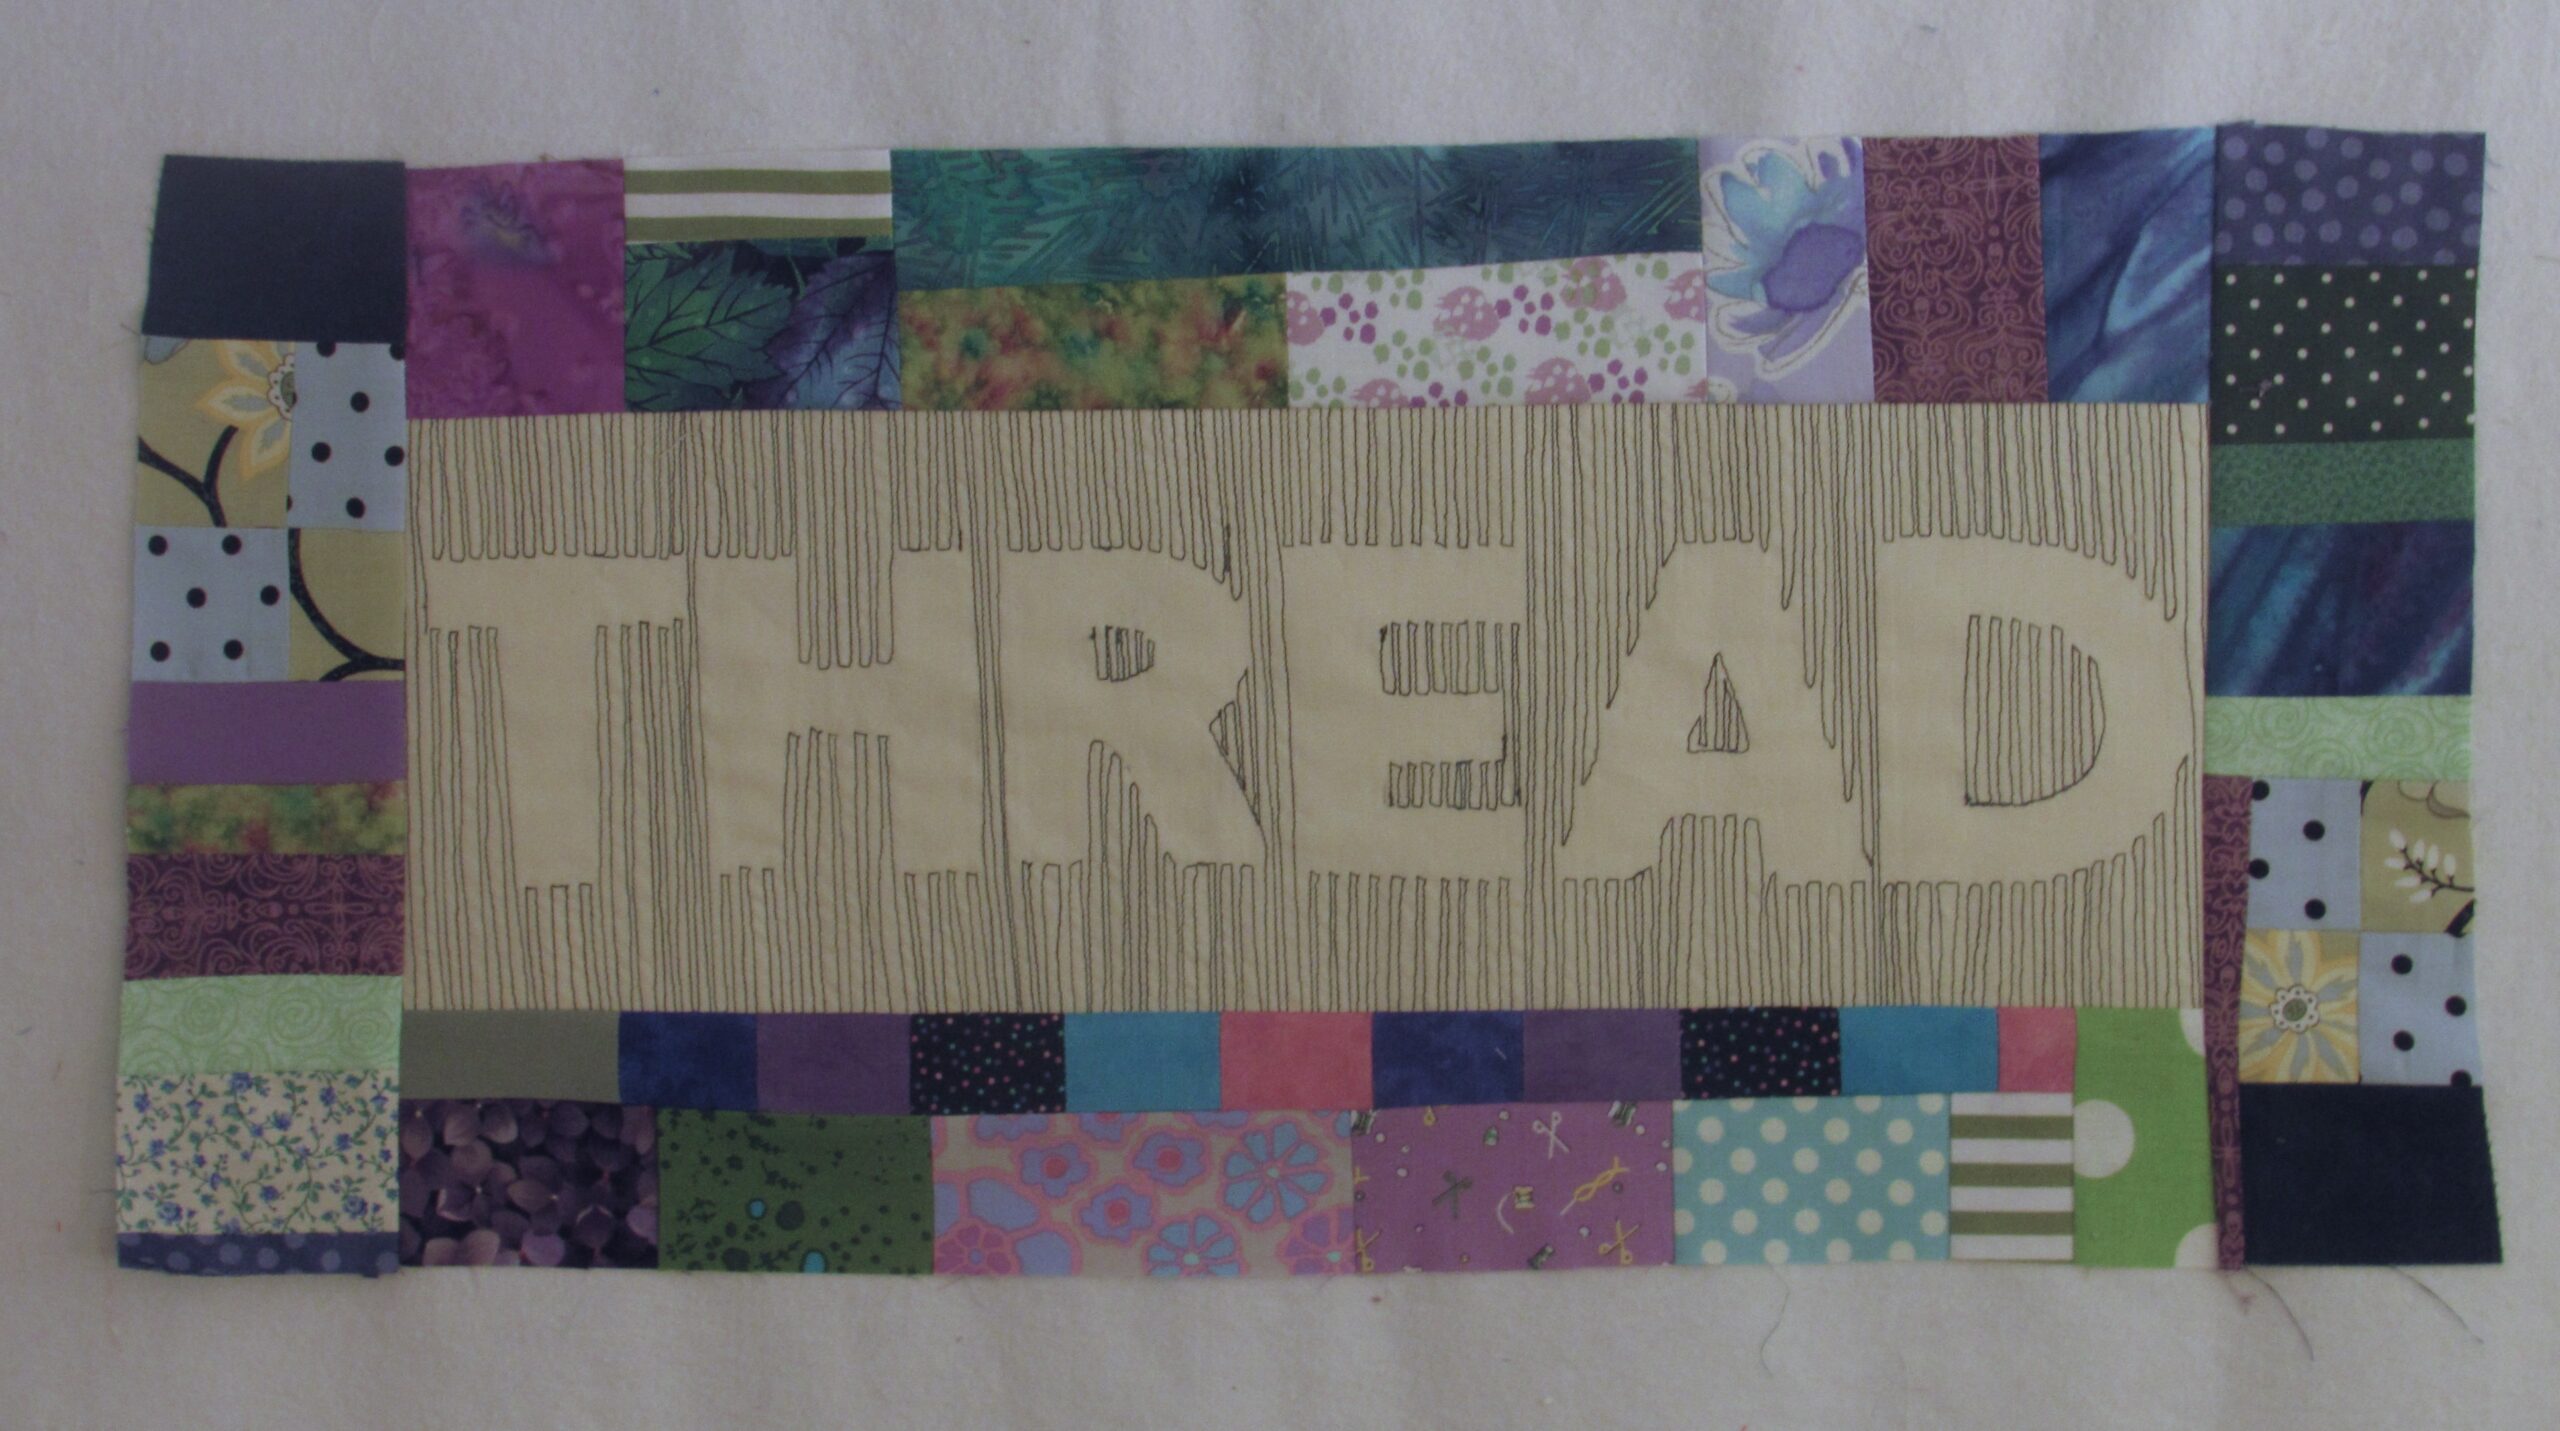
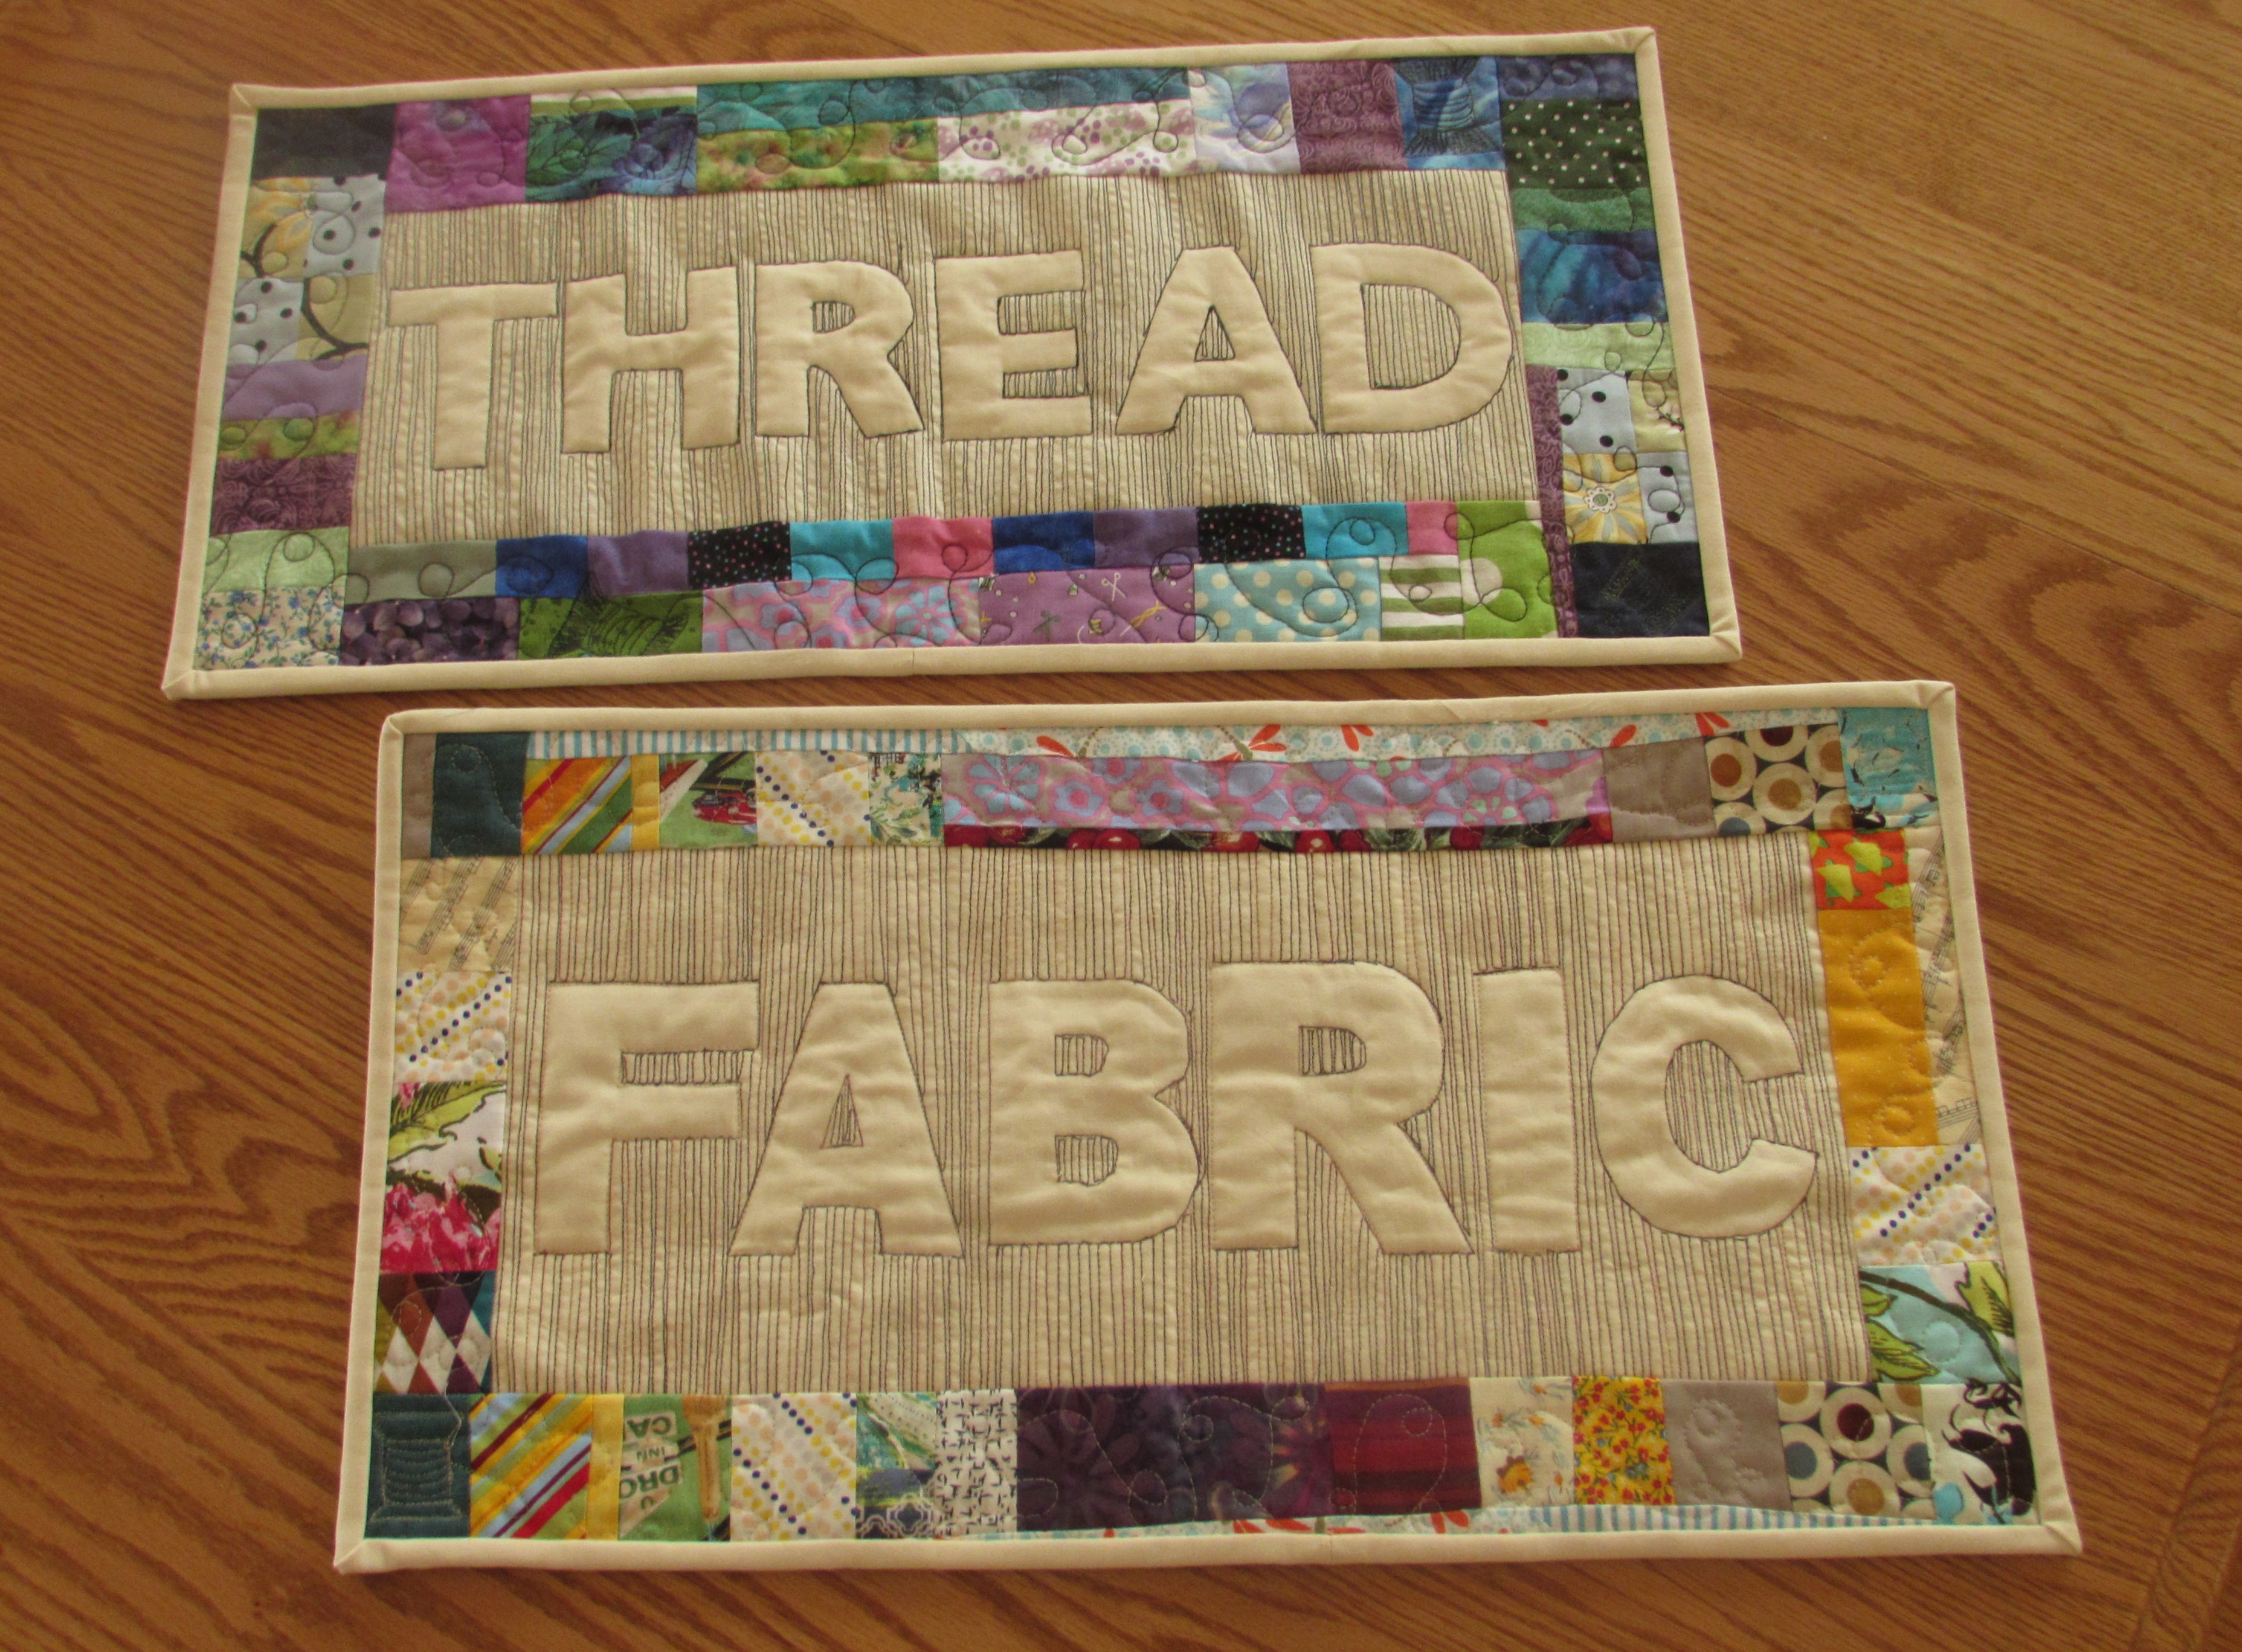
I really enjoyed playing with relief quilting when I made my FABRIC mini quilt a couple of weeks ago. So much so that I decided to make another one! I took plenty of pictures while making it so I could post a tutorial. I hope you will give it a try. The effect is wonderful and it is such an easy process.
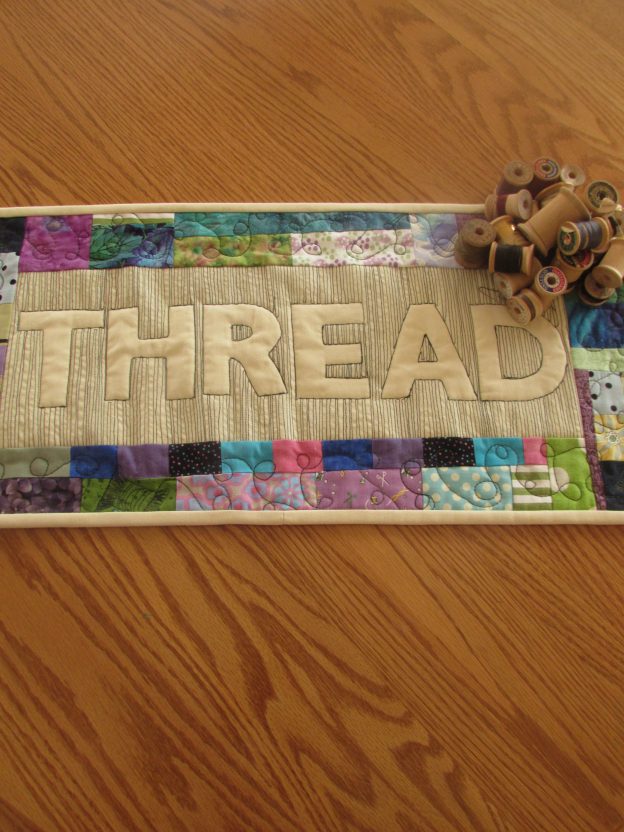
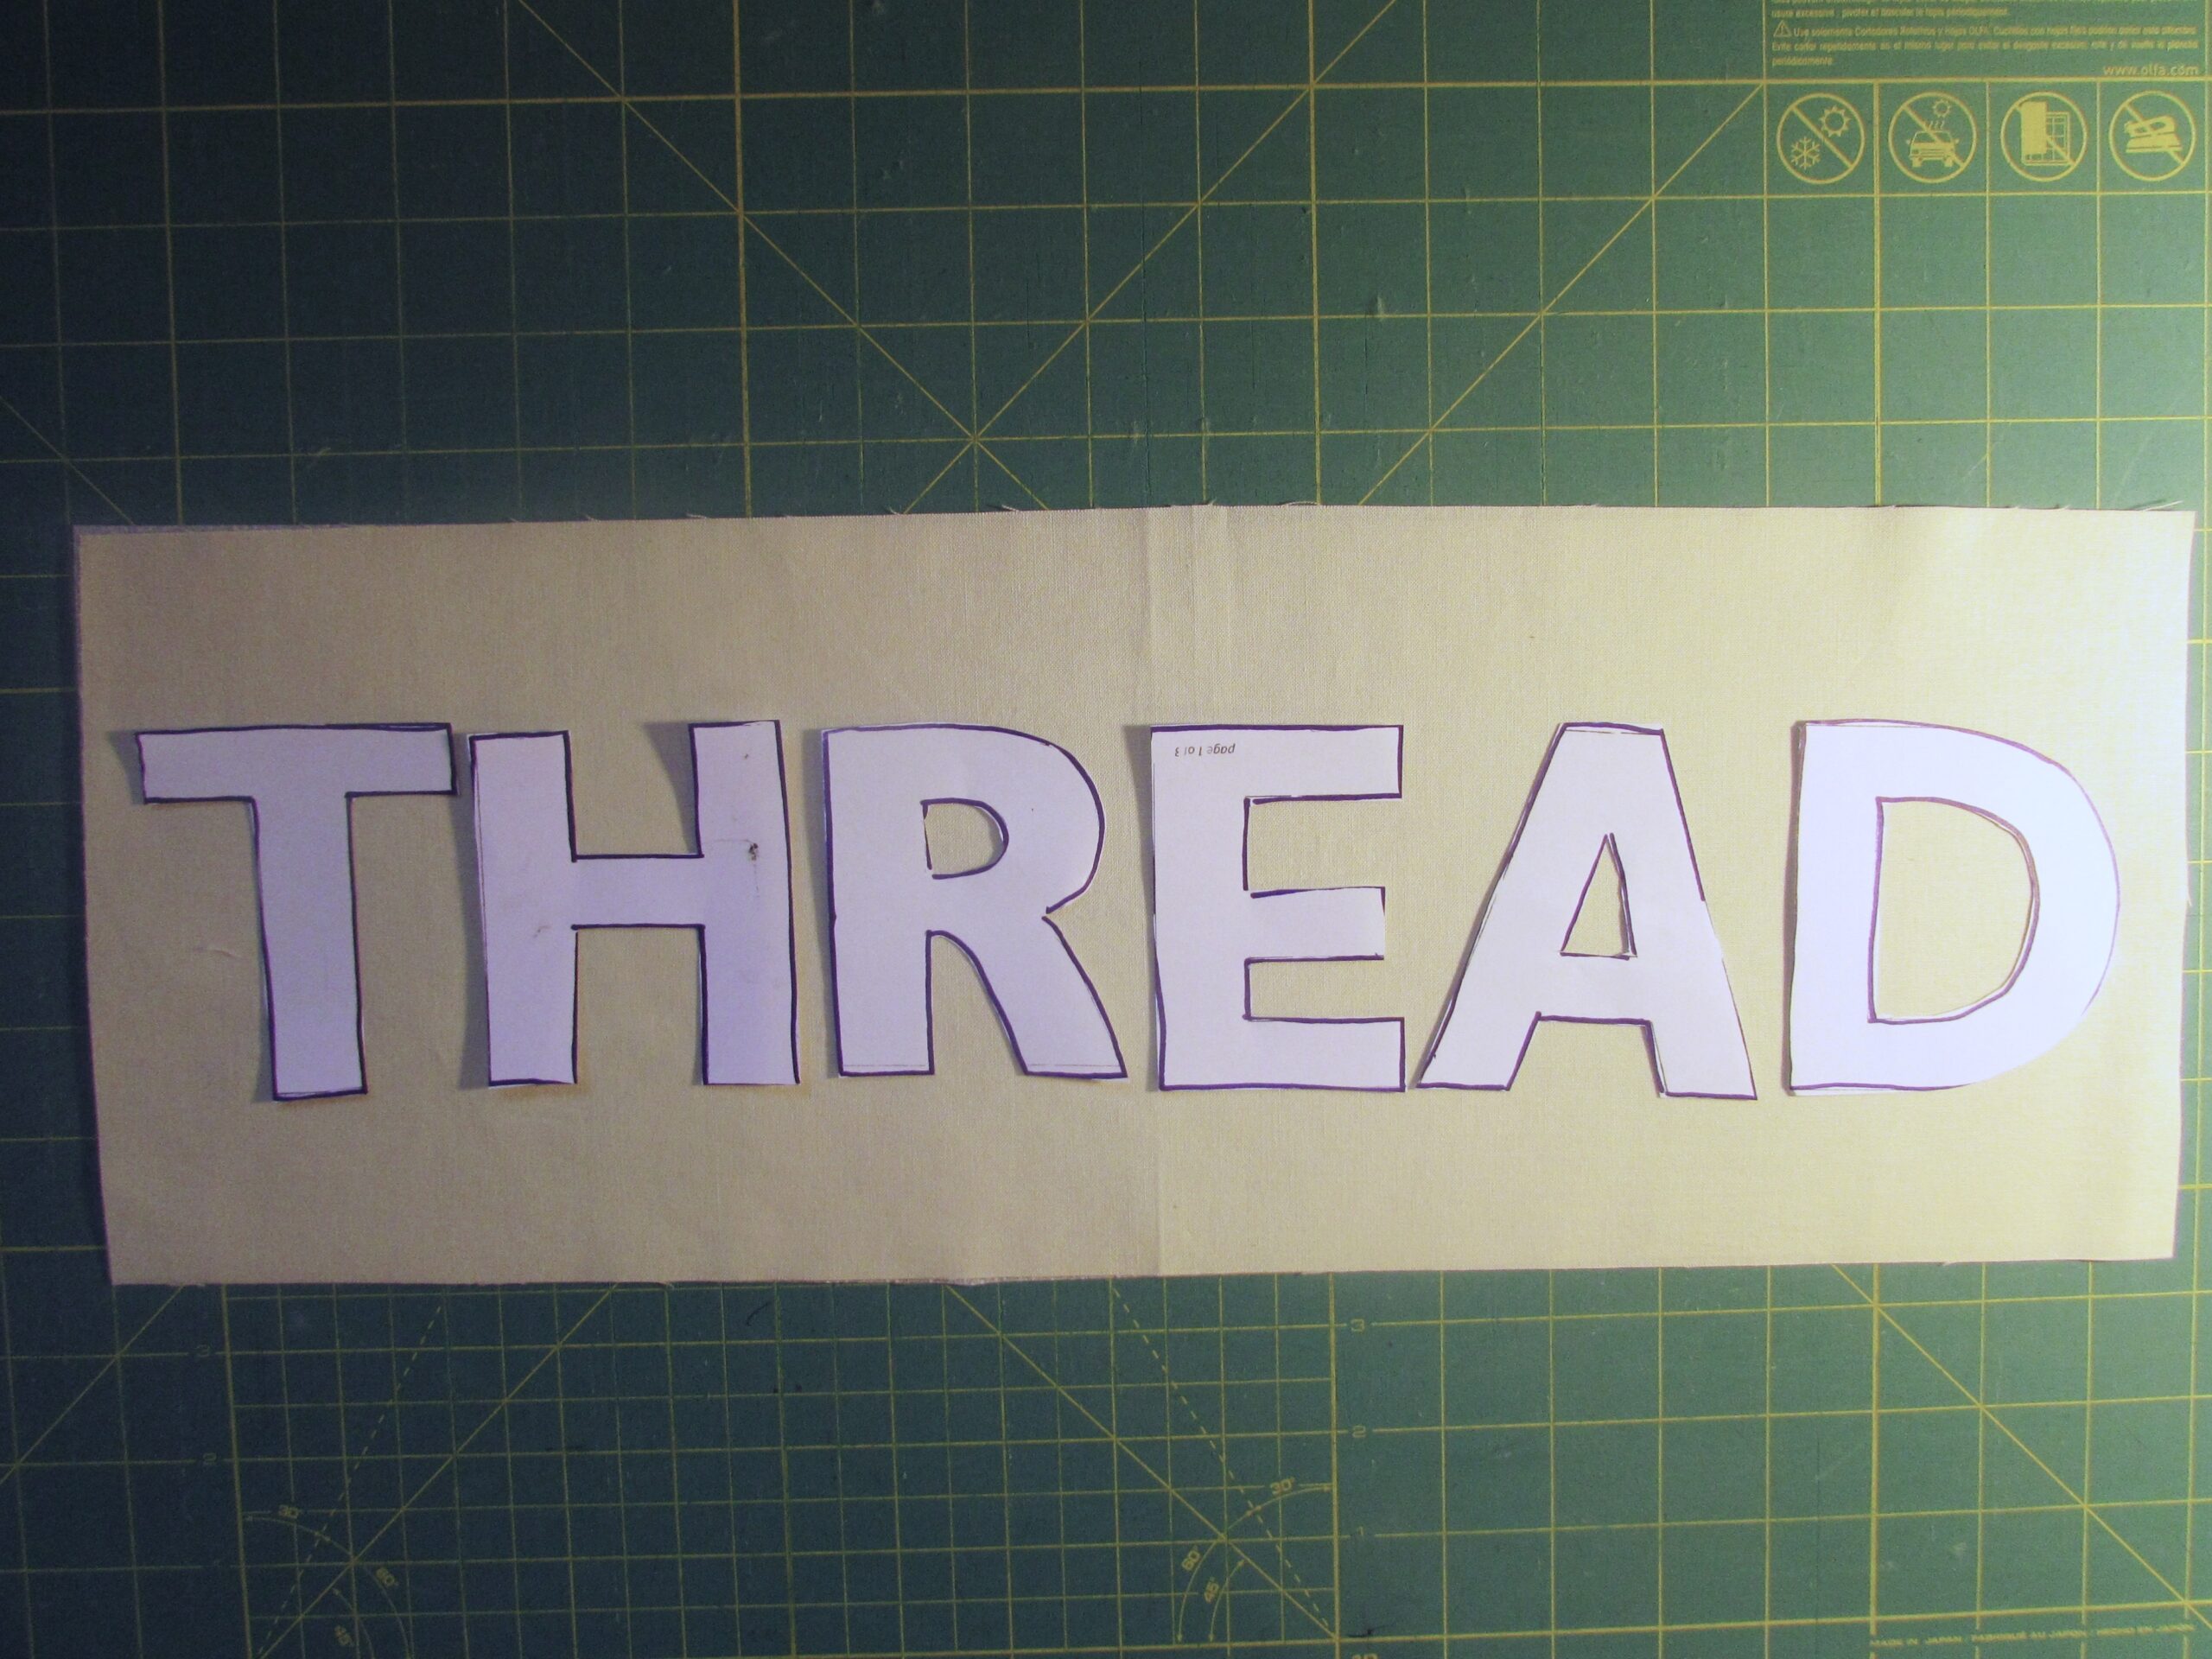
This time I wanted to try stitching the word on a piece of fabric with fusible stabilizer and then building the quilt from there. It worked out wonderfully. Since I already had one mini that said FABRIC, I decided to make another that said THREAD. This idea was inspired by a comment left on the first post by Diana, of A Red Delicious Life. She mentioned wanting to make one to hang above her thread. I decided to do the same. Now I have one to hang above the closet where I store fabric and another to hang above the thread collection hanging on the wall in my sewing room. Thanks Diana!!
Let’s get started.
I am going to provide the sizes that I used but this is so flexible. Increase or decrease as you like. My quilt finished at 11″ x 23″ so if you want a different size, adjust accordingly.
Materials List:
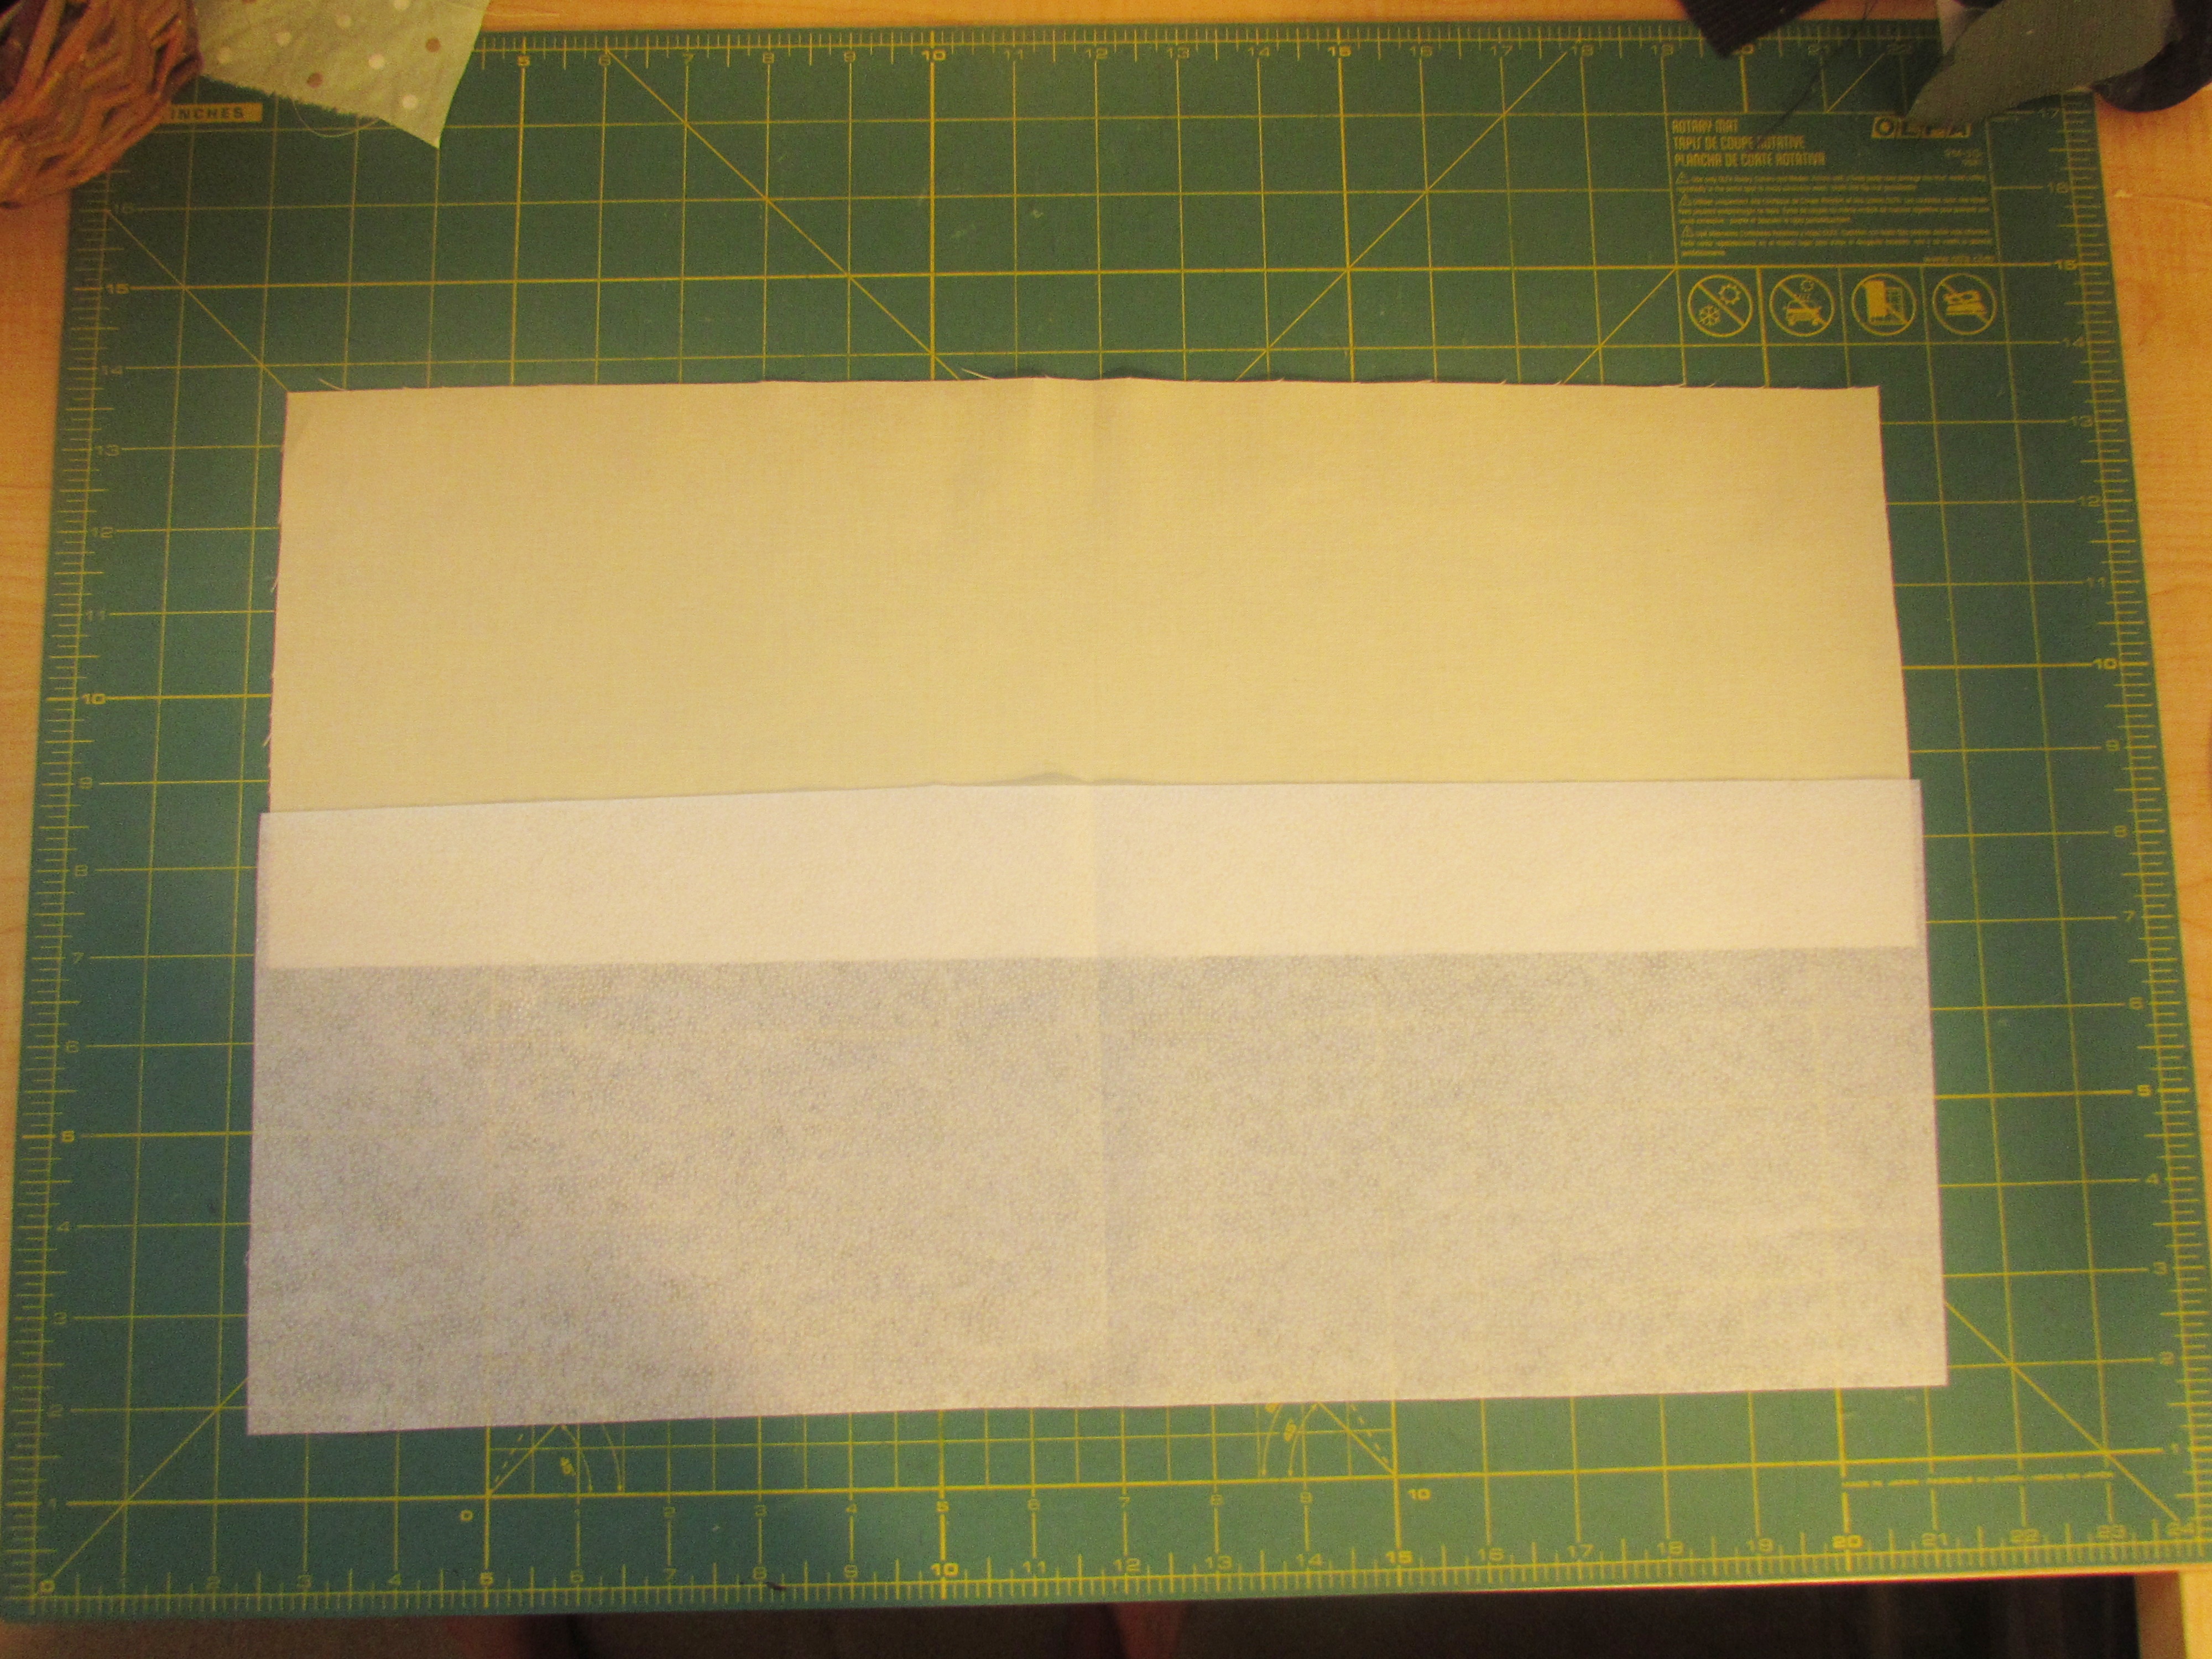
Background Fabric: one rectangle measuring 7″ x 19″
Heavyweight fusible interfacting: one rectangle measuring 7″ x 19″
Scraps for your border
Stencils for tracing the word THREAD. I used letters that were 3″ high.
Frixion pen or similar fabric marking pen
Binding fabric: Two strips that are 2 1/2″ by 42″ (Width of fabric)
Quilting thread. I used YLI thread in a variegated green and loved it!
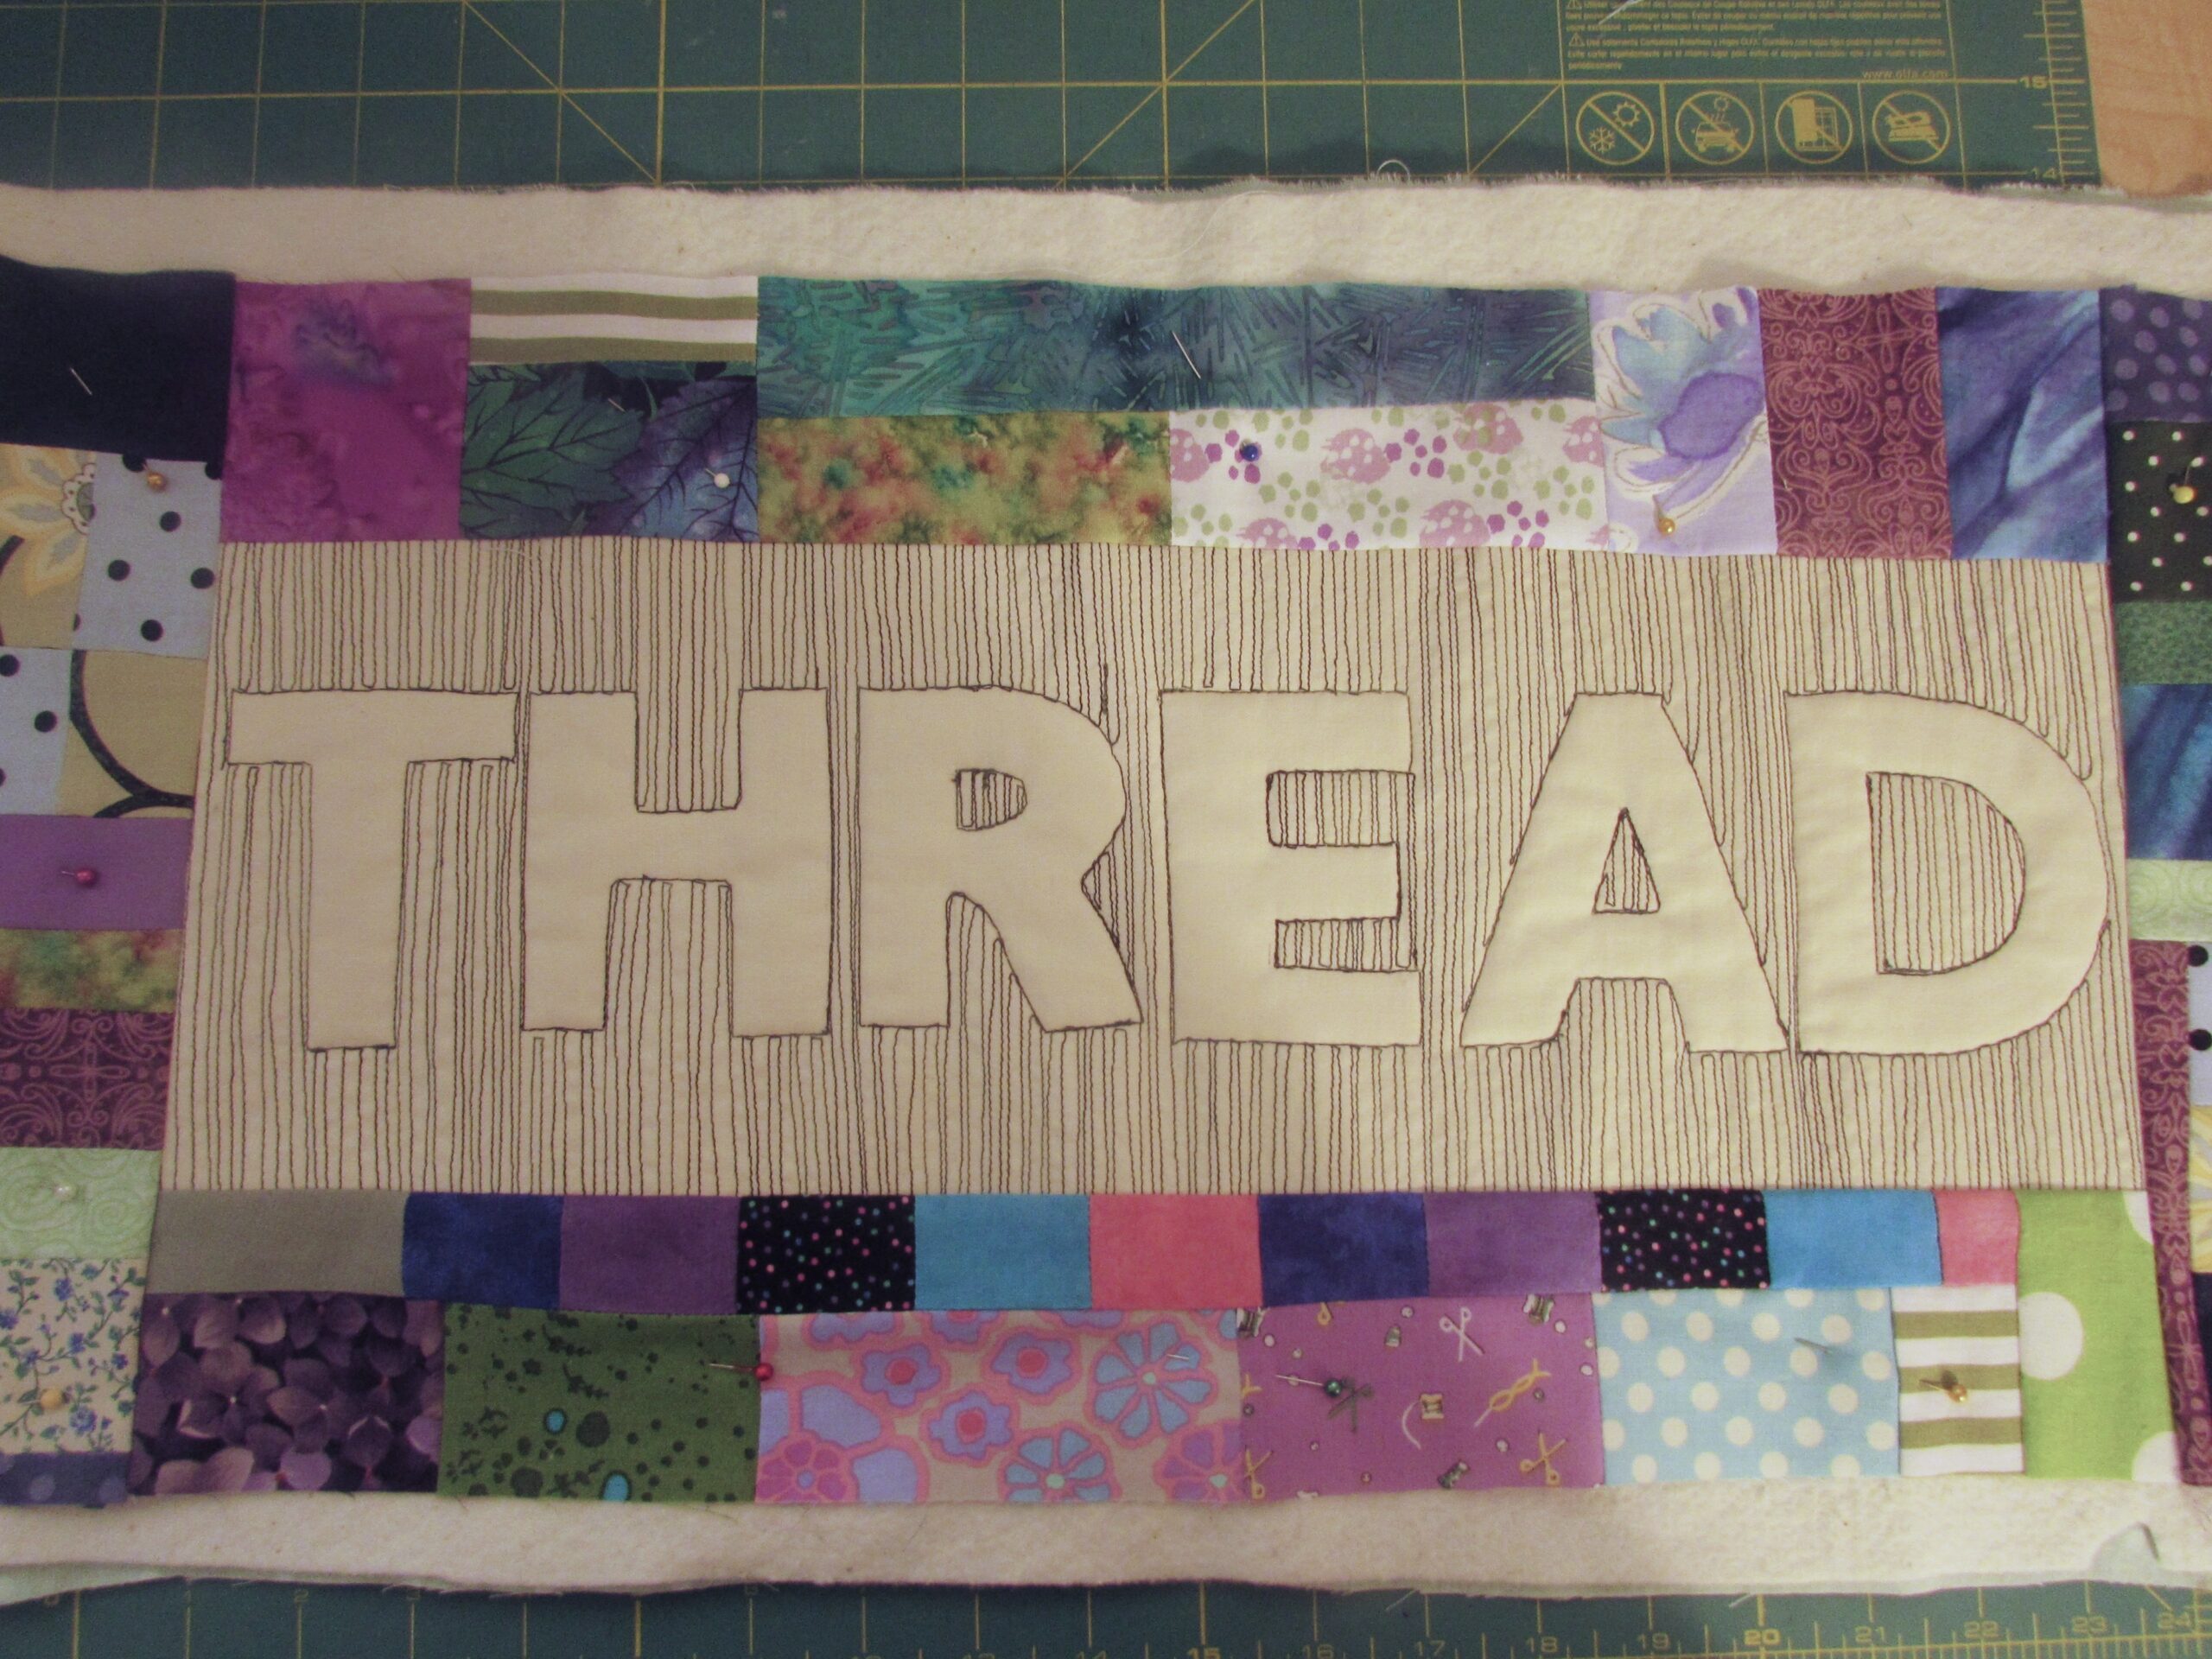
Take your background fabric and fuse the stabilizer to the wrong side of the fabric. Follow manufacturer’s instructions if you are not familiar with this process.
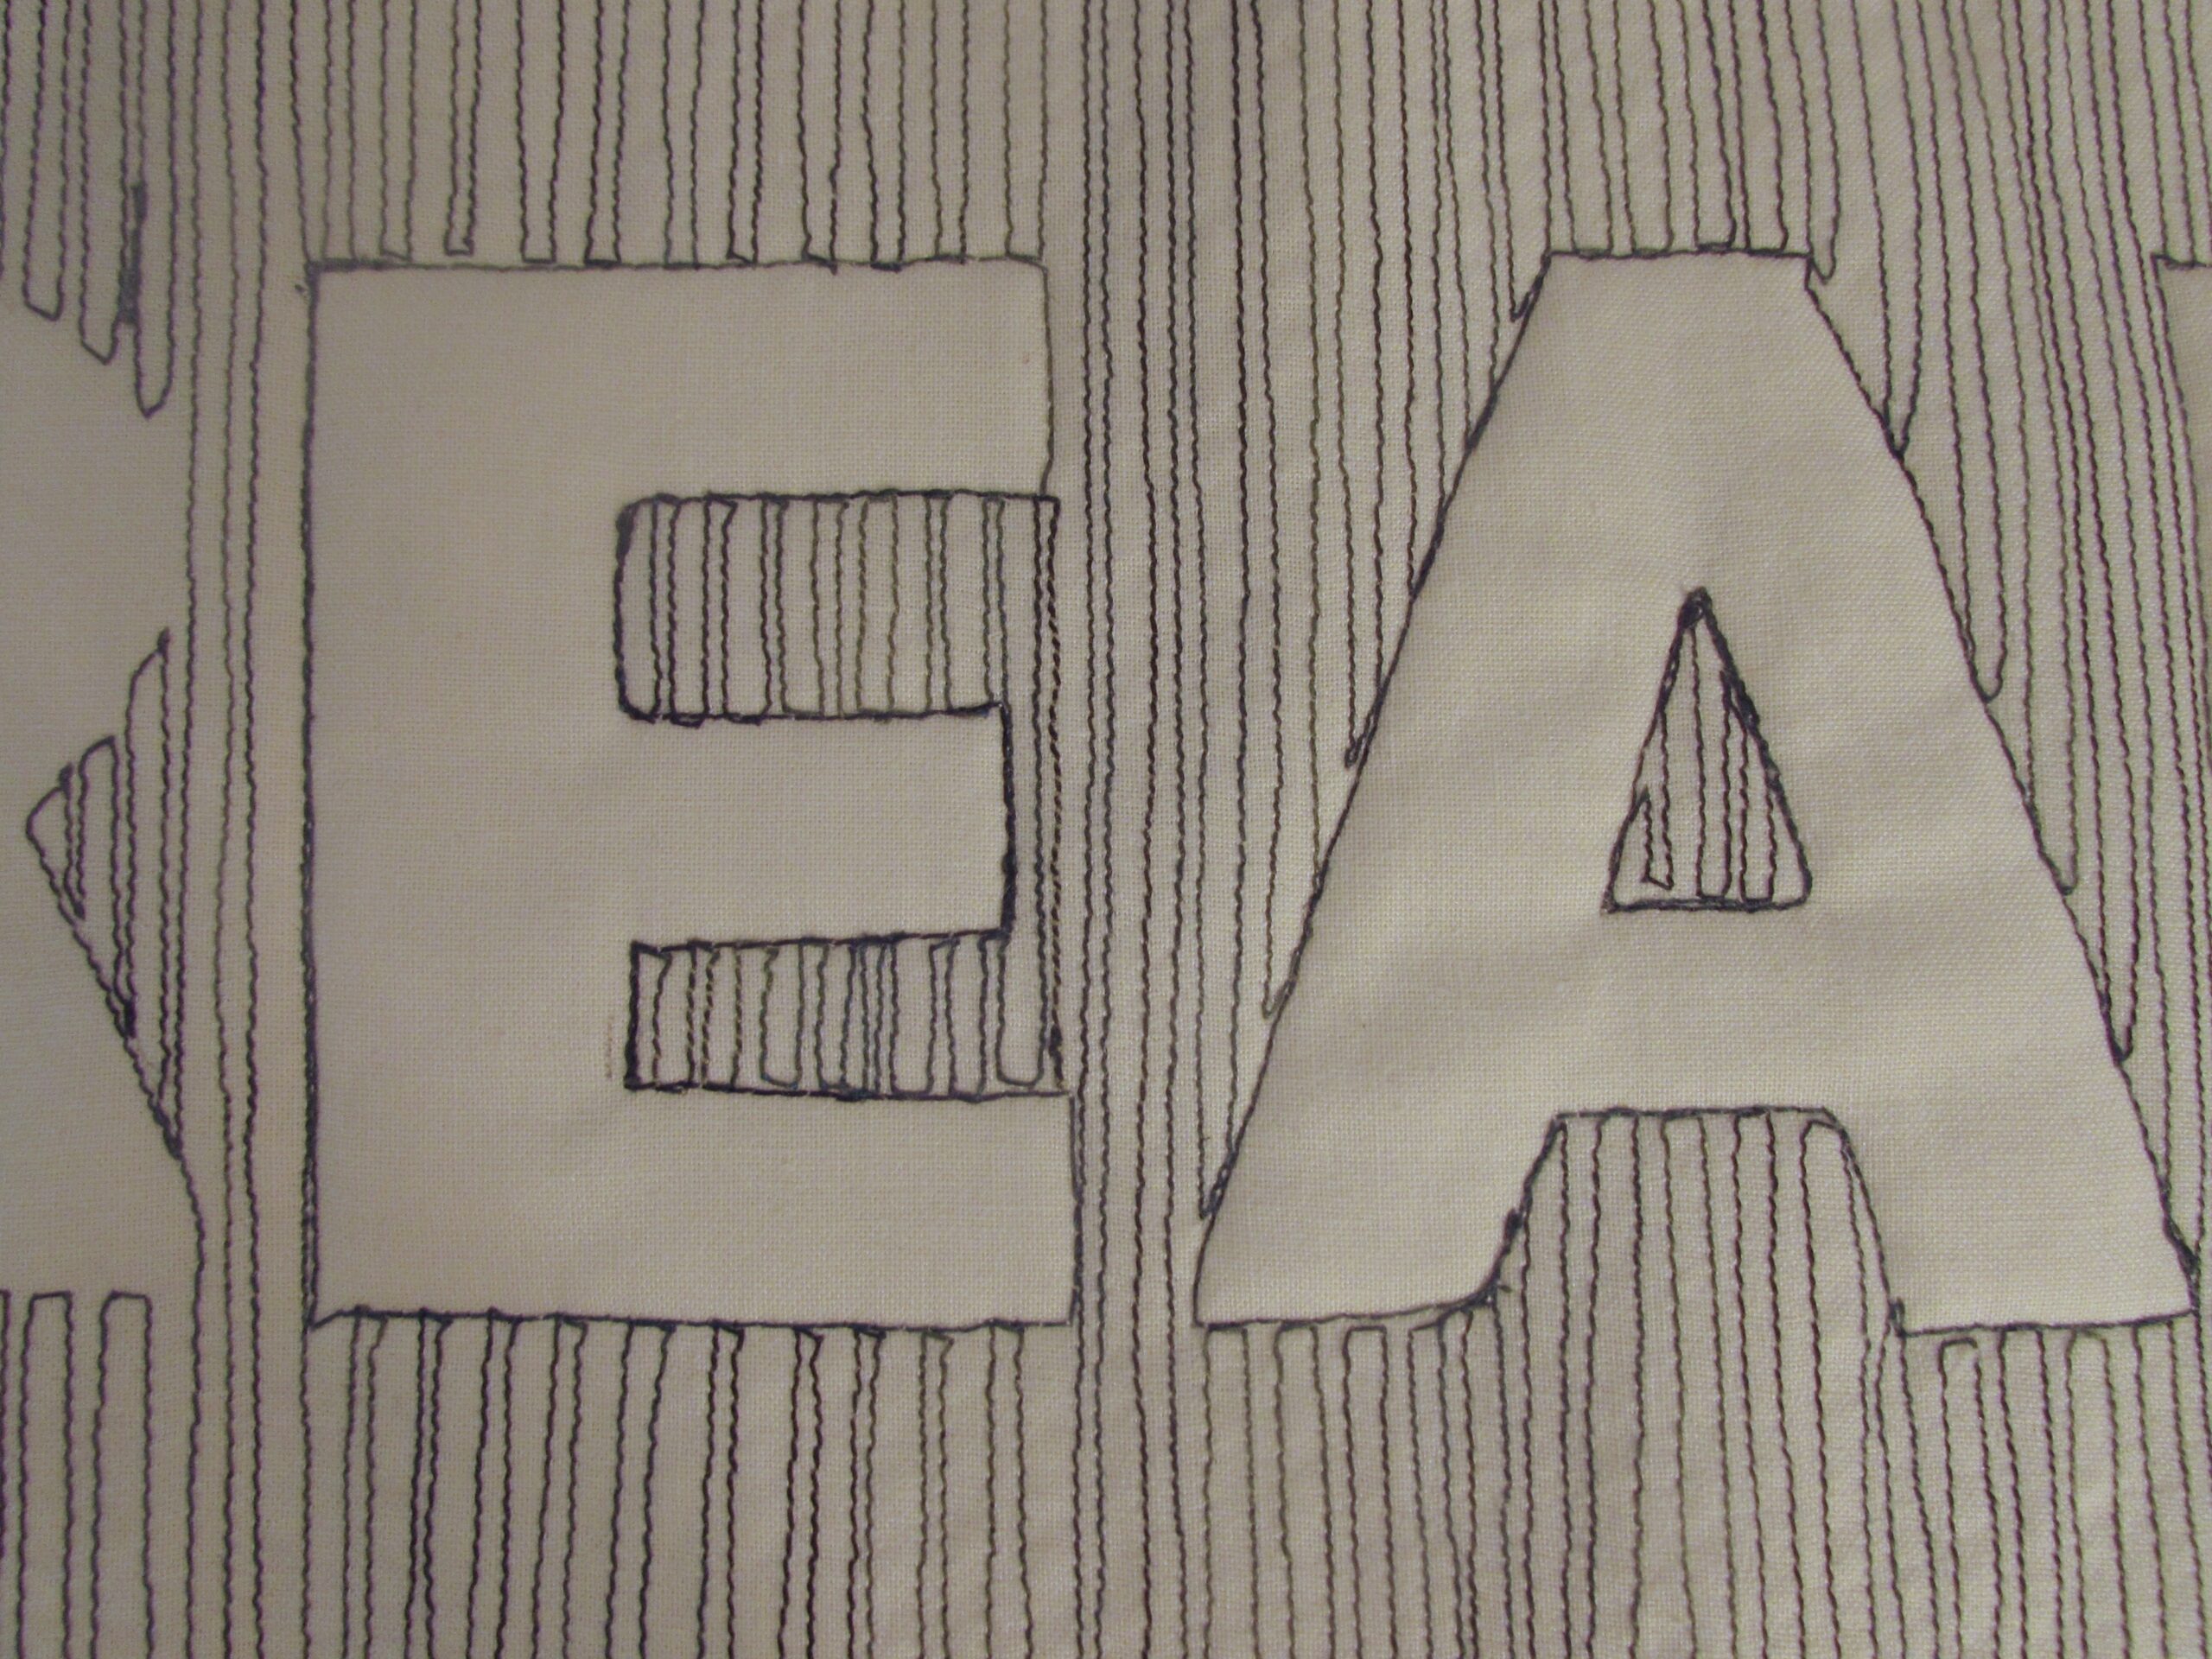
Trace the word on the fabric with the fabric safe marking pen of your choice. I didn’t leave very much room between the letters because I liked the way this looked. You could certainly adjust this to your taste. Also, I didn’t leave a ton of room on either side. Again, adjust as needed by cutting your background wider if you like.
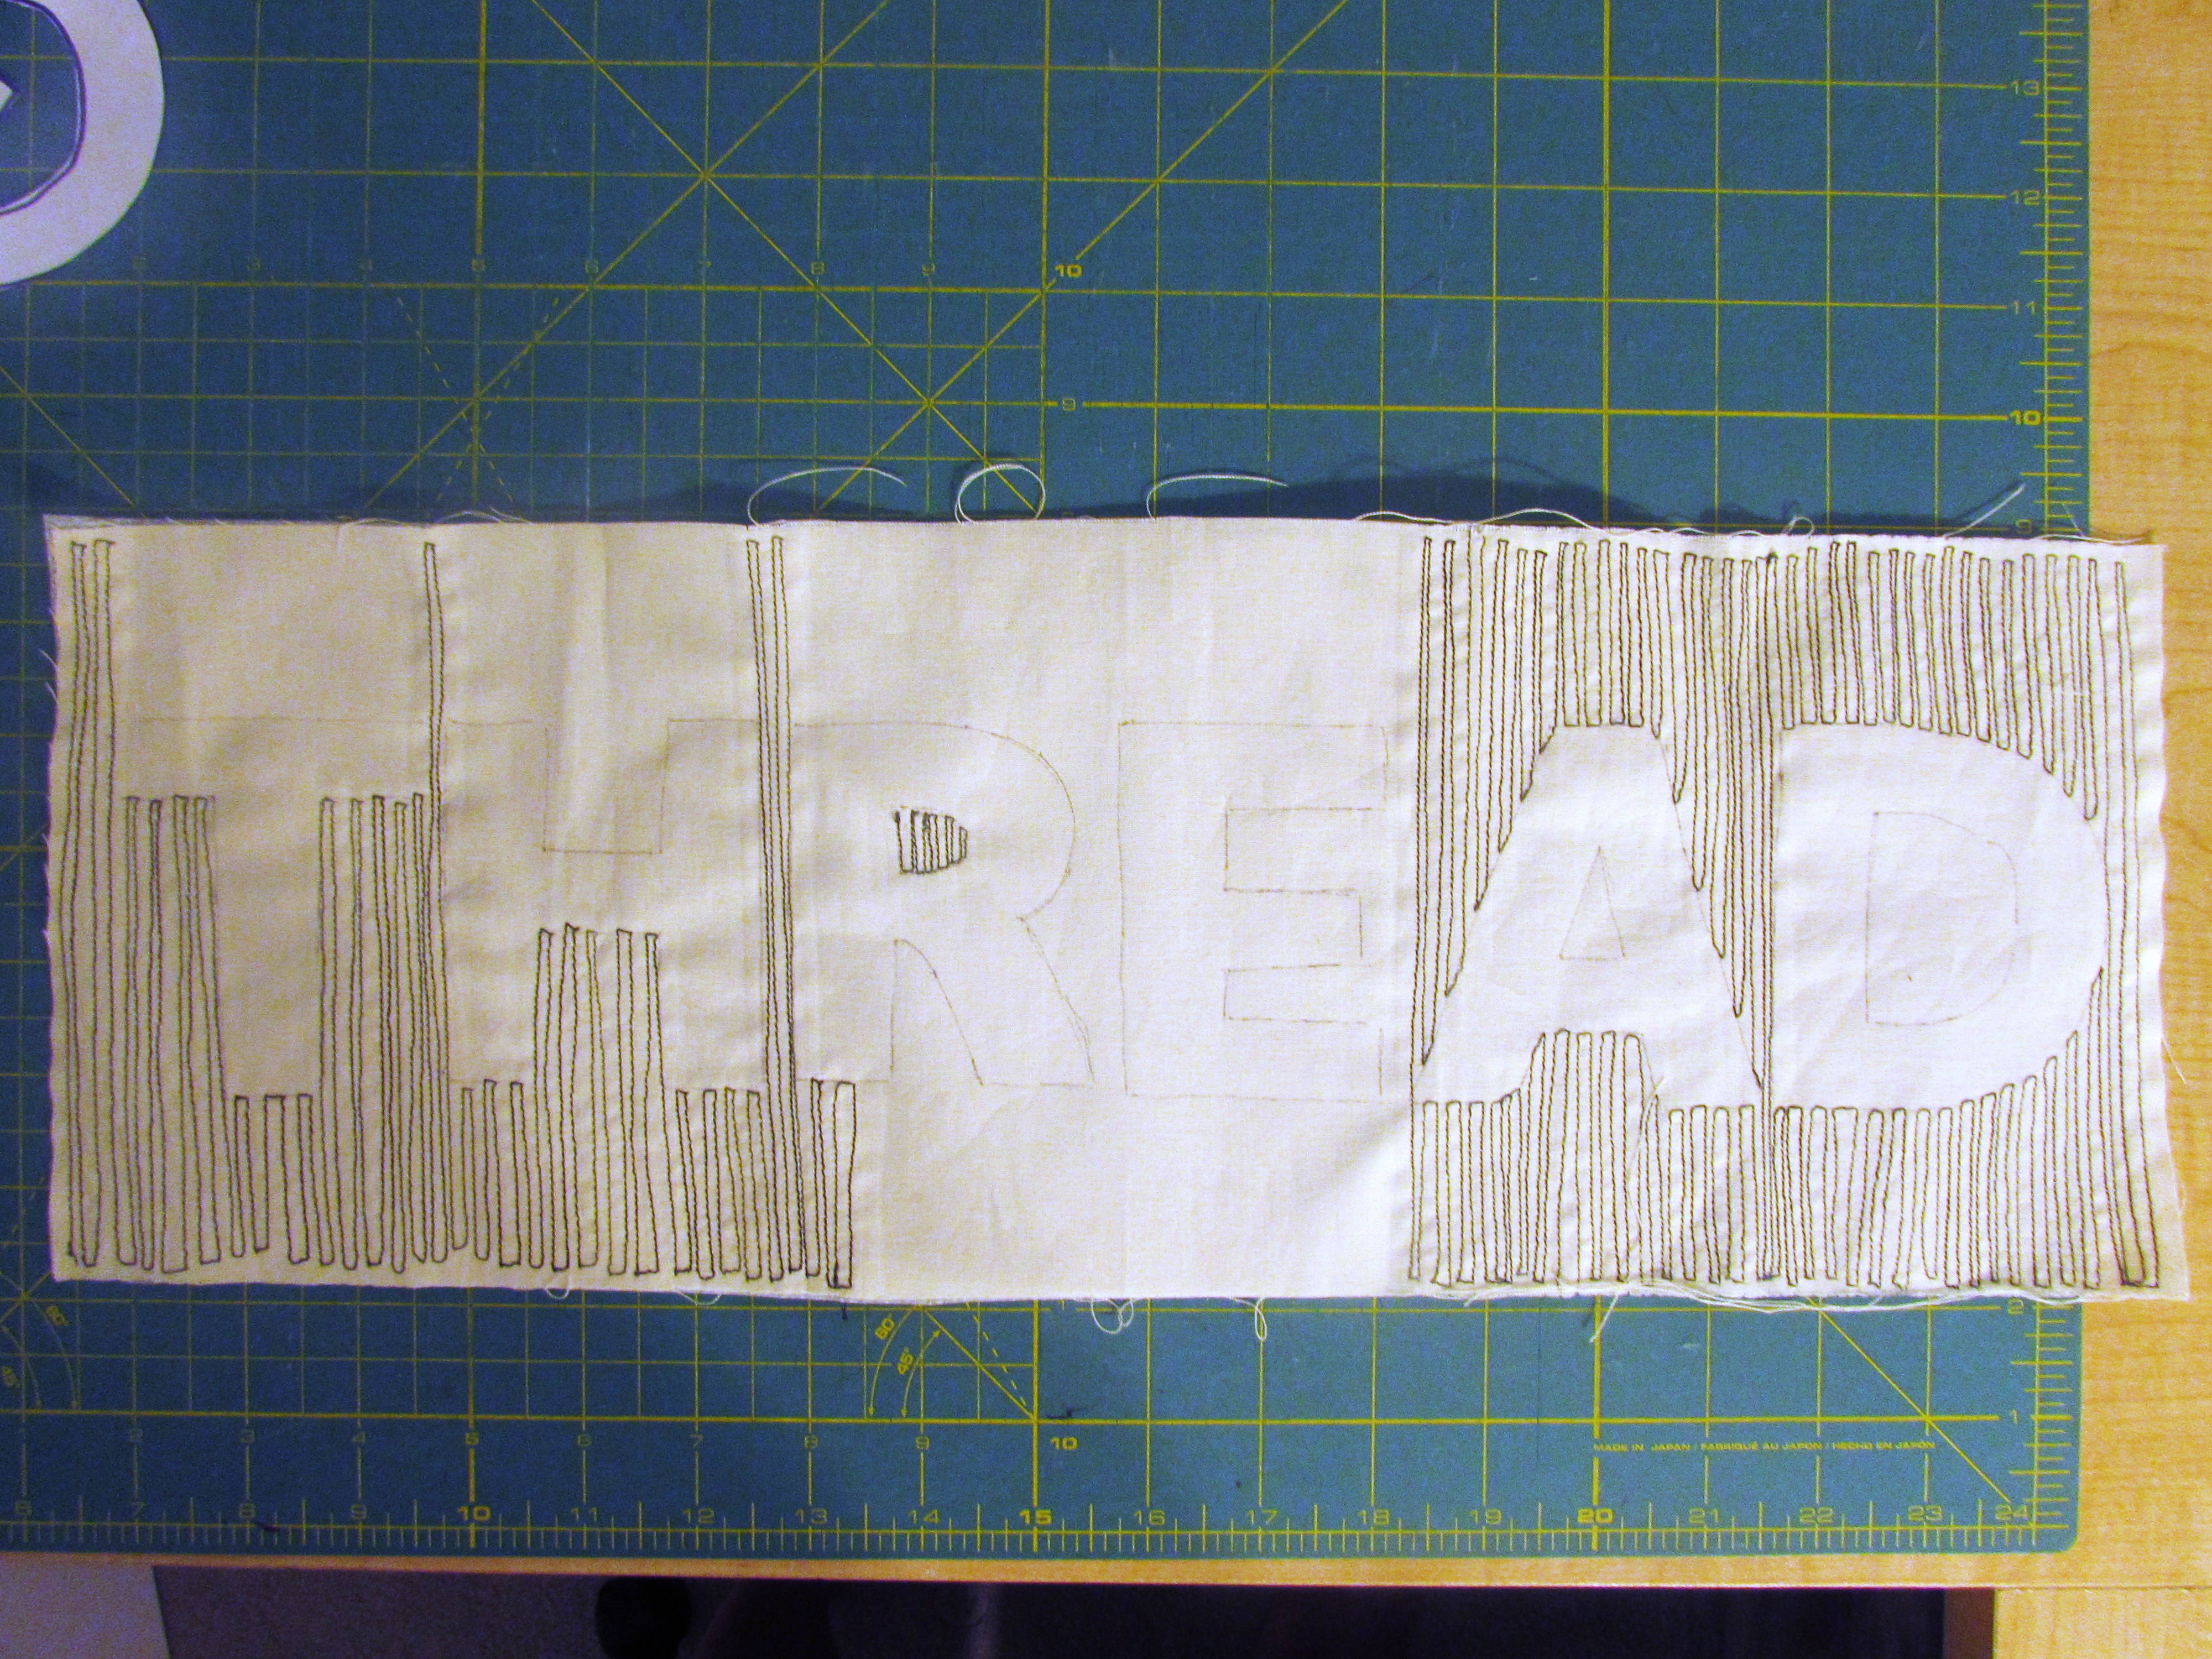
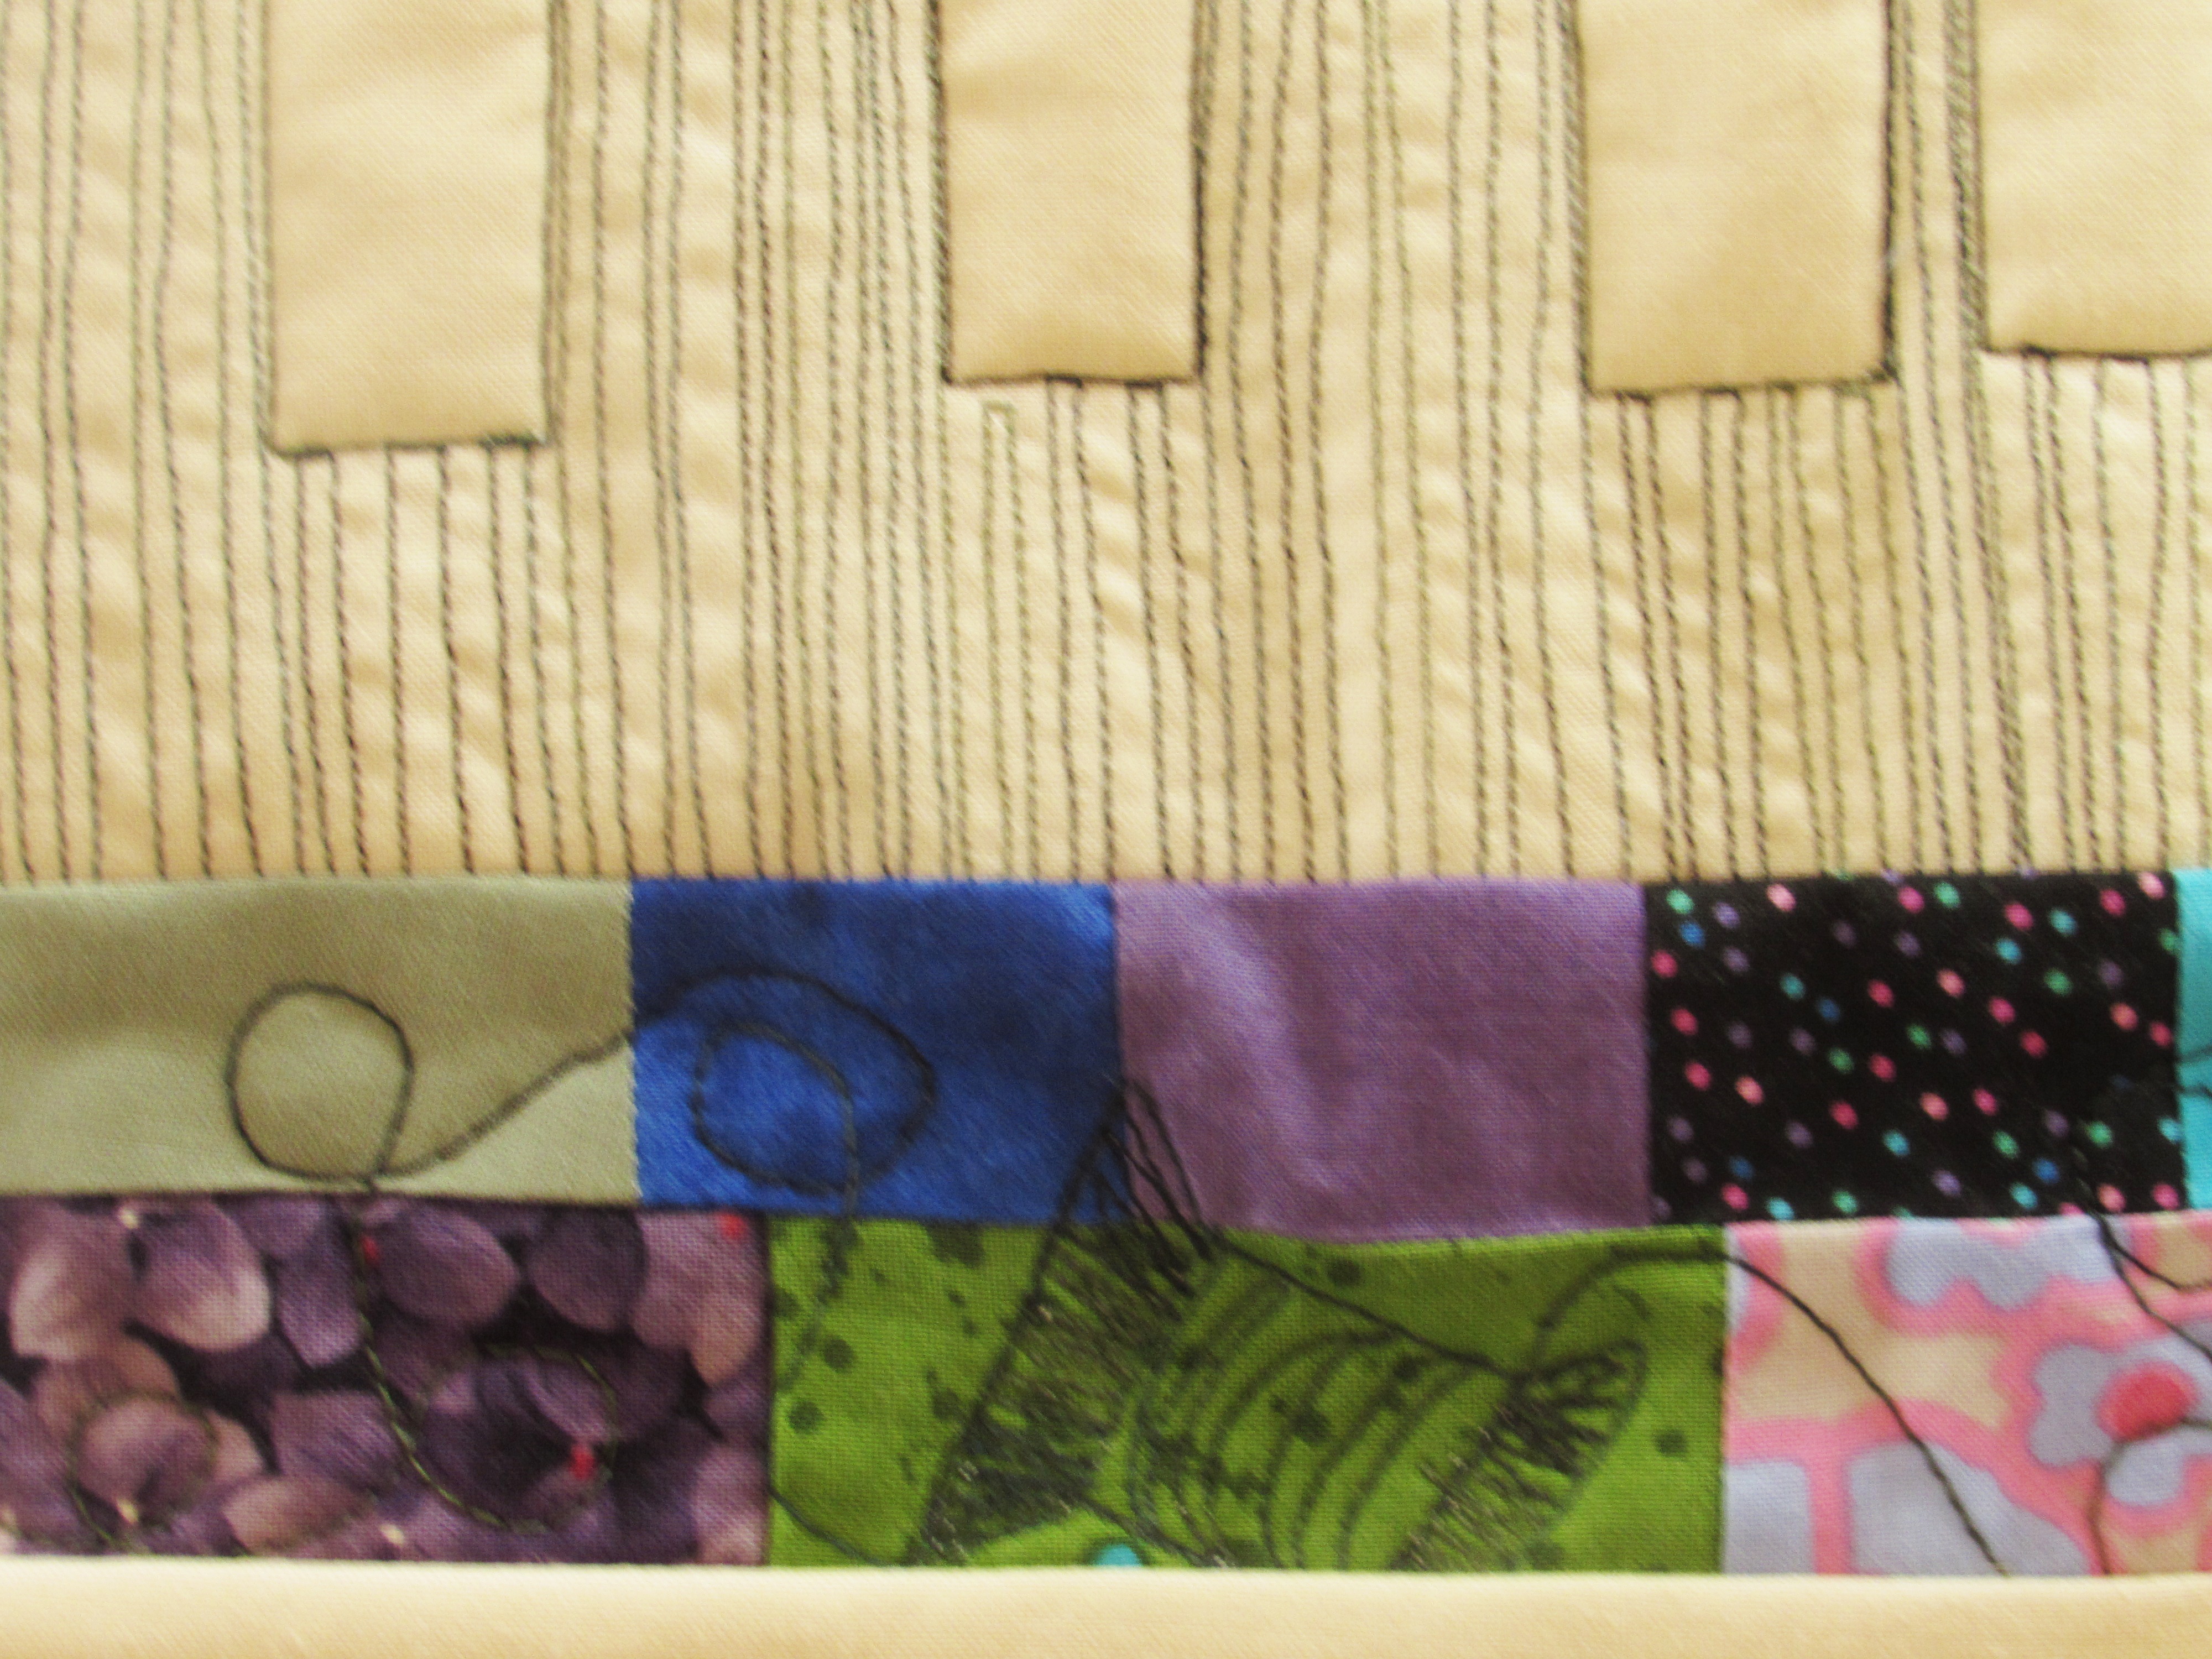
Using a walking foot, begin stitching long straight rows above, below and between the letters. I didn’t stitch the outline of the letters. This happens later on when you are quilting everything together. For now, just fill in every bit of space above, below and between each letter. You might choose to use a free motion foot for the little openings within a letter (e.g. the A and the D) so you don’t have to start and stop, twisting the fabric. I kept working with the walking foot because the block is small and easily rotates. Each time I came to the botton or top and needed to move to the next line, I very slowly stitched one stitch over, sometimes doing so by manually turning the wheel on the machine so I moved just one stitch. This kept my rows extremely close together. If you have a needle down function, this helps. Just go one stitch and let the needle stay down while you turn the piece. Now and then, the width looked to wide to me and I would back up and fill in with another line of stitching. Remember you will be viewing this from a distance and it looks much better that way. While stitching, you are looking at it from 6-8″ away and you’ll see every wobble. Not a problem. You are going for the overall effect.
See how the word starts to come to life? I love that! Now keep on stitching!
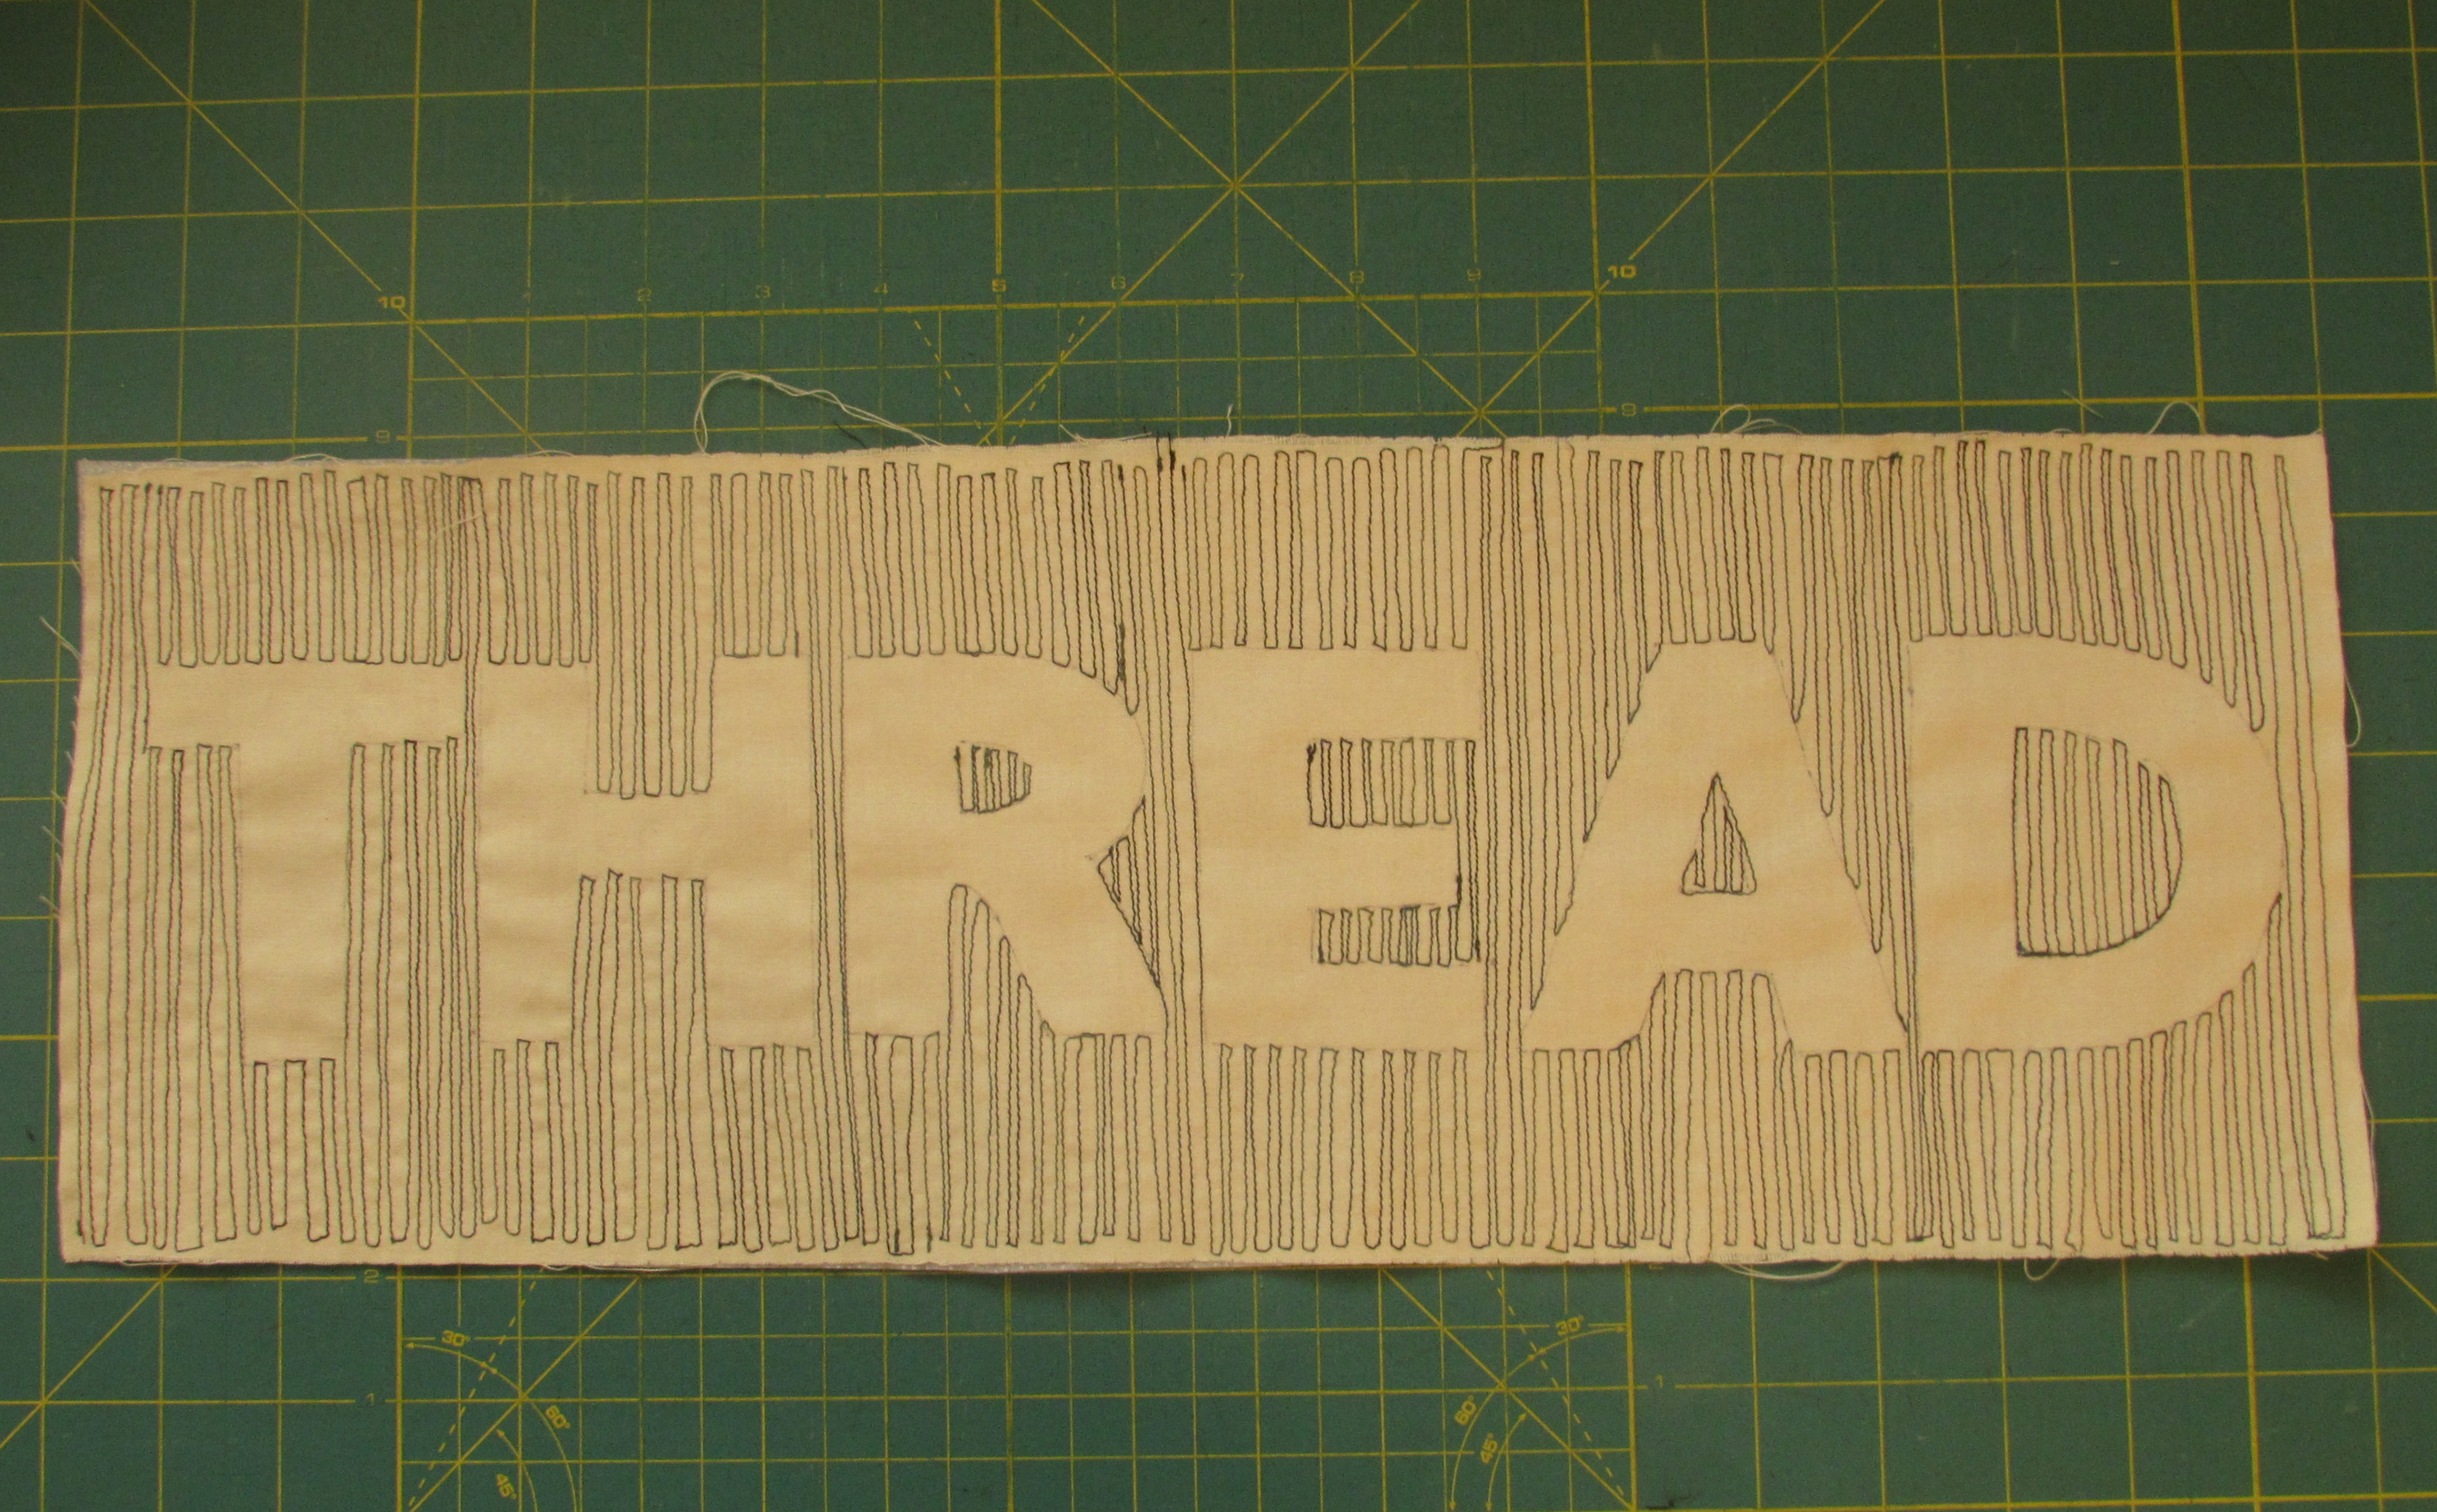
Making good progress here. The word is complete and it is time to begin working on your border.
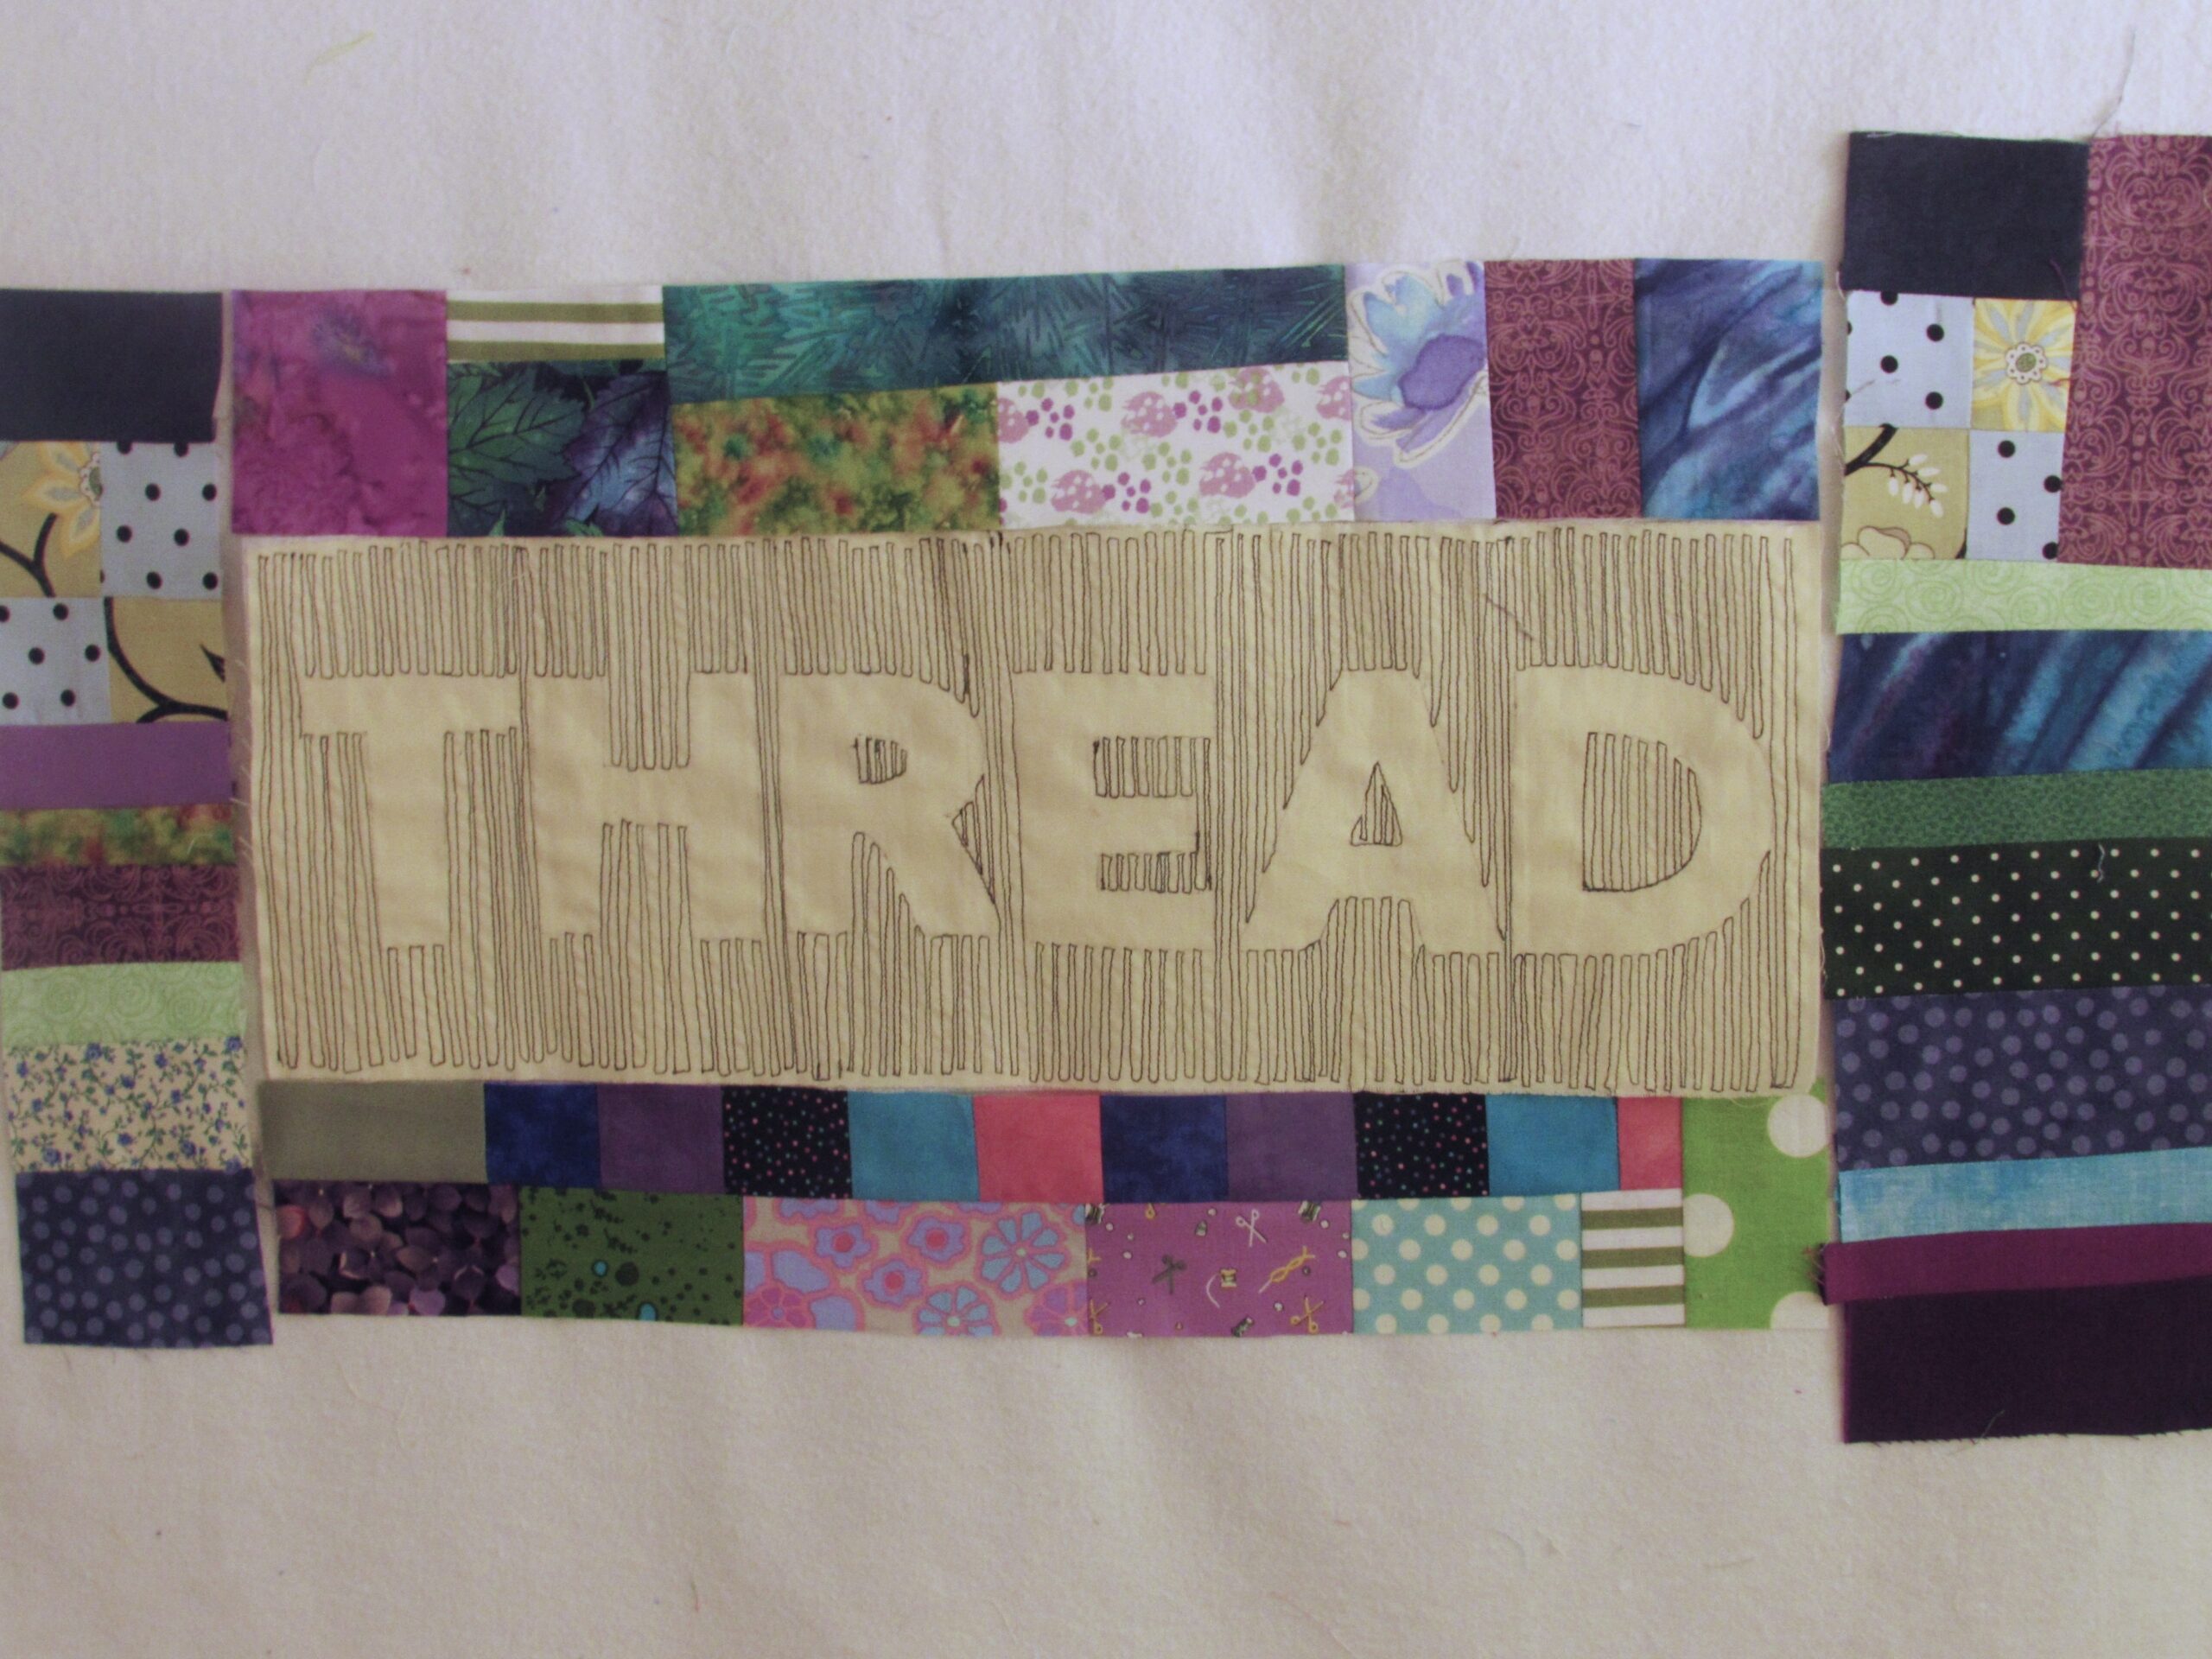
I made an improv border by taking squares and rectangles in my color scheme (basically greens, purples and blues) and built four pieces, two for the ends and two for the top and bottom. I didn’t worry about size too much. I made them a bit longer than the side I wanted to sew them to and since I wanted to have them trim out to 3 inches, I made sure the whole thing measured wider than 3 inches. Note: If you are not comfortable with this scrappy improv process, I recommend grabbing a copy of 15 Minutes of Play by Victoria Findlay Wolfe at your library. She does an excellent job of guiding you through. Alternatively, Amanda Jean Nyberg at Crazy Mom Quilts did a Quiltalong last summer called Scrap Vortex. In this post, she talks about building with scraps. It might be of help to you.
After playing with them on the design wall, I trimmed each to a width of 3″. I sewed the top and bottom borders on first and then added each side.
The next step is to make a quilt sandwich with your top, the batting and your backing fabric. I pieced the batting from scraps I had. Just pin it around the border tightly since you are going to quilt in the center first. My batting was just barely bigger than the top but since it was such a small piece I felt ok with that. Normally I use batting that is a good two inches larger than the top all the way around.
Continue to use your walking foot and slowly stitch around each letter. It is a bit like connecting the dots as you want to trace over the place where you stitched over to the next line. Just move slowly and turn frequently (with your needle down while turning) when stitching over a curve.
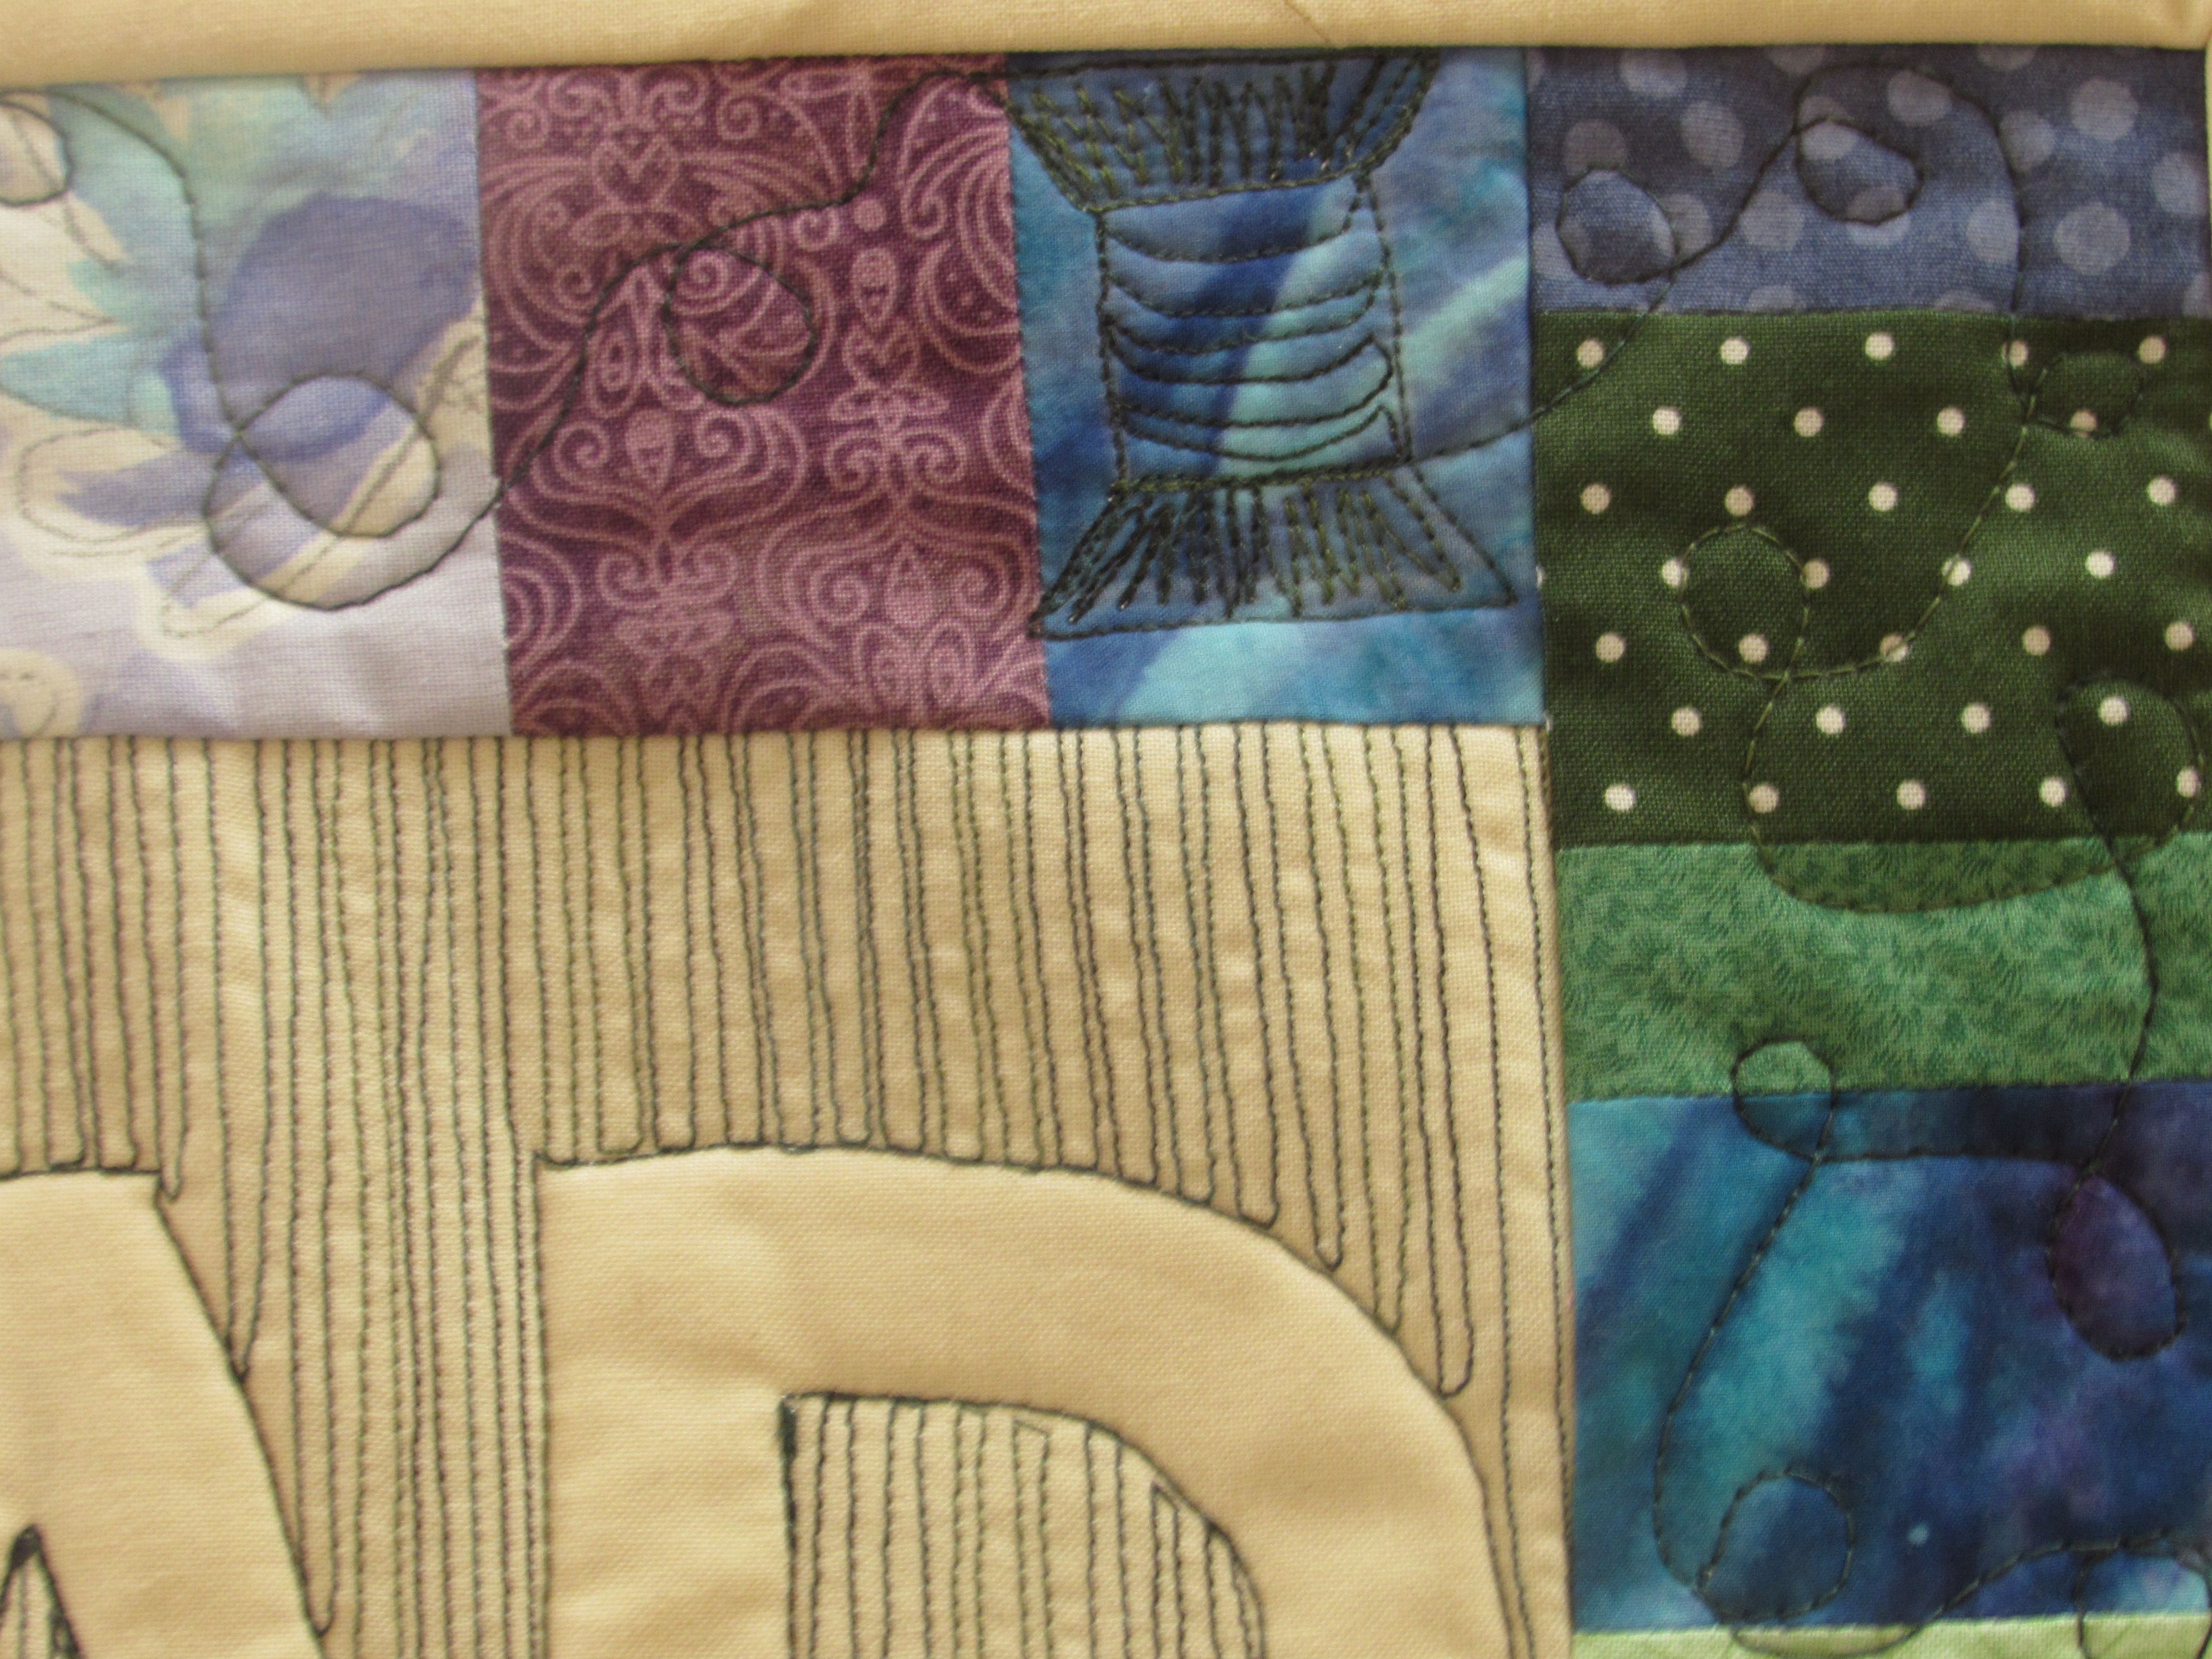
I love the way the letters come to life when quilted to the batting. Next I moved on to the border. I love the little spools of thread that I quilted on the first piece and carried them through to this piece as well. Considering the thread theme of this project, it worked well.
With each spool, I filled in the top and bottom so they would show up a bit better. If you like this idea, take a look at this tutorial of Lori Kennedy’s over at the Inbox Jaunt.
The spools are whimsical and they add a bit of movement to the quilting as the ‘thread’ flows off each spool.
Once you complete the quilting, trim, square and bind. Finished!
Isn’t this adorable?????
And both of them together?? All kinds of cuteness. What fun (and easy) projects both of these were. I have the sleeve sewn on to FABRIC but still need to make a sleeve for THREAD. They will be on the wall soon. I’ll post a picture next week.
I hope my explanation is helpful. If you make one, let me know. I would love to see it!
I’ll be linking to the usuals which can be found at the top of the page, under Link Ups.
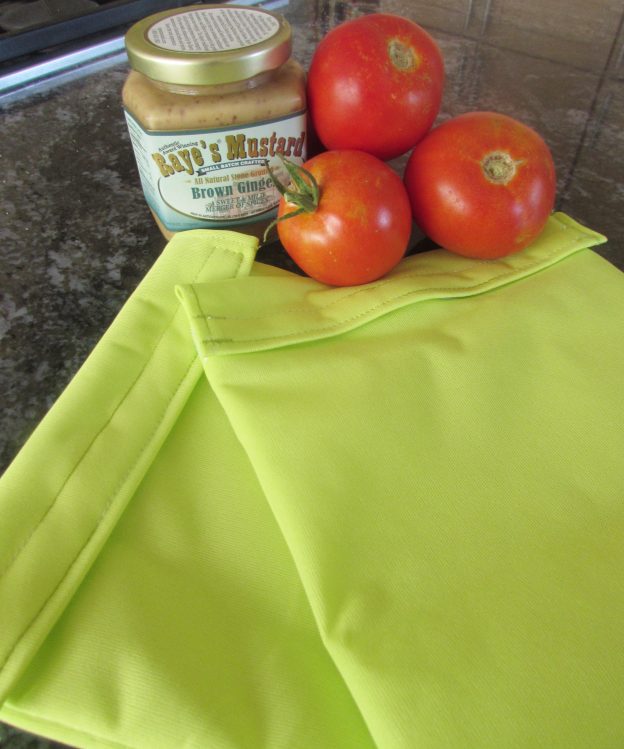
I am all about reusing and recycling. We try to minimize our garbage by recycling everything, composting all that we can and feeding many of our kitchen scraps to our chickens. As for single use plastic (e.g. zip lok bags), I really try to avoid them and when I do use them, I wash them and re-use them again and again because plastic just doesn’t break down or biodegrade. To that end, we have been using reusable bags for packing school and work lunches for the past several years. At this point they are looking pretty grungy. As usual, I hopped on Amazon to order some. Looking at the price ($25.90 for only three bags) and the simplicity of the bags, I decided to make them.
I wrote a tutorial for these bags a few months ago but had purchased the wrong fabric and found out it wasn’t food safe. I asked readers if anyone knew of a food safe fabric and lucky for me, Gayle of Pedal Sew Lightly, responded right away with a link to Wazoodle.
I quickly purchased a piece of PUL from that measured 18 x 60 inches (one half yard) and a strip of velcro for less than $15.00. Thus far, I have made three reusable bags (sandwich size) and I have plenty of fabric to make a few more. Yay for knowing how to sew, right?
These are extremely quick and easy to stitch up. Here are the instructions.
Materials required for one bag:
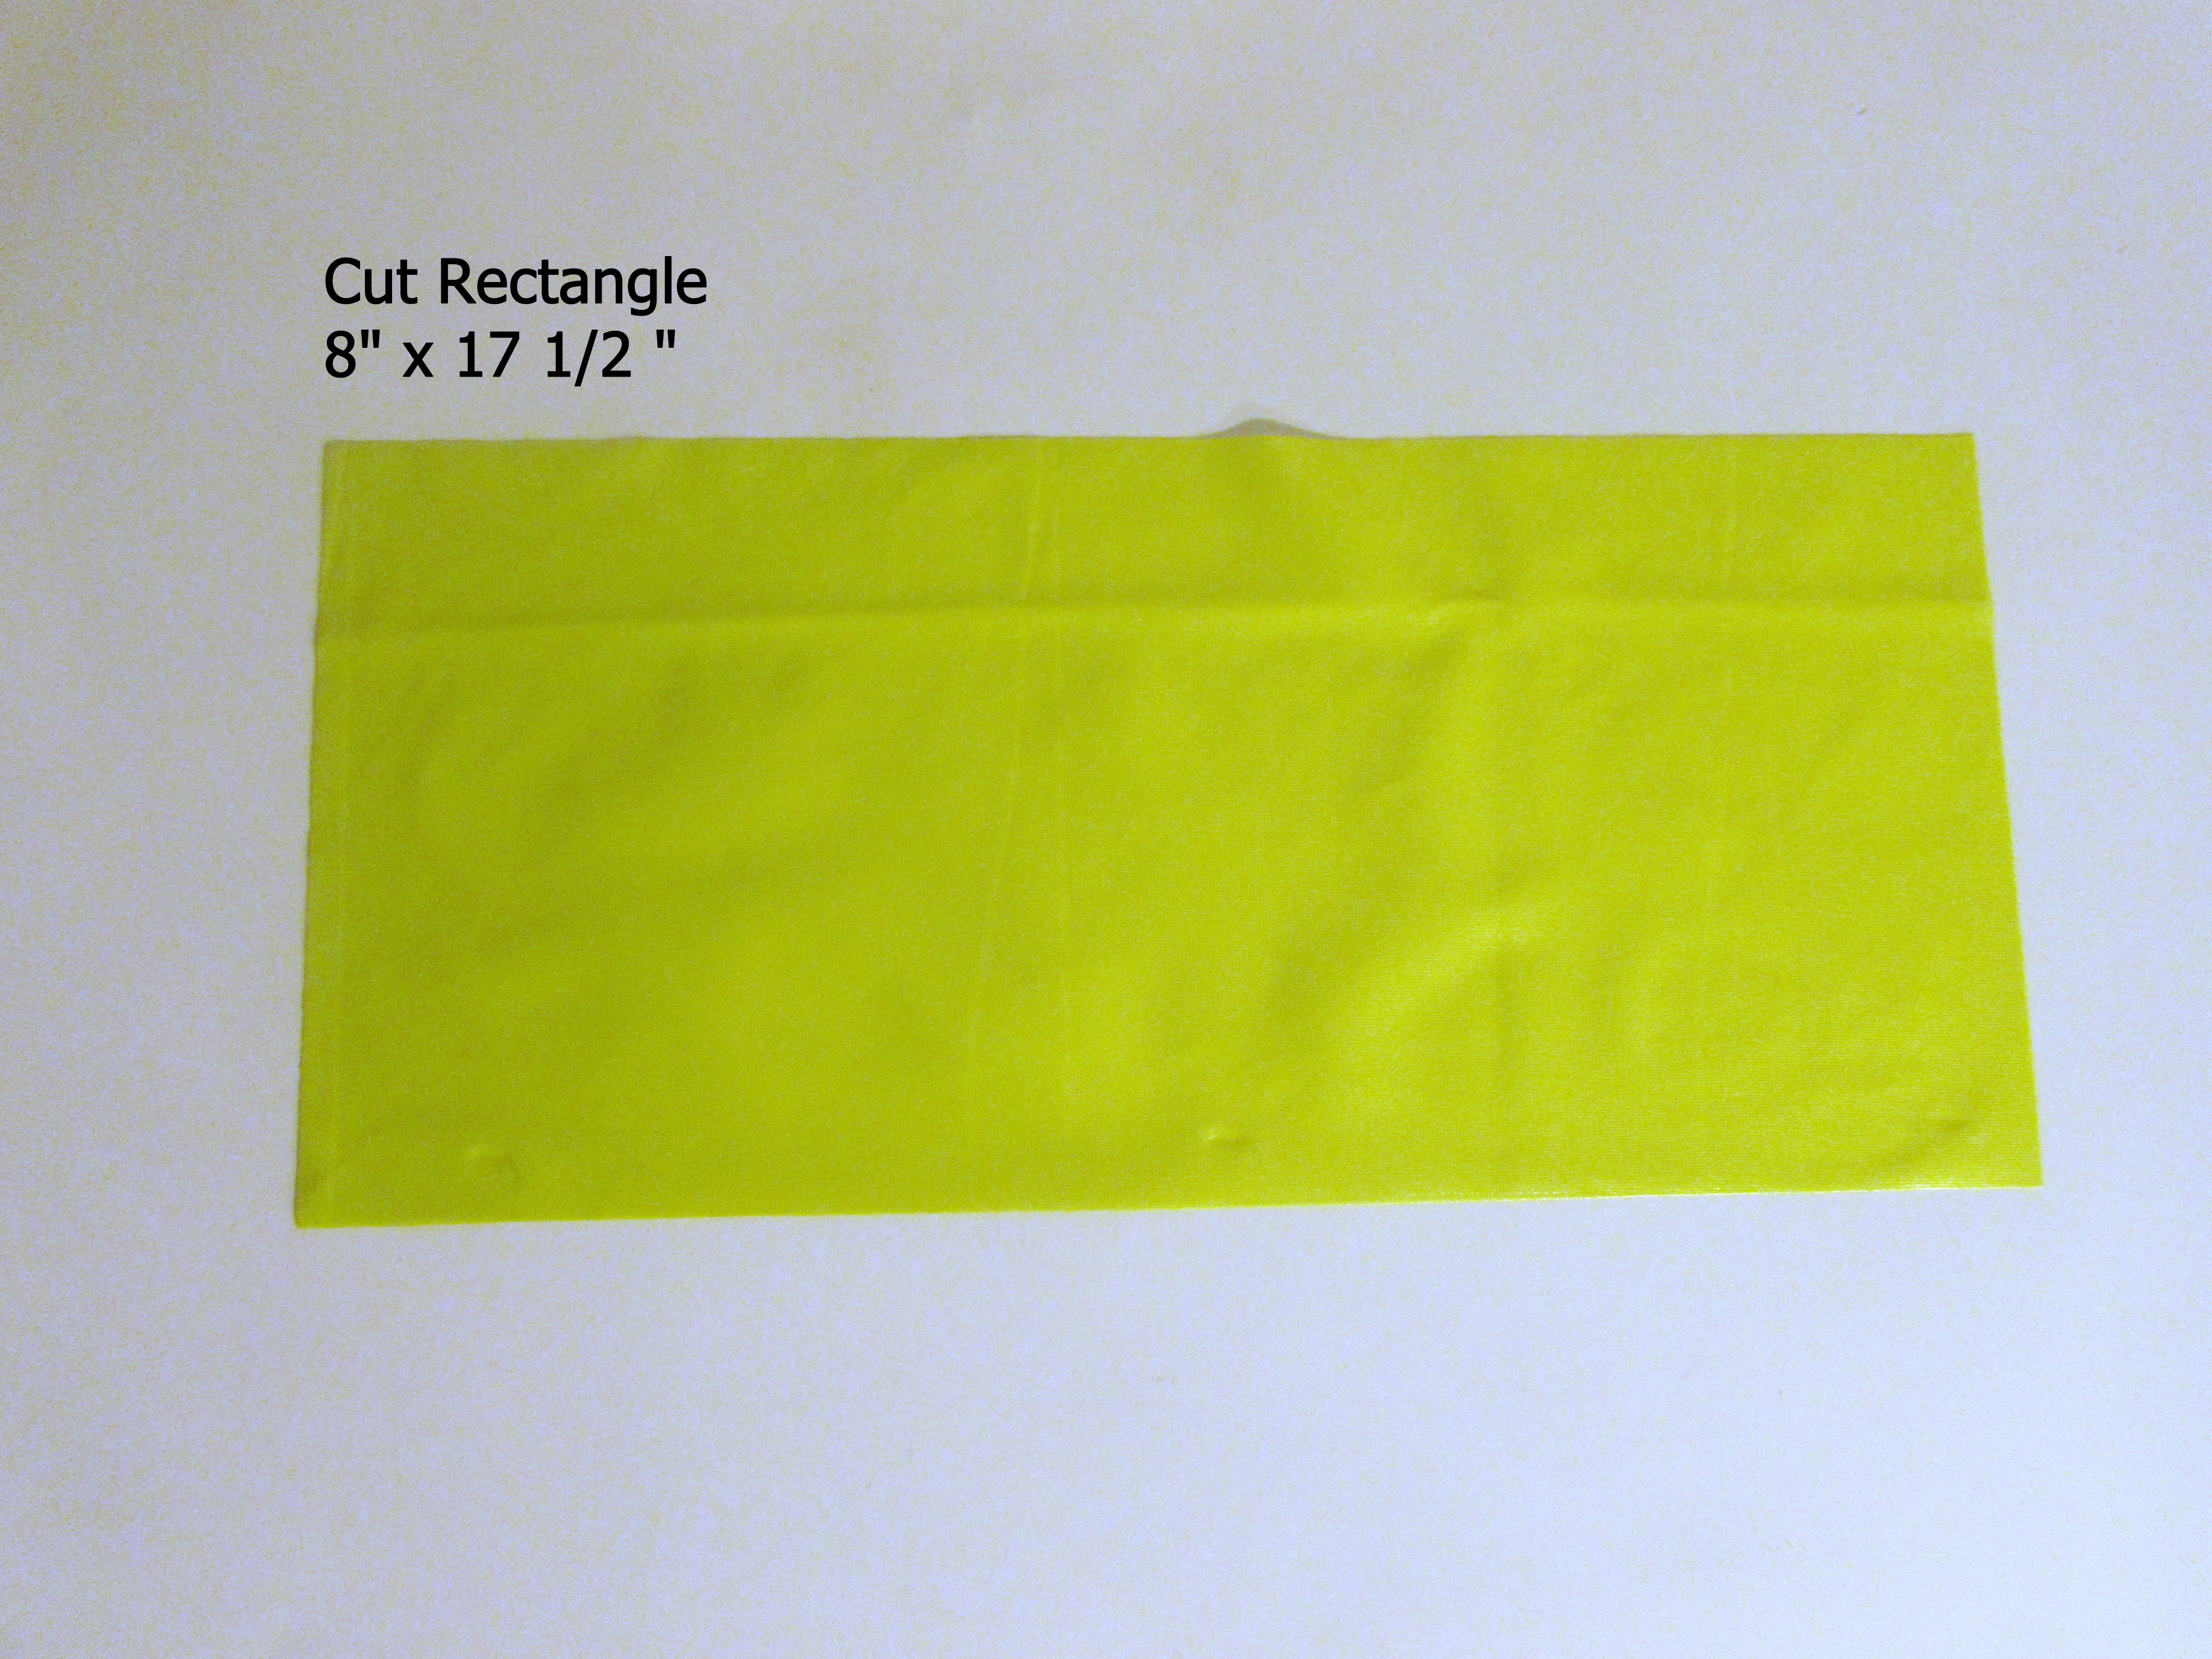
PUL fabric: 8 inches x 17.5 inches
Thread
Velcro: 8 inch strip that is one inch wide
Note: PUL is very slippery fabric. I used a walking foot when sewing because having the extra traction of the walking foot made it so much easier to stitch. Maintain a light hold on the back side of the fabric, as though you are guiding it through the machine. Hold it but don’t pull on it.
Cut your rectangle of fabric.
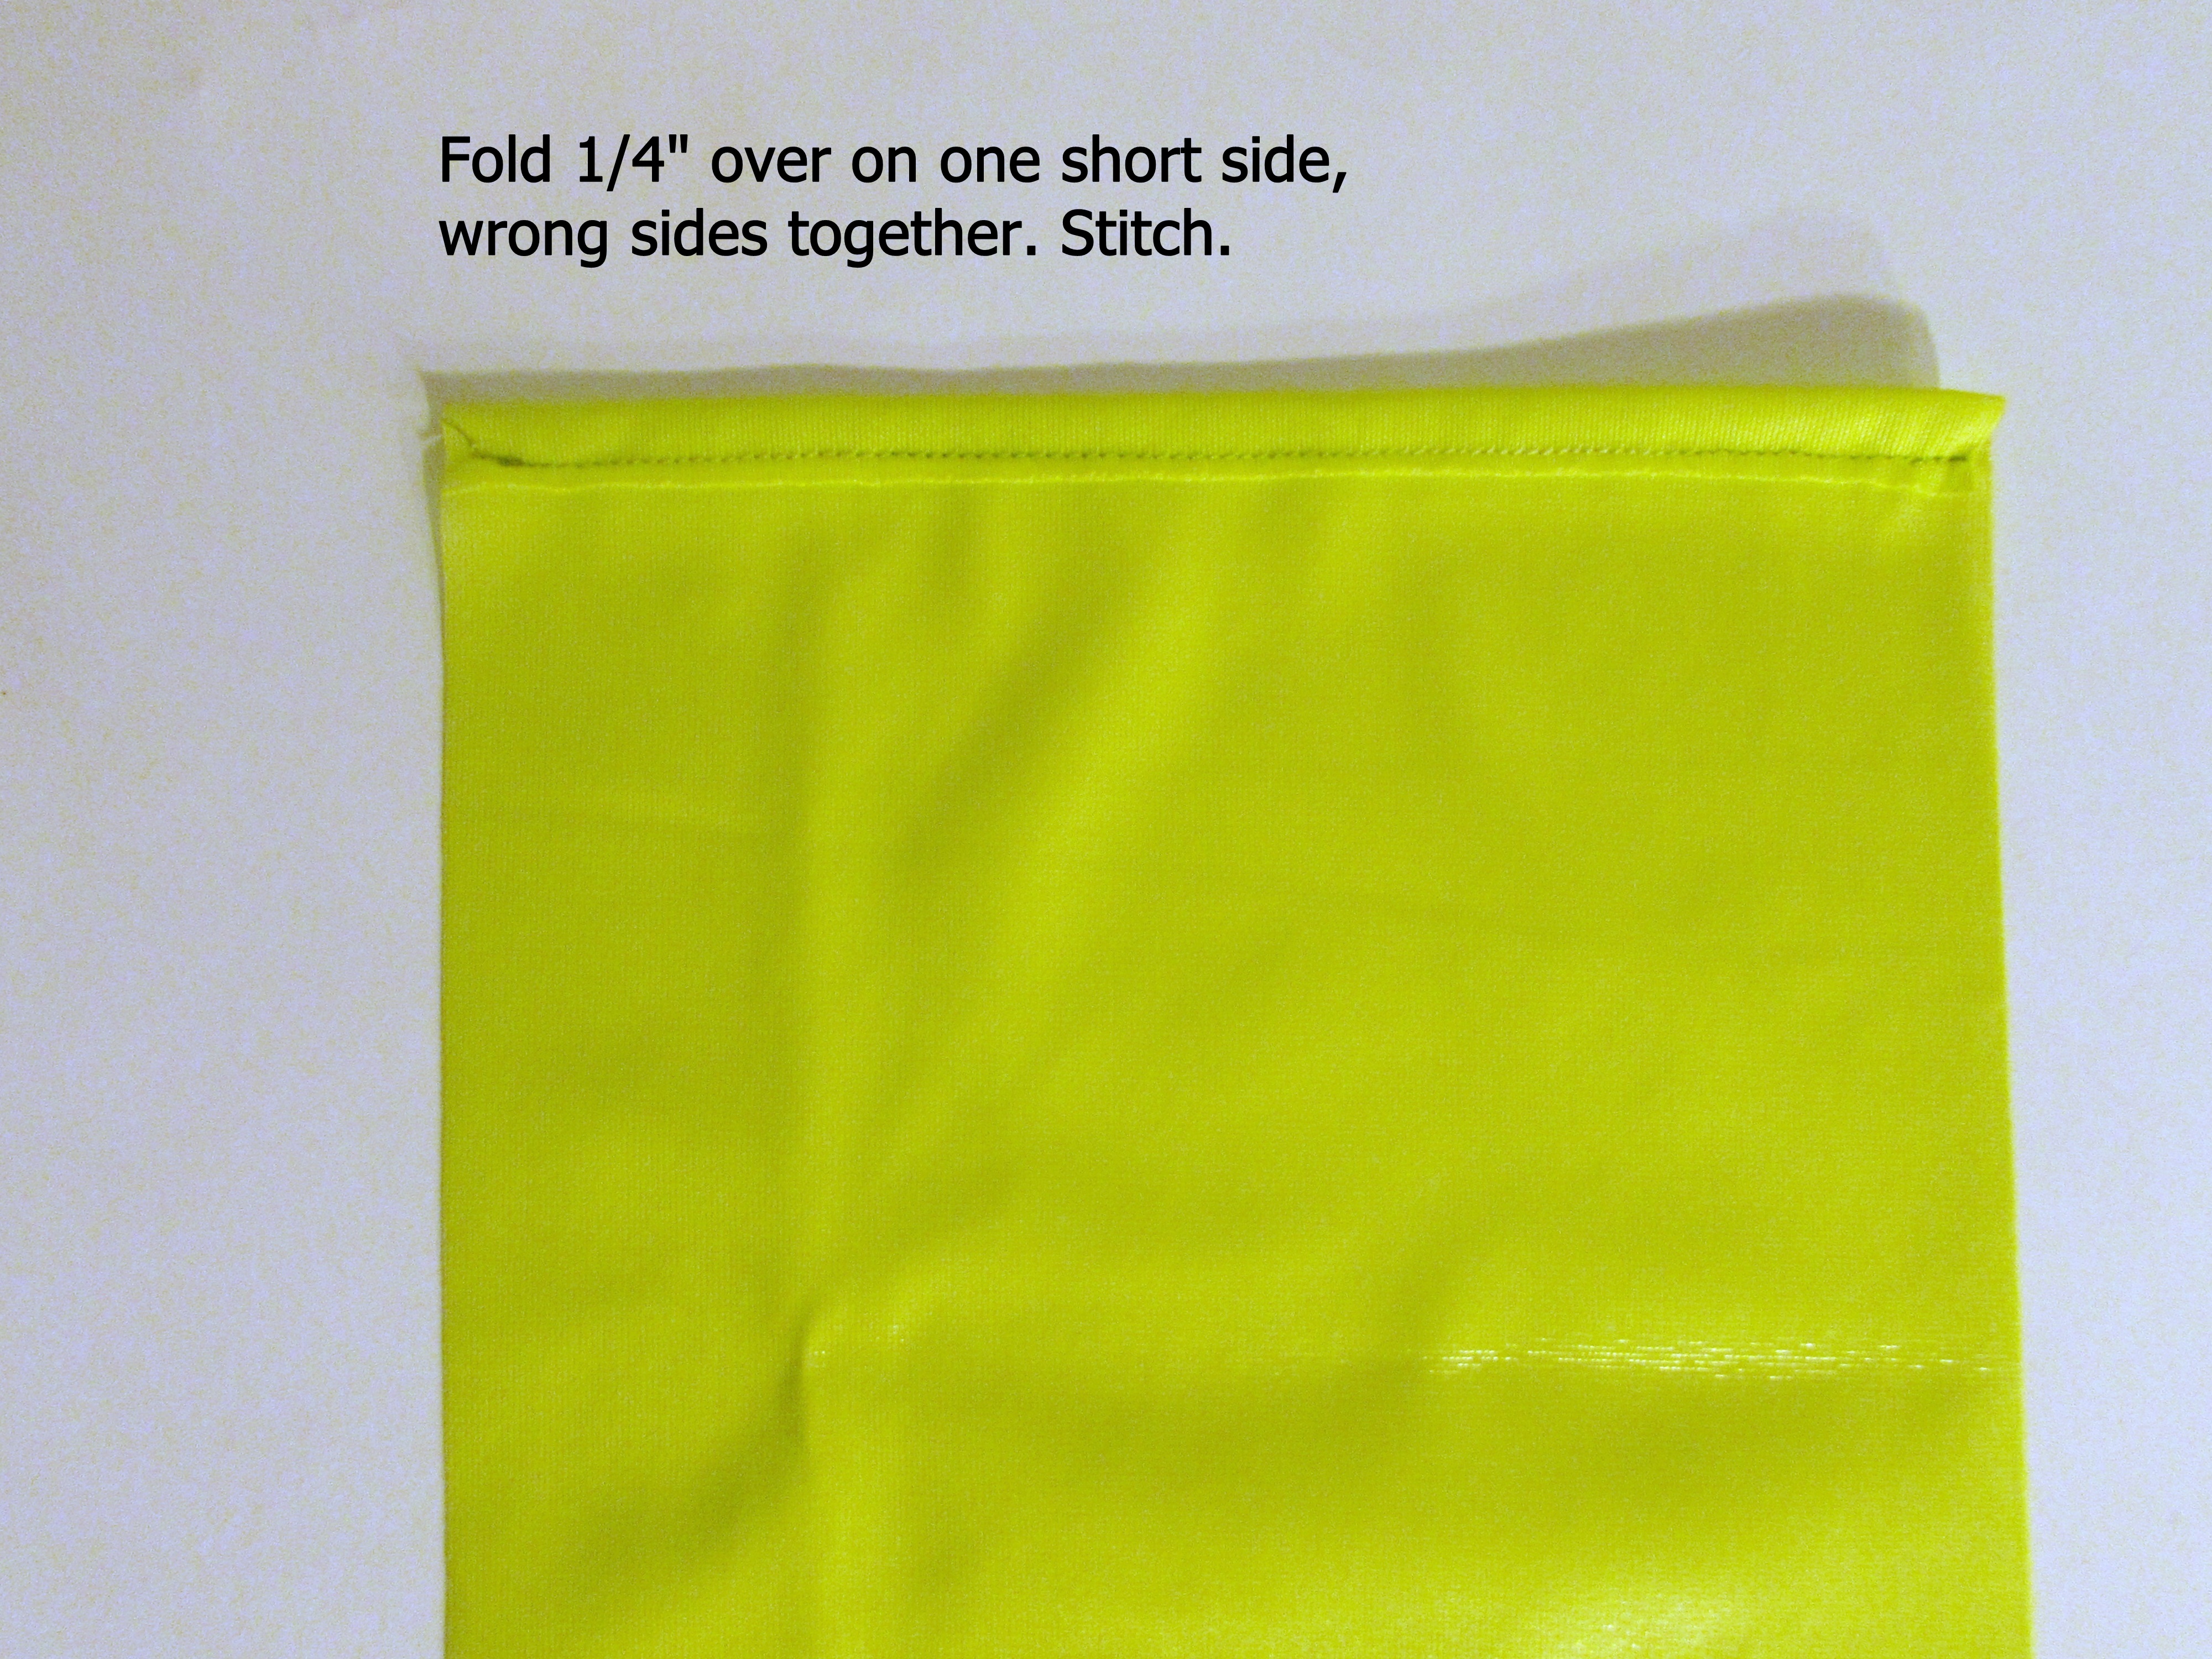
2. Finish one short edge.
3. Fold right sides together, leaving about 3 inches extending above the opposite side. Stitch sides together with a 3/8″ seam, catching each edge of the velcro in the side seam. Then turn the bag right side out.
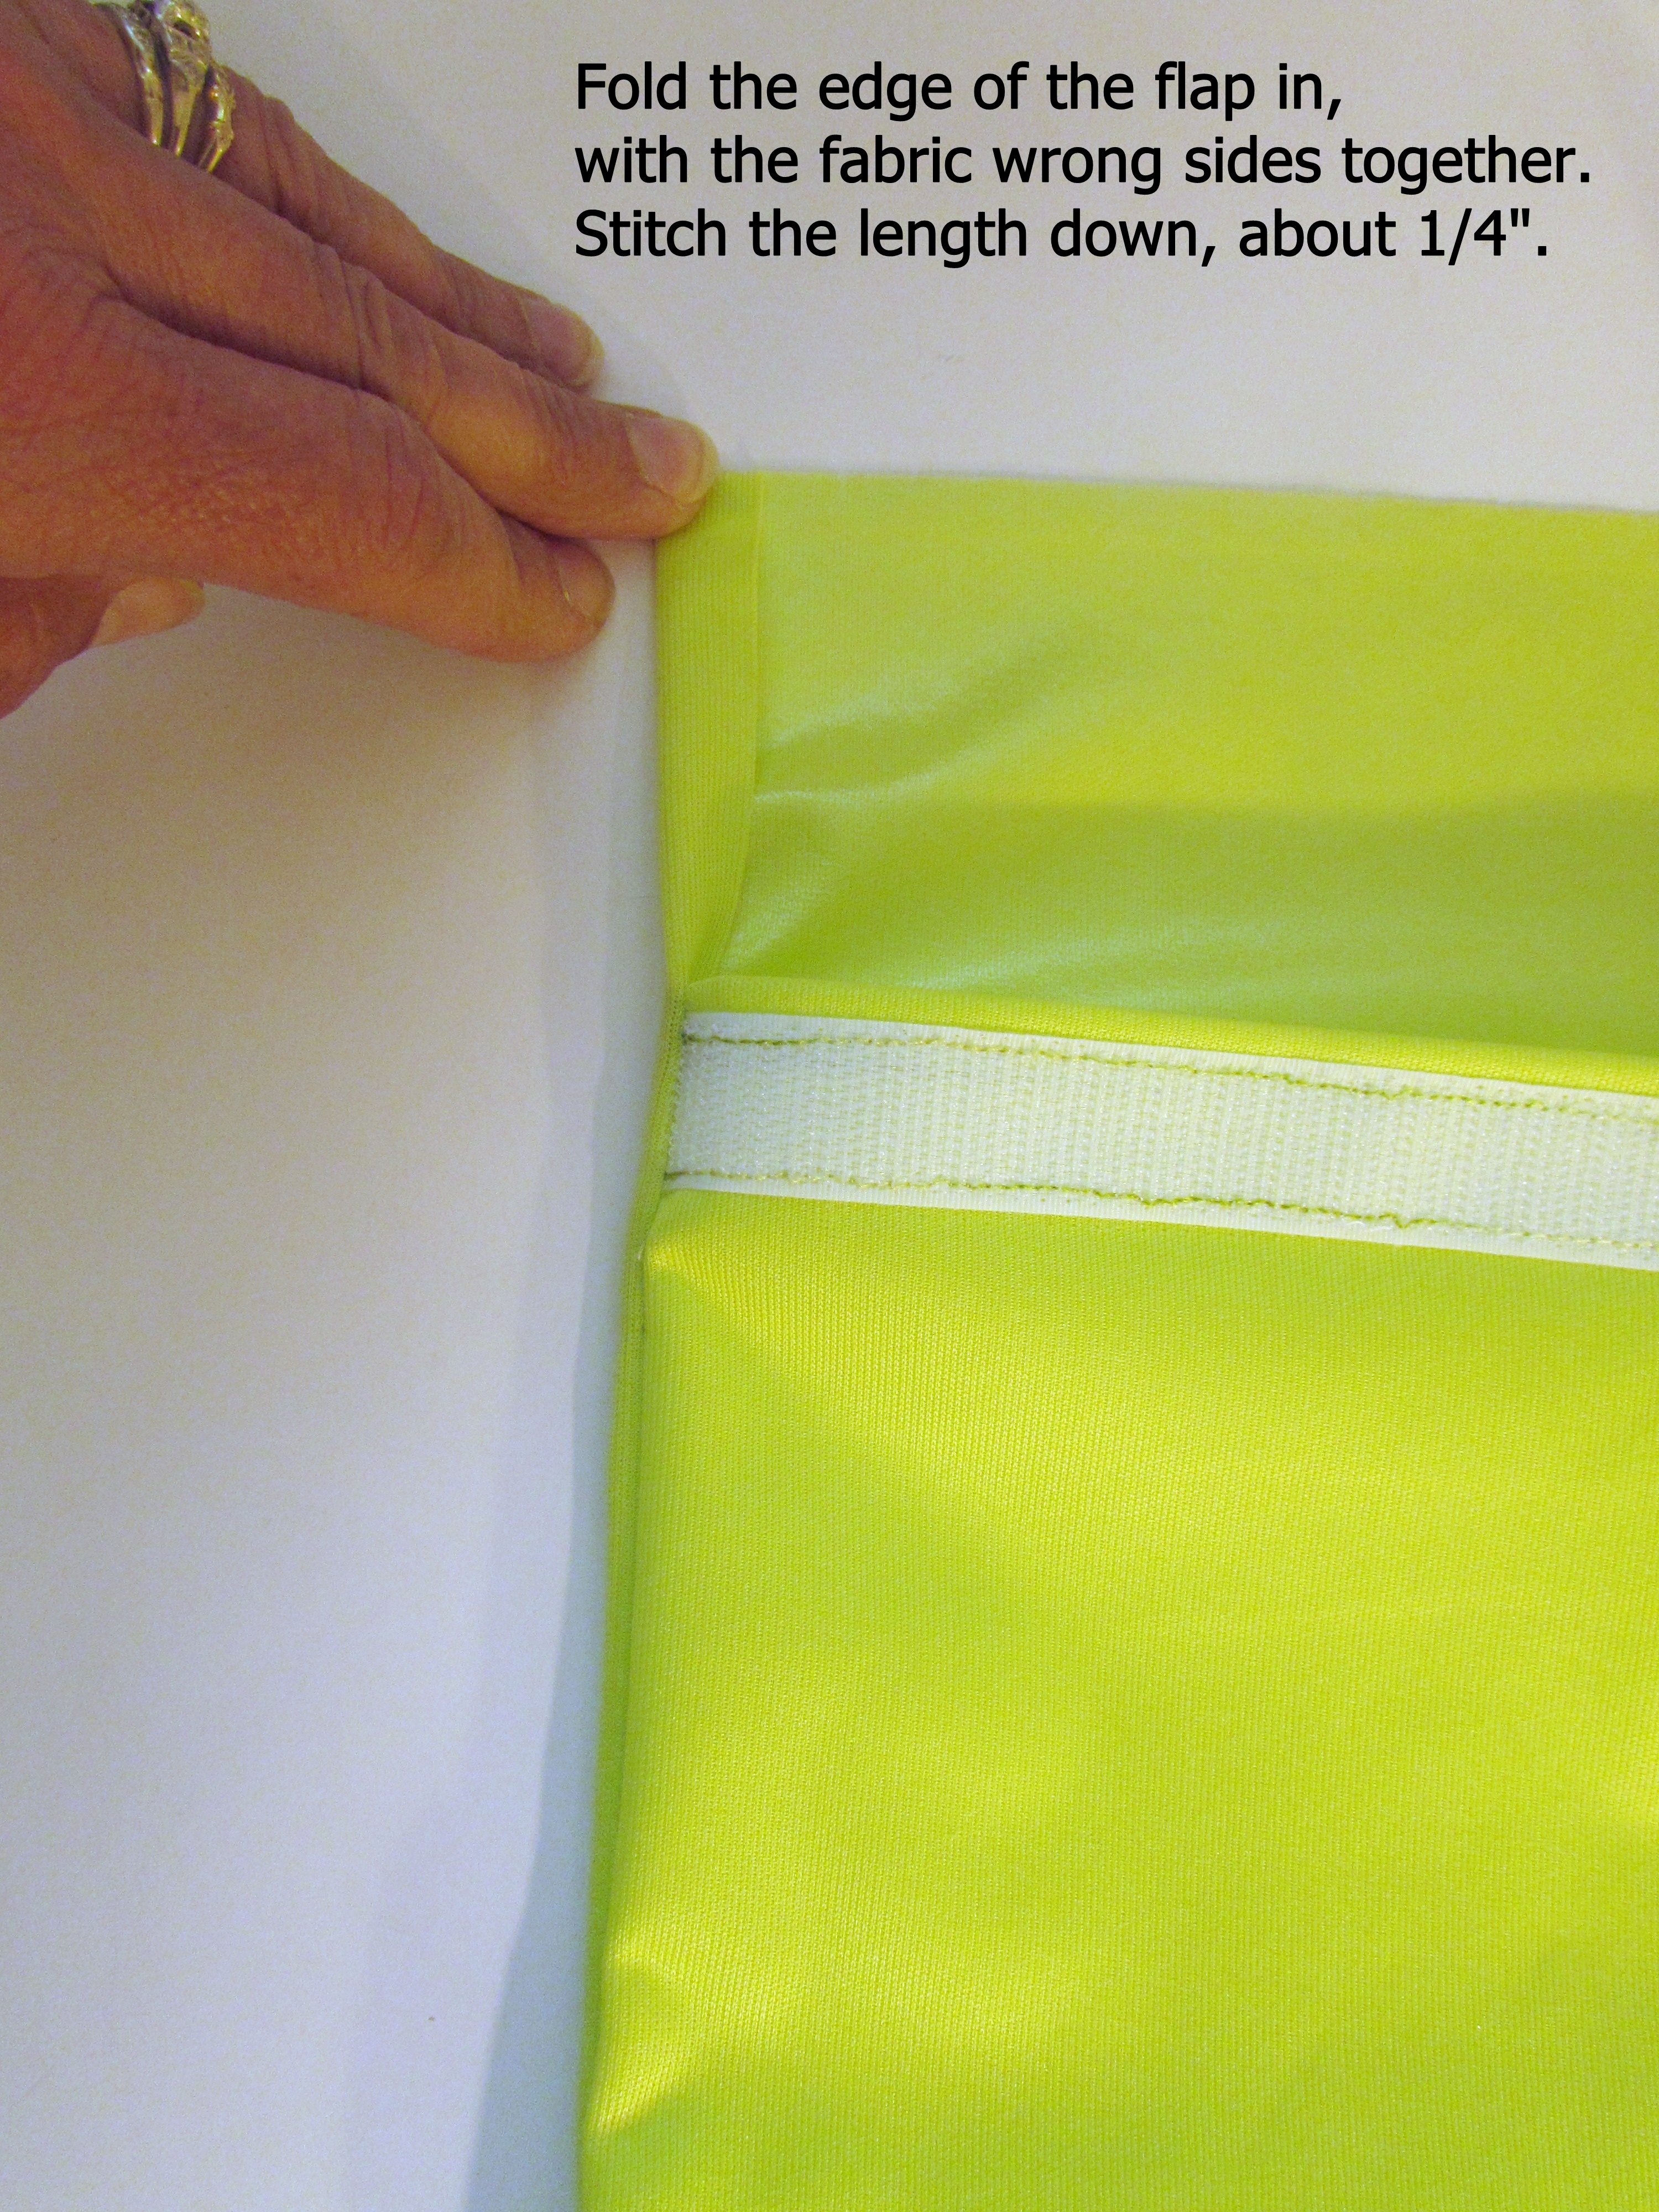
4.Finish the each side of the flap by folding over 1/4″ to the inside and stitching.
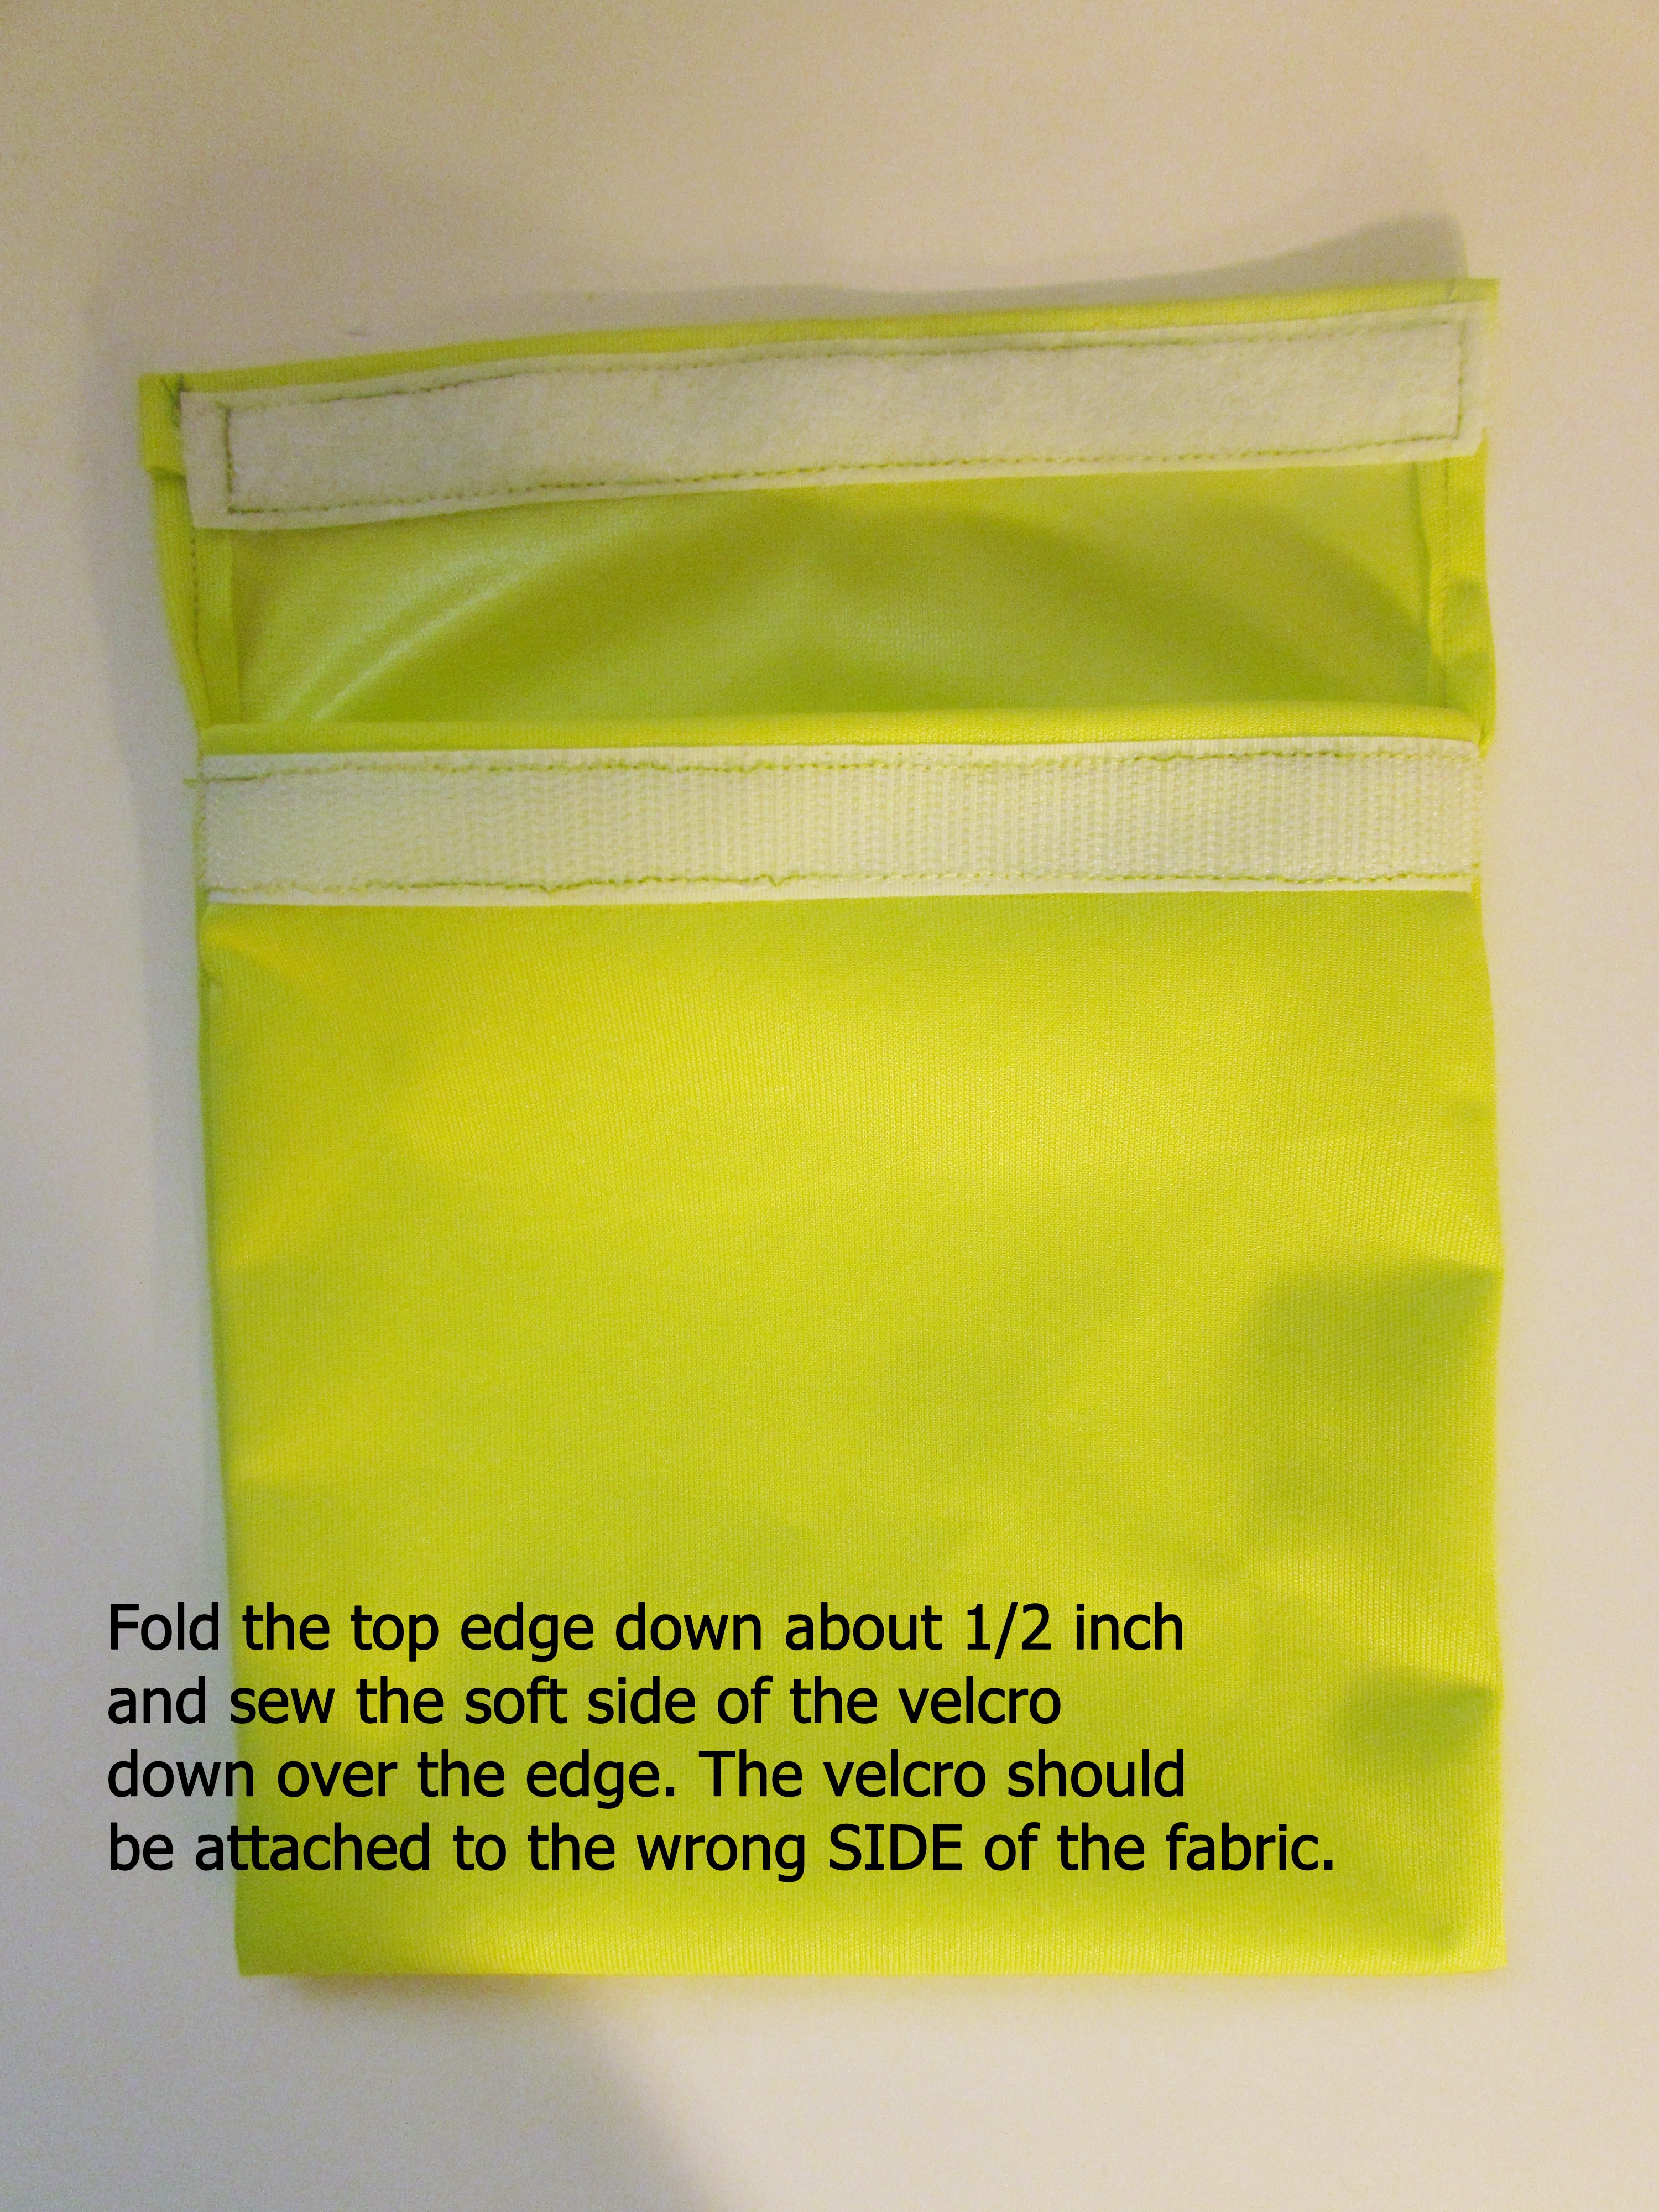
5. Fold over the top of the flap, bringing it to the inside. Sew the velcro to the inside of the flap, on top of the part you folded in. You may choose to pin this but I just stitched slowly and held it on top of the folded piece. It is a bit tricky because the PUL is slick so take your time and stitch slowly.
Finished! Not so hard, right? The first one took a few minutes as I got used to working with the PUL. The following two took less than 20 minutes each to make – these bags are that simple.
Let me know in the comments if you have any questions. Hope you will make a few of these and reduce the need for zip lok bags, thus reducing the amount of plastic in our landfills.
Linking up to my favorites. For more info, click on Link Ups at the top of the page.