Category Archives: Sewing Projects

Time for School

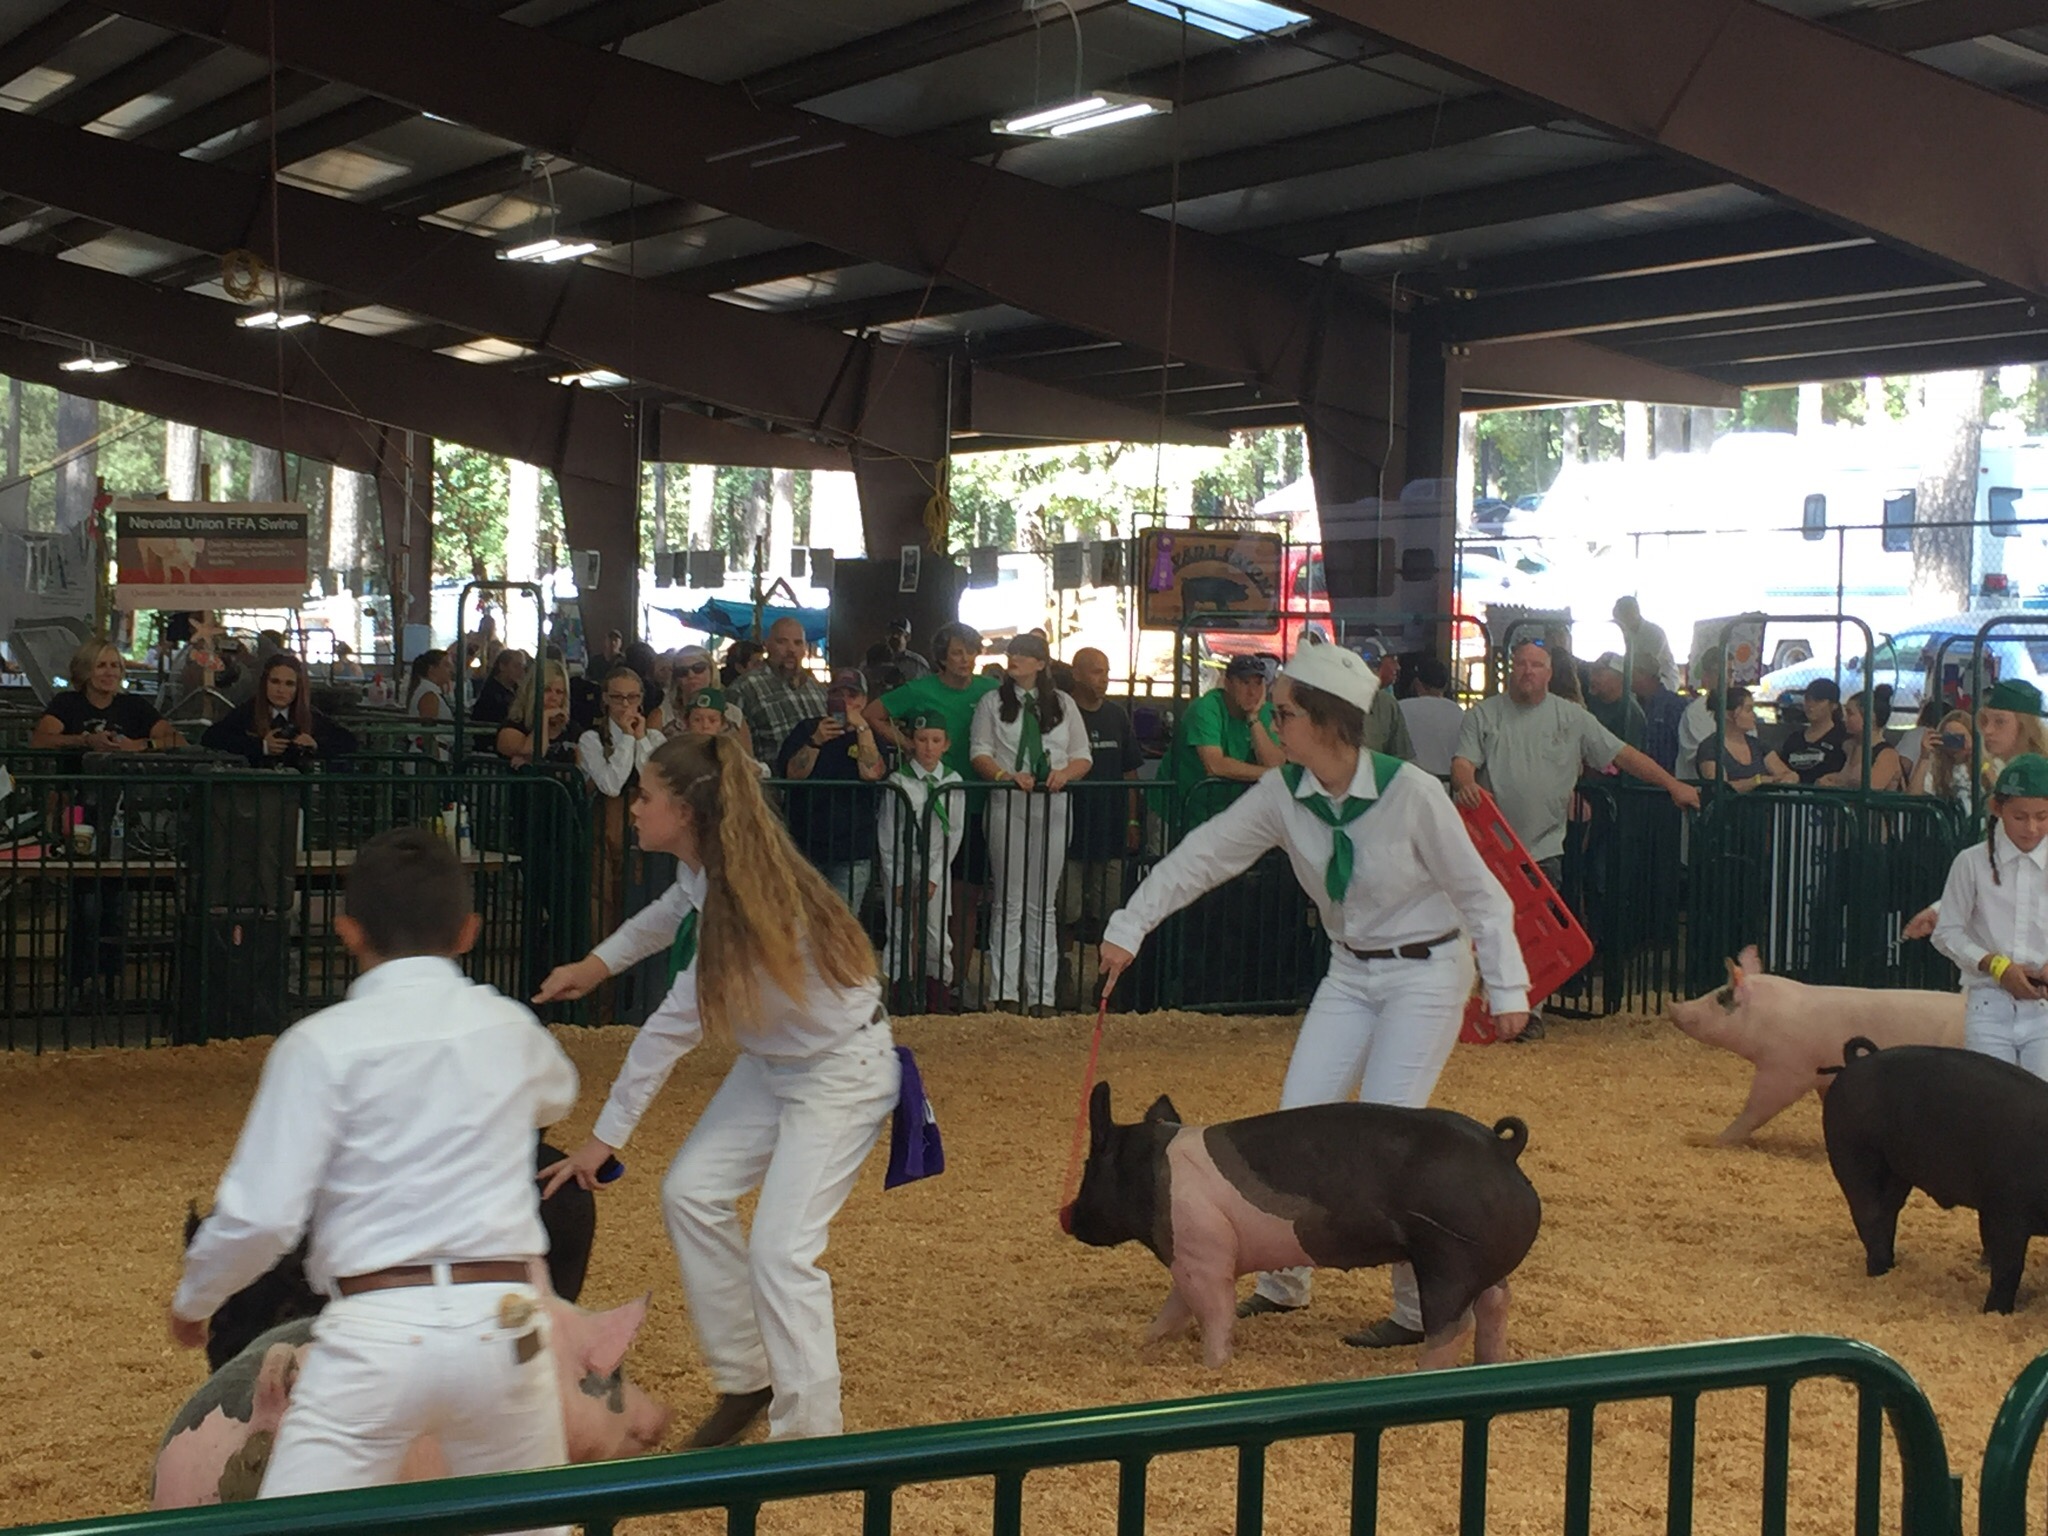
Hi Everyone — Today is the first day of school for Julia. Summer absolutely flew by. I posted a few pictures on Instagram last week about the county fair but I thought it would be fun to share some of the details with you.  Julia did a great job taking care of and showing Ella. When you show a pig at the fair, there are two places in which the kids compete. One is called Market Class which is where the judge assesses the quality of the pig, with regard to structure and muscle vs fat. Because the kid’s select their animal when it is very young based on it’s structure and then feed it out over the next six months, they have an impact on these things. If an animal is over weight or too lean, the owner adjusts feed accordingly. Julia had many challenges with Ella and her food intake so this was not easy.

Julia showing Ella off to the judge.

The other is showmanship which is where they judge the owner’s ability to work with their animal.  Out of about 20 kids in her group, Julia came in 6th in both Market Class and Showmanship. For her first year, this was so great.

Job well done Julia!

Better than that is when Ella was auctioned, she was purchased by the CEO of Telestream, the company I used to work at and where my husband currently works.  Each year the company buys one or two animals to support the local youth and then donates the meat to our local food bank.  Our family has been involved with Interfaith Food Ministry for many years so Julia is very familiar with the organization. Before Fair came, she wrote to the CEO and explained she would be so happy knowing Ella went to such a good cause, feeding the hungry in our town. In a month or so, Julia and I will pick the meat up and take it to the Food Ministry for disbursement.

I think 4-H is a wonderful organization as they have impact in many areas of a child’s growth and maturity. It was required that each of the kids (and one parent) work a shift in the Pasty Booth as this is a major fundraiser for the club.  Julia did great and the time flew by because the booth was very busy. Luckily the booth is air conditioned with those ovens going constantly.

Preparing Pastys to bake in the oven.

Saying good bye to Ella was sad for Julia but she knew this was the way it was supposed to play out.  She worked really hard and I am incredibly proud of her.

The last couple of days of summer were spent catching up after the busy week we had.  Yesterday Julia and I had lunch together and saw a movie to celebrate summer’s end.  It was lots of fun and she was ready to go back today and see all of the friends she missed over the summer.

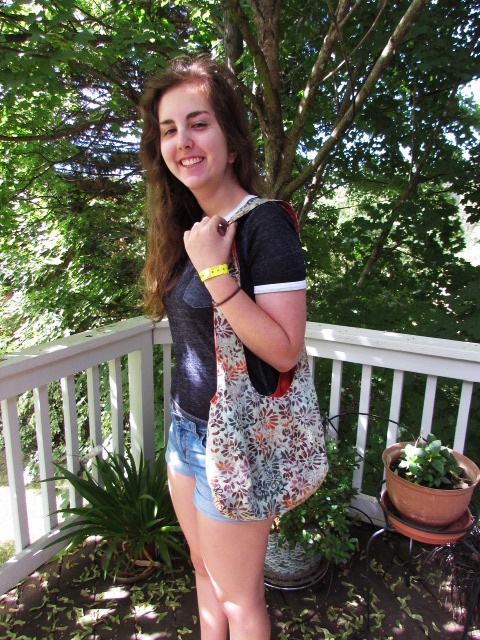
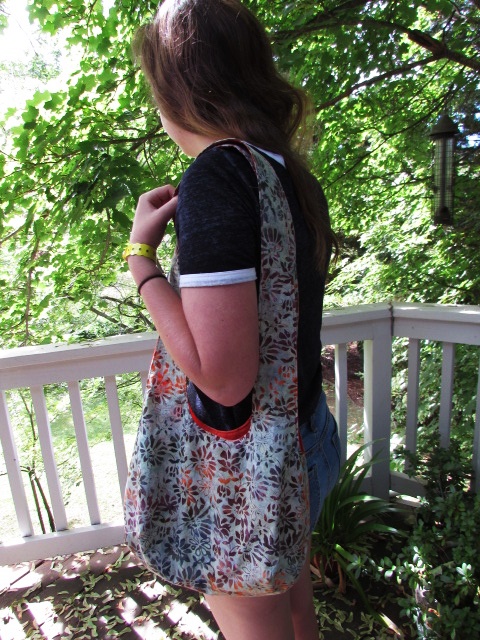
Before fair, Julia asked if I would make her a new purse. She is learning to drive and for the first time, has to carry a purse with her. Of course I agreed and we hopped on Pinterest to look at my board of Purses, Bags and Totes.    Julia chose a basic bag from Very Purple Person, called the Reversible Bag.  We made a few changes so hers is not reversible.  More on that in a minute though.

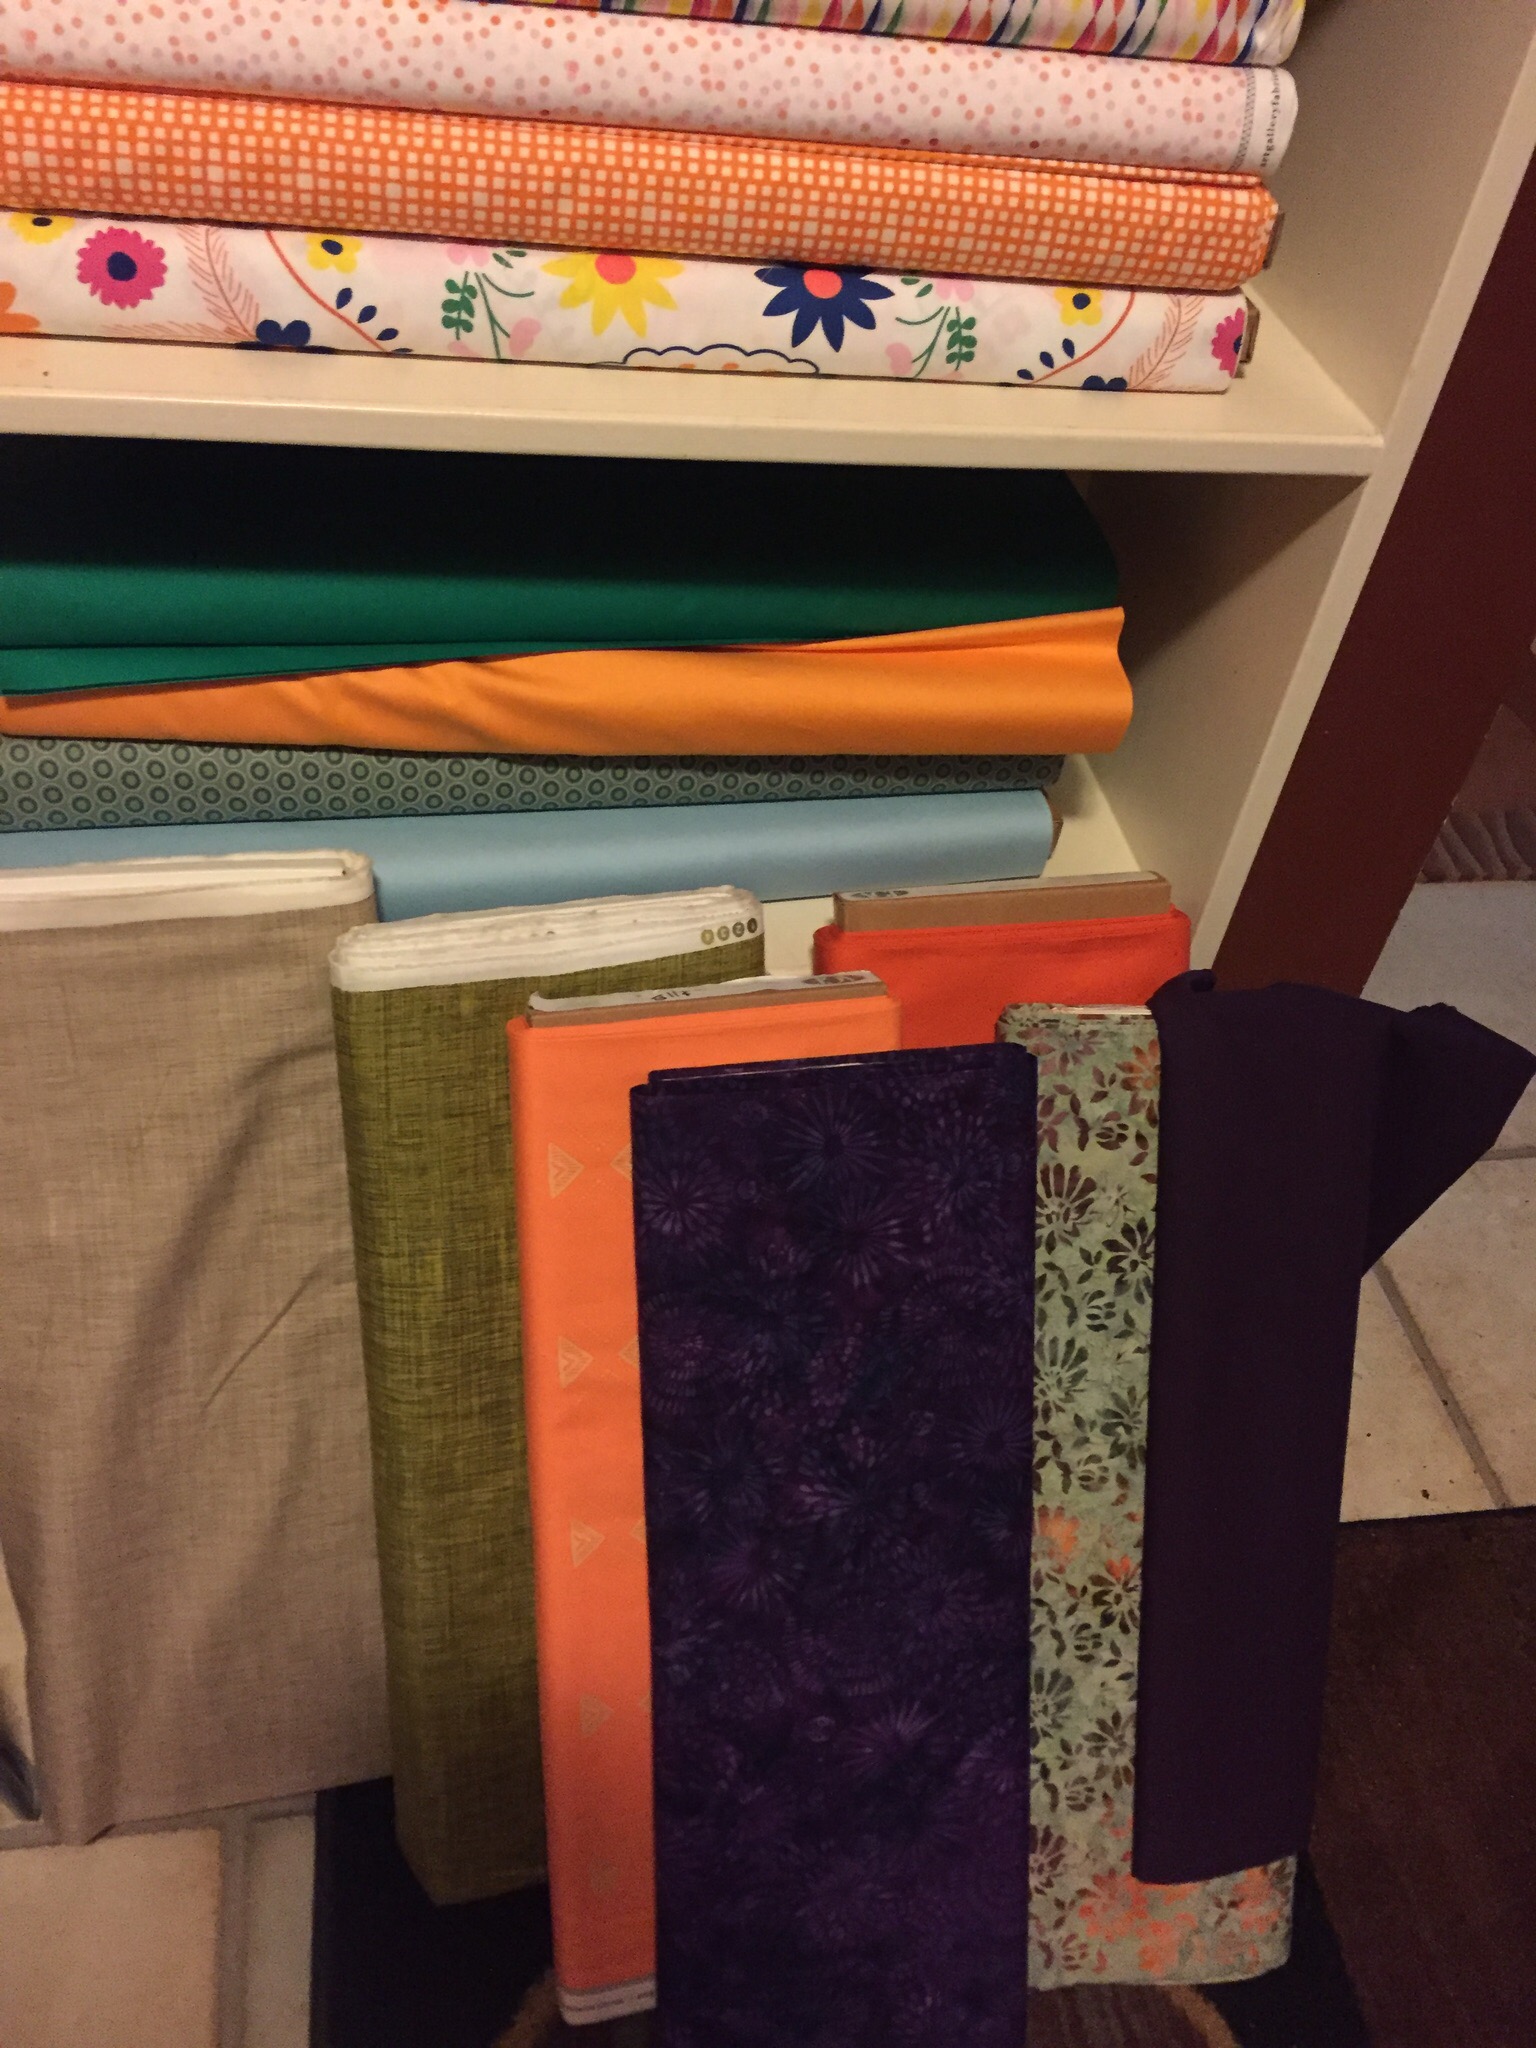
First she had to select her fabric.  She had fun looking at all of the bolts in the shop and selected a batik for the outside.  Then we pulled choices for the lining.

So many choices!

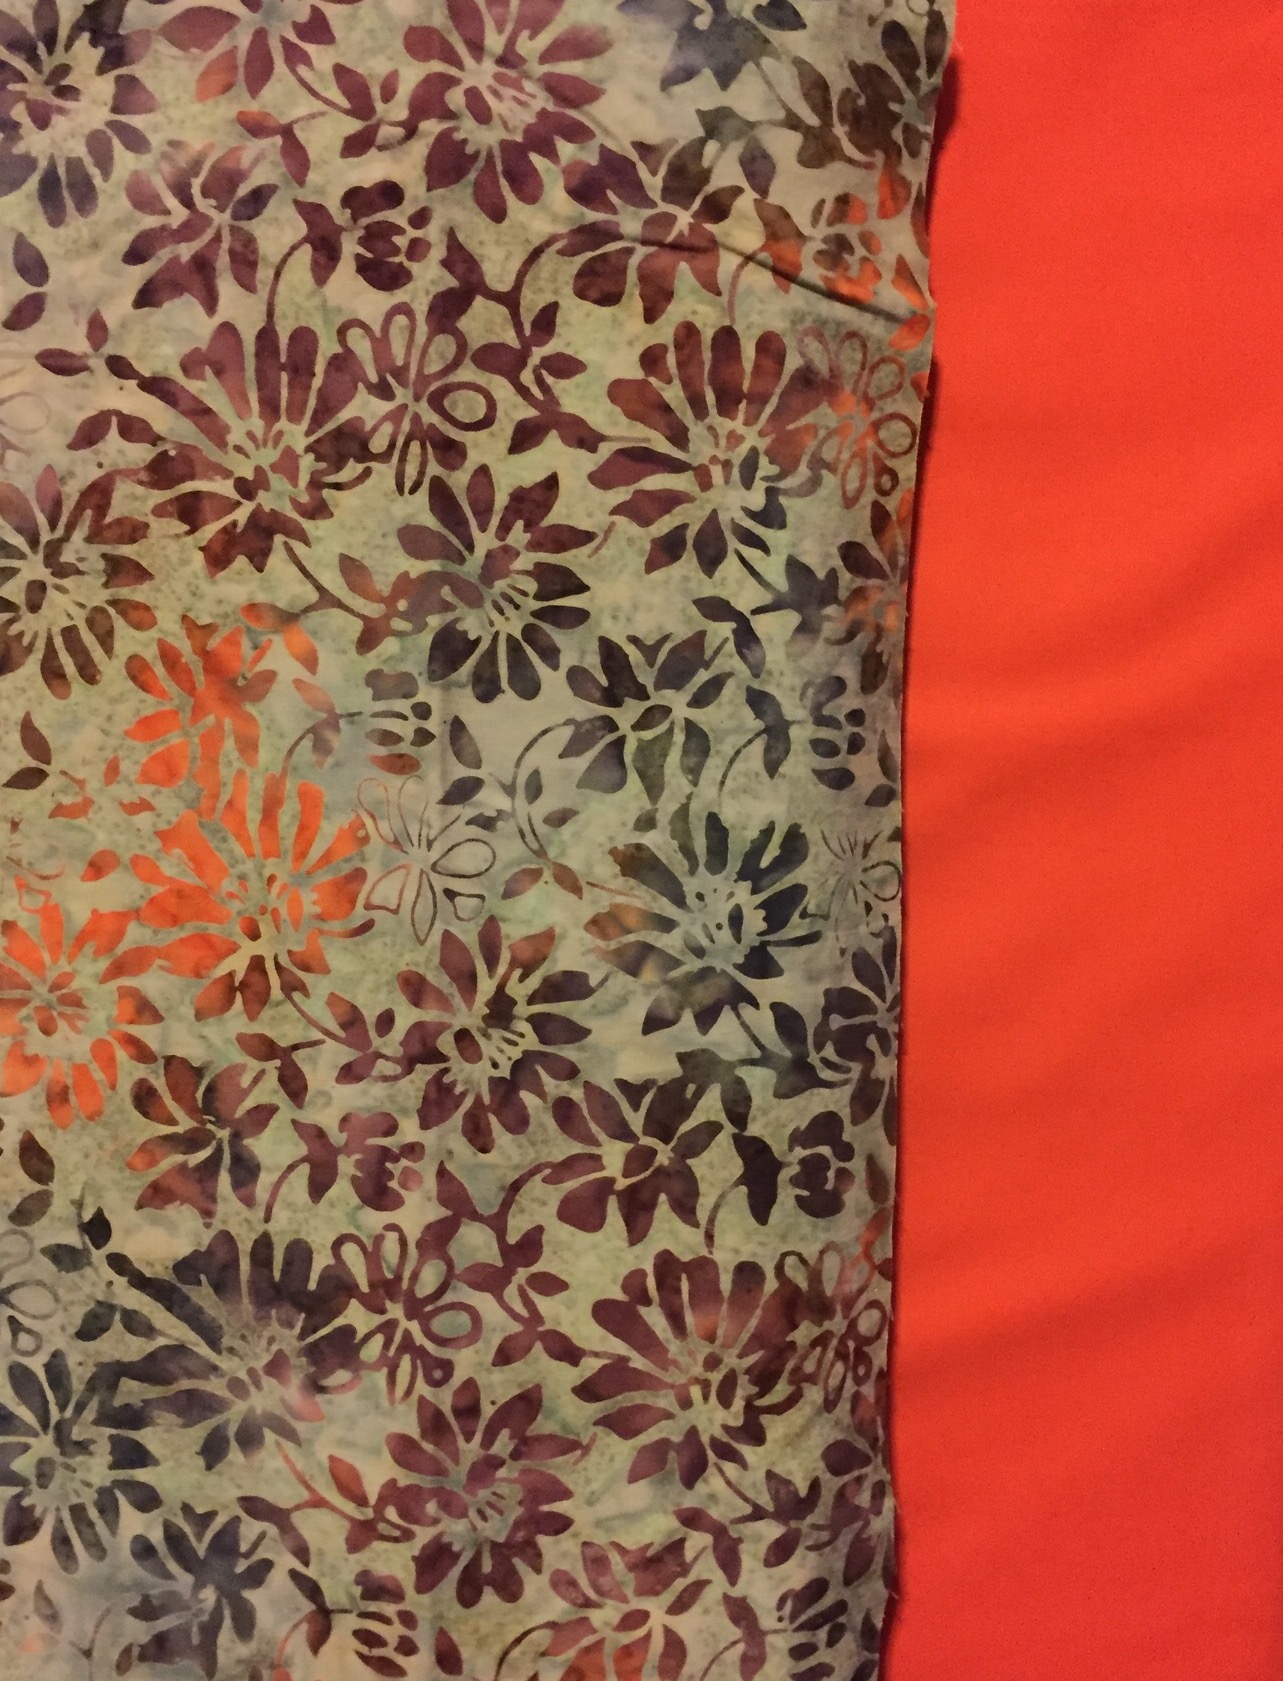
It didn’t take very long for her to settle on this Island Batik floral and the deep orange solid, Art Gallery’s Pure Element Tiger Lily.

It is a great combination and that orange works perfectly!

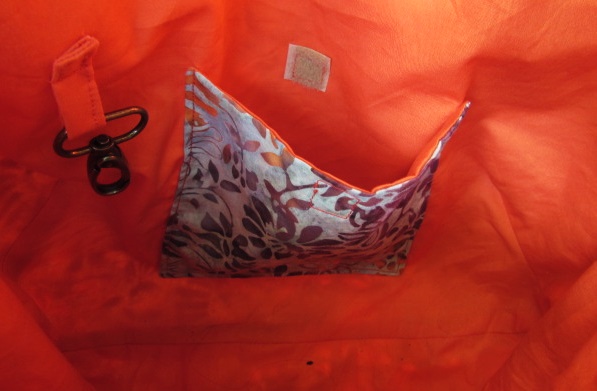
This bag is super simple. It prints as a PDF and you just need to tape a few pieces together to get the full template.  We did lengthen the strap.  Julia is 5′ 8″ and she wanted it to hang to her hip. I also added two pockets with Velcro closures to the interior and a little clip to hang her keys from.  (I still can’t believe she is old enough to need keys.  It seems like she should still be filling her purse with stuffed animals and markers.)

I didn’t put a closure at the top of the bag but I think I may add one.  It seems like it needs it so it isn’t always gaping open.  Julia doesn’t mind either way. Just trying to think of a closure that can be added now that the lining is all sewn in. I am sure I will think of something.

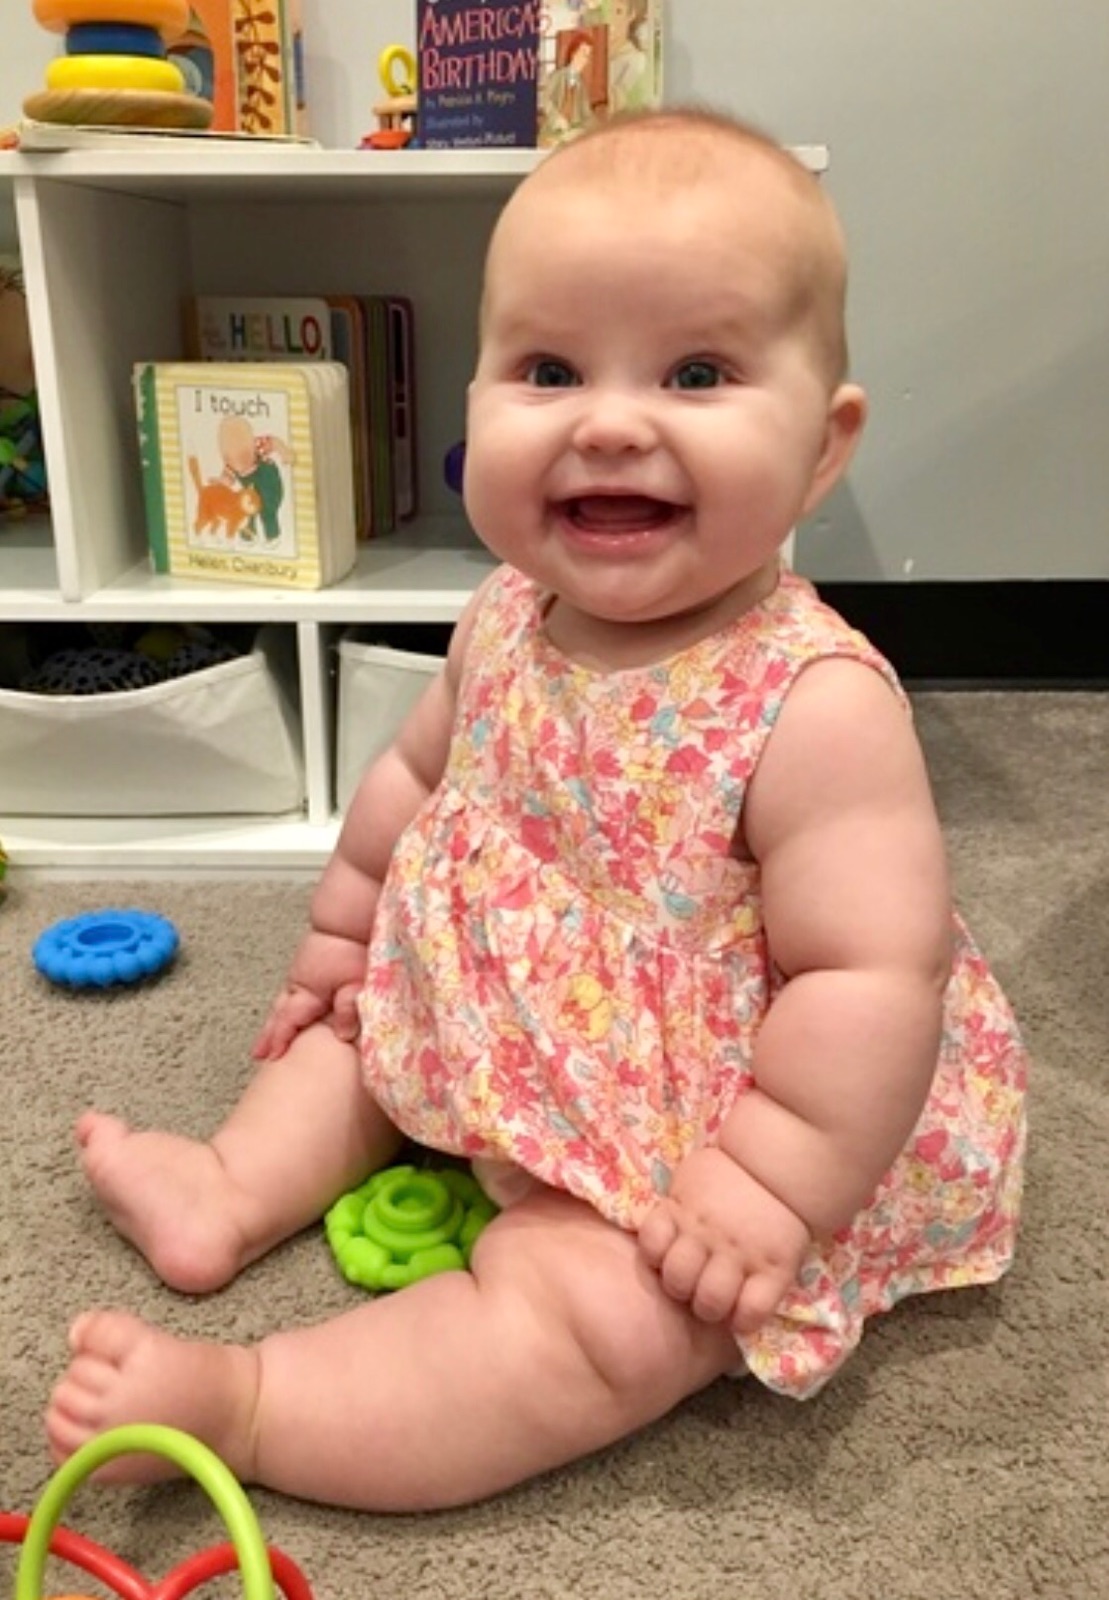
Sitting up like a big girl.

Now that fair is finished and school has started, it is time to catch up on housework and get ready for my son and his family.  Then come next week and we are all beyond excited!  Look at this girl — I can’t wait to play with her! She is sitting up and trying to crawl.  Just adorable.  🙂

Small Finishes for This Week

This week sure buzzed by quickly. There was not a whole lot of time spent in the sewing room.  I have been spending quite a bit of time working on the shop; especially on the process of moving patterns from the first shop to the new shop. I think it is worth the time it takes.  I have had a number of sales from the new shop so I know people are finding it. I like managing the patterns separately from the fabrics. But it has taken a lot of time!

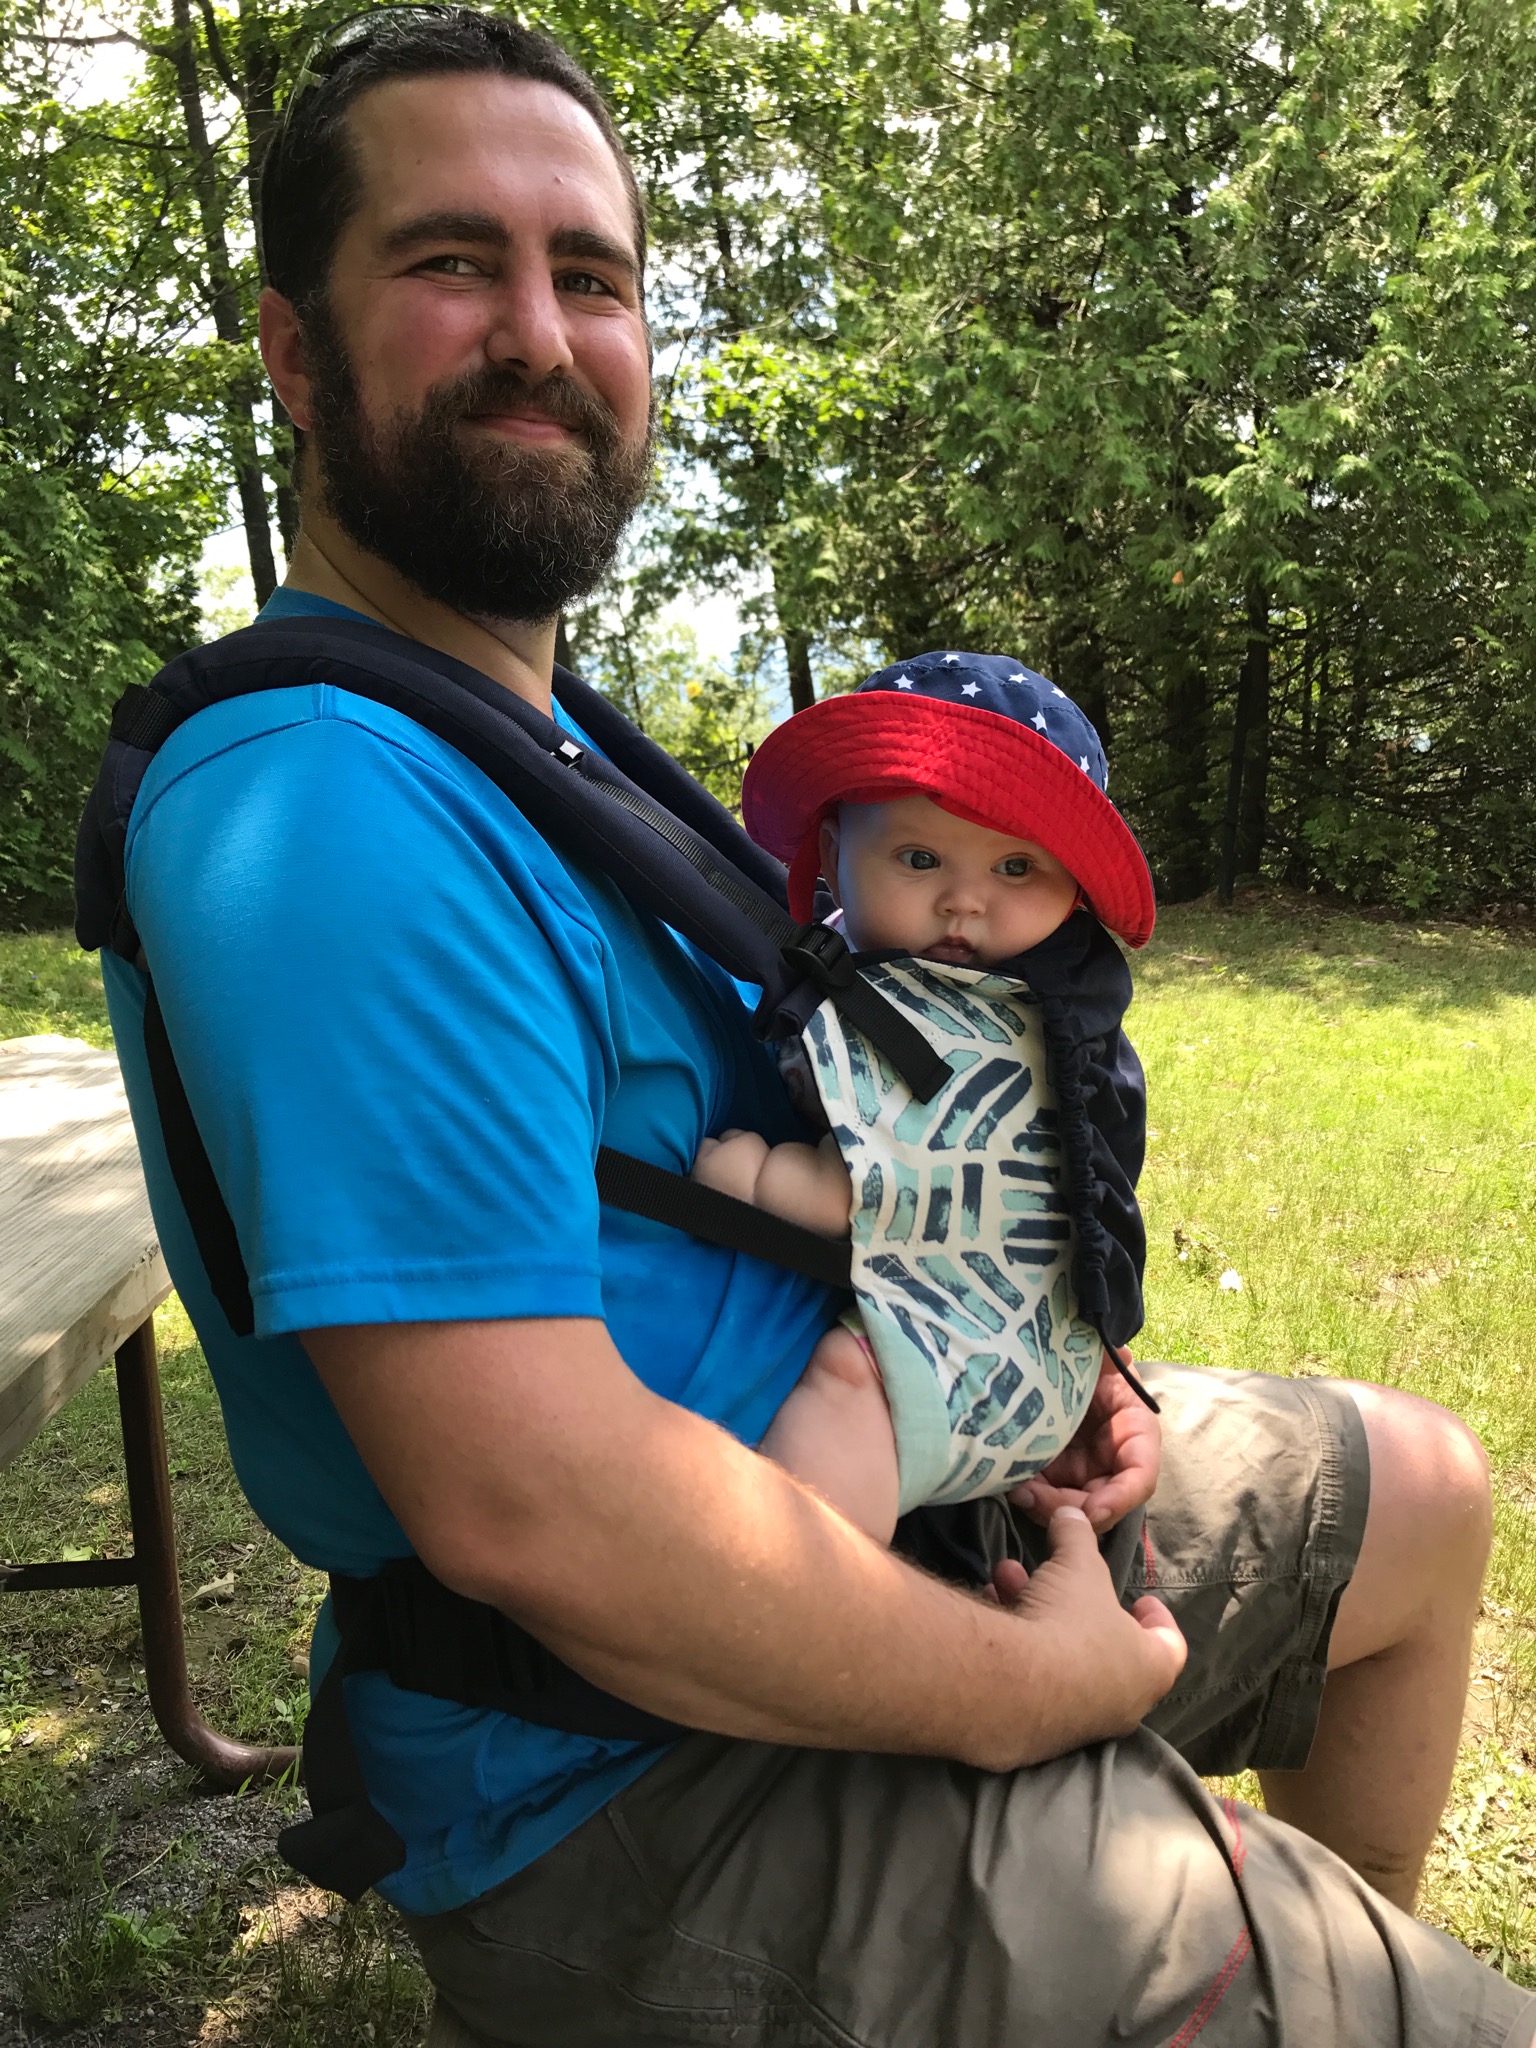
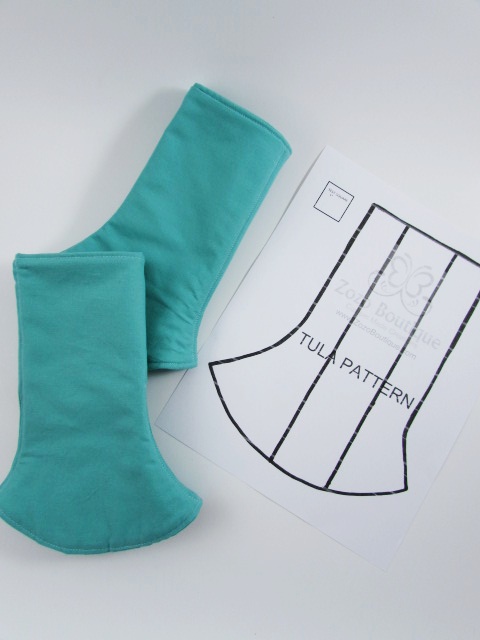
As far as sewing, I made two little projects for my sweet grand baby. My daughter in law asked me if I would make strap covers for their infant carrier. She even found the right pattern to use for the straps that fit her model carrier. I think this is a pretty smart move- the strap covers add some cushion if baby girl falls asleep with her face on those straps.  They also catch the drool that come along with baby. It is much easier to take the covers off and toss them in the wash then to wash the pack.
The pattern was a breeze to follow. I did have to make a quick trip to find some green fabric (it actually is green, but leaning to teal blue) for the covers. I had plenty of batting scraps for the filling and velcro for the closures.
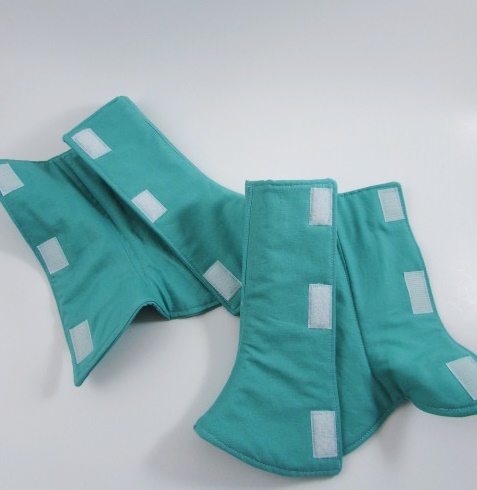
These are entirely reversible which would have been fun if I had used two different fabrics but I didn’t.  The pack is a print of green and blue and it didn’t need another fabric in the mix. Baby also needs a little hood that will attach to the pack but I haven’t tackled that yet. I did buy plenty of the fabric though. Hopefully I will get to that in another week or so.
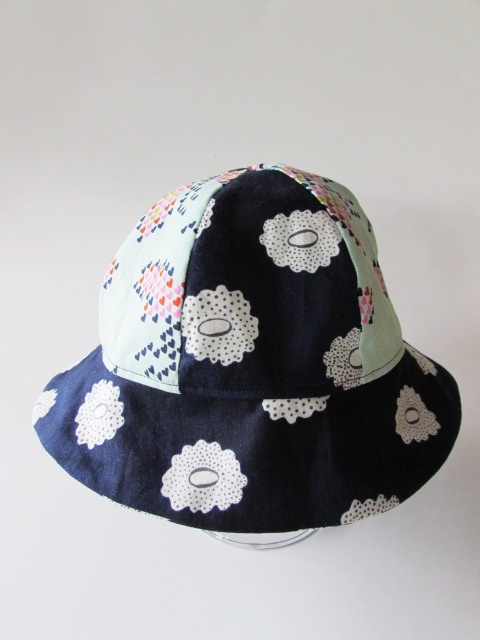
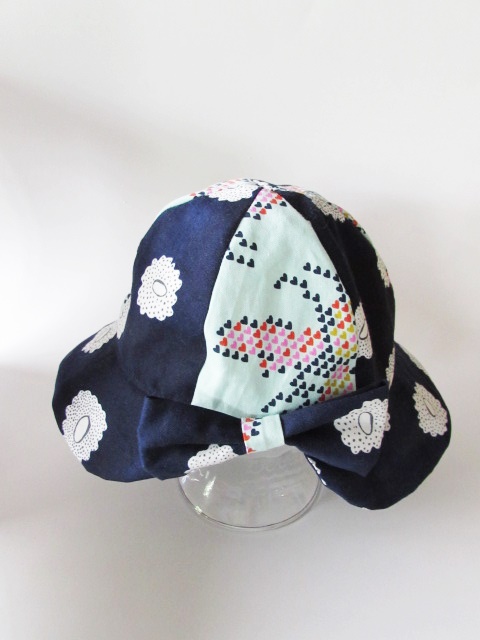
After making the little strap covers, I was in the mood to make something else for her. A few months ago, I purchased a collection of the older Cotton and Steel prints during a #destash on Instagram. I had not used any of them yet but as I poked through the bag, I found two prints that were perfect for a little sun hat.

Isn’t that the cutest thing? I had an old pattern from who knows what, so I can’t recommend it because you probably couldn’t find it anyway. There are many patterns like this though and a simple google search should be fruitful. It came together easily and I am hopeful it will fit. Her mama sent me the measurement of her head so if anything, it might be a little big.  I love the back side with a little bow.  Adorable.
I look forward to seeing it on her little head.  Finally, I started the memory quilt I am making for my nephew Sam.  He picked out an assortment of his football and baseball jerseys. He even sent a small one that he must have worn as a little boy. As suggested by several readers in the comments of an earlier post, I emailed Sarah from Confessions of a Fabric Addict to get her input.  She suggested a particular brand of fusible interfacing she likes for backing these projects. I ordered that and it is already here, ready and waiting for me.
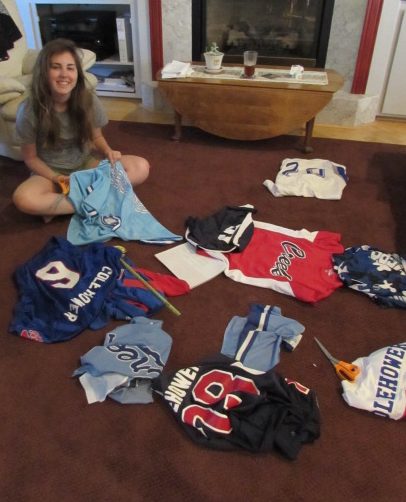
My ever helpful daughter and I cut the jerseys up.

I was really nervous to cut into these. Before we started cutting, Julia and I folded them into little blocks and laid them out to get an idea of how I would make this. Then we cut the fronts from the backs leaving everything intact and as large as possible.  I think I will make a lot of 14″ squares with the majority of the jerseys.  Then I will cut miscellaneous bits and pieces that aren’t going to measure up as big but should be included (mascots, American Flags, etc).  Those will be bordered in red and fit into the puzzle where I can. I think it shouldn’t be terribly difficult. The next step is to stabilize this slippery jersey fabric. Sam is off to college in the fall so maybe, just maybe, I will have it done in time?  Well, at least during autumn? Ok, ok, definitely before he graduates college?  We will have to see!
This week is once again my week to sponsor the giveaway for the Sewcial Bee Sampler. I had a lot of fun hosting the giveaway at the end of June too.  If you are participating in the sew along, hop over to Maureen Cracknell’s or Sharon Holland’s blog to find out how to enter and win! It could be your lucky week! There is also a discount code for the Sewcial Bee quilters. Go check it out!

Wishing you all a wonderful weekend!  I am linking up to a few favorites. Find them at the top of the page under Link Ups.

Have you signed up for the Needle and Foot News yet? Published monthly, this newsletter provides an update on the latest fabrics to arrive at the shop, as well as any promotions or events happening at Needle & Foot. Click here or use the sign up form at the right side of the page, toward the top!


Working with Wonder Woman

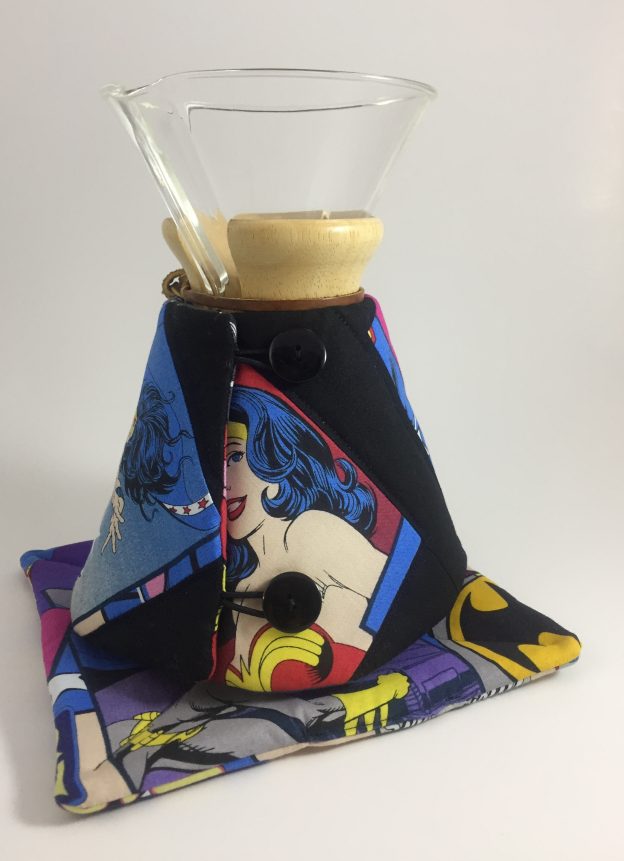
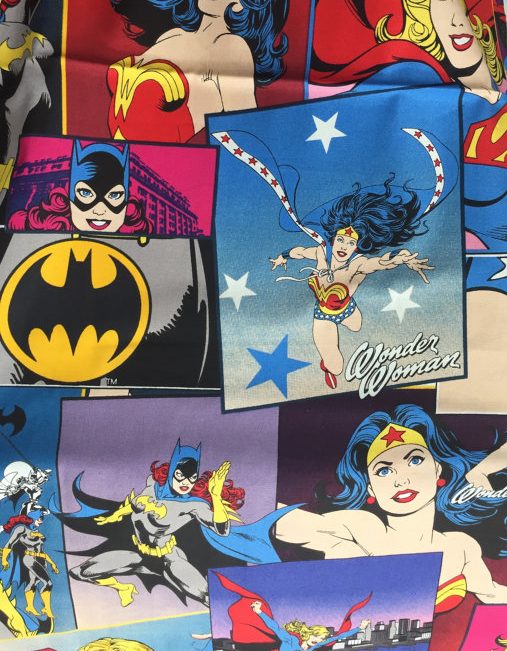
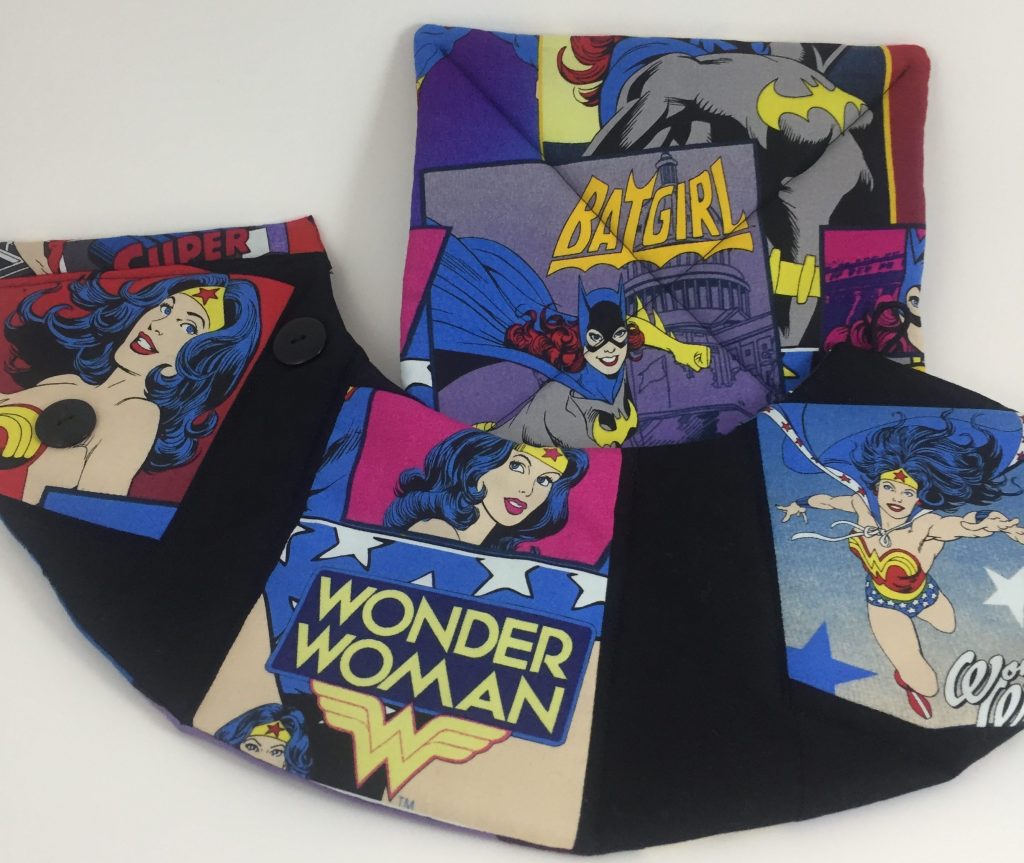
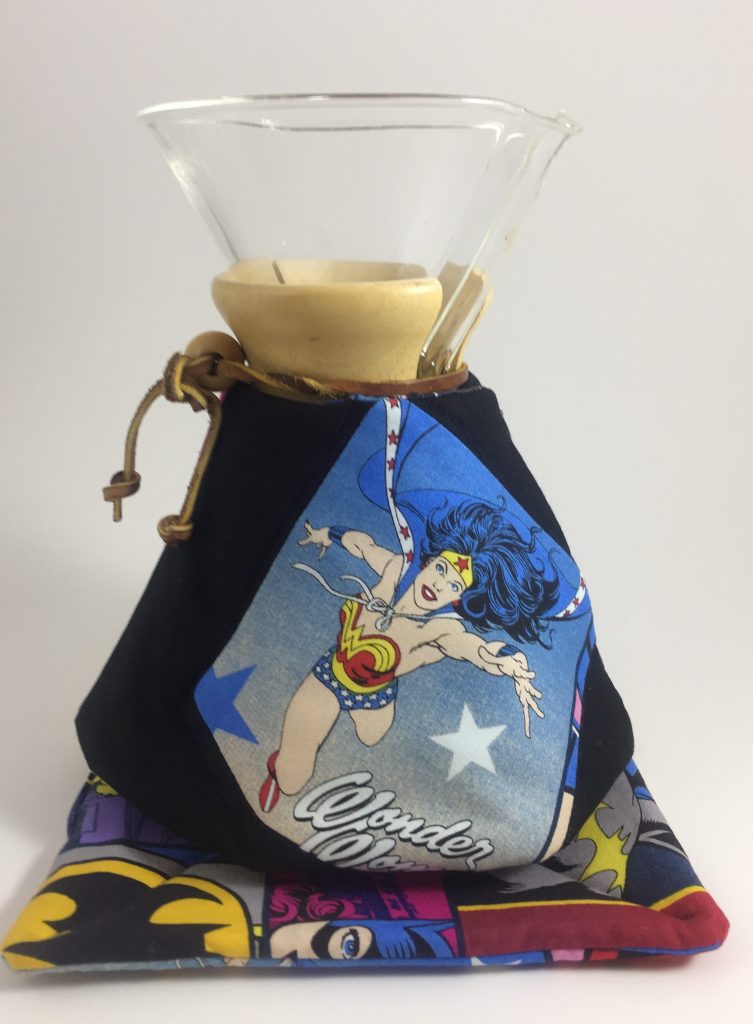
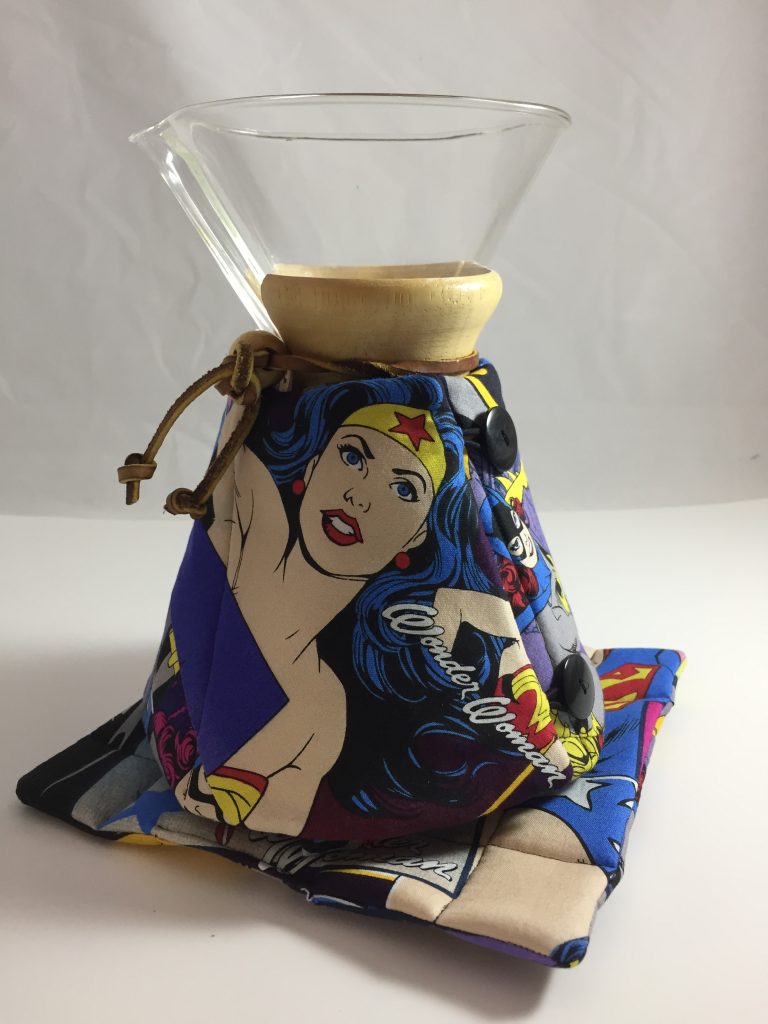
I just finished up a really fun project. I haven’t made a custom Chemex Cozy for a while and received this note from a customer about a week ago. She asked….”do you have one that is more Wonder WOMAN and less super Man?”  Clearly she wanted some female superheroes to grace her kitchen. After a very quick search, I found this fabric.
My customer thought it was perfect so I placed an order and waited for it to arrive from an Etsy shop in Texas.  As soon as I got it, I cut into it.  I must have been terribly excited because I cut these girls out upside down. Not once, but twice. Considering I only had one yard of fabric (it takes about 1/2 yard to make a set) I was seriously frustrated. It didn’t take me long to decide to try some improv work to save the fabric.
I started cutting out Wonder Woman (she was the key player for my customer) and laying out pieces with black fabric framing off the individual pieces.  I was really liking the way she looked and felt like the black fabric calmed the craziness of the fabric down a bit.


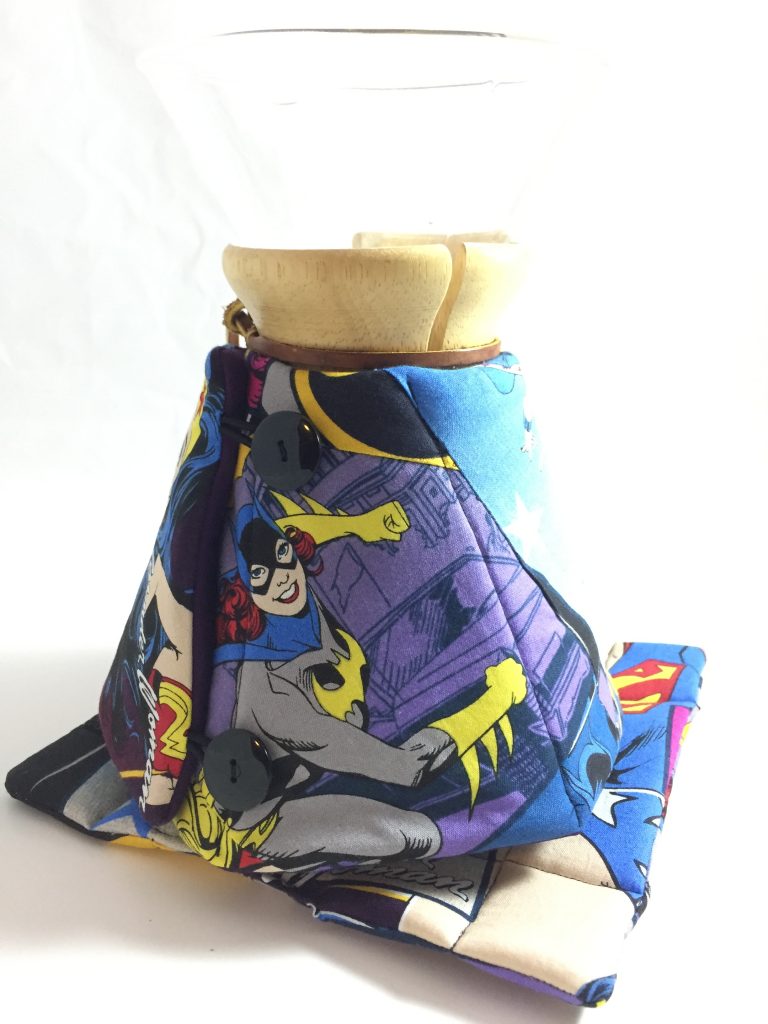
Once I got one cozy put together, I sent off a progress picture to my customer. I was honest and told her what had happened. Asking for her honest opinion, I explained I would be happy to purchase more fabric. She immediately responded that she missed all of the action and  wasn’t too wild about the black in between the clips of Wonder Woman. She suggested I take the fabric scraps and just sew them back together ‘like a patchwork’. Ok then, on to round two. (I was not at all disappointed that she was unhappy with my first rendition as I knew I could list it for sale in the shop.)

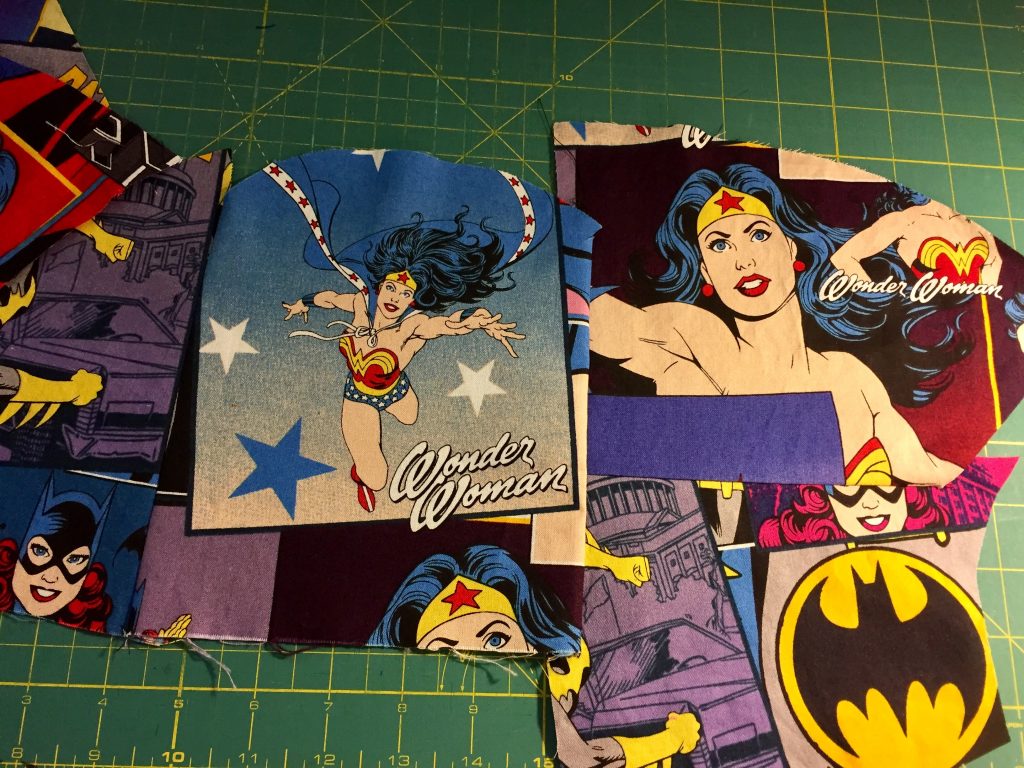
Drawing on my practice with making fabric Victoria Findlay Wolfe style, I played with the scraps I had. Luckily, I still had a lot of scraps.

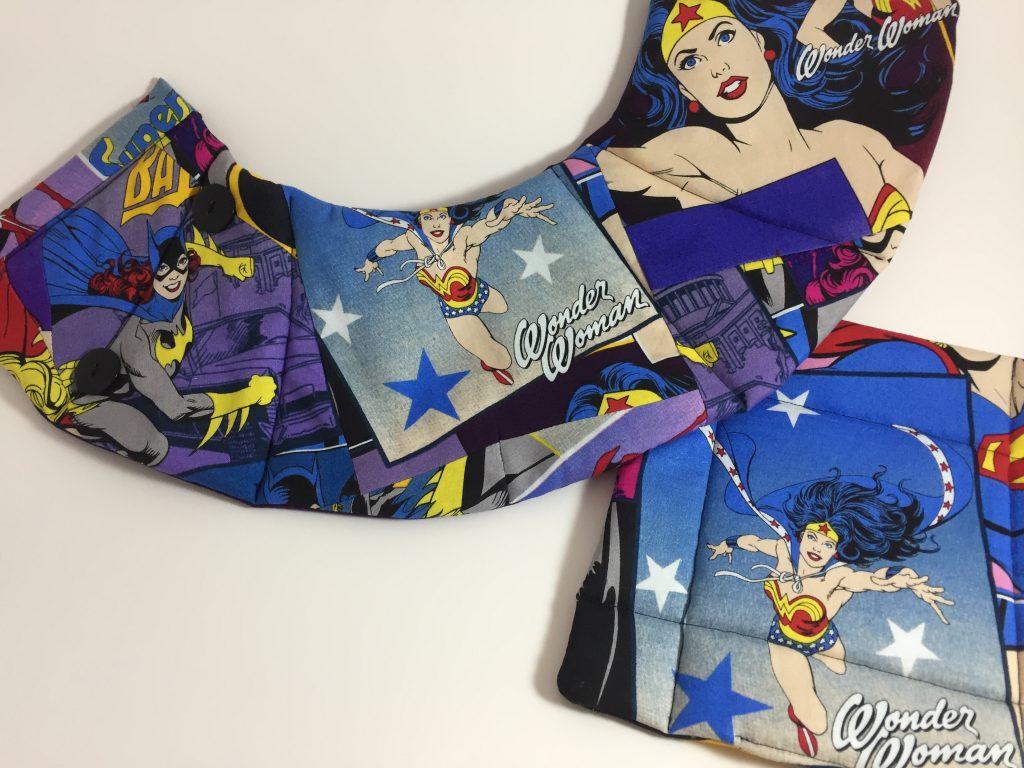
I only needed to have enough for the outside as I planned to line it with a solid fabric. Again, I tried to keep Wonder Woman as the main super hero and began laying pieces next to each other. I needed to end up with a wide strip of pieced fabric, enough for the large curve I cut for these cozies.

It came together so fast!  I showed Judy another progress picture and she was thrilled.  Having both a bright yellow solid and a deep purple solid, I let my customer choose her lining. She went with purple and I finished everything up soon thereafter.

I think it was a great lesson for me. Where I wanted to calm everything down and add the drama of the black frames, she wanted the chaos that DC Comic shows on most of their licensed fabric.

I suppose what I am trying to say is, it is such a trick to stock my shop with items (both handmade and fabrics) for my shoppers. I buy and make with my personal tastes reflected in my choices. I need to keep perspective on what the customer is going to like as well. At any rate, I loved creating both of these pieces and have no doubt the other one will sell swiftly.

If you make for others or for customers, how do you get that perspective? It is only natural to have a bias toward the styles, colors and themes you as the maker prefers, but we need to be able to figure out what the customer wants. Any input?

Just a quick note – I want to let you know I have begun a newsletter to keep readers posted about my fabric shop. I will be sending it out about every eight weeks or so and it will contain information on new arrivals and fun promotions for my newsletter subscribers. If you are interested, there is a sign up form on the right side of the page.


Linking up to a few places this week. Please take a look at the choices I have listed at the top of the page, under Link Ups.


Projects with Vintage Sheets

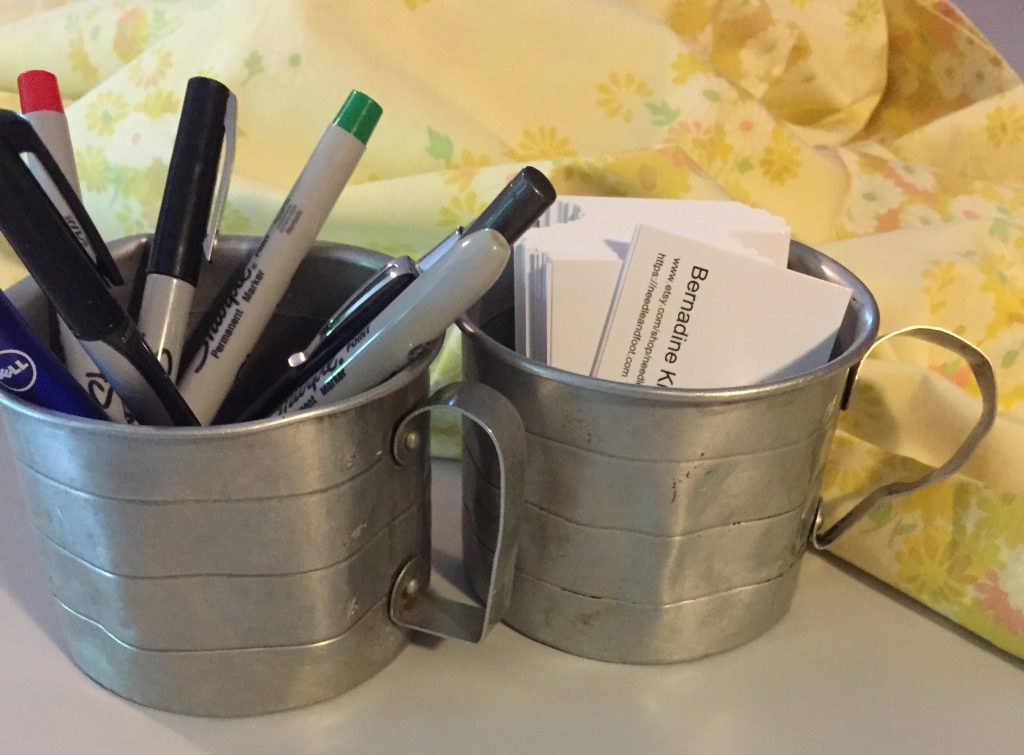
It is no secret that I have this crazy love of vintage everything.  I have posted many times about different thrifting trips where I have found little vintage treasures. It is fun to find uses for some of these little pieces. My sisters know of this passion of mine. Last month my youngest sister was cleaning out her in-laws house as they prepared to sell it.  She set these measuring cups aside for me, knowing I would want them. They are worn, bent and dented and I love them.

My collection of vintage sheets is quite large at this point. I often cut them into fat quarters and bundle them for sale in my shop. Last summer I made a queen size quilt and two throw pillows for the sewing room/guest room.

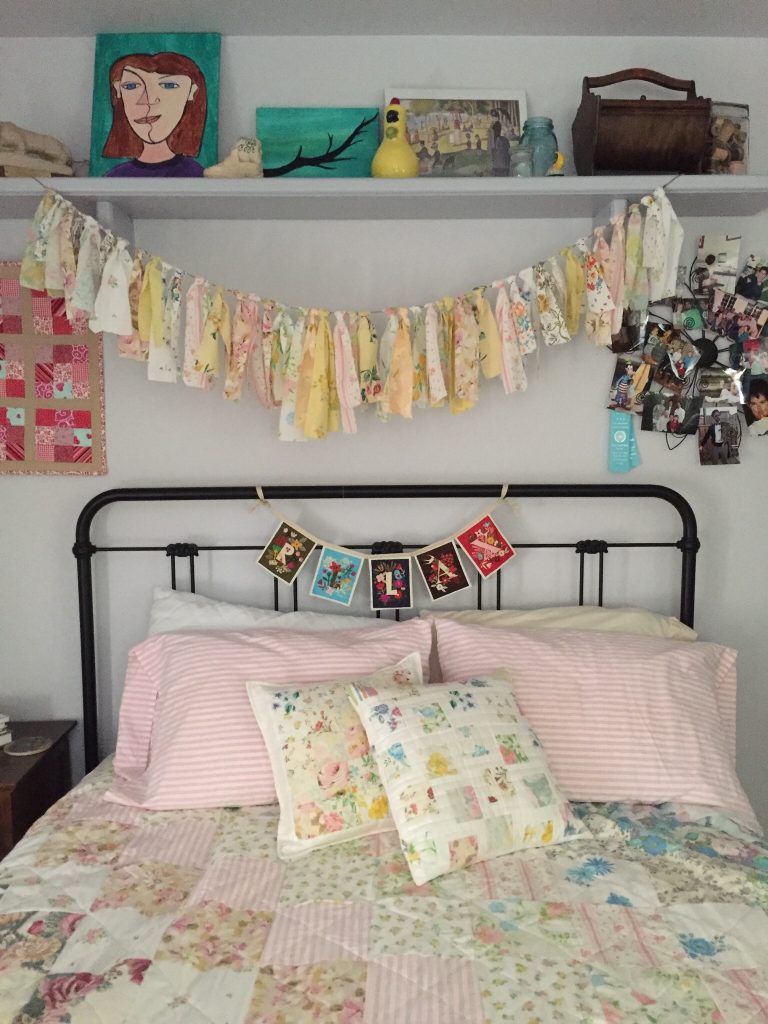
Two weeks ago I was cutting fat quarters and bundling them up for the shop when I realized I was amassing quite a stack of sheets. In an effort to use some of the scraps, I thought it would be fun to make a bunting with torn strips of the scraps I have from my sheets.  My plan was to hang it somewhere in the booth at the quilt show I worked earlier this month. I am not sure if you noticed it but I had it hanging around the table I used for cutting and transacting sales. Look at the table on the left in the picture below.
After cleaning up everything from the show I hung the bunting from a little shelf above the guest bed in my sewing room. Doesn’t it look cute with the quilt on the bed??

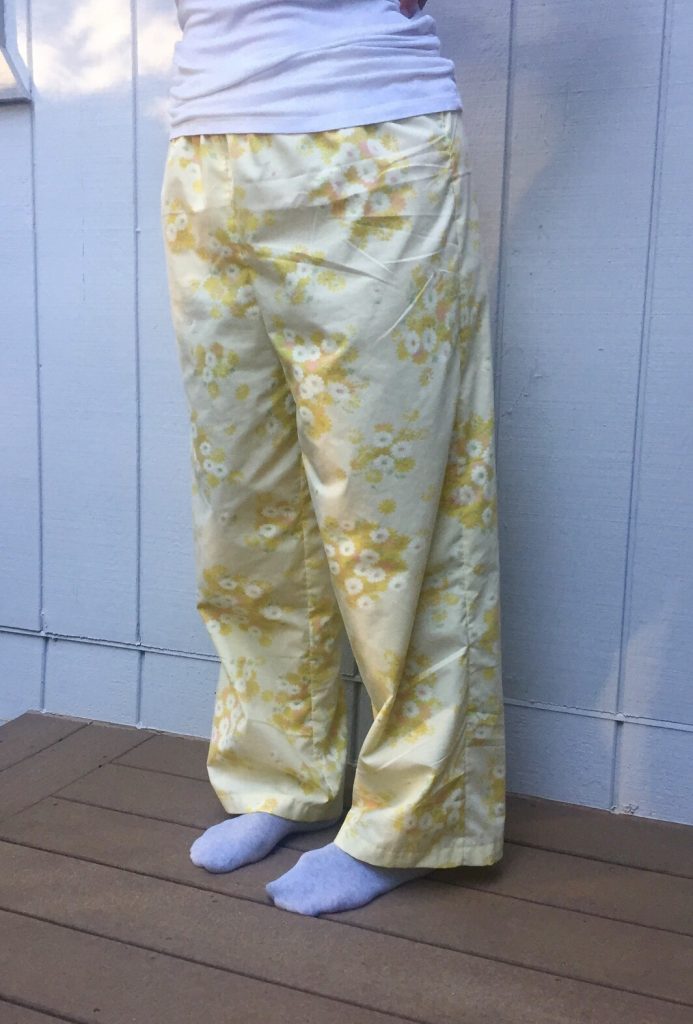
At about the same time, I decided to make a pair of pajama pants with one of the yellow sheets. The sheets are usually very soft as they have been used and laundered. I used a simple pattern, Simplicity 3935, to make them. It takes about as long to pin the pattern and cut the two pieces as it does to stitch them together. They are so, so comfortable. Here is the front – yes, they are a little wrinkled. I am not much for ironing my pj pants.  😉

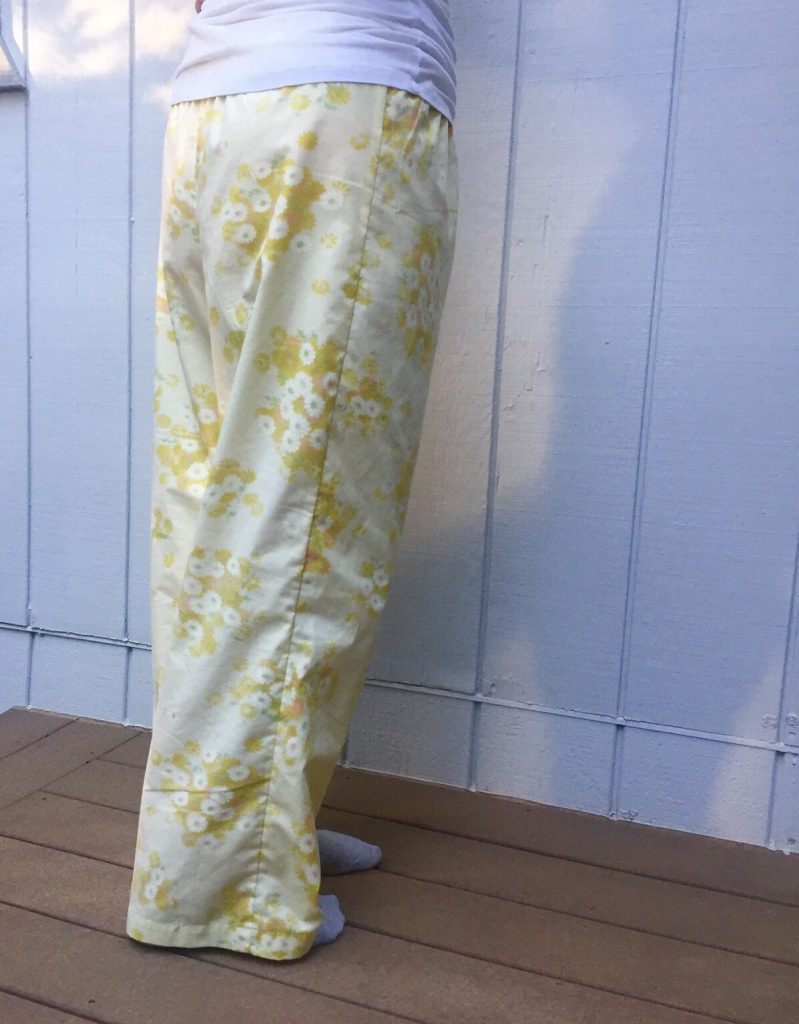
Now the back side – which looks much like the front!  I put a little label on the inside of the back waistband so I would know which was which.  Otherwise, you don’t know until you put them on backward and wonder why they don’t fit right. Ha!

Mostly I like to lay on the guest bed and marvel that my pj’s match the quilt. Not really though…

I do love the soft colors and patterns in these sheets. While I only list fat quarter bundles in my shop, I do sell whole sheets if someone wants one to back a quilt or make something like my really cool pajama pants.  If you are ever of a mind to do this, email me and I will send you pictures of what I have available.

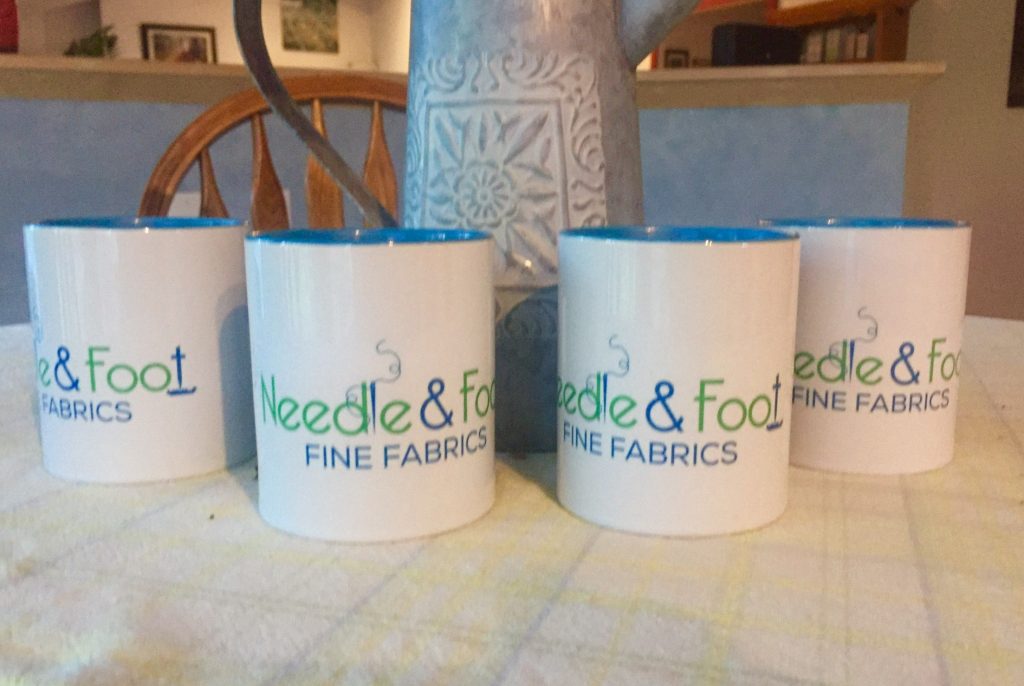
I want to show you a fun gift I received for Mother’s Day. My daughter somehow downloaded the logo to my business and had coffee mugs made for me. What a great surprise.

Aren’t these cute?? I just love them!

Just one more thing.  I have been following a series that my friend Mari is publishing over at Academic Quilter. She is on a tear organizing her sewing room, purging unused books, patterns and tools, and going through her stash and getting rid of fabrics she doesn’t want. She has been publishing these wonderfully inspiring posts with all kinds of suggestions for taking this project on. The posts are well written and divide the projects into manageable segments. I have to be honest and admit that to this point, I have only read the posts and wished I was doing the work. It has been so crazy lately and I haven’t spent the time to implement her ideas and suggestions. However, maybe you will have the time to take some of the ideas and put them to good use! Go check it out, if you haven’t already joined in.

Linking to some of my favorites – check out the list at the top of the page, under Link Ups!

Getting Ready

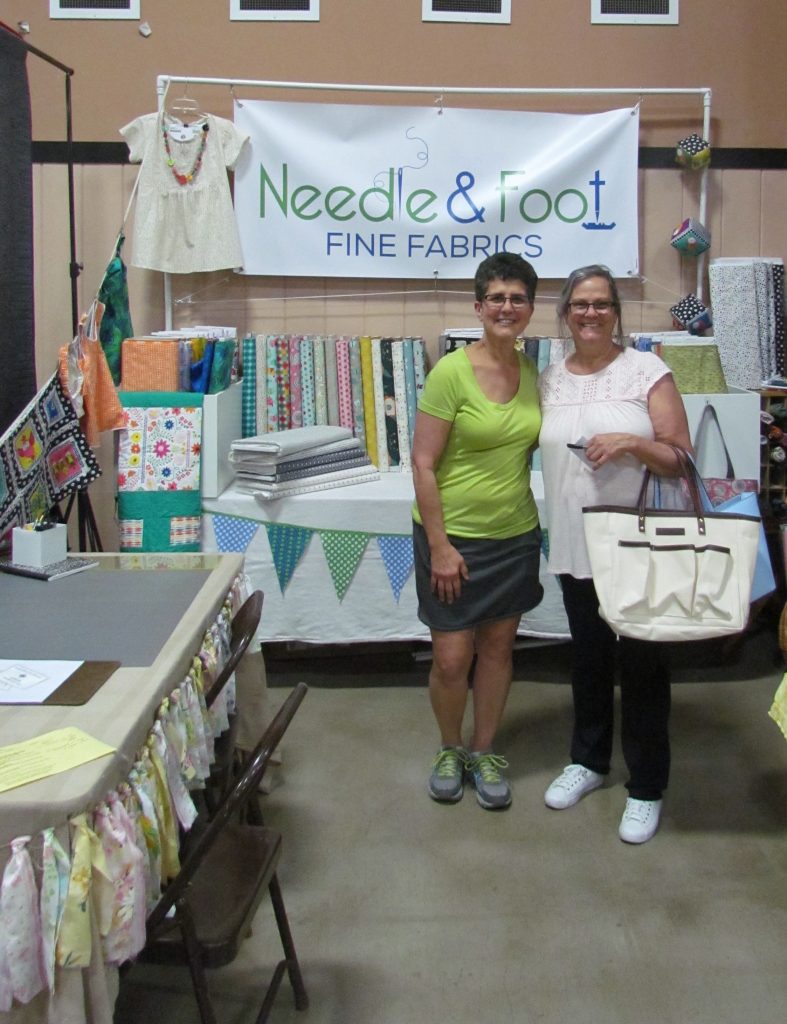
I spent quite a bit of time over the weekend preparing for a quilt show coming up this weekend. I decided to attend the show as a vendor and several months ago, I bought a booth for the vendor area. I got the smallest size booth they have and will give it a go.  My wonderful sister is coming to help me – this way if it is busy I will have help and if it is slow, she will commiserate with me.  Win-win for me!  She has great ideas and is very talented as a decorator so she has been a huge help as I collect what I need for the booth.

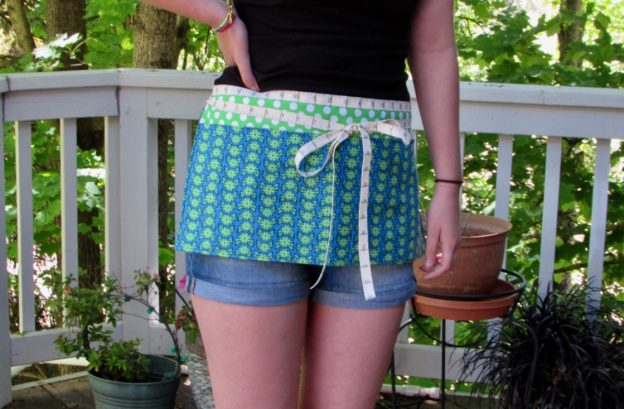
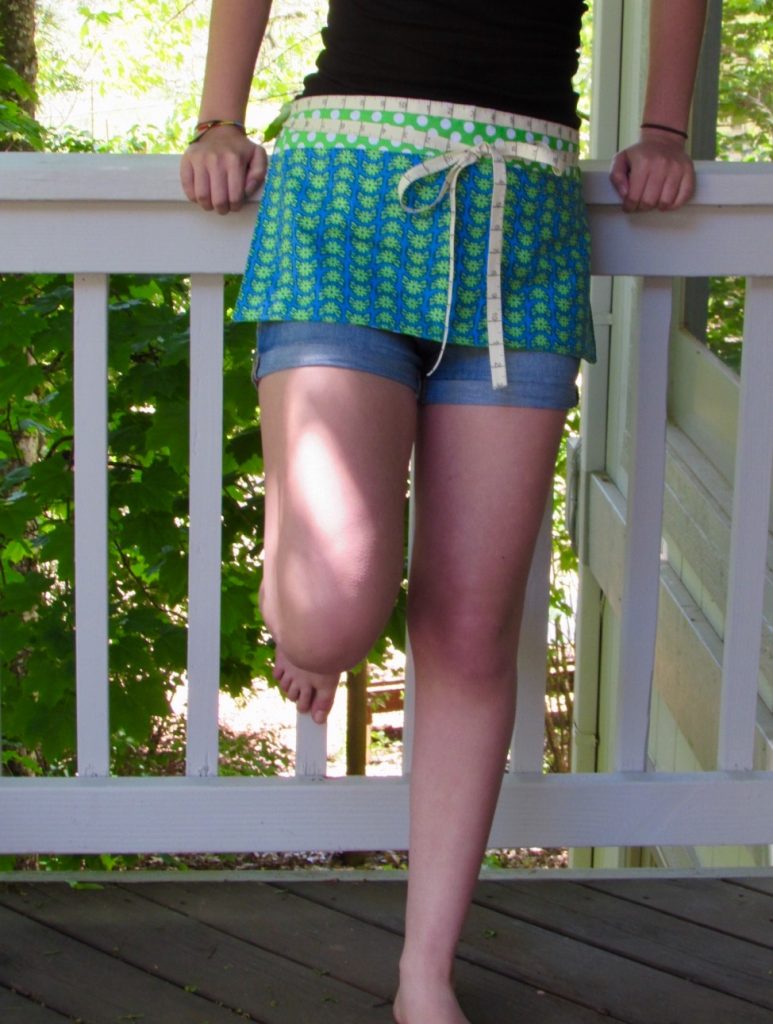
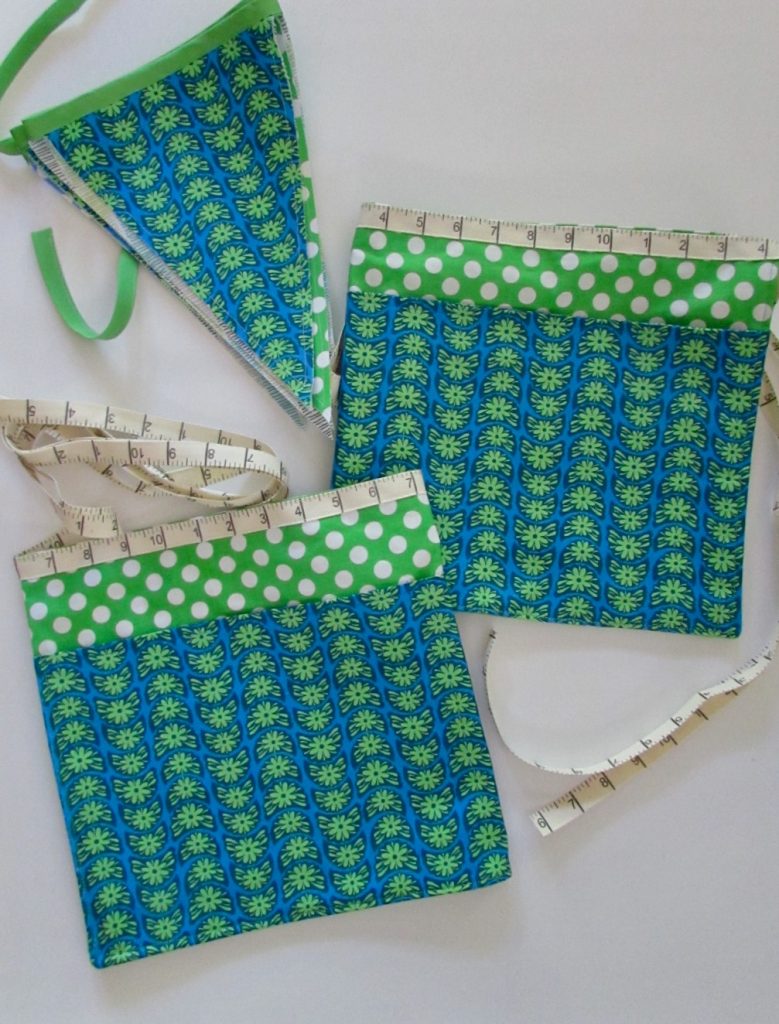
I used some green Ta Dot fabric (Michael Miller) and a piece of Crescent Bloom by Anna Maria Horner to make two work aprons for Patti and I to wear.   (Both of these fabrics are still available in my shop, though there is very little left.) The aprons were really a quick project and I just sort of made them up as I went. Check out the measuring tape twill that I used for the waist and the apron strings.  So cute! (Have to say the apron looks a whole lot cuter on my model than on me!!  🙂  )

Using the same fabrics, I made a bunting to hang across the front of one of the tables. Love these colors and they coordinate well with my logo.

Because this is my first time, I am trying not to spend tons of money. I did have to get a few things though. I am going for a bright, colorful look which will hopefully invite those shoppers to come and browse. You probably remember the banner I posted a few weeks ago.  My husband made me a frame with PVC pipe yesterday to hang it from.   People will definitely see that banner!

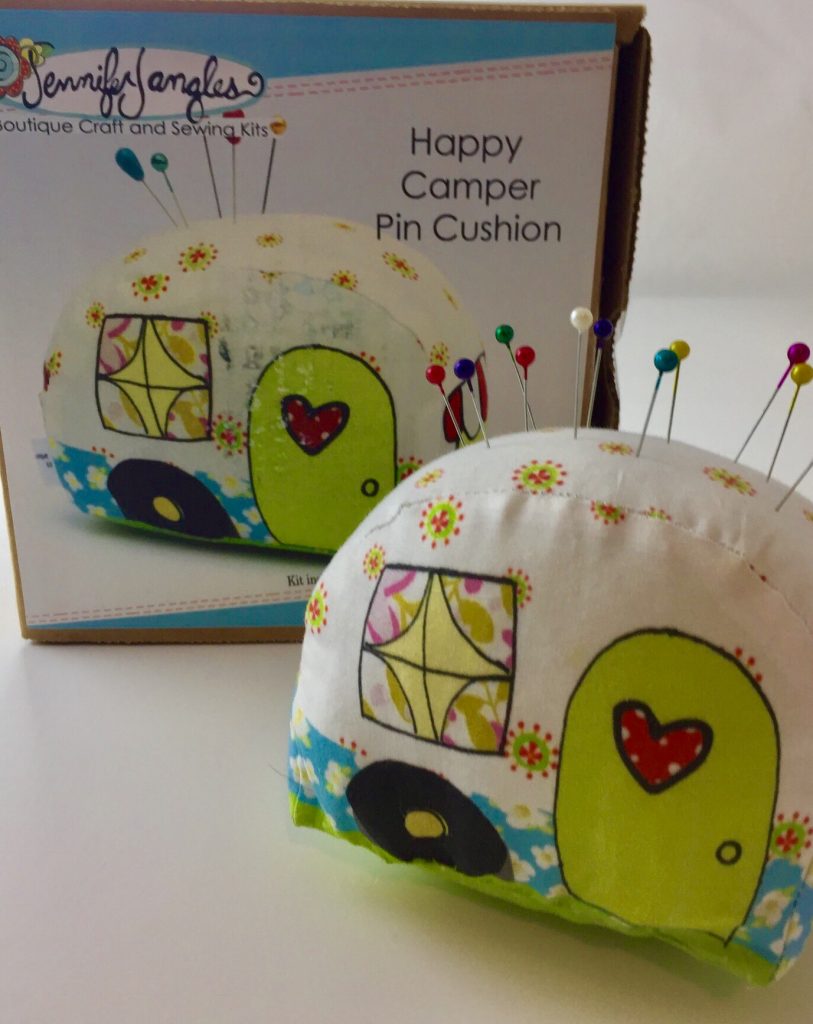
Pricing, oh my gosh — all the pricing that needed to be done. I have a small assortment of stitchery kits and a few projects for kids to make. Summer is coming and I thought it might be fun for some of the women to work on simpler projects with their grandchildren or children, as the case may be.  I made up a sample of this little pincushion kit. Isn’t it sweet? The kit includes everything needed so I think a young person could be quite successful making this. I have also marked a large assortment of fat quarter bundles and had to put pricing on the bolts (something I don’t normally do since it is just me down here in my little shop.)

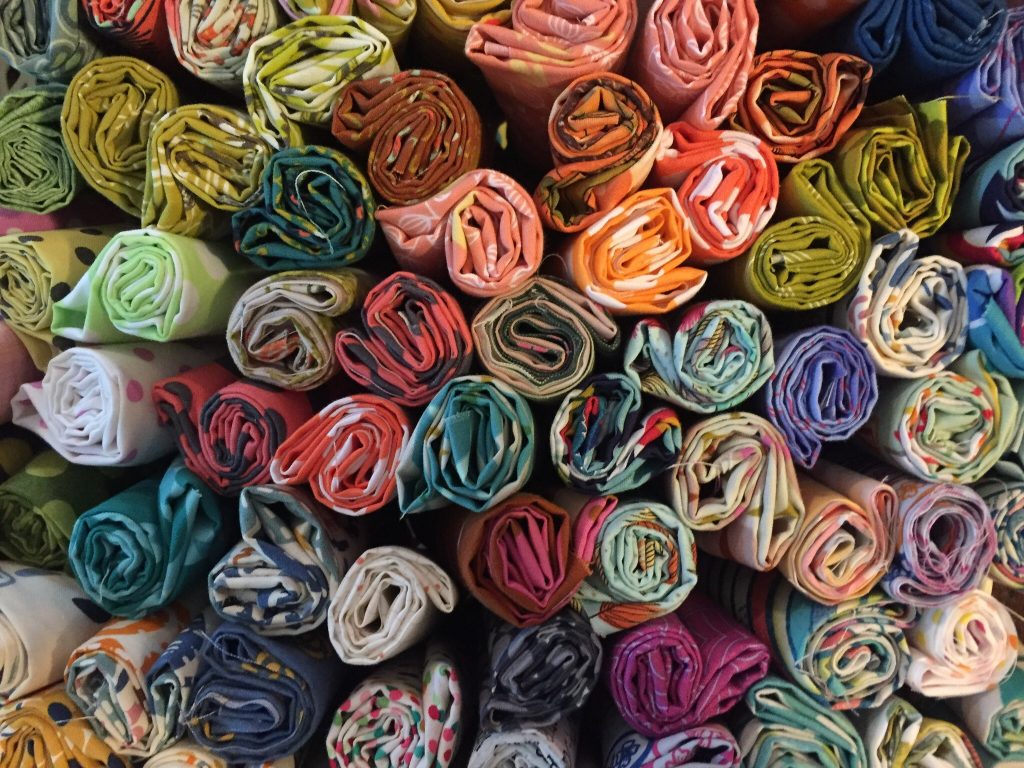
Fat quarters! I have cut all sorts of fat quarters. This is a gamble because I have no idea how many will sell. I hesitate to cut too many because than my fabric is chopped up. But I have a good size collection. I think I would rather run out than bring home a billion fat quarters. If you are a local reader, I hope you will come by and say hi on Saturday or Sunday at the quilt show.  Members of the Pine Tree Quilt Guild will enjoy a 15% discount this weekend. Hurray for being in the guild!

Finally, let’s all congratulate Sally! Her name was pulled as the winner of the giveaway of a copy of No Scrap Left Behind. Sally, I have sent you an email.  Please respond in the next day or two. If I don’t hear from you, I will pull another name on Wednesday. Thanks so much for all of the comments and ideas on scrap storage. So many of us do keep scraps but there were a handful of honest quilters out there who don’t choose to keep them. It’s all good!  Those that don’t want them seem to give them to their guild members or other quilty friends. Sounds like a good idea to me! There are still more bloggers sharing their projects on the blog hop this week. Keep checking them out and maybe you will still add a copy of the book to your library!

I doubt I will post again this week. I still have quite a bit to do in preparation for the show. Hopefully, I will be back to tell you of a successful experience after the show!

Linking these finishes up to my favorite linky parties. Check out the tab Link Ups at the top of the page.


Sweet Tweets Blocks and a Quilt Top

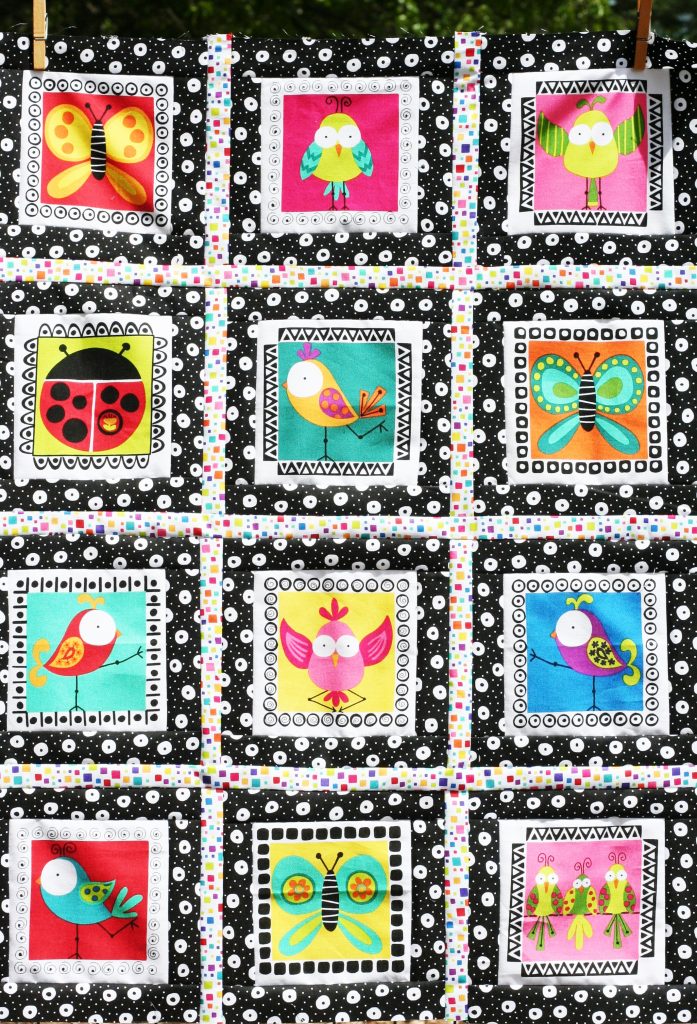
Yesterday I had the pleasure of introducing you to Kim Schaefer in my third Meet the Designer post. I hope you enjoyed getting to know her.  I have been playing with the fabrics in her Sweet Tweets line and have a few things to share with you.

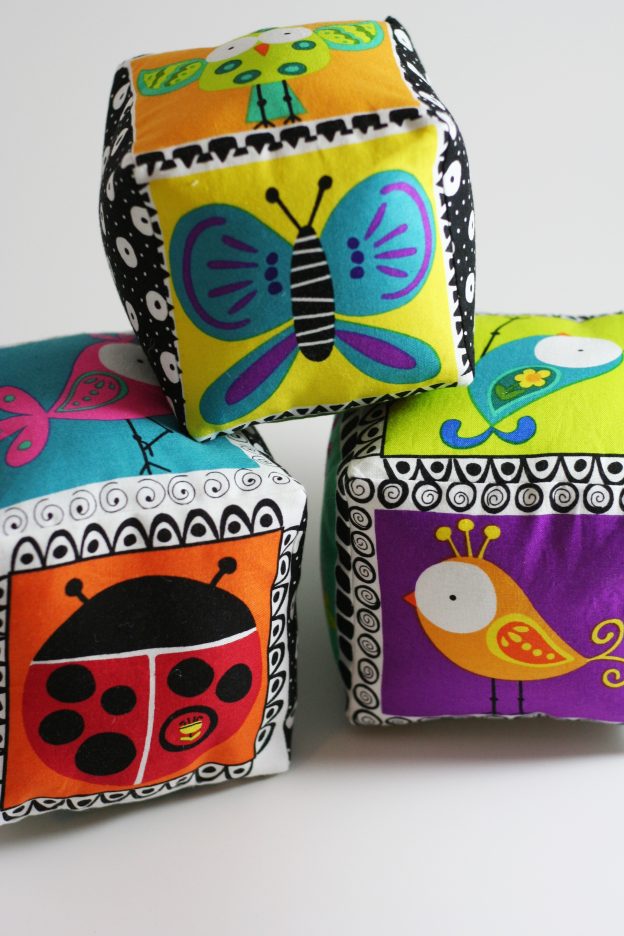
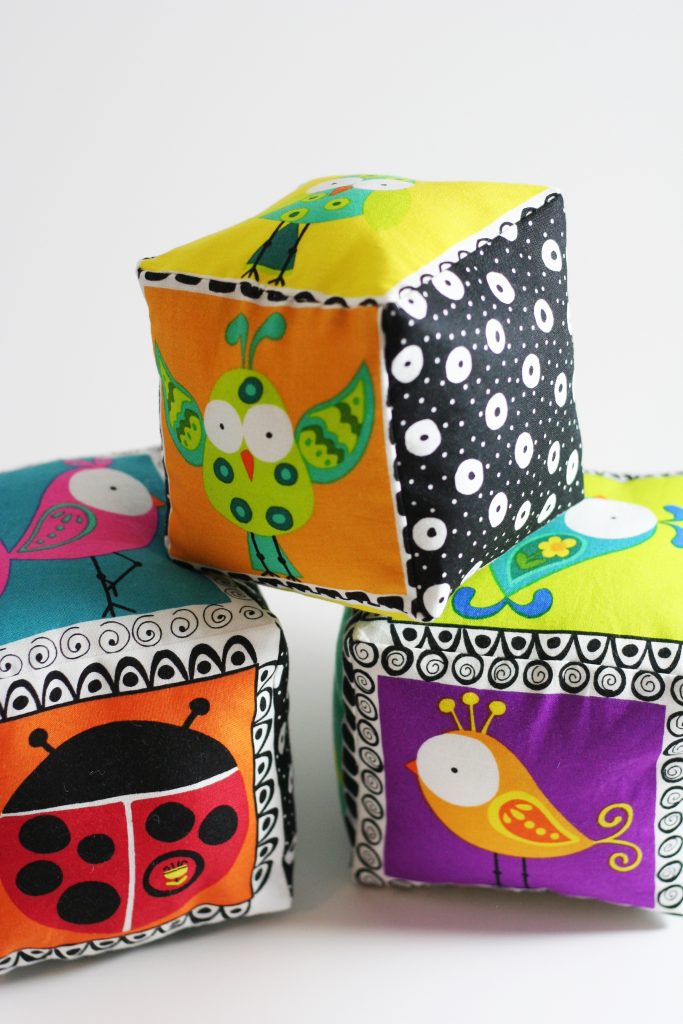
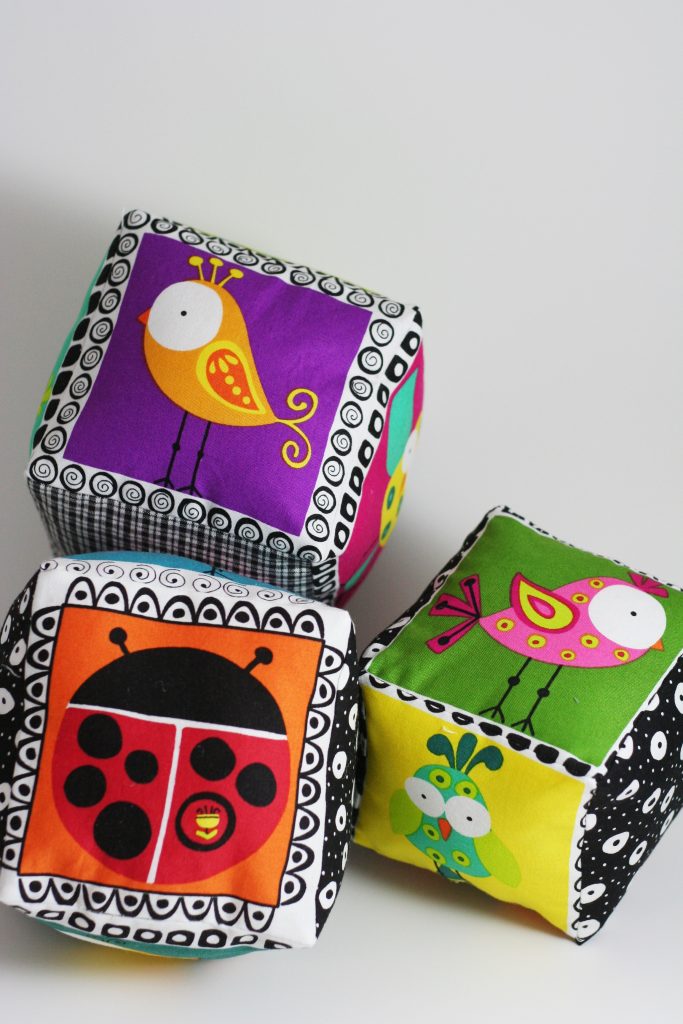
First off, I have been making these cute stuffed blocks. I have shared a couple of photos on Instagram so you probably have seen these in process. I used a simple tutorial provided by Abby Glassenberg at While She Naps.

Cutting the panel into blocks, I used four critters and two black and white squares from the Cheerios fabric for each block. I experimented a bit with the blocks. I made two of them bigger, utilizing the full size of the critter block and for the third one, I cut it down a bit so the block would be smaller. Two of the blocks are lined with fusible interfacing. It was only because I forgot that I didn’t line the third one. As a result, it is a bit on the mushy side – I like the result much better when the fabric was fused to the interfacing to give it some body.

Also, I only put one noisemaker rattle in each block and now I wish I had put two. (Actually, as I type this, I realize it would be so simple to open up the block again and add another rattle. I will do this because I think they don’t make enough noise with just the one rattle.)

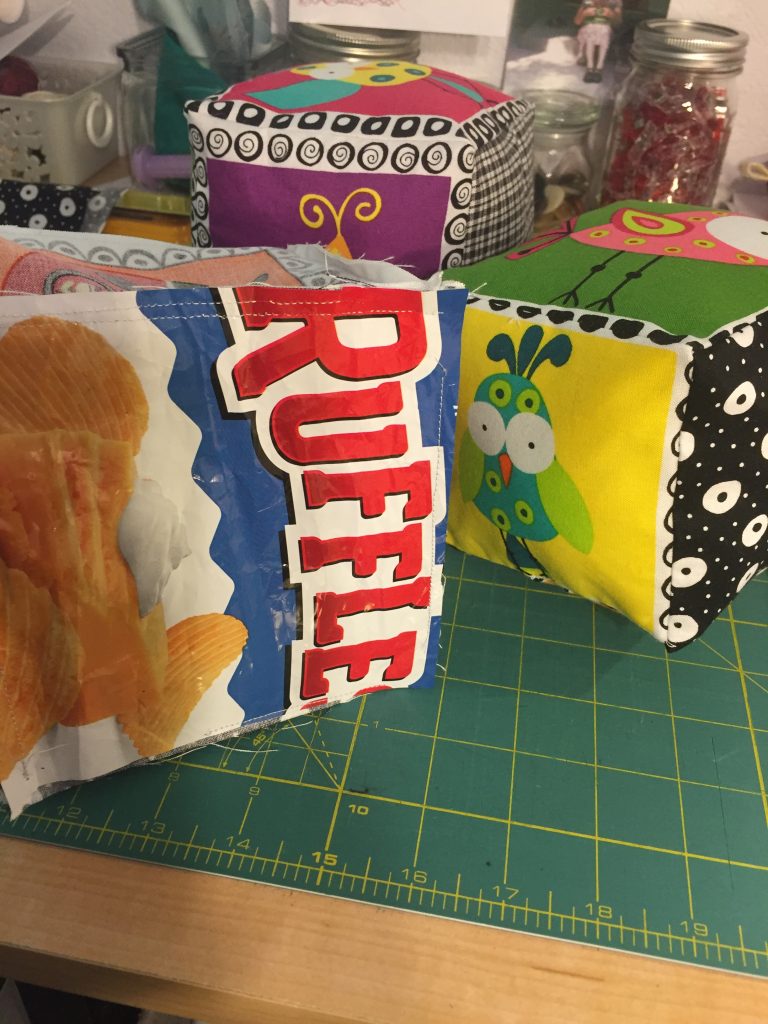
On one of the blocks, I lined one side with a clean piece of a potato chip bag. Abby had a list of suggestions for variations to try and I thought this sounded fun. It gives that block a crackly sound when it is manipulated. It was very simple to just wipe down the bag, cut a square and baste it to one of the sides. I did put the print side facing inward to the center of the block, just in case in might have shown through the fabric.

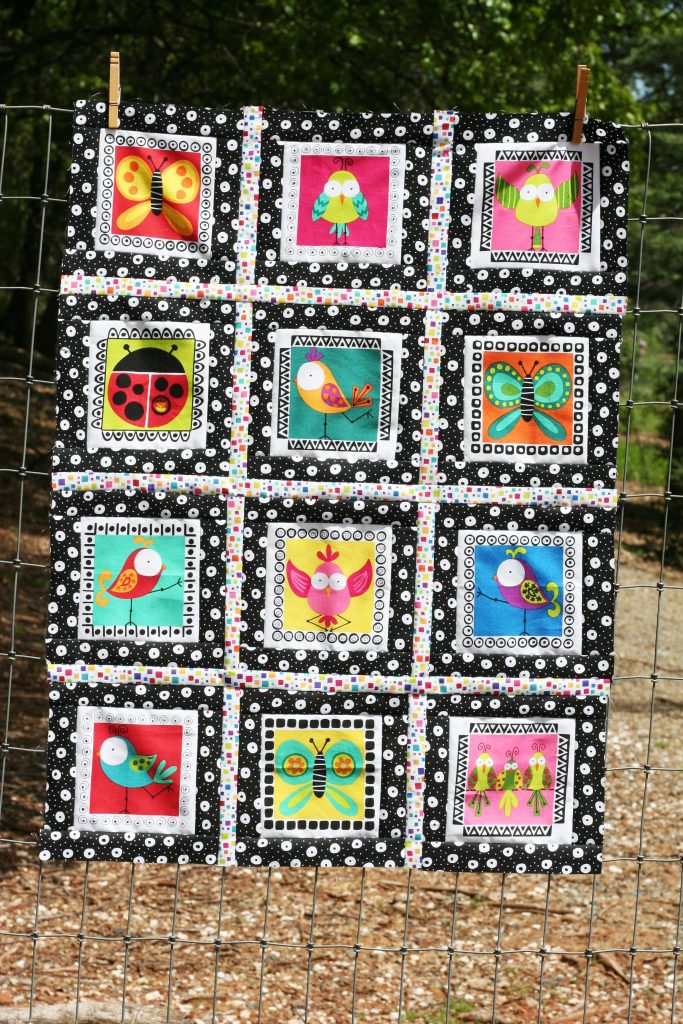
After making the blocks, I was on a tear and decided to make a baby quilt with some of the critter blocks from the panel. I started this on Tuesday afternoon this week and it came together quickly. I didn’t have a pattern in mind and decided to just put borders around each critter and sash them in one of the brighter prints from the Sweet Tweets line. I think it is just adorable! Panels can sometimes be difficult to utilize but this one lends itself to a number of projects.

Each critter block was cut to a 6″ square and I bordered it with the black and white Cheerio print. That brought the blocks up to 8″. Next I sashed them with the Hip to be Square print in Rainbow. Like I said in my previous post, I love the bright colors with the black and white print. With just the rainbow sashing, the quilt top is a bit too small for a baby quilt. It currently measures 24″ x 36″. Adding the rainbow sashing print around the outer edge of the quilt will help grow it just a bit.

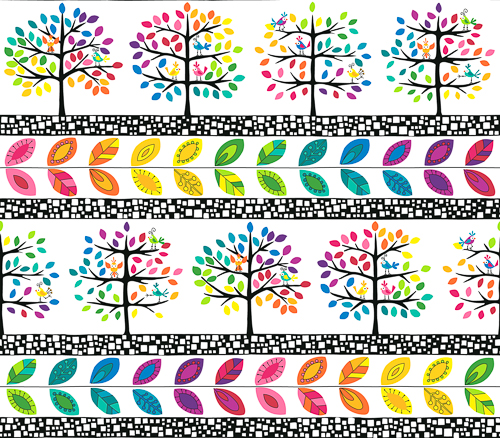
I have a bolt of this adorable border print coming in. I didn’t buy it with the first shipment of the line and think it is a great addition to this collection. I am not sure how I will cut it up but it will make a cute border and then hopefully the quilt top will be big enough.

I think this line is great for kids. However the black and white prints and the rainbow prints are versatile in their own right.  Great stash builders, for sure.  Reminder that they are on sale in my shop through this Sunday, April 23rd.

Hope you all have a great weekend.  Julia is finally getting her piglets this weekend. She is so excited. That is what we have planned, how about you??

Linking to my usual favorites, including Finish it Up Friday at Crazy Mom Quilts.


Christmas Finishes

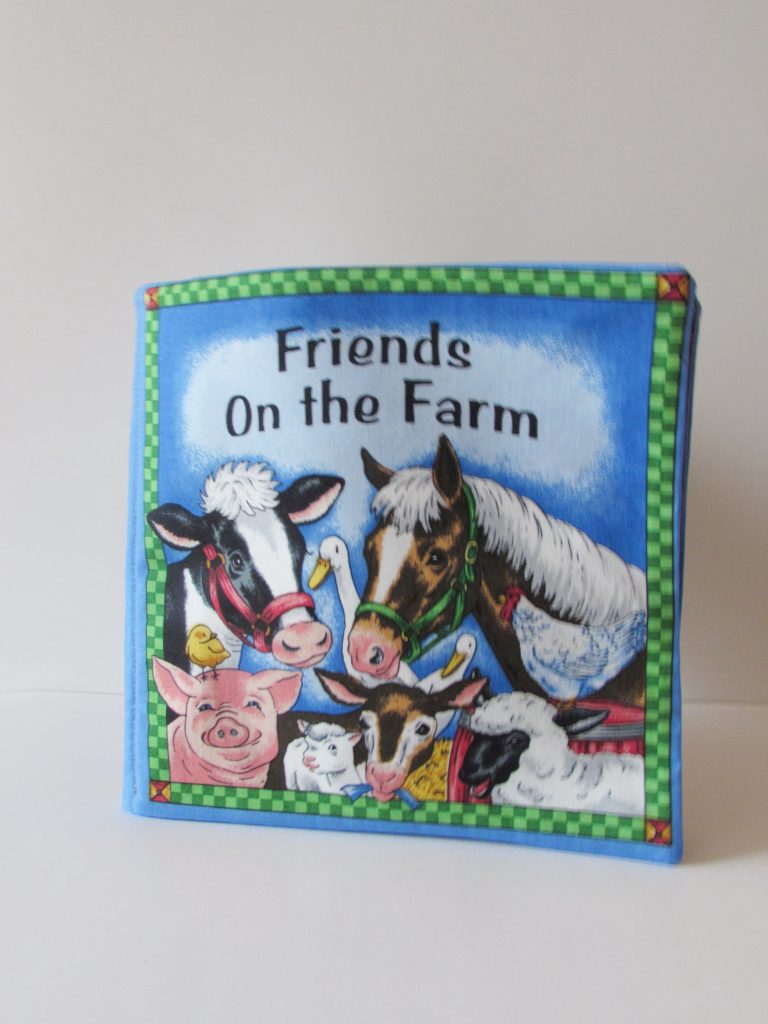
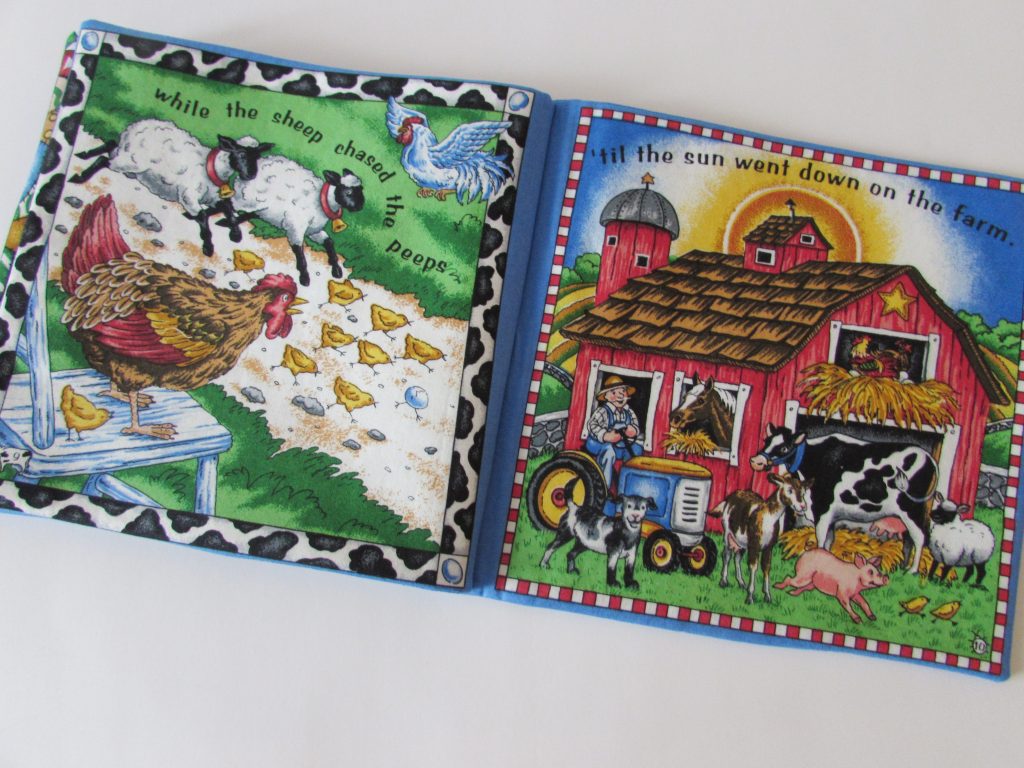
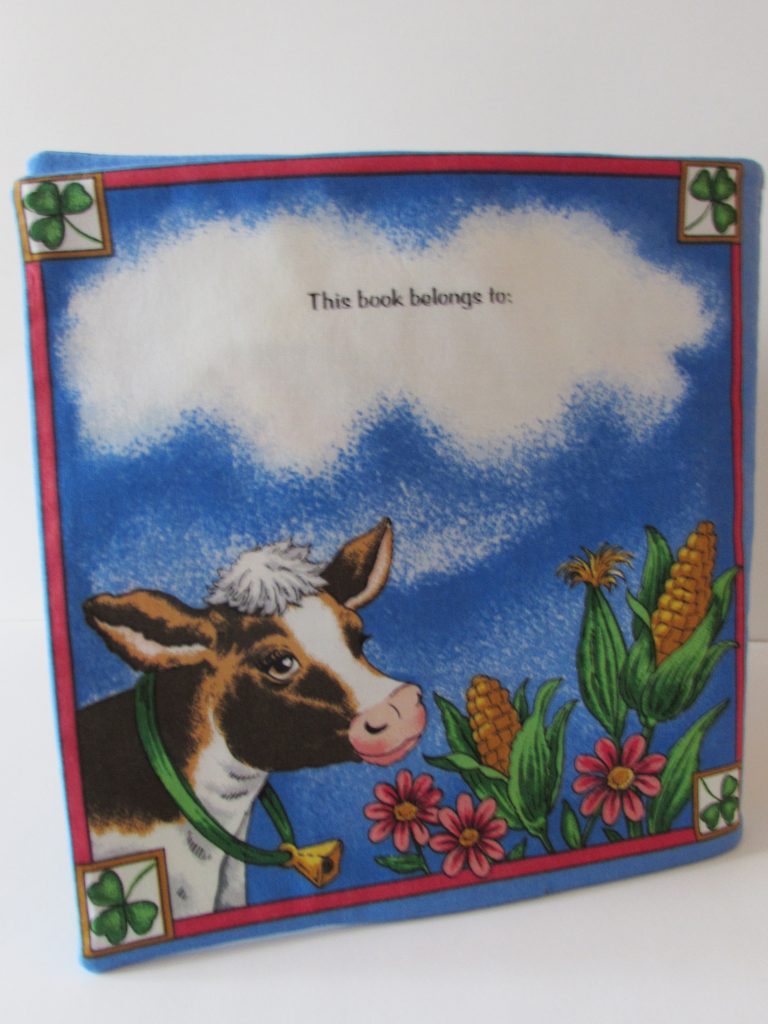
I have two little projects to share with you. These were both gifted at Christmas and I thought I would wait to post until after they had been given to their intended owners. First is a small, fabric book that I made for my soon-to-be-born grand daughter.

I have several of these panels, in two different flavors, that I purchased when a local fabric store was closing out, maybe four or five years ago? I thought it would be good to have them on hand as a fun gift to give. Then somehow I lost track of them or they went to the bottom of the pile in that closet of mine. After some digging, I found them.

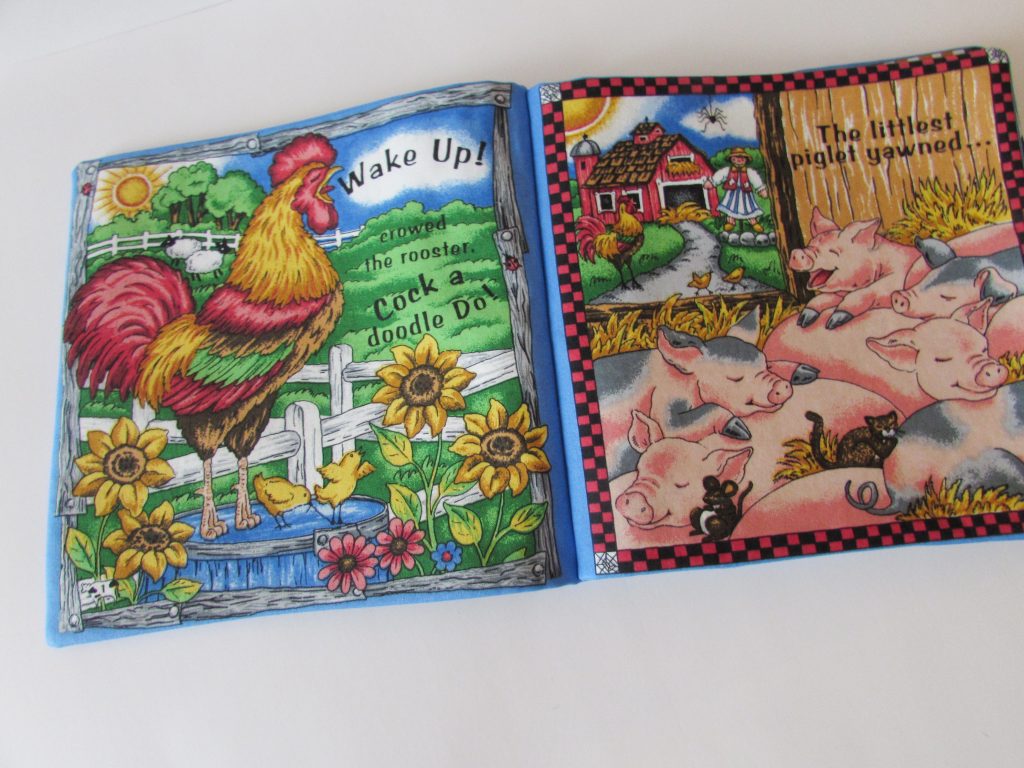
I think it is a sweet way to introduce baby to books. The pages are thick and easily grasped, bright colors and not a whole lot in the way of a plot. Plus it is washable which might come in handy.  😉

If you haven’t made one of these before, it is basically a panel of rectangles. Once you cut them out, the panels are paired up to be sewn in a certain order so the pages are in the correct order. (This is crucial when the plot is as deep as these are!) The instructions said to fuse a mid-weight interfacing to one page of each pair. I chose to use fusible batting instead. It makes the book a bit softer. Each pair of pages is sewn, right sides together and then turned right side out. Press and sew up the little opening that was left to turn the book right sides out. Stack the pages and sew down the center to hold them together. Ta da! Your book is complete.

I didn’t put her name on the book because it hasn’t been shared yet. (Actually, I am not certain they have truly decided on one yet.)

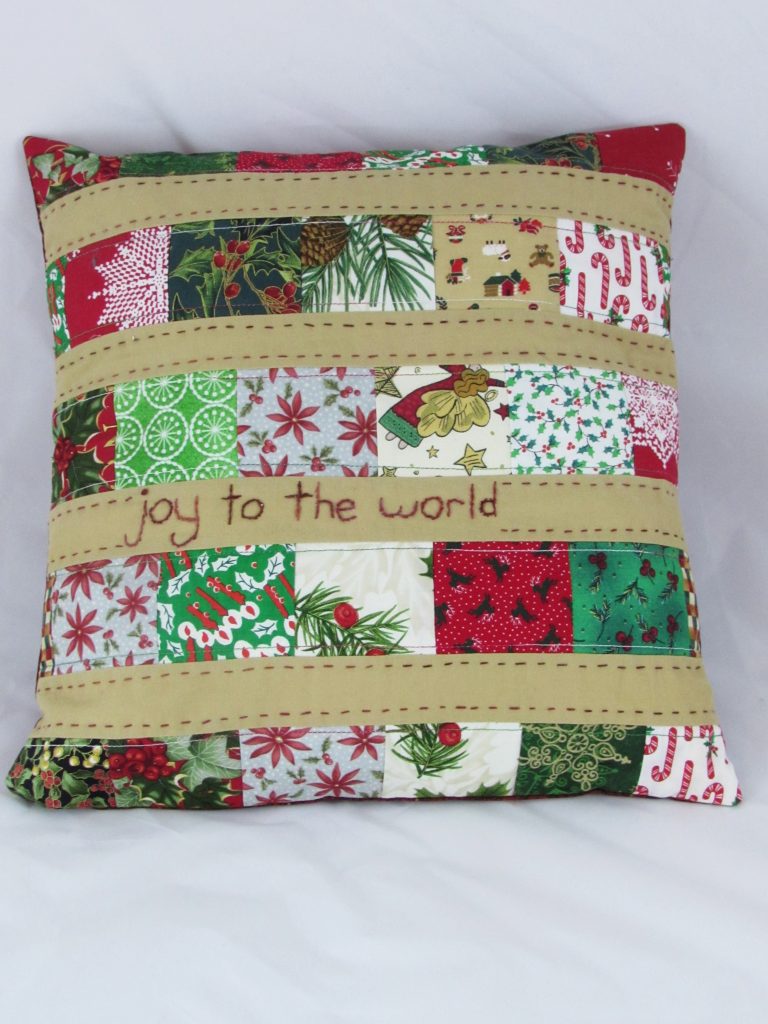
The other gift I made is a scrappy Christmas pillow. I had cut lots of rectangles from a bag of Christmas scraps and decided to use a few of them. I stitched the rows and then when I sewed the rows together I offset the seams. It makes things a little bit more interesting. I love some of the vintage Christmas scraps in this pillow (especially the candy cane fabric).

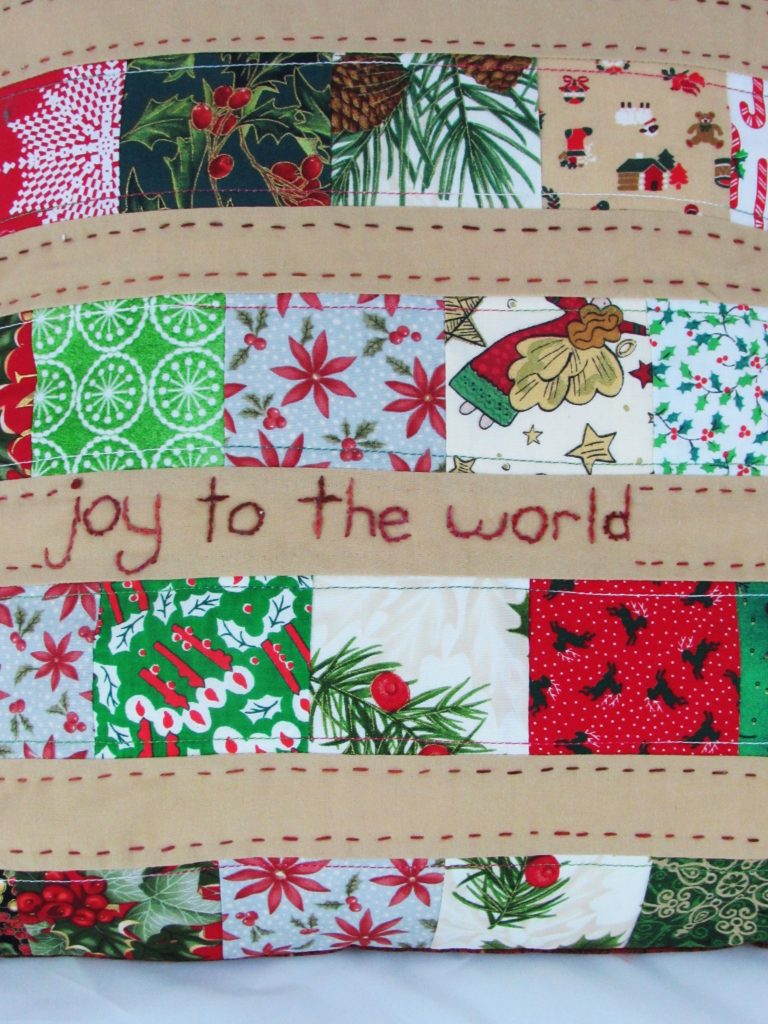
It looked too busy with the patchwork rows right next to each other so I took a solid khaki color scrap and cut some strips that were 1.5″ finished. At first I quilted the scrappy rows with my walking foot and a variegated Mettler thread in Christmas colors of red and green. That looked boring. I added the big stitch quilting on the solid rows and liked the way that was looking. (You may have seen some of this on Instagram – I shared a few pictures there along the way.

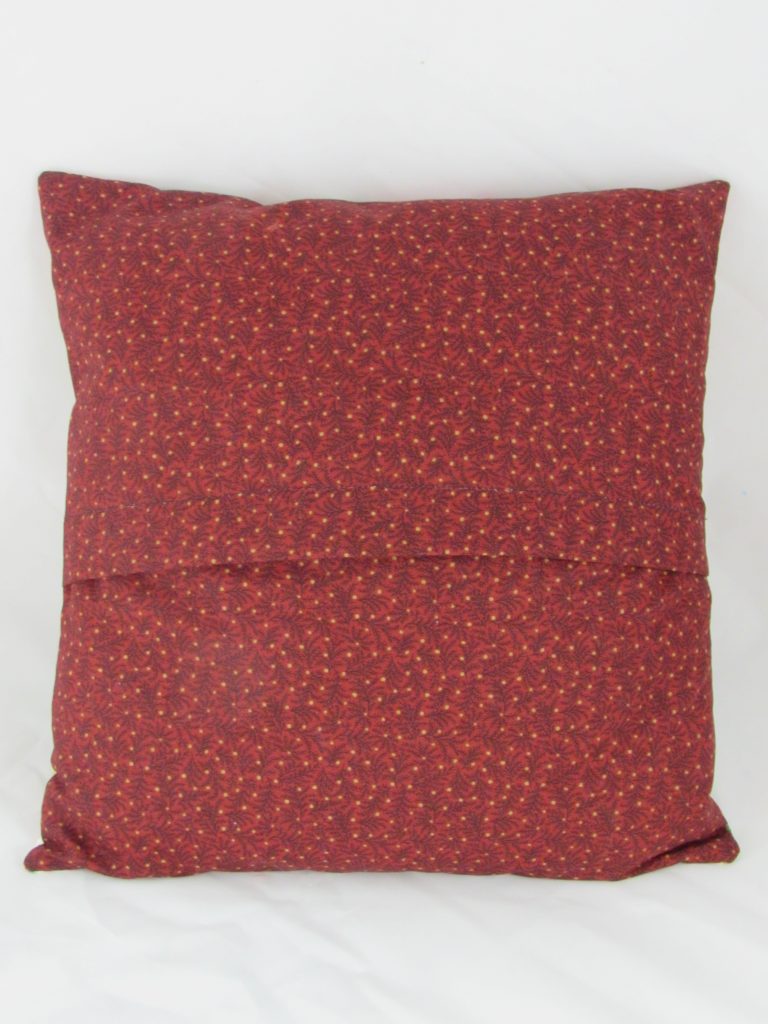
After doing the straight lines of big stitches (using Perle cotton thread) I added the phrasing. I think that finished it off nicely. A simple envelope backing and it was complete.

I didn’t give as many handmade gifts as I sometimes do. Time doesn’t always allow for these things! But these were very simple and fun to make.

I have been reading lots of great posts about everyone’s plans for the new year. I am hoping to get to that soon. I didn’t get it done ahead of time and now we are in the middle of lots of family time. Maybe next week when things settle down again. I do have some fun ideas for 2017 and am excited to share them. Stay tuned!

Happy New Year everyone! Wishing you all the best in 2017.


Linking to my usuals – find the links at the top of the page, under Link Ups. Additionally, I linked to Frontier Dream’s linky party, Keep Calm and Craft On.


Stocking the Shop

It is all about Christmas prep this week. I feel like an elf in Santa’s workshop except rather than making toys, I have been creating items for my shop. This is the biggest shopping time of the year and I try to take full advantage of it with regard to my Etsy shop.

img_1546

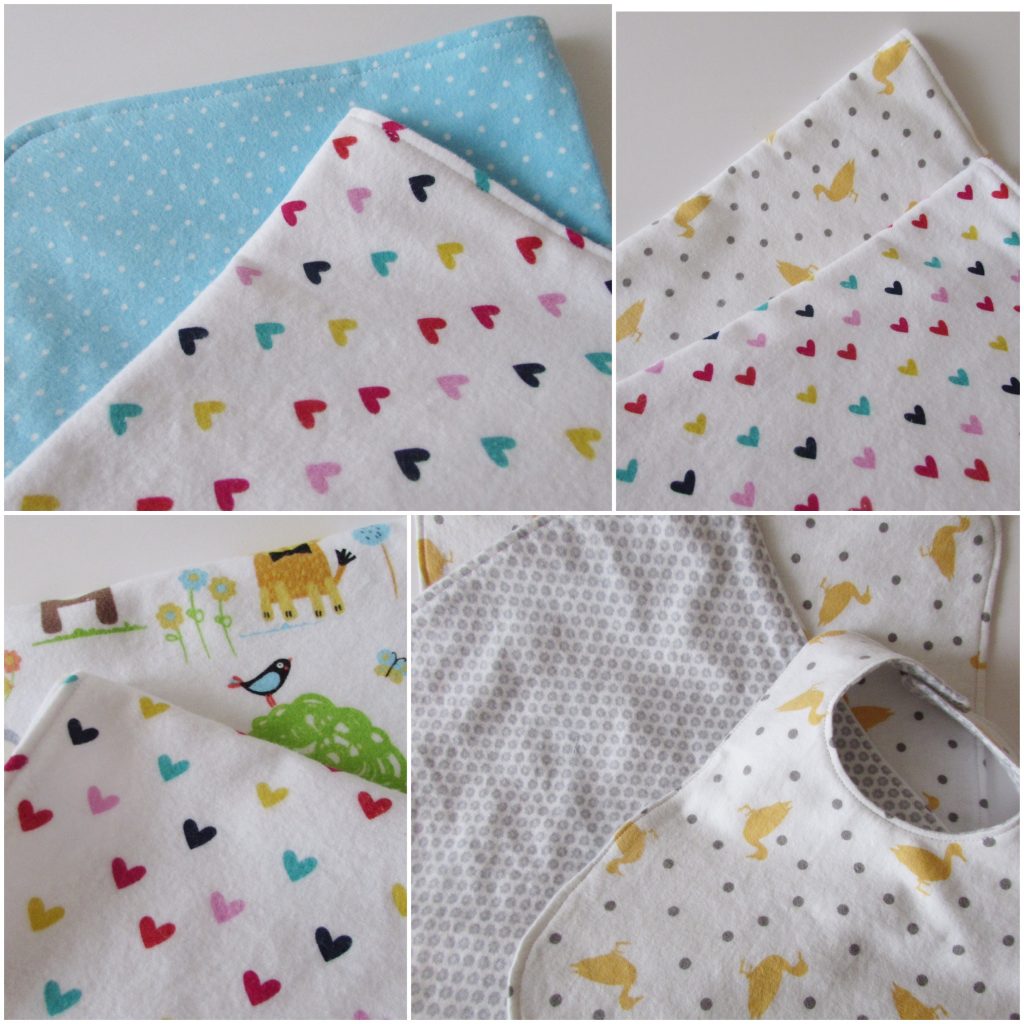
A friend asked me to make a set of burp cloths to gift to a friend at her work. It gave me a push to add some new baby items to my shop. Sewing with these soft flannels is a blast. Putting on a little music and creating little cuties for babies makes for a lovely afternoon. If I had to pick a favorite, it might just be the duck and dots print. I love yellow and gray together.

picmonkey-collage

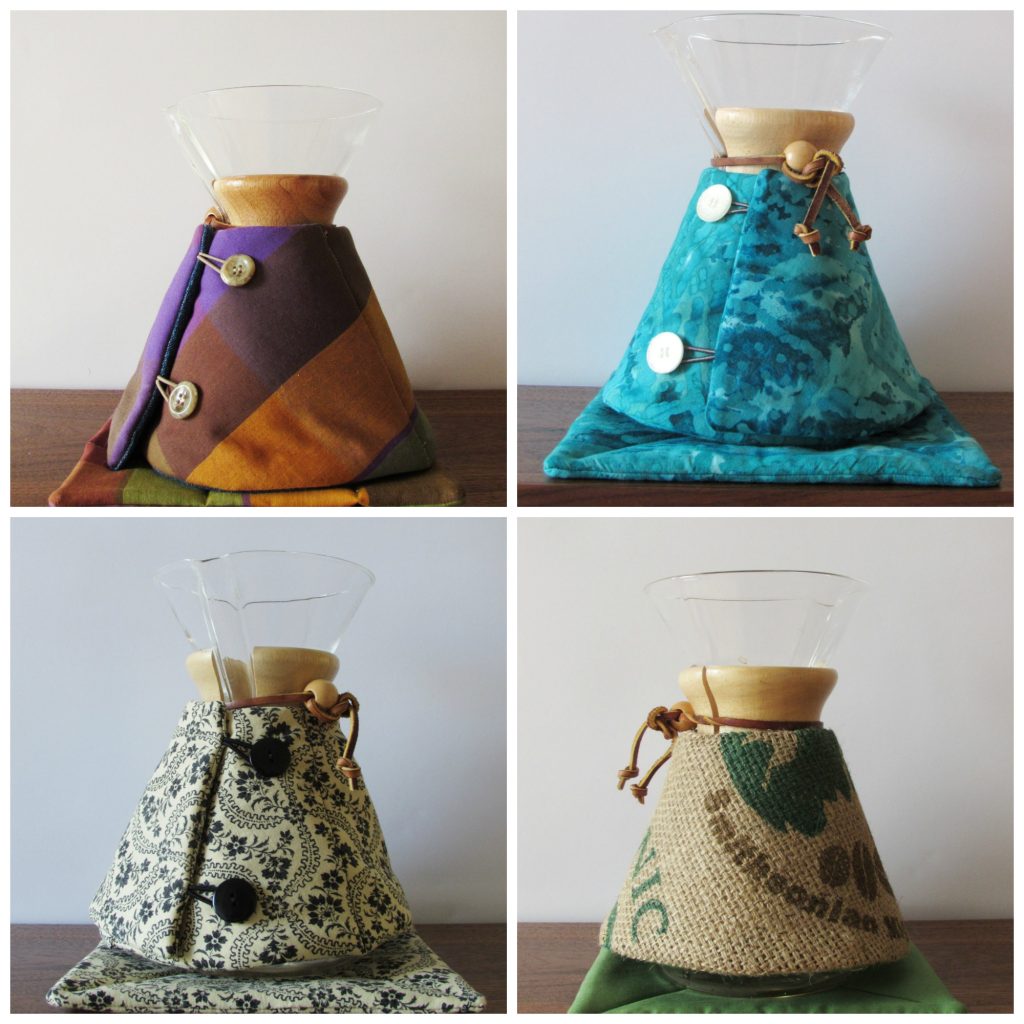
Here are a few of the Chemex Cozies I have recently listed. It is a challenge to be sure that I have lots of colors and choices available. The upcycled burlap pieces sell very quickly but they are a beast to create. There is always so much mess from cutting and stitching burlap; it just flies around the sewing room and fills my sewing machine with debris. As for colors, it feels like deep colors and basic patterns sell best. Also batiks – those are usually snapped up quite often.

picmonkey-collage-1

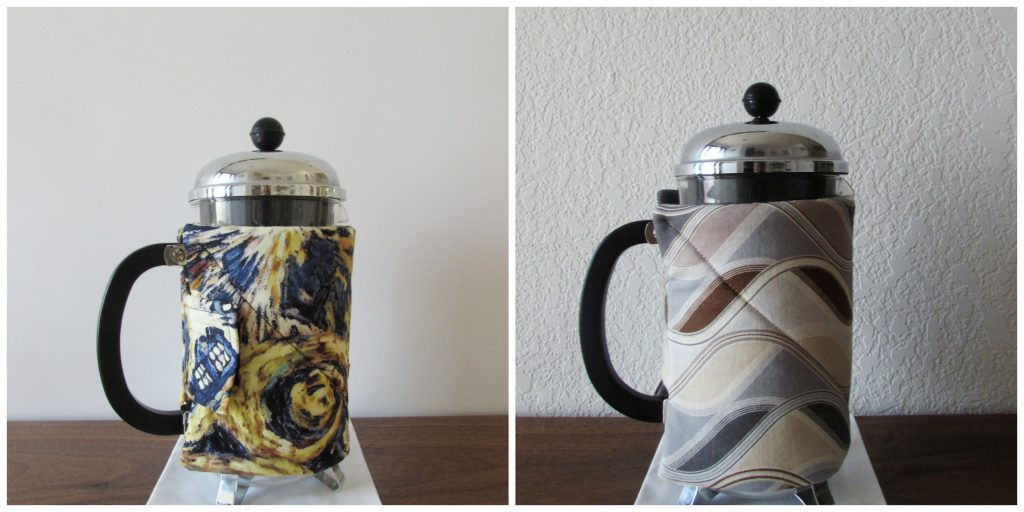
French press cozies are another strong seller in my shop. (Remember I wrote up a tutorial if you would like to make some for Christmas gifts – they are a fast project for the coffee lover in your family.)

I am also working on a baby quilt — I cut into a bundle of Maureen Cracknell’s Fleet & Flourish line. It is going to be adorable. I think I may soon share this as a finish. We will see. Our house has been passing this winter germ fest to anyone who enters. Julia had it and then I caught it and it turned into pneumonia. Now Ray has it. Ick.  Don’t come near Grass Valley or we might infect you! Hoping you all are staying healthy this season and enjoying whatever time you can find in your sewing room!

Remember, I am hosting a giveaway where one lucky person will win a copy of the 2017 Quilter’s Planner. Be sure you have entered as this is one very cool prize! The giveaway will remain open through Wednesday Evening (tomorrow). Good luck! I will post the winner on Thursday morning.


Holiday Scrappy Project

Thanksgiving was a wonderful day for our family. I hope it was the same for yours.  There is much to be grateful for, not the least of which is our on-line quilting community.  Now there will be the transition into the Christmas holiday season. I am hoping I can convince Ray to put up our outdoor lights this weekend. I think, of all the holiday decorations, the outdoor lights are my favorite. I like to get them up as early as possible so we can enjoy them for as long as possible.

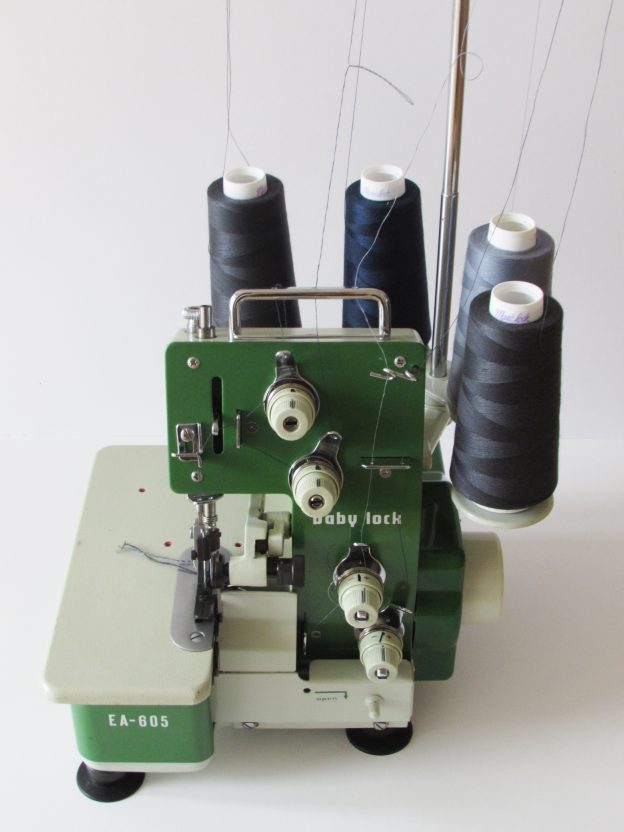
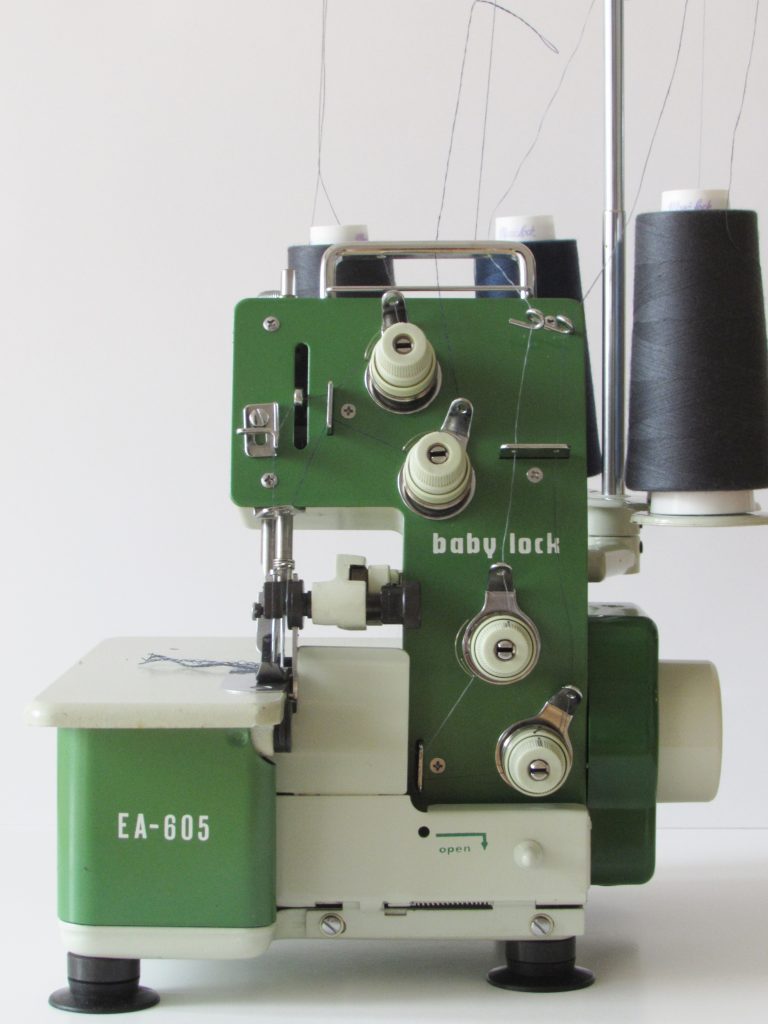
I have a new toy to share with you! The back story is that my father-in-law shares my love of thrift stores. We both enjoy the hunt as one never really knows what might be found on any given day. In October, my father-in-law called me and said he was at a thrift store and was looking at a sewing machine. He said he didn’t really know what it did but it looked interesting and was in great shape. I asked a few questions and figured out it was a vintage Baby Lock EA-605 serger. I think the model was made in the late 1970’s. It is a heavy little guy, being made of metal rather than plastic. When he said the machine was priced at $25, I asked him to grab it for me. He brought it over a few weeks ago when we were celebrating my birthday. (This was a mighty fine quilty birthday!)

img_8129

Actually, the serger won’t be used for quilting. In case you aren’t familiar, sergers are used to create a finished seam. There is a blade and four lines of thread. There are threads entering from above and below, though there is no bobbin. As the seam is created, the blade trims the excess fabric close to the finished edge. It is oh-so-cool! Having never used one, I signed up for a basic serger class at a little fabric shop in town. That helped me figure out some of the basics but there is still much to be learned. This particular machine is designed for woven fabrics, not knit fabrics. However my serger class instructor thinks I might be able to get a decent result with knits, so I will have to give it a try.

Because the machine needed a few adjustments I took it to our local sewing repair genius. Deby was able to clean and adjust everything and it runs so smoothly now.

img_8128

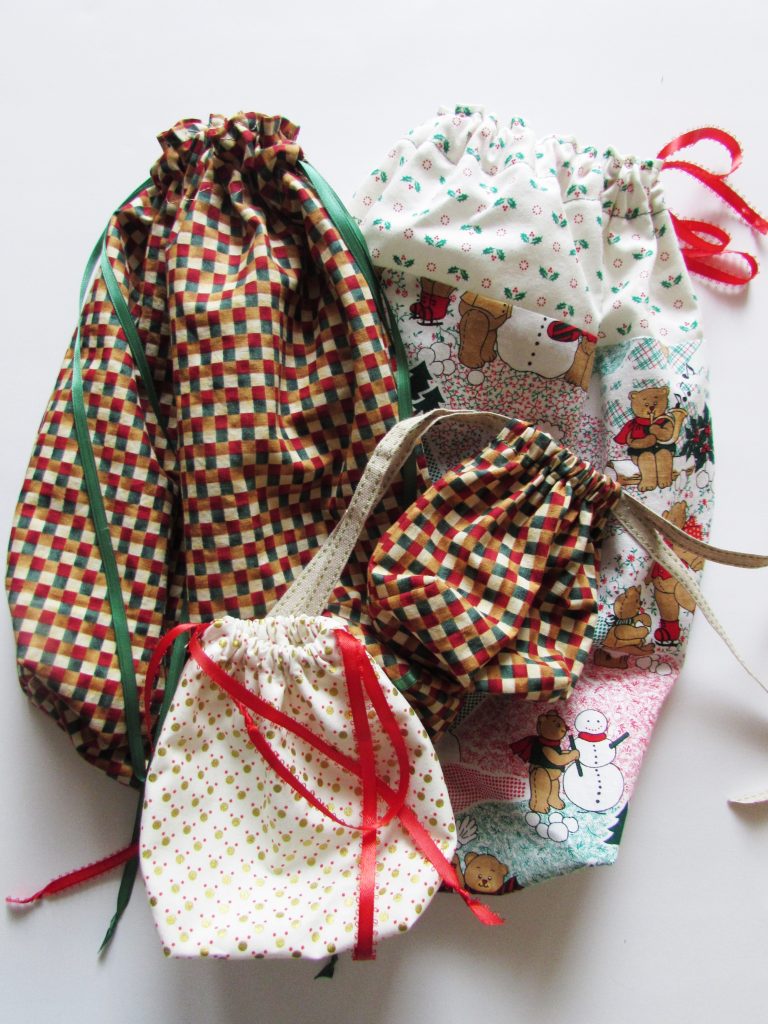
I wanted to practice on something simple so I made some Christmas themed drawstring bags. I have made a few each year for the past two years and have quite a collection now. I love not having as much paper to throw out come Christmas morning. I had a stack of vintage Christmas fabrics to use as well as loads of ribbon for the drawstrings.

img_8123

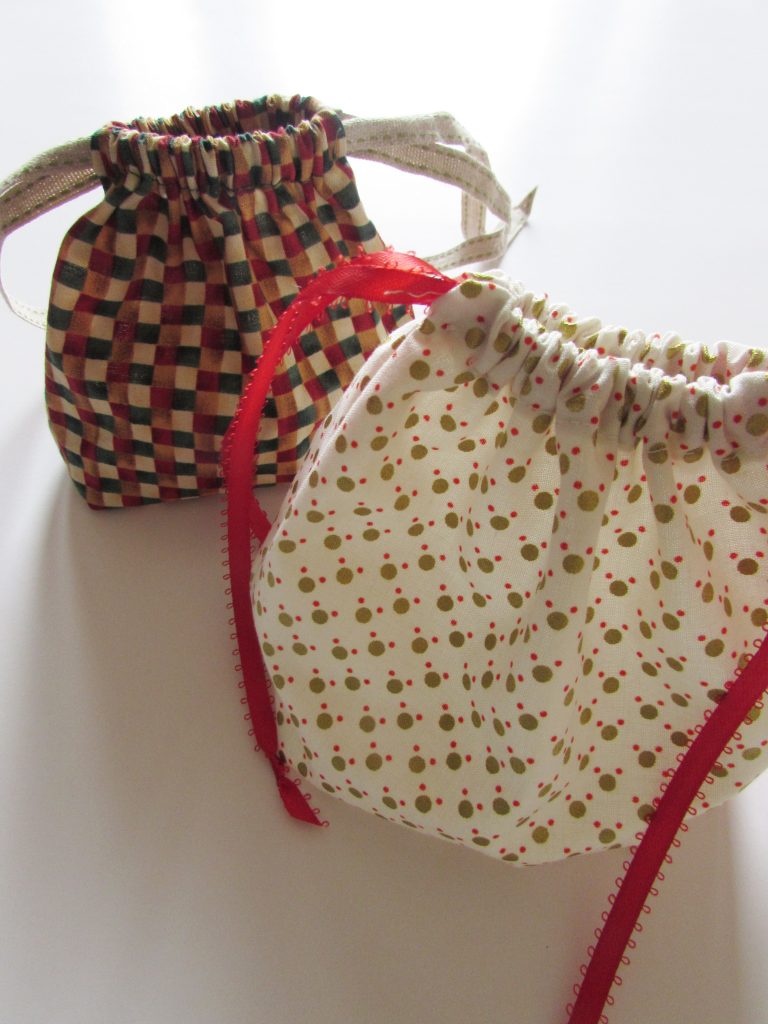
I think the tiny ones are just adorable.

img_8126

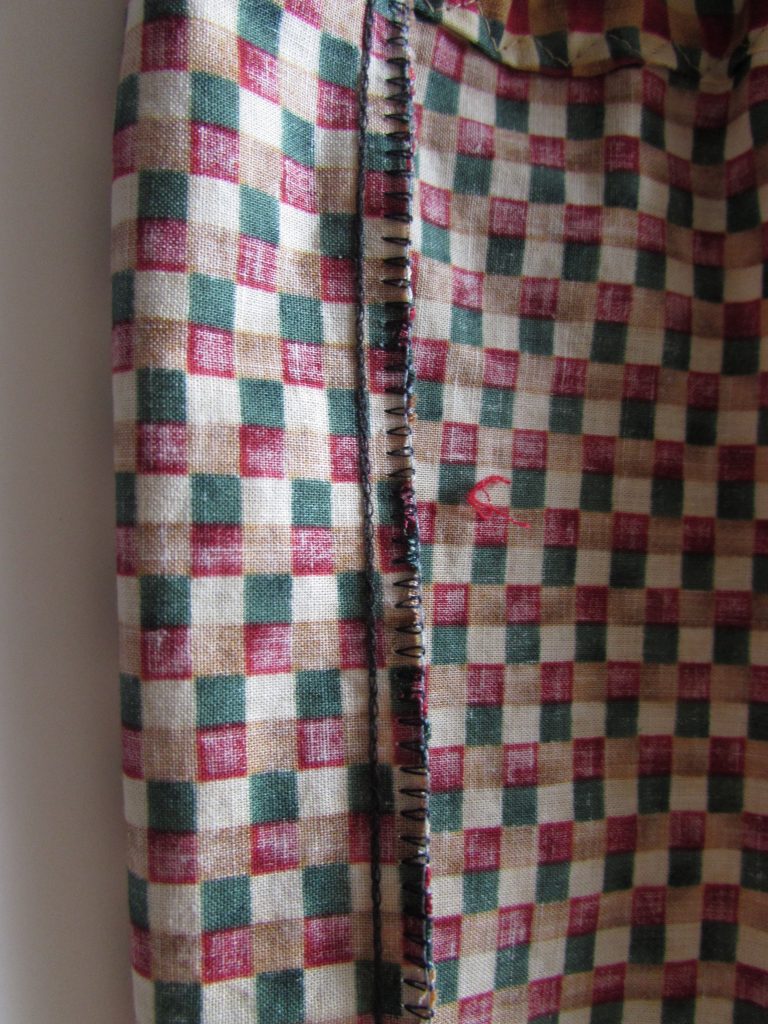
I turned this one inside out to show you the finished seam from the serger. I didn’t use the serger for the casing that the ribbons threads through. I switched over to the regular machine for that. Check out the clean finish on that seam. So great! I will practice a bit more and then try something simple like pajama pants.

If by chance you also have a serger, I would love to hear about any resources, blogs or uTube videos you might have found helpful for learning to use a serger.  Leave details in the comments.


craftsy-black-friday

Finally – Craftsy has gone all out for Black Friday this year. Beginning on Thursday, 11/24/16 classes are $17.99 each. Fabric and notions are all on sale as well. I am quite curious about the Boundless line of solids. I took a look and the prices are amazing. Solids, in a rainbow of thirty different colors, are available in pre-cuts such as layer cakes and jelly rolls, as well as yardage.

This is an affiliate link, meaning if you make a purchase after clicking over from my blog, I will receive a stipend.

I am linking up with a few favorites this week, including the Elm Street Quilts ‘Bag It’ event. Find out all about them at the top of the page, under Link Ups.

Tiny Baby Projects

A few posts back, I mentioned that our family will grow by three great-grandchildren in the first part of 2017? Guess what? One of those babies will be my first grandbaby. Does that make sense?? It sounds weird. Probably because I have been patiently waiting  for this for a long time. No, not really all that patiently. Sometimes Ray has to give me the stink-eye, reminding me to quit asking my kids about grandbabies. Finally, it’s going to happen– yahoo!! I get to be a Grandma, or Grammy. Probably Grammy, I like that better. My oldest and his wife are expecting their first baby, a sweet little girl, the first week of March!! Awesome news, this is.

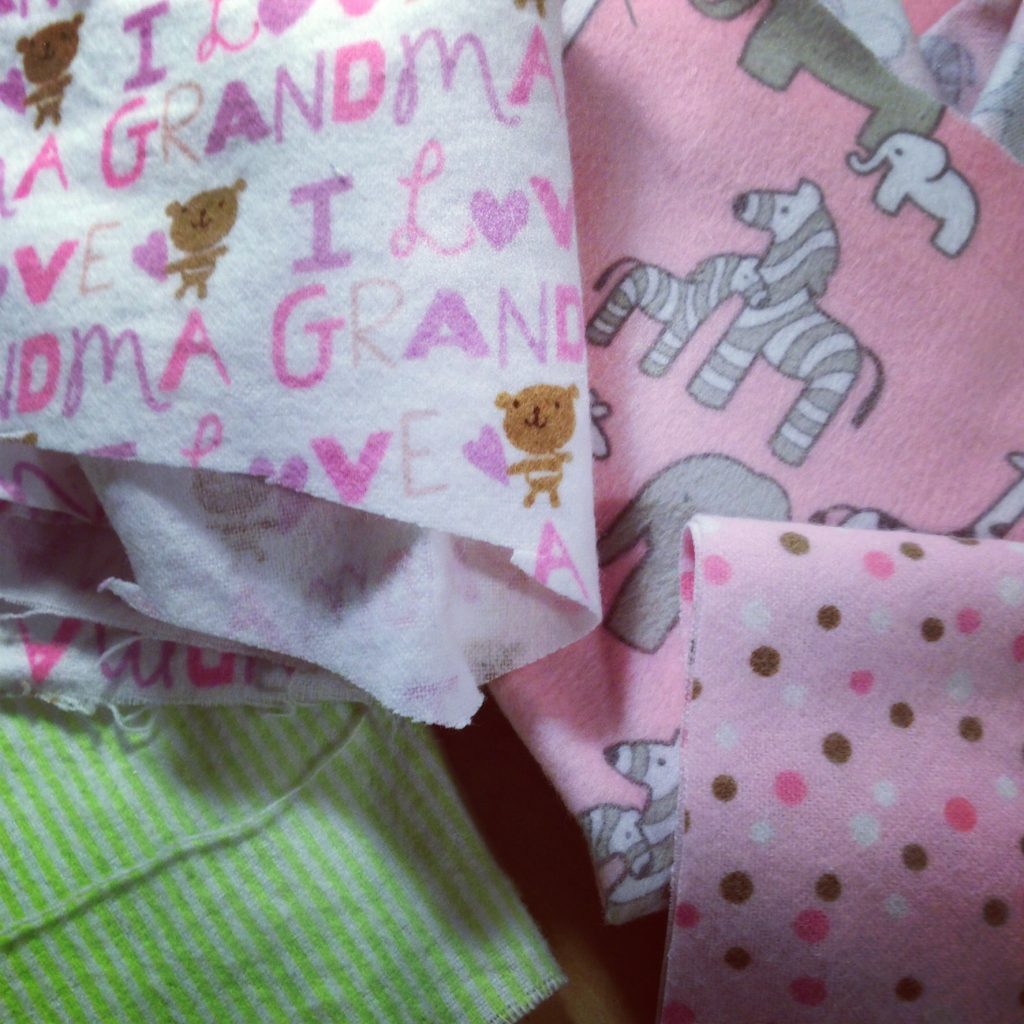
I have sent a few little things to them for the baby. (They live in Vermont – Clearly, it’s not going to be all that convenient to play with my granddaughter.) Last weekend I really wanted to make something for her. It was raining like crazy though, making a trip to the store somewhat unappealing.  (Seriously, it was raining that hard.) I dug around in my closet of more-fabric-than-anyone-could-need and pulled some flannel scraps. These were scraps in every sense of the word. They didn’t really go with anything and were not very big. Certainly I could turn them into something. Babies start out small – these were small scraps, I didn’t need to make anything huge, right?

img_1497

I also found a reasonably sized piece of white flannel and a tiny piece of white terrycloth. After an afternoon of playing around, this is where I ended up.

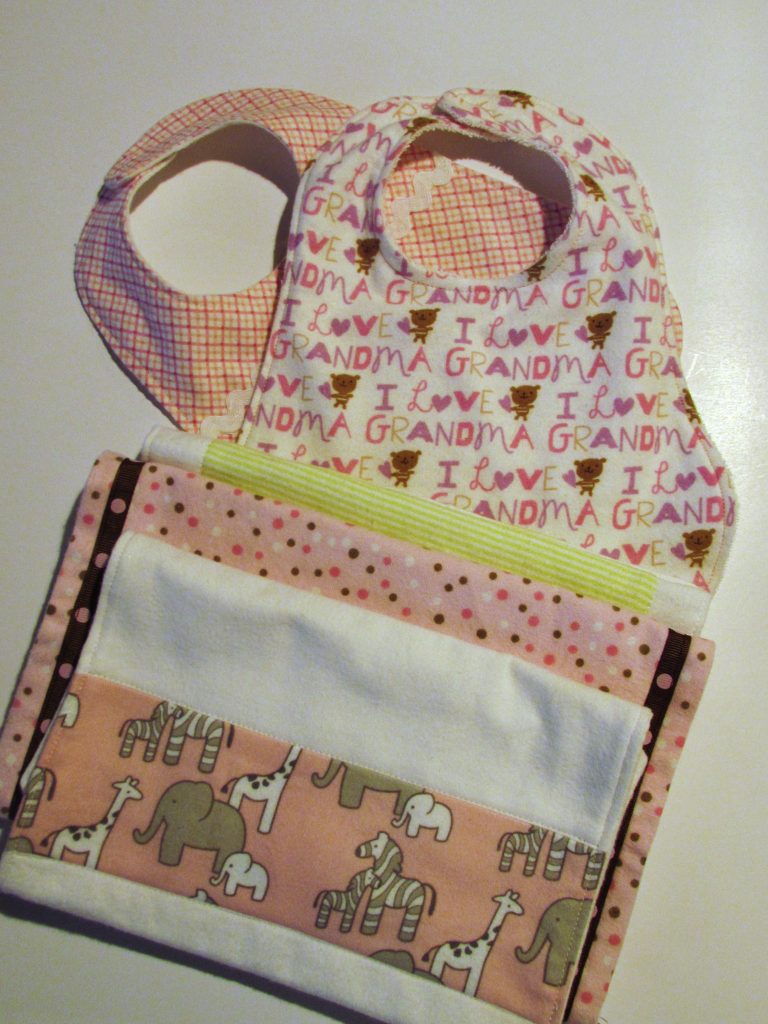
img_7967

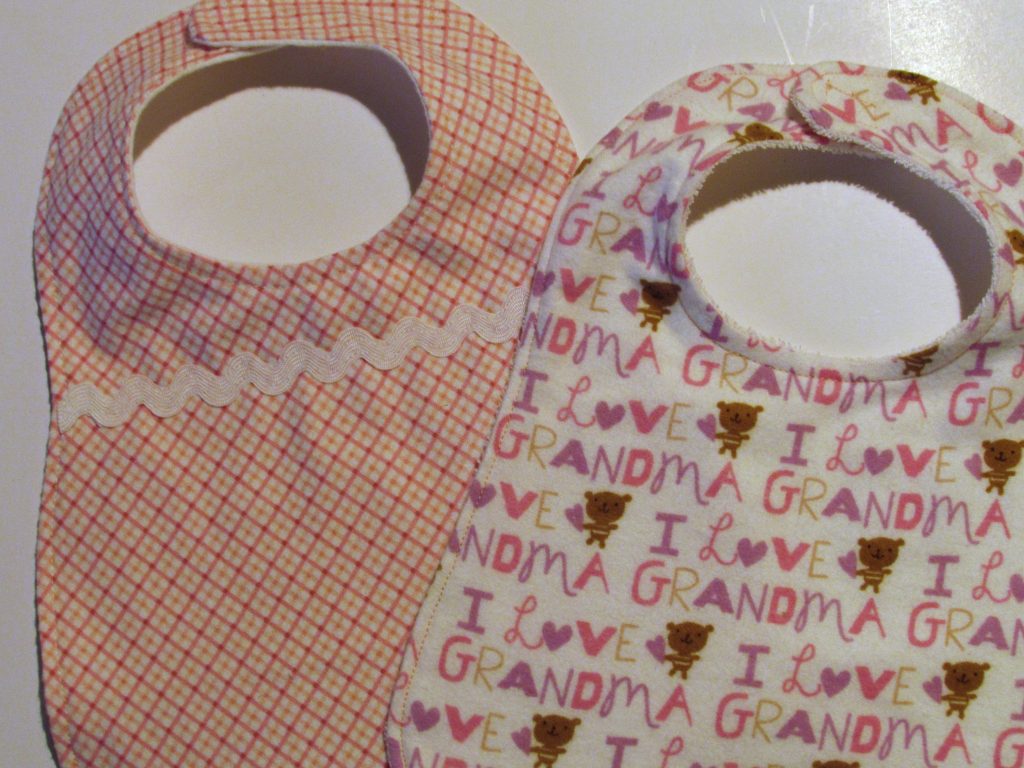
I squeaked one bib out of terrycloth and flannel and the other bib is backed with white flannel and trimmed with white rick-rack. I used velcro closures because I was out of the little gripper snaps and it was raining….. remember?

img_7960

Joy (baby girl’s other Grammy), if you are reading this, the “I Love Grandma” bib is for both of us. This girl is going to have two really cool grandmas.

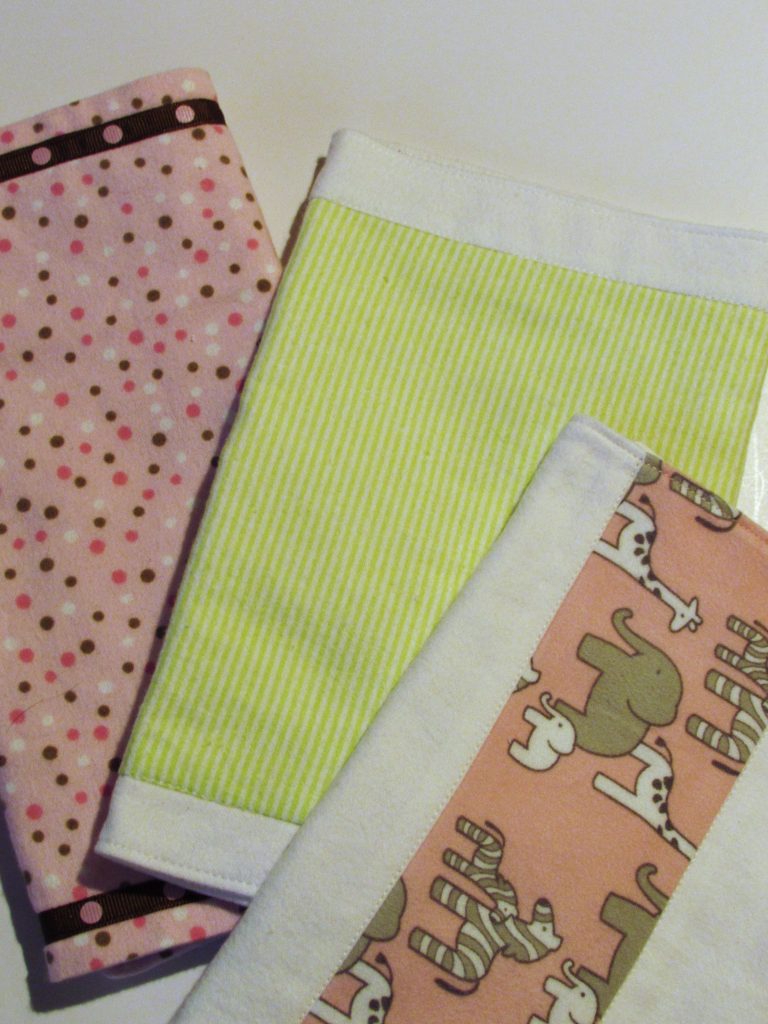
img_7962I also made three burp cloths. These are definitely scrappy. The elephant fabric was just a few bits so I mixed it with white flannel strips to get a large enough rectangle.  The lime green stripe was a narrow rectangle so I sewed it to a larger rectangle of white flannel, causing the white to wrap around to the front and create a large enough rectangle. That pink polka dot is adorable and I even had coordinating ribbon to embellish with. Fancy schmancy burp cloths for my special girl.  I sent them off to the kids with a note telling them that three burp cloths was not nearly sufficient but this would at least get them started. 😉

When I first started blogging, I posted a tutorial for burp clothes that wrap the backing to the front, like the green one.  If you want to check it out, click here.

img_1487

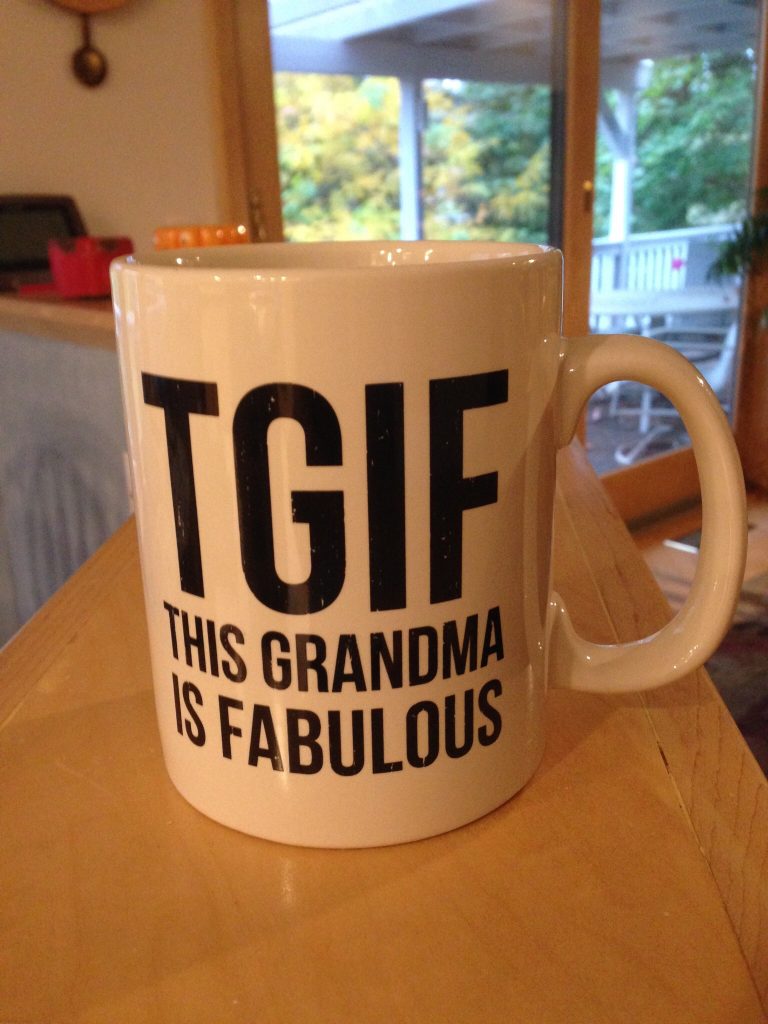
I can’t wait for this baby’s arrival. My son and DIL are so good about keeping all of us posted with ultrasound pictures and baby bump photos. She is clearly adorable already. For my birthday last week they sent me a lovely frame that says granddaughter on it and this TGIF mug. It is the perfect mug for me – holds a huge cup of coffee and reminds me I am soon to be a Grammy.

Linking to lots of fun places – check them out at the top of the page, under Link Ups.