Category Archives: Sewing Projects

A No-Sew Week

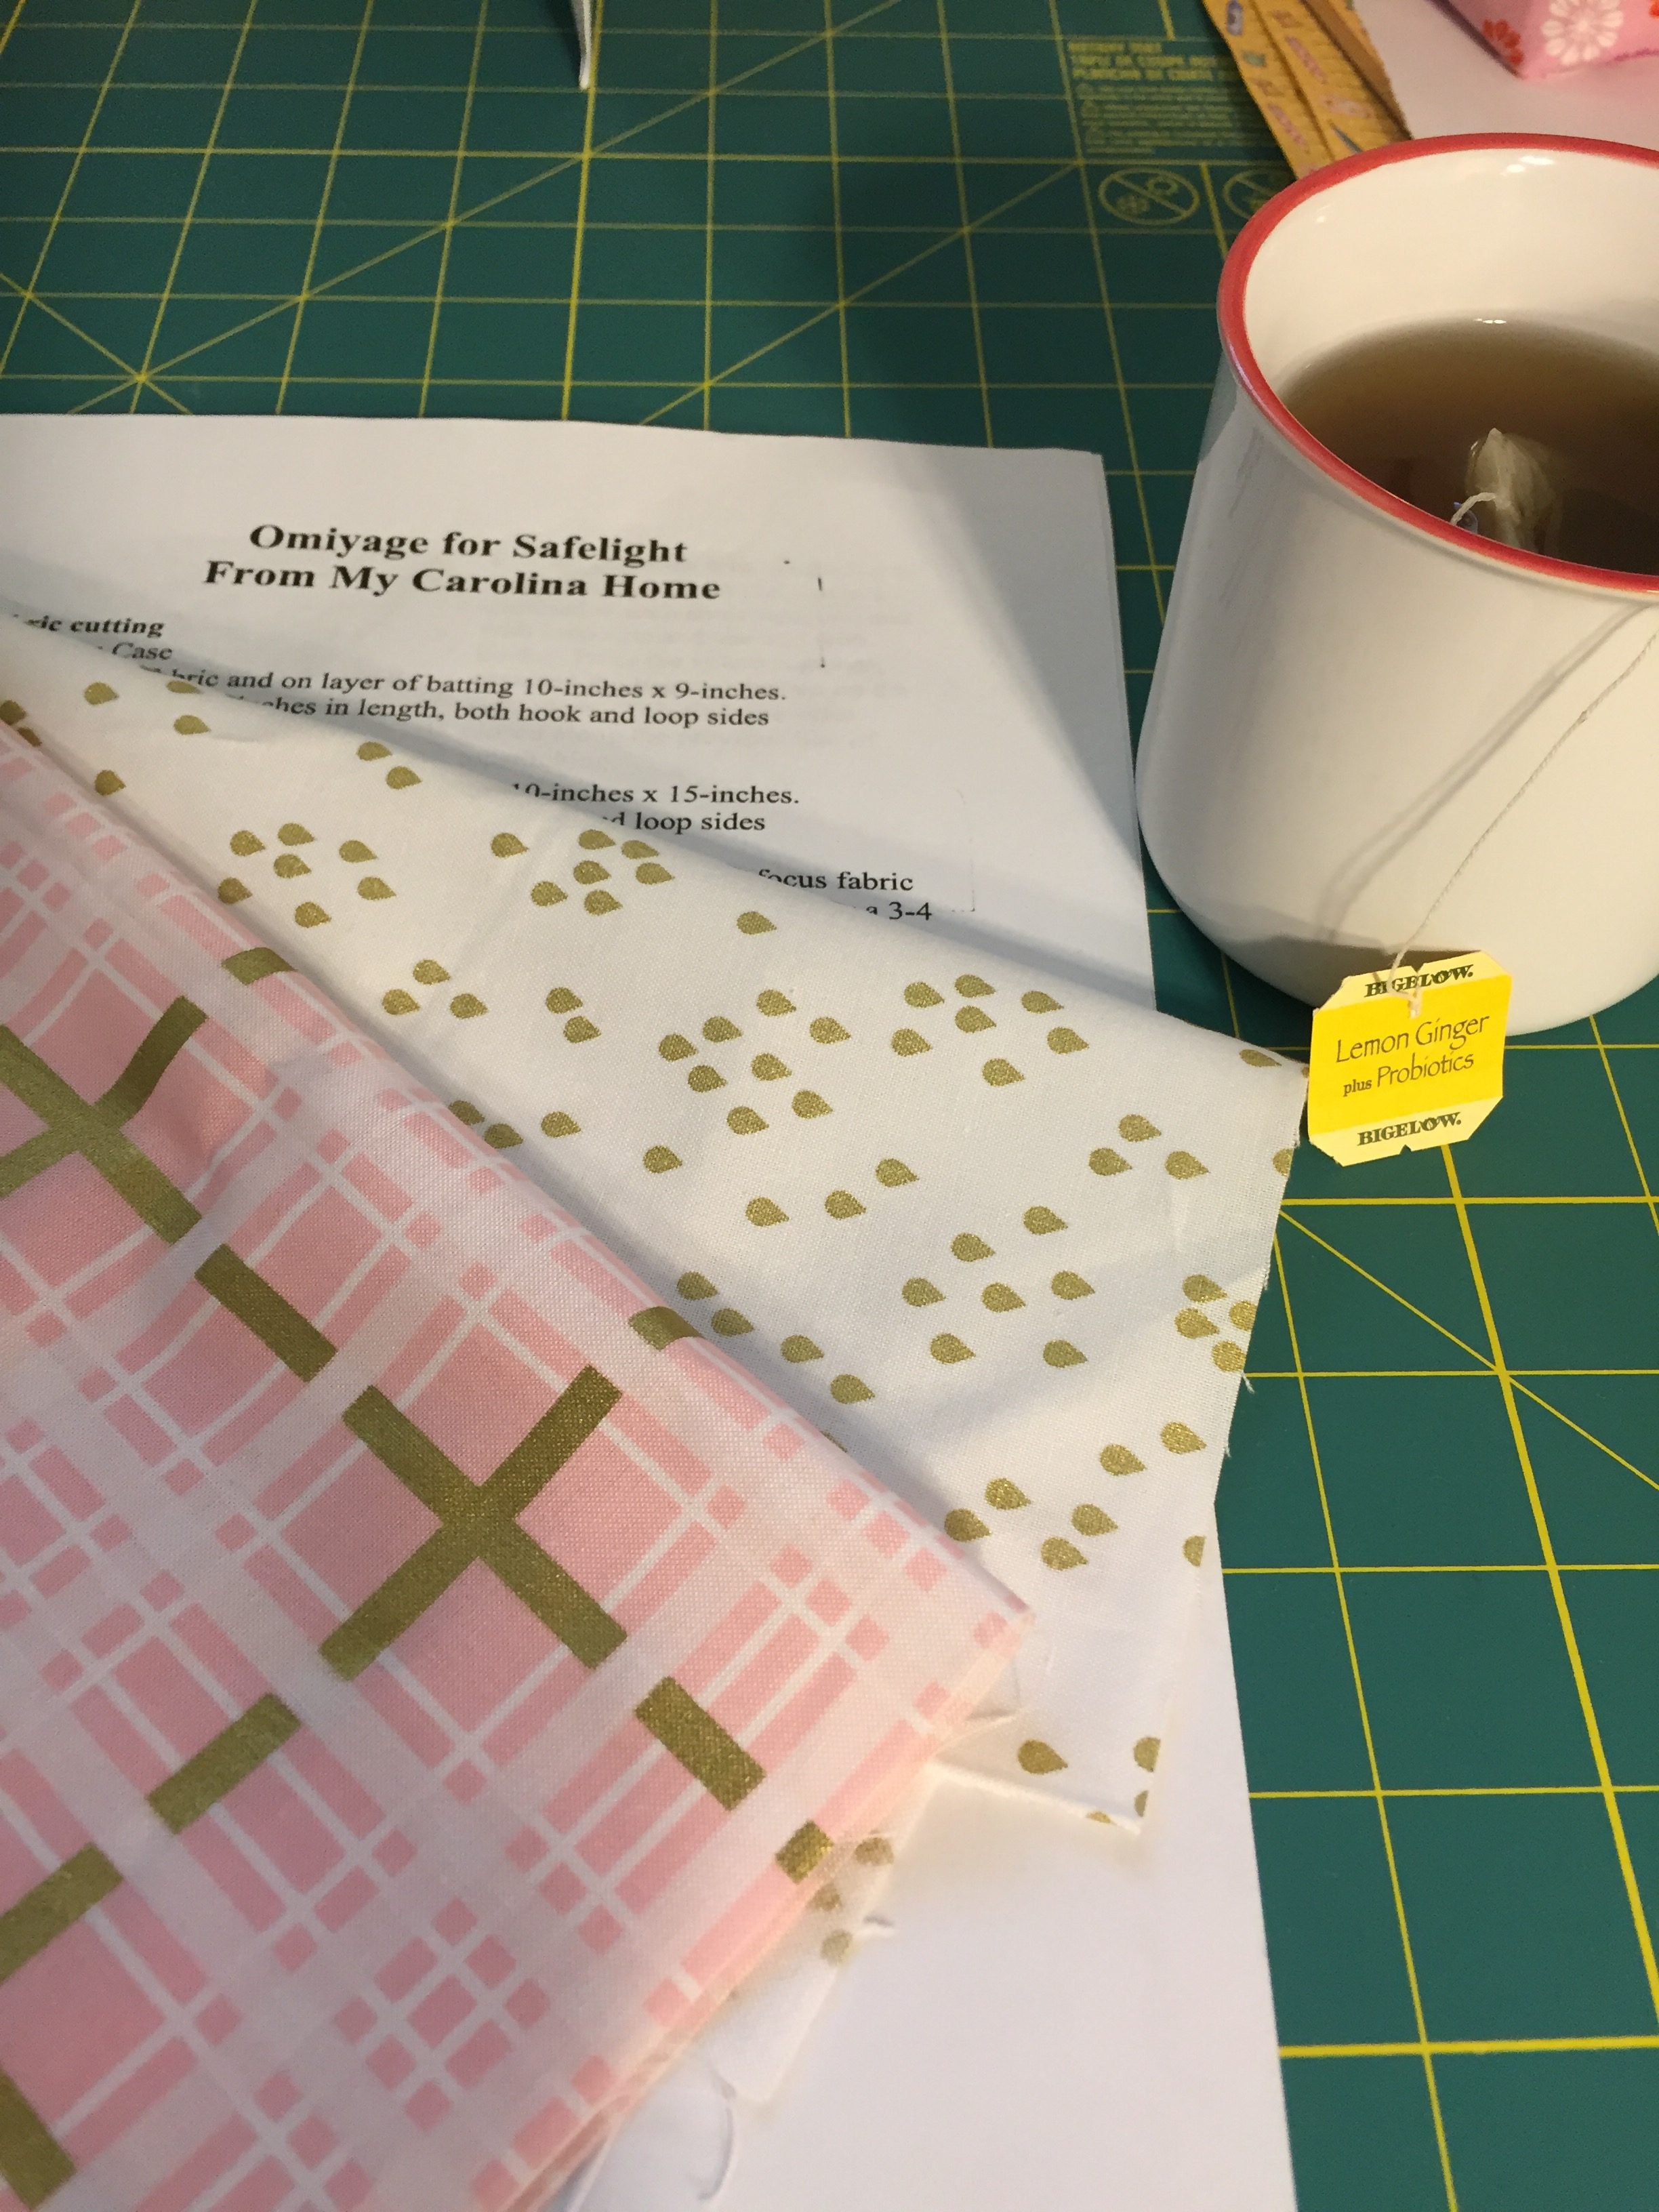
I miss my sewing machine.  I have not spent much time with her and I suspect she misses me just as much. It is a combination of things – we are having a patio built  and, while I am not doing any of the building, somehow it seems to take up some of my time.  Maybe because I am so excited about the progress (we have wanted this for a very long time) and I keep going out there to watch the next step.  Yesterday they poured a large portion of it and I spent most of the morning watching.  Poor guys probably are sick of having an audience.  Beyond that, June has been riddled with migraines.  I don’t know why (that is the million dollar question and if I had the answer I would be one happy quilter). But it has been a bad month with 9 migraines so far – along with each one, there is usually one more day of feeling wiped out.  So 18 days out of 26 haven’t been great. All this adds up very little sewing.

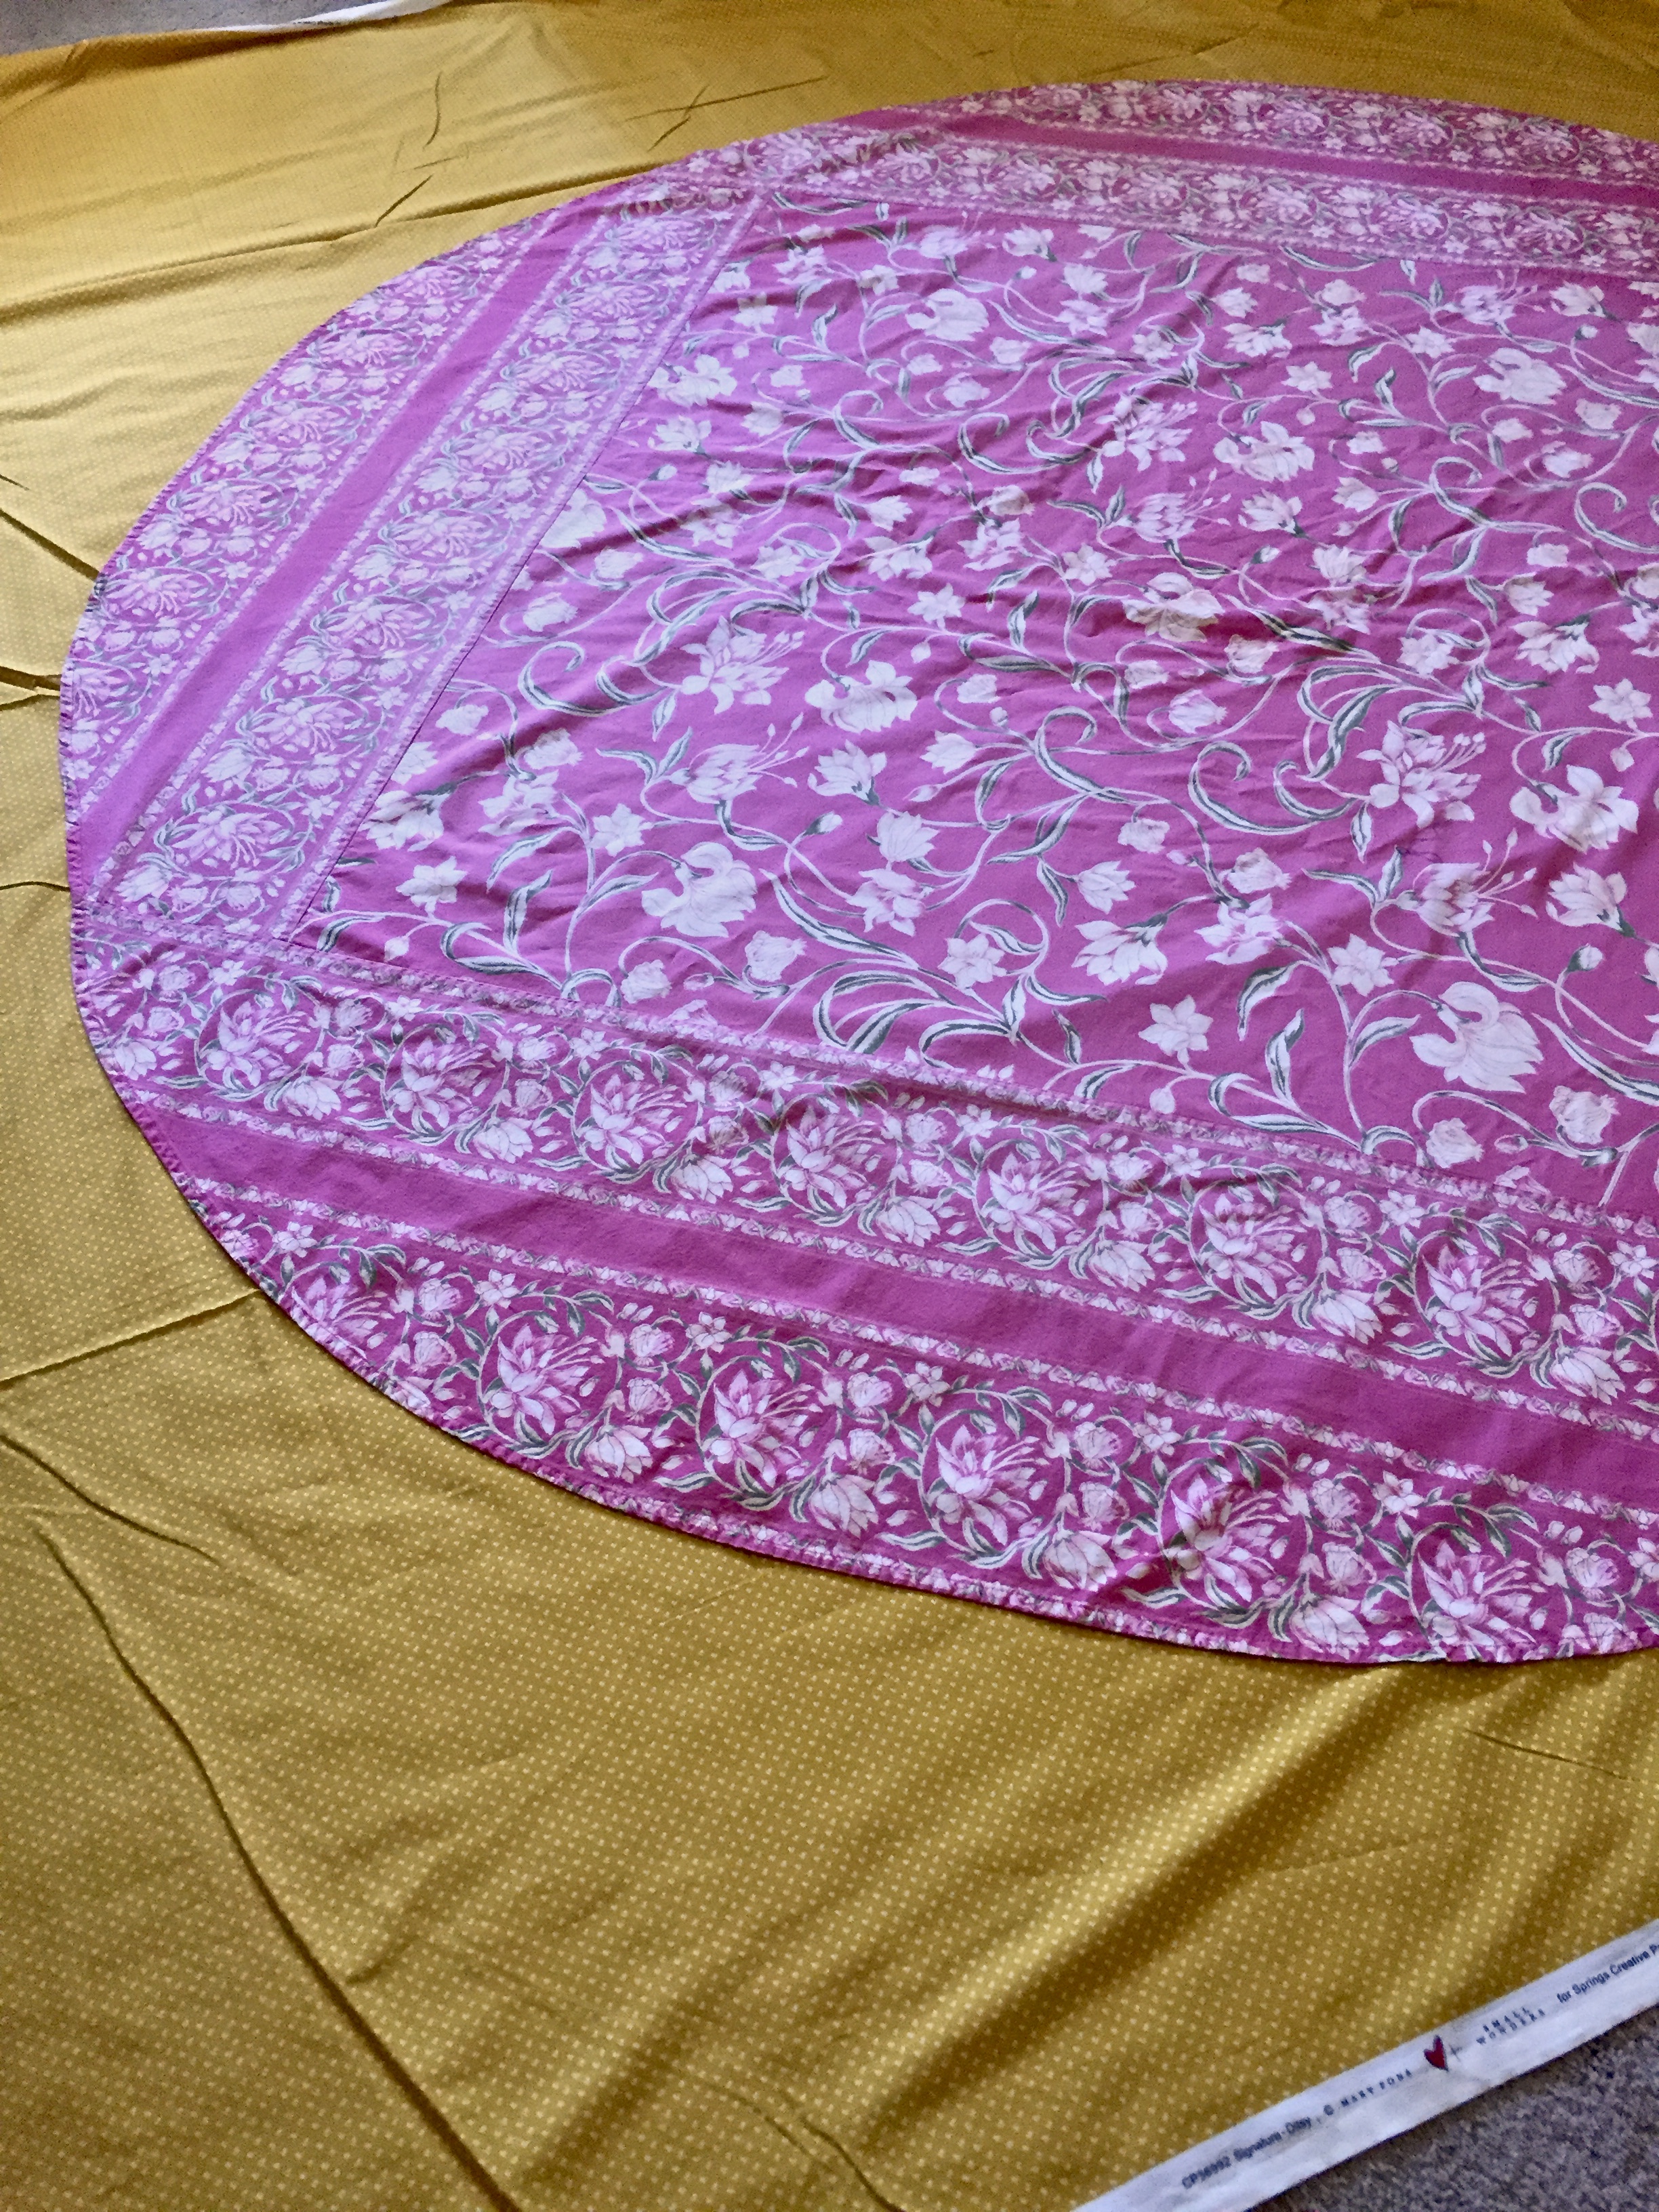
I will share something that I am playing around with.  I decided to make a new tablecloth for our outdoor table. We have coffee out there and dinner when the weather isn’t terribly hot.  I only have one tablecloth and it is getting a bit faded. Time for a new one.  The tablecloth is quite large – I think the diameter of the table is about 70 inches.  Add in the drop and enough to turn a hem, and it means cutting a circle with an 84″ diameter.

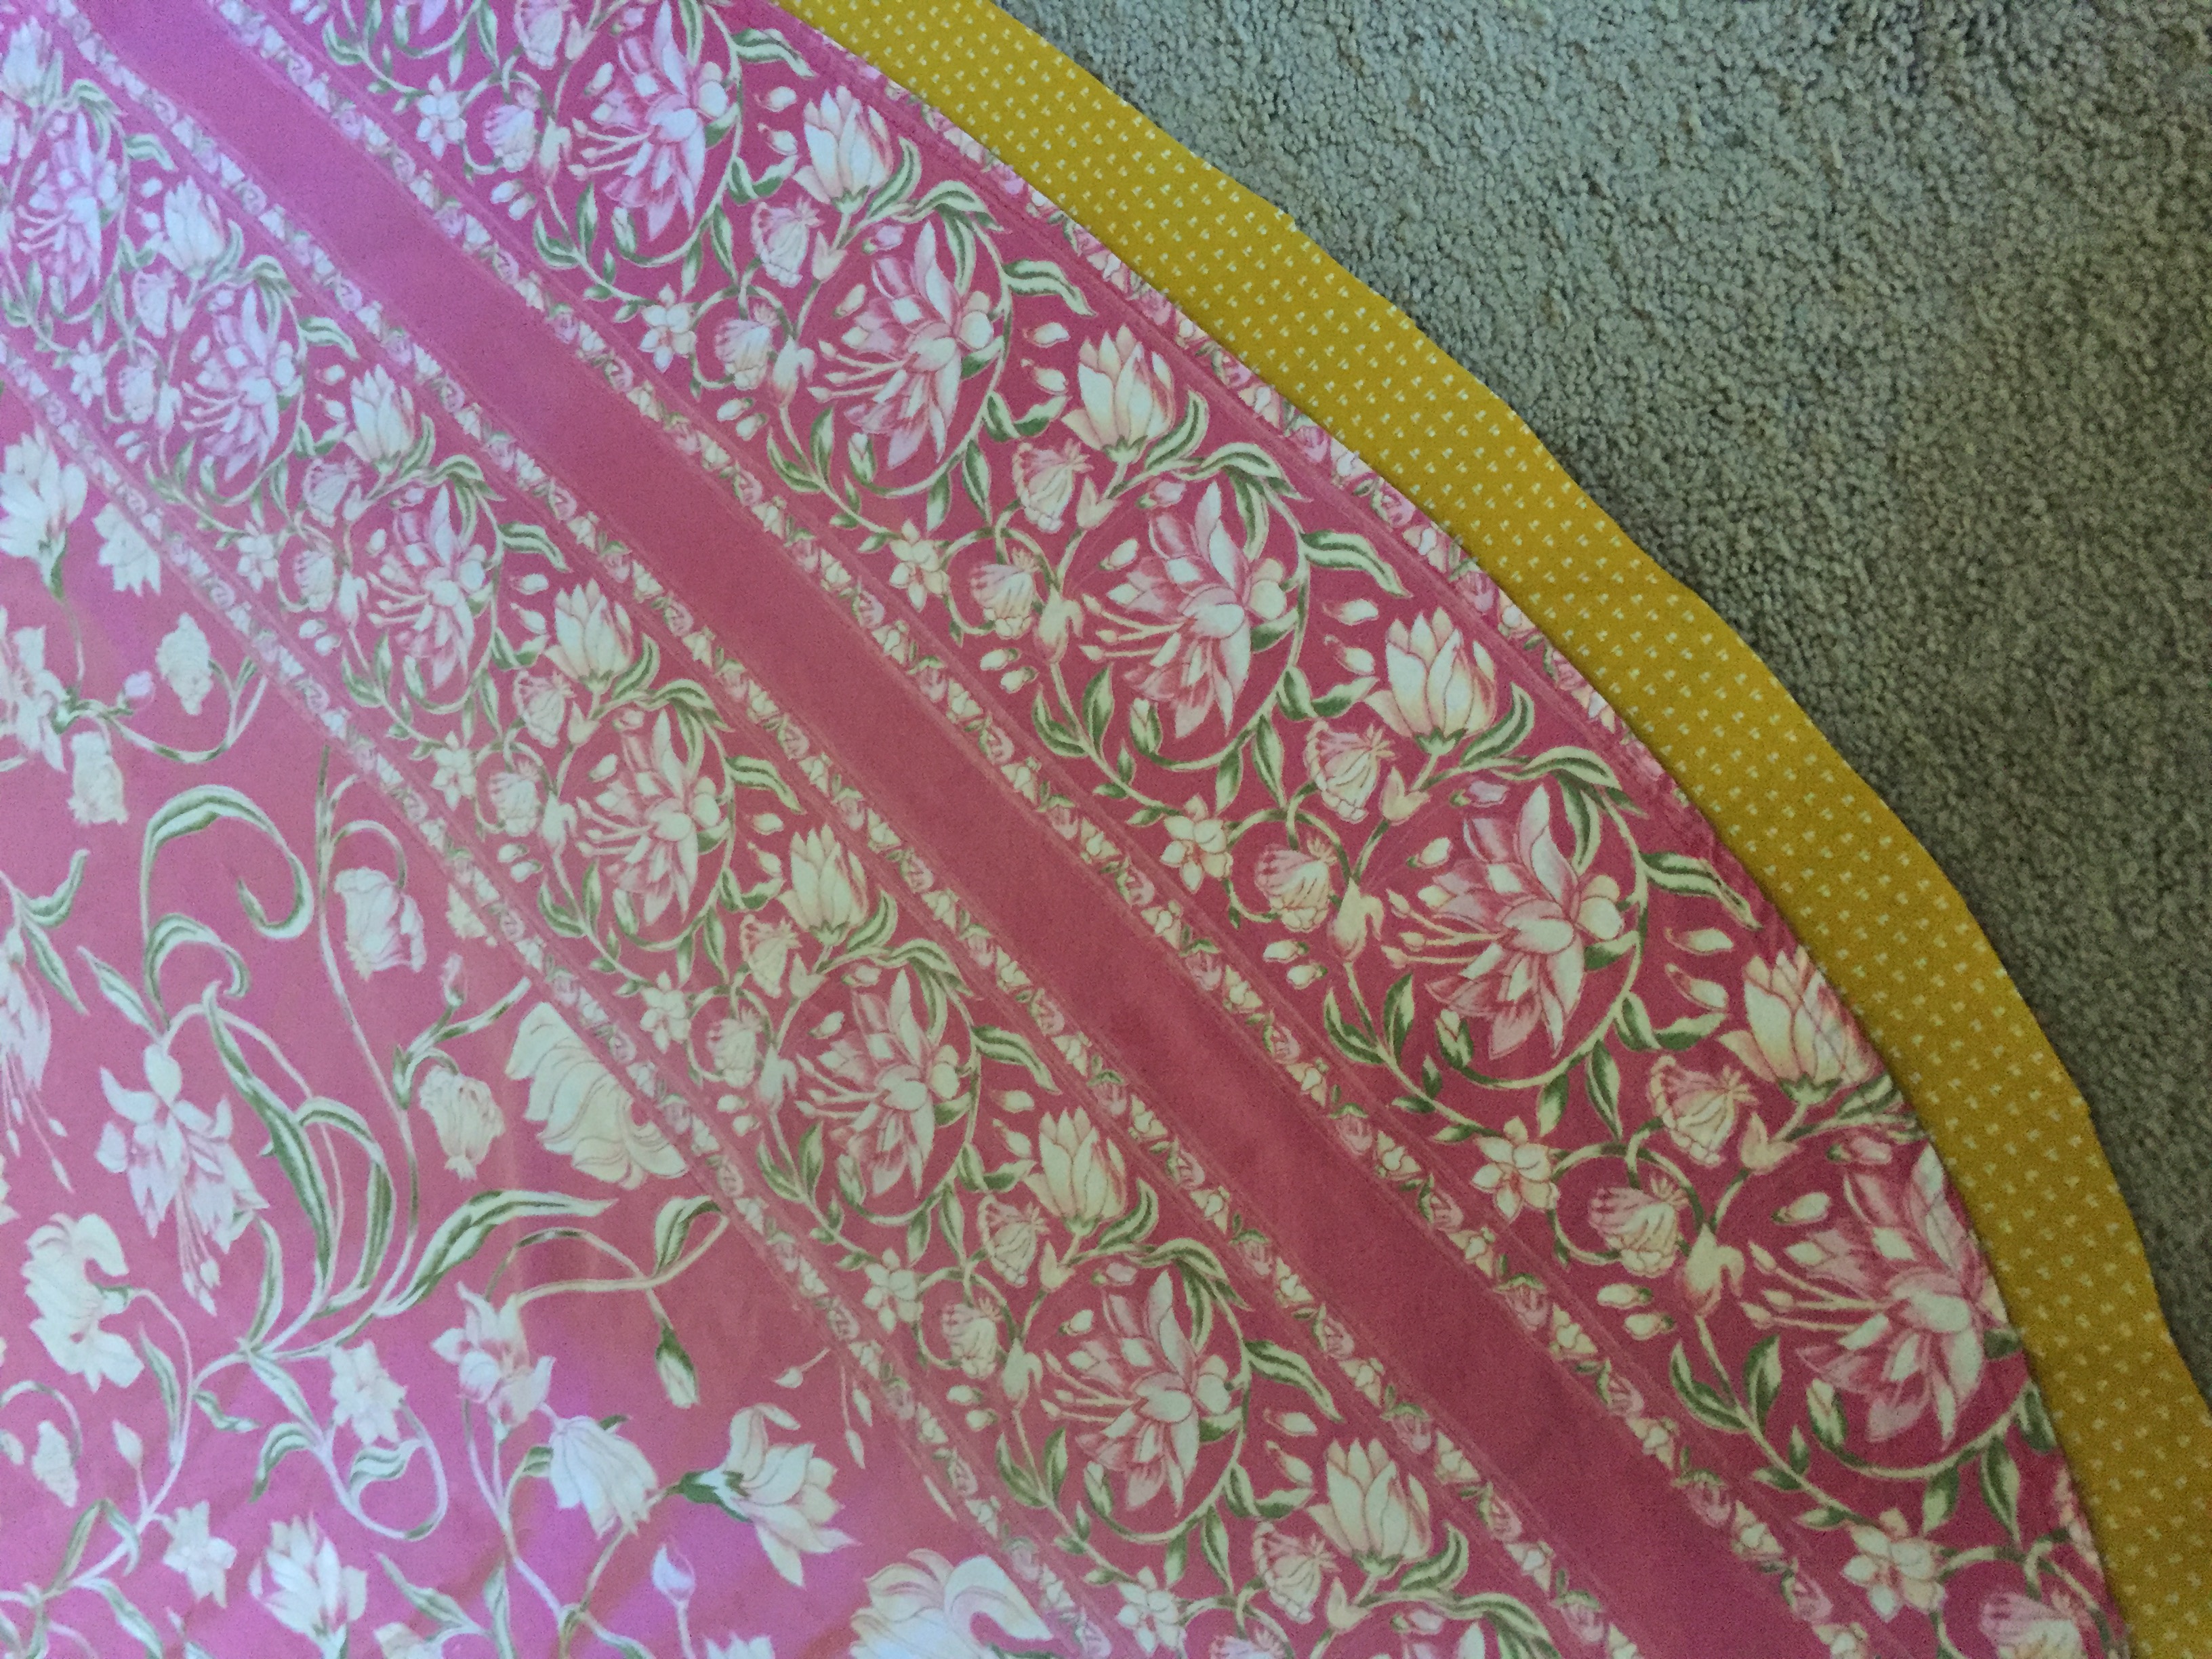
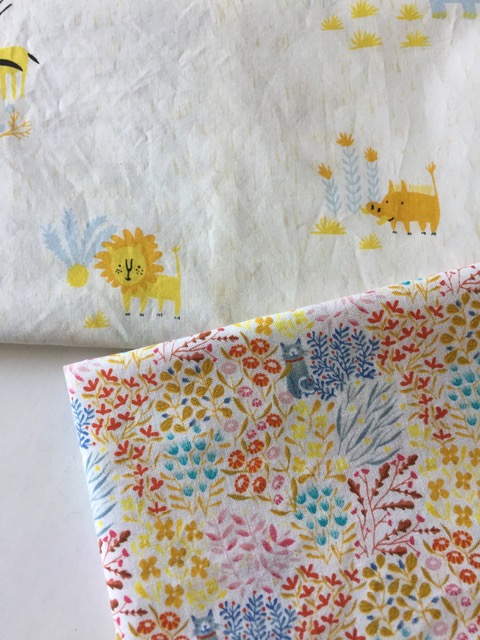
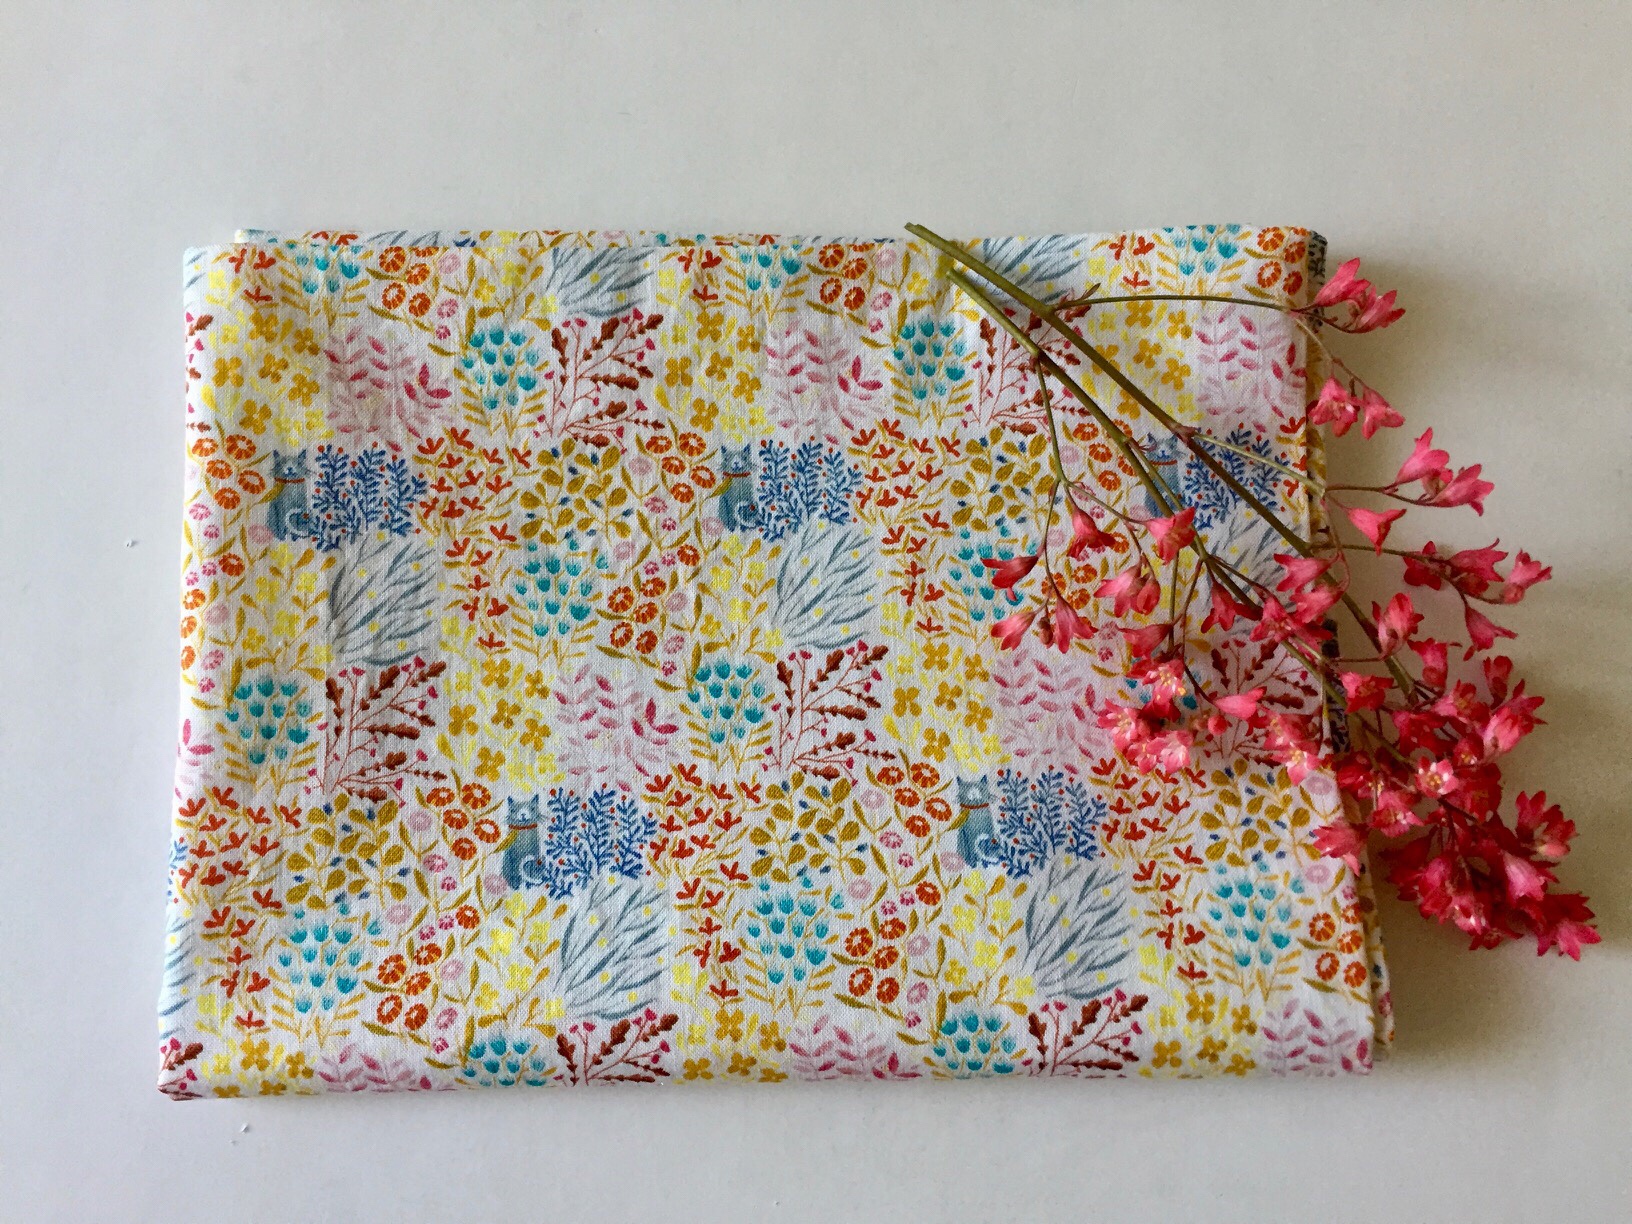
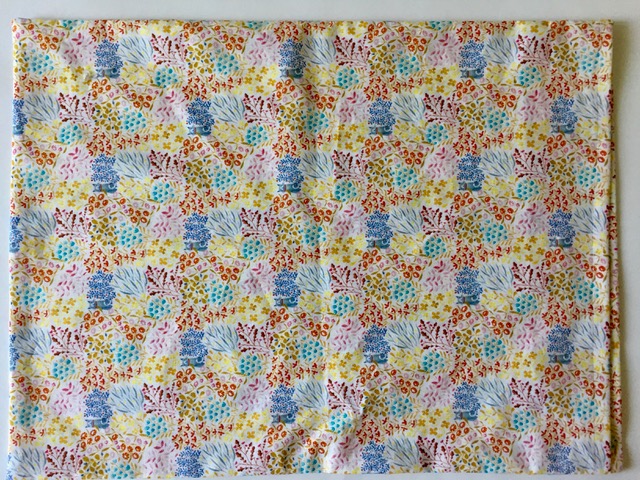
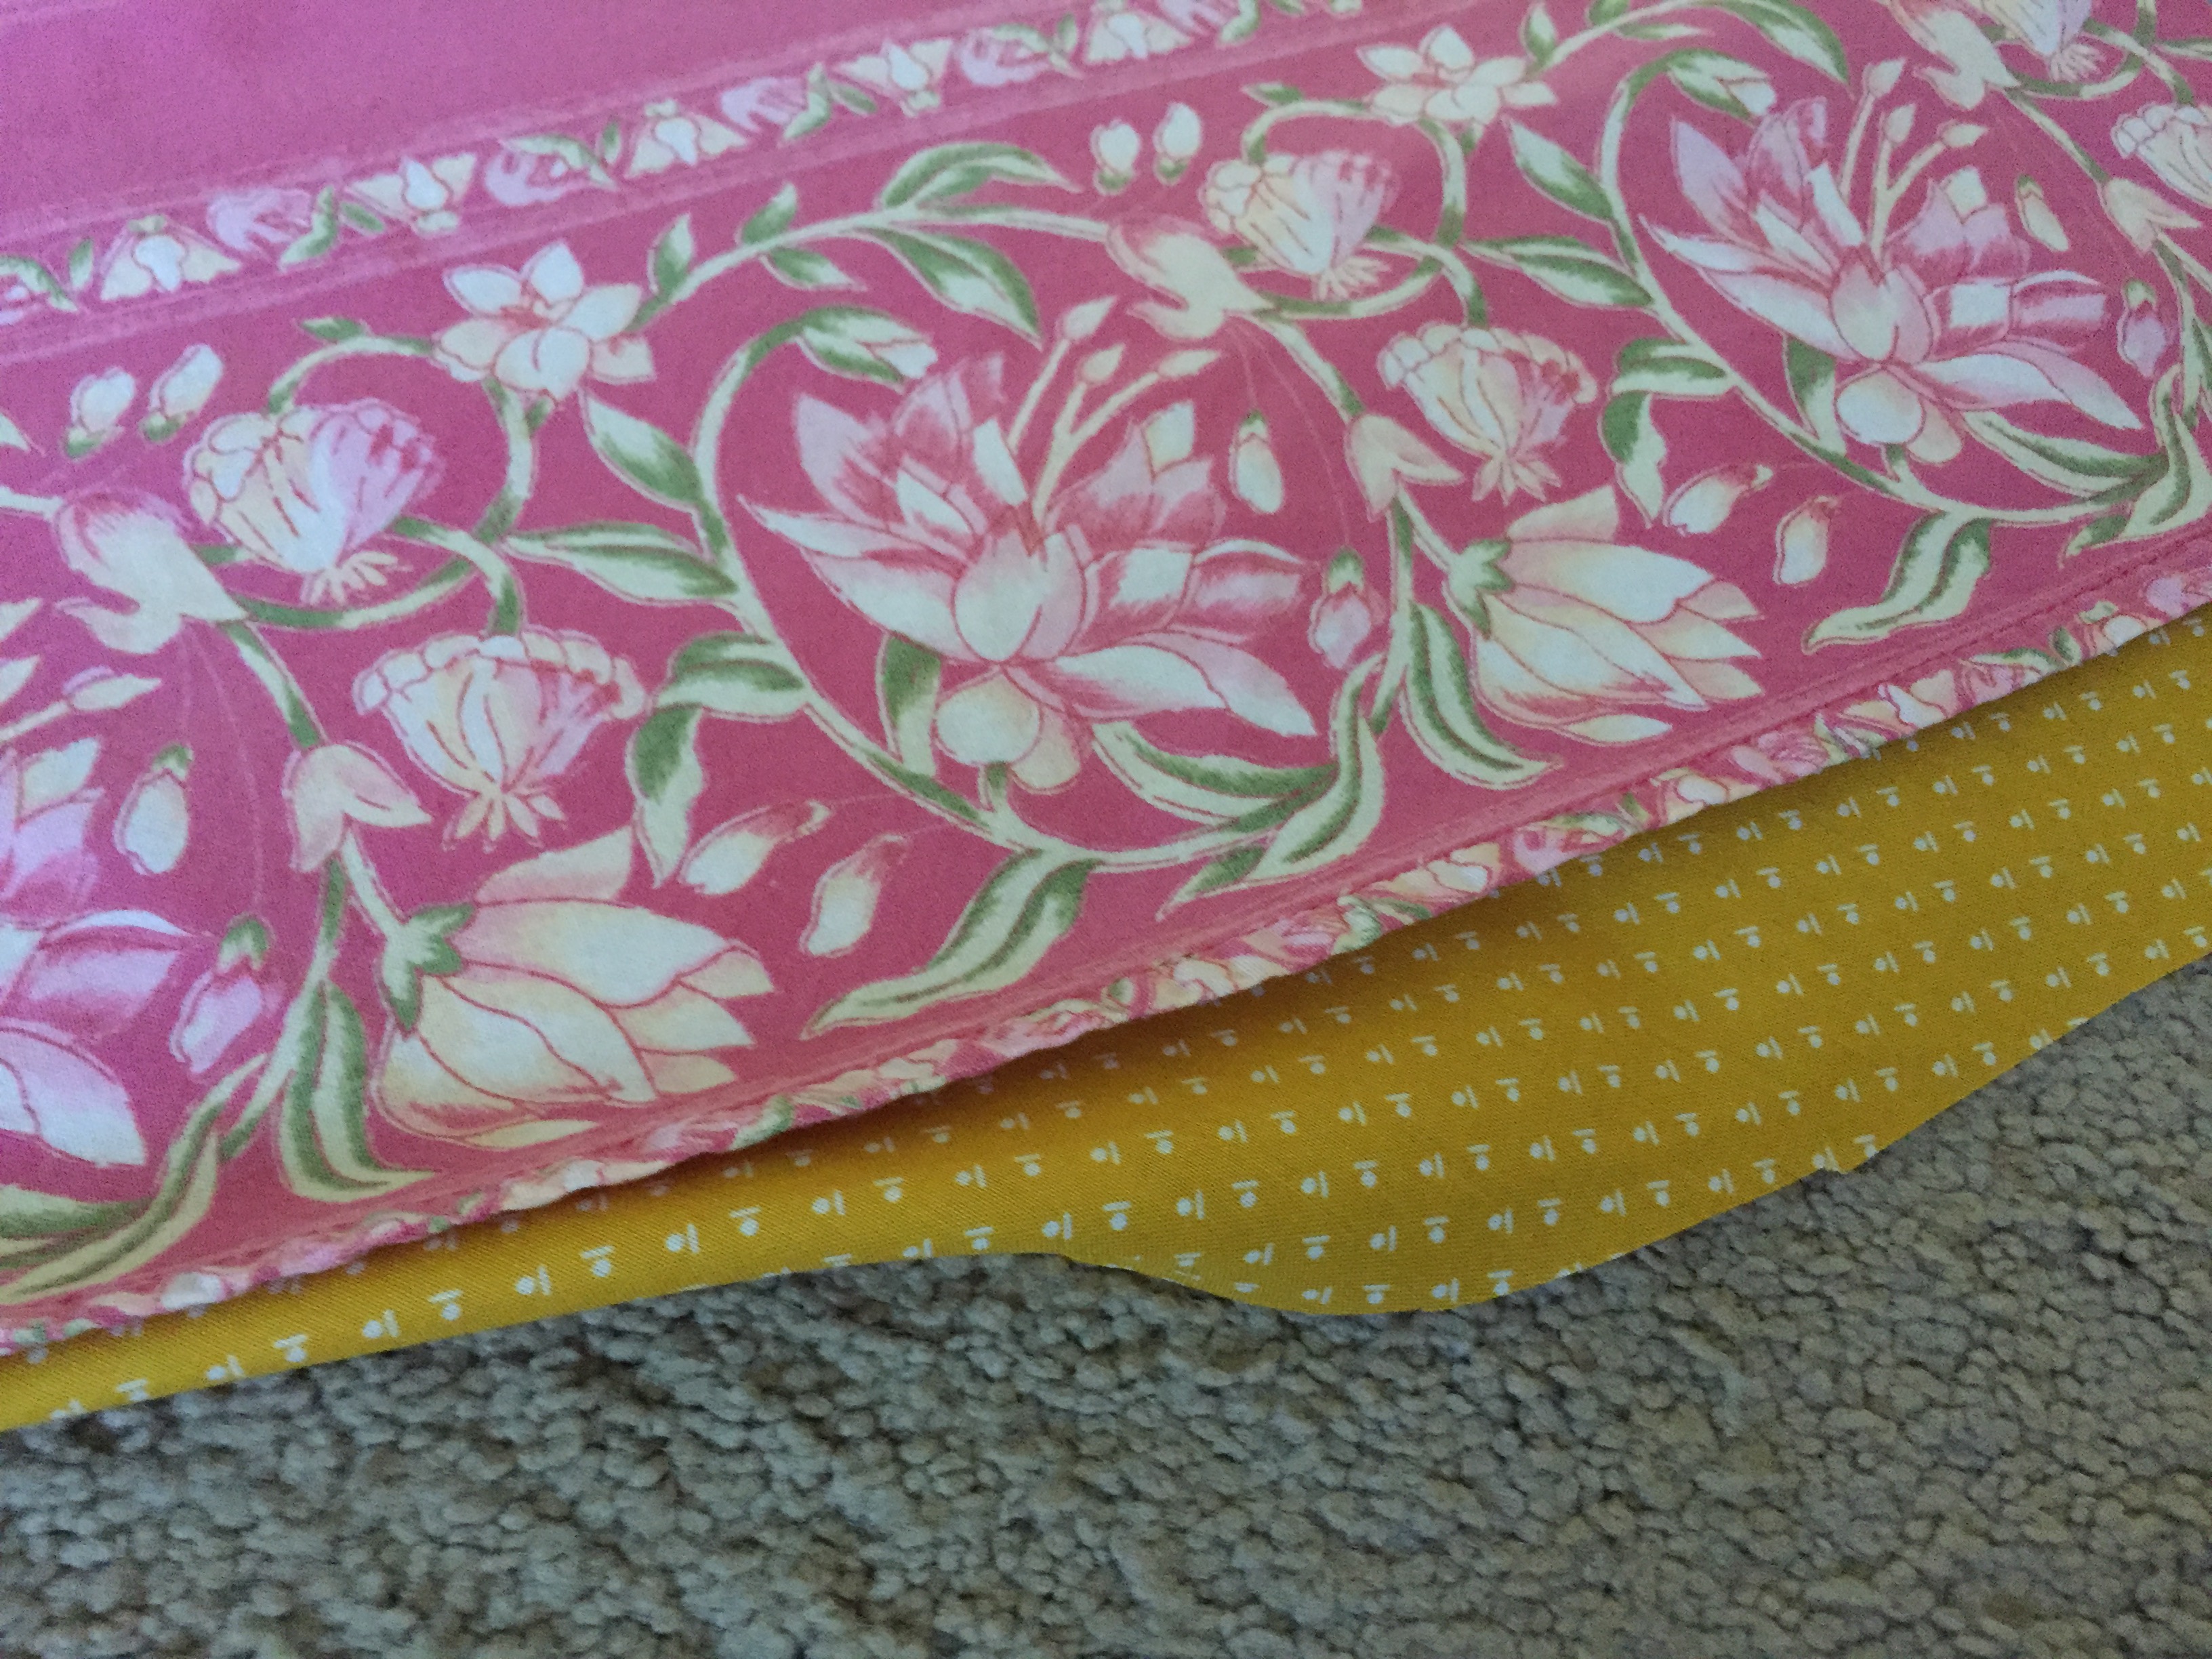
I decided to use a wide back fabric so I wouldn’t have to run a seam to get a wide enough piece.  Lucky me, I have a few wide backs in the shop from which to choose!  I picked this cheddar yellow print that was designed by Mary Fons. It is cute and sunny, nice for an outdoor tablecloth. Since I had a tablecloth that was already the correct size, I used it as a template and cut my piece about two inches bigger all the way around.  I didn’t mark anything, it was easy enough to just eyeball it. (By the way, even after cutting this large circle out, I have a lot of fabric left over – being 108″ wide means lots left for other projects!)

While I had it on the ground, I decided to just keep going and I brought the iron over and started to turn the yellow fabric under and press as I went along.  This worked really well – I kind of wondered if it was bad for the carpeting but didn’t seem to be a problem.  Actually I think I secretly wished I would burn a hole in the carpet because it is all worn and needs to be replaced anyway.  Alas, no such thing happened and for now, the ugly carpet remains.

After I got the first fold pressed, I pinned everything in place.  Then I felt ok about picking it up and moving it.  I took it to the regular ironing board and steamed a good crease in the hem, folding the raw edge in as I went around.

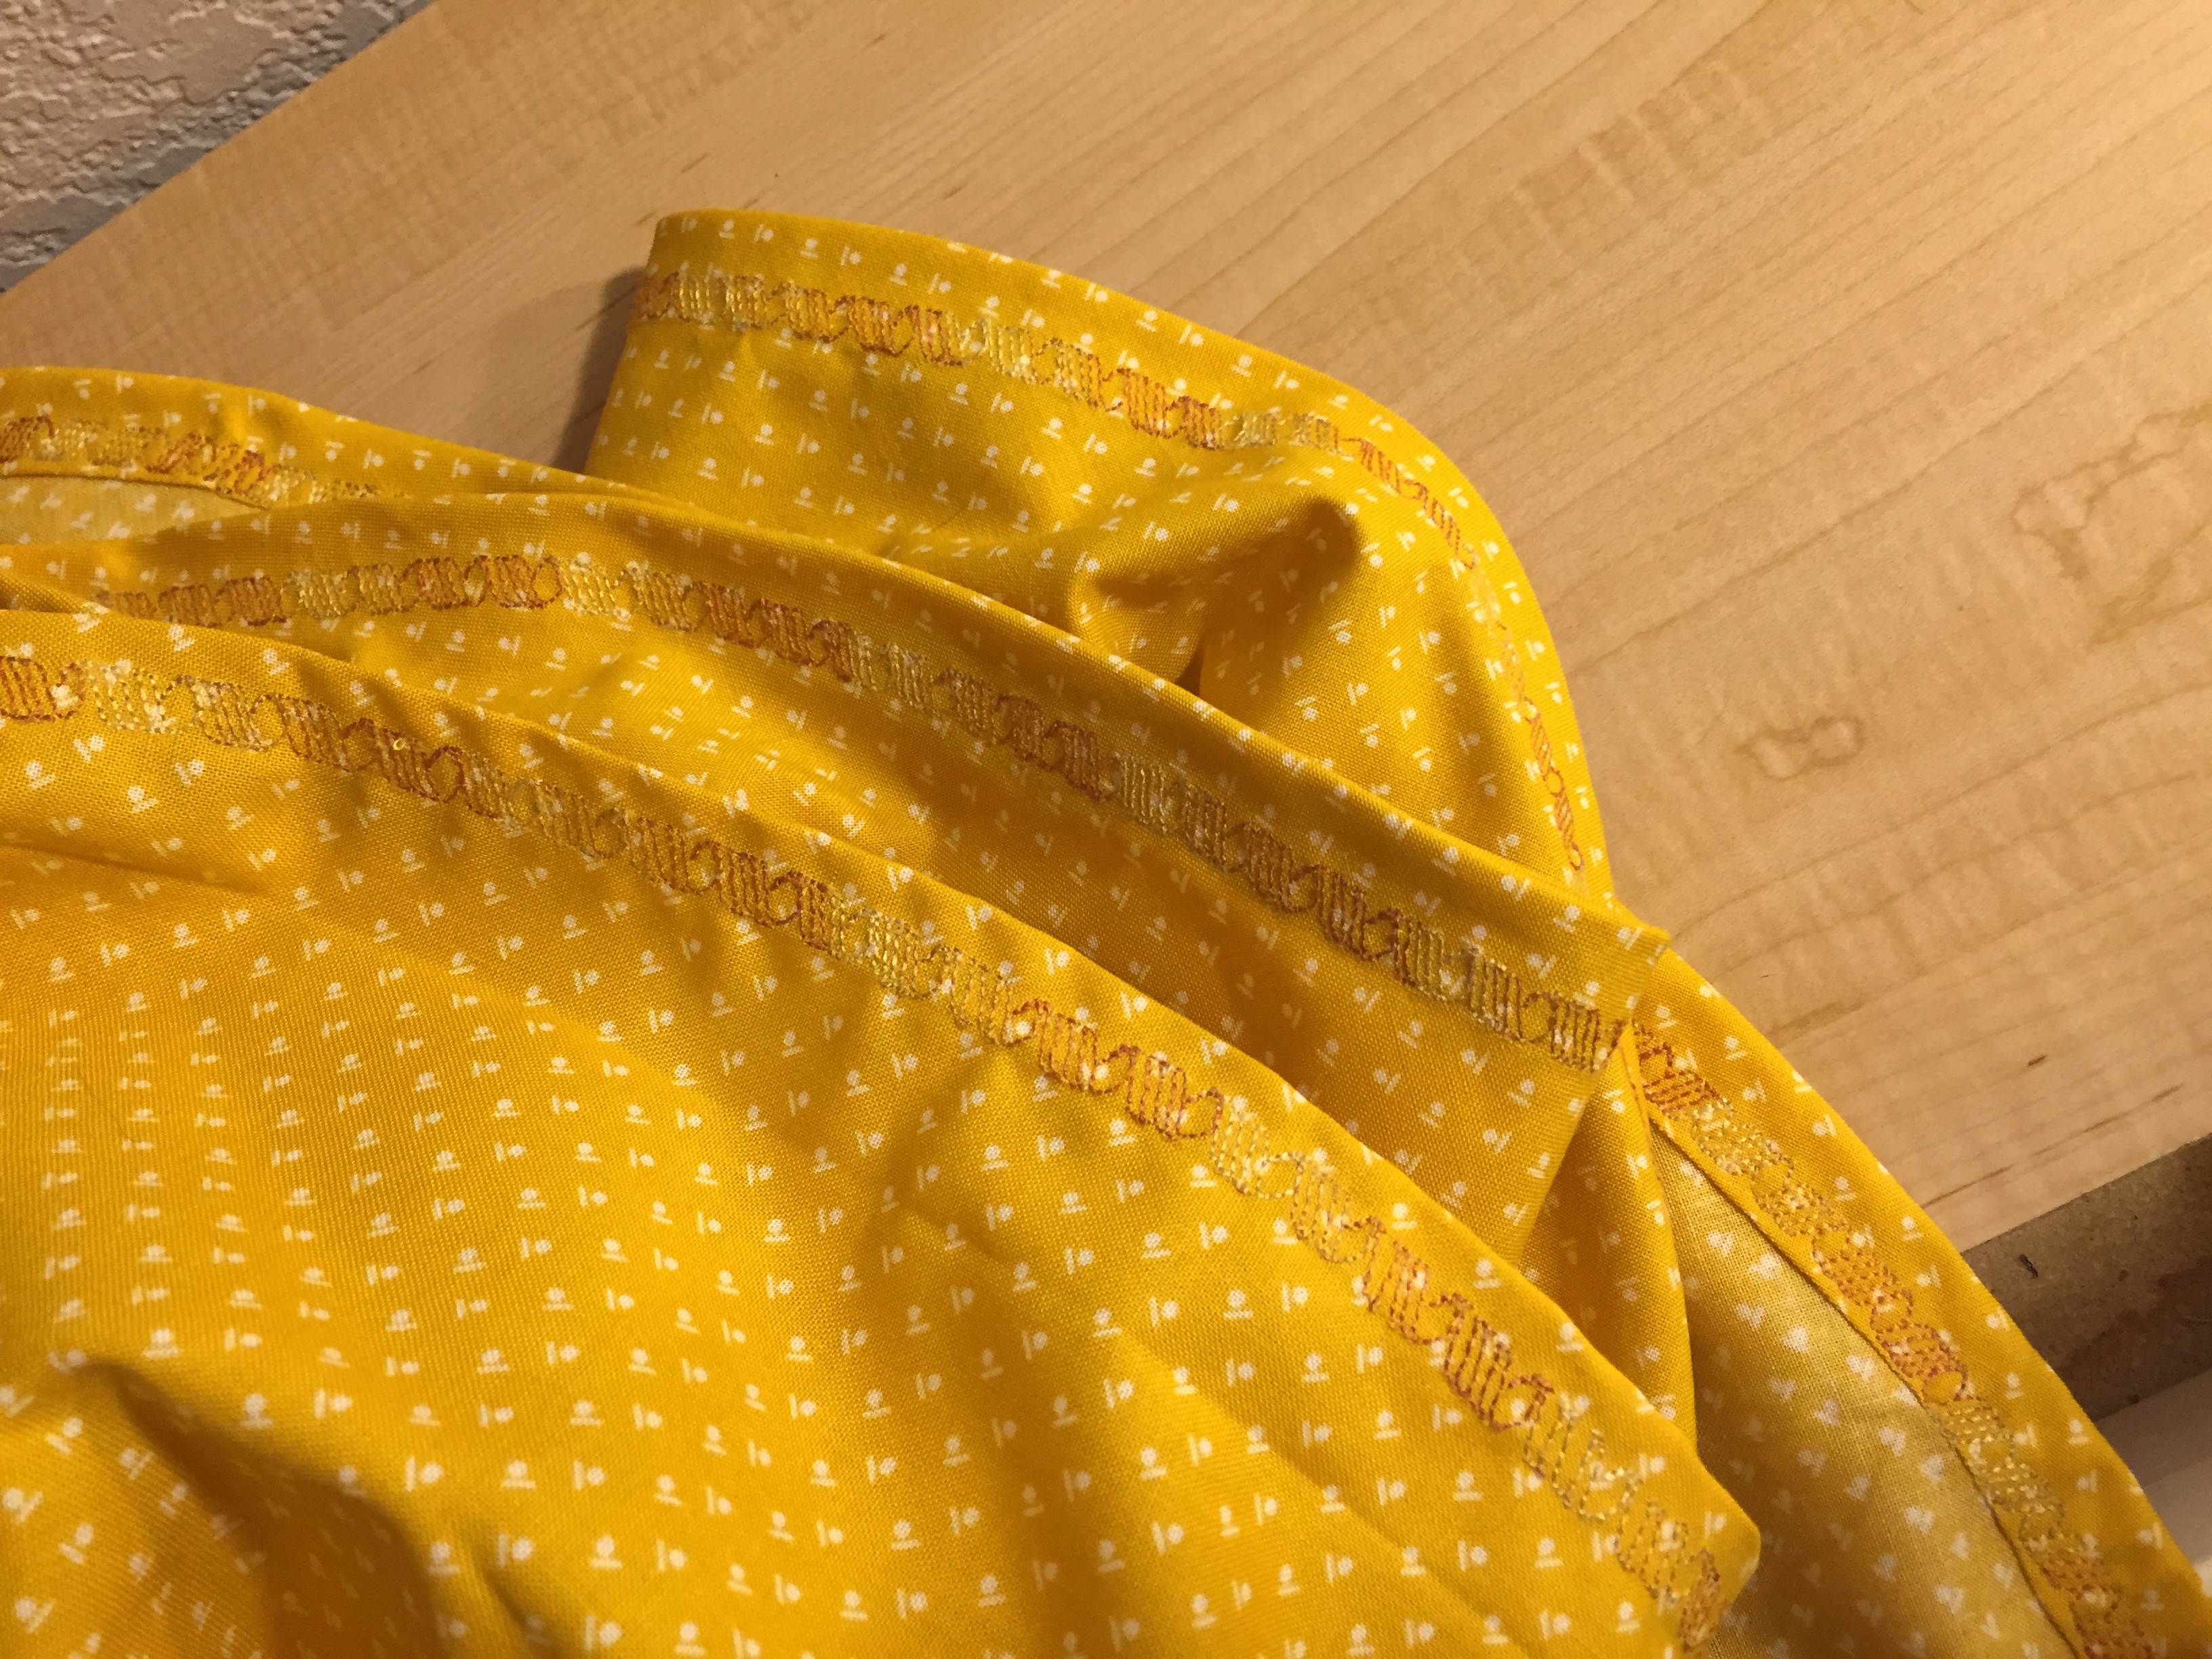
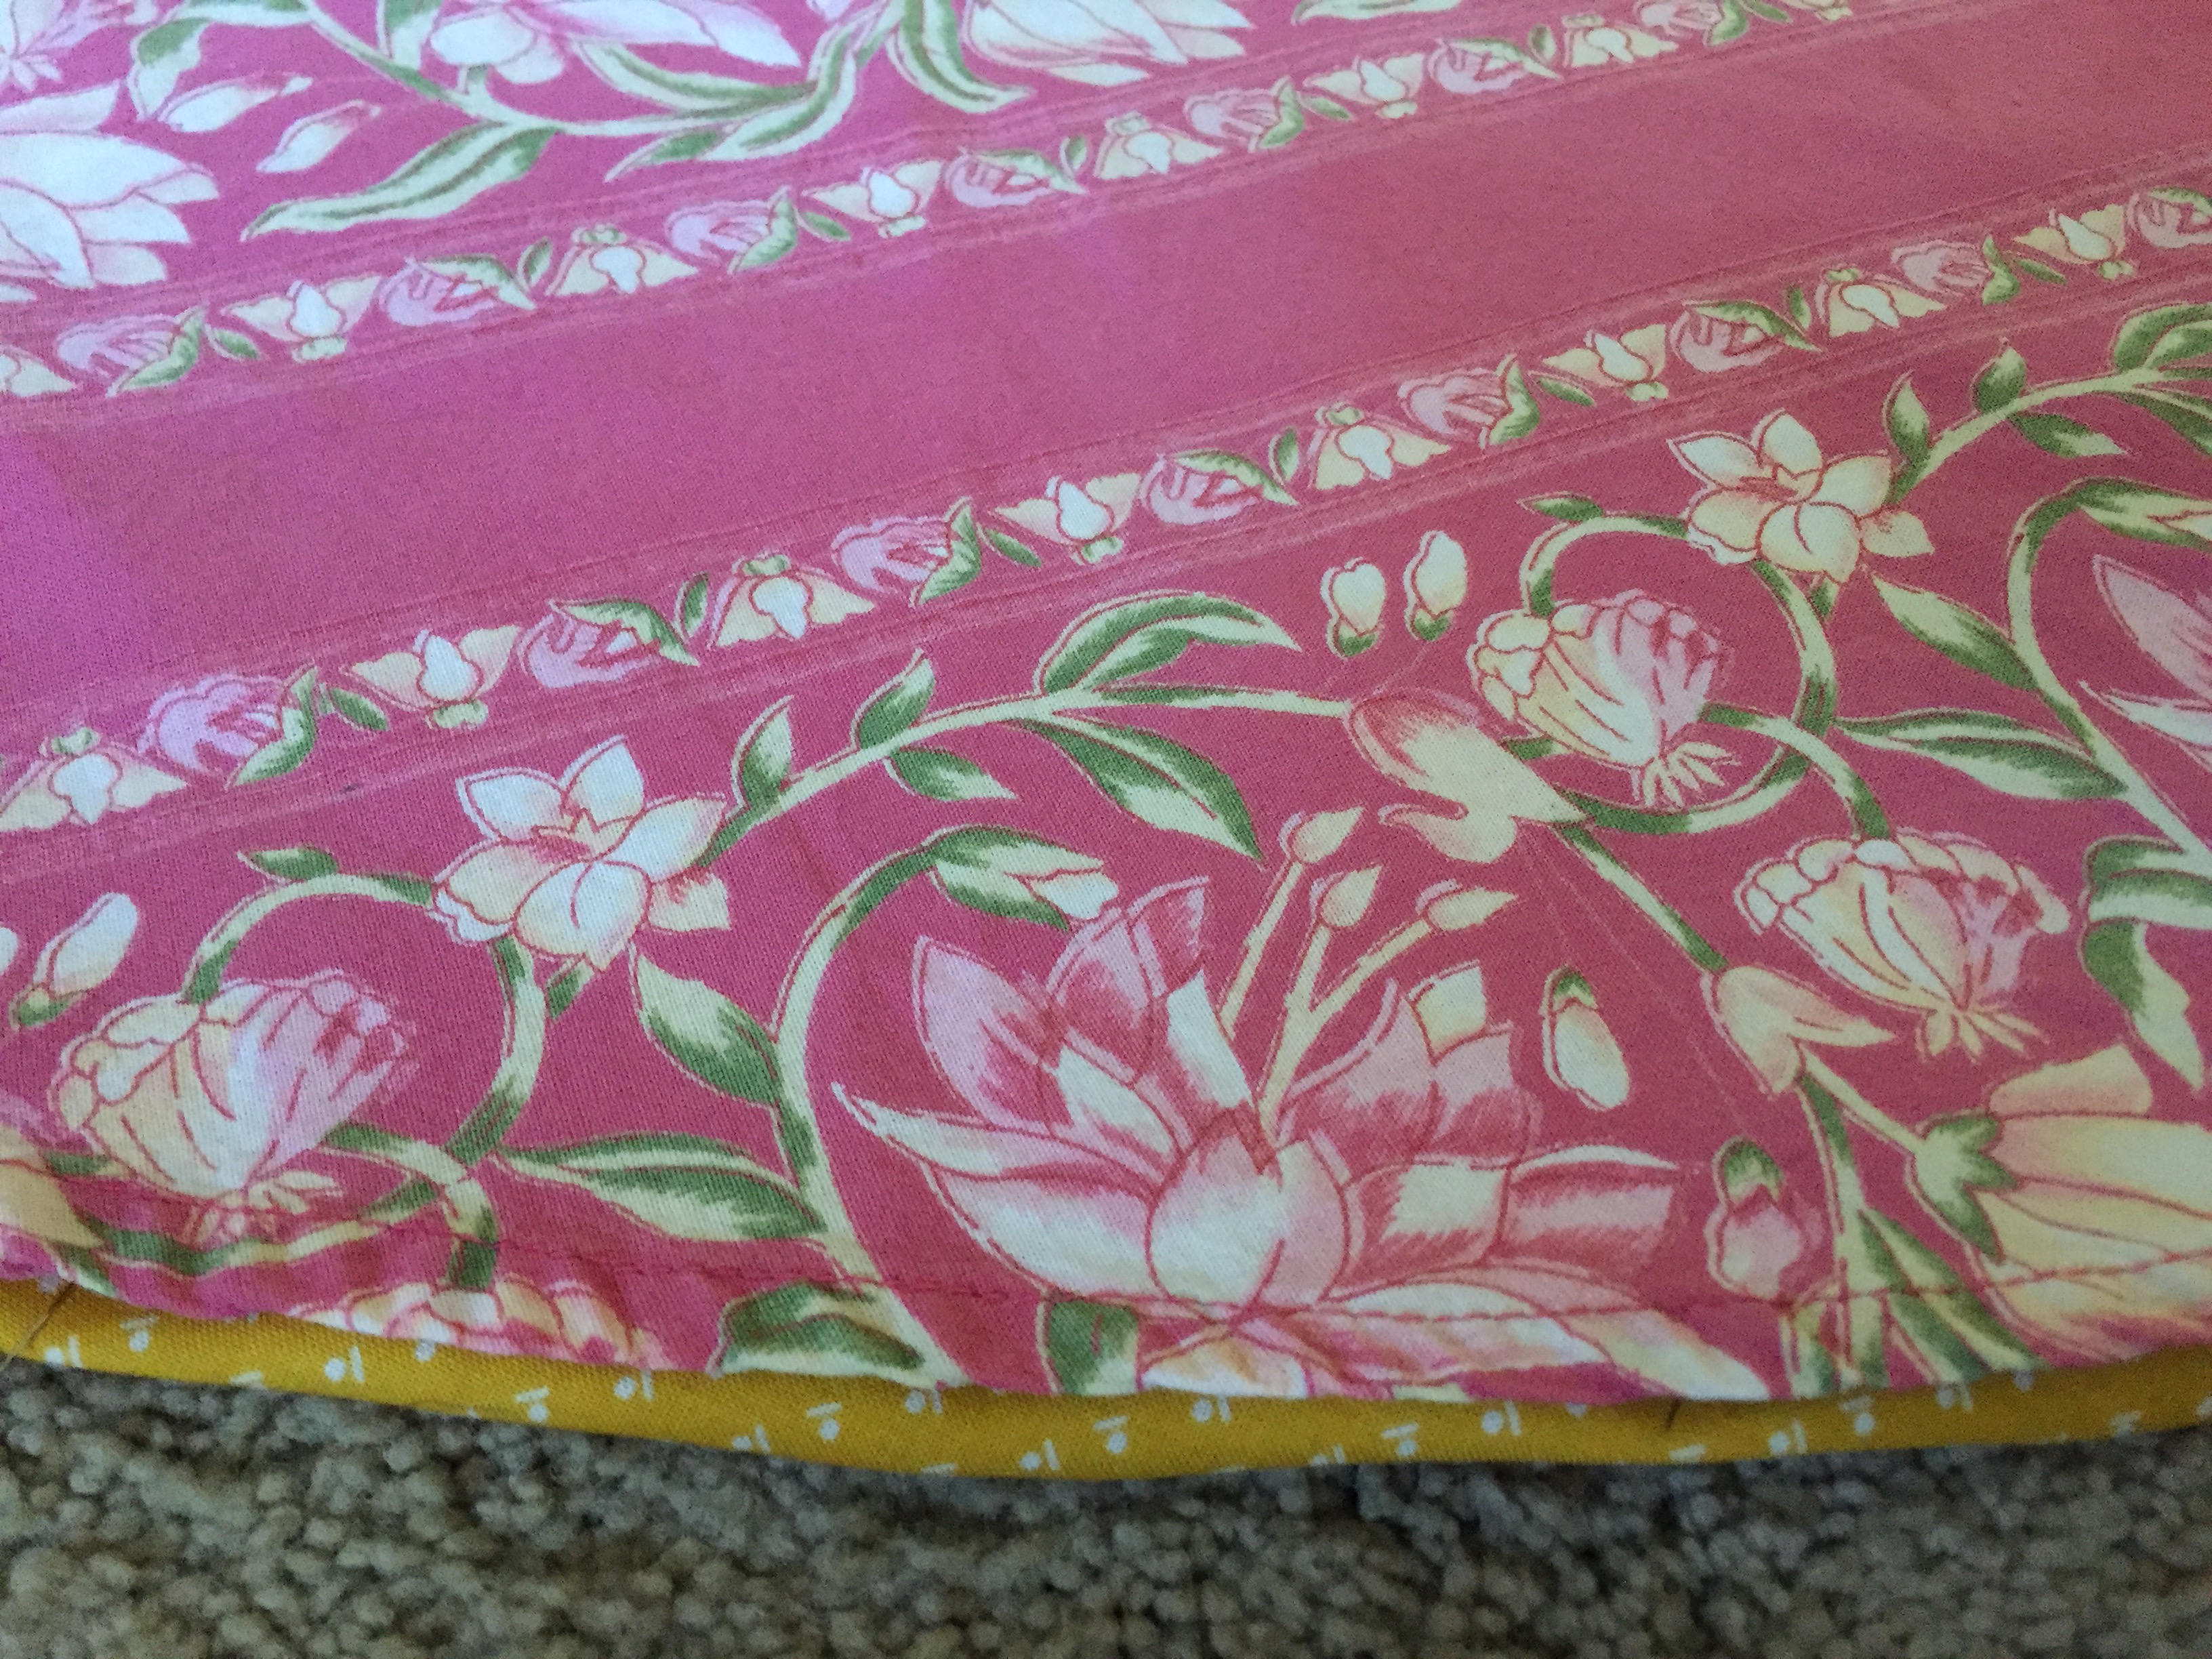
I wanted to use a decorative stitch for the hem.  Mainly because my Janome has five billion decorative stitches and I never use them.  I chose a Mettler variegated thread and a cute pattern that looks like ribbons. It looks really cute but wow, it took so long to go all the way around!  Probably about 1 1/2 – 2 hours?  It also took a crazy amount of thread.  Speaking of thread…..

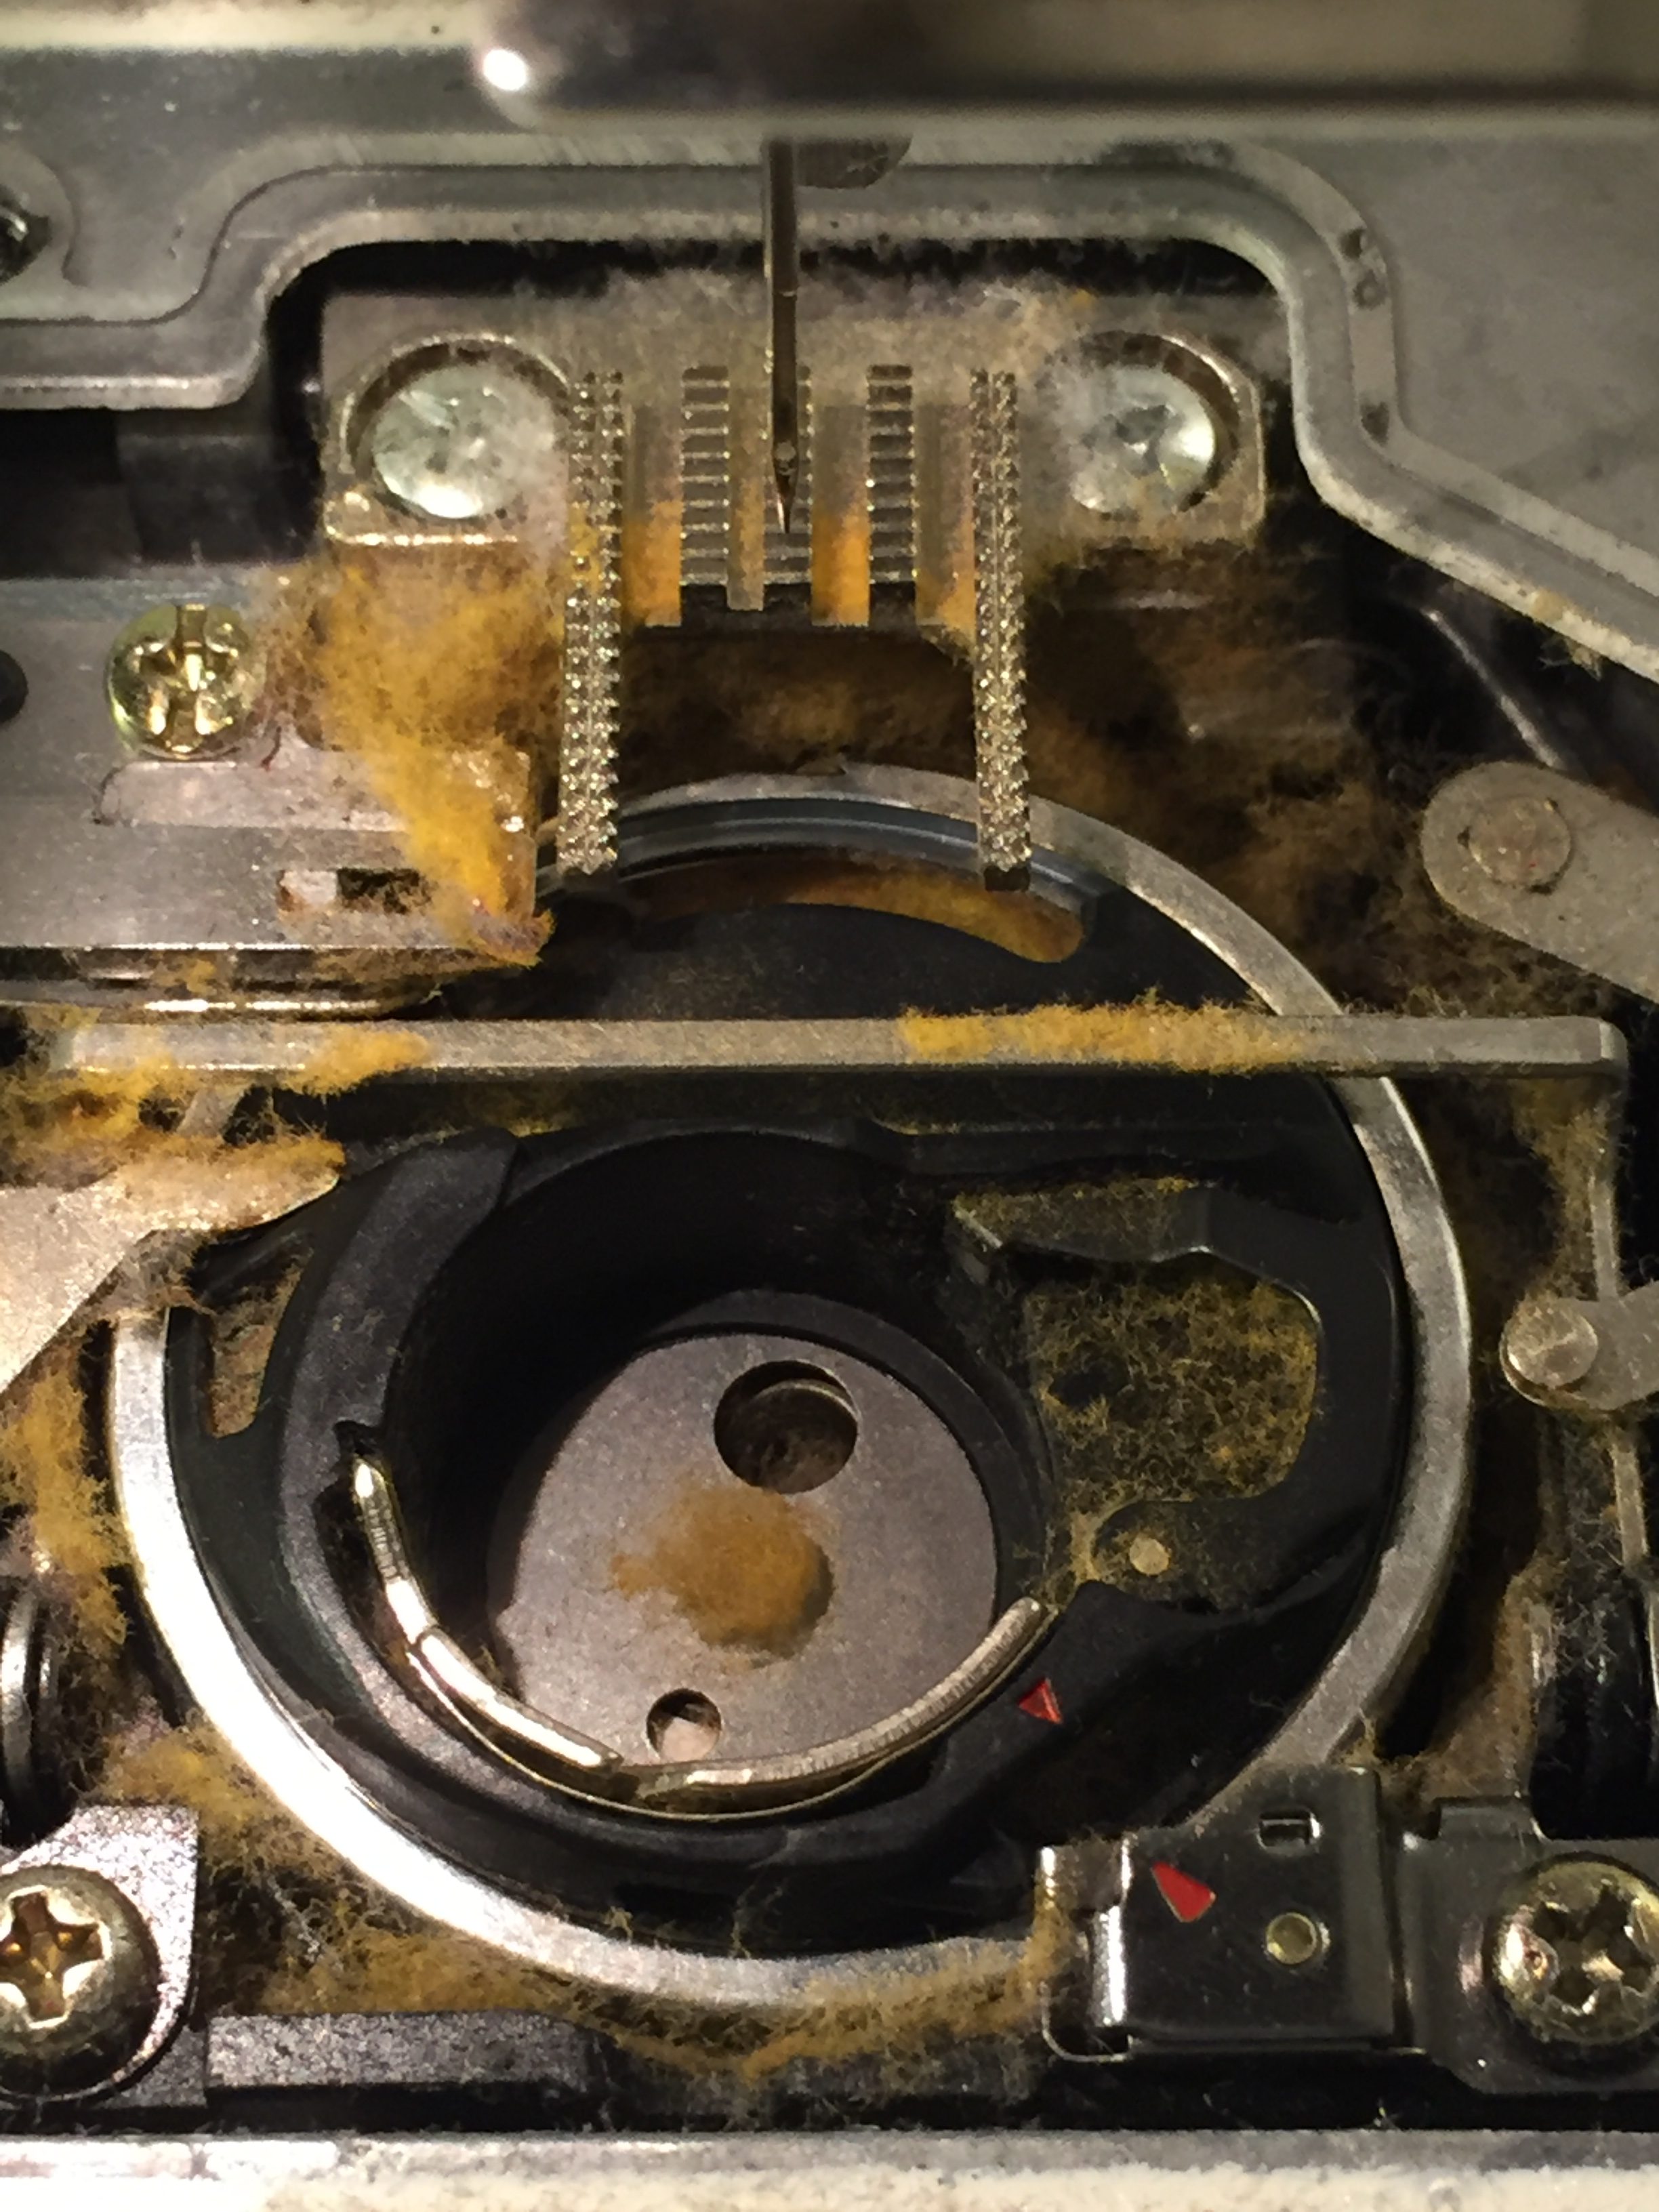
As I was hemming the tablecloth, I noticed my needle would come up and have fuzz all over it.  When I finished, I took the top plate off and look at the mess of fuzz!  I was amazed.  I haven’t used a ton of Mettler thread and have to wonder if this is typical?  I had cleaned it out prior to this project so the fuzz was only from hemming the tablecloth.  Anyone have experience with this sort of thing happening?  Kinda makes me even more of an Aurifil fan.

Ok – now that it was hemmed, I decided it was a bit boring.  Applique came to mind but I didn’t really feel like doing anything very fussy.  Then I thought about embroidery or some sort of big stitch design (like Sashiko) but I know myself and it would take too long. By the time I finished we wouldn’t be eating out on the deck anymore…..

So I thought about the gorgeous floral collage quilts by Laura Heine and took that as inspiration.  I gathered lots of floral scraps and applied fusible backing to them and started cutting out flowers – and more flowers – and even more.

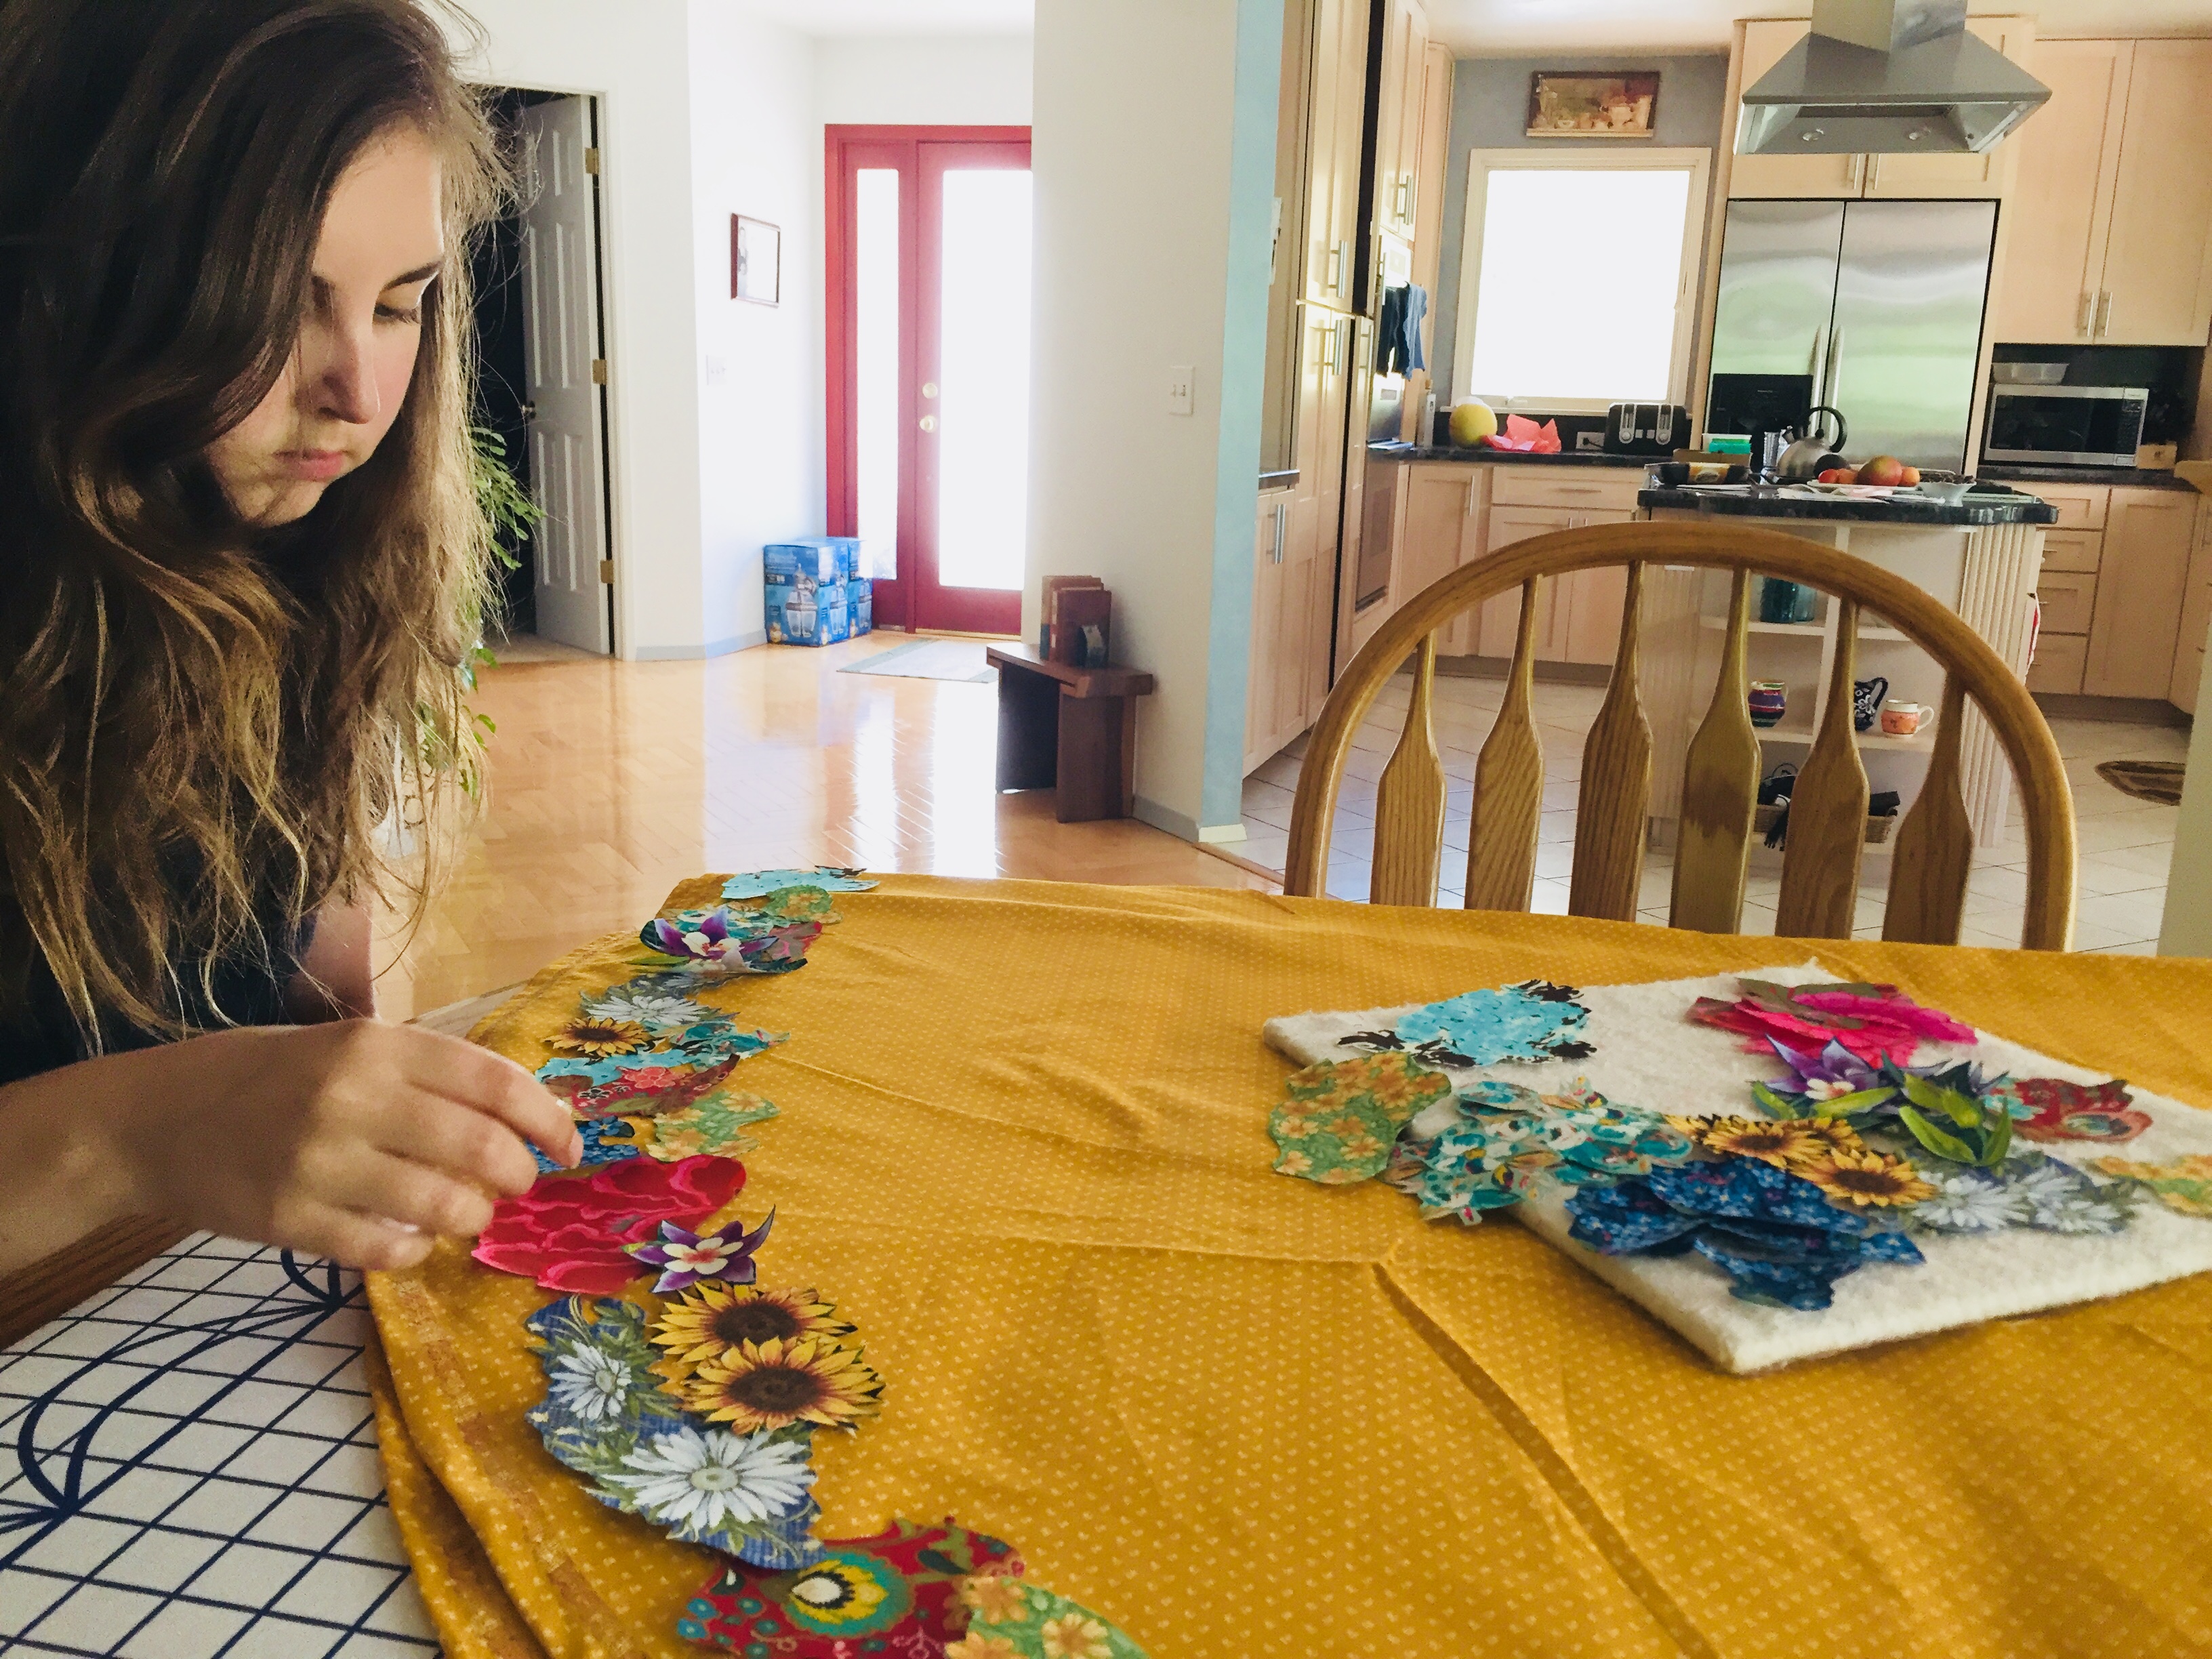
Julia and I started to play with arranging them around the hemline in a collage – our only aim was to distribute colors well and to keep the border about three inches tall.  We have 1/4 of the border pinned.

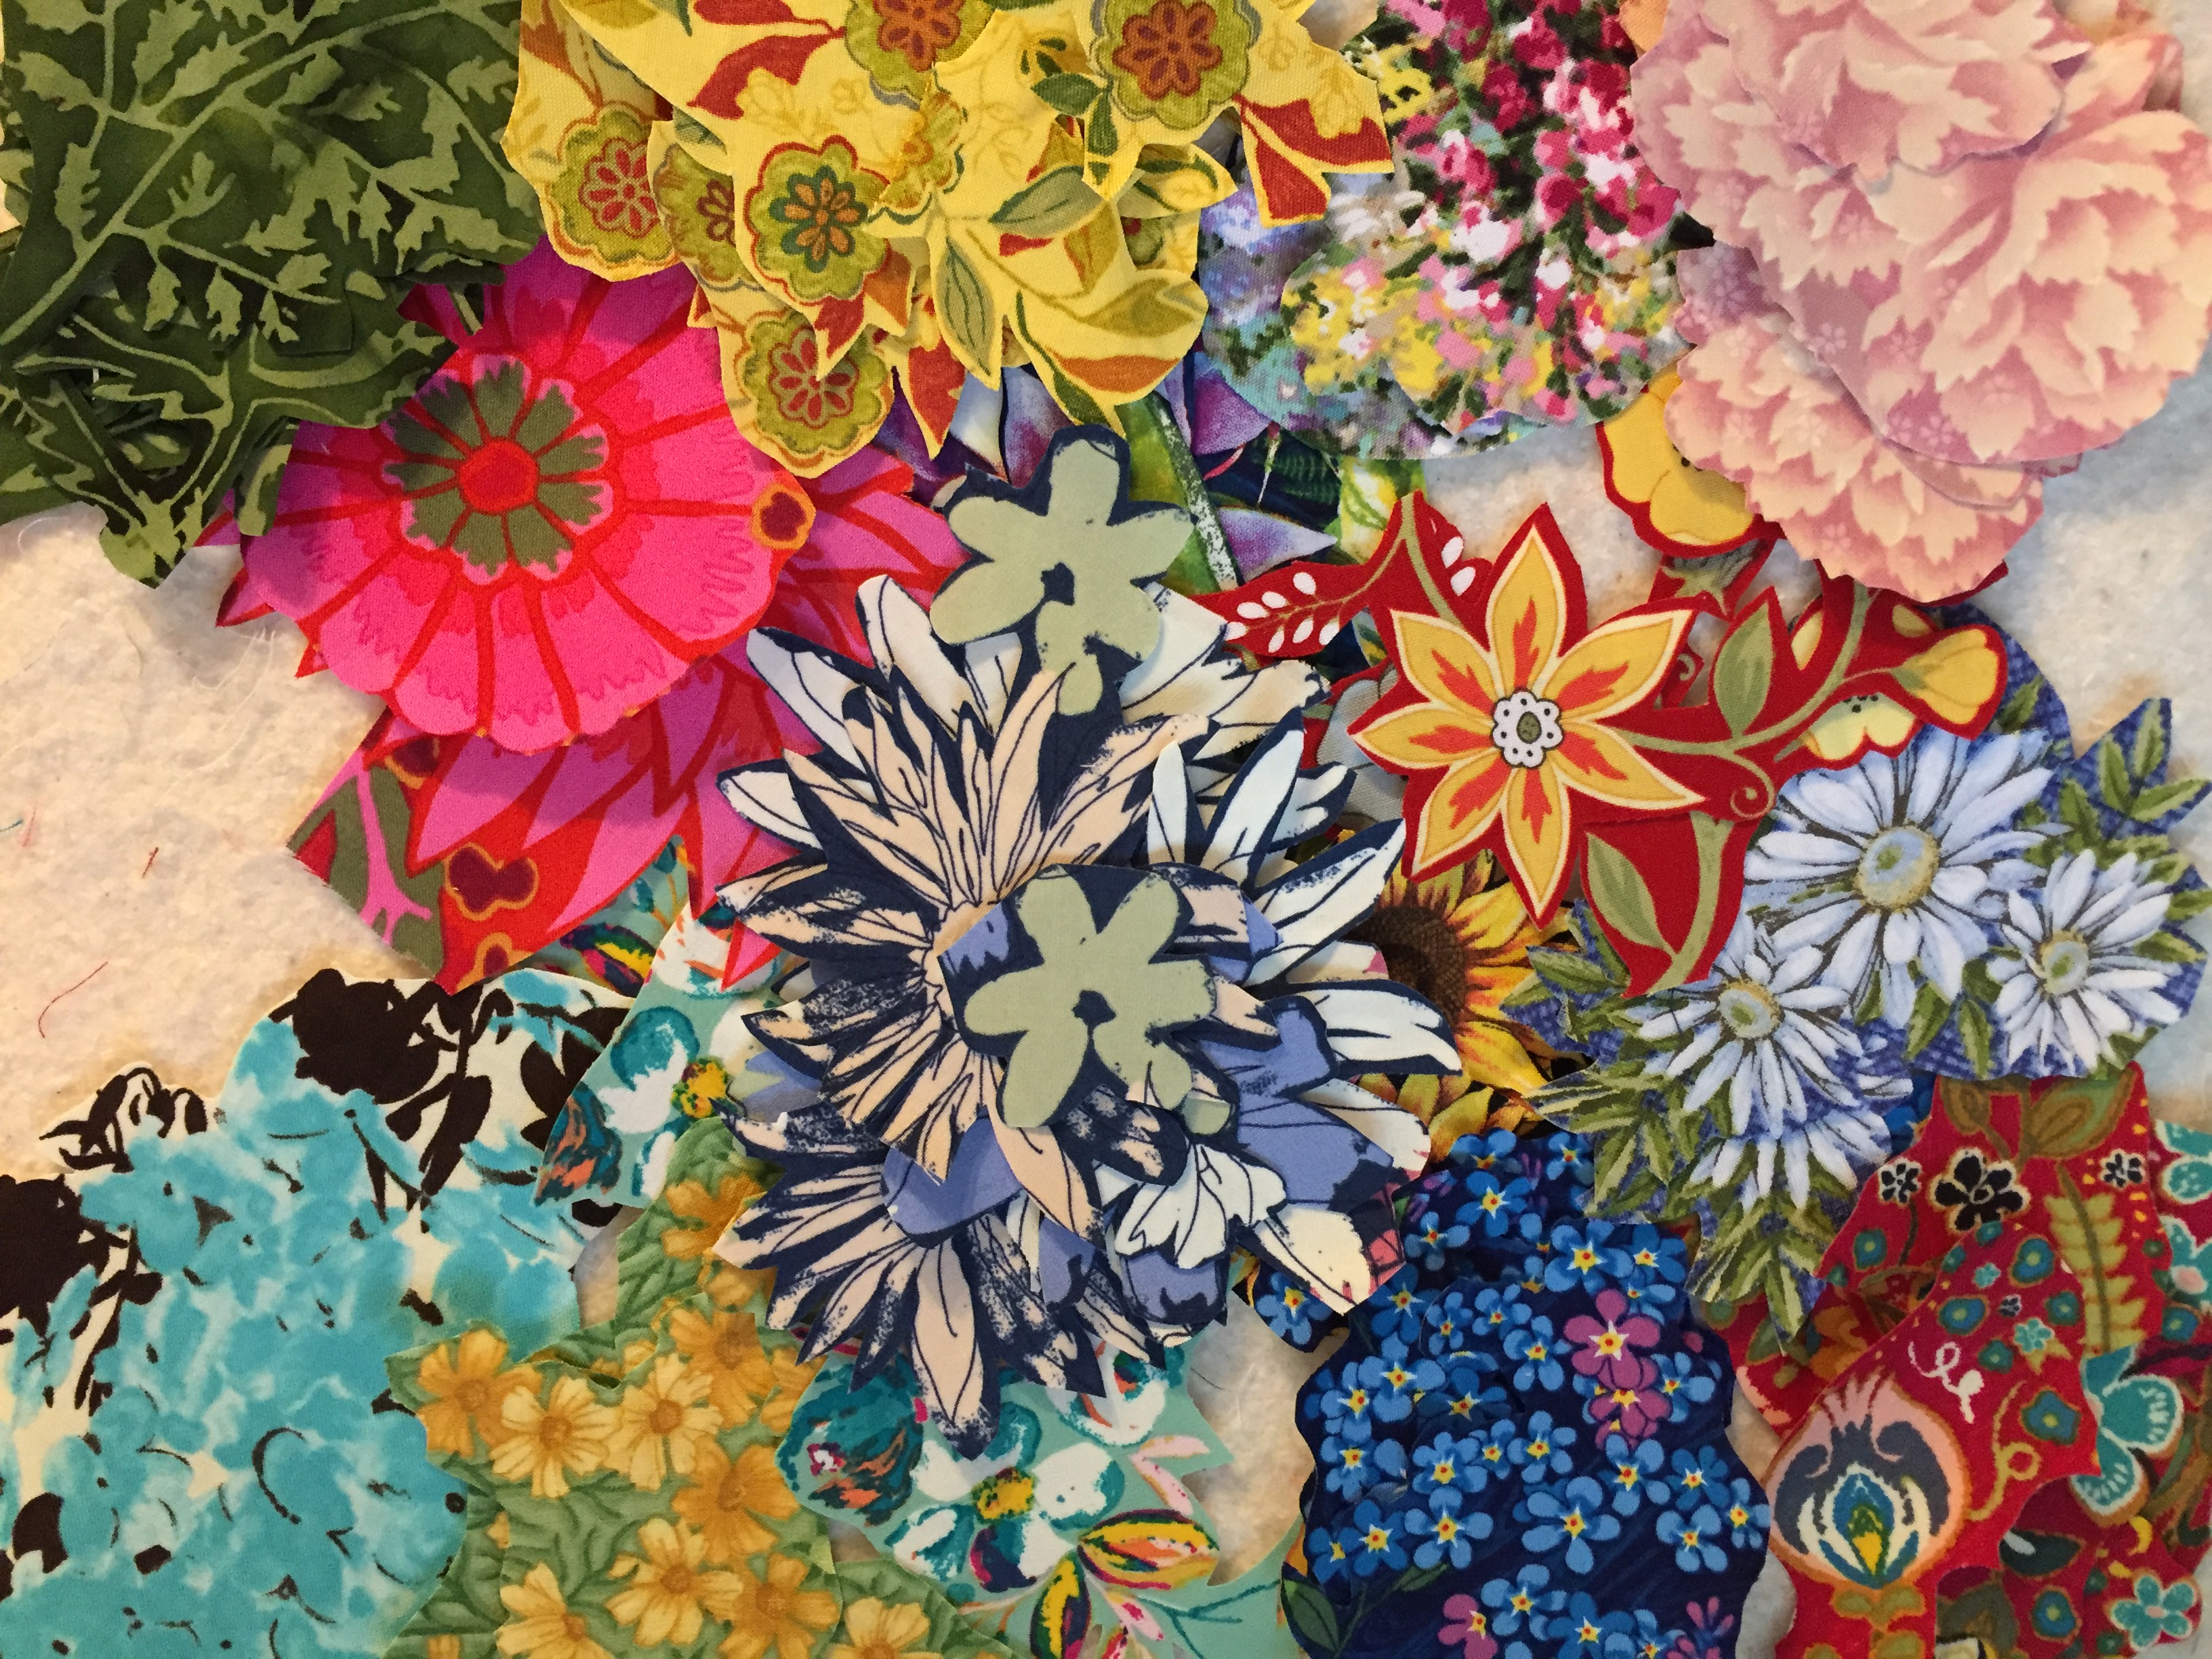
It was clear I didn’t have nearly enough blooms so back I went, fusing and cutting. This is quite fun so I am enjoying the process.  I haven’t yet fused any to the cloth yet.  I want to get most of the way around the cloth before I commit.  It is great practice because I have a Laura Heine pattern I want to make so this gives me a bit of an idea how I will go about it.

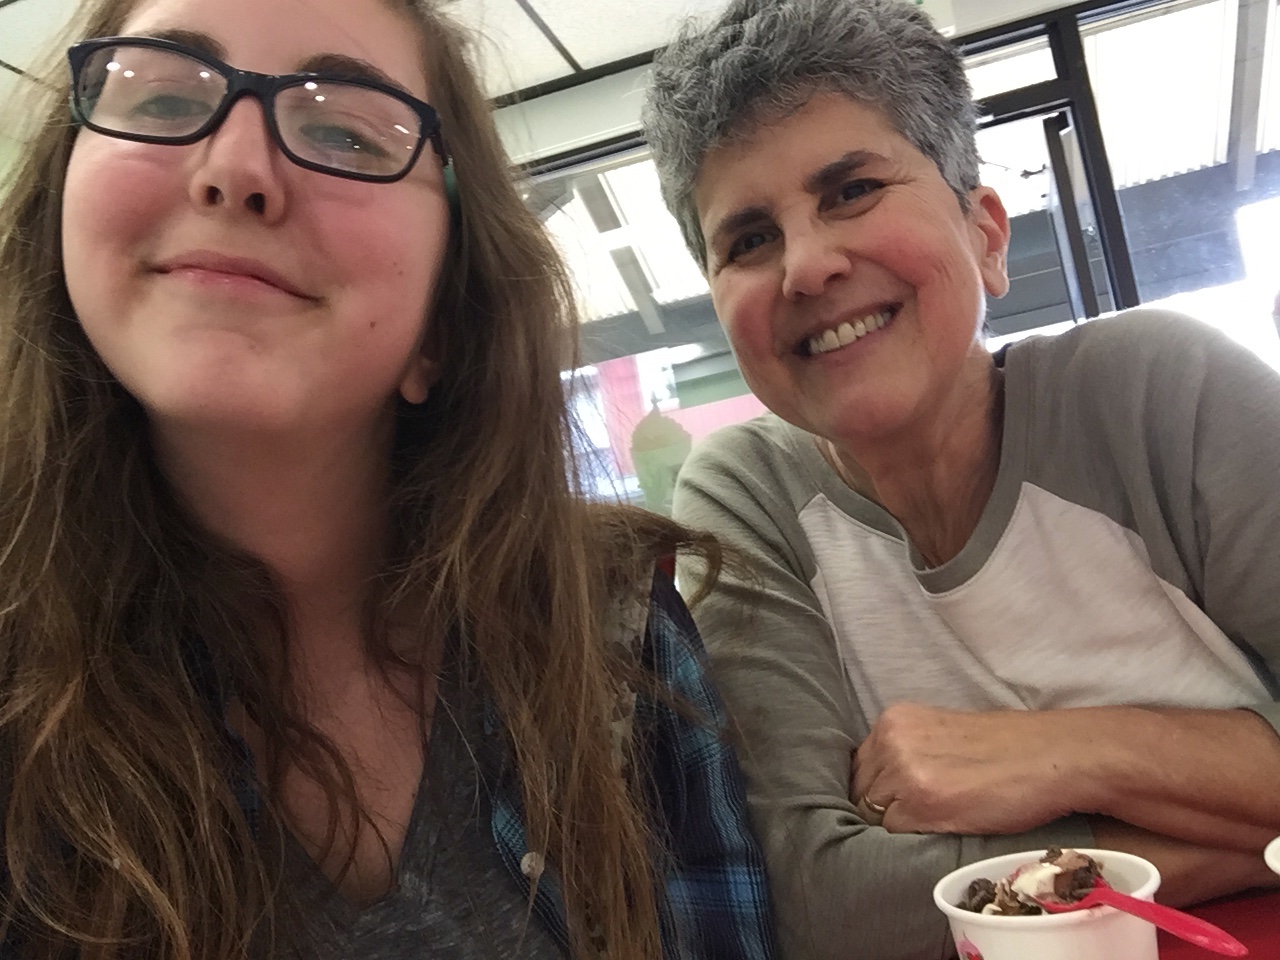
For now though, I have set everything aside.  Julia and I are taking off for Vermont!!  We are both so excited to go see family and to play with that grand daughter of mine. Projects will have to wait.  Flowers will remain unfused and the tablecloth unfinished.  Time for some grand baby time!

As an FYI – the shop will remain open but orders placed from June 28 – July 6th will ship on or about July 7th.

Wishing everyone a wonderful week and I will be back in a week or so!

Newsletter!

Have you signed up for my newsletter?  It is published every month or so and is full of information about my shop, new arrivals, sales, and events.  Click here to sign up!

SaveSave

SaveSave

Little Pillowcases

About a month ago, my daughter in law texted me to ask if I would make some small pillowcases for my grand baby.  She has recently taken to sleeping with a tiny pillow (which is so darn cute!) So a few cute pillowcases were needed.  Of course I am happy to make whatever I can.  I am unsure why I didn’t get these done sooner because they are so simple.

Hannah pillowcase

Serenghetti Beasties

I made two – each one quite different from the other.  The first one is made with some fabric by Clothworks. It is an organic cotton and the line is called Serenghetti Beasties.  (It is available in y shop and you can find it here.) I love the name! There are all sorts of safari animals like giraffes, zebras, hippos and lions on a crisp white background.  This fabric is so nice and soft, making it perfect for a pillow case.

The back is a coordinate from this line.  The dusty blue and white triangular pattern has little pops of yellow. I made standard, envelope style pillowcases and both finished at about 14 1/2″ x 19″.

Here is the second one I made.  I thought I would choose something more girlish in style.  This is also an organic line but it is produced by Windham Fabrics.  The line is called Paint the Town and it just came in about a week ago. It has a heavier weight to it but is still soft and cozy. There are masses of flowers and a sweet gray kitty hiding among the blooms. (Look for her next to the blue flowers.) This piece looks a bit like a watercolor to me. I think this will be a fun one because the kids have two cats. My sweet grand daughter really loves the cats and I am hoping she might have fun looking for the kitty when she uses this.

When I made this, I ran into a bit of a snag. The fabric is directional, with each kitty facing the same way.  I didn’t cut a piece large enough to have the cats going the right way on both the front and back.  So, I cheated and on the back side the kitties are going the wrong way.  I thought about it for all of 10 seconds and decided it wasn’t necessary to cut more fabric. (Really, I am supposed to sell the fabric, not consume it all myself!)

These were really a quick make.  Cut, sewn and finished in a little over an hour.  I did finish the seams with a zig zag stitch so they won’t fray with a lot of laundering.  They should hold up well and be nice and cozy for my girl.

I am linking up to all sorts of places.  Check them out at the top of the page, under Link Ups.

Also, if you haven’t yet signed up for the Needle & Foot newsletter, I hope you will.  It is sent out about every six weeks and contain updates on the new fabrics or events going happening in the shop. You can sign up by clicking here or using the link at the upper right side of the page.

Have a great weekend everyone!

Sewing for Safelight

Earlier this week, I shared this picture on Instagram.  I haven’t been feeling well thus very little has occurred in the sewing room.  Soon after returning from Vermont, I began to feel that sense of doom when you know you are coming down with a bug.  Yesterday I had a chest x-ray to confirm I have pneumonia. Yuk.  Not a whole lot of fun and way more than a lot of coughing is happening.

Not all is lost though.  I have been wanting to make a contribution to the annual event that is happening now at From My Carolina Home.  Carole is very supportive of her local domestic violence organization, Safelight.  Called Omiyage for Safelight, Carole is asking us to make a set of matching cosmetic bag and sunglass case.  She fills the cosmetic bags with some basic necessities and adds sunglasses to the case before donating them to Safelight.  I really like the idea of providing a small, pretty gift to women going through a rough time, hopefully letting them know people do care about them.

Carole’s version of the pouch and sunglasses case is a fun and easy make.  Even while not feeling well, this came together nicely. I used two coordinating fat quarters from Riley Blake to make this set.  I think the pale pink  plaid on the exterior is lovely and feminine.

For the interior, I chose the gold raindrops on a creamy off-white background.

She has a document here for you to download with all of the information.  Using Velcro instead of a zipper is a great idea. So simple! If you have a free hour or so, I encourage you to make a set.  I love sewing for others because it is such an easy way to share the love, right?  The only thing I had to purchase was the Velcro because I only had black strips and that wouldn’t look nice now would it?

Carole is really hoping for a few more sets to arrive before the last of April.  She wants to fill them and then gift them at the first of May.  Please consider supporting her event. She even has a few nice giveaways planned for those who contribute!

Have a great weekend everyone!

Up To 60% Off Hundreds Of Classes at Craftsy.com 4/6-4/8/18. No coupon needed.
Finally, we are going to have a very rainy weekend which is perfect.  I will be recuperating and plan to take advantage of this sale over at Craftsy!  How about you?

Linking to my favorites – see the tab, Link Ups at the top of the page.

This post contains affiliate links, meaning if a purchase is made while clicking through from my site, I will earn a small stipend.

fabric coasters

Tiny Finishes

Good morning!  It has been a crazy week which hasn’t allowed me much time in the sewing room.  Plus the two projects I worked on most are not able to be shared just yet.  But I do have something cute to show you.  When I make Chemex cozies for my customers, I end up with scraps.  Of course I do, right?  There are usually several larger scraps that result from cutting the curved shape of the cozy. I have been saving them (because my fabric obsession says I have to).  They are starting to really pile up.

coasters

I cut a stack of 5″ squares and thought I would eventually quilt them together. But realistically, when is that going to happen? Instead, I started making fabric coasters.  I love them and it is such meditative sewing.  Just listen to music and stitch away! They are so pretty.

Alison Glass Fabric Coasters

This print has been really popular for the cozies so I have a ton of scraps from it.

coasters

Maker Maker Grid Fabric Coasters

This is the linen and cotton blend called Maker Maker.  Also a popular one for the cozies and it has wonderful texture for the coasters.

Maker Maker Cotton and Linen Fabric Coasters

Here is another fabric from Maker Maker.  I actually used about half a bolt of this for cozies.  I think I made around 15 sets of Chemex cozies and hot pads, maybe more?coasters

Lovely bits of pink, blue and gray!These are made from a charm pack I have – It is a Moda line called Serenity, designed by Amy Ellis.  I love it and plan to use the whole pack for coasters.

I am not sure what to do with all of these.  I could try listing them in the shop and see if there is any interest.  Alternatively, they are cute gifts to have on hand.  Either way, super fun way to use up scraps.  Especially batting scraps.  All of those long strips one cuts after quilting a project – I have really worked that pile down!  For now, it just feels good to use up the fabric.

Finally, just want to throw a teaser out there.  I have an amazing event coming up.  I promise you are going to  smile and feel so good inside when you read about it.  Come back to learn more on February 1st!  See you then.  🙂

Linking to the usuals. Find them at the top of the page, under Link Ups!!  Have a great weekend all.


Handmade Christmas Gifts

Now that Christmas is done and gifts have been given and received, I thought I would share what I made with you. Usually I try to find a fun project to make and give during the Christmas season.  In recent years I have made purses, zip pouches, table runners and hot pads. This year I decided to make an apron for my Vermont daughter-in-law.  Also, I made hot pads for my California son and his girlfriend as well as my Toronto son and his wife.  These projects were quick and satisfying.

For the apron, I upcycled a duvet cover that I had bought a while back. I was thrilled to find this cover in a tan and cream stripe.  The neutral colors and the feel of the fabric assured me I would easily find many uses for the fabric.  I had a vintage pattern from 1975 that I have been holding on to, thinking it would make a really cute apron.

Originally the pattern was designed for a wrap around dress and let me just say, I would have totally loved wearing this dress at age 15 (not that I was necessarily 15 in 1975… oh wait, I was.)  Anyway, I had a really similar dress that I made out of a green striped seersucker fabric.  I was so cool.

Ok, back to the apron.  I had seen these Japanese work aprons and really liked them – this pattern is a bit of a compromise between a standard apron and the Japanese wrap style. This one is more fitted with darts in the bodice.

It wraps around the back with the tie coming through an opening left in the side seam.

I finished the interior seams by folding the raw edges in and top stitching them for a clean look.  This fabric would likely fray in the wash so this will prevent any issues.

I even remembered to put a little label on the inside.

Overall, this was a fun project and hopefully my daughter-in-law will get lots of use out of it.  She is a great cook so I suspect she will use it.

On to the hot pads!  I wanted to make something with the Maker Maker fabric I have in the shop.  I cannot even express how much I love this fabric!!  I made Chemex Cozies out of the Grid fabric and the gray and black Lines fabric.  They were far and above, my top sellers for the Christmas shopping season.Anyway, I thought I would make some hot pads using the Grid fabric and the cats.  The linen has such a nice texture and weight, making it perfect for kitchen accessories.  These finished at at eight inches square and are filled with two layers of Insul Bright, making them nice and thick.

The next gift I want to share was not made in the sewing room!  My husband decided he wanted to make a gift for each of the kids. The boys and their spouses received gorgeous rolling pins made with pieces of walnut and oak that he laminated together.  He turned them on his lathe to make a one piece rolling pin.  I just love them!  The kids were taken with the wonderful finish and really appreciated the work that went into these.

Each piece is different from the next with the stripes and color variations making them unique.

Since Julia isn’t really in need of a rolling pin just yet, he made her a piggy bank.  She had such a great time with Daisy and Ella last year, he thought this would be a fun way to remember that summer.

This was a challenging project but it turned out so cute!I love the shape of this little pig’s body and her curly tail.  It was so much fun to watch Ray making these projects during the months before the holidays.  I love having a few handmade gifts under the tree.  I also made some placemats for my parents but didn’t think to take pictures.  I will take some the next time I am up at their house so I can share them.  Were you able to make any of your holiday gifts this year?  If so, share in the comments.  I would love to hear about them!

Linking to my favorite parties, including Finished or Not Friday hosted by Busy Hands Quilts.  Check the Link Up tab at the top of the page for more info!  Have a great weekend all.  🙂

Finished! Christmas Tree Skirt

First of all, I want to thank you for the sweet comments on my last post.  I appreciate it.  Life isn’t predictable and this is just how it is — The migraines started almost ten years ago and I don’t see this changing any time soon.   But this week has been reasonable and I actually finished a project!  I also made a Christmas gift which I will share after the holidays. Hurray for time at the sewing machine.

I have wanted to make a quilted skirt for the Christmas tree for a long while.  Until now, I have just used a large piece of holiday fabric which I wrapped around the base of the tree.  But this year, we decided to decorate with two smaller trees instead of our usual very tall one.  This required two skirts, right?

I used a selection of holiday fabric for this.  Several of the prints are from Tis the Season, a line I carry in my shop.  The black print, the white tone on tone, and the darker red snowflake print were in my stash. The skirt was based on a pattern by Judy Metsker of Night Owl Quilting. This pattern when finished was a bit smaller than I wanted.  However, I had an older version of her pattern; it looks as though the newer version has size options.

At any rate, it was a very simple pattern.  I chose to quilt it sampler style with a different motif on each fabric using a white Mettler thread. I stitched a stipple on the red snowflake fabric and a little boxy FMQ motif on the Christmas gift fabric.

My favorite quilt motif is the row of basic Christmas trees I stitched along the border of the skirt.  I used a variegated Mettler thread in red, green and white which looks so festive.  On the white fabric I quilted a few wavy lines with stars on them.  I wasn’t able to get a photo that really shows this motif very well. I machine stitched the binding down using a zig zag stitch with the same variegated thread.  I think it looks great.

The second tree remains wrapped with that holiday fabric I have been using for so long.  But that is fine. The house looks festive and Christmas is around the corner.  How about you?  Is your tree up? Holiday shopping well underway?  Julia and I plan to go to Sacramento on Friday afternoon for the finishing touches on Christmas shopping.  I usually try to finish up early as the crowds get so crazy the week before Christmas.

Finally, I will be hosting a fun giveaway on Instagram this weekend.  Be sure to pop over Saturday morning to find out the details!  I held one last weekend and it was a lot of fun so I am going to do it again. Maybe this is your weekend to win!

Linking up to my usual favorites.  Check them ot at the top of the page, under Link Ups.


Winter Friends Christmas Stockings

While visiting my son, daughter in law, and grand baby in Vermont last month we talked about the holidays.  This is the first Christmas we will be apart.  My daughter in law is working her second year of her residency as a radiologist.  Apparently the second year residents don’t have the best work schedule.  She is working over Thanksgiving and Christmas both.  So the three of them will be celebrating holidays in between her shifts at the hospital.  Such is the life of a new doctor.

Always ones to look at the bright side, my son and DIL are kind of excited about Christmas though.  Because they have always traveled to California for Christmas since they married in 2010, they have never had their own Christmas tree or stockings.  They have an 8 month old daughter and it is time to begin their own family Christmas traditions.  When my DIL asked me to make them stockings I was so pleased.  What a fun project to tackle.  I showed her pictures of the fabrics I have in my shop and she chose the Winter Friends line by PB Textiles.  This is so perfect since they are a very outdoorsy family living in Vermont. What better theme than woodland creatures, Christmas trees and snowmen?

I was looking around on Pinterest for inspiration when I asked the kids what they had in mind.  They said to make them coordinate with the set of fabrics but to make each stocking with a different design.  So this is exactly what I set out to do!

First I wanted a template for the size of the stocking.  I remembered I had an old pattern from Simplicity that was designed by Eleanor Burns (of Quilt In a Day fame.) The size of the stocking wasn’t exactly right but it was enough to get me going.  I cut stocking shapes from batting and that is what I quilted my piece work to. From there I looked for ideas on line.  I found this tutorial by Amy Smart (Diary of a Quilter) and liked the idea of doing a ‘quilt as you go’ strip pieced design for one of the stockings.  Beyond that, I thought I would do a basic patchwork design and just go from there.

The strip pieced QAYG stocking was a breeze.  It came together easily.  This was the first stocking and I did use a few strips from other Christmas fabric scraps.  I kind of wish I had not done that because for the next two stockings I stuck with just the five Winter Friends prints.  Not a huge deal though. For the QAYG process, I cut random width strips and sewed one on top of the other beginning in the middle and working out to both the top and bottom.  Once the strips were sewn to the batting I trimmed to the stocking shape.

What originally got me wanting to add other pieces was this bit of text saying “the stockings were hung” which I thought cute to include. It looks cute and the colors match well enough so I left it as is.

For the next two stockings I made rows of patchwork which I then used for the stocking front in the same QAYG fashion.  I fussy cut the blocks featuring the larger snowmen, deer, woodland animals, and Christmas trees. These were alternated with 2 1/2″ squares of the other prints. I love the way the patchwork looks when set on point. This is my favorite of the stockings.

The second patchwork stocking is also really sweet.  I made little four patch blocks, fussy cutting the squirrels and hedge hogs to be used with the green snowflake print and the plaid print.  The four-patch squares are a little wonky but I am calling that a charming design feature.  😉

I sewed a curved piece of a cross hatch neutral fabric over the toe of each stocking to make it look sock-like.  I also embroidered a line of stitching to decorate it a bit more.  The toe pieces were hand cut so each one is different from the next.

The back side of each stocking is made with the larger print.  This decision was made purely out of laziness.  I had enough of this fabric in the sewing room at the time and would have had to walk all the way downstairs to grab more fabric if I chose a different one. How lazy can a quilter get???

I don’t know what the kids plan as far as family size but for now they have three stockings made.  I set aside enough fabric to be able to make two more stockings should the family grow!  I might not have exactly enough but they will still match the original stockings well enough. I am really happy with the stockings and hope the kids use them for many years to come.

In celebration of the upcoming holiday season, I have put all of the holiday fabric in my shop on sale for the weekend.  Use code HOLIDAYFABRIC25 to receive 25% off any of the Christmas fabrics listed.  I hope you will take advantage of this great sale which will run through end of day on Sunday, November 19th. Orders will ship out first thing Monday morning so you will have your fabric in plenty of time to do some holiday sewing!

I am linking up with my favorite linky parties. For more information, click on Link Ups at the top of the page.

Cross Body Bag for Travel

Most of the time, I use a big purse. I carry all sorts of stuff, probably more than I really need to. But that doesn’t work as well when I am traveling.  If I bring a tote bag or backpack on a plane (for a book, iPad, food etc) it becomes cumbersome to also have a purse.

I decided to make a slim, simple cross body bag for these, not-very-frequent, travel days. This way I will have a purse with my wallet and phone in it while I am traveling and it won’t take up tons of room in the carry-on bag. Brilliant, you say? Aw, shucks…

I chose the Grid fabric from Sarah Golden’s Maker Maker fabric.  It is a wonderful cotton and linen blend with great texture. Andover makes it and I have a selection in my shop.  I washed the fabric before I started so it would soften up a bit.

When I was thinking about this project, I decided to model it after the 30 Minute Pouch on KelbySews.com.  I have made tons of these as gifts.  One Christmas I gave them to a number of my friends, my sisters, my mom and mother-in-law. You can check those out here.  Anyway, I thought if I just made it substantially larger, added an interior pocket, and loops for a strap, it would be a cute bag.  Guess what?  I was right!  It turned out great.  Here are some photos of my process.

I cut the exterior piece, the batting and the lining all the same size, 9″ x 20″.  Then I quilted the batting to the exterior piece with three seams.  The quilting doesn’t show at all, black thread on a black print, but it held the batting in place while making the bag.

The interior pocket came next.  It is a bit of a trick to explain but I took a 5″ square and placed it on top of the lining piece, right sides together. I drew a rectangle toward the top, on the back side of the square and stitched around that rectangle.  Next I clipped out the interior of the rectangle so I could turn the fabric to the other side of the lining.

Finally, I took a second 5″ square and sewed it to the flap of fabric that was now on the wrong side of the lining.  (I know this is hard to follow and if anyone wants further info, I can write a tutorial.  It is a nice way to add a pocket to any bag you are working on. Let me know if you would be interested.)

Interior pocket sewed to lining fabric.

Once the pocket was in place, I set the zipper – I won’t go into detail here because I used the exact process described in the KelbySews tutorial. It is very simple.

Before sewing the side seams, I placed two loops of twill tape, one on each side, to be stitched into the side seam. Then I sewed the side seams.

This bag has exposed seams (the lining doesn’t hide them) so I did run a tight zig zag stitch along each side to finish the fabric.

Once the bag was flipped right side out, it looked like this.

The final piece was to make a long strap. I pieced together two lengths of fabric that were two inches wide. By pressing the raw edges to the center first, then pressing the whole strip in half, and finally stitching the strap all the way down the length of it, I quickly had a shoulder strap. I looped one end through each of the twill tape loops and stitched them together.  This means it isn’t adjustable.  If you wanted something more flexible, you could buy the hardware to make a little looped finish on the end of one strap.

Peeking at the interior of the bag.

The lining was a scrap from a thrift store but I love it with the Grid fabric.

For measurements, in case you are curious, the bag finishes at 8″ wide, 10″ tall, with a strap that is 50″ long.  I think the size is just what I wanted.  The only change I would make is to move the zipper up about two inches so I would have a bit more usable space inside the bag.  The most functional space is below the zipper and it would be better to have less space above the zipper.


Quilt Exhibit Recap

Last week I posted a little catch up on the fair, Julia’s pig Ella, and the purse I made for her.  In the comments, Yvonne of Quilting Jetgirl, reminded me I hadn’t said anything about the quilts I entered in the local fair.  I had originally planned to enter three quilts and that is what I technically signed up for.  As I got the quilts out to add the hanging sleeves, I noticed that I had machine stitched the binding to the Positively Floating plus quilt. In all honesty, I can’t remember why I machine stitched that one. Maybe I just wasn’t in the mood to stitch the binding down? Usually I kind of enjoy that last bit of stitching on a project.  At any rate, it didn’t make sense to enter that quilt because I was fairly sure the judge wouldn’t appreciate a machine stitched binding. Additionally, I had procrastinated on making the sleeves, it was the night before I had to bring them over to the fairgrounds, and I was running short on time. So I didn’t enter the plus quilt.

I did enter the relief quilted THREAD project and the Sweet Tweets baby quilt. I got a second place ribbon on the Sweet Tweets baby quilt.

Third place, the quilt below mine was 2nd place.

I received a third place ribbon on the THREAD project. Now before we all get excited, I will tell you the rest.  I am nothing, if not honest, right?  This is a very small show – all contained within one room and may 150 entries at most (including all garments, stitchery, knitting and quilts)  In the baby quilt category, there were two entries.  In the mini quilts of this size, there were three.  As my sister Patti wisely told me, the glass is half full – you got a 2nd and a 3rd place.  But my logical side says, meh, I got last out of three and 2nd out of two.  Either way, I am happy. I think I got over my fear of having someone look at my project and pick it apart (no pun intended!)  It was interesting to read the comments.  Here is a bit of what the judge wrote:

On the baby quilt:  She liked the fabric selection and the fussy cut blocks. She found the quilting design appropriate and noted my stitches were not all the same length. Binding was well done but quilt does not lie flat.

On the relief quilt:  Thread play noted and appreciated. Starts and stops should not be visible, addition of quilted thread spools noted and appreciated. Binding needs improvement.

So – it was an interesting experience.  I am not a terribly competitive person so usually, I don’t feel compelled to think of the judge’s perspective as I make projects.  I suppose if I decide to enter things again, I need to pay more attention to the details.

Yesterday I was having fun making a few bandana bibs for my little grand baby.  My son, his wife and the baby got to California yesterday after a few flight delays and weather issues. They are spending time in the Bay Area, about 150 miles from here and will come up here Wednesday.  The baby will be working on teething soon which means all of that drooling that comes with it. I thought bandana bibs might be nice for this. The first one is made with a Cotton & Steel print, Panda Bebe, a white flannel backing and a tiny velcro closure. After I made it, I decided it might be a tad bit on the small side.

I took the template and cut it to be a couple of inches longer. The second bib was made with a cute flannel scrap I had and a pink lining.  I suspect this one is long enough. They were fun to make and such a quick project. The template I used was from Grey House Harbor, a DIY website with lots of tutorials. It will be fun to see if these fit baby girl when she gets here.

Finally, today Needle and Foot is the sponsor of this week’s podcast at While She Naps. The host and author at this site, Abby Glassenberg, is someone I have long admired. So much so, I wrote a review of her newsletter and podcast a while back. When the opportunity came about to sponsor a podcast, I was more than happy to do so.  Abby’s strength lies in the breadth of subjects she covers both in her blog, newsletter and podcast. I hope you will click through and listen to today’s interview with Jamie Chalmers, otherwise known as Mr. X Stitch. His site boldly claims to be the world’s best contemporary needle crafts and embroidery site. You may have noticed that embroidery and cross stitch, among other styles of needle crafts, are trending these days.  Jamie’s hugely popular site features “Cute ThingsArty Things, and Rude Things as well as all other sorts of stitchy goodness“. I am looking forward to hearing the podcast today and getting to know more about Chalmers. As added incentive, Needle and Foot will be offering a discount to Abby’s and Jamie’s fans – you’ll need to go over and listen to find out the details though!