Category Archives: Sewing Projects

Making Pink Baskets

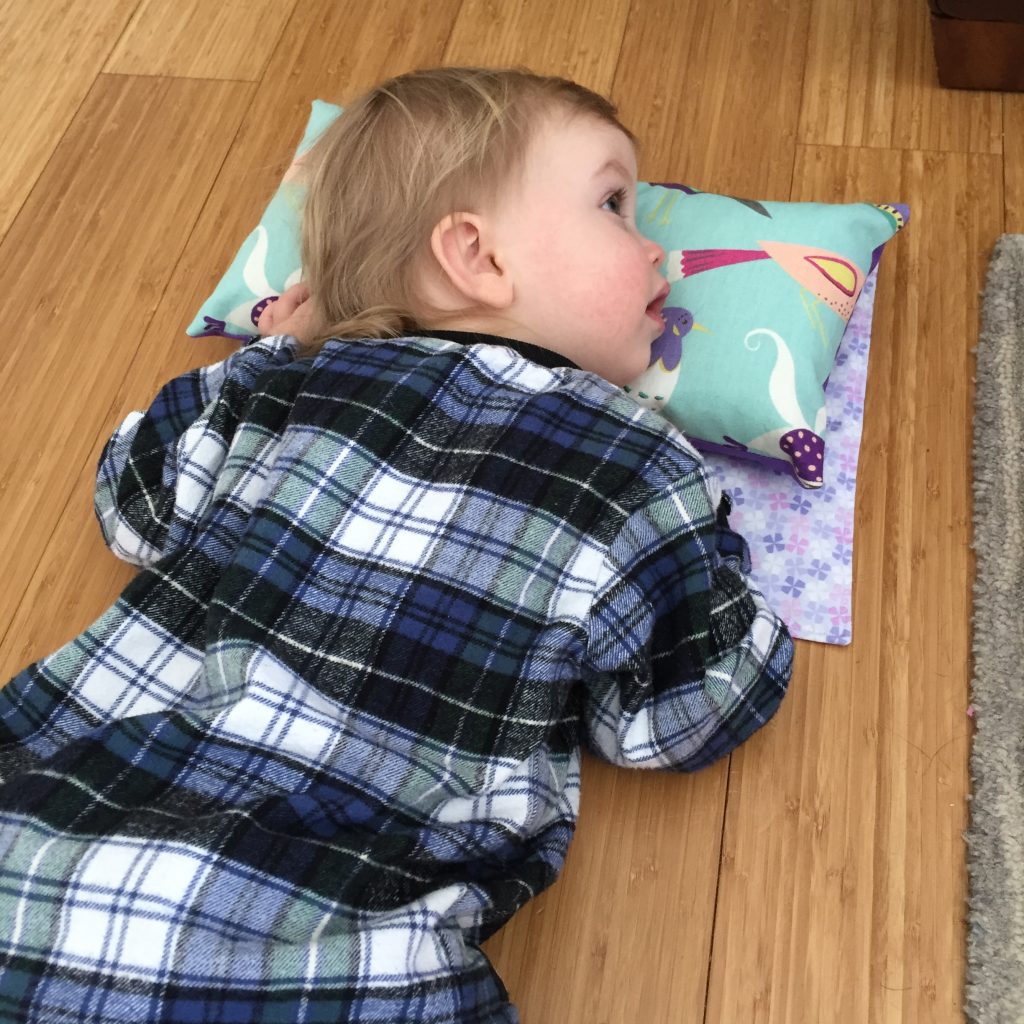
A few days ago my grand daughter face timed with me. She had a very specific request. “Grammy, I need a basket.” After chatting for a bit, she showed me how her parents had strung a line across a wall in the living room. It is right at her height and she now has a place to clip her art work on display. Sort of her own continuous gallery showing! But it seems she has nowhere to keep her extra clothespins and this was bothering her. Who am I to deny a toddler in need?

When asked what color, she immediately replied pink. Of course in the mind of a two year old, I wonder was that the first color that came to mind? Is pink her favorite color (or was it on that particular day?) No matter. I have plenty of pink fabric. 🙂

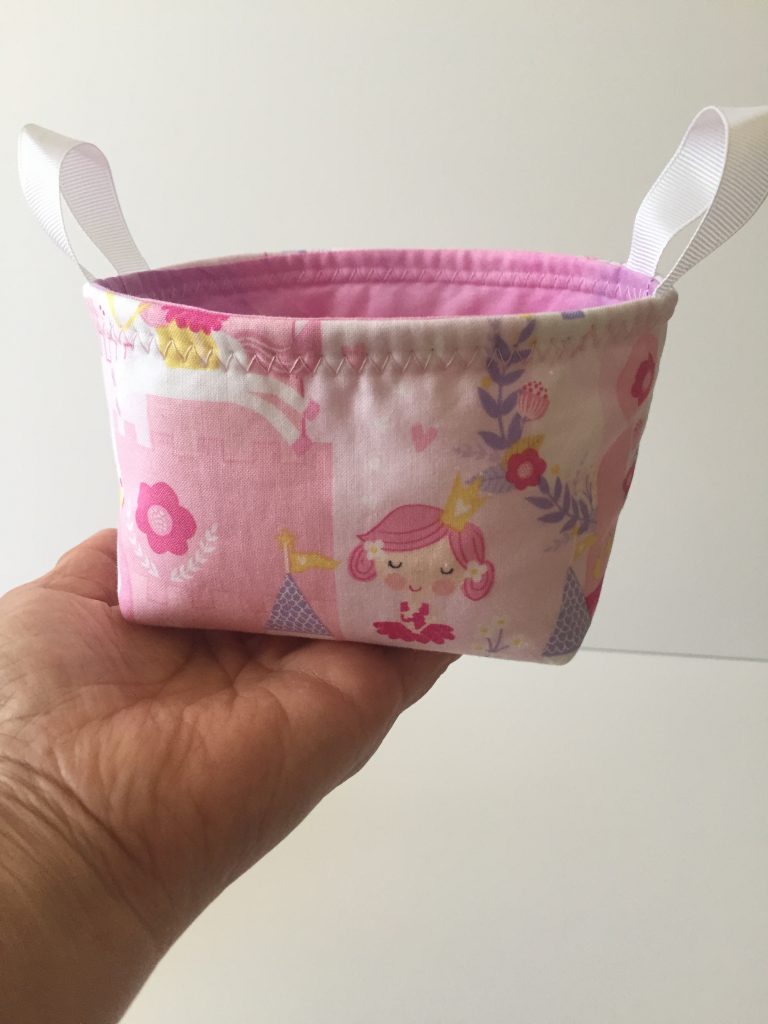
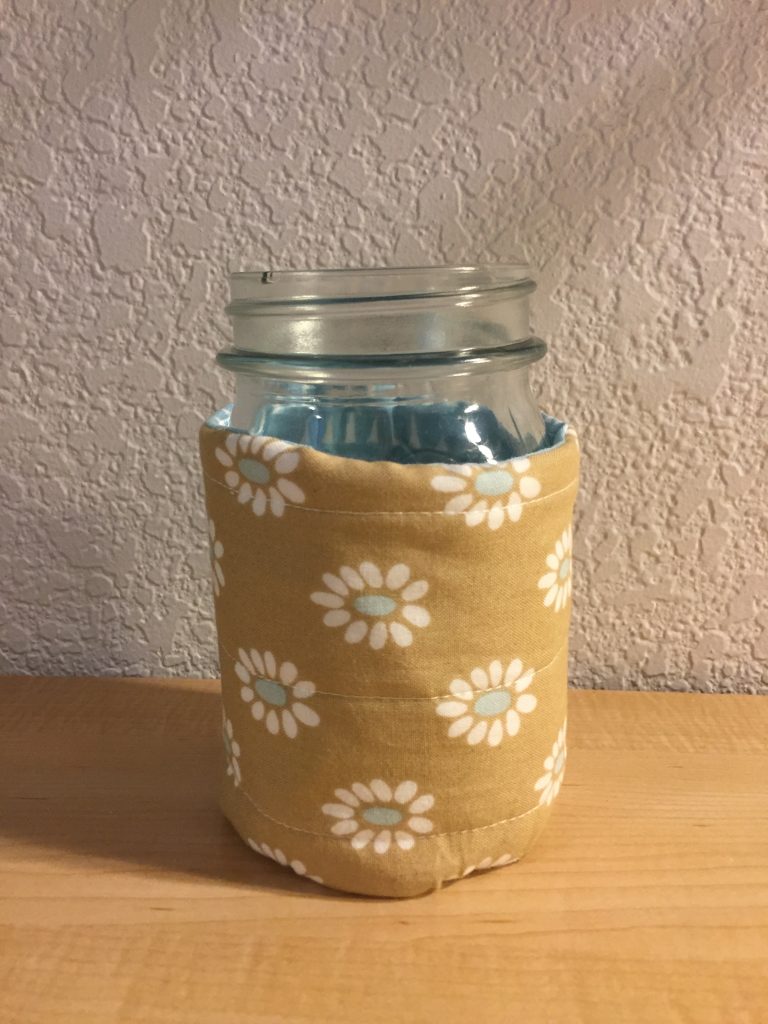
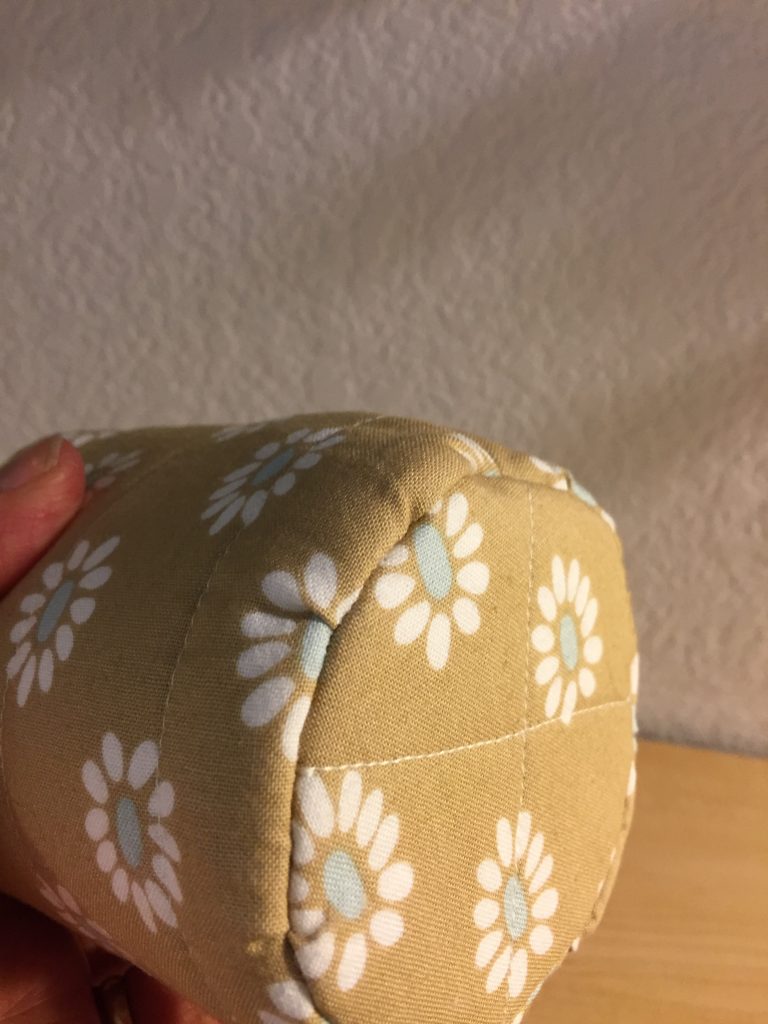
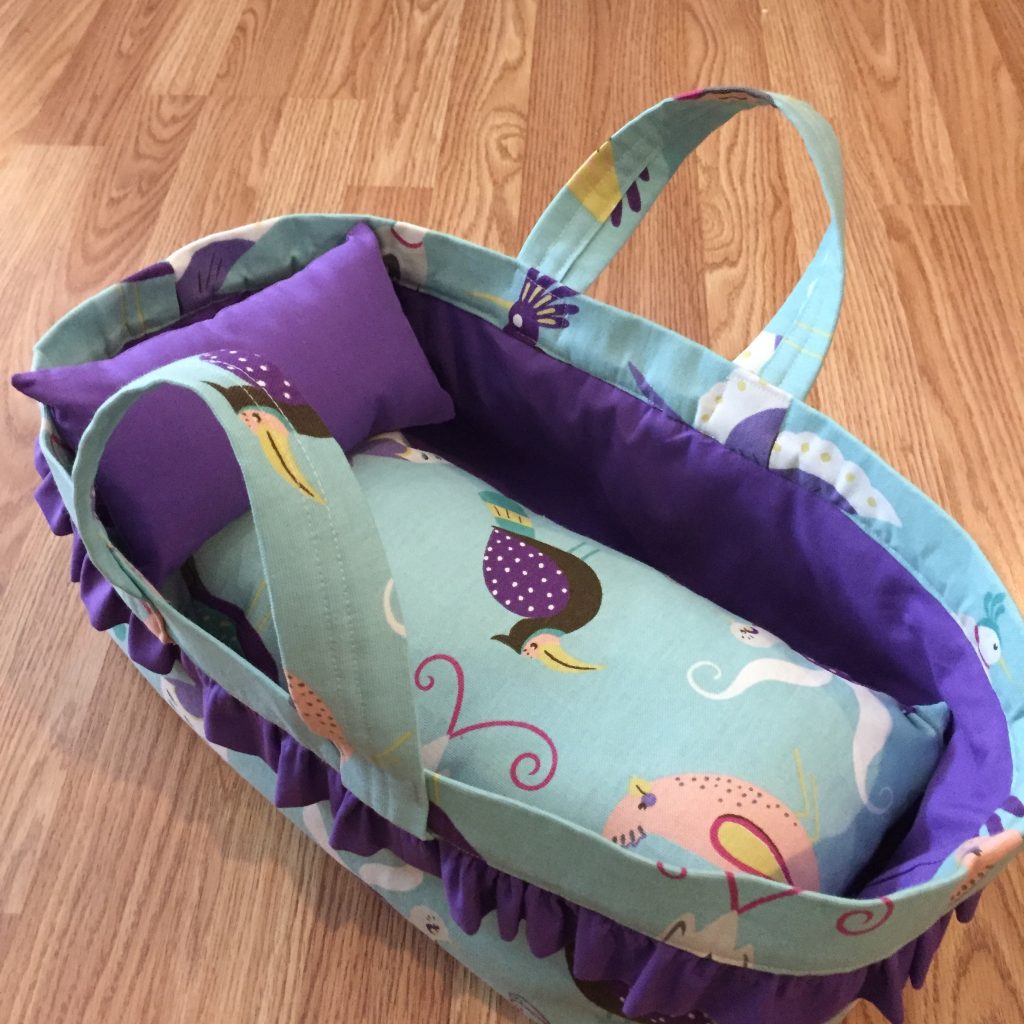
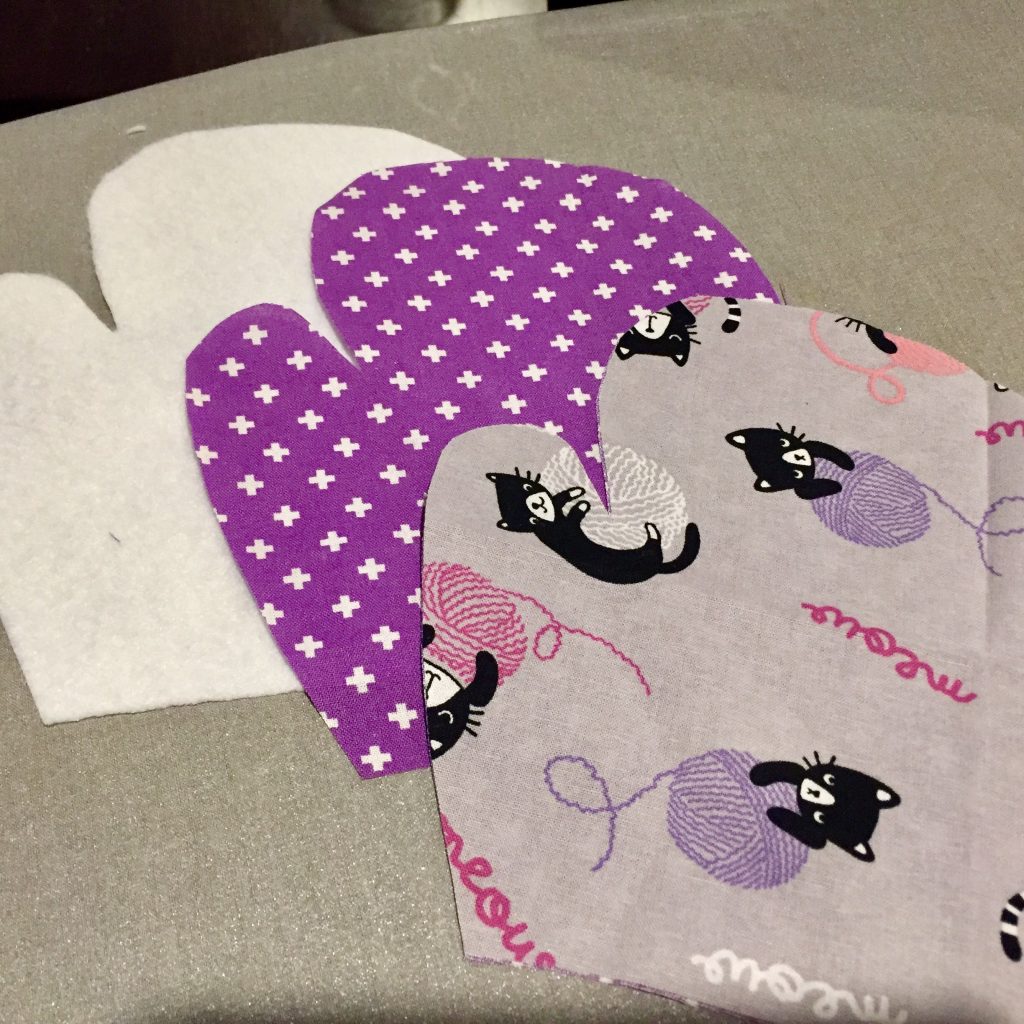
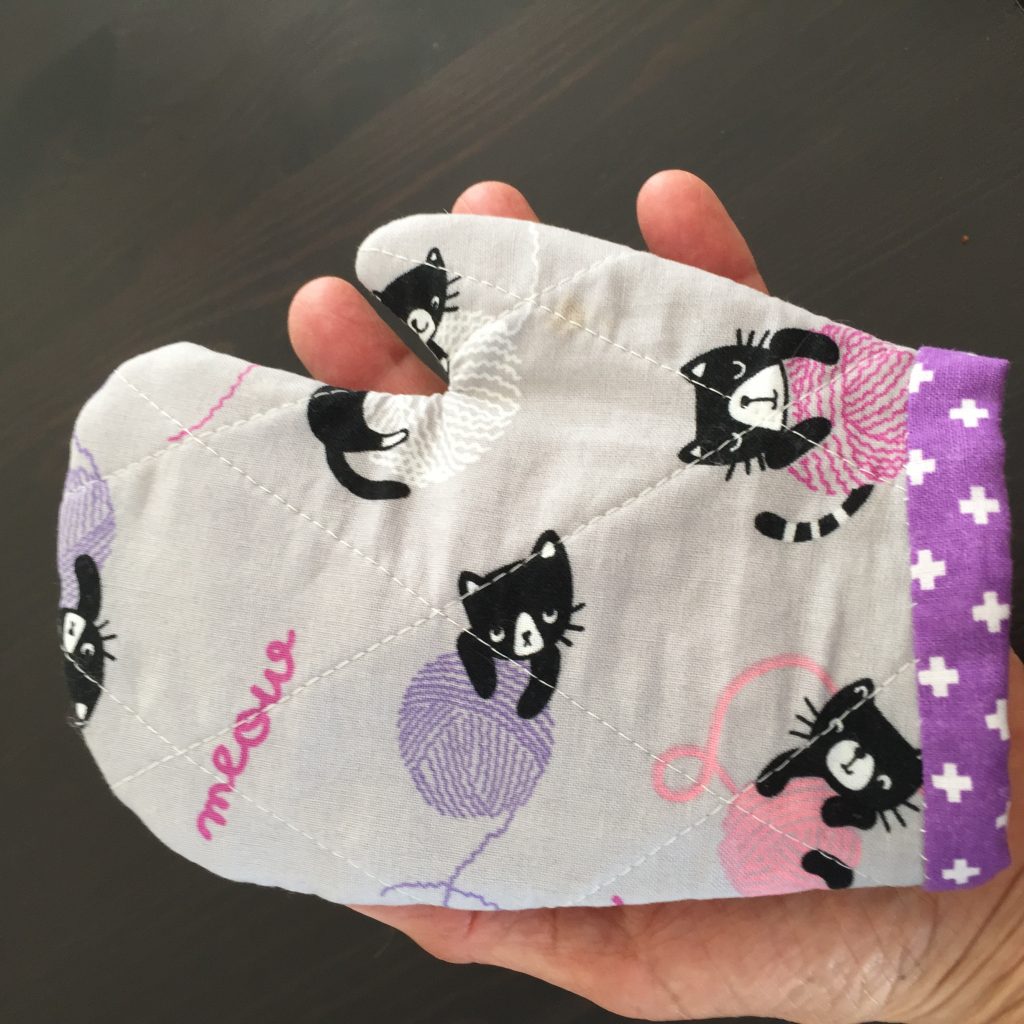
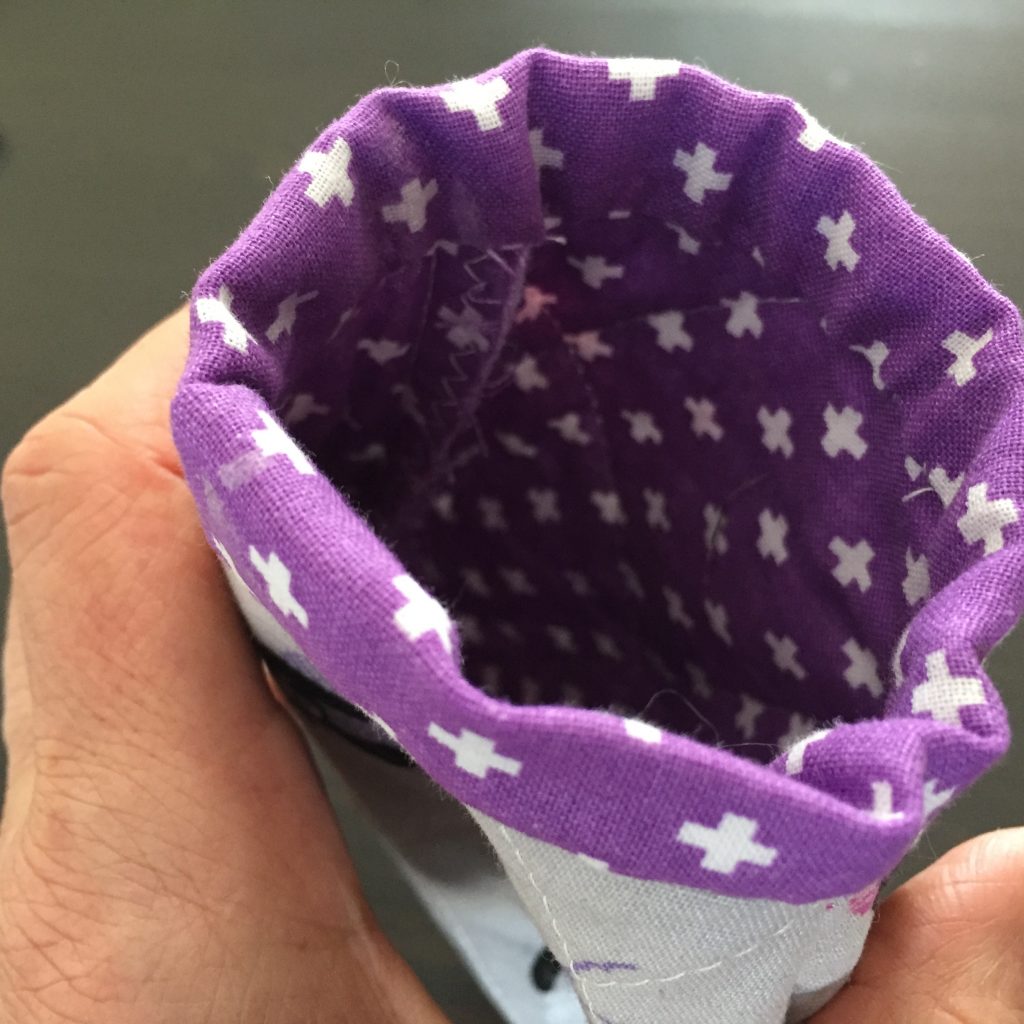
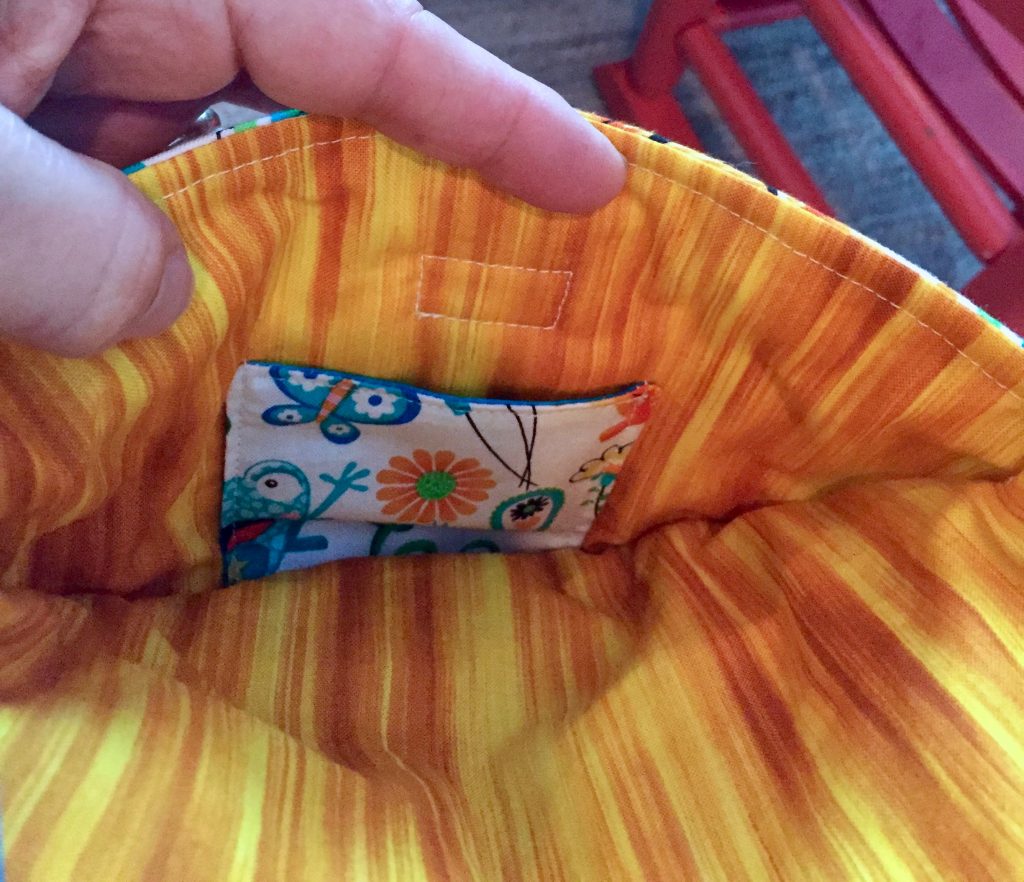
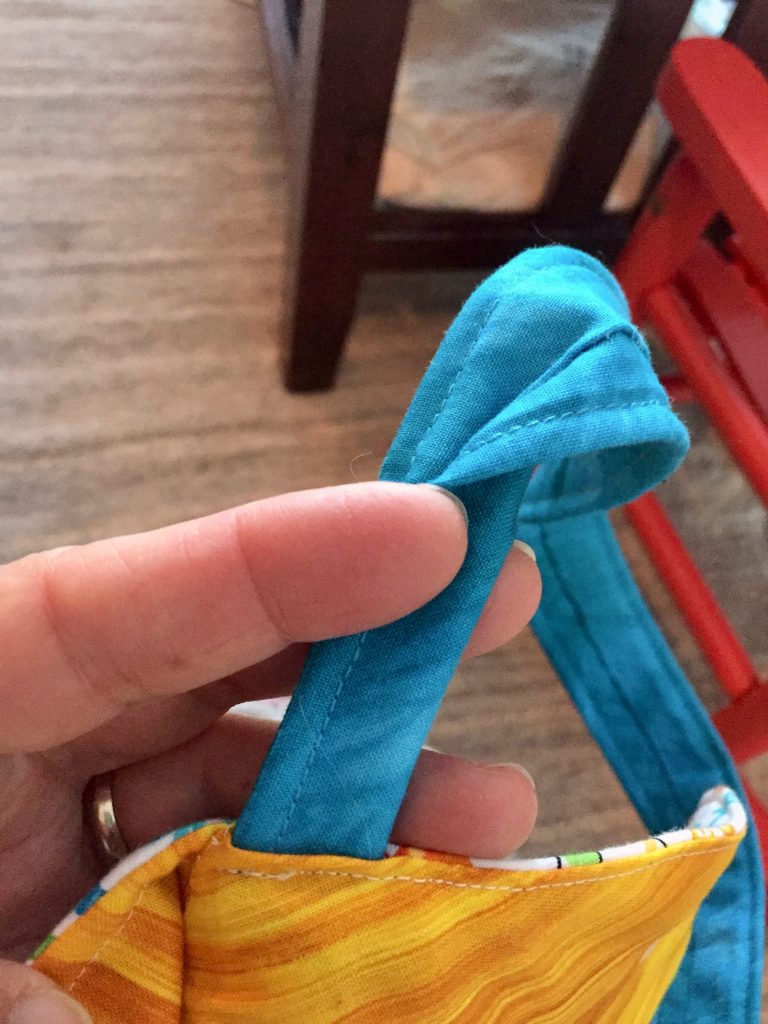
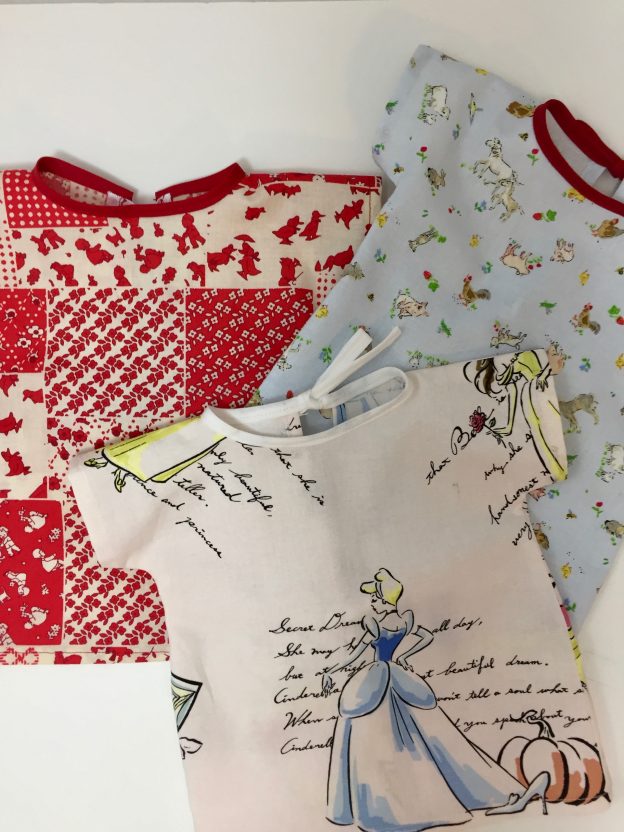
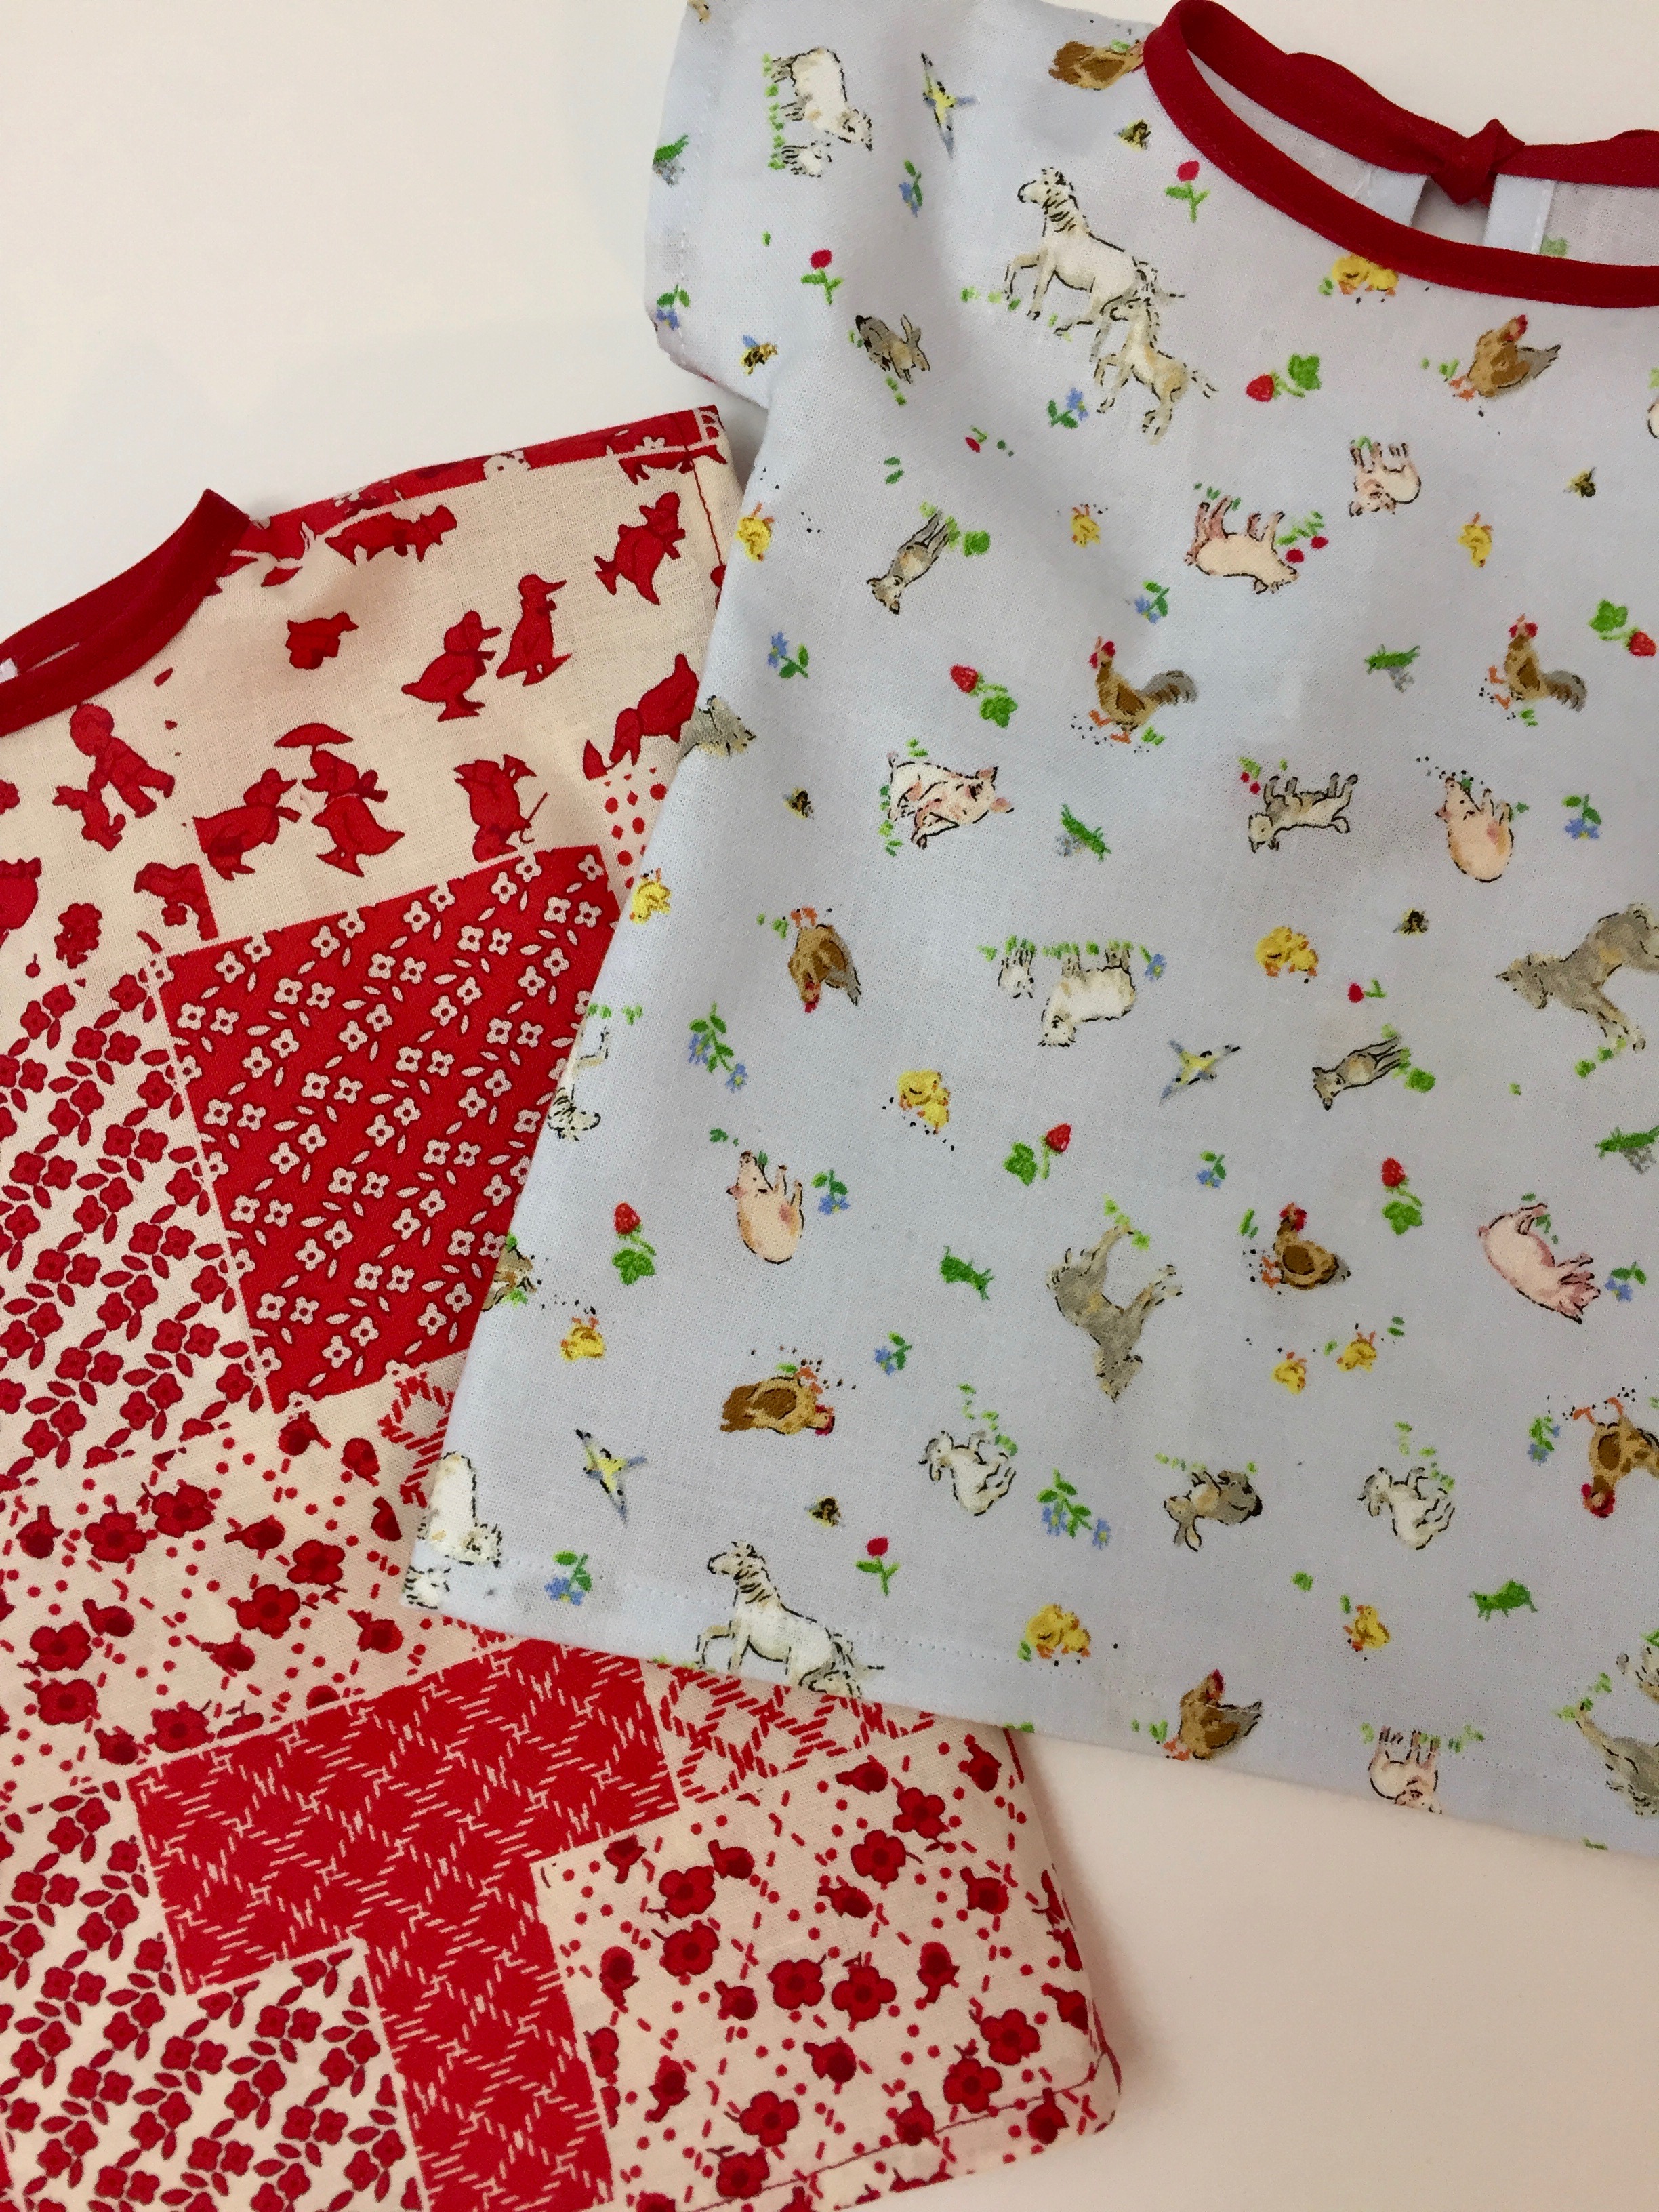
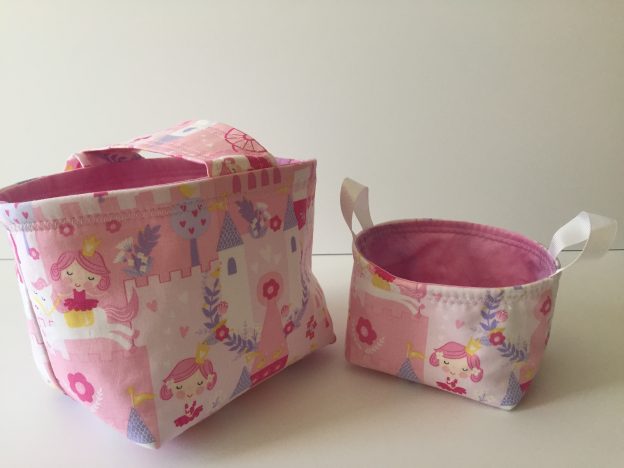
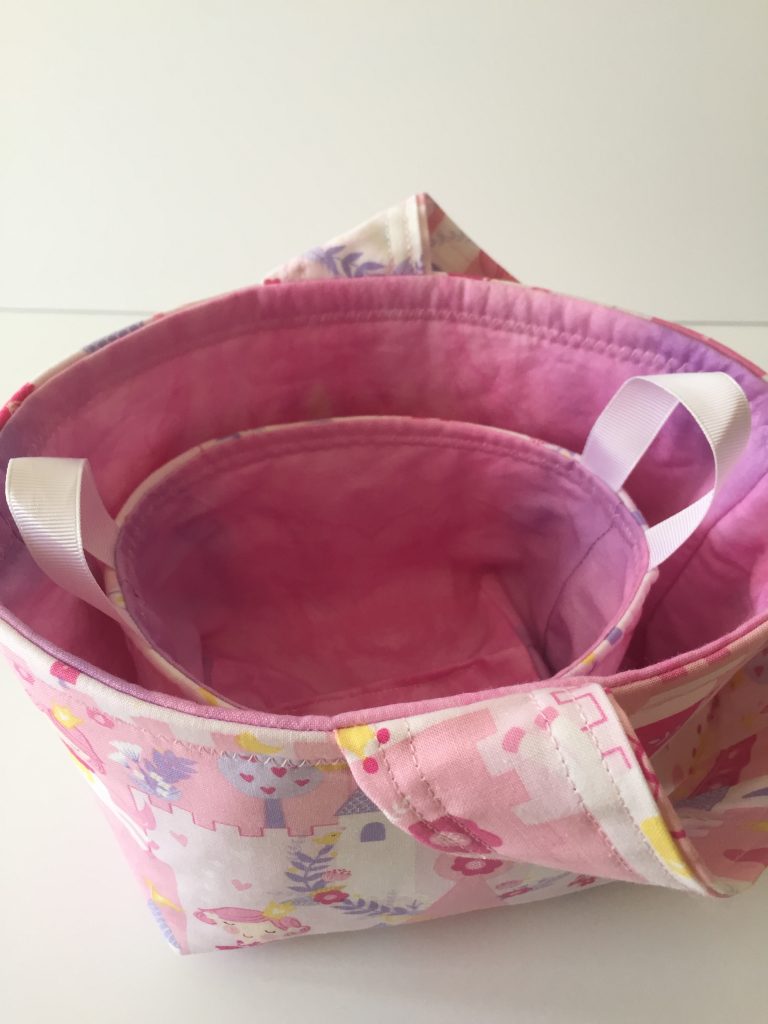
I used the ever-popular pattern for the One Hour Basket over at Kelby Sews as the starting point. I have made these a couple of times before and it truly takes only an hour (or less) to make. But the pattern size was too large. I cut it back and used rectangles measuring 6″ x 9″ for this little one. The little loopy handles are two bits of gross grain ribbon. I didn’t ever measure the finished size but you can see in relation to my hand, it isn’t large. Perfect for a few clothespins.

If one basket is fun, how about two?

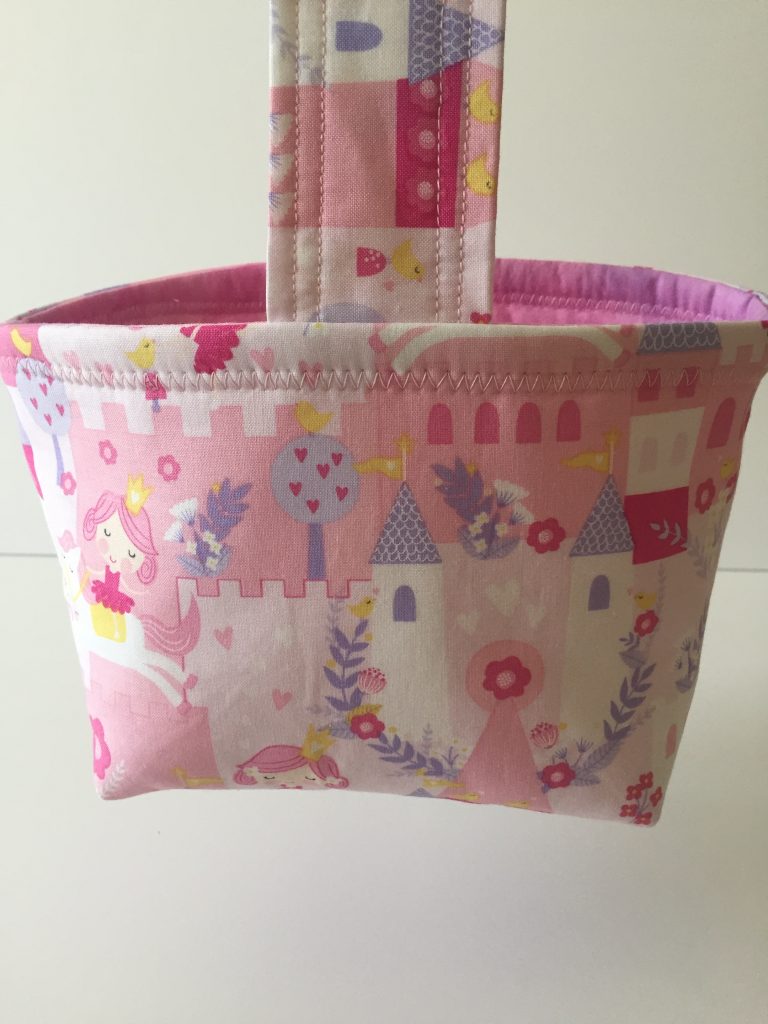
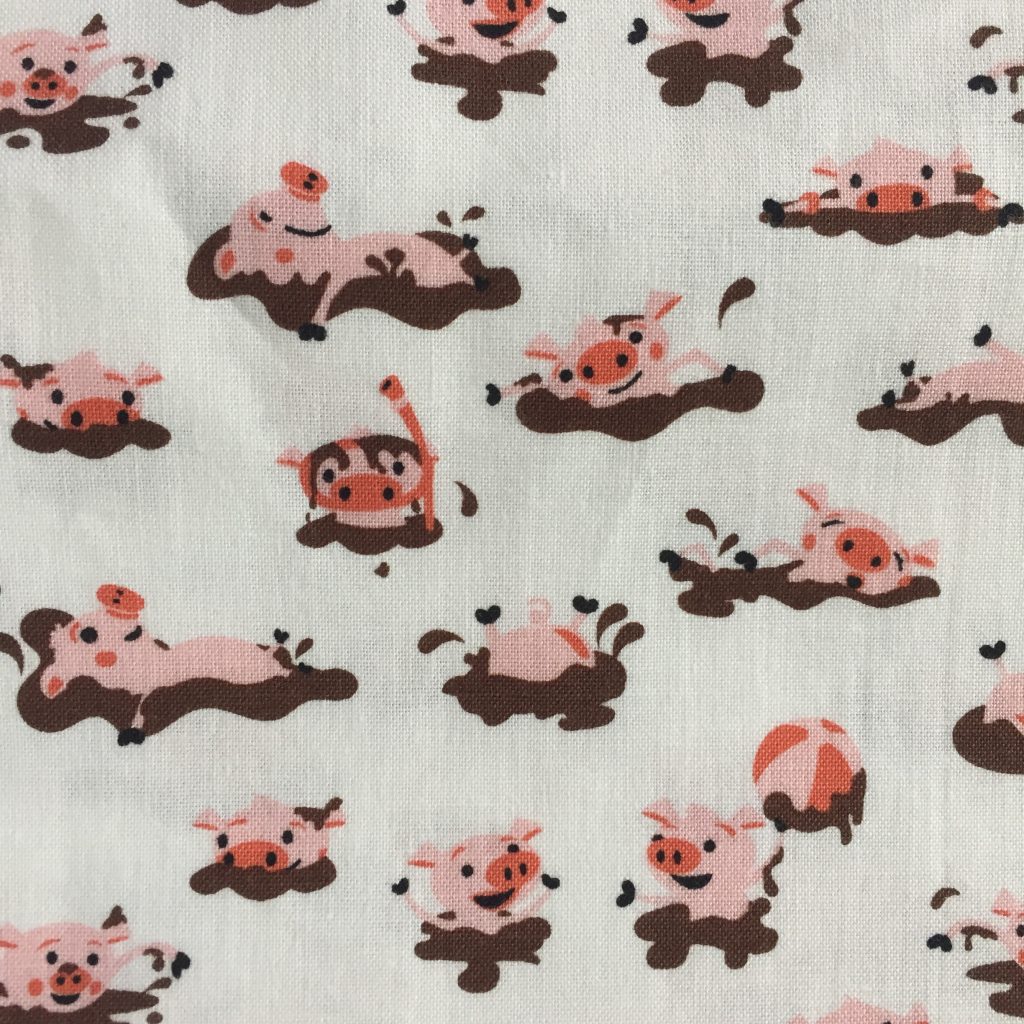
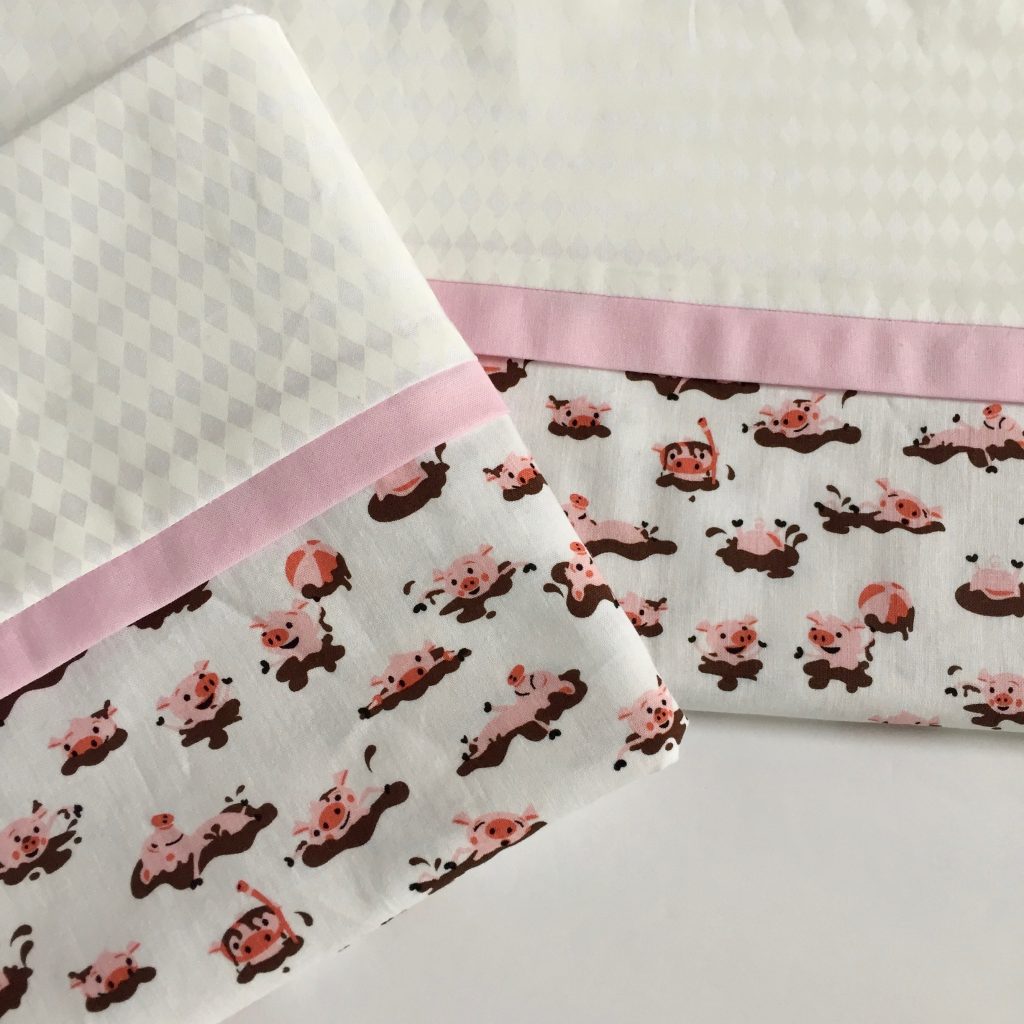
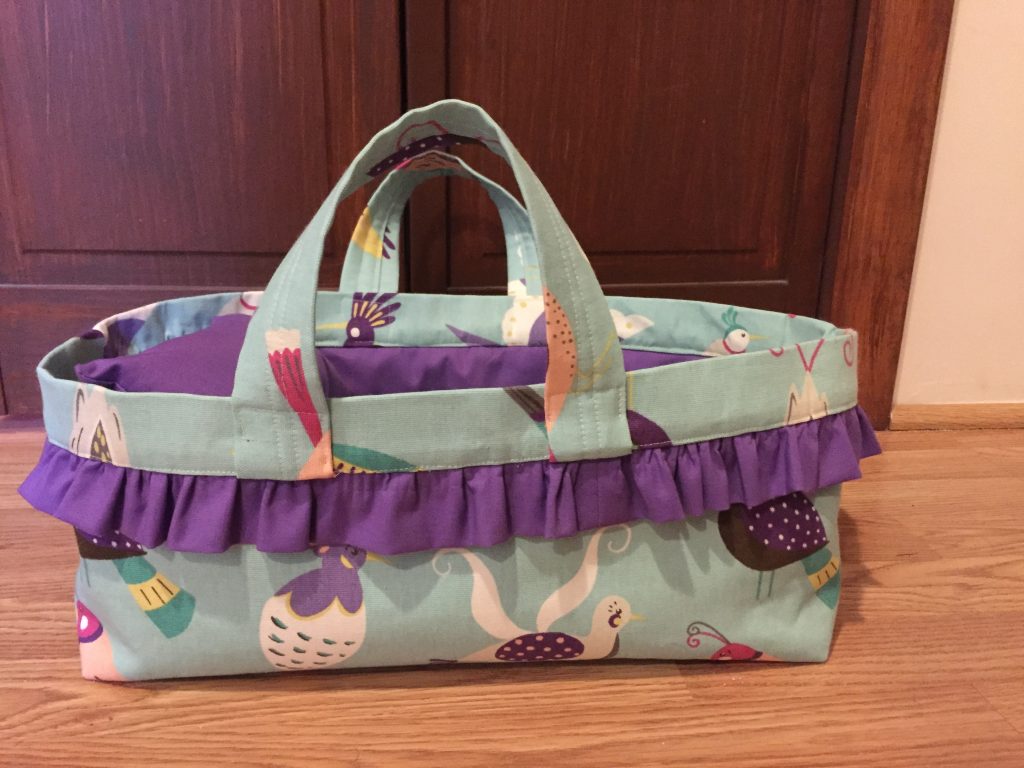
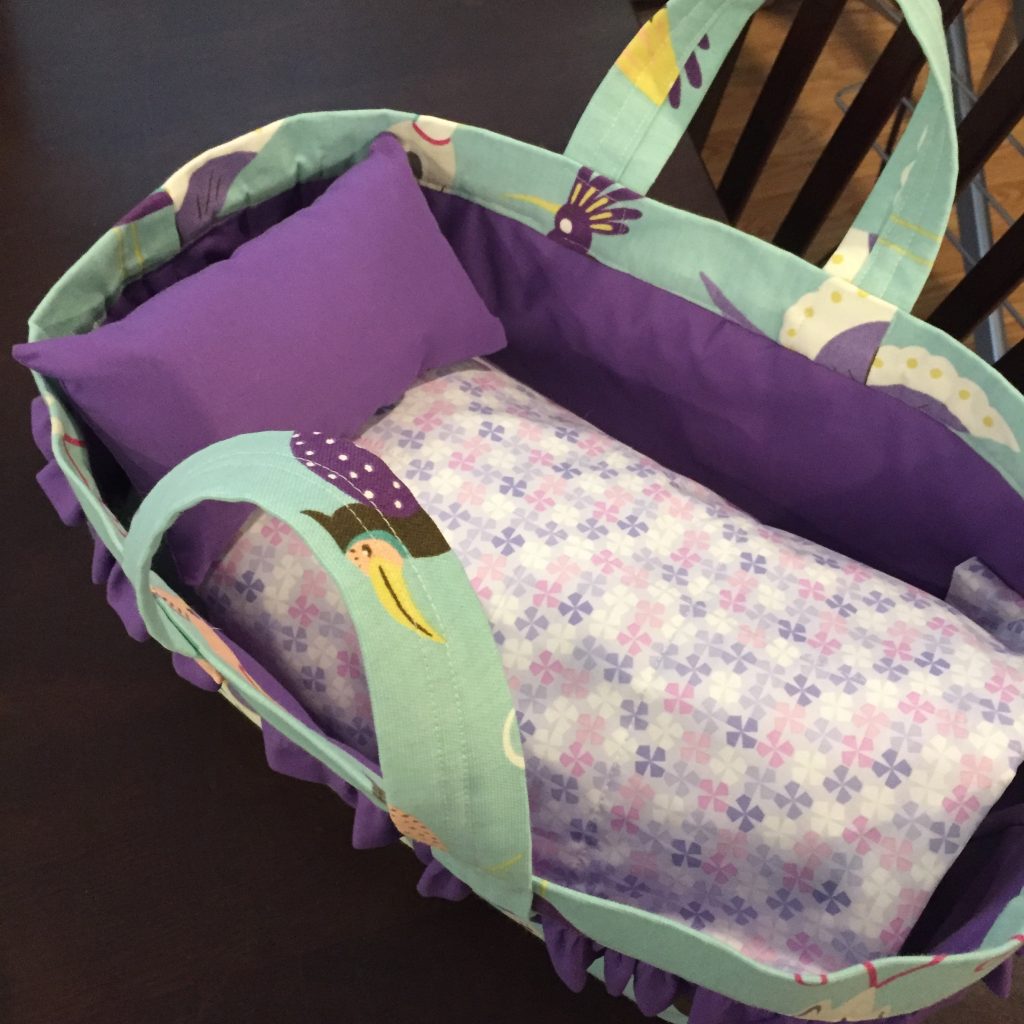
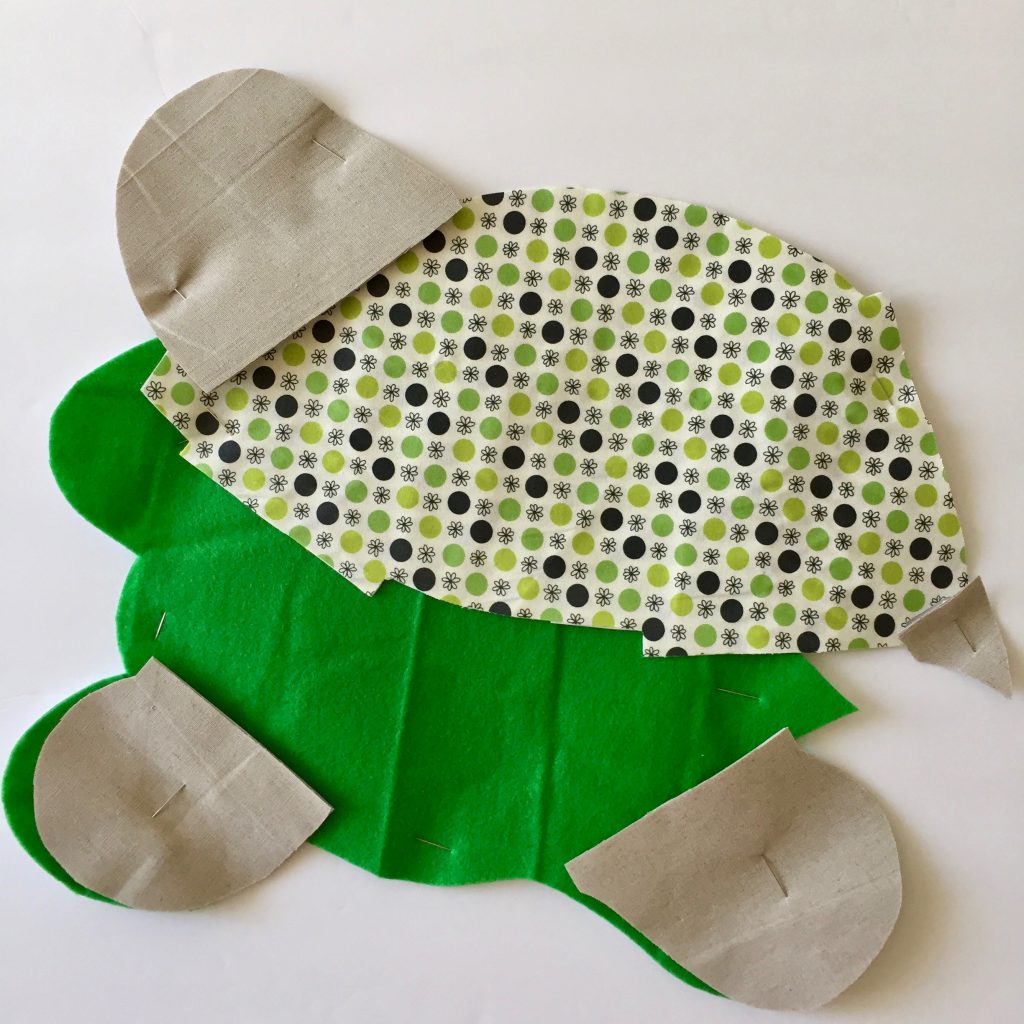
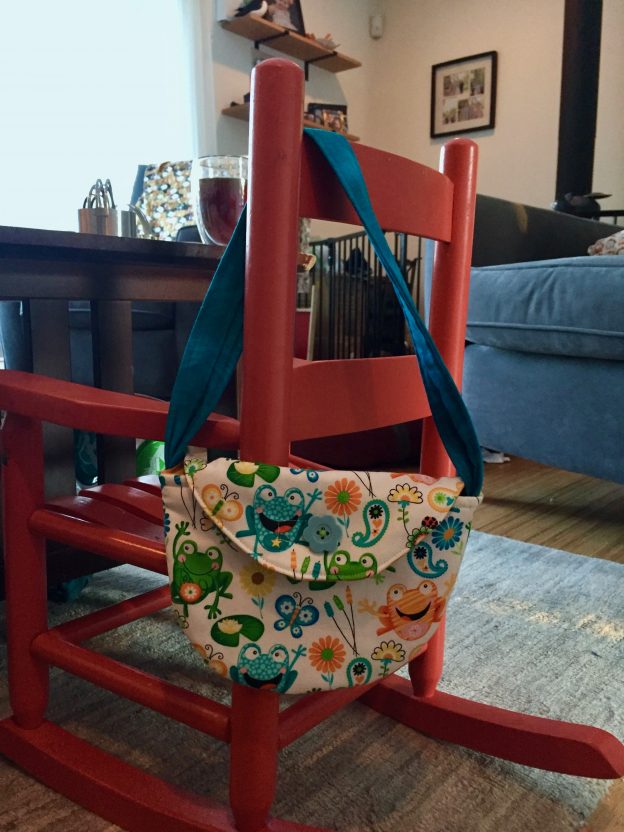
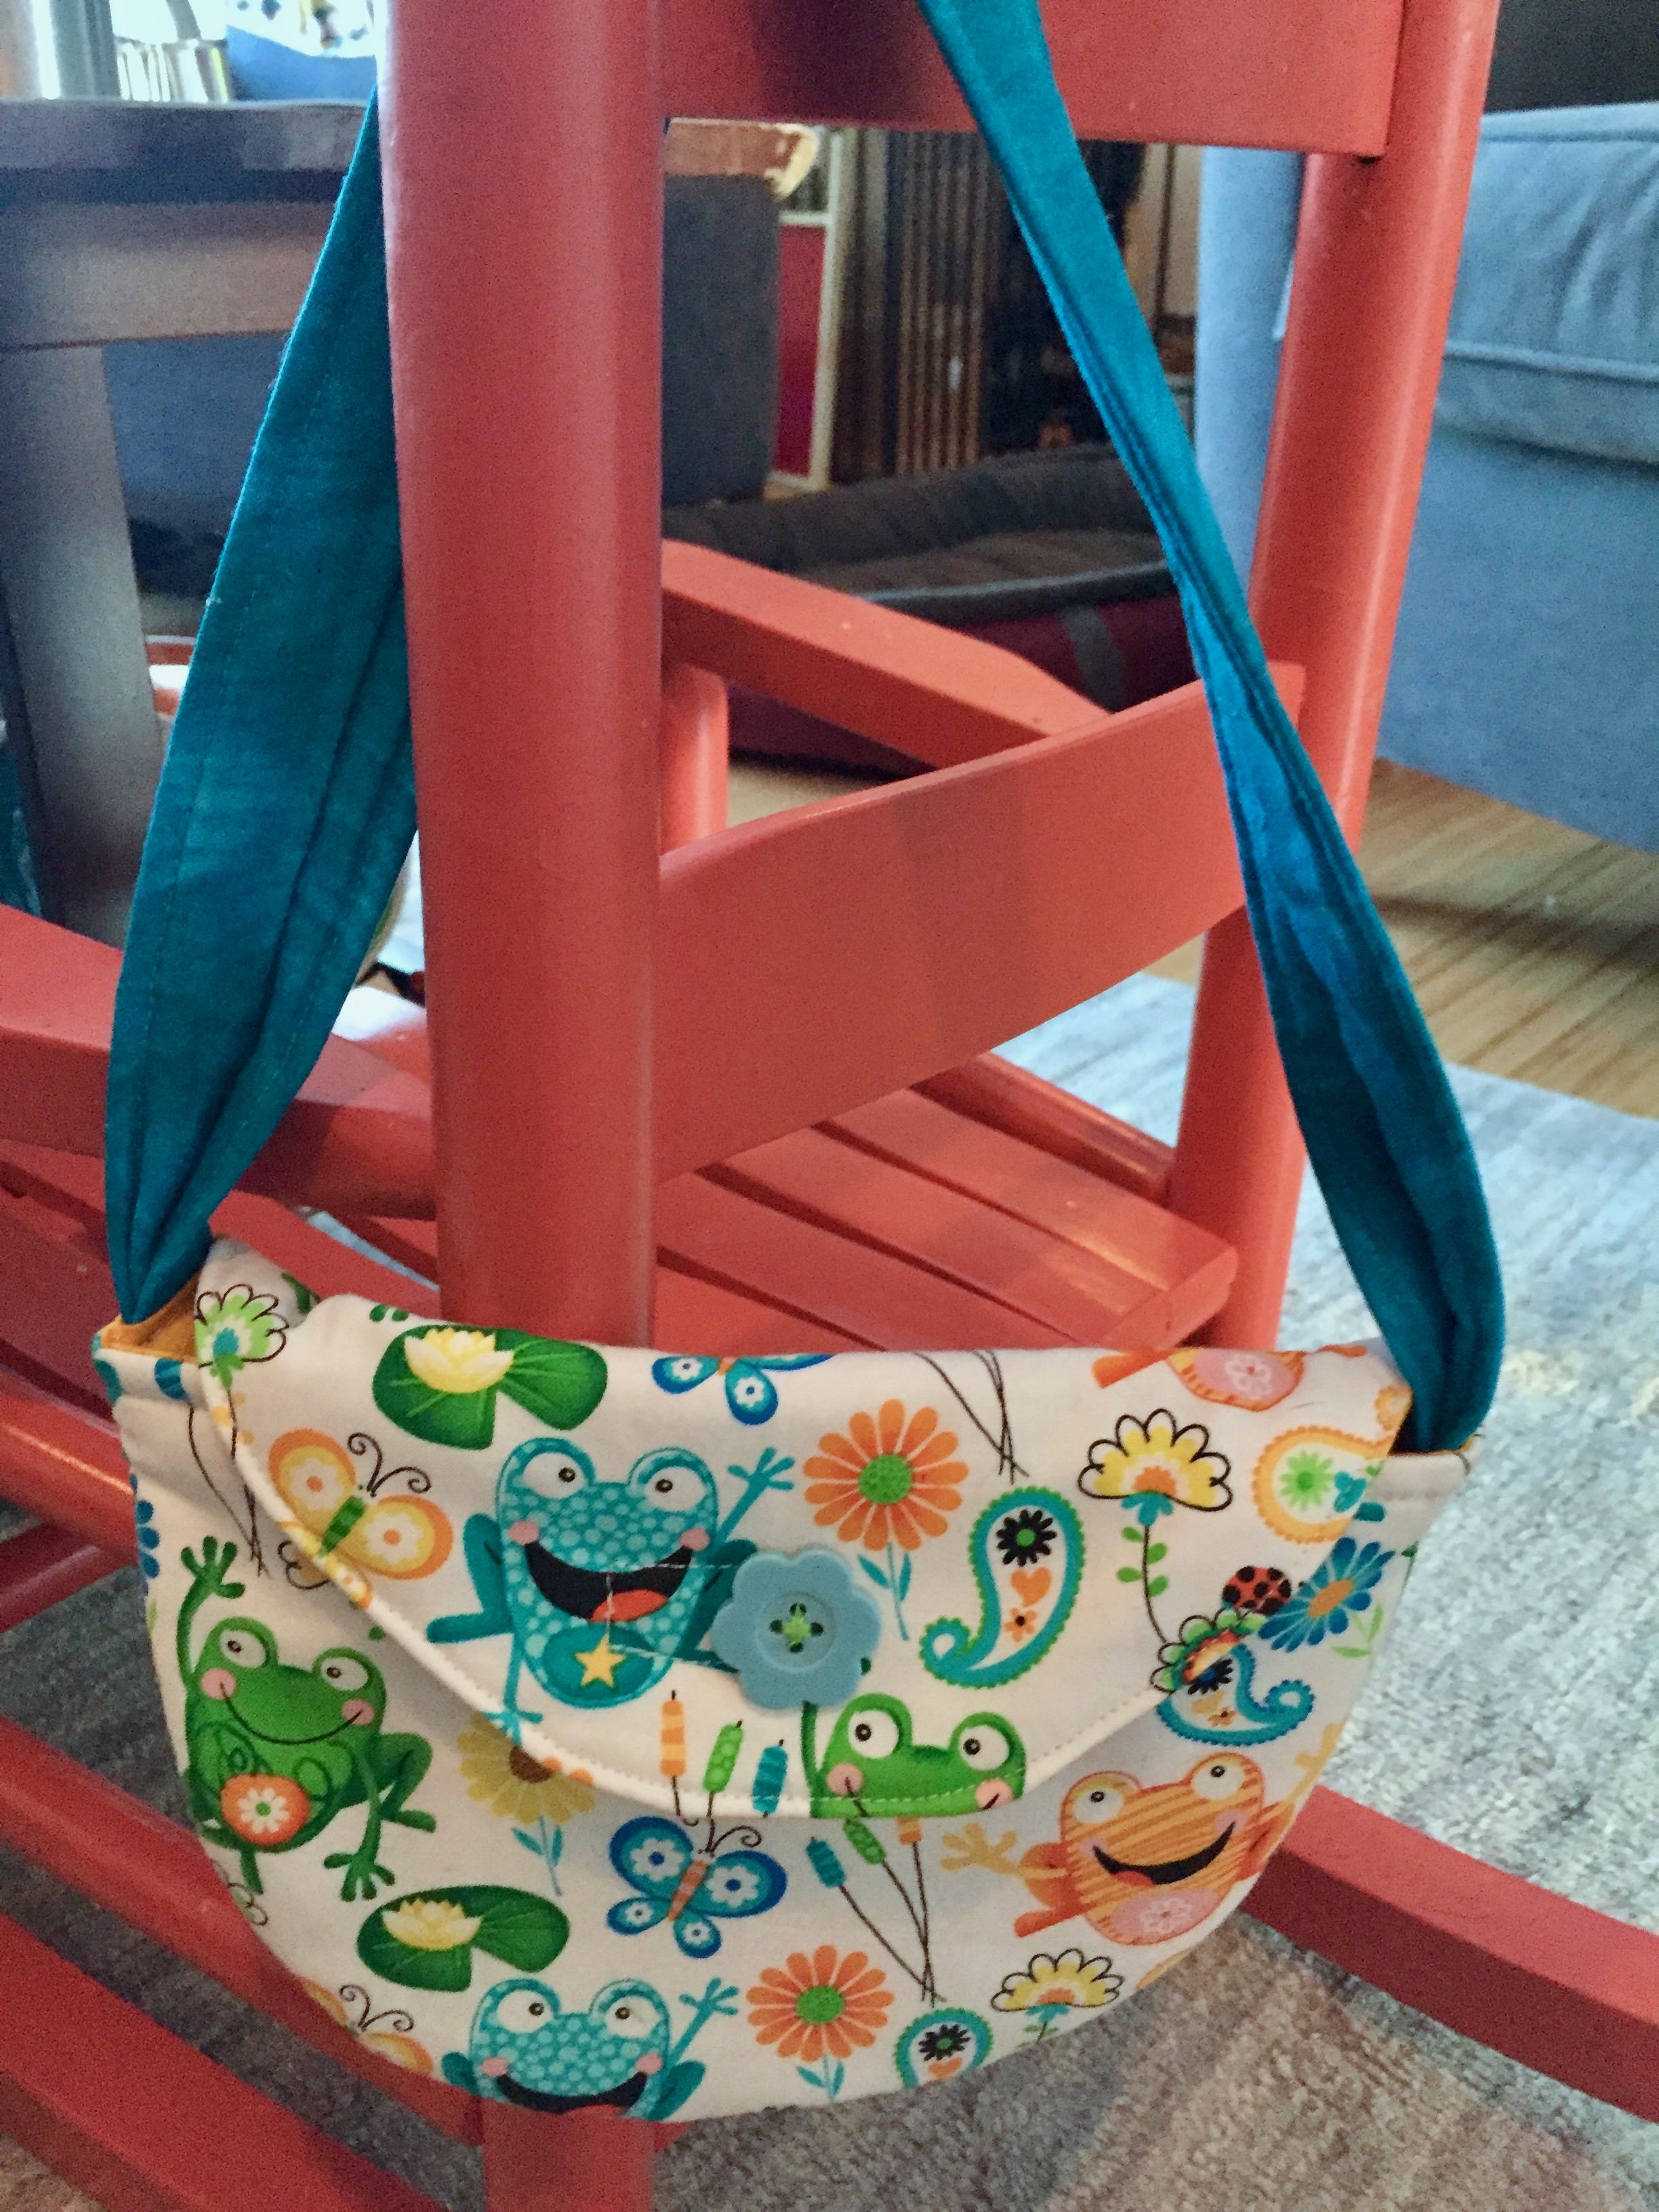
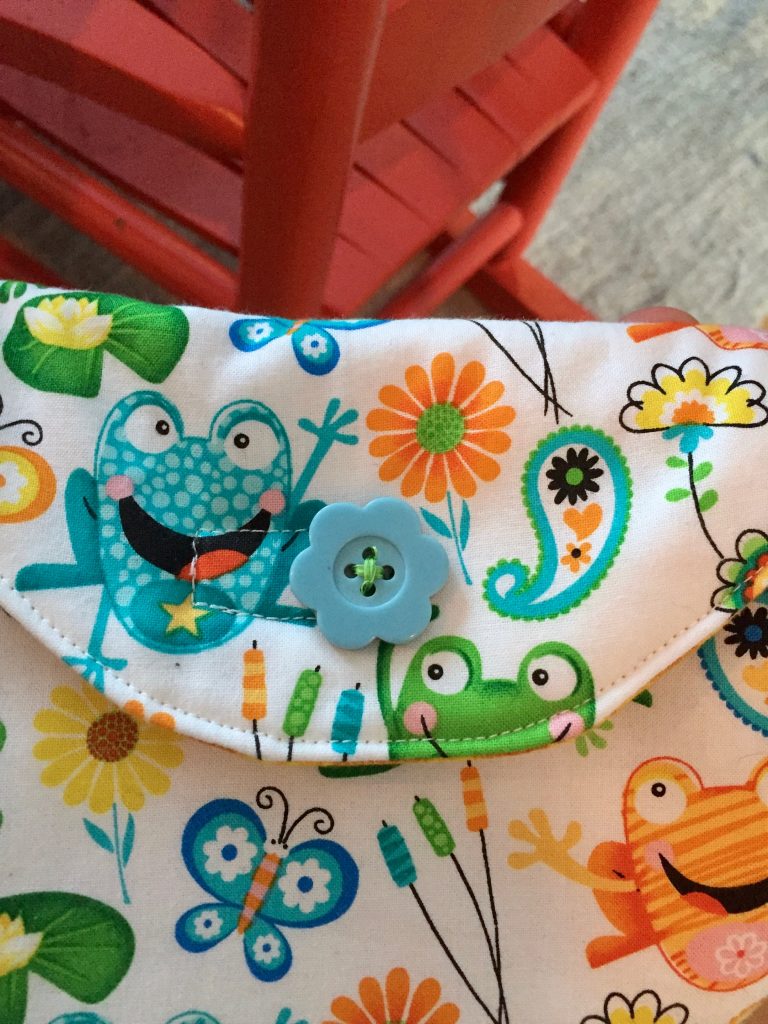
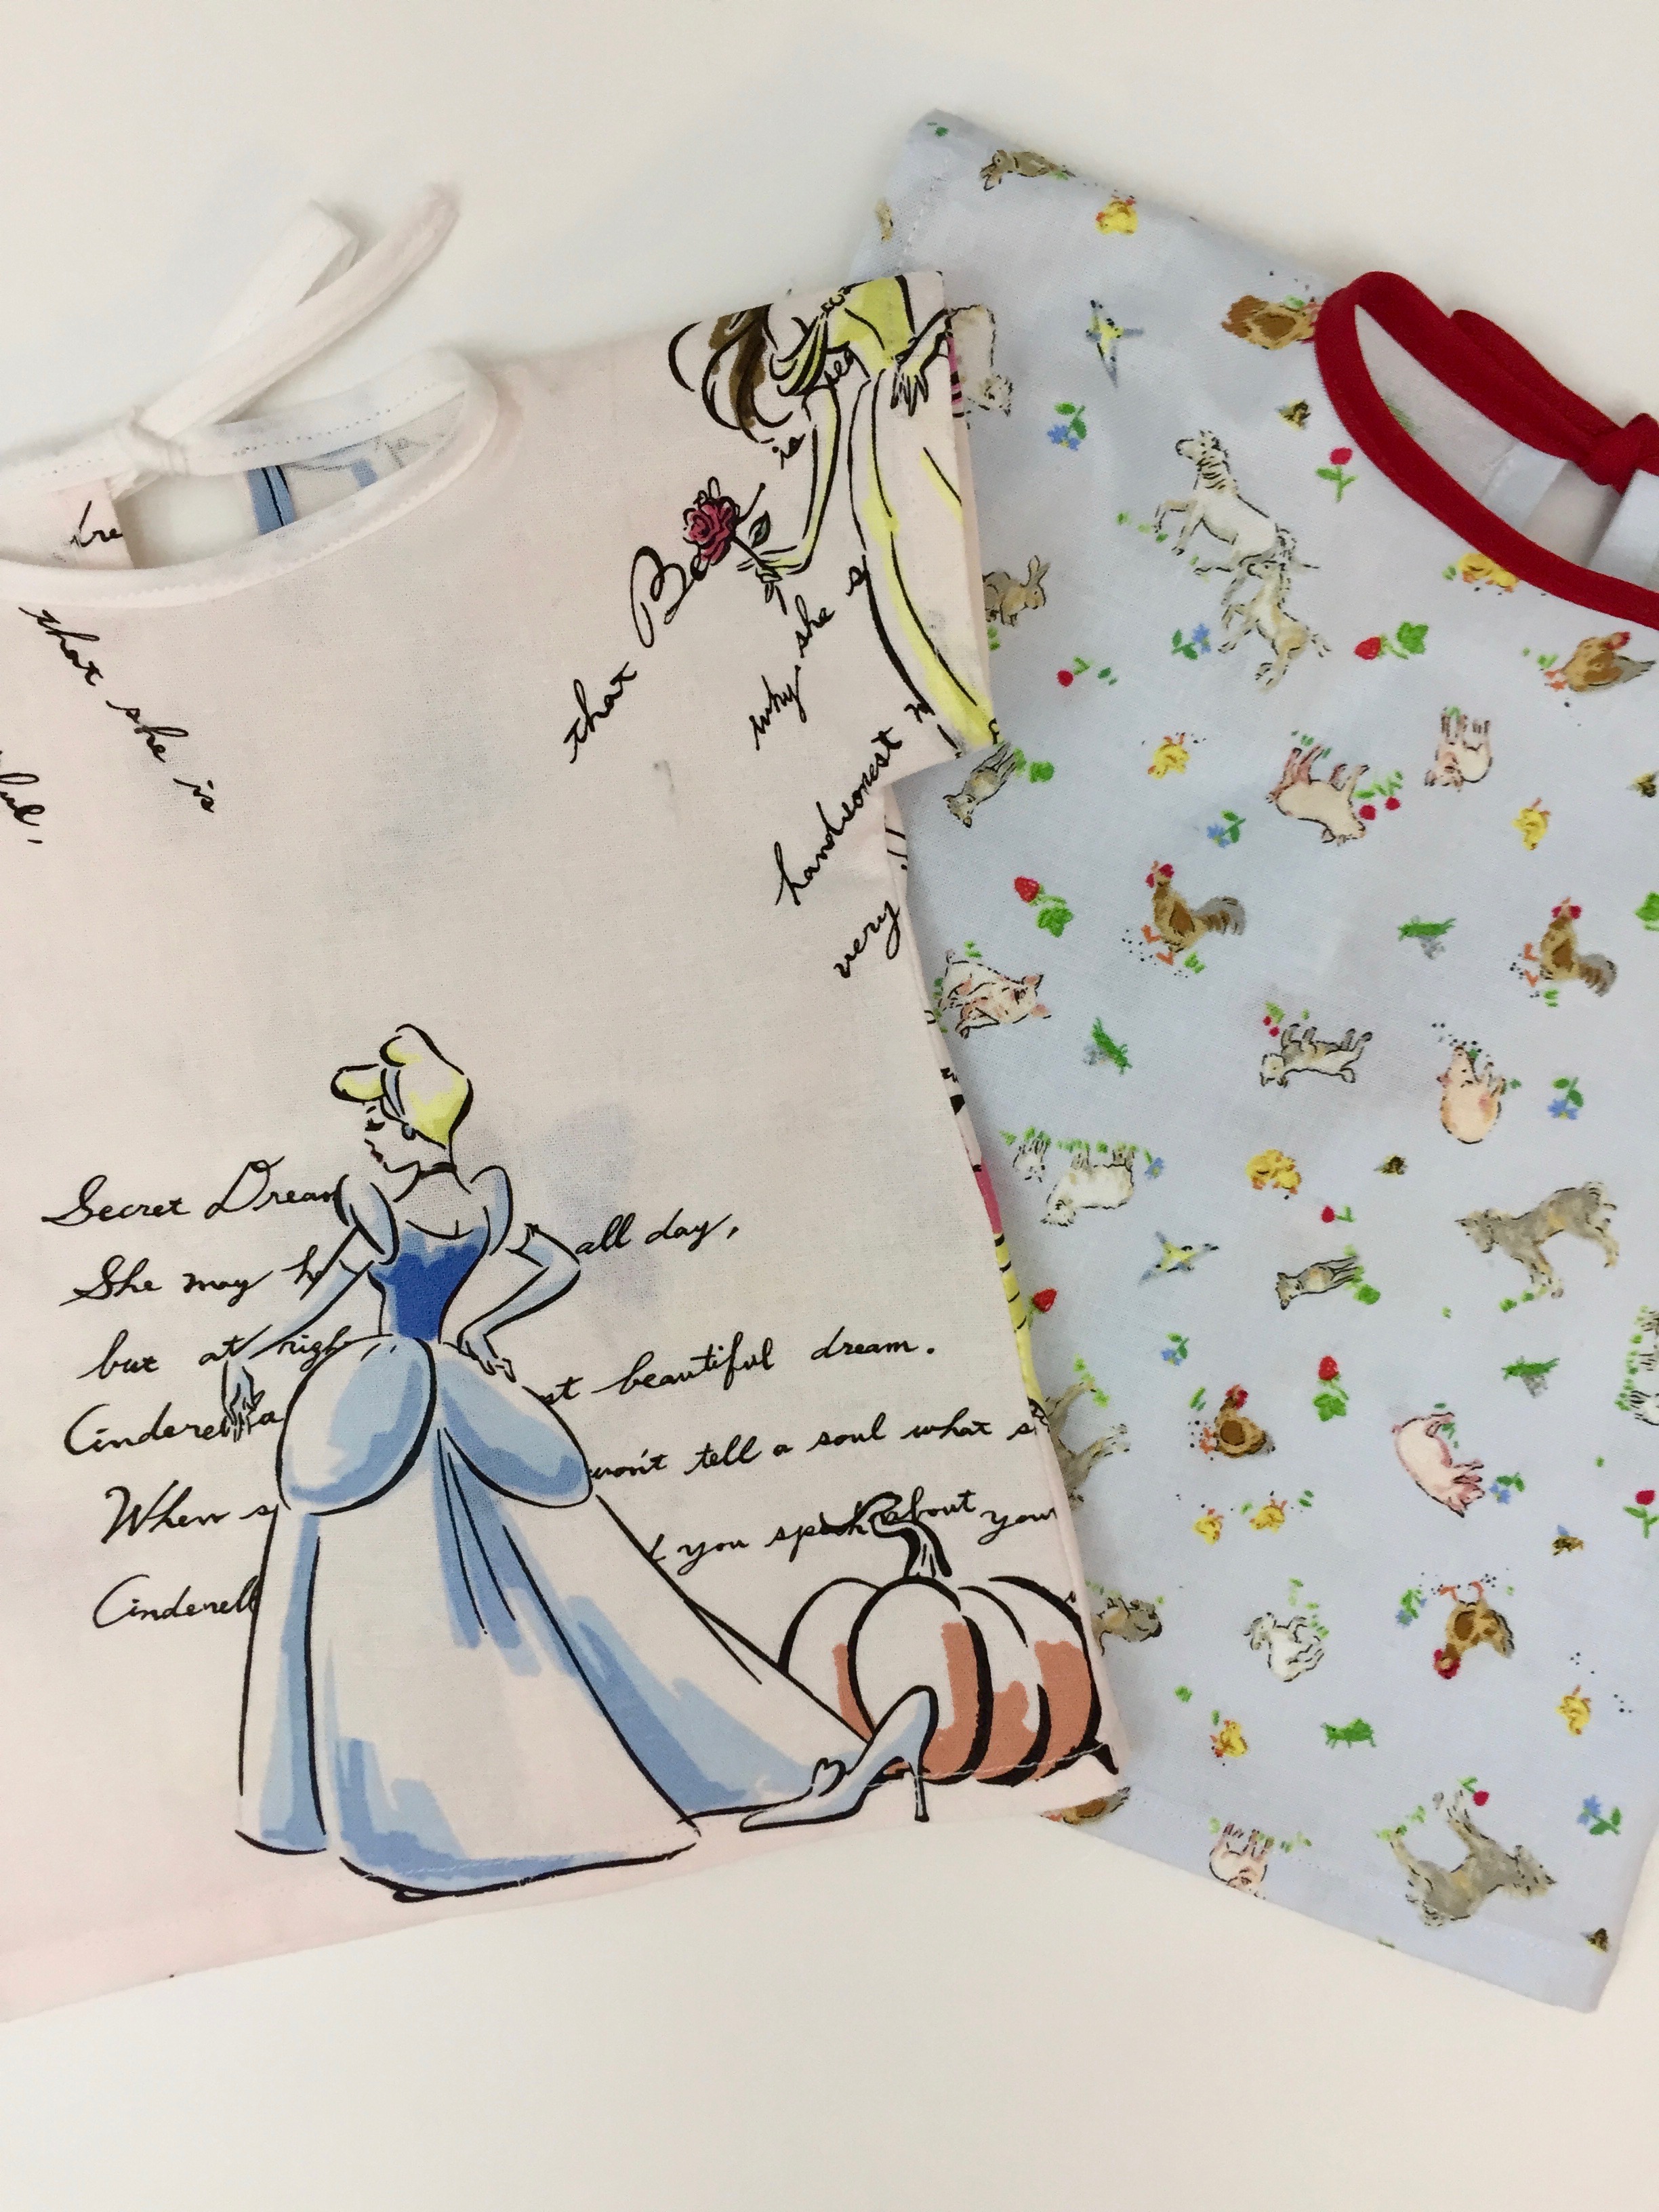
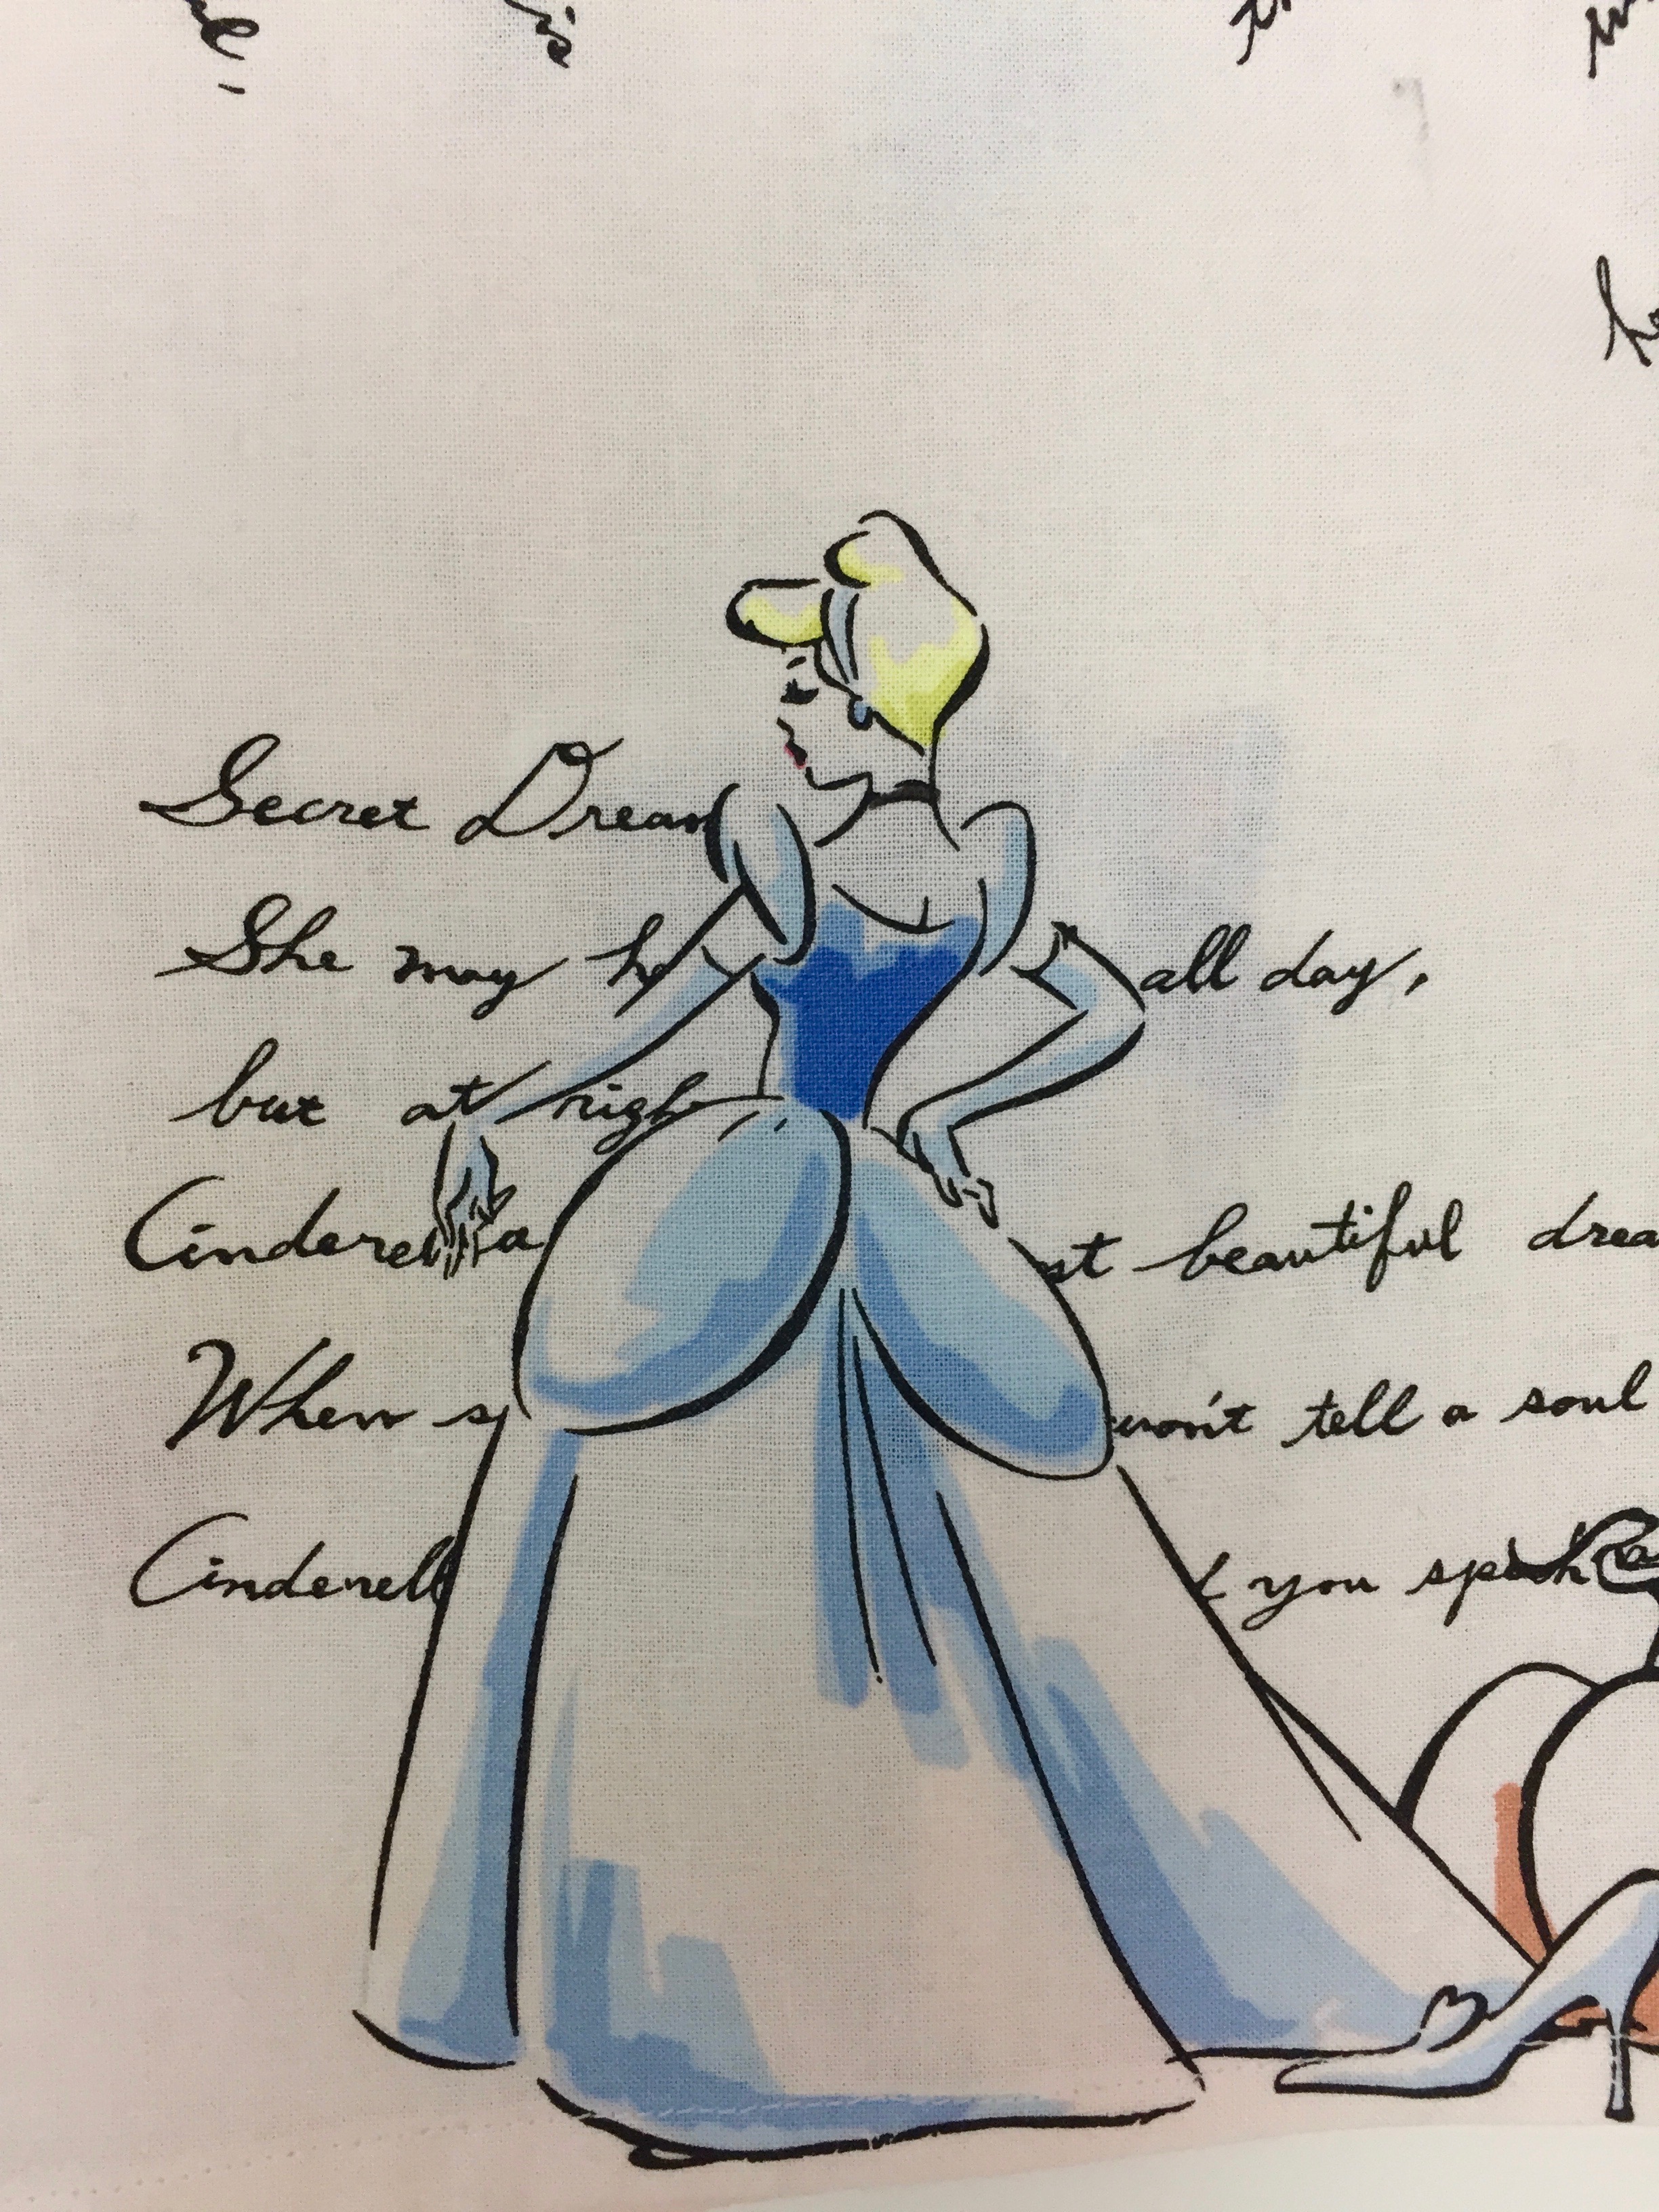
When I chose the piece of fabric down in my shop, I wasn’t really thinking and cut a 1/2 yard. The print is from Timeless Treasures Kidz and it is adorable. Loads of pink, with princesses and castles too. Since I had the extra fabric, it seemed like I ought to go ahead and make another basket. This one was cut with rectangles measuring 9″ x 12″. Like the tiny basket, I adhered a fusible Pellon batting to the outer fabric. But with this larger version, I also fused a stiff interfacing to the lining fabric to give it more structure.

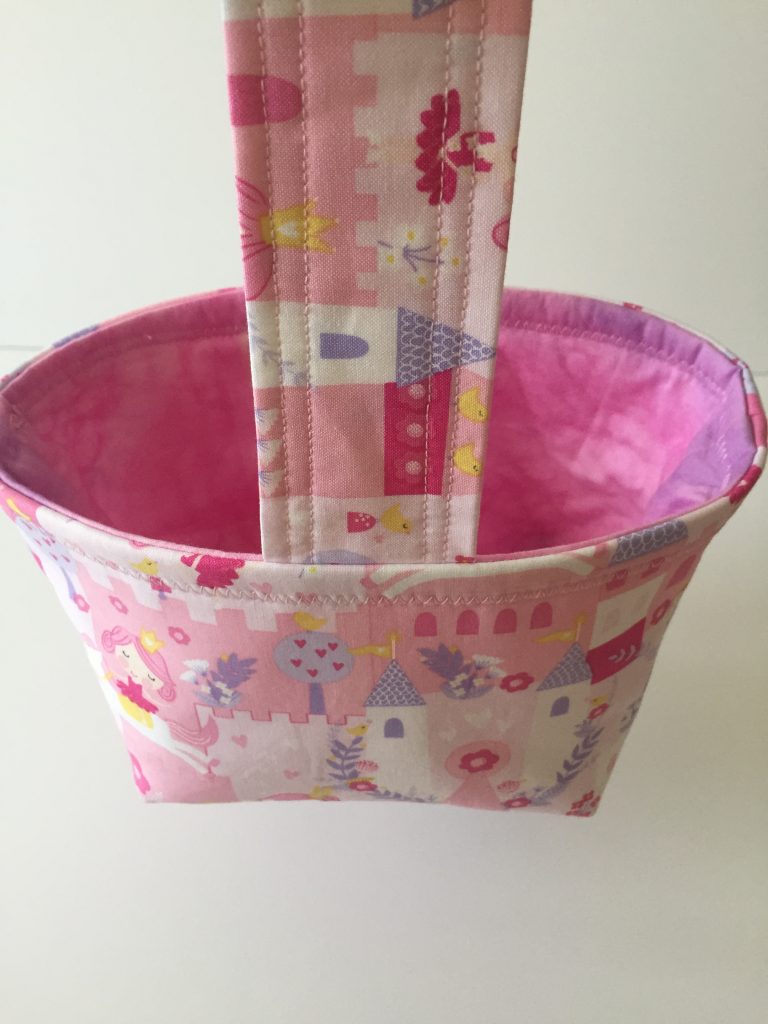
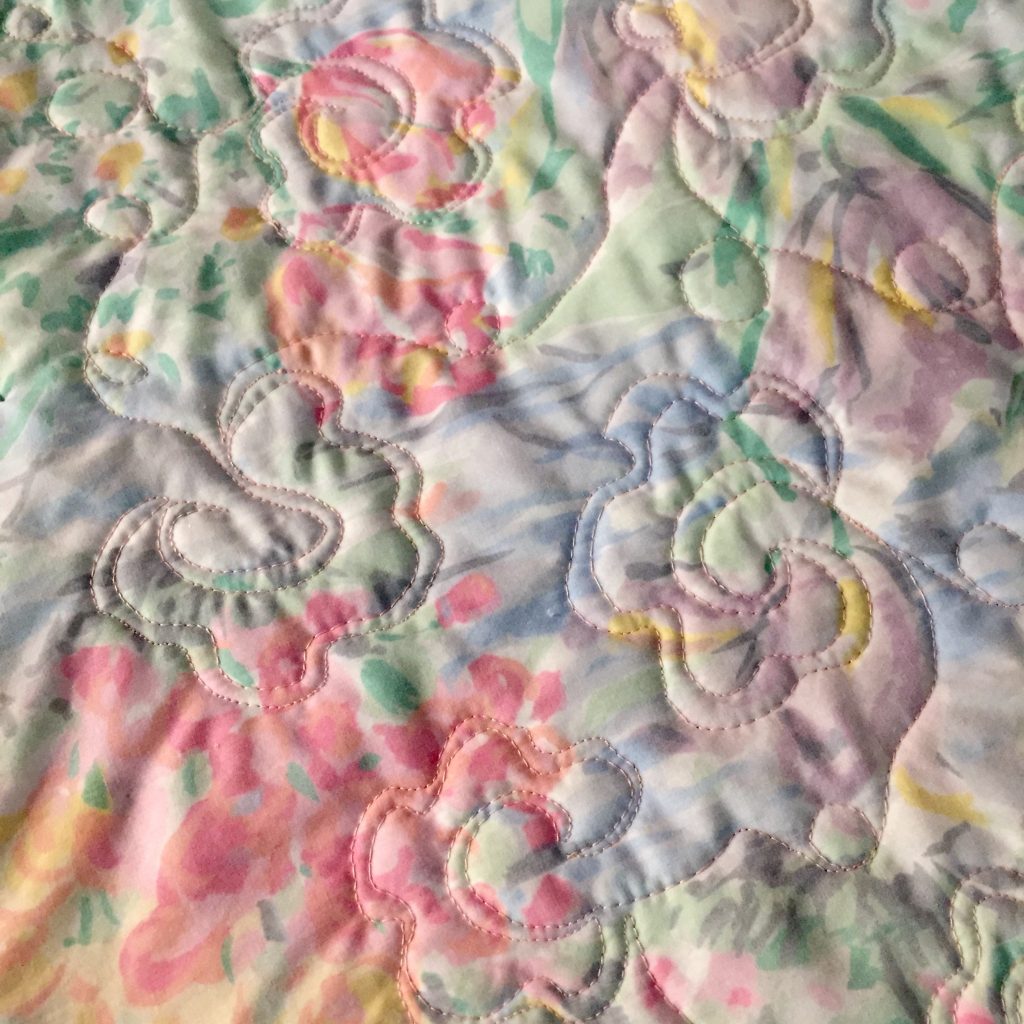
I made a handle so she can easily carry this one around if she wants to. The lining was from my stash – Julia had some wild pajama pants years ago with this faux tie dyed fabric.

Two baskets from Grammy

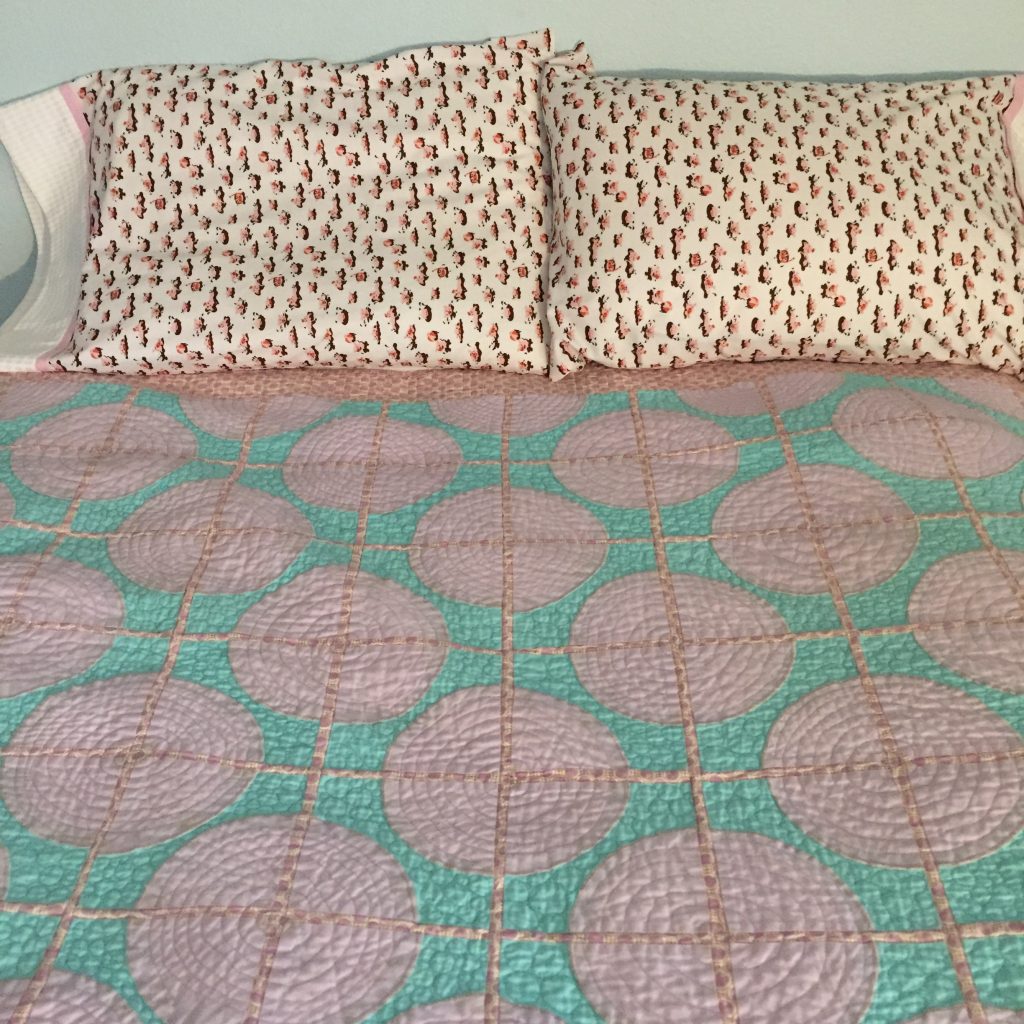
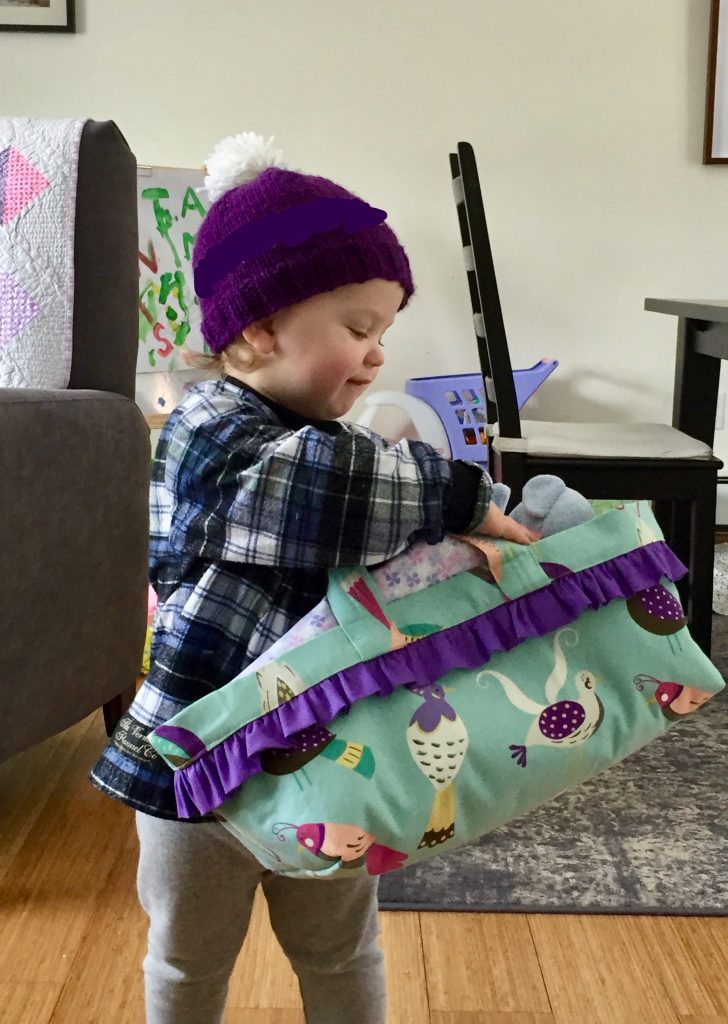
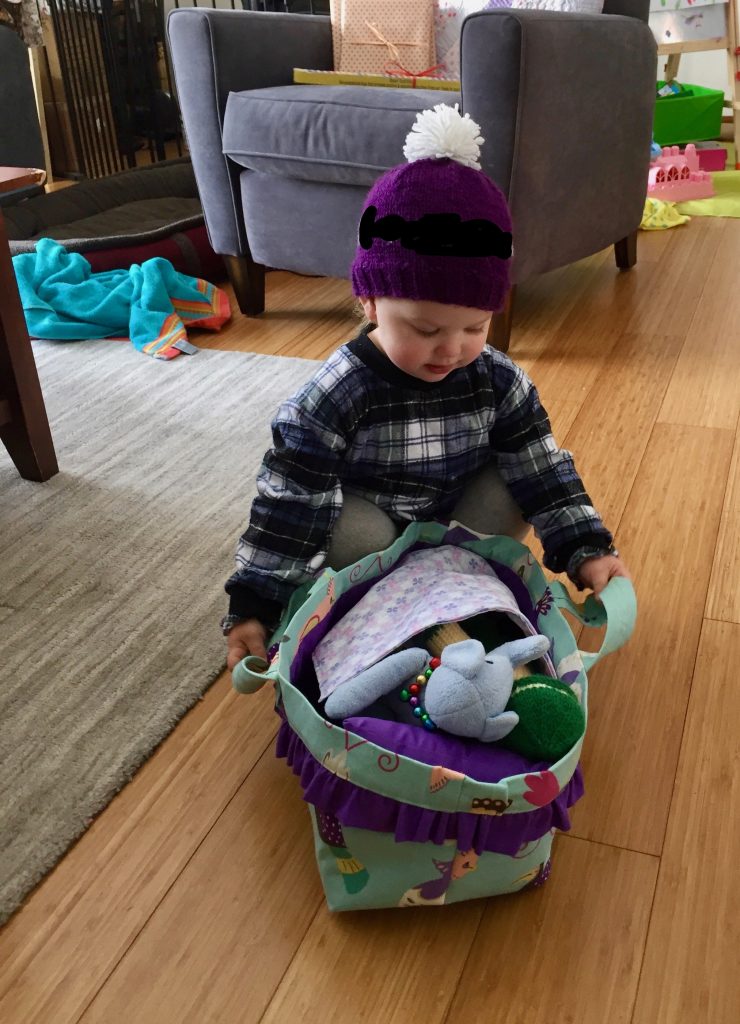
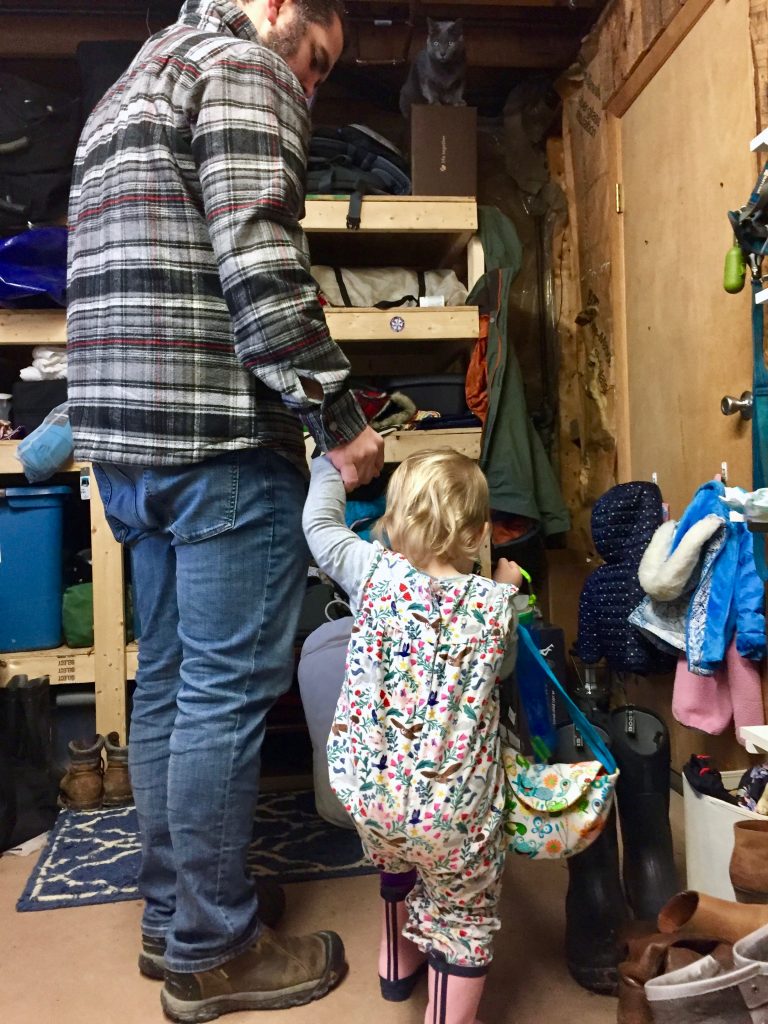
Aren’t they cute? It was fun to make them and to think of H playing with them. When I finished them yesterday, I texted a picture of them so she could see. She was apparently quite pleased. However about 15 minutes later the UPS truck went up their road. It was distressing for her to see him drive by. She thought he was going to stop and drop off the package from Grammy. Poor thing. The timing just seemed perfect to her. Hopefully her package will come on Saturday.

This was definitely a fun little project to whip up. I will link up with Sandra at MMM Quilts when she has her next DREAMI link up as this was surely one of those Drop Everything and Make It sort of projects!

Spring Break

I have been absent from blog land for a bit. Julia was on spring break and we had a lot of time to hang out together. It was really nice to have her home relaxing, not working on homework.

The break started with my son and his wife here for the weekend. Julia picked out her pig for this year and they wanted to come and join in on the fun. (My son raised market hogs during high school too and really enjoys this common interest he has with Julia.)

Leo, hiding in the corner while Julia waits patiently.

Let me introduce you to Leo. He is about 11 weeks old and has a very sweet personality. When Julia brought him home, he was very skittish. Poor little guy was so shy and wanted to hide in a corner of the pen, behind some weeds. Julia was very patient with him and just stayed near him but didn’t try to engage very much at all.

It didn’t take more than a few days before he would sniff her hands and come closer to her. She continued to just be with him, letting him approach her.

One week later, Leo is so much friendlier.

After the five days or so, Leo became very comfortable. He has gotten very social and loves to be scratched and rubbed whenever Julia is out with him.

Look at his cute smile!

Now they are best friends. He will not leave her side if she is in the pen. He nuzzles her legs and wants all of her attention. She did such a good job of gaining his trust and this will make it much easier for her when she starts to train him for showmanship.

Buttermilk Bend Trail on the South Yuba River

In between playing with Leo, we did go do a few fun things. One day we took a hike on the Buttermilk Bend trail along the South Yuba River. The wildflowers are gorgeous this time of year.

Globe Lillies

These wild lillies are one of may favorites.

With so many wildflowers, comes an abundance of butterflies. There were many and we enjoyed watching them.

Try as she might, Julia couldn’t get one to land on her hand.

Cherry Blossoms

At home everything is blooming too! This is our cherry tree. Each season it is anyone’s guess whether we will get cherries. Judging by the incredible bloom we have this year, I am feeling hopeful we will have fruit. The birds take more than their share, but I think we will have some to enjoy as well.

Asian Pear Apple Blossoms

We have two Asian Pear Apple trees, each of which are about four or five years old. This is a strong blossom year for both of them so maybe we will get fruit! Last year I think we only had two or three apples and they were not very big. Crossing fingers for this year.

Mason Jar Cozy

My quick sewing project for last week was this cozy for a pint size mason jar. My daughter in law takes jars of layered oatmeal (I think she puts fruit, milk and yogurt with the oats) to work and cooks them for her breakfast. She wanted a cozy for the jar because it gets fairly hot in the microwave. This isn’t exactly gorgeous, but I am fairly happy with it. First I measured the girth of the jar and the height I wanted. I cut two rectangles of fabric and one of batting, each 4 3/4″ x 11 1/2″. I also cut two circles of fabric and one of batting, 3 1/2″ in diameter. Then I quilted the batting to the exterior fabric. Stitching a seam along the short side first, I then pinned the outer fabric circle to the cylinder I had made. That was the most difficult part.

I couldn’t get it to fit correctly without a few tucks along the way. I did the same with the lining (except no batting this time). Then I stitched the lining and outer fabric right sides together around the top opening of the cylinder, leaving a couple of inches open so I could turn it right sides out. It worked well enough but I am sure if I made a few more, the aesthetics would look a bit nicer. (I did make a mock up with some ugly fabric before I started so I could be sure it would fit the jar.)

The week went by so quickly! School is in session again and we are back to our routine! Today I even did a bit of quilting on a baby quilt I am making. I love the way these flowers look. I backed the quilt with a vintage sheet I had thrifted a long while back. It is so soft! I will share this with you again when I get it finished up.

I hope you have been enjoying springtime! We are definitely in full spring season here in Northern California.

Big Decisions!

It is that time of year. College acceptances and declinations are being emailed out to all sorts of college seniors. Julia and her friends have been texting like mad, announcing what universities they did or didn’t get into. It is a very competitive process these days. I remember back in the day; you know, when I was walking five miles to school (up-hill) each way in the snow, it wasn’t such a huge deal to apply for college. I went to our local community college for two years and when I finished up the general education classes, I chose a four year university and picked a major. My main decision point was, in all honesty, where was my boyfriend going to attend? Sounds terrible, but it’s the truth. I also remember that in 1980 when I started college, the tuition fee each quarter was $69 ($207/year). I applied and just assumed I would get in. It wasn’t thought to be a big deal. I took the SAT’s but didn’t do anything amazing with those. My grades were reasonable but certainly not more than a 3.4 (or so?) GPA.

Oh how things have changed! The tuition at my alma mater is now up to approximately $3,200 per quarter ($9,600/year). Last year of the 55,000 applicants about 16,000 were accepted. There were 10,000 applicants with GPA’s of 4.0 or more who were turned down. The competition is fierce. College juniors and seniors take the SAT and ACT tests multiple times and when they aren’t satisfied with their scores, they work with SAT prep tutors. GPA’s of 4.0 and higher are prevalent and these kids are fighting for their spot.

Julia was fortunate in that she applied to four universities and was accepted at each one. We have done tours, walked campuses and, of course, talked and talked and talked. Julia had several decision points when choosing where to go but the most important was….. the swine unit! Once we got to this one, I knew her decision was made!


My daughter in her happy place.

The swine unit at this particular university is gigantic. There are approximately ten litters born each month. We saw the nursery area and drooled over these tiny piglets.

Look at them, one on top of the other! So funny.

We had toured the swine unit at other universities last year and while they were nice, they just didn’t compare.

Tell me the pig on the right isn’t smiling!

We went home from this particular tour and my daughter thought and thought about her choices. We called and cancelled our flights and the campus tours which were scheduled for next weekend.

Last Saturday she committed and is officially going off to college in September! This is such a milestone in her life. (Mine too! She is the last kiddo at home – the chicks will have all flown the coop!!) Here she is accepting the offer and of course, you know what the next step was. “Mom, what credit card should I use for the deposit?” Here we go!

I thought I would make a little something to surprise her – to celebrate this important decision. Looking through my stash, I remembered a piece of fabric Julia picked up last fall during a trip to Ben Franklin. It was a Riley Blake piece with piggies wallowing in mud and it made her smile.

Aren’t they cute? Snorkels and beach balls. Hahaha.

Pigs truly have a love of mud. Julia usually keeps a nice sized mud puddle in the pen for her piggies to play in and cool off with.

Anyway, my thought was to make a couple of pillow cases. They are simple and so fun to make. It had been a while since I had made these so I looked at the tutorial at the Seasoned Homemaker to refresh my memory. These are super easy to make and look so nice when complete. Using French seams creates a lovely finish on the inside.

These took very little time to whip up. I used a white on white fabric called Fool’s Gold from my shop. It is by Libs Elliot and the white is absolutely crisp. I think it dresses up the look just a bit (if that can happen with pigs playing in mud?!?) The soft pink trim was a scrap I had (always nice to use those up!)

I know the match isn’t perfect for the quilt she has on her bed but they are cute nonetheless. Julia is excited these days because there is so much going on with the last semester of high school! Next weekend she will select her piglet for this year. Photos to come!

If you haven’t tried making these ‘burrito style pillowcases’, I encourage you to give it a try. They look so pretty and are not at all difficult. Is it time to personalize your bed with some nice new pillowcases?

Loving These Handmade Gifts

My grand daughter turned two years old last week. Her parents and I wondered how this could be?? Those two years have buzzed by and here she is, a toddler who talks a blue streak, is starting to be potty trained, and has perfected the all-important sentence “I can do it myself”.

Oak and walnut step stool created by Grandpa.

My husband and I wanted to make her a gift from each of us. As one would expect, his was made of wood and mine of fabric. Ray made her a pretty step stool. My DIL actually asked him to make this. Recently they converted her crib to a toddler bed and it is a tiny bit tall for her still.

He laminated strips of oak and walnut together to make the top. Then he framed it with walnut. Always one to think of safety, he angled the legs on the bottom so it wouldn’t tip as she stepped on and off of it. He also put little grips on the bottom of each leg making it hug the floor for safety as well as avoiding any scratches on their hardwood flooring.

She loves her little seat. Such a sweet girl.

Gram-gram chose to make a little bassinet for her dollies and stuffed animals. H is at that age where she loves to put things and people to bed. Sometimes a doll or stuffed animal, sometimes her Gram-gram or her daddy – she loves to cover you up with a little blanket and say pat-pat when she tucks you in. Oh my heart.

I used a tutorial on Sew Mama Sew for this project. It was very fun to make. Nothing too unusual in the process at all, just boxed in corners, a lining of a stiff, fusible batting and a ruffle to decorate the outside. I used a home dec fabric from Jo-Ann’s for the outside. I love the whimsical birds. The lining, ruffle and pillow are made with a purple Kona cotton.

The bed was a little bit ‘floppy’ so before adding the band above the ruffle, I lined it with a stiff, fusible interfacing. That seemed to give it more structure.

A soft little dolly quilt too!

Of course a doll bed needs a little quilt! I used this little floral and just quilted a few lines across it each way. It is just the right size to tuck in a dolly or stuffed animal.

She loved it!

My grand daughter was all smiles when I gave it to her. She immediately loaded it up with a little doll and her stuffed elephant. (I blocked out the name on her hat, that is why it looks a little strange!)

How many animals can sleep in one little bed?

I really loved making this for her and hope she will play with it for a long time to come.

Using the little cushion as her own pillow. Testing out the softness for her baby dolls?

Of course she felt the need to do a little bit of quality control and lay on the cushion from the bed. Any good mommy has to make sure her dollies will be cozy, right?

Happy birthday to this two year old. Such a fun time for her as well as Gram-gram and Grandpa. Linking up with my usuals plus two new (for me) Linkys – one is called Show Off Saturday and the other is at The Crafty Quilter. Check the others out at the top of the page, under link ups!!

Remember that this Saturday, March 16th is National Quilting Day. Check your email first thing Saturday morning for a newsletter announcing some fun deals for just that day only! If you don’t subscribe to the Needle and Foot newsletter, this might be a good time to sign up!! Click here to subscribe – and remember, I won’t use your email address for anything else, nor will I share it.

PS – If you would like to see more of my husband’s woodworking, follow him on Instagram! He is @kringelwoods and is a talented kind of guy. (I may be a bit biased, but still….)

Vermont Sewing Continues

Time has flown by and I will be heading home on Wednesday. When I was getting ready to come out here I thought three weeks sounded like such a long time but yikes, it has gone by quickly!! We quickly settled into a rhythm and it has been wonderful

H and I have spent a lot of time in the kitchen. She has a new stool to stand on so she can ‘help’ cook and she just loves it. She crawls in and out constantly and has learned to drag it from counter to counter to the sink and back. Washing dishes, stirring and mixing, so many projects. Luckily she and I enjoy baking and we have made SOOO many things. Cookies, focaccia bread, muffins – I have probably put on a couple of pounds during this trip.

Maple Pecan Scones

Yesterday we made these Maple Pecan Scones. She had so much fun and was covered in flour by the end of this round of baking. They are delicious and if you want to try them, here is a link to the recipe on the King Arthur Flour website. I cut them fairly small so she wouldn’t have a huge serving. Actually I put half of them in the freezer so they can have them again after I leave.

As for sewing, I have done quite a bit! I made a table runner for my daughter in law. When I was at Jo-Ann’s, they had the Home Decor fabrics on sale and I picked up this floral print. It is a nice weight and has a linen like texture.

I also grabbed a celery green Kona solid (I don’t know what the real name is – I didn’t check the bolt.) This project took no time at all to make. I cut a rectangle (I think it was 14″ x 50″) and stitched the front and back, right sides together. Once I turned it right side out, I ran two lines of topstitching around the perimeter and called it good. It looks great on their dining room table. However, I removed it after taking the photo so we wouldn’t spill on it before my DIL even gets home!

Another project was to make a super hero cape for my grand daughter. Again, this was a very simple project. I bought a 1/2 yard of red satin fabric at Jo-Ann’s and folded it in 1/2, right sides together. I stitched around two sides and turned it right side out. With the folded side and the two stitched sides, it was finished on three sides of the square. After pressing it (on super low heat) I folded the raw edges to the inside and stitched two seams, one at the top edge and one about 2 inches lower. This left an opening at each side to thread the cord through.

My grand daughter wasn’t thrilled with this. She doesn’t seem to care one way or another about it. However, I suspect she will enjoy it at some point. It is silky and shiny and will catch her eye when she is in the mood for playing dress up.

I have just a few more days with her so I am keeping her home from day care this week. She can go at the end of the week after I leave. Not sure what we will do with our last couple of days but I know it will be fun.

Linking up with the usual parties. Check them out at the top of the page, under Link Ups.

So Much Grammy Time

I have been in Vermont for almost two weeks. That seems crazy – in some ways it is going way too fast but then I stop and realize I really miss my hubs and Julia. But it is all good. H and I are having such a good time together. She is still such a delight. I don’t see very much of the terrible 2’s in her at all. I think this is because she has very good language skills so normally she doesn’t get frustrated when she wants something (or doesn’t want something). She can get her message across. Of course, she is not all angel, all the time. She can be a teensy bit defiant now and then.

I find the gender based differences in children really interesting. I have three boys and a girl, a degree in Early Child Development and have worked in preschools and daycares. There are some very consistent, biologically hardwired, differences between the two genders and other differences that are taught by surroundings, toys offered and parental/caregiver attitudes. Language is a big one. It has been my experience that girls acquire language earlier than little boys and they will often sit for stories and language activities sooner/for longer periods than boys. H is really into singing though her songs are often a mash-up of ABC’s, Twinkle Twinkle Little Star and Wheels on the Bus. If someone sings with her, she can stay with one song. If she is singing solo, all the songs come up at one point or another during her performance. I appreciate that H’s parents have provided all sorts of toys – she has trucks, tractors, blocks, baby dolls, and stuffed animals. I tried to do the same with my kids and in fact, have the silliest picture of my oldest son (at 2 years old) trying to nurse his baby doll when his baby brother came along. Pretend play should be widespread and include all sorts of imaginary ideas and props.

There are also tons of art supplies in this house. It has been fun to spend time with markers, paints and crayons with H this trip. There was a large cardboard box downstairs and she discovered it made a great ‘vibrating noise’ when she scribbled on it. This was a great activity to do with her one morning last week.

Do A Dot Markers – No mess and they last forever!

One of the best art supplies in the house are this set of Do A Dot Markers. I think these were a gift from Santa this year. They are filled with washable liquid and have a little sponge on the top. If the lid is left off and the bottle is laying on its side, there is no leakage. They don’t dry out like other markers. Just give it a shake and press it on the paper a couple of times to wick the liquid back into the sponge at the top.

They also have little textured grips on each side making it easier for younger children to use them. It is very easy for kids to be ‘successful’ artists with these markers.

Pressing the marker up and down creates dots which are really fun. To use them like a paint brush or marker, the child presses down and drags them. The colors are vibrant. Anyway, no affiliation here, this grandma just highly recommends them!

This week I also did some sewing (of course!!) I made a little oven mitt for H. She loves to help cook and has been wearing mama’s huge silicon mitt while I am in the kitchen and then walking to the oven and warning me, “hot Grammy, too hot”. So she now has her own small oven mitt with kitties all over it!

I used a tutorial from IkatBag. There are so many really fun crafty projects on this website. I couldn’t figure out how to get my laptop to print on the printer here so I ended up just drawing out a little mitt and using that for the pattern. There is a layer of lining, fusible Pellon, and the outer layer. Both fabrics were fat quarters from Jo-Ann’s. I made the usual sandwich of inner and outer fabric and the batting, then quilted on the diagonal to hold the layers together. They were stitched right sides together and I did a zig-zag stitch around the edge to control any fraying.

Before turning it right side out, I clipped the curves and especially the slight V between thumb and mitt. The binding had to be stitched by hand both inside and out. The opening is too small to easily stitch it on the machine. H loves it and that is all I need to see!

My other projects for last week included a table runner for my DIL – her birthday is coming up next week so this will be a nice project to leave her for her when she gets back home. Also got the Squared Away quilt top stitched together. I will take pictures and share these later this week. Sewing plans for this week include a red satin cape for H to pretend with and more four patch blocks for the memory quilt I am working on.

Looking out the window, the blue skies make it seem like I should go take a walk but it is only 10 degrees out. Maybe when it gets to a toasty 15 degrees, I will venture out with the dog! Hope everyone is enjoying the week. Make sure to find a little time to create something!

Meet Turtle

Here is another project I made this week. This cute turtle was made with the free pattern, Myrtle the Purl Turtle, from Purl Soho. What a fun tutorial this is.

The shell is a piece from Flea Market Fancy by Denyse Schmidt. I love this fabric and have had it on the shelf for a bit now. I used a linen blend by Andover (available in my shop) for the head and the tops of the feet (or are they paws?) The linen adds a great textural component. Along those lines, the wool felt used for the belly is so soft, adding yet another texture. Two black buttons were sewn on for the eyes. The pattern doesn’t include a mouth. I thought about it for a bit but didn’t come up with a way to add a mouth that I liked. So, eyes only it is!!

Putting the turtle together was really simple. Stuffing the turtle was another story altogether. I couldn’t get the seams at the feet and head stuffed to my liking. If I really packed in the stuffing, everything got really stiff and lost the cozy appeal I wanted. But when I loosened the stuffing these little creases developed. After playing around with it for a while, I opted for the creases and the softer stuffing.

Turtle makes a handy foot rest.

I was happy to see my grand daughter’s excitement when I gave her the turtle. She patiently watched as I sewed the eyes on and then she happily took ownership! I tried to get her to name the turtle but she is too young and just didn’t get it. She calls it Turtle and that is good enough for me.

Sweetest little toes ever.

If you haven’t tried making a stuffed animal, this is a fun one to start with. The joins at the neck are a little tricky but other than that, easy peasy. Thanks to Purl Soho for this fun pattern. They have several other cute stuffed animal patterns (a teddy bear, super cute bunny, penguin and a cat) on their site that I look forward to trying. If you have any stuffed animal patterns you’ve used, I would love to hear about it. Always looking for the next project, right??

Linking up with my favorites. Check them out at the top of the page under Link Ups.

Be sure to check out my shop this weekend where you will find a 20% off sale on ALL fabrics in the Clearance & Remnant section

First Project Done

The first week in Vermont has gone well.  My grand daughter changed quite a bit since I was out here over the holidays.  She is such a happy girl.  Her vocabulary has increased and now she can tell me all sorts of things.  Her favorite line is ‘My do it myself’.  Can you tell she is nearly two years old?  As long as she is given a chance to do whatever it is herself, she is satisfied and if she can’t complete the task, she is ok with being helped.  I am thoroughly enjoying her.  However, it is surprising how she can tire me out.  I relish her two or three hour nap each afternoon.

As planned, I have been doing a bit of sewing during nap time.  (also prepping dinner, making cookies, doing a little laundry  – remember how much was accomplished during those wonderful nap times?) So far, I have been making four patch blocks for the memory quilt I am making for my friend Susie.  Stitching those only holds my attention for so long.  To keep things interesting, I switched back and forth between that  project and making a little purse for H.

I used a free pattern designed by Pat Bravo called Saddle Bag.  It is a small purse which meant I didn’t have to cut it down. The strap was too long so it was shortened quite a bit. Overall, this is a very simple bag to make.

Bright lining peeks out from inside as well as a tiny pocket for treasures.

An interior pocket was not included in the pattern but I thought it would be a fun addition to the little purse. Who knows what treasures will be stored in this pocket!

The only complaint I have about this pattern is the directions for the shoulder strap. I have made many bags, probably a dozen or more, and they were quite a bit more complex than this little one. But the way the instructions explained attaching the strap was just strange. I couldn’t make it work. Finally after fussing around, I remembered this is for a two year old. She absolutely does not care about the way the shoulder straps are attached. Actually I could have used two huge safety pins and all would have been fine! I decided to just stuff them in on each side and top stitch them down. Works fine!

Owning up to my mistake.

There is a mistake though and I may as well point it out! The velcro closure I added is way (as in WAY) off center! I saw this and remembered, yet again, it’s for a two year old and it is a toy. She doesn’t care about this sort of thing. So, even though I had a seam ripper sitting right there, I just left it be. I sewed a button on for a little decoration and there you have it! A lovely purse sporting all sorts of frogs and butterflies!

Off to the grocery store with dad and a brand new purse!

Isn’t she adorable? Actually, they both are. She loves her purse but she usually calls it her diaper bag. I wondered aloud why she said diaper bag instead of purse and my son explained that his wife hasn’t really been carrying a purse. She tends to throw her wallet into the diaper bag so she has just one bag to carry. This makes perfect sense. It is a diaper bag now!

I feel so lucky to have this long stretch of time in Vermont. When I was packing for the trip I was a bit concerned about the cold weather. Fortunately my son and DIL have tons of cold weather gear. It has been a surprise how much the right difference wearing the right gear makes. Today we took two walks. H really loves to be outside so I try to make it a point to be sure she gets to play outside every day. Today it was 16 degrees out and not a problem. She looks adorable with her snow suit on and her rosy cheeks. Of course I really miss Ray and Julia but this is a very special time for H and me. I feel like I am really getting to know her which is just a delight.

Linking up to my favorite places. Check them out at the top of the page, under Link Ups.

The Cutest Lion Ever

When the family was all here for the wedding last month, I asked my daughter in law if I could make a Halloween costume for H.  I know she won’t really ‘trick or treat’ since she isn’t even 2 years old yet.  But the kids at daycare will likely celebrate Halloween.  Also, she is starting to enjoy pretend play and dressing up with silly hats, wearing her mama’s ‘pretties’ (bracelets), etc.  I think even if she doesn’t trick or treat, she will enjoy having the costume to play with.

After chatting, we decided on a lion costume.  It will be fun for her to play with and she does enjoy roaring like a lion (which just cracks me up).  I ordered a pattern, which was silly because I have so many costume patterns in my pattern shop but I had sold the lion pattern already. Anyway, I selected McCall’s MP365 as it looked like it would be pretty simple to make.  I decided to leave the hand mitts off and make the tail detachable in case it was annoying when H was pretending to be a ferocious lion.

I chose a soft minky fabric for the body of the costume.  So cuddly….and so evil!  Honestly, cutting the minky was incredibly frustrating.  It slips and slides all over the place.  I would begin pinning the pattern piece from the center and work outward.  By the time I was to one end, the other would be off.  It was crazy!  So after putting nine billion pins in it, I finally started cutting. It made me nervous that sewing it would be a miserable experience but it wasn’t at all.  I had talked to my minky-expert-friend, Sophia, and she told me to use lots of pins and my walking foot.  The walking foot made all the difference.

One of my favorite parts of the costume is the lion’s mane.  I had bought brown fabric and was supposed to cut fringe to create the mane. But if H uses this very much, it will be washed a lot and I wasn’t about to finish each edge of the fringed mane.  I could have used minky because I wouldn’t need to finish the edges.  Then one day I was at Jo-Ann’s and I took a look at prepared trims.  I found this fringe and it was perfect!! It makes the lion sort of sweet.  My DIL says it reminds her of the Cowardly Lion from the Wizard of Oz. It was so easy to attach and saved me a lot of time. I also hand stitched a bit of it to the end of the tail.

This loop on the back side of my little lion holds the tail.

Making the tail detachable was not a huge deal.  I took a strip of minky and folded it wrong sides together and top stitched around all sides.  Then I used “steam a seam” and fused a square of fabric to the inside of the costume just behind where the tail would hang.  I wanted to reinforce that spot so the tail didn’t stretch out the fabric when my little lion was roaring over the grasslands.  Once the back side fabric was reinforced, I used the strip of fabric to make a belt loop of sorts.  Then I made a second strip of fabric in the same was as the first. After putting velcro on each end of the strip, I hand stitched it to the end of the tail. This strip passes through the loop and Velcro’s to itself.

All in all, it turned out really cute.  I just hope it fits!  I had measurements to work with but I won’t know until they try it on her.

The cutest, cuddliest lion costume!

I can’t wait to see this on H.  I am putting it in the mail this morning.  When I have pictures of it on her, I will share one.  Of course, one never knows how a toddler will react and she may decide she hates lion costumes.  In which case, I am sure the next child will enjoy it.  I can remember my kids wanting to be something for Halloween and I would not want to start that costume until just before Halloween because surely they would change their mind at least a couple of times.

A few new items for the shop.

Other than the costume, I have been focused on adding new versions of Chemex Cozies and French Press Cozies to my shop.  This is the season where people begin shopping for the holidays and these two items sell quite well as gifts.  That will likely be what I concentrate on for the next couple of weeks.  When I select another fabric to offer, I make one as a sample and then my customers order them according to the size they need.  I make them to order which keeps me busy but it also means I am not sewing and sewing unless the item is sold.  Otherwise, I am guessing at which size and version to make.

Are you doing any Halloween sewing this year?  Maybe fall decorations?  Tell me what you are working on!

Linking up with lots of fun places.  Check them out at the top of this page, under Link Ups.

Newsletter!

Have you signed up for my newsletter?  It is published every month or so and is full of information about my shop, new arrivals, sales, and events.  Click here to sign up!