Just popping in with a quick update. I have something new in the shop and I am really loving it. Recently I opened an account and started carrying Northcott Fabrics. In case you were not aware, they make tons of fun panels. I don’t use a whole lot of panels but my customers have shown me the light. Some of them are really cute and make for a fun, quick finish.
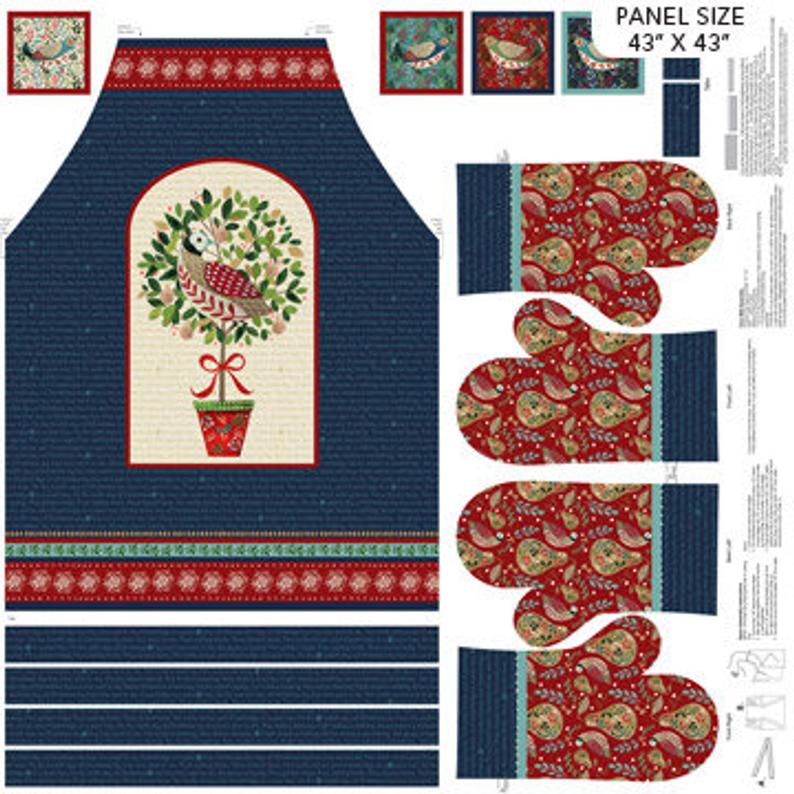
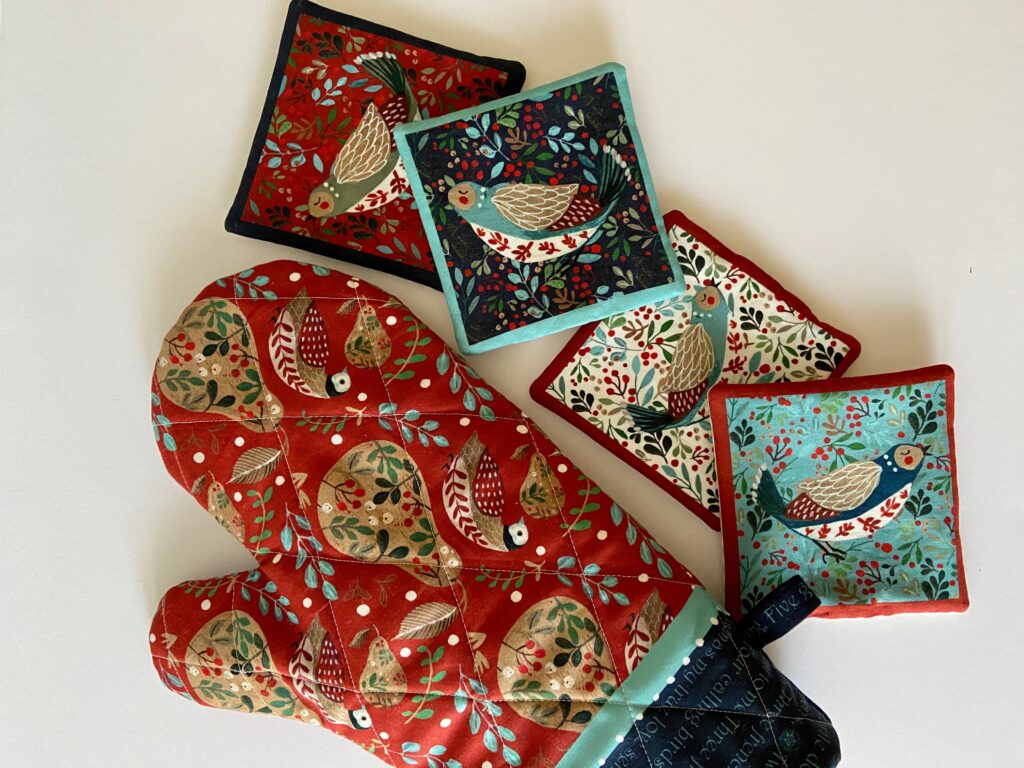
Thinking of holiday gifts, I thought this would be a great one to have in the shop. With the panel, a bit of lining and some Insul Bright, you get to make an apron, two oven mitts and four coasters. Instructions for most of it are on the panel. The coasters were my creation. They have the four squares at the top of the panel which are a bit of a bonus. I thought they were really cute so I made them into holiday coasters.
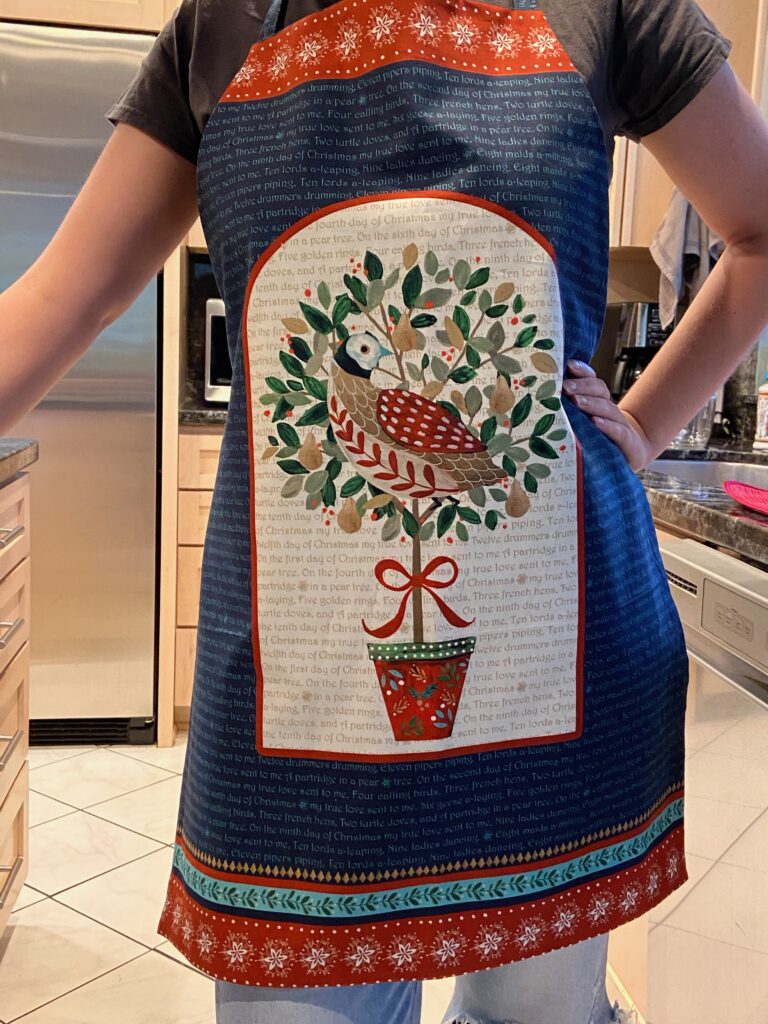
The apron is adorable. I lined it with a bias check fabric ( available in the shop) which gives a nice weight to the apron and also makes it reversible for use during the rest of the year.
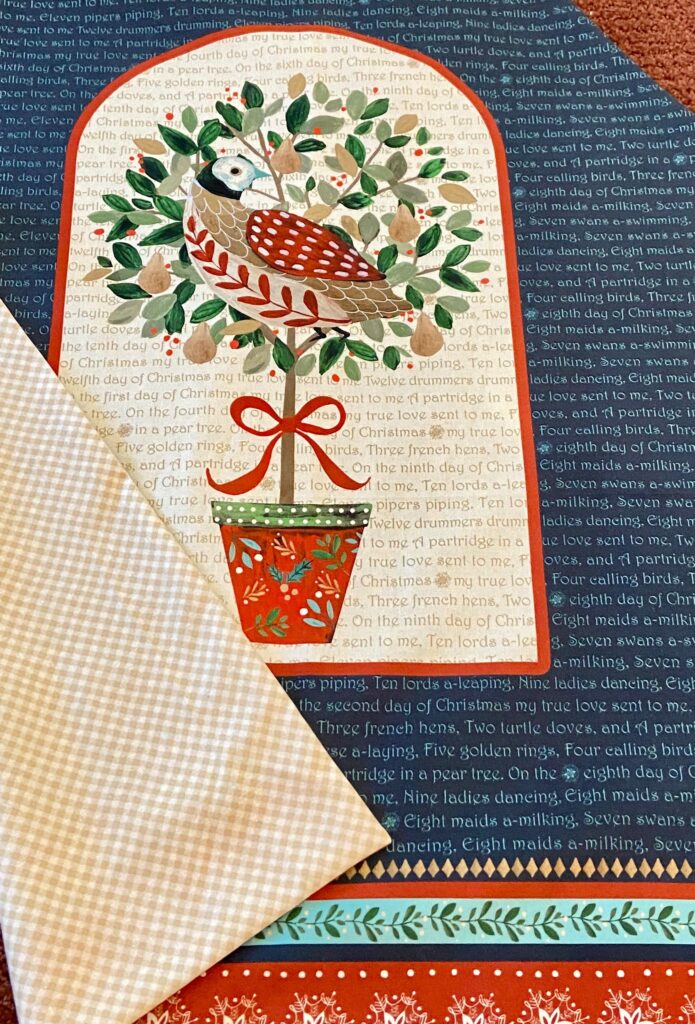
The lined side for you to take a peek at.
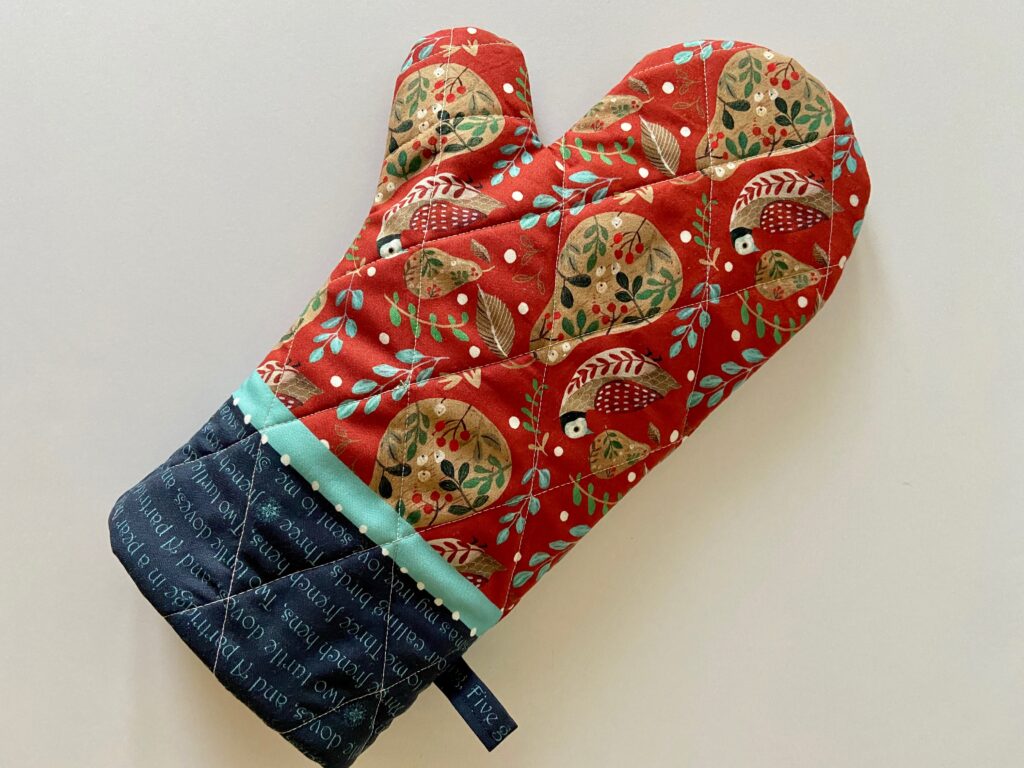
The oven mitts are a little tricky. I did a double layer of Insul Bright in them because I think they are more insulated this way. But it makes for a thick batch of fabric to sew. That part wasn’t a huge deal but binding the edge at the top was. My machine doesn’t have a free arm to sew a smaller, circular seam with. I was able to do it but it just took a bit of fiddling as I went around the circle.
Once the binding was stitched on, I folded it to the inside and pressed with steam. Then I hand stitched it down.
The coasters are a breeze. I used batting scraps and scraps from the lining of the apron to make these. I think I might give them a little top stitching around the perimeter now that I have looked at them for a bit. It will give a more finished look to them.
What do you think? I really like the resulting set. It makes a wonderful gift for someone or to give to yourself! Considering how long it has been since I have done a giveaway, I think it is time! I made a kit with everything you need – the Insul Bright for the mitts, the panel and the lining. You only need to supply the batting scraps for the coasters. I am certain each of us has plenty of scraps to use!
To enter the giveaway, you must follow Needle & Foot in some way. Please let me know how you follow. If you want links, follow me here on the blog or at any, or all, of these: Instagram, Facebook, Pinterest, or my newsletter (which is sent out all too infrequently but I do try!) Leave a comment and tell me if you are a fan of panels like these or if you usually do not choose to use them. I want to hear what your thoughts are. Giveaway open to US residents only (sorry – the cost of postage is prohibitive). Winner will be drawn on Sunday, November 1st at the end of the day. Good luck!!
After finishing my last quilt, I made a plan to make a bunting with the name of my second grand daughter on it. Her father made mention (not so subtly) that I made one right away for the first grand daughter but have not made one for the second who is now six months old. (I am fairly certain the baby hasn’t yet noticed this injustice but still.) Well, it still hasn’t happened.
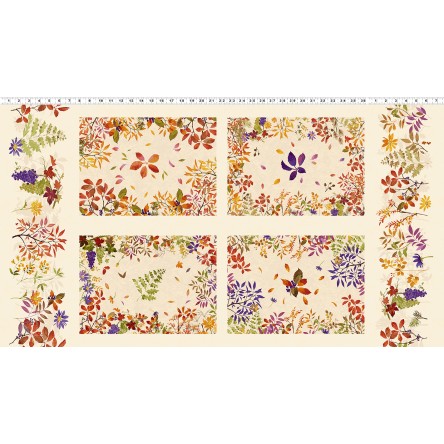
I had ordered some fall fabrics from Clothworks and they arrived last week. One of the bolts has a panel for making placemats and I really like the colors of the fabric. The line is called Autumn Air and was designed by Jim Ishikawa. They are just perfect for my dining room.
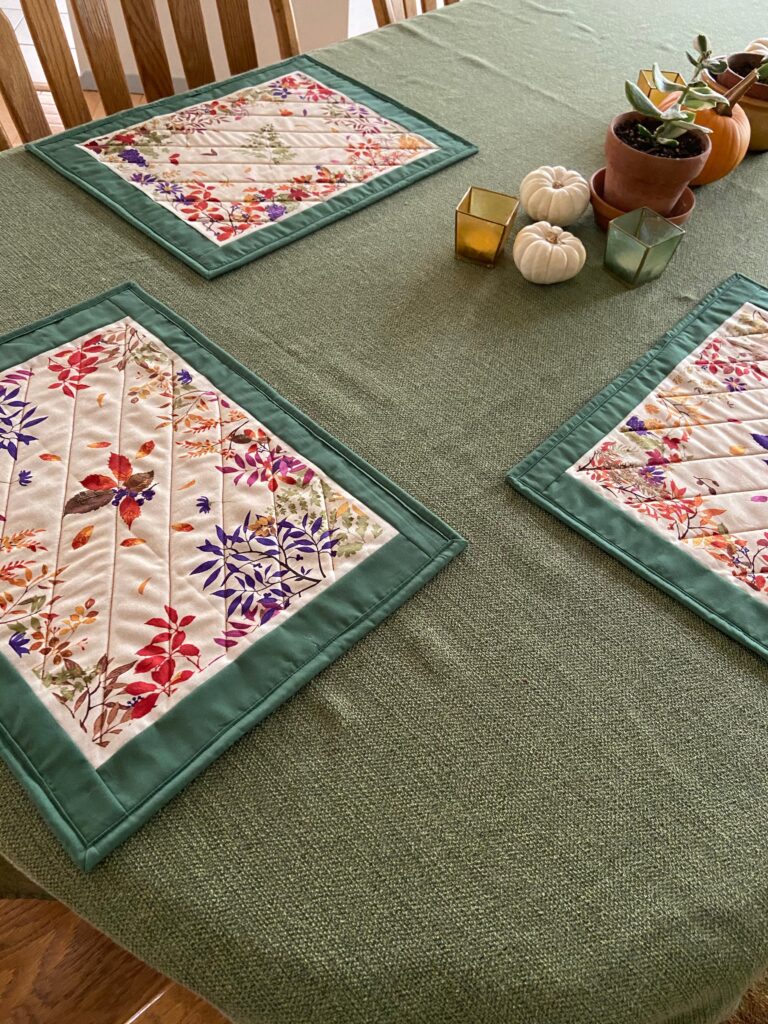
The panel includes four placemats as well as some extra floral print. I cut off the floral print and set it aside for a future project. After looking at the solids I had on hand, I decided to go with green. Adding some borders was quick and then I cut a tone on tone cream color fabric for the backing.
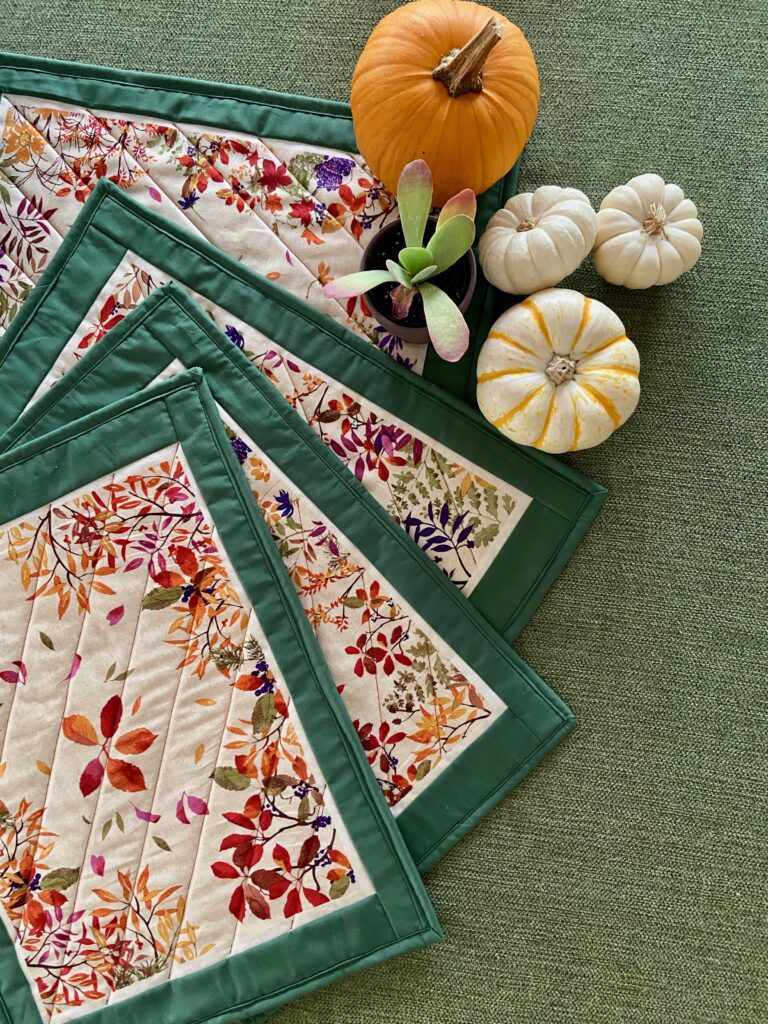
For quilting, I did diagonal lines, 1.5 inches apart on the floral section. I left the borders unquilted. With the borders, the mat finishes at 13″ x 17″. I think these are super and will be perfect to use each fall.
This quick make was quite satisfying. I am so over summertime and hot weather (it is 86 degrees and still smokey outside as I type this.) Using fall fabrics allowed me to pretend it was cool and crisp outside (as long as I didn’t look out the window anyway.)
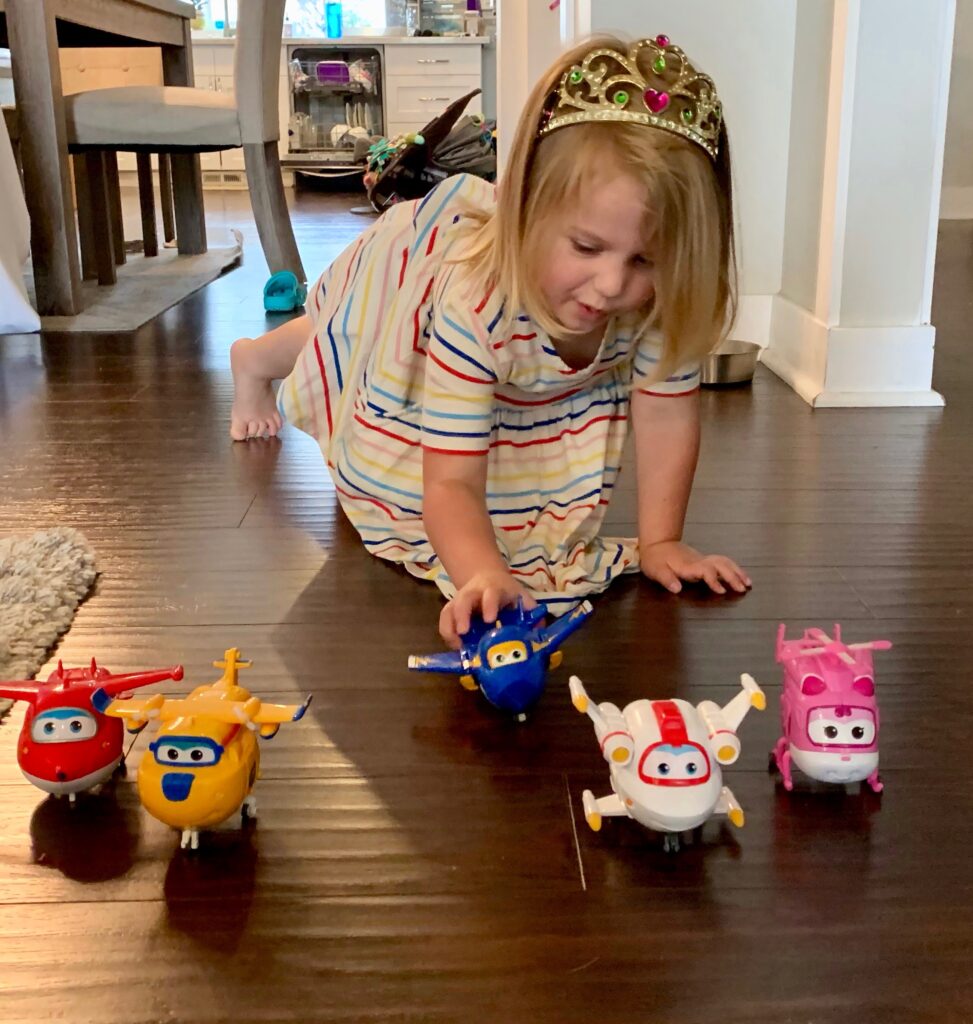
My sweet girl and her new toys.
I will leave you with this to make you smile. My grand daughter’s little friend has a really cool older brother. You know how cool a six year old can be! He wanted some new Matchbox cars and his mother said he could sell some of his current toys at a garage sale to make money for what he wanted. My grand daughter went ‘shopping’ there and snagged these new toys. She was thrilled. Most of her things are still in storage until they move into their new house and I am sure she was bored of the same toys she has been playing with in the rental.
We are going to head up there soon to help watch the kids while they move to the new house. My husband is going to help out with a few electrical projects before they move in. Hurray for another visit with my favorite girls! (I know, I know…. I had better go work on that bunting. I don’t want the baby to learn to spell before her name is up on the wall.)
June is winding down. Not sure how that is possible but really, it is best not to question things these days. Time passes, some days fly by and others feel so incredibly repetitive. Such is life during a pandemic.
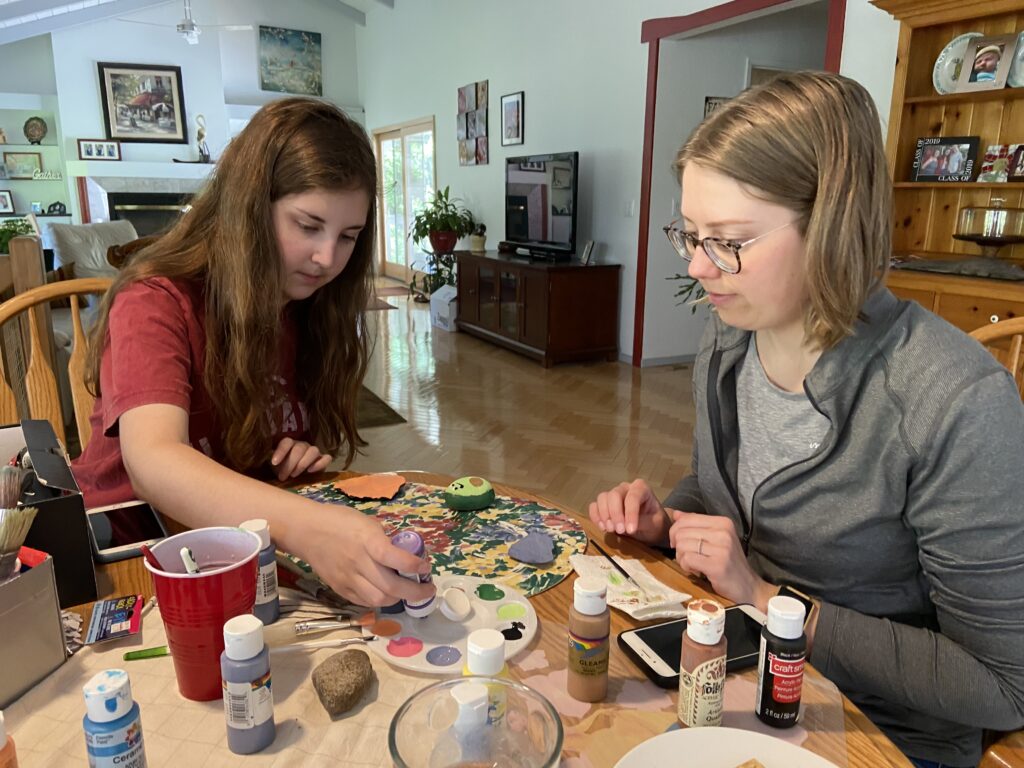
I haven’t shared much lately so I need to get caught up! First off – a little crafting. Julia and I have been trying to spend some time together making projects. A few weeks ago, my son and his wife were here for a weekend (the first time we had seen them since Christmas!!). We spent some time painting small rocks Julia had collected outside. The goal was to place them here and there along a local trail so others could spot them as they walked. We pulled out some (really old) acrylic paints and started painting. It was a fun way to spend an afternoon and we made quite an assortment.
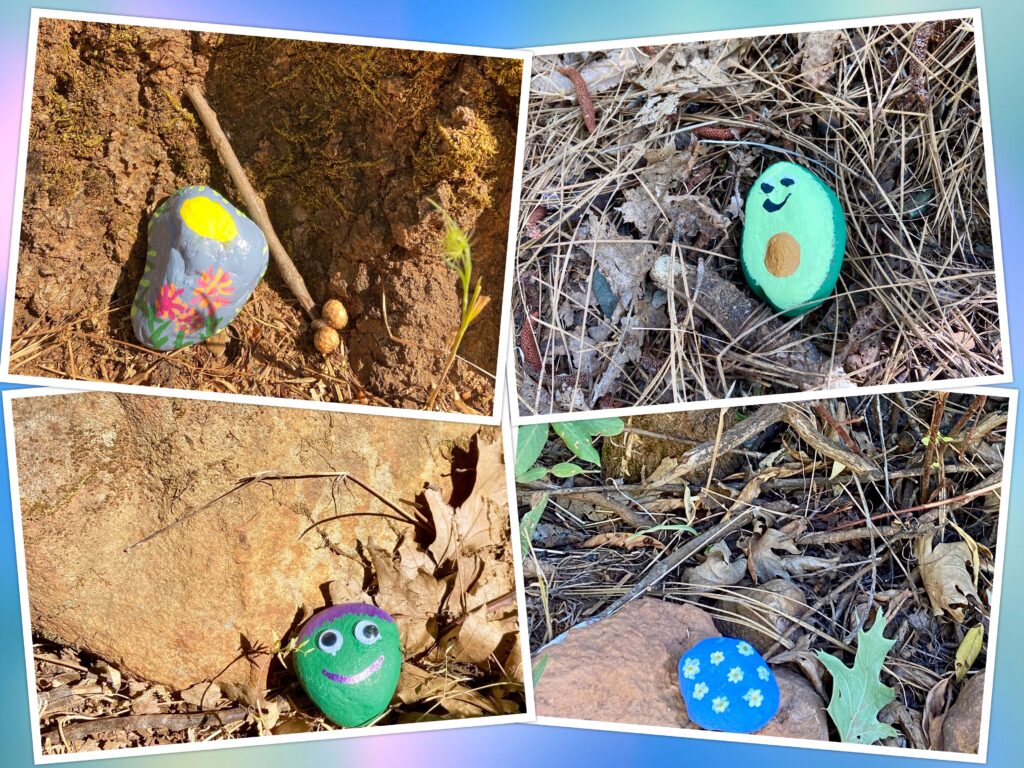
Flowers, an avocado, a monster and some sweet daisies
A few days ago we lucked into a nice cool morning so Julia and I walked the local trail and tucked the rocks here and there as we went. Love the monster with the googly eyes and the avocado (my DIL painted). Pretty creative!
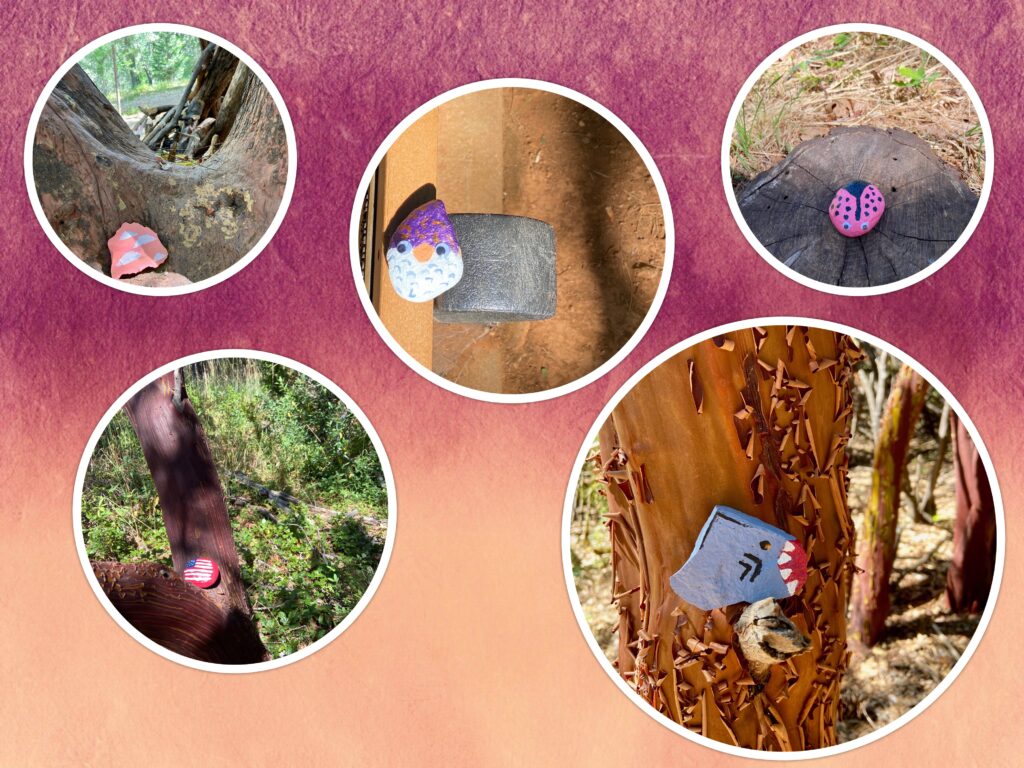
Clouds, Gnome, Ladybug, Flag and the scariest Shark EVER!
More fun! They look really cute out there. The shark is probably my favorite of this bunch. Plus he is sitting on the branch of a Manzanita tree and that curly bark is always fun to see. Julia and I will head back to the trail later this week. We want to see whether people leave the rocks there for others to see or if they pick them up.
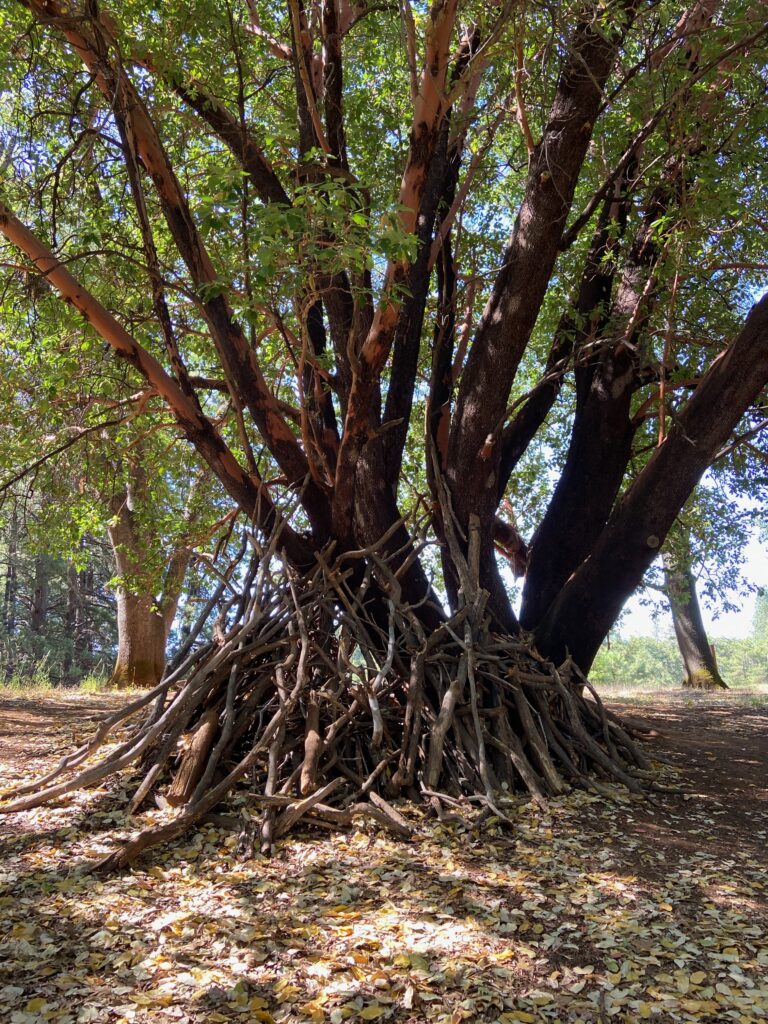
A play fort
About half way through the loop, there is this huge old oak tree. I have pictures of Julia sitting in it from years back. This time, there was this play fort built around the base of the tree. So many branches were collected and assembled teepee-style around the base. We went and peeked in. So cute!! There were a few bits and pieces of construction paper with flowers drawn on them hanging on the inside with string. At the opening to the fort there was a bit of red glitter sprinkled on the ground. I just love thinking of the kids who made this. I hope it stays in place as it must have taken quite a while to gather the branches and assemble this. There is nothing like pretending in a fort like this. I know my kids would have loved this when they were young.
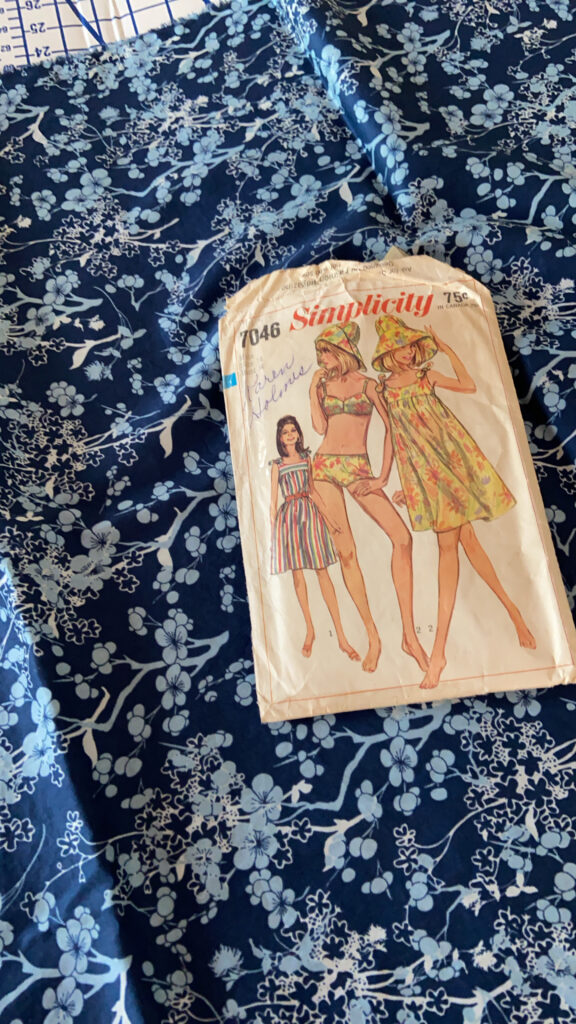
Vintage Simplicity Pattern
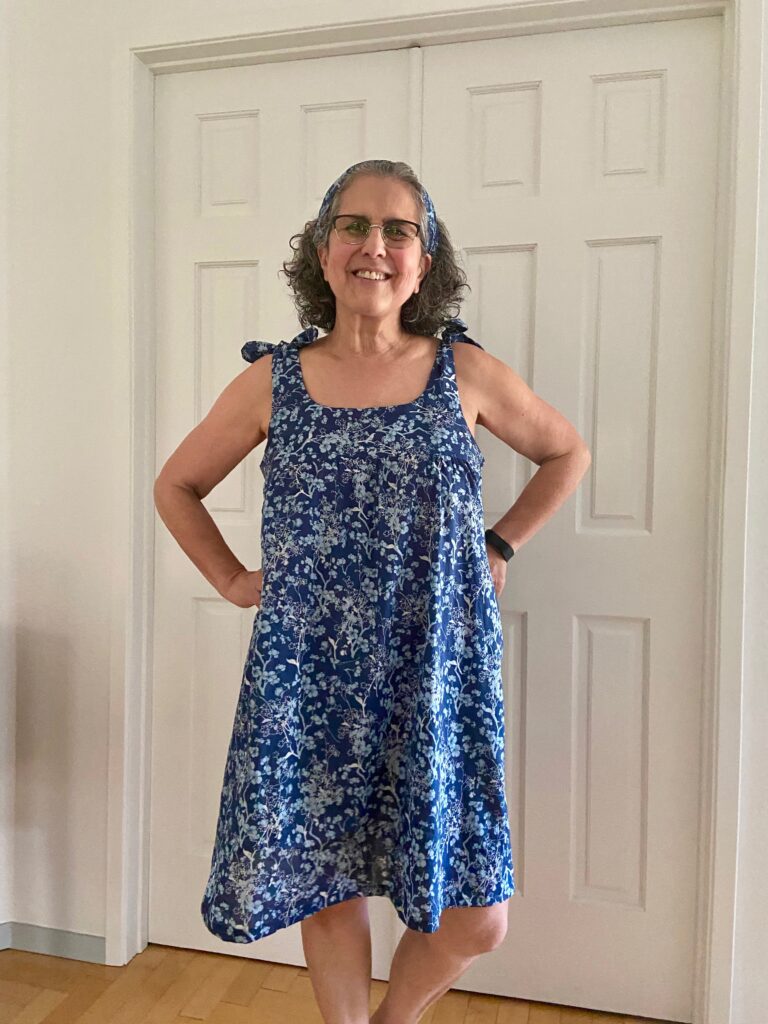
About a week or so back, I posted this picture on Instagram and Facebook. I decided to make a summer dress. I have had this vintage Simplicity pattern for a long time now. It was printed in 1966. I thought this would be perfect for lounging around. The fabric is a voile by Art Gallery Fabric. I love their voiles because they hang nicely and don’t wrinkle after washing. Super soft and comfortable too. The voiles have been quite popular in the shop lately so I am running low. I just placed an order for more and cannot wait until they arrive (maybe another ten days or so?)
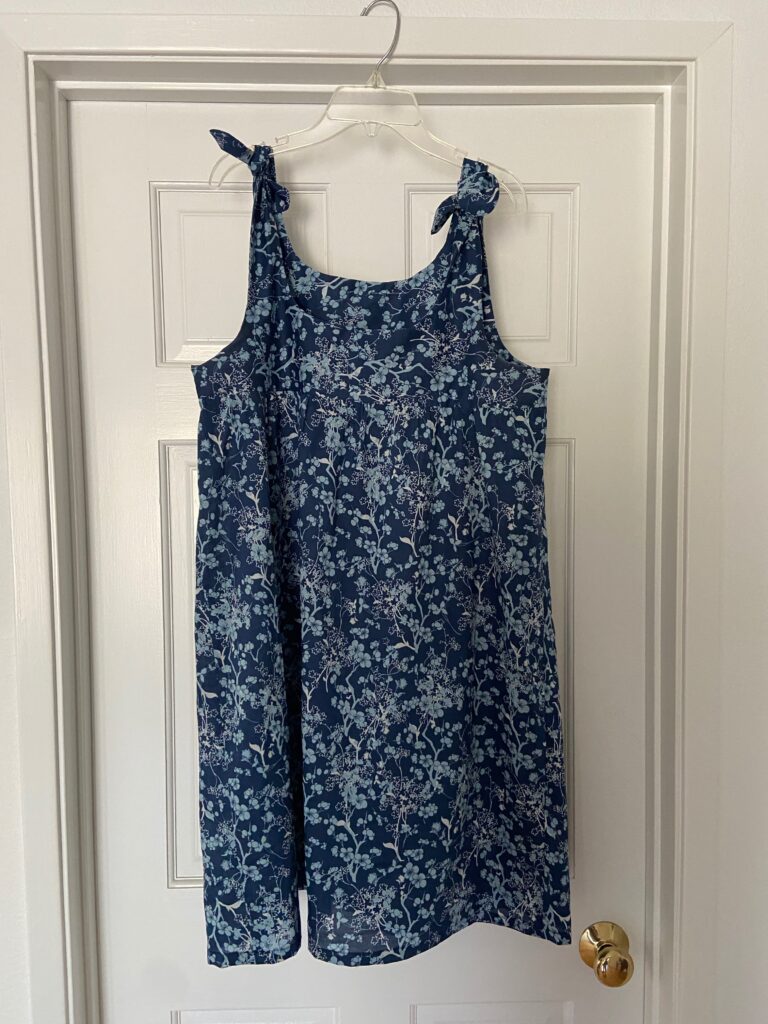
The dress took no time to put together. Four pieces to cut out and since it ties at the shoulder, no zipper to fuss with.
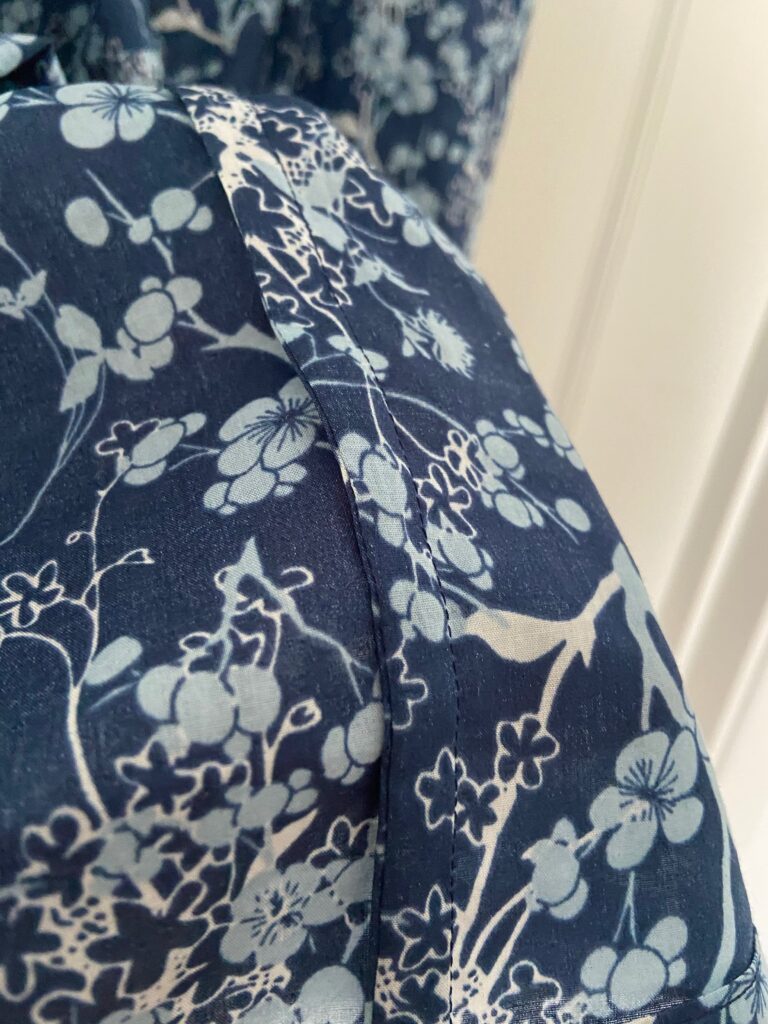
French seams to prevent fraying
I used French seams on the two side seams to prevent any fraying. These are super simple when dealing with simple, straight seams.
While it is certainly nothing fancy, it is just what I wanted. Cool and loose and comfy which is just my style. Whether it be 1966 or 2020, the pattern works just fine. Be warned though – sewing with vintage patterns is a little bit tricky. The sizing is very different. Don’t assume you are the same size with older patterns as with current. Rely on the measurements listed on the pattern – that will tell you what size you need to use. It was a fun dress to make.
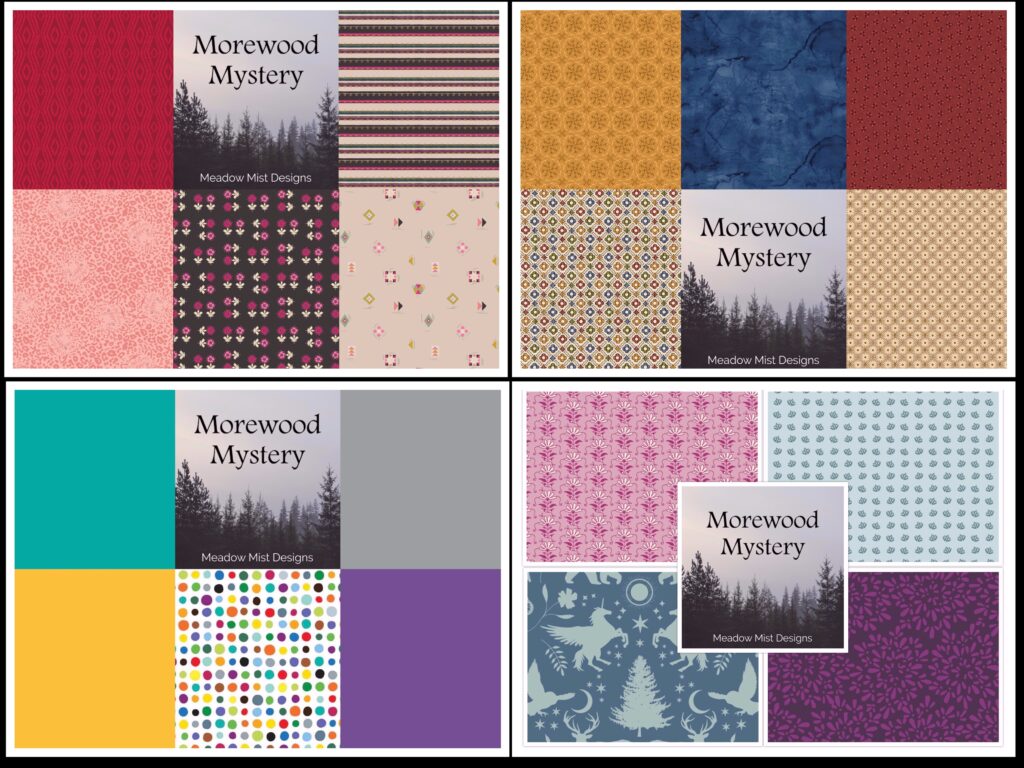
The kick off for this year’s Mystery Quilt Along happens this week! I am really excited. Probably due to the lack of local quilt guild activity and community quilting (with everyone staying home during the pandemic), the sign ups for this years QAL increased greatly. If you have not participated before, I encourage you to give it a try. I love working with Cheryl of Meadow Mist Designs, the host of this event and her patterns are always a hit. Without divulging anything I will tell you Cheryl described this year’s pattern as beginner friendly and it does not require any paper piecing or difficult techniques (eg the dreaded Y seams or curved blocks.)
Here are a few of the kits available. Pop over if you want to see the rest of them!
There are kits available in the shop if you prefer working from a kit rather than picking fabric yourself. Take a peek. They are selling like crazy and I have been cutting yard after yard of fabric this week!
Covid numbers continue to climb. Life is filled with this strange feeling of uncertainty even as we live in quarantine, doing the same things over and over with one day melting into the next. Hang in there, support each other and above all, sew something!
Just popping in to share the sweet gowns being made for Amy and her amazing dolls at A Doll Like Me. Really, if you want a fun project these are so easy to make and take little in the way of fabric, time or skill!
Just to remind you, Amy makes dolls for children (and some adults) who have special needs or limb or other physical differences. She knows the need for physical representation and the ability to see oneself as beautiful. Her work is amazing and has really taken off over the past two or three years. If you are unfamiliar with her work, please do check out her Facebook page.
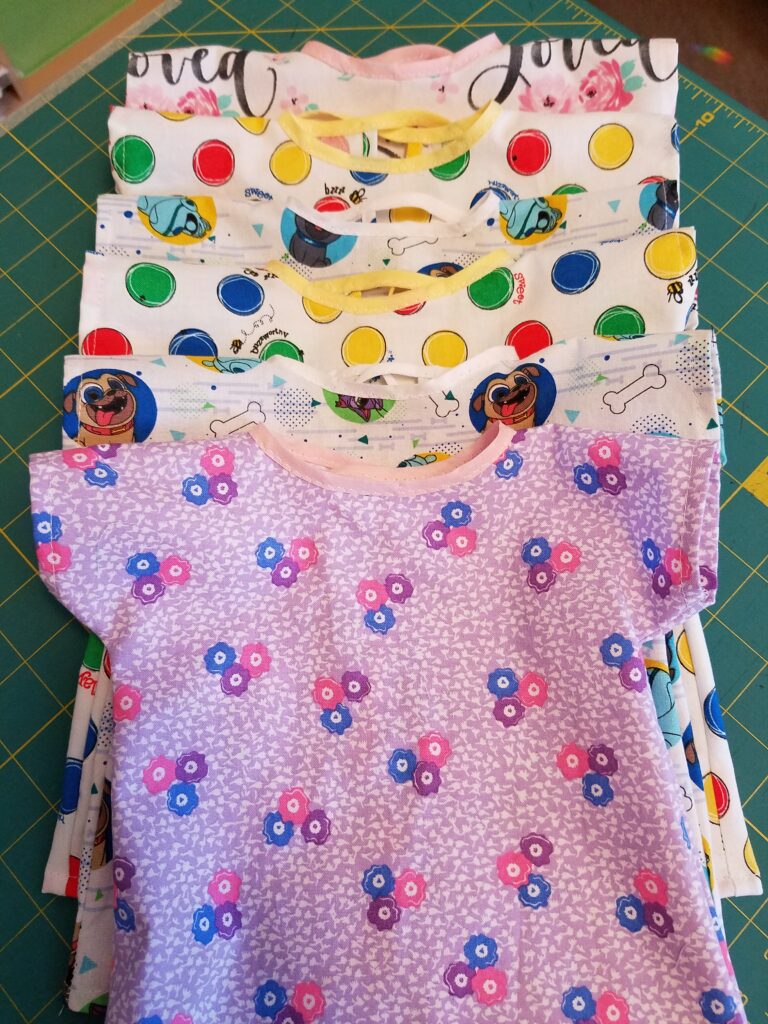
Six sweet hospital gowns donated by Carol.
The gowns we make and donate to Amy are given to children who have one of these dolls and are facing a hospital stay. There is a very therapeutic aspect in playing with their doll. Being able to dress up the doll in a hospital gown is one more way to deal with possible fear or anxiety around the upcoming stay.
So many fun fabrics! Gowns made by Wendy.
The gowns you see above were made and donated by Wendy of Pieceful Thoughts. Love those emojis and the ice cream cones – fun fabrics the kids will relate to. Really, these are super simple and this tutorial will take you through the process. With a fat quarter or other similar size scrap and some bias tape, you can make a gown too!
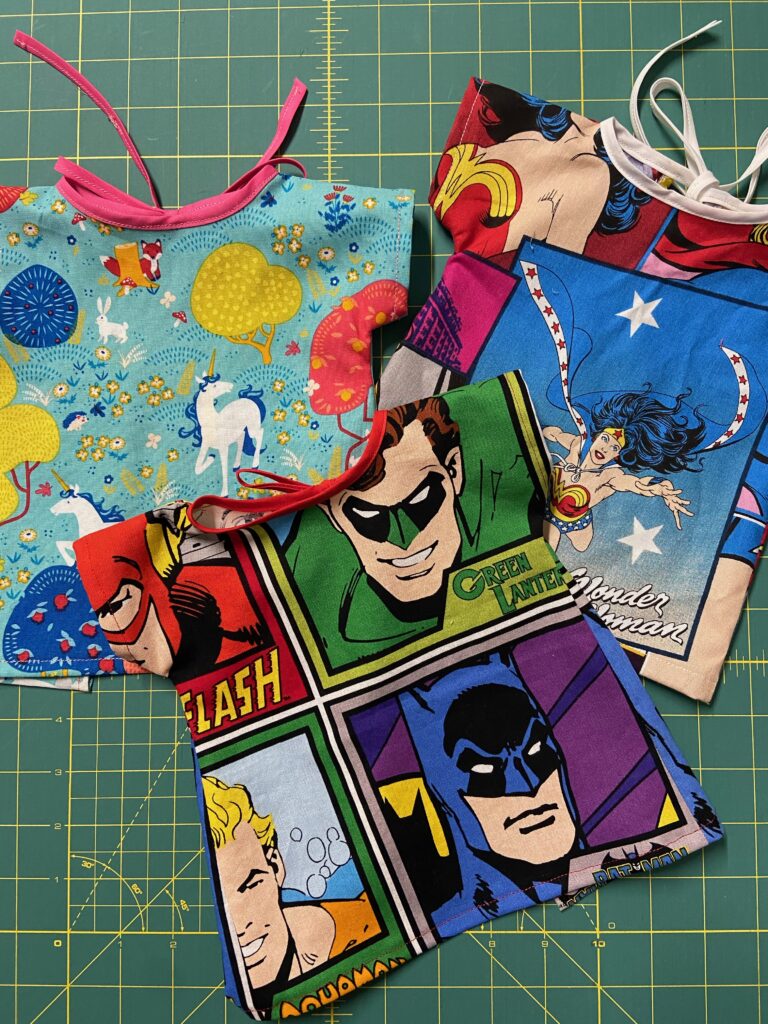
Super hero gowns for out littlest heroes.
I made these three gowns. I had super hero fabric left over from prior projects and thought these might be fun gowns. Also had that unicorn fabric sitting on the shelf. It was fun to pick out the fabric and think about the little ones who would dress their dolls and take them along to their next doctor visit or hospital stay. Even if they just act out the idea of being at the hospital or doctor’s office, this sort of pretend play is cathartic and necessary for children facing these challenges.
The back side of the super hero gowns.
I remember last spring, my grand daughter developed a terrible case of hives with no known reason. She had a trip to the ER which was scary. They gave her a stuffed bunny while she was there. When she came home, we were talking over FaceTime. She would hold her new bunny and tell it, “Yes, that was scary. You’re ok. It’s all done”. This was a way for her to process that experience. I remember watching this and immediately thinking of all of Amy’s children who face scary situations far too frequently. How crucial it is for them to have a way to process all of it.
If you want to make one or two, please feel free. If you have questions, leave them in the comments and I will get back to you. Need the mailing info? Leave a comment and I will email it to you privately.
Thanks Carol and Wendy!! Amy will have a nice stack of gowns to send out as needed.
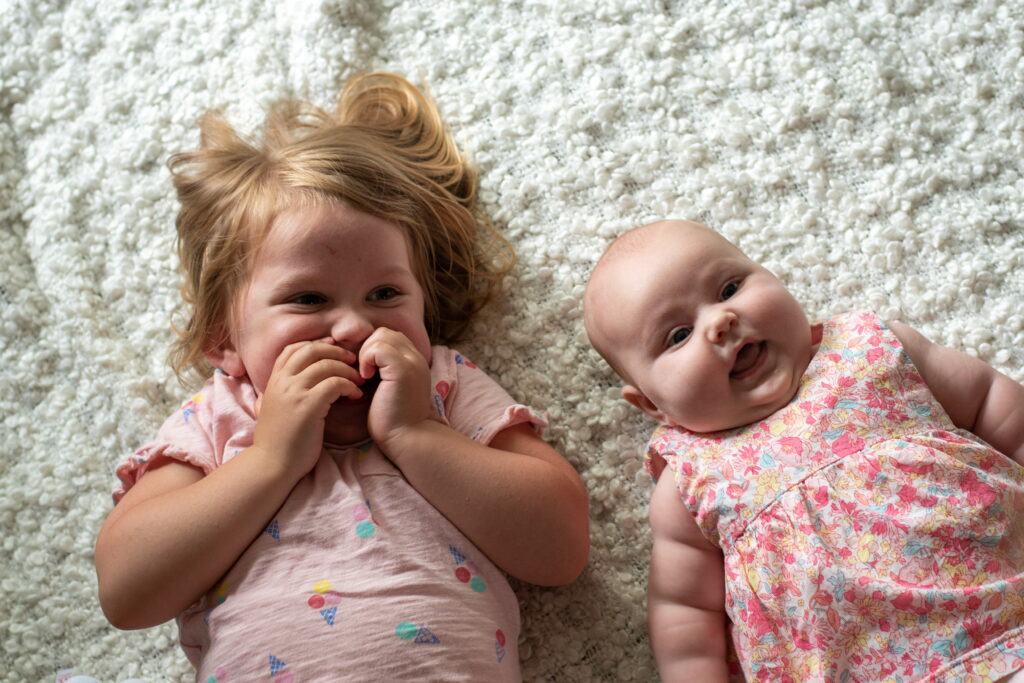
Ok, ok – You’re right. I can’t close before I share a picture of the girls.
This is a picture my son took last week. They are absolutely adorable. Big sis is three years old and little sis is three months old. (You are correct if you are thinking she isn’t all that little. Hahaha.)
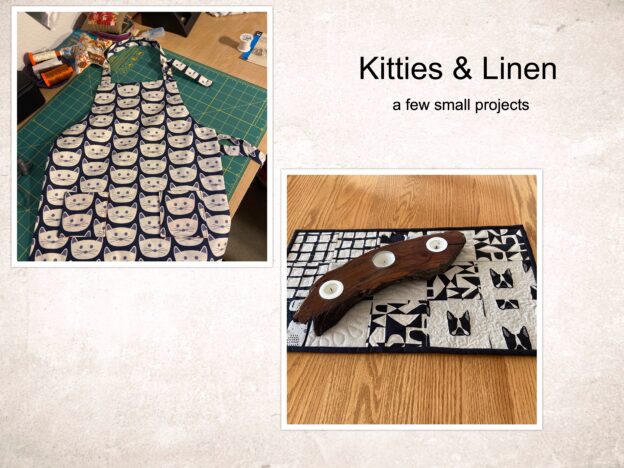
I have a couple of small projects to share today. Both happen to involve kitty fabric which is totally coincidental. Which one do you want to see first? Oh, the linen project? Ok – sure.
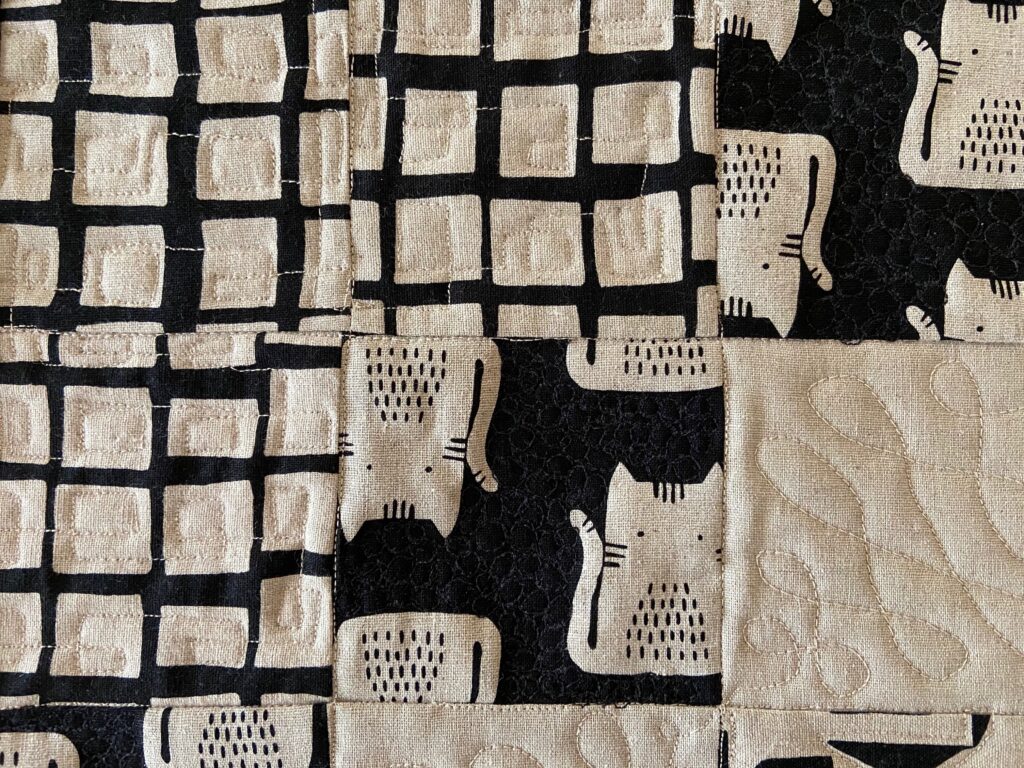
I have been selling a line of cotton linen blends made by Andover for as long as I have had my fabric shop (which is just over three years now – can you believe it??) I love these fabrics and try to always keep a few choices in the shop. I have also used them to make a lot of custom Chemex covers and French Press cozies to sell in my shop. This leaves me with quite the collection of oddly shaped scraps. Obviously, I cannot throw them away. (I know you understand).
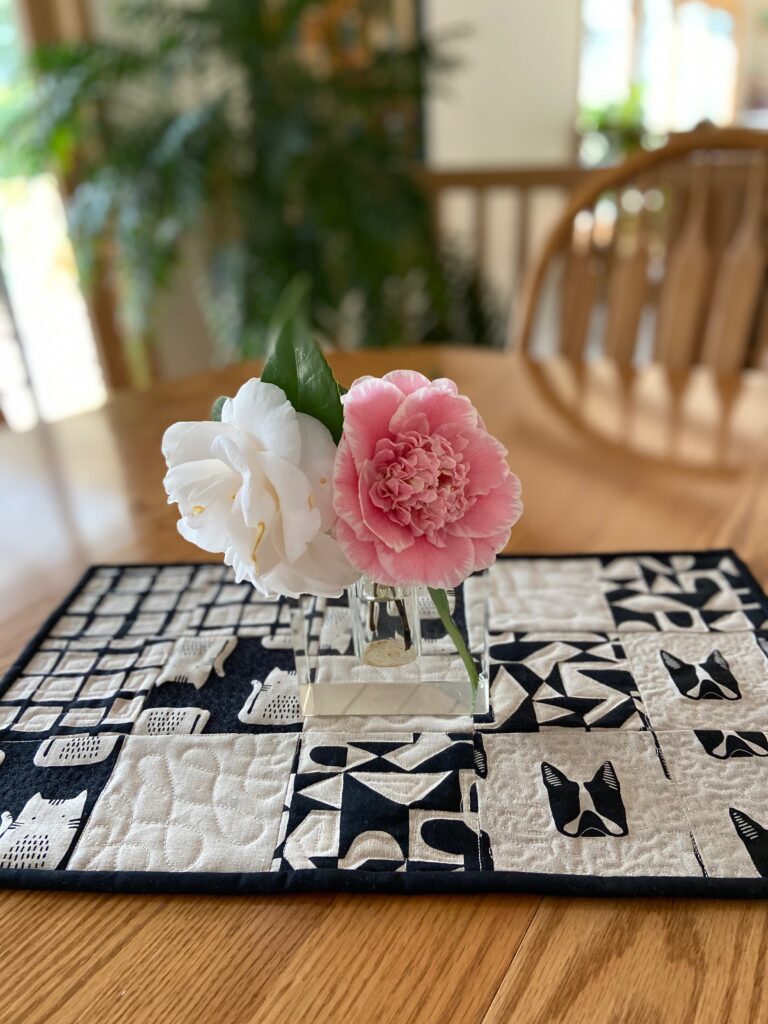
So I have been cutting them into squares to make it easier to play with them. I did a simple patchwork and quilted it up. I love the size of it and plan to make one or two more so I can use them as placemats on the table.
I quilted each of the fabrics with a different motif. Hard to see, but the kitty fabric has tiny pebbling. The black on black quilting was not fun. It is so hard to see as you are going! For the grid fabric, I did little squares that spiral this way and that. The solid fabric has loops. For the dogs I did a micro stipple. With the abstract shapes, I just outlined shapes which was easy and fun.
So pretty with some camellias from the garden.
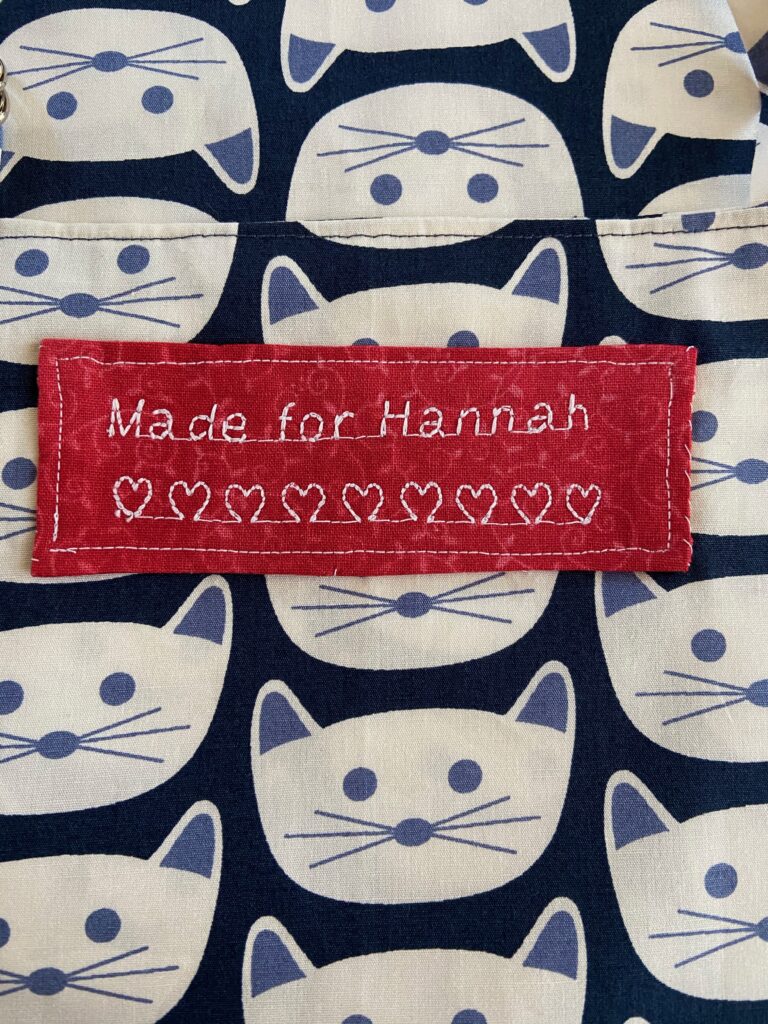
Want to see another kitty project? This one is totally different. My grand daughter has her 3rd birthday coming up on March 7th. I was wrapping her gifts so I could get them in the mail when I realized I had not made anything for her. Kind of silly, why do I have to ‘make’ something for her. She is equally impressed with a store bought or hand made gift. But for her first birthday, I made her a doll quilt and her second birthday I made a dolly bed.
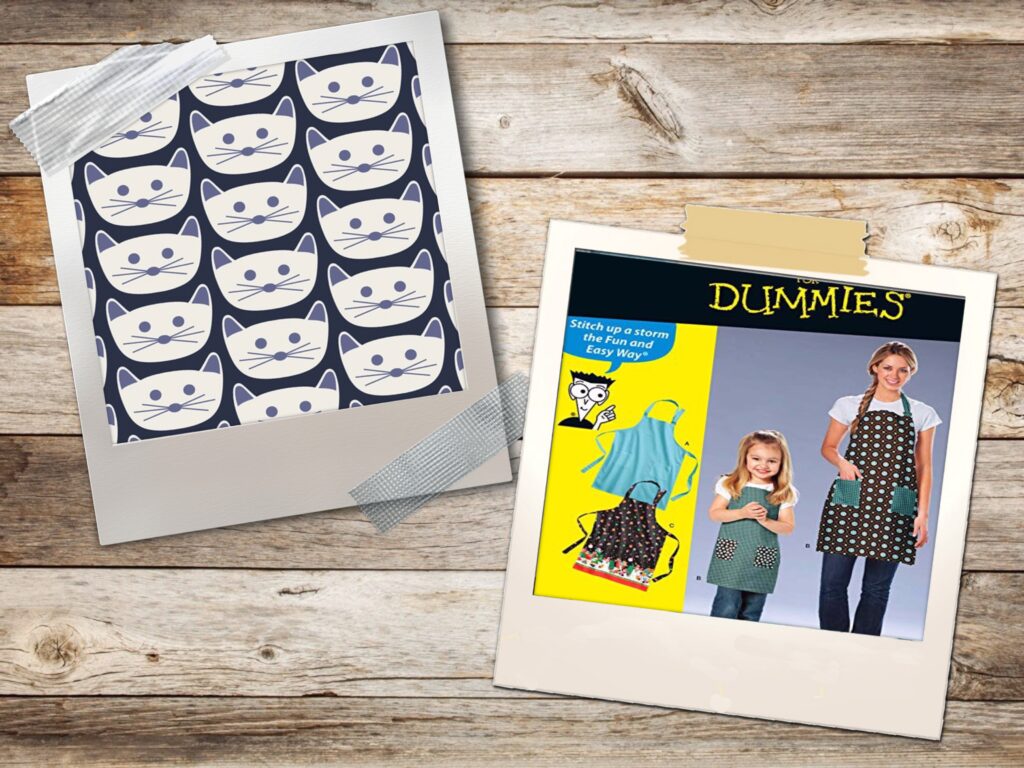
What was I to do?? I went downstairs and looked through my patterns and fabric. Wanting a quick project (since I had to mail it the next day) I chose to make her a little apron. They have two kitties at their house whom she dearly loves (though I am not at all sure her intense affection is reciprocal). I chose a sweet fabric designed by Dana Willard – you’ll find it in my shop if you click here.
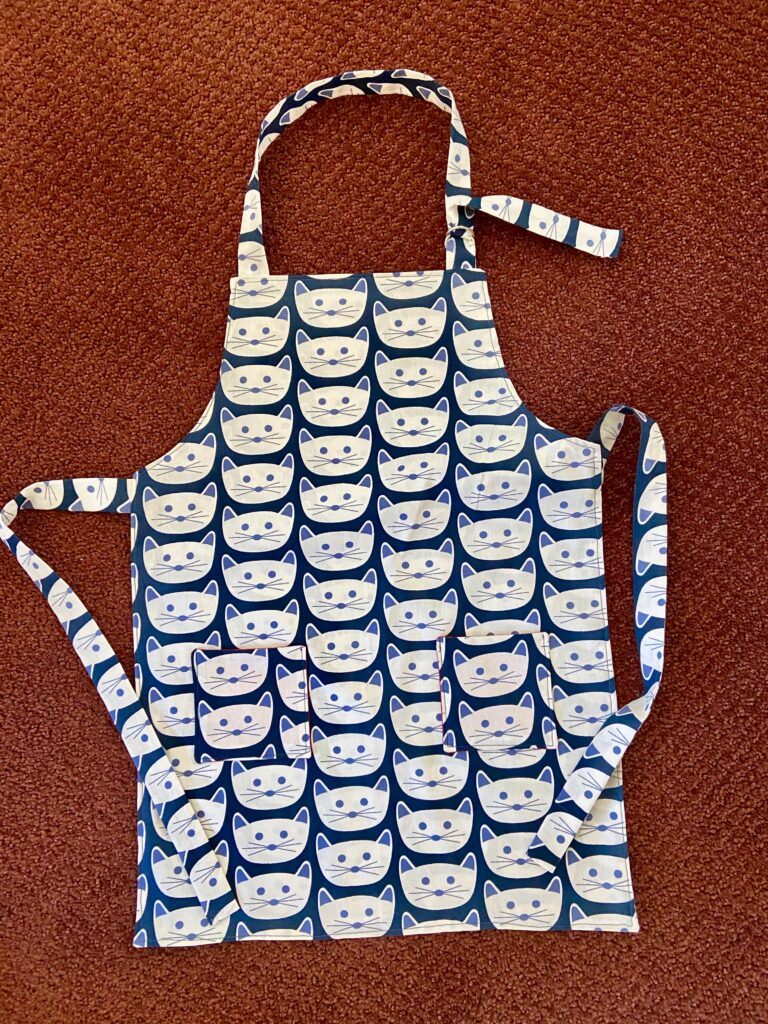
Such happy felines.
Because of the length, I had to cut 3/4 yard of fabric but it was just one piece and the ties. There was plenty of fabric left over to cut another length and line the apron. This actually made it a much quicker project. Rather than hemming under the edges of the perimeter of the apron, I just sewed the two panels right sides together (after basting the neck tie and waist ties in place). The additional layer of fabric gives the apron a much nicer weight. (Which is clearly the concern of any three year old. I didn’t want her to complain to her Gram-gram that ‘this apron is just too flimsy and light weight”. Haha)
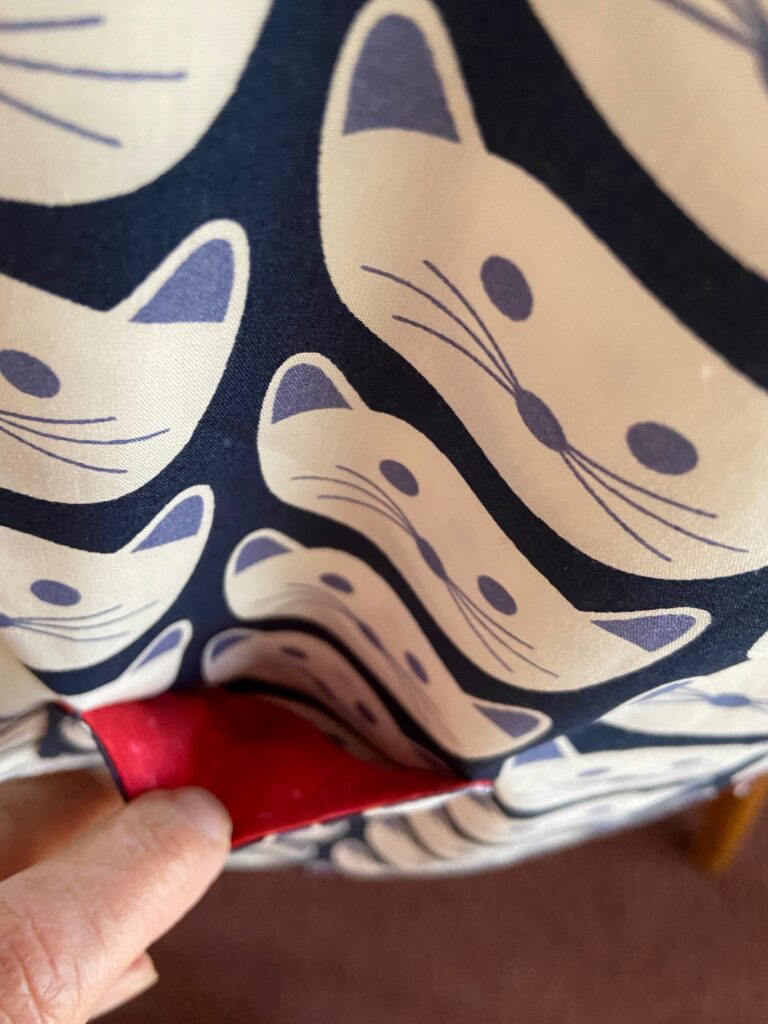
I lined the pockets with a pop of red which makes me happy and most likely matters not one bit to my sweet little girl. Again, lining the pockets seems quicker than turning under the edges and stitching them on. This way, once they are turned right side out and pressed, those edges stay right where they should be as they are stitched.
I do think she will enjoy the D-rings though. For some reason, I suspect she might want to see if she can loop the next strap through on her own. Most three year olds have this idea they can do everything on their own and she is no different.
It was a fun and really quick make – hoping she will enjoy wearing it. Her mama and daddy cook a lot and she is their helper. Now she can sport this little apron in the kitchen.
I even labeled it – The hearts look cute but I must have put too much pressure on the fabric because the bottoms of the hearts are too open. Sigh.
These projects were definitely a couple of squirrels that happened by so I’ll be sharing over at Sandra’s monthly DrEAMi link up! Also linking to From Bolt to Beauty.
Who is celebrating Leap Year today? Me, I am!! If you’d like to join me, head over to the shop because all yardage is 15% off. Clearance and remnants are 50% off. Crazy right? Great deals on lots of awesome fabric. Happy shopping!!
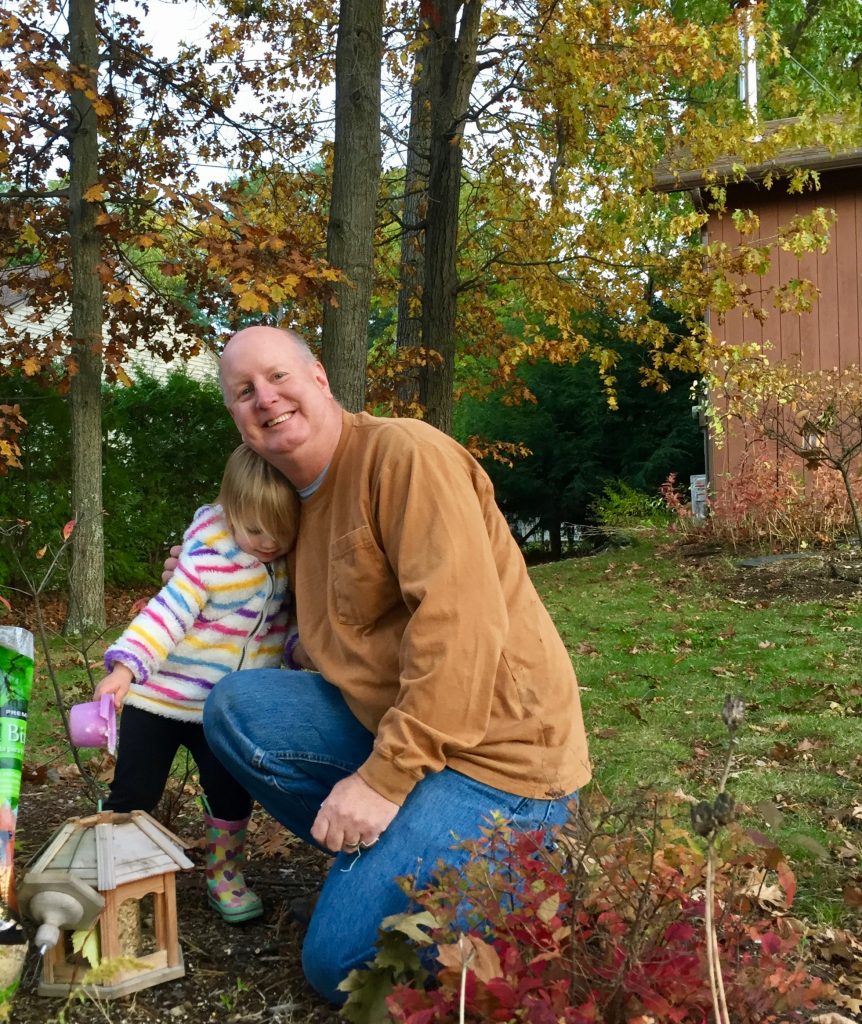
Happy Halloween!! Your recent two weeks of family time in Vermont were wonderful. The goal was to hang out with our son and his wife and spend as much time as possible with our grand daughter.
Grandpa was her favorite during our visit!
While there my grand daughter came down with a miserable virus and had terrible croup. Poor little girl was sick for a long stretch and toward the end of it, my husband came down with it. Not a fun bug at all! The two days before we left, my son and his wife were starting to come down with it but it didn’t look like they were going to be quite as sick.
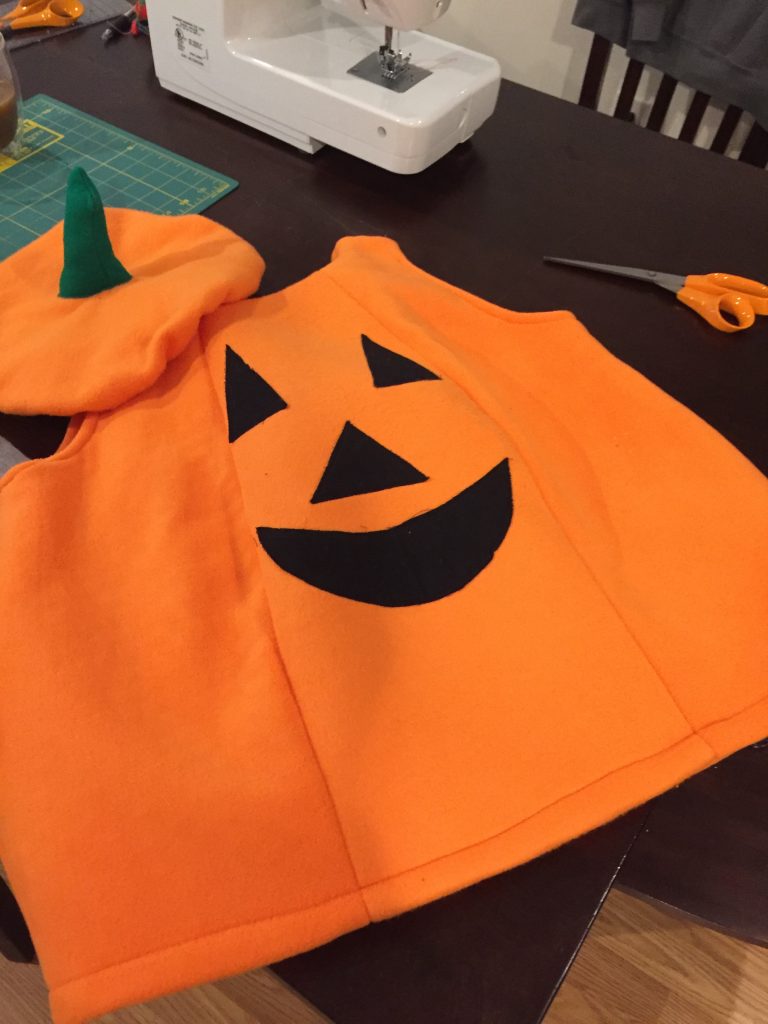
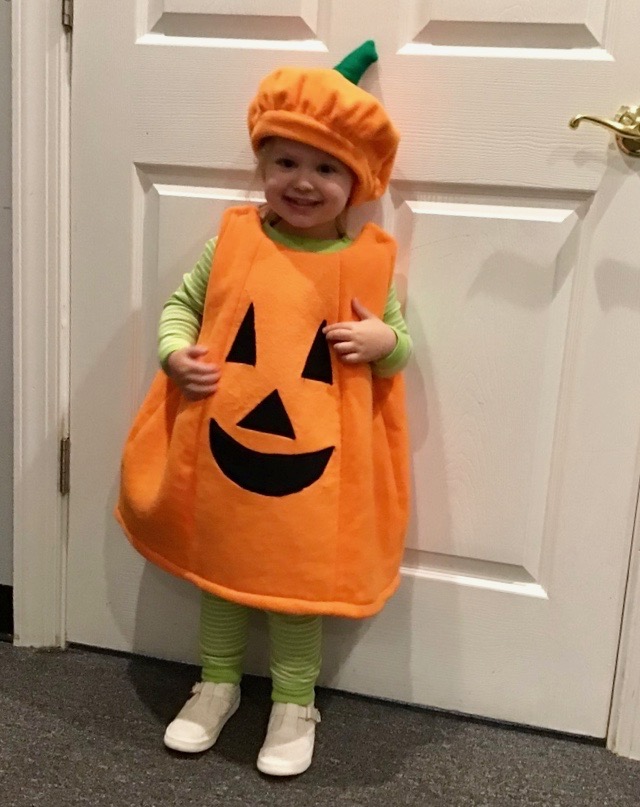
Since we were having some quiet time at home and H was taking long naps due to being sick, i did have time to do some sewing. I pulled out my DIL’s sewing machine to make a Halloween costume for H. She and her mom found a cute picture of a little girl dressed up as a pumpkin with green leggings and t-shirt on underneath.
I used a Simplicity pattern for the costume. There is a Jo-Ann’s in the next town over so off I went in search of orange fabric. At first I planned to use a wool felt but it was so stiff. I knew H wouldn’t have fun running around in that at her Halloween party (at her daycare). I was with my son Kyle (he and his wife drove over from New York for a weekend) and he spotted a bolt of orange fleece way up on a top shelf, not yet unwrapped. Lucky for me he is 6’ 2” and was happy to hop up and down to grab it. This was perfect.
The pumpkin is lined with fleece and filled with batting. Even trick or treating in Vermont, this girl is going to be quite warm. Her outfit is so heavy!! There was a stencil for the face but i felt like it was too big so I ended up cutting the pieces out free hand. Using a few bits of ‘Wonder-Under’, I fused the face to the front and appliquéd them with a simple zig zag stitch. The pattern called for a casing to be made at the hemline with elastic inserted to make it puffy. However with the fleece, there was already a nice shape to the pumpkin. Instead, I trimmed the fleece lining to be about two inches shorter than the outer layer. Turning one inch of the outer layer to the inside, I machine stitched the hemline.
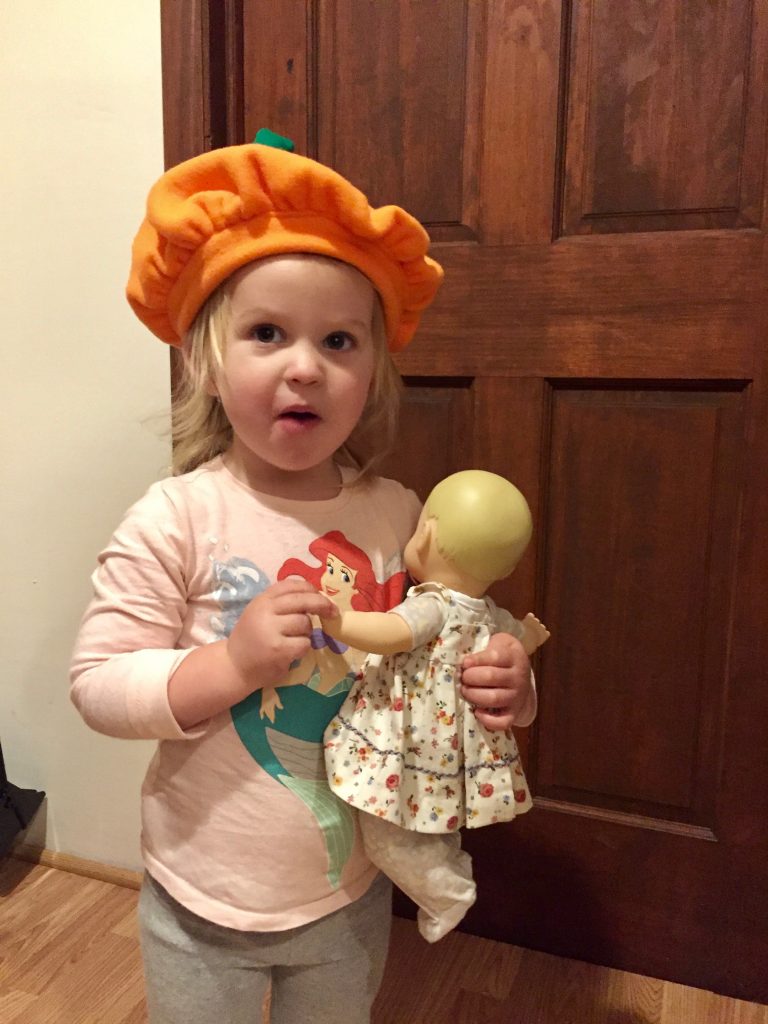
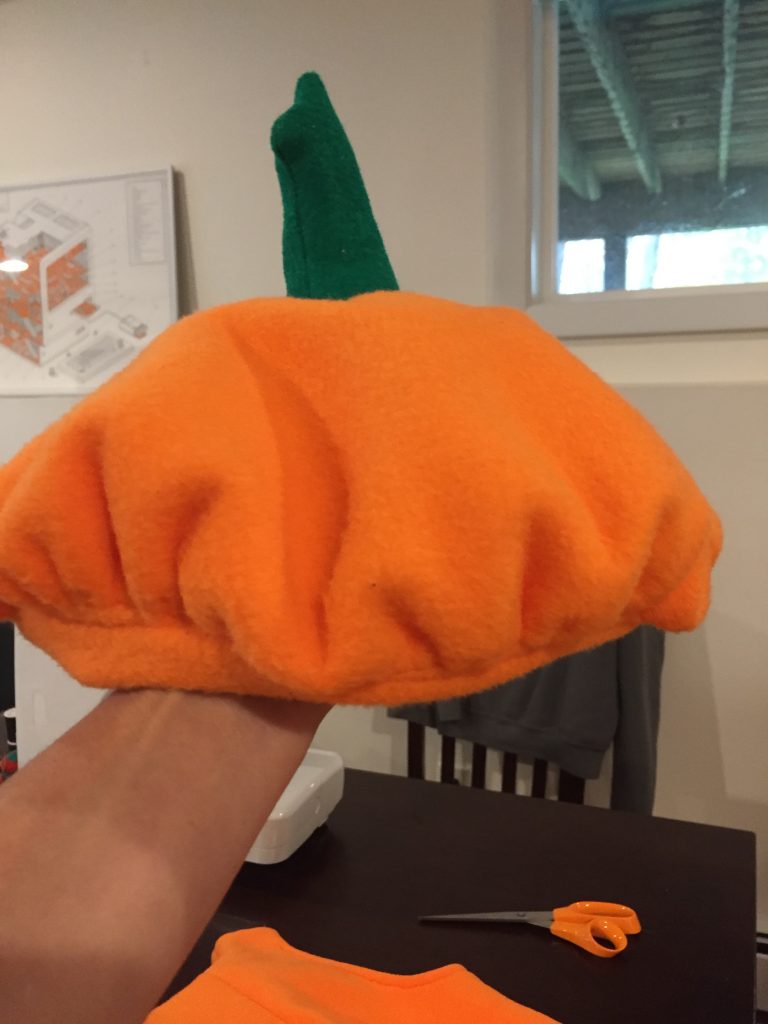
She was trying on the hat when I first finished it. But it was a bit too big.
Ok- my favorite part of the whole costume is definitely the hat. When I made it, H was quite happy to wear it about the house for an afternoon so I really hope she wears it on Halloween. It looks so darn cute on her. I made it during a nap time, guessing at the sizes and it was too big for her. There wasn’t a clean way to fix this without doing a lot of seam ripping. I had to rip one seam on the pumpkin and it was difficult to manage with that puffy fleece fabric. So I cheated and took a little tuck and just stitched it up. The hat is still a bit large but better than before.
So darn cute!
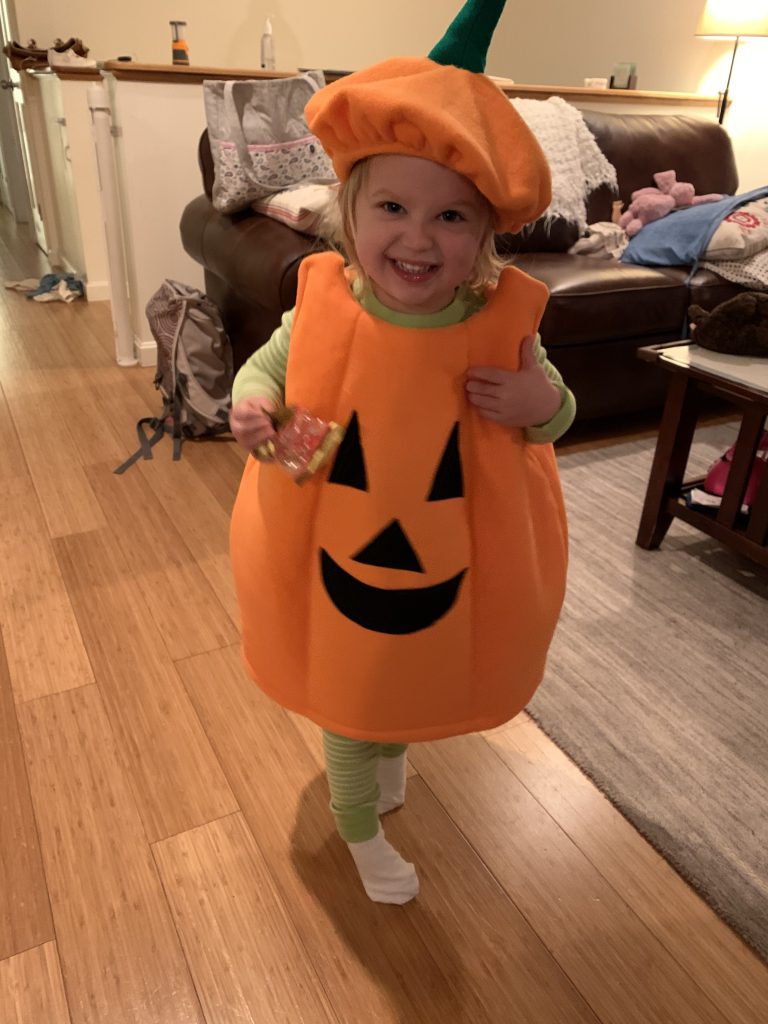
When I left I had not had time to run out and buy some velcro which was needed for the shoulder straps. So I left it unfinished and my daughter-in-law took care of it. I received some really cute pictures of H having fun with her costume today.
Getting ready for daycare earlier this morning. So much excitement!
I am glad they had a little party at her daycare. I hear they are supposed to have a lot of rain tonight so that may put the kibosh on any trick or treating.
I love the green and white striped leggings and t-shirt under her pumpkin costume.
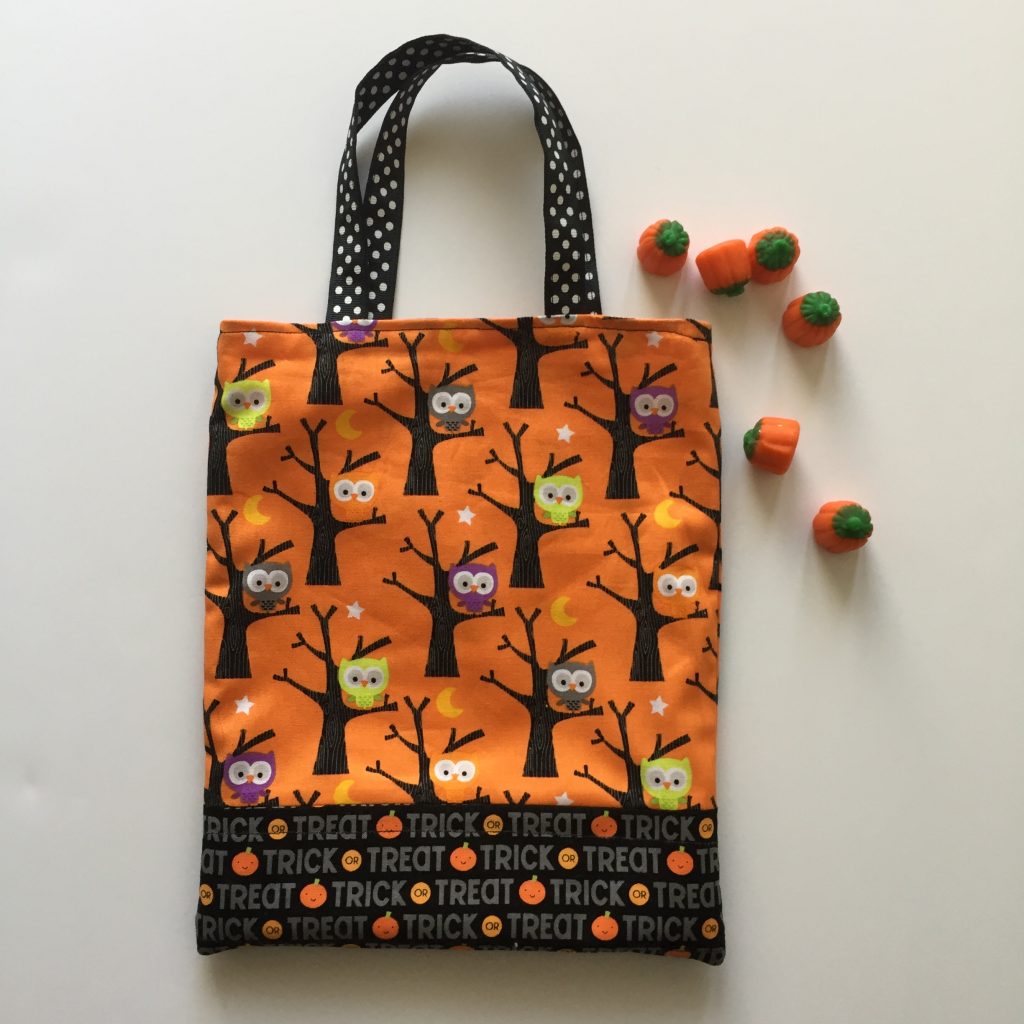
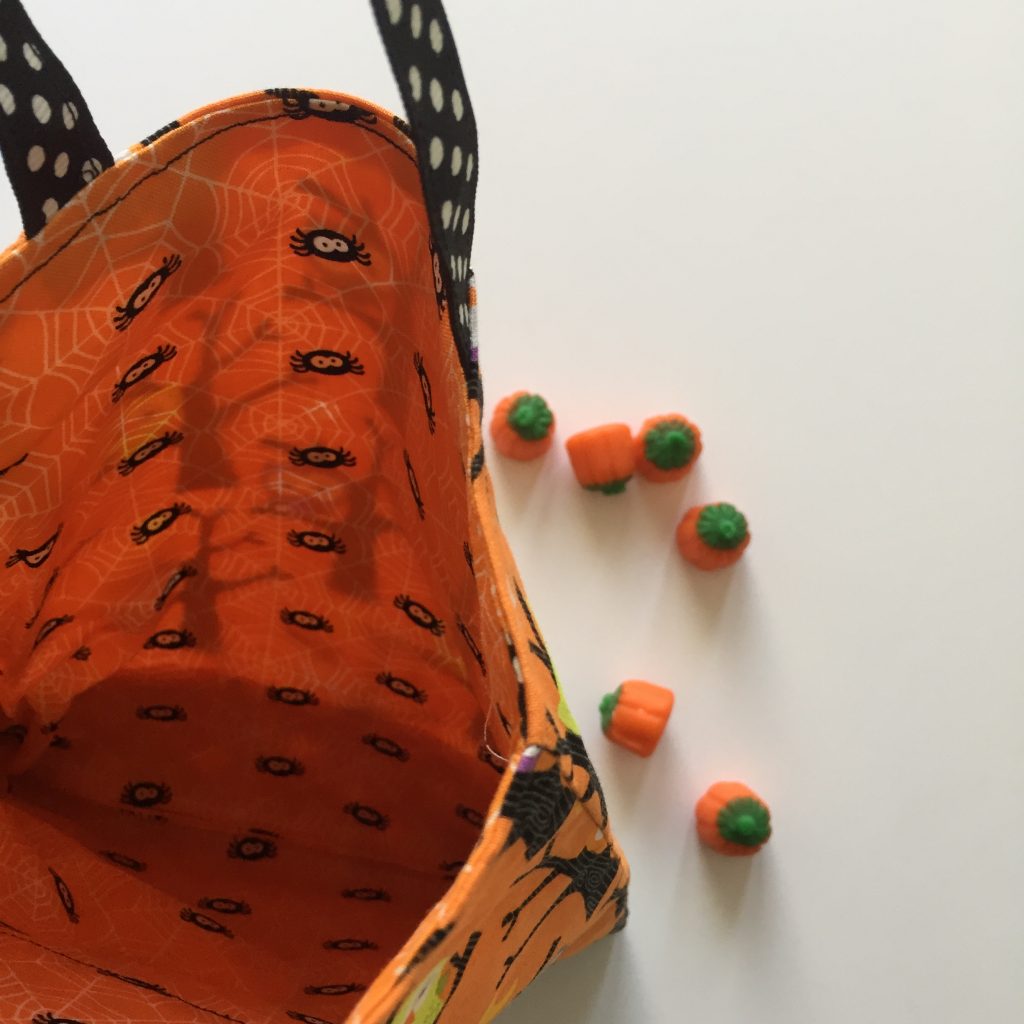
Just in case there was a chance for trick or treating, I also made her a tiny treat bag to carry.
This was designed off the cuff and I didn’t write down any measurements. If I had to guess, I would say it finished at about 8″ x 11″ or so. Maybe even a bit smaller. I had that polka dot ribbon on hand (actually had all of the supplies on hand) and I took two pieces and sewed them together (wrong sides together) just to make it a bit heftier.
The bag is lined, which makes it a bit stronger. Since she does not yet know what trick or treating really is, she won’t be disappointed this year if they skip it due to weather. She can play with this bag or use it next year.
While I was there H and I made a festive bandana for their dog Wusha. I think Wusha looks a bit embarrassed to wear it but this dog will do anything my grand daughter asks of her. I had the triangular pieces cut and pinned and then had H sit on my lap and help me feed the fabric through the machine. I tried to take a selfie because it was so sweet but I am really, really not good at those and didn’t get much of a picture! But we had fun and she was thrilled to help Gram-gram sew for a few minutes.
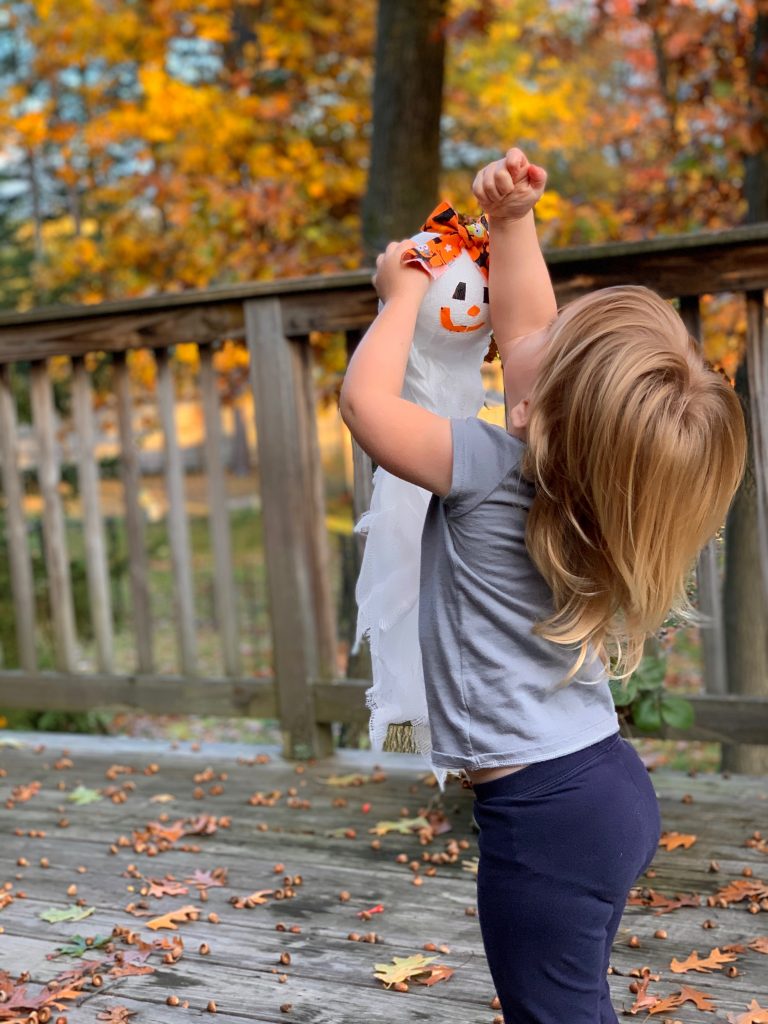
Introducing Georgie Ghost
One last project while we were there was to make a little ghost to hang in the dining room. We had been taking walks around the neighborhood and she really liked looking at the neighbors decorations. She loved the ghosts and a few little scarecrows we saw. I asked her if she would like to make a ghost and she was so excited.
This was super easy. One styrofoam ball from Wal-Mart and a packet of cheesecloth from the grocery store. I cut the cheesecloth in two strips and with the help of one happy two year old, layered the ball with the cheesecloth. Then we worked together to cut the eyes, nose and mouth. I had gotten her a glue stick that starts out purple and dries clear. This way she could see where she was putting the glue to put the pieces on. The addition of the bow on her head turned this little ghost into a girl. H and I had so much fun with this project and it was the perfect amount of work for a two year old.
Checking to see if Georgie Ghost can fly.
My son took the photos of H and her ghost – they are so sweet! We really enjoyed our time with the kids and can’t wait for our next visit. Grand parenting is the best and it would be even better if we all lived on the same side of the country!! Someday…
Linking up with a few fun places, including the monthly Favorite Finish party at Meadow Mist Designs. Be sure to check the top of the page under Link Ups!
It seems like more of last week was spent outside working in the garden than sewing. We had a bit of cooler weather which was a treat. I joined Ray in working outside several mornings and got several areas of the yard cleaned up. When you have a big yard it must be tackled in smaller sections. If I look at the whole, it is overwhelming and I just avoid it completely. By taking it in small portions, it is more manageable. Much like looking at a quilt top and thinking of all that needs to be quilted. Better to just start with one section and keep going, right?
I did get a few fun things done in the sewing room though. Julia and I have been shopping for fun things for her dorm room. She found out who her roommate is (a girl from Maryland) and also that she was placed in a double dorm room rather than a triple. The campuses in California are overcrowded and many of the dormitory rooms have been converted to triples with three students in them and yikes, that is a tight squeeze. She was really hoping for a traditional double and is so relieved she got one.
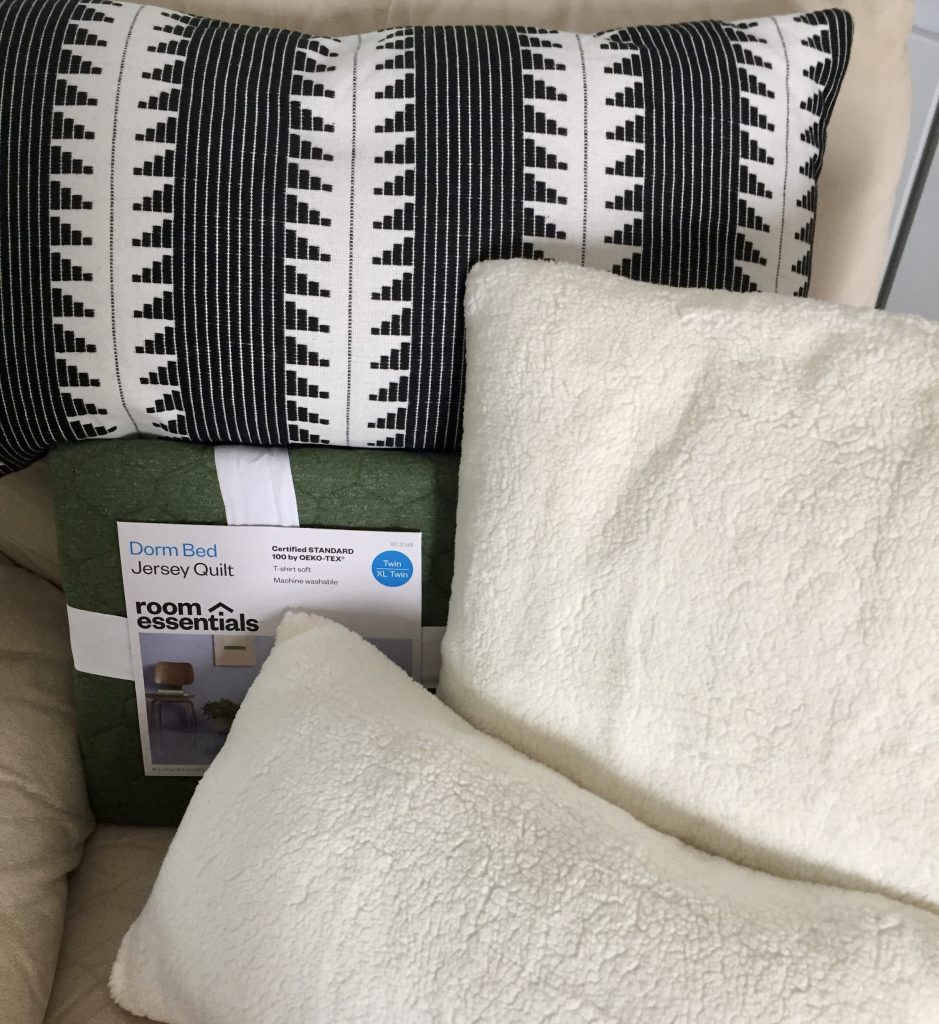
When we were shopping she picked out her comforter, sheets and towels. She wanted some throw pillows too. She selected a black and off-white pillow and was looking at others. Her (very) frugal mother was slightly gagging at the price of $25 each for dorm room throw pillows. Then I saw a faux sherpa pillow case at Target for $5.00. I explained I could cover a pillow form with it and she would have the same sort of pillow as the one she was looking at. Yay! Not like I needed another sewing project but this would be so quick. It was easy to convince myself to add it to the list!
As it turned out, the pillow case had an invisible zipper already placed in one end – better yet! So one pillow form fit the width perfectly – I only had to trim off some of the length and stitch up the end. Does it get any easier?
The length that was left was just enough to cover another form I had. This one had to be taken in about one inch on the width and I sewed about two inches of the long opening shut on each end. Then I hand stitched the opening shut after stuffing the form in. Hurray – two more throw pillows for $5.00 instead of $50, which makes this frugal mama happy. A quick distraction from other projects but completed in one sewing session!
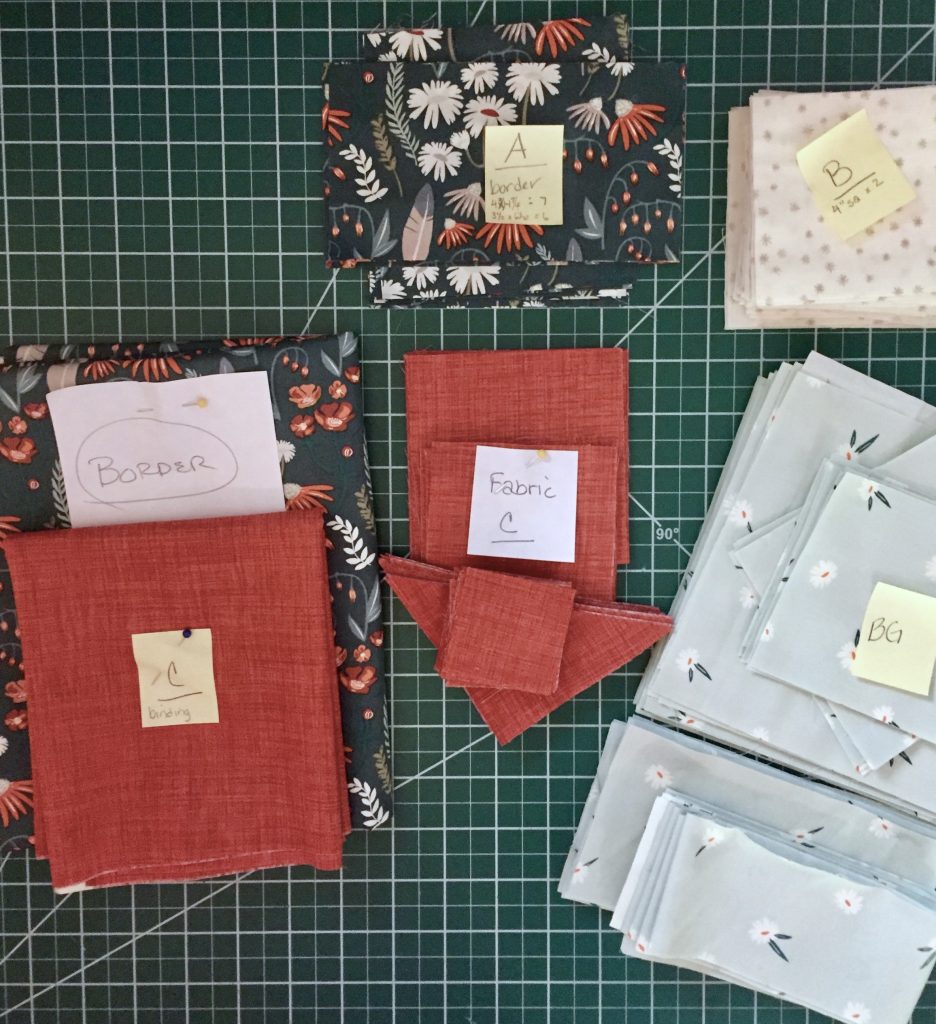
My other accomplishment of late was to cut the pieces for the Mosaic Mystery QAL. This is my second mystery QAL. The first one I did was with Tish from Tish in Wonderland and you can check it out here. Of course, I am a bit of a cheater. Because I sold kits for both QAL’s in my shop, I had the picture of the finished quilt ahead of time (to be able to create the kits). So for me it is more of a regular quilt along. The two fabrics on the left are Dancing Daisies and Wild Gatherings from Art Gallery Fabrics Capsule Campsite. From there I chose two blenders to round things out.
Anyway, I am thrilled to have the cutting completed for this project. I really like the fabrics I am using for it. They will be really nice in my living room as a lap quilt. Perfect colors! Cheryl’s Mosaic Mystery QAL goes at a very relaxed pace. July was fabric selection (but I didn’t commit to joining in until mid-August). Then she released cutting instructions in the beginning of August. The first steps for piecing will be released in early September. You can see there is plenty of time for you to join in still! I am enjoying all of the quilters that are actively involved in the Facebook group for the QAL. So many gorgeous combinations are being shown. However, if you are not one for pulling fabrics for a Mystery QAL, I still have kits available in the shop. Easy peasy!! (The collection I chose for my quilt is not listed as a kit but if you happen to love it and want it, let me know. I will happily create a kit for you.)
I have also continued quilting my friend’s memory quilt. I have just a few squares left to quilt and then on to binding. I will share that soon as I get it finished up. Hope you are all doing well. Have a wonderful weekend!
Sharing this post with several link-ups, including Sandra’s DrEAMI link up at month’s end.. Check them out at the top of the page, under Link Ups.
Also, have you signed up for the Needle & Foot newsletter? If not, click here to sign up. It is a great way to hear about current fabrics, sales or events!
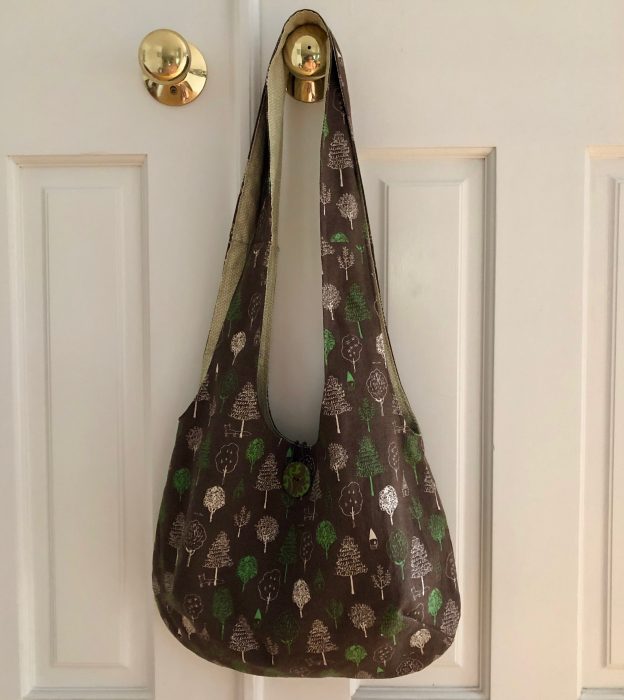
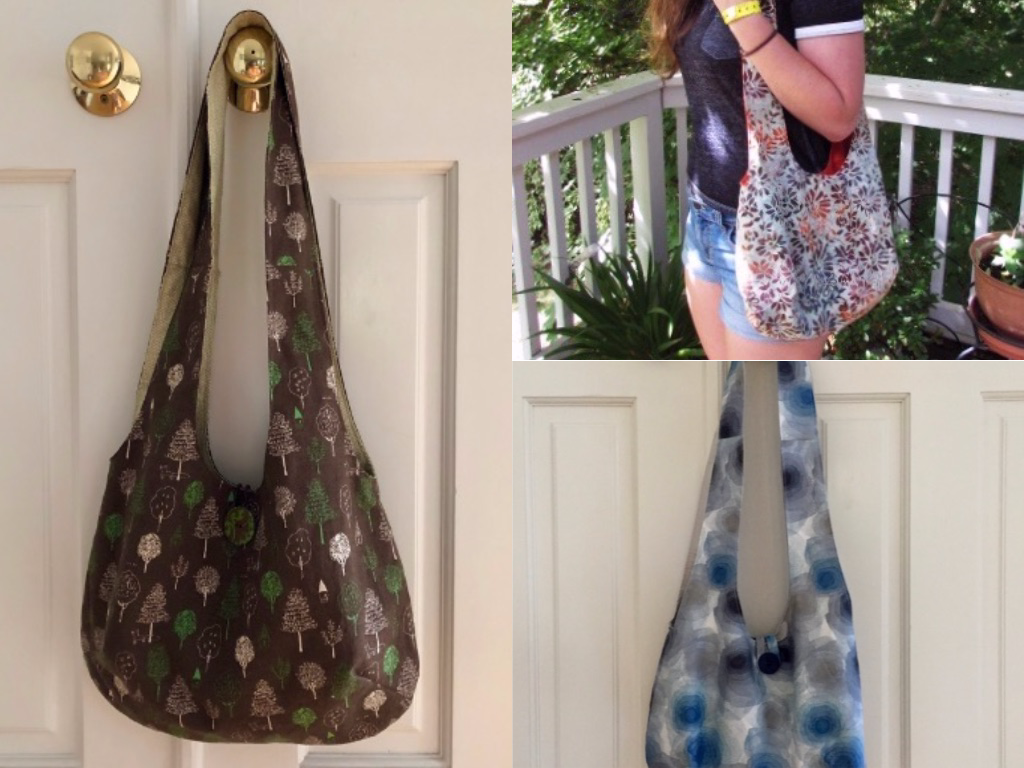
I told you I wanted one of these shoulder bags for myself! I have made two for Julia which you can see here and here. The pattern is a freebie from Very Purple Person.
They are so fun to make, don’t take too much time and not a lot of fabric so why not? It is a great way to use this sweet Japanese fabric that was given to me by my friend Patty. She vacationed in Japan about a year ago and when she returned she sent me five pieces of fun fabrics. Three of them were a beautiful cotton-linen blend and I have been holding on to them and thinking of how I wanted to use them.
Each cut is 1/2 yard and I was happy to be able to squeak a bag out of this one! I had to piece the shoulder strap a bit but you can’t even see it. The fabric has a great weight to it. I washed and dried it first because I suspected there would be some shrinkage. It was minimal though. Rather than sewing a gusset into the bottom of the bag for width, the designer simply used two wide darts at the bottom corners of the outer and interior fabrics. Very easy!
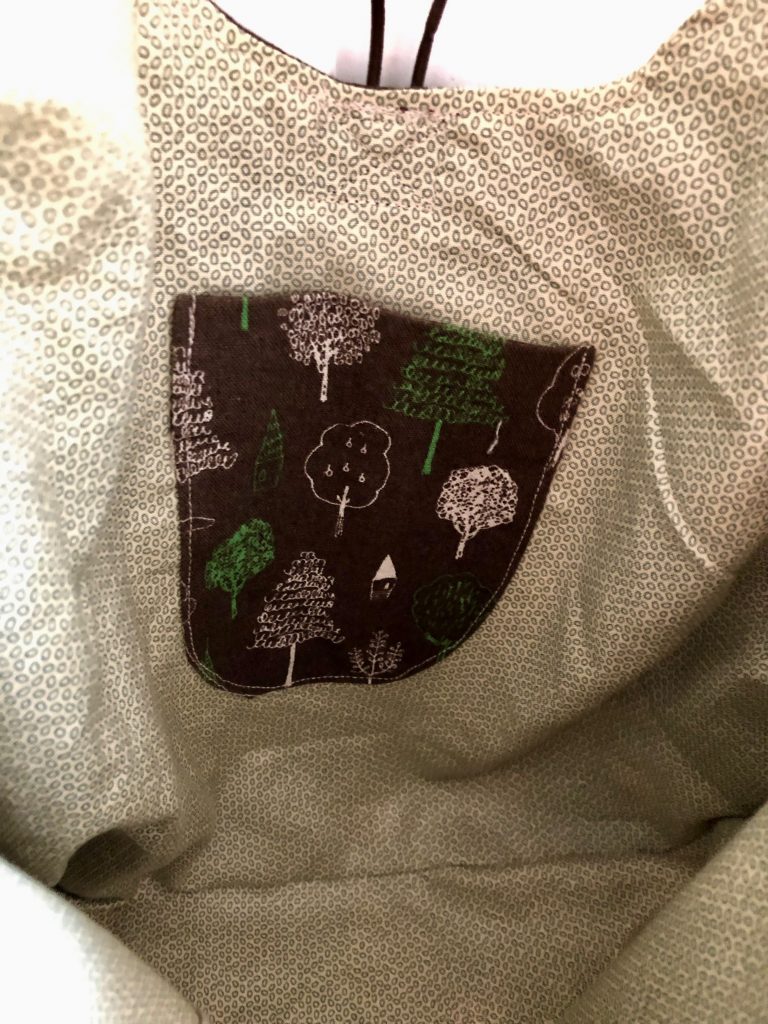
As usual, I added two interior patch pockets. Purses need pockets to keep the little things from always ending up at the bottom of the bag. The lining is an older print that has been in my stash forever. How great to use it up and have one less piece in the pile!
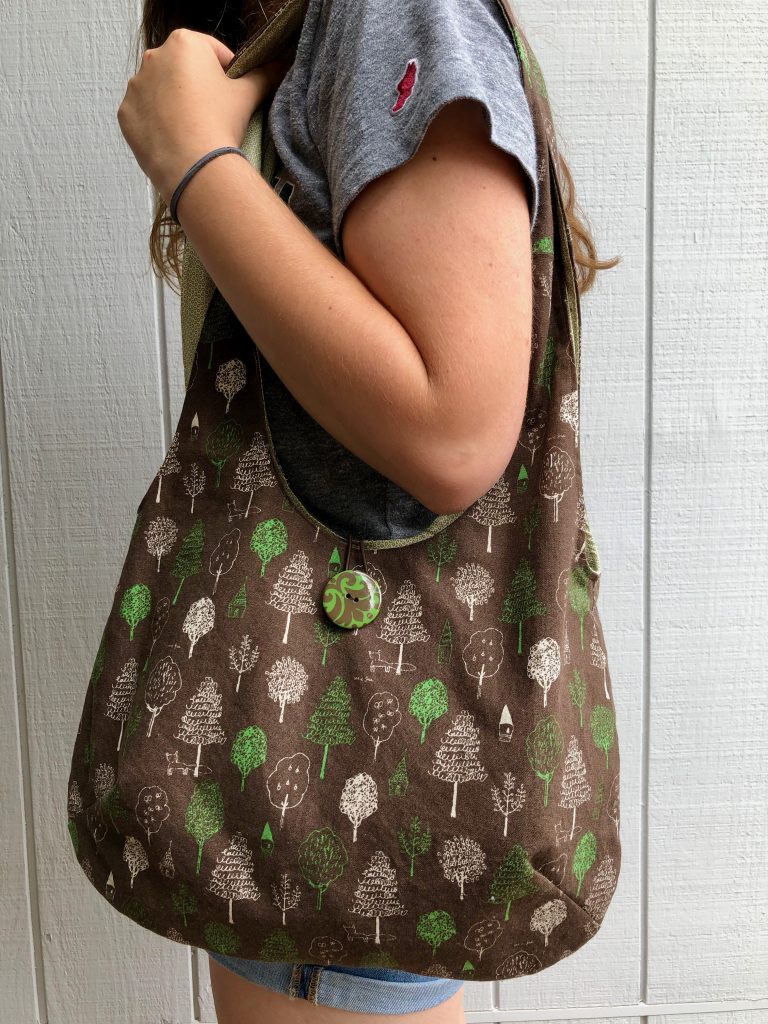
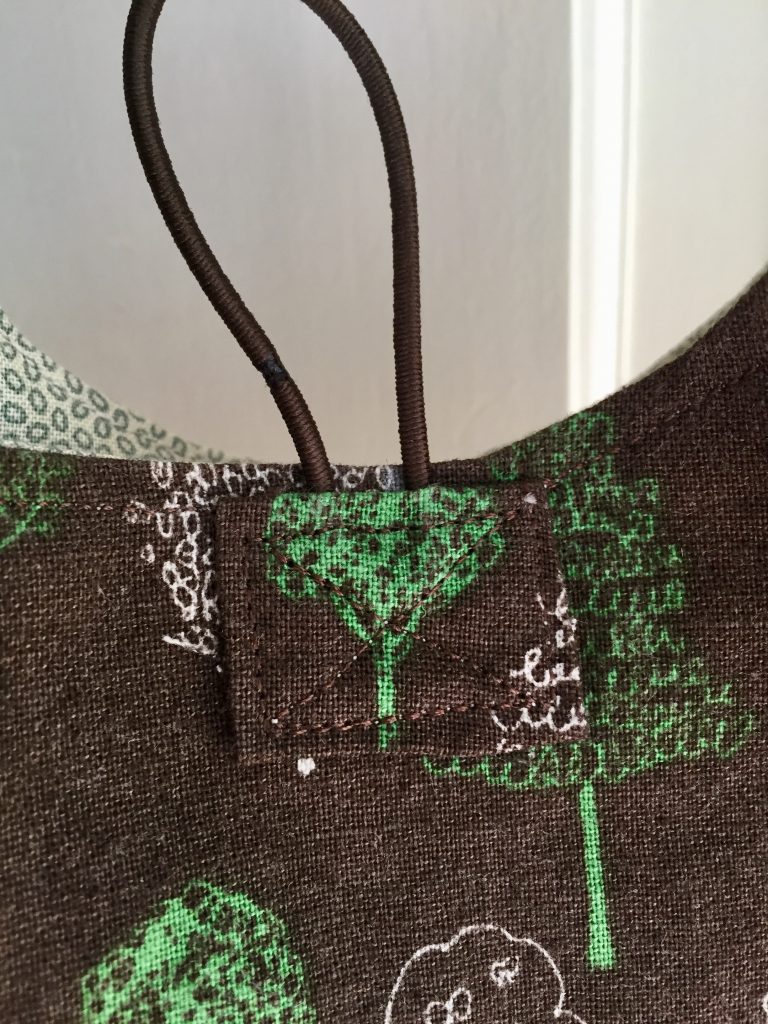
A simple hair elastic was added to loop around the button as a closure. I did this after the fact (meaning I forgot to stitch it in while constructing the bag.) But this was not a big deal. I basted the elastic (with my machine) where I wanted it. Then I folded up a square of fabric so no raw edges showed and stitched it over the bottom of the elastic. Let’s call it a design element, shall we?
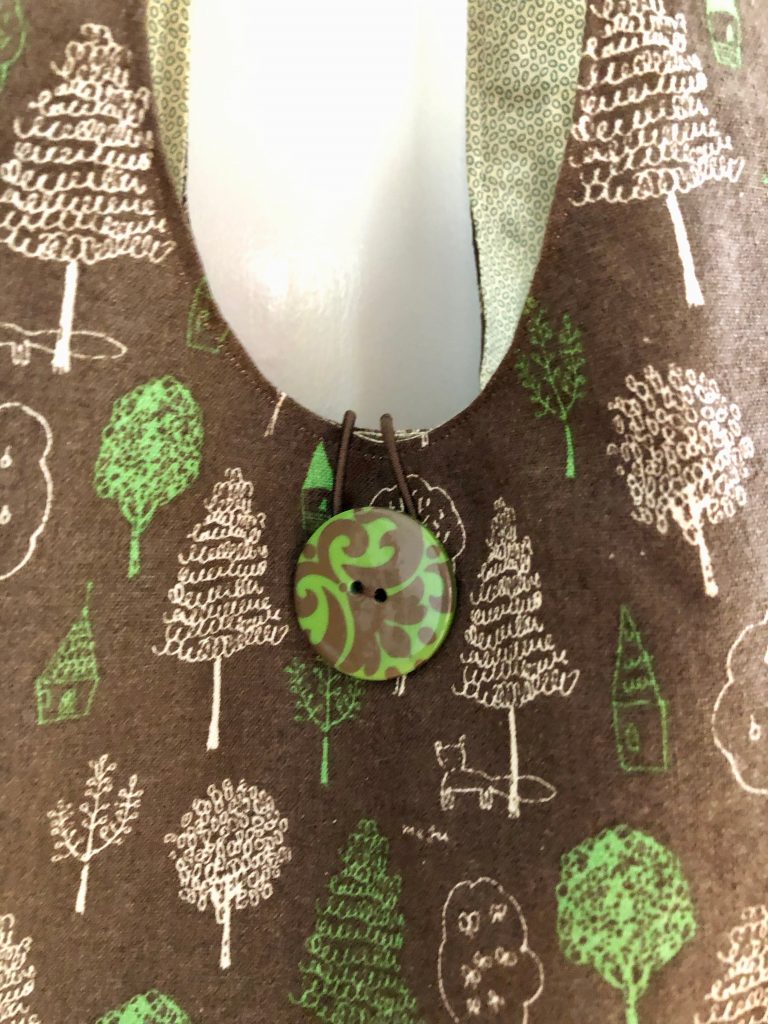
This button has been in my button jar for a very long while and it is perfect! I am happy to add this bag to my collection. A selection of different purses is fun to have – I am one who changes them out all the time. This one will be great for the fall which is just around the corner! If you are intimidated by making a bag, this is the pattern to try. It truly is simple. The most difficult part is turning the whole thing right side out as you pull it through the shoulder strap as it is bulky and can feel awkward. If you try it and have any problems, email me. Happy to help.
Adding a pocket or two to the interior (or exterior) is simple as well. Here is a link to a great tutorial if you need more information. Again, if you need help, send me a note.
Finally, I have a great giveaway happening on Instagram today and tomorrow. Be sure to click over and check it out!!
Lots going on around here lately. My husband has finally decided he is ‘done’ renovating our little house in Downieville and it is listed for sale. We bought it some years ago after I saw it for sale during a quilting retreat up in the mountains. We have enjoyed many weekends up there and Ray has really outdone himself with updating it. I suspect it will sell easily and make someone very happy.
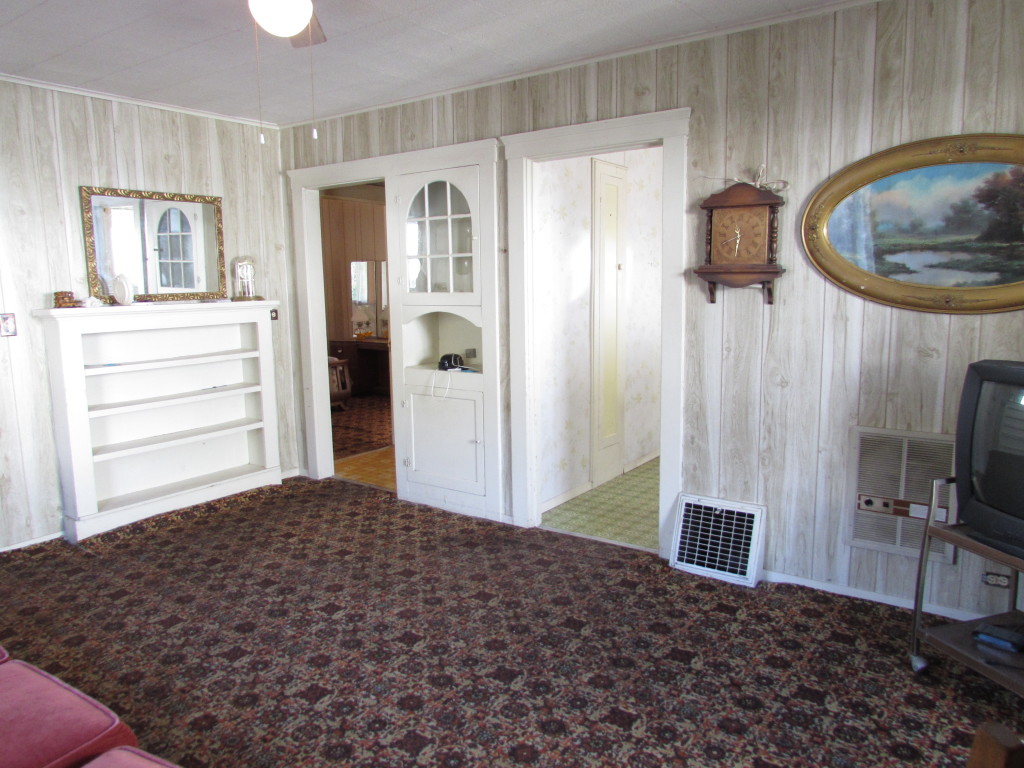
A “Before” photo
This is a shot of the living room when we were first looking at the house.
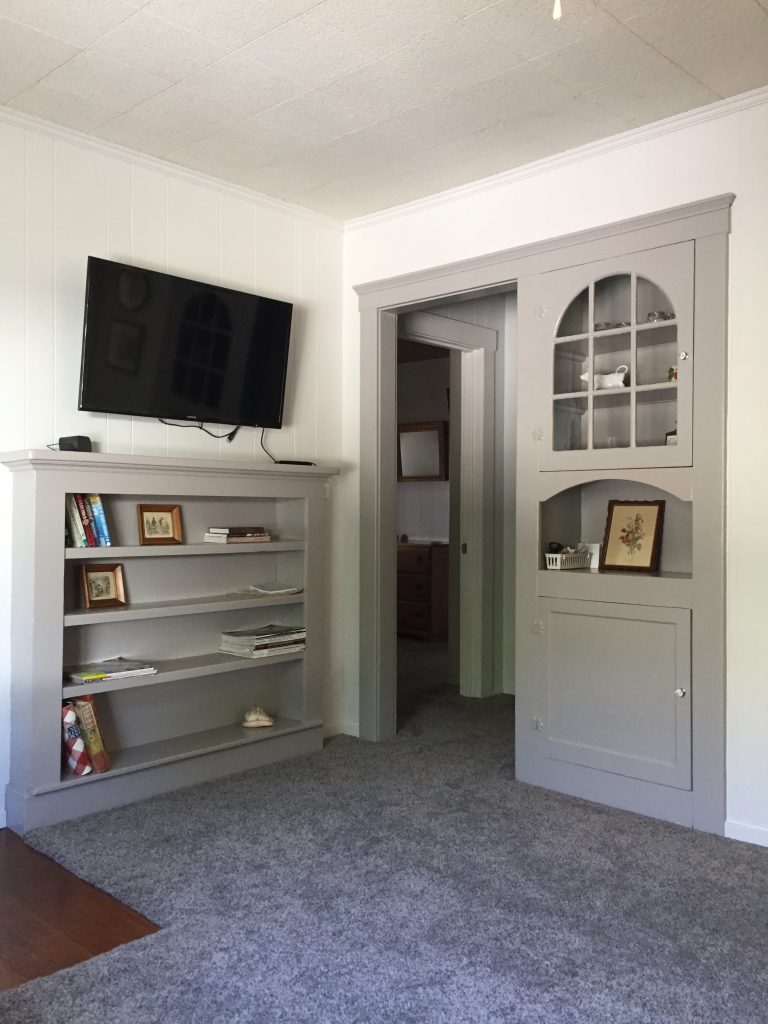
The same angle with Ray’s updates!
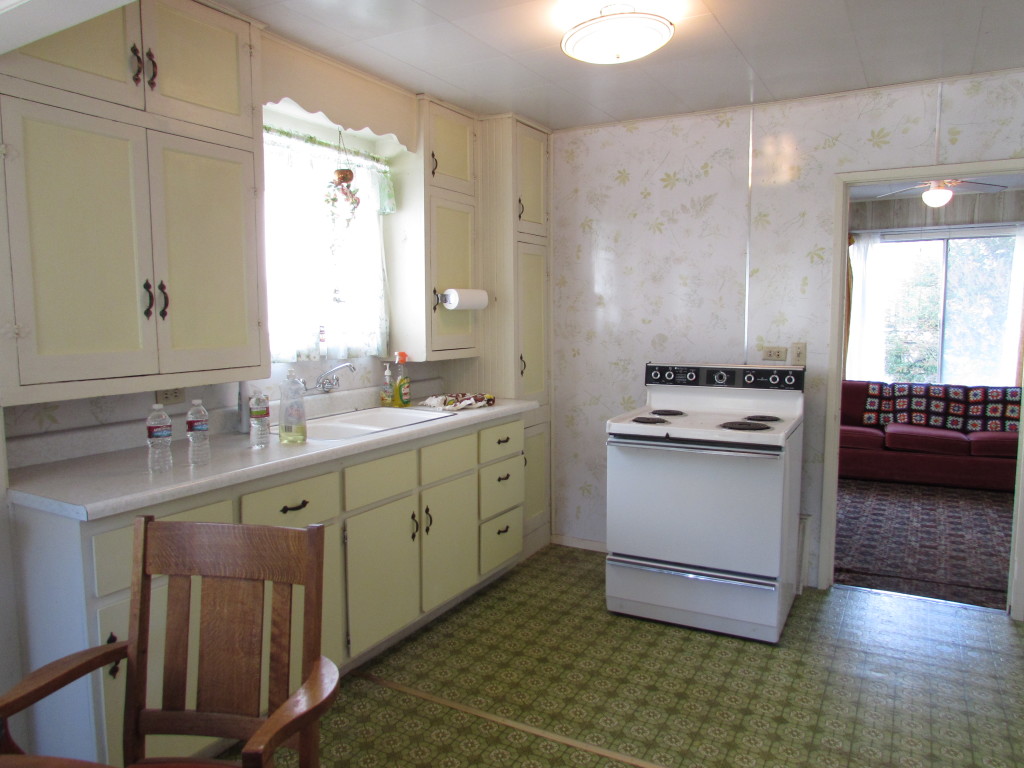
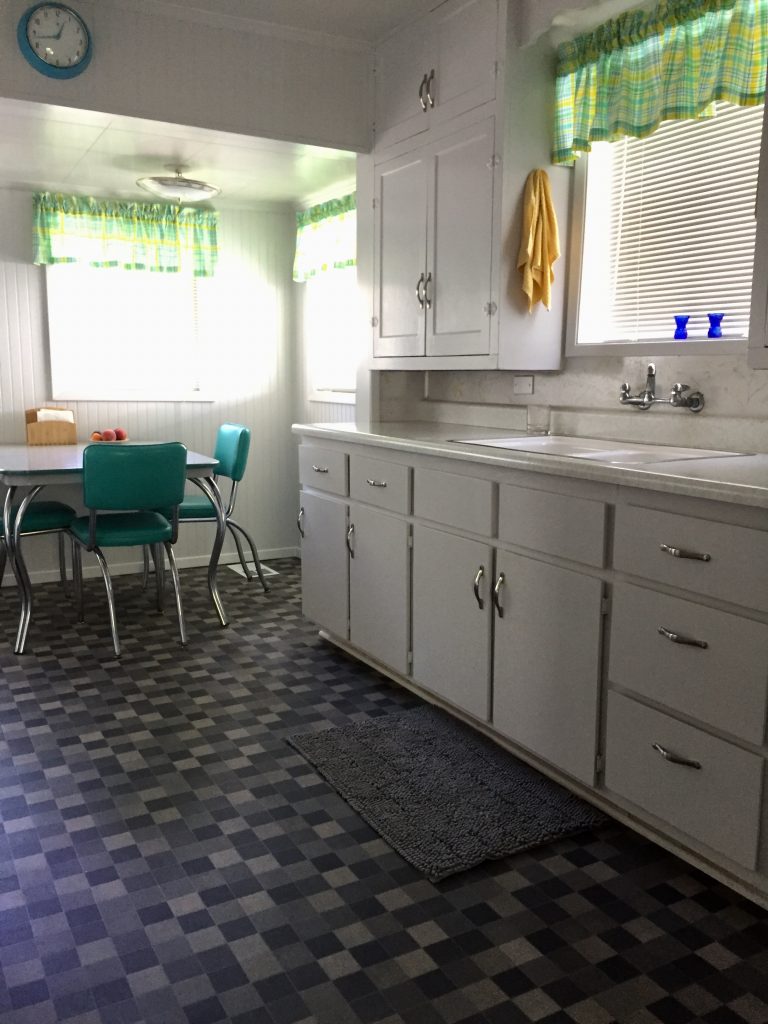
Want to see more? Here is the kitchen when we toured it the first time.
The “Before” shot of the kitchen.And the kitchen as it looks now. I love it!
In some ways we are sad to give this little house up but we are also ready to be responsible for just one house again. Life is always changing!
I did bits of sewing here and there over the past week but mostly I was napping and dealing with a long migraine cycle. Ugh, that is so frustrating. Started Sunday night and here it is Friday and I am not so sure it is over yet. Such a waste of time – dragging around and not accomplishing a whole lot. I am so fortunate that reading does not bother me when I am sick – many migraineur’s cannot read because of strong sensitivity with their eyes. I have a hard time looking at the computer, I think it is because of that little bit of movement that one’s eyes track while looking at a screen. But the T V and books are ok. Anyway, lots of napping and I am crossing my fingers it is over with soon. I did my second monthly injection of Ajovy yesterday. My neurologist said some people experience a benefit right away and it can take others 3 or 4 months to notice a difference. Maybe this month will be better!
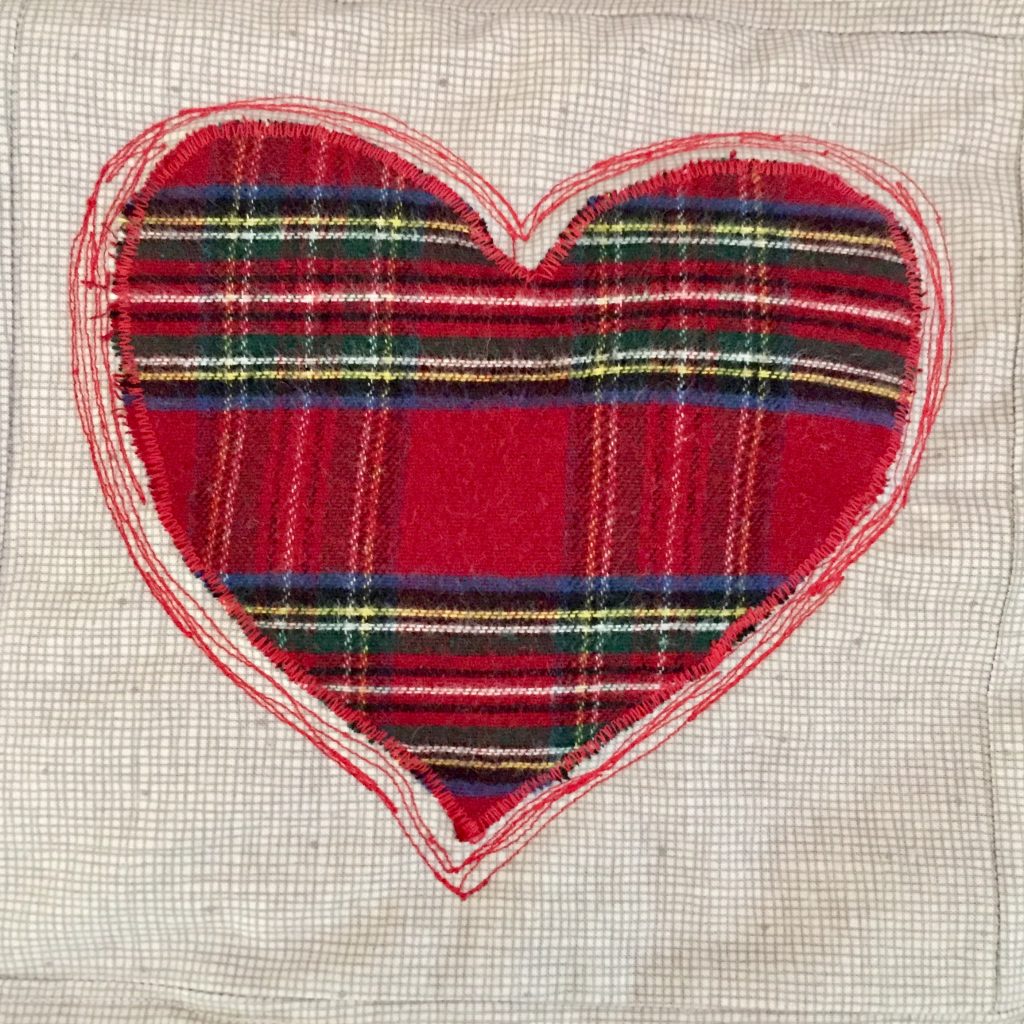
The sewing I did do was mainly working on my friend Susie’s memory quilt. I got it basted (Julia helped me crawl around on the floor for that!) I quilted straight lines through the sashing and have been thread sketching an echo of sorts around the two plaid hearts. I think it lends a rustic simple look which is perfect for the mood of this quilt. Next, I plan to work on the short sashing strips between the four patch blocks. Then I need to decide what I want to do with the four patch blocks. I am just taking it easy and enjoying the process.
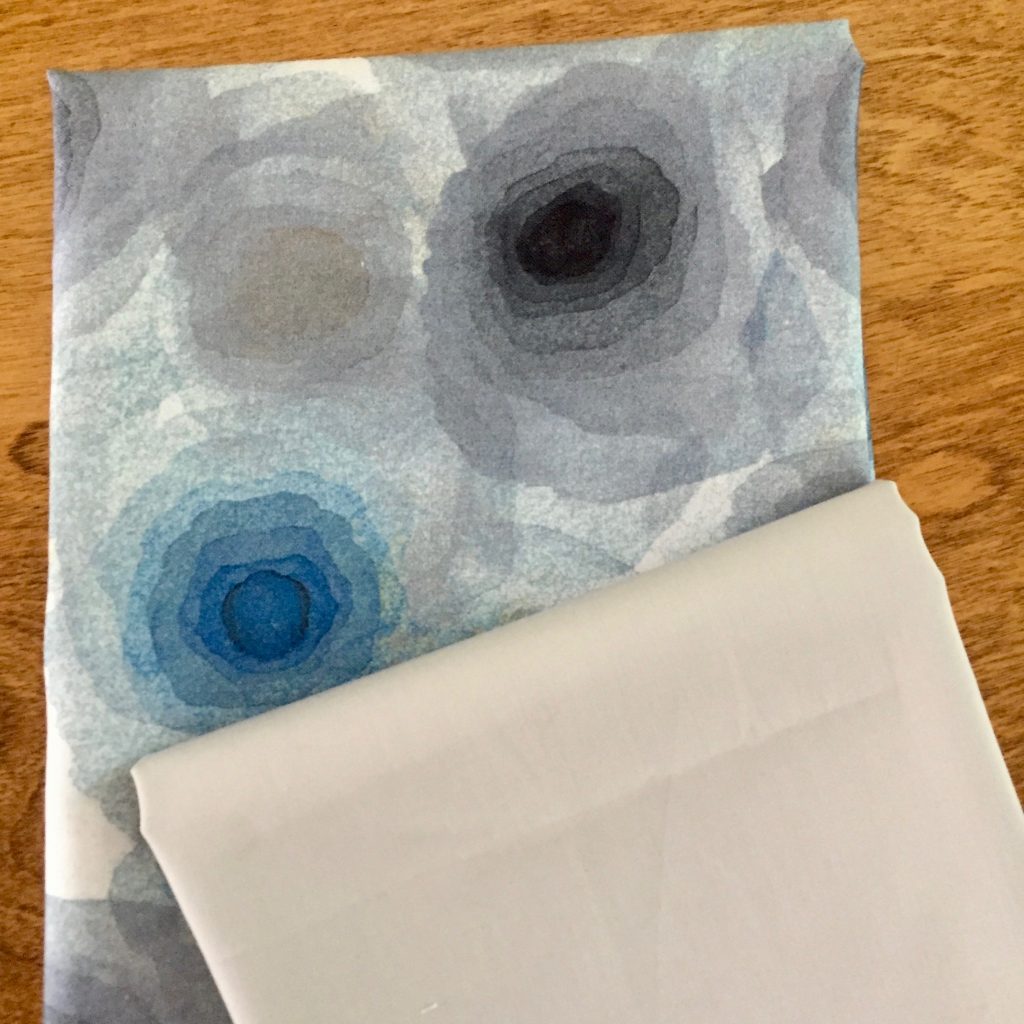
Julia has asked me to make her a new purse. The last one was made in fall of 2017 and it is looking a bit worn. I love her fabric choices! The blue and gray fabric just arrived last week and I am happy to cut into it and give it a try. It is called Harmony with Nature and was designed by Norman Wyatt. She chose the Mystic Gray (an Art Gallery Fabrics Pure Solid) for the lining.
Sam’s Jersey Quilt; November 2017
My sister asked me (a LONG time ago) to make a hanging sleeve for a quilt I made for my nephew. Remember his baseball and football jersey quilt? She wants to hang it on a wall in his room. I finally cut a few strips of this gray dot and will get that off to her in the mail.
Today is my husband’s birthday. I just finished making him a chocolate cake with chocolate frosting. To keep it dairy free, I used coconut cream instead of butter for the icing – it is yummy and I was licking my fingers the whole time I frosted the cake! I used coffee for the liquid instead of milk or cream because the coconut is fairly sweet and I thought the coffee might cut that a bit. He requested enchiladas from our local Mexican restaurant which is a treat for me. No cooking!! Then we eat cake. Probably way too many calories after a week of napping but such is life.
Hoping all of you are enjoying summer. Have a wonderful weekend and if it is hot outside (it is in the high 90’s here!) now is the time to enjoy the cool of your sewing room and make something!!
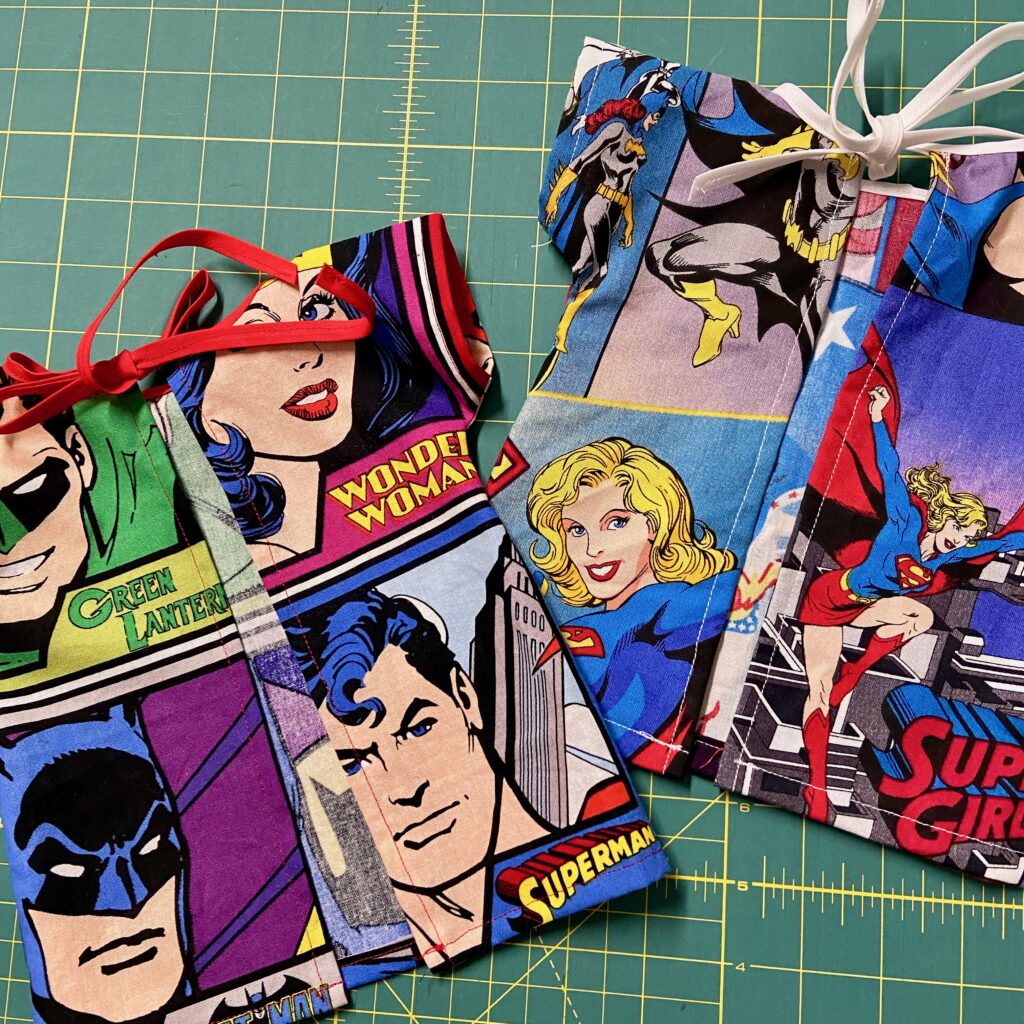
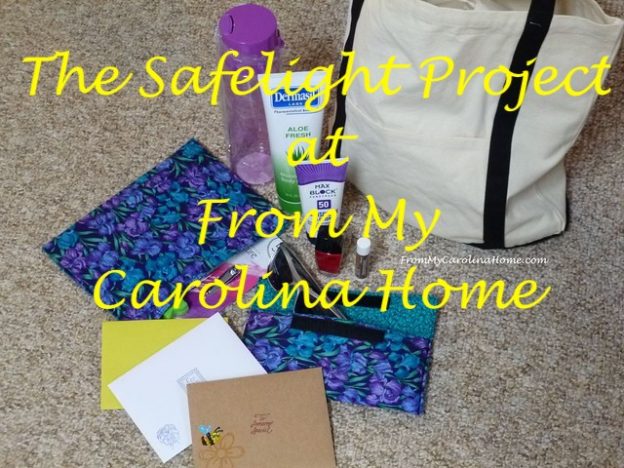
More than a year has flown by and it is once again time to sew for the Safelight Project. Hosted each year by Carole of From My Carolina Home, this project provides support to people in the domestic violence shelter that Carole advocates for. Just in case you are not familiar with Carole and her work, she is one incredibly kind soul. She has spent the better part of the last year working hard to gather hundreds of quilts for victims of the Carolina hurricane. Carole also is a very active blogger with all sorts of quilt alongs, fun tablescape ideas, upcycling and thrifting posts, as well as great recipes. Check out her blog as it is lots of fun.
The Safelight Project is one I have contributed to before. People escaping domestic violence need all the support possible. I love the idea of these gift totes filled with little necessities because so many times the person leaves with just the clothes they are wearing and not much more.
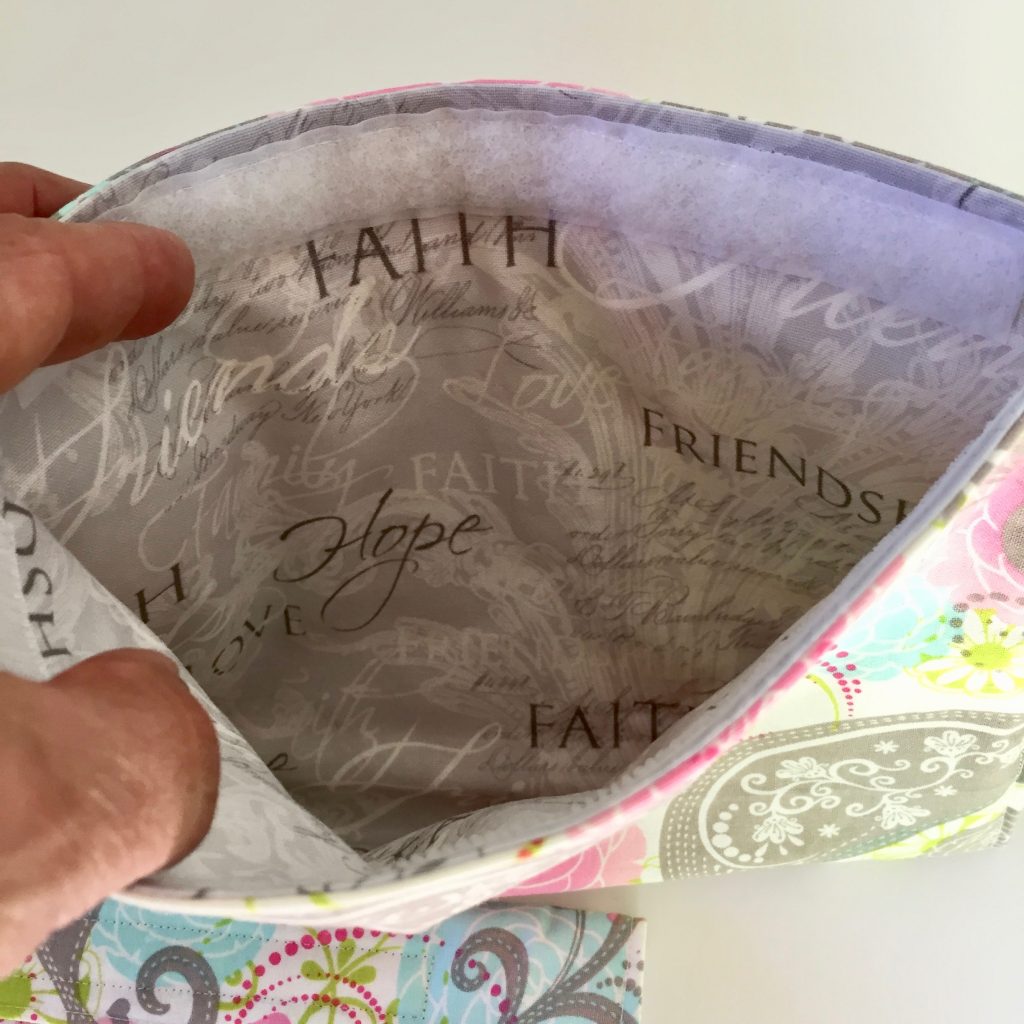
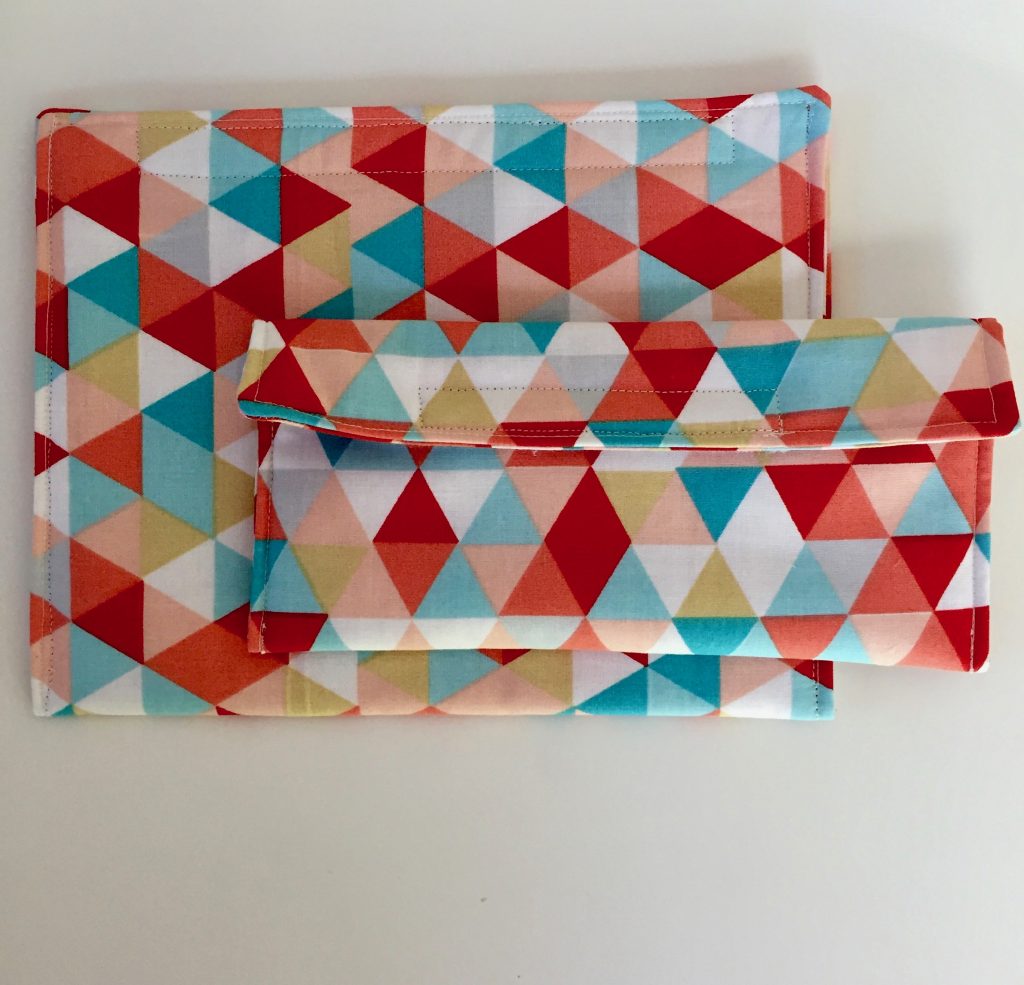
Making a cometic bag and sunglasses case takes little time and not a whole lot of fabric. The instructions are so simple (and available here). Each one just requires a bit of batting and a strip of velcro.
Carole collects many sets and includes them in the tote bags she fills with other sundries. It must be so gratifying to see these pouring into her mail each year.
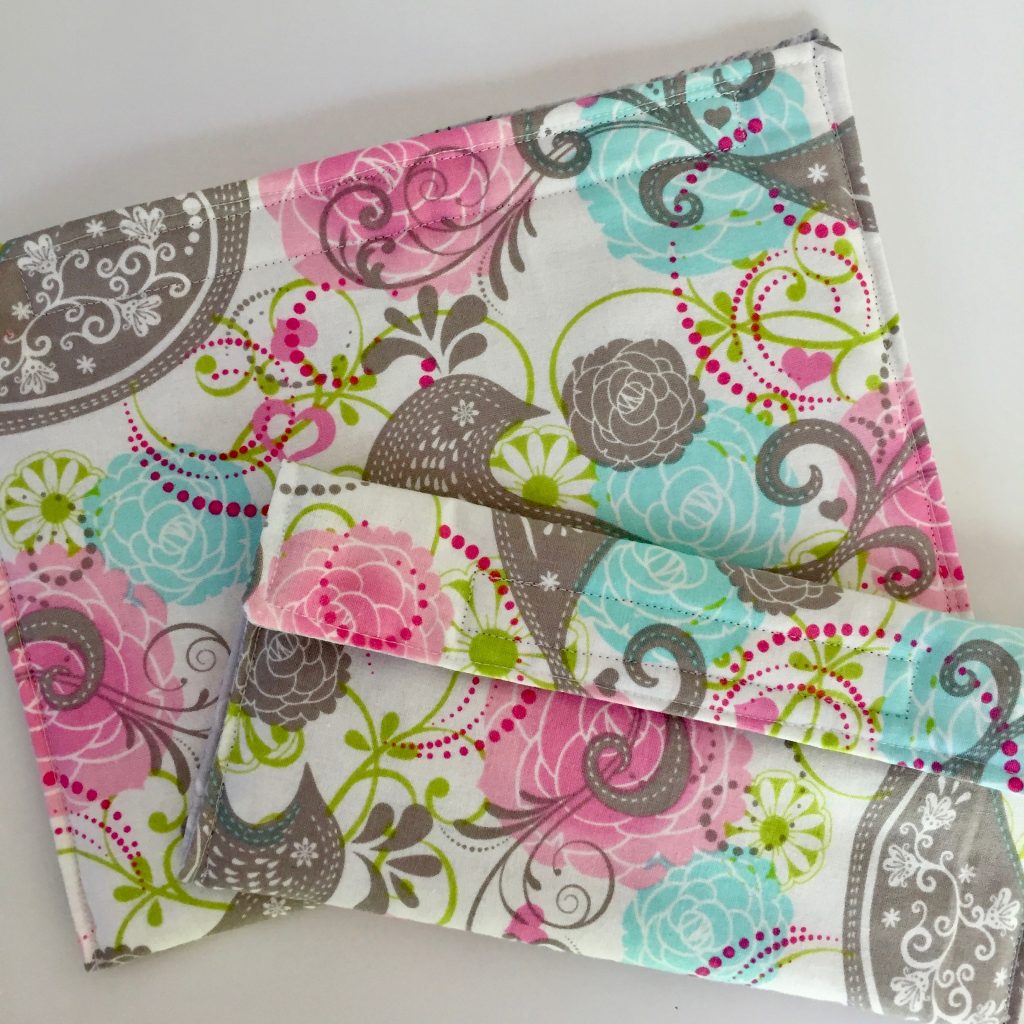
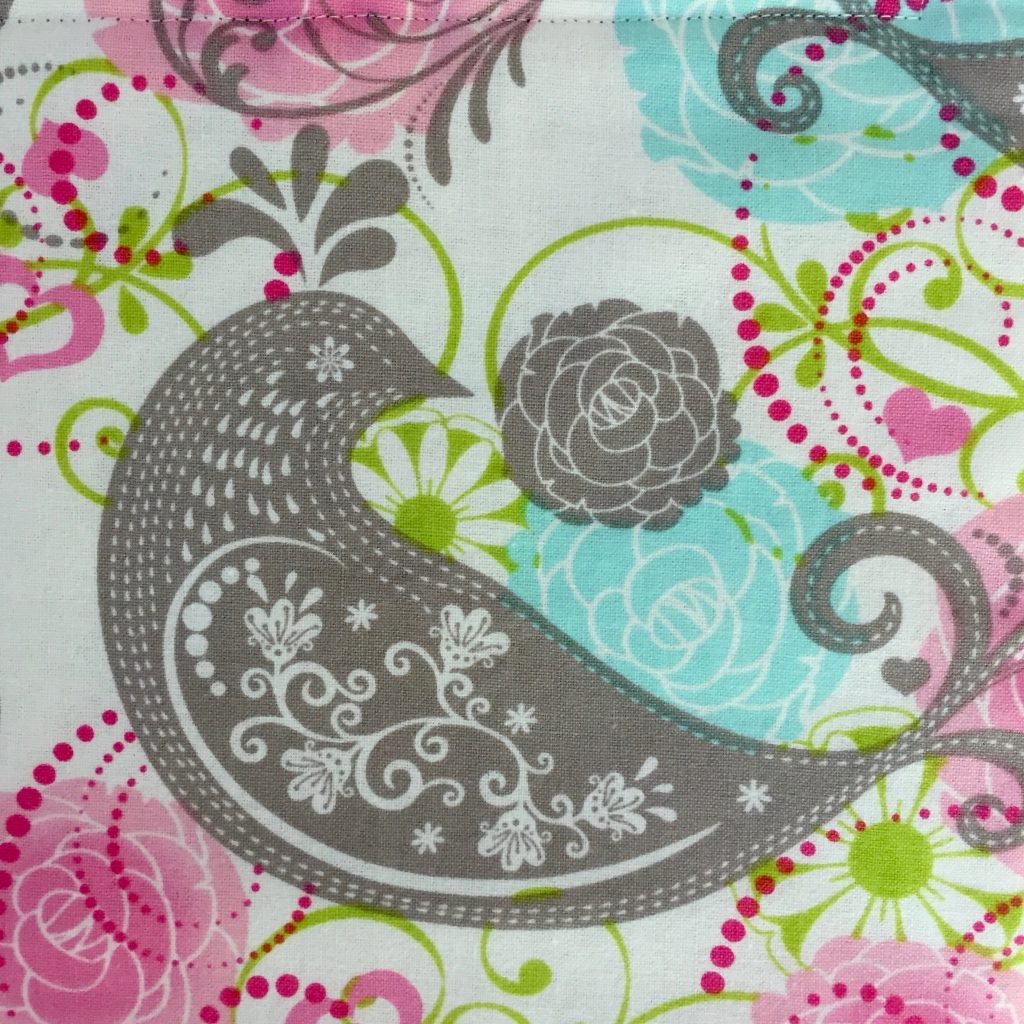
You know I have a thing for fabric with birds. This looks like a quail to me and I love it!! At first glance it looks like a paisley print but then this sweet bird shows through.
A bit of inspirational fabric made a sweet lining for this pouch.
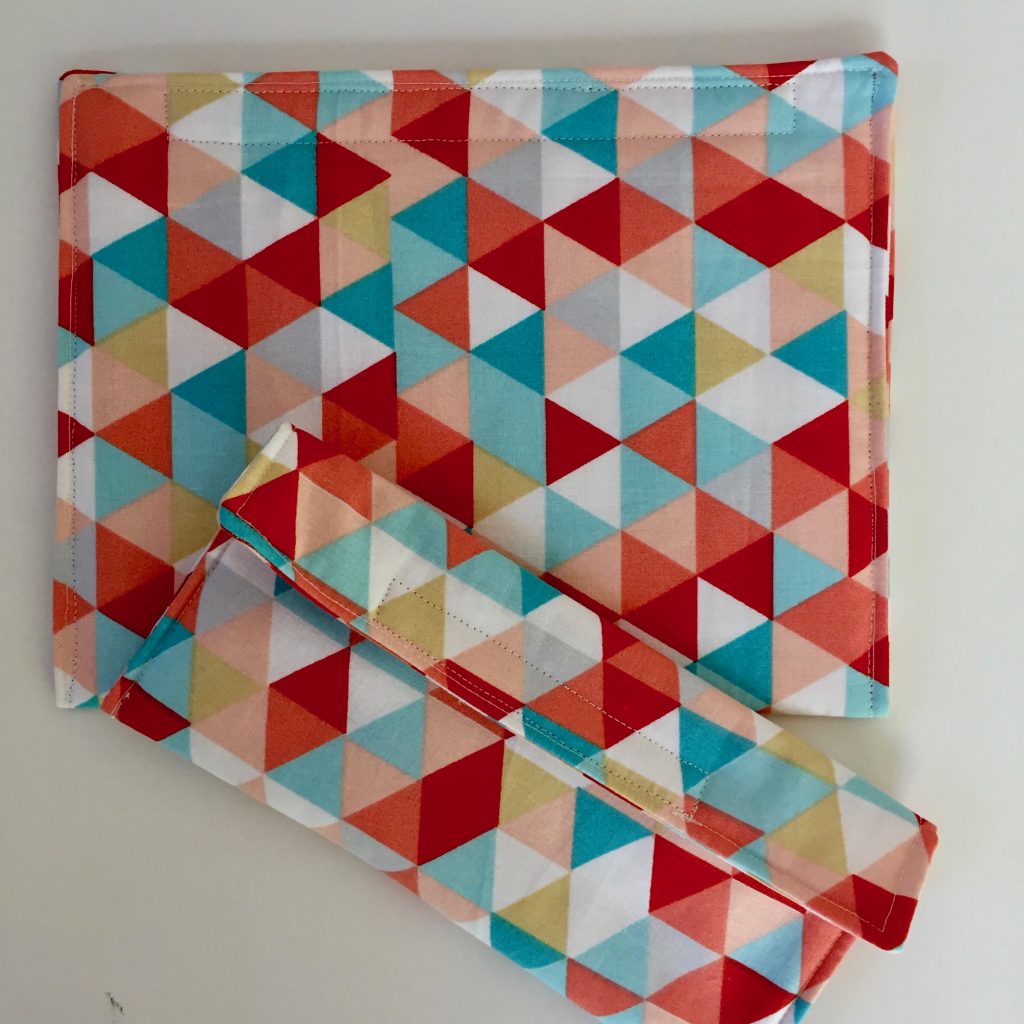
Have to say, I was a bit disappointed when I realized I cut the triangles going opposite directions for each of the cases. Ooops!
Both sets are in the mail today heading for Carole. Thanks so much to Carole for coordinating this wonderful event each year.
Linking up with a few sites, check them out at the top of the page, under Link Ups.