Spring Equals Birthdays & Proms

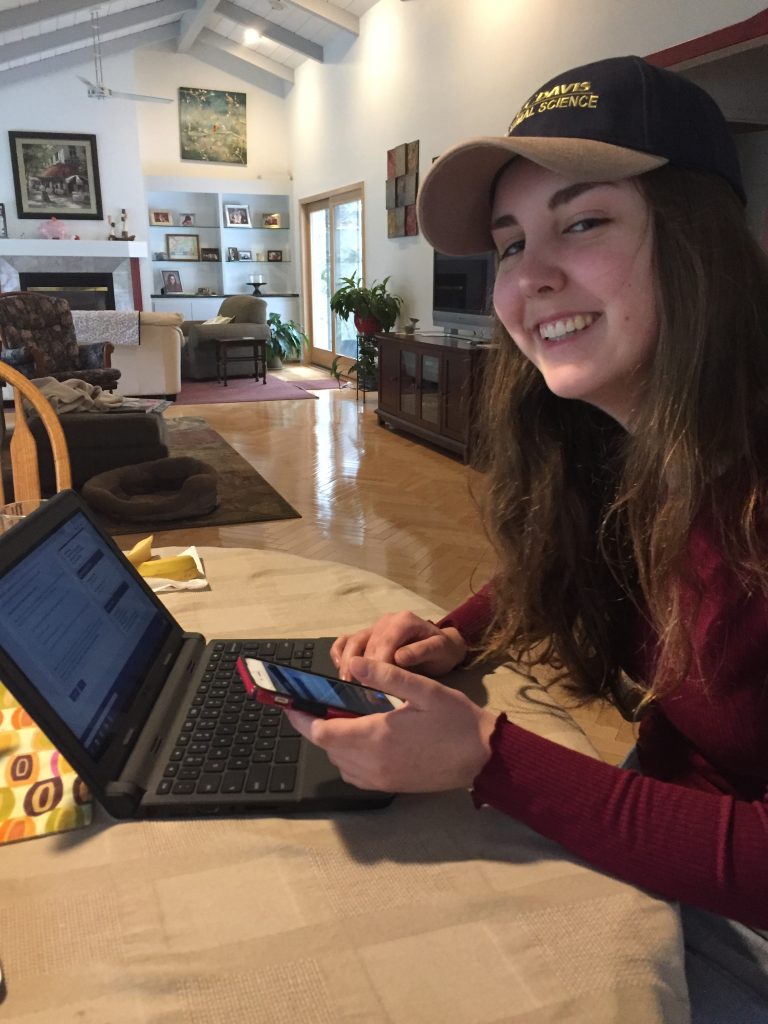
May has been such a busy month! School is winding down – senior year is coming to a close for Julia. Plus we have celebrated her 18th birthday and she went to her Senior Prom. Crazy to see this girl finishing up high school because it was only a few weeks ago that I felt like such an awful mother as I left her crying on the first day of Kindergarten. Such is life, right?

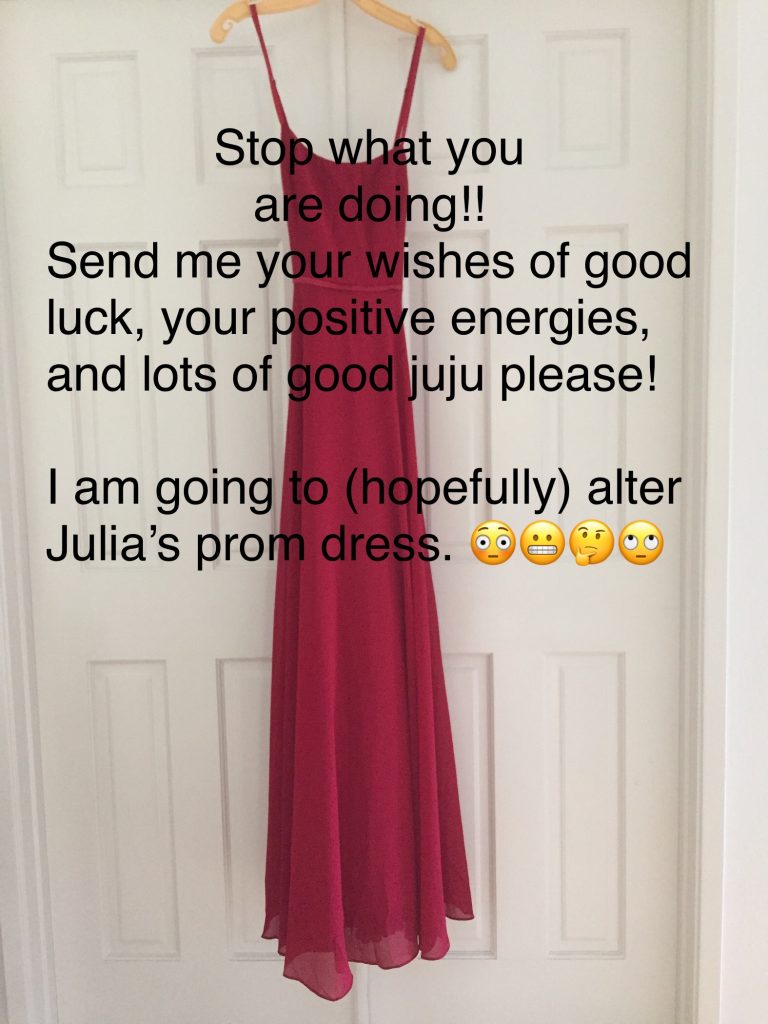
A few weeks ago, I posted this desperate plea on Instagram and Facebook. Julia’s prom dress didn’t really fit well and she asked if I could fix it. This was the week before prom. Being the confident sewist, I immediately suggested we return it and quickly find another dress. But she #1 – threw away the receipt and tags and #2 – said she loved this dress and wanted to wear it. OK, I promised to do what I could. The main issue was the lining was too snug around her waist. I looked at letting it out and adding some width to the side seams. But I suspected I would end up with something bulky that wouldn’t lay flat. My brilliant daughter, who doesn’t sew, asked if I couldn’t just lift the lining up, folding it right sides together, sewing all the way around, which would make it a little wider at her ribs. Does this make sense to you? It worked like a charm and was super easy. Sort of hard to explain though.

Photo credit to Natalie Webster.

The next issue was the hem. It was really long and she didn’t want to be tripping over it at the dance. I was a bit leary of this task because the outer fabric was a slippery chiffon. But with the help of YouTube, it was not hard at all. The video I watched instructed me to pin it about 1/4″ longer than I wanted it to be. Press it and stitch all the way around. Then trim the excess as close as possible to the seam line. Finally, roll that stitched line to the inside, pin and press and stitch again. I was amazed by how wonky the original hem was. There was no way to straighten it so Julia and I figured if we hadn’t noticed how wavy it was before, no one else would either and I just stitched it – crooked as can be.

Photo credit to Natalie Webster.

Hiding under that pretty dress are black sneakers because my daughter won’t wear much else!

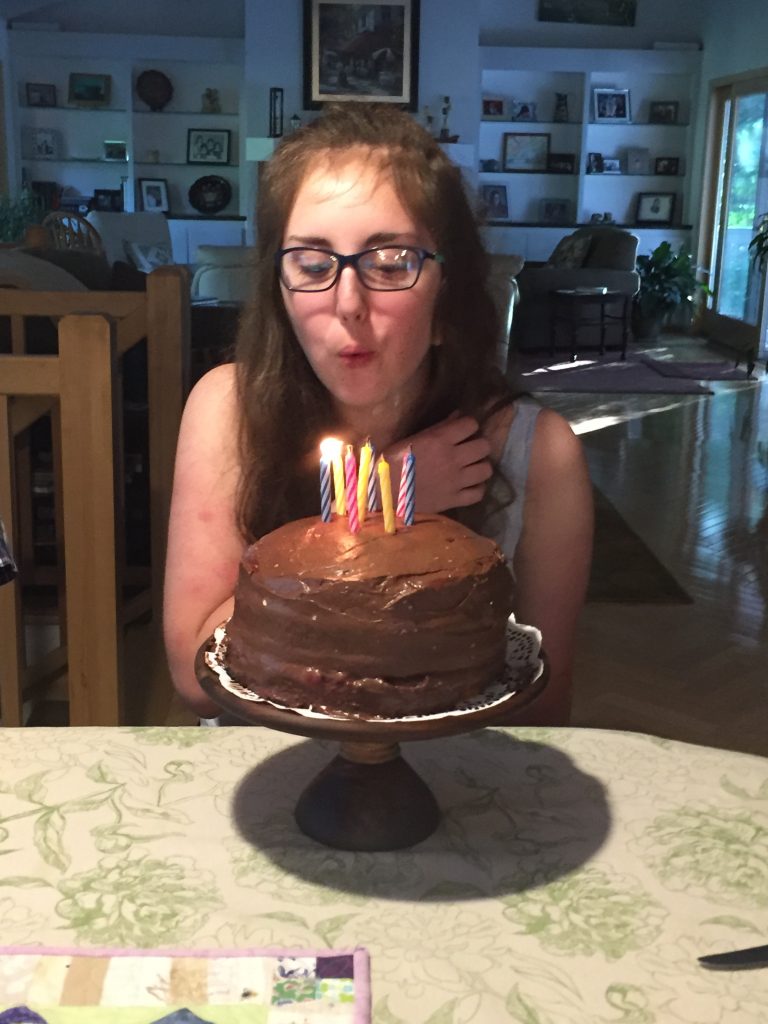
Following the prom, we celebrated Julia’s 18th birthday. Not sure if you remember but last year I made a cake for her 17th birthday and was not entirely successful!

This was one ugly cake!

This year Julia asked for the same yellow cake with strawberry filling and chocolate frosting. I wanted to use a cake mix again but with better results. My trusty internet sources advised adding an extra egg yolk and replacing the required water with milk. I did both of these, though I used almond milk to keep it dairy free for my husband. Also, another site suggested adding a couple of tablespoons of any pudding mix that would match the flavor of the cake. I had an old box of butterscotch pudding that likely expired in 2010 or so. I opened it and added two tablespoons and tossed the rest. Guess what? It worked wonderfully.

Such an improved version!

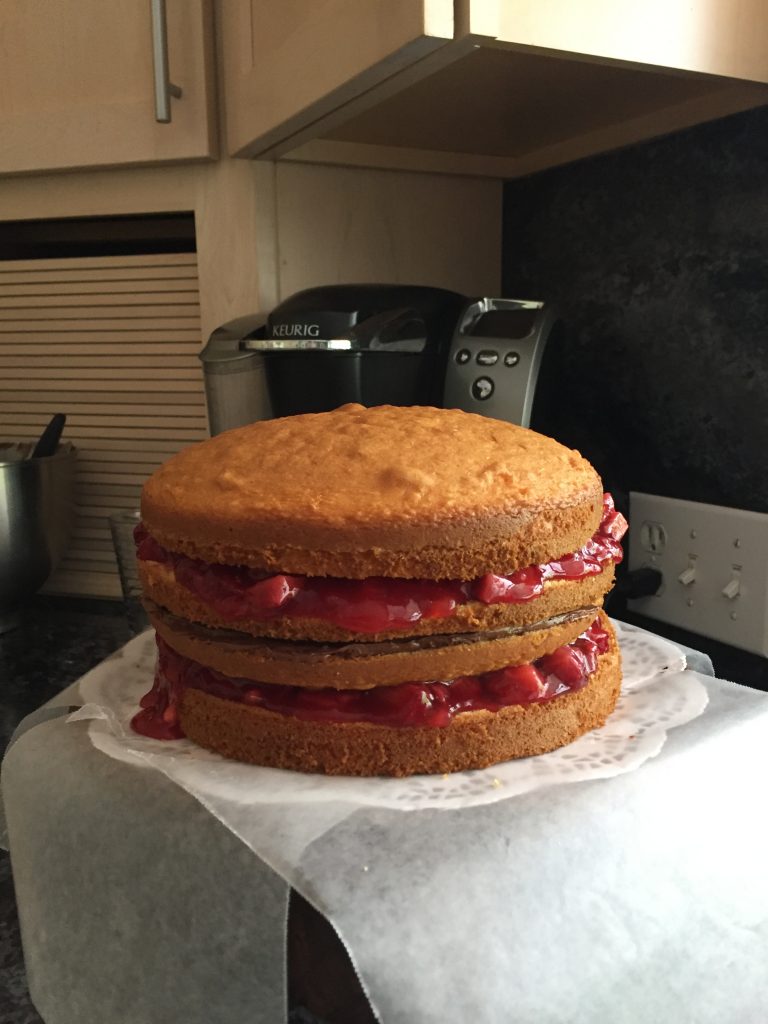
Julia was happy and we are hoping her wishes come true for this year!

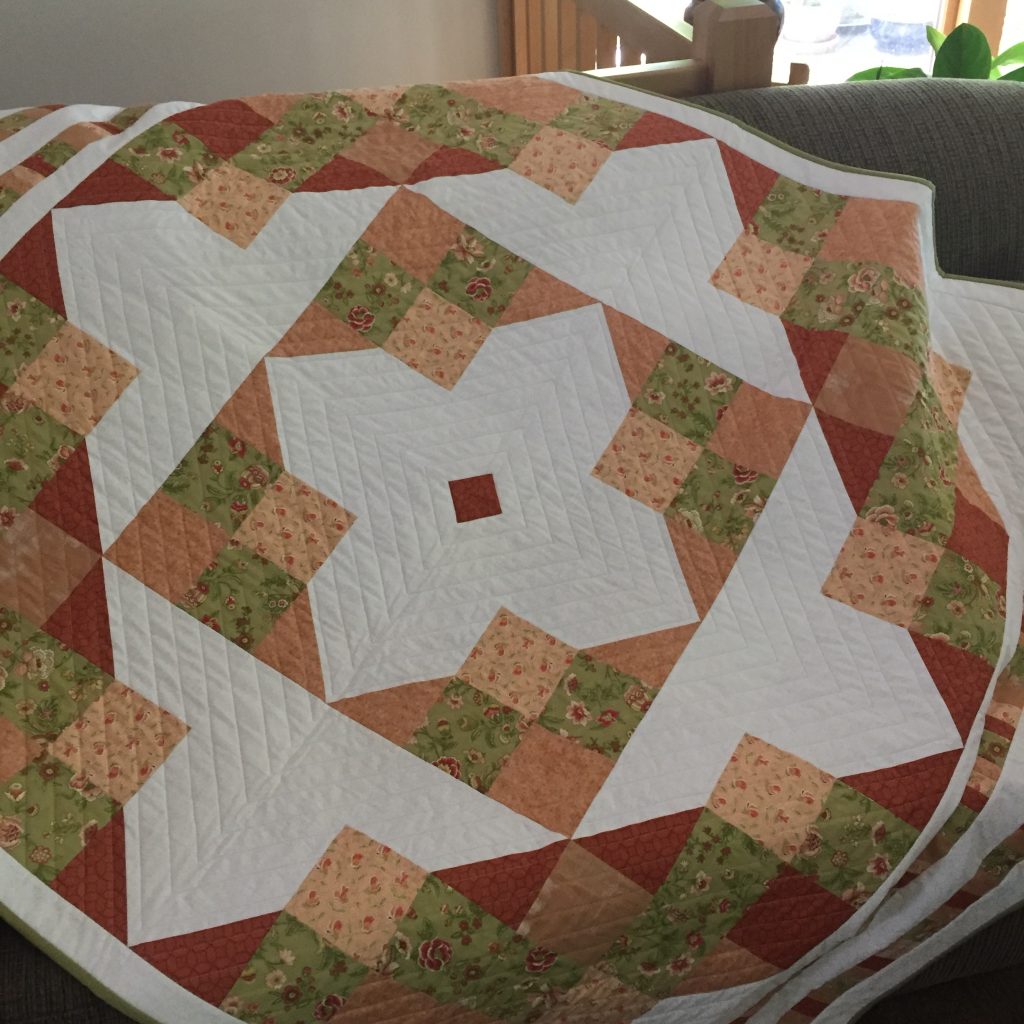
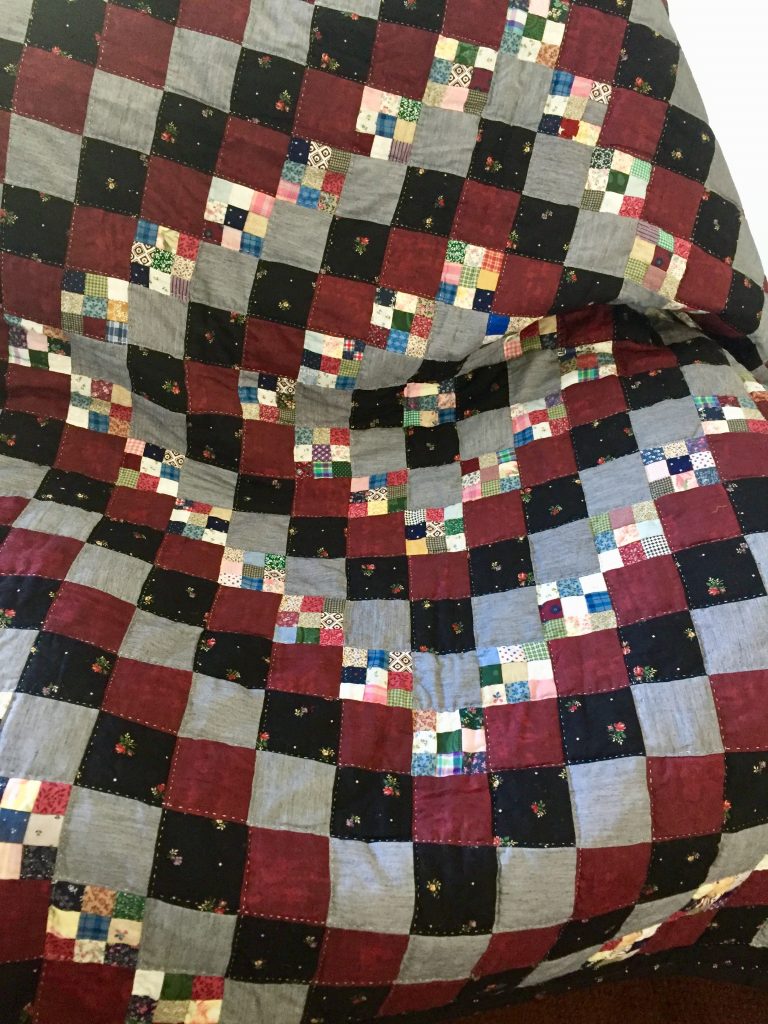
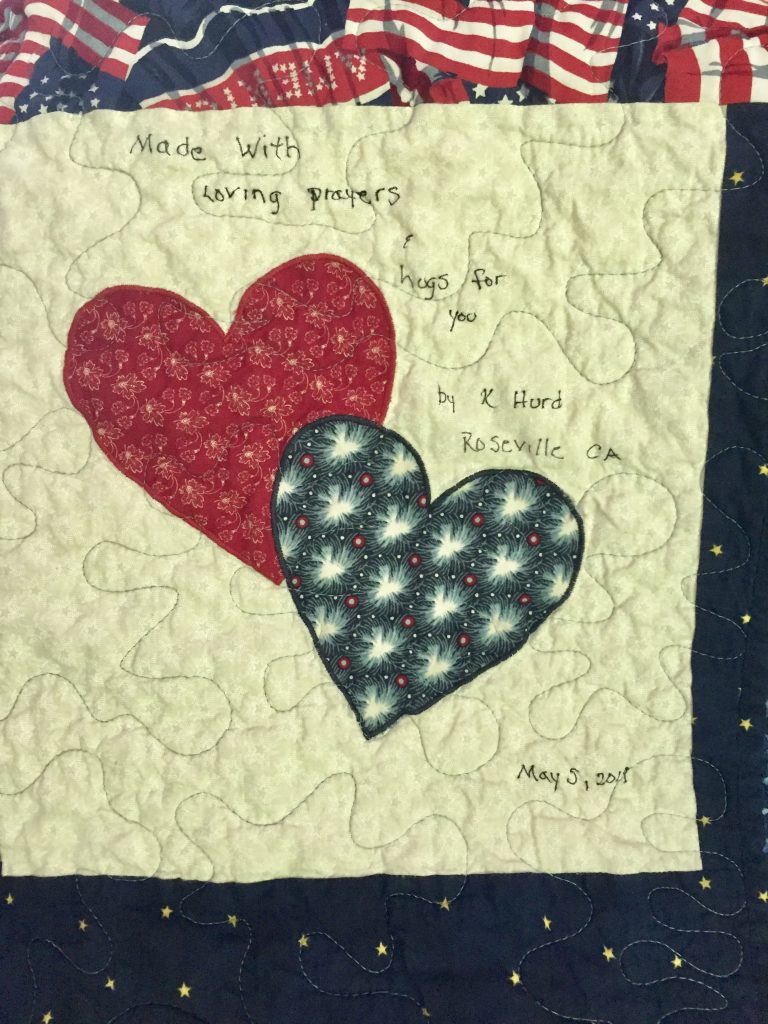
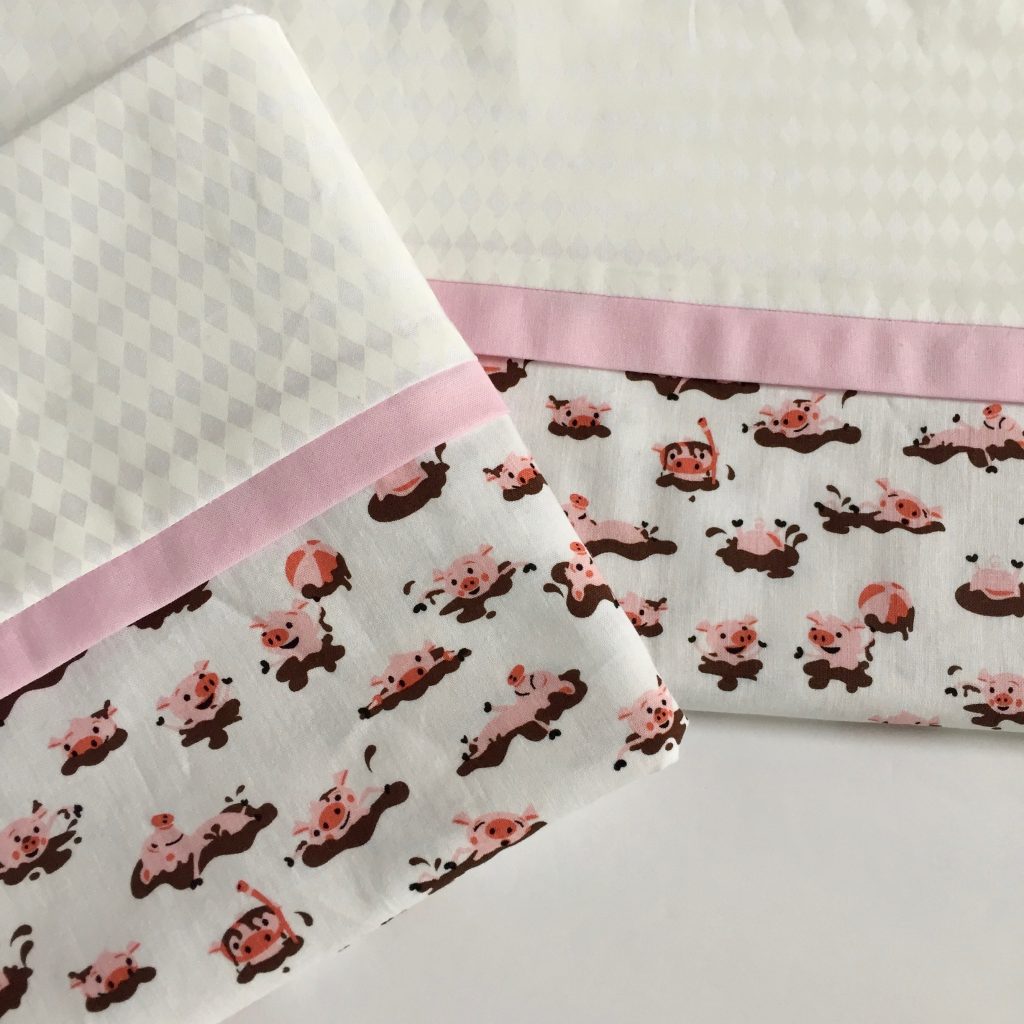
With all of this, plus two different awards nights at school, I haven’t done tons of sewing. One thing I am working on though is quilting a top given to me by a family friend. She actually donated three finished quilts to Mercyful Quilts. Then she sent me four tops she had, asking if I would finish them and donate those as well. I don’t normally do this because it takes a bit of time which I am sorely lacking, but she was so sweet to donate the other quilts and I agreed. I know they all won’t be finished terribly soon but I am working on the first one.

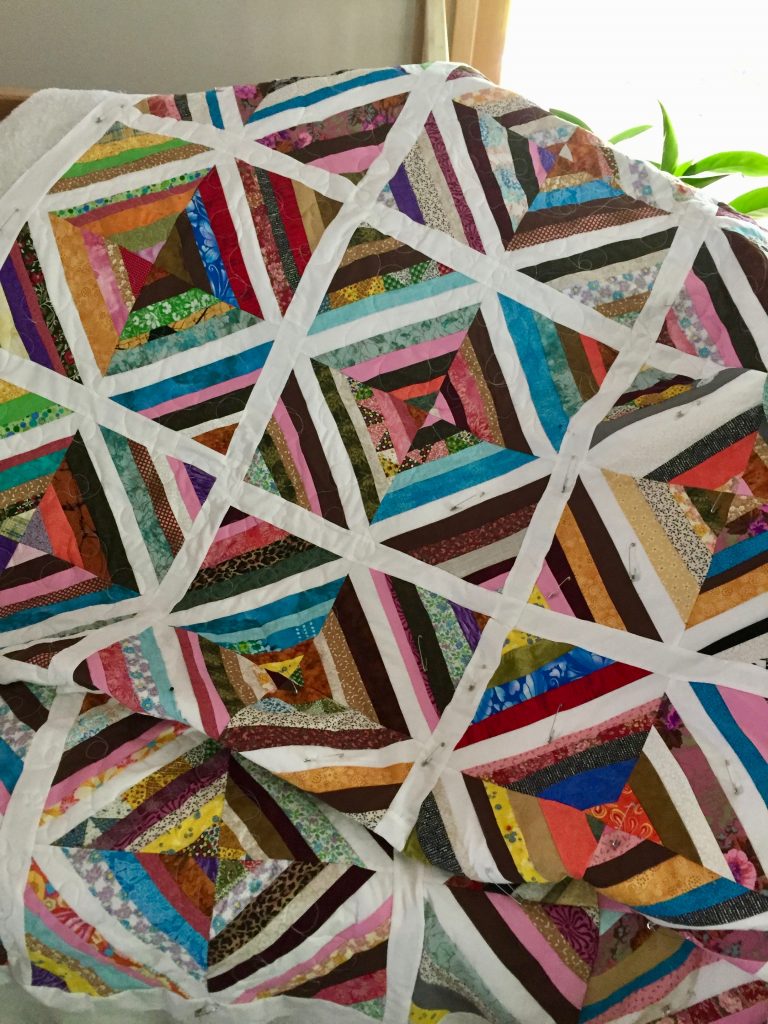
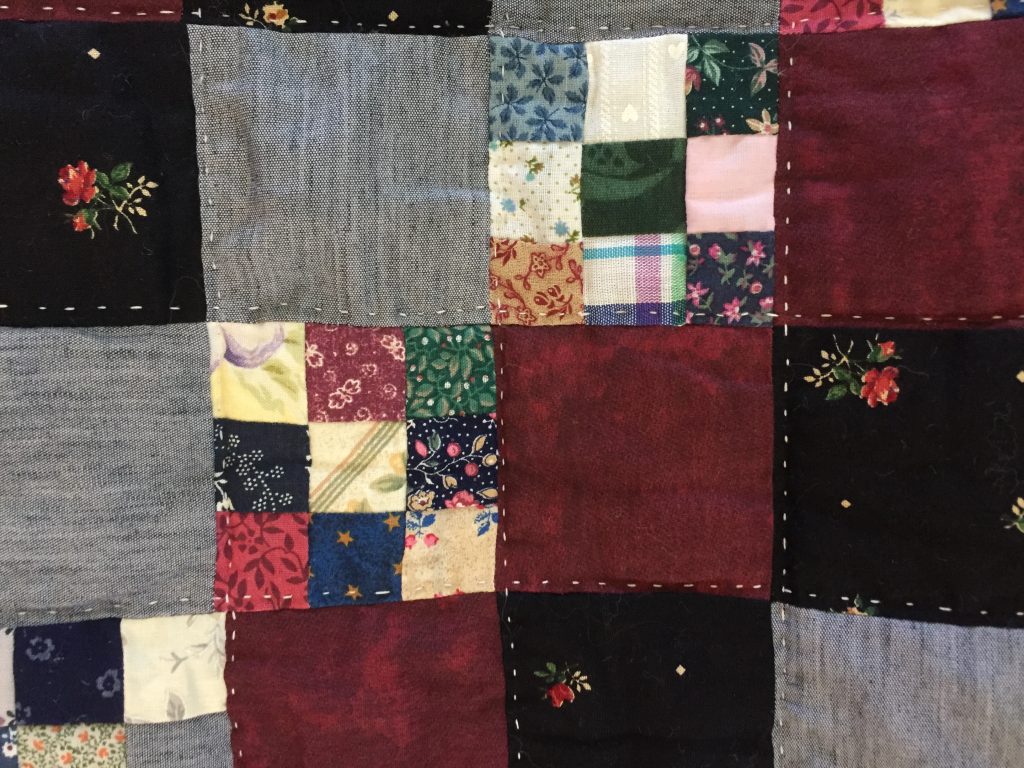
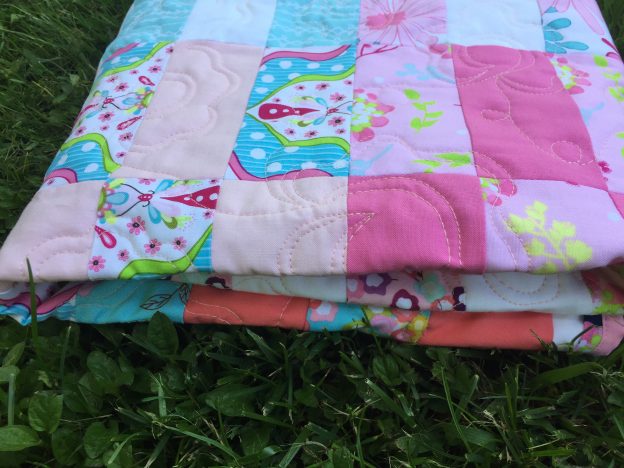
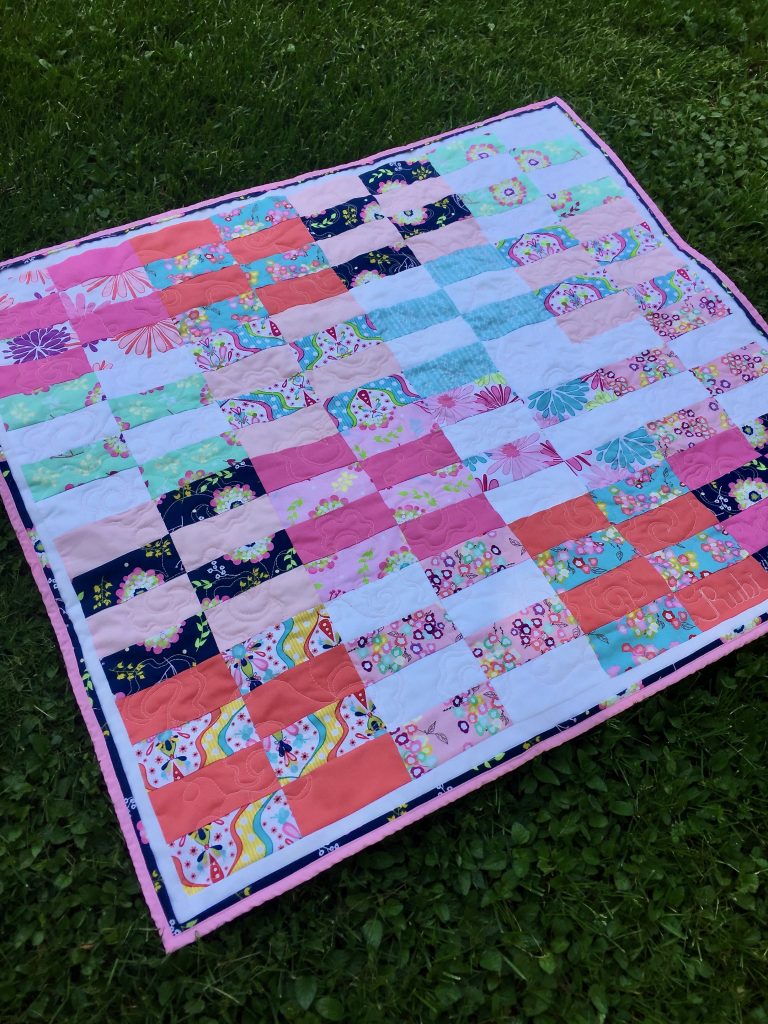
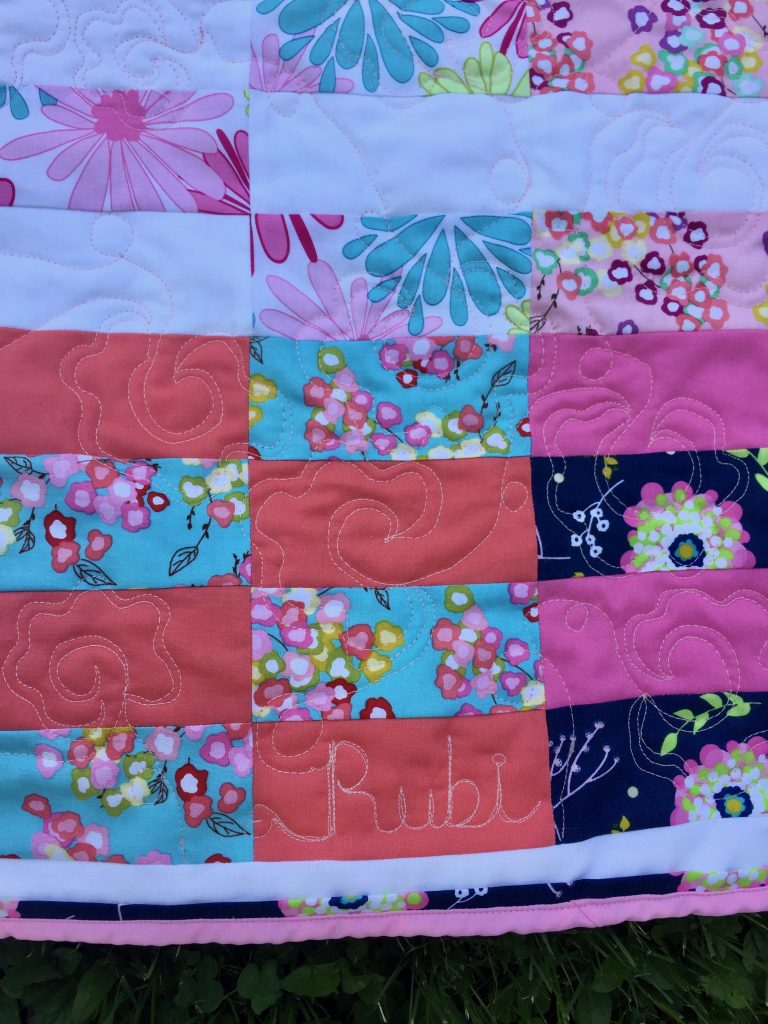
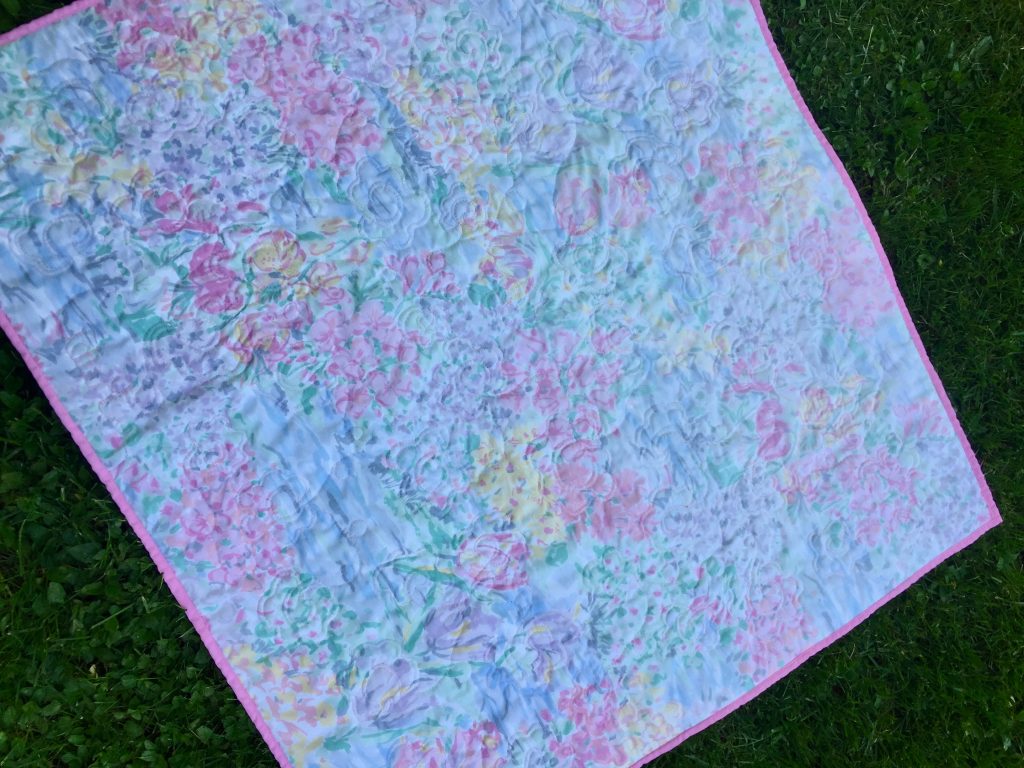
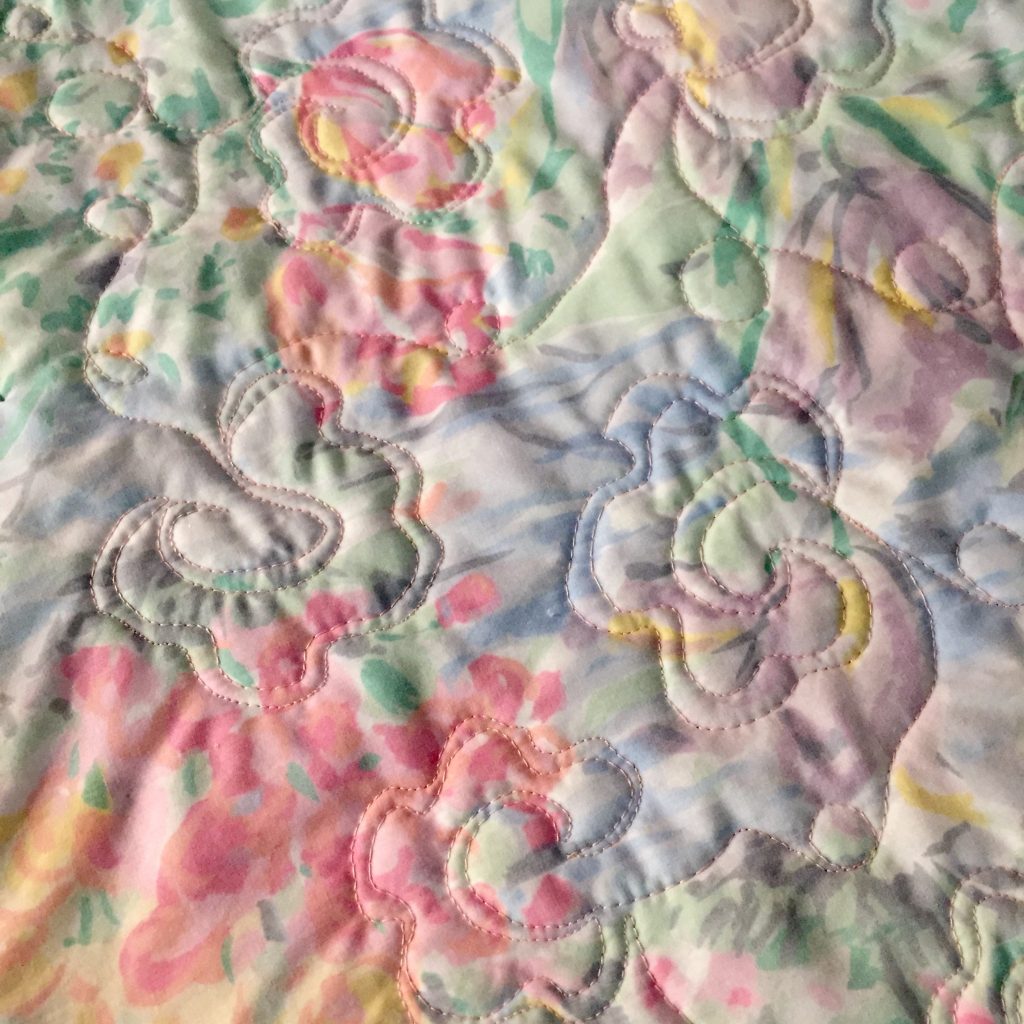
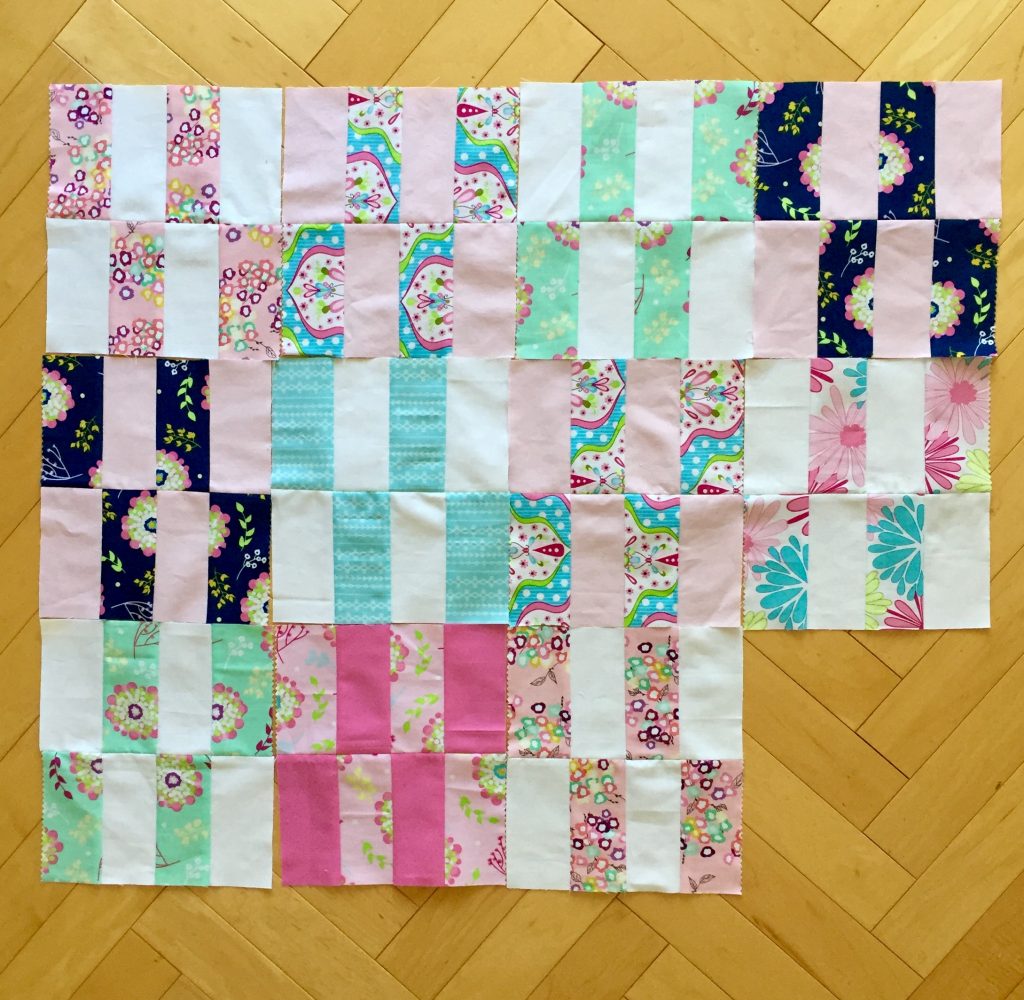
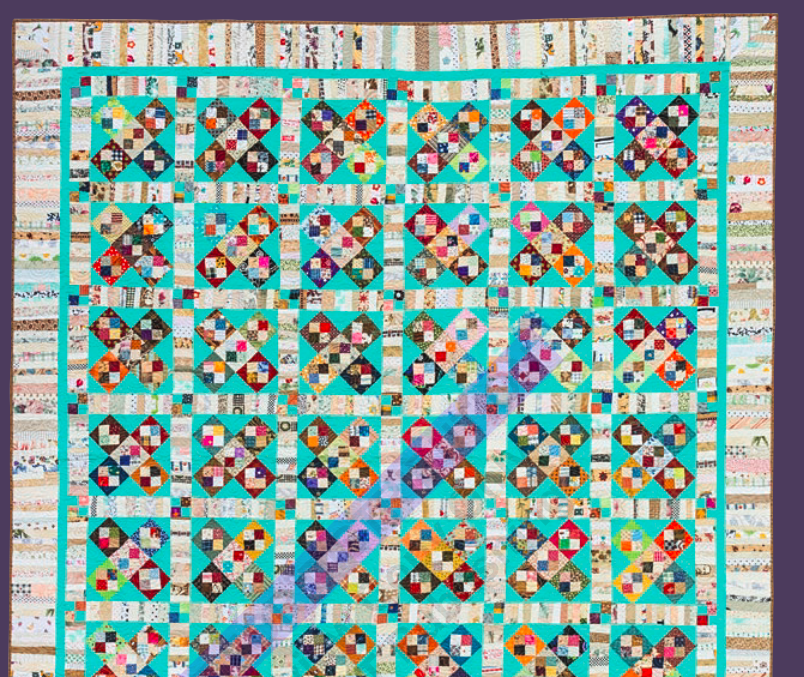
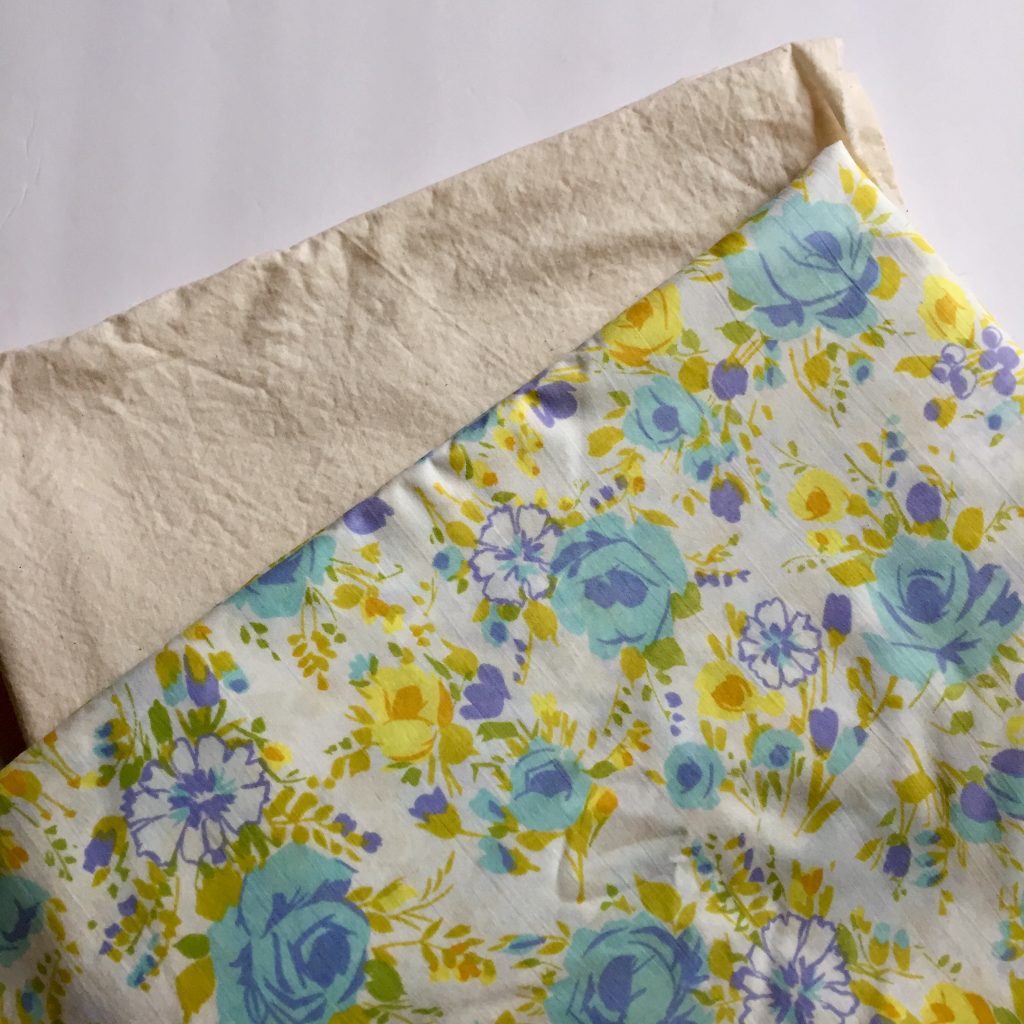
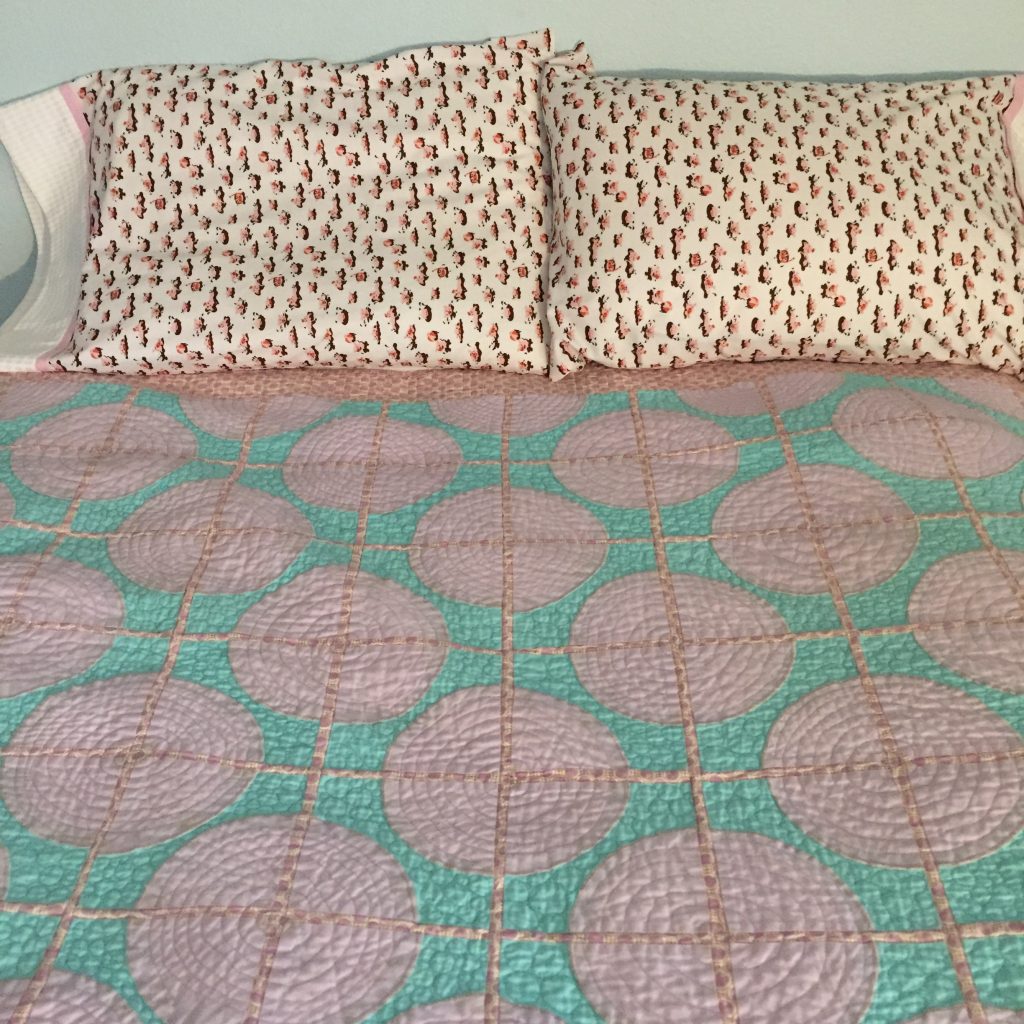
This string quilt was probably made a while back. There are many fabrics that look to be circa 1980’s and it is very pretty. Unfortunately, it doesn’t lie anywhere close to flat. I don’t think these string blocks were pieced with any sort of foundation paper or fabric, making them quite stretchy. I pressed it and starched it before pin basting. While pin basting, I took little tucks all over the place and hand stitched them which really helped. When I get to those bits, I quilt heavily over them so they won’t come apart. I am just using a loopy meander which is quite forgiving when I come to a section that is wavy. After binding and washing this it will, hopefully, crinkle up and be very cozy.

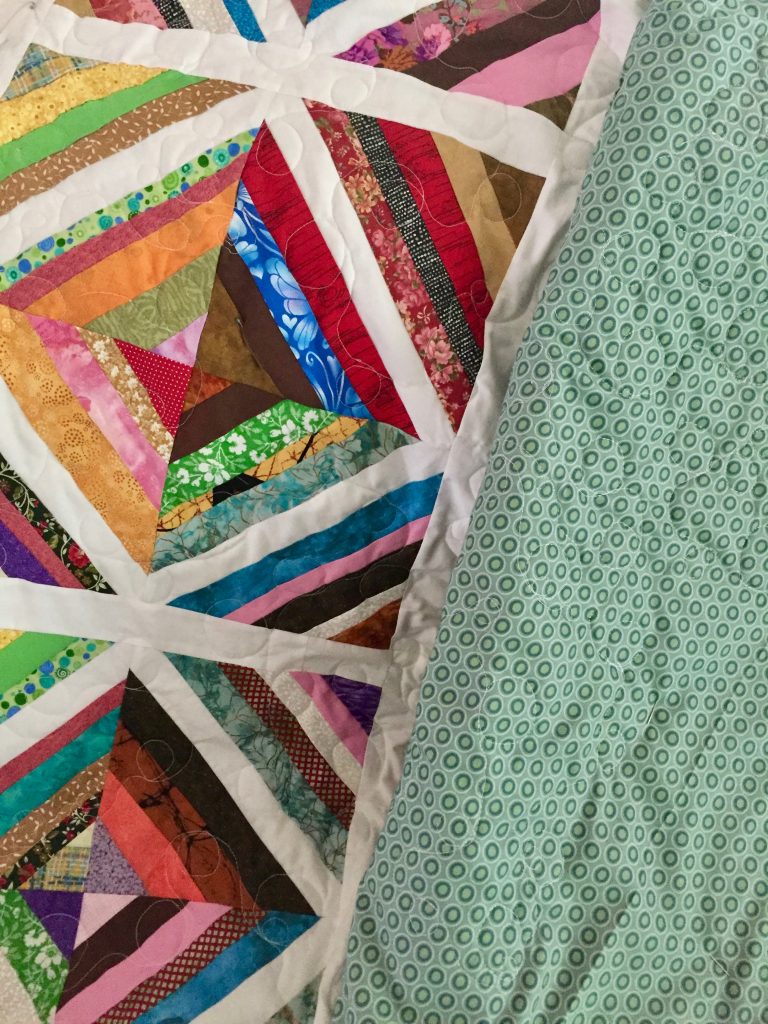
The backing is from the sale section in my shop. It is an Oval Elements piece from Art Gallery Fabric. Fabric for the binding has yet to be selected though. I am just about out of thread (which is silly since I am quilting it with white thread) so I won’t get too much farther on this today. I am counting this as my one project for Hands 2 Help and it should be finished early next week.

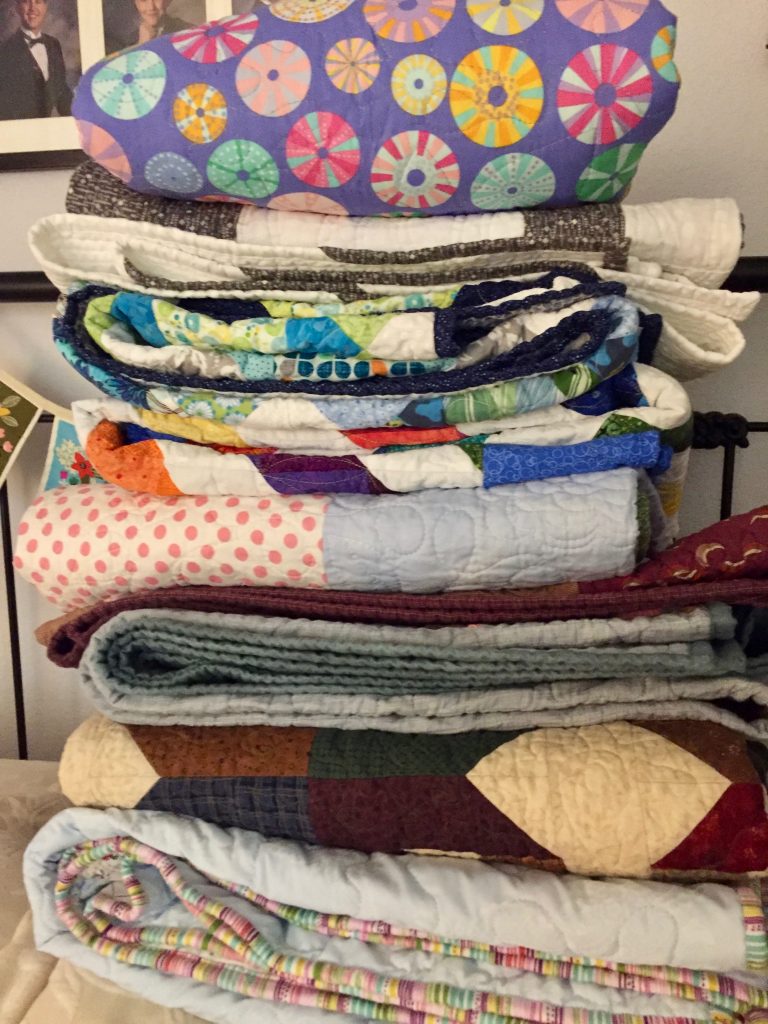
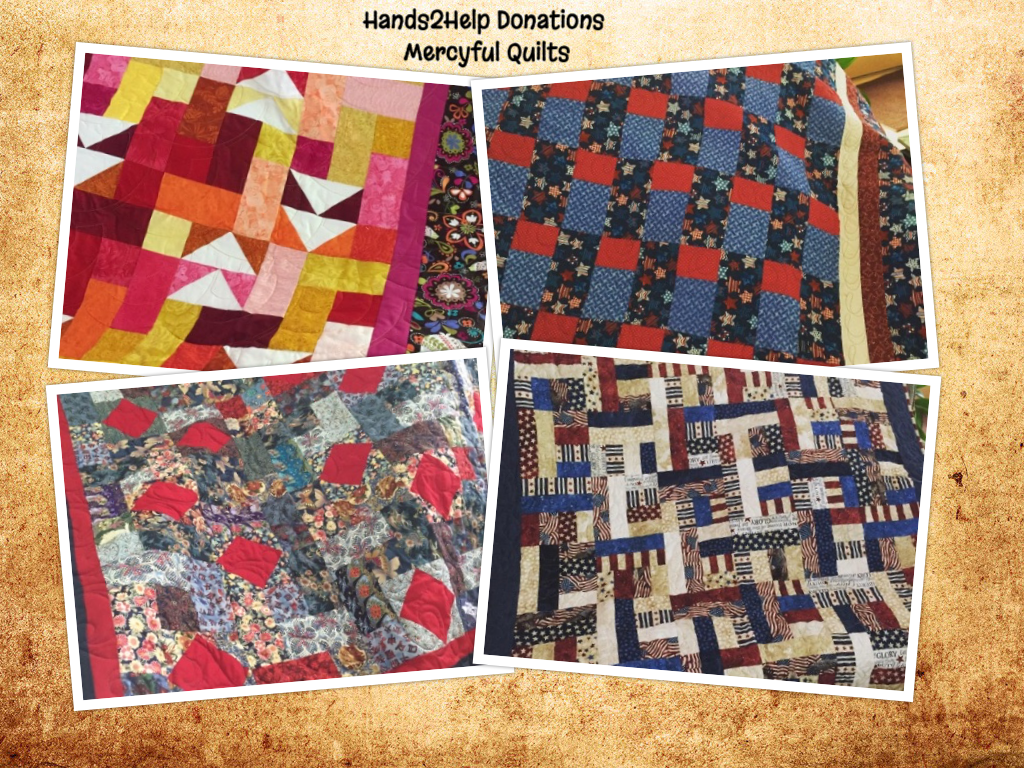
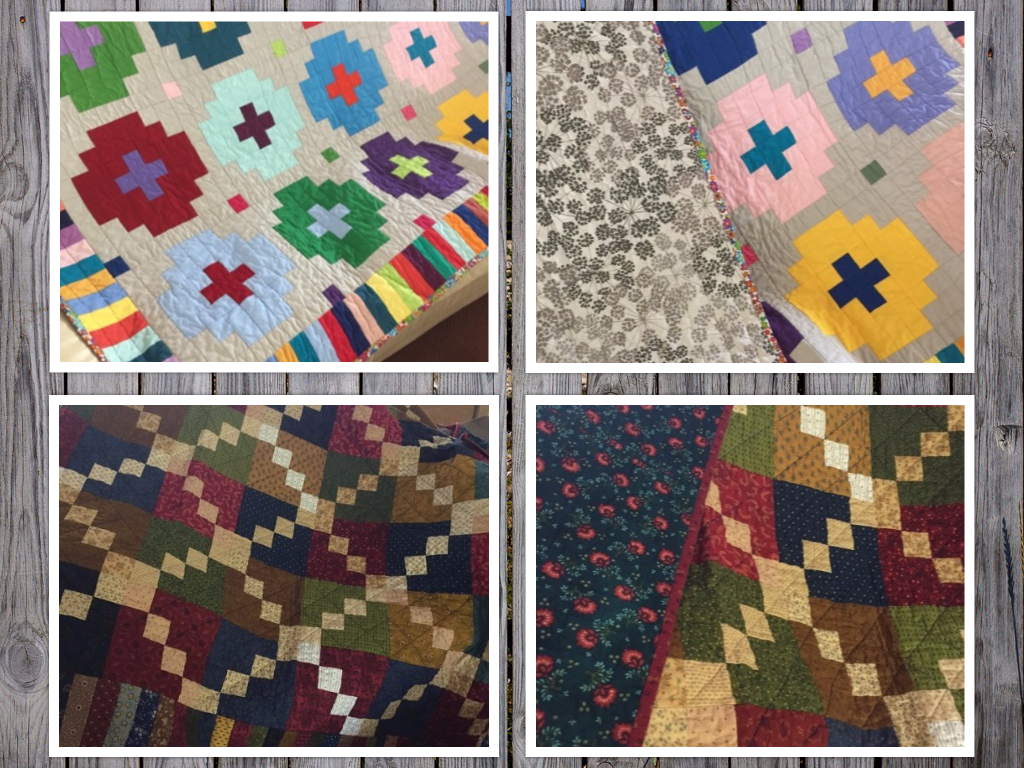
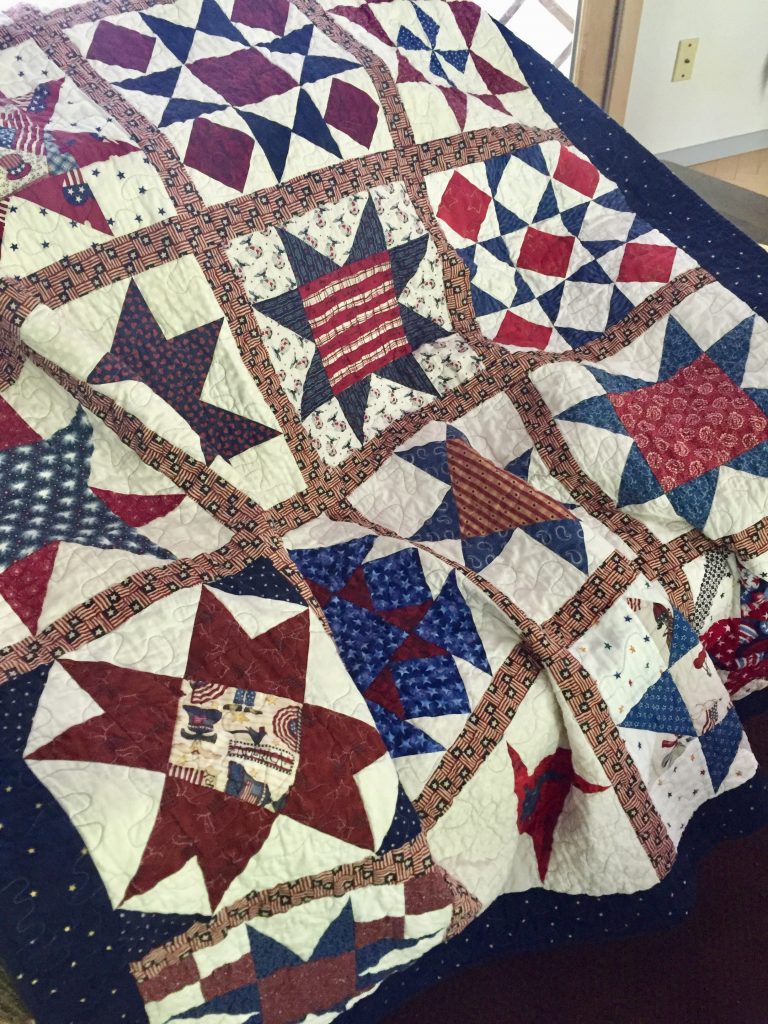
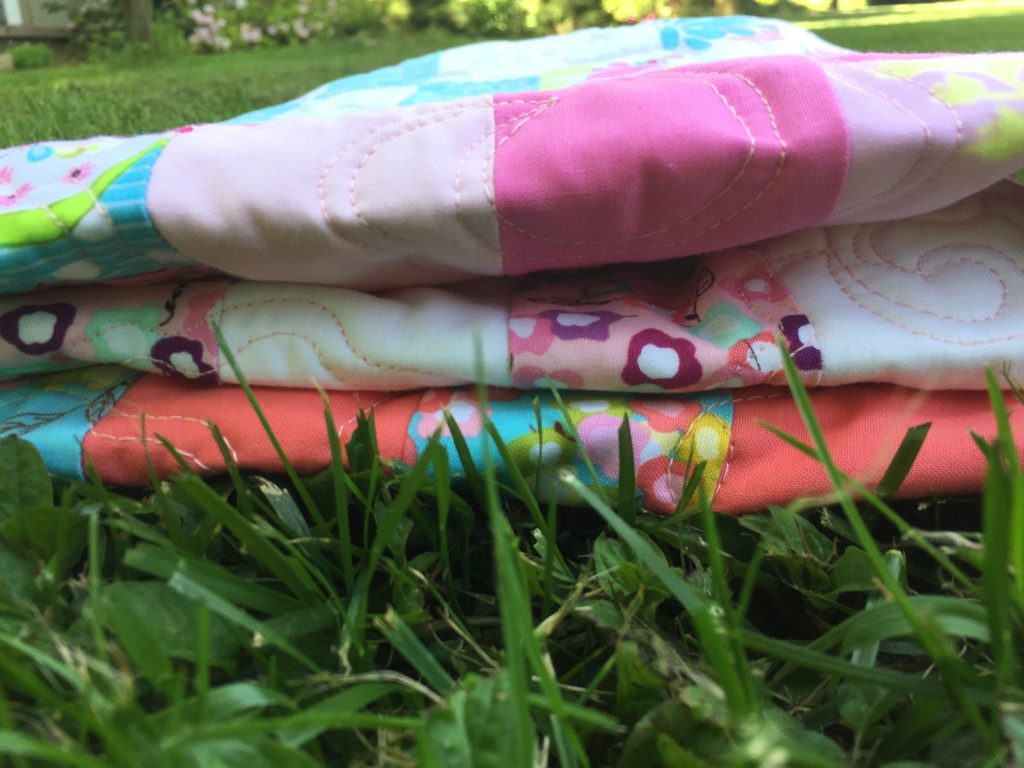
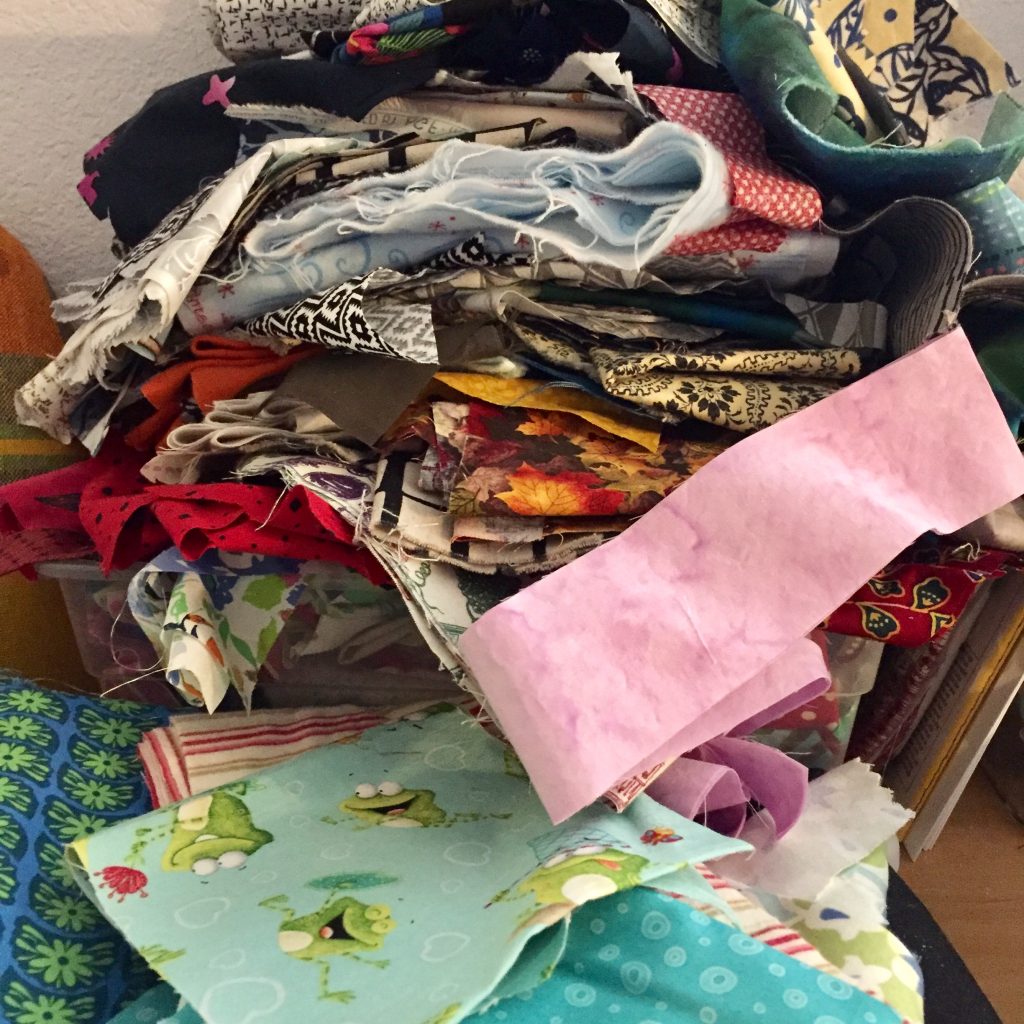
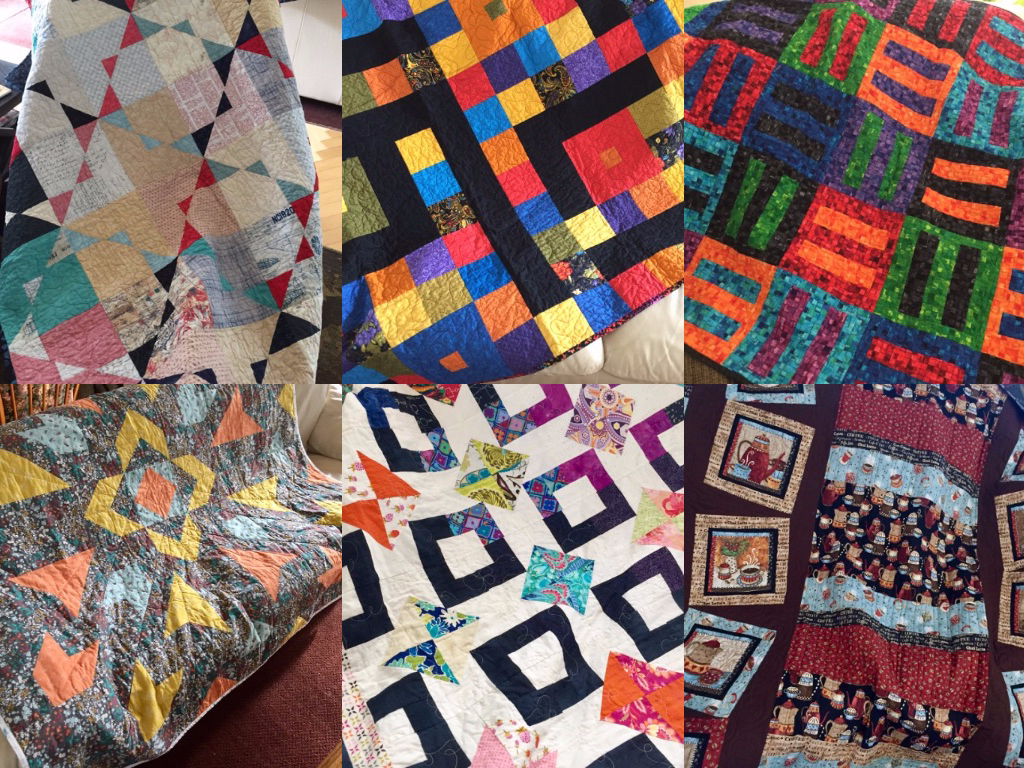
The quilts continue to arrive for Mercy Hospital and the Mercyful Quilts drive. The Hands 2 Help event at Confessions of a Fabric Addict has been amazing. I cannot even believe the number of quilts made for all of these deserving organizations . Just so inspiring. Some quilters have made 4 or 5 quilts – some even more than that. I have this stack and another box full ready for pick up. Judging by the emails I have received and blog posts I am reading, there are many more on the way. Thank you to all of you generous quilters!!

I hope everyone has a lovely long weekend. In the US, Monday is Memorial Day which many mark as the beginning of summer. We have had rainy, gloomy weather all week so it sure doesn’t feel summery here!

Sewing with Stretch Knit Fabrics

Sewing with knit fabrics, making t-shirts and tank tops is not terribly difficult. I have made a number of them. However I am usually less than satisfied with the finished look, especially the hem and the neckline. The other day I was reading a post by Leanne at Devoted Quilter and she shared a pretty blue t-shirt she made. By using a double needle (or twin needle) she was able to achieve a nice finish at the hem and neckline.

These are available everywhere – Jo-Anns, Amazon, etc.

Some time back, I purchased a double needle, fully intending to try this. But for whatever reason, the needle landed in the drawer with lots of other needles and was forgotten. Leanne’s success gave me just the push I needed to give it a try. I looked on-line to see if there was anything special about threading my machine (Janome 6500) for this needle. My machine has two posts for thread which is mandatory. But threading it was nearly the same as using only one spool of thread. I didn’t want to buy two spools of the same color thread since this isn’t a color I will use often. Instead, I wound an extra bobbin and used it on the second post. This worked just fine.

Two very neat rows of topstitching forming the hem of the sleeve.

Sewing with a twin needle is interesting in that you must stitch from the right (or the top) side of the garment. The twin stitching shows on top and the bottom stitching has an interesting zig zag pattern achieved from the use on two needles on top and only one bobbin on the bottom.

This is how the back side looks.

This is the part I think is so magical. When I first tried using the needle and a a few scraps, I wasn’t at all sure what the bottom would look like as I didn’t really understand how one bobbin would deal with two threads.

Ok, here are a few details about this project. Using McCall’s M6957 and my thrifted stretch knit fabric, I made a very simple t-shirt dress. I cut the top at a size 12 and graded the waist and hip area to a 14 so it wouldn’t hug at the belly (because that isn’t a look I need to share with the world). 😉 
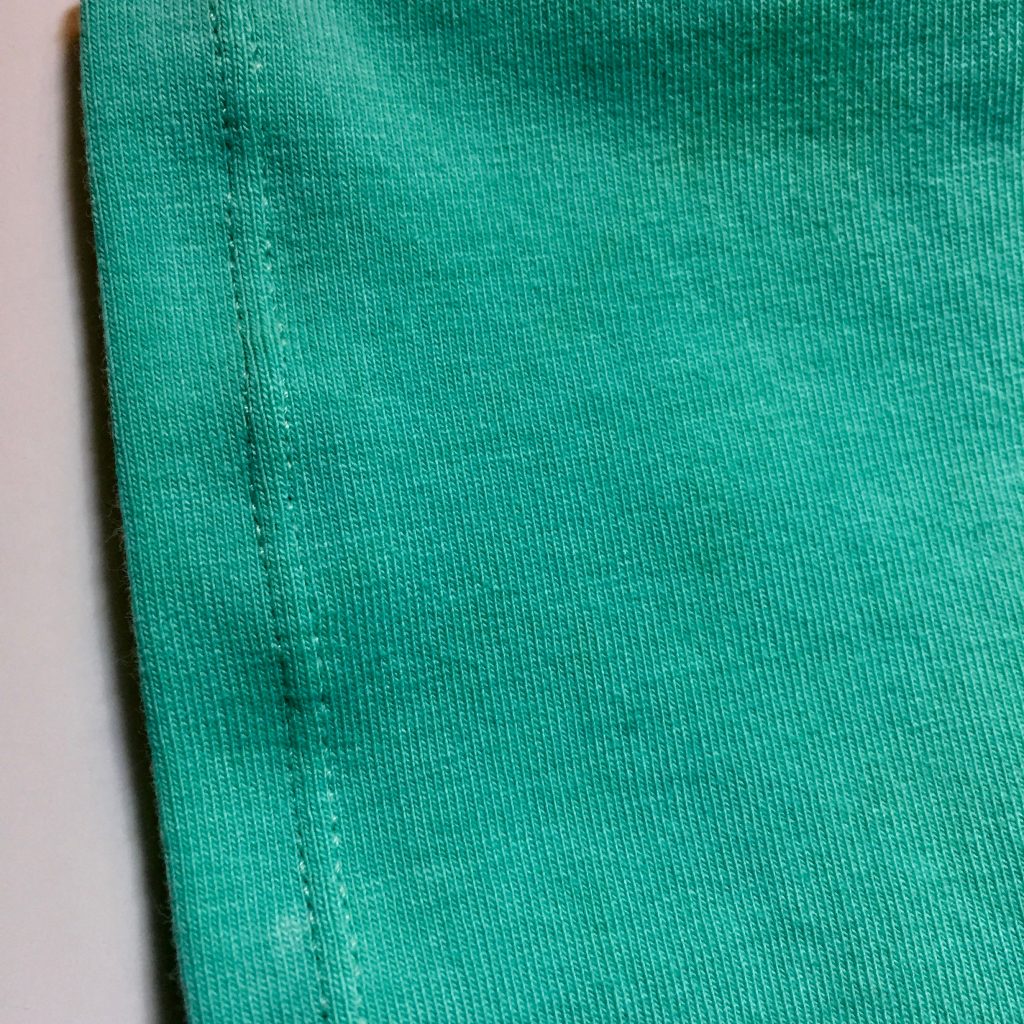
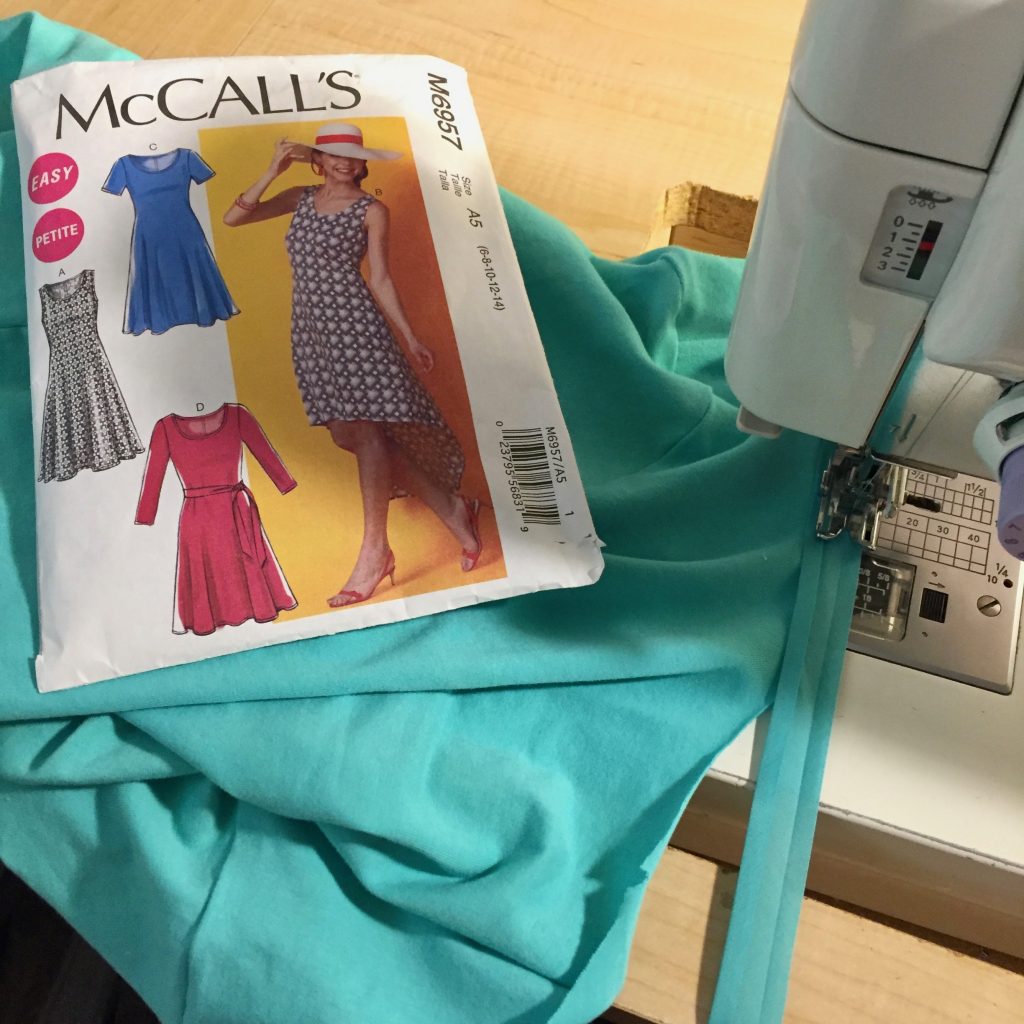
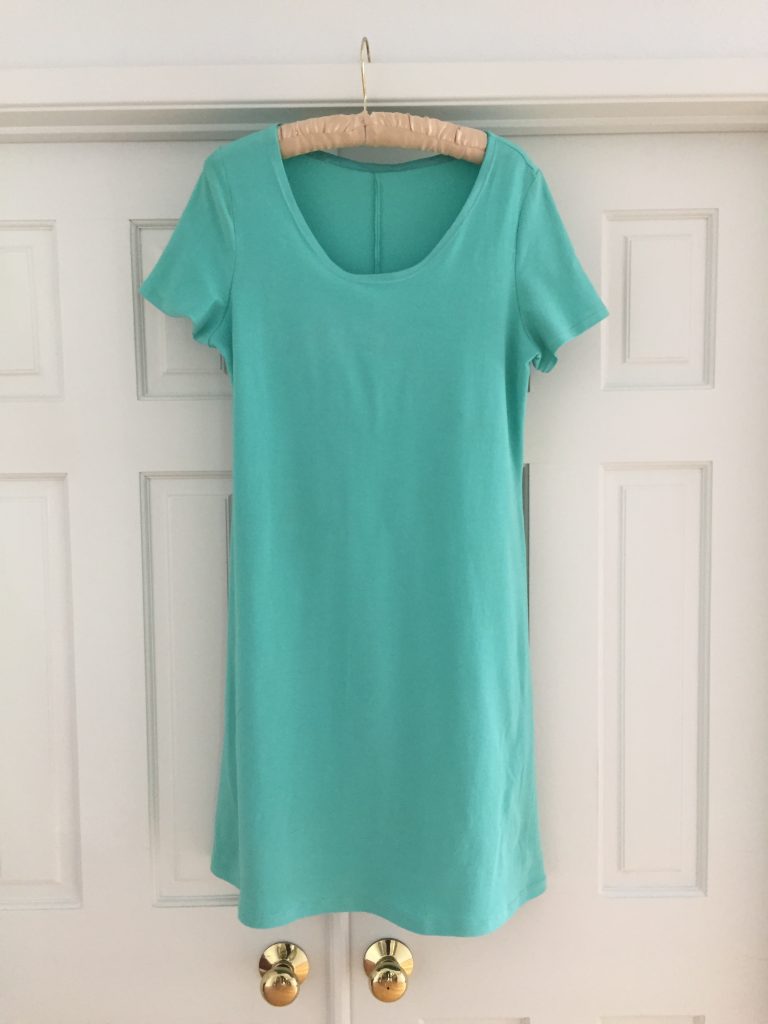
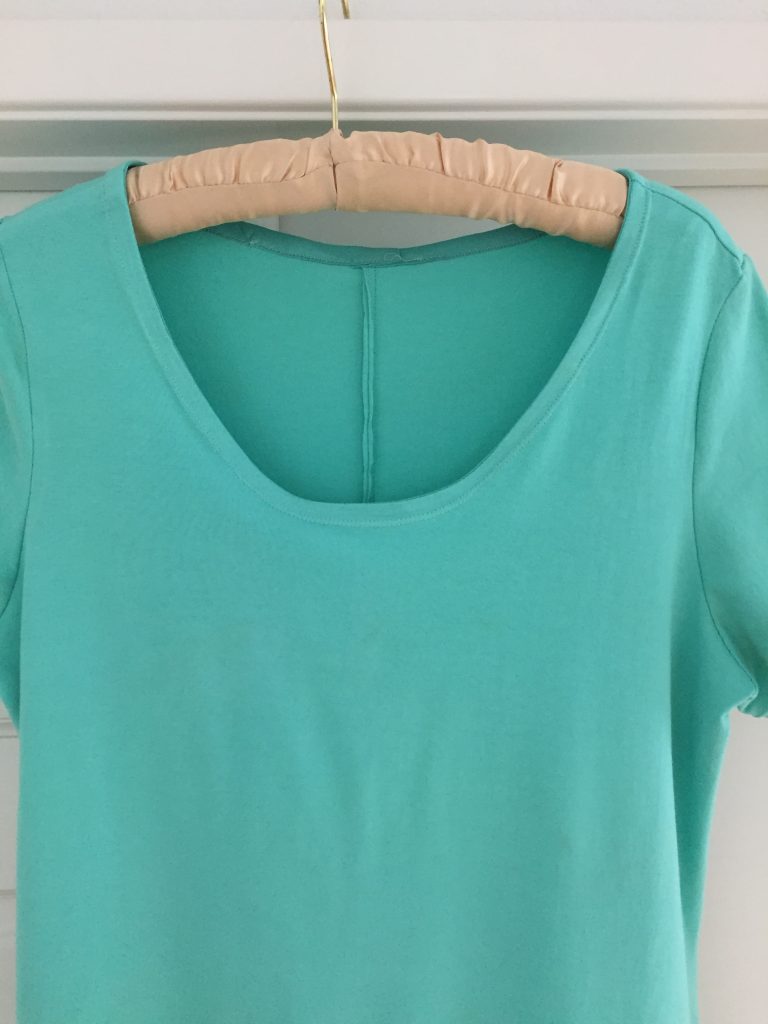
The cut of this simple dress is really comfortable and the fact there are only three pieces to the pattern makes it a very easy project to put together.

I have had this green knit fabric in the drawer for about a year now. I picked it up at a garage sale from someone who was clearing out a lot of fabric. (That was a great sale and I was fortunate to purchase a large stack of knit fabric in good condition). I thought I would use this piece of fabric because if the fit wasn’t good there wasn’t a big loss since there was only a few dollars investment.

I got lucky though and the fit is great. I don’t have a picture of it on me because as I write this, I don’t have anyone to take a photo. Selfies are not my forte so I am not going to bother. Maybe I will post one later on. For now, you get the boring picture of it hanging from the door.

In my opinion the double needle makes all the difference. The hemline, hem of the sleeves and the topstitching of the neckline look so clean. It really elevates the finish of this dress. One thing to note, the pattern instructions told me to just fold the neckline in toward the wrong side and topstitch. I don’t like that method as it usually makes a wavy neckline and it allows too much stretch.

Instead, I attached single fold bias tape and then folded that to the inside and topstitched it. This way, I have a cotton strip creating shape to the neckline. It lays flat and looks really nice. I also reinforced the shoulder seams with bias tape so they wouldn’t stretch. After sewing the shoulder seams and checking the fit, I took a small piece of bias tape, laid it over the seam line and stitched it down. A very easy task and it will prevent the seams from stretching.

Now that I feel confident about the fit and look of this pattern, I want to make another one. I have lots of nice knits and look forward to using them. I think I will make a sleeveless version since we have such warm summers.

Hoping all of you enjoy the weekend. We will likely have a fairly quiet weekend. Julia is studying for finals. My husband wrenched his back and is limping around trying to let it heal. No big plans for the Kringel’s this weekend!

Linking to my usuals – check them out at the top of the page under Link Ups.

So Many Mercyful Quilts!

As many of you know, this month is a busy one for quilters participating in Hands2Help 2019 making donation quilts. This wonderful event is sponsored annually by Sarah of Confessions of a Fabric Addict. She coordinates the donations of hundreds of quilts to several organizations. This year Mercyful Quilts is one of the very fortunate recipients of these quilts.

Last month I received a number of gorgeous quilts. Some I shared on Instagram but haven’t shared them on the blog. I want to be sure everyone gets a chance to see the amazing works of art that have been donated to Mercy Hospital. I can’t show all of them because that would make for a very long post. But here are some that have arrived recently. (Just in case you are new to my blog, please read about the Mercyful Quilt drive posts – click here and here to get the general info on this project.)

Just a sampling of the quilts coming in.

It is fun to be the person receiving these quilts. I love seeing everyone’s work – so many fun colors, patterns, pretty fabrics, beautiful quilting. Really, I am so fortunate to be the organizer of this project. It is like Christmas when the UPS truck drives up the driveway!

Each one is so unique and all of them are beautifully made.

Stunning, right?

This quilt was completely hand quilted. I was so surprised! What a treasure.

So many stitches went into this. It is lovely!

Both of the quilts shown above came from the same quilter. I appreciate her choice to make one more traditional with colors that would appeal to a man or woman. The other quilt with the rainbow of modern blocks and the piano key border is striking and very different. When families choose from all of the quilts it is nice to have a selection to select from. I hope they pick one that is somehow representative of the loss they are dealing with. Maybe that will bring an extra level of comfort to the family.

Not all quilts come via the UPS truck. Yesterday I had the pleasure of meeting up with a quilter from the Sacramento area. She emailed me to see if I had any plans to be in the area so she could give me the quilts personally. Heck yes! Any excuse to meet another quilter and have a cup of coffee with her.

Karrin blogs over at Karrin’s Crazy World and she donated three pretty quilts. Two are blue and yellow which is a fantastic color combination. The third one is a patriotic quilt which might just suit the family of a veteran. I am so happy to have these three quilts to add to the stack. The photos taken indoors don’t do them justice – the colors are more vibrant than shown.

Karrin and I had a nice long visit – Isn’t it crazy how two quilters who have never met can just sit down and start up a conversation? It comes easily and we really enjoyed ourselves. Karrin, I hope we can meet again to talk fabric, stippling, color preferences, batting and life in general! What a fun trip to Starbucks.

I am grateful for all of the quilts received thus far. I know more are on the way. Please know that once the Hands2Help event ends, the need for Mercyful quilts does not! I am happy to take quilts any time you want to donate one. The palliative care team over at Mercy Hospital is truly appreciative of these beautiful gifts you are making and sending to them. Thank you, thank you, thank you!

A Quilt for Rubi

My niece is waiting patiently for the arrival of her fourth little girl. Well, actually, this little one isn’t so tiny! At the ultrasound last week, the baby measured at almost ten pounds. My niece is really wanting this child to make her appearance. We are all hoping to hear from my sister soon that labor has begun. Just about every other text string, one of us asks “any baby updates?” C’mon Rubi!!

As you would imagine, I made a quilt for this great-niece of mine. I wanted to use pink but not only pink, you know? I decided to use the Floriography precuts and yardage I have had for quite a while. At first I thought about making a stacked coin quilt and started looking at my Pinterest boards to find the right one. While skimming and scrolling, I came upon a pin I had from Cluck Cluck Sew. She has a great tutorial for a Jelly Strip stash buster quilt. This seemed like a fun one to try.

Rubi’s quilt.

I am very pleased with the results! The colors are sweet and girlish but also quite bold. Using the coral color added a big pop as did the dark blue. The dark blue was one of my favorite prints and I was able to make a flange with it to use when I attached the binding. (I really like the look of a flanged binding. See more here, here and here.) Doesn’t the dark blue floral stand out beautifully between the white border and the bubble gum pink binding?

When I quilted this piece, I did a loose flower motif that I saw over at the Inbox Jaunt, one of my favorite places to look for fun quilting ideas. Lori calls this her Easy Breezy Flowers which is the perfect name. Hers were quilted tightly together but I spaced mine out. I didn’t want to densely quilt this – I wanted to leave it soft. However, the flowers are easy and quite forgiving. I even put Rubi’s name on one of the squares along the edge.

Because I rarely take the time and label my quilts, I at least quilted my initials in another corner. So someday when this heirloom is found by a quilt museum curator, they can wonder just exactly who BK really was.

Isn’t the backing beautiful? This soft sheet has been sitting in my stack of thrifted sheets for quite a while. I really love it – I think it looks like Monet painted it. I still have some left which makes me happy. It is a pretty piece of fabric.

The quilt finished at about 38″ square. I hope Rubi and her big sisters use it all the time. Being the fourth little girl, she is going to have so much attention from the big girls. I can’t wait to see pictures when she (finally) arrives!!

Silly Leo!

Leaving you with this funny photo of Leo. Yesterday Julia was gone all day working at her internship. So I went out with Leo to let him run around in the pasture. He found a soppy mud pit to play in and was soooo happy! He dug, snorted and snuffed for quite some time. It was a lot of fun to watch.

Hope all of you had a lovely weekend. This week I will be getting ready for the local guild’s quilt show. It is the only one I signed up for this year and I am looking forward to it. But I need to get organized! I also have a cute jersey knit dress I started this weekend and I think I should be able to finish it up. What are your plans for this week?

Spring Break

I have been absent from blog land for a bit. Julia was on spring break and we had a lot of time to hang out together. It was really nice to have her home relaxing, not working on homework.

The break started with my son and his wife here for the weekend. Julia picked out her pig for this year and they wanted to come and join in on the fun. (My son raised market hogs during high school too and really enjoys this common interest he has with Julia.)

Leo, hiding in the corner while Julia waits patiently.

Let me introduce you to Leo. He is about 11 weeks old and has a very sweet personality. When Julia brought him home, he was very skittish. Poor little guy was so shy and wanted to hide in a corner of the pen, behind some weeds. Julia was very patient with him and just stayed near him but didn’t try to engage very much at all.

It didn’t take more than a few days before he would sniff her hands and come closer to her. She continued to just be with him, letting him approach her.

One week later, Leo is so much friendlier.

After the five days or so, Leo became very comfortable. He has gotten very social and loves to be scratched and rubbed whenever Julia is out with him.

Look at his cute smile!

Now they are best friends. He will not leave her side if she is in the pen. He nuzzles her legs and wants all of her attention. She did such a good job of gaining his trust and this will make it much easier for her when she starts to train him for showmanship.

Buttermilk Bend Trail on the South Yuba River

In between playing with Leo, we did go do a few fun things. One day we took a hike on the Buttermilk Bend trail along the South Yuba River. The wildflowers are gorgeous this time of year.

Globe Lillies

These wild lillies are one of may favorites.

With so many wildflowers, comes an abundance of butterflies. There were many and we enjoyed watching them.

Try as she might, Julia couldn’t get one to land on her hand.

Cherry Blossoms

At home everything is blooming too! This is our cherry tree. Each season it is anyone’s guess whether we will get cherries. Judging by the incredible bloom we have this year, I am feeling hopeful we will have fruit. The birds take more than their share, but I think we will have some to enjoy as well.

Asian Pear Apple Blossoms

We have two Asian Pear Apple trees, each of which are about four or five years old. This is a strong blossom year for both of them so maybe we will get fruit! Last year I think we only had two or three apples and they were not very big. Crossing fingers for this year.

Mason Jar Cozy

My quick sewing project for last week was this cozy for a pint size mason jar. My daughter in law takes jars of layered oatmeal (I think she puts fruit, milk and yogurt with the oats) to work and cooks them for her breakfast. She wanted a cozy for the jar because it gets fairly hot in the microwave. This isn’t exactly gorgeous, but I am fairly happy with it. First I measured the girth of the jar and the height I wanted. I cut two rectangles of fabric and one of batting, each 4 3/4″ x 11 1/2″. I also cut two circles of fabric and one of batting, 3 1/2″ in diameter. Then I quilted the batting to the exterior fabric. Stitching a seam along the short side first, I then pinned the outer fabric circle to the cylinder I had made. That was the most difficult part.

I couldn’t get it to fit correctly without a few tucks along the way. I did the same with the lining (except no batting this time). Then I stitched the lining and outer fabric right sides together around the top opening of the cylinder, leaving a couple of inches open so I could turn it right sides out. It worked well enough but I am sure if I made a few more, the aesthetics would look a bit nicer. (I did make a mock up with some ugly fabric before I started so I could be sure it would fit the jar.)

The week went by so quickly! School is in session again and we are back to our routine! Today I even did a bit of quilting on a baby quilt I am making. I love the way these flowers look. I backed the quilt with a vintage sheet I had thrifted a long while back. It is so soft! I will share this with you again when I get it finished up.

I hope you have been enjoying springtime! We are definitely in full spring season here in Northern California.

Little Updates

Hurray – It’s Friday!! When you work at home, it doesn’t really matter as much that Friday rolls around, does it? But I still love that feeing of heading into the weekend. It is probably just ingrained in me from the years of being in school, working, having kids in school – Fridays are a great day!

I am popping in with just a few things to tell you. Before we get started, you may have noticed the incredibly beautiful hatching chick in the picture above. Julia made it in first grade and it makes me smile to remember those days. Do you keep your kids Objet d’art from way back when?

Ok, the first point of discussion is about commenting on various blog posts. There has always been this glitch in commenting on certain blog posts since I use WordPress for my blog. I know about fixing the no-reply issue and I have done that a couple of times but things are always changing and once again, there are many blogs I cannot comment on directly.

Additionally, those blogs I can comment on (that are not on a WordPress platform) usually have a Captcha process to go through. I don’t mind this for the most part. Many of the blogs have it set so I usually have to click one round of objects (you know, the fire hydrant, traffic light, bus, car, cross walk or store front) but there are some blogs where I have to go through five and six rounds. To be completely honest, after the 3rd round or so, I just give up. It becomes a bother.

Instead of just reading posts and not commenting, I have started to comment directly by using a blog reader. I have used Bloglovin for years to organize the blogs I follow and to keep track of those following me via Bloglovin. A while back they added a feature where a reader can comment on a post right there. It is not heavily used but it is so convenient. It does mean the author of the post has to check Bloglovin to see those comments. I cannot figure out a setting where they will notify me if I have a post comment on Bloglovin. That would be a great feature, so maybe one day. I just wanted to let people know that they might want to check Bloglovin and see if there are comments from yours truly or others on their posts. Not the perfect solution but I am going to continue to do this and see how it goes. At least I am trying to interact and not just lurk behind the scenes.

Springtime blocks.

As for sewing, I have been working on these cute blocks. This line is called Floriography. I had purchased a stack of it at least three years ago. I began a Tula Pink quilt with it but hated the way the blocks looked. I clearly didn’t know what I was doing and it gives me a headache just to look at those blocks! So, I decided to throw in some solids from my wonderful closet of stash and make these blocks. I want to make more blocks with the darker blue and pink before I really work on the layout. I am using a pattern (tutorial really) by Cluck Cluck Sew. I had pinned it long ago and decided this is a great use for it. I am looking forward to making more of these and putting it together.

This weekend Julia selects her piggy for this year. She is pretty excited (actually, so am I!). My son and his wife are coming for a little family time and my parents are coming to dinner tomorrow night as well. I am thinking steak and shrimp for dinner with peach cobbler for dessert. This should make for a great weekend! Family time, baby pigs, and good food. What more does this girl need?

Check out my Forsythia blooms! So pretty this time of year!

I cut some to bring in the house. The blossoms always drop everywhere but it doesn’t bother me. I love the bright yellow indoors!

Through this weekend!

Remember – there is a great sale on Michael Miller Fabric over at my shop. Today and through the weekend, it is 50% off. There are some great stripes for quilt bindings and a few large scale prints that would make wonderful quilt backs. Come take a look! Have a great weekend everyone! Linking with Myra at Busy Hands Quilts for Finished or Not Friday.

String Frenzy Book Tour

Today is my stop on the String Frenzy Book Tour!! You may have already read a few posts about this new book by none other than Bonnie Hunter. Bonnie, queen of scrappy quilts, has been at it again and this new book is the result of hours and hours of work. If you are new to my blog, welcome! I am so glad you’re here and hope you will take a few minutes to look around.

One of the things that impressed me about the book is Bonnie’s level of detail. She discusses the basics on block construction, string blocks, crumb blocks and foundation piecing. Lots and lots of great information for the beginner to intermediate quilter which is right where I fall.

Once she provides a good basis of instruction, she moves into the patterns. This book contains twelve unique quilt patterns with wonderful instruction. The difficulty ranges from advanced beginner to intermediate skill level.

I haven’t made a scrappy quilt in a very long time, which is made abundantly clear by the overflowing scrap bins and the pile of scraps not put away (for lack of a bin to fit them into)! While I didn’t have time to make an entire quilt, I did want to try one of the patterns. Making a table runner seemed more manageable with the other projects I have going on right now.

Daybreak from the String Frenzy book by Bonnie K Hunter

For my project, I selected the Daybreak pattern. I liked the tiny four patch blocks and the string pieced sashing Bonnie used in this pattern. These four patch blocks each finish at 2 1/2 inches. I used strip piecing to make these which was pretty darn quick.

Little four patch blocks.

When I was reading the book I decided rather than going with a totally scrappy look, I would choose a couple of colors to emphasize. My choices were green, blue and purple.

Scrappy four patch blocks

Then I decided I would use a pale green for the setting triangles within each block.

The borders were all pieced using my abundant supply of neutral scraps. I cut them into strings of varying widths and sewed large sections together. Then these were cut into strips measuring 2 1/2″ by 8″.

Finished! My version of Daybreak, just three blocks in all!

This is the finished project! I had intended to use it as a table runner but I really like it and am debating putting a sleeve on the back and hanging it in my sewing room. The finished measurements are approximately 12″ x 32″ and I have a spot on the wall that might work just fine. I need to think on that for a bit.

Quilting it was enjoyable. It has been a while since I have done any free motion quilting. I stitched in the ditch around the five on-point blocks within each block because I knew I wouldn’t be quilting those. I wanted to leave them alone. Additionally, I used loops on the low volume scrappy sashing and some wavy lines on the light green triangles.

As it should with a scrappy quilt, every bit of fabric came from my stash. I didn’t take a photo of the backing but even that was in the closet! Yay for using up some fabrics that have languished for a long while.

All in all, this is a great book. Lots of fun ways to use scraps and if you don’t want to make the entire quilt, go for a mini, a table topper or a runner. I love making smaller projects because there is a satisfying finish and practicing my FMQ is so much easier on small quilts.

Be sure to check out the other stops on the tour and look at the projects made by the rest of the gang. Here is the schedule:

Friday, 4/5: C&T Publishing at ctpub.com/blog

Saturday, 4/6: Pat Sloan at ilovetomakequilts.com

Sunday, 4/7: Sandra Clemons at makeitblossomdesigns.com

Monday, 4/8: Susan Arnold at quiltfabrication.com

Tuesday, 4/9: Bernie Kringel at needleandfoot.com. (You are here!!)

Wednesday, 4/10: Bonnie Hunter at quiltville.blogspot.com

Bonus!! C&T Pubs has generously provided me with an e-book of String Frenzy to give to one lucky reader. Leave me a comment and let me know if you are a scrappy quilter. Do you make lots of scrappy projects? What is your favorite way to use your scraps – and what constitutes a scrap? Will you save a 1.5″ square? How small is too small?? Looking forward to hearing back from you. Giveaway open until Friday and I will draw a winner over the weekend!

UPDATE: Giveaway now closed. Winner was comment #6, Sandy M! Congrats Sandy. Enjoy the book! 🙂

Sale happening in the shop this week!!


Calling to all customers!! I have all Michael Miller fabrics on sale at 50% off through the weekend! Yep — Such a great deal. Hop over the shop and take a look. I am sure you will find something you love. Prices can’t be beat. Shipping is a flat rate of $6.99 no matter how large the order is. Happy Shopping!!

Newsletter!

Have you signed up for my newsletter?  It is published every month or so and contains information about my shop, new arrivals, sales, and events.  Click here to sign up!

Odds & Ends

I am supposed to be at a class today. I have been really looking forward to it – Mel Beach came up from the South Bay to teach a workshop for our guild. But, as you can probably guess, the past two days were migraine days and I am wiped out today. It seemed ‘too difficult’ to cart the sewing machine and supplies and be in class, listening and comprehending a technique today. The day or two after a migraine are just weary for me. So, I am home.

I thought I would catch up with you. It has been a while since I have shared the Mercyful Quilts I’ve received. They are just gorgeous, I am sure you will agree!

Six new beautiful quilts for Mercy Hospital!

As always, the quilts are stunning. Each one is so unique and more beautiful than the last. Mercy Hospital’s Palliative Care team is so grateful for these. I hope you know how much your work and generosity are appreciated by staff and the families who are given these comforting, loving quilts. If this program is new to you, read this post and this one to see what it is all about!

I could drool over these Art Gallery bolts all day long.

I have been running out of space in the shop so I ordered a wire shelving rack. It is now filled with Art Gallery Fabric, my favorite of all fabric. Isn’t it a pleasure to look at this and just think of the projects one could make??? I have a box of AGF arriving today and I can’t wait. There will be a couple of new colors from the Pure Elements solid line as well as a few more from Maureen Cracknell’s Sun Kissed line. It’s like Christmas morning every time a box shows up!!

Did you have any idea of all the choices??

I am out of Mary Ellen’s Best Press and went to order a bottle on-line. Did you have any idea of the number of scents it is made with? I thought there was just the regular Mary Ellen’s – this caught me by surprise. Just what do you suppose “Caribbean Beach” smells like?? Of course I ordered unscented. I am not a fan of fragrance – not in lotion, creams – none of it. This was news to me. (I lead such an exciting life.)

OK – Better get busy. My project for today is to make a couple of simple curtains for the Downieville house. There is a stairwell off the kitchen, leading to the basement and it has a couple of windows. Those windows are single pane and can be quite warm in summer and chilly in winter. I am going to use this vintage sheet and line them with a heavy muslin. I think that will help and they will look cute. The old fashioned floral is perfect for the house. I have an old curtain from the window to use for measurements so this should be a quick project. (if my post-migraine brain cooperates.) Wish me luck!

If you haven’t yet read the fantastic comments and discussion on this post, please do! So many quilters are sharing their mistakes and quilting blunders. So funny to read these and very validating!! There is time to enter a comment sharing your experience as well. ( I am definitely reading all of them and trying to comment on most – it has been a challenge because of my head.) Prizes are offered!! Winners drawn Saturday morning. Go check it out.

Quilting, In Real Life

I have thought about hosting an event like this for a long while now. Occasional frustration while scrolling my various social media feeds got me thinking. While I do love the inspiration found on Instagram and Facebook, sometimes it makes me wish I were more skilled or more artistic or more prolific a quilter or more, just more. Know what I mean? It seems to me we should share both – the mistakes and the achievements, the blunders and the best of our work. This would present a balanced picture, it would show quilting – in real life!

In an effort to do this, I invite anyone who wants to share to leave a story in the comments. Explain what your mistake was, how you did or didn’t fix it, and what you learned from it (if anything!). Bloggers – if you write a post describing the same, please put the URL in a comment so we can all click through and read about your silly mistake or misunderstanding.

I have so many I could tell you about but I have chosen one big one that I chuckle about almost every time I bind a quilt. I would define this as a complete misunderstanding. I don’t have any wonderful pictures to illustrate this so I will just have to tell the story.

When I started quilting, I basically taught myself. This was back in the late 1970’s. At that time, I made three quilts – each one queen size. I had no clue about actually quilting a quilt so they were hand tied. Also, I didn’t know about binding a quilt so they were sort of made ‘envelope’ style. I layered the front and back, right sides together. Then I stitched around the perimeter, leaving an opening large enough to turn it right sides out. Then, get this, I took a layer of polyester batting and inserted it into the quilt and basically crawled in with it as far as I could to smooth it out. So the batting wasn’t really stitched in to anything and you can bet it was lumpy but I was 17 or 18 and I thought this was fine. This is sort of the back story – it isn’t the misunderstanding. We haven’t gotten there yet! I just wanted to tell you where I was coming from as far as quilting knowledge goes! It helps to know that though I began sewing when I was 11 years old, I made clothes – not quilts. I took home ec classes in high school and learned a lot about sewing then. You can read a post here that talks more about those classes if you like. The rules for making clothes are quite different than those for making quilts. This is what caused my major misunderstanding!!

Fast forward from 1978 to 2010 and I began quilting again. This time I had the benefit of all the tutorials on the internet. I read many and they were (and still are) very helpful. Some of the first projects I made were minis and table runners. Then I moved on to trying to make some lap size quilts. Binding quilts was quite tricky for me. I would look at the pictures of other quilts and the crisp bindings with beautifully mitered corners and wonder why the heck mine looked so weird.

Want to know why? Let me tell you. For the most part, I understood the process of making the double fold binding, stitching to 1/4″ before the corner and then off the corner, then I mitered the corner as I turned. All of that worked well. Once I got the binding entirely stitched on, I made my mistake.

I assumed that the 90 degree corner needed to be clipped! After all that work, I went to each of the corners and snipped them off!!! No kidding. I didn’t do this only once either. I did it to a couple of quilts before I figured it out. When sewing clothes, pillow cases or anything with a 90 degree angle, the corner is clipped off so when you turn it right side out, there is a nice crisp corner without excess fabric bunching it up. Well, as we know, bindings are folded over the corners and the corners need to be intact so they fill the binding. My habit to clip those corners was so strong I just did it automatically. Let’s just say the bindings on the first couple of quilts were very weird indeed. I don’t have any pictures of this. But I assure you, I did it repeatedly.

There were actually several habits that were hard to change when I started quilting. Using a 1/4″ seam felt so wrong to me. It didn’t seem like such a small seam could actually hold the pieces together. When sewing clothes, it is standard to use a 5/8″ seam. Also, I am used to back tacking each time I start and stop a seam. Most of the time, I still do this. Old habits die hard. But when I am piecing small blocks, it is problematic if I tack at the beginning and end of the seams – it can make my seams too fat, make the blocks too small, and sometimes causes those bitty pieces to get sucked into the machine at the feed dogs (which makes me crazy!)

We are all constantly learning. Many of my readers are amazing quilters, some are quite new to it and others are like me – gaining confidence with much still to learn. But – we are all right where we should be. Our projects should not be compared. They are as unique as each of us which is what makes life interesting.

I am looking forward to reading tales from others about your blunders, mishaps and misunderstandings! I had planned to have a link up ready for those with blog posts. Well, the weekend got away from me and it didn’t happen. Instead, bloggers, please leave the URL link to your blog post in a comment. Readers, please scroll the comments and click through to read the mistakes others have made. I can almost guarantee I will both learn something by reading these and will also have a laugh or two. For readers who are not bloggers, will you tell your story of a mistake or goof you made? Explain it, tell us how you did or didn’t fix it – share with us! Your story in a comment enters you in the drawing for the prizes! Readers, if you want to comment on others stories, please feel free. I think this will be a lot of fun.

At the end of the week, I will close the comments. Then I am going to draw names from all who entered their story and prizes will be given! Remember from the prior post? We have a gorgeous fat quarter bundle from Art Gallery Fabric, a $30 gift certificate to my shop, three pdf patterns from Bonjour Quilts, one pdf pattern from Devoted Quilter, two mini charm packs from My Sewcalled Quilts. Also, one more prize has been thrown into the mix – one book from C&T Publisher will also be awarded. Lots of fun things to give away!! (Note, when you leave your comment, please let me know if you live outside the US. I have to limit the fat quarter bundle to US residents only – darn those shipping costs!)

Thanks to everyone for participating! We need to encourage each other – one way to do this is to show both sides; our successes and our blunders!

Big Decisions!

It is that time of year. College acceptances and declinations are being emailed out to all sorts of college seniors. Julia and her friends have been texting like mad, announcing what universities they did or didn’t get into. It is a very competitive process these days. I remember back in the day; you know, when I was walking five miles to school (up-hill) each way in the snow, it wasn’t such a huge deal to apply for college. I went to our local community college for two years and when I finished up the general education classes, I chose a four year university and picked a major. My main decision point was, in all honesty, where was my boyfriend going to attend? Sounds terrible, but it’s the truth. I also remember that in 1980 when I started college, the tuition fee each quarter was $69 ($207/year). I applied and just assumed I would get in. It wasn’t thought to be a big deal. I took the SAT’s but didn’t do anything amazing with those. My grades were reasonable but certainly not more than a 3.4 (or so?) GPA.

Oh how things have changed! The tuition at my alma mater is now up to approximately $3,200 per quarter ($9,600/year). Last year of the 55,000 applicants about 16,000 were accepted. There were 10,000 applicants with GPA’s of 4.0 or more who were turned down. The competition is fierce. College juniors and seniors take the SAT and ACT tests multiple times and when they aren’t satisfied with their scores, they work with SAT prep tutors. GPA’s of 4.0 and higher are prevalent and these kids are fighting for their spot.

Julia was fortunate in that she applied to four universities and was accepted at each one. We have done tours, walked campuses and, of course, talked and talked and talked. Julia had several decision points when choosing where to go but the most important was….. the swine unit! Once we got to this one, I knew her decision was made!


My daughter in her happy place.

The swine unit at this particular university is gigantic. There are approximately ten litters born each month. We saw the nursery area and drooled over these tiny piglets.

Look at them, one on top of the other! So funny.

We had toured the swine unit at other universities last year and while they were nice, they just didn’t compare.

Tell me the pig on the right isn’t smiling!

We went home from this particular tour and my daughter thought and thought about her choices. We called and cancelled our flights and the campus tours which were scheduled for next weekend.

Last Saturday she committed and is officially going off to college in September! This is such a milestone in her life. (Mine too! She is the last kiddo at home – the chicks will have all flown the coop!!) Here she is accepting the offer and of course, you know what the next step was. “Mom, what credit card should I use for the deposit?” Here we go!

I thought I would make a little something to surprise her – to celebrate this important decision. Looking through my stash, I remembered a piece of fabric Julia picked up last fall during a trip to Ben Franklin. It was a Riley Blake piece with piggies wallowing in mud and it made her smile.

Aren’t they cute? Snorkels and beach balls. Hahaha.

Pigs truly have a love of mud. Julia usually keeps a nice sized mud puddle in the pen for her piggies to play in and cool off with.

Anyway, my thought was to make a couple of pillow cases. They are simple and so fun to make. It had been a while since I had made these so I looked at the tutorial at the Seasoned Homemaker to refresh my memory. These are super easy to make and look so nice when complete. Using French seams creates a lovely finish on the inside.

These took very little time to whip up. I used a white on white fabric called Fool’s Gold from my shop. It is by Libs Elliot and the white is absolutely crisp. I think it dresses up the look just a bit (if that can happen with pigs playing in mud?!?) The soft pink trim was a scrap I had (always nice to use those up!)

I know the match isn’t perfect for the quilt she has on her bed but they are cute nonetheless. Julia is excited these days because there is so much going on with the last semester of high school! Next weekend she will select her piglet for this year. Photos to come!

If you haven’t tried making these ‘burrito style pillowcases’, I encourage you to give it a try. They look so pretty and are not at all difficult. Is it time to personalize your bed with some nice new pillowcases?