Category Archives: Pieced Quilts

This and That

I live just far north enough that we get to enjoy a colorful autumn.  Right now it is spectacular.  I have lived in Pennsylvania and I know that what we enjoy here is not on par with the colors that splash the countryside this time of year in the East. However, we do have some really lovely leaves on display these days! This was taken in my neighborhood  yesterday when I was walking the dog.

photo 2 (8)Ok – moving over to the sewing room….. I was really productive this week. For starters, I had a few sales in my Etsy shop which is always exciting.  Now that fall has arrived, I have been selling the cozies that I make for Chemex coffee pots. If you aren’t familar with Chemex pots, they make the best drip coffee. However, because the pots don’t sit on a hot burner or stove, the coffee cools quickly. I have been making these insulated covers for a while now.  With this mad rush – 😉 – on Chemex cozies, I figured I had better make a few more for my shop. These came together quickly. I have been cutting them in batches when I have the time and then sewing them sort of assembly line style. I love the fabric on this one.

20141105_2023

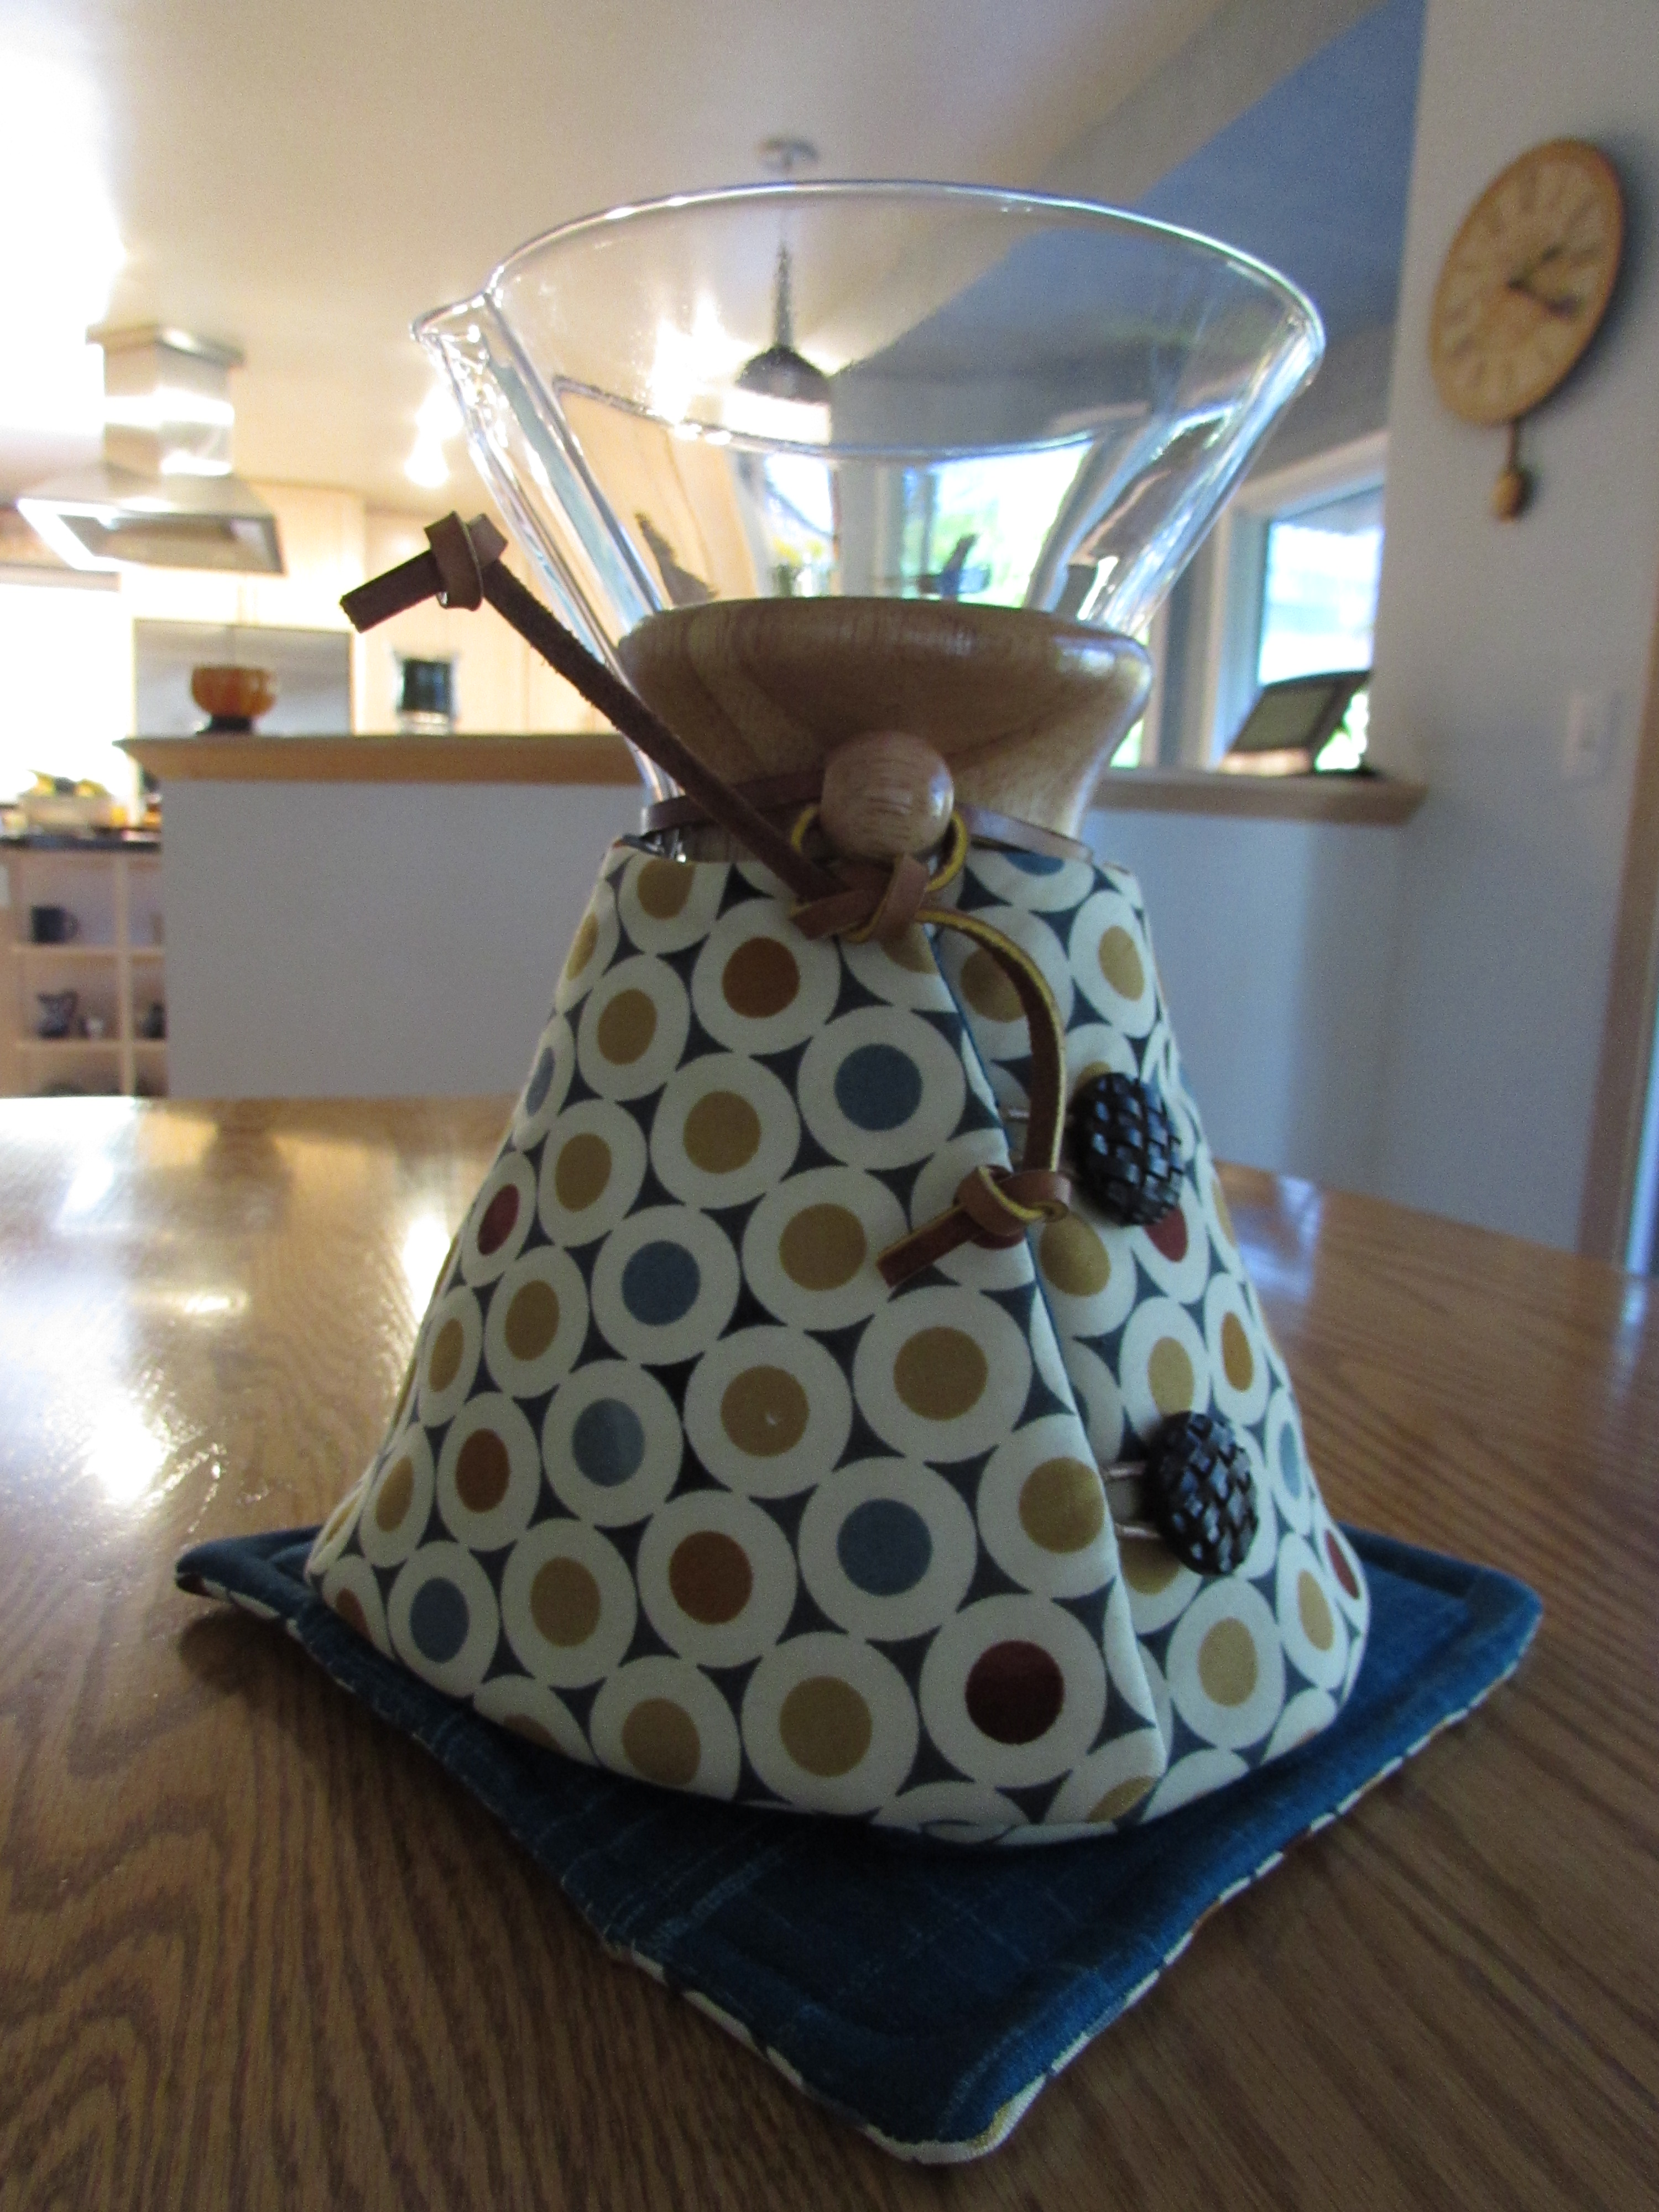
Here is another one. I had purchased this home dec fabric to use as a tablecloth but the piece I bought was too small so I am using it here.  Lovely!

20141028_2008

As an aside, I was taking some packages (Etsy orders) to the post office to mail. When I was there I saw that I had estimated the shipping fairly closely for one and had overpriced one package for a couple of dollars (not quite $2.00) I sighed and was telling the postal clerk that I can’t always come close when I quote the shipping charges and I wasn’t sure if I should refund the overage. She knows me since I have been there regularly lately (benefits of small town life) and said I shouldn’t only consider the post office charge.  She asked why am I not considering the time it takes to prepare the package, go to the post office, stand in line.  “That’s the ‘handling’ part in shipping and handling.”  Honestly, I never really thought about it and was always only charging for the postage. It made me feel better. This little Etsy shop has taught me a lot in the past few months. Very nice!

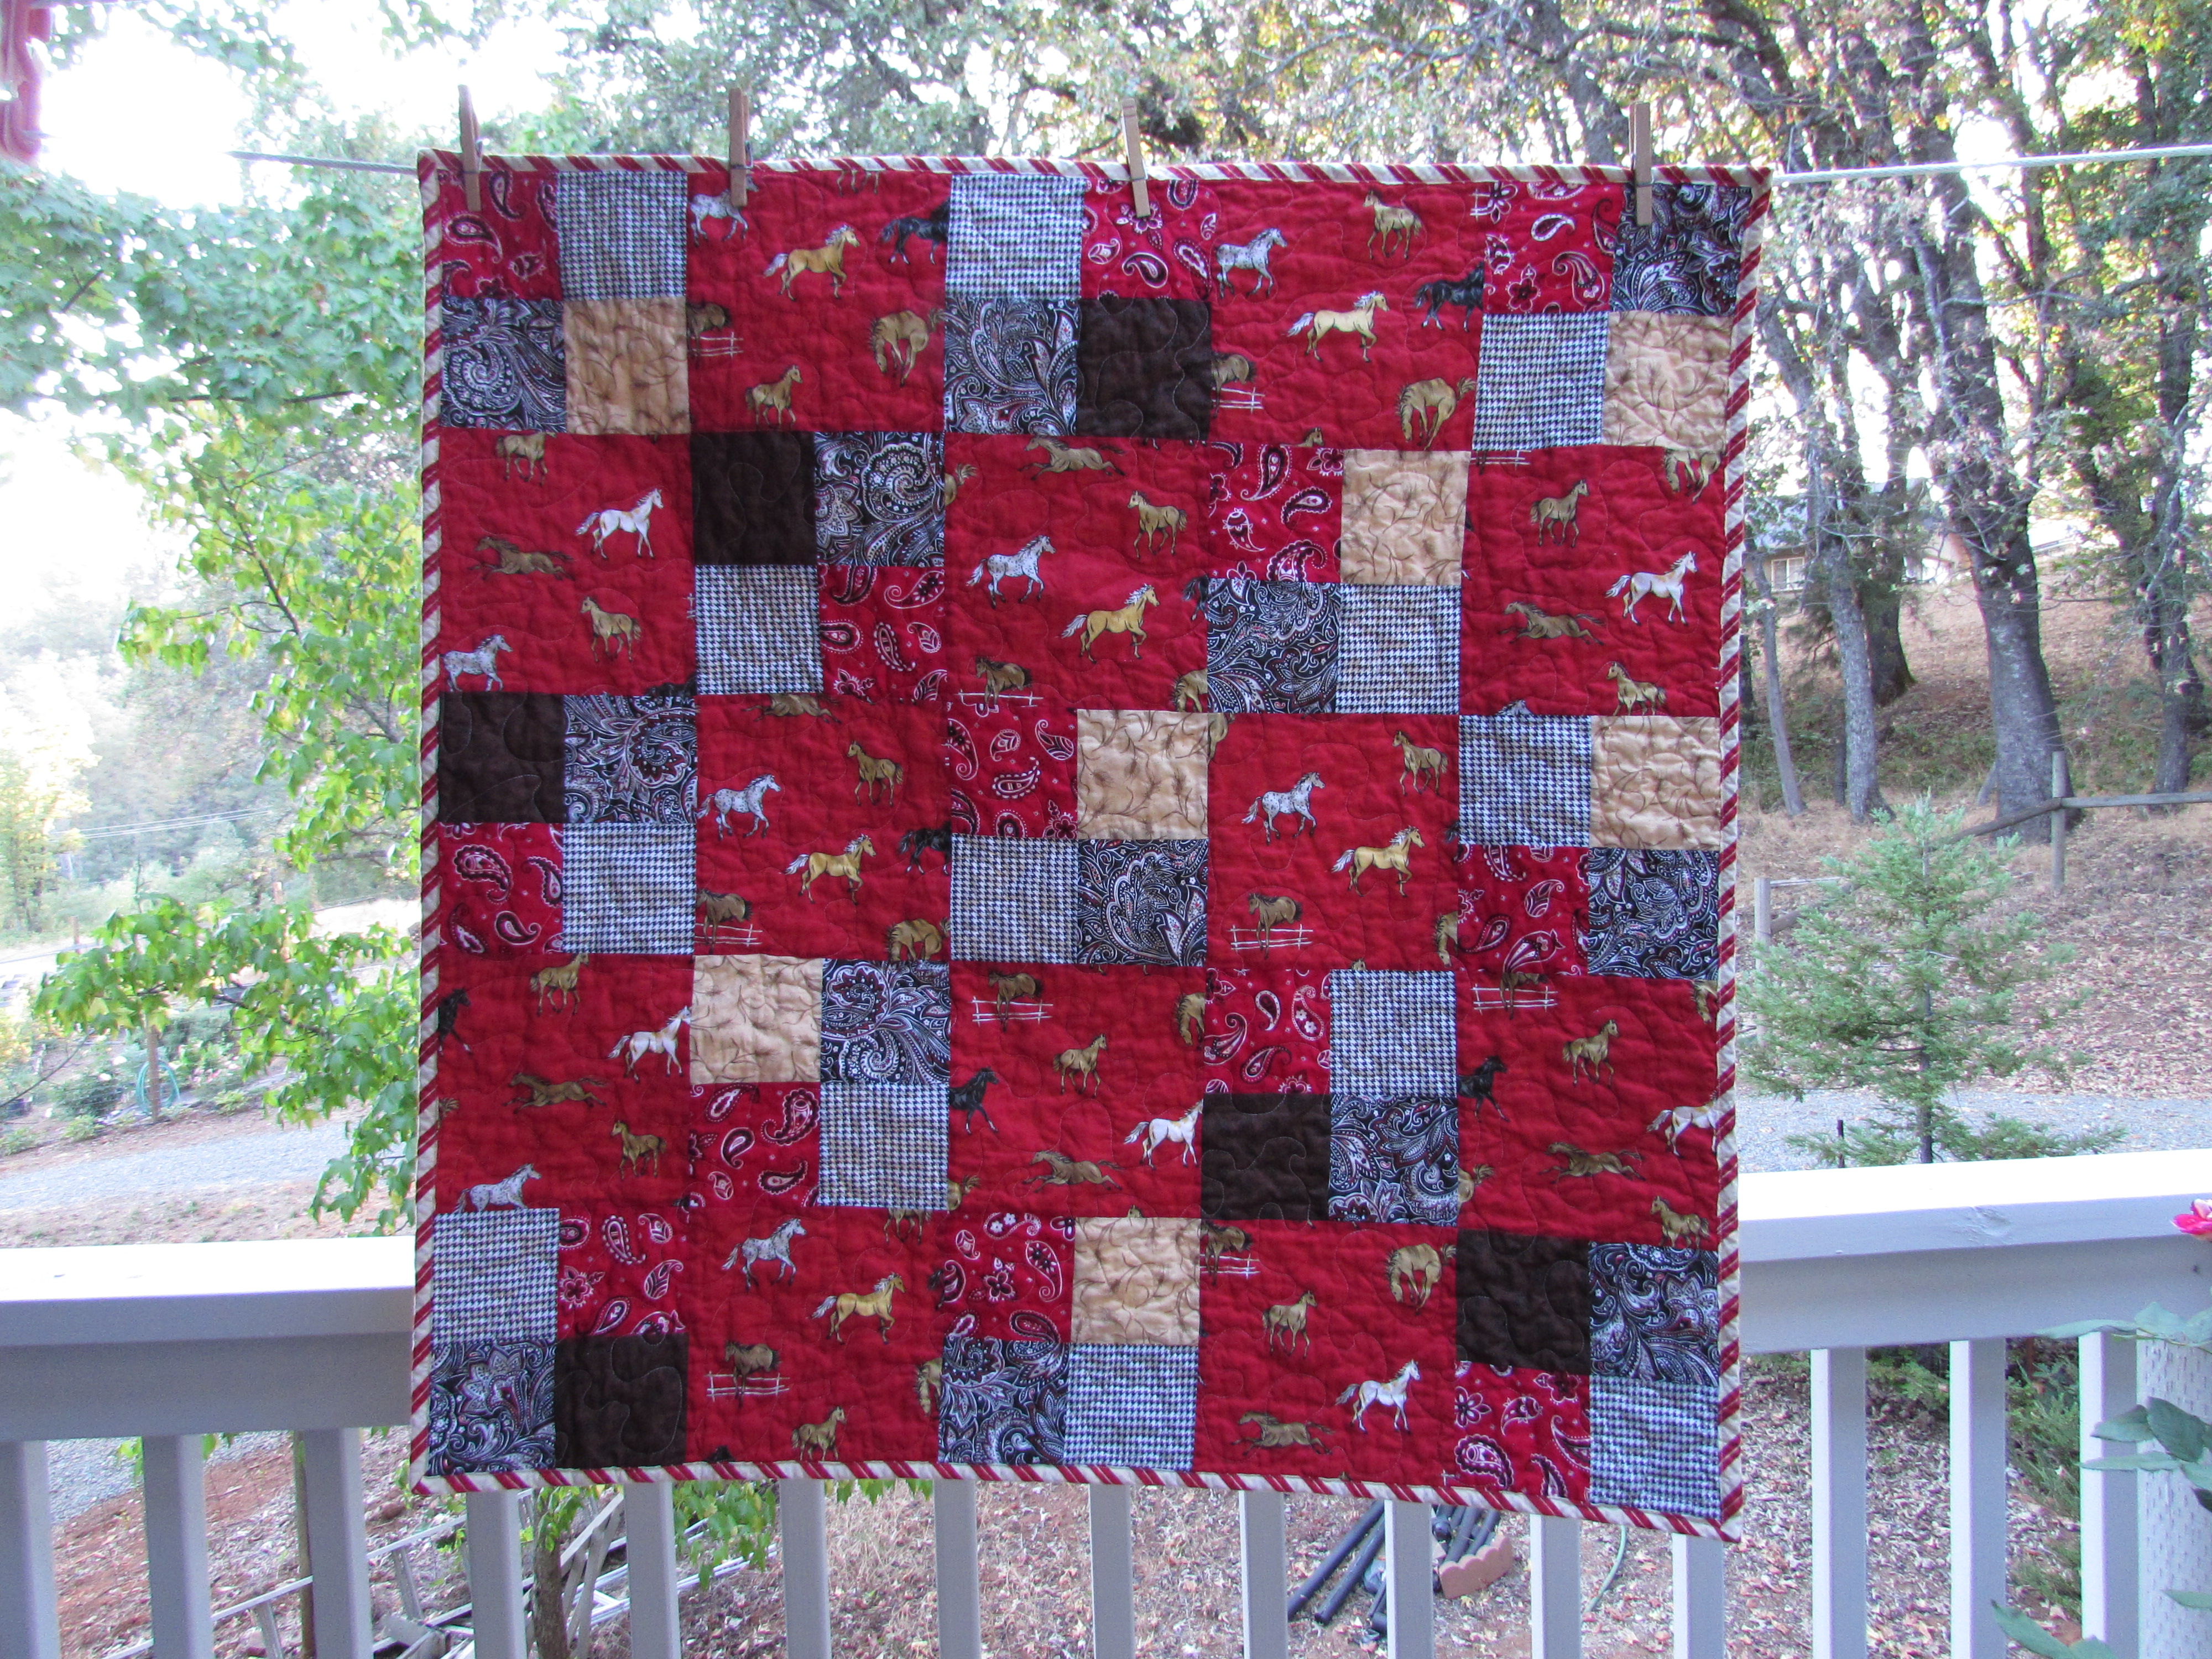
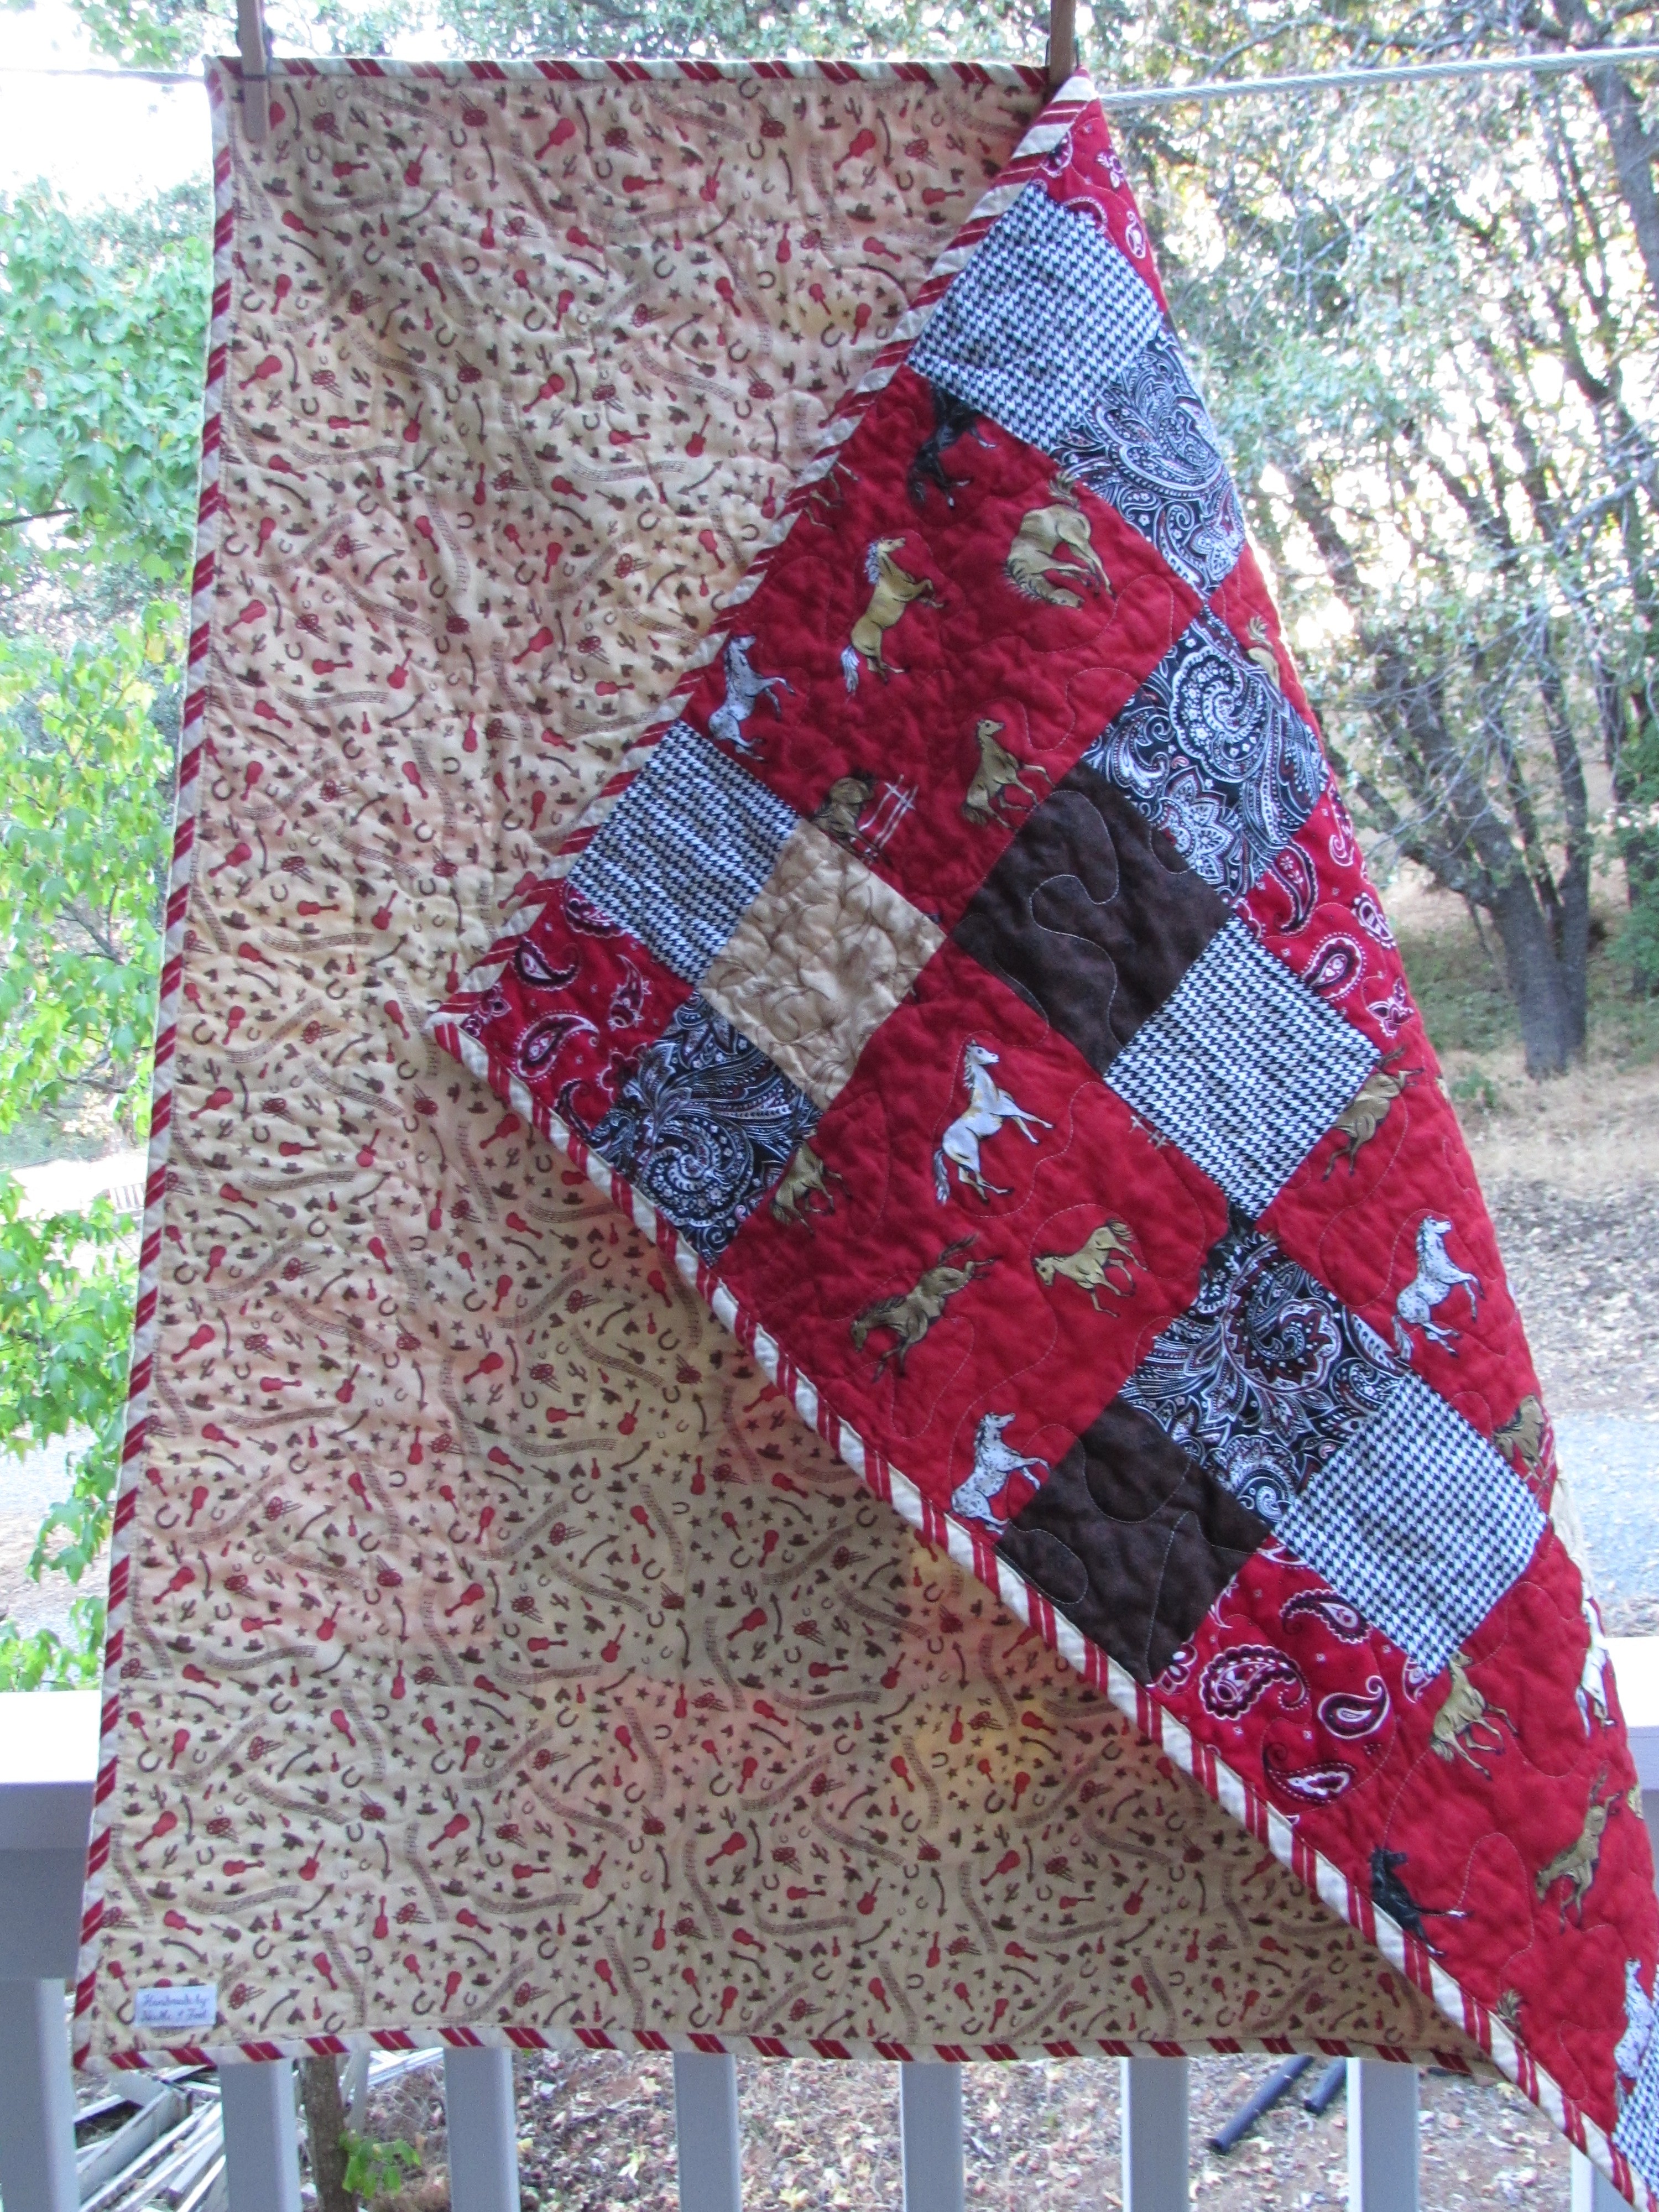
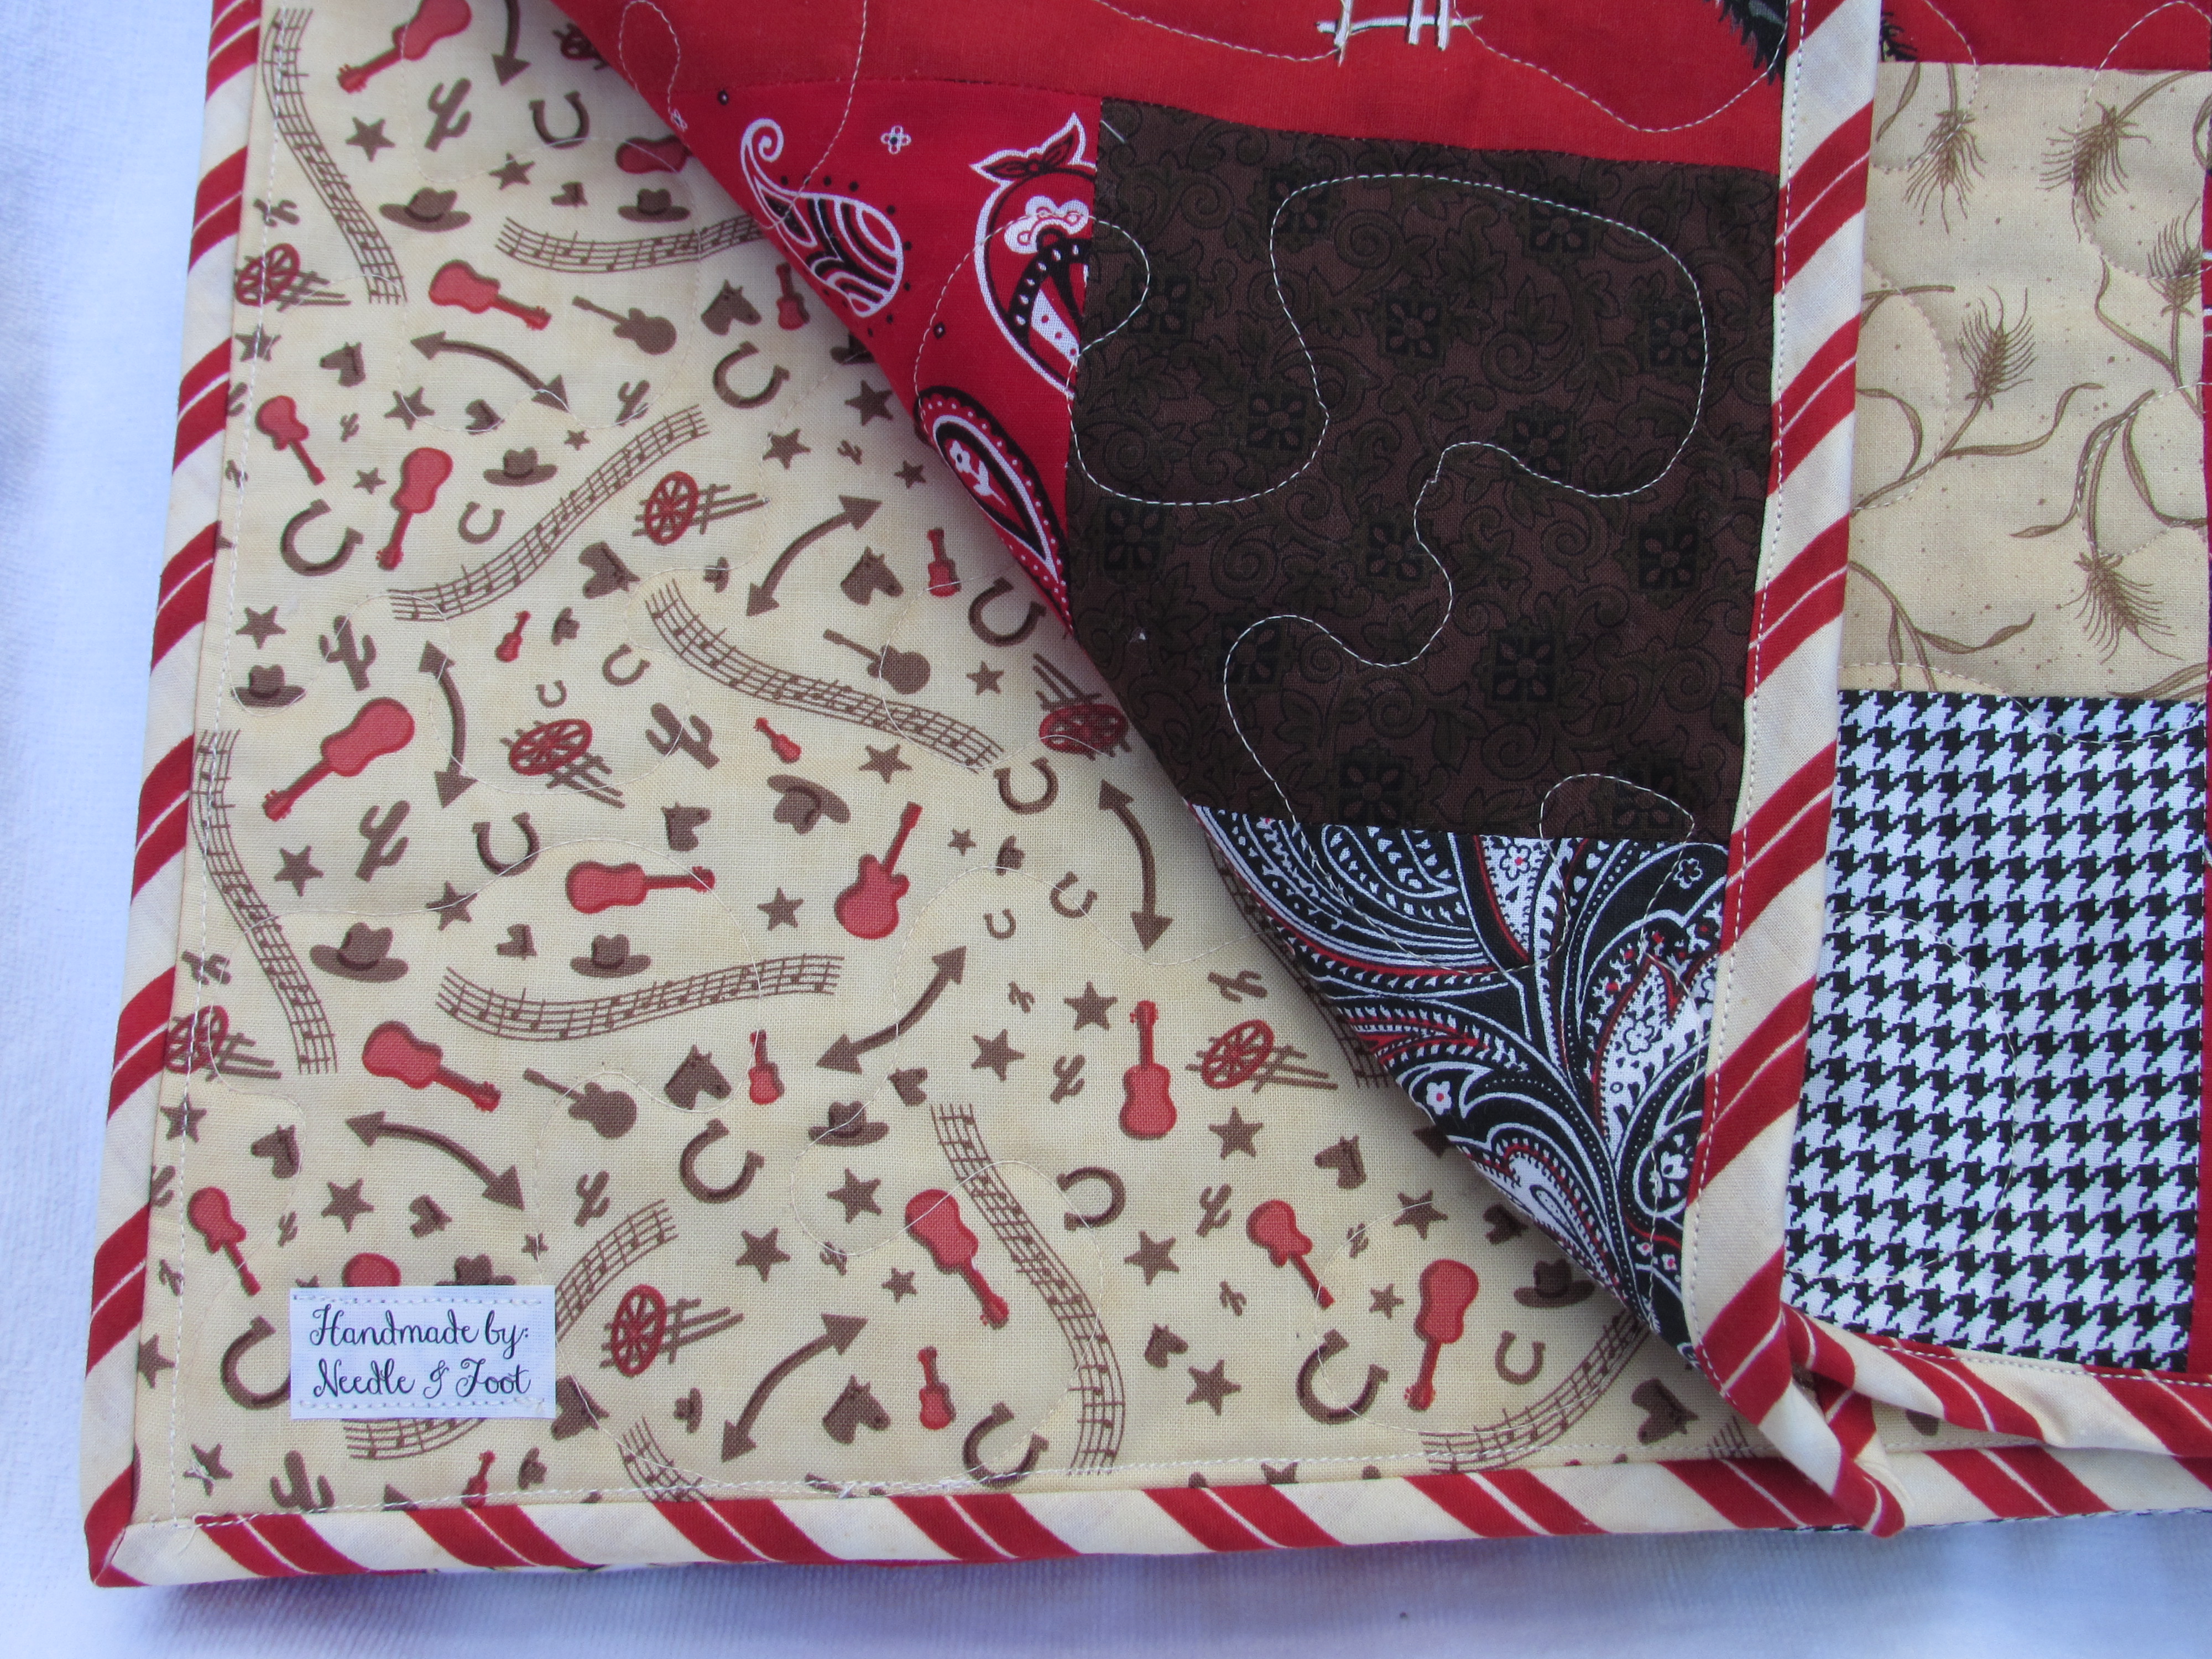
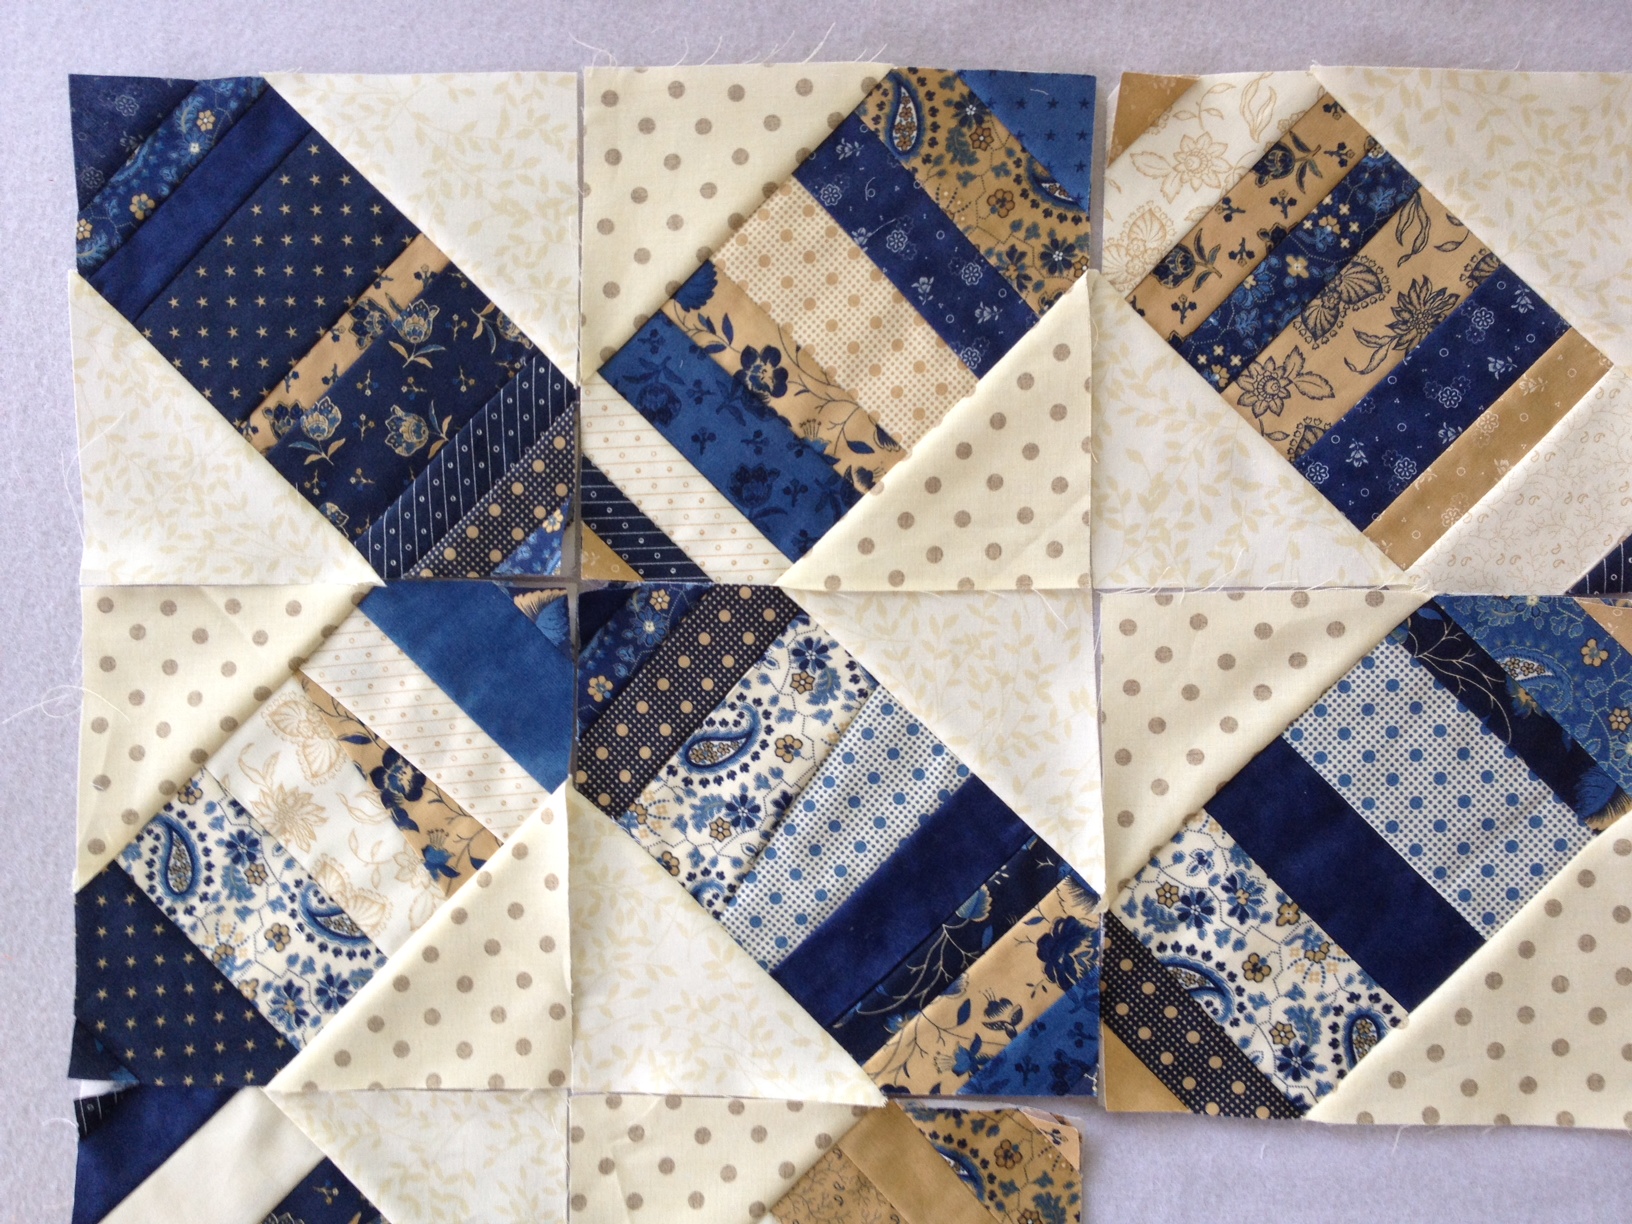
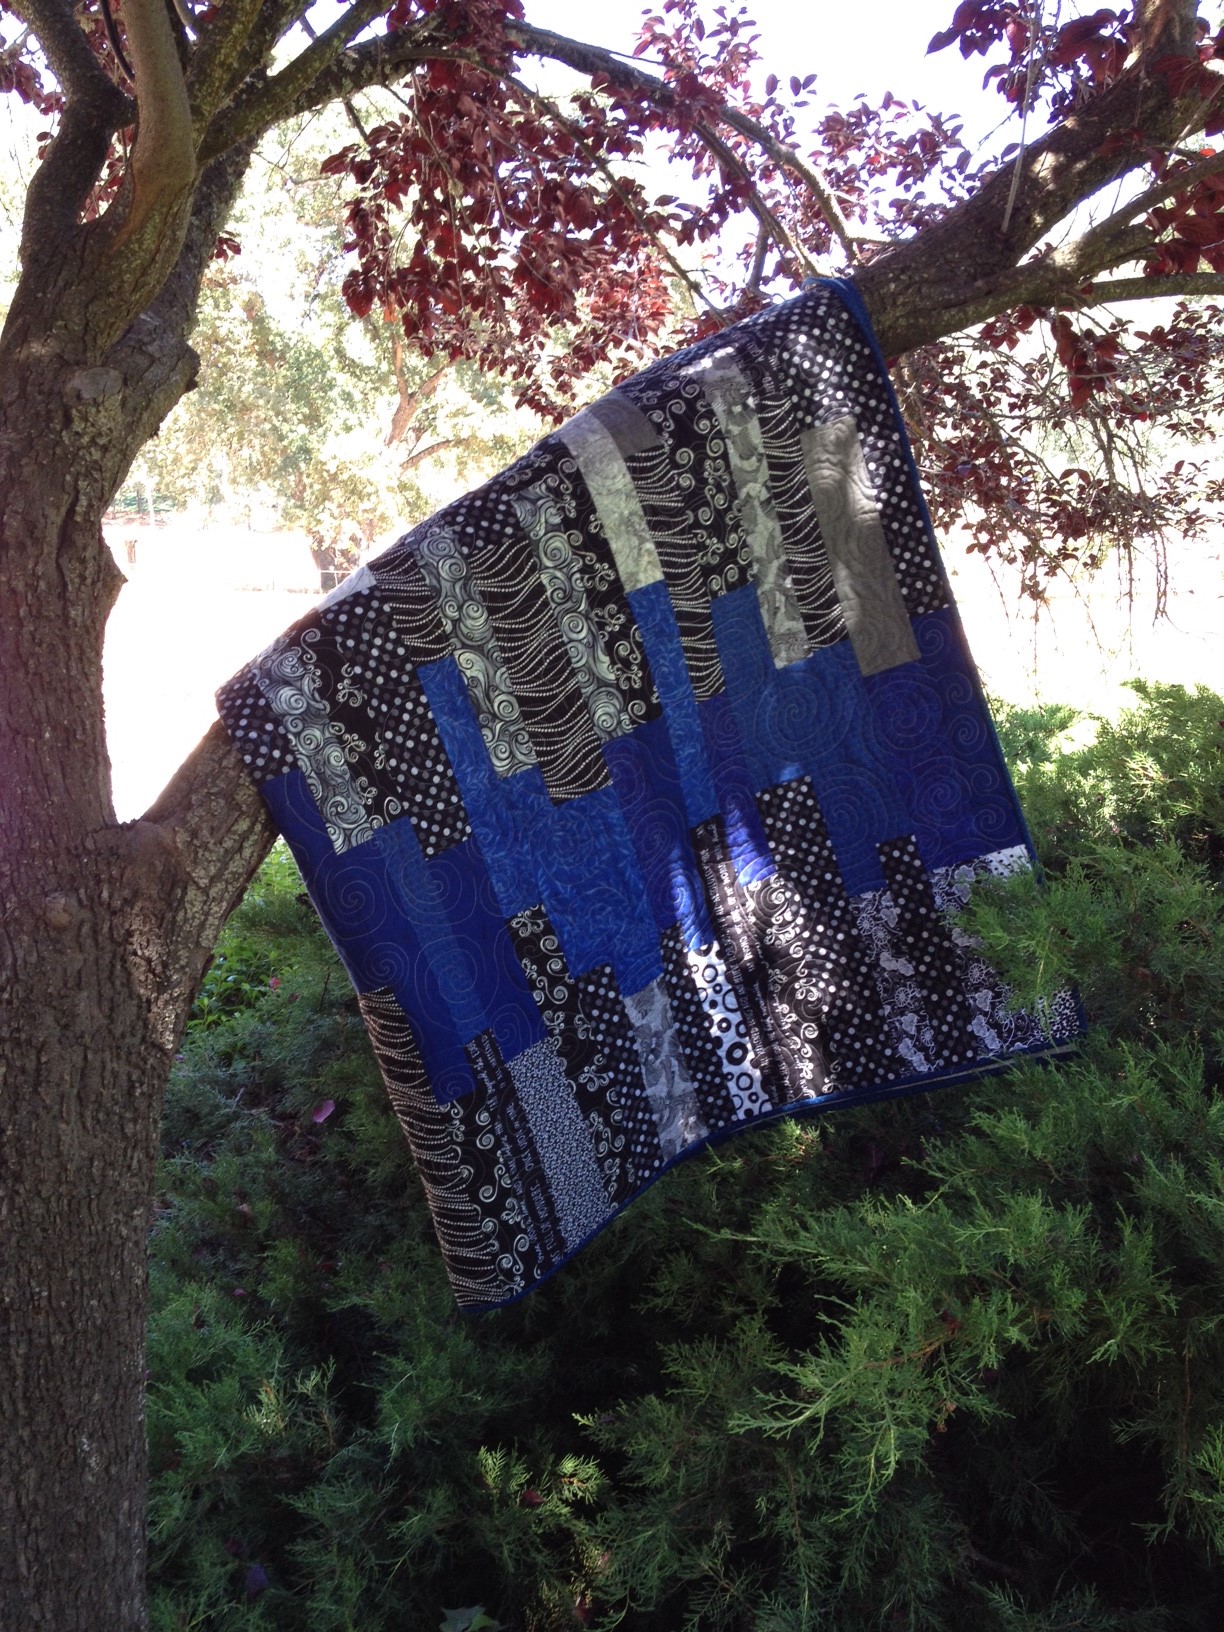
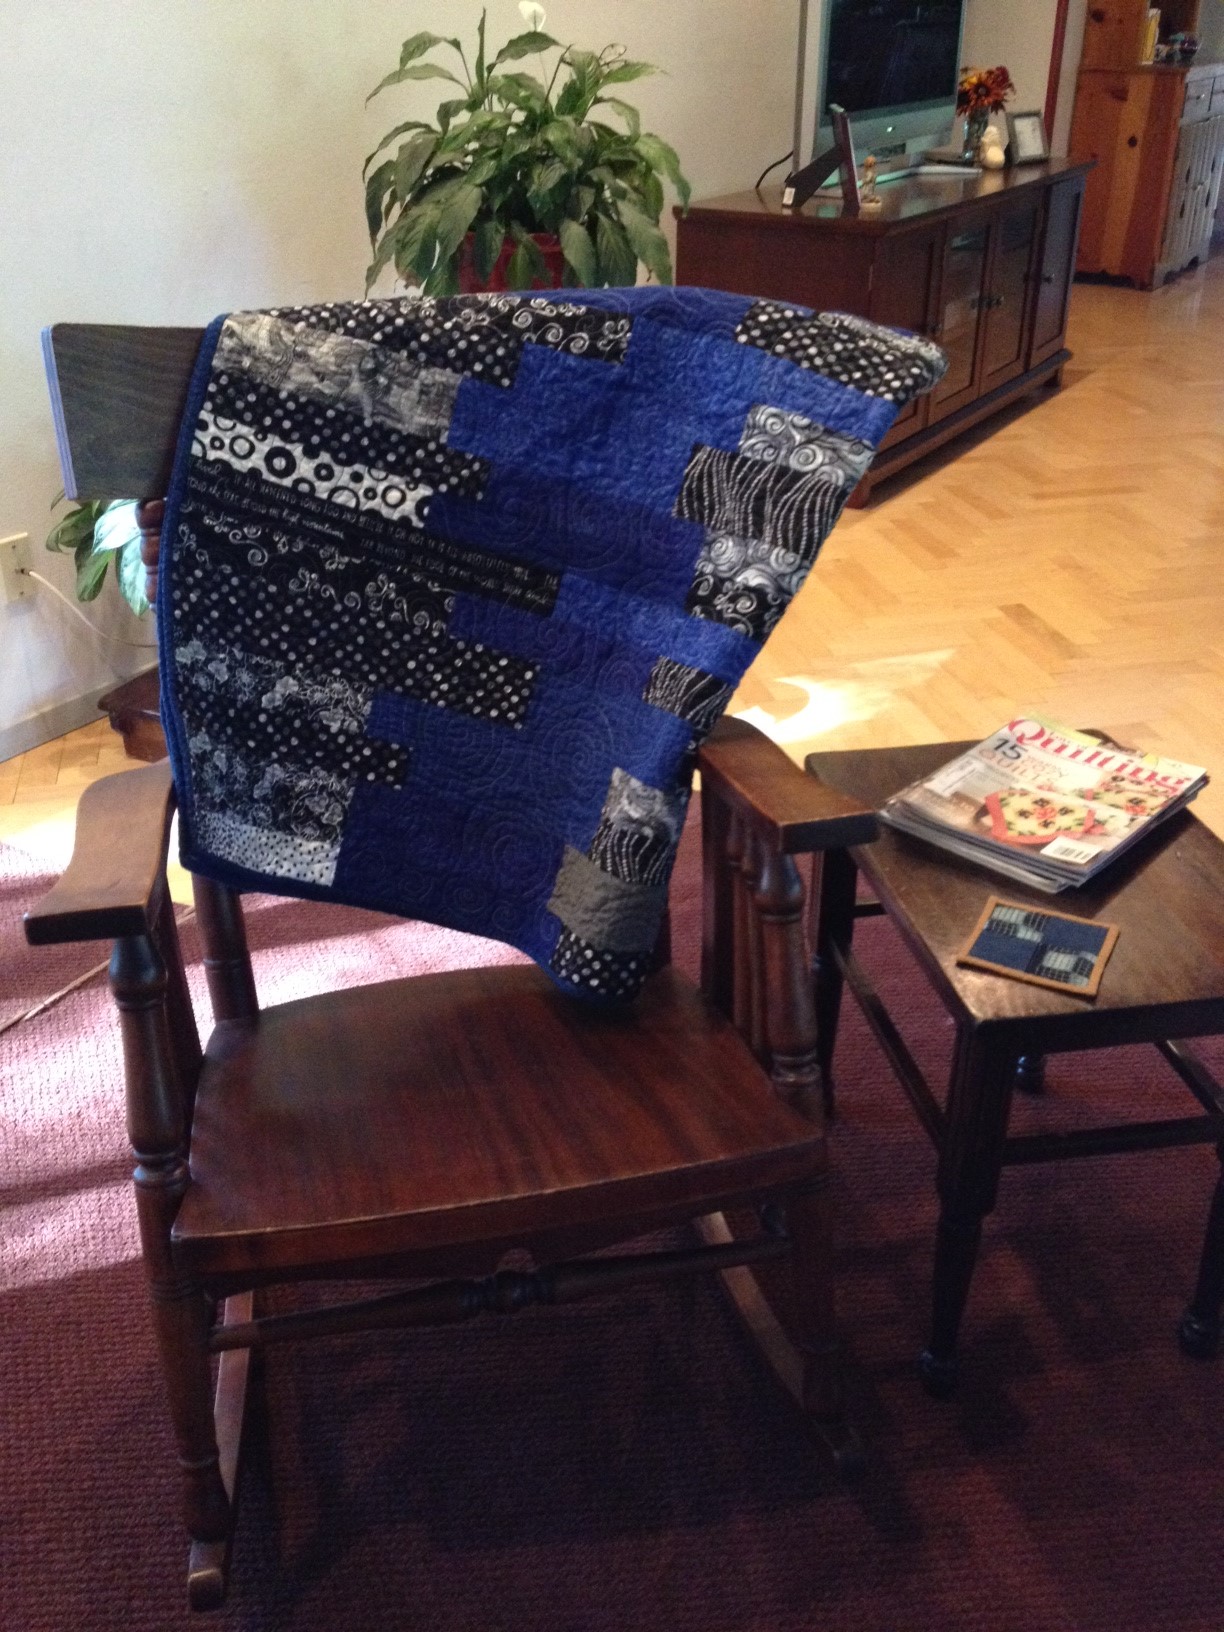
My main finish for this week is my Christmas Lattice Quilt.  I finally finished quilting it and even got the binding sewn on.  Yay!!

20141106_2034

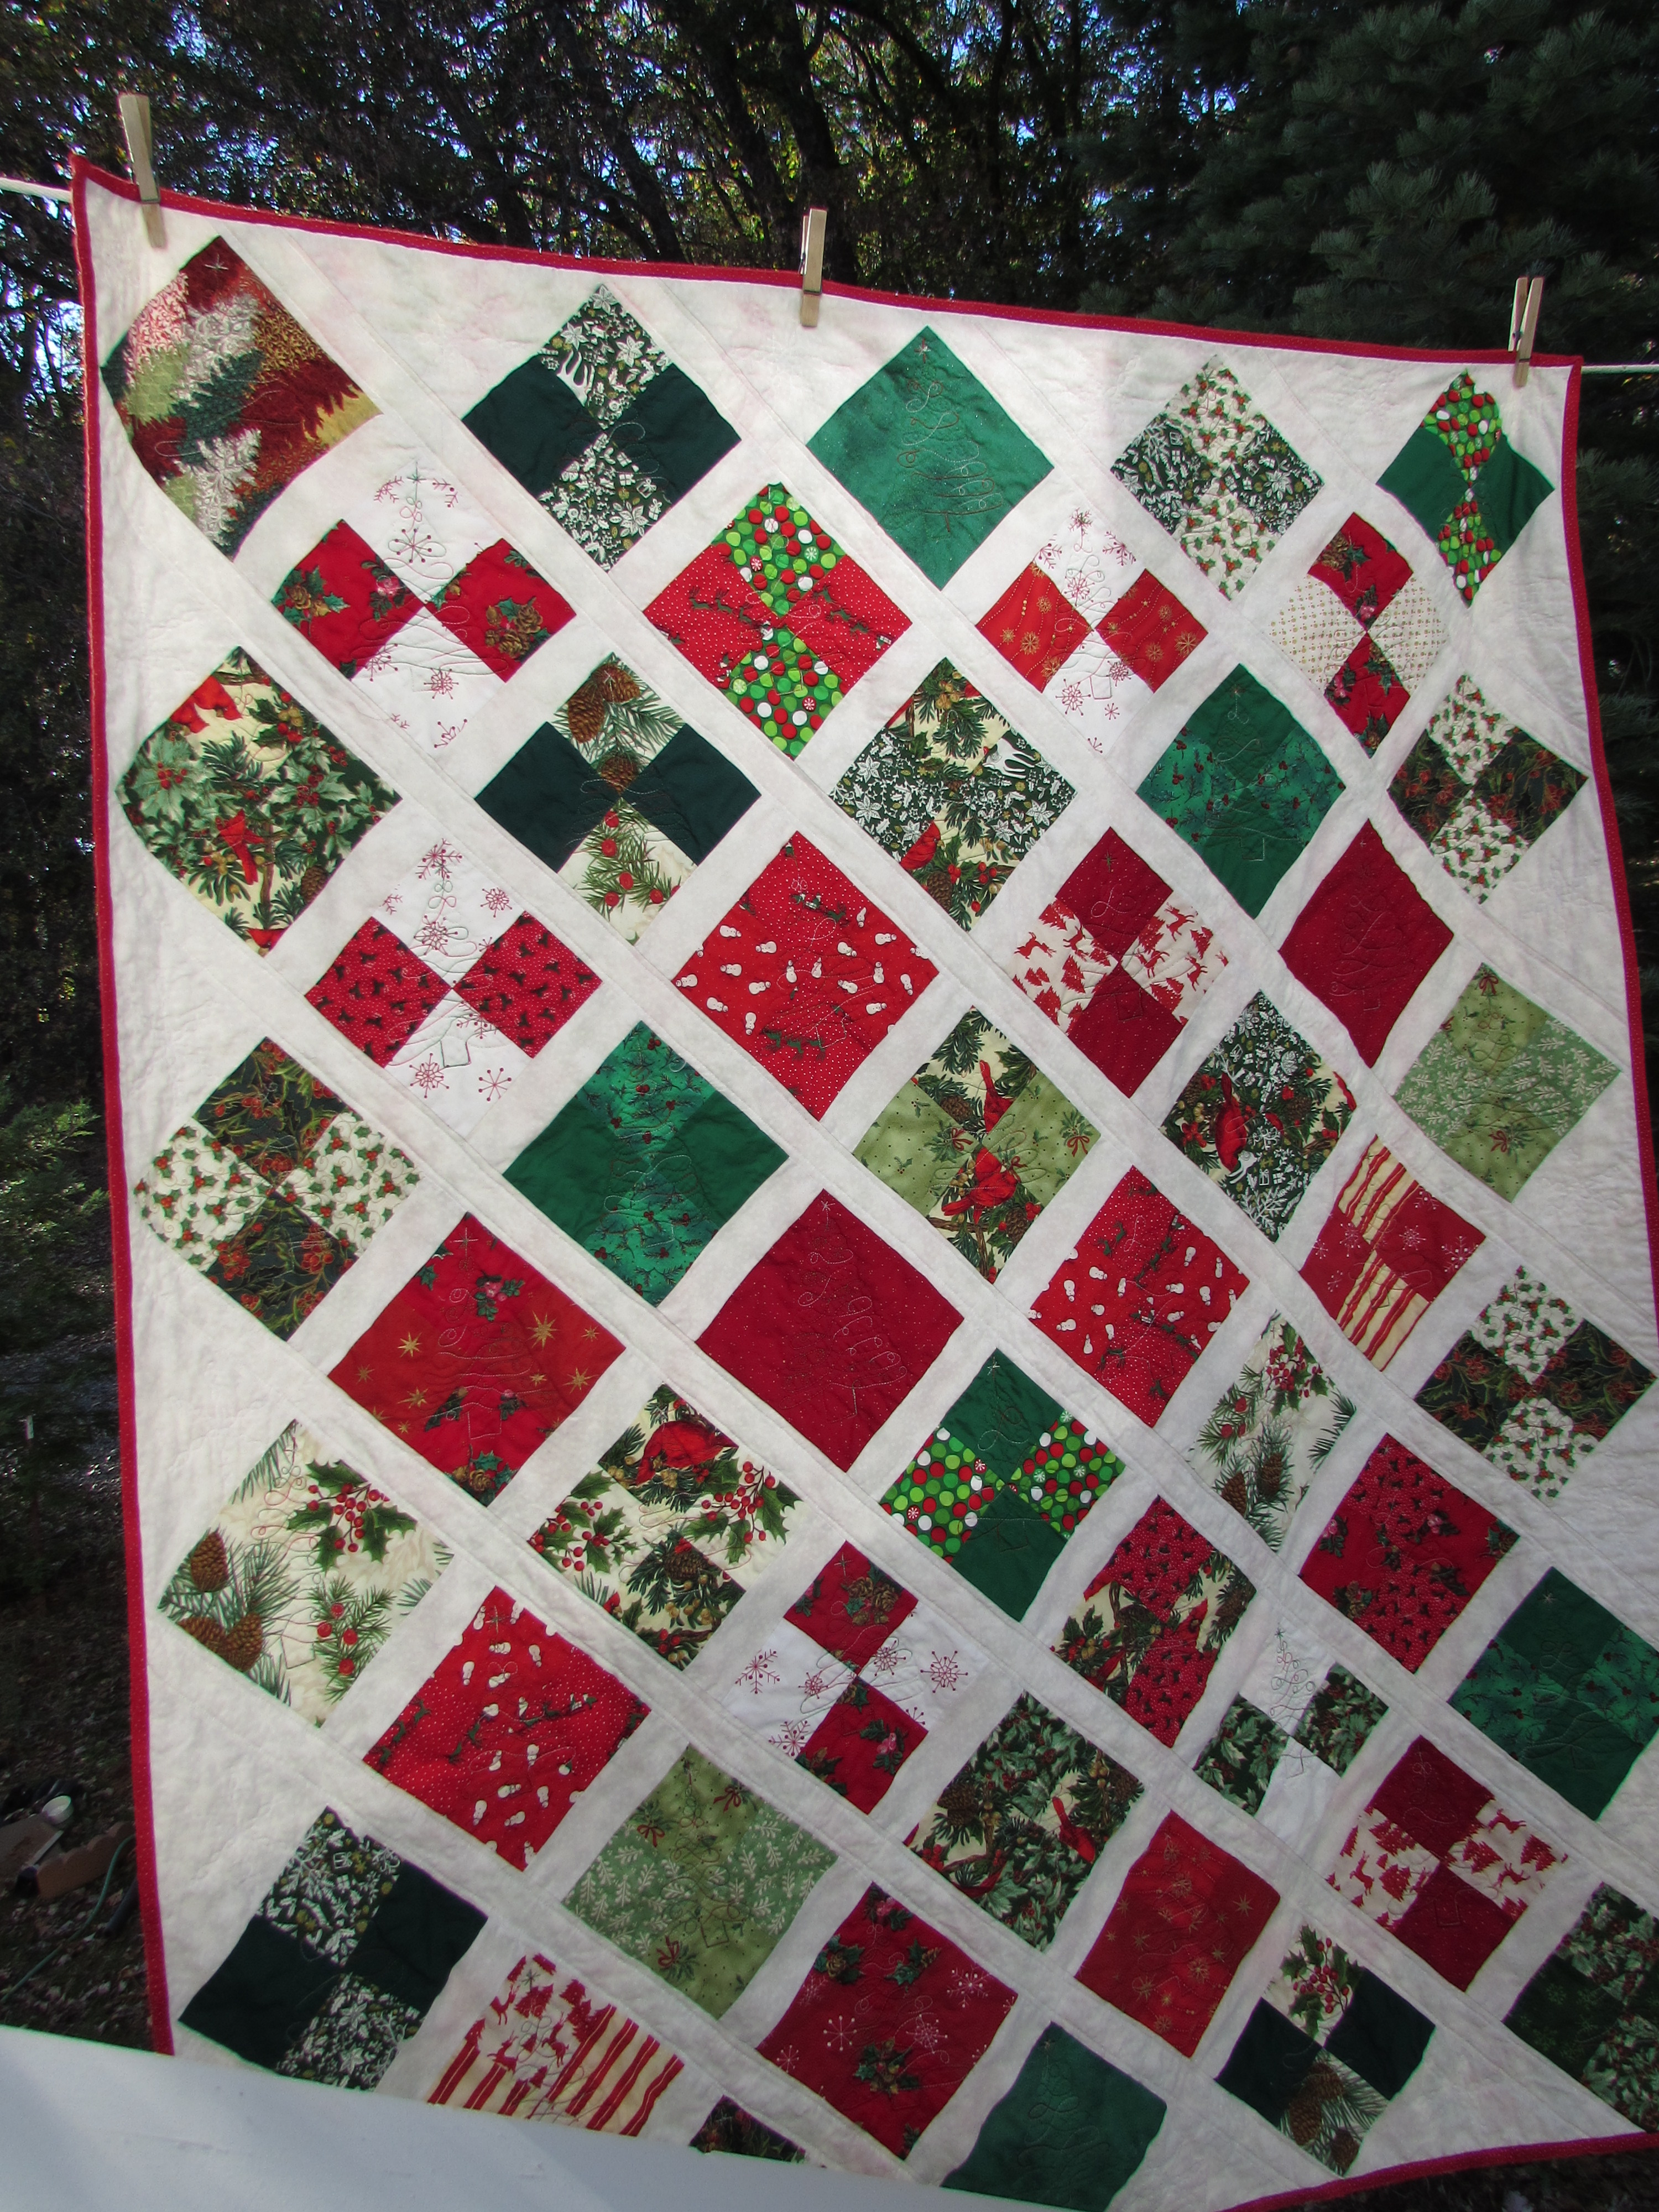
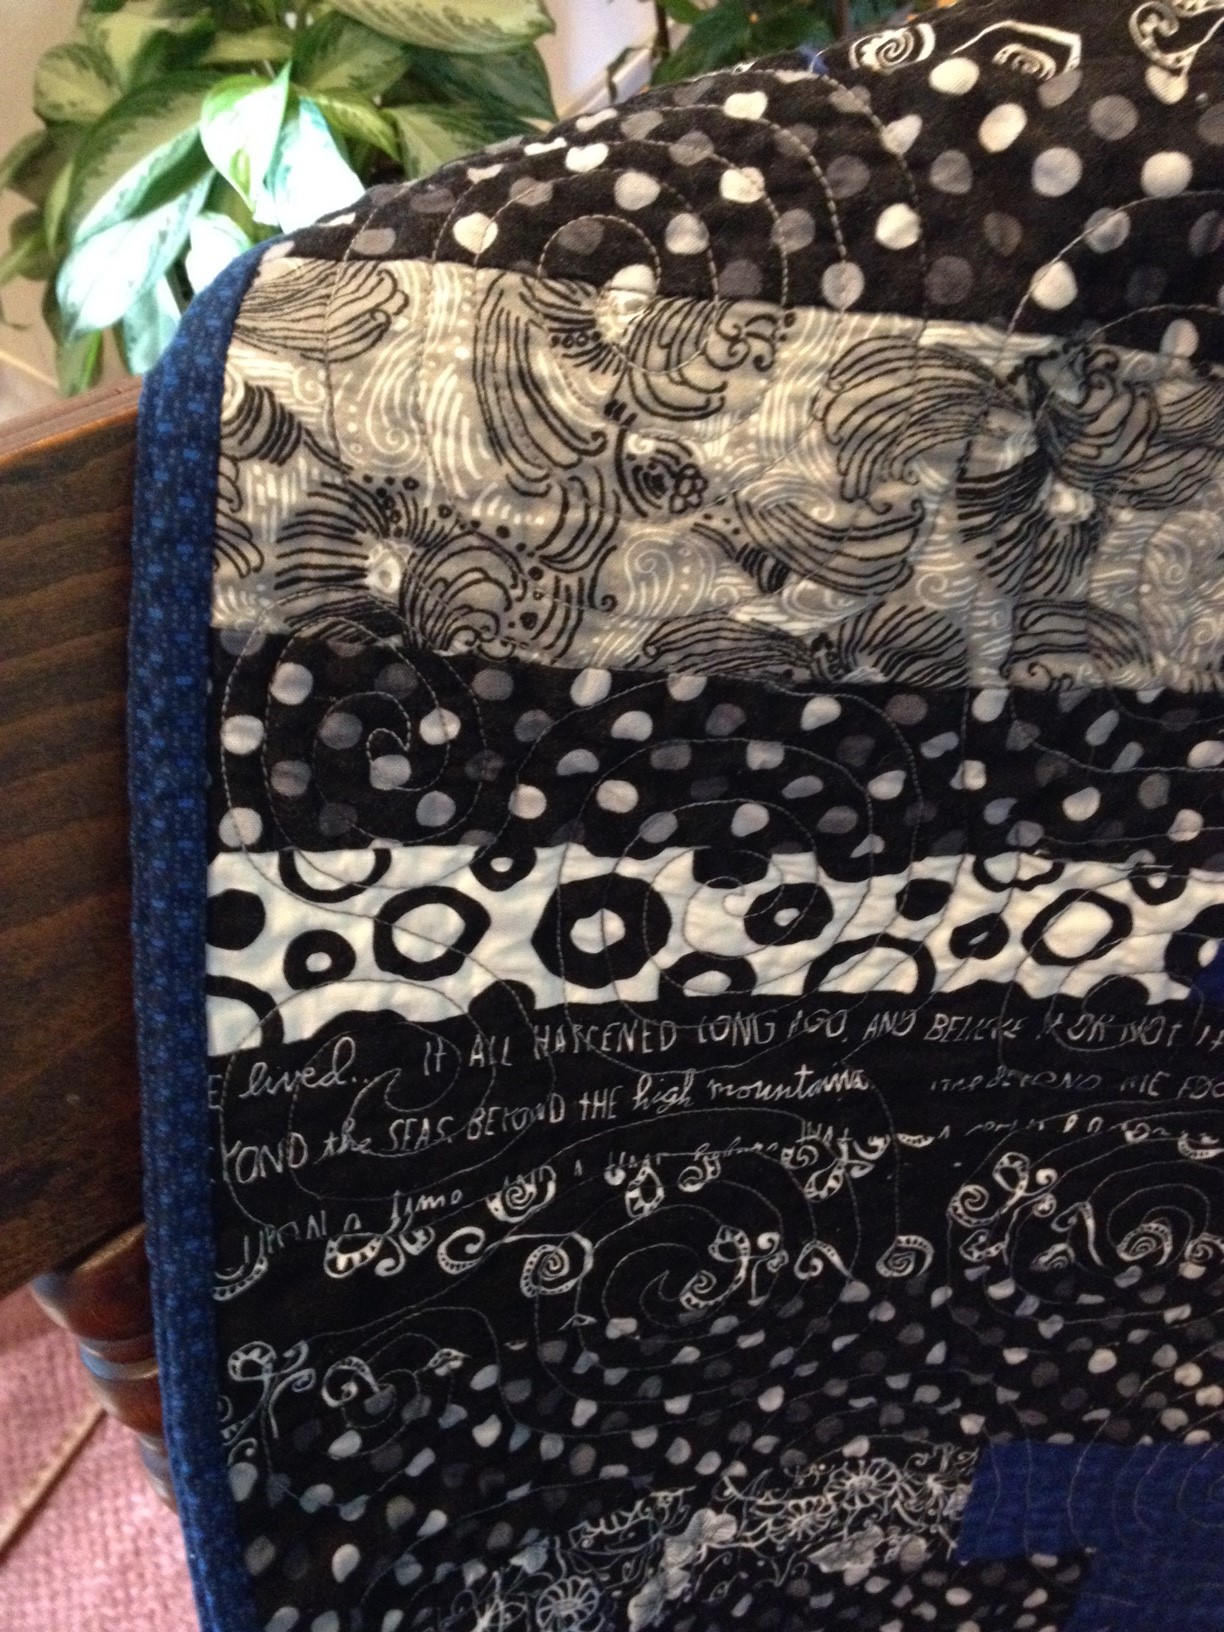
Overall, I am pleased with this project. I quilted it by free motion quilting a little Christmas tree on each block. As always, some turned out great and others, not so much! They were just free-hand, though I did use chalk and draw two guidelines forming a basic triangle to follow. They don’t show up all that well since some of the fabrics are busy prints. I also straight-line quilted the sashing.

20141106_2035

On the setting and corner triangles I FMQ’d snowflakes. These were really fun – again just free hand. I’m very happy with how these turned out.

20141106_2036

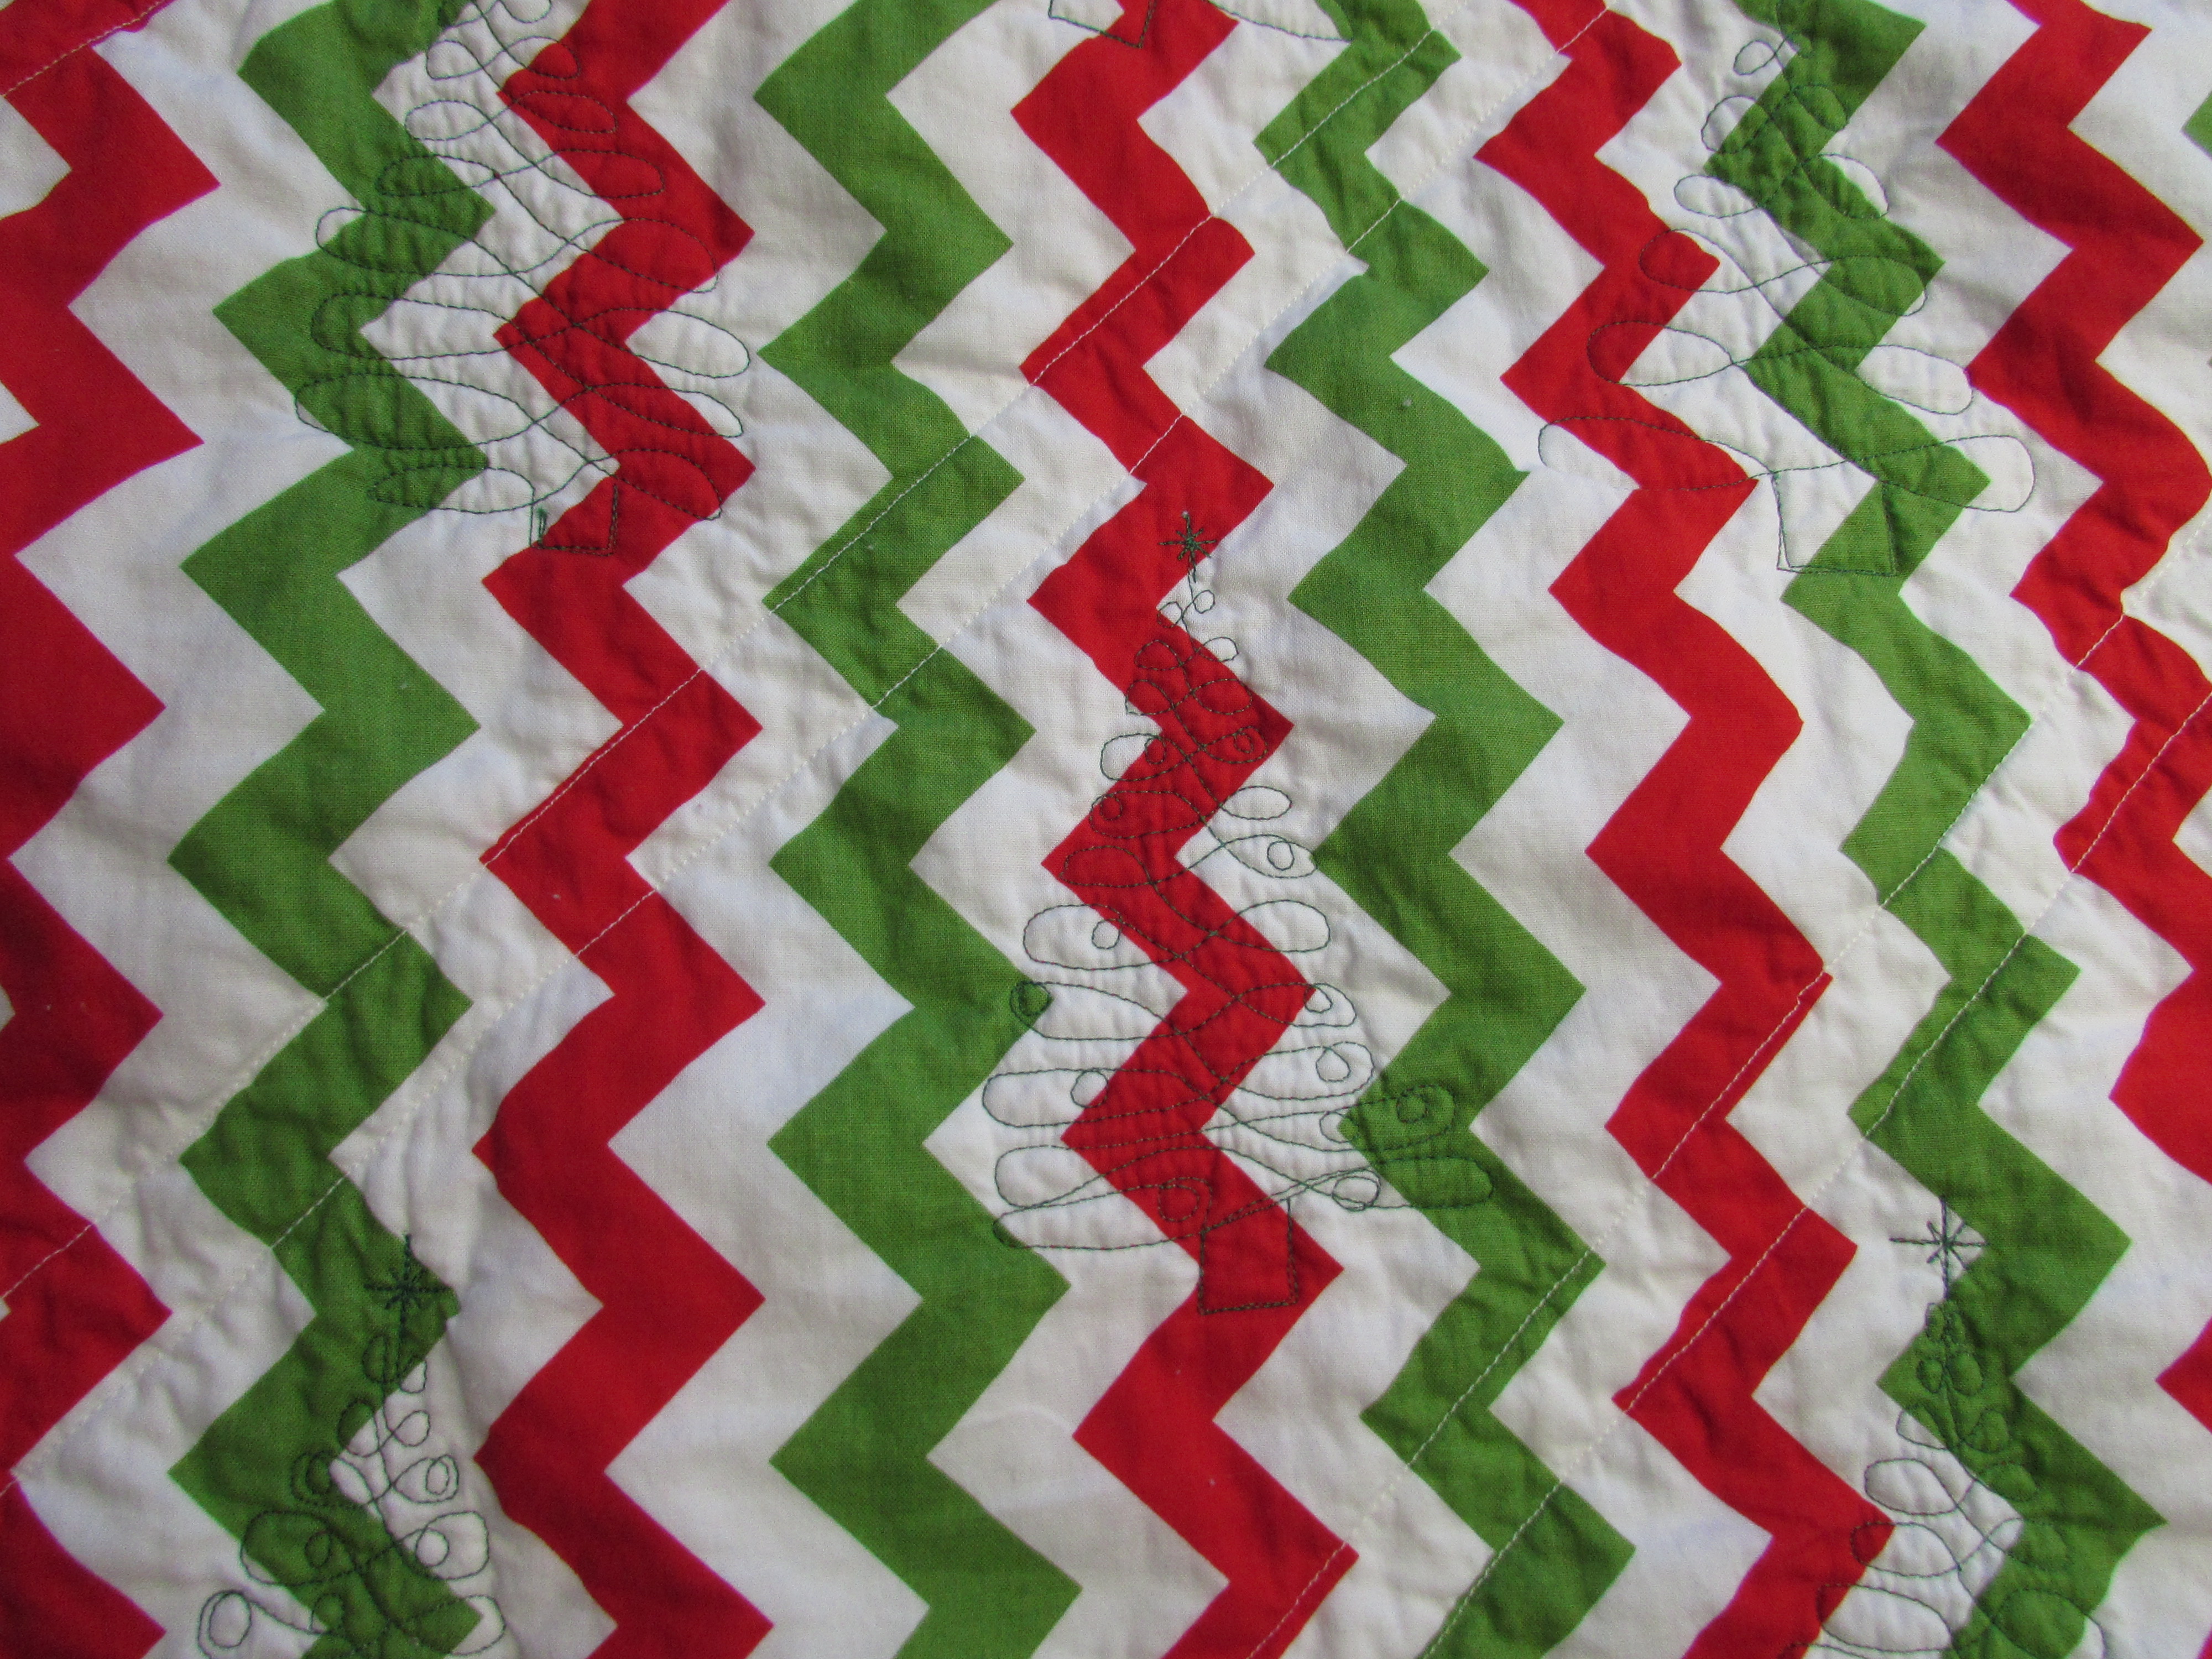
The front of the quilt is pretty.  The back….. Yikes! With each project there are lessons learned, right? Let’s just say that this quilt should only be viewed from the front. I had a remnant of a red and green chevron print that I used as the backing.  The trees look absolutely awful against the chevron.  They don’t line up with the geometry of the print and the bright green thread that I (for whatever reason?!?) used in the bobbin looks, ummm…. horrid. I should have used white and maybe the trees would have been less noticeable on the back.  At any rate, by the time I saw how poorly this looked, it was too late to change.  So, when I am a world-famous quilter and all of my work hangs in a museum 200 years from now, they will look at this one and just wonder what on earth possessed me. Shudder.

20141106_2040

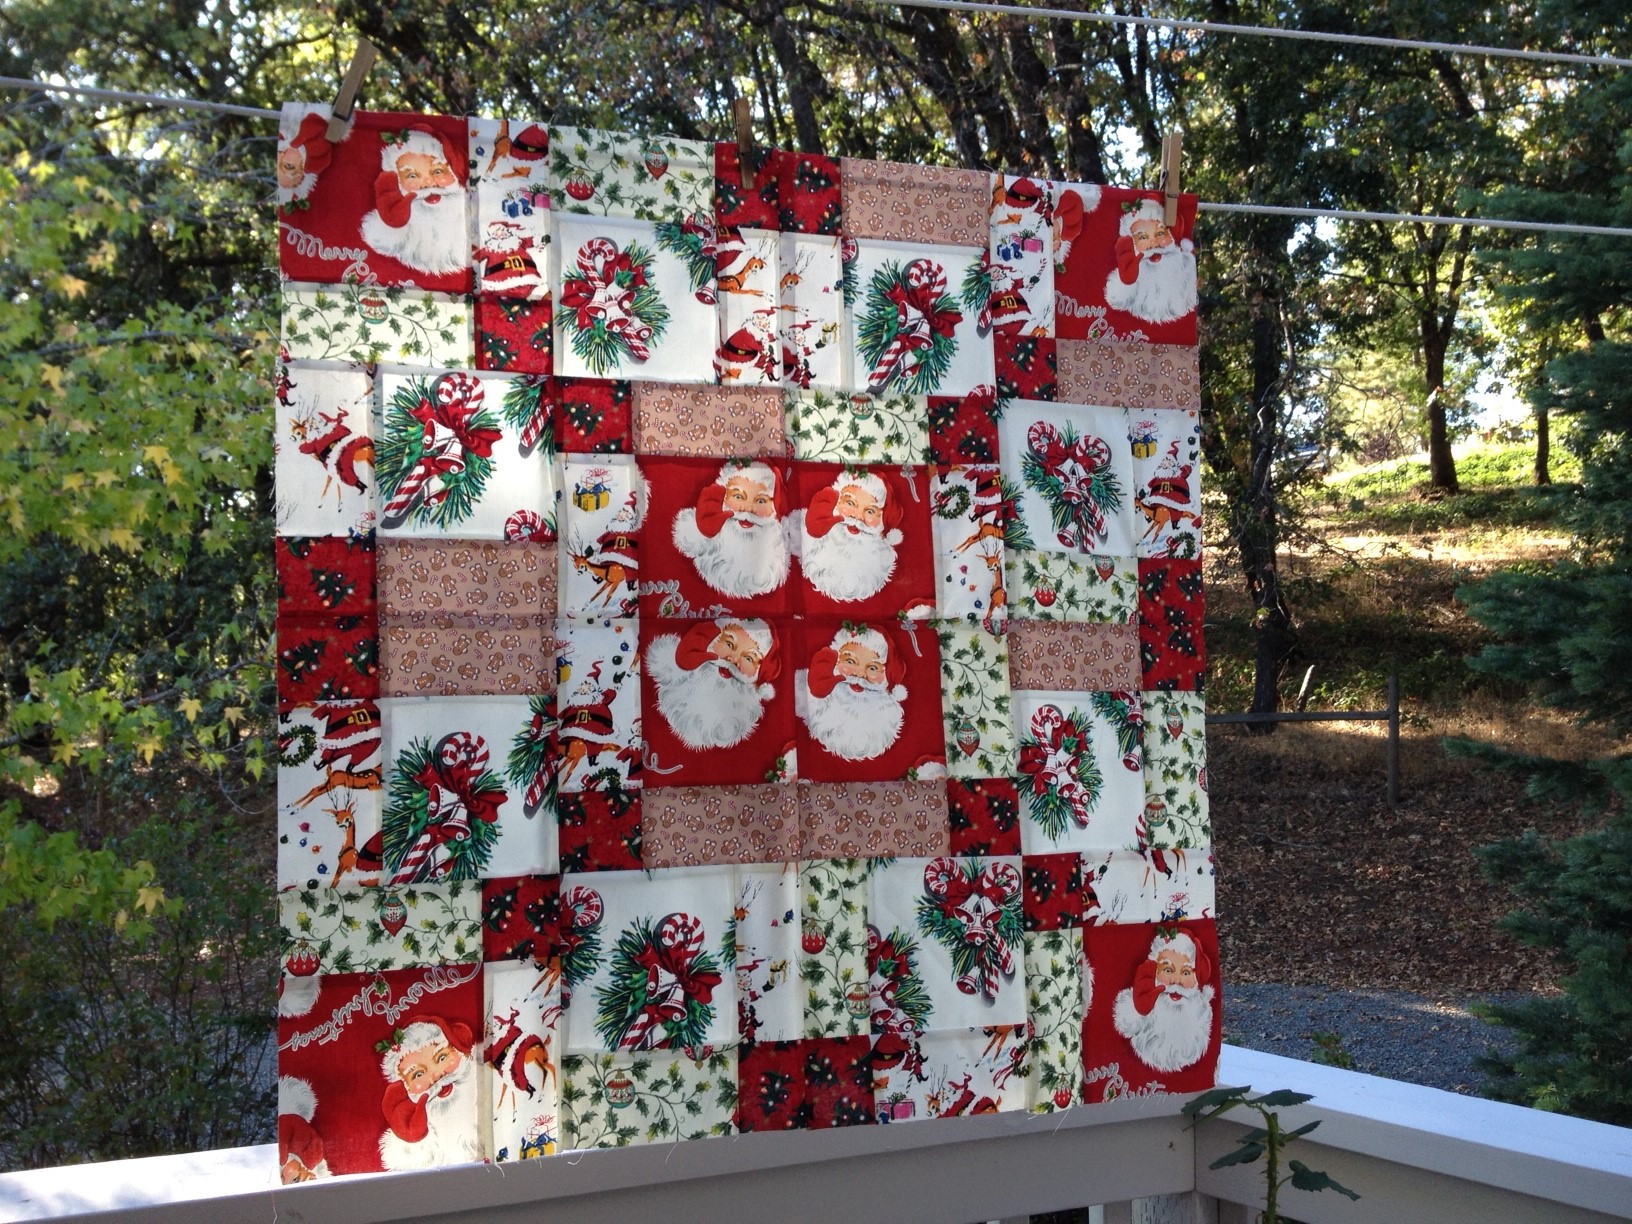
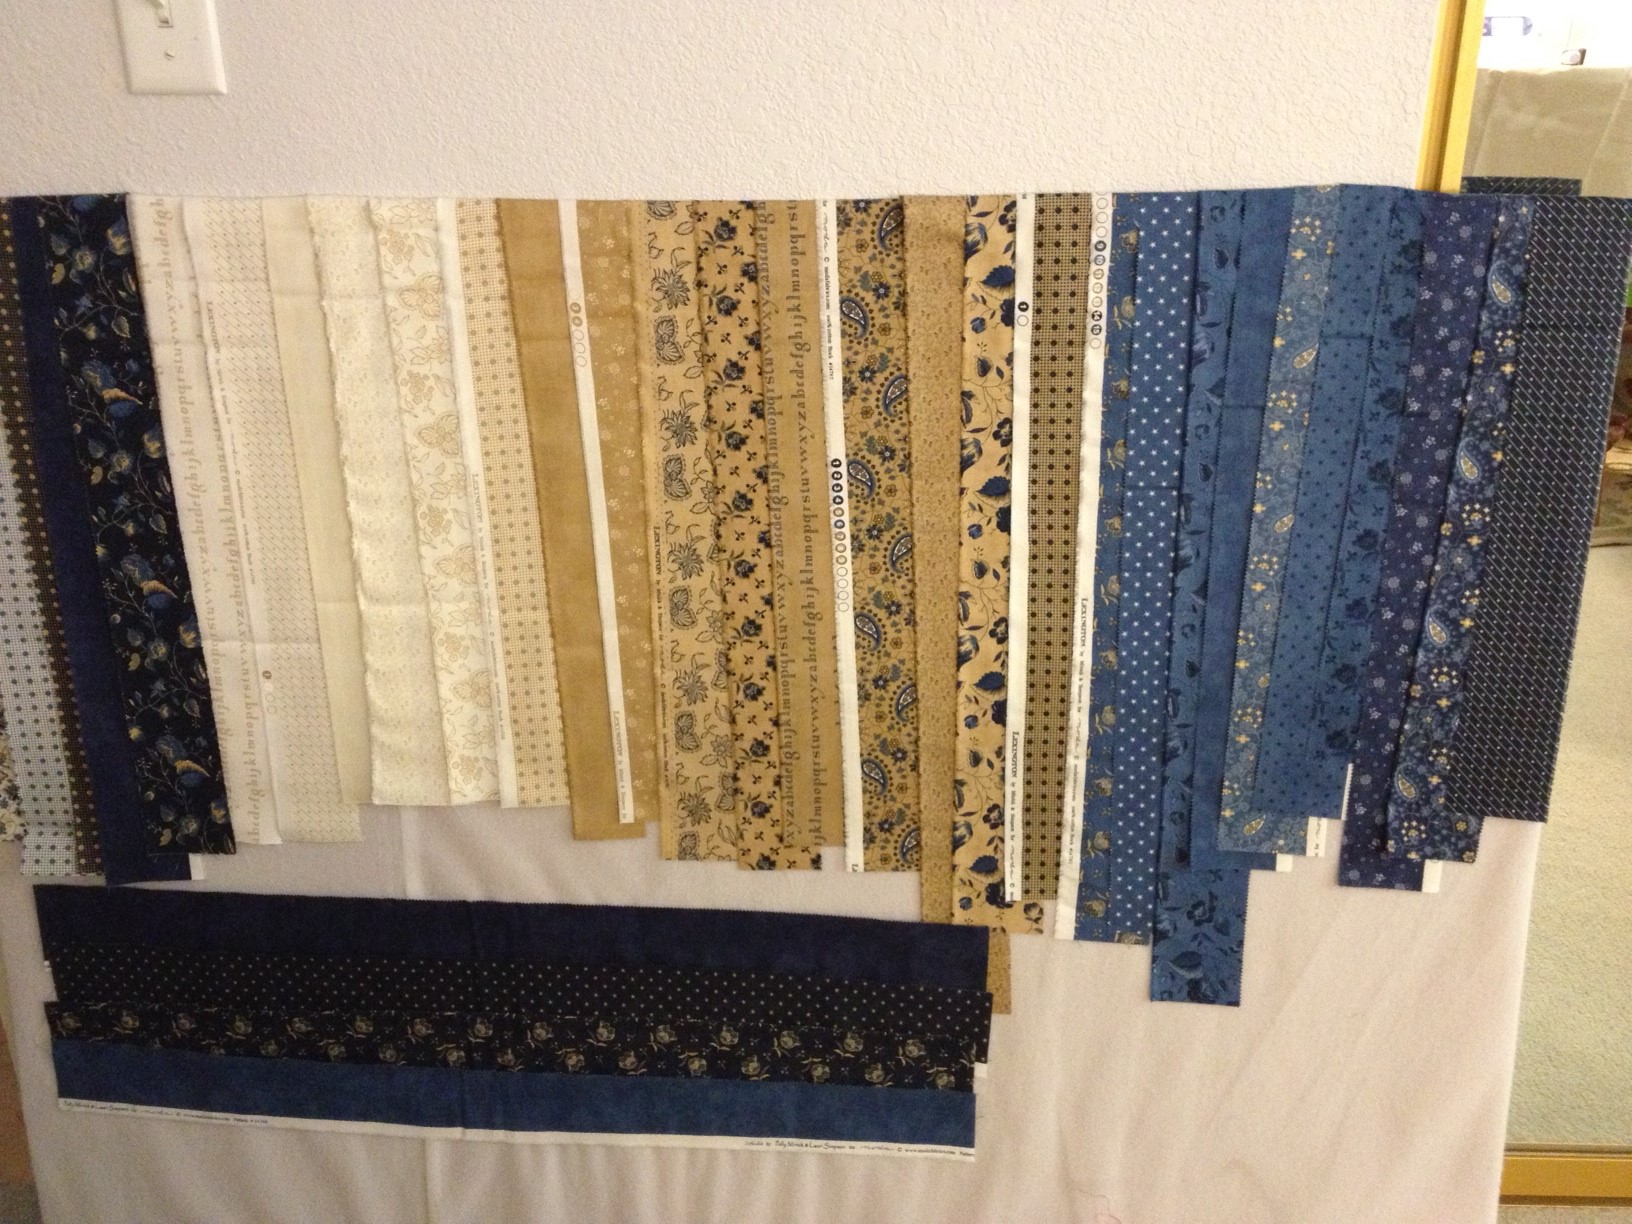
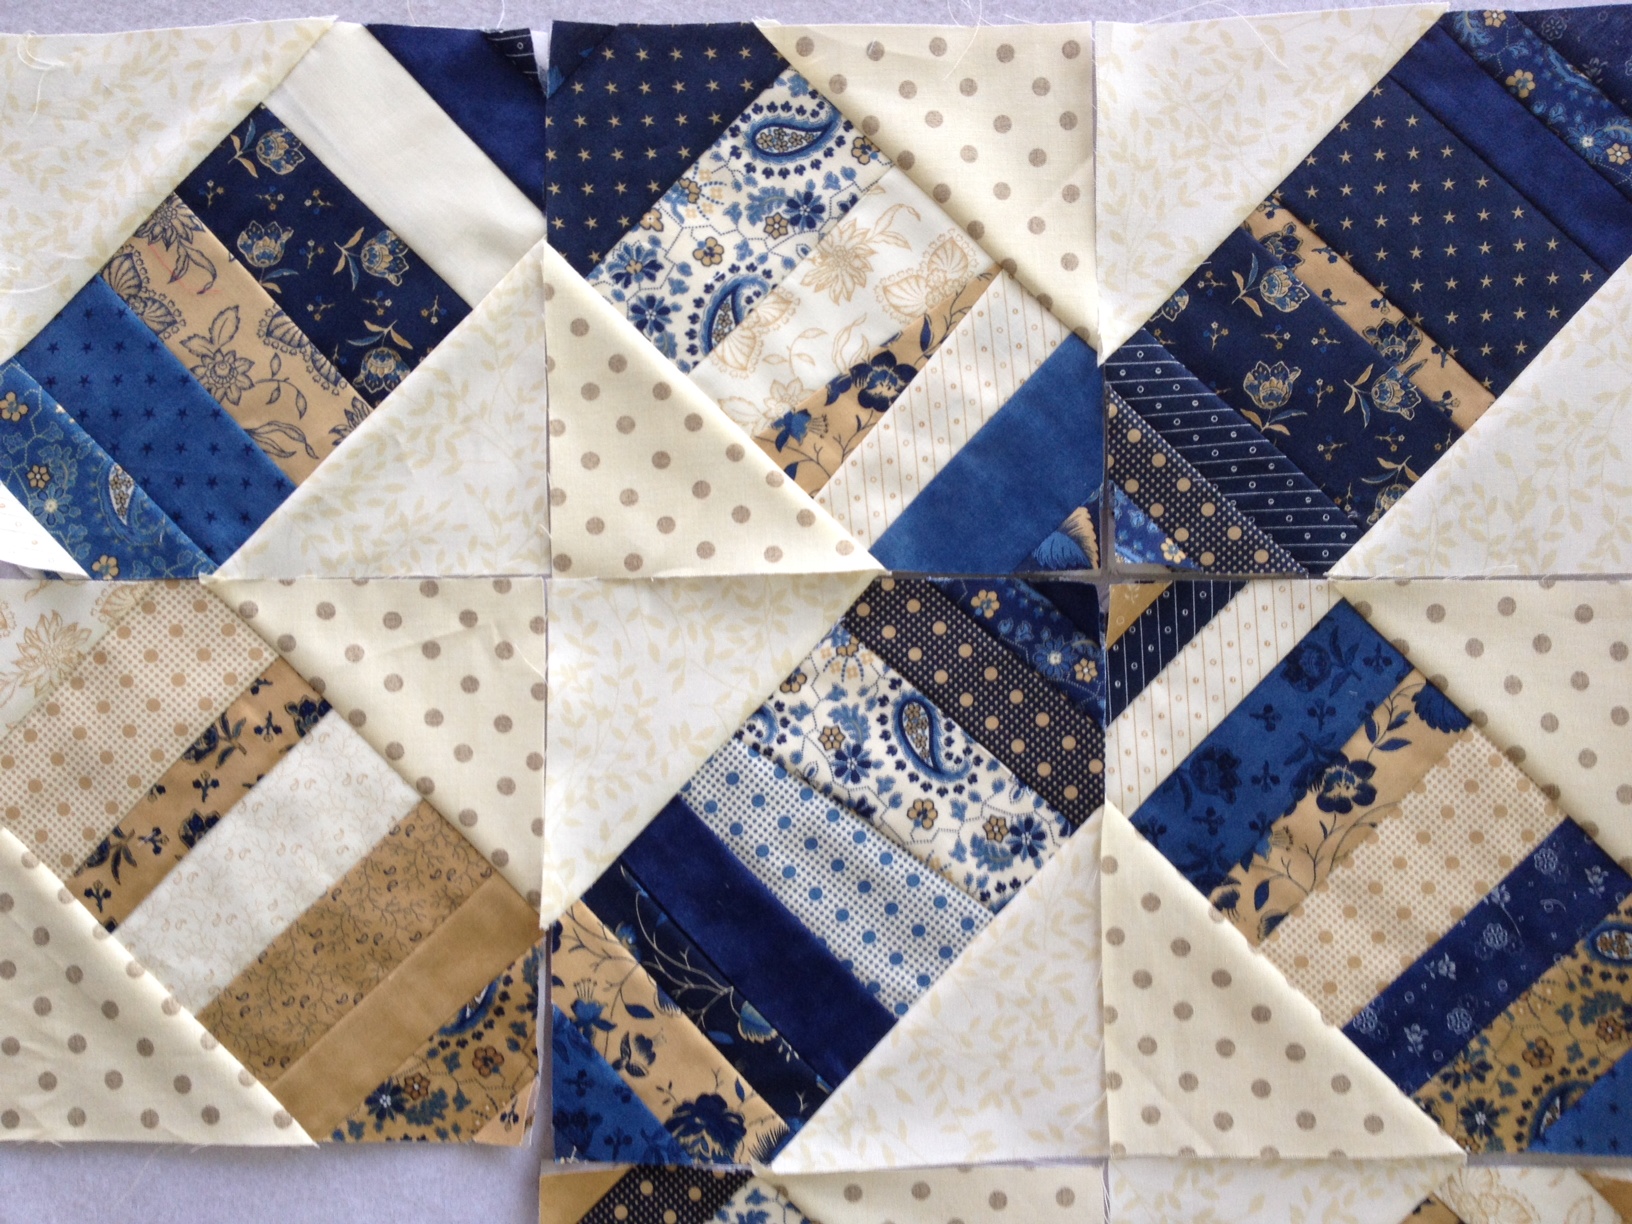
I am really trying to finish all of my WIP. Much as I am dying to make a new quilt top I need to finish up what I have already started. I hate having things stacked up. Tomorrow I will make the backing for the 1600 jelly roll quilt top that I made at the beginning of October. Hope to at least start the quilting on that one over the weekend.

In closing, does anyone need a good book recommendation?  I have read a few of the best books lately.  Here you go:

Me Before You by Jojo Moyes.  Excellent story with the best characters. Total tear jerker so have a box of tissues nearby. Basically the story is about a young woman who desperately needs work and finds a job as a companion to a very unhappy, cynical quadriplegic. There are some really funny parts as well as some very sad. No more details though as I don’t want to spoil the story.  Great book though.

The Namesake by Jhumpa Lahiri is wonderful. Again, great character development. This is a story of a couple in India that marries as arranged by their families. They come to live in the US in the mid 1960’s and raise two children. The story follows their assimilation into America and that of their kids. The insights into their culture are so interesting. Loved this book –  a really, really good read.

The Birthhouse by Ami McKay is a story about midwifery during the World War I era. The details are fascinating and the story is excellent.

What have you been reading lately? I would love to hear what is good and what’s not so great. Let me know!  Have a great weekend all.  🙂

Linking to Let’s Bee Social, Needle and Thread Thursday, TGIFF, & Crazy Mom Quilts. As usual, links to all of these wonderful sites are listed at the top of my page, under Link Ups.


Low and Slow

This week has been moving along slowly for me. I have hypoglycemia and every once in a while my blood sugar tanks.  When it does I am wiped out for a few days. For the most part if I do eat the right foods and don’t eat the wrong foods and my levels stay copacetic (a word my father loves to use!) Ok, last weekend I was not so careful. A couple of m&m’s, a 1/2 of a cookie here or there. white rice instead of brown and I am paying the price for these transgressions!  The problem is that 3 out of 4 times, such a small stray from my “healthy” diet doesn’t cause any problems, which makes temptation hard to resist. Every once in a while it throws everything out of balance.  Anyway, this makes for a ‘low and slow’ week, as my husband and I have come to call it. No energy to do much of anything. No ability to focus or concentrate.

Just to illustrate my point, here is a picture of the tub of butter that I personally selected at the grocery store this afternoon.  Please note that there is butter smeared on the outside, the little plastic seal is loose and protruding from the lid.  This is exactly how my husband found it in the fridge tonight.  He asked me if I had used this yet, or was it new? “New”, I replied.  “Just bought it earlier this afternoon”.  He just smiled.  No need to comment further.  He knows me too well. This is how the tub was when I bought it and how it was when I put it away.  Never did I even notice this mess.  Yep, low and slow.

photo (7)

Of course, it doesn’t take much energy to sit at a sewing machine between naps and reading my book on the couch. Surprisingly I got a number of things accomplished. Not with any great efficiency and certainly not without error.  I made great use of my seam ripper over the past few days.  Remember, low blood sugar = low brain function (at least for me anyways!!)  I was working on the sashing, corner and setting triangles for the Christmas Lattice Quilt that I blogged about here.  I just could not believe how many times I sewed the triangles in upside down.  Really? Upside down? Then I would have to look at it for a minute or two to determine exactly what I had done wrong. Jeez! The fabric I am using for the sashing is a white on white holiday print.  Again, upside down, or wrong side facing out. I was covered in tiny threads, picking out one seam after another. Finally I set that aside. It was making me more than a little crazy.

I needed a new project to work on (well, ‘needed’ might be a bit strong.) Never having made a disappearing nine patch, I decided to give that a try.   If you are unfamiliar with this block, there are a million tutorials out there for it. Basically you just create a nine patch block (3 rows of 3 squares each.) Then I cut the block down the center and across the center, creating four equal pieces. These smaller blocks are rearranged in whatever layout is pleasing to the eye and sewn back together. I was shopping a week or so ago and came across some cute retro looking holiday fabric in Jo-Ann’s. Without any plan in mind, I cut my squares, fussy cutting the Santa fabric and the candy cane fabric as much as possible so I could use those as a focal point.  I used a deeper red fabric for each of the center squares as I wanted to have smaller squares with a darker value than the rest of the squares. Here is the resulting 36 x 36″ quilt top.

disappearing 9 patch 2

Now that this little guy is sewn together, I have absolutely no plan as to what I will do with it! It is too large for a table topper and too small for a quilt. I didn’t really take into account what I wanted to do with this project when I was cutting up the squares.  (Remember, I was operating with significantly lower than normal brain function!) The size of Santa determined the size of that block and the rest of it just sort of happened. Any ideas??  I am thinking of adding a fairly large red border (maybe five inches wide all the way around?) and then just backing it with the same red. Then sewing the back to the front, envelope style – no binding needed. I could use it as a small table cloth if I don’t use any batting in the center.  Maybe that would be fun?

Another project that I worked on was a small art quilt. My inspiration for this project came from a piece that I saw on Pinterest (of course, where else?) I followed the link back to the original site, www.onthetrailcreations.com. The artist at this site designs and sells patterns and kits for quilted cards that are really pretty. I wanted to make a small (7 x 9 inch) art quilt. It was really the first time that I sketched something out and just cut little pieces to applique. I was pleasantly surprised at how easy it was. I did an autumn theme with a bird that is reminiscent of the nuthatches that frequent my feeders in the winter months.

Red-breasted-Nuthatch-3c

Here is my version:

20141001_1768

For the most part I used raw edge applique. For the gold strip running through the center I used a decorative, blanket stitch.  The branch that the little guy is sitting on was sketched with thread. (I have been practicing a bit of thread sketching lately and really enjoy it.) The leaves were cut from a scrap of fabric I found with leaves printed on it. I bound the quilt with the same fabric. You will notice the lower right corner of the binding looks all saggy and weird.  What can I say? Not my best work right there. 😉

20141001_1769I am really happy with the bird and the branch he is resting on though. Such a cute little guy. I used a french knot for his eye. I applied fusible stabilizer on the back of the base fabric before doing any of the stitching or fusing the applique pieces on. The stabilizer makes a world of difference.  Without it the fabric will often pull and bunch when densely stitching something (like the branch).

All in all, a fun week in the sewing room. My friend and I are going to a quilting retreat sponsored by a neighboring quilt guild in the town of Downieville this weekend. I have been stacking up everything I need to bring.  I have fabric ready for two different projects and most of the supplies gathered. Hoping for better energy and a higher level of functioning by then!!

Linking to my usual sites:  Freemotion by the River, WIP Wednesday, Lorna at Let’s Bee Social, Needle and Thread Thursday, TGIFF, and of course, Amanda Jean at Crazy Mom Quilts!! Take a minute to check out some of these sites. I have links to all of them at the top of my page under Link Ups.


Cowboy Small

Big news! I sold my first baby quilt on Etsy! I was so excited to see that order come across. My  quilt, Snips and Snails, featuring the ‘Here Boy’ fabric ,was purchased. I wrote a post about it earlier. After recovering from the excitement of selling a quilt, I decided I needed to make another baby boy quilt to list in my Etsy shop.

So… What to make??  I love reading and/or hearing about the process that an individual quilter uses to develop the design, choose the right fabrics, auditioning different prints and then coming up with the quilt they want to create. It is interesting to hear about those that choose and buy fabric first and then go forward from there  vs those that develop the design and then purchase fabric. I fall into the camp of buying the fabric first.  I love to pick up pieces that strike me for whatever reason.  Once I have a few that go together or even one that will be a good focus fabric, I start to think about what I want to make with it.

This week I made a darling baby quilt for a boy.  I developed the project around a piece of fabric with a vintage design featuring horses. About two weeks ago I found a great deal on some fabric at a garage sale.  I don’t tend to pay much attention to garage sales but my husband happened to notice an ad for a garage sale that listed fabric for sale. My interest was piqued and I went to it.  I scored an assortment of awesome fabric!

Back to the retro fabric that I found.  It is adorable.  I became sort of nostalgic as it reminded me of a book I read to my boys when they were little. This book, Cowboy Small, was written in 1949 by Lois Lenski. We read this book constantly and it was especially favored by my eIdest, Andrew (now 29 years). At some point in the story the cowboys are shown sitting around their campfire (eating beans out of a can) singing “Home on the Range.” At this point, Andrew would belt out his rendition of Home, Home on the Range. Look at the picture below from the book.

cowboy quilt 2

On the fabric there is a bucking horse that is so similar to this. Look to the left side.

horse quilt

Such a good memory for me. Needless to say, I was pretty excited to use the horse print for a baby quilt for a little guy. I selected a simple pattern alternating whole 8″ blocks with 8″ four-patch blocks.  The pattern was inspired by a quilt made by Amy Smart on Diary of a Quilter. Making the quilt five blocks wide and five blocks tall would give me a baby quilt that measured 40″ x 40″.   Ok, focal fabric selected and pattern decided upon, I just needed the scrappy fabrics for the four patch blocks. I pulled a stack of fat quarters and played around with those. Fortunately my sister was visiting for the weekend so I had her take a look.  As only a sister is allowed, she looked at a number of them and scratched them from the list right away.  She vetoed them saying they were too modern, wrong color, or too contemporary. Looking through my shelves, she pulled a black and white houndstooth pattern and the black, white and red paisley. Perfect additions! She has such good taste. Cutting and piecing such a simple design took no time at all.

Cowboy Small Baby Quilt; September 2014

20140911_1672

I backed it with this sweet Moda fabric called Honky Tonk. This was the perfect piece to use as backing.  It features cactus, guitars and musical notes – just like Cowboy Small!

20140911_1667

I quilted it with a large meandering pattern.  I really enjoyed quilting this project.  The stippling is a little herky-jerky in spots but overall it looks good (especially after washing and drying the quilt.) The binding is a bias stripe of light tan and red. Adorable! I machine stitched the binding on both the front and back of the quilt. (If you need a good tutorial on quilt binding, check out this one at Crazy Mom Quilts.)

Overall, this project was a blast.  It was a trip down memory lane which is always a fun thing! I will list this quilt in my Etsy shop for some lucky little cowboy.

Linking to: Freemotion by the River, Needle and Thread Thursday, Finish it Up Friday, and TGIFF. Links to each of these sites are available at the top of my page under Link Ups. There are some great projects featured at these linky sites. Take a minute and check them out!

What’s Next?

This quilting obssesion is such that I am always, always, always thinking of what’s next?  I have two quilts in progress and two projects that I am in the process of finishing up the binding.  Isn’t that plenty?  No, not even close.  If you are reading this, you probably understand.  I don’t know what drives this.  Is it all the amazing fabrics out there?  Do they  create this continual desire to start the next thing? Maybe it is the satisfaction of creating something? The peacefulness that comes over me when I am piecing something?? Honestly, it is almost always in the back of my mind; the next project.

So, here is “what’s next”, for today anyway.  On a whim, I purchased a bag of scraps from Southern Fabric.  Have you taken a look at their on-line shop?  It is filled with a huge assortment of really nice fabric.  I follow them on Instagram and Facebook because they are always having a sale on something.  One day it was bags of strips.  They were half off (regular price is $12.00).  The only thing guaranteed was that the strips were from a coordinated line from Moda.  Good enough for me.  Really, is there any line that I really wouldn’t want to work with?  Doubtful. (By the way, this isn’t a sponsored post.  I just love their shop.) With rapid speed, I received my bag of surprises in the mail. (I love a good surprise too!) I was so thrilled.  Look what I got:

blue stripsThe strips are from the Lexington line designed by Minick & Simpson for Moda Fabrics.  I love it.  My favorite pieces are the text prints that just repeat the alphabet.  Really sweet.  I think I need to order some yardage in that text print.  Two strips just isn’t going to do it for me.

It was easy to come up with a project for these strips.  I decided to make a string quilt. The tutorial that I liked best was found on Quiltville.com. The blocks are strip quilted on a  rectangular piece of fabric and then triangles are added to the sides to create the block. First I trimmed the selvages off and cut my strips into various widths between 1 1/2 inches to 2 1/2 inches.  I used a sheet that I cut into rectangles for the foundation fabric. For the triangles, I have some low volume fabrics that work perfectly.  Check these out:

blue quilt low volThese are such pretty pieces and I love them with the blues and tans of the Lexington line.  Here are the blocks that I have thus far. As I have mentioned before, I lean toward the precise side (that actually is a bit of an understatement) so I’ve decided to sew some of the strips slightly wonky and try to enjoy the freedom that allows.  Not so bad to relax and accept a little intentionally crooked piecing! If nothing else, it is kind of freeing.

blue tan quilt blocks 2

The blocks are fun to make – they require almost no concentration.  The only (small) downside is pressing the strips each time one is flipped over.  Usually I will sew one from each end, starting at the center so I can press two at a time.  Kind of a hassle to do the pressing.  Other than that, easy peasy.

blue tan quilt blocksI am taking off this afternoon to go visit my son for a couple of days.  He just got his first job after graduating college so I am looking forward to hearing how things are going. I suspect I might be able to find a few local quilt shops during my travels! (a given, right?) Hope you are all enjoying your fabric craziness as much as I am.

Linking up with:

Marelize at Anything Goes Monday; Alyce at Blossom Heart Quilts, Connie at Freemotion by the River, Heather and Megan at Randi at Fabric Tuesday. How about with the lovely Lorna at Let’s Bee Social?

Dabbling with Dresdens

I have been playing with Dresden plates this week.  Never have done this because I thought it would require a patience level that I usually don’t have. I was happy to learn that this isn’t so.  Dresden’s look so precise but they are actually quite easy, time-consuming, but still easy.  There is a pattern in the most recent Love of Quilting magazine for a table runner with three dresdens placed on it. I made it exactly as the pattern instructs.

Cutting the petals takes a bit of time.  I am wondering if I need to purchase a smaller rotary cutter. I have just the one (45mm) but maybe I need the smaller one for finer piece work.  Does this ring true to any of you?  Let me know how many rotary cutters you use and the best size – or is there little difference??

dresden cutting

Learning something new is the greatest.  With this project I learned the dresden block as well as tried chain piecing for the first time.  What a timesaver.  Plus it saves on thread.  I don’t usually think about that part of it, but really, I am always buying thread.

dresden chain piece


It all came together really quickly.  So cute!!

dresden layoutThe pattern calls for borders that are 3 1/2 inches in width.  After attaching them, I think they are too wide. The runner will finish out at 45 x 20 inches. That is much bigger than I usually make for a table runner. I haven’t decided if I will leave it this large and hang it on the wall.  Or I will trim the borders and make it fit my table better.  Thoughts on this??

dresden with borders

The green polka dot print will be used as the backing as well.  That was a great thrift store find at only $4.00 for two yards.  Not sure what I will bind it with. I have been trying to decide how best to quilt this project.  I want to enhance the dresdens and do a light meandering on the white backing.  Looking through Flickr is always inspiring and I found this idea.

dresden sample quilting

It is perfect for the dresdens though it looks a bit intense for my skill level.  I may have to tone it down a bit.  It’s a good place to start though.

Hope you are all working on something fun!

Linking up with TGIFF, CrazyMomQuilts, and RichardandTanyaQuilt!  Happy Friday!

Sophisticated

At the beginning of this year I set a goal to make three birthday quilts for three special women.  You can read about the first two of these quilts here.  Yesterday I finished the third of the birthday quilts!!  Yay! I will ship it out today in honor of her birthday, which is today!  Think it will make it from California to Chicago in time for her to open it tonight??  At least I am getting it in the mail – it will have to arrive a few days after the day.  I am sure she won’t mind. I really love this quilt. I had pinned this design on Pinterest a long while back and was so happy to have an occasion to make it.  I used the pattern called Sedimentary created by Debbie Grifka at Esch House Quilts. Before I got started I check with my son, partner of the birthday girl, Marisa.  I knew I wanted to use black, gray and white as the basis but wanted him to select the accent color.  He chose cobalt blue, which I thought was a great choice.  Nice bold contrast but not too bright. This is a really easy quilt to make.  Cutting pieces consisted of lots of strips in three different widths.  The pattern directions are crystal clear and easy to follow.  Once the strips are sewn together it is a matter of laying them out and moving them around until the layout is pleasing.  I think if I ever make it again, I would reduce the widths of the strips overall and just create more of them. The strip widths are a bit “chunky” looking and narrowing the width would help that.  Overall though, I am so happy with it and hope that Marisa loves it!! marisa quilt 6   It was a lot of fun to choose all of the different black and white and gray fabrics.  Some I had in my stash and others I purchased for the quilt.  I used two text prints that I thought were perfect for Marisa.  One was all about stories (fitting as she is absolutely a bibliophile) and the other is written in French (Marisa is multi-lingual and speaks French among other languages). I had not used text prints before and they look great. It is fun to personalize the quilt with  just the right text prints. marisa quilt 3   The quilting was easier than it has been.  I suppose that it truly is all about practicing and it seems that each time gets a bit more comfortable and looks better over all.  I used YLI thread in a varigated gray to quilt a random pattern of swirls. The pattern contrasts nicely with the linear direction of the pattern. The thread was heavier and showed off the quilting better. (Although on the swirls that were a bit herky jerky they showed up more than I wanted!!) The only real problem was when I was quilting on the darker black strips, it was hard to see where I was coming from and going to. The back – I love the back.  Sometimes I get more excited about the back of a quilt than the front.  I decided to make four modern blocks with leftover strips and insert them in a column.  It looks great. marisa quilt 7   It is bound with a tiny print of blue and black, setting off both the front and back nicely. marisa quilt 8 marisa quilt 9 Here is my favorite tale about this quilt.  When I had the quilt lying on the floor and I was squaring it off and trimming the excess before binding it, my 13 year old daughter came in the room and took a look at it.  She said, “Mom, this is so pretty.  It is sophisticated.  Just like Marisa.” I loved Julia’s  interpretation and that is how the name of the quilt came to be. Sophisticated. marisa quilt 10   Happy Birthday Marisa!!   Linking up with Freemotion by the River, Fabric Tuesday and Sew Cute Tuesday and Show and Tell Tuesday.  Also at the lovely Lorna’s, Let’s Bee Social and, finally with Freshly Pieced’s  WIP Wednesday.

My First Quilt

The first quilt I ever made was back in high school, meaning it was a very, very long time ago…. It was my senior year and I was taking a sewing class.  I don’t really remember how I got the idea to make the quilt but somehow I figured it out and decided to make it with log cabin blocks.  I knew next to nothing about quilting and didn’t really ask anyone how to do it.  I was just winging it.  Looking at the quilt now, this is painfully apparent!

I chose to use blues and browns for the color schemes.  I didn’t know that it would be best to use fabrics that were all one weight.  Instead, I chose cottons of all sorts, mainly based on whether I liked the colors and patterns.  Unfortunately, I used some very thin, lightweight cottons.  Over the years, these wore out quickly.  To make each block I used a sort of quilt-as-you-go method that I made up. (Not like I invented it but I had no instruction so I had to figure this out on my own.) I cut a block of muslin as a backing and centered a small square on it.  Then I created each block by sewing strips around and around that center block. This was a huge project at the time. I decided to make the quilt for a queen sized bed. If I was going to make it, I wanted to be able to use it for a long time. After weeks and weeks, I finished all of the squares. I sewed them together and, not surprisingly, my corners didn’t match.  At the time, I wasn’t really aware that they should.  Blissful ignorance!

This was back in 1978 and the batting that I was familiar with was mainly fluffy polyester. My Grandma Josie was looking at my quilt top and told me I should fill it with a blanket so it would be warmer. Once again, I didn’t know any better!  She gave me a huge and extremely heavy wool blanket. Ever obedient, I used this as the filling of my quilt.  I used a (very) thin muslin as the backing. All together this quilt weighed about twenty pounds.  Definitely warm and with the wool blanket in the middle, not easily washable! I had no idea about machine quilting, the only thing I had heard of was tying it.  So I tied it with yarn at each corner of the squares, nothing in the centers. It was so heavy and the muslin so thin that the yarn ties broke free from the muslin.  Really the backing floated freely and the quilt top was tied to that oh-so-heavy woolen blanket!

I loved this quilt and used it for years.  I even took it to college with me.  A queen sized, woolen filled, heavy-as-lead quilt to college on the central coast of California.  The weather is usually in the 70’s there so you can bet I was nice and warm at night.  Plus, I had to fold the quilt to fit it on my single size bed in the dorms.  Doubly warm! After college it was our quilt in my first home when I got married.  Here is my first baby snuggled into the quilt when he was just a few weeks old.  So, circa 1985.  Clearly this was taken before moms were taught to put their babies to sleep on their backs.  This poor little guy is face down, on a quilt, and….. on a waterbed. Yikes!! But just look at him….. so sweet.

quilt with andrew-3

The next baby came along in 1987 and yep, still face down but on a regular mattress by now. This quilt was so loved.

Over the years, the quilt has completely worn out.  I am now taking it apart so I can try to restore it.  I removed the ties and that weighty woolen blanket and I can now work on the top.  I think I will be able to replace some of the frayed strips. I will find some neutral fabrics that looks relatively similar. I am going to have to fuse the strips in place and applique the edges. Then I plan to create a new backing and use cotton batting in between.  I will machine quilt the top pretty tightly so that the worn strips will be held in place.  Can’t wait to give it a makeover!

With the scraps from the log cabin quilt I also made a tiny log cabin quilt for my babies to use.  I loved that it matched our quilt.  When each of my boys were newborns they used the quilt while they were still cozied up in the cradle that my father made. This quilt was filled with a puffy, poly batting and then stitched in the ditch for quilting.  No binding – I didn’t know about these details.  I just made it “envelope” style, sewing it right sides together and then flipping it right sides out.

BABY QUILT 1


After the first quilt, I made two more simple patchwork quilts in the late 1970’s.  These were filled with a poly batting and hand tied with yarn.  Both have worn out completely.  I wish I had pictures of them.  Fast forward 35 years and I am, once again, happily immersed in this quilting hobby of mine.


Linking up with Richard and Tanya’s LAFF, CrazyMomQuilts, and Link a Finish Friday.