Tag Archives: Art quilt

TBT – Class with Carol Taylor

First of all, just know that it is raining as I type this post. That makes me so happy!!

Today I thought I would share about a class I took with Carol Taylor back in spring of 2013. If you aren’t familiar with Carol, she is an extremely talented quilt artist from New York. She works on quilts that are often abstract and are always beautiful. Her talent with thread is beyond belief. If you are unfamiliar with her work, check out her gallery. It is a treat to look through.

One day (a long while back) I was looking at the website for my LQS and there was a post about a class with Carol Taylor coming soon. At first I didn’t think much of it because it didn’t seem possible that this Carol was the same Carol whose site I had looked at so many times. Then I saw the description of the class and was thrilled to see that it was her. Wondering how the heck our tiny guild could afford to bring her out, I called the shop. Apparently, we had partnered up with a guild about an hour away and the two guilds were splitting her travel expenses which made it just barely affordable.

I was very hesitant to sign up though. I felt like the class was out of my league and it was also fairly spendy for my budget. I talked to my husband and he encouraged me to go. I really wanted to just learn from her at whatever level I could, even if I wasn’t quite up to speed on the techniques. I am so glad I did becasue it was fantastic!

At the last minute, I talked one of my friends into going with me. There was a woman that had signed up and was ill so her spot was up for grabs. This was the second quilting class I had ever taken and I was more than a little unprepared for it. When Sophia (my friend that went with me) and I entered the room it was obvious that we were newbies. We both came with a tote bag of supplies and fabric, plus our machines. Yikes, the other women there had (literally) suitcases and duffel bags filled with fabric. They had large boxes, or kits, filled with needles, thread choices, mysterious feet for their sewing machines etc. I was overwhelmed. I brought exactly what the supply list said, no more than that.

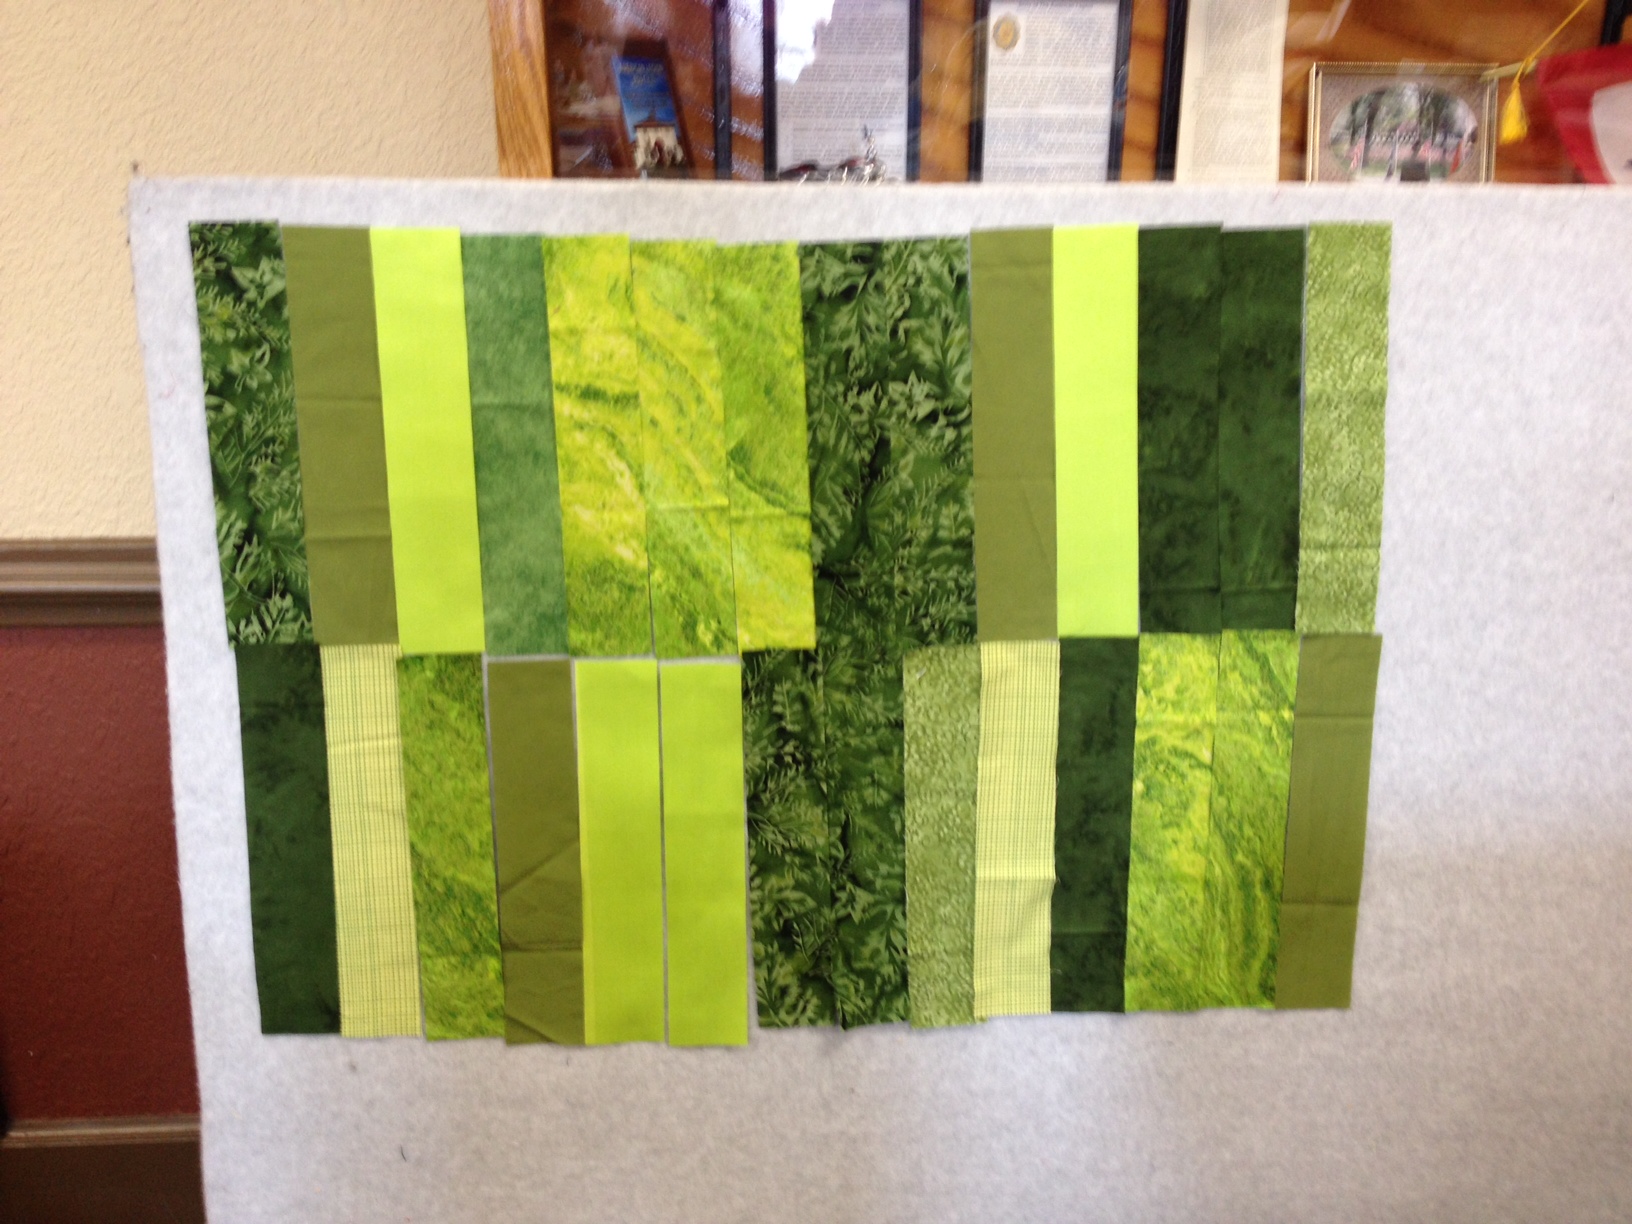
After lecturing for a bit, Carol had us get out the colors we wanted to use for the background. I had about five fat quarters. She came by and actually asked me where the rest was. I was baffled. Then she said to the class, “we need greens over here” and it was like the story of the ‘Loaves and the Fishes’. Twenty women started to hunt through their fabric, pulling out greens of every shade. This was really my first exposure to the kindness of the quilting community. I ended up with plenty. 🙂  We started cutting strips and playing with them.

Coleus class

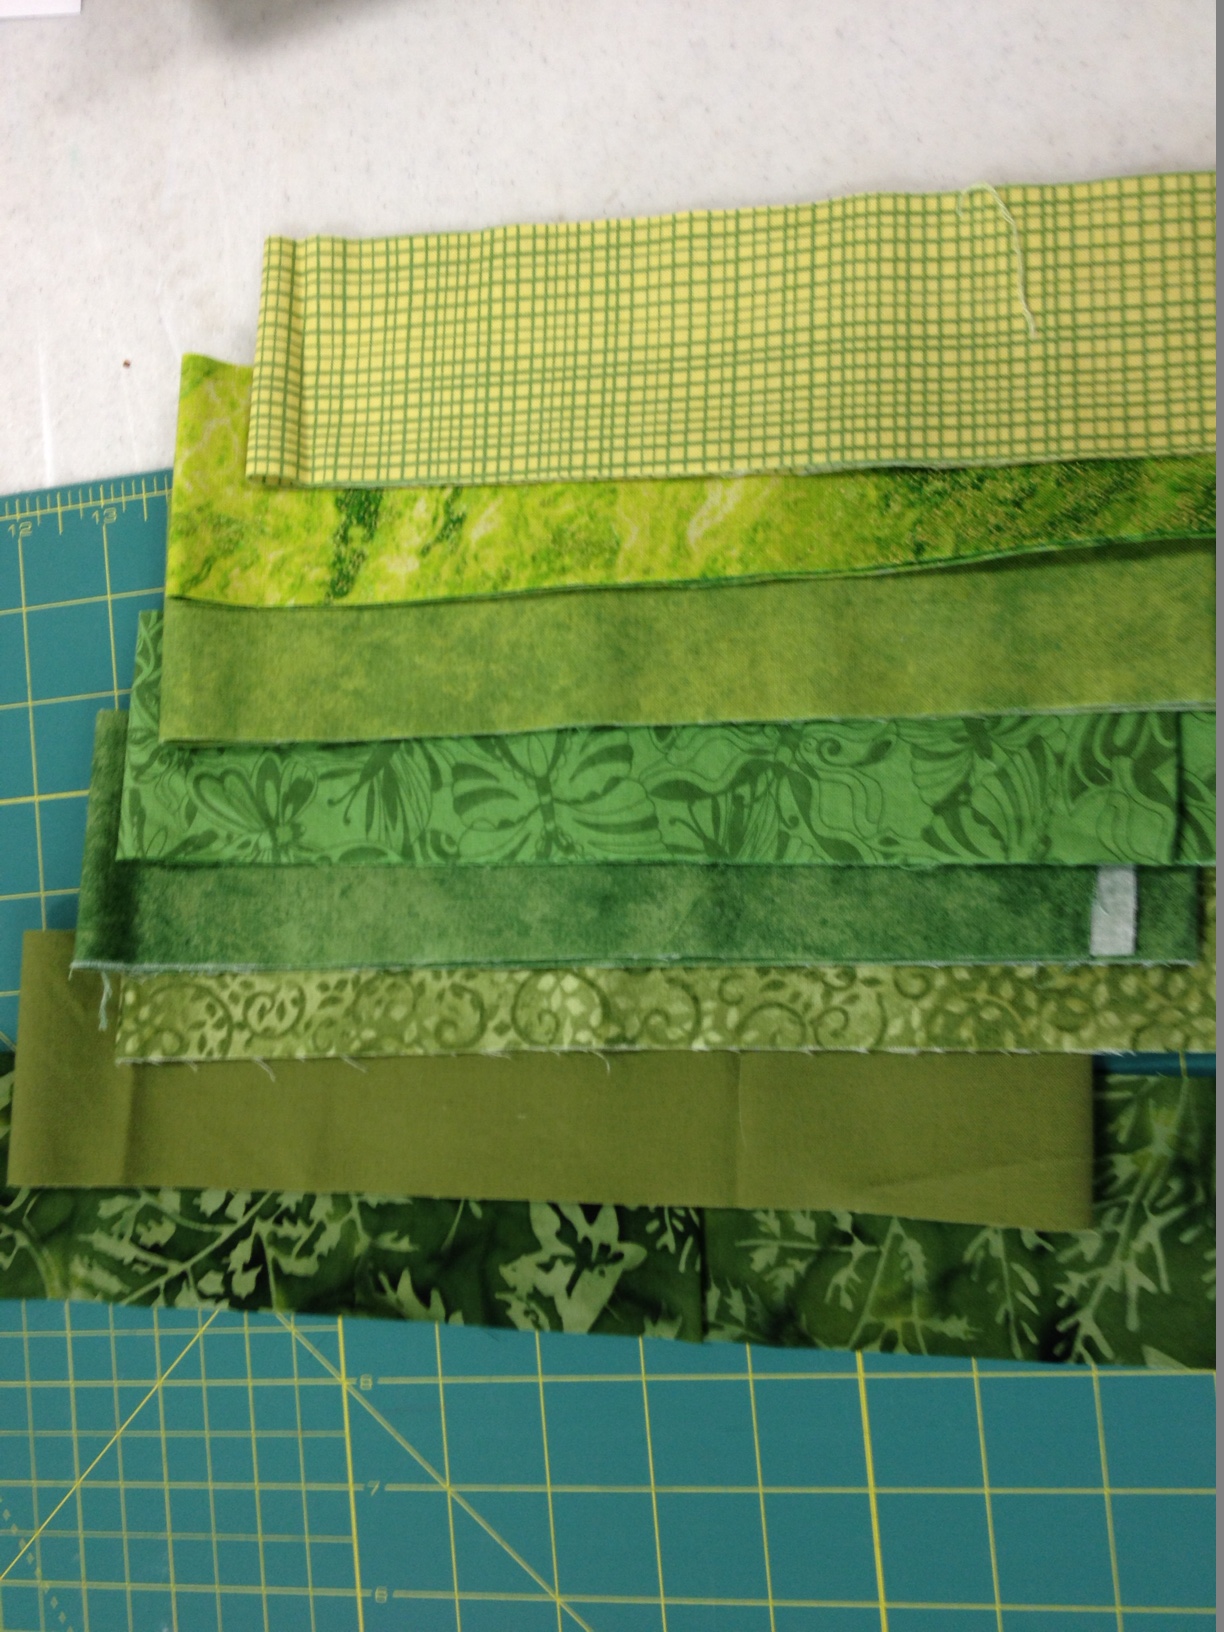
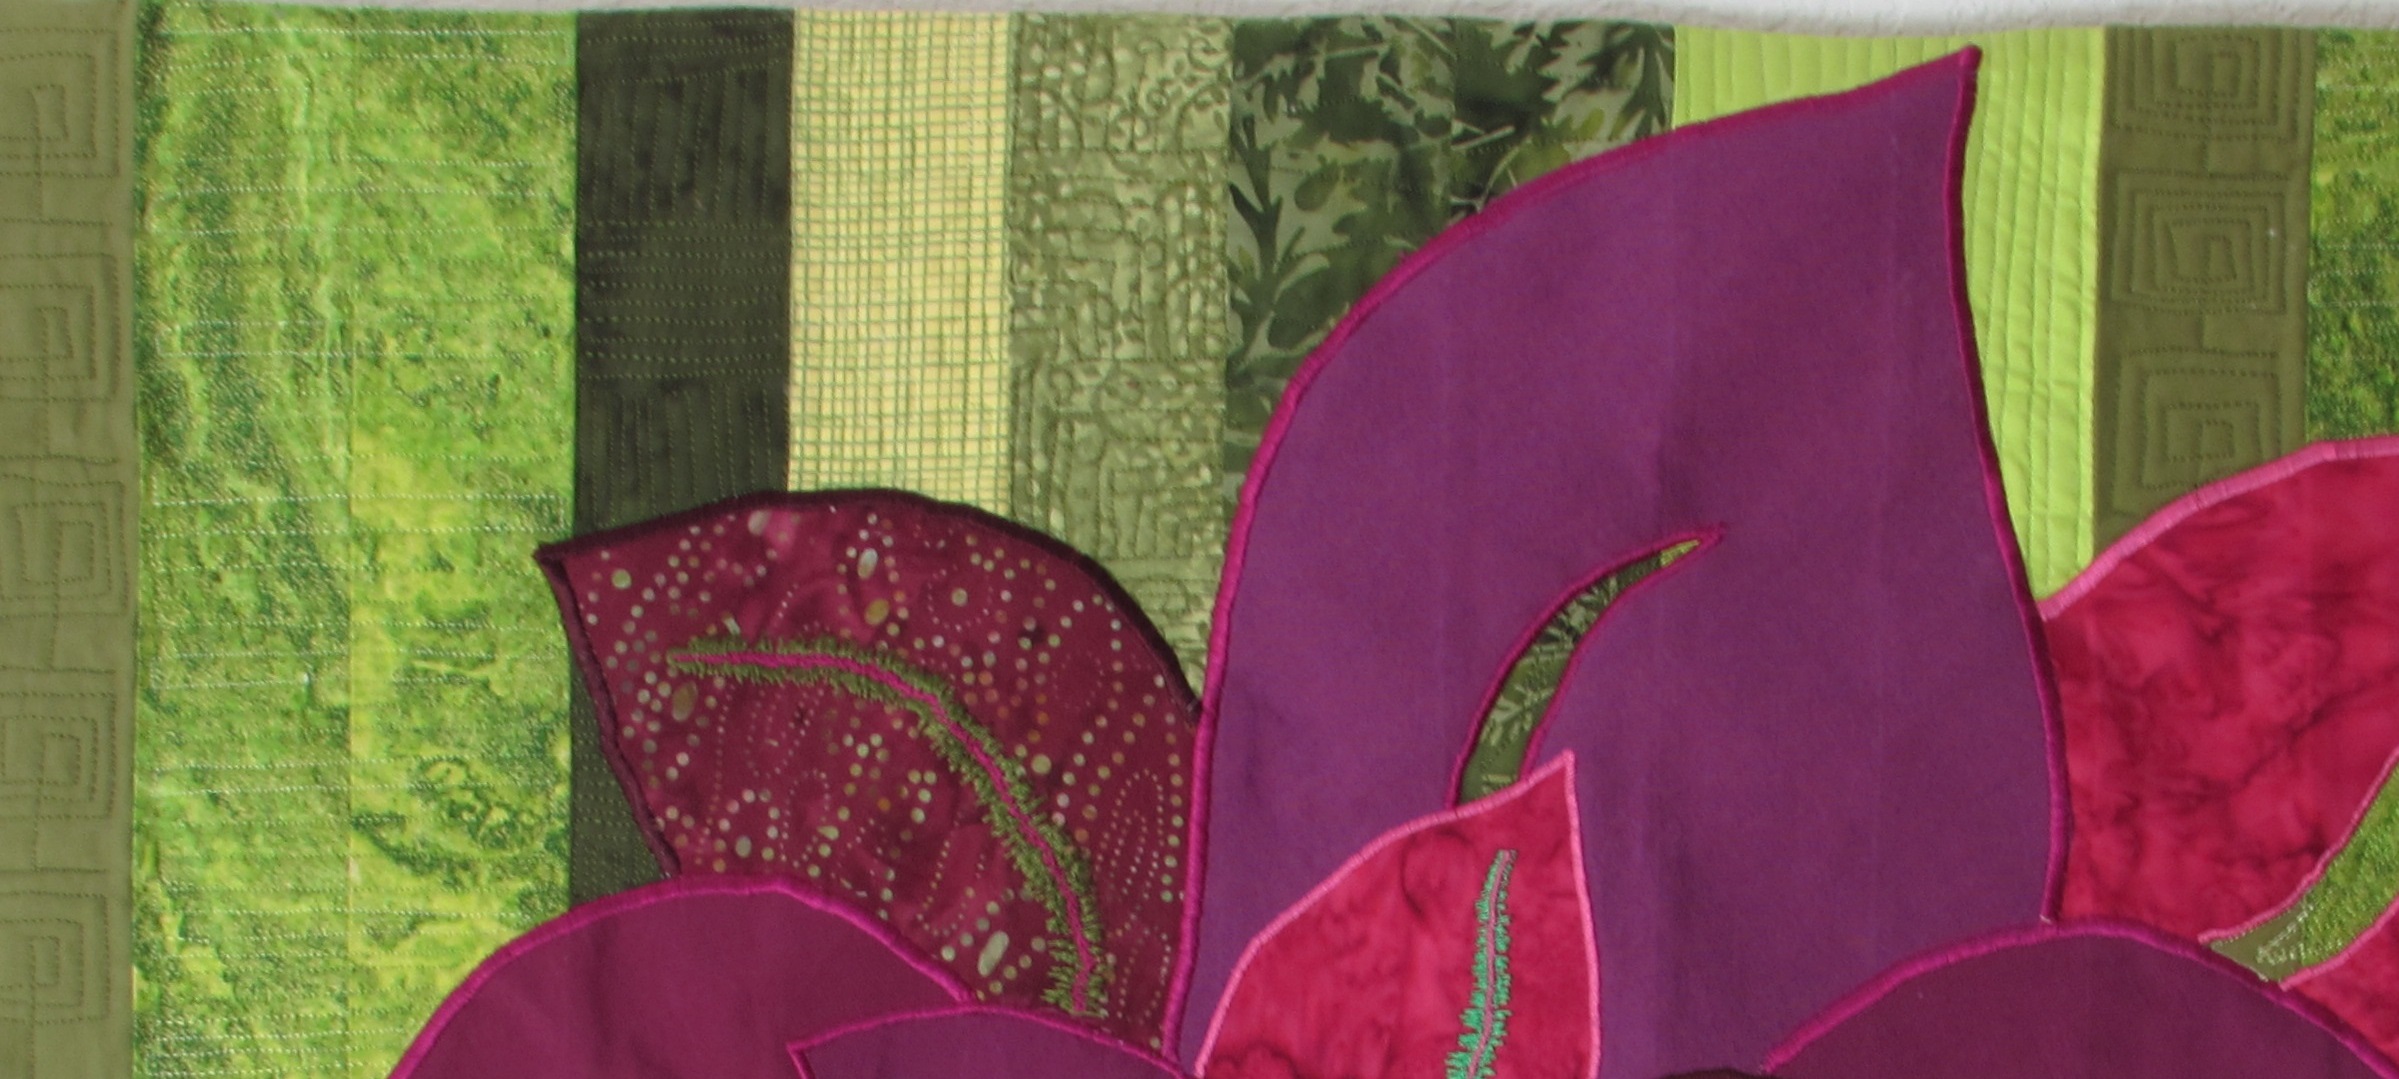
One of Carol’s strengths is her use of color and that is something that I have mentioned struggling with. She was so helpful. When she looked at my first choices (above) she explained there wasn’t enough value difference. Working together, and using donations from classmates,  I finally ended up with my backgound. The lightest solid green is a gorgeous silk given to me that adds a wonderful texture to the collection.

Coleus process

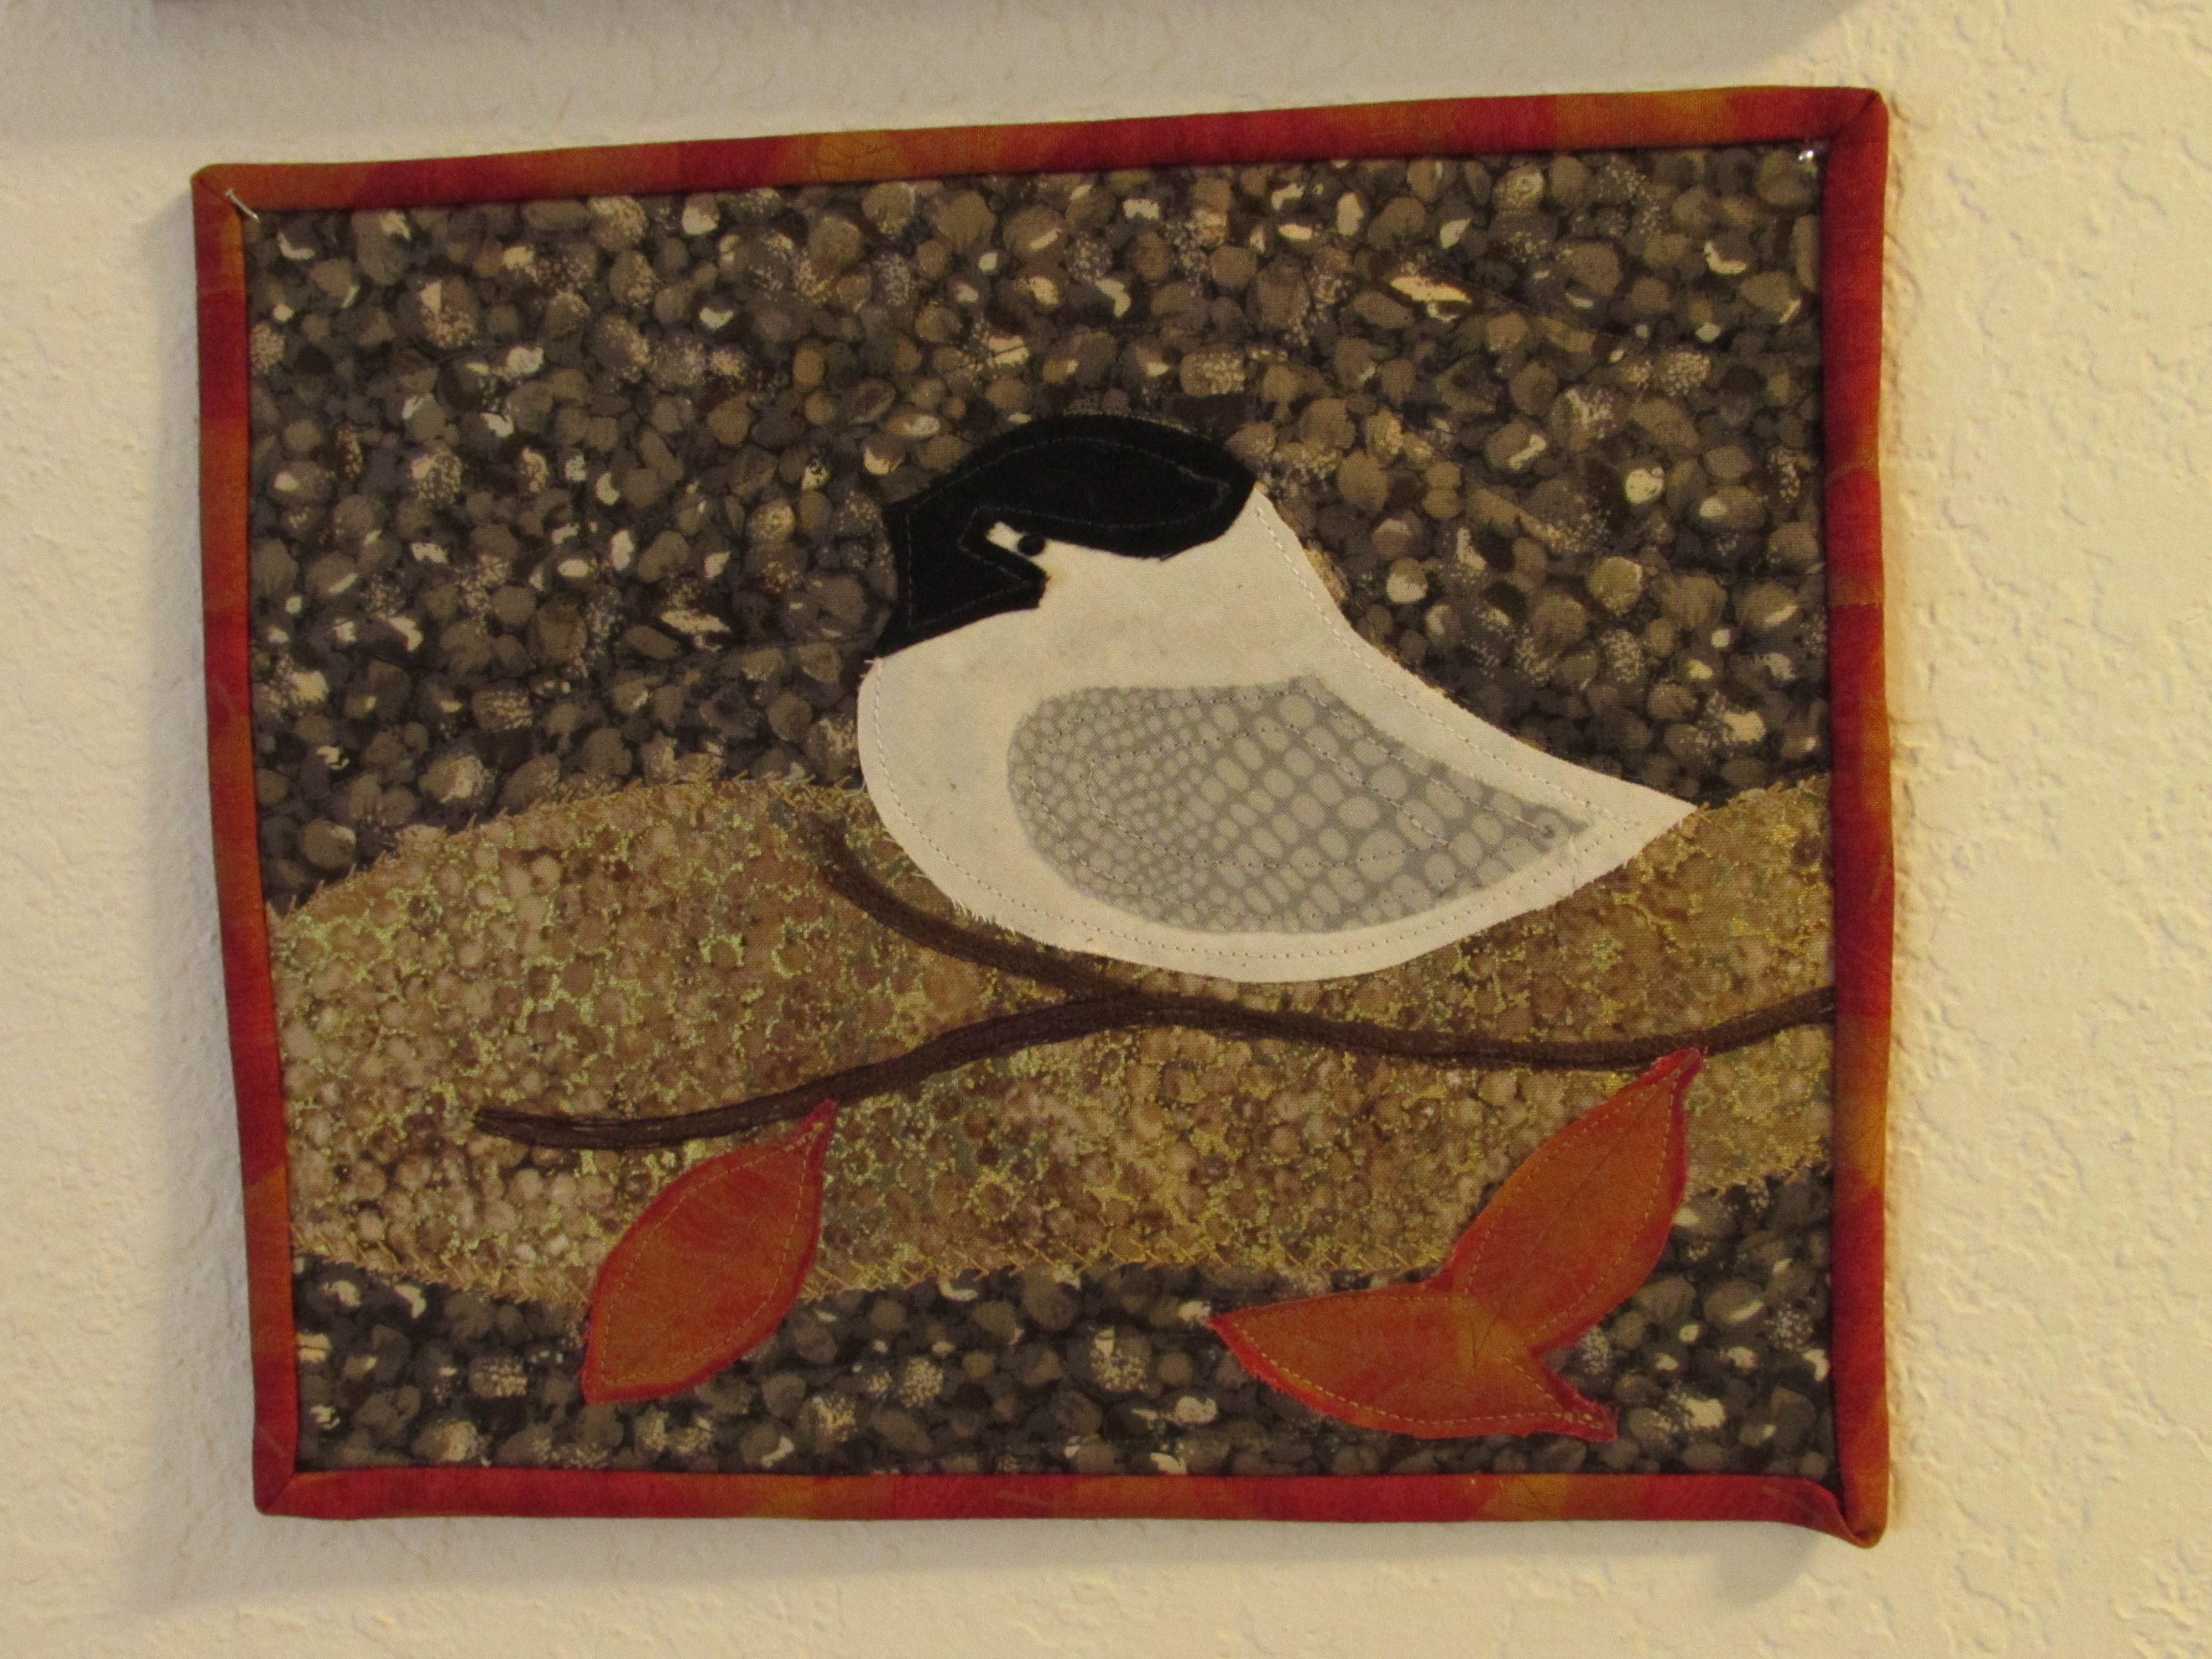
Beyond learning about value, I learned about design and free-form applique. I wanted to make a wall hanging that was inspired by some pictures of Coleus plants that I had brought to class. She had me cut huge leaves with my rotary cutter without drawing them or making any sort of pattern. It worked great and was so much fun.  (I wish I had taken pictures of the process but this was long before blogging so I don’t really have any.) Below is the end result of the class. I did have to finish much of this at home. By the end of the two day class, I had the background done and the leaves in place. It wasn’t quilted and much of the thread sketching down the center of the leaves was incomplete.

20140514_0740

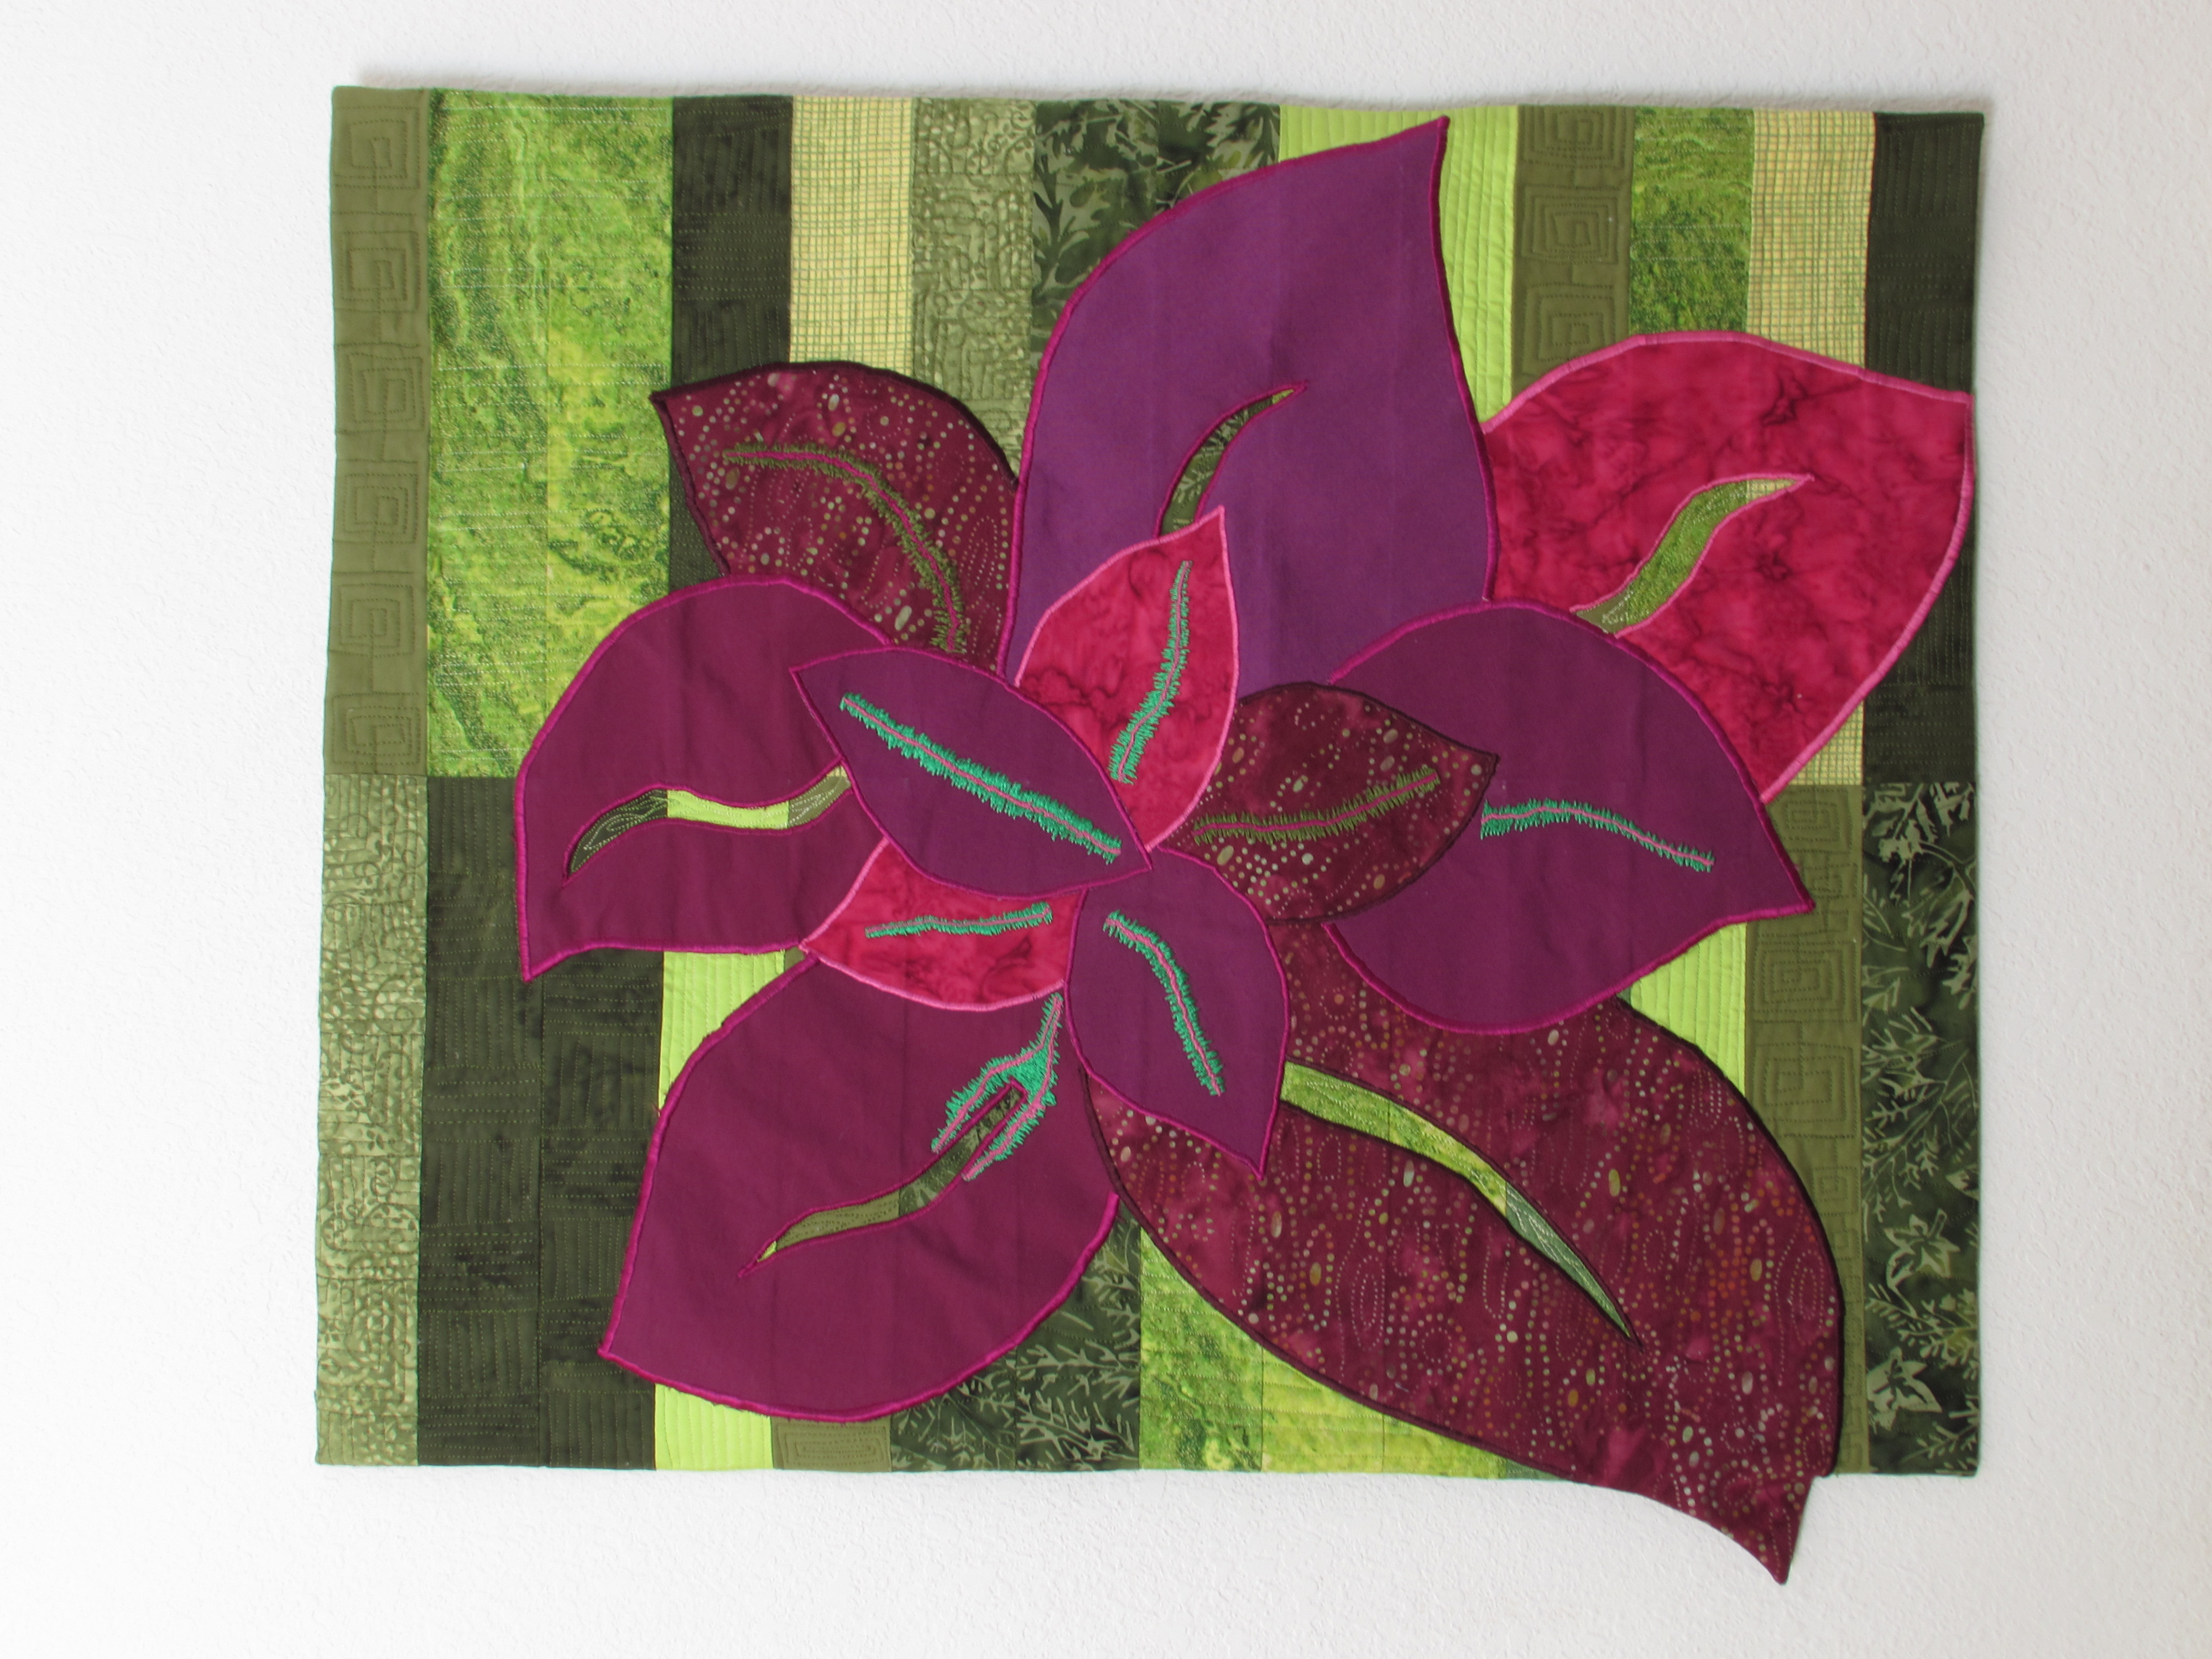
One of my favorite aspects of the quilt is the little point of the petal that hangs below the finished edge. Carol suggested this and it worked perfectly. There is a cute story behind the idea. As a well-known artist, many of Carol’s quilts hang in different shows and galleries. She had made a quilt that she wanted to enter in a show and it was 1/2″ short of the size requirement. The show held firm on their size requirement so Carol added a tiny fish that hangs off of the edge of the quilt.  They took her entry. You can see a photo of this on my Flikr page. Carol did a fantastic trunk show and was kind enough to let us take pictures.

This class was actually my first exposure to thread play. We used Sulky threads (which she sold in class in every color of the rainbow.) I love the veins that are sketeched in the center of the petals.

20140514_0740

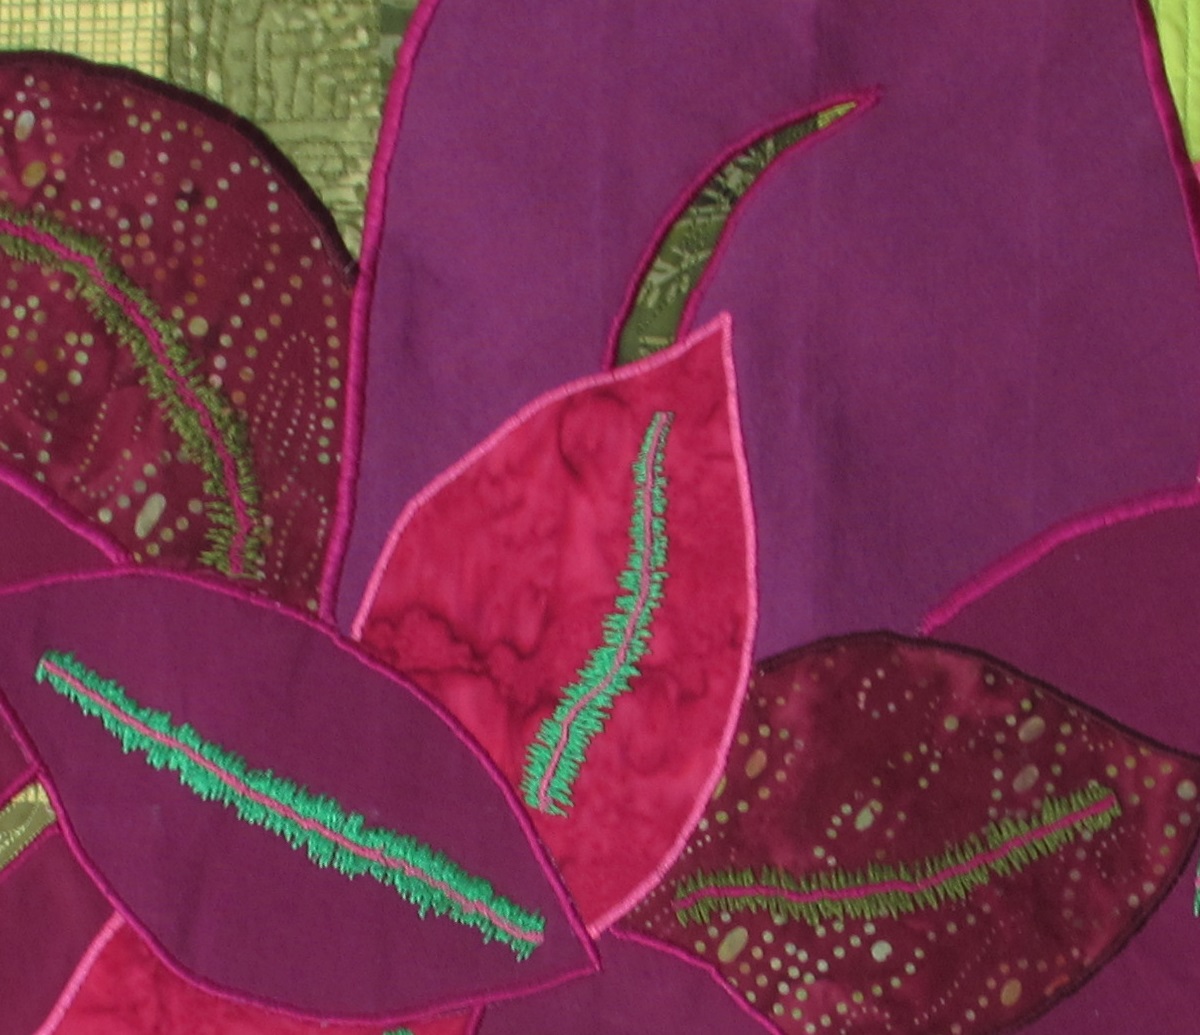
I also learned to incorporate texture with simple ideas such as cutting the center of some of the petals to show the green behind it as the center vein.

When I was ready to quilt it I used a different FMQ pattern in each of the green fabrics, repeating the pattern wherever that particular color strip was used.

Coleus Close up FMQWith a faced edge, rather than regular binding, the quilt finished out at 28″ wide by 25″ tall (including the tip of the leaf!)

This class was such a fantastic learning experience. If ever you have the opportunity to take a class with Carol, I cannot emphasize this enough – Do it! She has such talent and is a very good instructor as well.

Linking to Let’s Bee Social, Throwback Thursday and Crazy Mom Quilts.

Low and Slow

This week has been moving along slowly for me. I have hypoglycemia and every once in a while my blood sugar tanks.  When it does I am wiped out for a few days. For the most part if I do eat the right foods and don’t eat the wrong foods and my levels stay copacetic (a word my father loves to use!) Ok, last weekend I was not so careful. A couple of m&m’s, a 1/2 of a cookie here or there. white rice instead of brown and I am paying the price for these transgressions!  The problem is that 3 out of 4 times, such a small stray from my “healthy” diet doesn’t cause any problems, which makes temptation hard to resist. Every once in a while it throws everything out of balance.  Anyway, this makes for a ‘low and slow’ week, as my husband and I have come to call it. No energy to do much of anything. No ability to focus or concentrate.

Just to illustrate my point, here is a picture of the tub of butter that I personally selected at the grocery store this afternoon.  Please note that there is butter smeared on the outside, the little plastic seal is loose and protruding from the lid.  This is exactly how my husband found it in the fridge tonight.  He asked me if I had used this yet, or was it new? “New”, I replied.  “Just bought it earlier this afternoon”.  He just smiled.  No need to comment further.  He knows me too well. This is how the tub was when I bought it and how it was when I put it away.  Never did I even notice this mess.  Yep, low and slow.

photo (7)

Of course, it doesn’t take much energy to sit at a sewing machine between naps and reading my book on the couch. Surprisingly I got a number of things accomplished. Not with any great efficiency and certainly not without error.  I made great use of my seam ripper over the past few days.  Remember, low blood sugar = low brain function (at least for me anyways!!)  I was working on the sashing, corner and setting triangles for the Christmas Lattice Quilt that I blogged about here.  I just could not believe how many times I sewed the triangles in upside down.  Really? Upside down? Then I would have to look at it for a minute or two to determine exactly what I had done wrong. Jeez! The fabric I am using for the sashing is a white on white holiday print.  Again, upside down, or wrong side facing out. I was covered in tiny threads, picking out one seam after another. Finally I set that aside. It was making me more than a little crazy.

I needed a new project to work on (well, ‘needed’ might be a bit strong.) Never having made a disappearing nine patch, I decided to give that a try.   If you are unfamiliar with this block, there are a million tutorials out there for it. Basically you just create a nine patch block (3 rows of 3 squares each.) Then I cut the block down the center and across the center, creating four equal pieces. These smaller blocks are rearranged in whatever layout is pleasing to the eye and sewn back together. I was shopping a week or so ago and came across some cute retro looking holiday fabric in Jo-Ann’s. Without any plan in mind, I cut my squares, fussy cutting the Santa fabric and the candy cane fabric as much as possible so I could use those as a focal point.  I used a deeper red fabric for each of the center squares as I wanted to have smaller squares with a darker value than the rest of the squares. Here is the resulting 36 x 36″ quilt top.

disappearing 9 patch 2

Now that this little guy is sewn together, I have absolutely no plan as to what I will do with it! It is too large for a table topper and too small for a quilt. I didn’t really take into account what I wanted to do with this project when I was cutting up the squares.  (Remember, I was operating with significantly lower than normal brain function!) The size of Santa determined the size of that block and the rest of it just sort of happened. Any ideas??  I am thinking of adding a fairly large red border (maybe five inches wide all the way around?) and then just backing it with the same red. Then sewing the back to the front, envelope style – no binding needed. I could use it as a small table cloth if I don’t use any batting in the center.  Maybe that would be fun?

Another project that I worked on was a small art quilt. My inspiration for this project came from a piece that I saw on Pinterest (of course, where else?) I followed the link back to the original site, www.onthetrailcreations.com. The artist at this site designs and sells patterns and kits for quilted cards that are really pretty. I wanted to make a small (7 x 9 inch) art quilt. It was really the first time that I sketched something out and just cut little pieces to applique. I was pleasantly surprised at how easy it was. I did an autumn theme with a bird that is reminiscent of the nuthatches that frequent my feeders in the winter months.

Red-breasted-Nuthatch-3c

Here is my version:

20141001_1768

For the most part I used raw edge applique. For the gold strip running through the center I used a decorative, blanket stitch.  The branch that the little guy is sitting on was sketched with thread. (I have been practicing a bit of thread sketching lately and really enjoy it.) The leaves were cut from a scrap of fabric I found with leaves printed on it. I bound the quilt with the same fabric. You will notice the lower right corner of the binding looks all saggy and weird.  What can I say? Not my best work right there. 😉

20141001_1769I am really happy with the bird and the branch he is resting on though. Such a cute little guy. I used a french knot for his eye. I applied fusible stabilizer on the back of the base fabric before doing any of the stitching or fusing the applique pieces on. The stabilizer makes a world of difference.  Without it the fabric will often pull and bunch when densely stitching something (like the branch).

All in all, a fun week in the sewing room. My friend and I are going to a quilting retreat sponsored by a neighboring quilt guild in the town of Downieville this weekend. I have been stacking up everything I need to bring.  I have fabric ready for two different projects and most of the supplies gathered. Hoping for better energy and a higher level of functioning by then!!

Linking to my usual sites:  Freemotion by the River, WIP Wednesday, Lorna at Let’s Bee Social, Needle and Thread Thursday, TGIFF, and of course, Amanda Jean at Crazy Mom Quilts!! Take a minute to check out some of these sites. I have links to all of them at the top of my page under Link Ups.