Tag Archives: thread sketching

Lone Pine

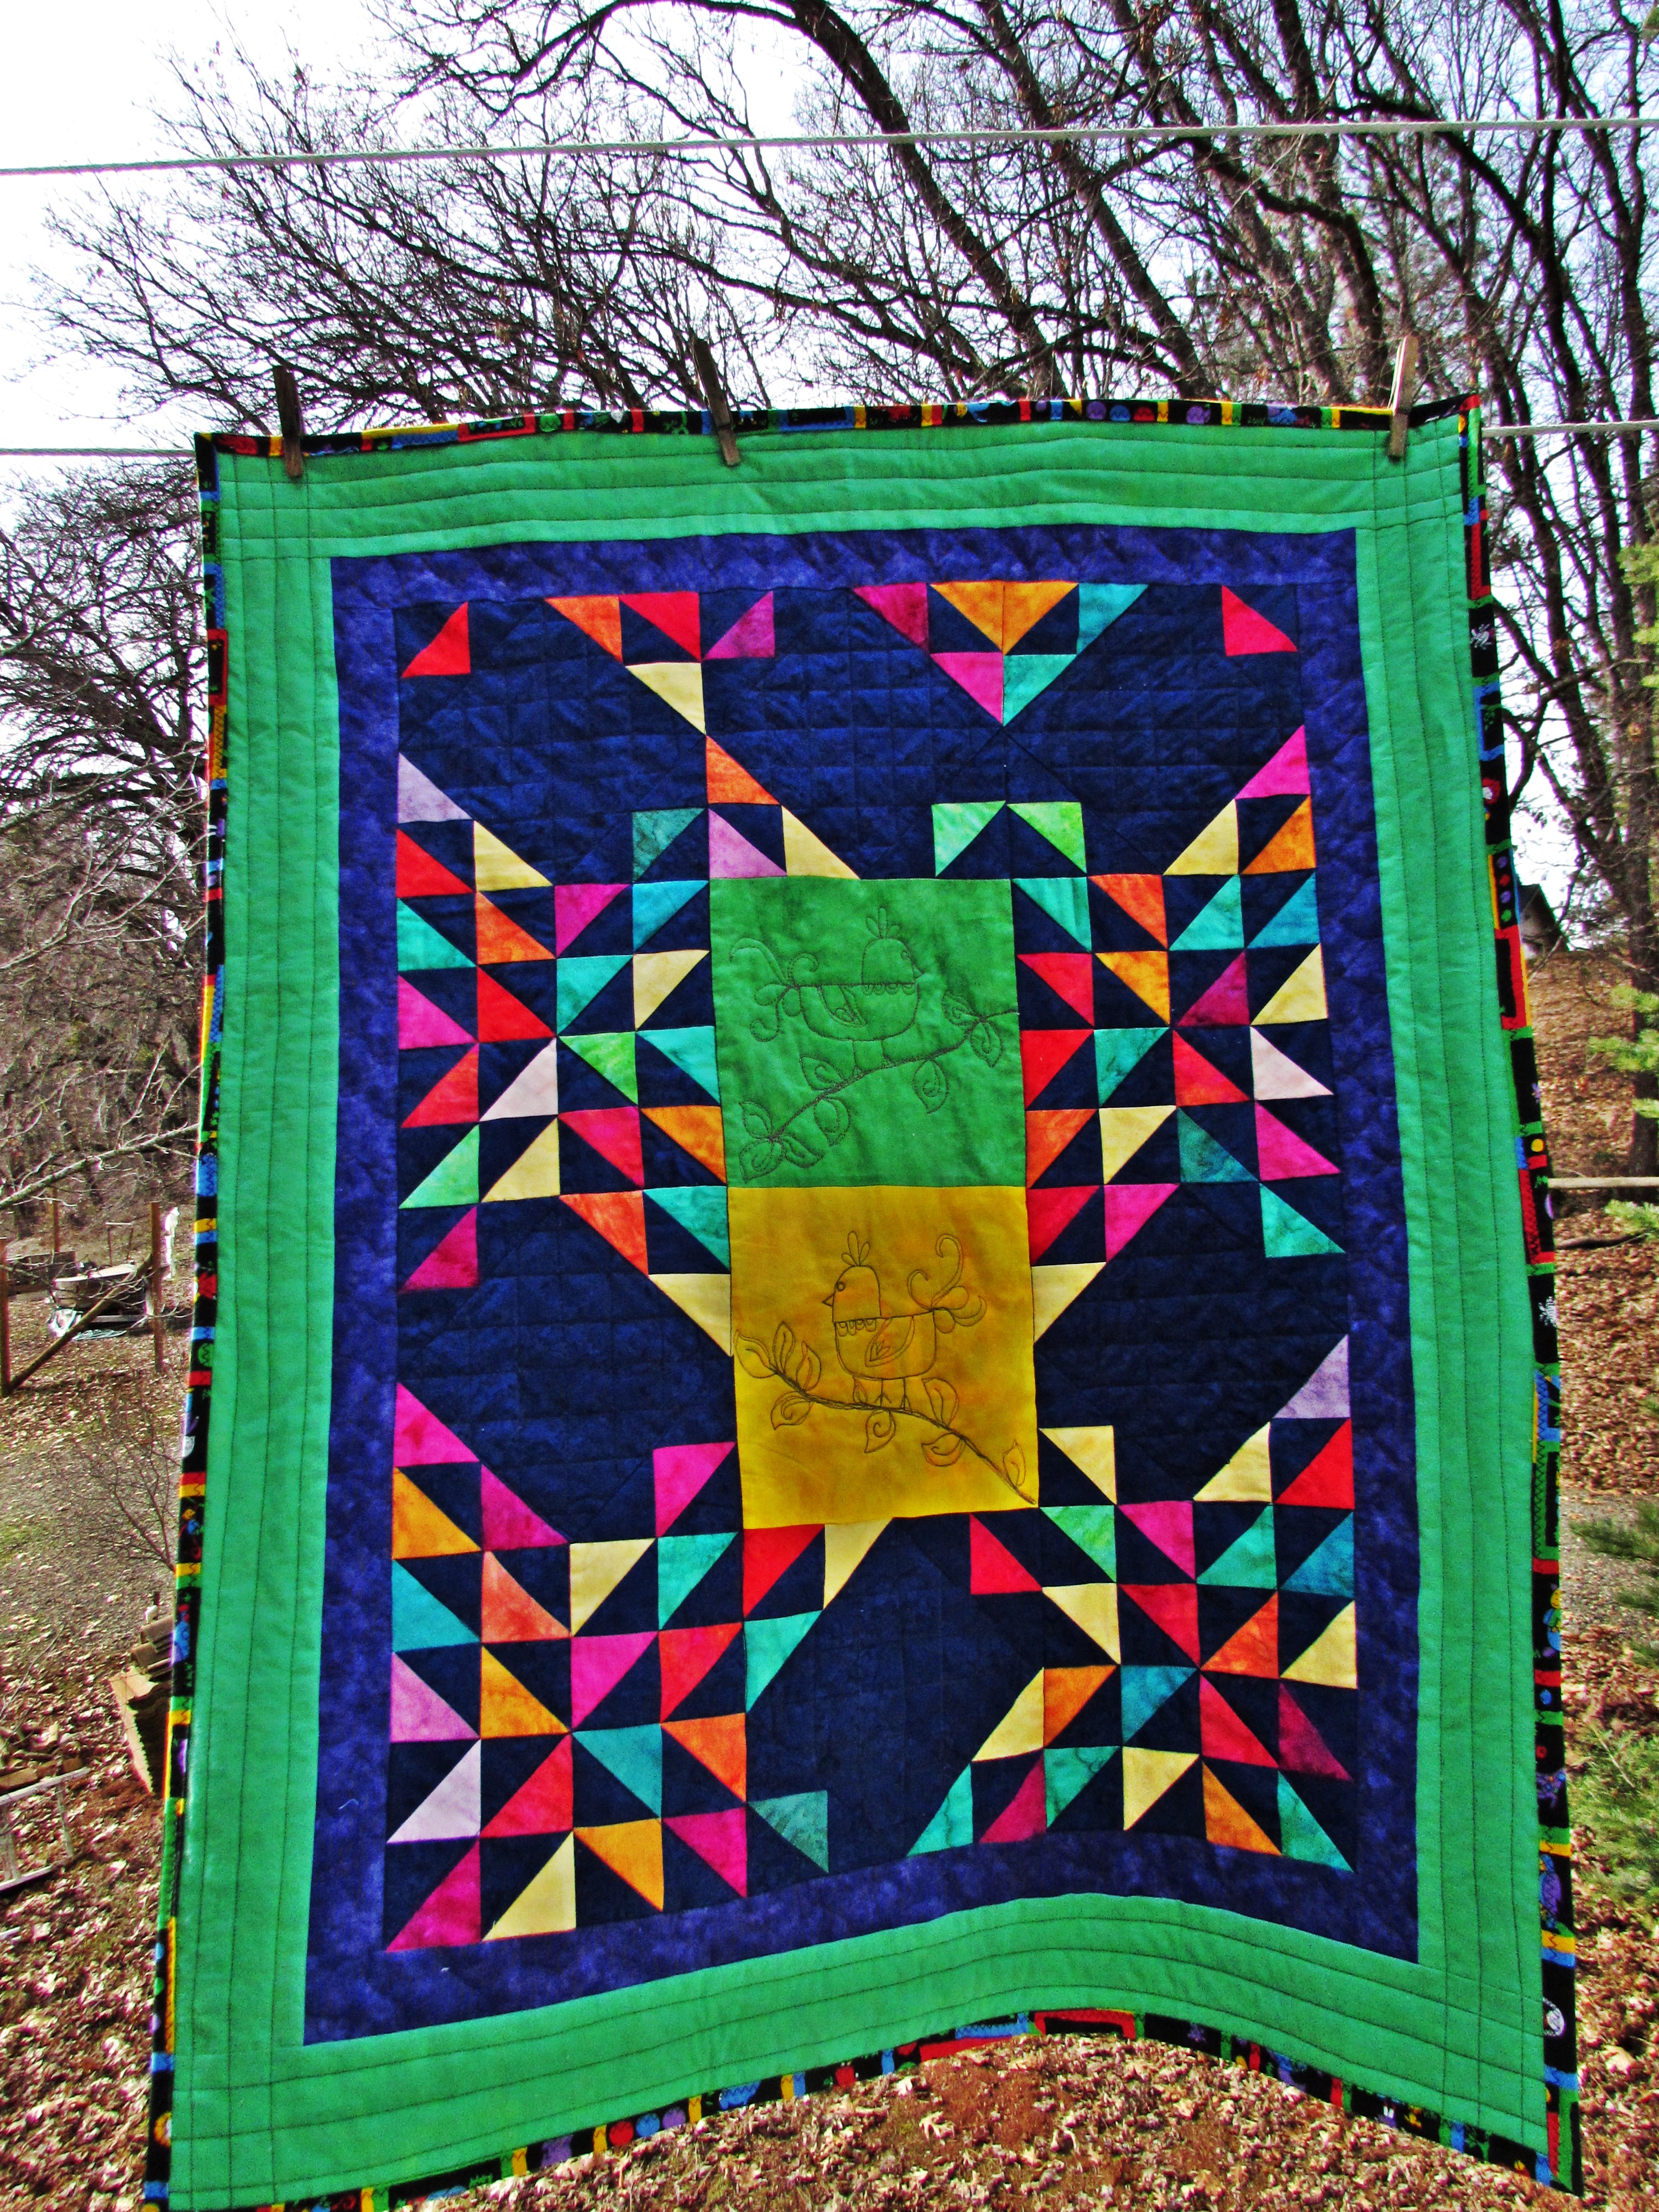
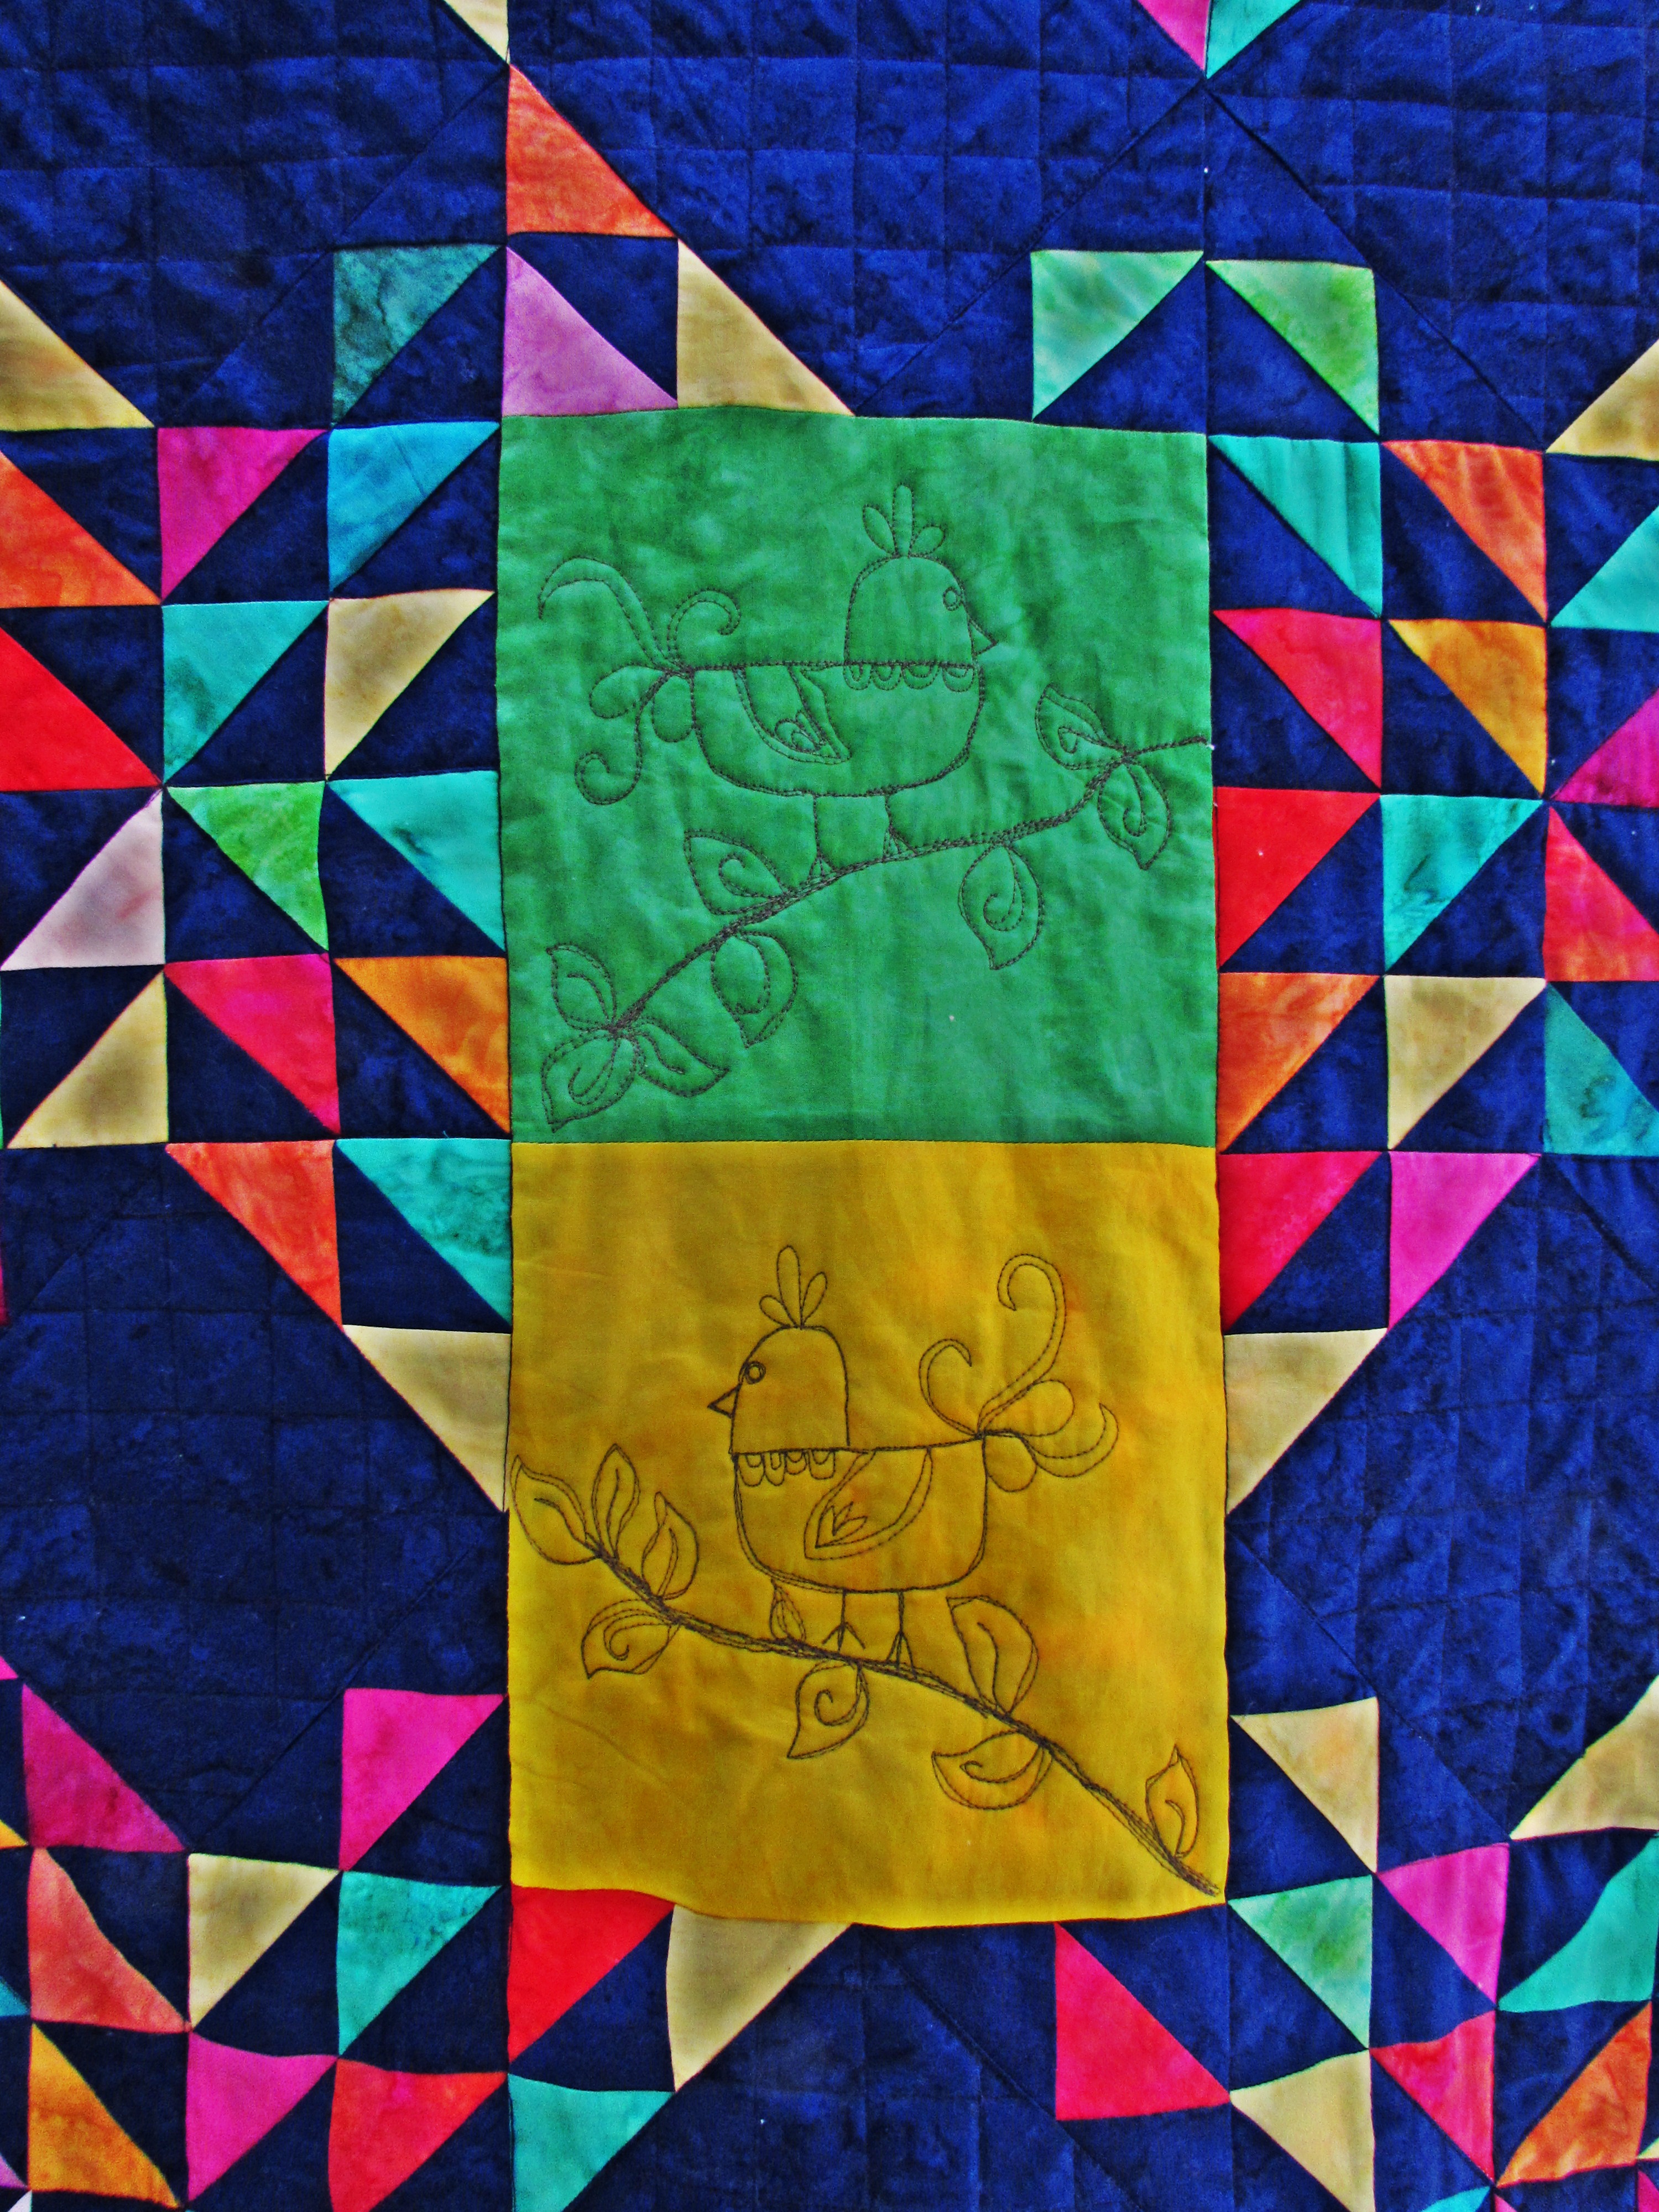
Last night I finished my Lone Pine art quilt. I am so glad I resurrected this UFO and finished it. Two years ago I pinned a lovely art quilt that is listed in an Etsy shop, Prairie Fiber Arts. I just loved it and I based my project on hers. Overall, I am very happy with the finish.

img_20160421_4886

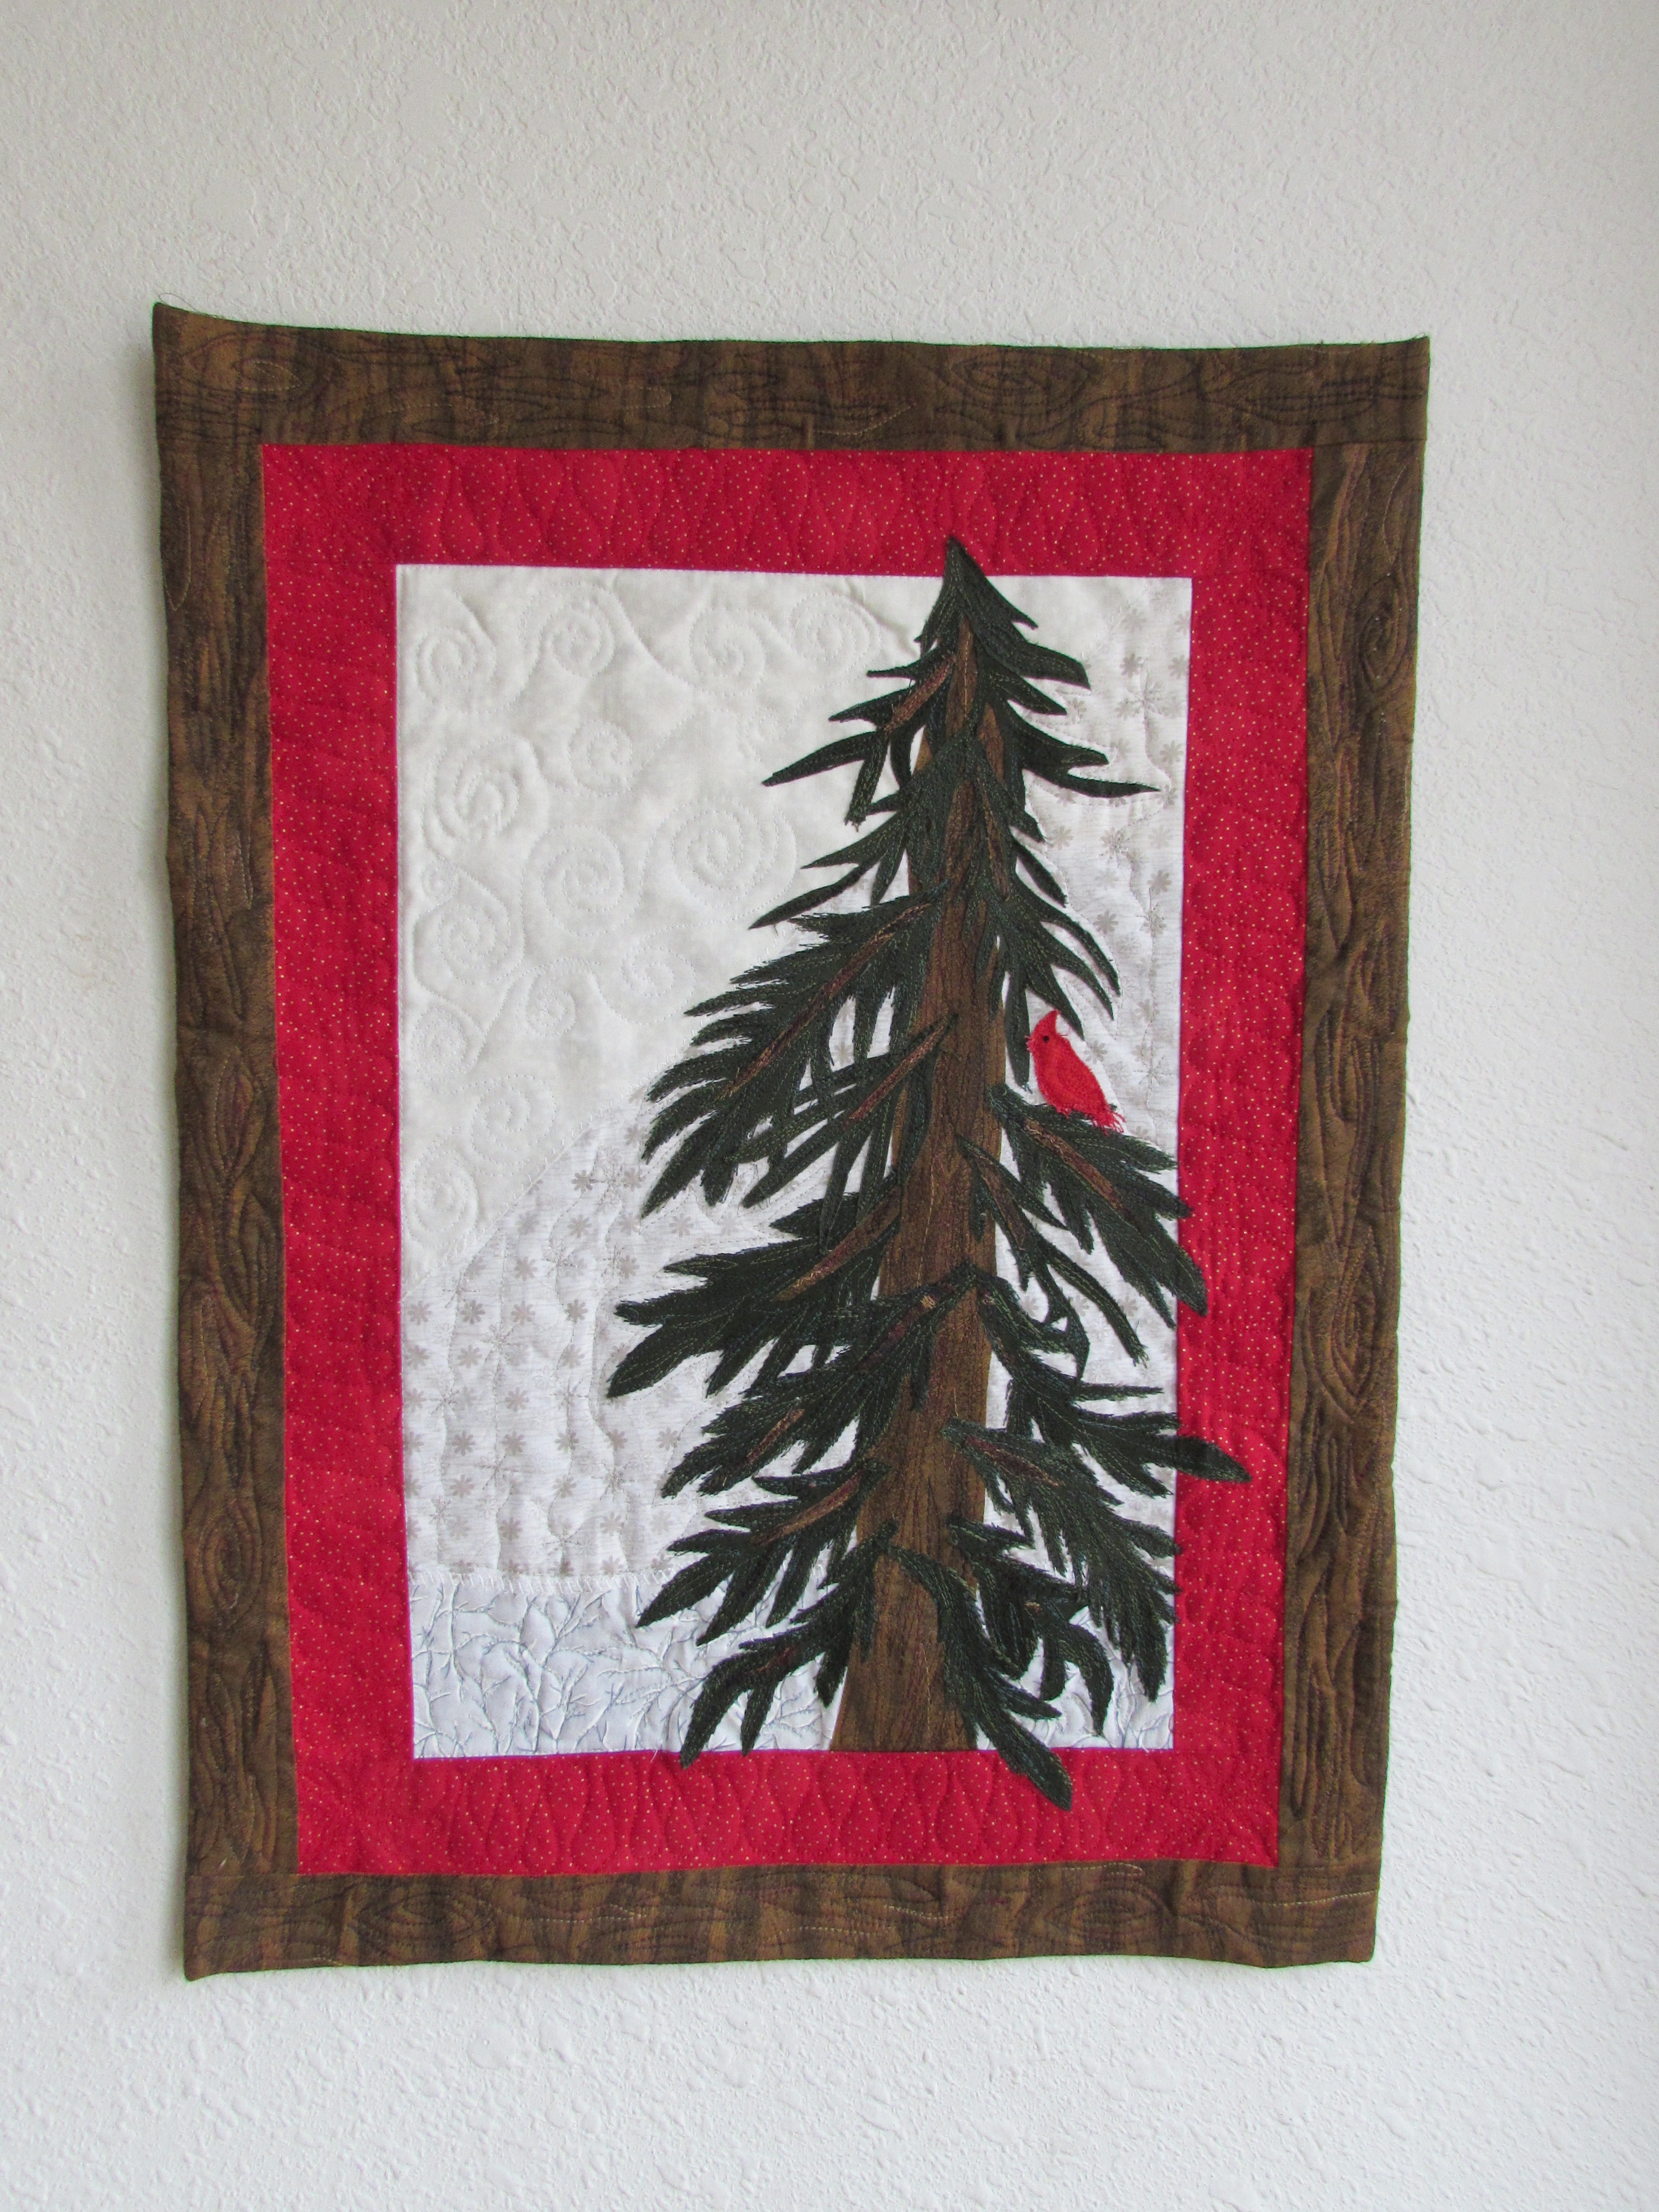
The background is pieced with three different low volume fabrics that exude winter. Once the background was pieced I added both the red and brown borders. I wanted to be able to let the boughs from the tree extend into the border. I fused some stabilizer to the back before I started any applique. Because I wasn’t exactly sure where I would be fusing the applique, I applied the stabilizer to the entire back side. You can see on the below picture that somehow I bubbled part of the background. Once I removed the stabilizer it all smoothed out.

img_20160415_4846

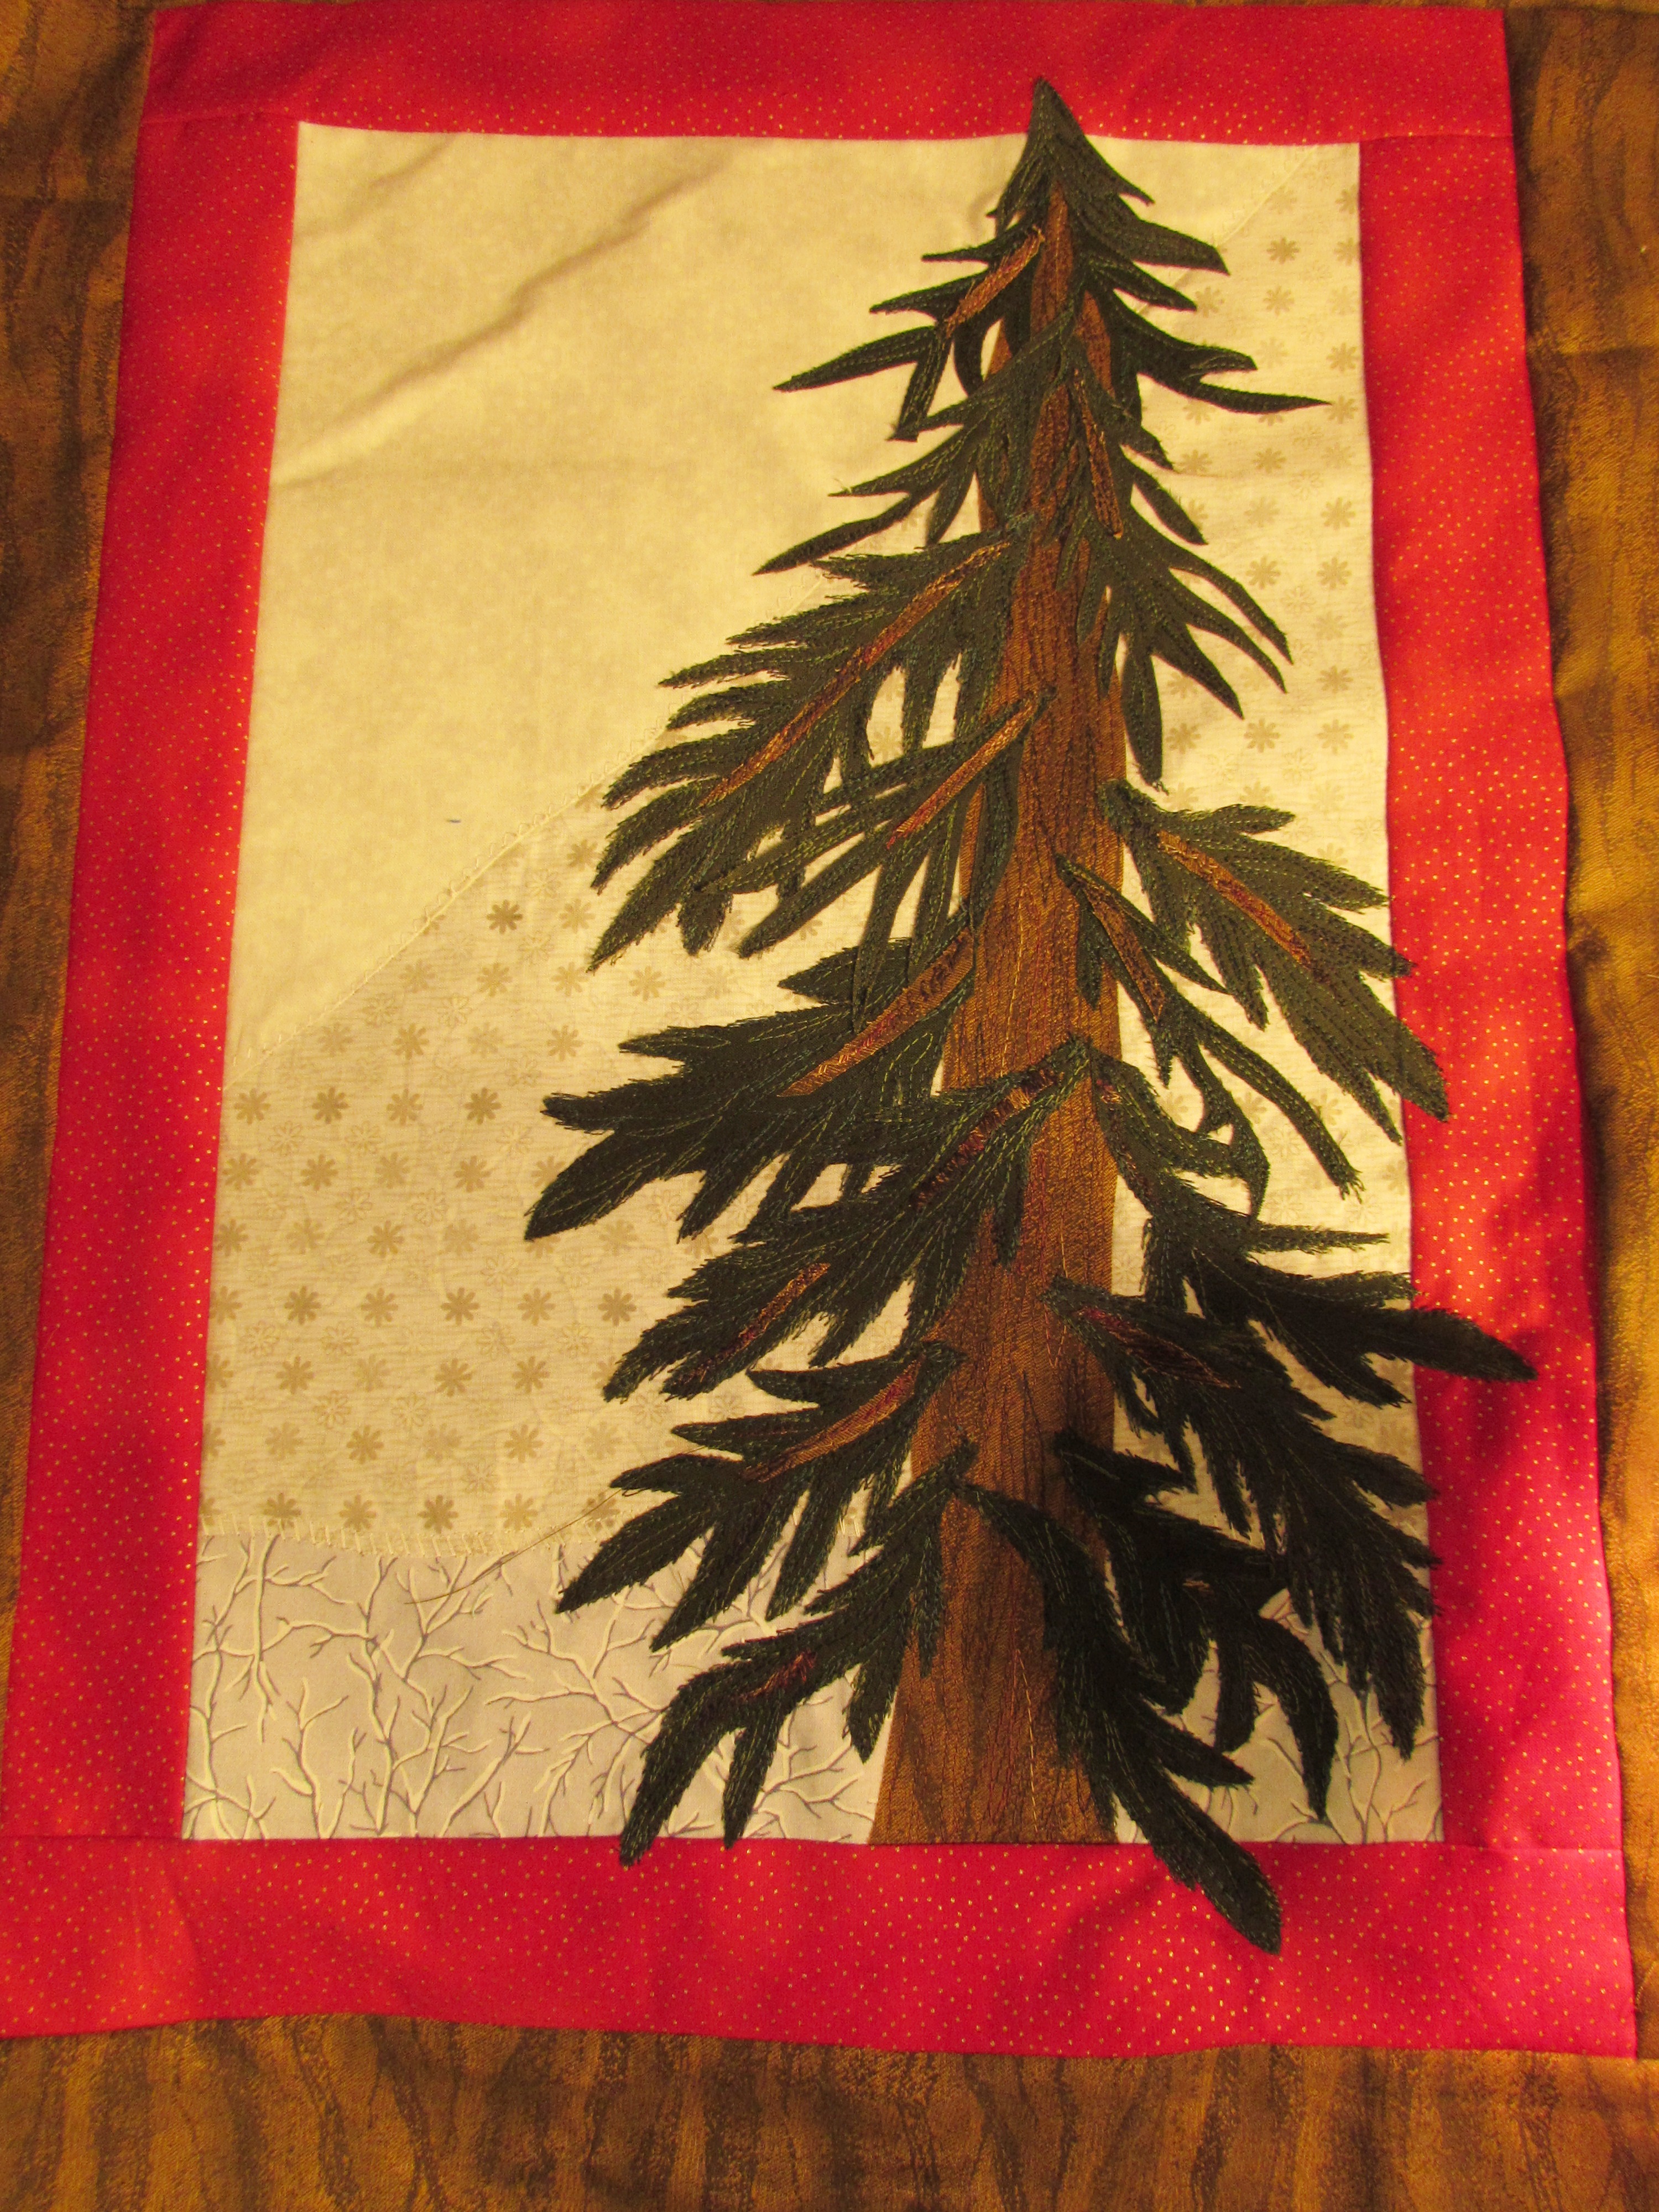
The stabilizer was problematic. It took quite a bit of time to remove it. I finally compromised and left a fair amount of it behind the tree. With the thread sketching, it was close to impossible to get all of the paper off.

Once the tree and my little cardinal were complete, I sandwiched top, batting and backing and planned my quilting. For whatever reason, I quilted the red border first and then worked the inside. I ended up with a pesky fold on the backing. It must not have been pin basted tightly enough.

img_20160421_4891

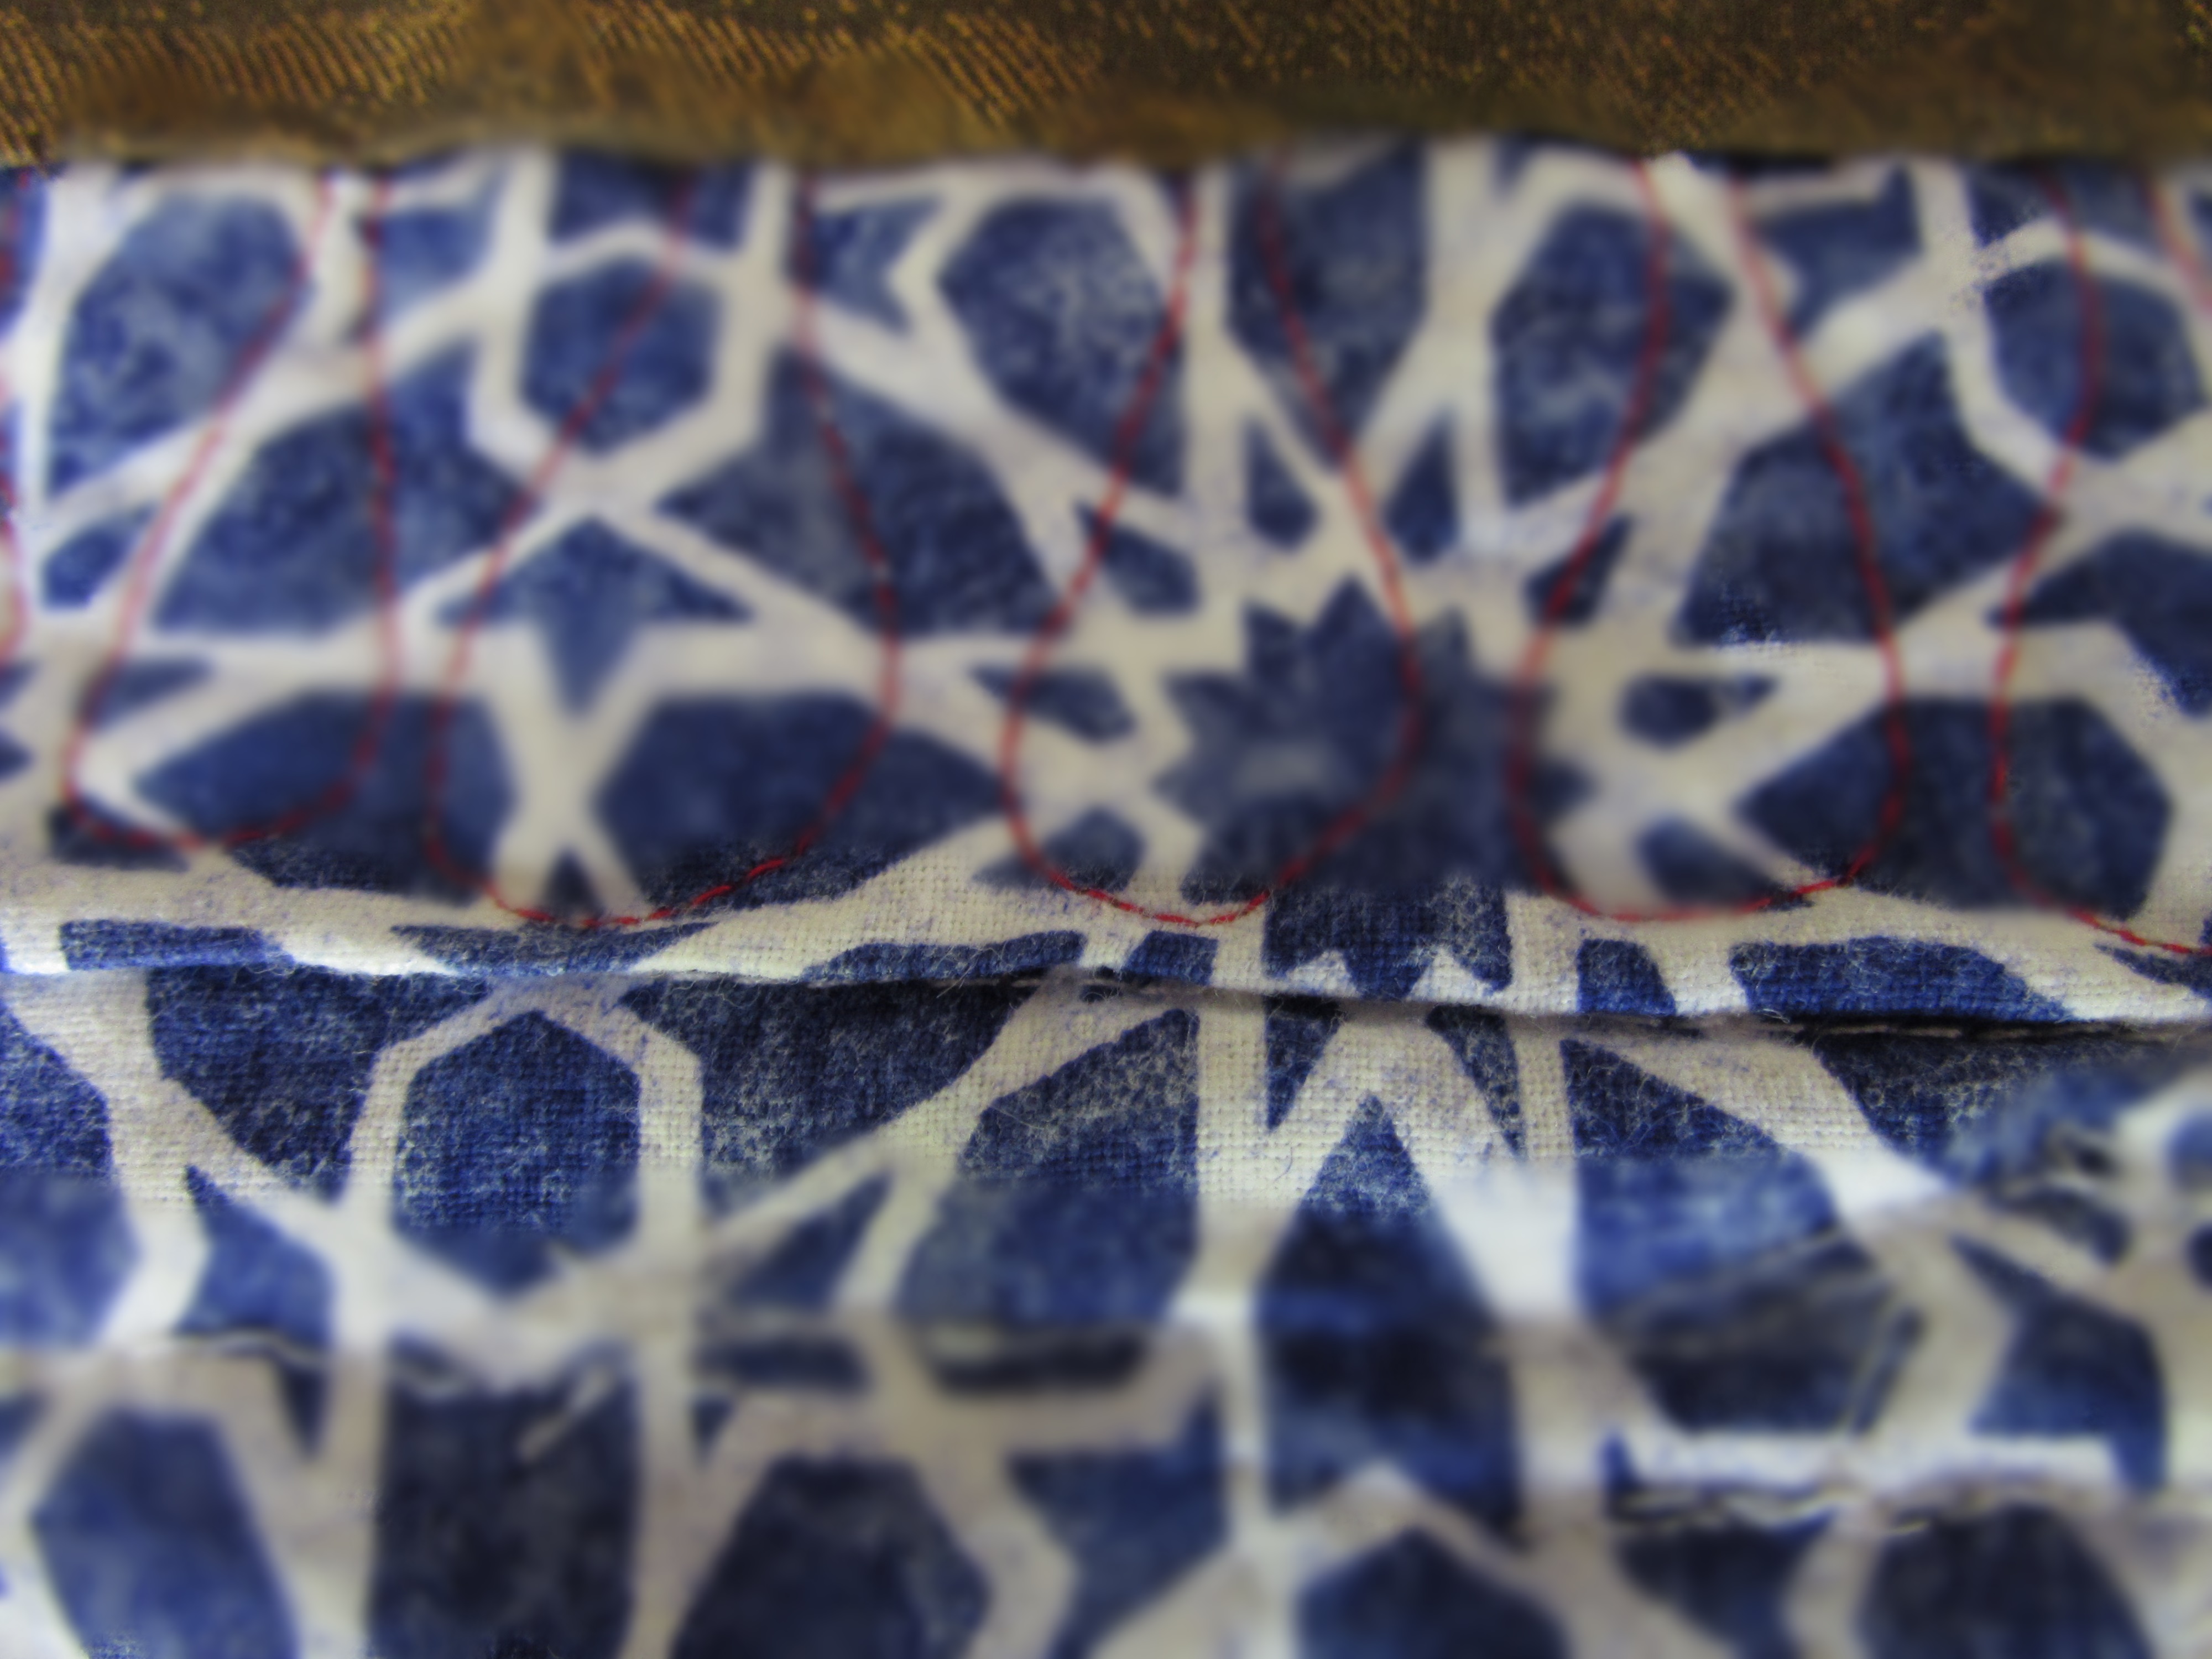
By the way, what was I thinking when I used this blue and white fabric for the backing. I know it doesn’t really matter, but every time I see the backing I wonder at my choice. Honestly, I think it was that I was so excited to quilt it that I didn’t even stop and think about the back. Yikes!

I am not going to list the negatives here.  Rather, I will celebrate what I love most about this piece.

img_20160421_4884 - Copy

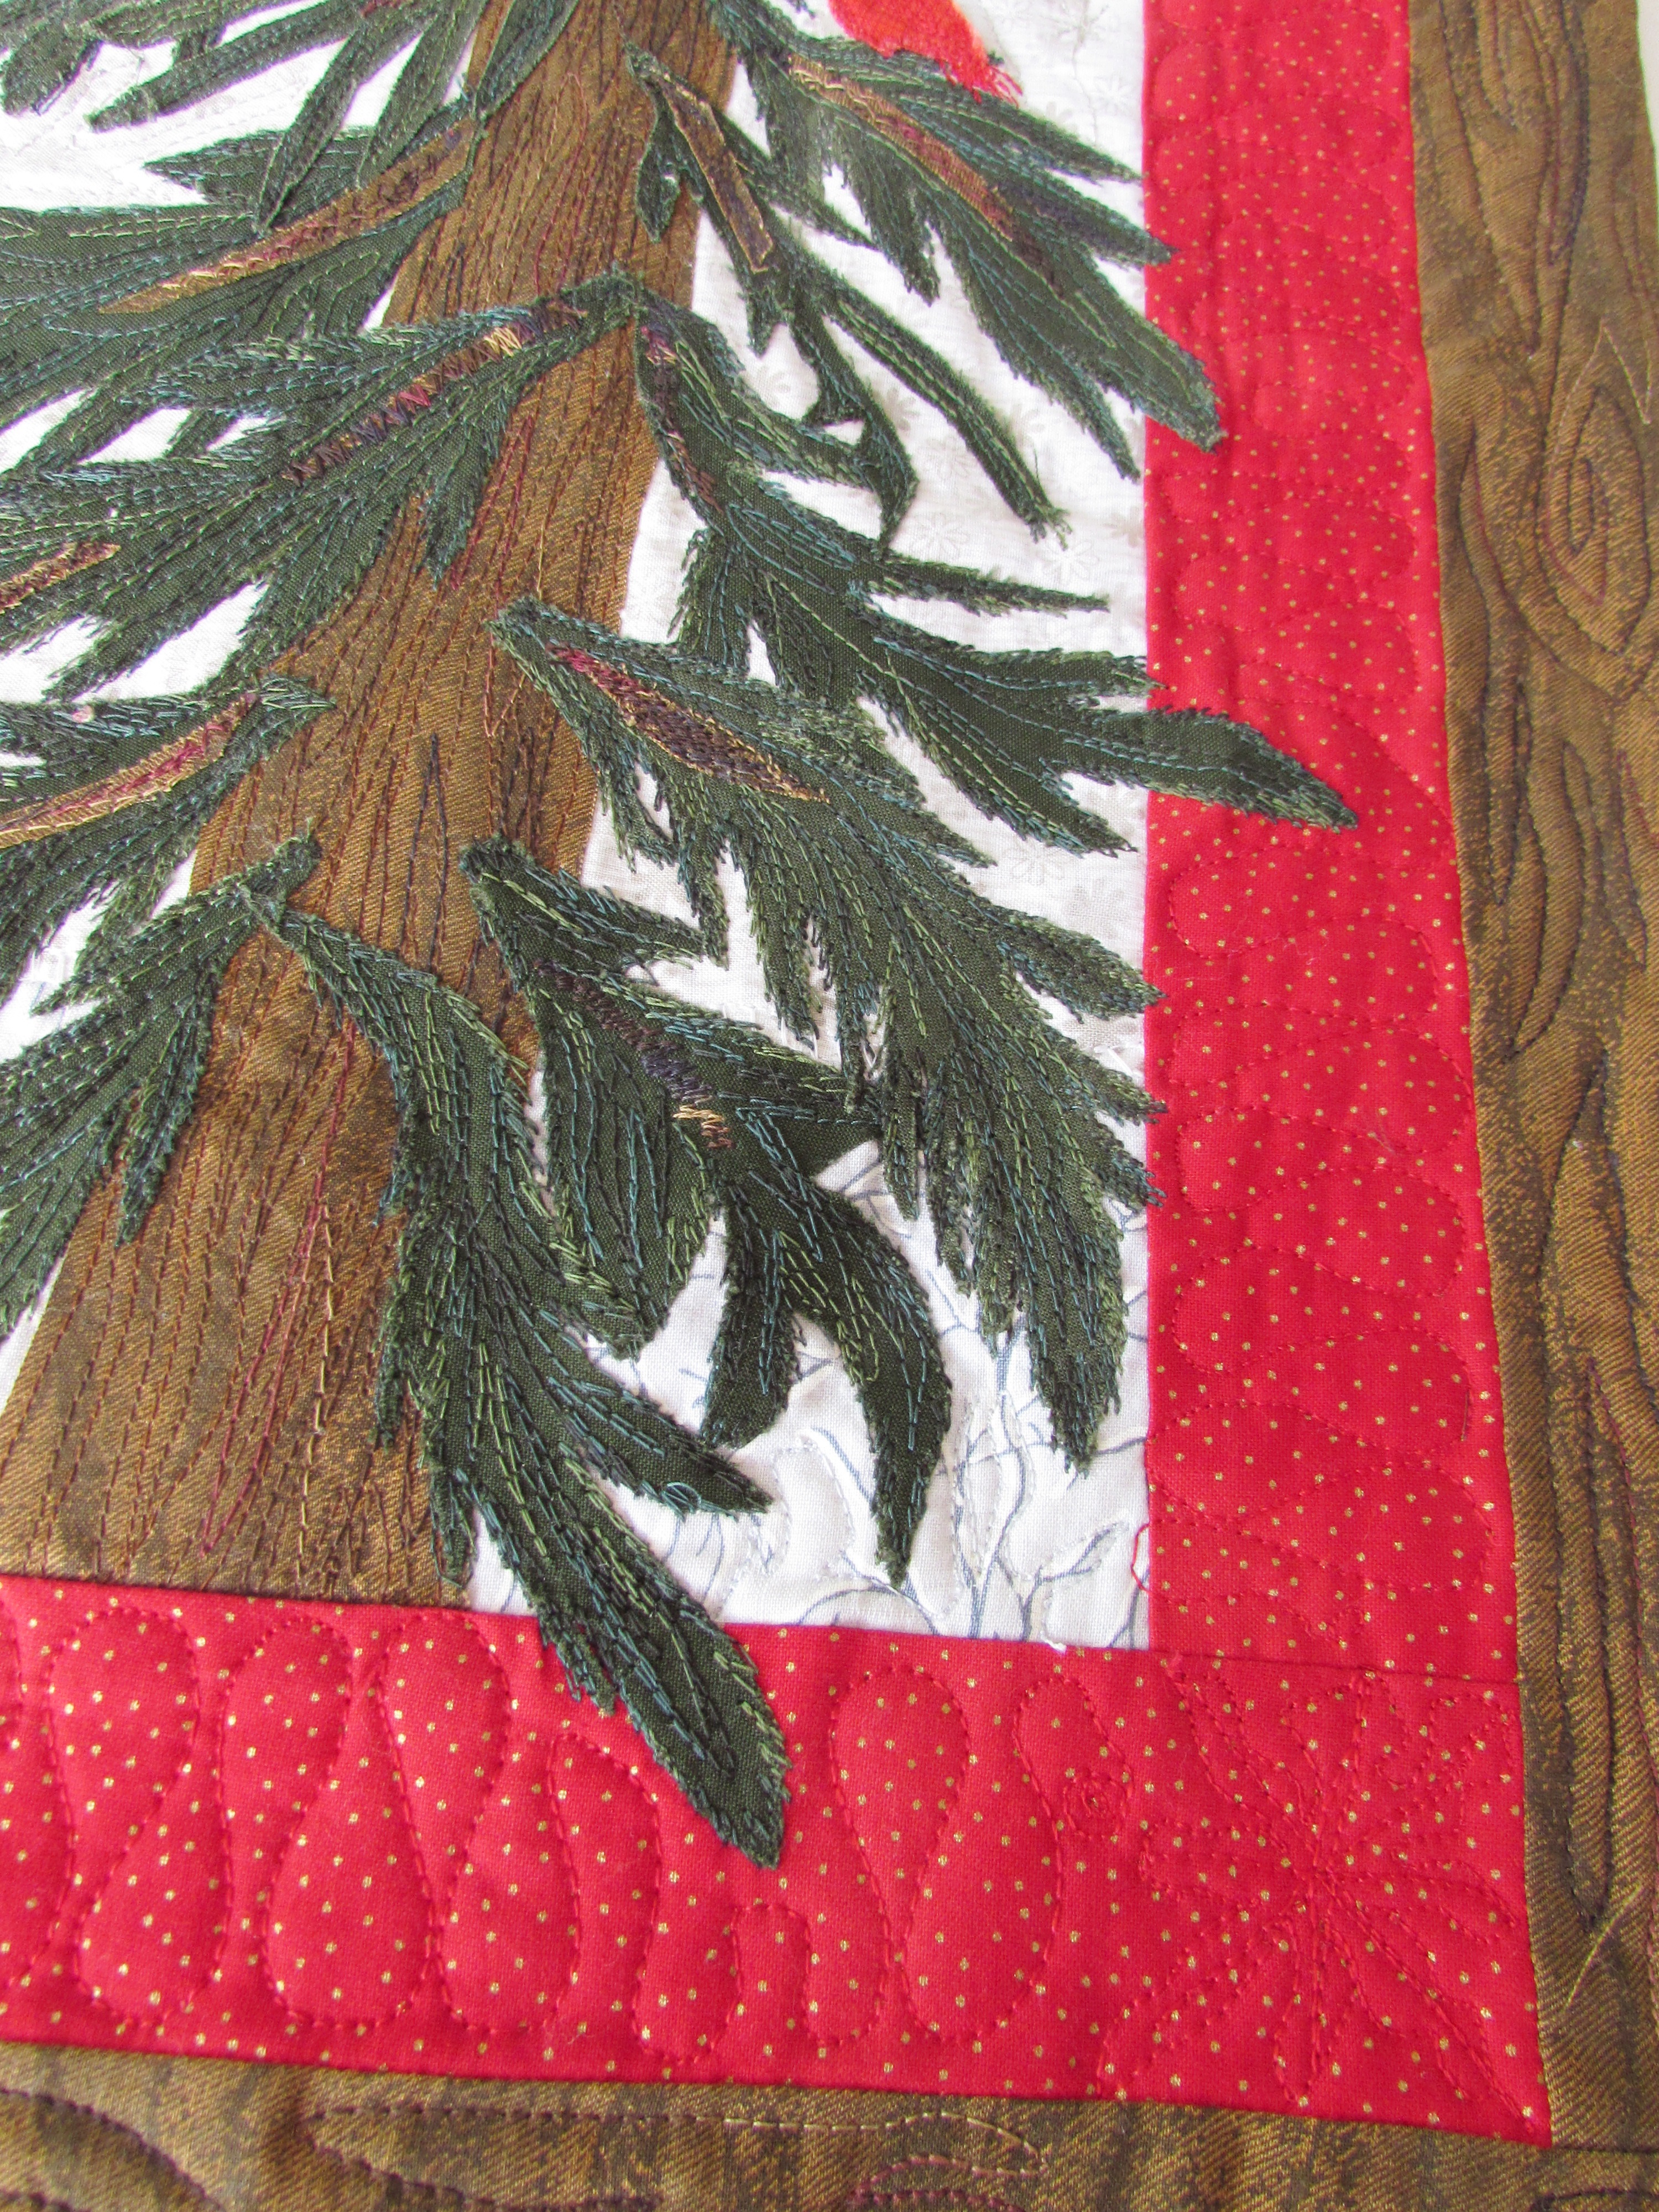
I love, love, love the thread sketching on the pine boughs. To give texture and color to the tree,  I used a variegated green YLI thread.  For the branch that makes up the core of the bough, I fused teeny tiny strips of bark and then thread sketched over it tightly. Again, I used a variegated brown YLI thread. I love the texture obtained with YLI threads. I also ran stitches up and down the main trunk of the tree. (I did most of that stitching prior to adding the boughs.I am also happy with the boughs that extend over into the red. I wasn’t exactly sure how to handle this when I was quilting the ribbons on the red. I made shorter waves where I had to. Rather than turn the corner with the ribbons on the red border, I stopped and made a little snowflake in each corner and then moved back into the ribbon motif. Hard to see with the red thread but I am pleased.

img_20160421_4882

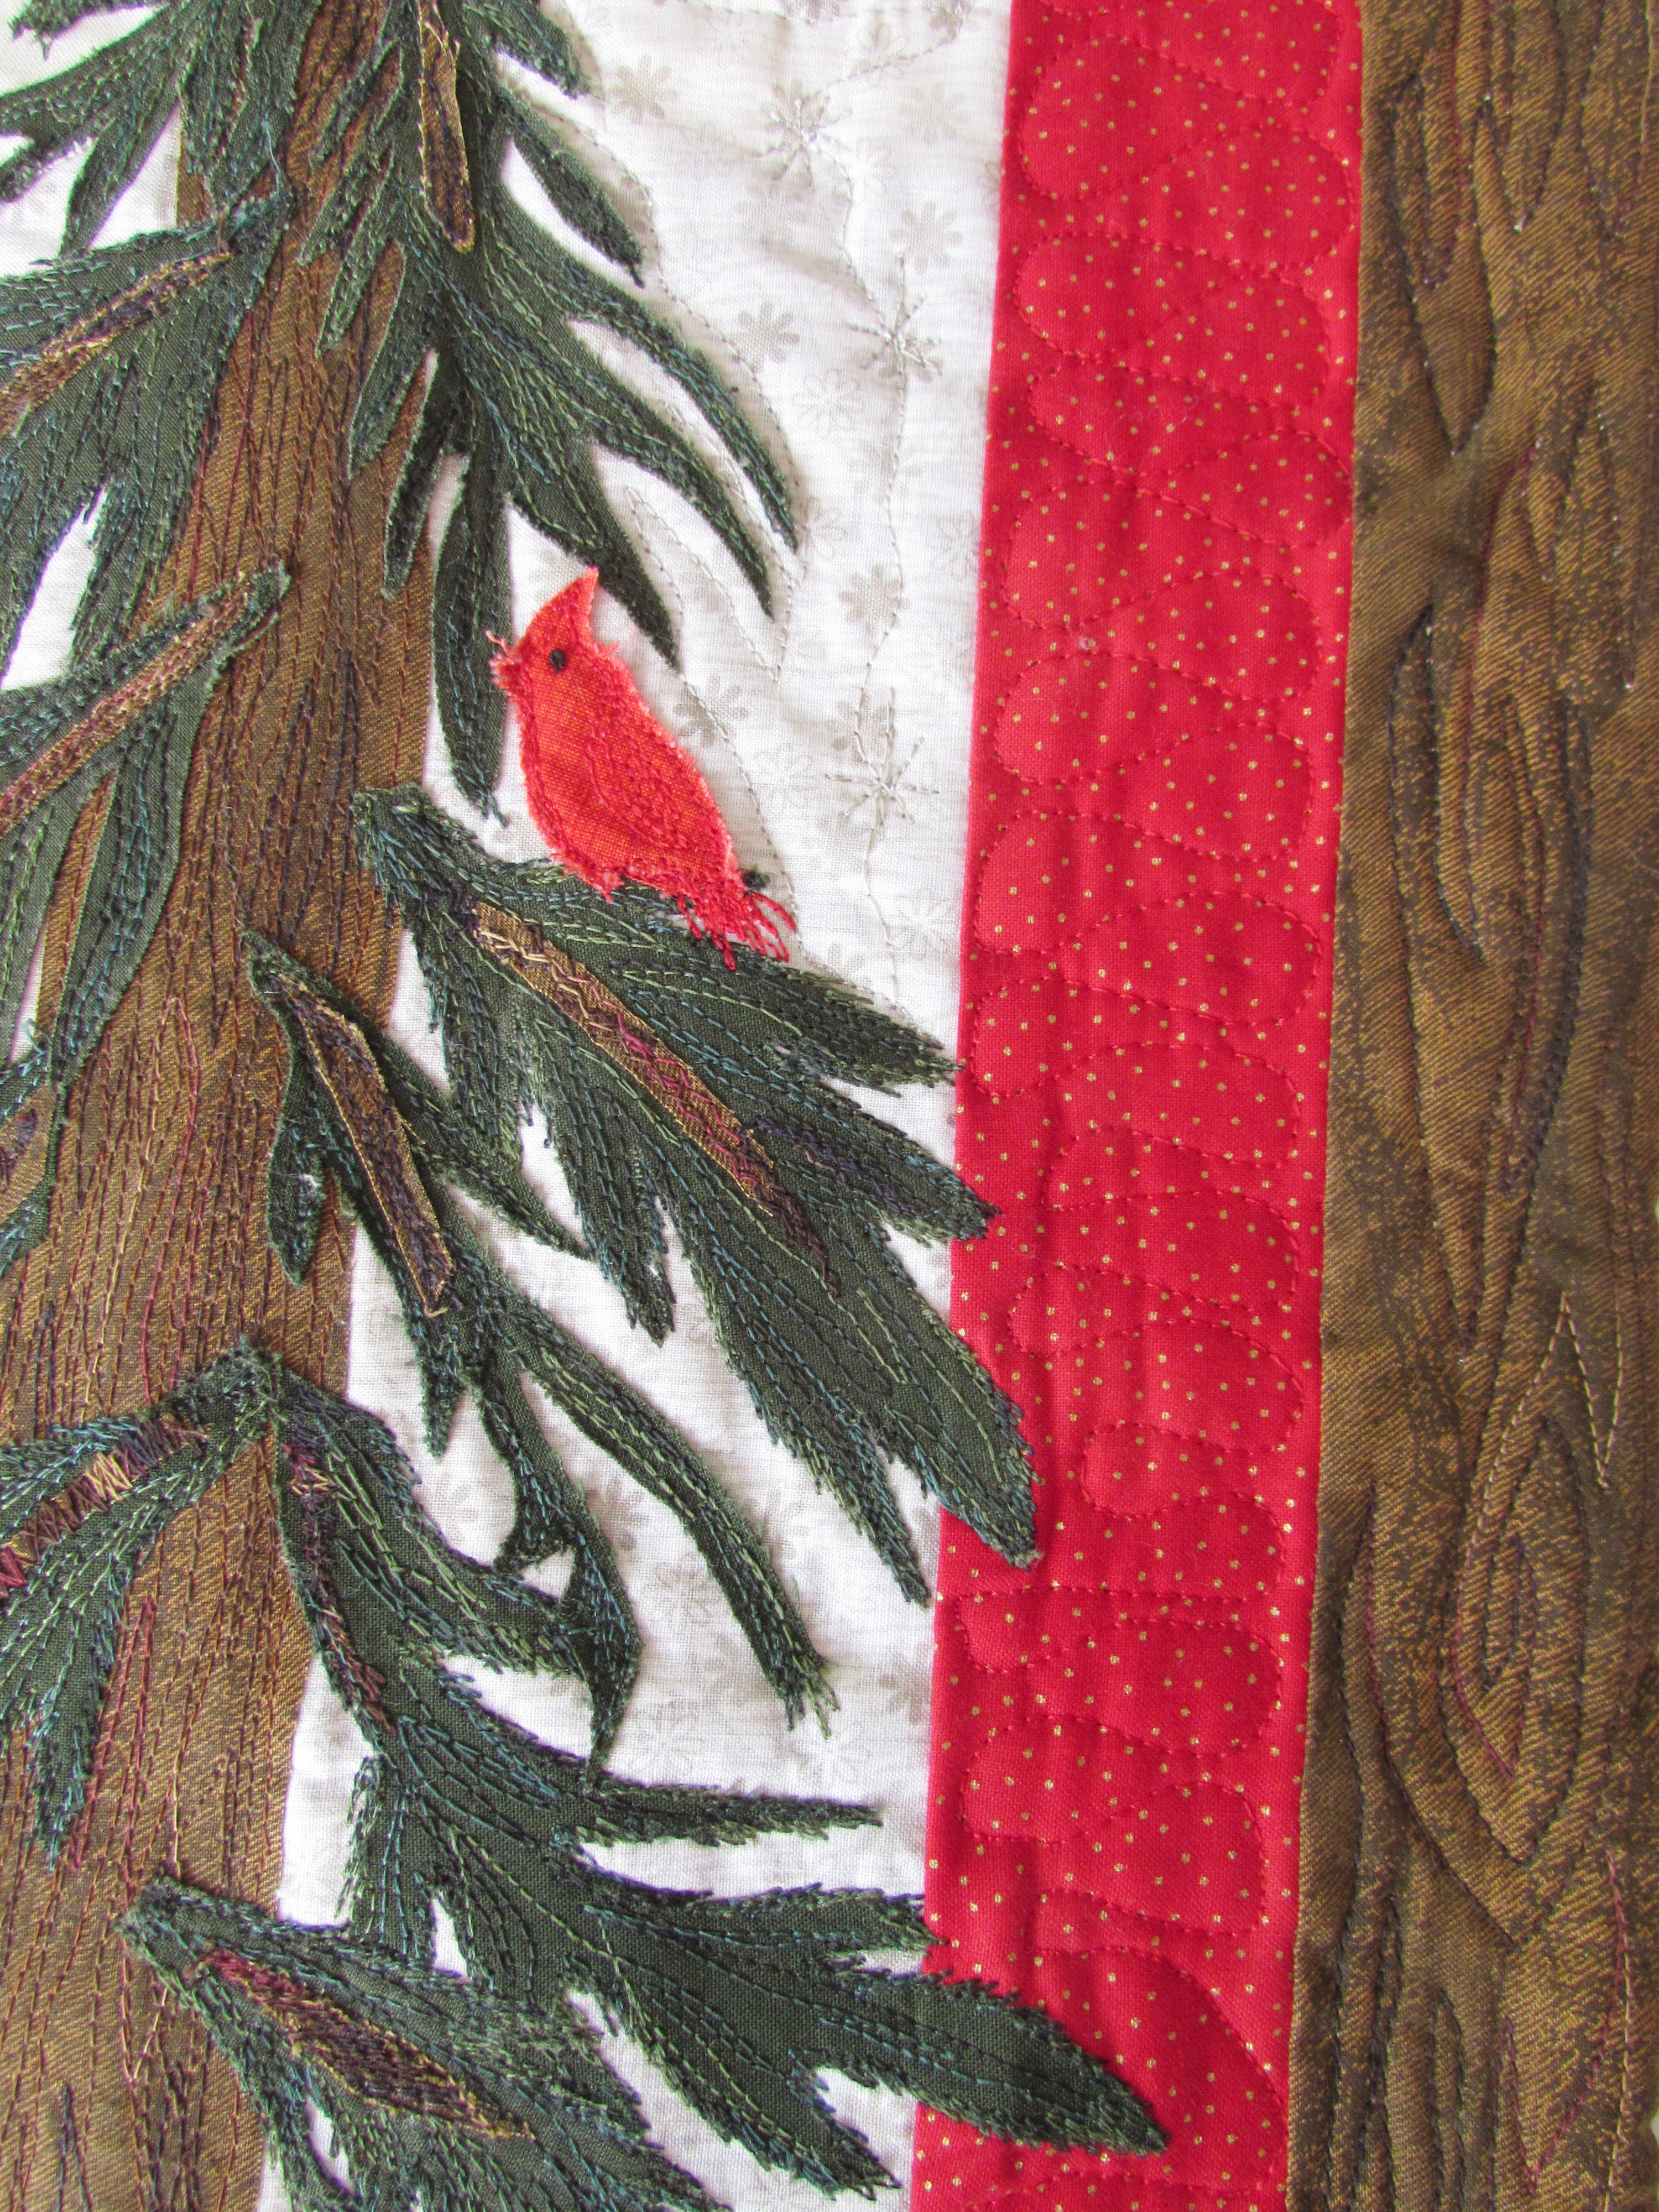
I love cardinals and we don’t get them at my house.  When we lived in State College, PA, we had many that would visit the feeder in the winter. They are such a pretty suprise. My little bird would look like any sort of bird and only by making her red did she become a cardinal. (Drawing isn’t my forte!)  On the outer border, I quilted wavy lines and did some pointy spirals to imitate the knots in a piece of wood. (Tutorial is available here from The Inbox Jaunt.)

It was an easy call to use a facing rather than a traditional binding on this project.  For those who haven’t faced a quilt yet, here is an excellent tutorial by Terry Aske. If you have not had the opportunity to look at Terry’s art quilts, please do. She is very talented!

This was so much fun. It makes me look forward to another small and satisfying project like this. The weekend is nearly here. We are supposed to have cooler days and maybe a bit of rain. Hope you all have a wonderful weekend.

Linking to Free Motion Mavericks, Finish it Up Friday, Off the Wall Friday, and Can I Get a Whoop-Whoop. All links are listed at the top of the page under link ups.


Fastest Quilt in the West

A few weeks before Christmas I wrote a post about this baby quilt top that I made using orphan blocks purchased at a little  shop in town. I added some solid blocks and borders and created it in a matter of a couple of hours. This week it is a finish; a satisfying, bright, cheerful finish!  It was a joy to put someone’s blocks to good use.

IMG_20160112_4444

I spent quite a bit of time deciding how I wanted to quilt this. It was a perfect slate for practicing but I wanted to stay with a theme that a child would enjoy. As I tend to do, I turned to Lori Kennedy’s site, The Inbox Jaunt, for inspiration. Her site overflows with inspiration and tutorials for all sorts of motifs. Please take a look if you haven’t yet seen her site. You will surely find something that motivates you to play with some FMQ. At first I stitched turtles. Lots of turtles. They were cute but mine didn’t have enough personality. I tried kitties. Same thing. I liked them but I didn’t love them. A little more time spent found me stitching dragonflies and bumblebees, again, very cute but not what I wanted. Then I found her birds. I combined two tutorials. This one called Baby Birds and this one called Spring is in the Air. These were so much fun to stitch. Lori’s quilting is near perfection and as such, very precise. Mine… not so much. I like to sketch the design and go back and forth, filling in as I like.

IMG_20160112_4446

I love them. I drew a wavy line for the branch and from there I just stitched. I think they are sweet simplicity.

This quilt is a busy one. There is a lot of color and movement with the layout of the HST blocks. Because I just had this incomplete set of blocks, it was difficult to piece it in a fashion that made sense. In an effort to keep it relatively calm and avoid having any child that plays with this quilt being overcome with dizziness, I kept the quilting simple on the main body of the quilt. I think this allows the baby birds to be a calming point of focus and the multicolored part of the quilt is less overwhelming. Before I started to  quilt it I stitched in the ditch along the length and width of the rows of blocks. I wanted to be sure that the quilt was solid before I worked on the birds, especially since they are front and center on the quilt. After thread sketching the two birds and the branches, I worked on the plain blue squares. At first I was going to do simpler birds but it seemed like too much. Instead, a simple cross hatch worked out wonderfully.

IMG_20160112_4454

I quilted the HST blocks along the seam lines. The purple border was fun. I played with Lori’s tutorial, Do the Twist and came up with this. My twist is elongated and filled the border quickly.IMG_20160112_4455

The green border was quilted with simple straight lines that I allowed to cross in each corner. No marking needed – nice and simple.

IMG_20160112_4457

The backing and binding were from a piece of yardage I have had in my stash for over twenty years! I remember buying it at a WalMart when we lived in Pennsylvania so that dates it to anywhere between 1992-1994. It was in a clearance bin and I probably paid a few bucks for several yards. I love that I finally found a use for it and it looks perfect with this quilt. The quilting doesn’t really show on the busy print but the colors (particularly the shade of green) couldn’t be better.

IMG_20160112_4450

The binding is machine stitched on both front and back so it should hold up for lots of laundering. I have not yet washed it and with the bright batiks used for the HST’s, I will put a lot of Color Catchers in with the wash. Crossing my fingers that nothing bleeds.

I am actually a bit sad to give this one away because of the birds but really, it will be better to have it loved by a child than sitting in my sewing room.

Linking to Freemotion by the River, Let’s Bee Social, Freemotion Mavericks, Confessions of a Fabric Addict and Finish it up Friday. All links can be found at the top of the page, under Link Ups.

TBT – Class with Carol Taylor

First of all, just know that it is raining as I type this post. That makes me so happy!!

Today I thought I would share about a class I took with Carol Taylor back in spring of 2013. If you aren’t familiar with Carol, she is an extremely talented quilt artist from New York. She works on quilts that are often abstract and are always beautiful. Her talent with thread is beyond belief. If you are unfamiliar with her work, check out her gallery. It is a treat to look through.

One day (a long while back) I was looking at the website for my LQS and there was a post about a class with Carol Taylor coming soon. At first I didn’t think much of it because it didn’t seem possible that this Carol was the same Carol whose site I had looked at so many times. Then I saw the description of the class and was thrilled to see that it was her. Wondering how the heck our tiny guild could afford to bring her out, I called the shop. Apparently, we had partnered up with a guild about an hour away and the two guilds were splitting her travel expenses which made it just barely affordable.

I was very hesitant to sign up though. I felt like the class was out of my league and it was also fairly spendy for my budget. I talked to my husband and he encouraged me to go. I really wanted to just learn from her at whatever level I could, even if I wasn’t quite up to speed on the techniques. I am so glad I did becasue it was fantastic!

At the last minute, I talked one of my friends into going with me. There was a woman that had signed up and was ill so her spot was up for grabs. This was the second quilting class I had ever taken and I was more than a little unprepared for it. When Sophia (my friend that went with me) and I entered the room it was obvious that we were newbies. We both came with a tote bag of supplies and fabric, plus our machines. Yikes, the other women there had (literally) suitcases and duffel bags filled with fabric. They had large boxes, or kits, filled with needles, thread choices, mysterious feet for their sewing machines etc. I was overwhelmed. I brought exactly what the supply list said, no more than that.

After lecturing for a bit, Carol had us get out the colors we wanted to use for the background. I had about five fat quarters. She came by and actually asked me where the rest was. I was baffled. Then she said to the class, “we need greens over here” and it was like the story of the ‘Loaves and the Fishes’. Twenty women started to hunt through their fabric, pulling out greens of every shade. This was really my first exposure to the kindness of the quilting community. I ended up with plenty. 🙂  We started cutting strips and playing with them.

Coleus class

One of Carol’s strengths is her use of color and that is something that I have mentioned struggling with. She was so helpful. When she looked at my first choices (above) she explained there wasn’t enough value difference. Working together, and using donations from classmates,  I finally ended up with my backgound. The lightest solid green is a gorgeous silk given to me that adds a wonderful texture to the collection.

Coleus process

Beyond learning about value, I learned about design and free-form applique. I wanted to make a wall hanging that was inspired by some pictures of Coleus plants that I had brought to class. She had me cut huge leaves with my rotary cutter without drawing them or making any sort of pattern. It worked great and was so much fun.  (I wish I had taken pictures of the process but this was long before blogging so I don’t really have any.) Below is the end result of the class. I did have to finish much of this at home. By the end of the two day class, I had the background done and the leaves in place. It wasn’t quilted and much of the thread sketching down the center of the leaves was incomplete.

20140514_0740

One of my favorite aspects of the quilt is the little point of the petal that hangs below the finished edge. Carol suggested this and it worked perfectly. There is a cute story behind the idea. As a well-known artist, many of Carol’s quilts hang in different shows and galleries. She had made a quilt that she wanted to enter in a show and it was 1/2″ short of the size requirement. The show held firm on their size requirement so Carol added a tiny fish that hangs off of the edge of the quilt.  They took her entry. You can see a photo of this on my Flikr page. Carol did a fantastic trunk show and was kind enough to let us take pictures.

This class was actually my first exposure to thread play. We used Sulky threads (which she sold in class in every color of the rainbow.) I love the veins that are sketeched in the center of the petals.

20140514_0740

I also learned to incorporate texture with simple ideas such as cutting the center of some of the petals to show the green behind it as the center vein.

When I was ready to quilt it I used a different FMQ pattern in each of the green fabrics, repeating the pattern wherever that particular color strip was used.

Coleus Close up FMQWith a faced edge, rather than regular binding, the quilt finished out at 28″ wide by 25″ tall (including the tip of the leaf!)

This class was such a fantastic learning experience. If ever you have the opportunity to take a class with Carol, I cannot emphasize this enough – Do it! She has such talent and is a very good instructor as well.

Linking to Let’s Bee Social, Throwback Thursday and Crazy Mom Quilts.